• Skip to primary navigation
  • Skip to main content
  • Skip to primary sidebar
  • Recipe Index
    • Air Fryer
  • Side Dishes
  • Substitutes
  • About
  • Contact
  • Subscribe

ForkLiftKitchen

menu icon
go to homepage
  • Recipe Index
    • Air Fryer
  • Side Dishes
  • Substitutes
  • About
  • Contact
  • Subscribe
subscribe
search icon
Homepage link
  • Recipe Index
    • Air Fryer
  • Side Dishes
  • Substitutes
  • About
  • Contact
  • Subscribe
×

Blog

What Is Butter? [Taste, Uses & More]

March 28, 2026

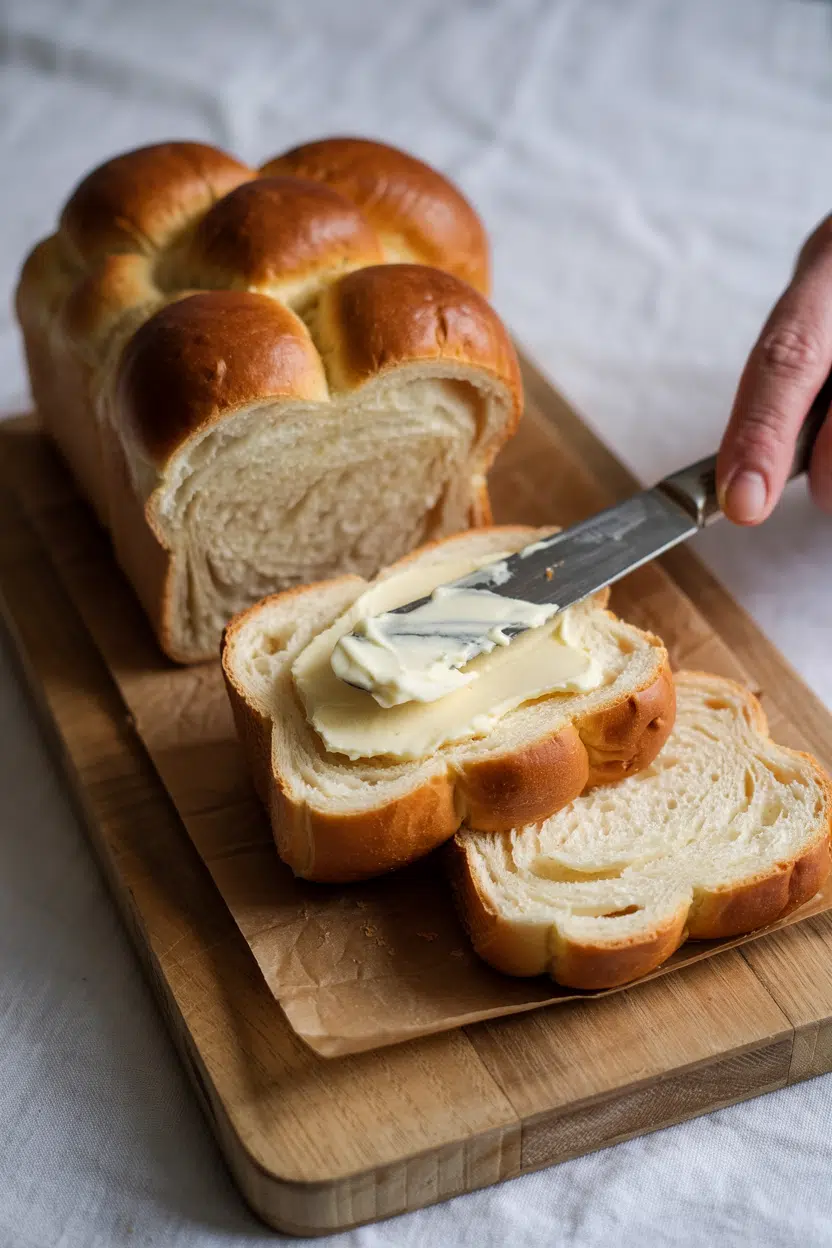
Slathered across a warm heel of bread, melting into every crevice until the surface shines - that moment is butter at its most direct.

What Is Butter

It's one of those ingredients that alternatives to olive oil and margarine in dairy recipes both try to replicate, and neither quite lands the same way.

QUICK SUMMARY

Butter is a churned dairy fat made from cream. It tastes rich, milky, and faintly sweet - and turns toasty and nutty when browned. Use it as a spread, a sauce finisher, or a baking fat. Refrigerate for up to 2 months; freeze for longer.

🧈Type: Churned dairy fat made from separated cream
👅Flavor: Rich, milky, sweet; nutty and toasty when browned
🍳Best Uses: Spreading, sauce finishing, baking, browning
🌡️Heat Limit: Burns around 300°F; clarify into ghee for higher heat
📅Shelf Life: Refrigerated 1-2 months unopened; frozen up to 9 months

What Is Butter?

Butter starts as heavy cream - specifically, the high-fat layer skimmed from cow's milk. Churning agitates the cream until the butterfat globules rupture and cluster together, separating from the liquid byproduct we call buttermilk.

The result is an emulsion of roughly 80% milkfat, 16-18% water, and a small fraction of milk solids.

Those milk solids are what make butter behave so differently from neutral oils - they carry flavor compounds, brown under heat, and lower the smoke point.

Several distinct varieties are worth knowing before you shop:

  • 🧂 Salted butter - table use, spreading; salt also acts as a mild preservative
  • 🎂 Unsalted butter - baking standard; lets you control sodium precisely
  • 🌿 Cultured butter - cream fermented before churning; tangier and more complex
  • 🫙 European-style butter - higher butterfat (82-84%) than American standard; richer and softer
  • 🔥 Clarified butter / ghee - milk solids and water removed; higher smoke point, longer shelf life

Understanding what replacements for heavy cream do in recipes helps explain why cream-derived butter performs so uniquely as a fat - the original fat content is everything.

What Does Butter Taste Like?
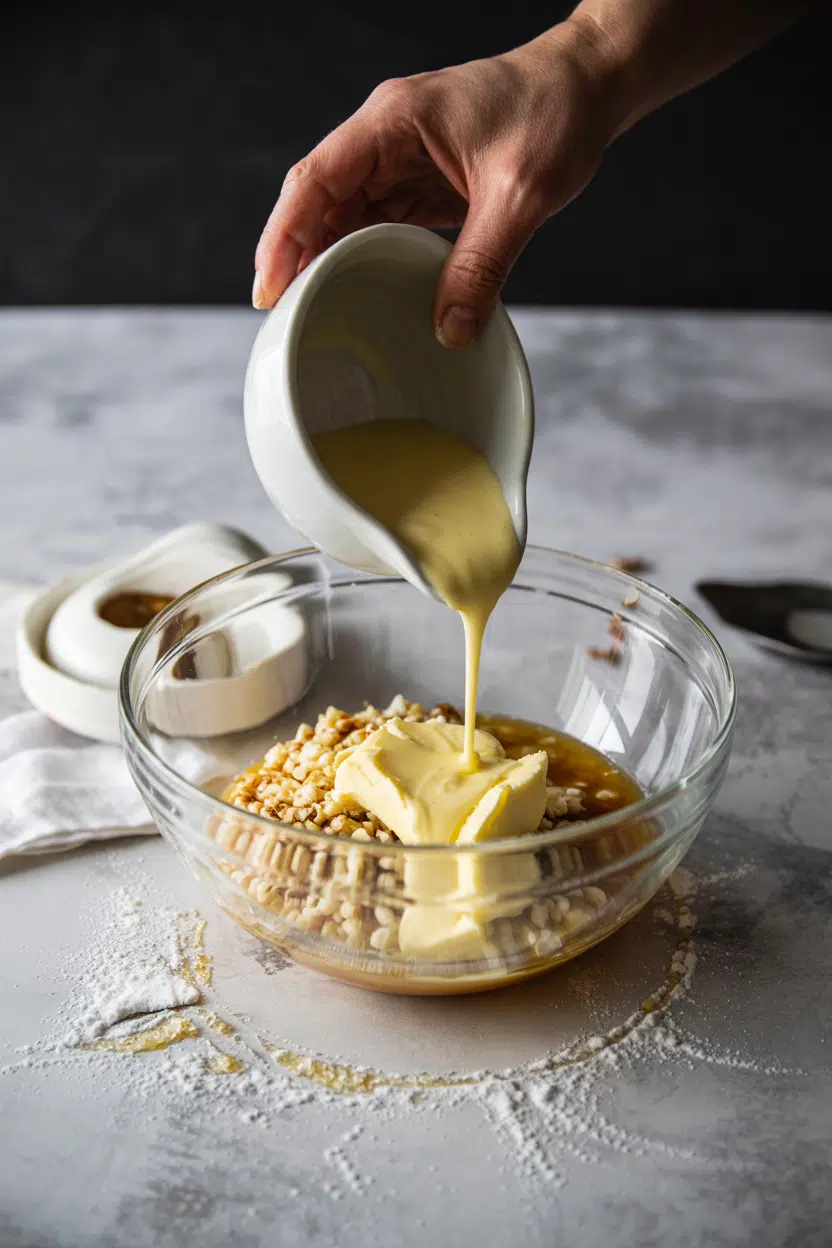
butter - What Is Butter

Butter's baseline flavor is rich and milky with a faint background sweetness - closer to concentrated cream than anything else. There's no sharp edge; it rounds flavors rather than asserting itself.

Sensory SnapshotModerate Intensity
👅 Flavor
richcreamy-milkyfaintly sweetnutty when browned
✋ Texture
firm when coldspreadable at room tempsilky when melted
👃 Aroma
fresh dairytoasty when browned

Heat changes everything. Brown butter (beurre noisette) develops a toasty, hazelnut-like profile as the milk solids caramelize - it's the same fat, transformed almost beyond recognition.

Cultured butter carries a mild tang from lactic acid fermentation, while salted butter adds a savory edge that makes it pop as a spread. Cold, firm butter tastes milder; give it time at room temperature and that dairy richness opens up noticeably.

How to Use Butter

Butter covers more ground in the kitchen than almost any other single fat. The key is matching the form of butter to the job.

How Butter Is Used
MethodBest ForTip
🧈 SpreadToast, bread, warm vegetablesUse salted at room temp for best flavor
🍳 SautéEggs, tender vegetables, fishKeep heat low-to-medium to avoid burning
🟤 Brown (beurre noisette)Pasta, roasted veg, baked goodsWatch closely - it goes from golden to burnt fast
💧 Clarify / GheeHigh-heat frying, Indian-style cookingRemove milk solids completely for a clean smoke point near 450°F
🥐 LaminateCroissants, puff pastryKeep butter cold during folding for distinct, flaky layers
🥄 Mount into saucePan sauces, beurre blancUse cold butter cut into cubes; whisk in off high heat

French cooking depends on butter at nearly every stage - from the initial sauté fat to the final mounting of pan sauces.

American baking relies heavily on unsalted butter for cookies, cakes, and pie crusts where fat distribution controls crumb texture.

Compound butters blended with garlic, lemon, or fresh herbs melt over grilled steaks and fish to finish the plate. Folded into mashed potatoes, cold cubes of butter emulsify into the starch for a silky result that oils won't match.

Golden Rule
Never substitute salted for unsalted in baking without adjusting your recipe's salt - the variance between brands can throw off balance in delicate cakes.

If a recipe needs a swap, knowing which butter swaps that work in dairy-heavy dishes saves the result - though the milk-solid flavor will be missing.

Try It In
🥞Fluffy Buttermilk PancakesButter in the batter and on the pan gives a golden, tender result→🌿Compound Butter (Herb)Mix-in technique shows how butter carries and holds flavors→🧄Compound Butter (Garlic)A freezer-friendly prep that finishes steaks and roasted vegetables→

How to Buy and Store Butter

At the store, check the wrapper before anything else. Even pale-yellow color, no streaks, and a clean dairy smell are the baseline markers of fresh butter; avoid packages with tears or visible moisture pooling inside the wrap.

Best Pick
European-style or cultured butter with 82%+ butterfat for baking and finishing sauces - higher fat means less water, which improves texture in laminated doughs and pan sauces alike.

For labels: "European-style" signals higher butterfat, and "cultured" means fermented cream with more tang. Unsalted is the default for baking; salted suits the table.

Store butter tightly wrapped in the coldest part of the fridge, away from strong-smelling foods - it absorbs odors quickly through the wrapper.

For batches you won't use within a month, freeze sealed blocks for up to 9 months.

Learn to recognize butter spoilage signs before the expiration date, since storage conditions matter as much as the date stamp.

For reference, buttermilk's shelf life follows similar refrigeration logic to fresh butter - both deteriorate fast once exposed to air.

Where to Start With Butter

Start unsalted. It gives you control over seasoning in baking and doesn't mask what the butter itself tastes like.

Once you're comfortable with basic uses, brown some butter in a light-colored pan - watch it shift from yellow to golden to amber, pull it the moment it smells nutty.

That single technique unlocks more flavor from the same block you already have.

For anyone swapping out butter for dietary reasons, know that nothing fully replicates all three roles at once: fat carrier, flavor source, and emulsifier. Work with what your recipe actually needs most, and match from there.

Frequently Asked Questions

What is butter made of?

Churned cream. Agitation breaks the fat globules apart, causing them to clump into butterfat solids while the liquid - buttermilk - drains away. Standard butter is roughly 80% milkfat, with water and milk solids making up the rest.

What's the difference between salted and unsalted butter?

Salt content only - the fat and milk solids are the same. Unsalted is preferred in baking because salt quantities vary between brands, making it hard to control the recipe's final seasoning.

Can you use butter for high-heat frying?

Not whole butter - its milk solids burn around 300°F. Clarify it into ghee first, which removes those solids and raises the smoke point to around 450°F, making it suitable for high-heat cooking.

How long does butter last in the fridge?

Unopened, about 1-2 months past the printed date when stored cold and tightly wrapped. Once opened, use within 2-4 weeks. Salted butter lasts slightly longer than unsalted because salt slows microbial growth.

Is butter dairy or non-dairy?

Dairy. Butter is made from cow's milk cream and contains both lactose and casein. Clarified butter and ghee have most lactose removed, but they're still dairy and not suitable for vegan diets.

Slow Cooker Cuban Ropa Vieja

March 28, 2026

Ropa vieja often disappoints with dry, stringy meat or watery sauce that slides off the beef. The fix is using well-marbled chuck roast and searing it before slow cooking to lock in moisture and build depth.

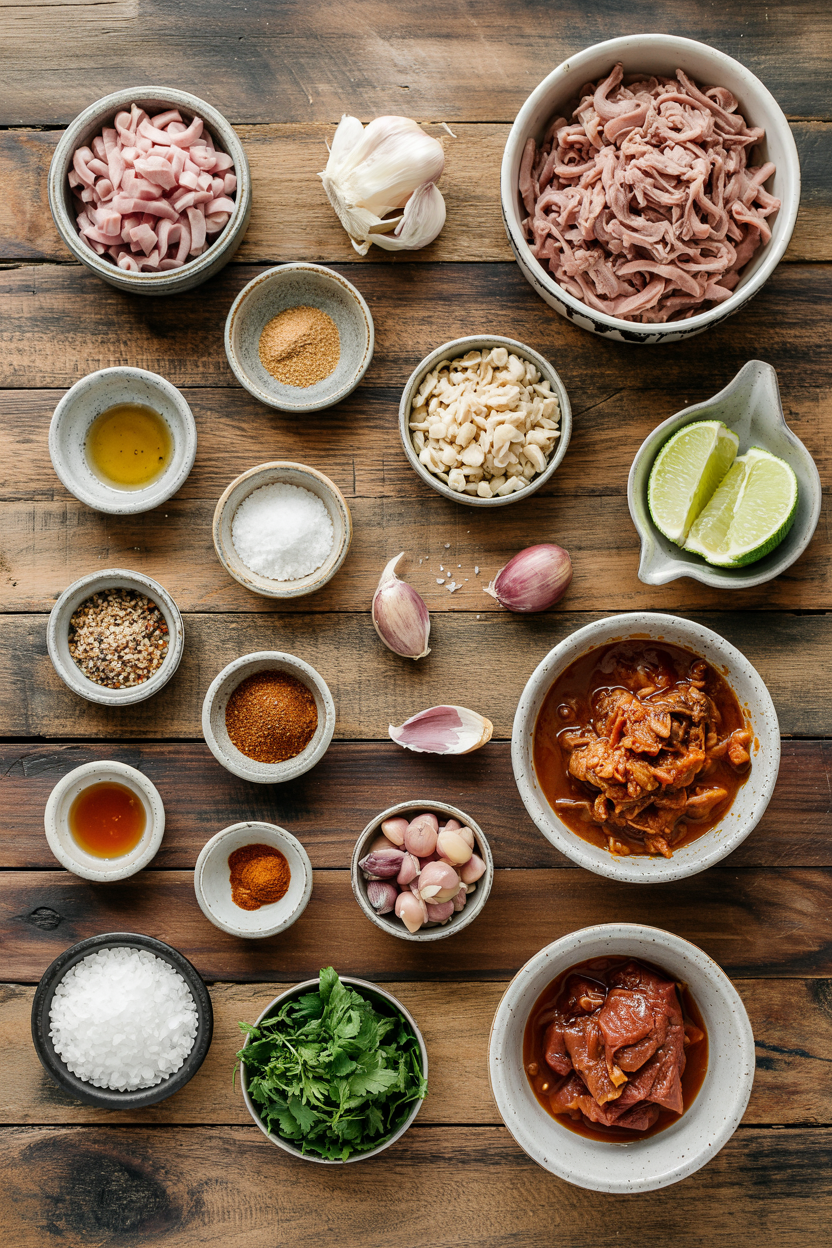
Slow Cooker Cuban Ropa Vieja served on a plate

The slow cooker breaks down tough connective tissue over 7-8 hours. You get fork-tender shreds without constant monitoring or temperature adjustments.

This works for meal prep Sundays or weeknights when you need dinner ready when you walk in.

QUICK SUMMARY

Slow Cooker Cuban Ropa Vieja turns chuck roast into tender shredded beef simmered with bell peppers, tomatoes, and green olives. Searing the meat first creates caramelized bits that flavor the sauce, and cooking low and slow for 7-8 hours breaks down tough fibers into pull-apart strands.

⏰Time Reality: 20 minutes hands-on, then 7-8 hours unattended on low heat
🔥First Critical Move: Sear beef 4 minutes per side before adding to slow cooker for deeper flavor
⚠️Watch Out: Lean beef dries out - use marbled chuck roast and cook on low, not high

Why This Recipe Works

The slow cooker melts fat and connective tissue in chuck roast without drying out the meat. Rich mains need something to cut through, and goulash does exactly that. For a version that comes together quickly, this quick goulash dish uses similar braising methods with paprika and tomatoes.

Quick Reference
⏱️
Prep Time
20 min
🔥
Cook Time
7-8 hours low
⏰
Total Time
7 hr 20 min
🍽️
Servings
6
📊
Difficulty
Medium
🏷️
Category
Main Dish
💡
Quick Tip
Sear meat first for richer flavor
🎯
Best For
Weeknight | Meal prep | Family dinner

Here's what makes it work:

  • Marbled chuck roast breaks down into tender shreds - fat renders during the 7-8 hour cook time, keeping beef juicy instead of dry
  • Searing beef before slow cooking builds caramelized bits - browned proteins dissolve into the sauce for deeper, richer flavor
  • Diced tomatoes add acid that tenderizes tough fibers - the acidic environment helps break down connective tissue while balancing richness
  • Layering aromatics creates complex flavor - onion, garlic, and bell peppers release different compounds at different stages of cooking
  • Low heat prevents stringy, overcooked texture - high heat boils liquid too fast and toughens protein strands
Quick Tip
Deglaze the skillet with ½ cup beef broth after searing to scrape up browned bits - pour this into the slow cooker for extra flavor depth

What You'll Need

Ingredients for Slow Cooker Cuban Ropa Vieja

Plan for one trip to the grocery store with a list. The potato works best when it hits the table at the same time as the main. For a version that comes together quickly, this easy potato recipe uses similar timing and works for meal prep.

🥩
Beef
  • 3 lbs chuck roast
  • Salt and black pepper
🫑
Vegetables
  • 2 bell peppers (red, green, or yellow)
  • 1 large onion
  • 4 cloves garlic
🥫
Base & Liquid
  • 1 can (14.5 oz) diced tomatoes
  • 1 cup beef broth
  • ½ cup green olives with brine
🌶️
Seasonings
  • 2 teaspoon ground cumin
  • 1 teaspoon dried oregano
  • 2 bay leaves
  • ½ teaspoon chili flakes (optional)

Ingredient Details

  • Chuck roast
    Look for visible white marbling throughout the meat - this fat melts during cooking and keeps beef tender
  • Bell peppers
    Red and yellow add sweetness, green adds earthiness - mix colors for balanced flavor or use all one type
  • Diced tomatoes
    Use canned with juice included - the liquid contributes to sauce volume and helps break down tough beef fibers
  • Green olives
    Pitted Spanish olives or Manzanilla work best - add with some brine for salty, briny contrast to sweet vegetables
  • Beef broth
    Low-sodium gives you control over salt levels - taste before adding extra seasoning since olives and broth add plenty
  • Ground cumin
    Toast in a dry pan for 30 seconds before adding to intensify earthy, warm flavor
  • Bay leaves
    Remove before shredding beef - they add herbal depth but turn bitter if left too long or broken into pieces

Ingredient Swaps

Some cuts cook faster or need less liquid. Most people skip this dip, but it balances the meal. We keep a batch ready for nights like this - simple sauce recipe thickens on the stovetop and works for leftovers.

Four swaps that work:

  • Chuck roast → brisket - Brisket has more fat and takes 8-9 hours on low, but shreds beautifully with richer flavor
  • Diced tomatoes → fresh plum tomatoes chopped - Use 5-6 plum tomatoes; add ¼ cup extra broth since fresh tomatoes release less liquid
  • Green olives → capers - Use 3 tablespoons capers for sharper, more concentrated briny flavor; reduce added salt
  • Beef broth → water with bouillon cube - Dissolve 1 cube per cup water; taste for salt since bouillon varies in sodium content

Chuck Roast

Works for: most home cooks, budget-friendly, reliable shredding texture, widely available

Skip if: you want leaner meat or faster cook time under 6 hours

Brisket

Works for: richer beef flavor, extra tender texture, special occasion meals

Skip if: you're on a tight budget or need dinner in under 8 hours

Flank Steak

Works for: leaner option, cooks faster in 5-6 hours, less fat to skim

Skip if: you want fall-apart tender texture - flank stays firmer and slices better than shreds

Instructions

You'll be hands-on for 20 minutes, then the slow cooker runs unattended. A good cocktail can make or break the plate. For a version that comes together quickly, this simple cocktail uses mint and lime to balance rich beef.

  1. Sear the beef: Heat a large skillet over medium-high heat with 2 tablespoons oil. Pat chuck roast dry with paper towels, season both sides with salt and pepper, then sear 4 minutes per side until deep brown crust forms. Transfer to slow cooker.

  2. Build the aromatic base: In the same skillet, add sliced onion and bell peppers. Cook 3-4 minutes until softened, stirring occasionally. Add minced garlic, cumin, oregano, and chili flakes (if using), cook 1 minute until fragrant. Deglaze pan with ½ cup beef broth, scraping browned bits from the bottom.

  3. Assemble in slow cooker: Pour vegetable mixture over beef in slow cooker. Add diced tomatoes with juice, remaining beef broth, green olives with 2 tablespoons brine, and bay leaves. Do not stir - liquid should just cover the meat.

  4. Cook low and slow: Cover and cook on low 7-8 hours (or high 4-5 hours if needed). Beef is done when it pulls apart easily with light fork pressure and shreds into strands without resistance. If liquid reduces too much, add ¼ cup water after 6 hours.

  5. Shred and finish: Remove bay leaves. Use two forks to pull beef into shreds directly in the slow cooker. Stir shredded beef into sauce, let sit 10 minutes to absorb liquid. Taste and adjust salt or add a pinch of sugar if sauce tastes too acidic.

Watch Out
Don't add bell peppers and onions at the start if you want them to hold shape - add after 4 hours on low for firmer texture instead of fully softened

What to Serve With It

Ropa vieja needs starch to soak up the sauce and something fresh to cut richness. Rich mains need something to cut through, and potato does exactly that. We keep a batch ready for nights like this - easy potato side crisps up in 15 minutes and balances the saucy beef.

Side Dish Prep Why It Works How to Serve
White rice Easy Absorbs sauce, neutral base for bold flavors, classic Cuban pairing Pile rice on plate, spoon beef and sauce over top, garnish with cilantro
Black beans Easy Adds protein and creamy texture contrast to shredded beef Serve beans alongside rice, drizzle beef sauce over both
Fried plantains Medium Sweetness balances savory, tangy beef and cuts through richness Slice ripe plantains, fry until golden, serve on the side for dipping
Simple green salad Easy Refreshing crunch and acidity balance heavy, saucy main dish Toss lettuce, cucumber, lime juice, olive oil; serve on separate plate
Yellow rice with saffron Medium Flavorful, attractive presentation for hosting or meal prep Cook rice with saffron threads, serve under beef for color contrast

Three ways to serve it:

  • Weeknight plate: Spoon beef over white rice, add black beans on the side, top with diced onion and cilantro for crunch
  • Meal prep bowls: Layer rice, shredded beef with sauce, roasted vegetables, store in airtight containers for 4 days
  • Hosting dinner: Serve over yellow saffron rice, add fried plantains and yuca fries, finish with mojo sauce drizzle
Best Pick
White rice or black beans work best for everyday meals - they're quick to prep and absorb the sauce without competing with the beef's flavor

Store and Reheat

Ropa vieja tastes better the next day after flavors meld overnight. The sauce thickens slightly, coating beef more evenly. Store in shallow containers so it cools within 2 hours to prevent bacterial growth.

Method Time Best For
🍳 Stovetop 5-7 min on low heat Restoring sauce texture, heating larger portions evenly
📦 Microwave 2-3 min at medium power Quick single servings, stir halfway through to distribute heat
🔥 Oven 15 min at 325°F covered Reheating multiple portions, maintaining moisture without drying beef

For best results when storing:

  • Cool quickly in shallow containers - spread beef in a single layer so it reaches fridge temperature within 2 hours
  • Store sauce with beef, not separately - keeps meat moist and prevents drying out during refrigeration
  • Freeze in portion-sized bags - press out air, lay flat, stack when frozen for easy storage up to 3 months
  • Add splash of broth when reheating - if sauce thickened too much in the fridge, stir in 2-3 tablespoons broth or water
  • Reheat only what you'll eat - repeated heating dries out beef and breaks down texture; thaw frozen portions overnight in fridge

Frequently Asked Questions

Can I make slow cooker ropa vieja ahead and freeze it?

Yes, freeze cooked ropa vieja in airtight containers or freezer bags for up to 3 months. Thaw overnight in the fridge, then reheat on the stovetop with a splash of broth to restore moisture.

How long do I cook ropa vieja in the slow cooker on low?

Cook on low for 7-8 hours until beef pulls apart easily with a fork. Check at 7 hours - if meat resists shredding, continue cooking and check every 30 minutes.

What side dishes go best with Cuban ropa vieja?

White rice, black beans, fried plantains, and simple green salad pair best. The rice and beans absorb sauce while plantains add sweetness to balance the tangy beef.

How do I know when the beef is done for shredding?

Beef is ready when you can pull it apart with light fork pressure and it separates into strands without resistance. If meat feels tough or springy, cook another 30-60 minutes and check again.

Can I substitute flank steak for chuck roast in this recipe?

Yes, but flank steak cooks faster (5-6 hours on low) and stays firmer - it slices better than it shreds. Chuck roast breaks down into tender strands, while flank maintains more structure.

Slow Cooker Cuban Ropa Vieja served on a plate

Slow Cooker Cuban Ropa Vieja

No ratings yet
Slow Cooker Cuban Ropa Vieja transforms marbled chuck roast into tender shredded beef simmered with bell peppers, tomatoes, and green olives. Searing the meat before slow cooking locks in moisture and builds rich flavor, while cooking low and slow for 7-8 hours breaks down tough fibers into pull-apart strands.
Print Recipe Pin Recipe
Prep Time 20 minutes mins
Cook Time 7 hours hrs 30 minutes mins
Total Time 7 hours hrs 50 minutes mins
Servings: 6 servings
Course: Main Dish
Cuisine: Cuban
Ingredients Equipment Method Notes

Ingredients
  

  • 3 lbs chuck roast well-marbled, dried and seasoned with salt and pepper
  • 2 bell peppers sliced, any color
  • 1 onion large, sliced
  • 4 cloves garlic minced
  • 1 can diced tomatoes 14.5 oz, juice included
  • 1 cup beef broth low sodium
  • 0.5 cup green olives with brine, pitted Spanish or Manzanilla
  • 2 teaspoon ground cumin toasted in dry pan before adding
  • 1 teaspoon dried oregano
  • 2 bay leaves remove before shredding
  • 0.5 teaspoon chili flakes optional
  • 2 tablespoon oil for searing beef

Equipment

  • Skillet Used to sear beef and cook aromatics.
  • Slow cooker Used to cook the beef low and slow.

Method
 

  1. Heat a large skillet over medium-high heat with 2 tablespoons oil. Pat chuck roast dry with paper towels, season both sides with salt and pepper, then sear 4 minutes per side until a deep brown crust forms. Transfer seared beef to slow cooker.
    3 lbs chuck roast, 2 tbsp oil
  2. In the same skillet, add sliced onion and bell peppers. Cook 3-4 minutes until softened, stirring occasionally. Add minced garlic, toasted cumin, oregano, and chili flakes (if using), and cook 1 minute until fragrant. Deglaze pan with ½ cup beef broth, scraping up browned bits from the bottom.
    2 bell peppers, 1 onion, 4 cloves garlic, 2 tsp ground cumin, 1 tsp dried oregano, 0.5 tsp chili flakes, 1 cup beef broth
  3. Pour the vegetable mixture over the beef in the slow cooker. Add diced tomatoes with juice, remaining beef broth, green olives with 2 tablespoons of brine, and bay leaves. Do not stir; liquid should just cover the meat.
    1 can diced tomatoes, 1 cup beef broth, 0.5 cup green olives, 2 bay leaves
  4. Cover and cook on low for 7-8 hours (or high for 4-5 hours if needed). Beef is done when it pulls apart easily with light fork pressure and shreds into strands without resistance. If liquid reduces too much after 6 hours, add ¼ cup water.
  5. Remove bay leaves. Use two forks to shred beef directly in the slow cooker. Stir shredded beef into the sauce and let sit 10 minutes to absorb liquid. Taste and adjust salt or add a pinch of sugar if sauce is too acidic.

Notes

  • Use well-marbled chuck roast for tender, juicy meat.
  • Sear beef first to develop rich, caramelized flavors in the sauce.
  • Cook on low heat to avoid drying out meat and achieve tender shredding texture.

Tried this recipe?

Let us know how it was!

How Long Does Beet Last? [Storage Guide]

March 28, 2026

Storing beets without washing them first is the step most people skip - and it's why a bag of fresh roots turns soft and moldy within days.

Can You Freeze Beet

Moisture trapped against the skin accelerates rot fast.

Unlike sweet potato's shelf life, which tolerates a cool pantry for weeks, beets genuinely need refrigeration to stay firm past a few days.

Understanding how to handle them from the moment you get home makes the difference between roots that last three weeks and roots you throw out.

For those curious about beet in cooking, proper storage directly affects how well they roast, pickle, or blend.

QUICK SUMMARY

Whole raw beets keep 2-3 weeks in the fridge unwashed, with greens removed. Cooked beets last 3-5 days refrigerated. Freeze cooked beets for up to 8-12 months. Never wash before storing, and strip greens within 24 hours of buying.

🧊Fridge (whole): 2-3 weeks unwashed, greens off, in perforated bag
🍳Fridge (cooked): 3-5 days in an airtight container
❄️Freezer (cooked): 8-12 months; flash-freeze first, then bag and seal

How Long Does Beet Last?

How long beets stay good depends heavily on their state - raw, cooked, or frozen - and where you keep them.

A whole root sitting in a cool pantry gives you maybe a week; the same root handled correctly in the fridge lasts three times longer.

Beet Shelf Life
MethodStateDurationNotes
🏠 PantryWhole, rawUp to 1 weekCool, dark, dry space only; fridge preferred for longer storage
🧊 FridgeWhole, raw2-3 weeksUnwashed, greens removed; perforated bag or crisper drawer
🧊 FridgeCooked3-5 daysRoasted, boiled, or steamed; kept in airtight container
❄️ FreezerCooked8-12 monthsBlanch or roast first; vacuum-seal or freeze in single layer before bagging
❄️ FreezerRaw, sliced6-8 monthsBlanch 2-3 min before freezing; reduces texture loss significantly

Cooked beets lose shelf life quickly because cooking breaks down cell walls, making them more vulnerable to bacteria. Raw roots hold longer precisely because that firm skin acts as a natural barrier - only if you keep it dry.

Watch Out
Beet greens pull moisture and nutrients from the root. Remove them within 24 hours of purchase or they'll shrivel your roots in days.

How to Store Beet

Getting storage right starts before the roots even go in the fridge. Similar to storing carrot correctly, the rules are simple but specific - and skipping any one of them shortens shelf life noticeably.

Fridge (whole raw): Trim greens to about 1-2 inches of stem - do not cut all the way to the crown, as a short stem reduces pigment bleeding. Do not wash the roots. Place them in a perforated plastic or breathable produce bag inside the crisper drawer. Wrapping individual roots in a paper towel before bagging controls excess moisture further.

Fridge (cooked): Let cooked beets cool completely, then transfer to an airtight container. Keep them whole or sliced - both work, though sliced beets absorb moisture faster and may soften by day four.

Counter or pantry: Only store whole beets here if you plan to use them within a few days. Keep them in a cool, dark spot, away from ethylene-producing fruit - apples, pears, and bananas all accelerate deterioration of both root and any remaining leaf.

  • 🚫 Don't wash before storing - trapped moisture causes rot within days
  • 🚫 Don't leave greens attached - they draw down the root's moisture and nutrients
  • ✅ Do store beet greens separately - wrapped and refrigerated, they keep 3-5 days and cook like spinach

Can You Freeze Beet?

Yes - with one important condition. Freezing raw whole beets without any pre-cooking leads to severe texture breakdown and an unpleasantly grainy result once thawed.

Cooked beets freeze far better.

Roasted beets hold color and flavor especially well through a long freeze.

If you're curious about how blanching affects greens specifically, how long kale without blanching keeps shows exactly why that step matters for leafy vegetables too.

Golden Rule
Always cook beets before freezing. Raw frozen beets turn grainy and waterlogged on thaw - no salvage method fixes that texture.

Follow these steps for the best results:

  1. Trim and wash Remove greens, scrub roots clean, and trim any long tap roots.
  2. Cook until just tender Roast at 400°F or boil until a knife slides in with slight resistance - not fully soft.
  3. Cool and peel Let beets cool completely. Peel if preferred, then slice or halve into even pieces.
  4. Flash-freeze on a tray Spread pieces in a single layer on a lined baking sheet and freeze for 1-2 hours until solid.
  5. Transfer and seal Move to airtight freezer bags, press out excess air, label with the date, and store for up to 8-12 months.

Thaw cooked beets overnight in the fridge, or reheat them directly from frozen in an oven or stew. Avoid microwaving from frozen - it creates uneven hot spots and turns the texture mushy.

Expect some softening regardless; thawed beets work best pureed, in soups, or roasted again briefly to re-crisp the edges.

Signs Beet Has Gone Bad

Fresh beets give clear signals when they've turned. A bit of surface dirt is normal - soft spots, sliminess, or mold are not.

Signs It's Gone Bad
👀
VisualSoft or collapsed spots on the root · Wrinkled, shriveled skin · Fuzzy mold near stem scar · Green or black slimy patches where skin is broken
👃
SmellSour or fermented odor · Ammonia-like earthiness
✋
TextureMushy or slimy when pressed · Excessively dry and hollow-feeling

Discard any beet showing mold, a strong sour smell, or large soft areas. Cutting around a small soft spot on an otherwise firm root is sometimes acceptable, however any mold on the skin means the whole root goes.

Cooked beets that smell sour or feel slimy after a few days in the fridge should not be eaten.

Getting the Most From Your Beets

Good storage habits add up fast. If you ever need to pivot because a recipe falls through, knowing beet swaps that work helps you use what's already in the crisper.

Root vegetables like turnip can play a similar role in many dishes, and replacements for turnip covers the overlap well.

  • 🌿 Use greens first - they have a much shorter window than the roots and taste best within 3 days
  • 🔪 Leave the stem stub on - cutting flush to the crown causes the red pigment to bleed into surrounding stored food
  • 🍎 Separate from ethylene fruit - keep beets away from apples, pears, and bananas in both fridge and pantry
  • 🧊 Roast before freezing - it preserves color and gives you a ready-to-use ingredient straight from the freezer

If you don't have a roasting rack handy when prepping beets for the freezer, a look at roasting rack stand-ins will keep the process moving without a specialty tool.

Shortcut
Roast a whole batch on the weekend, flash-freeze, and bag them. You'll have ready-to-use beets for soups, salads, and sides all month.

Frequently Asked Questions

Can you freeze cooked beets?

Yes. Cooked beets freeze well for up to 8-12 months when flash-frozen in a single layer before bagging. Roasted beets hold their color and flavor better than boiled ones after a long freeze.

How long do cooked beets last in the fridge?

3-5 days in an airtight container. Sliced cooked beets soften faster than whole ones, so use sliced portions within 3 days for the best texture.

Do beet greens need to be refrigerated?

Yes, immediately. Wrap them loosely in a damp paper towel and refrigerate - they'll stay good for 3-5 days. Left at room temperature, they wilt and go limp within hours.

Can you freeze raw beets?

Technically yes, but only if you blanch sliced raw beets first for 2-3 minutes. Skipping blanching causes severe texture breakdown - the thawed result turns grainy and waterlogged.

How do you thaw frozen beets?

Thaw overnight in the fridge for the best texture. For soups and stews, add them directly from frozen - no thawing needed, and reheating in the oven from frozen also works well.

What Is Cashews? Taste, Texture, Uses & More

March 28, 2026

Cashews do something in the kitchen that most nuts can't - they disappear into a dish and become it.

What Is Cashews

Soaked and blended, they turn into cream.

Ground, they become a spread.

Roasted whole, they hold their own as a snack.

Unlike peanuts and its flavor or what makes macadamia nuts distinct, cashews occupy a rare middle ground: mild enough to blend into backgrounds, sturdy enough to anchor a dish on their own.

QUICK SUMMARY

Cashews are kidney-shaped tree nuts with a mild, sweet-nutty, buttery flavor. They work raw, roasted, soaked, or blended - from Indian korma to vegan cream sauces. Mild in intensity and high in monounsaturated fats, they're a common allergen. Store refrigerated once opened.

🌰Flavor: Sweet-nutty, buttery, mildly earthy - mild overall intensity
🍳Best Uses: Vegan creams, stir-fries, roasted snacks, Indian sweets
📦Shelf Life: Months unopened at room temp; refrigerate or freeze once opened

What Is Cashews?

Cashews are tree nuts harvested from Anacardium occidentale, a tropical tree native to northeastern Brazil and now widely grown across South and Southeast Asia. India and Myanmar are among the world's largest producers and processors.

Each nut grows attached to the base of the cashew apple - a swollen, pear-like fruit - encased in a caustic shell that must be removed before the kernel is safe to eat.

At market, cashews appear in several forms.

  • 🌰 Raw cashews - pale ivory kernels, steamed or processed to remove the shell toxin but not roasted
  • 🔥 Dry-roasted - deepened flavor, firmer bite, longer shelf stability
  • 🧈 Cashew butter - ground into a smooth, spreadable paste; if you need a swap, check out alternatives to cashew butter that match its neutral creaminess
  • 🥛 Cashew milk and cashew cream - blended with water into dairy-free liquid products
  • 🍬 Kaju katli - a traditional Indian sweet made from ground cashew paste and sugar

The nut is gluten-free and suits both vegetarian and vegan diets, though it's one of the more common tree-nut allergens.

What Does Cashews Taste Like?

cashews - What Is Cashews

Cashews land on the gentler end of the nut spectrum. Their flavor is sweet-nutty and buttery, with a faint earthy undertone that never overwhelms - more of a soft backdrop than a defining character.

Sensory SnapshotMild Intensity
👅 Flavor
sweet-nuttybutterymildly earthy
✋ Texture
creamy when chewedslightly crunchy raw
👃 Aroma
warmtoastysubtle floral

Raw cashews compare closely to almonds and its flavor for mild nuttiness, though cashews are noticeably creamier and less bitter.

Heat changes things: dry-roasting amplifies the toasty aroma and adds a faint caramel edge from their natural sugars.

Soaking cashews overnight softens them entirely, making the flavor almost neutral - which is exactly why they blend so well into cream sauces.

Golden Rule
The milder the cashew's flavor, the more it absorbs the dish around it. Raw soaked cashews carry whatever seasoning you add. Roasted whole ones assert themselves.

How to Use Cashews

Cashews span more cooking roles than most tree nuts. Their natural fat content makes them blend-ready, while their firm raw texture handles dry-heat cooking equally well.

Indian cuisine relies on them both ways - whole nuts tempered in hot ghee for korma, and ground into the base of kaju katli and other milk-based sweets.

How Cashews Are Used
MethodBest ForTip
🥗 Soaked & BlendedVegan cream sauces, dairy-free cheeses, soupsSoak at least 4 hours; longer gives a smoother blend
🔥 Dry-RoastedSnacking, salad toppings, cocktail nutsWatch heat closely - sugars scorch fast without oil
🍳 Briefly Fried in OilStir-fry garnish, Thai cashew chicken30-45 seconds in hot oil; remove before they brown fully
🧁 Ground into PasteCashew butter, baked goods, kaju katliProcess warm roasted cashews for faster, smoother paste

In Southeast Asian cooking, cashews go into stir-fries alongside chile, soy, garlic, and ginger.

West African rice dishes and stews also use them for texture and richness.

On the vegan and plant-based side, cashew cream has largely replaced dairy in pasta sauces and dips - it holds emulsification well, though it doesn't behave exactly like actual cream; understanding how long cream keeps helps compare the two in recipe planning.

Cashews pair well with coconut milk and lime for bright, tropical profiles, and with rosemary or thyme when roasted for savory snacking.

If a recipe calls for cashews and you don't have them, alternatives to cashews can cover most roles depending on whether texture or creaminess matters more.

Try It In
🍗Air Fryer Chili-Lime Chicken WingsPairs with cashews' affinity for chile and citrus→🧄Air Fryer Garlic Parmesan Chicken TendersCrushed roasted cashews work as a coating alternative→🍯Air Fryer Honey Garlic Chicken TendersHoney-garlic mirrors cashews' sweet-savory range→

How to Buy and Store Cashews

Good cashews look uniform and pale ivory, without dark spots or an oily sheen.

Avoid any bag that smells sour or stale - rancid fat is the main enemy, and cashews' high oil content makes them vulnerable to it faster than drier nuts.

Watch Out
Broken or chipped cashew pieces oxidize faster than whole kernels. If buying pieces for blending, use them sooner or store them in the freezer.

For buying, prefer vacuum- or nitrogen-flushed packaging, which extends shelf life significantly. A full guide to storing cashews correctly covers the details by storage environment.

  • Pantry (unopened) - several months in a cool, dark cupboard
  • Refrigerator (opened) - up to 6 months in an airtight container
  • Freezer - up to a year; thaw only what you need to avoid repeated temperature cycling

Where to Start With Cashews

Cashews reward whoever uses them first as a blending ingredient, not just a snack.

If you're new to them, soak a cup overnight and blend with water, salt, and a squeeze of lemon - that's cashew cream, and it opens most of the plant-based cooking they're known for.

If you already roast them, try a brief skillet toast with rosemary and flaky salt before the next time you add them to a grain bowl.

The roasting doesn't need a rack - though tips on swapping out roasting rack options apply if you're scaling up.

Shortcut
No time to soak? Cover cashews in just-boiled water for 20-30 minutes. It won't match an overnight soak, but it gets close enough for blended sauces.

Frequently Asked Questions

Are cashews a nut or a seed?

Botanically, a seed - it grows inside a drupe attached to the cashew apple. In culinary and commercial contexts, it's classified and sold as a tree nut, which is also how it appears on allergen labels.

Are raw cashews really raw?

Not quite. The shell contains urushiol - the same compound in poison ivy - so all cashews are steamed or heat-processed before sale. What's labeled "raw" means unroasted, not truly unprocessed.

How do cashews compare to almonds in flavor?

Cashews are milder, creamier, and sweeter. Almonds have a drier texture and a slightly bitter, more assertive nuttiness that holds up better in high-acid or strongly spiced applications.

Can you use cashews in vegan cheese?

Yes, and they're the most common base for it. Soaked cashews blended with nutritional yeast, lemon, and salt produce a spreadable, tangy result. Fermentation with a probiotic culture develops sharper, more cheese-like flavor over 24-48 hours.

Do cashews go bad quickly?

Faster than lower-fat nuts like almonds. Their high oil content turns rancid at room temperature within weeks once the packaging is opened. Refrigeration or freezing keeps them fresh for months without flavor loss.

What Is Brioche Bread? [Taste, Uses & More]

March 28, 2026

Brioche does something no other bread quite manages: it carries a full meal forward on butter and eggs alone. Slice it for breakfast, stack it under a burger, or soak it overnight in custard for a Sunday French toast - the bread holds its structure and contributes flavor at every step.

What Is Brioche Bread

That combination of structural reliability and rich, egg-forward taste is why bakers and cooks keep coming back to it.

QUICK SUMMARY

Brioche is a French enriched yeast bread loaded with butter and eggs. It has a soft, pillowy crumb, a glossy golden crust, and a flavor that sits firmly between bread and pastry - mildly sweet, buttery, and egg-forward.

🧈Flavor: Buttery, slightly sweet, egg-forward, mildly yeasty
🍞Texture: Soft and pillowy, fine tender crumb, lightly springy
🍳Best Uses: French toast, burger buns, bread pudding, breakfast with jam
📦Shelf Life: 1-2 days at room temp; up to 1 month frozen
⚠️Watch Out: Contains butter, eggs, and gluten - not suitable for vegan or celiac diets

What Is Brioche Bread?

Brioche is an enriched yeast bread originating in France, with its strongest roots in Normandy and Île-de-France.

Unlike lean breads made with just flour, water, yeast, and salt, brioche incorporates generous quantities of butter and eggs directly into the dough, which is what places it in its own category.

The result is a loaf that behaves more like a pastry than a standard sandwich bread. It's baked in several forms - classic loaves, individual rolls, slider buns, and the iconic brioche à tête, a fluted mold topped with a small dough knob.

A few other regional varieties exist:

  • Brioche vendéenne - a braided version from the Vendée region, often lightly scented with orange flower water
  • Brioche loaf - the standard rectangular format sold in most bakeries and supermarkets
  • Brioche bun - portioned rolls used for sandwiches and burgers, now common far outside France
  • Brioche à tête - the traditional fluted single-serve form, recognizable by its topknot shape

The word is sometimes misspelled as brioché - the accent doesn't belong there in standard French.

What Does Brioche Bread Taste Like?

brioche bread - What Is Brioche Bread

Brioche tastes buttery and mildly sweet, with a clear egg presence that gives it more depth than plain white bread. The yeast contributes a soft background note, but it never dominates - richness from fat and egg is what you notice first.

Sensory SnapshotModerate Intensity
👅 Flavor
butteryslightly sweetegg-forwardmildly yeasty
✋ Texture
pillowyfine crumbspringy
👃 Aroma
warm butterbaked eggsoft vanilla

Toasting changes the profile noticeably. Heat caramelizes the natural sugars in the dough, pushing the sweetness forward and adding a light crispness to the crust while the interior stays soft.

The closest comparison is a richer, butterier challah - though challah uses oil rather than butter, so brioche has a creamier finish. It shares nothing with a standard sandwich loaf beyond its general shape.

Golden Rule
Brioche is not a neutral carrier. Its butter-egg flavor participates in every dish - build your toppings and fillings around that, not against it.

How to Use Brioche Bread

French toast is the most famous application, and for good reason. The tight, fine crumb soaks custard deeply without disintegrating, and the egg-and-butter content in the bread itself amplifies the custardy result. If you need a bread substitute for French toast, few options come close.

Bread pudding works on the same principle - the enriched crumb absorbs liquid slowly and evenly, producing a dense, set interior rather than a soggy one. Stale brioche is actually better here; it soaks faster.

Burger buns are the other major use. Pan-searing the cut side of a brioche bun in butter for 60 seconds gives you a golden crust that holds up under sauces without going limp.

How Brioche Bread Is Used
MethodBest ForTip
🍽️ Sliced FreshBreakfast with butter and jam, pâté serviceUse day-of for best crumb integrity
🍳 Custard Soak + Pan-FryFrench toast, pain perduCut thick - at least 3cm - so the center stays custardy
🫙 Baked in PuddingBread pudding, strataSlightly stale brioche absorbs more evenly than fresh
🍔 Pan-Seared BunBurgers, ham and Gruyère sandwichesButter the cut side; 60 seconds on medium-high is enough
🧂 Stale CrumbSavory coatings, panzanella-style saladsDry in a low oven before using; brioche crumbs brown fast

Brioche pairs cleanly with Brie and Gruyère, roast beef, ham, chocolate, and vanilla custard. Coffee and tea both work well alongside it.

Avoid very oily, heavy sauces - they flatten the butter-egg notes that make brioche worth using in the first place.

Try It In
🍮Warm Bread Pudding with Vanilla SauceBrioche's fine crumb sets into a dense, custardy pudding better than any lean bread→🧄Garlic Herb Pull Apart BreadSee how enriched dough handles herb-butter infusions in a pull-apart format→

How to Buy and Store Brioche Bread

Look for loaves with a deep golden, glossy crust - that sheen comes from an egg wash applied before baking and signals proper technique.

When sliced, the crumb should be tight and even, not crumbly at the edges or dense through the center (both point to under-proofing or low butter content).

Watch Out
Avoid refrigerating brioche. Cold temperatures accelerate starch retrogradation, staling the crumb faster than leaving it at room temperature would.

Storage is straightforward but time-sensitive. Brioche stales faster than lean breads because high fat content changes how the crumb holds moisture.

For details on how bread storage life works across different styles, the difference is significant.

  • Room temperature - keep in a paper bag inside a bread box, up to 1-2 days
  • Freezer - wrap tightly in plastic, then foil; use within 1 month for best texture
  • After freezing - thaw at room temperature or toast directly from frozen; avoid microwaving if you can

For a closer look at timing and signs of spoilage, see our full guide on brioche bread storage life.

Where to Start With Brioche

Buy a small loaf first. Toast one slice plain to understand the baseline butter-egg flavor before building anything on top of it. If that works for you, move to French toast - it's the simplest way to use brioche at its best.

Bakers who want to go further can try Belgian yeast waffles for a related enriched-dough comparison that uses a similar fat-and-egg structure in a different format.

Once you understand how enriched dough behaves, brioche stops feeling like a specialty item and starts becoming a regular tool.

Frequently Asked Questions

Is brioche bread sweet or savory?

It's mildly sweet but works in both directions. The sugar content is low enough that brioche handles savory fillings - ham, cheese, roast beef - without tasting like dessert. Context and toppings steer it either way.

How is brioche different from challah?

Both are enriched egg breads, but brioche uses a large quantity of butter while challah uses oil. Brioche has a creamier, richer flavor and a tighter crumb; challah is slightly leaner with a chewier texture.

Can you use brioche for burgers?

Yes, and it holds up well. Pan-sear the cut side in butter before assembling - the caramelized surface resists soaking from sauces. It works best with medium-weight burgers; very juicy patties can still overwhelm the crumb.

Can you freeze brioche?

Yes. Wrap individual slices or whole loaves tightly in plastic then foil and freeze up to one month. Thaw at room temperature or toast directly from frozen - the crumb recovers well either way.

Why is brioche so rich compared to other breads?

The dough contains a much higher ratio of butter and eggs than standard bread - sometimes up to 50% butter by flour weight in classic recipes. That fat content is what produces the tender crumb and creamy flavor.

What Is Beet? Taste, Uses & What It Tastes Like

March 28, 2026

Beet does something in a bowl that few other root vegetables can match - it bleeds color, builds sweetness, and leaves an unmistakable earthy note all at once. Whether roasted until caramelized, pickled in brine, or grated raw into a slaw, it reshapes whatever it touches.

What Is Beet

Few ingredients earn that kind of presence alongside something as simple as goat cheese or a drizzle of balsamic.

QUICK SUMMARY

Beet is a sweet, earthy root vegetable with moderate intensity and a signature mineral note. It roasts, pickles, and purees well. Raw beet is crisp; cooked beet turns tender. Shelf life runs 2-3 weeks refrigerated. Works in everything from borscht to grain bowls.

🌱Category: Root vegetable; taproot of the Beta vulgaris species
👅Flavor: Sweet, earthy, mineral - roasting deepens the sweetness significantly
🍳Best Uses: Roasting, pickling, pureeing into soups, grating raw into salads
🧀Top Pairings: Goat cheese, citrus, walnuts, dill, balsamic vinegar, yogurt
🛒Buying Tip: Choose firm, softball-sized roots; smaller ones taste sweeter
🗓️Shelf Life: Root: 2-3 weeks refrigerated; pickled: months; greens: 1-2 days

What Is Beet?

Beet - also called beetroot, table beet, or garden beet - is the swollen taproot of Beta vulgaris, a plant native to the Eurasian steppes. It was cultivated first for its leaves, with the root only coming into culinary focus around the 16th century.

In South Asia it's commonly known as chukandar.

Most people picture the deep ruby-red globe, however several distinct varieties exist.

  • Red or purple beet - the standard; highest in pigment, bold earthy-sweet flavor
  • Golden beet - milder, less mineral-forward, won't stain everything it touches
  • Chioggia beet - candy-striped interior of pink and white, slightly sweeter, loses stripes when cooked
  • Mangelwurzel - a large, livestock-bred variety, rarely found in kitchens

All varieties share an edible top: beet greens are tender when young and slightly bitter when mature, closer in character to chard than lettuce.

What Does Beet Taste Like?

Raw beet is crisp and watery, with a clean sweetness upfront and a distinct mineral-earth note underneath. That minerality is often described as iron-like - it's a signature quality no other common root vegetable replicates exactly.

Cooking changes beet considerably. Roasting concentrates the natural sugars and pulls back the raw earthiness, producing something closer to caramelized carrot - but with a deeper, beet-specific undertone.

Boiling softens the flavor rather than concentrating it.

Sensory SnapshotModerate Intensity
👅 Flavor
earthysweetmineralslightly bitter
✋ Texture
crisp rawtender when roasted
👃 Aroma
raw-vegetalsweet-earth when cooked

The slight bitterness comes mainly from the skin and from older, larger roots. Peeling and choosing smaller specimens largely removes it. Golden beets taste noticeably milder - less mineral, more straightforwardly sweet - making them a gentler entry point for skeptics.

How to Use Beet

Beet holds its own across an unusually wide range of cooking methods. Roasting is the most rewarding: wrap whole roots in foil at 400°F and roast for 45-60 minutes until a knife slides in with no resistance.

The result is deeply sweet with concentrated flavor. Sweet potato follows a similar oven-roasting logic, though beet's mineral edge keeps the two firmly distinct.

How Beet Is Used
MethodBest ForTip
🥗 Raw (grated)Slaws, salads, juicingUse a box grater or food processor; wear gloves
🔥 RoastedGrain bowls, salads, side dishesWrap in foil to trap steam and prevent color loss
♨️ Boiled/SteamedBorscht, purees, beet saladLeave skin on while boiling; it slips off easily after
🫙 PickledSandwiches, antipasto, preservingAdd warm spices (clove, allspice) for Eastern European style
🥤 Juiced/BlendedSmoothies, cold drinks, saucesBalance raw beet's earthiness with apple and ginger

Eastern European cuisines - particularly Russian, Ukrainian, and Polish - claim the most iconic beet dish: borscht, a slow-cooked soup where beet gives the broth its deep crimson color and sweet-sour base. Scandinavian and Middle Eastern kitchens use beet heavily in preserved and roasted forms.

Classic pairings work because they balance beet's sweetness and earthiness. Tangy goat cheese or feta cuts the sweetness.

Citrus - orange especially - brightens the mineral note. Walnuts and pistachios add crunch and fat.

Fresh dill and parsley cut through the richness when beet is roasted or served warm. If goat cheese isn't available, a suitable substitute can keep those flavor contrasts intact.

Watch Out
Avoid pairing beet with delicate white fish - the pigment bleeds and visually dominates the plate before flavor even registers.
Try It In
🥗Roasted Beet and Goat Cheese SaladClassic pairing with walnuts and citrus vinaigrette→🍲Borscht Ukrainian Beet SoupThe definitive Eastern European beet preparation→

How to Buy and Store Beet

At the market, reach for firm roots around softball size with smooth, unblemished skin.

Avoid anything with deep cracks, soft spots, or a woody feel - larger roots often develop a tough, fibrous core. Attached greens are a freshness signal: bright, unwilted tops mean the beet was recently harvested.

Golden Rule
Trim the greens within 24 hours of bringing beets home - they pull moisture from the root and shorten shelf life fast.

Store unwashed roots in a perforated bag in the crisper drawer; they'll keep for 2-3 weeks. Wrap trimmed greens separately and use them within 1-2 days - treat them like chard.

For more detail on maximizing storage time, see how long beets last under different conditions. Pickled beets stay shelf-stable for months unopened.

Start Here with Beet

New to beet? Roast a small batch with olive oil and salt, then pair with crumbled feta and a squeeze of lemon. That combination captures everything distinctive about this root - the sweetness, the mineral depth, the way acid pulls it into focus.

If the earthiness feels too strong, reach for golden beets first. They share the same texture and respond to the same methods, but deliver a softer, less mineral flavor.

From there, borscht and pickled preparations make sense as next steps.

Frequently Asked Questions

Are beets healthy?

Yes. Beets are high in folate, potassium, dietary fiber, and natural nitrates that support blood pressure. People on blood-pressure medication or nitrate-based prescriptions should check with a clinician before eating them regularly.

How do you roast beets without staining your hands?

Wear disposable gloves when peeling or slicing roasted beets. If staining happens anyway, rubbing hands with lemon juice or a paste of salt and oil removes most of the pigment quickly.

What are golden beets and do they taste different?

Golden beets are a yellow-fleshed variety of the same plant. They taste milder and less mineral than red beets, and they won't bleed color into other ingredients - making them easier to use in composed dishes.

Can you eat beet greens?

Yes - young beet greens are tender enough for salads; mature ones are better sautéed like chard with garlic and olive oil. Use them within 1-2 days; they wilt fast.

Can you substitute beet in a recipe?

For earthy sweetness, roasted [carrot or parsnip](https://forkliftkitchen.com/parsnip-substitutes/) comes closest. Neither replicates the mineral note or pigment, so the swap works better in cooked applications than in raw or pickled preparations where beet's specific character matters most.

How Long Does Carrot Last? [Storage Guide]

March 28, 2026

Freezing carrots seems straightforward until you pull a bag from the freezer six months later and find a mushy, colorless mess - which is why how you freeze them matters as much as whether you freeze them.

How Long Does Carrot Last In The Fridge

Whole raw carrots can survive a stint in the freezer, much like preparing salmon freezer burn properly teaches you that method determines outcome.

Blanched slices hold their texture and sweetness for up to a year, while unblanched whole carrots degrade faster and work only in cooked dishes.

Understanding what makes carrot distinct - its dense cell structure and high water content - explains why temperature management at every stage matters so much.

QUICK SUMMARY

Whole raw carrots last 3-4 weeks in the fridge and up to 8-12 months in the freezer when blanched first. Cut or baby carrots last 1-2 weeks refrigerated. Remove green tops immediately, store unwashed, and keep away from ethylene-producing fruit.

🥕Fridge (whole): 3-4 weeks unwashed in the crisper drawer
🔪Fridge (cut): 1-2 weeks in airtight container with damp paper towel
❄️Freezer (blanched): 8-12 months; blanching is essential for best texture
🏠Counter/Pantry: 1-3 days on counter; up to 2 weeks in cool dark pantry
⚠️Key Rule: Never store carrots near apples or pears - ethylene causes bitterness fast

How Long Does Carrot Last?

Shelf life varies significantly depending on form and storage method. A whole, unwashed carrot in the crisper drawer behaves very differently from a bag of pre-cut baby carrots left in a slightly warm fridge.

The biggest variable is surface area. Cut and peeled carrots expose more moisture to air, which accelerates both dehydration and microbial growth.

Carrot Shelf Life
MethodStateDurationNotes
🏠 CounterWhole1-3 daysSoftens quickly at room temp; avoid in warm kitchens
📦 PantryWhole1-2 weeksCool, dark, low-humidity space only; loses crunch over time
🧊 FridgeRaw whole3-4 weeksStore unwashed in crisper for best results
🧊 FridgeRaw sliced / baby1-2 weeksAirtight container with damp paper towel extends life
🧊 FridgeCooked3-5 daysSealed container; texture softens toward day 5
❄️ FreezerBlanched sliced8-12 monthsBest texture retention; blanch before freezing
❄️ FreezerRaw whole6-8 monthsUsable in soups; texture softens considerably

Cooked carrots lose firmness faster than raw ones because cooking breaks down cell walls. Plan to use refrigerated cooked carrots within three days if texture matters to the dish.

How to Store Carrot

The first rule is one most people skip: remove the green tops the moment you get home. Carrot greens actively draw moisture from the root, and even a day of contact accelerates limpness.

Counter: Whole carrots tolerate room temperature for one to three days, but warmth speeds softening. Only leave them out if you're cooking them today or tomorrow.

Pantry: A cool, dark pantry with low humidity can hold whole, uncut carrots for up to two weeks. They'll lose some crunch by the end of that window, but remain fully usable.

Fridge: Store whole carrots unwashed in the crisper drawer, ideally in a perforated plastic bag. Washing before storage introduces surface moisture that encourages slime. For cut carrots or baby carrots, use a sealed container lined with a damp paper towel - the moisture barrier prevents shriveling without creating the wet conditions that cause decay.

Watch Out
Keep carrots away from apples, pears, and other ethylene-producing fruit. Ethylene gas causes carrots to turn bitter and soft faster than nearly any other storage mistake.

For extra crunch on peeled carrot sticks, submerge them in cold water in a covered container and change the water every 24-48 hours. They'll stay snappy for up to a week this way.

Can You Freeze Carrot?

Yes - with one condition. Blanching before freezing is the difference between carrot slices that hold their shape in a stew and ones that disintegrate on contact with heat.

Similar to what happens with freezing kale without blanching, skipping that step shortens quality life and compromises texture significantly.

Raw whole carrots can go straight into the freezer, but they're only reliable in fully cooked applications like soups where softness won't matter.

Golden Rule
Blanch before freezing. Two minutes for small dice, three for slices, five for whole sticks - then shock immediately in ice water for the same duration.

Here's the full process for blanched slices:

  1. Peel and trim - remove tops and any damaged ends before cutting.
  2. Cut to shape - slices, batons, or dice; keep pieces uniform so blanching is even.
  3. Blanch - 2 minutes for small dice, 3 for slices, 5 for whole sticks in boiling water.
  4. Ice bath - transfer immediately to ice water for equal time to stop cooking.
  5. Drain and dry - pat thoroughly dry; excess moisture causes freezer burn.
  6. Flash-freeze - spread in a single layer on a tray and freeze until solid.
  7. Bag and label - transfer to airtight freezer bags, press out air, and date them.

To use frozen carrots, add them directly to simmering soups or stews without thawing. For salads or cold applications, thaw overnight in the fridge.

Don't refreeze after thawing if you care about texture.

Signs Carrot Has Gone Bad

Fresh carrots should feel rigid with a firm snap. Any deviation from that - limpness, stickiness, or off odors - signals the carrot has degraded.

A slightly limp carrot isn't automatically garbage. Dehydrated carrots can often be revived with a cold water soak.

The signs below, however, mean it's time to discard.

Signs It's Gone Bad
👀
VisualSlimy or mucous film on surface · Large dark brown or black spots near crown or cut ends · White powdery patches indicating dehydration or prolonged storage
👃
SmellSour or fermented odor · Off, earthy rot smell near dark spots
✋
TextureRubbery or collapsible body instead of firm snap · Mushy core when cut, often with liquid present

White powdery patches are sugar bloom from dehydration - the carrot isn't rotting, but the quality has declined enough to reconsider using it raw. If the carrot is also slimy or has dark mold spots, discard it without question.

Storing Carrots the Right Way

Four habits will keep carrots lasting as long as the table says they should. Skip any one of them and you'll be throwing out a bag that should have had two more weeks of life.

  • ✂️ Top immediately - cut greens off the day you buy them; leaving tops attached wicks moisture and shortens fridge life by days.
  • 💧 Wash before use, not before storage - surface moisture is the fastest route to slime and early decay.
  • 🥕 Blanch before freezing - always; raw-frozen carrots work only in fully cooked dishes where texture doesn't matter.
  • 🍎 Isolate from ethylene sources - a drawer shared with apples or pears will produce bitter, soft carrots faster than almost anything else.

For long-term storage decisions, preparing carrot properly before freezing makes a real difference in what you get back out of the freezer months later. The investment of a blanching step pays off every time.

Frequently Asked Questions

Can you freeze carrots raw or do you need to blanch them first?

You can freeze them raw, but blanching first is strongly recommended. Raw-frozen carrots turn mushy after thawing and are only reliable in cooked soups or stews. Blanched slices hold texture for up to 12 months.

How long do baby carrots last in the fridge?

Baby carrots last 1-2 weeks refrigerated in a sealed container with a damp paper towel. They degrade faster than whole carrots because the cut surfaces lose moisture and develop slime more quickly.

Do carrot tops spoil carrots faster?

Yes. Carrot greens draw moisture directly from the root through active transpiration. Even 24 hours with tops attached noticeably increases limpness - remove them immediately after purchase.

Why are my carrots bitter after storage?

Ethylene exposure is the most common cause. Storing carrots near apples, pears, or other ethylene-producing produce triggers a stress response that increases bitter compounds. Moving them to a separate drawer usually solves it.

Can you eat carrots with black spots?

Small surface spots can sometimes be cut away, but large or spreading black areas near the crown or cut ends indicate bacterial rot. If the carrot also smells off or feels mushy, discard it entirely.

Savory Breakfast Galette with Potatoes

March 28, 2026

A rustic galette with tender potato slices, caramelized onions, and melted cheese comes together in under an hour. The key is par-cooking the potatoes before assembly so they finish at the same time as the crust.

Savory Breakfast Galette with Potatoes served on a plate

This works when you need something that looks intentional but doesn't require babysitting. The dough handles the structure while the oven does the rest.

Make this for weekend brunch when you want something more interesting than scrambled eggs, or for meal prep when you need breakfast sorted for the week.

QUICK SUMMARY

This savory breakfast galette combines tender potatoes, caramelized onions, and cheese in a crispy folded crust. Par-cooking the potatoes ensures they finish tender without overbaking the dough. Best for brunch or meal prep when you want something that reheats well and feels more involved than standard breakfast fare.

⏱️Time: 55 minutes total, most of it hands-off baking time
🔑Method: Par-cook potatoes 5-7 minutes before layering on chilled dough
⚠️Watch Out: Soggy crust happens when potatoes aren't pre-cooked - drain excess moisture before assembly

Table of Contents

Toggle
  • Why This Recipe Works
  • What You'll Need
    • Ingredient Details
  • Ingredient Swaps
  • What to Serve With It
  • Store and Reheat
  • Frequently Asked Questions
  • Savory Breakfast Galette with Potatoes
    • Method 
    • Tried this recipe?

Why This Recipe Works

Rolling out cold dough and layering it with pre-cooked ingredients creates a crispy base that holds up under the filling. For a version that comes together quickly, a creamy potato side uses similar timing but skips the dough work entirely.

Quick Reference
⏱️
Prep Time
20 min
🔥
Cook Time
35 min
⏰
Total Time
55 min
🍽️
Servings
4-6 servings
📊
Difficulty
Medium
🏷️
Category
Main Dish
💡
Quick Tip
Pre-cook potatoes for crisp crust
🎯
Best For
Weeknight | Brunch | Meal prep
  • Par-cooking potatoes prevents a soggy crust - boil or microwave slices 5-7 minutes until fork-tender but still firm
  • Keeping dough cold before rolling stops shrinkage - chill for 30 minutes and work quickly during assembly
  • Baking at 375°F for 30-35 minutes creates golden edges without burning while cooking the filling through
  • Brushing crust edges with egg wash gives you that bakery-style shine and deeper browning
  • Leaving a 1-2 inch border prevents overflow - fold edges over filling for structure and a rustic look
Quick Tip
Roll dough to ⅛-inch thickness - thin enough for crisp texture, thick enough to hold the weight of the filling without tearing.

What You'll Need

Ingredients for Savory Breakfast Galette with Potatoes

Shopping for this comes down to pantry staples plus fresh potatoes and herbs. Most people skip this easy eggs recipe, but it uses the same oven timing if you want to double up on breakfast prep.

🥔
Vegetables
  • Potatoes (Yukon or Russet)
  • Yellow or green onions
🥐
Dough
  • Pie dough or puff pastry
  • Butter
🥓
Protein
  • Eggs
  • Bacon or breakfast sausage
🧀
Dairy
  • Gruyere or cheddar cheese
🌿
Herbs
  • Fresh thyme or parsley

Ingredient Details

  • Potatoes
    Yukon Gold holds shape better than Russet, but either works - slice thin and uniform for even cooking
  • Pie dough
    Store-bought saves time, but keep it cold until you're ready to roll or it'll shrink in the oven
  • Eggs
    Crack eggs directly onto the galette halfway through baking so yolks stay runny
  • Cheese
    Gruyere melts smooth and adds nutty flavor, cheddar works if you want sharper bite
  • Onions
    Cook until caramelized and golden - raw onions release too much moisture and make the crust soggy
  • Bacon
    Cook until crisp and drain on paper towels before adding to the galette - excess fat makes everything greasy
  • Herbs
    Fresh thyme holds up better to baking than parsley, which can turn brown - add parsley after baking for brightness

Ingredient Swaps

Most swaps work as long as you adjust for moisture and texture differences. The potatoes works best when it hits the table at the same time as the main, and for a version that comes together quickly, homemade potatoes recipe uses similar browning techniques without the pastry step.

  • Use gluten-free pie dough instead of regular - crust turns out slightly more fragile, handle gently when folding edges
  • Swap butter for dairy-free margarine - you'll lose some flakiness but the crust still crisps up fine
  • Replace cheese with vegan cheese or omit - texture won't be as creamy, but caramelized onions add enough richness
  • Trade bacon for mushrooms or tempeh bacon - adds umami without pork, cook mushrooms until moisture evaporates

Regular Potatoes

Works for: Neutral flavor, holds shape, starchy texture, easy to find

Skip if: You want faster cook time or prefer sweeter filling

Sweet Potatoes

Works for: Sweeter flavor, cooks faster, softer texture, more colorful

Skip if: You want traditional savory galette or firmer slices

Instructions

This takes about an hour start to finish, with most of that time spent letting the oven work. A good salad can make or break the plate, and for a version that comes together quickly, classic salad dish uses pantry staples and comes together while the galette bakes.

  1. Par-cook potatoes 5-7 minutes - boil or microwave sliced potatoes until fork-tender but still firm, then drain completely and pat dry with paper towels

  2. Roll chilled dough to ⅛-inch thickness on parchment paper, keeping edges rough and rustic, then transfer parchment to a baking sheet

  3. Layer filling in center - spread caramelized onions first, then overlapping potato slices, shredded cheese, and cooked bacon, leaving a 1-2 inch border

  4. Fold edges over filling - work around the circle, folding dough up and over the outer edge of the filling, overlapping pleats as you go

  5. Bake at 375°F for 30-35 minutes - brush crust with egg wash before baking, add eggs to the center halfway through if using, remove when edges turn golden and crisp

Golden Rule
Let the galette rest 5 minutes after baking before slicing - the filling sets up and makes cleaner cuts without everything sliding apart.

What to Serve With It

The galette needs something to cut through the richness and add texture contrast. Rich mains need something to cut through, and potatoes does exactly that - planning your savory chicken dish ideas around similar rustic meals keeps weeknight cooking simple.

Side Dish Prep Why It Works How to Serve
Mixed greens salad Easy Light contrast to rich galette, adds freshness Toss with lemon vinaigrette, serve on the side
Fresh fruit salad Easy Adds sweetness and brightness, balances savory filling Cut seasonal fruit, chill before serving
Roasted cherry tomatoes Easy Bright acidic complement, adds color to plate Roast at 400°F for 15 minutes, serve warm
Avocado slices Easy Creamy balance to savory dish, no cooking needed Slice just before serving, sprinkle with salt
Herbed roasted vegetables Medium Seasonal addition, adds texture variety Roast alongside galette, toss with herbs

Three ways to serve it:

  • For brunch hosting - slice into wedges, plate with fresh fruit and mimosas, let guests add hot sauce or sour cream
  • For meal prep - cut into individual portions, store in containers with arugula on the side, reheat in oven for crisp crust
  • For weeknight dinner - serve whole on a cutting board with a green salad and crusty bread for soaking up any runny yolk
Shortcut
Double the recipe and freeze one galette before baking - bake from frozen at 375°F for 45-50 minutes when you need breakfast sorted fast.

Store and Reheat

Leftovers keep for 3-4 days in the fridge and taste better reheated in the oven than the microwave. The coleslaw works best when it hits the table at the same time as the main, and for a version that comes together quickly, quick coleslaw dish stays crisp in the fridge for days and pairs with rustic breakfast dishes like this one.

Method Time Best For
🔥 Oven 10-15 minutes at 350°F Restoring crisp crust and warming filling evenly
🍳 Stovetop 5-7 minutes on medium-low Quick warm-up with skillet crisping the bottom
📦 Microwave 1-2 minutes Fast reheating when you don't care about crisp crust

For best results when storing:

  • Cool completely before refrigerating - covering while warm creates condensation that turns the crust soggy
  • Store in shallow airtight containers - stacking slices makes them steam and lose crispness
  • Wrap individual portions in foil for freezing - prevents freezer burn and makes reheating easier
  • Reheat in oven on a wire rack - lets air circulate and crisps the bottom instead of steaming it
  • Add fresh herbs after reheating - parsley and chives stay bright instead of turning brown

Frequently Asked Questions

Can I make savory breakfast galette with frozen pie dough?

Yes, thaw it completely in the fridge overnight before rolling. Cold dough prevents shrinking and keeps the crust flaky.

How should I store leftover galette and reheat it?

Store in airtight containers in the fridge for 3-4 days. Reheat in a 350°F oven for 10-15 minutes to restore crust crispness - skip the microwave unless you're okay with softer texture.

How do I know when potatoes inside the galette are fully cooked?

Par-cook them before assembly until fork-tender. When the crust turns golden brown after 30-35 minutes, the potatoes will be done - raw potatoes won't finish in time and make the crust soggy.

What causes the galette crust to get soggy and how to fix it?

Raw vegetables or excess liquid from eggs make soggy crust. Par-cook potatoes and drain them completely, cook onions until caramelized, and don't overload the filling with wet ingredients.

Can I scale this savory breakfast galette recipe for a larger group?

Make multiple galettes instead of one large one - bigger galettes are harder to fold and the center takes longer to bake. Two smaller galettes cook more evenly and look better on the table.

Savory Breakfast Galette with Potatoes served on a plate

Savory Breakfast Galette with Potatoes

No ratings yet
This savory breakfast galette combines tender potato slices, caramelized onions, and melted cheese in a crispy folded crust. Par-cooking the potatoes ensures they finish tender without overbaking the dough. Perfect for brunch or meal prep, it offers a satisfying alternative to traditional breakfast dishes.
Print Recipe Pin Recipe
Prep Time 20 minutes mins
Cook Time 35 minutes mins
Total Time 55 minutes mins
Servings: 5 servings
Course: Breakfast, Main Dish
Cuisine: American
Ingredients Method Notes

Ingredients
  

  • 4 cups potatoes sliced thin (Yukon or Russet)
  • 1 cup yellow onions caramelized
  • 1 sheet pie dough chilled
  • 2 tablespoons butter
  • 1 cup Gruyere cheese shredded
  • 4 bacon cooked until crisp and drained
  • 2 teaspoons fresh thyme
  • 1 egg for egg wash and optional addition in center

Method
 

  1. Boil or microwave sliced potatoes for 5-7 minutes until fork-tender but still firm, then drain completely and pat dry with paper towels.
    4 cups potatoes
  2. Roll chilled pie dough out to ⅛-inch thickness on parchment paper, keeping edges rough and rustic, then transfer parchment to a baking sheet.
    1 sheet pie dough
  3. Spread caramelized onions evenly in the center, then layer overlapping potato slices, shredded cheese, and cooked bacon, leaving a 1-2 inch border around the edges.
    1 cup yellow onions, 4 cups potatoes, 1 cup Gruyere cheese, 4 bacon
  4. Fold the dough edges over the filling, pleating as needed to create a rustic folded crust that encloses the filling.
    1 sheet pie dough
  5. Brush the crust with egg wash. Bake at 375°F (190°C) for 30-35 minutes until edges are golden and crisp. If using, add cracked eggs to the galette center halfway through baking. Remove when done and let rest 5 minutes before slicing.
    1 egg

Notes

  • Par-cooking potatoes prevents soggy crust by reducing moisture in the filling.
  • Keep dough cold before rolling to avoid shrinkage and maintain flakiness.
  • Brush crust edges with egg wash for golden color and shine.

Tried this recipe?

Let us know how it was!

How Long Does Brie Cheese Last? [Storage Guide]

March 28, 2026

Buying a wedge of brie and wondering how long you actually have before it turns is a reasonable concern - this soft, white-bloomy-rind cheese has a shorter window than most people expect. Unopened brie holds well in the fridge for 2-3 weeks, but once you cut into it, you're working with a 1-2 week clock.

Can You Freeze Brie Cheese

Proper wrapping and consistent refrigeration make the difference, especially since brie's creamy paste and living rind react badly to airtight plastic and temperature swings.

If you're stocking multiple soft cheeses, understanding storage for brie cheese in dairy recipes alongside options like alternatives to blue cheese and replacements for cream cheese keeps your fridge organized and your cheese safe.

QUICK SUMMARY

Brie lasts 2-3 weeks unopened in the fridge and 1-2 weeks after cutting. Freeze portioned wedges for up to 3 months, but expect texture changes. Always wrap opened brie in wax or parchment first - never airtight plastic alone.

🧊Fridge (opened): 1-2 weeks with proper wax-paper wrapping
❄️Freezer: 2-3 months; use thawed brie cooked, not raw
⚠️Key Rule: Discard if you see green or black mold, or smell strong ammonia

How Long Does Brie Cheese Last?

Brie's shelf life depends on whether the wheel is intact and how it's been stored since purchase. A few variables - fridge consistency, wrapping method, and whether the rind has been cut - shift these numbers meaningfully.

Brie Cheese Shelf Life
MethodStateDurationNotes
🧊 FridgeUnopened2-3 weeksOriginal packaging or wrapped; best-before date applies
🧊 FridgeOpened1-2 weeksWrap in wax/parchment then loose plastic; keep rind intact
❄️ FreezerUnopened2-3 monthsRind and creamy interior will change texture after thawing
❄️ FreezerOpened/portioned2-3 monthsBest for baking or cooked applications post-thaw
🏠 PantryWhole (short-term)1-2 daysCool, dark spot only; avoid if ambient temp exceeds 70°F
🏠 CounterSliced/served2-4 hours maxDiscard after serving window; bacteria grow quickly

Younger brie - firmer and less runny at the center - holds up slightly longer than a very ripe wheel. Brie de Meaux and other traditionally made varieties age faster than mass-produced double cream brie, so check the packing date when buying rather than relying solely on the best-before stamp.

How to Store Brie Cheese

The biggest mistake with opened brie is reaching for plain plastic wrap first. Tight plastic alone traps moisture against the rind and accelerates ammonia buildup, leaving you with a soggy, off-smelling cheese well before its time.

Golden Rule
Always wrap opened brie in wax or parchment paper first, then add a loose outer layer of plastic or a reusable cheese bag. The paper lets the bloomy rind breathe; the outer layer keeps fridge odors out.

Fridge: Place opened brie in the cheese drawer or a shallow container lined with paper, keeping the temperature between 35-40°F. Counter: A whole, unopened wheel can sit at a cool room temperature - below 70°F - for a day or two before serving, which actually helps the paste soften evenly. Serving: Pull brie from the fridge 30-60 minutes before eating so the interior reaches full creaminess; cold brie has a firmer, less expressive texture.

A few habits that extend life after opening:

  • 🧀 Keep the rind intact - it actively protects the paste underneath and slows spoilage
  • Use the cheese drawer - it holds slightly higher humidity than open fridge shelves, which suits brie well
  • Replace the paper layer each time you rewrap; used paper traps moisture and odor against the rind
  • Check the packing date at purchase - younger, firmer brie handles storage better than an already-ripe wheel

Storage needs differ across soft cheeses - camembert in dairy recipes follows a nearly identical wrapping method, while goat cheese in dairy recipes requires less airflow due to its denser, rind-free structure.

Can You Freeze Brie Cheese?

Yes, but with a clear tradeoff. Freezing extends brie's life to 2-3 months; however, the creamy interior becomes crumbly and slightly grainy after thawing, and the white rind may separate from the paste.

Raw, room-temperature brie loses its signature texture entirely once frozen and thawed.

Freeze brie only when you plan to cook with it - baked brie, sauces, and melted applications mask the texture change well. Raw eating after freezing is disappointing.

  1. Portion into wedges - cut the wheel into serving-size pieces before freezing; thawing a whole wheel leads to long thaw times and worse texture loss.
  2. Wrap tightly in plastic wrap - cover each wedge completely, pressing out air against the surface.
  3. Add a foil outer layer or freezer bag - this second barrier prevents freezer burn and protects the rind.
  4. Label with date - brie all looks the same frozen; mark the wedge weight and freeze date clearly.
  5. Thaw in the fridge for 24 hours - never at room temperature. Use within 24-48 hours after thawing.
Watch Out
Don't freeze a whole wheel without portioning first. The extended thaw time causes greater moisture loss and makes the paste separate more severely from the rind.

Signs Brie Cheese Has Gone Bad

Brie already carries surface mold - its white bloomy rind is a controlled Penicillium camemberti culture, not a spoilage sign. The difference between normal and dangerous comes down to color, smell, and texture.

Signs It's Gone Bad
👀
VisualFuzzy blue-green or black mold spots through the rind · Yellowing or brown streaks inside the paste · Excessive liquid pooling or slimy surface under the rind
👃
SmellSharp ammonia stronger than mild earthy mushroom · Putrid or sour odor beyond normal rind funk
✋
TextureSlimy or excessively sticky rind · Interior excessively dry, crumbly, or fully separated from rind

If colored mold (green or black) appears, a strong ammonia odor is present, or the rind feels slimy, discard the entire piece - don't cut around it.

Soft cheeses like brie don't have the density to contain mold safely the way hard cheeses do.

Getting the Most from Your Brie

These four habits cover the full storage cycle without repeating what you already know about timelines or spoilage.

  • 🧊 Breathable wrapping only - wax or parchment first, every single time you rewrap after cutting
  • 🍽️ Temper before serving - 30-60 minutes on the counter before guests arrive delivers the creaminess brie is known for
  • ❄️ Freeze in portions - single-use wedges mean you thaw only what you need and waste nothing
  • 🔍 Buy young when freezing is the plan - a firmer, less-ripe wheel survives the freeze-thaw cycle better than an already-soft one

If a wheel goes past its window, replacements for brie cheese can step in for most recipes - particularly baked and melted applications where the swap is nearly invisible.

Shortcut
Serve brie you're unsure about warm rather than raw - baking it at 350°F for 10-12 minutes eliminates surface concerns and the texture reads as intentional once melted.

Frequently Asked Questions

Is it safe to eat brie with white mold on the rind?

Yes - the white coating is Penicillium camemberti, an intentional culture that forms the bloomy rind. Only discard if the mold turns blue, green, or black, or if the smell shifts to sharp ammonia.

How long does brie last in the fridge after opening?

Opened brie stays good for 1-2 weeks when wrapped in wax or parchment paper with a loose outer layer. Wrapping in airtight plastic alone shortens that window and causes off-odors.

Can you freeze brie and still eat it raw after thawing?

Technically yes, but the texture suffers - the paste becomes crumbly and grainy rather than creamy. Thawed brie works far better baked or stirred into sauces than served on a board.

How do you thaw frozen brie without ruining it?

Move the wrapped wedge to the fridge and let it thaw slowly for 24 hours. Never thaw at room temperature - rapid warming worsens texture separation and increases bacterial risk.

Can you freeze baked brie?

Freezing baked brie isn't recommended - the pastry or toppings degrade significantly and the cheese re-separates on reheating. Freeze the raw, portioned wedge instead and bake directly from thawed.

What Is Basil? Taste, Uses & Growing Tips

March 28, 2026

Most people treat basil as an afterthought - something scattered on pizza or stirred into jarred sauce without much thought.

What Is Basil

That's the wrong approach. Fresh basil behaves more like a finishing spice than a background herb: add it too early, and the heat strips out its aroma entirely.

Understanding how and when to use it is the difference between a dish that smells like a garden and one that just tastes vaguely green.

QUICK SUMMARY

Basil is a tender aromatic herb with sweet, slightly peppery, and clove-like flavor notes. It's most effective added raw or off-heat, and anchors dishes like pesto, Caprese, and Thai curries. Fresh basil lasts 3-7 days; dried keeps for months.

🌿Flavor: Sweet, herbal, faintly peppery with mild clove and anise notes
🍽️Best Uses: Pesto, Caprese salad, pizza garnish, Thai curries, tomato sauces
🛒Buying Tip: Look for glossy, unblemished leaves with no yellowing or slimy spots
⏳Shelf Life: Fresh lasts 3-7 days depending on storage method; dried keeps months

What Is Basil?

Basil (Ocimum basilicum) is a leafy aromatic herb in the mint family, originally domesticated across tropical Asia and the Indian subcontinent.

It arrived in the Mediterranean centuries ago and has since become one of the most widely cultivated cooking herbs in the world.

Sweet basil - the broad-leafed, bright green variety sold in most grocery stores - is what Italian and Mediterranean cooking is built around. However, "basil" covers a wide family of cultivars with genuinely different characters.

  • 🌿 Sweet basil - mild, clove-forward, the standard for pesto and Caprese
  • 🌿 Thai basil - smaller, sturdier leaves with a pronounced licorice-spice flavor; holds up to heat better than sweet basil
  • 🌿 Holy basil (tulsi) - more peppery and clove-like, central to Indian cooking and distinctly different from sweet basil
  • 🌿 Lemon basil - citrus-forward, used in Southeast Asian cuisines and lighter dressings
  • 🌿 Purple basil - similar flavor to sweet basil with a slightly earthier edge and striking color

In Italian, basil is called basilico; in some older texts you'll see the Latin basilum. All varieties share that signature aromatic oil profile, though each tilts it in a different direction.

What Does Basil Taste Like?

basil - What Is Basil

Sweet basil delivers a layered experience: the first note is fresh and green, then a warm clove-like sweetness settles in, followed by a faint peppery finish.

It's often compared to peppery parsley crossed with mild anise, though the anise character stays in the background rather than dominating.

Sensory SnapshotModerate Intensity
👅 Flavor
sweet herbalclove-likefaintly pepperymild anise
✋ Texture
softtender
👃 Aroma
fresh greenwarmclove-like top notes

Thai basil tips the balance toward licorice and spice - much closer to tarragon than to sweet basil, which is why recipes calling for one won't always work with the other.

Heat changes everything: cook sweet basil for more than a minute and those delicate top notes fade fast, leaving only a faint vegetal sweetness behind.

That's the core reason most Italian recipes add it raw at the end.

Golden Rule
Add sweet basil off heat or at the very end of cooking. Anything over 30 seconds of direct high heat strips its volatile oils and dulls the aroma you're after.

How to Use Basil

Sweet basil's home territory is Italian and Mediterranean cooking. Torn over sliced tomato and fresh mozzarella with good olive oil, it's the backbone of Caprese - and understanding olive oil swaps that work matters here, since the oil carries basil's aroma across the dish. Blended with pine nuts, Parmesan, garlic, and olive oil, it becomes pesto - one of the few preparations that actually concentrates basil's flavor rather than cooking it away.

For hot applications, stir sweet basil into tomato sauce in the final 60 seconds, or scatter torn leaves over pizza straight from the oven. It works equally well stirred into minestrone off-heat for a burst of freshness just before serving.

Thai basil behaves differently. Its sturdier leaves and higher heat tolerance make it the right choice for stir-fries - adding it alongside garlic and chili garlic sauce stand-ins when building a Thai-style sauce.

Vietnamese pho traditionally arrives with a side of fresh Thai basil to tear in tableside.

How Basil Is Used
MethodBest ForTip
🥗 Raw / TornCaprese, pizza garnish, pho, grain bowlsTear rather than chop to avoid bruising and blackening
🍳 Off-HeatTomato sauces, soups, minestroneStir in 30-60 seconds before serving; don't let it simmer
🔥 Quick SautéThai stir-fries, pad krapowUse Thai basil - it holds aroma under brief high heat
🫙 BlendedPesto, herb oils, dressings, marinadesAdd a squeeze of lemon to slow browning in blended preparations

When no fresh basil is available, the role parsley plays in a dish often overlaps enough to partially fill the gap - though it lacks the clove and anise character basil brings.

A broader look at alternatives to basil covers what works variety by variety.

Try It In
🍅Tomato Basil Italian BruschettaClassic raw basil over tomato — no cooking required→🧀Tomato Basil Burrata CrostiniTorn fresh basil paired with creamy burrata and peak tomato→🍗Creamy Tomato Basil Chicken SkilletShows how to add basil off-heat in a cooked sauce→

How to Buy and Store Basil

At the store, look for stems with glossy, unblemished leaves - deep green, firm, and fully upright. Yellowing at the edges, slimy patches, or a slightly fermented smell all signal the bunch is past its best.

Stems should snap cleanly, not bend limply.

Quick Tip
Store sweet basil upright in a jar with an inch of room-temperature water, like cut flowers, and keep it on the counter - not in the fridge. Cold temperatures cause rapid blackening.

For Thai basil, a loose wrap in a damp paper towel and a spot in the warmest part of the fridge works better than the counter method.

Dried basil keeps well in a sealed container away from light for several months, though its flavor profile shifts - the fresh green notes disappear, leaving mostly the clove and herbal base.

Knowing the basil spoilage signs to watch for helps you use the bunch before it turns, especially when you're working through a large stem.

If a recipe calls for fresh tomato alongside basil and you're considering pantry options, keep in mind that swapping out canned tomato can shift the overall brightness of the dish too.

Start Here for Basil

New to cooking with it? Tear a few leaves over sliced tomato, drizzle with olive oil, and add a pinch of salt. That single preparation exposes every quality basil has to offer - no cooking skill required.

Once you're comfortable with basil raw, move to pesto. From there, the off-heat tomato sauce technique follows naturally.

Thai basil is its own learning curve - treat it as a separate ingredient, not a swap for sweet basil.

Frequently Asked Questions

What does basil taste like?

Sweet basil tastes herbal and faintly clove-like with a light peppery finish. The anise note is there but subtle - nothing like star anise. Thai basil shifts the balance toward licorice and spice.

Is basil the same as holy basil?

No. Holy basil (tulsi) is a distinct variety with a more clove-forward, peppery flavor and a slightly medicinal edge. It's common in Indian cooking and is not a direct substitute for sweet basil in most Western recipes.

Can you cook basil or should it be added raw?

Sweet basil should almost always go in at the very end, off heat. Thai basil tolerates brief high heat in stir-fries. Extended cooking destroys the volatile oils that give basil its aroma.

What basil should I use for pesto?

Sweet basil - specifically large-leaf Genovese basil if you can find it. Its mild, clove-forward flavor blends cleanly with pine nuts and Parmesan without overpowering either. Thai or holy basil will produce a noticeably different, sharper result.

How do you store fresh basil without it turning black?

Keep sweet basil at room temperature in a jar of water - cold causes blackening fast. Avoid washing until just before use, and keep it away from direct sunlight on the counter.

What Is Camembert Cheese? [Taste, Uses & More]

March 28, 2026

Baked whole in its rind with a few slashed garlic cloves and a sprig of thyme, camembert transforms into something closer to a warm cheese fondue than a sliced table cheese.

What Is Camembert Cheese

That single preparation reveals what makes this small French wheel so distinct - a soft-ripened structure that behaves completely differently depending on how ripe it is, how you handle it, and whether heat is involved.

Unlike goat cheese stand-ins or replacements for blue cheese, camembert occupies its own lane: bloomy rind, earthy interior, cow's milk richness.

QUICK SUMMARY

Camembert is a soft-ripened cow's milk cheese from Normandy, France, with a white bloomy rind and a creamy, earthy interior. It bakes beautifully, melts well, and works on cheese boards. Flavor ranges from mild and buttery when young to pungent and mushroomy at full ripeness.

🧀Type: Soft-ripened bloomy rind cow's milk cheese from Normandy
👅Flavor: Buttery, earthy, mushroomy, slightly tangy near the rind
🔥Best Uses: Baked whole, melted on tartines, cheese boards, stuffed in chicken
📅Shelf Life: 2-3 weeks unopened; 5-7 days once cut and refrigerated
🛒Buy: Look for a firm-yet-yielding center and an intact, uniformly white rind

What Is camembert cheese?

Camembert is a small, wheel-shaped soft-ripened cheese produced from cow's milk, originating in Normandy, France.

Cheesemakers ripen it from the outside in - a surface mold called Penicillium camemberti forms the distinctive white bloomy rind and slowly breaks down the interior paste to a creamy, yielding consistency.

The most protected form is Camembert de Normandie AOC, which requires raw (unpasteurized) milk from Normande cows and hand-ladling of the curd.

Most supermarket versions outside France are made from pasteurized milk and carry looser production standards, which affects both depth of flavor and texture.

A young wheel has a chalky, firmer center with mild flavor. As it matures toward the rind, the paste softens and the character deepens considerably.

Thinking about camembert in dairy recipes helps clarify which ripeness stage suits each application - a barely ripe wheel slices cleanly; a fully ripe one collapses into sauce.

Camembert is often compared to brie, its closest relative among bloomy rind cheeses, though the two differ in size, milk fat content, and overall intensity.

What Does camembert cheese Taste Like?

camembert cheese - What Is Camembert Cheese

Camembert leads with buttery, earthy notes and a mild mushroom quality that comes directly from the Penicillium camemberti rind. The paste carries a gentle tanginess, more pronounced near the outer edge where enzymatic activity is highest.

Sensory SnapshotModerate Intensity
👅 Flavor
butteryearthymushroomylightly tangy
✋ Texture
yielding pastecreamy when ripechalky when young
👃 Aroma
mushroom-forwardearthylight ammonia when very ripe

Ripeness shifts everything. A younger wheel tastes mild, almost milky, with clean dairy fat on the finish.

A fully ripe wheel is noticeably more pungent, the earthiness amplified, and a faint ammonia note may appear in the aroma - normal, though a sharp ammonia smell signals overripeness.

Heat rounds out the tang and coaxes the fat into a liquid, nutty richness.

Baked camembert tastes noticeably milder than the same wheel at room temperature, which is why the baked format appeals to people who find raw camembert too assertive.

Compared to brie, camembert is generally more intense - earthier and more pungent at equivalent ripeness.

Watch Out
A sharp, pronounced ammonia smell that doesn't fade after 10 minutes at room temperature means the wheel has passed peak ripeness. The flavor will be acrid rather than earthy - skip it or use it only in a baked application where the heat dissipates the ammonia.

How to Use camembert cheese

Baking the whole wheel is the most forgiving and crowd-friendly method. Score the top rind, add sliced garlic and fresh thyme, wrap in the wooden box or foil, and bake at 375°F (190°C) for 20-25 minutes until the center is fully molten. Rustic baguette or country bread makes the natural dipper.

Beyond baking, camembert covers several practical applications across French and European cooking. For anyone needing a swap, camembert cheese swaps that work includes options by texture and application - though using brie cheese for creaminess covers the closest like-for-like substitution.

How Camembert Is Used
MethodBest ForTip
🔥 Baked WholeCheese dip, sharing starterKeep the rind intact - it holds the melted paste together
🥗 Room TemperatureCheese boards, fruit pairingsRest 20-30 minutes out of the fridge before serving
🍳 Pan-SearedWarm salads, open-faced tartinesUse medium heat; high heat splits the fat before the center melts
🧅 MeltedGrilled cheese, stuffed chicken, pastaAdd late in cooking - camembert needs little time to melt through

On a cheese board, pair it with crisp apple or pear slices, walnuts, and a drizzle of honey or fig jam. Normandy dry cider is the regional pairing - it cuts through the fat cleanly.

A light-bodied Pinot Noir also works well. Avoid strong salty cured meats alongside it, since they drown out the cheese's more delicate earthiness.

Try It In
🥨Cheddar Cheese StrawsSwap in camembert for a softer, earthier pastry bite→🥚Egg and Cheese Breakfast SandwichMelted camembert adds richness in place of standard sliced cheese→🥗Blue Cheese Dressing (Homemade)See how soft cheeses blend into creamy dressings→

How to Buy and Store camembert cheese

Choose a whole small wheel with a uniformly white, intact bloomy rind - no green or black spots, no excessively wet or sticky surface. Press the center gently with one finger: ripe camembert yields slightly without feeling liquid.

A rock-hard center means it needs more time; a wheel that collapses under light pressure is at late-stage ripeness.

Shortcut
Buy camembert 2-3 days before you plan to serve it. Store it in the fridge in its original paper wrapping, then let it ripen on the counter at room temperature for a day if the center feels too firm.

Store it loosely wrapped in waxed paper or its original packaging inside a breathable container in the coldest part of the fridge. Airtight plastic traps moisture and accelerates rind breakdown.

For full detail on timing and signs of overripeness, how long camembert cheese keeps covers the shelf life by stage. An unopened wheel lasts 2-3 weeks refrigerated; once cut, use it within 5-7 days.

Start Here With Camembert

Pick your entry point based on what you actually want from the cheese.

  • 🔥 You want something shareable and low-effort - bake it whole with garlic and thyme, serve with bread.
  • 🧀 You want a cheese board centerpiece - buy a ripe wheel, bring it to room temperature, pair it with apple, honey, and dry cider.
  • 🍳 You want it in a cooked dish - use it as a filling for chicken breast or layer it into a grilled cheese; add it late so it doesn't overcook.
  • 🧑‍🍳 You're not sure camembert is right - read about [the role brie cheese plays](https://forkliftkitchen.com/brie-cheese/) in similar recipes to compare the two before committing.

The cheese rewards a small amount of attention to ripeness and temperature. Get those two right, and most applications handle themselves.

Golden Rule
Never serve camembert cold. Cold fat mutes the flavor and makes the texture dense. Twenty to thirty minutes on the counter before serving is the single biggest improvement you can make.

Frequently Asked Questions

How is camembert different from brie?

Camembert is smaller, more intense, and generally earthier than brie at equivalent ripeness. Brie typically has a higher fat content and milder flavor. The two share the same bloomy rind mold but differ in milk ratios, wheel size, and regional production rules.

What does camembert smell like?

A ripe camembert smells earthy and mushroom-forward, with a faint barnyard note. A light ammonia smell is normal but should dissipate within minutes of unwrapping; persistent sharp ammonia signals overripeness.

Can you bake camembert?

Yes - baking is one of the most effective ways to use it. Place the whole wheel in its wooden box or foil, score the rind, and bake at 375°F for 20-25 minutes. The rind holds the molten paste together like a natural bowl.

Is camembert pasteurized?

It depends on origin. Camembert de Normandie AOC is made from raw unpasteurized milk, which is why it's restricted in some countries including the US. Most supermarket versions sold outside France use pasteurized milk and have a milder, more consistent flavor.

How long does camembert last after opening?

Use it within 5-7 days once cut, rewrapped in waxed paper and refrigerated. It continues to ripen after cutting, so flavor intensifies and the paste softens further each day.

Savory Buckwheat Crepes with Egg and Ham

March 28, 2026

When weekend brunch needs to feel special but you only have 30 minutes, buckwheat crepes deliver. One batter makes four complete servings with ham, melted cheese, and soft eggs folded inside.

Savory Buckwheat Crepes with Egg and Ham served on a plate

The high heat crisps the edges while the buckwheat stays tender. You get the texture of restaurant crepes without flipping twice or fighting with sticky pans.

Make this for casual entertaining when you want something more interesting than scrambled eggs but less fussy than a full French breakfast spread.

QUICK SUMMARY

Thin buckwheat crepes cook in 1-2 minutes per side, then get filled with ham, cheese, and soft-cooked eggs. Rest the batter 30 minutes before cooking so the flour hydrates completely and the crepes don't tear when you flip them. The nutty buckwheat flavor works better than regular flour for savory fillings.

⏱️Time Reality: 15 minutes prep, plus 30-minute batter rest
🔥Key Move: Medium heat for the pan - adjust down if edges brown too fast
⚠️Watch Out: Skipping the rest makes crepes tear - cold batter needs time to hydrate

Why This Recipe Works

Buckwheat flour creates structure without gluten, which means tender crepes that still hold together when you fold them. The 30-minute rest lets the flour absorb liquid completely so you don't end up with thick spots or tears when the batter hits the pan. For a warm toast side dish that uses similar technique, the resting step works the same way.

Quick Reference
⏱️
Prep Time
15 min
🔥
Cook Time
15-20 min
⏰
Total Time
30-35 min
🍽️
Servings
4 servings
📊
Difficulty
Medium
🏷️
Category
Breakfast | Brunch
💡
Quick Tip
Rest batter 30 minutes for tender crepes
🎯
Best For
Weeknight | Meal prep | Entertaining
  • Cold milk prevents lumps: Room-temperature liquid makes flour clump - whisk cold milk into the buckwheat gradually
  • Thin batter spreads faster: Pour ¼ cup and tilt the pan within 10 seconds before the edges set
  • Low heat for eggs: Cook them separate on low for 3-5 minutes so the yolk stays soft and the whites don't turn rubbery
  • Butter the pan between crepes: Brush melted butter on the surface before each pour - it adds flavor and prevents sticking
  • Fold immediately after flipping: Add ham and cheese as soon as you flip, then fold while the crepe is still hot so the cheese melts
Golden Rule
Rest batter 30 minutes minimum - buckwheat needs time to hydrate or crepes tear when you flip them

What You'll Need

Ingredients for Savory Buckwheat Crepes with Egg and Ham

Shopping for this takes one trip to the dairy aisle and deli counter. Most people skip the resting step, but if you're trying this easy cheese recipe for the first time, batter texture matters more than fancy ingredients.

🥣
Batter Base
  • 1 cup buckwheat flour
  • 2 large eggs
  • 1 cup milk
  • ¼ cup water
  • ½ teaspoon salt
🍗
Fillings
  • 8 slices ham
  • 4 large eggs (for filling)
  • 1 cup Gruyère or Swiss cheese, grated
  • black pepper
🧈
Fat
  • 2 tablespoon butter (melted, for pan)
🌿
Optional Garnish
  • fresh chives or parsley

Ingredient Details

  • Buckwheat flour
    Use 100% buckwheat for gluten-free crepes - blends with wheat flour won't have the same nutty flavor
  • Large eggs
    Two eggs go in the batter for structure, four more cook separately as filling - don't mix them up
  • Milk
    Whole milk makes richer crepes but 2% works - cold liquid prevents lumps when you whisk
  • Ham slices
    Deli ham works better than thick-cut - thin slices fold easier and warm through faster
  • Gruyère cheese
    Melts smooth without getting greasy - Swiss is the backup if Gruyère costs too much
  • Butter (for pan)
    Brush melted butter on the pan between crepes - it browns the edges and keeps them from sticking
  • Water
    Thins the batter without adding dairy - use it to adjust consistency after the batter rests

Ingredient Swaps

Most swaps work if you're short one ingredient, but buckwheat flour is the only thing that gives these the right texture. Rich mains need something to cut through, and classic sauce dish options help when you want a creamy contrast on the plate.

  • Gluten-free all-purpose flour replaces buckwheat flour 1:1 but loses the nutty flavor - texture stays thin and tender
  • Almond or oat milk swaps for dairy milk 1:1 with slightly thinner batter - flavor changes minimally
  • Olive oil replaces butter for cooking with a different flavor profile - edges won't brown quite as golden
  • Turkey or chicken slices swap for ham with milder taste - texture stays tender but less salty

Buckwheat Flour

Works for: gluten-free diets, nutty flavor, traditional texture

Skip if: you need mild flavor or can't find it locally

Dairy Milk

Works for: rich crepes, smooth batter, better browning

Skip if: dairy-free or want lighter texture

Gruyère Cheese

Works for: smooth melting, authentic flavor, special occasions

Skip if: budget matters or you prefer sharper cheese

Instructions

Timing matters more than technique here - crepes cook fast once the batter hits the pan. The potato works best when it hits the table at the same time as the main. For a version that comes together quickly, this easy potato recipe uses similar pan-frying moves.

  1. Make the batter: Whisk buckwheat flour, 2 eggs, milk, water, and salt in a bowl until smooth with no lumps. Cover and rest at room temperature for 30 minutes so the flour hydrates completely.

  2. Heat the pan: Warm a non-stick or crepe pan over medium heat and brush with melted butter. Pour ¼ cup batter into the center and immediately tilt the pan in a circle to spread thin - this should take 10 seconds before the edges set.

  3. Cook the first side: Let the crepe cook 1-2 minutes until the edges lift and turn golden brown. Flip with a spatula and cook the second side 30-60 seconds until light brown spots appear.

  4. Add fillings and fold: While the second side cooks, place 2 ham slices and ¼ cup grated cheese on one half of the crepe. Crack one egg into a separate small pan on low heat and cook 3-5 minutes until the white sets but the yolk stays soft. Slide the cooked egg onto the ham and cheese, then fold the crepe in half and then in quarters.

  5. Repeat and serve: Brush the pan with butter before each crepe and repeat with remaining batter. Serve immediately while the cheese is melted and the eggs are warm.

Quick Tip
Crepe edges should lift easily when ready to flip - if they stick, lower the heat slightly and add more butter

What to Serve With It

Crepes need something fresh on the side to cut through all that cheese and egg. A good coleslaw can make or break the plate. For a version that comes together quickly, this crunchy coleslaw adds crisp texture without much work.

Side Dish Prep Why It Works How to Serve
Mixed green salad Easy Fresh greens cut through rich egg and cheese Toss with vinaigrette, serve on the side
Roasted potatoes Medium Adds hearty starch for hungry mornings Roast while batter rests, serve hot
Steamed asparagus Easy Tender texture contrasts with crispy crepe edges Steam 3-4 minutes, season with salt
Tomato slices Easy Bright acidity balances butter and cheese Slice thick, sprinkle with flaky salt
Herbed sour cream Easy Cool and tangy contrast to warm filling Mix sour cream with chives, dollop on top

Three ways to serve it:

  • Brunch spread: Set out crepes with bowls of different fillings - scrambled eggs, sautéed mushrooms, cooked bacon - so everyone builds their own
  • Quick weekday breakfast: Make crepes the night before, reheat in a dry pan, and fill with pre-cooked eggs and cheese in under 5 minutes
  • Meal prep stack: Cook all the crepes at once, layer between parchment paper, refrigerate for up to 3 days, then fill and warm as needed
Best Pick
Dijon mustard cream sauce adds tangy richness - whisk 2 tablespoon Dijon into ½ cup cream, warm gently, drizzle over folded crepes

Store and Reheat

Crepes store better than most breakfast dishes because they don't get soggy if you separate the components. Cool and crunchy, coleslaw resets your palate between bites. We keep a batch ready for nights like this - fresh homemade salad recipe uses the same resting technique for better texture.

Method Time Best For
🍳 Stovetop 2-3 min each side Restoring crispy edges and melting cheese
📦 Microwave 30-45 sec Quick reheating when texture doesn't matter
🔥 Oven 10 min at 350°F Warming multiple crepes at once evenly

For best results when storing:

  • Cool crepes completely on a wire rack before stacking - moisture condenses and makes them stick if you stack hot
  • Layer parchment paper between each crepe in an airtight container - they separate easily when you're ready to reheat
  • Store fillings separately from crepes in the fridge for 3-4 days - assemble just before serving so crepes don't get soggy
  • Freeze unfilled crepes up to 1 month with parchment between layers - thaw overnight in the fridge before reheating
  • Reheat filled crepes in a dry pan over medium-low heat - the stovetop restores crispy edges better than the microwave

Frequently Asked Questions

Can I substitute all-purpose flour for buckwheat flour?

Yes, but you lose the nutty flavor and gluten-free benefit. All-purpose flour makes softer, less characteristic crepes with milder taste.

How long to cook buckwheat crepes at medium heat?

Cook 1-2 minutes on the first side until edges lift and turn golden, then 30-60 seconds on the second side. Lower heat if edges brown too fast.

How do I prevent buckwheat crepes from tearing?

Rest the batter 30 minutes so buckwheat flour hydrates completely. If batter is too thin, add 1-2 tablespoons more flour and rest another 10 minutes.

Can I make savory buckwheat crepes ahead for meal prep?

Cook all the crepes and store unfilled in the fridge up to 3 days with parchment between layers. Cook eggs and warm ham fresh when ready to serve.

How do I know when savory buckwheat crepes are cooked through?

Edges lift easily with a spatula and turn golden brown, and the surface looks dry instead of wet. Crepes should be thin enough to see through slightly when held up to light.

Savory Buckwheat Crepes with Egg and Ham served on a plate

Savory Buckwheat Crepes with Egg and Ham

No ratings yet
These savory buckwheat crepes feature a tender, nutty batter rested for 30 minutes and filled with ham, melted cheese, and soft-cooked eggs. The crepes crisp at the edges under medium heat, creating a restaurant-style texture without fuss. Perfect for a flavorful weekend brunch or casual entertaining.
Print Recipe Pin Recipe
Prep Time 15 minutes mins
Cook Time 20 minutes mins
Total Time 35 minutes mins
Servings: 4 servings
Course: Breakfast, Brunch
Cuisine: French
Ingredients Equipment Method Notes

Ingredients
  

  • 1 cup buckwheat flour 100% buckwheat for gluten-free, nutty flavor
  • 2 large egg For the batter
  • 1 cup milk Cold, whole or 2% milk
  • 0.25 cup water To thin batter if needed
  • 0.5 teaspoon salt
  • 8 slices ham Thin deli slices for folding
  • 4 large egg For filling, cooked separately
  • 1 cup Gruyère cheese Grated; Swiss cheese can be used as substitute
  • black pepper To taste
  • 2 tablespoons butter Melted, for brushing pan
  • fresh chives or parsley Optional garnish

Equipment

  • non-stick or crepe pan Used to cook the crepes over medium heat and brush with melted butter
  • Whisk To mix the batter ingredients until smooth
  • Spatula To flip the crepes
  • Small pan To cook eggs on low heat separately
  • Brush To apply melted butter to the pan between crepes

Method
 

  1. Whisk buckwheat flour, 2 eggs, milk, water, and salt in a bowl until smooth with no lumps. Cover and rest at room temperature for 30 minutes to fully hydrate the flour.
    1 cup buckwheat flour, 2 large egg, 1 cup milk, 0.25 cup water, 0.5 teaspoon salt
  2. Warm a non-stick or crepe pan over medium heat and brush with melted butter to prevent sticking.
    2 tablespoons butter
  3. Pour ¼ cup of the batter into the center of the pan and immediately tilt in a circle to spread thin before the edges set (within 10 seconds). Cook the first side 1-2 minutes until edges lift and turn golden brown, then flip and cook the second side 30-60 seconds until light brown spots appear.
    1 cup buckwheat flour
  4. While the second side cooks, place 2 slices of ham and ¼ cup grated cheese on one half of the crepe. Meanwhile, crack one egg into a separate small pan on low heat and cook 3-5 minutes until the white sets but yolk remains soft. Slide cooked egg onto the ham and cheese, then fold the crepe in half and then in quarters.
    8 slices ham, 1 cup Gruyère cheese, 4 large egg
  5. Brush the pan with butter before each crepe and repeat cooking steps with remaining batter and fillings. Serve immediately while cheese is melted and eggs are warm. Garnish with fresh chives or parsley if desired.
    2 tablespoons butter, fresh chives or parsley

Notes

  • Rest the batter a full 30 minutes to prevent crepes from tearing.
  • Use cold milk when mixing to avoid lumps in batter.
  • Brush melted butter on the pan between crepes for flavor and non-stick cooking.

Tried this recipe?

Let us know how it was!

What Is Boursin Cheese? [Taste, Uses & More]

March 28, 2026

Spread on a cracker alongside a glass of wine, Boursin looks deceptively simple - a pale ivory round flecked with green herbs.

What Is Boursin Cheese

What most people don't realize until they start cooking with it is that this small foil-wrapped cheese can do far more than anchor a cheese board, from folding into pasta sauces to stuffing chicken breasts before roasting.

QUICK SUMMARY

Boursin is a soft, spreadable cow's milk cheese from France, blended with garlic and herbs. It tastes buttery and garlicky with a mild tang, and works cold as a spread or stirred into warm dishes for a quick, creamy sauce.

🧀Type: Soft herbed spreadable cheese, cow's milk, French origin
👅Flavor: Garlicky, buttery, herbaceous with a mild cultured tang
🍽️Best Uses: Crackers, pasta sauce, stuffed chicken, mashed potatoes
❄️Shelf Life: Unopened 3-6 weeks; opened 10-21 days refrigerated
🛒Buy It: Look for sealed foil rounds or tubs, pale ivory paste, no liquid pooling

What Is Boursin Cheese?

Boursin is a commercially produced soft cheese created in Normandy, France, by François Boursin in 1957. It falls into the same family as fromage frais - fresh, unaged, and light in texture - but is distinguished by its signature blend of garlic and herbs worked directly into the paste.

If you ever need a swap, checking fromage frais replacements can point you toward similar fresh cheeses.

The cheese is made from pasteurized cow's milk and cream, giving it a rich, spreadable consistency. You'll find it sold as foil-wrapped rounds or in plastic tubs, both in the same small-portion format designed for easy serving.

Boursin also goes by "garlic and herb cheese" or "boursin garlic and herb" on some labels and menus.

Beyond the classic Garlic & Fine Herbs, the brand produces several flavor varieties:

  • Garlic & Fine Herbs - the original; parsley, chives, and garlic dominate
  • Shallot & Chive - milder, with a sweeter allium note
  • Pepper - black and pink peppercorns pressed into the exterior rind
  • Cranberry & Spice - a sweeter seasonal variant for cheese boards
  • Fig & Balsamic - fruit-forward, less savory than the original

What Does Boursin Cheese Taste Like?

boursin cheese - What Is Boursin Cheese

Garlic leads, followed closely by a buttery richness that coats the palate like a well-made compound butter. The cultured cream gives the paste a faint, pleasant tang - noticeably milder than cream cheese, and without the sharpness you'd get from aged soft cheeses. Herbs like parsley and chives come through as fresh, grassy notes rather than sharp spice.

Sensory SnapshotModerate Intensity
👅 Flavor
garlickybutteryherbaceousmild tang
✋ Texture
softspreadableslightly grainy when cold
👃 Aroma
fresh garlicbuttery herb

Heat changes Boursin noticeably. Stirred into a warm pasta or soup, the garlic mellows and the cheese spreads into a velvety sauce rather than asserting itself as a distinct element.

Cold from the fridge, it's slightly grainy and the garlic is more upfront - letting it sit at room temperature for 20 minutes smooths both texture and flavor.

How to Use Boursin Cheese

At its most basic, Boursin needs no cooking. Spread cold from the tub onto sliced baguette or crackers, it works as a quick starter alongside cured meats like prosciutto or smoked salmon.

Crisp apples, pears, or grapes cut through the richness well on a cheese board.

Where Boursin earns its keep in the kitchen is as an instant sauce base. Stir a few tablespoons into hot, drained pasta with a splash of pasta water and it melts into a creamy garlic-herb coating in under a minute.

The same method works with warm vegetables - green beans, asparagus, or roasted potatoes stirred with Boursin off-heat come out glossy and well-seasoned.

How Boursin Cheese Is Used
MethodBest ForTip
🥗 Cold SpreadCrackers, baguette, sandwiches, cheese boardsBring to room temp 20 min before serving
🍳 Stirred InPasta sauces, mashed potatoes, soups, warm vegetablesAdd off-heat or at very end; avoid boiling
🔥 BakedWarm dips, stuffed chicken, filled pastryBrief bake only; high heat causes oil separation
🥄 BlendedCompound butters, dressings, cold dipsMix with softened butter 1:1 for a steak finish

For stuffed dishes, pack Boursin into a pocket cut in a chicken breast before pan-searing and roasting. The cheese melts into the meat as it cooks, keeping the interior moist.

If you want a baked warm dip, keep the oven at 350°F or below - anything higher risks splitting the fats. Looking for a substitute in these kinds of recipes, boursin cheese swaps covers the closest alternatives.

Boursin pairs naturally with French-inspired bistro cooking and American appetizer spreads. It holds its own against mild table wines with low tannins - a white Burgundy or a light Pinot Noir works cleanly.

Watch Out
Don't add Boursin to dishes that still have significant cooking time remaining. Long heat exposure fades the herb flavor and causes the cream to separate into greasy pockets rather than a smooth sauce.
Try It In
🧀Cheddar Cheese StrawsSwap in Boursin for a herby, garlicky twist on the classic→🍳Egg and Cheese Breakfast SandwichUse Boursin as the spread instead of plain butter or cream cheese→🥗Blue Cheese Dressing (Homemade)See how soft cheeses behave in cold, creamy dressings→

How to Buy and Store Boursin Cheese

Foil-wrapped rounds and sealed plastic tubs are the two formats you'll find in most supermarkets. Either works well - the foil round is classic, while the tub is easier to scoop from directly. Check that packaging is fully sealed and that the paste inside looks pale ivory with visible herb flecks. Any green or gray mold spots, liquid pooling at the bottom, or a bloated lid means skip it.

Shortcut
Once opened, press a piece of plastic wrap directly onto the surface of the cheese before replacing the lid. Direct contact prevents drying and slows oxidation of the herb oils.

Once open, use Boursin within 10-21 days for the best flavor and safety. Unopened tubs are typically good for 3-6 weeks refrigerated - always check the label.

Opened soft cheeses like this follow a similar timeline to ricotta: the sooner you use them after opening, the better. For a full breakdown by format and storage condition, see our guide on boursin cheese freshness guide.

Start Here

First time using Boursin? Serve it cold on crackers to understand the baseline flavor before you cook with it.

If you want a warm application, stir it into mashed potatoes - it's forgiving and gives you a clear sense of how the cheese melts. Pasta is the next step: boil, drain, add Boursin and a tablespoon of pasta water, toss off-heat.

Those three dishes cover what this type of cream cheese can and can't do under heat, and they set you up for the more involved uses like stuffed chicken or baked dips.

Golden Rule
Always add Boursin last. It's a finishing cheese, not a cooking cheese - heat is fine, but prolonged heat is not.

Frequently Asked Questions

Is Boursin cheese pasteurized?

Yes, commercial Boursin is made from pasteurized cow's milk. The label confirms this, making it generally safe for pregnant people who avoid unpasteurized cheeses. Always check your specific package, as formulations can vary by country.

What is the difference between Boursin and cream cheese?

Boursin is lighter and more spreadable, with garlic and herbs already blended in. Cream cheese is denser, tangier, and neutral in flavor. Boursin has a higher fat content from added cream, which makes it richer but less stable under direct heat.

Can you bake with Boursin?

Yes, but keep temperatures at or below 350°F and limit bake time. Higher heat or longer exposure causes the fats to separate, leaving an oily pool rather than a creamy texture. Stuffed chicken works well because the cheese is enclosed and protected.

How long does opened Boursin last in the fridge?

Use opened Boursin within 10-21 days. Press plastic wrap directly on the surface before sealing the tub to slow drying. Discard if you see any mold, off smell, or watery separation that doesn't re-incorporate when stirred.

Does Boursin work as a substitute for cream cheese in dips?

It works in most cold dips, but the garlic and herb flavor will dominate any recipe you use it in. Reduce or omit other aromatics in the recipe to avoid clashing. It won't hold structure as firmly as cream cheese in dense baked dips.

What Is Cabernet Sauvignon? [Taste, Uses & More]

March 28, 2026

That first sip hits with dark fruit and something almost mineral - blackcurrant, a whisper of cedar, and a dry grip that lingers long after you've swallowed.

What Is Cabernet Sauvignon

Cabernet sauvignon earns its reputation as the world's most recognized red wine, not through approachability, but through structure and depth.

If you've ever wondered why it tastes different depending on where it's from, or how to cook with it beyond drinking it, the difference comes down to tannins, terroir, and oak.

Knowing comparing cabernet franc vs cabernet sauvignon options sharpens your understanding of where cab sauv sits in the broader red wine landscape.

QUICK SUMMARY

Cabernet sauvignon is a full-bodied dry red wine with firm tannins, dark fruit, and cedar-oak character. It's built for red meat, aged cheeses, and slow braises. Unopened bottles last years; once opened, drink within 3-7 days.

🍇Type: Dry full-bodied red wine with firm tannic structure
👅Flavor: Blackcurrant, black cherry, cedar, tobacco, cocoa
🥩Best With: Grilled ribeye, lamb, aged cheddar, mushroom ragu
🌍Origin: Bordeaux, France - now grown globally
📅Shelf Life: Unopened: years to decades; opened: 3-7 days refrigerated
🌡️Store At: 55°F (13°C), on its side, in a cool dark place

What Is Cabernet Sauvignon?

Cabernet sauvignon originated in the Bordeaux region of France, specifically near the Garonne River, where it was first documented in the 17th century as a natural cross between cabernet franc and sauvignon blanc.

Its thick skin gives it high tannin levels and deep pigmentation - both defining traits.

It's classified as a dry red wine grape, grown across nearly every major wine-producing country. You'll find it labeled simply as Cabernet, Cab Sauv, or Cabernet-Sauvignon depending on the producer's style.

Growing region shapes it dramatically. Bordeaux-style cabernet tends to be leaner and more structured, while California Napa Valley expressions run riper and more fruit-forward.

  • 🇫🇷 Bordeaux, France - the original home; earthy, structured, cellar-worthy
  • 🇺🇸 Napa Valley, California - riper fruit, higher ABV, often oak-forward
  • 🇦🇷 Argentina and Chile - New World styles with softer tannins and accessible pricing
  • 🇮🇹 Tuscany, Italy - appears in modern Super Tuscan blends alongside sangiovese

What Does Cabernet Sauvignon Taste Like?

cabernet sauvignon - What Is Cabernet Sauvignon

Cassis - the concentrated flavor of blackcurrant - is the most consistent marker of cabernet sauvignon across all regions. Black cherry follows closely, with the exact fruit profile shifting based on climate: cooler regions produce tighter, more tart fruit, while warmer climates push toward riper plum and blueberry.

Sensory SnapshotStrong Intensity
👅 Flavor
cassisblack cherrycedartobaccococoa
✋ Texture
full-bodiedfirm tanninsdry finish
👃 Aroma
dark fruitgraphitecedar

Oak aging adds cedar, tobacco, and cocoa layers - the longer it sits in barrel, the more pronounced those notes become. A green, almost bell-pepper note sometimes appears in cooler-climate or less-ripe examples; this comes from pyrazines, aromatic compounds natural to the grape's genetics.

Compared to merlot, cab sauv is firmer and less plush. Its tannin grip is stronger, and the finish lasts noticeably longer.

Golden Rule
A green, vegetal note in cab sauv isn't always a flaw - it's a natural expression of pyrazines, most common in cool-climate Bordeaux or early-harvested grapes. In balance, it adds complexity.

How to Use Cabernet Sauvignon

Cabernet sauvignon works hardest when matched with fat, protein, and umami - the tannins bind to fat molecules in meat, softening their astringency and making both the food and wine taste rounder.

That's why a grilled ribeye is the textbook pairing.

For slower preparations, braised short ribs are built for this wine - the collagen-rich meat and reduced sauce echo the wine's structure. Use it directly in the braise or reduction; it concentrates well over heat and doesn't lose its character.

How Cabernet Sauvignon Is Used
MethodBest ForTip
🥩 GrillingRibeye, porterhouse, lamb chopsServe slightly below room temp - around 60°F - to keep tannins from tasting harsh
🍳 BraisingShort ribs, lamb shanks, oxtailAdd wine early so alcohol cooks off and fruit integrates into the sauce
🫕 DeglazingPan sauces and reductions for beefUse a younger, cheaper bottle - complex oak notes get lost when reduced hard
🧀 PairingAged cheddar, manchego, pecorino, dark chocolateMatch intensity - soft fresh cheeses get overpowered

Mushroom-based dishes - porcini ragu, roasted portobello, mushroom risotto - complement the wine's earthy graphite and cedar notes naturally. Dark chocolate at 70% cacao or higher works well when the cab has strong oak influence.

Two cuisines that rely on this grape most heavily are French (classic Bordeaux-style service) and California, where the grape has developed its own identity across Napa's distinct AVAs like Oakville and Rutherford.

If you're cooking without wine or need a substitute, cabernet sauvignon stand-ins cover the closest alternatives by cooking context.

Avoid pairing it with delicate white fish or citrus-forward salads - the tannins overwhelm light proteins and clash with bright acidity.

Try It In
🍅Roasted Garlic Marinara SauceA splash of red wine deepens the tomato base→🧈Roasted Garlic Béarnaise SauceRich enough to hold up to a glass alongside→🍗Slow Cooker Roast ChickenTry a lighter cab with poultry for a surprising match→

How to Buy and Store Cabernet Sauvignon

Start with the label. Vintage year and region tell you more than price - a 2019 Napa Valley Cabernet and a 2019 Bordeaux are both cab sauv, but they'll drink very differently. For drinking now, reach for younger Chilean or California bottles.

For cellaring, Bordeaux and premium Napa AVAs reward patience.

Shortcut
ABV above 13.5% usually signals a riper, fruit-forward New World style. Under 13%, expect a leaner, more structured Bordeaux-influenced profile.

Storage matters more with cab sauv than with lighter reds. Lay bottles on their side at 55°F (13°C) with 60-70% humidity if you plan to age them. Once opened, seal with a wine stopper and refrigerate upright.

Opened bottles hold for 3-7 days refrigerated - tannins and phenolics actually slow oxidation compared to lighter wines. Watch for cabernet sauvignon spoilage signs like a sharp vinegary smell or flat, dull color, which tell you the bottle has turned.

Start Here if You're New to Cab Sauv

Pick a Chilean or California Cabernet under $20 for your first bottle - these tend toward ripe fruit and softer tannins, which show the grape's core character without demanding age.

Once that clicks, step up to a Napa single-vineyard expression or a mid-range Bordeaux to see how what pairs with pinot noir contrasts sharply with the weight cab sauv brings to the table.

Cook with a bottle first if drinking feels like too much commitment. A pan sauce or short rib braise will show you exactly why this grape's structure matters - and why nothing quite replaces it.

Frequently Asked Questions

Is cabernet sauvignon dry or sweet?

Dry. Virtually all commercially produced cabernet sauvignon is fermented to full dryness, meaning residual sugar is minimal or undetectable. The ripe dark fruit flavors can read as sweetness, but there's no actual sugar driving them.

How tannic is cabernet sauvignon compared to merlot?

Significantly more tannic. Cabernet's thick skin produces higher phenolic content, resulting in a firmer, drier grip on the palate. Merlot's tannins are softer and less persistent.

Why does cabernet sauvignon taste green sometimes?

That green, bell-pepper character comes from pyrazines - aromatic compounds in the grape's skin that dominate when grapes are harvested underripe or grown in cool climates. Warmer vintages and longer hang times reduce this noticeably.

How long can you age cabernet sauvignon?

High-quality Bordeaux and Napa Cabernets can age 20-30 years or more under proper cellar conditions. Everyday bottles are built for 2-5 years. Once past their peak, tannins soften but fruit fades.

What does single-varietal cabernet sauvignon mean?

It means the wine is made from at least 75-85% cabernet sauvignon grapes, depending on the country's labeling laws. Bordeaux blends routinely add merlot or cabernet franc; a single-varietal bottling isolates the grape's character more directly.

Tres Leches Cake

March 28, 2026

Article Output

Most desserts dry out after a day or two in the fridge. The problem is standard cakes aren't designed to hold liquid, so they turn crumbly or stale.

Tres Leches Cake served on a plate

Tres leches cake solves this by soaking a light sponge in three types of milk. The structure absorbs the liquid instead of fighting it, creating a moist texture that lasts for days.

Make this when you need a party dessert that actually improves overnight. For planning your crawfish pie dinner, this works as a sweet finish that cuts through rich or spicy mains.

QUICK SUMMARY

Tres leches cake is a light sponge soaked in a mixture of sweetened condensed milk, evaporated milk, and heavy cream. The key is piercing the cake before soaking so the liquid penetrates evenly instead of pooling on top. Best served chilled after at least 3 hours of refrigeration.

⏱️Time Reality: 20 minutes prep, 30-35 minutes baking, 4+ hours chilling
🔑Critical Step: Pierce warm cake deeply 20 times before pouring milk mixture
⚠️Watch Out: Overmixing deflates the batter - fold gently to keep the sponge light

Why This Recipe Works

Room-temperature eggs whip to triple their volume in 3-4 minutes, creating air pockets that hold the milk soak. The fork piercing creates channels so the mixture saturates the crumb instead of sliding off. If you're looking for something sweet like cake, this method delivers consistent results every time.

Quick Reference
⏱️
Prep Time
20 min
🔥
Cook Time
30-35 min
⏰
Total Time
5 hr (including soaking)
🍽️
Servings
12 servings
📊
Difficulty
Medium
🏷️
Category
Dessert
💡
Quick Tip
Pierce cake before soaking for even absorption
🎯
Best For
Entertaining | Holiday

Five things that make this work:

  • Whipping eggs for 3-4 minutes builds volume that holds the milk soak without collapsing
  • Folding batter gently 10-15 times preserves air pockets instead of deflating them
  • Baking at 350°F for 30-35 minutes sets the structure before the soak goes on
  • Piercing the warm cake 20 times creates absorption channels throughout the crumb
  • Chilling for 3-4 hours lets the milk distribute evenly instead of pooling at the bottom
Quick Tip
Chill your mixing bowl and beaters for 10 minutes before whipping cream - cold tools create stiffer peaks faster

What You'll Need

Ingredients for Tres Leches Cake

Most grocery stores stock all three milks in the baking aisle. Bring eggs to room temperature 30 minutes before mixing - cold eggs won't whip to full volume. We keep a batch ready for nights like this - a simple homemade pack recipe works as a make-ahead breakfast that stretches through busy mornings.

🌾
Dry Ingredients
  • 1 cup all-purpose flour
  • 1½ teaspoons baking powder
  • ¼ teaspoon salt
🥚
Wet Base
  • 5 large eggs (room temperature)
  • 1 cup granulated sugar
  • ⅓ cup whole milk
  • 1 teaspoon vanilla extract
🥛
Milk Soak
  • 14 oz sweetened condensed milk
  • 12 oz evaporated milk
  • 1 cup heavy cream
🍰
Topping
  • 2 cups heavy cream
  • 3 tablespoons sugar
  • 1 teaspoon vanilla extract

Ingredient Details

  • Room-temperature eggs
    Whip to triple their volume in 3-4 minutes when at 68-70°F
  • All-purpose flour
    Creates structure that absorbs liquid without turning mushy
  • Baking powder
    Measure precisely - too much creates a bitter aftertaste
  • Sweetened condensed milk
    Adds sweetness and body to the soak mixture
  • Evaporated milk
    Provides richness without extra sugar
  • Heavy cream (for soak)
    Balances the other two milks - use full-fat for best texture
  • Heavy cream (for topping)
    Whip to stiff peaks so it holds shape on the cake

Ingredient Swaps

Dairy-free versions work if you swap all three milks for coconut equivalents. The texture changes slightly - coconut condensed milk adds subtle tropical notes that some prefer. For more recipe ideas, check the variations below before committing to one approach.

Four swaps that work:

  • Sweetened condensed milk → coconut condensed milk - Adds coconut flavor, makes the dessert dairy-free
  • All-purpose flour → gluten-free all-purpose blend - Creates a slightly denser crumb but still absorbs the soak
  • Heavy cream topping → coconut cream - Whips to stiff peaks for a dairy-free finish
  • Granulated sugar → maple syrup or honey - Reduce liquid by 2 tablespoons, adds deeper sweetness

Coconut Milk Soak

Works for: Dairy-free diets, adds tropical flavor

Skip if: You prefer traditional tres leches taste

Gluten-Free Flour Blend

Works for: Gluten sensitivities, still absorbs soak well

Skip if: You want the lightest possible texture

Sour Cream Topping

Works for: Tangy contrast, thicker layer that holds shape

Skip if: You prefer classic whipped cream finish

Instructions

The batter comes together in 10 minutes if you prep eggs ahead. Pierce the cake while it's still warm - cooled cakes form a skin that blocks absorption. We keep a batch ready for nights like this - this easy beef recipe delivers tender results without constant checking.

  1. Whip eggs and sugar. Beat 5 room-temperature eggs with 1 cup sugar for 3-4 minutes until tripled in volume and pale yellow. The mixture should ribbon off the beaters.

  2. Fold dry ingredients. Sift 1 cup flour, 1½ teaspoons baking powder, and ¼ teaspoon salt into the egg mixture. Fold gently 10-15 times until just combined - stop when streaks disappear.

  3. Bake the cake. Pour batter into a greased 9x13-inch pan. Bake at 350°F for 30-35 minutes until golden and a toothpick comes out clean. The surface should spring back when pressed.

  4. Soak the cake. Pierce the warm cake 20 times with a fork or toothpick, going all the way to the bottom. Mix 14 oz sweetened condensed milk, 12 oz evaporated milk, and 1 cup heavy cream. Pour slowly over the cake, letting it absorb. Chill 3-4 hours.

  5. Add topping. Whip 2 cups heavy cream with 3 tablespoons sugar and 1 teaspoon vanilla to stiff peaks. Spread over chilled cake. Refrigerate 1 hour before serving.

Golden Rule
Pierce deeply - shallow holes leave dry pockets at the bottom of the cake

What to Serve With It

A good chicken can make or break the plate. Tres leches is rich and sweet, so pair it with bright or tangy sides that cut through the cream. For a version that comes together quickly, this quick chicken dish balances the sweetness with savory depth.

Side Dish Prep Why It Works How to Serve
Fresh berries Easy Tart berries cut through the creamy sweetness Scatter on top or serve in a small bowl on the side
Mint leaves Easy Fresh herbal notes cleanse the palate between bites Tear leaves and sprinkle over whipped cream topping
Black coffee Easy Bitter coffee balances the milk-soaked sweetness Serve hot in small cups alongside each slice
Fruit salad Easy Natural fruit sugar complements without overwhelming Serve in a bowl on the side for contrast
Cinnamon dusting Easy Warm spice enhances traditional Mexican flavors Dust lightly over whipped cream before serving

Three ways to serve it:

  • Chill overnight for deeper milk penetration and firmer texture
  • Top with caramel drizzle for richer sweetness and visual appeal
  • Add chocolate shavings for textural contrast against creamy layers
Best Pick
Berries work best - strawberries or raspberries add tartness that prevents palate fatigue

Store and Reheat

Tres leches stays moist in the fridge for 3-4 days because the milk soak prevents drying. Cover tightly with plastic wrap to stop the whipped cream from absorbing fridge odors. Most people skip reheating, but it balances the meal when served chilled year-round.

Method Time Best For
🍳 Serve Chilled 0 min Best texture and flavor - no reheating needed
📦 Microwave 10-15 seconds Warming single slices slightly if preferred less cold

For best results when storing:

  • Refrigerate in a shallow airtight container for up to 4 days
  • Cover surface with plastic wrap pressed directly against the whipped cream
  • Freeze unfrosted cake for up to 1 month - add topping after thawing
  • Let chilled slices sit at room temperature 5 minutes before serving for fuller flavor
  • Store away from strong-smelling foods like onions or garlic to prevent absorption

Frequently Asked Questions

Can I use evaporated milk instead of whole milk in Tres Leches?

The whole milk goes in the batter, not the soak, so you can't swap it directly for evaporated milk without adjusting liquid ratios. Use 2% milk if you need a lighter option for the batter.

How long can I store Tres Leches Cake in the fridge?

Store covered in the fridge for 3-4 days. The milk soak keeps it moist, but the whipped cream topping can weep after that.

How do I know when Tres Leches Cake is fully baked?

A toothpick inserted in the center should come out clean, and the surface should spring back when pressed lightly. The edges will pull slightly away from the pan.

What should I do if my cake is too dry after soaking?

Mix another batch of the three-milk mixture and pour slowly over dry spots. Pierce additional holes in those areas to help absorption.

Can Tres Leches Cake be made in smaller or larger pans?

Use an 8x8-inch pan for a thicker cake or two 9-inch round pans for layering. Adjust baking time by 5-10 minutes and check doneness with a toothpick.

Tres Leches Cake served on a plate

Tres Leches Cake

No ratings yet
Tres leches cake is a light sponge soaked in a mixture of sweetened condensed milk, evaporated milk, and heavy cream. Piercing the warm cake before soaking ensures even absorption and a moist texture. Best served chilled after at least 3 hours of refrigeration for a rich, lasting dessert.
Print Recipe Pin Recipe
Prep Time 20 minutes mins
Cook Time 35 minutes mins
Total Time 5 hours hrs 20 minutes mins
Servings: 12 servings
Course: Dessert
Cuisine: Mexican
Ingredients Method Notes

Ingredients
  

  • 1 cup all-purpose flour
  • 1.5 teaspoons baking powder
  • 0.25 teaspoon salt
  • 5 large eggs room temperature
  • 1 cup granulated sugar
  • 0.33 cup whole milk
  • 1 teaspoon vanilla extract
  • 14 oz sweetened condensed milk
  • 12 oz evaporated milk
  • 1 cup heavy cream for soak
  • 2 cups heavy cream for topping
  • 3 tablespoons sugar for topping
  • 1 teaspoon vanilla extract for topping

Method
 

  1. Beat 5 room-temperature eggs with 1 cup sugar for 3-4 minutes until tripled in volume and pale yellow. The mixture should ribbon off the beaters.
    5 large eggs, 1 cup granulated sugar
  2. Sift 1 cup flour, 1½ teaspoons baking powder, and ¼ teaspoon salt into the egg mixture. Fold gently 10-15 times until just combined, stopping when streaks disappear.
    1 cup all-purpose flour, 1.5 teaspoons baking powder, 0.25 teaspoon salt
  3. Pour batter into a greased 9x13-inch pan. Bake at 350°F for 30-35 minutes until golden and a toothpick inserted comes out clean. The surface should spring back when pressed.
  4. Pierce the warm cake 20 times with a fork or toothpick, going all the way to the bottom. Mix 14 oz sweetened condensed milk, 12 oz evaporated milk, and 1 cup heavy cream. Pour slowly over the cake, letting it absorb. Chill for 3-4 hours.
    14 oz sweetened condensed milk, 12 oz evaporated milk, 1 cup heavy cream
  5. Whip 2 cups heavy cream with 3 tablespoons sugar and 1 teaspoon vanilla extract to stiff peaks. Spread over chilled cake. Refrigerate 1 hour before serving.
    2 cups heavy cream, 3 tablespoons sugar, 1 teaspoon vanilla extract

Notes

  • Pierce the cake deeply 20 times while still warm for even milk absorption.
  • Whip eggs at room temperature to triple volume for light sponge texture.
  • Chill the cake 3-4 hours after soaking for best moisture and flavor distribution.

Tried this recipe?

Let us know how it was!

What Is Blade Steak? [Taste, Uses & More]

March 28, 2026

Blade steak earns its place in a serious cook's rotation not because it's the easiest cut, but because it delivers a depth of beefy flavor that pricier steaks rarely match. Connective tissue runs right through its center - that single anatomical feature determines everything: your cooking method, your prep, your result.

What Is Blade Steak

Blade steak shares that same iron-forward richness with cuts like the taste of hanger steak but rewards patience in ways hanger doesn't require.

QUICK SUMMARY

Blade steak is a well-marbled chuck cut with a central line of connective tissue that makes cooking method everything. Braise it low and slow for tender, shreddable beef. Remove the membrane and sear it fast for a result close to flat iron. Rich, umami-forward, deeply beefy.

🐄Cut: Chuck primal, shoulder - well-marbled with central connective tissue seam
🔥Best Method: Braise low and slow, or remove membrane and pan-sear like flat iron
🧄Pairs With: Bold reds, rosemary, garlic, soy-lime marinades, chimichurri
🛒Buying Tip: Look for even marbling and the visible white center seam to confirm the cut
📅Shelf Life: 1-2 days refrigerated fresh; up to 12 months frozen vacuum-sealed

What Is blade steak?

Blade steak comes from the chuck primal - the shoulder section of the cow - where the muscles work hard and develop serious flavor as a result.

That workload also means more connective tissue, and in blade steak, a thin but significant strip of it runs straight down the center of each steak.

It goes by several names depending on the butcher and country. You'll see it labeled top blade steak, chuck blade, or blade chuck steak at American counters.

When that central connective tissue is removed entirely, the resulting cut is sold as flat iron steak - one of the more tender chuck cuts available.

Unlike skirt or flank, blade steak isn't particularly thin. It's a thicker, rectangular cut with visible marbling throughout, which is exactly what gives it flavor that leaner shoulder cuts can't replicate.

Knowing which version you're buying - membrane-in or membrane-out - shapes every decision that follows.

  • 🐄 Chuck primal - cut from the shoulder, not the loin or rib
  • 📍 Top blade - the most common retail name in the U.S.
  • 🔪 Flat iron - the same muscle, membrane removed, sold separately
  • 🌍 British/Irish markets - often labeled simply "blade" or "chuck blade"

What Does blade steak Taste Like?

blade steak - What Is Blade Steak

Beefy is the right word - specifically, a deep, iron-forward beefiness that sits closer to skirt steak than to a ribeye's buttery richness. The fat marbling contributes a round, almost meaty sweetness that balances that iron note.

Sensory SnapshotModerate Intensity
👅 Flavor
beefyumami-forwardiron-richslightly sweet
✋ Texture
moderately tender when braisedfirm when grilled whole
👃 Aroma
meatyroasted-butter

Heat changes this cut significantly.

A quick sear on a membrane-removed steak gives you caramelized crust with a tender, moist interior - closer to flat iron in every way.

Braise the whole steak low and slow, and the connective tissue dissolves into the cooking liquid, making the meat pull apart with a rich, gelatinous quality that's closer to short rib territory.

Watch Out
Grilling blade steak whole without removing the membrane leaves that central tissue intact. It won't break down over high dry heat - you'll get two tender halves separated by a chewy, inedible strip.

Skip the comparison to tenderloin or strip - blade steak has none of that mild, neutral character. Its flavor is assertive enough that it doesn't need much seasoning beyond salt, pepper, and time.

How to Use blade steak

The central connective tissue isn't a flaw - it's a decision point. Remove it and you have a fast-cooking steak. Leave it in and you commit to low, slow, moist heat.

For braising, set the steak in a heavy pot with aromatics - garlic, onion, rosemary, thyme - and enough red wine or beef stock to come halfway up the meat.

Two to three hours at a low simmer gives you beef that shreds cleanly for tacos or a proper ragù.

When comparing equipment for this kind of cook, comparing braising pan vs dutch oven options helps you decide which vessel retains heat most effectively for the long haul.

Sous-vide is another strong route: cooking at 135-140°F for several hours, then finishing with a hard sear, gives you edge-to-edge pink beef with the connective tissue partially broken down - a result that's difficult to achieve any other way. The precision involved is a different discipline from boiling, as the differences between sous vide vs boiling make clear.

With the membrane out, thin-sliced blade steak works well for fajitas and cheesesteaks.

A soy-sauce and lime marinade for 30 minutes, followed by high heat, handles it.

The same approach that works for dishes alongside skirt steak translates cleanly to blade steak strips.

If you're working without blade steak, blade steak swaps that work outlines the closest alternatives by cooking method.

How Blade Steak Is Used
MethodBest ForTip
🍲 BraisingShredded tacos, ragù, stewKeep liquid at a gentle simmer - a rolling boil toughens the meat
🌡️ Sous-Vide + SearRestaurant-style even cookPat completely dry before the finishing sear or you'll steam, not crust
🔥 Pan-Sear (membrane removed)Fast weeknight steak, sliced thinLet it rest 5 minutes - the thin cut loses juice fast when sliced hot
🌮 Marinated + SlicedFajitas, cheesesteaks, stir-frySlice against the grain at a 45° angle for maximum tenderness
🍔 GroundBurgers with deep beefy flavorAsk the butcher to grind it - adds richness to a leaner blend
Try It In
🍶Japanese Steakhouse Yum Yum SauceA natural pairing for seared blade steak slices→🧄Air Fryer Garlic Butter Steak TipsUse membrane-removed blade steak cut into tips→🥗Grilled Steak and Blue Cheese SaladSlice thinly after grilling for a bold, beefy salad→

How to Buy and Store blade steak

At the butcher counter, look for steaks with even marbling throughout and a moist, deep-red surface - not gray patches or dried, dark edges.

The visible white seam running down the center is what confirms you're looking at a true blade steak, not a trimmed flat iron.

Golden Rule
Decide before you buy: if you want quick-cook results, ask the butcher to remove the connective tissue. If you're braising, leave it - that tissue adds body and richness to the braising liquid.

Storage is straightforward.

Keep fresh blade steak refrigerated between 34-38°F and use it within 1-2 days.

For anything beyond that, vacuum-seal it - sealed cuts last up to 7 days in the fridge.

For long-term storage, freezing blade steak properly extends its life to 6-12 months without significant quality loss.

Unlike more delicate proteins - a a pan-seared salmon with dill sauce recipe demands day-of freshness - blade steak holds up well under controlled freezing conditions.

Where to Start With Blade Steak

Blade steak rewards cooks who read it correctly before applying heat. If you have two to three hours, braise it whole with aromatics and red wine -

you'll get something that rivals short rib for a fraction of the price. If time is short, pull the membrane, season well, and sear hard in a cast iron pan.

This is a cut that fits multiple situations. Just don't walk it into a hot grill without a plan.

Frequently Asked Questions

Is blade steak the same as flat iron?

Not exactly. Both come from the same top blade muscle, but flat iron has the central connective tissue removed before sale. Blade steak retains that membrane, which changes both cooking method and texture considerably.

Can blade steak be grilled?

Yes, but only after removing the central membrane. Grilling it whole leaves that connective tissue tough and chewy since dry high heat won't break it down. With the membrane out, grill quickly and slice against the grain.

How long should you braise blade steak?

Two to three hours at a low simmer is the standard range. Thicker steaks or larger braising batches may need closer to three hours before the connective tissue fully softens and the meat shreds easily.

What is the difference between blade steak and chuck steak?

Chuck steak is a broader category covering several shoulder cuts. Blade steak is a specific chuck cut defined by the top blade muscle and its central connective tissue seam - chuck steak doesn't always include that feature.

Does blade steak work for meal prep?

Braised blade steak is an excellent meal-prep cut. It reheats well in its own braising liquid without drying out, and shredded portions hold refrigerated for up to four days in a sealed container.

What Is Celery Seed? [Taste, Uses & More]

March 28, 2026

Coleslaw wouldn't be coleslaw without that faint bitter-green bite cutting through the mayo, and celery seed is often the reason why.

What Is Celery Seed

These tiny seeds - harvested from the flowering stalks of Apium graveolens - pack more celery flavor per pinch than a whole stalk ever could, which makes them a serious spice rather than an afterthought.

Their flavor sits close to the taste of lovage: sharp, green, and slightly resinous.

They also turn up in Bloody Mary mixes, though freezing bloody mary batches means that sharp seed flavor needs to stay punchy through the thaw.

QUICK SUMMARY

Celery seed is a small, hard spice with a concentrated bitter-green, slightly peppery flavor. Used whole or ground, it seasons pickles, coleslaw, brines, and spice blends. Whole seeds last 3-4 years; ground seed fades in under a year.

🌿Flavor: Bitter-green, peppery, faint anise-citrus edge
🫙Best Uses: Pickle brines, coleslaw dressings, spice blends, braising
🛒Buy: Whole seeds in sealed opaque containers; avoid clumpy or dusty product
📦Store: Airtight container, cool dark place; ground seed refrigerated
⏱️Shelf Life: Whole: 3-4 years. Ground: 6-12 months for best flavor

What Is Celery Seed?

Celery seed comes from wild celery (Apium graveolens), a plant native to the Mediterranean and West Asia.

The seeds are harvested from the plant's flowering stalks - not from the cultivated celery you buy at the grocery store, which rarely flowers under commercial growing conditions.

Each seed is tiny, brown, and slightly ridged, with a hard outer shell that holds concentrated volatile oils.

You'll find them sold whole or pre-ground, and sometimes blended with salt to make celery salt.

They go by several names - seleriac seed, smallage seed, or simply Apium graveolens seed - though "celery seed" is the standard term in most spice aisles.

Two forms matter for cooking:

  • 🌾 Whole celery seed - retains oils longer, ideal for brines, braises, and any application with enough heat or liquid to extract flavor over time
  • 🌿 Ground celery seed - dissolves into dressings and sauces instantly, but loses potency faster; [dill's shelf life](https://forkliftkitchen.com/dill-shelf-life/) follows a similar curve, fading quickly once processed

What Does Celery Seed Taste Like?

celery seed - What Is Celery Seed
Sensory SnapshotStrong Intensity
👅 Flavor
bitter-greenpepperycitrusy-anise
✋ Texture
hard/crunchy (whole)powdery (ground)
👃 Aroma
earthygreen-savory

Celery seed tastes like fresh celery stalks taken several steps further - greener, more bitter, and with a resinous edge that fresh celery never quite reaches.

The flavor sits close to lovage, and if you've browsed alternatives to lovage, you'll know celery seed appears on that list for good reason.

Heat softens the bitterness slightly, making slow-braised applications taste rounder than raw uses. In dressings, the ground seed hits immediately and with full force, so less goes further than you'd expect.

Golden Rule
Start with half the amount you think you need. Celery seed is strong enough that a quarter teaspoon can season an entire batch of coleslaw.

How to Use Celery Seed

Celery seed works across a surprisingly wide range of applications, though it earns its keep most in American pickling and condiment traditions. Pickle brines are the classic home - whole seeds infuse dill-style and bread-and-butter pickles with a savory, slightly bitter backbone that complements both vinegar and sugar.

Eastern European recipes use the same logic in sauerkraut and fermented vegetable jars.

In coleslaw and potato salad dressings, ground celery seed dissolves directly into mayonnaise without leaving gritty texture - a technique that a creamy coleslaw dressing recipe uses to deliver raw celery flavor without the crunch of actual celery.

It pairs cleanly with mustard seed, dill, apple cider vinegar, and cucumber, and holds up against bold partners like chili and black pepper.

How Celery Seed Is Used
MethodBest ForTip
🥗 Ground into dressingsColeslaw, mayo-based salads, saucesUse ground; add at the mixing stage for even distribution
🫙 Infused in brineDill pickles, bread-and-butter pickles, krautsUse whole seeds; they won't cloud the brine
🍲 Added to braisesSlow-cooked meats, stocks, bean dishesAdd whole and remove if texture is unwanted
🥂 Stirred into cocktailsBloody Mary mix, rimming salt blendsGrind finely or use celery salt for even flavor

Avoid celery seed in delicate floral desserts or fruit-only compotes - the bitter, savory edge clashes hard with those flavor profiles.

Brief toasting in a dry pan wakes the volatile oils before you grind or add whole seeds to a dish.

Try It In
🥗Poppy Seed Dressing (Homemade)A dressing where seeds do the heavy lifting — swap or pair with celery seed→

How to Buy and Store Celery Seed

Buy whole seeds whenever possible - ground celery seed loses its volatile oils faster and offers less control over flavor intensity. Look for small, uniform, brown seeds with a dry, clean aroma and no clumping inside the jar. Sealed opaque containers or tins protect the oils from light degradation.

Watch Out
Clumpy or dusty celery seed has likely absorbed moisture - the volatile oils will be weakened and the flavor flat. Skip that jar.

Storage is straightforward.

Whole seeds go in an airtight container in a cool, dark cupboard and keep well for 3-4 years.

Ground celery seed degrades faster; store it in an opaque jar and refrigerate it to push toward the 12-month end of its 6-12 month window.

For clear guidance on what to look for as seeds age, check for celery seed spoilage signs before using older stock.

Where to Start With Celery Seed

Celery seed is worth keeping on hand if you pickle regularly, make coleslaw from scratch, or season Bloody Mary mixes. Start with whole seeds - they last longer and do the most work in brines and slow-cooked dishes.

If you run out and need a fast swap, celery seed stand-ins cover the most practical options.

For anyone building a spice blend, note that celery salt is not a straight swap - it adds sodium you may not want, and replacements for celery salt help navigate that distinction.

Keep the whole seeds, grind as needed, and use a lighter hand than you think the recipe requires.

Frequently Asked Questions

Can I use celery seed instead of celery?

Yes, with adjustments. Celery seed delivers concentrated flavor but no water content or crunch, so it works in cooked dishes and dressings but won't replace fresh celery as a vegetable. Use roughly ¼ teaspoon of ground seed per medium stalk.

Is celery seed the same as celery salt?

No. Celery salt is a blend of ground celery seed and table salt, typically in a 1:2 or 1:3 ratio. Using one in place of the other changes the sodium level of your dish significantly.

How do you grind celery seed for dressings?

A spice grinder or mortar and pestle both work. Grind in small batches and use immediately - freshly ground celery seed is noticeably more aromatic than pre-ground product that's been sitting.

How long do celery seeds last?

Whole celery seeds stay potent for 3-4 years in an airtight container away from light and heat. Ground celery seed is best used within 6-12 months before the volatile oils fade.

Does toasting celery seed change the flavor?

Yes. Brief dry-toasting warms the volatile oils and makes the flavor more pronounced and slightly nuttier. Keep the heat low - 30 to 60 seconds in a dry pan is enough before the seeds can scorch.

What Is Burrata Cheese? [Taste, Uses & More]

March 28, 2026

Most people treat burrata the way they treat fresh mozzarella - sliced cold, plated quickly, eaten without much thought. That's a missed opportunity, because burrata is a fundamentally different product with a different payoff.

What Is Burrata Cheese
QUICK SUMMARY

Burrata is a fresh Italian cheese with a thin mozzarella-like shell and a loose, creamy interior of stracciatella. It's mild, milky, and rich - best served raw at room temperature, cut open at the table, and eaten within days of purchase.

🧀Type: Fresh stretched-curd cheese from Puglia, Italy
🥛Flavor: Mild milky sweetness, buttery cream, light lactic tang
🍽️Best Use: Served whole, torn over salads or warm pasta, on crostini
❄️Shelf Life: 2-5 days after opening; 7-10 days unopened
⚠️Avoid: High heat or heavy spiced sauces that destroy its delicate cream

What Is burrata cheese?

Burrata originated in Puglia, the heel of Italy's boot, and the name translates roughly to "buttered." It belongs to the pasta filata family - the same stretched-curd tradition that produces mozzarella - but the construction is more complex.

Cheesemakers form a thin pouch from fresh curd, fill it with stracciatella (shredded mozzarella-style curd mixed with cream), then seal the top.

The result is two textures in one cheese. The outer shell behaves like a soft, elastic fresh mozzarella.

The interior is entirely different: loose, silky, and slightly stringy, releasing a rush of cream the moment the shell is broken.

You may also see it labeled burrata di Andria, referencing the Apulian town where the style is said to have been developed in the early twentieth century. Most commercial versions are now produced across Italy and internationally, though Puglia remains the benchmark.

  • 🏷️ Other names - burrata di Andria, fresh burrata
  • 🥛 Outer shell - pasta filata curd, mild and elastic like fresh mozzarella
  • 🌀 Interior filling - stracciatella: pulled curd ribbons suspended in heavy cream
  • 📦 Sold as - individual balls in a whey or cream brine, sealed tub or pouch

What Does burrata cheese Taste Like?

burrata cheese - What Is Burrata Cheese

The outside tastes close to fresh mozzarella - clean, mildly milky, with a faint lactic tang and almost no sharpness. Cut it open, and the interior shifts register entirely.

The stracciatella filling delivers a richer, fattier creaminess that reads somewhere between ricotta and whipped cream, grounded by that same milky sweetness.

Temperature matters significantly here. Served cold from the fridge, the cream inside stiffens and the shell turns rubbery. At room temperature, the shell softens and the center loosens into something that pours gently onto whatever it touches. That contrast - elastic shell giving way to flowing cream - is the whole point.

Aroma is subtle: fresh milk, a light grassy note, nothing assertive.

Sensory SnapshotMild Intensity
👅 Flavor
milky sweetbutterylactic tang
✋ Texture
elastic shellsilky cream interior
👃 Aroma
fresh milklight grassy

How to Use burrata cheese

Burrata's greatest advantage is also its constraint: heat ruins it. This is not a melting cheese in the traditional sense.

Long exposure to direct heat dissolves the cream, collapses the stracciatella, and strips out what makes it worth buying. Every technique worth using keeps it raw or adds it at the very last second.

The most straightforward approach is also the best. Place a whole ball on a plate, drizzle with good extra-virgin olive oil, add flaky salt and cracked pepper, and let people break it open themselves.

With ripe heirloom tomatoes and fresh basil, it functions as a richer caprese - no other changes needed.

Warm applications work when timed correctly. Spoon it over just-cooked pasta off the heat, and the cream loosens into a light sauce without fully cooking. The same logic applies to pizza: add it after baking, not before. On toasted sourdough or crostini, it pairs well with prosciutto, stone fruit jam, or thin slices of grilled peach and fig.

Golden Rule
Always bring burrata to room temperature for 20-30 minutes before serving. Cold burrata straight from the fridge is firmer, less creamy, and significantly less rewarding.

Avoid pairing it with very spicy or heavily sauced dishes. The delicate cream gets lost entirely beneath bold flavors.

If you need a burrata cheese substitute for a cooked application, fresh ricotta or stracchino holds up to heat better.

How Burrata Is Used
MethodBest ForTip
🥗 Raw at Room TempPlated whole, caprese-style salads, crostiniServe within 30 min of pulling from fridge
🍝 Last-Minute SpoonWarm pasta, grain bowls, roasted vegetablesAdd off heat; residual warmth is enough
🍕 Post-Bake FinishPizza, flatbreads, toasted crostini basesPlace on top after removing from oven
🍑 Sweet PairingsGrilled peaches, figs, fruit-forward plattersA drizzle of balsamic ties the contrast together
Try It In
🧀Cheddar Cheese StrawsSee how fresh cheese works in a baked format→🍳Egg and Cheese Breakfast SandwichA build where creamy cheese makes a real difference→🥗Blue Cheese Dressing (Homemade)Compare how bold cheese flavors work in dressings→

How to Buy and Store burrata cheese

Look for a ball stored in clear whey or cream brine, with an intact, unbroken shell and no yellowing. White, slightly glossy, and firm to the eye - that's what fresh looks like.

Check the pack date and prioritize the most recently produced tub. When possible, choose Italian-origin products, particularly those noting Puglia or Andria provenance.

Quick Tip
Store burrata submerged in its liquid in the coldest part of your fridge - never let the outer shell dry out, or it toughens and cracks before you open it.

Once opened, use it the same day or within two to three days at most. burrata cheese freshness guide drops quickly once the seal is broken and the cream is exposed to air. Unopened tubs typically hold for 7-10 days from the pack date, similar to how fresh cream behaves in storage.

Do not freeze it - the cream separates and the shell texture does not recover.

Understanding how fresh cheese is made explains why burrata degrades faster than aged varieties: there's no rind, no acid barrier, and the fat-rich filling is especially prone to spoilage once exposed.

Buy It Fresh, Use It Fast

Burrata rewards the cook who plans around it rather than leaving it as an afterthought. If the pack date is more than a week old, pass. If it's fresh, buy it the day you plan to serve it.

Use it on something simple - a plate with good olive oil, ripe tomatoes, and crusty bread - before experimenting with warm applications. The straightforward version reveals what you're working with.

Once you've tasted it at its best, the other uses follow naturally.

Frequently Asked Questions

Is burrata the same as fresh mozzarella?

No. The outer shell is similar to fresh mozzarella, but the interior is stracciatella - shredded curd mixed with heavy cream. That filling makes burrata significantly richer and creamier than mozzarella throughout.

How should you eat burrata?

Serve it whole at room temperature, then cut or tear it open at the table so the cream spills out. Flaky salt, olive oil, and something acidic like tomato or a balsamic drizzle are all it needs.

Can you cook with burrata?

Yes, with limits. It works in warm dishes only when added off the heat - spooned over pasta or placed on pizza after baking. Direct heat dissolves the cream and destroys the texture entirely.

How long does burrata last in the fridge?

Unopened, most tubs last 7-10 days from the pack date. Once opened, use it within 2-3 days. Keep it submerged in its liquid - exposure to air accelerates spoilage. See our full burrata storage guide guide for details.

Is burrata high in fat?

Yes - more so than most fresh cheeses, because of the cream mixed into the stracciatella filling. It fits low-carb diets in portioned servings but is not suitable for dairy-free or vegan eating plans.

Crockpot Thai Peanut Chicken

March 28, 2026

Slow cooker chicken often turns out dry or tastes like boiled protein. The fix is using thighs instead of breasts and adding a peanut sauce that actually sticks.

Crockpot Thai Peanut Chicken served on a plate

High heat isn't an option here, so the sauce does all the work. Peanut butter and coconut milk create a thick coating that clings to the meat while it cooks low and slow.

This works for meal prep when you need something that reheats well and still tastes like you made an effort.

QUICK SUMMARY

Crockpot Thai Peanut Chicken uses chicken thighs slow-cooked in a creamy peanut-coconut sauce. The low heat keeps dark meat tender while the sauce thickens without burning. Sear the chicken first if you want deeper flavor, or skip it when pressed for time.

⏱️Time Reality: 10 minutes prep, then 5-6 hours unattended on low heat
🔑Critical Move: Stir in peanut butter during last 30 minutes to prevent over-thickening
⚠️Watch Out: Sauce splits if you use light coconut milk-full-fat keeps it creamy

Table of Contents

Toggle
  • Why This Recipe Works
  • What You'll Need
    • Ingredient Details
  • Ingredient Swaps
  • What to Serve With It
  • Store and Reheat
  • Frequently Asked Questions
  • Crockpot Thai Peanut Chicken
    • Method 
    • Tried this recipe?

Why This Recipe Works

Slow cookers don't brown or caramelize, so all the flavor comes from the sauce ingredients working together over hours. A good chicken can make or break the plate, and a juicy chicken side uses similar timing strategies for tender results.

Quick Reference
⏱️
Prep Time
10 min
🔥
Cook Time
4-6 hours
⏰
Total Time
4 hours 10 min
🍽️
Servings
4-6 servings
📊
Difficulty
Easy
🏷️
Category
Main Dish
💡
Quick Tip
Use chicken thighs for moisture retention
🎯
Best For
Weeknight | Meal prep

What makes this work:

  • Dark meat stays juicy - Thighs have enough fat to withstand long cooking without drying out
  • Full-fat coconut milk prevents separation - Low-fat versions turn watery and split under slow heat
  • Peanut butter added late thickens gradually - Stirring it in during the last 30 minutes keeps sauce from getting pasty
  • Soy sauce and lime balance sweetness - Brown sugar needs acid and salt to avoid cloying flavor
  • Low setting renders fat slowly - 5-6 hours on low produces tender, shreddable chicken without toughening
Quick Tip
Fill the crockpot only two-thirds full to avoid spillover and ensure even heat circulation

What You'll Need

Ingredients for Crockpot Thai Peanut Chicken

Shopping for this takes 10 minutes if you stock Asian basics. The peanut sauce works for meal prep because it holds up in the fridge for 3-4 days without breaking.

🍗
Protein
  • 2 lbs chicken thighs (boneless, skinless)
🥢
Sauce Base
  • ½ cup peanut butter (creamy, not natural)
  • 1 can (13.5 oz) coconut milk (full-fat)
  • 3 tablespoon soy sauce
  • 2 tablespoon lime juice (fresh)
  • 2 tablespoon brown sugar
🧄
Aromatics
  • 4 cloves garlic (minced)
  • 1 tablespoon fresh ginger (grated)
  • ¼-½ teaspoon red pepper flakes
🫙
Garnish
  • Fresh cilantro (chopped)
  • Lime wedges
  • Crushed peanuts (optional)

Ingredient Details

  • Chicken thighs
    More tender after slow cooking than breasts; fat content prevents drying
  • Peanut butter
    Use creamy, not natural-natural separates and turns oily in the crockpot
  • Full-fat coconut milk
    Light versions make watery sauce; full-fat stays creamy under low heat
  • Soy sauce
    Provides salt and umami; measure carefully as it concentrates during cooking
  • Lime juice
    Fresh juice only-bottled tastes flat after hours in the crockpot
  • Brown sugar
    Balances salty-spicy elements; reduce by 1 tablespoon if you prefer less sweetness
  • Red pepper flakes
    Start with ¼ teaspoon and add more at the end if needed-heat intensifies over time

Ingredient Swaps

Some substitutions change the sauce texture while others just shift the flavor profile slightly. Rich mains need something to cut through, and potato does exactly that, so for a version that comes together quickly, try fluffy mashed potato dish on the side.

Four swaps that work:

  • Almond butter instead of peanut butter - Less authentic but equally creamy; thins sauce slightly so reduce coconut milk by 2 tbsp
  • Tamari instead of soy sauce - Same salty-umami depth, safe for gluten-free diets with no flavor loss
  • Chicken breasts instead of thighs - Leaner but dries out faster; reduce cook time to 3-4 hours on low and check temp at 3 hours
  • Heavy cream instead of coconut milk - Richer but loses Thai flavor; use 1 cup cream + ¼ cup chicken broth to avoid overly thick sauce

Natural peanut butter

Works for: Cleaner ingredient list, no added sugar

Skip if: You want stable sauce-natural separates and turns oily under slow heat

Honey instead of brown sugar

Works for: Slightly different sweetness, thins sauce for easier stirring

Skip if: You want thick coating-honey keeps sauce runnier

Sriracha instead of red pepper flakes

Works for: More complex heat with garlic notes, easier to control spice

Skip if: You want dry spice only-sriracha adds liquid and changes consistency

Instructions

Plan for 5-6 hours on low heat, or 3-4 hours on high if you're rushed. The this dip works best when it hits the table at the same time as the main, so for a version that comes together quickly, check out this simple sauce recipe that pairs well.

How to make it:

  1. Mix the sauce - Whisk coconut milk, soy sauce, lime juice, brown sugar, garlic, ginger, and red pepper flakes in a bowl until smooth (2 minutes). Pour into crockpot.

  2. Add chicken - Place chicken thighs in sauce, turning once to coat both sides. No overlap needed-pieces can stack. Searing first adds flavor but skip it if you're short on time.

  3. Cook low and slow - Cover and cook on low for 5-6 hours or high for 3-4 hours. Check internal temp at the low end - chicken should hit 165°F (74°C) in the thickest part.

  4. Stir in peanut butter - 30 minutes before serving, whisk peanut butter into sauce until fully incorporated. Sauce will thicken as it sits. Shred chicken with two forks if desired, or leave whole.

  5. Finish and serve - Taste sauce and add extra lime juice, soy sauce, or red pepper flakes as needed. Garnish with cilantro, crushed peanuts, and lime wedges. Serve over jasmine rice or rice noodles.

Golden Rule
Test chicken temp with an instant-read thermometer at 165°F before shredding-guessing leads to undercooked or overcooked meat

What to Serve With It

Creamy peanut sauce needs something crisp or acidic to cut through all that richness. Salad cuts through all that richness, so for a version that comes together quickly, simple homemade salad adds the right texture contrast.

Side Dish Prep Why It Works How to Serve
Steamed jasmine rice Easy Neutral base soaks up sauce without competing 1 cup per serving, spooned under chicken
Rice noodles Easy Gluten-free option with soft texture that catches sauce Toss with sauce, top with chicken
Sautéed green beans Easy Fresh crunch contrasts creamy chicken Cook with garlic, serve alongside
Cucumber salad Easy Refreshing acidity balances richness Toss with rice vinegar, sesame seeds
Thai peanut slaw Medium Crunchy texture complements sauce, doubles down on peanut flavor Toss cabbage with extra peanut dressing

Three ways to serve it:

  • Over rice bowls - Spoon chicken and sauce over jasmine rice, top with cilantro and crushed peanuts for weeknight meals
  • In lettuce wraps - Shred chicken, serve in butter lettuce cups with shredded carrots and cucumber for low-carb option
  • With rice noodles - Toss cooked noodles with sauce, top with chicken pieces and lime wedges for gluten-free dinner
Shortcut
Use pre-minced garlic and ginger paste from a jar to cut prep time to under 5 minutes

Store and Reheat

Peanut sauce thickens in the fridge but loosens when reheated with a splash of coconut milk or water. Store chicken and sauce together in shallow containers so everything cools quickly and reheats evenly.

Method Time Best For
🍳 Stovetop 5-7 min over medium heat Even heating, best texture retention, add 2-3 tablespoon liquid to loosen sauce
🔥 Oven 15-20 min at 325°F (163°C) Larger portions, cover with foil to prevent drying
📦 Microwave 2-3 min, stir halfway Quick single servings, add splash of water before heating

For best results when storing:

  • Refrigerate within 2 hours - Cool chicken to room temp first, then transfer to airtight containers; keeps 3-4 days
  • Freeze in portions - Separate into meal-sized containers, freeze up to 2 months; thaw overnight in fridge before reheating
  • Add liquid when reheating - Sauce thickens when cold; stir in 2-3 tablespoon coconut milk or water to restore creamy texture
  • Store garnishes separately - Keep cilantro, peanuts, and lime wedges in separate containers; add fresh when serving
  • Use shallow containers - Speeds cooling and reheating; avoid containers deeper than 3 inches

Frequently Asked Questions

Can I use chicken breasts instead of thighs in Crockpot Thai Peanut Chicken?

Yes, but reduce cook time to 3-4 hours on low since breasts dry out faster. Check internal temp at 3 hours-pull at 165°F to avoid rubbery texture.

How should I store and reheat leftover Crockpot Thai Peanut Chicken?

Refrigerate in airtight containers for 3-4 days or freeze up to 2 months. Reheat on stovetop 5-7 minutes with 2-3 tablespoon coconut milk to loosen thickened sauce.

How can I tell when the chicken is fully cooked in the slow cooker?

Check internal temp with instant-read thermometer-chicken is done at 165°F in the thickest part. It should shred easily with a fork when fully cooked.

Why did my sauce turn out too thin or separate, and how to fix that?

Light coconut milk or natural peanut butter causes separation. Use full-fat coconut milk and creamy peanut butter, or thicken with 1 teaspoon cornstarch slurry simmered 5 minutes on stovetop.

What are good side dishes or accompaniments for Crockpot Thai Peanut Chicken?

Serve over jasmine rice or rice noodles to soak up sauce. Add sautéed green beans or cucumber salad for fresh crunch that cuts through richness.

Crockpot Thai Peanut Chicken served on a plate

Crockpot Thai Peanut Chicken

No ratings yet
Crockpot Thai Peanut Chicken uses tender chicken thighs slow-cooked in a creamy peanut and coconut milk sauce that thickens gently over low heat. Adding peanut butter late in cooking prevents over-thickening and helps the sauce cling perfectly to the meat.
Print Recipe Pin Recipe
Prep Time 10 minutes mins
Cook Time 6 hours hrs
Total Time 6 hours hrs 10 minutes mins
Servings: 6 servings
Course: Dinner, Main Dish
Cuisine: Asian-Inspired, Thai
Ingredients Method Notes

Ingredients
  

  • 2 lbs chicken thighs boneless, skinless
  • ½ cup peanut butter creamy, not natural
  • 1 can coconut milk 13.5 oz, full-fat
  • 3 tablespoon soy sauce
  • 2 tablespoon lime juice fresh
  • 2 tablespoon brown sugar
  • 4 cloves garlic minced
  • 1 tablespoon fresh ginger grated
  • ¼ teaspoon red pepper flakes can increase to ½ teaspoon if desired
  • fresh cilantro chopped, for garnish
  • lime wedges for serving
  • crushed peanuts optional, for garnish

Method
 

  1. Whisk coconut milk, soy sauce, lime juice, brown sugar, garlic, ginger, and red pepper flakes in a bowl until smooth, about 2 minutes. Pour the sauce mixture into the crockpot.
    1 can coconut milk, 3 tbsp soy sauce, 2 tbsp lime juice, 2 tbsp brown sugar, 4 cloves garlic, 1 tbsp fresh ginger, ¼ tsp red pepper flakes
  2. Add chicken thighs to the crockpot, turning once to coat both sides with the sauce. Pieces can stack without overlapping. Optionally sear thighs before adding for deeper flavor.
    2 lbs chicken thighs
  3. Cover and cook on low heat for 5 to 6 hours or on high heat for 3 to 4 hours. Check the internal temperature toward the lower end of cooking time; chicken is done at 165°F (74°C).
  4. About 30 minutes before serving, stir the peanut butter into the sauce in the crockpot until fully incorporated. The sauce will thicken as it stands. Optionally shred chicken with two forks or leave whole.
    ½ cup peanut butter
  5. Taste the sauce and adjust with additional lime juice, soy sauce, or red pepper flakes if needed. Garnish with chopped cilantro, crushed peanuts, and lime wedges. Serve over jasmine rice or rice noodles.
    fresh cilantro, lime wedges, crushed peanuts

Notes

  • Use full-fat coconut milk to keep the sauce creamy and prevent separation.
  • Add peanut butter late in the cooking process to avoid over-thickening.
  • Check chicken temperature with an instant-read thermometer to ensure it reaches 165°F.

Tried this recipe?

Let us know how it was!

What Is Artichoke Heart? [Taste, Uses & More]

March 28, 2026

You spot them on the shelf in two forms - a jar swimming in herb oil or a can with a plain label - and it's not always clear which one to reach for. Artichoke hearts are the trimmed, choke-removed center of the globe artichoke, and they do quiet, steady work in dishes where you want a meaty vegetable bite without the fuss of preparing a full thistle bud.

What Is Artichoke Heart

If you've landed here because of a recipe calling for dishes alongside spinach artichoke dip or you're working through endive swaps that work in a composed salad, this profile will help you understand the ingredient first.

QUICK SUMMARY

The artichoke heart is the tender center of the globe artichoke - mild, slightly nutty, and faintly briny when jarred. It works raw in salads, roasted for depth, or blended into dips and sauces. Jarred hearts are the most practical option for everyday cooking.

🌿Flavor: Mild, nutty, faintly sweet with a vegetal edge
🍽️Best Uses: Dips, pasta, pizza, antipasti, quiches
🛒Buy As: Fresh, jarred in oil, or canned in brine
⏱️Shelf Life: Fresh 5-7 days; opened jar 1-2 weeks refrigerated
✅Dietary: Vegan, gluten-free, low-fat, Mediterranean-friendly

What Is Artichoke Heart?

The globe artichoke (Cynara cardunculus var. scolymus) is a thistle bud cultivated across the Mediterranean for centuries, with Italy, Spain, and Egypt among the top producers today.

The heart is what remains after you strip away the tough outer leaves and scrape out the fuzzy choke sitting above it - a dense, bowl-shaped base that holds the plant's most tender flesh.

You'll find it sold under several names: globe artichoke heart, canned artichoke heart, marinated artichoke, or simply choke-removed artichoke. Fresh hearts require prep work and acidulated water to prevent browning.

Jarred or canned versions skip that step entirely.

Understanding the role hearts of palm plays in similar recipes helps clarify where artichoke hearts differ - hearts of palm is milder and more fibrous, while the artichoke heart has a denser, more savory character.

  • 🌍 Origin - Mediterranean; cultivated for over 2,000 years in Italy and North Africa
  • Plant family - Asteraceae (thistle family), not a true vegetable but a flower bud
  • Key varieties - Green Globe (common in US), Violetto (Italian, smaller and nuttier), Romanesco
  • Forms available - Fresh whole, quartered in jars, canned in brine, frozen, vacuum-packed

What Does Artichoke Heart Taste Like?

artichoke heart - What Is Artichoke Heart

The artichoke heart lands somewhere between mild asparagus and hearts of palm, with a nuttiness that neither of those shares. Raw or lightly blanched, it reads as clean and vegetal with a faint sweetness at the base.

That sweetness comes partly from cynarin, a compound unique to artichokes that temporarily affects how other flavors register on the palate.

Heat changes the profile. Roasting deepens the nuttiness and adds a slight caramelized edge. Slow cooking in liquid softens the flavor toward creamy and mild.

Jarred hearts carry an additional layer - mildly briny and tangy from the oil and acid brine - which is often the version most people know first.

Sensory SnapshotMild Intensity
👅 Flavor
nuttyvegetalfaintly sweetbriny (jarred)
✋ Texture
tenderslightly fibroussilky when pureed
👃 Aroma
floral-vegetalearthy green
Watch Out
Artichokes contain cynarin, a compound that makes water and wine taste sweeter immediately after eating them. This can make wine pairing tricky - dry, high-acid whites like Vermentino or Grüner Veltliner hold up best.

How to Use Artichoke Heart

Jarred artichoke hearts cover most everyday needs without prep. Drain them, rinse if you want less brine, and they're ready to slice, quarter, or blend. Fresh hearts need trimming, acidulated water to prevent oxidation, and either blanching or direct cooking before use.

Italian cooking claims the widest range of applications - antipasti platters, pasta with lemon and olive oil, and risotto all rely on the heart's ability to absorb surrounding flavors without disappearing into them. French preparations lean toward gratins and tarts.

American usage centers on spinach-artichoke dip and pizza toppings, where the jarred form dominates.

How Artichoke Heart Is Used
MethodBest ForTip
🥗 Raw/JarredSalads, antipasti, quick pastaRinse jarred hearts to reduce brine intensity
🔥 RoastedPizza, flatbreads, side dishesHalve and roast cut-side down for caramelization
🍳 SautéedPasta, frittatas, grain bowlsUse olive oil over high heat for light browning
🫙 Baked/StuffedSide dishes, appetizersBreadcrumbs, garlic, and Parmesan fill the cavity well
🥣 PureedDips, spreads, dairy-free saucesBlend with white beans or lemon for body without cream

Lemon, olive oil, and garlic form the core pairing foundation. From there, Parmesan and prosciutto push the flavor Italian; capers and anchovy take it toward a sharper, more assertive direction. Avoid pairing with strong sweet fruit or very bitter greens - both suppress the heart's mild, nutty profile. When considering swapping out artichoke heart in a recipe, the texture match matters more than flavor, since the heart's meatiness is its key function.

Try It In
🍲Classic Hearty Beef StewAdd artichoke hearts in the last 20 minutes for tender contrast→🍝Hearty Lentil Bolognese SauceChopped hearts fold in for extra texture and body→🥣Hearty Italian Minestrone SoupJarred hearts add meatiness without additional prep→

How to Buy and Store Artichoke Heart

Fresh whole artichokes should feel heavy for their size with tightly closed, squeaky-firm leaves and no brown cut edges at the stem. A little surface browning from frost is fine - it doesn't affect quality.

For jarred or canned versions, look for pale, uniform color, clear oil (not cloudy or rancid-smelling), and no bulging lids.

Golden Rule
Always keep opened jarred artichoke hearts fully submerged in their oil or brine. Exposed hearts oxidize quickly and develop off-flavors within a day or two.

Checking the artichoke heart's shelf life in detail is worth doing before you stock up - the gap between fresh (5-7 days refrigerated) and unopened canned (months to years) is significant.

Opened jars hold for 1-2 weeks refrigerated when kept covered in their liquid.

Store fresh whole artichokes in a perforated plastic bag in the crisper drawer, just as you would with keeping asparagus fresh - moisture retention is the priority.

Start With the Jar

If you're cooking with artichoke hearts for the first time, reach for a quality jarred version in olive oil rather than fresh.

The prep barrier with fresh hearts is real - trimming and acidulating adds 20+ minutes before you've cooked anything.

Once you understand how the jarred heart behaves - its texture, its brine, how it softens further with heat - moving to fresh becomes a natural next step.

For pairing ideas for artichokes beyond what's listed here, the flavor combinations expand significantly once you've worked with the ingredient a few times.

Frequently Asked Questions

Can you eat artichoke hearts raw?

Yes, but only very young, small hearts. Larger fresh hearts are too fibrous and bitter to eat without cooking. Jarred hearts in oil or brine are already softened and are the practical raw option for salads.

Are artichoke hearts healthy?

Yes. They're low in calories and fat while providing dietary fiber, folate, vitamin C, and potassium. The soluble fiber content supports digestive health, and they fit vegan, gluten-free, and Mediterranean diets without modification.

Why are artichoke hearts bitter?

Bitterness usually means the choke wasn't fully removed, or the outer leaf bases are still attached. Cynarin, the compound responsible for artichoke's distinct flavor, reads as bitter at high concentrations - blanching or roasting mellows it significantly.

How long do jarred artichoke hearts last after opening?

One to two weeks refrigerated, provided the hearts stay submerged in their oil or brine. If the liquid runs short, top it off with olive oil. Discard if you notice cloudiness, sourness, or any off-smell.

How do you cook fresh artichoke hearts?

Trim to the pale base, drop immediately into lemon water to prevent browning, then boil or steam for 10-15 minutes until a knife slides in easily. From there, roast, sauté, or use directly in your recipe.

« Previous Page
Next Page »

Primary Sidebar

ForkliftKitchen recipe developer

Welcome!

Recipe Developer · 12+ Yr Kitchen Veteran

I'm the recipe developer behind this site, focused on practical, well-tested dishes and smart ingredient swaps. Every recipe is written to be clear, reliable, and easy to make at home.

650+ Recipes
12+ Yrs Exp.
3x Tested
Our Story →

As Featured In

Allrecipes

TASTE OF HOME

Food52

HUFFPOST

Yahoo! Life

Our Editorial Standards

  • ✓ Every recipe tested at least 3 times before publishing
  • ✓ Substitutes verified by real kitchen trials, not guesswork
  • ✓ Reviewed for accuracy by our editorial team
  • ✓ Updated regularly with seasonal info and reader feedback

Most Popular

  • Creamy Lemon Shrimp Linguine
    Creamy Lemon Shrimp Linguine
  • Creamy Garlic Mushroom Chicken
    Creamy Garlic Mushroom Chicken
  • Sesame Ginger Chicken Noodle Bowls
    Sesame Ginger Chicken Noodle Bowls
  • Baked Lemon Herb Fish Fillets
    Baked Lemon Herb Fish Fillets
  • Veggie Loaded Fried Rice
    Veggie Loaded Fried Rice
  • Spicy Garlic Shrimp Stir Fry
    Spicy Garlic Shrimp Stir Fry

Join 8,000+ Home Cooks

Weekly Kitchen Tips

Easy recipes, smart substitutes, and real cooking shortcuts — every Thursday.

Subscribe Free →


Side Dishes

  • What to Serve With Asian Salmon? 15 Best Side Dishes
    What to Serve With Asian Salmon? 15 Best Side Dishes
  • Side Dishes for Strawberry Spinach Salad
    15 Best Side Dishes for Strawberry Spinach Salad
  • Sides for Grilled Cauliflower Steaks to Complete the Meal
    15 Sides for Grilled Cauliflower Steaks to Complete the Meal
  • 15 Sides To Serve With Calabacitas
    15 Best Sides for Calabacitas – Mexican-Inspired Favorites


Substitutes

  • 7 Best Substitutes for Hot Sauce in Marinades & Stir-Fries
    7 Best Substitutes for Hot Sauce in Marinades & Stir-Fries
  • 9 Best Substitutes for Butter in Baking and Cooking
  • 7 Best Substitutes for Tagliatelle for Italian Pasta Dishes
    7 Best Substitutes for Tagliatelle for Italian Pasta Dishes
  • 7 Best Substitutes for Udon Noodles in Asian Stir-Fries
    7 Best Substitutes for Udon Noodles in Asian Stir-Fries


Browse by Topic

  • Side Dishes320
  • Substitutes785
  • Dinner163
  • Air Fryer77
  • Taste Profiles484
  • Food Storage123


Reader Reviews

★★★★★

"Finally a food blog that tells you exactly why a substitute works instead of just listing options."

— Sarah M., via email

★★★★★

"The side dish recommendations are so specific — saved my dinner party twice this month."

— James R., Pinterest comment

★★★★★

"I trust this site more than most because they actually test everything. You can tell."

— Priya K., blog comment

Footer

↑ Back to Top

Forklift Kitchen

We do the heavy lifting so you can enjoy the cooking. Tested recipes, smart substitutes, and perfect pairings—built for real home cooks.

Content

  • Recipes
  • Substitutes
  • What to Serve With
  • Blog

Company

  • About Us
  • Contact
  • Subscribe

Legal

  • Privacy Policy
  • Terms of Service

As an Amazon Associate I earn from qualifying purchases.

© 2026 Forklift Kitchen.

Rate This Recipe

Your vote:


A rating is required
A name is required
An email is required