• Skip to primary navigation
  • Skip to main content
  • Skip to primary sidebar
  • Recipe Index
    • Air Fryer
  • Side Dishes
  • Substitutes
  • About
  • Contact
  • Subscribe

ForkLiftKitchen

menu icon
go to homepage
  • Recipe Index
    • Air Fryer
  • Side Dishes
  • Substitutes
  • About
  • Contact
  • Subscribe
subscribe
search icon
Homepage link
  • Recipe Index
    • Air Fryer
  • Side Dishes
  • Substitutes
  • About
  • Contact
  • Subscribe
×

Blog

Breakfast Naan with Eggs and Yogurt

March 28, 2026

When you need a quick breakfast that doubles as brunch material and actually satisfies, naan layered with spiced eggs and tangy yogurt delivers. One skillet, 20 minutes, and enough protein to carry you through lunch.

Breakfast Naan with Eggs and Yogurt served on a plate

The naan crisps while the eggs cook, so you're not waiting around. Layer them hot with cool yogurt sauce and fresh herbs for textural contrast that makes plain scrambled eggs feel boring.

Make this for weekend brunch gatherings when you want something impressive without actual work, or weeknight breakfasts when cereal isn't cutting it.

QUICK SUMMARY

Toasted naan topped with cooked eggs and herbed yogurt sauce creates a layered breakfast with crispy, creamy, and fresh components. The trick is toasting the naan separately so it stays crisp under the eggs. Assembly happens right before serving to prevent sogginess.

⏱️Timing: 10 minutes prep, 10 minutes cook, no marinating or advance work required
🔥Method: Toast naan 1.5 minutes per side on medium heat, then cook eggs low and slow
⚠️Watch Out: Add yogurt just before serving or naan turns soggy - assemble immediately after cooking

Table of Contents

Toggle
  • Why This Recipe Works
  • What You'll Need
    • Ingredient Details
  • Ingredient Swaps
  • What to Serve With It
  • Store and Reheat
  • Frequently Asked Questions
  • Breakfast Naan with Eggs and Yogurt
    • Method 
    • Tried this recipe?

Why This Recipe Works

High heat on the naan creates golden crispy edges while medium-low heat on the eggs keeps them moist without drying out. For a similar morning dish with different flavors, try another great semolina recipe when you're craving something warm and spiced.

Quick Reference
⏱️
Prep Time
10 min
🔥
Cook Time
10 min
⏰
Total Time
20 min
🍽️
Servings
2-3 servings
📊
Difficulty
Easy
🏷️
Category
Main Dish
💡
Quick Tip
Toast naan before layering eggs and yogurt
🎯
Best For
Weeknight | Brunch | Entertaining

Five reasons this works:

  • Separate cooking stations: Toasting naan while eggs cook prevents bottlenecking and keeps both components at peak texture
  • Layered assembly: Cool yogurt sauce on hot eggs creates temperature contrast that makes each bite more interesting
  • Medium-low egg heat: 3-4 minutes on gentle heat keeps eggs moist and avoids rubbery texture from overheating
  • Fresh herb finish: Chopping cilantro or mint right before plating retains brightness instead of wilting into the hot ingredients
  • Individual seasoning: Salting naan, eggs, and yogurt separately ensures balanced flavor instead of one dominant element
Quick Tip
Let cooked eggs rest off heat for 1 minute - carryover cooking finishes them gently without drying

What You'll Need

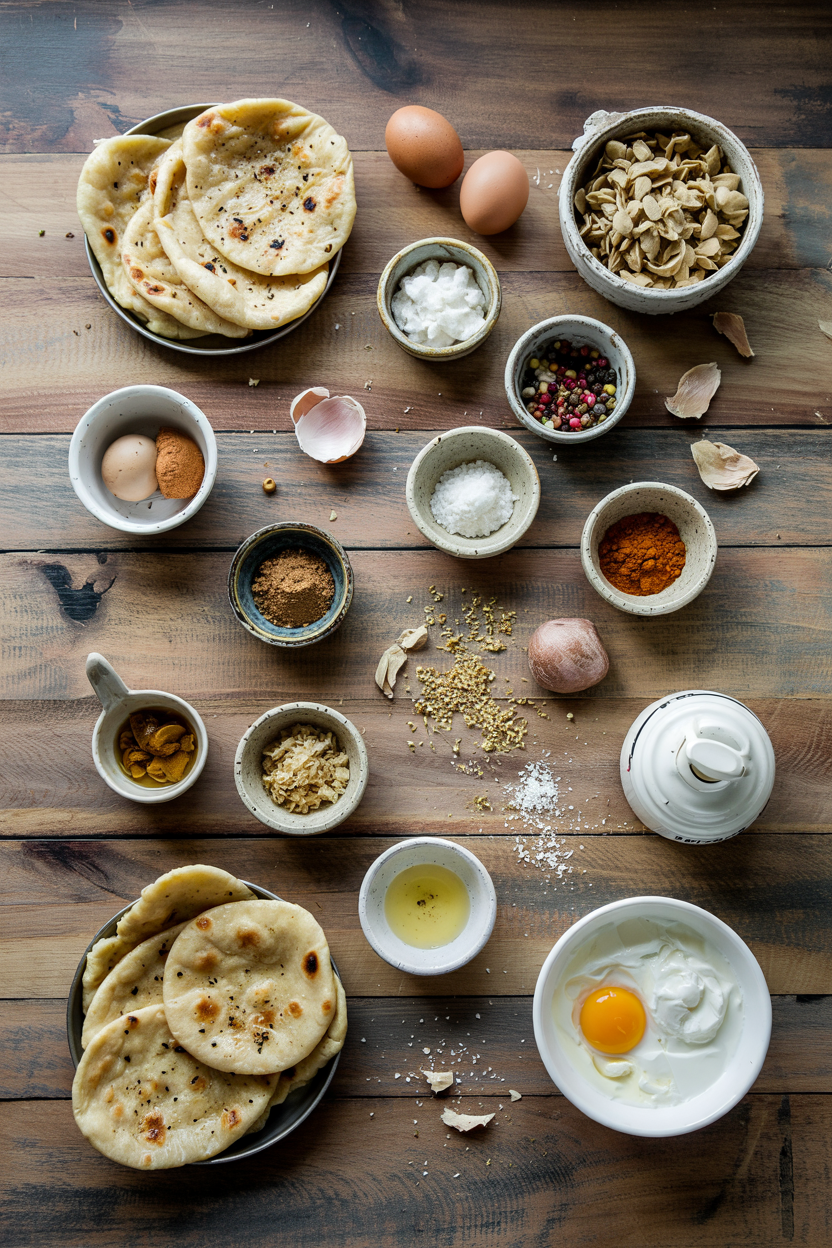
Ingredients for Breakfast Naan with Eggs and Yogurt

Shopping for this takes one grocery run since most items live in your fridge already. If you want something equally easy with eggs and bread, check out this fluffy homemade cheese recipe for when melted cheese sounds better than yogurt.

🍜
Base
  • naan bread (2-3 pieces)
🍗
Protein
  • eggs (4-6 large)
🧀
Sauce Base
  • plain yogurt (½ cup)
  • lemon juice (1 tbsp)
🧄
Seasoning
  • olive oil or butter (2 tbsp)
  • fresh herbs (cilantro, mint)
  • salt and black pepper
  • cumin, paprika (optional)
  • garlic (optional)

Ingredient Details

  • naan bread
    Use fresh naan from the bakery section - stale naan turns chewy instead of crispy when toasted
  • eggs
    Cook to medium or fully set - runny eggs make the naan soggy and create food safety concerns
  • plain yogurt
    Must be unsweetened - flavored or vanilla yogurt clashes with savory eggs and herbs
  • olive oil or butter
    Butter adds richer flavor for frying eggs; olive oil works if you want lighter taste
  • fresh herbs
    Chop cilantro or mint just before serving - pre-chopped herbs wilt and lose brightness
  • lemon juice
    Brightens yogurt sauce without making it runny - add 5 minutes before serving for best flavor
  • spices (cumin, paprika)
    Optional but add warmth - toast them in the pan before adding eggs for deeper flavor

Ingredient Swaps

Most swaps work if you match the role each ingredient plays in texture and flavor balance. When you're working with different proteins entirely, this simple homemade sauce adds similar richness if yogurt isn't your thing.

Four swaps that work:

  • naan bread → gluten-free flatbread: Slightly drier texture with less chew, but crisps up well when toasted - good for gluten-free diets
  • plain yogurt → Greek yogurt: Thicker consistency creates a more substantial sauce layer - use same amount but expect tangier flavor
  • olive oil → butter: Adds richness and slight nutty flavor when frying eggs - swap 1:1 for richer taste
  • fresh herbs → dried herbs: Use ⅓ the amount since dried herbs concentrate flavor - add to yogurt instead of sprinkling fresh

Greek Yogurt

Works for: Thicker sauce that doesn't run off naan, tangier flavor profile

Skip if: You want lighter, less acidic topping or prefer thinner drizzle

Gluten-Free Flatbread

Works for: Gluten-free diets, still crisps when toasted properly

Skip if: You want chewy texture - gluten-free versions are drier and less pliable

Tofu Scramble

Works for: Vegan or egg-free diets, similar protein content

Skip if: You want traditional egg texture - tofu crumbles differently and tastes earthier

Instructions

The whole process takes 20 minutes if you toast naan while eggs cook. For homemade naan that tastes better than store-bought, make this easy bread recipe ahead and freeze it for mornings like this.

  1. Toast naan: Heat a dry skillet over medium heat and toast naan 1.5 minutes per side until golden brown with crispy edges - flip once when you see light char marks forming.

  2. Prep yogurt sauce: Whisk plain yogurt with lemon juice, salt, and chopped herbs in a small bowl - mix 5 minutes before serving so flavors blend without yogurt separating.

  3. Cook eggs: Heat olive oil or butter in a non-stick skillet over medium-low heat, crack eggs directly into pan, and cook 3-4 minutes until whites set but yolks stay slightly runny - don't flip or stir if you want fried eggs.

  4. Season eggs: Sprinkle salt, black pepper, and optional spices (cumin, paprika) over eggs in the last minute of cooking - seasoning while hot helps spices bloom.

  5. Assemble immediately: Place toasted naan on plates, top with cooked eggs, drizzle yogurt sauce over everything, and finish with extra fresh herbs - serve within 2 minutes to keep naan crisp.

Golden Rule
Never assemble more than 2 minutes before serving - yogurt seeps into hot naan and turns it soggy fast

What to Serve With It

The naan and eggs need something fresh and crunchy to balance the richness. For more complete morning meal combinations, see weeknight hard boiled eggs meal ideas when you're planning ahead.

Side Dish Prep Why It Works How to Serve
Fresh fruit salad Easy Adds sweetness and hydration to cut through rich yogurt and eggs Serve cold in a bowl alongside naan
Sautéed spinach Easy Brings earthy greens and slight bitterness to balance creamy components Wilt in same skillet after eggs, season with garlic
Avocado slices Easy Adds creamy texture without dairy and healthy fats for satiety Slice fresh, sprinkle with salt, place on plate
Tomato slices Easy Provides acidity and juiciness to counter heavy yogurt and eggs Slice thick, season with salt and pepper
Spiced potato wedges Medium Makes the meal heartier for brunch crowds needing more substance Roast with cumin and paprika, serve hot

Three ways to serve it:

  • Weeknight breakfast: Pair with a fresh salad side and keep it simple with just eggs and yogurt
  • Brunch spread: Add spiced potato wedges, pickled onions, and harissa yogurt for guests who want variety
  • Light lunch: Serve with sautéed spinach and avocado slices for a vegetarian plate that actually fills you up
Best Pick
Pair with this easy smoothie recipe for a complete Indian-inspired breakfast that balances savory and sweet

Store and Reheat

Store components separately or the naan turns soggy overnight. Yogurt sauce keeps for 3 days but eggs dry out after day 2, so plan accordingly.

Method Time Best For
🍳 Stovetop 3-4 min on low heat Reheating naan separately to restore crisp edges
📦 Microwave 30-45 sec medium power Quick reheat when you're short on time but expect softer naan
🔥 Oven 5-7 min at 350°F Warming assembled naan and eggs without drying - best texture results

For best results when storing:

  • Fridge storage: Keep naan, eggs, and yogurt in separate airtight containers for up to 3 days - prevents cross-contamination of moisture
  • Yogurt sauce longevity: Store yogurt sauce with herbs mixed in but add fresh herbs when reheating for brighter flavor
  • Reheat naan first: Toast naan in a dry skillet before adding eggs so it crisps up instead of steaming
  • Avoid microwave for naan: Microwaving makes naan rubbery and tough - use stovetop or oven for better texture
  • Freeze partial components: Freeze cooked naan for up to 1 month but don't freeze assembled dish - eggs and yogurt separate when thawed

Frequently Asked Questions

Can I use store-bought naan or should I make it fresh?

Store-bought naan works fine if it's fresh from the bakery section. Stale or frozen naan turns chewy instead of crispy when toasted, so check the date and buy the freshest batch available.

How do I store and reheat leftovers without making naan soggy?

Store naan, eggs, and yogurt in separate airtight containers in the fridge for up to 3 days. Reheat naan in a dry skillet for 2-3 minutes to restore crispness before adding eggs and yogurt.

What's the best way to cook eggs on naan for soft texture?

Cook eggs on medium-low heat for 3-4 minutes until whites set but yolks stay slightly runny. Let them rest off heat for 1 minute - carryover cooking finishes them gently without drying out.

Why is my yogurt sauce separating when I assemble the dish?

Yogurt separates when it hits hot ingredients too early. Mix the sauce 5 minutes before serving and add it right before eating so it stays creamy instead of watery.

Can I scale this recipe to serve a larger brunch crowd?

Yes, double or triple all ingredients and cook eggs in batches to avoid overcrowding the pan. Toast naan in the oven at 375°F for 5-7 minutes to handle multiple pieces at once.

Breakfast Naan with Eggs and Yogurt served on a plate

Breakfast Naan with Eggs and Yogurt

No ratings yet
This Breakfast Naan with Eggs and Yogurt combines toasted naan layered with spiced eggs and a tangy herbed yogurt sauce for a crispy, creamy, and fresh breakfast. Toasting the naan separately keeps it crisp under the eggs, while the cool yogurt adds a refreshing contrast making it an easy, satisfying meal.
Print Recipe Pin Recipe
Prep Time 10 minutes mins
Cook Time 10 minutes mins
Total Time 20 minutes mins
Servings: 3 servings
Course: Breakfast, Main Dish
Cuisine: Indian-Inspired
Ingredients Equipment Method Notes

Ingredients
  

  • 2 pieces naan bread fresh naan for best crispness
  • 4 large eggs cook medium or fully set
  • 0.5 cup plain yogurt unsweetened
  • 1 tablespoon lemon juice freshly squeezed
  • 2 tablespoon olive oil or butter for cooking eggs; butter for richer flavor
  • to taste salt season naan, eggs, and yogurt separately
  • to taste black pepper season eggs
  • 1 tablespoon fresh herbs cilantro or mint, chopped just before serving
  • optional cumin and paprika toast spices before cooking eggs for warmth
  • optional garlic optional, for seasoning

Equipment

  • Skillet Used for toasting naan and cooking eggs
  • Small bowl Used for mixing yogurt sauce
  • Whisk or fork Used to whisk yogurt sauce

Method
 

  1. Heat a dry skillet over medium heat and toast naan for 1.5 minutes per side until golden brown and crispy. Flip once when light char marks appear.
    2 pieces naan bread
  2. In a small bowl, whisk plain yogurt with lemon juice, salt, and chopped fresh herbs. Mix about 5 minutes before serving to blend flavors without separating the yogurt.
    0.5 cup plain yogurt, 1 tbsp lemon juice, to taste salt, 1 tbsp fresh herbs
  3. Heat olive oil or butter in a non-stick skillet over medium-low heat. Crack eggs directly into the pan and cook for 3-4 minutes until whites are set but yolks remain slightly runny. Do not flip or stir for fried eggs.
    4 large eggs, 2 tbsp olive oil or butter
  4. Sprinkle salt, black pepper, and optional toasted spices (cumin, paprika) over the eggs during the last minute of cooking to bloom the spices' flavor.
    to taste salt, to taste black pepper, optional cumin and paprika
  5. Place toasted naan on plates, top with cooked eggs, drizzle with yogurt sauce, and finish with extra fresh herbs. Serve immediately within 2 minutes to maintain naan crispness.
    2 pieces naan bread, 4 large eggs, 0.5 cup plain yogurt, 1 tbsp fresh herbs

Notes

  • Toast naan separately before layering to keep it crispy under the eggs.
  • Add yogurt sauce just before serving to prevent sogginess.
  • Cook eggs on medium-low heat and let rest off heat for 1 minute to keep them moist.

Tried this recipe?

Let us know how it was!

What Is Brandy? Taste, Uses & How to Enjoy It

March 28, 2026

Most home cooks treat brandy as a specialty item-something used once a year for a Christmas cake or a dramatic tableside flambé-and that assumption undersells it badly.

What Is Brandy

A splash deglazes a pan sauce, a few tablespoons soak dried fruit overnight, and even a small pour stirred into chocolate ganache changes the whole character of a dessert. Cognac is the most recognized style, but the broader category covers far more ground than a single French appellation.

QUICK SUMMARY

Brandy is a distilled fruit spirit, most often made from grape wine and aged in oak. It delivers dried fruit, vanilla, and toasted spice character in a warming, silky pour-equally at home in a sauce, a dessert, or a glass.

🍇Category: Distilled fruit spirit, aged in wood
🟤Flavor: Dried fruit, vanilla, oak, caramelized sugar
🍳Best Uses: Flambéing, deglazing, soaking fruit, finishing sauces
📦Storage: Upright, cool, dark; opened best within 1-2 years
⏳Shelf Life: Indefinite unopened; aromatics fade gradually once open

What Is Brandy?

Brandy is a distilled spirit produced by fermenting fruit juice-almost always grape wine-then distilling it to concentrate alcohol, fruit sugars, and aromatic compounds. The word itself comes from the Dutch brandewijn, meaning "burnt wine," a nod to the heat used in distillation.

After distillation, most brandy is aged in oak barrels, which is where it picks up vanilla, spice, and caramel notes.

The spirit category is broad: it includes the prestigious appellations of Cognac and Armagnac from France, Spanish Brandy de Jerez, American grape brandy, and fruit brandies (eau-de-vie) made from cherries, plums, pears, or apples.

Age labeling matters more here than in almost any other spirit category. Look for these designations on the bottle:

  • VS (Very Special) - aged at least two years; lighter, fruitier, lower cost
  • VSOP (Very Superior Old Pale) - aged at least four years; rounder, more balanced
  • XO (Extra Old) - aged ten years or more; complex, deeply oak-driven
  • Armagnac - single-distilled in column stills, often more rustic than Cognac
  • Eau-de-vie - unaged fruit brandy; clear, intensely aromatic, no oak character

What Does Brandy Taste Like?

Brandy sits somewhere between a fortified wine and a well-aged whiskey in terms of flavor profile. Younger VS expressions lean toward fresh grape and dried apricot, with a clean alcohol warmth.

Older VSOP and XO bottles shift toward raisin, toasted oak, brown sugar, and a longer, almost creamy finish.

Sensory SnapshotModerate Intensity
👅 Flavor
dried apricotraisinvanillatoasted spicecaramelized sugar
✋ Texture
silkywarming finish
👃 Aroma
rich oakcandied fruitvanilla

Heat changes brandy noticeably. Added to a hot pan, the sharp alcohol edge burns off quickly, leaving behind the fruit and oak sweetness without the burn.

That's the version that makes sauces sing.

Golden Rule
For cooking, reach for a VS or VSOP - something you'd drink but wouldn't feel bad reducing in a pan. Never cook with anything labeled "cooking brandy"; the additives can turn bitter under heat.

How to Use Brandy

Brandy earns its place across sweet and savory cooking in ways few other spirits match. French cuisine relies on it for cognac-based reductions-classic crêpes Suzette is one of the most recognizable examples where a crêpes Suzette finish transforms the dish entirely.

Spanish cooks use Brandy de Jerez in rich sauces and dessert custards. British and Irish baking traditions soak dried fruit for Christmas cakes months in advance.

How Brandy Is Used in Cooking
MethodBest ForTip
🔥 FlambéingDesserts - cherries jubilee, bananas, crêpesWarm the brandy first; cold spirit won't ignite cleanly
🍳 DeglazingPan sauces for roasted pork, duck, gameAdd off the direct flame, then return to reduce by half
🍇 MacerationSoaking dried figs, raisins, apricots overnightUse just enough to cover; fruit absorbs most of the liquid
🥘 FinishingStews, game ragù, chocolate ganache, caramelAdd a spoonful off the heat to preserve volatile aromatics

Brandy pairs especially well with dark chocolate, butter, cream, and dried stone fruit. Nuts-walnuts and almonds in particular-bring out its toasted spice notes.

On the savory side, roasted pork and duck absorb the oak and fruit character cleanly, while strong cheeses like Comté or aged cheddar hold their own against the spirit's richness.

Avoid it alongside delicate greens or raw fish. The alcohol overrides any subtle freshness those ingredients carry.

Try It In
🥩Roasted Garlic Béarnaise SauceA splash of brandy deepens the reduction's savory base→🍅Roasted Garlic Marinara SauceDeglazing with brandy adds warm fruit character to tomato→☕Passion Fruit Cold Brew CoffeeBrandy's vanilla notes work surprisingly well with cold brew→

How to Buy and Store Brandy

Start with the age label. A VSOP is the most useful all-purpose bottle-old enough to have developed real oak character, young enough not to feel precious about using in a sauce.

Color is a reliable shortcut: clear amber to golden indicates proper wood aging; avoid any bottle that looks cloudy or shows sediment.

Watch Out
Brandy labeled "cooking wine" or "cooking brandy" often contains salt, sugar, and preservatives added to extend shelf life. These additives are fine in a glass of water, not in a reduction you're building from scratch.

Once you have a bottle you like, storage is straightforward.

  • 🌡️ Temperature - Store at room temperature or slightly cooler; avoid heat near a stove or window
  • 🔒 Seal - Keep the cap tight after every pour to limit oxidation and slow evaporation
  • ⬆️ Position - Store upright; unlike wine, the high ABV would eventually break down a cork stored on its side
  • 📅 Opened shelf life - Peak aroma holds for 1-2 years; after that it's still safe but the [brandy shelf life](https://forkliftkitchen.com/brandy-shelf-life/) gradually declines as volatiles escape

Where to Start With Brandy

Pick up a mid-range VSOP, ideally from Cognac or a reliable Spanish producer, and use it twice: once in a pan sauce, once soaking dried fruit. Those two applications reveal more about what brandy does in cooking than any amount of reading.

If a recipe calls for Cognac specifically, a quality VSOP grape brandy will do the job-check brandy swaps or cognac swaps if you're working around what's available. The spirit rewards low-commitment experimentation far more than it's given credit for.

Frequently Asked Questions

Is brandy the same as cognac?

No. Cognac is a specific type of brandy from the Cognac region of France, made under strict appellation rules. All cognac is brandy, but brandy from Spain, the US, or other French regions is not cognac.

What does brandy taste like compared to whiskey?

Brandy is generally sweeter and fruitier than whiskey, with dried-fruit and vanilla notes rather than grain or peat. Aged versions share the oak and caramel overlap, but the underlying fruit base keeps brandy distinctly rounder.

How is brandy made?

Grape wine is distilled to concentrate alcohol and aromatics, then aged in oak barrels for months to decades. The barrel aging is what gives brandy its color and most of its flavor complexity.

How long does brandy last after opening?

An opened bottle stays usable for years but is at its aromatic best within 1-2 years. Keep it sealed and upright; a bottle that's more than half empty loses aromatics faster due to the larger air gap.

Can you substitute brandy with another spirit in cooking?

Yes. Bourbon or dark rum are the closest matches for sweetness and oak character in cooked dishes. Sherry or Marsala work well in sauces where you need fruit depth without the high alcohol burn-off.

What Is Caciocavallo Cheese? [Taste, Uses & More]

March 28, 2026

You spot it at a specialty deli or Italian market - a pear-shaped wheel hanging from twine, its golden rind slightly oiled, labeled with a name most people can't quite place.

What Is Caciocavallo Cheese

Caciocavallo is one of southern Italy's oldest stretched-curd cheeses, and it's worth knowing beyond the novelty.

Young wheels taste milky and mild; aged ones cut sharp and complex.

Whether you're building an antipasto spread or looking for a melting cheese with more character than mozzarella, understanding this cheese helps you use it well - the way it works alongside dishes alongside antipasto squares makes that range even clearer.

QUICK SUMMARY

A pasta filata cheese from southern Italy with a teardrop shape and a flavor that shifts from milky and buttery when young to sharp, nutty, and umami-rich when aged. Melts beautifully, grates well, and works across antipasto plates, baked dishes, and pan-seared preparations.

🧀Type: Stretched-curd (pasta filata), firm to semi-hard
👅Flavor: Milky when young; sharp, tangy, nutty when aged
🔥Best Uses: Melting, grating over pasta, pan-searing, antipasto
🗓️Shelf Life: 2-3 weeks (young); 3-6 weeks (aged) refrigerated
📍Origin: Basilicata, Calabria, Sicily, Campania - southern and central Italy

What Is caciocavallo cheese?

Caciocavallo belongs to the pasta filata family - the same stretched-curd method used for mozzarella and provolone.

The curds are kneaded and pulled in hot water until elastic, then shaped into a teardrop or gourd, tied, and traditionally hung in pairs over a wooden beam to age.

That hanging posture is why some food historians trace the name to "cheese on horseback."

Most wheels come from southern and central Italy, specifically Basilicata, Calabria, Sicily, and Campania.

Protected-designation varieties include caciocavallo silano (DOP from Calabria and surrounding regions) and the rarer caciocavallo podolico, made from the milk of Podolica cattle and considered the premium version.

Smoked wheels - labeled affumicato - add another category entirely. You'll also see it spelled cacio cavallo or called caciocavallo ragusano in Sicily.

Cow's milk is standard, though small producers occasionally blend in sheep's milk for extra richness.

What Does caciocavallo cheese Taste Like?

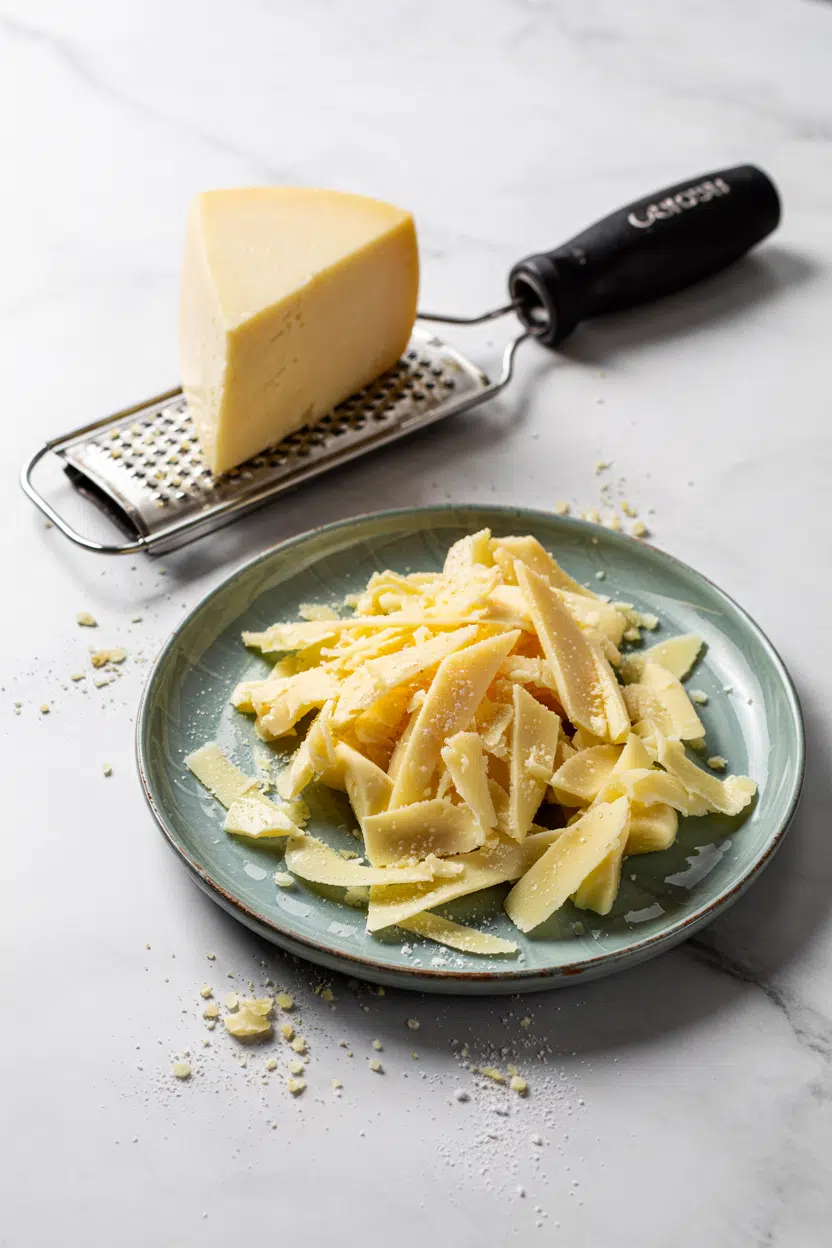
caciocavallo cheese - What Is Caciocavallo Cheese

Young caciocavallo tastes clean and milky with a slight buttery sweetness - soft enough to remind you of mild provolone or a young pecorino before bitterness develops. The texture is firm but springy, nowhere near crumbly.

Aged wheels shift noticeably. Sharpness builds, tanginess arrives, and a deeper umami and nutty character comes forward.

Some describe a faint piquant heat, similar to a mature provolone but with more complexity.

Sensory SnapshotModerate Intensity
👅 Flavor
milkybutterytangynuttysmoky (affumicato)
✋ Texture
firmcreamy stretch when meltedgranular when aged
👃 Aroma
clean and milkyearthyfaintly pungent (aged)

Heat changes everything. Melted caciocavallo pulls into long, creamy strings - closer to mozzarella in stretch but richer in flavor.

The smoked version carries a wood-forward aroma even before cooking, intensifying slightly when warmed.

How to Use caciocavallo cheese

Caciocavallo's range across age stages makes it genuinely useful in multiple roles. For caciocavallo cheese in dairy recipes, the age of the wheel you select changes the outcome significantly.

Golden Rule
Match the age to the job: use young caciocavallo where you want melt and mild creaminess; use aged caciocavallo where you'd reach for Parmigiano or sharp provolone.
How Caciocavallo Is Used
MethodBest ForTip
🥗 Cold SlicedAntipasto platters, sandwiches, charcuterie boardsPair with soppressata, olives, and fresh pear for contrast
🔥 Pan-SearedAppetizers - thick slices seared golden in a cast iron panServe immediately with honey or fig jam while crust holds
🫕 Baked/MeltedPolenta topping, baked peppers, eggplant, casserolesYoung caciocavallo gives the most stretch; aged adds flavor
🧂 GratedFinishing pasta, risotto, roasted vegetablesAged wheels only - young won't grate cleanly

In southern Italian cooking, caciocavallo appears stuffed into baked peppers and eggplant alongside breadcrumbs and herbs. Melted over polenta in dairy recipes, it creates a savory, stretchy layer that behaves much like a fontina-style topping.

The smoked version pairs well with cured pork - soppressata or prosciutto - in panini, where the smoky echo between ingredients reinforces the whole.

It works in Calabrian and Sicilian cuisines as a workhorse cheese for baked dishes, and Italian-American kitchens have long used it as a sandwich melter with more backbone than standard mozzarella. Robust red wines such as Nero d'Avola or Aglianico hold up to aged wheels without being overwhelmed;

honey and fig jam balance the saltiness in cold preparations.

Steer clear of very sour, citrus-heavy dressings alongside aged caciocavallo - the acidity fights rather than balances the salt. Delicate floral teas suffer the same way.

Try It In
🧀Cheddar Cheese StrawsSwap aged caciocavallo for a sharper, saltier twist on the classic→🍳Egg and Cheese Breakfast SandwichYoung caciocavallo melts cleanly and adds mild, creamy depth→

How to Buy and Store caciocavallo cheese

At the counter, look for a firm, smooth rind with a slight oil sheen on aged wheels - dull or cracked rinds can signal poor storage. Young caciocavallo should have a pale, moist paste and give slightly under finger pressure.

Whole or half wheels are better than pre-sliced supermarket blocks, which are typically older and have lost moisture unevenly.

Watch Out
Don't vacuum-seal a long-aged caciocavallo wheel. It needs minimal airflow - airtight sealing traps moisture and accelerates mold growth on the rind.

Wrap the cut face in wax paper or parchment, then loosely in plastic, and keep it in the fridge crisper drawer. Young caciocavallo holds 2-3 weeks once opened; aged wheels stay good for 3-6 weeks with proper wrapping. Smoked wheels tend to last slightly longer due to surface dryness. For extended storage, see guidance on freezing caciocavallo cheese - the texture changes, but grated frozen portions work fine for cooking. Storage principles aren't unlike those for fresh stretched-curd cheeses; storing mozzarella correctly follows a similar logic of breathability over airtight sealing.

Start Here With caciocavallo

New to this cheese? Buy a young wheel first.

Slice it cold against cured pork, or melt it over a simple baked vegetable dish to understand its baseline stretch and mild flavor.

  • 🧀 Mild and milky preference - start with young caciocavallo sliced on a board with honey and bread
  • 🔥 Want big flavor - go straight to an aged wheel grated over pasta or pan-seared with fig jam
  • 🌫️ Like smoke - affumicato versions work immediately in sandwiches or melted on polenta
  • 🍷 Wine pairing - aged wheels need a robust red; young wheels accept lighter options like Fiano or Falanghina

Once you've tried it young, aged caciocavallo feels like a logical next step - sharper, more assertive, and worth the upgrade.

Frequently Asked Questions

Is caciocavallo the same as provolone?

No, though both are pasta filata cheeses with overlapping flavor profiles. Caciocavallo has a more complex, slightly piquant character when aged and is tied in its distinctive pear shape, while provolone is typically molded into cylinders. Regional production and milk sourcing differ significantly.

Can you melt caciocavallo cheese?

Yes - it melts exceptionally well. Young caciocavallo pulls into long, creamy strings similar to mozzarella but with more flavor. Aged wheels melt more slowly and add sharpness rather than stretch.

How old is aged caciocavallo when sold?

Young wheels are typically sold after 2-3 months. "Aged" generally means 6-12 months, while some caciocavallo podolico wheels age beyond 2 years for maximum sharpness and complexity.

How do you tell smoked caciocavallo from naturally aged?

The rind is the giveaway - smoked wheels (affumicato) have a darker, brownish exterior versus the pale golden rind of unsmoked versions. The label should also state "affumicato" clearly. A quick smell confirms it: smoke is immediately detectable even through wrapping.

Is caciocavallo made from cow's milk?

Standard commercial caciocavallo uses cow's milk. The premium caciocavallo podolico variety comes specifically from Podolica cattle, a heritage breed, which gives the cheese a distinctive grassy richness. Small artisan producers occasionally blend in sheep's milk.

Pavlova with Fresh Fruit

March 28, 2026

A crisp meringue shell that cracks under your fork with a marshmallow-soft center underneath. That's what happens when you bake egg whites low and slow with sugar and cornstarch.

Pavlova with Fresh Fruit served on a plate

The oven does most of the work. You whip the meringue, shape it on parchment, then leave it alone for over an hour while it dries into that signature texture.

This works for celebrations and summer parties when you want a showstopper dessert that's naturally gluten-free and lighter than cake.

QUICK SUMMARY

Pavlova with Fresh Fruit is a crispy meringue shell with a soft marshmallow center, topped with whipped cream and fresh fruit. The success comes from low-temperature baking (225-250°F) for 1 to 1.5 hours, which creates the crisp exterior while keeping the inside tender. Add fruit just before serving so moisture doesn't soften the meringue.

⏱️Total Time: 1 hour 35 minutes active, plus cooling time in the oven
🔑Key Move: Add sugar 1 tablespoon at a time with 5 seconds between each addition
⚠️Watch Out: Any fat or yolk in the egg whites prevents whipping - use a clean bowl

Table of Contents

Toggle
  • Why This Recipe Works
  • What You'll Need
    • Ingredient Details
  • Ingredient Swaps
  • What to Serve With It
  • Store and Reheat
  • Frequently Asked Questions
  • Pavlova with Fresh Fruit
    • Method 
    • Tried this recipe?

Why This Recipe Works

Low-temperature baking is the difference between a soggy mess and a crisp shell with a tender center. Most people skip a simple cheesecake variation because timing intimidates them, but the oven handles everything once you shape the meringue.

Quick Reference
⏱️
Prep Time
20 min
🔥
Cook Time
1 hour 15 min
⏰
Total Time
1 hour 35 min
🍽️
Servings
6-8 servings
📊
Difficulty
Medium
🏷️
Category
Dessert
💡
Quick Tip
Low and slow baking for crisp shell
🎯
Best For
Entertaining | Weekend dessert

What makes this work:

  • Room-temperature egg whites whip higher - cold whites take longer to reach soft peaks and produce less volume
  • Cornstarch softens the interior - it prevents the center from drying out while the shell crisps
  • White vinegar stabilizes the meringue - the acid helps the egg whites hold their structure during baking
  • Cooling in the oven prevents cracking - rapid temperature changes cause the meringue to collapse or crack
  • Fresh fruit added last - moisture from fruit softens the meringue, so assemble just before serving
Quick Tip
Draw a 3-inch circle on parchment paper, flip it over, then pipe the meringue using the outline as a guide for an even base.

What You'll Need

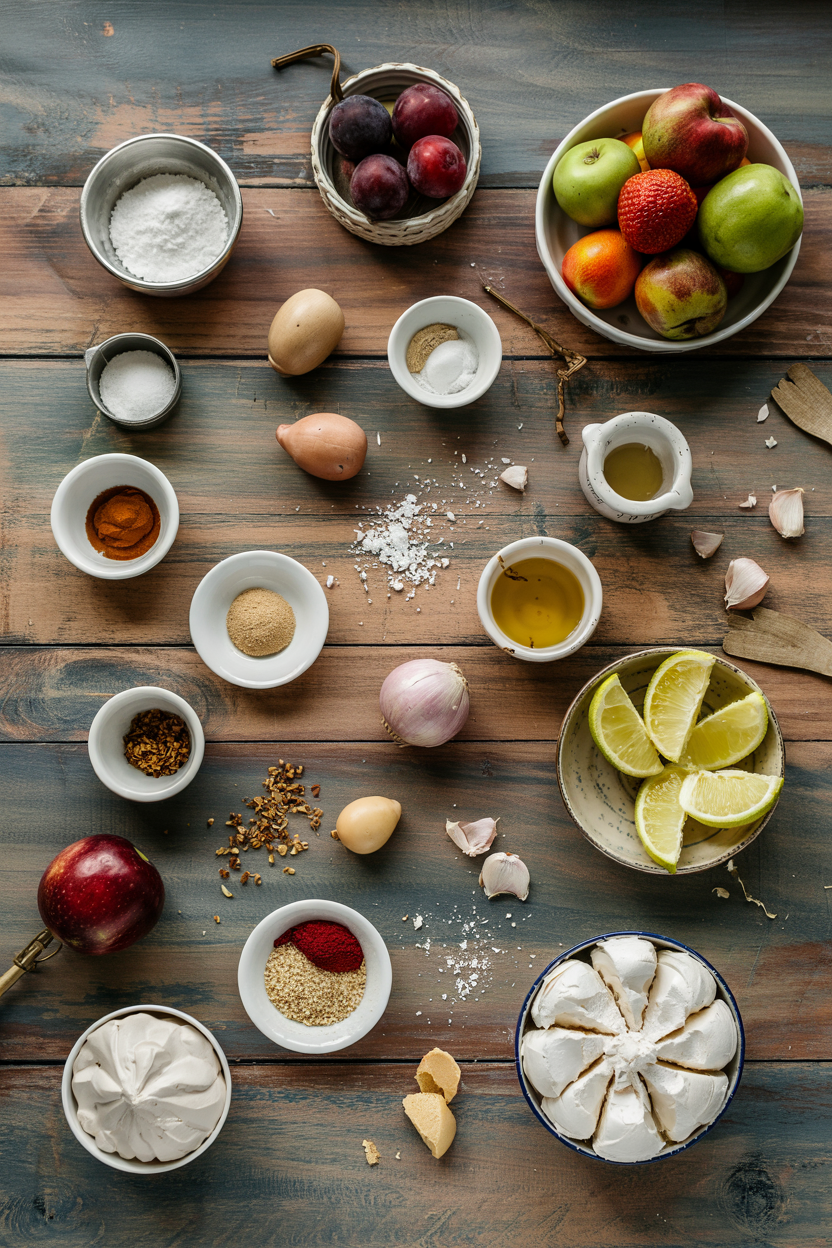
Ingredients for Pavlova with Fresh Fruit

Egg whites are the only non-negotiable ingredient here. You need them at room temperature so they whip to full volume with glossy peaks.

🥚
Base Meringue
  • 4 large egg whites (room temperature)
  • 1 cup granulated sugar
  • 1 teaspoon cornstarch
  • 1 teaspoon white vinegar
  • ½ teaspoon vanilla extract
🥛
Toppings
  • 1 cup heavy cream
  • 2 tablespoons powdered sugar
  • Fresh fruit (strawberries, kiwi, blueberries)

Ingredient Details

  • Egg whites
    Separate eggs when cold, then let whites sit 30 minutes at room temperature for better volume
  • Granulated sugar
    Add 1 tablespoon at a time with 5 seconds between additions so it fully dissolves into the whites
  • Cornstarch
    Fold in gently after whipping to avoid deflating the meringue
  • White vinegar
    Add after soft peaks form to stabilize the structure without affecting flavor
  • Heavy cream
    Chill the bowl and whisk for 15 minutes before whipping to soft peaks
  • Fresh fruit
    Pat dry with paper towels before topping to remove excess moisture
  • Vanilla extract
    Add at the end of whipping for subtle flavor without interfering with structure

Ingredient Swaps

Caster sugar dissolves faster than granulated, but most kitchens already stock the regular kind. Swap based on what's in your pantry, not what you think sounds fancy.

Four swaps that work:

  • Aquafaba instead of egg whites - use ½ cup (liquid from canned chickpeas), whips longer but creates similar structure (vegan)
  • Lemon juice instead of white vinegar - same acid effect with a hint of citrus flavor
  • Coconut cream instead of heavy cream - adds coconut flavor, works for dairy-free diets
  • Arrowroot powder instead of cornstarch - same thickening effect, safe for corn allergies

Granulated Sugar

Works for: Standard kitchens, dissolves well with gradual adding

Skip if: You want faster dissolving (use caster sugar)

Caster Sugar

Works for: Faster dissolving, slightly smoother texture

Skip if: You don't want to buy specialty sugar

Egg Whites

Works for: Traditional meringue, best volume and structure

Skip if: You're vegan (use aquafaba)

Aquafaba

Works for: Vegan diets, similar texture with longer whipping time

Skip if: You want traditional flavor and faster results

Instructions

The entire process takes about 1 hour 35 minutes, but most of that is oven time. You shape the meringue, then let heat and time do the rest.

  1. Whip the egg whites - Use an electric mixer on medium-high speed until soft peaks form (3-4 minutes), then add sugar 1 tablespoon at a time with 5 seconds between additions until stiff glossy peaks form (8-10 minutes total).

  2. Fold in cornstarch and vinegar - Gently fold cornstarch, white vinegar, and vanilla extract into the meringue using a spatula, lifting from the bottom to avoid deflating the whites.

  3. Shape the meringue - Spoon or pipe the meringue onto a parchment-lined baking sheet in a 7-8 inch circle with a slight well in the center, creating a nest shape for the toppings.

  4. Bake low and slow - Bake at 250°F (120°C) for 1 hour 15 minutes until the exterior is dry and crisp to the touch, then turn off the oven and let the meringue cool inside with the door ajar for 1 hour.

  5. Top and serve - Whip heavy cream with powdered sugar to soft peaks, spread over the cooled meringue, then top with fresh fruit just before serving.

Watch Out
Opening the oven door during baking causes temperature drops that crack the meringue - resist checking until the timer goes off.

What to Serve With It

Pavlova is already sweet and rich, so you need sides that add tartness or freshness without competing. Fresh fruit handles that contrast, but the choice of fruit changes the flavor profile completely.

Side Dish Prep Why It Works How to Serve
Fresh Berries Easy Tartness cuts through sweet meringue and cream Scatter over whipped cream just before serving
Passion Fruit Pulp Easy Bright tropical acidity balances richness Drizzle over fruit and cream for contrast
Lemon Curd Medium Zingy tartness adds another layer of flavor Dollop between whipped cream and fruit
Mint Leaves Easy Fresh herb contrast and visual pop Tear and scatter over finished pavlova
Chocolate Shavings Easy Decadent garnish complements fruit and cream Shave dark chocolate over assembled dessert

Three ways to serve it:

  • Classic berry mix - strawberries, blueberries, and kiwi with whipped cream for traditional flavor
  • Tropical style - mango, passion fruit pulp, and toasted coconut for bright acidity
  • Chocolate twist - chocolate shavings, raspberries, and a drizzle of berry coulis for richness
Best Pick
Assemble pavlova within 30 minutes of serving to prevent fruit moisture from softening the crisp meringue shell.

Store and Reheat

Pavlova doesn't hold up well once assembled because fruit moisture softens the meringue. Store components separately and assemble just before serving for best texture.

Method Time Best For
🔥 Oven 10-15 min at 250°F Drying out soggy unassembled meringue

For best results when storing:

  • Store unassembled meringue in an airtight container at room temperature for up to 2 days
  • Keep whipped cream separate in the fridge for 1-2 days, re-whip briefly before using
  • Store fresh fruit in the fridge unwashed until ready to assemble
  • Freeze plain meringue shells wrapped tightly for up to 1 month, thaw at room temperature for 30 minutes
  • Avoid storing assembled pavlova - fruit moisture breaks down the crisp texture within hours

Frequently Asked Questions

Can I make Pavlova ahead and store it?

Bake the meringue shell up to 2 days ahead and store it in an airtight container at room temperature. Assemble with whipped cream and fruit within 30 minutes of serving to prevent moisture from softening the crisp exterior.

How do I tell when Pavlova is fully baked?

The exterior should feel dry and crisp to the touch with a light tap, while the center remains soft like marshmallow. If the surface still feels tacky or sticky, bake for another 10-15 minutes.

What fruit pairs best with Pavlova?

Berries (strawberries, blueberries, raspberries), kiwi, and passion fruit work best because their tartness balances the sweet meringue. Stone fruits like peaches and plums also work for summer variations.

Why did my Pavlova turn out soggy?

Either the oven temperature was too high (which cooks the outside too fast), or you didn't bake it long enough to dry out the interior. Bake at 225-250°F for the full 1-1.5 hours and let it cool inside the oven.

Can I use aquafaba instead of egg whites?

Yes, use ½ cup aquafaba (liquid from canned chickpeas) instead of 4 egg whites. It takes longer to whip to stiff peaks (10-15 minutes) but creates a similar meringue structure for vegan diets.

Pavlova with Fresh Fruit served on a plate

Pavlova with Fresh Fruit

No ratings yet
Pavlova with Fresh Fruit features a crisp meringue shell with a soft marshmallow center, topped with whipped cream and fresh fruit. Baking low and slow at 225-250°F for over an hour creates the signature texture, while adding fruit just before serving keeps the meringue crisp.
Print Recipe Pin Recipe
Prep Time 20 minutes mins
Cook Time 1 hour hr 15 minutes mins
Total Time 1 hour hr 35 minutes mins
Servings: 6 servings
Course: Dessert
Cuisine: Australian, New Zealand
Ingredients Equipment Method Notes

Ingredients
  

  • 4 large egg whites room temperature
  • 1 cup granulated sugar add 1 tablespoon at a time
  • 1 teaspoon cornstarch fold in gently after whipping
  • 1 teaspoon white vinegar stabilizes meringue structure
  • 0.5 teaspoon vanilla extract add at end of whipping
  • 1 cup heavy cream chilled before whipping
  • 2 tablespoons powdered sugar for whipping cream
  • fresh fruit such as strawberries, kiwi, blueberries; pat dry before topping

Equipment

  • Electric mixer Used to whip egg whites and heavy cream
  • Spatula To fold cornstarch, vinegar, and vanilla into meringue
  • Piping bag or spoon To shape the meringue on parchment paper
  • Parchment paper Line baking sheet and guide meringue shape
  • Baking sheet To bake the meringue

Method
 

  1. Use an electric mixer on medium-high speed to whip egg whites until soft peaks form (about 3-4 minutes). Gradually add granulated sugar one tablespoon at a time, waiting 5 seconds between additions, continuing to whip until stiff, glossy peaks form (about 8-10 minutes total).
    4 large egg whites, 1 cup granulated sugar
  2. Gently fold the cornstarch, white vinegar, and vanilla extract into the whipped meringue using a spatula, lifting from the bottom to avoid deflating the mixture.
    1 teaspoon cornstarch, 1 teaspoon white vinegar, 0.5 teaspoon vanilla extract
  3. Spoon or pipe the meringue onto a parchment-lined baking sheet to form a 7-8 inch circle with a slight well in the center to create a nest shape for toppings.
  4. Bake the meringue at 250°F (120°C) for 1 hour 15 minutes until the exterior is dry and crisp to the touch. Then turn off the oven and let the meringue cool inside with the oven door ajar for 1 hour.
  5. Whip heavy cream with powdered sugar to soft peaks. Spread whipped cream over cooled meringue, then top with fresh fruit just before serving to maintain crispness.
    1 cup heavy cream, 2 tablespoons powdered sugar, fresh fruit

Notes

  • Ensure egg whites are free from yolk and fat to achieve maximum volume.
  • Add sugar gradually with short pauses to fully dissolve it into the whites.
  • Assemble pavlova within 30 minutes before serving to keep meringue crisp from fruit moisture.

Tried this recipe?

Let us know how it was!

What Is Blue Curacao? [Taste, Uses & More]

March 28, 2026

Blue curaçao earns its place behind every serious home bar not because of its color, but because it delivers something no other orange liqueur quite replicates: a bitter-orange backbone that holds its own in layered, citrus-forward cocktails. Producers like those making cointreau replacements or grand marnier replacements chase that same bitter citrus note, yet blue curaçao arrives with a distinctive sweetness and that unmistakable electric-blue hue.

What Is Blue Curacao

It's both functional and theatrical - a liqueur that does real flavor work while turning a glass visibly dramatic.

QUICK SUMMARY

Blue curaçao is a sweet, bitter-orange liqueur from the Caribbean island of Curaçao, colored bright blue with food dye. It's sweeter than triple sec and carries a pronounced laraha peel bitterness. Primarily used in cocktails and the occasional dessert glaze, opened bottles stay at peak flavor for 1-3 years.

🍊Flavor: Sweet citrus with bitter orange peel and faint floral notes
🍹Best Uses: Tiki cocktails, punch bowls, layered drinks, citrus glazes
🫙Shelf Life: Years unopened; 1-3 years opened with tight cap and cool storage

What Is Blue Curaçao?

Blue curaçao is an orange-flavored liqueur produced using the dried peel of the laraha bitter orange, a citrus fruit native to the Caribbean island of Curaçao.

The laraha evolved from Valencia oranges transplanted to Curaçao's arid soil, where the fruit became too bitter to eat but developed an intensely aromatic peel.

Producers steep or distill those dried peels to extract flavor, then sweeten the base and add bright blue food coloring - the only thing separating it visually from its clear orange-liqueur relatives. You'll also see it labeled simply as curaçao or curaçao liqueur.

Premium bottles sometimes note laraha or Curaçao island origin on the label, which signals a closer tie to the original recipe.

The alcohol content typically sits between 15% and 40% ABV depending on the producer, so strength varies significantly across brands. Pairing it with light rum or vodka is standard practice in Caribbean-influenced bartending.

What Does Blue Curaçao Taste Like?

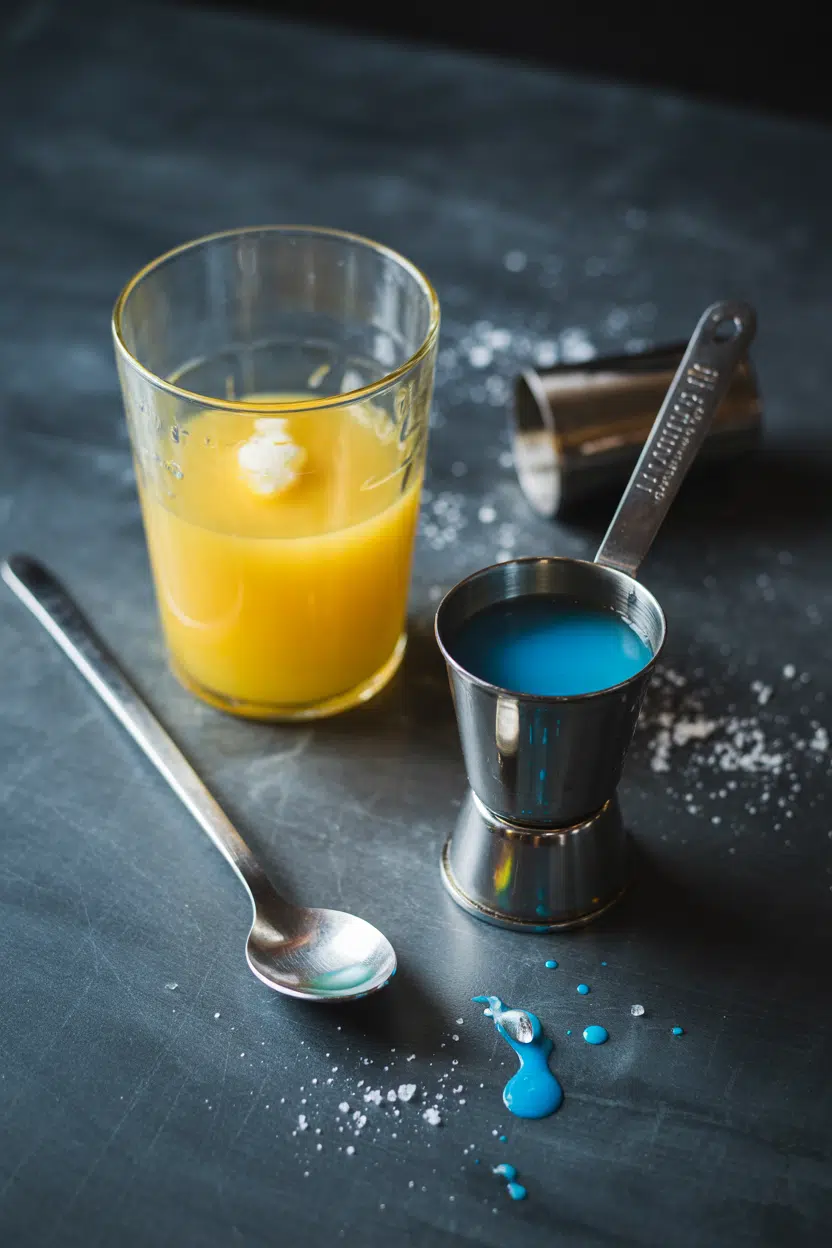
blue curacao - What Is Blue Curacao
Sensory SnapshotModerate Intensity
👅 Flavor
Bitter orange peelSweet citrusCandied orangeLightly floral
✋ Texture
SyrupySmooth
👃 Aroma
Zesty orange peelMild floral vanilla

The blue food coloring contributes nothing to flavor - taste it blind and you're drinking a sweeter, slightly more bitter version of triple sec.

Compared to Cointreau, blue curaçao is noticeably less sharp and more syrupy, with the laraha peel bitterness sitting under a layer of candied orange sweetness rather than cutting through clean.

That syrupy body also means it integrates differently in cocktails. Where triple sec stays bright, blue curaçao rounds off edges and adds weight.

The faint floral vanilla note in the aroma becomes most apparent when the liqueur is poured neat and warmed slightly in the hand - in a cold shaken drink, it mostly disappears into the citrus.

Watch Out
Blue curaçao will tint any dish or drink it enters - including cream-based sauces and light-colored batters. Account for the color before adding it to food.

How to Use Blue Curaçao

Blue curaçao's primary job is cocktail work, and it excels there across a range of formats. Classic tiki drinks like the Blue Lagoon depend on it for both the orange-citrus sweetness and the color.

In punch bowls, a measured pour adds orange scent without overpowering the fruit base.

How Blue Curaçao Is Used
MethodBest ForTip
🍹 Stirred or ShakenTiki cocktails, martinis, punchesUse 0.5-1 oz per drink; it sweetens fast
🧊 Blended with IceFrozen tropical drinks, slushiesColor dilutes slightly - add an extra splash
🔥 Reduced for GlazeCitrus dessert glazes, boozy compotesReduce gently; high heat drives off the nuance
✨ Float or SplashLayered cocktails, color finishingPour over the back of a spoon for clean layers

For cooking, small amounts work as a syrup substitute in fruit compotes or as a drizzle over citrus-glazed desserts.

The blue hue limits how far this can go - it's better suited to desserts that can absorb the color, such as soaked cakes or dark-fruit reductions.

Avoid pairing it with delicate green herbs. The sweetness buries fresh mint or basil instantly.

Strong smoky mezcal is another poor match; the flavor profiles actively fight each other.

Try It In
🍰Coconut Lime Poke CakeA splash in the soak adds bitter-orange depth to the citrus syrup→🍗Chili Lime Chicken Rice BowlsSmall amounts in the glaze add orange-peel sweetness without visual impact→

How to Buy and Store Blue Curaçao

Look for bottles labeled curaçao or blue curaçao - not just "blue orange liqueur," which is a generic category without the laraha connection.

Premium labels often cite Curaçao island origin or name the laraha orange explicitly; those bottles tend to deliver more complex bitterness than budget versions.

Golden Rule
Skip bottles with visible sediment or any off aroma on opening - these signal poor production or compromised storage before purchase.
  • Storage position - Keep the bottle upright to prevent the cap seal from degrading.
  • Light and heat - Store in a cool, dark cabinet; direct sunlight fades the blue dye over time.
  • Opened bottle - Cap tightly after every use; the shelf life of an opened bottle runs 1-3 years under good conditions.
  • Unopened - An unopened bottle will last for years without significant flavor loss.

If you ever need to swap it out, a mix of triple sec and a drop of blue food coloring is the most direct blue curaçao substitute. For the flavor without the color, triple sec replacements work well in most cocktail applications.

Where to Start with Blue Curaçao

Shortcut
New to blue curaçao? Mix it with vodka and pineapple juice first. That combination shows off its bitter-orange citrus note without masking it.

Start with cocktails if you want to understand what blue curaçao actually does. One drink - a simple Blue Lagoon or a vodka-pineapple split - will tell you more than any description.

Once you know how the sweetness and bitterness balance, you can make smarter calls about when to reach for it versus a drier orange liqueur.

Move to food applications only after you're comfortable with the flavor profile. The color is a constraint, but the bitter-orange note works in glazes and soaked desserts where that bitterness can echo citrus zest.

Frequently Asked Questions

Is blue curaçao alcoholic?

Yes. Most bottles fall between 15% and 40% ABV depending on the producer. It's not suitable for children, pregnant people, or anyone avoiding alcohol - even in small culinary amounts.

What is the difference between curaçao and triple sec?

Curaçao uses laraha bitter orange peel from the island of Curaçao and tends to be sweeter and slightly more bitter. Triple sec is a broader, drier style made from various orange peels without geographic restriction.

Why is curaçao blue?

The blue color comes entirely from added food dye - it has no effect on flavor. Producers introduced it to distinguish the product visually and create the dramatic color effect valued in tiki bartending.

Can you cook with blue curaçao?

Yes, in limited applications. It works in glazes, fruit compotes, and soaked cakes where the blue color can be absorbed. Avoid it in pale sauces or batters where the color is unwanted.

How much blue curaçao goes in a cocktail?

Most recipes call for 0.5 to 1 oz per drink. Because it's sweeter than triple sec, start at the lower end and adjust - it can tip a cocktail syrupy quickly if overdone.

What Is Chambord? [Taste, Uses & More]

March 28, 2026

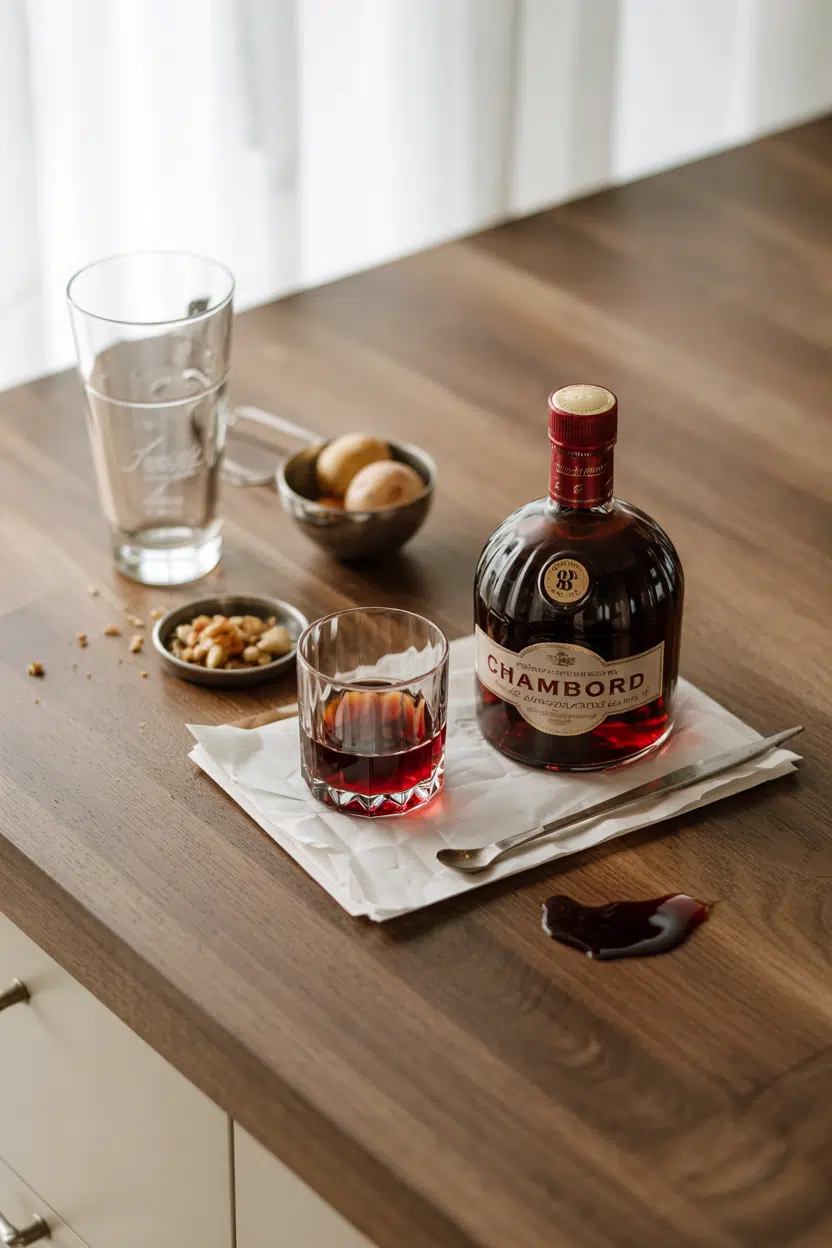
You spot it on the back bar shelf - that unmistakable spherical bottle with the gold rope and deep ruby liquid - and wonder what exactly Chambord is meant for beyond a passing garnish.

What Is Chambord

It's a French black raspberry liqueur built on a Cognac-style spirit base with vanilla and citrus peel, and it works far harder than most people realize.

Unlike single-note syrups, Chambord carries the kind of layered sweetness closer to the taste of creme de cassis - though with raspberry in place of blackcurrant.

If you're reaching for something to add boozy fruit character to both a glass and a pan, this is worth understanding properly.

QUICK SUMMARY

Chambord is a French black raspberry liqueur from the Loire Valley, flavored with vanilla, citrus peel, and a Cognac-style base. It pours deep ruby, tastes like boozy raspberry jam, and works in cocktails, meat glazes, and dessert sauces alike.

🫐Flavor: Jammy black raspberry, vanilla, warm oak, bright citrus
🍾Best Use: French Martini, Kir Royale, duck glaze, dessert sauces
🏺Storage: Cool, dark cabinet; refrigerate after opening for best results
⏳Shelf Life: Unopened: years; opened: 12-24 months before flavor fades
🔞Dietary: Contains alcohol and concentrated sugar; typically gluten-free

What Is Chambord?

Chambord is a black raspberry liqueur produced in the Loire Valley of France, drawing on a tradition of fruit liqueur-making that dates back centuries in the region.

The modern commercial version is built on a Cognac-style neutral grape spirit base, steeped with black and red raspberries, blackcurrants, vanilla, Moroccan citrus peel, and honey.

The result is a deep ruby-red liqueur with a visibly viscous pour and a distinctive spherical bottle capped with a golden crown-style top. It sits at around 16-17% ABV - lower than most spirits, higher than most wines.

Chambord is sometimes called simply "raspberry liqueur" or "black raspberry liqueur," though the brand name has become near-generic in bar settings.

It differs from cheaper raspberry cordials in one key way: the Cognac base adds warmth and genuine spirit depth rather than flat sweetness.

  • 🇫🇷 Origin - Loire Valley, France
  • Base spirit - Cognac-style grape spirit
  • Key botanicals - black raspberry, vanilla, citrus peel, honey
  • ABV - approximately 16-17%
  • Also called - black raspberry liqueur, Chambord Royale, raspberry liqueur

What Does Chambord Taste Like?

chambord - What Is Chambord

Chambord tastes like concentrated raspberry jam that's been spiked with a small measure of brandy. The dominant note is black raspberry - sweet and tart at once, riper and darker than fresh fruit.

Underneath that fruit core sits soft vanilla and honeyed sugar, which round out the edges and make the sweetness feel layered rather than sharp.

A Cognac-like warmth follows on the finish, alongside a faint citrus peel lift that keeps the whole thing from clogging the palate.

Sensory SnapshotStrong Intensity
👅 Flavor
jammy black raspberryvanilla-honeyedsweet-tartwarm oak
✋ Texture
syrupyviscoussilky
👃 Aroma
fresh and cooked raspberrysoft vanillatoasted spirit

Reduced by heat, the fruit character intensifies while the alcohol largely cooks off, leaving behind a sticky, tart berry glaze. Chilled in a shaken cocktail, the vanilla and citrus notes become more prominent than the spirit warmth.

How to Use Chambord

Chambord earns its keep in three distinct zones: cocktails, meat cookery, and desserts. Most people stop at the first - which leaves a lot of potential untapped.

In cocktails, the French Martini (vodka, Chambord, pineapple juice) is the most-reached-for application, and for a reason - the fruit sweetness bridges vodka's neutrality and pineapple's acidity cleanly.

Floating a splash over sparkling wine makes a raspberry variation on the classic Kir Royale; you'll find the full method in a kir royale french champagne recipe if you want precise proportions.

Beyond classic cocktails, Chambord stirs well into hot chocolate or coffee for a boozy raspberry finish.

In the kitchen, sauce reduction and deglazing are where Chambord punches above its weight.

The jammy fruit character concentrates under heat and pairs naturally with duck breast, pork tenderloin, and game birds - anywhere a sweet-tart berry contrast makes sense alongside rich meat fat.

Golden Rule
When cooking with Chambord, add it early enough to let the alcohol reduce - at least 3-4 minutes of simmering - or the raw spirit edge will dominate the sauce.

For desserts, drizzle warmed Chambord over vanilla ice cream, panna cotta, or cheesecake. Macerating fresh berries in a small measure for 30 minutes amplifies their flavor for cocktail garnishes or plated desserts.

How Chambord Is Used
MethodBest ForTip
🍸 Shaken/StirredFrench Martini, Kir Royale, soursUse 15-20 ml per serving; it's sweet, so balance with citrus
🍳 ReductionDuck glaze, pork sauce, game birdsSimmer 3-5 min to cook off alcohol before finishing with butter
🍨 DrizzleIce cream, panna cotta, cheesecakeWarm gently for a thinner sauce; serve at room temperature
🫐 MacerationCocktail garnishes, dessert toppings30-60 min at room temp is enough; longer softens the fruit too much
🥗 VinaigretteArugula, pear, and toasted nut saladsOne teaspoon per serving; balance with good red wine vinegar

Avoid using Chambord with delicate white-flesh fish - the heavy sweetness and vanilla overwhelm subtle flavors. Very bitter greens are a similar mismatch, with the sugar and berry notes clashing rather than complementing.

Try It In
🍞Classic Cinnamon French ToastDrizzle warmed Chambord instead of syrup for a berry-forward finish→☕Passion Fruit Cold Brew CoffeeSub a splash of Chambord for the passion fruit to shift it raspberry→🍫Passion Fruit Hot ChocolateReplace passion fruit with Chambord for a raspberry-chocolate version→

How to Buy and Store Chambord

Look for the sealed spherical bottle with a clear, deep ruby-red color inside. When tilted, the liquid should run in slow, thick legs - a sign of the proper sugar-and-spirit body. Check the ABV on the label: genuine Chambord runs 16-17%. Cloudiness or an unusually dark, brick-toned appearance can indicate oxidation.

Watch Out
Cheap raspberry liqueurs labeled as "Chambord-style" often use artificial flavor and thin syrup bases - the lack of a Cognac spirit foundation shows immediately in both aroma and cooking results.

Once open, store upright in a cool, dark cabinet and keep it tightly capped. Refrigerating after opening slows aroma loss and evaporation.

For the full picture on keeping chambord fresh, including how to tell when it's past its best, the details are worth reviewing before you commit a bottle to long-term storage.

  • Unopened - keeps for many years in cool, dark storage
  • Opened - peak quality holds 12-24 months; flavor fades gradually after that

Where to Start With Chambord

If you're new to it, shake a French Martini first - one part Chambord, two parts vodka, two parts pineapple juice.

That single drink shows you all three registers at once: the fruit sweetness, the vanilla depth, and how it bridges other flavors without dominating them.

From there, try a pan deglaze on duck or pork. If you find yourself short a bottle mid-recipe, there are practical alternatives to chambord worth knowing, particularly crème de cassis, which handles a similar role in sauces.

For the Cognac base side of things specifically, swapping out cognac covers what carries the warm spirit character when you need it.

One bottle covers cocktails, kitchen, and dessert - the range is wider than the price suggests.

Frequently Asked Questions

Is Chambord the same as raspberry liqueur?

Not exactly. Chambord is a specific brand of black raspberry liqueur made with a Cognac-style base, vanilla, and citrus peel. Generic raspberry liqueurs often lack that spirit foundation and taste noticeably flatter in both cocktails and cooking.

How strong is Chambord's alcohol content?

Chambord sits at approximately 16-17% ABV - about twice the strength of wine but well below standard spirits. It's low enough that a full pour in a cocktail adds sweetness without overwhelming the alcohol balance.

Can you cook with Chambord?

Yes - it reduces well into glazes and pan sauces for duck, pork, or game. Simmer for at least 3-4 minutes to cook off the raw spirit edge before finishing the sauce.

What cocktails use Chambord?

The French Martini (vodka, Chambord, pineapple juice) is the most common. It also appears in raspberry Kir Royale variants, sours, and as a float over sparkling wine or Champagne.

How long does Chambord last after opening?

Quality holds for 12-24 months once opened, provided the bottle is kept tightly capped and stored cool. The vanilla and citrus aromas fade first - the liqueur won't spoil, but it tastes noticeably duller past two years.

What Is Butter Bean? [Taste, Uses & More]

March 28, 2026

You spot them on the shelf - wide, flat, pale beans that look more substantial than a navy bean or a chickpea. Butter beans have a quiet confidence about them, the kind of ingredient that doesn't shout but quietly anchors a dish.

What Is Butter Bean
QUICK SUMMARY

Butter beans are large, flat mature lima beans with a mild, creamy-starchy flavor. They shine in slow-cooked stews, purees, and braised dishes. Dried beans need soaking and long simmering; canned versions are kitchen-ready in minutes.

👅Flavor: Mildly sweet, creamy, slightly nutty - never sharp
🍳Best Uses: Stews, purees, succotash, braised sides
🛒Buy: Canned for speed; dried for better texture control
⏱️Shelf Life: Canned: 2-5 years; dried: 1-2 years; cooked: 3-5 days
🌱Diet: Vegan, high fiber, plant protein - soak dried beans to reduce gas

What Is Butter Bean?

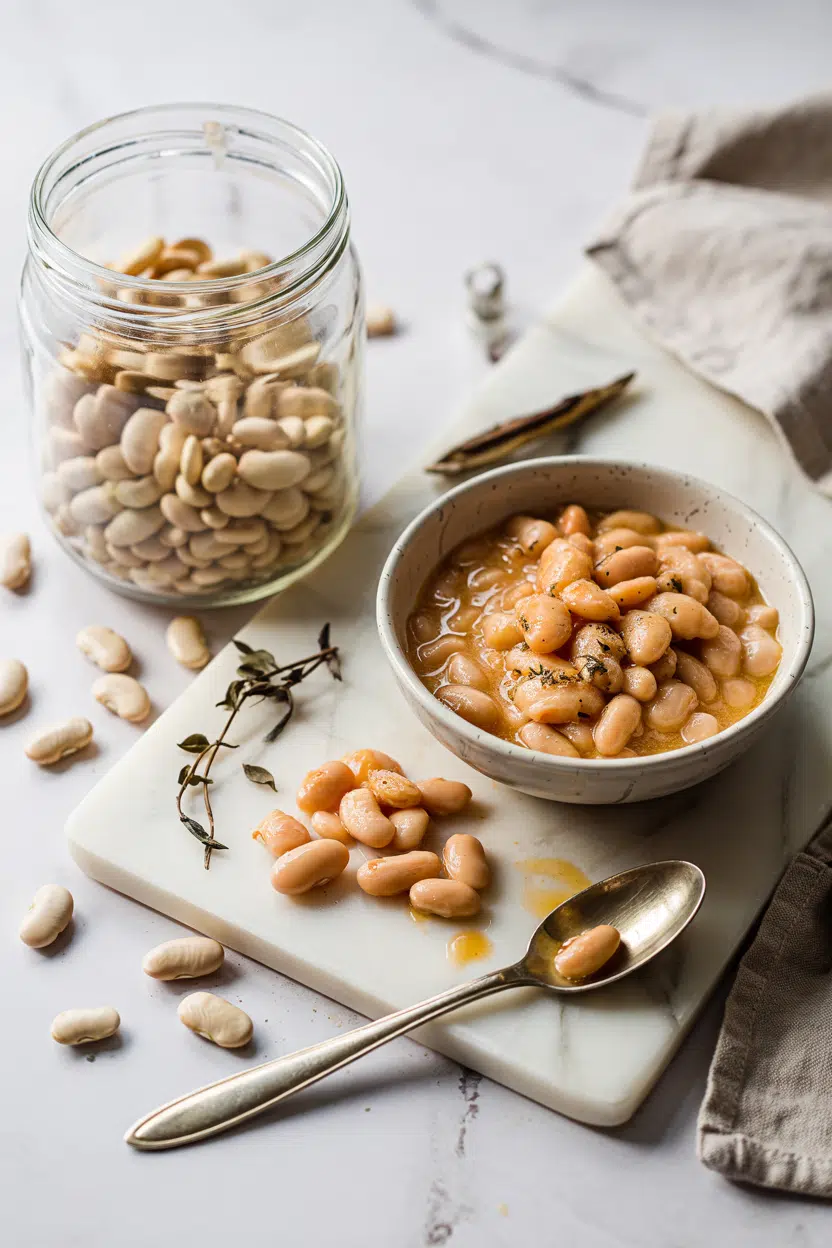
Butter beans are the large, mature seeds of the lima bean plant (Phaseolus lunatus), harvested after the pods have fully dried on the vine. They are wide, flat, and distinctly kidney-shaped, typically cream to pale green in color depending on the variety and processing stage.

The name "butter bean" is most common in the Southern United States, the Caribbean, and parts of the UK - though the bean itself is the same species as the standard lima. Large lima and butterbean (one word) are both accepted names for the same thing.

Baby limas are a related but smaller variety with a slightly different texture.

Originating in the Americas, butter beans moved into West African and Southern U.S. food traditions through centuries of agricultural exchange. Today they appear in Southern stews, Portuguese bean dishes, and Caribbean braises.

Two main forms are widely available:

  • Dried butter beans - require soaking and extended simmering; give you the most control over final texture
  • Canned butter beans - already cooked, convenient, and hold up well in most recipes that don't require hours of simmering

What Does Butter Bean Taste Like?

butter bean - What Is Butter Bean

Butter beans have a mild, creamy-starchy flavor with a faint natural sweetness and a subtle nuttiness underneath. They don't have the iron-forward edge of a kidney bean or the sharp bite of a pinto.

Sensory SnapshotMild Intensity
👅 Flavor
mildly sweetcreamy-starchyslightly nutty
✋ Texture
buttery when slow-cookedfirm when briefly simmered
👃 Aroma
mildearthy

Compared to a cannellini bean, butter beans taste milder and more buttery, with less of that dry, chalky finish.

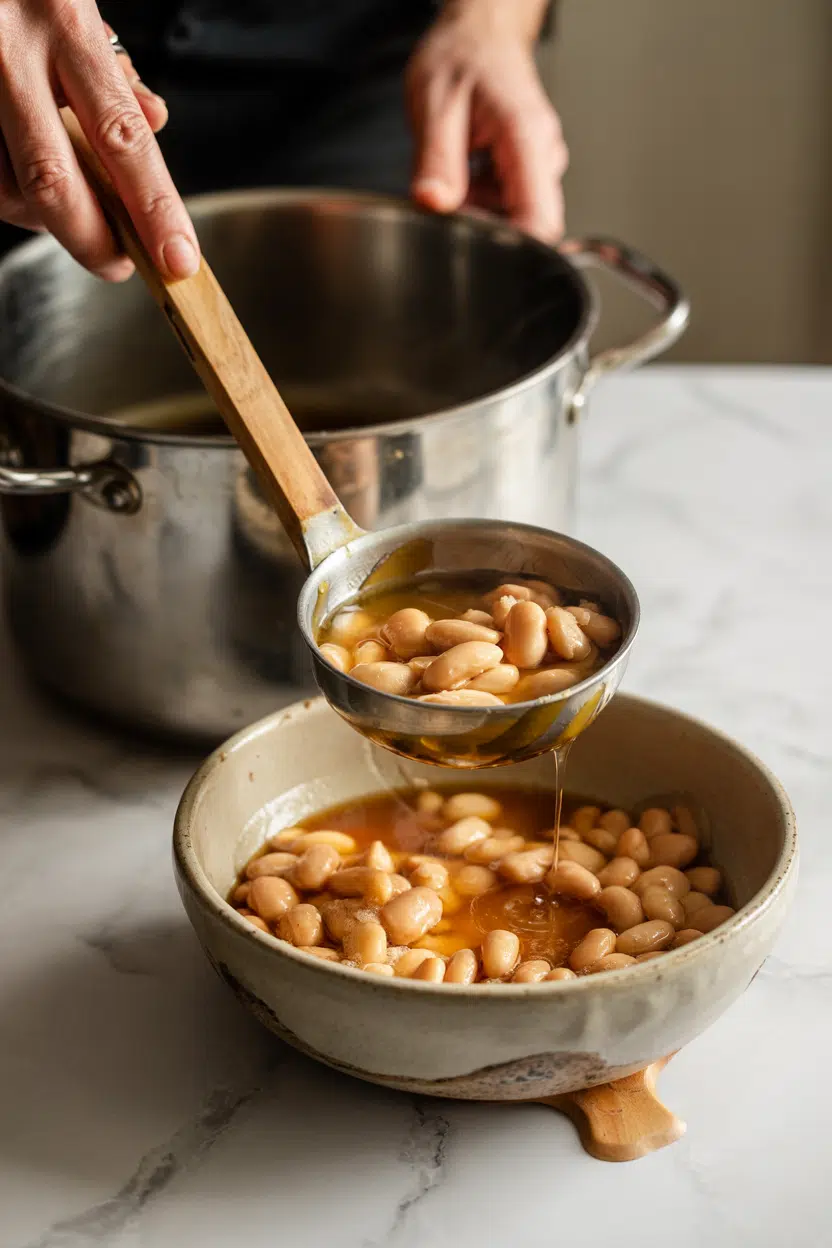
The texture is where they really differ - long simmering turns a butter bean almost spreadably soft at the center while the exterior still holds its shape.

Heat intensifies the starchy quality. A butter bean pulled after 20 minutes of simmering tastes quite different from one braised for an hour with smoked pork - the longer cook pulls sweetness forward and softens any raw, beany edge.

Golden Rule
Don't rush the simmer. Butter beans need low, steady heat to develop their signature creamy texture. High heat causes splitting and a mealy, grainy result.

How to Use Butter Bean

Butter beans absorb surrounding flavors readily, which makes them ideal for slow-cooked, savory dishes where fat, smoke, or acid can work into the bean over time.

They're a cornerstone of Southern cooking - braised with a ham hock and onion into a thick, brothy stew that eats like a full meal.

How Butter Beans Are Used
MethodBest ForTip
🍲 SimmeringStews, braises, ham hock dishesLow heat, long time - avoid rapid boiling
🥘 BraisingGarlic-lemon sides, greens-and-bean dishesAdd acid (lemon, vinegar) only near the end
🥗 Chilled/SaladWarm-grain salads, cold bean saladsPar-cook to just tender; cool in cold water
🫙 Mashing/PureeingDips, spreads, creamy sidesAdd olive oil and garlic; blend while warm
🫕 BakingCasseroles, gratin-style dishesUse canned beans to avoid over-drying

Beyond the Southern table, butter beans appear in Caribbean braises alongside braised oxtail, and in Portuguese stews layered with smoked sausage. They pair naturally with garlic and onion as a base, with fresh thyme or parsley added late to keep the herb flavor bright.

A splash of vinegar or lemon juice at the end cuts through the starchy richness.

Butter beans also fold well into succotash alongside corn and bell pepper, where their creamy bite contrasts the sweet crunch of the corn. For a quick side, mash them with olive oil and lemon for a spread that works anywhere you'd use hummus.

They also pair well with collard greens and smoked pork in a single pot.

Watch Out
Avoid long braises with high-acid ingredients like tomatoes added early. Extended acid exposure breaks down the bean's cell structure and turns the texture mealy and grainy.
Try It In
🍖Jamaican Oxtail Stew with Butter BeansA long braise where butter beans absorb rich, spiced meat stock→

How to Buy and Store Butter Bean

For canned butter beans, look for plump, intact beans floating in clear liquid. Avoid cans with dents, rust, or bulging seams.

For dried butter beans, choose uniformly large, flat seeds with pale, even coloring - skip bags with broken, powdery beans or dark spots, which signal age or poor storage.

Shortcut
Canned butter beans skip soaking and simmering entirely. Rinse them well, and they're ready to fold into a braise, salad, or dip in under five minutes.

Storage is straightforward:

  • Unopened cans - cool, dry pantry; good for 2-5 years
  • Dried beans - airtight container away from light; use within 1-2 years for best texture
  • Cooked or opened canned beans - sealed container in the fridge; use within 3-5 days

For a full breakdown of how long each form stays usable, see our guide on butter bean freshness guide.

Start With the Stew

New to butter beans? Begin with a simple braised version - canned beans, garlic, stock, and a drizzle of olive oil. That single cook will show you exactly how the texture shifts and how well they carry surrounding flavors.

Once you understand that baseline, every other use - butter bean alternatives, purees, casseroles - makes more sense. No better place to start.

Frequently Asked Questions

Are butter beans the same as lima beans?

Yes - butter beans are the large-variety mature form of the lima bean. The name "butter bean" is used in the Southern U.S., the Caribbean, and the UK, while "lima bean" is more common elsewhere. Baby limas are a smaller, related variety.

How long do dried butter beans take to cook?

After soaking overnight, dried butter beans typically simmer in 45-90 minutes over low heat. Older dried beans take longer. Skip soaking and they can take up to 2 hours.

Can you eat butter beans raw?

No. Raw butter beans contain linamarin, a naturally occurring compound that can release hydrogen cyanide when consumed uncooked. Thorough cooking destroys it completely, making them safe to eat.

Do butter beans need soaking?

Soaking isn't strictly required, but it reduces cook time significantly and helps break down oligosaccharides that cause gas. An overnight soak in cold water is the standard method; a quick hot soak (boil for 2 minutes, rest 1 hour) works as a faster alternative.

What do butter beans taste like compared to cannellini?

Butter beans are milder and more starchy-creamy than cannellini, which have a slightly firmer bite and a cleaner, less sweet flavor. Cannellini hold their shape better in long braises; butter beans go softer and more spreadable over extended cooking.

Crockpot Chicken Vindaloo

March 28, 2026

Slow cookers tenderize chicken thighs while vinegar and spices build layers of tangy heat. The crockpot does the heavy lifting-no babysitting, no stirring every fifteen minutes, just set it and walk away.

Crockpot Chicken Vindaloo served on a plate

Brown the chicken first if you have ten extra minutes. The seared crust adds depth that raw chicken can't match.

This works for weeknight dinners when you want something bold that doesn't demand constant attention. Dump everything in before work, come home to a house that smells like garlic and ginger.

QUICK SUMMARY

Crockpot Chicken Vindaloo slow-cooks chicken thighs in vinegar-spiked spices until fork-tender. The key is adding potatoes midway so they don't turn to mush while the sauce thickens naturally. Perfect for meal prep or hands-off weeknight dinners.

⏱️Time Reality: 15 minutes hands-on, then 5-6 hours on low heat
🔥Key Move: Brown chicken thighs before slow cooking for deeper flavor
⚠️Watch Out: Add vinegar in last 30 minutes to keep tang fresh instead of cooked-off

Table of Contents

Toggle
  • Why This Recipe Works
  • What You'll Need
    • Ingredient Details
  • Ingredient Swaps
  • What to Serve With It
  • Store and Reheat
  • Frequently Asked Questions
  • Crockpot Chicken Vindaloo
    • Method 
    • Tried this recipe?

Why This Recipe Works

Dark meat stays moist through long slow cooking while white vinegar balances the warm spices without turning bitter. For a version that comes together quickly, simple homemade chicken uses fewer ingredients but still delivers on tenderness.

Quick Reference
⏱️
Prep Time
15 min
🔥
Cook Time
5-6 hours
⏰
Total Time
5 hrs 15 min
🍽️
Servings
4-6 servings
📊
Difficulty
Easy
🏷️
Category
Main Dish
💡
Quick Tip
Brown chicken first for deeper flavor
🎯
Best For
Weeknight | Meal prep

Five reasons this works:

  • Chicken thighs hold moisture better than breasts - the fat renders slowly and bastes the meat from the inside as it cooks
  • Low heat builds flavor without drying protein - five hours on low reaches 165°F without overcooking the edges
  • Vinegar added late keeps tang bright - early addition makes the acidity taste cooked-off and flat
  • Brown sugar balances the acid - sweetness rounds out the vinegar's sharp edges without making it taste like dessert
  • Potatoes thicken sauce naturally - starch releases into the liquid and turns thin broth into clingy gravy
Quick Tip
Check chicken with an instant-read thermometer at the 5-hour mark-thighs should hit 165°F before you uncover to thicken

What You'll Need

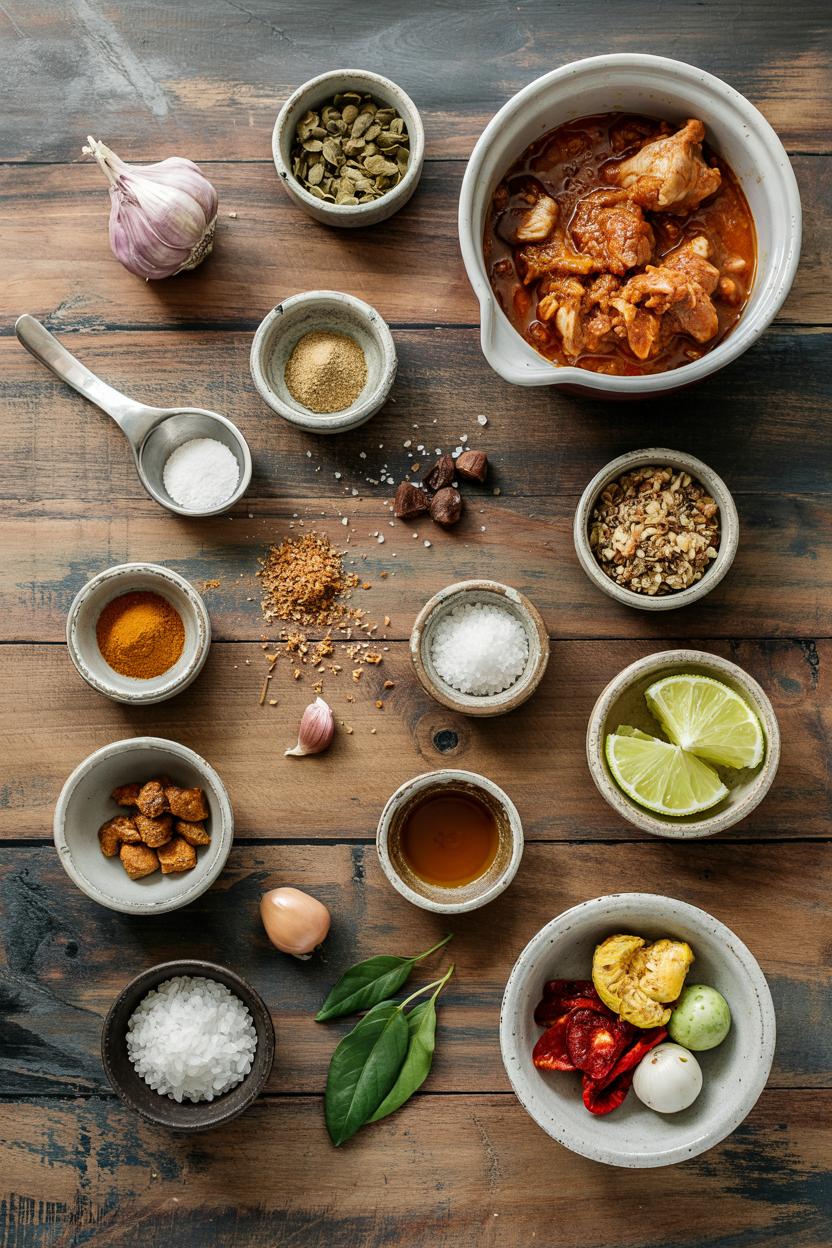
Ingredients for Crockpot Chicken Vindaloo

Stock up on vindaloo spice mix and chicken thighs-the rest you probably have. The biryani works best when it hits the table at the same time as the main, so if you're planning a full spread, homemade biryani recipe pairs without doubling your work.

🍗
Protein
  • 2 lbs chicken thighs, bone-in or boneless
🌶️
Spices & Aromatics
  • 3 tablespoon vindaloo curry paste or spice mix
  • 4 cloves garlic, minced
  • 1 tablespoon fresh ginger, grated
  • 1 large onion, diced
🥬
Vegetables
  • 2 medium potatoes, cubed
  • 2 tablespoon tomato paste
🫙
Liquids & Extras
  • ¼ cup white vinegar
  • 1 cup chicken broth
  • 1 tablespoon brown sugar
  • ½ cup coconut milk (optional)

Ingredient Details

  • Chicken Thighs
    Bone-in adds flavor but boneless cooks faster-both work, just adjust time by 30 minutes if using boneless
  • Vindaloo Spice Mix
    Store-bought paste saves time but check sodium levels-some brands run salty and you'll need to cut back on broth
  • White Vinegar
    Don't swap for balsamic or red wine vinegar-the sharp clean tang is what makes vindaloo taste right
  • Potatoes
    Russets hold shape better than red potatoes but either works if cut into 1-inch chunks
  • Coconut Milk
    Adds creaminess but skipping it keeps the dish lighter-stir in at the very end if using
  • Brown Sugar
    Balances vinegar's bite-start with 1 tablespoon and add more if your spice mix runs hot
  • Tomato Paste
    Concentrated flavor works better than canned tomatoes which water down the sauce

Ingredient Swaps

You can shift the heat level, swap proteins, or skip dairy without losing the core vindaloo character. Rich mains need something to cut through, and fry does exactly that-for a version that comes together quickly, easy fry side takes twenty minutes instead of five hours.

Four swaps that work:

  • Chicken breasts instead of thighs - leaner but dries out faster, so check doneness at 4 hours and pull early if needed
  • Apple cider vinegar for white vinegar - slightly sweeter tang, use same amount but taste before adding more
  • Cauliflower florets for potatoes - lower carb option, add in last 2 hours since they soften quicker
  • Yogurt or heavy cream for coconut milk - richer finish but no longer dairy-free, stir in off heat to prevent curdling

Homemade Spice Blend

Works for: When you can't find vindaloo paste or want control over heat level

Skip if: You're short on time-store-bought paste is faster and more authentic

Instant Pot Method

Works for: Cutting cook time to 25 minutes under pressure instead of 5 hours

Skip if: You prefer hands-off cooking-crockpot lets you leave the house without worry

Instructions

The whole thing takes fifteen minutes of knife work, then the slow cooker handles the rest. A dollop of verde takes each bite somewhere more interesting, so if you're building a full plate, a tangy dipping sauce adds contrast without adding another pot to clean.

  1. Brown the chicken - Heat 1 tablespoon oil in a skillet over medium-high heat and sear thighs 3-4 minutes per side until golden. Transfer to crockpot.
  2. Build the base - Add onion, garlic, ginger, vindaloo spice mix, tomato paste, brown sugar, and chicken broth to the crockpot. Stir to coat chicken evenly.
  3. Slow cook the meat - Cover and cook on low 3 hours until chicken registers 145°F on an instant-read thermometer.
  4. Add potatoes and finish cooking - Stir in potato chunks, cover, and cook another 2-3 hours until chicken hits 165°F and potatoes are fork-tender.
  5. Finish and thicken - Remove lid, stir in white vinegar, and cook uncovered 20-30 minutes to reduce sauce. Stir in coconut milk if using, taste for salt and sugar balance.
Golden Rule
Resist lifting the lid during the first 3 hours-every peek drops the temperature by 15°F and adds 20 minutes to cook time

What to Serve With It

Vindaloo needs something starchy to soak up the tangy sauce and something cool to balance the heat. The tea works best when it hits the table at the same time as the main, so for a version that comes together quickly, a cold tea on the side takes five minutes and cuts through rich curry flavors.

If you're looking for more chicken pairing ideas beyond these sides, check out easy chicken meal planning for a full breakdown of what works with bold poultry mains.

Side Dish Prep Why It Works How to Serve
Basmati Rice Easy Absorbs sauce without competing with spices Scoop rice into bowls first, ladle vindaloo over top
Naan Bread Easy Warm bread for scooping thick sauce Tear into pieces, serve in basket on the side
Cucumber Raita Easy Cooling yogurt cuts through vinegar heat Dollop on top or serve in small bowls alongside
Steamed Green Beans Easy Crisp texture contrasts tender chicken Toss with butter and salt, pile on the side
Jeera Rice Medium Cumin flavor complements vindaloo spices Toast cumin seeds in butter before cooking rice

Three ways to serve it:

  • Weeknight bowl style - spoon vindaloo over rice, top with cilantro and a squeeze of lime
  • Family-style platter - pile chicken and potatoes on a serving dish, surround with naan and raita bowls
  • Meal prep containers - portion into glass containers with rice on one side, vindaloo on the other
Best Pick
Basmati rice soaks up the sauce better than jasmine or brown rice-the long grains stay separate instead of clumping

Store and Reheat

Vindaloo holds up in the fridge for four days and freezes well if you want to batch cook. The sauce thickens as it cools, so add a splash of broth when reheating to loosen it back up.

Method Time Best For
🍳 Stovetop 7-10 min over medium heat Even reheating without drying out chicken
📦 Microwave 2-3 min, stirring halfway Single servings when you're in a rush
🔥 Oven 15-20 min at 350°F Larger portions or when reheating multiple containers

For best results when storing:

  • Cool completely before sealing - hot vindaloo creates condensation that waters down the sauce
  • Store sauce and chicken together - separating them dries out the meat
  • Use shallow containers - speeds cooling and prevents bacteria growth in the center
  • Freeze in single-serving portions - thaw only what you need instead of the whole batch
  • Add coconut milk after reheating - freezing splits dairy and coconut milk, so stir it in fresh

Frequently Asked Questions

How long to cook chicken vindaloo in crockpot?

Cook on low for 5-6 hours total-3 hours for the chicken base, then add potatoes and cook another 2-3 hours. Chicken should reach 165°F internal temperature before uncovering to thicken the sauce.

Can I make crockpot vindaloo ahead and store?

Yes, vindaloo keeps 3-4 days in the fridge or up to 3 months frozen. Cool completely before storing and reheat on the stovetop with a splash of broth to loosen the sauce.

What goes well served with chicken vindaloo?

Serve with basmati rice to soak up sauce, naan bread for scooping, and cucumber raita to cool the heat. Steamed green beans or roasted cauliflower add texture contrast.

How do I know when chicken vindaloo is fully cooked?

Check with an instant-read thermometer-chicken should register 165°F at the thickest part. The meat will be fork-tender and shred easily when fully cooked.

Can I use chicken breast instead of thighs in vindaloo?

You can, but breasts dry out faster in the slow cooker. Check doneness at 4 hours instead of 5, and pull them as soon as they hit 165°F to prevent rubbery texture.

Crockpot Chicken Vindaloo served on a plate

Crockpot Chicken Vindaloo

No ratings yet
Crockpot Chicken Vindaloo slow-cooks chicken thighs in tangy vinegar-spiked spices until fork-tender. Adding potatoes midway prevents them from turning mushy while the sauce thickens naturally, making this dish perfect for hands-off weeknight dinners or meal prep.
Print Recipe Pin Recipe
Prep Time 15 minutes mins
Cook Time 5 hours hrs 15 minutes mins
Total Time 5 hours hrs 30 minutes mins
Servings: 5 servings
Course: Main Dish
Cuisine: Indian
Ingredients Equipment Method Notes

Ingredients
  

  • 2 lbs chicken thighs bone-in or boneless
  • 3 tablespoon vindaloo curry paste or spice mix
  • 4 cloves garlic minced
  • 1 tablespoon fresh ginger grated
  • 1 large onion diced
  • 2 medium potatoes cubed
  • 2 tablespoon tomato paste
  • 0.25 cup white vinegar add in last 30 minutes
  • 1 cup chicken broth
  • 1 tablespoon brown sugar
  • 0.5 cup coconut milk optional, stir in at the end

Equipment

  • Skillet To brown the chicken before slow cooking
  • Crockpot For slow cooking the dish

Method
 

  1. Heat 1 tablespoon oil in a skillet over medium-high heat and sear chicken thighs 3-4 minutes per side until golden. Transfer to the crockpot.
    2 lbs chicken thighs
  2. Add diced onion, minced garlic, grated ginger, vindaloo spice mix, tomato paste, brown sugar, and chicken broth to the crockpot. Stir to coat chicken evenly.
    3 tbsp vindaloo curry paste, 4 cloves garlic, 1 tbsp fresh ginger, 1 large onion, 2 tbsp tomato paste, 1 tbsp brown sugar, 1 cup chicken broth
  3. Cover and cook on low for 3 hours until chicken registers 145°F on an instant-read thermometer. Avoid lifting lid during this time.
  4. Stir in cubed potatoes, cover, and cook another 2-3 hours until chicken hits 165°F and potatoes are fork-tender.
    2 medium potatoes
  5. Remove lid, stir in white vinegar, and cook uncovered for 20-30 minutes to reduce sauce. Stir in coconut milk if using, then taste and adjust seasoning with salt or sugar.
    0.25 cup white vinegar, 0.5 cup coconut milk

Notes

  • Brown chicken thighs before slow cooking for deeper flavor.
  • Add vinegar in the last 30 minutes to keep its tang fresh.
  • Resist lifting the lid during the first 3 hours to avoid heat loss and extended cooking time.

Tried this recipe?

Let us know how it was!

What Is Benedictine Liqueur? [Taste, Uses & More]

March 28, 2026

Brushed across a resting ham before the final blast of oven heat, Benedictine does something that no single-note sweetener can replicate - it leaves behind honey warmth, a whisper of dried herbs, and just enough spice to make the glaze feel composed rather than cloying.

What Is Benedictine Liqueur

If you've worked with amaretto swaps that work or spent time navigating swapping out cointreau, you already know how much a liqueur's specific flavor character matters in substitution. Benedictine is one of those bottles that earns its place on the shelf by doing things other liqueurs simply don't.

QUICK SUMMARY

A honeyed, herbal French liqueur built on a cognac base and a secret botanical blend, Bénédictine D.O.M. sits between the sweetness of Grand Marnier and the herbal edge of chartreuse - mild enough for baking, complex enough for serious cocktails.

🌿Flavor: Sweet honey and caramel with warm spice and subtle herbal finish
🍸Best Uses: Cocktails, custards, fruit compotes, glazes for roasted pork
🏷️Buy It As: Bénédictine D.O.M. - the original labeled bottle
📦Shelf Life: Unopened: indefinite; opened: best within 1-2 years
🌡️Store It: Upright, cool, dark pantry - reseal tightly after each pour

What Is Benedictine Liqueur?

Bénédictine has one of the more storied origin stories in spirits history.

A wine merchant named Alexandre Le Grand claimed in 1863 to have rediscovered a medieval monastic recipe from the Benedictine abbey of Fécamp in Normandy - and while historians debate how much of that story holds up, the liqueur he released became a legitimate classic.

The bottle carries the label D.O.M., an abbreviation for the Latin Deo Optimo Maximo ("to God, most good, most great"), a nod to that monastic framing. Production has remained in Fécamp ever since.

At its core, Benedictine is a cognac-based herbal liqueur, sweetened with honey and shaped by a proprietary blend of 27 plants and spices. The exact formula is kept secret, though confirmed botanicals include hyssop, angelica, and lemon balm.

It falls into the aromatic digestif category alongside chartreuse and génépy - sweet, complex, and built for sipping or mixing.

  • 🏷️ Full name - Bénédictine D.O.M. (also spelled Benedictine liqueur)
  • Base spirit - aged cognac
  • ABV - 40% (80 proof)
  • Country of origin - France (Normandy)
  • B&B - a common pre-bottled blend of Benedictine and brandy, slightly drier

What Does Benedictine Liqueur Taste Like?

benedictine liqueur - What Is Benedictine Liqueur

The first impression is sweet and honeyed, close to the caramel richness you get from grand marnier's flavor and uses - but Benedictine pulls away quickly with an herbal middle note that Grand Marnier doesn't have.

Think dried thyme, a faint resinous quality, and the kind of spice warmth you associate with mulled wine: cinnamon, clove, and a trace of ginger.

The finish lingers. That syrupy, silky mouthfeel coats the palate and holds the spice notes longer than you'd expect from a 40% ABV spirit.

Sensory SnapshotModerate Intensity
👅 Flavor
Honeyed caramelWarm spiceHerbalCitrus peel
✋ Texture
SyrupySilkyCoating finish
👃 Aroma
Warm brown spiceHoneyResinous herbs

Heat softens the herbal edge noticeably. In a warm custard or a finished sauce, Benedictine reads more as honeyed spice than as an herbal spirit - a useful distinction if you're cooking rather than mixing.

How to Use Benedictine Liqueur

Cocktails are where most people encounter Benedictine first.

It appears in the Vieux Carré alongside rye and cognac, where its honey-spice character bridges both base spirits, and in the Singapore Sling, where it anchors the gin's botanicals with sweetness and depth.

Golden Rule
Add Benedictine off-heat when you want to preserve its herbal aroma. High sustained heat drives off the volatile botanicals and leaves only sweetness.

In the kitchen, 1-2 tablespoons opens up a range of applications without overwhelming a dish.

How Benedictine Liqueur Is Used
MethodBest ForTip
🍸 Stirred inCocktails, hot chocolate, coffeeAdd last - never shake when pairing with aged spirits
🍳 Folded inPastry cream, custard, crème brûléeAdd after tempering, off direct heat
🔥 ReducedGlazes for pork or ham, dessert syrupsReduce gently; sweetness concentrates fast
🍐 SimmeredPoached pear or apple compoteAdd mid-poach so spice infuses the fruit

Pairings lean toward cognac, aged brandy, pear, quince, and vanilla - flavors that share Benedictine's warm, brown-spice register. Blue cheese and dark chocolate both work as contrasting partners, cutting the sweetness with bitterness or funk.

Knowing how long custard keeps matters when you're planning a Benedictine-spiked pastry cream ahead of an event.

If a recipe calls for a different herbal liqueur and you're considering a switch, benedictine liqueur swaps that work lays out the closest matches by flavor direction.

Avoid using Benedictine with raw bitter greens - radicchio and endive without a sweet counterpoint will fight the honey and make both elements taste off.

Try It In
🥃Irish Cream Liqueur HomemadeA liqueur base where Benedictine adds warm spice in place of plain sugar→

How to Buy and Store Benedictine Liqueur

Look for the Bénédictine D.O.M. label - that's the historic recipe, and it's the only version with the full botanical profile. At the store, check the fill level: a neck-fill line indicates the bottle has been stored upright and sealed properly.

The liquid should be clear amber with no cloudiness or sediment.

Watch Out
Avoid bottles stored near windows or under fluorescent display lighting. UV exposure degrades the botanicals and flattens the herbal character over time.

B&B (Benedictine and Brandy) is a drier pre-blended variant - useful if you want less sweetness in a cocktail but not a direct swap in baking.

For storage, keep the bottle upright in a cool, dark cabinet and reseal the cap firmly after each use.

The full picture of benedictine liqueur's shelf life covers edge cases, but the short version is: unopened bottles last indefinitely; opened, aim to use within one to two years for the best aromatic expression.

Start Here

Benedictine is most accessible as a cocktail modifier - start with a Vieux Carré or add a half-ounce to a brandy old-fashioned before moving into kitchen applications.

Best Pick
For first-time buyers, the standard Bénédictine D.O.M. bottle covers cocktails and cooking equally well - no need for a specialty edition.

Once you're comfortable with its flavor, try folding a tablespoon into a vanilla custard or a pear compote.

Those uses reveal why bartenders and pastry cooks both keep it close - the honey-spice depth is genuinely hard to replicate, and replacements for green chartreuse or grand marnier swaps that work confirm just how distinct each herbal liqueur really is.

Frequently Asked Questions

Is Benedictine liqueur sweet or dry?

Sweet. Benedictine is honey-forward with significant residual sugar, placing it firmly on the sweeter end of herbal liqueurs. B&B (Benedictine and Brandy) is the drier pre-blended option if sweetness is a concern.

How strong is Benedictine?

40% ABV (80 proof) - the same as most standard spirits. Despite its syrupy texture, it isn't lower in alcohol than a typical whiskey or gin.

Can Benedictine replace chartreuse in cocktails?

In a pinch, yes - but the result will be sweeter and less bitter. Chartreuse has a sharper herbal edge and higher ABV (55% green), so reduce any added sugar when substituting Benedictine.

What cocktails use Benedictine?

The Vieux Carré and the Singapore Sling are the two classics. It also appears in the Bobby Burns (Scotch and sweet vermouth) and many bartender-built stirred cocktails using aged base spirits.

Does cooking with Benedictine burn off all the alcohol?

Not entirely - alcohol retention depends on cooking time and method. Adding Benedictine off-heat or at the very end of cooking preserves the most aroma while still reducing the raw alcohol edge.

What Is Caster Sugar? Taste, Uses & More Guide

March 28, 2026

Shortbread batter, a Victoria sponge, a bowl of stiff meringue peaks - each relies on a sugar that vanishes into the mix rather than leaving gritty traces behind. Caster sugar does that job. Its crystals are finer than standard granulated sugar but coarser than powdered sugar, landing in a sweet spot that makes it the go-to for bakers who care about texture.

If you're working with whipped egg whites or a creamed butter base and the result keeps falling short, the sugar grade is often the culprit.

QUICK SUMMARY

Caster sugar is a finely milled dry sweetener with a clean, neutral sweetness and nearly no aroma. It dissolves faster than granulated sugar, making it the preferred choice for meringues, sponge cakes, cold drinks, and custards where a smooth, grit-free result matters.

🍬Flavor: Clean, neutral sweet - no caramel or molasses notes
🍰Best Uses: Meringues, sponge cakes, cocktails, custards, syrups
📦Shelf Life: Indefinite when stored airtight and dry; best within 2 years
🛒Also Called: Superfine sugar, baker's sugar, ultrafine sugar, castor sugar
🔄Swap: Granulated sugar works in most cooked recipes; blend it briefly to match the fine crystal size

What Is Caster Sugar?

Caster sugar is granulated cane or beet sugar that has been milled to a much finer crystal size than standard granulated sugar.

It originated in the United Kingdom, where it remains a baking staple, and the name comes from the old-fashioned sugar caster - a shaker used to dust fine sugar over food.

Outside the UK and Commonwealth countries, you'll find it sold as superfine sugar or baker's sugar. It is pure sucrose, just like regular granulated sugar, so it carries no additional flavor compounds on its own.

Two main varieties exist:

  • White caster sugar - the standard, made from refined cane or beet sucrose with a completely neutral flavor profile.
  • Golden caster sugar - less refined, retaining a trace of molasses for a faint, warm undertone; common in British artisan baking.

It sits between granulated sugar and powdered sugar on the processing spectrum. Unlike powdered sugar, it contains no cornstarch anti-caking agent, which is why it behaves differently in recipes that call for one or the other.

What Does Caster Sugar Taste Like?

caster sugar - What Is Caster Sugar

Pure, clean sweetness - that's the short answer. There are no caramel, molasses, or bitter notes in white caster sugar's dry form, making it one of the most neutral sweeteners available.

Sensory SnapshotMild Intensity
👅 Flavor
Clean sweetNeutralFaintly malty (cane)
✋ Texture
Fine crystallineFree-flowingDissolves fast
👃 Aroma
Nearly odorlessFaint cane scent when heated

On the tongue, it's nearly indistinguishable from granulated sugar in sweetness level. The difference is physical: fine crystals dissolve against moisture faster, so there's no gritty sensation when dissolved into a batter or drink.

Heat changes its behavior. Applied directly to a surface, caster sugar melts quickly and evenly toward caramel, though the flavor shift happens at the same temperature as any other sucrose - roughly 320°F (160°C).

Golden caster sugar adds a very subtle warmth that white caster sugar doesn't, though you'd only notice it in delicate preparations like a light syrup.

How to Use Caster Sugar

Dissolution speed is what sets caster sugar apart in practical cooking. Wherever undissolved sugar grains would ruin the result - a meringue, a cold cocktail, a silky custard - this is the sugar to reach for.

How Caster Sugar Is Used
MethodBest ForTip
🥄 WhippingMeringues, whipped cream, moussesAdd gradually to avoid deflating the foam
🧈 CreamingSponge cakes, Victoria sponge, pound cakeFine crystals aerate butter faster and more evenly
🥂 Dissolving coldCocktails, lemonade, iced tea, cold syrupsStirs in without heating - granulated sugar won't
🍮 Syrup & custardSimple syrups, crème brûlée, panna cottaDissolves without stirring over heat for long
✨ FinishingDusting fruit, warm crêpes, pavlovaMelts on contact with warm surfaces faster than coarse sugar

British baking leans on caster sugar most heavily - it's standard in a classic Victoria sponge and mandatory for a proper pavlova. French patisserie uses it in genoise and chiffon batters where even crumb structure depends on fine sugar integration.

Australian and New Zealand baking traditions follow the same approach, making caster sugar a pantry default across Commonwealth kitchens.

It pairs naturally with butter, eggs, vanilla, and cream in baked goods, and with rum, citrus, and berries in drinks and cold desserts. Where you'd want textural crunch on top of cookies or crumbles, coarser raw or demerara sugar does a better job.

For recipes where a dry, starchy sweetener matters, powdered sugar substitutes are worth understanding separately.

Golden Rule
Never substitute powdered sugar for caster sugar by volume in a cake batter - the cornstarch content alters the crumb structure.
Try It In
🥜Cinnamon Sugar Roasted NutsFine sugar coats the nuts evenly for a crisp, uniform crust→☕Iced Brown Sugar Oat Milk LatteShows how fast-dissolving sugar works in cold drinks→🍩Cinnamon Sugar Donut MuffinsCaster sugar in the batter gives a tender, even crumb→

How to Buy and Store Caster Sugar

Look for packaging labeled "caster sugar" or "superfine sugar" specifically - regular granulated sold in a similar bag won't perform the same way. Through the bag, the crystals should look uniform and free-flowing.

Avoid any package showing clumps or a damp appearance; moisture uptake has already begun.

Watch Out
Caster sugar absorbs moisture and odors faster than coarser granulated sugar - keep it well away from spices and damp areas of your pantry.

Storage is straightforward:

  • Airtight container - transfer from the bag immediately after opening to prevent clumping.
  • Cool, dry location - a pantry shelf away from the stove works; humidity is the main enemy.
  • Away from strong odors - fine crystals absorb surrounding scents more readily than coarser sugar.

Properly stored, caster sugar storage life is indefinite, though best quality holds for about two years. For comparison, most dry sugars share this longevity - see how sugar storage life varies across types if you're stocking multiple varieties.

Start Here If You're New to Caster Sugar

If your recipes come from British or Australian sources, you likely already need it and don't realize why your results differ when using regular granulated. Start with meringue or a Victoria sponge - both will immediately show the difference in texture.

For everything else, knowing your caster sugar swaps is useful: a brief blitz of granulated sugar in a food processor gets you close. However, for cold drinks and uncooked applications, it won't fully replicate the speed of dissolution that true superfine sugar delivers.

Shortcut
No caster sugar on hand? Pulse regular granulated sugar in a blender for 30 seconds. It won't be identical, but it works in most baked recipes.

Frequently Asked Questions

Can I use granulated sugar instead of caster sugar?

Yes, in most cooked or baked recipes with no noticeable difference in flavor. The risk is texture - coarser crystals may not cream or dissolve fully, leaving a slightly grainy result in delicate cakes or meringues.

How do you make caster sugar at home?

Pulse regular granulated sugar in a food processor or blender for about 30 seconds. Stop before it becomes powdery - you want fine crystals, not powder. Sift it to remove any lumps before using.

Does caster sugar melt faster than granulated?

Yes. Smaller crystals have more surface area, so they dissolve and melt more quickly. This is especially noticeable in cold liquids and when caramelizing on low heat.

Is caster sugar the same as superfine sugar?

Effectively yes - both refer to sugar milled to a finer crystal than standard granulated. "Caster" is the British term; "superfine" is common in American markets. Crystal size may vary slightly by brand.

What is the best sugar for meringue?

Caster sugar is the standard choice. Its fine crystals dissolve into egg whites quickly and completely, preventing the weeping or graininess that coarser granulated sugar can cause in a finished meringue.

How Long Does Brioche Bread Last? [Storage Guide]

March 28, 2026

Leftover brioche sitting on your counter after brunch is a familiar dilemma - you paid good money for that buttery loaf, and you don't want it going to waste.

Can You Freeze Brioche Bread

Unlike how long french toast keeps after it's cooked, an uncut brioche loaf has more options depending on how quickly you'll use it. Brioche's high fat and egg content makes it more perishable than lean breads, but it also responds well to freezing.

Get the storage right and you'll have usable bread for months.

QUICK SUMMARY

Brioche bread lasts 1-2 days at room temperature, up to 7 days in the fridge, and 2-3 months frozen. The fridge slows mold but accelerates staling in enriched crumb. Freeze sliced for quick toasting, or wrap the whole loaf tightly before storing.

🏠Pantry: 1-2 days whole; 1 day sliced before staling risk rises
🧊Fridge: 4-7 days whole; 3-5 days sliced in airtight wrap
❄️Freezer: 2-3 months best quality; label every package with freeze date

How Long Does Brioche Bread Last?

Brioche is an enriched dough - loaded with butter and eggs - and that richness is exactly why it spoils faster than a basic white sandwich loaf.

Moisture from the fat content keeps the crumb soft initially, but it also feeds mold quickly once the crust is exposed.

Understanding bread's shelf life in general helps set expectations, though brioche sits at the shorter end of the spectrum for room-temperature storage. Sliced pieces lose moisture faster than a whole uncut loaf, regardless of storage method.

Brioche Bread Shelf Life
MethodStateDurationNotes
🏠 PantryWhole1-2 daysMold risk rises after 48 hours due to high fat and egg content
🏠 PantrySliced1 dayStales faster once cut; keep wrapped to slow moisture loss
🧊 FridgeWhole4-7 daysSlows mold but firms the enriched crumb faster than room temp
🧊 FridgeSliced3-5 daysAirtight container essential to prevent drying
❄️ FreezerWhole2-3 monthsTightly wrapped; flavor loss accelerates beyond 3 months
❄️ FreezerSliced3 monthsIndividual slices toast straight from frozen; label with date

The fridge window is tempting when you can't finish a loaf quickly, but don't expect fridge-stored brioche to feel fresh. It will be safe to eat, just noticeably firmer.

How to Store Brioche Bread

Room temperature is the right call if you'll finish the loaf within two days. Pantry storage works best when brioche stays in its original paper bag or a breathable bread bag, kept away from direct heat sources like stovetops or sunny windowsills.

The fridge extends that window considerably, though it comes at a cost to texture. Fridge storage requires tight wrapping - plastic wrap plus a resealable bag blocks both moisture loss and the odors that fridge environments carry.

A brief warm in a 325°F oven or toaster before eating reduces that chalky, stale edge significantly.

Watch Out
Don't refrigerate brioche expecting it to stay soft. The fridge prevents mold but speeds up staling in enriched crumb - you're trading texture for time.

For longer storage, freezing beats the fridge every time. The method is simple, and the results hold up well for months when done correctly - more on that in the next section.

Can You Freeze Brioche Bread?

Yes - freezing is the best long-term storage method for brioche, and it handles the process better than most breads do. The high fat content actually helps protect the crumb during freezing compared to lean loaves.

Just as storing sourdough bread correctly requires thoughtful wrapping, brioche demands double protection against freezer burn.

Expect some minor texture change after freezing. The crumb loses a little of its original springy tenderness and may feel slightly drier, but reheating restores much of the richness.

  1. Slice first (if possible) - individual slices let you pull single servings without thawing the whole loaf.
  2. Wrap tightly in plastic wrap - cover every surface with no gaps, pressing out air as you go.
  3. Add a second layer - wrap again in aluminum foil or slide into a heavy-duty freezer bag and remove remaining air.
  4. Label with the date - use within 3 months for best flavor and texture.
  5. Thaw correctly - toast slices directly from frozen, or unwrap a whole loaf, place in a paper bag, and rest at room temperature for 2-4 hours, then refresh in a 325°F oven for 5-8 minutes.
Golden Rule
Always wrap twice before freezing brioche. A single layer of plastic wrap won't stop freezer odors from penetrating the fat-rich crumb.

Signs Brioche Bread Has Gone Bad

Brioche gives clear signals when it's past its point. Catching them early saves you from a disappointing bite - or worse.

Signs It's Gone Bad
👀
VisualSpeckled green, blue, or white fuzzy patches on crust or crumb · Wet or darkened spots where butter has pooled · Unusual discoloration across the crumb
👃
SmellSour or fermented odor · Putrid aroma replacing the faint sweet and buttery scent
✋
TextureSlimy or sticky surface on slices · Tacky crumb that feels damp under the crust

Never try to cut around mold on brioche. Mold threads penetrate the soft, egg-rich crumb deeply and won't be contained to a visible patch. Discard the whole loaf if you spot any growth.

Getting the Most From Your Brioche

Once you know the limits, it's straightforward to avoid waste. A few small habits protect both quality and safety, and brioche bread's flavor and uses are broad enough to justify making it last.

  • 🔪 Slice before freezing - individual portions toast straight from frozen without defrosting the whole loaf.
  • 🌡️ Reheat refrigerated slices - a 2-minute toaster run or 5 minutes at 325°F removes the chalky stale texture before serving.
  • 🍞 Use day-old brioche - slightly stale brioche soaks custard without falling apart, making it ideal for recipes like [cooking bread pudding perfectly](https://forkliftkitchen.com/what-to-serve-with-bread-pudding/).
  • 📅 Label every freezer package - three months passes faster than expected; a date on the bag prevents guesswork.
Best Pick
Freezing sliced brioche is the smartest move for most households. You get fridge-beating shelf life, single-serve convenience, and toast-ready slices in under 3 minutes.

Frequently Asked Questions

Can you freeze brioche rolls?

Yes. Wrap each roll individually in plastic wrap, then place them together in a freezer bag with the air removed. They keep well for up to 3 months and reheat in a 325°F oven for 5-7 minutes straight from frozen.

How long does brioche last in the fridge?

A whole loaf keeps 4-7 days; sliced brioche lasts 3-5 days. Airtight wrapping is essential - the fridge dries enriched crumb quickly without it.

Does freezing brioche change the texture?

Slightly. The crumb loses some of its original springiness and may feel marginally drier after thawing. Reheating in a low oven restores much of the richness.

How do you thaw a brioche loaf?

Unwrap the loaf, place it in a paper bag, and leave it at room temperature for 2-4 hours. Finish in a 325°F oven for 5-8 minutes to restore the crust and crumb.

Can you freeze sliced brioche for toast?

Yes, and it's the most practical method. Frozen slices go straight into the toaster without any thawing, and the high butter content means they toast evenly without becoming dry.

What Is Bay Leaf? [Taste, Uses & More]

March 28, 2026

Bay leaf does something no other herb does quite the same way: it works invisibly.

What Is Bay Leaf

You drop a whole dried leaf into simmering stock or a slow braise, and it never announces itself - it just makes everything taste more complete.

Understanding fish stock stand-ins gets easier once you understand why the base liquid matters, and bay leaf is a large part of that.

This leaf from the laurel tree (Laurus nobilis) has been used across Mediterranean kitchens for centuries, and its quiet contribution is harder to notice than it is to miss.

QUICK SUMMARY

A dried aromatic leaf from the laurel tree, bay leaf adds a resinous, camphor-tinged background note to long-simmered dishes. Always added whole and removed before serving. Moderate in intensity, broad in application across stocks, braises, beans, and pickling brines.

🌿Flavor: Herbaceous, resinous, mildly bitter with a faint floral note
🍲Best Uses: Stocks, braises, bean pots, tomato sauces, pickling brines
🛒Buy: Whole dried leaves, olive-green to dark green, intact and uncrumbled
📦Store: Airtight opaque container, away from heat and light
⏱️Shelf Life: Whole dried leaves hold aroma well for 6-12 months

What Is bay leaf?

Bay leaf comes from Laurus nobilis, a tree native to the Mediterranean basin that has been cultivated and traded since antiquity.

It belongs to the Lauraceae family and is also called bay laurel, sweet bay, or hoja de laurel in Spanish-speaking kitchens.

The leaves are oval and pointed, leathery in texture when fresh, and dry to a stiff, papery structure. Fresh leaves are deep green and glossy; dried ones shift to olive or muted green.

Two main forms appear in cooking:

  • 🌿 Dried bay laurel (Laurus nobilis) - the standard Western variety, sold whole or ground, used in European and Latin American cooking
  • 🌱 Indian bay leaf (tejpat) - from a different species (*Cinnamomum tamala*), with three distinct veins and a flavor closer to cinnamon and clove; used heavily in South Asian biryanis and curries

Unless a recipe specifies tejpat, the ingredient in question is almost always Laurus nobilis. The two are not direct substitutes - their flavor profiles differ significantly despite sharing the same common name in some markets.

What Does bay leaf Taste Like?

bay leaf - What Is Bay Leaf

Raw bay leaf tastes almost medicinal - sharp, slightly bitter, with a resinous edge that's more warning than welcome. That changes entirely once heat and time enter the equation.

Sensory SnapshotModerate Intensity
👅 Flavor
herbaceousresinousmildly bitterfaintly floral
✋ Texture
leathery (fresh)papery and brittle (dried)
👃 Aroma
menthol-tingedeucalyptuscamphor-like

Simmered in liquid for 45 minutes or more, the leaf releases eucalyptol and cineole - the essential oils responsible for its menthol-adjacent quality - into the broth.

The result is an aromatic undertone that reads as "depth" rather than any identifiable flavor.

Think of it as a restrained cross between oregano and eucalyptus, with a bay-specific resinous note that neither herb produces alone.

Fresh leaves are more pungent and slightly more bitter than dried; dried ones develop a softer, more rounded quality over time.

Watch Out
Bay leaf is fibrous and has sharp edges when dried. Always remove whole leaves before serving - swallowing one is uncomfortable and potentially harmful.

How to Use bay leaf

Bay leaf earns its place in slow-cooked, liquid-heavy preparations where it has time to release its oils. It doesn't work as a finishing herb or a garnish - heat and time are non-negotiable.

How Bay Leaf Is Used
MethodBest ForTip
🍲 Long simmerStocks, braises, bean pots, tomato sauceAdd at the start; remove before serving or straining
🌿 Bouquet garniFrench stews, court-bouillon, pot-au-feuTie with thyme and parsley stems; easy to pull out as one bundle
🫙 Pickling brineSavory preserves, pickled vegetables, canning jarsOne or two leaves per jar; pairs well with black peppercorns and garlic
🧈 Oil/butter infusionSautéed aromatics, rice pilaf, risotto baseSteep leaf in warm fat for 2-3 minutes before adding vegetables
🔥 Lightly crushedSpice rubs, marinades, adoboCrack the leaf to expose more surface area and amplify release

In Mediterranean cooking - particularly Italian and Greek - bay leaf appears in nearly every slow sauce and braise.

French cuisine formalized its role through the bouquet garni, where it works alongside thyme and rosemary (if your rosemary runs out, replacements for rosemary that hold up in a braise are worth knowing).

Latin American kitchens use it in adobos and long-cooked stews, while Indian cooks favor tejpat for biryani and dal.

Pairing-wise, bay leaf integrates best with tomatoes, beef, lamb, beans, lentils, garlic, and onion.

A tomato sauce simmered with one or two bay leaves for an hour develops a backbone that would otherwise require more acidity or salt - though if you're adjusting the sauce itself, tomato sauce swaps that work cover how different bases behave under long cooking.

Golden Rule
One large bay leaf or two small ones is enough for most pots. More doesn't mean more flavor - it means more bitterness.
Try It In
🥗Burmese Tea Leaf Salad (Lahpet Thoke)See how fermented leaf flavors build depth in a fresh context→🌿Thai Miang Kham Leaf WrapsA contrast in how aromatic leaves work raw versus cooked→

How to Buy and Store bay leaf

At the store, look for whole dried leaves that are olive-green to dark green, intact, and uncrumbled. Gray-brown, dusty, or heavily broken leaves have already lost most of their essential oils - they'll add very little to your pot.

Best Pick
Whole dried bay leaves over ground. Ground bay loses potency within 2-3 months; whole leaves stay aromatic for up to a year.

Fresh bay leaves are worth buying if available - they're more pungent and work well in shorter cooks. Store them wrapped in a damp paper towel inside a sealed bag in the fridge; they'll hold for one to two weeks.

For dried leaves, an airtight, opaque container away from heat and direct light is the standard approach.

A full breakdown of how long bay leaf keeps under different storage conditions covers the specifics, but the short answer is: dried whole leaves at 6-12 months, ground bay at 2-3 months, fresh at 1-2 weeks.

Start With the Stock

Bay leaf is one of those ingredients best understood through a simple test: make a pot of chicken stock twice - once with bay leaf, once without.

The difference won't be obvious, however removing it from your regular rotation will be.

If you're new to using it, start with one leaf in a bean soup or tomato sauce and go from there.

Anyone branching out from standard bay laurel should understand what replacements for bay leaf actually replicate - because none of them do it exactly.

Frequently Asked Questions

Are bay leaves edible?

Not in the practical sense. Bay leaves are safe to ingest but their fibrous, leathery structure doesn't break down during cooking. The stiff, sharp edges can irritate the throat or digestive tract, so always remove them before serving.

How long should bay leaf simmer in soup?

At least 30-45 minutes for noticeable flavor release. One to two hours is better for stocks and braises. Adding bay leaf in the final 10 minutes contributes almost nothing.

Can you use fresh bay leaves instead of dried?

Yes, with adjustment. Fresh leaves are more pungent and slightly more bitter, so use one fresh leaf where a recipe calls for two dried. The flavor is sharper but the same aromatic compounds are at work.

What is the difference between Indian bay leaf and bay laurel?

They're different species entirely. Indian bay leaf (tejpat) comes from Cinnamomum tamala and tastes closer to cinnamon and clove. Bay laurel (Laurus nobilis) is resinous and eucalyptus-like - the two are not interchangeable.

Does bay leaf do anything in a short cook?

Very little. The essential oils in bay leaf require sustained heat to release fully. In cooks under 20 minutes, the leaf doesn't contribute enough to justify adding it.

What Is Cane Syrup? Taste, Uses & Regional Notes

March 28, 2026

You spot a jar of cane syrup on a regional grocery shelf - amber, thick, labeled with a Louisiana brand name you don't recognize - and you wonder whether it's just a fancier version of swapping out brown sugar or swapping out maple syrup that you already know.

What Is Cane Syrup

It isn't. Cane syrup occupies its own lane: a pourable, deeply caramelized sweetener with a raw-cane brightness that molasses loses and refined sugar never had.

QUICK SUMMARY

Cane syrup is an amber, viscous sweetener made by evaporating pressed sugarcane juice without full crystallization. It delivers deep caramel and toffee notes with a faint vegetal brightness - richer than maple, lighter than molasses. Use it as a spread, glaze, or baking sweetener in Southern and Caribbean cooking.

🍬Flavor: Caramelized sugar, toffee, mild vegetal cane brightness, soft bitter finish
🫙Texture: Viscous, smooth, and pourable with a light sticky mouthcoating
🍽️Best Uses: Biscuit spread, glazing pork, baking spice cakes, barbecue sauce base
⏳Shelf Life: Unopened up to 2 years; opened and refrigerated 6-12 months
🛒Buy It: Look for "pure cane syrup" with only cane juice on the label; avoid unlabeled molasses blends

What Is Cane Syrup?

Cane syrup starts as freshly pressed sugarcane juice, then gets cooked down until most of its water evaporates and its natural sugars concentrate into a thick, amber syrup.

Unlike refined white sugar or even brown sugar and its flavor profile (shaped by added molasses), cane syrup never reaches the crystallization stage - it stays liquid and retains the vegetal compounds of raw cane.

It goes by several names depending on region.

In Louisiana, you'll see it labeled simply as sugarcane syrup or evaporated cane syrup; in Puerto Rico and the Dominican Republic, the near-equivalent is called melado; some older Southern labels call it cane molasses, though that's technically a misnomer.

There are mild differences across brands and origins:

  • ⚫ Louisiana-style cane syrup - darkest and most intensely caramelized; Steen's is the benchmark brand
  • 🌿 Melado (Caribbean) - slightly lighter in color, sometimes less cooked, with a fresher cane note
  • 🍯 Light cane syrup - shorter cook time, paler amber, closer in flavor to raw sugarcane juice

What Does Cane Syrup Taste Like?

cane syrup - What Is Cane Syrup

Cane syrup lands somewhere between dark brown sugar dissolved into syrup and a mild, unsmoked molasses. The dominant note is caramelized sugar - warm, round, with a toffee pull - followed by a distinctly green, grassy brightness from the raw cane that molasses simply doesn't carry.

That vegetal edge is the defining characteristic. Understanding brown sugar and its flavor helps here: brown sugar has molasses added back in, which means more bitterness and less of that fresh-cane quality.

Cane syrup keeps both sides of the equation in play - sweetness and a faint earthiness - without the heavy, bitter finish that blackstrap molasses delivers.

Sensory SnapshotModerate Intensity
👅 Flavor
caramelized sugartoffeevegetal canemild bitter finish
✋ Texture
viscoussmoothmouthcoating
👃 Aroma
toasty caramelfresh-cut cane grass

Heat intensifies the caramel notes and softens the vegetal edge, which is why cane syrup works well in glazes and baked goods - cooking rounds it out without flattening it entirely.

How to Use Cane Syrup

Southern and Caribbean kitchens treat cane syrup as an all-purpose sweetener, and its moderate intensity means it adds depth without overtaking everything else in the dish.

In Louisiana cooking, it goes straight onto hot buttered biscuits or cornbread, where the syrup soaks in and the toffee notes bloom against the fat.

Golden Rule
Use cane syrup at a 1:1 ratio wherever a recipe calls for maple syrup or honey - the viscosity is similar enough that no adjustment is needed in most sauces and marinades.

For glazing, brush a thin layer over pork ribs or a roasted ham in the last 20 minutes of cooking. The syrup's natural sugars caramelize quickly, so watch the heat.

Folded into barbecue sauce, it contributes a vegetal sweetness that distinguishes it from plain sugar-based sauces.

Baking is where cane syrup earns the most ground. Swap it into gingerbread, spice cakes, or quick breads wherever the recipe calls for brown sugar dissolved in a liquid - the cane brightness pairs especially well with ginger, cinnamon, and black pepper. For a quick everyday use, stir a spoonful into oatmeal or grits for a toffee-forward morning bowl.

How Cane Syrup Is Used
MethodBest ForTip
🍯 SpreadBiscuits, cornbread, pancakesPair with salted butter to balance sweetness
🔥 GlazingRoasted ham, pork ribsApply in the last 20 minutes; watch for scorching
🎂 BakingGingerbread, spice cakes, quick breadsReplace brown sugar by dissolving; reduce liquid slightly
🥣 Stir-inHot grits, oatmeal, tea, café con lecheAdd after cooking to preserve fresh-cane aroma
🍖 MarinadeJerk-style pork, Caribbean preparationsCombine with lime juice and black pepper for balance

Avoid pairing cane syrup with delicate floral honeys or high-acid emulsions - the syrup's density can overwhelm mild flavors and seize in sharp-acid dressings.

If you need a swap in a recipe, the guide on swapping out cane syrup covers the closest options by use case.

Try It In
🍮Indian Gulab Jamun Rose Syrup BallsCane syrup's caramel depth works as a base for the soaking syrup→

How to Buy and Store Cane Syrup

Look for jars or tins labeled "pure cane syrup" with a deep amber color that pours freely when tilted.

The ingredient list should show only cane juice or evaporated cane juice.

Skip anything labeled just "molasses" without further specification - the taste of molasses is significantly more bitter, and the two aren't interchangeable.

Also check for added high-fructose corn syrup, which dilutes flavor and changes the texture.

Watch Out
Opened cane syrup stored at room temperature in a warm kitchen can begin surface fermentation within weeks. Refrigerate after opening - the syrup will thicken slightly when cold but returns to full pourability at room temperature.

Once opened, keep the jar tightly capped in the refrigerator. Full guidance on keeping cane syrup fresh covers the signs of spoilage and how climate affects the timeline.

  • 🏪 Where to find it - Southern grocery chains, Caribbean markets, or online; Steen's is the most widely distributed Louisiana brand
  • ❄️ Opened refrigerated - 6-12 months at consistent cold temperature
  • 🌡️ Opened pantry (warm climate) - 3-6 months; watch for clouding or off-smell
  • 📦 Unopened - up to 2 years in a cool, dark pantry

Start Here With Cane Syrup

New to cane syrup? Begin with the biscuit test - heat a biscuit, add salted butter, drizzle the syrup.

That single application shows you exactly what the ingredient does without any cooking technique getting in the way.

Shortcut
If a recipe uses both molasses and brown sugar together, cane syrup alone often replaces both - its flavor covers the middle ground between them without the heaviness of either at full strength.

Once you understand the flavor, move to glazing pork or baking a spice cake. Anyone already comfortable with molasses swaps that work will find cane syrup an intuitive next step - same family, cleaner profile.

Frequently Asked Questions

Is cane syrup the same as molasses?

No. Cane syrup is made by evaporating sugarcane juice before crystallization; molasses is the byproduct left after sugar crystals are extracted. Cane syrup is sweeter, lighter in bitterness, and retains a fresh vegetal note that molasses loses.

How sweet is cane syrup compared to maple syrup?

Cane syrup is slightly sweeter than pure maple syrup and more intensely flavored. Maple has a lighter, woodsy character; cane syrup's caramel and toffee notes are more forward and dense.

Can you substitute cane syrup for brown sugar?

Yes, with a small adjustment. Use ¾ cup cane syrup per 1 cup packed brown sugar and reduce other liquids in the recipe by about 3 tablespoons. The flavor is comparable - cane syrup adds slightly more vegetal brightness.

Does cane syrup ferment or go bad?

It can. Opened jars left at warm room temperature may develop surface mold or begin fermenting within weeks, especially in humid climates. Refrigerating after opening prevents this reliably.

Where can you buy authentic Louisiana cane syrup?

Steen's Pure Cane Syrup is the most available brand and ships nationally through major online retailers. Southern grocery chains stock it regionally; Caribbean markets often carry melado as a close equivalent.

What Is Campari? Taste, Uses & More (Aperitif Guide)

March 28, 2026

You spot a squat, ruby-red bottle on the liquor store shelf and wonder what that shade of crimson even tastes like. Campari is one of those bottles people buy once for a Negroni, then find themselves reaching for again and again - first in cocktails, then in pan sauces, then stirred into sorbet.

It sits in a category closer to Aperol than to whiskey, though its bitter intensity puts it in a league of its own.

QUICK SUMMARY

Campari is a bright-red Italian bitter apéritif with a bold bittersweet profile built on orange peel, aromatic herbs, and caramel sugar. It's the backbone of the Negroni and Americano, and holds up in kitchen applications from pan glazes to granita.

🍊Flavor: Bitter orange peel, herbal bitterness, caramelized sugar finish
🍹Best Uses: Negroni, Americano, Campari soda, pan glazes, granita
🏪Buying Tip: Clear ruby-red color, sealed cap, no cloudiness or fading
📦Shelf Life: Unopened: years; opened: 6-24 months before noticeable fade
⚠️Avoid With: Delicate green salads, milk-based custards without added sugar balance

What Is Campari?

Campari is a bitter apéritif liqueur invented by Gaspare Campari in Milan in the 1860s. It belongs to the amaro family - Italian bittersweet digestive and aperitivo spirits - though it's drunk before meals rather than after.

The exact recipe remains a trade secret, but the flavor comes from a proprietary blend of herbs, fruit peels, and botanicals steeped in alcohol and water. Bitter orange and a rhubarb-like herbal note are the most identifiable components.

The rhubarb character isn't rhubarb itself - it's the interaction of quinine-adjacent botanicals with citrus.

It also goes by Campari bitter, Campari aperitivo, and Campari Milano depending on the market. The ABV typically sits at 20-25%, lower than spirits like gin but higher than most wines.

There are no major variety splits - one standard Campari formula dominates globally - though pre-mixed Campari soda cans exist for convenience.

Best Pick
Standard Campari is the go-to for cocktails and cooking. Skip flavored or pre-mixed expressions - they add sweeteners and carbonation that throw off your balance in recipes.

What Does Campari Taste Like?

campari - What Is Campari

Campari is bitter first, sweet second. The bitterness hits immediately - dry, citrus-forward, with a quinine-like edge that coats the palate.

Then the sweetness follows: caramelized cane sugar rounds out the sharpness without fully canceling it. That tension between bitter and sweet is exactly what makes it irreplaceable.

Think of it as a much more aggressive version of Aperol - similar orange base, completely different intensity.

Sensory SnapshotStrong Intensity
👅 Flavor
bitter orange peelcaramelized sugarherbal bitternessquinine edge
✋ Texture
syrupyslick
👃 Aroma
zesty bitter orangedry aromatic herbs

Heat changes things. Reducing Campari concentrates its sugar and botanical notes while mellowing the alcohol sharpness, producing a thicker, more jam-like bitterness.

Over ice, it opens up - the citrus aroma lifts and the sweetness feels more prominent.

How to Use Campari

Campari earns its place in the cocktail glass first. The Negroni - equal parts gin, Campari, and sweet vermouth - is its most iconic home, where the bitterness anchors both the botanical gin and the wine sweetness.

The Americano replaces the gin with soda water, making a lower-ABV, more refreshing build. A simple Campari soda - just poured over ice with sparkling water - is Italian aperitivo culture in a glass.

In the kitchen, the same bitterness that balances cocktails works hard in savory applications. Deglazing a pan for grilled pork with Campari and stock produces a glossy, bittersweet sauce that complements fatty cuts.

Adding a splash to marinades for lamb or game introduces citrus-bitter notes that cut richness before the meat ever hits the heat. Blood orange and Campari are a natural pairing - both share bitter citrus DNA, and a reduced blood orange-Campari glaze works well on duck breast.

On the dessert side, Campari granita is a standout application. Reducing it with sugar and water, then freezing and scraping, produces a bright, intensely bitter ice that pairs with cream or prosecco.

How Campari Is Used
MethodBest ForTip
🍹 Stirred/BuiltNegroni, Americano, Campari sodaAlways use equal parts - Campari overpowers if you go heavy
🔥 ReductionPan glazes, citrus dessert saucesReduce by half to concentrate flavor and mellow alcohol
❄️ FreezingGranita, sorbetAdd more sugar than you think - freezing dulls sweetness perception
🥩 MarinadeLamb, game, porkUse sparingly - 2 tablespoon per cup of marinade is enough

Campari pairs well with sweet vermouth, gin, prosecco, dark chocolate, rosemary, and citrus zest. Skip it with delicate green salads - the bitterness overwhelms subtle leaf flavors - and avoid it in milk-based custards unless you add significant extra sugar to compensate.

Try It In
🥩Pork Tenderloin with Apple GlazeSwap part of the glaze with Campari for a bitter citrus edge→🫙Lamb Chops with Mint SauceAdd Campari to the marinade for bitter-citrus depth before grilling→🍝Rigatoni with Meat SauceA small deglaze splash adds unexpected bitter backbone to tomato-based meat sauce→

How to Buy and Store Campari

A good bottle is easy to spot. Look for clear, bright ruby-red liquid with no cloudiness or sediment - either signals light or heat damage.

The screw cap or cork should be fully sealed with no leaking or crust around the neck.

Watch Out
A faded or brownish-red color means the bottle was stored in direct light or heat. The flavor will be flat. Don't buy it.

Store upright in a cool, dark cabinet - no refrigeration required for an unopened bottle. Once open, reseal it tightly after every pour and consider keeping it in the refrigerator to slow aroma loss.

Campari's shelf life after opening runs 6-24 months before the botanical notes visibly fade, though it won't spoil or become unsafe.

Where to Start With Campari

If you've never used Campari, build a Negroni first. Equal parts gin, Campari, and sweet vermouth - stirred over ice and strained - is the clearest way to understand what the bitterness does and how much you can work with it.

From there, try a one-ingredient kitchen test: deglaze a hot pan with two tablespoons of Campari after searing pork. That single step shows you how heat tames the alcohol and concentrates the flavor in a way no cocktail can.

Shortcut
Not ready for the full Negroni? Pour Campari over ice with soda water in a 1:3 ratio. It's the lowest-commitment way to get a read on the flavor before committing to a cocktail build.

Frequently Asked Questions

What is Campari made of?

The exact recipe is proprietary. It contains alcohol, water, sugar, and a blend of herbs and fruit peels - bitter orange peel and quinine-adjacent botanicals are the most identifiable. Gaspare Campari's original 1860s formula has never been publicly released.

Is Campari bitter or sweet?

Primarily bitter, with a secondary sweetness from caramel sugar. The bitter citrus and herbal notes hit first; the sweetness follows to soften them. Neither cancels the other - that tension is the point.

How strong is Campari's alcohol content?

Standard Campari is 20-25% ABV depending on the market - lower than spirits like gin or whiskey, but stronger than most wines. The US version sits at 24% ABV.

Can you cook with Campari?

Yes - it works well in pan glazes, marinades, and granita. Heat reduces the alcohol and concentrates the bitter-citrus flavor. Use it in small amounts; even two tablespoons in a pan sauce registers clearly.

What can I use instead of Campari?

Aperol is the closest widely available option, though it's noticeably less bitter and sweeter. For non-alcoholic builds, check [Campari substitutes](https://forkliftkitchen.com/campari-substitutes/) - bitter orange bitters with a splash of pomegranate juice approximate the color and edge.

Coconut Milk Rice Porridge

March 28, 2026

Creamy coconut milk with soft rice grains that break apart on the spoon. That's what happens when you simmer jasmine rice slowly with full-fat coconut milk and just enough water to keep it loose.

Coconut Milk Rice Porridge served on a plate

The pot does most of the work. You stir every few minutes to prevent sticking and watch the texture thicken into porridge.

This works for light breakfasts when you want something warm and filling without eggs or toast. It also doubles as a soothing dessert after dinner.

QUICK SUMMARY

Coconut milk rice porridge cooks jasmine rice in coconut milk and water until creamy and thick. Gentle simmering and frequent stirring prevent the bottom from burning and the coconut milk from separating. Make this when you need a comforting breakfast or light dessert that feels intentional but requires minimal effort.

⏱️Time Reality: 35-45 minutes total, most of it hands-off simmering
🔥First Move: Rinse rice until water runs clear to remove excess starch
⚠️Watch Out: High heat causes separation and burnt bottoms-keep it low and stir often

Table of Contents

Toggle
  • Why This Recipe Works
  • What You'll Need
    • Ingredient Details
  • Ingredient Swaps
  • What to Serve With It
  • Store and Reheat
  • Frequently Asked Questions
  • Coconut Milk Rice Porridge
    • Method 
    • Tried this recipe?

Why This Recipe Works

Low heat and periodic stirring release the rice starch slowly, creating a creamy texture without breaking the grains too much. For a version that comes together quickly, this quick waffles recipe uses a similar gentle cooking approach with different ingredients.

Quick Reference
⏱️
Prep Time
5 min
🔥
Cook Time
30-40 min
⏰
Total Time
35-45 min
🍽️
Servings
4 servings
📊
Difficulty
Easy
🏷️
Category
Breakfast | Dessert
💡
Quick Tip
Simmer gently; stir often for creaminess
🎯
Best For
Weeknight | Soothing meal

Five things that make this work:

  • Short-grain rice releases more starch - jasmine or sushi rice creates the creamy texture you want, while long-grain stays too separated
  • Full-fat coconut milk provides richness - the fat content keeps the porridge silky instead of watery
  • Low heat prevents separation - simmering around 180°F keeps the coconut milk emulsified instead of breaking into oil and water
  • Stirring every five minutes - regular agitation prevents sticking and helps the rice break down evenly
  • Adding liquid gradually - you control the final thickness by adjusting water or coconut milk in the last ten minutes
Quick Tip
Cover the saucepan partially to control evaporation and keep the porridge from thickening too fast.

What You'll Need

Ingredients for Coconut Milk Rice Porridge

The rice type matters more than the brand. We keep a batch ready for nights like this - this quick salad dish pairs well when you need something fresh alongside warm porridge.

🍜
Rice Base
  • 1 cup white rice (jasmine or sushi)
  • 1 can (13.5 oz) full-fat coconut milk
  • 3 cups water
🌶️
Seasonings
  • ½ teaspoon salt
  • 2-3 tablespoon sugar (palm or white)
🧄
Optional Aromatics
  • 1-inch piece fresh ginger (sliced)
  • 2-3 pandan leaves (tied in knot)

Ingredient Details

  • White rice (jasmine or sushi)
    Rinse under cold water until the water runs clear, about 2-3 minutes, to remove excess surface starch that causes gummy texture
  • Full-fat coconut milk
    Shake the can before opening to recombine separated cream and liquid; avoid light coconut milk which produces thin, watery porridge
  • Water
    Use the amount as a starting point and adjust in the last 10 minutes based on how thick you want the final porridge
  • Salt
    Add early to balance the coconut sweetness; start with less and adjust at the end since you can always add more
  • Sugar
    Palm sugar adds caramel depth, but white sugar works fine; add at the end so you can control sweetness level after tasting
  • Ginger (optional)
    Slice thinly and add at the start for warming flavor; remove before serving or leave in for stronger ginger taste
  • Pandan leaves (optional)
    Tie the leaves in a knot to release aroma without shredding into the porridge; remove before serving for clean presentation

Ingredient Swaps

Brown rice needs 15-20 more minutes and more liquid, but it adds nutty flavor if you have the time. For a version that comes together quickly, homemade coleslaw recipe works as a fresh contrast when serving this for brunch.

Four swaps that work:

  • Short-grain brown rice instead of white rice - adds whole grain nutrition and nuttier flavor but requires longer cooking time and more liquid to soften completely
  • Maple syrup instead of sugar - dissolves slower so add it earlier in the cooking process; use slightly less since it's sweeter than white sugar
  • Coconut water instead of plain water - increases coconut flavor and adds natural sweetness, so reduce the added sugar by half
  • Vanilla extract instead of pandan leaves - use ½ teaspoon at the end of cooking for aromatic sweetness without the herbal notes

Almond Milk

Works for: dairy-free diets when coconut flavor isn't critical

Skip if: you want traditional creamy richness and coconut taste

Instant Rice

Works for: quick meals when you need porridge in 15 minutes

Skip if: you want properly creamy texture since instant rice lacks starch

Rice Cooker Method

Works for: hands-off cooking when you need to multitask

Skip if: you want precise control over thickness and texture

Instructions

You need 35-45 minutes with most of it hands-off. We keep a batch ready for nights like this - a creamy homemade side adds texture contrast when the porridge feels too simple on its own.

  1. Rinse the rice under cold water in a fine mesh strainer until the water runs clear, about 2-3 minutes. Shake off excess water and transfer rice to a medium saucepan.

  2. Add coconut milk, water, salt, and optional ginger or pandan leaves to the saucepan with the rice. Stir once to combine, then bring to a gentle simmer over medium heat without stirring.

  3. Once simmering, reduce heat to low and cover the pan partially with the lid. Stir every 5 minutes with a wooden spoon, scraping the bottom to prevent sticking, for 25-30 minutes total.

  4. Check texture after 25 minutes - the rice should be soft and breaking apart with a creamy but still pourable consistency. Add warm water or coconut milk 2 tablespoons at a time if it's too thick, or simmer uncovered to thicken if needed.

  5. Remove from heat, discard ginger slices or pandan leaves, then stir in sugar to taste. Let the porridge rest off the heat for 5 minutes before serving to allow the texture to set slightly.

Golden Rule
Keep the heat low enough that you see gentle bubbles, not a rolling boil, to prevent the coconut milk from separating into oil and water.

What to Serve With It

Sweet porridge needs textural contrast to keep each bite interesting. For more complete breakfast ideas, easy chicken meal planning covers similar morning combinations with different protein options.

Side Dish Prep Why It Works How to Serve
Fresh mango slices Easy Bright acidity cuts through creamy coconut richness Arrange slices on top just before serving
Toasted shredded coconut Easy Adds crunchy texture and intensifies coconut flavor Toast in dry pan 2-3 minutes, sprinkle warm
Crushed peanuts Easy Provides nutty contrast and satisfying crunch Chop coarsely and scatter over individual bowls
Palm sugar syrup Medium Deep caramel notes add complexity to mild sweetness Drizzle 1-2 teaspoons over each serving
Candied ginger bits Easy Spicy-sweet contrast balances creamy porridge Chop finely and sprinkle sparingly on top

Three ways to serve it:

  • Breakfast bowl - top with sliced banana, toasted coconut, and a drizzle of honey for a complete morning meal
  • Light dessert - serve warm in small bowls with mango slices and crushed peanuts for a Southeast Asian-style sweet
  • Savory variation - skip the sugar, add fried shallots and a soft-boiled egg on top for a different flavor direction
Best Pick
Fresh tropical fruit works better than dried since it adds moisture and acidity that balances the rich coconut base.

Store and Reheat

Porridge thickens in the fridge overnight, so you'll need to loosen it when reheating. Rich mains need something to cut through, and a creamy homemade potatoes recipe does exactly that when you want a more substantial breakfast spread.

Method Time Best For
🍳 Stovetop 5-7 min Even reheating with best texture control; add liquid and stir constantly
📦 Microwave 2-3 min Single servings when you're in a rush; stir halfway through
🔥 Oven 10 min at 300°F Batch reheating in oven-safe dish; cover with foil and stir once

For best results when storing:

  • Cool porridge completely at room temperature before refrigerating - hot porridge creates condensation in the container that makes the texture watery
  • Store in shallow airtight containers - spreads the porridge thin for faster cooling and even reheating later
  • Add 2-3 tablespoons water or coconut milk when reheating - thickened porridge needs extra liquid to return to creamy consistency
  • Reheat gently and stir frequently - high heat causes the coconut milk to separate; keep it low and stir every 30 seconds
  • Freeze in portions if storing longer than 4 days - individual servings thaw and reheat faster than a large batch

Frequently Asked Questions

How long to cook coconut milk rice porridge on stovetop?

Cook for 30-40 minutes total at a gentle simmer. The rice needs 25-30 minutes of covered simmering with stirring every 5 minutes, plus 5 minutes resting off heat before serving.

Can I make coconut milk rice porridge ahead and reheat?

Yes, store it in the fridge for 3-4 days in an airtight container. Reheat on the stovetop with 2-3 tablespoons of water or coconut milk, stirring frequently, since it thickens considerably when cold.

What goes well with coconut milk rice porridge as toppings?

Fresh mango slices, toasted shredded coconut, crushed peanuts, and palm sugar syrup work best. For savory versions, try fried shallots and a soft-boiled egg instead of sweet toppings.

How do I know when coconut milk rice porridge is done cooking?

The rice grains should be completely soft and breaking apart when pressed with a spoon, with a creamy consistency that's thick but still pourable. If you can see individual grains that hold their shape, cook 5-10 minutes longer.

Can I use almond milk instead of coconut milk in this porridge?

Yes, but the texture will be thinner and less creamy since almond milk has lower fat content. Use unsweetened almond milk and add an extra 2 tablespoons to compensate, though the coconut flavor will be missing entirely.

Coconut Milk Rice Porridge served on a plate

Coconut Milk Rice Porridge

No ratings yet
Coconut milk rice porridge simmers jasmine rice in full-fat coconut milk and water until creamy and thick, with a gentle simmer and frequent stirring preventing burning. This dish works perfectly as a warm, filling breakfast or a soothing dessert with a silky texture from slow starch release and rich coconut milk.
Print Recipe Pin Recipe
Prep Time 5 minutes mins
Cook Time 35 minutes mins
Total Time 40 minutes mins
Servings: 4 servings
Course: Breakfast, Dessert
Cuisine: Southeast Asian
Ingredients Method Notes

Ingredients
  

  • 1 cup white rice jasmine or sushi, rinsed until water runs clear
  • 13.5 oz coconut milk full-fat, shake can before opening
  • 3 cups water adjust as needed to control porridge thickness
  • 0.5 teaspoon salt
  • 2.5 tablespoon sugar palm or white, add at end
  • 1 inch fresh ginger optional, thinly sliced
  • 2 leaves pandan leaves optional, tied in knot

Method
 

  1. Rinse the rice under cold water in a fine mesh strainer until the water runs clear, about 2-3 minutes. Shake off excess water and transfer rice to a medium saucepan.
    1 cup white rice
  2. Add coconut milk, water, salt, and optional ginger or pandan leaves to the saucepan with the rice. Stir once to combine, then bring to a gentle simmer over medium heat without stirring.
    13.5 oz coconut milk, 3 cups water, 0.5 tsp salt, 1 inch fresh ginger, 2 leaves pandan leaves
  3. Once simmering, reduce heat to low and cover the pan partially with the lid. Stir every 5 minutes with a wooden spoon, scraping the bottom to prevent sticking, for 25-30 minutes total.
    1 cup white rice, 13.5 oz coconut milk, 3 cups water, 0.5 tsp salt, 1 inch fresh ginger, 2 leaves pandan leaves
  4. Check texture after 25 minutes-the rice should be soft and breaking apart with a creamy but pourable consistency. Add warm water or coconut milk 2 tablespoons at a time if it's too thick, or simmer uncovered to thicken if needed.
    1 cup white rice, 13.5 oz coconut milk, 3 cups water
  5. Remove from heat, discard ginger slices or pandan leaves, then stir in sugar to taste. Let the porridge rest off the heat for 5 minutes before serving to allow the texture to set slightly.
    2.5 tbsp sugar

Notes

  • Keep heat low enough for gentle bubbles to prevent coconut milk separation and burning.
  • Stir porridge every 5 minutes to avoid sticking and promote creamy texture.
  • Adjust water or coconut milk in the last 10 minutes to achieve desired thickness.

Tried this recipe?

Let us know how it was!

How Long Does Boursin Cheese Last? [Storage Guide]

March 28, 2026

Leftover Boursin sitting in the fridge after a party is a common enough situation, and the question is always the same: how much longer is it actually good? Opened Boursin cheese lasts 7-10 days in the fridge, while an unopened foil-wrapped portion stays fresh for 3-4 weeks.

Can You Freeze Boursin Cheese

Much like salmon freezer burn explained applies to fish stored carelessly, poor wrapping is the fastest way to ruin a soft herbed spread.

Knowing the exact window - and how storage method shifts it - means less waste and better results.

QUICK SUMMARY

Opened Boursin lasts 7-10 days in the fridge and up to 1-2 months in the freezer - though freezing changes the texture permanently. Keep it tightly wrapped and away from the fridge door for the longest shelf life.

🧊Fridge (opened): 7-10 days in an airtight container
❄️Freezer: 1-2 months; use only in cooked dishes after thawing
⚠️Counter limit: 2-4 hours max; discard if left out overnight

How Long Does Boursin Cheese Last?

Boursin is a soft, cream cheese-based spread with herbs and garlic pressed into a compact foil-wrapped round. Its high moisture content means it's more sensitive to time and temperature than aged hard cheeses.

An unopened package respects its best-by date closely - the foil seal keeps air and bacteria out until you break it.

Once opened, the exposed herb layer begins to oxidize and the cream base absorbs surrounding fridge odors faster than most soft cheeses.

Boursin Cheese Shelf Life
MethodStateDurationNotes
🧊 FridgeUnopened3-4 weeksBest-by date applies; keep packaging fully intact
🧊 FridgeOpened7-10 daysWrap tightly; herbs lose freshness after one week
❄️ FreezerOpened1-2 monthsCooking use only; texture turns crumbly after thawing
🏠 CounterOpened2-4 hours maxFats separate and bacteria grow with prolonged exposure

The 7-10 day window for opened Boursin assumes correct storage. Kept in the fridge door - where temperatures swing with every opening - that timeline shortens noticeably.

How to Store Boursin Cheese

The original foil wrapping is useful but not airtight enough on its own after the first cut. Rewrap the cut face tightly in the original foil or fresh plastic wrap, then place the whole portion inside a small airtight container.

Golden Rule
Press a piece of parchment directly onto the surface of cut Boursin before sealing the container. It limits air contact and slows the top herb layer from drying out.

Position matters as much as packaging. Store Boursin on a middle or lower fridge shelf where temperature stays consistent - never in the door.

Those temperature swings dry out the cheese and accelerate spoilage faster than most soft cheeses.

  • 🧊 Fridge method - wrap in foil or plastic, then seal in a small airtight glass or plastic container
  • 🫙 Backup option - a resealable bag with air pressed out works if no container is available
  • 🚫 Avoid the fridge door - temperature fluctuation dries the cheese and shortens shelf life
  • 🌿 Herb darkening fix - if herbs darken but the cheese smells normal, trim that top layer and use within 2 days

If you're drawn to Boursin for its richness in cooking, the guide on using boursin cheese for creaminess covers the full range of applications that hold up under heat.

Can You Freeze Boursin Cheese?

Yes, with a firm caveat. Freezing works for Boursin, but it permanently changes the texture.

The fat and water in the cream base separate during freezing, and what thaws out is crumbly and grainy rather than smooth and spreadable.

This parallels what happens when freezing cream cheese - the emulsion breaks and the original silky texture doesn't return. Plan to use frozen Boursin only in hot applications where texture is irrelevant.

Shortcut
Portion Boursin into 2-3 tablespoon scoops before freezing so you thaw only what a single recipe needs - no refreezing required.
  1. Portion onto a lined tray - scoop 2-3 tablespoon portions onto a parchment-lined baking sheet and freeze until firm, about 2 hours
  2. Transfer to freezer bags - move the frozen portions into labeled airtight freezer bags, press out all air, and lay flat
  3. Thaw in the fridge - move a portion to the fridge 12-24 hours before use; do not rush with room-temperature thawing
  4. Use in cooked dishes only - stir into warm sauces, scrambled eggs, baked pasta, or warmed dips where the texture change disappears

Signs Boursin Cheese Has Gone Bad

Boursin spoils in predictable ways. Mold is the clearest signal - look for blue or green spots on the herb layer or cheese surface. Any visible mold means the whole portion goes in the bin, not just the affected area.

Signs It's Gone Bad
👀
VisualBlue/green mold spots · brown or yellow liquid pooling · darkened or slimy herb layer
👃
SmellSharp ammonia odor · sour rancid smell instead of fresh garlic-herb scent
✋
TextureExcessive watery separation · slimy surface · overly dry crumbly core
Watch Out
If Boursin was left out overnight, discard it regardless of how it looks or smells. Bacterial growth at room temperature doesn't always produce visible or smell-based clues.

Some liquid separation is normal after several days open - that's moisture releasing from the cream base. Excessive pooling of yellowed liquid alongside an off smell is the combination that confirms spoilage.

Getting the Most Out of Every Package

A few consistent habits make Boursin last reliably through its full window. None require special equipment.

  • Seal immediately after use - every extra hour of air exposure costs you spreadable texture
  • Freeze in portions - single-use scoops mean no thaw-and-refreeze cycle, which ruins texture entirely
  • Use thawed Boursin in hot dishes - scrambled eggs, baked pasta, and cream sauces mask the grainy texture completely
  • Know your substitutes - when Boursin runs out mid-recipe, [boursin cheese swaps that work](https://forkliftkitchen.com/boursin-cheese-substitutes/) covers the closest matches, and for richer cooking applications, options like [using goat cheese for creaminess](https://forkliftkitchen.com/goat-cheese-substitutes/) or [using cream cheese for creaminess](https://forkliftkitchen.com/cream-cheese-substitutes/) both hold up well under heat

Consistency matters most here. A portion stored properly every time lasts its full 7-10 days without compromise.

Frequently Asked Questions

Can you freeze Boursin cheese and still use it as a spread?

No. Freezing breaks the emulsion in the cream base, leaving the texture crumbly and grainy after thawing. Thawed Boursin works well in cooked dishes but won't spread cleanly on bread or crackers.

How long does opened Boursin last in the refrigerator?

Opened Boursin lasts 7-10 days in the fridge when wrapped tightly and stored in an airtight container. Keeping it in the fridge door shortens that window due to temperature fluctuations.

Does Boursin go bad if left out overnight?

Yes - discard it. Boursin is safe at room temperature for 2-4 hours maximum. Beyond that, bacterial growth reaches unsafe levels even if the cheese looks and smells fine.

Can you thaw Boursin quickly at room temperature?

Skip it. Room-temperature thawing accelerates the fat-water separation already caused by freezing, making the texture worse. Thaw in the fridge over 12-24 hours for the best result.

Is some liquid around Boursin normal, or does it mean it's spoiled?

A small amount of clear liquid separation is normal after a few days open. Yellowed or brown pooling liquid combined with an ammonia or sour smell confirms spoilage.

What Is Cachaca? [Taste, Uses & More]

March 28, 2026

Cachaça does something in a cocktail that swapping out vodka or reaching for plain white rum simply can't replicate - it brings a raw, grassy cane character that anchors a drink in a way that feels both earthy and alive.

What Is Cachaca

Brazil's national spirit has long lived in the shadow of rum in English-speaking markets, quietly powering one of the world's most iconic cocktails while remaining underappreciated as a cooking ingredient.

That's changing.

QUICK SUMMARY

Cachaça is a Brazilian sugarcane spirit distilled from fresh cane juice rather than molasses. Clear prata expressions are grassy and bright; aged ouro picks up wood spice. It's the backbone of the caipirinha and a capable cooking spirit.

🌿Flavor: Fresh sugarcane, grassy, earthy esters, subtle wood spice when aged
🍹Best Use: Caipirinha, marinades, flambéed fruit desserts, pan sauces
🛒Buy: Prata for cocktails, ouro for sipping and cooking; check 38-48% ABV
📦Storage: Upright, cool, dark place; best flavor within 1-3 years after opening
⏳Shelf Life: Indefinite for safety; unaged prata tastes best within 1-3 years opened

What Is cachaça?

Cachaça is Brazil's legally defined national spirit, distilled from fermented fresh sugarcane juice - not molasses, which is the key distinction separating it from most commercial rum.

Production is concentrated in Minas Gerais, São Paulo, and Rio de Janeiro, with hundreds of artisanal distilleries operating alongside large industrial producers.

Two main styles define the market. Prata (silver or white) is unaged or briefly rested, bottled clear with all its raw cane character intact. Ouro (gold or amber) spends time in wood - often Brazilian hardwoods like amburana or jequitibá, not always oak - picking up colour, tannin, and spice.

You'll sometimes see it labeled aguardente de cana or, incorrectly, "Brazilian rum." That second label is a misnomer worth ignoring.

If you've worked with rhum agricole from Martinique or Guadeloupe, you'll recognize the fresh-juice production method, though cachaça typically runs grassier and more funky.

  • 🌾 Prata (silver) - unaged or briefly rested; clear, bright, and vegetal
  • 🥃 Ouro (gold) - aged in wood barrels; amber colour, rounder, spiced
  • 🌿 Artisanal - pot-distilled, single-distillery expressions with more character
  • 🏭 Industrial - column-distilled, cleaner, milder; dominant in volume

What Does cachaça Taste Like?

cachaca - What Is Cachaca

Fresh sugarcane sweetness leads on the palate, but it's not the sticky sweetness of molasses-based spirits. It's greener - closer to biting into raw cane - with a grassy, slightly vegetal undercurrent and mild fruity esters that read almost funky on first encounter.

Unaged prata is the most nakedly expressive style, where that green-cane brightness dominates.

Aged ouro softens the edges considerably, trading some grassiness for vanilla, dried fruit, and wood spice depending on the barrel type. Amburana-aged cachaça in particular develops a distinctive cinnamon-like warmth that surprises drinkers expecting something closer to bourbon.

Sensory SnapshotModerate Intensity
👅 Flavor
fresh canegrassyearthy estersubtle vanilla (aged)
✋ Texture
light-bodiedslightly oily
👃 Aroma
cut sugarcanegreen grassmild fruity esters

Compared to unaged rum, cachaça is consistently grassier and more vegetal, with a brighter cane note that stays present even through muddled lime and sugar in a caipirinha.

How to Use cachaça

Cachaça's most famous role is the caipirinha - muddled lime wedges, granulated sugar, and a generous pour of prata over ice.

The grassy cane note holds its own against the acid, creating a balance that lighter spirits struggle to match.

It also works as a direct swap in daiquiri-style builds where rhum agricole is called for, though cooks looking for replacements for cachaça in a pinch will find the options limited but workable.

Outside cocktails, aged ouro earns its place in the kitchen.

How Cachaça Is Used
MethodBest ForTip
🍹 MuddlingCaipirinhas, citrus cocktailsUse prata; aged expressions muddy the citrus
🥩 MarinatingBeef, pork, chicken; adds cane sweetness and tenderizesCombine with lime juice, garlic, and brown sugar
🔥 FlambéingPineapple, banana, stone fruit dessertsOuro's wood spice complements caramelized fruit
🍳 DeglazingPan sauces for grilled meatsA small splash of ouro adds depth without sweetness
🎂 SoakingFruitcake, boozy syrups, baked-good glazesPairs with cinnamon and vanilla in the soak liquid

Cachaça pairs particularly well with lime and citrus, brown sugar, and tropical fruits like pineapple, passionfruit, and mango. Fresh herbs - mint and cilantro - work alongside it in cocktails and ceviches.

Aged expressions open up to vanilla, cinnamon, and even ginger when building sauces or reductions.

Watch Out
Avoid using cachaça with delicate raw white fish preparations or heavy dairy sauces - the spirit's earthy funk competes with subtle textures rather than complementing them.

Brazilian cooking is the natural home, but Latin American fusion and Caribbean-influenced coastal cuisines have adopted it readily. A shrimp ceviche with a small splash of cachaça and lime reads brighter than one made with plain citrus alone.

Try It In
🍗Air Fryer Chili-Lime Chicken WingsThe citrus-forward marinade is a natural fit for a prata splash→🍗Air Fryer Chili-Lime Chicken TendersCachaça in the marinade amplifies the lime and adds cane sweetness→🍤Air Fryer Chili-Lime ShrimpA touch of cachaça in the seasoning echoes classic ceviche brightness→

How to Buy and Store cachaça

At the bottle, look for two things: the style declaration (prata or ouro) and ABV. Traditional cachaça runs between 38-48%; anything outside that range or vaguely labeled "spirit" deserves skepticism.

Labels mentioning fresh juice or harvest date signal artisanal production, which generally means more distinct character.

Best Pick
For beginners: start with a mid-range prata for caipirinha builds, then try an amburana-aged ouro to understand how wood transforms the spirit's base cane character.

Storage is straightforward. Keep bottles upright in a cool, dark spot - heat and light degrade the volatile grassy notes faster in unaged expressions than in most spirits.

Seal the cap tightly after each pour. Understanding cachaca's shelf life matters most with delicate prata: best within 1-3 years of opening, though the bottle is safe indefinitely.

Start Here

Reach for prata if your goal is a caipirinha or any cocktail where grassy brightness should lead. Switch to ouro when you're deglazing, flambéing, or sipping straight - the wood rounds out what can feel raw in a cooking context.

  • 🍹 First cocktail - caipirinha with prata, fresh lime, and granulated sugar
  • 🥩 First kitchen use - add a splash to a beef or pork marinade with lime and garlic
  • 🔥 First upgrade - flambé sliced pineapple with ouro for an instant dessert

If the grassy funk of prata feels unfamiliar at first, try an aged expression instead - it bridges the gap more gently. Cachaça rewards curiosity.

Frequently Asked Questions

Is cachaça the same as rum?

No. Rum is typically distilled from molasses, a byproduct of sugar refining. Cachaça uses fresh sugarcane juice, which gives it a grassier, more vegetal flavor profile that molasses-based rum doesn't share.

How is cachaça made?

Fresh sugarcane is pressed, and the juice is fermented - often with wild or cultivated yeasts - then distilled, usually to between 38-48% ABV. Prata is bottled clear; ouro goes into wood barrels for aging.

What does cachaça taste like in a caipirinha?

The grassy cane sweetness holds its own against the lime's acidity, creating a rounder, earthier finish than a daiquiri made with plain white rum. The spirit's slight funk integrates rather than disappears.

Can you cook with cachaça?

Yes - aged ouro is the better cooking choice. It deglazes pan sauces, works in marinades, and flambés fruit desserts well. Prata's raw grassiness can turn sharp with heat, so save it for cold applications.

What's a good substitute if cachaça isn't available?

Rhum agricole is the closest match - same fresh-juice base, similar grassiness. White rum works in a pinch but loses the vegetal edge. You can also look at [alternatives to rum](https://forkliftkitchen.com/rum-substitutes/) for broader options depending on the recipe.

Chocolate Pots de Crème

March 28, 2026

When you need a dessert that works for dinner parties or a weekend treat that feels intentional, chocolate pots de crème delivers. One batch, minimal hands-on time, and enough richness to make espresso or fresh berries feel like part of the plan.

Chocolate Pots de Crème served on a plate

Bake the custards in a water bath and they set into silky, smooth chocolate without cracks. The egg yolks and cream do all the texture work.

Perfect for formal entertaining or romantic dinners when you want something impressive without multi-step prep.

QUICK SUMMARY

Chocolate pots de crème bake into silky, rich custards using egg yolks, heavy cream, and bittersweet chocolate. The water bath prevents curdling. Chill for at least 4 hours so the custard sets completely before serving.

⏱️Time: 15 min prep, 35-40 min bake, plus 4+ hours chilling
🔥Method: Temper egg yolks with hot cream, then bake in water bath at 325°F
⚠️Watch Out: Adding hot cream too fast curdles eggs - whisk slowly and strain before baking

Table of Contents

Toggle
  • Why This Recipe Works
  • What You'll Need
    • Ingredient Details
  • Ingredient Swaps
  • What to Serve With It
  • Store and Reheat
  • Frequently Asked Questions
  • Chocolate Pots de Crème
    • Method 
    • Tried this recipe?

Why This Recipe Works

The water bath keeps the oven temperature steady so the custard sets without curdling or cracking. Most people skip this because they think it's fussy, but it's the difference between silky texture and grainy disappointment. For a version that comes together quickly, simple bordeaux side dish uses similar techniques with different flavor profiles.

Quick Reference
⏱️
Prep Time
15 min
🔥
Cook Time
35-40 min
⏰
Total Time
50-60 min plus chilling
🍽️
Servings
6 servings
📊
Difficulty
Medium
🏷️
Category
Dessert
💡
Quick Tip
Bake in water bath for smooth custard
🎯
Best For
Entertaining | Weekend dessert

What makes this work:

  • Bittersweet chocolate (60-70% cocoa) provides deep flavor without excessive sweetness and sets the custard structure
  • Tempering egg yolks by slowly whisking hot cream prevents scrambling and creates smooth texture
  • Baking at 325°F in a water bath distributes heat evenly so custards set without cracking or curdling
  • Chilling for at least 4 hours allows the custard to firm up completely and develop full chocolate flavor
  • Straining the mixture before baking removes any lumps or air bubbles for a perfectly smooth finish
Quick Tip
Fill the water bath to half the ramekin height - enough to insulate but not so much it splashes during transfer to the oven.

What You'll Need

Ingredients for Chocolate Pots de Crème

High-quality chocolate matters here because it's the star ingredient. Cheaper chocolate contains stabilizers that can make the custard grainy or dull-tasting.

🍫
Chocolate Base
  • 6 oz bittersweet or semisweet chocolate (60-70% cocoa)
  • 1 cup heavy cream
  • ½ cup whole milk
🥚
Custard
  • 5 large egg yolks
  • ¼ cup granulated sugar
✨
Flavor
  • 1 teaspoon vanilla extract
  • Pinch of salt

Ingredient Details

  • Bittersweet chocolate
    Chop finely so it melts evenly when you add the hot cream - uneven pieces create lumps
  • Heavy cream
    Full-fat cream is non-negotiable for silky texture - reduced-fat versions produce watery custard
  • Egg yolks
    Use fresh eggs at room temperature so they temper more easily without curdling
  • Granulated sugar
    Whisk thoroughly with egg yolks until pale and slightly thick before adding cream
  • Vanilla extract
    Add after the custard mixture cools slightly to preserve the aromatic compounds
  • Salt
    A small pinch enhances the chocolate flavor without making the custard taste salty
  • Water bath
    Use hot tap water in the baking dish - it comes to temperature faster and keeps custards baking evenly

Ingredient Swaps

The chocolate type changes the sweetness level but not the technique. Most people reach for milk chocolate, but it makes the custard too sweet and doesn't set as firmly.

Common swaps:

  • Heavy cream → coconut cream - dairy-free with subtle coconut flavor; texture stays creamy
  • Granulated sugar → erythritol or monk fruit sweetener - cuts carbs for keto; slight cooling aftertaste
  • Bittersweet chocolate → semisweet or milk chocolate - sweeter, less intense chocolate; reduce sugar by 1-2 tablespoons
  • Whole milk → unsweetened almond milk - lighter, less creamy texture; dairy-free

Coconut cream

Works for: Dairy-free diets, tropical flavor pairing

Skip if: You want pure chocolate flavor without coconut notes

Milk chocolate

Works for: Sweeter palates, kid-friendly desserts

Skip if: You prefer deep, rich chocolate intensity

Almond milk

Works for: Dairy-free needs, cutting richness

Skip if: You want traditional silky, creamy texture

Instructions

The whole process takes about an hour of active time, then you wait while they chill. Tempering the eggs is the only tricky part - add the hot cream slowly and whisk constantly.

  1. Melt the chocolate. Chop 6 oz bittersweet chocolate finely and place in a heatproof bowl. Heat 1 cup heavy cream and ½ cup whole milk in a saucepan over medium heat until it just begins to simmer (3-4 minutes). Pour the hot cream mixture over the chocolate and let it sit for 1 minute, then whisk until completely smooth.

  2. Whisk the egg yolks. In a separate bowl, whisk 5 egg yolks with ¼ cup granulated sugar until pale yellow and slightly thick (about 2 minutes). This step aerates the yolks and dissolves the sugar.

  3. Temper the eggs. Slowly pour about ¼ cup of the warm chocolate mixture into the egg yolks while whisking constantly. Add the rest of the chocolate mixture gradually, whisking continuously to prevent the eggs from scrambling. Stir in 1 teaspoon vanilla extract and a pinch of salt.

  4. Strain and pour. Pour the custard through a fine-mesh sieve into a clean bowl to remove any lumps. Divide the mixture evenly among 6 ramekins (4-6 oz each). Place the ramekins in a deep baking dish and fill the dish with hot water until it reaches halfway up the sides of the ramekins.

  5. Bake and chill. Bake at 325°F for 35-40 minutes until the edges are set but the centers still jiggle slightly when you gently shake the pan. Remove the ramekins from the water bath and let them cool to room temperature, then cover and chill for at least 4 hours or overnight.

Watch Out
Custards continue cooking slightly as they cool - pull them when the centers are still wobbly or they'll end up grainy.

What to Serve With It

Rich chocolate needs something bright or crunchy to balance it. The custard works best when you pair it with contrasting textures or tart flavors that cut through the richness.

Side Dish Prep Why It Works How to Serve
Whipped cream Easy Lightness contrasts rich custard Dollop on top just before serving
Fresh raspberries Easy Tartness balances chocolate sweetness Scatter 4-5 berries over each custard
Toasted hazelnuts Easy Crunch and nutty flavor add texture Chop and sprinkle on top
Cocoa powder dusting Easy Enhances chocolate appearance and intensity Dust lightly through a fine sieve
Shortbread cookies Easy Buttery crispness pairs with creamy custard Serve 1-2 cookies on the side

Three ways to serve it:

  • For dinner parties: Top with candied orange peel and a drizzle of raspberry coulis for a restaurant-style presentation
  • For romantic dinners: Serve with a small espresso shot on the side to intensify the chocolate experience
  • For holiday meals: Add a sprinkle of sea salt flakes and a small sprig of fresh mint for visual contrast
Best Pick
Fresh raspberries add the perfect tart contrast without extra prep - just rinse and scatter them on top right before serving.

Store and Reheat

Chocolate pots de crème store well in the fridge for 3-4 days when you cover each ramekin tightly with plastic wrap. The custard texture softens slightly over time but stays smooth.

Method Time Best For
🍳 Stovetop Not recommended Risks curdling custard
📦 Microwave 15-20 sec at 50% power Quick warm-up with careful monitoring
🔥 Oven 10-12 min at 300°F Gentle warming of chilled custards

For best results when storing:

  • Cover each ramekin individually with plastic wrap pressed directly onto the custard surface to prevent skin from forming
  • Store ramekins upright in the fridge - tilting can cause uneven texture
  • Bring custards to room temperature for 15-20 minutes before serving for softer mouthfeel
  • Freeze custards up to 1 month in airtight containers, then thaw overnight in the fridge
  • Add fresh toppings like whipped cream or berries right before serving, not during storage

Frequently Asked Questions

Can I make chocolate pots de crème ahead and how long do they last?

Yes, make them up to 3 days ahead and store covered in the fridge. The texture actually improves after chilling overnight as the custard sets completely and flavors meld.

How do I know when pots de crème are fully baked but not overcooked?

Gently shake the baking dish - the edges should be set and the centers should jiggle like gelatin. If the whole custard is firm, it's overbaked and will turn grainy.

What can I serve alongside chocolate pots de crème?

Fresh raspberries, whipped cream, toasted nuts, or shortbread cookies work well. The tartness or crunch balances the rich, creamy custard.

Can I use milk chocolate instead of bittersweet chocolate in the recipe?

Yes, but reduce the sugar to 2-3 tablespoons since milk chocolate is already sweeter. The custard will be lighter in chocolate flavor and won't set as firmly.

What causes chocolate pots de crème to curdle and how do I prevent it?

Adding hot cream too fast scrambles the eggs. Temper slowly by whisking ¼ cup of hot cream into the yolks first, then add the rest gradually while whisking constantly.

Chocolate Pots de Crème served on a plate

Chocolate Pots de Crème

No ratings yet
Chocolate pots de crème are rich, silky custards made with bittersweet chocolate, egg yolks, and cream. Baking in a water bath ensures an even, crack-free texture while chilling develops the full chocolate flavor. This dessert is perfect for entertaining or special weekend treats with minimal hands-on time.
Print Recipe Pin Recipe
Prep Time 15 minutes mins
Cook Time 40 minutes mins
Total Time 55 minutes mins
Servings: 6 servings
Course: Dessert
Cuisine: French
Ingredients Equipment Method Notes

Ingredients
  

  • 6 oz bittersweet chocolate chopped finely
  • 1 cup heavy cream heated until simmering
  • 0.5 cup whole milk heated with cream
  • 5 large egg yolks at room temperature
  • 0.25 cup granulated sugar
  • 1 teaspoon vanilla extract added after tempering
  • pinch salt to enhance chocolate flavor

Equipment

  • Heatproof bowl For melting chocolate
  • Saucepan To heat cream and milk
  • Whisk For mixing egg yolks and custard
  • Fine-mesh sieve To strain custard before baking
  • Ramekins 4-6 oz size to hold custards
  • Deep baking dish For water bath during baking

Method
 

  1. Chop the bittersweet chocolate finely and place in a heatproof bowl. Heat the heavy cream and whole milk in a saucepan over medium heat until it just begins to simmer, about 3-4 minutes. Pour the hot cream mixture over the chocolate and let sit for 1 minute, then whisk until completely smooth.
    6 oz bittersweet chocolate, 1 cup heavy cream, 0.5 cup whole milk
  2. In a separate bowl, whisk the egg yolks and granulated sugar together until pale yellow and slightly thickened, about 2 minutes. This aerates the yolks and dissolves the sugar.
    5 large egg yolks, 0.25 cup granulated sugar
  3. Slowly pour about ¼ cup of the warm chocolate mixture into the egg yolks while whisking constantly. Gradually add the remaining chocolate mixture in a slow stream, whisking continuously to prevent the eggs from scrambling. Stir in the vanilla extract and a pinch of salt.
    6 oz bittersweet chocolate, 5 large egg yolks, 1 tsp vanilla extract, pinch salt
  4. Pour the custard through a fine-mesh sieve into a clean bowl to remove any lumps or air bubbles. Divide the mixture evenly among six 4-6 oz ramekins. Place the ramekins in a deep baking dish.
  5. Fill the baking dish with hot tap water until it reaches halfway up the sides of the ramekins. Bake the custards at 325°F (163°C) for 35-40 minutes until the edges are set but the centers jiggle slightly when shaken gently.
  6. Remove the ramekins from the water bath and let them cool to room temperature. Cover the ramekins and chill in the refrigerator for at least 4 hours or overnight to allow the custard to fully set and develop its flavor.

Notes

  • Use high-quality bittersweet chocolate for best flavor and smooth custard texture.
  • Temper the eggs slowly by whisking in hot cream gradually to avoid curdling.
  • Chill custards for at least 4 hours to allow firm setting and flavor melding before serving.

Tried this recipe?

Let us know how it was!

How Long Does Blue Cheese Last? [Storage Guide]

March 28, 2026

Buying a wedge of blue cheese and not knowing how long it will last is a familiar situation - and the answer depends more than you might expect on whether the cheese is opened, which variety it is, and how you wrap it.

Can You Freeze Blue Cheese

Much like how long cream cheese keeps, the fridge window shrinks fast once you break the seal.

Wrapping matters enormously here, and even storing parchment paper correctly plays into the system - because parchment is what keeps blue cheese breathing without drying out.

QUICK SUMMARY

Unopened blue cheese keeps 3-6 weeks in the fridge. Once opened, use it within 1-3 weeks, rewrapped in parchment and stored in a loose container. Frozen blue cheese lasts 2-3 months but works best in cooked dishes after thawing.

🧊Fridge (opened): 1-3 weeks, wrapped in parchment inside a loose container
❄️Freezer: 2-3 months; expect texture changes - use in cooked applications
📋Key rule: Label opened packages with date; softer varieties like Gorgonzola dolce trend shorter

How Long Does Blue Cheese Last?

Blue cheese shelf life varies by whether the wheel or wedge is sealed, which style you're storing, and how consistently cold your fridge runs. Firmer aged blues like Stilton or Roquefort naturally hold longer than creamy soft varieties.

Blue Cheese Shelf Life
MethodStateDurationNotes
🧊 FridgeUnopened3-6 weeksAged whole wheels and sealed retail packs last longer; check pack date and rind condition.
🧊 FridgeOpened1-3 weeksSofter styles like Gorgonzola dolce trend toward the shorter end; rewrap every time.
❄️ FreezerOpened2-3 monthsSafety is preserved but texture becomes crumbly or grainy - best for cooked dishes.
🏠 CounterAnyNot recommendedRoom temperature accelerates ammonia development and rind breakdown. Short room-rest before serving only.

The Penicillium roqueforti cultures already present in blue cheese continue to develop at room temperature. A brief rest on the counter before serving is fine; storing it there is not.

How to Store Blue Cheese

The wrapping method matters as much as temperature here. Blue cheese needs to breathe slightly - seal it too tight and moisture builds; leave it too open and it dries and picks up fridge odors.

Fridge: Keep blue cheese between 34-40°F (1-4°C). Rewrap cut surfaces in parchment or cheese paper first, then place in a loosely sealed plastic bag or a covered container. This setup allows minimal airflow without drying out the paste. Avoid cling film directly on the surface - it traps moisture and accelerates off-odors. Label the package with the opened date so you can track the shorter fridge window accurately.

Counter: Only acceptable for a 30-60 minute rest before serving. Beyond that, ammonia compounds build quickly and the rind deteriorates.

Just as storing feta cheese correctly hinges on keeping it submerged and sealed, blue cheese storage depends on finding the right balance between coverage and airflow.

Golden Rule
Rewrap blue cheese in fresh parchment every time you use it. Reusing the same wrap builds moisture and speeds spoilage.

Can You Freeze Blue Cheese?

Yes - but with clear expectations. Freezing blue cheese preserves safety for 2-3 months, however texture will change. Expect the paste to become crumbly, grainy, or slightly dry after thawing.

Creamy varieties will separate more. This makes frozen blue cheese best suited for sauces, baked dishes, dressings, and anything where texture is cooked out anyway.

  1. Crumble or cube the cheese into portions sized for one recipe - don't freeze a full wedge if you'll only need small amounts.
  2. Wrap tightly in parchment, then double-wrap in heavy-duty foil or vacuum-seal to prevent freezer burn.
  3. Label with the date and place toward the back of the freezer where temperature stays most stable.
  4. Thaw overnight in the fridge inside its wrapped container; use within 3 days and do not refreeze.

Avoid freezing whole soft blues intended for fresh crumbling on salads - the texture collapses and won't recover. Fresh crumbles for salads should always come from a refrigerated wedge, not from previously frozen cheese.

Watch Out
Refreezing thawed blue cheese is not safe. Once it's thawed, use it within 3 days - no exceptions.

Signs Blue Cheese Has Gone Bad

Reading spoilage on blue cheese is trickier than with most dairy because the blue-green Penicillium veins are supposed to be there. The problem is confusing those intentional molds with genuine spoilage growth.

Signs It's Gone Bad
👀
VisualFuzzy pink, orange, or black mold (beyond expected blue-green veins) · Sticky or slimy rind surface · Soggy texture on wedges · Darkened, sunken rind or murky pooling liquid
👃
SmellSharp ammonia odor · Putrid sour smell distinct from the normal pungent, tangy aroma
✋
TextureExcessive sliminess or complete sogginess of paste · Crumbly cheese turned powdery and bone dry

For hard aged blues, small unexpected spots of pink or orange mold can be managed - cut at least 1 inch around and below the affected area. Discard soft blues entirely if contamination is visible.

When in doubt, don't taste to test - discard.

Getting the Most from Blue Cheese

A few habits separate cheese that lasts the full window from cheese that's wasted halfway through. These aren't complicated, just consistent.

  • 🧀 Keep the rind intact - the original rind protects interior flavor; only cut what you're serving immediately.
  • 📦 Use a dedicated container - blue cheese odor is strong enough to transfer to other dairy in the fridge.
  • 🍋 Stretch smaller amounts - acid-based dressings with vinegar or lemon, or a drizzle of honey, extend a small wedge across more uses.
  • ❄️ Reserve frozen blue cheese for cooking - [using blue cheese for creaminess](https://forkliftkitchen.com/blue-cheese/) in sauces or pasta is where thawed portions perform well.

If you're running low and need a substitute, blue cheese stand-ins like aged Gorgonzola or strong feta can cover some applications.

For occasions where blue cheese is just one component of a spread, pairing ideas for blue cheese help you use up a wedge before it turns.

Similarly, goat cheese in dairy recipes shows how tangy soft cheeses can stand in when a softer texture is needed.

Shortcut
Crumble what you need right before serving and return the wedge to the fridge immediately - every extra minute at room temperature counts against shelf life.

Frequently Asked Questions

Is it safe to eat blue cheese with pink mold?

No. Pink mold is a spoilage organism, not the intended Penicillium culture. For firm aged blues, cut at least 1 inch around and below the spot. Discard soft or heavily contaminated pieces entirely.

Can you cut mold off blue cheese?

Only on hard, aged blues - cut at least 1 inch around and below any unexpected mold. Never cut and eat from soft blues like Gorgonzola dolce; discard the whole piece.

How long does blue cheese last in the fridge after opening?

Typically 1-3 weeks, rewrapped in parchment and stored in a covered container. Softer varieties like Gorgonzola dolce fall toward the shorter end of that range.

What is the best way to thaw frozen blue cheese?

Thaw it overnight in the fridge inside its wrapped container - never at room temperature. Use it within 3 days of thawing and don't refreeze.

Does the type of blue cheese affect how long it keeps?

Yes, significantly. Firm aged styles like Stilton and Roquefort keep longer than soft, creamy types. Higher moisture content in softer blues speeds spoilage once opened.

How Long Does Challah Bread Last? [Storage Guide]

March 28, 2026

Buying a fresh challah loaf on a Friday afternoon feels like a gift - that glossy braided crust, the pull-apart richness from the egg-enriched dough.

Can You Freeze Challah Bread

The problem is that this same egg content makes challah behave differently from a standard white sandwich loaf, and what makes challah bread distinct also affects how fast it dries, molds, and freezes.

Store it wrong, and a two-day-old loaf feels like it's been on the counter for a week.

This guide covers how long challah actually lasts, the best ways to store it, and exactly when to throw it out.

QUICK SUMMARY

Challah keeps 2-3 days at room temperature, up to 10 days in the fridge, and up to 3 months in the freezer. The egg-enriched crumb tolerates freezing well but stales quickly in the fridge without tight wrapping.

🍞Pantry: Whole loaf lasts 2-3 days in a paper bag or bread box
🧊Fridge: Up to 10 days whole, tightly wrapped to slow staling
❄️Freezer: Up to 3 months; slice before freezing for easiest use

How Long Does Challah Bread Last?

Challah's shelf life depends on how it's stored and whether the loaf has been sliced.

The egg wash coating slows surface drying on an intact braid, so a whole uncut loaf at room temperature outlasts a sliced one by about a day.

Refrigeration extends edible life but triggers starch retrogradation - the process where starch molecules realign and push out moisture, leaving the crumb firmer and drier.

That's why fridge challah often needs toasting to be pleasant, even when it's technically fine to eat.

For context on how this staling process plays out across enriched doughs, our guide on cooking bread perfectly breaks it down further.

Challah Bread Shelf Life
MethodStateDurationNotes
🏠 PantryWhole2-3 daysPaper bag or bread box; preserves crust sheen from egg wash
🏠 PantrySliced1-2 daysExposed crumb dries fast; use airtight wrap
🧊 FridgeWhole7-10 daysSlows mold but staling accelerates without tight wrap
🧊 FridgeSliced5-7 daysFirm crumb; best toasted for sandwiches
❄️ FreezerWhole3 monthsWrap tightly; egg-enriched crumb holds up well when sealed
❄️ FreezerSliced3 monthsFlash-freeze flat, then bag; best for French toast or toast-from-frozen

How to Store Challah Bread

Room temperature is the right default for a whole loaf you plan to finish within a few days. Plastic wrap at room temp is a trap - it softens the crust and creates a warm, humid environment that encourages mold faster than an unwrapped braid.

Golden Rule
If gifted fresh challah, leave it unwrapped for a few hours so the crust sets fully, then move to a paper bag or bread box. Wrapping too soon traps steam and softens the braid's signature sheen.

Here's how to store challah by method:

  • 🍞 Pantry (2-3 days) - Keep the whole braid in a paper bag or covered bread box; minimal airflow preserves crust texture without sogginess.
  • 🧊 Fridge (up to 10 days) - Wrap tightly in plastic wrap, then place in a resealable bag to limit moisture loss; expect a firmer crumb regardless.
  • ✂️ Sliced loaves - Wrap cut sides tightly with cling film and store in an airtight container; sliced challah dries significantly faster than whole.
  • ❄️ Freezer prep - Cool completely before wrapping; a warm loaf traps condensation that forms ice crystals and damages the soft crumb structure.

Day-old challah isn't a loss. Sprinkle it lightly with water and warm at 300°F for 8-12 minutes - the crumb revives and the glossy crust returns close to fresh.

Much like comparing milk wash vs egg wash options shows, the egg coating behaves distinctly under heat, which is why this reheat trick works so reliably on challah.

Can You Freeze Challah Bread?

Yes - challah freezes better than most bread types. The egg-enriched crumb has enough fat content to protect the soft interior from the worst effects of freezing, though it will lose some bounce after thawing.

Watch Out
Freezer burn on enriched bread develops an off, slightly rancid flavor from the fat in the dough. Our piece on salmon freezer burn explained details why fat content accelerates this - the same applies here. Seal out all air before freezing.

Follow these steps for best results:

  1. Cool completely - Fresh from the oven, wait until fully room temperature before any wrapping.
  2. Slice or keep whole - For slices, arrange in a single layer on a tray and flash-freeze for 1-2 hours before bagging.
  3. Wrap tightly - Whole loaves need plastic wrap first, then a layer of aluminum foil to block air and odor.
  4. Bag and label - Transfer slices to a heavy-duty freezer bag, press out air, and mark the date.
  5. Thaw correctly - Slices thaw at room temperature in 20-40 minutes; whole loaves need 2-4 hours, then 10-15 minutes at 300°F to refresh the crust.

Frozen slices are ideal for French toast - they absorb custard without falling apart, which a fresh soft slice sometimes can't manage.

Use within 3 months for best texture; challah is safe beyond that window but dryness and off-flavors increase noticeably.

Signs Challah Bread Has Gone Bad

Challah gives clear signals before it becomes unsafe. Mold is the most obvious: look for fuzzy green, white, or black spots anywhere on the braid or visible crumb.

Don't trim and eat - the egg-rich loaf holds internal moisture that lets mold threads spread well beyond visible patches.

Signs It's Gone Bad
👀
VisualFuzzy mold spots (green, white, black) · Wet or sticky patches where egg-wash gloss breaks down · Darkened interior streaks indicating internal mold
👃
SmellSharp sour or fermented odor · Rancid or egg-off aroma from degraded enriched fats
✋
TextureSlimy or wet spots in the crumb · Extremely hard, rock-like loaf from severe staling

A very firm, dry loaf is stale - not necessarily unsafe. However, any mold, sour smell, or unexpected sliminess means the loaf should go in the trash.

Getting the Most From Every Loaf

These four habits make a real difference with challah specifically - they address the egg content, the braid structure, and the bread's tendency to stale quickly once cut.

  • 🔪 Freeze single-serving slices - Pull exactly what you need for sandwiches or toast without thawing the whole loaf.
  • 💧 Reheat with a light water spritz - Revives the crumb and restores some gloss to the braided crust in under 15 minutes.
  • 🍳 Use slightly stale slices for French toast - Firmer crumb soaks custard better; frozen slices work especially well here.
  • 🏷️ Label every frozen bag with the date - Challah's egg fats turn stale-tasting faster than lean bread past the three-month mark.

If you're looking for ways to use the last of a loaf before it turns, pairing ideas from sides for challah bread offer options beyond the usual slice-and-butter.

And if you bake your own, the same storage rules apply - timing and wrapping matter just as much for homemade as for bakery-bought.

Frequently Asked Questions

Does refrigeration ruin challah?

Not ruin - but it accelerates staling through starch retrogradation, leaving the crumb noticeably firmer. Toast refrigerated slices to restore softness, and always wrap tightly to limit moisture loss before refrigerating.

Can you freeze homemade challah?

Yes, and it holds up well. Cool the loaf completely before wrapping in plastic then foil - warm loaves trap steam that forms damaging ice crystals. Freeze within a day of baking for best results.

Can you freeze sliced challah for French toast?

Yes - frozen slices are actually better for French toast than fresh ones. The firmer, slightly drier texture absorbs custard evenly without the slice falling apart during soaking or cooking.

What's the best way to thaw frozen challah?

Leave slices in the bag at room temperature for 20-40 minutes, then toast or warm in the oven. Whole loaves need 2-4 hours at room temperature, followed by 10-15 minutes at 300°F to refresh the crust.

Why does challah go stale faster than regular bread?

The enriched dough - eggs, oil, sometimes honey - creates a soft, open crumb that loses moisture quickly once cut. Starch retrogradation also speeds up in the fridge, making challah noticeably firmer than lean loaves stored the same way.

« Previous Page
Next Page »

Primary Sidebar

ForkliftKitchen recipe developer

Welcome!

Recipe Developer · 12+ Yr Kitchen Veteran

I'm the recipe developer behind this site, focused on practical, well-tested dishes and smart ingredient swaps. Every recipe is written to be clear, reliable, and easy to make at home.

650+ Recipes
12+ Yrs Exp.
3x Tested
Our Story →

As Featured In

Allrecipes

TASTE OF HOME

Food52

HUFFPOST

Yahoo! Life

Our Editorial Standards

  • ✓ Every recipe tested at least 3 times before publishing
  • ✓ Substitutes verified by real kitchen trials, not guesswork
  • ✓ Reviewed for accuracy by our editorial team
  • ✓ Updated regularly with seasonal info and reader feedback

Most Popular

  • Creamy Lemon Shrimp Linguine
    Creamy Lemon Shrimp Linguine
  • Creamy Garlic Mushroom Chicken
    Creamy Garlic Mushroom Chicken
  • Sesame Ginger Chicken Noodle Bowls
    Sesame Ginger Chicken Noodle Bowls
  • Baked Lemon Herb Fish Fillets
    Baked Lemon Herb Fish Fillets
  • Veggie Loaded Fried Rice
    Veggie Loaded Fried Rice
  • Spicy Garlic Shrimp Stir Fry
    Spicy Garlic Shrimp Stir Fry

Join 8,000+ Home Cooks

Weekly Kitchen Tips

Easy recipes, smart substitutes, and real cooking shortcuts — every Thursday.

Subscribe Free →


Side Dishes

  • What to Serve With Asian Salmon? 15 Best Side Dishes
    What to Serve With Asian Salmon? 15 Best Side Dishes
  • Side Dishes for Strawberry Spinach Salad
    15 Best Side Dishes for Strawberry Spinach Salad
  • Sides for Grilled Cauliflower Steaks to Complete the Meal
    15 Sides for Grilled Cauliflower Steaks to Complete the Meal
  • 15 Sides To Serve With Calabacitas
    15 Best Sides for Calabacitas – Mexican-Inspired Favorites


Substitutes

  • 7 Best Substitutes for Hot Sauce in Marinades & Stir-Fries
    7 Best Substitutes for Hot Sauce in Marinades & Stir-Fries
  • 9 Best Substitutes for Butter in Baking and Cooking
  • 7 Best Substitutes for Tagliatelle for Italian Pasta Dishes
    7 Best Substitutes for Tagliatelle for Italian Pasta Dishes
  • 7 Best Substitutes for Udon Noodles in Asian Stir-Fries
    7 Best Substitutes for Udon Noodles in Asian Stir-Fries


Browse by Topic

  • Side Dishes320
  • Substitutes785
  • Dinner163
  • Air Fryer77
  • Taste Profiles484
  • Food Storage123


Reader Reviews

★★★★★

"Finally a food blog that tells you exactly why a substitute works instead of just listing options."

— Sarah M., via email

★★★★★

"The side dish recommendations are so specific — saved my dinner party twice this month."

— James R., Pinterest comment

★★★★★

"I trust this site more than most because they actually test everything. You can tell."

— Priya K., blog comment

Footer

↑ Back to Top

Forklift Kitchen

We do the heavy lifting so you can enjoy the cooking. Tested recipes, smart substitutes, and perfect pairings—built for real home cooks.

Content

  • Recipes
  • Substitutes
  • What to Serve With
  • Blog

Company

  • About Us
  • Contact
  • Subscribe

Legal

  • Privacy Policy
  • Terms of Service

As an Amazon Associate I earn from qualifying purchases.

© 2026 Forklift Kitchen.

Rate This Recipe

Your vote:


A rating is required
A name is required
An email is required