• Skip to primary navigation
  • Skip to main content
  • Skip to primary sidebar
  • Recipe Index
    • Air Fryer
  • Side Dishes
  • Substitutes
  • About
  • Contact
  • Subscribe

ForkLiftKitchen

menu icon
go to homepage
  • Recipe Index
    • Air Fryer
  • Side Dishes
  • Substitutes
  • About
  • Contact
  • Subscribe
subscribe
search icon
Homepage link
  • Recipe Index
    • Air Fryer
  • Side Dishes
  • Substitutes
  • About
  • Contact
  • Subscribe
×

Blog

How Long Does Bechamel Sauce Last? [Storage Guide]

March 28, 2026

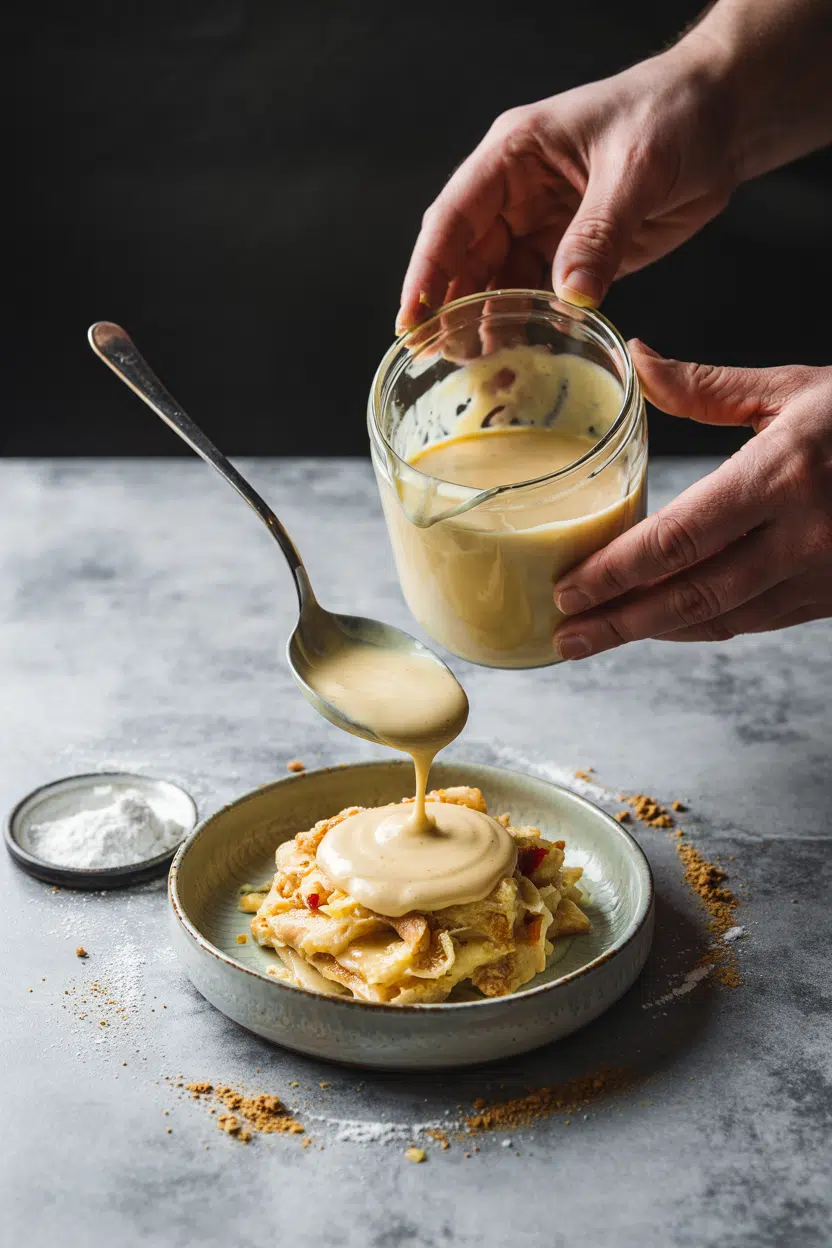
Storing bechamel sauce in a tall jar and sliding it straight into the fridge is one of the most common mistakes home cooks make - the sauce develops a rubbery skin, the fridge temperature spikes, and you're left with a lumpy mess by morning. Bechamel sauce, the classic roux-based white sauce built from butter, flour, and whole milk, has a shorter fridge life than most cooks expect, and its starch network makes it especially sensitive to temperature swings.
Can You Freeze Bechamel Sauce

Understanding the role bechamel sauce plays in dishes like lasagna and moussaka makes it worth storing properly rather than discarding.

The fat in bechamel comes from butter and whole milk - two ingredients with their own freshness windows, so keeping butter fresh and keeping whole milk fresh before you even start the sauce matters.

QUICK SUMMARY

Bechamel sauce keeps for 3-4 days in the fridge and up to 3 months in the freezer. Cool it quickly, press plastic wrap directly on the surface, and store in an airtight container. Expect some texture separation after freezing - whisking over low heat with a splash of milk fixes most of it.

🧊Fridge: 3-4 days in a sealed airtight container with surface wrap
❄️Freezer: 1-3 months; usable to 6 months with texture loss
⚠️Key Rule: Never refrigerate hot - cool in a shallow container first

How Long Does Bechamel Sauce Last?

Bechamel is a cooked dairy sauce, which means it carries the combined perishability of milk, butter, and a flour-thickened base. None of those ingredients are shelf-stable once heat and moisture have combined them into a sauce.

Bechamel Sauce Shelf Life
MethodStateDurationNotes
🧊 FridgeCooked3-4 daysCool within 2 hours; airtight container with surface wrap
❄️ FreezerCooked1-3 monthsBest quality; usable to 6 months with texture decline
🏠 CounterCooked2 hours maxServing window only - bacterial growth risk beyond this

The 3-4 day fridge window assumes the sauce was cooled promptly and sealed correctly. A sauce left uncovered overnight, even in the fridge, will develop a skin and expose the surface to bacterial contamination that shortens its safe window considerably.

The freezer range of 1-3 months is a quality guideline, not a safety cutoff.

Bechamel frozen past three months is often still safe to eat, however the starch network degrades and the sauce becomes increasingly grainy and watery even after whisking.

How to Store Bechamel Sauce

Speed of cooling is the single biggest factor in how well bechamel holds in the fridge. Transferring a hot batch directly into a deep jar traps heat at the center, raising the internal temperature for far longer than is safe.

Golden Rule
Spread hot bechamel into a wide, shallow container to cool quickly - then press plastic wrap directly on the surface before sealing. This prevents skin formation and limits mold exposure from the start.

Fridge: Pour the sauce into a shallow airtight container - glass or BPA-free plastic both work well - and press plastic wrap flush against the surface before closing the lid. Refrigerate within two hours of cooking and use within 3-4 days.

Freezer: Portion into single-meal amounts before freezing; repeated thawing and reheating damages texture and creates safety concerns. Flat freezer bags with squeezed-out air take up less space and thaw faster than rigid containers.

Counter: Two hours is the hard limit at room temperature. Beyond that, discard rather than refrigerate - bacteria multiply quickly in a warm dairy-flour mixture, and chilling doesn't reverse that growth.

If you're making a Mornay sauce variation with added cream, note that cream's shelf life in the fridge is roughly similar to milk - it won't meaningfully extend how long your finished sauce keeps, and it also won't cut it shorter.

Can You Freeze Bechamel Sauce?

Bechamel freezes well enough to be worth doing, though it won't come out of the freezer exactly as it went in.

The starch network formed by the flour-and-butter roux weakens at freezing temperatures, causing the sauce to separate into a grainy or watery phase upon thawing.

Shortcut
Make your bechamel slightly thicker than you need before freezing - thinning it post-thaw with a splash of milk is far easier than trying to thicken a sauce that's gone too loose.
  1. Cool completely - spread into a shallow container and let reach room temperature before freezing.
  2. Portion into servings - divide into ½-1 cup amounts so you thaw only what you need.
  3. Pack flat - transfer to resealable freezer bags, squeeze out all air, and lay flat in the freezer. For jars, leave at least 1 inch of headspace to allow for expansion.
  4. Label with date - note the date and portion size; use within 3 months for best results.
  5. Thaw overnight in the fridge - never thaw on the counter; slow, cold thawing preserves more of the sauce's structure.
  6. Reheat gently - warm over low heat, whisking constantly; add 1-2 tablespoons of milk per cup if the sauce looks dry or grainy. An immersion blender can re-emulsify mild separation.

Bechamel made with whole milk and a classic roux is easier to rescue post-thaw than versions with added eggs or cheese, which can curdle more severely.

Understanding comparing beurre manie vs roux options shows why a standard roux base gives you more flexibility when reheating a frozen sauce.

Signs Bechamel Sauce Has Gone Bad

Separation alone is not a spoilage sign - it's almost always a texture issue that reheating and whisking can fix. True spoilage in bechamel has specific markers that are hard to miss.

Signs It's Gone Bad
👀
VisualMold colonies (green, blue, or white patches) · Thick curdled lumps with clear watery separation · Unusual dark film beyond normal surface skin
👃
SmellSour or acrid odor · Yeasty smell distinct from mild cooked milk aroma
✋
TextureSlimy feel on stirring · Grainy curds that won't re-emulsify during gentle reheating

A light skin on the surface after refrigeration is normal and not a spoilage sign. That thin layer forms when surface moisture evaporates - pressing plastic wrap directly onto the sauce before storing prevents it entirely.

Watch Out
If your bechamel has an off smell, visible mold, or a slimy texture that doesn't change with reheating, discard the entire batch. Don't scrape mold off the surface and use the rest - the sauce is a soft, moist medium where contamination spreads below the visible layer.

Much like how long cream cheese keeps depends on how well you seal and handle it, bechamel's safe window tracks directly with how carefully it was stored from the start.

Getting the Most From Every Batch

Making a large pot of bechamel and storing it right pays off across multiple meals. These habits make the difference between a sauce that lasts the full four days and one that's borderline by day two.

  • 🧊 Portion before storing - single-meal amounts mean you never reheat the same batch twice.
  • 🌡️ Cool in a shallow container - surface area speeds cooling and keeps the sauce in the safe temperature zone.
  • 🥛 Whisk with milk when reheating - low heat and constant whisking restores creaminess; 1-2 tablespoons per cup is the right ratio.
  • 🔁 Blend for stubborn separation - a quick pass with an immersion blender while the sauce warms re-emulsifies what whisking alone can't.

If a recipe calls for a different thickener or you're out of swapping out all purpose flour options, the storage rules shift - rice flour-based sauces, for instance, freeze with less separation than wheat roux.

And if you'd rather skip bechamel entirely, exploring swapping out bechamel sauce for a given dish can sometimes simplify the storage question altogether.

Frequently Asked Questions

Can you freeze bechamel sauce and will it separate?

Yes, and yes - separation is expected. The roux's starch network weakens at freezing temperatures, producing a grainy or watery layer on thawing. Gentle reheating with constant whisking and a splash of milk restores most of the original texture.

Is separated bechamel safe to eat?

Separation by itself is a texture issue, not a safety one. As long as the sauce has no sour smell, mold, or slimy texture, it's safe - warm it gently and whisk to re-emulsify.

Does bechamel freeze better with cream or milk?

Cream-based versions tend to re-emulsify slightly more smoothly after freezing because of their higher fat content. However, the difference is modest - the roux ratio and thawing method matter more than the dairy choice.

How do you prevent skin when storing bechamel?

Press a sheet of plastic wrap directly onto the surface of the sauce before sealing the container. Direct contact eliminates the air gap where evaporation and skin formation occur.

Can I reheat bechamel sauce after freezing it more than once?

No - refreezing degrades both safety and texture significantly. Portion the sauce into single-use amounts before the first freeze so each portion is only thawed and reheated once.

What Is Capicola? [Taste, Uses & More]

March 28, 2026

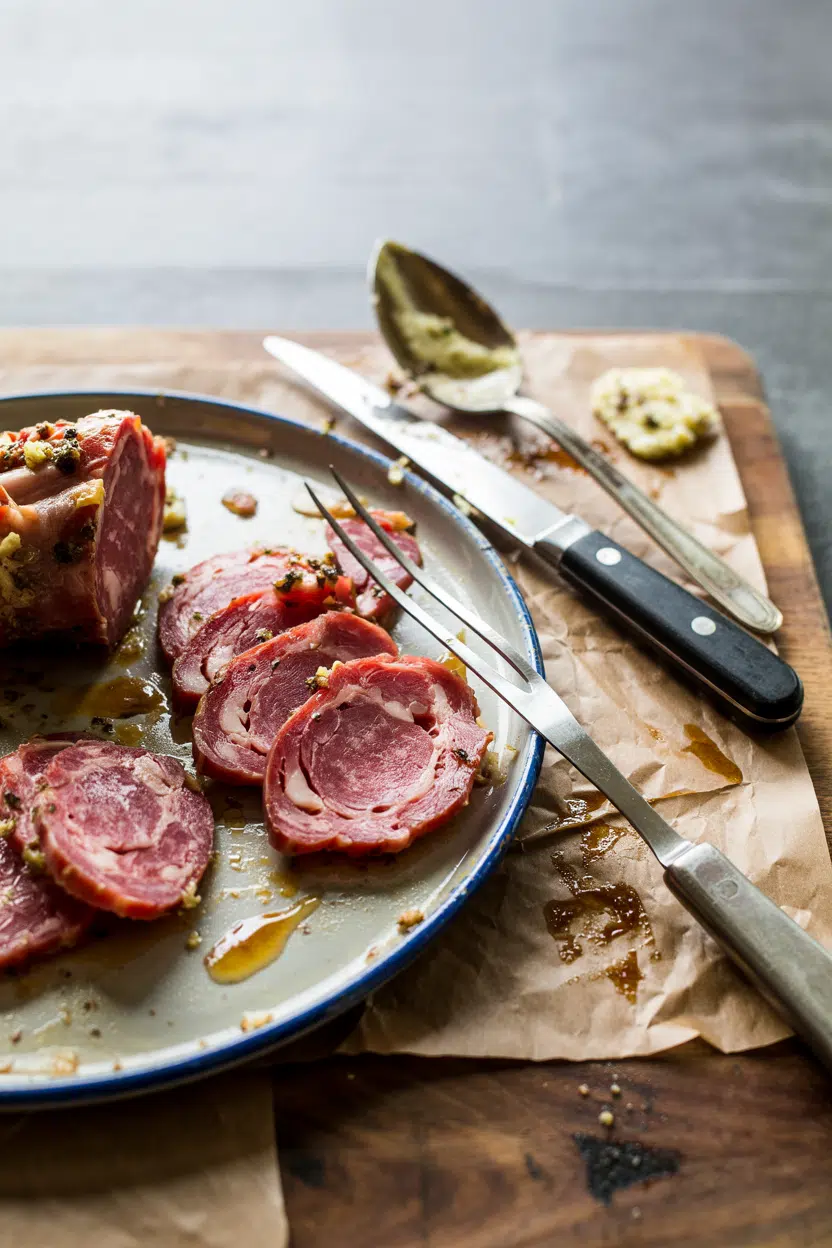
You spot it at the deli counter - deep cherry-red slices, laced with white fat, labeled "capicola" or sometimes "coppa" or the New Jersey-inflected gabagool. It looks like prosciutto but thicker, meatier, and more marbled.

What Is Capicola

Unlike leaner cured meats such as pancetta or guanciale, capicola comes from the pork neck and shoulder, which gives it a fat-to-muscle ratio that makes it richer and more intensely flavored than most dry-cured salumi on the counter.

QUICK SUMMARY

Capicola is a dry-cured pork salumi from Southern Italy, made from the neck and shoulder. It delivers rich umami with marbled fat, spice from black or red pepper, and a silky texture when sliced thin. Serve it on charcuterie boards, in Italian sandwiches, or torn into warm pasta.

🐷Category: Dry-cured pork salumi from pork neck and shoulder
👅Flavor: Rich umami, marbled fat sweetness, black or red pepper spice
🍽️Best Uses: Charcuterie boards, Italian subs, pizza topping, warm pasta
❄️Shelf Life: Sliced: 3-7 days opened; whole cured: weeks to months
🇮🇹Origin: Southern Italy, particularly Apulia and Calabria regions

What Is Capicola?

Capicola - also called capocollo, coppa, or capicolla depending on region - is a whole-muscle cured meat from Southern Italy, with roots in Apulia and Calabria. The name comes from capo (head) and collo (neck), describing exactly where the cut originates on the pig.

After trimming, the neck and shoulder muscle is rubbed with curing salt, black or red pepper, and regional spices like garlic and fennel, then stuffed into a casing and hung to age. The process takes weeks to months, concentrating flavor and firming the texture.

Two main styles exist: the dolce (sweet) version, seasoned with black pepper and mild spices, and the piccante (hot) Calabrese style, coated in chili pepper for a sharper, spicier finish.

Both share the same base cut and curing method - only the spice profile differs. Mortadella is another Italian cured pork product, though it's made from emulsified meat and bears almost no resemblance in texture or technique.

  • 🐷 Sweet (dolce) - black pepper, mild herbs, subtler spice
  • 🌶️ Hot (piccante / Calabrese) - coated in crushed red chili, more assertive heat
  • 🧂 Domestic versions - often milder, shorter aged, widely available sliced at deli counters

What Does Capicola Taste Like?

capicola - What Is Capicola

Capicola leads with deep pork umami - savory, slightly sweet from the intramuscular fat, with a lingering spice note depending on which style you buy.

The fat doesn't taste heavy; it melts into the meat and softens the salt, giving the whole slice a round, full quality.

Compared to prosciutto, capicola is meatier and fattier with more chew. It sits closer to coppa on the flavor spectrum - they're effectively the same product under different regional names.

Sensory SnapshotModerate Intensity
👅 Flavor
pork umamifat sweetnessblack pepper spiceherbaceous
✋ Texture
silky thin-slicedbuttery mouthfeelfirm but yielding
👃 Aroma
cured porkspicedearthy

When heat enters the equation, the fat renders slightly and the salt intensifies. Brief warming on a panini press or pizza oven makes it more aromatic - the spice crust becomes more pronounced without turning the meat tough.

How to Use Capicola

Capicola is most at home uncooked and sliced paper-thin, served alongside provolone or pecorino, olives, pickled peppers, and crusty bread on a charcuterie board. The fat-to-muscle ratio makes it satisfying in small quantities - a few slices carry real weight.

In sandwiches, it's the defining meat in an Italian sub and a core component of the New Orleans muffuletta, layered with sharp provolone and olive salad.

Folded into warm focaccia or pressed in a panini, the fat softens without fully rendering, keeping the slices tender and juicy.

Golden Rule
Don't fully cook capicola. The goal is gentle warming - enough for fat to soften, not enough to turn the slices chewy and dry.

On pizza, add capicola post-bake so it stays tender rather than crisping like bacon. Torn into hot pasta, it wilts just enough to release its fat into the sauce without disappearing into it.

Paired with ripe figs or melon, the sweet-salty contrast works the same way prosciutto does - only the porky depth is stronger.

How Capicola Is Used
MethodBest ForTip
🥗 Raw / SlicedCharcuterie boards, antipasto, melon pairingsSlice paper-thin for best texture and mouthfeel
🔥 Warmed / PressedPanini, focaccia sandwiches, muffulettaUse low-medium heat; fat softens but should not fully render
🍕 Post-Bake ToppingPizza, flatbreadsAdd after the oven, not before; prevents the meat from toughening
🍝 Torn into Hot DishesPasta, frittatas, warm saladsAdd off heat or in the final 30 seconds; residual warmth is enough

If you need a swap for a recipe, capicola swaps include prosciutto for a leaner result or speck for a smokier one. Avoid pairing capicola with delicate seafood - the cured pork flavor overpowers anything mild.

Try It In
🍗Air Fryer Lemon Pepper Chicken TendersWrap tenders with a capicola slice for a salty, spiced crust→🍖Air Fryer Lemon Pepper MeatballsFold torn capicola into the mix for deeper cured-pork flavor→

How to Buy and Store Capicola

At the deli counter, look for slices with deep cherry-red meat and even white marbling. Gray edges, wet surfaces, or slimy texture are signs of age or poor storage - pass on those.

Whole-muscle pieces from a reputable salumeria give you more control over thickness, which matters if you're slicing for a board.

Watch Out
Vacuum-packed sliced capicola looks sealed and safe, but check the sell-by date. Once opened, it deteriorates quickly - use it within 3-7 days and keep it tightly wrapped.

Store whole cured capicola wrapped in butcher paper or a clean tea towel in the fridge at 34-38°F. Vacuum-packed sliced capicola should stay sealed until use.

After opening, press out air before resealing. For a full breakdown of how long each format keeps, see our guide to capicola storage life.

Most commercial capicola contains nitrates and nitrites from curing salt - standard in dry-cured meats and responsible for both the color and preservation.

Start Here With Capicola

New to capicola? Buy the dolce (sweet) style first. Its milder spice lets the pork flavor and marbling speak clearly, and it works across more pairings without overwhelming anything on the board.

Once you're comfortable with the base flavor, try the Calabrese piccante version for heat, or seek out a whole coppa from a salumeria to slice to your preferred thickness.

Either way, keep the preparations simple - this is a cured meat that needs no cooking to earn its place on the plate.

Best Pick
For a first purchase, ask the deli counter for dolce capicola sliced at medium thickness. It's easier to pair and more forgiving than the spicy Calabrese style.

Frequently Asked Questions

Is capicola the same as coppa?

Effectively, yes - same cut, same curing method, different regional name. Coppa is the term used more widely in Italy, while capicola or capocollo appears more often in Southern Italian and Italian-American contexts.

What is the difference between capicola and prosciutto?

Prosciutto comes from the hind leg and is leaner, more delicate, and milder in flavor. Capicola comes from the neck and shoulder, making it fattier, meatier, and more intensely spiced.

How long does sliced capicola last in the fridge?

Unopened vacuum-packed slices keep 2-3 weeks. Once opened, use within 3-7 days stored tightly wrapped to limit air exposure.

Can you cook with capicola?

Yes, but keep heat minimal. Capicola works best added post-bake on pizza or torn into pasta off the heat. Full cooking toughens the meat and wastes the fat's silky quality.

Does capicola contain nitrates?

Most commercial capicola does, added via curing salt to preserve color and inhibit bacterial growth. Some artisan producers use celery powder as a natural alternative, though it still contains nitrates in a different form.

Breakfast Couscous with Dates and Almonds

March 28, 2026

Tender couscous grains that soak up sweetened milk, studded with chewy dates and crunchy toasted almonds. That's what happens when you steep fine couscous in warm spiced milk instead of plain water.

Breakfast Couscous with Dates and Almonds served on a plate

The pot does most of the work. You boil milk with cinnamon, pour it over couscous, cover for five minutes, then fluff.

This works for weeknight breakfast when you need something filling that doesn't involve standing over a stove. For a protein boost alongside, another great beans recipe adds savory balance to the sweet couscous.

QUICK SUMMARY

Breakfast Couscous with Dates and Almonds steeps fine couscous in spiced milk, then mixes in chopped dates and toasted almonds. The key is using boiling liquid and covering tightly so the grains hydrate evenly without turning gummy. Ready in 15 minutes with minimal active work.

⏱️Time Reality: 10 minutes hands-on, 5 minutes resting while covered
🔑First Critical Move: Boil milk completely before pouring over couscous grains
⚠️Watch Out: Under-toasted almonds taste bland-go until golden brown and fragrant

Table of Contents

Toggle
  • Why This Recipe Works
  • What You'll Need
    • Ingredient Details
  • Ingredient Swaps
  • What to Serve With It
  • Store and Reheat
  • Frequently Asked Questions
  • Breakfast Couscous with Dates and Almonds
    • Method 
    • Tried this recipe?

Why This Recipe Works

Fine couscous hydrates faster than oatmeal and stays fluffy if you use the right liquid ratio. One cup boiling milk per cup couscous creates tender grains that don't clump. We keep a batch ready for mornings when breakfast needs to happen fast-for a version that comes together quickly, this quick salad dish adds fresh crunch alongside.

Quick Reference
⏱️
Prep Time
10 min
🔥
Cook Time
5 min
⏰
Total Time
15 min
🍽️
Servings
4 servings
📊
Difficulty
Easy
🏷️
Category
Breakfast
💡
Quick Tip
Toast almonds for crunch, soak couscous hot
🎯
Best For
Weeknight | Brunch | Meal prep

What makes this method reliable:

  • Precise liquid ratio creates fluffy texture - one cup boiling milk per cup couscous hydrates grains without turning them mushy or leaving them crunchy
  • Toasting almonds develops nutty flavor - medium heat for 3-5 minutes with constant stirring turns raw nuts golden and aromatic instead of bland
  • Covering during rest traps steam - five minutes under a lid finishes hydration evenly so you don't get dry patches or soggy clumps
  • Chopping dates prevents clumping - quarter-inch pieces distribute sweetness throughout instead of leaving sticky date masses
  • Adding butter after cooking keeps grains separate - stirring in fat at the end coats individual grains so they stay fluffy instead of sticking together
Quick Tip
Add cinnamon directly to the milk before boiling so the spice infuses every grain instead of clumping on top

What You'll Need

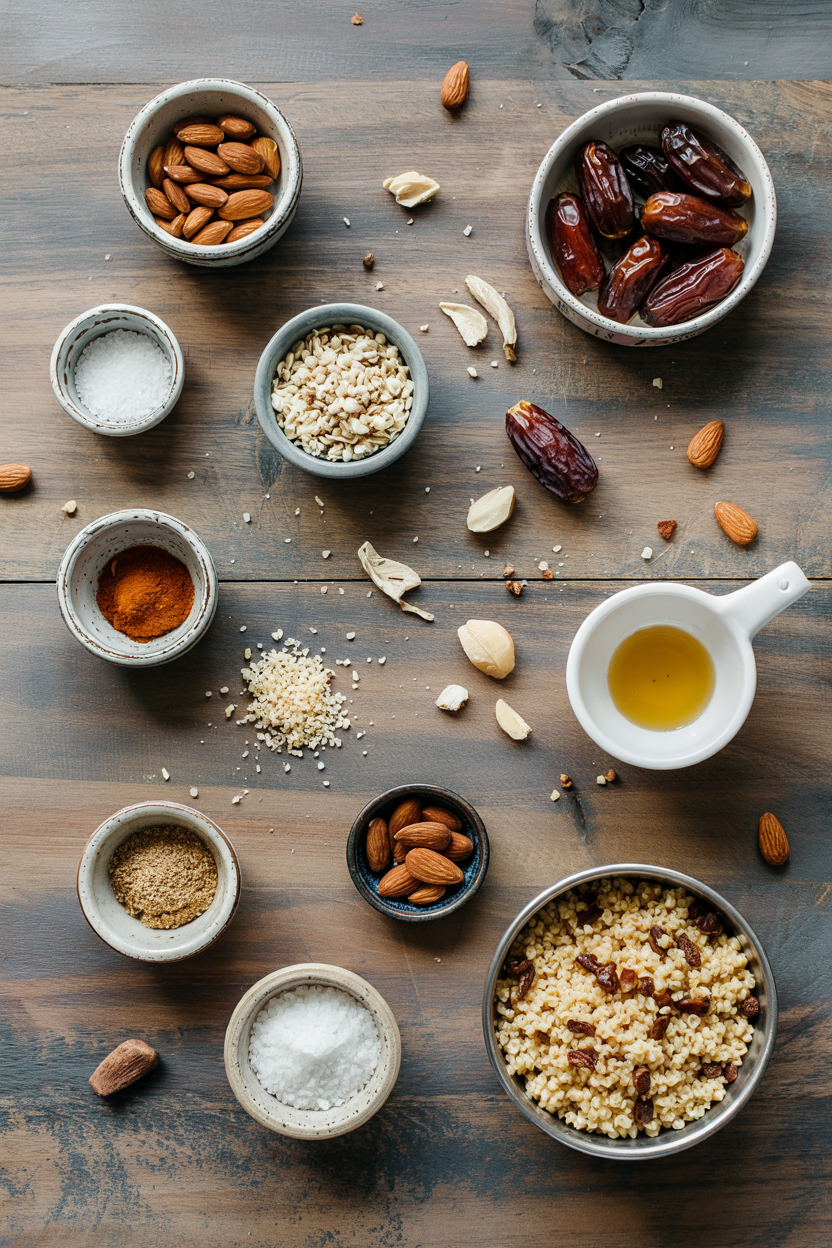
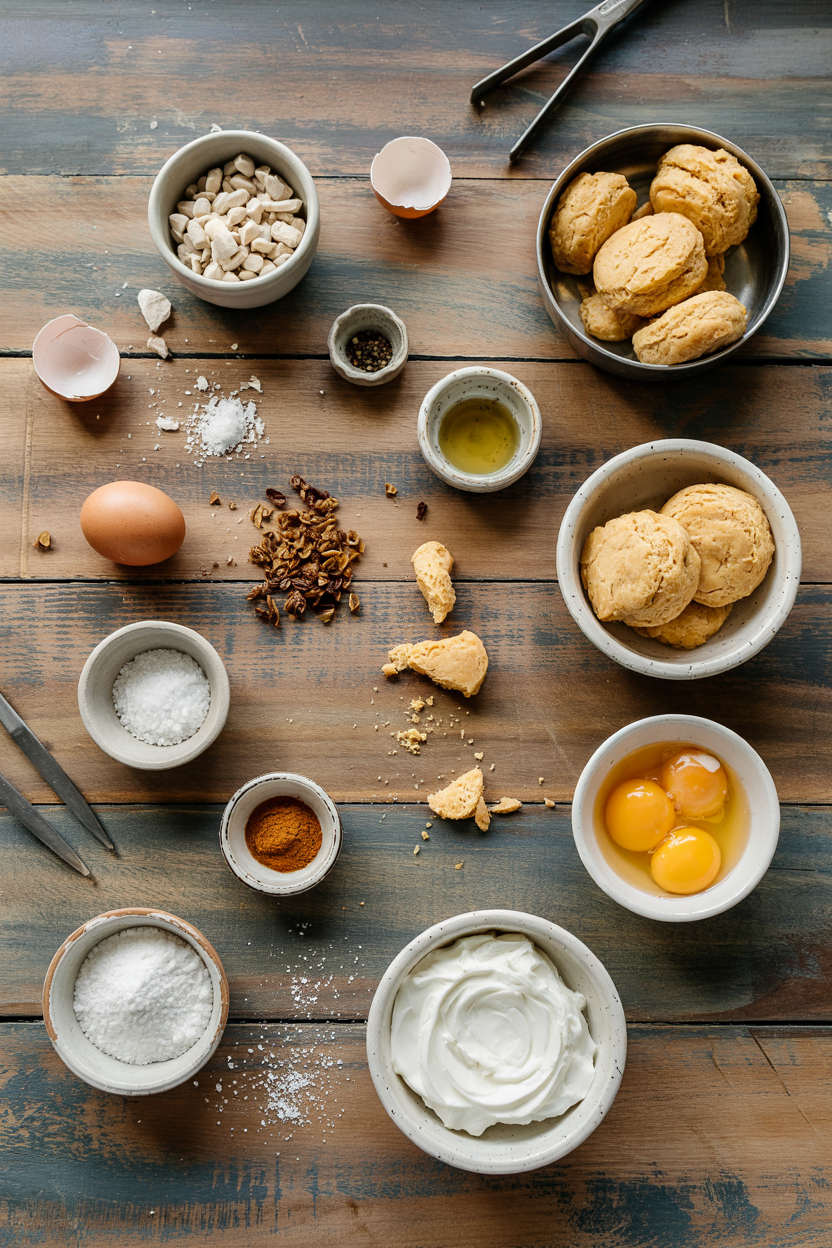
Ingredients for Breakfast Couscous with Dates and Almonds

Shop for fine Moroccan-style couscous, not the larger pearl type that takes longer to cook. Toast the almonds fresh - pre-toasted nuts from a bag lack the deep nutty flavor you get from heating them yourself.

🍜
Base Grain
  • 1 cup fine couscous
🧀
Liquid
  • 1 cup milk or alternative milk
  • 1 tablespoon butter or oil
🍋
Sweet Elements
  • ½ cup dates, chopped
  • 2 tablespoons honey or maple syrup
🫙
Flavor Additions
  • ⅓ cup sliced almonds
  • 1 teaspoon cinnamon
  • ½ teaspoon vanilla extract
  • Pinch of salt

Ingredient Details

  • Fine couscous
    Look for Moroccan-style or instant couscous-coarse types require longer steeping and won't turn fluffy in five minutes
  • Dates
    Medjool dates work best for their soft texture-chop into quarter-inch pieces so sweetness distributes evenly without sticky clumps
  • Almonds
    Use sliced almonds instead of whole-they toast faster and mix better with the couscous than large chunks
  • Milk
    Whole milk creates the creamiest result, but any dairy or non-dairy milk works-just bring it to a full boil before pouring
  • Honey or maple syrup
    Honey gives floral sweetness while maple adds earthy depth-drizzle more on top when serving if you want it sweeter
  • Cinnamon
    Add directly to the milk before boiling so it infuses the liquid instead of sitting on top in dry patches
  • Butter
    Stir in after fluffing to coat grains and keep them from sticking-coconut oil or olive oil works for dairy-free versions

Ingredient Swaps

Almonds toast faster than walnuts or pecans, but those work if you already have them. Different nuts change the flavor - pecans add buttery sweetness while walnuts bring earthy depth.

  • Almonds → walnuts or pecans - chop into similar-sized pieces and toast 1-2 minutes longer since they're denser than sliced almonds
  • Milk → almond or oat milk - use any non-dairy milk but skip low-fat versions that don't add enough richness to the couscous
  • Dates → raisins or dried cranberries - measure the same amount but expect less chewy texture and different sweetness levels
  • Honey → maple syrup or agave - swap one-to-one for any liquid sweetener, adjusting to taste since agave is slightly milder

Walnuts Instead of Almonds

Works for: budget shopping, deeper earthy flavor, softer crunch

Skip if: you want delicate nutty sweetness or fastest toasting time

Oat Milk Instead of Dairy

Works for: dairy-free needs, slightly sweet creamy base, similar texture

Skip if: you want the richest result or have oat allergies

Raisins Instead of Dates

Works for: budget-friendly option, no chopping needed, familiar sweetness

Skip if: you want chewy texture or concentrated caramel-like sweetness

Instructions

Total active time runs about 10 minutes with another five for resting. The couscous steeps while you toast nuts - no reason to stand around waiting.

  1. Toast the almonds - heat a dry skillet over medium heat, add sliced almonds, and stir constantly for 3-5 minutes until golden brown and fragrant, then transfer to a plate to stop cooking
  2. Boil the milk mixture - combine milk, cinnamon, and salt in a medium saucepan, bring to a full rolling boil over medium-high heat, watching closely so it doesn't boil over
  3. Steep the couscous - pour couscous into a bowl, add the boiling milk mixture immediately, stir once, cover tightly with a plate or lid, and let sit undisturbed for 5 minutes
  4. Fluff and mix - uncover the bowl, fluff couscous gently with a fork to separate grains, then stir in butter, honey, vanilla, chopped dates, and half the toasted almonds
  5. Serve warm - divide into bowls, top with remaining almonds, and drizzle with extra honey or maple syrup if you want it sweeter
Golden Rule
Never lift the cover during the 5-minute rest-trapped steam finishes hydrating the couscous evenly so you don't get crunchy grains

What to Serve With It

This needs something to cut the sweetness or add protein. Plain yogurt works, but scrambled eggs turn it into a complete meal. For a lighter pairing option, breakfast burritos meal planning ideas covers other morning combinations that balance carbs and protein.

Side Dish Prep Why It Works How to Serve
Plain Greek yogurt Easy Tangy creaminess balances sweet couscous, adds protein Dollop on top or serve in a separate bowl for dipping
Fresh orange slices Easy Bright citrus cuts through rich dates and honey Arrange on the side or squeeze juice over the couscous
Scrambled eggs Easy Savory protein turns this into a complete breakfast Serve alongside in a separate dish or on the same plate
Whole wheat toast Easy Adds crunch and neutral carbs to soak up honey drizzle Toast until golden, butter lightly, cut into triangles
Sliced fresh figs Easy Elegant fruit garnish with natural sweetness and texture Quarter fresh figs and arrange on top just before serving

Three ways to serve it:

  • Meal prep bowls - portion into containers with yogurt and berries on the side, then reheat couscous and add cold toppings when ready to eat
  • Brunch spread - set out warm couscous with bowls of extra nuts, dried fruit, honey, and yogurt so everyone builds their own bowl
  • Quick weekday breakfast - make a double batch on Sunday, store in the fridge, and reheat single portions in the microwave with a splash of milk
Shortcut
Buy pre-chopped dates from the bulk section to skip knife work-they cost slightly more but save 5 minutes of sticky chopping

Store and Reheat

Couscous dries out in the fridge but a splash of milk when reheating brings back the creamy texture. Store in shallow containers - they cool faster and prevent the grains from turning gummy. For different morning options that store well, simple traditional recipe works similarly for make-ahead breakfasts.

Method Time Best For
🍳 Stovetop 3-4 minutes low heat Retains fluffy texture, heats evenly, easy to add milk while stirring
📦 Microwave 1-2 minutes medium power Single servings when you're rushed, add 1-2 tablespoons milk first
🔥 Oven 10 minutes at 300°F Large portions for brunch, cover with foil to prevent drying out

For best results when storing:

  • Cool completely before covering - hot couscous creates condensation that makes grains soggy and promotes faster spoilage
  • Use airtight containers within 2 hours - shallow containers cool faster and prevent the danger zone where bacteria grows
  • Store dates and almonds separately if meal prepping - add them after reheating so nuts stay crunchy and dates don't turn hard
  • Add a splash of milk when reheating - 1-2 tablespoons per serving rehydrates dried-out grains and restores creamy texture
  • Freeze in single portions up to 1 month - thaw overnight in the fridge, then reheat on stovetop with extra liquid for best results

Frequently Asked Questions

How long does it take to cook couscous for breakfast?

Fine couscous steeps in 5 minutes after you pour boiling liquid over it. The milk needs 2-3 minutes to boil, so total cooking time is about 8 minutes from start to finish.

Can I make breakfast couscous ahead of time?

Yes, couscous keeps 3-4 days in the fridge in an airtight container. Reheat with a splash of milk to restore moisture since the grains dry out when cold.

What goes with breakfast couscous with dates and almonds?

Plain Greek yogurt, scrambled eggs, or fresh orange slices balance the sweetness. Whole wheat toast adds crunch and neutral carbs.

How do I know when breakfast couscous is fully cooked?

Couscous is done when all liquid absorbs and grains feel tender with no crunchy centers. If you see pooled liquid after 5 minutes, cover and wait another 2 minutes.

Can I use raisins instead of dates in breakfast couscous?

Yes, swap dates for an equal amount of raisins or any dried fruit. Raisins add sweetness but lack the chewy texture and caramel notes that dates provide.

Breakfast Couscous with Dates and Almonds served on a plate

Breakfast Couscous with Dates and Almonds

No ratings yet
Breakfast Couscous with Dates and Almonds steep fine couscous in warm spiced milk, then combines it with chopped dates and toasted almonds for a sweet and crunchy morning dish. This method uses boiling milk and a short resting time under cover to ensure tender, fluffy grains with minimal active cooking.
Print Recipe Pin Recipe
Prep Time 10 minutes mins
Cook Time 5 minutes mins
Total Time 15 minutes mins
Servings: 4 servings
Course: Breakfast
Cuisine: Moroccan-Inspired
Ingredients Equipment Method Notes

Ingredients
  

  • 1 cup couscous fine Moroccan-style
  • 1 cup milk or alternative milk, bring to full boil
  • 1 tablespoon butter or oil for dairy-free option
  • 0.5 cup dates chopped into quarter-inch pieces
  • 2 tablespoons honey or maple syrup
  • 0.33 cup almonds sliced
  • 1 teaspoon cinnamon add directly to milk before boiling
  • 0.5 teaspoon vanilla extract
  • pinch salt add to milk before boiling

Equipment

  • Skillet For toasting almonds
  • Medium saucepan To boil milk with cinnamon and salt
  • Mixing bowl To steep couscous in boiling milk
  • lid or plate To cover couscous bowl during steeping
  • Fork To fluff cooked couscous

Method
 

  1. Heat a dry skillet over medium heat, add sliced almonds, and stir constantly for 3-5 minutes until golden brown and fragrant. Transfer to a plate to stop cooking.
    0.33 cup almonds
  2. Combine milk, cinnamon, and salt in a medium saucepan. Bring to a full rolling boil over medium-high heat, watching closely to avoid boiling over.
    1 cup milk, 1 teaspoon cinnamon, pinch salt
  3. Pour couscous into a bowl, add the boiling milk mixture immediately, stir once, cover tightly with a lid or plate, and let sit undisturbed for 5 minutes.
    1 cup couscous, 1 cup milk, 1 teaspoon cinnamon, pinch salt
  4. Uncover the bowl and fluff the couscous gently with a fork to separate grains. Stir in butter, honey, vanilla, chopped dates, and half the toasted almonds.
    1 tablespoon butter, 2 tablespoons honey, 0.5 teaspoon vanilla extract, 0.5 cup dates, 0.33 cup almonds
  5. Divide couscous into bowls, top with remaining almonds, and drizzle extra honey or maple syrup if desired. Serve warm.
    0.33 cup almonds, 2 tablespoons honey

Notes

  • Use boiling milk to infuse cinnamon flavor evenly and achieve tender couscous grains.
  • Toast almonds until golden and fragrant to maximize nutty flavor and crunch.
  • Do not lift the lid during the 5-minute steep to allow even hydration and avoid gummy or crunchy patches.

Tried this recipe?

Let us know how it was!

What Is Brazil Nuts? Taste, Uses & Storage Guide

March 28, 2026

Brazil nuts show up in the bottom of a mixed nut bowl, get skipped over, and then someone finally cracks one open and realizes they've been missing out.

What Is Brazil Nuts

Much like swapping out butter for richer fats in a recipe, reaching for a brazil nut instead of a blander snack changes the whole equation - these are dense, creamy, and faintly cocoa-edged in a way that surprises most people the first time.

They're also among the most nutritionally loaded nuts on the shelf, which makes knowing how to use them well worth your time.

QUICK SUMMARY

Brazil nuts are large, oil-rich seeds from the Amazon basin with a buttery, mildly cocoa-edged flavor. Use them roasted as a snack, chopped into granola, or blended into nut butter. Limit intake to 1-3 per day due to extremely high selenium content.

🌰Flavor: Buttery, mildly sweet, faint cocoa bitterness at the finish
✋Texture: Very firm and dense, creamy and oily once chewed
🍽️Best Uses: Roasted snacks, granola, nut butter, chocolate bark, fish crusts
🌡️Storage: Refrigerate for months; freeze vacuum-sealed for up to a year
⚠️Watch: Extremely high selenium - keep daily intake to 1-3 nuts maximum
🌎Origin: Amazon basin, South America - wild-harvested from Bertholletia excelsa trees

What Is Brazil Nuts?

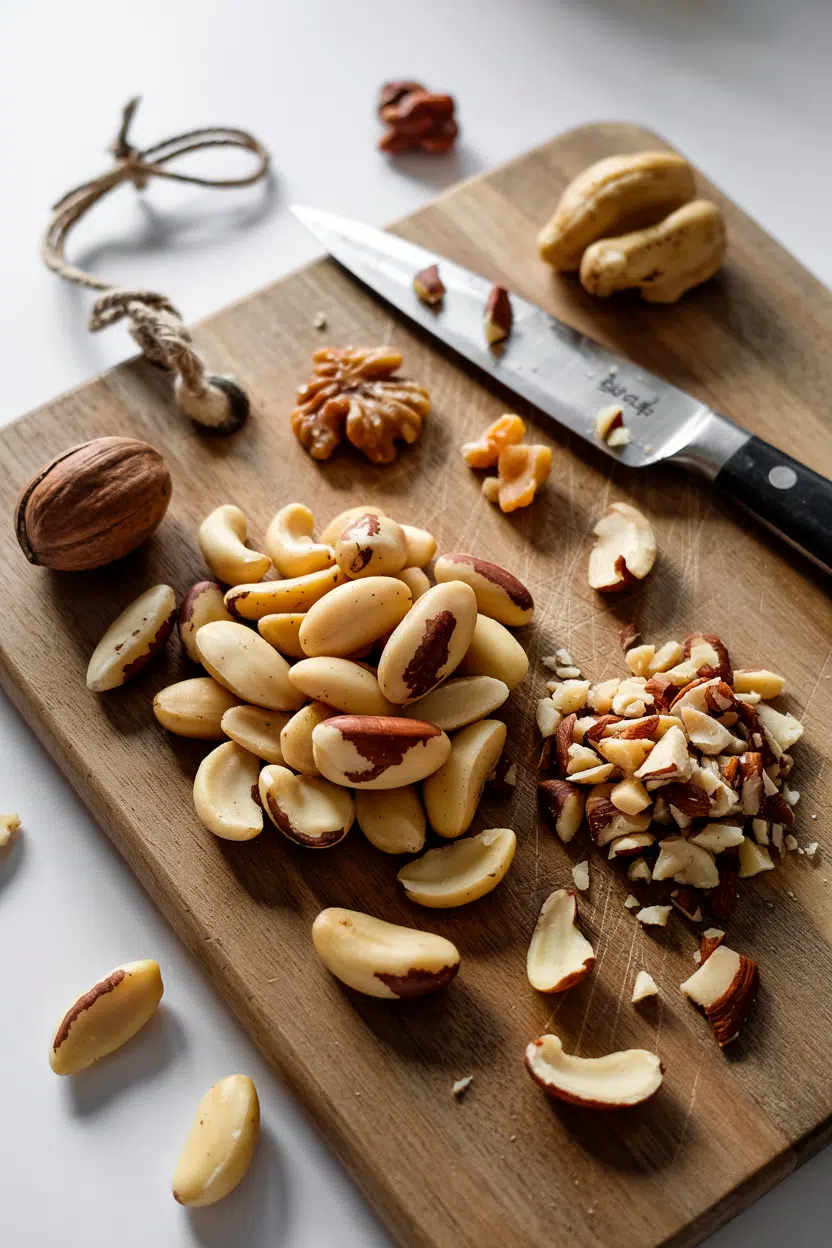
Brazil nuts are the seeds of Bertholletia excelsa, a towering tree native to the Amazon rainforest of South America. They're not true nuts in the botanical sense - they're seeds packed inside a large, woody pod that resembles a coconut, with each pod housing 8 to 24 seeds arranged like orange segments.

Wild harvesters collect fallen pods from the forest floor, since the Brazil nut tree does not grow commercially outside its native ecosystem.

That ecological dependency makes them one of the few major food products still sourced almost entirely from wild stands.

Also called castanha-do-pará in Brazil and sometimes simply "Brazilian nut," they're sold two ways:

  • 🌰 Shelled brazil nuts - cream-colored, triangular seeds ready to eat or cook with
  • 🪨 In-shell brazil nuts - sold whole in the pod shell, offering longer shelf life before cracking

Much like pistachio in cooking, brazil nuts occupy an interesting middle ground - they work as both a snack nut and a cooking ingredient without much adjustment.

Their standout trait beyond flavor is selenium content, with a single nut delivering more than a full day's recommended intake for most adults.

What Does Brazil Nuts Taste Like?

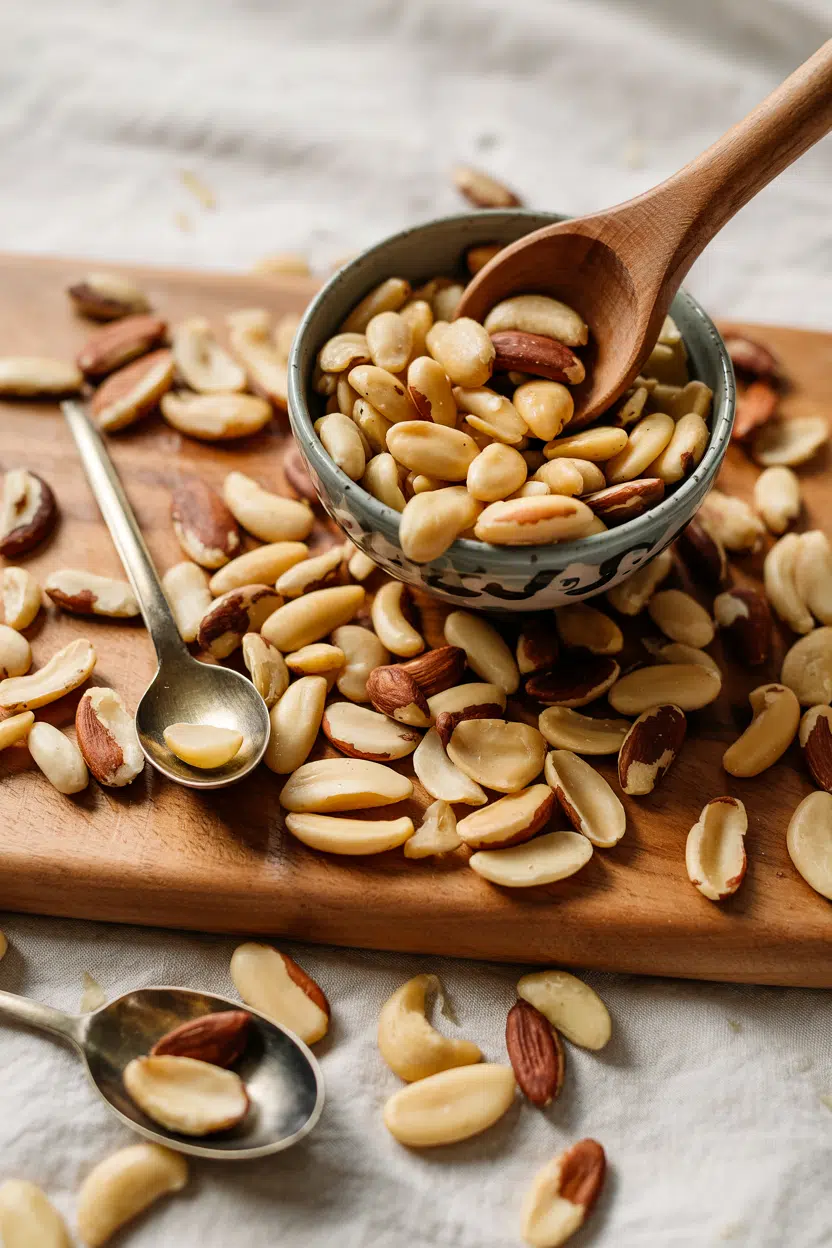
brazil nuts - What Is Brazil Nuts

Raw brazil nuts open with a buttery, mildly sweet note that settles quickly into something earthier. The finish carries a faint cocoa-like bitterness - subtle, not sharp - that separates them from most other tree nuts.

Sensory SnapshotModerate Intensity
👅 Flavor
butterymildly sweetcocoa-edgedearthy
✋ Texture
firmdensecreamy when chewed
👃 Aroma
warm nuttysubtle roasted cocoa

Compared to macadamia nuts and its flavor, brazil nuts share a similar creaminess, though they're denser and carry that cocoa finish that macadamias lack.

Think of it as somewhere between a macadamia and a lightly roasted almond - and for context, almonds's flavor and uses show how differently a nut with similar earthiness can behave in a recipe.

Dry-roasting shifts the profile noticeably. Heat deepens the cocoa notes, adds a toasty edge, and draws out more of the inherent sweetness.

Raw nuts are milder; roasted nuts are more assertive.

Golden Rule
Roast brazil nuts at 325°F (160°C) for 8-10 minutes. Higher heat pushes the natural oils toward bitterness fast - low and slow is the move here.

How to Use Brazil Nuts

Brazil nuts bring richness and a cocoa-edged crunch to both sweet and savory cooking. They work across more methods than most people expect.

How Brazil Nuts Are Used
MethodBest ForTip
🥗 RawSnacking, slicing into muesli or granola, adding to cheese boardsPair with aged manchego or a square of dark chocolate to highlight sweetness
🔥 Dry-RoastedStandalone snacks, salad toppings, brittle and barkToss with coarse sea salt and rosemary before roasting for a savory edge
🫙 BlendedBrazil nut butter, pesto-style sauces, baking fat replacementBlend with a neutral oil if the paste seizes; the high oil content usually keeps it smooth
🍞 Ground/CrustedCoatings for fish fillets or poultry, pie and tart crustsCombine with oats or breadcrumbs to moderate the richness in crusts

In Brazilian and Amazonian cooking, brazil nuts appear in both savory rice dishes and in sweets like cocada-style confections.

Modern Western kitchens use them most often folded into chocolate bark or nut brittles, where the cocoa finish pairs naturally with dark chocolate and orange zest.

They also stand in for pine nuts in pesto-style sauces - if you've ever needed brazil nuts stand-ins to go the other direction, that pairing logic works in reverse just as well.

Ground brazil nuts produce a rich, oily paste that functions as a spread or a baking fat. Mixed with maple syrup and a pinch of sea salt, it works across toast, oatmeal, or as a filling in chocolate truffles. The fat profile also makes it a natural fit for plant-forward baking where butter or coconut fat would otherwise dominate.

Try It In
🍂Cinnamon Sugar Roasted NutsDry-roasting brings out brazil nuts' cocoa depth and natural sweetness→🥗Waldorf Salad with Apples and WalnutsSwap or mix in chopped brazil nuts for extra richness and crunch→🍗Chicken Salad with Grapes and WalnutsBrazil nuts add dense, buttery texture where walnuts bring bitterness→

How to Buy and Store Brazil Nuts

Good brazil nuts look plump and cream-colored with a smooth, unbroken surface. Pass on anything shriveled, darkened, or with an overly slick, oily surface - those signs point to age and early rancidity.

Watch Out
An oily, wet-looking surface on shelled brazil nuts is a rancidity red flag - not freshness. Buy from stores with high turnover, especially in bulk bins.

For in-shell purchases, pick pods that feel heavy for their size with no visible cracks, mold, or insect holes in the shell. The weight signals the seeds inside are still dense and moist.

Storage is where most people go wrong with brazil nuts:

  • 🏠 Room temperature - only a few weeks before the high oil content begins to oxidize
  • ❄️ Refrigerated - airtight container extends freshness to several months
  • 🧊 Frozen - vacuum-sealed bags keep them good for a year or more

A full guide on keeping brazil nuts fresh covers the signs of rancidity in more detail - worth checking before stocking up in bulk.

The fat profile that makes these nuts rich also makes them one of the faster-spoiling options in your pantry, so cold storage isn't optional for any quantity beyond a week's use.

Where to Start With Brazil Nuts

Try a small roasted batch first. A handful dry-roasted with sea salt and a sprig of rosemary takes about ten minutes and shows you the full flavor range - buttery upfront, cocoa-edged at the finish, with a crunch that holds.

Once you know the flavor, move to chocolate bark: roughly chopped brazil nuts pressed into melted dark chocolate with orange zest is the most direct showcase of what they do best.

From there, the paste and crust applications open up naturally.

Keep the daily limit in mind - 1 to 3 nuts is the practical ceiling for most adults given the selenium load. That constraint actually makes them easier to use: a few go a long way in any recipe.

Frequently Asked Questions

Are brazil nuts good for you?

Yes, in small amounts. A single nut delivers more than 100% of the daily recommended selenium intake, plus magnesium, healthy fats, and protein. Eating too many regularly risks selenium toxicity, so keep it to 1-3 per day.

How many brazil nuts should I eat per day?

One to three nuts covers your daily selenium needs without risk of excess. Eating a full handful daily over time can push selenium levels into a toxic range - symptoms include hair loss, nail brittleness, and nausea.

Do brazil nuts taste like macadamia?

They share a creamy, buttery quality, but brazil nuts are denser and carry a faint cocoa-bitter finish that macadamias don't have. Macadamias are milder and sweeter overall.

Can you roast brazil nuts at home?

Yes. Spread shelled nuts on a dry baking sheet and roast at 325°F (160°C) for 8-10 minutes, stirring once halfway. Higher temperatures push the oils toward bitterness quickly, so keep the heat low.

Why do brazil nuts go rancid faster than other nuts?

Their unusually high oil content - around 66% fat by weight - oxidizes faster than lower-fat nuts like almonds or cashews. Cold storage is essential; room temperature works for only a few weeks before the flavor degrades.

What Is Calamansi? Taste, Uses & Flavor Guide

March 28, 2026

Most people reach for lime without a second thought, but calamansi operates on a different register entirely - sharper, more floral, and with a citrus depth that lime simply doesn't carry.

What Is Calamansi

Unlike the differences between lime vs lemon, which share a broadly similar flavor family, calamansi sits in its own category: intensely sour, highly aromatic, and impossible to fake with a standard citrus swap.

It's the fruit that anchors Filipino cooking, and once you understand what it actually does, you'll stop treating it as just another squeeze.

QUICK SUMMARY

Calamansi is a small Southeast Asian citrus with intensely sour, floral juice and aromatic zest. It's the backbone acid of Filipino cooking - used in marinades, dipping sauces, soups, and drinks. Green fruits are sold unripe but still usable; ripe ones show an orange blush and slightly sweeter edge.

🍋Flavor: Sharp sour with a floral undercurrent and mild tea-like bitterness
🍳Best Uses: Finishing acid, marinades, soy dipping sauce, sinigang, drinks
🛒Buy: Heavy, smooth-skinned fruits; green or orange-blushed both work
❄️Shelf Life: Whole in fridge: 2-3 weeks; juice refrigerated: 3-5 days
🌏Origin: Southeast Asia - primarily the Philippines and Indonesia

What Is calamansi?

Calamansi - also spelled kalamansi and sold under the name calamondin in some markets - is a small round citrus fruit native to Southeast Asia, most closely associated with the Philippines.

Each fruit is roughly the size of a large marble, with thin, smooth skin that starts deep green and ripens to a yellow-orange.

The pulp inside is divided into small, seed-filled segments and produces a disproportionately large amount of juice for its size.

Botanically, calamansi sits between a mandarin orange and a kumquat in its family tree, which explains its unusual flavor profile. In the Philippines, it's simply called calamansi; in Malaysia and Indonesia, you'll see it labeled limau kasturi.

Green fruits are harvested and used before full ripeness - that's standard practice, not a sign of poor quality. Ripe orange-yellow fruits carry a slightly sweeter undercurrent, but both stages are culinarily valid.

  • 🌿 Family - Rutaceae (citrus family), closely related to kumquat and mandarin
  • 📍 Primary origin - Philippines, with wide cultivation across Southeast Asia
  • 🔤 Alternate names - calamondin, kalamansi, Philippine lime, limau kasturi
  • 🍊 Size and appearance - marble-sized, thin-skinned, green to orange-yellow at full ripeness

What Does calamansi Taste Like?

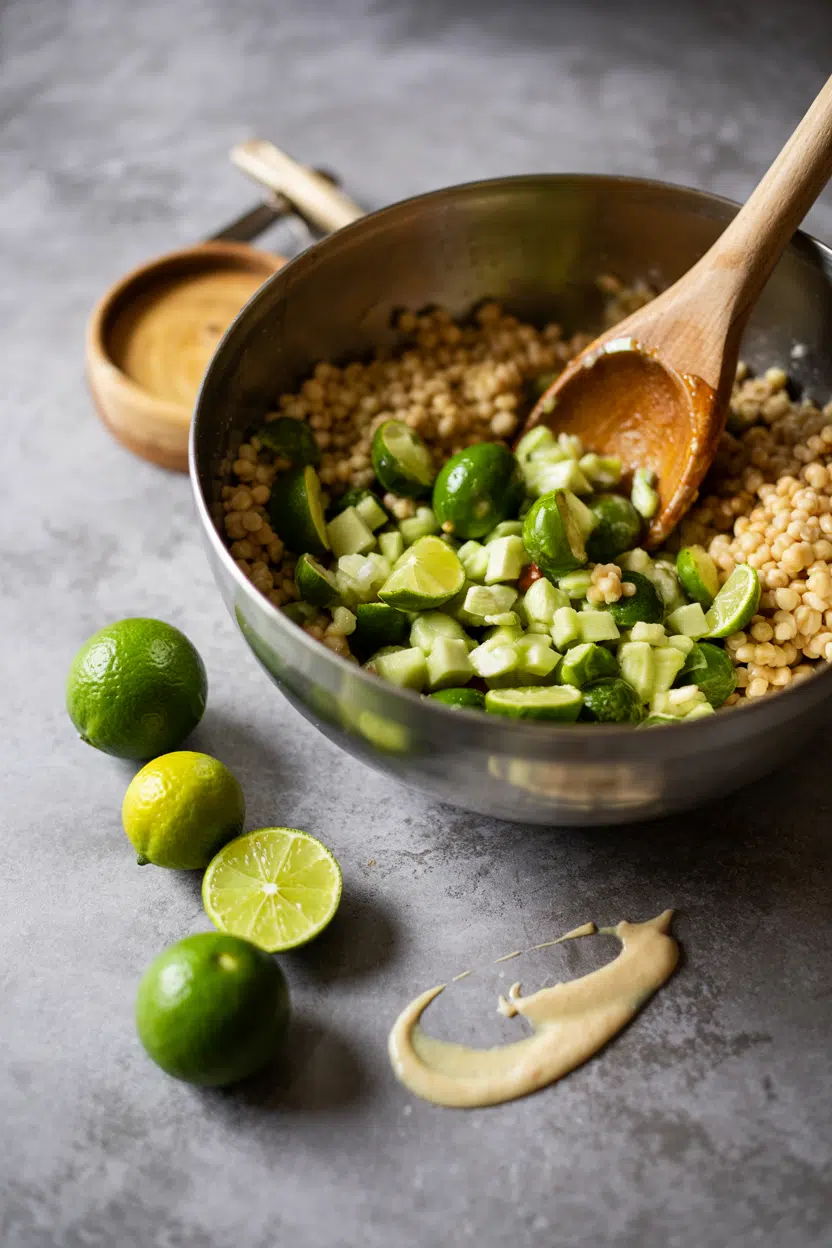
calamansi - What Is Calamansi

Calamansi juice hits with a concentrated, almost aggressive sourness - sharper than regular lime and with none of the slight oiliness you get from key lime.

Think of it as a tart lime crossed with tangerine: the citric punch is immediate, followed by a brief floral note and a faint tea-like bitterness that lingers.

That floral quality is what sets it apart. Regular lime is clean and sharp; calamansi adds an aromatic layer that changes the character of a dish, not just its acidity.

When comparing fruit fresh vs citric acid options for sour soups or marinades, fresh calamansi wins on complexity every time.

Heat softens the top-note sharpness but can amplify bitterness if the fruit cooks too long without sugar to balance it. Raw application - squeezed at the table or stirred in off heat - preserves its brightness best.

Sensory SnapshotStrong Intensity
👅 Flavor
sharp sourfloraltea-like bittercitrus-bright
✋ Texture
thin-skinnedjuicyseed-filled
👃 Aroma
floral-citrusfresh green zesthighly aromatic

How to Use calamansi

Calamansi juice functions as a finishing acid first and a cooking acid second. In Filipino kitchens, it's squeezed raw over grilled fish, bangus, and shrimp at the table - letting its brightness hit before it can cook off. That same principle applies to noodle dishes, where a halved calamansi served on the side lets each person dial in their own sourness.

Soy-calamansi sauce is perhaps its most iconic application: a mix of soy sauce, fresh calamansi juice, and often bird's eye chilies (siling labuyo). It doubles as a dipping sauce for lumpia and grilled meats.

For a sinigang sour pork soup recipe, calamansi adds the sharp, clear acidity the broth needs alongside tamarind.

Golden Rule
Add calamansi juice off heat or at the table whenever possible. Prolonged boiling kills the floral notes and risks turning the flavor bitter.

Beyond savory uses, calamansi juice and zest work well in drinks, marmalades, and baked goods. Iced calamansi juice - diluted with water and sweetened with sugar or honey - is a common Filipino refreshment.

The zest carries concentrated floral-citrus oils useful in curds and glazes for roasted pork or vegetables.

How Calamansi Is Used
MethodBest ForTip
🥗 Raw SqueezeFinishing acid over fish, seafood, noodlesSqueeze at the table to preserve floral brightness
🥗 Sauce/DipSoy-calamansi dipping sauce, marinadesBalance with soy ratio 1:1 to 2:1 soy-to-juice
🍳 SimmeredSinigang broth, reductions, glazesAdd sugar or honey to offset bitterness from heat
🧁 Zest/BakedMarmalades, curds, citrus glazesZest before juicing; use immediately for peak aroma
🥤 BlendedIced drinks, cocktails, concentratesSweeten with simple syrup; serve over ice within hours
Try It In
🍗Air Fryer Chili-Lime Chicken WingsSwap lime juice with calamansi for sharper, more aromatic heat→🧄Air Fryer Garlic Parmesan Chicken TendersA squeeze of calamansi cuts through the richness of parmesan coating→🍯Air Fryer Honey Garlic Chicken TendersCalamansi juice balances the honey glaze with bright, floral acidity→

How to Buy and Store calamansi

Look for fruits that feel heavy relative to their size - weight signals juice content. Skin should be smooth, thin, and glossy with no soft spots or wrinkling.

Green fruits are standard and fully usable; an orange blush means the fruit has ripened further and will carry a slightly less aggressive sourness.

Watch Out
Wrinkled skin means the fruit has lost moisture and much of its juice. Avoid it - you'll get minimal yield and flat flavor.

Store whole calamansi in the fridge crisper in a breathable bag.

For a full breakdown of how long calamansi keeps under different conditions, the shelf life differences matter more than most people expect.

Juice keeps 3-5 days refrigerated in a sealed jar.

If fresh calamansi isn't available, the alternatives to calamansi that hold up best are a lime-tangerine blend - though neither the floral notes nor the intensity will fully match.

  • 🧊 Whole, refrigerated - 2-3 weeks in a breathable bag in the crisper drawer
  • 🌡️ Whole, room temperature - several days; use quickly once removed from cold
  • 🫙 Juice, refrigerated - 3-5 days sealed; freeze in ice cube trays for longer storage

Start With the Squeeze

If you're new to calamansi, don't start with a recipe that cooks it. Squeeze it raw over rice, grilled chicken, or even plain noodles with soy sauce.

That single move shows you exactly what it does - and why lime doesn't replicate it. Once you've tasted the difference, working it into marinades and soups becomes intuitive.

Those looking to expand into related Southeast Asian aromatics will find that replacements for kaffir lime leaf and replacements for tangerine round out a similar flavor world worth understanding alongside calamansi.

Shortcut
Freeze fresh-squeezed calamansi juice in an ice cube tray. Each cube equals roughly 3-4 fruits - ready to drop into soups, sauces, or drinks year-round.

Frequently Asked Questions

Is calamansi the same as calamondin?

Yes - calamondin is simply the common English name used in Western markets for the same fruit. The name calamansi (or kalamansi) is standard in the Philippines, while calamondin appears more often in horticultural and ornamental plant contexts outside Asia.

Can you substitute lime for calamansi?

Lime works as a rough stand-in but won't replicate the floral notes or intensity. A mix of two parts lime juice to one part fresh tangerine juice gets closer - though the result is still less aromatic. Also check [kumquat swaps that work](https://forkliftkitchen.com/kumquat-substitutes/) for unusual but effective alternatives in certain applications.

How do you juice calamansi easily?

Cut the fruit crosswise (not pole to pole) and press it cut-side down over a small juicer or squeeze directly with your hand. Rolling the fruit on the counter first loosens the pulp and increases yield from these small, seed-dense fruits.

What dishes use calamansi in Filipino cuisine?

It appears in sinigang (sour tamarind soup), as a table condiment for grilled fish and pork, in soy-calamansi dipping sauce for lumpia, and stirred into pancit noodles. Iced calamansi juice is also a staple beverage across the Philippines.

How long does calamansi juice last?

Refrigerated in a sealed jar, fresh calamansi juice holds for 3-5 days before losing brightness. Freezing extends that window significantly - frozen juice cubes stay usable for up to 3 months with minimal flavor loss.

Savory Breakfast Clafoutis with Ham and Cheese

March 28, 2026

When you need a hands-off weekend brunch that works for meal prep or a lazy Saturday morning, this French-style egg custard delivers. One dish, minimal cleanup, and enough protein to carry you through lunch without feeling heavy.

Savory Breakfast Clafoutis with Ham and Cheese served on a plate

The oven does the work while you set the table. Eggs and milk bake into a tender custard with ham and cheese folded in, creating something between a frittata and a quiche without the crust.

Make this for family breakfasts when you want something that looks intentional but doesn't require standing over the stove.

QUICK SUMMARY

A custardy French egg bake with ham and cheese that roasts hands-off in one dish. The key is getting the egg-to-dairy ratio right - too much liquid leaves it runny, too little makes it dry. Bake at 350°F for 35-40 minutes until the edges set golden and the center barely jiggles.

⏱️Time Reality: 50-55 minutes total, 15 minutes hands-on
🔑First Move: Pat ham dry and whisk batter smooth before pouring
⚠️Watch Out: High-moisture cheese makes it watery - use firmer varieties like Gruyère or Swiss

Why This Recipe Works

The batter consistency determines everything - whisk eggs, milk, and flour into a smooth ribbon-like texture and the custard sets tender instead of rubbery. For a different approach to weekend brunch, this easy corn side offers a Southern-style alternative with similar hands-off appeal.

Quick Reference
⏱️
Prep Time
15 min
🔥
Cook Time
35-40 min
⏰
Total Time
50-55 min
🍽️
Servings
4-6 servings
📊
Difficulty
Medium
🏷️
Category
Breakfast | Brunch
💡
Quick Tip
Batter consistency like thin pancake batter
🎯
Best For
Weeknight | Meal prep | Entertaining

Why it succeeds:

  • High heat at 350°F sets the edges fast while keeping the center custardy
  • Pre-cooking ham removes excess moisture that would otherwise make it soggy
  • Nutmeg adds a warm background note without overpowering the cheese
  • Resting 10 minutes after baking lets the custard finish setting
  • Light-colored glass or ceramic dishes prevent burnt edges
Quick Tip
Whisk the batter for 2 minutes until it ribbons off the whisk - that's how you avoid lumps and get smooth custard texture.

What You'll Need

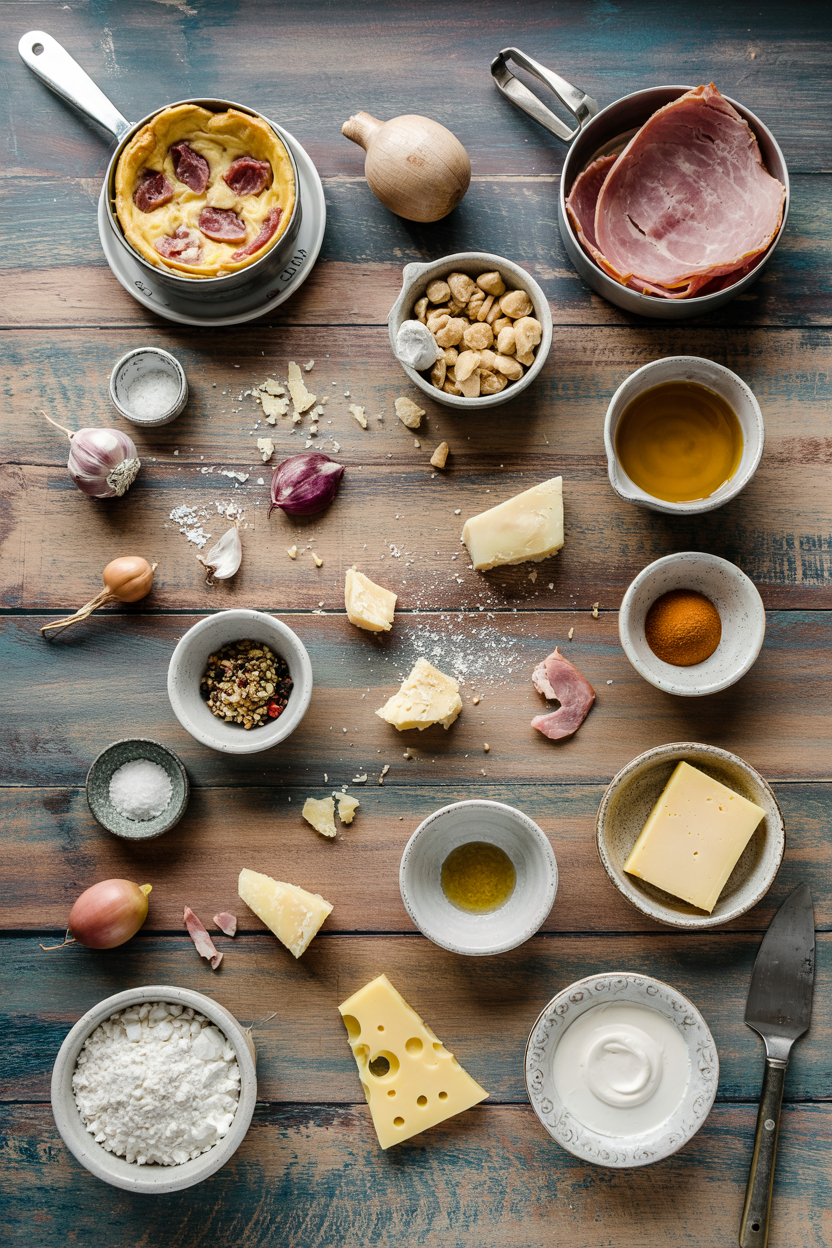
Ingredients for Savory Breakfast Clafoutis with Ham and Cheese

Shop for cooked ham and a firm cheese like Gruyère or Swiss - fresh deli ham works better than packaged slices. Rich mains need something to cut through, and pork does exactly that, like this tender pork side dish that pairs well with egg-based meals.

🥚
Eggs & Dairy
  • 6 large eggs
  • 1¼ cups whole milk or half-and-half
  • 1 cup shredded Gruyère or Swiss cheese
  • 2 tablespoon butter (for greasing)
🍖
Protein
  • 1 cup cooked ham, diced into ½-inch cubes
🌾
Binder
  • ½ cup all-purpose flour
🌶️
Seasonings
  • ½ teaspoon salt
  • ¼ teaspoon black pepper
  • ¼ teaspoon nutmeg (optional)
  • Fresh chives or thyme (optional)

Ingredient Details

  • Eggs
    Structure and custard base - use large eggs at room temperature for smoother mixing
  • Milk or Cream
    Moisture and creaminess - whole milk works; half-and-half makes it richer
  • All-Purpose Flour
    Binder creating custard texture - whisk gradually to avoid lumps
  • Cooked Ham
    Primary savory protein - pat dry and dice into ½-inch cubes to prevent sogginess
  • Gruyère or Swiss Cheese
    Melting and richness - shred fresh for better melt; avoid pre-shredded with anti-caking agents
  • Nutmeg
    Optional warm spice - adds subtle depth without competing with cheese
  • Fresh Herbs
    Optional finishing touch - chives or thyme add brightness; add at the end

Ingredient Swaps

Dietary restrictions or bare pantry don't stop this recipe. For a version that comes together quickly, this homemade salad recipe offers a fresh contrast to the rich custard.

Common swaps:

  • All-purpose flour → Gluten-free flour blend: Use 1:1 ratio; texture may be slightly more crumbly but still works
  • Milk or cream → Unsweetened almond or oat milk: Lighter texture with less richness; works for dairy-free needs
  • Gruyère → Cheddar or Parmesan: Sharper flavor with less melt; use what you have on hand
  • Cooked ham → Smoked turkey or mushrooms: Turkey keeps it similar; mushrooms make it vegetarian with earthy flavor

Gluten-Free Flour Blend

Works for: Celiac or gluten sensitivity; maintains structure

Skip if: You want classic French texture - gluten-free makes it slightly denser

Vegan Cheese or Nutritional Yeast

Works for: Dairy-free diets; nutritional yeast adds umami

Skip if: You need that melty, gooey cheese pull - vegan options don't melt the same

Instructions

Plan 50-55 minutes from start to table, with only 15 minutes of active work. The oven handles the rest while you clean up or set the brunch spread.

  1. Preheat oven to 350°F and prep the dish. Butter an 8-9 inch ovenproof glass or ceramic baking dish thoroughly - use at least 1 tablespoon spread evenly across the bottom and sides.

  2. Whisk the batter smooth. In a large bowl, whisk together 6 eggs, 1¼ cups milk, and ½ cup flour until ribbons form off the whisk, about 2 minutes. Add salt, pepper, and nutmeg if using.

  3. Layer ham and cheese in the dish. Pat 1 cup diced ham dry with paper towels, then scatter evenly in the buttered dish. Sprinkle 1 cup shredded cheese over the ham.

  4. Pour batter and bake. Pour the whisked batter over ham and cheese, tilting the dish gently to distribute evenly. Bake 35-40 minutes until edges are golden and set, center barely jiggles, and a knife inserted comes out mostly clean.

  5. Rest before serving. Remove from oven and let stand 10 minutes to finish setting. Slice into wedges and serve warm.

Best Pick
Check doneness at 35 minutes - edges should be fully set and golden while the center still has a slight wobble. That wobble disappears during the 10-minute rest.

What to Serve With It

Most people serve clafoutis alone, but it needs something to balance the richness. A good salad can make or break the plate, like this simple homemade dressing that adds tangy contrast without competing flavors.

Side Dish Prep Why It Works How to Serve
Mixed Green Salad Easy Balances richness with fresh crispness Light vinaigrette, serve alongside
Fruit Salad Easy Natural sweetness contrasts savory custard Fresh berries or melon, serve chilled
Roasted Potatoes Medium Hearty complement with crispy texture Herb-roasted, serve hot
Steamed Asparagus Easy Adds bright, fresh vegetable note Lemon butter, serve warm
Crusty Artisan Bread Easy For sopping custardy edges Toasted, serve with butter

Three ways to serve it:

  • Weekend brunch spread: Serve with fruit salad and coffee for a French-style leisurely breakfast
  • Light lunch: Pair with mixed greens and crusty bread for a satisfying midday meal
  • Make-ahead breakfast: Slice into portions, refrigerate, and reheat throughout the week for quick protein-packed mornings
Shortcut
Make it the night before, cover, and refrigerate unbaked. Next morning, let it sit at room temperature for 15 minutes, then bake as directed - adds 5 minutes to bake time.

For more savory pork meal ideas, that guide covers additional sides that work well with ham-based dishes.

Store and Reheat

Leftovers hold well for 3-4 days in an airtight container, making this practical for meal prep. The coleslaw works best when it hits the table at the same time as the main, and this simple coleslaw recipe adds crunchy contrast when you reheat clafoutis throughout the week.

Method Time Best For
🔥 Oven 10-15 min at 325°F Larger portions; restores crisp edges
🍳 Stovetop 3-5 min low heat Small slices; quickest reheat
📦 Microwave 1-2 min medium power Single portions; risk softening edges

For best results when storing:

  • Cool completely before storing - Hot clafoutis releases steam in containers, making it soggy
  • Use shallow airtight containers - Prevents moisture buildup and keeps texture better than deep containers
  • Layer parchment between slices - Stops them from sticking together when stacked
  • Freeze up to 1 month - Wrap individual portions in plastic wrap, then foil; thaw overnight in fridge
  • Reheat from cold, not frozen - Thaw first for even heating; frozen edges burn while center stays cold

Frequently Asked Questions

How long to cook savory breakfast clafoutis at 350°F?

Bake for 35-40 minutes until the edges are golden and set while the center has just a slight jiggle. Check at 35 minutes - a knife inserted near the center should come out mostly clean with a few moist crumbs.

Can I make savory breakfast clafoutis ahead and reheat?

Yes, bake it fully, cool completely, then refrigerate up to 3-4 days. Reheat slices in a 325°F oven for 10-15 minutes to restore crisp edges, or microwave individual portions for 1-2 minutes on medium power.

What side dishes pair well with savory breakfast clafoutis?

Mixed green salad with light vinaigrette balances the richness, or serve with fresh fruit salad for natural sweetness. Roasted potatoes add heartiness for a more filling brunch spread.

How do I know when the clafoutis is fully cooked?

Edges should be fully set and golden brown while the center barely jiggles when you shake the dish gently. A knife inserted near the center comes out mostly clean, and the top should be lightly golden with bubbling edges.

Can I substitute gluten-free flour in this clafoutis recipe?

Yes, use a 1:1 gluten-free flour blend as a direct swap for all-purpose flour. The texture may be slightly more crumbly and denser than the original, but it still sets into a tender custard.

Savory Breakfast Clafoutis with Ham and Cheese served on a plate

Savory Breakfast Clafoutis with Ham and Cheese

No ratings yet
This savory breakfast clafoutis blends eggs, ham, and cheese into a tender French-style custard baked hands-off in one dish. The perfect balance of egg and dairy creates a custardy texture that sets golden at 350°F, making it an ideal protein-rich brunch with minimal cleanup.
Print Recipe Pin Recipe
Prep Time 15 minutes mins
Cook Time 40 minutes mins
Total Time 55 minutes mins
Servings: 6 servings
Course: Breakfast, Brunch
Cuisine: French
Ingredients Equipment Method Notes

Ingredients
  

  • 6 large eggs room temperature
  • 1.25 cups whole milk or half-and-half for richer custard
  • 1 cup cooked ham diced into ½-inch cubes and patted dry
  • 1 cup Gruyère cheese shredded; Swiss can be used as substitute
  • 0.5 cup all-purpose flour gradually whisked to avoid lumps
  • 2 tablespoon butter for greasing the baking dish
  • 0.5 teaspoon salt
  • 0.25 teaspoon black pepper
  • 0.25 teaspoon nutmeg optional
  • to taste fresh herbs chives or thyme, optional finishing touch

Equipment

  • Ovenproof baking dish Use an 8-9 inch glass or ceramic dish for baking
  • Whisk For mixing eggs, milk, and flour into batter

Method
 

  1. Preheat oven to 350°F. Butter an 8-9 inch ovenproof glass or ceramic baking dish thoroughly, spreading at least 1 tablespoon evenly over bottom and sides.
    2 tbsp butter
  2. In a large bowl, whisk together 6 eggs, 1¼ cups milk, and ½ cup flour until the batter ribbons off the whisk and is smooth, about 2 minutes. Add salt, pepper, and nutmeg if using, and whisk to combine.
    6 large eggs, 1.25 cups whole milk, 0.5 cup all-purpose flour, 0.5 tsp salt, 0.25 tsp black pepper, 0.25 tsp nutmeg
  3. Pat 1 cup diced ham dry with paper towels, then scatter evenly in the buttered dish. Sprinkle 1 cup shredded Gruyère cheese evenly over the ham.
    1 cup cooked ham, 1 cup Gruyère cheese
  4. Pour the whisked batter over the ham and cheese in the dish, tilting gently to distribute evenly. Bake at 350°F for 35-40 minutes until the edges are golden and set and the center barely jiggles. A knife inserted should come out mostly clean.
    6 large eggs, 1.25 cups whole milk, 0.5 cup all-purpose flour, 1 cup cooked ham, 1 cup Gruyère cheese
  5. Remove the dish from the oven and let the clafoutis rest for 10 minutes to finish setting. Slice into wedges and serve warm, garnished with fresh chives or thyme if desired.
    to taste fresh herbs

Notes

  • Use firm cheeses like Gruyère or Swiss to avoid excess moisture and watery custard.
  • Pat ham dry before adding to prevent sogginess.
  • Allow baking dish to rest 10 minutes after removing from oven for perfect custard setting.

Tried this recipe?

Let us know how it was!

How Long Does Bok Choy Last? [Storage Guide]

March 28, 2026

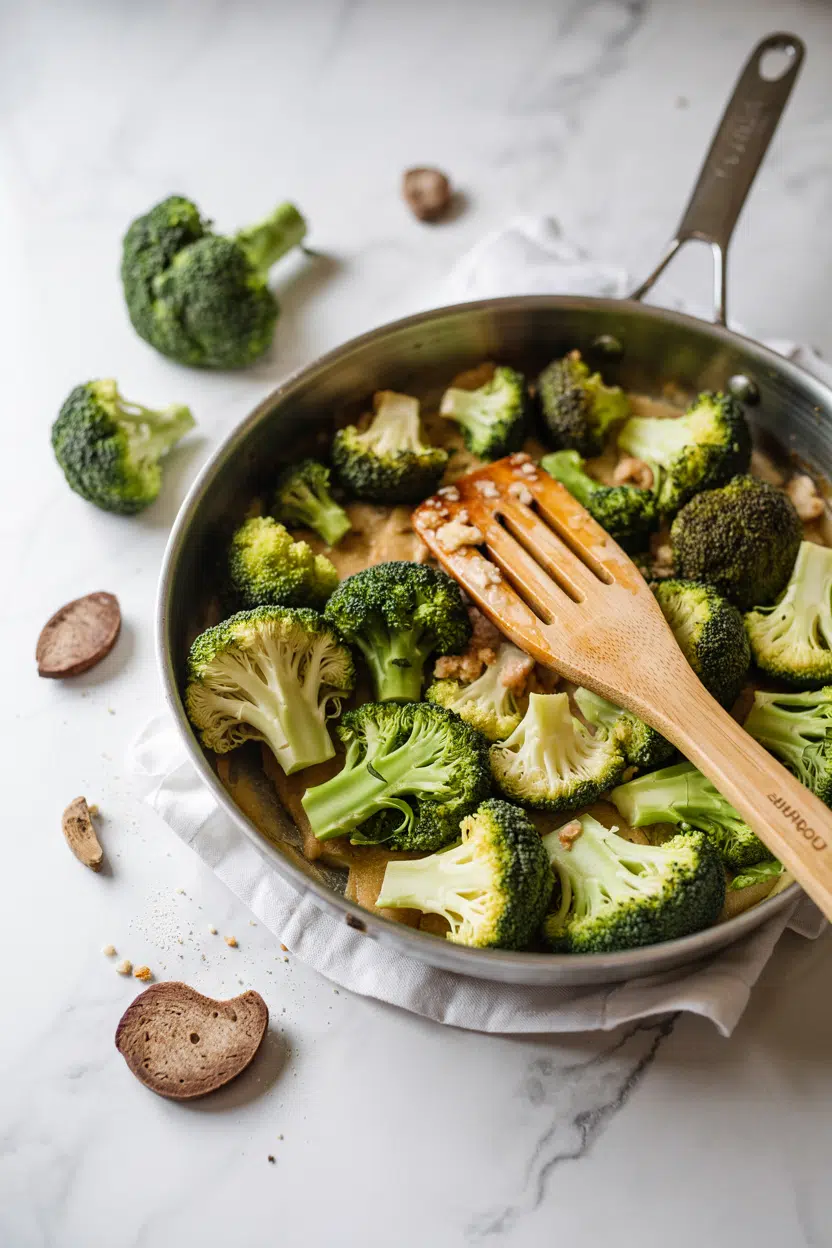
Storing bok choy wet is the single fastest way to ruin it, yet most people pull it from the grocery bag and tuck it straight into the fridge without a second thought.

Can You Freeze Bok Choy

Understanding the role bok choy plays in stir-fries, braises, and soups makes it worth keeping in good condition - and proper storage is what separates a crisp head of pak choi from a slippery, yellowed mess three days later.

QUICK SUMMARY

Raw whole bok choy keeps 5-7 days in the fridge when stored unwashed in a perforated bag. Sliced or cut pieces last 3-4 days. Blanched bok choy freezes well for 8-12 months. Never freeze it raw - always blanch first.

🧊Fridge (whole): 5-7 days unwashed in a perforated bag in the crisper
❄️Freezer (blanched): 8-12 months; blanch stalks and leaves separately first
⚠️Key rule: Store dry - trapped moisture on leaf edges causes slime and early decay

How Long Does Bok Choy Last?

Shelf life depends on two things: whether the bok choy has been cut, and how quickly it was cooled after purchase.

Whole heads with the base intact hold moisture through the stalk, which is why they outlast pre-cut pieces by several days.

Bok Choy Shelf Life
MethodStateDurationNotes
🧊 FridgeRaw, whole5-7 daysUnwashed, perforated bag in crisper; keep base intact
🧊 FridgeRaw, sliced3-4 daysWrap in damp paper towel inside a shallow airtight container
🧊 FridgeCooked3-4 daysCool to room temp first; store in an airtight container
❄️ FreezerBlanched raw8-12 monthsBlanch stalks and leaves separately; flash-freeze before bagging
❄️ FreezerCooked3-6 monthsTexture softens; best used in soups or stews after thawing
🏠 CounterRaw, whole12-24 hours maxWilts quickly; avoid in warm or humid kitchens

Baby bok choy follows the same general timeline, though its thinner stems mean it shows wilting a day or two sooner than mature heads.

Cut anything with slimy outer leaves before refrigerating - those leaves accelerate decay for the entire head if left on.

How to Store Bok Choy

The most important rule is to refrigerate bok choy dry and unwashed. Moisture trapped against the leaf edges is what causes slime to develop along the white midribs within a day or two.

Fridge (whole): Trim any damaged leaf tips, leave the base intact, and place the head unwashed into a perforated plastic or vented produce bag. Tuck it into the crisper drawer where humidity is higher and temperature is steady.

Fridge (cut pieces): Line a shallow airtight container with a damp - not wet - paper towel, layer the cut bok choy inside, and seal. The towel maintains just enough humidity without pooling moisture against the leaves.

Fridge (cooked): Let it cool fully at room temperature first, then transfer to an airtight container. Sealing hot bok choy creates condensation, which speeds breakdown.

Golden Rule
Keep the root end intact if present. It acts as a natural reservoir, drawing moisture up through the stalks and keeping the leaves hydrated longer in the fridge.

If you buy pre-washed bagged baby bok choy, open the bag, pat the leaves dry with paper towels, and repackage into a dry perforated bag. Factory-washed greens carry residual moisture that shortens shelf life by a day or more.

Can You Freeze Bok Choy?

Yes - but blanching is non-negotiable. Freezing raw bok choy without blanching causes severe cell rupture, producing a waterlogged, limp result that even soups can't salvage.

Unlike some leafy greens, bok choy has high water content in both the leaf blade and the white stalk, making it especially vulnerable to ice crystal damage.

Watch Out
Blanch stalks and leaves separately - stalks need 1-2 minutes in boiling water while tender leaves need only 30-45 seconds. Treating them the same leads to overcooked leaves or undercooked stems.
  1. Separate and trim - pull leaves from stalks, rinse both under cold water, and trim any damaged edges.
  2. Blanch in batches - boil stalks for 1-2 minutes, then blanch leaves for 30-45 seconds in the same pot.
  3. Ice-water shock - transfer immediately to a bowl of ice water and hold for the same duration as the blanch time.
  4. Drain and dry - spread on a clean towel and pat thoroughly; surface moisture causes ice clumping in the bag.
  5. Flash-freeze - arrange in a single layer on a baking sheet and freeze until solid, about 1-2 hours.
  6. Bag and label - pack into vacuum-seal bags or heavy-duty freezer bags, remove all air, and mark with the date.

For thawing, add frozen bok choy directly to hot soups or stir-fries - no need to thaw first. If you do need to thaw, do it overnight in the refrigerator.

Microwaving whole frozen pieces produces uneven heat and a mushy result.

Signs Bok Choy Has Gone Bad

Fresh bok choy has crisp, watery white stems and firm, dark green leaves. Spoilage is usually obvious before you even smell it.

Signs It's Gone Bad
👀
VisualSlimy, translucent leaf edges · Black or brown water-soaked spots on midribs and base · Widespread yellowing from outer leaves inward
👃
SmellSour or fermented odor when cut · Musty, stagnant smell from decaying base
✋
TextureLeaves collapsed into a wet, limp mass · Stems feel mushy or spongy instead of firm and watery

A few yellowed outer leaves aren't a reason to discard the whole head - peel them off and check the inner leaves and base. However, mushy stems, slimy leaves, or a sour smell means the whole head should go.

Don't taste it to check; the texture alone is sufficient evidence.

Keeping Bok Choy in Good Shape

A few consistent habits make the biggest difference in how long bok choy actually lasts.

When your supply runs low or a recipe falls through, knowing your bok choy stand-ins means dinner isn't derailed - and understanding how similarly leafy greens behave, like alternatives to spinach or replacements for napa cabbage, helps set realistic shelf life expectations across your produce drawer.

  • 🌿 Store dry, not damp - wash bok choy only right before use, never before refrigerating.
  • ❄️ Use the crisper drawer - temperature fluctuation in the main fridge compartment wilts leaves faster.
  • 🫙 Try the upright jar method - stand baby bok choy in a jar with a small amount of water at the base, cover loosely with a bag, and it can stay fresh upright for up to a week.
  • 🧊 Freeze in meal-size portions - portion blanched bok choy before bagging so you pull only what a single dish needs, similar to [how long kale without blanching keeps](https://forkliftkitchen.com/kale-without-blanching-shelf-life/) if you skip that step with other greens.

Frequently Asked Questions

Can you freeze bok choy raw or do you need to blanch it?

Blanching is required for good results. Raw bok choy freezes technically, however the high water content in both the stalks and leaves causes severe ice crystal damage, producing a watery, structureless texture after thawing.

How long does baby bok choy last in the fridge?

Roughly 4-6 days stored unwashed in a perforated bag. Baby bok choy has thinner stems than mature heads, so it wilts a day or two sooner under the same storage conditions.

Will frozen bok choy be mushy?

Stalks soften noticeably and leaves become limp - that's expected. Properly blanched bok choy still holds up well in soups, stews, and braises; it just won't have the crunch of fresh.

Can you freeze bok choy for a stir-fry later?

Yes, with caveats. Add it frozen directly to a very hot wok to minimize additional moisture release. Expect softer texture - frozen bok choy works better in saucy stir-fries than dry-fried preparations.

How do you store bok choy to keep it crisp?

Store it unwashed in a perforated bag in the crisper drawer and keep the base intact. The intact base helps the stalks retain moisture, which is what keeps them firm and snappy.

What Is Calabrian Chili? [Taste, Uses & More]

March 28, 2026

Bite into a preserved Calabrian chili and the heat arrives fast - bright, almost fruity, with a low smoky hum underneath.

What Is Calabrian Chili

It doesn't build slowly like a dried ancho or flatten out like standard red pepper flakes.

Understanding seasoning with chili paste helps frame how this pepper behaves differently in finished dishes, and keeping chili fresh becomes relevant quickly once you crack open a jar.

QUICK SUMMARY

A small, wrinkled red pepper from Calabria, southern Italy, sold fresh, dried, or preserved in oil. Delivers bright fruity heat with smoky undertones. Used widely in southern Italian cooking, pasta, pizza, and finishing condiments.

🌶️Flavor: Fruity, smoky, slightly tangy - salty when preserved
🔥Heat Level: Strong - hotter and fruitier than standard red pepper flakes
🍝Best Uses: Pasta, pizza, vinaigrettes, compound butter, soups
🫙Forms: Fresh, dried whole, paste, preserved in olive oil
📅Shelf Life: Opened jars last 2-3 months refrigerated; dried 6-12 months pantry

What Is Calabrian Chili?

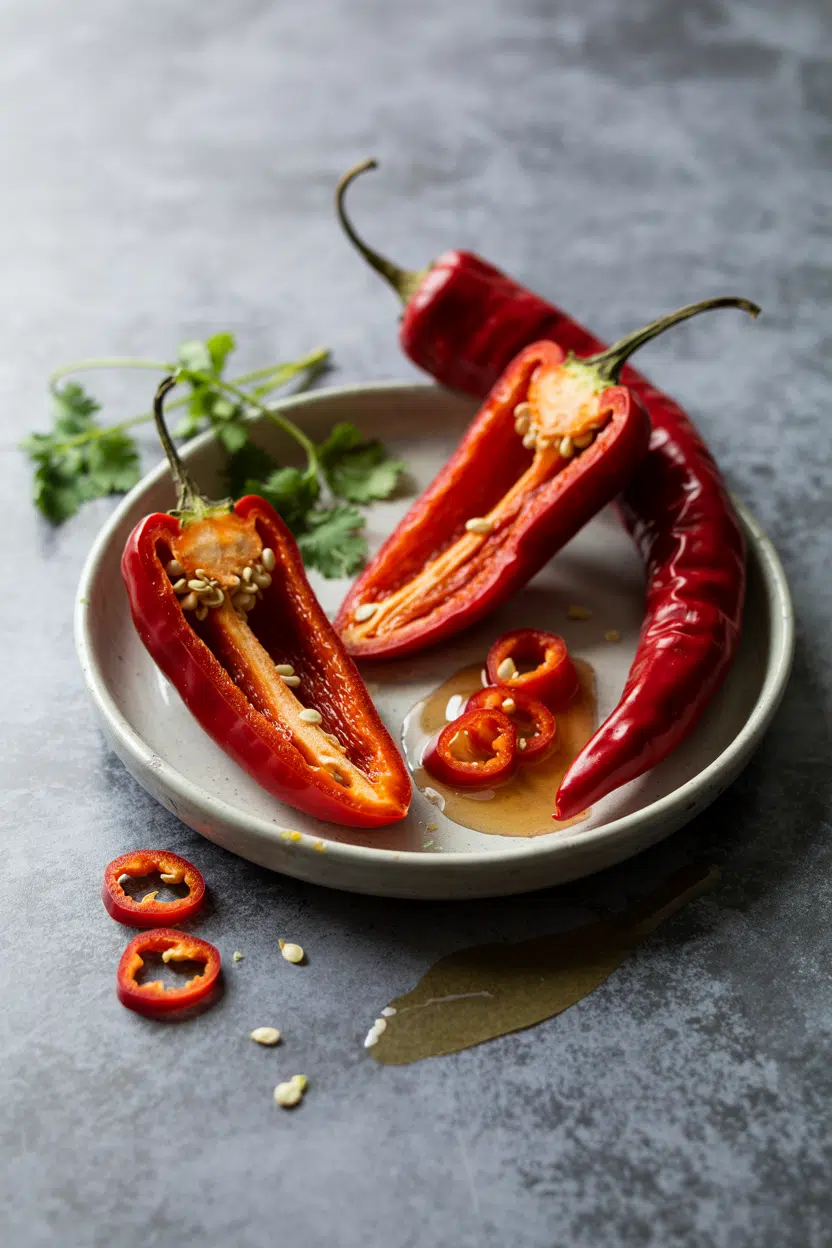
Calabrian chili - also called peperoncino calabrese or Calabrian pepper - comes from Calabria, the toe of Italy's boot.

This small, tapered red pepper has been central to the region's cooking for centuries, showing up in local salumi, sauces, and preserved condiments across southern Italian households.

The pepper belongs to the Capsicum annuum family and grows in several subforms. Most reach the market in one of four states:

  • 🌶️ Fresh whole - firm, slightly wrinkled, found at specialty grocers in season
  • 🌿 Dried whole - concentrated heat, chewy skin, long shelf life
  • 🫙 Preserved in oil - silky, mellow, ready to use straight from the jar
  • 🥫 Paste (chili paste) - blended with olive oil and salt, smooth enough to swirl into sauces

Each form behaves differently in cooking. Preserved chilies and paste are the most common formats in Italian-American restaurant kitchens, partly because olive oil stand-ins rarely replicate the way the oil carries and softens the pepper's heat in those jars.

Best Pick
For most home cooks, a jar of Calabrian chilies preserved in olive oil gives the best balance of convenience and flavor - no rehydrating, no blending required.

What Does Calabrian Chili Taste Like?

calabrian chili - What Is Calabrian Chili

The first thing you notice is brightness - a clean, almost citrus-adjacent heat that hits the front of the palate before settling into a woody warmth.

Unlike many dried chilies that lead with earthiness, Calabrian chili keeps a distinctly fruity red-pepper character throughout.

Sensory SnapshotStrong Intensity
👅 Flavor
fruitysmokytangysalty (preserved)
✋ Texture
firm (fresh)chewy (dried)silky (paste)
👃 Aroma
fruity red peppersubtle smoke

In paste form, the tangy fermented note becomes more pronounced - closer to a less vinegary gochujang than anything you'd find in a standard Italian pantry.

Heat level sits well above red pepper flakes but below a Thai bird's eye chile, landing roughly in the 25,000-40,000 Scoville range depending on the producer.

Preserved in oil, the fat rounds the edges and the salt comes forward.

How to Use Calabrian Chili

Calabrian chili earns its place as a finishing ingredient as often as a cooking one.

A single teaspoon of paste stirred into spaghetti aglio e olio changes the dish's entire direction - fruitier, hotter, more complex than garlic alone could manage.

How Calabrian Chili Is Used
MethodBest ForTip
🥗 Raw / FinishingSwirled into soups, spread on crostini, whisked into dressingsUse paste directly from the jar - no prep needed
🍳 Quick-sautéedBlooming heat and aroma in olive oil before adding tomato or garlic30 seconds over medium heat is enough - it scorches fast
🫕 Slow-simmeredPizza sauce, braised meats, long-cooked pasta saucesAdd early so heat mellows and integrates with the sauce
🧈 Compound butterGrilled steak, roasted seafood, finishing grilled breadBlend softened butter with paste at a 4:1 ratio

The pepper pairs tightly with extra-virgin olive oil, garlic, and lemon - the backbone of much southern Italian cooking.

It also works alongside pancetta or guanciale, where its fruity sharpness cuts through rendered fat.

The way it interacts with cured meats mirrors the taste of salami - there's a shared pepper-forward character that explains why the two appear together so often in southern Italian antipasto spreads.

For completely different serving ideas, dishes alongside chili offers a broader frame for pairing.

Avoid using Calabrian chili in dishes where delicate dairy is the centerpiece - the pepper's tang can clash with neutral cream-based sauces rather than complement them.

Try It In
🍗Air Fryer Chili-Lime Chicken WingsThe chili's fruity heat holds up perfectly against lime's acidity→🥩Air Fryer Chili-Lime Chicken TendersQuick weeknight use of paste as a marinade base→🥦Air Fryer Chili-Lime CauliflowerVegetable-forward dish where chili heat balances roasted sweetness→

How to Buy and Store Calabrian Chili

For preserved chilies in oil, look for deep red, glossy peppers fully submerged in the jar - any floating above the oil line will deteriorate faster.

Paste jars should have a tight seal and a uniform deep-red color with no grey or brown patches.

Watch Out
Dried Calabrian peppers sold in bulk should be pliable and bright red. Brown, dusty, or brittle skins mean the flavor has degraded - heat without fruit isn't worth buying.

Storage is straightforward once you know the rules:

  • Unopened jars - store in a cool pantry away from direct light, good for many months up to a year
  • Opened preserved jars or paste - refrigerate sealed and submerged in oil, use within 2-3 months
  • Dried whole chilies - airtight jar, cool dark pantry, 6-12 months; check for moisture

For a full breakdown, how long calabrian chili keeps covers edge cases like freezing paste and what spoilage actually looks like.

If you run short on the paste format, the guide to chili paste and its flavor clarifies what you lose and gain when switching to a generic chili paste.

Start Here With Calabrian Chili

New to this pepper? Open a jar of preserved chilies in oil. No prep, no rehydrating - chop one into pasta, spread another on toast with ricotta, and you'll understand the flavor inside ten minutes.

Once that makes sense, calabrian chili swaps that work is useful when the jar runs out mid-recipe.

From there, dried whole chilies and paste give you more control over heat and texture as you go.

Golden Rule
Always keep the peppers submerged in oil after opening. Exposure to air is the fastest route to spoilage - and wasted flavor.

Frequently Asked Questions

Is Calabrian chili the same as Calabrian pepper paste?

No - paste is a processed form made by blending Calabrian peppers with olive oil and salt. Whole preserved chilies retain more texture and a cleaner pepper character, while paste integrates more smoothly into sauces.

How hot is a Calabrian chili compared to red pepper flakes?

Noticeably hotter. Calabrian chilies typically range from 25,000-40,000 Scoville units, while standard red pepper flakes average around 15,000-30,000. The bigger difference is character - Calabrian heat is fruitier and more aromatic.

Can you substitute Calabrian chili with chili flakes?

Yes, with caveats. Flakes add heat but lack the fruity, slightly tangy character of Calabrian chili. Adding a small amount of sun-dried tomato or a drop of red wine vinegar can partially close the gap.

Where can I buy Calabrian chili paste?

Italian specialty stores and well-stocked grocery chains carry it, usually near jarred peppers or condiments. Online retailers stock a wider range of brands, including imported Calabrian producers with DOP-adjacent sourcing.

Can you use Calabrian chili oil as a finishing drizzle?

Yes - the oil left in a jar of preserved Calabrian chilies is one of its most underused byproducts. Drizzle it over pizza, grilled fish, or bruschetta for low-effort heat without adding solid pepper pieces.

Cornmeal Grits with Shrimp and Eggs

March 28, 2026

Overcooked shrimp turns rubbery and bland grits stick to the pan. The fix is cooking grits low and slow while searing shrimp fast over medium-high heat.

Cornmeal Grits with Shrimp and Eggs served on a plate

Stone-ground grits need 25-30 minutes at a gentle simmer to turn creamy. Shrimp cooks in under 3 minutes per side, so timing matters.

This works for brunch gatherings when you need something filling that doesn't require constant attention.

QUICK SUMMARY

Cornmeal Grits with Shrimp and Eggs layers creamy stone-ground grits with quick-seared shrimp and soft eggs. Cook grits at a simmer for 25-30 minutes, stirring every 5 minutes, then sauté shrimp 2-3 minutes per side. Finish with butter and lemon juice for brightness.

⏱️Total Time: 40 minutes with grits simmering while you prep shrimp and eggs
🔥Critical Step: Add grits slowly to boiling water while whisking to prevent lumps
⚠️Watch Out: High heat scorches grits and makes shrimp rubbery-keep grits at a gentle bubble and shrimp on medium-high for 2-3 minutes only

Why This Recipe Works

Stone-ground grits develop a creamy texture when cooked slowly with frequent stirring. For a protein-packed variation that works for meal prep, simple homemade rangoon uses similar timing but swaps the seafood approach.

Quick Reference
⏱️
Prep Time
10 min
🔥
Cook Time
30 min
⏰
Total Time
40 min
🍽️
Servings
4 servings
📊
Difficulty
Medium
🏷️
Category
Main Dish
💡
Quick Tip
Simmer grits low, shrimp quick, eggs fresh
🎯
Best For
Weeknight | Brunch | Meal prep

Why the method works:

  • Low heat prevents scorching - Grits cook evenly at a gentle simmer without burning or developing a bitter edge
  • Stirring every 5 minutes releases starch - Frequent whisking creates a creamy texture as the grits break down gradually
  • Quick shrimp sear locks in moisture - Medium-high heat for 2-3 minutes per side keeps shrimp tender and opaque without turning rubbery
  • Adding butter off heat enriches without separating - Stirring in 2 tablespoons of butter after cooking creates a silky finish that doesn't break
  • Finishing with lemon juice brightens flavors - A squeeze of citrus right before serving cuts through richness and lifts the entire dish
Golden Rule
Season the cooking water with 1 teaspoon salt per 4 cups to flavor grits thoroughly from the inside out-grits absorb seasoning while they cook

What You'll Need

Ingredients for Cornmeal Grits with Shrimp and Eggs

Stone-ground grits take longer to find than quick-cooking versions but deliver authentic texture. Rich mains need something to cut through, and a bright tangy slaw does exactly that.

🍜
Grain Base
  • 1 cup coarse stone-ground cornmeal (grits)
  • 4 cups water
  • 1 teaspoon salt
🦐
Protein
  • 1 pound medium to large shrimp, peeled and deveined
  • 4 large eggs
🧀
Richness
  • 2 tablespoons butter (plus extra for eggs)
  • ¼ cup milk or cream
🧄
Flavor
  • 2 cloves garlic, minced
  • 2 tablespoons lemon juice
  • ½ teaspoon black pepper
  • 2 tablespoons fresh parsley or chives, chopped

Ingredient Details

  • Stone-ground cornmeal
    Look for coarse texture labeled "grits"-fine cornmeal turns mushy and lacks authentic bite
  • Shrimp
    Buy peeled and deveined to save 10 minutes of prep-fresh or properly thawed frozen works equally well
  • Eggs
    Large eggs cook evenly in 3-4 minutes for sunny-side up with set whites and runny yolks
  • Butter
    Add 2 tablespoons to grits off heat for silky texture-high heat causes butter to separate
  • Milk or cream
    Stir in ¼ cup at the end to loosen grits if they thicken too much-whole milk or cream works best
  • Garlic
    Mince finely and add to shrimp pan for 30 seconds before adding shrimp to avoid burning
  • Lemon juice
    Add off heat right before serving to preserve brightness-cooking lemon juice turns it bitter

Ingredient Swaps

Quick-cooking grits cut time but sacrifice texture. Most people skip this dip, but it balances the meal-for something creamy, try a smooth creamy dip that comes together in minutes.

Four practical swaps:

  • Stone-ground cornmeal → quick-cooking grits - Cooks in 5-7 minutes instead of 25-30 but yields softer, less textured grits that lack the authentic gritty bite
  • Milk or cream → unsweetened almond or oat milk - Creates slightly thinner grits but works for dairy-free diets-maintain richness by adding an extra tablespoon of butter
  • Shrimp → diced chicken breast or firm tofu - Changes protein texture and requires adjusting cook time to 5-6 minutes for chicken or 4 minutes for tofu to heat through
  • Butter → olive oil or vegan butter - Alters richness and produces a lighter finish-use same amount but expect less silky mouthfeel

Stone-Ground Grits

Works for: Authentic texture, traditional Southern flavor, hearty bite

Skip if: You need dinner in under 15 minutes or prefer smooth, porridge-like consistency

Quick-Cooking Grits

Works for: Fast weeknight meals, softer texture, less stirring required

Skip if: You want authentic gritty texture or don't mind spending 30 minutes cooking

Instructions

Grits simmer for 25-30 minutes while you prep shrimp and eggs. Potatoes adds the contrast this plate needs, but timing matters-we keep a batch of fluffy mashed potato dish ready for nights like this.

  1. Bring 4 cups of water to a boil in a medium saucepan. Add 1 teaspoon salt. Slowly sprinkle in 1 cup stone-ground grits while whisking continuously to prevent lumps. Reduce heat to low and simmer uncovered for 25-30 minutes, stirring every 5 minutes, until grits are creamy and tender with a slight bite.

  2. Heat a non-stick or cast iron skillet over medium-high heat. Add 1 tablespoon butter. When butter foams, add 2 minced garlic cloves and cook for 30 seconds until fragrant but not browned. Add 1 pound peeled, deveined shrimp in a single layer with space between each piece. Cook 2-3 minutes per side until opaque and pink. Remove from heat, drizzle with 2 tablespoons lemon juice, and set aside.

  3. In the same skillet, reduce heat to medium-low. Add 1 tablespoon butter. Crack 4 large eggs into the pan, leaving space between each. Cook 3-4 minutes for sunny-side up with set whites and runny yolks, or flip for over-easy. Season with black pepper.

  4. Remove grits from heat. Stir in 2 tablespoons butter and ¼ cup milk or cream, whisking vigorously until smooth and creamy. Taste and adjust salt if needed.

  5. Divide grits among 4 bowls. Top each with shrimp, place one egg on each serving, and garnish with chopped fresh parsley or chives. Serve immediately while grits are hot and eggs are still soft.

Shortcut
Cook grits the night before and reheat gently on the stovetop with a splash of milk-saves 25 minutes on busy mornings

What to Serve With It

The grits works best when it hits the table at the same time as the main. For more options on building a complete plate, check out these easy fish meal ideas that work with seafood-based breakfasts and brunches.

Side Dish Prep Why It Works How to Serve
Steamed green beans Easy Light, fresh crunch cuts through creamy grits and rich eggs Toss with lemon zest and serve warm alongside grits
Simple mixed greens salad Easy Acidity from vinaigrette balances richness and adds texture Dress lightly with olive oil and vinegar, serve on the side
Sautéed spinach Easy Quick vitamin boost with earthy flavor that doesn't overpower Cook with garlic in butter, place next to grits
Roasted sweet potatoes Medium Natural sweetness adds contrast to savory shrimp and salty grits Cube and roast at 425°F for 20 minutes, serve warm
Collard greens Medium Traditional Southern pairing with smoky depth and hearty texture Simmer with bacon or smoked paprika, serve in small bowls

Three ways to serve it:

  • For weeknight meals - Pair with steamed green beans or sautéed spinach for a quick, balanced plate that takes under 10 minutes
  • For brunch gatherings - Serve alongside roasted sweet potatoes and collard greens for a full Southern-style spread with contrasting textures
  • For meal prep - Make grits ahead and reheat with a splash of milk, then top with freshly cooked shrimp and eggs each morning
Best Pick
Steamed green beans with lemon zest balance the richness without adding more fat-quick, light, and requires no extra pans

Store and Reheat

Grits thicken in the fridge and eggs don't reheat well. The potato salad works best when it hits the table at the same time as the main-for a version that comes together quickly, try light refreshing greens that pair well with seafood.

Method Time Best For
🍳 Stovetop 5-7 min Reheating grits gently with splash of milk for creamy texture
📦 Microwave 1-2 min Quick reheating of grits only-cover to retain moisture
🔥 Oven 10 min at 300°F Reheating grits and shrimp together without drying out

For best results when storing:

  • Refrigerate grits separately - Store in an airtight container for 3-4 days and add milk when reheating to restore creaminess
  • Store shrimp in shallow container - Keeps for 3-4 days and reheats best on the stovetop with a bit of butter to prevent drying
  • Skip storing cooked eggs - Eggs turn rubbery when reheated, so cook fresh each time you serve leftovers
  • Freeze grits only - Freeze grits up to 1 month in portions, thaw overnight in fridge, and reheat gently with extra liquid
  • Reheat grits low and slow - Use low heat and stir frequently to prevent scorching and restore smooth texture without lumps

Frequently Asked Questions

How long to cook grits on stovetop for creamy results?

Stone-ground grits need 25-30 minutes at a gentle simmer with stirring every 5 minutes. Quick-cooking grits only take 5-7 minutes but yield a softer, less textured result.

Can I make shrimp and grits with eggs ahead and reheat?

Cook grits ahead and store up to 3-4 days, reheating with milk on the stovetop. Cook shrimp and eggs fresh each time since both turn rubbery when reheated.

What side dishes pair well with shrimp and grits with eggs?

Steamed green beans, sautéed spinach, or a simple mixed greens salad cut through the richness with light, fresh crunch. For brunch, add roasted sweet potatoes or collard greens for a full Southern spread.

How do I know when shrimp and eggs are perfectly cooked?

Shrimp turns opaque and pink after 2-3 minutes per side-remove immediately to avoid rubbery texture. Eggs are done when whites are fully set but yolks remain soft and slightly runny, about 3-4 minutes for sunny-side up.

Can I substitute quick-cooking grits for stone-ground in this recipe?

Yes, but expect a softer, less textured result. Quick-cooking grits take only 5-7 minutes but lack the authentic gritty bite of stone-ground-use them when you need dinner fast and don't mind sacrificing traditional texture.

Cornmeal Grits with Shrimp and Eggs served on a plate

Cornmeal Grits with Shrimp and Eggs

No ratings yet
Cornmeal Grits with Shrimp and Eggs combines creamy stone-ground grits cooked low and slow with quick-seared shrimp and soft eggs. The grits simmer gently for 25-30 minutes to develop authentic texture, while shrimp cooks 2-3 minutes per side to remain tender.
Print Recipe Pin Recipe
Prep Time 10 minutes mins
Cook Time 30 minutes mins
Total Time 40 minutes mins
Servings: 4 servings
Course: Brunch, Main Dish
Cuisine: Southern
Ingredients Equipment Method Notes

Ingredients
  

  • 1 cup stone-ground cornmeal coarse texture, labeled 'grits'
  • 4 cups water
  • 1 teaspoon salt for seasoning cooking water
  • 1 pound shrimp medium to large, peeled and deveined
  • 4 large eggs
  • 2 tablespoons butter plus extra for eggs
  • 0.25 cup milk or cream to loosen grits if needed
  • 2 cloves garlic minced
  • 2 tablespoons lemon juice added off heat before serving
  • 0.5 teaspoon black pepper for seasoning eggs
  • 2 tablespoons fresh parsley or chives chopped, for garnish

Equipment

  • Medium saucepan to cook grits
  • Non-stick or cast iron skillet to cook shrimp and eggs
  • Whisk to prevent lumps in grits

Method
 

  1. Bring 4 cups of water to a boil in a medium saucepan. Add 1 teaspoon salt. Slowly sprinkle in 1 cup stone-ground grits while whisking continuously to prevent lumps. Reduce heat to low and simmer uncovered for 25-30 minutes, stirring every 5 minutes, until grits are creamy and tender with a slight bite.
    4 cups water, 1 teaspoon salt, 1 cup stone-ground cornmeal
  2. Heat a non-stick or cast iron skillet over medium-high heat. Add 1 tablespoon butter. When butter foams, add 2 minced garlic cloves and cook for 30 seconds until fragrant but not browned. Add 1 pound peeled, deveined shrimp in a single layer with space between each piece. Cook 2-3 minutes per side until opaque and pink. Remove from heat, drizzle with 2 tablespoons lemon juice, and set aside.
    2 tablespoons butter, 2 cloves garlic, 1 pound shrimp, 2 tablespoons lemon juice
  3. In the same skillet, reduce heat to medium-low. Add 1 tablespoon butter. Crack 4 large eggs into the pan, leaving space between each. Cook 3-4 minutes for sunny-side up with set whites and runny yolks, or flip for over-easy. Season with ½ teaspoon black pepper.
    2 tablespoons butter, 4 large eggs, 0.5 teaspoon black pepper
  4. Remove grits from heat. Stir in 2 tablespoons butter and ¼ cup milk or cream, whisking vigorously until smooth and creamy. Taste and adjust salt if needed.
    2 tablespoons butter, 0.25 cup milk or cream
  5. Divide grits among 4 bowls. Top each with shrimp, place one egg on each serving, and garnish with chopped fresh parsley or chives. Serve immediately while grits are hot and eggs are still soft.
    1 cup stone-ground cornmeal, 1 pound shrimp, 4 large eggs, 2 tablespoons fresh parsley or chives

Notes

  • Cook grits at a gentle simmer and stir every 5 minutes to prevent scorching and promote creaminess.
  • Sear shrimp quickly over medium-high heat 2-3 minutes per side to keep them tender.
  • Add butter off heat to grits for a silky finish and lemon juice last to brighten flavors.

Tried this recipe?

Let us know how it was!

What Is Blueberries? [Taste, Uses & More]

March 28, 2026

Fold blueberries into pancake batter on a Sunday morning and something small but reliable happens: they sink, burst, and pocket juice into the crumb, turning an ordinary breakfast into something you'd order twice.

What Is Blueberries

That behavior - firm skin, juicy interior, bright sweet-tart flavor - defines why these berries show up in everything from muffin tins to pan sauces for duck.

They're closely related to berries you might already use, and if you're ever swapping out blackberries or swapping out cranberries in a recipe, blueberries are often the first option worth considering.

This guide covers what they taste like, how to cook with them, and what to look for at the market.

QUICK SUMMARY

Blueberries are small, round berries with a bright sweet-tart flavor, firm pop-skin texture, and juicy interior. They work raw, baked, or simmered, and pair with everything from cream cheese to roasted pork. Refrigerate unwashed for up to 10 days, or freeze for months.

🫐Flavor: Sweet-tart with floral hints and mild earthy depth in wild types
🍳Best Uses: Baked goods, compotes, smoothies, pan sauces, fresh garnish
🛒Buy: Deep indigo color, silvery bloom, firm and dry - no leaking or mold
❄️Store: Unwashed in the fridge up to 10 days; freeze for long-term use
⚠️Avoid With: Strong bitter greens and oily fish - both override the berry's subtlety

What Is Blueberries?

Blueberries belong to the Vaccinium genus, a group of shrub-grown fruits native to eastern North America and now cultivated across the northern hemisphere. The name covers several species, but two dominate the market: highbush blueberry (Vaccinium corymbosum), the large-fruited commercial type common in grocery stores, and lowbush blueberry, sold as "wild blueberry," which grows smaller, darker, and more intensely flavored.

Each berry has a smooth indigo to deep-blue skin with a pale, star-shaped calyx - the dried flower remnant at the blossom end - which is a quick visual identifier.

Bilberry is a close European relative often confused with the wild type, and regional names like huckleberry get applied loosely to wild Vaccinium species across North America.

Fresh blueberries are available summer through early fall in most regions. Frozen, dried, and canned versions extend availability year-round without major flavor loss, especially in cooked applications.

What Does Blueberries Taste Like?

blueberries - What Is Blueberries

Ripe blueberries read as bright, sweet-tart - similar to a mild blackberry crossed with grape, but with a sharper, cleaner acidity and less of the jammy depth blackberries carry.

Subtle floral and honey notes sit underneath, especially in fully ripe highbush fruit.

Wild lowbush varieties push those characteristics further. Smaller size means more skin-to-juice ratio, which amplifies both the earthy-wild undernote and the acidic tang - they taste more concentrated, less polished.

Sensory SnapshotModerate Intensity
👅 Flavor
sweet-tartfloralearthy-wildhoney
✋ Texture
firm skinjuicy interiorjammy when cooked
👃 Aroma
mildly floralfresh green-fruit

Heat changes everything. Baked or simmered, the skins soften, the juice releases, and the floral notes concentrate into something richer and more distinctly berry-jam adjacent.

Unripe berries drop the honey notes entirely and lean sour - usable in compote with added sugar, but not ideal raw.

How to Use Blueberries

Blueberries handle heat well and hold their shape in baked applications better than most soft fruits. In muffins and quick breads, they stay mostly intact, pocketing juice into the crumb without collapsing the structure.

Pies and galettes benefit from the skins holding firm while the interior thickens into a cohesive filling.

Golden Rule
Toss fresh blueberries in a tablespoon of flour before folding into batter - it slows sinking and distributes them evenly through the crumb.

Simmered into compote, blueberries break down in minutes over medium heat with a splash of lemon juice and sugar. That compote works over pancakes and waffles, alongside roasted pork or duck, or spooned onto ricotta toast. For cocktails and smoothies, they puree cleanly and add deep color alongside mild acidity.

  • 🧁 Baked goods - muffins, pancakes, pies, galettes, scones, and quick breads all use them whole
  • 🍯 Compote and jam - simmers fast; concentrates the floral notes; keeps well refrigerated
  • 🥗 Raw and fresh - tossed in yogurt, oatmeal, salad dressings, or on a cheeseboard with soft cheese
  • 🥤 Pureed - blended into smoothies, vinaigrettes, or strained for cocktail syrups
  • 🍖 Savory sauces - quick-sautéed with shallot and a splash of vinegar for a glaze over pork or chicken

North American and Scandinavian cooking lean heaviest on blueberries - pies, preserves, and baked goods dominate both traditions.

Modern fusion cooking increasingly treats them as a sauce fruit, pairing blueberries with duck, chicken, and pork the same way stone fruits get used.

For fruit-forward savory pairings, blueberries swaps that work can help when the season is short or supply is low.

How Blueberries Are Used
MethodBest ForTip
🥗 RawYogurt, oatmeal, cheeseboards, saladsUse ripe, firm berries; wash just before serving
🧁 BakedMuffins, pies, tarts, galettes, pancakesFlour-coat before adding to batter to prevent sinking
🍳 SimmeredCompote, jam, pan sauce, syrupAdd lemon juice early to preserve color and brighten flavor
🥤 PureedSmoothies, vinaigrettes, cocktail syrupsStrain through a fine mesh to remove skins for silky texture
Try It In
🍗Air Fryer Honey Garlic Chicken TendersA blueberry compote makes a sharp, fruity dipping contrast→🍋Air Fryer Lemon Pepper Chicken TendersLemon and blueberry are a natural pairing — try a berry glaze alongside→🍖Crispy Honey Garlic Chicken WingsSwap or extend the glaze with reduced blueberry for a fruity depth→

How to Buy and Store Blueberries

Good blueberries don't need much inspection - the visual cues are fast. Look for berries that are plump, uniformly deep blue to indigo, and coated in a natural silvery bloom.

That bloom is a sign of freshness; avoid anything shiny, soft, or leaking. Steer clear of trays with crushed fruit or visible mold at the base, which spreads fast.

Watch Out
Red or green patches on blueberries mean underripe. They won't sweeten off the vine - what you buy is what you get.

Wild lowbush berries run smaller and darker than the highbush commercial variety; expect more concentrated flavor and a firmer, drier texture. Both types store the same way: unwashed in a breathable container in the refrigerator.

Washing before storage introduces moisture that accelerates softening and mold.

For a detailed breakdown of how long blueberries keeps under different conditions, including frozen versus refrigerated timelines, that guide covers the specifics.

Briefly: fresh berries last 5-10 days refrigerated; frozen, they hold well for up to a year with minimal quality loss.

Start Here

If you've never cooked with blueberries beyond raw snacking, a quick compote is the right first step. Four ingredients, ten minutes, and you have a sauce that works across breakfast, dessert, and savory mains.

  • 🫐 Raw first - add to yogurt, oatmeal, or a cheeseboard before committing to a recipe
  • 🔥 First cooked project - simmer into compote with lemon juice, sugar, and a pinch of salt
  • 🧁 First bake - fold into muffin batter, flour-coated, for a reliable result with minimal technique

If you're mid-recipe without blueberries, how long blueberries keeps matters less than having the right swap - and swapping out raspberries follows similar logic when acidity is the main job in the dish.

Frequently Asked Questions

Are blueberries good for you?

Yes. Blueberries are low in calories and provide vitamin C, fiber, manganese, and anthocyanins - the pigments that give them their color and act as antioxidants. They fit most diets, though they do add natural sugars and carbohydrates to a meal.

How do blueberries taste compared to blackberries?

Blueberries are milder and brighter, with a cleaner acidity and floral notes. Blackberries are deeper, jammier, and more intensely seedy - their flavor is richer but less delicate than blueberry.

Can you eat blueberry skins?

Yes - the skin is fully edible and where most of the anthocyanins concentrate. In pureed applications like sauces or cocktail syrups, straining removes the skins for a smoother result if texture is a concern.

How to tell if blueberries are ripe?

Ripe blueberries are uniformly deep blue to indigo with a visible silvery bloom and give slightly under gentle pressure. Any red or green tinge means underripe - they won't sweeten further once picked.

How to freeze blueberries properly?

Spread unwashed berries in a single layer on a sheet pan and freeze until solid - about two hours - then transfer to a freezer bag. This prevents clumping and keeps them loose for easy portioning later.

What Is Cheddar Cheese? [Taste, Uses & More]

March 28, 2026

A grilled cheese with sliced cheddar pulling apart in long, golden threads, or a ploughman's lunch with a thick wedge sitting beside sharp mustard and pickles - these are the scenes where cheddar does its best work.

What Is Cheddar Cheese

It's one of the most copied cheeses in the world, yet the real thing has a depth that mild imitations can't match, and even colby jack cheese in dairy recipes rarely reaches the same savory complexity.

From a grocery-store block to a two-year aged farmhouse wheel, cheddar covers more ground than almost any other cheese category.

QUICK SUMMARY

Cheddar cheese is a firm, pressed cow's-milk cheese from Somerset, England. It ranges from smooth and mild when young to crumbly, sharp, and nutty with age. It melts well, grates easily, and anchors British and American cooking alike.

🧀Category: Hard cow's-milk cheese, pressed and aged
👅Flavor: Buttery when mild, tangy and nutty when aged
🍽️Best Uses: Melting, grating, baking, cheese boards
❄️Shelf Life: Opened block: 3-4 weeks refrigerated, tightly wrapped
🛒Buy It: Look for smooth, uncracked surface; aged varieties show visible crumble inside

What Is cheddar cheese?

Cheddar originates from the village of Cheddar in Somerset, southwest England, where cheesemakers were producing it as far back as the 12th century.

Its defining production step - the cheddaring process - involves cutting the curd into slabs, stacking them, and repeatedly turning them to expel whey and develop a dense, close-knit paste.

Today, West Country Farmhouse Cheddar holds Protected Designation of Origin status in the UK, meaning it must be made in Somerset, Dorset, Devon, or Cornwall from local milk.

Most supermarket cheddar is made far from England, however, and skips traditional aging in favor of speed.

Age determines category more than anything else:

  • ⏱️ Mild cheddar - aged 2-3 months; smooth, soft, and easy-melting
  • 🧀 Sharp cheddar - aged 6-12 months; firmer, tangier, and more pronounced in flavor
  • ⭐ Extra-sharp or aged cheddar - 12 months and beyond; crumbly, crystalline, deeply savory
  • 🟠 Orange vs. white cheddar - color comes from annatto dye and has no effect on flavor or aging

What Does cheddar cheese Taste Like?

cheddar cheese - What Is Cheddar Cheese

Young, mild cheddar tastes clean and buttery, with a gentle dairy sweetness and almost no sharpness. It's the closest in character to Colby - smooth on the palate, easy-going, and unremarkable on its own.

Aged cheddar is a different experience entirely. Sharp cheddar delivers a pronounced tang, a lingering nuttiness, and a slight earthiness that deepens with every additional month of aging.

The comparison to using gruyere cheese for creaminess holds at the older end of the spectrum - both cheeses develop similar savory, nutty complexity, though cheddar stays drier and more acidic.

Sensory SnapshotModerate Intensity
👅 Flavor
butterytangynuttyslightly earthy
✋ Texture
firm and sliceablecrumbly when aged
👃 Aroma
dairy-forwardbutteryaged tang

Heat changes the character further. Melted mild cheddar turns creamy and mild-sweet; melted aged cheddar can turn slightly oily if pushed too hard, releasing fat before the proteins have a chance to stretch.

How to Use cheddar cheese

Cheddar's range across heat and temperature is what makes it so central to British and American cooking. At room temperature, it holds its shape cleanly for cheese boards.

Under heat, it melts into sauces, soaks into bread, and forms the golden crust on a gratin.

Golden Rule
Melt cheddar low and slow. High heat causes the fat to separate before the proteins soften, leaving you with a greasy, broken sauce instead of a smooth one.
How Cheddar Cheese Is Used
MethodBest ForTip
🥗 Raw / SlicedCheese boards, sandwiches, ploughman's lunchPair with crisp apple or pear to cut richness
🫕 MeltingGrilled cheese, nachos, cheese sauce, macaroniUse mild or medium; aged cheddar splits more easily
🧁 BakingSavory scones, biscuits, cheese straws, pastry doughGrate from frozen for even distribution in dough
✨ Grating / FinishingBaked potatoes, gratins, soups, vegetable dishesUse sharp or aged for maximum flavor impact

Cheddar pairs naturally with apples, pears, and crusty bread, and the pairing with brown ale or a single-malt whisky is a classic British pub move. Scallions, caramelized onions, and bacon all amplify its savory edge.

Avoid pairing it with overly acidic fruit compotes - they compete with cheddar's own tang rather than complementing it.

Try It In
🧀Flaky Cheddar Cheese StrawsSharp cheddar baked into a crisp, savory snack→

How to Buy and Store cheddar cheese

Buying by color is a trap. Orange cheddar gets its hue from annatto dye - it signals nothing about flavor or quality. Instead, focus on texture: a young block should feel firm and smooth with no cracks; an aged block should show a slightly rough surface and, ideally, small white calcium lactate crystals inside the paste when cut.

Watch Out
Avoid any block with a slimy or sticky surface - that's a sign of improper storage or spoilage, not just condensation.

For storage, wrap the cut surface in cheese paper or parchment, then loosely bag it. This lets the cheese breathe without drying out.

Keep it away from strong-smelling foods in the fridge, and treat the shelf life of your dairy section the same way you'd track milk's shelf life - use dates as a guide, not a guarantee.

Shelf life at a glance:

  • 📦 Unopened block - 6-8 weeks refrigerated
  • ✂️ Opened block - 3-4 weeks, tightly wrapped
  • 🧂 Shredded cheddar - 1-2 weeks; pre-shredded dries and molds faster
  • 🏆 Aged blocks - keep longer and continue developing flavor in the fridge

For a full breakdown of how to manage opened and unopened blocks, the guide to cheddar cheese in dairy recipes covers the details.

Where to Start with Cheddar

Start with a medium or sharp cheddar if you're cooking - mild cheddar disappears into dishes, while aged adds clear flavor without being aggressive. For cheese boards, go aged and crumbly alongside something crisp and fresh.

If you want to branch out from cheddar, look at cheddar cheese stand-ins that hold up in the same melting and grating roles.

Sharp cheddar rewards attention - grate it fresh, melt it slowly, and it will outperform anything pre-shredded at the same price point.

Frequently Asked Questions

Is cheddar a hard or soft cheese?

Cheddar is a hard cheese. It's made by pressing the curds firmly and aging the block, which removes moisture and creates a firm, dense paste. Older cheddar gets progressively drier and more crumbly.

Why does cheddar get crunchy crystals?

Those white specks are calcium lactate crystals, which form as moisture evaporates and lactic acid concentrates during aging. They're harmless and actually signal well-aged cheddar with good flavor development.

What is sharp cheddar vs mild cheddar?

The difference is aging time. Mild cheddar is aged 2-3 months and tastes clean and buttery; sharp cheddar is aged 6-12 months and develops a pronounced tang and firmer texture.

Does cheddar melt well?

Mild and medium cheddar melt smoothly over low heat. Aged cheddar can separate and turn oily if overheated because its lower moisture content makes it less forgiving.

Can you freeze cheddar cheese?

Yes, though the texture becomes crumbly after thawing, making it better for cooking than eating straight. Grate it before freezing and it works well in baked dishes and sauces.

What Is Butter Extract? [Taste, Uses & More]

March 28, 2026

Buttercream frosting is where most home bakers first reach for butter extract - a tiny bottle that adds a rich, creamy aroma without softening the fat structure that holds a stiff piping swirl together.

What Is Butter Extract

Much like using almond extract for creaminess or using rum extract for creaminess, butter extract works by concentrating flavor compounds into a few potent drops.

It's a small tool with a specific job, and knowing how to use it well makes a measurable difference in finished baked goods.

QUICK SUMMARY

Butter extract is a concentrated liquid flavoring that mimics browned butter's aroma using lactones and diacetyl dissolved in an alcohol or glycerin base. A few drops add rich, dairy-like notes to frostings, batters, and sauces without adding fat.

🍶Type: Water or alcohol-based flavor extract, no fat
🧈Flavor: Rich butter, mild caramel, faint cream
🧁Best Use: Frostings, vegan baking, low-fat muffins
📅Shelf Life: 2-3 years unopened; 6-12 months opened
🛒Buy It: Look for sealed glass bottles labeled natural or artificial butter flavor

What Is Butter Extract?

Butter extract is a commercial flavoring developed primarily in North America and Europe to replicate butter's aroma and taste in a fat-free liquid form.

It dissolves flavor compounds - chiefly diacetyl and lactones - into an alcohol or water-glycerin base, delivering concentrated buttery notes from a teaspoon or less.

You'll also see it labeled butter flavor extract, artificial butter extract, or buttery extract on store shelves.

Some brands market a thicker, emulsified version called butter emulsion, which blends better into high-fat batters without the slight sharpness an alcohol base can occasionally introduce.

Unlike most dairy-derived ingredients, much like lemon extract in dairy recipes, this extract functions purely as a flavor signal rather than a structural one. It contributes no fat, no cholesterol, and negligible calories.

  • 🍶 Alcohol-base versions - sharper initial aroma, better for frostings and cold applications
  • 💧 Glycerin or water-base versions - softer, rounder flavor; preferred for vegan baking and heat-stable applications
  • 🧪 Natural vs. artificial - natural versions use milk-derived lactones; artificial versions synthesize diacetyl and vanillin without dairy

What Does Butter Extract Taste Like?

butter extract - What Is Butter Extract

Butter extract tastes like browned butter stripped of its fat - a concentrated hit of warm, toasty dairy with faint caramel and cream-like undertones. It's noticeably less rich than real butter on the palate, since there's no fat to carry the flavor through, however the aroma does much of the perceptual work.

Sensory SnapshotModerate Intensity
👅 Flavor
Rich ButterMild CaramelCream-like
✋ Texture
Thin LiquidNo Fat Body
👃 Aroma
Warm ToastyVanilla-Lactone

At moderate intensity, the extract reads as dairy-forward with a subtle sweetness - closer to beurre noisette than fresh churned butter.

Heat can dull the volatile top notes, so adding it off-heat or near the end of cooking preserves the fullest aroma.

When combined with actual fat - oil, coconut cream, or vegan shortening - the flavor perception deepens considerably.

The fat carries the lactone compounds across the palate the same way real butter would, which is why comparing vanilla extract vs vanilla powder options matters too: the carrier affects delivery.

How to Use Butter Extract

Restraint is the first rule. Start with ½ to 1 teaspoon per batch for most recipes, then taste before adding more - overdoing it produces a chemical, almost artificial aftertaste.

Golden Rule
Add butter extract off-heat or at the very end of mixing. High heat evaporates volatile flavor compounds quickly, leaving almost nothing behind.
How Butter Extract Is Used
MethodBest ForTip
🧁 Folded InButtercream, frostings, fillingsAdd after creaming fat; taste before adding more
🥣 Stirred InMashed potatoes, custards, pastry creamAdd near end of cooking to protect aroma
🍞 Mixed into BatterQuick breads, muffins, low-fat cookiesCombine with wet ingredients before folding into dry
🫙 Blended into OilPopcorn, sautéed greens, finishing oilsWhisk thoroughly; glycerin-base blends more evenly

Vegan and plant-based baking is where butter extract earns its clearest role. Paired with neutral oil or vegan shortening, it brings the dairy-adjacent warmth that makes cookies and scones feel less like compromises.

For richer complexity, pairing it with vanilla extract, brown sugar, or a pinch of salt sharpens the buttery perception noticeably.

Savory applications work too. Sautéed mushrooms, low-fat mashed potatoes, and pan sauces all respond well to a few drops stirred in at the finish.

Exploring using butter extract for creaminess in these contexts shows how a small amount can round out a dish without added saturated fat.

Try It In
🍶Amaretto Extract RecipeSee how concentrated extracts layer for complex flavor→

How to Buy and Store Butter Extract

Look for sealed glass bottles with a clear label specifying whether the product is natural or artificial and what the carrier base is - alcohol or glycerin. Avoid any bottle with visible cloudiness or separation, both signs of age or contamination.

Watch Out
Some labels say "butter flavor" but the base is pure glycerin - that matters if you're avoiding alcohol or need a different viscosity for blending into oils.

Store the bottle in a cool, dark cupboard, cap tightly closed. Exposure to heat and light accelerates oxidation, which dulls the lactone compounds responsible for the warm, toasty aroma.

Full guidance on keeping butter extract fresh covers the shelf markers worth knowing, including when intensity loss crosses into unusable.

Unopened, expect 2-3 years of peak quality. Once opened, aim to use it within 6-12 months for fullest aroma, though it often remains usable beyond that window at reduced strength.

The role of using glycerin for creaminess matters here too - glycerin-base versions tend to hold their character slightly longer once opened than high-alcohol alternatives.

Where to Start With Butter Extract

Two applications stand out as the clearest entry points. Buttercream frosting shows the extract's strength immediately -

one teaspoon into a standard batch adds unmistakable aroma without breaking the structure. Vegan cookie dough is the second: a few drops alongside neutral oil closes most of the gap left by missing dairy fat.

  • 🧁 First batch - use ½ teaspoon in buttercream, taste, then decide if it needs more
  • 🌱 Vegan baking - pair with coconut oil or vegan butter for the fullest dairy-like result
  • 🍿 Quickest test - stir into warm popcorn oil for an immediate, low-stakes tasting

Keep expectations calibrated. Butter extract signals butter; it does not replace its fat, richness, or structural role.

Used for what it actually does, it's a genuinely useful addition to any extract shelf.

Frequently Asked Questions

Is butter extract dairy-free?

Artificial butter extract contains no dairy fat and is typically dairy-free. Natural versions may use milk-derived lactones as flavor compounds, so always read the allergen statement on the label before using in dairy-free recipes.

Can you substitute butter extract for butter?

No - butter extract only provides flavor, not fat or structure. It can supplement or mimic butter's aroma in low-fat recipes, however it cannot replace real butter's role in emulsification, moisture, or texture.

How much butter extract should you use per recipe?

Start with ½ to 1 teaspoon for a standard batch of cookies, frosting, or batter. Adding too much produces a sharp chemical note, so taste incrementally rather than measuring by feel.

What is diacetyl and why does it matter in butter extract?

Diacetyl is the primary flavor compound responsible for butter's characteristic aroma, occurring naturally in dairy and produced synthetically for artificial flavorings. At concentrations used in home cooking it poses no known risk, though industrial inhalation exposure is a separate occupational concern.

Does butter extract work in savory dishes?

Yes, in small amounts. A few drops stirred into mashed potatoes, sautéed greens, or a pan sauce at the finish adds warm, buttery aroma without saturated fat. Use less than you would in baking - savory dishes amplify concentration.

Slow Cooker Black Bean Soup

March 28, 2026

When you need a hands-off dinner that doubles as meal prep for the week, slow cooker black bean soup delivers. One pot, six ingredients, and you walk away while the beans turn tender and the broth thickens into something that tastes like it took effort.

Slow Cooker Black Bean Soup served on a plate

Dried beans do the heavy lifting. They break down just enough to create a creamy base while staying intact, giving you texture canned beans can't match.

Perfect for busy weeks when cooking feels like a chore but you still want real food that reheats well and freezes even better.

QUICK SUMMARY

Slow cooker black bean soup uses dried beans, aromatics, and cumin to build a thick, smoky soup with minimal effort. Soak the beans overnight to cut cook time and puree a third of the finished soup for creamy texture. Add lime juice after cooking to keep beans tender.

⏱️Time Reality: Soak beans 8-12 hours, then 6-8 hours on Low
🔥Critical Move: Sauté onion and garlic first for depth
⚠️Watch Out: Add lime juice last or beans stay hard

Table of Contents

Toggle
  • Why This Recipe Works
  • What You'll Need
    • Ingredient Details
  • Ingredient Swaps
  • What to Serve With It
  • Store and Reheat
  • Frequently Asked Questions
  • Slow Cooker Black Bean Soup
    • Method 
    • Tried this recipe?

Why This Recipe Works

Dried black beans need time to soften, and the slow cooker provides steady, gentle heat that prevents them from splitting or turning mushy. For meal planning strategies that pair well with slow cooker recipes, a similar soup recipe uses the same method with different beans and spices.

Quick Reference
⏱️
Prep Time
15 min
🔥
Cook Time
6-8 hours
⏰
Total Time
6-8 hours 15 min
🍽️
Servings
6 servings
📊
Difficulty
Easy
🏷️
Category
Main Dish
💡
Quick Tip
Soak beans overnight to reduce cook time
🎯
Best For
Weeknight | Meal prep

What makes this work:

  • Overnight soaking reduces cook time by 2+ hours and makes beans easier to digest
  • Sautéing onion and garlic before adding them to the slow cooker builds a savory base that raw aromatics can't deliver
  • Pureeing one-third of the cooked soup creates a thick, creamy texture without adding dairy or starch
  • Using vegetable broth instead of water gives the beans something to absorb as they cook, making every bite flavorful
  • Adding lime juice after cooking preserves bean tenderness since acid slows softening if added early
Quick Tip
Cook on Low for 6-8 hours or High for 3-4 hours. Beans should be tender with no crunch in the center.

What You'll Need

Ingredients for Slow Cooker Black Bean Soup

Dried black beans cost less than canned and give you control over texture. Most home cooks worry about soaking overnight, but planning ahead on shopping night solves it without extra effort.

🫘
Base
  • Dried black beans
  • Vegetable broth
  • Bay leaf
🧄
Aromatics
  • Onion
  • Garlic
  • Olive oil
🌶️
Spices
  • Cumin
  • Smoked paprika
🍋
Finishing
  • Lime juice
  • Cilantro

Ingredient Details

  • Dried black beans
    Soak 8-12 hours or use quick-soak method (boil 2 minutes, rest 1 hour). Unsoaked beans add 2-3 hours to cook time.
  • Onion
    Yellow or white onion works. Dice small so it softens completely during slow cooking.
  • Garlic
    Fresh garlic delivers more punch than powder. Sauté first to mellow the sharpness.
  • Cumin
    Ground cumin adds earthy, warm flavor. Start with 1 teaspoon and adjust after cooking.
  • Vegetable broth
    Low-sodium broth lets you control salt. Use 6 cups for thicker soup, 7 cups for thinner.
  • Lime juice
    Fresh lime juice brightens the soup. Add after cooking to keep beans tender.
  • Bay leaf
    Adds subtle herbaceous depth. Remove before serving or pureeing.

Ingredient Swaps

Canned beans cut prep time but change texture, and most pantry spices swap easily without wrecking the flavor profile. When choosing variations that still make sense for slow-cooked soups, check ingredients you already have before shopping for exact matches.

Four swaps that work:

  • Canned black beans for dried - reduce cook time to 2-3 hours on Low, expect softer texture
  • Water plus bouillon for vegetable broth - use 1 cube per 2 cups water, adjust salt at the end
  • Ground coriander for cumin - adds citrusy, floral notes instead of smoky earthiness
  • White vinegar for lime juice - sharper acid with no citrus sweetness, use half the amount

Dried Beans

Works for: better texture control, firmer bite, lower cost

Skip if: you're cooking same-day or forgot to soak overnight

Canned Beans

Works for: last-minute meals, shorter cook time, no soaking

Skip if: you want firm beans or thicker soup base

Instructions

This takes 15 minutes of active work, then the slow cooker handles the rest. The beans soften while you're gone, and pureeing part of the soup at the end thickens it without adding flour or cornstarch.

  1. Soak the beans: Place dried black beans in a large bowl, cover with 3 inches of cold water, and soak 8-12 hours. Drain and rinse before using.
  2. Sauté aromatics: Heat olive oil in a skillet over medium heat. Add diced onion and cook 3-4 minutes until soft, then add minced garlic and cook 1 minute until fragrant.
  3. Combine in slow cooker: Transfer sautéed aromatics to slow cooker. Add drained beans, vegetable broth, cumin, smoked paprika, and bay leaf. Stir to combine.
  4. Cook low and slow: Cover and cook on Low for 6-8 hours or High for 3-4 hours. Beans are done when tender with no crunch in the center.
  5. Puree and finish: Remove bay leaf. Transfer 2 cups of soup to a blender and puree until smooth, then stir back into the pot. Add lime juice and chopped cilantro, taste, and adjust salt.
Golden Rule
Taste the soup after pureeing and before serving. Slow cookers don't evaporate liquid like stovetops, so you'll likely need more salt than you expect.

What to Serve With It

Black bean soup needs something to break up the texture and add contrast. Starch soaks up the broth, crunch resets your palate, and acidity cuts through the richness. For more structured meal planning around comforting soups, warm bowl dinner ideas cover timing and plate balance for different soup types.

Side Dish Prep Why It Works How to Serve
Cornbread Easy Sweet crumb soaks up broth, adds textural contrast Serve warm with butter on the side
Simple green salad Easy Fresh greens and vinaigrette cut richness Dress lightly, serve alongside soup
White rice Easy Neutral base makes soup more filling Spoon rice into bowl, ladle soup over
Tortilla chips Easy Salty crunch breaks up creamy texture Crumble over soup or serve on the side
Avocado slices Easy Creamy, mild flavor balances spice and acid Top each bowl with 3-4 slices

Three ways to serve it:

  • Meal prep bowls: Divide soup into containers, pack rice and toppings separately, assemble when reheating
  • Taco night variation: Serve soup in bowls with shredded cheese, sour cream, and crushed chips like a deconstructed taco
  • Quick weeknight dinner: Ladle over rice, top with cilantro and lime wedges, serve with warm tortillas on the side
Shortcut
Make a double batch and freeze half in single-serve containers. Reheat from frozen in the microwave for 4-5 minutes, stirring halfway through.

Store and Reheat

Black bean soup thickens as it cools because the beans absorb liquid. Store it with slightly more broth than you'd serve, then thin it out when reheating. For busy weeks when batch cooking matters, this reheats better than most soups because the beans hold their shape instead of breaking down further.

Method Time Best For
🍳 Stovetop 5-7 min Larger portions, restoring texture with gentle heat and stirring
📦 Microwave 2-3 min Single servings, quick lunches when you're short on time
🔥 Oven 15-20 min at 325°F Multiple servings when stovetop isn't available

For best results when storing:

  • Store soup in shallow, airtight containers to cool quickly and evenly in the fridge
  • Add extra broth before refrigerating since beans absorb liquid as they sit
  • Freeze in single-serve portions for easier thawing and reheating on busy nights
  • Keep garnishes separate - cilantro, lime juice, and sour cream don't freeze well
  • Reheat gently on stovetop with a splash of broth or water to restore original consistency

Frequently Asked Questions

Can I use canned black beans instead of dried?

Yes, use three 15-ounce cans of drained, rinsed black beans and reduce cook time to 2-3 hours on Low. The soup will be softer and less chunky since canned beans break down faster.

How long can I store leftover slow cooker black bean soup?

Store in the fridge for 3-4 days in an airtight container. Freeze for up to 3 months in single-serve portions for easier reheating.

How do I know when black beans are fully cooked in the slow cooker?

Beans are done when they're tender with no crunch in the center. Test by pressing a bean between your fingers - it should mash easily without resistance.

Why is my slow cooker black bean soup bland and how to fix it?

Slow cookers don't reduce liquid like stovetops, so soups need more seasoning at the end. Add salt gradually after cooking, then stir in lime juice, cumin, or hot sauce to brighten the flavor.

Can I double or halve this slow cooker black bean soup recipe?

Yes, but keep your slow cooker between half and three-quarters full for even cooking. Halving works fine; doubling may require a larger slow cooker or two batches.

Slow Cooker Black Bean Soup served on a plate

Slow Cooker Black Bean Soup

No ratings yet
Slow cooker black bean soup uses dried beans and simple aromatics to build a thick, smoky soup with minimal effort. Soaking beans overnight reduces cook time, and pureeing part of the soup creates a creamy texture without dairy. Add fresh lime juice after cooking to keep the beans tender and flavorful.
Print Recipe Pin Recipe
Prep Time 15 minutes mins
Cook Time 7 hours hrs
Total Time 7 hours hrs 15 minutes mins
Servings: 6 servings
Course: Main Dish
Cuisine: American, Vegetarian
Ingredients Equipment Method Notes

Ingredients
  

  • 1 pound dried black beans soaked 8-12 hours and drained
  • 6 cups vegetable broth low-sodium for better control of salt
  • 1 bay leaf to be removed before serving or pureeing
  • 1 medium onion diced small
  • 3 cloves garlic minced
  • 1 tablespoon olive oil
  • 1 teaspoon ground cumin adjust after cooking if needed
  • 1 teaspoon smoked paprika
  • 2 tablespoons lime juice added after cooking
  • 2 tablespoons cilantro chopped fresh, added after cooking

Equipment

  • Slow cooker Used to cook the soup low and slow
  • Skillet Used to sauté onion and garlic before slow cooking
  • Blender Used to puree part of the soup for creamy texture

Method
 

  1. Place dried black beans in a large bowl, cover with 3 inches of cold water, and soak for 8-12 hours. Drain and rinse before using.
    1 pound dried black beans
  2. Heat olive oil in a skillet over medium heat. Add diced onion and cook 3-4 minutes until soft, then add minced garlic and cook 1 minute until fragrant.
    1 medium onion, 3 cloves garlic, 1 tablespoon olive oil
  3. Transfer sautéed aromatics to the slow cooker. Add drained beans, vegetable broth, ground cumin, smoked paprika, and bay leaf. Stir to combine.
    1 pound dried black beans, 6 cups vegetable broth, 1 bay leaf, 1 teaspoon ground cumin, 1 teaspoon smoked paprika
  4. Cover and cook on Low for 6-8 hours or High for 3-4 hours. Beans are done when tender with no crunch in the center.
    1 pound dried black beans
  5. Remove bay leaf. Transfer 2 cups of soup to a blender and puree until smooth, then stir back into the pot. Add lime juice and chopped cilantro, taste, and adjust salt.
    1 bay leaf, 2 tablespoons lime juice, 2 tablespoons cilantro

Notes

  • Soak beans overnight to reduce cook time and improve digestibility.
  • Sauté onions and garlic before slow cooking to build deeper flavor.
  • Add lime juice after cooking to keep beans tender and enhance brightness.

Tried this recipe?

Let us know how it was!

What Is Bisquick? [Taste, Uses & More]

March 28, 2026

Biscuits on a Tuesday night take about 12 minutes when there's a box of Bisquick on the shelf - no cutting cold butter, no sifting, no fuss over fat ratios the way scratch recipes demand.

What Is Bisquick

That kind of speed is exactly why Bisquick has held shelf space in American kitchens since 1931, and why home cooks reach for it far beyond biscuits.

Understanding what it actually is - and what it genuinely tastes like - helps you decide when it earns that shelf space and when butter swaps that work or baking powder swaps that work might matter more to the final result.

QUICK SUMMARY

Bisquick is a pre-mixed baking blend of enriched flour, leavening, salt, and fat. It tastes mild and slightly salty with a faint shortening note. Best for pancakes, drop biscuits, and dumplings. Opened boxes stay good for 3-6 months in an airtight container.

🌾Category: Shelf-stable prepared baking mix from General Mills
👅Flavor: Mild, slightly salty, faint buttery shortening note
🍳Best Uses: Pancakes, drop biscuits, dumplings, pot pie topping
📦Shelf Life: Unopened: up to a year; opened airtight: 3-6 months
⚠️Watch Out: Contains wheat and sometimes dairy - check the label before using

What Is Bisquick?

Bisquick is a prepared baking mix developed by General Mills and launched in the United States in 1931. It was originally created to make biscuits fast on dining cars, where consistency and speed mattered more than scratch technique.

The core formula combines enriched all-purpose flour, baking powder, salt, and a fat - historically shortening, now partially replaced with vegetable oil depending on the variety.

That pre-blended fat is the key difference between Bisquick and plain flour: you skip the step of cutting cold fat into dry ingredients yourself.

Several varieties exist on the market today:

  • 🟡 Original Bisquick - the standard blend, slightly salty, neutral fat base
  • 🔵 Buttermilk Bisquick - adds dried buttermilk for slight tang; check for dairy allergens
  • 🟢 Gluten-Free Bisquick - uses rice flour blend; labeled separately
  • ⚪ Heart Smart Bisquick - reduced fat, lower sodium formulation

It goes by informal names like biscuit mix, pancake mix, or (less commonly) bizquick or Bis-quick, though those spellings are just phonetic shorthand. The brand is sometimes used interchangeably with generic store-brand biscuit mixes, which follow the same basic formula.

What Does Bisquick Taste Like?

bisquick - What Is Bisquick

On its own, Bisquick tastes like mildly salted, neutral flour with a faint background note of shortening. There's no strong butter flavor, no tang, and no sweetness beyond what enriched flour naturally carries.

Sensory SnapshotModerate Intensity
👅 Flavor
mild wheatyslightly saltyneutral shortening
✋ Texture
tender crumbslightly crumbly
👃 Aroma
flouryfaint shortening

Compared to scratch biscuits made with cold butter, Bisquick-based baked goods taste cleaner and less complex. Butter builds a richer, slightly grassy flavor that the shortening in Bisquick doesn't fully replicate.

Heat does change things. Baked and griddle-cooked Bisquick develops a light toasted wheat note that's absent in the dry mix. Dumplings cooked in broth pick up savory flavors from the liquid, which does most of the flavor work.

Golden Rule
Bisquick is a neutral base - it carries flavor, it doesn't create it. Season the dish around it, not the mix itself.

How to Use Bisquick

Bisquick works across a wider range of dishes than most people initially try it in. The ratio changes by application, so following the box ratio for each dish matters more here than with flexible scratch recipes.

The mix pairs naturally with buttermilk or whole milk, eggs, and salted butter for both sweet and savory applications.

Maple syrup or fruit compotes round out pancakes; cheddar and chives shift it toward savory biscuits.

For rich dumplings, roasted chicken and gravy carry the whole dish.

If you don't have all your ingredients, knowing vegetable oil stand-ins or how long how long milk keeps can save a batch.

How Bisquick Is Used
MethodBest ForTip
🥞 GriddlePancakes, silver dollar cakesLet batter rest 2 minutes before pouring - fluffier result
🥐 Baked (drop)Drop biscuits, cheese scones, coffee cakeDon't overmix - stir until just combined to keep crumb tender
🍲 SimmeredDumplings in chicken and dumplingsDrop by spoon onto simmering broth, cover tightly, don't lift the lid
🍗 Pan-friedLight coating for chicken or pork cutletsMix with seasoning only - no egg needed for a thin crust
🥧 Baked (crust)Pot pie topping, impossible piePour over filling directly - it self-separates into a crust layer

Bisquick fits squarely in American home-style cooking - Southern drop biscuits, Midwestern pot pies, and camping-friendly pancakes where a full kitchen isn't available.

It doesn't suit yeasted bread or any recipe needing long gluten development, and its pre-added leavening can throw off delicate emulsions.

When the mix isn't available, bisquick swaps that work or even self rising flour swaps that work can bridge the gap in most recipes.

Try It In
🍲Chicken and DumplingsBisquick makes the dumpling step nearly foolproof→

How to Buy and Store Bisquick

Buy sealed boxes and check the best-by date printed on the carton end. Caked lumps inside the box signal moisture exposure - skip that one. If you're buying Buttermilk Bisquick for a dairy-free household, read the label carefully; it contains dried buttermilk.

Watch Out
The fat in Bisquick can go rancid over time, especially in warm pantries. If the dry mix smells stale or sour, discard it - the leavening will be flat too.

Store an opened box in an airtight container in a cool, dry spot. The original box alone won't block moisture or pantry pests long-term.

Transferred correctly, opened Bisquick holds quality for 3-6 months.

For unopened boxes, bisquick's shelf life can stretch up to a year, though leavening potency does fade.

That degradation pattern mirrors what happens with raw flour - flour's shelf life follows a similar arc once the package is opened and exposed to air.

Start Here

If you've never used Bisquick before, start with drop biscuits - stir, drop by spoon onto a baking sheet, bake at 450°F for 10 minutes.

That single test tells you how the mix handles in your oven and whether the salt level suits your cooking.

From there, dumplings in a chicken broth base are the next move. Those two applications cover most of what Bisquick does well.

Shortcut
For savory biscuits, stir ½ cup shredded sharp cheddar and a pinch of garlic powder directly into the dry Bisquick before adding milk. No other changes needed.

Frequently Asked Questions

What is Bisquick made of?

Enriched all-purpose flour, leavening (baking powder), salt, and fat (shortening or vegetable oil). The pre-blended fat is what separates it from plain flour - you skip cutting fat in yourself.

Is Bisquick the same as pancake mix?

Not exactly. Both contain flour and leavening, but dedicated pancake mixes often include added sugar and powdered milk. Bisquick is more neutral and works across savory applications where a sweet pancake mix would not.

Can you use Bisquick for biscuits?

Yes - drop biscuits are one of its core applications. They won't be as layered or rich as scratch buttermilk biscuits, but they bake in about 10 minutes with minimal effort.

How long does Bisquick last once opened?

About 3-6 months when stored airtight in a cool, dry place. The fat in the mix degrades faster than the flour, so a rancid or stale smell is the clearest sign it's past its best.

Does Bisquick work for gluten-free baking?

Only if you buy the specifically labeled Gluten-Free Bisquick, which uses a rice flour blend. Standard Bisquick contains wheat and is not safe for gluten-free diets.

What Is Cavatappi Pasta? [Taste, Uses & More]

March 28, 2026

Macaroni and cheese made with cavatappi holds its sauce in a way flat or smooth pasta simply can't - the spiral groove and hollow tube work together to pull in every bit of cheddar, and that's before you even factor in the ridged exterior.

What Is Cavatappi Pasta

Whether you're building a cold italian pasta salad in grain dishes or layering a baked ragù casserole, this corkscrew shape earns its spot.

Knowing what cavatappi actually tastes like, how to cook it properly, and what to pair it with makes the difference between a dish that works and one that doesn't.

QUICK SUMMARY

Cavatappi is a short, ridged corkscrew pasta made from durum semolina. Its hollow spiral traps chunky and creamy sauces better than most short pasta shapes. Mild in flavor, it works as a neutral carrier that lets the sauce do the talking. Dry shelf life runs 12-24 months unopened.

🌾Flavor: Mild wheaty, slightly nutty, neutral sauce carrier
🍝Best Uses: Mac and cheese, baked casseroles, cold pasta salads
🧀Pairs With: Cheddar, fontina, ragù, pesto, creamy tomato sauces
📦Shelf Life: 12-24 months unopened; 12-18 months opened, airtight
🏷️Also Known As: Cellentani, spirali - same shape, different brand names

What Is cavatappi pasta?

Cavatappi is a short, hollow pasta shaped into a double-helix corkscrew, made from durum semolina and water. The name translates roughly from Italian as "corkscrew," which describes the shape exactly.

Its modern commercial form was popularized in the 20th century, though the shape draws on older Italian pasta-making traditions.

You'll see it sold under several names depending on the brand. Cellentani is the most common alternate name, used by Barilla; spirali appears less frequently but refers to the same shape.

What sets cavatappi apart structurally is the combination of three sauce-trapping features working at once:

  • 🌀 Hollow tube - sauce and small ingredients travel inside the pasta itself
  • 🌀 Spiral groove - wraps around the outside, collecting chunky bits of meat or vegetable
  • 🌀 Ridged exterior - fine lines across the surface grip creamy and oil-based sauces

No single other short pasta combines all three. Rotini has the spiral but no hollow core.

Penne has the tube but no spiral channel. If you need a substitute, understanding what each shape sacrifices is worth looking into through our guide to alternatives to cavatappi pasta.

What Does cavatappi pasta Taste Like?

cavatappi pasta - What Is Cavatappi Pasta

Cavatappi tastes the way most good dried pasta does - mild, faintly wheaty, with a subtle nuttiness from the durum semolina that becomes slightly more pronounced as it cooks. It's a neutral base, not a flavor in itself.

The texture is where it earns its reputation. Cooked al dente, the exterior has a slight chew from the ridges while the interior stays springy and light.

Overcook it and that contrast collapses into uniformity - edible, but you lose what makes the shape worth choosing.

Sensory SnapshotMild Intensity
👅 Flavor
wheatyslightly nuttyneutral
✋ Texture
firmspringychewy ridges
👃 Aroma
toasted grainsubtle wheat

Compared to rotini or penne, cavatappi delivers more sauce per bite - not because it tastes different, but because more surface area means more sauce reaches your palate in every forkful.

Whole-wheat cavatappi shifts the flavor noticeably, adding a nuttier, earthier base that works well with robust ragùs but can feel heavy against light pesto.

How to Use cavatappi pasta

Cavatappi handles three cooking methods particularly well, and each one plays to a different structural advantage.

How Cavatappi Is Used
MethodBest ForTip
🍳 Boiled + SaucedCreamy or chunky sauces, ragù, vodka saucePull from water 1 minute early if baking after
🥘 BakedMac and cheese, casseroles, gratinsUndercook by 2 minutes before baking to avoid mush
🥗 Cold/SaladPasta salads with vinaigrette and vegetablesRinse with cold water after draining to stop cooking

For baked mac and cheese, cavatappi is the shape most restaurant versions use because the hollow spiral holds the cheddar sauce inside and outside the pasta simultaneously.

A creamy cheddar-fontina blend coats it better than it would coat penne or elbows.

You can follow a mac and cheese recipe built specifically for the shape if you want the ratio of sauce to pasta dialed in.

Pesto clings to the ridges and spiral grooves, trapping basil, pine nut, and parmesan bits in a way flat pasta can't replicate - cooking pesto sauce perfectly matters here because an overly oily pesto slides off even ridged pasta.

Avoid thin, brothy sauces. There's nothing for the shape to hold - the sauce runs straight through and pools at the bottom of the bowl.

Golden Rule
Always undercook cavatappi by 1-2 minutes before baking. The oven adds heat and the pasta absorbs sauce as it finishes cooking - start at full al dente and you'll end up with mush.
Try It In
🍗Creamy Tuscan Chicken PastaThe spiral traps sun-dried tomato and cream sauce in every bite→🌿Creamy Pesto Chicken PastaRidges grip pesto better than smooth short pasta shapes→🍤Lemon Garlic Butter Shrimp PastaLight butter sauce clings to the exterior ridges without pooling→

How to Buy and Store cavatappi pasta

Bronze-cut cavatappi is the better buy. The bronze die-cutting process leaves a rougher surface than Teflon-cut pasta, which means more texture for sauces to grip. Look for it labeled as "trafilata al bronzo." Avoid boxes where the pasta looks powdery white at the ends - that residue signals age or humidity damage.

Watch Out
White powdery residue on dry cavatappi isn't flour - it's a sign of age or poor storage. The pasta has started to degrade and won't cook evenly. Skip that box.

For whole-wheat or gluten-free cavatappi, check the ingredient label carefully. Whole-wheat versions use whole durum semolina and cook slightly differently; gluten-free blends vary between rice, corn, and quinoa bases, each with a different texture and cooking time.

Store an opened box by transferring the pasta to an airtight container - humidity and pantry pests are the main threats. Much like wheat's shelf life, dry durum pasta holds well when kept away from moisture and heat.

Check cavatappi pasta spoilage signs if you're unsure whether an older box is still usable.

  • Unopened - 12-24 months in a cool, dry pantry
  • Opened, airtight - 12-18 months if kept dry
  • Cooked - 3-5 days refrigerated in a sealed container

Start Here for the Best Results

If you're buying cavatappi for the first time, go bronze-cut and use it in a baked dish - that's where the shape shows its full advantage.

The hollow spiral holds sauce through both the boiling and baking stages, and you'll immediately understand why this shape outperforms elbows in mac and cheese.

Already have a box? Try it cold in a pasta salad first. It's the fastest test of how the ridges and spiral trap vinaigrette and chunky vegetables without a sauce overwhelmingly thick.

From there, the shape works for almost any dish that would otherwise call for rotini or penne - with better sauce delivery in every case.

Frequently Asked Questions

How is cavatappi different from rotini?

Cavatappi has a hollow core that rotini lacks. Both have a spiral shape, but cavatappi traps sauce inside and outside the tube simultaneously. Rotini holds sauce only on its exterior grooves.

Is cavatappi the same as cellentani?

Yes - cellentani is Barilla's brand name for the same shape. The shape, dimensions, and cooking behavior are identical. Use them interchangeably in any recipe.

How long to cook cavatappi for al dente?

Most brands cook to al dente in 9-11 minutes in well-salted boiling water. Start tasting at 8 minutes - the pasta should have a slight resistance at the center when bitten through.

Does cavatappi hold sauce better than penne?

Yes, for most sauces. Cavatappi adds a spiral channel and ridged exterior to penne's hollow tube, giving sauce three surfaces to cling to instead of one. The advantage is most noticeable with chunky or creamy sauces.

Can you use cavatappi for mac and cheese?

It's one of the best shapes for it. The hollow spiral pulls cheese sauce inside and holds it on the ridged exterior, giving you more sauce per bite than elbows or penne deliver.

What Is Broccoli? [Taste, Uses & More]

March 28, 2026

Broccoli does something few vegetables manage: it works at every temperature, every texture, and in nearly every savory context.

What Is Broccoli

Raw, it contributes crunch and a clean bite to slaws and crudité platters; roasted hard, it turns slightly sweet with crisp, browned edges; pureed, it gives soups a thick, vegetal body.

It sits in the same cruciferous family as brussels sprout stand-ins and cauliflower - the air fryer cauliflower cooking methods that work so well for that vegetable translate directly to broccoli florets, too.

Few ingredients deliver this kind of range from a single grocery run.

QUICK SUMMARY

Broccoli is a green cruciferous vegetable with a mild bitter flavor, crisp texture when raw, and slightly sweet notes when roasted. It works steamed, stir-fried, pureed, or raw, pairing well with garlic, lemon, Parmesan, and soy. Fresh heads keep 5-7 days refrigerated.

🥦Type: Cruciferous vegetable, Italian origin, edible florets and stalk
👅Flavor: Mildly bitter, vegetal, slightly sweet when roasted
🍳Best Uses: Roasting, stir-frying, steaming, pureeing into soup
🛒Buy It: Tight dark-green florets, firm pale stalks, no yellowing
🗓️Shelf Life: Whole heads 5-7 days; pre-cut florets 3-4 days; cooked 3-5 days

What Is Broccoli?

Broccoli is a cruciferous vegetable in the Brassica oleracea species, the same broad species that gave us cabbage, cauliflower, and kale.

Originally cultivated in Italy - calabrese broccoli, named for Calabria, is the variety most common in Western markets - it has been eaten in the Mediterranean for over 2,000 years.

You may also see it labeled as broccoli florets when sold pre-cut, or encounter broccolini, a hybrid with thinner stalks and a milder flavor (for alternatives to broccolini, most crucifer swaps apply equally).

The plant is essentially an immature flower head: what we eat is the cluster of tightly closed buds before they bloom.

Both the dark-green florets and the pale-green stalk are edible, though the stalk takes longer to cook and has a slightly firmer bite.

Purple-tinged varieties exist and behave the same way in the kitchen - the color fades to green once cooked.

  • 🌿 Calabrese broccoli - the standard supermarket variety with large, compact heads
  • 🌿 Broccolini - a broccoli-gai lan hybrid with thin stalks and smaller florets
  • 🌿 Romanesco - a relative with fractal-patterned heads and a nuttier flavor
  • 🌿 Purple sprouting broccoli - multiple small heads on one plant, sweeter and more tender

What Does Broccoli Taste Like?

broccoli - What Is Broccoli

Raw broccoli has a clean, mildly bitter bite - green and slightly astringent, with a faint sulfurous undertone shared by all brassicas. It tastes similar to cabbage and Brussels sprouts, though with less earthiness than kale.

Understanding what preparing kale properly looks like helps here - broccoli requires far less attention to tame its bitterness.

Heat transforms the flavor. Steaming or blanching softens the bitterness into a more neutral, grassy sweetness. Roasting pushes further: at high heat, natural sugars caramelize and the floret edges turn slightly nutty.

Overcooking is the only real risk - too much moisture and high heat activate sulfur compounds (glucosinolates) that produce the distinct boiled-broccoli odor most people find unpleasant.

Sensory SnapshotModerate Intensity
👅 Flavor
mildly bittervegetalslightly sweet when roastedcabbage-like
✋ Texture
crisp rawtender-crisp when cookedcreamy when pureed
👃 Aroma
green and grassysulfurous if overcooked

How to Use Broccoli

Broccoli is one of the most method-flexible vegetables in a savory kitchen. It holds its structure through dry heat and breaks down cleanly with moisture - knowing which method to reach for changes the result significantly.

How Broccoli Is Used
MethodBest ForTip
🥗 RawSlaws, crudité platters, saladsCut florets small; slice stalk thin against the grain
♨️ SteamedSimple sides, pasta additionsSteam 4-5 minutes max; finish with lemon and olive oil
🔥 RoastedSalads, sheet-pan sides, grain bowls425°F, single layer, don't crowd - edges need dry heat to brown
🥢 Stir-friedAsian-style dishes, quick weeknight dinnersHigh heat, small florets, add soy and garlic in the last 60 seconds
🫕 PureedBroccoli cheddar soup, creamy saucesBlanch first, then blend with stock for smooth body without stringiness
🔥 GrilledWhole halved heads, charred sidesBrush cut sides with oil; grill over medium-high for 6-8 minutes

Garlic, lemon, and Parmesan form the most reliable flavor base for broccoli in Italian and Mediterranean cooking. In Chinese-style stir-fries, soy sauce and sesame oil replace those - a classic beef and broccoli stir-fry uses high heat and oyster sauce to build a glossy coating around the florets. For umami depth in any preparation, anchovy or a strip of bacon added early in cooking makes the broccoli's bitter notes recede quickly.

In American cooking, broccoli is most often paired with cheddar cheese - broccoli cheddar soup being the standard - while roasted broccoli florets tossed with Parmesan have largely replaced steamed broccoli on restaurant menus.

The choice of what to serve dishes alongside broccoli depends heavily on the cooking method used, since roasted broccoli reads very differently from steamed on the same plate.

Watch Out
Avoid cooking broccoli with high moisture and prolonged heat together. Boiling for more than 5-6 minutes triggers sulfur compound release - the result is that sharp, unpleasant odor and a mushy texture that can't be recovered.
Try It In
🥢Beef and Broccoli Stir FryHigh-heat stir-fry that shows how soy and oyster sauce coat florets perfectly→🧀Parmesan Roasted Broccoli FloretsDemonstrates the caramelized, slightly sweet result that only dry high heat delivers→🍗Chicken and Broccoli Alfredo BakeShows how blanched broccoli holds its texture inside a cream-based bake→

How to Buy and Store Broccoli

At the market, look for tight, dark-green florets with no yellowing or open blossoms - yellow florets signal the plant is past peak and will taste more bitter and less firm.

The stalk should feel solid and pale green, not limp or hollow at the cut end.

A slight purple tinge on the florets is fine; black spots at the base are not.

Quick Tip
Don't wash broccoli before refrigerating - moisture accelerates decay. Wrap loosely in a paper towel, place in a perforated bag, and store in the crisper drawer. Wash just before use.

At home, keeping broccoli fresh comes down to moisture control in the crisper.

Whole heads last 5-7 days; pre-cut florets drop to 3-4 days because cut surfaces oxidize faster.

Cooked broccoli keeps 3-5 days in an airtight container.

If broccoli is out of season or unavailable, a guide to replacements for broccoli covers the closest options, including cauliflower and replacements for green cabbage that share similar texture behavior when cooked.

Start Here With Broccoli

Roast it first. A hot oven at 425°F with olive oil, salt, and a single layer of florets is the fastest path to understanding why broccoli has staying power in serious kitchens.

  • 🔥 New to broccoli - roast at high heat until the edges crisp; finish with lemon
  • 🥢 Want speed - stir-fry with garlic and soy takes under 10 minutes
  • 🥣 Want comfort - blanch and blend into broccoli cheddar soup for a classic result
  • 🥗 Keeping it raw - cut small, toss with a sharp vinaigrette to cut bitterness

Don't start with steaming. It's not wrong, however it's the method least likely to show you what the vegetable can do.

Frequently Asked Questions

Is broccoli a vegetable or a flower?

Both, technically. The part we eat is an immature flower head - tightly clustered buds that haven't yet bloomed. It's classified and sold as a vegetable, however botanically it's the reproductive structure of the plant.

Why does broccoli smell when cooked?

Overcooking breaks down glucosinolates into sulfur-containing compounds - the same chemistry that gives boiled cabbage its odor. Keep cook times under 6 minutes with wet methods, and the smell stays minimal.

How long does broccoli last in the fridge?

Whole unwashed heads keep about 5-7 days in the crisper. Pre-cut florets go faster - expect 3-4 days before texture and color degrade noticeably.

Can you eat broccoli stem?

Yes. The stalk is fully edible - peel the outer fibrous layer and the interior is mild and slightly sweeter than the florets. Slice it thin for stir-fries or cut into batons for crudité.

Is broccoli healthy to eat raw?

Yes, and some nutrients - particularly vitamin C - are higher in raw broccoli since heat degrades them. Raw florets are also a source of intact glucosinolates, which cooking partially breaks down.

What Is Bechamel Sauce? [Taste, Uses & More]

March 28, 2026

Potato gratin would be a different dish without béchamel - drier, denser, and missing that creamy binding layer that holds each slice together. This sauce, made from just butter, flour, and milk, shows up across French and Italian kitchens as both a finished product and a starting point for richer derived sauces.

Understanding what béchamel actually tastes like - and how to use it well - is worth the time, whether you're making lasagna or a simple potato gratin.

QUICK SUMMARY

Béchamel is a mild, silky white sauce built from a butter-flour roux and warm milk. It tastes gently dairy-sweet with a toasty backbone, and it functions as a base sauce, binder, or creamy layer in dozens of dishes. Homemade keeps 2-3 days refrigerated.

🧈Category: Classic French mother sauce made from roux and milk
🤍Flavor: Mild dairy sweetness with buttery richness and faint toasty flour
🍝Best Uses: Lasagna, gratins, Mornay sauce, creamy soups, croquettes
❄️Shelf Life: Homemade 2-3 days refrigerated; store-bought up to 7 days opened
⚠️Watch For: Lumps from too-hot roux, skin on cooling, flat taste without seasoning

What Is Béchamel Sauce?

Béchamel is one of the five classical French mother sauces, which means it functions as the foundation for a family of derived sauces rather than as an end in itself.

The base is always a white roux - equal parts butter and flour cooked briefly together - into which warm milk is whisked gradually until the starch hydrates and the sauce thickens.

It originated in seventeenth-century French court cooking and is named after Louis de Béchamel, a financier credited with its development, though the sauce likely predates him.

Outside France, it travels under other names: Italians call it salsa besciamella, and British cooks commonly refer to it as white sauce or sauce blanche.

Variations exist primarily in thickness and seasoning. A thin béchamel pours like heavy cream and works in soups; a thick one holds its shape in croquettes.

Nutmeg is the classic seasoning addition, though white pepper is equally common.

  • 🇫🇷 French origin - one of Escoffier's codified five mother sauces
  • Core ratio - typically 1:1 butter-to-flour by weight, with milk added to consistency
  • Mornay sauce - the most common derivative, made by melting Gruyère or Parmesan into béchamel
  • Dietary note - contains gluten and dairy; requires substitutions for vegan or gluten-free diets

What Does Béchamel Sauce Taste Like?

bechamel sauce - What Is Bechamel Sauce

Béchamel on its own is deliberately mild. The dominant note is gentle dairy sweetness from the milk, underscored by the richness of butter.

Behind that is a faint wheaty, toasty quality from the cooked roux - subtle enough that most people don't identify it consciously, but noticeable if the flour is undercooked and raw-tasting.

Sensory SnapshotMild Intensity
👅 Flavor
dairy-sweetbutterytoasty-flournutmeg warmth
✋ Texture
silkyvelvetycoat-the-spoon
👃 Aroma
warm milklightly toasty

Seasoning changes everything. A pinch of nutmeg - or a related warm spice; see our allspice vs nutmeg breakdown - adds floral warmth that lifts the sauce from flat to rounded.

Without it, béchamel can taste one-dimensional, more filler than sauce.

Texture matters as much as flavor here. A properly whisked béchamel feels silky and coats ingredients evenly.

Over-thickened, it turns starchy and pasty - closer to a gluey paste than a sauce.

Golden Rule
Cook the roux for at least 1-2 minutes before adding milk. This eliminates the raw flour taste that makes béchamel taste flat and starchy rather than clean and dairy-forward.

How to Use Béchamel Sauce

Béchamel earns its place in so many recipes because its mild, neutral base absorbs other flavors without fighting them. It carries cheese, mustard, nutmeg, and herbs equally well.

How Béchamel Is Used
MethodBest ForTip
🍝 LayeredLasagna, baked pasta, moussakaUse medium-thick consistency so it doesn't run between layers
🧀 Cheese baseMornay sauce, mac and cheese, gratinsAdd cheese off-heat to prevent graininess
🥣 ThinnedCream of mushroom, cream of celery soupsWhisk in stock or extra milk gradually
🫙 BinderCroquettes, savory soufflés, stuffed vegetablesUse a thick roux ratio so the mixture holds shape when cold
🌿 EnrichedMustard sauce, horseradish cream sauceStir in condiments at the end over low heat

French cooking treats béchamel as the backbone of the gratin family, and Italian cooks layer it into lasagna alongside ragù to keep the pasta from drying out during long baking. British cuisine reaches for it in fish pies and cauliflower cheese.

American casseroles often use a simplified version made from canned cream soup - that's béchamel in spirit, if not technique.

It pairs naturally with Gruyère, Parmesan, or cheddar for cheese sauces, and with root vegetables like cauliflower, potatoes, and parsnips in baked dishes. Poached or baked white fish also takes well to it.

If you want to compare it to a related hollandaise sauce - another butter-based sauce - the key difference is that béchamel is starch-thickened while hollandaise relies on emulsified egg yolks.

Shortcut
For a weeknight Mornay, make a basic béchamel, remove from heat, and whisk in finely grated Gruyère or cheddar by the handful. No extra steps - just stir until melted and glossy.
Try It In
🤍Classic French Béchamel White SauceThe foundational recipe — master ratios and technique before adapting→

How to Buy and Store Béchamel Sauce

Making béchamel from scratch gives you better texture than any jar. When buying ingredients, select whole milk for its higher fat content - it produces a richer, more stable sauce than reduced-fat versions.

Butter should be pale yellow and firm; unsalted gives you control over the final seasoning.

Best Pick
If buying ready-made, choose a refrigerated tub labeled "fresh" over shelf-stable versions. Check for no separation or watery layer when you open it - that's a sign of emulsion breakdown.

For storage, the main enemy is skin formation as the sauce cools.

  • Press plastic wrap directly onto the sauce surface before refrigerating - this blocks air contact and prevents skin
  • Airtight container - keeps for 2-3 days homemade; store-bought refrigerated versions typically last 5-7 days once opened
  • Reheat gently - use a low flame and whisk constantly; high heat causes the sauce to scorch or separate
  • Freezing works - though texture may turn slightly grainy; whisk vigorously after thawing to re-emulsify

For a full breakdown of timing and signs of spoilage, the bechamel sauce storage life guide covers it in detail.

Where to Start with Béchamel

Start with lasagna if you've never made it before - the sauce gets baked in and minor imperfections in texture disappear. Once that feels easy, move to a stovetop Mornay for mac and cheese, where the sauce is more exposed and technique shows.

If your goal is gratins, a medium-thick béchamel poured over cauliflower and baked until bubbling is low-risk and high-reward. The lasagna storage life article is useful once you start batch-cooking.

Frequently Asked Questions

Is béchamel the same as white sauce?

Yes, in most home-cooking contexts. "White sauce" is the British and American everyday name for béchamel - same roux base, same milk, same technique. The distinction only matters in formal French cooking, where béchamel is specifically one of the five mother sauces.

How do you fix lumpy béchamel?

Pass it through a fine-mesh sieve while still hot, then whisk vigorously. If lumps persist, blend briefly with an immersion blender. The most common cause is adding cold milk too fast - always add warm milk in a slow stream.

Can you freeze béchamel sauce?

Yes, for up to 3 months. Freeze in a sealed container with minimal headspace. Thaw overnight in the fridge, then whisk over low heat - the texture may be slightly grainy but returns to smooth with enough stirring.

What makes béchamel taste bland?

Under-seasoning is the usual culprit - béchamel needs salt, white pepper, and nutmeg to taste rounded rather than flat. Using low-fat milk also reduces the dairy richness that gives the sauce its body and faint sweetness.

What is béchamel sauce used for beyond pasta?

It works as a binder in croquettes and savory soufflés, a base for creamy soups like cream of mushroom, and a coating sauce for baked fish or vegetable gratins. Thin it with stock for soups; thicken it for croquette filling.

How Long Does Cantaloupe Last? [Storage Guide]

March 28, 2026

Buying a cantaloupe feels straightforward until you're staring at a half-eaten melon three days later, unsure whether it's still safe. Ripe cantaloupe has a narrow storage window - get the conditions wrong and that sweet, orange flesh turns watery and fermented fast, much like about what happens to gluten during fermentation shows how quickly food chemistry shifts when conditions tip.

Can You Freeze Cantaloupe

Understanding cantaloupe's flavor and uses first helps clarify what you're actually trying to preserve.

This guide covers every storage method, freeze process, and spoilage sign so nothing goes to waste.

QUICK SUMMARY

A whole ripe cantaloupe lasts up to 7 days in the fridge. Cut melon stays good for 3-4 days in an airtight container. Freeze sliced, peeled pieces for up to 12 months - expect soft texture after thawing.

🧊Fridge (whole): 5-7 days in crisper; wrap cut surfaces airtight
❄️Freezer (sliced): 8-12 months; texture softens, best for smoothies
🏠Counter: 1-5 days unripe to ripen; use ripe melon within 1-2 days

How Long Does Cantaloupe Last?

Cantaloupe shelf life depends on two things: ripeness at purchase and whether the melon has been cut. An unripe, whole melon is more forgiving; a ripe or sliced one is on a tight clock.

Cantaloupe Shelf Life
MethodStateDurationNotes
🏠 CounterWhole (unripe)1-5 daysRipens at room temp; move to fridge once ripe
🏠 CounterWhole (ripe)1-2 days maxOverripens quickly; refrigerate immediately
🧊 FridgeWhole5-7 daysCrisper drawer preferred; aroma may blunt slightly
🧊 FridgeSliced/cut3-4 daysAirtight container essential; absorbs fridge odors fast
❄️ FreezerSliced8-12 monthsTexture becomes soft; use in smoothies or cooked dishes

The high water content in melon flesh - roughly 90% - is what drives this timeline. Once cells are exposed to air, moisture escapes quickly and microbial activity accelerates.

Whole melons keep longer because the melon rind acts as a natural barrier.

Golden Rule
Move a ripe whole cantaloupe to the fridge the same day you buy it. Every hour at room temperature shortens its refrigerator life.

How to Store Cantaloupe

Storage method matters more with cantaloupe than with most fruit because the flesh is so porous. A few specific habits protect both flavor and safety.

Counter: Only store whole, unripe cantaloupe at room temperature. Cantaloupe produces ethylene gas as it ripens, so a counter spot works well for bringing firm melon to peak ripeness. Avoid warm, humid pantries - they accelerate overripening and mold at the stem cavity.

Fridge: Once ripe, a whole melon goes straight into the crisper drawer or the coldest shelf. For cut pieces, wrap exposed flesh tightly in plastic wrap or place cubes in a shallow airtight container - glass is a strong choice because it keeps aroma neutral and won't absorb odors.

A few handling rules that matter:

  • 🧅 Keep cut cantaloupe away from onions, garlic, and pungent cheeses - the porous flesh absorbs odors faster than almost any other fruit.
  • Don't store cut pieces uncovered - air exposure dries the flesh and invites spoilage within hours.
  • Check ripeness before refrigerating - the stem end should have a slight give and a strong sweet aroma; refrigerating an unripe melon stalls the process and often leads to bland flesh.

Can You Freeze Cantaloupe?

Yes - with one honest caveat. Frozen cantaloupe thaws into soft, watery pieces because its high water content causes cell walls to rupture during freezing, similar to how salmon freezer burn explained details ice crystal damage in other water-rich foods.

Frozen melon works well in smoothies, compotes, and sauces, but it won't hold its shape on a fruit platter.

Watch Out
Never freeze whole or unpeeled cantaloupe. The rind traps moisture and produces a watery, poor-quality freeze that ruins the flesh beneath it.

The flash-freeze step is the key to avoiding a clumped, icy block. The same principle behind the flash freeze meatballs technique applies here - individual pieces freeze separately before being bagged together.

  1. Peel and seed - remove all rind and scoop out seeds completely before doing anything else.
  2. Cut into uniform cubes - consistent size ensures even freezing and easier portioning later.
  3. Flash-freeze on a baking sheet - spread pieces in a single layer and freeze for 1-2 hours until firm.
  4. Transfer to freezer bags - use airtight freezer bags or vacuum-seal bags; remove as much air as possible and label with the date.
  5. Thaw in the fridge - allow several hours for a gradual thaw, or add directly from frozen into smoothies and blended preparations.

Signs Cantaloupe Has Gone Bad

Most spoilage is obvious once you know what to look for. Don't taste a suspect melon to check - mold, sour smell, or slimy texture means discard it.

Signs It's Gone Bad
👀
VisualDark, watery patches on flesh · translucent wet areas indicating cell breakdown · mold at stem cavity or cut surfaces (white, green, or blue fuzz) · shriveling rind or leaking juices
👃
SmellSour or fermented aroma · alcoholic sweetness replacing fresh melon scent
✋
TextureSlimy or excessively mushy flesh · collapses under light finger pressure

One area that catches people off guard: the stem end. Mold often starts there before appearing on the flesh.

Check it every time you pull the melon from the fridge.

Tips for Getting the Most from Your Cantaloupe

These four habits add days to your melon's usable life without extra effort.

  • Buy to a schedule - purchase cantaloupe within a day or two of when you plan to eat it; the storage window is short even under ideal conditions.
  • Use thawed melon strategically - frozen and thawed cantaloupe suits smoothies, fruit sauces, and compotes well; if you need fresh texture, consider [alternatives to cantaloupe](https://forkliftkitchen.com/cantaloupe-substitutes/) that freeze with better structure.
  • Glass over plastic for cut pieces - glass containers don't retain odors between uses, keeping each batch of cut melon tasting clean.
  • Label everything you freeze - 8-12 months is a long window, and unlabeled bags become mystery fruit by month four.
Shortcut
Freeze a batch of cubed cantaloupe in smoothie-sized portions - about 1 cup each - so you can grab a bag directly from the freezer without measuring.

Frequently Asked Questions

Should you refrigerate whole cantaloupe?

Only once it's ripe. An unripe melon ripens better at room temperature; cold air stalls the process and can produce bland, firm flesh. Once it gives slightly at the stem end and smells sweet, refrigerate it promptly.

How long does cantaloupe last in the fridge after cutting?

Cut cantaloupe keeps for 3-4 days in the fridge in an airtight container. Beyond that, moisture loss and bacterial activity degrade both texture and safety.

Does cantaloupe freeze well for smoothies?

Yes - it's one of the best uses for frozen cantaloupe. The soft, watery texture after thawing blends seamlessly into smoothies. Add it straight from frozen for a thicker consistency.

How long can you keep cantaloupe at room temperature?

An unripe whole melon is fine on the counter for up to 5 days while it ripens. A ripe melon at room temperature has just 1-2 days before overripening and fermentation begin.

Can you cut off mold from cantaloupe and eat the rest?

No - discard the whole melon. Cantaloupe's porous flesh allows mold roots to spread well beyond the visible surface, unlike hard cheeses where trimming is considered safe.

Savory Cheddar Drop Biscuits with Eggs

March 28, 2026

Drop biscuits often taste like cardboard or come out dense and heavy. The fix is using cold butter cut into flour and folding in sharp cheddar right before baking.

Savory Cheddar Drop Biscuits with Eggs served on a plate

High heat creates a golden crust while keeping the inside tender. The cheese melts into pockets throughout instead of clumping at the bottom.

Make this when you need a fast breakfast that feels more intentional than cereal. Pair the biscuits with fried or scrambled eggs for protein that sticks.

QUICK SUMMARY

Savory Cheddar Drop Biscuits with Eggs combines tender drop biscuits loaded with sharp cheddar and fluffy eggs for a complete breakfast. Cold butter creates flaky layers while high heat at 425°F sets the crust in 12-15 minutes. Perfect for weeknight mornings or meal prep when you want real food fast.

⏱️Time Reality: 15 minutes prep, 12-15 minutes baking, plus 5 for eggs
🧈Success Move: Keep butter cold and cut it into flour until pea-sized bits remain
⚠️Watch Out: Overmixing develops gluten and makes biscuits tough-stop when just combined

Table of Contents

Toggle
  • Why This Recipe Works
  • What You'll Need
    • Ingredient Details
  • Ingredient Swaps
  • What to Serve With It
  • Store and Reheat
  • Frequently Asked Questions
  • Savory Cheddar Drop Biscuits with Eggs
    • Method 
    • Tried this recipe?

Why This Recipe Works

Drop biscuits skip the rolling and cutting, which means less gluten development and a more tender crumb. Cold butter steams during baking, creating flaky layers without the fuss of traditional biscuits. For a version that comes together quickly, a similar breakfast recipe uses bread instead of biscuit dough for even faster mornings.

Quick Reference
⏱️
Prep Time
15 min
🔥
Cook Time
12-15 min
⏰
Total Time
30 min
🍽️
Servings
6 servings
📊
Difficulty
Easy
🏷️
Category
Breakfast | Brunch
💡
Quick Tip
Keep butter cold for flaky biscuits
🎯
Best For
Weeknight | Meal prep

Key success factors:

  • Baking powder leavens the dough - Fresh baking powder creates lift and air pockets for a tender crumb rather than dense hockey pucks
  • Sharp cheddar adds savory depth - The cheese melts into pockets throughout the biscuit, creating bursts of tangy flavor in every bite
  • Cold butter creates flakiness - Chilled butter stays solid during mixing and steams in the oven, forming distinct flaky layers
  • Drop method saves time - Spooning dough onto the pan eliminates rolling and cutting, reducing handling that can toughen biscuits
  • High heat sets the crust - Baking at 425°F browns the exterior quickly while keeping the inside moist and tender
Golden Rule
Chill butter in the freezer for 15 minutes before cutting it into flour-this extra step guarantees flaky layers every time.

What You'll Need

Ingredients for Savory Cheddar Drop Biscuits with Eggs

All-purpose flour provides structure while baking powder creates lift without yeast. Sharp cheddar cheese delivers the savory punch that makes these biscuits worth eating. For more bread-based breakfast ideas, try this warm homemade breakfast recipe that uses similar pantry staples.

🍞
Dry Ingredients
  • 2 cups all-purpose flour
  • 1 tablespoon baking powder
  • 1 teaspoon salt
🧀
Fats & Dairy
  • ½ cup cold unsalted butter
  • 1 cup sharp cheddar cheese, shredded
  • ¾ cup whole milk or buttermilk
🥚
Eggs
  • 6 large eggs
  • Black pepper to taste
  • Butter for frying
🌿
Optional Extras
  • Fresh chives or thyme
  • Extra cheese for topping
  • ¼ teaspoon baking soda (if using buttermilk)

Ingredient Details

  • All-purpose flour
    Measure by spooning into the cup and leveling off-scooping directly packs too much flour and creates dry biscuits
  • Cold unsalted butter
    Cut into small cubes and chill in freezer 15 minutes before using-cold butter creates steam pockets for flakiness
  • Sharp cheddar cheese
    Shred from a block instead of buying pre-shredded-the anti-caking coating on bagged cheese prevents proper melting
  • Baking powder
    Check expiration date-old leavening loses potency and results in flat, dense biscuits that don't rise
  • Milk or buttermilk
    Buttermilk adds tang and tenderizes the crumb, but regular whole milk works if you add 1 tablespoon lemon juice
  • Large eggs
    Cook eggs to your preference-fried with runny yolks or scrambled soft both pair well with the biscuit texture
  • Fresh herbs
    Chives or thyme add herby brightness without overwhelming the cheddar-fold in 2 tablespoons chopped herbs with the cheese

Ingredient Swaps

Substitutions work when you need to accommodate dietary restrictions or use what you have on hand. Most swaps alter texture slightly but deliver similar results. Rich mains need something to cut through, and a bright tangy slaw balances the richness of cheese and eggs without much effort.

Four practical swaps:

  • Gluten-free flour blend for all-purpose - Use a 1:1 blend designed for baking, but texture may be slightly grainier and less tender than wheat flour
  • Dairy-free margarine or coconut oil for butter - Chill thoroughly before using and expect less pronounced flaky layers but still tender crumb
  • Mild cheddar or Monterey Jack for sharp cheddar - Less assertive flavor but similar melt and texture, good when cooking for kids
  • Non-dairy milk for regular milk - Unsweetened almond or oat milk works but may create a slightly different crumb structure

Buttermilk

Works for: Adding tang and tenderness through acidity that reacts with baking powder

Skip if: You don't have it-make a substitute with milk plus 1 tablespoon lemon juice

Regular Milk

Works for: Standard tender biscuits without tang, uses what most people already have

Skip if: You want extra rise and tanginess-buttermilk creates a lighter crumb

Instructions

The dough comes together in one bowl with minimal handling. Mix just until combined-overmixing activates gluten and creates tough biscuits. Potatoes adds the contrast this plate needs, but timing matters. For a version that comes together quickly, creamy homemade potatoes recipe cooks while the biscuits bake for perfectly timed meal prep.

  1. Preheat oven to 425°F and line a baking sheet with parchment paper. Mix flour, baking powder, and salt in a large bowl. Cut cold butter into flour using a pastry cutter or fork until mixture resembles coarse crumbs with pea-sized butter bits remaining.
  2. Fold in shredded cheddar cheese gently to distribute evenly throughout the flour mixture. Add milk and stir with a fork just until dough comes together-stop when you still see flour streaks. Dough should be shaggy and slightly sticky.
  3. Drop ¼-cup portions of dough onto prepared baking sheet, spacing them 1 inch apart. Don't smooth the tops-rustic uneven shapes create more crispy edges and textural contrast.
  4. Bake 12-15 minutes until tops turn golden brown and edges look set. Biscuits are done when a toothpick inserted in the center comes out clean. Let cool on pan 5 minutes before serving.
  5. Cook eggs while biscuits bake. Heat butter in a non-stick skillet over medium heat. Crack eggs directly into pan for fried eggs, or whisk and scramble over medium-low heat until just set. Season with salt and black pepper. Serve eggs alongside or on top of warm biscuits.
Shortcut
Make biscuit dough the night before and refrigerate covered-cold dough is easier to portion and bakes up even flakier.

What to Serve With It

A dollop of dressing takes each bite somewhere more interesting. Most sides should contrast the richness of cheddar and butter without adding more heaviness. For complete meal planning, check out easy chicken meal planning for breakfast pairing strategies that work beyond this recipe.

Side Dish Prep Why It Works How to Serve
Fresh fruit salad Easy Adds sweetness and freshness that cuts through savory cheese Serve chilled in a bowl alongside warm biscuits
Sautéed spinach Easy Provides greens and wilts quickly with just garlic and oil Cook in same pan after frying eggs for one-pan efficiency
Hash browns Medium Crispy potato complements tender biscuit texture Fry until golden and serve hot with biscuits and eggs
Tomato slices Easy Acidity balances richness from butter and cheddar Slice thick, season with salt, serve raw or lightly grilled
Crispy bacon Easy Adds smoky, salty protein that pairs naturally with eggs Bake on sheet pan while biscuits cook for timing efficiency

Three ways to serve it:

  • Breakfast sandwich style - Split biscuit in half, layer with fried egg, cheese, and hot sauce for a handheld meal
  • Brunch spread - Arrange biscuits on a platter with scrambled eggs, bacon, fruit salad, and jam for casual entertaining
  • Meal prep breakfast - Store biscuits and eggs separately, reheat and assemble each morning for grab-and-go convenience
Best Pick
Serve with herb crème fraîche or sour cream mixed with chives-the cool creaminess cuts the warm richness perfectly.

Store and Reheat

Biscuits dry out quickly at room temperature, so refrigerate within 2 hours of baking. Store eggs separately to prevent sogginess. The breakfast works best when it hits the table at the same time as the main. We keep a batch ready for nights like this-bright salad recipe adds freshness when rich breakfasts need balance.

Method Time Best For
🔥 Oven 10 min at 350°F Crisping biscuits and warming without drying out-cover with foil
🍳 Stovetop 3-4 min medium heat Reheating eggs with less moisture loss-add splash of butter or milk
📦 Microwave 30-45 sec medium Quick single-serving reheat but softens biscuit crust texture

For best results when storing:

  • Refrigerate biscuits in airtight container - They keep 3-4 days wrapped tightly in foil or sealed container at 40°F or below
  • Freeze biscuits up to 3 months - Wrap individually in plastic wrap, then place in freezer bag to prevent freezer burn
  • Store cooked eggs separately - Keep eggs in sealed container in fridge up to 3 days away from biscuits to prevent sogginess
  • Reheat with added moisture - Brush biscuits with melted butter or milk before reheating to restore tenderness
  • Thaw frozen biscuits overnight - Move from freezer to fridge the night before, then reheat in oven for best texture restoration

Frequently Asked Questions

Can I make cheddar drop biscuits ahead and freeze them?

Yes, freeze unbaked biscuit dough portions on a baking sheet until solid, then transfer to a freezer bag. Bake directly from frozen at 425°F for 15-18 minutes without thawing.

How do I store and reheat leftover biscuits and eggs?

Store biscuits and eggs separately in airtight containers in the fridge up to 3-4 days. Reheat biscuits covered in foil at 350°F for 10 minutes and warm eggs gently in a skillet with a bit of butter.

How do I know when cheddar drop biscuits are fully baked?

Biscuits are done when tops turn golden brown and a toothpick inserted in the center comes out clean-this happens at 12-15 minutes at 425°F. The edges should look set and slightly crispy.

Why are my biscuits dense and how can I fix it?

Dense biscuits usually result from overmixing the dough or using warm butter. Mix just until combined with visible flour streaks remaining, and keep butter cold by chilling it in the freezer for 15 minutes before cutting into flour.

What egg cooking methods work best with cheddar drop biscuits?

Fried eggs with runny yolks or soft scrambled eggs work best because they stay creamy and contrast the tender biscuit texture. Cook eggs over medium or medium-low heat to prevent rubberiness.

Savory Cheddar Drop Biscuits with Eggs served on a plate

Savory Cheddar Drop Biscuits with Eggs

No ratings yet
Savory Cheddar Drop Biscuits with Eggs features tender drop biscuits loaded with sharp cheddar and flaky layers created by cold butter. Baked at high heat for a golden crust, these biscuits pair perfectly with fried or scrambled eggs for a flavorful, quick breakfast.
Print Recipe Pin Recipe
Prep Time 15 minutes mins
Cook Time 20 minutes mins
Total Time 35 minutes mins
Servings: 6 servings
Course: Breakfast, Brunch
Cuisine: American
Ingredients Equipment Method Notes

Ingredients
  

  • 2 cups all-purpose flour spooned and leveled
  • 1 tablespoon baking powder fresh
  • 1 teaspoon salt
  • 0.5 cup unsalted butter cold, cut into small cubes and chilled
  • 1 cup sharp cheddar cheese shredded from block
  • 0.75 cup whole milk or buttermilk buttermilk adds tang and tenderness
  • 6 large eggs
  • black pepper to taste for eggs
  • butter for frying eggs
  • fresh chives or thyme optional, fold in 2 tablespoons chopped with cheese
  • 0.25 teaspoon baking soda optional, if using buttermilk
  • extra cheese optional for topping

Equipment

  • Pastry cutter or fork To cut cold butter into flour
  • Baking sheet For baking drop biscuits
  • Parchment paper To line baking sheet
  • Non-stick skillet For frying or scrambling eggs

Method
 

  1. Preheat oven to 425°F and line a baking sheet with parchment paper. In a large bowl, mix flour, baking powder, salt, and baking soda if using. Cut cold butter into flour using a pastry cutter or fork until mixture resembles coarse crumbs with pea-sized butter bits.
    2 cups all-purpose flour, 1 tbsp baking powder, 1 tsp salt, 0.5 cup unsalted butter, 0.25 tsp baking soda
  2. Gently fold shredded cheddar cheese and optional chopped herbs into the flour mixture. Add milk and stir with a fork just until dough comes together, leaving flour streaks visible for a shaggy, slightly sticky texture.
    1 cup sharp cheddar cheese, 0.75 cup whole milk or buttermilk, fresh chives or thyme
  3. Drop ¼-cup portions of dough onto the prepared baking sheet, spacing them about 1 inch apart. Do not smooth the tops to keep rustic, uneven shapes for crisp edges.
    2 cups all-purpose flour, 1 cup sharp cheddar cheese
  4. Bake in the preheated oven for 12-15 minutes, until tops are golden brown and edges look set. Confirm doneness by inserting a toothpick in the center; it should come out clean. Let biscuits cool on the pan for 5 minutes before serving.
  5. While biscuits bake, heat butter in a non-stick skillet over medium heat. Crack eggs directly into the pan for fried eggs or whisk and scramble over medium-low heat until just set. Season eggs with salt and black pepper to taste.
    6 large eggs, black pepper, butter

Notes

  • Keep butter cold and cut into small cubes, chilling in freezer 15 minutes for flaky layers.
  • Mix dough just until combined to avoid tough, dense biscuits.
  • Bake at high heat (425°F) to achieve a golden crust while keeping interior tender.

Tried this recipe?

Let us know how it was!

What Is Bratwurst? Taste, Texture, Uses & More

March 28, 2026

Bratwurst does something in a recipe that most sausages can't quite replicate - it holds its structure under high heat while still releasing enough fat to baste everything around it. That combination of a firm, coarse grind and a snappy natural casing makes it the anchor of a plate, not just a protein on the side.

What Is Bratwurst

Whether you're grilling links for a backyard crowd or braising them in beer for sandwiches, bratwurst earns its place through sheer depth of flavor and texture.

QUICK SUMMARY

Bratwurst is a German fresh pork sausage with a coarse grind, snappy casing, and mild herb spicing built around marjoram and nutmeg. It's best grilled or beer-braised, pairs with mustard and sauerkraut, and keeps 3-5 days refrigerated or up to 4 months frozen.

🌍Origin: Germany and Central Europe, with strong regional subtypes
👅Flavor: Savory, pork-forward, mildly herbed with warm spice notes
🍳Best Uses: Grilled on a bun, beer-braised, sliced into potato skillets
🛒Buying Tip: Look for pale pink links with tight, unbroken casings
❄️Shelf Life: Fresh 3-5 days refrigerated; frozen up to 4 months
⚠️Watch Out: Gray color or sticky casing means the link has turned

What Is Bratwurst?

Bratwurst is a fresh or smoked German sausage made primarily from ground pork, sometimes blended with veal or beef, seasoned with marjoram, nutmeg, and white pepper, and stuffed into natural casings. The word itself comes from the Old German brät (finely chopped meat) and Wurst (sausage), though today's versions range from coarsely to finely ground depending on region.

Germany produces dozens of recognized regional varieties, and three stand out on international shelves.

  • Thüringer bratwurst - Long, thin links with a pronounced marjoram flavor; one of the oldest documented German sausage styles.
  • Nürnberger bratwurst - Small-diameter links, roughly finger-sized, spiced with marjoram and often grilled over beechwood charcoal.
  • Weißwurst - A white, milk-blanched Munich specialty made with veal and pork back, traditionally eaten before noon with sweet mustard.

Fresh bratwurst is uncooked and must be fully heated before serving. Pre-smoked or pre-cooked versions are available and behave differently on the grill - worth checking the label before you cook.

What Does Bratwurst Taste Like?

bratwurst - What Is Bratwurst

Pork is the dominant note, and it comes through clean - fatty and meaty without the cured funk of salami or the smoke-heavy profile of a smoked kielbasa. Marjoram gives bratwurst its characteristic herbal lift, slightly floral and more delicate than the oregano-forward flavor of Italian sausage. Nutmeg adds a faint warmth underneath.

Sensory SnapshotModerate Intensity
👅 Flavor
pork-forwardmildly herbedwarm spice
✋ Texture
snappy casingjuicy coarse grind
👃 Aroma
meatywarm spice

Heat changes everything. Raw bratwurst smells faintly of pork and spice; grilled, it develops a browned crust that concentrates those marjoram and nutmeg notes considerably.

Beer-braised links stay juicier and more subtle, letting the natural pork flavor lead.

Golden Rule
Don't pierce the casing before cooking. Puncturing the link lets the fat and juices escape, leaving you with a drier, less flavorful result.

How to Use Bratwurst

Bratwurst is built for high-heat cooking methods that char the casing and render the fat through the grind. Grilling over medium heat is the standard - roughly 15 to 20 minutes, turning regularly to avoid blowouts.

For extra insurance against splitting, many cooks use a beer braise first: simmer raw links in lager or wheat beer with sliced onions for 10 minutes, then finish on a hot grill for color and casing snap.

How Bratwurst Is Used
MethodBest ForTip
🔥 GrillingBun service, Oktoberfest plattersMedium heat; turn every 4-5 min to char evenly
🍺 Beer Braise + SearJuicier links, sandwiches, stewsSimmer in lager 10 min; finish on high heat
🍳 Pan-FryingSliced into skillets, hash dishesSlice after cooking to avoid casing sticking
🫕 BraisingOnion-beer sandwiches, winter stewsLow oven, 325°F, fully submerged in liquid
🌡️ Oven BakingBatch cooking, meal prep375°F for 25-30 min; broil last 3 min for color

In German and Austrian cooking, bratwurst appears alongside sauerkraut, spaetzle, and roasted potatoes. American Midwest traditions - built on heavy German immigration - serve it on a pretzel or rye bun with grainy mustard and caramelized onions.

Sliced into a breakfast hash with pork shoulder trimmings and potatoes, it works equally well at brunch. Avoid pairing bratwurst with very sweet fruit sauces; they bury the herb spicing rather than complement it.

For a full rundown of what to set on the table alongside it, see side dishes for bratwurst.

Try It In
🥚Egg and Cheese Breakfast SandwichSwap in sliced bratwurst for a heartier, spiced-up morning build→🥔Classic Potato SaladServe alongside grilled brats — mustard in the dressing ties both together→🧅Crispy Sweet Chili Onion RingsA sharper, crunchier topping alternative to caramelized onions on brats→

How to Buy and Store Bratwurst

Fresh bratwurst should look pale pink to light tan with casings that are smooth, tight, and unbroken. Avoid links that appear gray, feel sticky, or smell sour - those signs indicate spoilage regardless of the sell-by date.

Check the label for whether the sausage is raw, pre-cooked, or smoked, since cooking times differ significantly across those categories.

Watch Out
Pre-cooked or smoked bratwurst still needs to be heated through - but raw fresh bratwurst must reach an internal temperature of 160°F. Don't assume pre-smoked means ready to eat cold.

For storage, keep unopened fresh links in the refrigerator at 34-40°F and use within 3-5 days. Once opened or cooked, use within 3-4 days.

Freeze raw links within 2 days of purchase for up to 4 months - wrap individual links in plastic before bagging to prevent freezer burn. Thaw overnight in the fridge, not on the counter.

Full details on bratwurst freshness guide cover freezer timing and safety windows by variety.

Where to Start With Bratwurst

New to bratwurst? Start with a standard fresh pork link from a butcher or supermarket meat case, not a pre-cooked shelf-stable version.

Grill or pan-fry it plain first to understand the baseline flavor before adding beer braises or toppings. If you can't find bratwurst locally or need a different spice profile for a recipe, checking bratwurst replacements will point you toward the closest alternatives by cooking method and flavor.

Bratwurst rewards simple treatment. Get the heat right, leave the casing intact, and let the pork and spices do the work.

Frequently Asked Questions

What is the difference between bratwurst and regular sausage?

Bratwurst is a specific German fresh sausage defined by its coarse pork grind and herb spicing - primarily marjoram and nutmeg. "Regular sausage" is a broad category; bratwurst differs by its natural casing, regional origin, and distinct spice profile rather than a generic breakfast or Italian blend.

Does bratwurst need to be cooked before grilling?

Fresh, raw bratwurst must be fully cooked - grilling alone is sufficient if done over medium heat to an internal temperature of 160°F. Pre-cooking in beer first is optional, not required; it adds juiciness but isn't a food safety step.

What spices are in bratwurst?

Marjoram and nutmeg are the core spices, with white pepper and ginger common in most blends. Regional recipes vary - Nürnberger bratwurst leans heavier on marjoram, while Weißwurst uses parsley and lemon zest alongside the standard spices.

Is bratwurst beef or pork?

Primarily pork, often from pork shoulder or a shoulder-belly blend. Some varieties include veal, and a few use beef, but pure pork is the traditional and most widely sold form outside of Germany.

How do you tell if bratwurst is cooked through?

Use an instant-read thermometer - 160°F at the center confirms doneness. Visually, the casing should be evenly browned with no pink remaining when the link is cut, though color alone isn't a reliable safety indicator.

« Previous Page
Next Page »

Primary Sidebar

ForkliftKitchen recipe developer

Welcome!

Recipe Developer · 12+ Yr Kitchen Veteran

I'm the recipe developer behind this site, focused on practical, well-tested dishes and smart ingredient swaps. Every recipe is written to be clear, reliable, and easy to make at home.

650+ Recipes
12+ Yrs Exp.
3x Tested
Our Story →

As Featured In

Allrecipes

TASTE OF HOME

Food52

HUFFPOST

Yahoo! Life

Our Editorial Standards

  • ✓ Every recipe tested at least 3 times before publishing
  • ✓ Substitutes verified by real kitchen trials, not guesswork
  • ✓ Reviewed for accuracy by our editorial team
  • ✓ Updated regularly with seasonal info and reader feedback

Most Popular

  • Creamy Lemon Shrimp Linguine
    Creamy Lemon Shrimp Linguine
  • Creamy Garlic Mushroom Chicken
    Creamy Garlic Mushroom Chicken
  • Sesame Ginger Chicken Noodle Bowls
    Sesame Ginger Chicken Noodle Bowls
  • Baked Lemon Herb Fish Fillets
    Baked Lemon Herb Fish Fillets
  • Veggie Loaded Fried Rice
    Veggie Loaded Fried Rice
  • Spicy Garlic Shrimp Stir Fry
    Spicy Garlic Shrimp Stir Fry

Join 8,000+ Home Cooks

Weekly Kitchen Tips

Easy recipes, smart substitutes, and real cooking shortcuts — every Thursday.

Subscribe Free →


Side Dishes

  • What to Serve With Asian Salmon? 15 Best Side Dishes
    What to Serve With Asian Salmon? 15 Best Side Dishes
  • Side Dishes for Strawberry Spinach Salad
    15 Best Side Dishes for Strawberry Spinach Salad
  • Sides for Grilled Cauliflower Steaks to Complete the Meal
    15 Sides for Grilled Cauliflower Steaks to Complete the Meal
  • 15 Sides To Serve With Calabacitas
    15 Best Sides for Calabacitas – Mexican-Inspired Favorites


Substitutes

  • 7 Best Substitutes for Hot Sauce in Marinades & Stir-Fries
    7 Best Substitutes for Hot Sauce in Marinades & Stir-Fries
  • 9 Best Substitutes for Butter in Baking and Cooking
  • 7 Best Substitutes for Tagliatelle for Italian Pasta Dishes
    7 Best Substitutes for Tagliatelle for Italian Pasta Dishes
  • 7 Best Substitutes for Udon Noodles in Asian Stir-Fries
    7 Best Substitutes for Udon Noodles in Asian Stir-Fries


Browse by Topic

  • Side Dishes320
  • Substitutes785
  • Dinner163
  • Air Fryer77
  • Taste Profiles484
  • Food Storage123


Reader Reviews

★★★★★

"Finally a food blog that tells you exactly why a substitute works instead of just listing options."

— Sarah M., via email

★★★★★

"The side dish recommendations are so specific — saved my dinner party twice this month."

— James R., Pinterest comment

★★★★★

"I trust this site more than most because they actually test everything. You can tell."

— Priya K., blog comment

Footer

↑ Back to Top

Forklift Kitchen

We do the heavy lifting so you can enjoy the cooking. Tested recipes, smart substitutes, and perfect pairings—built for real home cooks.

Content

  • Recipes
  • Substitutes
  • What to Serve With
  • Blog

Company

  • About Us
  • Contact
  • Subscribe

Legal

  • Privacy Policy
  • Terms of Service

As an Amazon Associate I earn from qualifying purchases.

© 2026 Forklift Kitchen.

Rate This Recipe

Your vote:


A rating is required
A name is required
An email is required