• Skip to primary navigation
  • Skip to main content
  • Skip to primary sidebar
  • Recipe Index
    • Air Fryer
  • Side Dishes
  • Substitutes
  • About
  • Contact
  • Subscribe

ForkLiftKitchen

menu icon
go to homepage
  • Recipe Index
    • Air Fryer
  • Side Dishes
  • Substitutes
  • About
  • Contact
  • Subscribe
subscribe
search icon
Homepage link
  • Recipe Index
    • Air Fryer
  • Side Dishes
  • Substitutes
  • About
  • Contact
  • Subscribe
×

Blog

How Long Does Egg Salad Last? [Storage Guide]

March 29, 2026

Egg salad comes together fast, but figuring out how long it stays safe in the fridge is where most people pause.

How Long Is Egg Salad Good For In The Fridge

The answer hinges on two timers running at once - when the eggs were cooked and how long the finished salad has been sitting.

Much like storing potato salad correctly, the mayo-based formula means you're working with a short, firm window before food safety becomes a real concern.

QUICK SUMMARY

Egg salad lasts 3-4 days in the fridge stored in an airtight container at 40°F or below. Freezing is possible but mayonnaise separates badly on thawing. The clock starts when the eggs were cooked - not when you mixed the salad.

🧊Fridge: 3-4 days from when eggs were cooked, airtight container
❄️Freezer: 1-2 months, expect watery and grainy texture after thawing
⚠️Counter: 2 hours maximum - discard anything left out longer

How Long Does Egg Salad Last?

Freshly made egg salad holds for 3-4 days in the refrigerator, provided it's stored correctly and kept at 40°F (4°C) or below.

That window is counted from when the hard-boiled eggs were cooked, not from when you assembled the salad - a distinction that can cost you a day or more of safe storage if ignored.

Room temperature is a different story entirely. Both chopped egg and mayonnaise create conditions where bacteria like Staphylococcus aureus multiply rapidly, making the 2-hour counter limit non-negotiable.

The same compressed timeline applies to how long tuna salad keeps and to keeping chicken salad fresh - mayo-based salads share the same vulnerability.

Egg Salad Shelf Life
MethodStateDurationNotes
🧊 FridgeFreshly made3-4 daysAirtight container; clock starts at egg cooking, not mixing
🧊 FridgeOpened / leftovers3-4 daysReturn to fridge within 2 hours; discard after day 4 from cooking
❄️ FreezerCooked (frozen immediately)1-2 monthsQuality degrades; egg whites become crumbly, mayo separates
🏠 CounterAny2 hours maxNot safe beyond this point - discard, do not refrigerate afterward

Store-bought egg salad follows the same 3-4 day rule once opened, using the sell-by date only as a freshness reference before the container is cracked.

How to Store Egg Salad

Speed matters here. Let the salad cool no longer than 2 hours after making it, then move it straight to the fridge - don't wait for it to fully reach room temperature before chilling.

Fridge: Transfer to a shallow airtight container or a glass jar with a tight lid to minimize headspace. Shallow containers chill the salad faster and more evenly than deep ones, which matters for food safety. Counter: Never leave egg salad unattended on a table - at a picnic or party, set the serving bowl over a bed of ice to keep the temperature down and stay within the 2-hour window.

Golden Rule
Label every container with two dates: the date the eggs were cooked and a "use by" date 4 days later. The mixing date is irrelevant for food safety purposes.

A few habits that make a real difference:

  • 🥄 Use clean utensils every time - introducing crumbs or a used spoon into a mayo-based salad accelerates bacterial growth significantly.
  • 📦 Make smaller batches - sizing to what you'll eat in 3 days avoids pushing into the risky fourth day.
  • 🌡️ Check your fridge temperature - anything above 40°F shortens the safe window, sometimes by a full day.

Can You Freeze Egg Salad?

Freezing egg salad is technically safe, but the texture aftermath is rough. Egg whites turn crumbly and grainy, and the mayonnaise separates into a watery, unappetizing puddle after thawing - no amount of stirring fully rescues it.

The smarter approach is to freeze the egg base before adding mayo. Portion the seasoned chopped eggs into a freezer-safe container, then stir in fresh mayonnaise after thawing.

If you've already mixed a full batch and want to freeze it anyway, here's how to limit the damage:

  1. Portion into small servings - use airtight, freezer-safe containers sized for one or two servings to minimize repeated freeze-thaw cycles.
  2. Press plastic wrap directly onto the surface before sealing the lid to reduce ice crystal formation on the salad.
  3. Label with the freeze date - use within 1-2 months for best results, though quality drops noticeably after the first month.
  4. Thaw overnight in the fridge - never on the counter. Drain any pooled liquid, stir well, and fold in a small spoon of fresh mayonnaise to restore some creaminess.
Watch Out
Do not refreeze thawed egg salad. Once it's been brought back to fridge temperature, it must be eaten within the remaining days of its original 3-4 day window.

Signs Egg Salad Has Gone Bad

Trust your senses - and act fast if something seems off. Egg salad near the end of its window can look normal until it doesn't, so check carefully before serving.

Signs It's Gone Bad
👀
VisualGrayish-green ring around yolk pieces · Cloudy or slimy-looking liquid pooling on top · Mold growth (white, green, or black flecks)
👃
SmellSharp sulfur or rotten-egg odor · Sour, rancid, or vinegary smell from mayo breakdown
✋
TextureSlimy film or mouthfeel on the surface · Grainy or chalky yolk pieces that won't blend when stirred

The slimy texture and sulfur smell are the clearest red flags. Discard immediately if you notice either - do not taste-test to confirm.

Understanding food safety raw meat explained reinforces the same core principle: when in doubt, throw it out.

Getting the Most From Every Batch

Egg salad rewards a bit of planning. These habits keep it safer and better-tasting through its full window.

  • 🧊 Chill the bowl before serving - nest your serving bowl in ice to stay under the 2-hour room-temperature limit at gatherings.
  • 🥚 Freeze the egg base, not the full salad - omit mayo before freezing and add it fresh after thawing for far better results, similar to the approach used in a a freezer-friendly breakfast burrito pack recipe where wet ingredients are added post-freeze.
  • 📅 Date from the eggs, not the mix - the safety clock is fixed to when the hard-boiled eggs were cooked.
  • 🍽️ Plan the meal ahead - check out pairing ideas for egg salad to plan uses that get the batch eaten within 3 days.
Shortcut
Make egg salad in two-serving batches timed to lunches. Smaller batches stay fresher longer and eliminate the temptation to push past day 4.

Frequently Asked Questions

Can you freeze egg salad with mayonnaise?

Yes, but the result is poor. Mayonnaise separates on thawing, leaving a watery, grainy texture. Freezing the egg base without mayo, then adding fresh mayo after thawing, produces much better results.

How long is store-bought egg salad good for?

Once opened, store-bought egg salad lasts 3-4 days refrigerated in an airtight container. Use the sell-by date only as a guide before opening - after that, the 3-4 day rule applies regardless.

How long can egg salad sit out?

Two hours maximum at room temperature. In warm conditions above 90°F, that drops to one hour. Discard anything left out longer - refrigerating it afterward won't make it safe.

Can you eat egg salad after 5 days?

No. The 4-day limit from egg cooking is a hard food safety boundary, not a quality guideline. By day 5, bacterial load can be dangerous even if the salad looks and smells fine.

Does adding mustard or vinegar help egg salad last longer?

Slightly, but not enough to extend the storage window beyond 4 days. Acid slows some bacterial growth, however the eggs and mayo still impose the same food safety limit.

Chicken Inasal Filipino-Style

March 29, 2026

You need 4-6 hours for marinating and 20 minutes at the grill. No oven, no skillet, no shortcuts that actually work.

Chicken Inasal Filipino-Style served on a plate

The marinade does the heavy lifting. Calamansi juice and vinegar tenderize the meat while garlic and brown sugar build flavor layers that stick to every bite.

This works for weeknight dinners when you plan ahead or weekend cookouts when you want something that tastes like you traveled for it.

QUICK SUMMARY

Chicken Inasal is grilled Filipino chicken marinated in calamansi juice, vinegar, garlic, and annatto oil. The key is marinating 4-6 hours minimum so the acid breaks down muscle fibers while sugar caramelizes on the grill. Plan ahead for tender, tangy chicken with charred edges that stays juicy.

⏰Time Reality: 15 min prep, 4-6 hr marinating, 20 min grilling - no rushing the marinade
🔥Method Shortcut: Preheat grill to medium heat (350-400°F) before chicken hits the grates
⚠️Watch Out: Baste every 5 minutes or the glaze won't build and chicken dries out

Table of Contents

Toggle
  • Why This Recipe Works
  • What You'll Need
    • Ingredient Details
  • Ingredient Swaps
  • What to Serve With It
  • Store and Reheat
  • Frequently Asked Questions
  • Chicken Inasal Filipino-Style
    • Method 
    • Tried this recipe?

Why This Recipe Works

Marinating chicken in citrus and vinegar for hours tenderizes meat while garlic and brown sugar create a glaze that caramelizes without burning. For a version that comes together quickly, this related rice recipe uses similar aromatics with less hands-on time.

Quick Reference
⏱️
Prep Time
15 min + 4-6 hr marinating
🔥
Cook Time
15-20 min
⏰
Total Time
4 hr 30 min
🍽️
Servings
4 servings
📊
Difficulty
Medium
🏷️
Category
Main Dish
💡
Quick Tip
Marinate 4+ hours for flavor, baste often
🎯
Best For
Weeknight | Entertaining

Five reasons this method delivers:

  • Dark meat stays juicy - Thighs and drumsticks have enough fat to withstand high heat without drying out like breasts
  • Acid tenderizes muscle fibers - Calamansi juice and vinegar break down proteins during the marinate, creating tender texture
  • Annatto oil builds color and flavor - Basting with achuete oil every 5 minutes layers earthy notes and golden-brown caramelization
  • Medium heat prevents burning - Cooking at 350-400°F caramelizes sugar in the marinade without charring garlic bits
  • Resting redistributes juices - 5-10 minutes off the grill lets meat relax so juices don't run out when you cut
Quick Tip
Pat chicken skin dry before grilling to promote crisping and prevent steam

What You'll Need

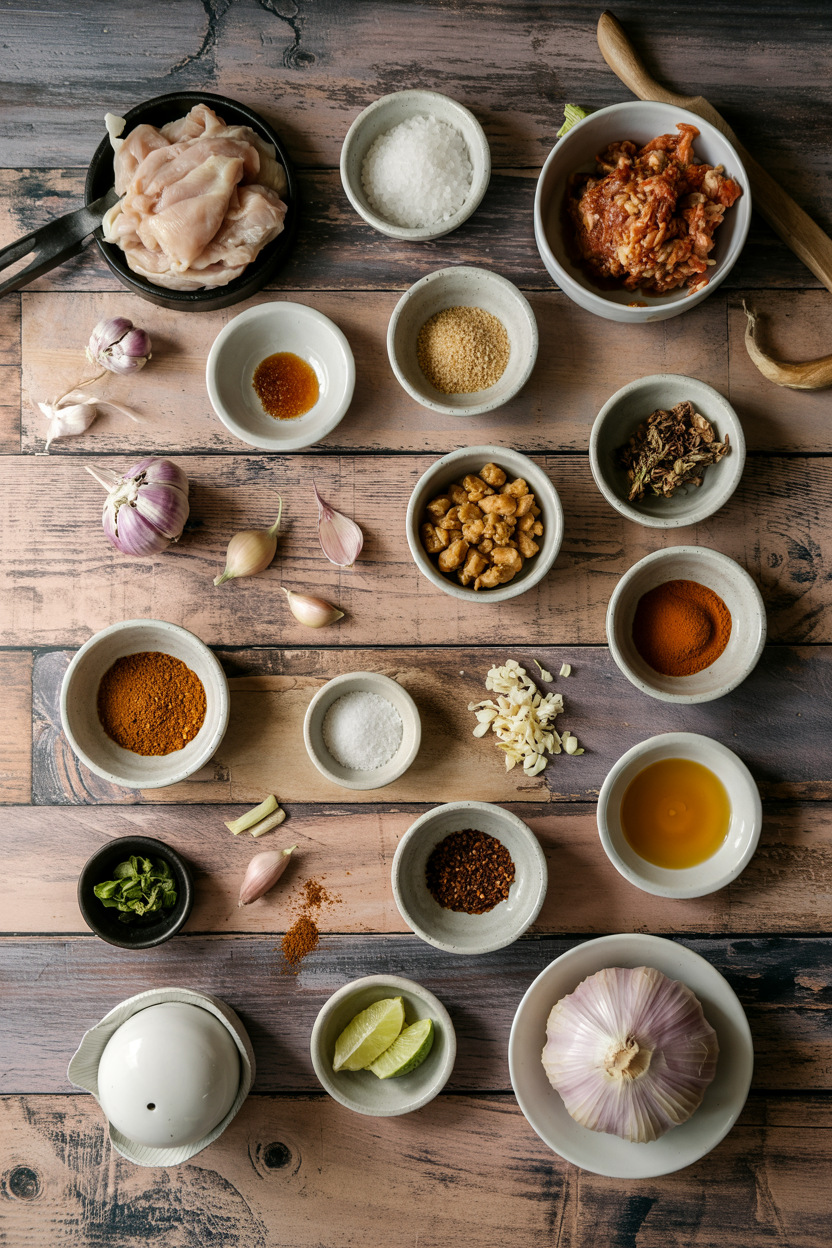
Ingredients for Chicken Inasal Filipino-Style

Most grocery stores stock everything except calamansi juice, which swaps easily for lemon or lime. Slaw adds the contrast this plate needs, but timing matters - for a version that comes together quickly, this crunchy slaw uses sesame dressing that balances rich grilled meat.

🍗
Protein
  • 2 lbs chicken thighs or drumsticks, skin-on
🧄
Aromatics
  • 6 garlic cloves, minced
  • 1-inch ginger, grated
🥢
Marinade
  • ¼ cup calamansi juice or lemon juice
  • ¼ cup white or cane vinegar
  • 2 tablespoon soy sauce or fish sauce
  • 2 tablespoon brown sugar
  • 1 teaspoon black pepper
🫙
Basting Oil
  • ¼ cup annatto oil (achuete oil)

Ingredient Details

  • Chicken thighs or drumsticks
    Skin-on pieces keep meat moist during grilling and crisp up with frequent basting
  • Calamansi juice
    Filipino citrus fruit - substitute equal parts lemon juice for similar tangy acidity
  • Vinegar
    Cane vinegar is traditional but white vinegar or apple cider vinegar work without changing flavor much
  • Annatto oil
    Made by steeping annatto seeds in hot oil for 10 minutes - gives signature golden color and earthy taste
  • Garlic and ginger
    Fresh only - minced garlic and grated ginger release oils that infuse marinade and stick to meat
  • Brown sugar
    Balances acidity and caramelizes on the grill - honey works but burns faster, watch closely
  • Soy sauce or fish sauce
    Both add umami depth - fish sauce is more traditional, soy sauce is milder and easier to find

Ingredient Swaps

Most swaps work if you match acidity levels and cooking times. A good sauce can make or break the plate - for a version that comes together quickly, this creamy sauce balances grilled meat with less prep.

Four swaps that work:

  • Calamansi juice → Lemon or lime juice - Use equal amounts, slight flavor shift but acidity stays consistent
  • Brown sugar → Honey - Same sweetness but caramelizes faster, reduce grill time by 2-3 minutes and watch for burn
  • Soy sauce → Tamari or coconut aminos - Gluten-free options with similar umami, coconut aminos are slightly sweeter
  • Charcoal grill → Gas grill or broiler - Less smoky flavor but faster setup, broiler adds char in final 3-4 minutes

Chicken Thighs

Works for: Staying juicy on high heat, crisping skin, holding up to basting

Skip if: You want leaner meat or faster cooking time

Chicken Breasts

Works for: Lower fat content, faster cook time (12-15 min), budget-friendly

Skip if: You grill often - breasts dry out fast and need constant monitoring

Annatto Oil

Works for: Authentic color and earthy flavor, traditional method

Skip if: You can't find annatto seeds - use regular oil with paprika for color only

Cane Vinegar

Works for: Slightly sweet acidity, traditional Filipino flavor

Skip if: White vinegar or apple cider vinegar is what you have - acidity matters more than type

Instructions

Marinating takes 4-6 hours but grilling goes fast once the heat is right. Rich mains need something to cut through, and rolls do exactly that - for a version that comes together quickly, classic rolls dish complements smoky grilled flavors.

  1. Mix the marinade: Whisk together calamansi juice, vinegar, soy sauce, brown sugar, garlic, ginger, and black pepper in a bowl until sugar dissolves. Score chicken skin lightly with a knife so marinade penetrates deeper. Place chicken in a large resealable bag or shallow dish, pour marinade over, and massage to coat every piece. Seal and refrigerate 4-6 hours, flipping halfway through.

  2. Make annatto oil: Heat ¼ cup neutral oil in a small pan over medium heat until shimmering. Add 2 tablespoons annatto seeds and steep 10 minutes, stirring occasionally until oil turns deep golden-orange. Strain seeds out and set oil aside for basting.

  3. Preheat the grill: Heat grill to medium (350-400°F). Clean grates thoroughly and oil them with a folded paper towel dipped in vegetable oil. Medium heat prevents sugar in the marinade from burning before chicken cooks through.

  4. Grill and baste: Remove chicken from marinade and shake off excess. Place chicken skin-side down on grill grates and cook 8-10 minutes without moving. Flip and baste with annatto oil using a brush. Continue grilling 7-10 minutes, basting every 5 minutes and flipping once more. Chicken is done when internal temperature reads 165°F and juices run clear when pierced.

  5. Rest and serve: Transfer chicken to a plate and tent loosely with foil. Rest 5-10 minutes so juices redistribute. Serve with extra annatto oil drizzled on top and toyomansi dipping sauce (equal parts soy sauce and calamansi juice) on the side.

Golden Rule
Baste every 5 minutes during grilling - skipping builds no glaze and dries out the chicken

What to Serve With It

Grilled chicken needs something to balance smokiness and cut richness. When planning your chicken tenders dinner, pair with sides that add freshness or soak up juices.

Side Dish Prep Why It Works How to Serve
Garlic fried rice Easy Soaks up glaze and adds savory carbs Serve warm alongside chicken with extra annatto oil drizzled on rice
Atchara (pickled papaya) Medium Cuts through richness with acidity and crunch Spoon cold atchara directly onto plate for contrast
Steamed green beans Easy Adds vegetable balance without competing flavors Toss with garlic butter and serve hot
Grilled corn on the cob Easy Complements smoky flavors and adds sweetness Brush with annatto oil during grilling for color
Java rice Medium Buttery, fragrant rice enhances meal without overpowering Serve as a bed under chicken for presentation

Three ways to serve it:

  • Weeknight plate: Garlic fried rice + steamed green beans + toyomansi dipping sauce on the side
  • Cookout spread: Grilled corn + atchara + extra annatto oil for drizzling
  • Meal prep bowls: Java rice + fresh tomato and onion salad + sliced grilled chicken
Best Pick
Garlic fried rice is the traditional pairing - it soaks up glaze and adds savory carbs that balance tangy chicken

Store and Reheat

Grilled chicken loses crispness in the fridge but reheats better than most proteins. Most people skip salad, but it balances the meal - for a version that comes together quickly, easy potato salad side adds creamy contrast that holds up next to rich grilled meat.

Method Time Best For
🍳 Stovetop 5-7 min on medium heat Reheating with added sauce to restore moisture
🔥 Oven 10-12 min at 350°F Even reheating that preserves crisp skin
📦 Microwave 2-3 min at 70% power Quick reheating when texture matters less

For best results when storing:

  • Cool completely before refrigerating - Hot chicken creates condensation in the container that makes skin soggy
  • Store in shallow airtight containers - Keeps chicken fresh 3-4 days and prevents cross-contamination
  • Freeze up to 3 months - Wrap individual pieces in foil, then place in freezer bags for easy portioning
  • Reheat with moisture - Add a splash of water or extra annatto oil when reheating to prevent drying
  • Crisp skin under broiler - After reheating, place chicken under broiler for 2-3 minutes to restore crunch

Frequently Asked Questions

Can I use chicken breast instead of thighs for Chicken Inasal?

Yes but reduce cook time to 12-15 minutes and watch closely. Breasts dry out faster than thighs because they have less fat, so baste every 3-4 minutes and check internal temp at 12 minutes.

How do I store and reheat leftover Chicken Inasal?

Refrigerate in airtight containers up to 3-4 days or freeze up to 3 months. Reheat in oven at 350°F for 10-12 minutes to preserve crispy skin, or stovetop with added sauce for moisture.

What internal temperature indicates Chicken Inasal is done?

165°F at the thickest part of the meat. Insert a thermometer near the bone without touching it, and juices should run clear when pierced with a knife.

Why is my Chicken Inasal dry or rubbery, how to fix?

Overcooking or insufficient basting causes dryness. Cook only to 165°F internal temp and baste every 5 minutes during grilling. If already dry, rest in foil with spare marinade to rehydrate slightly.

What side dishes and sauces best accompany Chicken Inasal?

Garlic fried rice and atchara (pickled papaya) are traditional. Serve with toyomansi dipping sauce (equal parts soy sauce and calamansi juice) or spiced vinegar with chili and garlic for heat.

Chicken Inasal Filipino-Style served on a plate

Chicken Inasal Filipino-Style

No ratings yet
Chicken Inasal is a Filipino grilled chicken marinated in calamansi juice, vinegar, garlic, and annatto oil. Marinating 4-6 hours tenderizes the meat and infuses flavor, while grilling at medium heat with frequent basting creates a juicy, tangy chicken with caramelized, charred edges.
Print Recipe Pin Recipe
Prep Time 15 minutes mins
Cook Time 20 minutes mins
Total Time 35 minutes mins
Servings: 4 servings
Course: Main Dish
Cuisine: Filipino
Ingredients Method Notes

Ingredients
  

  • 2 lbs chicken thighs or drumsticks skin-on
  • 6 cloves garlic minced
  • 1 inch ginger grated
  • 0.25 cup calamansi juice or lemon juice as substitute
  • 0.25 cup vinegar white, cane, or apple cider vinegar
  • 2 tablespoon soy sauce or fish sauce as substitute
  • 2 tablespoon brown sugar
  • 1 teaspoon black pepper
  • 0.25 cup annatto oil made by steeping annatto seeds in oil for basting

Method
 

  1. Whisk together calamansi juice, vinegar, soy sauce, brown sugar, garlic, ginger, and black pepper until sugar dissolves. Lightly score chicken skin; place chicken in resealable bag or shallow dish. Pour marinade over and massage each piece. Seal and refrigerate 4-6 hours, flipping halfway through.
    0.25 cup calamansi juice, 0.25 cup vinegar, 2 tbsp soy sauce, 2 tbsp brown sugar, 6 cloves garlic, 1 inch ginger, 1 tsp black pepper, 2 lbs chicken thighs or drumsticks
  2. Heat ¼ cup neutral oil in a small pan over medium heat until shimmering. Add 2 tablespoons annatto seeds and steep for 10 minutes, stirring occasionally until oil turns golden-orange. Strain out seeds and set aside oil for basting.
    0.25 cup annatto oil
  3. Preheat grill to medium heat (350-400°F). Clean and oil grates with a paper towel dipped in vegetable oil. Medium heat prevents burning sugar and cooks chicken evenly.
  4. Remove chicken from marinade, shaking off excess. Place skin-side down on grill and cook 8-10 minutes without moving. Flip and baste with annatto oil. Continue grilling 7-10 minutes more, basting every 5 minutes and flipping once more. Cook until internal temperature reaches 165°F and juices run clear.
    2 lbs chicken thighs or drumsticks, 0.25 cup annatto oil
  5. Transfer grilled chicken to a plate and tent loosely with foil. Rest for 5-10 minutes to redistribute juices. Serve with extra annatto oil drizzled on top and toyomansi dipping sauce on the side.
    0.25 cup annatto oil

Notes

  • Marinate at least 4 hours for tender, flavorful chicken.
  • Baste every 5 minutes during grilling to build glaze and prevent dryness.
  • Rest chicken after grilling 5-10 minutes to keep it juicy.

Tried this recipe?

Let us know how it was!

What Is Creme de Cacao? [Taste, Uses & More]

March 29, 2026

You spot it on the back shelf of the liquor store, wedged between bottles you recognize - alternatives to triple sec sit nearby, and so do alternatives to amaretto - and you pick it up wondering what exactly crème de cacao is for.

What Is Creme De Cacao

It turns out this chocolate liqueur earns a permanent spot in any home bar that takes cocktails or desserts seriously.

QUICK SUMMARY

Crème de cacao is a sweet chocolate liqueur made from cocoa beans, sugar, and neutral spirit. It comes in white (clear) and dark varieties, with moderate intensity. Use it in classic cocktails, dessert glazes, and cake soaks.

🍫Flavor: Sweet chocolate, toasty cocoa, vanilla and caramel backing
🍸Best Uses: Cocktails, mousse, cake soak, coffee
🏷️Varieties: White (clear, neutral color) and dark (roasted cocoa depth)
📦Shelf Life: Opened: best within 12-24 months; unopened: shelf-stable for years
⚠️Note: Contains alcohol and high added sugar - not suitable for children

What Is Creme de Cacao?

Crème de cacao is a European-origin liqueur built on cocoa bean extract, sugar syrup, and a neutral grain or grape spirit.

Despite the name, it contains no actual cream - "crème" refers to the thick, syrupy texture created by the high sugar content.

It comes in two forms. White crème de cacao is filtered clear and delivers chocolate flavor without darkening a drink, while dark crème de cacao retains deeper color and carries more roasted cocoa character.

The liqueur typically runs 20-40% ABV, lower-proof bottles reading sweeter and higher-proof ones showing more spirit heat. Vanilla is a standard secondary addition, giving the base an aromatic warmth that plain cocoa extract alone wouldn't provide.

Understanding how cocoa bean extract is used here helps if you're already familiar with comparing cocoa powder vs baking cocoa options - the soluble cocoa solids in baking follow similar flavor logic, just without the alcohol.

Golden Rule
White and dark crème de cacao are interchangeable in flavor - choose white to keep cocktails visually pale, dark when color doesn't matter or depth of roast does.

What Does Creme de Cacao Taste Like?

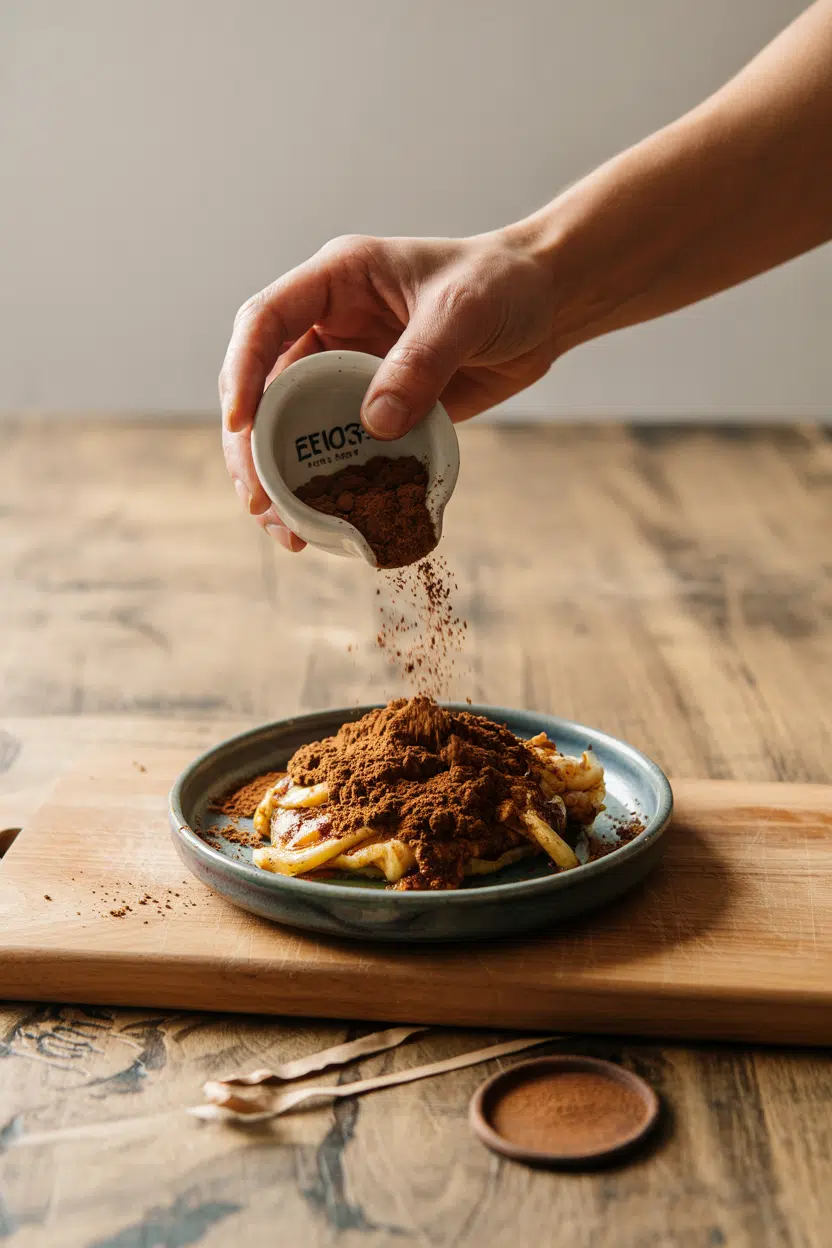
creme de cacao - What Is Creme De Cacao

Crème de cacao tastes like chocolate syrup crossed with a lightly sweetened brandy: smooth, cocoa-forward, with a slick body and an alcohol-warmed finish. The sweetness lands up front, followed by a toasty cocoa bitterness that lingers.

Sensory SnapshotModerate Intensity
👅 Flavor
sweet chocolatetoasty cocoavanillacaramel
✋ Texture
syrupyslick
👃 Aroma
warm cocoalight vanillanutty roast

Dark crème de cacao skews toward unsweetened cocoa powder with added sugar - noticeably less candy-sweet, more like a bar of 70% chocolate dissolved in spirit. White keeps the vanilla note front and center, making it taste slightly more floral.

Vanilla plays a real supporting role here, much like how the comparing vanilla extract vs vanilla powder options debate shows that vanilla form matters to the final flavor.

Heat doesn't change crème de cacao dramatically, though reducing it concentrates both sweetness and bitterness simultaneously.

How to Use Creme de Cacao

Crème de cacao shows up most reliably in classic cocktail recipes. The Grasshopper calls for equal parts crème de cacao, crème de menthe, and cream - a trio that produces a mint-chocolate drink with a milkshake weight.

The Brandy Alexander pairs it with cognac and cream for a chocolate-forward after-dinner drink.

Beyond the shaker, it works as a dessert ingredient in its own right.

  • 🍰 Cake soak - Brush it onto sponge layers or ladyfingers to add chocolate aroma and keep crumb moist without thinning the structure.
  • 🍫 Chocolate mousse - Fold a small measure into the base; it adds depth without adding water, which would destabilize the foam.
  • ☕ Coffee drinks - Stir into hot espresso or a mug of black coffee for a quick adult mocha; no additional sweetener usually needed.
  • 🍦 Ice cream base - A tablespoon per quart of custard lowers the freezing point slightly, giving homemade gelato a softer scoop.
  • 🧁 Glaze and drizzle - Reduce gently with a little cream to make a concentrated chocolate glaze for brownies or bundt cakes.

It pairs especially well with brandy and dark rum, cream and half-and-half, espresso, orange zest, hazelnut, and dark chocolate. Avoid pairing it with delicate green herbs or high-acid fruit preparations where its sugar would throw off the balance.

If a recipe calls for it and you're out, the guide on alternatives to creme de cacao covers which swaps hold up in drinks versus baked uses.

Similarly, if you're scaling a Grasshopper and need a crème de menthe replacement, creme de menthe swaps that work walks through the closest options.

How Creme de Cacao Is Used
MethodBest ForTip
🍸 Stirred ColdCocktails, whipped creamUse white to avoid color transfer in pale drinks
🍰 Folded InMousse, batter, ice cream baseAdd after mixing fats to avoid deflating structure
🔥 ReducedGlazes, drizzles, saucesUse low heat - high heat drives off aroma quickly
🎂 Brushed OnCake soaks, ladyfingersApply warm layers in two passes for even absorption
Try It In
🍫Silky Chocolate MousseFold in a measure for extra depth without thinning the foam→🎂Rich Chocolate Layer CakeUse as a chocolate soak between layers→🥜Cinnamon Sugar Roasted NutsA small drizzle adds chocolate-cocoa gloss to the coating→

How to Buy and Store Creme de Cacao

Read the label before you buy. Look for "cocoa extract" or "natural cocoa" listed as a flavoring - bottles that only mention "artificial flavor" will taste flat and one-dimensional.

Check that ABV sits between 20 and 40%; anything lower is mostly sugar syrup.

Watch Out
Avoid bottles with cloudy sediment. Unopened crème de cacao should be completely clear - cloudiness can indicate improper storage or degraded emulsifiers.

Choose white crème de cacao when color matters in a recipe (pale cocktails, light mousses) and dark when you want roasted cocoa character. Once open, store upright in a cool, dark pantry with the cap tight.

For a full breakdown of timelines and signs of decline, the guide on keeping creme de cacao fresh covers both opened and unopened bottles in detail.

Starting With Creme de Cacao

If you're new to this liqueur, start with a Brandy Alexander - it shows off both the chocolate sweetness and the creamy texture without requiring much technique.

From there, the dark variety earns its place in glazes and cake soaks where roasted cocoa depth matters.

  • 🍸 First cocktail - Brandy Alexander: cognac, dark crème de cacao, heavy cream, shaken and strained.
  • 🎂 First baked use - Brush white crème de cacao onto a chocolate sponge between layers before frosting.
  • ☕ Simplest move - Add a tablespoon to hot espresso; no other changes needed.

Those needing a brandy substitute for the Alexander can find a solid starting point in alternatives to brandy - several options keep the spirit-meets-cream balance intact.

Frequently Asked Questions

Is crème de cacao alcoholic?

Yes. It typically runs 20-40% ABV, depending on the brand. Higher-proof versions show more spirit heat; lower-proof ones taste predominantly sweet.

What is the difference between white and dark crème de cacao?

White is filtered clear and emphasizes vanilla-forward sweetness; dark retains color and carries a stronger roasted cocoa note. Flavor intensity is similar, but dark skews toward bittersweet chocolate.

Can you cook with crème de cacao?

Yes - it works as a cake soak, mousse addition, and glaze base. Use low heat when reducing, since high temperatures drive off the cocoa aroma before it concentrates.

How sweet is crème de cacao compared to chocolate liqueur?

Crème de cacao and chocolate liqueur are often used interchangeably, but chocolate liqueur brands like Godiva tend to be thicker and sweeter. Crème de cacao generally has a lighter body and cleaner cocoa finish.

What cocktails use crème de cacao?

The Grasshopper and Brandy Alexander are the two most well-known. It also appears in the Chocolate Martini, the Mudslide, and various after-dinner cream drinks.

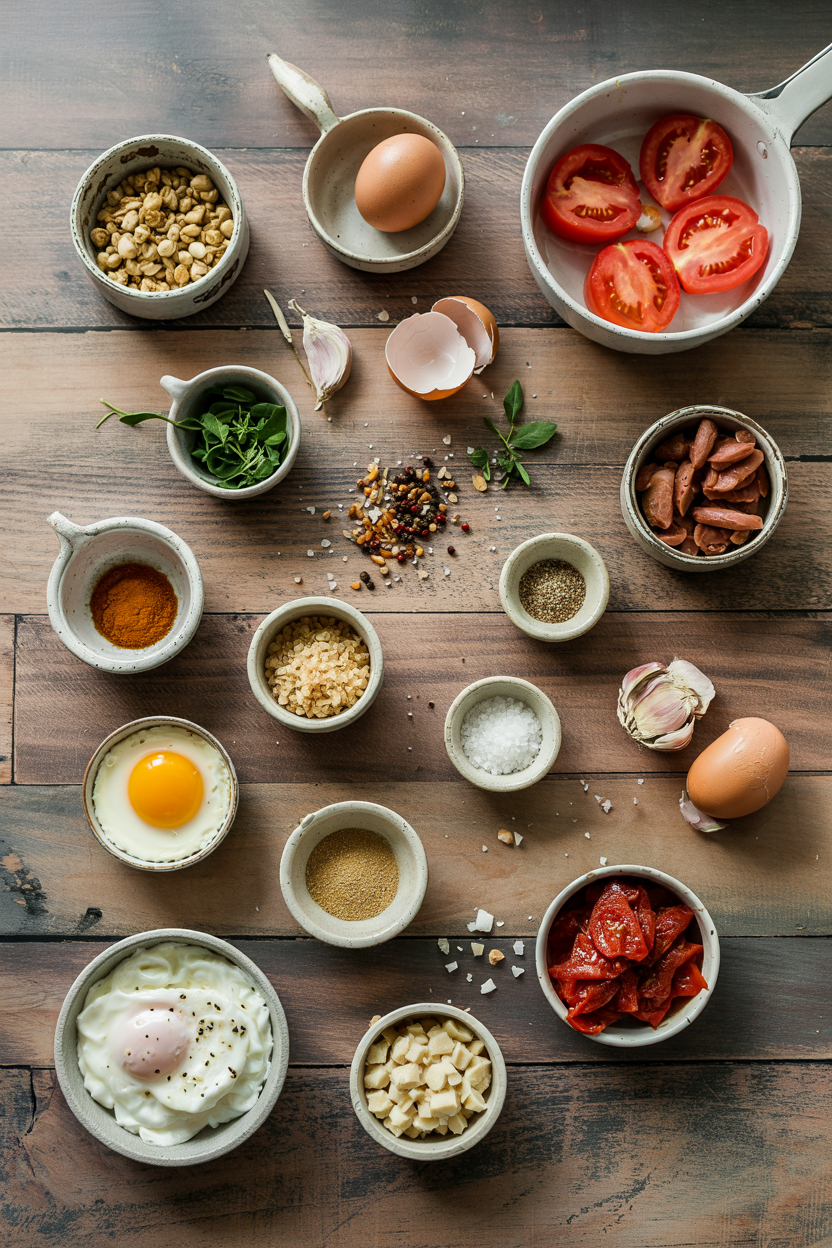
Egg and Tomato Breakfast Skillet

March 29, 2026

Soft yolks barely set in a tomato base thick enough to cling to bread. That's what happens when you crack eggs directly into simmered tomatoes and onions at the right heat.

Egg and Tomato Breakfast Skillet served on a plate

The skillet does the work. You build flavor by cooking down the tomatoes, then let gentle heat set the eggs without drying them out.

This is what we make for weekend brunch when you want something substantial but don't want to stand over the stove flipping things.

QUICK SUMMARY

Eggs cracked into a skillet of sautéed tomatoes, onions, and garlic create a one-pan breakfast with runny yolks and tender tomato chunks. The trick is letting the tomatoes simmer uncovered to thicken before adding eggs, then covering gently so the whites set without turning rubbery. Fresh tomatoes deliver the best texture, but canned works when time is tight.

⏱️Time Reality: 10 minutes prep, 12-15 minutes cook time - no standing around
🔥First Move: Sauté onions until translucent, then add tomatoes and cook uncovered 5-7 minutes
⚠️Watch Out: High heat makes rubbery eggs - use medium-low after cracking eggs in, cover 3-5 minutes

Table of Contents

Toggle
  • Why This Recipe Works
  • What You'll Need
    • Ingredient Details
  • Ingredient Swaps
  • What to Serve With It
  • Store and Reheat
  • Frequently Asked Questions
  • Egg and Tomato Breakfast Skillet
    • Method 
    • Tried this recipe?

Why This Recipe Works

Sautéing tomatoes uncovered concentrates flavor and evaporates excess liquid before the eggs go in. This builds a base thick enough to support the eggs without pooling water that steams them instead of gently cooking them. For a version that comes together quickly, this simple eggs recipe uses the same technique with peppers for extra color and sweetness.

Quick Reference
⏱️
Prep Time
10 min
🔥
Cook Time
12-15 min
⏰
Total Time
22-25 min
🍽️
Servings
2-3 servings
📊
Difficulty
Easy
🏷️
Category
Main Dish
💡
Quick Tip
Use fresh tomatoes and gentle heat
🎯
Best For
Weeknight | Meal prep

Why it works:

  • Medium heat prevents burnt garlic - adding garlic in the last minute keeps it fragrant without turning bitter
  • Uncovered simmering thickens the base - 5-7 minutes reduces liquid so eggs sit in tomato instead of water
  • Spacing eggs prevents sticking - leaving 1 inch between each egg lets them cook evenly without merging
  • Covering the skillet sets whites gently - 3-5 minutes on low heat firms up whites while keeping yolks soft
  • Salt in stages builds flavor - seasoning after tomatoes simmer and again after eggs prevents oversalting
Quick Tip
Preheat your skillet on medium for 2-3 minutes before adding oil - the even heat prevents hot spots that can scramble eggs too fast in some areas while leaving others runny.

What You'll Need

Ingredients for Egg and Tomato Breakfast Skillet

Ripe fresh tomatoes deliver the best texture and brightness, but canned diced tomatoes work when fresh aren't available or when you're short on time. We keep a batch ready for nights like this - a quick cheese recipe uses similar pantry staples for a filling breakfast that stores well.

🥚
Eggs
  • 4-6 large eggs
🍅
Tomatoes & Aromatics
  • 2 cups fresh diced tomatoes (or 1 can 14 oz diced)
  • 1 medium onion, diced
  • 2 garlic cloves, minced
🫒
Base & Seasoning
  • 2 tablespoons olive oil
  • ½ teaspoon salt (adjust)
  • ¼ teaspoon black pepper
  • Optional: chili flakes to taste
🌿
Finish
  • 2 tablespoons fresh basil or parsley
  • Optional: ¼ cup crumbled feta or shredded mozzarella

Ingredient Details

  • Fresh tomatoes
    Choose ripe, firm tomatoes - Roma or plum varieties hold shape better during cooking and release less water than beefsteak
  • Eggs
    Room temperature eggs cook more evenly - pull from the fridge 15 minutes before or place in warm water 5 minutes
  • Olive oil
    Extra virgin adds fruity depth, but regular olive oil works fine if that's what you have - just enough to coat the pan
  • Onion
    Yellow or white onion both work - dice small (¼ inch) so it softens quickly without crunchy bits
  • Garlic
    Fresh garlic tastes sharper and more aromatic than jarred - add it last to prevent burning and bitterness
  • Fresh herbs
    Basil adds sweetness, parsley adds brightness - tear or chop right before serving to preserve color and aroma
  • Cheese (optional)
    Feta adds tangy saltiness, mozzarella adds mild creaminess - sprinkle over eggs in the last minute of cooking so it softens without melting completely

Ingredient Swaps

Most swaps work if you adjust timing and expect slightly different texture or brightness. The base stays the same - tomatoes, aromatics, eggs - but you can flex on everything else depending on what's in the fridge or pantry.

Four swaps that work:

  • Fresh tomatoes → canned diced or crushed tomatoes - Cook 2-3 minutes longer to thicken; flavor is more acidic but pantry-friendly and consistent year-round
  • Olive oil → vegetable or avocado oil - Neutral flavor instead of fruity; use same amount; performance is nearly identical
  • Fresh herbs → dried herbs - Use 1 teaspoon dried basil or parsley; add during tomato simmer instead of at the end for fuller flavor
  • Onion → shallot or green onion - Shallots are milder and sweeter; green onion cooks faster (2-3 minutes) and adds sharper bite

Canned Tomatoes

Works for: Budget cooking, off-season, consistent acidity, pantry convenience

Skip if: You want bright fresh tomato flavor or you have ripe tomatoes on hand

Dried Herbs

Works for: Pantry staple, longer shelf life, works when fresh herbs wilt too fast

Skip if: You have fresh herbs - the aroma and color won't match dried versions

Shallots Instead of Onion

Works for: Milder sweetness, faster cooking, elegant presentation

Skip if: You want stronger onion punch or you're on a tight budget (shallots cost more)

Instructions

The entire dish cooks in one skillet in under 15 minutes once the onions go in. Build the tomato base first, then crack eggs directly into the sauce and cover until whites set but yolks stay soft.

  1. Heat skillet and sauté onions: Warm 2 tablespoons olive oil in an oven-safe skillet over medium heat for 1-2 minutes. Add diced onion, stir, and cook 4-5 minutes until translucent and edges start to soften. Don't rush this step - undercooked onions stay crunchy and sharp.
  2. Add tomatoes and simmer uncovered: Stir in diced tomatoes with their juice, salt, and black pepper. Let the mixture simmer uncovered for 5-7 minutes, stirring occasionally, until liquid reduces and tomatoes soften into a chunky sauce. The base should look thick, not watery.
  3. Stir in garlic: Add minced garlic, stir for 1 minute until fragrant but not browned. Watch the heat - garlic burns fast and turns bitter if the pan is too hot.
  4. Crack eggs into skillet: Lower heat to medium-low. Use a spoon to make 4-6 shallow wells in the tomato mixture, spacing them evenly. Crack one egg into each well. Sprinkle optional cheese over the eggs if using.
  5. Cover and cook eggs gently: Cover the skillet with a lid or foil. Cook 3-5 minutes until egg whites are set but yolks are still soft when you jiggle the pan. Remove from heat, sprinkle fresh herbs, and serve immediately.
Golden Rule
Lower the heat to medium-low before adding eggs - high heat makes rubbery whites and overcooked yolks in under 2 minutes.

What to Serve With It

This skillet needs something to soak up the tomato base and balance the richness of soft yolks. Crusty bread works, but sides with crunch or acidity make the plate feel more complete. A good coleslaw can make or break the plate. For a version that comes together quickly, easy scrambled eggs dinner nights pair this dish with starchy sides and bright salads that cut through richness.

Side DishPrepWhy It WorksHow to Serve
Toasted whole grain breadEasySoaks up tomato sauce, adds crunchToast slices until golden, serve warm on the side
Mixed greens saladEasyFresh, light contrast to rich eggsToss greens with lemon juice and olive oil
Avocado slicesEasyCreamy fat balances acidity of tomatoesSlice ripe avocado, season with salt and pepper
Crispy breakfast potatoesMediumComplements savory eggs, adds textureRoast cubed potatoes at 425°F until golden
Warm pita breadEasyGreat for scooping, holds up to sauceWarm pita in dry skillet 30 seconds per side

Three ways to serve it:

  • Weekend brunch spread: Serve with toasted bread, fresh fruit salad, and a drizzle of harissa for heat
  • Light lunch plate: Pair with mixed greens tossed in lemon vinaigrette and avocado slices
  • Meal prep breakfast: Make skillet ahead, reheat gently, serve over warm pita with a dollop of tahini
Best Pick
Toasted whole grain bread is the easiest and most versatile side - it soaks up the tomato base, adds crunch, and turns this into a complete meal in under 5 minutes.

Store and Reheat

Eggs firm up in the fridge but reheat well if you use gentle heat and don't rush it. The tomato base holds up better than the eggs, so expect slightly denser yolks after storing. Salad adds the contrast this plate needs, but timing matters. We keep a batch ready for nights like this - a fresh homemade salad recipe uses simple greens and vinaigrette to cut through richness without overpowering the dish.

MethodTimeBest For
🍳 Stovetop3-5 min on medium-lowBest texture, restores moisture without overcooking eggs
🔥 Oven8-10 min at 325°F (165°C)Even heating, good for larger portions, keeps eggs tender
📦 Microwave1-2 min in short burstsFastest option, but monitor closely to prevent rubbery eggs

For best results when storing:

  • Cool skillet before refrigerating - let it sit at room temperature 10-15 minutes so condensation doesn't make the tomato base watery
  • Use shallow airtight containers - spreads the mixture thin so it cools faster and reheats more evenly
  • Store up to 3-4 days in the fridge - eggs stay safe but yolks firm up; flavor holds well
  • Reheat with a splash of water - add 1-2 tablespoons water or broth before reheating to restore moisture
  • Freeze tomato base only - cook tomatoes and onions, cool completely, freeze up to 1 month; add fresh eggs when reheating

Frequently Asked Questions

Can I make egg and tomato breakfast skillet ahead of time?

Cook the tomato and onion base up to 2 days ahead, store in the fridge, then reheat and add fresh eggs when ready to serve. Cooked eggs store 3-4 days but yolks firm up, so they won't be as runny after reheating.

What is the best way to reheat this skillet without drying eggs?

Reheat on the stovetop over medium-low heat for 3-5 minutes with a splash of water or broth to add moisture. Cover the skillet while reheating to steam the eggs gently instead of drying them out.

How do I know when the eggs are perfectly cooked?

Egg whites should look opaque and firm when you gently shake the pan, while yolks stay glossy and jiggle slightly. This usually takes 3-5 minutes covered on medium-low heat once eggs are added.

Why are my eggs soggy or rubbery in the tomato skillet?

Soggy eggs happen when the tomato base is too watery - simmer uncovered for 5-7 minutes to thicken before adding eggs. Rubbery eggs come from high heat - lower to medium-low and cover gently so eggs cook without toughening.

Can I scale this recipe for larger groups?

Double the tomato base and use a 12-inch skillet or two smaller pans to fit 8-10 eggs comfortably. Cook time stays the same, but you may need an extra 1-2 minutes covered to set all the eggs evenly.

Egg and Tomato Breakfast Skillet served on a plate

Egg and Tomato Breakfast Skillet

No ratings yet
Eggs cracked into a skillet with sautéed tomatoes, onions, and garlic create a flavorful one-pan breakfast with runny yolks and tender tomato chunks. The key is simmering the tomatoes uncovered to thicken before gently cooking eggs under a cover, resulting in perfectly set whites without rubbery texture.
Print Recipe Pin Recipe
Prep Time 10 minutes mins
Cook Time 15 minutes mins
Total Time 25 minutes mins
Servings: 3 servings
Course: Breakfast, Main Dish
Cuisine: American
Ingredients Equipment Method Notes

Ingredients
  

  • 4 large eggs room temperature
  • 2 cups fresh diced tomatoes or 1 can (14 oz) diced tomatoes
  • 1 medium onion diced
  • 2 cloves garlic minced
  • 2 tablespoons olive oil extra virgin preferred
  • 0.5 teaspoon salt adjust to taste
  • 0.25 teaspoon black pepper
  • chili flakes optional, to taste
  • 2 tablespoons fresh basil or parsley chopped
  • 0.25 cup crumbled feta or shredded mozzarella optional

Equipment

  • Oven-safe skillet Used to cook the tomato base and eggs all in one pan
  • lid or foil To cover skillet and gently set eggs

Method
 

  1. Warm 2 tablespoons olive oil in an oven-safe skillet over medium heat for 1-2 minutes. Add diced onion and cook for 4-5 minutes until translucent and edges soften. Do not rush this step to avoid crunchy onions.
  2. Stir in diced tomatoes with their juice, salt, and black pepper. Let the mixture simmer uncovered for 5-7 minutes, stirring occasionally, until the liquid reduces and tomatoes become a thick, chunky sauce.
  3. Add minced garlic and stir for 1 minute until fragrant but not browned. Maintain medium heat to prevent burning the garlic.
  4. Lower heat to medium-low. Use a spoon to make 4 shallow wells in the tomato mixture, spacing them evenly. Crack one egg into each well. Sprinkle optional cheese over the eggs if using.
  5. Cover the skillet with a lid or foil. Cook for 3-5 minutes until the egg whites are set but the yolks remain soft and jiggly. Remove from heat, sprinkle chopped fresh basil or parsley, and serve immediately.

Notes

  • Use medium heat to prevent burning garlic and onions.
  • Simmer tomatoes uncovered to reduce liquid and prevent soggy eggs.
  • Lower heat and cover skillet when cooking eggs to keep yolks runny and whites tender.

Tried this recipe?

Let us know how it was!

How Long Does Chive Last? [Storage Guide]

March 29, 2026

Chives are one of those herbs where freezing often makes more sense than you'd think - a bunch bought for one recipe can outlast its usefulness in the fridge long before you get through it, and the freezer genuinely preserves their flavor for months.

Can You Freeze Chive

Similar logic applies to other soft herbs; how long basil keeps follows the same pattern of a narrow fresh window versus a much longer frozen one.

Understanding exactly how long fresh chives last - and which storage method fits your actual cooking habits - prevents a lot of wasted bunches.

QUICK SUMMARY

Fresh chives last 5-10 days in the fridge and up to 6-8 months in the freezer. Keep them wrapped in a damp paper towel inside a breathable container. Frozen chives lose their crisp texture but hold flavor well for cooked dishes.

🧊Fridge (raw): 5-10 days wrapped damp in a breathable container
❄️Freezer (sliced): 6-8 months; chop first, freeze flat before bagging
⚠️Key Rule: Dry chives before fridge storage to prevent sliminess and rot

How Long Does Chive Last?

Fresh chives are more perishable than many cooks expect, and their hollow blades dry out or turn slimy depending on how much moisture is present.

The range in fridge life comes down to prep: a bunch stored loosely in a bag degrades faster than one that's properly dried and wrapped.

Chive Shelf Life
MethodStateDurationNotes
🏠 CounterRaw (upright)1 day maxBlades wilt quickly at room temp even in water
🧊 FridgeRaw (whole)5-10 daysWrapped damp, stored near the crisper drawer
🧊 FridgeSliced4-7 daysAirtight container lined with a paper towel
❄️ FreezerSliced6-8 monthsFreeze flat first; texture softens but flavor holds

The shorter fridge range applies when chives go in damp or loosely stored. Dry them thoroughly first and you'll consistently land toward the 10-day end.

Garlic chives follow the same timeline, though their broader, flat blades tend to wilt a day or two faster.

How to Store Chive

Moisture control is the single biggest factor with chive storage - too much and the blades go slimy, too little and they dry out and become papery. Getting the balance right takes one extra minute of prep.

Golden Rule
Always dry chives before refrigerating. Use a salad spinner or pat dry with paper towels - excess moisture on the blades is the primary cause of slime and early rot.

Fridge: Trim the base of the bunch, pat the blades dry, then wrap them loosely in a damp paper towel. Slide the bundle into a perforated plastic bag or a partially open container and store near the crisper. For longest fridge life, stand the bunch upright in a jar with about an inch of water and drape a loose plastic bag over the tops - change the water every 2-3 days.

Freezer: Chop chives to your preferred size before freezing; whole frozen bunches clump and become impossible to portion. Full process is covered in the freezer section below.

Counter: Don't leave chives out for more than a day. Even standing in water at room temperature, the blades wilt and the cut ends deteriorate quickly. Learning about chive's flavor and uses gives useful context for which storage format - whole for garnish, chopped for cooking - actually makes sense for your recipes.

Can You Freeze Chive?

Freezing works well for chives, with one important caveat: thawed chives go limp.

They won't revive as a crisp raw garnish after freezing, so this method is best suited to soups, sauces, eggs, and other cooked dishes where texture doesn't matter.

Watch Out
Don't freeze chives whole. An unchopped bunch freezes into a clumped mass that's nearly impossible to break apart cleanly. Always chop to size before the tray step.
  1. Wash and dry - Rinse the chives under cold water, then spin or pat completely dry. Any surface moisture causes ice crystals and soggy results.
  2. Chop to size - Cut to the length or size you'll use in cooking. Thin rings work for most applications.
  3. Spread flat - Lay in a single layer on a baking sheet and freeze for 30-60 minutes until individual pieces are firm.
  4. Bag and label - Transfer to a labeled **freezer bag**, press out excess air, and seal. Use within 6-8 months for best flavor.

For even more convenience, freeze chopped chives in an ice cube tray with a little water or oil - each cube becomes a ready-to-drop portion for soups and sauces.

The guide on keeping herbs in ice cube trays fresh covers how long those portioned cubes actually hold up.

No thawing is needed for cooked dishes - add frozen chives directly to hot food. For a cold garnish, thaw briefly in the fridge and use immediately.

Signs Chive Has Gone Bad

Most spoilage in chives is visible before you ever smell anything off. Check the base of the bunch first - that's where deterioration starts and spreads upward.

Signs It's Gone Bad
👀
VisualSlimy, translucent blades at the base · Brown or black blotches along the hollow green stems · Limp blades that won't rebound after misting
👃
SmellSour or fermented oniony odor instead of a fresh, sharp green scent
✋
TextureSliminess on leaf surfaces · Papery, dry tips alongside soggy bases

Discard any bunch showing sliminess, dark rot, or a sour smell. Don't taste-test a questionable bunch to confirm.

Chives follow a similar spoilage pattern to other soft allium-family herbs - parsley spoilage signs overlap closely with what you'd see here.

Getting the Most From Every Bunch

A few targeted habits make a real difference with chive shelf life. If you've already run through your fresh supply, chive swaps that work can help you find a usable substitute without a trip to the store.

  • 🧊 Upright jar method - Stand trimmed chives in an inch of water in the fridge; change water every 2-3 days for close to the full 10-day window.
  • ✂️ Separate the flowers - Trim pale tubular **chive blossoms** and use or freeze them separately; they concentrate onion flavor but wilt faster than the blades.
  • 🧊 Label freezer bags - Date every bag at the time of freezing. Six months passes faster than expected, and flavor does degrade past that point.
  • 🔄 Know your use - Keep a small fresh portion for raw garnish and freeze the rest immediately; don't wait for the whole bunch to near the end of its fridge life.

When chives run out, swapping out green onion or checking alternatives to scallion gives you the closest flavor matches without hunting for another bunch.

Frequently Asked Questions

Do chives last longer in a jar of water?

Yes, noticeably so. Standing trimmed chives upright in an inch of water in the fridge keeps the blades hydrated and extends freshness toward the 10-day mark. Change the water every 2-3 days and drape a loose bag over the tops.

Can you freeze chives whole or should you chop first?

Always chop first. Whole frozen bunches fuse into a clumped mass that's difficult to portion cleanly. Chopping before the tray-freeze step keeps pieces separate and easy to measure.

Are chive flowers edible and how do you store them?

Yes, chive blossoms are edible and carry a concentrated onion flavor. Store them in the fridge for 1-2 days max, or freeze them separately from the blades since they deteriorate faster.

Can you use frozen chives as a raw garnish?

Not effectively. Freezing breaks down the cell walls in the hollow blades, leaving them limp and watery once thawed. Reserve frozen chives for cooked applications and keep a small fresh portion for garnishing.

Do garlic chives store the same way as regular chives?

The same methods apply, but garlic chives' flat blades tend to wilt a day or two faster than the hollow blades of Allium schoenoprasum. Store them with the same damp-wrap method and expect a slightly shorter fridge window.

What Is Doubanjiang? [Taste, Uses & More]

March 29, 2026

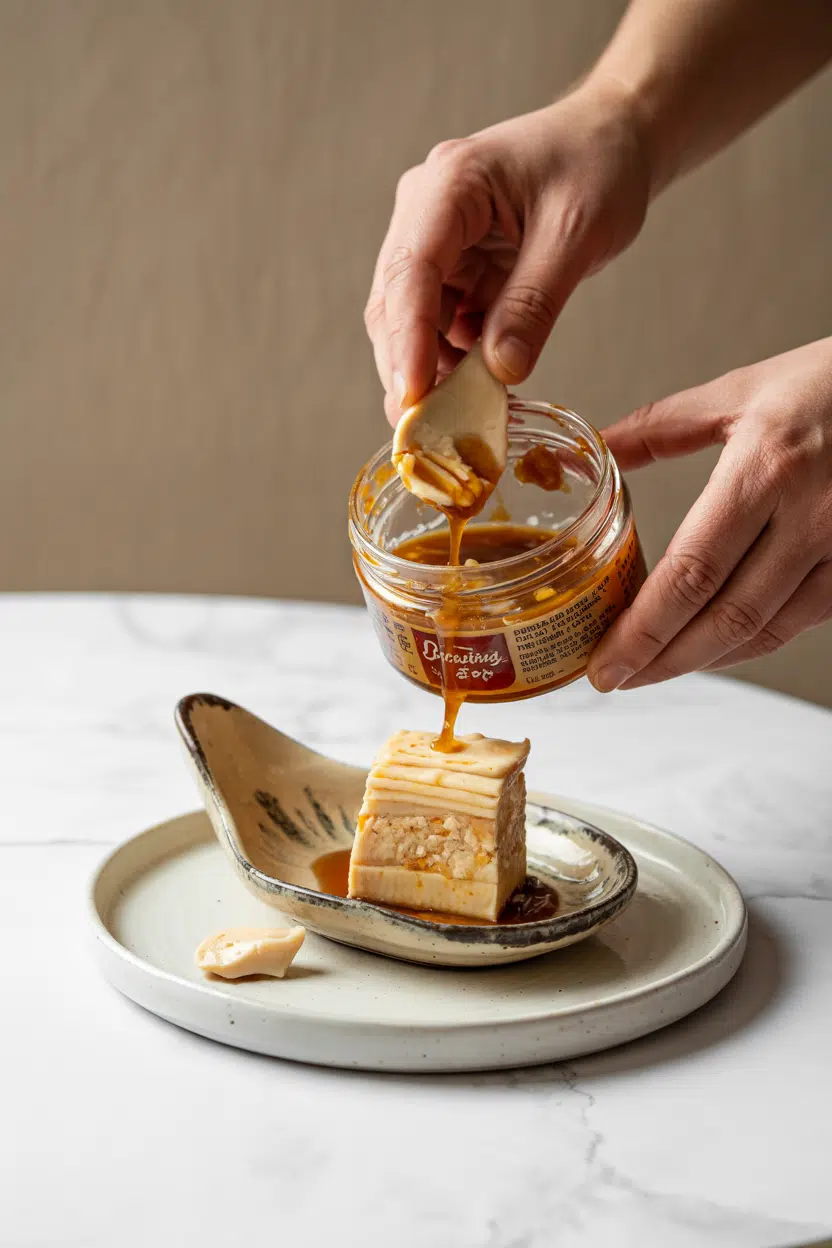
You spot a small jar labeled doubanjiang - or maybe "toban djan" or "broad bean chili paste" - on the shelf at an Asian grocery, deep red-brown through the glass with a slick of oil pooling at the top.

What Is Doubanjiang

It's the kind of paste that rewards the curious and quietly dominates Sichuan cooking in a way that swapping out sichuan peppercorn or any other single ingredient simply can't replicate.

Fermented broad beans and chilies are its backbone, and what happens to gluten during fermentation guide explains why the fermentation process also matters for anyone watching their diet.

This article tells you exactly what it is, how it tastes, and how to put it to work.

QUICK SUMMARY

Doubanjiang is a fermented broad bean and chili paste from Sichuan, China. It delivers deep umami, salty heat, and a pungent fermented aroma. Used as a stir-fry base or braising seasoning, it's the defining flavor of mapo tofu. Opened jars keep up to 12 months refrigerated.

🌶️Flavor: Umami-rich, salty, fermented heat with a tangy aged edge
🫙Texture: Coarse, chunky, oily paste with visible chili pieces
🍽️Best Uses: Mapo tofu, braised pork, spicy noodle broths, stir-fry bases
📦Shelf Life: Unopened 12-24 months; opened and refrigerated 6-12 months
🛒Buy It: Asian grocery stores, online; look for "Pixian" on the label

What Is doubanjiang?

Doubanjiang is a fermented paste built on salted broad (fava) beans and dried red chilies, with fermented soy typically added alongside. It originates from Pixian county near Chengdu in Sichuan province, which is why premium versions are sold as Pixian doubanjiang - a label worth seeking out. The paste is aged in clay pots under the sun, sometimes for two or more years, which develops its characteristic deep red-brown color and layered, complex character.

It goes by several names: toban djan, douban sauce, and broad bean chili paste are the most common in Western markets. Not all products sold under these names are equal, however.

Cheaper versions skip the long fermentation and rely on fresh chili rather than properly aged beans, producing a thinner, less developed result.

Two main styles exist: the standard version (spicy and fermented) and a non-spicy variant called sweet bean paste, which is a different product entirely. For Sichuan cooking, always confirm the label includes chilies and notes fermented broad beans specifically.

  • 🌍 Origin - Pixian county, Chengdu, Sichuan province, China
  • 🫘 Base ingredients - Broad (fava) beans, dried chilies, fermented soy, salt
  • ⏳ Aging - Premium Pixian paste is aged 1-3 years in open-air clay pots
  • 🏷️ Alternate names - Toban djan, douban sauce, broad bean chili paste

What Does doubanjiang Taste Like?

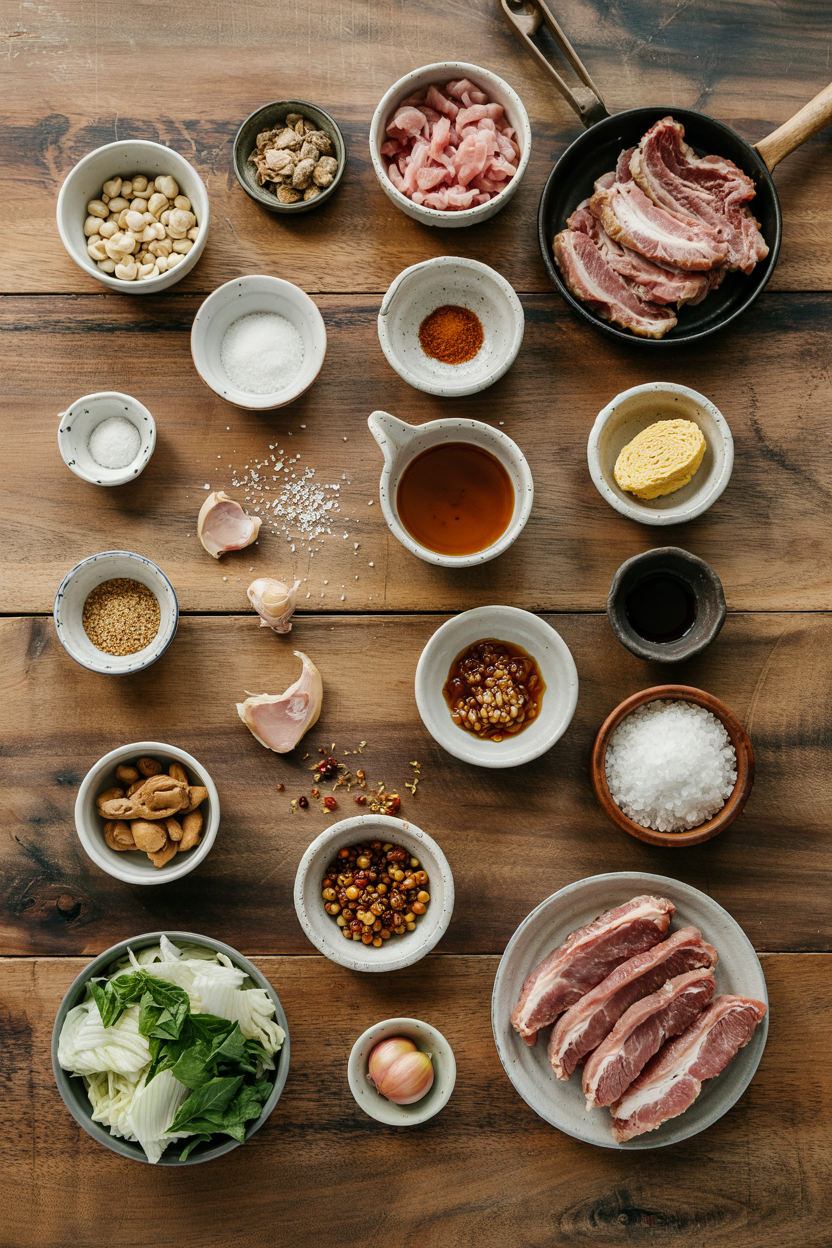
doubanjiang - What Is Doubanjiang

Think of a saltier, earthier miso blended with a chunky chili paste - then push the fermented character further and add an oily, almost lacquered finish.

That's the closest shorthand. Salty and umami-forward are the dominant registers, with chili heat that lands mid-palate rather than at the tip of the tongue.

Sensory SnapshotStrong Intensity
👅 Flavor
umami-richsaltyfermented heattangy-aged
✋ Texture
coarsechunkyoily paste
👃 Aroma
pungent fermented beantoasty chili oil

The flavor also changes with heat. Frying doubanjiang in hot oil - a technique called stir-frying the paste - drives off sharper raw fermented notes and develops a toasty, rounded depth.

Raw from the jar, the tang and salt are more upfront; cooked, it softens into the dish's backbone rather than standing apart.

Golden Rule
Always fry doubanjiang in oil before adding liquid. A bare 60-90 seconds in a hot wok unlocks its aroma and rounds out the raw fermented edge.

Longer braising mellows the heat further without erasing the umami core.

That slow fade is why the paste works in hour-long braises as well as five-minute stir-fries - it behaves differently at each cooking stage.

Note that chili's shelf life can affect heat intensity in dried chili products generally, so older or degraded paste may taste flatter than a freshly opened jar.

How to Use doubanjiang

Doubanjiang earns its place at the start of a dish, not the end. In classic mapo tofu, the paste hits the wok first in peanut or vegetable oil alongside garlic and scallions, creating a spiced fat base before any protein or tofu enters the pan. That first sizzle is where the flavor compounds develop.

How Doubanjiang Is Used
MethodBest ForTip
🔥 Stir-fried in oilMapo tofu, kung pao sauces, stir-fry basesUse medium-high heat; 60-90 seconds is enough before adding aromatics
🍲 Braising liquidSpicy pork belly, beef shank, whole tofu blocksAdd early so the paste has time to dissolve and integrate
🍜 Simmered in brothSpicy noodle soup bases, hotpot dipping brothsSimmer at least 10 minutes to reduce the raw salt spike
🥣 Blended into dressingsCold noodle sauces, dumpling dipping condimentsBalance with sesame oil and a small amount of sugar or rice vinegar

Beyond Sichuan dishes, the paste integrates well into contemporary fusion applications wherever a fermented chili element is needed.

Stir it into marinades for grilled eggplant or pork ribs, or whisk a small amount into a warm vinaigrette for roasted vegetables.

It pairs directly with soft or silken tofu, ground pork, and fermented black beans - ingredients that can hold up to its salt and intensity.

Shortcut
For a fast dumpling dip, blend 1 teaspoon doubanjiang with 1 tablespoon neutral oil, ½ teaspoon sugar, and a splash of rice vinegar. No cooking needed.

If a recipe calls for a different fermented chili product and you're out of options, reviewing alternatives to doubanjiang covers what substitutes preserve the umami depth versus what only approximates the heat.

One important note: doubanjiang overwhelms delicate dairy sauces and has no place in sweet preparations.

Try It In
🍲Sichuan Mapo Tofu with PorkThe definitive use case — paste fried in oil, then silken tofu and ground pork added→🥦Beef and Broccoli with Oyster SauceAdd a small spoon of doubanjiang to the sauce for a deeper, spicier stir-fry base→🍗Crockpot Chicken Vegetable SoupA teaspoon stirred into the broth at the start adds slow-building heat and umami→

How to Buy and Store doubanjiang

At the store, prioritize jars labeled Pixian or those that specifically list fermented broad beans and chilies as the first ingredients.

A deep red-brown color with visible oil pooling at the top is a good sign; so is a pronounced, pungent fermented aroma when you crack the lid at home.

Avoid jars with musty smells or visible fuzzy white mold on the surface - surface oil is fine, surface mold is not.

Watch Out
Some products labeled "douban sauce" or "chili bean sauce" use soy as the primary base rather than broad beans. They taste different and won't replicate authentic Pixian results.

Store unopened jars in a cool, dark pantry for up to 24 months.

Once opened, press the paste down with a clean spoon, ensure a layer of oil covers the surface, seal tightly, and refrigerate.

For a full breakdown of exactly how long doubanjiang keeps under various storage conditions, that guide covers edge cases like partially dried jars and freezing.

Refrigerated and properly sealed, opened paste stays good for 6-12 months.

Start Here if You're New to It

Pick up one jar of Pixian doubanjiang and use it in a single dish first - mapo tofu is the straightforward entry point because the paste is the structural foundation, not a background note.

You'll learn what "frying the paste in oil" means and how the flavor compounds once it hits heat.

Start with one teaspoon less than the recipe calls for. Doubanjiang is salty enough to throw off seasoning fast, and you can always add more at the end.

Once you know its output, building from there is straightforward.

Frequently Asked Questions

Is doubanjiang spicy?

Yes, but the heat level varies by brand and age. Pixian doubanjiang carries moderate chili heat - noticeable but not overwhelming. Longer-aged versions tend to have deeper, mellower heat rather than sharp immediate burn.

Can I substitute doubanjiang with gochujang?

Not directly. Gochujang is sweeter, smoother, and fermented soy-forward rather than broad bean-forward. If you need gochujang itself, check [alternatives to gochujang](https://forkliftkitchen.com/gochujang-substitutes/) - but for doubanjiang, a closer swap is miso blended with sambal oelek.

How much doubanjiang to use in mapo tofu?

Most recipes use 1½ to 2 tablespoons for two servings. Start at 1 tablespoon if your paste is particularly salty, then taste before adding more - mapo tofu also gets salt from soy sauce and fermented black beans.

Is doubanjiang vegan?

The paste itself - broad beans, chilies, soy, salt - is vegan. However, some brands add shrimp paste or use equipment shared with shellfish products. Check individual labels if this matters for your diet.

What is Pixian doubanjiang?

Pixian doubanjiang is the premium regional variety made in Pixian county, Sichuan. It uses a longer sun-aged fermentation - often 1-3 years - which produces a deeper color, richer umami, and more complex fermented character than standard versions.

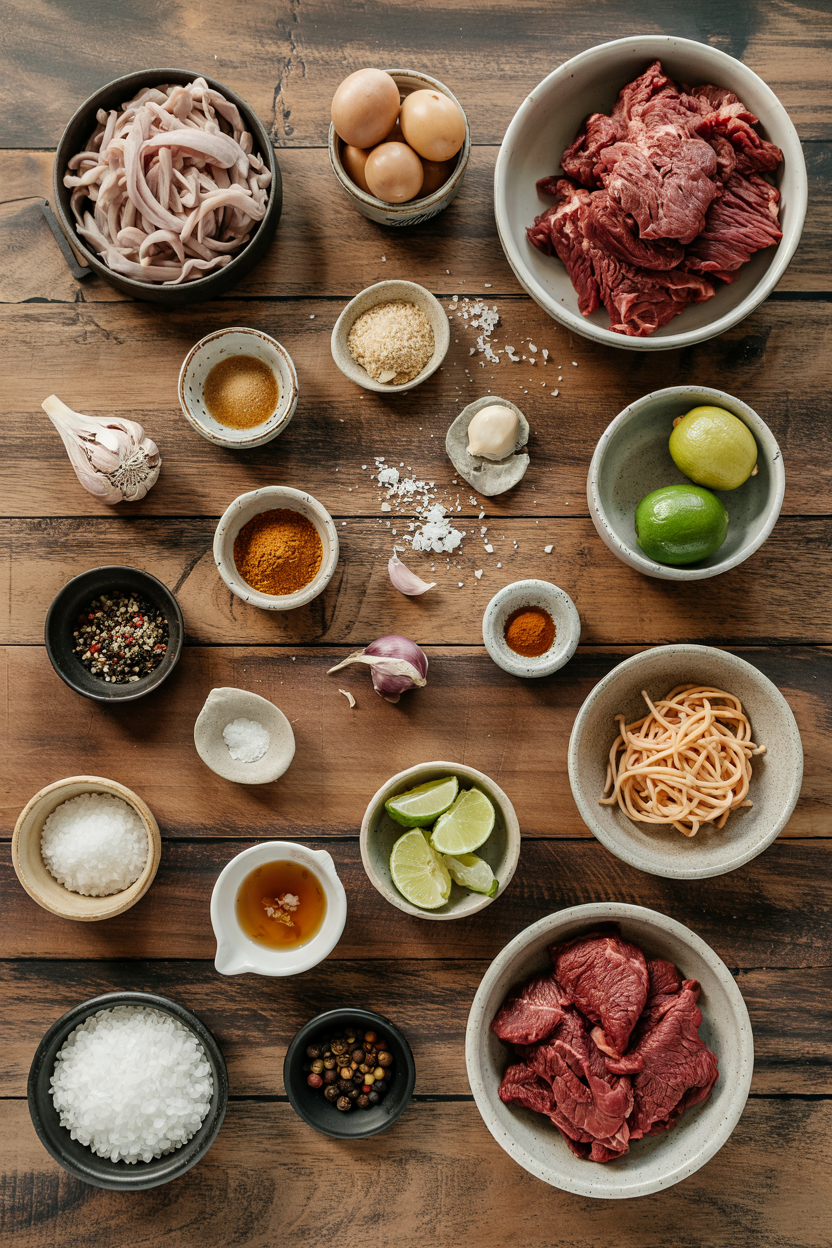
Beef Mechado Filipino-Style

March 29, 2026

Most stews turn out watery or tough because timing and liquid control get ignored. The fix is searing beef first and simmering at a steady low temperature until the meat pulls apart with a fork.

Beef Mechado Filipino-Style served on a plate

High heat at the start creates browning that translates to deeper flavor later. The tomato-soy base needs time to reduce into a thick coating that clings to every piece of beef.

This works for weeknight dinners when you want comfort food that doesn't require constant attention. Set the pot to simmer and walk away for 90 minutes.

QUICK SUMMARY

Beef Mechado is a Filipino braised stew with fork-tender beef chuck simmered in tomato sauce and soy sauce until the meat breaks down and the sauce thickens into a glossy red coating. Sear the beef before braising to lock in browning, then simmer low for 90 minutes until the beef shreds easily.

⏱️Time Reality: 1 hour 50 minutes total - 20 minutes prep, 90 minutes unattended simmer
🔥First Critical Step: Sear beef chunks 3-4 minutes per side over medium-high heat before adding liquid
⚠️Watch Out: Add potatoes and carrots in the last 20 minutes or they'll turn to mush

Why This Recipe Works

A good beef stew delivers tender meat without babysitting the pot. Rich mains need something to cut through, and another great beef recipe does exactly that-mechado builds depth through searing and long simmering that breaks down connective tissue.

Quick Reference
⏱️
Prep Time
20 min
🔥
Cook Time
1 hour 30 min
⏰
Total Time
1 hour 50 min
🍽️
Servings
6 servings
📊
Difficulty
Medium
🏷️
Category
Main Dish
💡
Quick Tip
Sear beef before simmering for best depth
🎯
Best For
Weeknight | Meal prep | Family dinner

Why it delivers:

  • Beef chuck breaks down into tender bites - marbled fat melts during the 90-minute simmer and keeps the meat moist instead of dry
  • Searing creates a crust that locks in browning - those caramelized bits dissolve into the sauce and add depth you can't get from boiling alone
  • Tomato sauce and soy sauce balance each other - the acid from tomatoes cuts the salt from soy and creates a tangy-savory coating
  • Gentle simmer at 180-200°F prevents toughness - high heat seizes the beef and makes it chewy, low heat relaxes the fibers until they fall apart
  • Deglazing the pan with soy sauce captures fond - those stuck-on bits hold concentrated flavor that would otherwise go to waste
Quick Tip
Marinate the beef 30 minutes to 2 hours before cooking to let the soy sauce penetrate the meat and season from the inside out.

What You'll Need

Ingredients for Beef Mechado Filipino-Style

Beef mechado uses pantry staples and forgiving vegetables that hold up to long cooking. For a version that comes together quickly, simple salad recipe adds contrast without extra prep time-mechado only requires one pot and ingredients you probably already have.

🥩
Protein
  • 2 lbs beef chuck or beef shank, cut into 2-inch cubes
🥢
Sauce Base
  • ⅓ cup soy sauce
  • 1 cup tomato sauce
  • 2 tablespoon calamansi or lemon juice
  • 2 cups beef broth or water
🥔
Vegetables
  • 3 medium potatoes, peeled and quartered
  • 2 medium carrots, peeled and sliced
🧄
Aromatics
  • 6 cloves garlic, minced
  • 1 medium onion, diced
  • 2 bay leaves
  • 3 tablespoon pork lard or cooking oil

Ingredient Details

  • Beef chuck or shank
    Marbled cuts with connective tissue turn tender after long braising-lean cuts dry out and get stringy
  • Soy sauce
    Adds umami and salt to the broth-use low-sodium if you're watching salt intake or it can overpower the tomato
  • Tomato sauce
    Creates the signature red base-avoid marinara or pasta sauce which contain herbs that clash with Filipino flavors
  • Calamansi or lemon juice
    Balances richness with acid-add at the end so heat doesn't cook off the brightness
  • Potatoes
    Yukon gold or russet hold their shape better than red potatoes which turn mealy after long cooking
  • Pork lard
    Traditional fat adds depth-swap with vegetable oil for a neutral option that still sears the beef
  • Bay leaves
    Subtle aroma that rounds out the sauce-remove before serving so no one bites into a leathery leaf

Ingredient Swaps

Not every pantry stocks calamansi or pork lard, and beef cuts vary by what's on sale. Most swaps work as long as you adjust cooking time and seasoning to match. Some changes affect texture more than flavor-know what you're trading before you commit.
Four reliable swaps:

  • Beef chuck → stew beef or brisket - Stew beef cooks faster (60-75 minutes), brisket needs longer (2+ hours) but both turn tender with low heat
  • Soy sauce → tamari or coconut aminos - Tamari tastes nearly identical and keeps it gluten-free, coconut aminos are sweeter and less salty so add more
  • Tomato sauce → crushed tomatoes with a splash of paste - Chunkier texture but same tangy base, add 1 tablespoon tomato paste to thicken the sauce
  • Calamansi juice → lemon or lime juice - Lemon is closest in acidity, lime is sharper, both work if you adjust to taste at the end

Pork Lard

Works for: Traditional flavor and rich depth

Skip if: You want a neutral taste or dairy-free option

Vegetable Oil

Works for: Neutral flavor and lighter finish

Skip if: You want the richness that comes from pork fat

Sweet Potatoes

Works for: Sweeter flavor and softer texture

Skip if: You prefer starchy potatoes that hold their shape longer

Instructions

The timing matters more than the technique. Sear the beef in batches so each piece gets a crust, then simmer low until the meat pulls apart-rushing either step ruins the texture.

  1. Marinate the beef - Combine beef cubes with ¼ cup soy sauce and let sit 30 minutes to 2 hours in the fridge so the marinade penetrates the meat.

  2. Sear the beef in batches - Heat 2 tablespoons pork lard or oil in a heavy-bottom pot or Dutch oven over medium-high heat, add beef (don't crowd the pan), and sear 3-4 minutes per side until browned, then remove and set aside.

  3. Sauté aromatics and deglaze - Add remaining 1 tablespoon oil to the pot, cook garlic and onion 2-3 minutes until soft, pour in remaining soy sauce to deglaze and scrape up browned bits stuck to the bottom.

  4. Braise the beef - Return beef to the pot, add tomato sauce, bay leaves, and beef broth, bring to a boil, then reduce to a gentle simmer (180-200°F), cover, and cook 90 minutes until beef is fork-tender.

  5. Add vegetables and finish - Stir in potatoes and carrots, simmer uncovered 20 minutes until vegetables are soft, remove from heat, stir in calamansi or lemon juice, and let rest 10 minutes before serving.

Golden Rule
Simmer uncovered the last 10-15 minutes to thicken the sauce-if it's still watery, mix 1 tablespoon cornstarch with 2 tablespoons water and stir in.

What to Serve With It

Mechado's thick sauce needs something to soak it up or cut through the richness. For a version that comes together quickly, planning your pulled beef dinner adds contrast without extra prep time-rice and pickles are the default but a fresh side resets your palate between bites.

Side Dish Prep Why It Works How to Serve
Steamed jasmine or white rice Easy Absorbs the savory sauce and balances richness Serve hot in bowls, ladle mechado over the top
Garlic fried rice Easy Adds roasted garlic flavor that complements the stew Fry day-old rice with minced garlic until crispy
Sautéed spinach or bok choy Easy Adds bitterness and freshness to cut through fat Wilt greens in garlic oil, season with salt
Atchara (pickled papaya) Medium Tangy crunch resets your palate between bites Serve cold in a small bowl on the side
Garlic bread Easy Soaks up sauce and adds a buttery crunch Toast sliced baguette with garlic butter

Three ways to serve it:

  • Family-style over rice - Ladle mechado into a large serving bowl, bring steamed rice to the table, and let everyone build their own plate
  • Meal prep bowls - Pack rice, beef, and vegetables in separate containers so you can reheat without turning the rice mushy
  • With pickles and greens - Serve atchara or quick-pickled cucumbers alongside sautéed spinach to balance the richness
Best Pick
Garlic fried rice soaks up sauce better than plain white rice and adds a nutty, crispy layer that makes leftovers taste less boring.

Store and Reheat

Mechado keeps well because the sauce protects the beef from drying out. Cool and chill, salad adds the contrast this plate needs, but timing matters-store the stew in shallow containers so it cools fast and reheats evenly without scorching the bottom.

Method Time Best For
🍳 Stovetop 10-15 min on medium-low Retains texture and flavor, even heating throughout
🔥 Oven 20 min at 325°F (163°C) Even reheating for large batches, prevents scorching
📦 Microwave 2-3 min, stir halfway Small portions, quick heat, but can dry out edges

For best results when storing:

  • Cool completely before refrigerating - Hot stew raises fridge temperature and creates condensation that dilutes the sauce
  • Use shallow airtight containers - Speeds cooling and prevents the top layer from drying out or forming a skin
  • Separate rice from stew - Store them in different containers so rice doesn't absorb all the liquid and turn mushy
  • Skim fat before reheating - Chill the stew overnight, scrape off the solidified fat layer on top, and reheat for a cleaner finish
  • Add a splash of broth when reheating - Sauce thickens in the fridge, thin it out with 2-3 tablespoons broth or water before warming

Frequently Asked Questions

Can I use stew beef instead of chuck for beef mechado?

Yes, stew beef works but cooks faster-check for tenderness at 60-75 minutes instead of 90. Chuck has more marbling and connective tissue that breaks down into a richer sauce.

How should I store and reheat leftovers to keep texture?

Store in shallow airtight containers in the fridge for 3-4 days or freeze up to 3 months. Reheat on the stovetop over medium-low heat for 10-15 minutes, adding a splash of broth if the sauce thickened.

How do I know when the beef mechado is fully cooked and tender?

The beef should pull apart easily with a fork after 90 minutes of simmering at 180-200°F. If it's still tough, cover and simmer another 15-30 minutes until the fibers break down.

What causes the sauce to be watery or bland and how to fix it?

Watery sauce happens when you skip reducing at the end or use too much broth. Simmer uncovered for 10-15 minutes or stir in 1 tablespoon cornstarch mixed with 2 tablespoons water to thicken.

How can I scale beef mechado for large groups or meal prep?

Double or triple the recipe but sear the beef in batches so each piece browns properly. Use a larger pot or Dutch oven and keep the simmer temperature steady-cooking time stays the same.

Beef Mechado Filipino-Style served on a plate

Beef Mechado Filipino-Style

No ratings yet
Beef Mechado is a Filipino braised stew featuring fork-tender beef chuck simmered in a tangy tomato-soy sauce until tender. The recipe emphasizes searing beef first for deeper flavor and a slow simmer to achieve a glossy, rich sauce coating the meat.
Print Recipe Pin Recipe
Prep Time 20 minutes mins
Cook Time 1 hour hr 30 minutes mins
Total Time 1 hour hr 50 minutes mins
Servings: 6 servings
Course: Main Dish
Cuisine: Filipino
Ingredients Equipment Method Notes

Ingredients
  

  • 2 lbs beef chuck cut into 2-inch cubes
  • ⅓ cup soy sauce divided, low-sodium optional
  • 1 cup tomato sauce
  • 2 tablespoon calamansi juice or lemon juice, added at end
  • 2 cups beef broth or water
  • 3 medium potatoes peeled and quartered
  • 2 medium carrots peeled and sliced
  • 6 cloves garlic minced
  • 1 medium onion diced
  • 2 leaves bay leaves
  • 3 tablespoon pork lard or cooking oil

Equipment

  • Heavy-bottom pot or Dutch oven Used to sear beef and braise the stew

Method
 

  1. Combine beef cubes with ¼ cup soy sauce and marinate in the fridge for 30 minutes to 2 hours to allow the marinade to penetrate the meat.
    2 lbs beef chuck, ⅓ cup soy sauce
  2. Heat 2 tablespoons pork lard or oil in a heavy-bottom pot or Dutch oven over medium-high heat. Add the beef in batches without crowding and sear each side for 3-4 minutes until browned. Remove beef and set aside.
    2 lbs beef chuck, 3 tbsp pork lard
  3. Add remaining 1 tablespoon oil to the pot. Sauté garlic and onion for 2-3 minutes until softened. Pour in remaining soy sauce to deglaze the pan and scrape up browned bits from the bottom.
    6 cloves garlic, 1 medium onion, ⅓ cup soy sauce, 3 tbsp pork lard
  4. Return the seared beef to the pot. Add tomato sauce, bay leaves, and beef broth. Bring to a boil, then reduce heat to maintain a gentle simmer at 180-200°F. Cover and cook for 90 minutes until the beef is fork-tender.
    2 lbs beef chuck, 1 cup tomato sauce, 2 leaves bay leaves, 2 cups beef broth
  5. Stir in potatoes and carrots. Simmer uncovered for 20 minutes until vegetables are tender. Remove from heat and stir in calamansi or lemon juice. Let rest for 10 minutes before serving.
    3 medium potatoes, 2 medium carrots, 2 tbsp calamansi juice

Notes

  • Sear beef in batches to develop a deep brown crust and avoid steaming.
  • Add vegetables late in cooking to prevent them from becoming mushy.
  • Simmer uncovered at the end to thicken sauce or use cornstarch slurry if needed.

Tried this recipe?

Let us know how it was!

What Is Cornmeal? Taste, Uses, and How to Cook

March 29, 2026

Cornmeal does one thing no other grain does quite the same way: it brings the natural sweetness and body of dried maize into batters, coatings, and porridges without losing that distinctly toasted corn character under heat.

What Is Cornmeal

Whether you're looking at swapping out corn flour in a flatbread or exploring replacements for grits in a Southern breakfast, the ground grain itself is worth understanding on its own terms.

QUICK SUMMARY

Cornmeal is dried maize ground to varying coarseness. It delivers a sweet-corn, nutty flavor with a gritty or creamy texture depending on grind and cooking method. Use it for cornbread, polenta, grits, and frying coatings. Naturally gluten-free. Stone-ground lasts 3-6 months; degerminated keeps longer.

🌽Flavor: Sweet corn, nutty, earthy, lightly toasted when cooked
✋Texture: Granular raw; gritty when coarse-cooked, creamy when boiled
🔥Best Uses: Cornbread, polenta, grits, fried coatings, flatbreads
📦Shelf Life: Degerminated: months pantry; stone-ground: up to 1 year frozen
🌾Gluten-Free: Naturally gluten-free; check label if cross-contamination is a concern

What Is Cornmeal?

Cornmeal is dried maize kernels that have been milled into granules, with grind size determining most of its cooking behavior. It originated in Mesoamerica, where indigenous peoples ground dried corn for centuries before the grain spread globally.

The grind size - fine, medium, or coarse - changes everything from texture to cook time. Fine cornmeal behaves closer to flour in batters; coarse cornmeal holds its granular structure through long simmers.

Color is another variable that matters for recipes. Yellow cornmeal is the most common, with a fuller flavor; white cornmeal is milder; blue cornmeal, milled from blue maize, carries a slightly nuttier, earthier edge.

Regional names reflect how the same grain gets used differently across cultures:

  • 🌽 Polenta - Italian term, typically coarse-ground yellow cornmeal boiled into porridge
  • 🍚 Grits - Southern U.S. staple, often white cornmeal, stone-ground or hominy-based
  • 🫔 Masa harina - a different product entirely, made from nixtamalized corn with a distinct lime-treated flavor
  • 🌾 Maize meal - common name in parts of Africa and the Caribbean for similar ground corn products

Masa harina and cornmeal are not interchangeable - understanding masa harina and its flavor makes that distinction clear.

What Does Cornmeal Taste Like?

cornmeal - What Is Cornmeal

Raw cornmeal smells mildly sweet with a warm, dusty corn note. Cooked, it opens up into something closer to roasted corn - toasty, slightly nutty, and gently earthy.

It tastes less like fresh sweet corn and more like a corn tortilla or a dried corn kernel - drier in sweetness, with more grain-forward depth. The sweetness doesn't disappear under heat; it just becomes more subdued and toasted.

Sensory SnapshotModerate Intensity
👅 Flavor
sweet cornnuttyearthytoasted
✋ Texture
granulargrittycreamy when boiled
👃 Aroma
warm toasted cornmildly sweet

Stone-ground cornmeal retains the germ and hull oils, which adds a richer, slightly more complex flavor compared to degerminated varieties. Toasting dry cornmeal in a skillet before adding it to a recipe deepens those nutty notes noticeably.

Shortcut
Toast cornmeal dry in a skillet for 3-4 minutes before adding to batter or porridge. It deepens the nutty flavor without adding any extra ingredients.

How to Use Cornmeal

Cornmeal earns its place across several distinct cooking roles, and the grind size guides which role it fills. Fine or medium grind works for baked goods; coarse grind belongs in long-cooked porridges.

In Southern U.S. cooking, cornbread and grits anchor the grain's identity - and knowing the taste of grits helps explain why grind and water ratio matter as much as they do.

Polenta in northern Italian cooking follows similar logic with coarse yellow cornmeal simmered low and slow. Caribbean and West African porridges use maize meal in much the same way.

How Cornmeal Is Used
MethodBest ForTip
🍞 BakingCornbread, muffins, skillet breads, flatbreadsUse fine or medium grind; mix with a binder like egg or buttermilk
🍲 BoilingPolenta, grits, porridgeUse coarse grind; stir frequently and allow 20-40 minutes for full creaminess
🍳 FryingBreading for fish, chicken, okraMedium grind gives the best crunch without burning before the interior cooks
🍕 DustingPizza peels, baking sheets, bread proofingCoarse grind prevents sticking and adds crunch to crust bottoms

Cornmeal pairs well with butter, sharp cheddar, buttermilk, and honey in baked applications. For savory dishes, smoked meats, roasted vegetables, and chili bring out the earthy notes.

Herbs like thyme or chives cut through the richness of polenta or grits effectively.

Recipes that call for a masa or corn tortilla flavor require nixtamalized masa harina, not plain cornmeal - a common mix-up worth avoiding.

If you need to swap the grain out, cornmeal swaps that work covers what holds up in different applications.

A good place to put coarse-ground cornmeal to immediate use is a bowl of cornmeal grits with shrimp and eggs alongside the dishes it naturally anchors.

Try It In
🍤Cornmeal Grits with Shrimp and EggsShows coarse cornmeal at its creamy, savory best→

How to Buy and Store Cornmeal

At the store, the key choice is between stone-ground and degerminated cornmeal. Stone-ground retains the germ, giving fuller flavor and more fiber - but the natural oils mean it goes rancid faster.

Degerminated cornmeal has the germ removed, which extends shelf life significantly.

Check the color and smell before buying. Yellow, white, and blue varieties each suit different recipes.

Any oily or off smell indicates oxidized fats - skip it.

Watch Out
Stone-ground cornmeal left in a warm pantry can go rancid within weeks of opening. Always refrigerate or freeze it once opened.

Storage method depends on which type you have. For guidance on storing cornmeal correctly, the approach differs enough between stone-ground and degerminated that it's worth confirming before you buy in bulk.

  • 🧊 Stone-ground, opened - refrigerate in an airtight container; use within 3 months or freeze up to 1 year
  • 📦 Degerminated, unopened - cool, dark pantry shelf; lasts many months past purchase date
  • 🔒 All types - keep away from moisture; any clumping signals humidity exposure

Start With the Right Grind

If you're new to cooking with cornmeal, medium-grind yellow cornmeal is the entry point. It handles cornbread without becoming dense, works as a frying coating, and bridges the gap between fine and coarse applications.

Once you've used medium grind, move to coarse for polenta or grits - where replacements for polenta show just how central that grind texture is to the final dish.

Stone-ground is worth seeking out when flavor is the priority; degerminated works when shelf life and convenience matter more.

Best Pick
Medium-grind stone-ground yellow cornmeal covers the most ground for a first purchase - capable in cornbread, coatings, and a quick skillet porridge.

Frequently Asked Questions

What is the difference between cornmeal and masa harina?

Masa harina is made from nixtamalized corn - dried kernels soaked in an alkaline lime solution before grinding. That process changes the flavor, nutrition, and texture entirely. Plain cornmeal cannot replicate it in tamales or corn tortillas.

Does cornmeal taste like corn?

Yes, but drier and more toasted than fresh corn. The sweetness is present but subdued, closer to a corn tortilla than a cooked cob. Cooking brings out a nutty, earthy depth that raw kernels don't have.

What grind of cornmeal is best for cornbread?

Medium grind is the standard choice - it gives a slightly textured crumb without being gritty. Fine grind produces a softer, more cake-like result. Coarse grind is too rough for most cornbread recipes.

Is cornmeal gluten-free?

Cornmeal is naturally gluten-free. However, cross-contamination during milling is possible if the facility also processes wheat. Anyone with celiac disease should look for a certified gluten-free label.

Can you use cornmeal instead of flour in bread?

Not as a direct one-to-one swap. Cornmeal lacks gluten, so a full substitution produces a crumbly, dense loaf. Most cornbread recipes use a partial blend with wheat flour or eggs and buttermilk to compensate.

Turkish Menemen with Eggs and Tomatoes

March 29, 2026

You need 18 minutes start to finish. No marinating, no flipping, no fussy technique - just sauté vegetables, add eggs, and let low heat do the work.

Turkish Menemen with Eggs and Tomatoes served on a plate

The eggs stay soft because you cook them gently at the end. High heat scrambles them into dry chunks, but low heat with a quick fold keeps them custardy.

Make this when you want something fast that feels more intentional than plain scrambled eggs. Works for breakfast, brunch, or a light lunch when the fridge is down to basics.

QUICK SUMMARY

Turkish Menemen with Eggs and Tomatoes is a soft-cooked egg dish with sautéed tomatoes, peppers, and onions. Cook the vegetables until tender, then add beaten eggs and fold gently over low heat. The key is reducing the tomato liquid before adding eggs so the dish doesn't turn watery.

⏱️Time: 18 minutes total - 10 min prep, 8 min cook
🔥First Move: Sauté onions and peppers 4-5 min until soft before adding tomatoes
⚠️Watch Out: Watery tomatoes dilute the dish - cook uncovered 3-4 min to evaporate excess liquid

Table of Contents

Toggle
  • Why This Recipe Works
  • What You'll Need
    • Ingredient Details
  • Ingredient Swaps
  • What to Serve With It
  • Store and Reheat
  • Frequently Asked Questions
  • Turkish Menemen with Eggs and Tomatoes
    • Method 
    • Tried this recipe?

Why This Recipe Works

Gentle heat keeps the eggs soft while the tomatoes break down into a light sauce. Most people skip a similar breakfast recipe but it balances the meal. For a version that comes together quickly, we keep a batch ready for nights like this - sautéing the vegetables first builds flavor before the eggs go in.

Quick Reference
⏱️
Prep Time
10 min
🔥
Cook Time
8 min
⏰
Total Time
18 min
🍽️
Servings
2-3 servings
📊
Difficulty
Easy
🏷️
Category
Main Dish
💡
Quick Tip
Cook eggs gently for soft curds
🎯
Best For
Weeknight | Brunch | Casual entertaining

Five things that make this work:

  • Sauté onions and peppers first - 4-5 minutes until soft builds a sweet, tender base that raw vegetables can't match
  • Reduce tomato liquid before adding eggs - simmering uncovered 3-4 minutes prevents a watery, soupy texture
  • Use ripe tomatoes - underripe tomatoes taste sharp and acidic, ripe ones create a naturally sweet sauce
  • Cook eggs on low heat - high heat turns them rubbery, low heat keeps them soft and slightly runny
  • Season gradually - adding salt and pepper in stages during cooking layers the flavor instead of one flat note at the end
Quick Tip
Use a nonstick or well-seasoned cast iron skillet to prevent sticking - eggs will slide around instead of clumping on the pan.

What You'll Need

Ingredients for Turkish Menemen with Eggs and Tomatoes

Ripe tomatoes and fresh eggs make the biggest difference here. A good this related spinach recipe can make or break the plate. For a version that comes together quickly, shop for ingredients you can prep in under 10 minutes.

🥚
Eggs
  • 4-6 large eggs
🍅
Vegetables
  • 3 ripe tomatoes, diced
  • 1 green pepper, chopped
  • 1 small onion, diced
🫒
Base & Seasoning
  • 2-3 tablespoon olive oil
  • Salt to taste
  • Black pepper to taste
🌶️
Optional Spices
  • Paprika or chili flakes
  • Fresh parsley for garnish

Ingredient Details

  • Eggs
    Fresher eggs yield better texture and fluffier curds - check the date and use within a week of purchase
  • Ripe tomatoes
    Squeeze gently - ripe tomatoes give slightly under pressure and smell sweet, underripe ones stay firm and have no aroma
  • Green peppers
    Traditional Turkish Menemen uses mild green peppers, not sweet bell peppers, for a slightly bitter edge
  • Olive oil
    Use enough to coat the pan - skimping on oil makes vegetables stick and burn instead of softening
  • Onions
    Dice small for even cooking - large chunks take longer to soften and create uneven texture
  • Salt
    Add in stages while cooking to build layered flavor - salting only at the end tastes flat
  • Black pepper
    Freshly ground black pepper has more punch than pre-ground - crack it right before adding for the best aroma

Ingredient Swaps

You can swap peppers or tomatoes depending on what's in the fridge. Bell peppers work if you want a milder, sweeter flavor than traditional green peppers.

Four swaps that work:

  • Green peppers to bell peppers - milder and sweeter, softer texture, less bitter edge
  • Olive oil to butter - adds richness and deeper flavor, watch heat to prevent burning
  • Fresh tomatoes to canned diced tomatoes - more consistent year-round, less fresh taste but faster cooking
  • Black pepper to paprika - adds smoky heat instead of pungency, changes the flavor profile slightly

Bell Peppers

Works for: Milder flavor, sweeter taste, softer texture

Skip if: You want traditional Turkish bitterness and snap

Green Peppers

Works for: Traditional Turkish flavor, slight bitterness, firmer texture

Skip if: You prefer sweeter, less assertive peppers

Canned Tomatoes

Works for: Budget-friendly, consistent year-round, faster cooking

Skip if: You want fresh, bright tomato flavor

Butter Instead of Olive Oil

Works for: Richer flavor, deeper color, creamier texture

Skip if: You want lighter, more traditional Mediterranean taste

Instructions

The vegetables take 7-8 minutes total before the eggs go in. Start with the onions and peppers so they soften before you add tomatoes.

  1. Heat olive oil in a nonstick or cast iron skillet over medium heat. Add diced onions and chopped green peppers, then sauté 4-5 minutes, stirring frequently, until soft and translucent. Season with a pinch of salt.
  2. Add diced tomatoes and stir to combine. Cook uncovered 3-4 minutes, stirring occasionally, until most of the liquid evaporates and the mixture thickens slightly. Season with salt and black pepper.
  3. Beat eggs in a bowl with a pinch of salt. Pour over the tomato mixture and reduce heat to low. Let eggs sit undisturbed for 30 seconds to set slightly on the bottom.
  4. Gently fold eggs with a wooden spoon or spatula. Cook 3-5 minutes, folding every 30 seconds, until eggs are softly set but still slightly runny. Eggs will continue cooking after you remove the pan from heat.
  5. Remove from heat and let rest 1-2 minutes. Sprinkle with optional paprika or chili flakes, garnish with fresh parsley if using, and serve immediately with crusty bread.
Golden Rule
Remove the pan from heat when eggs look slightly underdone - carryover cooking finishes them off without drying them out.

What to Serve With It

Turkish Menemen needs something to scoop it up and a fresh contrast to cut the richness. For savory chicken dish ideas we keep a batch ready for nights like this - crusty bread is non-negotiable for soaking up the sauce.

Side Dish Prep Why It Works How to Serve
Crusty Turkish bread Easy Soaks up tomato sauce, traditional accompaniment, adds texture Serve warm on the side or tear into pieces for scooping
Simple cucumber salad Easy Fresh contrast to warm eggs, crunchy texture, cooling effect Toss sliced cucumbers with lemon juice, salt, and olive oil
Black olives Easy Adds saltiness, Mediterranean flavor, textural contrast Serve in small bowl on the side for snacking between bites
Plain yogurt Easy Cooling balance to warm spices, creamy richness, traditional pairing Dollop on top or serve in small bowl for dipping bread
Warm pita bread Easy Easy sharing, soft texture, works for scooping and wrapping Warm in oven or skillet, cut into wedges, serve alongside

Three ways to serve it:

  • Quick weeknight breakfast: Serve with crusty bread and black olives for a simple Mediterranean morning meal
  • Brunch spread: Add cucumber salad, yogurt, and warm pita for a full Turkish breakfast table
  • Light lunch: Pair with homemade salad recipe and a simple homemade drink for a balanced midday meal
Best Pick
Fresh bread straight from the bakery makes the biggest difference - crusty outside, soft inside, perfect for soaking up every bit of tomato sauce.

Store and Reheat

Menemen keeps in the fridge 3-4 days but the eggs soften as they sit. Rich mains need something to cut through, and coleslaw does exactly that. For a version that comes together quickly, this easy coleslaw recipe we keep a batch ready for nights like this - stovetop reheating restores the texture better than the microwave.

Method Time Best For
🍳 Stovetop 3-4 min low heat Best texture restoration, even heating, prevents drying
📦 Microwave 1-2 min medium power Quick reheating, single servings, when speed matters most
🔥 Oven 5 min at 300°F (150°C) Even reheating for larger portions, gentle warming

For best results when storing:

  • Cool completely before refrigerating - hot Menemen creates condensation in the container, which makes it watery when reheated
  • Use shallow airtight containers - wider surface area cools faster and prevents bacterial growth
  • Store up to 3-4 days in the fridge - eggs lose texture after that and taste flat
  • Reheat gently on stovetop with a splash of water or oil - high heat dries out the eggs and makes them rubbery
  • Freezing works but changes texture - eggs get slightly grainy after thawing, better for mixing into other dishes than eating plain

Frequently Asked Questions

Can I substitute bell peppers for green peppers in Menemen?

Yes, bell peppers work and taste milder and sweeter than traditional green peppers. You lose the slight bitterness that defines authentic Turkish Menemen, but the texture and cooking time stay the same.

How long can I store cooked Menemen in the refrigerator?

Cooked Menemen keeps 3-4 days in an airtight container in the fridge. The eggs soften and lose texture after that, and the flavor starts to taste flat.

How do I know when the eggs in Menemen are fully cooked?

Eggs are done when they're softly set with no liquid pooling in the pan. They should look slightly underdone when you remove the pan from heat - carryover cooking finishes them in 1-2 minutes.

What can I do if my Menemen turns out watery?

Cook the tomatoes longer before adding eggs - simmer uncovered 3-4 minutes to evaporate excess liquid. If it's already watery, increase heat slightly and cook uncovered until the liquid reduces.

Can I make Menemen ahead and reheat without losing texture?

Yes, but the eggs soften when reheated. Stovetop reheating on low heat with a splash of water or oil works better than the microwave, which dries them out.

Turkish Menemen with Eggs and Tomatoes served on a plate

Turkish Menemen with Eggs and Tomatoes

No ratings yet
Turkish Menemen is a soft-cooked egg dish with sautéed tomatoes, green peppers, and onions. Cooking the vegetables until tender and reducing their liquid before gently folding in the eggs ensures a custardy texture without watery sauce. This recipe is quick and perfect for breakfast, brunch, or a light lunch.
Print Recipe Pin Recipe
Prep Time 10 minutes mins
Cook Time 8 minutes mins
Total Time 18 minutes mins
Servings: 3 servings
Course: Breakfast, Brunch, Main Dish
Cuisine: Mediterranean, Turkish
Ingredients Equipment Method Notes

Ingredients
  

  • 4 large eggs beaten with a pinch of salt
  • 3 ripe tomatoes diced
  • 1 green pepper chopped, mild, traditional Turkish style
  • 1 small onion diced small for even cooking
  • 3 tablespoon olive oil enough to coat the pan
  • salt to taste, added in stages
  • black pepper freshly ground, to taste
  • paprika or chili flakes optional garnish
  • fresh parsley optional garnish

Equipment

  • Nonstick or cast iron skillet Used for sautéing vegetables and cooking eggs gently
  • Wooden spoon or spatula For gently folding eggs during cooking
  • Mixing bowl For beating eggs

Method
 

  1. Heat olive oil in a nonstick or cast iron skillet over medium heat. Add diced onions and chopped green peppers, then sauté for 4-5 minutes, stirring frequently, until soft and translucent. Season with a pinch of salt during cooking.
    3 tbsp olive oil, 1 small onion, 1 green pepper, salt
  2. Add diced tomatoes and stir to combine. Cook uncovered for 3-4 minutes, stirring occasionally, until most of the liquid evaporates and the mixture thickens slightly. Season with salt and black pepper to taste.
    3 ripe tomatoes, salt, black pepper
  3. Beat eggs in a bowl with a pinch of salt. Pour the beaten eggs over the tomato mixture and reduce heat to low. Let eggs sit undisturbed for 30 seconds to set slightly on the bottom.
    4 large eggs, salt
  4. Gently fold eggs with a wooden spoon or spatula. Cook for 3-5 minutes, folding every 30 seconds, until eggs are softly set but still slightly runny. Remove from heat when eggs look slightly underdone; they will finish cooking off heat.
    4 large eggs
  5. Let the Menemen rest off heat for 1-2 minutes. Sprinkle with optional paprika or chili flakes and garnish with fresh parsley if using. Serve immediately with crusty bread or preferred sides.
    paprika or chili flakes, fresh parsley

Notes

  • Sauté onions and peppers first to build a tender, flavorful base.
  • Reduce tomato liquid to prevent watery Menemen before adding eggs.
  • Cook eggs gently on low heat and remove when slightly underdone to keep them soft and custardy.

Tried this recipe?

Let us know how it was!

What Is Delicata Squash? [Taste, Uses & More]

March 29, 2026

You spot delicata squash at the farmers market and it's hard to miss - small, oblong, cream-yellow with dark green stripes running stem to tip.

What Is Delicata Squash

Most winter squash sends you reaching for a peeler and a heavy knife, but delicata skips that step entirely because its skin is thin enough to eat.

That no-peel quality, paired with a naturally sweet, starchy interior, makes it one of the most approachable squashes to cook on a weeknight.

If you already know your way around alternatives to acorn squash or replacements for butter in roasted vegetable dishes, delicata fits right into that same practical cooking mindset.

QUICK SUMMARY

Delicata squash is a small winter squash with edible striped skin and a sweet, starchy interior. It roasts quickly without peeling, tastes like a lighter butternut, and pairs well with sage, maple, and goat cheese. Whole squash keeps up to 3 months in cool storage.

🎃Category: Winter squash, North American cultivar
🍬Flavor: Sweet-corn, nutty, buttery, mild intensity
🔪Best Use: Roasted in rings, stuffed halves, grain bowls
📦Shelf Life: Whole 2-3 months; cut 5-7 days refrigerated
✅Dietary: Naturally gluten-free, vegan, low in fat

What Is Delicata Squash?

Delicata squash is a winter squash cultivar developed in North America, though its roots trace back to an 1894 seed catalog introduction.

It belongs to the Cucurbita pepo species - the same family as zucchini and acorn squash - and goes by several alternate names including sweet potato squash and pepita squash.

The fruit is small and oblong, typically 6-9 inches long, with pale cream or yellow skin marked by longitudinal green or orange stripes. Unlike butternut or kabocha, the skin stays tender after cooking, so it's fully edible once roasted.

Delicata doesn't store as long as its thicker-skinned cousins, which is part of why it stayed under the radar for so long. It's seen a strong revival in farm-to-table American cooking over the past decade.

Understanding where delicata sits among the broader squash family helps - if you've browsed alternatives to kabocha squash or read up on pumpkin's flavor and uses, delicata occupies a lighter, more delicate end of the winter squash spectrum.

  • 🎃 Species - Cucurbita pepo, same as acorn squash and zucchini
  • 🏷️ Alternate names - Sweet potato squash, pepita squash, delicata gourd
  • 📏 Size - Small, typically 6-9 inches, easier to halve than large squash
  • 🟢 Skin - Thin and edible; no peeling required after cooking

What Does Delicata Squash Taste Like?

delicata squash - What Is Delicata Squash

Delicata tastes like a lighter, less dense version of butternut squash - sweet and starchy, with a corn-like sweetness that's more subtle than a roasted sweet potato.

There's a mild nuttiness underneath, and the overall flavor sits firmly in the gentle, not aggressive, range.

Sensory SnapshotMild Intensity
👅 Flavor
sweet-cornnuttybuttery
✋ Texture
creamy when roastedfirm raw
👃 Aroma
mildly sweettoasty when caramelized

Heat deepens the flavor noticeably. Raw delicata smells faintly sweet, but caramelization in a hot oven draws out a toasty, almost honey-like aroma that raw flesh doesn't hint at.

The flesh turns creamy inside while the cut edges brown and firm up, giving you two textures in one slice.

Golden Rule
Don't rush the oven temperature. Roasting at 425°F or higher is what triggers caramelization on the cut edges - lower heat just steams the flesh without developing that toasty sweetness.

How to Use Delicata Squash

Roasting is the most effective method and the one that shows off delicata's natural sweetness best. Slice into half-inch rings, toss with olive oil, salt, and pepper, and roast at 425°F for 20-25 minutes. The rings hold their shape, the edges caramelize, and you get a side dish with almost no prep work.

Halved and stuffed, delicata works well as a main course. Fill the cavity with quinoa, herbs, and goat cheese or ricotta, then bake until the flesh is fork-tender.

For a faster option, pan-sear slices cut-side down in a hot cast iron skillet - it builds a browned crust in about 8 minutes.

Delicata also purees into a light, smooth soup when blended with stock and aromatics, though the soup will be thinner than one made with butternut.

For pairing ideas for delicata squash beyond the basics, maple glazes, sage butter, and toasted pepitas all complement the natural sweetness without overwhelming it.

Watch Out
Strongly acidic dressings - heavy vinegar or citrus - compete with delicata's mild sweetness and flatten it. Save the bright acids for a finishing squeeze rather than a primary dressing.
How Delicata Squash Is Used
MethodBest ForTip
🔥 RoastingRings, halves, salads, grain bowls425°F; cut edges down for best browning
🍳 Pan-SearingQuick weeknight side, textured slicesCast iron, high heat, 4 min per side
🫙 Baking StuffedMain course with grains or cheeseHalve lengthwise, scoop seeds, fill cavity
🥣 PureeingLight soups, blended saucesAdd stock gradually - flesh is less dense than butternut

If you find yourself without delicata, the guide on swapping out delicata squash covers the closest alternatives across roasting and stuffing applications.

Try It In
🎃Stuffed Acorn SquashSame stuffed-half technique works with delicata→🥣Butternut Squash SoupSwap in delicata for a lighter, thinner version→🐟Salmon and Squash RecipesRoasted rings pair naturally with fatty fish→

How to Buy and Store Delicata Squash

At the market, look for firm, unblemished skin with clean cream-yellow coloring and well-defined green or orange stripes. The stem end should feel dry and intact - wrinkling near the stem signals age.

Skip any fruit with soft spots or sticky patches.

Shortcut
Smaller delicata squash (under 1 lb) tend to have a higher skin-to-flesh ratio and cook faster - useful when you're slicing rings for a weeknight side.

Store whole squash in a cool, dry, dark place - a pantry shelf or basement works well. Do not refrigerate whole squash; cold storage shortens rather than extends shelf life.

Once cut, wrap tightly in plastic or beeswax wrap and refrigerate for up to a week.

Cooked delicata keeps 3-5 days in the fridge in a sealed container. For longer storage, the details on freezing delicata squash are worth reviewing before you commit to a bulk buy.

A baking sheet makes roasting rings straightforward - if yours is warped, the alternatives to a roasting rack piece covers a few workarounds.

Where to Start With Delicata Squash

Delicata is the right squash if you want a fast, weeknight-friendly option without the peeling and heavy prep that most winter squash demands.

  • 🔪 First cook - Slice into rings, roast at 425°F, done in 25 minutes
  • 🧀 First pairing - Goat cheese or ricotta with fresh thyme; no complicated glaze needed
  • 📅 Buy in fall - Peak season runs September through November; that's when selection is broadest

Treat it simply the first time. Once you know how the flesh caramelizes and holds shape, stuffed halves and grain bowls follow naturally.

Frequently Asked Questions

Is delicata squash the same as acorn squash?

No. Both are Cucurbita pepo winter squash, but they differ in shape, skin thickness, and flavor. Acorn squash has ridged, dark green skin that's too tough to eat; delicata has thin, edible striped skin and a noticeably sweeter, corn-like flavor.

Does delicata squash need peeling?

No peeling needed. The skin softens completely during roasting or baking and is safe to eat. This is the main practical difference between delicata and most other winter squash varieties.

Are delicata squash seeds edible?

Yes. Rinse, dry, and roast them at 325°F for 15-20 minutes with oil and salt. They're smaller than pumpkin seeds but have the same nutty flavor once toasted.

How do you cook delicata squash quickly?

Slicing into half-inch rings and roasting at 425°F takes about 20-25 minutes total. Pan-searing rings in cast iron is faster - roughly 8 minutes - and produces a well-browned crust on both sides.

Can you eat delicata squash raw?

Technically yes, but raw flesh is starchy, dense, and bland - very little of the sweetness comes through without heat. Cooking is what develops the flavor, so raw preparation isn't worth it here.

Pork Tonkatsu Japanese-Style

March 29, 2026

You need 25 minutes and one shallow pan of hot oil. No special equipment, no advance prep, no complicated techniques-just pork, panko, and proper frying temperature.

Pork Tonkatsu Japanese-Style served on a plate

The breading creates a golden shell that stays crisp while the pork cooks through. Oil at 350°F sets the panko without burning while the meat reaches 145°F inside.

This works for weeknight dinners when you want something that feels like a restaurant meal but comes together in the time it takes to cook rice. Perfect for casual entertaining or meal prep that reheats better than you'd expect.

QUICK SUMMARY

Pork tonkatsu is breaded pork loin fried until crispy and golden. The key is maintaining oil temperature at 350°F so the panko crust crisps without absorbing grease while the pork stays juicy inside. Make this when you want a satisfying meal that's ready in under 30 minutes.

⏱️Time Reality: 15 minutes prep, 8-10 minutes frying per batch
🔥First Critical Action: Dry pork completely before breading or coating won't stick
⚠️Watch Out: Oil below 340°F creates greasy tonkatsu; use thermometer to monitor temperature

Table of Contents

Toggle
  • Why This Recipe Works
  • What You'll Need
    • Ingredient Details
  • Ingredient Swaps
  • What to Serve With It
  • Store and Reheat
  • Frequently Asked Questions
  • Pork Tonkatsu Japanese-Style
    • Method 
    • Tried this recipe?

Why This Recipe Works

High heat frying seals the breading before moisture escapes from the pork. The three-step breading process-flour, egg, panko-creates layers that trap steam inside while the outside crisps. For a complete Asian-inspired meal, pair this with something tender like pork that uses similar cooking methods but different flavors.

Quick Reference
⏱️
Prep Time
15 min
🔥
Cook Time
8-10 min
⏰
Total Time
25 min
🍽️
Servings
4 servings
📊
Difficulty
Medium
🏷️
Category
Main Dish
💡
Quick Tip
Maintain 350°F oil for even crispiness
🎯
Best For
Weeknight | Entertaining

What makes tonkatsu work:

  • Panko breadcrumbs create a lighter crust than regular breadcrumbs-the larger flakes trap air pockets that crisp without getting dense
  • Pork loin chops stay juicier than tenderloin because the fat content prevents drying even if you slightly overcook
  • Oil temperature at 350°F is the sweet spot where breading sets immediately without soaking up grease
  • Pounding pork to even thickness ensures the center cooks through at the same rate as the edges
  • Resting on a wire rack after frying lets steam escape from the bottom so the crust stays crisp instead of turning soggy
Quick Tip
Use a candy thermometer clipped to the side of the pan. Oil temperature drops when you add cold pork, so wait 30 seconds between batches for it to recover.

What You'll Need

Ingredients for Pork Tonkatsu Japanese-Style

Shopping for tonkatsu means picking up panko if you don't already have it-the flaky Japanese breadcrumbs make all the difference. Everything else is standard pantry items and fresh pork from the meat counter.

🍗
Protein
  • 4 pork loin chops (½ inch thick)
🫙
Breading Station
  • 1 cup all-purpose flour
  • 2 eggs (beaten)
  • 2 cups panko breadcrumbs
🫙
Cooking & Finishing
  • Vegetable oil (for frying)
  • Salt and pepper
  • Tonkatsu sauce
🥬
Sides
  • Shredded cabbage
  • Lemon wedges

Ingredient Details

  • Pork loin chops
    Look for ½-inch thick cuts with some marbling. Avoid ultra-lean chops-they dry out fast.
  • Panko breadcrumbs
    Buy Japanese-style panko, not Italian breadcrumbs. The flakes are larger and create a lighter, crispier crust.
  • All-purpose flour
    Regular white flour works fine. The flour layer helps egg adhere to the pork.
  • Eggs
    Beat eggs with a fork until yolks and whites combine completely. Add 1 tablespoon water to thin slightly.
  • Vegetable oil
    Use neutral high-smoke-point oil like vegetable, canola, or peanut. You need about 1 inch depth in the pan.
  • Tonkatsu sauce
    Find it in the Asian aisle. If unavailable, mix equal parts ketchup and Worcestershire sauce with a pinch of sugar.
  • Shredded cabbage
    Slice cabbage as thin as possible. Soak in ice water for 10 minutes to crisp before serving.

Ingredient Swaps

Most swaps work if you understand how they change texture or cook time. Chicken breast fries faster than pork and needs a lighter hand to avoid drying out.

Four swaps that work:

  • All-purpose flour → gluten-free flour blend: Use 1:1 ratio. Breading texture stays similar but may brown slightly faster.
  • Panko → crushed cornflakes or gluten-free panko: Use same amount. Cornflakes create a crunchier, slightly sweeter crust that browns faster.
  • Pork loin chops → chicken breast: Use 1:1 ratio. Pound to ½ inch thickness, fry 3-4 minutes per side. Chicken cooks faster than pork.
  • Vegetable oil → canola or peanut oil: Use 1:1 ratio. Both have high smoke points and neutral flavor for frying.

Pork Loin Chops (Standard)

Works for: Most home cooks, classic tonkatsu texture, stays juicy even if slightly overcooked

Skip if: You want leaner protein or cooking for someone who avoids red meat

Chicken Breast (Leaner)

Works for: Lower fat option, cooks faster (saves 2-3 minutes), similar breading technique

Skip if: You want richer flavor or worry about drying out meat during frying

Pork Tenderloin (Alternative Cut)

Works for: Budget option, very tender texture, slices into medallions easily

Skip if: You want more marbling or prefer bone-in chops for juiciness

Instructions

Tonkatsu comes together in under 30 minutes if you set up your breading station before heating the oil. The frying itself takes just 8 minutes per batch once the oil reaches temperature.

  1. Prep the pork: Pat pork chops completely dry with paper towels. Pound each chop to ½-inch even thickness using a meat mallet. Season both sides with salt and pepper.

  2. Set up breading station: Place flour in one shallow dish, beaten eggs in a second dish, and panko in a third dish. Line them up in order-flour, egg, panko-for easy dredging.

  3. Bread the pork: Dredge each pork chop in flour, shake off excess. Dip in beaten egg, let excess drip off. Press firmly into panko, coating both sides completely. Press panko gently to adhere.

  4. Heat oil and fry: Pour vegetable oil 1 inch deep into a large skillet. Heat to 350°F on a candy thermometer. Carefully add 2 pork chops, frying 4 minutes per side until golden brown and internal temperature reaches 145°F. Transfer to wire rack.

  5. Rest and slice: Let tonkatsu rest on wire rack 5 minutes. Slice crosswise into ½-inch strips. Serve immediately with tonkatsu sauce, shredded cabbage, and lemon wedges.

Watch Out
Don't skip the resting step. Five minutes on a wire rack lets steam escape so the bottom crust stays crisp instead of turning soggy from trapped moisture.

What to Serve With It

Tonkatsu needs something fresh and acidic to cut through the fried richness. Rice absorbs the sauce, but vegetables add the crunch and brightness that balance the plate. For easy weeknight meals, try easy cuban mojo pork dinner nights for more ideas on pairing pork with sides.

Side Dish Prep Why It Works How to Serve
Steamed white rice Easy Neutral base absorbs tonkatsu sauce without competing Serve rice in bowl, place sliced tonkatsu on top, drizzle sauce over everything
Shredded cabbage salad Easy Fresh crunch and mild flavor cuts through fried richness Pile raw shredded cabbage beside tonkatsu, dress lightly with rice vinegar
Miso soup Easy Light, savory broth adds warmth without heaviness Serve in small bowls as starter or alongside main plate
Pickled daikon or cucumber Medium Acidity brightens flavors and cleanses palate between bites Serve small portion on plate edge as palate cleanser
Japanese potato salad Medium Creamy, cool contrast balances hot, crispy tonkatsu Serve small scoop beside tonkatsu for contrast

Three ways to serve it:

  • Classic Japanese style: Tonkatsu sliced over steamed rice in a bowl, cabbage salad on the side, miso soup for sipping
  • Bento box approach: Cold tonkatsu sliced thin, tucked into lunch box with rice, pickles, and edamame
  • Sandwich format: Tonkatsu between soft white bread with tonkatsu sauce and shredded cabbage (katsu sando style)
Best Pick
Shredded cabbage soaked in ice water for 10 minutes turns crisp and sweet. Drain well, toss with a tiny drizzle of rice vinegar and sesame oil right before serving.

Store and Reheat

Fried foods lose their edge in the fridge, but tonkatsu holds up better than most breaded proteins if you reheat it right. Skip the microwave unless you're okay with rubbery breading. For more Asian-inspired dishes that store well, check out this easy salad recipe that keeps for days.

Method Time Best For
🔥 Oven 10-12 min at 350°F Restores crispness without drying out pork
🍳 Stovetop 3-5 min in skillet on medium heat Small portions when you need quick crisp refresh
📦 Microwave 30-45 seconds When you're eating cold leftovers and don't care about texture

For best results when storing:

  • Refrigerate in single layer in shallow airtight container with paper towel underneath to absorb moisture-keeps 3-4 days
  • Freeze unsliced tonkatsu wrapped individually in plastic wrap, then placed in freezer bag-lasts up to 1 month
  • Reheat from frozen directly in 350°F oven for 15-18 minutes, no thawing needed
  • Don't stack hot tonkatsu when storing or condensation makes breading soggy-let cool completely on wire rack first
  • Slice just before serving when reheating so interior stays moist while exterior re-crisps

Frequently Asked Questions

How long to cook pork tonkatsu at 350°F?

Fry for 4 minutes per side at 350°F until golden brown and internal temperature reaches 145°F. Total cooking time is 8 minutes for ½-inch thick pork chops.

Can I make pork tonkatsu ahead?

Yes. Bread the pork up to 4 hours ahead and refrigerate uncovered on a plate. Fry just before serving for best crispness.

What goes with pork tonkatsu?

Serve with steamed white rice, shredded cabbage salad, miso soup, and pickled vegetables. The rice absorbs sauce while cabbage adds fresh crunch.

How do I know when pork tonkatsu is done?

Check internal temperature with instant-read thermometer-it should read 145°F in the thickest part. The breading will be deep golden brown and crisp.

Can I use chicken instead of pork for tonkatsu?

Yes. Pound chicken breast to ½-inch thickness and fry 3-4 minutes per side until internal temperature reaches 165°F. Chicken cooks faster than pork and has less fat.

Pork Tonkatsu Japanese-Style served on a plate

Pork Tonkatsu Japanese-Style

No ratings yet
Pork tonkatsu features breaded pork loin chops fried to a crispy, golden perfection with a juicy interior. Maintaining oil temperature at 350°F ensures a crisp panko crust without excess grease. Ready in under 30 minutes, it's ideal for quick weeknight dinners or casual entertaining.
Print Recipe Pin Recipe
Prep Time 15 minutes mins
Cook Time 10 minutes mins
Total Time 25 minutes mins
Servings: 4 servings
Course: Main Dish
Cuisine: Japanese
Ingredients Method Notes

Ingredients
  

  • 4 pieces pork loin chops ½ inch thick, patted dry
  • 1 cup all-purpose flour for dredging
  • 2 units eggs beaten with 1 tablespoon water
  • 2 cups panko breadcrumbs Japanese style
  • to cover vegetable oil for frying, about 1 inch deep
  • salt to season pork
  • pepper to season pork
  • to serve tonkatsu sauce
  • to serve shredded cabbage thinly sliced
  • to serve lemon wedges

Method
 

  1. Pat pork chops completely dry with paper towels. Pound each chop to ½-inch even thickness using a meat mallet. Season both sides with salt and pepper.
    4 pieces pork loin chops, salt, pepper
  2. Place flour in one shallow dish, beaten eggs in a second dish, and panko breadcrumbs in a third dish. Arrange in order for easy dredging.
    1 cup all-purpose flour, 2 units eggs, 2 cups panko breadcrumbs
  3. Dredge each pork chop in flour and shake off excess. Dip in beaten egg and let excess drip off. Press firmly into panko breadcrumbs, coating both sides completely.
    4 pieces pork loin chops, 1 cup all-purpose flour, 2 units eggs, 2 cups panko breadcrumbs
  4. Pour vegetable oil 1 inch deep into a large skillet. Heat to 350°F using a candy thermometer. Add 2 pork chops carefully and fry 4 minutes per side until golden brown and internal temperature reaches 145°F. Transfer to a wire rack to drain.
    to cover vegetable oil, 4 pieces pork loin chops
  5. Let tonkatsu rest on a wire rack for 5 minutes to prevent sogginess. Slice crosswise into ½-inch strips and serve immediately with tonkatsu sauce, shredded cabbage, and lemon wedges.
    to serve tonkatsu sauce, to serve shredded cabbage, to serve lemon wedges

Notes

  • Maintain oil temperature at 350°F for a crisp, non-greasy crust.
  • Pat pork dry thoroughly before breading for best adhesion.
  • Rest tonkatsu on a wire rack to keep crust crisp after frying.

Tried this recipe?

Let us know how it was!

What Is Comté Cheese? Taste, Uses & Pairings

March 29, 2026

Comté occupies a role in French Alpine cooking that no other cheese quite fills - it melts without breaking, ages without turning harsh, and brings a layered depth that younger cheeses simply don't have.

What Is Comte Cheese

Much of that reputation comes from raw cow's milk sourced from Montbéliarde cattle grazing Jura highlands, then cave-aged under strict PDO rules.

If you've cooked with gruyere cheese and its flavor and want to go deeper, Comté is the natural next step - fruitier, more aromatic, and arguably more complex.

Cooks who've tried replacements for beaufort cheese often land on Comté as a reliable bridge between mild and assertive Alpine styles.

QUICK SUMMARY

Comté is a PDO-protected French cheese aged between 4 and 24+ months. Its flavor runs from fruity and buttery at younger ages to deeply nutty, savory, and crystalline at full maturity. It melts well, boards beautifully, and pairs with Jura wines or dry cider.

🧀Flavor: Nutty, fruity, umami-rich with caramel and browned butter notes
🔥Best Use: Fondue, gratin, croque-monsieur, cheese boards, grating
📅Shelf Life: 2-4 weeks refrigerated after purchase; older wedges hold longer

What Is Comté Cheese?

Comté is a pressed-cooked cheese made from raw cow's milk in the Franche-Comté region of eastern France, near the Swiss border.

Every wheel must pass PDO (Protected Designation of Origin) standards - from the breed of cattle to the altitude of the pastures and the minimum aging period of 4 months.

Wheels are enormous, typically 40-45 kg each, and are aged on spruce planks in mountain caves called fruitières. The affinage process - the art of cave-aging - is where most of the flavor develops.

Young wheels (4-8 months) taste mild and milky; wheels aged 12-24 months develop walnut, browned butter, and dried fruit complexity.

It's often confused with Gruyère or Emmental, and for good reason - all three are Alpine pressed-cooked cheeses made with raw milk.

Comté is generally fruitier and more aromatic than either, though if you're navigating using emmental cheese for creaminess in a recipe, you'll find Comté can step in with similar melt behavior but a bolder character.

  • 🏔️ PDO-protected - legally must come from Franche-Comté, eastern France
  • Montbéliarde cattle - the primary breed; their milk has high fat and protein content ideal for aged cheese
  • Affinage range - 4 months minimum; premium wheels labeled at 12, 18, or 24+ months
  • No two wheels are identical - seasonal pasture variation means summer milk wheels taste different from winter ones

What Does Comté Cheese Taste Like?

comte cheese - What Is Comte Cheese

Comté's flavor is layered in a way that shifts noticeably with age. A young wheel leads with fresh dairy, light apple notes, and gentle salt. An older wheel - 18 months or more - tilts toward walnut, caramel, savory broth, and sometimes a pleasant beefy depth.

Sensory SnapshotModerate Intensity
👅 Flavor
NuttyFruityUmamiCaramel
✋ Texture
FirmCrystalline (aged)Creamy when melted
👃 Aroma
ButteryEarthy cellarClean grassy milk

The texture changes just as dramatically as the flavor. Younger Comté slices cleanly and melts into a smooth, slightly stringy pull.

Longer-aged wheels develop small protein crystals - similar to what you'd find in a well-aged Parmigiano - that add a faint crunch and concentrate the umami hit.

Heat brings out its sweetness. Melted Comté in a fondue or gratin has a caramel-forward, nutty finish that reads richer than it does straight from the wheel.

How to Use Comté Cheese

Comté is one of the few cheeses that performs equally well raw and cooked, which makes it genuinely useful across a range of dishes. French Alpine cooking is its home territory - fondue, gratin dauphinois, and croque-monsieur are the classics for good reason.

Golden Rule
Match the age of the wheel to the job: younger Comté (under 12 months) for melting; older Comté (18+ months) for boards and grating, where the crystalline texture and full flavor can be appreciated uncut.
How Comté Is Used
MethodBest ForTip
🫕 MeltingFondue, gratin, croque-monsieur, cheese saucesUse medium-aged (8-14 months) for best melt without graininess
🥧 BakingSavory tarts, soufflés, cheese strawsGrate finely so it incorporates evenly into batters and doughs
🧀 Raw / SlicedCheese boards, winter salads, charcuterie pairingsServe at room temperature for 30 minutes to open the aroma
🧂 Grated FinishMac and cheese, soups, roasted vegetablesChoose older wheels for maximum nutty depth at finish

On a cheese board, pair Comté with fresh apple slices, poached pear, toasted walnuts, or quince paste. Dry Jura wines - particularly vin jaune or an unoaked Chardonnay - are the regional match, though a crisp hard cider or blonde ale works just as well.

Charcuterie like jambon cru or saucisson sits alongside it naturally.

Avoid pairing Comté with strongly iodized fish preparations - the umami clash flattens both. Delicate floral desserts suffer similarly when Comté is on the same plate.

Try It In
🥨Cheddar Cheese StrawsSwap in Comté for a nuttier, more complex savory straw→🍳Egg and Cheese Breakfast SandwichMelted Comté adds a caramel-nutty depth to a morning classic→

How to Buy and Store Comté Cheese

Look for a wedge cut from a wheel with the green oval PDO stamp visible on the rind - that stamp confirms authentic Franche-Comté origin. The paste should be straw-yellow, firm, and slightly moist.

Avoid wedges with chalky, dry edges or an off-white, crumbly interior not consistent with normal aging.

Watch Out
Don't store Comté wrapped tightly in plastic. Direct plastic contact cuts off rind respiration and accelerates moisture loss at the edges. Use cheese paper or waxed paper inside a loosely closed container instead.

For aging guidance, look for wheels labeled by months of affinage - 12-month wheels are a reliable starting point, while 18-24+ month wheels suit experienced Comté eaters who want full crystalline intensity.

Understanding comte cheese's shelf life helps you plan how much to buy at once, since medium-aged wedges are best within 2-4 weeks of purchase.

Refrigerated properly, older wheels hold their flavor slightly longer before the edges dry out.

If you can't find Comté locally, the alternatives to comte cheese guide covers the closest substitutes by use case, and the guide to replacements for gruyere cheese is useful if you're working through Alpine cheese options more broadly.

Where to Start with Comté

New to Comté?

Buy a 12-month wheel and melt it into a simple gratin or croque-monsieur first. That's where it shows its best quality - the melt is clean, the flavor lands clearly, and you'll understand immediately why French home cooks reach for it over generic Swiss-style cheese.

Once you're comfortable there, step up to an 18-month wedge on a board alongside apple and walnut. Proper dairy storage matters too - the same way milk in dairy recipes needs careful handling, Comté rewards attention to wrapping and temperature.

Best Pick
For first-time buyers, a 12-14 month Comté hits the widest range of uses - meltable, boardable, and aromatic without the intensity that polarizes some tasters at 24 months.

Frequently Asked Questions

Is Comté the same as Gruyère?

No. Both are Alpine pressed-cooked cheeses made from raw cow's milk, but Comté comes exclusively from Franche-Comté, France, while Gruyère is Swiss. Comté is typically fruitier and more aromatic; Gruyère is slightly saltier and earthier.

How long is Comté aged?

A minimum of 4 months by PDO law, but most wheels sold commercially are aged 8-24 months. Premium wheels labeled at 18 or 24+ months are sought for their crystalline texture and intense nutty flavor.

Can vegetarians eat Comté?

Not typically. Comté is made with animal rennet, which is not suitable for most vegetarians. No vegetarian-rennet version exists under PDO rules, so the traditional product always contains it.

What wine pairs best with Comté?

Vin jaune from the Jura is the classic regional match - its oxidative, nutty character mirrors the cheese. Unoaked white Burgundy or Jura Chardonnay also works well without competing.

Does Comté have lactose?

Well-aged Comté has very low residual lactose - the long fermentation and aging process breaks most of it down. Many people with mild lactose sensitivity tolerate it without issue, though tolerance varies individually.

What Is Espresso Powder? [Taste, Uses & More]

March 29, 2026

You spot it tucked between the instant coffee and the cocoa powder, a small jar labeled espresso powder that most shoppers walk past.

What Is Espresso Powder

That's a mistake, because this concentrated, finely ground dried coffee does something liquid coffee never can - it adds a deep, roasty intensity to food without adding a single drop of moisture.

Whether you're reaching for it in a brownie batter or a steak rub, dishes alongside coffee suddenly have a whole new depth when this ingredient enters the mix.

If ganache is on your list, note that alternatives to heavy cream in ganache pair just as well with an espresso boost as the classic version does.

QUICK SUMMARY

Espresso powder is a dry, concentrated coffee flavoring made from dark-roasted beans or dehydrated brewed espresso. It delivers intense roasty bitterness without liquid, making it ideal for baking, rubs, and chocolate desserts. A little goes a long way.

☕What It Is: Finely powdered dried espresso, not standard instant coffee granules
🤎Flavor: Intensely bitter, roasty, with cocoa and slight smoky undertones
🎂Best For: Chocolate baked goods, ganache, dry rubs, spice blends
📦Shelf Life: Up to 2 years unopened; 6-12 months once opened in pantry
🛒Buy It: Look for labels reading "instant espresso powder" from dark-roasted beans, uniform fine texture

What Is Espresso Powder?

Espresso powder - also sold as instant espresso powder or concentrated coffee powder - is made by roasting dark coffee beans, brewing them into espresso, then dehydrating and grinding that brewed coffee into a very fine powder. It originated from Italian espresso culture but became a globalized pantry staple through commercial production, most notably via brands like Medaglia d'Oro and King Arthur.

It is not the same as ground espresso beans or standard instant coffee granules, and that distinction matters. Instant coffee is milder, lighter in roast, and dissolves more readily into cold liquids; espresso powder is darker, denser in flavor, and engineered for concentrated intensity in small doses.

Several subtypes exist worth knowing:

  • ☕ Instant espresso powder - the most common form; fully soluble in hot water or fat
  • 🍫 Espresso extract powder - a more concentrated version sometimes used in professional pastry kitchens
  • ⚠️ Ground espresso (not powder) - whole-bean grind, does NOT dissolve; a common but costly mix-up at the store

What Does Espresso Powder Taste Like?

espresso powder - What Is Espresso Powder

On its own, espresso powder tastes intensely bitter with a deep, dark-roast character - think the concentrated hit of a well-pulled espresso shot, but drier and sharper.

There's a cocoa-like bitterness underneath, plus a faint smoky undertone that sets it apart from milder instant coffee.

Sensory SnapshotStrong Intensity
👅 Flavor
bitter-darkroastycocoa-likesmoky
✋ Texture
fine powderdissolves in heat
👃 Aroma
roasted coffeewarm caramelcocoa

Heat amplifies its roasty edge and melds it into surrounding flavors rather than announcing itself loudly. In chocolate cake or ganache, you won't taste coffee outright - you'll taste chocolate that seems richer and more complex than usual.

Golden Rule
Espresso powder doesn't make food taste like coffee - it makes chocolate taste more like chocolate. Keep that distinction in mind before every use.

How to Use Espresso Powder

One to two teaspoons is the standard working dose for most baking recipes, enough to deepen flavor without pushing the coffee note into the foreground. Fold it dry into batters, whisk it into dry rubs, or dissolve it in a small amount of hot water first when making sauces and ganache.

In baking, it pairs brilliantly with dark chocolate and cocoa powder - the bitterness frequencies align and reinforce each other.

A batch of brownies, a chocolate layer cake, or chocolate chip cookie dough all benefit from a small addition.

For savory applications, stirring it into a dry rub for steaks or ribs gives roasty umami depth; its earthiness also works well in a Mexican mole or chili blend.

Much like making memphis dry rub ribs at home shows, a bold spice profile is what separates a great rub from a forgettable one - espresso powder earns its spot there.

How Espresso Powder Is Used
MethodBest ForTip
🎂 Dry into batterChocolate cakes, brownies, cookiesAdd with dry ingredients; no dissolving needed
🍫 Dissolved in liquidGanache, sauces, frostingsDissolve in 1 teaspoon hot water first for even distribution
🥩 Dry rubSteaks, ribs, brisket spice blendsCombine with brown sugar and smoked paprika to balance bitterness
🌶️ Spice blendsMole, chili, BBQ saucesStart with half a teaspoon; add more to taste

Avoid pairing it with delicate floral desserts or light teas - the intensity overwhelms subtle flavor profiles. Strong partners are what it needs: butter, brown sugar, vanilla, cream, mascarpone, mushrooms, and beef.

Try It In
🥩Instant Pot Pot RoastEspresso powder in the rub deepens the braising liquid→🎂Rich Chocolate Layer CakeA teaspoon in the batter sharpens every chocolate note→

How to Buy and Store Espresso Powder

Look for packages labeled "instant espresso powder" or "espresso extract powder" made from dark-roasted beans. The texture should be uniformly fine - no visible clumps - and the aroma should hit immediately when you open the jar.

Skip anything that smells flat or stale at the shelf, and don't grab a bag of ground espresso by mistake; it won't dissolve.

Watch Out
Ground espresso and espresso powder are not interchangeable. Ground espresso won't dissolve and will leave gritty particles throughout your batter or sauce.

For storage, an airtight, opaque container in a cool pantry is sufficient for everyday use. Refrigerating in a sealed jar extends freshness noticeably, especially in humid climates - a principle that applies broadly to ground coffee products, as how long coffee keeps makes clear.

Full guidance on keeping espresso powder fresh covers pantry versus fridge scenarios in detail.

  • 📦 Unopened - 12-24 months at room temperature
  • 🫙 Opened, pantry - 6-12 months in an airtight container
  • ❄️ Refrigerated - up to 18 months; bring to room temperature before measuring to avoid condensation

Start With Chocolate

If you've never used espresso powder before, chocolate baking is the right entry point. Add one teaspoon to your next brownie or chocolate cake recipe and note the difference - it's subtle but real.

From there, branching into dry rubs or spice blends feels natural.

If your pantry is already stocked with comparing cocoa powder vs baking cocoa options, espresso powder becomes a logical next step in building chocolate depth.

And when a recipe calls for it but you're out, espresso powder stand-ins can bridge the gap without derailing the dish.

Frequently Asked Questions

Is espresso powder the same as instant coffee?

No. Espresso powder is darker, more concentrated, and made from dark-roasted beans specifically. Instant coffee uses a lighter roast and produces a milder, thinner flavor that doesn't deliver the same depth in baking.

How much espresso powder equals a shot of espresso?

Dissolve one teaspoon in two tablespoons of hot water for a rough equivalent to one espresso shot. It won't replicate the crema, but the flavor intensity is comparable for cooking purposes.

Can I substitute espresso powder with instant coffee?

Yes, but use about twice the amount to compensate for lower intensity. The flavor will be slightly milder and less roasty, which works in most baking recipes but falls short in dry rubs.

Does espresso powder contain caffeine?

Yes, though the amount per teaspoon is small - roughly 30-50mg depending on the brand. Spread across an entire baked dish, each serving contains a trace amount, well below a standard coffee serving.

Can I use espresso powder in cold recipes without dissolving it first?

It depends on the recipe. In dry rubs or batters that bake, it disperses fine without pre-dissolving. In no-bake desserts or cold creams, dissolve it first in a small amount of warm liquid to prevent graininess.

Crockpot Pozole Verde

March 28, 2026

When you need a hands-off dinner that works for meal prep or a casual family gathering, pozole verde delivers. One slow cooker, minimal active work, and a bright green broth that tastes like you spent hours at the stove.

Crockpot Pozole Verde served on a plate

Roast the tomatillos and peppers first, then let the crockpot do everything else. The pork shreds without effort after 7 hours on low.

Perfect for weeknight dinners when you want real food without the babysitting, or for weekends when you're feeding a crowd and need something that holds well.

QUICK SUMMARY

Crockpot Pozole Verde is a tangy Mexican stew with tender pork shoulder, hominy, and a bright green broth made from roasted tomatillos and peppers. Roast the vegetables first for depth, then slow cook everything on low for 6-8 hours until the pork falls apart. Add hominy in the last 1-2 hours so it stays intact instead of turning mushy.

⏱️Time Reality: 20 minutes prep, then 6-8 hours unattended slow cooking
🔥Key Move: Roast tomatillos and peppers 10-12 minutes before blending
⚠️Watch Out: Add hominy last 1-2 hours only or it turns to mush

Table of Contents

Toggle
  • Why This Recipe Works
  • What You'll Need
    • Ingredient Details
  • Ingredient Swaps
  • What to Serve With It
  • Store and Reheat
  • Frequently Asked Questions
  • Crockpot Pozole Verde
    • Method 
    • Tried this recipe?

Why This Recipe Works

Fatty pork shoulder breaks down during the long slow cook, creating fall-apart tender meat that shreds with a fork. For a lighter version with faster prep, we keep this easy joes recipe on rotation when you need something that comes together quickly.

Quick Reference
⏱️
Prep Time
20 min
🔥
Cook Time
6-8 hours (low slow cooker)
⏰
Total Time
6 hr 20 min
🍽️
Servings
6-8 servings
📊
Difficulty
Easy
🏷️
Category
Main Dish
💡
Quick Tip
Roast tomatillos before blending for depth
🎯
Best For
Weeknight | Meal prep

What makes this work:

  • Roasting tomatillos and peppers at 425°F for 10-12 minutes develops deeper flavor and removes the raw vegetal taste that makes unroasted verde sauce taste flat
  • Pork shoulder's fat content keeps the meat moist during the 6-8 hour slow cook, reaching an internal temp of 190°F where collagen breaks down completely
  • Blending the roasted vegetables creates a slightly chunky broth that clings to the pork and hominy instead of staying thin and watery
  • Adding hominy in the last 1-2 hours prevents it from overcooking into mush while still letting it absorb the broth's flavor
  • Seasoning gradually throughout cooking builds layers of flavor that taste more complex than dumping everything in at once
Quick Tip
Skim foam from the broth during the first hour of cooking for a clearer, cleaner-tasting finished stew

What You'll Need

Ingredients for Crockpot Pozole Verde

The ingredient list looks long but most of it goes into the slow cooker at once. For a side that balances the richness, we pair it with a simple salad recipe that adds crunch without extra cooking time.

🍗
Pork
  • 2-3 lbs pork shoulder
🥬
Vegetables
  • 1 lb tomatillos
  • 2 jalapeños or poblano peppers
  • 1 onion
  • 4 cloves garlic
🍜
Hominy
  • 2 (15-oz) cans hominy
🥢
Broth & Seasonings
  • 4 cups chicken broth
  • 1 bunch cilantro
  • 2 teaspoon oregano
  • 2 limes

Ingredient Details

  • Pork shoulder
    Use the fattier cut with marbling - lean pork dries out during the long slow cook
  • Tomatillos
    Remove the papery husks and rinse the sticky coating before roasting
  • Jalapeños or poblanos
    Remove seeds for mild heat, leave them in for more kick - poblanos are milder than jalapeños
  • Hominy
    Drain and rinse canned hominy before adding to remove the tinny liquid
  • Chicken broth
    Use low-sodium so you can control the salt level as the broth reduces
  • Cilantro
    Save half the bunch for garnish - add stems to the blender for flavor, leaves for finishing
  • Oregano
    Mexican oregano tastes more citrusy than Mediterranean, but either works

Ingredient Swaps

The core ingredients create the traditional verde flavor, but you can adjust based on what's in your pantry. A dollop of this dip takes each bite somewhere more interesting - try a creamy homemade sauce recipe when you want something tangy to cut through the richness.

Four swaps that work:

  • Chicken thighs instead of pork shoulder: Reduces cook time to 4-5 hours on low, creates lighter texture with less fat
  • Canned white corn instead of hominy: Loses the traditional chewy texture but cooks faster and costs less
  • Vegetable broth instead of chicken broth: Keeps the dish dairy-free and vegetarian if you skip the pork
  • Serrano peppers instead of jalapeños: Increases heat level and adds more intense pepper flavor

Pork Shoulder

Works for: Traditional flavor, fall-apart texture, holds up to long cooking

Skip if: You need faster cook time or want leaner protein

Chicken Thighs

Works for: Lighter meal, shorter cooking window, less fat to skim

Skip if: You want rich traditional pozole with deep pork flavor

Canned Hominy

Works for: No-soak convenience, predictable texture, always available

Skip if: You can find dried hominy and want chewier kernels

Instructions

Roast the vegetables first, then everything goes into the slow cooker for unattended cooking. The pork works best when it hits the table at the same time as the main - we keep a quick potato dish ready for nights like this when you need something filling on the side.

  1. Roast tomatillos and peppers: Remove husks from tomatillos, rinse sticky coating, and cut in half. Halve peppers and remove seeds if you want less heat. Spread on a baking sheet and roast at 425°F for 10-12 minutes until charred in spots and softened.

  2. Blend the verde sauce: Transfer roasted vegetables to a blender with cilantro stems (save leaves for garnish), garlic, and 1 cup chicken broth. Blend until mostly smooth but still slightly chunky, about 30 seconds.

  3. Add everything to slow cooker: Cut pork shoulder into 3-4 large chunks and place in slow cooker. Pour in blended verde sauce, remaining 3 cups chicken broth, and oregano. Cover and cook on low for 6-7 hours.

  4. Add hominy and finish cooking: After 6-7 hours when pork is tender, drain and rinse canned hominy, then add to slow cooker. Cover and cook on low for 1-2 more hours until hominy is heated through and pork reaches 190°F internal temperature.

  5. Shred pork and adjust seasoning: Remove pork chunks, shred with two forks, and return to slow cooker. Taste broth and add salt, lime juice, and chopped cilantro leaves until it tastes bright and balanced.

Golden Rule
Don't add hominy until the last 1-2 hours or it overcooks into mushy paste that ruins the texture

What to Serve With It

Pozole verde needs crunchy, fresh sides that balance the tender stew and rich broth. Rich mains need something to cut through, and coffee does exactly that - try a classic coffee dish when you want a warm finish to the meal.

Side Dish Prep Why It Works How to Serve
Corn tortillas Easy Traditional accompaniment for scooping pozole Warm on griddle, serve on the side for tearing
Cabbage slaw Easy Crunchy contrast balances tender stew texture Thinly slice cabbage, toss with lime, serve as topping
Sliced radishes Easy Adds sharp, crisp freshness to each bite Slice thin, float on top or serve on side platter
Sour cream or crema Easy Cool creamy contrast to spicy broth Dollop on top or pass at table for drizzling
Tostadas Easy Crisp base for pozole toppings and stew Serve whole on side for breaking and dipping

Three ways to serve it:

  • Weeknight family meal: Serve pozole in bowls with cabbage slaw, radishes, lime wedges, and warm tortillas on the side for a complete dinner
  • Casual entertaining: Set up a topping bar with diced avocado, crumbled queso fresco, oregano, and salsa verde so guests can customize their bowls
  • Meal prep: Portion into containers with pork and hominy together, keep toppings separate, and reheat on stovetop with a splash of broth
Shortcut
Buy pre-shredded cabbage and pre-sliced radishes from the produce section to skip all the knife work on serving day

Store and Reheat

Pozole keeps well for meal prep and actually tastes better the next day after the flavors marry. The potato works best when it hits the table at the same time as the main - for a version that comes together quickly, try a quick potato dish when you need something creamy without extra steps.

Method Time Best For
🍳 Stovetop 8-10 min Reheating evenly without drying meat
📦 Microwave 3-4 min Quick reheating in single portions
🔥 Slow cooker 2-3 hours on low Reheating large batch gently

For best results when storing:

  • Let pozole cool to room temperature before transferring to shallow airtight containers - deep containers take too long to chill in the fridge
  • Store broth with pork and hominy together in the fridge for 3-4 days, keep fresh toppings like cilantro and lime separate
  • Freeze pozole without hominy for up to 3 months - add fresh or canned hominy when reheating for better texture
  • Add a splash of chicken broth or water when reheating since the hominy absorbs liquid and the stew thickens overnight
  • Reheat on stovetop over medium-low heat, stirring occasionally until steaming throughout before serving

Frequently Asked Questions

Can I substitute chicken for pork in Crockpot Pozole Verde?

Yes, use boneless chicken thighs and reduce cook time to 4-5 hours on low. The texture will be lighter and less rich than traditional pork shoulder pozole.

How long can I store leftover Pozole Verde in the fridge?

Store pozole in airtight containers in the fridge for 3-4 days. Keep fresh toppings separate and add them when reheating.

How do I tell when the pork is tender and done in pozole?

The pork should reach 190°F internal temperature and fall apart easily when you press it with a fork. If it's still tough or stringy, cook for another hour on low.

My pozole tastes bland; how to fix this?

Add more salt gradually, squeeze in fresh lime juice, and stir in chopped cilantro. If it's still flat, roast more tomatillos and peppers, blend them, and stir into the broth.

What are good side dishes to serve with Crockpot Pozole Verde?

Serve with warm corn tortillas, cabbage slaw, sliced radishes, lime wedges, and crema or sour cream. Tostadas also work well for scooping and dipping.

Crockpot Pozole Verde served on a plate

Crockpot Pozole Verde

No ratings yet
Crockpot Pozole Verde is a tangy Mexican stew featuring tender pork shoulder, hominy, and a bright green broth made from roasted tomatillos and peppers. Roasting the vegetables before slow cooking develops deep flavor while the pork becomes fall-apart tender after hours in the crockpot.
Print Recipe Pin Recipe
Prep Time 20 minutes mins
Cook Time 6 hours hrs 20 minutes mins
Total Time 6 hours hrs 40 minutes mins
Servings: 6 servings
Course: Dinner, Main Dish
Cuisine: Mexican
Ingredients Equipment Method Notes

Ingredients
  

  • 2.5 lbs pork shoulder cut into 3-4 large chunks, use fattier cut with marbling
  • 1 lb tomatillos remove papery husks and rinse sticky coating before roasting
  • 2 jalapeños or poblano peppers halve, remove seeds for less heat or leave in for more
  • 1 onion halved
  • 4 cloves garlic
  • 2 15-oz cans hominy drain and rinse canned hominy before adding
  • 4 cups chicken broth use low-sodium
  • 1 bunch cilantro save leaves for garnish, add stems to blender
  • 2 teaspoon oregano Mexican or Mediterranean
  • 2 limes added at end for brightness

Equipment

  • Slow cooker Used to cook the pork and stew low and slow
  • Blender Used to blend roasted vegetables and cilantro stems into verde sauce
  • Baking sheet Used for roasting tomatillos and peppers before blending

Method
 

  1. Preheat oven to 425°F. Remove husks from tomatillos, rinse to remove sticky coating, and cut in half. Halve peppers and remove seeds for less heat if desired. Spread tomatillos, peppers, and halved onion on a baking sheet. Roast for 10-12 minutes until charred in spots and softened.
    1 lb tomatillos, 2 jalapeños or poblano peppers, 1 onion
  2. Transfer roasted vegetables to a blender. Add cilantro stems, garlic cloves, and 1 cup chicken broth. Blend until mostly smooth but still slightly chunky, about 30 seconds.
    1 lb tomatillos, 2 jalapeños or poblano peppers, 1 onion, 4 cloves garlic, 4 cups chicken broth, 1 bunch cilantro
  3. Cut pork shoulder into 3-4 large chunks and place in slow cooker. Pour in blended verde sauce, remaining 3 cups chicken broth, and oregano. Cover and cook on low for 6-7 hours.
    2.5 lbs pork shoulder, 4 cups chicken broth, 1 bunch cilantro, 2 tsp oregano
  4. After 6-7 hours when pork is tender, drain and rinse canned hominy. Add hominy to slow cooker and cover. Cook on low for another 1-2 hours until hominy is heated through and pork reaches 190°F internal temperature.
    2 15-oz cans hominy, 2.5 lbs pork shoulder
  5. Remove pork chunks and shred with two forks. Return shredded pork to slow cooker. Taste broth and add salt, lime juice, and chopped cilantro leaves until bright and balanced.
    2.5 lbs pork shoulder, 1 bunch cilantro, 2 limes

Notes

  • Roasting tomatillos and peppers develops deeper flavor and removes raw vegetal taste.
  • Add hominy only in last 1-2 hours to prevent mushy texture.
  • Skim foam from broth during first hour for clearer stew.

Tried this recipe?

Let us know how it was!

How Long Does Cheese Curds Last? [Storage Guide]

March 28, 2026

Buying a fresh bag of cheese curds is one of those small grocery wins - you get home, pop one in your mouth, and that signature squeak confirms they're in good shape.

Can You Freeze Cheese Curds

The question is what happens next, because the role cheese curds plays in dishes from poutine to casseroles depends entirely on how fresh they are.

These are among the most perishable fresh dairy products you'll handle, and a few days of poor storage can cost you both the texture and the safety window.

QUICK SUMMARY

Cheese curds last 7-10 days unopened in the fridge and 3-7 days once opened. Freeze only if you plan to cook them - thawed curds lose their squeak permanently. Drain whey, use paper towel layers, and never leave them on the counter beyond 8 hours.

🧊Fridge (unopened): 7-10 days in sealed original packaging
🧊Fridge (opened): 3-7 days; drain whey and layer with paper towel
❄️Freezer: 2-3 months; texture softens - cook, don't snack

How Long Do Cheese Curds Last?

Fresh curds have a narrow shelf window compared to aged cheeses, and that window shrinks the moment you open the bag.

Unopened, store-bought curds in their original sealed packaging hold their squeak for roughly 7-10 days - the seal keeps moisture and bacteria in check.

Once exposed to air, that window tightens fast. Opened curds last 3-7 days, and the speed of decline depends on how much standing whey you allow to pool around them.

Cheese Curds Shelf Life
MethodStateDurationNotes
🧊 FridgeUnopened7-10 daysKeep in original sealed packaging; check date code
🧊 FridgeOpened3-7 daysDrain whey; layer with paper towel; loosely wrapped
❄️ FreezerOpened/portioned2-3 monthsSqueak lost; best for cooking and melting only
🏠 CounterRaw4-8 hours maxSafe for transport; bacteria multiply fast beyond 8 hours

Room temperature is worth flagging separately. Counter display at a farmers market or a short drive home is fine, but heat accelerates bacterial growth in fresh curds faster than in most other dairy.

Past 8 hours unrefrigerated, discard them.

How to Store Cheese Curds

The biggest enemy of fresh curds in the fridge isn't time - it's moisture. Leaving them submerged in whey is the single most common mistake, and it turns a 7-day curd into a 2-day curd.

Golden Rule
Never store cheese curds sitting in pooled whey. Drain it, line your container with a paper towel, and swap that towel daily.

Here's how to handle each storage scenario:

Fridge (unopened): Leave curds in original packaging until you're ready to use them, and refrigerate immediately after purchase.

Fridge (opened): Drain any accumulated whey and transfer curds to a shallow container or a loosely closed resealable bag. Fold a paper towel between layers to absorb moisture, and replace it daily. This approach is similar to how you'd handle fresh mozzarella in dairy recipes - controlling surface moisture is everything.

Counter: Short transport or brief room-temperature service is acceptable, but return them to the fridge within 4-8 hours.

Can You Freeze Cheese Curds?

You can freeze cheese curds, but go in with clear expectations. The squeak is gone for good once they thaw - freezing disrupts the protein structure that gives fresh curds their characteristic bounce.

Thawed curds become softer and slightly rubbery, which makes them well-suited for melting into mac and cheese, soups, and casseroles but unsuitable for fresh snacking or poutine.

If you're weighing your options for a poutine recipe, understanding using poutine vs disco fries for creaminess can help you decide whether frozen curds are even the right call.

Watch Out
Freezing a bulk bag without portioning first creates one solid frozen block. Portion before freezing - you'll thank yourself later.

Follow these steps to freeze curds properly:

  1. Pat dry - Remove curds from packaging and blot thoroughly with paper towels to eliminate surface moisture.
  2. Portion - Divide into single-use amounts so you thaw only what you need.
  3. Flash-freeze - Spread portions in a single layer on a baking sheet and freeze for 1-2 hours until firm.
  4. Transfer - Move to vacuum-seal or heavy-duty freezer bags, pressing out as much air as possible before sealing. The same air-removal logic behind [freezing vacuum sealed salmon](https://forkliftkitchen.com/vacuum-sealed-salmon-shelf-life/) applies here - less air means less freezer burn.
  5. Label and store - Mark the date; use within 2-3 months for best quality.

To thaw, move the sealed bag to the fridge for 12-24 hours. For soups or casseroles, you can add frozen curds directly without thawing.

Much like salmon freezer burn explained, texture damage from improper freezing is irreversible - the flash-freeze step is not optional.

Signs Cheese Curds Have Gone Bad

Fresh curds have a mild, clean milky smell and a firm, slightly springy texture. Deviation from either of those two baselines is your first signal to take a closer look.

Signs It's Gone Bad
👀
VisualSlimy or translucent surface film · Green, blue, or black mold spots · Cloudy or discolored whey pooling
👃
SmellSour or putrid odor · Ammonia-like sharpness distinct from normal milky tang
✋
TextureComplete loss of bounce · Curds collapse into mush · Excessive sliminess

Mold on fresh curds isn't surface-only the way it can be with harder aged cheese - discard the entire batch if you see any mold spots. An ammonia smell or persistent sourness beyond the normal tang is equally decisive.

When in doubt, don't eat it.

Getting the Most From Your Curds

Fresh cheese curds reward a bit of planning, and a few habits make a real difference. If you're storing alternatives to cheese curds alongside the real thing, the same whey-management principles apply to most fresh dairy.

  • 🛒 Buy fresh, buy close to use - Purchase curds the day you plan to eat them; look for springy pieces with a mild milky aroma.
  • 📄 Paper towel is your tool - Layer curds with paper towel in the fridge and swap it daily to preserve squeak as long as possible.
  • 🧊 Freeze with a purpose - Only freeze curds you intend to cook; if your plan is poutine or fresh snacking, use them within the fridge window.
  • 🫙 Lost the squeak? Keep cooking - Curds that have gone soft but smell clean work well in mac and cheese, casseroles, and grilled sandwiches.
Shortcut
No time to drain and re-wrap? Tilt the open bag, press gently to drain whey, fold the top over, and refrigerate - 60 seconds of effort adds at least a day of quality.

Frequently Asked Questions

Can you freeze cheese curds and keep the squeak?

No. Freezing permanently alters the protein structure responsible for the squeak. Thawed curds become softer and slightly rubbery - fine for melting, not for fresh eating.

How long do cheese curds last in the fridge after opening?

Opened curds last 3-7 days refrigerated. Draining whey and layering with paper towel pushes that closer to 7 days; sitting in liquid shortens it significantly.

Can you eat cheese curds past the sell-by date?

Sometimes, if they've been stored well and show no mold, off smell, or sliminess. Sell-by dates on fresh curds are conservative - use your senses, not just the date.

What are the signs cheese curds have gone bad?

Key signs are mold spots, a sour or ammonia-like smell, slimy surface film, and curds that collapse rather than bounce. Any one of these is reason enough to discard.

What is the best way to store cheese curds for poutine?

Buy them the day you make poutine and keep them refrigerated until the last moment. Fresh, squeaky curds are non-negotiable for poutine - freezer curds won't give you the right texture.

What Is Butternut Squash? [Taste, Uses & More]

March 28, 2026

Butternut squash does something no other starchy vegetable quite manages: it caramelizes under dry heat into a sweet, nutty, deeply savory side with almost no effort required.

What Does Butternut Squash Taste Like

Roasted, pureed, or mashed, it holds its own as a lead ingredient - not just a filler.

Cooks reaching for acorn squash substitutes or alternatives to kabocha squash often land here, and for good reason.

QUICK SUMMARY

Butternut squash is a pear-shaped winter squash with orange flesh that roasts to a sweet, creamy, nutty texture. Raw it's dense and firm; cooked it turns silky. Use it in soups, gratins, grain bowls, and pies from autumn through winter.

🍂Flavor: Sweet caramel and nutty notes with a mild savory undercurrent
🔪Best Uses: Roasting, pureeing for soup, mashing, baking into gratins
🧡Texture: Dense raw, silky and creamy when cooked or pureed
❄️Shelf Life: Whole: up to 3 months; cut: 3-5 days refrigerated
🌍Also Known As: Butternut pumpkin (AU/NZ), butternut gourd, gramma

What Is Butternut Squash?

Butternut squash belongs to the species Cucurbita moschata, a group of winter squashes domesticated in Central America and northeastern South America thousands of years ago.

It arrived in North American commercial markets in the mid-twentieth century and has since become one of the most widely grown winter squashes in the world.

The squash has a distinctive pear shape - a slender neck attached to a rounded base - covered in smooth, matte tan skin.

All the seeds sit in the base cavity, which means the neck yields a solid block of dense orange flesh with no waste.

Outside North America, names shift. Australians and New Zealanders call it butternut pumpkin, while "gramma" appears in some regional Australian contexts.

Despite the different names, the squash is identical - same flesh, same flavor, same cooking behavior.

  • 🧡 Flesh color - deep orange from high beta-carotene content
  • 🌱 Species - Cucurbita moschata, distinct from pumpkin (C. pepo) and Hubbard (C. maxima)
  • 📐 Structure - solid neck, seed cavity confined to the bulbous base
  • 🌍 Origin - the Americas; now grown globally in temperate climates

What Does Butternut Squash Taste Like?

butternut squash - What Does Butternut Squash Taste Like

Raw butternut squash tastes faintly green and starchy, with a mild sweetness that barely hints at what heat will unlock. The real character emerges under dry heat.

Roasting drives off moisture and concentrates its natural sugars into pronounced brown-sugar and caramel notes with a nuttiness that carries a faint chestnut quality. There's also a quiet savory undercurrent that keeps the sweetness from tipping into dessert territory.

Compared to the taste of pumpkin, butternut reads sweeter, smoother, and less fibrous. Sweet potato is the closest parallel overall, though butternut finishes drier and nuttier - less sugary on the back palate.

Sensory SnapshotModerate Intensity
👅 Flavor
sweetcaramelnuttyearthy
✋ Texture
dense rawsilky cooked
👃 Aroma
warmtoasty

How to Use Butternut Squash

Butternut squash handles heat in several ways, and each method pulls a different quality from the flesh. Roasting at high heat concentrates flavor; simmering then pureeing produces a smooth, neutral base for soups; steaming keeps the texture softer for mashing.

How Butternut Squash Is Used
MethodBest ForTip
🔥 RoastingCaramelized cubes, sheet-pan sides, grain bowlsCut into even pieces; toss with oil and roast at 425°F for best browning
🍲 Simmering + PureeingSoups, bisques, baby food, smoothie baseSimmer until fully tender, then blend hot with stock for a silky finish
♨️ Steaming / BoilingMashed squash, stuffing base, puree for piesSteam over simmering water to avoid waterlogging the flesh
🫕 BakingGratins, lasagna layers, savory tarts, piesSlice thin for even cooking in layered dishes; pre-roast cubes for gratins
🥗 SautéingWarm salads, risotto additions, quick weeknight sidesCut small for faster cooking; add aromatics like sage or thyme early

Brown butter and sage is the pairing most associated with butternut squash in North American and Italian kitchens - the nuttiness of browned butter mirrors the squash's own character. For recipes where you want to skip the dairy, knowing your replacements for butter keeps the dish on track. Cheese pairings lean toward goat cheese, feta, and Parmesan - all sharp enough to cut the sweetness. Spices from the curry family (cumin, coriander, cinnamon) work especially well in Middle Eastern-style stews.

Across cuisines, butternut appears in Italian risotto and lasagna with béchamel, North American autumnal grain bowls with farro and pumpkin seeds, and modern Australian seasonal menus.

For cooks who rely on spaghetti squash swaps that work, butternut can step in when a creamier, denser result is acceptable.

Golden Rule
Roast butternut squash cut-side down first for the first half of cooking - the direct contact with the pan drives caramelization faster than exposed flesh ever will.
Try It In
🍵Butternut Squash SoupThe puree method at its simplest — sweet, creamy, and deeply savory→

How to Buy and Store Butternut Squash

At the market, weight matters more than size. A butternut squash should feel noticeably heavy for its dimensions - lightness signals moisture loss and older flesh inside.

Look for matte, unblemished tan skin; any soft spots near the stem or deep surface cuts that expose flesh are reasons to pass.

Watch Out
A shiny skin on butternut squash means it was harvested too early. Matte skin signals a cured, mature squash with better flavor and longer shelf life.

A firm, dry stem is the clearest indicator of a mature, well-cured squash. Once you're home:

  • Whole squash - store at 50-60°F in a cool, dark, dry spot; keeps for several weeks to 3 months
  • Cut squash - wrap the cut face tightly and refrigerate; use within 3-5 days
  • Cooked squash - refrigerate for 3-4 days or freeze for several months

Understanding butternut squash's shelf life in more detail helps when you're buying several squashes at once for winter storage.

Where to Start with Butternut Squash

First time cooking it? Roast halved in the oven - cut side down at 400°F until the flesh yields easily to a fork. That one method teaches you the flavor, the texture, and the timing before you complicate anything.

Already comfortable roasting? Move to butternut squash bisque or a gratin layered with béchamel and Parmesan.

If you need a swap for a recipe, butternut squash swaps that work covers the most reliable alternatives, and sweet potato swaps that work is useful when the recipe leans in the opposite direction.

Shortcut
Buy pre-cut butternut squash cubes from the produce section when time is short - flavor is nearly identical to whole, and you skip the hardest part of prep.

Frequently Asked Questions

Is butternut squash a vegetable or a fruit?

Botanically, it's a fruit - it develops from a flower and contains seeds. In cooking and nutrition contexts, we treat it as a starchy vegetable, the same way we classify tomatoes and cucumbers.

How sweet is butternut squash compared to pumpkin?

Butternut squash is noticeably sweeter and creamier than most culinary pumpkins. Its natural sugar content is higher, and its flesh is denser with less fiber, which makes the sweetness more concentrated when roasted.

Can you eat butternut squash raw?

Yes, though the flavor is bland and starchy and the texture is quite hard. Thin ribbons or spiralized raw butternut work in salads with bold dressings, but most cooks cook it first for palatability.

How do you tell when a butternut squash is ripe?

Look for fully matte tan skin with no green patches and a firm, dry stem. A ripe squash will also feel heavy and produce a hollow sound when tapped - any softness in the skin means it's past its best.

What substitutes work for butternut squash in soup?

Kabocha squash and sweet potato are the closest matches - both puree smoothly and carry similar sweetness. Kabocha produces a slightly drier, earthier soup, while sweet potato adds more sugar and a distinct orange color.

Crockpot Moroccan Chickpea Stew

March 28, 2026

A rich, spiced stew that fills your kitchen with cinnamon and cumin while the slow cooker does everything. Chickpeas turn creamy without falling apart, and the vegetables cook down into tender bites that soak up all the warm Moroccan flavors.

Crockpot Moroccan Chickpea Stew served on a plate

Set it in the morning and come home to dinner. No stirring, no watching, no second-guessing if you added enough liquid.

This is what you make when you want something cozy but don't want to stand at the stove for an hour.

QUICK SUMMARY

A hands-off Moroccan chickpea stew that cooks in a crockpot for 6-8 hours. The slow cooker keeps chickpeas intact while vegetables turn fork-tender. Warm spices build depth without any stirring or adjustments.

⏱️Time Reality: 15 minutes prep, then walk away for 6-8 hours
🔥Key Move: Add canned chickpeas in the last hour to avoid mush
⚠️Watch Out: Too little liquid burns the bottom-keep 2 cups minimum

Table of Contents

Toggle
  • Why This Recipe Works
  • What You'll Need
    • Ingredient Details
  • Ingredient Swaps
  • What to Serve With It
  • Store and Reheat
  • Frequently Asked Questions
  • Crockpot Moroccan Chickpea Stew
    • Method 
    • Tried this recipe?

Why This Recipe Works

Layer spices with your vegetables at the start and the slow heat draws out every bit of cumin and cinnamon without turning bitter. For another hands-off dinner that uses similar warming spices, try this warm homemade fenkata recipe-it builds flavor the same way with a different protein.

Quick Reference
⏱️
Prep Time
15 min
🔥
Cook Time
6-8 hours low or 3-4 hours high
⏰
Total Time
6-8 hours
🍽️
Servings
6 servings
📊
Difficulty
Easy
🏷️
Category
Main Dish
💡
Quick Tip
Brown onions first for deeper flavor
🎯
Best For
Weeknight | Meal prep

What makes this work:

  • High heat releases oils from cumin and coriander - browning your onions and garlic for 5 minutes before adding everything to the crockpot deepens the base flavor
  • Chickpeas stay intact when added late - canned chickpeas turn mushy if they cook for 8 hours, so stir them in during the last hour
  • Diced carrots at half-inch cook evenly - uniform cuts mean everything reaches fork-tender at the same time without some pieces turning to mush
  • Two cups of vegetable broth prevents burning - slow cookers have hot spots, and enough liquid keeps the bottom from scorching
  • Fresh herbs at the end brighten the whole pot - cilantro or parsley stirred in right before serving wakes up spices that have mellowed during the long cook
Quick Tip
Stir the stew once halfway through cooking to redistribute heat and prevent any sticking on the bottom.

What You'll Need

Ingredients for Crockpot Moroccan Chickpea Stew

Stock your pantry with canned chickpeas, spices, and broth, then grab fresh vegetables the day you want to cook. Most people skip verde, but it balances the meal. For a version that comes together quickly, this smooth creamy dip works as a topping or side.

🫘
Protein Base
  • 2 cans (15 oz each) chickpeas, drained and rinsed
🥬
Vegetables
  • 1 large onion, diced
  • 3 cloves garlic, minced
  • 3 medium carrots, diced (½-inch pieces)
🥫
Liquid & Base
  • 1 can (14.5 oz) diced tomatoes
  • 2 cups vegetable broth
🌶️
Moroccan Spice Blend
  • 1 ½ teaspoon ground cumin
  • 1 teaspoon ground coriander
  • ½ teaspoon ground cinnamon
  • 1 teaspoon smoked paprika
  • 1 teaspoon fresh ginger, grated
  • ½ teaspoon harissa or chili flakes (optional)
🌿
Finishing Touches
  • ¼ cup fresh cilantro or parsley, chopped
  • Salt and black pepper to taste
  • Juice of ½ lemon

Ingredient Details

  • Canned chickpeas
    Rinse them well to remove excess sodium and starchy liquid that can make the stew cloudy
  • Vegetable broth
    Low-sodium works best so you control the salt level at the end-taste before adding more
  • Carrots
    Cut to uniform half-inch dice so they cook evenly-larger chunks stay crunchy after 6 hours
  • Moroccan spices
    Add half at the start and the rest 30 minutes before serving for layered depth without bitterness
  • Fresh ginger
    Grate it fine so it melts into the stew-big chunks stay harsh and fibrous
  • Fresh herbs
    Stir them in right before serving or they turn brown and lose their brightness
  • Harissa
    Start with a quarter teaspoon and taste-it's easy to add heat but impossible to take it away

Ingredient Swaps

Swap chickpeas for black beans if you want something softer, or use chicken broth instead of vegetable for a non-vegan version. Cool and crunchy, slaw resets your palate between bites. For a version that comes together quickly, something crunchy like slaw works next to this warm stew.

Four swaps that work:

  • Canned black beans for chickpeas - softer texture, slightly sweeter, same protein punch
  • Water plus bouillon cube for vegetable broth - less nuanced but gets you there on a budget
  • Fresh chopped tomatoes for canned diced - reduces liquid slightly, so add an extra half cup of broth
  • Parsley for cilantro - milder finish if you're in the cilantro-tastes-like-soap camp

Dried Chickpeas

Works for: Planning ahead-soak overnight, add at the start, they cook through in 8 hours

Skip if: You're starting in the morning and forgot to soak-they'll stay crunchy

Canned Chickpeas

Works for: Same-day cooking with zero soak time-just rinse and add in the last hour

Skip if: You want firmer texture-canned chickpeas turn soft faster than dried

Sweet Potato Instead of Carrots

Works for: Creamier texture and natural sweetness that balances warm spices

Skip if: You don't want the stew to thicken too much-sweet potato breaks down more than carrots

Instructions

The stew needs 6-8 hours on low or 3-4 on high, so plan your start time based on when you want to eat. Rich mains need something to cut through, and salad does exactly that. For a version that comes together quickly, a crisp green salad works on the side.

  1. Brown your aromatics in a skillet over medium heat. Add a tablespoon of oil, then cook diced onion for 3 minutes until it softens. Toss in minced garlic and grated ginger, stir for another minute until you smell it, then scrape everything into the slow cooker. This step builds the flavor base you can't get from raw onions.

  2. Layer vegetables and spices in the crockpot. Add diced carrots, canned tomatoes with their juice, vegetable broth, cumin, coriander, cinnamon, and paprika. Stir once to mix, then put the lid on. Don't add chickpeas yet-they go in later.

  3. Cook on low for 6-8 hours or high for 3-4 hours. Check after 6 hours on low-carrots should be fork-tender with no crunch. If they're still firm, give it another hour. Stir once halfway through if you're around, but it's not critical.

  4. Add chickpeas in the last hour of cooking. Drain and rinse two cans of chickpeas, stir them in, replace the lid, and let them heat through. This timing keeps them intact instead of mushy.

  5. Finish with fresh herbs and lemon juice. Turn off the heat, stir in chopped cilantro or parsley and a squeeze of lemon juice. Taste and add salt if needed-the broth might have enough already. Let it sit for 5 minutes before serving so the flavors settle.

Golden Rule
Keep at least 2 cups of liquid in the pot at all times-slow cookers with hot spots will burn the bottom if it runs dry.

What to Serve With It

You need something that soaks up the spiced broth or adds crunch to balance the soft chickpeas. The traditional works best when it hits the table at the same time as the main. For a version that comes together quickly, a cold traditional side refreshes between bites. If you want more pairing options for soup-based meals, check out these cozy soup night ideas for side dishes that work with any warm bowl.

Side Dish Prep Why It Works How to Serve
Couscous Easy Tiny grains soak up the spiced broth without getting soggy Spoon stew over a mound of fluffy couscous in a wide bowl
Warm Pita Bread Easy Perfect for scooping chickpeas and mopping up sauce Tear into quarters and serve in a basket on the side
Simple Green Salad Easy Fresh crunch and acidity cut through the warm spices Toss greens with lemon vinaigrette and serve alongside
Steamed Rice Easy Neutral base that lets the Moroccan flavors shine Serve stew in bowls over a scoop of white or brown rice
Charred Eggplant Salad Medium Smoky, cool contrast that matches the spice profile Spoon onto plates as a side or stir into the stew itself

Three ways to serve it:

  • Over couscous with yogurt dolloped on top - the cool yogurt calms the spices and adds creaminess
  • In bowls with warm pita and harissa on the side - everyone controls their own heat level
  • With herbed flatbread and roasted cauliflower - turns it into a full spread for guests
Best Pick
Serve with a lemon-tahini drizzle for nutty brightness that ties the whole plate together.

Store and Reheat

The stew keeps for 3-4 days in the fridge and actually tastes better the next day when the spices have more time to blend. Transfer it to shallow containers so it cools fast-deep pots take too long and create a food safety risk. Freeze portions in airtight containers for up to 3 months.

Method Time Best For
🍳 Stovetop 5-7 min simmer Even warming without drying out chickpeas
📦 Microwave 2-3 min, stir halfway Single servings when you're in a hurry
🔥 Oven 15 min at 350°F Large batches that need gentle, even heat

For best results when storing:

  • Cool the stew to room temperature within 2 hours - bacteria grow fast in the warm zone between 40-140°F
  • Store broth and solids together - separating them dries out the chickpeas and vegetables
  • Add fresh herbs after reheating - cilantro and parsley turn brown and bitter when stored
  • Thin with extra broth when reheating - the stew thickens in the fridge as starches absorb liquid
  • Freeze in single-serving portions - you can reheat exactly what you need without thawing the whole batch

Frequently Asked Questions

Can I use dried chickpeas instead of canned in crockpot Moroccan chickpea stew?

Yes, but soak them overnight first. Add soaked chickpeas at the start of cooking and they'll be tender after 8 hours on low.

What is the best way to store and reheat Moroccan chickpea stew?

Store in airtight containers in the fridge for 3-4 days or freeze for 3 months. Reheat on the stovetop over medium heat for 5-7 minutes, adding a splash of broth if it's too thick.

How do I know when the chickpeas and vegetables are fully cooked in the slow cooker?

Carrots should be fork-tender with no crunch, and chickpeas should be soft but still hold their shape. Check after 6 hours on low-if vegetables resist a fork, cook for another hour.

Why is my stew bland and how can I fix the flavor?

Add more spices or a squeeze of lemon juice after cooking. Slow cookers mellow flavors, so taste and adjust seasoning at the end-salt and acid wake everything up.

Can I scale this recipe for larger or smaller portions?

Yes, but keep the liquid ratio the same-at least 2 cups for a full slow cooker. For smaller batches, cut everything in half and check doneness 30 minutes earlier than the recipe states.

Crockpot Moroccan Chickpea Stew served on a plate

Crockpot Moroccan Chickpea Stew

No ratings yet
This Crockpot Moroccan Chickpea Stew is a hands-off slow cooker recipe that fills your kitchen with warm spices like cinnamon and cumin. Chickpeas stay creamy without falling apart while vegetables soften to perfect tenderness. The stew simmers all day for a rich, cozy dinner with minimal effort.
Print Recipe Pin Recipe
Prep Time 15 minutes mins
Cook Time 6 hours hrs
Total Time 6 hours hrs 15 minutes mins
Servings: 6 servings
Course: Dinner, Main Dish
Cuisine: Moroccan
Ingredients Equipment Method Notes

Ingredients
  

  • 2 cans chickpeas drained and rinsed, added in last hour
  • 1 large onion diced
  • 3 cloves garlic minced
  • 3 medium carrots diced in ½-inch pieces
  • 1 can diced tomatoes include juice
  • 2 cups vegetable broth low sodium preferred
  • 1.5 teaspoon ground cumin add half at start, half near end
  • 1 teaspoon ground coriander add half at start, half near end
  • 0.5 teaspoon ground cinnamon add half at start, half near end
  • 1 teaspoon smoked paprika add half at start, half near end
  • 1 teaspoon fresh ginger grated finely
  • 0.5 teaspoon harissa optional, start with less and adjust for heat
  • 0.25 cup fresh cilantro or parsley chopped, added at end
  • 0.5 lemon juice freshly squeezed, added at end

Equipment

  • Slow cooker Used for slow cooking the stew
  • Skillet Used to brown onions and garlic

Method
 

  1. Heat a tablespoon of oil in a skillet over medium heat. Cook diced onion for 3 minutes until softened. Add minced garlic and grated ginger; cook for another minute until fragrant. Transfer all to the slow cooker.
    1 large onion, 3 cloves garlic, 1 tsp fresh ginger
  2. Add diced carrots, canned diced tomatoes with juice, vegetable broth, cumin, coriander, cinnamon, and smoked paprika into the slow cooker. Stir once to combine. Do not add chickpeas yet. Cover with lid.
    3 medium carrots, 1 can diced tomatoes, 2 cups vegetable broth, 1.5 tsp ground cumin, 1 tsp ground coriander, 0.5 tsp ground cinnamon, 1 tsp smoked paprika
  3. Cook on low for 6-8 hours or on high for 3-4 hours. Stir once halfway through cooking if possible. Check carrots after 6 hours on low; they should be fork-tender. If still firm, cook another hour.
  4. Drain and rinse chickpeas well. Stir them into the stew during the last hour of cooking and replace the lid to let them heat through without becoming mushy.
    2 cans chickpeas
  5. Turn off heat. Stir in chopped cilantro or parsley and lemon juice. Taste and season with salt and pepper if needed. Let stew rest for 5 minutes before serving to let flavors meld.
    0.25 cup fresh cilantro or parsley, 0.5 lemon juice

Notes

  • Brown onions and garlic first to deepen flavor.
  • Add chickpeas in the last hour to keep them intact.
  • Keep at least 2 cups of liquid to avoid burning on bottom.

Tried this recipe?

Let us know how it was!

What Is Bittersweet Chocolate? [Taste, Uses & More]

March 28, 2026

Bittersweet chocolate announces itself before you even take a bite - the roasted cocoa aroma hits first, dense and dry, with a faint whisper of something fruity underneath.

What Is Bittersweet Chocolate

Then comes the snap, firm and clean, followed by a slow melt that coats the palate with deep, only slightly sweet chocolate.

It's the kind of intensity that makes bakers reach for it deliberately, not by default.

QUICK SUMMARY

Bittersweet chocolate is a high-cocoa dark chocolate with deep roasted flavor and restrained sweetness. Most bars fall between 60-70% cocoa solids. It's the go-to for ganache, mousses, and baked goods where pronounced chocolate bitterness matters.

🍫Flavor: Deep roasted cocoa, low sweetness, faint fruity or winey undertones
🔪Best Uses: Ganache, brownies, mousse, tempering, chocolate glazes
🌡️Store At: 60-68°F in an airtight container, away from strong odors
📅Shelf Life: 12-24 months unopened; shorter once opened or tempered
⚠️Watch For: White bloom on the surface signals temperature damage, not spoilage

What Is Bittersweet Chocolate?

Bittersweet chocolate belongs to the dark chocolate family, distinguished by its high cocoa solids content - typically 60-70% or above - and a noticeably lower sugar ratio than semisweet.

It's made from cocoa mass (ground cacao), cocoa butter, and sugar, with no milk solids in most standard formulations.

The name "bittersweet" doesn't have a legally standardized definition in most markets. In the United States, the FDA requires only that dark chocolate contain at least 35% cocoa solids, so labeling varies between brands.

Cacao originates from West Africa and South America, and where those beans were grown directly shapes the bar in your hands. Single-origin bittersweet chocolate from Ecuador or Madagascar can carry distinct fruity or winey notes that commodity blends don't show.

You may also see it labeled as bittersweet dark chocolate or simply listed with its cocoa percentage. For coating and enrobing work, professionals often specify couverture, a higher-fat version with more cocoa butter that flows more smoothly when melted.

  • 🌍 Origin: Cacao-growing regions in West Africa and South America
  • Category: Dark chocolate (cocoa solids + cocoa butter + sugar)
  • Also called: Bittersweet dark chocolate, dark bittersweet, high-percentage dark
  • Key distinction: Less sugar than semisweet; no milk solids in standard versions

What Does Bittersweet Chocolate Taste Like?

bittersweet chocolate - What Is Bittersweet Chocolate

The dominant note is roasted cocoa - dry, slightly astringent, and noticeably less sweet than semisweet chocolate. Think of it as unsweetened cocoa powder with added cocoa butter smoothing out the rougher edges.

Sensory SnapshotStrong Intensity
👅 Flavor
bitter-cocoadeep roastedfaint fruitywiney
✋ Texture
firm snapsmooth melt
👃 Aroma
roasted cocoafaint vanillanutty

Heat changes the profile noticeably. Melted bittersweet chocolate loses its firm astringency and opens up into a rounder, more concentrated cocoa flavor with a glossy, fluid texture.

Single-origin bars add another dimension entirely. A Madagascan bar might carry raspberry or red-fruit brightness; an Ecuadorian one leans toward earthy, almost tobacco-like depth.

Those nuances largely disappear once the chocolate is cooked into a brownie, however - heat simplifies the profile back toward core roasted cocoa.

Golden Rule
The higher the cocoa percentage, the less sugar - so moving from 60% to 72% bittersweet noticeably shifts the balance toward bitter. Taste before using if you've switched brands or percentages mid-recipe.

How to Use Bittersweet Chocolate

Ganache is where bittersweet chocolate performs best. The high cocoa fat content creates a stable, glossy emulsion with heavy cream, and the restrained sweetness lets you control the final sugar level of truffles or glazes independently. If you're working through cream alternatives, knowing which heavy cream in ganache swaps that work will save a failed batch.

How Bittersweet Chocolate Is Used
MethodBest ForTip
🫕 MeltingGanache, glazes, hot chocolate, saucesUse a double-boiler; keep water off the chocolate to prevent seizing
🍫 TemperingBonbons, molded chocolates, dipped fruitSeed method or marble slab; target 88-90°F working temp
🔪 ChoppingBrownie and cookie batters, muffinsRough chop creates uneven pockets that melt differently - intentional
✨ ShavingCitrus salads, plated desserts, drinksUse a warm peeler for curls; a cold bar produces fine shards

In French pâtisserie, bittersweet chocolate anchors classic chocolate mousse, where its bitterness balances whipped egg and cream. American baking leans on it in brownies and cookies, where chopped pieces create concentrated chocolate pockets.

Mexican-influenced savory cooking uses melted bittersweet chocolate in mole-style sauces - a small amount stirred into a chile-based braise adds depth without reading as sweet.

Pairing follows the logic of contrast and amplification. Espresso, sea salt, and toasted nuts amplify the roasted bitterness. Citrus - particularly blood orange - cuts through the fat and lifts the fruity notes already in the chocolate. Red wine and dried stone fruit extend those winey undertones found in single-origin bars.

Avoid pairing with delicate floral teas; the cocoa simply overwhelms them. Highly acidic fresh dairy added unwarmed can also seize unmixed melted chocolate instantly.

Try It In
🫕Rich Chocolate FondueHigh cocoa fat gives this fondue a smooth, glossy dip every time→🍋Lemon Mint Hot ChocolateCitrus cuts through bittersweet's richness for a less-cloying drink→🌺Passion Fruit Hot ChocolateTropical acidity amplifies the winey notes in high-percentage bars→

How to Buy and Store Bittersweet Chocolate

Look for bars labeled "bittersweet" or carrying a cocoa percentage of 60% or higher - that number is the most reliable signal.

A good bar should have a glossy surface, a clean audible snap when broken, and no white dusty or streaky patches.

Watch Out
White bloom - a chalky or streaky film on the surface - means the bar experienced temperature swings or moisture. It's safe to eat or melt, but tempered work from bloomed chocolate won't set with a clean snap or shine.

For coating and enrobing, couverture-grade bars are worth the premium. They contain more cocoa butter than standard baking chocolate and melt to a thinner, more workable consistency.

Store bars at 60-68°F in an airtight container or tightly rewrapped in their original foil. Keep them away from coffee, spices, or other strong-smelling foods - cocoa butter absorbs odors readily.

Understand bittersweet chocolate's shelf life before buying in bulk, since a 12-24 month window only holds if storage conditions stay consistent.

Where to Start With Bittersweet Chocolate

Start with ganache. A 2:1 chocolate-to-cream ratio at 60-65% cocoa gives you a baseline that's rich without being harsh - from there you adjust percentage up or down based on how much bitterness you want.

If a recipe calls for semisweet and you only have bittersweet, a small reduction in added sugar usually corrects the balance; knowing your bittersweet chocolate stand-ins makes that swap straightforward.

Shortcut
Buy one mid-range bittersweet bar at 64-66% for general baking, and one single-origin bar at a similar percentage for eating and tasting. The contrast shows you exactly how much origin affects flavor before it gets cooked away.

Frequently Asked Questions

Is bittersweet chocolate the same as dark chocolate?

Bittersweet is a category within dark chocolate, not a separate thing. All bittersweet chocolate is dark, but not all dark chocolate qualifies as bittersweet - the term implies a higher cocoa percentage and lower sugar than generic dark or semisweet bars.

What percentage is bittersweet chocolate?

Most bars labeled bittersweet fall between 60-72% cocoa solids. There's no universal legal standard, so the percentage on the label is the most reliable guide - 60% sits at the sweeter end, while 70%+ is noticeably more bitter.

How bitter is bittersweet compared to semisweet?

Noticeably more bitter. Semisweet chocolate typically runs 45-60% cocoa solids with more sugar; bittersweet starts around 60% and pushes higher. Side by side, bittersweet has less sweetness and a drier, more roasted finish.

Does bittersweet chocolate contain dairy?

Not always. Standard bittersweet chocolate made from cocoa mass, cocoa butter, and sugar is dairy-free and often vegan. Some brands add milk solids or use shared equipment - always check the label if dairy is a concern.

Can you use bittersweet chocolate directly in ganache without tempering?

Yes. Ganache doesn't require tempered chocolate - you simply melt it into warm cream. Tempering only matters when you need the finished chocolate to set hard and glossy, as with molded bonbons or dipped confections.

What Is Cayenne Pepper? [Taste, Uses & More]

March 28, 2026

Shakshuka doesn't get its persistent, building heat from tomatoes alone - that steady warmth spreading through each spoonful comes from a pinch of cayenne pepper stirred in early.

What Is Cayenne Pepper

Ground from dried cayenne pods, this is the spice that delivers clean, reliable fire without altering moisture or muddying other flavors.

Cooks reach for it across Cajun rubs, hot sauces, and even chocolate desserts for one reason: it's a precision tool.

When you run out, replacements for red pepper flakes or replacements for chipotle powder can fill the gap, but neither replicates cayenne's sharp, focused punch.

QUICK SUMMARY

Cayenne pepper is a finely ground, bright-red chili powder with clean, penetrating heat and a faint earthy base. Use it in dry rubs, soups, hot sauces, and spice blends wherever you need steady, consistent fire without added moisture.

🌶️Flavor: Sharp, clean heat with slight earthy-vegetal and mild fruity notes
💪Intensity: Strong - a little goes a long way in most dishes
🍳Best Uses: Dry rubs, soups, hot sauces, eggs, chili, roasted vegetables
🧂Pairs With: Garlic, cumin, smoked paprika, lime, honey, tomato
📦Storage: Airtight, opaque container in a cool, dark pantry
⏱️Shelf Life: Peak flavor 6-12 months; potency fades after 12 months

What Is cayenne pepper?

Cayenne pepper is a dried, finely ground chili made from cayenne pods (Capsicum annuum), a variety originally cultivated in northern South America. The name comes from Cayenne, the capital of French Guiana, where the pepper was historically traded and distributed.

Ground cayenne goes by several names depending on region and context.

You'll encounter it labeled as ground cayenne, cayenne powder, or sometimes "bird pepper" in parts of the Caribbean and West Africa.

The label "red pepper" is a frequent but misleading shorthand - red pepper can refer to any number of ground chilis, while cayenne is a specific species and heat level.

Most commercially sold cayenne sits between 30,000 and 50,000 Scoville heat units (SHU) - significantly hotter than standard paprika (roughly 250-1,000 SHU) but milder than habanero-based powders.

Understanding seasoning with chili powder helps clarify where cayenne sits in the chili family: chili powder is a blend, while cayenne is a single-origin, single-species grind.

  • 🌍 Origin - Northern South America; named for Cayenne, French Guiana
  • 🌿 Species - Capsicum annuum, same species as sweet bell and jalapeño peppers
  • 🌡️ Heat range - 30,000-50,000 SHU; hotter than paprika, milder than habanero
  • 🏷️ Also known as - ground cayenne, cayenne powder, bird pepper, red pepper (imprecise)

What Does cayenne pepper Taste Like?

cayenne pepper - What Is Cayenne Pepper

Capsaicin is the compound responsible for cayenne's defining characteristic: a sharp, penetrating heat that hits the back of the palate quickly and lingers. Unlike the rounded warmth of smoked paprika or the earthy burn of ancho, cayenne delivers what most cooks describe as clean fire - no smokiness, no sweetness, just forward heat.

Beneath that heat sits a faint earthy-vegetal base and a mild fruity brightness, though both are easy to miss unless cayenne is used sparingly. At high concentrations, the capsaicin effectively drowns out the subtler notes.

Sensory SnapshotStrong Intensity
👅 Flavor
clean heatearthy-vegetalmild fruity
✋ Texture
fine powderdry
👃 Aroma
warmfaintly smokypeppery sharp

Compared to crushed red pepper flakes, ground cayenne is more consistent - each pinch delivers the same heat, whereas flakes vary based on seed concentration.

Compared to sweet paprika, it's in a different league entirely.

If you need the color of paprika without sacrificing heat, replacements for paprika worth considering include smoked paprika or a small amount of cayenne blended with a mild chili powder.

How to Use cayenne pepper

Cayenne's dry, powder form makes it one of the most adaptable heat sources in a spice cabinet. It disperses evenly into liquids, coats surfaces in dry rubs without clumping, and blooms quickly when hit with hot oil.

Golden Rule
Bloom cayenne briefly in warm oil before adding other ingredients - 20 to 30 seconds is enough to open up aroma compounds without scorching the powder and turning it bitter.

Cajun and Creole cooking relies heavily on cayenne as a foundational heat element in dry rubs, étouffée, and gumbo. In Mexican and Tex-Mex kitchens, it intensifies taco meat and enchilada sauces. South American and some Indian recipes use it as a powdered red chili substitute when dried whole chilis aren't available.

How Cayenne Pepper Is Used
MethodBest ForTip
🧂 Dry RubGrilled meats, Cajun or Creole spice blendsCombine with smoked paprika, black pepper, and cumin for balance
🍳 Bloomed in OilCurries, sautéed bases, shakshukaKeep heat moderate - 20-30 seconds max before adding wet ingredients
🥣 Stirred into LiquidSoups, stews, hot sauces, vinaigrettesAdd in stages; heat intensifies as the dish reduces
✨ Finishing DustRoasted vegetables, eggs, chocolate dessertsUse after cooking so heat perception stays bright, not cooked-in

Pairing cayenne with honey or brown sugar cuts its sharpness in marinades and glazes. Garlic and lime amplify its brightness; cumin and smoked paprika round it out.

Adding it to seasoning with hot sauce blends gives you layered heat rather than flat spice.

Try It In
🍗Air Fryer Lemon Pepper Chicken TendersA pinch of cayenne sharpens the lemon pepper coating→🥦Air Fryer Lemon Pepper CauliflowerCayenne adds steady heat to the roasted florets→🍖Air Fryer Lemon Pepper MeatballsA small amount builds background warmth in the blend→

How to Buy and Store cayenne pepper

Look for a bright, saturated red color with no gray tints or visible clumps - both signal age or moisture exposure. Check the label carefully: "pure cayenne" is a specific grind, while generic "red pepper" blends may include other chilis and deliver inconsistent heat.

Prefer recent best-by dates and sealed, airtight packaging.

Watch Out
Cayenne stored near a stove loses potency fast. Heat and light degrade volatile capsaicinoids quickly - even a few weeks of poor storage can flatten its punch significantly.

Store cayenne in an airtight, opaque container in a cool, dark pantry.

Peak flavor lasts 6-12 months; after that, the heat slowly fades rather than disappearing suddenly.

A sniff test tells you most of what you need to know - if the peppery sharpness is gone, the potency is too.

For a full breakdown of what to look for, check cayenne pepper spoilage signs to know when it's time to replace your jar.

Start Here for Better Heat

Cayenne is the right choice when you need controlled, additive heat with no moisture, smoke, or sweetness competing for attention.

  • 🌶️ For dry rubs - Start with ¼ teaspoon per pound of meat; [making memphis dry rub ribs at home](https://forkliftkitchen.com/memphis-dry-rub-ribs/) is a good benchmark for cayenne proportion in a spice blend
  • 🥣 For soups and stews - Add early and taste at the end; heat builds as liquid reduces
  • 🍫 For sweet applications - Use a pinch only; even ⅛ teaspoon in chocolate desserts lands clearly
  • 🧴 For [seasoning with cayenne pepper](https://forkliftkitchen.com/cayenne-pepper-substitutes/) in any recipe - Go low first; you can always add heat, not remove it
Shortcut
If a finished dish tastes flat rather than spicy, stir a small pinch of cayenne directly into the liquid and wait two minutes before adding more - heat perception catches up slowly.

Frequently Asked Questions

Is cayenne pepper the same as chili powder?

No. Cayenne is a single-origin, single-species grind from Capsicum annuum pods. Chili powder is a seasoning blend that typically combines ground chilis, cumin, garlic powder, and oregano - cayenne is often one component of it.

How hot is cayenne pepper on the Scoville scale?

Most ground cayenne falls between 30,000 and 50,000 Scoville heat units. That puts it well above jalapeño (2,500-8,000 SHU) but noticeably below habanero (100,000-350,000 SHU).

Can you substitute cayenne for red pepper flakes?

Yes, but use roughly half the amount - cayenne disperses more evenly and delivers consistent heat, while flakes have variable intensity based on seed content. Start with a 1:2 ratio (cayenne to flakes) and adjust.

How much cayenne should you add to a recipe?

A general starting point is ⅛ to ¼ teaspoon per four servings for moderate background heat. Dishes with fat or dairy can take slightly more, since both mute capsaicin perception.

Does cayenne pepper lose heat when cooked?

Capsaicin is heat-stable, so cooking doesn't neutralize it. However, long simmering in liquid can slightly mellow the perception of heat as capsaicin distributes throughout the dish rather than concentrating in each bite.

What Is Brown Rice? Taste, Texture, Uses & More

March 28, 2026

You spot it on the shelf between the white rice and the wild rice, packaged in a matte kraft bag with a tan, fibrous look that's nothing like the polished grains next to it.

What Is Brown Rice

Brown rice gets passed over constantly - and if you've been defaulting to pairing ideas for white rice without giving brown a real try, this guide will change that.

Understanding rice in grain dishes more broadly helps, but brown rice has a specific character worth knowing on its own terms.

QUICK SUMMARY

Brown rice is a whole grain with bran and germ intact, giving it a toasty, nutty flavor and chewy bite that white rice lacks. It takes longer to cook but holds up better in grain bowls, pilafs, and stews. Shelf life is shorter than white rice due to natural oils in the bran.

🌾Type: Whole grain, hulled rice with bran and germ intact
👅Flavor: Toasty, nutty, slightly earthy with a clean grain note
✋Texture: Chewy and firm, holds shape better than white rice
🍳Best Uses: Grain bowls, pilafs, fried rice, rice-and-beans, curries
🗓️Shelf Life: 6-12 months unopened; 3-6 months opened in pantry
⚠️Watch Out: Bran oils go rancid faster than white rice - store carefully

What Is Brown Rice?

Brown rice is a whole grain - a rice kernel with only the tough outer husk removed during milling. The bran layer and germ remain intact, which is what separates it from white rice, where both are polished away.

That retained bran is the source of its color, chew, and nutritional profile.

It's grown across South and Southeast Asia and cultivated globally today. You'll find it sold under names like hulled rice, whole-grain rice, or labeled by subtype - long-grain brown, short-grain brown, brown basmati, and jasmine brown are the most common formats.

Long-grain varieties cook up separate and fluffy; short-grain cooks stickier and denser.

Among wild rice in grain dishes and other whole grains, brown rice sits closest to white rice in flavor but leans heartier in texture.

It's worth knowing which subtype you're buying, since long-grain brown basmati behaves differently in a pilaf than short-grain brown in a grain bowl.

What Does Brown Rice Taste Like?

brown rice - What Is Brown Rice

Brown rice has a toasty, nutty base flavor with a slightly sweet, grainy note underneath. The earthiness is mild - closer to oats or barley than to quinoa, which carries a more distinct, almost mineral edge.

Heat brings out the nuttiness. Toasting dry grains in a pan before adding liquid deepens the flavor noticeably, making it closer to a roasted grain than a neutral starch.

Sensory SnapshotModerate Intensity
👅 Flavor
toasty nuttyslightly sweetearthy
✋ Texture
chewyslightly firm
👃 Aroma
toastedgrassy

The aroma is grassy and faintly toasted even before cooking, which is a sign of freshness. If the dry grain smells sharp or sour, the bran oils have likely started to turn.

How to Use Brown Rice

Brown rice earns its place wherever texture and flavor need to carry weight, not just absorb it. It holds up under heavy sauces and doesn't turn mushy in the same way white rice can.

That firmness is the whole point.

For full pairing ideas beyond the basics, the guide on what pairs with brown rice covers ingredient combinations in more depth. The short version: legumes, roasted vegetables, and soy- or miso-based sauces are the most reliable partners.

Golden Rule
Chill cooked brown rice completely before using it in fried rice - warm grains clump and steam instead of frying. Overnight in the fridge works best.
How Brown Rice Is Used
MethodBest ForTip
🍚 SimmeredGrain bowls, curries, rice-and-beansUse a 2:1 water-to-rice ratio; keep lid on throughout
🥘 Pilaf MethodPilafs, stuffed peppers, casserolesToast grains dry in the pan before adding stock for deeper flavor
🍳 Fried RiceStir-fries, wok dishesUse day-old chilled rice; fresh grains won't crisp properly
🫙 Oven-BakedCasseroles, one-pan dishesBake covered with stock at 375°F for even, hands-off cooking
⚡ Pressure CookedWeeknight cooking, batch prepInstant Pot cuts cook time to around 22-25 minutes with natural release

Brown rice appears across South Asian whole-grain dishes, Southeast Asian home cooking, and Latin American rice-and-beans combinations. It's also the default base in vegetarian grain-bowl cuisine, where its chew compensates for the absence of meat.

Skip it in classic sushi, where polished short-grain white rice is non-negotiable for the right texture and stickiness.

Try It In
🥛Cinnamon Rice HorchataBrown rice adds a nuttier base to this classic drink→🌽Coconut Rice with CornThe grain's chew holds up against creamy coconut milk→🌶️Dirty Rice with CornBrown rice gives this dish a heartier, firmer bite→

How to Buy and Store Brown Rice

Look for sealed bags with a recent packaging or expiry date. The kernels should be uniformly tan with visible bran flakes - not pale or polished-looking.

If you can smell the bag at the store, do it; a rancid or sharp odor means the bran oil has already started degrading.

Watch Out
Brown rice goes rancid faster than white rice because the bran layer contains natural oils. Heat and light accelerate this - a pantry near the stove is the wrong spot.

Storage and shelf life vary more than most people expect, and how long rice keeps depends heavily on whether the bag has been opened and where it's stored. For brown rice specifically:

  • 🏪 Unopened pantry - 6-12 months in a cool, dark spot
  • 📦 Opened, airtight container, pantry - 3-6 months; keep away from heat sources
  • ❄️ Opened, airtight container, refrigerated - 6-12 months; fridge slows bran oil oxidation significantly

Watch for brown rice spoilage signs like an off smell, yellowing kernels, or any visible moisture - any of these means discard it.

Where to Start with Brown Rice

Brown rice rewards patience. If you've found it bland before, the issue is almost always underseasoning the cooking water or skipping the toasting step.

Start with the pilaf method: toast dry grains in a little olive oil or ghee, then add salted stock instead of plain water.

That single change closes most of the flavor gap between brown and white.

For anything beyond the basics, replacements for brown rice and replacements for rice can point you toward alternatives if the texture still isn't working for your dish.

Best Pick
Long-grain brown basmati is the most forgiving starting point - it cooks up separate, carries the nuttiness well, and works in both Indian-style dishes and Western grain bowls.

Frequently Asked Questions

Is brown rice healthier than white rice?

Generally, yes. Brown rice retains the bran and germ, providing more fiber, magnesium, manganese, and B vitamins than white rice. It also has a lower glycemic impact, meaning blood sugar rises more gradually after eating it.

How long does brown rice take to cook?

On the stovetop, brown rice takes 40-50 minutes simmered with the lid on. A pressure cooker or Instant Pot cuts that to around 22-25 minutes with natural release - the most practical option for weeknight cooking.

Can you use brown rice for fried rice?

Yes, and it works well once chilled. The firmer texture of brown rice actually holds up better in a hot wok than freshly cooked white rice. Day-old refrigerated grains are essential - fresh brown rice will clump and steam.

Does brown rice need rinsing before cooking?

Rinsing removes surface starch and any dust from milling, which is worth doing. However, unlike white rice, brown rice doesn't get noticeably stickier without rinsing - it's a minor step rather than a critical one.

Why is brown rice chewier than white rice?

The bran layer surrounding each kernel resists water absorption during cooking. White rice, with the bran milled off, absorbs water faster and cooks to a softer texture. That bran also takes longer to fully hydrate, which is why brown rice needs more time and water.

« Previous Page
Next Page »

Primary Sidebar

ForkliftKitchen recipe developer

Welcome!

Recipe Developer · 12+ Yr Kitchen Veteran

I'm the recipe developer behind this site, focused on practical, well-tested dishes and smart ingredient swaps. Every recipe is written to be clear, reliable, and easy to make at home.

650+ Recipes
12+ Yrs Exp.
3x Tested
Our Story →

As Featured In

Allrecipes

TASTE OF HOME

Food52

HUFFPOST

Yahoo! Life

Our Editorial Standards

  • ✓ Every recipe tested at least 3 times before publishing
  • ✓ Substitutes verified by real kitchen trials, not guesswork
  • ✓ Reviewed for accuracy by our editorial team
  • ✓ Updated regularly with seasonal info and reader feedback

Most Popular

  • Creamy Lemon Shrimp Linguine
    Creamy Lemon Shrimp Linguine
  • Creamy Garlic Mushroom Chicken
    Creamy Garlic Mushroom Chicken
  • Sesame Ginger Chicken Noodle Bowls
    Sesame Ginger Chicken Noodle Bowls
  • Baked Lemon Herb Fish Fillets
    Baked Lemon Herb Fish Fillets
  • Veggie Loaded Fried Rice
    Veggie Loaded Fried Rice
  • Spicy Garlic Shrimp Stir Fry
    Spicy Garlic Shrimp Stir Fry

Join 8,000+ Home Cooks

Weekly Kitchen Tips

Easy recipes, smart substitutes, and real cooking shortcuts — every Thursday.

Subscribe Free →


Side Dishes

  • What to Serve With Asian Salmon? 15 Best Side Dishes
    What to Serve With Asian Salmon? 15 Best Side Dishes
  • Side Dishes for Strawberry Spinach Salad
    15 Best Side Dishes for Strawberry Spinach Salad
  • Sides for Grilled Cauliflower Steaks to Complete the Meal
    15 Sides for Grilled Cauliflower Steaks to Complete the Meal
  • 15 Sides To Serve With Calabacitas
    15 Best Sides for Calabacitas – Mexican-Inspired Favorites


Substitutes

  • 7 Best Substitutes for Hot Sauce in Marinades & Stir-Fries
    7 Best Substitutes for Hot Sauce in Marinades & Stir-Fries
  • 9 Best Substitutes for Butter in Baking and Cooking
  • 7 Best Substitutes for Tagliatelle for Italian Pasta Dishes
    7 Best Substitutes for Tagliatelle for Italian Pasta Dishes
  • 7 Best Substitutes for Udon Noodles in Asian Stir-Fries
    7 Best Substitutes for Udon Noodles in Asian Stir-Fries


Browse by Topic

  • Side Dishes320
  • Substitutes785
  • Dinner163
  • Air Fryer77
  • Taste Profiles484
  • Food Storage123


Reader Reviews

★★★★★

"Finally a food blog that tells you exactly why a substitute works instead of just listing options."

— Sarah M., via email

★★★★★

"The side dish recommendations are so specific — saved my dinner party twice this month."

— James R., Pinterest comment

★★★★★

"I trust this site more than most because they actually test everything. You can tell."

— Priya K., blog comment

Footer

↑ Back to Top

Forklift Kitchen

We do the heavy lifting so you can enjoy the cooking. Tested recipes, smart substitutes, and perfect pairings—built for real home cooks.

Content

  • Recipes
  • Substitutes
  • What to Serve With
  • Blog

Company

  • About Us
  • Contact
  • Subscribe

Legal

  • Privacy Policy
  • Terms of Service

As an Amazon Associate I earn from qualifying purchases.

© 2026 Forklift Kitchen.

Rate This Recipe

Your vote:


A rating is required
A name is required
An email is required