• Skip to primary navigation
  • Skip to main content
  • Skip to primary sidebar
  • Recipe Index
    • Air Fryer
  • Side Dishes
  • Substitutes
  • About
  • Contact
  • Subscribe

ForkLiftKitchen

menu icon
go to homepage
  • Recipe Index
    • Air Fryer
  • Side Dishes
  • Substitutes
  • About
  • Contact
  • Subscribe
subscribe
search icon
Homepage link
  • Recipe Index
    • Air Fryer
  • Side Dishes
  • Substitutes
  • About
  • Contact
  • Subscribe
×

Blog

What Is Cod? [Taste, Uses & More]

March 29, 2026

Most people assume mild means boring, and that assumption leads them to overcook cod, bury it in heavy sauces, and wonder why it never tastes as good as it did at a restaurant.

What Is Cod

The reality is that cod's restraint is the point - its clean, low-oil flavor and large moist flakes make it one of the most adaptable white fish in any kitchen.

QUICK SUMMARY

Cod is a mild, cold-water white fish with large moist flakes and a clean, faintly sweet flavor. It suits baking, pan-searing, frying, and chowders equally well. Fresh fillets last just 1-2 days in the fridge, so buy close to when you'll cook it.

🐟Fish Type: Cold-water white fish, North Atlantic and Pacific
👅Flavor: Mild, slightly sweet, clean with subtle brine
🍳Best Uses: Fish and chips, baked fillets, chowders, poached dishes
🧊Shelf Life: Fresh: 1-2 days fridge; frozen: up to 6 months
⚠️Watch Out: Strong spiced sauces and high-heat dry grilling kill its delicate character

What Is Cod?

Cod belongs to the family Gadidae and comes primarily in two commercial species: Atlantic cod (Gadus morhua), fished from the North Atlantic, and Pacific cod (Gadus macrocephalus), harvested across the North Pacific.

Both share the same general profile - white, firm flesh and a mild flavor - though Atlantic cod tends to have slightly larger flakes and a marginally sweeter taste.

You'll encounter it under several names depending on preparation. Bacalhau (Portuguese) and bacalao (Spanish) refer to the salt-dried form, which has been a staple of European cooking for centuries and requires soaking before use. Stockfish is cod dried without salt, common in Scandinavian pantries.

Fresh cod is sold as whole fish, skin-on fillets, or boneless loins. Here's what to know about each form:

  • 🐟 Whole cod - Best indicator of freshness; clear eyes, bright red gills, firm flesh
  • Skin-on fillets - Hold together better during pan-searing and baking; skin crisps well
  • Boneless loins - The thickest center-cut section, best for even cooking and presentation
  • Salt cod (bacalhau/bacalao) - Extended shelf life; needs 24-48 hours of soaking and water changes before cooking

What Does Cod Taste Like?
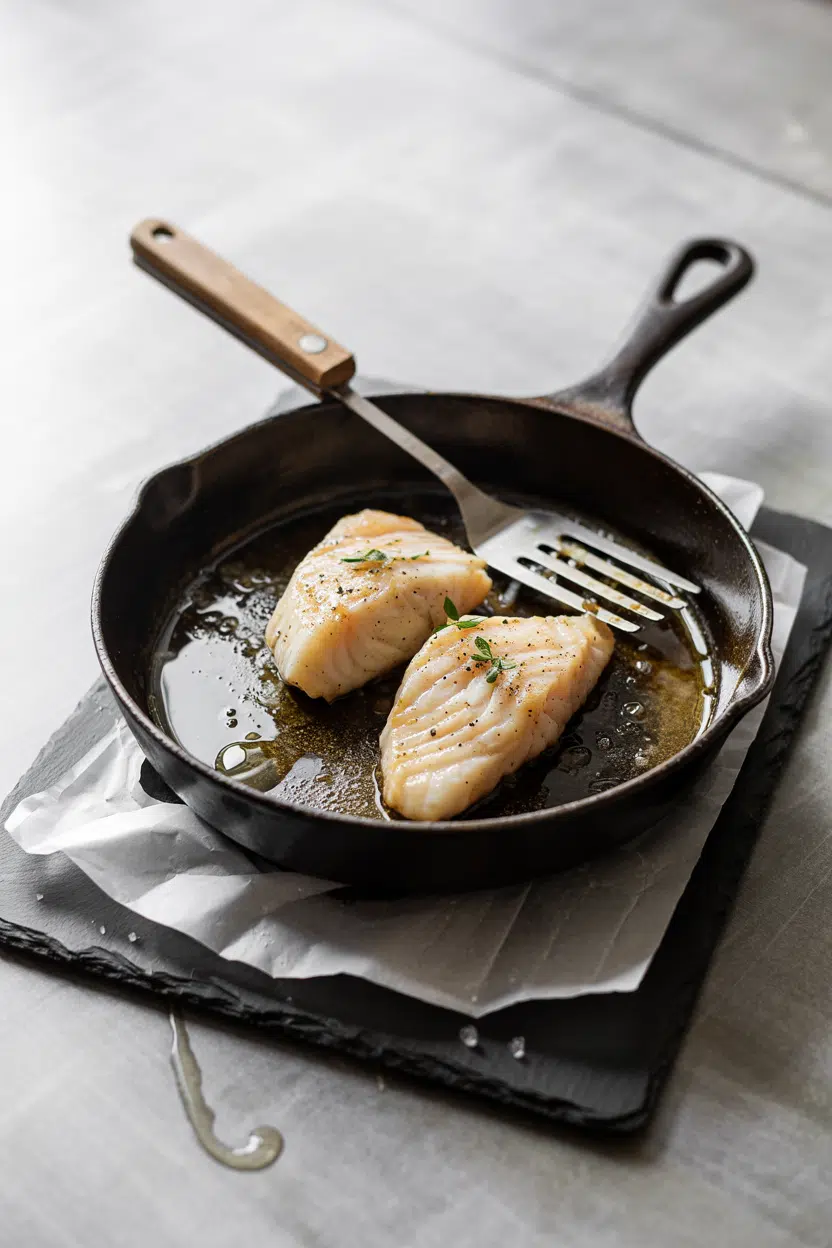
cod - What Is Cod

Cod's flavor is genuinely mild - not in a forgettable way, but in a way that leaves room for everything around it.

The flesh carries a faint sweetness, a clean oceanic note, and just enough natural brine to taste like the sea without tipping into fishiness.

Sensory SnapshotMild Intensity
👅 Flavor
mildly sweetclean brinelow-oil umami
✋ Texture
firm rawlarge moist flakes
👃 Aroma
very mild oceanicnon-fishy

Compared to haddock and pollock, cod is milder and less distinctly smoky. Heat transforms the texture significantly - raw cod is firm and dense, but once cooked it pulls apart into wide, glossy flakes.

Overcooked cod turns dry and loses those flakes entirely, which is the most common mistake home cooks make.

Golden Rule
Pull cod from heat when the thickest part just turns opaque. Residual heat finishes the job - another 60 seconds on the burner and the flakes start to seize.

How to Use Cod

Cod's firm-yet-flaky structure handles a wider range of cooking methods than most white fish. It holds together in chowders, crisps up under a beer batter, and takes on aromatics well when baked or poached.

How Cod Is Used
MethodBest ForTip
🍺 Deep-FriedClassic beer-battered fish and chipsKeep batter ice-cold; fry at 180°C (350°F) for a crisp shell
🫙 BakedBreadcrumb-crusted fillets, whole loins with herbsA light coating of butter or olive oil prevents the surface from drying
🍳 Pan-SearedCrispy skin-on fillets, brown-butter preparationsDry fillets thoroughly and press gently on the pan to avoid curling
🥣 PoachedDelicate salads, court-bouillon preparationsKeep the liquid at a gentle simmer - a rolling boil breaks the flakes
🍲 StewedChowders, tomato-based braises, bacalhau dishesAdd cod in the final 5-8 minutes so it doesn't overcook in the liquid

British cuisine claims cod most visibly through fish and chips, but the fish has a strong presence across Portuguese cooking as bacalhau, in Scandinavian simple bakes, and in New England chowders. Pairings that work: lemon and capers, brown butter and parsley, garlic and olive oil, dill, and mild white wines like Pinot Grigio.

Potatoes - whether chips, mash, or roasted - appear alongside cod across nearly every cuisine that uses it.

If you need a cod substitute for a recipe, haddock is the closest match; halibut works for thicker preparations where you want a firmer bite.

Try It In
🧄Garlic Butter Lemon CodPan-seared fillets with a classic brown butter finish→🎣Air Fryer Cod Fish CakesCrispy outside, tender flaked cod inside→🍋Baked Cod with Lemon ButterSimple weeknight bake that keeps the flakes intact→

How to Buy and Store Cod

Fresh cod gives clear signals when it's worth buying. Translucent, glossy flesh with tight flakes that spring back when pressed is what you want.

Avoid fillets with yellowing edges, dull color, or any sharp fishy odor - at peak freshness, cod smells faintly of the ocean, nothing more.

Watch Out
Check the label for "previously frozen" - that cod has already used up a significant portion of its shelf life and should be cooked the same day you buy it.

Store fresh cod in the coldest part of your fridge, ideally on a plate covered tightly with plastic wrap or in a shallow airtight container. Use it within 1-2 days.

For longer storage, freeze it; properly wrapped frozen cod holds its quality for 3-6 months. Detailed guidance on cod storage life and fish storage more broadly is worth checking before you buy in bulk.

Shortcut
If you can only find frozen cod, thaw it overnight in the fridge on a wire rack over a plate - this keeps water from pooling under the fillet and softening the texture.

Start Here for Best Results

Cod rewards simplicity. If you're cooking it for the first time, go with a baked loin - season with salt, rub with butter or olive oil, and roast at 200°C (400°F) for 12-15 minutes depending on thickness.

That single method teaches you the texture cod should hit and gives you a reference point for everything else.

Once you know how the flakes behave, try pan-searing skin-on fillets or adding it to a chowder. Salt cod (bacalhau) is a separate project with a longer prep commitment, but it's worth it once you're confident with the fresh form.

Frequently Asked Questions

Is cod a white fish?

Yes. Cod is a lean, white-fleshed sea fish with low fat content and a mild flavor. It belongs to the same broader category as haddock, pollock, and hake - all cold-water white fish with flaky flesh.

How do you tell if cod is fresh?

Fresh cod has translucent, glossy flesh that bounces back when pressed. Any yellowing at the edges, dull color, or sharp fishy smell means the fish is past its best.

Can you substitute cod for haddock?

Yes, they're the closest swap in white fish cooking. Haddock has a slightly stronger flavor and smaller flakes, but it works in almost every cod recipe without adjusting cook time.

Is cod healthy to eat?

Cod is low in fat and calories while providing solid lean protein, vitamin B12, selenium, and moderate omega-3 fatty acids. The main exception is salt cod (bacalhau), which carries very high sodium levels before soaking.

How long does fresh cod last in the fridge?

Fresh raw cod keeps for 1-2 days stored in the coldest part of the fridge. If you're not cooking it within that window, freeze it immediately rather than letting it sit.

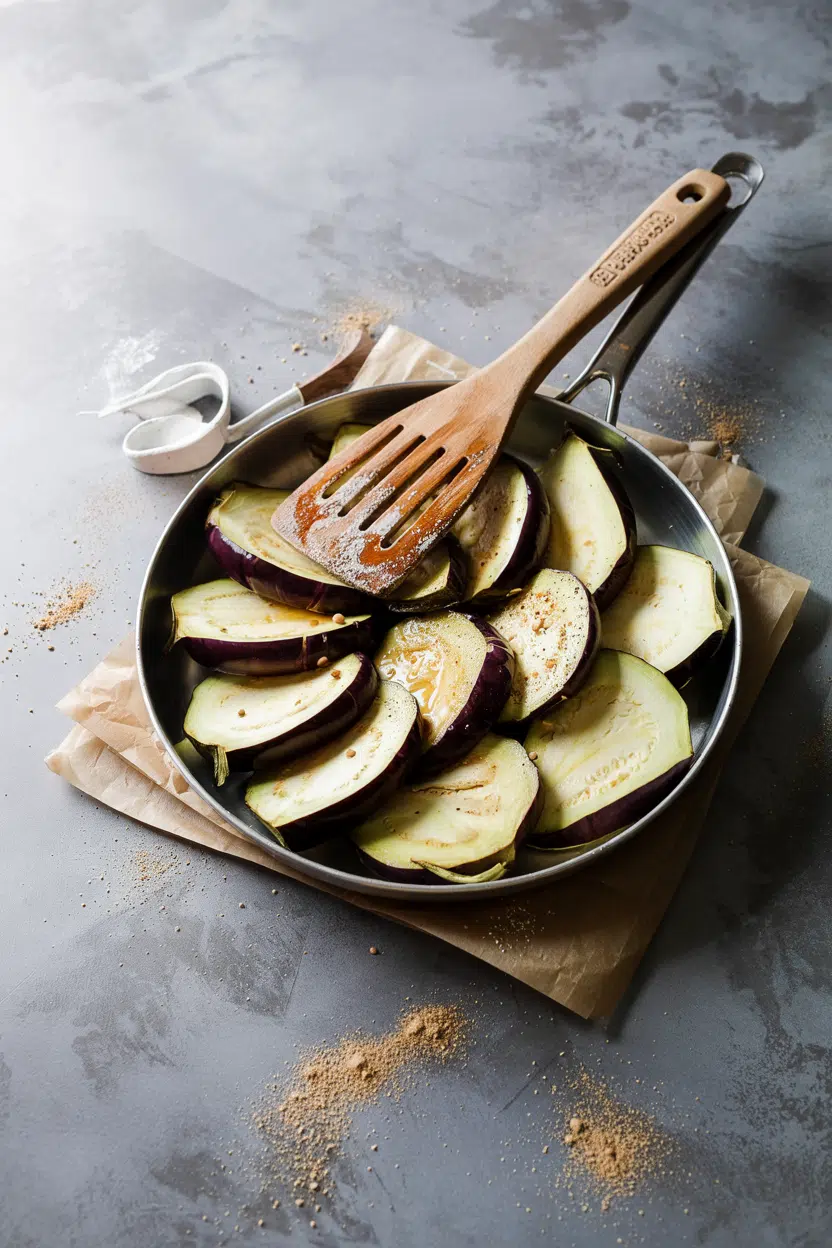
What Is Eggplant? [Taste, Uses & More]

March 29, 2026

You spot it at the market and hesitate - that glossy, deep-purple globe sitting next to the bell peppers and zucchini. Eggplant looks confident on the outside, however many cooks aren't sure what to do with it once they get it home.

What Does Eggplant Taste Like

That uncertainty is understandable. Eggplant's spongy flesh behaves differently from almost any other produce - it soaks up fat and flavor like a sponge, collapsing from dense and raw into something genuinely silky.

Get that right, and dishes like moussaka, baba ganoush, and baingan bharta make a lot more sense.

QUICK SUMMARY

Eggplant - also called aubergine or brinjal - is a mildly flavored nightshade with spongy flesh that turns silky under heat. It absorbs oils and sauces readily, making it ideal for roasting, frying, and braising across Mediterranean, Middle Eastern, and South Asian cuisines.

👅Flavor: Mildly sweet, slightly bitter near seeds, umami when roasted
✋Texture: Spongy raw, silky and creamy when properly cooked
🍳Best Uses: Roasting, grilling, frying, braising in curries or stews
🛒Buying Tip: Look for firm skin, tight green calyx, no soft spots
📅Shelf Life: Best within 3-5 days; refrigerate wrapped in a paper bag

What Is Eggplant?

Eggplant is a nightshade fruit - botanically a berry - though every cuisine in the world treats it as a vegetable. It was first domesticated in India and spread through Southeast Asia before Arab traders carried it into the Mediterranean basin during the Middle Ages.

You'll find it sold under several names depending on where you shop. In the UK and much of Europe it's aubergine; across South Asia and parts of Africa it's brinjal or baingan.

Varieties differ significantly in size and behavior:

  • Globe eggplant - the large, bulbous type most common in North American supermarkets; best for thick slices, baking, or frying
  • Japanese eggplant - long and slender with thinner skin; cooks faster and has a slightly sweeter, less bitter flavor
  • Italian eggplant - smaller than globe, with a thinner skin and fewer seeds; holds its shape well when sliced
  • Thai eggplant - small, round, and firm; used whole in Southeast Asian curries, with a notably more bitter edge

All share the same defining characteristic: white, spongy flesh with small edible seeds that becomes progressively creamier as heat is applied.

What Does Eggplant Taste Like?

eggplant - What Does Eggplant Taste Like

Raw eggplant tastes mild with a faint bitterness, most noticeable near the seed pockets. That bitterness softens significantly once heat is applied.

Roast it at high heat and the flavor shifts into something richer - earthy and umami-forward, closer to roasted mushrooms than anything else in the produce aisle. Grill it and you get a smoky, slightly sweet edge on top of that same earthiness.

Sensory SnapshotMild Intensity
👅 Flavor
mildly sweetslightly bitterumami (roasted)
✋ Texture
spongy rawsilky cooked
👃 Aroma
earthytoasty

The texture shift matters as much as flavor. Cooked correctly, the flesh becomes almost creamy - a quality that makes it work so well in dips like baba ganoush or as a layering element in moussaka.

Undercooked, it stays spongy and slightly unpleasant.

Watch Out
Eggplant won't turn silky unless it reaches full tenderness. Pull it too early and you get a rubbery, sponge-like texture that no sauce will fix.

How to Use Eggplant

Eggplant earns its place across more cuisines than almost any other vegetable, largely because its neutral base flavor adapts to bold seasonings without fighting back.

Mediterranean cooks lean on olive oil, garlic, and tomato; South Asian cooks use it with cumin, turmeric, and chili; East Asian cooks pair it with soy, sesame, and ginger.

The key is matching the cooking method to what you want the eggplant to do.

How Eggplant Is Used
MethodBest ForTip
🔥 RoastingBaba ganoush, dips, saladsRoast whole directly over flame or under broiler for smoky flesh
🍳 Pan-fryingMoussaka layers, caponataSalt slices first to draw out moisture before frying
🥘 BraisingBaingan bharta, curries, ratatouilleCut into chunks; let it absorb the cooking liquid fully
🫙 BakingEggplant parmesan, stuffed eggplantPre-bake slices before layering to avoid watery final dish
🥢 Stir-fryingAsian-style dishes with soy and chiliUse Japanese or Chinese varieties; they cook faster and hold shape

Eggplant pairs cleanly with tomato, garlic, tahini, lemon, and olive oil - the backbone of dishes like caponata and baba ganoush. It also takes well to mozzarella and feta, which is why it appears so often in baked Mediterranean preparations.

If you need a swap for a specific recipe, eggplant alternatives depend heavily on whether you need the absorbency, the bulk, or just the mild flavor profile. For side-dish pairing ideas, pairings for caponata covers the full spread.

Try It In
🥗Roasted Eggplant Salad with TahiniHigh heat brings out the umami depth; tahini ties it together→🫙Smoky Baba Ganoush Eggplant DipChar-roasted flesh makes the classic smoky dip→🍆Imam Bayildi Stuffed EggplantA Turkish braised classic that shows eggplant at its silkiest→

How to Buy and Store Eggplant

Pick eggplants that feel firm and heavy for their size, with smooth, glossy skin and a tight, bright-green calyx at the stem. Wrinkled skin, soft spots, or brown scarring all signal an eggplant past its window.

Best Pick
Smaller eggplants - Japanese or Italian varieties - tend to have fewer seeds, thinner skins, and a sweeter flavor than large globe types. Reach for them when cooking quickly or serving without heavy sauce.

Storage is straightforward once you know eggplant's one sensitivity: ethylene gas. Keep it away from bananas, apples, and other ethylene-producing fruits, which accelerate softening.

  • Room temperature - whole, uncut eggplant keeps 1-3 days on the counter in a cool spot
  • Refrigerator crisper - wrap in a paper bag (not plastic) and store up to 5 days; plastic traps moisture and speeds decay
  • Cut eggplant - use within 1 day; flesh browns quickly once exposed to air

For a full breakdown of timing by variety, the eggplant freshness guide guide covers globe, Japanese, and Italian types separately.

Start Here If You're New to Eggplant

Don't start with eggplant parmesan or moussaka - both require multiple steps and are unforgiving if the eggplant isn't properly cooked first. Start with roasting.

Halve a globe eggplant, brush with olive oil, and roast cut-side down at high heat until completely tender. That single technique shows you exactly how the texture transforms - and the result is side dishes for moussaka territory once you're ready to go further.

Golden Rule
Always cook eggplant to full tenderness. It does not improve with a little more time - it requires it. Undercooked eggplant has a bitter, spongy texture that no seasoning corrects.

Once roasting is easy, move to pan-frying with salted slices, then into braised preparations. The learning curve is short once you understand what heat does to the flesh.

Frequently Asked Questions

Is eggplant a vegetable or a fruit?

Botanically it's a fruit - specifically a berry that develops from the plant's flower. Every cuisine treats it as a vegetable, however, because its flavor and texture behave like one in savory cooking.

Why do you salt eggplant before cooking?

Salting draws out moisture so the eggplant fries or sautés instead of steaming in its own liquid. It also firms the flesh slightly, which helps it hold shape during pan-frying rather than collapsing into mush.

Does eggplant taste bitter?

Modern cultivars are much less bitter than older varieties. Any residual bitterness concentrates near the seeds and softens with heat; salting before cooking reduces it further.

How do you keep eggplant from getting soggy?

Salt sliced eggplant for 20-30 minutes, then pat dry before cooking. For baked dishes like eggplant parmesan, pre-bake or pan-fry the slices first to drive off moisture before layering with sauce.

Can you eat eggplant skin?

Yes - and it's worth keeping. The skin of eggplant contains nasunin, a polyphenol antioxidant that may protect cell membranes. Thin-skinned Japanese and Italian varieties are easiest to eat with skin on; large globe skin can turn chewy when baked.

Beef Pepper Steak Chinese-Style

March 29, 2026

Slicing beef thin against the grain and cooking it fast over high heat keeps flank steak tender. The black pepper and soy sauce build a savory coating that clings to the meat without tasting sticky or sweet.

Beef Pepper Steak Chinese-Style served on a plate

The wok does most of the work. You sear the beef in batches so it browns instead of steaming, then toss everything together at the end.

This works for weeknight dinners when you need something fast that tastes like takeout but costs half as much.

QUICK SUMMARY

Beef Pepper Steak slices flank steak thin against the grain, then stir-fries it with bell peppers and onions in a glossy black pepper sauce. High heat seals the beef and keeps the peppers crisp-tender. Cook the meat in batches so it sears instead of steaming.

⏱️Time: 25 minutes total - 15 prep, 10 cook
🔥Method: Slice beef thin, marinate 20 minutes, stir-fry in batches
⚠️Watch Out: Crowding the pan makes beef steam instead of sear - cook 6 oz at a time

Table of Contents

Toggle
  • Why This Recipe Works
  • What You'll Need
    • Ingredient Details
  • Ingredient Swaps
  • What to Serve With It
  • Store and Reheat
  • Frequently Asked Questions
  • Beef Pepper Steak Chinese-Style
    • Method 
    • Tried this recipe?

Why This Recipe Works

Flank steak stays tender when you slice it ⅛ inch thick against the grain and marinate it with cornstarch. Most people skip soup, but it balances the meal. For a version that comes together quickly, another great soup recipe shows how broth-based dishes round out the plate.

Quick Reference
⏱️
Prep Time
15 min
🔥
Cook Time
10 min
⏰
Total Time
25 min
🍽️
Servings
4 servings
📊
Difficulty
Medium
🏷️
Category
Main Dish
💡
Quick Tip
Cook beef fast on high heat for tenderness
🎯
Best For
Weeknight | Meal prep | Budget

Five reasons this recipe delivers:

  • High-heat stir-frying seals the beef in 2-3 minutes and prevents it from releasing moisture that makes the sauce watery
  • Cornstarch marinade coats each beef slice and creates a velvety texture when the meat hits the hot oil
  • Cooking in batches lets the pan stay hot enough to sear instead of steam, which keeps the beef tender and the edges slightly crisp
  • Adding peppers last preserves their snap - they need only 2 minutes to soften while keeping texture
  • Black pepper heat balances the salty soy sauce and adds a sharp bite that cuts through the richness of the beef
Quick Tip
Freeze flank steak for 20 minutes before slicing so it firms up enough to cut paper-thin slices against the grain.

What You'll Need

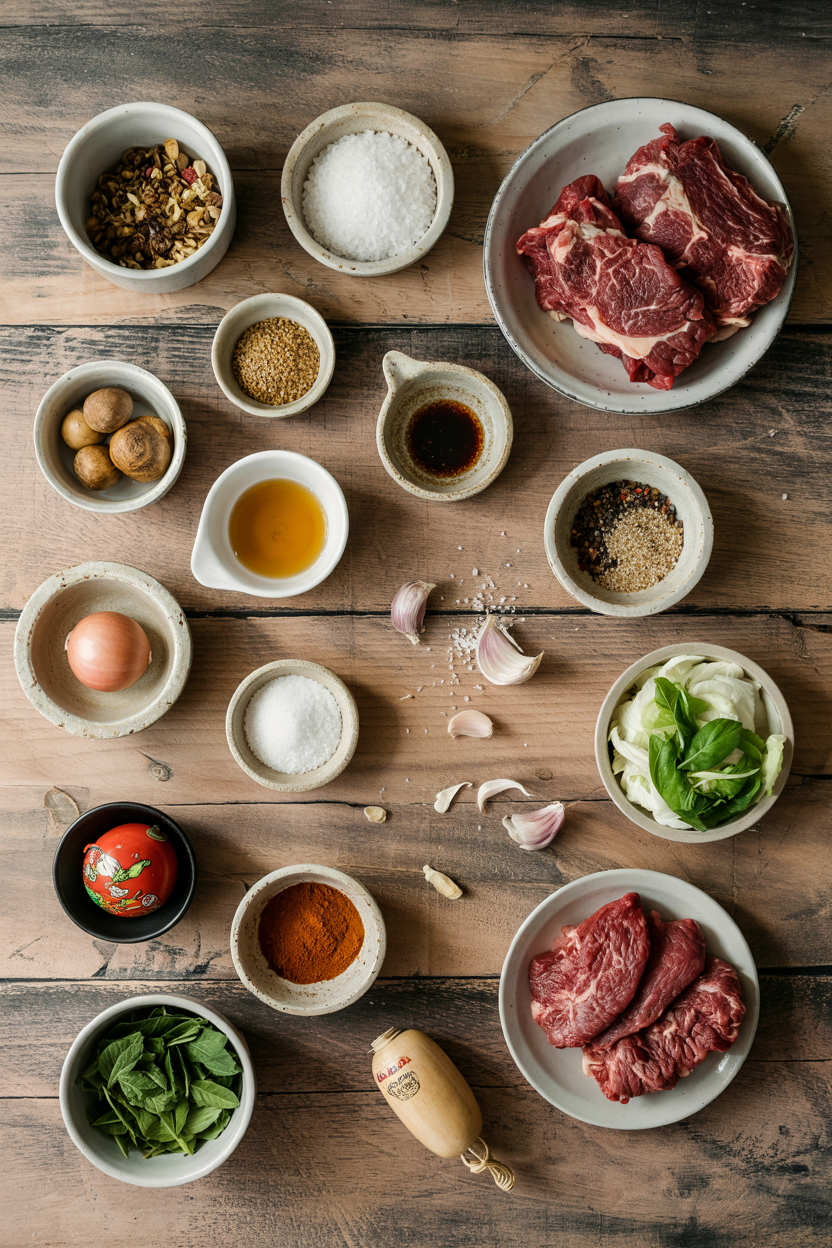
Ingredients for Beef Pepper Steak Chinese-Style

Buy flank steak that's deep red with minimal fat marbling, and slice it yourself for the thinnest pieces. A good gravy can make or break the plate. For a version that comes together quickly, this simple gravy uses similar savory techniques with different cuts of beef.

🥩
Protein
  • 1 lb flank steak (sliced thin against grain)
🫑
Vegetables
  • 2 bell peppers (red, green, or both, sliced)
  • 1 medium onion (sliced)
🥢
Sauce Base
  • 3 tablespoon soy sauce
  • ½ cup beef broth
  • 1 tablespoon cornstarch (plus more for slurry)
  • 2 teaspoon black pepper (freshly ground)
🧄
Aromatics
  • 3 cloves garlic (minced)
  • 1 tablespoon fresh ginger (minced)
  • 2 tablespoon vegetable oil

Ingredient Details

  • Flank steak
    Slice ⅛ inch thick against the grain after freezing 20 minutes - this ensures tender bites instead of chewy strips
  • Black pepper
    Use coarsely ground black pepper or crush whole peppercorns in a mortar - pre-ground loses its punch and tastes flat
  • Soy sauce
    Low-sodium soy sauce lets you control salt levels better than regular, which can make the sauce too salty after reducing
  • Bell peppers
    Slice peppers into 1-inch strips so they cook evenly in 2 minutes - smaller pieces turn mushy, larger ones stay raw
  • Cornstarch
    Mix 1 tablespoon cornstarch with 2 tablespoons cold water before adding to sauce - dry cornstarch clumps immediately
  • Garlic and ginger
    Add aromatics after the oil heats and stir constantly for 30 seconds - they burn fast and turn bitter if left too long
  • Vegetable oil
    Use neutral oil with a high smoke point like canola or peanut - olive oil smokes at stir-fry temperatures and tastes off

Ingredient Swaps

Flank steak works best for texture, but sirloin or skirt steak slice thin and cook just as fast. Rich mains need something to cut through, and gravy does exactly that. We keep a batch ready for nights like this - this simple gravy uses similar techniques with cube steak instead.

Four common swaps:

  • Flank steak → sirloin or skirt steak: Sirloin costs less and stays tender when sliced thin, but has slightly less beefy flavor than flank
  • Soy sauce → tamari: Tamari tastes identical and keeps the recipe gluten-free without changing the sauce texture or saltiness
  • Vegetable oil → avocado or light olive oil: Both handle high heat without smoking, though avocado oil costs more and olive oil adds a faint grassy note
  • Cornstarch → arrowroot powder: Arrowroot thickens the same way but creates a slightly clearer sauce instead of the traditional glossy finish

Fresh Ginger vs Ground Ginger

Works for: Fresh ginger adds bright, zingy heat and pairs perfectly with garlic in stir-fries

Skip if: You only have ground ginger - use ½ teaspoon ground instead of 1 tablespoon fresh, but it tastes more muted

White Pepper vs Black Pepper

Works for: White pepper gives subtler heat and is traditional in Chinese cooking, especially for lighter-colored sauces

Skip if: You want the signature bold pepper bite that defines this dish - black pepper has more punch

Instructions

Marinate the beef for 20-30 minutes while you prep the vegetables, then cook everything in batches over high heat. Potato soaks up every drop of sauce on the plate. For a version that comes together quickly, simple homemade potato works as a side that balances the pepper heat.

  1. Slice and marinate the beef: Cut flank steak against the grain into ⅛-inch slices, then toss with 2 tablespoons soy sauce and 1 tablespoon cornstarch. Let sit 20 minutes at room temperature while you prep vegetables - the cornstarch coats the beef and creates a tender texture.

  2. Prep vegetables and sauce: Slice bell peppers and onion into 1-inch strips, mince garlic and ginger, and mix beef broth with remaining 1 tablespoon soy sauce and 2 teaspoons black pepper. Have everything ready before you start cooking since stir-frying moves fast.

  3. Sear the beef in batches: Heat wok or large skillet over high heat for 2 minutes, add 1 tablespoon oil, then cook half the beef in a single layer for 1-2 minutes per side until browned but still slightly pink inside. Remove to a plate and repeat with remaining beef - don't crowd the pan or the meat steams instead of searing.

  4. Cook vegetables and aromatics: Add remaining oil to the same pan, toss in garlic and ginger, and stir for 30 seconds until fragrant. Add bell peppers and onion, stir-fry 2 minutes until crisp-tender, then pour in the sauce mixture and bring to a simmer.

  5. Thicken sauce and combine: Mix 1 tablespoon cornstarch with 2 tablespoons cold water, pour into simmering sauce while stirring constantly, and cook 1 minute until glossy and thick. Return beef to the pan with any juices, toss everything together for 30 seconds to heat through, and serve immediately over rice.

Watch Out
Don't cook beef longer than 2-3 minutes total or it turns tough and chewy - medium-rare to medium doneness keeps flank steak tender when sliced thin.

What to Serve With It

The savory sauce needs something neutral to soak into, and steamed rice does that without competing with the black pepper heat. The katsu works best when it hits the table at the same time as the main. For a version that comes together quickly, this quick katsu dish adds crispy texture next to tender beef. If you need more hearty beef dinner ideas, that page shows how to build complete steak meals with sides that match.

Side Dish Prep Why It Works How to Serve
Steamed Jasmine Rice Easy Neutral base absorbs the glossy sauce and balances the black pepper heat Spoon beef and vegetables over rice, letting sauce pool at the bottom
Quick Stir-Fried Bok Choy Easy Adds fresh green contrast and cooks in 3 minutes with garlic and soy Serve alongside beef for color and a lighter vegetable option
Garlic Green Beans Easy Crunchy texture complements tender beef, and garlic echoes the aromatics in the sauce Blanch beans 2 minutes, then toss with minced garlic and sesame oil
Simple Cucumber Salad Easy Cold, crisp, and tangy - cuts through the rich sauce and refreshes your palate Slice cucumbers thin, toss with rice vinegar and a pinch of sugar
Vegetable Fried Rice Medium Turns this into a fuller meal with eggs, peas, and carrots mixed into day-old rice Serve beef on top of fried rice so the sauce soaks into the grains

Three ways to serve it:

  • Weeknight plate: Spoon beef and vegetables over steamed jasmine rice with stir-fried bok choy on the side - everything cooks in under 30 minutes
  • Meal prep bowls: Divide rice, beef, and peppers into containers with cucumber salad kept separate until serving so it stays crisp
  • Family dinner: Serve beef family-style in a wide bowl with vegetable fried rice and garlic green beans on separate platters for passing
Best Pick
Steamed jasmine rice soaks up the sauce better than long-grain white rice because it's slightly sticky and clumps together, catching every drop of the glossy black pepper coating.

Store and Reheat

Store beef and vegetables together in a shallow airtight container for up to 4 days in the fridge. Homemade adds the contrast this plate needs, but timing matters. We keep a batch ready for nights like this - smooth creamy dip works as a cold sauce option next to warm leftovers.

Method Time Best For
🍳 Stovetop 5 minutes over medium heat Retaining texture - add 1 tablespoon water to refresh sauce without overcooking beef
📦 Microwave 1-2 minutes at 50% power Quick reheating - stir halfway through to heat evenly, though peppers soften more
🔥 Oven 10 minutes at 300°F Reheating large portions evenly - cover with foil to prevent drying

For best results when storing:

  • Cool beef to room temperature within 30 minutes before refrigerating to prevent bacteria growth and condensation that makes the sauce watery
  • Store rice separately from beef so the rice doesn't absorb all the sauce and turn mushy
  • Freeze portions up to 2 months in freezer-safe containers, but peppers soften more after thawing
  • Reheat only the amount you'll eat since beef gets tougher each time it's reheated
  • Add fresh sliced green onions or cilantro after reheating to brighten flavors that dull in storage

Frequently Asked Questions

Can I use sirloin instead of flank steak for pepper steak?

Yes - sirloin works well when sliced thin against the grain and stays tender with the cornstarch marinade. It costs less than flank steak but has slightly less beefy flavor.

How should I store and reheat leftover beef pepper steak?

Store in an airtight container for 3-4 days in the fridge, or freeze up to 2 months. Reheat on the stovetop over medium heat with 1 tablespoon water to refresh the sauce without overcooking the beef.

How do I know when the beef pepper steak is properly cooked?

Beef should be browned on the outside but still slightly pink inside after 2-3 minutes total cooking time. The sauce should coat the beef and vegetables in a glossy layer without pooling watery liquid at the bottom.

What causes soggy peppers and how can I avoid it?

Overcooking and adding too much liquid early make peppers soggy. Cook peppers only 2 minutes over high heat and add them after the beef so they stay crisp-tender.

Can I make beef pepper steak ahead and reheat later?

Yes - cook the full recipe, cool it quickly, and store up to 4 days. The beef stays tender when reheated gently, though peppers soften slightly compared to freshly cooked.

Beef Pepper Steak Chinese-Style served on a plate

Beef Pepper Steak Chinese-Style

No ratings yet
Beef Pepper Steak features thinly sliced flank steak stir-fried with bell peppers and onions in a savory black pepper sauce. Cooking the beef in batches over high heat seals in juiciness and keeps the peppers crisp-tender for a quick and tender weeknight meal.
Print Recipe Pin Recipe
Prep Time 15 minutes mins
Cook Time 10 minutes mins
Total Time 25 minutes mins
Servings: 4 servings
Course: Main Dish
Cuisine: Chinese
Ingredients Equipment Method Notes

Ingredients
  

  • 1 lb flank steak sliced thin against the grain
  • 2 count bell peppers red, green, or both, sliced into 1-inch strips
  • 1 medium onion sliced
  • 3 tablespoon soy sauce divided
  • 0.5 cup beef broth
  • 2 tablespoon vegetable oil
  • 1 tablespoon cornstarch plus 1 tablespoon more for slurry
  • 2 teaspoon black pepper freshly ground
  • 3 cloves garlic minced
  • 1 tablespoon fresh ginger minced

Equipment

  • Wok or large skillet Used for high heat stir-frying the beef and vegetables

Method
 

  1. Cut flank steak against the grain into ⅛-inch slices. Toss with 2 tablespoons soy sauce and 1 tablespoon cornstarch. Let sit 20 minutes at room temperature while prepping vegetables.
    1 lb flank steak, 3 tbsp soy sauce, 1 tbsp cornstarch
  2. Slice bell peppers and onion into 1-inch strips. Mince garlic and ginger. Mix beef broth with remaining 1 tablespoon soy sauce and 2 teaspoons black pepper. Have all ready before cooking.
    2 count bell peppers, 1 medium onion, 3 cloves garlic, 1 tbsp fresh ginger, 0.5 cup beef broth, 3 tbsp soy sauce, 2 tsp black pepper
  3. Heat wok or large skillet over high heat for 2 minutes. Add 1 tablespoon oil, cook half the beef in single layer for 1-2 minutes per side until browned but still slightly pink. Remove to plate and repeat with remaining beef. Avoid crowding pan.
    2 tbsp vegetable oil, 1 lb flank steak
  4. Add remaining oil to pan. Stir in garlic and ginger, cook 30 seconds until fragrant. Add bell peppers and onion, stir-fry 2 minutes until crisp-tender. Pour in sauce mixture and bring to simmer.
    2 tbsp vegetable oil, 3 cloves garlic, 1 tbsp fresh ginger, 2 count bell peppers, 1 medium onion, 0.5 cup beef broth, 3 tbsp soy sauce, 2 tsp black pepper
  5. Mix 1 tablespoon cornstarch with 2 tablespoons cold water. Pour into simmering sauce, stirring constantly, cook 1 minute until glossy and thickened. Return beef with juices, toss together for 30 seconds to heat through. Serve immediately over rice.
    1 tbsp cornstarch, 1 lb flank steak

Notes

  • Slice beef thin against the grain after freezing 20 minutes for easier cutting and tender texture.
  • Cook beef in batches to avoid steaming and achieve a flavorful sear.
  • Add peppers last and cook briefly to keep them crisp-tender and avoid sogginess.

Tried this recipe?

Let us know how it was!

What Is Creme de Cassis? [Taste, Uses & More]

March 29, 2026

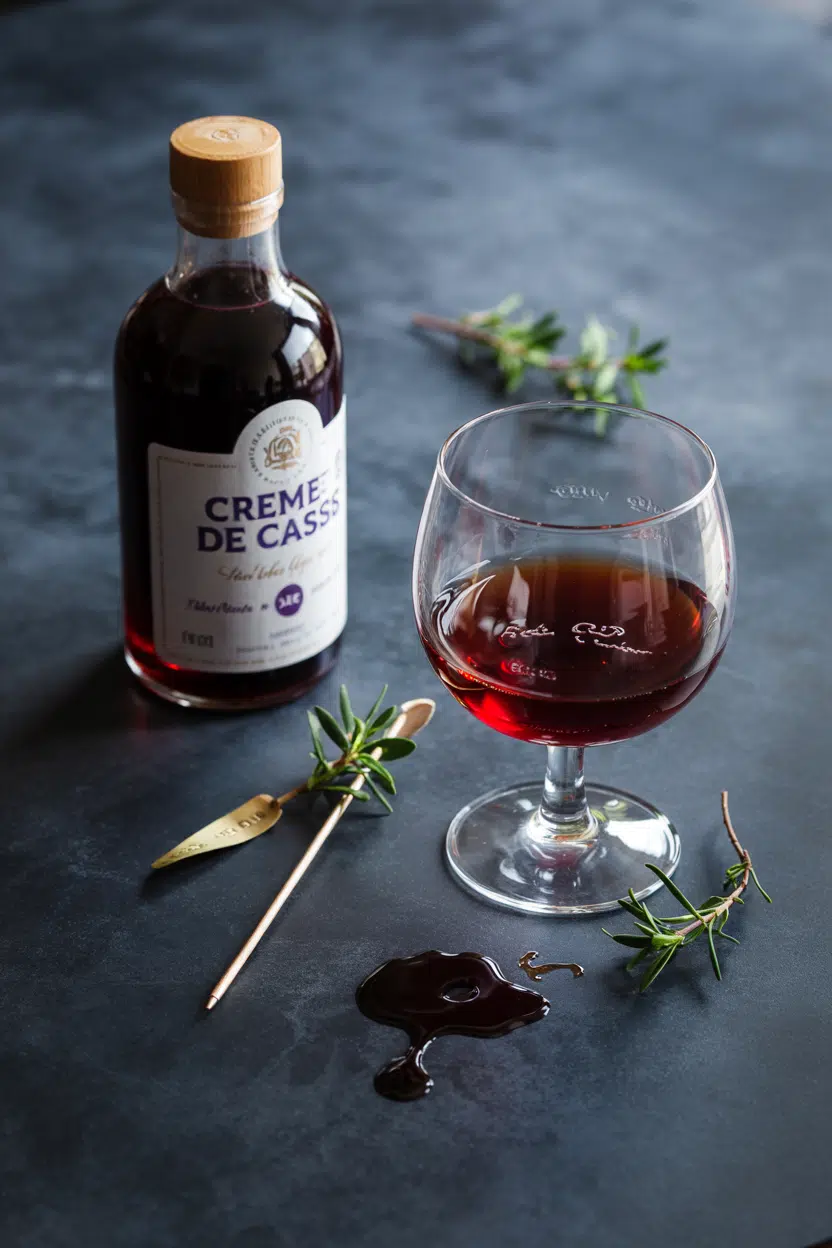
That first pour of crème de cassis into a glass is striking - the liquid is so dark it reads almost black, then settles into a deep ruby once light catches it.

What Is Creme De Cassis

The scent arrives before you even raise the glass: concentrated blackcurrant, faintly floral, with a candied-fruit edge that signals sweetness without apology.

Unlike other fruit liqueurs that lean neutral or boozy, this one tastes unmistakably of its source, the way replacements for amaretto highlight just how much the almond note defines that category.

If benedictine liqueur swaps that work teach anything, it's that a liqueur's character is inseparable from its base ingredient - and cassis proves that point at every sip.

QUICK SUMMARY

Crème de cassis is a sweet blackcurrant liqueur from Burgundy, France. Deep, jammy, and syrupy, it's used most often in cocktails like the Kir and Kir Royale, though it also works in glazes, sauces, and desserts. Opened bottles keep best within one to two years.

🍇Flavor: Deep blackcurrant jam, tangy undertone, dark-fruit richness
🍹Best Use: Cocktail modifier, Kir Royale, glazes, dessert sauces
🏷️Origin: Burgundy, France - made by macerating blackcurrants in neutral spirit
🌡️Intensity: Strong - a small pour carries significant sweetness and color
📦Shelf Life: Unopened for several years; opened best within 1-2 years refrigerated

What Is Crème de Cassis?

Crème de cassis is a blackcurrant liqueur produced by macerating fresh or frozen blackcurrants in a neutral alcohol base, then blending the infusion with sugar syrup.

It originated in the Burgundy region of France, with Dijon historically considered the capital of production - bottles labeled "crème de cassis de Dijon" follow traditional regional standards.

The name translates literally as "blackcurrant cream," though no dairy is involved. "Cream" in French liqueur terminology signals high sugar content, distinguishing the style from drier fruit spirits.

Standard bottles range from roughly 15% to 20% ABV. Higher sugar content pushes the ABV lower and yields a thicker, more syrupy result.

Understanding the role currant plays in European cooking helps explain why the French built an entire liqueur category around the berry - blackcurrants are intensely aromatic and tart, making them ideal for maceration.

  • 🍇 Crème de cassis de Dijon - the benchmark regional style, typically thicker and more concentrated
  • Standard blackcurrant liqueur - widely available outside France, lighter sweetness and ABV may vary
  • Low-alcohol cassis - some producers make reduced-ABV versions for non-spirit mixing

What Does Crème de Cassis Taste Like?

creme de cassis - What Is Creme De Cassis

Crème de cassis tastes like blackcurrant jam that's been thinned and lifted with alcohol - rich, dark, and sweet up front, with a firm tartness underneath that keeps it from reading as flat.

The finish lingers with a slow, syrupy sweetness rather than a clean cut.

Sensory SnapshotStrong Intensity
👅 Flavor
jammytangydark-fruitfloral
✋ Texture
syrupyviscous
👃 Aroma
concentrated blackcurrantcandied-fruitlight floral

Compared to fresh blackcurrants, the liqueur is far sweeter and softer - the raw berry's sharp, almost piney edge is smoothed down by sugar and maceration.

Cassis syrup (the non-alcoholic version) is noticeably sharper; crème de cassis sits between the two in intensity.

Heat concentrates its sugar and deepens the dark-fruit note, which is why reductions for glazes taste even more jammy than a cold pour.

Golden Rule
Use less than you think. Crème de cassis is dense with sugar and color - even a tablespoon dramatically shifts a drink or sauce.

How to Use Crème de Cassis

The Kir is where most bottles begin their life: a splash of crème de cassis stirred into dry white wine, the sweetness of the liqueur offsetting the wine's acidity.

Swap the wine for Champagne and you have a Kir Royale, one of the most widely recognized French aperitifs.

Both drinks use roughly one part cassis to five or six parts wine.

Beyond cocktails, it functions as a dark-fruit modifier in gin sours, bourbon smashes, and brandy-based drinks - adding color, sweetness, and depth without overpowering the base spirit.

Bartenders often reach for it the way they'd use a flavored syrup, though its alcohol content means it alters proof.

If a recipe calls for crème de cassis and you're out, swapping out creme de cassis covers the closest alternatives across both cocktail and cooking contexts.

For reference, swapping out triple sec follows a similar logic - orange liqueurs and cassis both serve as sweet modifiers, just with different fruit profiles.

In the kitchen, the uses extend further than most people expect.

How Crème de Cassis Is Used
MethodBest ForTip
🍹 Cold/StirredKir, Kir Royale, cocktails, drizzles over ice creamAdd after building the drink - stir gently to layer color
🔥 ReducedPan glazes for duck, pork, and game birdsReduce slowly on low heat; high heat scorches the sugar fast
🥣 FoldedPanna cotta, sorbet base, vinaigretteAdd at the end - heat dulls the bright berry aroma
🍑 MaceratingSoaking fruit for tarts, pavlovas, and cheese boardsMix with a little lemon juice to keep fruit from going too sweet

Crème de cassis pairs particularly well with goat cheese and aged hard cheeses, where its sweetness contrasts the salt and funk.

It also works in a homemade lemon vinaigrette - a few drops alongside the acid add fruit depth without making the dressing taste like dessert, which is how it connects to a recipe like this Lemon Vinaigrette Dressing (Homemade).

Try It In
🥗Lemon Vinaigrette Dressing (Homemade)A small splash of cassis adds dark-fruit depth to the acid base→🍅Roasted Garlic Marinara SauceTry a small pour in the reduction for layered fruit-tomato richness→🧈Roasted Garlic Béarnaise SaucePair alongside duck glazed with cassis for a full Burgundy-style plate→

How to Buy and Store Crème de Cassis

Start with bottles labeled "crème de cassis de Dijon" - these meet traditional Burgundy production standards and tend to have more concentrated blackcurrant flavor.

Before buying, shake the bottle gently; a thicker pour against the glass indicates higher sugar content and a more syrupy result.

Watch Out
Don't confuse crème de cassis with cassis syrup (sirop de cassis) - the syrup contains no alcohol and tastes sharper. They're not interchangeable in cocktails.

Check the ABV and sugar content when comparing bottles. Lower ABV usually means more sugar and a heavier texture, which suits dessert applications.

Higher ABV versions carry more complexity and work better in spirit-forward cocktails.

  • Unopened - store in a cool, dark place; lasts several years without quality loss
  • After opening - refrigerate upright to slow oxidation; best flavor within 1-2 years
  • Signs of decline - color fading from black-ruby to brownish, flat aroma, muted sweetness

For a full breakdown of timing and what changes with age, creme de cassis's shelf life covers the specifics in detail.

It's also worth noting that the high sugar content functions as a natural preservative - similar to how sugar's shelf life extends far beyond most pantry staples because microbes struggle to grow in concentrated sugar environments.

Start with One Bottle, One Drink

Crème de cassis is not a one-trick ingredient, however it earns its place fastest in a glass. Mix one part cassis with five parts dry white wine - that's a Kir, and it takes thirty seconds.

From there, the bottle opens into glazes, desserts, and sauces at your pace.

Best Pick
For first-time buyers: choose a crème de cassis de Dijon in the 16-18% ABV range. It's concentrated enough for cocktails and not so sweet it overwhelms food applications.

Buy one mid-range Burgundy bottle before experimenting with cheaper supermarket versions. The blackcurrant character is noticeably stronger, and the difference matters when cassis is the main flavor in a drink.


Frequently Asked Questions

Is crème de cassis a liqueur or a syrup?

It's a liqueur - it contains alcohol, typically 15-20% ABV. Cassis syrup (sirop de cassis) is the non-alcoholic version and tastes sharper. The two aren't interchangeable in cocktails, though the syrup works as a stand-in in cooking.

How sweet is crème de cassis compared to other liqueurs?

Very sweet - it's among the higher-sugar liqueur styles. A standard bottle contains around 350-400g of sugar per liter, more than most triple secs or amarettos. Lower ABV bottles skew even sweeter.

Can crème de cassis be cooked?

Yes, and it reduces well into glazes and pan sauces. Keep heat low - its sugar burns quickly at high temperatures. Add it off-heat when finishing a sauce to preserve the bright berry aroma.

What is the difference between cassis and blackcurrant syrup?

Cassis syrup has no alcohol and a sharper, less complex flavor. Crème de cassis gains depth from maceration and alcohol, which extract more aromatic compounds from the berry. Flavor intensity also differs - cassis liqueur is richer and more rounded.

Does crème de cassis need to be refrigerated after opening?

Refrigeration isn't strictly required - sugar and alcohol prevent spoilage - however cold storage slows oxidation and preserves the blackcurrant aroma significantly longer. Bottles kept at room temperature after opening tend to lose brightness within months.

Baked Cottage Cheese Egg Squares

March 29, 2026

Mixing eggs with cottage cheese and baking them in a square pan creates a firm-edged, tender breakfast that slices clean and holds up for days. The cottage cheese keeps the center moist while the oven sets the structure. You don't need to flip or babysit-just mix, pour, and bake.

Baked Cottage Cheese Egg Squares served on a plate

This works for meal prep when you need grab-and-go protein that tastes like you tried.

QUICK SUMMARY

Baked cottage cheese egg squares bake in one pan at 350°F for 25-30 minutes. The cottage cheese adds moisture and protein while eggs and flour create structure. Use full-fat cottage cheese and drain vegetables well to avoid sogginess.

⏱️Time: 35-40 minutes total, most of it hands-off baking
🔑Key Move: Fold batter gently-no stirring or beating after mixing
⚠️Watch Out: Soggy centers happen when vegetables aren't drained; squeeze them dry first

Why This Recipe Works

The cottage cheese works best when it hits the table at the same time as the main. For a version that comes together quickly, another great lox recipe uses similar morning-friendly timing.

Quick Reference
⏱️
Prep Time
10 min
🔥
Cook Time
25-30 min
⏰
Total Time
35-40 min
🍽️
Servings
6
📊
Difficulty
Easy
🏷️
Category
Breakfast | Brunch
💡
Quick Tip
Do not overmix batter-fold gently for fluffier texture
🎯
Best For
Weeknight | Meal prep | Brunch

Five reasons this recipe delivers:

  • Baking powder leavens the batter so squares puff slightly instead of cooking flat and dense
  • Full-fat cottage cheese adds moisture and tang without making the texture wet or heavy
  • Whisking eggs separately for 30 seconds incorporates air before folding in dry ingredients for lighter texture
  • A knife inserted in the center comes out clean when the eggs are fully set but not overcooked
  • Firm edges with a tender center happen when you bake at 350°F and avoid opening the oven early
Quick Tip
Let the batter rest 5 minutes before baking so the flour hydrates fully and the texture sets evenly.

What You'll Need

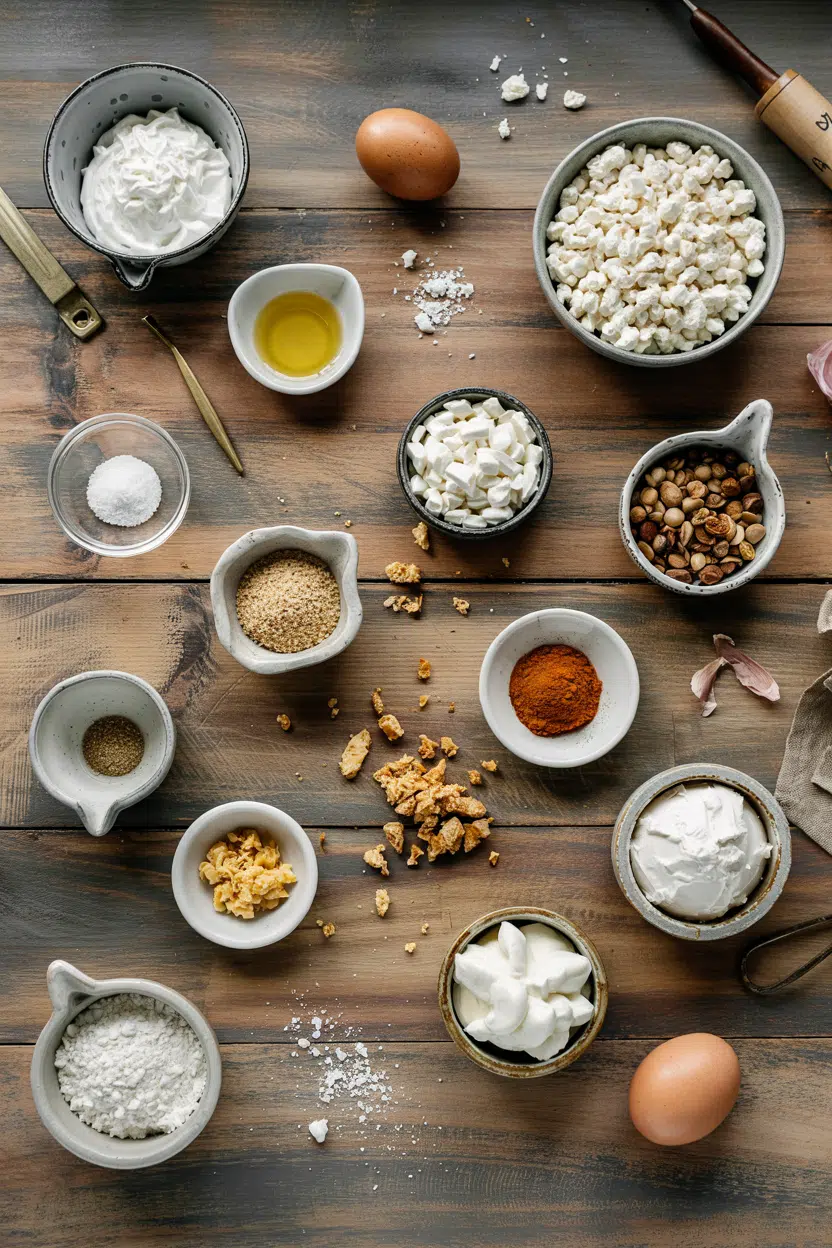
Ingredients for Baked Cottage Cheese Egg Squares

Most people skip measuring flour correctly, but it balances the meal. We keep a batch ready for nights like this-easy basket side uses similar breakfast timing.

🥚
Eggs & Dairy
  • 6 large eggs
  • 1 cup cottage cheese (full-fat)
  • ¼ cup milk
  • ½ cup grated cheese (optional)
🌾
Dry Ingredients
  • ¾ cup all-purpose flour
  • 1 teaspoon baking powder
  • ½ teaspoon salt
  • ¼ teaspoon black pepper
🌿
Herbs & Vegetables
  • 2 tablespoon chopped parsley or chives
  • ½ cup vegetables (spinach, bell peppers-optional)

Ingredient Details

  • Eggs
    Use room temperature eggs-they mix more evenly and help the batter rise
  • Cottage Cheese
    Full-fat cottage cheese keeps the squares moist; low-fat versions dry out during baking
  • All-Purpose Flour
    Level flour with a knife after spooning into the measuring cup to avoid dense texture
  • Baking Powder
    Fresh baking powder (under 6 months old) gives better rise and lighter texture
  • Milk
    Milk thins the batter just enough to pour easily but not so much that it becomes watery
  • Vegetables
    Squeeze spinach or peppers in a towel for 1-2 minutes to remove excess liquid before adding
  • Herbs
    Fresh herbs add brighter flavor than dried; use 1 tablespoon dried if that's what you have

Ingredient Swaps

A good swap can make or break the plate. For a version that comes together quickly, classic salad dish uses similar fresh herbs.

Four swaps that work:

  • All-purpose flour → gluten-free flour blend: Slightly denser texture but no gluten flavor change; use 1:1 ratio
  • Milk → unsweetened almond or oat milk: Little flavor change and thins batter similarly for dairy-free option
  • Cottage cheese → ricotta cheese: Creamier texture and milder flavor; you may need 1-2 tablespoons less milk
  • Grated cheese → nutritional yeast: Adds tangy cheese flavor without dairy but drier texture; use 3 tablespoons

Gluten-Free Flour Blend

Works for: Celiac or gluten sensitivity; similar rise with slight density increase

Skip if: You want the lightest possible texture or don't have xanthan gum in the blend

Ricotta Cheese

Works for: Creamier, milder flavor; easier to find than cottage cheese sometimes

Skip if: You want the tangy cottage cheese flavor or a firmer texture

Instructions

Rich mains need something to cut through, and eggs do exactly that. For a version that comes together quickly, this creamy homemade uses similar breakfast-friendly timing.

  1. Preheat oven to 350°F and grease an 8x8-inch baking dish with butter or line with parchment paper for easy removal after baking.
  2. Whisk eggs in a mixing bowl for 30 seconds until slightly frothy, then stir in cottage cheese, milk, salt, and black pepper until just combined.
  3. Fold in flour and baking powder gently using a spatula, stopping as soon as no dry streaks remain-overmixing creates tough texture.
  4. Stir in herbs, grated cheese, and drained vegetables if using, then pour batter into prepared dish and smooth the top lightly.
  5. Bake 25-30 minutes until center is set and a knife inserted comes out clean; edges should be lightly golden and pulling away slightly from the pan.
Golden Rule
Never open the oven door before 20 minutes-temperature drops cause uneven rising and soggy centers.

What to Serve With It

Cool and crunchy sides reset your palate between bites. If you need more poached eggs meal planning ideas, that guide covers similar breakfast pairings.

Side Dish Prep Why It Works How to Serve
Simple green salad Easy Adds light freshness and crunch to balance the rich egg texture Toss greens with lemon vinaigrette and serve on the side
Roasted potatoes Medium Complements with hearty texture and soaks up any leftover egg Roast cubed potatoes at 400°F for 25 minutes until crispy
Steamed asparagus Easy Offers balanced, fresh vegetable contrast without heaviness Steam 4-5 minutes, drizzle with olive oil and lemon juice
Whole grain toast Easy Provides crunch and carbs for fullness on meal-prep mornings Toast bread, spread with butter or avocado, slice in half
Fresh fruit platter Easy Balances savory with natural sweetness for brunch spreads Slice mixed berries, melon, and citrus, arrange on platter

Three ways to serve it:

  • For weeknight breakfasts: Pair with roasted potatoes and steamed asparagus for a balanced plate
  • For brunch hosting: Serve with smoked salmon, avocado slices, and fresh fruit for variety
  • For meal prep: Slice into squares, store in containers, and reheat with a simple green salad each morning
Best Pick
Herb yogurt sauce adds light tang that complements the egg and cheese without overpowering the dish.

Store and Reheat

Potatoes soak up every drop of sauce on the plate. We keep a batch ready for nights like this-classic potatoes dish uses similar make-ahead timing.

Method Time Best For
🔥 Oven 10-12 min at 325°F Retaining texture and even reheating without softening edges
📦 Microwave 1-2 min on medium power Quick reheating but may soften edges slightly
🍳 Stovetop 3-4 min covered in skillet on low Crispy bottom restoration with gentle heat

For best results when storing:

  • Cool completely before storing to prevent condensation that makes the squares soggy
  • Store in shallow airtight containers in the fridge for 3-4 days; stack with parchment between layers
  • Freeze individual squares wrapped in plastic then placed in freezer bags for up to 2 months
  • Reheat from frozen by adding 2-3 minutes to oven time or microwaving on defrost first
  • Avoid reheating more than once as texture becomes rubbery and dry with repeated heating

Frequently Asked Questions

Can I use ricotta instead of cottage cheese?

Yes-ricotta creates a creamier texture with milder flavor. You may need 1-2 tablespoons less milk since ricotta is smoother than cottage cheese.

How do I store and reheat baked cottage cheese egg squares?

Store in the fridge for 3-4 days in an airtight container. Reheat in the oven at 325°F for 10-12 minutes or microwave 1-2 minutes on medium power.

What is the ideal internal temperature or visual cue for doneness?

Insert a knife in the center-it should come out clean or with moist crumbs. The edges should be lightly golden and pulling away slightly from the pan.

Why are my baked egg squares soggy and how can I fix it?

Excess liquid from vegetables or too much milk causes sogginess. Squeeze vegetables dry for 1-2 minutes and measure liquids accurately next time.

Can I double the recipe or freeze leftovers?

Yes-double the recipe and use a 9x13-inch pan, adding 5-10 minutes to baking time. Freeze individual squares wrapped in plastic for up to 2 months.

Baked Cottage Cheese Egg Squares served on a plate

Baked Cottage Cheese Egg Squares

No ratings yet
Baked Cottage Cheese Egg Squares blend cottage cheese and eggs baked in a single pan for a tender, moist breakfast that slices clean and holds up well for days. The cottage cheese adds moisture and protein while the eggs and flour provide structure, making it ideal for meal prep or grab-and-go mornings.
Print Recipe Pin Recipe
Prep Time 10 minutes mins
Cook Time 30 minutes mins
Total Time 40 minutes mins
Servings: 6 servings
Course: Breakfast, Brunch
Cuisine: American
Ingredients Method Notes

Ingredients
  

  • 6 large eggs use room temperature eggs
  • 1 cup cottage cheese full-fat for moisture
  • 0.25 cup milk
  • 0.5 cup grated cheese optional
  • 0.75 cup all-purpose flour level after spooning
  • 1 teaspoon baking powder fresh under 6 months
  • 0.5 teaspoon salt
  • 0.25 teaspoon black pepper
  • 2 tablespoon herbs chopped parsley or chives; fresh preferred
  • 0.5 cup vegetables optional, spinach or bell peppers; drained

Method
 

  1. Preheat oven to 350°F and grease an 8x8-inch baking dish with butter or line with parchment paper for easy removal.
  2. Whisk eggs in a mixing bowl for 30 seconds until slightly frothy, then stir in cottage cheese, milk, salt, and black pepper until just combined.
    6 large eggs, 1 cup cottage cheese, 0.25 cup milk, 0.5 tsp salt, 0.25 tsp black pepper
  3. Fold in flour and baking powder gently using a spatula, stopping as soon as no dry streaks remain to avoid tough texture.
    0.75 cup all-purpose flour, 1 tsp baking powder
  4. Stir in herbs, grated cheese, and drained vegetables if using, then pour batter into prepared dish and smooth the top lightly.
    2 tbsp herbs, 0.5 cup grated cheese, 0.5 cup vegetables
  5. Let the batter rest for 5 minutes to hydrate the flour fully before baking.
  6. Bake for 25-30 minutes until center is set and a knife inserted comes out clean; edges should be lightly golden and pulling away slightly from the pan.

Notes

  • Do not overmix the batter; fold gently for a fluffier texture.
  • Drain vegetables well to avoid soggy centers.
  • Never open the oven door before 20 minutes to ensure even rising and avoid sogginess.

Tried this recipe?

Let us know how it was!

How Long Does Chocolate Chips Last? [Storage Guide]

March 29, 2026

Storing chocolate chips in a loosely resealed bag - then reaching in right from the fridge - is the single habit that ruins more chips than any other.

Can You Freeze Chocolate Chips

That condensation hit triggers sugar bloom, leaving chips chalky and clumped, which is why the container and the process matter equally.

Much like the salmon freezer burn guide shows for fish, packaging choices make or break long-term quality.

Done right, chocolate chips outlast almost every other baking staple in your pantry.

QUICK SUMMARY

Unopened chocolate chips last up to 12 months in the pantry. Once opened, fridge storage extends that to 12 months and freezer storage to 24 months - provided chips stay sealed and airtight at every stage.

🏠Pantry (unopened): Up to 12 months in a sealed bag away from heat
🧊Fridge (opened): 6-12 months in a rigid airtight container with a date label
❄️Freezer (opened): 12-24 months double-wrapped; thaw sealed to room temp before opening

How Long Do Chocolate Chips Last?

Shelf life for chocolate chips depends more on packaging and environment than on the chips themselves.

An unopened bag in a cool pantry can comfortably reach 12 months, and best-by dates on bags are often conservative - manufacturers build in margin.

Once the bag is open, exposure to air, moisture, and ambient heat all accelerate fat oxidation in the cocoa butter. Semisweet chips hold up slightly better than milk or white chocolate chips because lower milk-fat content means slower rancidity.

Chocolate Chips Shelf Life
MethodStateDurationNotes
🏠 PantryUnopened12 monthsOriginal sealed bag; store away from heat and sunlight
🏠 PantryOpened6 monthsReseal in an airtight container; limit moisture and odors
🧊 FridgeOpened6-12 monthsAirtight container; bring to room temp before opening
❄️ FreezerOpened12-24 monthsDouble-wrapped; quality declines gradually past 24 months

White chocolate chips carry the shortest effective window because they lack cocoa solids and rely entirely on milk fat, which goes rancid faster. Understanding the taste of chocolate chips across types helps explain why each variety responds differently to aging.

How to Store Chocolate Chips

The pantry works for short-term storage, but only if conditions are right. Chips sitting on top of the oven or near a warm appliance soften, develop fat bloom, and lose their snap - even before you open the bag.

Golden Rule
Keep chips below 70°F and away from odor sources. Chocolate absorbs surrounding smells fast - store it nowhere near onions, spices, or anything pungent.

Here's how to apply that across each method:

  • Pantry: Transfer opened chips to an airtight container or vacuum bag immediately; original bags rarely reseal well enough to block moisture long-term.
  • Fridge: Use a rigid airtight container plus a secondary zip-top bag to reduce condensation risk; label with the date and chip type (semisweet, milk, or white).
  • Counter jar: Keep a small working supply of frequently used chips at room temp, then store the bulk quantity in the fridge or freezer - don't leave a half-full bag sitting out for weeks.

Just as storing sugar correctly means protecting it from humidity, chips need the same discipline - moisture is the enemy of both.

Can You Freeze Chocolate Chips?

Yes - and for anyone baking infrequently or buying in bulk, freezing is worth doing. Properly frozen chips retain quality for 12-24 months, and the process is straightforward.

Shortcut
Freeze chips in portion-sized bags so you pull only what a recipe needs. No thawing the whole batch for two tablespoons.
  1. Bag and seal - Move chips to a heavy-duty freezer bag or vacuum-seal pouch; squeeze out every bit of air before sealing.
  2. Double-wrap - Place the sealed bag inside a rigid freezer container or wrap tightly in foil to guard against **freezer burn**.
  3. Label clearly - Mark the date and chip type (semisweet, milk, white) so you don't mix them up months later.
  4. Freeze flat - Lay bags flat for compact stacking; they freeze solid within a few hours.
  5. Thaw sealed - Transfer the sealed package to the fridge for several hours or overnight, then bring to room temperature while still sealed before opening to prevent condensation.

One texture note: chips may develop slight surface bloom after thawing - that white film is cosmetic, not spoilage. They'll still melt and bake normally.

If chips have degraded in flavor from extended freezing, chocolate chips swaps that work can fill the gap rather than using stale product in a recipe.

Signs Chocolate Chips Has Gone Bad

Most chocolate chip spoilage is misread, not missed.

The white or gray film that alarms so many bakers is usually fat bloom (cocoa butter separating to the surface) or sugar bloom (moisture dissolving then recrystallizing sugar) - neither is a food-safety problem.

Signs It's Gone Bad
👀
VisualWhite or grayish dusty film (bloom) · Fuzzy mold spots from moisture exposure · Visible clumping or wet patches
👃
SmellRancid or sour odor · Cardboard-like smell from fat oxidation · Stale or off cocoa aroma
✋
TextureChalky or gritty mouthfeel · Sticky or clumped chips from moisture

The smell test settles most questions. A rancid or cardboard odor means fat oxidation has progressed too far - no amount of heat will fix it.

If chips smell and taste normal but show bloom, use them in melted applications or baked goods without concern.

Watch Out
Mold is rare on dry chips but real - any fuzzy spots mean moisture got in. Discard the batch. Don't taste-test around visible mold.

Keep More, Waste Less

Applying a few consistent habits eliminates almost all chocolate chip waste. These are the ones that make the biggest difference:

  • Portion before freezing - Divide bulk bags into recipe-sized portions so you pull only what you need and the rest stays sealed.
  • Bring to room temp sealed - Whether from fridge or freezer, always warm chips in their sealed container before opening to block condensation.
  • Label by type and date - Semisweet, milk, and white chips behave differently in recipes; mislabeling costs you a batch.
  • Avoid warm storage spots - Keep chips away from the stove, direct sunlight, or any appliance that radiates heat.

Similar discipline applies elsewhere in the kitchen - knowing how long butter keeps under the same fridge and freezer logic helps build consistent storage habits across baking staples.

Frequently Asked Questions

Do chocolate chips go bad if they have white on them?

Not necessarily. A white or grayish film is usually fat bloom or sugar bloom - cosmetic issues caused by temperature swings or moisture, not spoilage. Smell and taste the chips; if both are normal, use them.

Can you use bloomed chocolate chips in baking?

Yes. Bloom doesn't affect how chips melt or bake. Use bloomed chips in cookies, brownies, or ganache without any adjustment - the discoloration disappears once melted.

Should I refrigerate chocolate chips to keep them fresh?

For opened chips you won't use within a few weeks, yes - the fridge extends life to 6-12 months. The catch is condensation: always store in a fully airtight container and warm to room temp while sealed before opening.

Can you freeze chocolate chips and will they melt afterward?

Freezing doesn't damage the melt behavior of chocolate chips. They melt normally in baking or over a double boiler after thawing - just thaw sealed to prevent surface condensation that causes sugar bloom.

How long do white chocolate chips last compared to semisweet?

White chocolate chips have a shorter effective shelf life because they contain no cocoa solids - only milk fat and cocoa butter, both of which oxidize faster. Expect 6-9 months in the pantry versus up to 12 months for semisweet.

What Is Drambuie? [Taste, Uses & More]

March 29, 2026

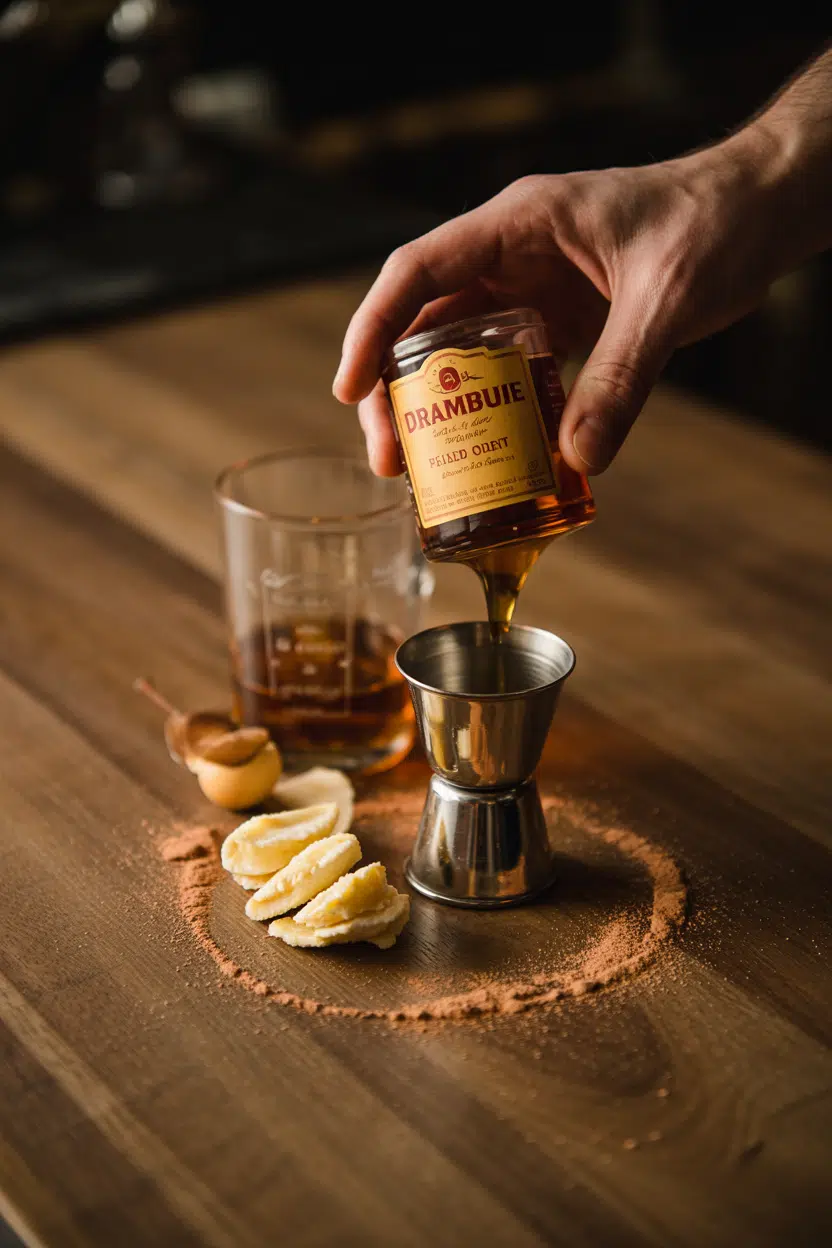
Drambuie does something no plain Scotch or straightforward honey syrup can replicate: it delivers both at once, wrapped in a layer of cinnamon, clove, and heather warmth.

What Is Drambuie

Bartenders reach for it when a drink needs weight and sweetness without losing its spirit backbone, and home cooks use it where a glaze or sauce needs complexity on a single pour.

Unlike orange liqueurs - where cointreau swaps that work give you a clear path if a bottle runs short - Drambuie's layered malt-and-honey profile is harder to replace on the fly.

It sits in a category of its own, closer in spirit to what makes benedictine liqueur distinct than to anything fruit-based.

QUICK SUMMARY

Drambuie is a Scotch whisky liqueur sweetened with heather honey and spiced with herbs, cinnamon, and clove. Golden-amber and syrupy, it's best known in the Rusty Nail cocktail but works equally well in glazes, sauces, and hot drinks.

🍯Flavor: Honeyed malt with warm spice, herbal notes, and faint citrus
🥃Best Uses: Rusty Nail, hot toddies, roasted meat glazes, dessert sauces
🏴󠁧󠁢󠁳󠁣󠁴󠁿Origin: Scotland, with roots in an Isle of Skye recipe
📦Shelf Life: Unopened: many years; opened: best within 2-3 years
⚠️Watch: Contains alcohol and significant sugar; not suitable for those avoiding either

What Is Drambuie?

Drambuie is a whisky-based herbal liqueur produced in Scotland, made from aged Scotch whisky, heather honey, and a proprietary blend of herbs and spices. The name comes from the Scottish Gaelic An Dram Buidheach, meaning "the drink that satisfies."

Its origin story traces to the Isle of Skye in 1746, linked to a recipe allegedly gifted to a Scottish clan by Bonnie Prince Charlie after Culloden.

Whether that legend holds up historically, the liqueur has been commercially produced since 1909 and is now one of the most recognized Scotch-based liqueurs worldwide.

The liqueur sits in a specific subcategory alongside other herb-forward spirit liqueurs - swapping out benedictine liqueur follows a similar logic to finding a Drambuie stand-in, since both rely on a spirit base plus herbal complexity.

You may see it labeled as Drambuie liqueur or Drambuie Scotch liqueur; "drambuie" (lowercase) is a common misspelling but refers to the same product.

  • 🥃 Base spirit - aged Scotch whisky, giving malt and oak character
  • 🍯 Sweetener - Scottish heather honey, not refined sugar
  • 🌿 Botanical blend - herbs and spices including cinnamon, clove, and nutmeg
  • 📍 ABV - 40% alcohol by volume, same as standard whisky

What Does Drambuie Taste Like?

drambuie - What Is Drambuie

Honeyed malt leads on the palate, followed immediately by warm spice - cinnamon and clove come through clearly, with nutmeg sitting underneath. There's a faint citrus peel note at the edges that keeps the sweetness from feeling heavy.

The texture is syrupy and silky, noticeably more viscous than plain Scotch. It tastes closest to a sweetened tawny sherry crossed with a single malt, though nearer in style to other honeyed whisky liqueurs than to brandy or bourbon-based alternatives.

Sensory SnapshotStrong Intensity
👅 Flavor
honeyed maltwarm spiceherbalcitrus peel
✋ Texture
syrupysilky
👃 Aroma
honeyed maltwarm spiceherbal

Heat amplifies the honey note and softens the spice edges - in a hot toddy or warm sauce, the cinnamon recedes and the malt reads sweeter.

Reduced to a syrup, it thickens considerably and the herbal notes concentrate alongside the honey.

How to Use Drambuie

The Rusty Nail is where most people meet Drambuie: two parts Scotch, one part Drambuie, stirred over ice.

It's the cocktail that put the liqueur on bar menus globally, and the ratio is easy to adjust based on how sweet you want the drink.

Beyond cocktails, Drambuie earns its place in the kitchen.

Brushed over roasted pork or ham in the final ten minutes of cooking, it produces a honey-spice glaze with more depth than a plain honey wash.

Stirred into pan drippings with a little butter, it becomes a finishing sauce for game birds or pork chops.

The technique of making compound butter (herb) at home applies directly here - fold a tablespoon of Drambuie into softened butter with a pinch of sea salt and you have a compound butter that melts well over a rested steak.

Golden Rule
Reduce Drambuie by half before adding it to a sauce. Full-strength, it can tip a savory dish too sweet; reduced, the honey and spice integrate cleanly.

For desserts, a small reduction - simmered down with a splash of cream - drizzles over baked apples or panna cotta without clashing. Flambéed with pear or banana, the alcohol burns off and leaves honeyed whisky aroma behind.

How Drambuie Is Used
MethodBest ForTip
🥃 StirredRusty Nail, hot toddy, espresso drinksAdd last; taste as you go - sweetness amplifies cold
🍳 Pan glazePork, ham, root vegetablesBrush in final 10 min to prevent burning
🔥 ReductionDessert syrups, finishing saucesReduce by half; watch closely - honey scorches fast
🍌 FlambéFruit dessertsWarm the liqueur first; ignite off heat
🧈 Compound butterSteaks, roasted veg, warm breadOne tablespoon per 60g butter is enough

Pairings that work reliably: dark chocolate, apricot, roasted apple, aged cheddar, Manchego, ginger, and citrus zest. Avoid using Drambuie with delicate white fish or green salads - the honey-spice weight overwhelms both.

Try It In
🍅Roasted Garlic Marinara SauceA base where a Drambuie reduction adds unexpected depth→🥩Roasted Garlic Béarnaise SauceRicher with a small pour of Drambuie stirred into the finish→🧈Compound Butter (Garlic)Swap or add Drambuie for a honey-spice version→

How to Buy and Store Drambuie

Buy a sealed 700-750 ml bottle from a reputable retailer and check the fill level and cap integrity before purchasing. The liquid should be golden-amber and clear; avoid bottles with cloudy or significantly darkened liquid, which points to poor storage history.

Watch Out
Cloudy Drambuie isn't a style variation - it signals temperature damage or contamination. Don't buy it, and don't use a bottle that has developed cloudiness after opening.

Store upright in a cool, dark pantry or liquor cabinet, cap tightly closed. Unlike wine, Drambuie doesn't need refrigeration - the alcohol and sugar content preserve it well at room temperature.

For a full breakdown of timelines and signs of decline, the guide on how long drambuie keeps covers both opened and unopened bottles in detail.

  • Unopened - lasts many years if stored away from heat and direct light
  • Opened - best within 2-3 years for peak flavor; safe longer if properly sealed
  • Temperature - avoid anywhere above 25°C or subject to swings

Where to Start With Drambuie

If you're new to the bottle, mix a Rusty Nail first - it shows both sides of the liqueur's character without any cooking required.

From there, the glaze route is the easiest kitchen entry point: roasted carrots or a pork tenderloin, a brush in the last ten minutes, done.

If you can't find Drambuie or want a cost comparison, reviewing replacements for drambuie will show which honeyed whisky liqueurs come closest and where they fall short.

Understanding what does single malt mean guide also helps when you're deciding which Scotch to pair alongside it in a Rusty Nail.

Frequently Asked Questions

Is Drambuie whisky or liqueur?

It's a liqueur. Drambuie uses aged Scotch whisky as its base but adds heather honey and herbs, which classifies it as a liqueur, not a straight whisky. The ABV is 40%, the same as most standard whiskies.

What does Drambuie taste like in a cocktail?

In a Rusty Nail, it rounds out the Scotch with honey sweetness and warm spice while keeping the malt character intact. It doesn't read as sugary - the herbal notes balance the honey.

Can you cook with Drambuie?

Yes, and it performs well reduced into glazes or sauces. The honey-spice profile survives moderate heat, though reducing by half before adding to savory dishes prevents over-sweetness.

Is Drambuie gluten free?

Most distilled spirits are considered low in gluten because distillation removes proteins. However, Drambuie is not certified gluten-free, and those with celiac disease should consult their doctor before consuming any barley-based distilled spirit.

How does Drambuie compare to amaretto in cooking?

Amaretto is almond-forward and sweeter; Drambuie is malt-forward with spice and honey. They're not interchangeable, though both suit dessert glazes - if you need to swap amaretto instead, [replacements for amaretto](https://forkliftkitchen.com/amaretto-substitutes/) covers the closest options.

Chicken Pastilla Moroccan-Style

March 29, 2026

You need 80 minutes and a few specialty items, but nothing you can't find at the grocery store. No marinating overnight, no multi-day prep, no advanced pastry skills required.

Chicken Pastilla Moroccan-Style served on a plate

The phyllo dough does the heavy lifting. You layer it with butter, fill it with spiced chicken and almonds, then bake until golden and crackling.

This is what you make for weekend dinners when you want something that feels special without spending all day in the kitchen. Works for entertaining or when you're tired of the same rotation.

QUICK SUMMARY

Moroccan chicken pastilla is a savory pie with crispy phyllo crust, tender spiced chicken, toasted almonds, and eggs. Brush each phyllo layer with butter so the crust crisps without sogginess. The filling needs to simmer 35-40 minutes until the chicken hits 165°F and the liquid reduces.

⏱️Time Reality: 30 min prep, 50 min baking, 10 min rest before slicing
🔪First Critical Move: Sear chicken thighs, then simmer with spices until tender
⚠️Watch Out: Watery filling makes soggy crust - drain well before layering phyllo

Table of Contents

Toggle
  • Why This Recipe Works
  • What You'll Need
    • Ingredient Details
  • Ingredient Swaps
  • What to Serve With It
  • Store and Reheat
  • Frequently Asked Questions
  • Chicken Pastilla Moroccan-Style
    • Method 
    • Tried this recipe?

Why This Recipe Works

High heat and butter-brushed phyllo create a crisp, flaky crust that shatters when you cut into it. For a different take on tender chicken with layers, try this classic chicken dish that uses a quick sear instead of slow simmering.

Quick Reference
⏱️
Prep Time
30 min
🔥
Cook Time
50 min
⏰
Total Time
80 min
🍽️
Servings
6 servings
📊
Difficulty
Involved
🏷️
Category
Main Dish
💡
Quick Tip
Brush phyllo butter for best crispness
🎯
Best For
Entertaining | Weekend meal

Here's what makes it work:

  • Boneless chicken thighs stay tender through the long simmer and don't dry out when you bake the assembled pie
  • Toasted almonds add crunch that contrasts with the moist filling and keeps each bite interesting
  • Eggs bind the filling so it holds together when you slice instead of falling apart on the plate
  • Butter on every phyllo layer creates golden, crackling pastry that doesn't stick or tear during assembly
  • Baking at 350-375°F crisps the phyllo without burning the edges while heating the filling through
Quick Tip
Brush melted butter on each phyllo sheet evenly for crisp texture

What You'll Need

Ingredients for Chicken Pastilla Moroccan-Style

Stock up on phyllo dough and chicken thighs - the rest are pantry spices and basic produce. Skip the specialty store run.

🍗
Chicken
  • 2 lbs boneless, skinless chicken thighs
  • 3 large eggs
🫙
Phyllo & Fat
  • 1 package (16 oz) phyllo dough, thawed
  • 1 cup (2 sticks) butter, melted
🧄
Aromatics & Herbs
  • 1 large onion, finely diced
  • 1 cup fresh parsley, chopped
🌶️
Spices & Extras
  • 2 teaspoon ground cinnamon
  • 1 teaspoon ground ginger
  • ½ teaspoon turmeric
  • 1 cup sliced almonds
  • ¼ cup powdered sugar (optional)
  • Salt and black pepper

Ingredient Details

  • Chicken thighs
    Dark meat stays moist through the simmer and bake; breasts dry out and toughen
  • Phyllo dough
    Keep covered with damp towel while working to prevent drying and tearing
  • Almonds
    Toast in dry skillet 3-5 minutes until fragrant and golden for maximum crunch
  • Butter
    Melt completely before brushing; cold butter tears phyllo and doesn't spread evenly
  • Eggs
    Temper by whisking warm filling into eggs slowly to prevent scrambling
  • Ground cinnamon
    Signature Moroccan spice that balances savory chicken with subtle sweetness
  • Fresh parsley
    Chop finely so it distributes through filling without clumping or bitter stems

Ingredient Swaps

You can adjust proteins and nuts based on what's in the pantry or dietary needs. The phyllo and butter are harder to substitute without changing texture.

Four swaps that work:

  • Chicken thighs → Chicken breasts: Leaner meat cooks faster but risks drying out the filling; check at 165°F and don't overcook
  • Butter → Olive oil or vegan butter: Less rich and slightly less crisp phyllo but keeps it dairy-free
  • Almonds → Walnuts or pecans: Different crunch and flavor profile but still nutty and toasted
  • Phyllo dough → Puff pastry: Richer, flakier crust but heavier and less traditionally Moroccan; bake at 400°F for 35-40 minutes

Rotisserie Chicken

Works for: Saving 40 minutes of cooking time, using leftovers, quick assembly

Skip if: You want the freshest flavor or control over seasoning depth

Puff Pastry Instead of Phyllo

Works for: Richer, flakier crust, easier handling without tearing

Skip if: You want traditional crisp texture or lighter, layered pastry

Instructions

Plan for 30 minutes of hands-on prep and 50 minutes in the oven. The filling needs time to cool slightly before you can layer the phyllo without melting the butter.

  1. Sear and simmer the chicken: Heat 2 tablespoons oil in a large sauté pan over medium-high heat. Season chicken thighs with salt and pepper, then sear 3-4 minutes per side until golden. Add diced onion, cinnamon, ginger, turmeric, and 1 cup water. Cover and simmer 35-40 minutes until chicken reaches 165°F and liquid reduces. Shred chicken with two forks.

  2. Toast almonds and temper eggs: Toast sliced almonds in a dry skillet over medium heat for 3-5 minutes, stirring frequently, until golden and fragrant. Whisk eggs in a bowl. Slowly add ½ cup warm chicken filling to eggs while whisking constantly to temper, then stir egg mixture back into chicken filling. Mix in chopped parsley.

  3. Layer the bottom phyllo: Preheat oven to 375°F. Brush a 9-inch pie dish with melted butter. Lay one phyllo sheet in the dish, brush with butter, repeat with 5-6 more sheets, letting edges hang over sides. Keep unused phyllo covered with damp towel.

  4. Fill and top with phyllo: Spread half the chicken mixture in the phyllo-lined dish. Sprinkle toasted almonds over chicken, then add remaining chicken filling. Fold overhanging phyllo edges over filling. Layer 5-6 more phyllo sheets on top, brushing each with butter, tucking edges into dish sides.

  5. Bake and rest: Brush top phyllo layer generously with remaining butter. Bake 40-50 minutes until phyllo turns golden brown and crisp. Let rest 10 minutes before slicing. Dust with powdered sugar if using.

Golden Rule
Drain chicken filling well and do not overfill phyllo layers

What to Serve With It

This pie needs something fresh and bright to cut through the rich, spiced filling. Most people skip salad, but it balances the meal and gives you a break between bites. For more ways to round out your plate, check out these complete shredded chicken meal ideas that work with similar warm, savory mains.

Side Dish Prep Why It Works How to Serve
Simple green salad Easy Light, refreshing contrast to rich pastilla Toss mixed greens with lemon vinaigrette, serve on the side
Couscous Easy Classic Moroccan pairing, soaks up any filling Steam couscous with butter and herbs, serve warm
Roasted vegetables Medium Adds warmth and earthy sweetness Roast carrots, zucchini, bell peppers at 400°F for 25 minutes
Cucumber yogurt salad Easy Cooling balance to warm spices Mix diced cucumber with Greek yogurt, mint, lemon juice
Moroccan carrot salad Easy Bright, sweet, tangy flavor balance Shred carrots, toss with cumin, lemon, olive oil

Three ways to serve it:

  • For weeknight meals: Pair with simple green salad and warm couscous for a complete Moroccan-style dinner
  • For entertaining: Add cucumber yogurt salad, roasted vegetables, and mint tea for a full spread
  • For casual dinners: Serve with Moroccan carrot salad and warm flatbread for scooping
Best Pick
Cucumber yogurt salad cools and brightens the rich spiced chicken

Store and Reheat

Pastilla holds in the fridge for 3-4 days but the phyllo softens over time. The oven brings back crispness better than stovetop or microwave.

Method Time Best For
🔥 Oven 15-20 min at 350°F Restoring crisp phyllo and warming filling evenly
🍳 Stovetop 5-7 min covered on low heat Quick warm-up but phyllo softens
📦 Microwave 1-2 min Fast reheating but soggy crust likely

For best results when storing:

  • Cool completely before wrapping to prevent condensation that makes phyllo soggy
  • Wrap tightly in foil or store in airtight container to maintain moisture in filling
  • Freeze unbaked pastilla up to 1 month; bake from frozen at 375°F for 60-70 minutes
  • Reheat individual slices in oven at 350°F for 10-12 minutes to crisp edges
  • Store filling and phyllo separately if prepping ahead, then assemble and bake fresh

Frequently Asked Questions

Can I use boneless chicken breasts instead of thighs?

Yes, but breasts cook faster and dry out more easily. Check internal temp at 165°F after 25-30 minutes of simmering, then shred immediately to prevent toughening.

How should I store leftover chicken pastilla?

Cool completely, then wrap tightly in foil or store in an airtight container in the fridge for 3-4 days. Reheat in oven at 350°F for 15-20 minutes to restore crispness.

What internal temperature means chicken pastilla is done?

The chicken filling should reach 165°F during the simmering step before you assemble the pie. The baking step crisps the phyllo and heats everything through, not cooks the chicken.

How do I prevent soggy phyllo crust in chicken pastilla?

Brush each phyllo layer with melted butter and drain the chicken filling well before layering. Excess liquid makes the bottom phyllo soggy and prevents crisping during baking.

Can chicken pastilla be made ahead and frozen?

Yes, assemble the unbaked pastilla, wrap tightly in foil, and freeze up to 1 month. Bake from frozen at 375°F for 60-70 minutes until golden and heated through.

Chicken Pastilla Moroccan-Style served on a plate

Chicken Pastilla Moroccan-Style

No ratings yet
Chicken Pastilla Moroccan-Style is a savory Moroccan pie featuring tender spiced chicken and toasted almonds encased in a crisp, buttery phyllo crust. Brush each phyllo layer with melted butter to achieve a flaky texture while simmering the chicken filling until tender and flavorful.
Print Recipe Pin Recipe
Prep Time 30 minutes mins
Cook Time 50 minutes mins
Total Time 1 hour hr 20 minutes mins
Servings: 6 servings
Course: Main Dish
Cuisine: Moroccan
Ingredients Equipment Method Notes

Ingredients
  

  • 2 lbs chicken thighs boneless, skinless
  • 3 large eggs
  • 16 oz phyllo dough thawed
  • 1 cup butter melted
  • 1 large onion finely diced
  • 1 cup fresh parsley chopped
  • 2 teaspoon ground cinnamon
  • 1 teaspoon ground ginger
  • 0.5 teaspoon turmeric
  • 1 cup sliced almonds
  • 0.25 cup powdered sugar optional
  • salt
  • black pepper
  • 2 tablespoon oil for searing chicken
  • 1 cup water

Equipment

  • large sauté pan Used for searing and simmering chicken
  • Dry skillet Used for toasting almonds
  • 9-inch pie dish Used for layering phyllo and baking

Method
 

  1. Heat 2 tablespoons oil in a large sauté pan over medium-high heat. Season chicken thighs with salt and pepper, then sear 3-4 minutes per side until golden. Add diced onion, ground cinnamon, ground ginger, turmeric, and 1 cup water. Cover and simmer 35-40 minutes until chicken reaches 165°F and liquid reduces. Shred chicken with two forks.
    2 lbs chicken thighs, 1 large onion, 2 tsp ground cinnamon, 1 tsp ground ginger, 0.5 tsp turmeric, 1 cup water, salt, black pepper, 2 tbsp oil
  2. Toast sliced almonds in a dry skillet over medium heat for 3-5 minutes, stirring frequently, until golden and fragrant. Whisk eggs in a bowl. Slowly add ½ cup warm chicken filling to eggs while whisking constantly to temper, then stir egg mixture back into chicken filling. Mix in chopped parsley.
    1 cup sliced almonds, 3 large eggs, 2 lbs chicken thighs, 1 cup fresh parsley
  3. Preheat oven to 375°F. Brush a 9-inch pie dish with melted butter. Lay one phyllo sheet in the dish, brush with butter, repeat with 5-6 more sheets, letting edges hang over sides. Keep unused phyllo covered with damp towel.
    1 cup butter, 16 oz phyllo dough
  4. Spread half the chicken mixture in the phyllo-lined dish. Sprinkle toasted almonds over chicken, then add remaining chicken filling. Fold overhanging phyllo edges over filling. Layer 5-6 more phyllo sheets on top, brushing each with butter, tucking edges into dish sides.
    2 lbs chicken thighs, 1 cup sliced almonds, 1 cup butter, 16 oz phyllo dough
  5. Brush top phyllo layer generously with remaining butter. Bake 40-50 minutes until phyllo turns golden brown and crisp. Let rest 10 minutes before slicing. Dust with powdered sugar if using.
    1 cup butter, 0.25 cup powdered sugar

Notes

  • Drain chicken filling well to avoid soggy phyllo crust.
  • Brush melted butter evenly on all phyllo layers for crispness and easy handling.
  • Cool filling slightly before layering phyllo to prevent melting butter and tearing dough.

Tried this recipe?

Let us know how it was!

How Long Does Cornmeal Last? [Storage Guide]

March 29, 2026

Storing cornmeal in the same cupboard spot regardless of type is one of the most common mistakes home cooks make - and it's how a bag of stone-ground cornmeal turns bitter months before it should.

How Long Does Cornmeal Last

Unlike keeping all purpose flour fresh, cornmeal storage splits sharply by milling method: whole-grain varieties carry live oils that oxidize, while degerminated supermarket bags are far more shelf-stable.

Understanding which type you have changes every decision that follows.

QUICK SUMMARY

Unopened degerminated cornmeal keeps 12-24 months in the pantry. Opened stone-ground cornmeal goes rancid in 3-6 months at room temp - refrigerate or freeze it. Cooked cornbread or polenta lasts 3-7 days refrigerated in an airtight container.

🏠Pantry (unopened): 12-24 months for degerminated; use stone-ground faster
🧊Fridge (opened): 6-12 months; best method for whole-grain varieties
❄️Freezer: 12-24 months; quality best within 12 months for stone-ground
🍞Cooked (fridge): 3-7 days in an airtight container
⚠️Key rule: Stone-ground and degerminated cornmeal behave very differently - label your containers

How Long Does Cornmeal Last?

Shelf life depends almost entirely on whether the germ and bran were removed during milling.

Degerminated cornmeal - the standard supermarket product - has had those oil-rich components stripped out, which is exactly why it keeps so much longer than its stone-ground counterpart.

Stone-ground cornmeal retains the germ, and those natural corn oils oxidize when exposed to heat, light, and air. That oxidation is rancidity, and it develops faster than most pantry cooks expect.

Cornmeal Shelf Life
MethodStateDurationNotes
🏠 PantryUnopened12-24 monthsDegerminated only; cool, dark, dry location
🏠 PantryOpened3-12 monthsStone-ground: 3-6 months; degerminated: up to 12 months
🧊 FridgeOpened6-12 monthsBest method for whole-grain or stone-ground varieties
❄️ FreezerOpened12-24 monthsQuality declines after 2 years; stone-ground best within 12 months
🏠 CounterCooked1-2 days maxCornbread or polenta; mold and bacteria risk
🧊 FridgeCooked3-7 daysAirtight container; 3-4 days for best texture

Masa harina's shelf life follows a similar pattern - the presence of fat-bearing components is always the limiting factor for dried corn products.

How to Store Cornmeal

The pantry works for degerminated cornmeal, but only with the right setup. Transfer opened bags into an airtight, opaque container immediately - thin plastic bags let in moisture, light, and pantry moths with almost no resistance.

Watch Out
Indian meal moths can penetrate thin paper or plastic bags. A sealed glass jar or hard-sided container with a locking lid is the only reliable barrier.

Here's how to handle each method:

  • Pantry - Use an airtight, opaque container in a cool, dark spot away from the stove or oven; degerminated cornmeal only.
  • Fridge - Store opened stone-ground cornmeal in an airtight glass jar or heavy resealable bag with excess air pressed out; label with the date opened.
  • Cooked products - Wrap cornbread tightly or transfer polenta to a sealed container before refrigerating; don't leave either at room temperature beyond two hours.

A practical trick: keep a small working jar on the counter for daily use and store the bulk supply in the fridge or freezer. That way convenience doesn't cost you shelf life.

Can You Freeze Cornmeal?

Freezing is the best long-term option for stone-ground cornmeal, and it works well for degerminated types too. Dry cornmeal handles freezing with almost no texture penalty - the main risk is condensation during thawing, not ice crystal damage.

Golden Rule
Never thaw frozen cornmeal at room temperature inside a sealed bag. Condensation forms on cold meal and creates clumps - or worse, mold in anything cooked afterward.

Follow these steps for best results:

  1. Portion first - Divide into meal-size amounts so you only thaw what you need.
  2. Vacuum-seal or double-bag - Use vacuum-seal bags or heavy-duty freezer bags with all air pressed out; double-bag for storage beyond six months.
  3. Freeze flat and label - Note the date and cornmeal type (stone-ground vs. degerminated); freeze flat to save space.
  4. Thaw correctly - Move the portion to the fridge for 12-24 hours, or use directly from frozen in baking; if thawing in the bag, let it reach room temp briefly before opening to prevent condensation.
  5. Sift before use - Break up any clumps with a sift; toast briefly in a dry pan if the aroma seems faint but not rancid.

The same principle of airtight, odor-free storage that protects keeping vacuum sealed salmon fresh applies here - cornmeal picks up freezer odors quickly without a proper seal.

Signs Cornmeal Has Gone Bad

Dry cornmeal rarely molds, but rancidity is a real and common problem - especially in stone-ground varieties. The signs are specific enough to recognize quickly.

Signs It's Gone Bad
👀
VisualGreasy or clumped meal from oil oxidation · Webbing or small larvae (Indian meal moth) · Mold spots on cooked cornbread or polenta
👃
SmellSharp, bitter, or paint-like rancid odor · Musty or mildewy smell from moisture contamination
✋
TextureOily residue on fingers · Sticky clumps instead of free-flowing grit

Rancid cornmeal won't make you sick in a single bite, however the oxidized oils taste bitter and won't improve with cooking. Don't bake with it hoping the flavor will cook out - it won't.

For comparison, cornstarch spoilage signs are mostly textural; cornmeal's main failure mode is smell.

Getting the Most from Every Bag

Knowing cornmeal's flavor and uses makes it easier to plan quantities and avoid buying more than you'll use before stone-ground varieties turn.

  • 🗓️ Label everything - Write the type (stone-ground vs. degerminated) and date opened; the two behave so differently that guessing will cost you batches.
  • 🔍 Inspect before buying - Check bulk bins and bags for tiny holes or webbing; an **Indian meal moth** infestation can spread through your pantry fast.
  • 🌡️ Match storage to type - Degerminated cornmeal is fine in the pantry; stone-ground should default to the fridge or freezer from day one.
  • 🔄 Have a backup plan - If your cornmeal is past its window, knowing [replacements for cornmeal](https://forkliftkitchen.com/cornmeal-substitutes/) can save a recipe without a last-minute store run.

If polenta is your main use and you're working through a large batch, alternatives to polenta are worth keeping in mind for the days between restocking.

Frequently Asked Questions

How long does stone-ground cornmeal last?

Opened stone-ground cornmeal lasts 3-6 months in the pantry before the germ oils go rancid. Refrigeration extends that to 6-12 months; freezing pushes it to 12 months with minimal quality loss.

Can you use rancid cornmeal in baking?

No. Rancid cornmeal produces a sharp, bitter flavor that survives baking and ruins the finished dish. Discard any bag with a paint-like or musty odor.

Does cornmeal go bad if kept sealed?

Sealed degerminated cornmeal is very shelf-stable and rarely spoils within its 12-24 month window. Sealed stone-ground cornmeal still degrades because the germ oils oxidize slowly even without air exposure - it just takes longer.

How should I store bulk cornmeal?

Divide bulk cornmeal into meal-size portions and vacuum-seal or double-bag each one. Freeze the main supply and keep only a small working amount in a sealed jar in the fridge.

Can cornmeal get freezer burn?

Technically yes, though it shows as flavor loss and faint off-notes rather than the ice-crystal damage seen in wet foods. Double-bagging and pressing out all air before freezing prevents it reliably.

Breakfast Arepas with Cheese

March 29, 2026

Precooked cornmeal arepas often turn out dry or fall apart because home cooks treat them like regular cornbread. The fix is using masarepa (precooked cornmeal) with just enough water to create a pliable dough that holds its shape while frying.

Breakfast Arepas with Cheese served on a plate

Medium heat gives you a crispy golden crust without burning the exterior before the inside cooks through. The cheese melts into pockets of creamy richness while the corn develops a toasted flavor.

Make these for weeknight breakfasts when you want something more substantial than toast but don't have time for complicated recipes. They work cold from the fridge or hot off the pan, and you can prep the dough the night before.

QUICK SUMMARY

Breakfast arepas with cheese are pan-fried cornmeal discs stuffed with melty cheese that cook in 15 minutes. Precooked cornmeal (masarepa) mixed with water forms a dough you shape into thick rounds, then fry until golden. Make these when you need a filling gluten-free breakfast that holds up for meal prep.

⏱️Time Reality: 25 minutes total with 5-10 minute dough rest for better cohesion
🔥Critical Move: Add water gradually to avoid wet or crumbly dough consistency
⚠️Watch Out: High heat burns the outside while leaving raw dough inside - cook on medium only

Table of Contents

Toggle
  • Why This Recipe Works
  • What You'll Need
    • Ingredient Details
  • Ingredient Swaps
  • What to Serve With It
  • Store and Reheat
  • Frequently Asked Questions
  • Breakfast Arepas with Cheese
    • Method 
    • Tried this recipe?

Why This Recipe Works

Masarepa behaves differently than regular cornmeal because it's been cooked and dried before milling, which means it rehydrates into a cohesive dough instead of crumbling. Most people skip potatoes, but it balances the meal. For a version that comes together quickly, this easy potatoes recipe finishes in the air fryer while you shape the arepas.

Quick Reference
⏱️
Prep Time
10 min
🔥
Cook Time
15 min
⏰
Total Time
25 min
🍽️
Servings
4 servings
📊
Difficulty
Easy
🏷️
Category
Main Dish
💡
Quick Tip
Cook on medium heat for crispy, golden crust
🎯
Best For
Weeknight | Meal prep | Family breakfast

Five reasons this works:

  • Gradual water addition - Prevents too-wet dough that falls apart or too-dry dough that cracks when shaped
  • 5-10 minute dough rest - Lets masarepa fully hydrate so discs hold their shape during cooking
  • ½ inch thickness - Ensures the inside cooks through before the outside burns on medium heat
  • Sealed cheese pocket - Pressing edges firmly around cheese prevents leaking during frying
  • Covered pan finish - Traps heat in the last 2 minutes to melt cheese completely without overcooking exterior
Quick Tip
Shape discs about ½ inch thick - thinner arepas cook too fast and stay dense, thicker ones burn outside before cooking through.

What You'll Need

Ingredients for Breakfast Arepas with Cheese

Shop for precooked cornmeal labeled "masarepa" or "harina precocida" in the Latin foods aisle, not regular cornmeal or polenta. A good oatmeal can make or break the plate. We keep a batch ready for nights like this - quick oatmeal dish handles the morning rush when you're making extras.

🌽
Base
  • 2 cups precooked cornmeal (masarepa)
  • 2½ cups warm water
  • 1 teaspoon salt
🧀
Filling
  • 1 cup shredded queso fresco or mozzarella
  • 2 tablespoons butter or vegetable oil (for frying)
🫙
Optional Add-Ins
  • ¼ cup milk (for softer dough)
  • Scrambled eggs (for filling)
  • Diced onions (for sauté)

Ingredient Details

  • Precooked Cornmeal (Masarepa)
    Use only precooked cornmeal labeled "masarepa" - regular cornmeal or polenta won't form cohesive dough and will crumble when shaped
  • Water
    Add warm water gradually in tablespoons after initial mixing to hit soft, pliable consistency that doesn't stick to hands
  • Salt
    Use moderate salt (1 teaspoon per 2 cups masarepa) - too much overpowers cheese, too little tastes flat
  • Cheese
    Fresh queso fresco or mozzarella melts best - aged cheeses turn oily or don't melt fully inside the pocket
  • Butter or Oil
    Use enough fat to lightly coat the pan bottom - too little causes sticking, too much makes greasy arepas
  • Milk (Optional)
    Replace up to half the water with milk for slightly richer, softer dough - whole milk works better than skim
  • Cooking Temperature
    Medium heat (325-350°F) gives crispy golden crust without burning - high heat chars outside while leaving raw dough inside

Ingredient Swaps

Venezuelan arepas traditionally use white masarepa, but yellow masarepa works with a slightly sweeter corn flavor. Rich mains need something to cut through, and homemade does exactly that. For a version that comes together quickly, tangy homemade recipe pairs with arepas when you're serving them for brunch instead of breakfast.

Four swaps that work:

  • Masarepa → polenta or regular cornmeal - Dough texture changes completely and may need extra hydration time or binder like egg; not traditional but gluten-free
  • Queso fresco → mozzarella or Monterey Jack - Both melt well with mild flavor; Monterey Jack adds slight tang, mozzarella is stringier
  • Butter → vegetable or avocado oil - Less rich flavor but still crisps the exterior; avocado oil handles higher heat without smoking
  • Water → milk or plant milk - Creates softer, slightly richer dough; almond or oat milk work for dairy-free version

Queso Fresco

Works for: Authentic flavor, crumbly texture that melts into creamy pockets

Skip if: Can't find it locally - mozzarella substitutes well with slightly different texture

Mozzarella

Works for: Easy to find, melts completely, mild flavor that doesn't overpower corn

Skip if: You want less stringy cheese - queso fresco or Monterey Jack are better

Milk in Dough

Works for: Softer texture, slightly richer flavor, good for kids who prefer milder taste

Skip if: You're keeping it dairy-free or want traditional Venezuelan texture - use water only

Instructions

Cook four arepas at once in a large cast iron skillet, or work in two batches using a standard 10-inch nonstick pan. The coleslaw works best when it hits the table at the same time as the main. For a version that comes together quickly, homemade coleslaw recipe adds crunch when you need contrast on the plate.

  1. Mix the dough: Combine 2 cups masarepa, 1 teaspoon salt, and 2½ cups warm water in a mixing bowl. Stir with your hands until no dry pockets remain, then let rest 5-10 minutes until dough is soft and pliable, not sticky. If dough feels dry or cracks when you press it, add water 1 tablespoon at a time.

  2. Shape the discs: Divide dough into 8 equal portions (about ¼ cup each). Roll each into a ball, then flatten into a disc about ½ inch thick and 3-4 inches wide. Press your thumb into the center to create a shallow pocket, add 2 tablespoons cheese, then fold dough over and seal edges by pressing firmly.

  3. Start frying: Heat 1 tablespoon butter or oil in a nonstick or cast iron skillet over medium heat (about 325-350°F). Place arepas in pan seam-side down, leaving space between each. Cook 5-7 minutes until bottom is golden brown with crispy edges.

  4. Flip and finish: Flip arepas when bottom forms a golden crust that releases easily from pan. Add another ½ tablespoon butter if pan looks dry. Cook second side 5-7 minutes until golden, then cover pan for final 2 minutes to melt cheese completely.

  5. Rest and serve: Transfer cooked arepas to a plate and let rest 2-3 minutes before serving. The exterior stays crispy while the inside sets slightly. Brush with melted butter for extra shine and flavor.

Quick Tip
Flip arepas only when the bottom releases easily from the pan with a light golden crust - forcing them too early tears the dough and creates uneven cooking.

What to Serve With It

Arepas work as the main or as a side to scrambled eggs and bacon for a full breakfast spread. Salad adds the contrast this plate needs, but timing matters. We keep a batch ready for nights like this - something fresh and light balances the richness when you're serving brunch.

Side Dish Prep Why It Works How to Serve
Fried or Scrambled Eggs Easy Adds protein and runny yolk contrasts crispy arepa texture Serve eggs on top or alongside, let yolk soak into arepa
Avocado Slices Easy Creamy texture balances salty cheese and corn Slice ripe avocado, season with salt and lime juice
Black Beans Easy Adds fiber and earthy flavor that complements cheese Warm canned black beans with cumin, serve in small bowl
Fresh Tomato Salsa Easy Bright acidity cuts through rich cheese and butter Dice tomatoes, onion, cilantro; add lime and salt
Coffee or Fresh Juice Easy Traditional Venezuelan breakfast pairing with strong coffee Brew strong coffee or serve orange juice on the side

Three ways to serve it:

  • Weeknight breakfast: Pair with fried eggs and avocado for a filling gluten-free meal that works for meal prep
  • Weekend brunch: Add cilantro-lime crema, black beans, and fresh salsa for a full Latin-style breakfast spread
  • Snack or light meal: Serve arepas alone with hot sauce or garlic aioli for dipping
Best Pick
Fried eggs with runny yolks turn arepas into a complete breakfast - the yolk soaks into the corn and creates a rich sauce without extra work.

Store and Reheat

Cooked arepas keep their crispy exterior better than most cornmeal dishes when stored properly and reheated on the stovetop instead of microwave. Most people skip potatoes, but it balances the meal. For a version that comes together quickly, this easy potatoes recipe rounds out breakfast when you're reheating a batch.

Method Time Best For
🍳 Stovetop 5-7 min over medium heat Restoring crispy crust and melting cheese evenly
🔥 Oven 10 min at 350°F (175°C) Reheating multiple arepas at once without drying out
📦 Microwave 30-45 seconds Quick reheating when you don't care about crispy texture

For best results when storing:

  • Refrigerate in single layer: Place cooled arepas in shallow airtight container separated by parchment paper to prevent sticking; keeps 3-4 days
  • Freeze individually: Wrap each arepa in plastic wrap, then place in freezer bag; freeze up to 2 months
  • Reheat on stovetop: Heat 1 teaspoon butter in pan over medium heat, cook 3-4 minutes per side until crispy and heated through
  • Skip microwave when possible: Microwave makes arepas soggy and rubbery; use only when you're in a rush
  • Thaw frozen arepas first: Let sit at room temperature 20 minutes or refrigerate overnight before reheating for even warming

Frequently Asked Questions

Can I use regular cornmeal instead of precooked masarepa?

No - regular cornmeal or polenta won't form cohesive dough because it hasn't been precooked and dried. Masarepa rehydrates into pliable dough that holds together when shaped and fried, while raw cornmeal stays grainy and crumbles apart.

How do I store and reheat leftover breakfast arepas with cheese?

Refrigerate cooked arepas in an airtight container for 3-4 days, or freeze individually wrapped for up to 2 months. Reheat on the stovetop over medium heat for 5-7 minutes to restore crispy crust - microwave makes them soggy.

What is the best way to tell when arepas are fully cooked?

Look for golden brown crust on both sides that feels firm and slightly crispy when touched. The arepa should sound hollow when tapped and release easily from the pan without sticking, usually after 5-7 minutes per side on medium heat.

Why do my arepas turn out soggy or dry and how to fix?

Soggy arepas come from too much water in the dough or cooking at low heat - add water gradually and cook on medium heat. Dry arepas happen from too little water or overcooking - add water 1 tablespoon at a time until dough is pliable, and remove arepas from heat once both sides are golden.

How many arepas should I make per person for breakfast?

Plan for 2 arepas per person when serving as the main breakfast dish, or 1 arepa per person if you're pairing them with eggs, beans, and other sides. Appetites vary, so make extras for meal prep since they reheat well.

Breakfast Arepas with Cheese served on a plate

Breakfast Arepas with Cheese

No ratings yet
Breakfast arepas with cheese are pan-fried cornmeal discs stuffed with melty cheese that cook in 25 minutes total. Using precooked cornmeal (masarepa) mixed with warm water creates a pliable dough that fries to a crispy golden crust while the cheese melts inside. This gluten-free breakfast is filling and perfect for meal prep or weeknight mornings.
Print Recipe Pin Recipe
Prep Time 10 minutes mins
Cook Time 15 minutes mins
Total Time 25 minutes mins
Servings: 4 servings
Course: Breakfast, Main Dish
Cuisine: Latin American
Ingredients Equipment Method Notes

Ingredients
  

  • 2 cups precooked cornmeal masarepa, also labeled harina precocida
  • 2.5 cups water warm, add gradually for pliable dough
  • 1 teaspoon salt
  • 1 cup cheese shredded queso fresco or mozzarella
  • 2 tablespoons butter or vegetable oil for frying

Equipment

  • Mixing bowl For mixing dough
  • Nonstick or cast iron skillet For frying arepas

Method
 

  1. Combine 2 cups masarepa, 1 teaspoon salt, and 2.5 cups warm water in a mixing bowl. Stir with your hands until no dry pockets remain. Let rest 5-10 minutes until dough is soft and pliable. If dough cracks or feels dry, add water 1 tablespoon at a time.
    2 cups precooked cornmeal, 2.5 cups water, 1 teaspoon salt
  2. Divide dough into 8 equal portions (about ¼ cup each). Roll each into a ball then flatten into a ½ inch thick disc about 3-4 inches wide. Press a shallow pocket in the center, add 2 tablespoons shredded cheese, then fold dough over and seal edges firmly.
    1 cup cheese
  3. Heat 1 tablespoon butter or oil in a nonstick or cast iron skillet over medium heat (325-350°F). Place arepas seam-side down, spaced apart. Cook 5-7 minutes until bottom is golden brown and crispy.
    2 tablespoons butter or vegetable oil
  4. Flip arepas when bottom releases easily from pan with a golden crust. Add ½ tablespoon more butter if pan is dry. Cook 5-7 minutes until second side is golden. Cover pan and cook 2 additional minutes to melt cheese inside.
    2 tablespoons butter or vegetable oil
  5. Transfer arepas to a plate and let rest 2-3 minutes. The exterior remains crispy while the inside sets slightly. Optionally brush with melted butter for extra flavor.

Notes

  • Add water gradually to avoid wet or crumbly dough.
  • Cook on medium heat to prevent burning and ensure arepas cook through.
  • Press edges firmly around cheese to avoid leakage during frying.

Tried this recipe?

Let us know how it was!

What Is Demerara Sugar? [Taste, Uses & More]

March 29, 2026

Sprinkle demerara sugar over a batch of scones before they go into the oven, and something specific happens at the surface: those large, pale-golden crystals don't dissolve - they hold their shape, toast slightly, and form a faintly crunchy, caramelized crust that finer sugars simply won't produce.

What Is Demerara Sugar

That texture is the whole point.

QUICK SUMMARY

Demerara sugar is a coarse raw cane sugar with large golden crystals and a mild caramel-molasses flavor. It excels as a finishing sugar on baked goods, in hot drinks, and anywhere a crunchy caramelized crust is the goal.

🍬Flavor: Mild caramel, light molasses, faint toffee undertone
✨Best Use: Finishing sugar on muffins, scones, and hot drinks
🌡️Heat Behavior: Crystals resist melting - caramelize rather than dissolve
📦Shelf Life: Indefinite if kept dry; best quality within 2-3 years
🔄Closest Swap: Turbinado sugar for texture; light brown sugar for flavor without crunch

What Is Demerara Sugar?

Demerara sugar is a raw cane sugar with large, coarse crystals and a natural coating of light molasses left from minimal processing.

It takes its name from the Demerara region of Guyana, where sugarcane cultivation shaped the local sugar industry - though today it's produced across multiple cane-growing regions worldwide.

Unlike refined white sugar, demerara retains a thin molasses layer that gives each crystal its pale-golden color and mild caramel character. You'll find it sold as raw demerara, demerara sugar crystals, or Demerara cane sugar depending on the brand.

It sits in a category alongside turbinado sugar and brown sugar - all three share a molasses presence - however, demerara's crystals are distinctly larger and drier than both. Here's what separates them:

  • Crystal size - Coarser than turbinado, significantly coarser than brown sugar
  • Moisture content - Dry and free-flowing; brown sugar is deliberately moist and sticky
  • Molasses intensity - Lighter than dark brown sugar, comparable to light brown sugar but cleaner
  • Processing - Minimally refined; the molasses coating is natural, not added back like in brown sugar

What Does Demerara Sugar Taste Like?

demerara sugar - What Is Demerara Sugar

Demerara sugar's flavor is restrained - mild caramel at the front, a low hum of molasses in the background, and a quiet toffee note that surfaces when heat is involved. It's noticeably less sweet-forward than white sugar because the molasses adds complexity that cuts pure sweetness.

Sensory SnapshotModerate Intensity
👅 Flavor
mild caramellight molassessubtle toffee
✋ Texture
large crunchy crystalsgranular
👃 Aroma
warm brown sugarfaint molasses

Under a broiler or torch, the crystals caramelize slowly and develop a deeper, slightly bitter edge - closer to butterscotch than straight sugar. Stirred into hot coffee or tea, they dissolve gradually, releasing that warm brown-sugar scent while adding mild body to the cup.

Compared to light brown sugar in baked goods, demerara reads as a cleaner molasses note with more physical texture rather than more flavor intensity.

Golden Rule
The flavor impact of demerara is modest - the texture impact is significant. Use it where the crunch matters as much as the sweetness.

How to Use Demerara Sugar

Finishing is where demerara earns its place. Sprinkle it over muffin tops, scone surfaces, or streusel before baking and the crystals stay mostly intact, producing a crackling crust. That's a result no fine sugar can replicate.

How Demerara Sugar Is Used
MethodBest ForTip
🧂 FinishingMuffins, scones, cookies, crumble toppingsApply just before baking so crystals toast without fully dissolving
🔥 CaramelizingBroiled fruit halves, crème brûlée-style desserts, glazed vegetablesSpread in an even layer - coarse crystals need longer torch time than fine sugar
☕ DissolvingHot coffee, tea, warm cocktails, tiki syrups with rumStir for 30-60 seconds longer than you would with white sugar
🍞 Baking InGranola, oatmeal, cookie dough where crystal bits should surviveFold in gently at the end - heavy mixing breaks the crystals down
🥩 GlazingPork rubs, roasted carrots, ham glazesCombine with butter or fat to encourage even caramelization

In British baking, demerara appears most often on top of shortbreads, tea loaves, and flapjacks - the crunch is part of the expected texture. Caribbean-influenced recipes use it in rum-based syrups and marinades, where the light molasses note deepens the spirit's character.

It pairs directly with butter, dark rum, oats, cinnamon, ginger, coffee, vanilla, and citrus zest. Avoid using it in applications that need complete, rapid dissolution - clear cocktail syrups, Swiss meringue, or any preparation where undissolved crystal grit is a problem.

If you need a swap with the same crystal structure, turbinado sugar behaves nearly identically in most of these methods. For flavor-only substitution in baked goods, brown sugar alternatives cover the molasses notes without the crunch.

Try It In
🥜Cinnamon Sugar Roasted NutsDemerara adds crunch and caramel depth to the coating→☕Iced Brown Sugar Oat Milk LatteSwap in demerara for a coarser, slightly drier molasses note→🧁Cinnamon Sugar Donut MuffinsUse on top for a crackling crust the standard recipe won't produce→

How to Buy and Store Demerara Sugar

Look for packages labeled explicitly as "demerara" with visibly large, pale-golden crystals through the bag. Avoid anything with sticky clumps - that signals excess moisture, which means crystals are already breaking down.

Overly dark crystals can indicate older stock or heavier molasses content than standard demerara.

Watch Out
Clumped or sticky demerara has absorbed moisture and won't perform as a finishing sugar. Those broken-down crystals will dissolve before the oven sets the crust.

Prefer sealed retail bags or small glass jars over bulk bins, where humidity exposure is harder to track.

  • Container - Transfer to an airtight jar or sealed container once opened
  • Location - Cool, dry spot away from the stove and any moisture sources
  • Avoid - Storing near strong aromatics; demerara absorbs odors over time

Shelf life is technically indefinite for sugar kept properly dry, however demerara's best quality window runs about 2-3 years before the faint molasses notes start to flatten.

Start With the Crust

If you've never used demerara, the muffin-top test is the right entry point. Swap it in for any recipe that calls for a sugar sprinkle before baking - the immediate difference in surface texture makes the ingredient's purpose obvious.

From there, try it in hot coffee or over broiled citrus halves, where the gradual dissolution and caramelization show a second side of what the crystal structure does under heat.

Those three uses cover most of what demerara does well, and they'll tell you quickly where it fits in your kitchen.

Frequently Asked Questions

Is demerara sugar the same as turbinado?

Not exactly. Both are raw cane sugars with a natural molasses coating, but turbinado crystals are slightly finer and lighter in color. Demerara has a marginally deeper caramel note and coarser grain - in most recipes, they're interchangeable.

Can you use demerara instead of brown sugar?

Yes, with a texture trade-off. Demerara is dry and coarse; brown sugar is moist and fine, which affects spread and density in baked goods. Substituting works best in recipes where a slightly drier, crunchier result is acceptable.

Does demerara sugar melt when baking?

Partially. Crystals soften and caramelize at the surface but don't fully dissolve the way fine sugars do, especially when used as a topping. Folded into dough at high ratios, more of the crystal structure does break down over a full bake time.

Is demerara sugar healthier than white sugar?

Nutritionally, they're nearly identical - both are primarily sucrose at roughly the same calorie count. Demerara contains trace minerals from the residual molasses, but the amounts are too small to be nutritionally meaningful at normal serving sizes.

Can demerara sugar be used in cold drinks?

It dissolves poorly in cold liquid - the large crystals need heat to break down efficiently. For iced drinks, make a simple syrup with demerara first, then add it to the cold beverage for even sweetness without grit.

Beef Picadillo Cuban-Style

March 29, 2026

Ground beef often turns out dry or bland when you don't control the fat ratio or skip the browning step. The trick is using 80/20 beef and letting it develop a deep brown crust before adding tomato sauce and aromatics.

Beef Picadillo Cuban-Style served on a plate

High heat at the start creates the savory base that makes Cuban Picadillo taste right. The sweet-salty balance from raisins and olives does the rest.

Make this when you want something that feels like a real meal but comes together in 30 minutes.

QUICK SUMMARY

Cuban-style Beef Picadillo is ground beef simmered with tomato sauce, green olives, and raisins for a savory-sweet balance. Brown the beef well in batches to build flavor, then simmer uncovered so the sauce thickens without getting watery. Serve over white rice or with black beans for a complete weeknight dinner.

⏱️Time Reality: 10 min prep, 20 min cook - no marinating or overnight planning
🔥Critical First Step: Brown beef in batches over medium-high heat for 4-5 min
⚠️Watch Out: Too many raisins make it overly sweet - measure them carefully and balance with salt or vinegar

Table of Contents

Toggle
  • Why This Recipe Works
  • What You'll Need
    • Ingredient Details
  • Ingredient Swaps
  • What to Serve With It
  • Store and Reheat
  • Frequently Asked Questions
  • Beef Picadillo Cuban-Style
    • Method 
    • Tried this recipe?

Why This Recipe Works

The 80/20 fat ratio keeps the beef juicy even after simmering, while sautéing onions and bell peppers before adding garlic prevents burnt, bitter aromatics. For a version that comes together quickly, more beef ideas like braised short ribs or pot roast use similar browning techniques but need longer cook times.

Quick Reference
⏱️
Prep Time
10 min
🔥
Cook Time
20 min
⏰
Total Time
30 min
🍽️
Servings
4 servings
📊
Difficulty
Easy
🏷️
Category
Main Dish
💡
Quick Tip
Brown beef well for rich flavor
🎯
Best For
Weeknight | Meal prep

Five reasons this works:

  • 80/20 ground beef - Higher fat content keeps the meat moist during simmering and adds richness to the sauce
  • Brown beef in batches - Crowding the pan steams the meat instead of creating the caramelized crust that builds flavor
  • Sauté aromatics gently - Medium heat for 5 minutes softens onions and peppers without burning, creating a sweet base
  • Simmer uncovered - Evaporating moisture concentrates the tomato sauce and prevents watery Picadillo
  • Add garlic late - Minced garlic burns easily, so adding it in the last 1-2 minutes keeps the flavor fresh
Quick Tip
Break up beef with a wooden spoon while it cooks - large clumps won't brown evenly and create uneven texture

What You'll Need

Ingredients for Beef Picadillo Cuban-Style

Cuban Picadillo uses pantry staples and fresh aromatics you can grab at any grocery store. Rich mains need something to cut through, and beef does exactly that - this homemade salad recipe balances the savory richness with bright acidity.

🍗
Protein
  • 1 lb ground beef (80/20)
🥬
Aromatics
  • 1 medium onion, diced
  • 1 green bell pepper, diced
  • 4 cloves garlic, minced
🥢
Sauce & Seasonings
  • 1 cup tomato sauce
  • 1 teaspoon ground cumin
  • 1 bay leaf
  • Salt and pepper to taste
🫙
Sweet & Salty
  • ¼ cup green olives, sliced
  • 2 tablespoon raisins
  • 2 tablespoon olive oil

Ingredient Details

  • Ground beef (80/20)
    The fat ratio keeps meat juicy during simmering - leaner beef dries out and tastes bland
  • Onion and green bell pepper
    Dice both to the same size (about ¼ inch) so they cook evenly and soften at the same rate
  • Tomato sauce
    Plain tomato sauce works best - avoid seasoned or marinara varieties that add competing flavors
  • Green olives
    Pimiento-stuffed olives add traditional color and a mild briny flavor without overpowering the dish
  • Raisins
    Soak in warm water for 5 minutes if they're dried out - plump raisins distribute sweetness better
  • Cumin
    Ground cumin adds earthy warmth - toast whole cumin seeds for 30 seconds if you want deeper flavor
  • Bay leaf
    Remove before serving - it adds subtle aroma but turns bitter if it breaks apart

Ingredient Swaps

Ground turkey or chicken works if you want leaner protein, but you'll need to add extra fat to keep the Picadillo from drying out. We keep a batch ready for nights like this - this creamy homemade potato recipe uses similar pantry staples and stores just as well.

Four swaps that work:

  • Ground beef → ground turkey or chicken - Use 93/7 turkey and add 1 tablespoon extra olive oil while browning to compensate for lower fat content
  • Green olives → capers or black olives - Capers add sharper brine, black olives taste milder and less tangy
  • Raisins → dried currants or chopped dried apricots - Currants are smaller and distribute evenly, apricots add slight tartness
  • Tomato sauce → crushed tomatoes or passata - Crushed tomatoes create chunkier texture, passata makes it smoother and slightly thicker

Ground Turkey

Works for: Lower-fat diets, lighter flavor, leaner texture

Skip if: You want traditional richness or don't want to add extra oil

Black Olives

Works for: Milder briny flavor, softer texture, kid-friendly meals

Skip if: You want the sharp, tangy punch that defines Cuban-style Picadillo

Instructions

You'll spend 10 minutes chopping and 20 minutes at the stove with occasional stirring. The cocktail works best when it hits the table at the same time as the main - for a version that comes together quickly, classic accompaniment recipe like a simple mojito takes 5 minutes and uses fresh mint.

  1. Brown the beef: Heat 1 tablespoon olive oil in a large skillet over medium-high heat for 1 minute. Add ground beef and cook 4-5 minutes, breaking it up with a wooden spoon, until no pink remains and beef is deeply browned. Transfer to a plate.
  2. Sauté aromatics: Add remaining 1 tablespoon olive oil to the same skillet. Add diced onion and green bell pepper, cook 5 minutes over medium heat, stirring occasionally, until softened and translucent. Add minced garlic, cook 1 minute until fragrant.
  3. Build the sauce: Return browned beef to the skillet. Stir in tomato sauce, cumin, bay leaf, salt, and pepper. Add green olives and raisins, stir to combine.
  4. Simmer uncovered: Bring mixture to a simmer, then reduce heat to medium-low. Cook uncovered 10-15 minutes, stirring every 3-4 minutes, until sauce thickens and coats the beef. The mixture should look glossy and slightly reduced, not watery.
  5. Rest and serve: Remove from heat, discard bay leaf. Let Picadillo sit 5 minutes off heat so flavors meld and sauce thickens further. Taste and adjust salt or add a splash of vinegar if it tastes too sweet.
Golden Rule
Don't skip browning the beef - the caramelized crust creates the savory foundation that makes Picadillo taste right

What to Serve With It

A good salad can make or break the plate - you need something starchy to soak up the sauce and something fresh to cut the richness. For savory steak meal ideas that follow the same plate-building logic, pair similar saucy beef dishes with rice, beans, and bright vegetable sides.

Side Dish Prep Why It Works How to Serve
White rice Easy Neutral base soaks up the savory-sweet sauce Spoon Picadillo over mound of rice, let sauce pool around edges
Black beans Easy Adds protein and earthy flavor that complements cumin Serve beans on the side or layer under Picadillo on rice
Fried plantains Medium Sweet caramelized edges balance salty olives Slice ripe plantains, fry 2-3 min per side until golden
Simple green salad Easy Fresh crunch and acidity cut through rich beef Dress greens with lime juice and olive oil, serve on the side
Tostones Involved Twice-fried plantains add crispy, salty crunch Fry green plantain slices, smash flat, fry again until crisp

Three ways to serve it:

  • Classic Cuban plate: White rice as base, Picadillo ladled over top, black beans and fried plantains on the side
  • Taco filling: Spoon Picadillo into warm tortillas, top with diced avocado, cilantro, and lime wedges
  • Bowl-style: Layer rice, beans, Picadillo, and chopped lettuce in a bowl with mojo sauce drizzled on top
Best Pick
White rice is the go-to side - it soaks up sauce without competing with the sweet-savory flavors

Store and Reheat

Picadillo stores well because the sauce keeps the beef moist, and the flavors deepen overnight. Salad adds the contrast this plate needs, but timing matters - we keep a batch ready for nights like this, something creamy to dunk like poppy seed dressing makes leftover Picadillo work as a quick lunch over greens.

Method Time Best For
🍳 Stovetop 5-7 min Best flavor and texture - add 2 tablespoon water or broth to prevent drying
📦 Microwave 2-3 min Single servings - cover and stir halfway through
🔥 Oven 20 min at 350°F Large portions - cover with foil to keep moisture in

For best results when storing:

  • Cool quickly: Spread Picadillo in a shallow container so it cools to room temp in 30 minutes before refrigerating
  • Fridge storage: Store in airtight container for 3-4 days - the sauce keeps beef moist longer than plain cooked ground meat
  • Freeze in portions: Divide into single-serving containers, freeze up to 3 months - thaw overnight in fridge before reheating
  • Add liquid when reheating: Stir in 1-2 tablespoon water, broth, or extra tomato sauce if Picadillo looks dry after storing
  • Refresh flavors: Taste after reheating and add a pinch of cumin, salt, or a splash of vinegar to brighten the flavor

Frequently Asked Questions

Can I make Beef Picadillo Cuban-Style ahead and reheat?

Yes - cook it completely, cool to room temperature, then refrigerate in an airtight container for up to 4 days. Reheat on the stovetop over medium heat with a splash of water or broth to restore moisture.

How long should I cook Picadillo at medium heat?

Simmer uncovered for 10-15 minutes at medium-low heat after adding the sauce. The mixture should thicken and coat the beef without looking watery or dry.

What are signs that Cuban Picadillo is done?

The beef should be fully browned with no pink, the sauce should coat the meat without pooling liquid at the bottom, and the mixture should look glossy and slightly thickened. Let it rest 5 minutes off heat to finish setting.

How to fix bland or dry Cuban Picadillo?

For bland flavor, add more salt, cumin, or a splash of vinegar to balance the sweetness. For dryness, stir in 2-3 tablespoon tomato sauce or broth and simmer 2-3 minutes to rehydrate the beef.

Can I scale Picadillo recipe for a crowd?

Yes - double or triple the recipe, but brown the beef in batches so it caramelizes instead of steaming. Use a larger skillet or wide pot to give the extra volume room to simmer properly.

Beef Picadillo Cuban-Style served on a plate

Beef Picadillo Cuban-Style

No ratings yet
Beef Picadillo Cuban-Style is a savory-sweet ground beef dish simmered with tomato sauce, green olives, and raisins. Browning the beef well before simmering creates a rich flavor base, while the balance of sweet raisins and salty olives make it uniquely delicious. Ready in 30 minutes, it's perfect for a quick weeknight meal.
Print Recipe Pin Recipe
Prep Time 10 minutes mins
Cook Time 20 minutes mins
Total Time 30 minutes mins
Servings: 4 servings
Course: Main Dish
Cuisine: Cuban
Ingredients Method Notes

Ingredients
  

  • 1 lb ground beef use 80/20 fat ratio for juiciness
  • 1 medium onion diced about ¼ inch
  • 1 medium green bell pepper diced about ¼ inch
  • 4 cloves garlic minced, add late
  • 1 cup tomato sauce plain, no seasoning
  • 1 teaspoon ground cumin earthy warmth
  • 1 leaf bay leaf remove before serving
  • 0.25 cup green olives sliced, preferably pimiento-stuffed
  • 2 tablespoon raisins measure carefully to avoid too much sweetness
  • 2 tablespoon olive oil used for browning and sautéing

Method
 

  1. Heat 1 tablespoon olive oil in a large skillet over medium-high heat for 1 minute. Add ground beef and cook 4-5 minutes, breaking it up with a wooden spoon, until no pink remains and beef is deeply browned. Transfer to a plate.
    1 lb ground beef, 2 Tbsp olive oil
  2. Add remaining 1 tablespoon olive oil to the same skillet. Add diced onion and green bell pepper, cook 5 minutes over medium heat, stirring occasionally, until softened and translucent. Add minced garlic, cook 1 minute until fragrant.
    1 medium onion, 1 medium green bell pepper, 4 cloves garlic, 2 Tbsp olive oil
  3. Return browned beef to the skillet. Stir in tomato sauce, cumin, bay leaf, salt, and pepper. Add green olives and raisins, stir to combine.
    1 lb ground beef, 1 cup tomato sauce, 1 tsp ground cumin, 1 leaf bay leaf, 0.25 cup green olives, 2 Tbsp raisins
  4. Bring mixture to a simmer, then reduce heat to medium-low. Cook uncovered 10-15 minutes, stirring every 3-4 minutes, until sauce thickens and coats the beef. The mixture should look glossy and slightly reduced, not watery.
    1 lb ground beef, 1 cup tomato sauce, 1 tsp ground cumin, 1 leaf bay leaf, 0.25 cup green olives, 2 Tbsp raisins
  5. Remove from heat, discard bay leaf. Let Picadillo sit 5 minutes off heat so flavors meld and sauce thickens further. Taste and adjust salt or add a splash of vinegar if it tastes too sweet.
    1 leaf bay leaf

Notes

  • Brown beef in batches without crowding the pan for best caramelization.
  • Simmer uncovered to thicken sauce and concentrate flavors.
  • Add garlic last to prevent burning and preserve fresh flavor.

Tried this recipe?

Let us know how it was!

How Long Does Cooked Chicken Last? [Storage Guide]

March 29, 2026

Freezing cooked chicken is one of the smartest moves you can make after a big cook - but only if you handle the cooling and packaging correctly.

How Long Does Cooked Chicken Last In The Freezer

Get that wrong, and you'll either pull rubbery, freezer-burned meat from the freezer or, worse, create conditions where bacteria thrive before it ever gets cold.

The same rules apply whether you're dealing with a sheet pan of chicken breast, leftover rotisserie chicken, or shredded chicken from a slow cooker.

Much like keeping turkey fresh, the clock starts the moment your chicken comes off the heat, and understanding cooked meat's shelf life makes the difference between a safe meal and a discarded one.

QUICK SUMMARY

Cooked chicken lasts 3-4 days in the fridge and up to 6 months in the freezer. Cool it within 2 hours, store in airtight containers, and label everything. Never leave it at room temperature - there is no safe pantry option.

🧊Fridge: 3-4 days in a shallow airtight container
❄️Freezer: Best quality 2-4 months; safe up to 6 months
⏱️Key Rule: Refrigerate or freeze within 2 hours of cooking, no exceptions

How Long Does Cooked Chicken Last?

Cooked chicken holds for 3-4 days in the fridge regardless of how it was prepared - baked, poached, grilled, or shredded. That window doesn't change based on how it looks; it's set by bacterial growth rates at refrigerator temperatures.

Sliced or shredded chicken sits within the same 3-4 day range, however it dries out faster than whole pieces.

Understanding what makes cooked chicken distinct from other proteins helps explain why it spoils faster than, say, a cured or smoked meat.

Cooked Chicken Shelf Life
MethodStateDurationNotes
🧊 FridgeWhole / Pieces3-4 daysStore in shallow airtight container; cool within 2 hours.
🧊 FridgeSliced / Shredded3-4 daysWrap tightly or add sauce - dries faster once cut.
❄️ FreezerAny2-6 monthsBest quality within 2-4 months; safe beyond if frozen solid.
🏠 CounterAny2 hours maxNot safe to store - discard anything left out longer.

The 2-hour rule at room temperature applies year-round. On a hot day above 32°C (90°F), that window drops to just one hour.

How to Store Cooked Chicken

Speed is the first priority here. Cool cooked chicken on a wire rack rather than piling hot pieces into a deep bowl - stacking slows the cooling rate and keeps the center in the temperature danger zone longer.

Fridge: Transfer chicken into shallow airtight containers or resealable freezer-quality bags with excess air pressed out, then refrigerate promptly within 2 hours. Freezer: Portion first, wrap each piece tightly in plastic wrap or vacuum seal, then place in a labeled freezer bag or rigid container. Counter: Not an option - cooked chicken cannot be stored safely at room temperature.

The same discipline applies when storing raw chicken correctly before cooking, so it's worth reviewing both if you're prepping in bulk.

Golden Rule
Label every container with the cook date, not the storage date. Rotate freezer stock oldest-first and aim to use everything within 3 months for best quality.

A few habits that prevent the most common storage mistakes:

  • ✅ Use shallow containers - they drop temperature faster than deep bowls or pots.
  • ✅ Squeeze air from bags - trapped air accelerates freezer burn and dryness.
  • ✅ Portion before freezing - never freeze a whole bird in one block if you'll need only part of it.
  • ❌ Don't refrigerate while hot - it raises the fridge's ambient temperature and slows neighboring food's cooling too.

Can You Freeze Cooked Chicken?

Yes - and cooked chicken freezes well, especially when portioned into meal-sized amounts before it goes in. Breast meat is the most vulnerable to texture loss; it can turn dry and stringy after freezing.

Shredded chicken or pieces stored in sauce hold up noticeably better.

Best Pick
Freeze shredded or sauced chicken over plain breast pieces. The moisture in the sauce acts as a buffer against freezer burn and dryness during storage.

Follow these steps for the best results:

  1. Cool first - bring chicken to room temperature within 2 hours; never freeze it while still warm.
  2. Portion by meal - divide into serving-sized amounts so you thaw only what you need.
  3. Wrap tightly - use plastic wrap or a vacuum bag first, then transfer to a labeled airtight freezer bag or rigid container.
  4. Label with date - note the cook date and aim to use within 2-4 months for peak quality.

To thaw, move portions to the fridge overnight - that's the safest method.

For faster thawing, submerge the sealed bag in cold water and swap the water every 30 minutes.

Reheat immediately after thawing, and bring the internal temperature back to 74°C (165°F).

Much like cooking salmon freezer burn right, managing moisture during and after freezing is what separates a decent result from a disappointing one.

Signs Cooked Chicken Has Gone Bad

Trust your senses - they're reliable here. Don't taste-test chicken to determine safety; Salmonella and Listeria produce no detectable flavor, so the taste of salmonella gives you nothing useful to work with.

Signs It's Gone Bad
👀
VisualDull gray or greenish tinge on surface · Discoloration near bone or skin · Visible mold spots (white, green, or black)
👃
SmellSour or putrid odor · Ammonia-like smell · Any sharp scent unlike fresh cooked poultry
✋
TextureSlimy or sticky film on surface · Mushy interior · Unusually dry and fibrous with no moisture
Watch Out
If color, smell, or texture raise any doubt, discard the chicken immediately. Bacterial contamination is not always visible - when in doubt, throw it out.

Getting the Most from Your Leftovers

The fundamentals come down to timing, packaging, and rotation. Cool fast, store airtight, label everything - these three habits eliminate the vast majority of waste and safety risks.

Rotisserie chicken deserves a specific mention. It's a common source of leftovers, and knowing the best ways to serve and store it helps - the guide on cooking rotisserie chicken right covers both angles.

When reheating anything from the fridge or freezer, always hit 74°C (165°F) internally, and don't refrigerate it again after reheating if it's been sitting out.

Shred and sauce before freezing where possible. It's the single biggest quality upgrade with almost no extra effort.

Frequently Asked Questions

How long does rotisserie chicken last in the fridge?

3-4 days, same as home-cooked chicken. Store-bought rotisserie chicken should be refrigerated within 2 hours of purchase. Remove meat from the carcass before storing - it cools faster and takes up less space.

Can you refreeze cooked chicken after thawing?

Only if it was thawed in the refrigerator and never left at room temperature. You must reheat it to 74°C (165°F) before refreezing. Each freeze-thaw cycle degrades texture noticeably.

Is frozen cooked chicken still safe after 6 months?

Yes, if it has been frozen solid continuously. Safety isn't the issue - quality is. Past the 4-month mark, expect drier texture and some flavor loss, particularly in breast meat.

Can I freeze cooked chicken in a slow cooker sauce?

Yes, and it's actually the best way to freeze it. The sauce prevents moisture loss and protects against freezer burn. Use freezer-safe containers and leave a small gap for expansion.

Does cooked chicken last longer if vacuum sealed?

In the freezer, yes - vacuum sealing significantly reduces freezer burn and extends peak quality closer to the 6-month mark. In the fridge, the 3-4 day window still applies regardless of packaging.

What Is Farina? [Taste, Uses & More]

March 29, 2026

Most people assume farina is just a fancy name for any hot cereal, but it's actually a specific milled product - the refined endosperm of wheat, ground to fine granules that cook into a smooth, creamy porridge.

What Is Farina

Unlike replacements for wheat bran or replacements for cornmeal, farina is a deliberately mild, starch-forward grain product with its own distinct cooking behavior.

It thickens fast, holds a silky texture when handled correctly, and works in far more dishes than most cooks expect.

QUICK SUMMARY

Farina is finely milled wheat endosperm cooked into a smooth porridge. It has a mild, slightly wheaty flavor that takes on sweetness or savoriness easily. Use it for hot breakfast cereal, puddings, and as a binder in meatballs or a light coating for pan-frying.

🌾Category: Milled wheat product, hot cereal grain
👅Flavor: Mild, faintly wheaty, slightly sweet when cooked
🍳Best Uses: Porridge, puddings, binder, light fry coating
⚠️Dietary: Contains gluten - not suitable for celiac disease
📦Shelf Life: Unopened up to 24 months; opened 6-12 months in pantry

What Is farina?

Farina comes from the milled inner endosperm of common wheat (Triticum aestivum), sifted to remove most of the bran and germ, leaving fine, pale granules.

The name itself is Italian for "flour," though in the American market it refers specifically to this hot cereal product sold under brands like Cream of Wheat.

It sits in a different category from oatmeal's flavor and uses - farina is wheat-derived and gelatinizes differently, producing a denser, smoother consistency than rolled oats.

Semolina is a close relative, milled from durum wheat rather than common wheat, and typically coarser in grind.

Whole-grain farina exists and carries more fiber, though it's less widely stocked than the standard enriched variety.

You'll see it labeled several ways in stores:

  • 🌾 Farina - the generic term used in European and specialty markets
  • 🥣 Cream of Wheat - the dominant American brand name, now used interchangeably
  • 🌱 Whole wheat farina - includes the bran layer, higher in fiber
  • ✨ Enriched farina - standard product with added iron and B vitamins

What Does farina Taste Like?

farina - What Is Farina

Raw farina tastes of almost nothing - a faint, dry wheaty note and little else. Cooking changes that picture considerably.

As the granules hydrate and starches gelatinize, a mild sweetness emerges alongside a clean, warm grain flavor. It's softer and less assertive than semolina porridge, and much more neutral than corn grits.

Toasting farina in a dry pan before adding liquid, similar to how you'd treat a roux, pushes the flavor toward something nuttier and more complex.

Sensory SnapshotMild Intensity
👅 Flavor
mildly wheatyfaintly sweettoasty when browned
✋ Texture
silky when cookedgrainy if underdone
👃 Aroma
warmfaintly grainy

The texture is where farina earns its reputation. Properly cooked, it's silky and almost custardy - the starch gelatinization process, explored in detail alongside gelatin and its flavor, explains why liquid ratio and heat control matter so much here.

Undercooked farina has a gritty, slightly pasty quality that puts people off permanently if that's their first experience.

Golden Rule
Whisk constantly during the first two minutes of cooking. Farina clumps form quickly and won't break down once set - steady motion is the only prevention.

How to Use farina

Farina's neutral base makes it genuinely useful across both sweet and savory cooking. American kitchens reach for it most at breakfast, cooked with milk or water until thick, then finished with butter, maple syrup, or cinnamon.

Eastern European cooks stir it into soups and stews as a thickener, producing a smoother, wheat-thickened body without the cloudiness of cornstarch.

Beyond porridge, it functions as a binder in meatballs and meatloaf, absorbing moisture and holding structure the way breadcrumbs do - sometimes better, since the fine grind distributes more evenly.

Lightly coating fish fillets or sliced vegetables in dry farina before pan-frying gives a thin, crisp crust similar to what semolina delivers, though farina browns more quickly due to its finer particle size.

If you're out of it, farina swaps that work include semolina and fine cornmeal for most of these applications.

How Farina Is Used
MethodBest ForTip
🥣 SimmeredHot porridge, savory grain bowlsUse 4:1 liquid-to-farina ratio; whisk constantly
🍳 Toasted then simmeredNuttier porridge, deeper flavor baseToast dry in pan 2-3 min until fragrant before adding liquid
🫙 BakedSweet puddings, casserolesAllow extra bake time - farina thickens further as it cools
🧆 As binderMeatballs, meatloaf, pattiesUse 2-3 tablespoons per pound of meat in place of breadcrumbs
🐟 Light coatingPan-fried fish, vegetablesSeason the farina before coating; fry on medium-high heat

Pair it with broth and cheese for a savory grits-style bowl, or with berries and brown sugar for a classic sweet finish. Cinnamon, nutmeg, vanilla, and banana all work well in sweet preparations.

Try It In
🍓Fruit & Cheese Snack BoxPairs the sweet-grain notes farina loves→🌰Cinnamon Sugar Roasted NutsSame warm spice profile as a topped farina bowl→🍮Warm Bread Pudding with Vanilla SauceShows how baked farina pudding is built similarly→

How to Buy and Store farina

Look for packages labeled "farina" or "Cream of Wheat" with pale, uniform granules and no visible clumping inside the bag. Whole-grain farina is sold as "whole wheat farina" or marked "100% whole grain" -

check expiry dates carefully, since the retained germ makes it go rancid faster than the refined version.

Watch Out
Opened farina left in its original paper bag picks up moisture and off-flavors quickly. Transfer it to an airtight container immediately after opening.

Once opened, store farina in an airtight container in a cool, dry pantry - away from the stove or any heat source.

Refrigerating or freezing an opened container extends usability beyond the standard 6-12 month window.

For a full breakdown of dates and signs of spoilage, farina's shelf life covers what to look for.

Unopened, it stays good for up to 24 months.

Start Here

New to farina? Cook it once as a plain porridge with milk and a pinch of salt, so you understand its base texture before building on it.

From there, the savory path - broth, cheese, a fried egg on top - surprises most people who only know the sweet version.

If you want to branch into related grains, alternatives to durum flour and replacements for semolina flour show where farina fits in the broader wheat family. It's a modest ingredient.

Used with intention, it consistently delivers.

Frequently Asked Questions

What is farina made from?

Farina is milled from the endosperm of common wheat, with most of the bran and germ removed. The result is a fine, pale granule that cooks quickly and thickens into a smooth porridge.

Is farina the same as semolina?

No. Semolina comes from durum wheat and has a coarser grind and more pronounced flavor. Farina uses common wheat and is finer and milder - they behave similarly in porridge but aren't interchangeable in all recipes.

Is farina gluten-free?

No - farina contains gluten and is not safe for people with celiac disease or wheat allergy. Rice-based hot cereals or certified gluten-free oat porridge are the standard replacements.

Can you use farina in baking?

Yes, in specific applications. Farina works well in baked puddings and casseroles, where it thickens as it cooks and firms further on cooling. It doesn't replace flour in standard bread or cake recipes.

Why does farina get lumpy when cooked?

Lumps form when dry granules hit hot liquid without immediate stirring - the outer starch gelatinizes and seals clusters before they hydrate fully. Whisking from the moment you add farina to the liquid prevents this entirely.

Sticky Toffee Pudding

March 29, 2026

ToggleBaking sticky toffee pudding at 350°F with soaked dates creates a moist, tender crumb that stays soft for days. The dates break down during mixing and release natural sugars that caramelize into sticky edges.

Sticky Toffee Pudding served on a plate

The toffee sauce goes on twice-once during baking and again when serving. This double hit of brown sugar and cream turns a simple cake into something worth making on a random Tuesday.

Make this when you want a rich dessert that doesn't require any special skills or equipment.

QUICK SUMMARY

Sticky toffee pudding pairs soft, date-studded cake with rich toffee sauce. Soaking dates in hot water for 15 minutes creates the signature moist texture. The brown sugar in both cake and sauce delivers deep caramel flavor without any fancy techniques.

⏱️Time Reality: 50 minutes total-15 for prep, 35-40 for baking, plus cooling
🔑First Move: Soak dates in boiling water immediately so they're ready when you need them
⚠️Watch Out: Sauce burns fast-use medium heat and stir constantly while simmering

Why This Recipe Works

Soaking dates in hot liquid softens them completely so they blend into the batter without lumps. Creaming butter with brown sugar for 3-4 minutes incorporates air that keeps the dense cake from turning into a brick.

Quick Reference
⏱️
Prep Time
15 min
🔥
Cook Time
35-40 min
⏰
Total Time
50-55 min
🍽️
Servings
6 servings
📊
Difficulty
Medium
🏷️
Category
Dessert
💡
Quick Tip
Soak dates for moist texture
🎯
Best For
Weeknight | Entertaining

What makes this different from regular cake:

  • Baking soda reacts with the dates to create a tender crumb that doesn't dry out
  • Brown sugar in the batter caramelizes during baking for deeper flavor than white sugar
  • Heavy cream in the sauce creates a velvety coating that soaks into the warm cake
  • Baking at 350°F for 35-40 minutes sets the edges without overcooking the center
  • The water bath method isn't necessary-standard oven baking works fine for home kitchens
Quick Tip
Check doneness by pressing the top lightly-it should spring back with a slight indent, not sink completely.

What You'll Need

Ingredients for Sticky Toffee Pudding

Buy Medjool dates, not the chopped kind coated in sugar. Most people skip this traditional British dessert at home, but you probably have everything else already-for a simple homemade gelato recipe that works alongside this one, it uses similar pantry items like cream and vanilla.

🍯
Cake Base
  • Medjool dates (1½ cups, pitted)
  • All-purpose flour (1¾ cups)
  • Baking soda (1 tsp)
  • Baking powder (1 tsp)
  • Salt (¼ tsp)
🧈
Wet Ingredients
  • Butter (6 tbsp, softened)
  • Brown sugar (¾ cup, packed)
  • Eggs (2 large)
  • Vanilla extract (1 tsp)
🍮
Toffee Sauce
  • Brown sugar (1 cup, packed)
  • Butter (½ cup)
  • Heavy cream (1 cup)
  • Vanilla extract (½ tsp)
  • Salt (pinch)

Ingredient Details

  • Medjool dates
    Soak in 1¼ cups boiling water for 15 minutes-drain well before using or the batter gets too wet
  • Brown sugar
    Use dark brown for deeper molasses flavor, light brown for milder caramel-don't swap for white sugar
  • Butter
    Must be softened to room temperature for proper creaming-cold butter won't incorporate air
  • Baking soda
    Reacts with the dates' natural acidity to create lift-don't skip or the cake stays dense
  • Heavy cream
    Must be at least 36% fat for the sauce to thicken properly-milk makes it too thin
  • All-purpose flour
    Measure by spooning into the cup and leveling off-scooping directly packs it too tight
  • Eggs
    Bring to room temperature first so they blend smoothly without deflating the creamed butter

Ingredient Swaps

Dates are non-negotiable, but the supporting cast has some flexibility. If you need dairy-free or gluten-free options, these swaps work without completely changing the texture.

Four swaps that work:

  • Prunes or raisins for dates - Less sticky and milder flavor, but the cake stays moist enough for weeknight desserts
  • Gluten-free flour blend for all-purpose - Use a 1:1 baking blend with xanthan gum already added; texture gets slightly crumbly but still holds together
  • Coconut oil or dairy-free margarine for butter - Changes the flavor profile to slightly tropical; use refined coconut oil to minimize the coconut taste
  • Full-fat coconut milk for heavy cream - Sauce thickens differently and takes longer to reduce, but the richness stays intact

Medjool Dates

Works for: Traditional sticky texture, natural sweetness, moist crumb

Skip if: Can't find them-use prunes instead but expect less caramel flavor

Prunes or Raisins

Works for: Budget-friendly alternative, still adds moisture

Skip if: You want authentic sticky toffee flavor-prunes taste more like generic dried fruit

Instructions

The cake takes 50 minutes from start to finish, including soaking time. Most people skip traditional British desserts at home, but if you want a classic beef dish that works for the same entertaining moments, it uses a similar hands-off approach.

  1. Soak the dates: Pour 1¼ cups boiling water over pitted dates in a bowl. Let sit 15 minutes until very soft, then drain well and mash with a fork into a chunky paste.

  2. Cream butter and sugar: Beat softened butter with ¾ cup brown sugar using an electric mixer on medium-high for 3-4 minutes until light and fluffy. Add eggs one at a time, beating well after each, then mix in vanilla.

  3. Combine dry and wet: Whisk flour, baking soda, baking powder, and salt in a separate bowl. Add half the flour mixture to the butter mixture and fold gently, then add the mashed dates, then the remaining flour. Mix just until no dry streaks remain-overmixing makes the cake tough.

  4. Bake the cake: Pour batter into a greased and floured 9-inch square pan. Bake at 350°F for 35-40 minutes until the top springs back lightly when pressed and a toothpick shows moist crumbs, not wet batter.

  5. Make the sauce: While the cake bakes, melt ½ cup butter in a saucepan over medium heat. Add 1 cup brown sugar and heavy cream, stirring constantly. Bring to a gentle simmer and cook 5-7 minutes, stirring often, until thick enough to coat the back of a spoon. Remove from heat and stir in vanilla and salt.

Shortcut
Make the toffee sauce up to 3 days ahead and reheat gently before serving-it thickens as it cools, so add a splash of cream when reheating.

What to Serve With It

The richness needs a contrasting temperature or texture to balance each bite. For a version that comes together quickly, an easy eggplant side adds a savory contrast if you're building a full dinner around this dessert.

Side Dish Prep Why It Works How to Serve
Whipped cream Easy Light, airy texture cuts the dense richness Dollop cold whipped cream on warm pudding
Vanilla ice cream Easy Cold contrast makes the warm toffee sauce more pronounced Scoop directly on top while pudding is still hot
Fresh berries Easy Tartness balances sweet caramel notes Scatter raspberries or sliced strawberries around the plate
Strong black tea Easy Traditional British pairing-bitter tannins cut through richness Serve hot tea in a separate cup alongside
Clotted cream Easy Extra indulgence for special occasions Serve a spoonful on the side for guests to add themselves

Three ways to serve it:

  • Weeknight casual: Pour toffee sauce over warm cake and serve with vanilla ice cream-the temperature contrast does all the work
  • Holiday dinner: Drizzle with rum or whisky toffee sauce (add 2 tablespoons to the finished sauce) and top with clotted cream for a boozy, indulgent version
  • Cold weather comfort: Serve with strong black tea or espresso to cut the sweetness-the bitterness makes each bite taste less cloying
Best Pick
Cold vanilla ice cream on warm pudding creates the best texture contrast-the ice cream melts slightly into the toffee sauce and forms a creamy pool.

Store and Reheat

The cake stays moist for 3-4 days in the fridge if you store it right. For a version that comes together quickly, a simple eggplant on the side reheats just as well and uses similar timing.

Method Time Best For
🔥 Oven 15 min at 325°F Reheating the entire pudding without drying it out
📦 Microwave 1-2 min Quick single servings when you need dessert fast
🍳 Stovetop 5-7 min low heat Reheating just the toffee sauce separately

For best results when storing:

  • Let the cake cool completely before wrapping to prevent condensation from making it soggy
  • Store cake and sauce separately in airtight containers-combined, the cake absorbs too much liquid and gets mushy
  • Reheat toffee sauce with a splash of cream if it's too thick after refrigeration
  • Freeze individual portions wrapped tightly in plastic wrap, then foil-thaw overnight in the fridge before reheating
  • Don't add ice cream or whipped cream until serving-dairy toppings don't store well and turn grainy when frozen

Frequently Asked Questions

Can I make sticky toffee pudding ahead of time?

Yes-bake the cake up to 2 days ahead and store covered at room temperature. Make the toffee sauce separately and reheat both before serving for the best texture.

What's the best way to store leftover sticky toffee pudding?

Store cake and sauce separately in airtight containers in the fridge for 3-4 days. Combined storage makes the cake too wet and mushy.

How do I know when sticky toffee pudding is fully baked?

Press the top lightly-it should spring back with a slight indent. A toothpick inserted in the center should show moist crumbs, not wet batter or completely clean.

Why did my sticky toffee pudding turn out dry or dense?

Overbaking dries it out-watch the time closely and check at 35 minutes. Dense texture comes from too much flour or insufficient creaming of butter and sugar.

Can I use raisins instead of dates in sticky toffee pudding?

Yes, but the texture and flavor change-raisins are less sticky and have milder sweetness. Soak them the same way as dates for at least 15 minutes before using.

Sticky Toffee Pudding served on a plate

Sticky Toffee Pudding

No ratings yet
Sticky toffee pudding features a moist, date-studded cake baked at 350°F paired with a rich toffee sauce that's added during baking and at serving. Soaking Medjool dates in hot water ensures a tender crumb while brown sugar and cream create a luscious caramel flavor.
Print Recipe Pin Recipe
Prep Time 15 minutes mins
Cook Time 40 minutes mins
Total Time 55 minutes mins
Servings: 6 servings
Course: Dessert
Cuisine: British
Ingredients Method Notes

Ingredients
  

  • 1.5 cups Medjool dates pitted, soak in 1¼ cups boiling water for 15 minutes, then drain and mash
  • 1.75 cups all-purpose flour measure by spooning and leveling
  • 1 teaspoon baking soda
  • 1 teaspoon baking powder
  • 0.25 teaspoon salt
  • 6 tablespoon butter softened to room temperature
  • 0.75 cup brown sugar packed, for cake batter
  • 2 large eggs room temperature
  • 1 teaspoon vanilla extract for cake batter
  • 1 cup brown sugar packed, for toffee sauce
  • 0.5 cup butter for toffee sauce
  • 1 cup heavy cream at least 36% fat, for toffee sauce
  • 0.5 teaspoon vanilla extract for toffee sauce
  • pinch salt for toffee sauce

Method
 

  1. Pour 1¼ cups boiling water over pitted Medjool dates in a bowl. Let soak for 15 minutes until very soft, then drain well and mash into a chunky paste with a fork.
    1.5 cups Medjool dates
  2. Beat softened butter with ¾ cup brown sugar using an electric mixer on medium-high speed for 3-4 minutes until light and fluffy. Add eggs one at a time, beating well after each addition. Then mix in vanilla extract.
    6 tbsp butter, 0.75 cup brown sugar, 2 large eggs, 1 tsp vanilla extract
  3. Whisk together flour, baking soda, baking powder, and salt in a separate bowl. Add half the flour mixture to the butter mixture and fold gently. Then add the mashed dates, followed by the remaining flour. Mix just until no dry streaks remain to prevent toughness.
    1.75 cups all-purpose flour, 1 tsp baking soda, 1 tsp baking powder, 0.25 tsp salt, 1.5 cups Medjool dates, 6 tbsp butter, 0.75 cup brown sugar, 2 large eggs, 1 tsp vanilla extract
  4. Pour the batter into a greased and floured 9-inch square pan. Bake at 350°F for 35-40 minutes until the top springs back lightly when pressed and a toothpick inserted shows moist crumbs but no wet batter.
  5. While the cake bakes, melt ½ cup butter in a saucepan over medium heat. Add 1 cup brown sugar and heavy cream, stirring constantly. Bring to a gentle simmer and cook for 5-7 minutes, stirring often, until thick enough to coat the back of a spoon. Remove from heat and stir in vanilla extract and a pinch of salt.
    0.5 cup butter, 1 cup brown sugar, 1 cup heavy cream, 0.5 tsp vanilla extract, pinch salt

Notes

  • Soak dates well to achieve a moist texture and avoid lumps in batter.
  • Cream butter and brown sugar thoroughly to incorporate air for a light crumb.
  • Watch the toffee sauce carefully as it can burn quickly; stir constantly over medium heat.

Tried this recipe?

Let us know how it was!

What Is Currant? [Taste, Uses & More]

March 29, 2026

Bite into a ripe red currant straight off the stem and the first thing you notice is the skin - taut, then suddenly gone - followed by a rush of juice so sharp it almost stings. That balance between acidic brightness and underlying fruit sweetness is what makes currants one of the most sought-after berries in preserves, sauces, and European baking.

What Is Currant

Cooks reach for them when raspberries or blackberries aren't quite tart enough to cut through rich meat or thick cream.

QUICK SUMMARY

Currants are small, intensely tart berries from Ribes shrubs, available in black, red, and white varieties. Black currants carry the boldest flavor; red currants are the sharpest; white currants are mildest. Used in jellies, sauces, and preserves, they last 3-7 days refrigerated.

🍇Category: Berry (shrub fruit), fresh or dried
👅Flavor: Bright tart to deeply tangy, variety-dependent
🍳Best Uses: Jams, jellies, sauces, tarts, summer pudding
❄️Shelf Life: 3-7 days refrigerated; freeze for longer storage
🌍Cuisines: British, French, Scandinavian, Central/Eastern European

What Is Currant?

Currants are small cluster-bearing berries from Ribes shrubs, native to temperate Europe and Western Asia.

They grow in trailing bunches called strigs and come in three main types: black currant (Ribes nigrum), red currant (Ribes rubrum), and white currant, which is a pale cultivar of the red.

Each variety has a distinct character. Red and white currants are translucent, jewel-like, and remain attached to slender green stems at harvest, while black currants are deep purple-black with a noticeably stronger aroma.

There's a common naming confusion worth clearing up. The dried "currant" sold in grocery stores - found in scones and panettone - is not a Ribes berry at all.

Those are Zante currants, dried Corinth grapes from Greece, named after the port of Zante.

Fresh currants are rarely grown commercially in the United States due to historical cultivation bans that protected pine trees from a fungal disease. That's why finding them at farmers markets or specialty stores still feels like a small event.

Watch Out
Don't swap fresh currants for Zante currants in recipes without adjusting sugar and liquid. Zante currants are raisins - dense, sweet, and dry - while fresh currants are tart, juicy berries.

What Does Currant Taste Like?

currant - What Is Currant

Red currants taste like a sharper, more astringent cranberry - their acidity is clean and almost citrus-adjacent. The flavor sits in the front of the mouth, bright and fleeting.

Black currants are a different experience entirely. Their flavor is deeper, more complex, and slightly medicinal, reminiscent of a concentrated tart blackberry layered with herbal, almost woody notes. Crème de cassis, the French liqueur made from black currants, captures this quality well.

White currants are the gentlest of the three, offering mild sweetness with just a whisper of acidity. Heat intensifies currants' tartness and draws out natural pectin, which is why they're so well-suited to jams and jellies.

Sensory SnapshotStrong Intensity
👅 Flavor
bright tartastringentherbal (black)mildly sweet (white)
✋ Texture
firm skinjuicy bursttiny seeds
👃 Aroma
sharp green-fruity (red)earthy, medicinal (black)

How to Use Currant

Currants are workhorses in the kitchen, though their role shifts significantly depending on whether you're cooking sweet or savory. Red currant jelly is the classic British pairing for roast lamb and game birds - its tartness cuts through fat the way few condiments can.

The red currant jelly article goes deeper into making and using it.

Black currants take well to reduction. Simmered with red wine, port, and thyme, they form a sauce rich enough to serve over duck or venison.

For baking, all three varieties earn their place:

  • Raw garnish - Scatter fresh red or white currants over yogurt, ricotta, or panna cotta for immediate acidity.
  • Tarts and upside-down cakes - Fold currants into batter or layer them in a base; they hold their shape under moderate heat.
  • Summer pudding - The classic British preparation where berries macerate bread with their juice overnight.
  • Compote - Cook briefly with sugar for a cheese board accompaniment, especially good with aged goat cheese.
  • Dried Zante currants - Stir into scone dough, panettone, or lemon pound cake batter for concentrated fruity sweetness.

Currants pair strongly with vanilla, lemon zest, dark chocolate, and rosemary. They don't work well with very bitter greens, where their sharp seeds interrupt rather than complement.

Golden Rule
Always strain black currant sauce through a fine-mesh sieve after cooking. The seeds are edible but their texture disrupts smooth reductions and coulis.
How Currants Are Used
MethodBest ForTip
🥗 RawGarnishing desserts, adding acidity to dairy dishesUse red or white; black currants are very astringent uncooked
🍳 SimmeredJams, jellies, syrups, savory saucesHigh natural pectin means jams set quickly - watch the heat
🧁 BakedTarts, cakes, scones (Zante currants)Toss dried currants in flour before folding into batter
🥄 MaceratedSummer pudding, compotes, cheese boardsA little sugar and an hour at room temperature draws enough juice
Try It In
🍫Rich Chocolate Layer CakeBlack currant compote between layers sharpens the chocolate→🍋Lemon Pound CakeZante currants fold into the batter for pockets of sweetness→☕Lemon Mint Hot ChocolateSwap lemon for black currant syrup for a fruity variation→

How to Buy and Store Currant

Fresh currants are seasonal, peaking in midsummer. Look for firm clusters with glossy, unshriveled skin. Red and white currants should be translucent and still attached to their green stems. Black currants should be deeply pigmented with a strong aromatic scent - a faint smell suggests an early harvest.

Avoid any berries with dull skin, leaking juice, or signs of mold. A single moldy berry spreads fast in a packed container.

Shortcut
Don't wash currants until you're ready to use them. Moisture accelerates breakdown. Store dry in a shallow paper towel-lined container in the refrigerator.

Fresh currants last 3-7 days refrigerated. For longer storage, freeze them unwashed on a baking sheet first, then transfer to bags - this keeps them from clumping.

Our full guide to currant storage guide covers freezing in detail. If a recipe calls for black currants you can't source, currant replacements covers the closest options.

Start With Red Currant Jelly

If you've never cooked with currants before, red currant jelly is the most forgiving entry point.

It requires no special equipment, sets reliably due to high natural pectin, and has immediate kitchen utility - alongside roast meat, stirred into pan sauces, or spread on buttered bread.

From there, move to black currant jam or a simple compote. Both reward the same approach: gentle heat, a little sugar, and patience.

Frequently Asked Questions

Are currants the same as raisins?

No. Fresh currants are small berries from Ribes shrubs; they're tart and juicy. Zante currants - the dried kind sold for baking - are dried Corinth grapes, a type of small raisin with no botanical relationship to Ribes berries.

How do currants differ from gooseberries?

Both come from Ribes shrubs, but gooseberries grow singly and are larger, with a thicker skin and a flavor closer to tart grape. Currants grow in clusters and are smaller, juicier, and more intensely acidic.

What can I substitute for black currants?

Blackberries are the closest fresh substitute - similar depth with less astringency. For crème de cassis specifically, a [crème de cassis substitute](https://forkliftkitchen.com/creme-de-cassis-substitutes/) like black raspberry liqueur or blueberry syrup works in most sauces.

Can you eat currant seeds?

Yes, currant seeds are edible and safe. They're very small and cause no harm, though their texture is noticeable in smooth preparations like coulis or sauces, which is why straining is recommended.

How do you freeze currants?

Spread dry, unwashed currants in a single layer on a baking sheet and freeze for 2 hours first. Then transfer to freezer bags. This flash-freeze step prevents the berries from clumping into a solid mass.

French Crème Brûlée

March 29, 2026

Custard with a crackling caramelized top that shatters when you tap it with a spoon. That's what happens when you bake silky vanilla cream in a water bath and torch sugar until it turns to glass.

French Crème Brûlée served on a plate

The slow bake keeps the texture smooth. You whisk hot cream into egg yolks slowly, strain out any lumps, then let gentle heat do the rest.

This works for dinner parties when you need something that looks impressive but comes together with five ingredients and a kitchen torch.

QUICK SUMMARY

French crème brûlée is a silky vanilla custard topped with caramelized sugar that forms a crisp shell. Success depends on tempering eggs slowly to prevent curdling and baking in a water bath at 325°F for even heat. Make this when you want a restaurant-quality dessert that requires only five ingredients and one critical technique.

⏱️Time Reality: 15 minutes active, 40-45 minutes baking, 2-3 hours chilling before serving
🔥Method Shortcut: Temper eggs by adding hot cream one slow stream at a time over 2 minutes
⚠️Watch Out: Custard curdles if cream is too hot or added too fast - whisk constantly and go slow

Table of Contents

Toggle
  • Why This Recipe Works
  • What You'll Need
    • Ingredient Details
  • Ingredient Swaps
  • What to Serve With It
  • Store and Reheat
  • Frequently Asked Questions
  • French Crème Brûlée
    • Method 
    • Tried this recipe?

Why This Recipe Works

Baking custard in a water bath keeps the temperature steady so the eggs set without scrambling. The hot water surrounding the ramekins creates gentle, even heat that produces a smooth texture instead of a grainy one.

Quick Reference
⏱️
Prep Time
15 min
🔥
Cook Time
40-45 min
⏰
Total Time
3 hr including chilling
🍽️
Servings
4-6 servings
📊
Difficulty
Medium
🏷️
Category
Dessert
💡
Quick Tip
Chill custard 2-3 hours before torching
🎯
Best For
Entertaining

Five things that make this work:

  • Heavy cream with 36% fat minimum - lower fat content produces thin, watery custard that won't set properly
  • Straining custard before baking - catches any cooked egg bits or foam for a perfectly smooth texture
  • Room temperature eggs - cold eggs curdle when hot cream hits them, even with slow tempering
  • Water bath halfway up ramekins - insulates custard from direct oven heat so edges don't overcook while center sets
  • Custard jiggles slightly in center when done - fully firm custard means it's overbaked and will turn grainy
Quick Tip
Hold the torch 2-3 inches above the sugar and keep it moving - staying in one spot burns the caramel before the rest melts

What You'll Need

Ingredients for French Crème Brûlée

Shop for heavy cream in the dairy section, not the whipping cream aisle. Rich mains need something to cut through, and this side does exactly that. For a version that comes together quickly, this easy sauce recipe works when you're short on time.

🥛
Dairy Base
  • 2 cups heavy cream (36% fat minimum)
  • Optional: ¼ cup whole milk to lighten
🥚
Eggs & Sugar
  • 5 large egg yolks (room temperature)
  • ⅓ cup granulated sugar (for custard)
  • ¼ cup turbinado sugar (for topping)
🌿
Aromatics
  • 1 vanilla bean or 1 tablespoon vanilla extract
  • Pinch of salt
  • Optional: citrus zest or espresso powder

Ingredient Details

  • Heavy cream
    Look for 36% fat or higher - anything less produces thin custard that won't set properly in the water bath
  • Egg yolks
    Let eggs sit at room temperature for 30 minutes before whisking - cold yolks curdle when hot cream hits them
  • Vanilla bean
    Split the pod lengthwise and scrape seeds into cream - the pod itself steeps for deeper flavor than extract alone
  • Turbinado sugar
    Coarse crystals caramelize more evenly than granulated - white sugar works but melts faster and burns easier
  • Ramekins
    Use 4-6 oz shallow ramekins - deeper dishes take longer to bake and the center stays runny while edges overcook
  • Fine mesh strainer
    Strain custard after whisking - catches any cooked egg bits or foam that would mar the smooth texture
  • Kitchen torch
    A propane torch from the hardware store works better than culinary torches - hotter flame caramelizes sugar faster with less risk of warming custard

Ingredient Swaps

Most swaps change the texture more than the flavor. Pastry adds the contrast this plate needs, but timing matters. For a version that comes together quickly, this easy pastry recipe delivers without the wait.

Four swaps that work:

  • Heavy cream → full-fat coconut milk - adds subtle coconut flavor and makes it dairy-free, but custard sets slightly softer and less rich
  • Vanilla bean → vanilla extract - use 1 tablespoon extract instead of one bean, flavor is less intense but simpler and cheaper
  • Turbinado sugar → granulated white sugar - caramelizes faster so watch closely, forms thinner crust with less crunch
  • Granulated sugar → erythritol or monk fruit - reduces carbs for keto, but caramel topping won't harden the same way

Vanilla Bean

Works for: dinner parties, special occasions, when you want visible vanilla specks and deeper flavor

Skip if: you're on a budget or making a large batch - extract costs less and measures faster

Vanilla Extract

Works for: weeknight desserts, batch cooking, when you want consistent vanilla flavor without prep

Skip if: you're serving guests who expect the visual impact of vanilla bean specks in the custard

Instructions

The custard bakes for 40-45 minutes but needs 2-3 hours to chill before you torch the sugar. Most people skip this side, but it balances the meal. We keep a batch ready for nights like this - simple homemade chicken comes together while the custard chills.

  1. Heat 2 cups heavy cream with split vanilla bean (or 1 tablespoon extract) and pinch of salt in a saucepan over medium heat until small bubbles form at the edges, about 5 minutes. Remove from heat and let steep 10 minutes if using vanilla bean.

  2. Whisk 5 egg yolks with ⅓ cup granulated sugar in a bowl until pale yellow. Slowly pour hot cream into yolks in a thin stream while whisking constantly - take 2 full minutes to add all the cream so eggs don't curdle.

  3. Strain custard through a fine mesh strainer into a large measuring cup or bowl. Divide evenly among 4-6 ramekins, filling each about ¾ full.

  4. Place ramekins in a large baking dish and pour hot water into the dish until it reaches halfway up the sides of the ramekins. Bake at 325°F for 40-45 minutes until edges are set but centers jiggle slightly when gently shaken.

  5. Remove ramekins from water bath, let cool 30 minutes at room temperature, then refrigerate uncovered for 2-3 hours until completely chilled. Before serving, sprinkle 1-2 teaspoons turbinado sugar evenly over each custard, then torch in circular motions until sugar melts and turns golden brown.

Watch Out
Wipe water off the outside of ramekins before placing them in the oven - water on the exterior creates steam that makes custard edges watery instead of creamy

What to Serve With It

A good pack can make or break the plate. For a version that comes together quickly, a simple pack side gives you something fresh without extra cooking.

Side Dish Prep Why It Works How to Serve
Fresh berries Easy Tart raspberries or strawberries cut through rich vanilla custard Scatter 3-4 berries on plate next to ramekin or arrange on top of caramel
Espresso or black coffee Easy Bitter coffee balances sweet caramel and cleanses palate between bites Serve in small cups alongside dessert - double espresso works best
Shortbread cookies Easy Buttery, crumbly texture adds contrast without competing with custard Place 1-2 cookies on the side for scooping custard or dipping
Berry coulis Medium Tart sauce adds color and cuts sweetness with bright acidity Drizzle 2 tablespoons around ramekin on plate or serve in small dish
Champagne Easy Bubbles and dry finish balance creamy custard for elegant pairing Pour a glass to sip between spoonfuls - temperature contrast enhances both

Three ways to serve it:

  • For celebrations: Serve with champagne and fresh raspberries - the bubbles cut through the cream while berries add tartness
  • For casual dinners: Pair with strong espresso and a shortbread cookie - coffee balances sweetness and cookie adds crunch
  • For dinner parties: Drizzle berry coulis around the ramekin on a white plate - red sauce against golden caramel looks restaurant-quality
Best Pick
Fresh raspberries or blackberries work better than strawberries - smaller berries have more concentrated tartness that balances the sweet custard without needing extra sugar

Store and Reheat

Custard keeps for 3-4 days in the fridge but the caramel topping softens after a few hours. Torch the sugar right before serving so it stays crisp instead of turning sticky and wet.

Method Time Best For
🔥 No Reheating Serve chilled Best texture - custard stays silky and caramel stays crisp
🍳 Room Temp 15-20 min Takes edge off coldness without warming custard or melting caramel
📦 Microwave 20-30 sec low power Emergency only - custard warms unevenly and caramel dissolves

For best results when storing:

  • Cover ramekins with plastic wrap pressed directly onto custard surface - prevents skin from forming and keeps texture smooth
  • Store without caramel topping - torch sugar just before serving so it stays crisp instead of dissolving into custard
  • Refrigerate unbaked custard up to 24 hours - pour into ramekins, cover, chill, then bake when ready (add 5 minutes to bake time)
  • Freeze custard (no topping) up to 1 month - thaw overnight in fridge, torch sugar before serving (texture slightly less silky)
  • Keep custard away from strong-smelling foods - vanilla custard absorbs odors from garlic, onions, or fish easily

Frequently Asked Questions

Can I make crème brûlée ahead and refrigerate?

Yes, bake the custard up to 3 days ahead and store covered in the fridge. Torch the sugar topping right before serving so it stays crisp instead of dissolving into the custard.

How do I know when crème brûlée is done baking?

The edges should be set and firm while the center jiggles slightly when you gently shake the ramekin. If the entire custard is solid, it's overbaked and will turn grainy.

Can I use milk instead of heavy cream?

You can replace up to ¼ cup of cream with whole milk to lighten the custard, but using all milk produces thin, watery results. Heavy cream with 36% fat minimum is critical for proper texture.

Why did my caramel topping burn?

Holding the torch too close or staying in one spot too long burns the sugar before it melts evenly. Keep the torch 2-3 inches away and move it in steady circles until the sugar turns golden brown.

How to fix cracked crème brûlée?

Cracks come from rapid cooling or overbaking. Let custard cool in the oven with the door cracked for 15 minutes before moving to the counter. The caramel topping hides surface cracks once torched.

French Crème Brûlée served on a plate

French Crème Brûlée

No ratings yet
French Crème Brûlée is a silky vanilla custard topped with a crackling caramelized sugar shell. This recipe uses slow tempering of eggs and baking in a water bath at 325°F to achieve a smooth texture and perfect set. It requires only five ingredients and a kitchen torch for a restaurant-quality dessert.
Print Recipe Pin Recipe
Prep Time 15 minutes mins
Cook Time 45 minutes mins
Total Time 3 hours hrs
Servings: 6 servings
Course: Dessert
Cuisine: French
Ingredients Equipment Method Notes

Ingredients
  

  • 2 cups heavy cream 36% fat minimum
  • 0.25 cup whole milk optional, to lighten
  • 5 large egg yolks room temperature
  • 0.33 cup granulated sugar for custard
  • 0.25 cup turbinado sugar for topping
  • 1 vanilla bean vanilla bean or 1 tablespoon vanilla extract
  • pinch salt

Equipment

  • Saucepan Heat cream and steep vanilla
  • Fine-mesh strainer Strain custard to remove lumps
  • Ramekins Bake custard in shallow 4-6 oz dishes
  • Baking dish Hold water bath for ramekins
  • Kitchen torch Caramelize the sugar topping
  • Whisk Whisk eggs and sugar

Method
 

  1. Heat heavy cream with split vanilla bean (or vanilla extract) and a pinch of salt in a saucepan over medium heat until small bubbles form at the edges, about 5 minutes. Remove from heat and let steep 10 minutes if using vanilla bean.
    2 cups heavy cream, 1 vanilla bean vanilla bean, pinch salt
  2. Whisk egg yolks with granulated sugar in a bowl until pale yellow. Slowly pour hot cream into yolks in a thin stream while whisking constantly, taking 2 minutes to add all so the eggs do not curdle.
    5 large egg yolks, 0.33 cup granulated sugar, 2 cups heavy cream
  3. Strain custard through a fine mesh strainer into a large bowl or measuring cup. Divide evenly among 4-6 ramekins, filling each about three quarters full.
  4. Place ramekins in a large baking dish and pour hot water into the dish until it reaches halfway up the sides of the ramekins. Bake at 325°F for 40-45 minutes until edges are set but centers jiggle slightly when gently shaken.
  5. Remove ramekins from water bath, let cool 30 minutes at room temperature, then refrigerate uncovered for 2-3 hours until completely chilled.
  6. Before serving, sprinkle 1-2 teaspoons turbinado sugar evenly over each custard, then use a kitchen torch in circular motions until sugar melts and turns golden brown.
    0.25 cup turbinado sugar

Notes

  • Use heavy cream with at least 36% fat for a proper custard texture.
  • Strain custard before baking to remove lumps for smooth texture.
  • Keep the kitchen torch moving 2-3 inches above sugar to avoid burning.

Tried this recipe?

Let us know how it was!

What Is Cumin? Taste, Uses, Origins & More

March 29, 2026

You spot cumin at the store in two forms - small, ridged brown seeds and a warm yellow-brown powder - and the choice between them matters more than most labels suggest. Cumin is one of the most widely used spices on the planet, anchoring dishes from Indian dal to Mexican taco seasoning to Moroccan tagine, yet it's easy to buy the wrong form, store it too long, or use it in a way that mutes its best qualities.

What Is Cumin

This guide covers what cumin actually tastes like, how to cook with it properly, and what to look for when buying.

QUICK SUMMARY

Cumin is a dried spice seed with a warm, earthy, slightly bitter flavor and a sharp citrus top note. It's essential in Indian, Mexican, and North African cooking. Buy whole seeds for maximum freshness, and toast before using whenever possible.

🌿Category: Dried spice seed from the Cuminum cyminum plant
👅Flavor: Warm, earthy, bitter-citrus with smoky depth when toasted
🍳Best Uses: Tadka, taco seasoning, tagines, chili, hummus, spice blends
🕐Shelf Life: Whole seeds 1-2 years; ground cumin 6 months to 1 year
🌍Cuisines: Indian, Middle Eastern, Mexican, North African, Latin American

What Is Cumin?

Cumin is the dried seed of Cuminum cyminum, a flowering plant in the parsley family native to the Eastern Mediterranean and South Asia. The seeds are small, oblong, and ridged, brownish in color, and sold either whole or pre-ground into a warm yellow-brown powder.

Known as jeera in Hindi and comino in Spanish, it's one of the oldest documented spices in recorded history. It appears in ancient Egyptian texts and remains a staple across dozens of cuisines today.

Two main forms dominate home kitchens:

  • Whole cumin seeds - used for tempering in hot oil, pickling blends, and dishes where texture matters
  • Ground cumin - used in spice rubs, marinades, and blended seasonings like garam masala and ras el hanout

Cumin is often confused with caraway, which looks nearly identical but has a sweeter, anise-like flavor profile. The two are not interchangeable in most recipes.

It's also distinct from coriander seed, though the two pair together constantly. If you work with coriander often, coriander seed swaps may be useful when building spice blends.

What Does Cumin Taste Like?

Cumin has a strong, unmistakable flavor - warm and earthy up front, with a dry bitterness and a bright citrus-like top note that lifts the whole profile.

Raw, the seeds taste sharp and slightly harsh. Heat changes everything.

Sensory SnapshotStrong Intensity
👅 Flavor
warm earthybitter-warmslightly citrusysmoky when toasted
✋ Texture
hard brittle seedfine powder (ground)
👃 Aroma
warm pungentnutty-citrus

Toasted in a dry pan, the bitterness softens and a smoky, nutty depth emerges. Ground fresh from toasted seeds, the aroma is noticeably more complex than anything from a pre-ground jar.

Cumin tastes closest to caraway and toasted coriander, however it's drier, earthier, and has a sharper high note that neither of those spices quite matches. That distinction matters when you're building a spice blend - cumin anchors; coriander rounds; caraway adds sweetness.

Golden Rule
Always taste a pinch of your ground cumin before adding it to a dish. Stale cumin loses its citrus top note first, leaving only flat earthiness - a sign to replace it.

How to Use Cumin

Cumin works across a remarkable range of cooking traditions, and the method you choose determines how its flavor lands in the final dish.

Blooming in hot fat is the most common technique in Indian cooking. Whole seeds dropped into hot oil or ghee pop and sizzle - this is called tadka - releasing their oils into the fat before other ingredients are added. Dal, curries, and jeera rice all rely on this step.

How Cumin Is Used
MethodBest ForTip
🌱 Dry ToastMaximizing aroma before grindingMedium heat, keep moving - 60 to 90 seconds
🍳 Tadka (hot oil)Indian dals, curries, jeera riceAdd seeds when oil shimmers; don't let them burn
🥣 Ground into blendsTaco seasoning, garam masala, ras el hanout, rubsGrind fresh from toasted seeds for best results
🥘 Added early to stewsChili, tagines, long-braised dishesEarly addition integrates flavor; late addition keeps it sharp

Beyond Indian cooking, cumin appears in Mexican and Latin American dishes as ground seasoning in taco meat, beans, and rice. In North African cooking, it anchors ras el hanout and Moroccan tagines alongside coriander and cinnamon.

Middle Eastern cooks use it in hummus, falafel, and spiced roasted vegetables.

Cumin pairs closely with cilantro, lime, garlic, chili peppers, and coriander seed - a combination that crosses almost every cuisine where cumin appears. Keep it away from delicate white fish with subtle herbs, where its intensity overwhelms rather than adds.

If you ever need a replacement, cumin alternatives covers the closest options by cooking context.

Try It In
🥩Xinjiang Cumin Lamb Stir FryWhole seeds bloom fast over high heat — a lesson in cumin's intensity→🍚Jeera Rice Indian Cumin RiceClassic tadka technique — seeds popped in ghee before rice is added→🥕Moroccan Carrot Salad with CuminGround cumin used cold — shows its citrus edge without any heat→

How to Buy and Store Cumin

Whole seeds are the better purchase for most home cooks. Rub a few between your fingers before buying - they should smell bright and warm immediately, with some oiliness.

Avoid seeds that are dusty, pale, or clumped together.

Best Pick
Buy whole seeds and grind them yourself. A cheap spice grinder takes seconds, and freshly ground cumin from toasted seeds has noticeably more aroma than any pre-ground jar.

For ground cumin, check for a recent roast or pack date and buy in small quantities - a 50g jar used within six months beats a large jar sitting for two years.

Storage is straightforward:

  • 🫙 Whole seeds - airtight container, away from heat and light; good for 1-2 years
  • 🧂 Ground cumin - separate sealed jar; best within 6 months to 1 year
  • ❄️ Refrigeration - optional, however helpful in warm or humid climates for ground spice

For a full breakdown of cumin's shelf life and how to tell when it's past its best, that guide covers every storage scenario in detail.

Start With Whole Seeds

If you only keep one form, make it whole seeds. Toast a small batch in a dry pan, grind what you need, and keep the rest sealed.

Ground cumin from a pre-opened jar works fine in blended spice rubs and long-cooked stews, where the difference is less noticeable. However, for tadka or any dish where cumin is the lead flavor, freshly ground seeds from toasted stock will produce a visibly different result.

Start there and adjust from experience.

Frequently Asked Questions

Should you toast cumin before using it?

Yes, for most applications. Toasting whole seeds in a dry pan for 60-90 seconds deepens the smoky, nutty character and softens the raw bitterness. Skip toasting only when adding ground cumin early to a long-simmered dish.

Is cumin the same as coriander?

No. Both are dried seeds from the parsley family, but cumin is earthier and more bitter, while coriander seed is warmer and slightly sweet. They appear together in many spice blends precisely because they complement rather than duplicate each other.

Can I substitute cumin with caraway?

In a pinch, yes - but the flavor shifts noticeably. Caraway is sweeter with an anise edge, while cumin is drier and more bitter. Use caraway at a slightly smaller quantity and expect a milder, less earthy result.

How long does ground cumin last?

About 6 months to 1 year at peak flavor in a sealed jar away from heat. After that, it won't make you sick, but the citrus top note fades first and the spice tastes flat. The sniff test is reliable - no aroma means no flavor.

Does cumin have any nutritional value?

At typical cooking quantities, the contribution is small but real. Cumin contains iron, manganese, and trace antioxidants. It's gluten-free, vegan, and adds negligible calories per serving.

Chicken Cacciatore Italian-Style

March 29, 2026

Searing chicken thighs skin-side down in hot oil creates the browned fond that flavors the entire pot. The high heat renders fat and crisps skin while leaving the meat juicy enough to survive 40 minutes of simmering.

Chicken Cacciatore Italian-Style served on a plate

You don't flip them or move them around. The pan builds flavor while you prep vegetables.

This works for weeknight dinners when you want something that tastes slow-cooked but doesn't require all afternoon. The Dutch oven does most of the work while you make a side or set the table.

QUICK SUMMARY

Chicken cacciatore is a braised Italian chicken dish with peppers, tomatoes, and wine that simmers on the stovetop. Bone-in thighs stay tender during the 40-minute simmer while the sauce reduces to a thick, herb-rich coating. Make this when you need a one-pot dinner that reheats well for meal prep.

⏱️Time Reality: 60 minutes start to finish-15 minutes active prep, 45 minutes mostly hands-off simmering
🔥First Critical Move: Pat chicken completely dry and sear skin-side down 5-7 minutes undisturbed over medium heat
⚠️Watch Out: Covering the pan while simmering creates watery sauce-leave lid off to reduce liquid by half

Table of Contents

Toggle
  • Why This Recipe Works
  • What You'll Need
    • Ingredient Details
  • Ingredient Swaps
  • What to Serve With It
  • Store and Reheat
  • Frequently Asked Questions
  • Chicken Cacciatore Italian-Style
    • Method 
    • Tried this recipe?

Why This Recipe Works

Deglazing the pan with wine after searing captures all the browned bits stuck to the bottom. Those caramelized proteins dissolve into the sauce and add depth you can't get from just adding wine to raw ingredients. For more hands-off Italian chicken options, this juicy chicken uses a slow cooker instead.

Quick Reference
⏱️
Prep Time
15 min
🔥
Cook Time
45 min
⏰
Total Time
60 min
🍽️
Servings
4 servings
📊
Difficulty
Medium
🏷️
Category
Main Dish
💡
Quick Tip
Sear chicken first for best texture
🎯
Best For
Weeknight | Meal prep | Entertaining

Five things that make this work:

  • Bone-in thighs retain moisture during the long simmer-boneless breast dries out and shreds before the sauce finishes reducing
  • Uncovered simmering concentrates flavor by evaporating excess liquid-the sauce should coat the back of a spoon by minute 40
  • Wine deglazes the pan immediately after searing-those stuck-on bits dissolve and give the sauce savory depth
  • Medium heat prevents burning garlic and scorching tomatoes-low and steady wins over high heat that creates bitter spots
  • Checking 165°F internal temp ensures doneness without cutting into chicken-use an instant-read thermometer in the thickest part
Quick Tip
Add minced garlic only after onions soften-raw garlic burns in 30 seconds on high heat and turns bitter.

What You'll Need

Ingredients for Chicken Cacciatore Italian-Style

The bone-in thighs are non-negotiable here because they stay juicy through the full simmer. Boneless will work but you'll need to cut the cooking time by 10-15 minutes or risk dry, stringy meat.

🍗
Protein
  • 4-6 bone-in chicken thighs (skin-on)
🥬
Vegetables
  • 2 bell peppers (red or yellow), sliced
  • 1 large onion, sliced
  • 8 oz mushrooms, sliced (optional)
🧄
Aromatics
  • 4 cloves garlic, minced
  • 2 teaspoon dried oregano
  • 1 teaspoon dried basil
🥢
Sauce Base
  • 1 (28 oz) can crushed tomatoes
  • ½ cup dry red wine
  • 2 tablespoon olive oil
  • 2 tablespoon capers or olives (optional)

Ingredient Details

  • Bone-in chicken thighs
    Pat completely dry with paper towels for 2-3 minutes-wet skin steams instead of sears and won't crisp up
  • Dry red wine
    Use something you'd drink-cheap cooking wine tastes sour and metallic after it reduces for 40 minutes
  • Crushed tomatoes
    San Marzano or fire-roasted varieties add more depth than basic crushed-check for no added sugar on the label
  • Bell peppers
    Red and yellow stay sweeter than green-slice them ¼-inch thick so they soften without disintegrating
  • Fresh vs dried herbs
    Dried oregano and basil hold up better during the simmer-add fresh herbs in the final 10 minutes if using
  • Capers or olives
    Add briny, salty punch at the end-rinse capers first to remove excess salt that can overpower the sauce
  • Mushrooms
    Cremini or baby bella work best-slice thick (¼ inch) so they hold texture and don't turn slimy

Ingredient Swaps

Boneless chicken thighs cut the cook time but need closer monitoring-they go from done to dry in about 5 minutes. Check temp at 25 minutes instead of 35.

Four practical swaps:

  • Bone-in thighs → boneless thighs or breast: Reduce simmer to 25-30 minutes and check internal temp at 25 minutes-breast dries out faster and needs constant monitoring
  • Dry red wine → chicken broth + 1 tablespoon red wine vinegar: Less depth but similar acidity-add vinegar at the end to avoid bitterness from prolonged cooking
  • Crushed tomatoes → diced tomatoes or fresh purée: Diced creates chunkier sauce that takes longer to thicken-purée fresh tomatoes with immersion blender first
  • Bell peppers → zucchini or eggplant: Slice zucchini into half-moons or cube eggplant into 1-inch pieces-both need salting first to prevent mushiness

Bone-In Thighs

Works for: Full 40-minute simmer, stays juicy, deeper flavor from bones

Skip if: You need it done in under 30 minutes or prefer white meat

Boneless Breast

Works for: Faster cook time (25 min), leaner option, easier to slice

Skip if: You want forgiving timing or richer flavor-breast dries out fast

Instructions

The chicken finishes cooking in the sauce, so pulling it early from the sear is intentional. It'll reach 165°F during the simmer while the sauce thickens around it.

  1. Sear the chicken: Pat thighs completely dry with paper towels. Heat 2 tablespoon olive oil in large Dutch oven or deep skillet over medium heat for 2 minutes. Add chicken skin-side down and cook undisturbed 5-7 minutes until skin releases easily and turns golden brown. Flip and cook 3 minutes. Remove to plate.
  2. Cook the vegetables: Add sliced onion and peppers to same pan with chicken fat. Cook 5-6 minutes, stirring occasionally, until onion softens and edges brown slightly. Add minced garlic and cook 1 minute until fragrant but not browned.
  3. Deglaze and build sauce: Pour in ½ cup red wine and scrape bottom of pan with wooden spoon to release stuck bits. Simmer 3 minutes until wine reduces by half. Add crushed tomatoes, oregano, basil, and ½ teaspoon each salt and black pepper. Stir to combine.
  4. Simmer the chicken: Nestle seared chicken thighs into sauce skin-side up. Add mushrooms if using. Bring to gentle simmer over medium-low heat. Cook uncovered 35-40 minutes, stirring sauce every 10 minutes, until chicken reaches 165°F internal temp and sauce thickens enough to coat spoon.
  5. Finish and rest: Stir in capers or olives if using. Taste sauce and adjust salt if needed. Remove from heat, cover, and let rest 5 minutes before serving so chicken reabsorbs juices.
Golden Rule
Leave the pan uncovered during the entire simmer-covering traps steam and creates watery sauce that won't cling to chicken.

What to Serve With It

Cacciatore needs something to soak up the tomato sauce-plain pasta or polenta work but they don't add much contrast. For a complete weeknight plate, weeknight chicken dinner ideas covers more pairing options that balance rich braised dishes.

Side Dish Prep Why It Works How to Serve
Creamy Polenta Easy Soft, buttery base absorbs sauce without competing flavors Spoon polenta onto plate first, nestle chicken on top, drizzle sauce over
Garlic Bread Easy Crunchy contrast mops up extra sauce from the plate Toast thick slices with butter and garlic, serve on the side for dipping
Steamed Green Beans Easy Fresh, crisp texture cuts through rich tomato sauce Steam until bright green, toss with lemon juice and olive oil
Roasted Rosemary Potatoes Medium Hearty starch with crispy edges adds textural variety Roast at 425°F for 30 min, toss with fresh rosemary before serving
Simple Arugula Salad Easy Peppery greens balance richness without heavy dressing Toss arugula with lemon vinaigrette, shaved parmesan, serve immediately

Three ways to serve it:

  • Over pasta: Toss cooked penne or rigatoni directly in the sauce for 1 minute before plating-ridged pasta grabs more sauce than smooth shapes
  • With crusty bread: Slice a baguette, brush with olive oil, toast under broiler 2 minutes-use for mopping up sauce at the end
  • Meal prep bowls: Layer polenta, chicken, and sauce in containers with steamed broccoli on the side-reheat polenta and chicken together for 3 minutes
Best Pick
Creamy polenta hits the sweet spot-it's fast to make, absorbs sauce like a sponge, and adds richness without heaviness.

Store and Reheat

Chicken cacciatore tastes better the next day after the sauce has time to settle into the meat. Store it within 2 hours of cooking to avoid bacteria growth-the tomato sauce holds heat longer than you think. For a starchy side that reheats well with braised chicken, this easy potato wedges recipe crisps up fast in the oven.

Method Time Best For
🍳 Stovetop 7-10 min over medium-low Preserving texture-add 2 tablespoon water, cover, stir halfway through
🔥 Oven 15 min at 350°F covered Crisping skin-uncover last 5 min to restore crunch on top
📦 Microwave 2-3 min on 70% power Speed only-skin turns rubbery, stir sauce halfway through

For best results when storing:

  • Cool quickly: Spread chicken and sauce in shallow container-deep containers trap heat and create bacterial breeding ground
  • Separate components: Store chicken and sauce together but keep sides like polenta or pasta separate-starches get mushy after 2 days
  • Refrigerate up to 4 days: Tomato-based sauces hold well but check for sour smell before reheating-toss if it smells off
  • Freeze up to 3 months: Cool completely first, use freezer bags, press out air-frozen cacciatore loses some texture but flavor holds
  • Add moisture when reheating: Splash 2-3 tablespoon water or broth into pan-prevents sauce from drying out or scorching during reheat

Frequently Asked Questions

Can I use chicken breast instead of thighs in chicken cacciatore?

Yes, but reduce simmer time to 25-30 minutes and check internal temp at 25 minutes. Breast dries out faster than thighs and needs closer monitoring-pull it at exactly 165°F to avoid stringy, dry meat.

How long can I store leftover chicken cacciatore in the fridge?

Store in airtight container for 3-4 days. The tomato sauce actually improves after a day as flavors meld-toss if you notice sour smell or mold on surface.

What is the best way to check if chicken cacciatore is fully cooked?

Insert instant-read thermometer into thickest part of thigh without touching bone-it should read 165°F. Visual cue: juices run clear when you pierce meat, and flesh pulls away from bone easily.

Why is my chicken cacciatore sauce watery, and how can I fix it?

You covered the pan during simmering or added too much liquid. Fix: Remove lid, increase heat to medium, and simmer 10-15 minutes until sauce reduces and thickens-stir occasionally to prevent scorching.

Can I double the chicken cacciatore recipe for a large group?

Yes, but use two pans or sear chicken in batches-overcrowding prevents proper browning. Double all ingredients and simmer 5-10 minutes longer since larger volume takes more time to reduce.

Chicken Cacciatore Italian-Style served on a plate

Chicken Cacciatore Italian-Style

No ratings yet
Chicken cacciatore is a classic Italian braised chicken dish with bone-in thighs simmered in a rich tomato, pepper, and wine sauce. The searing step builds deep flavor, while the uncovered simmer reduces the sauce to a thick, herbaceous coating. This one-pot meal is perfect for weeknight dinners and meal prep.
Print Recipe Pin Recipe
Prep Time 15 minutes mins
Cook Time 45 minutes mins
Total Time 1 hour hr
Servings: 4 servings
Course: Main Dish
Cuisine: Italian
Ingredients Equipment Method Notes

Ingredients
  

  • 4-6 chicken thighs bone-in, skin-on, patted dry
  • 2 bell peppers red or yellow, sliced
  • 1 onion large, sliced
  • 8 oz mushrooms sliced, optional
  • 4 cloves garlic minced
  • 2 teaspoon dried oregano
  • 1 teaspoon dried basil
  • 28 oz crushed tomatoes 1 can
  • 0.5 cup dry red wine
  • 2 tablespoon olive oil
  • 2 tablespoon capers or olives optional, rinsed if using capers
  • 0.5 teaspoon salt for sauce
  • 0.5 teaspoon black pepper for sauce

Equipment

  • Dutch oven or deep skillet Used for searing chicken and simmering sauce
  • Instant-read thermometer To check chicken internal temperature
  • Wooden spoon For scraping fond and stirring sauce
  • Paper towels For patting chicken dry

Method
 

  1. Pat chicken thighs completely dry with paper towels. Heat 2 tablespoon olive oil in a large Dutch oven or deep skillet over medium heat for 2 minutes. Add chicken skin-side down and cook undisturbed for 5-7 minutes until skin releases easily and turns golden brown. Flip and cook 3 more minutes. Remove chicken to a plate.
    4-6 chicken thighs, 2 tbsp olive oil
  2. Add sliced onion and bell peppers to the same pan with the chicken fat. Cook 5-6 minutes, stirring occasionally, until the onion softens and edges brown slightly. Add minced garlic and cook 1 minute until fragrant but not browned.
    2 bell peppers, 1 onion, 4 cloves garlic
  3. Pour in ½ cup red wine and scrape the bottom of the pan with a wooden spoon to release stuck brown bits. Simmer 3 minutes until wine reduces by half. Add crushed tomatoes, dried oregano, dried basil, salt, and black pepper. Stir to combine.
    28 oz crushed tomatoes, 2 tsp dried oregano, 1 tsp dried basil, 0.5 cup dry red wine, 0.5 tsp salt, 0.5 tsp black pepper
  4. Nestle seared chicken thighs into the sauce skin-side up. Add mushrooms if using. Bring to a gentle simmer over medium-low heat. Cook uncovered for 35-40 minutes, stirring the sauce every 10 minutes, until the chicken reaches 165°F internal temperature and the sauce thickens enough to coat the back of a spoon.
    4-6 chicken thighs, 8 oz mushrooms
  5. Stir in capers or olives if using. Taste the sauce and adjust salt if needed. Remove from heat, cover, and let rest for 5 minutes before serving so the chicken reabsorbs the juices.
    2 tbsp capers or olives

Notes

  • Pat chicken completely dry for a crispy sear and better flavor.
  • Leave the pan uncovered during simmering to avoid watery sauce.
  • Use an instant-read thermometer to ensure chicken reaches 165°F without overcooking.

Tried this recipe?

Let us know how it was!

What Is Coconut Milk? Taste, Uses & More Explained

March 29, 2026

A bowl of Thai green curry that lands on the table still bubbling tells you immediately whether the cook used coconut milk or not - the sauce clings to the vegetables, pools around the chicken, and carries a faint sweetness that no other liquid replicates.

What Is Coconut Milk

Coconut milk is extracted from grated mature coconut meat steeped in warm water, and its role in cooking extends well beyond curry: it shows up in Filipino rice desserts, Caribbean stews, and dairy-free ice cream with equal effect.

Unlike how long milk keeps in a refrigerator, an unopened can of coconut milk sits fine in a pantry for up to two years, making it one of the more reliable pantry staples around.

It is also a frequent companion to swapping out coconut oil in plant-based cooking, since both ingredients draw from the same source.

QUICK SUMMARY

Coconut milk is a plant-based creamy extract pressed from mature coconut meat. It has a mildly sweet, rich, and nutty flavor with floral undertones. Use it in curries, soups, desserts, and dairy-free baking. Full-fat canned versions give the most body; carton versions work for drinking and lighter cooking.

🥥Flavor: Mildly sweet, rich, nutty, with subtle floral undertones
🍳Best Uses: Curries, soups, dairy-free desserts, and cocktails
🛒Buy: Full-fat canned for cooking; aseptic carton for drinking
📦Storage: Pantry unopened; refrigerate opened, use within 4-7 days
🌿Diet: Dairy-free, vegan, lactose-free, high in saturated fat

What Is Coconut Milk?

Coconut milk comes from Southeast Asia and the Pacific islands, where it has been a kitchen staple for centuries under names like gata in the Philippines and santan in Indonesia and Malaysia.

It falls into the category of plant-based culinary extracts - not a juice, not a nut milk in the almond-milk sense, but a pressed emulsion of grated mature coconut meat and warm water.

The two most common forms are canned coconut milk and carton coconut milk, and they behave very differently. Canned is thicker, higher in fat, and typically splits into a solid cream layer on top and a thinner liquid below when stored cold.

Carton versions are diluted and stabilized, designed more for pouring than for sauces.

Full-fat canned coconut milk is the version most recipes mean when they just say "coconut milk." Coconut cream is a separate product - even richer and thicker - and if a recipe calls for it specifically, replacements for coconut cream differ from swaps for the regular milk.

  • 🥥 Gata / Santan - regional names used across Filipino and Indonesian cooking
  • Canned coconut milk - higher fat, cream layer separates when chilled
  • Carton coconut milk - diluted, stabilized, suited for beverages and cereal
  • Light coconut milk - canned but with more water, lower fat content

What Does Coconut Milk Taste Like?

coconut milk - What Is Coconut Milk

Coconut milk tastes mildly sweet and nutty, closer to a richer, more aromatic version of almond milk than to anything dairy-based.

The sweetness is gentle - it never reads as sugary on its own - and a faint floral note trails behind the fat.

Sensory SnapshotModerate Intensity
👅 Flavor
mildly sweetnuttyfloral
✋ Texture
silkypourable when diluted
👃 Aroma
fresh coconutlightly oily

Heat changes the character noticeably.

A long simmer concentrates the fat and draws out more coconut fragrance, while a quick stir into a finished dish keeps the flavor lighter and the texture silkier.

Adding raw lemon cold into coconut milk can push the fat toward slight separation - not curdling the way dairy curdles, but visually uneven.

That's worth knowing before finishing a sauce at the last minute.

How to Use Coconut Milk

Thai cooking relies on coconut milk more than almost any other cuisine: green curry, red curry, and Tom Kha Gai all use it as the primary liquid base. In Kerala and Goan cooking from southern India, it replaces cream in fish curries and lentil dishes. The Caribbean uses it in rice and stew dishes where it provides both fat and a background sweetness.

Golden Rule
Always simmer coconut milk gently. A hard boil causes the fat to separate and gives the sauce a broken, greasy appearance that's hard to recover.

Coconut milk pairs cleanly with lime and tamarind for brightness, chili and ginger for heat, and brown sugar or palm sugar when you want to push toward dessert territory.

Fish and shellfish absorb it particularly well in a low-and-slow poach.

For occasions where this ingredient isn't on hand, swapping out coconut milk works best when you match the fat content, not just the liquid volume.

How Coconut Milk Is Used
MethodBest ForTip
🍲 SimmerCurries, soups, stewsKeep heat medium-low; stir often to prevent fat separation
🔥 ReduceConcentrating flavor, thickening saucesStir frequently - it scorches faster than stock
🥤 BlendedSmoothies, cocktails, salad dressingsUse carton version; canned is too thick for drinking
🧁 BakedVegan brownies, cakes, custardsFull-fat canned gives the best moisture and binding
🍨 ChurnedDairy-free ice cream baseChill can overnight before churning for max fat content
Try It In
🍚Coconut Milk Rice PorridgeA simple base that shows how coconut milk thickens and sweetens as it reduces→

How to Buy and Store Coconut Milk

Full-fat canned coconut milk is the right buy for any recipe that needs a creamy body - curry, soup, or baked dessert. Aseptic carton versions work for beverages and lighter applications; check the ingredient list and look for just coconut and water if you want to avoid gums and stabilizers. Skip dented cans and swollen cartons.

Watch Out
Cream separation in a chilled can is normal, not spoilage. Shake or stir before using. If it smells sour or looks curdled after opening, discard it.

Unopened cans keep in a cool pantry for up to two years - check the date stamp.

Once open, transfer leftovers to a sealed container and refrigerate; use within 4-7 days.

Homemade coconut milk pressed from fresh grated coconut moves faster, lasting only 2-3 days.

For a full breakdown of timelines, guidance on keeping coconut milk fresh covers opened, unopened, and homemade across different storage conditions.

If you're already relying on using cream for creaminess in other recipes, the same refrigerator rules apply here.

Start with the Canned Version

If coconut milk is new to your kitchen, reach for a full-fat can before anything else - it shows you the ingredient at its most expressive.

Simmer it into a simple Thai red curry or stir it into a lentil soup with turmeric and ginger.

Once you understand how the fat behaves and where the flavor lands, the carton version and light versions become easier decisions to make.

Frequently Asked Questions

Is coconut milk dairy?

No. Coconut milk contains no dairy - it's pressed from coconut meat and water. It is naturally lactose-free and vegan, making it a common substitute in dairy-sensitive cooking.

What is the difference between full-fat and light coconut milk?

Light coconut milk is full-fat canned milk diluted with more water before canning. It has less body and a milder coconut flavor, so it works in soups but not in ice cream or thick sauces where fat content matters.

Can you freeze coconut milk?

Yes, though texture changes after thawing - the fat and liquid separate more noticeably. It still works fine in cooked dishes like curries and soups once you whisk it back together.

How do you separate coconut cream from coconut milk?

Refrigerate an unopened full-fat can overnight without shaking it. The cream solidifies at the top; open carefully and scoop it off before the liquid below mixes back in.

Does coconut milk taste like coconut water?

Not really. Coconut water is thin, lightly sweet, and comes from inside the young coconut's hollow center. Coconut milk is opaque, fat-rich, and far more flavorful - the two come from different parts of the fruit.

« Previous Page
Next Page »

Primary Sidebar

ForkliftKitchen recipe developer

Welcome!

Recipe Developer · 12+ Yr Kitchen Veteran

I'm the recipe developer behind this site, focused on practical, well-tested dishes and smart ingredient swaps. Every recipe is written to be clear, reliable, and easy to make at home.

650+ Recipes
12+ Yrs Exp.
3x Tested
Our Story →

As Featured In

Allrecipes

TASTE OF HOME

Food52

HUFFPOST

Yahoo! Life

Our Editorial Standards

  • ✓ Every recipe tested at least 3 times before publishing
  • ✓ Substitutes verified by real kitchen trials, not guesswork
  • ✓ Reviewed for accuracy by our editorial team
  • ✓ Updated regularly with seasonal info and reader feedback

Most Popular

  • Creamy Lemon Shrimp Linguine
    Creamy Lemon Shrimp Linguine
  • Creamy Garlic Mushroom Chicken
    Creamy Garlic Mushroom Chicken
  • Sesame Ginger Chicken Noodle Bowls
    Sesame Ginger Chicken Noodle Bowls
  • Baked Lemon Herb Fish Fillets
    Baked Lemon Herb Fish Fillets
  • Veggie Loaded Fried Rice
    Veggie Loaded Fried Rice
  • Spicy Garlic Shrimp Stir Fry
    Spicy Garlic Shrimp Stir Fry

Join 8,000+ Home Cooks

Weekly Kitchen Tips

Easy recipes, smart substitutes, and real cooking shortcuts — every Thursday.

Subscribe Free →


Side Dishes

  • What to Serve With Asian Salmon? 15 Best Side Dishes
    What to Serve With Asian Salmon? 15 Best Side Dishes
  • Side Dishes for Strawberry Spinach Salad
    15 Best Side Dishes for Strawberry Spinach Salad
  • Sides for Grilled Cauliflower Steaks to Complete the Meal
    15 Sides for Grilled Cauliflower Steaks to Complete the Meal
  • 15 Sides To Serve With Calabacitas
    15 Best Sides for Calabacitas – Mexican-Inspired Favorites


Substitutes

  • 7 Best Substitutes for Hot Sauce in Marinades & Stir-Fries
    7 Best Substitutes for Hot Sauce in Marinades & Stir-Fries
  • 9 Best Substitutes for Butter in Baking and Cooking
  • 7 Best Substitutes for Tagliatelle for Italian Pasta Dishes
    7 Best Substitutes for Tagliatelle for Italian Pasta Dishes
  • 7 Best Substitutes for Udon Noodles in Asian Stir-Fries
    7 Best Substitutes for Udon Noodles in Asian Stir-Fries


Browse by Topic

  • Side Dishes320
  • Substitutes785
  • Dinner163
  • Air Fryer77
  • Taste Profiles484
  • Food Storage123


Reader Reviews

★★★★★

"Finally a food blog that tells you exactly why a substitute works instead of just listing options."

— Sarah M., via email

★★★★★

"The side dish recommendations are so specific — saved my dinner party twice this month."

— James R., Pinterest comment

★★★★★

"I trust this site more than most because they actually test everything. You can tell."

— Priya K., blog comment

Footer

↑ Back to Top

Forklift Kitchen

We do the heavy lifting so you can enjoy the cooking. Tested recipes, smart substitutes, and perfect pairings—built for real home cooks.

Content

  • Recipes
  • Substitutes
  • What to Serve With
  • Blog

Company

  • About Us
  • Contact
  • Subscribe

Legal

  • Privacy Policy
  • Terms of Service

As an Amazon Associate I earn from qualifying purchases.

© 2026 Forklift Kitchen.

Rate This Recipe

Your vote:


A rating is required
A name is required
An email is required