• Skip to primary navigation
  • Skip to main content
  • Skip to primary sidebar
  • Recipe Index
    • Air Fryer
  • Side Dishes
  • Substitutes
  • About
  • Contact
  • Subscribe

ForkLiftKitchen

menu icon
go to homepage
  • Recipe Index
    • Air Fryer
  • Side Dishes
  • Substitutes
  • About
  • Contact
  • Subscribe
subscribe
search icon
Homepage link
  • Recipe Index
    • Air Fryer
  • Side Dishes
  • Substitutes
  • About
  • Contact
  • Subscribe
×

Blog

Air Fryer Beef Empanadas

March 29, 2026

Air frying beef empanadas at 350°F for 12-15 minutes creates golden, crispy shells with juicy filling inside. The circulating hot air crisps the dough evenly without deep-frying or flipping halfway through.

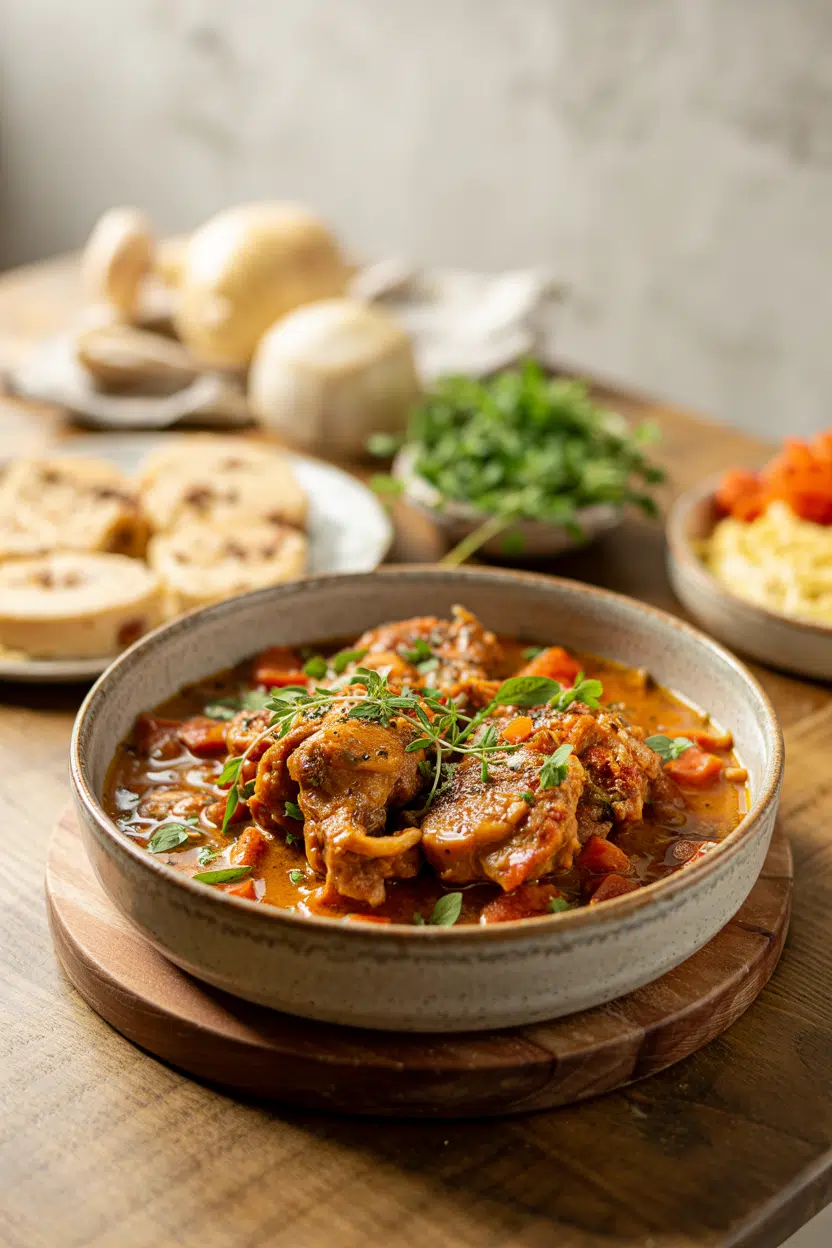
Air Fryer Beef Empanadas served on a plate

You get crispy handheld pockets without standing over a pot of oil. The egg wash caramelizes into a glossy finish while the ground beef stays tender.

Make these for weeknight dinners when you want something more interesting than tacos but just as fast.

QUICK SUMMARY

Air fryer beef empanadas cook in 15 minutes with minimal oil and maximum crispness. The key is draining the filling completely and sealing edges with a fork to prevent leaks. Perfect for meal prep or entertaining when you need handheld portions that reheat well.

⏱️Time Reality: 25 min prep plus 15 min air frying; filling can be made ahead
🔥Method Shortcut: Drain cooked beef completely before filling to avoid soggy dough
⚠️Watch Out: Overfilling causes leaks; use 2 tablespoon per empanada and seal edges firmly with fork

Table of Contents

Toggle
  • Why This Recipe Works
  • What You'll Need
    • Ingredient Details
  • Ingredient Swaps
  • What to Serve With It
  • Store and Reheat
  • Frequently Asked Questions
  • Air Fryer Beef Empanadas
    • Method 
    • Tried this recipe?

Why This Recipe Works

The air fryer crisps empanada dough at 350°F without submerging it in oil, using rapid air circulation to create the same golden exterior you'd get from deep-frying. For a version that comes together quickly, a simple fish variation uses the same air fryer technique with lighter protein.

Quick Reference
⏱️
Prep Time
25 min
🔥
Cook Time
12-15 min
⏰
Total Time
40 min
🍽️
Servings
8 empanadas
📊
Difficulty
Medium
🏷️
Category
Appetizer
💡
Quick Tip
Avoid overfilling to prevent leaks
🎯
Best For
Weeknight | Meal prep | Entertaining

Why it works:

  • Ground beef sautés with onion and garlic for 5-7 minutes until browned, creating a savory base that stays juicy after draining excess fat
  • Cumin and paprika add Latin American warmth without overpowering the beef, giving each bite recognizable empanada flavor
  • Draining the cooked filling removes moisture that would turn the dough soggy or cause leaks during air frying
  • Sealing edges with a fork creates a tight crimp that holds filling inside even when the dough puffs and crisps at high heat
  • Egg wash brushed on dough helps the exterior brown evenly and creates a glossy finish that looks bakery-quality
Quick Tip
Chill the dough for 30 minutes before shaping to prevent tearing and make folding easier.

What You'll Need

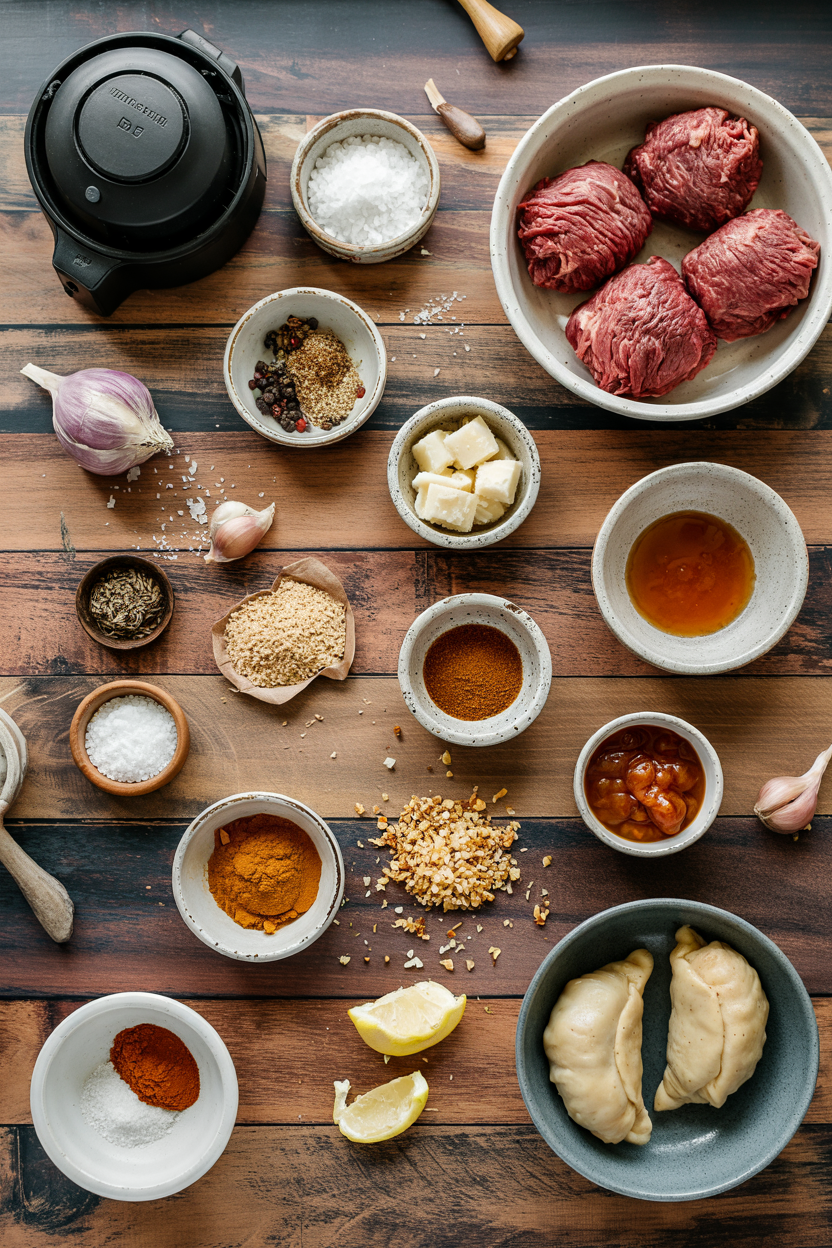
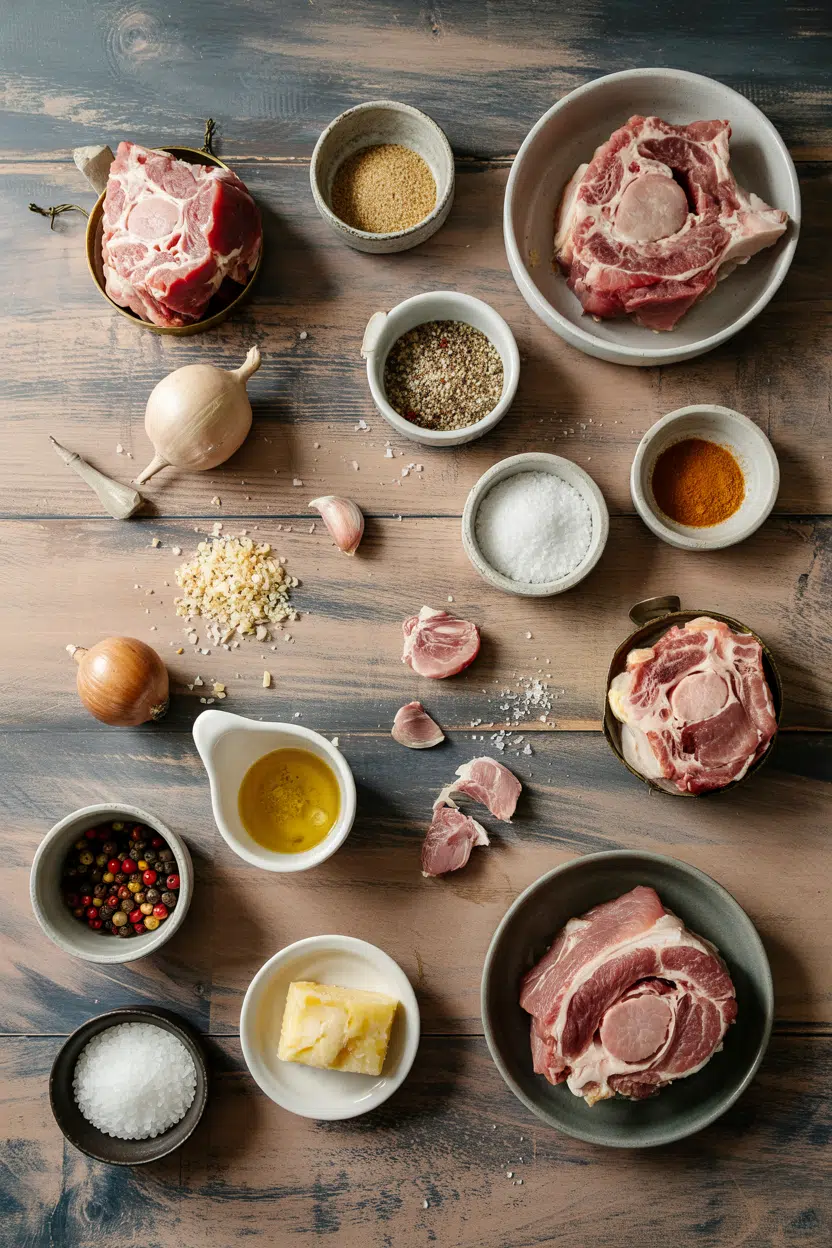
Ingredients for Air Fryer Beef Empanadas

Store-bought empanada dough saves 20 minutes compared to homemade and air fries with the same crispy results. For a version that comes together quickly, this related corn recipe uses similar seasoned beef filling wrapped in masa dough.

🍗
Protein
  • 1 lb ground beef (80/20 blend)
🧄
Aromatics
  • 1 medium onion, diced
  • 3 garlic cloves, minced
  • 1 bell pepper, diced (optional)
🌶️
Spices
  • 1 teaspoon ground cumin
  • 1 teaspoon paprika
  • Salt and pepper to taste
🫙
Dough & Finish
  • 8-10 empanada dough discs
  • 1 egg (beaten, for wash)
  • 1 tablespoon olive oil

Ingredient Details

  • Ground beef (80/20)
    Use 80/20 blend for enough fat to keep filling juicy; leaner beef dries out after draining
  • Empanada dough
    Look for refrigerated discs in Latin markets or use thawed frozen dough; keep chilled until filling
  • Onion
    Dice small (¼-inch) so it cooks quickly and distributes evenly in each bite
  • Cumin
    Ground cumin is essential for that signature empanada flavor; don't skip or substitute
  • Egg wash
    Beat 1 egg with 1 teaspoon water; brush lightly on dough just before air frying for even browning
  • Olive oil
    Use for sautéing beef and vegetables; neutral oil works just as well
  • Bell pepper
    Optional for sweetness and texture; omit if you prefer a simpler beef filling

Ingredient Swaps

Ground turkey or chicken works when you want lighter protein, but you'll need to add a teaspoon of oil to the pan since lean poultry doesn't render fat like beef. We keep a batch ready for nights like this - a creamy potato side crisps in the air fryer at the same temperature and timing.

Four practical swaps:

  • Ground beef → Ground turkey or chicken: Lighter flavor with less fat; add 1 teaspoon oil to pan and season extra since poultry tastes milder than beef
  • Empanada dough → Gluten-free pie crust: Works for gluten-free diets but may tear easier; handle gently and reduce air frying time by 2 minutes
  • Egg wash → Milk or oil brush: Dairy-free option that still helps browning but won't create the same glossy finish
  • Bell pepper → Diced carrot or omit: Budget-friendly swap that adds sweetness without changing texture much; carrot needs 2 extra minutes to soften

Store-Bought Empanada Dough

Works for: Quick prep, consistent results, beginner-friendly

Skip if: You want homemade flavor or can't find empanada discs locally

Homemade Empanada Dough

Works for: Better flavor control, fresh dough texture, adjustable thickness

Skip if: You're short on time or new to dough-making

Refrigerated Pie Dough

Works for: Emergency swap when empanada dough is unavailable, similar texture

Skip if: You want authentic empanada taste or need thinner dough

Instructions

You'll spend 25 minutes on filling and assembly, then 15 minutes while the air fryer does the rest. For a version that comes together quickly, homemade fries recipe air fries at the same temperature if you're making sides at the same time.

  1. Sauté the filling: Heat 1 tablespoon olive oil in a skillet over medium-high heat for 1 minute. Add diced onion and cook 3 minutes until soft, then add minced garlic and cook 30 seconds until fragrant. Add ground beef and break it apart with a wooden spoon, cooking 5-7 minutes until browned with no pink remaining. Stir in cumin, paprika, salt, and pepper. Drain excess fat completely through a fine-mesh strainer and let filling cool 10 minutes.

  2. Prepare the dough: Remove empanada dough discs from refrigerator and let sit at room temperature for 5 minutes if they're too stiff to fold. Place one disc on a clean work surface and spoon 2 tablespoons of cooled filling onto the center, leaving a ½-inch border around the edge.

  3. Seal the empanadas: Fold the dough in half over the filling to create a half-moon shape. Press edges together firmly with your fingers, then use a fork to crimp the sealed edge by pressing down at ¼-inch intervals all the way around. Make sure there are no gaps or the filling will leak during cooking.

  4. Apply egg wash: Beat 1 egg with 1 teaspoon water in a small bowl. Use a pastry brush to lightly coat the top of each empanada with egg wash. This creates the golden color and helps the dough crisp.

  5. Air fry: Preheat air fryer to 350°F for 3 minutes. Place empanadas in the basket in a single layer with 1 inch of space between each. Air fry for 12-15 minutes, flipping halfway through, until golden brown and crispy. The internal temperature should reach 160°F. Let rest 3 minutes before serving.

Watch Out
Don't overfill empanadas with more than 2 tablespoons of filling or they'll burst open during cooking. Less is more when it comes to sealing properly.

What to Serve With It

Beef empanadas need something fresh or tangy to cut through the rich filling and crispy dough. A dollop of dressing takes each bite somewhere more interesting. If you're planning your beef stroganoff dinner, many of those same sides work here with handheld empanadas instead of plated beef.

Side Dish Prep Why It Works How to Serve
Simple green salad Easy Fresh lettuce and tomato balance the fried dough and rich beef filling Toss greens with lime vinaigrette and serve on the side
Black beans Easy Adds fiber and hearty complement without competing with empanada flavor Warm canned beans with cumin and serve in a small bowl
Cilantro-lime rice Medium Neutral base that soaks up any filling that escapes, plus bright citrus flavor Cook white rice and stir in lime juice and chopped cilantro
Chimichurri sauce Easy Bright herbaceous sauce cuts through beef richness with garlic and parsley punch Blend parsley, garlic, olive oil, vinegar; serve in dipping bowl
Guacamole Easy Creamy cooling contrast to spiced filling, works as dip or dollop on top Mash avocado with lime, salt, and diced onion

Three ways to serve it:

  • Weeknight plate: Pair empanadas with simple green salad and black beans for a balanced dinner that takes 10 minutes to assemble
  • Party appetizers: Serve with three dipping sauces (chimichurri, salsa, crema) and let guests choose their favorite flavor combination
  • Meal prep lunch: Pack empanadas with cilantro-lime rice and guacamole in separate containers; reheat empanadas in air fryer at work
Shortcut
For a version that comes together quickly, creamy dressing side dish works as a quick dipping sauce when you don't have time to make chimichurri.

Store and Reheat

Cooked empanadas last 3-4 days in the fridge when stored in an airtight container, stacked with parchment paper between layers to prevent sticking. We keep a batch ready for nights like this - a simple complementary side reheats at the same temperature if you're warming multiple dishes.

Method Time Best For
🔥 Air Fryer 5-7 min at 350°F Restores crispy exterior perfectly; best for 1-4 empanadas
🔥 Oven 8-10 min at 350°F Even warming for larger batches; place on baking sheet
📦 Microwave 1-2 min medium power Quickest option but dough loses crispness; wrap in damp paper towel

For best results when storing:

  • Cool completely before refrigerating: Let empanadas sit at room temperature 20 minutes so condensation doesn't make the dough soggy
  • Stack with parchment: Place a sheet of parchment paper between each empanada layer to prevent them from sticking together
  • Freeze for meal prep: Unbaked empanadas freeze for 2 months; air fry from frozen at 350°F for 18-20 minutes without thawing
  • Store filling separately: If making ahead, cook and refrigerate filling up to 3 days, then assemble and cook empanadas fresh
  • Skip microwave reheating: Air fryer or oven brings back the crispy texture; microwave makes dough chewy and soft

Frequently Asked Questions

Can I make air fryer beef empanadas ahead and freeze them?

Yes, assemble unbaked empanadas and freeze them in a single layer on a baking sheet for 2 hours, then transfer to a freezer bag for up to 2 months. Air fry from frozen at 350°F for 18-20 minutes without thawing.

What is the best way to reheat empanadas without losing crispiness?

Use the air fryer at 350°F for 5-7 minutes or the oven at the same temperature for 8-10 minutes. Both methods restore the crispy exterior better than the microwave.

How do I know when the empanadas are fully cooked inside?

The dough should be golden brown and the internal temperature of the filling should reach 160°F on an instant-read thermometer. If you don't have a thermometer, cut one open to check that the filling is steaming hot throughout.

Why are my empanadas leaking filling during cooking?

You're either overfilling them or not sealing the edges properly. Use only 2 tablespoons of filling per empanada and press the edges firmly with a fork to create a tight seal with no gaps.

Can I use ground turkey instead of beef for air fryer empanadas?

Yes, ground turkey works but it's leaner so add 1 teaspoon of oil to the pan when cooking and season more generously since turkey has milder flavor than beef. The air frying time stays the same.

Air Fryer Beef Empanadas served on a plate

Air Fryer Beef Empanadas

No ratings yet
Air fryer beef empanadas cook quickly to a golden crisp with juicy, well-seasoned filling inside. Using minimal oil and an egg wash, this recipe delivers handheld pockets perfect for weeknight dinners or entertaining without deep-frying.
Print Recipe Pin Recipe
Prep Time 25 minutes mins
Cook Time 15 minutes mins
Total Time 40 minutes mins
Servings: 8 empanadas
Course: Appetizer, Dinner
Cuisine: Latin American
Ingredients Equipment Method Notes

Ingredients
  

  • 1 lb ground beef 80/20 blend for juiciness
  • 1 medium onion diced small
  • 3 cloves garlic minced
  • 1 each bell pepper diced (optional)
  • 1 teaspoon ground cumin
  • 1 teaspoon paprika
  • 8-10 discs empanada dough store-bought refrigerated discs
  • 1 each egg beaten with 1 teaspoon water for egg wash
  • 1 tablespoon olive oil for sautéing filling

Equipment

  • Air fryer Used for cooking empanadas evenly with less oil
  • Skillet Cook beef filling on stovetop
  • Fine-mesh strainer Drain excess fat from cooked filling
  • Pastry brush Apply egg wash on empanadas
  • Fork Seal empanada edges by crimping

Method
 

  1. Heat olive oil in a skillet over medium-high heat for 1 minute. Add diced onion and cook 3 minutes until soft. Add minced garlic and cook 30 seconds until fragrant. Add ground beef and break apart with a wooden spoon. Cook 5-7 minutes until browned with no pink remaining. Stir in cumin, paprika, salt, and pepper. Drain excess fat completely through a fine-mesh strainer. Let filling cool for 10 minutes.
    1 lb ground beef, 1 medium onion, 3 cloves garlic, 1 tsp ground cumin, 1 tsp paprika, 1 tbsp olive oil
  2. Remove empanada dough discs from refrigerator and let sit at room temperature 5 minutes if stiff. Place one disc on a clean surface and spoon 2 tablespoons of cooled filling onto center, leaving a ½-inch border.
    8-10 discs empanada dough
  3. Fold dough in half over filling to form half-moon shape. Press edges together firmly with fingers, then crimp sealed edge with a fork at ¼-inch intervals to prevent leaks.
    8-10 discs empanada dough
  4. Beat egg with 1 teaspoon water. Use a pastry brush to lightly coat the top of each empanada with egg wash to promote golden brown and glossy finish.
    1 each egg
  5. Preheat air fryer to 350°F for 3 minutes. Place empanadas in single layer in basket, leaving 1 inch space between each. Air fry for 12-15 minutes until golden brown and crispy. The internal temperature should reach 160°F. Let rest 3 minutes before serving.

Notes

  • Drain the cooked filling completely to prevent soggy dough and leaks.
  • Use 2 tablespoons filling per empanada to avoid bursting during cooking.
  • Brush egg wash lightly for evenly browned and glossy empanadas.

Tried this recipe?

Let us know how it was!

What Is Cremini Mushroom? Taste, Uses & More

March 29, 2026

You spot them at the market in a brown paper tray, right next to the white button mushrooms - darker, firmer, and somehow more serious-looking. Cremini mushrooms sit in that productive middle ground between the mild button and the substantial portobello, which means they handle heat well, hold shape in long braises, and bring genuine umami depth to nearly any savory dish.

What Is Cremini Mushroom

Understanding the role portobello mushroom plays in cooking helps clarify why creminis occupy such useful territory between two well-known relatives.

QUICK SUMMARY

Cremini mushrooms are a young, brown stage of Agaricus bisporus - firmer and earthier than white button mushrooms, milder than a portobello. They sauté, roast, braise, and stuff well, and they add umami without dominating a dish.

🍄Also Known As: Brown mushroom, baby bella, crimini
👅Flavor: Earthy, nutty, umami-rich, slightly sweet when sautéed
🔥Best Methods: Sauté, roast, braise, stuff, grill
🛒Buy: Firm, dry caps with closed gills and no ammonia smell
📅Shelf Life: 5-10 days refrigerated in a paper bag

What Is Cremini Mushroom?

Cremini mushrooms - also sold as brown mushrooms, baby bellas, or crimini - are the adolescent form of Agaricus bisporus, the same species that becomes a portobello at full maturity. The name comes from the Italian word for cream, though the cap color runs from light tan to deep brown.

Compared to a white button mushroom, creminis are harvested slightly later, which gives them a denser cell structure and a more developed flavor.

Their round caps are closed or just starting to open, the gills remain hidden beneath the cap edge, and the short, thick stem stays firm even after cooking.

Growers cultivate them worldwide, though the variety traces back to Mediterranean Europe. You'll find them sold both loose and pre-packaged, typically in 8- or 16-ounce containers.

If a recipe calls for creminis and you can't find them, cremini mushroom stand-ins cover the closest options by cooking method - because the swap matters more when you're roasting than when you're blending into a sauce.

What Does Cremini Mushroom Taste Like?

cremini mushroom - What Is Cremini Mushroom
Sensory SnapshotModerate Intensity
👅 Flavor
earthynuttyumamilightly sweet
✋ Texture
firm and meaty rawtender-chewy cooked
👃 Aroma
fresh forest floorlightly mushroomy

Raw creminis taste mildly earthy with a subtle nuttiness - more developed than a white button mushroom, but without the intensity a fully matured portobello delivers.

The button mushroom and its flavor profile reads comparatively bland next to a cremini, which carries more glutamate content even before heat is applied.

Heat changes them noticeably. Sautéing over medium-high produces browning that concentrates sugars and deepens the umami, while long braising in wine or stock makes them tender-chewy and almost meaty in a sauce.

Roasting at high heat drives off moisture and intensifies the earthy, nutty notes most.

Golden Rule
Don't crowd creminis in the pan. A single layer with space around each mushroom lets moisture escape, so they brown properly instead of steaming into softness.

How to Use Cremini Mushroom

Sautéing is where creminis earn their keep most often.

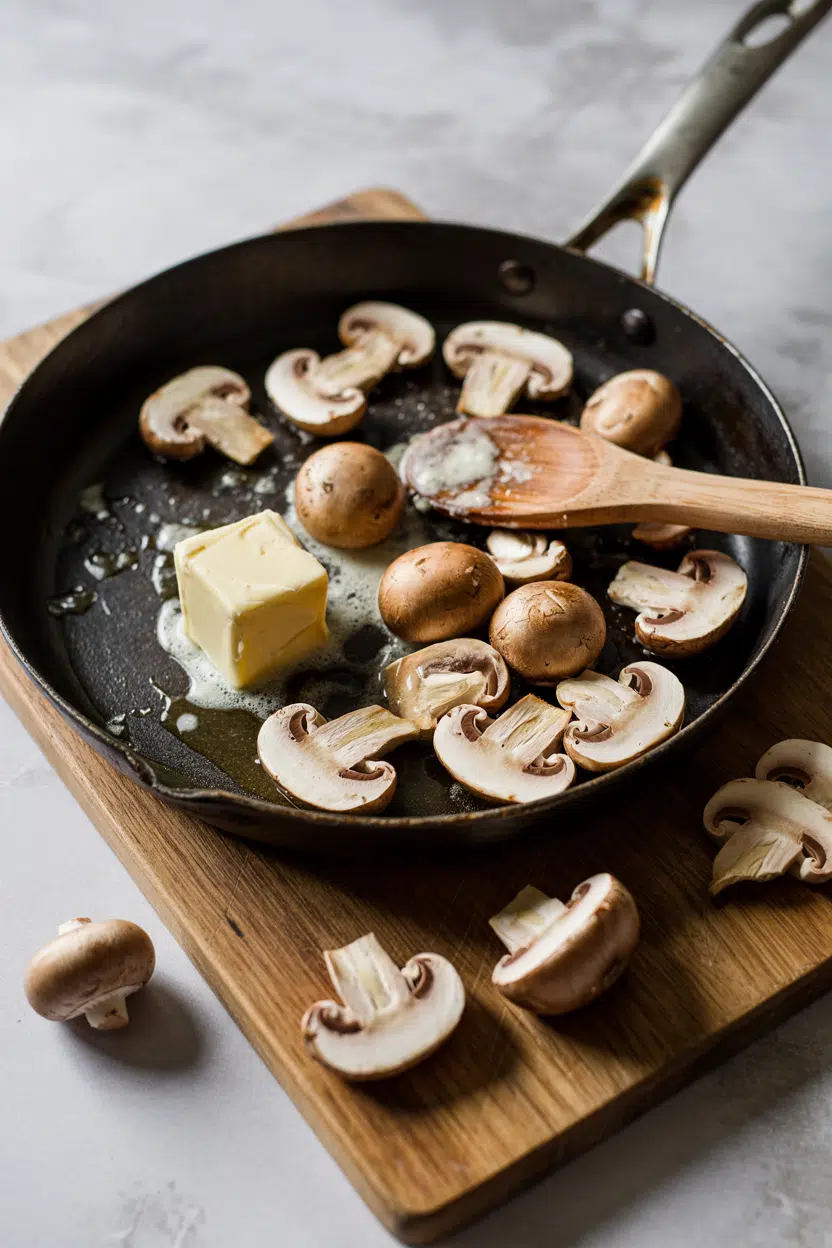
A hot pan with butter or olive oil, sliced creminis in a single layer, and a few minutes undisturbed produces the browned, umami-forward result that makes them useful as a side, a pasta topping, or a burger addition.

The step-by-step for making garlic butter sautéed mushrooms at home shows exactly how to get the browning right without burning the garlic.

Beyond sautéing, creminis hold up well across several cooking methods.

How Cremini Mushroom Is Used
MethodBest ForTip
🍳 SautéPasta, rice dishes, side vegetableHigh heat, single layer, minimal stirring
🔥 RoastConcentrated flavor, sheet-pan meals425°F, halved, toss with oil and thyme
🥘 BraiseStews, ragù, wine saucesAdd whole or halved; they hold shape well
🫙 Stuffed & BakedAppetizers, small bitesRemove stems, fill, bake at 375°F until tender
🥗 RawSalads, thin-sliced boardsSlice very thin; dress just before serving

In Italian cooking, creminis go into risotto and pasta with cream, shallots, and white wine.

French preparations use them in deglazes and pan sauces alongside thyme and red wine.

American cooks blend them finely into burger patties to add moisture and umami - a technique that reduces the need for added salt.

Their pairing with garlic, rosemary, soy sauce or tamari, and mascarpone gives them range across European and East Asian fusion dishes.

Finely chopped creminis sweated low and slow form an excellent base for ragù or stuffing - the texture that results works well alongside meat or on its own.

They also grill cleanly on skewers, and pairing them with peppers and onions gives what pairs with caponata real overlap in flavor territory.

Try It In
🍝One-Pot Creamy Mushroom OrzoCreminis sautéed and simmered into a rich, single-pan pasta→🫙Air Fryer Stuffed MushroomsWhole caps hold their shape well in the air fryer→🧀Cheesy Spinach Stuffed MushroomsUses the firm cremini cap as a natural edible vessel→

How to Buy and Store Cremini Mushroom

Fresh creminis should feel firm and dry to the touch, with caps that are fully closed or just barely starting to open. Closed gills signal freshness - once the cap flattens and gills are fully exposed, the mushroom is aging fast.

  • ✅ Good signs - Dry, brown, unblemished caps; firm stems; earthy smell
  • ❌ Avoid - Slimy stems, dark wet spots, or any ammonia odor
  • 📦 Storage - Loose in a paper bag in the refrigerator crisper drawer
  • 💧 Don't wash before storing - Added moisture accelerates spoilage

Stored correctly, creminis last 5 to 10 days refrigerated. Check for cremini mushroom spoilage signs if you're unsure - sliminess and a sharp ammonia smell are the clearest indicators to discard.

Skip plastic bags, which trap humidity and shorten that window considerably.

Watch Out
Never store creminis in a sealed plastic bag. The trapped moisture turns them slimy within 2-3 days, well before their natural shelf life ends.

Start With Cremini

Creminis are a reliable first choice for cooks who want more flavor than a button mushroom without the size and intensity of a portobello.

Reach for them when a dish needs umami structure - a pasta sauce, a braise, a stuffed appetizer - and let high, dry heat do the work.

If you're still undecided on which mushroom fits your dish, portobello mushroom swaps that work and button mushroom stand-ins both help clarify where creminis sit on the spectrum.

Shortcut
When a recipe says "mushrooms" without specifying, creminis are the default. They're firmer than white buttons and won't turn mushy in sauces or stews.

Frequently Asked Questions

Are cremini mushrooms the same as button mushrooms?

Same species, different stage. Both are Agaricus bisporus, but creminis are harvested later, giving them a browner cap, denser texture, and more developed umami flavor than their white counterpart.

How do cremini mushrooms differ from portobello?

Portobellos are fully matured creminis, left to grow until the cap opens wide and the gills are exposed. They're larger, meatier, and more intensely flavored - better for grilling whole, while creminis suit sliced applications.

Can you eat cremini mushrooms raw?

Yes. Slice them very thin and dress just before serving to prevent browning. Raw creminis have a firm, slightly chewy bite and a mild earthy flavor that works in salads.

How long do cremini mushrooms last in the fridge?

Typically 5 to 10 days stored loose in a paper bag in the crisper drawer. Plastic packaging or pre-washing shortens that window - discard any that smell of ammonia or feel slimy.

Do cremini mushrooms shrink a lot when cooked?

Yes - they can lose up to 50% of their volume as moisture releases during cooking. Account for this by starting with more than the final dish requires, especially in stews or sautés.

Quinoa Breakfast Bowl with Berries

March 29, 2026

Cooking quinoa in milk with vanilla extract creates fluffy grains that taste like dessert but work as breakfast. The 2:1 liquid ratio prevents mushiness while the berries stay juicy on top.

Quinoa Breakfast Bowl with Berries served on a plate

The pot does most of the work. You rinse, simmer 15 minutes, then rest off heat while the quinoa absorbs the last bit of moisture.

This is what we make for meal prep Sundays when you want healthy breakfasts that actually keep you full until lunch.

QUICK SUMMARY

Quinoa simmered in milk with vanilla creates a protein-packed breakfast bowl topped with fresh berries and nuts. Rinse the quinoa first to remove bitterness, then simmer covered for 15 minutes before resting off heat. The key is adding berries right before serving so they stay firm instead of bleeding color into the quinoa.

⏱️Time Reality: 20 minutes total - 5 minutes active prep, rest is hands-off simmering
🔑First Critical Move: Rinse quinoa for 1 minute under cold water in fine mesh strainer
⚠️Watch Out: Too much liquid makes mushy quinoa - stick to 2:1 ratio and drain any excess

Table of Contents

Toggle
  • Why This Recipe Works
  • What You'll Need
    • Ingredient Details
  • Ingredient Swaps
  • What to Serve With It
  • Store and Reheat
  • Frequently Asked Questions
  • Quinoa Breakfast Bowl with Berries
    • Method 
    • Tried this recipe?

Why This Recipe Works

Cooking quinoa in milk instead of water adds creaminess and natural sweetness without extra sugar. For a version that comes together quickly, easy parfait side uses similar ingredients with zero cooking required.

Quick Reference
⏱️
Prep Time
5 min
🔥
Cook Time
15 min
⏰
Total Time
20 min
🍽️
Servings
2-3 servings
📊
Difficulty
Easy
🏷️
Category
Breakfast
💡
Quick Tip
Rinse quinoa well to remove bitterness
🎯
Best For
Weeknight | Meal prep

What makes this bowl work:

  • Rinsing removes saponins - the natural coating on quinoa tastes bitter if you skip this step
  • The 2:1 liquid ratio creates fluffy separate grains instead of porridge texture
  • Simmering covered traps steam so quinoa cooks evenly without drying out
  • Resting off heat lets grains absorb the last bit of moisture and firm up
  • Adding berries last keeps them from bleeding color and turning the whole bowl pink
Quick Tip
Toast nuts separately at 350°F for 5 minutes - raw nuts turn soggy when mixed with hot quinoa

What You'll Need

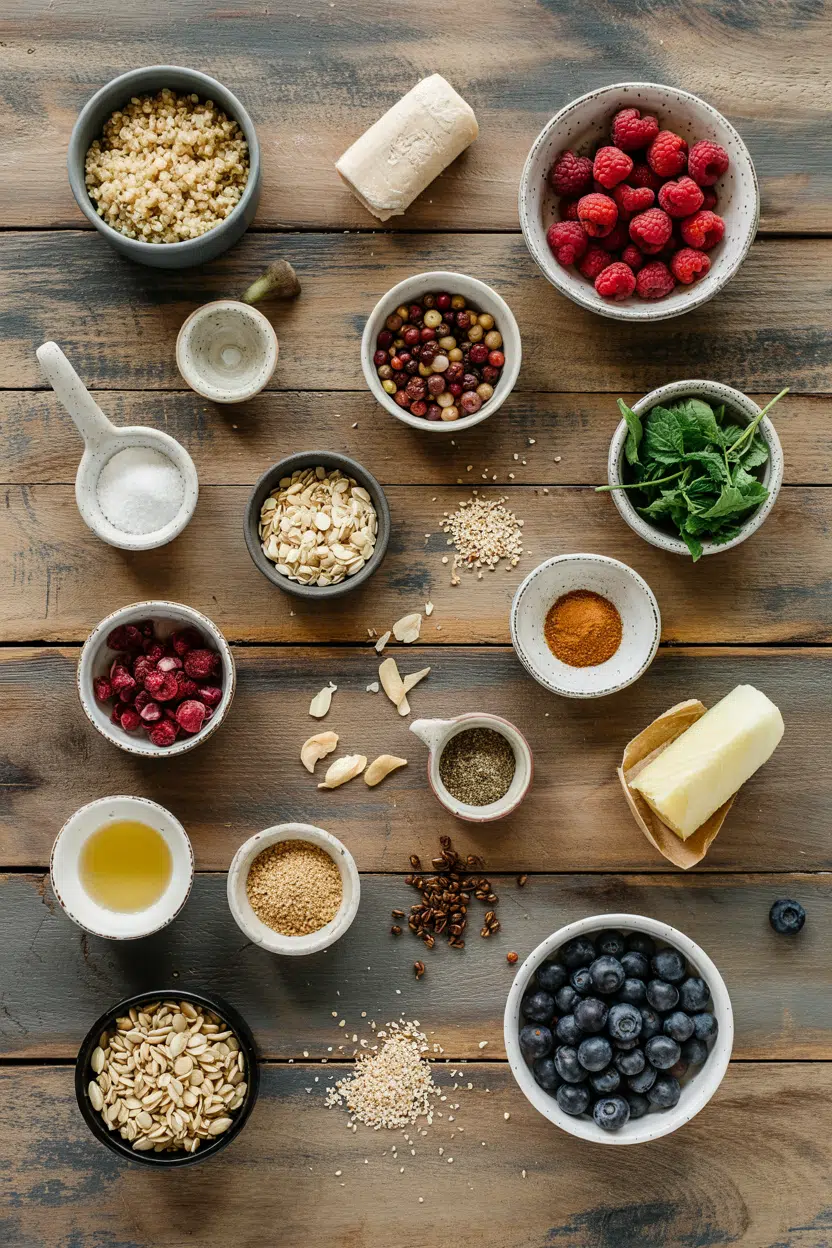
Ingredients for Quinoa Breakfast Bowl with Berries

Shop for quinoa in the grain aisle near rice, not the health food section where it costs twice as much. We keep a batch ready for nights like this - classic salad dish balances the sweetness with something bright and herby.

🍜
Base Grain
  • 1 cup quinoa, rinsed
  • 2 cups milk or milk alternative
🍋
Fresh Toppings
  • 1 cup mixed berries (strawberries, blueberries, raspberries)
  • ¼ cup sliced almonds or walnuts
🥢
Flavor Boost
  • 2 tablespoon honey or maple syrup
  • 1 teaspoon vanilla extract
🫙
Optional Add-Ins
  • 1 tablespoon chia seeds
  • ¼ teaspoon cinnamon

Ingredient Details

  • Quinoa
    Rinse for 1 minute under cold water in a fine mesh strainer - skipping this leaves a bitter, soapy taste from natural saponins
  • Milk
    Whole milk creates the creamiest texture, but almond or oat milk work with slightly thinner results - avoid rice milk which turns gummy
  • Mixed Berries
    Fresh berries stay firm and juicy, frozen berries work but release more liquid - thaw and drain before adding to avoid a watery bowl
  • Honey or Maple Syrup
    Add after cooking, not during - cooking sweeteners caramelize and stick to the pan instead of coating the quinoa
  • Vanilla Extract
    Add when the liquid starts boiling for subtle flavor throughout - stirring in at the end makes it taste like an afterthought
  • Nuts
    Toast at 350°F for 5 minutes before adding - raw nuts turn soggy when mixed with hot quinoa and lose their crunch
  • Chia Seeds
    Optional but adds texture and fiber - mix in while quinoa is still warm so seeds absorb moisture and soften slightly

Ingredient Swaps

Most swaps work if you match the role: creamy for creamy, crunchy for crunchy, sweet for sweet. Rich mains need something to cut through, and coleslaw does exactly that - crunchy homemade coleslaw recipe cuts the sweetness with vinegar tang.

Four swaps that work:

  • Almond milk for dairy milk - slightly thinner texture, neutral flavor (1:1 ratio, dairy-free)
  • Frozen berries for fresh - softer texture, thaw and drain first to prevent watery bowl (1:1 ratio, budget-friendly)
  • Seeds for nuts - similar crunch, different flavor, use pumpkin or sunflower seeds (1:1 ratio, nut-free)
  • Maple syrup for honey - similar sweetness, slightly different flavor profile (1:1 ratio, vegan)

Couscous

Works for: Faster cook time (5 minutes), similar fluffy texture, mild flavor

Skip if: You need gluten-free or want higher protein - couscous is wheat-based pasta

Steel-Cut Oats

Works for: Heartier texture, chewier bite, similar protein content, budget-friendly

Skip if: You're short on time - oats take 25-30 minutes and need constant stirring

Buckwheat

Works for: Nutty flavor, gluten-free, similar protein, works with same liquid ratio

Skip if: You want mild flavor - buckwheat has strong earthy taste that overpowers vanilla

Instructions

The whole process takes 20 minutes with only 5 minutes of active work. For a version that comes together quickly, a creamy potatoes on the side adds savory contrast to the sweet bowl.

  1. Rinse quinoa in a fine mesh strainer under cold water for 1 minute. Swirl with your hand to remove the natural coating that tastes bitter.

  2. Combine rinsed quinoa and milk in a medium saucepan over medium-high heat. Add vanilla extract when the liquid starts boiling, then reduce heat to low and cover.

  3. Simmer covered for 15 minutes without lifting the lid. The steam cooks the quinoa evenly - peeking releases heat and adds cook time.

  4. Remove from heat and let rest covered for 5 minutes. The grains absorb the last bit of liquid and firm up during this rest.

  5. Fluff quinoa gently with a fork, then stir in honey or maple syrup. Divide into bowls and top with fresh berries and toasted nuts right before serving.

Golden Rule
Use exactly 2 cups liquid for 1 cup quinoa - more makes mushy porridge, less leaves crunchy undercooked grains

What to Serve With It

Most people eat this bowl alone, but adding protein or something savory turns it into a full meal. A dollop of this dip takes each bite somewhere more interesting - smooth creamy dip adds richness without making the plate too heavy.

Side Dish Prep Why It Works How to Serve
Scrambled Eggs Easy Adds savory protein contrast to sweet bowl, makes meal more filling for active mornings Serve eggs on the side with black pepper and hot sauce for those who want savory
Greek Yogurt Easy Extra creaminess and protein boost, tangy flavor balances honey sweetness Dollop on top or serve on the side for stirring in - adds richness without cooking
Whole Grain Toast Easy Adds crunch and carbs for fullness, soaks up any extra milk in the bowl Toast until golden, spread with almond butter or jam, serve alongside bowl
Fresh Orange Slices Easy Light citrus balance cuts through creamy quinoa, adds vitamin C and refreshing bite Peel and slice into rounds, arrange on plate next to bowl for palate cleansing
Spinach Smoothie Easy Greens add nutrients and freshness, liquid form pairs well with grain-based breakfast Blend spinach, banana, milk, and ice - drink alongside bowl for complete meal

Three ways to serve it:

  • For meal prep: Portion cooked quinoa into containers without berries or nuts, add those fresh each morning
  • For brunch hosting: Set up a topping bar with berries, nuts, seeds, yogurt, and multiple sweetener options
  • For weekday grab-and-go: Make overnight in jars with chia seeds, refrigerate, top with berries before leaving
Shortcut
Cook a double batch on Sunday - plain quinoa keeps 4 days refrigerated and reheats in 2 minutes for quick breakfasts all week

Store and Reheat

Quinoa breakfast bowls keep better than oatmeal because the grains stay separate instead of turning gluey. Store the quinoa base separate from toppings so berries don't bleed and nuts stay crunchy.

Method Time Best For
🍳 Stovetop 3-4 minutes Quick gentle reheating with splash of milk - stir constantly to prevent sticking
📦 Microwave 1-2 minutes Fast reheating, cover bowl to retain moisture, stir halfway through
🔥 Oven 10 minutes at 300°F Reheating multiple servings evenly - cover with foil to prevent drying out

For best results when storing:

  • Refrigerate cooked quinoa in shallow airtight containers - cools faster and prevents bacterial growth in thick layers
  • Keep berries separate until serving - moisture from berries turns quinoa soggy and bleeds color throughout
  • Store toasted nuts in separate container - they stay crunchy instead of absorbing moisture from quinoa
  • Add fresh milk when reheating - cooked quinoa dries out, a splash of milk brings back creamy texture
  • Use within 3-4 days refrigerated - quinoa stays safe longer but texture gets grainy after day four

Frequently Asked Questions

How long to cook quinoa for breakfast bowl?

Simmer quinoa covered for 15 minutes, then rest off heat for 5 minutes. The total cook time is 20 minutes - 15 active simmer plus 5 minute rest to absorb remaining liquid.

Can I make quinoa breakfast bowl ahead?

Cook quinoa up to 4 days ahead and refrigerate in airtight containers. Add berries, nuts, and sweetener right before serving so toppings stay fresh and crunchy instead of soggy.

What goes with quinoa breakfast bowl?

Scrambled eggs add savory protein, Greek yogurt boosts creaminess, and whole grain toast provides crunch. Fresh orange slices or a spinach smoothie complete the meal with vitamin C and greens.

How do I know when quinoa is done and fluffy?

Quinoa is done when you see tiny white spirals around each grain and the texture is tender with slight bite. If liquid remains after 15 minutes, drain it - overcooked quinoa turns mushy.

Can I use steel-cut oats instead of quinoa?

Steel-cut oats work but take 25-30 minutes and need constant stirring. Use the same liquid ratio but expect chewier texture - oats are heartier while quinoa stays light and fluffy.

Quinoa Breakfast Bowl with Berries served on a plate

Quinoa Breakfast Bowl with Berries

No ratings yet
This quinoa breakfast bowl features fluffy quinoa cooked in milk with vanilla extract, topped with fresh berries and toasted nuts for a balanced, protein-packed start to your day. The rinsing step removes bitterness, and simmering with a 2:1 liquid ratio ensures perfect texture without mushiness.
Print Recipe Pin Recipe
Prep Time 5 minutes mins
Cook Time 15 minutes mins
Total Time 20 minutes mins
Servings: 3 servings
Course: Breakfast
Cuisine: American
Ingredients Equipment Method Notes

Ingredients
  

  • 1 cup quinoa rinsed under cold water for 1 minute in a fine mesh strainer
  • 2 cups milk whole milk preferred, almond or oat milk work as alternatives
  • 1 teaspoon vanilla extract added when milk starts boiling
  • 2 tablespoons honey or maple syrup, stirred in after cooking
  • 1 cup mixed berries fresh strawberries, blueberries, raspberries; add just before serving
  • 0.25 cup sliced almonds or walnuts, toasted at 350°F for 5 minutes separately
  • 1 tablespoon chia seeds optional, stirred in while quinoa is still warm
  • 0.25 teaspoon cinnamon optional

Equipment

  • Fine-mesh strainer For rinsing quinoa to remove bitterness
  • Medium saucepan To cook quinoa in milk
  • Fork To fluff quinoa after cooking

Method
 

  1. Rinse quinoa in a fine mesh strainer under cold water for 1 minute, swirling with your hand to remove the natural coating that tastes bitter.
    1 cup quinoa
  2. Combine rinsed quinoa and milk in a medium saucepan over medium-high heat. Add vanilla extract when the liquid starts boiling, then reduce heat to low and cover.
    1 cup quinoa, 2 cups milk, 1 teaspoon vanilla extract
  3. Simmer covered for 15 minutes without lifting the lid to ensure even cooking with trapped steam.
    1 cup quinoa, 2 cups milk
  4. Remove from heat and let rest covered for 5 minutes so quinoa absorbs remaining moisture and firms up.
    1 cup quinoa, 2 cups milk
  5. Fluff quinoa gently with a fork, then stir in honey or maple syrup and optional chia seeds and cinnamon while the quinoa is still warm.
    2 tablespoons honey, 1 tablespoon chia seeds, 0.25 teaspoon cinnamon
  6. Divide quinoa into bowls and top with fresh mixed berries and toasted nuts just before serving to keep toppings fresh and crunchy.
    1 cup mixed berries, 0.25 cup sliced almonds

Notes

  • Rinse quinoa thoroughly to remove bitter saponins and avoid off flavors.
  • Maintain 2:1 liquid to quinoa ratio to prevent mushy texture.
  • Toast nuts separately to keep them crunchy when added to hot quinoa.

Tried this recipe?

Let us know how it was!

What Is Choy Sum? Taste, Uses & Cooking Tips

March 29, 2026

Most people who pass choy sum at the market assume it's just another bok choy - smaller maybe, a bit leafier, roughly interchangeable with whatever other brassica is on the shelf.

What Is Choy Sum

That assumption costs them one of the most genuinely tender greens in Chinese cooking, one built specifically for speed, heat, and a faint floral note that no other leafy green quite replicates.

Unlike napa cabbage stand-ins that need bulk and braise time, choy sum is done in under two minutes and brings its own character to the plate.

QUICK SUMMARY

Choy sum is a mild, lightly floral Chinese leafy green with edible yellow flower buds, tender leaves, and crisp pale stems. It cooks in under two minutes, suits stir-fries, blanching, and soups, and stays fresh for up to a week refrigerated.

🌿What It Is: Tender Chinese flowering cabbage from the Brassica family
👅Flavor: Mild green, lightly sweet, faint floral-mustardy note
🍳Best Uses: Quick stir-fry, blanching, noodle soups, steamed sides
🧄Top Pairings: Garlic, oyster sauce, sesame oil, ginger, soy sauce
🗓️Shelf Life: 3-7 days refrigerated, wrapped in a damp paper towel

What Is choy sum?

Choy sum - also called Chinese flowering cabbage or cai xin - originates from the Guangdong region of southern China, where it remains a staple of Cantonese home cooking.

The name translates roughly to "vegetable heart," pointing to the tender inner stems and young flower shoots that make it prized.

Botanically it belongs to Brassica chinensis var. parachinensis, putting it in the same family as bok choy and gai lan, however its structure sets it apart clearly.

Each bunch has slender pale-green stems, soft broad leaves, and small edible yellow flower buds - the flowers are the telling identifier at market.

Those buds should be compact and mostly closed; fully opened blooms signal the plant has bolted and the stems will be tougher and more bitter.

You'll find it sold under several names depending on the region and retailer:

  • 🌼 Cai xin / choi sum - Mandarin and Cantonese romanizations of the same plant
  • Chinese flowering cabbage - the common English supermarket label
  • Yu choy - a closely related variety, sometimes used interchangeably at market, though yu choy stems tend to be slightly thinner

If choy sum isn't available, a guide to choy sum stand-ins covers what holds up in similar dishes.

What Does choy sum Taste Like?

choy sum - What Is Choy Sum

Choy sum sits at the mild end of the brassica spectrum.

The leaves deliver a clean, lightly bitter green flavor similar to spinach but with more structure, while the stems add a faint sweetness and a subtle mustardy edge - not sharp, more like a whisper.

Sensory SnapshotMild Intensity
👅 Flavor
mild greenlightly bitterfaint floralslightly sweet
✋ Texture
crisp stemstender leaves
👃 Aroma
fresh greensubtle floral-mustardy

Compared to bok choy, choy sum is noticeably more delicate - less watery in the stem, with a floral quality bok choy lacks entirely.

Gai lan is the earthier, slightly more bitter cousin; choy sum is softer in every respect.

Heat changes the profile quickly: brief cooking mellows the bitterness and brings forward the floral note, while overcooking collapses the stems and flattens the flavor entirely.

Golden Rule
Stop cooking choy sum the moment the stems turn bright green and just yield to a knife. Past that point, both texture and the floral note are gone.

How to Use choy sum

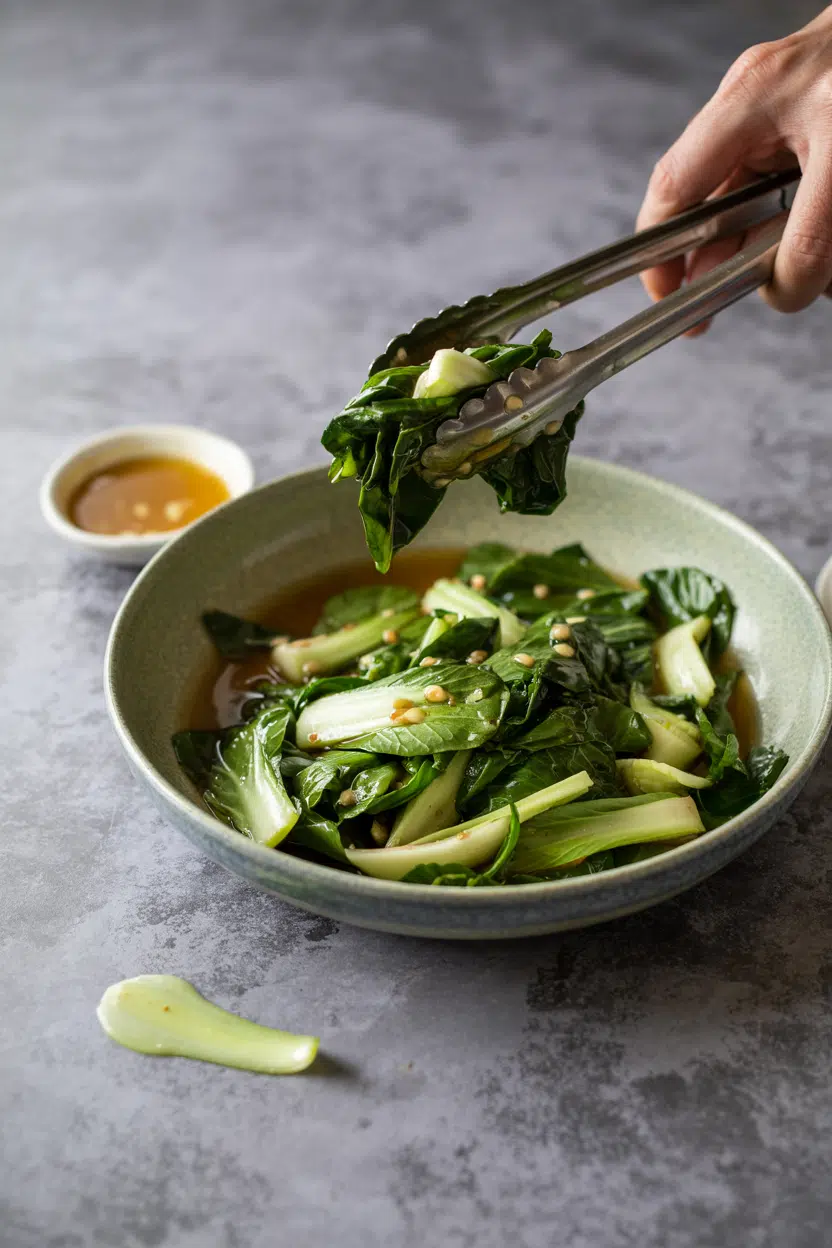
Choy sum is built for high-heat, short-cook methods. The classic Cantonese preparation is a garlic stir-fry: a screaming-hot wok, a splash of light soy, thirty seconds of tossing, done.

The stems stay crisp, the leaves wilt just enough, and the garlic does most of the aromatic heavy lifting.

Blanching is equally common in Cantonese restaurants. Drop the whole bunch into salted boiling water for sixty to ninety seconds, drain, then dress with oyster sauce and sesame oil at the table.

If you ever need to swap that sauce, a guide to swapping out oyster sauce covers what keeps the dish working.

How Choy Sum Is Used
MethodBest ForTip
🥢 Stir-fryWeeknight sides, garlic dishesUse the highest heat available; keep it moving
💧 BlanchingRestaurant-style plated greensIce bath stops cooking and holds the color
🍜 SoupNoodle broths, hot potAdd in the last 60 seconds only
♨️ SteamingSides alongside fish or braised porkSteam over already-boiling water, lid on tight
🥗 Raw (young shoots)Light salads with vinaigretteUse only the smallest, most tender inner leaves

Beyond standalone sides, chopped choy sum works well as a dumpling filling - the moisture releases during steaming rather than making the wrapper soggy, unlike denser cabbages. It also fits neatly into noodle soups alongside pork or tofu.

Dense cream or dairy sauces overwhelm its delicate character, so keep the pairings light and lean.

Try It In
🥟Dim Sum DumplingsChoy sum adds moisture and a green note to the filling→🥗Summer Berry Spinach SaladSwap young choy sum shoots for spinach when in season→

How to Buy and Store choy sum

At the market, reach for bunches with bright, uniformly green leaves and firm pale stems. Compact yellow buds are a good sign - they indicate the plant hasn't yet bolted.

Skip any bunch with limp leaves, brown stem edges, or thick woody bases; those signal overmaturity and a tougher, more bitter result.

Quick Tip
Smaller bunches almost always outperform larger ones. Thinner stems mean sweeter flavor and faster, more even cooking.

Proper storage matters for a green this delicate, and keeping choy sum fresh comes down to moisture control - wrap unwashed bunches in a damp paper towel, seal loosely in a perforated plastic bag, and refrigerate in the crisper drawer.

  • Shelf life - 3 to 7 days refrigerated; use closer to 3 days for peak texture and floral aroma
  • Don't wash before storing - excess moisture accelerates leaf breakdown significantly
  • Signs of decline - yellowing leaves, softened stems, or a sulfurous smell mean it's past its window, much the same way [broccoli spoilage signs](https://forkliftkitchen.com/broccoli-shelf-life/) work in the same family

Start With the Stir-Fry

If this is your first time cooking choy sum, the garlic stir-fry is the right entry point.

It takes under five minutes, uses pantry staples, and shows you exactly how quickly this green transforms under heat.

Once you've nailed timing - and you'll know because the stems go bright and crisp without going limp - every other method becomes easier to calibrate.

For comparison, understanding what makes bok choy distinct helps clarify why choy sum earns its own place rather than functioning as a simple swap.

The alternatives to bok choy guide is also useful if you're building a recipe around Cantonese greens and need flexibility.

Frequently Asked Questions

Is choy sum the same as cai xin?

Yes - cai xin is the Mandarin romanization of the same plant choy sum names in Cantonese. Both refer to Chinese flowering cabbage. Some regional markets label them differently, however the vegetable in the bundle is identical.

How does choy sum taste compared to bok choy?

Choy sum is more delicate and has a faint floral note that bok choy lacks. Bok choy has thicker, more watery stems and a cleaner, blander green flavor with no mustardy edge.

Can you eat choy sum raw?

Young shoots and inner leaves work raw in salads after thorough washing. Larger stems are edible raw but can be mildly tough and slightly more bitter; brief blanching makes them easier to digest.

How long does choy sum last in the fridge?

Properly stored, choy sum lasts 3 to 7 days. Wrap it unwashed in a damp paper towel and keep it in the crisper; floral aroma fades first, so use it early for the best result.

What is choy sum used for?

It's most common in Cantonese stir-fries, blanched as a plated side with oyster sauce, and added to noodle soups in the final minute. It also appears chopped in dumpling fillings and lightly raw in salads.

Air Fryer Chicken Katsu Cutlets

March 29, 2026

Complete Article Output

Crispy breading crackles when you bite into tender chicken that stayed juicy through the whole cook. That's what happens when you air fry panko-crusted cutlets at 400°F instead of pan-frying them in oil.

Air Fryer Chicken Katsu Cutlets served on a plate

The air fryer crisps the coating without the mess of deep frying. You get golden edges and a light crunch that doesn't taste greasy.

Make this on weeknights when you want something fast that still feels like real cooking. Works for meal prep too-the cutlets reheat better than most breaded chicken.

QUICK SUMMARY

Air fryer chicken katsu delivers crispy panko-crusted cutlets in 27 minutes without deep frying. Pound the chicken to ½ inch thickness so it cooks evenly, bread in flour-egg-panko order, then air fry at 400°F for 12 minutes. The key is spacing cutlets 1 inch apart so hot air circulates and crisps every side.

⏱️Time Reality: 15 minutes prep, 12 minutes cooking-doable on a Tuesday
🔑First Critical Step: Pat chicken completely dry before flouring or breading won't stick
⚠️Watch Out: Overcrowding the basket traps steam-leave 1 inch gaps or coating turns soggy

Why This Recipe Works

Pounding chicken to uniform thickness means every piece finishes cooking at the same time. The three-step breading creates layers that lock moisture inside while the panko crisps. For a version that comes together quickly, something juicy like chicken works when you're planning the week ahead.

Quick Reference
⏱️
Prep Time
15 min
🔥
Cook Time
12 min
⏰
Total Time
27 min
🍽️
Servings
2-4 servings
📊
Difficulty
Easy
🏷️
Category
Main Dish
💡
Quick Tip
Pound chicken ½ inch thick evenly
🎯
Best For
Weeknight | Meal prep

Why it delivers crispy results:

  • Even thickness prevents dry edges: Pounding chicken to ½ inch means the center cooks through before the outside dries out
  • Flour layer makes breading stick: The dry flour absorbs surface moisture so egg wash clings instead of sliding off
  • Panko creates light crunch: Japanese breadcrumbs have larger flakes than regular crumbs-they crisp without getting dense or greasy
  • Hot air circulation replaces oil: Spacing cutlets 1 inch apart lets 400°F air hit all sides and turn the coating golden in 12 minutes
  • Internal temp confirms doneness: Pulling chicken at exactly 165°F means it stays juicy-carryover cooking adds another 3-5 degrees while it rests
Quick Tip
Spray both sides of breaded cutlets lightly with oil before air frying-it helps the panko turn golden instead of staying pale.

What You'll Need

Ingredients for Air Fryer Chicken Katsu Cutlets

Stock your pantry with panko and neutral oil spray-the rest you already have. For a version that comes together quickly, tender pork side dish works when you're stocking the freezer for later.

🍗
Protein
  • 2 boneless chicken breasts (about 1 lb total)
🫙
Breading Station
  • ½ cup all-purpose flour
  • 2 large eggs (beaten)
  • 1 ½ cups panko breadcrumbs
🌶️
Seasonings
  • 1 teaspoon salt
  • ½ teaspoon black pepper
🫙
For Cooking
  • Neutral oil spray (vegetable or avocado)
  • Optional: tonkatsu sauce for serving

Ingredient Details

  • Boneless chicken breasts
    Look for pieces around 8 oz each so they pound to uniform size-avoid the giant 12 oz breasts that cook unevenly
  • Panko breadcrumbs
    Japanese-style panko has bigger, flakier crumbs than Italian breadcrumbs-it stays crispier and doesn't get soggy as fast
  • All-purpose flour
    The flour dries the chicken surface so egg wash sticks-skip this step and the breading slides right off
  • Eggs
    Beat eggs until fully blended with no streaks-uniform egg wash means even breading coverage
  • Neutral oil spray
    Vegetable or avocado oil works best-olive oil has a lower smoke point and can taste bitter at high heat
  • Tonkatsu sauce
    This sweet-savory Japanese sauce is the classic pairing-find it in the Asian section or make a quick version with ketchup and Worcestershire
  • Salt and pepper
    Season the flour instead of the raw chicken-it distributes more evenly and doesn't wash off in the egg

Ingredient Swaps

Most swaps work fine if you adjust cook time by a minute or two. Rich mains need something to cut through, and this easy fry recipe pairs well when you're serving a crowd.

Common swaps that work:

  • Rice flour or gluten-free flour replaces all-purpose flour for gluten-free breading-the coating may be slightly less crispy but still crunchy
  • Chicken thighs swap for breasts if you want more flavor and juiciness-cook 2-3 minutes longer since dark meat needs slightly higher internal temp
  • Crushed cornflakes or tortilla chips replace panko for different crunch-watch closely since they brown faster than breadcrumbs
  • Buttermilk or yogurt substitutes for egg wash if you want tangier flavor-the coating will be slightly thicker

Chicken Breasts

Works for: Uniform shape, lean protein, even cooking, mild flavor that takes sauce well

Skip if: You want more forgiving cook time-breasts dry out faster than thighs

Chicken Thighs

Works for: More flavor, stays juicier, harder to overcook, budget-friendly option

Skip if: You need uniform presentation-thighs have irregular shapes that don't slice as neatly

Panko Breadcrumbs

Works for: Light crispy texture, stays crunchy longer, authentic Japanese coating

Skip if: You can't find panko-regular breadcrumbs work but create denser coating

Crushed Cornflakes

Works for: Budget-friendly swap, extra-crunchy texture, good pantry substitute

Skip if: You're strict about authenticity-cornflakes brown faster and taste different than panko

Instructions

Plan 27 minutes start to finish-most of that is hands-on breading and flipping. A dollop of smooth creamy dip takes each bite somewhere more interesting, especially when timing runs tight.

  1. Prep the chicken: Slice each breast horizontally to create 2 thinner cutlets, then pound with a meat mallet or rolling pin until ½ inch thick throughout. Pat completely dry with paper towels-any moisture prevents breading from sticking.

  2. Set up breading station: Place flour mixed with salt and pepper in first shallow bowl, beaten eggs in second bowl, panko in third bowl. Line them up in order so you can dip with one hand and keep the other clean.

  3. Bread each cutlet: Dredge chicken in flour and shake off excess, dip in egg until fully coated, then press into panko on both sides. Press gently so crumbs stick but don't pack down-you want them loose enough to crisp up.

  4. Air fry: Spray air fryer basket with oil, place cutlets in single layer with 1 inch between them, spray tops lightly with oil. Air fry at 400°F for 6 minutes, flip, spray again, cook 6 more minutes until internal temp hits 165°F and coating turns golden brown.

  5. Rest and serve: Let cutlets rest on cutting board 5 minutes before slicing-this keeps juices inside instead of running out onto the plate. Slice crosswise into strips if serving over rice, or serve whole with tonkatsu sauce on the side.

Golden Rule
Don't skip the resting step after air frying-cutting into hot chicken immediately releases all the juices and leaves you with dry meat.

What to Serve With It

The crispy coating needs something to balance it-mild starch or tangy vegetables work best. Most people skip savory chicken dish ideas entirely, but they round out the meal when you're short on time.

Side Dish Prep Why It Works How to Serve
Steamed white rice Easy Neutral base soaks up tonkatsu sauce without competing with crispy chicken Slice cutlets over rice, drizzle sauce on top
Shredded cabbage salad Easy Crunchy, refreshing contrast cuts through rich breading Serve raw alongside cutlets, dress with rice vinegar
Miso soup Easy Warm, light, salty balance to fried main dish Serve in small bowls before or alongside chicken
Japanese potato salad Medium Creamy, tangy side that feels substantial for guests Scoop onto plate next to sliced chicken
Pickled vegetables Easy Acidic crunch cleanses palate between bites Serve small pile on side of plate as condiment

Three ways to serve it:

  • Katsu sandwich: Tuck cutlet into soft white bread with shredded cabbage and tonkatsu sauce for Japanese-style sandwich
  • Over curry: Slice cutlet and place on top of Japanese curry rice for katsu curry bowl
  • Bento style: Pack sliced cutlet with rice, pickles, and edamame for portable lunch
Best Pick
Steamed rice with shredded cabbage hits the right balance-the bland starch soaks up sauce while crisp cabbage cuts richness.

Store and Reheat

Breaded chicken holds up better than most leftovers if you reheat it right. The crispy coating can last 3-4 days in the fridge without turning completely soggy. We keep a batch ready for nights like this-tender cauliflower side dish adds the color the plate needs without extra work.

Method Time Best For
🔥 Air Fryer 4-6 min at 350°F Restores crispy coating without drying out chicken-best overall method
🔥 Oven 8-10 min at 375°F Reheating multiple cutlets at once-place on wire rack over baking sheet
📦 Microwave 30-45 seconds Speed over texture-coating goes soft but chicken stays warm and edible

For best results when storing:

  • Cool completely before storing: Hot chicken creates condensation in containers that makes breading soggy
  • Use shallow airtight containers: Stack cutlets with parchment between layers to prevent sticking
  • Refrigerate within 2 hours: Breaded chicken sits in food safety danger zone faster than plain meat
  • Freeze for longer storage: Wrap individual cutlets in plastic, then foil-good for up to 2 months
  • Reheat from frozen adds time: Air fry frozen cutlets 10-12 minutes at 350°F, no thawing needed

Frequently Asked Questions

Can I use chicken thighs instead of breasts for katsu?

Yes-thighs stay juicier and have more flavor, but their irregular shape means uneven breading. Pound them to ½ inch thick and add 2-3 minutes to the cook time since dark meat needs slightly longer.

How should I store and reheat leftover chicken katsu cutlets?

Store in shallow airtight containers in the fridge for 3-4 days. Reheat in the air fryer at 350°F for 4-6 minutes to restore crispiness-the oven works too but takes 8-10 minutes.

What internal temperature indicates chicken katsu is fully cooked?

Pull it at exactly 165°F measured in the thickest part. Carryover cooking adds another 3-5 degrees while it rests, so don't go higher or the chicken dries out.

Why did my chicken katsu lose its crispiness in the air fryer?

Overcrowding the basket traps steam and makes breading soggy. Leave 1 inch between cutlets so hot air circulates freely-cook in batches if needed.

Can I prepare air fryer chicken katsu ahead of time and freeze it?

Yes-bread the cutlets, freeze them uncooked on a baking sheet until solid, then wrap individually in plastic and foil. Air fry from frozen at 350°F for 16-18 minutes, flipping halfway.

Air Fryer Chicken Katsu Cutlets served on a plate

Air Fryer Chicken Katsu Cutlets

No ratings yet
Air Fryer Chicken Katsu Cutlets deliver crispy, juicy panko-crusted chicken without the mess of deep frying. Pounding the chicken to an even ½ inch thickness and air frying at 400°F for 12 minutes ensures a golden, crunchy coating with tender meat inside.
Print Recipe Pin Recipe
Prep Time 15 minutes mins
Cook Time 12 minutes mins
Total Time 27 minutes mins
Servings: 4 servings
Course: Main Dish
Cuisine: Japanese
Ingredients Method Notes

Ingredients
  

  • 2 boneless chicken breasts about 1 lb total, sliced horizontally then pounded to ½ inch thickness
  • 0.5 cup all-purpose flour mixed with salt and pepper for breading
  • 2 large eggs beaten
  • 1.5 cups panko breadcrumbs
  • 1 teaspoon salt seasoned in flour
  • 0.5 teaspoon black pepper seasoned in flour
  • neutral oil spray vegetable or avocado oil for spraying cutlets and air fryer basket
  • tonkatsu sauce optional, for serving

Method
 

  1. Slice each chicken breast horizontally to create 2 thinner cutlets, then pound each piece with a meat mallet or rolling pin until they reach ½ inch thickness. Pat completely dry with paper towels to ensure breading sticks.
    2 boneless chicken breasts
  2. In three shallow bowls, place the flour mixed with salt and pepper in the first, beaten eggs in the second, and panko breadcrumbs in the third. Arrange in order for efficient breading.
    0.5 cup all-purpose flour, 1 tsp salt, 0.5 tsp black pepper, 2 large eggs, 1.5 cups panko breadcrumbs
  3. Dredge each cutlet in the seasoned flour and shake off excess. Dip fully into beaten eggs, then press both sides into panko breadcrumbs, pressing gently to adhere crumbs without compacting.
    2 boneless chicken breasts, 0.5 cup all-purpose flour, 2 large eggs, 1.5 cups panko breadcrumbs, 1 tsp salt, 0.5 tsp black pepper
  4. Spray the air fryer basket with neutral oil. Place cutlets in a single layer with at least 1 inch space between pieces. Lightly spray the tops with oil. Air fry at 400°F for 6 minutes, flip cutlets, spray tops again, and cook for an additional 6 minutes until coating is golden and internal temperature reaches 165°F.
    neutral oil spray
  5. Transfer cutlets to a cutting board and let rest for 5 minutes to retain juices. Slice crosswise if desired and serve with optional tonkatsu sauce.
    tonkatsu sauce

Notes

  • Pat chicken dry before breading for best adhesion.
  • Leave 1 inch spacing in air fryer to avoid soggy coating.
  • Let cutlets rest after cooking to keep meat juicy.

Tried this recipe?

Let us know how it was!

What Is Creme Fraiche? [Taste, Uses & More]

March 29, 2026

Most cooks treat crème fraîche as a fancy stand-in for sour cream, grab a tub when a recipe calls for it, and never think much further. That's a missed opportunity. Crème fraîche behaves differently from other cultured dairy - it doesn't break under heat, it contributes richness without heaviness, and its tang sits at a quieter register than sour cream.

What Is Creme Fraiche

Understanding what it actually does puts you in control of when to reach for it and when something else fits better.

QUICK SUMMARY

Crème fraîche is a cultured high-fat cream with a silky texture and mild tang. It holds up to heat without curdling, making it ideal for finishing soups, sauces, and tarts. Shelf life runs about 7-14 days once opened.

🧈Flavor: Mildly tangy, buttery, with a faint lactic sweetness
🥄Texture: Thick, silky, spoonable - holds its shape
🍳Best Uses: Finishing soups, pan sauces, tarts, and cold dips
❄️Storage: Refrigerated, sealed; use within 7-14 days of opening
⚠️Avoid: Vigorous boiling or long high-acid braises that thin the texture

What Is Creme Fraiche?

Crème fraîche is a fermented dairy product made by introducing lactic acid bacteria into heavy cream and letting it culture at a controlled temperature. The bacteria consume lactose, produce lactic acid, and cause the cream to thicken into a dense, spoonable consistency.

Normandy in northern France is its historical home, where the region's high-fat milk made for an especially rich result.

Unlike mascarpone, which is coagulated with acid and has no live cultures, crème fraîche retains active bacterial activity up to its sell-by date. It's sometimes called French sour cream, though that label understates its fat content and overstates its sharpness.

In some UK contexts, "double cream" overlaps loosely in richness, but it isn't fermented.

The fat content is the defining structural fact - typically 30-45%, well above standard sour cream's 18-20%. That extra fat is precisely why it doesn't curdle when heated, making it more reliable in cooked applications than greek yogurt swaps used in similar roles.

Golden Rule
Fat content is what separates crème fraîche from other cultured dairy. Higher fat means more heat stability - don't substitute a lower-fat product and expect the same behavior in a hot pan.

What Does Creme Fraiche Taste Like?

Crème fraîche tastes richer and less sharp than sour cream, with a buttery undercurrent that sour cream doesn't carry. The tang is real but measured - closer to a mild lactic note than the vinegar-forward bite you get from some commercial sour creams.

Sensory SnapshotModerate Intensity
👅 Flavor
mildly tangybutterylactic sweetnessslightly nutty
✋ Texture
silkythick but pourable
👃 Aroma
creamylightly fermented

When heated, the flavor mellows further - the tang softens and the butter notes come forward. Used cold, straight from the tub, a faint nuttiness registers that disappears once it's folded into a warm dish.

That behavioral shift is worth knowing before you decide where to use it.

How to Use Creme Fraiche

Finishing is where crème fraîche excels. Stir it into mushroom soup off the heat and it creates a silky, glossy texture without any risk of breaking. The same logic applies to pan sauces - add it after you've pulled the pan from the flame and it integrates cleanly.

How Crème Fraîche Is Used
MethodBest ForTip
🥗 Cold / RawToppings for fruit, pancakes, galettes; herb dips and cold saucesSeason with lemon and a pinch of salt to lift the flavor
🍳 Finishing (off-heat)Soups, pan sauces, pasta, mashed potatoesAdd after removing from heat to preserve texture and tang
🫙 BakedTart fillings, gratins, quichesLow to moderate oven heat - avoid temperatures above 375°F for delicate applications
🔥 Light simmerCream-based pasta sauces, braised chicken dishesKeep heat low and stir gently; don't let it reach a rolling boil

In French and Central European cooking, crème fraîche appears as both a cooking component and a condiment. Modern American bistro menus use it most often as a finishing dollop - spooned over beet salads, smoked salmon plates, or roasted root vegetables.

It pairs naturally with fresh herbs like chives, tarragon, and dill, and holds its own against smoked fish and shallots.

Cold applications are underused outside of French contexts. Folding crème fraîche with mustard and herbs makes a fast cooling sauce for pork or roast chicken that requires no cooking at all.

  • 🍋 With citrus - a squeeze of lemon brightens the lactic note without fighting the tang
  • 🌿 With herbs - tarragon and dill are classic; chives work for anything savory
  • 🐟 With smoked fish - the fat and mild acidity cut through smoke effectively
  • 🍓 With berries and stone fruit - sweetness in the fruit sharpens the buttery flavor contrast
Try It In
🫙Homemade French Crème FraîcheMake it from scratch with just two ingredients→

How to Buy and Store Creme Fraiche

Look for tubs labeled clearly as crème fraîche with a pale ivory color and a dense, spoon-coating texture visible through the lid. Avoid packaging with bulging lids or visible watery whey pooling on top - both signal age or temperature abuse.

Watch Out
If your crème fraîche shows significant liquid separation or a sharp, off smell, don't stir it back together and use it anyway. Discard it. Texture and aroma are your two reliable freshness signals.

Once opened, keep it sealed tightly and refrigerated. For more detail on how long opened and unopened containers last, the full crème fraîche shelf life breakdown covers temperature variables and storage containers.

As a practical comparison, sour cream freshness guide follows similar rules, though sour cream's lower fat content makes it slightly more prone to weeping.

  • Unopened: 2-3 weeks in the fridge, depending on sell-by date
  • Opened: 7-14 days if kept cold and uncontaminated
  • Freezing: Not recommended - fat separation damages the texture irreversibly

Starting With Creme Fraiche

If you're new to it, start cold. Spoon it over roasted vegetables or a bowl of berries before you cook with it - that's the clearest way to understand its flavor baseline. Once you know what it tastes like unaltered, folding it into a warm pasta sauce or finishing a soup becomes a much more deliberate decision.

Cooks who already use sour cream regularly will find the swap natural for most applications. The key difference you'll notice: crème fraîche won't fight you in a hot pan.

If you need a closer substitute in baked recipes, the crème fraîche substitutes guide covers fat-matched options that behave similarly under heat.

Shortcut
No crème fraîche at the store? Mix one tablespoon of buttermilk into one cup of heavy cream, cover loosely, and leave at room temperature for 12-24 hours. The result is close enough for most cooked applications.

Frequently Asked Questions

Is crème fraîche the same as sour cream?

No. Both are cultured dairy, but crème fraîche has roughly double the fat content of standard sour cream. That higher fat makes it more heat-stable and gives it a milder, butterier flavor.

Can you cook with crème fraîche without it curdling?

Yes, within limits. Its high fat content resists curdling at moderate heat, making it reliable for finishing sauces and soups. Vigorous boiling or long, high-acid braises will eventually thin or break it.

How do you substitute crème fraîche in recipes?

For cold applications, full-fat sour cream or strained Greek yogurt works adequately. For cooked dishes, use full-fat sour cream with care at low heat - lower-fat options risk splitting where crème fraîche would hold.

Is crème fraîche suitable for lactose-intolerant people?

Only marginally. Bacterial culturing reduces lactose slightly, but crème fraîche still contains enough to cause reactions in sensitive individuals. It's not a safe option for strict dairy-free or severe lactose-intolerant diets.

Can you freeze crème fraîche?

Freezing isn't recommended. The high fat content separates on thawing, leaving a grainy, watery texture that doesn't recover. Buy smaller tubs and use within the opened shelf life instead.

What Is Chorizo? Taste, Uses & What It Tastes Like

March 29, 2026

You spot it at the deli counter - a deep red, smoke-dusted sausage hanging in a tight casing - and reach for it without quite knowing how it differs from the salami or pepperoni beside it.

What Is Chorizo

Chorizo is in its own category entirely, and which style you pick changes everything about how you cook with it.

QUICK SUMMARY

Chorizo is a pork sausage spiced with smoked paprika and garlic. Spanish chorizo is dry-cured and sliceable; Mexican chorizo is raw and cooked by crumbling. Both deliver smoky, garlicky, umami-forward flavor but suit different cooking methods and dishes entirely.

🌶️Flavor: Smoky paprika, garlic, savory fat, slight tang
🍖Type: Cured sausage (Spanish) or raw fresh sausage (Mexican)
🍳Best Uses: Tapas, paella, breakfast scrambles, stews, empanadas
❄️Shelf Life: Cured: weeks to months; fresh Mexican: 1-2 days fridge
🛒Buy It: Look for firm, deep-red cured links or bright-red sealed fresh sausage

What Is Chorizo?

Chorizo is a pork-based sausage originating from the Iberian Peninsula, now closely associated with both Spanish and Mexican cooking traditions. The defining spice is pimentón - smoked paprika - which gives chorizo its signature red color and smoky character that no other sausage quite replicates.

Spanish chorizo is dry-cured, meaning it undergoes a curing process that removes moisture and firms the meat into a sliceable, shelf-stable sausage. You'll find it labeled chorizo seco or simply Spanish chorizo, and it comes in mild and spicy varieties depending on the paprika used.

Mexican chorizo is an entirely different product. It's a raw, loose fresh sausage seasoned with dried chiles, garlic, and vinegar - the acid giving it a sharp, bright tang that distinguishes it clearly from its Spanish counterpart.

  • Spanish chorizo - firm, sliceable, dry-cured; ready to eat without cooking
  • Mexican chorizo - loose, raw, removed from casing; always cooked before eating
  • Chouriço - the Portuguese spelling; similar to Spanish chorizo but often smokier
  • Chorizo seco - Spanish term for the fully dried, hardest-cured version
Watch Out
Spanish cured chorizo does not need cooking; Mexican chorizo absolutely does. Using Mexican chorizo like a cured sausage - sliced cold - is unsafe. Check the label before you cook.

What Does Chorizo Taste Like?

Spanish chorizo tastes closest to a smoky, spiced salami - deeply savory, faintly sweet from the paprika, and rich with cured pork fat. Heat a slice in a pan and the fat renders out in orange pools, intensifying every note.

Mexican chorizo reads differently: bright red from dried chiles, tangy from vinegar, and aggressively garlicky. Cooked and crumbled, it develops crisp edges with a loose, almost granular texture.

Sensory SnapshotStrong Intensity
👅 Flavor

smoky paprikagarlickytangyumami-rich
✋ Texture

firm & sliceable (Spanish)crumbly (Mexican)
👃 Aroma

pungent smoked paprikawarm garliccured pork

Both styles share that core pork-fat richness and a pronounced smokiness that lingers. Neither is subtle - chorizo announces itself in any dish it enters.

How to Use Chorizo

Spanish cured chorizo needs little effort. Slice it thin for a charcuterie board alongside manchego or sharp cheddar, or sear thick rounds in a dry pan until the fat blooms and the edges brown. It's essential to an authentic paella, where it colors the rice orange and layers in that characteristic smoky pork depth.

Mexican chorizo works best when cooked from raw. Remove it from the casing, crumble it into a hot pan, and cook until the fat renders and the meat crisps slightly. Use it in huevos rancheros, fold it into breakfast burritos, or stir it through black beans for a fast, protein-rich stew.

Both styles cross into pasta, pizza, and baked casseroles without trouble. If you need a comparable sausage with its own regional character, andouille is the closest American-style alternative.

How Chorizo Is Used
Method Best For Tip
🥗 Sliced raw Tapas, charcuterie boards, sandwiches Spanish cured only; slice thin against the grain
🍳 Pan-fry & crumble Breakfast scrambles, taco fillings, bean stews Mexican chorizo; cook until fat fully renders
🥘 Stew or braise Paella, lentil stew, white bean soup Add early so fat integrates into the liquid
🔥 Bake or roast Casseroles, empanada filling, pizza topping Slice or crumble depending on type; fat bastes surrounding ingredients
🌮 Grill Whole Spanish links, party platters Score the casing lightly to prevent bursting
Try It In

🥘Seafood and Chorizo PaellaSpanish chorizo colors the rice and builds the smoky base→🍳Chorizo and Potato Breakfast HashMexican chorizo crumbled and crisped with potatoes and eggs→🧀Melted Queso Fundido with ChorizoFresh Mexican chorizo stirred into molten melted cheese→

How to Buy and Store Chorizo

Good Spanish cured chorizo should feel firm throughout, show deep red color, and have visible white fat marbling in the cross-section. Avoid any link with a sticky or slimy casing - both signal age or improper storage.

For Mexican chorizo, look for bright red color in sealed packaging with a faint, clean vinegar smell. A sour or ammonia-like odor means it has turned; don't buy it.

Golden Rule
Fresh Mexican chorizo lasts only 1-2 days in the fridge. If you buy more than you'll use in two days, freeze it immediately - it holds well for up to 3 months.

Opened cured chorizo keeps refrigerated for 2-3 weeks when wrapped tightly. For more detail on safe windows, see our guide to chorizo storage life.

If a recipe calls for something you don't have, check these chorizo swaps before changing the whole dish.

Start Here

New to chorizo? Buy a cured Spanish link first. Slice it cold, taste the paprika and fat, and understand the baseline flavor.

From there, try crumbling fresh Mexican chorizo into scrambled eggs - it's the fastest way to see how differently the two types cook and eat.

Neither style pairs well with delicate flavors. Skip chorizo anywhere you'd use a mild white fish or want restraint on the plate.

Lean into it where you want smoke, heat, and a pork backbone to carry the whole dish.

Shortcut
No cured chorizo on hand? A few drops of smoked paprika oil stirred into cooked ground pork gets you surprisingly close for stews and rice dishes.

Frequently Asked Questions

What is the difference between Spanish and Mexican chorizo?

Spanish chorizo is dry-cured and fully ready to eat without cooking. Mexican chorizo is raw, loose, and spiced with dried chiles and vinegar rather than smoked paprika alone - it must be cooked before eating.

Is chorizo spicy?

Not always. Spanish chorizo comes in mild (dulce) and spicy (picante) versions depending on the paprika used. Mexican chorizo tends to carry more heat from dried chiles but still ranges from mild to hot by brand.

Can chorizo be eaten raw?

Spanish cured chorizo is safe to eat without cooking, the same way you'd eat salami. Mexican chorizo is raw pork and must be cooked to a safe internal temperature before eating.

How long does chorizo last in the fridge?

Fresh Mexican chorizo lasts 1-2 days refrigerated once opened. Sliced cured Spanish chorizo keeps for 2-3 weeks tightly wrapped in the fridge. Freeze either type if you won't use it within those windows.

What cheeses pair well with chorizo?

Manchego is the classic match for Spanish cured chorizo - its buttery, slightly salty character holds up to the smoke. Sharp cheddar or Oaxacan cheese work well alongside Mexican chorizo, especially in queso fundido or quesadillas.

What Is Dream Whip? [Taste, Uses & More]

March 29, 2026

Banana cream pie at a church potluck, a fruit salad mounded with something that holds its shape hours after anyone touched it - Dream Whip is usually the reason that topping hasn't melted into a puddle.

What Is Dream Whip

This powdered mix reconstituted with chilled milk became the backbone of mid-century no-bake American desserts, and it still shows up in recipes that need a stable, replacements for whipped cream without the fuss of heavy cream.

It won't taste like something from a French patisserie, but that was never the point.

QUICK SUMMARY

Dream Whip is a shelf-stable powdered whipped topping mix that reconstitutes with cold milk into a light, sweet, vanilla-forward topping. It's more stable than fresh whipped cream, making it the go-to for no-bake pies, trifles, and potluck desserts that need to hold shape for hours.

🍬Flavor: Sweet, vanilla-forward, lightly artificial, mild dairy note
☁️Texture: Airy, mousse-like, holds soft peaks without weeping
🥧Best Uses: No-bake pie fillings, trifles, fruit salads, sheet cake toppings
📦Shelf Life: Sealed: years; opened: 6-12 months; prepared: 2-3 days refrigerated
⚠️Watch Out: Breaks down with heat; can weep with very acidic fruits

What Is Dream Whip?

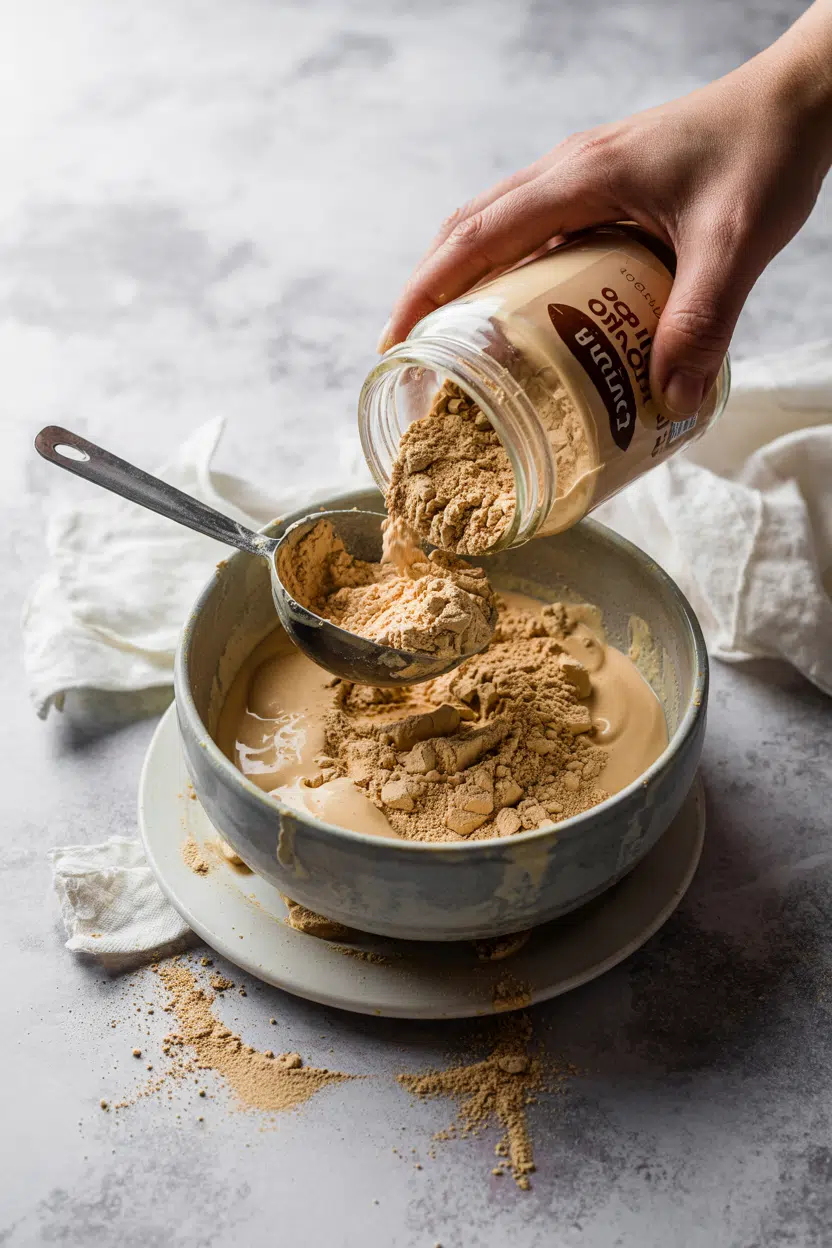
Dream Whip is an instant whipped topping mix in dry powder form, sold in envelopes or canisters.

General Foods introduced it in the United States in the 1950s, positioning it as a pantry-stable alternative to fresh cream that required no refrigeration until use.

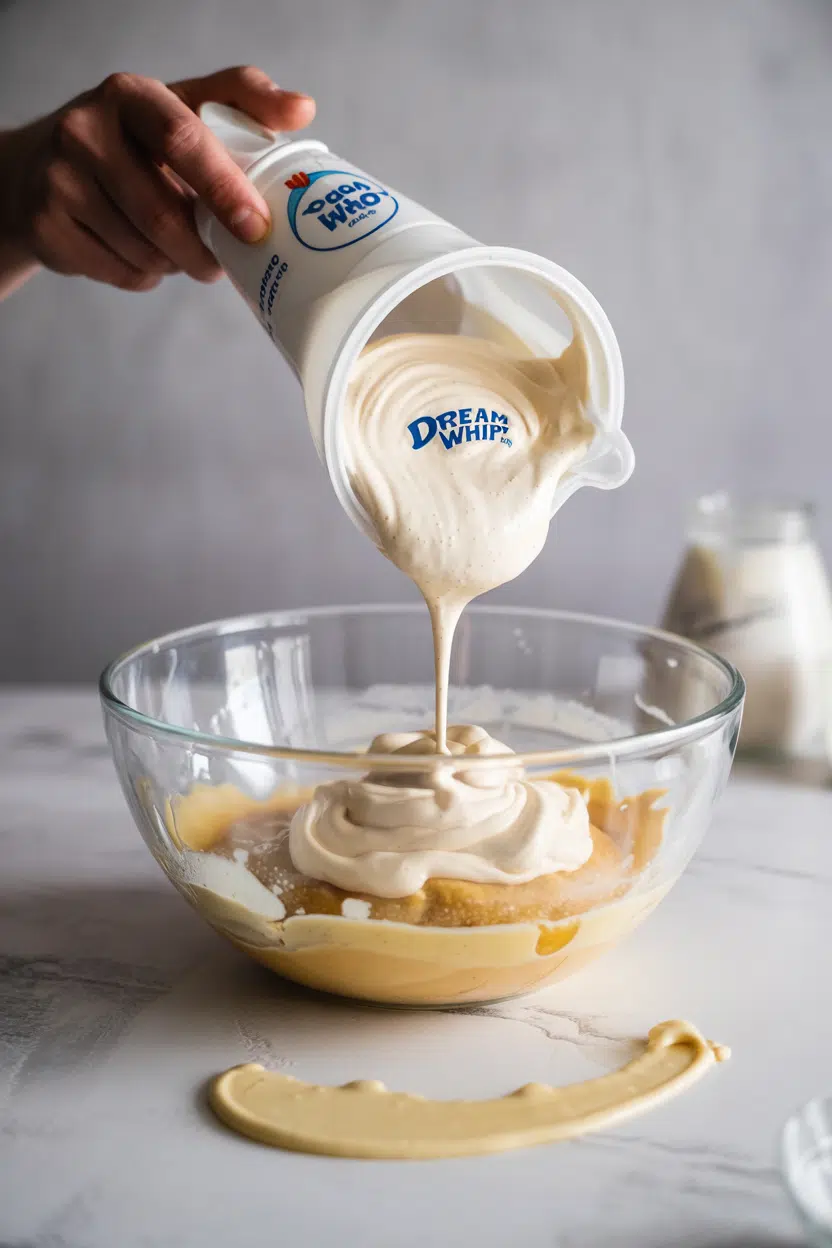
The mix is reconstituted by beating the powder with cold milk - and often a splash of vanilla extract - using an electric mixer until it thickens into a soft, airy topping.

It belongs to the category of processed dry dessert mixes, alongside instant pudding and gelatin powder. You'll see it labeled as DreamWhip, Dream Whip mix, or simply powdered whipped topping mix depending on the retailer.

There are no major flavor sub-varieties; the standard formula is vanilla.

Dream Whip differs from Cool Whip in one key way: it starts as a powder.

Understanding the role Cool Whip plays in similar recipes helps clarify what each product is actually doing - Cool Whip is pre-whipped and frozen, while Dream Whip is shelf-stable and made fresh each time.

  • 🥛 Reconstituted with milk - cold milk activates the mix; warm milk prevents proper aeration
  • 📦 Pantry-stable dry form - no refrigeration needed until the packet is opened or prepared
  • 🇺🇸 Mid-century American origin - developed as a convenience product for home bakers in the 1950s

What Does Dream Whip Taste Like?

dream whip - What Is Dream Whip

Dream Whip tastes like a light vanilla mousse with a mild confectionery sweetness - not rich, not sharp, just quietly sweet. The vanilla note is recognizable but leans artificial, in the way that boxed cake mix vanilla does.

When prepared with whole milk, a thin dairy undertone comes through, though it's never creamy in the way fresh whipped cream is.

The texture does most of the heavy lifting. Silky and airy rather than dense, it dissolves quickly on the tongue without leaving a heavy or fatty coating.

The aroma before mixing is faintly starchy with a clean vanilla sweetness - not unpleasant, but unmistakably a powder product.

Sensory SnapshotModerate Intensity
👅 Flavor
vanilla-forwardsweetmildly artificiallight dairy
✋ Texture
airymousse-likesilky
👃 Aroma
sweet vanillaslightly starchy

Compared side by side, Dream Whip reads closer to Cool Whip than to freshly whipped heavy cream. Fresh cream has more fat, more richness, and a neutral flavor that lets other ingredients lead.

Dream Whip's vanilla sweetness is already present, which means it's actively flavoring whatever it touches.

How to Use Dream Whip

Dream Whip earns its place in recipes where stability matters more than richness.

Beat the powder with cold milk using an electric mixer - room temperature milk won't whip properly - and within two to three minutes you have a topping that holds soft peaks for hours without weeping.

Golden Rule
Always start with cold milk - ideally straight from the fridge. Warm milk prevents the mix from aerating and you'll get a thin, liquid result that doesn't recover.

Folded into instant pudding, it creates a mousse-like filling that sets firmly in a graham cracker crust without needing gelatin.

The banana pairs cleanly with the vanilla sweetness - for recipes where banana isn't available, a quick look at alternatives to banana turns up options like plantain or canned pear that hold up similarly in chilled fillings.

Blended with softened cream cheese, Dream Whip makes a quick no-bake cheesecake-style filling with more structure than either ingredient alone. It also layers well in trifles, where a topping that doesn't soak through surrounding sponge cake matters.

For a sharper contrast in flavor, pair it with lemon curd or pineapple - both cut through the sweetness without collapsing the aeration.

How Dream Whip Is Used
MethodBest ForTip
🥣 Whipped with milkPie toppings, fruit salad crowns, sheet cake toppingUse cold milk and a chilled bowl for maximum volume
🍮 Folded into puddingNo-bake mousse fillings, banana cream pie, trifle layersFold gently after both are separately mixed to keep air in
🧀 Blended with cream cheeseQuick pie fillings, dessert dips, no-bake cheesecakeSoften cream cheese fully first or lumps won't mix out
🧁 Piped coldBars, sheet cakes, trifle assemblyChill prepared topping 15 minutes before piping for cleaner peaks

Avoid using Dream Whip over warm or hot fillings - heat breaks down the aeration immediately and the topping thins to a liquid.

Very acidic fruits like fresh pineapple or passion fruit can cause slight weeping without added sugar to balance them.

If you need an option with a different profile, the options covered under replacements for dream whip include both dairy and non-dairy paths.

Try It In
🧀Whipped Feta DipSee how whipping changes a dairy base's texture entirely→🍯Whipped Feta with HoneySweet-savory balance that mirrors Dream Whip's vanilla-sweet profile→🥖Whipped Ricotta Crostini AppetizerLight, airy dairy base — similar whipped texture, savory direction→

How to Buy and Store Dream Whip

Buy Dream Whip in sealed envelopes or canisters with an intact factory seal and a visible best-by date.

Skip any box that shows moisture staining or powder clumping visible through packaging - that's a sign the dry mix has already absorbed ambient humidity and won't whip to full volume.

Watch Out
Once opened, Dream Whip absorbs odors and moisture fast. Transfer unused powder to an airtight container immediately - a loose envelope left in a humid pantry will clump within weeks.

Store the sealed dry mix in a cool, dry pantry away from direct heat or steam.

Opened powder keeps well for 6-12 months in an airtight container.

Prepared topping should be refrigerated and used within 2-3 days - after that, it can begin to weep and lose structure.

For a full breakdown of what to watch for, the guide on dream whip spoilage signs covers both the dry powder and the prepared topping in detail.

Just as storing sugar correctly in an airtight container prevents clumping, the same principle applies to Dream Whip powder. Humidity is the main enemy.

The prepared topping doesn't freeze as cleanly as something like a dairy cream - for comparison, freezing cool whip works well because it's designed for the freezer, while Dream Whip topping softens significantly on thaw.

Where Dream Whip Fits in Your Kitchen

Dream Whip is a specialist, not a daily staple. Reach for it when a recipe specifically calls for a stable, sweet, no-bake topping that won't weep over several hours on a buffet table or in a layered dessert.

  • 🥧 Start here for no-bake pies - folded with instant pudding into a graham cracker crust, it sets without gelatin or the oven
  • 🍽️ Use for potluck desserts - holds shape at room temperature longer than fresh whipped cream, which matters for trifles and fruit salads
  • 🧀 Combine with cream cheese - the firmest result Dream Whip can deliver, good for dips and cheesecake-style fillings

If a recipe needs a neutral, rich topping that doesn't add vanilla sweetness, fresh whipped heavy cream is the better call. Dream Whip is the right tool when stability and shelf life matter more than dairy richness.

Frequently Asked Questions

What is Dream Whip made of?

The dry mix contains sugar, modified starch, sodium caseinate, and artificial vanilla flavor, among other stabilizers. It requires cold milk added during preparation, which provides the dairy content and helps the mix aerate into a topping.

Can you substitute Cool Whip for Dream Whip?

Yes, in most recipes. Use Cool Whip as a 1:1 volume swap for prepared Dream Whip. The flavor is similar, though Dream Whip tends to be slightly sweeter and firmer when freshly made versus thawed Cool Whip.

How long does Dream Whip last after mixing?

Refrigerate prepared Dream Whip and use it within 2-3 days. Beyond that, the topping starts to weep liquid and loses its airy structure, especially if folded with fruit or pudding.

Does Dream Whip need milk?

Yes - cold milk is required for the mix to whip properly. Water won't provide enough protein and fat structure for aeration. Whole milk gives the fullest volume; lower-fat milk works but produces a slightly thinner result.

Is Dream Whip gluten free?

The standard formula does not list wheat as an ingredient, but the packaging does not carry a certified gluten-free label. People with celiac disease should check the current package for allergen statements, as formulas and manufacturing lines can change.

Shrimp Veracruz Mexican-Style

March 29, 2026

When you need a hands-off dinner that works for busy weeknights or casual entertaining, Shrimp Veracruz delivers. One skillet, 30 minutes, and a bright tomato sauce that does the heavy lifting while you prep rice or set the table.

Shrimp Veracruz Mexican-Style served on a plate

The high heat sears the shrimp while the sauce simmers down. You get tender shrimp and a chunky, briny sauce without babysitting the pan.

Perfect for nights when you want something that feels intentional but doesn't require advanced planning or special equipment.

QUICK SUMMARY

Shrimp Veracruz is a coastal Mexican dish built on sautéed shrimp, tomatoes, olives, and capers. The key is cooking the shrimp quickly at medium-high heat to avoid rubbery texture, then adding lime juice off heat to preserve brightness. It's done when shrimp are opaque and curled, about 2 minutes per side.

⏱️Time Reality: 30 minutes total - 15 minutes prep, 15 minutes active cooking with no downtime
🔥First Critical Step: Pat shrimp dry before cooking to prevent steaming and watery sauce
⚠️Watch Out: Overcrowding the pan steams shrimp instead of searing - cook in batches if needed

Table of Contents

Toggle
  • Why This Recipe Works
  • What You'll Need
    • Ingredient Details
  • Ingredient Swaps
  • What to Serve With It
  • Store and Reheat
  • Frequently Asked Questions
  • Shrimp Veracruz Mexican-Style
    • Method 
    • Tried this recipe?

Why This Recipe Works

The high heat and quick sear lock in moisture while the sauce simmers separately. For more seafood ideas that follow the same fast-cooking principle, try a homemade shrimp recipe with similar timing.

Quick Reference
⏱️
Prep Time
15 min
🔥
Cook Time
15 min
⏰
Total Time
30 min
🍽️
Servings
4 servings
📊
Difficulty
Easy
🏷️
Category
Main Dish
💡
Quick Tip
Don't overcook shrimp; add lime last
🎯
Best For
Weeknight | Entertaining

Here's what makes it reliable:

  • Pat shrimp dry with paper towels - removes surface moisture so shrimp sear instead of steam, preventing watery sauce
  • Sauté onions 3-4 minutes before adding garlic - softens onions without burning garlic, which turns bitter in 30 seconds
  • Keep skillet at medium-high heat - creates quick sear on shrimp in about 2 minutes per side, keeping texture firm
  • Simmer sauce 7-8 minutes - thickens tomato base while keeping some chunks, avoiding thin or overly smooth texture
  • Add lime juice off heat just before serving - preserves citrus brightness that cooking would diminish
Quick Tip
Chop green olives coarsely to distribute briny flavor evenly throughout the sauce without overwhelming individual bites.

What You'll Need

Ingredients for Shrimp Veracruz Mexican-Style

Shopping for this recipe takes one trip. Most of the work happens in the skillet while you chop vegetables and prep the shrimp.

🦐
Protein
  • 1 lb shrimp (peeled, deveined)
🥬
Vegetables
  • 1½ cups diced tomatoes
  • 1 onion (chopped)
  • 1 bell pepper (chopped)
  • 2 jalapeños (sliced)
  • 3 cloves garlic (minced)
🫙
Briny Elements
  • ½ cup green olives (pitted, chopped)
  • 2 tablespoon capers
🍋
Finishing
  • 2 tablespoon lime juice
  • ¼ cup cilantro (chopped)
  • 2 tablespoon olive oil

Ingredient Details

  • Shrimp
    Use fresh or fully thawed shrimp - frozen shrimp release excess water that breaks sauce texture and prevents proper searing
  • Green Olives
    Pitted green olives provide signature briny flavor - chop coarsely so they distribute throughout sauce without overwhelming individual bites
  • Capers
    Rinse capers briefly if they taste too salty - this balances sauce saltiness without losing tangy punch
  • Jalapeños
    Remove seeds and membranes for mild heat - leave them in if you want more spice, or substitute with bell pepper for zero heat
  • Tomatoes
    Canned diced tomatoes work as well as fresh - drain slightly if using canned to prevent overly thin sauce
  • Lime Juice
    Add lime juice off heat at the end - cooking lime juice diminishes its brightness and leaves flat flavor
  • Olive Oil
    Use enough to coat the skillet but not pool - about 2 tablespoons prevents sticking without making sauce greasy

Ingredient Swaps

The base ingredients stay consistent, but peppers and olives adjust to preference. For other coastal Mexican dishes with similar flexibility, check this easy potato recipe that adapts just as well.

Four swaps that work:

  • Green olives → capers only or chopped pickles - keeps briny, tangy flavor but shifts saltiness level (budget, flavor-swap)
  • Jalapeños → serrano peppers or mild bell pepper - changes heat from mild to hot or removes it entirely (flavor-swap)
  • Shrimp → scallops or firm white fish - alters texture and requires different cook times (method-swap)
  • Lime juice → lemon juice - slightly different citrus profile but maintains brightness (flavor-swap)

Capers Only (No Olives)

Works for: budget meals, simpler briny flavor, fewer ingredients to prep

Skip if: you want the signature Veracruz olive flavor and fuller texture

Serrano Peppers

Works for: higher heat preference, authentic spicy Mexican flavor

Skip if: you prefer mild dishes or cook for kids who avoid spice

Scallops

Works for: special occasions, sweeter flavor, similar quick sear method

Skip if: you need budget-friendly protein or prefer shrimp's snappy texture

Instructions

The skillet does most of the work in 15 minutes. You sauté vegetables, simmer sauce, then sear shrimp at the end so they don't overcook.

  1. Pat shrimp dry with paper towels and season with salt. Heat 2 tablespoons olive oil in a large skillet over medium-high heat until shimmering, about 1 minute.
  2. Add chopped onion and bell pepper, sauté 3-4 minutes until softened. Stir in minced garlic and sliced jalapeños, cook 30 seconds until fragrant but not browned.
  3. Add diced tomatoes, green olives, and capers. Stir to combine, then simmer 7-8 minutes until sauce thickens slightly and tomatoes break down but maintain some chunks.
  4. Push sauce to sides of skillet, add shrimp in single layer. Cook 2 minutes per side until opaque and curled, flipping once - don't overcrowd or shrimp will steam instead of sear.
  5. Remove skillet from heat, stir in lime juice and chopped cilantro. Taste and adjust salt if needed, then serve immediately over rice or with warm tortillas.
Golden Rule
Don't overcrowd the pan - cook shrimp in batches if necessary, leaving ¼-inch gaps between pieces to ensure proper searing instead of steaming.

What to Serve With It

Rich mains need something to cut through, and dressing does exactly that. For more ideas that balance the plate, look at easy fish meal ideas that pair with Mexican-style seafood.

Side Dish Prep Why It Works How to Serve
White Rice Easy Neutral base absorbs flavorful sauce without competing Spoon shrimp and sauce over warm rice
Warm Corn Tortillas Easy Traditional accompaniment for scooping shrimp and sauce Wrap shrimp in tortillas or serve on the side
Black Beans Easy Adds protein and earthy flavor that balances briny sauce Serve alongside or mixed into rice
Steamed Vegetables Easy Light option that balances rich, saucy shrimp Place on side of plate, drizzle with lime
Simple Salad Easy Refreshing contrast to hot, cooked seafood Toss with lime vinaigrette, serve before or alongside

Three ways to serve it:

  • Weeknight bowl: Spoon Shrimp Veracruz over cilantro-lime rice with black beans on the side - everything in one bowl
  • Entertaining platter: Arrange shrimp on a large platter with warm tortillas, guacamole, and this quick corn dish for passing family-style
  • Meal prep: Portion shrimp and sauce into containers with rice, reheat stovetop for 3-5 minutes throughout the week
Best Pick
Cilantro-lime rice adds fresh, fragrant element that complements the tangy sauce - cook rice with lime zest and chopped cilantro stirred in at the end.

Store and Reheat

Leftovers keep 3-4 days in the fridge in a shallow airtight container. The shrimp stays tender if you reheat gently and don't overcook it again.

Method Time Best For
🍳 Stovetop 3-5 min over medium heat Best flavor, preserves shrimp texture without turning rubbery
🔥 Oven 10 min at 325°F Even reheating, avoids rubbery shrimp if covered with foil
📦 Microwave 1-2 min on medium power Quick reheating, cover to retain moisture and prevent drying

For best results when storing:

  • Cool completely before refrigerating - prevents condensation that dilutes sauce and makes shrimp soggy
  • Use shallow containers - shrimp cools faster and reheats more evenly in thin layers instead of deep bowls
  • Freeze up to 1 month - sauce freezes well but shrimp texture softens slightly, so reheat gently on stovetop
  • Add fresh lime juice after reheating - restores brightness that fades during storage, about 1 teaspoon per serving
  • Reheat only what you'll eat - repeatedly reheating shrimp makes it rubbery, so portion before storing

Frequently Asked Questions

Can I use frozen shrimp for Shrimp Veracruz?

Yes, but thaw completely first and pat dry with paper towels. Frozen shrimp release excess water that breaks sauce texture and prevents proper searing.

How do I know when Shrimp Veracruz shrimp are perfectly cooked?

Shrimp are done when they turn opaque and curl into a C-shape, about 2 minutes per side. If they curl into tight O-shapes, they're overcooked and will be rubbery.

What can I substitute for green olives in Shrimp Veracruz?

Use extra capers or chopped pickles to keep the briny, tangy flavor. The sauce won't taste identical but maintains the salty-acidic balance that defines Veracruz style.

Can I make Shrimp Veracruz ahead?

Make the sauce up to 2 days ahead and refrigerate, then cook shrimp fresh when serving. Reheating cooked shrimp makes them rubbery, so prep the sauce but sear shrimp last minute.

Is Shrimp Veracruz gluten-free?

Yes, all core ingredients are naturally gluten-free. Just confirm your canned tomatoes and capers don't contain added gluten-containing stabilizers.

Shrimp Veracruz Mexican-Style served on a plate

Shrimp Veracruz Mexican-Style

No ratings yet
Shrimp Veracruz is a quick, one-skillet Mexican coastal dish featuring tender shrimp seared at high heat and simmered in a bright tomato sauce with olives, capers, and jalapeños. The sauce simmers to thicken while the shrimp cooks quickly, preserving their juicy texture. This recipe is perfect for easy weeknight dinners or casual entertaining.
Print Recipe Pin Recipe
Prep Time 15 minutes mins
Cook Time 15 minutes mins
Total Time 30 minutes mins
Servings: 4 servings
Course: Dinner, Main Dish
Cuisine: Mexican
Ingredients Equipment Method Notes

Ingredients
  

  • 1 lb shrimp peeled and deveined, fresh or fully thawed
  • 1.5 cups tomatoes diced, fresh or canned (drained if canned)
  • 1 item onion chopped
  • 1 item bell pepper chopped
  • 2 items jalapeños sliced, seeds and membranes removed for mild heat
  • 3 cloves garlic minced
  • 0.5 cup green olives pitted and coarsely chopped
  • 2 tablespoon capers rinsed if too salty
  • 2 tablespoon lime juice added off heat
  • 0.25 cup cilantro chopped
  • 2 tablespoon olive oil for sautéing and cooking

Equipment

  • Large skillet Used for sautéing vegetables, simmering sauce, and searing shrimp
  • Paper towels Used to pat shrimp dry before cooking

Method
 

  1. Pat shrimp dry with paper towels and season lightly with salt. Heat olive oil in a large skillet over medium-high heat until shimmering, about 1 minute.
    1 lb shrimp, 2 tbsp olive oil
  2. Add chopped onion and bell pepper to the skillet and sauté for 3-4 minutes until softened.
    1 item onion, 1 item bell pepper
  3. Stir in minced garlic and sliced jalapeños and cook for 30 seconds until fragrant but not browned.
    2 items jalapeños, 3 cloves garlic
  4. Add diced tomatoes, chopped green olives, and capers to the skillet. Stir to combine and simmer the sauce for 7-8 minutes until it thickens slightly and tomatoes break down but remain chunky.
    1.5 cups tomatoes, 0.5 cup green olives, 2 tbsp capers
  5. Push the sauce to the edges of the skillet and add shrimp in a single layer. Cook each side for about 2 minutes until shrimp are opaque and curled. Do not overcrowd the pan; cook in batches if necessary.
    1 lb shrimp
  6. Remove the skillet from heat. Stir in lime juice and chopped cilantro. Taste and adjust salt if needed. Serve immediately over rice or with warm tortillas.
    2 tbsp lime juice, 0.25 cup cilantro

Notes

  • Pat shrimp dry thoroughly to ensure proper searing and avoid watery sauce.
  • Cook shrimp in batches if needed to prevent overcrowding and steaming.
  • Add lime juice off heat to preserve fresh citrus brightness.

Tried this recipe?

Let us know how it was!

What Is Cranberries? [Taste, Uses & More]

March 29, 2026

Most people assume cranberries just need sugar - dump them in a pot, add sweetener, done.

What Is Cranberries

That framing undersells what's actually happening: raw cranberries carry a sharp, almost aggressive tartness that doesn't disappear with heat, it redirects.

If you're reaching for maple syrup swaps that work to sweeten a cranberry sauce, knowing why the berry needs that counterweight makes the difference between a sauce that sings and one that just sits.

And if you're planning a full holiday spread, storing turkey correctly before the cranberries even hit the stove matters more than most people realize.

QUICK SUMMARY

Cranberries are small, firm, bright-red berries with sharp tartness and strong astringency when raw. They're rarely eaten plain - most often simmered, baked, dried, or juiced - and need sweetening to balance their acidity. Fresh cranberries peak in fall; frozen ones keep nearly a year.

🍋Flavor: Bright, sharp tartness with astringent backing and low natural sweetness
🍳Best Uses: Sauces, glazes, baked goods, syrups, juices, and dried snacks
🌍Cuisines: North American, Scandinavian, British and Irish baking traditions
🥩Pairs With: Turkey, pork, orange zest, ginger, goat cheese, apples, walnuts
🗓️Shelf Life: Fresh: 2-4 weeks refrigerated; frozen: up to 10-12 months

What Is Cranberry?

Cranberries (Vaccinium macrocarpon) are small, round berries native to the acidic bogs and coastal marshes of Northeastern North America. They grow on low, creeping vines - not trees or upright bushes - in waterlogged, peaty soil that few other crops tolerate.

You'll also see them called bog cranberries or American cranberries. They're botanically related to blueberries and lingonberries, though their flavor profile sits in its own category, much sharper and more astringent than either.

Fresh cranberries arrive in stores from late September through December. Outside that window, frozen and dried are the practical options, and both behave differently in the kitchen.

  • 🔴 Fresh cranberries - firm, whole berries used for sauces, baking, and glazes
  • 🟠 Dried cranberries - sweetened, chewy, used in granola, trail mix, and baked goods
  • 🧃 Cranberry juice - pressed and often blended with sweetener; used in drinks and reductions
  • 🥄 Frozen cranberries - identical to fresh for cooked applications; skip thawing before baking

What Does Cranberry Taste Like?

cranberries - What Is Cranberries

Raw cranberries hit with immediate, sharp acidity - closer to a very tart green apple or sour pomegranate aril than to any sweeter berry. That initial tartness is followed by a dry, mouth-tightening astringency from the skin.

Sensory SnapshotStrong Intensity
👅 Flavor
bright tartacidicastringentlow sweetness
✋ Texture
firmtaut skinjuicy pop
👃 Aroma
greenpineycitrus-bright

Heat changes the dynamic significantly. Simmered cranberries lose some astringency as the skins break, and the flavor opens up into something more rounded - still tart, still acidic, but softer at the edges.

That's the version most people know from cranberry sauce.

Dried cranberries taste quite different. Sweetener is added during processing, so the tartness is muted and the texture shifts from firm-juicy to chewy. They don't substitute for fresh in cooked recipes without adjustments.

Watch Out
Raw cranberries are edible but strongly astringent - eating a handful plain is a bracing experience. Always taste before adding to uncooked preparations, and factor in sweetening before serving.

How to Use Cranberry

Cranberries anchor one of the most iconic dishes in North American cooking: Thanksgiving cranberry sauce, simmered with orange zest and sugar until the berries pop and the liquid thickens into a jammy, jewel-red condiment.

That same principle - heat, acid, sweetener - scales into glazes for roasted pork loin, and pairing ideas for roast pork loin show how the berry's tartness cuts right through fatty meat.

Fresh ginger pairs particularly well with cranberry, adding warmth to sauces and compotes. If you're using it regularly and want it to stay sharp, keeping ginger fresh is worth reading before you stock up.

How Cranberry Is Used
MethodBest ForTip
🍲 SimmeredCranberry sauce, compotes, glazesAdd sugar gradually - taste as you go
🥧 BakedMuffins, scones, tartsUse whole or chopped; frozen works without thawing
🧃 Juiced/ReducedSyrups, cocktails, vinaigrettesReduce with citrus for more depth
🌬️ FrozenExtending shelf life, later saucesFreeze raw; no quality loss for cooked use
☀️ DriedGranola, trail mix, cheese boardsCheck sugar content - commercially dried versions vary widely

On cheese boards, cranberry chutney or compote pairs sharply with goat cheese and brie, cutting the cream with acidity.

In baking, cranberries share ground well with apples, pears, and walnuts - all of them sturdy enough to hold up against the berry's punch.

For drinks, cranberry juice reduced with orange zest makes a syrup that works in cocktails, mocktails, or poured over plain yogurt.

Try It In
🍅Roasted Garlic Marinara SauceSee how acid-forward ingredients build a balanced base→🧈Roasted Garlic Béarnaise SauceUnderstand how acidity balances rich, fatty sauces→🍗Slow Cooker Roast ChickenA natural landing spot for a cranberry glaze or sauce→

How to Buy and Store Cranberry

Firm, glossy, deep-red berries are what you want. Avoid any that are soft, shriveled, or showing moisture inside the bag - leaked juice signals bruising or breakdown. Smaller packages often have better berry-to-berry consistency than bulk bags.

Shortcut
Buy a double batch in season and freeze half immediately. Frozen cranberries perform identically to fresh in any cooked application, and the fresh window is short.

Keep unwashed cranberries in their original bag or a breathable container in the refrigerator. Don't wash until you're ready to use them - moisture accelerates softening.

Much like storing blueberries correctly, keeping them dry in a cold environment is the main lever for extending life.

For full detail on timing and signs of spoilage, cranberries's shelf life covers fresh, frozen, and dried options in one place.

Where to Start With Cranberry

If you've only ever opened a can of jellied cranberry sauce, start with a fresh batch simmered on the stove. It takes under 15 minutes and the result tastes sharper, brighter, and more alive than anything canned.

From there, try folding dried cranberries into scone batter or a vinaigrette - low effort, immediate payoff.

If the tartness still feels like too much, replacements for cranberries covers options that bring similar acidity with less bite.

And if you're after the citrus dimension, the choice between comparing dried orange zest vs fresh options affects the brightness of your final sauce more than most cooks expect.

Frequently Asked Questions

Can you eat cranberries raw?

Yes, raw cranberries are safe to eat. They're intensely tart and astringent without sweetening, which most people find unpleasant in quantity. Small amounts work in raw salsas or relishes when balanced with sugar and citrus.

Why are cranberries so tart?

Cranberries contain high levels of organic acids - primarily citric, malic, and quinic acid - with very little natural sugar to offset them. That acid-to-sugar ratio is what sets them apart from most other berries.

How long do cranberries last in the fridge?

Fresh cranberries keep for about 2-4 weeks refrigerated when stored dry and unwashed. Frozen cranberries last up to 10-12 months with no meaningful quality loss for cooked use.

Are dried cranberries healthy?

Dried cranberries retain some fiber and polyphenols, but most commercial versions contain significant added sugar to offset the tartness. Check the label - sugar content varies widely between brands and styles.

Are cranberries and berries the same thing?

Botanically, yes - cranberries are true berries in the scientific sense, related to blueberries and lingonberries. In common usage, "berries" often refers to sweeter fruits like strawberries, which are not true berries botanically.

What Is Chicken Broth? [Taste, Uses & More]

March 29, 2026

Warm, faintly golden, and carrying the quiet depth of roasted bones and slow-cooked vegetables - chicken broth announces itself before it ever reaches your lips. That first smell when you crack open a carton or lift a lid off a simmering pot is immediately recognizable: savory, herbed, a little sweet from the carrots.

What Is Chicken Broth

It's one of the most useful cooking liquids in a home kitchen, and understanding what it actually tastes like - and how to use it well - changes how you cook chicken and almost everything alongside it.

QUICK SUMMARY

Chicken broth is a savory, golden cooking liquid made from simmered chicken, bones, and aromatics. It's mildly salty, umami-rich, and slightly sweet from cooked vegetables. Use it as a base for soups, sauces, and grains. Low-sodium versions give you the most seasoning control.

🍗Flavor: Umami-rich, mildly salty, slightly sweet from vegetables
🫙Best Uses: Soups, pan sauces, risotto, braising, poaching
🛒Buying Tip: Choose low-sodium for better seasoning control
❄️Shelf Life: 3-4 days refrigerated; up to 6 months frozen
⚠️Watch For: High sodium in commercial broths; always check the label

What Is Chicken Broth?

Chicken broth is a seasoned cooking liquid produced by simmering chicken meat, bones, vegetables, and aromatics - typically onion, carrot, and celery - in water for anywhere from one to several hours.

It belongs to the broader category of stocks and cooking liquids used as foundational bases across dozens of cuisines.

The terms chicken broth and chicken stock are often used interchangeably, though technically broth is made with more meat and is seasoned, while stock leans on bones and is left unseasoned. Neither label is strictly enforced on commercial packaging, so the distinction matters more in professional kitchens than at home.

A longer-cooked, bone-heavy version that turns gelatinous when chilled is sometimes marketed as bone broth, which is higher in collagen.

Commercial versions come as shelf-stable cartons, cans, bouillon cubes, and concentrated pastes. Each varies in sodium content, intensity, and clarity.

Consommé sits at the refined end of the spectrum - a clarified, intensely flavored broth - while a standard bouillon cube sits at the most convenient, most heavily salted end.

What Does Chicken Broth Taste Like?

chicken broth - What Is Chicken Broth

Chicken broth tastes savory and mild - umami-forward without being aggressive, with a faint sweetness from cooked carrots and onion underneath. It's lighter than a long-simmered beef stock and more approachable than beef consommé, which carries a much more concentrated, almost intense character.

Sensory SnapshotModerate Intensity
👅 Flavor
umami-richmildly saltyslightly sweetsavory
✋ Texture
thin liquidslightly slick (gelatinous)
👃 Aroma
roasted chickenherbed vegetable stock

Heat concentrates the flavor. Reducing broth by half over high heat produces something closer to a pan sauce base, with noticeably more body and salt intensity.

Homemade broth made from bones develops a slight gelatin quality when chilled - that gentle wobble signals collagen extraction and fuller mouthfeel once reheated.

Golden Rule
Taste your broth before you season your dish. Commercial broths vary wildly in saltiness - what reads as "low-sodium" on one brand may still be quite salty compared to another.

How to Use Chicken Broth

Chicken broth earns its place in more dishes than most cooks realize. It's not just for soup - it functions as a deglazing liquid, a poaching medium, a thinning agent for cream sauces, and a flavor carrier for grains like rice and farro.

French cooking relies on it for veloutés and pan sauces; Chinese cooking uses it as the base for congee and clear soups; American comfort cooking builds chicken noodle soup and gravies on it.

How Chicken Broth Is Used
MethodBest ForTip
🍲 SimmeringSoups, congee, braising liquidStart with cold broth for cleaner flavor extraction
🥘 DeglazingPan sauces, graviesAdd to a hot pan immediately after removing the protein
🫕 PoachingChicken breasts, dumplings, eggsKeep at a bare simmer - boiling toughens delicate proteins
⬇️ ReductionConcentrated sauces, glazesUse unsalted broth; sodium concentrates fast

A classic mirepoix - onion, carrot, celery - pairs naturally with chicken broth because those same aromatics typically went into making it. White wine or dry sherry added alongside broth cuts through richness in pan sauces.

Butter stirred in at the end adds gloss and body. For everyday cooking, substituting broth for water when cooking rice or small pasta shapes like orzo adds quiet depth without extra effort.

Shortcut
Pour chicken broth into ice cube trays and freeze solid. One cube equals roughly two tablespoons - ideal for adding small amounts to pan sauces without opening a full carton.
Try It In
🍜Agedashi Tofu in Dashi BrothSee how a clear savory broth carries delicate tofu without overpowering it→🌶️Sichuan Hot Pot Broth BaseChicken broth as the foundation for a deeply spiced communal pot→

How to Buy and Store Chicken Broth

Look for low-sodium or unsalted versions when buying commercial broth - they give you control over final seasoning. A good carton should show a clear, golden hue through the packaging window or once poured; avoid anything cloudy or with a dull, gray cast.

The aroma check matters too: fresh, roasted chicken smell is a positive sign. A flat or metallic smell is not.

Watch Out
Once opened, refrigerated broth must be used within 3-4 days. It won't always smell off before it turns - when in doubt, discard it.

Storage is straightforward. Unopened shelf-stable cartons keep in a cool pantry for months.

Opened broth goes into a sealed container in the refrigerator immediately. For details on how long both homemade and commercial versions last, the chicken broth freshness guide guide covers each scenario.

Freeze excess broth in portioned containers - it keeps well for three to six months and loses minimal flavor. Using a mirepoix base when making homemade broth significantly improves the depth of what you're storing.

Start with the Basics

New to cooking with broth? Start with a boxed low-sodium version and use it anywhere a recipe calls for water near savory ingredients. Cook your rice in it.

Deglaze your next pan of seared chicken thighs with it. Once you know how it behaves, explore homemade - even a simple batch from leftover bones pays off in flavor and cost.

If you need a stand-in, check the chicken broth swaps guide for the closest alternatives.

Frequently Asked Questions

Is chicken broth the same as chicken stock?

Not exactly. Broth is made with more meat and is typically seasoned; stock relies on bones and is left unseasoned to preserve flexibility. In practice, commercial labels use both terms loosely - the real difference shows up in homemade versions.

Can you substitute chicken broth for water?

Yes, in most savory applications. It adds umami and depth wherever water would be flat. The exception: if the recipe already has heavy seasoning, use low-sodium broth to avoid oversalting.

How long does homemade chicken broth last?

Refrigerated homemade broth keeps for 3-4 days in a sealed container. Frozen, it holds well for up to 6 months. Cool it fully before freezing to preserve clarity and prevent ice crystal damage to flavor compounds.

Does chicken broth have collagen?

Bone-based broths do. When you simmer chicken bones long enough, collagen breaks down into gelatin - visible as a wobble or slight slick texture when the broth is chilled. Standard meat-only broths contain little to none.

Can you drink chicken broth straight?

Yes. Warm broth drunk on its own is common across many food traditions, particularly when someone is unwell. Low-sodium homemade versions work best for this - commercial broths can taste overly salty without food to balance them.

What Is Demi Glace? [Taste, Uses & More]

March 29, 2026

A spoonful of demi glace dropped into a hot pan after searing short ribs transforms the drippings into something a home cook rarely achieves without it.

What Is Demi Glace

This classical French reduction is one of the few ingredients in a professional kitchen that does the work of hours in a single tablespoon. Concentrated, glossy, and intensely savory, it belongs in far more home kitchens than it currently occupies.

QUICK SUMMARY

Demi glace is a deeply reduced brown stock and espagnole sauce from classical French cuisine. It delivers concentrated umami, roasted bone depth, and a silky, glossy texture that enriches pan sauces, braises, and plated meats with minimal effort.

🍖Flavor: Rich umami beefiness with roasted, caramelized, and faint acidic notes
🥄Texture: Silky, glossy warm; syrupy and clingy when reduced further
🍳Best For: Pan sauces, braises, short ribs, osso buco, and roasted beef dishes
❄️Shelf Life: Opened jar: 1-2 weeks refrigerated; frozen: up to 6 months
⚠️Watch: High sodium in commercial versions; not vegetarian or kosher unless labeled

What Is Demi Glace?

Demi glace (also written demiglace or demi-glace) is a classical French sauce base built from two foundational components: brown veal or beef stock and espagnole sauce, a rich mother sauce made with brown roux and tomato paste.

The two are combined and simmered together - sometimes for hours - until the liquid reduces by roughly half, producing a glossy, nearly syrupy concentrate.

The name comes from French: demi means "half," referencing that final reduction. Escoffier codified the technique in the late 19th century, and it became a cornerstone of haute cuisine.

A further reduction yields glace de viande, a firmer, more intensely flavored product used in even smaller quantities.

Commercial versions now come as jarred concentrates, frozen blocks, or shelf-stable tubs, which make the ingredient accessible without the multi-day kitchen process. Regardless of form, the defining characteristic is the same: collagen-rich gelatin from reduced bones gives demi glace its signature body and glossy coat.

What Does Demi Glace Taste Like?

demi glace - What Is Demi Glace
Sensory SnapshotStrong Intensity
👅 Flavor
umami-forwardroasted bonecaramelizedfaint acidic lift
✋ Texture
silkyglossysyrupy
👃 Aroma
deep roasted meatbrown butterfaint wine

Think of a very concentrated beef gravy - then strip away the starchy thickness and replace it with something cleaner, more mineral, and far more intense.

That's the baseline. Roasted bone depth sits at the core, layered with a slightly bitter caramelized sweetness from the browning process and a subtle acidic lift from wine or tomato used in the espagnole component.

Straight from a spoon, demi glace is almost overwhelmingly savory. In cooking, that intensity is the point - a tablespoon or two is enough to deepen an entire sauce.

Heat amplifies the roasted notes; mounting with butter at the end rounds everything out and pulls the acidity into balance.

Golden Rule
Never use demi glace unseasoned as a finished sauce. It's a base - always taste and adjust salt after adding it, since commercial versions already carry significant sodium.

How to Use Demi Glace

Demi glace earns its place most visibly in pan sauces. After searing a steak or lamb chop, deglaze the pan with red wine or cognac, scrape up the fond, and whisk in a spoonful of demi glace.

The sauce tightens, glosses, and clings to the meat within minutes - no long reduction required.

How Demi Glace Is Used
MethodBest ForTip
🥩 Pan DeglazingGlossy pan sauces for steak, lamb, duckAdd after wine reduces; whisk off heat
🍲 Braising LiquidShort ribs, oxtail, osso buco enrichmentUse sparingly - it concentrates further as it cooks
🧈 Butter MountingFinishing composed sauces, restaurant-style jusRemove from heat before adding cold butter cubes
🥕 GlazingRoasted root vegetables, mushroomsThin with a little stock; brush on before final roast

Beyond the pan, demi glace works as an enrichment layer in longer braises. Stirred into beef bourguignon or added to the braising liquid for osso buco, it adds color, body, and depth that plain stock can't match.

Wild mushrooms and shallots are natural partners - their earthiness amplifies the roasted notes without competing.

For composed sauces, demi glace pairs with cream or butter to create velouté-style finishes, or with fresh thyme and bay leaf for a cleaner, herb-forward jus. Avoid pairing it with delicate fish or bright citrus preparations - the heavy roast character overwhelms both.

Try It In
🥄Roasted Garlic Béarnaise SauceStir in a spoonful for extra richness and savory depth→🧈Compound Butter (Herb)Finish a pan sauce with herb butter for a glossy, restaurant-style result→

How to Buy and Store Demi Glace

Good commercial demi glace should be deeply brown and glossy - avoid anything pale, cloudy, or thin in the jar. Frozen versions should arrive as solid, uniform blocks without visible freezer burn crystals.

Check ingredient labels: quality products list stock and espagnole components, not primarily salt or starch.

Watch Out
Many budget demi glace products are thickened with cornstarch or maltodextrin rather than collagen. They won't give you the same glossy coat or mouthfeel - read the label before buying.

Storage is straightforward but time-sensitive once opened. Unopened commercial jars keep in a pantry for months to a year; after opening, refrigerate in a sealed container and use within one to two weeks.

For the full picture on how long opened and frozen portions stay good, see our guide to demi glace storage guide. Frozen portions hold well for three to six months - vacuum bags or rigid airtight containers prevent flavor loss.

The gelatin content makes frozen demi glace firm up completely, which is normal and a good sign of quality.

Where to Start With Demi Glace

If you're new to this ingredient, skip the elaborate composed sauces for now. Sear a good beef cut, deglaze with whatever wine is open, and whisk in a tablespoon of demi glace.

That single move shows you what it does - and why chefs keep it close.

  • Already comfortable with pan sauces? Move to braising: add two tablespoons to your next short rib braise for noticeably deeper color and body.
  • Want to experiment with demi glace replacements? Reduced beef stock with a little tomato paste gets close, though the gelatin-driven texture won't fully match.

Start with a small jar before committing to a larger frozen block. One jar goes further than you'd expect.

Frequently Asked Questions

Is demi glace the same as gravy?

No. Gravy is typically thickened with flour or cornstarch and made from roasting drippings. Demi glace gets its body from collagen-rich gelatin released during long bone reduction - no starch required. The flavor concentration is also far higher than most gravies.

How is demi glace made?

Brown veal or beef stock is combined with espagnole sauce - a mother sauce made from brown roux, mirepoix, and tomato - then simmered until reduced by roughly half. The process extracts gelatin from the bones, creating the glossy body.

Can you freeze demi glace?

Yes - freezing is the preferred storage method for homemade batches. Portion it into ice cube trays first, then transfer the frozen cubes to airtight bags. Each cube gives you a ready, measured amount without thawing the whole batch.

Is demi glace vegetarian?

Standard demi glace is not - it's made from veal or beef bones and meat. A few commercial brands produce mushroom-based or vegetable stock reductions sold as vegetarian alternatives, but these differ significantly in flavor and gelatin content.

How much demi glace should you use per serving?

One to two tablespoons per portion is typical for a pan sauce serving two. Because the flavor is highly concentrated, more than that risks an overly salty, heavy result - especially with commercial products that already contain added sodium.

Chicken Souvlaki Greek-Style

March 29, 2026

Grilled chicken often turns out dry or underseasoned. The solution is marinating thighs in lemon, garlic, and oregano, then grilling at medium-high heat until charred but juicy.

Chicken Souvlaki Greek-Style served on a plate

The marinade does double duty - it flavors and tenderizes the meat. You skip the brine step and still get moist chicken with crispy edges.

Make this when you want Mediterranean flavors without tracking down specialty ingredients or spending hours in the kitchen.

QUICK SUMMARY

Marinate chicken in olive oil, lemon juice, garlic, and oregano for 1-4 hours. Thread onto skewers and grill at medium-high heat for 10-12 minutes, flipping every 3-4 minutes. Remove at 165°F internal temperature and rest 5 minutes before serving.

⏱️Time: 15 min prep, 1-4 hr marinate, 10-12 min cook
🔥First Move: Cut chicken into 1.5-inch cubes for even cooking
⚠️Watch: Oil grill grates before cooking or chicken sticks and tears

Table of Contents

Toggle
  • Why This Recipe Works
  • What You'll Need
    • Ingredient Details
  • Ingredient Swaps
  • What to Serve With It
  • Store and Reheat
  • Frequently Asked Questions
  • Chicken Souvlaki Greek-Style
    • Method 
    • Tried this recipe?

Why This Recipe Works

Most people skip fries, but it balances the meal. For a version that comes together quickly, this simple fries recipe pairs with grilled chicken without extra cleanup.

Quick Reference
⏱️
Prep Time
15 min
🔥
Cook Time
10-12 min
⏰
Total Time
1 hr 30 min
🍽️
Servings
4 servings
📊
Difficulty
Easy
🏷️
Category
Main Dish
💡
Quick Tip
Marinate 1-4 hours, grill high heat 10 min
🎯
Best For
Weeknight | Meal prep | Entertaining

What makes this work:

  • Chicken thighs stay juicy - Dark meat has enough fat to handle direct heat without drying out
  • Acid tenderizes the meat - Lemon juice breaks down proteins during marinating for tender texture
  • High heat creates char - Medium-high grill temperature caramelizes edges while cooking through
  • Resting retains moisture - Five minutes off heat lets juices redistribute instead of running out
  • Uniform pieces cook evenly - 1.5-inch cubes finish at the same time with no raw centers
Quick Tip
Soak wooden skewers for 30 minutes before grilling so they don't burn, or use metal skewers and skip the step entirely.

What You'll Need

Ingredients for Chicken Souvlaki Greek-Style

Rich mains need something to cut through, and chicken does exactly that. For a version that comes together quickly, this quick chicken dish works when you need variety without changing your shopping list.

🍗
Protein
  • 2 lbs chicken thighs (or breasts)
🧄
Aromatics
  • 4 cloves garlic, minced
  • 1 small onion, cut into chunks (optional)
🥢
Marinade
  • ⅓ cup olive oil
  • 3 tablespoon lemon juice
  • 2 teaspoon dried oregano
  • 1 teaspoon salt
  • ½ teaspoon black pepper
🫙
Equipment
  • Wooden or metal skewers
  • Mixing bowl
  • Meat thermometer

Ingredient Details

  • Chicken thighs
    Boneless, skinless thighs stay moist on the grill; breasts work but dry out faster if overcooked
  • Olive oil
    Extra virgin adds flavor; regular olive oil works fine and costs less
  • Lemon juice
    Fresh lemon juice tastes brighter than bottled; use 1-2 lemons
  • Garlic
    Fresh cloves deliver sharp, pungent flavor; jarred minced garlic is milder but saves time
  • Oregano
    Dried oregano is traditional for souvlaki; fresh oregano works but use 3x the amount
  • Wooden skewers
    Soak in water 30 minutes before grilling to prevent burning; metal skewers skip this step
  • Bell pepper chunks
    Optional addition for color and sweetness; thread between chicken pieces

Ingredient Swaps

Salad cuts through all that richness. For a version that comes together quickly, try something fresh like salad alongside the skewers for contrast.

Four swaps that work:

  • Chicken thighs → chicken breasts - Leaner option cooks faster but dries out easily; watch internal temp closely and remove at exactly 165°F
  • Olive oil → avocado oil - Neutral flavor with similar smoke point; works if you don't want olive taste
  • Lemon juice → red wine vinegar - Sharper acidity with different tang; use 2 tablespoon instead of 3
  • Oregano → thyme or marjoram - Herbal shift with less piney flavor; use same amount

Chicken Thighs

Works for: staying juicy on high heat, forgiving timing, richer flavor

Skip if: you want leaner meat or prefer white meat texture

Chicken Breasts

Works for: lower fat content, milder taste, faster cooking

Skip if: you tend to overcook chicken or forget to check temp

Metal Skewers

Works for: reusable option, no soaking needed, conducts heat for even cooking

Skip if: you only have wooden skewers or worry about hot metal handles

Instructions

The chicken works best when it hits the table at the same time as the main. We keep a batch ready for nights like this - simple homemade potato wedges finish in the oven while the skewers grill.

  1. Mix marinade and chicken - Whisk olive oil, lemon juice, garlic, oregano, salt, and pepper in a mixing bowl. Cut chicken into 1.5-inch cubes and toss in marinade. Cover and refrigerate 1-4 hours.

  2. Prep skewers and grill - Soak wooden skewers 30 minutes if using. Preheat grill to medium-high heat (400-450°F). Oil grill grates with a paper towel dipped in oil using tongs.

  3. Thread chicken onto skewers - Remove chicken from marinade and thread onto skewers, leaving 1 inch between pieces. Discard leftover marinade.

  4. Grill until charred - Place skewers on grill and cook 10-12 minutes total, flipping every 3-4 minutes. Check internal temperature with meat thermometer - remove at 165°F.

  5. Rest before serving - Transfer skewers to a plate and rest 5 minutes. Juices redistribute during resting instead of running out when you cut.

Best Pick
Use a meat thermometer instead of guessing - chicken looks done before it hits 165°F, and undercooked poultry is a food safety risk.

What to Serve With It

The potato wedges works best when it hits the table at the same time as the main. If you need more ideas for rounding out the plate, check out easy chicken meal planning for sides that match the cooking timeline.

Side Dish Prep Why It Works How to Serve
Greek Salad Easy Fresh veggies and feta balance grilled chicken Chop cucumber, tomato, onion; toss with olives and feta
Rice Pilaf Easy Neutral carb soaks up any leftover marinade Cook rice with chicken broth and butter; fluff before serving
Pita Bread Easy Traditional accompaniment for wrapping chicken Warm pita in oven 2-3 minutes; serve whole or cut into wedges
Roasted Vegetables Medium Adds warm, hearty element to the plate Toss zucchini and bell peppers with oil; roast 20 min at 425°F
Tzatziki Sauce Easy Cool cucumber-yogurt sauce contrasts lemony chicken Mix Greek yogurt, grated cucumber, garlic, dill; chill 30 min

Three ways to serve it:

  • Wrap in pita - Slide chicken off skewers, tuck into warm pita with tzatziki and chopped tomatoes
  • Over rice bowl - Serve skewers on rice pilaf with cucumber salad and lemon wedges
  • With roasted vegetables - Plate skewers alongside warm roasted peppers and zucchini
Shortcut
Most people skip this dip, but it balances the meal - try this tangy dip recipe for a quick spread that uses pantry staples.

Store and Reheat

Cooked chicken souvlaki keeps 3-4 days in the fridge. Store in an airtight container as soon as it cools to room temperature - shallow containers speed up cooling and reduce bacterial growth.

Method Time Best For
🍳 Stovetop 5-7 min Quick reheating while preserving texture
📦 Microwave 1-2 min Small portions when speed matters (may dry chicken)
🔥 Oven 10 min at 350°F Larger portions with even warming throughout

For best results when storing:

  • Cool completely before sealing - Hot chicken in a closed container creates condensation that turns the meat soggy
  • Remove from skewers - Store chicken pieces separately for easier portioning and faster reheating
  • Add moisture when reheating - Drizzle with olive oil or broth before warming to prevent drying
  • Freeze for meal prep - Portion into individual servings and freeze up to 2 months; thaw overnight in fridge
  • Reheat once only - Multiple reheat cycles dry out chicken and increase food safety risks

Frequently Asked Questions

How long to cook chicken souvlaki on the grill?

Grill chicken souvlaki 10-12 minutes total at medium-high heat (400-450°F), flipping every 3-4 minutes. Check internal temperature with a meat thermometer - remove at 165°F for food safety.

Can I make chicken souvlaki ahead and store it?

Marinate chicken up to 6 hours before grilling. Cooked souvlaki keeps 3-4 days in the fridge or 2 months frozen. Reheat in a skillet with a drizzle of olive oil to prevent drying.

What internal temperature indicates chicken souvlaki is done?

Remove chicken at 165°F internal temperature measured with a meat thermometer. Insert the probe into the thickest part of a piece - it's the only reliable way to confirm doneness without cutting and losing juices.

How do I fix dry or bland chicken souvlaki?

For dry chicken, slice thinly and serve with tzatziki or garlic sauce to add moisture. Bland souvlaki usually means short marinating time - always marinate at least 1 hour and season with salt before cooking.

Can I substitute chicken breast for thighs in souvlaki?

Chicken breasts work but dry out faster than thighs. Watch cook time closely and remove at exactly 165°F - breasts have less fat to keep them moist during grilling.

Chicken Souvlaki Greek-Style served on a plate

Chicken Souvlaki Greek-Style

No ratings yet
Chicken souvlaki marinated in lemon, garlic, and oregano delivers juicy, flavorful grilled chicken with crispy edges. The marinade tenderizes the meat while the medium-high heat grilling creates a perfect char. This easy recipe brings classic Mediterranean flavors with minimal prep and simple ingredients.
Print Recipe Pin Recipe
Prep Time 15 minutes mins
Cook Time 12 minutes mins
Total Time 27 minutes mins
Servings: 4 servings
Course: Main Dish
Cuisine: Greek
Ingredients Equipment Method Notes

Ingredients
  

  • 2 lbs chicken thighs boneless, skinless, cut into 1.5-inch cubes
  • ⅓ cup olive oil extra virgin preferred
  • 3 tablespoon lemon juice freshly squeezed
  • 4 cloves garlic minced
  • 2 teaspoon dried oregano
  • 1 teaspoon salt
  • ½ teaspoon black pepper

Equipment

  • Wooden or metal skewers Used to thread chicken for grilling
  • Mixing bowl To mix marinade and chicken
  • Meat thermometer To check internal temperature of chicken

Method
 

  1. Whisk olive oil, lemon juice, garlic, oregano, salt, and pepper in a mixing bowl. Add chicken cubes, toss to coat. Cover and refrigerate for 1 to 4 hours.
    2 lbs chicken thighs, ⅓ cup olive oil, 3 tbsp lemon juice, 4 cloves garlic, 2 tsp dried oregano, 1 tsp salt, ½ tsp black pepper
  2. If using wooden skewers, soak them in water for 30 minutes to prevent burning. Preheat grill to medium-high heat (400-450°F). Oil grill grates with a paper towel dipped in oil using tongs.
  3. Remove chicken from marinade and thread onto skewers, leaving about 1 inch between pieces. Discard leftover marinade.
    2 lbs chicken thighs
  4. Place skewers on the grill and cook for 10 to 12 minutes total, flipping every 3 to 4 minutes. Check internal temperature with a meat thermometer and remove once chicken reaches 165°F.
    2 lbs chicken thighs
  5. Transfer cooked skewers to a plate and let rest for 5 minutes to allow juices to redistribute before serving.

Notes

  • Soak wooden skewers for 30 minutes before grilling to prevent burning; metal skewers can be used without soaking.
  • Use a meat thermometer to ensure chicken reaches a safe internal temperature of 165°F for food safety.
  • Marinate the chicken for at least 1 hour and up to 4 hours for best flavor and tenderness.

Tried this recipe?

Let us know how it was!

How Long Does Cooked Ham Last? [Storage Guide]

March 29, 2026

Finding a wedge of leftover ham at the back of the fridge - with no idea when you carved it - is one of the more common food safety scares in a home kitchen. Cooked ham spoils faster than most people expect, and the gap between "still fine" and "off" can close within a day or two.

How Long Does Cooked Ham Last In The Fridge

Unlike dry-cured products, fully cooked ham is perishable the moment it's sliced or opened, which is worth keeping in mind whether you're dealing with comparing slicing knife vs carving knife options or just pulling leftovers from a holiday spiral ham. Knowing the actual numbers - and the signs to watch for - keeps your meals safe and cuts down on waste.

QUICK SUMMARY

Cooked ham lasts 3-5 days in the fridge once opened or carved, and up to 7 days in unopened vacuum packaging. Freeze it for up to 2 months for best texture. Never leave cooked ham out longer than 2 hours.

🧊Fridge (opened): 3-5 days in an airtight container or tight wrap
❄️Freezer: 1-2 months for best quality; texture declines after that
⚠️Counter limit: 2 hours maximum at room temperature - 1 hour above 90°F

How Long Does Cooked Ham Last?

Shelf life depends on whether the ham is opened, how it was packaged, and whether it's sliced or whole. Unopened, vacuum-packed cooked ham holds up to 7 days in the fridge - always check the use-by date on the label, since milk use by date explained and similar date-label guides confirm that "use by" is a safety marker, not just a quality guide.

Once you open or carve a ham, the clock resets to 3-5 days regardless of original packaging.

Deli-sliced ham sits at the shorter end of that window - more cut surface means faster bacterial exposure. Whole glazed or bone-in ham carved at home holds a little longer, closer to 5 days when wrapped tight.

Cooked Ham Shelf Life
MethodStateDurationNotes
🧊 FridgeOpened / carved3-5 daysAirtight container or tight wrap; deli slices at shorter end
🧊 FridgeUnopened vacuum pack7 daysCheck label use-by date; open packs revert to 3-5 day rule
❄️ FreezerCooked (sliced or whole)1-2 monthsBest quality; acceptable up to 3 months but texture declines
🏠 CounterCooked2 hours max1 hour if ambient temperature exceeds 90°F
Watch Out
Opening a vacuum-sealed store ham resets its shelf life immediately. A pack that shows 5 days remaining on its label is now a 3-5 day fridge item from the moment you break the seal.

How to Store Cooked Ham

Getting ham back into the fridge quickly is the first and most important step. Cool carved or sliced ham within 2 hours of cooking or serving -

bacteria including listeria and staphylococcus aureus multiply rapidly in the temperature danger zone, and keeping meat fresh consistently requires treating that 2-hour window as a hard limit, not a guideline.

Fridge: For slices, stack them in a shallow airtight container to limit air exposure. For a whole or bone-in ham, wrap the cut face tightly in plastic wrap, then a layer of heavy-duty foil. Store-bought spiral or glazed ham should stay in its original packaging until opened, then transfer to an airtight container. Freezer: Vacuum-seal portions where possible - standard wrapping works but vacuum sealing significantly reduces freezer burn. Counter: Not an option for storage; cooked ham is perishable and should never be left out as a serving option beyond 2 hours.

  • 📅 Label every package - write the carve or open date so you track the 3-5 day window without guessing.
  • 🍖 Keep glaze off stored ham - apply glazes at reheating, not before storage; sugar-based glazes cause surface browning and sticky buildup in the fridge.
  • 🔥 Reheat in portions - pull only what you'll eat; repeated reheating shortens safe fridge life for remaining leftovers.

Can You Freeze Cooked Ham?

Yes - freezing is a sound option, though texture does take a hit.

Ham becomes noticeably drier and grainier after freezing, particularly pre-sliced deli ham where the cell structure is already disrupted by slicing.

Glazing after reheating helps recover some moisture and surface gloss.

For context, the same texture trade-off applies to other proteins - salmon freezer burn explained covers why fat content and wrapping method determine how much quality loss you actually see.

Golden Rule
Never refreeze thawed cooked ham without reheating it first. Repeated freeze-thaw cycles accelerate texture breakdown and raise safety risk from bacterial growth during each thaw.
  1. Cool completely - bring ham to room temperature (no longer than 2 hours total), then refrigerate until fully cold before freezing.
  2. Portion and separate - for slices, stack with a sheet of parchment between each slice to prevent sticking; cut whole hams into meal-sized portions.
  3. Wrap tightly - wrap each portion in plastic wrap first, then a layer of heavy-duty foil; vacuum-seal if available for best protection.
  4. Label with date - mark the freeze date and aim to use within 1-2 months for best quality.
  5. Thaw in the fridge - allow 24-48 hours for most portions; for faster thawing, submerge the sealed package in cold water, changing water every 30 minutes.

Signs Cooked Ham Has Gone Bad

Trust your senses before anything else. Sliminess is the most reliable early warning - a tacky sheen or surface film on slices signals bacterial growth even when the ham still smells faintly normal.

Understanding the role pork plays in foodborne illness risk helps explain why cooked ham, despite already being heat-treated, remains vulnerable to post-cook contamination.

Signs It's Gone Bad
👀
VisualSlimy film or tacky sheen on slices · Green, gray, or brown discoloration at edges or cut surfaces · Cloudy or watery pooling in packaging
👃
SmellSour or fermented odor distinct from smoky or cured aroma · Chemical or ammonia-like smell indicating advanced spoilage
✋
TextureStickiness or slime when touched · Mushy or overly dry, fibrous texture inconsistent with original firmness

Don't taste-test to decide. Discard cooked ham the moment you notice any sliminess, off odor, or unusual discoloration - no visible mold or strong smell is required to make the call.

Getting the Most From Leftover Ham

Four habits make a real difference with cooked ham storage. None of them require extra equipment - just consistency.

  • 🏷️ Date it immediately - label the package the moment you carve or open it, not the next morning when memory gets fuzzy.
  • 🌡️ Respect the 2-hour rule - this applies at the table too; a serving platter sitting out through a long meal accumulates time fast.
  • 🧊 Vacuum-seal freezer portions - standard wrapping works, however vacuum sealing cuts freezer burn significantly, similar to results seen with [how long honey glazed salmon keeps](https://forkliftkitchen.com/honey-glazed-salmon-shelf-life/) when sealed properly.
  • 📦 Don't trust the original packaging after opening - even store spiral ham loses its sealed-pack protection the moment it's opened; transfer to airtight storage right away.
Shortcut
Portion and freeze leftover ham the same day you carve it - don't wait until day 4. Fresher ham going into the freezer means better texture coming out.

Frequently Asked Questions

Can you eat cooked ham after 7 days in the fridge?

Not safely, if it's been opened or carved. The 7-day limit applies only to unopened, vacuum-packed cooked ham. Once opened, the safe window is 3-5 days regardless of how it smells.

How long is sliced ham good for in the refrigerator?

Sliced cooked ham lasts 3-5 days in the fridge in an airtight container. Deli-style pre-sliced ham sits closer to 3 days because more cut surface means faster bacterial exposure.

How long can leftover ham stay at room temperature?

Two hours maximum. If the room or outdoor temperature exceeds 90°F, that limit drops to one hour. Beyond that, discard it - reheating won't make ham safe once bacteria have multiplied.

Does the bone in a bone-in ham affect how long it keeps?

Slightly. The bone itself isn't a spoilage risk, however meat close to the bone can spoil marginally faster once carved. Wrap the exposed cut face tightly and use within 5 days.

Can you freeze glazed ham, and does the glaze survive freezing?

Yes, glazed ham freezes fine, however the glaze turns sticky and loses its sheen during thawing. Remove or ignore the glaze before freezing and apply a fresh one after reheating for better results.

What Is Farmers Cheese? Taste, Uses & More Guide

March 29, 2026

Farmers cheese earns its place in recipes not by melting or browning but by holding structure and contributing a quiet, milky tang that richer cheeses tend to overpower.

What Is Farmers Cheese

Unlike using ricotta for creaminess or leaning on cottage cheese for bulk, farmers cheese brings a distinct curd texture that survives heat, folds cleanly into fillings, and spreads without turning watery.

If you've noticed it in blintzes or on a bagel board and wondered what separates it from the rest of the fresh cheese category, this profile covers exactly that - and blintzes's shelf life is one reason the filling cheese matters so much.

QUICK SUMMARY

Farmers cheese is a fresh acid-set curd cheese with a mild tang, moist crumbly texture, and clean milky flavor. It works cold as a spread or filling, holds shape when heated, and suits both sweet and savory applications across Eastern European and American cooking.

🧀Type: Fresh acid-set dairy cheese, drained and lightly pressed curds
👅Flavor: Mildly tangy, clean milky, slightly salty
✋Texture: Moist and granular; crumbly to semi-firm based on pressing
🍽️Best Uses: Pierogi fillings, blintzes, spreads, cheesecake-style bakes
🌍Cuisines: Polish, Ukrainian, Russian, Jewish Eastern European, American farmhouse
🗓️Shelf Life: Unopened: 2-3 weeks refrigerated; opened: 5-7 days best quality

What Is Farmers Cheese?

Farmers cheese is a fresh acid-set cheese made by warming whole or part-skim milk, adding an acid or starter culture to form curds, then draining off the whey and pressing the result to varying firmness.

The process is simple enough that home production is common - it predates industrial cheesemaking by centuries in both Eastern Europe and rural North America.

You'll find it sold as loose, spooned curds or as a pressed block depending on the producer. The block form slices cleanly; the loose form folds into fillings or spreads without extra work.

Tvorog (or twaróg in Polish) is the closest Eastern European equivalent, though regional versions vary in fat content and firmness. In American grocery stores it sometimes appears labeled as pressed cottage cheese, which is an accurate description of the production method if not the full identity.

  • 🧀 Loose curd style - spooned from a container, higher moisture, best for fillings and blends
  • 🧀 Pressed block style - firmer, sliceable, suits spreads and crumbling over dishes
  • 🧀 Tvorog / twaróg - Eastern European equivalent; may be drier or fattier depending on country

The whey drained off during production is a byproduct worth noting - understanding about whey brine for feta shows how this liquid is used elsewhere in cheese production rather than discarded.

What Does Farmers Cheese Taste Like?

farmers cheese - What Is Farmers Cheese

Farmers cheese tastes clean and milky with a mild lactic tang - sharper than fresh mozzarella but nowhere near the edge of a young chèvre. The saltiness is light, present mainly to balance rather than define the flavor.

Sensory SnapshotMild Intensity
👅 Flavor
milkymildly tangyslightly salty
✋ Texture
granular curdsmoistcrumbly to semi-firm
👃 Aroma
fresh milklow lactic tang

Compared to cottage cheese, it tastes less watery and more concentrated - the drainage and pressing steps remove the liquid that dilutes cottage cheese flavor.

Ricotta is sweeter and smoother; farmers cheese has more textural definition and a noticeably drier finish on the palate.

Heat doesn't intensify the tang much. When baked inside a blintz or folded into a casserole, the flavor softens slightly and the curds become creamier without breaking down completely.

Golden Rule
The milder the farmers cheese, the more it relies on what you pair it with. Add herbs, zest, or alliums early - the cheese absorbs surrounding flavors as it sits.

How to Use Farmers Cheese

Farmers cheese is most at home in Eastern European cooking, particularly in Polish and Ukrainian kitchens where it fills pierogi, vareniki, and uszka.

It also appears throughout Russian and Jewish Eastern European cuisine - in blintze fillings sweetened with sugar and lemon zest or in savory dumplings mixed with potato and onion.

For cold applications, it spreads directly onto rye bread or bagels, often mixed with chives, parsley, or smoked salmon.

The texture holds without turning paste-like, which makes it better for open-faced preparations than cream cheese when you want visible curd structure.

How Farmers Cheese Is Used
MethodBest ForTip
🥗 Cold / SpreadBagels, rye toast, open-faced sandwichesMix in fresh herbs and a pinch of salt before spreading
🍳 Filling (heated)Pierogi, blintzes, vareniki, stuffed cabbageDrain any excess whey before mixing to avoid soggy dough
🔥 BakedCasseroles, savory pies, cheesecake-style dessertsBlend smooth first for uniform texture in sweet bakes
🥣 Blended / FoldedScrambled eggs, mashed potatoes, dipsFold in at low heat to preserve curd texture and tang

Sweet applications are worth separate attention. Blended with sugar, vanilla, and lemon zest, farmers cheese becomes a cheesecake-style filling that's denser than one made with cream cheese but lighter than a fully baked New York style.

It's a traditional base for Eastern European-style baked cheesecakes where the curd structure is intentional.

Watch Out
Don't try to pan-fry farmers cheese or use it as a melting cheese in a sauce. It won't develop a crust, and high direct heat causes it to weep whey and fall apart rather than meld.

Pairing-wise, caraway seeds, chives, and roasted root vegetables anchor the savory side. On the sweet side, honey and fresh stone fruit balance the tang without overwhelming it.

For anyone working through farmers cheese in dairy recipes, understanding these pairings helps decide when a substitute will hold up and when it won't.

Try It In
🧀Cheddar Cheese StrawsSwap in farmers cheese crumbles for a milder, tangier version→🍳Egg and Cheese Breakfast SandwichFarmers cheese adds tang and texture where cream cheese is too rich→🥗Blue Cheese Dressing (Homemade)Use as a mild base to soften the blue cheese sharpness→

How to Buy and Store Farmers Cheese

Look for white to pale-cream curds with consistent moisture and no discolored spots. A pressed block should feel firm but not hard; loose curds should look moist without sitting in a pool of cloudy whey.

That cloudiness signals age - skip it.

Shortcut
If you want slices for a spread board, buy the pressed block. If you're making pierogi or blintze filling, buy loose curds - they drain faster and blend without extra effort.

At the store, give the container a quick smell through the seal if possible. Fresh farmers cheese smells clean and milky.

Any sour or ammonia edge means it's past its window.

Store it refrigerated in its original sealed container, or transfer to an airtight box with any excess whey pressed out.

For a full breakdown of timing and safe handling, storing farmers cheese correctly covers the specifics beyond the general guidelines here.

Opened portions last 5-7 days at best quality; unopened runs 2-3 weeks.

The same spoilage logic that applies to cottage cheese in dairy recipes holds here - once the whey turns cloudy and the smell shifts, it's done.

Start With the Filling

Farmers cheese rewards cooks who treat it as a structural ingredient first, a flavor ingredient second.

Its mild tang and curd texture do their best work inside something - a folded blintz, a pinched pierogi, a pressed sandwich.

Start there, and for making pierogi with sour cream at home, farmers cheese is the filling that keeps the dough from turning soggy.

If you've only used it cold on bread, try it once heated inside a folded egg. That's the version that shows what this cheese can actually do.

Frequently Asked Questions

Is farmers cheese the same as cottage cheese?

No. Both start from acidified milk curds, but farmers cheese is drained and pressed further, removing more whey. The result is firmer, drier, and less watery than cottage cheese, with a more concentrated milky tang.

Can you substitute farmers cheese for ricotta?

Yes, in most fillings and baked dishes. Farmers cheese is less sweet and more granular than ricotta, so the result will be slightly tangier and drier. For smooth baked fillings, blend it first to close the texture gap.

How long does farmers cheese last in the fridge?

Unopened, about 2-3 weeks from the pack date. Once opened, use it within 5-7 days. Store in an airtight container with excess whey pressed out to slow spoilage.

How do you make farmers cheese at home?

Warm whole milk to around 185°F, add white vinegar or lemon juice, and let the curds form for a few minutes. Drain through cheesecloth, salt lightly, and press to your preferred firmness - looser for fillings, firmer for slicing.

Can you freeze farmers cheese?

Technically yes, but the texture changes significantly after thawing - curds become grainier and release more whey. Frozen-then-thawed farmers cheese is better folded into cooked fillings than used fresh as a spread.

What Is Custard Powder? [Taste, Uses & More]

March 29, 2026

Custard powder does one thing no other pantry powder quite replicates: it turns plain hot milk into a pourable, silky custard in under five minutes, no eggs required.

What Is Custard Powder

That speed and reliability explain why it has stayed on British kitchen shelves since Alfred Bird invented it in 1837, and why it became equally essential in South Asian home baking.

Understanding custard's shelf life and the dairy components you mix it with - milk, cream - matters too, since cream spoilage signs can affect the finished dish even when the powder itself is fine.

QUICK SUMMARY

Custard powder is a cornflour-based blend of starch, sugar, and vanilla flavoring that thickens milk into a smooth, egg-free custard. Mild, sweet, and fast to prepare, it suits poured desserts, trifle layers, baked fillings, and quick puddings across British and South Asian cooking.

🥛What It Is: Cornflour, sugar, vanillin, and color - no eggs
👅Flavor: Mild sweet vanilla with a smooth, starchy body
🍮Best Uses: Trifle, poured pudding sauces, chilled dessert fillings
📦Shelf Life: Unopened 12-24 months; opened 6-12 months if kept dry
⚠️Watch Out: Overheating or over-stirring after thickening thins the sauce

What Is Custard Powder?

Custard powder is a dry powdered blend built around cornflour (cornstarch) as its primary thickener, with sugar, vanilla or vanillin flavoring, and an annatto- or beta-carotene-based yellow color.

Alfred Bird formulated the original version in Birmingham in 1837, specifically to create a custard his egg-allergic wife could eat - making it one of the earliest commercially invented food products in British history.

The powder sits in the category of dairy-free custard bases, meaning the powder itself contains no milk until you add it.

It goes by several names depending on the market: instant custard mix, vanilla custard powder, or simply custard mix on South Asian packaging.

Beyond Britain, it became a staple ingredient in Indian mithai-making and in Australian and New Zealand home baking, where it often replaces flour in shortbread-style biscuits.

There are a few subtypes worth knowing:

  • 🟡 Standard custard powder - the classic Bird's-style blend; requires hot milk and stirring
  • ⚡ Instant custard powder - pre-gelatinized starch that sets with cold or lukewarm milk
  • 🌿 Natural-flavor varieties - use real vanilla extract instead of vanillin; slightly more complex aroma
  • 🌾 Gluten-free labeled versions - cornflour-based but certified to avoid cross-contamination

What Does Custard Powder Taste Like?

custard powder - What Is Custard Powder

Custard powder on its own is gently sweet with a starchy, neutral base and a warm vanilla aromatic note that comes almost entirely from vanillin rather than real egg yolk.

Once cooked into milk, that starchy quality rounds out into something closer to a light vanilla pudding.

Sensory SnapshotMild Intensity
👅 Flavor
sweet vanillastarchy neutrallightly eggy
✋ Texture
silkyslightly gelatinous
👃 Aroma
warm vanillacooked starch

Compared to a true crème anglaise made with egg yolks, custard powder custard tastes noticeably less rich - the depth that fat-soluble egg compounds provide simply isn't there.

It's closer to a light pastry cream: smooth, mildly sweet, and reliable, without the custardy complexity that egg coagulation produces.

Chilling it firms the texture further, shifting it toward a set cream rather than a sauce.

Golden Rule
Use full-fat milk, not skimmed, when cooking custard powder - fat content directly controls how rich and smooth the finished custard feels.

How to Use Custard Powder

Custard powder's most common role is as a poured warm sauce over steamed puddings, bread pudding, and fruit crumbles - the kind of dessert where warm, flowing custard is the point.

For this, you mix the powder with a little cold milk to form a paste, then stir the paste into simmering milk until it thickens, which takes roughly two to three minutes.

Chilled, it becomes a setting medium for layered desserts.

A classic British trifle relies on a cooled custard layer to separate the soaked sponge from the whipped cream on top, and a strawberry shortcake trifles recipe shows exactly how that layering works when custard is the structural element.

The pairings that work best are those that contrast the mild vanilla base: fresh raspberries and strawberries cut through the sweetness, while caramel or butterscotch sauces deepen it.

How Custard Powder Is Used
MethodBest ForTip
🍳 Stir into hot milkPoured custard sauce over puddingsMake a cold paste first to prevent lumps
❄️ Chill-setTrifle layers, custard slice fillingsPress cling wrap to the surface to prevent skin
🧁 Baked into doughShortbread biscuits, custard tartsReplaces a portion of flour; reduces by about 20%
🥄 Folded into creamQuick custard mousse or trifle toppingWhisk into softly whipped cream before it stiffens

In South Asian baking, custard powder flavors milk-based sweets and fillings, often combined with condensed milk for a firmer set.

Knowing what pairs with bread pudding also points to custard powder's natural role - it's frequently the warm sauce answer on that list.

If you don't have custard powder on hand, replacements for custard powder range from vanilla pudding mix to a cornstarch-and-vanilla combination.

Try It In
🍞Warm Bread Pudding with Vanilla SauceCustard powder makes the poured sauce in minutes→🍋Lemon Raspberry Loaf CakeUse custard powder in the batter for a tender crumb→🍓Fresh Strawberry Shortcake TriflesCustard layer holds the trifle structure together→

How to Buy and Store Custard Powder

Look for tins or packets with a uniform pale yellow color and no visible clumping - clumps signal moisture exposure, which degrades both the starch and the flavor.

The ingredient list should lead with cornflour or cornstarch; avoid any product with an unusually strong artificial perfume, which often means low-quality vanillin.

Watch Out
Custard powder absorbs odors readily. Store it away from spices, coffee, and anything pungent - even through sealed packaging over time.

Once opened, transfer the powder to an airtight container rather than leaving it in the original tin, which often doesn't reseal tightly.

Pantry storage in a cool, dry spot is ideal; the fridge is unnecessary and risks condensation.

Proper guidance on keeping custard powder fresh covers the full timeline, and similarly, storing milk correctly matters since milk quality affects the final custard even when the powder is fine.

  • Unopened shelf life - 12 to 24 months from manufacture date
  • Opened shelf life - 6 to 12 months in an airtight container
  • Discard if - the powder smells off, has clumps that don't break up, or has a grey tint

Where to Start With Custard Powder

If you're new to custard powder, begin with a poured sauce: three tablespoons of powder, one tablespoon of sugar, and 500ml of full-fat milk produces a reliable, smooth custard on a first attempt.

Once you're confident there, try it as a baked ingredient - substituting 20-25% of the flour in shortbread with custard powder gives a noticeably softer, more fragrant biscuit.

For those already comfortable with both, the alternatives to cornstarch page is useful when you need to adjust a custard powder recipe that calls for extra thickening.

Frequently Asked Questions

Is custard powder the same as custard?

No. Custard powder is a dry blend of cornflour, sugar, and flavoring - it requires milk and heat to become custard. The finished liquid is the custard; the powder is just the starting ingredient.

Can you substitute custard powder for eggs?

Not directly. Custard powder can replace eggs as a thickener in sauces and fillings, but it won't replicate egg coagulation, binding, or lift in baked goods. It works best as a flavor-and-thicken substitute, not a structural one.

Does custard powder need to be cooked?

Standard custard powder does - raw cornflour has a chalky, starchy taste that only disappears once heated. Instant custard powder varieties use pre-gelatinized starch and can set with warm or cold milk without full cooking.

Is custard powder gluten free?

Most standard custard powders are naturally gluten-free since cornflour contains no gluten. However, cross-contamination during manufacturing is possible, so look for a certified gluten-free label if you have coeliac disease.

What is the difference between custard powder and custard mix?

The terms are often used interchangeably, but custard mix sometimes includes added milk solids or sugar pre-blended for a simpler one-step preparation. Check the label - pure custard powder typically just needs milk, while a mix may only need water.

Pork Osso Buco

March 29, 2026

Most braised pork ends up either dry or swimming in watery sauce. The fix is using bone-in shanks and braising low and slow in a heavy pot with partial liquid submersion.

Pork Osso Buco served on a plate

The marrow enriches the sauce while connective tissue breaks down into gelatin. You sear first for flavor, then the oven does the work at 300-325°F for 2.5 hours.

Make this when you want a comfort meal that looks intentional but doesn't require constant attention. The bones tell you everything about doneness-when the meat pulls away easily, you're done.

QUICK SUMMARY

Pork Osso Buco is bone-in shanks braised low and slow in tomato, wine, and aromatics until the meat falls off the bone. The marrow melts into the sauce while long cooking breaks down tough connective tissue. Choose this when you need hands-off cooking with rich, restaurant-level results.

⏱️Time Reality: 2 hours 50 minutes total, most of it unattended braising in the oven
🔥Critical First Step: Pat shanks completely dry before searing to get proper browning
⚠️Watch Out: Too much liquid makes watery sauce-liquid should only halfway cover the shanks

Why This Recipe Works

Braising transforms tough cuts into fork-tender meat through slow, moist heat. For a version that comes together quickly, a tender pork variation works when you need dinner in under 30 minutes.

Quick Reference
⏱️
Prep Time
20 min
🔥
Cook Time
2 hr 30 min
⏰
Total Time
2 hr 50 min
🍽️
Servings
4 servings
📊
Difficulty
Medium
🏷️
Category
Main Dish
💡
Quick Tip
Sear well for flavor, braise low and slow
🎯
Best For
Weeknight | Meal prep | Comfort meal

What makes this work:

  • Bone-in shanks - The marrow melts into the braising liquid, adding richness and body that boneless cuts can't match
  • Dry searing first - Moisture prevents browning, so patting shanks dry creates the caramelized crust that builds flavor
  • Partial submersion - Liquid halfway up the shanks steams the top while braising the bottom, keeping meat moist without diluting the sauce
  • Low oven temperature - 300-325°F breaks down collagen slowly without toughening the proteins or drying out the meat
  • Wine deglazing - The acid lifts browned bits from the pan and balances the richness of the pork and tomatoes
Golden Rule
If the meat doesn't fall off the bone with light fork pressure, it needs more time-keep braising.

What You'll Need

Ingredients for Pork Osso Buco

Shopping is straightforward if you stick to bone-in shanks and crushed tomatoes. Most people skip golden roasted potatoes, but they balance the meal and soak up leftover sauce.

🍗
Pork
  • 4 bone-in pork shanks (1.5-2 lbs each)
🥬
Aromatics
  • 1 onion (diced)
  • 2 carrots (diced)
  • 2 celery stalks (diced)
  • 4 garlic cloves (minced)
🥢
Braising Liquid
  • 1 can (28 oz) crushed tomatoes
  • 1 cup white wine
  • 2 cups chicken or vegetable broth
  • 2 bay leaves
🌶️
Finishing
  • Lemon zest (for gremolata)
  • Fresh parsley (chopped)
  • Salt and black pepper

Ingredient Details

  • Pork shanks
    Look for shanks with visible marrow in the center-that's what makes the sauce silky and rich
  • Crushed tomatoes
    Crushed tomatoes provide body without excess liquid; diced tomatoes work but puree them first
  • White wine
    Dry white wine like Sauvignon Blanc or Pinot Grigio adds acidity; skip sweet wines that make the sauce cloying
  • Mirepoix vegetables
    Dice onion, carrot, and celery into equal-sized pieces so they cook evenly during the braise
  • Bay leaves
    Two bay leaves add herbal depth; remove them before serving or they turn bitter with extended cooking
  • Gremolata
    Mix lemon zest, minced garlic, and parsley just before serving-it loses brightness if made ahead
  • Heavy pot
    Use a Dutch oven or heavy-bottomed pot that holds heat evenly and prevents scorching during the long braise

Ingredient Swaps

Most substitutions work if you match the role each ingredient plays. Rich mains need something to cut through, and classic salad dish does exactly that with crisp greens and bright vinaigrette.

Four swaps that work:

  • Pork shoulder chunks instead of shanks - Less marrow flavor but still tender; cut into 2-inch pieces and reduce cook time by 30 minutes
  • Vegetable broth instead of chicken broth - Lighter flavor, fully vegetarian; use low-sodium to control salt levels
  • Dry white grape juice + 1 tablespoon vinegar instead of wine - Slightly sweeter, less complexity; the vinegar adds back acidity
  • Pureed canned diced tomatoes instead of crushed - Works in a pinch; blend smooth or the sauce stays chunky

Pork Shoulder

Works for: budget cooking, less marrow preference, shorter braise times

Skip if: you want classic osso buco richness, bone presentation matters

Vegetable Broth

Works for: vegetarian diets, lighter flavor, keeping it dairy-free

Skip if: you need deeper savory notes, richer body in the sauce

Grape Juice + Vinegar

Works for: alcohol-free cooking, kids at the table, slightly sweet profiles

Skip if: you want authentic wine complexity, more sophisticated flavor

Instructions

The first 20 minutes sets up the rest of the cook. The minestrone works best when it hits the table at the same time as the main, so start tender roasted vegetable side in the slow cooker before you sear the pork.

  1. Dry and season the shanks. Pat pork shanks completely dry with paper towels for 2 minutes. Season all sides with salt and black pepper. Heat 2 tablespoons oil in a Dutch oven over medium-high heat until shimmering.
  2. Sear the pork. Add shanks and sear 3-4 minutes per side until golden brown. Don't move them-let the crust form. Remove to a plate.
  3. Build the base. Add diced onion, carrot, and celery to the pot. Cook 5 minutes, stirring occasionally, until softened. Add minced garlic and cook 1 minute until fragrant.
  4. Deglaze and braise. Pour in wine and scrape up browned bits for 2 minutes. Add crushed tomatoes, broth, and bay leaves. Return shanks to pot-liquid should come halfway up the meat. Cover, transfer to a 325°F oven, and braise 2.5 hours until fork-tender.
  5. Finish the sauce. Remove shanks to a platter and tent with foil. Simmer sauce uncovered on the stovetop 10-15 minutes until thickened. Discard bay leaves. Spoon sauce over shanks and top with lemon zest, garlic, and parsley gremolata.
Shortcut
Skip chopping vegetables by using frozen mirepoix-it saves 10 minutes of prep and works just as well in the braise.

What to Serve With It

A dollop of this dip takes each bite somewhere more interesting. For a version that comes together quickly, simple sauce recipe adds garlicky brightness-we keep a batch ready for nights like this.

Side Dish Prep Why It Works How to Serve
Creamy polenta Easy Soaks up sauce, mild flavor balances rich pork Spoon hot polenta on plate, nestle shank on top, drizzle with extra sauce
Garlic mashed potatoes Easy Comforting base, familiar flavors, hearty texture Mound potatoes on one side, lean shank against them, spoon sauce over both
Roasted green beans Easy Crisp texture contrasts braised meat, fresh flavor cuts richness Toss with olive oil and salt, roast at 425°F for 15 minutes, serve alongside
Arugula salad Easy Peppery bite balances heavy sauce, adds brightness Dress with lemon vinaigrette, serve on separate plate to keep greens crisp
Crusty bread Easy Mops up leftover sauce, adds textural variety Slice thick, toast lightly, serve warm in a basket

Three ways to serve it:

  • Family-style comfort - Spoon polenta on a large platter, arrange shanks on top, scatter gremolata, pass extra sauce at the table
  • Plated dinner - Center shank on mashed potatoes, spoon sauce around, lean roasted green beans against the bone for height
  • Meal prep - Pack shank with polenta and sauce in containers, store green beans separately, reheat and assemble fresh
Best Pick
Polenta is the traditional choice because it doesn't compete with the sauce-it just carries it to your mouth.

Store and Reheat

Osso buco actually improves after a day in the fridge as flavors meld. For more serving ideas when you're planning your cuban mojo pork dinner, check that guide-the same sides work for any braised pork dish.

Method Time Best For
🍳 Stovetop 10-15 min Even heating, thickening sauce, maintaining texture
🔥 Oven 20 min at 325°F Large portions, keeping meat tender, hands-off reheating
📦 Microwave 3-5 min Single portions, quick weekday lunches, office meals

For best results when storing:

  • Cool before refrigerating - Let shanks rest 30 minutes at room temperature so steam doesn't condense into excess liquid in the container
  • Store in shallow containers - Use containers 2 inches deep or less so the braise cools quickly and reheats evenly
  • Keep sauce with meat - Store shanks submerged in sauce to prevent drying; the gelatin keeps everything moist
  • Freeze in portions - Wrap individual shanks with sauce in foil, then bag them-makes thawing and reheating faster
  • Add fresh gremolata - Make the lemon zest, garlic, and parsley mix right before serving-it loses brightness when stored

Frequently Asked Questions

How long to cook pork osso buco at 325°F?

Braise for 2.5 hours at 325°F until the meat pulls away from the bone with light fork pressure. Check at 2 hours-if it resists, keep cooking in 15-minute intervals.

Can I make pork osso buco ahead and reheat?

Yes, it's better the next day. Cool completely, refrigerate up to 4 days, then reheat gently on the stovetop with a splash of broth to loosen the sauce.

What goes well with pork osso buco?

Creamy polenta or mashed potatoes soak up the sauce, while roasted green beans or arugula salad add textural contrast. Crusty bread works for mopping up leftover sauce.

How do I know when pork osso buco is done braising?

The meat should pull away from the bone easily with a fork-if you have to tug or cut, it needs more time. The sauce should coat a spoon and look glossy, not watery.

Can I use pork shoulder instead of shanks for osso buco?

Yes, cut pork shoulder into 2-inch chunks and reduce the braise time to 2 hours. You lose the marrow richness and bone presentation, but the meat still turns out tender.

Pork Osso Buco served on a plate

Pork Osso Buco

No ratings yet
Pork Osso Buco features bone-in pork shanks braised slowly in a rich tomato, wine, and aromatic broth until tender. The marrow melts into the sauce, creating depth and silky texture, while slow oven cooking breaks down connective tissue for melt-in-your-mouth meat.
Print Recipe Pin Recipe
Prep Time 20 minutes mins
Cook Time 2 hours hrs 30 minutes mins
Total Time 2 hours hrs 50 minutes mins
Servings: 4 servings
Course: Main Dish
Cuisine: Italian
Ingredients Equipment Method Notes

Ingredients
  

  • 4 bone-in pork shanks 1.5-2 lbs each, pat completely dry before searing
  • 1 onion diced
  • 2 carrots diced
  • 2 celery stalks diced
  • 4 cloves garlic minced
  • 28 oz crushed tomatoes one can
  • 1 cup white wine dry, such as Sauvignon Blanc or Pinot Grigio
  • 2 cups chicken broth or vegetable broth
  • 2 bay leaves remove before serving
  • lemon zest for gremolata
  • fresh parsley chopped, for gremolata
  • salt to taste
  • black pepper to taste
  • 2 tablespoon oil for searing

Equipment

  • Dutch oven Used for searing and braising the pork shanks

Method
 

  1. Pat pork shanks completely dry with paper towels for 2 minutes. Season all sides with salt and black pepper. Heat 2 tablespoons oil in a Dutch oven over medium-high heat until shimmering.
    4 bone-in pork shanks, salt, black pepper, 2 tbsp oil
  2. Add shanks and sear 3-4 minutes per side until golden brown. Do not move them to allow crust formation. Remove shanks to a plate.
    4 bone-in pork shanks, 2 tbsp oil
  3. Add diced onion, carrot, and celery to the pot. Cook 5 minutes, stirring occasionally, until softened. Add minced garlic and cook 1 minute until fragrant.
    1 onion, 2 carrots, 2 celery stalks, 4 cloves garlic
  4. Pour in white wine and scrape up browned bits from the bottom of the pot for 2 minutes. Add crushed tomatoes, broth, and bay leaves. Return shanks to pot, ensuring liquid comes halfway up the meat. Cover and transfer to a 325°F oven. Braise for 2.5 hours until meat is fork-tender.
    28 oz crushed tomatoes, 1 cup white wine, 2 cups chicken broth, 2 bay leaves, 4 bone-in pork shanks
  5. Remove shanks to a platter and tent with foil. Simmer sauce uncovered on stovetop for 10-15 minutes until thickened. Discard bay leaves. Spoon sauce over shanks and top with gremolata made of lemon zest, minced garlic, and chopped parsley.
    2 bay leaves, lemon zest, 4 cloves garlic, fresh parsley, 4 bone-in pork shanks

Notes

  • Pat shanks completely dry before searing to ensure good browning.
  • Liquid should cover only halfway up the shanks to prevent watery sauce.
  • Braise at low oven temperature (325°F) for tender, flavorful meat.

Tried this recipe?

Let us know how it was!

What Is Coffee Creamer? [Taste, Uses & More]

March 29, 2026

Coffee creamer does one specific job - it softens bitterness, adds sweetness, and carries a flavor note into every sip without requiring you to keep fresh dairy on hand.

What Is Coffee Creamer

Unlike storing milk correctly or tracking how long cream keeps, a shelf-stable carton of creamer sits quietly in the pantry until you need it.

That convenience has made it a fixture in American kitchens, offices, and drive-through culture alike.

QUICK SUMMARY

Coffee creamer is a sweetened, emulsified liquid or powder designed to lighten and flavor coffee. It comes in dairy and non-dairy forms, spans dozens of flavor profiles, and requires no refrigeration until opened in its shelf-stable version.

☕Flavor: Sweet, creamy, with vanilla, hazelnut, or caramel notes
🥄Texture: Silky and slightly syrupy when stirred into hot liquid
🍽️Best Uses: Drip coffee, cold brew, iced coffee, quick desserts
📦Shelf Life: Refrigerated: 7-14 days open; powdered: months if sealed
⚠️Watch For: Hydrogenated oils, soy or almond allergens, high added sugar per tablespoon

What Is Coffee Creamer?

Coffee creamer is a manufactured add-in - liquid or powdered - engineered to replicate or amplify what milk or cream does in coffee, but with a longer shelf life and more flavor options.

It originated in mid-20th century North America as a convenience product for households and workplaces that couldn't keep fresh dairy reliably stocked.

Knowing storing coffee correctly is only half the equation - what goes into the cup matters just as much.

Most commercial versions fall into two camps: liquid creamers (refrigerated or shelf-stable cartons) and powdered non-dairy creamer (dry, shelf-stable tins or packets). Both use emulsifiers and stabilizers to prevent separation in hot or cold coffee.

  • 🧴 Liquid creamer - dairy or non-dairy, sweetened, often flavored; the most common format
  • 🥛 Powdered creamer - dry-blended fats, sugars, and casein or plant proteins; dissolves in hot liquid
  • 🌱 Non-dairy creamer - made with coconut, palm, soy, almond, or oat bases instead of cow's milk
  • 🍂 Seasonal / flavored variants - pumpkin spice, peppermint mocha, cinnamon roll; limited-run lines

The category also goes by liquid creamer, flavored creamer, and simply coffee additive - all describing the same functional product.

What Does Coffee Creamer Taste Like?

coffee creamer - What Is Coffee Creamer

Coffee creamer tastes like a sweeter, more concentrated version of flavored half-and-half - rich and milky up front, with a flavor note (vanilla, hazelnut, caramel) that lingers after the sip.

It lacks the fresh-dairy brightness of real cream, trading that zing for a smoother, more uniform sweetness.

Sensory SnapshotModerate Intensity
👅 Flavor
sweetcreamyvanilla-forwardmild caramel
✋ Texture
silkyslightly syrupy
👃 Aroma
warm vanillamild nuttinessfaint spice

Powdered creamer carries a flatter, almost neutral base with a subtle cooked-sugar note. Concentrated liquid creamers - especially seasonal flavors - can taste noticeably artificial if used beyond the recommended splash.

The sweetness intensifies in cold brew and iced coffee because there's no heat to disperse the sugars quickly.

Golden Rule
Start with half the amount you think you need. Creamer's sweetness compounds fast in concentrated coffee drinks - you can always add more, never less.

How to Use Coffee Creamer

The most straightforward use is stirring liquid creamer into hot drip coffee or a brewed espresso drink. A tablespoon or two lightens color, cuts bitterness, and delivers whatever flavor the creamer carries - without any additional sweetener required.

Cold applications work just as well.

Creamer blends smoothly into cold brew and iced coffee, and because it's already emulsified, it won't bead up on the surface the way a thin cream sometimes does.

For quick desserts, a splash stirred into instant pudding or hot oatmeal adds sweetness and a flavor note in one step.

Understanding the role half and half plays in coffee drinks helps clarify where creamer overlaps and where it doesn't.

How Coffee Creamer Is Used
MethodBest ForTip
☕ Hot CoffeeDrip, pour-over, instant, espresso drinksAdd after brewing; stir immediately
🧊 Cold DrinksCold brew, iced coffee, blended drinksShake carton first; it mixes without heat
🍮 Quick DessertsOatmeal, instant pudding, no-bake saucesUse flavored creamer to replace sugar and cream at once
🍫 Hot DrinksHot chocolate, chai, spiced teaVanilla or caramel creamers pair well with chocolate
🍸 Coffee CocktailsWhite Russian riffs, spiked iced coffeeHazelnut or vanilla creamers replace Kahlúa-style sweetness

One place to avoid it: any recipe requiring structural fat, like whipped cream or a cream-based béchamel. Creamer's emulsifiers hold it stable in liquid but won't whip, and high-heat simmering can break the emulsion into an oily, grainy mess.

Try It In
🥣Maple Baked OatmealStir in vanilla creamer to sweeten and enrich the base→🧋Passion Fruit Iced TeaA splash of coconut creamer adds creaminess without dairy→🍑Peach Cold Brew CoffeeVanilla creamer rounds out the cold brew's bitterness→

How to Buy and Store Coffee Creamer

At the store, check shelf-stable cartons for intact tamper seals and no bloating - a swollen carton signals bacterial activity. For refrigerated dairy creamers in clear bottles, avoid any with visible separation or gritty texture before opening.

Powdered creamer should feel dry and free-flowing; clumping means moisture has gotten in.

Watch Out
Many powdered and liquid non-dairy creamers contain hydrogenated or palm oils, and "non-dairy" doesn't mean allergen-free - soy, almond, and oat bases all appear. Check the label if allergies are a factor.

Storage is straightforward once you know the format:

  • Shelf-stable liquid - store at room temperature; refrigerate after opening and use within 7-14 days
  • Refrigerated dairy creamer - keep at or below 40°F at all times; use within 7-14 days of opening
  • Powdered creamer - seal tightly after each use; stays shelf-stable for many months in a dry environment

For a complete breakdown, coffee creamer's shelf life covers expiration windows, signs of spoilage, and whether freezing is viable. If you're weighing alternatives, swapping out coffee creamer and swapping out half and half both offer tested replacements for different recipes.

Where to Start With Coffee Creamer

Coffee creamer is a tool with a narrow but reliable range. Grab a refrigerated vanilla liquid creamer first - it covers the widest range of uses, from morning coffee to quick oatmeal, without committing to a polarizing flavor like hazelnut.

If you drink cold brew regularly, creamer is worth keeping in rotation.

It blends cleanly cold, adds sweetness without a separate sugar step, and the emulsified texture holds up better in cold liquid than a thin dairy pour.

For anyone avoiding dairy, oat-based non-dairy creamers currently offer the closest texture match to a light cream - smooth, neutral enough to let the coffee flavor through, and widely available.

Shortcut
Single-serve creamer pods are ideal for travel, office drawers, or camping - no refrigeration needed, and each pod is measured so you don't over-pour.

Frequently Asked Questions

Is coffee creamer dairy or non-dairy?

Both versions exist. Some creamers use real milk or cream as a base; others use plant oils, soy, almond, or oat instead. Check the label - "non-dairy" doesn't always mean free of casein, a milk protein used as an emulsifier in some powdered versions.

Does coffee creamer curdle in coffee?

Rarely under normal conditions - creamer is emulsified specifically to resist this. However, adding expired creamer to very acidic or heavily concentrated coffee can cause visible curdling. Freshness and moderate coffee acidity keep it stable.

How many calories are in a tablespoon of creamer?

Most liquid creamers run 20-35 calories per tablespoon, higher than whole milk. Sugar-free versions drop this significantly but use artificial sweeteners or sugar alcohols instead. Powdered creamers are similar per equivalent serving.

Can you use coffee creamer in baking?

Yes, with limits. It works in muffins, quick breads, or no-bake recipes where liquid and sweetness are needed. Avoid it in recipes that rely on fat structure - it won't behave like heavy cream in custards or whipped toppings.

How long does opened creamer last?

Refrigerated liquid creamer lasts 7-14 days after opening if kept at or below 40°F. Knowing [heavy cream spoilage signs](https://forkliftkitchen.com/heavy-cream-shelf-life/) helps you apply the same sniff-and-look checks to dairy-based creamers. Powdered creamer stays good for months if sealed dry.

How Long Does Eggplant Last? [Storage Guide]

March 29, 2026

Left over from last night's stir-fry or sitting on the counter since Tuesday, eggplant has a narrower storage window than most cooks expect.

Can You Freeze Eggplant

Whole, uncut eggplant holds up for 5-7 days in the fridge, but once sliced, that window drops to just a day or two before oxidation turns the flesh brown and watery.

Understanding eggplant in cooking shows why texture matters so much here - spongy or bitter eggplant is nearly unusable.

Knowing where and how long to store it prevents waste before it starts.

QUICK SUMMARY

Whole eggplant lasts 5-7 days in the fridge, 2-3 days in a cool pantry, and up to 12 months in the freezer if roasted first. Sliced eggplant degrades fast - use within 1-2 days. Keep it away from ethylene producers like tomatoes to slow softening.

🧊Fridge (whole): 5-7 days in the crisper, unwashed, loosely wrapped
❄️Freezer (roasted): 6-12 months; blanched raw stores 2-6 months
⚠️Key Rule: Never freeze raw without blanching first - texture suffers badly

How Long Does Eggplant Last?

Storage method changes the timeline dramatically for eggplant, more so than for many other vegetables. The skin's firmness and the seeds inside both degrade at different rates depending on temperature, humidity, and whether the flesh has been cut.

Eggplant Shelf Life
MethodStateDurationNotes
🏠 CounterWhole1-3 daysAvoid direct sun and heat sources; use while still firm
🗄️ PantryWhole2-3 daysCool, dark spot only; seeds bitter quickly past this point
🧊 FridgeWhole5-7 daysCrisper drawer at high humidity; do not wash until use
🧊 FridgeSliced1-2 daysAirtight container; oxidizes and goes watery fast
🧊 FridgeCooked3-4 daysStore separately from raw produce in a sealed container
❄️ FreezerRaw (blanched)2-6 monthsExpect spongy texture after thawing
❄️ FreezerCooked/Roasted6-12 monthsBest for purees, stews, and casseroles

One factor unique to eggplant: seed bitterness accelerates with age. Even fridge-stored eggplant held past seven days will develop dense brown seed pockets that taste harsh and aren't saved by cooking.

Watch Out
Placing eggplant near the coldest part of your fridge causes chill damage - pitted, water-soaked skin that looks like bruising and can't be reversed.

How to Store Eggplant

Whole eggplant is sensitive to both cold damage and ethylene gas, which makes placement inside your fridge matter.

Storing it next to tomatoes or bananas - both heavy ethylene producers - speeds up softening noticeably, just as it does for keeping zucchini fresh.

Fridge: Place whole, unwashed eggplant in the crisper drawer set to high humidity. If your fridge runs dry, wrap it loosely in a paper towel inside a perforated produce bag - this prevents moisture loss without trapping condensation. Counter/Pantry: A cool, dark spot away from sunlight and heat works for 1-3 days maximum. Sliced: Seal cut eggplant in an airtight container immediately and refrigerate; press a piece of plastic wrap directly against the cut surface to slow oxidation.

  • 🧅 Keep away from ethylene sources - tomatoes, bananas, and apples all accelerate softening
  • Don't wash before storing - surface moisture encourages mold at the stem end
  • Use the crisper, not the door - temperature fluctuations at the door cause premature softening
  • Cooked eggplant - store in a sealed container, separated from raw produce, and use within 3-4 days

Can You Freeze Eggplant?

Yes, but the method determines how useful the result is. Raw frozen eggplant becomes spongy and mealy after thawing, even when blanched first.

Roasting before freezing locks in more flavor and produces a texture that holds up in stews, casseroles, and baked pasta dishes.

Golden Rule
Roast eggplant before freezing whenever possible. It shrinks the volume, concentrates flavor, and dramatically reduces post-thaw sogginess compared to blanched raw slices.
  1. Slice into ½-inch rounds or cubes, depending on intended use.
  2. Blanch (raw method) in boiling water for 2-4 minutes, then transfer immediately to an ice bath. Drain and pat completely dry.
  3. Roast (preferred method) with a little oil until just cooked through. Cool fully before freezing.
  4. Flash-freeze in a single layer on a lined tray for 1-2 hours until solid.
  5. Transfer to airtight freezer bags, pressing out excess air, and label with the date.

Thaw frozen eggplant in the fridge overnight, or add frozen pieces directly to soups and stews without thawing. Grilling or eating thawed eggplant as a standalone slice doesn't work - the texture won't recover.

Signs Eggplant Has Gone Bad

Fresh eggplant should feel heavy, firm, and slightly springy when pressed - the skin tight and glossy. Several clear indicators tell you it's no longer safe or worth using.

Signs It's Gone Bad
👀
VisualDark or water-soaked patches under the skin · Wrinkled, collapsed skin · Large brown seed pockets throughout the flesh
👃
SmellSour or musty odor from mushy spots · Fermented smell from the stem end
✋
TextureMushy or slimy flesh · Dry, corky brown centers around seeds

Small surface blemishes can be trimmed before cooking. However, extensive soft spots, any sour odor, or visible mold mean the whole eggplant should be discarded - internal rot spreads faster than the outside suggests.

Getting the Most from Your Eggplant

A few habits consistently extend usable life and improve results at the stove. If an eggplant is already past its best, knowing eggplant swaps that work can save a recipe rather than stall it.

  • Buy and use within one week - firm, glossy eggplant at purchase means you have the full fridge window ahead
  • Brown seeds aren't always spoilage - a small, dense seed center in older eggplant is bitter but can be removed; the surrounding flesh may still be usable in cooked dishes
  • Salt selectively - salt slices for 20-30 minutes before sautéing to draw out moisture, but skip this step for thin Asian varieties, which don't need it
  • Roast before freezing - this applies equally whether you're prepping for a casserole or a sauce; [keeping kale without blanching fresh](https://forkliftkitchen.com/kale-without-blanching-shelf-life/) follows similar logic about pre-treatment and texture tradeoffs

Frequently Asked Questions

How long does eggplant last in the fridge?

Whole eggplant keeps 5-7 days in the crisper drawer at high humidity. Sliced eggplant lasts only 1-2 days before oxidizing and turning watery, even in an airtight container.

Can you freeze eggplant without cooking it?

Yes, but blanching first is required - raw unblanched eggplant develops severe off-texture when frozen. Even blanched, expect a spongy result; use only in cooked dishes, not as standalone slices.

Will eggplant go bad if left out overnight?

Whole eggplant left out overnight in a cool kitchen is generally fine and falls within the 1-3 day counter window. Cooked or sliced eggplant left at room temperature overnight should be discarded.

How do you store cut eggplant?

Press plastic wrap directly against the cut surface to limit air exposure, then seal in an airtight container and refrigerate. Use within 1-2 days before the flesh browns and becomes watery.

Should you salt eggplant before cooking?

Only when sautéing - salting for 20-30 minutes draws out excess moisture and prevents greasy results. Skip it for thin Asian varieties and for roasting or grilling, where it's unnecessary.

Shrimp Fra Diavolo

March 29, 2026

Tender shrimp bathed in spicy tomato sauce with garlic biting through every forkful. That's what happens when you simmer crushed tomatoes with chili flakes and white wine until the sauce clings to each piece of seafood.

Shrimp Fra Diavolo served on a plate

The pan does most of the work. You get restaurant-level heat and depth without babysitting a pot for an hour.

This works for weeknight meals when you need something that feels special but doesn't require marinating or multi-step prep. Make it on a Tuesday when you want real food fast.

QUICK SUMMARY

Shrimp Fra Diavolo delivers spicy, garlic-forward tomato sauce with tender shrimp that cook in under 5 minutes. The key is simmering the sauce uncovered to concentrate flavors before adding the seafood. Works for date nights or casual entertaining when you need something that looks harder than it is.

⏱️Time Reality: 25 minutes total, 15 for sauce, 5 for shrimp
🔥Critical Move: Add chili flakes to hot oil first to bloom the heat
⚠️Watch Out: Overcrowding the pan steams shrimp instead of searing them - cook in batches if needed

Table of Contents

Toggle
  • Why This Recipe Works
  • What You'll Need
    • Ingredient Details
  • Ingredient Swaps
  • What to Serve With It
  • Store and Reheat
  • Frequently Asked Questions
  • Shrimp Fra Diavolo
    • Method 
    • Tried this recipe?

Why This Recipe Works

High heat with a quick sear locks in moisture while the sauce reduces to coat each piece of shrimp without turning them rubbery. Most people skip fish, but it balances the meal. For a version that comes together quickly, more seafood ideas use similar techniques with different proteins.

Quick Reference
⏱️
Prep Time
10 min
🔥
Cook Time
15 min
⏰
Total Time
25 min
🍽️
Servings
4 servings
📊
Difficulty
Medium
🏷️
Category
Main Dish
💡
Quick Tip
Simmer sauce; avoid overcooking shrimp.
🎯
Best For
Weeknight | Entertaining

What makes this version work:

  • Chili flakes bloom in hot oil first - infuses the base with heat before aromatics go in, creating deeper spice throughout
  • White wine deglazes the pan after garlic softens - loosens browned bits and adds acidity that balances tomato sweetness
  • Sauce simmers uncovered for 15 minutes - reduces to proper thickness so it clings instead of pooling
  • Shrimp cook 2-3 minutes per side maximum - prevents rubbery texture while still reaching opaque doneness
  • Fresh parsley goes in off heat - preserves bright color and fresh herb aroma instead of wilting into the sauce
Quick Tip
Leave 1 inch between each shrimp in the pan to brown instead of steam - cook in two batches if your skillet isn't wide enough.

What You'll Need

Ingredients for Shrimp Fra Diavolo

Shopping takes 10 minutes if you grab peeled shrimp and crushed tomatoes from the canned goods aisle. A good caesar salad can make or break the plate. For a version that comes together quickly, something fresh like caesar salad cuts through all that richness.

🦐
Seafood
  • 1½ lbs shrimp (peeled, deveined, 16-20 count)
🥬
Aromatics & Vegetables
  • 6 cloves garlic (minced)
  • 1 small onion (diced)
  • ¼ cup fresh parsley (chopped)
🥢
Sauce Base
  • 28 oz crushed tomatoes
  • ½ cup white wine
  • ¼ cup olive oil
  • 2 tablespoon lemon juice
🌶️
Seasonings
  • 1-2 teaspoon red chili flakes
  • 1 teaspoon salt

Ingredient Details

  • Shrimp (16-20 count)
    Use fresh shrimp when possible - prevents rubbery texture and ensures quick, even cooking without waterlogging the sauce
  • Crushed tomatoes
    Provides base acidity and body for the sauce - avoid diced tomatoes unless you blend them first for smoother consistency
  • Garlic (fresh minced)
    Essential aromatic that builds signature flavor - cook 30-45 seconds only to prevent burnt bitterness
  • Red chili flakes
    Defines signature heat level - add early to hot oil to bloom the spice and infuse throughout
  • Olive oil
    Fat for sautéing and flavor carrier - use enough to coat the pan bottom and prevent garlic from sticking
  • White wine
    Deglazes pan and adds acidity plus depth - pour in after garlic softens and simmer 2 minutes to cook off alcohol
  • Fresh parsley
    Bright finish and color contrast - add off heat to preserve fresh herb aroma instead of wilting

Ingredient Swaps

Substitutions work when you match texture and cook time to the original ingredient. Rich mains need something to cut through, and fries does exactly that. For a version that comes together quickly, homemade fries recipe adds crispy contrast.

Four swaps that work:

  • Scallops or firm white fish instead of shrimp - texture firmer, adjust cooking time up slightly for thicker pieces (budget | method-swap)
  • Chicken broth with lemon juice instead of white wine - less depth but keeps acidity, use equal amount (dairy-free | budget)
  • Canned diced tomatoes (blended) instead of crushed - texture chunkier unless you pulse in a blender first (budget)
  • Fresh chopped chili or cayenne powder instead of red chili flakes - heat level varies, start with half and adjust (method-swap)

Fresh Shrimp

Works for: Quick cooking, tender texture, clean seafood flavor

Skip if: Budget tight - frozen works fine if thawed properly

Frozen Shrimp (Thawed)

Works for: Budget cooking, meal prep, longer shelf life

Skip if: Convenience matters - extra thawing step adds 30 minutes

Instructions

Sauce needs 15 minutes to reduce before shrimp go in. The fries works best when it hits the table at the same time as the main. We keep a batch ready for nights like this - creamy homemade potato recipe finishes while the sauce simmers.

  1. Heat olive oil in heavy skillet over medium heat. Add chili flakes and heat 30 seconds until fragrant, then add diced onion and cook 3-4 minutes until softened. Stir in minced garlic and cook 30-45 seconds until aromatic but not browned.

  2. Pour in white wine and simmer 2 minutes to reduce by half. Add crushed tomatoes, salt, and stir to combine. Bring to gentle simmer, then reduce heat to medium-low and cook uncovered 15 minutes, stirring occasionally, until sauce thickens and reduces slightly.

  3. Pat shrimp dry with paper towels and season with salt. Push sauce to sides of pan and add shrimp in single layer with 1 inch space between each piece. Cook 2-3 minutes per side until shrimp turn opaque with slight curl.

  4. Stir shrimp into sauce gently to coat. Remove from heat and stir in lemon juice. Taste and adjust seasoning with more salt or chili flakes if needed.

  5. Garnish with chopped fresh parsley and serve immediately. Spoon extra sauce over pasta, rice, or crusty bread on the side.

Golden Rule
Never cook shrimp longer than 6 minutes total - they continue cooking in the hot sauce after you pull the pan off heat.

What to Serve With It

This needs something to soak up the spicy tomato sauce and balance the heat. A dollop of homemade takes each bite somewhere more interesting. We keep a batch ready for nights like this - something creamy to dunk cools the spice between forkfuls. For complete meal planning around similar seafood dishes, check out light seafood dish planning for pairing ideas.

Side Dish Prep Why It Works How to Serve
Spaghetti or Linguine Easy Soaks up spicy sauce, adds carbs to balance seafood Toss hot pasta with sauce, top with shrimp and parsley
Garlic Bread Easy Crispy texture contrasts tender shrimp, perfect for dipping Toast slices until golden, serve on side for sauce mopping
Simple Green Salad Easy Fresh greens and light vinaigrette cut through richness Dress lightly with lemon and olive oil, serve alongside
Steamed Broccoli Easy Mild vegetable contrast adds fiber without competing flavors Steam until tender-crisp, drizzle with lemon juice
Roasted Asparagus Medium Earthy vegetable complements seafood, adds visual contrast Roast at 425°F for 12 minutes with olive oil and salt

Three ways to serve it:

  • Over pasta with crusty bread - traditional Italian approach that soaks up every drop of sauce
  • With risotto and grilled vegetables - creamy base balances spicy sauce for entertaining
  • On polenta with caprese salad - adds texture contrast and fresh tomato sweetness
Best Pick
Linguine tossed with the sauce before plating - pasta absorbs flavor better than serving it on the side.

Store and Reheat

Cool sauce and shrimp separately before storing to prevent overcooking during reheating. Containers should be shallow to speed cooling and prevent bacterial growth.

Method Time Best For
🍳 Stovetop 3-5 min Best texture - reheats quickly without toughening shrimp
📦 Microwave 1-2 min (short bursts) Quick single servings - watch closely to prevent rubbery texture
🔥 Oven 10-12 min at 350°F Warming larger portions - maintains sauce texture but takes longer

For best results when storing:

  • Cool components separately - refrigerate sauce and shrimp in different shallow containers within 2 hours of cooking
  • Reheat gently on stovetop - warm sauce first over medium-low heat, add shrimp last 1-2 minutes just until heated through
  • Add splash of liquid - stir in wine, broth, or water if sauce thickens too much in the fridge
  • Freeze sauce only - tomato base freezes well up to 2 months, cook fresh shrimp when ready to serve
  • Use within 3-4 days - seafood loses quality quickly, eat refrigerated leftovers by day four maximum

Frequently Asked Questions

Can I use frozen shrimp for Shrimp Fra Diavolo?

Yes, thaw frozen shrimp completely in the fridge overnight or under cold running water for 15 minutes. Pat dry thoroughly before cooking to prevent steaming instead of searing.

How should I store and reheat leftovers safely?

Store sauce and shrimp separately in shallow airtight containers for 3-4 days. Reheat sauce on stovetop over medium-low heat, add shrimp last 1-2 minutes just until warmed through.

How do I know when the shrimp is perfectly cooked?

Shrimp are done when opaque throughout with a slight C-curve, usually 2-3 minutes per side. Overcooking past 6 minutes total creates rubbery texture.

What can I do if my sauce is too spicy or bland?

If too spicy, add more crushed tomatoes or a pinch of sugar to balance heat. If bland, stir in salt gradually, plus extra chili flakes and lemon juice to brighten flavor.

Can I double the recipe for a larger group?

Yes, double sauce ingredients and simmer in a larger pot. Cook shrimp in batches to avoid overcrowding - they need space to sear instead of steam.

Shrimp Fra Diavolo served on a plate

Shrimp Fra Diavolo

No ratings yet
Shrimp Fra Diavolo features tender shrimp simmered in a spicy, garlic-forward tomato sauce that develops deep flavor by cooking uncovered. This quick recipe uses chili flakes bloomed in hot oil and white wine to balance acidity, delivering a restaurant-quality dish in just 25 minutes.
Print Recipe Pin Recipe
Prep Time 10 minutes mins
Cook Time 15 minutes mins
Total Time 25 minutes mins
Servings: 4 servings
Course: Main Dish
Cuisine: Italian
Ingredients Equipment Method Notes

Ingredients
  

  • 1.5 lbs shrimp peeled, deveined, 16-20 count
  • 6 cloves garlic minced
  • 1 small onion diced
  • 0.25 cup fresh parsley chopped
  • 28 oz crushed tomatoes
  • 0.5 cup white wine
  • 0.25 cup olive oil
  • 2 tablespoon lemon juice
  • 1.5 teaspoon red chili flakes use 1-2 teaspoon depending on heat preference
  • 1 teaspoon salt

Equipment

  • Heavy skillet Used for sautéing and simmering sauce, and cooking shrimp

Method
 

  1. Heat olive oil in a heavy skillet over medium heat. Add red chili flakes and heat for 30 seconds until fragrant. Add diced onion and cook 3-4 minutes until softened. Stir in minced garlic and cook 30-45 seconds until aromatic but not browned.
    0.25 cup olive oil, 1.5 tsp red chili flakes, 1 small onion, 6 cloves garlic
  2. Pour in white wine and simmer for 2 minutes to reduce by half. Add crushed tomatoes and salt, then stir to combine. Bring to a gentle simmer, reduce heat to medium-low and cook uncovered for 15 minutes, stirring occasionally, until the sauce thickens and reduces slightly.
    0.5 cup white wine, 28 oz crushed tomatoes, 1 tsp salt
  3. Pat shrimp dry with paper towels and season with salt. Push sauce to sides of pan and add shrimp in a single layer with about 1 inch space between pieces. Cook 2-3 minutes per side until shrimp turn opaque with a slight curl. Cook in batches if needed to avoid crowding.
    1.5 lbs shrimp, 1 tsp salt
  4. Gently stir cooked shrimp into the sauce to coat. Remove from heat and stir in lemon juice. Taste and adjust seasoning with additional salt or chili flakes if needed.
    1.5 lbs shrimp, 2 tbsp lemon juice, 1.5 tsp red chili flakes, 1 tsp salt
  5. Garnish with chopped fresh parsley and serve immediately, spooning extra sauce over pasta, rice, or crusty bread if desired.
    0.25 cup fresh parsley

Notes

  • Always add chili flakes to hot oil first to bloom the flavor before other ingredients.
  • Cook shrimp in batches with space between pieces to avoid steaming and achieve proper sear.
  • Simmer sauce uncovered for full 15 minutes to thicken and concentrate flavors.

Tried this recipe?

Let us know how it was!
« Previous Page
Next Page »

Primary Sidebar

ForkliftKitchen recipe developer

Welcome!

Recipe Developer · 12+ Yr Kitchen Veteran

I'm the recipe developer behind this site, focused on practical, well-tested dishes and smart ingredient swaps. Every recipe is written to be clear, reliable, and easy to make at home.

650+ Recipes
12+ Yrs Exp.
3x Tested
Our Story →

As Featured In

Allrecipes

TASTE OF HOME

Food52

HUFFPOST

Yahoo! Life

Our Editorial Standards

  • ✓ Every recipe tested at least 3 times before publishing
  • ✓ Substitutes verified by real kitchen trials, not guesswork
  • ✓ Reviewed for accuracy by our editorial team
  • ✓ Updated regularly with seasonal info and reader feedback

Most Popular

  • Creamy Lemon Shrimp Linguine
    Creamy Lemon Shrimp Linguine
  • Creamy Garlic Mushroom Chicken
    Creamy Garlic Mushroom Chicken
  • Sesame Ginger Chicken Noodle Bowls
    Sesame Ginger Chicken Noodle Bowls
  • Baked Lemon Herb Fish Fillets
    Baked Lemon Herb Fish Fillets
  • Veggie Loaded Fried Rice
    Veggie Loaded Fried Rice
  • Spicy Garlic Shrimp Stir Fry
    Spicy Garlic Shrimp Stir Fry

Join 8,000+ Home Cooks

Weekly Kitchen Tips

Easy recipes, smart substitutes, and real cooking shortcuts — every Thursday.

Subscribe Free →


Side Dishes

  • What to Serve With Asian Salmon? 15 Best Side Dishes
    What to Serve With Asian Salmon? 15 Best Side Dishes
  • Side Dishes for Strawberry Spinach Salad
    15 Best Side Dishes for Strawberry Spinach Salad
  • Sides for Grilled Cauliflower Steaks to Complete the Meal
    15 Sides for Grilled Cauliflower Steaks to Complete the Meal
  • 15 Sides To Serve With Calabacitas
    15 Best Sides for Calabacitas – Mexican-Inspired Favorites


Substitutes

  • 7 Best Substitutes for Hot Sauce in Marinades & Stir-Fries
    7 Best Substitutes for Hot Sauce in Marinades & Stir-Fries
  • 9 Best Substitutes for Butter in Baking and Cooking
  • 7 Best Substitutes for Tagliatelle for Italian Pasta Dishes
    7 Best Substitutes for Tagliatelle for Italian Pasta Dishes
  • 7 Best Substitutes for Udon Noodles in Asian Stir-Fries
    7 Best Substitutes for Udon Noodles in Asian Stir-Fries


Browse by Topic

  • Side Dishes320
  • Substitutes785
  • Dinner163
  • Air Fryer77
  • Taste Profiles484
  • Food Storage123


Reader Reviews

★★★★★

"Finally a food blog that tells you exactly why a substitute works instead of just listing options."

— Sarah M., via email

★★★★★

"The side dish recommendations are so specific — saved my dinner party twice this month."

— James R., Pinterest comment

★★★★★

"I trust this site more than most because they actually test everything. You can tell."

— Priya K., blog comment

Footer

↑ Back to Top

Forklift Kitchen

We do the heavy lifting so you can enjoy the cooking. Tested recipes, smart substitutes, and perfect pairings—built for real home cooks.

Content

  • Recipes
  • Substitutes
  • What to Serve With
  • Blog

Company

  • About Us
  • Contact
  • Subscribe

Legal

  • Privacy Policy
  • Terms of Service

As an Amazon Associate I earn from qualifying purchases.

© 2026 Forklift Kitchen.

Rate This Recipe

Your vote:


A rating is required
A name is required
An email is required