Complete Article Output
Crispy breading crackles when you bite into tender chicken that stayed juicy through the whole cook. That's what happens when you air fry panko-crusted cutlets at 400°F instead of pan-frying them in oil.

The air fryer crisps the coating without the mess of deep frying. You get golden edges and a light crunch that doesn't taste greasy.
Make this on weeknights when you want something fast that still feels like real cooking. Works for meal prep too-the cutlets reheat better than most breaded chicken.
Air fryer chicken katsu delivers crispy panko-crusted cutlets in 27 minutes without deep frying. Pound the chicken to ½ inch thickness so it cooks evenly, bread in flour-egg-panko order, then air fry at 400°F for 12 minutes. The key is spacing cutlets 1 inch apart so hot air circulates and crisps every side.
Why This Recipe Works
Pounding chicken to uniform thickness means every piece finishes cooking at the same time. The three-step breading creates layers that lock moisture inside while the panko crisps. For a version that comes together quickly, something juicy like chicken works when you're planning the week ahead.
Remember it later
Planning to try this recipe soon? Save it for a quick find later!
Prep Time
15 min
Cook Time
12 min
Total Time
27 min
Servings
2-4 servings
Difficulty
Easy
Category
Main Dish
Quick Tip
Pound chicken ½ inch thick evenly
Best For
Weeknight | Meal prep
Why it delivers crispy results:
- Even thickness prevents dry edges: Pounding chicken to ½ inch means the center cooks through before the outside dries out
- Flour layer makes breading stick: The dry flour absorbs surface moisture so egg wash clings instead of sliding off
- Panko creates light crunch: Japanese breadcrumbs have larger flakes than regular crumbs-they crisp without getting dense or greasy
- Hot air circulation replaces oil: Spacing cutlets 1 inch apart lets 400°F air hit all sides and turn the coating golden in 12 minutes
- Internal temp confirms doneness: Pulling chicken at exactly 165°F means it stays juicy-carryover cooking adds another 3-5 degrees while it rests
What You'll Need
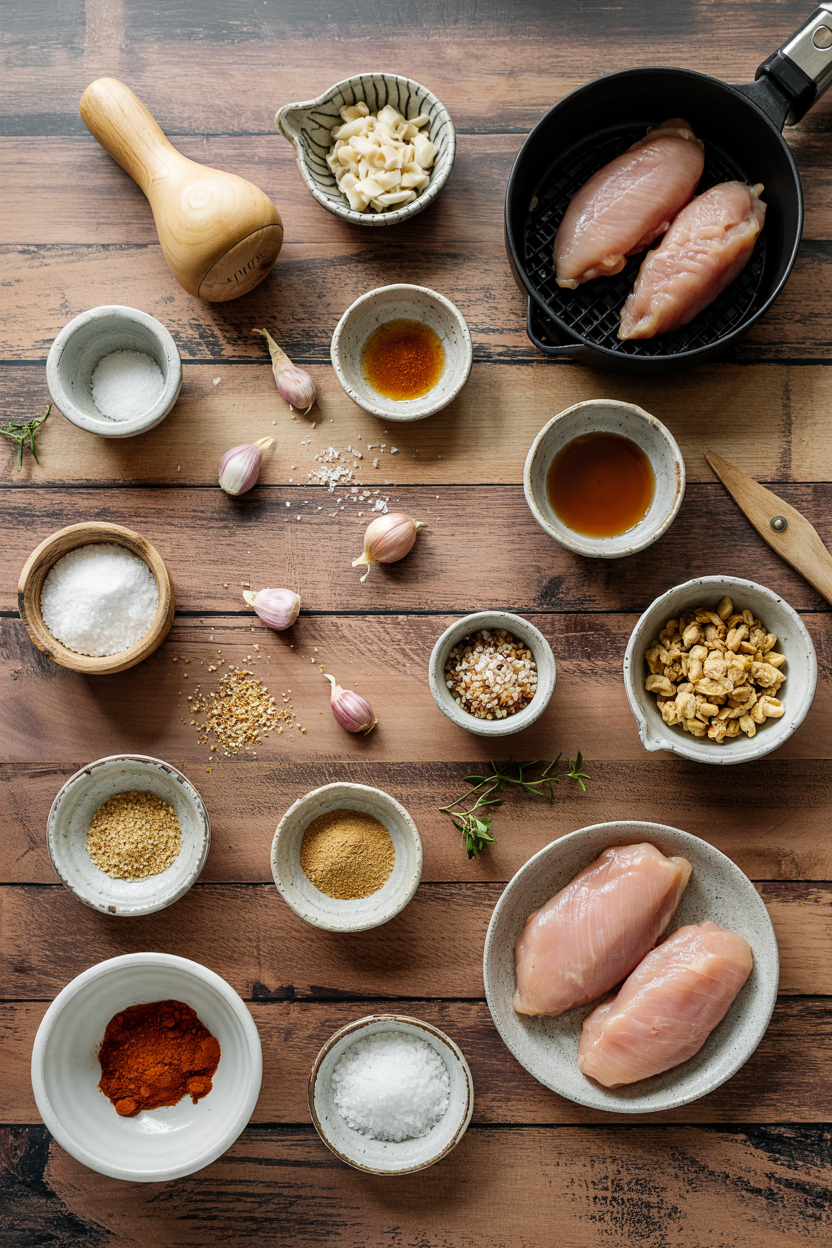
Stock your pantry with panko and neutral oil spray-the rest you already have. For a version that comes together quickly, tender pork side dish works when you're stocking the freezer for later.
- 2 boneless chicken breasts (about 1 lb total)
- ½ cup all-purpose flour
- 2 large eggs (beaten)
- 1 ½ cups panko breadcrumbs
- 1 teaspoon salt
- ½ teaspoon black pepper
- Neutral oil spray (vegetable or avocado)
- Optional: tonkatsu sauce for serving
Ingredient Details
- Boneless chicken breasts
Look for pieces around 8 oz each so they pound to uniform size-avoid the giant 12 oz breasts that cook unevenly - Panko breadcrumbs
Japanese-style panko has bigger, flakier crumbs than Italian breadcrumbs-it stays crispier and doesn't get soggy as fast - All-purpose flour
The flour dries the chicken surface so egg wash sticks-skip this step and the breading slides right off - Eggs
Beat eggs until fully blended with no streaks-uniform egg wash means even breading coverage - Neutral oil spray
Vegetable or avocado oil works best-olive oil has a lower smoke point and can taste bitter at high heat - Tonkatsu sauce
This sweet-savory Japanese sauce is the classic pairing-find it in the Asian section or make a quick version with ketchup and Worcestershire - Salt and pepper
Season the flour instead of the raw chicken-it distributes more evenly and doesn't wash off in the egg
Ingredient Swaps
Most swaps work fine if you adjust cook time by a minute or two. Rich mains need something to cut through, and this easy fry recipe pairs well when you're serving a crowd.
Common swaps that work:
- Rice flour or gluten-free flour replaces all-purpose flour for gluten-free breading-the coating may be slightly less crispy but still crunchy
- Chicken thighs swap for breasts if you want more flavor and juiciness-cook 2-3 minutes longer since dark meat needs slightly higher internal temp
- Crushed cornflakes or tortilla chips replace panko for different crunch-watch closely since they brown faster than breadcrumbs
- Buttermilk or yogurt substitutes for egg wash if you want tangier flavor-the coating will be slightly thicker
Chicken Breasts
Works for: Uniform shape, lean protein, even cooking, mild flavor that takes sauce well
Skip if: You want more forgiving cook time-breasts dry out faster than thighs
Chicken Thighs
Works for: More flavor, stays juicier, harder to overcook, budget-friendly option
Skip if: You need uniform presentation-thighs have irregular shapes that don't slice as neatly
Panko Breadcrumbs
Works for: Light crispy texture, stays crunchy longer, authentic Japanese coating
Skip if: You can't find panko-regular breadcrumbs work but create denser coating
Crushed Cornflakes
Works for: Budget-friendly swap, extra-crunchy texture, good pantry substitute
Skip if: You're strict about authenticity-cornflakes brown faster and taste different than panko
Instructions
Plan 27 minutes start to finish-most of that is hands-on breading and flipping. A dollop of smooth creamy dip takes each bite somewhere more interesting, especially when timing runs tight.
Prep the chicken: Slice each breast horizontally to create 2 thinner cutlets, then pound with a meat mallet or rolling pin until ½ inch thick throughout. Pat completely dry with paper towels-any moisture prevents breading from sticking.
Set up breading station: Place flour mixed with salt and pepper in first shallow bowl, beaten eggs in second bowl, panko in third bowl. Line them up in order so you can dip with one hand and keep the other clean.
Bread each cutlet: Dredge chicken in flour and shake off excess, dip in egg until fully coated, then press into panko on both sides. Press gently so crumbs stick but don't pack down-you want them loose enough to crisp up.
Air fry: Spray air fryer basket with oil, place cutlets in single layer with 1 inch between them, spray tops lightly with oil. Air fry at 400°F for 6 minutes, flip, spray again, cook 6 more minutes until internal temp hits 165°F and coating turns golden brown.
Rest and serve: Let cutlets rest on cutting board 5 minutes before slicing-this keeps juices inside instead of running out onto the plate. Slice crosswise into strips if serving over rice, or serve whole with tonkatsu sauce on the side.
What to Serve With It
The crispy coating needs something to balance it-mild starch or tangy vegetables work best. Most people skip savory chicken dish ideas entirely, but they round out the meal when you're short on time.
| Side Dish | Prep | Why It Works | How to Serve |
|---|---|---|---|
| Steamed white rice | Easy | Neutral base soaks up tonkatsu sauce without competing with crispy chicken | Slice cutlets over rice, drizzle sauce on top |
| Shredded cabbage salad | Easy | Crunchy, refreshing contrast cuts through rich breading | Serve raw alongside cutlets, dress with rice vinegar |
| Miso soup | Easy | Warm, light, salty balance to fried main dish | Serve in small bowls before or alongside chicken |
| Japanese potato salad | Medium | Creamy, tangy side that feels substantial for guests | Scoop onto plate next to sliced chicken |
| Pickled vegetables | Easy | Acidic crunch cleanses palate between bites | Serve small pile on side of plate as condiment |
Three ways to serve it:
- Katsu sandwich: Tuck cutlet into soft white bread with shredded cabbage and tonkatsu sauce for Japanese-style sandwich
- Over curry: Slice cutlet and place on top of Japanese curry rice for katsu curry bowl
- Bento style: Pack sliced cutlet with rice, pickles, and edamame for portable lunch
Store and Reheat
Breaded chicken holds up better than most leftovers if you reheat it right. The crispy coating can last 3-4 days in the fridge without turning completely soggy. We keep a batch ready for nights like this-tender cauliflower side dish adds the color the plate needs without extra work.
| Method | Time | Best For |
|---|---|---|
| 🔥 Air Fryer | 4-6 min at 350°F | Restores crispy coating without drying out chicken-best overall method |
| 🔥 Oven | 8-10 min at 375°F | Reheating multiple cutlets at once-place on wire rack over baking sheet |
| 📦 Microwave | 30-45 seconds | Speed over texture-coating goes soft but chicken stays warm and edible |
For best results when storing:
- Cool completely before storing: Hot chicken creates condensation in containers that makes breading soggy
- Use shallow airtight containers: Stack cutlets with parchment between layers to prevent sticking
- Refrigerate within 2 hours: Breaded chicken sits in food safety danger zone faster than plain meat
- Freeze for longer storage: Wrap individual cutlets in plastic, then foil-good for up to 2 months
- Reheat from frozen adds time: Air fry frozen cutlets 10-12 minutes at 350°F, no thawing needed
Frequently Asked Questions
Yes-thighs stay juicier and have more flavor, but their irregular shape means uneven breading. Pound them to ½ inch thick and add 2-3 minutes to the cook time since dark meat needs slightly longer.
Store in shallow airtight containers in the fridge for 3-4 days. Reheat in the air fryer at 350°F for 4-6 minutes to restore crispiness-the oven works too but takes 8-10 minutes.
Pull it at exactly 165°F measured in the thickest part. Carryover cooking adds another 3-5 degrees while it rests, so don't go higher or the chicken dries out.
Overcrowding the basket traps steam and makes breading soggy. Leave 1 inch between cutlets so hot air circulates freely-cook in batches if needed.
Yes-bread the cutlets, freeze them uncooked on a baking sheet until solid, then wrap individually in plastic and foil. Air fry from frozen at 350°F for 16-18 minutes, flipping halfway.
Air Fryer Chicken Katsu Cutlets
Ingredients
Method
- Slice each chicken breast horizontally to create 2 thinner cutlets, then pound each piece with a meat mallet or rolling pin until they reach ½ inch thickness. Pat completely dry with paper towels to ensure breading sticks.2 boneless chicken breasts
- In three shallow bowls, place the flour mixed with salt and pepper in the first, beaten eggs in the second, and panko breadcrumbs in the third. Arrange in order for efficient breading.0.5 cup all-purpose flour, 1 tsp salt, 0.5 tsp black pepper, 2 large eggs, 1.5 cups panko breadcrumbs
- Dredge each cutlet in the seasoned flour and shake off excess. Dip fully into beaten eggs, then press both sides into panko breadcrumbs, pressing gently to adhere crumbs without compacting.2 boneless chicken breasts, 0.5 cup all-purpose flour, 2 large eggs, 1.5 cups panko breadcrumbs, 1 tsp salt, 0.5 tsp black pepper
- Spray the air fryer basket with neutral oil. Place cutlets in a single layer with at least 1 inch space between pieces. Lightly spray the tops with oil. Air fry at 400°F for 6 minutes, flip cutlets, spray tops again, and cook for an additional 6 minutes until coating is golden and internal temperature reaches 165°F.neutral oil spray
- Transfer cutlets to a cutting board and let rest for 5 minutes to retain juices. Slice crosswise if desired and serve with optional tonkatsu sauce.tonkatsu sauce
Notes
- Pat chicken dry before breading for best adhesion.
- Leave 1 inch spacing in air fryer to avoid soggy coating.
- Let cutlets rest after cooking to keep meat juicy.