• Skip to primary navigation
  • Skip to main content
  • Skip to primary sidebar
  • Recipe Index
    • Air Fryer
  • Side Dishes
  • Substitutes
  • About
  • Contact
  • Subscribe

ForkLiftKitchen

menu icon
go to homepage
  • Recipe Index
    • Air Fryer
  • Side Dishes
  • Substitutes
  • About
  • Contact
  • Subscribe
subscribe
search icon
Homepage link
  • Recipe Index
    • Air Fryer
  • Side Dishes
  • Substitutes
  • About
  • Contact
  • Subscribe
×

Blog

What Is Enchilada Sauce? Taste, Uses & More

March 29, 2026

Enchilada sauce announces itself before it even hits the pan - that deep, smoky wave of toasted dried chiles and warm garlic filling the kitchen as it comes to a simmer.

What Is Enchilada Sauce

Unlike making mexican salsa roja at home or a roasted tomatillo salsa verde recipe, this sauce is cooked down, strained smooth, and built specifically to cling to tortillas and brown at the edges during baking. Enchilada sauce is its own category - thinner than mole, more chile-forward than a standard tomato sauce, and more cohesive than a chunky salsa.

QUICK SUMMARY

A cooked, strained chile-tomato sauce built on rehydrated dried chiles, tomatoes, and warm spices. Earthy, mildly smoky, and lightly acidic. Used primarily to coat and bake enchiladas, though it works well as a braising liquid and finishing sauce.

🌶️Flavor: Earthy chile heat, smoky, slightly bitter, bright tomato acidity
🍲Best Uses: Coating enchiladas, braising chicken or pork, layering casseroles
🧅Key Chiles: Ancho and guajillo are the most common base chiles
🧊Shelf Life: Canned (unopened): up to a year; opened or homemade: 4-7 days refrigerated
✅Dietary: Naturally gluten-free from chiles and tomatoes - always check commercial labels

What Is Enchilada Sauce?

Enchilada sauce is a cooked, strained savory sauce from Mexico, with roots in central and northern regional preparations.

It's made by rehydrating dried chiles - most commonly ancho and guajillo - then blending them with tomatoes or tomato paste, garlic, onion, cumin, and sometimes lard or vegetable oil before straining to a smooth, pourable consistency.

It's thinner and less complex than mole roja, and smoother than any chunky salsa or fresh table sauce.

The straining step is what separates it: seeds and skins are removed, leaving a cohesive sauce that coats tortillas evenly and browns during oven baking without breaking apart.

You'll also find it labeled salsa para enchiladas, red enchilada sauce, or enchilada gravy. Commercial versions vary widely - some are made with a tomato base and minimal chile, others lean harder on dried chile concentration.

Understanding replacements for adobo sauce is useful context here, since the two are sometimes confused despite having very different flavor profiles and applications.

  • 🌶️ Ancho chiles - dried poblanos that contribute mild heat and a raisin-like earthiness
  • 🌶️ Guajillo chiles - thin-skinned with sharper heat and brighter color
  • 🧄 Aromatics - garlic and onion, either sautéed or blended raw into the sauce
  • 🫙 Commercial versions - often contain added stabilizers, sodium, or sugars; check the label

What Does Enchilada Sauce Taste Like?
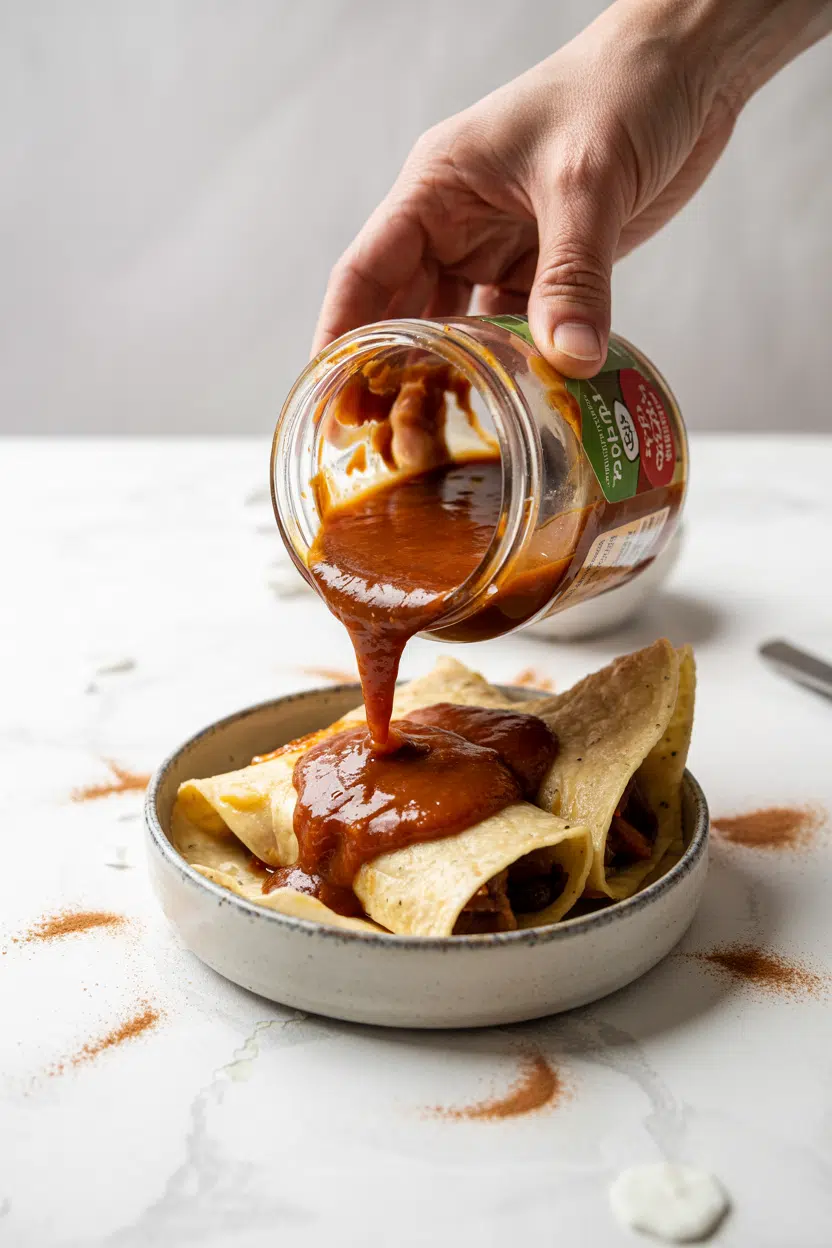
enchilada sauce - What Is Enchilada Sauce

The dominant note is earthy, toasted chile - warm and slightly bitter in the way that good dark coffee is bitter, not harsh.

A secondary brightness comes from tomato or vinegar, which cuts through the heaviness of the dried chiles and keeps the sauce from tasting flat.

Cumin and garlic sit in the background, rounding the spice profile into something cohesive and savory.

The heat level is typically mild to moderate - present but not sharp - depending on the chile ratio and whether hotter varieties like árbol were added.

Sensory SnapshotModerate Intensity
👅 Flavor
earthysmokymildly bitterlightly acidic
✋ Texture
smoothpourablelightly oily
👃 Aroma
toasted chilesmokywarm spice

Compared to a thin mole roja, it lacks the nutty, chocolate-sweet layers that come from seeds, nuts, or dried fruit.

Think of it as a mole roja stripped back to its essential chile-and-spice structure - if you're drawn to that fuller complexity, making puebla mole poblano chicken at home shows how those extra layers get built.

How to Use Enchilada Sauce

The classic application is coating corn tortillas for baked enchiladas - dipping each tortilla in warm sauce before rolling it around a filling of shredded chicken, pork, or black beans, then pouring more sauce over the top to brown in the oven.

That browning step is where the sauce concentrates at the edges and develops its deepest flavor.

Golden Rule
Always warm the sauce before dipping tortillas. Cold sauce tears corn tortillas on contact - heated sauce keeps them pliable enough to roll without cracking.

Beyond enchiladas, it pulls real weight as a braising liquid. Simmering shredded chicken or pork chunks directly in the sauce keeps the meat moist and seasons it from the inside out.

How Enchilada Sauce Is Used
MethodBest ForTip
🫕 Dipping & BakingClassic rolled or stacked enchiladasWarm sauce first; bake until edges bubble and brown
🍗 Pan-PoachingShredded chicken or pork fillingSimmer on low; pull meat before sauce reduces too far
🫙 Blending Into FillsBean, cheese, or sweet potato fillingsAdd in small amounts to season and loosen the mix
🥘 Braising LiquidMeatballs, pork chunks, roasted vegetablesThin with stock if needed; cover and braise low and slow
🍳 DrizzlingEggs, huevos rancheros, grain bowlsUse at room temperature or slightly warmed

It pairs naturally with Monterey Jack, queso fresco, Mexican crema, pickled red onion, and corn tortillas. If a recipe calls for it but you're out, understanding swapping out enchilada sauce gives you workable options without losing the dish's core flavor direction.

Avoid using it with delicate seafood - the chile smoke overpowers mild fish almost immediately.

Try It In
🌮Chicken Enchiladas with Red SauceThe full build — dipped tortillas, shredded chicken, sauce over top, baked until browned→

How to Buy and Store Enchilada Sauce

When buying canned or bottled versions, check the label for named chile varieties - ancho or guajillo listed as ingredients signal better flavor than a generic "chile powder" base.

High sodium counts and stabilizers are common in commercial sauces, so compare labels if you're watching salt intake. A good sauce pours smooth without watery separation in the can.

Watch Out
Some commercial enchilada sauces contain wheat-based thickeners. If gluten is a concern, check the label even if the ingredient list looks clean - cross-contamination warnings apply to some brands.

For homemade or fresh refrigerated versions, look for a deep red-brown color and a clean chile aroma when opened - no sour or fermented smell.

Opened cans and homemade batches both keep for 4-7 days refrigerated in a sealed container.

For a full breakdown, enchilada sauce's shelf life covers freezing timelines and signs of spoilage in detail.

Frozen sauce holds well for 2-3 months.

Where to Start with Enchilada Sauce

Start with a mid-range canned sauce made with ancho or guajillo if you're new to working with it - it gives you a reliable baseline before committing to a homemade batch.

Once you're cooking with it regularly, making your own from rehydrated dried chiles takes about 30 minutes and produces a noticeably deeper result.

If the sauce tastes flat from the can, simmer it for five minutes with a pinch of cumin.

The spice in most commercial sauces benefits from that brief reduction - knowing swapping out cumin can also help if your pantry is light on that spice.

Use it first in a baked enchilada, where the heat concentrates its flavor before you start experimenting with braising or breakfast applications.

Frequently Asked Questions

Is enchilada sauce spicy?

Most enchilada sauce is mild to moderate - ancho and guajillo chiles bring earthy warmth rather than sharp heat. Sauces made with árbol or chipotle run hotter. Check the label or chile list before cooking.

What is the difference between enchilada sauce and salsa?

Enchilada sauce is cooked, strained smooth, and made from rehydrated dried chiles - it's designed to coat and bake. Salsa is typically fresher, chunkier, and served as a condiment rather than a cooking sauce.

Can I use enchilada sauce instead of salsa in recipes?

In cooked dishes like casseroles or braised meats, yes - the swap works. In fresh applications like dips or pico-style toppings, enchilada sauce is too thin and smoky to substitute directly.

How do I thicken watery enchilada sauce?

Simmer it uncovered over medium-low heat for 5-10 minutes - reduction is the cleanest fix. For a faster result, whisk in a small amount of tomato paste, which thickens without changing the flavor profile.

What chiles make authentic enchilada sauce?

Ancho and guajillo are the most traditional base chiles - ancho adds earthiness and mild heat, guajillo contributes brighter color and slightly sharper flavor. Some regional recipes add mulato or pasilla for extra depth. Alternatives to [chili garlic sauce](https://forkliftkitchen.com/chili-garlic-sauce-substitutes/) won't replicate this; dried whole chiles are the right starting point.

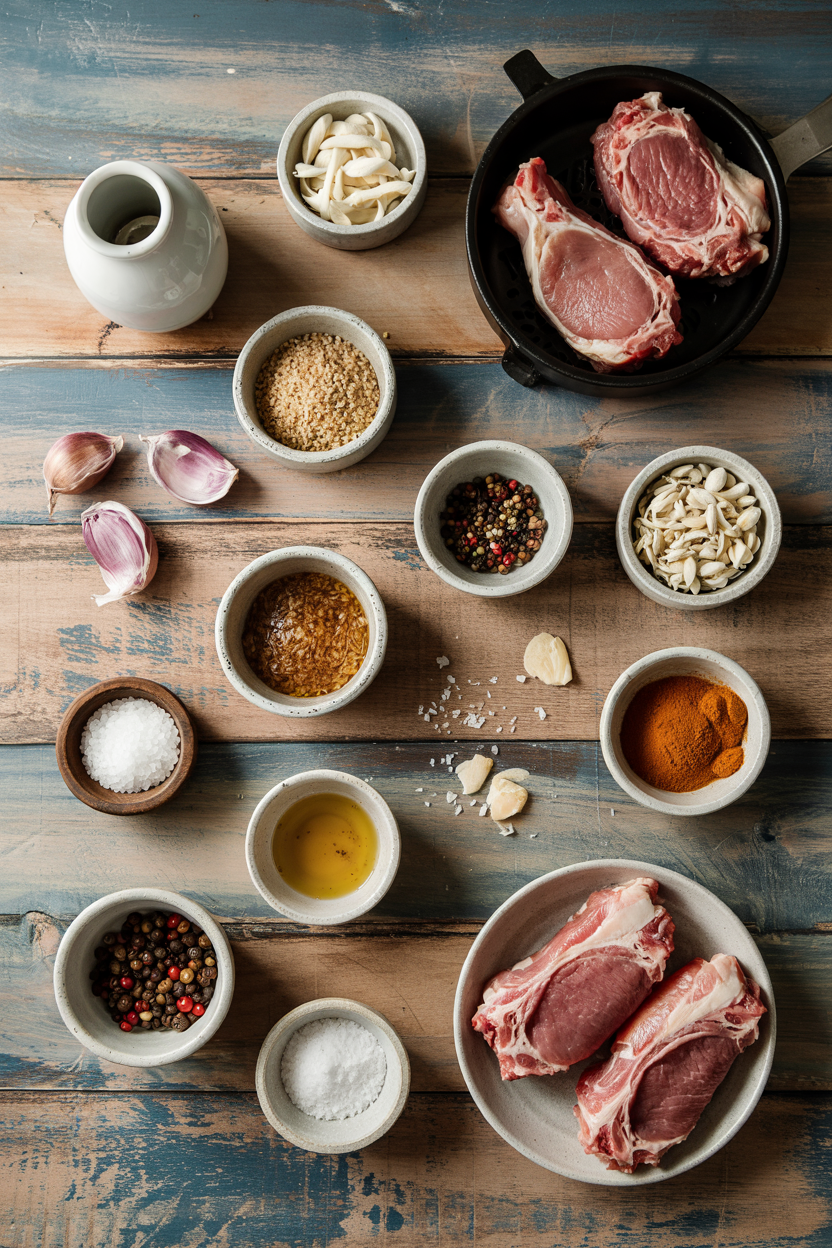
Air Fryer Lamb Cutlets

March 29, 2026

Cooking lamb cutlets at 400°F in an air fryer gives you crispy edges and a juicy center in 10 minutes. The high heat renders fat quickly while the meat stays tender.

Air Fryer Lamb Cutlets served on a plate

You don't need a grill or a cast iron pan. The air fryer circulates heat around each cutlet so both sides brown evenly without flipping.

Make this when you want a high-protein dinner that feels special but cooks faster than chicken breasts.

QUICK SUMMARY

Air fryer lamb cutlets cook in 8-10 minutes at 400°F with a simple garlic-rosemary marinade. The key is preheating the air fryer and patting the meat dry before cooking so the exterior crisps instead of steams. Pull them at 135°F internal for medium-rare or 145°F for medium.

⏱️Plan ahead: Marinate 30-60 minutes, or skip it and season right before cooking
🔥Start hot: Preheat air fryer to 400°F for 3 minutes before adding cutlets
⚠️Watch out: Overcrowding makes cutlets steam instead of crisp-leave 1-inch gaps between pieces

Table of Contents

Toggle
  • Why This Recipe Works
  • What You'll Need
    • Ingredient Details
  • Ingredient Swaps
  • What to Serve With It
  • Store and Reheat
  • Frequently Asked Questions
  • Air Fryer Lamb Cutlets
    • Method 
    • Tried this recipe?

Why This Recipe Works

High heat creates a caramelized crust while the air fryer's circulation keeps the inside tender. For a version that comes together quickly, homemade pork recipe uses a similar method with slightly longer cooking time.

Quick Reference
⏱️
Prep Time
10-15 min
🔥
Cook Time
8-12 min
⏰
Total Time
20-30 min
🍽️
Servings
4 servings
📊
Difficulty
Easy
🏷️
Category
Main Dish
💡
Quick Tip
Preheat air fryer for crispier cutlets
🎯
Best For
Weeknight, Entertaining

Five things that make this work:

  • Room temperature meat cooks evenly - Cold centers stay undercooked while edges dry out
  • Preheating the basket - A hot surface starts the browning immediately instead of gradual heating
  • Flipping halfway - One flip at the 5-minute mark browns both sides without constant monitoring
  • Spacing cutlets - Hot air needs room to circulate or the meat steams instead of crisps
  • Resting 5 minutes - Juices redistribute so they don't pool on the cutting board when you slice
Best Pick
Use a meat thermometer to check doneness-135°F for medium-rare, 145°F for medium. Visual cues lie when meat is this small.

What You'll Need

Ingredients for Air Fryer Lamb Cutlets

Rich mains need something to cut through, and cheese does exactly that. We keep a batch ready for nights like this - simple cheese recipe takes less than 10 minutes to prep.

🥩
Protein
  • 8 lamb cutlets (rib or loin)
🧄
Aromatics
  • 3 cloves garlic, minced
  • 2 tablespoons fresh rosemary, chopped
🥢
Marinade Base
  • 3 tablespoons olive oil
  • 2 tablespoons lemon juice
🌶️
Seasonings
  • 1 teaspoon salt
  • ½ teaspoon black pepper
  • ½ teaspoon paprika (optional)
  • Fresh mint or parsley for garnish

Ingredient Details

  • Lamb cutlets
    Rib cutlets have a small eye of meat with a bone handle-prettier for serving. Loin cutlets have more meat but less visual appeal. Both work fine.
  • Olive oil
    Helps herbs stick to the meat and promotes browning. Don't skip it or the cutlets won't crisp.
  • Garlic
    Fresh minced garlic works best. Pre-minced garlic from a jar loses its punch in high heat.
  • Fresh rosemary
    Strip leaves from the stem and chop them fine. Woody stems don't soften and taste bitter if you bite one.
  • Lemon juice
    Brightens the lamb's richness and helps tenderize the meat slightly. Use fresh-squeezed if possible.
  • Salt
    Season generously-lamb has a strong flavor that needs salt to balance it. Add more after cooking if needed.
  • Paprika
    Adds color and mild sweetness. Smoked paprika gives a charred flavor without a grill.

Ingredient Swaps

A good eggs can make or break the plate. For a version that comes together quickly, this easy eggs recipe uses similar seasonings with a different protein base.

Four reliable swaps:

  • Olive oil → avocado oil - Neutral flavor with a higher smoke point. Use the same amount.
  • Fresh rosemary → dried rosemary - Less aromatic but works in a pinch. Use 1 teaspoon dried instead of 2 tablespoons fresh.
  • Lemon juice → white wine vinegar - Similar acidity with a sharper edge. Start with 1 tablespoon and add more if needed.
  • Lamb cutlets → bone-in lamb chops - Thicker meat needs 2-3 extra minutes cooking time. Check internal temp at 10 minutes.

Rib Cutlets

Works for: Elegant plating, small portions, quick cooking (bone conducts heat)

Skip if: You want more meat per piece or need to feed big appetites

Loin Cutlets

Works for: Larger portions, more meat per piece, family-style serving

Skip if: You want the bone-in presentation or faster cook time

Smoked Paprika

Works for: Adding depth without heat, mimicking grilled flavor

Skip if: You prefer mild seasoning or want traditional Mediterranean taste

Instructions

The chicken works best when it hits the table at the same time as the main. We keep a batch ready for nights like this - juicy chicken side dish roasts while you prep other components.

  1. Mix marinade and coat cutlets - Whisk olive oil, lemon juice, garlic, rosemary, salt, pepper, and paprika in a small bowl. Pat lamb cutlets dry with paper towels. Rub marinade over all sides. Let sit 30-60 minutes at room temperature or marinate in the fridge up to 2 hours.
  2. Preheat air fryer - Set air fryer to 400°F and preheat for 3 minutes. A hot basket starts the sear immediately instead of warming up gradually with the meat inside.
  3. Arrange cutlets in basket - Place cutlets in a single layer with 1-inch gaps between each piece. Don't overlap or stack them. Cook in batches if needed.
  4. Cook and flip - Air fry 4-5 minutes, then flip each cutlet with tongs. Cook another 4-5 minutes until internal temperature reaches 135°F for medium-rare or 145°F for medium. Edges should look golden-brown with slight char marks.
  5. Rest before serving - Transfer cutlets to a plate and rest 5 minutes uncovered. The internal temp will rise 3-5 degrees while juices settle back into the meat. Garnish with fresh mint or parsley.
Shortcut
Skip marinating if you're short on time. Season cutlets right before cooking and they'll still taste good-just less depth of flavor.

What to Serve With It

Most people skip peppers, but it balances the meal. For a version that comes together quickly, easy peppers side takes similar cooking time and uses the same equipment.

If you're planning a fuller spread with other proteins, check out turkey meatballs meal planning ideas for combinations that work on busy nights.

Side Dish Prep Why It Works How to Serve
Roasted garlic mashed potatoes Easy Creamy starch absorbs lamb juices and balances strong flavors Spoon onto plates while hot, drizzle with pan drippings
Steamed green beans Easy Light texture and fresh snap contrast rich meat Toss with butter and lemon zest right before serving
Herbed couscous Easy Cooks in 5 minutes, soaks up lamb drippings, complements rosemary Fluff with a fork, stir in chopped parsley or mint
Mixed greens salad Easy Crisp lettuce and tangy vinaigrette cut through lamb's richness Dress right before serving to keep greens from wilting
Grilled asparagus Medium Charred flavor matches lamb's caramelized crust Drizzle with olive oil and sprinkle with sea salt flakes

Three ways to serve it:

  • Weeknight plate - One cutlet per person with mashed potatoes and steamed green beans on the side
  • Entertaining spread - Two cutlets per guest with minted pea purée, roasted root vegetables, and a small arugula salad
  • Meal prep bowl - Slice cutlets thin and pack with quinoa, roasted carrots, and a small container of mint yogurt sauce
Best Pick
Mint yogurt sauce (Greek yogurt, chopped mint, lemon juice, salt) takes 2 minutes to whisk together and works with every side dish on this list.

Store and Reheat

Lamb cutlets stay tender for 3-4 days in the fridge if you store them right. The peppers works best when it hits the table at the same time as the main - simple burgers side dish reheats in similar time.

Method Time Best For
🍳 Stovetop 4-5 min low heat Quick reheat that keeps texture close to fresh-cooked
🔥 Oven 10 min at 300°F Even heating for multiple cutlets without overcooking
📦 Microwave 1-2 min low power Fastest option when you need food now, texture suffers slightly

For best results when storing:

  • Cool completely before storing - Warm meat creates condensation in containers, making cutlets soggy
  • Use shallow airtight containers - Glass or BPA-free plastic works. Don't stack cutlets more than two layers deep.
  • Separate bones from sliced meat - If meal prepping, slice meat off the bone first for easier portioning and reheating
  • Add a drizzle of olive oil before reheating - Helps restore moisture lost during storage
  • Freeze individually - Wrap each cutlet in plastic wrap, then store in a freezer bag for up to 2 months. Thaw overnight in the fridge before reheating.

Frequently Asked Questions

How long to cook air fryer lamb cutlets at 400°F?

Cook 8-10 minutes total at 400°F, flipping once at the 4-5 minute mark. Check internal temp with a meat thermometer-135°F for medium-rare, 145°F for medium.

Can I make air fryer lamb cutlets ahead?

Marinate cutlets up to 2 hours ahead, but don't cook them until you're ready to eat. Reheated lamb tastes fine but the texture never matches fresh-cooked.

What goes well with air fryer lamb cutlets?

Mashed potatoes, couscous, green beans, roasted asparagus, or a simple mixed greens salad. Add mint yogurt sauce or chimichurri for extra flavor.

How do I know when air fryer lamb cutlets are done?

Use a meat thermometer-135°F is medium-rare, 145°F is medium. Visual cues don't work reliably with small cuts like this.

Can I use boneless lamb cutlets instead of bone-in?

Yes, but they may cook 1-2 minutes faster since the bone conducts heat. Check internal temp at 6 minutes to avoid overcooking.

Air Fryer Lamb Cutlets served on a plate

Air Fryer Lamb Cutlets

No ratings yet
Air fryer lamb cutlets cook quickly at 400°F with a garlic-rosemary marinade for a crispy exterior and juicy interior. Preheating the air fryer and patting the meat dry ensures a perfect sear without steaming. This recipe offers a special high-protein dinner that cooks faster than traditional methods.
Print Recipe Pin Recipe
Prep Time 15 minutes mins
Cook Time 10 minutes mins
Total Time 25 minutes mins
Servings: 4 servings
Course: Main Dish
Cuisine: Mediterranean
Ingredients Equipment Method Notes

Ingredients
  

  • 8 pieces lamb cutlets rib or loin cutlets
  • 3 cloves garlic minced fresh garlic
  • 2 tablespoons fresh rosemary chopped finely, leaves only
  • 3 tablespoons olive oil
  • 2 tablespoons lemon juice freshly squeezed preferred
  • 1 teaspoon salt to season lamb
  • 0.5 teaspoon black pepper
  • 0.5 teaspoon paprika optional, smoked paprika recommended
  • to taste fresh mint or parsley for garnish

Equipment

  • Air fryer Used to cook lamb cutlets evenly at high heat
  • Meat thermometer Check internal temperature for doneness
  • Small bowl For mixing marinade ingredients
  • Tongs Used to flip the cutlets in the air fryer
  • Paper towels Pat lamb cutlets dry before marinating

Method
 

  1. Whisk together olive oil, lemon juice, garlic, rosemary, salt, pepper, and paprika in a small bowl.
    3 tablespoons olive oil, 2 tablespoons lemon juice, 3 cloves garlic, 2 tablespoons fresh rosemary, 1 teaspoon salt, 0.5 teaspoon black pepper, 0.5 teaspoon paprika
  2. Pat lamb cutlets dry with paper towels. Rub marinade evenly over all sides. Let sit 30-60 minutes at room temperature or marinate up to 2 hours in the fridge. (Optional: skip marinating and season just before cooking.)
    8 pieces lamb cutlets, 3 tablespoons olive oil, 2 tablespoons lemon juice, 3 cloves garlic, 2 tablespoons fresh rosemary, 1 teaspoon salt, 0.5 teaspoon black pepper, 0.5 teaspoon paprika
  3. Set air fryer to 400°F and preheat for 3 minutes to ensure a hot basket for immediate sear.
  4. Place cutlets in a single layer in the air fryer basket with at least 1-inch gaps between pieces. Avoid overlapping or stacking.
    8 pieces lamb cutlets
  5. Air fry cutlets for 4-5 minutes, then flip each cutlet using tongs. Cook for another 4-5 minutes, checking internal temperature with a meat thermometer. Remove when it reaches 135°F for medium-rare or 145°F for medium.
    8 pieces lamb cutlets
  6. Transfer cutlets to a plate and rest uncovered for 5 minutes to allow juices to redistribute. Garnish with fresh mint or parsley before serving.
    to taste fresh mint or parsley

Notes

  • Preheating the air fryer basket ensures a crisp exterior on the lamb cutlets.
  • Patting meat dry before marinating prevents steaming and promotes browning.
  • Use a meat thermometer to achieve precise doneness, as visual cues can be misleading.

Tried this recipe?

Let us know how it was!

What Is Cubanelle Pepper? [Taste, Uses & More]

March 29, 2026

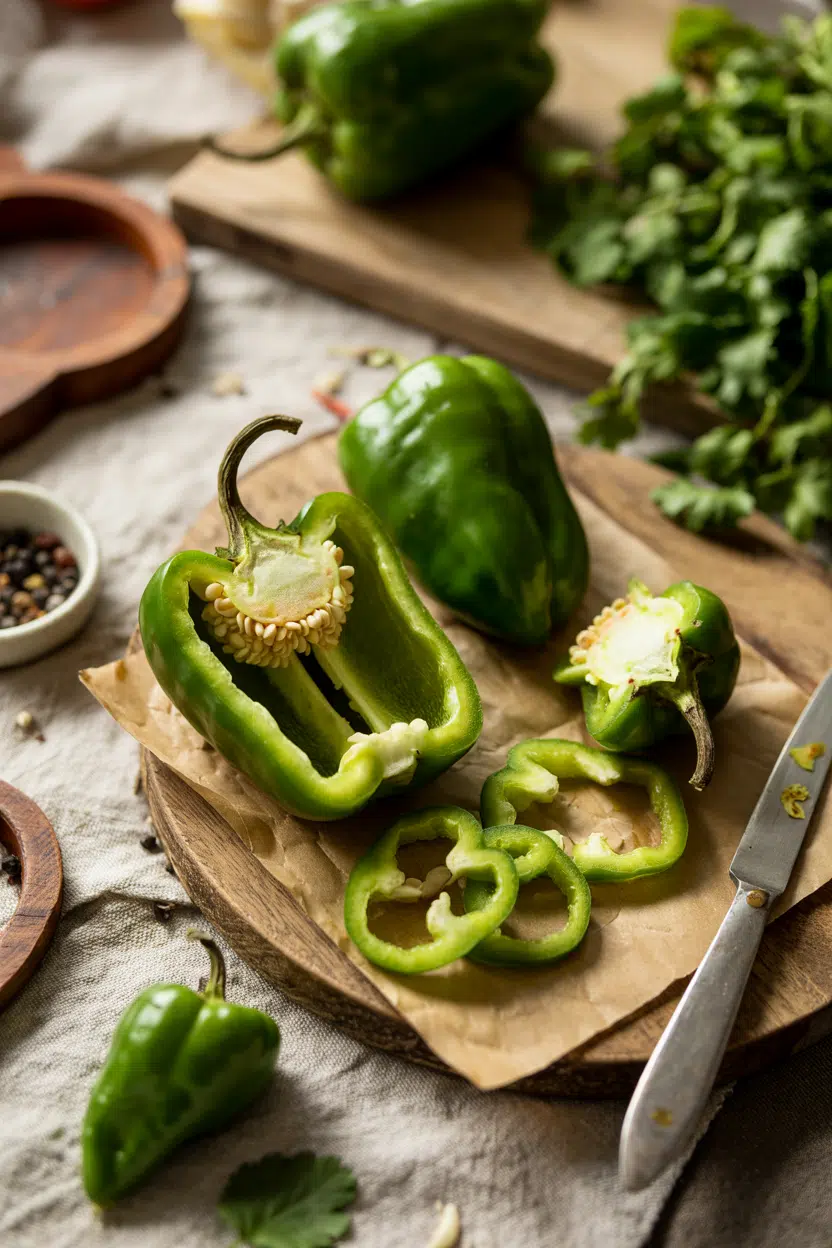
Cubanelle pepper earns its place in the pan before anything else happens - sliced into a hot skillet with olive oil and garlic, it softens in minutes and sweetens as it cooks.

What Is Cubanelle Pepper

Few peppers move between raw crunch and silky tenderness so quickly, which is why Caribbean and Italian kitchens have relied on it for generations.

Cooks who want something milder than a seasoning with banana pepper but thinner-skinned and less watery than a bell are exactly who this pepper was built for.

If you're already familiar with the frying pepper category, cubanelle is where it peaks - and if alternatives to banana pepper brought you here, you'll find this one worth knowing well.

QUICK SUMMARY

The cubanelle pepper is a thin-walled sweet frying pepper with mild heat, a lightly sweet and grassy flavor, and a tender texture that softens fast in the pan. It's a staple in Caribbean and Italian cooking, raw or cooked.

🌶️Flavor: Mildly sweet, green and grassy, subtle fruitiness when ripe
🍳Best Uses: Sautéed, pan-fried, roasted, stuffed, or pickled
🌍Cuisines: Caribbean, Italian, Cuban, Latin American
❄️Shelf Life: 7-10 days whole in the fridge; 2-3 days once cut
🛒Buy It: Look for firm, glossy, pale yellow-green skin with no soft spots or wrinkling

What Is cubanelle pepper?

Cubanelle is a sweet frying pepper with an elongated, tapered shape and thin, tender walls.

It originated in the Caribbean and northern South America, gaining particular traction in Cuba before Italian immigrant communities in the United States adopted it as their go-to frying pepper.

You'll find it sold under several names. Cuban pepper, Italian frying pepper, ají cubanelle, and Cubanelle chili all refer to the same fruit - the name shifts by region and market.

At the store, it typically appears pale yellow-green, though fully ripe specimens turn red and taste noticeably sweeter.

Size-wise, it runs four to six inches long and narrower than a bell pepper, with skin thin enough that it blisters and softens under heat faster than almost any other sweet pepper.

  • 🌶️ Category - sweet pepper / frying pepper
  • 🌍 Origin - Caribbean and northern South America, popularized in Cuba and Italy
  • 🏷️ Alternate names - Cuban pepper, Italian frying pepper, ají cubanelle
  • 🎨 Color range - pale yellow-green when young, ripens to red

What Does cubanelle pepper Taste Like?

cubanelle pepper - What Is Cubanelle Pepper

Raw cubanelle has a mild, grassy sweetness with a light vegetal edge - cleaner and less sharp than a green bell pepper, and gentler than a banana pepper.

Some batches carry a faint, low heat that registers more as warmth than spice.

Sensory SnapshotMild Intensity
👅 Flavor
sweetgrassylightly fruity
✋ Texture
thin-walledtender
👃 Aroma
mildlightly sweet when warmed

Heat transforms it noticeably. Cooking concentrates the natural sugars, the grassy edge fades, and the pepper takes on a soft, almost jammy sweetness.

Ripe red cubanelles push that fruit note further - closer to a roasted pimento than anything sharp or bitter.

Compared to a bell pepper, cubanelle is thinner-skinned, less watery, and noticeably sweeter without the flat, starchy quality a green bell can carry.

It's also milder than most banana peppers while sharing the same general frying pepper profile - handy context if you've already looked at replacements for jalapeno pepper and want something on the gentler end of the spectrum.

How to Use cubanelle pepper

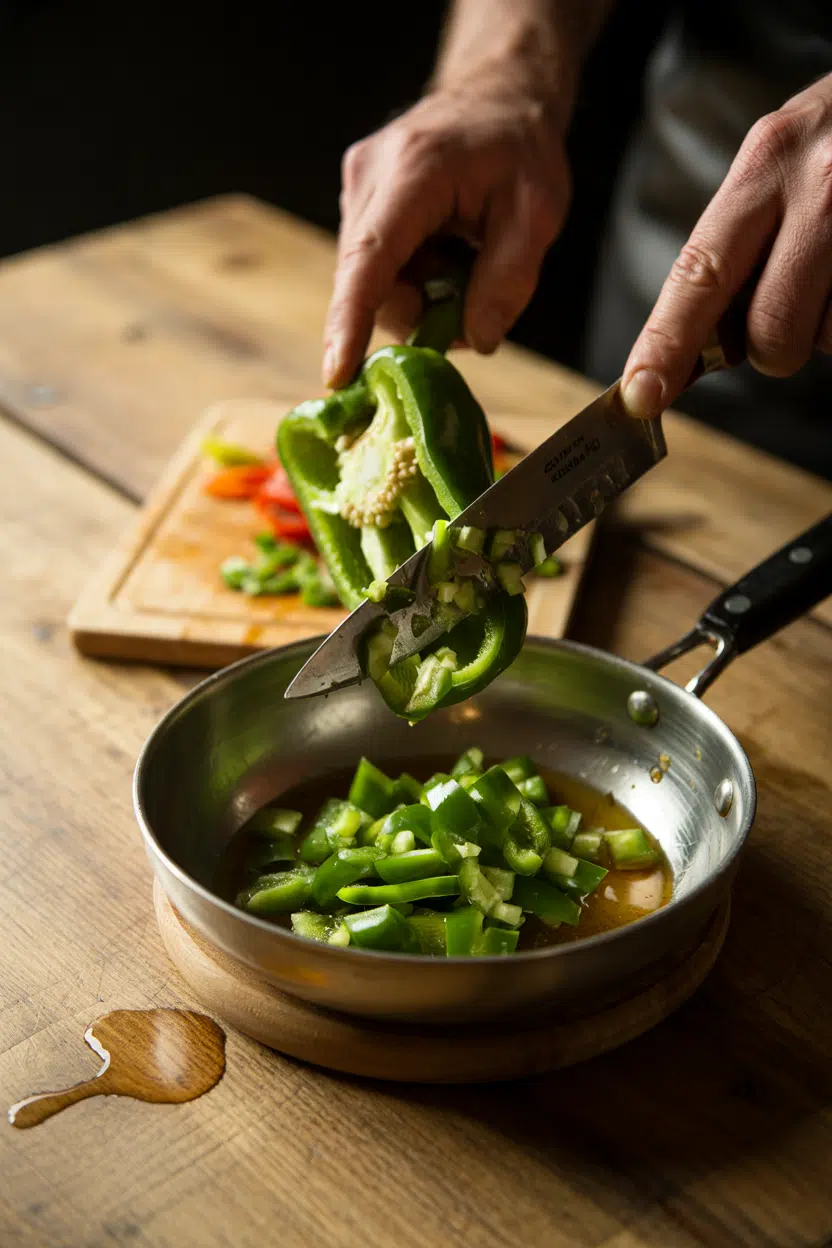
Sautéing is cubanelle's strongest role. A hot pan with olive oil brings out its sweetness within five minutes, making it ideal for Italian-style peperonata over pasta or piled onto sandwiches. The thin walls mean it doesn't need long cooking - high heat and a short window is all it takes.

Stuffing works too, though cubanelle's narrower cavity suits cheese or crumbled meat better than the dense fillings you'd pack into a bell pepper.

For sofrito - the aromatic base common across Caribbean cooking - cubanelle adds body and sweetness without competing with the other aromatics.

Understanding seasoning with recaito vs sofrito helps clarify where cubanelle fits in that base versus where herbs take over.

Golden Rule
Don't braise cubanelle for more than 20 minutes in a liquid-heavy dish - the thin walls disintegrate and the pepper loses all texture and presence.

Raw, it brings a tender crunch to salsas and salads that holds up better than you'd expect given how quickly it cooks.

Pickling is another strong use - a quick vinegar brine keeps the flesh firm and adds acid contrast on sandwiches or burgers.

How Cubanelle Pepper Is Used
MethodBest ForTip
🥗 RawSalsas, salads, fresh toppingsSlice thin so the tender wall doesn't feel flabby
🍳 Sauté / Pan-FryPeperonata, antipasti, sandwichesHigh heat, short time - 4 to 6 minutes max
🔥 Roast / BroilMilder roasted pepper alternative, dipsSkin blisters fast - watch closely under the broiler
🫙 Quick-PickleSandwich toppings, burgers, condimentsUse a 1:1 vinegar-to-water brine; ready in 24 hours
🍲 Sofrito / Stew BaseCaribbean and Latin rice dishes, beansAdd early - thin walls melt into the sauce
Try It In
🍗Air Fryer Lemon Pepper Chicken TendersCubanelle sautéed alongside adds a sweet, mild pepper contrast→🥦Air Fryer Lemon Pepper CauliflowerSwap or add cubanelle strips for extra sweetness and color→🍖Air Fryer Lemon Pepper MeatballsDiced cubanelle mixed in keeps meatballs moist and lightly sweet→

How to Buy and Store cubanelle pepper

Firmness is the first thing to check. A good cubanelle feels solid along its full length, with glossy skin and no soft patches or brown pitting. Wrinkled skin signals age - the pepper will still cook, however the texture and flavor will be diminished.

Shortcut
Can't find cubanelle? A mild banana pepper or Anaheim pepper is the closest swap - the [alternatives to cubanelle pepper](https://forkliftkitchen.com/cubanelle-pepper-substitutes/) guide covers the differences in detail.

Color tells you about ripeness, not quality. Pale yellow-green is standard and slightly grassier; light red means sweeter and more fruit-forward.

Both are worth buying depending on what the dish needs.

Store whole peppers unwashed in a perforated plastic bag in the crisper drawer, and plan to use them within a week.

For a full breakdown of how long they hold under different conditions, the cubanelle pepper's shelf life guide covers refrigerator, counter, and sliced timelines in detail. Once cut, use within two to three days.

Where Cubanelle Fits in Your Kitchen

Cubanelle is the pepper to reach for when you need sweetness without heat and tenderness without bulk.

It outperforms a bell pepper in cooking anywhere fast heat and quick softening matter - and it's a better choice than bell for sofrito and peperonata where thin walls and low water content keep the base tight, not watery.

Best Pick
Start with a simple sauté in olive oil and garlic - it's the fastest way to understand what cubanelle does and where it outpaces a standard sweet pepper.

If you cook Caribbean, Italian, or Latin American food regularly, keep a few in the crisper at all times.

They're one of the most useful frying peppers at the market - and among the easiest to cook well.

For anyone building out their pepper pantry, the alternatives to bell pepper guide is a useful next step for understanding where each sweet pepper earns its place.

Frequently Asked Questions

Are cubanelle peppers spicy?

No - cubanelle rates between 0 and 1,000 Scoville units, which puts it firmly in the sweet pepper range. Occasional batches carry a faint background warmth, however it never builds into actual heat.

How do you roast cubanelle peppers?

Place whole peppers under a broiler or directly over a gas flame, turning until the skin blisters and chars on all sides - about 8 to 10 minutes. Transfer to a covered bowl for 10 minutes, then peel the skin off easily with your fingers.

Can you freeze cubanelle peppers?

Yes, though texture suffers - thin walls turn soft and watery after thawing. Freeze sliced or diced cubanelle on a sheet tray first, then transfer to a bag; use directly from frozen in cooked dishes only.

How does cubanelle taste compared to bell pepper?

Cubanelle is sweeter, thinner-skinned, and less watery than a green bell pepper. It also cooks faster and doesn't carry the flat, slightly bitter edge that green bell peppers often do.

How do you pickle cubanelle peppers at home?

Slice the peppers into rings and pack them into a clean jar. Pour over a warm brine of equal parts white vinegar and water with a teaspoon of salt and sugar; seal and refrigerate for at least 24 hours before using.

Breakfast Sourdough Toast with Mushrooms

March 29, 2026

You need 20 minutes and one skillet. No special ingredients, no complicated steps, just sourdough bread and mushrooms cooked right.

Breakfast Sourdough Toast with Mushrooms served on a plate

The secret is timing: toast the bread first so it stays crisp under the toppings. Mushrooms release moisture as they cook, which means soggy bread if you're not careful.

This works for weekend brunch when you want something more interesting than scrambled eggs or weeknight breakfasts when cereal sounds depressing.

QUICK SUMMARY

Breakfast Sourdough Toast with Mushrooms delivers crispy bread topped with golden, garlicky mushrooms in 20 minutes. The key is toasting the bread first and drying the mushrooms before cooking so they caramelize instead of steam. Works for casual brunch or quick weeknight mornings when you need something more substantial than toast alone.

⏱️Total time: 20 minutes, most of it hands-off while mushrooms cook
🔥Critical move: Pat mushrooms dry with paper towels before sautéing for proper browning
⚠️Watch out: Add garlic in the last 1-2 minutes only or it burns and tastes bitter

Table of Contents

Toggle
  • Why This Recipe Works
  • What You'll Need
    • Ingredient Details
  • Ingredient Swaps
  • What to Serve With It
  • Store and Reheat
  • Frequently Asked Questions
  • Breakfast Sourdough Toast with Mushrooms
    • Method 
    • Tried this recipe?

Why This Recipe Works

High heat sautéing caramelizes the mushrooms while the sourdough's sturdy crumb holds up under the toppings. Rich mains need something to cut through, and biscuits does exactly that. For a version that comes together quickly, this easy biscuits recipe uses cast iron to maintain even heat and prevent steaming.

Quick Reference
⏱️
Prep Time
10 min
🔥
Cook Time
10 min
⏰
Total Time
20 min
🍽️
Servings
2-3 servings
📊
Difficulty
Easy
🏷️
Category
Main Dish
💡
Quick Tip
Toast bread before sautéing mushrooms
🎯
Best For
Weeknight | Brunch | Casual entertaining

What makes this technique work:

  • Thick-cut sourdough: Firm structure prevents collapse under wet toppings and adds tangy flavor base
  • Medium-high heat sauté: 5-7 minutes at the right temperature caramelizes mushrooms without steaming
  • Late garlic addition: Adding minced garlic in the last 1-2 minutes prevents burning and bitter taste
  • Pat mushrooms dry: Removing excess moisture before cooking ensures browning instead of steaming
  • Cast iron skillet: Retains consistent heat across the pan surface for even mushroom caramelization
Golden Rule
Add salt halfway through cooking, after mushrooms start releasing their moisture. Too early and they steam; too late and they don't season properly.

What You'll Need

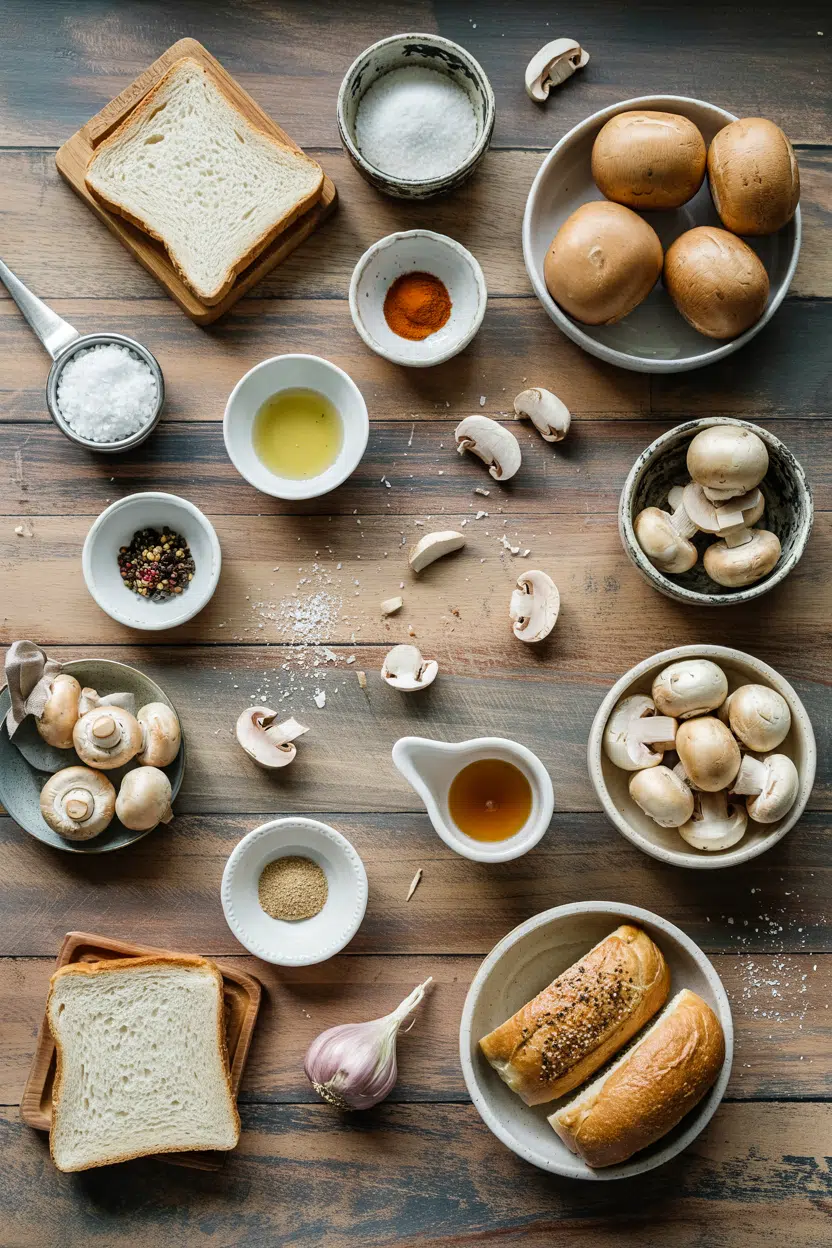
Ingredients for Breakfast Sourdough Toast with Mushrooms

Most of this lives in your pantry or fridge already. Potato adds the contrast this plate needs, but timing matters. For a version that comes together quickly, a similar breakfast recipe keeps mushrooms as the star with minimal shopping.

🍞
Bread Base
  • Sourdough bread (thick-cut, 1-inch slices)
🍄
Main Topping
  • Button mushrooms (8-10 oz, sliced)
  • Garlic (2-3 cloves, minced)
🫒
Cooking Fat
  • Olive oil (2 tbsp)
  • Butter (1 tbsp, optional)
🌿
Finishing Touches
  • Fresh thyme or parsley (chopped)
  • Salt and black pepper
  • Lemon juice (optional squeeze)
  • Parmesan or feta (optional)

Ingredient Details

  • Sourdough bread
    Use day-old bread if possible - slightly stale slices toast better and hold their shape under toppings
  • Mushrooms
    Button mushrooms work fine, but cremini add deeper flavor; avoid prewashed mushrooms since they hold too much water
  • Olive oil
    Regular olive oil is better than extra virgin here since you're cooking at medium-high heat
  • Garlic
    Fresh garlic tastes sharper than jarred; mince it finely so it disperses evenly and doesn't burn
  • Butter
    Adds richness and helps mushrooms brown, but skip it if you want to keep this dairy-free
  • Fresh herbs
    Thyme pairs best with mushrooms, but parsley adds brightness; add after cooking to preserve color and flavor
  • Lemon juice
    A small squeeze brightens the earthy mushroom flavor and cuts through richness

Ingredient Swaps

You can adjust this based on what's in your kitchen without losing the core texture or flavor. Most people skip salad, but it balances the meal. For a version that comes together quickly, this easy salad recipe works with the swaps below.

Four reliable swaps:

  • Gluten-free bread for sourdough: Use thick-cut gluten-free bread; texture will be less chewy and may soften faster under toppings
  • Extra olive oil for butter: Keeps the recipe dairy-free; reduces richness slightly but maintains proper browning
  • Cremini or shiitake for button mushrooms: Stronger umami flavor and meatier texture; cook the same way
  • Nutritional yeast for parmesan: Adds savory, cheesy flavor without dairy; sprinkle 1-2 tablespoon on finished toast

Avocado oil instead of olive oil

Works for: Higher smoke point if your heat runs hot, neutral flavor lets mushrooms shine

Skip if: You want the fruity note olive oil adds to the finished dish

Dried herbs instead of fresh

Works for: Budget cooking, longer shelf life, easier prep

Skip if: You want bright, fresh herb flavor; use ⅓ the amount if substituting

Garlic powder instead of fresh garlic

Works for: Quick prep, less chance of burning, smoother distribution

Skip if: You want sharp, aromatic garlic flavor; use ½ teaspoon powder per clove

Instructions

The entire process takes 20 minutes with most of the time spent watching mushrooms cook. Salad adds the contrast this plate needs, but timing matters. For a version that comes together quickly, this fresh salad side dish pairs well while you follow these steps.

  1. Toast the bread: Preheat oven to 350°F (175°C) or use a toaster. Toast sourdough slices 3-4 minutes until golden and crisp. Set aside on a plate.

  2. Prep mushrooms: Pat mushrooms dry with paper towels. Slice them ¼-inch thick. Mince garlic and set aside separately.

  3. Sauté mushrooms: Heat 2 tablespoon olive oil in a cast iron skillet over medium-high heat. Add mushrooms in a single layer. Cook 3 minutes without stirring until bottoms brown. Add salt and pepper, then stir and cook another 3-4 minutes until golden.

  4. Add garlic and butter: Push mushrooms to the side, add 1 tablespoon butter (if using) and minced garlic to the cleared space. Cook 1-2 minutes until garlic smells fragrant but doesn't brown. Stir everything together.

  5. Finish and serve: Remove skillet from heat. Stir in chopped fresh herbs and a squeeze of lemon juice if using. Spoon mushrooms over toasted sourdough. Top with grated parmesan or feta if desired. Serve immediately.

Shortcut
Toast bread in the same skillet before cooking mushrooms. Brush slices with olive oil, toast 2 minutes per side, then wipe skillet and proceed with mushrooms.

What to Serve With It

You need something bright or crisp to balance the earthy mushrooms and rich bread. Rich mains need something to cut through, and coleslaw does exactly that. For a version that comes together quickly, simple homemade coleslaw adds crunch while checking weeknight chicken dinner ideas for more complete meals.

Side Dish Prep Why It Works How to Serve
Fresh fruit salad Easy Bright, juicy contrast to savory mushrooms Serve chilled in a small bowl on the side
Scrambled eggs Easy Adds protein, complements mushroom umami Cook soft and creamy, serve alongside toast
Roasted tomatoes Easy Juicy acidity balances richness of butter Roast halved tomatoes with olive oil, nestle on plate
Mixed green salad Easy Fresh, crunchy, balances heavy toast Dress lightly with vinaigrette, serve on the side
Coffee or tea Easy Classic breakfast beverage pairing Brew hot, serve in a mug

Three ways to serve it:

  • Brunch spread: Add mimosas, herb vinaigrette for drizzling, and a charcuterie platter for variety
  • Weeknight breakfast: Pair with scrambled eggs and coffee for a complete, fast meal
  • Casual entertaining: Serve with mixed green salad and hot sauce on the side for guests who want heat
Best Pick
Scrambled eggs cooked soft with butter add protein without competing with the mushroom flavor. Cook them while the toast cools slightly so everything finishes together.

Store and Reheat

Store mushrooms and toast separately if you can - assembled toast gets soggy fast. A good potato can make or break the plate. For a version that comes together quickly, creamy homemade potatoes recipe keeps well and reheats better than the assembled toast.

Method Time Best For
🍳 Stovetop 3-4 min Rewarming mushrooms with restored texture; add splash of water
🔥 Oven 5-7 min at 350°F Crisping toast and warming mushrooms simultaneously on a sheet pan
📦 Microwave 30-45 seconds Quick reheating when you don't care about crisp toast; mushrooms only

For best results when storing:

  • Separate components: Store cooked mushrooms in an airtight container and toast separately; assemble right before eating
  • Fridge life: Cooked mushrooms last 3-4 days refrigerated; toast gets stale after 1 day
  • Freeze mushrooms only: Freeze cooked mushrooms up to 1 month; thaw in fridge overnight and reheat on stovetop
  • Re-crisp toast: Toast stored bread again for 2-3 minutes before topping to restore crunch
  • Reheat mushrooms with liquid: Add 1-2 tablespoon water or broth when reheating to restore moisture and prevent drying

Frequently Asked Questions

How long to cook mushrooms for toast?

Cook mushrooms 5-7 minutes total over medium-high heat. Let them sit undisturbed for the first 3 minutes to develop a golden-brown crust, then stir and cook another 3-4 minutes until tender and caramelized.

Can I make mushroom toast ahead and reheat?

Cook mushrooms up to 3 days ahead and store them separately from the bread. Reheat mushrooms on the stovetop with a splash of water, then toast fresh bread right before assembling to keep it crisp.

What goes well with breakfast sourdough toast?

Scrambled eggs, fresh fruit salad, roasted tomatoes, or a simple mixed green salad all work. You want something bright or juicy to balance the earthy mushrooms and rich bread.

How do I know when mushrooms are perfectly cooked?

Look for golden-brown edges, tender texture when you press with a spatula, and a glossy appearance from released moisture. They should smell earthy and garlicky, not watery or bland.

Can I use portobello or shiitake instead of button mushrooms?

Yes, both work and add stronger umami flavor. Slice portobellos ½-inch thick and cook 1-2 minutes longer; shiitakes cook in the same time as button mushrooms but have a meatier texture.

Breakfast Sourdough Toast with Mushrooms served on a plate

Breakfast Sourdough Toast with Mushrooms

No ratings yet
Breakfast Sourdough Toast with Mushrooms features crispy sourdough bread topped with golden, garlicky mushrooms cooked in a cast iron skillet. The secret to perfect texture is toasting the bread first and patting mushrooms dry to ensure caramelization without sogginess. This simple yet flavorful dish works well for weekend brunch or quick weeknight mornings.
Print Recipe Pin Recipe
Prep Time 10 minutes mins
Cook Time 10 minutes mins
Total Time 20 minutes mins
Servings: 3 servings
Course: Breakfast, Main Dish
Cuisine: American
Ingredients Equipment Method Notes

Ingredients
  

  • 3 slices sourdough bread thick-cut, 1-inch slices, day-old if possible
  • 8 oz button mushrooms sliced ¼-inch thick, pat dry before cooking
  • 2 tablespoon olive oil regular olive oil preferred for sautéing
  • 1 tablespoon butter optional, adds richness
  • 2 cloves garlic minced, add in last 1-2 minutes
  • to taste salt add halfway through cooking mushrooms
  • to taste black pepper add halfway through cooking mushrooms
  • 1 tablespoon fresh thyme or parsley chopped, stirred in after cooking
  • 1 teaspoon lemon juice optional, small squeeze for brightness
  • to taste parmesan or feta optional, grated for topping

Equipment

  • Cast iron skillet Used to sauté mushrooms evenly and toast bread if preferred
  • Toaster or oven For toasting sourdough bread slices

Method
 

  1. Preheat oven to 350°F (175°C) or use a toaster. Toast sourdough slices 3-4 minutes until golden and crisp. Set aside on a plate.
    3 slices sourdough bread
  2. Pat mushrooms dry with paper towels to remove moisture, then slice them ¼-inch thick. Mince garlic cloves and set aside separately.
    8 oz button mushrooms, 2 cloves garlic
  3. Heat 2 tablespoons olive oil in a cast iron skillet over medium-high heat. Add mushrooms in a single layer and cook 3 minutes without stirring to brown the bottoms. Add salt and black pepper, then stir and cook another 3-4 minutes until mushrooms are golden and tender.
    8 oz button mushrooms, 2 tbsp olive oil, to taste salt, to taste black pepper
  4. Push mushrooms to one side of the skillet. Add 1 tablespoon butter (if using) and minced garlic to the cleared space. Cook 1-2 minutes until garlic is fragrant but not browned. Stir everything together.
    1 tbsp butter, 2 cloves garlic
  5. Remove skillet from heat. Stir in chopped fresh thyme or parsley and an optional squeeze of lemon juice. Spoon mushrooms over toasted sourdough bread. Top with grated parmesan or feta if desired and serve immediately.
    1 tbsp fresh thyme or parsley, 1 tsp lemon juice, to taste parmesan or feta, 3 slices sourdough bread, 8 oz button mushrooms

Notes

  • Pat mushrooms dry thoroughly to ensure they caramelize instead of steaming.
  • Add salt only after mushrooms start releasing moisture to avoid soggy texture.
  • Add minced garlic in the last 1-2 minutes of cooking to prevent burning and bitterness.

Tried this recipe?

Let us know how it was!

What Is Ciabatta? [Taste, Uses & More]

March 29, 2026

Ciabatta does something no other white bread quite manages: it holds its structure through a panini press, soaks up olive oil without turning to mush, and still delivers a crust that shatters on the first bite.

What Is Ciabatta

That performance comes from high-hydration dough - a wet, slack mix that produces the bread's signature open crumb and chewy interior.

Understanding those qualities helps you use it well, just as knowing the quirks of artisan loaves shapes how you handle baguette swaps that work or plan ahead with a storing sourdough loaf overnight guide.

QUICK SUMMARY

Ciabatta is a high-hydration Italian white bread with a crisp crust and large, airy holes. Its mild wheaty flavor and chewy crumb make it ideal for panini, bruschetta, croutons, and dipping. Best eaten fresh, but freezes well within 48 hours.

🍞Type: Artisan Italian white bread, high-hydration style
👅Flavor: Mild wheaty sweetness, subtle tang, nutty crust
✋Texture: Crisp outer crust, airy and chewy open crumb
🍽️Best Uses: Panini, bruschetta, croutons, soups, dipping
📅Shelf Life: Best same day; 1-2 days at room temp, 3 months frozen

What Is ciabatta?

Ciabatta originated in the Veneto region of northeastern Italy in 1982, developed by baker Arnaldo Cavallari as a response to the growing popularity of French baguettes in Italy.

The name translates directly to "slipper" in Italian - a nod to the bread's flat, wide, slightly irregular shape.

It belongs to the artisan white bread category, defined by its high water-to-flour ratio, typically 75-80%, which is unusually wet compared to most breads.

That wet dough is often fermented using a biga, a stiff pre-ferment that develops flavor over many hours before the final mix.

The result is a loaf with a thin, golden crust and a crumb full of large, irregular holes - the open structure that distinguishes it from commercially produced sandwich bread.

You may see it labeled as ciabatta italiana, ciabatta loaf, or Italian slipper bread.

Common variations include ciabatta integrale (made with whole wheat flour), ciabatta al latte (with added milk for a softer crumb), and smaller rolls called ciabattine, widely used for individual sandwiches.

  • 🇮🇹 Origin - Veneto, Italy, early 1980s
  • Defining trait - High-hydration dough giving an open, hole-filled crumb
  • Common forms - Full loaf, ciabattine rolls, whole wheat (integrale) version
  • Pre-ferment method - Often uses biga for longer flavor development

What Does ciabatta Taste Like?

ciabatta - What Is Ciabatta

Ciabatta has a mild, wheaty sweetness at its core - not sugary, but the kind of gentle grain flavor that comes from good white flour and proper fermentation.

The crust adds a light nuttiness from the Maillard reaction during baking, giving the outer layer a slightly roasted note that contrasts with the softer interior.

When made with a biga or cold-fermented overnight, there's a subtle lactic tang - not as pronounced as sourdough, but enough to add depth.

Sensory SnapshotMild Intensity
👅 Flavor
wheatymildly nuttysubtle tang
✋ Texture
chewyspringycrisp crust
👃 Aroma
toastylight yeast

Compared to a baguette, ciabatta is chewier with larger holes and a less brittle crust. The interior is springy enough to compress under a panini press and bounce back when used for open-faced sandwiches - neither too dense nor too delicate.

Flavor intensifies slightly when toasted, pushing the nutty crust notes forward.

How to Use ciabatta

Ciabatta earns its place across a wide range of preparations, mostly because the open crumb behaves differently depending on how you apply heat. The key decision is whether you want the crumb to stay airy or let it absorb something.

How Ciabatta Is Used
MethodBest ForTip
🥪 Panini PressPressed sandwiches with melted cheese and cured meatsUse medium heat; high heat crushes the crumb before the cheese melts
🔥 Broiler / GrillBruschetta base, garlic toast, crouton prepCut side down, 2-3 minutes; watch closely - the thin crust burns fast
🌡️ Oven WarmReviving day-old loaves before serving5 minutes at 375°F unwrapped restores the crust without drying the crumb
🫙 Torn RawDipping into olive oil, soups, stewsTear rather than slice - ragged edges hold more oil or broth

For Italian applications, ciabatta works as a natural base for bruschetta - rub a cut half with raw garlic after toasting, then top as needed.

Split horizontally and pressed, it handles classic panini combinations well; planning what pairs with panini alongside a prosciutto-and-mozzarella fill rounds out a proper lunch spread.

Cubed and tossed with olive oil, rosemary, and flaky salt, it makes croutons with more chew and structure than standard sandwich bread can offer.

A thick slice alongside a herb crusted prime rib roast recipe soaks up pan drippings without collapsing the way a lighter bread would.

Watch Out
Avoid pairing ciabatta with very watery or heavily sauced stews - the large holes absorb liquid rapidly, and the bread turns waterlogged within minutes. Use it for dipping at the table, not as a base to ladle over.

Pairings that work well include extra-virgin olive oil with balsamic, burrata or Taleggio, olive tapenade, roasted vegetables with pesto, and prosciutto or salami. For a simple spread, the bread's mild flavor makes it equally good with butter and jam at breakfast.

If you're out of ciabatta entirely, options for swapping out ciabatta cover the closest alternatives by use case.

Try It In
🧀Crispy Garlic Parmesan Mozzarella SticksCiabatta croutons make a crunchy counterpart on the side→🍳Egg and Cheese Breakfast SandwichCiabatta's sturdy crumb holds eggs and cheese without collapsing→🫒Mediterranean Olive TapenadeSpread directly on toasted ciabatta for a bruschetta-style bite→

How to Buy and Store ciabatta

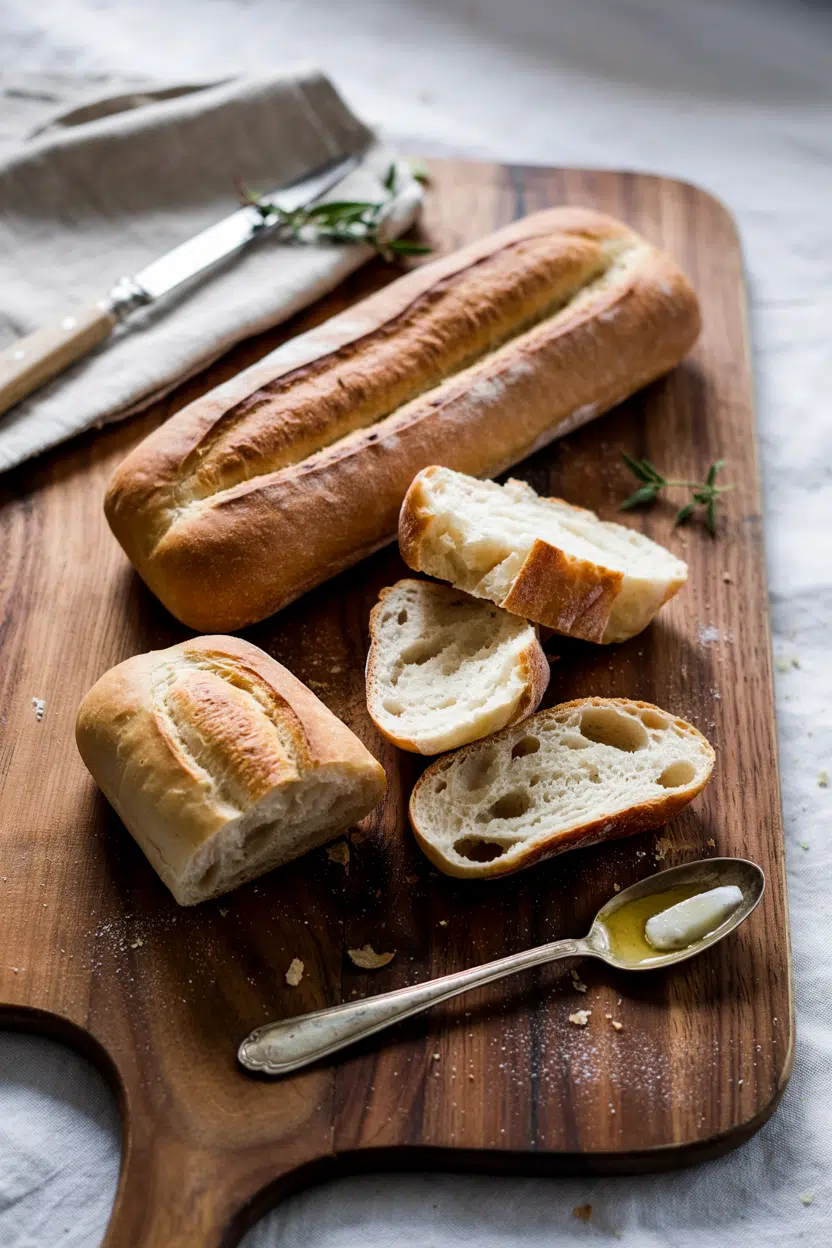
Good ciabatta is easy to identify. Look for a thin, golden-brown crust with visible blistering on the surface, and check the crumb - torn open, it should show large, irregular holes, not a uniform fine grain.

Press the loaf lightly; it should spring back with some resistance.

Best Pick
Artisan bakery ciabatta made with biga will have noticeably more flavor and a better crust than supermarket versions. If the crumb looks like regular sandwich bread under the crust, skip it.

Avoid loaves with a pale or soft crust, dense crumb, or a uniform interior - these are signs of industrial-style production that skips the long fermentation and high hydration.

At room temperature, store in a paper bag or wrapped in a clean kitchen towel for up to two days; plastic traps moisture and softens the crust.

Recognizing ciabatta spoilage signs early - mold patches, off smell, slimy crust - prevents you from serving a bad loaf.

For longer storage, freeze slices or a whole loaf within 24-48 hours; rewarm directly from frozen at 375°F for 8-10 minutes to restore the crust.

Start Here With Ciabatta

Go fresh from an artisan bakery if you can - same-day ciabatta at its best needs nothing beyond olive oil and salt. For sandwiches, split and press; for soups, tear and dip.

If you want the open crumb and mild tang but need a different texture, swapping out focaccia covers breads with similar Italian roots but a softer bite.

Golden Rule
Buy same-day when possible, freeze within 48 hours if you can't finish it, and never store in plastic - ciabatta's crust is its best feature and the first thing to go.

Frequently Asked Questions

What does ciabatta taste like?

Mild and wheaty, with a light nutty note from the crust and occasional subtle tang when long-fermented. It's not strongly flavored - the bread is designed to complement fillings and oils rather than compete with them.

Is ciabatta the same as focaccia?

No. Both are Italian and high-hydration, but focaccia is baked flat in an oiled pan, giving it a soft, pillowy crumb and an oily crust. Ciabatta has a crispier crust, larger holes, and a chewier interior without the added oil throughout.

How long does ciabatta last?

Best eaten the day it's baked. Stored in a paper bag at room temperature, it holds for 1-2 days before the crust softens and the crumb dries out. Frozen within 48 hours, it keeps up to 3 months.

How do you toast ciabatta without crushing it?

Place it cut-side down under a broiler or on a grill rather than in a toaster. A panini press works at medium heat - high heat compresses the crumb before the crust has time to crisp properly.

Can you freeze ciabatta?

Yes, and it freezes well. Slice before freezing so you can pull individual pieces as needed, then reheat directly from frozen at 375°F for 8-10 minutes unwrapped to bring the crust back.

What Is Dukkah? Taste, Uses & Flavor Guide Explained

March 29, 2026

You spot a squat jar of dukkah at a specialty store - coarse, sandy-looking, somewhere between a spice blend and a nut mix - and you're not quite sure what to do with it.

What Is Dukkah

It's not as recognizable as storing dukkah correctly matters, but first you need to know what's actually in that jar and why it earns a permanent spot in your pantry.

Unlike single-note seasonings, this Egyptian blend brings crunch, warmth, and aroma all at once.

QUICK SUMMARY

Dukkah is an Egyptian dry blend of toasted nuts, sesame seeds, and warm spices. It's coarse in texture, moderately intense in flavor, and used primarily as a dip base, finishing sprinkle, or crust for proteins. Store in an airtight container and use within 1-3 months.

🌰Flavor: Nutty, toasty, earthy with warm coriander and cumin notes
🫙Best Use: Dipped with olive oil and bread, or crusted onto fish and chicken
🌡️Intensity: Moderate - assertive enough to taste, not overpowering
📦Shelf Life: 1-3 months pantry; up to 6 months refrigerated after opening
⚠️Watch For: Nut allergies - hazelnut and almond are common base ingredients

What Is Dukkah?

Dukkah - also spelled duqqa, dukka, or dokka - is a coarsely ground dry blend from Egypt with roots stretching back centuries in North African and Eastern Mediterranean kitchens.

It belongs to the dry spice-and-nut blend category, meaning it's neither a paste nor a pure powder but something textured in between.

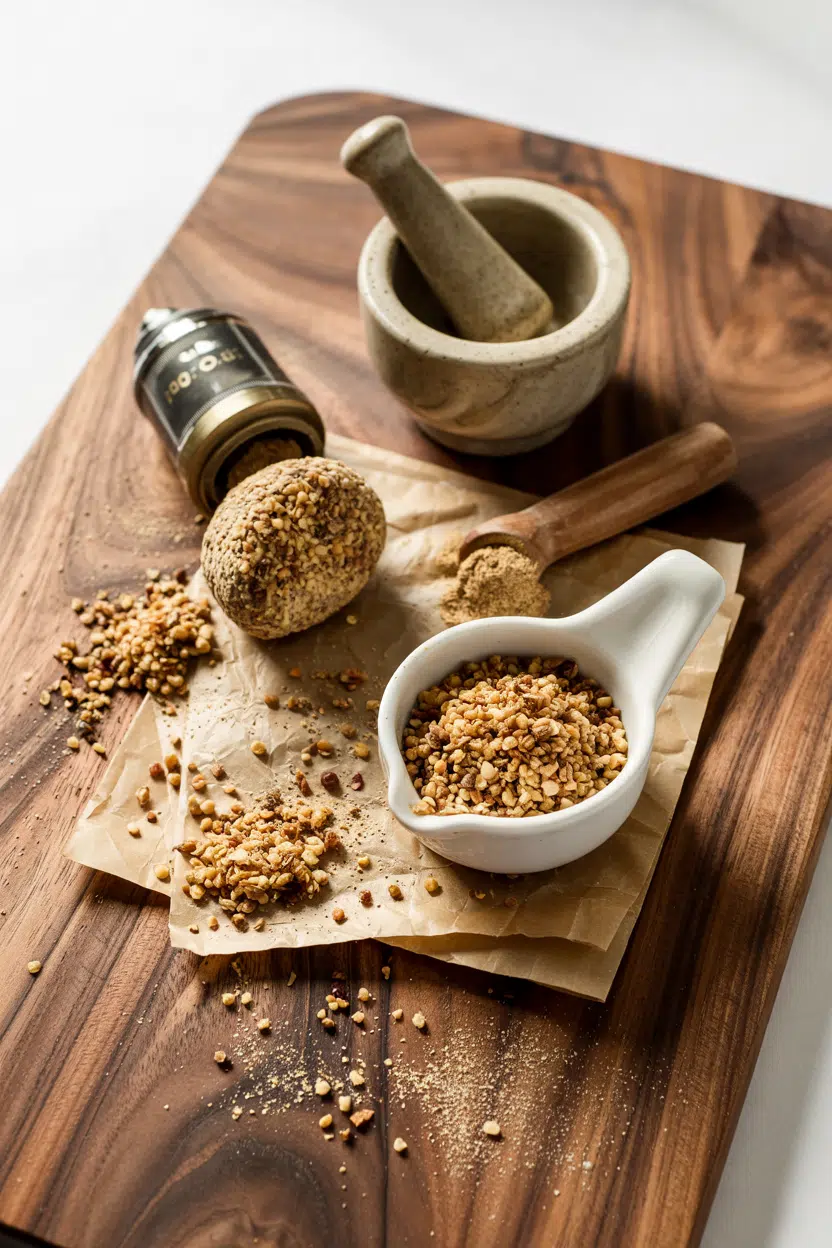
The base is always toasted nuts, typically hazelnuts or almonds, combined with sesame seeds, coriander seeds, and cumin.

From there, recipes vary widely by household and region - some versions add dried mint, black pepper, or fennel seeds, while others keep it minimal and let the hazelnuts speak.

  • 🌰 Hazelnut dukkah - the classic Egyptian version; rich and slightly sweet from the roasted nuts
  • 🫘 Almond dukkah - slightly drier and milder, popular in home kitchens as a nut-swap
  • 🌿 Seed-only dukkah - made without tree nuts using sunflower or pumpkin seeds; suits nut-free diets
  • 🧂 Spiced variations - some blends add baharat, smoked paprika, or chili for additional layers

No breadcrumbs means it's naturally gluten-free, though commercial blends sometimes add them as filler.

What Does Dukkah Taste Like?

dukkah - What Is Dukkah

Think of dukkah as toasted sesame-nut granola that went savory. The dominant notes are nutty and toasty, with a rounded earthiness from coriander seeds and a low, warm hum of cumin underneath.

Sensory SnapshotModerate Intensity
👅 Flavor
nuttytoastyearthywarmly spiced
✋ Texture
coarse-crunchyslightly powdery
👃 Aroma
toasted sesamewarm coriandercumin

It reads closer to za'atar than to a hot spice blend - there's no significant heat.

If you're familiar with the taste of ras el hanout, dukkah is gentler and crunchier, without the floral or bitter notes that blend can carry.

The texture is part of the flavor experience. Each bite delivers a short crunch followed by a powdery finish - that contrast is what makes it work as a dip coating rather than just a seasoning.

How to Use Dukkah

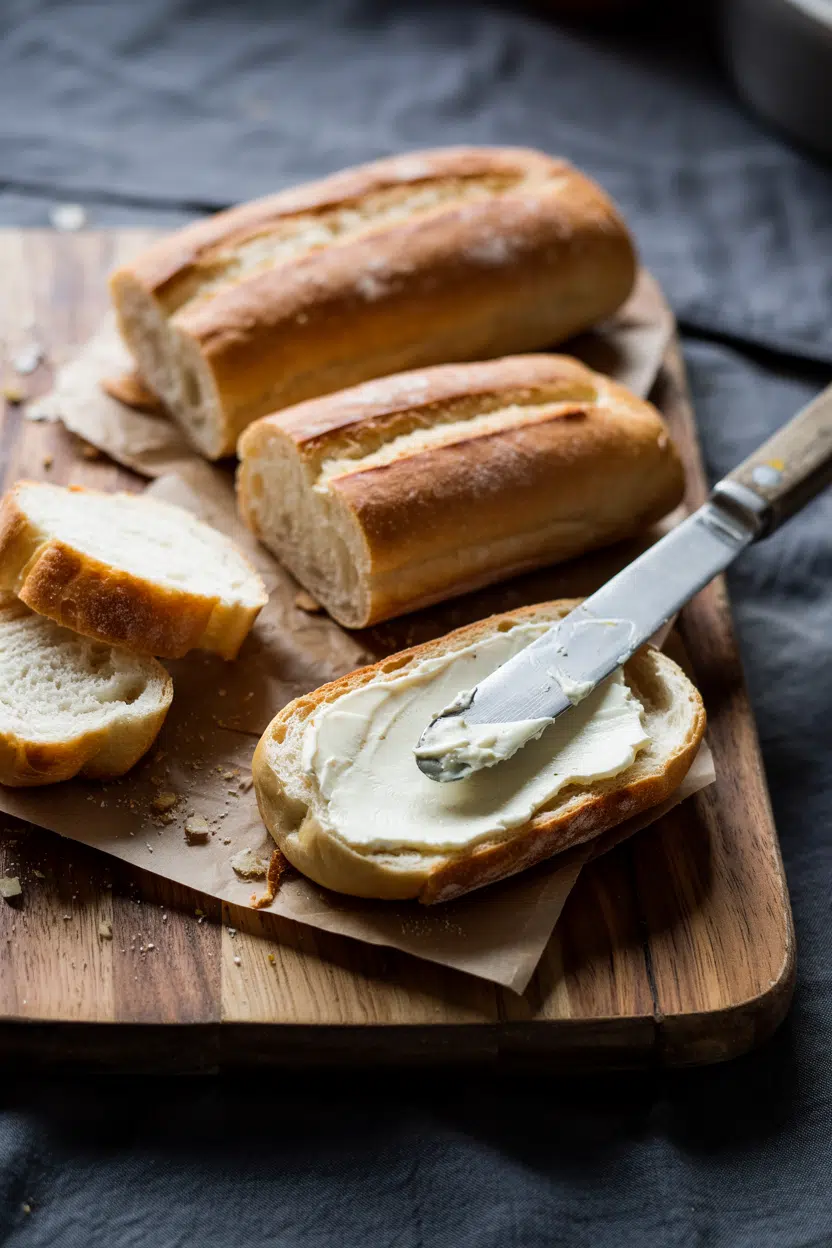
The most traditional method involves two small bowls: one of good olive oil, one of dukkah. Tear bread, dip it in the oil, press it into the dukkah.

That's the Egyptian street-food move, and it works because the oil carries the fat-soluble aromatics straight into the crust.

Golden Rule
Always dip bread in oil first, then into dukkah - oil is the adhesive. Dry bread repels the blend and you lose half the crunch.

Beyond bread, dukkah adapts well across a range of applications. Keeping roasted vegetables fresh is one concern, but getting them into the oven with a dukkah crust is a bigger reward - eggplant and carrots both take it well.

How Dukkah Is Used
MethodBest ForTip
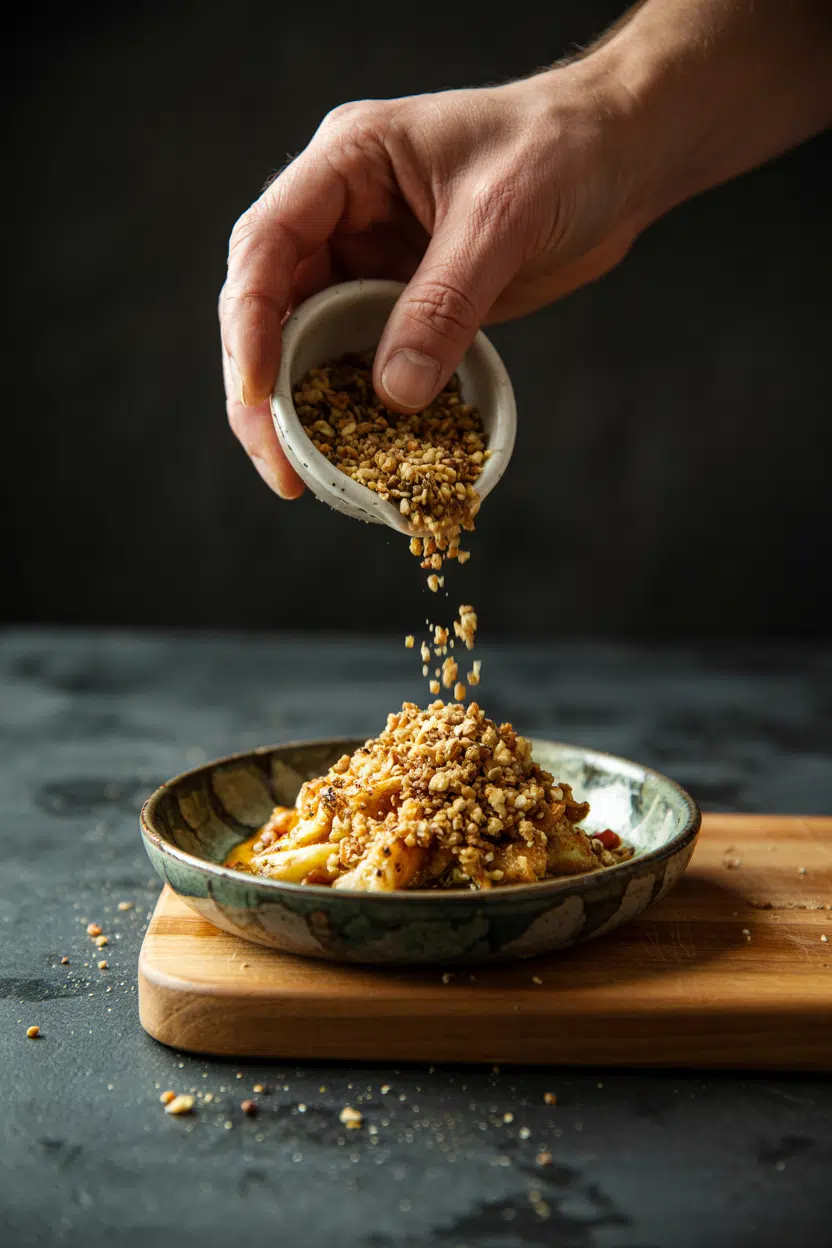
🥗 Finishing SprinkleHummus, grain bowls, labneh, saladsAdd at the last second to preserve crunch
🍗 Crust/RubChicken, salmon, sea bass before roastingPress firmly into an oil or egg-wash coating
🫙 Dip BaseBread dipping with olive oil, pitaUse a wide, shallow bowl for easy coverage
🧈 Compound ButterSteak, roasted carrots, finishing cornFold 1-2 tablespoon into softened butter
🥣 Stirred-InYogurt, labneh, tahini dipsMix gently - don't grind it down further

If you're using alternatives to pita bread for the classic dip, flatbreads, sourdough, or even crackers all hold up.

For a richer preparation, making compound butter (herb) at home follows the same logic - dukkah folds into softened butter the same way herbs do, and it holds well for a week refrigerated.

Dukkah plays across Egyptian and Levantine cooking, but modern fusion kitchens have taken it further - scattered over avocado toast, mixed into vinaigrettes, or pressed into cheese logs as a coating.

Try It In
🧈Compound Butter (Garlic)Fold dukkah in for a nutty, spiced finishing butter→🍗Sheet Pan Roast ChickenPress a dukkah crust onto thighs before roasting→🍲Slow Cooker Roast ChickenStir dukkah into pan juices for a finishing sauce→

How to Buy and Store Dukkah

Good dukkah should look coarse. Reject any jar where the contents have collapsed into a fine, uniform powder - that means either over-processing or moisture damage.

Watch Out
Smell before you buy. A stale or rancid scent means the nut oils have turned - no amount of toasting or mixing will fix that batch.
  • ✅ Visible nut pieces - intact sesame seeds and chunky nut fragments signal fresh, coarse grind
  • ✅ Fresh toasted aroma - should smell warm and nutty, not flat or musty
  • ⚠️ Ingredient list check - confirm hazelnut vs almond if nut allergies are a concern
  • ⚠️ No breadcrumbs - added fillers dilute the blend and can introduce gluten

Shelf life depends heavily on nut content. Pantry storage in a sealed container works for 1-3 months; refrigeration extends that to 4-6 months. For the full picture on storing dukkah correctly, fat oxidation from the nut oils is the main enemy - keep it away from heat and light.

Where to Start with Dukkah

Start with bread and olive oil. That single combination shows you what dukkah actually does - the crunch, the aroma, the way it coats without overwhelming.

If a blend runs out and you need dukkah swaps that work, za'atar with added crushed nuts comes closest in both function and flavor profile.

Move to proteins next. A dukkah-crusted salmon fillet or pressed-on chicken thigh is a fast, high-return use that requires almost no technique.

From there, the grain bowl and hummus applications follow naturally - you'll start seeing it as a textural seasoning, not just a dip.

Frequently Asked Questions

What is dukkah made of?

The core ingredients are toasted hazelnuts or almonds, sesame seeds, coriander seeds, and cumin. Most recipes add salt and sometimes dried herbs like mint. Commercial blends vary, so check the label for fillers like breadcrumbs.

Is dukkah vegan?

Yes, traditional dukkah contains only nuts, seeds, and spices - no animal products. Always verify commercial blends haven't added dairy-based fillers, but standard recipes are fully plant-based.

Can you make dukkah without nuts?

Yes. Replace tree nuts with toasted sunflower seeds, pumpkin seeds, or a mix of both. The texture stays coarse and the flavor remains earthy, though you lose some of the richness hazelnuts or almonds provide.

How long does dukkah last?

At room temperature in a sealed container, 1-3 months. Refrigerated, it holds up to 4-6 months. Rancid-smelling or flat-tasting dukkah should be discarded regardless of date.

What is the difference between dukkah and za'atar?

Za'atar is herb-forward - dried thyme or oregano with sumac and sesame - while dukkah leads with nuts and warm spices. Za'atar is finer in texture; dukkah is coarser and richer from the nut content.

Chicken Vesuvio Chicago-Style

March 29, 2026

Complete Article Output

Most chicken dinners either dry out or taste bland, and the potatoes turn out soggy or undercooked. The fix is roasting bone-in thighs with cut potatoes at high heat while deglazing the pan with white wine for a glossy sauce.

Chicken Vesuvio Chicago-Style served on a plate

This works when you want crispy skin without the fuss of frying or constant flipping. The oven does the heavy lifting while you make a salad or set the table.

Make this for weeknight dinners when you need something that looks intentional but doesn't require babysitting the stove.

QUICK SUMMARY

Chicago-style Chicken Vesuvio roasts bone-in chicken thighs with Italian-seasoned potatoes, garlic, and rosemary at high heat. The key is searing the skin first, then roasting everything in one pan so the wine and broth create a glossy sauce while the chicken crisps. This works for weeknight meals, meal prep, or casual gatherings when you want roasted comfort food without constant monitoring.

⏱️Total Time: 65 minutes active (includes 15 min prep, 50 min cook)
🔥Critical First Step: Pat chicken skin completely dry, then sear skin-side down 6-8 minutes without moving
⚠️Watch Out: Crowding the pan steams the chicken instead of roasting - leave space between pieces or use two pans

Why This Recipe Works

High heat crisps the chicken skin while the bone-in thighs stay juicy, and deglazing with white wine after searing pulls the caramelized bits into a sauce. For chicken dinners that need more depth, try this simple rice recipe alongside - the starch soaks up the pan drippings.

Quick Reference
⏱️
Prep Time
15 min
🔥
Cook Time
50 min
⏰
Total Time
65 min
🍽️
Servings
4 servings
📊
Difficulty
Medium
🏷️
Category
Main Dish
💡
Quick Tip
Sear chicken skin-side down for crispiness
🎯
Best For
Weeknight | Meal prep | Entertaining

Five reasons this delivers crispy roasted comfort:

  • Bone-in thighs stay juicy - the bones conduct heat evenly and the dark meat resists drying out at 400°F
  • Searing the skin first renders fat - this creates a crispy base before the oven finishes the job
  • White wine deglazes the pan - the acid lifts caramelized bits and creates a glossy sauce without extra steps
  • Potatoes roast in chicken fat - they absorb the drippings and turn golden with crispy edges
  • Garlic and rosemary infuse during roasting - the heat mellows the garlic and releases the rosemary oils into the sauce
Golden Rule
Pat the chicken skin completely dry before searing - any moisture creates steam instead of crust

What You'll Need

Ingredients for Chicken Vesuvio Chicago-Style

Bone-in chicken thighs and evenly cut potatoes form the base, while garlic and rosemary build the aromatic backbone. Most supermarkets stock everything in one trip, and the pantry covers the rest.

🍗
Protein
  • 4 bone-in, skin-on chicken thighs (about 2 lbs)
🥔
Vegetables
  • 1½ lbs Yukon Gold or red potatoes, cut into 1-inch wedges
  • 1 cup artichoke hearts, quartered (optional)
🧄
Aromatics
  • 8-10 garlic cloves, peeled and smashed
  • 2 sprigs fresh rosemary
  • ¼ cup fresh parsley, chopped
🥢
Liquids & Fats
  • ¼ cup olive oil
  • ½ cup dry white wine
  • ½ cup chicken broth
  • 2 tablespoon butter (optional)

Ingredient Details

  • Bone-in chicken thighs
    Skin crisps better than breasts and the meat stays tender - look for thighs around 6-8 oz each for even cooking
  • Yukon Gold or red potatoes
    Hold their shape during roasting and develop golden edges - cut into 1-inch wedges so they cook at the same rate as the chicken
  • Garlic cloves
    Smash with the side of a knife to release oils without burning - add after searing so they roast gently in the oven
  • Fresh rosemary
    Use whole sprigs so you can remove them easily - dried rosemary turns woody and bitter at high heat
  • Dry white wine
    Choose something you'd drink (Pinot Grigio, Sauvignon Blanc) - the acid deglazes the pan and balances the richness
  • Artichoke hearts
    Canned or jarred work fine - drain and pat dry before adding to avoid watery sauce
  • Olive oil
    Use enough to coat the chicken and potatoes - this promotes browning and prevents sticking in the cast iron

Ingredient Swaps

Artichoke hearts add a briny tang but aren't essential, and you can adjust the wine or potatoes based on what's in your pantry. Swapping boneless chicken speeds up cook time but sacrifices the crispy skin and juicy texture.

Four swaps that work:

  • Artichoke hearts → green beans or asparagus - trim and toss in during the last 15 minutes of roasting for a firmer, more vegetal bite
  • White wine → chicken broth plus 1 teaspoon lemon juice - keeps the deglazing step but removes alcohol and cuts acidity slightly
  • Bone-in thighs → boneless thighs or breasts - reduce oven time to 25-30 minutes and check for 165°F internal temp to avoid drying out
  • Yukon Gold potatoes → cauliflower florets - roast 20-25 minutes for a low-carb option with softer texture and faster cook time

Bone-In Chicken Thighs

Works for: crispy skin, juicy meat, traditional Vesuvio texture

Skip if: you need faster cook time or prefer lean white meat

Boneless Chicken Thighs

Works for: quicker roasting (25-30 min), easier eating, no bones

Skip if: you want crispy skin or traditional Chicago-style presentation

Chicken Breasts

Works for: leaner protein, faster cook time, white meat preference

Skip if: you want moist meat or don't want to monitor closely for dryness

Instructions

Searing the chicken takes 6-8 minutes, then everything roasts together for 40-45 minutes while you prep sides or clean up. The whole process uses one cast iron skillet from stovetop to oven.

  1. Prep and dry the chicken. Pat chicken thighs completely dry with paper towels, then season both sides with salt and pepper. Heat 2 tablespoons olive oil in a large cast iron skillet over medium-high heat until shimmering.

  2. Sear the chicken skin-side down. Place chicken thighs skin-side down in the hot skillet without crowding - leave at least 1 inch between pieces. Sear 6-8 minutes without moving until skin releases easily and turns golden-brown. Flip and sear 2 minutes on the other side, then transfer chicken to a plate.

  3. Roast the potatoes with aromatics. Toss potato wedges with remaining 2 tablespoons olive oil, smashed garlic cloves, and rosemary sprigs in the same skillet. Arrange in a single layer, then nestle the seared chicken thighs on top, skin-side up. Roast at 400°F for 40-45 minutes until chicken reaches 165°F internal temperature and potatoes are fork-tender with golden edges.

  4. Deglaze and build the sauce. Remove skillet from oven (use oven mitts - handle stays hot). Transfer chicken and potatoes to a serving platter and tent with foil. Place skillet over medium heat, add white wine, and scrape up browned bits with a wooden spoon. Add chicken broth and optional artichoke hearts, then simmer 3-4 minutes until sauce reduces slightly. Stir in butter if using.

  5. Rest and serve. Pour sauce over chicken and potatoes, then garnish with chopped parsley. Let rest 5 minutes before serving so the juices redistribute and the flavors settle.

Shortcut
If your potatoes aren't tender when the chicken hits 165°F, remove the chicken and tent with foil while the potatoes roast another 10 minutes

What to Serve With It

Rich roasted chicken with garlicky potatoes needs something fresh or tangy to cut through the richness. Most people reach for salad or another vegetable, but the right side depends on how heavy the rest of the meal feels.

Side Dish Prep Why It Works How to Serve
Simple green salad Easy Fresh greens and vinaigrette cut through the roasted richness Toss mixed greens with lemon vinaigrette just before serving
Steamed green beans Easy Light vegetable adds crunch without competing with potatoes Steam 4-5 minutes, toss with butter and sea salt
Garlic bread Easy Soaks up the white wine pan sauce and adds carb balance Toast in oven last 10 minutes of chicken roasting time
Roasted Brussels sprouts Medium Earthy crunch pairs with roasted potatoes and adds nutrients Roast on separate sheet pan at 400°F for 25-30 minutes
Sautéed spinach Easy Quick leafy green balances heavy roasted flavors Sauté with garlic in 3 minutes while chicken rests

Three ways to serve it:

  • Weeknight casual: Serve straight from the cast iron skillet with a simple green salad and crusty bread for soaking up sauce
  • Meal prep: Portion chicken and potatoes into containers, then reheat with the sauce spooned over to keep everything moist
  • Hosting dinner: Plate individually with roasted Brussels sprouts and a fresh salad side dish for color contrast
Best Pick
A bright, acidic side cuts through the richness better than another starch - lemon vinaigrette on greens does the job

Store and Reheat

Leftover Chicken Vesuvio keeps in the fridge for 3-4 days when stored with the sauce to prevent drying out. The potatoes soften slightly but still taste good reheated, and the chicken skin loses some crispness but stays flavorful.

Method Time Best For
🍳 Stovetop 5-8 min over medium heat Quick reheating with sauce on low - keeps chicken moist but won't restore crispy skin
📦 Microwave 1-2 min on medium power Fastest option for single servings - skin softens completely but meat stays tender
🔥 Oven 15-20 min at 350°F Best to restore crispness and even heating - cover with foil first 10 minutes, then uncover to crisp skin

For best results when storing:

  • Store chicken and potatoes in shallow containers - this speeds cooling and prevents bacterial growth in the fridge
  • Keep sauce separate if possible - pour it over just before reheating so the chicken skin doesn't turn soggy
  • Reheat in the oven for crispier skin - place chicken on a wire rack over a sheet pan and roast at 350°F uncovered for the last 5 minutes
  • Freeze chicken and sauce separately - potatoes turn grainy when frozen, so freeze only the chicken and sauce for up to 2 months
  • Thaw frozen portions in the fridge overnight - reheat in a covered skillet with a splash of broth to restore moisture

Frequently Asked Questions

Can I make Chicken Vesuvio Chicago-style ahead and reheat?

Yes, roast everything up to 2 days ahead, then store chicken, potatoes, and sauce separately in the fridge. Reheat in a 350°F oven for 15-20 minutes, covering with foil for the first 10 minutes to prevent drying, then uncover to crisp the skin.

How long do I roast Chicken Vesuvio at 400°F for safe doneness?

Roast for 40-45 minutes at 400°F until an instant-read thermometer inserted into the thickest part of the thigh reads 165°F. The skin should be golden-brown and the juices should run clear when pierced.

What is the best way to tell when Chicken Vesuvio is cooked through?

Use an instant-read thermometer inserted into the thickest part of the thigh without touching bone - it should read 165°F. The skin should be crispy and golden, and the juices should run clear, not pink.

What should I do if my chicken skin is not crispy after roasting?

Turn the broiler to high and broil the chicken for 2-3 minutes, watching closely to prevent burning. Make sure the skin was patted completely dry before searing next time, and don't overcrowd the pan.

Can I substitute boneless chicken thighs for bone-in in this recipe?

Yes, but reduce roasting time to 25-30 minutes and check for 165°F internal temperature to avoid drying out. The skin won't crisp as well and the meat texture will be different, but the flavor still works.

Chicken Vesuvio Chicago-Style served on a plate

Chicken Vesuvio Chicago-Style

No ratings yet
This Chicken Vesuvio Chicago-Style recipe roasts bone-in chicken thighs with Italian-seasoned potatoes at high heat to achieve crispy skin and juicy meat. Deglazing the pan with white wine creates a glossy sauce that enhances every bite, making it ideal for weeknight dinners or casual gatherings without stove babysitting.
Print Recipe Pin Recipe
Prep Time 15 minutes mins
Cook Time 50 minutes mins
Total Time 1 hour hr 5 minutes mins
Servings: 4 servings
Course: Main Dish
Cuisine: Italian-American
Ingredients Equipment Method Notes

Ingredients
  

  • 4 bone-in chicken thighs about 2 lbs, skin-on
  • 1.5 lbs Yukon Gold or red potatoes cut into 1-inch wedges
  • 1 cup artichoke hearts quartered, optional
  • 8 to garlic cloves peeled and smashed
  • 2 sprigs fresh rosemary
  • 0.25 cup fresh parsley chopped, for garnish
  • 0.25 cup olive oil divided for searing and roasting
  • 0.5 cup dry white wine for deglazing the pan
  • 0.5 cup chicken broth added to sauce
  • 2 tablespoon butter optional, stirred into sauce
  • to taste salt for seasoning
  • to taste black pepper for seasoning

Equipment

  • Cast iron skillet Used to sear chicken and roast in oven
  • Instant-read thermometer To check chicken internal temperature
  • Wooden spoon Used for deglazing and scraping pan bits

Method
 

  1. Pat chicken thighs completely dry with paper towels, then season both sides with salt and pepper. Heat 2 tablespoons olive oil in a large cast iron skillet over medium-high heat until shimmering.
    4 bone-in chicken thighs, 0.25 cup olive oil, to taste salt, to taste black pepper
  2. Place chicken thighs skin-side down in the hot skillet without crowding-leave at least 1 inch between pieces. Sear 6-8 minutes without moving until skin releases easily and turns golden-brown. Flip and sear 2 minutes on the other side, then transfer chicken to a plate.
    4 bone-in chicken thighs
  3. Toss potato wedges with remaining 2 tablespoons olive oil, smashed garlic cloves, and rosemary sprigs in the same skillet. Arrange in a single layer, then nestle the seared chicken thighs on top, skin-side up. Roast at 400°F for 40-45 minutes until chicken reaches 165°F internal temperature and potatoes are fork-tender with golden edges.
    1.5 lbs Yukon Gold or red potatoes, 8 to garlic cloves, 2 sprigs fresh rosemary, 0.25 cup olive oil, 4 bone-in chicken thighs
  4. Remove skillet from oven (use oven mitts). Transfer chicken and potatoes to serving platter and tent with foil. Place skillet over medium heat, add white wine, and scrape up browned bits with a wooden spoon. Add chicken broth and optional artichoke hearts, then simmer 3-4 minutes until sauce reduces slightly. Stir in butter if using.
    0.5 cup dry white wine, 0.5 cup chicken broth, 2 tbsp butter, 1 cup artichoke hearts
  5. Pour sauce over chicken and potatoes, then garnish with chopped parsley. Let rest 5 minutes before serving so the juices redistribute and the flavors settle.
    0.25 cup fresh parsley

Notes

  • Pat chicken skin completely dry before searing to ensure crispiness.
  • Do not overcrowd the skillet during searing to prevent steaming.
  • Use an instant-read thermometer to confirm chicken internal temperature reaches 165°F.

Tried this recipe?

Let us know how it was!

How Long Does Cranberry Sauce Last? [Storage Guide]

March 29, 2026

Leftover cranberry sauce is one of those post-holiday fridge mysteries - you're not sure if it's still good, and you don't want to find out the hard way. Homemade cranberry sauce lasts 7-10 days in the fridge, and an unopened commercial can sits comfortably in the pantry for 12-18 months, but the rules shift the moment you crack it open or cook a batch.

Can You Freeze Cranberry Sauce

Just as storing sugar correctly depends on keeping moisture out, cranberry sauce storage hinges on airtight containment and consistent cold.

Understanding what makes cranberry sauce distinct - its high acidity and natural pectin - helps explain why it holds up longer than most condiments.

QUICK SUMMARY

Opened or homemade cranberry sauce lasts 7-10 days refrigerated in an airtight container. Unopened canned sauce keeps 12-18 months in the pantry. Freeze it for up to 8-12 months - expect slight texture changes, especially with jellied-style varieties.

🥫Pantry (unopened): 12-18 months in a cool, dark spot
🧊Fridge (opened/homemade): 7-10 days in an airtight container
❄️Freezer: 8-12 months; stir after thawing to reincorporate separated liquid

How Long Does Cranberry Sauce Last?

Shelf life depends heavily on two factors: whether it's opened or sealed, and whether it's homemade or commercial. Commercial canned cranberry sauce - both whole-berry and jellied varieties - is shelf-stable until opened because the canning process eliminates active bacteria.

Once opened, the clock starts regardless of the source. Homemade sauce made without commercial preservatives behaves similarly to the opened canned version, giving you the same 7-10 day fridge window.

That window narrows to two hours on the counter during serving.

Cranberry Sauce Shelf Life
MethodStateDurationNotes
🏪 PantryUnopened (canned)12-18 monthsCool, dark spot; check manufacturer date
🧊 FridgeOpened or homemade7-10 daysAirtight container at 34-40°F (1-4°C)
❄️ FreezerHomemade or opened canned8-12 monthsMay separate; texture softens after thawing
🏠 CounterOpened2 hours maxDiscard after serving window; bacterial risk

One practical note: low-sugar homemade sauces don't carry the same preservative buffer as commercial varieties. Their shorter effective fridge life sits closer to 7 days, not 10.

How to Store Cranberry Sauce

The method that works for unopened cans won't cut it once you open the lid. Each form of cranberry sauce needs a specific approach.

Pantry: Store unopened commercial cans in a cool, dry spot away from heat sources like the oven or a sunny shelf. A pantry or cellar works well.

Fridge: Cool sauce to room temperature - no longer than one hour out - before sealing. Use a shallow airtight container or a resealable jar with minimal headspace; the shallow depth speeds chilling so the center reaches a safe temperature faster.

Watch Out
Don't seal hot sauce directly in the fridge. Trapped steam raises the internal fridge temperature and creates condensation that encourages bacterial growth. Cool first, then seal and chill.

Freezer (long-term): Transfer to a freezer-safe container - never freeze in the original opened can, which can rust and introduce off-flavors. Leave about ½ inch of headspace for expansion.

Counter (serving): Keep the sauce bowl out for no longer than two hours. Beyond that, discard what remains rather than returning it to the fridge.

  • 🥄 Use a clean serving spoon every time - repeated dipping with a used utensil shortens fridge life by introducing contaminants.
  • Keep the container shallow - deep bowls hold heat longer, slowing safe cool-down.
  • Label opened containers - even one day makes a difference near the 10-day mark.

Can You Freeze Cranberry Sauce?

Yes - cranberry sauce freezes well, though texture changes are worth anticipating. Whole-berry sauce may separate into liquid and softened berries after thawing; stirring gently over low heat usually reincorporates them. Jellied-style varieties lose some firmness but return to a spreadable consistency when warmed.

The high sugar and acid content protect against freezer burn better than most foods, though quality still declines past 12 months - a similar degradation pattern to what's covered in salmon freezer burn explained.

Golden Rule
Freeze in ½-cup to 1-cup portions. Thawing only what you need means better texture control - and no refreezing, which degrades quality fast.
  1. Cool completely - bring sauce to room temperature before freezing to prevent ice crystals forming in hot spots.
  2. Portion into containers or bags - use freezer-safe containers or heavy-duty freezer bags; leave ½ inch headspace for expansion.
  3. Remove air and press flat - for bags, press out as much air as possible and lay flat; this speeds freezing and thawing.
  4. Label with date and type - note whether it's whole-berry or jellied, and include the sugar level if it's a low-sugar homemade batch.
  5. Thaw in the fridge overnight - or submerge the sealed bag in cold water for faster results; stir gently before serving.

Signs Cranberry Sauce Has Gone Bad

Cranberry sauce's bright color and sharp tang make spoilage relatively easy to spot - when something is off, it's usually obvious.

Signs It's Gone Bad
👀
VisualMold on surface or rim (white, green, or fuzzy) · Darkened or dull color · Cloudy liquid with scum · Bubbling or foaming in refrigerated sauce
👃
SmellSour or yeasty odor · Fermenting smell distinct from normal cranberry tang
✋
TextureSlimy film on surface · Watery separation that won't re-emulsify when stirred

Bubbling in a cold container is a red flag - it signals active fermentation, not just normal liquid separation. Discard immediately if you see mold, detect a yeasty or fermented smell, or find a slimy surface film.

Shortcut
Normal thawed sauce may look separated - loose liquid around softened berries is expected. The problem is smell, mold, or slime, not separation alone.

Getting the Most from Every Batch

Good storage habits protect both safety and flavor across multiple uses.

  • Freeze flat in bags - stacking flat freezer bags reduces ice crystals and cuts thaw time significantly.
  • Reheat thawed whole-berry sauce gently - low heat and slow stirring reincorporate separated liquid without breaking the berries down further.
  • Note sugar levels on labels - low-sugar homemade sauce softens more during freezing and needs more careful thawing; tracking this upfront avoids texture surprises.
  • Don't assume canned and homemade behave the same - commercial jellied cranberry sauce contains more pectin and sugar, giving it a firmer freeze-thaw response than most homemade versions.

If you've worked through a batch and want something different next time, there are cranberry sauce swaps that work for both cooking and serving contexts.

Frequently Asked Questions

Can you freeze canned cranberry sauce?

Yes, but transfer it to a freezer-safe container first - never freeze in the opened can, which rusts and affects flavor. Jellied varieties hold their shape reasonably well; expect slight softening after thawing.

How long does cranberry sauce last in the fridge?

Opened or homemade cranberry sauce lasts 7-10 days refrigerated in an airtight container. Low-sugar homemade batches sit closer to the 7-day end of that range.

Does cranberry sauce go bad?

It does. Mold, a sour or yeasty smell, and slimy surface texture are the clearest indicators. Normal liquid separation after freezing is not a spoilage sign on its own.

How do you thaw cranberry sauce safely?

Thaw overnight in the fridge for best texture. For faster results, submerge the sealed bag in cold water, changing the water every 30 minutes until thawed.

Can you freeze cranberry relish or chutney?

Yes, both freeze well for up to 3 months. Relish (typically raw and uncooked) may lose some crunch; chutney holds up better due to its higher sugar and vinegar content.

What Is Dry Vermouth? [Taste, Uses & More]

March 29, 2026

You spot a slim bottle of dry vermouth on the shelf-wedged between the gin and the cooking wines-and wonder if it belongs in your glass, your pan, or both.

What Is Dry Vermouth

The answer is yes to each.

Dry vermouth sits at a useful crossroads: it's an the differences between aperitifs vs digestifs that also functions as a light cooking wine, bringing herbal depth and a clean, bitter edge that straight white wine simply doesn't have.

If you've been reaching for alternatives to sherry to finish a pan sauce, dry vermouth deserves a closer look.

QUICK SUMMARY

Dry vermouth is an aromatized fortified wine flavored with botanicals-wormwood, citrus peel, chamomile, and herbs. It's dry, herbaceous, and lightly bitter, used in martinis and pan sauces alike. Once opened, refrigerate and use within a few months.

🌿Flavor: Dry, herbaceous, lightly bitter with citrus and floral notes
🍾Category: Aromatized fortified wine; not plain white wine
🍳Best Uses: Martinis, pan sauces, seafood, deglazing, vinaigrettes
🛒Buy: Look for pale straw color; choose Noilly Prat or Dolin
⏳Shelf Life: Unopened 2-3 years; opened refrigerated 1-6 months

What Is dry vermouth?

Dry vermouth is an aromatized fortified wine-a base of white wine boosted with neutral spirits, then steeped with a proprietary blend of botanicals.

Those botanicals typically include wormwood (the defining bitter ingredient), citrus peel, chamomile, sage, and various herbs depending on the producer.

It originated in two places: Turin, in northern Italy, and France, where the Noilly-style dry expression became the global benchmark.

The French and Italian traditions differ subtly-French dry vermouth (like Noilly Prat) tends to be more oxidative and savory; Italian dry vermouth leans slightly more floral.

You'll see it labeled as vermouth sec, dry vermut, or simply French dry vermouth. It's also worth distinguishing it from its sweeter cousin-the amaretto sweet vermouth guide explains how those styles diverge in flavor and use.

Dry vermouth has low residual sugar compared to its sweet counterpart, which gives it a clean, lean profile closer to a bone-dry white wine than a liqueur.

What Does dry vermouth Taste Like?

dry vermouth - What Is Dry Vermouth
Sensory SnapshotModerate Intensity
👅 Flavor
dryherbaceouslightly bittercitrus peel
✋ Texture
light-bodiedslightly oily
👃 Aroma
herbalcitrusfaint mineral

Think of dry vermouth as a floral Sauvignon Blanc crossed with a lightly bitter aperitif. The wormwood delivers a clean background bitterness-not sharp or medicinal, but present enough to notice.

On the palate it's dry and lean, with herbal mid-notes of thyme and chamomile and a bright citrus top. The mouthfeel is light-bodied with a faint botanical oiliness.

Heat changes things. When you cook with dry vermouth, the alcohol cooks off and the herbal notes concentrate, making the savory botanical character more pronounced in the finished dish.

That's useful in sauces, and it's why plain white wine doesn't replicate it exactly.

Golden Rule
Taste your vermouth before cooking with it. If it smells flat or slightly vinegary, those off-notes will concentrate in the pan. Fresh is non-negotiable.

How to Use dry vermouth

Dry vermouth earns its place in both the bar cart and the kitchen.

It's the backbone of a classic dry martini-typically stirred with gin in a ratio that varies by preference, with the vermouth providing the herbal, floral structure that makes the drink more than just cold gin.

In the kitchen, it behaves like a sharper, more aromatic dry white wine. The most reliable cooking application is deglazing: a splash into a hot pan after searing fish or chicken lifts the fond and adds a herbal brightness that plain wine doesn't match.

Shallot-and-vermouth pan sauces finished with butter are a French bistro standard for a reason-they work.

How Dry Vermouth Is Used
MethodBest ForTip
🍸 CocktailDry martini, Gibson, Vesper riffsStore opened bottle in fridge; stale vermouth ruins the drink
🔥 DeglazingPan sauces for fish, chicken, scallopsAdd off heat briefly, then return to reduce by half
🦪 SteamingClams, mussels, shrimpSwap 1:1 for dry white wine in the broth base
🥗 DressingVinaigrettes, marinadesUse sparingly-bitterness amplifies in acid-forward dressings
🍐 PoachingPears, stone fruit, light dessertsReduce with honey and thyme to build a syrup base

Dry vermouth also works in steamed shellfish-clams and mussels opened in a vermouth broth pick up herbal and citrus notes that feel more complex than a standard white wine version.

If you don't have a bottle on hand, a guide to dry vermouth stand-ins covers which alternatives hold up in both cooking and cocktails.

Avoid pairing it with heavy chocolate desserts or strongly spiced curries. The botanical subtlety simply disappears against bold, competing flavors.

Try It In
🍋Air Fryer Lemon Pepper Chicken TendersA vermouth deglaze adds herbal lift to the lemon-pepper profile→🍤Air Fryer Lemon Pepper ShrimpShrimp and vermouth are a natural pairing — try it in the sauce→🍹Classic Shrimp CocktailAdd a splash to the poaching liquid for subtle botanical depth→

How to Buy and Store dry vermouth

Look for bottles labeled "dry" or "sec" with a pale straw color. Cloudy liquid or visible sediment are signs of poor storage or age-skip those.

Producers like Noilly Prat and Dolin offer consistent herbal balance and are widely available.

Watch Out
Dry vermouth oxidizes faster than still wine. A bottle left at room temperature after opening loses its botanical brightness within days, not weeks.

Before opening, store the bottle upright in a cool, dark place. After opening, seal it tightly and refrigerate immediately.

  • 🌡️ Unopened: Cool, dark cupboard; stable for 2-3 years
  • ❄️ Opened: Refrigerate upright; use within 1-6 months
  • 🔍 Check before use: Flat or vinegary smell means it's past its best

A detailed breakdown of keeping dry vermouth fresh is worth reading if you only open bottles occasionally-bottle size and frequency of use both affect how quickly quality fades.

Start Here

New to dry vermouth? Buy a mid-size bottle of Noilly Prat, open it, and use it within a month. Start with a simple pan sauce-shallots, a splash of vermouth, butter, and lemon over sole or scallops.

That single dish will show you exactly what this ingredient does.

If cocktails are your entry point, a classic martini with a proper vermouth ratio is more educational than any recipe description.

For the bar side of things, making espresso martini cocktail at home shows how fortified wine elements interact with spirits-a useful contrast to the dry martini's restraint.

Dry vermouth rewards cooks and bartenders who treat it as a perishable ingredient, not a shelf staple.

Frequently Asked Questions

Is dry vermouth the same as white wine?

No. Dry vermouth is a fortified wine steeped with botanicals including wormwood, giving it a herbal, lightly bitter character that plain white wine lacks. It's also higher in alcohol and more aromatic, so it behaves differently in both drinks and sauces.

How does dry vermouth differ from sweet vermouth?

Sweet vermouth has significantly more residual sugar and a richer, darker flavor with notes of vanilla and spice. Dry vermouth is lean and herbaceous; they're not interchangeable in cocktails or cooking.

Can you cook with dry vermouth instead of white wine?

Yes, and it often improves the dish. Dry vermouth adds herbal complexity that white wine doesn't provide, and it substitutes 1:1 in most recipes. Reduce the quantity slightly if the dish is very delicate, as the botanicals concentrate with heat.

How long does opened dry vermouth last?

Refrigerated and tightly sealed, it holds well for 1-3 months; some bottles stay acceptable up to 6 months. Smell it before using-oxidized vermouth smells flat or faintly vinegary and will degrade any dish.

What cocktails use dry vermouth?

The dry martini is the most iconic, but dry vermouth also appears in the Gibson, the Tuxedo, and the Corpse Reviver No. 2. It's always used in smaller quantities than the base spirit, acting as an aromatic modifier rather than the main ingredient.

Lamb Navarin French-Style

March 29, 2026

You need 1 hour 50 minutes and one heavy pot. No constant stirring, no complicated French techniques, no multiple pans.

Lamb Navarin French-Style served on a plate

Lamb shoulder simmers while you prep vegetables or set the table. The braising liquid turns into sauce as it cooks, so you're not making gravy separately.

This is what we make for spring weeknight dinners when we want something substantial that doesn't need babysitting.

QUICK SUMMARY

Lamb Navarin is a French braise where lamb shoulder simmers with spring vegetables in wine or stock until fork-tender. The key is browning the meat well before the slow cook - that fond becomes your sauce base. Add vegetables in stages so carrots stay intact while peas don't turn to mush.

⏱️Plan for 2 hours: 20 minutes prep, 90 minutes hands-off simmering
🔥Sear in batches: Brown lamb 3-4 minutes per side without crowding the pot
⚠️Watch the timing: Add hard vegetables 45 minutes before done, delicate ones in the last 10 minutes or they'll fall apart

Table of Contents

Toggle
  • Why This Recipe Works
  • What You'll Need
    • Ingredient Details
  • Ingredient Swaps
  • What to Serve With It
  • Store and Reheat
  • Frequently Asked Questions
  • Lamb Navarin French-Style
    • Method 
    • Tried this recipe?

Why This Recipe Works

Lamb shoulder has enough fat and connective tissue to stay moist during the long simmer. Rich mains need something to cut through, and gnocchi does exactly that. For a version that comes together quickly, this quick gnocchi recipe works as a side when you want starch that isn't potatoes.

Quick Reference
⏱️
Prep Time
20 min
🔥
Cook Time
1 hour 30 min
⏰
Total Time
1 hour 50 min
🍽️
Servings
4-6 servings
📊
Difficulty
Medium
🏷️
Category
Main Dish
💡
Quick Tip
Brown lamb well before slow braise
🎯
Best For
Weeknight | Meal prep | Entertaining

What makes this work:

  • Use well-marbled lamb shoulder - The fat renders during braising and connective tissue breaks down into gelatin that thickens the sauce naturally
  • Sear lamb in batches - Crowding the pot steams the meat instead of browning it, and you lose the caramelized bits that build sauce depth
  • Deglaze after searing - That stuck-on fond is concentrated lamb flavor; scraping it up with wine or stock becomes your sauce base
  • Add vegetables in stages - Carrots and turnips go in 45 minutes before done, peas in the last 10 minutes so everything finishes tender but not mushy
  • Simmer at 180-200°F - Higher heat makes lamb stringy; gentle bubbling at medium-low keeps it fork-tender
Quick Tip
Toss lamb pieces with 1-2 tablespoons flour before searing - it creates a light coating that helps thicken the braising liquid without making a separate roux

What You'll Need

Ingredients for Lamb Navarin French-Style

A good potatoes can make or break the plate. The starch absorbs all that braising liquid and gives you something to twirl your fork through. For a version that comes together quickly, this fluffy mashed potato dish takes 20 minutes and soaks up sauce better than bread.

🍖
Lamb
  • 2 lbs lamb shoulder, cut into 2-inch cubes
  • 1-2 tablespoon all-purpose flour
🥕
Spring Vegetables
  • 3 medium carrots, peeled and sliced
  • 2 medium turnips, peeled and cubed
  • 1 cup fresh or frozen peas
  • 1 yellow onion, diced
🧄
Aromatics
  • 3 cloves garlic, minced
  • 3 sprigs fresh thyme
  • 2 bay leaves
  • Fresh parsley for garnish
🍷
Braising Liquid
  • 1 cup red wine or beef stock
  • 2 cups lamb or beef stock
  • 2 tablespoon tomato paste
  • 2 tablespoon olive oil
  • Salt and black pepper

Ingredient Details

  • Lamb shoulder
    Boneless works best - look for pieces with visible marbling and avoid pre-trimmed cuts that are too lean
  • Flour
    Dust meat right before searing so it doesn't get gummy; shake off excess or it clumps in the sauce
  • Spring vegetables
    Cut carrots and turnips into similar-sized pieces so they cook evenly; frozen peas work as well as fresh
  • Tomato paste
    Sauté it for 1-2 minutes after browning lamb to cook out the raw tomato taste and deepen the color
  • Red wine
    Use something you'd drink - cheap cooking wine tastes sour; dry reds like Côtes du Rhône or Pinot Noir work best
  • Fresh herbs
    Tie thyme sprigs and bay leaves together with kitchen twine so you can pull them out easily before serving
  • Stock
    Low-sodium gives you control over salt levels; add more at the end instead of starting too salty

Ingredient Swaps

Most swaps work without changing the method. The biggest variable is cooking time - lamb leg takes 15-20 minutes longer to get tender than shoulder because it's leaner.

Four swaps that don't change the outcome:

  • Lamb leg or shanks instead of shoulder - Shanks add more gelatin to the sauce but need 2 hours of simmering; leg is leaner so add extra stock halfway through
  • Cornstarch slurry instead of flour - Mix 1 tablespoon cornstarch with 2 tablespoons cold water, stir in during the last 10 minutes for a glossy gluten-free sauce
  • Extra beef stock instead of red wine - Use 1 additional cup stock and add 1 tablespoon red wine vinegar at the end to replace the acidity wine provides
  • Frozen peas instead of fresh - Add them straight from the freezer in the last 5 minutes; they'll thaw and heat through without getting mushy

Dried herbs instead of fresh

Works for: Budget cooking, pantry meals - use half the quantity since dried herbs are more concentrated

Skip if: You want that bright, just-picked herb aroma - dried thyme and bay are fine but dried parsley tastes like dust

Parsnips or rutabaga instead of turnips

Works for: Sweeter, earthier flavor profile - cut them slightly larger since they cook faster than turnips

Skip if: You're going for traditional French flavor - turnips have a peppery bite that parsnips don't

Instructions

The whole thing takes under 2 hours with 20 minutes of active work. Most people skip the gribiche, but it balances the meal. For a version that comes together quickly, this quick sauce dish adds tangy richness without extra cooking.

  1. Pat lamb dry and season with salt and pepper, then toss with flour if using. Heat 2 tablespoons olive oil in a Dutch oven over medium-high heat. Brown lamb in two batches, 3-4 minutes per side until deep golden. Don't move the pieces around - let them sit and develop a crust. Transfer to a plate.

  2. Lower heat to medium and add diced onion to the pot. Sauté 3-4 minutes until softened and translucent, scraping up browned bits with a wooden spoon. Add minced garlic and tomato paste, cook 1-2 minutes until paste darkens slightly and garlic smells fragrant.

  3. Pour in red wine (or 1 cup stock) and scrape the bottom of the pot to release all the stuck-on fond. Let it simmer 2-3 minutes until reduced by half. Add remaining stock, thyme, bay leaves, and browned lamb with any accumulated juices. Bring to a simmer, cover, and reduce heat to medium-low so liquid barely bubbles.

  4. Simmer covered for 45 minutes, then add carrots and turnips. Stir gently, cover again, and cook 35-40 minutes more until lamb is fork-tender and vegetables are soft but still hold their shape. Check doneness by pressing a piece of lamb with a fork - it should break apart easily and internal temp should hit 190°F.

  5. Add peas in the last 10 minutes of cooking, then remove pot from heat. Let stew sit 10 minutes off heat so flavors meld and sauce thickens slightly. Pull out thyme stems and bay leaves, taste for salt, and stir in chopped fresh parsley right before serving.

Golden Rule
Keep the simmer gentle - you should see occasional bubbles breaking the surface, not a rolling boil. High heat makes lamb stringy and vegetables fall apart.

What to Serve With It

The stew works best when it hits the table at the same time as the side. Crusty bread soaks up sauce but you need something green to cut through all that richness. We keep a batch ready for nights like this - a fresh salad on the side adds crunch and brightness without extra cooking.

Side Dish Prep Why It Works How to Serve
Crusty French bread Easy Soaks up braising liquid without competing flavors Slice thick, warm in oven last 5 minutes
Buttery mashed potatoes Easy Creamy base absorbs sauce, adds comfort factor Make while lamb simmers, keep warm covered
Simple green salad Easy Fresh greens cut richness, add crunch contrast Dress lightly with vinaigrette, serve cold
Steamed green beans Easy Mild vegetable doesn't fight lamb, adds color Steam 4-5 minutes, toss with butter and salt
Rice pilaf Medium Fluffy grain soaks up sauce, stretches servings Cook with stock for extra flavor, fluff before serving

Three ways to serve it:

  • Weeknight style: Ladle stew over mashed potatoes with bread on the side - the potatoes catch the sauce and bread mops up what's left
  • Lighter version: Serve in shallow bowls with a big green salad and skip the starch - the vegetables in the stew are substantial enough
  • For guests: Plate over rice pilaf with glazed baby carrots on the side and a small ramekin of mint sauce for drizzling
Shortcut
Make the stew a day ahead and reheat gently on the stovetop - the flavors deepen overnight and the lamb gets even more tender

Store and Reheat

Navarin keeps 3-4 days in the fridge and freezes well for up to 3 months. The salad cuts through all that richness. For a version that comes together quickly, a fresh salad on the side takes 10 minutes and balances the heavy stew without extra cooking.

Method Time Best For
🍳 Stovetop 10-15 min over medium-low Preserving texture, controlling moisture - add splash of stock if needed
🔥 Oven 20 min at 325°F covered Even warming without stirring - use oven-safe dish, uncover last 5 minutes
📦 Microwave 2-3 min at 50% power Single portions in a hurry - stir halfway through to avoid hot spots

For best results when storing:

  • Cool stew to room temp within 2 hours - Transfer to shallow containers so it chills faster and bacteria doesn't grow
  • Store vegetables and liquid together - Separating them dries out the lamb and you lose the sauce
  • Press plastic wrap directly on surface before lidding - Prevents oxidation and keeps the top layer from drying out
  • Thaw frozen navarin overnight in fridge - Microwave thawing makes lamb rubbery; slow thawing in fridge keeps it tender
  • Reheat only what you'll eat - Repeated heating breaks down vegetables and makes lamb mushy

Frequently Asked Questions

How long to cook Lamb Navarin at simmer?

Simmer lamb covered at medium-low for 1.5 hours total - 45 minutes before adding hard vegetables, then 35-40 minutes more after you add carrots and turnips. Lamb is done when it reaches 190°F internal temp and breaks apart easily with a fork.

Can I make Lamb Navarin ahead and reheat?

Yes - make it up to 2 days ahead and store covered in the fridge. The flavors deepen overnight and lamb gets more tender. Reheat gently on the stovetop over medium-low for 10-15 minutes, adding a splash of stock if it looks dry.

How do I know when Lamb Navarin is done?

Press a piece of lamb with a fork - it should break apart with gentle pressure and feel tender, not chewy. Internal temp should hit 190°F and vegetables should be soft but still hold their shape, not mushy.

What if my lamb is tough after cooking?

Keep simmering - tough lamb means it needs more time. Add ½ cup extra stock if the liquid is low, cover, and simmer another 20-30 minutes at medium-low until fork-tender.

Can I use lamb leg instead of shoulder?

Yes, but add 15-20 minutes to the cooking time since leg is leaner and takes longer to break down. Check it at 1 hour 45 minutes and keep simmering if it's not fork-tender yet.

Lamb Navarin French-Style served on a plate

Lamb Navarin French-Style

No ratings yet
Lamb Navarin is a traditional French braise where lamb shoulder simmers slowly with spring vegetables in wine and stock until tender. Browning the meat well before simmering creates a rich sauce base, while adding vegetables in stages keeps them perfectly textured. This stew is hearty, hands-off, and ideal for weeknight dinners.
Print Recipe Pin Recipe
Prep Time 20 minutes mins
Cook Time 1 hour hr 50 minutes mins
Total Time 2 hours hrs 10 minutes mins
Servings: 6 servings
Course: Dinner, Main Dish
Cuisine: French
Ingredients Equipment Method Notes

Ingredients
  

  • 2 lbs lamb shoulder cut into 2-inch cubes, boneless with visible marbling
  • 1.5 tablespoon all-purpose flour toss lamb with before searing; dust and shake off excess
  • 3 medium carrots peeled and sliced
  • 2 medium turnips peeled and cubed
  • 1 cup peas fresh or frozen
  • 1 medium yellow onion diced
  • 3 cloves garlic minced
  • 3 sprigs fresh thyme tie together with bay leaves for easy removal
  • 2 leaves bay leaves tie together with thyme
  • 1 cup red wine or use additional stock if preferred
  • 2 cups lamb or beef stock low sodium preferred for salt control
  • 2 tablespoon tomato paste sauté after browning lamb for deeper color and flavor
  • 2 tablespoon olive oil for searing and sautéing
  • salt and black pepper for seasoning lamb and adjusting to taste
  • fresh parsley chopped for garnish

Equipment

  • Dutch oven Used for searing lamb and slow simmering the stew
  • Wooden spoon For scraping fond and stirring

Method
 

  1. Pat lamb dry and season with salt and pepper, then toss with flour if using. Heat 2 tablespoons olive oil in a Dutch oven over medium-high heat. Brown lamb in two batches, 3-4 minutes per side until deep golden. Do not move pieces while browning. Transfer browned lamb to a plate.
    2 lbs lamb shoulder, 1.5 tbsp all-purpose flour, 2 tbsp olive oil
  2. Lower heat to medium and add diced onion to the pot. Sauté for 3-4 minutes until softened and translucent, scraping up browned bits with wooden spoon. Add minced garlic and tomato paste, cook 1-2 minutes until paste darkens and garlic is fragrant.
    1 medium yellow onion, 3 cloves garlic, 2 tbsp tomato paste
  3. Pour in red wine or 1 cup stock and scrape the bottom of the pot to release all stuck-on fond. Let simmer 2-3 minutes until reduced by half. Add remaining stock, thyme, bay leaves, and browned lamb with juices. Bring to a simmer, cover, and reduce heat to medium-low ensuring liquid barely bubbles.
    1 cup red wine, 2 cups lamb or beef stock, 3 sprigs fresh thyme, 2 leaves bay leaves, 2 lbs lamb shoulder
  4. Simmer covered for 45 minutes. Add carrots and turnips, stir gently, cover again and cook for 35-40 minutes more until lamb is fork-tender and vegetables are soft but hold shape. Check lamb tenderness by pressing with a fork; it should break apart easily.
    3 medium carrots, 2 medium turnips, 2 lbs lamb shoulder
  5. Add peas during the last 10 minutes of cooking. Remove pot from heat, let stew sit for 10 minutes off heat to meld flavors and thicken sauce slightly. Remove thyme stems and bay leaves. Adjust salt if needed and stir in chopped fresh parsley just before serving.
    1 cup peas, 3 sprigs fresh thyme, 2 leaves bay leaves, fresh parsley

Notes

  • Brown lamb well in batches to develop rich fond for sauce depth.
  • Add vegetables in stages: carrots and turnips 45 minutes before done, peas last 10 minutes.
  • Simmer gently at medium-low to keep lamb tender and vegetables intact.

Tried this recipe?

Let us know how it was!

What Is Cranberry Sauce? [Taste, Uses & More]

March 29, 2026

Roast turkey at Thanksgiving earns most of the glory, but cranberry sauce is what keeps the plate from tasting flat.

What Is Cranberry Sauce

Understanding what makes turkey distinct as a protein helps explain why it pairs so naturally with a sharp, fruit-forward condiment - and why cranberry sauce has held that role for centuries.

Two teaspoons of sugar and a handful of cranberries sounds deceptively simple, though keeping sugar fresh matters more than most home cooks realize when building the sauce from scratch.

This is an ingredient that shows up in two very different forms and behaves differently in each - worth knowing before you buy or cook.

QUICK SUMMARY

Cranberry sauce is a tart, lightly sweet condiment made from cooked cranberries and sugar. It comes as smooth jellied or chunky whole-berry versions. Most common at Thanksgiving alongside roast turkey, it also works as a glaze, spread, or vinaigrette base year-round.

🍬Flavor: Tart and acidic with sweetness from added sugar
🫙Forms: Jellied (smooth) or whole-berry (chunky)
🦃Best With: Roast turkey, pork, ham, brie, sandwiches
📦Shelf Life: Opened jar: 7-10 days; homemade: 5-7 days refrigerated
🌎Origin: Northeastern North America - a staple of North American holiday cooking

What Is Cranberry Sauce?

Cranberry sauce is a cooked fruit condiment originating in Northeastern North America, built on two core ingredients: fresh or frozen cranberries and sugar.

The berries are simmered until they burst and release their natural pectin, which causes the sauce to thicken and set as it cools.

It goes by several names depending on form and preparation - cranberry relish, cranberry conserve, jellied cranberry sauce, or whole-berry cranberry sauce. Those last two describe the most important split in the category.

  • 🫙 Jellied cranberry sauce - blended or strained smooth, gels into a firm, sliceable cylinder; the classic canned version
  • 🍒 Whole-berry cranberry sauce - berries left intact or partially crushed, producing a chunky, spoonable relish with visible fruit
  • 🍊 Cranberry conserve - a richer variation that includes citrus zest, nuts, or dried fruit cooked into the base
  • 🥄 Raw cranberry relish - fresh cranberries pulsed with sugar and orange, uncooked, with sharper tartness and a coarser texture

The commercial canned version has existed since 1912, when Ocean Spray first produced it at scale, making it one of the earliest mass-market fruit condiments in the United States.

What Does Cranberry Sauce Taste Like?

cranberry sauce - What Is Cranberry Sauce

Cranberry sauce lands somewhere between a tart berry jam and a sharp fruit vinegar reduction - brighter and more acidic than strawberry jam, less sweet than applesauce.

The raw berry itself is aggressively sour, almost inedible without sugar; cooking with sweetener rounds that edge into a balanced, bright tang.

Sensory SnapshotStrong Intensity
👅 Flavor
tartacidiclightly sweetfaint bitter note
✋ Texture
gel-like (jellied)chunky and pulpy (whole-berry)
👃 Aroma
freshly tartcitrus-bright

That faint bitter note from the cranberry skin is more pronounced in whole-berry versions, where the skins remain intact. Jellied sauce loses most of the bitterness during straining and sets with a cleaner, more uniformly sweet-tart profile.

Adding orange zest or juice - as many recipes do - pushes the aroma toward citrus and softens any harsh edges.

For a direct comparison of how that zest choice affects the final flavor, comparing dried orange zest vs fresh options breaks down the practical difference.

How to Use Cranberry Sauce

Cranberry sauce performs two distinct jobs in cooking: it acts as a condiment served alongside protein, and it functions as an acidic component that balances fat and richness. Knowing both roles opens up uses well beyond the Thanksgiving table.

How Cranberry Sauce Is Used
MethodBest ForTip
🥗 CondimentRoast turkey, ham, pork loin, charcuterie boardsServe chilled; the cold temperature sharpens the tartness
🍳 GlazeRoasted pork loin, baked ham, chicken thighsThin with orange juice and brush on during the last 15 minutes of roasting
🧀 ToppingBaked brie, cream cheese, crostiniWarm slightly before spooning over brie to help it spread evenly
🥣 Stir-InYogurt, oatmeal, overnight oatsWhole-berry versions add texture; jellied blends in more smoothly
🥗 Vinaigrette baseAutumn salads, grain bowlsWhisk 1 tablespoon into olive oil and apple cider vinegar for instant dressing
🍪 Baking fillingThumbprint cookies, bar cookies, pastryUse whole-berry for structure; jellied can bleed into the dough

On a leftover turkey sandwich, cranberry sauce replaces both mustard and pickle - its acidity cuts through mayo, and its sweetness balances smoked or roasted meat.

Keeping track of turkey spoilage signs is worth doing before you reach for the leftover bird.

Golden Rule
Cranberry sauce should contrast the main ingredient, not match it. Pair it with rich, fatty, or mild-flavored proteins - avoid using it with already-acidic or heavily spiced dishes where competing tartness creates a muddy flavor.

Cranberry sauce doesn't work alongside deeply spiced chilies or delicate Eastern desserts, where its sharp acidity overrides subtler notes. If you need something with less intensity for those contexts, alternatives to cranberry sauce covers several fruit-based options with softer profiles.

Try It In
🌶️Japanese Steakhouse Yum Yum SauceSee how a tangy condiment balances rich, grilled protein→🍅Roasted Garlic Marinara SauceAnother fruit-forward sauce built on acidity and reduction→🧈Roasted Garlic Béarnaise SauceA rich sauce that pairs well with the same proteins cranberry sauce complements→

How to Buy and Store Cranberry Sauce

Fresh cranberries are seasonal - available roughly October through December in most North American markets. Choose berries that are firm, glossy, and deep red; a ripe cranberry bounces when dropped.

Soft, shriveled, or pale berries signal age.

Watch Out
Labels on prepared sauces can be misleading. "Cranberry sauce" on a can is almost always jellied. To get whole-berry texture, look for "whole berry cranberry sauce" specifically - the two behave very differently in recipes.

For prepared commercial sauce, check that seals are intact and cans show no bulging or denting. Once opened, transfer to an airtight container and refrigerate immediately.

  • Unopened commercial cans - store in a cool pantry for up to a year past production date
  • Opened jarred or canned sauce - refrigerate and use within 7-10 days
  • Homemade cranberry sauce - refrigerate and use within 5-7 days
  • Freezing - both homemade and commercial versions freeze well for up to 2 months

For a closer look at maximizing refrigerator and pantry life, keeping cranberry sauce fresh covers the specifics in detail.

Note also that pectin - the natural thickener responsible for jellied texture - behaves differently at varying temperatures, which is why refrigerated sauce is firmer than room-temperature sauce; about pectin white coating avocado explains how this same compound appears across produce in unexpected ways.

Where to Start With Cranberry Sauce

New to cooking with it?

Start with a whole-berry sauce on roast pork - the fat in the pork absorbs the acidity better than lean turkey does, making the balance more forgiving.

Already comfortable with the basics?

Push into glazing territory: thin the sauce with orange juice and use it as a brush-on finish for ham or chicken in the last 15 minutes of oven time.

The result is deeper, slightly caramelized, and sharper than anything from a bottle.

Frequently Asked Questions

What does cranberry sauce taste like?

It's sharply tart and acidic, with sweetness that depends on how much sugar is used. The flavor sits between a sour berry jam and a mild fruit vinegar - brighter and less sweet than most fruit preserves.

What is jellied cranberry sauce?

Jellied cranberry sauce is blended and strained smooth, then cooked until the natural pectin sets it into a firm, sliceable gel. It has a cleaner, more uniform sweetness than whole-berry versions because the bitter skins are removed.

Can you freeze cranberry sauce?

Yes - both homemade and commercial cranberry sauce freeze well for up to two months. Thaw overnight in the refrigerator; whole-berry versions may release extra liquid, which you can stir back in.

How do you make cranberry sauce without sugar?

Substitute honey, maple syrup, or a zero-calorie sweetener like erythritol in equal amounts. The sauce will still set from pectin, however the texture may be slightly looser than a standard recipe.

Is cranberry sauce healthy?

Cranberries themselves contain vitamin C, fiber, and antioxidant polyphenols, but commercial cranberry sauce is high in added sugar. Whole-berry versions retain more fiber; reduced-sugar or homemade recipes offer better nutritional control.

What Is Chihuahua Cheese? [Taste, Uses & More]

March 29, 2026

You spot it at the cheese counter - a pale-yellow wheel or vacuum-sealed block labeled queso Chihuahua, sometimes queso menonita - and you're not sure what to do with it.

What Is Chihuahua Cheese

It sits between the swapping out queso fresco options and the panela cheese in dairy recipes picks, looking unassuming. Don't pass it up.

QUICK SUMMARY

Chihuahua cheese is a mild, buttery cow's milk cheese from northern Mexico that melts smoothly and strings beautifully. It works across quesadillas, queso fundido, chiles rellenos, and cheese boards. Flavored somewhere between mild cheddar and Monterey Jack, it's a reliable melting cheese for Mexican and Tex-Mex cooking.

🧀Flavor: Mild, buttery, slightly tangy with a salty finish
🌡️Texture: Semi-soft when sliced, creamy and stringy when melted
🍳Best Uses: Quesadillas, queso fundido, chiles rellenos, nachos
📦Shelf Life: Sealed: 3-6 weeks; opened block: 2-3 weeks refrigerated
🛒Buy It: Look for firm pale-yellow blocks or wheels; skip pre-shredded bags

What Is Chihuahua Cheese?

Queso Chihuahua originated in the state of Chihuahua in northern Mexico, introduced by Mennonite settlers who brought European cheesemaking traditions with them in the early 20th century. That heritage explains why it's also sold under the name queso menonita - both names refer to the same cheese.

It falls in the semi-soft category, made from whole cow's milk, and pressed into wheels or rectangular blocks. The paste is pale yellow, smooth, and elastic when cold.

Younger wheels are mild and pliable; slightly aged versions develop a firmer texture and a more pronounced tang. It's one of the most produced cheeses in Mexico, though outside of northern Mexico and the U.S.

Southwest, it can still be tricky to track down.

  • 🧀 Category - Semi-soft cow's milk cheese, Mexican table and melting cheese
  • 🌍 Origin - Chihuahua state, Mexico; brought by Mennonite settlers
  • 🏷️ Alternate Names - Queso Chihuahua, queso menonita, Chihuahua (queso)
  • 🔄 Varieties - Fresh/young (mild, very pliable) and slightly aged (firmer, tangier rind)

What Does Chihuahua Cheese Taste Like?

chihuahua cheese - What Is Chihuahua Cheese

Chihuahua cheese lands closest to a mild cheddar or Monterey Jack - buttery up front, lightly salty, with a gentle tang that sharpens slightly near the rind. It's nowhere near as assertive as aged cheddar.

Heat changes it noticeably. Melted, the tang softens and the creaminess pushes forward, producing a rich, mild base that doesn't compete with bold toppings.

Sensory SnapshotMild Intensity
👅 Flavor
butterylightly tangysalty
✋ Texture
semi-softelasticstringy when melted
👃 Aroma
milkyfresh grassy

Aged wheels gain a slightly sharper finish and a firmer bite, which makes them better candidates for grating than the younger, softer blocks.

For anyone exploring alternatives to monterey jack, queso Chihuahua is the closest match that also brings Northern Mexican character to the dish.

How to Use Chihuahua Cheese

Melting is where queso Chihuahua earns its place. It softens evenly under heat without the greasy separation you get from lower-quality processed cheeses, which is why it's a staple in quesadillas - using quesadillas for creaminess highlights exactly why the cheese choice matters there.

Queso fundido is arguably its highest calling. A cast-iron skillet, some rendered chorizo, and a handful of shredded queso Chihuahua produces a bubbling, stringy dip - a melted queso fundido with chorizo recipe gives you the full method.

Shredded over chiles rellenos before they go into the oven, it forms a golden crust while staying molten underneath.

Golden Rule
Always shred or slice your own block. Pre-shredded queso Chihuahua contains anti-caking agents that prevent smooth, even melting.

Beyond melting, the cheese holds its own at room temperature. Sliced into a torta alongside pickled jalapeños and bolillo bread, it contributes a cool, creamy contrast to spicy fillings.

Cubed on a cheese board with mild cured meats, corn, and roasted poblano peppers, it reads as approachable and crowd-friendly.

How Chihuahua Cheese Is Used
MethodBest ForTip
🫕 MeltedQueso fundido, quesadillas, nachosLow to medium heat; stir often to keep it smooth
🔥 BakedChiles rellenos, enchiladasShred finely so it melts before the outer crust overbrowns
🥞 Pan-friedQuesadillas, crispy cheese skirtsMedium heat; press lightly for even contact
🧀 Sliced/CubedTortas, cheese boardsServe at room temperature for the best texture

It pairs well with fresh tortillas, chorizo, tomatoes, and cilantro - essentially the flavor backbone of Northern Mexican home cooking.

If you need a swap in a recipe, reviewing chihuahua cheese in dairy recipes covers the closest stand-ins, and oaxaca cheese stand-ins is worth checking if your goal is the same stringy melt.

Try It In
🧀Cheddar Cheese StrawsSwap in queso Chihuahua for a milder, butterier version→🍳Egg and Cheese Breakfast SandwichMelts smoothly on a hot egg without turning greasy→🥗Blue Cheese Dressing (Homemade)A mild contrast reference for building a balanced cheese board→

How to Buy and Store Chihuahua Cheese

Look for a firm, pale-yellow block or wheel with a smooth, dry rind and no sticky spots.

Cloudy moisture pooling inside the package or an ammonia scent are both signs of age - pass on those. Vacuum-sealed wedges or freshly cut blocks melt far better than pre-shredded bags.

Watch Out
Avoid pre-shredded queso Chihuahua for hot applications. Anti-caking coatings cause clumping and uneven melt in quesadillas or queso fundido.

Once opened, wrap the block first in wax paper, then in plastic wrap, or transfer it to an airtight container. This preserves moisture and stops the cheese from absorbing fridge odors.

A well-wrapped block keeps for about 2-3 weeks; details on chihuahua cheese's shelf life break down what to watch for as it ages.

Start with a Quesadilla

If you've never cooked with queso Chihuahua before, a quesadilla is the right first move. A hot skillet, a flour tortilla, and a generous layer of shredded queso Chihuahua will show you exactly what this cheese does - that even, stringy, clean melt that holds together without going greasy.

From there, queso fundido with chorizo is the natural next step. Once you've seen it melt twice, you'll understand why cooks in Chihuahua and across the U.S.

Southwest reach for it over and over.

Frequently Asked Questions

Is Chihuahua cheese the same as queso menonita?

Yes, they're the same cheese. Queso menonita refers to its origin with Mennonite settlers; queso Chihuahua refers to the state. Some producers label it one way, some the other - the cheese itself is identical.

Does Chihuahua cheese melt like mozzarella?

It melts similarly - smooth and stringy - but with a more buttery, slightly tangy flavor. Mozzarella is blander and wetter; queso Chihuahua adds more richness to the finished dish.

Can Chihuahua cheese be used for queso fundido?

Absolutely - it's one of the most traditional choices for queso fundido. Its even melt and mild flavor let the chorizo and peppers stay front and center without the cheese overpowering them.

Where can I buy Chihuahua cheese?

Mexican grocery stores and well-stocked Latin markets carry it most reliably. Some large supermarkets stock it in the specialty cheese section, typically vacuum-sealed under the queso Chihuahua or queso menonita label.

Can you freeze Chihuahua cheese?

You can freeze it, but the texture turns crumbly after thawing. Frozen queso Chihuahua works in cooked applications like quesadillas or enchiladas, but won't slice cleanly for boards or tortas.

What Is Dijon Mustard? [Taste, Uses & More]

March 29, 2026

You spot it at the back of the fridge door - a small glass jar, pale yellow-beige, with a French label you can barely read. Dijon mustard is one of those condiments that earns far more than its shelf space suggests.

What Is Dijon Mustard

Unlike the bright-yellow squeeze bottles used for hot dogs, this is a sharp, emulsified paste that quietly anchors vinaigrettes, pan sauces, and glazes across French and modern American cooking.

QUICK SUMMARY

Dijon mustard is a smooth, pale-yellow condiment from Burgundy, France, made with brown or black mustard seeds and white wine or vinegar. It has a sharp, tangy, pungent flavor that works across dressings, sauces, glazes, and spreads. Opened jars keep well for 6-12 months in the fridge.

🌍Origin: Dijon region, Burgundy, France
👅Flavor: Sharp, tangy, pungent with front-palate heat
🍽️Best Uses: Vinaigrettes, pan sauces, glazes, spreads
🛒Buy It: Look for brown mustard seeds and wine on the label
⏱️Shelf Life: Unopened up to 24 months; opened, 6-12 months refrigerated

What Is Dijon Mustard?

Dijon mustard originated in the Dijon region of Burgundy, France, where it was traditionally made using brown or black mustard seeds ground with verjuice - the acidic juice of unripe grapes.

Modern producers replaced verjuice with white wine or wine vinegar, which is now the standard.

The result is a finely ground, smooth emulsion with no visible seed texture. It sits in a different category from whole-grain mustard, which retains crushed seeds, and from yellow mustard, which uses milder white mustard seeds and turmeric for color.

You'll see it labeled as moutarde de Dijon, Dijon-style mustard, or simply Dijon.

Not all jars are equal. Authentic Dijon lists brown or black mustard seeds alongside wine or vinegar - skip vague "Dijon-style" products if the sharp, pungent profile matters to you.

If you're ever in a pinch, brown mustard comes closest to replicating the heat level, while yellow mustard is milder but widely available.

What Does Dijon Mustard Taste Like?

dijon mustard - What Is Dijon Mustard

Dijon hits the front of the palate first with sharp, bright heat from the brown mustard seed oils, followed immediately by tangy acidity from the wine or vinegar base. There's a faint savory bitterness underneath - not harsh, but noticeable.

Sensory SnapshotStrong Intensity
👅 Flavor
SharpTangySavoryBitter
✋ Texture
SmoothCreamySilky
👃 Aroma
PungentVinousFaintly Fermented

Think of it as a sharper yellow mustard crossed with a tangy white-wine vinaigrette. Heat cooking mellows its edge noticeably - stirred into a cream sauce, the sharpness softens into something rounder and more savory.

Used cold in a dressing, the full bite stays intact.

Golden Rule
Add Dijon off the heat when making cream sauces - prolonged boiling drives off the volatile compounds that give it its distinctive sharpness.

How to Use Dijon Mustard

Whisking into emulsions is where Dijon earns its place first. A teaspoon in a vinaigrette acts as an emulsifier, binding oil and vinegar into a cohesive, stable dressing. The same property makes it useful in homemade mayonnaise blends and aioli-style spreads.

In hot applications, Dijon builds depth in pan sauces and beurre monté - deglaze a skillet after searing pork or chicken, add a splash of white wine, then whisk in a spoonful before finishing with butter.

Classic Dijon cream sauce, served alongside steak or salmon, follows the same logic.

How Dijon Mustard Is Used
MethodBest ForTip
🥗 Cold EmulsionVinaigrettes, dressings, sandwich spreadsUse 1 teaspoon per 3 tablespoon oil - it binds without dominating
🍳 Pan SauceCream sauces for steak, salmon, porkAdd off the heat to preserve sharpness
🔥 GlazeRoast chicken, pork tenderloin, rack of lambMix with honey or sherry vinegar before brushing on
🥣 Fold-inPotato salad, egg salad, deviled eggsStart with half the amount you think you need

Dijon pairs cleanly with shallots, garlic, tarragon, and chives. It works alongside cream and butter in French-style preparations, and balances well with honey for glazes on pork or roasted root vegetables.

For a classic balsamic vinaigrette, a small amount of Dijon adds body without shifting the flavor profile.

Try It In
🍯Honey Mustard Dressing (Homemade)Dijon's sharpness balances the sweetness perfectly→🥩Air Fryer Honey Mustard Pork ChopsA glaze where Dijon's bite cuts through the honey→🫙Honey Mustard Dipping SauceFast sauce where the Dijon base does the heavy lifting→

How to Buy and Store Dijon Mustard

Read the ingredient list before buying. Brown or black mustard seeds plus white wine or wine vinegar should appear near the top. A smooth, even pale yellow-beige color with no visible liquid separation in the sealed jar signals good emulsion stability.

Watch Out
Labels saying "Dijon-style" or "Dijon-flavor" can use white mustard seeds and skip the wine entirely - the heat and tang will be noticeably weaker.

Storage is straightforward:

  • Unopened - keep in a cool, dark pantry; stable for 12-24 months
  • After opening - refrigerate in the original jar or sealed tube
  • Aroma - fades fastest at room temperature, so don't leave it out between uses
  • Color shift - slight darkening over time is normal and doesn't affect safety

For a full breakdown of timelines and signs of spoilage, see our guide to dijon mustard storage life. If you run out, dijon mustard alternatives covers the closest alternatives - and for seed-texture fans, whole-grain mustard is the most direct swap.

Start Here With Dijon Mustard

If you've never cooked with it before, start with a vinaigrette. Whisk one teaspoon into a simple oil-and-vinegar dressing - that single use demonstrates both its emulsifying function and its flavor contribution better than any other application.

From there, move to a pan sauce or a honey glaze for roasted pork. Those two applications cover the full range of what Dijon does in a hot kitchen.

Once you've used it in all three contexts, you'll stop reaching past it.

Frequently Asked Questions

Is Dijon mustard spicy?

It's sharp rather than spicy in the chili-heat sense. The heat comes from brown mustard seed oils and hits the front of the palate quickly, then fades - it doesn't linger the way capsaicin does.

How is Dijon mustard different from yellow mustard?

Yellow mustard uses milder white mustard seeds, water, and turmeric - it's tangier and softer. Dijon uses brown or black seeds with wine, giving it significantly more heat and a more complex, savory edge.

Can you cook with Dijon mustard?

Yes - it works in pan sauces, glazes, and baked applications. Add it off the heat in cream sauces to preserve its sharpness, since prolonged boiling mutes the flavor considerably.

Does Dijon mustard contain alcohol?

White wine is used in production, but most of the alcohol processes out before the final product. Residual alcohol levels in commercial Dijon are typically negligible.

How long does Dijon mustard last after opening?

Refrigerated, an opened jar retains its best quality for 6-12 months. The flavor slowly mellows beyond that point, though the mustard remains safe to eat for longer if stored properly.

Shrimp Laksa Malaysian-Style

March 29, 2026

You need 35 minutes and one pot. No marinating, no complicated curry building, no multi-hour simmer.

Shrimp Laksa Malaysian-Style served on a plate

Shrimp cook in the broth at the very end so they stay tender. The laksa paste blooms in oil first, then coconut milk goes in to create a creamy base without splitting.

This is what we make on weeknights when takeout sounds good but homemade tastes better.

QUICK SUMMARY

Shrimp laksa delivers creamy coconut broth with spiced paste, rice noodles, and tender shrimp in under 40 minutes. Sauté the paste fully until fragrant to unlock flavor, then simmer gently to avoid splitting the coconut milk. Make this when you want bold Malaysian comfort without hours of work.

⏱️Real Time: 15 min prep, 20 min cook, noodles boil while broth simmers
🔑Key Move: Add shrimp last and simmer 2-3 minutes only
⚠️Watch Out: Boiling coconut milk causes grainy texture - keep heat at gentle simmer

Table of Contents

Toggle
  • Why This Recipe Works
  • What You'll Need
    • Ingredient Details
  • Ingredient Swaps
  • What to Serve With It
  • Store and Reheat
  • Frequently Asked Questions
  • Shrimp Laksa Malaysian-Style
    • Method 
    • Tried this recipe?

Why This Recipe Works

The broth builds flavor in layers instead of relying on hours of simmering. Sautéing laksa paste in oil for five minutes releases oils and aromatics that would stay muted otherwise, and adding coconut milk at a simmer prevents the proteins from separating into a grainy mess. For a version that comes together quickly, tender shrimp recipe uses a similar gentle-simmer approach to keep seafood from turning rubbery.

Quick Reference
⏱️
Prep Time
15 min
🔥
Cook Time
20 min
⏰
Total Time
35 min
🍽️
Servings
4 servings
📊
Difficulty
Medium
🏷️
Category
Main Dish
💡
Quick Tip
Simmer broth gently to avoid bitterness.
🎯
Best For
Weeknight | Meal prep | Entertaining

What makes this work:

  • Sautéing paste for 5 minutes on medium heat releases fragrant oils without burning the spices
  • Shrimp go in last and cook 2-3 minutes until opaque so they stay tender instead of rubbery
  • Boiling noodles separately and rinsing in cold water stops carryover cooking that turns them mushy
  • Simmering broth at 180°F prevents coconut milk from splitting into grainy curds
  • Adding fresh herbs and bean sprouts right before serving preserves their crisp texture and bright color
Quick Tip
Toast dried shrimp for 1 minute before adding paste to build deeper umami flavor in the broth.

What You'll Need

Ingredients for Shrimp Laksa Malaysian-Style

Fresh shrimp matter here because frozen versions release excess water that dilutes the broth. Laksa paste does the heavy lifting - it's a concentrated blend of lemongrass, galangal, chili, and shrimp paste that would take an hour to build from scratch. We keep a batch ready for nights like this - this easy salad recipe uses a similar keep-it-simple strategy with pantry staples.

🦐
Protein
  • 1 lb shrimp, peeled and deveined
🥢
Broth Base
  • 3 tablespoon laksa paste
  • 1 can (14 oz) coconut milk
  • 2 cups chicken or seafood stock
  • 1 tablespoon fish sauce
🍜
Noodles
  • 8 oz rice noodles
🧄
Aromatics
  • 3 garlic cloves, minced
  • 2 shallots, sliced
🥬
Toppings
  • 1 cup bean sprouts
  • Fresh cilantro and mint
  • 2 limes, cut into wedges

Ingredient Details

  • Shrimp (fresh, peeled, deveined)
    Use fresh shrimp for tender texture; frozen versions release water that dilutes broth and turn rubbery when cooked.
  • Laksa paste
    Store-bought paste saves an hour of prep; look for brands with lemongrass, galangal, and shrimp paste listed in the first three ingredients.
  • Coconut milk (full-fat)
    Full-fat coconut milk creates creamy broth; light versions taste thin and won't emulsify properly with the paste.
  • Rice noodles
    Boil for 2-3 minutes only, then rinse in cold water to stop cooking; overcooked noodles turn mushy when added to hot broth.
  • Fish sauce
    Adds umami depth to broth; start with 1 tablespoon and adjust at the end based on saltiness of your stock.
  • Bean sprouts (fresh)
    Add raw right before serving to keep their crisp snap; cooked sprouts turn limp and lose texture contrast.
  • Fresh herbs (cilantro, mint)
    Tear leaves just before garnishing to preserve bright flavor; chopping bruises herbs and releases oils too early.

Ingredient Swaps

Laksa paste is traditional, but you can build flavor from scratch if you have lemongrass, coriander, and dried chili on hand. Rice noodles swap easily for shirataki noodles if you want lower carbs, though the texture shifts from springy to slightly firm. For a version that comes together quickly, a bright tangy slaw uses similar fresh herbs and lime for brightness.

Swaps that work:

  • Rice noodles → shirataki noodles: Lower carbs but slightly firmer texture; rinse well before adding to broth
  • Laksa paste → homemade spice blend (coriander, chili, lemongrass): Less concentrated flavor and longer prep but works in a pinch
  • Fresh shrimp → frozen shrimp: Thaw completely and pat dry to avoid excess water in broth; texture will be slightly less tender
  • Coconut milk → coconut cream diluted with water: Thicker, richer broth; use 1 cup cream with 1 cup water

Fresh Shrimp

Works for: tender texture, no thawing time, minimal water release

Skip if: budget is tight or fresh seafood isn't available

Frozen Shrimp

Works for: meal prep, budget cooking, longer shelf life

Skip if: you want the most tender texture or fastest cook time

Store-Bought Laksa Paste

Works for: weeknight speed, consistent flavor, no ingredient hunting

Skip if: you have fresh lemongrass and galangal and time to spare

Homemade Spice Blend

Works for: controlling heat level, using fresh aromatics, avoiding preservatives

Skip if: you need dinner in under 40 minutes or lack specialty ingredients

Instructions

The broth needs 15 minutes from start to simmer, and shrimp take 2-3 minutes at the end. Cook noodles while the broth simmers so everything finishes at the same time without reheating. For a version that comes together quickly, a creamy bread on the side uses a similar timing strategy where components cook separately and meet at the table.

  1. Sauté aromatics and paste: Heat 2 tablespoons oil in a medium pot over medium heat. Add shallots and garlic, cook 2 minutes until softened. Stir in laksa paste and cook 5 minutes, stirring constantly, until paste darkens and smells fragrant.
  2. Build broth: Pour in coconut milk and stock, stir to combine. Bring to a simmer (small bubbles around edges, not a rolling boil), then reduce heat to low. Add fish sauce. Simmer gently 10 minutes to let flavors meld.
  3. Cook noodles separately: While broth simmers, boil rice noodles in a separate pot for 2-3 minutes until tender but still springy. Drain, rinse under cold water, set aside.
  4. Add shrimp: Add peeled shrimp to simmering broth. Cook 2-3 minutes until shrimp turn opaque and firm. Don't overcook - they'll curl tightly and turn rubbery.
  5. Assemble bowls: Divide noodles among 4 bowls. Ladle hot broth and shrimp over noodles. Top with bean sprouts, torn cilantro, torn mint, and lime wedges.
Watch Out
If broth boils hard, coconut milk will split and turn grainy. Keep heat at a gentle simmer with small bubbles.

What to Serve With It

Laksa is rich and creamy, so you want sides that add crunch or acidity to cut through the coconut. Fresh vegetables and light salads balance the bowl without adding more heaviness. Most people skip tea, but it balances the meal. For a version that comes together quickly, a simple complementary side uses a similar strategy.

Side Dish Prep Why It Works How to Serve
Cucumber slices Easy Cool contrast to spicy broth Slice thin, toss with rice vinegar and salt
Simple green salad Easy Light freshness balances richness Dress with lime juice and fish sauce
Steamed bok choy Easy Adds mild vegetable complement Steam 3 minutes, drizzle with soy sauce
Pickled vegetables Medium Adds acidity and crunch Quick-pickle carrots and radishes in vinegar
Roti canai Involved Traditional flatbread complements broth Warm in skillet, serve for dipping

Three ways to serve it:

  • Weeknight bowl: Serve with cucumber slices and a wedge of lime for quick crunch and acidity
  • Meal prep version: Pack broth and noodles separately, reheat broth and pour over fresh noodles at serving
  • Entertaining style: Set out bowls of bean sprouts, herbs, lime, and sambal so guests customize their own bowls
Shortcut
Pre-chop all toppings and store in the fridge so you can assemble bowls in under 2 minutes when the broth is ready.

Store and Reheat

Broth and noodles store separately because noodles absorb liquid and turn mushy overnight. Keep broth in one container and cooked noodles in another with a splash of oil to prevent sticking. The slaw works best when it hits the table at the same time as the main. For a version that comes together quickly, this easy salad recipe uses a similar keep-separate strategy for meal prep.

Method Time Best For
🍳 Stovetop 5-7 min Rewarming broth gently without splitting coconut milk
📦 Microwave 2-3 min, stirring halfway Fast reheating but less ideal for noodles which can turn rubbery
🔥 Oven 10 min at 300°F Gentle reheating of broth in covered oven-safe dish

For best results when storing:

  • Store broth and noodles separately in airtight containers; broth keeps 3-4 days, noodles 2-3 days in fridge
  • Add fresh herbs and bean sprouts only when serving, not before storing - they wilt and lose crunch overnight
  • Freeze broth only (no noodles or shrimp) in shallow containers for up to 1 month; thaw overnight in fridge before reheating
  • Reheat noodles by dipping briefly in boiling water for 30 seconds, then drain and add to hot broth
  • Don't reheat shrimp in broth - they overcook and turn rubbery; add fresh shrimp when reheating or eat cold shrimp on the side

Frequently Asked Questions

How long to cook shrimp laksa at simmer?

Simmer the broth for 10 minutes to meld flavors, then add shrimp and cook 2-3 minutes until opaque. Longer cooking turns shrimp rubbery.

Can I make shrimp laksa broth ahead and freeze it?

Freeze broth only (no noodles or shrimp) in shallow containers for up to 1 month. Thaw overnight in fridge and reheat gently, then add fresh shrimp and noodles.

How do I know when shrimp is cooked in laksa?

Shrimp turns opaque and firm after 2-3 minutes in simmering broth. It curls into a tight C-shape - if it curls into an O-shape, it's overcooked.

What causes laksa broth to become bitter and how to fix?

Burnt spices or paste cause bitterness. Stir paste constantly when sautéing and use moderate heat. Fix by adding sugar or extra coconut milk to balance.

Can I use dried shrimp in laksa paste instead of fresh?

Toast dried shrimp for 1 minute before adding to paste for deeper umami flavor. Use 2 tablespoons dried shrimp for every 1 pound fresh shrimp in the recipe.

Shrimp Laksa Malaysian-Style served on a plate

Shrimp Laksa Malaysian-Style

No ratings yet
Shrimp laksa delivers a rich, creamy coconut broth infused with spiced laksa paste, tender shrimp, and rice noodles in under 40 minutes. The key to this flavorful Malaysian dish is fully sautéing the paste until fragrant, then simmering gently to prevent coconut milk from splitting, ensuring a smooth broth every time.
Print Recipe Pin Recipe
Prep Time 15 minutes mins
Cook Time 20 minutes mins
Total Time 35 minutes mins
Servings: 4 servings
Course: Main Dish
Cuisine: Malaysian
Ingredients Equipment Method Notes

Ingredients
  

  • 1 lb shrimp peeled and deveined, fresh preferred
  • 3 tablespoon laksa paste
  • 14 oz coconut milk full-fat, canned
  • 2 cups chicken or seafood stock
  • 1 tablespoon fish sauce
  • 8 oz rice noodles
  • 3 cloves garlic minced
  • 2 shallots sliced
  • 1 cup bean sprouts fresh
  • cilantro and mint fresh, torn leaves for garnish
  • 2 lime cut into wedges

Equipment

  • Medium pot Used to sauté paste and simmer broth
  • Separate pot For boiling rice noodles

Method
 

  1. Heat 2 tablespoons of oil in a medium pot over medium heat. Add sliced shallots and minced garlic and cook for 2 minutes until softened. Stir in the laksa paste and cook for 5 minutes, stirring constantly, until the paste darkens in color and smells fragrant.
    3 cloves garlic, 2 shallots, 3 tbsp laksa paste
  2. Pour in the coconut milk and stock, stirring to combine. Bring the mixture to a gentle simmer with small bubbles around the edges-avoid a rolling boil. Reduce heat to low and stir in fish sauce. Simmer gently for 10 minutes to meld flavors.
    14 oz coconut milk, 2 cups chicken or seafood stock, 1 tbsp fish sauce
  3. While the broth is simmering, boil rice noodles in a separate pot for 2 to 3 minutes until tender but still springy. Drain and rinse under cold water to stop cooking, then set aside.
    8 oz rice noodles
  4. Add peeled shrimp to the simmering broth and cook for 2 to 3 minutes until shrimp turn opaque and firm. Avoid overcooking as shrimp will curl tightly and become rubbery.
    1 lb shrimp
  5. Divide the cooked noodles among 4 bowls. Ladle hot broth with shrimp over the noodles. Top with fresh bean sprouts, torn cilantro and mint leaves, and lime wedges for squeezing.
    8 oz rice noodles, 1 lb shrimp, 1 cup bean sprouts, cilantro and mint, 2 lime

Notes

  • Sauté laksa paste fully until fragrant to unlock deep flavors without burning.
  • Cook shrimp just 2-3 minutes at the end in simmering broth to keep tender.
  • Simmer broth gently to avoid coconut milk splitting and turning grainy.

Tried this recipe?

Let us know how it was!

What Is Cool Whip? [Taste, Uses & More]

March 29, 2026

Most people assume Cool Whip is just a cheaper, shelf-stable knockoff of whipped cream - something you reach for only when you've run out of the real thing.

What Is Cool Whip

That assumption misses what makes it genuinely useful: unlike freshly whipped cream, it holds its shape for days without weeping or collapsing, which is exactly why it shows up on every potluck pie from November through July.

Understanding the role whipped cream plays in desserts helps clarify where Cool Whip diverges - and why that divergence is often an advantage.

If you've been using it without thinking much about it, there's more to know.

QUICK SUMMARY

Cool Whip is a frozen whipped topping made by Kraft Heinz - sweeter and more stable than fresh whipped cream. Thaw it in the fridge, then spread, fold, or dollop it onto chilled desserts. It holds its shape for 3-5 days after opening.

🍬Flavor: Sweet, mildly tangy, neutral dairy-like finish
☁️Texture: Airy, lightly gelatinized, holds shape well
🥧Best Uses: Pie topping, mousse base, trifle layers, sheet cake frosting
❄️Storage: Frozen until needed; refrigerate after thawing
⏱️Shelf Life: 3-5 days refrigerated after opening; check date on frozen tub

What Is Cool Whip?

Cool Whip is a manufactured whipped topping produced by Kraft Heinz and sold frozen in tubs at the grocery store.

It was introduced in the United States in 1966 as a convenience alternative to homemade whipped cream - one that required no whipping and held its structure far longer.

Unlike whipped cream, it's built on a base of water, hydrogenated vegetable oils, and stabilizers rather than heavy dairy cream. Some formulations include milk ingredients; others are positioned as dairy-free, so the label matters depending on your dietary needs.

It's also sold under informal names like "whipped topping" or simply misspelled as "cool-whip" or "CoolWhip," though the Kraft Heinz brand name is the one most shoppers recognize. Several varieties exist:

  • 🏷️ Original - the standard formula, the most widely stocked
  • 🏷️ Lite - reduced fat, slightly less airy body
  • 🏷️ Extra Creamy - denser texture, closer to whipped cream mouthfeel
  • 🏷️ Sugar Free - sweetened with sugar substitutes, similar texture
  • 🏷️ Free (fat-free) - noticeably lighter, less stable when folded into mixtures

When a recipe needs something with comparable stability but a different flavor profile, options for swapping out cool whip are broader than most people expect.

What Does Cool Whip Taste Like?

cool whip - What Is Cool Whip

Cool Whip tastes sweet first, neutral second. The sweetness is clean and upfront - noticeably more pronounced than freshly whipped heavy cream.

There's a faint cultured or tangy undertone underneath, but it's subtle enough that most people wouldn't call it sour.

What it lacks is the rich, milky depth of cream whipped from scratch. That's the trade-off: stability in exchange for some fresh-dairy complexity.

The aroma follows the same pattern - mild sweet cream, low on dairy character.

Sensory SnapshotMild Intensity
👅 Flavor
sweetmildly tangyneutral dairy
✋ Texture
airylightly gelatinized
👃 Aroma
mild sweet cream

Temperature changes the experience slightly. Straight from the fridge it's firm and holds a clean edge; at room temperature it softens quickly and the sweetness feels more forward.

Keep it cold right up until serving.

Golden Rule
Always serve Cool Whip cold. Even 20 minutes on a warm counter softens the texture enough to lose its visual lift and make the sweetness taste one-dimensional.

How to Use Cool Whip

Cool Whip earns its place in American home baking and potluck-style cooking because it removes steps. No chilling the bowl, no risk of over-whipping - you open the container and it's ready.

That convenience makes it the default topping in a wide range of chilled desserts.

How Cool Whip Is Used
MethodBest ForTip
🥗 SpreadPumpkin pie, lemon pie, chilled tartsSpread straight from fridge; smooth with an offset spatula
🌀 Fold InNo-bake mousse, trifles, parfaits, pudding mixturesFold gently - don't stir, or you'll deflate the airy body
☕ DollopHot cocoa, coffee, fruit saladsAdd at the last moment; it softens fast in hot drinks
🍰 FrostSheet cakes, bars needing a light finishKeep the cake cold; apply Cool Whip no more than a few hours before serving

It pairs especially well with pumpkin pie, fresh berries, chocolate pudding, and instant pudding mixes. Graham crackers and Cool Whip together form the structural backbone of dozens of no-bake icebox desserts.

Avoid using it anywhere high heat is involved - it melts and separates in the oven.

For those who need a fully dairy-based alternative, replacements for whipped cream cover a range of options from coconut cream to aquafaba.

Speaking of which, if a recipe calls specifically for coconut-based toppings, guides on swapping out coconut cream are worth a look before substituting blindly.

Try It In
🧀Whipped Feta DipSee how whipped toppings create airy, spreadable textures→🍯Whipped Feta with HoneySweet-savory contrast that mirrors Cool Whip's neutral sweetness→🍞Whipped Ricotta Crostini AppetizerLight, airy texture — a reference point for whipped topping body→

How to Buy and Store Cool Whip

Find it in the freezer section, not the dairy aisle. Look for tubs with clean, flat lids - bulging lids or visible ice crystals inside the container suggest the product has partially thawed and refrozen, which damages texture.

Watch Out
Refrozen Cool Whip loses its airy structure and turns grainy. If a tub has been thawed at any point before you buy it, skip it and pick another.

Thaw the sealed tub in the refrigerator for 4-6 hours before use. Once opened, keep it refrigerated with the lid firmly closed.

Proper storing cool whip correctly extends its refrigerator window - but even under ideal conditions, opened Cool Whip is best within 3-5 days. Refreezing after thawing isn't recommended; the texture won't recover.

Start Here If You're New to It

Cool Whip works best as a ready-to-use topping or fold-in base - not a replacement for every whipped cream application. If you want something with more dairy richness, it'll fall short.

If you need a stable, sweet topping that survives a few days in the fridge without collapsing, it's the right call.

Start with a chilled pie or a simple pudding parfait. Those two uses show exactly what whipped topping stand-ins can and can't replicate - and they'll tell you quickly whether Cool Whip fits your recipe or something else does.

Frequently Asked Questions

Is Cool Whip dairy?

It depends on the variety. Original Cool Whip contains skim milk and light cream, making it a dairy product. The Free and Extra Creamy versions also contain milk ingredients, so only specially labeled non-dairy versions are milk-free.

How long does Cool Whip last after opening?

3-5 days refrigerated, lid on, in its original container. Beyond that, the texture softens and the product can pick up fridge odors.

Can you whip Cool Whip to make it stiffer?

No - it's already stabilized and aerated at the factory. Whipping it further deflates the structure and makes it runny rather than stiffer.

Is Cool Whip vegan?

Most standard varieties are not vegan because they contain milk ingredients. Kraft Heinz does not currently market any Cool Whip variety as certified vegan, so check the label carefully.

Can you use Cool Whip as a pie filling instead of just a topping?

Yes - folding Cool Whip into cream cheese or instant pudding creates a stable no-bake filling for chilled pies. It holds structure in the fridge but won't survive a baked pie shell in the oven.

What Is Fernet Branca? [Taste, Uses & More]

March 29, 2026

Few ingredients draw such a clear line between those who reach for them and those who recoil.

What Is Fernet Branca

Fernet Branca occupies a specific and irreplaceable role in both the cocktail world and the kitchen - it delivers a bitter menthol punch that no other amaro quite replicates, and understanding the differences between aperitifs vs digestifs helps explain exactly where it fits in a meal.

QUICK SUMMARY

Fernet Branca is a high-proof Italian amaro from Milan, dating to 1845. Its flavor is intensely bitter, menthol-forward, and herbal. Used as a digestif, a cocktail bitter, and occasionally in cooking, it's assertive enough that a small amount goes a long way.

🌿Flavor: Intense bitter herbs, menthol, dark caramel, and dry licorice
🍶Category: Bitter amaro liqueur, balsam style, produced in Milan
🥃Best Uses: Digestif, Fernet con cola, Hanky Panky cocktail, pan sauces
📅Shelf Life: Indefinite unopened; 3-5 years opened if stored cool and capped
⚠️Avoid With: Delicate white fish and light dairy desserts where menthol clashes

What Is Fernet Branca?

Fernet Branca is a balsam-style amaro first produced in Milan in 1845 by the Branca family, making it one of the oldest continuously produced bitter liqueurs in the world. It belongs to the amaro category - Italian bitter herbal liqueurs - though it sits at the extreme end of that spectrum in terms of bitterness and complexity.

The formula includes dozens of botanicals, though the exact recipe remains a trade secret. Confirmed or widely cited ingredients include gentian root, myrrh, rhubarb, chamomile, cinchona bark, and saffron, combined with a base of neutral spirit and aged in oak.

You may see it spelled Fernet-Branca, fernét branca, or simply fernet. Common uses outside of Italy reflect two distinct traditions:

  • 🇮🇹 Italian tradition - served neat as an after-dinner digestif, often chilled
  • 🇦🇷 Argentinian tradition - mixed with cola over ice as Fernet con cola, the country's defining long drink
  • 🍸 American craft bars - used as a cocktail bitter component, most famously in the Hanky Panky
Golden Rule
Fernet Branca is not a casual sipper for the uninitiated - start with a small measure over ice before committing to a full pour.

What Does Fernet Branca Taste Like?

fernet branca - What Is Fernet Branca

The first encounter with Fernet Branca is rarely neutral. Bitter, medicinal, and cooling hit in quick succession - the menthol and eucalyptus arrive early, followed by a wave of dark caramel and licorice sweetness that never fully softens the underlying bitterness.

Sensory SnapshotPungent Intensity
👅 Flavor
bitter herbsmentholdark carameldry licorice
✋ Texture
viscouswarming finishlingering dryness
👃 Aroma
camphoraceousdried herbscitrus peel

Compared to other bitters, it's drier and more medicinal than Campari and far more intense than standard cocktail bitters - closer to Jägermeister in its menthol character but without that liqueur's sweetness.

The finish is long, drying, and warming from the high ABV.

Chilling it slightly moderates the alcohol burn and lets the herbal complexity settle into focus.

How to Use Fernet Branca

Fernet Branca rewards restraint. In cocktails and cooking alike, small amounts carry significant weight - a half-ounce or less is usually the right entry point.

How Fernet Branca Is Used
MethodBest ForTip
🥃 Neat / ChilledAfter-dinner digestif, palate cleanser between coursesServe in a small chilled glass; no ice dilution needed
🥤 MixedFernet con cola, Hanky Panky cocktail, Old Fashioned dashUse cola with high sweetness to balance the bitterness
🍳 CookingBeef braises, pan sauce deglazing, reductionsAdd a small splash at the end - heat volatilizes the menthol fast
🍫 DessertDark chocolate ganache, ice cream bases, infused syrupsPair only with dark chocolate or espresso - not light dairy

In cocktails, Fernet Branca plays a supporting role well. A small dash sharpens an Old Fashioned or Manhattan with bitter menthol notes, while the Hanky Panky uses it as a primary component alongside sweet vermouth and gin.

For Fernet con cola, the standard Argentinian ratio is roughly one part fernet to three parts cola over ice.

In savory cooking, a splash into a beef braise or pan sauce adds herbal depth that red wine alone doesn't replicate. Folded into dark chocolate ganache, it bridges coffee and cocoa bitterness with a cooling finish.

If a recipe calls for a similar bitter amaro and you're out, knowing your replacements for fernet branca saves the dish without a wasted trip.

Try It In
🥩Classic Hearty Beef StewA splash of fernet adds herbal depth to the braising liquid→🍲Slow Cooker Beef Stew with VegetablesLow and slow lets the bitter botanicals mellow into the broth→🥣Creamy Beef StewUse fernet sparingly here — the menthol can cut through cream cleanly→

How to Buy and Store Fernet Branca

Identification is straightforward. Look for the dark brown bottle with the Branca eagle label and the text "Fernet Branca" clearly printed - no imitator uses that exact branding. Confirm the ABV sits between 39-45% on the label, and check that the cap seal is intact before purchase.

Watch Out
Avoid bottles with torn or broken seals - minor sediment is normal in aged herbal liqueurs, but free-floating sediment in a fresh bottle is a red flag.

Store upright in a cool, dark location with the cap tightly closed; heat and light degrade the volatile botanical oils over time.

Proper guidance on keeping fernet branca fresh covers the full storage detail, but the short version is: unopened bottles last indefinitely, and opened bottles hold best flavor for 3-5 years.

Where to Start With Fernet Branca

New to Fernet Branca? Begin with Fernet con cola - the cola sweetness makes the bitterness approachable while still letting the herbal character show.

Confident with bitter flavors? Try it neat and chilled as a post-meal digestif, which is how the Italians have been drinking it since 1845.

Cocktail builders should treat it like replacements for angostura bitters - a few drops reshape a drink entirely, and the same principle applies here at the half-ounce scale.

Similarly, if you're building a bitter cocktail and reach for Campari instead, reading about replacements for campari clarifies exactly how that swap changes the flavor profile.

Fernet Branca rewards those willing to meet it on its own terms.

Frequently Asked Questions

Is Fernet Branca a liqueur or a spirit?

It's a liqueur - specifically a bitter amaro liqueur. It's made by macerating botanicals in a neutral spirit base, then sweetening slightly, which distinguishes it from an unaged straight spirit.

How strong is Fernet Branca?

The standard bottling is 39% ABV in most markets, though some regional versions reach 45%. That's stronger than most wines and comparable to standard whiskey.

Can you drink Fernet Branca straight?

Yes - it's traditionally served neat or chilled as a digestif after meals. The flavor is intense, so first-timers often prefer it over a single large ice cube to slow the ABV heat.

What cocktails use Fernet Branca?

The Hanky Panky is the most prominent - gin, sweet vermouth, and a generous measure of fernet. It also appears as a small dash in Old Fashioneds and Manhattans, and as the base of Fernet con cola.

Is Fernet Branca vegan?

It's generally considered vegan, as the production process doesn't use animal-derived fining agents. However, Branca doesn't officially certify batches as vegan, so those with strict dietary requirements should verify directly with the producer.

What Is Cynar? [Taste, Uses & More]

March 29, 2026

You spot a dark bottle at the liquor store, a stout shape with an artichoke printed on the label, and wonder what exactly you're supposed to do with it.

What Is Cynar

Cynar sits in that odd middle zone between spirits you reach for automatically and the ones you file away as "interesting." If you already know your way around replacements for aperol or have experimented with swapping out fernet branca, Cynar belongs on your radar for the same reason - it fills a flavor space nothing else quite covers.

QUICK SUMMARY

Cynar is an Italian artichoke-based amaro with a bittersweet, herb-forward flavor and a syrupy-smooth finish. It works as an aperitivo over ice, a Negroni variation, or a cooking addition to pan sauces and braises.

🌿Flavor: Bittersweet and herbal with vegetal artichoke and mild citrus
🍹Best Use: Aperitivo over ice, Cynar Spritz, or a Negroni variation
🍶ABV: Low-to-moderate; lighter than most standard spirits
📦Storage: Cool, dark place; drink opened bottles within 1-2 years
🔄Substitutes: Campari or another bitter amaro in a pinch, with flavor trade-offs

What Is Cynar?

Cynar (pronounced CHEE-nar) is an Italian amaro - a category of herbal bitter liqueur - produced by the Campari Group.

Its name comes directly from Cynara scolymus, the botanical name for the globe artichoke, which anchors the flavor along with a proprietary blend of roughly 13 other herbs and plants.

The liqueur was developed in post-war northern Italy and positioned squarely in the aperitivo tradition: a low-ABV, appetite-stimulating drink served before a meal. It pours a deep amber-chestnut color with no sediment and a viscous, almost syrupy body.

You'll sometimes hear it called artichoke liqueur or Cynar amaro interchangeably.

Within the amaro family, it occupies a specific lane - less aggressively medicinal than Fernet-Branca, less bright-red and candy-forward than Campari, and earthier than Amaro Montenegro.

Understanding where these bitters sit relative to each other is useful; you can get a sense of that range by looking at amaro montenegro swaps that work and seeing how drinkers navigate between them.

  • 🌍 Origin - Post-war northern Italy, now distributed internationally by Campari Group
  • 🌿 Key botanical - Artichoke leaf (*Cynara scolymus*) alongside 12+ additional herbs
  • 🍶 ABV - Typically low-to-moderate, well below standard spirits like whiskey or gin
  • 🎨 Color - Deep amber to chestnut; should be clear with no cloudiness

What Does Cynar Taste Like?

cynar - What Is Cynar

Cynar leads with bittersweet herb and holds it through the finish. The artichoke note is real - vegetal and slightly green - however it never reads as sharp or raw.

Think of artichoke heart rather than raw artichoke leaf.

Sensory SnapshotModerate Intensity
👅 Flavor
bittersweetherbalvegetalcaramelizedmild citrus
✋ Texture
syrupysmooth
👃 Aroma
dried herbsgreen artichokecaramelorange peel

Caramelized sugar rounds out the bitterness without making it sweet in any cloying way. There's a mild citrus lift - most noticeable mid-palate - and a faint earthiness that lingers.

The finish is tannic and slightly dry, which is exactly what makes it work as an appetite primer.

Heat softens the bitterness when Cynar is used in cooking, pulling more of the caramel and herb notes forward while the sharp vegetal edge recedes.

How to Use Cynar

Cynar earns its place at the table long before dinner. Served over ice with an orange twist, it's the aperitivo in its purest form - low enough in alcohol that a single serving sharpens appetite without dulling it.

Building a Cynar Spritz follows the same logic as making Italian aperol spritz cocktail at home, though the result is earthier and less sweet: Cynar, prosecco, and a splash of soda over ice.

Golden Rule
Always add the citrus twist last when serving Cynar over ice - the expressed oils from the peel cut through the sweetness and sharpen the herbal notes.

In cocktails, it steps into the bitter slot wherever Campari would go.

A Cynar Negroni swaps Campari for Cynar and shifts the whole drink toward something earthier and more vegetal - the gin and sweet vermouth still anchor it, however the artichoke note adds a layer Campari doesn't offer.

With tonic, it makes a long, bittersweet highball that drinks well in warm weather.

Cooking with Cynar is a smaller, more deliberate move. Deglaze a hot pan after searing pork or beef, let the liqueur reduce by half, and you get a bitter-herbal fond that no wine or stock replicates in quite the same way.

A small splash stirred into a vinaigrette alongside olive oil works against roasted mushrooms or aged cheeses like Parmigiano-Reggiano.

How Cynar Is Used
MethodBest ForTip
🥂 AperitivoBefore-dinner drink over ice with orange twistUse a large ice cube to slow dilution
🍹 CocktailsNegroni variation, Spritz, tonic highballSwap 1:1 for Campari as a starting point
🍳 Pan deglazePan sauces for grilled steak or porkReduce by half before adding stock or butter
🥗 VinaigretteDressings for bitter greens or roasted vegUse sparingly - 1 teaspoon per serving maximum
🥩 MarinadeShort roasts of pork or root vegetablesPair with olive oil and lemon to balance
Try It In
🍅Roasted Garlic Marinara SauceA splash of Cynar deepens the bitter-herbal base→🥩Roasted Garlic Béarnaise SaucePairs with the same grilled meats Cynar glazes well→🍋One-Pan Baked Lemon Herb Chicken ThighsUse Cynar in the pan drippings for a bitter-herbal finish→

How to Buy and Store Cynar

At the store, check the seal and label first. The bottle should show a clear amber-chestnut color with no sediment; cloudiness signals a problem.

ABV appears on the label and typically sits well below that of standard spirits - that's expected and correct.

Watch Out
Cynar bottles left on a sunny back bar for years lose their herbal brightness fast. Always check that a bottle has been stored upright and away from light before you buy.

Once home, store it upright in a cool, dark cabinet.

Unlike wine, you don't need the refrigerator - the sugar and alcohol content preserve it well at room temperature.

Unopened, Cynar holds for several years.

Opened bottles stay at their sharpest within one to two years; after that, the herbal notes flatten noticeably.

Knowing the cynar spoilage signs is useful if you've had a bottle sitting open for a while.

Where to Start with Cynar

Don't open Cynar for the first time and pour it into a complex cocktail. Start over ice with an orange twist - that's the format that shows you exactly what you're working with before you start layering it into Negroni builds or pan sauces.

If you find the bitterness too forward on its own, build a simple Spritz first. Anyone already comfortable with campari's flavor and uses will calibrate quickly - Cynar is earthier and softer, not sharper.

For a direct swap comparison, replacements for cynar and swapping out campari both map out where the two bitters overlap and diverge.

Frequently Asked Questions

What is Cynar made of?

Cynar is built on globe artichoke (*Cynara scolymus*) leaf as its signature botanical, combined with a proprietary blend of roughly 13 additional herbs and plants. The exact formula isn't public, however caramelized sugar and an alcohol base round out the blend.

Is Cynar alcoholic and what is its ABV?

Yes, Cynar is alcoholic. It typically sits at around 16.5% ABV, which is lower than most spirits but higher than wine - making it suitable for a long aperitivo session without the punch of a full-strength cocktail.

How does Cynar differ from Campari?

Campari is brighter, more citrus-forward, and closer to candy-bitter. Cynar is darker, earthier, and built around the vegetal artichoke note - less flashy in a cocktail but more useful as a cooking ingredient.

Can you cook with Cynar?

Yes - it reduces well in a hot pan and adds bitter-herbal depth to sauces for pork or beef. Use it in small amounts; a tablespoon or two is enough, since the bitterness concentrates as the liquid reduces.

Does Cynar need to be refrigerated after opening?

No. The sugar and alcohol content keep it stable at room temperature. A tightly recorked bottle in a cool, dark cabinet is all it needs - refrigeration won't hurt it, however it's not required.

Beef Bourguignon French-Style

March 29, 2026

Most braised beef falls apart but tastes bland or ends up tough and chewy. The fix is searing beef chuck in batches before braising low and slow in red wine with bacon and fresh thyme.

Beef Bourguignon French-Style served on a plate

The Dutch oven does the heavy lifting. You get fork-tender meat and a glossy, wine-rich sauce without constant stirring or temperature checks.

Make this for comfort food nights when you want something that tastes like it took all day but only needs 30 minutes of hands-on work.

QUICK SUMMARY

Beef Bourguignon braises beef chuck in red wine with bacon, mushrooms, and herbs for 2.5-3 hours at 325°F. Searing the meat first locks in flavor, and the slow braise breaks down tough connective tissue into tender, sauce-soaked chunks. Pull it when a fork slides through the beef with no resistance.

⏱️Time Reality: 30 minutes prep, then 2.5-3 hours hands-off braising in the oven.
🔥Critical First Step: Sear beef in small batches on high heat-crowding steams instead of browns.
⚠️Watch Out: Watery sauce means too much liquid or not enough reduction-simmer uncovered the last 30 minutes.

Table of Contents

Toggle
  • Why This Recipe Works
  • What You'll Need
    • Ingredient Details
  • Ingredient Swaps
  • What to Serve With It
  • Store and Reheat
  • Frequently Asked Questions
  • Beef Bourguignon French-Style
    • Method 
    • Tried this recipe?

Why This Recipe Works

Braising beef chuck at a steady 325°F for hours breaks down collagen into gelatin that thickens the sauce naturally. Rich mains need something to cut through, and potatoes does exactly that. For a version that comes together quickly, homemade potatoes recipe soaks up every drop of wine-rich braising liquid.

Quick Reference
⏱️
Prep Time
30 min
🔥
Cook Time
2 hours 30 min
⏰
Total Time
3 hours
🍽️
Servings
6 servings
📊
Difficulty
Medium
🏷️
Category
Main Dish
💡
Quick Tip
Sear beef well for deep flavor
🎯
Best For
Weeknight | Meal prep | Entertaining

Here's what makes it reliable:

  • Well-marbled beef chuck - Fat melts during the long braise and bastes the meat from the inside, keeping every bite moist and flavorful instead of dry.
  • Deglazing with dry red wine - Scraping up the caramelized bits from searing adds a layer of savory depth you can't get from just adding liquid.
  • Low, slow oven braise at 325°F - The gentle heat breaks down tough connective tissue into tender, pull-apart chunks without drying out the exterior.
  • Adding vegetables halfway through - Carrots and onions go in after the first hour so they soften without turning to mush by the time the beef is done.
  • Uncovered finish for the last 30 minutes - This reduces and thickens the sauce naturally without needing flour or cornstarch at the end.
Quick Tip
Tie fresh thyme sprigs in cheesecloth so you can fish them out easily before serving-no one wants to bite into a woody stem.

What You'll Need

Ingredients for Beef Bourguignon French-Style

Buy beef chuck with visible white marbling-that fat is what keeps the meat juicy through the long braise. Most people skip beef, but it balances the meal. We keep a batch ready for nights like this - classic beef dish uses similar technique but finishes in half the time.

🍗
Protein
  • 2.5 lbs beef chuck, cut into 2-inch cubes
  • 4 oz bacon or pancetta, diced
🥬
Vegetables
  • 3 large carrots, peeled and cut into 1-inch pieces
  • 1 large yellow onion, chopped (or 12 pearl onions, peeled)
  • 8 oz mushrooms, quartered
  • 4 cloves garlic, minced
🥢
Liquids & Seasonings
  • 2 cups dry red wine (Burgundy or Pinot Noir)
  • 2 cups beef broth
  • 2 tablespoon tomato paste
  • 3-4 sprigs fresh thyme
  • Salt and black pepper
🫙
Optional Thickener
  • 2 tablespoon all-purpose flour (for dredging beef)
  • 2 tablespoon butter (for sautéing vegetables)

Ingredient Details

  • Beef chuck
    Look for chunks with visible fat streaks-lean beef dries out during the long braise and won't break apart with a fork.
  • Dry red wine
    Use Burgundy or Pinot Noir-avoid sweet wines or "cooking wine," which make the sauce cloying and throw off the balance.
  • Bacon or pancetta
    Renders fat for searing the beef and adds a smoky, salty backbone to the sauce-don't skip this step.
  • Fresh thyme
    Tie sprigs together with kitchen twine or wrap in cheesecloth so you can pull them out before serving-dried thyme works but use half the amount.
  • Tomato paste
    Adds acidity and a subtle umami note that rounds out the wine-cook it for a minute before adding liquids to remove the raw taste.
  • Mushrooms
    Cremini or button mushrooms work best-quarter them so they hold their shape and don't turn slimy during the braise.
  • Pearl onions
    Traditional but fussy-substitute chopped yellow onion if you don't want to peel 12 tiny onions.

Ingredient Swaps

You can swap beef chuck for brisket or short ribs if that's what you have. Beef adds the contrast this plate needs, but timing matters. For a version that comes together quickly, a fresh salad on the side cuts through the richness without adding more cooking steps.

Four swaps that work:

  • Beef chuck → beef brisket or short ribs - Same fatty marbling for braising, but brisket cooks slightly faster and short ribs add more bone-in richness (adjust time by 30 minutes).
  • Dry red wine → grape juice with 2 tablespoon red wine vinegar or extra beef broth - Less complex flavor and missing the wine's acidity, but gets you through in a pinch if you need alcohol-free.
  • Bacon → smoked turkey bacon or omit entirely - Lose the smoky fat layer but the dish still works, just season more aggressively with salt and consider adding a bay leaf for depth.
  • Flour for thickening → cornstarch slurry (1 tablespoon cornstarch + 2 tablespoon water) - Mix at the end and simmer for 2 minutes until glossy-works for gluten-free but gives a slightly different sheen.

Beef Brisket Instead of Chuck

Works for: Similar fat content, slightly leaner texture, cooks in about 2 hours instead of 2.5-3

Skip if: You want maximum tenderness-brisket holds its shape more and doesn't fall apart as easily

Grape Juice + Vinegar Instead of Wine

Works for: Alcohol-free version, still adds fruity acidity and some sweetness to balance the beef

Skip if: You want the deep, complex wine flavor-grape juice tastes lighter and one-dimensional

Instructions

Plan for 30 minutes of active prep, then the oven does the rest for 2.5-3 hours. Salad adds the contrast this plate needs, but timing matters. We keep a batch ready for nights like this - tender roasted vegetable side roasts alongside the stew so everything finishes at once.

  1. Sear the beef in batches. Pat beef cubes dry with paper towels and season with salt and pepper. Heat a Dutch oven over medium-high heat, cook diced bacon until crispy (about 5 minutes), then remove with a slotted spoon. Sear beef in the bacon fat in batches-2-3 minutes per side until deep brown-then set aside. Don't crowd the pan or the beef will steam instead of caramelize.

  2. Sauté aromatics and deglaze. Lower heat to medium, add chopped onion and cook until softened (about 5 minutes), then stir in minced garlic and tomato paste and cook for 1 minute until fragrant. Pour in 1 cup of red wine, scraping up all the browned bits stuck to the bottom of the pot-this is where the flavor lives.

  3. Build the braising liquid. Return beef and bacon to the pot, add remaining 1 cup wine, beef broth, and fresh thyme sprigs tied together. Bring to a simmer, cover with a lid, and transfer to a 325°F oven. Braise for 1.5 hours without opening the lid.

  4. Add vegetables and finish braising. After 1.5 hours, stir in carrots, mushrooms, and pearl onions (or more chopped yellow onion). Return to the oven uncovered and braise for another 1-1.5 hours until the beef breaks apart with light fork pressure and the sauce has thickened. Skim any fat off the surface halfway through if needed.

  5. Rest and reduce the sauce. Remove from the oven and let rest for 10 minutes. If the sauce is still thin, transfer the pot to the stovetop and simmer on medium heat for 10-15 minutes until it coats the back of a spoon. Remove thyme sprigs, taste, and adjust salt before serving.

Golden Rule
Don't skip deglazing the pan after searing-those stuck-on brown bits dissolve into the wine and become the backbone of your sauce.

What to Serve With It

This stew needs something starchy to soak up the wine-rich sauce. This dip adds the contrast this plate needs, but timing matters. For even more planning help, check out hearty beef dinner ideas for side pairings that match the richness.

Side Dish Prep Why It Works How to Serve
Buttery mashed potatoes Easy Creamy texture absorbs sauce, mild flavor doesn't compete Spoon stew over potatoes, let sauce pool in the center
Egg noodles Easy Light base that twirls the sauce, cooks in 8 minutes Toss noodles with a little butter, serve stew on top
Crusty French bread Easy Crispy exterior soaks up sauce, adds textural contrast Slice thick, toast lightly, serve on the side for dipping
Steamed green beans Easy Fresh, snappy contrast to the rich, slow-cooked stew Toss with butter and garlic, serve alongside for brightness
Roasted root vegetables Medium Earthy sweetness complements the wine and mushrooms Roast carrots, parsnips, and turnips at 400°F for 30 minutes

Three ways to serve it:

  • Weeknight dinner - Ladle over buttered egg noodles with steamed green beans on the side and crusty bread for mopping up sauce.
  • Hosting a dinner party - Serve in shallow bowls over potato gratin with haricot verts and a glass of the same red wine you braised with.
  • Meal prep containers - Pack stew in one compartment, mashed potatoes or cooked rice in another, and reheat both together for balanced leftovers.
Shortcut
Skip peeling pearl onions-chop a large yellow onion instead and get the same sweet, caramelized flavor without the fussy prep work.

Store and Reheat

Beef Bourguignon tastes even better the next day after the flavors meld overnight. Transfer to shallow airtight containers while still warm so it cools quickly in the fridge. This dip adds the contrast this plate needs, but timing matters. For a version that comes together quickly, a creamy dip on the side works as a quick starter while you reheat the stew.

Method Time Best For
🍳 Stovetop 5-10 min over medium heat, stirring occasionally Even heating and sauce rehydration-add a splash of broth if too thick
🔥 Oven 20 min at 325°F covered with foil Large batches that need gentle, even reheating without drying out
📦 Microwave 3-4 min on 70% power, stirring halfway Single servings when you need it fast-add a tablespoon of water first

For best results when storing:

  • Cool quickly before refrigerating - Spread stew in a shallow container so it drops below 40°F within 2 hours and avoids bacterial growth.
  • Store in the fridge for 3-4 days - The sauce may thicken overnight; thin with a splash of beef broth when reheating.
  • Freeze for up to 3 months - Use freezer-safe containers and leave 1 inch of headspace for expansion, then thaw overnight in the fridge before reheating.
  • Reheat only what you'll eat - Repeated heating and cooling breaks down the beef texture and concentrates the salt, making the sauce too salty.
  • Add fresh herbs when reheating - Toss in a sprig of fresh thyme or a handful of chopped parsley right before serving to brighten the flavors.

Frequently Asked Questions

Can I use another cut of beef besides chuck?

Yes-beef brisket or short ribs work well because they have similar fat marbling that breaks down during braising. Brisket cooks slightly faster (about 2 hours) and short ribs add bone-in richness but may need an extra 30 minutes.

How should I store leftover Beef Bourguignon?

Store in an airtight container in the fridge for 3-4 days or freeze for up to 3 months. The sauce thickens overnight, so add a splash of beef broth when reheating to loosen it back up.

How do I know when the beef is perfectly tender?

The beef is done when a fork slides through with no resistance and the meat breaks apart with light pressure. If you feel any toughness or chewiness, cover and braise for another 30 minutes.

What if my sauce is too thin or watery?

Transfer the pot to the stovetop and simmer uncovered on medium heat for 10-15 minutes until it reduces and coats the back of a spoon. You can also whisk together 1 tablespoon cornstarch with 2 tablespoons water and stir it in during the last 5 minutes.

Can I double the recipe for larger groups?

Yes, but use a larger Dutch oven (at least 7 quarts) and sear the beef in smaller batches so you don't overcrowd the pan. The braising time stays the same-just check for fork-tender beef at the 2.5-hour mark.

Beef Bourguignon French-Style served on a plate

Beef Bourguignon French-Style

No ratings yet
Beef Bourguignon braises beef chuck in red wine with bacon, mushrooms, and fresh thyme for tender, flavorful meat and a rich sauce. Searing the beef first locks in flavor, and slow braising breaks down connective tissue for a glossy, wine-rich stew. This recipe requires 30 minutes of prep and produces satisfying comfort food with minimal hands-on time.
Print Recipe Pin Recipe
Prep Time 30 minutes mins
Cook Time 2 hours hrs 30 minutes mins
Total Time 3 hours hrs
Servings: 6 servings
Course: Dinner, Main Dish
Cuisine: French
Ingredients Equipment Method Notes

Ingredients
  

  • 2.5 lbs beef chuck cut into 2-inch cubes with visible fat marbling
  • 4 oz bacon diced
  • 3 large carrots peeled and cut into 1-inch pieces
  • 1 large yellow onion chopped (or substitute 12 pearl onions, peeled)
  • 8 oz mushrooms quartered, preferably cremini or button
  • 4 cloves garlic minced
  • 2 cups dry red wine Burgundy or Pinot Noir
  • 2 cups beef broth
  • 2 tablespoon tomato paste
  • 3 sprigs fresh thyme tied together with kitchen twine or wrapped in cheesecloth
  • 2 tablespoon all-purpose flour for dredging beef, optional
  • 2 tablespoon butter for sautéing vegetables, optional
  • salt to season beef and adjust at the end
  • black pepper to season beef and adjust at the end

Equipment

  • Dutch oven Used for searing beef and braising the stew in the oven
  • Oven For braising the beef stew at 325°F

Method
 

  1. Pat beef cubes dry and season with salt and pepper. Heat Dutch oven over medium-high heat and cook diced bacon until crispy, about 5 minutes. Remove bacon with slotted spoon. Sear beef in batches in bacon fat for 2-3 minutes per side until deep brown. Do not crowd the pan to avoid steaming. Set beef aside.
    2.5 lbs beef chuck, 4 oz bacon, salt, black pepper
  2. Lower heat to medium. Add chopped onion and cook until softened, about 5 minutes. Stir in minced garlic and tomato paste; cook for 1 minute until fragrant. Pour in 1 cup of red wine, scraping up browned bits from the pot's bottom.
    1 large yellow onion, 4 cloves garlic, 2 tbsp tomato paste, 2 cups dry red wine
  3. Return beef and bacon to the pot. Add remaining 1 cup red wine, beef broth, and fresh thyme sprigs tied together. Bring to a simmer, cover with lid, and transfer to 325°F oven. Braise for 1.5 hours without opening the lid.
    2.5 lbs beef chuck, 4 oz bacon, 2 cups dry red wine, 2 cups beef broth, 3 sprigs fresh thyme
  4. After 1.5 hours, stir in carrots, mushrooms, and pearl onions (or chopped yellow onion). Return to oven uncovered and braise for another 1 to 1.5 hours until beef is fork-tender and sauce thickened. Skim fat from surface halfway through if needed.
    3 large carrots, 8 oz mushrooms, 1 large yellow onion
  5. Remove pot from oven and let rest for 10 minutes. If sauce is too thin, simmer uncovered over medium heat on stovetop for 10-15 minutes until it coats the back of a spoon. Remove thyme sprigs, taste, and adjust salt before serving.
    3 sprigs fresh thyme, salt

Notes

  • Make sure to sear beef in small batches to develop deep flavor and avoid steaming.
  • Tie fresh thyme sprigs in cheesecloth or kitchen twine for easy removal before serving.
  • Simmer sauce uncovered at the end if it is too thin or watery to achieve a rich, glossy consistency.

Tried this recipe?

Let us know how it was!

How Long Does Coffee Creamer Last? [Storage Guide]

March 29, 2026

Many people assume that once coffee creamer hits the pantry shelf, it's immune to spoilage - and that assumption leads to sour coffee more often than you'd think.

Can You Freeze Coffee Creamer

The reality is that shelf life varies significantly depending on whether your creamer is dairy-based, powdered, or shelf-stable liquid, and whether the seal has been broken.

Understanding coffee creamer's full range of coffee creamer's flavor and uses helps clarify why storage matters as much as it does - different formulations behave very differently once opened.

QUICK SUMMARY

Coffee creamer lasts 7-14 days in the fridge once opened (dairy style) or up to 2-3 months for opened shelf-stable nondairy liquid kept chilled. Unopened pantry versions last 6-12 months. Freeze in small portions; expect texture changes.

🧊Fridge (opened dairy): 7-14 days sealed tight; minimize room-temperature exposure
🥛Fridge (opened nondairy liquid): 2-3 months if refrigerated promptly after opening
🏠Pantry (sealed): 6-12 months for powdered or shelf-stable liquid; check best-by date
❄️Freezer: 1-3 months opened; expect separation and thinner texture after thawing
⚠️Key rule: Opened shelf-stable liquid creamer is not safe to leave at room temperature

How Long Does Coffee Creamer Last?

Shelf life depends on three variables: creamer type, seal status, and storage location. Dairy liquid creamers behave closer to milk than to a shelf-stable product - they spoil fast once opened.

Powdered creamer is the longest-lasting option by a wide margin, provided it stays dry.

Coffee Creamer Shelf Life
MethodStateDurationNotes
🏠 PantryUnopened (liquid or powder)6-12 monthsIntact seal required; verify best-by date before use
🏠 PantryOpenedNot recommendedOpened liquid must be refrigerated; opened powder stays pantry-safe only if fully airtight
🧊 FridgeUnopened (refrigerated dairy)1-2 monthsFollow printed use-by date; chilled dairy creamers have shorter windows than shelf-stable
🧊 FridgeOpened dairy liquid7-14 daysTreat like half-and-half; for more on that, see [half-and-half spoilage signs](https://forkliftkitchen.com/half-and-half-shelf-life/)
🧊 FridgeOpened shelf-stable nondairy liquid2-3 monthsSeparation increases over time; shake before each use
❄️ FreezerOpened (liquid)1-3 monthsEmulsion separates; best reserved for cooking, not direct coffee use
❄️ FreezerUnopened (powder or shelf-stable)3-6 monthsPowdered creamer retains quality longest; liquid cartons may be frozen if packaging permits

The gap between dairy and nondairy creamers is worth noting. Compared to how long milk keeps, dairy-style liquid creamer tracks closely - 7 to 14 days is a firm window, not a suggestion.

Watch Out
Opened shelf-stable creamer says "refrigerate after opening" for a reason. Room-temperature storage after breaking the seal accelerates bacterial growth, even in nondairy formulas.

How to Store Coffee Creamer

Storage method hinges on which type you have - the rules differ enough that mixing them up causes waste.

Pantry: Sealed powdered creamer and intact shelf-stable liquid cartons do well in a cool, dark cabinet away from heat sources. Keep the factory seal completely intact; even a small puncture changes the equation.

Fridge: Once opened, refrigerate immediately and keep the lid sealed between uses. Minimize how long the bottle sits out while pouring - repeated temperature cycling shortens the window. Use the original bottle, or transfer to a clean airtight glass jar; avoid metal lids, which can corrode with flavored varieties.

Counter: Never leave opened liquid creamer out for more than two hours. This applies equally to dairy and most nondairy liquids once the seal is broken.

  • ✏️ Label the bottle - write the open date directly on the cap; dairy creamer especially needs a countdown
  • 🔄 Shake before every pour - shaking recombines the stabilizers and fats that settle in flavored nondairy creamers
  • 🫙 Store powdered creamer with a desiccant packet - especially in humid climates where clumping starts fast

Can You Freeze Coffee Creamer?

Yes - with realistic expectations. Freezing works, but the emulsion in liquid creamer will likely separate, leaving a grainy or thinner texture on thaw. That's fine for pancakes, cream sauces, or baked goods, where texture change goes unnoticed.

It's less ideal for pouring directly into coffee.

The ice-cube-tray method is the most practical approach here. For context on how cream-based products respond to freezing generally, how long cream keeps covers similar behavior in higher-fat dairy.

  1. Portion it out - pour into ice-cube trays or small airtight freezer-safe containers rather than freezing the whole bottle
  2. Leave headspace - allow roughly ½ inch of room in jars; liquid expands as it freezes
  3. Label and freeze flat - mark the date, then freeze flat for efficient stacking and easy rotation
  4. For powdered creamer - transfer to an airtight, moisture-proof freezer bag before freezing to block humidity

Thaw overnight in the fridge, or place a frozen cube in warm (not hot) water until slushy. Whisk or shake thoroughly before use - this helps recombine the separated fats.

Flavored varieties like vanilla or hazelnut may also lose intensity after freezing.

Golden Rule
Never freeze creamer in the original bottle. The liquid expands and can rupture the container - and even if it doesn't, the volume thaws unevenly and separates badly.

Signs Coffee Creamer Has Gone Bad

Liquid dairy creamers give clear signals. Nondairy versions can be trickier - separation alone doesn't mean spoilage, but combined with off-smell, it does.

Signs It's Gone Bad
👀
VisualThick clumps or visible curdling · Darkened or moldy spots at bottle rim · Persistent separation that won't recombine after shaking
👃
SmellSour or rancid odor (dairy) · Chemical or synthetic off-smell (flavored nondairy)
✋
TextureSludgy or grainy mouthfeel · Oily film on container interior

Don't taste-test anything that looks or smells suspicious. Discard it - the cost of a new bottle beats a stomach upset.

Keeping Creamer Fresh Longer

A few habits extend the useful life of every type significantly. Understanding the role half and half plays in coffee helps explain why dairy-based creamers follow such similar spoilage patterns - the fat content is the variable.

If creamer runs out before its time, alternatives to coffee creamer are worth knowing for the short term.

  • 🧊 Freeze in single-serve portions - ice-cube trays let you thaw only what you need for baking or cooking
  • 📅 Write the open date on the lid - dairy creamer in particular needs a visible countdown, not a memory test
  • 🍳 Reserve frozen creamer for recipes - pancake batter, sauces, and baked goods mask any texture change from freezing
  • 🌾 Revive clumped powdered creamer - spread on a tray to dry briefly, then sift; next time, store with a desiccant packet

Frequently Asked Questions

Can you freeze coffee creamer and keep its flavor?

Mostly, yes - though flavored varieties like vanilla or hazelnut lose some intensity after freezing. The emulsion also separates, so frozen creamer works better in cooked recipes than poured directly into coffee.

How long does powdered creamer last once opened?

An opened container of powdered creamer lasts up to 3-6 months if kept in a cool, dry place in an airtight container. Humidity is the enemy - clumping signals moisture has gotten in.

Does flavored creamer go bad faster than plain?

Not necessarily faster, but the spoilage is harder to detect. Added sugars and flavorings can mask an off-smell until the creamer is quite far gone - check the texture and look for separation.

Can you use expired creamer for cooking?

A best-by date is a quality marker, not a hard safety cutoff - if it smells and looks normal, it may still work in baked goods or sauces. However, any sour smell or visible curdling means discard it regardless of intended use.

Why does creamer curdle in hot coffee?

Curdling usually means the creamer was already close to spoiling, or the temperature shock was too extreme. Pouring very cold creamer into boiling-hot coffee strains even a fresh emulsion - let coffee cool slightly first.

What Is Emmental Cheese? [Taste, Uses & More]

March 29, 2026

You spot a wedge of emmental cheese at the deli counter - pale gold, springy, dotted with those unmistakable round holes - and it looks familiar enough to grab without much thought.

What Is Emmental Cheese

Most people reach for it on instinct, then underuse it, melting it onto a sandwich when it's capable of anchoring a proper fondue or finishing a gratin with a clean, nutty depth that sharper cheeses can't quite replicate.

If you've been treating it as a generic stand-in for replacements for comte cheese or raclette cheese stand-ins without knowing what it actually brings, this guide covers exactly that.

QUICK SUMMARY

Emmental is a pale-gold Swiss semihard cow's-milk cheese with large round holes and a mild, nutty, buttery flavor. It melts smoothly, pairs well with cured meats and white wine, and suits fondue, gratins, and sandwiches where clean melt matters most.

🧀Flavor: Mild nutty, buttery, slightly fruity, clean lactic sweetness
🍽️Best Uses: Fondue, gratins, croque-monsieur, quiche, cheese boards
🌡️Texture: Firm and springy raw; creamy and smooth when melted
🛒Buy: Look for evenly distributed holes and a faint yeasty, nutty smell
📅Shelf Life: Opened wedge lasts 2-4 weeks in cheese paper in the fridge

What Is emmental cheese?

Emmental originates from the Emmental valley in the canton of Bern, Switzerland, where it has been produced since at least the 15th century.

It's a pressed, semihard cow's-milk cheese made from raw or thermized milk, formed into large wheels with a mildly elastic rind.

The cheese's most recognizable feature is its round "eyes" - the holes formed by carbon dioxide released during aging by Propionibacterium freudenreichii, a specific bacterial culture that also contributes much of the cheese's mild flavor.

Without those bacteria, you'd have a very different product.

Commercially, it goes by several names: Emmentaler, Swiss cheese in North American markets, or simply emmental. The authentic Swiss version carries AOC/AOP designation, though many other countries - France, Germany, Austria - produce their own versions using the same method.

Flavor and quality vary quite a bit between AOC-certified Swiss wheels and mass-produced supermarket slices.

  • 🇨🇭 Swiss Emmentaler AOP - raw milk, aged minimum 4 months, pronounced nutty flavor
  • 🏭 Commercial "Swiss cheese" - thermized or pasteurized milk, milder, widely available
  • 🇫🇷 French Emmental - slightly larger holes, creamier paste, close in flavor to Swiss versions

What Does emmental cheese Taste Like?

emmental cheese - What Is Emmental Cheese

Emmental is mild and approachable - not sharp, not pungent, and nothing close to challenging. The dominant note is a clean nuttiness, closer to toasted walnut than anything sharp or acidic, backed by a gentle buttery quality that lingers briefly.

There's a light fruity sweetness in the background, almost like mild apple, and a lactic freshness that keeps the whole profile clean rather than rich.

It's often compared to Gruyère, and fairly so - think of emmental as the softer, more restrained sibling.

Sensory SnapshotMild Intensity
👅 Flavor
nuttybutterylightly fruitylactic sweet
✋ Texture
firmspringycreamy when melted
👃 Aroma
mildly nuttylightly yeasty

Heat is where emmental's texture changes most noticeably. Raw, it's firm with a slight elastic resistance under the bite.

Melted, it becomes smooth and fluid without breaking into greasy strands - a behavior that makes it reliable in cooked applications where clean melt matters.

Golden Rule
Emmental loses most of its subtle fruity notes under high heat. Use lower, gentler heat when melting to preserve flavor alongside that clean melt.

How to Use emmental cheese

Fondue is where emmental earns its reputation. Classic Swiss fondue blends it with Gruyère in roughly equal parts - emmental contributes the smooth, fluid melt while Gruyère adds the deeper savory note. Neither cheese works quite as well alone for this purpose, which is why the combination is traditional rather than optional. If you're exploring the full range of Swiss fondue-style dishes, rich chocolate fondue in dairy recipes shows how the same melting-pot format extends well beyond cheese.

Beyond fondue, emmental handles gratins and potato dauphinoise cleanly, grating finely and melting into the layers without overwhelming the dish. A croque-monsieur depends on it - the cheese should melt onto the ham without going stringy or separating.

How Emmental Cheese Is Used
MethodBest ForTip
🫕 FondueClassic Swiss fondue blended with GruyèreUse dry white wine or kirsch to keep it fluid
🥘 Gratin/BakingPotato dauphinoise, quiche, gratin toppersGrate finely for even melting across the surface
🥪 Melted sandwichCroque-monsieur, ham-and-cheese, ReubenMedium heat only - prevents separation
🧀 Cold plateCheese boards, deli slices, cubed for snackingPair with crisp apple, Dijon, or rye bread
🍲 SaucesMornay, béchamel-based mac and cheeseAdd off-heat once béchamel is ready

On a cheese board, emmental holds its own alongside cured ham or prosciutto, crisp apples or pears, and walnuts. Pair it with a dry Sauvignon Blanc or dry Riesling rather than a heavy tannic red, which tends to flatten its mild character.

Avoid placing it next to strong blue cheeses - the contrast doesn't flatter either.

For anyone considering swapping out emmental cheese in a recipe, Gruyère is the closest match, though it brings more intensity - and our guide on replacements for gruyere cheese covers the reverse situation just as well.

Try It In
🧀Cheddar Cheese StrawsSwap in emmental for a milder, nuttier straw→🍳Egg and Cheese Breakfast SandwichEmmental melts cleanly without overpowering eggs→

How to Buy and Store emmental cheese

At the counter, look for a pale gold paste with medium-to-large round eyes distributed evenly through the wedge - uneven or absent holes can indicate poor aging conditions. The rind should be dry and intact.

Smell it: you want a faint yeasty, nutty note; any sharp ammonia or sour smell is a sign of age or poor storage.

Watch Out
Avoid pre-grated emmental packed in sealed bags. Without proper airflow, the cheese sweats and loses its clean flavor faster than a properly wrapped wedge.

Wrap opened wedges in cheese paper or waxed paper, not airtight plastic, and store in the vegetable drawer where temperature stays steady. Airtight plastic short-term is fine for a day or two, however prolonged sealing causes moisture buildup and off-flavors.

  • 📦 Unopened vacuum wedge - several months refrigerated
  • 🧀 Opened wedge in cheese paper - 2-4 weeks in the fridge
  • 🫙 Grated emmental - 5-7 days, covered in the fridge

Tracking how emmental behaves across longer storage windows fits the same logic as understanding milk's shelf life - both depend on consistent cold and minimal air exposure.

For full guidance on emmental cheese in dairy recipes and how shelf life affects cooking decisions, that resource goes into more detail.

Start With the Fondue

If you've never cooked with emmental before, fondue is the right first move. It shows exactly what the cheese does - how it melts, how it behaves with wine and heat, and why pairing it with using gruyere cheese for creaminess produces something neither cheese achieves alone.

Once you have the melt behavior down, the rest follows naturally. Gratins, croque-monsieur, quiche - all reward the same clean, even melt that makes emmental reliable rather than flashy.

Best Pick
For cooking, a Swiss Emmentaler AOP wheel or wedge outperforms the pre-sliced supermarket version on flavor. If AOC-certified isn't available, French Emmental is a solid second choice.

Frequently Asked Questions

What does Emmental cheese taste like?

Mild, nutty, and buttery with a faint lactic sweetness and light fruity background. It's less sharp than Gruyère and less tangy than aged cheddar, making it one of the gentler cooking cheeses available.

Is Emmental the same as Swiss cheese?

Not exactly. "Swiss cheese" is a North American term borrowed from emmental's appearance and mild profile, but it typically refers to a milder, pasteurized commercial version. Authentic Emmentaler AOP from Switzerland uses raw milk and has a more pronounced flavor.

Can Emmental be used in fondue?

Yes - it's one of the two traditional cheeses in classic Swiss fondue. It's blended with Gruyère, with emmental providing the smooth melt and Gruyère adding savory depth.

Is Emmental good for melting?

Yes. Its relatively low moisture and semihard structure let it melt smoothly without breaking into greasy pools. Medium heat gives the cleanest result - high heat can cause separation.

Is Emmental vegetarian?

Most traditional and many commercial versions use animal rennet, making them not vegetarian-friendly. Check the label specifically for "vegetarian rennet" or "microbial rennet" if that matters for your diet.

« Previous Page
Next Page »

Primary Sidebar

ForkliftKitchen recipe developer

Welcome!

Recipe Developer · 12+ Yr Kitchen Veteran

I'm the recipe developer behind this site, focused on practical, well-tested dishes and smart ingredient swaps. Every recipe is written to be clear, reliable, and easy to make at home.

650+ Recipes
12+ Yrs Exp.
3x Tested
Our Story →

As Featured In

Allrecipes

TASTE OF HOME

Food52

HUFFPOST

Yahoo! Life

Our Editorial Standards

  • ✓ Every recipe tested at least 3 times before publishing
  • ✓ Substitutes verified by real kitchen trials, not guesswork
  • ✓ Reviewed for accuracy by our editorial team
  • ✓ Updated regularly with seasonal info and reader feedback

Most Popular

  • Creamy Lemon Shrimp Linguine
    Creamy Lemon Shrimp Linguine
  • Creamy Garlic Mushroom Chicken
    Creamy Garlic Mushroom Chicken
  • Sesame Ginger Chicken Noodle Bowls
    Sesame Ginger Chicken Noodle Bowls
  • Baked Lemon Herb Fish Fillets
    Baked Lemon Herb Fish Fillets
  • Veggie Loaded Fried Rice
    Veggie Loaded Fried Rice
  • Spicy Garlic Shrimp Stir Fry
    Spicy Garlic Shrimp Stir Fry

Join 8,000+ Home Cooks

Weekly Kitchen Tips

Easy recipes, smart substitutes, and real cooking shortcuts — every Thursday.

Subscribe Free →


Side Dishes

  • What to Serve With Asian Salmon? 15 Best Side Dishes
    What to Serve With Asian Salmon? 15 Best Side Dishes
  • Side Dishes for Strawberry Spinach Salad
    15 Best Side Dishes for Strawberry Spinach Salad
  • Sides for Grilled Cauliflower Steaks to Complete the Meal
    15 Sides for Grilled Cauliflower Steaks to Complete the Meal
  • 15 Sides To Serve With Calabacitas
    15 Best Sides for Calabacitas – Mexican-Inspired Favorites


Substitutes

  • 7 Best Substitutes for Hot Sauce in Marinades & Stir-Fries
    7 Best Substitutes for Hot Sauce in Marinades & Stir-Fries
  • 9 Best Substitutes for Butter in Baking and Cooking
  • 7 Best Substitutes for Tagliatelle for Italian Pasta Dishes
    7 Best Substitutes for Tagliatelle for Italian Pasta Dishes
  • 7 Best Substitutes for Udon Noodles in Asian Stir-Fries
    7 Best Substitutes for Udon Noodles in Asian Stir-Fries


Browse by Topic

  • Side Dishes320
  • Substitutes785
  • Dinner163
  • Air Fryer77
  • Taste Profiles484
  • Food Storage123


Reader Reviews

★★★★★

"Finally a food blog that tells you exactly why a substitute works instead of just listing options."

— Sarah M., via email

★★★★★

"The side dish recommendations are so specific — saved my dinner party twice this month."

— James R., Pinterest comment

★★★★★

"I trust this site more than most because they actually test everything. You can tell."

— Priya K., blog comment

Footer

↑ Back to Top

Forklift Kitchen

We do the heavy lifting so you can enjoy the cooking. Tested recipes, smart substitutes, and perfect pairings—built for real home cooks.

Content

  • Recipes
  • Substitutes
  • What to Serve With
  • Blog

Company

  • About Us
  • Contact
  • Subscribe

Legal

  • Privacy Policy
  • Terms of Service

As an Amazon Associate I earn from qualifying purchases.

© 2026 Forklift Kitchen.

Rate This Recipe

Your vote:


A rating is required
A name is required
An email is required