• Skip to primary navigation
  • Skip to main content
  • Skip to primary sidebar
  • Recipe Index
    • Air Fryer
  • Side Dishes
  • Substitutes
  • About
  • Contact
  • Subscribe

ForkLiftKitchen

menu icon
go to homepage
  • Recipe Index
    • Air Fryer
  • Side Dishes
  • Substitutes
  • About
  • Contact
  • Subscribe
subscribe
search icon
Homepage link
  • Recipe Index
    • Air Fryer
  • Side Dishes
  • Substitutes
  • About
  • Contact
  • Subscribe
×

Blog

What Is Dashi Powder? [Taste, Uses & More]

March 29, 2026

Crack open a tin of dashi powder and the smell hits you before anything else - smoky katsuobushi with a faint mineral edge of dried kelp underneath.

What Is Dashi Powder

That two-second sensory moment tells you exactly what this pantry staple does: it delivers the foundational umami of Japanese cooking without a two-hour simmer.

The same flavor backbone that runs through miso soup, udon broth, and chawanmushi starts here, in a fine powder that dissolves in seconds.

Building a well-layered broth means understanding how your supporting players interact - knowing when swapping out soy sauce or comparing aji mirin vs rice vinegar options changes the final result helps dashi powder do its job better.

QUICK SUMMARY

Dashi powder is a concentrated instant stock seasoning made from katsuobushi, kombu, and sometimes shiitake. It dissolves in hot water to produce a light, umami-rich broth with smoky and briny notes - the fast-track base for miso soup, noodle broths, and simmered dishes.

🌊Flavor: Umami-forward, briny-mineral, lightly smoky, mildly salty
🍜Best Uses: Miso soup, udon broth, nimono, chawanmushi, seasoned rice
🧂Key Note: High sodium - reduce added salt in any recipe using it
📦Shelf Life: Unopened up to a year; opened best within 6-12 months if kept dry
⚠️Dietary: Contains fish (bonito) - look for shiitake-only or kombu-only versions for vegan needs

What Is Dashi Powder?

Dashi powder is a shelf-stable, instant stock seasoning that compresses the labor of traditional Japanese dashi into a fine, dissolvable granule.

Traditional dashi - a clear, lightly smoky stock - is the flavor foundation of Japanese cooking, made by steeping katsuobushi (dried, fermented, smoked bonito flakes) and kombu (dried kelp) in hot water.

The powder replicates that process in concentrated form. Most commercial versions blend katsuobushi extract, kombu extract, and salt, with some adding dried shiitake for an earthier depth.

Shiitake-forward or kombu-only versions are sold specifically as vegetarian alternatives.

You'll see it sold under several names:

  • 🧂 Dashi granules - same product, coarser grind
  • 🧂 Instant dashi - used generically across brands
  • 🧂 Hon-dashi - a specific Ajinomoto brand name, though widely misused as a category term
  • 🧂 Dashi no moto - the Japanese term meaning "base for dashi," common on imported packaging

Reading the ingredient list matters. Better products list katsuobushi and kombu clearly; cheaper ones lean on MSG, salt, and flavor extracts with minimal actual fish or seaweed content.

What Does Dashi Powder Taste Like?
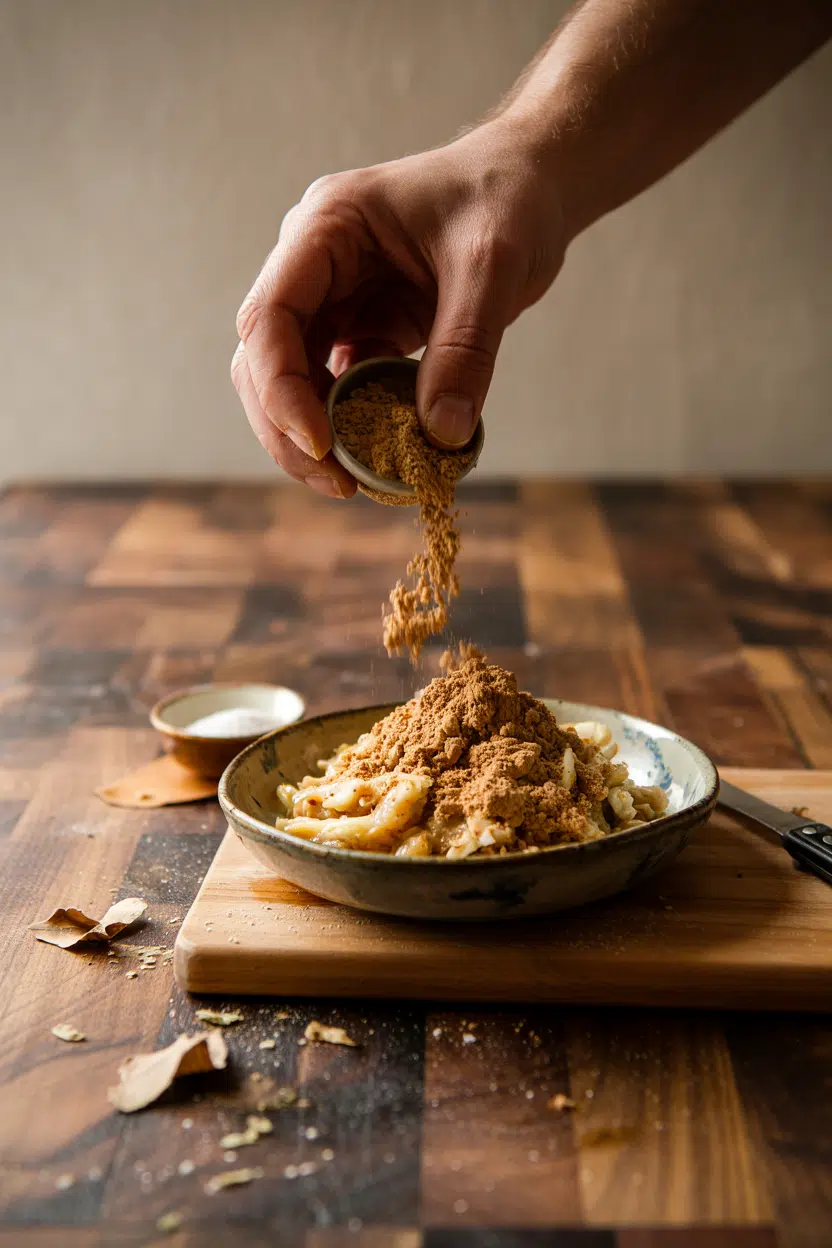
dashi powder - What Is Dashi Powder

Dashi powder produces a broth closest to a light fish stock crossed with seaweed broth - but cleaner and more restrained than either alone.

The bonito component brings a smoky, slightly savory depth; the kombu brings a mineral, ocean-salt brightness that pushes it into umami territory.

Sensory SnapshotModerate Intensity
👅 Flavor
umami-richbriny-mineralsmokylightly salty
✋ Texture
fine powder drysmooth clear broth dissolved
👃 Aroma
smoky-katsuobushiseaweed-bright

The flavor is moderate in intensity - assertive enough to anchor a soup base, restrained enough to not overwhelm delicate ingredients like soft tofu or silken egg.

Heat amplifies the glutamate compounds from the kombu, which is why a hot bowl of miso soup tastes more rounded than the powder smells straight from the tin.

Shiitake-based dashi powders add a woodsy, earthier undertone that shifts the profile noticeably.

How to Use Dashi Powder

The standard application is simple: dissolve in hot water to build an instant dashi stock.

A typical ratio is about one teaspoon per two cups of water, though this varies by brand and dish - stronger concentrations suit nimono (simmered vegetables) or rich noodle broths, while lighter ratios suit clear soups.

Golden Rule
Always dissolve dashi powder in hot (not boiling) water - around 160-180°F keeps the delicate smoky-mineral notes intact. Hard boiling drives off volatile aroma compounds.

Beyond stock, the powder works well as a dry seasoning additive sprinkled directly into braises, rice cookers, or whisked into sauces off heat.

Miso soup is the obvious entry point, but dashi powder earns its keep in udon and soba broths, chawanmushi (steamed egg custard), and takikomi gohan (seasoned rice cooked with vegetables).

For the latter, a half-teaspoon added to the rice cooker with soy sauce, mirin, and shiitake mushrooms builds a complete flavor base without a separate stock step.

It pairs closely with miso paste, soy sauce, and mirin - the three most common co-seasonings in Japanese home cooking. Tofu, daikon, scallions, clams, and shrimp all absorb dashi-based broths well.

If you run out, there are workable dashi powder stand-ins - though none replicate the exact smoky-mineral combination precisely.

How Dashi Powder Is Used
MethodBest ForTip
💧 DissolvedMiso soup, udon broth, clear soupsUse 1 teaspoon per 2 cups hot water; adjust for intensity
🍲 Added to simmering liquidNimono, braises, hot potsStir in early so it integrates with other seasonings
🥣 Dry-sprinkledSeasoned rice, sauces, dressingsStart with half the amount you think you need - it concentrates
🥚 Whisked inChawanmushi, egg dishesDissolve fully before combining with egg to avoid lumps
Try It In
🍲Creamy Chicken and Wild Rice SoupA spoonful of dashi powder deepens the broth without extra stock→

How to Buy and Store Dashi Powder

Read the ingredient list first. Good dashi powder names katsuobushi and kombu prominently, without leaning on generic "fish extract" or excessive filler salt. Single-use sachets preserve freshness well; airtight tins work too, but check the seal.

Watch Out
A sharp, overpowering fishy smell on opening usually means moisture got in - or the stock is old. Either way, the flavor will be flat and stale. Don't use it.

Clumping is the main storage enemy. Once opened, transfer to an airtight container and keep it away from humidity, heat, and direct light.

A cool pantry shelf works fine - the refrigerator adds unnecessary moisture risk. For shelf life specifics and whether freezing dashi powder makes sense for your situation, the answer depends on how often you cook with it.

  • ✅ Unopened - keeps up to a year in a cool, dry pantry
  • ✅ Opened - best within 6-12 months in an airtight container
  • ❌ Clumped or fishy-smelling - discard; flavor is gone

Where to Start With Dashi Powder

Dashi powder rewards simple first uses. Start with a basic miso soup: dissolve one teaspoon in two cups of hot water, add a spoonful of miso paste, and finish with tofu and scallions.

Understanding what pairs with miso soup helps you build meals around this base quickly.

From there, try it in a rice cooker with soy sauce and shiitake.

Once you see how the powder layers with other seasonings, you'll reach for it in broths and sauces naturally - and if miso runs low, knowing your options for replacements for miso paste keeps the whole system running.

Frequently Asked Questions

Is dashi powder the same as hondashi?

No - hon-dashi is a specific brand by Ajinomoto, not a category name. Other brands make dashi powder using similar or different ingredient ratios. Hon-dashi is the most widely available, so the name stuck as shorthand.

How much dashi powder per cup of water?

Half a teaspoon per cup is a standard starting point. Increase to three-quarters of a teaspoon for richer broth in noodle soups or simmered dishes. Brand concentration varies, so always check the packaging first.

Can vegetarians use dashi powder?

Standard dashi powder contains bonito (fish), so it's not vegetarian. Kombu-only or shiitake-kombu blends are sold specifically for plant-based diets - check labels for "vegan dashi" or "kombu dashi" on the packaging.

Can you add dashi powder directly to food without dissolving it first?

Yes, in liquid-based dishes. Sprinkle it into soups, braises, or the rice cooker and it dissolves in the existing moisture. Avoid adding it dry to low-moisture dishes - it won't distribute evenly.

Does dashi powder expire?

It has a best-by date, and quality does fade after opening. Moisture exposure degrades the powder faster than age alone - clumping and a flat or stale aroma are signs it's past its best.

Seafood Cioppino San Francisco-Style

March 29, 2026

Rich seafood stews often turn into watery soup or rubbery shellfish. The fix is simmering clams and mussels in broth first, then adding delicate fish and shrimp at the end so nothing overcooks.

Seafood Cioppino San Francisco-Style served on a plate

A heavy-bottomed pot holds steady heat without scorching the tomato base. The wine deglazes the pan and builds depth while the alcohol cooks off.

Make this when you want a weekend meal that looks impressive but doesn't require constant attention. The broth does most of the work while you prep crusty bread for dipping.

QUICK SUMMARY

San Francisco cioppino layers Dungeness crab, clams, mussels, shrimp, and firm white fish in a tomato-wine broth that simmers gently to keep seafood tender. Adding shellfish by cook time prevents rubbery texture - clams go in first, shrimp last. Serve immediately with sourdough to soak up the broth.

⏱️Time Reality: 60 minutes total - 20 minutes prep, 40 minutes simmering and staging seafood
🔥Critical Move: Simmer broth at 185°F, never boil, to keep liquid clear and seafood tender
⚠️Watch Out: Discard any shellfish that don't open after cooking - sign they were already dead

Table of Contents

Toggle
  • Why This Recipe Works
  • What You'll Need
    • Ingredient Details
  • Ingredient Swaps
  • What to Serve With It
  • Store and Reheat
  • Frequently Asked Questions
  • Seafood Cioppino San Francisco-Style
    • Method 
    • Tried this recipe?

Why This Recipe Works

Simmering shellfish in stages keeps each type tender instead of turning them all rubbery. For a version that comes together quickly, homemade lobster thermidor recipe uses similar layering techniques with rich sauce.

Quick Reference
⏱️
Prep Time
20 min
🔥
Cook Time
40 min
⏰
Total Time
60 min
🍽️
Servings
6 servings
📊
Difficulty
Medium
🏷️
Category
Main Dish
💡
Quick Tip
Add seafood by doneness, simmer gently
🎯
Best For
Weekend meal | Entertaining

What makes this work:

  • Sautéing garlic for 1-2 minutes until fragrant builds aromatic base without burning - browned garlic tastes bitter
  • Deglazing with white wine and simmering 3-5 minutes cooks off alcohol while adding acidity that balances sweet crab
  • Keeping broth at 185°F instead of boiling prevents cloudy liquid and tough shellfish texture
  • Adding clams first, then mussels, then fish and shrimp ensures everything reaches doneness at the same time
  • Soaking shellfish in cold salted water for 20 minutes expels sand that would grit up the broth
Quick Tip
Remove shrimp when they turn opaque pink and firm, about 3-4 minutes - carryover cooking happens fast in hot broth

What You'll Need

Ingredients for Seafood Cioppino San Francisco-Style

Dungeness crab defines San Francisco-style cioppino, but snow crab works when fresh isn't available. We keep a batch ready for nights like this - this creamy potatoes soaks up extra broth without competing with seafood flavor.

🦐
Seafood
  • 1 lb Dungeness crab (cracked)
  • 1 lb clams (Manila or razor)
  • 1 lb mussels
  • 1 lb shrimp (peeled, deveined)
  • 1 lb firm white fish (halibut or cod)
🥬
Aromatics
  • 1 onion (diced)
  • 6 cloves garlic (minced)
  • Fresh parsley or fennel fronds
🥢
Broth Base
  • 28 oz canned crushed tomatoes
  • 1 cup dry white wine
  • 2 cups fish stock or clam juice
🌶️
Seasonings
  • Red pepper flakes (optional)
  • Salt and black pepper
  • Olive oil

Ingredient Details

  • Dungeness crab
    Use pre-cracked shells to make eating easier - crack legs and body with seafood crackers before cooking
  • Clams and mussels
    Tap any open shells before cooking - if they don't close, discard them as they're already dead
  • Firm white fish
    Halibut or cod hold up best in broth - tilapia works but breaks apart more easily
  • Canned tomatoes
    Crushed tomatoes create thicker broth than whole peeled - both work, adjust simmering time
  • Dry white wine
    Use sauvignon blanc or pinot grigio - avoid oaked wines that add woody flavor
  • Fish stock
    Bottled clam juice works in a pinch - use half clam juice, half water to avoid overly briny taste
  • Fresh herbs
    Add parsley or fennel fronds in the last minute of cooking to preserve bright green color

Ingredient Swaps

Shellfish allergies or budget constraints mean adjusting the seafood mix. A good creamy dip side dish can make or break the plate when serving bread alongside cioppino.

Four swaps that work:

  • Dungeness crab → Snow crab legs: Slightly sweeter taste, similar firm texture - thaw frozen legs completely before adding
  • Clams → Cockles or littleneck clams: Smaller shells, same briny flavor - reduce cooking time by 2 minutes
  • Dry white wine → Extra fish stock plus 2 tablespoons white wine vinegar: Mimics acidity without alcohol - add vinegar at end to preserve brightness
  • Firm white fish → Tilapia or mahi-mahi: Budget-friendly, breaks apart faster - add in last 3 minutes instead of 5

Fresh Live Shellfish

Works for: Weekend entertaining when you can shop day-of, best flavor and texture

Skip if: Shopping ahead or storing overnight - shellfish die quickly and turn rubbery

Frozen Seafood Mix

Works for: Budget meals, advance prep, consistent availability year-round

Skip if: Serving guests - texture suffers from freezing, especially shrimp and delicate fish

Instructions

Staging seafood by cook time prevents the rubbery texture that ruins most stews. The fresh salad side dish works best when it hits the table at the same time as the main.

  1. Sauté aromatics: Heat 3 tablespoons olive oil in a large Dutch oven over medium heat. Add diced onion and cook 5 minutes until softened. Add minced garlic and cook 1-2 minutes until fragrant but not browned.

  2. Deglaze and build broth: Pour in 1 cup white wine, scraping up any browned bits from the pan. Simmer 3-5 minutes until alcohol smell fades. Add crushed tomatoes, fish stock, and red pepper flakes. Bring to a simmer and cook 15 minutes uncovered to concentrate flavors.

  3. Add first-stage shellfish: Reduce heat to maintain gentle simmer at 185°F. Add clams first, cover pot, and cook 5 minutes. Add mussels, cover again, and cook 3-4 minutes until shells open. Remove any shellfish that don't open.

  4. Add fish and shrimp: Nestle fish chunks into broth and add shrimp on top. Cover and simmer 4-5 minutes until fish flakes easily with a fork and shrimp turn opaque pink. Add cracked crab pieces in last 2 minutes just to heat through.

  5. Finish and serve: Remove from heat immediately. Stir in fresh parsley or fennel fronds. Ladle into large bowls, making sure each serving gets a variety of seafood. Serve with crusty sourdough for soaking up broth.

Golden Rule
Never let the broth boil once seafood goes in - high heat turns tender shellfish into rubber bands in under 2 minutes

What to Serve With It

Most people skip sides entirely, but bread alone doesn't fill out the meal. For fresh seafood dinner ideas, balance rich broth with something crisp or starchy.

Side Dish Prep Why It Works How to Serve
Crusty sourdough bread Easy Signature pairing for San Francisco cioppino, soaks up tomato broth Toast thick slices, rub with garlic, drizzle with olive oil
Simple green salad Easy Adds fresh crunch contrast to rich seafood stew Dress lightly with lemon vinaigrette, serve alongside
Steamed rice Easy Neutral base absorbs extra broth, makes meal more filling Spoon rice into bowls first, ladle cioppino over top
Roasted seasonal vegetables Medium Adds color and texture variety without competing flavors Roast zucchini, bell peppers, or fennel at 425°F for 20 minutes
Garlic butter potatoes Medium Hearty complement for cold weather, soaks up broth like bread Roast baby potatoes with garlic and butter, serve on the side

Three ways to serve it:

  • Family-style: Ladle cioppino into a large serving bowl in the center of the table, pass crusty bread and aioli for dipping
  • Individual bowls: Portion seafood evenly into wide shallow bowls, garnish each with fresh herbs and lemon wedges
  • Over rice or pasta: Spoon steamed rice or linguine into bowls first, top with cioppino so starch absorbs broth
Shortcut
Buy pre-cracked Dungeness crab from the seafood counter - saves 10 minutes of prep and keeps hands clean

Store and Reheat

Cioppino tastes best fresh, but you can store leftovers if you separate seafood from broth. Cauliflower brings the color this plate needs - tender cauliflower side dish rounds out reheated cioppino when serving next-day leftovers.

Method Time Best For
🍳 Stovetop 5-8 minutes over medium-low Best texture retention, reheat broth and seafood separately
📦 Microwave 2-3 minutes, stirring halfway Quick single servings, broth only - seafood gets rubbery
🔥 Oven 15-20 minutes at 325°F Large batches in covered oven-safe dish, gentle even heating

For best results when storing:

  • Refrigerate within 2 hours: Transfer cioppino to shallow airtight container, cool to room temperature first to prevent steam buildup
  • Separate seafood if possible: Store shellfish and fish separate from broth - recombine when reheating to control texture
  • Use within 3-4 days: Seafood spoils faster than other proteins - smell before reheating and discard if fishy odor develops
  • Freeze broth only: Freeze tomato-wine broth base up to 2 months, add fresh seafood when serving - frozen shellfish turns mushy
  • Reheat gently: Never boil reheated cioppino - warm over low heat just until steaming to keep seafood tender

Frequently Asked Questions

Can I make Seafood Cioppino ahead and reheat?

Make the tomato-wine broth base up to 2 days ahead and refrigerate. Add fresh seafood when you're ready to serve - reheating cooked shellfish and fish turns them rubbery.

How do I know when the shellfish in Cioppino is done?

Clams and mussels are done when shells open fully, usually 5-8 minutes of simmering. Shrimp turn opaque pink and firm in 3-4 minutes, while fish flakes easily with a fork after 4-5 minutes.

Can I use frozen seafood instead of fresh in Cioppino?

Yes, but thaw completely in the refrigerator overnight first. Frozen seafood releases more water into the broth and has slightly softer texture than fresh.

What should I do if the broth tastes bland?

Add more salt first - seafood needs aggressive seasoning. If still flat, simmer uncovered for 10 minutes to concentrate flavors, or add a splash of white wine and a pinch of red pepper flakes.

What are good side dishes to serve with Cioppino?

Crusty sourdough bread is traditional for soaking up broth. Add a simple green salad for crunch contrast, or serve over steamed rice to make the meal more filling.

Seafood Cioppino San Francisco-Style

No ratings yet
This San Francisco-style Seafood Cioppino features a rich tomato-wine broth simmered gently to keep seafood tender. Layering shellfish by cook time - clams first, shrimp last - prevents rubbery texture and ensures every bite is flavorful. Serve immediately with crusty sourdough bread to soak up the delicious broth.
Print Recipe Pin Recipe
Prep Time 20 minutes mins
Cook Time 40 minutes mins
Total Time 1 hour hr
Servings: 6 servings
Course: Main Dish
Cuisine: American, Seafood
Ingredients Equipment Method Notes

Ingredients
  

  • 1 lb dungeness crab cracked shells
  • 1 lb clams Manila or razor
  • 1 lb mussels
  • 1 lb shrimp peeled and deveined
  • 1 lb firm white fish halibut or cod
  • 1 onion diced
  • 6 cloves garlic minced
  • to taste fresh parsley or fennel fronds added at end for freshness
  • 28 oz canned crushed tomatoes
  • 1 cup dry white wine such as sauvignon blanc or pinot grigio
  • 2 cups fish stock or clam juice clam juice diluted with water if desired
  • to taste red pepper flakes optional
  • to taste salt and black pepper
  • 3 tablespoons olive oil

Equipment

  • Heavy-bottomed pot or Dutch oven Use for steady heat and to prevent scorching

Method
 

  1. Heat 3 tablespoons olive oil in a large Dutch oven over medium heat. Add diced onion and cook for 5 minutes until softened. Add minced garlic and cook for 1-2 minutes until fragrant but not browned.
    3 tablespoons olive oil, 1 onion, 6 cloves garlic
  2. Pour in 1 cup dry white wine, scraping up any browned bits from the pan. Simmer for 3-5 minutes until the alcohol smell fades. Add crushed tomatoes, fish stock, and red pepper flakes. Bring to a simmer and cook uncovered for 15 minutes to concentrate flavors.
    1 cup dry white wine, 28 oz canned crushed tomatoes, 2 cups fish stock or clam juice, to taste red pepper flakes
  3. Reduce heat to maintain a gentle simmer at about 185°F. Add clams first, cover the pot, and cook for 5 minutes. Then add mussels, cover again, and cook 3-4 minutes until shells open. Discard any shellfish that do not open.
    1 lb clams, 1 lb mussels
  4. Nestle fish chunks into the broth and add shrimp on top. Cover and simmer for 4-5 minutes until fish flakes easily with a fork and shrimp turn opaque pink. Add cracked crab pieces in the last 2 minutes just to heat through.
    1 lb firm white fish, 1 lb shrimp, 1 lb dungeness crab
  5. Remove from heat immediately. Stir in fresh parsley or fennel fronds to preserve color. Ladle into large bowls, ensuring each serving has a variety of seafood. Serve with crusty sourdough bread for dipping.
    to taste fresh parsley or fennel fronds

Notes

  • Simmer broth at 185°F without boiling to keep liquid clear and tender seafood.
  • Add shellfish by cook time to prevent rubbery texture: clams first, shrimp last.
  • Discard any shellfish that do not open after cooking as they may be unsafe to eat.

Tried this recipe?

Let us know how it was!

What Is Colby Jack Cheese? [Taste, Uses & More]

March 29, 2026

Melted across a backyard burger or pulled from a lunchbox next to crackers and apple slices, Colby Jack shows up in the most reliable corners of American eating. It's not a showoff cheese - it's the one that melts cleanly, slices without crumbling, and offends nobody at the table.

What Is Colby Jack Cheese

Understanding what makes it work helps you use it better, whether you're building a quesadilla or stocking the fridge for the week.

QUICK SUMMARY

Colby Jack is a semi-soft blended American cheese made from Colby and Monterey Jack curds. It melts smoothly, tastes mild and buttery, and suits everyday cooking from burgers to baked potatoes.

🧀Type: Semi-soft blended cow's milk cheese, American origin
👅Flavor: Mild, buttery, lightly tangy with a hint of sweetness
🍳Best Uses: Melting on burgers, quesadillas, mac and cheese, grilled cheese
❄️Shelf Life: Opened block 3-4 weeks; shredded 1-2 weeks refrigerated
🛒Buy It: Choose vacuum-sealed blocks with clear marbling and no dark spots

What Is Colby Jack Cheese?

Colby Jack - also written Colby-Jack or called marble cheese - is a blended American cheese made by combining Colby curds and Monterey Jack curds before pressing. The result is that familiar orange-and-white marbled pattern running through every slice.

It originates from the American Midwest, where both of its parent cheeses were already established regional staples. Colby was developed in Wisconsin in the 1880s, while Monterey Jack traces its roots to California.

The blend is classified as a semi-soft cheese with an open-curd structure, meaning it retains more moisture than aged hard cheeses. That moisture is exactly what gives it such a forgiving melt.

Unlike processed cheese products, Colby Jack is a natural cheese made from cow's milk - though reduced-fat versions exist. Those versions hold their shape better under heat but sacrifice the creamy melt that makes the original worth using.

If you've been buying pre-shredded bags and wondering why the melt feels gummy, the cheese curds structure in a fresh block makes a real difference.

What Does Colby Jack Cheese Taste Like?

colby jack cheese - What Is Colby Jack Cheese

Colby Jack tastes like a milder, creamier cheddar crossed with the gentle sweetness of Monterey Jack. Neither component dominates - the Colby brings a faint tang, and the Jack smooths it out.

Sensory SnapshotMild Intensity
👅 Flavor
butterymildly tangyslightly sweet
✋ Texture
semi-softcreamy when melted
👃 Aroma
mild dairyfresh cream

Cold from the fridge, it's moist and slightly springy with a clean dairy flavor. Heat changes it fast - the open-curd structure collapses into a smooth, milky pool rather than a stringy or greasy one.

Aged Colby Jack develops a slightly sharper edge over time, but most supermarket blocks are sold young. Don't expect the complexity of a cave-aged wheel here.

This is an everyday cheese that earns its place through consistency, not drama.

How to Use Colby Jack Cheese

Melting is where Colby Jack performs best. Low to medium heat keeps it smooth; high heat or prolonged cooking will cause the fat to separate and turn greasy.
How Colby Jack Is Used
MethodBest ForTip
🔥 MeltingBurgers, grilled cheese, baked potatoes, mac and cheeseUse low-medium heat; add near the end of cooking
🥗 Sliced coldSnack boards, sandwiches, lunchbox packsSlice from a cold block for cleaner edges
🧺 Shredded/GratedQuesadillas, casseroles, scrambled eggs, omeletsShred from a block - pre-shredded has anti-caking powder that dulls the melt
🍳 Broiled brieflyNachos, baked potatoes, open-faced sandwichesWatch closely - it browns in under 2 minutes under a hot broiler

In Tex-Mex cooking, shredded Colby Jack goes into quesadillas and burritos where even melting matters more than sharp flavor. American diner staples - burgers, grilled cheese, mac and cheese - are the natural home for this cheese.

For snack boards and lunchboxes, cube it and pair with apple or pear slices, ham or turkey deli meats, crackers, and sweet pickles. The mild flavor works beside almost anything without competing.

If you want a closer melt match in a recipe, Monterey Jack is the nearest swap, and a range of colby jack cheese swaps can cover different cooking needs.

Golden Rule
Add Colby Jack in the last minute or two of cooking. Prolonged heat separates the fat and turns a smooth melt greasy.
Try It In
🧀Cheddar Cheese StrawsSwap in Colby Jack for a milder, creamier version→🍳Egg and Cheese Breakfast SandwichIts clean melt makes it ideal for layered egg sandwiches→

How to Buy and Store Colby Jack Cheese

Vacuum-sealed blocks are the best buy. Look for a clear marbled orange-and-white pattern with no dark spots, slime, or visible mold on the rind edges. For pre-shredded bags, check for minimal white powdery residue - heavy anti-caking coating signals a less fresh product.

Watch Out
Store Colby Jack away from strong-smelling foods like onions or cured meats. Its open-curd structure absorbs odors faster than harder cheeses.

Storage is straightforward:

  • Unopened block - refrigerate; lasts 2-3 months
  • Opened block - wrap in wax paper, then foil or an airtight container; use within 3-4 weeks
  • Shredded - keep in a sealed bag; use within 1-2 weeks

For full guidance on how long it keeps under different conditions, the colby jack cheese storage life breakdown covers opened, unopened, and frozen scenarios in detail.

Start Here With Colby Jack

New to this cheese? Buy a block, not a bag. Shred it yourself for the cleanest melt and best flavor.

  • For burgers or grilled cheese - slice cold, apply at the last minute, lid the pan
  • For quesadillas or scrambled eggs - shred from a cold block and add off-heat or at the end
  • For snack boards - cube it and pair with fruit, deli meat, and crackers; no cooking needed

Colby Jack is a reliable, low-maintenance cheese that delivers consistent results. Start with a block from the deli section, and you'll see why it's been a staple of American home kitchens for decades.

Frequently Asked Questions

Is Colby Jack the same as Monterey Jack?

No. Monterey Jack is a single cheese; Colby Jack is a blend of Colby and Monterey Jack curds pressed together. Monterey Jack is slightly creamier and paler, while Colby adds a faint tang and the orange color to the finished block.

Does Colby Jack melt well?

Yes - its high moisture content and open-curd structure make it one of the more reliable melting cheeses in everyday cooking. Keep heat at low to medium; high heat causes fat separation and a greasy result.

Is Colby Jack cheese processed?

No. It's a natural cheese made from cow's milk, not a processed product like American cheese slices. The marbled appearance comes from blending two different cheese curds, not from added emulsifiers.

Can you freeze Colby Jack cheese?

Yes, but texture suffers. Freezing causes the moisture in the open-curd structure to crystallize, leaving the thawed block crumbly rather than springy. Frozen Colby Jack works fine shredded into cooked dishes but won't slice cleanly.

How long does Colby Jack last in the fridge?

An unopened vacuum-sealed block keeps 2-3 months refrigerated. Once opened, wrap it tightly and use within 3-4 weeks. Pre-shredded Colby Jack has a shorter window - about 1-2 weeks after opening.

What Is Enoki Mushroom? [Taste, Uses & More]

March 29, 2026

You spot a cluster of enoki at the grocery store - long white stems bundled tight in plastic wrap, with tiny pinhead caps that look almost too delicate to cook.

What Does Enoki Mushroom Taste Like

They're not a specialty item anymore; enoki mushrooms show up in Asian grocery stores and mainstream supermarkets alike, sitting quietly next to shiitake and oyster varieties.

If you already know your way around shiitake mushroom swaps that work or alternatives to maitake mushroom, enoki will feel like a welcome change of pace - lighter, crispier, and far more subtle in flavor.

QUICK SUMMARY

Enoki mushrooms are slender, white-stemmed cultivated mushrooms with a crisp bite and mild umami flavor. They work best in quick-cook applications - hot pot, miso soup, stir-fries - and raw in salads. Avoid long cooking times, which destroy their signature texture.

🍄Flavor: Mild umami, faintly sweet, light nutty note
✋Texture: Crisp raw, tender and slightly gelatinous when cooked
🔥Best For: Hot pot, miso soup, stir-fry, salads, tempura
🌿Diet: Vegan, low calorie, low fat, good fiber source
📅Shelf Life: 5-10 days refrigerated; use opened packs within a week

What Is Enoki Mushroom?

Enoki mushroom - also called enokitake or golden needle mushroom - is a cultivated variety native to East Asia, grown commercially in Japan, Korea, and China. Unlike foraged mushrooms, it's almost entirely a farmed product, raised in CO₂-rich containers that produce the characteristic long pale stems and tiny caps we recognize in stores.

In the wild, enoki grows in clusters on dead or dying trees and looks quite different: darker caps, shorter stems, and a rougher appearance. The cultivated version is what nearly everyone outside of rural East Asia encounters.

  • 🍄 Also known as - enokitake, golden needle mushroom, enoki
  • Origin - East Asia; farmed primarily in Japan, Korea, China
  • Form - Long, slender white stems (10-13 cm) with pinhead caps, sold in bundles
  • Varieties - Standard white cultivated; wild-type enoki (darker, less common in markets)
  • Category - Cultivated edible mushroom, species Flammulina velutipes

What Does Enoki Mushroom Taste Like?

enoki mushroom - What Does Enoki Mushroom Taste Like

Enoki has a mild, understated flavor - nothing close to the earthiness of portobello or the meatiness of shiitake.

Think of it as a gentler, crispier oyster mushroom, or a firm bean sprout that carries just a whisper of mushroom umami.

Sensory SnapshotMild Intensity
👅 Flavor
mild umamifaintly sweetdelicate nutty
✋ Texture
crisp rawtender-gelatinous cooked
👃 Aroma
very mildfaintly earthy

Heat changes enoki noticeably.

Raw, the stems snap like a fresh bean sprout and carry almost no aroma. Cooked briefly, they soften to a pleasantly slippery, tender texture while the umami deepens - not dramatically, but enough to round out a broth.

Overcooked, they turn limp and watery, which is why timing matters more with enoki than with most other mushrooms.

Golden Rule
Add enoki in the final 60-90 seconds of cooking. Any longer and you lose the texture that makes them worth using.

How to Use Enoki Mushroom

Enoki's strength is its texture, not its flavor - so every cooking method should protect that snappy, slender bite. Japan, Korea, and China each have traditions built around this idea, and modern fusion kitchens have adopted it too.

For hot pot, enoki is nearly essential.

Adding them last - as you would when making Japanese sukiyaki hot pot at home - keeps the stems springy rather than waterlogged.

Miso soup is another natural fit; a small handful dropped in right before serving adds texture without muddying the broth, and there are many other pairing ideas for miso soup that complement enoki well.

How Enoki Mushroom Is Used
MethodBest ForTip
🥗 RawSalads, bento toppings, cold noodle dishesTrim the base, separate stems, dress lightly
🍲 Hot PotShabu-shabu, sukiyaki, Korean jeongolAdd in the last 60-90 seconds only
🥢 Stir-FryGarlic-soy side dish, Korean banchanHigh heat, 1-2 minutes max
🍤 TempuraAppetizers, bento, snack plattersKeep clusters intact; don't overcrowd the oil
🍜 Broth GarnishRamen, miso soup, clear Japanese soupsDrop in at the last moment, raw or barely blanched

Enoki pairs well with soy sauce, sesame oil, scallions, and tofu - ingredients that complement without overpowering. Light seafood like scallops or shrimp works equally well.

If you're making tempura, note that tempura flour stand-ins can affect how the batter clings to thin stems, so a standard tempura flour is worth keeping on hand.

Avoid long braises or heavy cream sauces. Both destroy texture and bury the subtle flavor that makes enoki distinct from heartier mushrooms.

Try It In
🍝One-Pot Creamy Mushroom OrzoAdd enoki at the very end to keep stems tender, not mushy→🍄Air Fryer Stuffed MushroomsUse enoki as a textural garnish alongside heartier caps→🧀Cheesy Spinach Stuffed MushroomsContrast the richness of the filling with crisp enoki on the side→

How to Buy and Store Enoki Mushroom

Fresh enoki should look clean and uniform. Reach for clusters with bright white or pale gold stems, tiny closed caps, and no sign of browning at the base.

Watch Out
Slime at the stem base, separated stems, or any brown discoloration means the cluster is past its prime. Don't buy it.

At home, keep enoki unwashed in its original packaging or transfer it to a paper bag inside the crisper drawer. Moisture accelerates deterioration fast with this mushroom.

Check for enoki mushroom spoilage signs before using any cluster that's been sitting more than a few days - an opened pack narrows the window considerably.

  • Shelf life - 5-10 days refrigerated; opened packages closer to 5
  • Storage - Paper bag or original wrap, crisper drawer, never airtight plastic
  • Don't wash - Rinse only immediately before use; moisture damages stems quickly

Starting with Enoki

Enoki isn't a mushroom that announces itself.

Its value is in what it contributes - clean texture, quiet umami, and visual elegance - rather than bold flavor.

Start by dropping a handful into miso soup or a hot pot; no prep required beyond trimming the base.

If you can't find them or want something with more body, the guide to alternatives to enoki mushroom covers the closest swaps, and the roundup on replacements for oyster mushroom is useful if you're shopping for a similar delicate texture.

Once you understand how briefly enoki needs to cook, the rest comes easily.

Shortcut
Not sure where to start? Add a trimmed cluster to store-bought miso soup in the last 30 seconds. That's the fastest way to understand what enoki does.

Frequently Asked Questions

Are enoki mushrooms poisonous?

Cultivated enoki sold in stores are safe to eat raw or cooked. However, there have been recalls linked to Listeria contamination in packaged enoki, so checking current recall notices before eating them raw is sensible practice.

Can you eat enoki mushrooms raw?

Yes, raw enoki is common in salads and cold dishes across East Asia. Rinse thoroughly, trim the base cluster, and separate the stems before using them raw.

How do you cook enoki mushrooms so they stay crisp?

Add them at the very end - 60 to 90 seconds in a hot pan or broth is enough. Anything longer and the stems go limp and watery.

How long do enoki mushrooms last in the fridge?

Unopened, 7-10 days in the crisper drawer. Once the pack is opened or the base is trimmed, use them within 4-5 days before the stems deteriorate.

What are enoki mushrooms used for in Japanese cooking?

In Japanese cooking, enoki appear most often in miso soup, shabu-shabu, and ramen as a finishing garnish. They're also wrapped in nori or meat slices and pan-fried as a simple side dish called enoki no bacon maki.

Air Fryer Scotch Quail Eggs

March 29, 2026

Perfect party finger food that works for weekend snacks or holiday appetizers. You get crispy golden breading, savory sausage, and creamy yolk in one bite - all done in the air fryer without deep frying.

Air Fryer Scotch Quail Eggs served on a plate

The trick is cold boiled quail eggs wrapped in seasoned sausage, breaded, then air fried at 375°F for 10-12 minutes. No oil bath, no splatter, and the basket crisps the coating evenly.

Make these when you need something that looks impressive but doesn't require constant attention. For a version that comes together quickly, this simple chicken works alongside without competing for oven space.

QUICK SUMMARY

Air Fryer Scotch Quail Eggs are bite-sized appetizers with crispy panko coating, seasoned sausage, and tender quail eggs. Boil the eggs 4 minutes, wrap in sausage, bread in flour-egg-crumbs, then air fry at 375°F for 10-12 minutes. The coating crisps without deep frying and the sausage stays juicy if you don't overcook past 160°F internal temp.

⏱️Timeline: 30-35 minutes total with 20 minutes hands-on prep
🔑Critical Move: Chill wrapped eggs 15 minutes before breading so coating sticks
⚠️Watch Out: Overcrowding the basket makes soggy spots - leave 1-inch gaps

Table of Contents

Toggle
  • Why This Recipe Works
  • What You'll Need
    • Ingredient Details
  • Ingredient Swaps
  • What to Serve With It
  • Store and Reheat
  • Frequently Asked Questions
  • Air Fryer Scotch Quail Eggs
    • Method 
    • Tried this recipe?

Why This Recipe Works

The air fryer circulates hot air at 375°F to crisp the breading without submerging in oil. Cold boiled eggs wrapped in sausage create structure - the firm egg holds shape while the sausage cooks through to 160°F. Most people skip stuffed grape leaves, but it balances the meal. For a version that comes together quickly, more recipe ideas work alongside without competing for oven space.

Quick Reference
⏱️
Prep Time
20 min
🔥
Cook Time
10-12 min
⏰
Total Time
30-35 min
🍽️
Servings
8 servings (8-10 eggs)
📊
Difficulty
Medium
🏷️
Category
Appetizer
💡
Quick Tip
Use cold eggs, spray oil for crispiness
🎯
Best For
Entertaining | Meal prep | Weeknight snack

Five things that guarantee success:

  • Boil quail eggs exactly 4 minutes then shock in ice bath 5 minutes - shorter and they're runny, longer and the yolks turn gray
  • Pat eggs completely dry before wrapping - moisture prevents sausage adhesion and makes breading slide off
  • Chill sausage-wrapped eggs 15 minutes before breading so the meat firms up and the coating sticks during cooking
  • Spray or brush oil evenly on breaded eggs - dry spots won't crisp and you'll get pale patches instead of golden brown
  • Check internal temperature at 160°F with a thermometer in the sausage layer - guessing leads to raw centers or dry overcooked meat
Golden Rule
Leave 1-inch space between eggs in the air fryer basket - overcrowding blocks airflow and creates soggy spots that never crisp.

What You'll Need

Ingredients for Air Fryer Scotch Quail Eggs

Buy quail eggs at specialty grocers or Asian markets. A good meatballs can make or break the plate. For a version that comes together quickly, simple meatballs side dish adds protein without extra cleanup.

🥚
Eggs
  • 8-10 quail eggs
🥩
Sausage
  • 8 oz ground sausage or seasoned ground pork
🍞
Breading
  • ½ cup flour
  • 1 egg (for wash)
  • 1 cup breadcrumbs (panko preferred)
🧂
Seasonings
  • Salt
  • Black pepper
  • Herbs (parsley or sage, optional)
  • Mustard (optional, for sausage mix)
🫒
Finishing
  • Oil spray

Ingredient Details

  • Quail eggs
    Fresh eggs within 7 days peel easier than older ones - check date stamps at specialty stores.
  • Ground sausage
    Use breakfast sausage with 15-20% fat - leaner meat dries out and doesn't stick to eggs as well.
  • Breadcrumbs
    Panko creates crunchier coating than fine crumbs - toast plain panko 3 minutes in the air fryer for extra crispness.
  • Flour
    All-purpose works for standard breading - swap almond flour for keto or gluten-free versions.
  • Egg wash
    Beat egg with 1 tablespoon water or milk for thinner coating that spreads easier.
  • Oil spray
    Avocado or olive oil spray works best - butter-flavored spray adds richness but can burn at high temps.
  • Herbs
    Fresh parsley or sage mixed into sausage adds brightness - dried herbs work but use half the amount.

Ingredient Swaps

Standard sausage and panko give the classic pub texture. The meatballs works best when it hits the table at the same time as the main. For a version that comes together quickly, simple meatballs side dish adds variety without extra planning.

Four swaps that work:

  • Ground turkey or chicken instead of sausage - leaner with milder flavor, add 1 tablespoon oil to the meat to prevent dryness
  • Panko or gluten-free crumbs instead of regular breadcrumbs - panko crisps more, gluten-free versions stay slightly softer but still acceptable
  • Almond flour instead of all-purpose flour - nutty taste and keto-friendly, use same amount for dredging step
  • Egg whites only instead of whole egg wash - slightly less binding power but works fine, beat until frothy before using

Ground Pork Sausage (Traditional)

Works for: Classic flavor with enough fat for juicy coating

Skip if: You want leaner protein or need to reduce saturated fat

Ground Turkey

Works for: Lower-fat option that still wraps eggs well if you add oil

Skip if: You want richer sausage flavor without extra seasoning steps

Panko Breadcrumbs

Works for: Maximum crunch with light airy texture

Skip if: You need gluten-free or prefer finer coating

Instructions

Timing matters - boil eggs first, chill wrapped eggs, then bread and cook. Chicken adds the contrast this plate needs, but timing matters. For a version that comes together quickly, easy chicken side finishes in the same window as the eggs.

  1. Boil quail eggs 4 minutes in simmering water, then transfer immediately to ice bath for 5 minutes. Peel gently under running water - the shells crack easily so work slowly and start from the wider end where the air pocket sits.

  2. Wrap each peeled egg with about 1 ounce seasoned sausage, pressing meat evenly around all sides with no gaps. Pat the sausage layer smooth with damp hands so breading adheres evenly. Chill wrapped eggs on a plate 15 minutes in the fridge.

  3. Set up breading station with three shallow bowls: flour in first, beaten egg wash in second, breadcrumbs in third. Roll each chilled egg in flour, shake off excess, dip in egg wash, then coat completely in breadcrumbs. Press crumbs gently so they stick.

  4. Spray breaded eggs lightly with oil and place in air fryer basket in single layer with 1-inch gaps. Cook at 375°F for 10-12 minutes, flipping halfway through, until coating turns golden brown and internal temperature reaches 160°F in the sausage layer.

  5. Rest cooked eggs 5 minutes on a wire rack before slicing - cutting immediately releases hot juices and makes the filling slide out. Slice in half to show the cross-section for serving.

Shortcut
Peel under running water to loosen stubborn shell bits - the water flows between shell and egg white to make it slide off easier without tearing the surface.

What to Serve With It

You need sides that cut richness or add crunch. Salmon adds the contrast this plate needs, but timing matters. For a version that comes together quickly, easy salmon side works in the same timing window. If you're planning the full spread, complete macaroni salad meal ideas walks through building balanced plates with similar appetizers.

Side Dish Prep Why It Works How to Serve
Simple mixed greens salad Easy Fresh lettuce cuts through rich fried coating Toss greens with lemon vinaigrette, serve cold alongside hot eggs
Roasted vegetables Medium Adds fiber and contrasting texture to protein-heavy appetizer Roast carrots, Brussels sprouts at 400°F for 20 minutes
Mustard dip Easy Sharp tangy flavor cuts through savory sausage Mix Dijon with honey or serve whole grain mustard straight
Pickled cucumbers Easy Acidic crunch balances rich fried coating Quick pickle sliced cucumbers in vinegar 30 minutes before serving
Crusty bread Easy Soaks up dipping sauces and rounds out the plate Slice baguette, toast lightly if you want crunch

Three ways to serve it:

  • Party platter style - arrange eggs on board with mustard, aioli, and pickles for grazing
  • Individual appetizer plates - one egg half per person with small salad and crusty bread
  • Snack box meal prep - pack eggs with veggie sticks and dipping sauce in containers for grab-and-go protein
Best Pick
Honey mustard or spicy Sriracha mayo as dipping sauce - the sweetness or heat balances the savory sausage without overpowering the mild egg flavor.

Store and Reheat

Cooked Scotch quail eggs hold 3-4 days in the fridge in shallow airtight containers. Stack with parchment between layers to prevent sticking. Rich mains need something to cut through, and potato does exactly that. For a version that comes together quickly, this easy potato recipe pairs without adding cleanup.

Method Time Best For
🔥 Oven 8 minutes at 375°F Recrisping coating evenly without drying interior
💨 Air Fryer 5-7 minutes at 375°F Quick reheating with crispness restored
📦 Microwave 30-45 seconds Fast reheating when you accept softer texture

For best results when storing:

  • Cool completely before refrigerating - warm eggs create condensation that makes breading soggy
  • Store unwrapped or loosely covered - tight wrapping traps moisture and softens the crust
  • Reheat uncovered in oven or air fryer - covering steams the coating instead of crisping it
  • Freeze up to 1 month in single layer on parchment-lined tray, then transfer to freezer bag once solid
  • Thaw overnight in fridge before reheating - cooking from frozen makes uneven hot spots and soggy breading

Frequently Asked Questions

Can I substitute chicken eggs for quail eggs?

Yes, but cook chicken eggs 8-9 minutes instead of 4, use 4-5 ounces sausage per egg, and increase air fryer time to 15-18 minutes. The larger size makes them less party-friendly but still works for meal prep.

How do I store and reheat leftover Air Fryer Scotch Quail Eggs?

Store in shallow airtight container in fridge 3-4 days. Reheat in air fryer 5-7 minutes at 375°F or oven 8 minutes at 375°F - both methods restore crispness better than microwave.

What is the best way to tell when the sausage is cooked through?

Use instant-read thermometer inserted into sausage layer - it should read 160°F. Visual cue is golden-brown coating with no pink visible when you slice one egg in half to test.

Why do my Scotch quail eggs lose their crispiness sometimes?

Too much moisture on eggs before breading or overcrowding the air fryer basket blocks airflow. Pat eggs completely dry, leave 1-inch gaps between pieces, and spray oil evenly before cooking.

How do I scale this recipe for larger gatherings?

Cook in batches to avoid overcrowding - each batch takes 10-12 minutes. Keep finished eggs warm on a wire rack in 200°F oven while you cook remaining batches. Plan 2-3 eggs per guest for appetizer portions.

Air Fryer Scotch Quail Eggs served on a plate

Air Fryer Scotch Quail Eggs

No ratings yet
Air Fryer Scotch Quail Eggs feature crispy panko coating, savory seasoned sausage, and creamy quail eggs. Boil the eggs for 4 minutes, wrap with sausage, bread, and air fry at 375°F for 10-12 minutes to achieve a golden, crispy finish without deep frying.
Print Recipe Pin Recipe
Prep Time 20 minutes mins
Cook Time 12 minutes mins
Total Time 32 minutes mins
Servings: 8 servings
Course: Appetizer
Cuisine: British
Ingredients Method Notes

Ingredients
  

  • 8 quail eggs boiled and peeled
  • 8 oz ground sausage seasoned, or ground pork
  • 0.5 cup flour all-purpose for dredging
  • 1 large egg beaten with 1 tablespoon water for egg wash
  • 1 cup breadcrumbs panko preferred
  • salt to taste for sausage seasoning
  • black pepper to taste for sausage seasoning
  • herbs parsley or sage optional for sausage mix
  • mustard optional for sausage mix
  • oil spray avocado or olive oil spray for crisping

Method
 

  1. Boil quail eggs in simmering water for 4 minutes, then transfer immediately to an ice bath for 5 minutes. Peel gently under running water starting from the wider air pocket end.
    8 quail eggs
  2. Wrap each peeled egg with about 1 ounce of seasoned sausage, pressing meat evenly with no gaps. Pat the sausage smooth with damp hands and chill wrapped eggs for 15 minutes in the fridge.
    8 quail eggs, 8 oz ground sausage, salt, black pepper, herbs, mustard
  3. Set up a breading station with flour, egg wash (beaten egg with water), and breadcrumbs in three shallow bowls. Roll each chilled egg in flour, shake off excess, dip in egg wash, then coat completely with breadcrumbs. Press crumbs gently to adhere.
    0.5 cup flour, 1 large egg, 1 cup breadcrumbs
  4. Lightly spray breaded eggs with oil and place in a single layer in the air fryer basket with 1-inch gaps. Cook at 375°F for 10-12 minutes, flipping halfway, until golden brown and internal sausage temperature reaches 160°F.
    oil spray
  5. Rest cooked eggs for 5 minutes on a wire rack before slicing in half to serve, allowing juices to settle.

Notes

  • Boil quail eggs exactly 4 minutes and shock in ice bath 5 minutes to avoid gray yolks or runniness.
  • Pat eggs dry before wrapping to ensure sausage sticks well and breading adheres.
  • Leave 1-inch spacing in air fryer basket and spray oil evenly for even crisping without soggy spots.

Tried this recipe?

Let us know how it was!

What Is Cube Steak? [Taste, Uses & More]

March 29, 2026

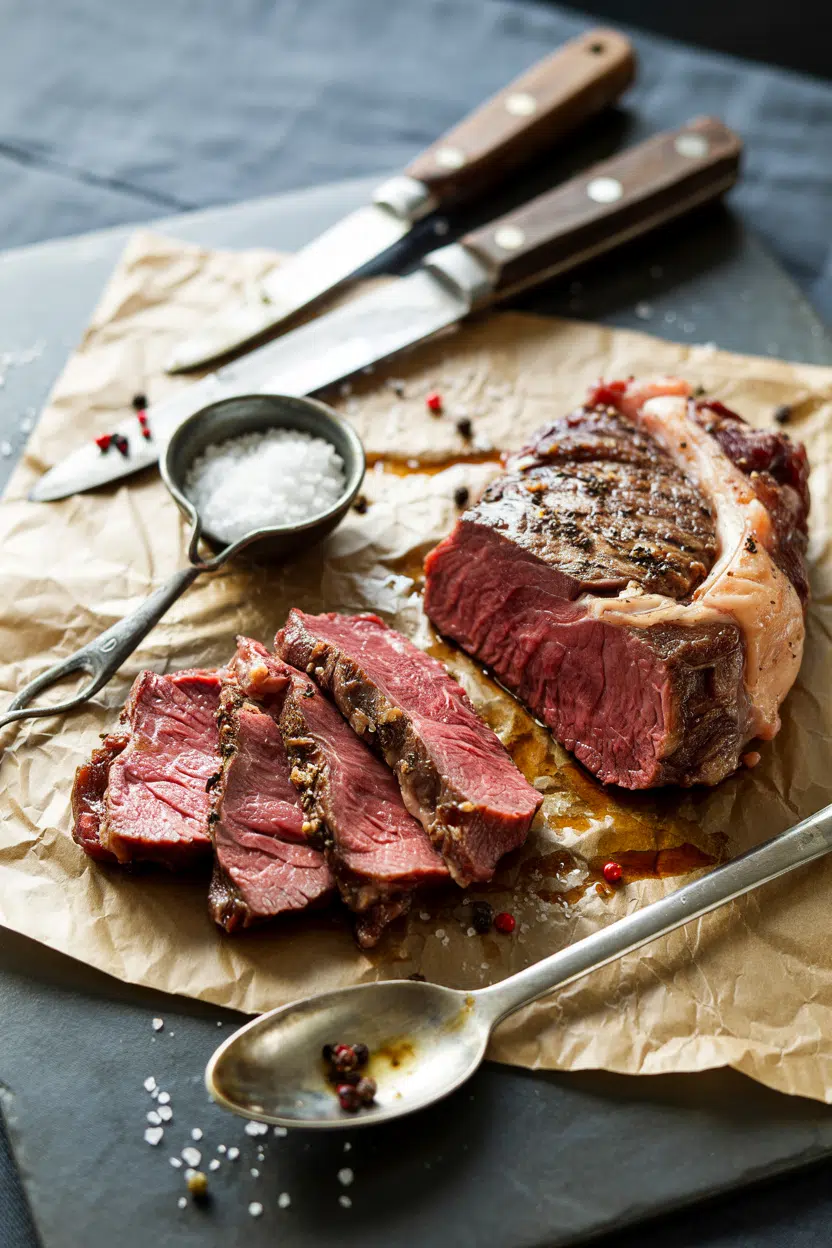
Country-fried steak showing up on a diner menu is almost always cube steak underneath that breaded crust - and what to serve with chicken-fried steak matters just as much as the cut itself. Cube steak is one of the more approachable beef cuts you'll find at a grocery store, but it's easy to overcook or undercook if you don't understand what's been done to it before it hit the package.

What Is Cube Steak

This profile covers what it is, how it tastes, and how to get the most out of it.

QUICK SUMMARY

Cube steak is a tenderized top round or top sirloin cut with a mildly beefy, savory flavor that absorbs sauces and breading well. Best for pan-frying, quick braises, and diner-style comfort dishes. Use within 2-4 days or freeze up to 4 months.

🥩Category: Tenderized beef cut, typically top round or top sirloin
👅Flavor: Mildly beefy, savory, slightly iron-like, absorbs marinades readily
🍳Best Uses: Breaded frying, pan gravy, quick braises, steak sandwiches
❄️Shelf Life: 2-4 days refrigerated; up to 4 months frozen
⚠️Watch Out: Overcooking turns it chewy fast - thin cut means heat moves quickly

What Is Cube Steak?

Cube steak starts as top round or top sirloin - two of the leaner, tougher sections of the animal - then gets run through a mechanical tenderizer or hand-pounded with a meat mallet.

That process leaves a grid of small indentations across the surface, which is where the name "cube" comes from.

The cut goes by several names depending on region and context. Minute steak is the most common alternate name, though there are subtle differences worth knowing - see our breakdown of minute steak vs cube steak for specifics.

You'll also see it labeled as cubed steak or tenderized round at the butcher counter.

Most cube steaks are sold pre-tenderized, already cut thin - usually around a half-inch thick. That uniform thinness is what makes them cook quickly and what earns the "minute steak" nickname.

Unlike ribeye or strip, there's very little marbling, so the tenderizing process does a lot of the work that fat would otherwise do in a richer cut.

Golden Rule
The crosshatch marks aren't cosmetic - they break down muscle fiber so the steak doesn't need long cook times. That's the whole point of the cut.

What Does Cube Steak Taste Like?

cube steak - What Is Cube Steak

Cube steak has a mild, straightforwardly beefy flavor - closer to a lean sirloin than anything rich or fatty. There's a faint iron note you get with leaner beef, but it's not sharp or off-putting.

Mostly it tastes like a clean, neutral steak.

Sensory SnapshotModerate Intensity
👅 Flavor
beefymildly savoryslightly iron-like
✋ Texture
tender when cooked rightfibrous if overdone
👃 Aroma
warm roasted beefneutral raw scent

That neutral base is actually what makes cube steak work in so many dishes. It absorbs pan sauces, gravies, and batters more readily than a well-marbled cut, because there's less competing fat flavor.

Sear it hot and you get a proper roasted beef crust; finish it in cream gravy and it takes on that richness completely.

Texture is where cube steak succeeds or fails. Done right, the tenderized fibers stay soft and yielding. Push it a minute too long and the lean meat tightens into something tough and stringy - that's the main thing to watch.

How to Use Cube Steak

The most well-known use is country-fried or chicken-fried steak - dredged in seasoned flour, dipped in buttermilk batter, and shallow-fried until the crust sets golden. That preparation suits cube steak specifically because the tenderized surface holds breading better than a smooth cut would.

Outside of frying, it's equally at home in quick braises. A short simmer in tomato sauce, mushroom gravy, or French onion-style broth softens the fibers further without drying them out.

Knowing pairings for cube steak makes a difference here - mashed potatoes and roasted vegetables absorb the sauce and round out the plate.

How Cube Steak Is Used
MethodBest ForTip
🍳 Pan-FriedCountry-fried steak, breaded cutletsUse a buttermilk soak for better batter adhesion
🥘 Quick BraiseGravy dishes, stroganoff-style, tomato saucesKeep liquid shallow and time short - 20-30 min max
🥩 Pan-SearedSteak sandwiches, Philly-style with peppers and onionsHigh heat, fast sear - don't crowd the pan
🌮 Marinated & SlicedTacos, fajitas, Tex-Mex applicationsBrief acid marinade (30 min) adds flavor without over-tenderizing

For sandwiches, a griddle sear with sautéed onions and bell peppers gets the job done fast. Sliced thin after cooking, cube steak works in fajitas and tacos too - a brief mustard and Worcestershire marinade sharpens the flavor before it hits the pan.

Try It In
🧅Cube Steak with Onion GravyPan-seared cube steak finished in a rich, savory onion pan sauce→

How to Buy and Store Cube Steak

At the store, look for steaks with uniform tenderize marks across the full surface - uneven patterning can mean the tenderizing was inconsistent, which affects how the meat cooks. The meat should be a clean, lean red with minimal dark spots and only a thin fat margin around the edge.

Avoid packages with excessive liquid pooled inside or any sour smell.

Watch Out
Excess liquid in the packaging usually means the steak has been sitting too long. A wet surface also makes it harder to get a proper sear.

Store it in its original packaging and refrigerate immediately. Use within 2-4 days for best results.

For longer storage, rewrap tightly in plastic wrap and a layer of foil before freezing - freezer burn hits lean cuts faster than fatty ones. Frozen cube steak keeps well for up to 4 months; see our full guide on cube steak storage guide for thawing tips.

If you ever need a swap, cube steak swaps covers the closest alternatives by cooking method.

Start With the Pan

If you're cooking cube steak for the first time, skip the grill and reach for a heavy skillet instead.

The controlled heat lets you manage the thin cut without overshooting doneness, and a pan sauce or simple gravy turns whatever fond you build into a finished dish with no extra effort.

  • 🍳 First cook - Pan-sear in oil over medium-high, 2-3 minutes per side, then deglaze with beef broth for an easy pan gravy.
  • 🥘 Second cook - Try a short braise in mushroom or tomato sauce once you know how the steak behaves in your pan.
  • 🌮 Branch out - Once comfortable, slice it thin for fajitas or build a Philly-style sandwich on a griddle.

The cut rewards quick, decisive cooking. Hesitate with the heat and it gets chewy - commit to it and it delivers every time.

Frequently Asked Questions

What is cube steak cut from?

Cube steak comes from the top round or top sirloin - lean, relatively tough sections from the hindquarter. Mechanical tenderizing makes these otherwise chewy cuts quick-cooking and palatable without long braising times.

Is cube steak the same as minute steak?

They overlap but aren't identical. Both are thin, fast-cooking beef cuts, however minute steak may not always be mechanically tenderized the way cube steak is. The crosshatch pattern is the reliable distinguishing mark of cube steak.

Why is it called cube steak?

The name refers to the small square indentations left by the mechanical tenderizer - not the shape of the steak itself. Those cube-shaped marks are the visual signature of the cut.

How do you cook cube steak so it stays tender?

Keep the heat high and the time short - 2-3 minutes per side is enough for a sear. Alternatively, a brief braise in liquid (under 30 minutes) works well. Avoiding dry, prolonged heat is what keeps it from toughening.

Can you grill cube steak?

Yes, but it needs a brief marinade first and very high, direct heat for a fast sear. The thin cut and lean muscle dry out quickly on a grill, so pull it after 2 minutes per side at most.

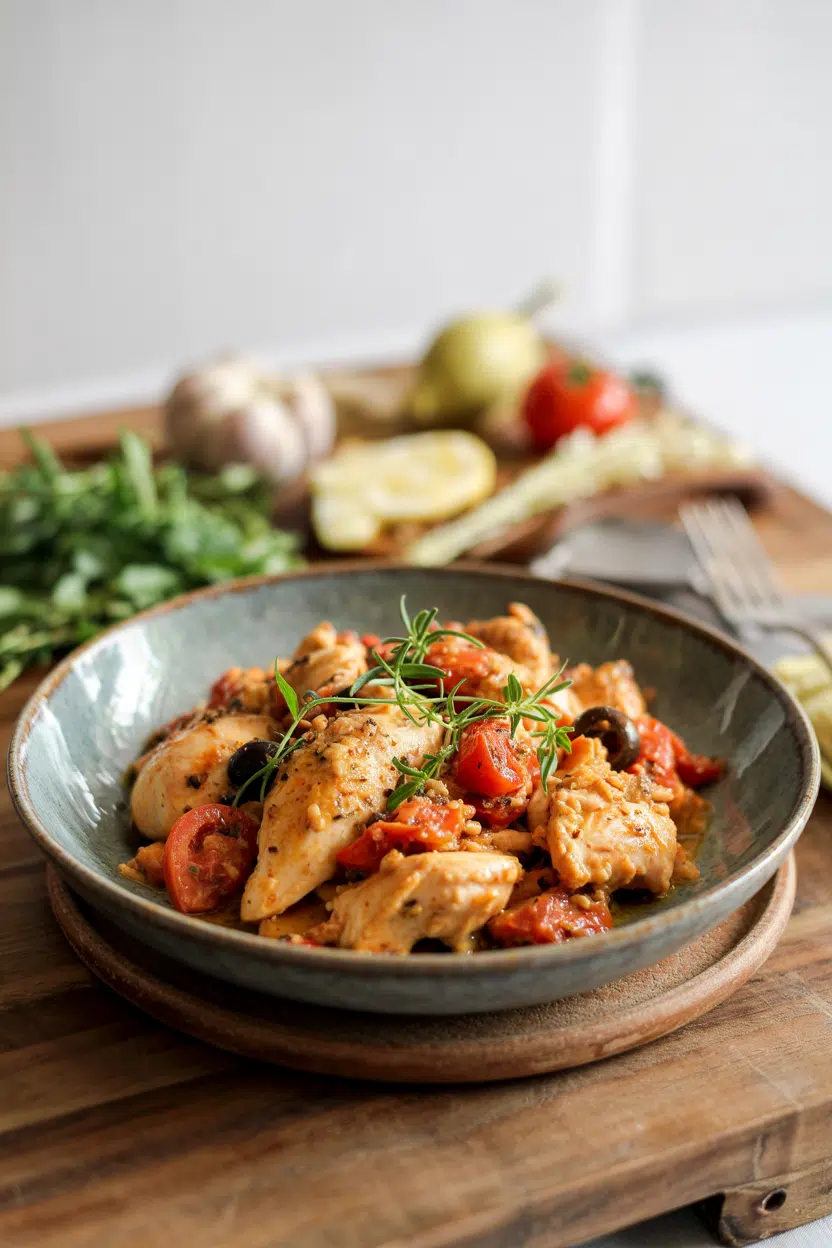
Chicken Provençal with Tomatoes and Olives

March 29, 2026

Braised chicken often comes out bland or the sauce splits and tastes one-dimensional. The fix is searing bone-in thighs first to render fat and build fond, then deglazing with wine to lift every bit of caramelized flavor.

Chicken Provençal with Tomatoes and Olives served on a plate

High heat crisps the skin while the dark meat stays tender in the tomato-olive sauce. The herbes de Provence and garlic bloom in olive oil before the liquid goes in, so the flavors layer instead of muddle.

This works for weeknight dinners when you want something that feels rustic but doesn't require babysitting. Serve it straight from the skillet or make it ahead for meal prep.

QUICK SUMMARY

Chicken Provençal with Tomatoes and Olives braises bone-in thighs in a garlicky tomato sauce with black olives and herbs. The key is searing the chicken skin-side down first to render fat and crisp the skin, then simmering in the sauce until it thickens and the chicken hits 165°F. Ready in 55 minutes with one skillet.

⏱️Timing: 15 minutes prep, 40 minutes cook time, mostly hands-off simmering
🔥Method Shortcut: Pat chicken dry and sear skin-side down first for 6-8 minutes without flipping
⚠️Watch Out: Overcrowding the pan causes soggy skin - sear in batches with space between pieces

Table of Contents

Toggle
  • Why This Recipe Works
  • What You'll Need
    • Ingredient Details
  • Ingredient Swaps
  • What to Serve With It
  • Store and Reheat
  • Frequently Asked Questions
  • Chicken Provençal with Tomatoes and Olives
    • Method 
    • Tried this recipe?

Why This Recipe Works

Bone-in, skin-on thighs stay juicy while the skin crisps in a hot skillet. For a version that comes together quickly, a simple chicken recipe uses a similar braising method with fewer ingredients.

Quick Reference
⏱️
Prep Time
15 min
🔥
Cook Time
40 min
⏰
Total Time
55 min
🍽️
Servings
4 servings
📊
Difficulty
Medium
🏷️
Category
Main Dish
💡
Quick Tip
Sear chicken skin first for crispy texture
🎯
Best For
Weeknight | Entertaining | Meal prep

The technique builds flavor in stages:

  • Searing skin-side down renders fat and crisps the skin - no flipping for 6-8 minutes locks in texture
  • Deglazing lifts browned bits from the pan - wine or stock scrapes up caramelized fond that adds depth
  • Braising at medium-low heat keeps the meat tender - thighs stay juicy while the sauce reduces and thickens
  • Ripe tomatoes create a rich, slightly sweet base - under-ripe tomatoes make the sauce acidic and flat
  • Black olives add salty, briny contrast - Niçoise or Kalamata balance the sweetness from tomatoes and herbs
Quick Tip
Use a meat thermometer to check doneness - pull chicken at 165°F (74°C) internal temperature in the thickest part to avoid dry meat

What You'll Need

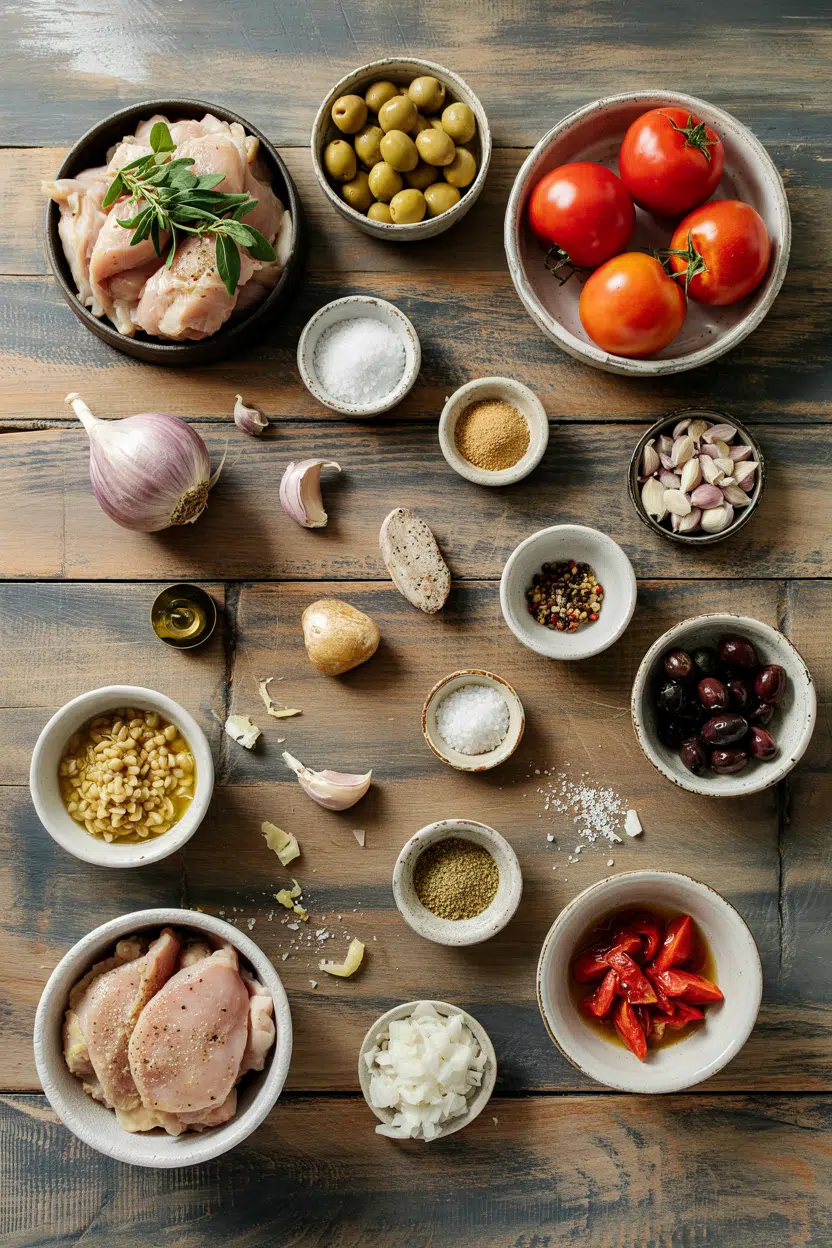
Ingredients for Chicken Provençal with Tomatoes and Olives

Stock your pantry with bone-in thighs, ripe tomatoes, and black olives for this one-skillet meal. Rich mains need something to cut through, and coleslaw does exactly that - we keep a batch of something crunchy like coleslaw ready for nights like this.

🍗
Chicken
  • 4 bone-in, skin-on chicken thighs (about 2 lbs)
🥬
Vegetables
  • 2 cups ripe tomatoes (fresh or canned, diced)
  • 1 medium onion or 2 shallots (diced)
  • 4 garlic cloves (minced)
🫙
Pantry
  • ½ cup black olives (Niçoise or Kalamata, pitted)
  • ½ cup white wine or chicken stock
  • 2 tablespoons olive oil
  • 1 tablespoon herbes de Provence (or thyme and rosemary)
  • Salt and black pepper
  • 1 lemon (optional, for brightness)

Ingredient Details

  • Bone-in, skin-on chicken thighs
    The bone keeps meat moist during braising while the skin crisps when seared - boneless dries out faster
  • Ripe tomatoes
    Use canned if fresh aren't in season - under-ripe tomatoes make the sauce thin and acidic instead of rich
  • Black olives
    Niçoise are milder, Kalamata more intense - rinse very salty olives before adding to the sauce
  • Herbes de Provence
    A blend of thyme, rosemary, oregano, and lavender - use dried thyme and rosemary if you don't have the mix
  • White wine
    Deglazes the pan and adds acidity - swap for chicken stock plus a squeeze of lemon juice if skipping alcohol
  • Olive oil
    Builds the base flavor and helps sear the chicken - use enough to coat the pan底 without pooling
  • Garlic
    Add after onions soften to prevent burning - burnt garlic tastes bitter and ruins the sauce

Ingredient Swaps

Swap chicken thighs for breasts if that's what you have, but cut the cook time. A good coleslaw can make or break the plate - for a version that comes together quickly, this easy broccoli recipe adds a tender vegetable side.

Four swaps that work:

  • Chicken thighs → chicken breasts - cook for 20-25 minutes instead of 40, check at 165°F to avoid dryness, less fat means less rich flavor
  • Black olives → green olives or capers - green olives are firmer and less fruity, capers add sharp brine but no body
  • White wine → chicken stock with lemon juice - use ½ cup stock plus 1 tablespoon lemon juice for similar acidity and depth
  • Herbes de Provence → dried thyme, rosemary, oregano mix - combine 1 teaspoon each for a close match without the lavender note

Chicken Breasts

Works for: leaner option, faster cook time, mild flavor

Skip if: you want crispy skin, juicy dark meat, richer sauce from rendered fat

Green Olives

Works for: firmer texture, milder flavor, less intense brine

Skip if: you want the signature fruity, rich olive flavor typical of Provençal cooking

Instructions

Pat the chicken dry and set your skillet over medium-high heat - crispy skin starts with dry skin. Most people skip broccoli, but it balances the meal - for a version that comes together quickly, fluffy mashed potato dish soaks up the tomato-olive sauce.

  1. Pat chicken thighs dry with paper towels and season both sides with salt and black pepper. Heat 2 tablespoons olive oil in a large heavy skillet or cast iron pan over medium-high heat. Place chicken skin-side down and sear for 6-8 minutes without moving until the skin is golden brown and crispy. Flip and sear the other side for 3-4 minutes, then remove chicken to a plate.

  2. Reduce heat to medium and add diced onion or shallots to the same skillet. Sauté for 5 minutes until soft and translucent, stirring occasionally. Add minced garlic and cook for 1 minute until fragrant but not browned - burnt garlic tastes bitter.

  3. Pour in ½ cup white wine or chicken stock and scrape the bottom of the pan with a wooden spoon to lift browned bits. Let the liquid simmer for 2 minutes to reduce slightly. Add 2 cups diced tomatoes, ½ cup black olives, and 1 tablespoon herbes de Provence. Stir to combine.

  4. Return chicken thighs to the skillet, skin-side up, nestling them into the sauce. Bring to a simmer, then reduce heat to medium-low. Cover partially and simmer for 25-30 minutes until the chicken reaches 165°F (74°C) internal temperature and the sauce thickens. If the sauce looks thin, uncover and simmer 5 more minutes to reduce.

  5. Remove the skillet from heat and let the chicken rest for 5 minutes before serving. Taste the sauce and adjust salt, pepper, or add a squeeze of lemon juice for brightness. Serve chicken with sauce spooned over the top.

Golden Rule
Check chicken temp in the thickest part - pull at 165°F (74°C) and rest 5 minutes so juices redistribute instead of running out when you cut

What to Serve With It

The tomato-olive sauce needs something starchy to soak it up - rice, crusty bread, or couscous all work. The coleslaw works best when it hits the table at the same time as the main, like this easy homemade recipe that cuts through rich braised chicken.

Side DishPrepWhy It WorksHow to Serve
Crusty BreadEasySoaks up tomato-olive sauce without competing for flavorWarm slices in oven 5 min, serve on the side for dipping
Steamed Green BeansEasyLight, crisp contrast to rich braised chickenSteam 4-5 min until tender-crisp, toss with butter and lemon
Rice or CouscousEasyMild base absorbs sauce flavors without overpoweringCook according to package, fluff and serve under chicken
Simple Mixed Greens SaladEasyFresh, peppery greens balance richnessToss with vinaigrette, serve alongside for textural contrast
Roasted Fingerling PotatoesMediumCrispy, hearty side for a more filling mealRoast at 425°F for 25-30 min, season with herbs and salt

Three ways to serve it:

  • Weeknight dinner: Serve over rice with steamed green beans on the side - everything cooks while the chicken braises
  • Casual entertaining: Spoon chicken and sauce over herbed polenta with a mixed greens salad - feels rustic and intentional
  • Meal prep: Portion chicken with sauce into containers, pack with couscous and roasted vegetables for reheating later
Best Pick
Crusty bread is the fastest side - warm it while the chicken rests and use it to soak up every bit of sauce

Store and Reheat

Chicken Provençal keeps for 3-4 days in the fridge and reheats well on the stovetop or in the oven. The homemade works best when it hits the table at the same time as the main - for a version that comes together quickly, planning your kung pao chicken dinner offers pairing ideas for similar braised chicken dishes.

MethodTimeBest For
🍳 Stovetop5-7 min over medium heat with lidEven reheating, maintains sauce texture, best for crispy skin
🔥 Oven15-20 min at 325°F (160°C) coveredLarge portions, preserving crispy skin, hands-off reheating
📦 Microwave2-3 min at medium powerQuick single servings, when you don't care about crispy skin

For best results when storing:

  • Use shallow airtight containers - chicken and sauce cool faster and more evenly, reducing bacterial growth risk
  • Store sauce and chicken together - keeps meat moist and prevents drying out during storage
  • Freeze for up to 3 months - portion into freezer-safe containers, thaw overnight in fridge before reheating
  • Add a splash of stock when reheating - if sauce looks thick or dried out, stir in 2-3 tablespoons chicken stock
  • Reheat to 165°F (74°C) internal temperature - use a thermometer to confirm the chicken is hot all the way through

Frequently Asked Questions

Can I make Chicken Provençal ahead and reheat?

Yes, make it up to 2 days ahead and store in the fridge. Reheat on the stovetop over medium heat with the lid on for 5-7 minutes until the chicken hits 165°F internal temperature.

How long should I cook Chicken Provençal in the oven?

If you sear the chicken first on the stovetop, then braise it covered in a 350°F (175°C) oven for 30-35 minutes until it reaches 165°F. Check with a thermometer in the thickest part.

What is the best internal temperature for doneness?

Pull chicken at 165°F (74°C) internal temperature measured in the thickest part. Let it rest 5 minutes so the juices redistribute instead of running out when you cut.

Why is my chicken skin soggy and how to fix it?

Overcrowding the pan causes steaming instead of searing. Pat chicken dry, sear skin-side down in batches with space between pieces, and finish under the broiler for 2-3 minutes to re-crisp.

Can I substitute chicken breasts for thighs in this recipe?

Yes, but reduce cook time to 20-25 minutes and check at 165°F to avoid dryness. Breasts are leaner and cook faster than thighs, so watch them closely.

Chicken Provençal with Tomatoes and Olives served on a plate

Chicken Provençal with Tomatoes and Olives

No ratings yet
Chicken Provençal braises bone-in, skin-on chicken thighs in a rich tomato and black olive sauce infused with garlic and herbes de Provence. The key to this dish is searing the chicken skin-side down to render fat and crisp the skin before simmering slowly until tender and flavorful. Ready in 55 minutes using just one skillet, it's perfect for rustic weeknight dinners or meal prep.
Print Recipe Pin Recipe
Prep Time 15 minutes mins
Cook Time 40 minutes mins
Total Time 55 minutes mins
Servings: 4 servings
Course: Dinner, Main Dish
Cuisine: French, Provençal
Ingredients Equipment Method Notes

Ingredients
  

  • 4 pieces bone-in, skin-on chicken thighs about 2 lbs
  • 2 cups tomatoes ripe, fresh or canned, diced
  • 1 medium onion or shallots diced
  • 4 cloves garlic minced
  • 0.5 cup black olives Niçoise or Kalamata, pitted
  • 0.5 cup white wine or chicken stock white wine preferred; stock plus lemon juice if no alcohol
  • 2 tablespoons olive oil for searing and sauce base
  • 1 tablespoon herbes de Provence or substitute thyme and rosemary
  • salt to season chicken and sauce
  • black pepper to season chicken and sauce
  • 1 whole lemon optional, for brightness, juice to taste

Equipment

  • Heavy skillet or cast iron pan Used for searing and braising the chicken
  • Paper towels To pat chicken dry before searing
  • Wooden spoon Used to scrape up browned bits during deglazing
  • Meat thermometer To check chicken internal temperature for doneness

Method
 

  1. Pat chicken thighs dry with paper towels and season both sides with salt and black pepper.
    4 pieces bone-in, skin-on chicken thighs, salt, black pepper
  2. Heat 2 tablespoons olive oil in a large heavy skillet or cast iron pan over medium-high heat. Place chicken skin-side down and sear for 6-8 minutes without moving until the skin is golden brown and crispy. Flip and sear the other side for 3-4 minutes, then remove chicken to a plate.
    2 tablespoons olive oil, 4 pieces bone-in, skin-on chicken thighs
  3. Reduce heat to medium and add diced onion or shallots to the same skillet. Sauté for 5 minutes until soft and translucent, stirring occasionally.
    1 medium onion or shallots
  4. Add minced garlic and cook for 1 minute until fragrant but not browned.
    4 cloves garlic
  5. Pour in ½ cup white wine or chicken stock and scrape the bottom of the pan with a wooden spoon to lift browned bits. Let the liquid simmer for 2 minutes to reduce slightly.
    0.5 cup white wine or chicken stock
  6. Add 2 cups diced tomatoes, ½ cup black olives, and 1 tablespoon herbes de Provence. Stir to combine.
    2 cups tomatoes, 0.5 cup black olives, 1 tablespoon herbes de Provence
  7. Return chicken thighs to the skillet, skin-side up, nestling them into the sauce. Bring to a simmer, then reduce heat to medium-low.
    4 pieces bone-in, skin-on chicken thighs
  8. Cover partially and simmer for 25-30 minutes until the chicken reaches 165°F internal temperature and the sauce thickens. If the sauce looks thin, uncover and simmer 5 more minutes to reduce.
  9. Remove the skillet from heat and let the chicken rest for 5 minutes before serving. Taste the sauce and adjust salt, pepper, or add a squeeze of lemon juice for brightness. Serve chicken with sauce spooned over the top.
    salt, black pepper, 1 whole lemon

Notes

  • Sear chicken skin-side down without moving to achieve crispy skin and render fat.
  • Use a meat thermometer to pull chicken at 165°F to avoid dryness.
  • Deglaze the pan with wine or stock to lift flavorful browned bits for a richer sauce.

Tried this recipe?

Let us know how it was!

What Is Cipollini Onion? [Taste, Uses & More]

March 29, 2026

Cipollini onions do something in a hot pan that no other onion quite manages - they caramelize deeply and evenly without turning to mush, holding their round, flattened shape while their high sugar content concentrates into a rich, almost jammy sweetness.

What Is Cipollini Onion

That combination of structural integrity and fast browning is why you'll find them at the center of Italian agrodolce, French braises, and American sheet-pan dinners alike.

Pairing them with balsamic vinegar cooking methods opens up a whole glossy glaze approach that suits everything from pork roasts to pizza toppings.

Getting them onto a preparing roasting rack properly setup lets hot air circulate underneath, which accelerates browning without steaming.

QUICK SUMMARY

The cipollini onion is a small, squat Italian bulb with a higher sugar content than common yellow onions. It caramelizes faster, holds its shape when roasted or braised, and delivers a mild sweetness that deepens dramatically with heat.

🧅What It Is: Small, flat Italian bulb onion with thin papery skin
🍯Flavor: Sweet and mildly pungent raw, rich and caramelized when cooked
🍳Best Uses: Roasting whole, glazing, braising, pickling, skewering
📦Shelf Life: 2-4 weeks pantry; 3-5 days once peeled and refrigerated
🌍Origin: Northern Italy; now grown across Europe and North America

What Is cipollini onion?

Cipollini onions - the plural is cipolline in Italian - are a distinct variety of bulb onion native to northern Italy, where they've been cultivated for centuries as a cooking staple.

Unlike common yellow onions, they grow flat and wide, rarely exceeding two inches across, with a thin, papery golden-bronze skin that peels away more easily than most alliums.

Their defining characteristic is a higher sugar-to-water ratio than standard yellow onions, which means they brown faster and taste noticeably sweeter, especially once cooked.

You'll sometimes see them labeled "Italian pearl onion," which is misleading - pearl onions are a different species entirely, smaller and more spherical, with a crisper texture.

Cipollini are also occasionally compared to shallots, and the resemblance holds when both are eaten raw: a mild, slightly complex onion flavor without the sharp bite of a white onion. However, cipollini are larger, flatter, and behave differently under heat.

  • 🧅 Size - Typically 1-2 inches in diameter, much flatter than round onion varieties
  • 🌱 Skin - Thin, golden-bronze, papery; peels cleanly after blanching
  • 🍬 Sugar content - Higher than yellow onions, lower than sweet Vidalia onions
  • 📍 Names used - Cipollini, cipolline, Italian pearl onion (inaccurate but common)

What Does cipollini onion Taste Like?

cipollini onion - What Is Cipollini Onion

Raw cipollini carries a moderate onion pungency - sharper than a shallot, gentler than a white onion. There's a clean sweetness underneath that isn't saccharine, more like the natural sugar in a good spring onion.

The texture at this stage is firm and dense, almost snappy when sliced.

Heat changes everything. Slow roasting or braising coaxes out a buttery, caramelized depth that few other alliums can match at this small size.

The flesh turns creamy and yielding, and the flavor shifts from mild-pungent to something closer to roasted sweet onion with a faint savory edge.

Sensory SnapshotModerate Intensity
👅 Flavor
sweetmildly pungentcaramelized
✋ Texture
firm rawcreamy cooked
👃 Aroma
mildly onionybuttery-sweet when cooked

Quick pickling shifts the profile again - acid tempers the sweetness and introduces a bright, tangy note that works well as a garnish over fatty meats or rich cheese plates.

How to Use cipollini onion

Cipollini onions are almost always cooked whole or halved, which preserves their shape and lets the cut surface brown evenly. Their small size means they're ready to drop straight into a dish without any further prep beyond peeling.

Roasting is where they perform best. Tossed in olive oil with thyme and a little honey, they go glossy and golden in about 25 minutes at 400°F. Laid out alongside carrots and parsnips on a sheet pan, they hold their own against heartier root vegetables without dissolving.
Golden Rule
Blanch cipollini in boiling water for 30 seconds, then transfer to ice water - the skins slip off cleanly without tearing the flesh.

Braising opens up a different set of pairings. Whole cipollini added to a red wine braise with braised beef or lamb absorb the cooking liquid and emerge silky and deeply savory.

Their dense flesh doesn't fall apart the way pearl onions sometimes do after long cooking.

For agrodolce - the Italian sweet-sour preparation - cipollini are reduced in butter, balsamic vinegar, and a pinch of sugar until glazed and sticky. It's one of the most direct ways to show off their natural sugar content.

Understanding cipollini onion cooking methods helps you match the right technique to whatever dish you're building.

How Cipollini Onion Is Used
MethodBest ForTip
🔥 RoastingSheet-pan dinners, side dishesHigh heat (400°F+) accelerates browning; don't crowd the pan
🥩 BraisingBeef, pork, or lamb braises and stewsAdd whole in the last 45-60 minutes so they hold shape
🍯 Pan-glazingAgrodolce, balsamic reductionsMedium heat; stir often once the sugar starts to caramelize
🥒 Quick picklingGarnishes, cheese boards, sandwichesSlice thin; use wine vinegar for a cleaner, less sweet brine

Grilling whole cipollini on skewers alongside lamb or pork is common in Mediterranean cooking - the char adds a slight bitterness that contrasts the sweetness nicely.

Even for pizza and flatbreads, caramelized cipollini pair well with Parmigiano and a drizzle of olive oil.

The same sweet-savory dynamic that makes them work in Italian contorni carries across into dishes inspired by other traditions - similar to how preparing fried shallots asian garnish properly relies on coaxing maximum sweetness from a small allium under fast, controlled heat.

Try It In
🧅Crispy Sweet Chili Onion RingsCipollini's natural sweetness pairs well with chili-spiked batters→🥩Pork Chops with Apples and OnionsUse cipollini in place of standard onions for richer, stickier pan sauce→🥗Lentil Salad with Red Onion and HerbsQuick-pickled cipollini make a sharper, sweeter swap for raw red onion→

How to Buy and Store cipollini onion

Look for bulbs that feel firm and heavy for their size, with dry, intact papery skins and no visible soft spots or green shoots. Loose or shriveled skin usually signals age or moisture damage.

Jarred peeled cipollini are a reliable shortcut - check that the brine is clear, not cloudy.

Watch Out
Don't store cipollini next to potatoes. Potatoes release moisture and ethylene gas that accelerate sprouting and softening in alliums.

Store whole, unwashed bulbs somewhere cool, dry, and ventilated - a mesh bag in a pantry or root cellar works well, and they'll keep for 2-4 weeks.

Once peeled or cut, move them to an airtight container in the fridge and use within 3-5 days.

Knowing the cipollini onion spoilage signs helps you catch early deterioration before it affects the rest of your batch.

Pickled cipollini last months unopened; once opened, refrigerate and use within a few weeks.

Where to Start With Cipollini

Cipollini rewards simple treatment. If you've never cooked with them before, roast a batch whole with olive oil, thyme, and a splash of balsamic - thirty minutes is enough to see exactly what sets them apart from a standard onion.

Best Pick
For a first-time cook, agrodolce is the single recipe that demonstrates every quality cipollini offers: sweetness, texture, and that fast caramelizing ability.

From there, try adding them whole to a slow braise.

Their dense flesh holds up where other small onions don't, and the flavor they absorb from stock and wine is genuinely different from anything a yellow onion delivers at the same scale.

Frequently Asked Questions

Are cipollini onions the same as pearl onions?

No. Pearl onions are a different species - smaller, rounder, and crisper with a more neutral flavor. Cipollini are flatter, sweeter, and caramelize much faster due to their higher sugar content.

How do you peel cipollini onions quickly?

Blanch them in boiling water for 30 seconds, then drop into ice water. The skins loosen immediately and slip off with minimal effort, leaving the flesh fully intact.

Can you substitute cipollini for shallots?

Yes, in most cooked applications. Cipollini are larger and sweeter, so use fewer and expect a slightly richer result. They don't work as a raw shallot substitute where a finer mince is needed.

Are cipollini onions sweeter than yellow onions?

Yes, noticeably. Their higher sugar-to-water ratio makes the sweetness more pronounced both raw and cooked. They're not as sweet as Vidalia onions, but they caramelize faster than either.

Can you eat cipollini onions raw?

Yes, though their flavor is best developed through cooking. Raw, they work thinly sliced in quick pickles or as part of a cured meat board where mild onion bite is welcome.

What Is Edam Cheese? [Taste, Uses & More]

March 29, 2026

Bite into a slice of edam cheese and the first thing you notice is restraint - a mild, milky warmth that doesn't shout.

What Is Edam Cheese

It's the cheese that holds back, letting the ham, the mustard, the rye bread beside it have their moment, while still adding a quiet, slightly nutty richness to every bite.

If you've tried replacements for havarti cheese or explored what makes gouda cheese distinct, Edam sits comfortably in that same family - approachable, unfussy, and more capable than its mild reputation suggests.

QUICK SUMMARY

Edam is a semi-hard Dutch cow's-milk cheese with a mildly nutty, buttery flavor and a firm yet springy texture. Sold in its iconic waxed rind, it slices cleanly, melts gently, and suits everything from cheese boards to grilled sandwiches. Young Edam is mild; aged Edam grows firmer and nuttier.

🧀Flavor: Mild, buttery, lightly nutty with faint fruity notes
🇳🇱Origin: Netherlands (North Holland)
🔪Best Uses: Slicing, melting, cheese boards, grating
❄️Storage: Refrigerate cut wedges; whole waxed rounds keep at cool room temp short-term
📅Shelf Life: Cut wedge lasts 2-3 weeks refrigerated; grated lasts 5-7 days

What Is Edam Cheese?

Edam originated in the town of Edam in North Holland, where it has been traded since at least the 14th century. It's a semi-hard cheese made from cow's milk, pressed into a round ball shape and coated in a distinctive paraffin rind - red for export, yellow for domestic sale.

Inside, the paste is pale yellow, close-grained, and smooth.

Young Edam (aged around four weeks) is supple and mild; aged Edam (six months or more) turns firmer, drier, and noticeably nuttier - sometimes rubbed with black wax to signal its maturity.

You'll also see it labeled Edammer or Edamkaas in European markets. Edam is lower in fat than many comparable cheeses because it's made from part-skimmed milk, which is one reason its flavor stays subtle rather than rich.

  • 🧀 Young Edam - Mild, springy, ideal for slicing and melting
  • 🧀 Aged Edam (Belegen) - Firmer, nuttier, better for grating and cheese boards
  • 🧀 Export Edam - Red-waxed rounds, the most common form outside the Netherlands

What Does Edam Cheese Taste Like?

edam cheese - What Is Edam Cheese

Young Edam tastes mildly nutty and lightly salty, with a faint buttery quality and the occasional ghost of something fruity - almost like a hint of dried apricot at the edge. It's close to young gouda in profile, though less creamy and a little leaner on the palate. If you enjoy using cheddar cheese for creaminess in recipes, Edam gives you a similar mild savory note with noticeably less richness.

As Edam ages, its flavor concentrates and sharpens. The nuttiness deepens, saltiness becomes more pronounced, and the texture shifts from springy to crumbly.

Sensory SnapshotMild Intensity
👅 Flavor
nuttybutterylightly saltyfaint fruity
✋ Texture
firmspringycrumbly when aged
👃 Aroma
mild milkylightly nutty

How to Use Edam Cheese

Edam earns its place on a Dutch-style lunch plate alongside rye bread, pickled gherkins, and cured ham - a combination that appears across Northern European kitchens.

In the Netherlands, it's a daily staple, and it features heavily in christmas food in netherlands guide spreads alongside mustard and seasonal breads.

Sliced thin, it fits naturally into a ham-and-mustard sandwich. Melted, it behaves well over gentle heat without turning greasy or breaking - a useful quality for grilled sandwiches, quiches, and savory tarts.

Edam also works in fondue blends where you need body without an overpowering flavor, and it grates cleanly over boiled potatoes or a simple bowl of soup.

Watch Out
Avoid pairing Edam with very bitter greens or heavy chiles. Its mild flavor disappears against aggressive ingredients - save it for pairings where subtlety is the point.

For cheese boards, pair Edam with crisp apples or pears, red grapes, and whole-grain mustard. It also sits well beside a light-bodied riesling or a crisp lager.

On the cooking side, edam cheese stand-ins like young gouda or havarti behave similarly if Edam isn't available, while gouda cheese in dairy recipes covers fuller-fat swaps when richer melt is needed.

How Edam Cheese Is Used
MethodBest ForTip
🥗 Cold SlicedSandwiches, cheese boards, lunch platesSlice thin for sandwiches; thicker for boards
🍳 MeltedGrilled cheese, quiches, savory tartsUse low heat - Edam melts cleanly without grease
🫕 Fondue BlendAdding body to fondue without overpoweringCombine with a sharper cheese for balance
🧂 GratedTopping soups, potatoes, baked dishesAged Edam grates cleaner and adds more flavor
Try It In
🧀Cheddar Cheese StrawsSwap in Edam for a milder, less sharp version→🍳Egg and Cheese Breakfast SandwichEdam melts cleanly and won't overpower the egg→

How to Buy and Store Edam Cheese

Look for wedges with a smooth, intact wax rind - no cracks, no wet patches on the cut surface. Press the cheese gently; young Edam should have slight give without feeling soft or sticky.

Avoid pre-grated Edam where possible, as it dries out quickly and loses its springy texture.

Quick Tip
Wrap cut Edam in wax paper or parchment before refrigerating - not plastic wrap directly against the paste. This lets the cheese breathe without drying out.

Store cut wedges in an airtight container in the fridge, where they'll last 2-3 weeks.

Whole waxed rounds hold at cool room temperature for short periods, but refrigerate them for any storage beyond a few days.

Grated Edam should be used within 5-7 days - for full guidance on keeping edam cheese fresh, the shelf-life breakdown covers every format.

Unlike fresh dairy (see how long milk keeps for comparison), waxed Edam has considerably more staying power.

Start With the Slice

Young Edam is where most people should begin - mild enough to suit almost anyone, firm enough to hold up on a board or in a sandwich. Once you've tried it cold, melt it once over low heat and see how cleanly it behaves.

If you want more punch, step toward an aged Edam or reach for gouda. If you want it even gentler, havarti is the closer call.

Edam rarely disappoints - it just asks you to let it play its role without competition.

Frequently Asked Questions

Is Edam cheese like Gouda?

They're close but not identical. Edam is made from part-skimmed milk, so it's leaner and milder than young gouda, with less creaminess on the palate. Both share a nutty, buttery character that intensifies with age.

Is Edam cheese strong?

Young Edam is mild - one of the gentler semi-hard cheeses available. Aged Edam (six months or more) develops a noticeably nuttier, saltier edge, but it never reaches the sharpness of aged cheddar or aged gouda.

Can you melt Edam cheese?

Yes, and it melts cleanly over low-to-medium heat without turning greasy or stringy. It works in grilled sandwiches, quiches, and fondue blends - just avoid high direct heat, which can cause the fat to separate.

Does Edam cheese contain lactose?

It contains small amounts. Aging reduces lactose content, so older Edam has less than young Edam. People with mild lactose sensitivity often tolerate it, but it's not suitable for those with severe dairy intolerance.

What is the red wax on Edam cheese for?

The red paraffin wax coating seals the cheese for export, preventing moisture loss and surface mold during transit and storage. Dutch domestic Edam typically uses yellow wax; the red coating became the international standard.

Beef Nihari Pakistani-Style

March 29, 2026

Final Recipe Article Output

When you want a dish that fills the kitchen with spice and comfort, beef Nihari delivers. This slow-simmered stew transforms tough beef shank into falling-apart tender meat in a silky, deeply spiced gravy perfect for weekend cooking or meal prep.

Beef Nihari Pakistani-Style served on a plate

The low simmer does the work. You build flavor with toasted spices in ghee, then let time break down the collagen while you fold laundry or clean the kitchen.

Make this for festive meals when you need something that looks impressive but doesn't chain you to the stove, or batch it for lunches all week.

QUICK SUMMARY

Beef Nihari is a Pakistani slow-cooked stew where beef shank simmers 4-6 hours with Nihari masala spices until the meat falls apart and the gravy thickens to silky. The long simmer breaks down tough collagen into rich, gelatinous broth that coats rice or naan. Best for weekend cooking when you can set it and walk away.

⏱️Time Reality: 20 minutes prep, then 4-6 hours of mostly hands-off simmering
🔥Key Move: Toast spices in ghee 3-4 minutes before adding liquid to wake up aromatics
⚠️Watch Out: High heat toughens meat; keep simmer gentle at 180°F for tender results

Why This Recipe Works

Beef shank has enough connective tissue to turn gelatinous during the long simmer, creating that signature silky gravy. For a hearty beef variation that comes together faster, we make simple homemade beef when time is tight.

Toasting the Nihari masala in fat first extracts oils from fennel, cardamom, and cinnamon that water can't pull out. Adding the flour slurry after hours of cooking prevents clumping and lets you control thickness.

Quick Reference
⏱️
Prep Time
20 min
🔥
Cook Time
4-6 hours
⏰
Total Time
4 hr 20 min to 6 hr 20 min
🍽️
Servings
6-8 servings
📊
Difficulty
Involved
🏷️
Category
Main Dish
💡
Quick Tip
Simmer low and slow for tender beef
🎯
Best For
Weekend cooking | Entertaining | Meal prep
  • Gentle simmer at 180°F: Keeps meat tender while collagen melts into the gravy without drying out
  • Ghee for tempering spices: Fat carries aromatic compounds better than water, building deeper flavor
  • Wheat flour slurry added late: Thickens gravy to coat the back of a spoon without clumps or raw taste
  • Beef shank or stew meat: Gelatin-rich cuts create silky texture as they break down over hours
  • Resting off heat 15 minutes: Lets flavors meld and gravy settle before serving
Golden Rule
Maintain a bare simmer where bubbles just break the surface - anything more vigorous turns meat stringy instead of tender.

What You'll Need

Ingredients for Beef Nihari Pakistani-Style

Shopping for Nihari means hitting the butcher counter for beef shank with bone and grabbing a jar of pre-mixed Nihari masala if you don't want to blend your own spices. For more beef recipe options when planning your week, try this rich beef dish planning approach.

The ingredient list looks long but most items are pantry staples once you stock Nihari masala.

🍖
Meat
  • 2 lbs beef shank or stew meat
  • Optional: beef bones for extra gelatin
🧄
Aromatics
  • 2 medium onions, sliced
  • 2 tablespoon ginger-garlic paste
  • 2-3 green chilies, slit
🌶️
Spices
  • 3-4 tablespoon Nihari masala
  • 1 teaspoon salt (adjust to taste)
🫙
Base + Thickener
  • ¼ cup ghee or oil
  • 2 tablespoon wheat flour or atta
  • 6 cups water
  • Fresh coriander and lemon wedges for garnish

Ingredient Details

  • Beef shank with bone
    Bone marrow adds richness; ask butcher to cut into 2-inch pieces for even cooking
  • Nihari masala
    Pre-mixed spice blend from Pakistani grocers saves time; look for brands with fennel and cardamom listed first
  • Ghee
    Clarified butter adds nutty depth; use vegetable oil if dairy-free but flavor will be lighter
  • Ginger-garlic paste
    Fresh paste is pungent and bright; jarred works in a pinch but add extra at the end
  • Wheat flour (atta)
    Whole wheat flour gives authentic earthy flavor; all-purpose flour works but tastes slightly cleaner
  • Green chilies
    Slit lengthwise without removing seeds for controlled heat that infuses gradually
  • Onions
    Slice thin so they dissolve into gravy during long cooking, adding sweetness and body

Ingredient Swaps

Nihari adapts to what you have, though some swaps change texture more than others. If you're exploring beef stew variations while meal planning, check out this bright salad recipe to balance richness.

Four swaps that work:

  • Beef shank → Beef stew meat: Less gelatinous gravy but still tender after slow cooking; budget-friendly
  • Ghee → Vegetable oil: Lighter flavor without the nutty richness; keeps it dairy-free
  • Wheat flour → Rice flour or chickpea flour: Slightly grainier texture but gluten-free; use 1.5 tablespoon instead of 2
  • Stovetop simmer → Pressure cooker: Cuts time to 1-1.5 hours but loses some depth; 40 minutes high pressure with natural release

Stovetop (Traditional)

Works for: Deep developed flavor, silky gravy, authentic texture

Skip if: Short on time or need faster weeknight option

Pressure Cooker

Works for: Quick tender meat in under 2 hours, weeknight-friendly

Skip if: Want traditional layered flavor and maximum richness

Instructions

The method is straightforward: toast spices, brown meat, simmer low, thicken late. For a side that works while you wait, pair with creamy potatoes side dish since both cook hands-off.

Here's the process:

  1. Toast the aromatics: Heat ghee in a heavy-bottomed pot over medium heat. Add sliced onions and cook 8-10 minutes until golden brown. Stir in ginger-garlic paste and Nihari masala, cooking 3-4 minutes until fragrant and bubbling. The spices should smell earthy and the oil will separate slightly around the edges.

  2. Sear the beef: Add beef shank pieces to the pot and sear 5-6 minutes, turning to brown all sides. The meat won't cook through but develops a crust that adds depth. Pour in 6 cups water and bring to a boil, then reduce heat immediately to low simmer.

  3. Simmer low and slow: Cover pot and maintain a bare simmer where bubbles just break the surface, around 180°F. Cook 4-6 hours, stirring every hour. The meat is done when it shreds easily with light fork pressure and the gravy has reduced by a third.

  4. Thicken the gravy: Mix 2 tablespoon wheat flour with ¼ cup water until smooth. After 3-4 hours of simmering, slowly stir the slurry into the pot while stirring constantly. Simmer uncovered 15 minutes until gravy coats the back of a spoon but still pours easily.

  5. Rest and garnish: Turn off heat and let Nihari sit covered 15 minutes. The flavors meld and excess fat rises to the surface for easy skimming. Serve hot, garnished with fresh coriander, green chilies, and lemon wedges.

Shortcut
If you're short on time, use a pressure cooker: brown meat and spices, add water, cook 40 minutes high pressure with natural release, then add thickener and simmer 10 minutes uncovered.

What to Serve With It

Nihari needs something to soak up that rich, spiced gravy and cut through the heaviness. Most people reach for naan, but the right sides turn this into a complete meal.

For more ideas on building balanced beef dinners, check out this crunchy homemade coleslaw recipe that works with stews.

Side Dish Prep Why It Works How to Serve
Steamed basmati rice Easy Neutral base absorbs gravy without competing Pile rice on plate, ladle Nihari over top
Naan or roti Easy Traditional scoop for gravy and meat, adds chew Tear pieces, dip into gravy, wrap around meat
Cucumber salad Easy Fresh crunch and coolness reset palate between bites Dice cucumbers, toss with lemon juice and salt
Pickled onions Easy Sharp acidity cuts richness, adds bright contrast Serve small bowl on side for spooning over stew
Mint yogurt raita Easy Cooling dairy soothes heat from spices and chilies Dollop on side, stir into gravy or eat between bites

Three ways to serve it:

  • Classic weeknight: Steamed basmati rice, naan for dipping, simple cucumber salad on the side
  • Festive spread: Sheermal or rumali roti, pickled onions, mint raita, green chutney for variety
  • Meal prep bowls: Rice base, Nihari ladled over, fresh coriander and lemon wedges for reheating brightness
Best Pick
Naan or roti with Nihari is the traditional way - the bread soaks up gravy and lets you scoop tender meat without utensils.

Store and Reheat

Nihari tastes better the next day after flavors meld overnight. The gravy thickens as it cools, so you may need to add water when reheating.

Method Time Best For
🍳 Stovetop 10-15 min Even reheating, restores silky gravy texture
🔥 Oven 20 min at 325°F Large portions reheated evenly in covered dish
📦 Microwave 3-5 min Quick individual servings, stir halfway through

For best results when storing:

  • Cool quickly: Spread Nihari in shallow containers so it reaches fridge temp within 2 hours
  • Skim excess fat: Cold gravy makes it easy to lift solidified fat layer off top before reheating
  • Add liquid when reheating: Gravy thickens in fridge; stir in ¼ cup water per serving when warming
  • Freeze in portions: Use freezer-safe containers with 1-inch headspace for expansion; label with date
  • Reheat once only: Gravy breaks down with repeated heating; freeze meal-sized portions instead of one big batch

Frequently Asked Questions

Can I use a pressure cooker to speed up Beef Nihari?

Yes, brown the meat and spices first, then pressure cook on high for 40 minutes with natural release. Add flour slurry after and simmer uncovered 10 minutes to thicken. The meat will be tender but flavor won't be as deeply developed as the traditional stovetop method.

How long can I store leftover Nihari in the fridge?

Store in an airtight container for 3-4 days. The gravy thickens as it cools, so add a splash of water when reheating. Skim off any solidified fat on top before warming for cleaner flavor.

What is the best way to tell when Nihari meat is done?

Test with a fork after 4 hours - the meat should shred easily with light pressure and fall apart without pulling. If it's still chewy or resists, keep simmering another hour and check again.

Why does my Nihari gravy separate or become oily?

Too much fat or adding the flour slurry too quickly causes separation. Skim excess oil from the surface during cooking and add the thickener slowly while stirring constantly. If it's already separated, cool slightly, skim fat, then reheat gently while stirring.

Can I prepare Beef Nihari in advance for a party?

Yes, Nihari tastes better the next day after flavors meld. Make it 1-2 days ahead, cool quickly, and refrigerate. Reheat gently on the stovetop with a splash of water to loosen the gravy, then garnish fresh right before serving.

Beef Nihari Pakistani-Style served on a plate

Beef Nihari Pakistani-Style

No ratings yet
Beef Nihari is a traditional Pakistani slow-cooked stew where tough beef shank simmers for hours in a deeply spiced, silky gravy. Toasting the Nihari masala in ghee releases essential oils, and a slow simmer tenderizes the meat perfectly, making it ideal for weekend cooking or meal prep.
Print Recipe Pin Recipe
Prep Time 20 minutes mins
Cook Time 5 hours hrs
Total Time 5 hours hrs 20 minutes mins
Servings: 6 servings
Course: Main Dish
Cuisine: Pakistani
Ingredients Equipment Method Notes

Ingredients
  

  • 2 lbs beef shank cut into 2-inch pieces, with bone
  • 2 medium onions sliced thin
  • 2 tablespoon ginger-garlic paste
  • 3 tablespoon Nihari masala pre-mixed spice blend
  • 1 teaspoon salt adjust to taste
  • ¼ cup ghee or vegetable oil for dairy-free
  • 2 tablespoon wheat flour atta; for slurry thickener
  • 6 cups water
  • 2 green chilies slit lengthwise for garnish
  • to taste fresh coriander for garnish
  • to taste lemon wedges for garnish

Equipment

  • Heavy-bottomed pot Used for slow simmering the Nihari

Method
 

  1. Heat ghee in a heavy-bottomed pot over medium heat. Add sliced onions and cook 8-10 minutes until golden brown. Stir in ginger-garlic paste and Nihari masala, cooking 3-4 minutes until fragrant and oil separates around edges.
    2 medium onions, 2 tbsp ginger-garlic paste, 3 tbsp Nihari masala, ¼ cup ghee
  2. Add beef shank pieces to the pot and sear for 5-6 minutes, turning to brown all sides. Pour in 6 cups water and bring to a boil, then reduce heat immediately to maintain a low simmer.
    2 lbs beef shank, 6 cups water
  3. Cover the pot and maintain a bare simmer at about 180°F (bubbles just break the surface). Cook for 4 to 6 hours, stirring every hour. Meat is done when it shreds easily and gravy reduces by one-third.
  4. After 3-4 hours of simmering, mix wheat flour with ¼ cup water until smooth. Slowly stir slurry into pot while stirring constantly. Simmer uncovered for 15 minutes until gravy coats the back of a spoon but still pours easily.
    2 tbsp wheat flour
  5. Turn off heat and let Nihari sit covered for 15 minutes. Skim excess fat if desired. Serve hot garnished with fresh coriander, slit green chilies, and lemon wedges.
    2 green chilies, to taste fresh coriander, to taste lemon wedges

Notes

  • Maintain a gentle simmer at 180°F to keep meat tender and avoid dryness.
  • Toast spices in ghee first to extract full aroma and flavor.
  • Add the flour slurry late to prevent clumps and control gravy thickness.

Tried this recipe?

Let us know how it was!

What Is Cream Cheese? Taste, Uses & Everyday Guide

March 29, 2026

Most people assume cream cheese is just a bagel topping - a condiment that earns its place on a Sunday morning and not much else. That's a significant underestimation. Cream cheese is a fresh dairy staple that pulls serious weight in baking, cooking, and cold preparations, and understanding how it actually tastes and behaves in the kitchen changes how you use it.

What Is Cream Cheese

Knowing how cream behaves as an ingredient also helps - and the same logic applies here, whether you're spreading it cold or folding it into a cheesecake batter.

QUICK SUMMARY

Cream cheese is a soft, fresh dairy cheese with mild tang, buttery richness, and a clean finish. It spreads cold, whips into frostings, and bakes into cheesecakes. Opened blocks keep about 7-10 days refrigerated.

🧀Type: Fresh unripened cheese made from cream and milk
👅Flavor: Mild lactic tang, buttery, slight sweetness, clean dairy finish
🍽️Best Uses: Bagel schmear, cheesecake, frosting, savory dips
🌡️Storage: Refrigerate; use within 7-10 days of opening
⚠️Watch Out: Splits at high heat and in long-simmer acidic sauces

What Is cream cheese?

Cream cheese originated in the United States and was commercially standardized in the 1870s in New York. Philadelphia cream cheese, introduced in 1872, became the category's benchmark brand - so dominant that "Philadelphia" is now shorthand for the product itself in many countries.

By regulation, cream cheese must contain at least 33% milkfat and no more than 55% moisture, which gives it that characteristic dense, spreadable texture. It's a fresh unripened cheese, meaning it skips the aging process entirely and goes straight from production to refrigerated shelves.

A few varieties are worth knowing:

  • Full-fat block - The standard for baking and frosting; firmer texture, most consistent results.
  • Whipped cream cheese - Air-incorporated for a lighter spread; not a reliable substitute in baked recipes.
  • Neufchâtel - A lower-fat version with slightly more moisture and a softer, less dense texture.
  • Vegan alternatives - Typically cashew- or soy-based; flavor and melt behavior differ notably from dairy versions.

Neufchâtel is often shelved beside standard cream cheese and marketed as a cream cheese substitute, but its higher moisture content affects baked recipes.

What Does cream cheese Taste Like?

cream cheese - What Is Cream Cheese

Cream cheese has a mild lactic tang - sharper than mascarpone, softer than fresh goat cheese. The richness comes from its high fat content, which coats the palate and rounds out that tang into something buttery rather than sour.

There's a faint natural sweetness underneath, though it's subtle enough that the overall impression stays savory-leaning. Cold cream cheese tastes denser and more restrained; at room temperature, the fat loosens and the tang becomes more pronounced.

Sensory SnapshotModerate Intensity
👅 Flavor
lactic tangbutteryfaint sweetnessclean dairy finish
✋ Texture
smoothdense and spreadablefirms when chilled
👃 Aroma
mild milkysubtle tang

When baked into cheesecake, the heat tempers the sharpness and amplifies the buttery note - the tang pulls back but never disappears entirely.

For comparison, mascarpone alternatives often use cream cheese as a base precisely because the fat content is close, even though the flavor profiles differ.

Golden Rule
Always bring cream cheese to room temperature before beating it into frostings or batter. Cold cream cheese stays lumpy no matter how long you mix.

How to Use cream cheese

Cream cheese performs differently depending on temperature, so it's worth thinking about the method before you start.

How Cream Cheese Is Used
MethodBest ForTip
🧈 Cold SpreadBagel schmear, stuffed jalapeños, chicken fillingUse straight from the fridge; block form holds shape better than whipped
🔥 BakedNew York-style cheesecake, swirled brownies, baked dipsRoom-temperature block only; whipped version causes uneven bake
🍦 Whipped/BeatenCream-cheese frosting for carrot cake or red velvetBeat with butter first, then add sugar; prevents a runny result
🍝 Stirred into SauceCreamy pasta sauces, mashed potatoesUse low heat and add off the boil to prevent splitting

In American kitchens, cream cheese is most visible on a bagel - a classic schmear with smoked salmon, chives, and lemon zest is the benchmark pairing. Jewish-American food culture cemented that combination, and it remains the most recognizable use globally.

Beyond breakfast, cream cheese works hard in baking. It's the non-negotiable base for New York-style cheesecake, and it anchors cream-cheese frosting - the tangy counterpoint that keeps carrot cake and red velvet from tasting one-dimensional.

Savory applications extend further than most people use it. Fold it cold into herb-and-salmon dips, swirl a spoonful into pasta off the heat, or mix it into mashed potatoes for extra body.

Cream cheese pairs cleanly with dill, chives, brown sugar, vanilla, strawberries, and lemon zest.

Watch Out
Don't add cream cheese to a hard boil or a long-simmer acidic sauce. The proteins seize and the fat splits, leaving a grainy, broken texture that won't smooth out.
Try It In
🐟Smoked Salmon and Cream Cheese BagelThe benchmark pairing — cold block cream cheese, cured fish, chives→🫒Cream Cheese and Olive SpreadA savory dip that shows how cream cheese holds up with bold mix-ins→🍯Honey Cinnamon Cream CheeseSweetened spread that highlights the buttery, faintly sweet baseline→

How to Buy and Store cream cheese

At the store, choose a plump, sealed block with no watery separation visible on the lid or foil. Check the sell-by date and look for packages listing pasteurized cream and milk as the first ingredients.

Avoid anything with bloating, punctures, or liquid pooling inside the packaging.

Shortcut
Block cream cheese outperforms tubs and whipped varieties in every baked recipe. Buy the block by default and you'll never need to second-guess the substitution.

Storage is straightforward. Keep it refrigerated in its original foil, and once opened, transfer it to an airtight container to prevent it from absorbing fridge odors.

  • Unopened block - Stays good for 3-4 weeks past the printed date when refrigerated consistently.
  • Opened block - Use within 7-10 days for best quality; discard if you see mold or smell sour rather than tangy.
  • Freezing - Possible but not ideal; texture becomes crumbly after thawing, fine for baking but not spreading.

For a closer look at safe timelines, the cream cheese storage guide guide covers edge cases and signs of spoilage in detail.

Where to Start with Cream Cheese

If you're working out whether this ingredient fits a recipe, the decision is quick. Cold and uncooked is where cream cheese is most reliable - spreads, dips, and stuffed fillings require no special technique. Baking demands the full-fat block at room temperature, nothing else.

Reach for it when a recipe needs dairy richness with a hint of tang that butter alone won't provide. It pairs equally well alongside cheesecake sides or stirred into a weeknight pasta sauce.

Start cold, keep the heat low when you do cook it, and the full-fat block won't let you down.

Frequently Asked Questions

Is cream cheese the same as Neufchâtel?

No. American Neufchâtel has less fat and more moisture than standard cream cheese. It spreads similarly but produces a softer, less stable result in baked recipes like cheesecake.

How long does cream cheese last after opening?

About 7-10 days in an airtight container in the refrigerator. Discard it earlier if the surface shows mold, pinkish discoloration, or the smell has shifted from tangy to sour.

Does cream cheese freeze well?

It freezes but the texture changes significantly - it turns crumbly and grainy after thawing. Frozen cream cheese works in baked cheesecakes or cooked sauces, not as a spread.

What is the best cream cheese for cheesecake?

Full-fat block cream cheese, fully softened to room temperature. Philadelphia is the most consistent brand; avoid whipped or reduced-fat versions, which add excess moisture and affect the set.

Can you use cream cheese in pasta sauce?

Yes, with low heat. Stir it in off the boil or over a gentle simmer. Adding it to a hard boil or acidic sauce causes the fat to separate and the texture to turn grainy.

What Is Chinese Broccoli? Taste, Uses & More

March 29, 2026

You spot it at the market and pause - those glossy, dark-green stalks with small flowering buds look familiar but aren't quite broccoli. Chinese broccoli, also called gai lan or kai-lan, is a leafy Brassica that holds its own anywhere other sturdy greens would go, from a quick weeknight stir-fry to a slow-cooked braise.

What Is Chinese Broccoli

Cooks who regularly work with bok choy cooking methods or swapping out mustard green will find gai lan fits naturally into that same repertoire.

Here's what you're actually buying, how it tastes, and how to cook it well.

QUICK SUMMARY

Chinese broccoli (gai lan) is a leafy Brassica with thick, crunchy stems and glossy dark-green leaves. It has a mild bitterness, a faint mustard tang, and stays crisp when cooked quickly. Best used in stir-fries, blanched as a side, or steamed with soy. Refrigerate and use within a week.

🌿Category: Leafy Brassica, also called gai lan or kai-lan
👅Flavor: Mild bitter, faintly sweet, light mustard tang
🍳Best Uses: Stir-fry with oyster sauce, blanched, steamed with soy
🛒Buy It: Look for firm stems, tight buds, unblemished dark leaves
❄️Shelf Life: 3-7 days refrigerated in a damp paper towel
🥦Closest Match: Milder than broccoli rabe, closer to tender kale with mustard notes

What Is Chinese Broccoli?

Chinese broccoli is a leafy green in the Brassica family, originating from Southern China and Southeast Asia.

It goes by gai lan in Cantonese and kai-lan in Malay and other Southeast Asian languages - both names refer to the same plant.

Unlike head broccoli, gai lan is eaten stem-to-leaf. The plant produces thick, meaty stalks, broad dark-green leaves, and small flower buds that are harvested before they fully open.

It is closer in form to kale than to the broccoli you'd find in a Western produce aisle.

There's also a baby gai lan variety, which has thinner stems, smaller buds, and a slightly more tender texture throughout.

For cooks looking at alternatives to choy sum, gai lan is a frequently cited option because both share similar stem-and-leaf structure, though gai lan has thicker stalks and a more pronounced bite.

  • 🌿 Full-size gai lan - thick stems, wide leaves, earthy and slightly bitter
  • 🌱 Baby gai lan - thinner stems, uniformly small buds, milder flavor and quicker cooking time

What Does Chinese Broccoli Taste Like?

chinese broccoli - What Is Chinese Broccoli

Gai lan's flavor sits between tender kale and broccoli rabe - it carries a mild bitterness without the sharp pepperiness that makes rabe polarizing. There's a faint mustard tang, a clean green note, and a subtle sweetness that comes forward when the vegetable is briefly blanched or stir-fried over high heat.

Sensory SnapshotModerate Intensity
👅 Flavor
mild bitterfaintly sweetmustard tang
✋ Texture
crisp stemstender leaves
👃 Aroma
fresh greenlight cabbage-sulfur if overcooked

Heat changes the flavor noticeably. A short stir-fry over high heat keeps bitterness mild and brings out sweetness in the stems.

Overcooking shifts things - the sulfur compounds in the Brassica release more strongly, and you lose the clean green note that makes gai lan worth cooking in the first place.

Cooks who find broccoli rabe too aggressive often prefer gai lan, and anyone considering swapping out broccoli rabe will find gai lan is the more approachable option.

How to Use Chinese Broccoli

Cantonese cooking built its reputation for gai lan on one preparation: blanched or stir-fried, finished with oyster sauce and a drizzle of hot oil over the top. It's the standard side dish in dim sum restaurants and a staple in home kitchens across Southern China and Southeast Asia. That preparation alone is worth learning.

Beyond that, gai lan handles a range of methods well.

It pairs naturally with garlic, ginger, soy sauce, and sesame oil - all of which balance or soften its mild bitterness.

Thinly sliced beef and tofu are common protein pairings; both absorb the same seasoning profile.

For a complete spread, consider what dishes alongside stir fry work with these Cantonese flavors.

Golden Rule
Split thick stems lengthwise before cooking so they finish at the same time as the leaves. Uneven cuts mean mushy leaves and undercooked stalks.
How Chinese Broccoli Is Used
MethodBest ForTip
🔥 Stir-fryCantonese side dishes, noodle bowls, fried riceHigh heat, 2-3 minutes max to keep stems crisp
💧 Blanch & shockCold sides, sesame-soy salads, meal prep30-60 seconds in boiling water, then ice bath immediately
♨️ SteamTender result for oyster sauce finish4-5 minutes over simmering water; serve immediately
🍲 Light braiseBeef and black bean sauce dishesAdd gai lan near the end; stems need only 4-6 minutes

Gai lan also works well charred briefly on a grill and finished with citrus - a less traditional approach that gives the stems a smoky edge. Avoid long, slow stews; the stems turn pithy and the leaves dissolve.

Try It In
🥩Beef and Broccoli Stir FrySwap in gai lan for a more tender, leafy result→🧀Parmesan Roasted Broccoli FloretsTry with gai lan stems for a different roasted texture→🍗Chicken and Broccoli Alfredo BakeGai lan holds up better than florets in a cream sauce→

How to Buy and Store Chinese Broccoli

At the market, look for firm, glossy stems with no soft spots or pithy sections. Leaves should be dark green and flat - not yellowed, wilted, or spotted.

Buds should be tightly closed; open flowers mean the plant is past its prime. For baby gai lan, the stems should be uniformly thin with small, consistent buds throughout.

Watch Out
Limp stems are a firm pass. Soft, flexible stalks mean moisture loss has already started - no amount of storage will recover the crunch.

At home, wrap loosely in a damp paper towel and place in a perforated plastic bag in the crisper drawer.

This keeps humidity up while allowing enough airflow to prevent rot.

Proper handling makes a real difference, and preparing chinese broccoli properly starts with how you store it.

Use within 3-7 days; baby gai lan is best within three to four days.

If gai lan isn't available, a guide to alternatives to chinese broccoli can help you find the right stand-in for your dish.

And if oyster sauce is also out of stock, oyster sauce stand-ins covers the most practical swaps for that sauce specifically.

Start With the Stir-Fry

New to gai lan? The oyster sauce stir-fry is the entry point. High heat, two minutes, a generous pour of oyster sauce, and you'll understand immediately why this vegetable anchors so many Cantonese menus.

  • 🔥 For crunch - stir-fry over the highest heat your pan will take, add stems first
  • 💧 For softness - blanch briefly, shock in ice water, finish with soy-sesame dressing
  • 🍲 For a richer dish - add to a light braise with beef and black bean sauce in the final minutes

Pick one method, cook it once, and you'll find it becomes a weekly habit.

Frequently Asked Questions

Is Chinese broccoli the same as kale?

No, they are different plants, though both are Brassicas. Gai lan has thicker, crunchier stems and a milder, less earthy bitterness than curly or lacinato kale. The leaf texture is also smoother and less fibrous.

How do you cook gai lan so it isn't bitter?

High heat and short cooking time are the main tools - two to three minutes in a hot wok keeps bitterness mild. Blanching in salted boiling water for 30-60 seconds also softens the bitter edge noticeably before finishing with sauce.

Can you eat Chinese broccoli raw?

Yes, though the stems are quite firm and the bitterness is more pronounced uncooked. Thinly shaving raw stems into a slaw with an acidic dressing works better than eating them whole.

What is baby gai lan used for?

Baby gai lan suits quick stir-fries and steamed dishes where uniform tenderness matters. Its thinner stems cook in about half the time of mature stalks, making it better suited to dishes where you want stem and leaf to finish together.

Does Chinese broccoli have more calcium than regular broccoli?

Yes, gram for gram gai lan is notably high in calcium compared to head broccoli, alongside vitamin A and vitamin C. It also contains glucosinolates, which is worth knowing for anyone sensitive to cruciferous vegetables in large amounts.

How Long Does Dill Weed Last? [Storage Guide]

March 29, 2026

Buying a bunch of fresh dill weed is easy - figuring out how long it actually holds before the fronds go limp and slimy is less obvious.

Can You Freeze Dill Weed

Fresh dill (Anethum graveolens) is more perishable than most cooks expect, and how long fresh herbs keep depends heavily on how they're handled from the moment you get home.

Store it right and you get a full week of bright, grassy dill fronds; store it wrong and you're looking at three days before the stems turn dark.

QUICK SUMMARY

Fresh dill weed lasts 5-7 days in the fridge when stored upright in water. Frozen dill keeps 4-6 months. Dried dill holds up to a year in an airtight container. The ice cube method best preserves flavor for long-term use.

🧊Fridge: Fresh sprigs last 5-7 days stored upright in water
❄️Freezer: Chopped in oil or butter, keeps 4-6 months
🏠Pantry (dried): Airtight and away from heat, stays potent up to 12 months

How Long Does Dill Weed Last?

Fresh dill weed is one of the more delicate herbs in the produce aisle, and its shelf life shifts based on whether it's whole, cut, or already cooked into a dish.

Understanding dill weed's flavor and uses helps explain why the volatile oils that make it so aromatic also make it quick to degrade.

Dill Weed Shelf Life
MethodStateDurationNotes
🧊 FridgeRaw (fresh sprigs)5-7 daysStems upright in water or wrapped in damp paper towel extends life toward 7 days
🧊 FridgeCooked (in dish)3-4 daysFlavor fades in cooked applications; store in sealed container
❄️ FreezerRaw (chopped or whole)4-6 monthsChopped in oil or butter retains flavor better than plain frozen leaves
🏠 PantryDried6-12 monthsKeep airtight, away from heat and light; flavor drops sharply after 12 months

The gap between five and seven days for fresh sprigs comes down to how much moisture control you maintain.

Cut stems kept upright in water behave more like flowers than salad greens - they last noticeably longer than loosely bagged sprigs left lying flat.

How to Store Dill Weed

Fresh dill needs a slightly different approach depending on whether you bought a whole bunch with stems or a bag of loose sprigs. Both methods share one priority: controlled moisture.

For whole bunches: trim the stem ends and stand them upright in a jar with one to two inches of water, then drape a loose plastic bag over the top. For cut sprigs or loose leaves: wrap them lightly in a damp paper towel and place inside a perforated plastic bag or a container with ventilation. Avoid sealing wet dill in a fully airtight bag - trapped moisture speeds up sliming and rot.

Watch Out
Never wrap fresh dill tightly while still wet. Sealed moisture turns fronds slimy within two days - shake off excess water before storing.

Dried dill stores entirely differently. Keep it in an airtight glass jar, away from the stove and out of direct sunlight. The volatile oils that carry its aroma are heat-sensitive; a cabinet above the stove will cut its potency to months, not a year. For comparison, how long parsley keeps follows nearly the same fridge method, though parsley is somewhat more forgiving with moisture.

Can You Freeze Dill Weed?

Yes - and freezing is genuinely the best long-term strategy for fresh dill, provided you do it correctly. Plain frozen sprigs lose their texture completely; the fronds go limp on thawing and become unusable as a garnish.

The ice cube tray method sidesteps this problem.

  1. Wash and dry - Rinse sprigs and pat them fully dry; excess moisture causes ice crystals that degrade flavor.
  2. Chop the leaves - Roughly chop dill fronds away from the thick stems.
  3. Pack into an ice cube tray - Add one tablespoon of chopped dill per cavity, then cover with water, olive oil, or melted butter.
  4. Flash-freeze whole sprigs (alternative) - Spread intact sprigs on a baking sheet, freeze until solid, then transfer to a sealed freezer bag.
  5. Remove air and seal - Press out as much air as possible before sealing bags; label with date and portion (e.g., "dill-oil 1 TB").

Thawing is straightforward for cooked applications. Drop frozen dill cubes directly into soups, sauces, or dressings without thawing - the oil or butter carries the flavor straight into the dish. Whole frozen sprigs work well in long-simmering stews where the texture loss is irrelevant.

Don't refreeze after thawing.

Golden Rule
Freeze dill in oil or butter, not plain water. Fat binds the volatile compounds, so the frozen cubes taste closer to fresh than water-frozen dill does.

Signs Dill Weed Has Gone Bad

Fresh dill gives clear signals when it's past its window. Catching them early matters - sliminess at the stem base can spread to otherwise healthy fronds quickly.

Signs It's Gone Bad
👀
VisualYellowing fronds · Limp, papery texture · Black spots near stem bases · White, gray, or black mold fuzz on leaves
👃
SmellSour or musty odor · Loss of the bright, grassy dill scent
✋
TextureSliminess at stem bases · Mushy or waterlogged leaves

Discard any dill showing sliminess, off-odors, or visible mold - trimming around the bad spots isn't safe or effective here. Dried dill doesn't spoil in the same way; it won't make you sick past its date, however it will taste like nothing.

Crush a pinch between your fingers - if the aroma is weak, it's time to replace it.

Getting the Most From Your Dill

Good storage habits reduce waste, however they work best when paired with a few practical decisions about when to use fresh versus dried.

  • 🌿 Revive limp sprigs - Trim the stems and stand them in fresh cold water for 30-60 minutes; this often restores enough crispness for garnishing.
  • ❄️ Use whole frozen sprigs strategically - Reserve them for slow-cooked soups and braises, where softened texture is unnoticeable.
  • 🏷️ Label every freezer bag - Include date and portion size; dill-oil cubes all look identical after a month.
  • 🧂 Default to dried for pickles and rubs - Dried dill's concentrated aroma holds up to salt brines and dry heat where fresh fronds would just disappear.

If you're running low on fresh dill, swapping out dill weed with another herb is straightforward for cooked applications, though the flavor profile shifts.

For a broader reference on keeping cut herbs alive, how long dill keeps covers the full picture including dill seed and dill oil.

Shortcut
Freeze a full bunch on the day you buy it. Chop, pack into an ice cube tray with olive oil, freeze solid, then bag. Done in under 10 minutes, good for 6 months.

Frequently Asked Questions

Can you freeze fresh dill so it keeps flavor?

Yes, and the ice cube tray method preserves flavor far better than freezing plain leaves. Packing chopped dill into trays with oil or butter binds the volatile compounds that carry its aroma. Plain frozen leaves keep some flavor but lose noticeably more during thawing.

How long does dill weed last in the fridge once cut?

Cut sprigs last 5-7 days when stored correctly. Wrap them in a damp paper towel inside a breathable bag, or stand stems upright in water.

Does dill lose flavor when dried?

Dried dill has a different flavor profile - more muted and hay-like compared to fresh. It doesn't replace fresh one-for-one; use roughly twice the amount of dried when substituting, and expect less brightness in the final dish.

Can you freeze dill in ice cube trays with oil?

Yes - it's the most practical long-term storage method. One tablespoon of chopped dill per cube is a useful portion size. Drop cubes directly into warm pans or soups without thawing first.

Is it safe to use dill that has turned slightly yellow?

Slightly yellowed fronds with no sliminess or off-odor are safe but past their flavor peak. Discard any sprigs showing slime, mold, or a sour smell - those indicate bacterial or fungal growth, not just age.

What Is Chili Powder? Taste, Uses, Flavor & More

March 29, 2026

Chili powder does one thing that no single-spice shortcut can replicate: it builds a warm, earthy base layer that makes everything from a pot of chili con carne to a dry-rubbed pork shoulder taste like it was seasoned with intention.

What Is Chili Powder

The blend is doing more work than most cooks realize, which is also why reaching for alternatives to cayenne pepper or replacements for chipotle powder only gets you partway there - neither substitute recreates the full profile.

QUICK SUMMARY

Chili powder is a ground spice blend built around dried red chiles, cumin, and paprika. It delivers moderate heat with earthy, smoky depth - a reliable backbone for Tex-Mex dishes, braises, and rubs. Best within 6-12 months of purchase.

🌶️Flavor: Warm, earthy heat with smoky or faintly sweet undertones
🍳Best Uses: Taco meat, chili, dry rubs, roasted vegetables, marinades
🛒Buying Tip: Deep red color, no clumping; check label for chile types listed
📦Storage: Airtight, opaque container in a cool, dark pantry shelf
⏱️Shelf Life: Peak aroma within 6-12 months; color holds longer than heat does

What Is Chili Powder?

Chili powder is a ground spice blend, not a single ground chile. Most commercial versions combine dried red chiles - often ancho or cayenne - with cumin, garlic powder, oregano, and paprika, though exact ratios vary by brand.

The blend was popularized in the United States and became a foundational seasoning in Tex-Mex and Southwestern cooking.

You'll see it spelled "chilli powder" in British English and "chile powder" in writing that refers to single-variety ground chiles, though these terms often overlap in casual use.

Understanding that distinction matters at the store.

A jar labeled "ancho chile powder" or "guajillo chile powder" contains only that one ground chile - no added cumin or garlic.

Standard chili powder blends are the seasoning; single-origin powders are the raw material for building your own blend, which is why knowing cumin and its flavor helps you balance the proportions when you're blending from scratch.

  • 🌶️ Standard blend - ground chiles, cumin, garlic powder, oregano, paprika
  • Single-origin powders - ancho, guajillo, or cayenne ground alone, no additives
  • Hot vs. mild - cayenne-heavy blends run hotter; ancho-forward blends stay mild and sweet
  • Regional names - "Mexican chili powder" is an informal label, not a regulated category

What Does Chili Powder Taste Like?

chili powder - What Is Chili Powder

Chili powder lands at moderate intensity - noticeable heat without the sharp punch of straight cayenne.

The dominant notes are warm and earthy, with a background that reads slightly smoky or faintly fruity depending on which dried chiles anchor the blend.

Sensory SnapshotModerate Intensity
👅 Flavor
earthywarm heatmildly bitterfaintly smoky
✋ Texture
fine powderslightly gritty
👃 Aroma
toasted red pepperearthyfaintly fruity

Think of it as paprika with structure. The role paprika in spice blends plays is largely color and mild sweetness - chili powder adds that same base but layers in capsaicin-driven heat and the herbal edge from oregano and cumin.

Heat builds gradually rather than hitting immediately. Coarsely ground versions feel slightly gritty if tasted raw, but that texture dissolves completely once the powder cooks into fat or liquid.

Watch Out
Older chili powder loses volatile heat well before it loses color. A jar that still looks red may taste flat - trust your nose over your eyes.

How to Use Chili Powder

Brown it in fat first. Chili powder blooms - its fat-soluble compounds release fully when cooked in oil or rendered meat fat for 30 to 60 seconds before liquid is added. Skipping this step gives you raw-spice flavor instead of developed depth.

The classic applications are taco meat and chili con carne, where the powder goes in during the browning stage alongside cumin and garlic.

It's equally effective as a dry rub component for chicken thighs, pork shoulder, or beef ribs before roasting or grilling.

If you're swapping out chili powder in any of these contexts, keep in mind you're replacing a blend, not a single spice.

Stir it into tomato-based braises and bean dishes early enough to cook out the raw edge.

For roasted vegetables - sweet potatoes and cauliflower especially - toss with oil and chili powder before the pan goes into the oven, not after.

How Chili Powder Is Used
MethodBest ForTip
🥩 Bloomed in FatTaco meat, chili con carne, bean stewsCook in oil or meat fat 30-60 sec before adding liquid
🧂 Dry RubChicken, pork, beef ribs, burgersMix with brown sugar and smoked paprika for balance
🍲 Stirred into SauceTomato braises, enchilada sauce, meatloafAdd early - needs time to mellow and integrate
🥄 Finishing SprinkleRoasted vegetables, corn, avocado toastUse sparingly raw; heat hasn't been cooked out
🫙 Marinade BaseGrilled meats, tofu, shrimp skewersCombine with oil, lime juice, and garlic powder

Cumin is chili powder's closest companion in almost every application - understanding cumin swaps that work is useful any time you're building a Tex-Mex spice profile from scratch.

Try It In
🍗Air Fryer Chili-Lime Chicken WingsChili powder in the rub drives the heat against bright lime→🍗Air Fryer Garlic Parmesan Chicken TendersA pinch rounds out garlic and parmesan without taking over→🍗Air Fryer Honey Garlic Chicken TendersBalances the sweetness with earthy, low-key heat→

How to Buy and Store Chili Powder

Color is your first quality signal. A good chili powder blend looks deep brick-red, not dull brown or gray.

Clumping inside the jar means moisture has already degraded the powder - skip it.

Best Pick
Blends that list specific chile types (ancho, cayenne) on the label give you more control over heat level and flavor than generic "chili powder" with no ingredient breakdown.

For storage, an airtight, opaque container away from the stove is essential. Heat and light degrade capsaicin and volatile aromatics faster than most cooks expect.

The details on storing chili powder correctly matter if you buy in bulk or keep multiple blends open at once.

  • Shelf life - Best within 6-12 months; after that, heat fades even if color holds
  • Container - Opaque, airtight; avoid clear glass near a bright window
  • Allergen note - Check for anti-caking agents if strict allergen control applies
  • Smoked paprika blends - If your chili powder has a smoky edge, knowing [replacements for smoked paprika](https://forkliftkitchen.com/smoked-paprika-substitutes/) helps when you need to sub the whole blend

Start Here Based on What You're Cooking

If you're making chili or taco meat, use a full-blend commercial chili powder and bloom it in fat.

If you want more control over heat or want single-origin complexity, build your own blend from ancho or guajillo powder plus cumin, garlic, and oregano.

Golden Rule
One tablespoon of chili powder per pound of meat is the reliable baseline for Tex-Mex dishes - adjust from there based on your blend's heat level.

For rubs and marinades, start with half the amount you think you need. Raw chili powder is more intense than cooked, and a heavy hand on a dry rub can overwhelm leaner proteins like chicken breast or shrimp.

Frequently Asked Questions

What is the difference between chili powder and paprika?

Paprika is a single ground dried pepper - mild, sweet, and one-dimensional. Chili powder is a blend: it contains paprika (or red chile base), plus cumin, garlic powder, and oregano. Chili powder carries more heat and structural complexity.

How spicy is chili powder?

Most commercial blends are moderate - noticeably warm but not sharp. Cayenne-heavy blends run hotter; ancho-forward blends stay mild. The capsaicin level depends on which chiles anchor the specific blend you're using.

Can you substitute chili powder for cayenne?

Not directly. Cayenne is pure heat; chili powder adds cumin, garlic, and paprika alongside it. Substituting one for the other changes both the heat level and the flavor profile of the dish significantly.

Is chili powder the same as chili flakes?

No. Chili flakes are coarsely crushed dried chiles - usually a single variety like cayenne or red pepper - with no added spices. Chili powder is a fine-ground blend. They don't swap evenly in recipes.

Does chili powder go bad?

It won't become unsafe, but it loses potency. After 12 months, the volatile heat compounds degrade noticeably while the red color persists. Smell the jar - if it smells flat or dusty rather than spiced, replace it.

What Is Dill Weed? [Taste, Uses & More]

March 29, 2026

Fresh dill weed does something few herbs manage: it anchors a dish without taking it over.

What Does Dill Weed Taste Like

The feathery fronds add a bright, anise-citrus lift to cold sauces, cured fish, and potato dishes - and keeping dill fresh is the first thing worth learning, because its flavor degrades fast once those fronds start to wilt.

If you've been reaching for tarragon swaps that work to fill the anise gap in a recipe, dill weed is often the cleaner, lighter answer.

QUICK SUMMARY

Dill weed is the feathery green fronds of the dill plant, used fresh as a finishing herb. It delivers a mild anise-citrus flavor with a grassy edge - best added at the end of cooking or straight to cold dishes.

🌿Flavor: Mild anise, bright citrus top notes, subtle grassy bitterness
🍽️Best Uses: Salmon, tzatziki, potato dishes, cucumber salads, egg dishes
🌍Key Cuisines: Scandinavian, Eastern European, Mediterranean, Middle Eastern
❄️Shelf Life: Fresh: 5-10 days; dried: 6-12 months; frozen: up to 6 months
⚠️Key Rule: Add dill weed at the end - heat kills its delicate flavor quickly

What Is Dill Weed?

Dill weed refers specifically to the feathery green fronds of Anethum graveolens, a flowering herb native to Eurasia - spanning the Mediterranean coast east toward India.

The name "dill weed" distinguishes the leaves from dill seed, which comes from the same plant but has a sharper, more concentrated flavor.

You'll also see it labeled as dill fronds or simply fresh dill at the market.

The plant belongs to the same family as fennel, caraway, and parsley - all Apiaceae - which explains some of its flavor overlap with those herbs.

  • 🌿 Plant family - Apiaceae (same as fennel, caraway, and carrot)
  • 🌍 Origin - Wild across Eurasia; cultivated for at least 5,000 years
  • 🌱 Forms available - Fresh fronds, dried flakes, or frozen chopped
  • 🔤 Alternate names - Dill fronds, fresh dill, *Anethum graveolens*; "dillweed" (one word) is a common informal spelling

Fresh fronds are the preferred form for most cooking - dried dill weed retains some flavor but loses the grassy brightness that makes the fresh herb worth using.

What Does Dill Weed Taste Like?

dill weed - What Does Dill Weed Taste Like

Dill weed tastes like a lighter, less assertive version of fennel fronds crossed with parsley - though the taste of parsley is earthier and more neutral by comparison.

The dominant note is mild anise or licorice, softened by a bright citrusy top note that lifts the palate without sharpness.

There's also a subtle grassy bitterness underneath, which keeps the herb from tasting sweet or cloying.

Sensory SnapshotModerate Intensity
👅 Flavor
mild anisecitrusyherbal-sweetgrassy-bitter
✋ Texture
featherysoft when heated
👃 Aroma
fresh-grassyanise-forward

Heat changes things fast. Cooking dill weed for more than a minute or two collapses the citrus brightness and leaves a flat, slightly bitter residue. That's why it's almost always added last.

How to Use Dill Weed

Dill weed performs best as a finishing herb - stirred in at the end, scattered over the top, or folded into cold preparations where no heat is involved.

Its anise-citrus character integrates cleanly with dairy, fish, and starchy vegetables without competing for attention.

In Scandinavian cooking, it's inseparable from gravlax cured salmon - and if you want to try making it at home, making gravlax cured salmon at home walks through the full cure.

Eastern European cuisines use dill weed heavily in pickle brines, cold beet soups, and yogurt-dressed salads.

Mediterranean cooks fold it into tzatziki alongside cucumber and garlic; for alternatives to that sauce, replacements for tzatziki sauce covers the closest options.

In Middle Eastern herb salads, it adds an anise note that balances sharper greens.

Golden Rule
Add dill weed in the final 60-90 seconds of cooking, or after the heat is off entirely. Any longer and the citrus top notes cook out completely.

The herb pairs especially well with oily fish like salmon and trout, cucumber, new potatoes with butter, sour cream, cream cheese, and eggs.

Tossed new potatoes with dill and butter is a classic combination - and dishes alongside new potatoes shows how dill-dressed potatoes fit into a broader spread.

How Dill Weed Is Used
MethodBest ForTip
🥗 Raw/FinishingGravlax, open-faced sandwiches, cucumber saladsAdd just before serving; don't pre-mix hours ahead
🥣 Cold SaucesTzatziki, dill dip, yogurt dressings, deviled eggsLet it sit 15-30 min for flavors to meld
🍲 Last-Minute HeatFish soups, chowders, steamed vegetablesStir in off-heat or in the final 60-90 seconds
🫙 BrinesDill pickles, quick-pickled cucumbersUse stems and fronds both - stems hold up in brine
Try It In
🥗Japanese Seaweed SaladA light, herb-friendly salad where dill's citrus note works well→🌿Hiyashi Wakame Seaweed SaladFresh herbs lift this chilled salad's clean, briny flavor→🍱Korean Kimbap Seaweed Rice RollsSwap in dill as a fresh herb accent for the filling→

How to Buy and Store Dill Weed

At the market, look for bright green fronds with no yellowing, limpness, or brown spots on the tips.

The stems should bend without snapping, and the bunch should smell fresh and grassy - if there's no aroma, the flavor has already started to go.

Watch Out
Avoid bunches with wet or slimy cut ends. That moisture signals bacterial breakdown has started, and the fronds will deteriorate within a day or two.

Once home, trim the stem ends, wrap the bunch loosely in a damp paper towel, and store it in a resealable bag or upright in a jar of water in the fridge.

Proper handling - detailed in our guide to storing dill weed correctly - can extend fresh fronds to the full 5-10 day window.

Frozen dill weed holds up to six months and works well in cooked applications.

Dried dill weed lasts 6-12 months but loses much of the citrus brightness - use it when fresh isn't available, and double-check that it still has a noticeable aroma before adding it to a dish.

Start Here With Dill Weed

New potatoes with butter and dill, or a simple cucumber-yogurt sauce - those two applications show what dill weed does better than any description can. If you need a stand-in, dill weed stand-ins covers the closest flavor matches.

Start fresh, start cold, and always add it last. That's the entire framework.

Frequently Asked Questions

Is dill weed the same as dill?

Mostly yes. "Dill weed" specifically means the feathery green fronds of the dill plant, as opposed to dill seed. In everyday use, "fresh dill" and "dill weed" refer to the same thing.

Does dill taste like anise?

Yes, but milder. Dill weed shares anise's core flavor compound, anethole, though in lower concentration than star anise or licorice. A citrusy brightness softens the anise note considerably.

Can I substitute dill for fennel in recipes?

In herb applications, yes - dill fronds swap reasonably well for fennel fronds. Dill is lighter and less sweet, so the anise note will be less pronounced in the finished dish.

How long does dried dill retain flavor?

Dried dill weed holds noticeable flavor for about 6-12 months when stored in an airtight container away from heat and light. After that, the anise notes fade and the herb tastes mostly grassy and flat.

Can you use dill weed stems, or just the fronds?

Both are usable. Tender upper stems carry the same flavor as the fronds and work fine chopped into dishes. Thicker lower stems are better reserved for pickle brines, where they infuse flavor without being eaten.

Beef Shank Caldereta Filipino-Style

March 29, 2026

Complete Article Output

Beef shank simmered in thick tomato sauce with vegetables that soak up every bit of that savory-sweet glaze. That's what happens when you cook caldereta low and slow until the meat falls off the bone.

Beef Shank Caldereta Filipino-Style served on a plate

You need 2-3 hours of gentle simmering, but the pot does most of the work. Add vegetables in the last 30 minutes so they stay intact instead of turning to mush.

Make this for family dinners when you want something that fills the house with the smell of garlic and tomatoes while you catch up on laundry.

QUICK SUMMARY

Beef Shank Caldereta is a Filipino stew where beef shank simmers in tomato sauce with liver spread until fork-tender. The key is low heat for 2-3 hours so collagen breaks down and the sauce thickens naturally. Add potatoes and carrots in the last 30 minutes to prevent them from dissolving into the sauce.

⏱️Time Reality: 20 minutes prep, then 2.5 hours of mostly hands-off simmering
🔥First Critical Move: Sear beef shank 4-5 minutes per side in hot pan before simmering
⚠️Watch Out: Adding vegetables too early turns them mushy - wait until last 30 minutes

Why This Recipe Works

Beef shank has more connective tissue than other cuts, which means longer cooking but richer flavor. Rice adds the contrast this plate needs, but timing matters. For a version that comes together quickly, simple rice recipe works well alongside this stew.

Quick Reference
⏱️
Prep Time
20 min
🔥
Cook Time
2 hr 30 min
⏰
Total Time
2 hr 50 min
🍽️
Servings
6 servings
📊
Difficulty
Medium
🏷️
Category
Main Dish
💡
Quick Tip
Simmer low and slow for tender beef
🎯
Best For
Weeknight | Meal prep | Family

What makes this work:

  • Searing creates the base: Browning beef shank in a hot pan for 4-5 minutes per side builds the fond that flavors the entire stew
  • Bone marrow enriches the sauce: The marrow from beef shank melts into the tomato sauce during simmering, adding richness you can't get from boneless cuts
  • Low simmer tenderizes: Maintaining 180-200°F keeps collagen breaking down slowly without toughening the meat
  • Liver spread adds umami: This traditional ingredient deepens the savory base without making the stew taste liver-forward
  • Late vegetable addition preserves texture: Potatoes and carrots added in the last 30 minutes stay intact and soak up sauce without dissolving
Quick Tip
Deglaze the pan with ½ cup stock or tomato sauce after searing to capture all the browned bits stuck to the bottom

What You'll Need

Ingredients for Beef Shank Caldereta Filipino-Style

Shopping for this takes one trip to a grocery store with a decent meat counter. Most people skip rolls, but it balances the meal. We keep a batch ready for nights like this - homemade rolls recipe pairs well with stews that need something to scoop up the sauce.

🍗
Beef
  • 2 lbs beef shank (bone-in)
🥬
Vegetables
  • 2 medium potatoes (cubed)
  • 2 carrots (sliced)
  • 1 red bell pepper (diced)
  • 1 green bell pepper (diced)
  • ½ cup green peas
🥢
Sauce Base
  • 2 cups tomato sauce
  • 3 tablespoon liver spread
  • 1 cup beef or chicken stock
  • 2 tablespoon soy sauce
🧄
Aromatics
  • 3 cloves garlic (minced)
  • 1 medium onion (diced)
  • 2 bay leaves

Ingredient Details

  • Beef shank
    Pick bone-in pieces with visible marrow - the marrow melts into the sauce and adds richness you can't replicate with boneless cuts
  • Tomato sauce
    Use plain tomato sauce without added herbs or sugar so you control the seasoning; canned works better than fresh for consistency
  • Liver spread
    Find it in the canned meat aisle - this traditional ingredient adds deep umami without making the stew taste liver-forward
  • Potatoes
    Waxy varieties like Yukon Gold hold their shape better than russets, which break down and cloud the sauce
  • Bell peppers
    Use a mix of red and green for color contrast - red adds sweetness while green provides slight bitterness
  • Stock
    Beef stock deepens the meaty base, but chicken stock works if you want a lighter flavor - water with a bouillon cube is the budget option
  • Garlic
    Fresh cloves sautéed until fragrant build the aromatic base - skip jarred minced garlic, which tastes flat after long simmering

Ingredient Swaps

Some swaps change the flavor profile but still deliver a hearty stew. Rich mains need something to cut through, and salad does exactly that. For a version that comes together quickly, something fresh like salad cuts the richness without adding more cooking steps.

Four swaps that work:

  • Beef chuck or brisket instead of beef shank: Less gelatinous texture but similar tenderness after 2-3 hours of simmering - use the same cook time and method
  • Pureed chicken liver instead of liver spread: Sauté 2-3 chicken livers until cooked through, then blend with a splash of stock for similar umami depth
  • Sweet potatoes or turnips instead of regular potatoes: Different flavor but same absorbency - sweet potatoes add mild sweetness while turnips bring earthiness
  • Crushed tomatoes with a pinch of sugar instead of tomato sauce: Chunkier texture and slightly longer cook time to break down tomatoes, but similar tangy base

Beef Chuck

Works for: Budget-friendly swap with similar tenderness after slow cooking

Skip if: You want the gelatinous richness that only bone-in shank provides

Coconut Milk

Works for: Dairy-free creaminess with mild sweetness that complements tomato sauce

Skip if: You prefer the traditional Filipino flavor without tropical notes

Crushed Tomatoes

Works for: More textured sauce with tomato chunks throughout the stew

Skip if: You want smooth, consistent sauce that coats the meat evenly

Instructions

The entire process takes just under 3 hours, with most of that time spent simmering. Start by searing the beef to build the flavor base. A good salad can make or break the plate. We keep a batch ready for nights like this - something creamy to dunk works alongside anything with a thick sauce.

  1. Sear the beef shank: Heat 2 tablespoons oil in a large heavy-bottom pot over medium-high heat. Brown beef shank 4-5 minutes per side until deeply caramelized. Remove and set aside.

  2. Build the aromatic base: In the same pot, sauté minced garlic and diced onion until fragrant and softened, about 3 minutes. Deglaze with ½ cup stock, scraping up browned bits with a wooden spoon.

  3. Simmer the beef: Return beef to pot and add tomato sauce, liver spread, remaining stock, soy sauce, and bay leaves. Bring to a gentle simmer, then reduce heat to low. Cover partially and simmer 2-2.5 hours, stirring every 30 minutes, until meat falls off the bone.

  4. Add vegetables: When beef is fork-tender, add cubed potatoes and sliced carrots. Simmer uncovered 20 minutes. Add bell peppers and green peas, then cook 10 more minutes until vegetables are tender but intact.

  5. Rest and serve: Remove from heat and let rest 10 minutes off heat to let flavors meld. Check seasoning and adjust with salt or soy sauce. Serve over steamed white rice or garlic fried rice.

Golden Rule
Maintain a gentle simmer at 180-200°F throughout cooking - bubbles should barely break the surface to keep meat tender

What to Serve With It

Caldereta needs something to balance the rich tomato sauce and tender beef. The slaw works best when it hits the table at the same time as the main. For a version that comes together quickly, a crunchy slaw on the side adds texture contrast without more cooking. For more ways to round out the meal, check out complete beef tenderloin meal ideas that work with any hearty beef stew.

Side Dish Prep Why It Works How to Serve
Steamed White Rice Easy Soaks up thick tomato sauce and balances rich beef Spoon caldereta over rice, letting sauce seep into grains
Garlic Fried Rice Easy Adds aromatic crunch that complements savory stew Serve alongside or use as base for beef and vegetables
Cucumber Salad Easy Refreshing crunch cuts through richness with vinegar tang Serve in small bowl on the side for palate cleansing
Steamed Green Beans Easy Light vegetable contrast adds color without competing flavors Season simply with salt and serve alongside stew
Crusty Bread Easy Helps scoop up sauce for sopping every bit from the bowl Slice thick and serve warm on the side

Three ways to serve it:

  • Weeknight bowl: Spoon caldereta over steamed rice in a wide bowl, letting the sauce pool around the edges for maximum sopping
  • Family-style platter: Serve beef and vegetables on a large platter with rice on the side, letting everyone build their own plate
  • Meal prep container: Pack rice on one side, caldereta on the other so the rice stays fluffy and absorbs sauce when reheated
Shortcut
Make garlic fried rice with day-old leftover rice - it fries up crispier and doesn't clump like fresh rice

Store and Reheat

Caldereta tastes better the next day after flavors meld in the fridge overnight. Store in shallow airtight containers so it cools quickly and reheats evenly without drying out the beef.

Method Time Best For
🍳 Stovetop 10-15 min Gentle reheating with stirring to prevent scorching
🔥 Oven 20 min at 325°F Even reheating without drying out meat or vegetables
📦 Microwave 2-3 min on medium Quick single servings, stir midway to distribute heat

For best results when storing:

  • Cool completely before refrigerating: Let stew sit at room temperature 30 minutes so condensation doesn't make sauce watery
  • Store in shallow containers: Spread caldereta in wide containers instead of deep bowls for faster cooling and safer storage
  • Keep vegetables intact: Avoid over-stirring when storing so potatoes and carrots don't break down further
  • Add liquid when reheating: Splash in 2-3 tablespoons stock or water if sauce thickens too much in the fridge
  • Freeze in portions: Divide into single-serving containers and freeze up to 3 months - thaw overnight in fridge before reheating

Frequently Asked Questions

Can I use beef chuck instead of beef shank for caldereta?

Yes, beef chuck works well with the same 2-3 hour simmer time. You lose the gelatinous richness from bone marrow, but the meat still becomes fork-tender and absorbs the tomato sauce.

How should I store leftover caldereta and what's the best reheat method?

Store in airtight containers in the fridge for 3-4 days or freeze up to 3 months. Reheat gently on the stovetop with a splash of stock to restore sauce consistency - microwave works for quick single servings but can dry out the meat.

How do I know when beef shank is tender enough in caldereta?

The meat should fall off the bone easily when you poke it with a fork after 2-2.5 hours of simmering. If it still resists, keep simmering another 30 minutes at low heat.

Why is my caldereta sauce watery and how do I fix it?

Too much liquid or not enough reduction causes watery sauce. Simmer uncovered for the last 30 minutes to evaporate excess liquid, or thicken with a cornstarch slurry (1 tablespoon cornstarch mixed with 2 tablespoons water).

What are good side dishes to serve with beef shank caldereta?

Steamed white rice or garlic fried rice soaks up the thick sauce best. Add a simple cucumber salad or steamed green beans for crunch and freshness that cuts through the rich tomato base.

Beef Shank Caldereta Filipino-Style served on a plate

Beef Shank Caldereta Filipino-Style

No ratings yet
Beef Shank Caldereta is a Filipino stew featuring slow-simmered beef shank in a rich tomato sauce with liver spread and vegetables. The key is low and slow cooking for 2 to 3 hours until the meat is fork-tender and the sauce naturally thickens. Adding vegetables in the last 30 minutes preserves their texture while soaking up the savory-sweet sauce.
Print Recipe Pin Recipe
Prep Time 20 minutes mins
Cook Time 2 hours hrs 30 minutes mins
Total Time 2 hours hrs 50 minutes mins
Servings: 6 servings
Course: Main Dish
Cuisine: Filipino
Ingredients Equipment Method Notes

Ingredients
  

  • 2 lbs beef shank bone-in with visible marrow
  • 2 medium potatoes cubed, waxy variety preferred
  • 2 carrots sliced
  • 1 red bell pepper diced
  • 1 green bell pepper diced
  • 0.5 cup green peas
  • 2 cups tomato sauce plain, no herbs or sugar
  • 3 tablespoon liver spread
  • 1 cup beef or chicken stock
  • 2 tablespoon soy sauce
  • 3 cloves garlic minced
  • 1 medium onion diced
  • 2 bay leaves
  • 2 tablespoon oil for searing

Equipment

  • Large heavy-bottom pot Used for searing and simmering the beef stew
  • Wooden spoon To scrape up browned bits when deglazing

Method
 

  1. Heat 2 tablespoons oil in a large heavy-bottom pot over medium-high heat. Brown beef shank 4-5 minutes per side until deeply caramelized. Remove and set aside.
    2 lbs beef shank, 2 tbsp oil
  2. In the same pot, sauté minced garlic and diced onion until fragrant and softened, about 3 minutes. Deglaze with ½ cup stock, scraping up browned bits with a wooden spoon.
    3 cloves garlic, 1 medium onion, 1 cup beef or chicken stock
  3. Return beef to pot and add tomato sauce, liver spread, remaining stock, soy sauce, and bay leaves. Bring to a gentle simmer, then reduce heat to low. Cover partially and simmer 2 to 2.5 hours, stirring every 30 minutes, until meat falls off the bone.
    2 lbs beef shank, 2 cups tomato sauce, 3 tbsp liver spread, 1 cup beef or chicken stock, 2 tbsp soy sauce, 2 bay leaves
  4. When beef is fork-tender, add cubed potatoes and sliced carrots. Simmer uncovered 20 minutes. Add diced bell peppers and green peas, then cook 10 more minutes until vegetables are tender but intact.
    2 medium potatoes, 2 carrots, 1 red bell pepper, 1 green bell pepper, 0.5 cup green peas
  5. Remove from heat and let rest 10 minutes off heat to let flavors meld. Check seasoning and adjust with salt or soy sauce as needed. Serve over steamed white rice or garlic fried rice.
    2 tbsp soy sauce

Notes

  • Sear beef shank well to build a rich flavor base for the stew.
  • Maintain a gentle simmer around 180-200°F to ensure tender meat without toughening.
  • Add vegetables late in cooking to preserve texture and avoid mushiness.

Tried this recipe?

Let us know how it was!

How Long Does Cool Whip Last? [Storage Guide]

March 29, 2026

Picking up a frozen tub of Cool Whip is easy - figuring out how long it actually stays good is where things get foggy. Cool Whip is sold frozen, not refrigerated, so its storage rules differ from most toppings you'd grab off a shelf.

How Long Does Cool Whip Last In The Fridge

Understanding those rules matters here because thawing, re-sealing, and serving habits all affect how fast the texture and safety window close.

If you're curious about cool whip and its flavor before committing to a tub, that's worth checking - and if you're already weighing alternatives to whipped topping, the shelf life gap between options is real.

QUICK SUMMARY

Cool Whip lasts 7-14 days in the fridge once thawed, and 6-12 months in the freezer when unopened. Once opened, refreezing harms texture significantly. Keep it covered, use a clean spoon, and track your thaw date.

🧊Fridge (opened): 7-14 days, kept covered at 34-40°F
❄️Freezer (unopened): 6-12 months at 0°F for best quality
⚠️Key rule: Avoid refreezing after a full thaw - texture turns watery and grainy

How Long Does Cool Whip Last?

Cool Whip starts its life frozen, which means shelf life splits into two distinct phases depending on where the tub is sitting.

Once you move it to the fridge to thaw, the 7-14 day window begins - shorter if the lid comes off repeatedly or warm air gets in.

The stabilizers in Cool Whip - modified food starch and xanthan gum - help maintain structure, but they can't hold the emulsion indefinitely after thawing.

For context on how dairy-adjacent products behave over time, the same thaw-and-use principle applies to how long milk keeps.

Cool Whip Shelf Life
MethodStateDurationNotes
❄️ FreezerUnopened6-12 monthsKeep at 0°F; quality drops after 6 months
❄️ FreezerOpened (refrozen)1-2 monthsTexture suffers; watery and grainy after thaw
🧊 FridgeThawed, opened7-14 daysStore covered at 34-40°F; avoid repeated warm-air exposure
🧊 FridgeThawed, unopened7-14 daysOnce fully thawed, treat as opened - use promptly
🏠 CounterAny2 hours maxBacteria multiply quickly; do not soften at room temperature
Golden Rule
Label the tub with your thaw date the moment it goes in the fridge. The 14-day window moves fast, especially with a half-used tub in the back of a busy refrigerator.

How to Store Cool Whip

Proper storage comes down to two decisions: where the tub lives and what covers it. Both affect how quickly the topping separates or picks up off-flavors.

Fridge: After thawing, keep the original lid snapped firmly on the tub. If the lid seal has weakened, transfer leftovers to an airtight plastic container with a tight snap lid to reduce air exposure.

Freezer: Leave unopened tubs in their original packaging and store flat at 0°F. For opened portions you want to save short-term, spoon into a shallow freezer-safe airtight container with minimal headspace - though expect some texture loss.

Counter: Don't leave Cool Whip out to soften before serving. Unlike butter, a thawed tub sitting at room temperature accelerates separation and bacterial growth.

  • 🥄 Use a clean spoon every time - introducing bacteria from another food shortens the fridge window noticeably.
  • ❄️ Only thaw what you need - leave the rest of the tub frozen to protect texture.
  • 📅 Track the thaw date - not the purchase date, which tells you nothing about remaining fridge life.

Can You Freeze Cool Whip?

Yes - and in fact, freezing is its default state. The nuance is in how you freeze it and whether it's been opened already.

Unopened tubs go straight back into the freezer with no prep. Opened tubs need a bit more care, and the honest caveat is that refreezing after a full thaw degrades the emulsion that hydrogenated vegetable oil and casein create. The process works for freezing whipped cream, and similar rules apply here - thaw slow, use cold.

  1. Keep unopened tubs sealed - return directly to the freezer in original packaging, no steps needed.
  2. Portion opened Cool Whip - spoon into a shallow, freezer-safe airtight container and leave minimal headspace to reduce freezer burn risk.
  3. Label with the date - write the freeze date clearly; aim to use within 1-2 months for opened portions.
  4. Freeze at 0°F (-18°C) - colder storage preserves the modified food starch structure longer.
  5. Thaw in the fridge only - allow 4-6 hours for small tubs or overnight for full ones; stir gently once thawed to reincorporate any separated liquid.
Watch Out
Refreezing a fully thawed tub doesn't just hurt texture - it can cause persistent watery separation that no amount of stirring fixes. If a tub has been sitting in the fridge for several days, use it rather than refreeze it.

Signs Cool Whip Has Gone Bad

Cool Whip's non-dairy base makes spoilage slightly less obvious than cream-based toppings, but the signs are clear once you know what to check.

Mold is the most direct indicator - discard immediately if any fuzzy growth appears. Beyond that, discoloration and texture shifts tell the story before any smell does.

Signs It's Gone Bad
👀
VisualGrayish or dull surface (no longer bright white) · Mold spots or fuzzy growth · Excessive liquid pooling that won't re-emulsify
👃
SmellSour or fermented odor · Chemical or rancid oil smell
✋
TextureLumpy or curdled after stirring · Thin watery consistency that won't re-emulsify

Don't taste-test to confirm spoilage. If mold is present or the smell is off, discard the entire tub.

Getting the Most Out of Every Tub

A few habit shifts extend usable life and protect texture without extra effort.

  • 🥧 Use slightly cold for spreading - a still-firm tub spreads cleanly on pies without weeping or sliding.
  • 🍰 Accept texture trade-offs in baked recipes - folded into pie filling or baked bars, minor separation is undetectable.
  • 🔄 Know your swap options - if your tub has gone grainy, [cool whip swaps that work](https://forkliftkitchen.com/cool-whip-substitutes/) cover the closest alternatives, and [swapping out whipped cream](https://forkliftkitchen.com/whipped-cream-substitutes/) broadens the field further.
  • 🧪 Watch the xanthan gum - this stabilizer is what keeps texture cohesive; recipes relying on it (like no-bake cheesecakes) tolerate less separation than simple dollop applications, so [swapping out xanthan gum](https://forkliftkitchen.com/xanthan-gum-substitutes/) matters if texture is critical.
Shortcut
Keep one tub in the freezer and one actively thawing in the fridge. Rotate when the fridge tub hits 10 days - you'll never open a tub that's past its window.

Frequently Asked Questions

Can you put Cool Whip in the fridge after opening?

Yes - the fridge is the correct home for an opened tub. Keep it sealed with the original lid or transfer to an airtight container, and use within 7-14 days.

How long can Cool Whip sit out at room temperature?

No more than 2 hours. Beyond that, bacterial growth accelerates and the emulsion starts separating - room temperature softening is the most common misuse of an open tub.

Can you refreeze Cool Whip after thawing?

Technically yes, but the result is noticeably watery and grainy. The hydrogenated vegetable oil emulsion breaks down during refreezing, and stirring won't restore the original airy texture.

Does Cool Whip go bad if frozen too long?

It stays safe past 12 months but quality drops after 6. Freezer burn causes off-flavors and texture loss - the modified food starch that holds structure degrades slowly at extended freeze times.

Is it safe to use Cool Whip past the best-by date if it's been frozen?

Generally yes, if stored continuously at 0°F with no signs of freezer burn or off-smell. Best-by dates assume freezer storage - check for discoloration and odor after thawing before using.

How Long Does Daikon Radish Last? [Storage Guide]

March 29, 2026

Freezing daikon radish is where most people go wrong - whole raw roots turn mealy and watery after thawing, and the texture loss is hard to recover from.

Can You Freeze Daikon Radish

The good news stops there only if you freeze it unprepared; blanch or cook it first, and frozen daikon holds up well in soups, stews, and braises for months.

If you're working with a large white radish and wondering how to extend its life beyond a week, storage method and prep state matter more than most people expect.

Daikon, also called mooli, behaves quite differently from carrot swaps that work or even options covered in guides to swapping out radish - its high water content makes it more sensitive to temperature shifts and rough handling.

QUICK SUMMARY

Whole daikon radish keeps 2-3 weeks in the fridge unwrapped with greens removed. Cut pieces last 5-7 days in an airtight container. Blanched or cooked daikon freezes well for 6-8 months. Raw whole daikon should never go straight into the freezer.

🧊Fridge (whole): 2-3 weeks, greens removed, wrapped in damp paper towel
❄️Freezer (blanched): 6-8 months; blanch first for best texture after thawing
⚠️Key rule: Remove greens immediately - they pull moisture and shorten root life significantly

How Long Does Daikon Radish Last?

Daikon's shelf life depends almost entirely on how it's been prepped and where you store it.

A whole, uncut root with its greens removed outlasts a sliced one by weeks, and understanding daikon radish and its flavor helps explain why - that dense, high-water flesh loses crispness quickly once air hits a cut surface.

Daikon Radish Shelf Life
MethodStateDurationNotes
🏠 CounterWhole1-2 daysShort-term only; softens quickly at room temp
📦 PantryWholeNot recommendedWarm, dry air accelerates wilting fast
🧊 FridgeWhole (no greens)2-3 weeksUnwashed, wrapped, in crisper drawer
🧊 FridgeSliced or cut5-7 daysAirtight container with damp paper towel
🧊 FridgeCooked3-4 daysSealed container; works well in broth-based dishes
❄️ FreezerBlanched or cooked6-8 monthsFlash-freeze on tray before bagging
❄️ FreezerRaw shredded2-3 monthsSoftens after thaw; cooked dishes only

Cut daikon browns faster than whole, and cooked daikon in broth lasts slightly less time than raw fridge-stored pieces.

Compared to how long ginger keeps, daikon is far more forgiving in the fridge but far less so in the freezer without blanching first.

How to Store Daikon Radish

The single most impactful step happens before the daikon even reaches the fridge. Trim the leafy greens immediately - they draw moisture directly from the root, and leaving them attached can shorten fridge life by up to a week.

Golden Rule
Never store daikon with greens attached in the fridge. Remove them at the door, and your root stays firm days longer.

From there, storage is straightforward but specific:

  • Whole root - Leave the skin on, wrap loosely in a damp paper towel, and tuck into a perforated produce bag in the crisper drawer. Don't wash it first.
  • Cut or sliced pieces - Place in an airtight container lined with a damp paper towel, or submerge in cold water and change it daily; drain before using.
  • Cooked daikon - Transfer to a sealed container while still slightly warm, refrigerate within two hours, and use within 3-4 days.
  • Counter - Only hold whole daikon at room temp for 24-48 hours if you're cooking it that day.

Daikon doesn't release ethylene gas itself, however it's mildly sensitive to high-ethylene neighbors like apples and pears - keep it away from those in the crisper.

Can You Freeze Daikon Radish?

Yes, but method determines whether you get something useful or a soggy disappointment. Raw whole daikon should not be frozen - the high water content ruptures cell walls during freezing, leaving the flesh grainy and loose after thawing.

Watch Out
Freezing raw, whole daikon is the most common mistake. Always blanch sliced pieces or cook daikon first - thawed raw chunks will be too watery for any dish.

Blanched or cooked daikon freezes well and holds up in soups and stews for up to 8 months. Follow these steps for the best result:

  1. Trim and peel - Remove greens, scrub the root, and peel if desired; slice into chunks sized for your intended dish.
  2. Blanch - Drop sliced pieces into boiling water for 2-3 minutes, then transfer immediately to ice water to stop cooking; pat completely dry.
  3. Flash-freeze - Arrange pieces in a single layer on a baking sheet and freeze for 1-2 hours until solid.
  4. Bag and seal - Transfer to labeled freezer bags or airtight containers, press out air, and seal tight.

To thaw, move the bag to the fridge for several hours.

Alternatively, add frozen pieces directly to soups or stews - no thawing needed. Raw shredded daikon can be frozen for 2-3 months, however expect significant softening; it's only worth doing if the dish is fully cooked.

Signs Daikon Radish Has Gone Bad

Fresh daikon should feel firm and dense, smell faintly peppery, and show clean white flesh when cut. Anything outside that range deserves a close look.

Signs It's Gone Bad
👀
VisualDark brown or black patches from skin · Internal brown streaks · Slimy or translucent areas · Pronounced shriveling and soft spots
👃
SmellSour or fermented odor from cut surface · Rotten sharp smell instead of clean peppery scent
✋
TextureMushy or collapsing when squeezed · Mealy, spongy interior after long fridge storage

Slime anywhere on the root is a hard discard - don't try to cut around it. Widespread softness or off-odors follow the same rule, similar to how kale without blanching spoilage signs can sneak up before you notice visible changes.

Shortcut
A slightly limp or dry-skinned daikon isn't necessarily bad - soak sliced pieces in cold water for 30 minutes to restore some crispness before using raw.

Getting the Most from Your Daikon

A few targeted habits separate daikon that lasts three weeks from one that wilts in days.

If you need to work around a missing ingredient, a guide to swapping out daikon radish covers root-by-root options - and alternatives to turnip overlap more than you'd expect for cooked applications.

  • 🥬 Cut greens at the door - Do this before refrigerating, every time, no exceptions.
  • 🔪 Use grated daikon fresh - Daikon oroshi (grated daikon) loses its sharp bite quickly; grate it right before serving as a sushi garnish or condiment. If you're focused on [keeping sushi fresh](https://forkliftkitchen.com/sushi-shelf-life/), fresh-grated daikon is non-negotiable.
  • 💧 Submerge cut pieces in water - For short-term crisp storage of 1-2 days, cold water beats the container method; change the water daily.
  • 🍲 Freeze only what you'll cook - Blanched chunks work in miso soup, nikujaga, and braised dishes; don't freeze anything destined to be eaten raw.

Frequently Asked Questions

Can you freeze daikon radish raw?

Technically yes, but the result is poor. Raw daikon's high water content causes cell walls to burst during freezing, producing a mushy, grainy texture after thaw. Only freeze raw shredded daikon if you plan to cook it thoroughly afterward - 2-3 months max.

How long does daikon last in the fridge?

Whole daikon with greens removed lasts 2-3 weeks in the crisper drawer. Cut or sliced pieces drop to 5-7 days in an airtight container, and cooked daikon keeps 3-4 days sealed.

Can you freeze grated daikon?

Yes, for up to 2-3 months, however the texture softens considerably. Frozen grated daikon is only suitable for cooked applications - don't use it as daikon oroshi or any raw garnish after freezing.

Can thawed daikon be used raw?

No. Freezing breaks down daikon's cell structure, and thawed pieces are soft and watery regardless of how they were frozen. Use thawed daikon only in soups, stews, or braises where texture matters less.

How do you store daikon with the greens still attached?

Cut them off immediately - don't store daikon with greens attached. The greens actively draw moisture from the root and accelerate shriveling. Store trimmed greens separately in a damp paper towel and use within 2 days.

Lamb Moussaka Greek-Style

March 29, 2026

Golden brown layers of spiced lamb, tender eggplant, and creamy béchamel stacked into a single baking dish. This is what happens when you roast vegetables properly and build a meat sauce with cinnamon instead of Italian herbs.

Lamb Moussaka Greek-Style served on a plate

The dish bakes at 350°F for 75 minutes while you clean up or make a salad. No flipping, no stirring, no opening the oven door every five minutes.

Make this for weeknight dinners when you want something that feels special but doesn't require constant attention. It also works for meal prep since the flavors get better after a day in the fridge.

QUICK SUMMARY

Lamb Moussaka layers spiced ground lamb, roasted eggplant, and béchamel sauce in a 9x13 baking dish. Salt the eggplant first to remove moisture and prevent sogginess. The dish needs 20 minutes of resting time after baking so the layers set before slicing.

⏱️Time Reality: 30 minutes prep, 75 minutes baking, 20 minutes rest before serving
🔥Critical Move: Brown the lamb deeply and simmer the sauce uncovered to concentrate flavors
⚠️Watch Out: Runny béchamel means you didn't cook the roux long enough-whisk for 2-3 minutes before adding milk

Table of Contents

Toggle
  • Why This Recipe Works
  • What You'll Need
    • Ingredient Details
  • Ingredient Swaps
  • What to Serve With It
  • Store and Reheat
  • Frequently Asked Questions
  • Lamb Moussaka Greek-Style
    • Method 
    • Tried this recipe?

Why This Recipe Works

A good style can make or break the plate. For a version that comes together quickly, we use this quick style dish that keeps everything on one sheet pan.

Quick Reference
⏱️
Prep Time
30 min
🔥
Cook Time
1 hr 15 min
⏰
Total Time
1 hr 45 min
🍽️
Servings
6 servings
📊
Difficulty
Medium
🏷️
Category
Main Dish
💡
Quick Tip
Salt eggplant to remove bitterness
🎯
Best For
Weeknight | Meal prep | Entertaining

Why it works:

  • Salting eggplant removes bitterness and excess water - prevents soggy layers and lets the vegetable caramelize properly
  • Browning lamb over medium-high heat develops fond - deglazing the pan pulls those bits into the sauce for deeper flavor
  • Simmering meat sauce uncovered concentrates flavors - reduces liquid by about one-third in 15 minutes
  • Cooking the roux before adding milk prevents lumps - whisking for 2-3 minutes activates the flour and creates smooth béchamel
  • Resting 20 minutes after baking sets the layers - makes slicing clean instead of sliding apart on the plate
Golden Rule
Check the meat reaches 160°F internal temperature before layering-undercooked lamb tastes gamey and won't finish cooking in the oven

What You'll Need

Ingredients for Lamb Moussaka Greek-Style

Most people skip something fresh and light, but it balances the meal. We keep a batch ready for nights like this - this fresh salad fits on the same table without adding extra cook time.

🍗
Protein
  • 1½ lbs ground lamb
🥬
Vegetables
  • 2 medium eggplants (sliced ½ inch thick)
  • 2 medium potatoes (sliced ¼ inch thick)
  • 1 yellow onion (diced)
  • 4 garlic cloves (minced)
🥢
Sauce Base
  • 3 tablespoon tomato paste
  • 1 cup crushed tomatoes
  • 3 cups whole milk
  • 4 tablespoon butter
  • ¼ cup all-purpose flour
🌶️
Aromatics + Spices
  • 1½ teaspoon ground cinnamon
  • ½ cup grated Parmesan cheese
  • ⅓ cup olive oil
  • Salt and black pepper

Ingredient Details

  • Ground lamb
    Rich, distinct flavor that defines Greek Moussaka-don't substitute with turkey unless necessary
  • Eggplant
    Salt slices for 20 minutes, rinse, and pat dry to remove moisture and bitterness
  • Béchamel sauce
    Cook the roux until it smells toasted before adding milk-prevents lumps and raw flour taste
  • Cinnamon
    Warm spice that lifts lamb flavor authentically-skip Italian herbs like basil or oregano here
  • Tomato paste
    Concentrates tomato flavor in meat sauce-cook for 1-2 minutes before adding liquids
  • Parmesan cheese
    Adds umami to béchamel-swap for Pecorino or nutritional yeast if needed
  • Potatoes
    Optional layer that adds heft-slice thin and roast to prevent undercooked centers

Ingredient Swaps

The pies works best when it hits the table at the same time as the main. For a version that comes together quickly, this quick pies dish saves you 15 minutes without sacrificing texture.

Four swaps that work:

  • Ground lamb → ground beef or turkey - slightly milder flavor with leaner texture, use 80/20 beef for moisture
  • All-purpose flour → gluten-free flour blend or cornstarch - thickens béchamel differently, whisk continuously and expect slightly longer cook time
  • Potatoes → zucchini slices or omit entirely - lowers carbs and creates softer texture, salt and drain zucchini like eggplant
  • Parmesan cheese → nutritional yeast - loses umami depth but maintains topping texture for dairy-free version

Ground Beef

Works for: Budget-friendly swaps, milder lamb flavor, easier to find at most stores

Skip if: You want authentic Greek flavor-beef lacks the richness lamb brings

Gluten-Free Flour

Works for: Celiac diets, similar thickening power with 1:1 ratio in béchamel

Skip if: You're new to making roux-regular flour is more forgiving with lumps

Instructions

Most people skip a tangy dipping sauce, but it balances the meal. For a version that comes together quickly, we make this sauce in the food processor while the moussaka bakes.

  1. Salt and roast the eggplant. Slice eggplant ½ inch thick, sprinkle with 1 tablespoon salt, and let sit 20 minutes. Rinse, pat dry, and arrange on a baking sheet. Brush with 3 tablespoons olive oil and roast at 400°F for 20 minutes, flipping halfway until golden.

  2. Brown the lamb and build the sauce. Heat 2 tablespoons olive oil in a large skillet over medium-high heat. Add ground lamb, breaking it into small pieces, and cook 8-10 minutes until deeply browned. Add onion and garlic, cook 3 minutes, then stir in tomato paste and cinnamon. Pour in crushed tomatoes, season with salt and pepper, and simmer uncovered 15 minutes until thickened.

  3. Make the béchamel sauce. Melt butter in a saucepan over medium heat. Whisk in flour and cook 2-3 minutes until the roux smells toasted. Slowly add milk, whisking constantly, and cook 8-10 minutes until thick enough to coat the back of a spoon. Remove from heat and stir in half the Parmesan cheese.

  4. Layer the moussaka. In a 9x13 baking dish, layer half the roasted eggplant, all the potato slices if using, then all the meat sauce. Add remaining eggplant and pour béchamel over the top. Sprinkle with remaining Parmesan cheese.

  5. Bake and rest before serving. Bake at 350°F for 75 minutes until the top is golden brown and bubbly. If the béchamel browns too quickly after 30 minutes, tent loosely with foil. Let rest 20 minutes before slicing into squares.

Shortcut
Skip roasting potatoes separately-layer them raw between the eggplant and they'll cook through in the oven while baking

What to Serve With It

The meal feels incomplete without something on the side. For weeknight sausage sandwiches meal planning ideas, we pair rich mains with crisp vegetables or bread that soaks up extra sauce.

Side Dish Prep Why It Works How to Serve
Greek Salad Easy Freshness and acidity balance the richness of béchamel and lamb Toss cucumber, tomato, red onion, olives, and feta with lemon vinaigrette
Crusty Bread Easy Soaks up extra sauce and béchamel on the plate Warm sliced baguette or pita bread in the oven for 5 minutes
Roasted Green Beans Easy Adds light, crunchy vegetable contrast to tender layers Toss with olive oil, salt, and roast at 425°F for 15 minutes
Tzatziki Easy Cool yogurt complements warm spices in the lamb sauce Mix Greek yogurt, grated cucumber, garlic, lemon juice, and dill
Lemon Roasted Potatoes Medium Adds additional hearty side with citrus notes that brighten the plate Toss potato wedges with lemon juice, olive oil, oregano, and roast 40 minutes

Three ways to serve it:

  • For weeknight dinners: Pair with Greek salad and crusty bread for a complete meal that takes minimal extra effort
  • For entertaining: Add spanakopita, stuffed grape leaves, and a feta-olive platter as appetizers before the moussaka
  • For meal prep: Portion into individual containers with roasted green beans and reheat throughout the week
Best Pick
Tzatziki works best when served cold on the side-the cool yogurt cuts through the richness without competing with the béchamel

Store and Reheat

Leftovers keep their texture when stored properly and reheated with moisture. This dip adds the contrast this plate needs, but timing matters-make it fresh when serving reheated moussaka so the textures don't all go soft.

Method Time Best For
🔥 Oven 25-30 min at 350°F Preserving crispy béchamel top and even heating through all layers
📦 Microwave 3-5 min on 50% power Fast reheating single portions when you accept softer texture
🍳 Stovetop 10 min covered, low heat Small portions when you want to avoid drying out the béchamel

For best results when storing:

  • Cool completely before refrigerating - prevents condensation from making the béchamel watery, takes about 1 hour at room temperature
  • Store in shallow airtight containers - keeps 3-4 days in the fridge, makes reheating more even
  • Freeze individual portions wrapped tightly - lasts up to 3 months, thaw overnight in fridge before reheating
  • Add a tablespoon of water when reheating in microwave - prevents the béchamel from drying out and cracking
  • Tent with foil when reheating in oven - protects the top from burning while the center warms through

Frequently Asked Questions

Can I substitute ground beef for ground lamb in Moussaka?

Yes, use 80/20 ground beef for moisture since it has a milder flavor than lamb. The texture stays similar but you lose some of the authentic richness that defines Greek Moussaka.

How long can I store leftover Lamb Moussaka in the fridge?

Store in an airtight container for 3-4 days in the fridge. Cool completely before refrigerating to prevent condensation from making the béchamel watery.

What internal temperature indicates the lamb mixture is cooked through?

Cook ground lamb to 160°F internal temperature before layering in the baking dish. Undercooked lamb tastes gamey and won't finish cooking properly during the bake.

Why is my Moussaka soggy and how do I fix it?

Soggy moussaka happens when eggplant isn't salted before roasting-salt slices for 20 minutes, rinse, and pat dry to remove excess moisture. If it's already baked, drain visible liquid and broil for 3-5 minutes to crisp the top.

How do I scale Lamb Moussaka for larger gatherings?

Double the recipe and use two 9x13 baking dishes instead of one larger pan-moussaka bakes more evenly in standard-depth dishes. Keep baking time the same at 75 minutes and check that both pans are golden and bubbly.

Lamb Moussaka Greek-Style served on a plate

Lamb Moussaka Greek-Style

No ratings yet
Lamb Moussaka Greek-Style layers spiced ground lamb, roasted eggplant, and creamy béchamel in a single baking dish for a comforting Greek classic. Salting the eggplant removes excess moisture to prevent sogginess, and slow simmering the meat sauce with cinnamon deepens the flavor. The dish bakes for 75 minutes and rests before serving for clean slices.
Print Recipe Pin Recipe
Prep Time 30 minutes mins
Cook Time 1 hour hr 15 minutes mins
Total Time 1 hour hr 45 minutes mins
Servings: 6 servings
Course: Main Dish
Cuisine: Greek
Ingredients Method Notes

Ingredients
  

  • 1.5 lbs ground lamb rich, distinct flavor that defines the dish
  • 2 medium eggplants sliced ½ inch thick, salted to remove moisture and bitterness
  • 2 medium potatoes sliced ¼ inch thick, optional layer adds heft
  • 1 medium yellow onion diced
  • 4 cloves garlic minced
  • 3 tablespoon tomato paste cook 1-2 minutes before adding liquids
  • 1 cup crushed tomatoes
  • 3 cups whole milk
  • 4 tablespoon butter
  • 0.25 cup all-purpose flour whisk for 2-3 minutes before adding milk to prevent lumps
  • 1.5 teaspoon ground cinnamon warm spice that enhances lamb flavor
  • 0.5 cup Parmesan cheese grated, adds umami to béchamel
  • 0.33 cup olive oil used for roasting eggplant and cooking lamb
  • to taste salt for seasoning eggplant and meat sauce
  • to taste black pepper for seasoning meat sauce

Method
 

  1. Slice eggplant ½ inch thick, sprinkle with 1 tablespoon salt, and let sit for 20 minutes. Rinse the slices, pat dry, arrange on a baking sheet, brush with 3 tablespoons olive oil, and roast at 400°F for 20 minutes flipping halfway until golden.
    2 medium eggplants, 0.33 cup olive oil, to taste salt
  2. Heat 2 tablespoons olive oil in a large skillet over medium-high heat. Add ground lamb, breaking it into small pieces, and cook 8-10 minutes until deeply browned. Add diced onion and minced garlic, cook 3 minutes, then stir in tomato paste and ground cinnamon. Pour in crushed tomatoes, season with salt and pepper, and simmer uncovered for 15 minutes until thickened.
    1.5 lbs ground lamb, 1 medium yellow onion, 4 cloves garlic, 3 tbsp tomato paste, 1 cup crushed tomatoes, 1.5 tsp ground cinnamon, to taste salt, to taste black pepper, 0.33 cup olive oil
  3. Melt butter in a saucepan over medium heat. Whisk in flour and cook for 2-3 minutes until the roux smells toasted. Slowly add milk while whisking constantly and cook for 8-10 minutes until thick enough to coat the back of a spoon. Remove from heat and stir in half the grated Parmesan cheese.
    4 tbsp butter, 0.25 cup all-purpose flour, 3 cups whole milk, 0.5 cup Parmesan cheese
  4. In a 9x13 baking dish, layer half the roasted eggplant, then all potato slices if using, followed by all the meat sauce. Add the remaining eggplant on top and pour béchamel sauce over. Sprinkle with the remaining Parmesan cheese.
    2 medium eggplants, 2 medium potatoes, 1.5 lbs ground lamb, 1 cup crushed tomatoes, 3 cups whole milk, 0.5 cup Parmesan cheese
  5. Bake the assembled moussaka at 350°F for 75 minutes until the top is golden brown and bubbly. If the béchamel browns too quickly after 30 minutes, tent loosely with foil. Let rest for 20 minutes before slicing into squares.

Notes

  • Salt eggplant slices for 20 minutes then rinse to remove bitterness and excess moisture.
  • Brown lamb thoroughly and simmer sauce uncovered to concentrate flavor and thicken.
  • Cook the roux fully before adding milk to avoid lumps in béchamel sauce.
  • Let the moussaka rest 20 minutes after baking for cleaner slices.

Tried this recipe?

Let us know how it was!

What Is Cointreau? [Taste, Uses & More]

March 29, 2026

You spot a bottle of Cointreau on the back bar shelf and it looks almost too simple - clear liquid, orange label, no drama.

Yet this single bottle shows up in three of the most ordered cocktails in the world, and serious home bartenders treat it as a non-negotiable staple alongside triple sec alternatives and grand marnier alternatives. Cointreau earns that shelf space because nothing else delivers the same combination of clean orange intensity and reliable sweetness at 40% ABV.

QUICK SUMMARY

Cointreau is a clear French orange liqueur made from sweet and bitter orange peels, bottled at 40% ABV. It delivers bright, clean orange flavor with a crystalline sweetness and subtle floral bitterness - the standard choice for Margaritas, Sidecars, and Cosmopolitans.

🍊Flavor: Bright bitter orange peel, clean sweetness, light floral bitterness
🍹Best Uses: Margaritas, Sidecars, Cosmopolitans, chocolate desserts, pan sauces
🏷️Also Known As: Triple sec, orange liqueur, Cointreau orange
📦Storage: Cool, dark pantry; sealed after opening
⏳Shelf Life: Indefinite unopened; best quality 2-4 years once opened

What Is Cointreau?

Cointreau is a French orange liqueur produced in Saint-Barthélemy-d'Anjou, France, by the Cointreau family since 1875. It falls within the triple sec category, though the brand predates the generic term and holds its own distinct identity.

The liqueur is made by macerating a blend of sweet and bitter orange peels in neutral spirit, then distilling and blending the result to 40% ABV.

That higher alcohol content sets it apart from most generic triple secs, which typically run 15-30% ABV and taste noticeably thinner.

Unlike orange curaçao, which often carries caramel color or artificial flavoring, Cointreau remains completely clear. Other names you'll see on menus or in recipes include "orange liqueur," "Cointreau orange," and simply "triple sec" - though the latter covers a wide range of quality.

  • Triple sec - The broad category Cointreau belongs to, covering any clear, orange-flavored liqueur
  • Orange curaçao - A related style, often colored, sometimes aged, with a slightly different flavor profile
  • Grand Marnier - A cognac-based orange liqueur; richer and darker than Cointreau, not a direct equivalent

What Does Cointreau Taste Like?

cointreau - What Is Cointreau

Cointreau leads with bright, bitter orange peel - the kind of sharp citrus note you get from zesting a fresh navel orange directly over a glass. Clean crystalline sweetness follows immediately, balancing without turning syrupy.

Sensory SnapshotStrong Intensity
👅 Flavor
bitter orange peelcrystalline sweetcandied citrusfloral bitter
✋ Texture
syrupy mouthfeelethanol warmth
👃 Aroma
zesty orange peelorange blossom

The finish carries noticeable ethanol warmth - more so than lower-ABV triple secs - which actually helps it hold its own against strong base spirits.

In cooked applications, heat drives off alcohol quickly, leaving behind candied orange and floral bitterness that reads almost like a high-quality marmalade.

Compared to generic triple sec, the difference is immediate. Generic versions tend toward artificial sweetness and flat citrus.

Cointreau is sharper, more orange-forward, and cleaner on the palate.

Golden Rule
Never substitute a low-ABV generic triple sec 1:1 for Cointreau in a recipe - the sweetness balance and citrus intensity are different enough to throw off the whole drink.

How to Use Cointreau

Cointreau's clearest role is as the orange-liqueur component in classic cocktails. A standard Margarita calls for roughly three-quarters of an ounce - enough to bridge tequila and lime without dominating either.

The Margarita's balance depends heavily on this ratio holding steady.

In a Sidecar, Cointreau links cognac and lemon juice, providing sweetness without the barrel weight of Grand Marnier. The Cosmopolitan uses it differently - here the orange aroma lifts vodka and cranberry, adding brightness to what would otherwise be a flat combination.

Cooking opens up a second set of applications. Handle it carefully off heat.

How Cointreau Is Used
MethodBest ForTip
🍹 Stirred/ShakenMargaritas, Sidecars, CosmopolitansMeasure precisely - sweetness throws off balance quickly
🔥 ReducedCocktail syrups, fruit macerationsReduce over low heat; high heat kills orange aroma fast
🍳 Sauce finishDuck pan sauces, butter sauces for poultryWhisk in off-heat after removing from the burner
🍫 Ganache / dessertsChocolate truffles, orange-chocolate cakesAdd 1-2 teaspoon per 100g chocolate for clean orange note
🔆 FlamedCrêpes Suzette-style finishes, dessert glazesWarm gently before flaming; cold spirit won't catch flame

Cointreau pairs naturally with tequila, cognac, vodka, dark chocolate, lemon, and lime. Thyme or rosemary added to a Cointreau reduction creates a French bistro-style glaze that works well over roasted duck or pork.

Avoid pairing it with delicate raw seafood or strong bitter greens - the orange bitterness compounds rather than complements.

If you need to swap it out, check the options across cointreau alternatives and triple sec alternatives before settling on a replacement, since ABV and sweetness level both matter.

Try It In
🍫Lemon Mint Hot ChocolateA splash of Cointreau adds orange depth to citrus-chocolate drinks→

How to Buy and Store Cointreau

Look for the official clear glass bottle with an orange label stating 40% ABV. The tamper band around the cork or cap should be fully intact.

Avoid any bottle showing cloudiness - Cointreau is crystal clear by nature, and any haze suggests contamination or extreme temperature damage.

Best Pick
Full-size 750ml bottles offer the best value for regular cocktail use. Buy miniatures only for a single occasion - the seal degrades faster on smaller bottles once opened.

For storage, keep the bottle upright in a cool, dark pantry away from direct sunlight or heat sources. Unlike wine, Cointreau doesn't require refrigeration.

Opened bottles stay at peak quality for 2-4 years when sealed tightly; for a more detailed breakdown, see our guide on cointreau storage life. Unopened bottles last indefinitely at room temperature.

Where to Start with Cointreau

Start with a Margarita or Sidecar if you've never cooked or mixed with Cointreau before. Both recipes use it in a defined role - a fixed amount, a specific job - which makes the contribution easy to taste and understand.

Move to savory applications only after you've tasted it straight. A small sip at room temperature shows you exactly what the orange bitterness and sweetness will contribute before heat changes the equation.

Shortcut
Stir ½ oz Cointreau into a store-bought dark chocolate ganache and chill for 30 minutes - it's the fastest way to see how the orange note behaves in a fat-based recipe without committing to a full bake.

Anyone exploring orange liqueurs further should also look at blue curaçao - same flavor family, very different visual impact and typical ABV.

Frequently Asked Questions

Is Cointreau the same as triple sec?

Cointreau is a triple sec, but triple sec is not always Cointreau. Triple sec names a category of clear orange liqueurs; Cointreau is a premium brand within it, bottled at 40% ABV versus the 15-25% common in cheaper versions.

How much Cointreau goes in a Margarita?

The standard ratio is ¾ oz (22ml) Cointreau to 1½ oz tequila and ¾ oz fresh lime juice. Adjusting Cointreau up or down shifts the sweetness balance, so start with the standard before experimenting.

What alcohol is similar to Cointreau?

Pierre Ferrand Dry Curaçao and Combier Liqueur d'Orange are the closest matches - both run at or near 40% ABV with real orange peel distillation. Grand Marnier works structurally but adds cognac richness that changes the drink's character.

Does Cointreau contain real oranges?

Yes - both sweet and bitter orange peels are macerated in neutral spirit before distillation. No artificial orange flavoring is used; the citrus character comes entirely from the peel oils extracted during that process.

Can you cook with Cointreau without tasting the alcohol?

Yes, with the right technique. Adding it off-heat to a warm sauce or reducing it gently in a syrup drives off most of the ethanol while preserving the orange aroma. Boiling it hard destroys the citrus notes along with the alcohol.

« Previous Page
Next Page »

Primary Sidebar

ForkliftKitchen recipe developer

Welcome!

Recipe Developer · 12+ Yr Kitchen Veteran

I'm the recipe developer behind this site, focused on practical, well-tested dishes and smart ingredient swaps. Every recipe is written to be clear, reliable, and easy to make at home.

650+ Recipes
12+ Yrs Exp.
3x Tested
Our Story →

As Featured In

Allrecipes

TASTE OF HOME

Food52

HUFFPOST

Yahoo! Life

Our Editorial Standards

  • ✓ Every recipe tested at least 3 times before publishing
  • ✓ Substitutes verified by real kitchen trials, not guesswork
  • ✓ Reviewed for accuracy by our editorial team
  • ✓ Updated regularly with seasonal info and reader feedback

Most Popular

  • Creamy Lemon Shrimp Linguine
    Creamy Lemon Shrimp Linguine
  • Creamy Garlic Mushroom Chicken
    Creamy Garlic Mushroom Chicken
  • Sesame Ginger Chicken Noodle Bowls
    Sesame Ginger Chicken Noodle Bowls
  • Baked Lemon Herb Fish Fillets
    Baked Lemon Herb Fish Fillets
  • Veggie Loaded Fried Rice
    Veggie Loaded Fried Rice
  • Spicy Garlic Shrimp Stir Fry
    Spicy Garlic Shrimp Stir Fry

Join 8,000+ Home Cooks

Weekly Kitchen Tips

Easy recipes, smart substitutes, and real cooking shortcuts — every Thursday.

Subscribe Free →


Side Dishes

  • What to Serve With Asian Salmon? 15 Best Side Dishes
    What to Serve With Asian Salmon? 15 Best Side Dishes
  • Side Dishes for Strawberry Spinach Salad
    15 Best Side Dishes for Strawberry Spinach Salad
  • Sides for Grilled Cauliflower Steaks to Complete the Meal
    15 Sides for Grilled Cauliflower Steaks to Complete the Meal
  • 15 Sides To Serve With Calabacitas
    15 Best Sides for Calabacitas – Mexican-Inspired Favorites


Substitutes

  • 7 Best Substitutes for Hot Sauce in Marinades & Stir-Fries
    7 Best Substitutes for Hot Sauce in Marinades & Stir-Fries
  • 9 Best Substitutes for Butter in Baking and Cooking
  • 7 Best Substitutes for Tagliatelle for Italian Pasta Dishes
    7 Best Substitutes for Tagliatelle for Italian Pasta Dishes
  • 7 Best Substitutes for Udon Noodles in Asian Stir-Fries
    7 Best Substitutes for Udon Noodles in Asian Stir-Fries


Browse by Topic

  • Side Dishes320
  • Substitutes785
  • Dinner163
  • Air Fryer77
  • Taste Profiles484
  • Food Storage123


Reader Reviews

★★★★★

"Finally a food blog that tells you exactly why a substitute works instead of just listing options."

— Sarah M., via email

★★★★★

"The side dish recommendations are so specific — saved my dinner party twice this month."

— James R., Pinterest comment

★★★★★

"I trust this site more than most because they actually test everything. You can tell."

— Priya K., blog comment

Footer

↑ Back to Top

Forklift Kitchen

We do the heavy lifting so you can enjoy the cooking. Tested recipes, smart substitutes, and perfect pairings—built for real home cooks.

Content

  • Recipes
  • Substitutes
  • What to Serve With
  • Blog

Company

  • About Us
  • Contact
  • Subscribe

Legal

  • Privacy Policy
  • Terms of Service

As an Amazon Associate I earn from qualifying purchases.

© 2026 Forklift Kitchen.

Rate This Recipe

Your vote:


A rating is required
A name is required
An email is required