• Skip to primary navigation
  • Skip to main content
  • Skip to primary sidebar
  • Recipe Index
    • Air Fryer
  • Side Dishes
  • Substitutes
  • About
  • Contact
  • Subscribe

ForkLiftKitchen

menu icon
go to homepage
  • Recipe Index
    • Air Fryer
  • Side Dishes
  • Substitutes
  • About
  • Contact
  • Subscribe
subscribe
search icon
Homepage link
  • Recipe Index
    • Air Fryer
  • Side Dishes
  • Substitutes
  • About
  • Contact
  • Subscribe
×

Blog

What Is Hazelnut? [Taste, Texture, Uses & More]

March 30, 2026

Crack open a raw hazelnut and the scent is almost nothing - mild, faintly green. Toast it, and the whole room shifts: brown butter, warm wood, a whisper of cocoa.
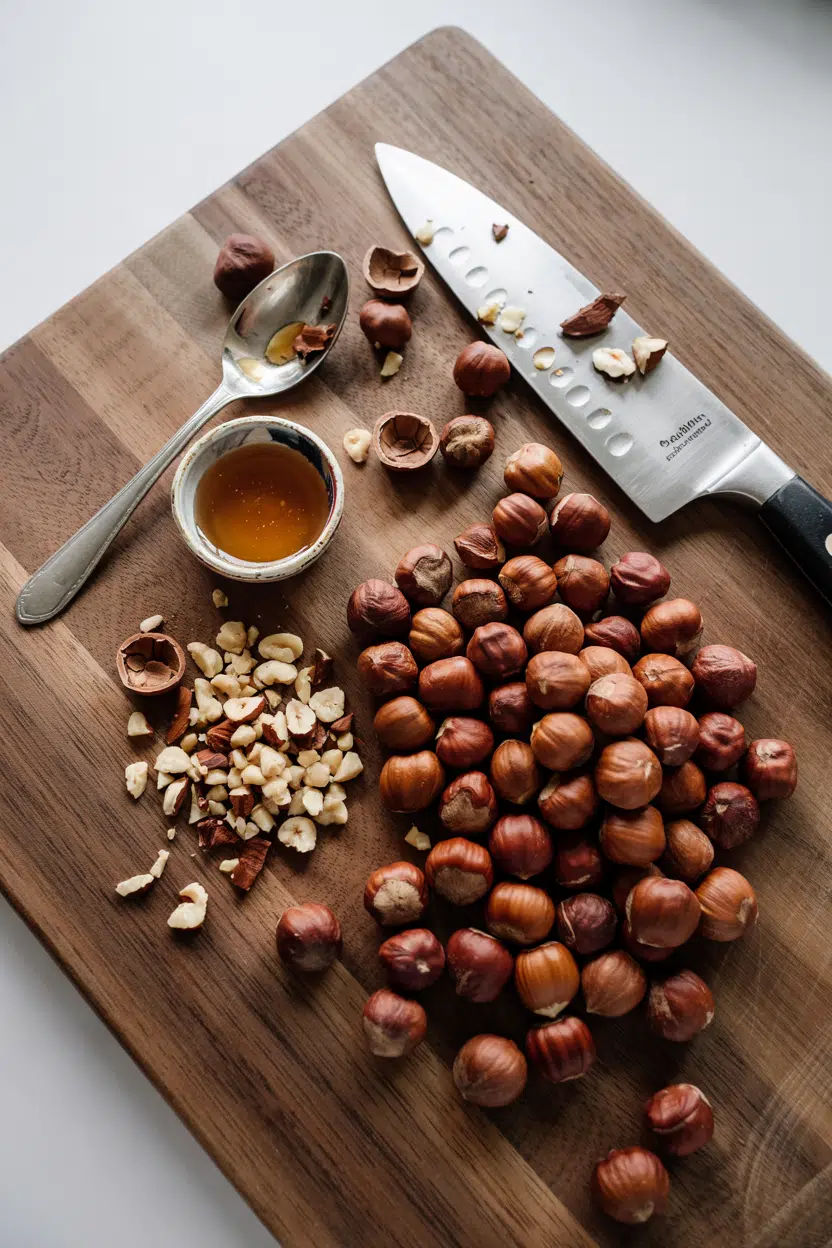
What Is Hazelnut

That transformation is the heart of what hazelnuts do, and it sets them apart from pecans and its flavor or any other nut in the same category.

If you've been reaching for a finishing oil and wondering about swapping out walnut oil, pressed hazelnut oil deserves a serious look.

QUICK SUMMARY

The hazelnut is a small round tree nut with a sweet, buttery, toasty flavor that deepens dramatically with heat. Eaten raw, roasted, ground into praline, or pressed into oil, it's a staple in European baking and confectionery with a shelf life that rewards buying in bulk.

🌰Category: Tree nut, also called filbert or cobnut
👅Flavor: Sweet-nutty, buttery, toasty with a faint cocoa edge
🔥Best Use: Roasted for texture, ground for praline or gianduja
❄️Shelf Life: Up to 12 months frozen; 6-9 months refrigerated shelled
🌍Origin: Temperate Europe and western Asia, with Turkey as the dominant producer

What Is Hazelnut?

The hazelnut is the seed of Corylus avellana, a shrub native to temperate Europe and western Asia. Turkey grows roughly 70% of the world's supply, which explains why it anchors so much of Middle Eastern and Italian confectionery.

You'll find it sold under a few names. Filbert is the most common alternate name in North America; cobnut refers to a fresh, unhusked variety popular in the UK, eaten before full drying.

The nut sits inside a hard brown shell with a papery inner skin. That skin is bitter when raw - most recipes call for removing it after roasting by rubbing the warm nuts in a towel.

Three commercial forms dominate:

  • 🌰 Whole in-shell - longest shelf life, best for long storage
  • Shelled raw - ready to roast or grind, most widely stocked
  • Blanched - skin already removed, used in fine pastry work and gianduja production

If your recipe calls for hazelnut and you're out, knowing the closest options for hazelnut butter stand-ins or full nut replacements is worth having on hand before you start.

What Does Hazelnut Taste Like?
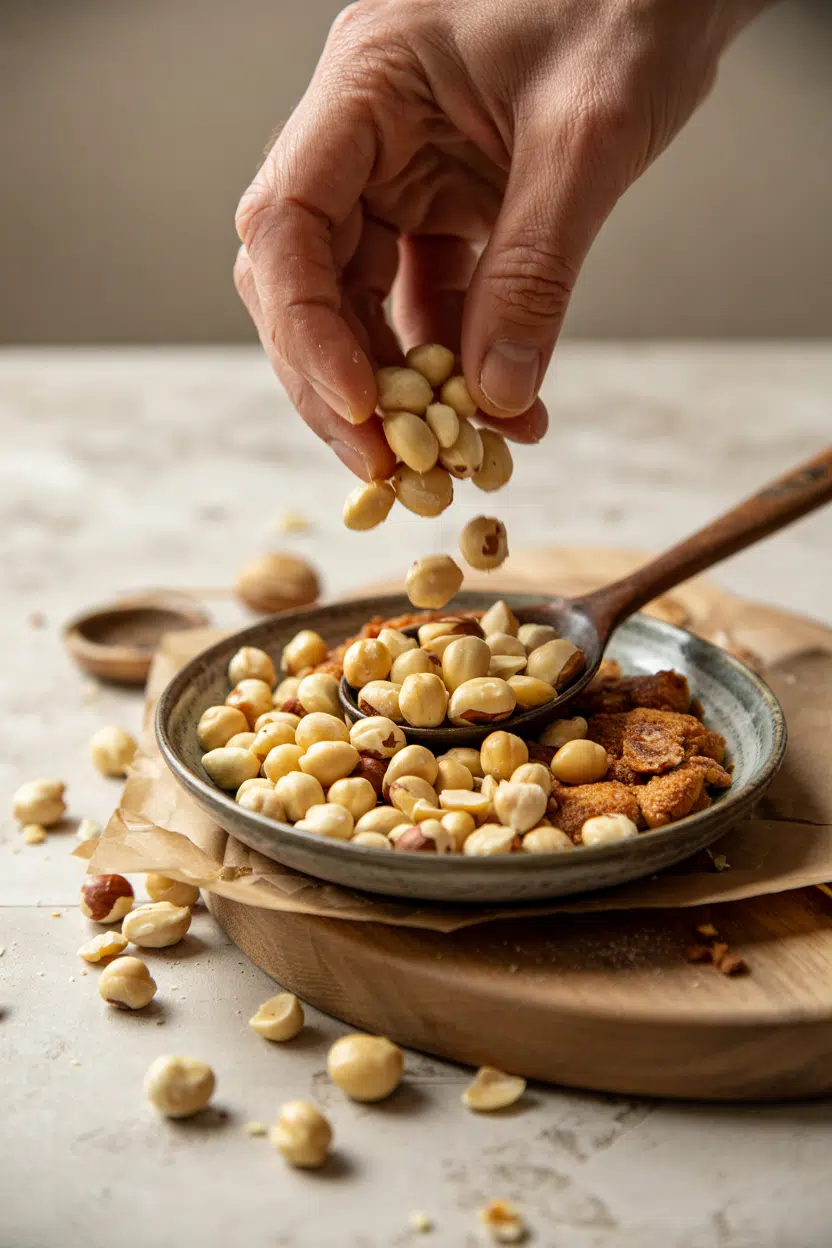
hazelnut - What Is Hazelnut

Raw hazelnuts taste mildly sweet and faintly earthy, closer to a fresh-pressed oil than a roasted snack. The flavor is round and low-key - not sharp, not astringent.

Heat changes everything. Dry-roasting pulls out deep buttery and toasty notes along with that characteristic cocoa-like edge, which is why most professional recipes specify roasted nuts even when the application is cold.

Sensory SnapshotModerate Intensity
👅 Flavor
sweet-nuttybutterytoastyfaint cocoa
✋ Texture
crisp rawcreamy ground
👃 Aroma
warm toastedbrown butter

Compared to almonds and its flavor, hazelnuts are richer and rounder with less of the clean, dry crispness. The butter note is distinctly hazelnut's - almonds don't carry it.

Golden Rule
Always toast hazelnuts before using them in a recipe, even if the instructions don't specify. Raw hazelnuts have only a fraction of the flavor payoff.

How to Use Hazelnut

Hazelnuts cross between sweet and savory kitchens with little effort. Italian and French pastry traditions make the heaviest use of them - gianduja (the chocolate-hazelnut paste behind most commercial spreads), praline, and Paris-Brest are built around this nut.

How Hazelnut Is Used
MethodBest ForTip
🥗 RawMuesli, granola, light saladsSkin-on adds slight bitterness; blanch first for cleaner flavor
🔥 Dry-RoastedChopped toppings, nut butters, crustsRoast at 160°C/325°F for 10-12 minutes; rub skins off while warm
🎂 Ground/PastePraline, cakes, gianduja, spreadsProcess roasted nuts until oil releases for smooth paste
🫙 Pressed OilFinishing dressings, drizzling over roasted vegUse unrefined oil cold; heat destroys its aroma fast

On the savory side, finely chopped hazelnuts work as a crust for chicken or fish - the roasted notes pair well with rosemary and brown butter sauces.

Whole roasted hazelnuts scattered over grain bowls or roasted root vegetables add crunch and a nutty counterpoint to earthy flavors.

Chocolate and coffee are the closest flavor partners. Pear, vanilla, and brown butter also pull out the nut's sweeter register effectively.

One pairing to skip: very delicate fish like sole or flounder, where the nut's assertive roasted quality overwhelms the protein unless you're building a deliberate crust.

If hazelnut butter isn't available for a recipe, knowing your alternatives to macadamia oil or similar mild-fat options helps you stay on track.

Try It In
🍗Sheet Pan Roast ChickenHazelnut crust adds nutty depth to roasted skin→🍗Slow Cooker Roast ChickenToasted hazelnuts finish the dish with warm, buttery crunch→🍗Instant Pot Roast ChickenScattered chopped hazelnuts bring texture to a soft braise→

How to Buy and Store Hazelnut

Buying whole in-shell hazelnuts gives you the most flexibility - shells protect the fat inside from oxidizing.

For shelled nuts, look for a uniform tan color with no oily sheen on the surface and no musty smell, both of which signal rancidity.

Watch Out
Clumping inside a vacuum pack or an off, paint-like smell means the oils have already turned. Rancid hazelnuts won't improve with roasting - skip the bag.

Storage is straightforward:

  • Room temperature - airtight container, up to 3 months; fine for frequent use
  • Refrigerator - airtight, 6-9 months; best for opened bags
  • Freezer - up to 12 months with no quality loss; freeze in portion-sized bags
  • Whole in-shell - cool, dry pantry for up to a month; no special container needed

A full breakdown of variables - humidity, shell-on vs. shelled, roasted vs. raw - lives in the guide to hazelnut's shelf life.

Where to Start with Hazelnut

If this nut is new to your kitchen, roast a small batch first. Smell the difference between raw and roasted - that shift tells you everything about why this ingredient works.

From there, the clearest entry points depend on what you cook most:

  • Bakers - start with a simple praline paste; it takes 20 minutes and opens every French pastry application, including [making paris brest praline choux at home](https://forkliftkitchen.com/paris-brest-praline-choux/)
  • Savory cooks - scatter toasted chopped hazelnuts over roasted carrots or squash with a drizzle of brown butter
  • Spread lovers - blend roasted hazelnuts into a nut butter before adding any chocolate; the base flavor alone is worth knowing

Need to replace it? Swapping out hazelnut covers which nuts hold up in which applications.

Frequently Asked Questions

Is hazelnut the same as filbert?

Yes, in most contexts. Filbert is the North American commercial name for the same nut - Corylus avellana. Some growers use "filbert" specifically for a longer, more tubular variety, but in grocery stores and recipes the two names are interchangeable.

Can you freeze hazelnuts?

Yes. Shelled hazelnuts freeze well for up to 12 months with no meaningful flavor loss. Pack them in airtight bags in small portions so you're not thawing and refreezing the whole batch repeatedly.

How do hazelnuts compare to almonds?

Hazelnuts are richer and more buttery; almonds are drier and cleaner-tasting. Hazelnuts also carry a faint cocoa-like edge that almonds don't have, making them better suited to chocolate pairings.

What does hazelnut oil taste like?

Unrefined hazelnut oil tastes intensely of roasted hazelnuts - nutty, buttery, and slightly sweet. It's used as a finishing oil, not for cooking, because heat destroys its aroma quickly.

Are hazelnuts healthy?

They're high in monounsaturated fats (oleic acid), vitamin E, and manganese. They're calorie-dense, gluten-free, and suitable for vegan diets, but they're a significant allergen for anyone with a tree-nut sensitivity.

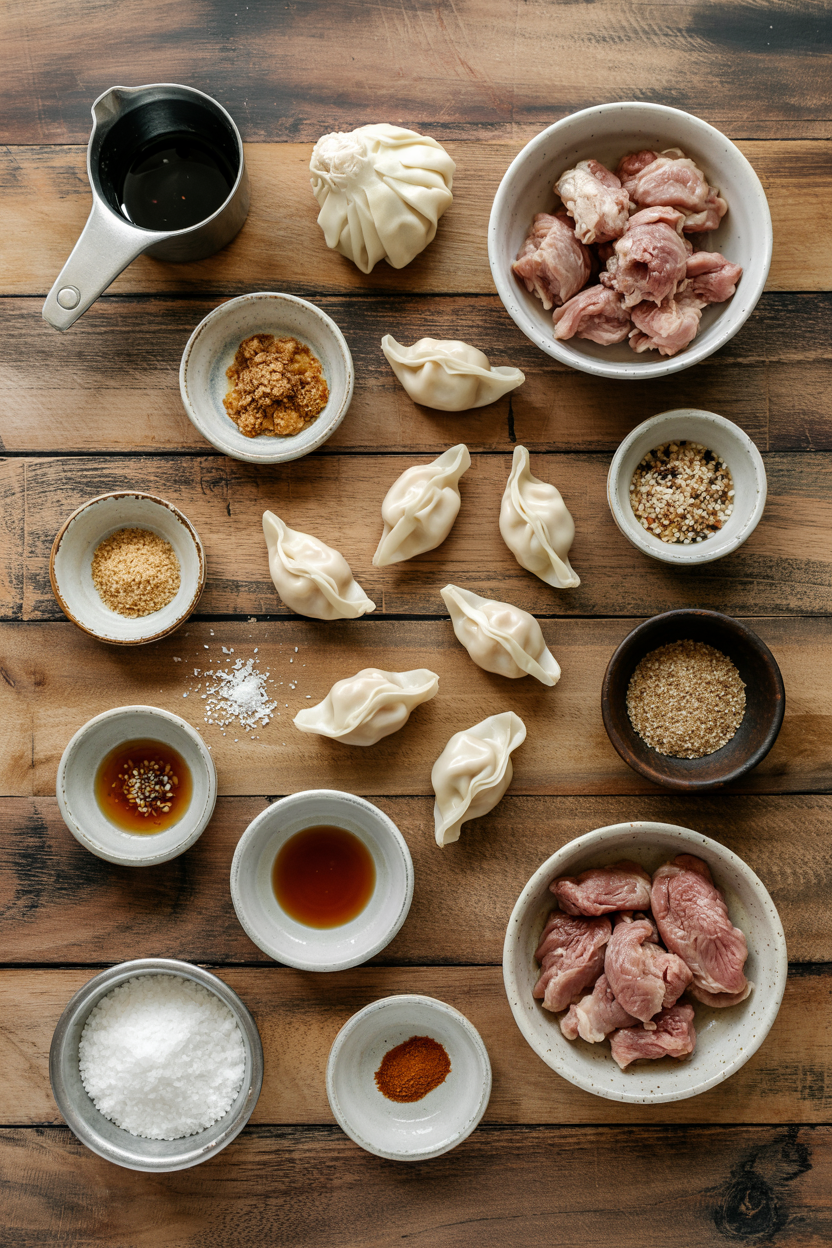
Air Fryer Pork Gyoza

March 30, 2026

Crispy edges on gyoza with juicy pork filling spilling out when you bite down. That's what happens when you air fry them at 370°F instead of pan-frying in oil.

Air Fryer Pork Gyoza served on a plate

The air fryer crisps the bottoms while steaming the tops at the same time. You get restaurant-style texture without standing over a skillet or dealing with splattering oil.

This works for weeknight dinners when you want dumplings but don't want to babysit a pan. Perfect for meal prep since you can freeze wrapped gyoza and cook them straight from frozen.

QUICK SUMMARY

Air fryer pork gyoza delivers crispy bottoms and tender steamed tops in under 10 minutes. The key is preheating the air fryer and adding a tablespoon of water halfway through to create steam while the wrappers brown. Use ground pork with enough fat to keep the filling juicy.

⏱️Time Reality: 20 minutes to wrap, 8-10 minutes to cook per batch
🔑First Critical Move: Squeeze cabbage dry before mixing to avoid soggy wrappers
⚠️Watch Out: Overfilled gyoza tear during cooking - stick to 1 tablespoon filling per wrapper

Why This Recipe Works

Air frying creates two textures at once without flipping or monitoring heat levels. High heat crisps the wrapper bottoms while steam keeps the tops tender, and the circulating air cooks ground pork to 160°F without drying out the filling. For a version that comes together quickly, more seafood ideas work when you want variety beyond pork.

Quick Reference
⏱️
Prep Time
20 min
🔥
Cook Time
8-10 min
⏰
Total Time
30 min
🍽️
Servings
4 servings (approx. 20 gyoza)
📊
Difficulty
Medium
🏷️
Category
Appetizer
💡
Quick Tip
Lightly oil wrappers for crispiness
🎯
Best For
Weeknight | Entertaining | Meal prep

Key success factors:

  • Preheat the air fryer at 360°F for 3 minutes - cold baskets cook unevenly and wrappers stick to the surface
  • Leave 1.5 cm gaps between gyoza - crowding blocks airflow and creates soggy spots instead of crispy edges
  • Add 1 tablespoon water after 3 minutes - steams the tops while bottoms continue browning for contrast
  • Check internal temp with instant-read thermometer - pork must reach 160°F in the center to avoid raw filling
  • Flip gyoza after 5 minutes - ensures both sides brown evenly and prevents one-sided crispiness
Quick Tip
Brush or spray a light layer of oil on wrapped gyoza before air frying. This helps wrappers crisp without burning and prevents sticking to the basket.

What You'll Need

Ingredients for Air Fryer Pork Gyoza

Shopping takes 10 minutes if your store stocks gyoza wrappers in the refrigerated Asian section. Most ingredients sit in your pantry already - soy sauce, sesame oil, ginger, garlic. We keep a batch ready for nights like this - simple homemade ribs round out Asian-inspired dinners when you want protein variety.

🍗
Protein
  • 1 lb ground pork (80/20 fat ratio)
🥬
Vegetables
  • 1 cup cabbage, finely chopped
  • 2 green onions, sliced thin
🧄
Aromatics
  • 2 cloves garlic, minced
  • 1 teaspoon fresh ginger, grated
🥢
Seasonings & Sauce
  • 2 tablespoon soy sauce
  • 1 teaspoon sesame oil
  • 1 tablespoon vegetable oil (for brushing)
🫙
Wrappers
  • 20-24 gyoza wrappers (round, thin)
  • 2 tablespoon water (for sealing and steaming)

Ingredient Details

  • Ground pork (80/20)
    Fat content keeps filling juicy - leaner pork dries out during cooking and tastes bland
  • Gyoza wrappers
    Round, thin wrappers work best - thicker dumpling wrappers stay chewy and don't crisp properly
  • Cabbage
    Squeeze out moisture before mixing into filling - excess water leaks through wrappers and makes them soggy
  • Fresh ginger
    Grate on a microplane for fine texture that distributes evenly - chunky ginger creates hot spots in filling
  • Sesame oil
    Use toasted sesame oil, not regular - adds nutty depth that raw sesame oil lacks
  • Vegetable oil
    Brush or spray lightly on wrappers before cooking - too much oil creates greasy gyoza instead of crispy ones
  • Water for steaming
    Add after 3 minutes of air frying - earlier timing makes wrappers soggy, later timing leaves tops undercooked

Ingredient Swaps

Ground pork delivers the traditional juicy filling, but swaps work when you need leaner protein or have dietary restrictions. Ground chicken or turkey substitutes easily but cooks faster and dries out more, so check doneness at 7 minutes instead of 8.

Four swaps that work:

  • Ground chicken for pork - leaner, less fatty, hits 165°F internal temp instead of 160°F, slightly drier texture
  • Tamari for soy sauce - gluten-free swap with similar salty umami, slightly thicker consistency, 1:1 ratio
  • Napa cabbage for regular cabbage - more tender leaves, milder flavor, less moisture to squeeze out before mixing
  • Rice paper for gyoza wrappers - gluten-free option, more delicate and translucent, requires soaking before wrapping

Ground Chicken/Turkey

Works for: Lower fat option, leaner protein, cooks 1-2 minutes faster

Skip if: You want traditional juicy filling, prefer richer flavor, worried about dryness

Coconut Aminos

Works for: Gluten-free and soy-free diets, slightly sweeter flavor profile

Skip if: You need traditional salty umami taste, watching sugar intake

Garlic Powder

Works for: Convenience, longer shelf life, easier to distribute evenly in filling

Skip if: You want fresh sharp garlic bite, have fresh cloves available

Instructions

Wrapping takes 15 minutes once you find your rhythm. Mix the filling first, then wrap all gyoza before turning on the air fryer - this prevents rushed wrapping while the first batch cooks. For a version that comes together quickly, this quick salad dish adds crunch and balances the rich pork.

  1. Mix the filling. Combine ground pork, squeezed-dry cabbage, garlic, ginger, green onions, soy sauce, and sesame oil in a bowl. Mix with your hands until ingredients distribute evenly but don't overwork - 30 seconds of mixing is enough. Overmixing makes filling dense instead of tender.

  2. Wrap the gyoza. Place 1 tablespoon filling in the center of each wrapper. Wet the edges with water using your finger, fold in half, and press firmly to seal. Create 3-4 pleats on one side if you want traditional crimped edges, or press flat for simpler half-moon shapes. Keep wrapped gyoza covered with a damp towel while you finish the batch.

  3. Preheat the air fryer. Set to 370°F and preheat for 3 minutes. Brush or spray the basket lightly with vegetable oil to prevent sticking. Arrange gyoza in a single layer with 1.5 cm gaps between each piece - don't crowd or stack them.

  4. Air fry and steam. Cook for 3 minutes, then open the basket and spritz 1 tablespoon water around the gyoza (not directly on them). Close and cook for 2 more minutes. Flip each gyoza with tongs or a spatula, then cook for another 3-4 minutes until bottoms turn golden brown and wrappers look slightly translucent.

  5. Check doneness. Insert an instant-read thermometer into the center of one gyoza - pork should read 160°F. If it's under, cook for 1-2 more minutes. Remove from basket immediately and serve hot with dipping sauce.

Golden Rule
Don't skip the water spritz step. That tablespoon creates steam inside the air fryer, which cooks the wrapper tops while bottoms crisp. Without it, you get dry, undercooked tops even when bottoms look done.

What to Serve With It

Gyoza works as an appetizer or light dinner, but you need something fresh to cut through the rich pork filling. Rice or noodles make it a full meal, while salads and pickled vegetables add crunch and acidity. For savory pork meal ideas that round out dumpling nights, consider pairing strategies that balance textures and flavors.

Side Dish Prep Why It Works How to Serve
Steamed rice Easy Absorbs dipping sauce, stretches gyoza into full meal Serve warm in bowls, let diners add gyoza and sauce on top
Cucumber salad Easy Crisp texture contrasts tender gyoza, tangy vinegar cuts richness Toss with rice vinegar and sesame seeds, serve chilled
Miso soup Easy Warm broth balances fried texture, light and doesn't fill you up Serve in small bowls alongside gyoza as first course
Stir-fried bok choy Easy Quick greens add color and nutrients, mild flavor doesn't compete Cook with garlic and soy sauce, serve hot on the side
Edamame Easy Salty snack keeps guests busy while you cook batches Boil or steam, toss with coarse sea salt, serve warm

Three ways to serve it:

  • As appetizer - plate 4-5 gyoza per person with small bowls of soy-vinegar dipping sauce, serve edamame and pickles on the side
  • As light dinner - serve 8-10 gyoza over steamed rice, add stir-fried vegetables and miso soup for complete meal
  • For entertaining - arrange gyoza on platter with multiple dipping sauces (soy-vinegar, chili oil, ponzu), add cucumber salad and seaweed salad
Best Pick
Soy-vinegar dipping sauce (3 parts soy sauce to 1 part rice vinegar) is the classic pairing. Add a drop of sesame oil and sprinkle of chili flakes for more depth.

Store and Reheat

Cooked gyoza stay crispy for 3-4 days in the fridge if you store them in a single layer. Stack them and the moisture from the filling softens the wrappers into mush. Uncooked wrapped gyoza freeze for up to 2 months and cook straight from frozen - add 2-3 minutes to the cooking time. We keep a batch ready for nights like this - this easy sauce recipe adds creamy tang that makes plain dumplings feel special.

Method Time Best For
🔥 Air Fryer 3-4 min at 350°F Restores crispy bottoms, works for 1-2 servings
📦 Oven 10 min at 375°F Reheating multiple servings evenly, larger batches
🍳 Microwave 1-2 min Quick reheating when texture doesn't matter, softer wrappers

For best results when storing:

  • Refrigerate cooked gyoza in shallow airtight container with parchment between layers - prevents sticking and moisture buildup
  • Freeze uncooked wrapped gyoza on parchment-lined sheet until solid, then transfer to freezer bag - keeps wrappers from tearing
  • Cook frozen gyoza directly at 370°F for 11-13 minutes - no thawing needed, just add 2-3 extra minutes to cooking time
  • Don't microwave for crispiness - steam makes wrappers soggy and chewy instead of crisp
  • Reheat in single layer whether using air fryer or oven - stacking creates steam that softens bottoms

Frequently Asked Questions

How long to cook air fryer pork gyoza and at what temperature?

Cook gyoza at 370°F for 8-10 minutes total. Add 1 tablespoon water after 3 minutes to steam the tops, flip at 5 minutes, then cook until bottoms turn golden brown and internal temp reaches 160°F.

Can I make pork gyoza ahead and freeze them?

Yes. Freeze uncooked wrapped gyoza in a single layer on a parchment-lined sheet until solid, then transfer to a freezer bag for up to 2 months. Cook directly from frozen at 370°F for 11-13 minutes without thawing.

What are some good sides to serve with air fryer pork gyoza?

Steamed rice, cucumber salad, miso soup, stir-fried bok choy, and edamame all work well. Rice stretches gyoza into a full meal, while cucumber salad and pickled vegetables cut through the rich filling with tangy crunch.

How do I know when air fryer pork gyoza is fully cooked?

Insert an instant-read thermometer into the center of one gyoza - pork should read 160°F. Wrappers should look golden brown on the bottom and slightly translucent on top with no raw dough visible.

Can I use ground chicken or turkey instead of pork?

Yes. Ground chicken or turkey works as a leaner swap but cooks faster and dries out more easily. Check doneness at 7 minutes instead of 8, and cook to 165°F internal temp instead of 160°F.

Air Fryer Pork Gyoza served on a plate

Air Fryer Pork Gyoza

No ratings yet
Air fryer pork gyoza delivers crispy bottoms and tender steamed tops in under 10 minutes per batch. Preheating the air fryer and adding a tablespoon of water halfway through cooking creates steam while browning the wrappers perfectly. This method produces juicy pork filling with restaurant-style texture without oil splatter.
Print Recipe Pin Recipe
Prep Time 20 minutes mins
Cook Time 10 minutes mins
Total Time 30 minutes mins
Servings: 4 servings
Course: Appetizer
Cuisine: Asian-Inspired
Ingredients Equipment Method Notes

Ingredients
  

  • 1 lb ground pork 80/20 fat ratio to keep filling juicy
  • 1 cup cabbage finely chopped and squeezed dry
  • 2 pieces green onions sliced thin
  • 2 cloves garlic minced
  • 1 teaspoon fresh ginger grated
  • 2 tablespoon soy sauce
  • 1 teaspoon sesame oil toasted sesame oil recommended
  • 1 tablespoon vegetable oil for brushing basket and wrappers
  • 20 pieces gyoza wrappers round, thin
  • 2 tablespoon water for sealing wrappers and steaming during cooking

Equipment

  • Air fryer Used to cook the gyoza at 370°F with steam
  • Instant-read thermometer To check the internal temperature of pork filling
  • Mixing bowl For combining filling ingredients
  • Tongs or Spatula To flip gyoza during cooking

Method
 

  1. Mix ground pork, squeezed-dry cabbage, garlic, ginger, green onions, soy sauce, and sesame oil in a bowl. Mix with hands about 30 seconds until evenly combined but not overworked.
    1 lb ground pork, 1 cup cabbage, 2 pieces green onions, 2 cloves garlic, 1 tsp fresh ginger, 2 tbsp soy sauce, 1 tsp sesame oil
  2. Place 1 tablespoon filling in center of each gyoza wrapper. Wet edges with water, fold in half, and press to seal. Create 3-4 pleats on one side or press flat for half-moon shape. Keep wrapped gyoza covered with a damp towel.
    20 pieces gyoza wrappers, 2 tbsp water
  3. Preheat air fryer to 370°F for 3 minutes. Lightly brush or spray vegetable oil on the basket to prevent sticking. Arrange gyoza in a single layer with at least 1.5 cm gaps between each piece.
    1 tbsp vegetable oil
  4. Air fry gyoza for 3 minutes. Open basket and spritz 1 tablespoon water around gyoza (not directly on them). Close and cook for 2 more minutes. Flip gyoza with tongs or spatula and cook another 3-4 minutes until bottoms are golden and wrappers appear translucent.
    2 tbsp water
  5. Check doneness by inserting an instant-read thermometer into the center of one gyoza; pork should read 160°F. If under, cook 1-2 minutes more. Remove immediately and serve hot with dipping sauce.

Notes

  • Preheat the air fryer to 370°F for even cooking and to prevent wrappers sticking.
  • Leave gaps between gyoza to ensure proper airflow and crispy bottoms.
  • Spritz water after 3 minutes to steam tops, creating the perfect crisp and tender contrast.

Tried this recipe?

Let us know how it was!

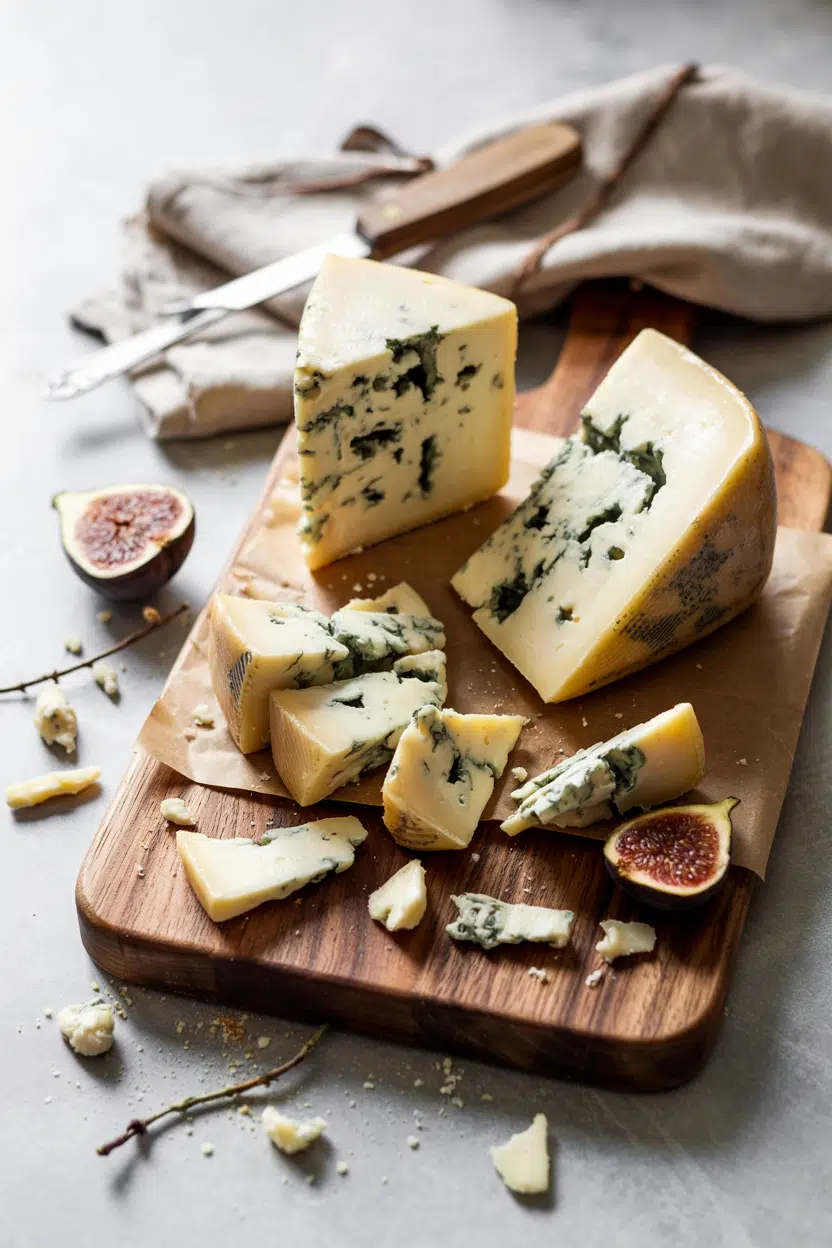
What Is Gorgonzola Cheese? [Taste, Uses & More]

March 30, 2026

Most people assume gorgonzola is just "strong blue cheese" and stop there - grabbing any crumbled blue off the shelf without realizing they've missed the entire point.

What Is Gorgonzola Cheese

The difference between a creamy, sweet Gorgonzola Dolce spread on crostini and a sharp, crumbly Gorgonzola Piccante stirred into risotto is not subtle; they behave like different cheeses entirely.

Cooks who've struggled with watery, acidic results when substituting might find it easier to start with swapping out stilton cheese or even look at gouda cheese stand-ins before circling back to understand what makes gorgonzola genuinely distinct.

QUICK SUMMARY

Gorgonzola is a PDO-protected Italian blue cheese from Northern Italy, made from cow's milk and aged to develop blue-green veins. Dolce is mild, creamy, and spreadable; Piccante is sharp, crumbly, and intense. Both melt, crumble, and pair well across a wide range of savory dishes.

🧀Type: Mold-ripened cow's milk blue cheese, two main varieties
👅Flavor: Tangy-sweet to sharp-piquant, salty, earthy blue notes
🍽️Best Uses: Risotto, pasta sauces, salads, cheese boards, crostini
🧊Shelf Life: Opened wedge lasts 1-3 weeks refrigerated and well-wrapped
📍Origin: Lombardy and Piedmont, Northern Italy - PDO designation protected

What Is gorgonzola cheese?

Gorgonzola originates from the Lombardy and Piedmont regions of Northern Italy, and its production is protected under a PDO (Protected Designation of Origin) designation - meaning authentic gorgonzola can only come from specific Italian provinces.

It's a mold-ripened blue cheese made exclusively from full-fat cow's milk, inoculated with Penicillium roqueforti cultures, then aged and hand-pierced with metal needles to open air channels that let the blue-green veining develop throughout the paste.

Two distinct varieties exist, and they're not interchangeable:

  • 🧀 Gorgonzola Dolce - Aged 2-3 months; soft, moist, and spreadable with a mild, tangy-sweet profile. Also sold as Gorgonzola Cremificato when whipped with cream.
  • 🧀 Gorgonzola Piccante - Aged 6-12 months; firm, crumbly, and sharply piquant with deeper earthy notes and a granular, slightly crystalline texture.
  • 🌍 Common confusion - "Gorgonola" is a frequent misspelling, not a separate product. Always verify PDO labeling for regional authenticity.

When a recipe calls for a milder substitute, options for replacements for gorgonzola cheese can help you navigate between Dolce-style and Piccante-style swaps depending on what the dish needs.

What Does gorgonzola cheese Taste Like?

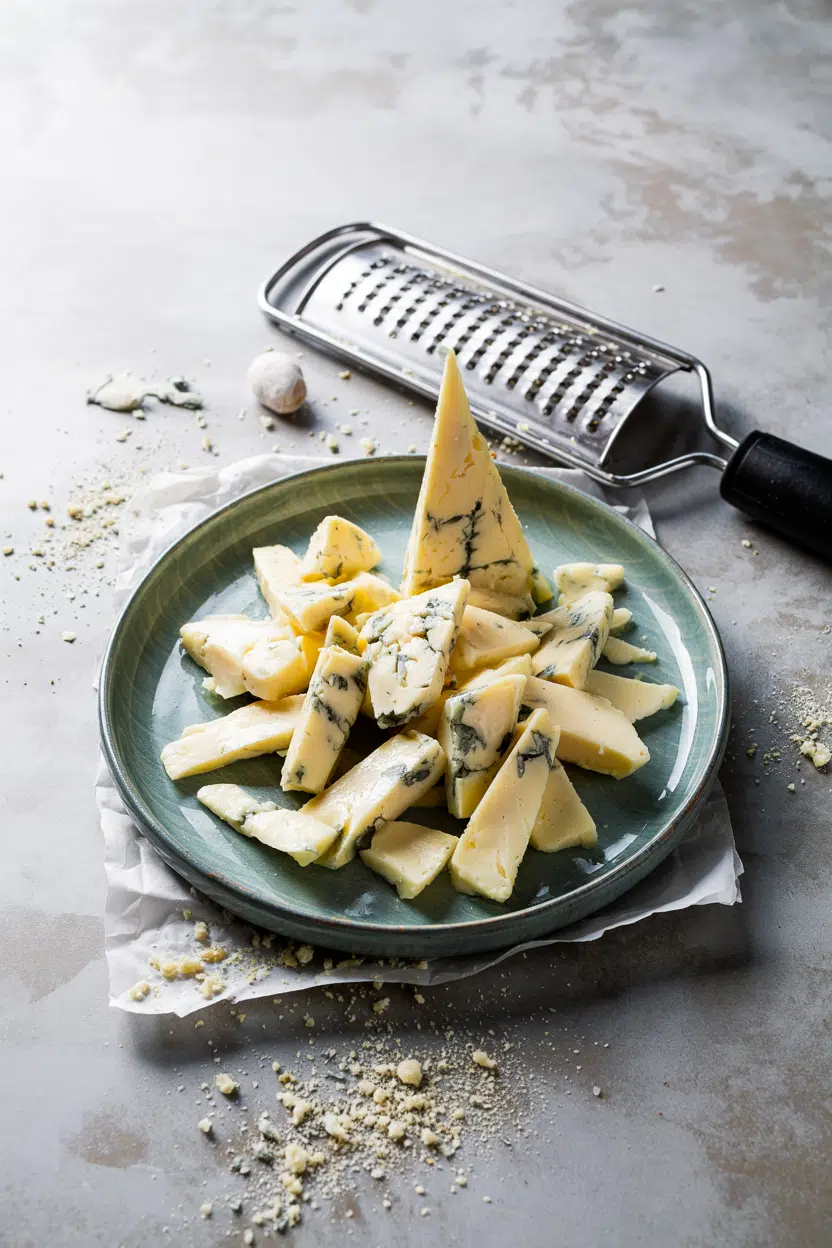
gorgonzola cheese - What Is Gorgonzola Cheese

Gorgonzola's flavor depends heavily on which variety you're eating. Dolce tastes tangy and faintly sweet, with a milky creaminess and soft earthy notes that don't overwhelm - it's approachable for anyone new to blue cheeses.

Piccante is a different experience: sharp, salty, and persistently piquant, with pronounced mushroom-like earthiness from the extended mold activity. Unlike Roquefort - which can veer sulfurous from sheep's milk - gorgonzola stays rounder and less aggressive even at peak intensity, which is part of why it works so well in cooked applications.
Sensory SnapshotStrong Intensity
👅 Flavor
tangy-sweetsharp-piquantsaltyearthy
✋ Texture
creamy-spreadablecrumbly-granular
👃 Aroma
musty-earthymilky

Heat softens the sharpness noticeably - melted Piccante in a warm sauce loses some of its bite and gains a rounder, savory depth that raw crumbles won't give you.

How to Use gorgonzola cheese

Gorgonzola works across a wider range of preparations than most blue cheeses because the two varieties each suit different cooking contexts. Dolce is the melting choice; Piccante is the finishing and crumbling choice.

How Gorgonzola Is Used
MethodBest ForTip
🥗 Raw / CrumbledArugula-pear salad, cheese boards, pizza toppingUse Piccante for more punch; Dolce for a milder finish
🍳 Melted into sauceRisotto, creamy pasta with pancetta, polentaAdd off-heat or at low temperature to avoid graining
🥖 Baked / BroiledCrostini with fig jam, stuffed mushroomsKeep oven time short - 5-8 minutes max before it splits
🧈 Whipped / BlendedCompound butter for steak, dips, spreadsBlend Dolce with softened butter or cream cheese for balance

Northern Italian cooking leans on gorgonzola heavily - risotto ai quattro formaggi, polenta con gorgonzola, and pasta with pancetta and walnut cream are all regional staples.

French bistro and modern American steakhouse menus borrow these ideas freely, pairing it with bitter greens like radicchio or arugula to cut through the richness.

For pairings, fresh pears, walnuts, honey, and aged balsamic are the reliable quartet. Strong reds like Barolo or a tawny Port stand up to the saltiness without being overwhelmed.

Avoid overly sweet syrupy glazes - they push past the savory mold notes rather than complementing them.

If you're building a sauce and want to understand how a comparable cheese behaves differently, using roquefort cheese for creaminess gives a useful side-by-side context.

Knowing the role roquefort cheese plays in French cooking also helps explain why gorgonzola melts more smoothly - cow's milk fat behaves more predictably under heat than sheep's milk fat.

Try It In
🥗Blue Cheese Dressing (Homemade)Dolce crumbles dissolve into the base for a creamier, less sharp result→🧀Cheddar Cheese StrawsSwap a portion of cheddar for Piccante to add earthy sharpness→🍳Egg and Cheese Breakfast SandwichA small amount of Dolce melts into eggs for a savory, tangy layer→

How to Buy and Store gorgonzola cheese

At the cheese counter, look for clean, evenly distributed blue-green veining and a moist, unblemished paste for Dolce. Piccante should show a firmer, slightly granular crumb - visible crystallization is a sign of proper aging, not spoilage.

Reject any wedge with an ammonia smell or excessive pooled liquid in the packaging.

Watch Out
An ammonia smell means the cheese has broken down past its prime. Sharp pungency is normal; a harsh chemical odor is not - put it back.

For storage, wrap in parchment first, then loosely in plastic or use a breathable cheese bag.

Store it in the coldest part of your refrigerator - the cheese drawer or the back of the bottom shelf - to slow moisture loss and mold overgrowth.

An unopened vacuum pack holds 3-6 weeks; an opened wedge is best used within 1-3 weeks.

The detail on using gorgonzola cheese for creaminess covers how storage method directly affects how the cheese performs when melted.

Where to Start With Gorgonzola

New to gorgonzola? Start with Dolce - it's the lower-commitment entry point.

Crumble it over a pear and arugula salad with walnuts and a drizzle of honey, and you'll understand immediately why this cheese earns its place on a board or in a pan.

Best Pick
Dolce for melting and first-time use. Piccante for cheese boards, salad crumbles, and dishes where you want the blue flavor front and center.

Once you're comfortable with Dolce, move to Piccante in cooked preparations - stirred into risotto near the end of cooking, or crumbled over a finished steak. That's the range gorgonzola covers, and it's worth exploring both ends of it.

Frequently Asked Questions

Is gorgonzola safe during pregnancy?

Many markets sell pasteurized gorgonzola, which is generally considered safer during pregnancy - check the label directly. Unpasteurized versions carry a listeria risk and are typically avoided. Your healthcare provider can confirm what's appropriate for your situation.

How can you tell if gorgonzola has gone bad?

An ammonia smell, pink or orange discoloration, or a slimy surface are the clearest signs. Normal blue-green veining and a sharp, pungent smell are expected - those aren't spoilage indicators.

How do you melt gorgonzola without it separating?

Use low heat and add the cheese off direct flame - stir it into a warm sauce rather than a boiling one. Dolce melts more smoothly than Piccante because its higher moisture content helps it incorporate without breaking.

Can vegans eat gorgonzola?

No - gorgonzola is made from cow's milk and is not suitable for vegan diets. Some plant-based blue-style cheeses exist as alternatives, though their flavor and melt behavior differ significantly.

What wine pairs best with gorgonzola?

Tawny Port and Barolo are the classic matches - their sweetness and tannin structure both hold up against the cheese's saltiness. For Dolce, a lighter Moscato d'Asti works well as a contrast pairing.

Charred Broccoli Salad with Almonds

March 30, 2026

Crispy almonds scattered over broccoli florets with blackened edges and a bright lemon glaze. That's what happens when you char vegetables in a hot skillet instead of roasting them.

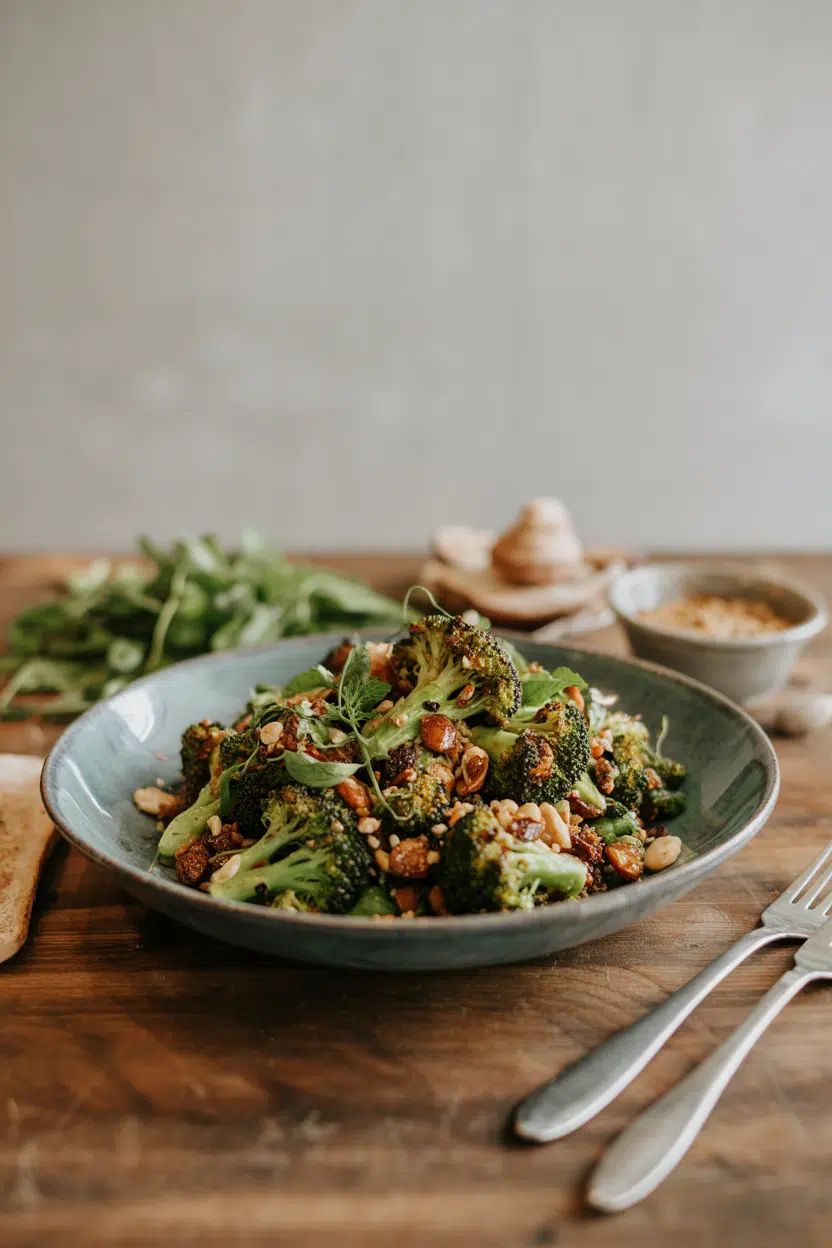
Charred Broccoli Salad with Almonds served on a plate

The pan does most of the work. You get caramelized spots without flipping every 30 seconds or babysitting a sheet pan.

This works for weeknight meals when you need something fast that looks like you actually planned ahead. Pair it with a this tender pork and you've got dinner.

QUICK SUMMARY

A cast iron skillet salad featuring broccoli florets charred over high heat until blackened spots appear, tossed with toasted almonds and a bright lemon dressing. The key is drying the broccoli thoroughly before cooking so it chars instead of steaming, creating tender-crisp texture with smoky edges in under 20 minutes.

⏱️Time Reality: 18 minutes total, with 8 minutes of active charring time
🔥First Critical Action: Heat cast iron skillet fully before adding dried broccoli florets
⚠️Watch Out: Toast almonds separately to prevent burning-they cook faster than broccoli

Why This Recipe Works

Most people skip salad, but it balances the meal. For a version that comes together quickly, flaky shrimp side dish works when you need protein on the same plate.

Quick Reference
⏱️
Prep Time
10 min
🔥
Cook Time
8 min
⏰
Total Time
18 min
🍽️
Servings
4 servings
📊
Difficulty
Easy
🏷️
Category
Side
💡
Quick Tip
Char broccoli over high heat until blackened spots appear
🎯
Best For
Weeknight | Meal prep | Entertaining

What makes this work:

  • High heat creates char without steam: Medium-high heat on cast iron renders moisture quickly, leaving crisp edges instead of soggy florets
  • Separate almond toasting controls texture: Toasting nuts in a dry pan for 3-5 minutes prevents burning and preserves crunch that holds up in the dressed salad
  • Lemon juice added after cooling preserves brightness: Adding acid to hot vegetables dulls the citrus flavor-cooling first keeps the dressing vibrant and tangy
  • Resting time melds flavors: A 10-minute rest allows the dressing to coat evenly and the onion bite to mellow without making the broccoli soggy
  • Salt layering builds depth: Seasoning before charring and adjusting after tossing creates balanced flavor throughout instead of surface-level saltiness
Quick Tip
Pat broccoli florets completely dry with paper towels before oiling-water prevents charring and creates steam that turns the texture mushy instead of crisp.

What You'll Need

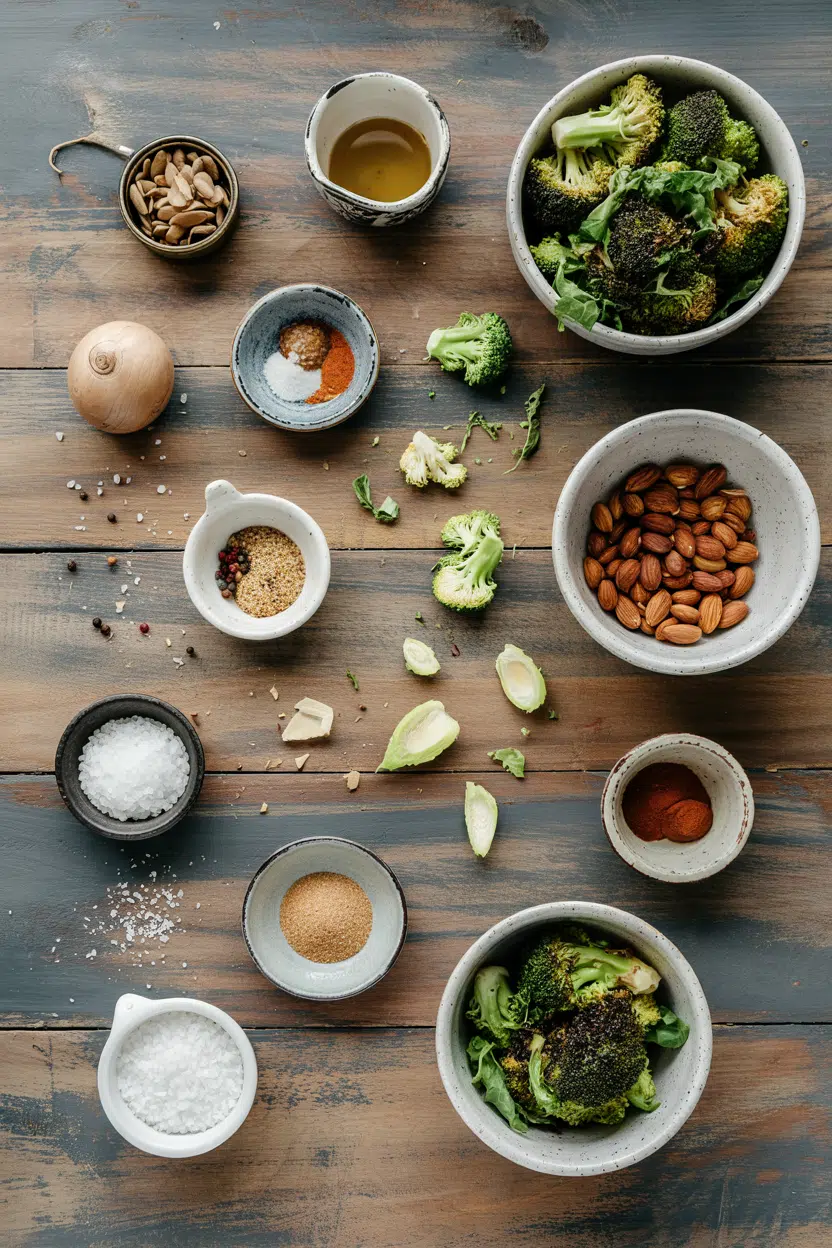
Ingredients for Charred Broccoli Salad with Almonds

A good salad can make or break the plate. For a version that comes together quickly, this fresh salad uses similar bright flavors with different textures.

🥬
Main Vegetable
  • Broccoli florets (4 cups, about 1 large head)
🫙
Nuts & Aromatics
  • Sliced or slivered almonds (⅓ cup)
  • Red onion (¼ cup, thinly sliced)
  • Garlic (2 cloves, minced)
🥢
Dressing Base
  • Olive oil (3 tablespoons)
  • Lemon juice (2 tablespoons, fresh)
  • Salt (½ teaspoon, plus more to taste)
  • Black pepper (¼ teaspoon)
🧀
Optional Additions
  • Parmesan cheese (¼ cup, shaved)
  • Cherry tomatoes (½ cup, halved)

Ingredient Details

  • Broccoli florets
    Cut into uniform 1-inch pieces for even charring-smaller pieces burn before the stems cook through, larger pieces stay raw in the center
  • Sliced almonds
    Slivered or sliced both work, but sliced creates more surface area for toasting and better crunch distribution throughout the salad
  • Olive oil
    Use regular olive oil, not extra virgin-high heat can make EVOO bitter, and regular oil has a higher smoke point for proper charring
  • Lemon juice
    Fresh lemon juice tastes brighter than bottled-the acidity level is more consistent and the citrus oils add complexity that bottled versions lack
  • Red onion
    Slice as thin as possible-thick slices taste too sharp and overpower the other flavors instead of adding a mild bite
  • Garlic
    Mince finely so it distributes evenly in the dressing-large chunks taste raw and harsh instead of blending into the background
  • Parmesan cheese
    Shave with a vegetable peeler for thin, delicate pieces that melt slightly into the warm broccoli-grated cheese clumps and doesn't integrate as smoothly

Ingredient Swaps

The salad works best when it hits the table at the same time as the main. For a version that comes together quickly, juicy salad side dish offers more protein-forward options for meal prep.

Four swaps that work:

  • Walnuts or pecans instead of almonds: Slightly softer texture with earthier, less sweet flavor-toast the same way but watch closely since walnuts brown faster
  • Avocado or grapeseed oil instead of olive oil: Higher smoke point prevents bitterness during charring-use the same amount and expect a more neutral flavor base
  • Lime juice or white vinegar instead of lemon juice: Lime adds tropical brightness while vinegar tastes sharper-start with 1.5 tablespoons and adjust to taste
  • Nutritional yeast instead of Parmesan: Adds umami without dairy-use 2 tablespoons and expect a slightly nuttier, less salty flavor

Sliced Almonds

Works for: Meal prep, larger batches, better crunch distribution

Skip if: You want heartier texture or only have whole almonds on hand

Whole Almonds (Chopped)

Works for: Heartier texture, less prep, budget-friendly bulk buying

Skip if: You need even toasting or want delicate crunch

Cauliflower Florets

Works for: Milder flavor, lower carb count, similar texture when charred

Skip if: You want the slightly bitter green vegetable flavor or deeper color contrast

Instructions

Rich mains need something to cut through, and this salad does exactly that. For a version that comes together quickly, quick chicken dish pairs well when you need protein that cooks in the same time window.

  1. Heat cast iron skillet over medium-high for 3 minutes until water droplets sizzle immediately. Pat broccoli florets completely dry with paper towels, toss with 2 tablespoons olive oil and salt in a bowl, then spread in a single layer with 1-inch space between pieces. Cook undisturbed for 3 minutes until bottoms blacken, flip with tongs, cook another 2-3 minutes until tender-crisp with charred edges throughout.

  2. Toast almonds in separate dry skillet over medium heat for 3-5 minutes, stirring constantly. Watch for golden-brown color and nutty aroma-remove immediately when edges start darkening to prevent bitter burnt flavor. Transfer to plate to stop cooking.

  3. Transfer charred broccoli to large mixing bowl and let cool for 5 minutes. Add minced garlic, sliced red onion, remaining 1 tablespoon olive oil, lemon juice, and black pepper. Toss gently until dressing coats all pieces evenly.

  4. Let salad rest at room temperature for 10 minutes before serving. This allows flavors to meld and onion bite to mellow without making broccoli soggy. Taste and adjust salt-you'll likely need another pinch to balance the acidity.
  5. Add toasted almonds right before serving, reserving a few for garnish. Toss once more, top with shaved Parmesan and cherry tomatoes if using. Serve immediately while broccoli is still slightly warm and almonds are crunchy.

Watch Out
Don't overcrowd the skillet-cook broccoli in two batches if needed. Crowding traps steam and prevents charring, leaving you with gray, soggy florets instead of crispy blackened edges.

What to Serve With It

Beef adds the contrast this plate needs, but timing matters. For a version that comes together quickly, rich beef dish planning shows you how to build the full plate without everything finishing at different times.

Side Dish Prep Why It Works How to Serve
Grilled chicken breast Easy Lean protein balances the nutty richness and adds substance without competing flavors Slice chicken and arrange over salad or serve alongside for a complete lunch
Quinoa pilaf Easy Hearty grain base soaks up lemon dressing and adds texture contrast to crispy vegetables Serve warm quinoa in bowls, top with charred broccoli salad, drizzle extra dressing
Roasted sweet potatoes Medium Natural sweetness balances broccoli bitterness and adds filling starch without heaviness Cube and roast sweet potatoes, serve warm alongside salad for meal prep bowls
Garlic bread Easy Simple starch soaks up leftover dressing and adds crispy-chewy texture to the plate Toast bread, rub with garlic, serve warm on the side for dipping in dressing
Charcuterie board Medium Mix of proteins and cheeses pairs with salad crunch for entertaining without cooking Arrange meats, cheeses, and crackers, place salad in center bowl for sharing

Three ways to serve it:

  • As a main for lunch: Top with grilled chicken, hard-boiled eggs, or chickpeas for protein, serve with crusty bread on the side
  • For meal prep: Pack salad without almonds, store nuts separately, add just before eating to maintain crunch for 3-4 days
  • At a potluck: Double the recipe, serve in a large bowl with extra lemon wedges and Parmesan on the side for guests to customize
Best Pick
Pair with honey mustard vinaigrette instead of plain lemon dressing-the sweet tang complements the charred flavor and adds richness without making the salad heavy.

Store and Reheat

The salad works best when it hits the table at the same time as the main. For a version that comes together quickly, rich beef side dish reheats better than most and pairs with leftovers all week.

Method Time Best For
🍳 Stovetop 3-4 min over medium heat Refreshing crispness without wilting-toss in skillet with a splash of oil
🔥 Oven 5-7 min at 350°F (175°C) Reheating larger portions while maintaining texture-spread on sheet pan
📦 Microwave 30-45 seconds Quick warming but texture softens-best for meal prep when you don't mind less crunch

For best results when storing:

  • Fridge storage: Keep salad in airtight, shallow container for 3-4 days-shallow containers prevent bottom layer from getting soggy under weight
  • Store almonds separately: Add nuts right before eating to maintain crunch-stored together they soften and lose texture within hours
  • Skip freezing: Broccoli texture breaks down when frozen and thawed-it turns mushy and loses the tender-crisp bite completely
  • Refresh before serving: Add fresh lemon juice and a drizzle of olive oil to brighten flavors that dull in the fridge overnight
  • Bring to room temp: Pull salad from fridge 15 minutes before serving-cold broccoli tastes muted and dressing doesn't coat as smoothly

Frequently Asked Questions

How long to cook charred broccoli salad in skillet?

Cook broccoli 5-7 minutes total over medium-high heat-3 minutes undisturbed for the first side to blacken, then 2-4 minutes after flipping until tender-crisp with charred edges throughout. The stems should pierce easily with a fork but still have slight resistance.

Can I make charred broccoli salad ahead of time?

Make the salad up to 4 hours ahead and store in the fridge, but hold the almonds until serving to prevent sogginess. The broccoli holds texture well for same-day prep, but add fresh lemon juice and nuts right before serving for best flavor and crunch.

What goes well with charred broccoli salad?

Pair with grilled chicken, roasted pork loin, or garlic shrimp for a complete meal-the bright lemon dressing cuts through rich proteins and the crispy almonds add texture contrast. It also works alongside quinoa pilaf, roasted sweet potatoes, or crusty bread for lighter vegetarian dinners.

How do I know when broccoli is properly charred?

Look for blackened spots covering 30-40% of the floret surface with bright green still visible-the stems should be tender when pierced with a fork but not mushy. If the broccoli turns entirely brown or gray, you've overcooked it and lost the crisp texture.

Can I use walnuts instead of almonds?

Walnuts work but have a softer, more buttery texture and earthy flavor compared to almonds' crisp crunch and mild sweetness. Toast them the same way but watch closely since walnuts brown 1-2 minutes faster and can turn bitter if overcooked.

Charred Broccoli Salad with Almonds served on a plate

Charred Broccoli Salad with Almonds

No ratings yet
Charred Broccoli Salad with Almonds features broccoli florets blackened in a hot skillet, tossed with toasted almonds and a bright lemon dressing. Drying the broccoli thoroughly before charring ensures a tender-crisp texture with smoky edges in under 20 minutes.
Print Recipe Pin Recipe
Prep Time 10 minutes mins
Cook Time 8 minutes mins
Total Time 18 minutes mins
Servings: 4 servings
Course: Side
Cuisine: American
Ingredients Equipment Method Notes

Ingredients
  

  • 4 cups broccoli florets cut into uniform 1-inch pieces
  • 0.33 cup almonds sliced or slivered
  • 0.25 cup red onion thinly sliced
  • 2 cloves garlic minced
  • 3 tablespoons olive oil regular olive oil, not extra virgin
  • 2 tablespoons lemon juice fresh
  • 0.5 teaspoon salt plus more to taste
  • 0.25 teaspoon black pepper
  • 0.25 cup parmesan cheese shaved, optional
  • 0.5 cup cherry tomatoes halved, optional

Equipment

  • Cast iron skillet Used for charring broccoli over medium-high heat
  • Dry skillet Used separately for toasting almonds
  • Mixing bowl For tossing salad ingredients
  • Tongs To flip broccoli florets

Method
 

  1. Heat cast iron skillet over medium-high heat for 3 minutes until water droplets sizzle immediately. Pat broccoli florets completely dry with paper towels, toss with 2 tablespoons olive oil and salt in a bowl, then spread in a single layer with 1-inch space between pieces. Cook undisturbed for 3 minutes until bottoms blacken, flip with tongs, cook another 2-3 minutes until tender-crisp with charred edges throughout.
    4 cups broccoli florets, 3 tablespoons olive oil, 0.5 teaspoon salt
  2. Toast almonds in separate dry skillet over medium heat for 3-5 minutes, stirring constantly. Watch for golden-brown color and nutty aroma-remove immediately when edges start darkening to prevent bitter burnt flavor. Transfer to plate to stop cooking.
    0.33 cup almonds
  3. Transfer charred broccoli to large mixing bowl and let cool for 5 minutes. Add minced garlic, sliced red onion, remaining 1 tablespoon olive oil, lemon juice, and black pepper. Toss gently until dressing coats all pieces evenly.
    4 cups broccoli florets, 2 cloves garlic, 0.25 cup red onion, 3 tablespoons olive oil, 2 tablespoons lemon juice, 0.25 teaspoon black pepper
  4. Let salad rest at room temperature for 10 minutes before serving. This allows flavors to meld and onion bite to mellow without making broccoli soggy. Taste and adjust salt-you'll likely need another pinch to balance the acidity.
    0.5 teaspoon salt
  5. Add toasted almonds right before serving, reserving a few for garnish. Toss once more, top with shaved Parmesan and cherry tomatoes if using. Serve immediately while broccoli is still slightly warm and almonds are crunchy.
    0.33 cup almonds, 0.25 cup parmesan cheese, 0.5 cup cherry tomatoes

Notes

  • Pat broccoli florets completely dry to ensure proper charring and avoid steaming.
  • Toast almonds separately and watch closely to prevent burning, as they cook faster than broccoli.
  • Allow salad to rest before serving to meld flavors and mellow onion bite without sogginess.

Tried this recipe?

Let us know how it was!

What Is Date? [Taste, Uses & More]

March 29, 2026

Sticky toffee pudding would not exist without dates - and neither would half the energy bars lining your gym bag.

What Is Date

Unlike raisins and its flavor or prune swaps that work, dates bring a deep caramel richness that refined sugar simply cannot replicate.

They show up in everything from Moroccan tagines to blended smoothies, carrying real sweetness with a concentrated punch that changes how a whole dish tastes.

QUICK SUMMARY

Dates are sticky, stone-fruit sweeteners from the date palm, harvested ripe and often dried. They taste like caramelized brown sugar with butterscotch depth, work across sweet and savory dishes, and store for months when kept properly sealed.

🌴Origin: Middle East and North Africa, grown on Phoenix dactylifera palms
🍬Flavor: Deep caramel, butterscotch, and subtle brown-sugar tang
🍽️Best Uses: Energy bars, tagines, sticky puddings, smoothie sweetener
❄️Shelf Life: Months at room temp; 6+ months refrigerated once opened
🛒Buy: Look for plump, glossy skin with no hard dry spots or sour smell

What Is Date?

The date palm (Phoenix dactylifera) has been cultivated across the Middle East and North Africa for thousands of years, making dates one of the oldest farmed fruits on record.

They are oblong stone fruits, each containing a single long hard pit surrounded by dense, sugary flesh.

Ripe dates are typically dried - either naturally on the tree or post-harvest - which concentrates their sugars and extends shelf life dramatically.

Two varieties dominate Western markets. Medjool dates are large, soft, and deeply sweet with a jammy, almost fudge-like texture. Deglet Noor dates are smaller, drier, and slightly less sweet, making them better for chopping into cooked dishes where you want sweetness without excess moisture.

Other names you'll encounter include "date palm fruit" and the botanical name Phoenix dactylifera, though most home cooks simply say dates.

Products derived from them - date paste, date sugar, and date syrup - all start from the same dried fruit and carry the same characteristic caramel depth.

If you need a swap for a recipe, the guide on replacements for date covers the closest options across different applications.

What Does Date Taste Like?

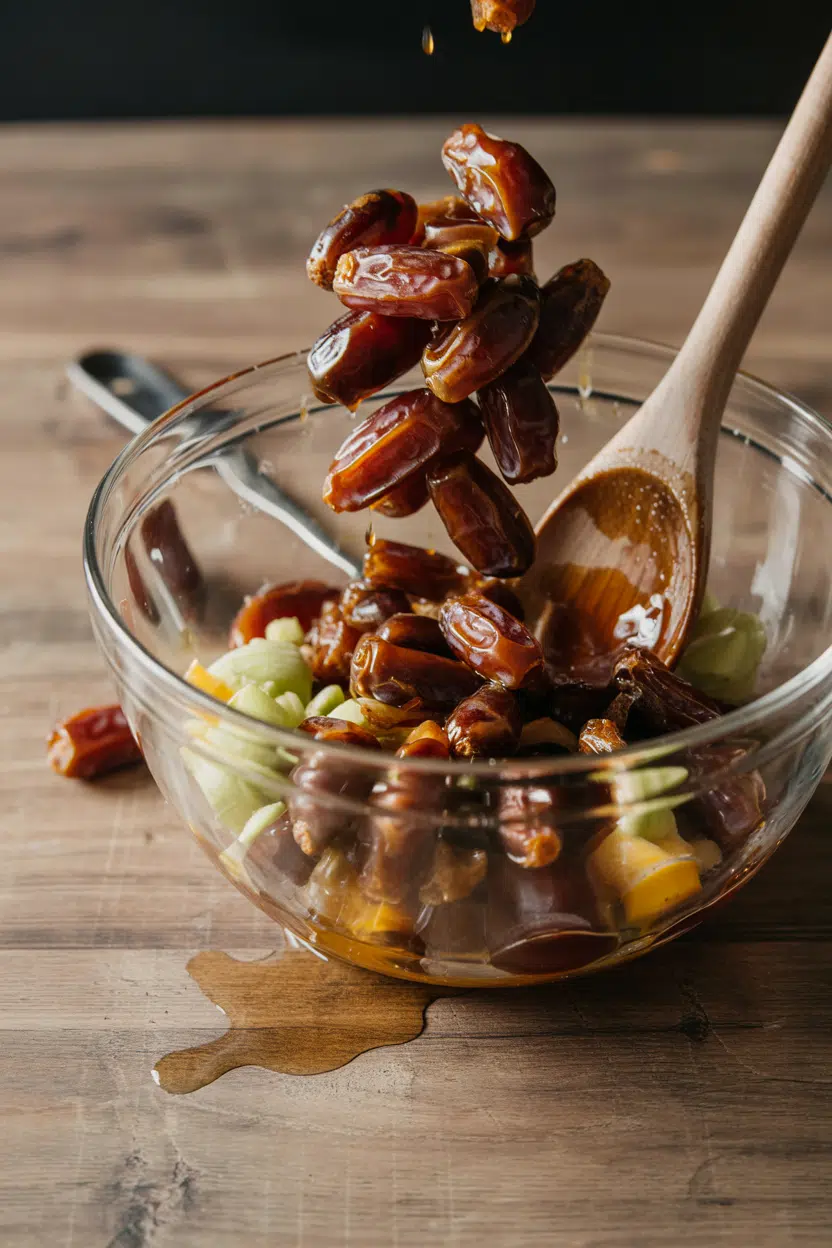
date - What Is Date

Dates taste closest to caramelized brown sugar crossed with dried figs, but without the brightness or acidity you'd find in dried apricots - a contrast worth noting if you're familiar with swapping out apricot in baked goods.

The sweetness is dense and layered, with butterscotch and toffee notes underneath.

There's also a faint fermented warmth, especially in Medjool dates, that keeps the flavor from feeling flat.

Sensory SnapshotStrong Intensity
👅 Flavor
caramelbutterscotchbrown sugar
✋ Texture
chewystickyjammy when cooked
👃 Aroma
warmhoneyedfaintly fermented

Heat changes dates noticeably.

Raw, they are chewy and sticky with a concentrated sweetness.

Cooked in a braise or baked into a loaf, the flesh softens to something jammy, and the caramel notes deepen further while the faint fermented edge fades.

Deglet Noor dates taste drier and more muted than Medjools, so the variety you choose genuinely shifts the intensity of the final dish.

How to Use Date

Dates are among the few ingredients that move between snack, sweetener, and ingredient without any processing beyond pitting. Start by removing the date pit - squeeze from one end and the pit slides out, or slice lengthwise and pull it free.

From there, the options split across several cooking approaches.

How Dates Are Used
MethodBest ForTip
🥗 RawSnacking, stuffed appetizers with goat cheese or walnuts, energy ballsSoak briefly in warm water if they feel stiff - Medjools rarely need it
🍳 Braised/StewedTagines, lamb stews, savory North African dishesAdd in the last 20 minutes so they soften without dissolving
🥐 BakedSticky toffee pudding, date loaves, cookies, muffinsPuree with hot water first for even distribution in batter
🔀 BlendedSmoothies, sauces, date paste as a sugar substituteSoak for 20 minutes before blending for a smoother paste

In Middle Eastern cooking, dates anchor desserts like ma'amoul (semolina pastries filled with date paste) and date halva.

North African tagines use chopped dates alongside lamb and warm spices for a sweet-savory balance.

British baking leans on them for a sticky toffee pudding recipe that has become a worldwide staple.

Dates pair especially well with walnuts, almonds, orange zest, cinnamon, ginger, and goat cheese.

Lamb is their best savory partner.

Watch Out
Avoid pairing dates with sharp, high-acid vinaigrettes or very floral teas - the heavy sweetness clashes rather than contrasts.

Similarly, alternatives to fig are useful to know when a recipe calls for dried fig and you only have dates - the swap works well in most baked goods and braises.

Try It In
🥓Bacon Wrapped DatesThe classic sweet-savory appetizer with crispy bacon and jammy date→🌾Breakfast Couscous with Dates and AlmondsDates as a natural sweetener in a no-added-sugar morning bowl→🥤Jallab Lebanese Date DrinkA chilled Middle Eastern drink built on date syrup and rose water→

How to Buy and Store Date

At the store, Medjool dates should look plump and glossy with unbroken skin.

A light white bloom on the surface is crystallized sugar - harmless, but it signals the fruit is drying out.

Avoid any dates with hard dry patches, visible mold, or a sour fermented smell. Deglet Noor dates should look drier and slightly translucent, which is normal for the variety.

Golden Rule
Once you open a package of dates, move them to an airtight container and refrigerate - this stops sugar bloom and slows mold growth significantly.
  • 🌡️ Pantry (unopened) - Packaged dates stay stable for several months at cool room temperature.
  • ❄️ Refrigerator (opened) - Airtight container; dates keep for 6 months or longer.
  • 🧊 Freezer - Sealed bags; dates freeze well for up to 12 months with no texture loss.

For a full breakdown of timing and signs of spoilage, date's shelf life covers every storage scenario. If you're also stocking a baking pantry, the guide on keeping sugar fresh is worth pairing with it.

Start With Medjool

New to cooking with dates? Buy a pack of Medjool dates first.

They're the most forgiving variety - soft enough to eat raw, easy to pit, and rich enough to work in almost any recipe without pre-soaking.

  • 🍫 For baking - Blend soaked Medjools into date paste and swap 1:1 by weight for refined sugar in loaves or bars.
  • 🥩 For savory dishes - Use Deglet Noor instead; their drier texture holds up better in long braises.
  • ⚡ For quick snacks - Stuff a pitted Medjool with a walnut half and a thin slice of goat cheese.

Once you've used them a few ways, the difference between varieties becomes obvious, and you'll know exactly which one to reach for.

Frequently Asked Questions

What is the difference between Medjool and Deglet Noor dates?

Medjool dates are large, soft, and deeply sweet with a fudge-like texture. Deglet Noor dates are smaller, drier, and less intensely sweet - better for cooking in dishes where you don't want extra moisture.

Can you bake with dates instead of sugar?

Yes, date paste substitutes for refined sugar in most baked goods. Use roughly the same weight of date paste as sugar called for, and reduce other liquids by about 25% to account for the added moisture.

Do dates need to be pitted before cooking?

Always remove the pit before cooking - it's hard enough to crack a tooth or damage blender blades. Squeeze from one end or slice the date lengthwise to pull it out cleanly.

How sweet are dates compared to sugar?

Dates contain roughly 60-70% sugar by weight - close to refined sugar by volume but with fiber slowing absorption. The flavor is more complex than white sugar, with caramel and butterscotch depth layered into the sweetness.

Are dates suitable for a diabetic diet?

Not without careful portion control. Dates are high in glucose and fructose, so blood sugar impact is real even though fiber moderates it slightly. Anyone managing blood sugar should treat dates as a concentrated sweetener, not a free food.

Chicken Karahi Pakistani-Style

March 29, 2026

When family dinner needs to feel less routine and more intentional, this Pakistani chicken curry delivers real flavor without advanced technique. One heavy pan, high heat, and a handful of spices turn bone-in chicken and fresh tomatoes into a meal that works for weeknight exhaustion or casual weekend hosting.

Chicken Karahi Pakistani-Style served on a plate

The karahi does the work while you stir every few minutes. You get tender chicken in a thick, spiced tomato sauce that clings to each piece instead of pooling at the bottom.

Perfect for budget-friendly family gatherings when you want something warming that doesn't require marinating or babysitting multiple pots.

QUICK SUMMARY

Chicken Karahi is a Pakistani curry made by searing bone-in chicken in a karahi or wok, then simmering it with fresh tomatoes, ginger-garlic paste, and green chilies until the sauce thickens and oil separates. The key is high-heat searing followed by patient tomato reduction - this creates tender, juicy chicken coated in a concentrated, spiced sauce that doesn't need cream or thickeners.

⏱️Timing: 45 minutes start to finish, 30 minutes active cooking while sauce reduces
🔥First Move: Sear chicken pieces on high heat for 3-4 minutes per side before adding tomatoes
⚠️Watch Out: Overcrowding the pan creates steam instead of browning - cook in batches if needed

Why This Recipe Works

Bone-in chicken stays juicy through high-heat cooking while fresh tomatoes break down into a naturally thick sauce. For a version that comes together quickly, consider a juicy homemade sweet potatoes recipe that uses similar timing and hands-off technique.

Quick Reference
⏱️
Prep Time
15 min
🔥
Cook Time
30 min
⏰
Total Time
45 min
🍽️
Servings
4 servings
📊
Difficulty
Medium
🏷️
Category
Main Dish
💡
Quick Tip
Use fresh tomatoes and avoid overcrowding pan
🎯
Best For
Weeknight | Entertaining

What makes this technique reliable:

  • Searing at high heat renders fat from the skin and creates fond that flavors the sauce
  • Cooking tomatoes for 15-20 minutes until oil separates concentrates flavor and prevents watery texture
  • Tempering cumin seeds in hot oil releases aromatic compounds that penetrate the entire dish
  • Bone-in pieces retain moisture during extended simmering while boneless chicken would dry out
  • Adding fresh coriander and green chilies off heat preserves their bright, herbal punch
Quick Tip
Stir every 2-3 minutes during tomato reduction to prevent sticking - the sauce should coat the spoon and leave oil trails on the pan surface

What You'll Need

Ingredients for Chicken Karahi Pakistani-Style

Fresh tomatoes and bone-in chicken form the foundation, with whole spices added at precise moments to layer flavor.

🍗
Chicken
  • 2 lbs bone-in chicken pieces (thighs and drumsticks), skinless
🥬
Tomatoes & Chilies
  • 4 large ripe tomatoes, diced
  • 3-4 green chilies, slit lengthwise
  • Fresh coriander leaves (½ cup chopped)
🧄
Aromatics & Spices
  • 2 tablespoon ginger-garlic paste
  • 1 teaspoon cumin seeds
  • 1 teaspoon red chili powder
  • 1 teaspoon garam masala
  • Salt to taste
🫙
Fat
  • ⅓ cup vegetable or mustard oil

Ingredient Details

  • Bone-in chicken pieces
    Keeps meat juicy during high-heat cooking - dark meat works better than breasts for extended simmering
  • Fresh ripe tomatoes
    Forms the tangy base that thickens naturally without thickeners - underripe tomatoes won't break down properly
  • Ginger-garlic paste
    Creates aromatic foundation that permeates the sauce - use fresh paste or mince both finely for even distribution
  • Green chilies
    Provides authentic heat and grassy aroma - slit them to release flavor without overwhelming spice
  • Cumin seeds
    Toasted in hot oil, they add smoky earthiness that grounds the bright tomato acidity
  • Vegetable or mustard oil
    Higher smoke point than olive oil handles searing heat - mustard oil adds traditional pungency
  • Fresh coriander leaves
    Added off heat at the end, they provide fresh herbal brightness that balances rich spiced sauce

Ingredient Swaps

Most swaps work if you adjust cooking time and accept slight flavor shifts.

Four substitutions that hold up:

  • Boneless chicken thighs for bone-in pieces - Reduce cook time by 8-10 minutes and check doneness at 18 minutes to prevent drying; loses some depth but speeds prep
  • Canned crushed tomatoes for fresh tomatoes - Use 1 can (14 oz) and reduce simmering time to 10 minutes since they're already broken down; sauce may be darker but still tangy
  • Jalapeño or serrano chilies for green chilies - Similar heat level with slightly different flavor profile; use same quantity and slitting method
  • Ghee for vegetable oil - Adds nutty richness and traditional flavor; use same amount but watch for browning since it has lower smoke point

Bone-In vs Boneless Chicken

Works for: Traditional flavor depth, meal prep portions, when you have 45 minutes for full cook time

Skip if: You need dinner in under 30 minutes or prefer no bones at the table

Fresh vs Canned Tomatoes

Works for: Pantry cooking, consistent year-round results, when fresh tomatoes are pale or underripe

Skip if: You want brighter acidity and lighter sauce color that only fresh tomatoes provide

Instructions

Sear first, then simmer low until the sauce clings and oil pools at the edges.

  1. Sear the chicken: Heat oil in a karahi or heavy-bottomed wok over high heat until shimmering. Add chicken pieces in a single layer with 2 cm space between them and sear 3-4 minutes per side until golden-brown crust forms. Remove chicken and set aside.

  2. Temper spices: Lower heat to medium, add cumin seeds to the same oil, and cook 30 seconds until aromatic and slightly darkened. Stir in ginger-garlic paste and cook 1 minute until raw smell disappears, stirring constantly to prevent sticking.

  3. Build the sauce: Add diced tomatoes, red chili powder, salt, and green chilies. Stir well, increase heat to medium-high, and cook uncovered 15-20 minutes, stirring every 2-3 minutes, until tomatoes break down completely and oil separates from the sauce and pools at the edges.

  4. Simmer chicken: Return seared chicken to the pan, coat pieces with sauce, reduce heat to medium-low, and cover. Simmer 12-15 minutes until chicken reaches 165°F internal temperature and no pink remains at the bone.

  5. Finish and rest: Sprinkle garam masala over the chicken, stir gently to coat, and turn off heat. Add chopped fresh coriander and remaining green chilies, cover, and let rest 5 minutes before serving to allow flavors to meld.

Golden Rule
Don't rush the tomato reduction - sauce is ready when you can see oil separating and pooling at the pan edges, not before

What to Serve With It

Rich, spiced sauce needs neutral sides that soak up liquid without competing for attention. For more ideas on planning your chicken saltimbocca dinner, explore different approaches to balancing bold mains with simple accompaniments.

Side Dish Prep Why It Works How to Serve
Plain basmati rice Easy Neutral base absorbs sauce and balances heat without adding competing flavors Scoop rice onto plate, spoon karahi over top, let sauce pool around grains
Naan or roti Easy Traditional bread for scooping thick sauce and tender chicken pieces Tear warm bread into pieces, use to scoop chicken and sauce directly
Cucumber raita Easy Cooling yogurt cuts through spice and adds creamy contrast to oily sauce Dollop raita on the side, mix small amounts into bites for temperature relief
Sliced onions with lemon Easy Raw crunch and acidity brighten each bite and cleanse palate between forkfuls Arrange thin-sliced onions on plate, squeeze lemon over before serving
Jeera rice Medium Cumin-scented rice echoes karahi spices without overwhelming the main dish Serve alongside or under chicken, garnish with fresh coriander

Three ways to serve it:

  • Weeknight plate: Plain rice, karahi spooned over, side of cucumber raita, torn naan for scooping
  • Casual gathering: Jeera rice on a platter, karahi in center, bowls of raita and sliced onions for passing
  • Meal prep bowls: Portion rice into containers, top with chicken and sauce, pack raita separately to add when reheating
Shortcut
Use store-bought naan warmed in the oven instead of making roti from scratch - it saves 30 minutes without compromising the meal

Store and Reheat

Karahi holds well in the fridge and freezes partially, though fresh garnish wilts. Rich mains need something to cut through, and something fresh like salad does exactly that - consider pairing reheated karahi with a crisp side to balance the richness.

Method Time Best For
🍳 Stovetop 5-7 min over medium heat, stirring occasionally Even heating, preserves sauce texture, chicken stays tender
🔥 Oven 15 min at 325°F covered with foil Reheating larger portions gently without stirring
📦 Microwave 2-3 min on 70% power, covered Quick single portions when time matters more than texture

For best results when storing:

  • Transfer karahi to shallow airtight container within 2 hours of cooking to cool quickly and prevent bacterial growth
  • Store in fridge up to 3-4 days - sauce thickens as it sits but thins again when reheated
  • Freeze up to 2 months in freezer-safe container, leaving 1-inch headspace for expansion; thaw overnight in fridge before reheating
  • Add splash of water or chicken broth when reheating if sauce looks too thick or starts to stick
  • Garnish with fresh coriander after reheating since stored herbs wilt and lose color - skip reheating old garnish

Frequently Asked Questions

Can I make Chicken Karahi ahead and reheat?

Yes, make it up to 2 days ahead and store in the fridge. Reheat on the stovetop with a splash of water to loosen the sauce, and add fresh coriander just before serving since the original garnish wilts.

What is the best way to tell Chicken Karahi is cooked thoroughly?

Check that chicken reaches 165°F internal temperature at the thickest part near the bone, and no pink remains when you cut into a piece. The meat should pull away easily from the bone.

Can boneless chicken replace bone-in in Chicken Karahi?

Yes, use boneless thighs and reduce simmering time to 10-12 minutes to prevent drying. You'll lose some depth of flavor but gain faster cooking and easier eating.

How to fix a bland or watery Chicken Karahi sauce?

Increase heat to medium-high and cook uncovered, stirring often, until excess liquid evaporates and oil separates. Adjust salt, add more red chili powder or garam masala, and finish with fresh coriander for brightness.

What sides complement Chicken Karahi for a gathering?

Serve with jeera rice, warm naan, cucumber raita, and sliced onions with lemon. Add papadum crackers and mint chutney for texture contrast and cooling elements that balance the spiced sauce.

Chicken Karahi Pakistani-Style served on a plate

Chicken Karahi Pakistani-Style

No ratings yet
Chicken Karahi Pakistani-Style is a flavorful Pakistani chicken curry made by searing bone-in chicken and simmering it with fresh tomatoes and spices. The high-heat technique and tomato reduction create a thick, spiced sauce that clings to tender chicken pieces, perfect for weeknight dinners or casual entertaining.
Print Recipe Pin Recipe
Prep Time 15 minutes mins
Cook Time 30 minutes mins
Total Time 45 minutes mins
Servings: 4 servings
Course: Dinner, Main Dish
Cuisine: Pakistani
Ingredients Equipment Method Notes

Ingredients
  

  • 2 lbs bone-in chicken pieces thighs and drumsticks, skinless
  • 4 large tomatoes ripe, diced
  • 3-4 green chilies slit lengthwise
  • 0.5 cup fresh coriander leaves chopped
  • 2 tablespoon ginger-garlic paste
  • 1 teaspoon cumin seeds
  • 1 teaspoon red chili powder
  • 1 teaspoon garam masala
  • 0.33 cup vegetable or mustard oil
  • salt to taste

Equipment

  • Karahi or heavy-bottomed wok Used to sear chicken and cook the curry.

Method
 

  1. Heat oil in a karahi or heavy-bottomed wok over high heat until shimmering. Add chicken pieces in a single layer with 2 cm space between them and sear 3-4 minutes per side until golden-brown crust forms. Remove chicken and set aside.
    2 lbs bone-in chicken pieces, 0.33 cup vegetable or mustard oil
  2. Lower heat to medium, add cumin seeds to the same oil, and cook 30 seconds until aromatic and slightly darkened. Stir in ginger-garlic paste and cook 1 minute until raw smell disappears, stirring constantly to prevent sticking.
    2 tbsp ginger-garlic paste, 1 tsp cumin seeds, 0.33 cup vegetable or mustard oil
  3. Add diced tomatoes, red chili powder, salt, and green chilies. Stir well, increase heat to medium-high, and cook uncovered 15-20 minutes, stirring every 2-3 minutes, until tomatoes break down completely and oil separates from the sauce and pools at the edges.
    4 large tomatoes, 3-4 green chilies, 1 tsp red chili powder, salt
  4. Return seared chicken to the pan, coat pieces with sauce, reduce heat to medium-low, and cover. Simmer 12-15 minutes until chicken reaches 165°F internal temperature and no pink remains at the bone.
    2 lbs bone-in chicken pieces
  5. Sprinkle garam masala over the chicken, stir gently to coat, and turn off heat. Add chopped fresh coriander and remaining green chilies, cover, and let rest 5 minutes before serving to allow flavors to meld.
    0.5 cup fresh coriander leaves, 1 tsp garam masala, 3-4 green chilies

Notes

  • Stir every 2-3 minutes during tomato reduction to prevent sticking and ensure sauce thickens properly.
  • Do not overcrowd the pan when searing to achieve a proper golden crust on chicken.
  • Add fresh coriander and green chilies off heat to preserve bright, fresh flavors at the end.

Tried this recipe?

Let us know how it was!

What Is Collard Greens? [Taste, Uses & More]

March 29, 2026

Slow-braised collard greens ladled over a pot of black-eyed peas are one of those combinations that needs almost no explanation - the leaves do the work, holding their shape while everything else softens around them.

What Does Collard Greens Taste Like

Understanding the role mustard green plays in similar preparations helps put collards in context: these are sturdy, assertive greens built for heat and long cooking.

If you ever need collard green swaps that work, the options are narrower than you'd expect, which says something about what makes collards distinctive.

QUICK SUMMARY

Collard greens are large, dark-leaved brassicas with a bitter-green, earthy flavor that mellows with slow cooking. A cornerstone of Southern American cuisine, they hold up to braising, smoking, and long pot cooking better than nearly any other leafy green.

🌿Flavor: Bitter-green and earthy, turns smoky and mellow when braised
🍳Best For: Slow braising, sautéing with garlic, pot cooking with smoked pork
🗓️Shelf Life: 5-10 days refrigerated, unwashed in a damp paper towel or perforated bag

What Is Collard Greens?

Collard greens - formally Brassica oleracea var. acephala, and sometimes called colewort in older texts - are a non-heading member of the cabbage family.

They arrived in the American South via West Africa through the Atlantic trade routes, and they've been a cornerstone of soul food cooking ever since.

The leaves are broad, flat, and dark green, with prominent central ribs that run the full length of each leaf. Unlike kale, collards don't curl at the edges; the leaf surface stays relatively smooth and intact even after long cooking.

Several varieties exist, though most home cooks encounter two main types:

  • 🌱 Georgia Southern (Green Glaze) - the classic heirloom variety, large leaves with a waxy surface and thick central ribs
  • 🌱 Champion - a more compact, faster-growing cultivar with slightly more tender leaves
  • 🌱 Flash - a modern hybrid bred for bolt resistance and uniform leaf size, widely available at grocery stores

Traditional fat sources for the braising pot have shifted over the years - if you're cooking without smoked pork, knowing your replacements for lard keeps the dish on track without losing body in the liquid.

What Does Collard Greens Taste Like?

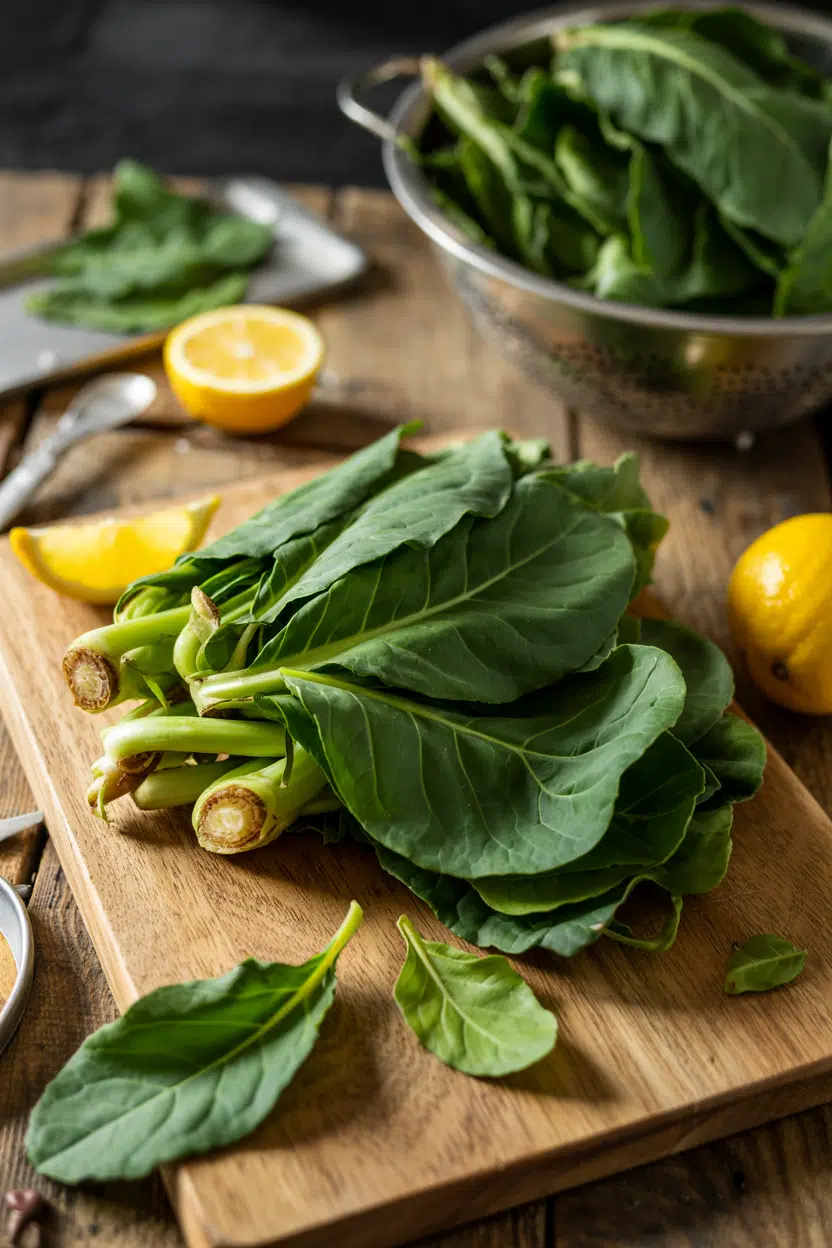
collard greens - What Does Collard Greens Taste Like

Raw collard greens are bitter and vegetal, with a green sharpness that sits somewhere between mature kale and cabbage. The flavor isn't harsh, however - it's more straightforward than the peppery bite of mustard greens.

Sensory SnapshotModerate Intensity
👅 Flavor
bitter-greenearthycabbage-likesmoky when braised
✋ Texture
sturdy rawtender when slow-cooked
👃 Aroma
green and vegetalonion-like when sautéed

Heat changes everything. Long braising with smoked meat draws out a mellow, almost sweet earthiness, softening the bitterness into background depth.

A splash of apple cider vinegar at the end sharpens the flavor back up, cutting through the fat in the braising liquid with a clean acidity.

How to Use Collard Greens

Southern American cooking owns the most recognized preparations, but collards travel well across other traditions. Portuguese caldo verde uses a close relative sliced fine into broth, and West African-influenced dishes often pair collards with tomato and spiced stewing liquids.

The leaf's durability is the constant - it doesn't dissolve, doesn't go limp, and doesn't disappear into a dish.

Golden Rule
Always strip the central rib before cooking. It stays tough long after the leaf has turned tender, and leaving it in throws off the texture of the whole pot.

The most straightforward approach is slow braising: leaves torn into large pieces and cooked low in stock with a ham hock or smoked turkey for one to three hours.

Sautéing with garlic and onion over high heat is faster and keeps more of the bitter-green character intact.

For collard wraps, blanch the whole leaf briefly, shock it in ice water, and the leaf becomes pliable enough to roll around grains or beans without tearing.

How Collard Greens Are Used
MethodBest ForTip
🫕 BraisingSoul food pots, smoked pork preparationsCook low and slow; add vinegar in the final 10 minutes
🥘 SautéingQuick weeknight sides, garlic-forward dishesHigh heat, short time - keeps the green bite
🥗 Blanched WrapGrain or bean wraps, meal prep rollsIce bath immediately after blanching to hold the green color
🔥 GrillingSmoky charred sides, barbecue accompanimentsBrush with oil; char edges only - center stays intact
🫘 Pot cookingBean dishes, stews, black-eyed pea potsAdd leaves in the last 30 minutes to avoid over-softening

Collard greens added to a pot of beans bring both texture and a bitter green note that balances the starchiness - see what pairs with black eyed peas for how these combinations get built out into full plates.

Pairings that reliably work include smoked pork, apple cider vinegar, hot sauce, garlic, and tomato - all ingredients that play against the leaf's natural bitterness rather than with it.

Try It In
🌿Southern Collard GreensThe stovetop classic — garlic, pot likker, and slow-cooked leaves→🍖Southern Collard Greens with Ham HockLong-braised with smoked pork for deep, smoky pot flavor→

How to Buy and Store Collard Greens

At the market, look for deep green, unblemished leaves with firm, moist stems. Yellowing edges signal age; slimy patches along the central rib mean the leaf is past its best.

Larger leaves typically have thicker ribs that need more trimming, not a quality flaw - just something to account for before you cook.

Watch Out
Remove rubber bands from bunched collards before storing. They bruise the stems and accelerate decay at the point of contact.

Store collards unwashed in the refrigerator, either in a perforated plastic bag or wrapped loosely in a damp paper towel.

They keep well for 5 to 10 days - older, larger leaves at the shorter end of that window.

Washing before storage invites rot; rinse only when you're ready to cook.

Collard greens hold longer than kale in most cases, though how long mustard green keeps follows a similar pattern worth knowing if you're rotating brassica greens regularly.

Where to Start with Collard Greens

If you've never cooked collards before, start with a braise. It's forgiving, the timing is flexible, and the result is hard to ruin.

  • New to collards - Braise with smoked turkey leg, garlic, and a splash of apple cider vinegar for two hours; strip the ribs first
  • Short on time - Sauté torn leaves with garlic and chili flakes over high heat for eight to ten minutes
  • Exploring beyond Southern cooking - Shred finely and stir into bean soup, or blanch whole leaves for wraps

For reference on how collards compare to their closest relatives, kale and its flavor and pairing ideas for kale give a useful side-by-side sense of where the two greens diverge in the kitchen.

Collards are less fussy than their reputation suggests - they just need heat and time.

Frequently Asked Questions

Are collard greens bitter?

Yes, raw collards are noticeably bitter, though less peppery than mustard greens. Long braising significantly reduces that bitterness, and adding vinegar or a pinch of sugar at the end balances what remains.

How do collard greens differ from kale?

Collard leaves are broader, flatter, and less curly than kale, with a milder bitter flavor and a firmer texture that holds up better to very long cooking. Kale softens faster and has a slightly more mineral, grassy taste.

Can you eat collard greens raw?

You can, but the central rib stays unpleasantly fibrous. Remove the rib, slice the leaves very thin, and massage with a dressing - the texture becomes more approachable without any heat.

How long do collard greens take to cook?

Sautéed collards take 8-12 minutes over high heat. Traditional braising runs 1-3 hours low and slow, which is what produces the tender, deeply savory texture most associated with soul food preparations.

Why do people add vinegar to collard greens?

Vinegar cuts through the fat in the braising liquid and brightens the flavor of the finished leaves. Apple cider vinegar is most common; it also balances residual bitterness without masking the smoky depth from the pork.

What Is Escarole? [Taste, Uses & More]

March 29, 2026

Escarole shows up in a bowl of classic Italian wedding soup or a slow-braised pot of white beans, doing quiet work that a milder green simply can't.

What Is Escarole

It holds up under heat, pushes back against rich pork fat, and keeps enough bitterness to make the whole dish feel alive.

If you've cooked with what makes frisee distinct or spent time swapping out frisee, escarole will feel familiar - broader, softer, and more forgiving in the pan.

QUICK SUMMARY

Escarole is a chicory-family leafy green with wide, pale-ribbed leaves. Raw, it's crisp and mildly bitter. Cooked, it turns sweet and tender. Common in Italian and French cooking, it pairs well with garlic, white beans, and anchovies.

🌿Flavor: Mild bitter, slightly peppery, faint nutty sweetness
🍳Best Uses: Soups, sautés, salads, braised side dishes
🛒Buy: Firm pale inner leaves, crunchy white ribs, no slime
❄️Shelf Life: 5-10 days refrigerated, unwashed
🍽️Cuisines: Italian, French, Mediterranean, Italian-American

What Is escarole?

Escarole is a broad-leaved endive belonging to the chicory genus Cichorium, the same botanical family as frisée, radicchio, and Belgian endive. It originated in the Mediterranean and has been cultivated across Italy and southern France for centuries.

The plant forms a loose, open head. Outer leaves are dark green and slightly waxy; inner leaves pale toward creamy yellow at the core.

Those pale inner leaves are the most prized - less bitter, more tender, and sweeter in flavor.

You may see it labeled broad-leaved endive or escarole lettuce at farmers markets.

A related type called catalogna, sometimes sold alongside it, is narrower and more deeply cut. Comparing radicchio vs red cabbage options gives useful context for how chicory-family bitterness varies across different leaves.

  • 🌱 Family - Chicory (*Cichorium endivia*), same genus as Belgian endive and radicchio
  • 🌍 Origin - Mediterranean, with deep roots in Italian and French regional cooking
  • 🥬 Leaf structure - Wide, slightly wavy leaves with a firm, pale midrib running to the center
  • 📛 Alternate names - Broad-leaved endive, escarole lettuce; catalogna is a related but distinct type

What Does escarole Taste Like?

escarole - What Is Escarole

Raw escarole sits somewhere between romaine and radicchio on the bitterness scale - more assertive than romaine, far gentler than the sharp bite of frisée. There's a mild pepperiness and a faint nutty sweetness, especially in the pale inner leaves.

Sensory SnapshotModerate Intensity
👅 Flavor
mild bitterpepperynutty sweetness
✋ Texture
crisp ribs rawtender when cooked
👃 Aroma
mildly grassylightly herbaceous

Heat changes escarole significantly. A quick sauté with garlic and olive oil softens the bitterness and coaxes out a gentle sweetness the raw leaf only hints at.

Long braising - as in white bean soup - mellows it almost completely, leaving a silky texture and a mild, savory depth.

Golden Rule
Use inner pale leaves raw. Save the darker outer leaves for soups and braises where heat does the work of taming their bitterness.

How to Use escarole

Escarole handles more cooking methods than most leafy greens. It holds structure in soups, wilts beautifully in a hot pan, and still works raw in a salad when dressed assertively.

An anchovy-lemon vinaigrette or a bold citrus dressing gives it the acidic counterweight it needs to shine cold.

How Escarole Is Used
MethodBest ForTip
🥗 RawBitter green salads, grain bowls, leaf wrapsUse inner pale leaves; dress with citrus or anchovy vinaigrette
🍳 SautéWarm side dish, pasta add-inAdd garlic and red pepper flakes; cook just until wilted, 3-4 minutes
🥣 Braise/SoupWhite bean soup, Italian wedding soupStir in near the end - it only needs 5-8 minutes to become silky
🧀 BakedGratins, stuffed leaves with cheese and breadcrumbsBlanch first to remove excess moisture before baking
❄️ Blanch and shockComposed plates, cold salads30 seconds in boiling water, then ice bath to set color and soften bitterness

In Italian-American cooking, escarole and white beans with pancetta is the standard preparation - a three-ingredient combination that rarely fails.

Parmesan works as a finishing note, and replacements for olive oil can shift the dish depending on what fat you have at hand.

If a recipe calls for a chicory you don't have, swapping out escarole covers the closest options by cooking method and bitterness level.

Try It In
🍗Air Fryer Garlic Parmesan Chicken TendersPair alongside braised escarole for a quick weeknight plate→🍋Air Fryer Lemon Pepper Chicken TendersLemon cuts through escarole's bitterness in the same way citrus dressing does→🥔Air Fryer Garlic Parmesan Potato WedgesServe with sautéed escarole for a garlic-forward vegetarian pairing→

How to Buy and Store escarole

Choose heads where the inner leaves are pale, tightly packed, and firm - that's where the sweetness lives. White ribs should snap, not bend.

Skip any head with slimy edges or large brown patches on the outer leaves; those signs spread fast once refrigerated.

Watch Out
Oversized, mature heads are significantly more bitter than smaller ones. If only large heads are available, strip and discard the dark outer layers before cooking.

Wrap the unwashed head loosely in a damp paper towel, then place it in a perforated plastic bag in the crisper drawer. Don't wash until you're ready to use it - moisture accelerates decay.

A detailed breakdown of escarole's shelf life covers how freshness at purchase affects how long it holds.

Properly stored, escarole typically lasts 5-10 days in the fridge.

Where to Start with Escarole

Start with a quick sauté if you're new to the green. Heat olive oil, add sliced garlic and a pinch of red pepper flakes, then toss in a roughly torn head and cover the pan for three minutes.

That single technique teaches you everything: how fast it wilts, how bitterness fades with heat, and how much volume it loses.

Once you understand that, soups and grain bowls follow naturally.

For anyone already comfortable with endive's flavor and uses or the alternatives to endive, escarole is the logical next step - wider, milder, and more at home in a hot pan.

Shortcut
Buy two heads: use the inner leaves raw in a salad and braise the outer leaves in soup the same day. One purchase, two techniques, zero waste.

Frequently Asked Questions

Is escarole the same as endive?

No. Both belong to the chicory family, but escarole has wide, flat leaves while Belgian endive forms a tight, pale torpedo-shaped head. Escarole is more suited to soups and sautés; endive is typically served raw or lightly grilled.

How bitter is escarole?

Mildly bitter - less sharp than frisée and far gentler than radicchio. Inner pale leaves are noticeably sweeter than the dark outer ones, so leaf position matters when managing bitterness.

Can you eat escarole raw?

Yes. Use the inner pale leaves, which are less bitter and more tender. A citrus or anchovy vinaigrette balances the mild bitterness well in a raw salad.

How do you cook escarole so it isn't bitter?

Heat reduces bitterness significantly. A quick sauté with garlic softens it; long braising in soup mellows it almost completely. Blanching for 30 seconds then shocking in cold water also strips noticeable bitterness before a second cook.

How long does escarole last in the fridge?

Typically 5-10 days when stored unwashed in a damp paper towel inside a perforated bag in the crisper. Heads that are already a few days old at purchase will land at the shorter end of that range.

What Is Cucumber? [Taste, Uses & More]

March 29, 2026

You spot it at the market - long, waxy, and deeply green - and reach for it almost automatically.

What Is Cucumber

Cucumber is one of those produce-aisle staples that rarely gets a second thought, which is a shame, because knowing how to use it well makes a real difference.

Like squash's shelf life or replacements for celery flakes, understanding cucumber on its own terms opens up more options than you'd expect.

QUICK SUMMARY

Cucumber is a mild, crisp gourd fruit with roughly 95% water content and a clean vegetal flavor. It shines raw - in salads, cold sauces, and quick pickles - and holds up briefly to light heat. Thin-skinned varieties like English and Persian cucumbers are ready to eat as-is.

👅Flavor: Mildly sweet, clean, slightly bitter in the skin
🍽️Best Uses: Salads, tzatziki, quick pickles, cold soups
🌍Cuisines: Mediterranean, South Asian, East Asian, Middle Eastern
❄️Storage: Wrapped in paper towel, in fridge; lasts 1-2 weeks whole
⚠️Avoid: Long braising - it turns mushy and loses all texture fast

What Is Cucumber?

Cucumber originated on the Indian subcontinent and has been cultivated for at least 3,000 years. Botanically, it's a vine fruit in the gourd family (Cucurbitaceae), though most people use it as a vegetable.

Its thin-to-waxy green skin wraps a pale, crunchy flesh with a spongy seed cavity at the center.

Several distinct types exist, and the differences matter at the stove. English cucumbers are long, nearly seedless, and thin-skinned - no peeling required. Persian cucumbers are shorter and similarly tender. Pickling cucumbers (sometimes called gherkins when small) are bumpy, firm, and higher in acid tolerance, making them ideal for brine.

Standard waxed cucumbers at most grocery stores have a thicker skin and more prominent seeds.

The alternate names can be confusing: "cuke" is informal shorthand, while "gherkin" specifically refers to small pickling varieties, not just any small cucumber. For raw eating, thin-skinned varieties win.

If swapping out radish in a crunchy salad component, Persian cucumber is often the cleaner choice because of its snappy bite without the peppery edge.

What Does Cucumber Taste Like?

cucumber - What Is Cucumber

Cucumber flavor is mild and clean - think watery zucchini crossed with mild celery, but lighter and more neutral than either. The flesh itself is subtly sweet with almost no bitterness. It's the skin where things get more interesting.

The skin contains cucurbitacins, bitter compounds that vary by variety and growing conditions. Most commercial cucumbers have had these bred down significantly, but a skin-on slice of a standard waxed cucumber can still carry a faint bitter edge.

English and Persian types have far less. Raw flesh smells fresh and lightly green - nothing sharp or funky.

Heat changes the profile quickly. Brief grilling or charring softens the crunch and brings out a mild sweetness, while long cooking collapses the texture entirely and turns the flavor watery.

Pickling adds a tangy brightness that sharpens the otherwise quiet flavor.

Sensory SnapshotMild Intensity
👅 Flavor
mildly sweetclean vegetalslightly bitter skin
✋ Texture
crispjuicyspongy seed cavity
👃 Aroma
fresh greenlightly vegetal

How to Use Cucumber

Raw is where cucumber does its best work.

Sliced thin into salads, ribboned over grain bowls, or pressed into tzatziki with Greek yogurt and dill - the crunch and water content cut through richer ingredients.

Raita works the same way in South Asian meals, balancing heat and fat.

Just like storing lettuce correctly keeps your salad base crisp, prepping cucumber just before serving prevents it from weeping into everything else.

Cold applications are its natural territory.

  • 🥒 Quick pickling - Thinly sliced and soaked in rice vinegar, sugar, and salt for Japanese-style sunomono; ready in 20 minutes
  • 🥣 Cold soups - Seeded and blended with yogurt or broth for chilled gazpacho or cucumber-yogurt soup; seed removal keeps the texture clean
  • 🍜 Raw noodles - Spiralized into long strands as a low-carb substitute in chilled sesame noodle dishes
  • 🥂 Drinks - Muddled or infused into water, gin cocktails, or even cold brew for a clean aromatic note

Brief grilling or charring works too - a few minutes over high heat gives cucumber a smoky edge that's unexpected and genuinely good in a warm salad. Beyond that, stop.

Long braising turns it structureless fast.

Cucumber pairs well across cuisines. In Mediterranean cooking, it goes with feta, dill, and lemon.

In East Asian dishes, expect soy sauce, sesame oil, and rice vinegar. Southeast Asian preparations often add mint, fish sauce, and chili.

Middle Eastern menus lean into yogurt-based sauces.

How Cucumber Is Used
MethodBest ForTip
🥗 Raw slicingSalads, sandwiches, tea platesSalt slices and pat dry to prevent sogginess
🥒 Quick picklingSunomono, burger toppers, banh miUse pickling cucumbers for firmer texture after brine
🥣 BlendingCold soups, raita, tzatzikiSeed and drain before blending to avoid wateriness
🔥 Light grillingWarm salads, side dishesKeep it under 3-4 minutes total - texture collapses fast
Try It In
☕Cucumber Cold Brew CoffeeUnexpected pairing that plays off cucumber's clean, green notes→🥒Dill Cucumber SaladClassic vinegar-and-dill treatment that takes 10 minutes→🍅Tomato Cucumber SaladHigh-contrast salad where cucumber's cool crunch balances ripe tomato→

How to Buy and Store Cucumber

At the store, firmness is the main signal.

Press gently along the body - any soft spots or give indicate age.

Skin should be evenly green and smooth for English or Persian types, or bumpy and firm for pickling varieties.

Wrinkled skin or sunken ends mean the cucumber has already started losing moisture.

Skip waxed cucumbers with an unusually heavy shine if you plan to eat the skin.

Golden Rule
Never store cut cucumber uncovered - exposed flesh releases moisture quickly, sogging everything nearby in the fridge.

At home, store whole cucumbers unwashed, wrapped loosely in a paper towel and placed in a perforated plastic bag in the fridge.

The paper towel absorbs condensation; without it, surface moisture accelerates decay.

Similar logic applies when storing zucchini correctly - the gourd family generally needs dry, cool air, not wet cold.

For a full breakdown of timing by variety, the guide on how long cucumber keeps covers it in detail.

Cut cucumber lasts just 2-3 days; plan accordingly.

Start Here

Cucumber rewards a simple approach. If you're new to it, start raw - sliced thin with good vinegar, dill, and a pinch of salt.

That alone shows you what it does best.

From there, try blending it into a cold sauce like tzatziki; if you need something different in that role, the options for swapping out tzatziki sauce are worth checking.

Skip long heat entirely until you've built a feel for how fast the texture turns.

Cucumber's value is in its crunch and restraint - cooking strips both away quickly.

Frequently Asked Questions

Is cucumber a fruit or vegetable?

Botanically, it's a fruit - it develops from a flower and contains seeds. In cooking and grocery contexts, it's treated as a vegetable because its flavor profile is savory and mild, not sweet.

Why do cucumbers taste bitter?

Bitterness comes from cucurbitacins, compounds concentrated mostly in the skin and near the stem end. Peeling the cucumber or trimming the stem end removes most of it. English and Persian varieties have been bred for very low cucurbitacin levels.

Can you eat cucumber seeds?

Yes - they're edible and mild. The issue is texture and water content: the seed cavity is spongier and releases more liquid, which can water down cold soups, sauces, or salads. Scoop them out when moisture control matters.

Are cucumbers low in calories?

Very. A whole cup of sliced cucumber is around 16 calories, mostly because it's roughly 95% water. It also provides vitamin K and small amounts of vitamin C and potassium.

Does salting cucumber before using it actually help?

Yes, for texture-sensitive applications. Salting draws out excess water through osmosis, which prevents slices from weeping into a salad or thinning out a yogurt sauce. Let salted slices sit 10-15 minutes, then pat dry before using.

Beef Brisket Jewish-Style

March 29, 2026

ToggleSlow-braised brisket with caramelized onions and a sweet-savory glaze creates fork-tender meat. The low oven temperature renders fat while the braising liquid keeps everything moist.

Beef Brisket Jewish-Style served on a plate

The pan does most of the work. You sear the meat once, add liquid, cover, and let the oven handle the rest.

This works for holiday gatherings when you need something that feeds a crowd and tastes better the next day.

QUICK SUMMARY

Beef Brisket Jewish-Style braises in the oven for 3-4 hours until fork-tender. Sear the meat first to build flavor, then let low heat and braising liquid do the work. Rest 20 minutes before slicing against the grain for tender results.

⏱️Time Reality: 30 minutes prep, then 3-4 hours mostly unattended in the oven
🔥First Move: Sear brisket 4-5 minutes per side before adding liquid
⚠️Watch Out: Slice against the grain or the meat gets chewy

Why This Recipe Works

Searing the brisket before braising locks in a caramelized crust that adds depth to the sauce. For a similar slow-braised approach with different spices, check out this related beef recipe.

Quick Reference
⏱️
Prep Time
30 min
🔥
Cook Time
3-4 hours
⏰
Total Time
3.5-4.5 hours
🍽️
Servings
8-10 servings
📊
Difficulty
Medium
🏷️
Category
Main Dish
💡
Quick Tip
Rest brisket 20 minutes before slicing
🎯
Best For
Holiday dinner | Meal prep | Entertaining

Why it works:

  • Low oven temperature (300-325°F) breaks down collagen slowly - keeps meat tender and prevents drying
  • Brown sugar balances tomato paste acidity - creates a glossy, balanced sauce
  • Internal temp of 195-205°F signals doneness - meat pulls apart easily with a fork
  • Layering onions and carrots under the brisket - adds aromatics directly into the braising liquid
  • Resting 20-30 minutes before slicing - lets juices redistribute so meat stays moist
Quick Tip
Heat your pan to medium-high before searing. The brisket should sizzle immediately when it hits the surface.

What You'll Need

Ingredients for Beef Brisket Jewish-Style

Buy a 5-7 lb whole brisket with a thin fat cap still attached. Trim excess fat but leave a quarter-inch layer to keep the meat moist during the long braise.

🥩
Protein
  • 5-7 lb beef brisket (whole cut, flat or point)
🥬
Aromatics
  • 3-4 large onions (sliced)
  • 4-6 cloves garlic (minced)
  • 2-3 carrots (chopped, optional)
  • 2 celery stalks (chopped, optional)
🥢
Braising Liquid
  • 3 cups beef broth (low-sodium)
  • ¼ cup tomato paste
  • ¼ cup brown sugar
🌶️
Spices
  • 2 bay leaves
  • 1 teaspoon black pepper
  • 1 teaspoon paprika (or smoked paprika)
  • Salt to taste

Ingredient Details

  • Beef Brisket
    Look for a whole brisket with even thickness. Trim fat to a thin layer but don't remove it all.
  • Onions
    Yellow onions caramelize best. Slice thick so they hold shape during long cooking.
  • Beef Broth
    Use low-sodium broth so you control the salt level. You'll reduce the liquid at the end.
  • Tomato Paste
    Adds umami and thickens the sauce. Stir it in early so it doesn't clump.
  • Brown Sugar
    Balances acidity and helps the sauce caramelize. Add it toward the end to prevent burning.
  • Paprika
    Regular paprika adds color. Smoked paprika adds depth. Start with regular if unsure.
  • Bay Leaves
    Remove before serving. They add subtle herbal notes during the long braise.

Ingredient Swaps

You can swap chuck roast for brisket if needed, though the texture will be slightly less tender. Use the same cook time and check for fork-tender doneness at 195°F internal temp.

Common swaps:

  • Chuck roast for brisket - less tender but still flavorful, same 3-4 hour cook time
  • Maple syrup or honey for brown sugar - liquid sweeteners thin the sauce slightly, reduce by 2 tablespoons
  • Ketchup for tomato paste - adds extra sweetness and tang, skip half the brown sugar
  • Smoked paprika for regular paprika - deeper flavor, use half the amount first

Chuck Roast

Works for: budget meals, similar braising time

Skip if: you want traditional texture and presentation

Vegetable Broth

Works for: dairy-free or lighter flavor profiles

Skip if: you want deep savory richness

Onion Powder

Works for: convenience, no chopping required

Skip if: you want texture and caramelized sweetness in the sauce

Instructions

Sear the brisket first, then cover and braise low and slow. The oven does the work while you prep sides or clean up.

  1. Sear the brisket. Heat a large roasting pan or Dutch oven over medium-high. Season brisket with salt, pepper, and paprika. Sear 4-5 minutes per side until deep brown. Remove and set aside.

  2. Build the braising base. Add sliced onions, garlic, carrots, and celery to the same pan. Cook 5-6 minutes until onions soften. Stir in tomato paste and cook 2 minutes. Add beef broth and scrape up browned bits.

  3. Braise in the oven. Return brisket to the pan fat-side up. Add bay leaves and brown sugar. Cover tightly with foil or a lid. Roast at 300-325°F for 3-4 hours until fork-tender and internal temp reaches 195-205°F.

  4. Reduce the sauce. Remove brisket and tent with foil. Simmer braising liquid uncovered on the stovetop for 15-20 minutes until thickened. Adjust salt and pepper.

  5. Rest and slice. Let brisket rest uncovered 20-30 minutes. Slice against the grain into thin slices. Serve with reduced sauce spooned over the top.

Golden Rule
Always slice against the grain. Look for the lines of muscle fiber and cut perpendicular to them.

What to Serve With It

Rich mains need something to cut through, and a simple salad does exactly that. For a version that comes together quickly, try this quick salad dish for crunch and brightness.

Side Dish Prep Why It Works How to Serve
Mashed Potatoes Easy Creamy texture soaks up braising sauce Spoon brisket sauce over potatoes
Roasted Green Beans Easy Adds fresh crunch and color contrast Roast at 425°F while brisket rests
Challah Bread Easy Traditional Jewish bread, perfect for soaking juices Slice thick, serve warm on the side
Potato Kugel Medium Hearty, savory, traditional pairing Bake alongside brisket last hour
Braised Cabbage Easy Tangy sweetness balances rich meat Simmer in brisket drippings

Three ways to serve it:

  • Holiday plate: Brisket with potato kugel, braised cabbage, challah bread
  • Weeknight simple: Brisket over mashed potatoes with roasted green beans
  • Meal prep bowls: Sliced brisket with steamed carrots and rice
Shortcut
Make brisket a day ahead. The flavor deepens overnight and slicing cold meat is easier.

Store and Reheat

Brisket stores well and often tastes better the next day as flavors deepen. Slice only what you need and store the rest whole to prevent drying.

Method Time Best For
🍳 Stovetop 10-15 min over low heat Reheating sliced brisket with sauce
📦 Microwave 2-3 min in short bursts Single portions, cover to retain moisture
🔥 Oven 20-25 min at 300°F Whole brisket, even warming without drying

For best results when storing:

  • Refrigerate in shallow airtight containers - brisket lasts 3-4 days
  • Store sauce separately - prevents meat from getting soggy
  • Freeze in portions - wrap tightly in plastic, then foil, up to 3 months
  • Add extra sauce when reheating - keeps meat moist and flavorful
  • Slice only what you need - whole brisket stays juicier in storage

Frequently Asked Questions

Can I use a slow cooker instead of oven for Jewish brisket?

Yes, sear the brisket first, then transfer to a slow cooker with aromatics and liquid. Cook on low 8-10 hours until fork-tender.

How do I store and reheat leftover brisket to keep it moist?

Store brisket whole or sliced in airtight containers with extra sauce. Reheat gently in a covered pan with sauce over low heat or in the oven at 300°F.

What internal temperature indicates brisket is done and tender?

Brisket is done at 195-205°F internal temperature. It should be fork-tender and easy to shred.

Why is my brisket tough even after long cooking, and how to fix?

Undercooked brisket stays tough. Return it to the oven with extra liquid and cook longer until it reaches 195°F and probes tender.

What are good side dishes to serve with Jewish-style beef brisket?

Serve with mashed potatoes, roasted green beans, challah bread, potato kugel, or braised cabbage. These sides balance the rich meat and soak up the sauce.

Beef Brisket Jewish-Style served on a plate

Beef Brisket Jewish-Style

No ratings yet
This slow-braised Jewish-style beef brisket features a caramelized onion and sweet-savory glaze that makes the meat tender and flavorful. The low oven temperature and braising liquid ensure moist, fork-tender results that improve when rested and sliced against the grain.
Print Recipe Pin Recipe
Prep Time 30 minutes mins
Cook Time 3 hours hrs 30 minutes mins
Total Time 4 hours hrs
Servings: 9 servings
Course: Main Dish
Cuisine: Jewish
Ingredients Equipment Method Notes

Ingredients
  

  • 5-7 lb beef brisket whole cut, flat or point, with a thin fat cap trimmed to about a quarter-inch
  • 3-4 large onions sliced thick
  • 4-6 cloves garlic minced
  • 2-3 carrots chopped, optional
  • 2 stalks celery chopped, optional
  • 3 cups beef broth low-sodium
  • ¼ cup tomato paste
  • ¼ cup brown sugar
  • 2 bay leaves remove before serving
  • 1 teaspoon black pepper
  • 1 teaspoon paprika regular or smoked
  • salt to taste, for seasoning

Equipment

  • Large roasting pan or Dutch oven Used for searing brisket and braising in the oven
  • Foil or lid To cover the pan tightly during braising

Method
 

  1. Heat a large roasting pan or Dutch oven over medium-high heat. Season the brisket generously with salt, black pepper, and paprika. Sear the brisket 4-5 minutes per side until a deep brown crust forms. Remove the brisket and set aside.
    5-7 lb beef brisket, 1 tsp black pepper, 1 tsp paprika, salt
  2. Add sliced onions, minced garlic, chopped carrots, and chopped celery to the same pan. Cook for 5-6 minutes until the onions soften and start to caramelize. Stir in tomato paste and cook 2 minutes more. Add beef broth and scrape up any browned bits on the pan bottom.
    3-4 large onions, 4-6 cloves garlic, 2-3 carrots, 2 stalks celery, ¼ cup tomato paste, 3 cups beef broth
  3. Return the brisket to the pan with the fat side up. Add bay leaves and sprinkle brown sugar over the onions. Cover the pan tightly with foil or a lid. Roast in the oven at 300-325°F for 3 to 4 hours until the brisket is fork-tender and the internal temperature reaches 195-205°F.
    5-7 lb beef brisket, 2 bay leaves, ¼ cup brown sugar
  4. Remove the brisket from the pan and tent it loosely with foil. Simmer the braising liquid uncovered on the stovetop for 15-20 minutes until thickened. Adjust seasoning with salt and pepper as needed.
  5. Let the brisket rest uncovered for 20-30 minutes to redistribute juices. Slice thinly against the grain and serve with the reduced sauce spooned over the top.
    5-7 lb beef brisket

Notes

  • Always slice brisket against the grain for maximum tenderness.
  • Resting the meat before slicing allows juices to redistribute and prevents dryness.
  • Use low-sodium broth to control saltiness, adjusting seasoning at the end.

Tried this recipe?

Let us know how it was!

What Is Clementine? Taste, Uses & More

March 29, 2026

Peel a clementine and the aroma hits before you even take a bite - a clean citrus blossom scent with a faint sweetness that's closer to perfume than pith.

What Is Clementine

The first segment releases juice that's bright and tangy, then rounds into a honeyed sweetness that lingers.

That combination is why clementines outsell most other small citrus on produce shelves.

If you're working with citrus in a recipe and need to know what can stand in, understanding clementine swaps that work saves you a trip to the store.

Clementines also cross paths with other marmalade citrus - if you've ever tried swapping out lime marmalade, clementine makes a warmer, less bitter alternative.

QUICK SUMMARY

A clementine is a small, seedless mandarin hybrid with sweet citrus flavor, bright acidity, and a thin, easy-peel skin. Eat it fresh, juice it, zest it, or glaze with it. Refrigerated, it keeps up to two weeks.

🍊Flavor: Sweet citrus, tangy, lightly floral with a honeyed finish
🍽️Best Uses: Fresh snacking, glazes, salads, zest in dressings
🌡️Intensity: Moderate - sweet-forward with lively acidity
🛒Buy: Heavy for size, glossy smooth skin, no soft spots
⏱️Shelf Life: 3-7 days room temp; up to 14 days refrigerated
✅Diet: Naturally vegan, gluten-free, low-calorie, high in vitamin C

What Is Clementine?

A clementine is a small citrus fruit produced by crossing a mandarin with a sweet orange, first cultivated in Algeria in the late 19th century.

It takes its name from Father Clément Rodier, who is widely credited with developing the hybrid.

Spain and France later drove commercial production, and the fruit became a staple of European winter markets before spreading globally.

Most clementines are nearly or completely seedless, which sets them apart from older mandarin varieties.

The skin is thin, glossy, and deep orange - it pulls away cleanly without tools, making the fruit uniquely practical.

You may also see it labeled as clemenules (a popular Spanish cultivar), clementina in Italian and Spanish contexts, or loosely called a seedless mandarin in supermarkets.

Clementines typically weigh between 70 and 100 grams and are slightly smaller than a tangerine. Several cultivars exist, including Nules, Hernandina, and Oroval, each varying slightly in season and seed count.

The peak season runs from November through January in the Northern Hemisphere, which is why they appear heavily in holiday fruit displays.

What Does Clementine Taste Like?

clementine - What Is Clementine

Clementines taste like a sweeter, milder version of a tangerine, with less of the sharp bitterness you get from a navel orange's pith.

The flavor profile is dominated by bright citrus sweetness, with a clean tangy acidity that doesn't overwhelm.

There's a subtle floral note - faint, not perfumed - and a honeyed finish that makes the fruit feel richer than its size suggests.

Sensory SnapshotModerate Intensity
👅 Flavor
Sweet citrusBright tangyHoneyedLightly floral
✋ Texture
JuicyTender pulpFirm membranes
👃 Aroma
Citrus blossomZestyPerfumed peel

Heat concentrates the sweetness and softens the acidity, which is why a reduced clementine glaze reads sweeter and more jammy than the raw fruit. Raw segments keep that pop of brightness, making them more useful where contrast is the goal.

The peel zested over a finished dish adds the aromatic top note without the juice's acidity.

How to Use Clementine

Raw segmentation is the most common approach - pull segments apart and eat them fresh, or toss them into green salads alongside arugula, fennel, and goat cheese. The sweet acidity lifts bitter greens without needing much additional dressing. For a simple vinaigrette, clementine juice and zest replace lemon well and add a rounder, less sharp citrus note.

Golden Rule
Zest before you juice. Once the fruit is squeezed, the peel dries out fast and the aromatic oils are harder to extract cleanly.

Glazing is where clementines earn real kitchen credibility.

Reduce the juice with honey and soy, and you have a glaze that works on roasted salmon, duck breast, or chicken thighs - the sugars caramelize without burning as quickly as straight citrus reductions. Candied peel is another strong use: simmer strips in sugar syrup, dry them, and fold them into biscotti or chocolate bark.

Small-batch marmalade is worth making when you have a surplus, and the fruit's low-to-no seed count makes the process faster than most citrus preserves.

How Clementine Is Used
MethodBest ForTip
🥗 RawSalads, snacking, cocktail garnishAdd segments last so juice doesn't bleed into the dressing
🍳 GlazedSalmon, chicken, duckReduce juice by half before adding honey for a thicker glaze
🍋 Zested/JuicedMarinades, vinaigrettes, curdsUse a microplane and stop before the white pith
🍯 PreservedMarmalade, candied peelBlanch peel twice to reduce bitterness before candying

Clementine pairs well with olive oil, rosemary, and thyme in Mediterranean-style preparations, and with ginger and soy in East Asian-influenced glazes. Avoid pairing with heavy cream-based savory sauces - the acidity breaks the fat and curdles the sauce.

For recipes where a citrus glaze is the centerpiece, these work as a strong starting point:

Try It In
🍗Air Fryer Honey Garlic Chicken TendersSwap lemon for clementine juice in the glaze for a sweeter finish→🐟Air Fryer Honey Garlic Salmon BitesClementine juice adds bright citrus to the honey garlic base→🍖Crispy Honey Garlic Chicken WingsUse clementine zest in the sauce to add a floral citrus lift→

How to Buy and Store Clementine

Pick clementines that feel heavy for their size - that weight signals high juice content. The skin should be smooth and glossy with no wrinkling, soft spots, or mold at the stem end.

Loose clementines give you better control over selection than pre-bagged nets, where hidden bruising is common.

Watch Out
Wrinkled skin means the fruit has dried out inside. Even if it looks fine otherwise, the juice content will be low and the flavor flat.

Store unwashed clementines at room temperature for up to a week in a cool, ventilated spot.

For longer storage, move them to the crisper drawer in a breathable bag - they'll hold for 10 to 14 days.

Peeled segments keep in a sealed container in the fridge for 3 to 4 days, though they lose some aroma.

The full breakdown of clementine's shelf life covers edge cases like humidity and post-peel storage in more detail.

Where to Start With Clementine

Clementines are one of the few fruits that work equally well straight from the peel or in a cooked application. Start fresh - eat a few segments to understand the baseline sweetness and acidity before cooking with them.

Shortcut
No fresh clementines on hand? Knowing which replacements for tangerine carry the same sweet-citrus profile helps you adapt any recipe on the fly.

Once you've cooked with the juice, try the zest - it adds the citrus aroma without the acidity, which gives you more control in delicate recipes.

If you're ever zesting for baking and run short, lime zest swaps that work can fill the gap, though the flavor will be sharper. Clementines reward simple handling - the less you do to them, the more the natural flavor shows.

Frequently Asked Questions

Are clementines the same as tangerines?

No. Clementines are a mandarin-sweet orange hybrid; tangerines are a separate mandarin variety. Clementines are typically sweeter, smoother-skinned, and nearly always seedless, while tangerines often have seeds and slightly more tartness.

Are clementines seedless?

Most are, but not guaranteed. Clementines grown near cross-pollinating citrus varieties can develop seeds. Buying certified seedless or organically isolated cultivars like Nules reduces the chance significantly.

When are clementines in season?

Peak season runs November through January in the Northern Hemisphere. Spanish and Moroccan harvests hit shelves earliest, typically by late October, while Californian crops extend availability into February.

Can you freeze clementine segments?

Yes. Peel and segment them, then freeze on a lined tray before transferring to a bag. Texture softens after thawing, so use frozen segments in smoothies, glazes, or sauces rather than fresh applications.

How many clementines equal one orange?

Roughly two to three clementines match one medium navel orange in juice volume. For zest, two clementines yield about the same amount as one orange, though the flavor is sweeter and less bitter.

How Long Does Edamame Last? [Storage Guide]

March 29, 2026

Finding a bag of edamame in the back of your fridge - unsure whether it's still safe - is a surprisingly common situation. Edamame, the immature soybean harvested before the pod hardens, spoils faster than most people expect, and the difference between raw pods, shelled beans, and cooked edamame means storage rules aren't one-size-fits-all.

How Long Does Edamame Last In The Fridge

Much like the blanch kale for freezing technique applies differently depending on leaf state, edamame storage depends entirely on what form you're working with.

QUICK SUMMARY

Fresh edamame pods last 2-4 days in the fridge; shelled raw beans last 3-4 days. Cooked edamame holds 3-5 days. Home-blanched frozen edamame keeps 6-8 months; commercial frozen reaches 8-12 months. Blanch before freezing - skipping this step ruins texture.

🧊Fridge (pods): 2-4 days unwashed in a perforated produce bag
❄️Freezer (home-blanched): 6-8 months; label bags with the date
⚠️Key rule: Always blanch before freezing - raw frozen beans turn mushy and grey

How Long Does Edamame Last?

Shelf life shifts significantly depending on whether you're dealing with pods, shelled beans, or cooked edamame. Pods hold moisture better than shelled beans because the outer casing slows oxidation - that's why raw pods outlast their shelled counterparts by a surprising margin.

Understanding what makes edamame distinct from mature soybeans matters here: the high water content of immature beans is exactly what makes them sweet and tender, and also what accelerates spoilage compared with dried legumes.

Edamame Shelf Life
MethodStateDurationNotes
🧊 FridgeRaw in pod2-4 daysKeep pods whole and unwashed; store in coldest fridge zone
🧊 FridgeShelled raw3-4 daysAirtight container lined with a paper towel to absorb moisture
🧊 FridgeCooked3-5 daysCool quickly; shallow airtight containers speed cooling
❄️ FreezerStore-bought frozen (unopened)8-12 monthsPre-blanched commercially; best quality within one year
❄️ FreezerHome-blanched then frozen6-8 monthsBlanching locks color and texture; always label with date
🏠 PantryCanned (unopened)12-36 monthsCheck can condition and printed expiry before use

Reheating cooked edamame more than once shortens that 3-5 day window noticeably. Canned edamame is the outlier here - shelf-stable and far more forgiving than any fresh or frozen form.

How to Store Edamame

Refrigerate fresh edamame immediately after purchase. Leaving it on the counter, even briefly, accelerates moisture loss and speeds decay in ways that are hard to reverse once started.

Pods: Leave them unwashed and store in a perforated produce bag or loosely covered in the crisper drawer. Washing before storage traps surface moisture that leads to sliminess.

Shelled raw beans: Dry them thoroughly - this step matters more than most people realize. Store in an airtight container lined with a paper towel to pull away any residual moisture, and keep them in the coldest fridge zone rather than the door.

Cooked edamame: Cool quickly before refrigerating. Shallow containers work best because they let heat escape faster, keeping the beans at a food-safe temperature sooner.

Canned edamame: Keep cans upright, dry, and away from heat or direct sunlight. No refrigeration needed until opened. Much like storing tofu correctly after opening, any leftover canned edamame should move to an airtight container and be refrigerated right away.

Golden Rule
Keep edamame in the pod until you're ready to use it. Pods slow moisture loss and preserve the beans' natural sweetness longer than shelled storage allows.

Can You Freeze Edamame?

Yes - and freezing is the single best way to extend edamame well beyond its short fridge life.

The critical step is blanching before freezing; skipping it causes the enzymes in immature soybeans to keep working, resulting in dull, grey, mushy beans even straight from the freezer.

Store-bought frozen edamame already handles this - commercial packages are pre-blanched before packaging, which is why they hold texture better than most home-frozen batches.

For green pea swaps that work in cooked dishes, frozen edamame often performs well, but only if it's been blanched properly first.

  1. Shell or leave in pods - both can be frozen; pods take slightly longer to blanch.
  2. Blanch in boiling water - shelled beans for 2-3 minutes, pods for 3-4 minutes.
  3. Shock immediately - transfer straight to ice water to stop cooking and lock the green color.
  4. Drain and pat dry - excess water forms ice crystals that damage texture.
  5. Flash-freeze on a tray - spread in a single layer and freeze until solid, about 1-2 hours.
  6. Transfer and label - move to airtight freezer bags, squeeze out air, and write the date clearly.

To thaw, either move the bag to the fridge overnight or drop frozen beans directly into boiling water. Avoid slow countertop thawing - it creates a warm, moist surface that encourages bacterial growth.

Watch Out
Freezing raw shelled edamame without blanching is the most common mistake. The beans emerge grey and mushy - unlike the situation with some leafy greens, skipping the blanch here causes irreversible texture damage.

Note that freezing kale without blanching follows different rules from edamame - kale can survive the skipped step better than immature soybeans can.

Signs Edamame Has Gone Bad

Fresh and cooked edamame give clear signals when they've turned. Trust your senses - any one of the signs below is enough reason to discard.

Signs It's Gone Bad
👀
VisualDark brown or black spots on pods or beans · Slimy sheen on shelled beans · Cloudy liquid around cooked edamame · Pod shriveling with brown spotting
👃
SmellSour or fermented odor · Tangy or 'off' smell instead of fresh, grassy scent
✋
TextureMushy or excessively slimy beans · Pods that feel waterlogged or papery and brittle

Fresh edamame smells distinctly grassy and clean - a sour or fermented odor is a hard stop. Discard any edamame showing off smells, sliminess, visible mold, or unusual discoloration without exception.

Getting the Most From Your Edamame

A few habits make the difference between edamame that lasts and edamame that gets thrown out.

If you've run out and need a stand-in, checking replacements for edamame or even snow pea swaps that work can help bridge the gap in most recipes.

  • 🫛 Leave pods intact - shell only what you plan to use immediately; whole pods stay fresh longer.
  • 🧻 Dry before storing - wet shelled beans in a sealed container spoil fast; the paper towel trick is non-negotiable.
  • 🏷️ Label freezer bags - home-blanched edamame loses quality after 6-8 months, and undated bags always get forgotten.
  • 🔥 Reheat from frozen - adding frozen edamame directly to boiling water or a hot pan minimizes sogginess better than thawing first.
Shortcut
Buy commercial frozen edamame when you want long shelf life without the blanching process - it's pre-blanched, consistent in texture, and ready to cook from frozen in under five minutes.

Frequently Asked Questions

How long does cooked edamame last in the fridge?

Cooked edamame keeps for 3-5 days in an airtight container in the fridge. Cool it quickly after cooking - leaving it at room temperature for more than two hours before refrigerating shortens that window.

Can you freeze shelled edamame without blanching?

Technically yes, but the results are poor. Enzymes in unblanched immature soybeans stay active during freezing, causing grey color and mushy texture that blanching would have prevented.

How long does frozen edamame last in the freezer?

Home-blanched edamame lasts 6-8 months at peak quality; commercial frozen packages hold 8-12 months unopened. Both remain safe beyond those windows but texture and flavor decline noticeably.

Is canned edamame safe after the expiration date?

Usually, yes - printed dates on canned goods indicate quality, not a hard safety cutoff. Inspect the can first: bulging, rust, deep dents along seams, or an off smell after opening are all reasons to discard.

Should you store edamame in the pod or shelled?

In the pod, always - until you're ready to eat them. The pod slows moisture loss and oxidation, keeping beans sweeter and firmer for longer than shelled storage allows.

Pork Banh Mi Filling

March 29, 2026

Marinating pork in soy sauce, fish sauce, and lemongrass before cooking creates caramelized edges and tender filling. The sugar browns in the pan while the pork stays moist from the fat.

Pork Banh Mi Filling served on a plate

Medium heat keeps the sugar from burning while the meat cooks through. You skip the flipping and the babysitting.

This is what we make for meal prep when you need protein that works in sandwiches, bowls, or lettuce wraps all week.

QUICK SUMMARY

Pork shoulder marinated in soy sauce, fish sauce, garlic, and lemongrass, then sautéed over medium heat until caramelized. The fat in the pork keeps it juicy while the sugar creates golden-brown edges. Marinate for at least 30 minutes or the flavor stays on the surface.

⏱️Time reality: 15 minutes active, 30 minutes if you marinate properly
🔥Critical first move: Cut pork into even ½-inch cubes so every piece cooks at the same rate
⚠️Watch out: High heat burns the sugar before the pork cooks - use medium heat and resist cranking the burner

Table of Contents

Toggle
  • Why This Recipe Works
  • What You'll Need
    • Ingredient Details
  • Ingredient Swaps
  • What to Serve With It
  • Store and Reheat
  • Frequently Asked Questions
  • Pork Banh Mi Filling
    • Method 
    • Tried this recipe?

Why This Recipe Works

The fat in pork shoulder melts during cooking and bastes the meat from the inside. Marinating for 30 minutes gives the soy sauce and fish sauce time to penetrate the meat, not just coat it. For a version that comes together quickly, a tender pork variation uses similar aromatics with a different spice profile.

Quick Reference
⏱️
Prep Time
15 min
🔥
Cook Time
15-20 min
⏰
Total Time
30-35 min
🍽️
Servings
4 servings
📊
Difficulty
Medium
🏷️
Category
Main Dish
💡
Quick Tip
Marinate pork 30 min for best flavor
🎯
Best For
Weeknight | Meal prep

What makes this filling work:

  • Medium heat caramelizes the sugar - Too high burns it, too low steams the pork instead of browning it
  • 30-minute minimum marinating - Flavors penetrate the meat instead of washing off when you cook
  • ½-inch cubes cook evenly - Larger pieces stay raw in the center while smaller bits dry out
  • 145°F internal temp keeps pork juicy - Overcooking turns it dry and chalky
  • Deglazing lifts the fond - A splash of rice vinegar after browning captures the stuck-on bits and turns them into glaze
Quick Tip
Let the pork rest 5 minutes after cooking so the juices redistribute instead of running all over the cutting board.

What You'll Need

Ingredients for Pork Banh Mi Filling

Buy pork shoulder instead of tenderloin - the fat content keeps the filling moist even if you overcook it slightly. Lemongrass shows up fresh in the produce section near the ginger, but minced paste in a jar works when you're short on time.

🍗
Protein
  • Pork shoulder or pork belly (1 lb / 450g, cut into ½-inch cubes)
🧄
Aromatics
  • Garlic (3 cloves, minced)
  • Lemongrass (2 stalks, minced, or 2 tablespoon paste)
  • Scallions (2, sliced)
🥢
Sauce Base
  • Soy sauce (2 tbsp)
  • Fish sauce (1 tbsp)
  • Sugar (1 tbsp)
  • Rice vinegar (1 tbsp)
🌶️
Seasonings
  • Black pepper (½ tsp)
  • Chili flakes (½ tsp, optional)

Ingredient Details

  • Pork shoulder or pork belly
    Fat keeps the filling tender - lean cuts dry out before they brown
  • Soy sauce
    Provides salt and umami depth - use low-sodium if you're watching salt intake
  • Fish sauce
    Adds authentic savory complexity - don't skip or the filling tastes flat
  • Lemongrass
    Fresh lemongrass has more citrusy punch than paste, but paste saves 10 minutes of prep
  • Sugar
    Balances the salty fish sauce and helps caramelize the pork - granulated white sugar works best
  • Garlic
    Mince it fine so it melts into the marinade instead of burning in the pan
  • Rice vinegar
    Deglazes the pan after browning and adds a bright finish - skip if you don't have it

Ingredient Swaps

Ground pork cooks faster but loses the chewy texture you get from cubed shoulder. Maple syrup or honey will caramelize differently than white sugar - they burn quicker, so watch the heat.

Four swaps that work:

  • Tamari instead of soy sauce - Use 1:1 ratio for gluten-free with the same umami depth
  • Ground pork instead of pork shoulder - Cooks in 8-10 minutes but softer texture, less chew
  • Lemon zest and ginger instead of lemongrass - Use 1 teaspoon zest + 1 tablespoon minced ginger, more citrusy and less herbal
  • Lime juice instead of rice vinegar - Use 1:1 ratio, tangier acid that works in the marinade or for deglazing

Pork Shoulder

Works for: Tender filling with chewy texture, stays moist even if slightly overcooked

Skip if: You need dinner in under 20 minutes - cubing and marinating takes time

Ground Pork

Works for: Quick weeknight cooking, softer texture for kids, uniform browning

Skip if: You want meaty chunks with caramelized edges - ground pork crumbles instead

Instructions

The pork needs 15 minutes to brown properly - rushing it on high heat burns the sugar before the meat cooks through. Cut the cubes evenly so they finish at the same time. For a version that comes together quickly, simple samosas recipe pairs well with this filling for a full Vietnamese-inspired meal.

  1. Marinate the pork - Mix soy sauce, fish sauce, garlic, lemongrass, sugar, black pepper, and chili flakes in a mixing bowl. Add pork cubes, toss to coat, and marinate 30 minutes at room temperature or up to 2 hours in the fridge.

  2. Heat the pan - Warm a cast iron skillet or heavy pan over medium heat for 3 minutes. Add 1 tablespoon neutral oil and swirl to coat.

  3. Brown the pork - Add pork in a single layer with 2 cm gaps between pieces. Cook 4-5 minutes without stirring until the bottom caramelizes and turns golden brown. Flip and cook 4-5 minutes more until the second side browns.

  4. Check doneness - Insert a thermometer into the thickest cube - it should read 145°F (63°C). If it's not there yet, stir and cook 2-3 minutes more.

  5. Deglaze and rest - Add 1 tablespoon rice vinegar to the hot pan and scrape up any stuck bits with a wooden spoon. Stir in scallions, cook 30 seconds, then remove from heat. Let rest 5 minutes before serving.

Golden Rule
Don't overcrowd the pan - cook in two batches if needed so the pork browns instead of steaming in its own juice.

What to Serve With It

Most people pile the filling into sandwiches, but it works just as well over rice or in lettuce wraps when you need a lighter meal. A dollop of dressing takes each bite somewhere more interesting. For a version that comes together quickly, creamy homemade dressing recipe adds tang without overpowering the pork.

Side Dish Prep Why It Works How to Serve
Pickled daikon and carrot Easy Crisp acidic contrast cuts through rich pork Layer directly on sandwich or serve on the side
Fresh cucumber slices Easy Cool crunch balances warm savory filling Slice thin and stack on bread or add to bowls
Herb sprigs (cilantro, mint) Easy Brightens flavors and adds fresh green notes Tuck whole sprigs into sandwiches or chop over rice
Baguette with butter or mayo Easy Classic soft vehicle absorbs juices and glaze Split lengthwise, spread condiments, pile filling inside
Crispy fried shallots Medium Adds texture and aromatic crunch Sprinkle on top right before serving

Three ways to serve it:

  • Classic banh mi - Layer pork on a toasted baguette with pickled vegetables, cucumber, cilantro, jalapeños, and sriracha mayo
  • Rice bowl - Spoon pork over jasmine rice with shredded carrots, cucumber, and a drizzle of hoisin sauce
  • Lettuce wraps - Fill butter lettuce leaves with pork, herbs, pickled vegetables, and a squeeze of lime
Best Pick
For weeknight meals, prep the pickled vegetables on Sunday - they keep for 2 weeks and cut your weeknight assembly time in half.

Store and Reheat

The filling holds up in the fridge for 3-4 days and tastes better the next day after the flavors settle. Store it in a shallow airtight container so it cools quickly and doesn't sit in the danger zone too long. Salad cuts through all that richness. For a version that comes together quickly, something fresh and light brings crisp texture to balance the savory pork.

Method Time Best For
🍳 Stovetop 5-7 minutes over medium heat Retaining texture and fresh flavor
🔥 Oven 10 minutes at 350°F (175°C) Warming large portions evenly
📦 Microwave 1-2 minutes, stirring halfway Quick reheating for single servings

For best results when storing:

  • Cool quickly - Spread pork in a thin layer on a sheet pan before transferring to storage containers
  • Freeze in portions - Divide into 1-cup servings for easy thawing and minimal waste
  • Add moisture when reheating - Splash 1-2 tablespoon water or broth into the pan to keep pork from drying out
  • Thaw overnight - Move frozen pork to the fridge 24 hours before you need it for even reheating
  • Reheat only once - Repeated heating dries out the meat and dulls the flavors

Frequently Asked Questions

How long to cook pork banh mi filling at medium heat?

Cook pork cubes for 8-10 minutes total - 4-5 minutes per side without stirring so they caramelize properly. Check internal temp at 145°F (63°C) before removing from heat.

Can I make pork banh mi filling ahead and store?

Yes - cooked pork lasts 3-4 days in the fridge in an airtight container. Freeze for up to 2 months in portioned containers and thaw overnight in the fridge before reheating.

What goes best with pork banh mi filling as sides?

Pickled daikon and carrot, fresh cucumber slices, cilantro and mint sprigs, and crispy fried shallots. These add acidity, crunch, and freshness to balance the rich savory pork.

How do I know when pork banh mi filling is done?

Check with a thermometer - the internal temp should read 145°F (63°C). The pork should have golden-brown caramelized edges and no pink in the center when you cut a piece open.

Can I use ground pork instead of pork shoulder?

Yes - ground pork cooks faster (8-10 minutes total) but gives you softer texture without the chewy caramelized chunks. Use the same marinade and break it into crumbles as it browns.

Pork Banh Mi Filling served on a plate

Pork Banh Mi Filling

No ratings yet
Pork shoulder is marinated with soy sauce, fish sauce, garlic, and lemongrass then sautéed over medium heat until golden and caramelized. The pork's fat keeps the filling juicy while the sugar creates rich, golden-brown edges. Marinate for at least 30 minutes for the flavors to fully penetrate the meat.
Print Recipe Pin Recipe
Prep Time 15 minutes mins
Cook Time 20 minutes mins
Total Time 35 minutes mins
Servings: 4 servings
Course: Main Dish
Cuisine: Vietnamese
Ingredients Equipment Method Notes

Ingredients
  

  • 1 lb pork shoulder cut into ½-inch cubes
  • 2 tablespoon soy sauce
  • 1 tablespoon fish sauce
  • 3 cloves garlic minced
  • 2 stalks lemongrass minced, or 2 tablespoon paste as substitute
  • 1 tablespoon sugar granulated white sugar preferred
  • 1 tablespoon rice vinegar for deglazing after browning
  • 2 tablespoon neutral oil e.g. canola or vegetable oil, for cooking
  • ½ teaspoon black pepper
  • ½ teaspoon chili flakes optional
  • 2 pieces scallions sliced, stirred in at end

Equipment

  • Cast iron skillet Used for sautéing pork over medium heat
  • Thermometer Used to check internal temperature of pork
  • Mixing bowl To marinate pork
  • Wooden spoon For deglazing and stirring

Method
 

  1. In a mixing bowl, combine soy sauce, fish sauce, garlic, lemongrass, sugar, black pepper, and chili flakes. Add the pork cubes and toss to coat evenly. Marinate at room temperature for 30 minutes or up to 2 hours in the fridge.
    1 lb pork shoulder, 2 tbsp soy sauce, 1 tbsp fish sauce, 3 cloves garlic, 2 stalks lemongrass, 1 tbsp sugar, ½ tsp black pepper, ½ tsp chili flakes
  2. Warm a cast iron skillet or heavy pan over medium heat for about 3 minutes. Add 1 tablespoon neutral oil and swirl to coat the pan evenly.
    2 tbsp neutral oil
  3. Place the pork cubes in a single layer with 2 cm gaps between pieces. Cook without stirring for 4-5 minutes until the bottoms caramelize and develop golden brown edges. Flip and cook the other side another 4-5 minutes until browned.
    1 lb pork shoulder
  4. Insert a thermometer into the thickest pork cube; the internal temperature should reach 145°F (63°C). If not yet done, stir and cook for an additional 2-3 minutes.
    1 lb pork shoulder
  5. Add 1 tablespoon rice vinegar to the hot pan and scrape up any browned bits with a wooden spoon. Stir in sliced scallions and cook for 30 seconds. Remove from heat and let the pork rest for 5 minutes before serving to redistribute juices.
    1 tbsp rice vinegar, 2 pieces scallions

Notes

  • Cut pork into even ½-inch cubes for consistent cooking.
  • Use medium heat to caramelize sugar without burning it.
  • Let the pork rest 5 minutes after cooking for juicier results.

Tried this recipe?

Let us know how it was!

What Is Creamed Corn? [Taste, Uses & Serving Ideas]

March 29, 2026

Most people assume creamed corn is just blended or pureed corn - it isn't.

What Is Creamed Corn

The real product is whole or partially broken kernels suspended in a thick, milky liquid scraped from the corn's inner endosperm, and that distinction changes how it behaves in a recipe entirely.

If you've ever planned dishes alongside corn pudding and wondered why the batter turned out richer than expected, creamed corn is usually why.

QUICK SUMMARY

Creamed corn is whole and partially broken corn kernels in a thick, starchy-milky liquid. It tastes like a mild, sweet corn chowder base - soft, slightly grainy, and gently sweet. Used in casseroles, soups, cornbread, and holiday sides.

👅Flavor: Sweet corn sugar, mild starch, light vegetal notes
✋Texture: Soft kernels in a silky, slightly viscous liquid
🌽Best Uses: Corn casserole, chowder base, cornbread, skillet sides
🥫Forms: Canned cream-style corn or homemade from fresh ears
🗓️Shelf Life: Unopened cans: years; opened refrigerated: 3-4 days; frozen: 2-3 months

What Is Creamed Corn?

Creamed corn - also sold as cream-style corn - is a stewed corn preparation made by cutting whole kernels from the cob and then scraping the cob's surface to release the milky, starchy endosperm liquid underneath.

That liquid is what thickens the mixture naturally, with or without added dairy.

Canned versions have been a staple of American pantries since the early 20th century, most commonly associated with Southern and Midwestern home cooking.

Fresh or homemade cream corn starts with plump ears; after kerneling, cooks scrape the cob with the back of a knife to extract every drop of that thickening juice.

There are two broad forms worth knowing:

  • Canned cream-style corn - pre-cooked, shelf-stable, consistent texture; may contain added sugar, salt, or starch
  • Homemade creamed corn - made from fresh sweet corn ears; brighter flavor, looser texture, no additives

Understanding corn chowder spoilage signs is useful context here, since the dairy and starch in creamed corn follow similar spoilage timelines once opened.

What Does Creamed Corn Taste Like?

creamed corn - What Is Creamed Corn

Creamed corn reads as genuinely sweet - that's the natural corn sugar - layered over a quiet, starchy creaminess that coats the palate without heaviness.

It doesn't taste like cream of corn soup; the sweetness is more forward, and the body is thinner.

Sensory SnapshotModerate Intensity
👅 Flavor
sweet corn sugarstarchymild vegetal
✋ Texture
soft kernelssilky viscous liquidslightly grainy
👃 Aroma
warm sweet cornlight milky

Heat changes the profile. Gently simmered, the sweetness mellows slightly and the starch thickens into a fuller, more pudding-like body.

Overcooked, the kernels lose structure and the mixture becomes a monotone starchy paste - still edible, but flat.

The closest comparison is a sweet corn chowder base stripped of its savory seasonings, or a very thin corn pudding before eggs and flour enter the picture.

How to Use Creamed Corn

Creamed corn works in more contexts than the holiday table casserole most people associate it with. Its natural sweetness and built-in starch make it a functional ingredient across several cooking methods.

How Creamed Corn Is Used
MethodBest ForTip
🫙 BakedCorn casserole, corn pudding, cornbreadAdds moisture and binds the batter without extra liquid
🍲 SimmeredCorn chowder base, creamy corn soupsStir in near the end - prolonged heat makes kernels mushy
🍳 Pan-finishedSkillet creamed corn, side dishes with meatFinish with butter and black pepper; add bacon for smokiness
🌿 Stirred in rawCornbread mix, muffins, quick breadsReplace some of the liquid called for in the recipe

In Southern cooking, it's the base of corn casserole - folded with eggs, sour cream, and a box of corn muffin mix, then baked until just set.

Midwestern cooks stir it into skillet sides with butter and thyme, finishing alongside roast chicken or pork.

It also folds into succotash; if you're making southern summer succotash at home, creamed corn adds body that whole-kernel corn alone won't provide.

Strong pairings include sharp cheddar, crispy bacon or pancetta, green chiles, and scallions. Avoid dropping it into high-acid raw salads - the starchy liquid breaks the texture of anything delicate.

For a full list of what works well beside it, dishes alongside creamed corn covers the full spread.

Watch Out
Don't add creamed corn to long braises or slow cooker dishes early. The kernels disintegrate into a grainy starch paste over extended cooking - stir it in during the last 20 minutes instead.
Try It In
🍳Skillet Creamed CornPan-finished with butter, the fastest way to see this ingredient's full range→🫙Creamed Corn Southern StyleThe classic baked casserole version with a properly set, custardy center→

How to Buy and Store Creamed Corn

For canned cream-style corn, check for firm seams and no bulging or denting - a swollen can is a hard pass.

The contents should be pale yellow with visible whole kernels floating in a viscous liquid; uniform smoothness usually indicates too much added starch or blending.

For fresh ears destined for homemade batches, look for plump kernels that release milky juice when pierced with a fingernail.

Shriveled tips or dry, dented kernels mean the sugars have already converted to starch - the flavor won't recover on the stove.

Quick Tip
Transfer opened canned creamed corn into a sealed glass container immediately - the metal can accelerates off-flavors once exposed to air.

Storage is straightforward: unopened cans live in a cool, dry pantry indefinitely within the printed date. Once opened, refrigerate in an airtight container and use within 3-4 days.

For homemade batches, the guidance on keeping creamed corn fresh covers freezing options, which extend the window to 2-3 months.

Start Here If You're New to Creamed Corn

Don't start with the casserole.

The skillet version - kernels simmered with butter, black pepper, and a splash of cream - gives you the clearest read on what this ingredient actually tastes like and how much liquid it adds to a dish.

Once you know that, swapping out creamed corn in a recipe or scaling it up into baked dishes becomes a straightforward call.

If the replacements for butter in your pantry are limited, olive oil works as a stand-in for the skillet version - the result is slightly less rich but still shows you the core flavor clearly.

Golden Rule
Add heat gently and pull it early. Creamed corn thickens fast and scorches on high heat - medium-low is the right setting every time.

Frequently Asked Questions

Is creamed corn just pureed corn?

No. Creamed corn keeps whole and partially broken kernels intact; the "cream" comes from the scraped endosperm liquid, not from blending. Pureed corn is smooth throughout, while creamed corn has distinct kernel texture in a viscous liquid base.

Does creamed corn contain dairy?

Not always. The creaminess in standard canned cream-style corn comes from the corn's own endosperm starch, not added dairy. Homemade and some restaurant versions do add milk or cream, so check the label or recipe if dairy is a concern.

Can you freeze creamed corn?

Yes. Homemade creamed corn freezes well for up to 2-3 months in a sealed container. Thaw overnight in the fridge and stir well before reheating, as the starch can separate slightly on thawing.

How do you thicken creamed corn that's too watery?

Simmer it uncovered over medium-low heat, stirring often, until the liquid reduces. A small slurry of cornstarch and cold water - about one teaspoon per cup - also works fast without changing the flavor.

Is creamed corn vegetarian?

Most canned cream-style corn is vegetarian and naturally gluten-free. Versions made with added cream or butter are vegetarian but not vegan - check the ingredient list, since some brands add lactic acid or other processing aids.

What Is Chive? [Taste, Uses & More]

March 29, 2026

Snip a small bunch of fresh chives over a warm bowl of soup and the room picks up a clean, grassy-onion scent almost immediately.

What Is Chive

That fragrance is a reliable signal: the flavor underneath is gentle, bright, and just sharp enough to notice without overpowering anything near it.

QUICK SUMMARY

Chives are slender hollow stems from the allium family with a mild onion-garlic flavor and fresh grassy aroma. Best used raw or off-heat, they add bright green color and a gentle allium note to eggs, potatoes, dips, and cold sauces without dominating the dish.

🌿Flavor: Mild onion, light garlic, clean grassy finish
🍳Best Uses: Raw garnish, folded into dips, off-heat soup topping
🥔Pairs With: Potato, egg, sour cream, cream cheese, salmon
📦Shelf Life: 4-7 days refrigerated in a damp paper towel wrap
⚠️Avoid: Long braising or high-heat frying - both kill flavor and color

What Is Chive?

Chive - formally Allium schoenoprasum - is a perennial herb native to temperate regions of Europe and Asia.

It belongs to the allium family alongside onions, garlic, and shallots, though its flavor registers far lower on the intensity scale than any of those relatives.

The plant produces hollow, grass-like green tubes that grow in dense clumps, and it's those slender stems we harvest and use in cooking.

Garden chives are the standard variety found in most grocery stores and home herb pots.

A distinct cousin, garlic chives (Allium tuberosum), has flat rather than hollow stems and a noticeably stronger garlic character - worth knowing if you buy from a farmers' market where both may appear unlabeled.

You'll also see them called French chives or simply chives (occasionally misspelled as "chiveses").

Unlike scallions, chives have no usable white bulb - the entire edible portion is the slender green stem, which keeps them suited to delicate applications where a scallion's firmer bite would feel out of place.

If you ever run short, a quick look at chive swaps that work covers the closest options by flavor profile.

What Does Chive Taste Like?

chive - What Is Chive

Fresh chives taste like a very mild green onion - the sharpness is present but restrained, layered with a light garlic undertone and a clean, grassy finish.

Think of the top third of a scallion, stripped of any fibrous heat, and you're close.

Sensory SnapshotMild Intensity
👅 Flavor
mild onionlight garlicfresh grassy
✋ Texture
tenderdelicate snap
👃 Aroma
mild alliumfresh grassy

Heat changes the equation quickly. A brief 30-second stir off-heat softens the raw edge slightly and keeps the green color vivid.

Anything beyond that - sustained sautéing, braising, or deep frying - strips out the allium brightness and leaves behind a flat, faintly bitter taste with a dull olive-green color.

Raw is almost always the right call. That fragile freshness is exactly what makes chives worth using.

How to Use Chive

Chives work best as a finishing herb, not a cooking base. The standard technique is to snip the stems with scissors rather than chop with a knife - a blade bruises the hollow tubes and releases liquid that dulls both color and flavor.

Hold a small bunch over the dish and snip directly for the cleanest result.

Golden Rule
Always add chives at the very end of cooking, or after the heat is off entirely. Even 60 seconds of direct heat drains their color and flattens their flavor.
How Chive Is Used
MethodBest ForTip
🥗 Raw SnippedBaked potato topping, egg garnish, cold saladsSnip with scissors - don't chop - to avoid bruising
🥣 Folded InSour cream dip, compound butter, herb cheesesStir in gently; overmixing turns color dull
🍲 Off-Heat StirVichyssoise, scrambled eggs, warm vinaigrettesAdd after the pan leaves the flame - 30 seconds max contact
🍳 Light SautéOmelets, quick pan saucesOne minute only; watch closely for color change

French cooking uses chives as part of the classic fines herbes blend alongside tarragon and chervil. Eastern European and British cooking leans on them heavily in potato dishes and cold dips.

In American casual cooking, baked potatoes and chive sour cream are the most recognizable pairing, though compound butters and cream cheese spreads rely on them just as much.

Chives pair cleanly with potato, egg, sour cream, salmon, cream cheese, lemon, and butter. They sit alongside parsley in herb mixes without competing.

For garnish inspiration from a related allium, the technique behind a fried shallots asian garnish recipe shows how allium family members can anchor a plated dish as a visual and flavor element.

Try It In
🧀Cheddar and Chive BiscuitsA baked application that keeps chives folded in — not on top — for even distribution→

How to Buy and Store Chive

Good fresh chives are easy to spot. Bright green, upright stems with no yellowing, sliminess, or papery base are the sign of a healthy bunch. Avoid anything limp, spotted, or carrying an off smell - those indicate age.

Following the store fresh herbs technique will extend nearly any fresh herb, chives included.

Quick Tip
Wrap chives loosely in a damp paper towel, slide them into a breathable bag, and keep them in the crisper drawer. Don't seal them airtight - they need a little airflow to stay crisp.

Fresh chives hold well for 4-7 days in the refrigerator this way. Trimmed stems stood upright in a glass of water can last 1-2 weeks, though peak flavor fades around day five.

Watch for chive spoilage signs like yellowing tips, slimy stems, or a sour smell - any of those and it's time to replace the bunch.

Where to Start With Chive

Start with the two applications that show chives at their best - a baked potato with sour cream, and scrambled eggs finished just off the heat.

  • 🥔 Baked potato first - snip generously over sour cream and you'll immediately understand how chives add flavor without heat
  • 🍳 Then try eggs - fold into soft scrambled eggs off the flame for a clean, grassy-onion finish that doesn't compete with the yolk
  • 🧈 Next, compound butter - mix snipped chives into softened butter with lemon zest; this is the move that opens up fish and vegetable applications

Those three anchor every other use. Once you know how chives behave in each format - raw garnish, folded cool, stirred off-heat - every other dish follows the same logic.

Frequently Asked Questions

Are chives the same as green onions?

No. Chives are thinner, fully hollow, and have no usable white bulb. Green onions have a firmer stem and a more pronounced bite. For dishes where the difference matters, [replacements for green onion](https://forkliftkitchen.com/green-onion-substitutes/) breaks down which alliums swap cleanly.

Can you cook chives?

Briefly, yes - but raw is better for flavor and color. A light sauté under one minute or an off-heat stir works. Anything longer and the bright allium note disappears, leaving flat, slightly bitter stems.

Can you freeze chives?

Yes, though frozen chives lose their texture and won't work as a fresh garnish. Snip them, freeze flat on a tray, then transfer to a bag. Use them only in cooked applications like compound butter or warm sauces.

How long do chives last in the fridge?

Wrapped in a damp paper towel, fresh chives last 4-7 days. Standing trimmed stems in a glass of water extends that to about two weeks, but flavor peaks around day five regardless of storage method.

What's the difference between chives and garlic chives?

Garlic chives (*Allium tuberosum*) have flat, solid stems and a distinctly stronger garlic flavor compared to the mild onion note of standard garden chives. They're common in Chinese and Southeast Asian cooking and are not interchangeable in most Western recipes.

What Is Doenjang? Taste, Uses & How to Cook With It

March 29, 2026

Doenjang hits you before you even taste it - that sharp, barnyard-ferment smell rising from the jar signals something ancient and serious at work.

What Is Doenjang

It's the kind of paste that makes a plain broth taste like it's been simmering for hours, and understanding the role soy sauce plays in Korean cooking helps explain why doenjang occupies a different, deeper register entirely.

If you're already familiar with alternatives to soy sauce, doenjang sits in a related family - fermented, sodium-forward, but far more complex in structure.

QUICK SUMMARY

Doenjang is a Korean fermented soybean paste with deep umami, earthy bean flavor, and a pungent fermented tang. It anchors soups, stews, and marinades, working as a savory backbone rather than a single-note seasoning. High in sodium, long shelf life, and vegan.

🫙Category: Fermented soybean paste, Korean pantry staple
👅Flavor: Deep umami, earthy, salty, bright fermented tang
🔥Intensity: Strong - use sparingly and taste as you go
🍲Best Uses: Doenjang-jjigae, soups, marinades, dipping pastes
❄️Storage: Refrigerate once opened, tightly sealed
⏱️Shelf Life: Opened: 6-12 months refrigerated; unopened: years

What Is Doenjang?

Doenjang (된장) is a thick, coarse-textured fermented soybean paste that forms the savory backbone of Korean cooking.

Made by pressing and drying soybeans into meju blocks, fermenting those blocks in brine, then separating the liquid (which becomes ganjang, or Korean soy sauce) from the solids - the thick, dark paste left behind is doenjang.

The word translates roughly to "thick paste," which describes its physical character well. Commercial varieties tend toward a smoother consistency, while traditionally aged versions keep visible soybean chunks and develop sharper, more complex fermented notes over months or years.

Regional variation runs deep: producers in Korea's Jeolla and Gyeongsang provinces are known for longer-aged, more intensely flavored varieties.

  • 🫙 Traditional doenjang - made with handmade meju, aged in clay pots, chunky and pungent
  • 🏭 Commercial doenjang - smoother paste, milder flavor, more consistent batch to batch
  • 🌿 Cheonggukjang - a shorter-fermented variant, even more pungent, closer to Japanese natto in character

Understanding the role gochujang plays alongside doenjang helps clarify the Korean pantry - both are fermented pastes, but gochujang adds heat and sweetness where doenjang delivers pure savory depth.

What Does Doenjang Taste Like?

doenjang - What Is Doenjang

Doenjang leads with a wallop of umami - not clean or subtle, but layered and rooted in fermented soybean protein.

Underneath that is a pronounced earthiness, like damp soil and roasted legumes, followed by a bright acidic tang from fermentation and a firm saltiness throughout.

Sensory SnapshotStrong Intensity
👅 Flavor
deep umamiearthysaltyfermented tang
✋ Texture
coarse pasteoily sheen
👃 Aroma
barnyard-fermentroasted soypungent

Compared to miso, doenjang is richer, chunkier, and significantly earthier - miso tends toward cleaner, more delicate sweetness.

Heat mellows doenjang's sharpest fermented edges without stripping the umami, which is why dissolving it into a simmering broth opens up a rounder, more integrated flavor than eating it raw.

Watch Out
Doenjang's saltiness concentrates as a dish reduces. Add it early when dissolving into broths, and taste before adding any additional salt.

How to Use Doenjang

Doenjang's most iconic application is doenjang-jjigae, the Korean soybean paste stew built on a base of the paste dissolved into anchovy or kelp broth, loaded with tofu, zucchini, and mushrooms.

It's a dish where the paste does almost all the seasoning work on its own.

For reference on how well tofu holds up in long-simmered stews, the guide on keeping tofu fresh is useful before you buy in bulk.

Beyond stew, doenjang reaches across many preparations.

How Doenjang Is Used
MethodBest ForTip
🥗 RawDipping paste for raw vegetables, ssam wrapsMix with sesame oil, garlic, and a drop of gochujang to balance the raw pungency
🍲 Dissolved in brothSoups, jjigae, noodle brothsWhisk through a fine strainer or mash into broth - don't boil hard after adding
🥩 MarinadePork belly, beef short ribs, tofu steaksMarinate overnight; the fermented enzymes help tenderize meat
🔥 Sweated with aromaticsStir-fry bases, braised vegetables, banchanCook with garlic and sesame oil for 1-2 minutes to round out the raw ferment edge

Pairing doenjang with garlic, scallion, and sesame oil is the classic Korean flavor trio - each one amplifies the paste's savory depth without competing. Pork and beef stand up well to its intensity; delicate white fish generally doesn't.

Large amounts of sugar flatten the fermented tang, so keep sweeteners minimal when doenjang is the featured ingredient.

If you're looking for something to swap in when doenjang isn't available, the guide on replacements for doenjang covers the practical options, including miso-based workarounds.

Try It In
🍲Korean Doenjang Jjigae Soybean StewThe definitive dish — doenjang front and center in a hearty tofu and vegetable stew→

How to Buy and Store Doenjang

At the store, look for jars with dense, dark brown paste and minimal liquid separation pooling at the top. A faint fermented aroma through the packaging is normal and expected.

Labels reading "aged" (jang) or "handmade meju" signal a traditionally produced product with more complex flavor development.

Best Pick
For cooking doenjang-jjigae at home, a mid-priced jar with visible soybean bits gives better texture and depth than ultra-smooth commercial blends.

Avoid jars with an aggressively rotten smell (distinct from fermented tang) or heavy mold on the surface beyond the expected white bloom.

Once opened, refrigerate tightly sealed in the original jar or an airtight container to slow oxidation.

For a full breakdown of how long it lasts under different conditions, see the guide on doenjang's shelf life.

Aged varieties intensify further in the fridge over time - which is either an asset or a liability depending on your tolerance for pungency.

Start With Doenjang-Jjigae

If this is your first jar, go straight to a simple stew.

Dissolve two tablespoons into anchovy broth, add tofu and zucchini, and simmer for fifteen minutes - that single dish shows you what doenjang does at its best.

From there, thin spoonfuls into marinades or dressings to explore its range.

People who cook regularly with alternatives to miso paste often find doenjang is the more grounding, rugged option once they try it side by side.

Golden Rule
Taste doenjang before you cook with it. Saltiness varies significantly between brands and ages - your broth may need no added salt at all.

Frequently Asked Questions

How is doenjang different from miso?

Doenjang is earthier, chunkier, and more pungent than most miso. Miso typically ferments with added koji mold and often contains rice or barley, giving it a cleaner, sometimes slightly sweet flavor. Doenjang ferments from meju - pure soybean blocks - producing a rawer, more barnyard-forward result.

Can you substitute miso for doenjang?

Yes, with caveats. Miso works as a structural substitute in soups and marinades but delivers a milder, less earthy result. Use a darker miso variety like red or hatcho for the closest flavor match, and consider the guide on alternatives to gochujang if your recipe also calls for that paste.

What does doenjang taste like in soups?

Heat mellows its sharpest edges, producing a deep, savory broth with earthy undertones and no single aggressive note. The fermented tang softens significantly, leaving behind layered umami that tastes slow-cooked even in a quick stew.

Is doenjang vegan?

The paste itself is vegan - soybeans, salt, and water. However, traditional doenjang-jjigae broth uses dried anchovies or shrimp. Substitute kombu and dried shiitake broth for a fully plant-based version without losing much depth.

How do you reduce the saltiness of doenjang in a dish?

Add more unsalted broth or water to dilute the paste, and introduce starchy vegetables like potato or daikon, which absorb salt as they cook. Rinsing the paste itself is not recommended - it strips flavor along with sodium.

Pork Belly Adobo

March 29, 2026

You need 90 minutes from start to finish. No marinating overnight, no multi-hour braises-just pork belly, soy sauce, vinegar, and a pot that simmers while you handle everything else.

Pork Belly Adobo served on a plate

The braising liquid does the heavy lifting. Vinegar tenderizes the meat while soy sauce builds that dark, glossy finish Filipino adobo is known for.

This works for weeknight dinners when you want something that tastes slow-cooked but doesn't require all-day supervision. The pork comes out tender enough to pull apart with a fork, with edges that crisp slightly when you reduce the sauce at the end.

QUICK SUMMARY

Pork Belly Adobo simmers pork belly in soy sauce, vinegar, garlic, and bay leaves until tender. Searing the pork first locks in flavor, and a 60-75 minute simmer breaks down the fat without drying out the meat. The result is glossy, fork-tender pork with a tangy-salty sauce perfect for rice.

⏱️Time Reality: 90 minutes total-15 minutes prep, 75 minutes mostly hands-off simmering
🔥Critical First Step: Sear pork belly chunks until golden before adding liquid to build depth
⚠️Watch Out: Don't skip marinating-at least 30 minutes prevents bland, one-note flavor

Table of Contents

Toggle
  • Why This Recipe Works
  • What You'll Need
    • Ingredient Details
  • Ingredient Swaps
  • What to Serve With It
  • Store and Reheat
  • Frequently Asked Questions
  • Pork Belly Adobo
    • Method 
    • Tried this recipe?

Why This Recipe Works

Pork belly holds up to long simmering without falling apart. The fat renders slowly, keeping the meat moist while the vinegar tenderizes tough fibers, and searing before braising builds a base layer of caramelization that plain boiled pork lacks-if you want richness that tastes earned, not faked, try a quick pork dish that balances fat and acid from the start.

Quick Reference
⏱️
Prep Time
15 min
🔥
Cook Time
1 hr 15 min
⏰
Total Time
1 hr 30 min
🍽️
Servings
4 servings
📊
Difficulty
Medium
🏷️
Category
Main Dish
💡
Quick Tip
Sear pork before simmer for better flavor
🎯
Best For
Weeknight | Meal prep | Family dinner

Five things that make this work:

  • Pork belly stays juicy through long cooking - fat content prevents drying even after 75 minutes of simmering
  • Vinegar tenderizes without a marinade - acid breaks down connective tissue during the braise, so meat turns fork-tender
  • Searing builds fond before liquid goes in - browned bits on the pot bottom dissolve into the sauce for deeper flavor
  • Low simmer prevents tough, rubbery texture - gentle heat renders fat slowly without seizing up the proteins
  • Reducing the sauce at the end concentrates flavor - uncovered simmering in the last 15 minutes thickens the glaze naturally
Quick Tip
Cut pork belly into 1.5-inch cubes-smaller pieces fall apart, larger ones take too long to cook through evenly.

What You'll Need

Ingredients for Pork Belly Adobo

Stock your pantry with soy sauce, vinegar, garlic, and bay leaves. Most Filipino kitchens keep these on hand year-round, and the pork belly is the only thing you'll need to pick up fresh-everything else likely sits in your cabinet already.

🥓
Protein
  • Pork belly (skin-on, 1.5-2 lbs)
🧄
Aromatics
  • Garlic (6-8 cloves, smashed)
  • Onion (1 medium, sliced)
  • Bay leaves (3-4 leaves)
🥢
Braising Liquid
  • Soy sauce (½ cup)
  • Vinegar (¼ cup white or cane)
  • Water (½ cup)
  • Sugar (1 tbsp, optional)
🌶️
Spices
  • Black peppercorns (1 teaspoon whole)
  • Oil (1 tablespoon for searing)

Ingredient Details

  • Pork belly
    Skin-on works best-it renders fat slowly and adds body to the sauce; boneless belly cooks faster but lacks depth
  • Soy sauce
    Use regular soy sauce, not low-sodium-adobo needs the salt to balance vinegar's sharpness
  • Vinegar
    White vinegar or cane vinegar gives the sharpest tang; apple cider vinegar softens the edge but changes the flavor profile
  • Garlic
    Smash cloves with the side of a knife-more surface area equals faster flavor release into the braising liquid
  • Bay leaves
    Dried bay leaves work fine; fresh ones add more herbal punch but aren't necessary for solid results
  • Black peppercorns
    Whole peppercorns infuse heat slowly; ground pepper turns muddy and bitter during long simmering
  • Water
    Use just enough to cover the pork-too much dilutes the sauce and takes longer to reduce at the end

Ingredient Swaps

Pork belly anchors this recipe, but leaner cuts work when you adjust cooking time. The vinegar-soy balance shifts slightly with each swap, so taste and tweak before you serve.

  • Pork belly → pork shoulder - leaner texture, add 15-20 minutes simmering time, less fatty richness
  • Soy sauce → tamari - gluten-free option, slightly less salty so you may need extra
  • White vinegar → apple cider vinegar - milder tang, fruitier finish, works if you prefer less sharpness
  • Sugar → brown sugar or omit entirely - brown adds caramel notes, skipping it makes the sauce more savory

Pork Shoulder

Works for: Budget cooking, meal prep in bulk, less fat overall

Skip if: You want the silky richness pork belly fat provides

Apple Cider Vinegar

Works for: Milder acidity, fruity undertones, kid-friendly versions

Skip if: You want sharp, classic Filipino adobo tang

Instructions

Cut the pork, marinate it for 30 minutes, then sear and simmer. The entire process takes 90 minutes, but only 15 require active work-the rest happens on the stove while you prep rice or clean up.

  1. Cut and marinate the pork. Slice pork belly into 1.5-inch cubes. Toss with soy sauce, vinegar, smashed garlic, bay leaves, and peppercorns in a bowl. Let sit 30 minutes at room temperature.

  2. Sear the pork belly. Heat oil in a heavy-bottom pot or Dutch oven over medium-high. Remove pork from marinade (save the liquid), then sear pieces 3-4 minutes per side until golden and caramelized.

  3. Add the braising liquid. Pour reserved marinade, onion, water, and sugar into the pot. Bring to a boil, then reduce heat to low. Cover and simmer 60-75 minutes, stirring every 20 minutes, until pork pierces easily with a fork.

  4. Reduce the sauce. Remove the lid, increase heat to medium, and simmer 10-15 minutes until sauce thickens and coats the back of a spoon. The pork edges will crisp slightly as liquid reduces.

  5. Rest before serving. Turn off heat and let pork sit in the pot 10 minutes. The sauce thickens further as it cools, and flavors settle into the meat.

Watch Out
Don't add garlic too early-toss it in with the marinade, not during the initial sear, or it burns and turns bitter before the pork even finishes browning.

What to Serve With It

Adobo works on its own with rice, but sides that cut through fat make the meal feel complete. Most people default to plain steamed rice, which works, but planning your complete pork braciole meal ideas means balancing richness with something crisp, tangy, or light enough to reset your palate between bites.

Side Dish Prep Why It Works How to Serve
Steamed jasmine rice Easy Absorbs sauce without competing with flavor Serve warm, spoon adobo sauce over rice
Sautéed greens (bok choy, spinach) Easy Balances richness with freshness and crunch Toss with garlic, serve on the side
Pickled vegetables (atchara) Medium Adds acidic crunch that cuts through fat Serve cold in a small bowl as a condiment
Fried egg Easy Yolk mixes with sauce for extra richness Fry sunny-side up, place on top of rice
Garlic fried rice Easy Adds toasted garlic flavor that complements pork Use day-old rice, fry with garlic until crispy

Three ways to serve it:

  • For weeknight meals: Steamed rice, sautéed bok choy, fried egg on top-fast, filling, balanced
  • For meal prep: Portion pork with rice in containers, reheat with pickled vegetables on the side
  • For family dinner: Garlic fried rice, crispy lumpia, fresh tomato-cucumber salad for contrast
Best Pick
Pickled vegetables cut through the fat better than anything else-make a batch on Sunday and keep it in the fridge all week.

Store and Reheat

Adobo holds up better than most braises when you reheat it. The sauce thickens as it cools, and flavors deepen overnight, so day-two adobo often tastes better than fresh-cooked.

Method Time Best For
🍳 Stovetop 5-7 min on medium-low Even reheating, restores sauce texture without drying pork
📦 Microwave 2-3 min on high, stir halfway Quick reheating, less texture control but fast
🔥 Oven 10-15 min at 325°F Larger portions, retains texture, good for meal prep containers

For best results when storing:

  • Cool adobo completely before refrigerating - hot food raises fridge temperature and creates condensation that dilutes the sauce
  • Store in shallow, airtight containers - speeds cooling, prevents bacterial growth, keeps sauce from separating
  • Reheat gently with a splash of water - restores sauce consistency if it thickened too much overnight
  • Freeze in single-meal portions - thaws faster, reduces waste, works for up to 2 months without losing texture
  • Skim excess fat before reheating - solidified fat on top is easy to remove cold, improves flavor balance when reheated

Frequently Asked Questions

Can I make pork belly adobo ahead and reheat?

Yes, adobo tastes better the next day. Store it in the fridge for up to 4 days and reheat gently on the stovetop with a splash of water to loosen the sauce.

How long should I simmer pork belly for tender results?

Simmer for 60-75 minutes on low heat. The pork should pierce easily with a fork and pull apart without resistance when it's done.

What are the best side dishes to serve with pork belly adobo?

Steamed jasmine rice, sautéed greens, pickled vegetables, or a fried egg all work. Anything that cuts through the richness or soaks up the sauce balances the plate.

Can I use chicken or other meats instead of pork belly?

Yes, chicken thighs or pork shoulder work. Reduce cooking time to 30-40 minutes for chicken, or add 15-20 minutes for leaner pork shoulder to tenderize properly.

Why is my adobo sauce too sour or bland and how to fix it?

Too sour means too much vinegar-add a teaspoon of sugar and simmer a few more minutes. Bland flavor usually means not enough marinating or unbalanced soy-to-vinegar ratio-taste and adjust before serving.

Pork Belly Adobo served on a plate

Pork Belly Adobo

No ratings yet
Pork Belly Adobo simmers pork belly in a flavorful mix of soy sauce, vinegar, garlic, and bay leaves until tender. Searing the pork first locks in flavor, and a slow 75-minute simmer tenderizes the meat while developing a rich, glossy sauce perfect for rice.
Print Recipe Pin Recipe
Prep Time 15 minutes mins
Cook Time 1 hour hr 15 minutes mins
Total Time 1 hour hr 30 minutes mins
Servings: 4 servings
Course: Main Dish
Cuisine: Filipino
Ingredients Equipment Method Notes

Ingredients
  

  • 1.5 lbs pork belly skin-on, cut into 1.5-inch cubes
  • 0.5 cup soy sauce
  • 0.25 cup vinegar white or cane vinegar
  • 6 cloves garlic smashed
  • 3 bay leaves
  • 1 medium onion sliced
  • 0.5 cup water
  • 1 tablespoon sugar optional
  • 1 tablespoon oil for searing
  • 1 teaspoon black peppercorns whole

Equipment

  • Heavy-bottom pot or Dutch oven Used for searing and simmering the pork belly

Method
 

  1. Slice pork belly into 1.5-inch cubes. Toss with soy sauce, vinegar, smashed garlic, bay leaves, and whole black peppercorns in a bowl. Let sit at room temperature for 30 minutes.
    1.5 lbs pork belly, 0.5 cup soy sauce, 0.25 cup vinegar, 6 cloves garlic, 3 bay leaves, 1 tsp black peppercorns
  2. Heat oil in a heavy-bottom pot or Dutch oven over medium-high heat. Remove pork from marinade (reserve the liquid). Sear pork pieces 3-4 minutes per side until golden and caramelized.
    1 tbsp oil, 1.5 lbs pork belly
  3. Pour the reserved marinade, sliced onion, water, and sugar into the pot. Bring to a boil, then reduce heat to low. Cover and simmer for 60-75 minutes, stirring every 20 minutes, until pork is fork-tender.
    0.5 cup soy sauce, 0.25 cup vinegar, 1 medium onion, 0.5 cup water, 1 tbsp sugar
  4. Remove the lid and increase heat to medium. Simmer uncovered for 10-15 minutes until the sauce thickens and coats the back of a spoon and pork edges crisp slightly.
  5. Turn off heat and let pork rest in the pot for 10 minutes to allow the sauce to thicken further and the flavors to settle.

Notes

  • Use skin-on pork belly for best fat rendering and sauce body.
  • Reserve marinade for braising to build deep flavor and avoid waste.
  • Do not add garlic during searing to prevent bitterness; include it only in the marinade.

Tried this recipe?

Let us know how it was!

What Is Corn Syrup? Taste, Uses & More Explained

March 29, 2026

Corn syrup pours slowly - thick, clear, and faintly sweet before it even hits your tongue.

What Is Corn Syrup

That glossy viscosity is the whole point: this liquid sweetener doesn't just add sugar, it changes the physical structure of whatever it enters.

Bakers reach for it when they need a frosting that won't crust over or a candy that won't turn grainy.

If you've ever looked for alternatives to maple syrup or weighed swapping out agave nectar, you've already circled the question of what corn syrup actually does that other sweeteners can't.

QUICK SUMMARY

Corn syrup is a thick glucose-based liquid sweetener made from corn starch. It tastes clean and mildly sweet, with dark varieties adding molasses depth. Home bakers use it to prevent crystallization, add shine to glazes, and stabilize frostings and candies.

🌽What It Is: Glucose syrup processed from corn starch via enzymes
🍬Flavor: Clean, neutral sweet; dark version has mild molasses notes
🥧Best Uses: Pecan pie, fudge, nougat, glazes, and stable frostings
📦Shelf Life: Up to 2 years unopened; 6-12 months once opened
🛒Buy It As: Light or dark corn syrup in squeeze bottles at most grocery stores

What Is Corn Syrup?

Corn syrup is a liquid sweetener derived from corn starch, produced by breaking that starch down into glucose using enzymes - specifically alpha-amylase and glucoamylase.

It originated in the American Midwest, where corn belt agriculture made starch-based processing cheap and scalable.

The result is a thick, glossy syrup that functions primarily as glucose syrup in both home kitchens and industrial food production. You'll see it labeled several ways:

  • 🌽 Light corn syrup - clear, mildly sweet, the standard home-baking version
  • 🍯 Dark corn syrup - blended with molasses, darker in color, deeper in flavor
  • ⚗️ High-fructose corn syrup (HFCS) - further processed to convert glucose into fructose; used almost exclusively in commercial food manufacturing
  • 🏷️ Glucose syrup - the international equivalent, often used in confectionery and candy making

HFCS is a distinct product - sweeter and chemically different - not a direct substitute for the bottled corn syrup on grocery shelves.

What Does Corn Syrup Taste Like?

corn syrup - What Is Corn Syrup

Light corn syrup tastes clean and straightforwardly sweet, with almost no background flavor to compete with other ingredients. It's comparable to simple syrup or a very lightly flavored honey - sweet, smooth, and neutral.

Sensory SnapshotModerate Intensity
👅 Flavor
clean sweetglucose-forwardmild molasses (dark)
✋ Texture
thickglossyviscous
👃 Aroma
faint sweetlight caramel

Dark corn syrup is a different experience. The added molasses pulls flavor toward something richer - lightly bitter at the edges, with a faint mineral warmth. Heated corn syrup develops a subtle caramel note, though it never reaches the complexity of true caramel made from granulated sugar.

Golden Rule
Use light corn syrup when you want sweetness without flavor intrusion. Switch to dark when you want molasses depth without the sharp bitterness of pure molasses.

How to Use Corn Syrup

Corn syrup earns its place through function, not flavor. Its main job is controlling sugar behavior - and it does that in several distinct ways depending on the application.

How Corn Syrup Is Used
MethodBest ForTip
🥄 DissolvedBatters, syrups, beveragesMeasure by weight when precision matters - it sticks to cups
🔥 HeatedCandy tempering, caramel-style sauces, fudgeHeat gently and stir early; it scorches faster than granulated sugar
✨ BrushedPie crusts, pastry glazes, baked goodsThin with a drop of warm water for easier brushing
🍦 FoldedFrostings, icings, fondant, nougatAdd gradually - too much makes frostings heavy and over-glossy

Classic American confectionery is where corn syrup appears most often. Pecan pie is the textbook example -

the filling relies entirely on corn syrup's ability to set into a smooth, sliceable layer without crystallizing, and a pecan pie southern-style recipe shows how central that syrup texture is to the final structure.

Beyond pies, it appears in fudge and nougat (where it keeps candies chewy rather than grainy), barbecue glazes (where a neutral sweetener won't compete with smoke and spice), and commercial pie fillings.

It pairs naturally with butter for shiny glazes, with vanilla and warm spices like cinnamon and nutmeg, and with nuts, citrus zest, and chocolate.

Where it doesn't belong: creamed butter-sugar cake batters that depend on granulated sugar's sharp crystals for aeration, or yeast doughs where honey or table sugar gives more predictable fermentation results.

If you're short on corn syrup entirely, a look at alternatives to corn syrup will show which swaps hold up structurally.

Try It In
🌹Indian Gulab Jamun Rose Syrup BallsCorn syrup adds gloss and prevents the sugar syrup from crystallizing→

How to Buy and Store Corn Syrup

At the grocery store, look for light corn syrup in a sealed plastic squeeze bottle - the pour spout design minimizes drips and reduces surface crystallization around the cap.

Choose dark corn syrup only when the recipe specifies it; the molasses flavor is noticeable and not always welcome.

Watch Out
Don't confuse standard dark corn syrup with high-fructose corn syrup. HFCS is an industrial ingredient not sold in home-kitchen bottles - if the label says "dark corn syrup," it's the molasses-blended variety.

Store bottles upright in a cool, dark pantry, cap tightly closed.

Unlike granulated sugar, whose longevity is covered in our guide to sugar's shelf life, corn syrup is more sensitive to heat and air exposure - both accelerate surface crystallization.

For everything you need to know about keeping corn syrup fresh, the shelf life details are worth reviewing before a big baking project.

Unopened bottles last up to two years. Once opened, plan to use the bottle within six to twelve months for best quality.

Start With Light, Add Dark Later

If you're new to corn syrup, buy light first. It's the more neutral option, and it handles the widest range of recipes - from pie glazes to candy work - without adding flavor you didn't intend.

Reach for dark corn syrup once you know a recipe specifically needs that molasses warmth.

And if a recipe calls for something adjacent - like molasses itself - knowing the molasses swaps that work helps you navigate what's interchangeable and what isn't.

Frequently Asked Questions

What is corn syrup made of?

It's made from corn starch broken down by enzymes into glucose. The process uses alpha-amylase to liquefy the starch, then glucoamylase to convert it into simple sugars. The result is filtered and concentrated into syrup.

Is corn syrup the same as high-fructose corn syrup?

No. Standard corn syrup is primarily glucose; HFCS undergoes additional processing to convert some of that glucose into fructose, making it sweeter. HFCS is an industrial ingredient and is not sold in home-kitchen bottles.

Does corn syrup taste like sugar?

Light corn syrup tastes sweet but less sharp than granulated sugar - closer to simple syrup. It lacks the slight edge that sucrose has, which is why it adds sweetness without changing the flavor profile of a recipe.

Can you substitute corn syrup with honey?

Yes, in a 1:1 ratio for most baking, but honey adds its own flavor and can make baked goods brown faster. It also doesn't prevent crystallization as effectively in candy work, so results may vary in fudge or nougat.

What does dark corn syrup taste like?

Dark corn syrup tastes like a mild, sweetened molasses - less bitter and sharp than pure molasses, but with a noticeable caramel-brown warmth. It works well in recipes that call for depth alongside sweetness, like barbecue glazes or dark baked goods.

Chicken Katsu Japanese-Style

March 29, 2026

Breaded chicken that stays crispy sounds simple until yours turns out soggy or dry. The secret is panko breadcrumbs instead of regular crumbs and frying at exactly 350°F to set the crust before the meat overcooks.

Chicken Katsu Japanese-Style served on a plate

High heat seals the coating while the chicken stays juicy inside. You get a golden, crunchy shell that doesn't fall apart when you cut into it.

Make this on weeknights when you want something better than takeout but don't have time for complicated recipes.

QUICK SUMMARY

Chicken Katsu uses panko breadcrumbs and a simple three-step dredging process to create a crispy, golden crust. Pounding the chicken to even thickness ensures it cooks through without drying out. Fry at 350°F for 3-4 minutes per side and rest on a wire rack to keep the coating crisp.

⏱️Time Reality: 25 minutes start to finish - 15 minutes prep, 10 minutes frying
🔥Critical First Move: Pound chicken to ½ inch thickness before breading for even cooking
⚠️Watch Out: Wet chicken makes soggy breading - pat completely dry before dredging

Table of Contents

Toggle
  • Why This Recipe Works
  • What You'll Need
    • Ingredient Details
  • Ingredient Swaps
  • What to Serve With It
  • Store and Reheat
  • Frequently Asked Questions
  • Chicken Katsu Japanese-Style
    • Method 
    • Tried this recipe?

Why This Recipe Works

Panko creates a lighter, crunchier crust than regular breadcrumbs because the flakes are larger and irregularly shaped. For a version that comes together quickly, this quick chicken dish uses similar frying techniques with a sweet-savory glaze.

Quick Reference
⏱️
Prep Time
15 min
🔥
Cook Time
10 min
⏰
Total Time
25 min
🍽️
Servings
4 servings
📊
Difficulty
Easy
🏷️
Category
Main Dish
💡
Quick Tip
Use room-temp chicken for even cooking
🎯
Best For
Weeknight | Meal prep

Five things that make this work:

  • Pounding to even thickness - Half-inch pieces cook through in the same time without dry edges
  • Oil temperature at 350°F - Hot enough to crisp the panko but not so hot it burns before the chicken is done
  • Three-step dredging - Flour, egg, panko creates layers that stick and crunch
  • Resting on a wire rack - Air circulation keeps the bottom crisp instead of steaming against the plate
  • Neutral high-heat oil - Vegetable or canola oil has a 400°F smoke point and won't flavor the crust
Quick Tip
Press panko lightly onto the egg-coated chicken to avoid clumps that fall off during frying

What You'll Need

Ingredients for Chicken Katsu Japanese-Style

The dredging station takes three shallow bowls and the ingredients you already have. A dollop of aioli takes each bite somewhere more interesting - classic aioli dish works especially well with the crispy coating.

🍗
Protein
  • 1.5 lbs boneless chicken thighs or breasts
🫙
Breading
  • ½ cup all-purpose flour
  • 2 large eggs
  • 1.5 cups panko breadcrumbs
🌶️
Seasonings
  • 1 teaspoon salt
  • ½ teaspoon black pepper
🥢
For Cooking & Serving
  • 1 cup vegetable oil (for frying)
  • Tonkatsu sauce (for serving)
  • Shredded cabbage (optional)
  • Lemon wedges (optional)

Ingredient Details

  • Boneless chicken thighs or breasts
    Thighs stay juicier but breasts work if you watch the timing closely - both need pounding to ½ inch
  • Panko breadcrumbs
    Japanese-style panko is coarser and flakier than regular breadcrumbs - the texture makes all the difference
  • All-purpose flour
    Creates the first layer that helps egg stick - rice flour works for gluten-free but the crust won't be as crisp
  • Eggs
    Beat until uniform so the panko coats evenly - streaky eggs leave bare spots
  • Vegetable oil
    Canola or sunflower oil also work - anything with a 400°F smoke point that won't add flavor
  • Tonkatsu sauce
    Sweet-savory sauce similar to Worcestershire - you can fake it with ketchup and soy sauce if needed
  • Shredded cabbage
    Traditional side that adds crunch and cuts through the richness - slice thin for best texture

Ingredient Swaps

You can adjust this for dietary needs or what's in your pantry. Most people skip aioli, but it balances the meal - for a version that comes together quickly, classic aioli dish adds creamy heat that pairs with the crispy coating.

Four swaps that work:

  • Chicken breasts instead of thighs - Leaner but prone to drying out if you overcook by even a minute
  • Rice flour for all-purpose flour - Makes it gluten-free but the crust won't be quite as crisp
  • Crushed cornflakes for panko - Crunchier texture with a slightly sweet flavor that some people prefer
  • Air fryer instead of deep frying - Spray with oil and cook at 400°F for 10-12 minutes, flipping halfway

Chicken Thighs

Works for: Juicier meat that forgives slight overcooking

Skip if: You want the leanest option

Chicken Breasts

Works for: Lower fat and faster cooking time

Skip if: You tend to overcook chicken - these dry out fast

Deep Frying

Works for: Crispiest crust with even golden color

Skip if: You're avoiding extra oil

Air Frying

Works for: Less oil and easier cleanup

Skip if: You want restaurant-level crispy coating

Instructions

The entire process takes 25 minutes from raw chicken to crispy cutlet. The cake works best when it hits the table at the same time as the main - easy cake side adds a light, slightly sweet finish to the meal.

  1. Pound and season the chicken - Place chicken between plastic wrap and pound with a meat mallet or rolling pin to ½ inch thickness. Season both sides with salt and pepper.
  2. Set up the dredging station - Put flour in one shallow bowl, beat eggs in a second bowl, and spread panko in a third bowl. Line them up in that order.
  3. Coat the chicken - Dredge each piece in flour, shake off excess, dip in egg to coat completely, then press into panko on both sides. Press lightly so the breadcrumbs stick.
  4. Fry at 350°F - Heat ½ inch of oil in a deep skillet over medium-high heat until it reaches 350°F on a thermometer. Fry chicken 3-4 minutes per side until golden brown and internal temp hits 165°F. Don't crowd the pan - fry 2 pieces max at once.
  5. Rest on a wire rack - Transfer cooked chicken to a wire rack set over a baking sheet. Let rest 5 minutes so steam escapes and the crust stays crisp. Slice and serve with tonkatsu sauce.
Watch Out
Oil that's too cool makes greasy, soggy coating - use a thermometer and wait for 350°F before adding chicken

What to Serve With It

Fried chicken needs something fresh and crunchy to cut through the richness. Rich mains need something to cut through, and salad does exactly that - homemade salad recipe adds a light, tangy contrast.

Side Dish Prep Why It Works How to Serve
Steamed white rice Easy Neutral base that soaks up tonkatsu sauce Serve hot with sauce drizzled over rice
Shredded cabbage salad Easy Crunchy, fresh contrast to fried coating Toss with rice vinegar and sesame oil
Miso soup Easy Warm, savory balance for comfort meal Serve in small bowls on the side
Pickled daikon Medium Tangy palate cleanser between bites Serve in small dish as condiment
Japanese potato salad Medium Creamy texture pairs with crispy chicken Serve cold in small portion alongside

Three ways to serve it:

  • Traditional plate - Sliced katsu over rice with shredded cabbage and tonkatsu sauce drizzled on top
  • Katsu sandwich - Tuck cutlet into soft white bread with cabbage and Japanese mayo
  • Curry bowl - Serve over rice with Japanese curry sauce instead of tonkatsu sauce
Best Pick
Serve with lemon wedges on the side - the citrus brightens the fried coating and cuts through richness

Store and Reheat

Katsu loses crispness in the fridge but reheats better than most fried foods if you use the oven. Store in an airtight container with paper towels underneath to absorb moisture for 3-4 days.

Method Time Best For
🔥 Oven 10 min at 400°F Restoring crisp crust - best overall method
🍳 Stovetop 3-4 min per side Quick crisp in skillet with small amount of oil
📦 Microwave 1-2 min Fast heat but coating turns soft and chewy

For best results when storing:

  • Place paper towels under chicken - Absorbs moisture so the breading doesn't get soggy in the container
  • Store in shallow container - Deep containers trap steam and make coating soft
  • Reheat in oven, not microwave - 400°F for 10 minutes brings back most of the crisp
  • Freeze for up to 1 month - Wrap individually in plastic then foil before freezing
  • Slice after reheating, not before - Whole pieces retain moisture better than sliced chicken

Frequently Asked Questions

Can I use chicken breast instead of thighs for Chicken Katsu?

Yes, but watch the timing closely because breasts dry out faster than thighs. Pound to ½ inch thickness and pull them at exactly 165°F internal temp.

How should I store and reheat leftover Chicken Katsu?

Store in an airtight container with paper towels underneath for 3-4 days. Reheat in a 400°F oven for 10 minutes to restore most of the crisp - microwaving makes the coating soft.

What is the best way to tell when Chicken Katsu is fully cooked?

Use an instant-read thermometer to check for 165°F in the thickest part. The coating should be golden brown with no pink meat visible when you cut into it.

How do I prevent the breading from falling off during frying?

Pat chicken completely dry before dredging and don't skip the flour step - it helps egg stick. Press panko lightly onto the egg-coated chicken and let it sit 5 minutes before frying.

What sides or sauces traditionally accompany Chicken Katsu?

Tonkatsu sauce is the traditional dipping sauce - it's sweet and tangy. Serve with steamed rice, shredded cabbage, and miso soup for a complete meal.

Chicken Katsu Japanese-Style served on a plate

Chicken Katsu Japanese-Style

No ratings yet
Chicken Katsu features panko breadcrumbs and a three-step dredging process to create a crispy golden crust. Pounding the chicken to an even ½ inch thickness ensures juicy, evenly cooked meat. Frying at 350°F for 3-4 minutes per side produces a crunchy, non-soggy coating.
Print Recipe Pin Recipe
Prep Time 15 minutes mins
Cook Time 10 minutes mins
Total Time 25 minutes mins
Servings: 4 servings
Course: Main Dish
Cuisine: Japanese
Ingredients Equipment Method Notes

Ingredients
  

  • 1.5 lbs chicken thighs or breasts boneless, pounded to ½ inch thickness
  • 0.5 cup all-purpose flour for dredging
  • 2 large eggs beaten
  • 1.5 cups panko breadcrumbs
  • 1 teaspoon salt for seasoning chicken
  • 0.5 teaspoon black pepper for seasoning chicken
  • 1 cup vegetable oil for frying
  • tonkatsu sauce for serving
  • shredded cabbage optional, for serving
  • lemon wedges optional, for serving

Equipment

  • Meat mallet or rolling pin used to pound chicken to even thickness
  • Three shallow bowls for dredging station: flour, egg, panko
  • deep skillet for frying chicken in oil
  • Instant-read thermometer to check oil and chicken temperature
  • Wire rack to rest chicken and keep crust crisp

Method
 

  1. Place chicken between plastic wrap and pound with a meat mallet or rolling pin to ½ inch thickness. Season both sides with salt and pepper.
    1.5 lbs chicken thighs or breasts, 1 tsp salt, 0.5 tsp black pepper
  2. Put flour in one shallow bowl, beat eggs in a second bowl, and spread panko in a third bowl. Line them up in that order.
    0.5 cup all-purpose flour, 2 large eggs, 1.5 cups panko breadcrumbs
  3. Dredge each piece in flour, shake off excess, dip in egg to coat completely, then press into panko on both sides. Press lightly so the breadcrumbs stick.
    0.5 cup all-purpose flour, 2 large eggs, 1.5 cups panko breadcrumbs
  4. Heat ½ inch of vegetable oil in a deep skillet over medium-high heat until it reaches 350°F on a thermometer. Fry chicken 3-4 minutes per side until golden brown and internal temperature hits 165°F. Fry 2 pieces max at once to avoid crowding.
    1 cup vegetable oil, 1.5 lbs chicken thighs or breasts
  5. Transfer cooked chicken to a wire rack set over a baking sheet. Let rest 5 minutes so steam escapes and the crust stays crisp. Slice and serve with tonkatsu sauce.
    tonkatsu sauce

Notes

  • Press panko lightly onto chicken to avoid clumps falling off during frying.
  • Pat chicken completely dry before dredging to prevent soggy breading.
  • Use a thermometer to maintain oil temperature at 350°F for crisp crust.

Tried this recipe?

Let us know how it was!

What Is Corn Flour? [Taste, Uses & More]

March 29, 2026

Fine, dry, and faintly gold, corn flour carries the smell of a warm tortilla press before you've added a drop of fat. It's one of those pantry ingredients that signals a dish will taste like real corn - not artificial corn flavoring - before anything hits the heat.

What Is Corn Flour

Understanding what makes it distinct from cornstarch or masa harina saves you from reaching for the wrong bag at the worst moment.

QUICK SUMMARY

Corn flour is finely milled whole dried corn, ground to a soft, powdery texture. It delivers a mild, grainy-sweet corn flavor that deepens when cooked. Use it for cornbread, coatings, flatbreads, and thickening - not as a direct swap for cornstarch or wheat flour.

🌽Flavor: Mildly sweet, grainy-corn, toasty with heat applied
🧁Best Uses: Cornbread, coatings, flatbreads, stew thickening
🌡️Intensity: Moderate - noticeable corn flavor, not neutral
📦Shelf Life: 6-12 months unopened; 3-6 months once opened
✅Dietary: Naturally gluten-free from pure corn; check labels for cross-contamination risk

What Is Corn Flour?

Corn flour is made by milling whole dried corn kernels - including the germ, endosperm, and bran - into a fine, smooth powder.

That whole-kernel composition is what separates it from cornstarch, which is pure extracted starch with no bran or germ, and from coarser cornmeal, which is ground to a much coarser consistency.

You'll find it sold under several names depending on where you shop. In the UK, "cornflour" almost always means cornstarch - a persistent source of confusion for bakers working across recipes from different regions.

  • Corn flour / maize flour - finely milled whole corn, pale yellow or white
  • Cornmeal - same source grain, coarser grind, more gritty texture
  • Cornstarch - pure starch only, no fiber or germ, neutral in flavor
  • Masa harina - nixtamalized corn flour, chemically distinct, not a substitute

Nixtamalization - the process of soaking corn in an alkaline solution - changes corn's flavor and nutritional profile so significantly that masa harina and corn flour behave like different ingredients in a recipe. Don't swap them without knowing the consequence.

What Does Corn Flour Taste Like?

corn flour - What Is Corn Flour
Sensory SnapshotModerate Intensity
👅 Flavor
mildly sweetgrainy-corntoasty
✋ Texture
fine and powderytender crumb when baked
👃 Aroma
fresh cornwarm toasted notes

Raw corn flour smells like dried field corn - clean, slightly starchy, faintly grassy. That changes fast once heat is applied.

In a hot pan or oven, the grainy-corn note sharpens into something more toasty and rounded, closer to the outside crust of a skillet cornbread than to a fresh cob. It's less sweet than sweet corn kernels and nowhere near as neutral as wheat flour.

Think of it as sitting between the two.

Golden Rule
Corn flour's flavor is not background noise. If you add it to a recipe, the dish will taste like corn - plan for that, don't fight it.

Overworking a corn flour batter can also bring out a slightly gritty texture, particularly in flatbreads. Work the dough until just combined, then stop.

How to Use Corn Flour

Baking is where corn flour performs most consistently. Used alone or blended with wheat flour, it produces a tender, close crumb with a pronounced corn flavor - standard in cornbread, muffins, and hush puppies across the Southern United States and Caribbean.

Mixing it with wheat flour gives quick breads more structure while keeping that corn-forward character. A 50/50 blend works well for pancakes.

Going 100% corn flour in pancakes is possible - they'll be more fragile and noticeably denser.

How Corn Flour Is Used
MethodBest ForTip
🔥 BakingCornbread, muffins, hush puppies, flatbreadsBlend with wheat flour for better rise and structure
🍳 Coating & FryingFried chicken, fish, shrimp with a corn crustSeason the flour well - corn flavor needs salt to pop
🍲 ThickeningChili, stews, bean soups where corn flavor is welcomeWhisk into cold liquid first to prevent lumping
🫓 Dry DustingTortillas, griddles, pizza peelsLight hand - too much creates a raw-flour taste

Frying with corn flour produces a crispier, more golden crust than all-purpose wheat flour alone. Smoked pork, chicken thighs, and white fish all coat well. Pair the coating with buttermilk or a jalapeño brine beforehand for maximum adhesion.

For thickening, corn flour adds mild corn flavor alongside its thickening power - which means it doesn't suit delicate sauces or custards where a neutral starch is needed. Use it in chili, bean stews, or anything already built on corn or tomato.

If you need a flavor-neutral thickener, cornstarch swaps are worth reviewing first.

Corn flour pairs naturally with butter, cheddar, honey, and buttermilk in baked goods, and with tomato, smoked pork, and jalapeño in savory applications.

Try It In
🥞Besan Flour PancakesSee how a grain flour handles pancake batter — useful context for corn flour blends→

How to Buy and Store Corn Flour

Look for bags labeled "corn flour" or "maize flour" with a uniform pale yellow or white color and a soft, powdery feel through the bag. Dark specks, clumping, or a flat stale smell are signs of age or moisture exposure - skip those.

Watch Out
UK recipes that call for "cornflour" almost always mean cornstarch - not milled whole corn. Check the recipe's origin before buying.

Once opened, transfer corn flour to an airtight container immediately. Pantry storage works for 3-6 months; refrigerating or freezing extends that significantly.

For a full breakdown of how different flour storage life timelines compare, it's worth checking before you stock up. Corn flour's shelf life runs shorter than refined wheat flours because the germ - retained from the whole kernel - contains oils that go rancid over time.

Where to Start With Corn Flour

Corn flour rewards a simple entry point: skillet cornbread. One bake tells you everything about its flavor, crumb texture, and how it behaves with fat and dairy.

From there, use it as a partial replacement in pancake batters, then try it as a frying coat. If a recipe calls for it but you're short, corn flour replacements can bridge the gap without abandoning the dish.

The more you cook with it, the easier it becomes to place corn flour's distinct flavor exactly where it belongs.

Frequently Asked Questions

Is corn flour the same as cornstarch?

No. Corn flour is milled from whole dried corn kernels and retains fiber, germ, and flavor. Cornstarch is pure extracted starch - neutral in taste, with no fiber or germ. They thicken differently and are not interchangeable in most recipes.

What is the difference between cornmeal and corn flour?

Grind size. Both come from dried whole corn, but cornmeal is coarser, producing a grittier texture in baked goods. Corn flour is ground fine enough to feel powdery, giving a smoother, more tender crumb.

Is corn flour gluten-free?

Yes, pure corn flour contains no gluten. However, cross-contamination at the mill is a real risk - check for a certified gluten-free label if you're cooking for someone with celiac disease.

Can I use corn flour instead of wheat flour?

Not as a direct one-to-one swap. Corn flour has no gluten, so baked goods won't rise or hold structure the same way. Blending it with a gluten-containing or binding flour gives better results than substituting fully.

What does corn flour taste like in cornbread?

It adds a pronounced toasty corn flavor and a slightly denser, more tender crumb than wheat-only versions. The crust browns more deeply, and the interior stays moist without tasting starchy or gummy.

« Previous Page
Next Page »

Primary Sidebar

ForkliftKitchen recipe developer

Welcome!

Recipe Developer · 12+ Yr Kitchen Veteran

I'm the recipe developer behind this site, focused on practical, well-tested dishes and smart ingredient swaps. Every recipe is written to be clear, reliable, and easy to make at home.

650+ Recipes
12+ Yrs Exp.
3x Tested
Our Story →

As Featured In

Allrecipes

TASTE OF HOME

Food52

HUFFPOST

Yahoo! Life

Our Editorial Standards

  • ✓ Every recipe tested at least 3 times before publishing
  • ✓ Substitutes verified by real kitchen trials, not guesswork
  • ✓ Reviewed for accuracy by our editorial team
  • ✓ Updated regularly with seasonal info and reader feedback

Most Popular

  • Creamy Lemon Shrimp Linguine
    Creamy Lemon Shrimp Linguine
  • Creamy Garlic Mushroom Chicken
    Creamy Garlic Mushroom Chicken
  • Sesame Ginger Chicken Noodle Bowls
    Sesame Ginger Chicken Noodle Bowls
  • Baked Lemon Herb Fish Fillets
    Baked Lemon Herb Fish Fillets
  • Veggie Loaded Fried Rice
    Veggie Loaded Fried Rice
  • Spicy Garlic Shrimp Stir Fry
    Spicy Garlic Shrimp Stir Fry

Join 8,000+ Home Cooks

Weekly Kitchen Tips

Easy recipes, smart substitutes, and real cooking shortcuts — every Thursday.

Subscribe Free →


Side Dishes

  • What to Serve With Asian Salmon? 15 Best Side Dishes
    What to Serve With Asian Salmon? 15 Best Side Dishes
  • Side Dishes for Strawberry Spinach Salad
    15 Best Side Dishes for Strawberry Spinach Salad
  • Sides for Grilled Cauliflower Steaks to Complete the Meal
    15 Sides for Grilled Cauliflower Steaks to Complete the Meal
  • 15 Sides To Serve With Calabacitas
    15 Best Sides for Calabacitas – Mexican-Inspired Favorites


Substitutes

  • 7 Best Substitutes for Hot Sauce in Marinades & Stir-Fries
    7 Best Substitutes for Hot Sauce in Marinades & Stir-Fries
  • 9 Best Substitutes for Butter in Baking and Cooking
  • 7 Best Substitutes for Tagliatelle for Italian Pasta Dishes
    7 Best Substitutes for Tagliatelle for Italian Pasta Dishes
  • 7 Best Substitutes for Udon Noodles in Asian Stir-Fries
    7 Best Substitutes for Udon Noodles in Asian Stir-Fries


Browse by Topic

  • Side Dishes320
  • Substitutes785
  • Dinner163
  • Air Fryer77
  • Taste Profiles484
  • Food Storage123


Reader Reviews

★★★★★

"Finally a food blog that tells you exactly why a substitute works instead of just listing options."

— Sarah M., via email

★★★★★

"The side dish recommendations are so specific — saved my dinner party twice this month."

— James R., Pinterest comment

★★★★★

"I trust this site more than most because they actually test everything. You can tell."

— Priya K., blog comment

Footer

↑ Back to Top

Forklift Kitchen

We do the heavy lifting so you can enjoy the cooking. Tested recipes, smart substitutes, and perfect pairings—built for real home cooks.

Content

  • Recipes
  • Substitutes
  • What to Serve With
  • Blog

Company

  • About Us
  • Contact
  • Subscribe

Legal

  • Privacy Policy
  • Terms of Service

As an Amazon Associate I earn from qualifying purchases.

© 2026 Forklift Kitchen.

Rate This Recipe

Your vote:


A rating is required
A name is required
An email is required