Breaded chicken that stays crispy sounds simple until yours turns out soggy or dry. The secret is panko breadcrumbs instead of regular crumbs and frying at exactly 350°F to set the crust before the meat overcooks.

High heat seals the coating while the chicken stays juicy inside. You get a golden, crunchy shell that doesn't fall apart when you cut into it.
Make this on weeknights when you want something better than takeout but don't have time for complicated recipes.
Chicken Katsu uses panko breadcrumbs and a simple three-step dredging process to create a crispy, golden crust. Pounding the chicken to even thickness ensures it cooks through without drying out. Fry at 350°F for 3-4 minutes per side and rest on a wire rack to keep the coating crisp.
Why This Recipe Works
Panko creates a lighter, crunchier crust than regular breadcrumbs because the flakes are larger and irregularly shaped. For a version that comes together quickly, this quick chicken dish uses similar frying techniques with a sweet-savory glaze.
Remember it later
Planning to try this recipe soon? Save it for a quick find later!
Prep Time
15 min
Cook Time
10 min
Total Time
25 min
Servings
4 servings
Difficulty
Easy
Category
Main Dish
Quick Tip
Use room-temp chicken for even cooking
Best For
Weeknight | Meal prep
Five things that make this work:
- Pounding to even thickness - Half-inch pieces cook through in the same time without dry edges
- Oil temperature at 350°F - Hot enough to crisp the panko but not so hot it burns before the chicken is done
- Three-step dredging - Flour, egg, panko creates layers that stick and crunch
- Resting on a wire rack - Air circulation keeps the bottom crisp instead of steaming against the plate
- Neutral high-heat oil - Vegetable or canola oil has a 400°F smoke point and won't flavor the crust
What You'll Need
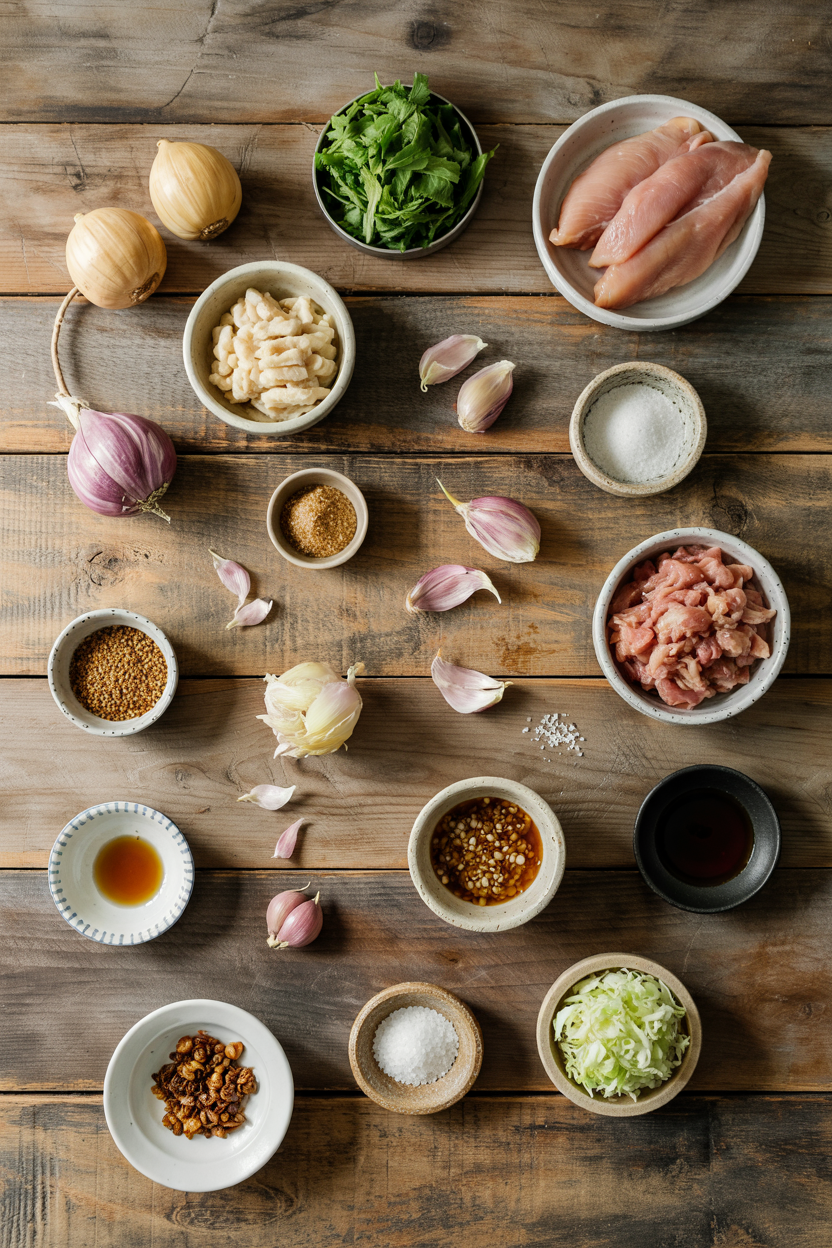
The dredging station takes three shallow bowls and the ingredients you already have. A dollop of aioli takes each bite somewhere more interesting - classic aioli dish works especially well with the crispy coating.
- 1.5 lbs boneless chicken thighs or breasts
- ½ cup all-purpose flour
- 2 large eggs
- 1.5 cups panko breadcrumbs
- 1 teaspoon salt
- ½ teaspoon black pepper
- 1 cup vegetable oil (for frying)
- Tonkatsu sauce (for serving)
- Shredded cabbage (optional)
- Lemon wedges (optional)
Ingredient Details
- Boneless chicken thighs or breasts
Thighs stay juicier but breasts work if you watch the timing closely - both need pounding to ½ inch - Panko breadcrumbs
Japanese-style panko is coarser and flakier than regular breadcrumbs - the texture makes all the difference - All-purpose flour
Creates the first layer that helps egg stick - rice flour works for gluten-free but the crust won't be as crisp - Eggs
Beat until uniform so the panko coats evenly - streaky eggs leave bare spots - Vegetable oil
Canola or sunflower oil also work - anything with a 400°F smoke point that won't add flavor - Tonkatsu sauce
Sweet-savory sauce similar to Worcestershire - you can fake it with ketchup and soy sauce if needed - Shredded cabbage
Traditional side that adds crunch and cuts through the richness - slice thin for best texture
Ingredient Swaps
You can adjust this for dietary needs or what's in your pantry. Most people skip aioli, but it balances the meal - for a version that comes together quickly, classic aioli dish adds creamy heat that pairs with the crispy coating.
Four swaps that work:
- Chicken breasts instead of thighs - Leaner but prone to drying out if you overcook by even a minute
- Rice flour for all-purpose flour - Makes it gluten-free but the crust won't be quite as crisp
- Crushed cornflakes for panko - Crunchier texture with a slightly sweet flavor that some people prefer
- Air fryer instead of deep frying - Spray with oil and cook at 400°F for 10-12 minutes, flipping halfway
Chicken Thighs
Works for: Juicier meat that forgives slight overcooking
Skip if: You want the leanest option
Chicken Breasts
Works for: Lower fat and faster cooking time
Skip if: You tend to overcook chicken - these dry out fast
Deep Frying
Works for: Crispiest crust with even golden color
Skip if: You're avoiding extra oil
Air Frying
Works for: Less oil and easier cleanup
Skip if: You want restaurant-level crispy coating
Instructions
The entire process takes 25 minutes from raw chicken to crispy cutlet. The cake works best when it hits the table at the same time as the main - easy cake side adds a light, slightly sweet finish to the meal.
- Pound and season the chicken - Place chicken between plastic wrap and pound with a meat mallet or rolling pin to ½ inch thickness. Season both sides with salt and pepper.
- Set up the dredging station - Put flour in one shallow bowl, beat eggs in a second bowl, and spread panko in a third bowl. Line them up in that order.
- Coat the chicken - Dredge each piece in flour, shake off excess, dip in egg to coat completely, then press into panko on both sides. Press lightly so the breadcrumbs stick.
- Fry at 350°F - Heat ½ inch of oil in a deep skillet over medium-high heat until it reaches 350°F on a thermometer. Fry chicken 3-4 minutes per side until golden brown and internal temp hits 165°F. Don't crowd the pan - fry 2 pieces max at once.
- Rest on a wire rack - Transfer cooked chicken to a wire rack set over a baking sheet. Let rest 5 minutes so steam escapes and the crust stays crisp. Slice and serve with tonkatsu sauce.
What to Serve With It
Fried chicken needs something fresh and crunchy to cut through the richness. Rich mains need something to cut through, and salad does exactly that - homemade salad recipe adds a light, tangy contrast.
| Side Dish | Prep | Why It Works | How to Serve |
|---|---|---|---|
| Steamed white rice | Easy | Neutral base that soaks up tonkatsu sauce | Serve hot with sauce drizzled over rice |
| Shredded cabbage salad | Easy | Crunchy, fresh contrast to fried coating | Toss with rice vinegar and sesame oil |
| Miso soup | Easy | Warm, savory balance for comfort meal | Serve in small bowls on the side |
| Pickled daikon | Medium | Tangy palate cleanser between bites | Serve in small dish as condiment |
| Japanese potato salad | Medium | Creamy texture pairs with crispy chicken | Serve cold in small portion alongside |
Three ways to serve it:
- Traditional plate - Sliced katsu over rice with shredded cabbage and tonkatsu sauce drizzled on top
- Katsu sandwich - Tuck cutlet into soft white bread with cabbage and Japanese mayo
- Curry bowl - Serve over rice with Japanese curry sauce instead of tonkatsu sauce
Store and Reheat
Katsu loses crispness in the fridge but reheats better than most fried foods if you use the oven. Store in an airtight container with paper towels underneath to absorb moisture for 3-4 days.
| Method | Time | Best For |
|---|---|---|
| 🔥 Oven | 10 min at 400°F | Restoring crisp crust - best overall method |
| 🍳 Stovetop | 3-4 min per side | Quick crisp in skillet with small amount of oil |
| 📦 Microwave | 1-2 min | Fast heat but coating turns soft and chewy |
For best results when storing:
- Place paper towels under chicken - Absorbs moisture so the breading doesn't get soggy in the container
- Store in shallow container - Deep containers trap steam and make coating soft
- Reheat in oven, not microwave - 400°F for 10 minutes brings back most of the crisp
- Freeze for up to 1 month - Wrap individually in plastic then foil before freezing
- Slice after reheating, not before - Whole pieces retain moisture better than sliced chicken
Frequently Asked Questions
Yes, but watch the timing closely because breasts dry out faster than thighs. Pound to ½ inch thickness and pull them at exactly 165°F internal temp.
Store in an airtight container with paper towels underneath for 3-4 days. Reheat in a 400°F oven for 10 minutes to restore most of the crisp - microwaving makes the coating soft.
Use an instant-read thermometer to check for 165°F in the thickest part. The coating should be golden brown with no pink meat visible when you cut into it.
Pat chicken completely dry before dredging and don't skip the flour step - it helps egg stick. Press panko lightly onto the egg-coated chicken and let it sit 5 minutes before frying.
Tonkatsu sauce is the traditional dipping sauce - it's sweet and tangy. Serve with steamed rice, shredded cabbage, and miso soup for a complete meal.
Chicken Katsu Japanese-Style
Ingredients
Equipment
Method
- Place chicken between plastic wrap and pound with a meat mallet or rolling pin to ½ inch thickness. Season both sides with salt and pepper.1.5 lbs chicken thighs or breasts, 1 tsp salt, 0.5 tsp black pepper
- Put flour in one shallow bowl, beat eggs in a second bowl, and spread panko in a third bowl. Line them up in that order.0.5 cup all-purpose flour, 2 large eggs, 1.5 cups panko breadcrumbs
- Dredge each piece in flour, shake off excess, dip in egg to coat completely, then press into panko on both sides. Press lightly so the breadcrumbs stick.0.5 cup all-purpose flour, 2 large eggs, 1.5 cups panko breadcrumbs
- Heat ½ inch of vegetable oil in a deep skillet over medium-high heat until it reaches 350°F on a thermometer. Fry chicken 3-4 minutes per side until golden brown and internal temperature hits 165°F. Fry 2 pieces max at once to avoid crowding.1 cup vegetable oil, 1.5 lbs chicken thighs or breasts
- Transfer cooked chicken to a wire rack set over a baking sheet. Let rest 5 minutes so steam escapes and the crust stays crisp. Slice and serve with tonkatsu sauce.tonkatsu sauce
Notes
- Press panko lightly onto chicken to avoid clumps falling off during frying.
- Pat chicken completely dry before dredging to prevent soggy breading.
- Use a thermometer to maintain oil temperature at 350°F for crisp crust.