• Skip to primary navigation
  • Skip to main content
  • Skip to primary sidebar
  • Recipe Index
    • Air Fryer
  • Side Dishes
  • Substitutes
  • About
  • Contact
  • Subscribe

ForkLiftKitchen

menu icon
go to homepage
  • Recipe Index
    • Air Fryer
  • Side Dishes
  • Substitutes
  • About
  • Contact
  • Subscribe
subscribe
search icon
Homepage link
  • Recipe Index
    • Air Fryer
  • Side Dishes
  • Substitutes
  • About
  • Contact
  • Subscribe
×

Blog

What Is Fleur de Sel? [Taste, Uses & More]

March 30, 2026

Fleur de sel earns its place at the finish line.

What Is Fleur De Sel

A pinch over a seared steak or a square of dark chocolate does something no ordinary salt can replicate - it adds a light crunch, a clean briny lift, and just enough mineral sweetness to make the whole dish snap into focus.

This is not a cooking salt.

It's the last thing you reach for before a plate leaves the kitchen.

QUICK SUMMARY

Fleur de sel is a hand-harvested finishing salt from the Atlantic coast of France. Its pale, moist flakes deliver a clean brine with soft mineral sweetness - best applied after cooking, never during, to preserve the texture that makes it worth the price.

🌊Flavor: Clean brine, light mineral sweetness, gentle oceanic tang
🧂Best Use: Finishing steaks, chocolate, roasted vegetables, oysters
🇫🇷Origin: Brittany and Guérande salt pans, Atlantic coast of France
📦Shelf Life: Indefinite for flavor; best texture within 1-3 years
⚠️Avoid: Baking, braises, or any dish where salt must dissolve fully into the food

What Is fleur de sel?

Fleur de sel - French for "flower of salt" - is the thin, delicate crust of crystals that forms on the surface of coastal salt pans during warm, dry, and gently windy days.

Workers skim it by hand before it can sink and mix with the coarser salt below, which is why supply is limited and prices run higher than everyday sea salt.

Most of the world's best-regarded fleur de sel comes from Brittany on France's Atlantic coast, with Guérande being the most recognized producing area.

You'll also see it labeled fleur de sel de Bretagne, and regional certifications matter - look for those origin markers on the package.

The crystals themselves are pale gray or off-white, irregularly shaped, and slightly moist to the touch. That moisture is part of what gives the salt its softer bite compared to fully dried flake salts.

  • 🌸 Also called - sea flower, French sea salt, fleur de sel de Bretagne
  • 🏷️ Category - finishing salt, hand-harvested sea salt
  • 🌍 Key regions - Guérande, Île de Ré, Noirmoutier (all Atlantic France)
  • 🔍 Versus regular sea salt - skimmed from the surface rather than raked from the bottom of the pan

What Does fleur de sel Taste Like?
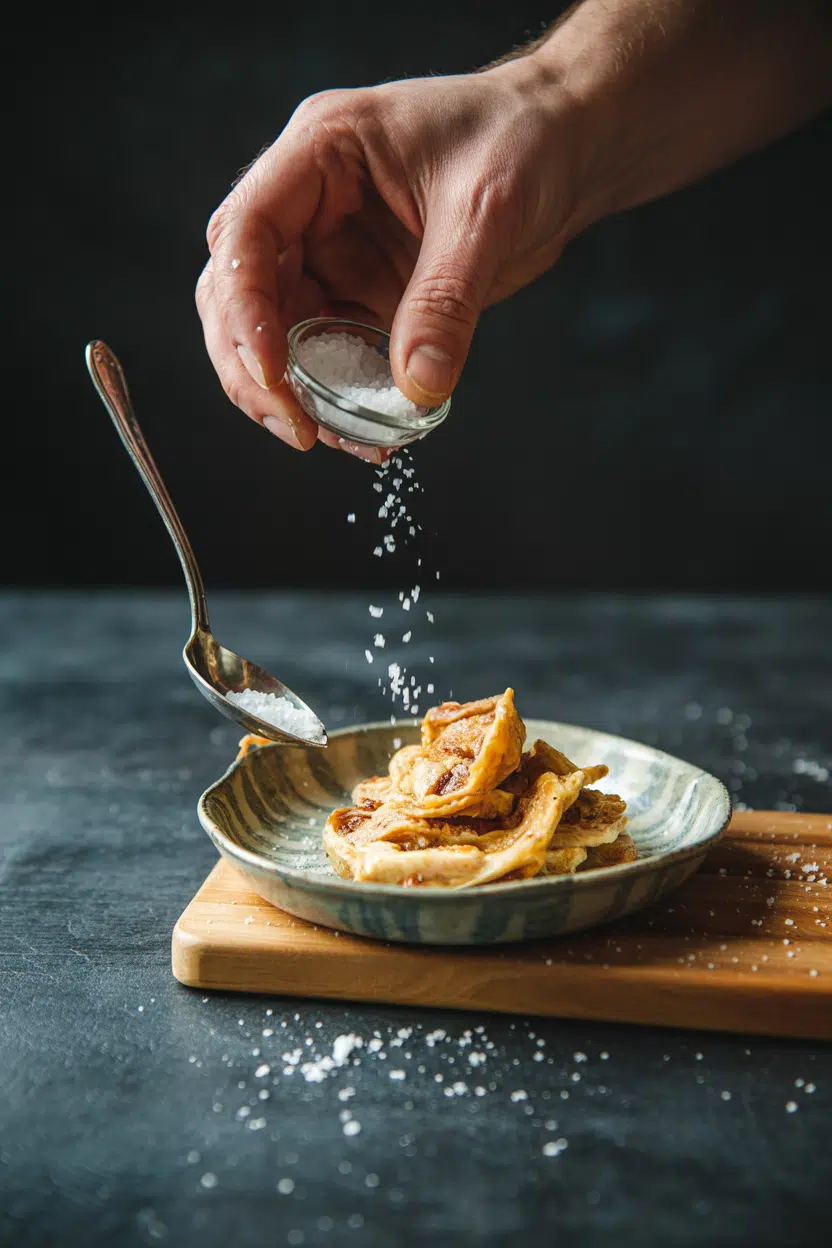
fleur de sel - What Is Fleur De Sel

The flavor is clean and briny without the sharp edge you get from iodized table salt. There's a quiet mineral sweetness underneath - not sugary, but soft - and a barely-there oceanic quality that dissipates quickly on the tongue.

Compared to regular sea salt, fleur de sel is noticeably lighter and less aggressive. It tastes similar, yes, but where standard sea salt hits in a single note, fleur de sel resolves across a few seconds.

The finish is short and pleasant rather than persistently salty.

Sensory SnapshotModerate Intensity
👅 Flavor
clean brinemineral sweetnessoceanic tang
✋ Texture
light flakyslightly crunchymoist crystals
👃 Aroma
fresh marinefaint minerality

Heat destroys the texture advantage almost instantly. Once dissolved into a dish, fleur de sel becomes indistinguishable from any other salt - which is precisely why it belongs only at the end, not in the pot.

How to Use fleur de sel

Fleur de sel is a finishing salt only. Apply it at the very end of cooking or directly at the table - never in boiling water, never into a marinade, never stirred into a sauce.

The crystal structure is the whole point.

That light crunch lands on the tongue first, followed by the brine, and that sequence is what separates a finished dish from a merely seasoned one.

French cooks in Brittany have applied it this way for centuries, and modern pastry kitchens follow the same logic when tapping it over salted caramels and dark chocolate bars.

Golden Rule
Add fleur de sel after the heat is off and right before serving. Even thirty seconds in residual steam will start to dissolve the crystals.

Pairings lean toward rich, fatty, or sweet: butter, olive oil, dark chocolate, caramel, citrus, and fresh oysters all benefit from the contrast.

On the savory side, roasted root vegetables, seared steak after resting, and grilled oysters right before serving are classic applications.

How Fleur de Sel Is Used
MethodBest ForTip
🧂 Cold FinishSalads, avocado toast, buttered breadPinch between fingers and drop from height for even distribution
🥩 Post-Roast GarnishSeared steak, roasted vegetables, whole fishApply after resting, not directly off the heat
🍫 ConfectioneryDark chocolate, caramels, shortbreadPress lightly so crystals adhere without sinking in
🦪 Table ServiceOysters, compound butters, charcuterie boardsSmall ramekin on the side lets guests control their own finish

If you need salt for general cooking and wonder about swapping out fleur de sel for a more affordable option, most recipes handle the substitution well at the seasoning stage.

Try It In
🥦Parmesan Roasted Brussels SproutsA pinch at plating sharpens the roasted edges→🦪Mussels in White Wine SauceFinish the bowl at the table for a briny lift→🍰Cinnamon Streusel Coffee CakeA few crystals on the streusel balance the sweetness→

How to Buy and Store fleur de sel

Look for crystals that are pale gray or off-white, irregular in shape, and slightly moist when you press the bag.

Bright-white, uniformly shaped flakes signal a refined product - closer to a dried flake salt than true fleur de sel. Labels matter: Guérande and Brittany are the benchmarks, and regional designations on the package confirm origin.

Watch Out
Humidity is the enemy. A damp pantry or an uncovered dish near the stove will cause crystals to clump and lose their distinct crunch within weeks.

Store fleur de sel in a small, dry, covered container at room temperature, away from steam, direct heat, and humidity. A ceramic cellar or tight-lidded glass jar works well.

Flavor holds indefinitely under those conditions, though fleur de sel's shelf life for peak texture runs roughly one to three years before the crystals start to compact.

When to Reach for It

This salt earns its price only when the crystal matters. Use it whenever texture is part of the eating experience - a crunch, a pop, a moment of saltiness distinct from the dish itself.

Best Pick
Start with fleur de sel on dark chocolate or a ripe avocado. Both let the crystals stay intact long enough to taste what the fuss is about.

Skip it for anything long-cooked or baked where salt dissolves into the recipe. For those jobs, a reliable workhorse like kosher salt's flavor and uses make it the smarter, more economical choice.

Frequently Asked Questions

Is fleur de sel healthier than table salt?

Not significantly. Sodium content is essentially the same by weight. However, fleur de sel crystals are larger, so a pinch delivers less sodium by volume than the same pinch of fine table salt.

How do you use fleur de sel on chocolate?

Sprinkle it directly onto melted or tempered chocolate before it sets, or press a few crystals onto finished truffles and caramels. Apply lightly - two or three crystals per bite is enough.

What is the difference between fleur de sel and kosher salt?

Kosher salt is a coarse cooking and curing salt with no particular regional flavor - it's meant to dissolve into food. Fleur de sel is a finishing salt valued for its moist, delicate crystals and subtle mineral flavor that should stay intact on the plate.

Can you use fleur de sel for everyday cooking?

You can, but it's wasteful. Once dissolved into boiling water or a sauce, the texture disappears and the flavor is indistinguishable from cheaper salts. Reserve it for finishing.

Does fleur de sel dissolve faster than regular salt?

Yes. Its crystals are thinner and more fragile than kosher or coarse sea salt, so they dissolve quickly on contact with warm food or liquid. That's another reason to apply it only at the very end.
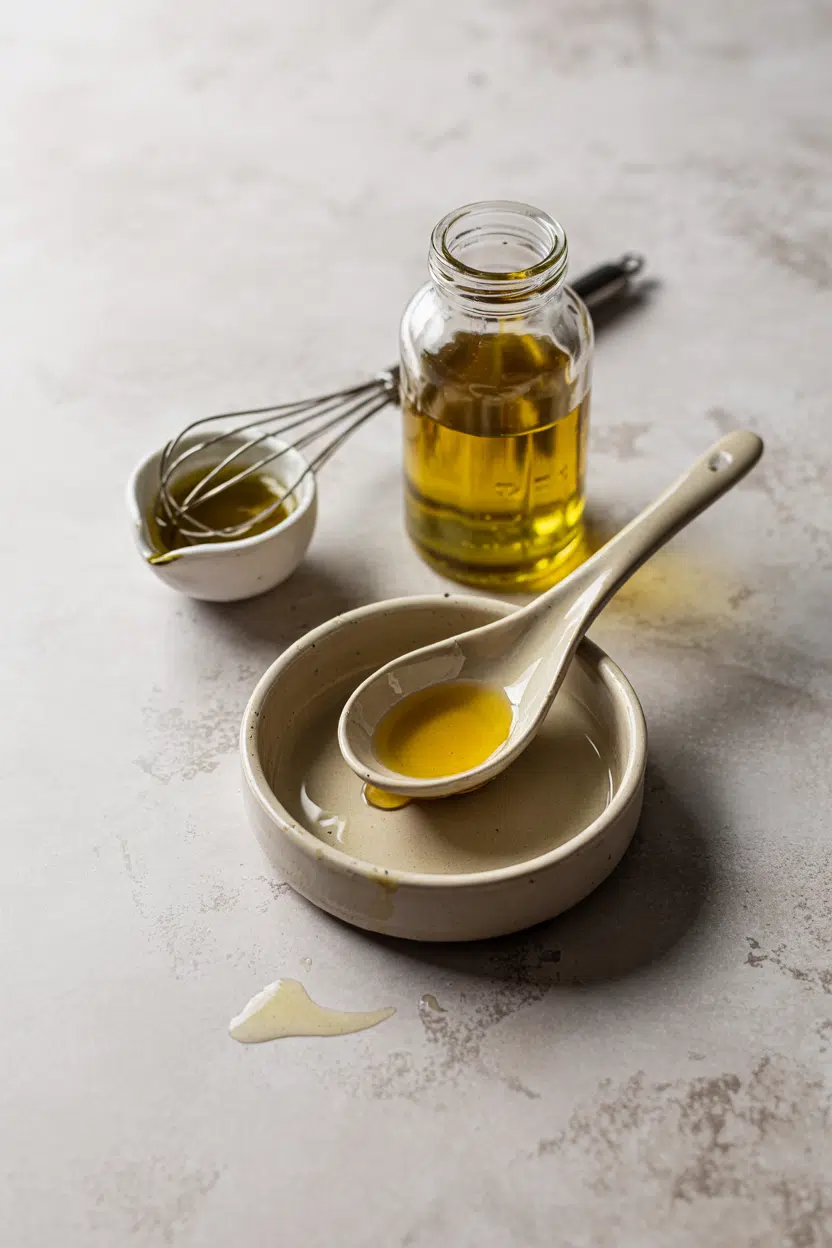
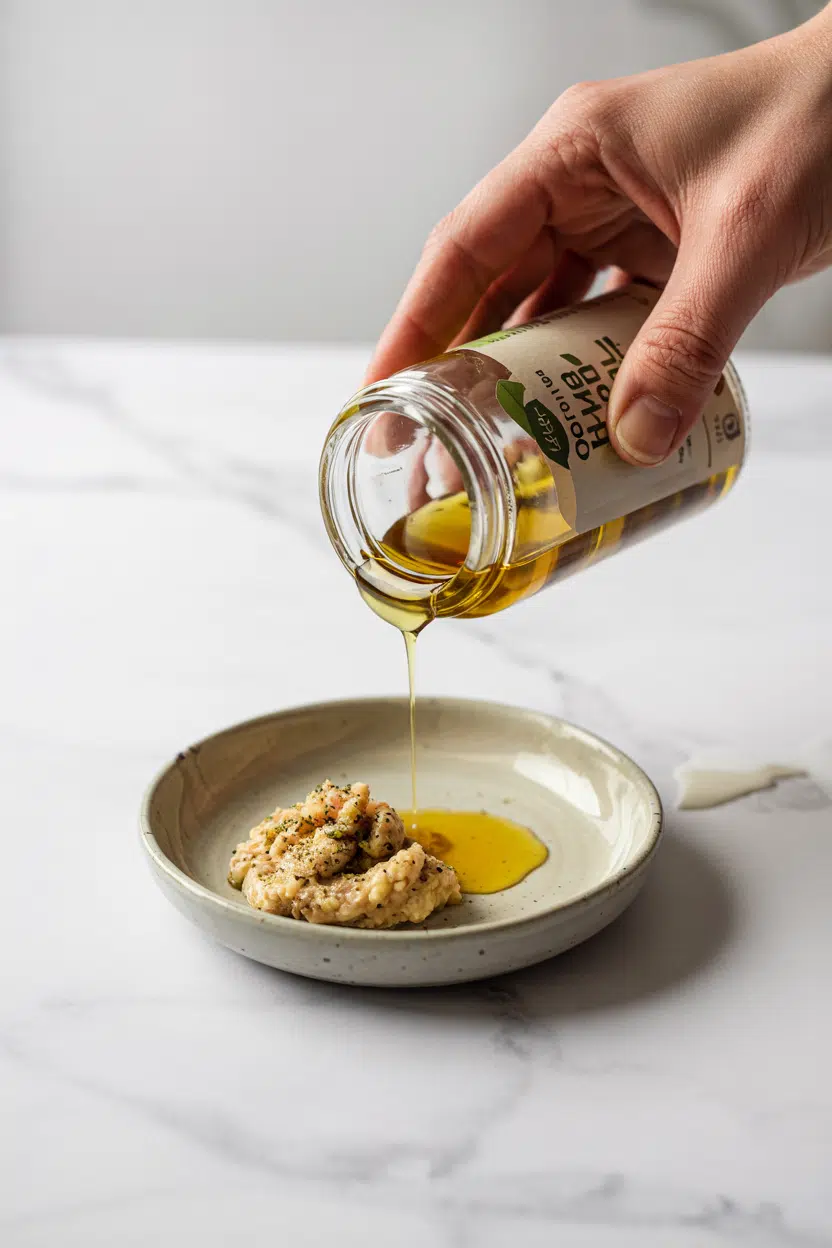
What Is Hemp Oil? [Taste, Uses & More]

March 30, 2026

Crack open a fresh bottle of cold-pressed hemp oil and the smell hits you first - green, faintly toasted, with an edge that reads almost like cut grass on a warm morning.

What Is Hemp Oil

The liquid itself pours a deep, shadowy green, viscous enough to coat a spoon but light on the tongue.

It's an oil that signals its character before you even taste it, which is exactly why knowing how to use it matters.

Unlike alternatives to flaxseed oil or replacements for pumpkin seed oil, hemp oil occupies a specific lane - finishing, drizzling, dressing - and it does that job with real distinction.

QUICK SUMMARY

Hemp oil is a cold-pressed seed oil with a nutty, grassy, mildly bitter flavor. Use it as a finishing oil - drizzled, whisked, or blended - never heated. It stores best in the fridge after opening and lasts 3-4 months.

🌿Flavor: Nutty, grassy, mildly bitter with a green, hemp-seed edge
🍶Best Use: Finishing oil for salads, grain bowls, soups, and dressings
🌡️Heat: No high heat - flavor degrades and nutrients break down fast
🧴Storage: Dark glass bottle, refrigerated after opening
📅Shelf Life: Up to 12 months unopened; 3-4 months refrigerated once opened

What Is hemp oil?

Hemp oil - also called hempseed oil or Cannabis sativa seed oil - is extracted from the seeds of the hemp plant through cold pressing, the same mechanical method used for extra-virgin olive oil. No solvents, no heat. That cold-pressing process preserves the oil's fatty acid profile and its characteristic green color.

It comes from a temperate-climate crop with deep roots in European and Asian agriculture, and has been pressed for food and industrial use for centuries. Today's food-grade versions are produced worldwide, with quality ranging considerably by brand and harvest date.

One clarification matters here: hemp oil is not CBD oil. CBD is extracted from the flowers and leaves using methods like CO2 extraction, and it contains cannabinoids.

Hemp oil comes from the seeds, contains negligible THC, and carries no meaningful cannabinoid content. If a bottle labeled "hemp oil" references CBD or CO2 extraction, it's a different product.

The oil is rich in omega-6 and omega-3 fatty acids at roughly a 3:1 ratio, plus tocopherols (vitamin E).

Those same fatty acids make it sensitive to heat and prone to rancidity - which explains every handling and storage rule that follows.

What Does hemp oil Taste Like?

hemp oil - What Is Hemp Oil

Hemp oil sits in the same family as walnut oil and pumpkin seed oil - rich, seed-forward, slightly bitter - but with a grassier, more distinctly green character that sets it apart.

Think toasted hemp seeds blended with fresh-cut herbs, then thinned to a pourable consistency.

Sensory SnapshotModerate Intensity
👅 Flavor
nuttygrassymildly bittergreen
✋ Texture
lightsilkyslightly viscous
👃 Aroma
greengrassytoasted seed

Heat changes it fast. Even gentle warming pushes the bitter and grassy notes forward in an unpleasant way, which is why cold use isn't just a nutritional recommendation - it's a flavor one.

Older or improperly stored oil turns noticeably rancid, developing a sharp, paint-like smell. That's the omega fatty acids oxidizing.

Fresh oil should smell green and slightly toasted, never acrid.

How to Use hemp oil

Hemp oil is a finishing oil, full stop.

Its delicate fatty acid structure breaks down under heat, and the flavor turns harsh before you've even reached a moderate sauté temperature.

Think of it the way you'd use a high-quality extra-virgin olive oil - added at the end, not the beginning.

For context on how it stacks up against everyday cooking fats, our guide to olive oil stand-ins covers where hemp oil can and can't step in.

How Hemp Oil Is Used
MethodBest ForTip
🥗 DressingVinaigrettes, grain bowl drizzlesPair with lemon or apple cider vinegar to balance bitterness
🥗 Cold FinishingSoups, roasted vegetables, hummusAdd just before serving - heat destroys the aroma
🥗 BlendingPesto, cold purées, dipsUse in place of half the olive oil for a grassier note
🥗 Smoothies & YogurtNutritional boost, no-cook applicationsStart with 1 teaspoon - the flavor is present even in small amounts

Hemp oil fits naturally into modern Nordic and farm-to-table cooking, where restrained, green-forward flavors are valued over richness.

It works well alongside fresh dill, parsley, or basil, and holds its own next to strong companions like goat cheese or toasted walnuts.

Pair it with roasted root vegetables after they come off the heat, or whisk it into a simple vinaigrette with apple cider vinegar and a pinch of flaky salt.

One dish where it shines quietly: a warm lentil or farro bowl drizzled just before serving, where the grassy note reads as intentional seasoning.

Watch Out
Avoid using hemp oil with strongly bitter greens like radicchio or endive - the bitterness compounds and the dish can turn harsh. Stick to milder bases like spinach, arugula in small amounts, or cooked grains.

If you run out, hemp oil stand-ins cover the closest matches for both flavor and fatty acid profile.

Try It In
🍰Olive Oil CakeSwap half the olive oil for hemp oil to add a nutty, green undertone→🍋Ricotta with Lemon and Olive OilA finishing-oil dish where hemp oil's grassy edge complements lemon well→🫙Labneh with Olive Oil and Za'atarHemp oil's herbaceous notes pair naturally with za'atar's green, earthy character→

How to Buy and Store hemp oil

Cold-pressed is the only label worth buying. Look for bottles in opaque or dark glass - light degrades the oil quickly, and any reputable producer knows this. The color should be a deep, rich green. A pale or yellowish hemp oil suggests over-processing or age.

Best Pick
Choose bottles with a harvest date or best-by date printed on the label. A recent date tells you more than any marketing claim on the front.

Check the label carefully. Hemp oil should list Cannabis sativa seed oil as the sole ingredient.

If the bottle references CBD, cannabinoids, or CO2 extraction, that's a different product with a different price point and purpose.

  • 🌡️ Before opening - store in a cool, dark cupboard away from the stove; shelf life runs about 12 months
  • ❄️ After opening - refrigerate immediately in the original dark glass bottle, capped tightly
  • 📅 Opened shelf life - 3-4 months refrigerated before rancidity becomes noticeable
  • 👃 Rancidity check - fresh oil smells green and toasted; discard anything sharp, paint-like, or acrid

For longer-term storage questions, the full guide on freezing hemp oil covers what happens to texture and flavor past the fridge window.

Start with a Drizzle

Hemp oil rewards a specific kind of cook - one who thinks about finishing touches. If you want to try it, start with a grain bowl or a simple vinaigrette before committing to larger quantities.

  • 🥗 First use - drizzle over a warm farro or lentil bowl just before serving
  • 🧄 Second use - whisk into a dressing with lemon juice, garlic, and parsley
  • 🌿 Third use - fold a teaspoon into hummus alongside tahini for added silkiness

Reach for alternatives to walnut oil if the grassy edge isn't what you're after - walnut oil gives the same richness without the green character.

Golden Rule
Never heat hemp oil. Add it off-heat, after cooking, always. One round in a hot pan and you've lost both the flavor and the nutritional value.

Frequently Asked Questions

Is hemp oil the same as CBD oil?

No. Hemp oil is cold-pressed from Cannabis sativa seeds and contains negligible THC and no meaningful cannabinoids. CBD oil is extracted from the plant's flowers and leaves using methods like CO2 extraction and is a different product entirely.

Can you cook with hemp oil?

Not over heat. Hemp oil has a low smoke point and its omega fatty acids degrade quickly when warmed, turning the flavor harsh. Use it exclusively as a finishing oil - drizzled, whisked, or blended cold.

Does hemp oil contain THC?

Negligible amounts only - well below any psychoactive or detectable threshold. Food-grade cold-pressed hemp oil comes from the seeds, which carry essentially no THC content.

How long does hemp seed oil last?

Unopened, about 12 months stored in a cool, dark place. Once opened and refrigerated, expect 3-4 months before rancidity becomes noticeable. A sharp or paint-like smell means it's past its point.

What's the difference between hemp oil and walnut oil in cooking?

Both are finishing oils with rich, nutty flavor, but hemp oil adds a distinctly grassy, green edge that walnut oil lacks. Walnut oil is slightly warmer and more neutral, making it easier to use across a wider range of dishes.

Air Fryer Chickpea Fritters

March 30, 2026

Mashing chickpeas with onion, garlic, and spices creates a batter that holds together in the air fryer without deep frying. High heat crisps the edges while the inside stays tender and moist.

Air Fryer Chickpea Fritters served on a plate

The air fryer basket does the work. You get golden, crunchy fritters without standing over a hot pan of oil.

This works for weeknight appetizers, meal prep lunches, or party platters when you need something fast that looks intentional.

QUICK SUMMARY

Coarsely mashed chickpeas mixed with flour, egg, and aromatics create fritters that crisp in the air fryer at 375°F. The batter rests for 10 minutes to hydrate the flour and improve binding. Spray oil on the fritters before cooking to boost crispiness.

⏱️Time Reality: 30 minutes total - 15 to prep and mix, 12-15 to air fry
🔧First Move: Drain chickpeas well and pat dry before mashing
⚠️Watch Out: Excess moisture makes soggy fritters - add flour gradually until batter holds shape

Why This Recipe Works

Mashing chickpeas coarsely preserves texture while creating enough surface area to bind with flour and egg. For a version that comes together quickly, quick chicken dish pairs well with these fritters for a complete meal.

Quick Reference
⏱️
Prep Time
15 min
🔥
Cook Time
12-15 min
⏰
Total Time
30 min
🍽️
Servings
4 servings (about 12 fritters)
📊
Difficulty
Easy
🏷️
Category
Appetizer
💡
Quick Tip
Spray oil for extra crisp
🎯
Best For
Weeknight | Meal prep | Entertaining

Five things that make this work:

  • Coarse mash: Leaving some chickpea chunks creates texture and prevents dense, pasty fritters
  • Resting time: 10-minute rest hydrates flour and tightens binding before shaping
  • Oil spray: Light coating before air frying crisps edges without deep frying
  • Even sizing: 2-inch patties cook uniformly and develop golden crust without burning
  • 375°F heat: High temperature renders moisture and sets exterior before interior dries out
Quick Tip
Flip fritters at 7 minutes for even browning on both sides

What You'll Need

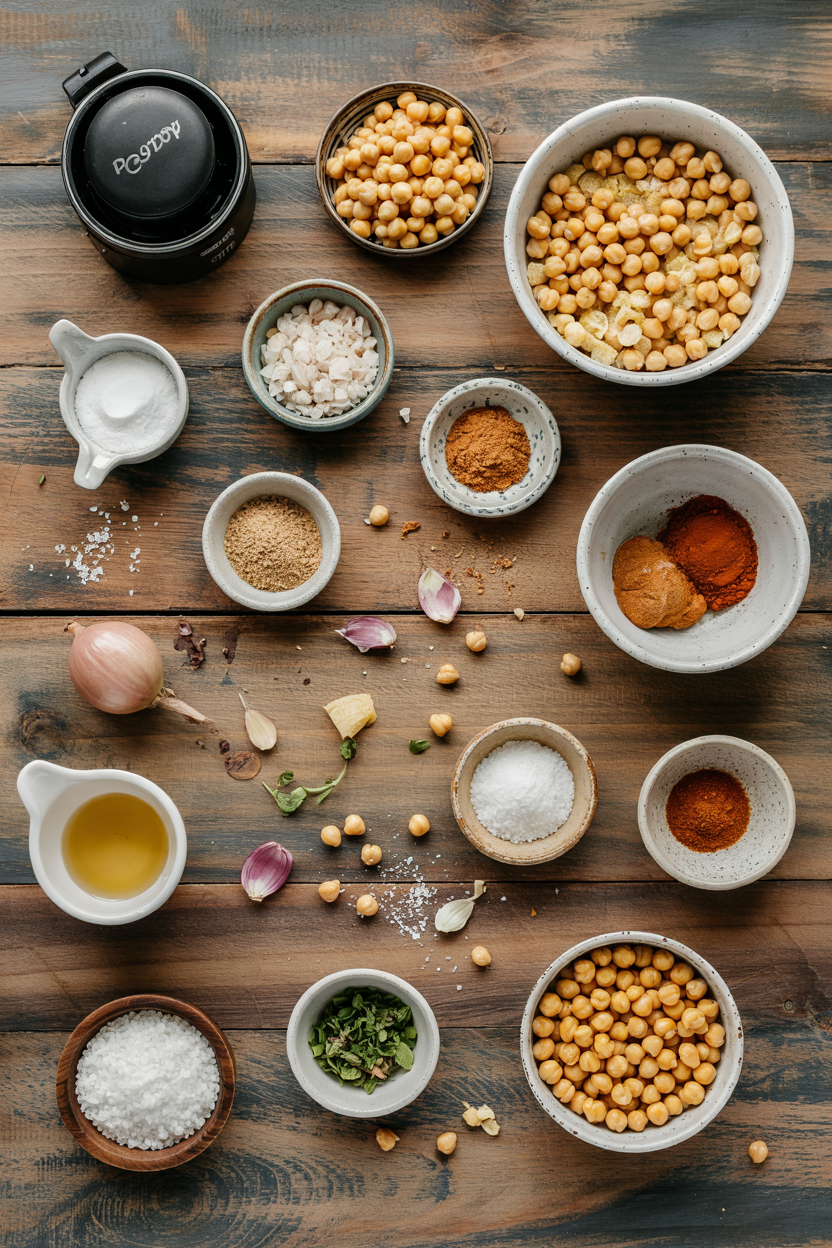
Ingredients for Air Fryer Chickpea Fritters

Canned chickpeas drain faster than dried, cutting prep by an hour. The potato wedges works best when it hits the table at the same time as the main, and for a version that comes together quickly, easy potato wedges side rounds out the meal.

🫘
Base
  • 1 can (15 oz) chickpeas, drained and patted dry
  • ¼ cup all-purpose flour or chickpea flour
  • 1 large egg or flax egg
  • ½ teaspoon baking powder
🧄
Aromatics
  • ½ small onion, finely diced
  • 2 garlic cloves, minced
  • ¼ cup fresh parsley or cilantro, chopped
🌶️
Spices
  • 1 teaspoon ground cumin
  • ½ teaspoon ground coriander
  • ½ teaspoon paprika
  • ½ teaspoon salt
🫙
Finishing
  • Oil spray

Ingredient Details

  • Canned chickpeas
    Drain well and pat dry with paper towels - excess liquid creates soggy batter that won't hold
  • All-purpose flour
    Add gradually until batter is sticky but shapeable - too much makes dry fritters
  • Egg or flax egg
    Use flax egg (1 tablespoon ground flax + 3 tablespoon water) for vegan version - let sit 5 minutes to thicken
  • Fresh herbs
    Chop fine and add just before shaping - large pieces create weak spots
  • Baking powder
    Optional but creates lighter texture - skip if you prefer dense fritters
  • Oil spray
    Spray basket and fritters lightly before cooking - increases crispiness without deep frying
  • Spices
    Toast cumin and coriander in dry pan for 30 seconds to bloom flavor before adding to batter

Ingredient Swaps

Chickpea flour adds nuttier flavor and works for gluten-free diets. Ribeye adds the contrast this plate needs, but timing matters, and for a version that comes together quickly, simple homemade ribeye makes a hearty pairing.

Four swaps that work:

  • All-purpose flour → chickpea flour: Adds nutty taste and makes gluten-free - use same amount but batter may need extra minute to hydrate
  • Egg → flax egg: Mix 1 tablespoon ground flax with 3 tablespoon water, let sit 5 minutes - binds well but texture slightly denser
  • Fresh parsley → cilantro or basil: Changes flavor profile but keeps freshness - use same amount
  • Spice mix → curry powder or za'atar: Swap cumin-coriander-paprika blend 1:1 for different aromatic profile

Chickpea Flour

Works for: Gluten-free diets, adds nutty depth, binds well

Skip if: You prefer milder flavor or don't have specialty flour

All-Purpose Flour

Works for: Neutral flavor, lighter texture, always in pantry

Skip if: You need gluten-free option

Instructions

The batter comes together in 15 minutes with resting time. Most people skip chicken, but it balances the meal, and for a version that comes together quickly, quick chicken dish works well alongside these fritters.

  1. Mash chickpeas coarsely in mixing bowl with fork or potato masher - leave some chunks for texture, don't puree smooth. Add diced onion, minced garlic, chopped herbs, and all spices. Mix until evenly distributed.

  2. Add egg and flour gradually - crack egg into bowl, stir to coat chickpeas, then add flour 1 tablespoon at a time until batter is sticky but holds shape when pressed. Add baking powder if using. Let batter rest 10 minutes at room temperature.

  3. Shape into 2-inch patties - scoop 2 tablespoons batter per fritter, press gently to flatten to ½-inch thickness. Place on plate while shaping remaining batter. Spray air fryer basket lightly with oil.

  4. Air fry at 375°F for 12-15 minutes - arrange fritters in single layer with 1-inch gaps between each. Spray tops lightly with oil. Cook 7 minutes, flip with spatula, spray again, cook 5-8 minutes more until golden brown and firm to touch.

  5. Cool 3 minutes before serving - fritters firm up as they cool and excess steam escapes. Serve warm with tahini sauce, garlic yogurt dip, or spicy harissa mayo.

Golden Rule
Don't skip the rest time - flour needs 10 minutes to hydrate or fritters fall apart during cooking

What to Serve With It

The fritters need something to balance the richness and provide textural contrast. If you're planning your strawberry spinach salad dinner, these fritters add protein and heartiness to the plate.

Side Dish Prep Why It Works How to Serve
Simple green salad Easy Fresh greens cut through rich fritters Toss mixed greens with lemon vinaigrette, serve cold
Roasted sweet potatoes Easy Natural sweetness complements spiced fritters Cube and roast at 400°F for 25 minutes
Cucumber tomato salad Easy Cool, crunchy contrast to warm fritters Dice vegetables, dress with olive oil and lemon
Brown rice or quinoa Easy Whole grains make complete meal Cook according to package, serve warm
Hummus dip platter Easy Enhances chickpea theme, crowd pleaser Serve store-bought or homemade with pita wedges

Three ways to serve it:

  • Light lunch: Plate 3-4 fritters with cucumber tomato salad and tahini drizzle for quick weekday meal
  • Party appetizer: Arrange on platter with hummus, pickled vegetables, and pita bread for sharing
  • Meal prep bowl: Pack fritters with brown rice, roasted sweet potatoes, and garlic yogurt sauce for grab-and-go lunches
Best Pick
Tahini sauce is the top pairing - nutty flavor complements chickpeas without overpowering spices

Store and Reheat

Fritters hold up for 3-4 days in the fridge and freeze well for up to 2 months. Salmon adds the contrast this plate needs, but timing matters, and for a version that comes together quickly, this quick salmon dish makes an easy weeknight pairing.

Method Time Best For
🔥 Air Fryer 5-7 min at 350°F Restoring crispiness
🔥 Oven 10 min at 350°F Batch reheating multiple fritters
📦 Microwave 30-45 sec Quick reheat but softens texture

For best results when storing:

  • Cool completely before storing - warm fritters create condensation that makes them soggy
  • Layer with parchment in airtight container to prevent sticking
  • Freeze on sheet pan first then transfer to freezer bag - prevents fritters from clumping together
  • Reheat from frozen at 350°F for 10-12 minutes - no need to thaw
  • Avoid microwave for best texture - air fryer or oven keeps exterior crispy

Frequently Asked Questions

Can I make air fryer chickpea fritters ahead and reheat?

Yes - cook fritters completely, cool, then refrigerate up to 4 days. Reheat in air fryer at 350°F for 5-7 minutes to restore crispiness.

How do I store leftover chickpea fritters?

Store in airtight container with parchment between layers for 3-4 days in fridge. Freeze for up to 2 months on sheet pan first, then transfer to freezer bag.

How do I know when chickpea fritters are cooked through?

Fritters are done when golden brown on both sides and firm to touch with no raw batter smell. Internal texture should be tender but not mushy.

Why do my chickpea fritters fall apart in the air fryer?

Under-binding causes this - add egg or flax egg, mash chickpeas coarsely not smooth, rest batter 10 minutes, and add flour gradually until mixture holds shape. Too much moisture from undrained chickpeas also weakens structure.

Can I double or halve this recipe easily?

Yes - multiply or divide all ingredients proportionally. Cook in batches if doubling to avoid overcrowding air fryer basket, which prevents proper crisping.

Air Fryer Chickpea Fritters served on a plate

Air Fryer Chickpea Fritters

No ratings yet
Coarsely mashed chickpeas combined with flour, egg, aromatics, and spices create tender fritters that crisp perfectly in the air fryer. A 10-minute rest hydrates the flour to improve binding, while spraying oil before cooking ensures golden, crunchy edges. These fritters make a quick, healthy appetizer or snack with minimal fuss.
Print Recipe Pin Recipe
Prep Time 15 minutes mins
Cook Time 15 minutes mins
Total Time 30 minutes mins
Servings: 4 servings
Course: Appetizer
Cuisine: Mediterranean
Ingredients Method Notes

Ingredients
  

  • 1 can (15 oz) chickpeas drained and patted dry
  • 0.25 cup all-purpose flour or chickpea flour; add gradually until batter holds shape
  • 1 large egg or flax egg (1 tablespoon ground flax + 3 tablespoon water, let sit 5 minutes)
  • 0.5 teaspoon baking powder optional for lighter texture
  • 0.5 small onion finely diced
  • 2 cloves garlic minced
  • 0.25 cup fresh parsley or cilantro, chopped finely
  • 1 teaspoon ground cumin toast 30 seconds before adding if possible
  • 0.5 teaspoon ground coriander toast 30 seconds before adding if possible
  • 0.5 teaspoon paprika
  • 0.5 teaspoon salt
  • oil spray for basket and fritters

Method
 

  1. Mash chickpeas coarsely in a mixing bowl using a fork or potato masher, leaving some chunks for texture. Add diced onion, minced garlic, chopped herbs, and all spices. Stir until evenly combined.
    1 can (15 oz) chickpeas, 0.5 small onion, 2 cloves garlic, 0.25 cup fresh parsley, 1 tsp ground cumin, 0.5 tsp ground coriander, 0.5 tsp paprika, 0.5 tsp salt
  2. Add the egg to the mixture and stir to coat the chickpeas. Gradually add flour one tablespoon at a time until batter is sticky but holds shape when pressed. Stir in baking powder if using. Let batter rest at room temperature for 10 minutes to hydrate the flour.
    1 large egg, 0.25 cup all-purpose flour, 0.5 tsp baking powder
  3. Scoop about 2 tablespoons of batter per fritter and press gently to form 2-inch diameter patties about ½ inch thick. Place patties on a plate while shaping the rest. Lightly spray the air fryer basket with oil.
  4. Arrange the fritters in a single layer in the air fryer basket with about 1-inch gaps. Lightly spray tops with oil. Cook at 375°F for 7 minutes, then flip each fritter with a spatula, spray again with oil, and cook for another 5 to 8 minutes until golden brown and firm to touch.
    oil spray
  5. Let the fritters cool for 3 minutes before serving to let them firm up and allow excess steam to escape. Serve warm with tahini sauce, garlic yogurt dip, or spicy harissa mayo.

Notes

  • Drain and pat chickpeas dry thoroughly to avoid soggy batter.
  • Resting the batter for 10 minutes hydrates the flour and improves binding.
  • Spray oil on fritters and basket before and during cooking to enhance crispiness without deep frying.

Tried this recipe?

Let us know how it was!

What Is Gouda Cheese? [Taste, Uses & More]

March 30, 2026

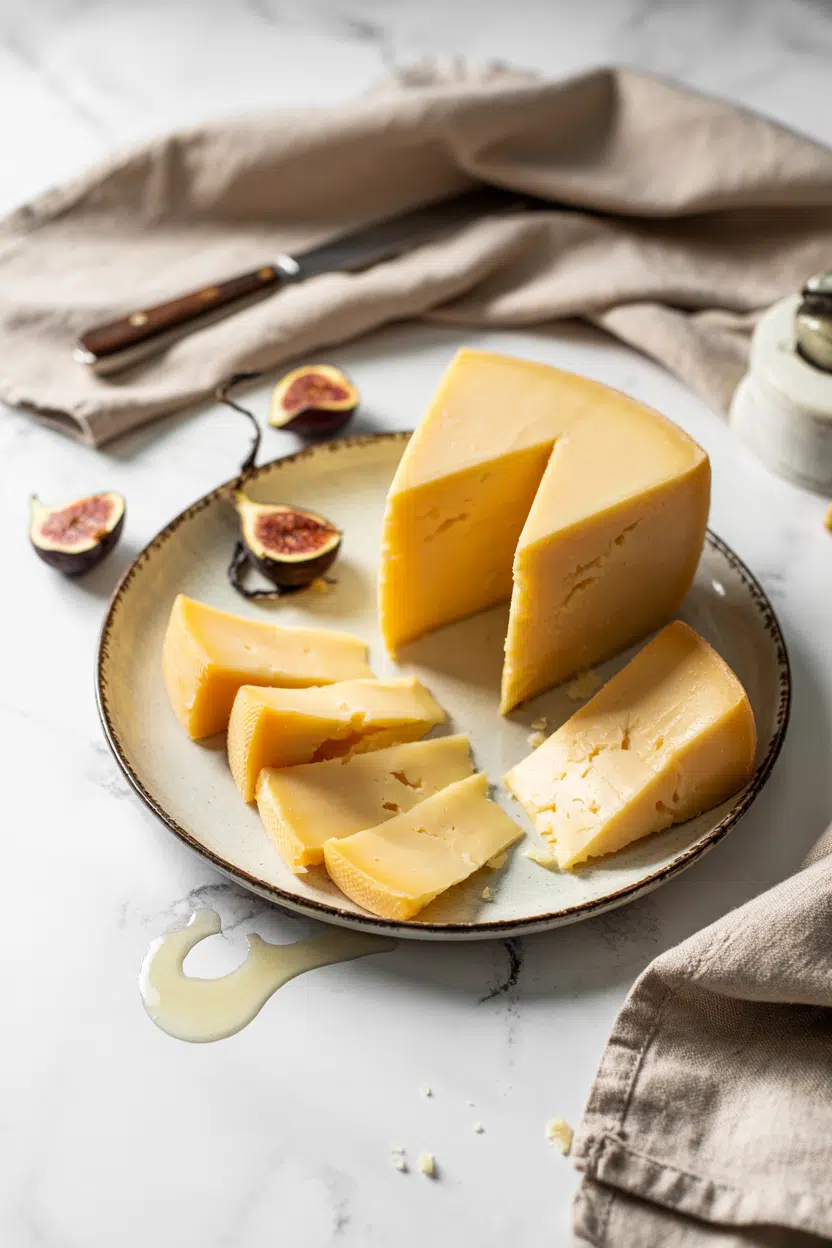
Warm, faintly sweet, and unmistakably rich - gouda cheese announces itself the moment you slice into a wheel. That pale-golden interior gives off a gentle milky warmth when young, shifting toward deep caramel and roasted-nut territory as it ages into something altogether more complex.

What Is Gouda Cheese

It's one of the most widely eaten cheeses in the world, and for good reason: few others span such a wide flavor range within a single category, making it equally at home on a cheese board as it is melted into a gratin.

QUICK SUMMARY

Gouda is a Dutch cow's-milk cheese ranging from mild and creamy when young to nutty, caramel-rich, and crystalline when aged. It melts well, pairs broadly, and suits everything from sandwiches to cheese boards to cream sauces.

🧀Type: Semi-hard aged cow's-milk cheese from the Netherlands
👅Flavor: Mild buttery cream when young; nutty caramel sweetness when aged
🍳Best Uses: Melting, grating, cheese boards, sandwiches, gratins
❄️Shelf Life: 2-3 weeks (young); 3-6 weeks (aged) once opened in fridge
🛒Buy It: Look for pale-golden paste or visible tyrosine crystals in aged wheels

What Is Gouda Cheese?

Gouda - or Goudse kaas in Dutch - is a washed-curd cheese originating from the South Holland and Noord-Holland regions of the Netherlands.

The washed-curd process sets it apart: after the milk coagulates, warm water replaces some of the whey before pressing, which rinses out lactose and gives the finished cheese its characteristic mild sweetness.

Wheels are pressed into rounds and then coated in wax or left with a natural rind before aging begins. Age determines almost everything about the final character of the cheese.

  • Young Gouda (jong) - aged 4-8 weeks; pale, smooth, pliant texture; mild and creamy
  • Semi-aged (jong belegen) - 2-6 months; firmer, slightly more pronounced flavor
  • Aged (belegen to oud) - 6 months to 2+ years; harder, crumblier, with visible tyrosine crystals and deep caramel-butterscotch notes
  • Smoked Gouda - a common variant cold-smoked over wood, adding warm smoky depth

If you're already familiar with edam cheese or emmental, gouda occupies a richer, more buttery space than either.

What Does Gouda Cheese Taste Like?

Young Gouda is mild and approachable - think soft creaminess with a faint sweet edge, not far from a young mild cheddar. There's no sharpness, no bite.

Aged Gouda is a different cheese entirely. The flavor deepens into butterscotch, roasted walnut, and a savory umami layer that builds slowly on the palate.

Extra-aged wheels develop an almost granular intensity that edges toward aged parmesan or Grana Padano.

Sensory SnapshotModerate Intensity
👅 Flavor
butterycaramelnuttyumami
✋ Texture
smooth and pliant (young)crumbly and crystalline (aged)
👃 Aroma
milky (young)warm caramel and earthy (aged)

Heat amplifies that sweetness. Melt gouda into a sauce and the caramel notes become noticeably more forward - which is one reason it works so well in cream-based dishes.

How to Use Gouda Cheese

Melting is where gouda earns its reputation. Young and semi-aged wheels soften smoothly at low-medium heat without breaking, making them ideal for grilled cheese, panini, and fondue. Aged wheels melt less cleanly but contribute more flavor - grate them over roasted vegetables or fold them into mac and cheese for a rounded, buttery depth.

Golden Rule
Match the age of the gouda to the job: young for melting, aged for grating and cheese boards.

On cheese boards, cubed or sliced gouda pairs naturally with crisp apples or pears, honey or quince paste, walnuts, and rye or sourdough bread. Wholegrain mustard cuts through its richness cleanly.

Cured ham or prosciutto is the classic savory partner.

For wine, amber beers and medium-bodied reds - think a Grenache or a Côtes du Rhône - hold up to aged wheels without overwhelming them. Need a swap?

Check our guide to gouda cheese alternatives for alternatives that work across these same applications.

How Gouda Is Used
MethodBest ForTip
🫕 MeltingGrilled cheese, fondue, cream sauces, paniniUse young or semi-aged; keep heat low to avoid graininess
🥗 Raw / SlicedSandwiches, cheese boards, charcuterieSlice thin against cured meats to balance saltiness
🧆 BakedGratins, casseroles, smoked-gouda bakesSmoked Gouda adds warm depth to potato and egg dishes
🧂 GratedRoasted vegetables, pasta, mac and cheeseAged wheels grate cleanly and add nutty umami
🥘 Pan-searedSalad toppers, appetizersSlice thick and sear quickly over high heat for a golden crust
Try It In
🧀Cheddar Cheese StrawsSwap in aged gouda for a nuttier, sweeter twist on the classic→🍳Egg and Cheese Breakfast SandwichYoung gouda melts cleanly and pairs well with egg and cured meat→

How to Buy and Store Gouda Cheese

At the counter, inspect the paste before buying. Young Gouda should look pale golden and uniformly smooth - no sticky or slimy rind, no sour liquid at a cut edge.

For aged wheels, small white tyrosine crystals throughout the paste are a sign of proper aging, not a defect.

Watch Out
Deep cracks in the rind or a sharp ammoniated smell signal a wheel that has aged past its prime or been stored poorly. Skip it.

Wrap opened gouda in cheese paper or parchment - not plastic wrap, which traps moisture and encourages mold. Store in the cheese drawer or a perforated container.

For more detail on timelines and signs of spoilage, see our full guide to gouda cheese storage life.

  • Young Gouda - 2-3 weeks opened; up to 2-3 months for unopened waxed wheels
  • Aged Gouda - 3-6 weeks opened; its lower moisture content extends longevity

Start with Young, Graduate to Aged

If you haven't cooked with gouda before, young Gouda is the entry point. It melts without fuss, tastes crowd-friendly, and costs less than aged wheels.

Once you're comfortable, pick up a small wedge of aged Gouda and eat it at room temperature with a few walnuts and a smear of honey. That's when the full character of the cheese reveals itself - caramel, crystal, depth.

From there, smoked Gouda opens another direction entirely. It's a useful tool for casseroles and breakfast dishes where you want smoky warmth without reaching for bacon.

Shortcut
Not sure which age to buy? Semi-aged (jong belegen) is the middle ground - more flavor than young, still melts reliably.

Frequently Asked Questions

Is gouda the same as cheddar?

No. Both are cow's-milk cheeses, however gouda uses a washed-curd process that removes lactose and produces a sweeter, less sharp flavor. Cheddar is cheddared - stacked and turned to expel whey - which creates a tangier, more acidic profile. See our notes on [cheddar cheese substitutes](https://forkliftkitchen.com/cheddar-cheese-substitutes/) for more on how the two compare.

What does aged gouda taste like compared to young gouda?

Young gouda is mild and creamy with a soft buttermilk sweetness. Aged gouda develops butterscotch, roasted-nut, and savory umami notes, with a firmer, slightly crumbly texture and visible tyrosine crystals throughout.

Can lactose-intolerant people eat gouda?

Possibly, in modest amounts. The washed-curd process removes much of the lactose, and further aging reduces it more. Aged gouda in particular is often tolerated by lactose-sensitive people, though individual responses vary.

Can you freeze gouda cheese?

Technically yes, however freezing damages the texture - young gouda becomes crumbly and grainy after thawing. Aged gouda holds up slightly better and can be frozen if you plan to grate it rather than slice or melt it.

What wines pair well with gouda?

Medium-bodied reds like Grenache or Côtes du Rhône work well with aged wheels. Young gouda suits lighter options - an off-dry Riesling or a crisp amber ale balances its mild creaminess without overpowering it.

Farro Caponata Salad

March 30, 2026

Chewy farro tossed with caramelized eggplant, briny olives, and sharp red wine vinegar. That's what happens when you roast vegetables until golden and fold them into cooked grain while everything's still warm.

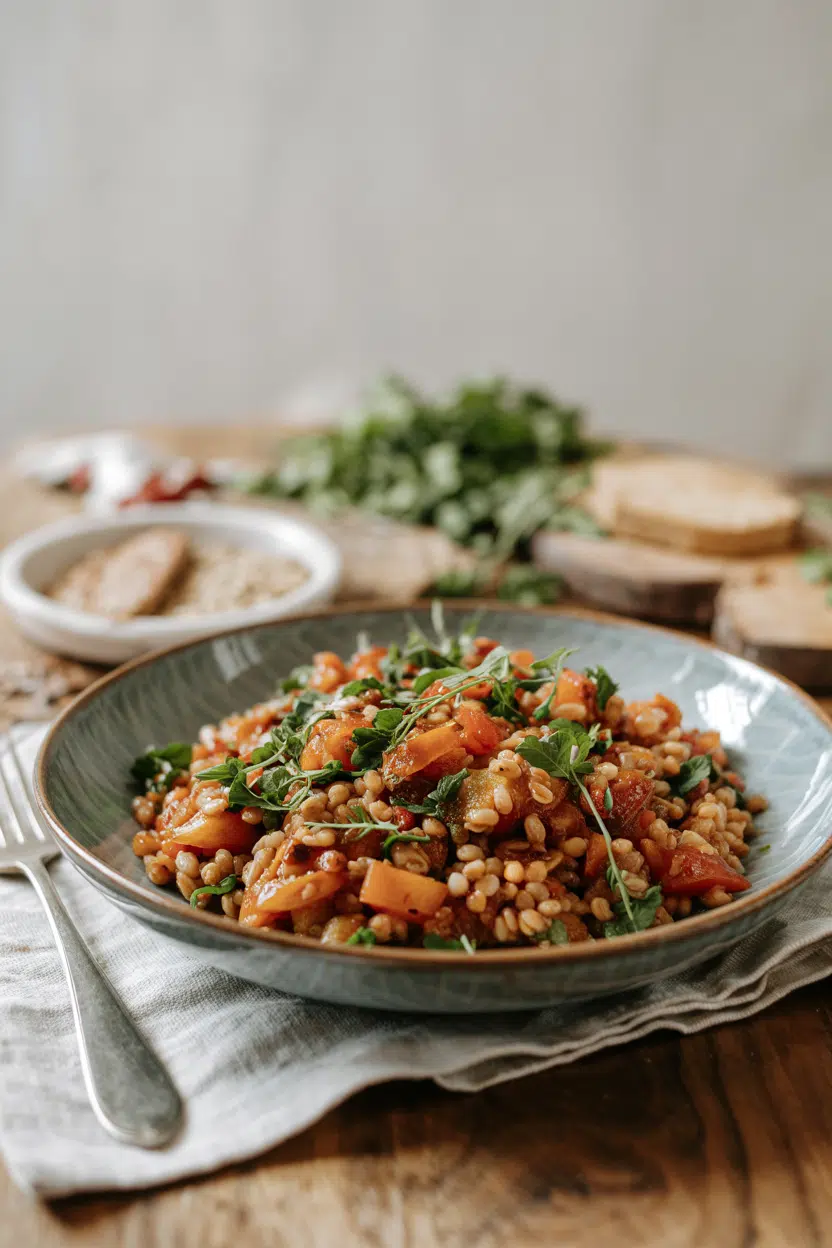
Farro Caponata Salad served on a plate

The grain soaks up the tangy dressing without turning mushy. You get Mediterranean flavors in one bowl that works cold or at room temperature.

This is what we make for meal prep lunches or when hosting and you need something that sits on the counter without wilting. For a version that comes together quickly, simple salad recipe works when farro feels like too much effort.

QUICK SUMMARY

Farro Caponata Salad combines chewy pearled farro with roasted eggplant, capers, and olives in a red wine vinegar dressing. Roasting the eggplant until golden prevents sogginess and delivers sweet caramelized flavor that balances the tangy brine.

⏱️Time commitment: 55 minutes total - 30 for farro, 25 for roasting eggplant
🔥First critical move: Salt eggplant cubes 20 minutes before cooking to draw out moisture
⚠️Watch out: Add vinegar off heat after vegetables cool slightly or acidity turns harsh

Table of Contents

Toggle
  • Why This Recipe Works
  • What You'll Need
    • Ingredient Details
  • Ingredient Swaps
  • What to Serve With It
  • Store and Reheat
  • Frequently Asked Questions
  • Farro Caponata Salad
    • Method 
    • Tried this recipe?

Why This Recipe Works

Roasting eggplant at 400°F until browned concentrates its flavor and creates texture that holds up when mixed with grain. Most people skip salad, but it balances the meal.

Quick Reference
⏱️
Prep Time
15 min
🔥
Cook Time
40 min
⏰
Total Time
55 min
🍽️
Servings
4-6 servings
📊
Difficulty
Medium
🏷️
Category
Side | Lunch
💡
Quick Tip
Roast eggplant until golden for best flavor
🎯
Best For
Weeknight | Meal prep | Entertaining

Five things that make this work:

  • Pearled farro cooks in 25-30 minutes - unpearled varieties take 60+ minutes and throw off timing for weeknight meals
  • Salting eggplant for 20 minutes pulls out moisture - prevents soggy salad and reduces bitterness that ruins the sweet-tart balance
  • Roasting at 400°F creates caramelization - higher heat burns edges before centers soften; lower heat steams vegetables instead of browning them
  • Adding vinegar off heat preserves brightness - cooking with acid toughens vegetables and makes the dressing taste flat instead of sharp
  • Folding basil in last keeps color vibrant - heat wilts herbs and turns them gray within minutes
Quick Tip
Soak farro 30 minutes before cooking to cut boiling time by 5-10 minutes when you're in a rush.

What You'll Need

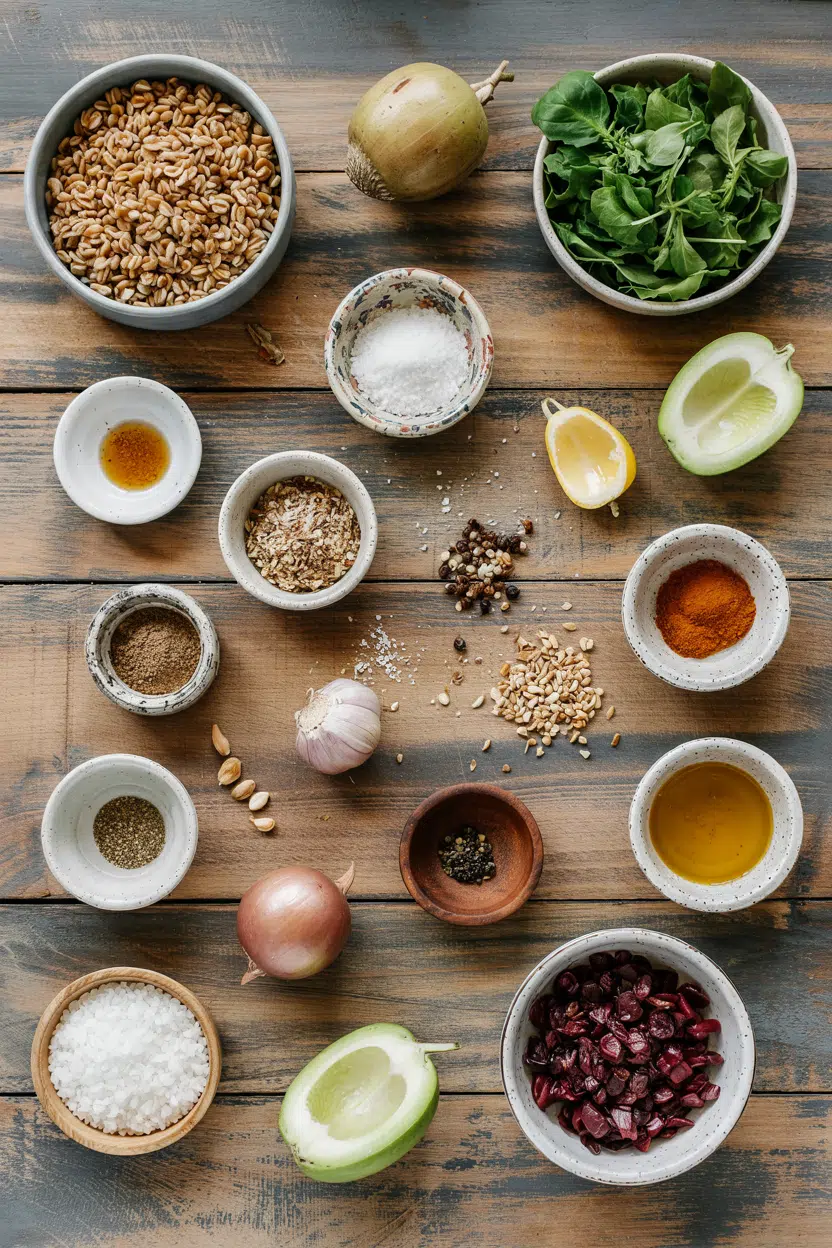
Ingredients for Farro Caponata Salad

Shopping for this takes one trip to the produce section and the grain aisle. A good salad can make or break the plate.

🍜
Base Grain
  • 1 cup pearled or semi-pearled farro
  • Water for boiling
🥬
Vegetables
  • 1 medium eggplant, diced
  • 1 cup cherry tomatoes, halved
  • ½ red onion, diced
  • 2 cloves garlic, minced
🥢
Flavor Components
  • ¼ cup red wine vinegar
  • ⅓ cup olive oil
  • 2 tablespoon capers, drained
  • ⅓ cup olives, sliced
  • ¼ cup fresh basil, torn
🫙
Optional Toppings
  • ¼ cup pine nuts
  • 1 teaspoon sugar (if needed)
  • Salt and black pepper

Ingredient Details

  • Pearled farro
    Look for "pearled" or "semi-pearled" on the label - unpearled takes 60+ minutes to cook and will be too firm
  • Eggplant
    Choose firm, glossy eggplant without soft spots; dice into ¾-inch cubes for even roasting in 20-25 minutes
  • Red wine vinegar
    Don't substitute white vinegar - red wine vinegar has the right balance of tang and depth for caponata flavor
  • Capers
    Drain well and pat dry before adding or excess brine makes the salad too salty
  • Olive oil
    Use regular olive oil for roasting and save extra-virgin for the final dressing drizzle
  • Pine nuts
    Toast in a dry pan 3-5 minutes, stirring constantly - they burn fast and turn bitter
  • Fresh basil
    Tear leaves instead of chopping to prevent bruising and add just before serving to keep color bright

Ingredient Swaps

Swaps work when you need gluten-free, faster cooking, or different textures. For a version that comes together quickly, homemade salad recipe uses simpler greens when grains feel like too much.

Four swaps that work:

  • Farro → quinoa - cooks in 15 minutes instead of 30, softer texture, naturally gluten-free
  • Eggplant → zucchini or mushrooms - roast zucchini 15 minutes at 425°F; mushrooms add earthy depth but less creaminess
  • Pine nuts → toasted walnuts or almonds - chop coarsely and toast the same way, slightly different flavor but same crunch
  • Red onion → shallots - milder, sweeter flavor that cooks faster and doesn't overpower the dish

Quinoa Instead of Farro

Works for: gluten-free eaters, faster meals (15 min cook time), softer texture preference

Skip if: you want chewy grain texture or nutty flavor that stands up to bold caponata dressing

Zucchini Instead of Eggplant

Works for: lighter texture, faster roasting (15 min), less prep (no salting needed)

Skip if: you want creamy vegetable texture or traditional caponata flavor that eggplant delivers

Instructions

You need 55 minutes from start to finish with most of that hands-off boiling and roasting time. Rich mains need something to cut through, and potato does exactly that.

  1. Boil the farro: Bring 3 cups water to boil in medium pot, add 1 cup farro and ½ teaspoon salt, reduce to simmer and cook 25-30 minutes until chewy-tender with slight bite, then drain in colander and set aside to cool slightly.
  2. Prep and salt the eggplant: Dice eggplant into ¾-inch cubes, toss with 1 teaspoon salt in bowl, let sit 20 minutes, then pat dry with paper towels to remove moisture and bitterness.
  3. Roast the vegetables: Toss dried eggplant with 3 tablespoon olive oil, spread on sheet pan in single layer, roast at 400°F for 20-25 minutes turning halfway until golden and tender with caramelized edges.
  4. Make the caponata mixture: In large bowl, combine roasted eggplant, halved cherry tomatoes, diced red onion, minced garlic, capers, and sliced olives, then drizzle with red wine vinegar and remaining olive oil off heat.
  5. Assemble the salad: Fold cooked farro into vegetable mixture while both are still warm, season with salt and pepper, add torn basil leaves last, and toss gently until vinaigrette coats everything evenly.
Golden Rule
Add vinegar after vegetables cool slightly - mixing while too hot makes the acid harsh and toughens the eggplant instead of brightening flavors.

What to Serve With It

This needs protein or another vegetable to make a full meal. For planning your curried chicken salad dinner, savory chicken dish ideas covers complete plate options.

Side Dish Prep Why It Works How to Serve
Grilled chicken Easy Protein balances hearty grain base and absorbs tangy dressing Slice and place on top or serve alongside
Simple green salad Easy Refreshing crunch cuts through rich caponata flavors Dress lightly with lemon and olive oil
Crusty whole grain bread Easy Soaks up vinaigrette and adds texture contrast Toast and serve warm on the side
Roasted seasonal vegetables Medium Adds color and varied textures to the plate Roast same temp and time as eggplant
Marinated grilled shrimp Medium Light protein that doesn't overpower Mediterranean flavors Skewer and grill 2-3 min per side

Three ways to serve it:

  • Meal prep lunch: Pack 4-6 portions in containers with grilled chicken on top; keeps 3-4 days and tastes better after flavors meld
  • Picnic or potluck: Serve at room temperature in large bowl with extra basil and pine nuts on the side for guests to add
  • Casual dinner party: Plate individually with seared protein and drizzle extra vinaigrette around the edge
Best Pick
This works cold or at room temperature, so make it hours ahead and skip last-minute stress when hosting.

Store and Reheat

Farro salad keeps well but texture changes slightly in the fridge. The chicken works best when it hits the table at the same time as the main.

Method Time Best For
🍳 Stovetop 5-7 minutes on medium heat, stirring occasionally Reviving warmth without making vegetables soggy
📦 Microwave 1-2 minutes in 30-second bursts, stir between Quick reheating single portions for lunch
🔥 Oven 10 minutes at 325°F covered with foil Even reheating that preserves roasted texture

For best results when storing:

  • Fridge storage: Keep in airtight container 3-4 days; spread in shallow container so it cools faster and prevents bacterial growth
  • Freezing caution: Freeze up to 1 month but eggplant texture softens significantly; farro and dressing freeze better than vegetables
  • Serving cold: This tastes best at room temperature, so pull from fridge 30 minutes before serving instead of reheating
  • Reviving dried salad: Drizzle 1-2 tablespoon olive oil and toss before serving if farro absorbed all the dressing overnight
  • Adding fresh elements: Toss in fresh basil, extra capers, or toasted pine nuts right before serving to brighten flavors

Frequently Asked Questions

Can I use quick-cooking farro for this salad?

Yes, quick-cooking farro works and cuts time to 10-12 minutes. Check doneness at 8 minutes since brands vary and you still want chewy texture, not mushy.

What is the best way to store leftovers safely?

Store in airtight container in fridge up to 4 days. Spread in shallow container so it cools within 2 hours to prevent bacterial growth.

How do I know when eggplant is fully cooked for caponata?

Eggplant is done when golden brown on edges and fork-tender in center after 20-25 minutes at 400°F. It should collapse slightly when pressed but not turn to mush.

Why is my caponata salad soggy and how do I fix it?

Sogginess comes from skipping the salt step on eggplant or overcrowding the pan. Salt eggplant 20 minutes before roasting and spread in single layer with space between pieces.

Can I double the recipe and how does that affect cooking times?

Yes, double all ingredients but use two sheet pans for eggplant so it roasts instead of steams. Farro cooking time stays the same at 25-30 minutes regardless of amount.

Farro Caponata Salad served on a plate

Farro Caponata Salad

No ratings yet
Farro Caponata Salad combines chewy pearled farro with caramelized roasted eggplant and Mediterranean flavors like capers and olives. Roasting eggplant until golden prevents sogginess and balances the tangy red wine vinegar dressing in this versatile salad that serves well cold or at room temperature.
Print Recipe Pin Recipe
Prep Time 15 minutes mins
Cook Time 40 minutes mins
Total Time 55 minutes mins
Servings: 5 servings
Course: Lunch, Side Dish
Cuisine: Mediterranean
Ingredients Method Notes

Ingredients
  

  • 1 cup pearled farro or semi-pearled; soak 30 minutes before cooking if in a hurry
  • 1 medium eggplant diced into ¾-inch cubes
  • 1 cup cherry tomatoes halved
  • 0.5 unit red onion diced
  • 2 cloves garlic minced
  • 0.25 cup red wine vinegar
  • 0.33 cup olive oil use 3 tablespoon for roasting eggplant and rest for dressing
  • 2 tablespoon capers drained
  • 0.33 cup olives sliced
  • 0.25 cup fresh basil torn
  • 0.25 cup pine nuts optional, toasted
  • 1 teaspoon sugar optional, if needed to balance acidity
  • salt for eggplant salting and seasoning
  • black pepper to taste for seasoning

Method
 

  1. Bring 3 cups water to a boil in a medium pot. Add 1 cup farro and ½ teaspoon salt. Reduce heat to a simmer and cook for 25-30 minutes until chewy-tender with slight bite. Drain farro in a colander and set aside to cool slightly.
    1 cup pearled farro
  2. Dice eggplant into ¾-inch cubes. Toss with 1 teaspoon salt in a bowl and let sit for 20 minutes. Then pat dry with paper towels to remove moisture and bitterness.
    1 medium eggplant, salt
  3. Toss the dried eggplant cubes with 3 tablespoons olive oil. Spread in a single layer on a sheet pan. Roast at 400°F for 20-25 minutes, turning halfway, until golden and tender with caramelized edges.
    1 medium eggplant, 0.33 cup olive oil
  4. In a large bowl, combine roasted eggplant, halved cherry tomatoes, diced red onion, minced garlic, drained capers, and sliced olives. Drizzle with red wine vinegar and the remaining olive oil off heat. Stir gently.
    1 medium eggplant, 1 cup cherry tomatoes, 0.5 unit red onion, 2 cloves garlic, 0.25 cup red wine vinegar, 0.33 cup olive oil, 2 tbsp capers, 0.33 cup olives
  5. Fold the cooked farro into the vegetable mixture while both are still warm. Season with salt and black pepper. Add torn basil leaves last and toss gently until the vinaigrette coats everything evenly.
    1 cup pearled farro, salt, black pepper, 0.25 cup fresh basil

Notes

  • Salt eggplant for 20 minutes before roasting to draw out moisture and reduce bitterness.
  • Add red wine vinegar off the heat after vegetables cool slightly to avoid harsh acidity.
  • Toast pine nuts separately for 3-5 minutes in a dry pan to add crunchy texture if using.

Tried this recipe?

Let us know how it was!

How Long Does Half and Half Last? [Storage Guide]

March 30, 2026

That leftover carton sitting in the back of your fridge after Sunday brunch - the one you're not sure is still good - is exactly why half and half storage needs a straight answer.

Can You Freeze Half And Half

Half and half spoils faster than most dairy staples once opened, and the signs aren't always obvious until the carton is already in your coffee.

Understanding cream spoilage signs helps you catch the problem before it hits your cup.

For context on the role half and half plays in coffee, cooking, and baking, the details make the storage rules click faster.

QUICK SUMMARY

An unopened carton keeps 2-3 weeks in the fridge. Once opened, use it within 7-10 days. Freezing works but changes texture - thawed half and half is best saved for cooked dishes, not cold drinks.

🧊Fridge (opened): 7-10 days sealed tight in its original carton
❄️Freezer: 1-2 months; expect separation after thawing
⚠️Key Rule: Mark the open date on the carton - don't rely on memory

How Long Does Half and Half Last?

Shelf life depends on two things: whether the carton has been opened and where it's stored. An unopened carton held at or below 40°F stays good for 2-3 weeks, generally until the printed date.

Once you break the seal, the clock resets to 7-10 days regardless of what the label says.

UHT half and half - the shelf-stable version sold unrefrigerated - follows different rules before opening but behaves like standard half and half once opened. Dishes made with half and half, like cream soups or pan sauces, follow standard cooked-food rules and last 3-4 days in the fridge. For comparison, how long heavy cream keeps follows a nearly identical pattern, so the same habits apply to both.

Half and Half Shelf Life
MethodStateDurationNotes
🧊 FridgeUnopened2-3 weeksRefrigerate at or below 40°F; use by printed date
🧊 FridgeOpened7-10 daysKeep sealed; shorter if cap is left loose or frequently handled
❄️ FreezerOpened1-2 monthsTexture changes after thawing; use in cooked dishes only
🧊 FridgeCooked (soups, sauces)3-4 daysStandard cooked-food rules apply

How to Store Half and Half

The fridge is the only appropriate home for fresh half and half, and placement inside the fridge matters more than most people expect. Door storage exposes dairy to frequent temperature swings every time you open the fridge -

keeping the carton on a middle or back shelf holds it closer to a steady 40°F.

Golden Rule
Write the open date on the carton the moment you break the seal. The printed sell-by date no longer applies once opened.

Fridge: Store in the original carton with the cap pressed fully closed after each pour. If you've transferred it to another vessel, use a glass jar with a tight lid - airtight contact limits both oxidation and fridge odors. Freezer: Use a rigid, freezer-safe container with about one inch of headspace for expansion, or portion it into an ice-cube tray and transfer the frozen cubes to a sealed bag. Counter: Half and half left out longer than two hours enters the bacterial danger zone - don't put it back.

  • 🚫 Avoid the door shelf - temperature fluctuates with every opening, cutting shelf life short
  • 🚫 Don't freeze in the original carton - no headspace means ruptures and leaks as liquid expands
  • ✅ Seal tightly every time - even a loose cap accelerates spoilage by days

Can You Freeze Half and Half?

Yes, you can freeze half and half - with one honest caveat. Fat separation during freezing is guaranteed, and vigorous shaking or whisking after thawing rarely restores the original smooth texture.

That makes thawed half and half a poor choice for cold coffee but a solid one for soups, cream sauces, and baked goods where gentle heat reintegrates the fat.

Watch Out
Don't freeze half and half expecting it to taste the same in cold drinks. Graininess is noticeable in unheated applications - reserve thawed portions for cooking.

The ice-cube method is the most practical approach for recipe use: freeze in ¼-½ cup portions so you pull only what you need without thawing a full batch repeatedly.

For anyone already considering half and half swaps that work in a recipe, thawed half and half behaves similarly to a light cream substitute in hot applications.

  1. Portion it out Pour into a freezer-safe rigid container leaving 1 inch of headspace, or fill an ice-cube tray in measured amounts.
  2. Label and freeze Mark the container with today's date and use within 1-2 months for best quality.
  3. Thaw overnight Move the container to the fridge the night before you need it - don't thaw at room temperature.
  4. Whisk before using Shake or whisk vigorously to recombine separated fat before adding to hot liquids.
  5. Temper if needed To prevent curdling in sauces, whisk a small amount of hot liquid into the thawed half and half first before adding the full portion.

Signs Half and Half Has Gone Bad

Fresh half and half has a very mild, clean dairy smell and a pale, uniform cream color. Anything that departs noticeably from that baseline is worth taking seriously.

Signs It's Gone Bad
👀
VisualCurdling or visible lumps · Yellowing or darkening from pale cream · Separation that doesn't reblend with shaking
👃
SmellSour or tangy odor stronger than normal mild dairy · Sharp, almost fermented note
✋
TextureSlimy film on the surface · Grainy or separated bits that won't reblend

Don't taste-test to confirm. If smell, texture, or color is off on any one count, discard it. Spoiled dairy can carry bacterial loads high enough to cause illness even when the sourness seems mild.

Keeping Half and Half Longer

Good habits at the point of purchase extend shelf life before the carton even opens. Grab half and half from the back of the refrigerated shelf at the store - those cartons have the furthest-out dates.

At home, the same discipline pays off.

  • 📅 Mark the open date - use a marker on the cap so you always know exactly where you stand
  • 🧊 Store on a middle shelf - consistent cold beats the convenience of the door
  • 🥄 Freeze in recipe portions - ¼ to ½ cup cubes mean you never thaw more than you need
  • 🍲 Default to cooked uses after freezing - sauces, soups, and baked goods hide any texture change; cold drinks don't

If a recipe calls for something richer and your half and half is nearly gone, knowing replacements for milk can help you bridge the gap without a store run.

Frequently Asked Questions

Can you freeze half and half for coffee?

Technically yes, however thawed half and half turns grainy and separates in cold drinks. The texture change is noticeable in unheated coffee. Freeze it only if you plan to use it in hot cooked dishes.

How long is half and half good after the sell-by date?

An unopened carton stored properly is often still good 3-5 days past the sell-by date. Once opened, the 7-10 day rule applies from the day you broke the seal, regardless of the printed date.

Does freezing half and half ruin it?

It doesn't ruin it for cooking. Fat separation happens every time, and whisking after thawing helps but won't fully restore smoothness. For hot sauces and soups, the quality difference is minimal.

Is UHT half and half shelf stable?

Yes, sealed UHT cartons stay shelf stable at room temperature until opened, often for several months. Once opened, refrigerate and use within 7-10 days - the same window as standard half and half.

Can you use thawed half and half in sauces?

Yes, and it performs well. Whisk it thoroughly after thawing, then temper it by adding a spoonful of hot sauce liquid before incorporating the full amount to prevent curdling.

Air Fryer Stuffed Grape Leaves

March 30, 2026

When you need a hands-off appetizer for weeknight dinners or entertaining, air fryer stuffed grape leaves deliver. One batch, minimal cleanup, and the air fryer crisps the edges while keeping the rice filling tender.

Air Fryer Stuffed Grape Leaves served on a plate

The air fryer cuts cooking time in half compared to traditional steaming. You get caramelized leaf edges without soggy centers or constant monitoring.

Perfect for meal prep when you want Mediterranean flavor without the typical hour-long simmer time.

QUICK SUMMARY

Air fryer stuffed grape leaves use short-grain rice, ground meat, and fresh herbs rolled tightly in brined grape leaves and cooked at 350°F for 15 minutes. The controlled air circulation crisps edges while steaming the filling without the multi-hour stovetop method. Roll tightly and brush with olive oil for compact, evenly browned results.

⏱️Timing: 40 minutes total-25 minutes prep, 15 minutes air frying
🔑Critical Move: Soak jarred grape leaves 10 minutes to remove excess brine salt
⚠️Watch Out: Overfilling bursts leaves-use 1 tablespoon filling per leaf and roll firmly

Table of Contents

Toggle
  • Why This Recipe Works
  • What You'll Need
    • Ingredient Details
  • Ingredient Swaps
  • What to Serve With It
  • Store and Reheat
  • Frequently Asked Questions
  • Air Fryer Stuffed Grape Leaves
    • Method 
    • Tried this recipe?

Why This Recipe Works

Air frying forces hot air circulation around each grape leaf, crisping exposed edges while trapping steam inside to cook the rice filling. For a version that comes together quickly, more recipe ideas show how the same basket setup works for different Mediterranean appetizers.

Quick Reference
⏱️
Prep Time
25 min
🔥
Cook Time
15 min
⏰
Total Time
40 min
🍽️
Servings
6 servings (about 24 grape leaves)
📊
Difficulty
Medium
🏷️
Category
Appetizer
💡
Quick Tip
Roll tightly for best texture
🎯
Best For
Weeknight | Meal prep | Entertaining

Why the method works:

  • Short-grain rice absorbs moisture from the meat and herbs without turning mushy during the 15-minute cook time
  • Brushing leaves with olive oil before air frying creates crisp edges while preventing sticking to the basket
  • The 350°F temperature cooks filling through without burning the delicate grape leaf exterior
  • Par-cooking rice for 5 minutes speeds air fryer cooking and prevents crunchy centers
  • Rolling seam-side down keeps leaves sealed during air circulation
Quick Tip
Flip stuffed leaves gently after 7 minutes to promote even browning on both sides without tearing

What You'll Need

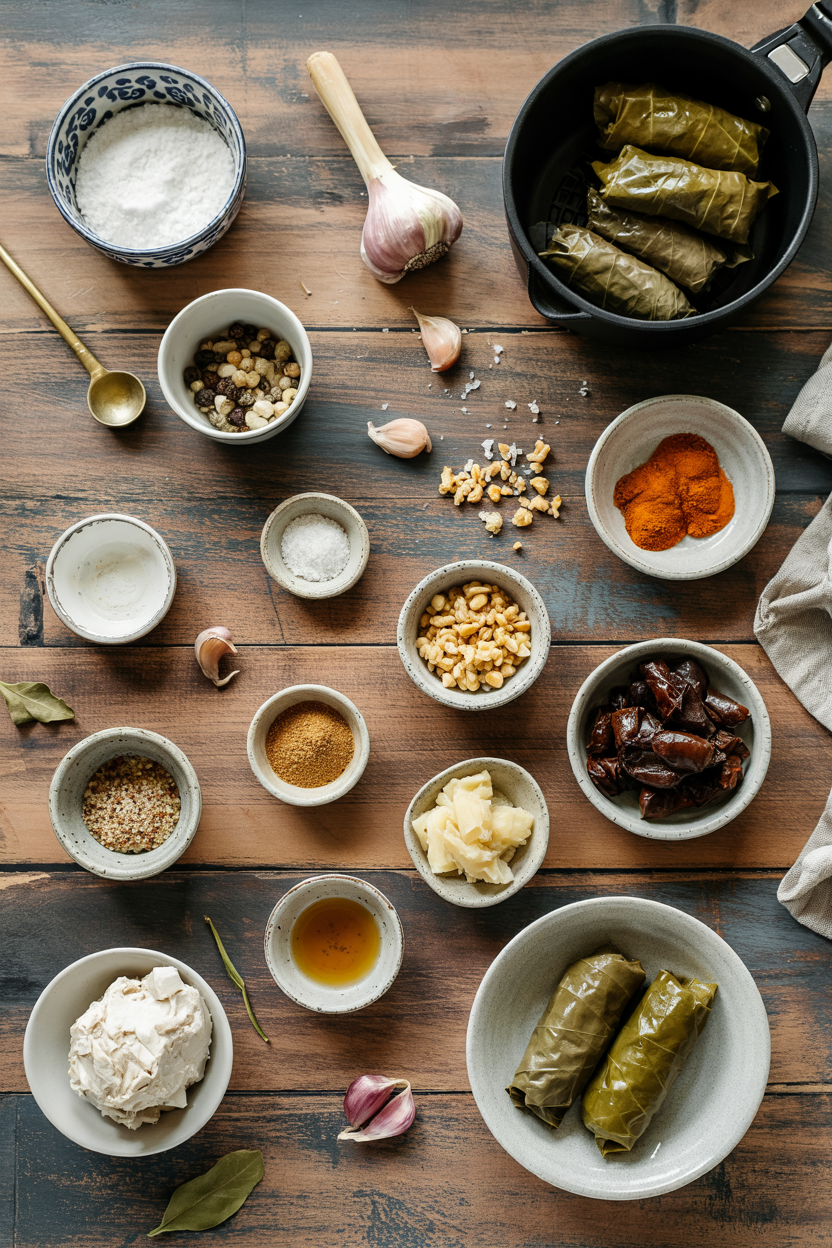
Ingredients for Air Fryer Stuffed Grape Leaves

Jarred grape leaves work best for weeknight cooking since they're pre-softened and ready after a quick soak. A good simple potato wedges recipe uses similar air fryer basket layering to prevent overcrowding.

🍃
Grape Leaves
  • 24 jarred or frozen grape leaves
🍜
Rice Base
  • ¾ cup short-grain rice
  • 1½ cups water (for par-cooking)
🍗
Meat Filling
  • ½ lb ground lamb or beef
🧄
Aromatics
  • 1 small onion, finely diced
  • 2 cloves garlic, minced
🥬
Fresh Herbs
  • ¼ cup fresh parsley, chopped
  • 2 tablespoons fresh dill, chopped
  • 1 tablespoon fresh mint, chopped
🥢
Flavor Base
  • 2 tablespoons olive oil
  • 2 tablespoons lemon juice
  • 1 tablespoon tomato paste
🌶️
Spices
  • 1 teaspoon salt
  • ½ teaspoon black pepper
  • ¼ teaspoon cinnamon

Ingredient Details

  • Grape leaves
    Soak jarred leaves 10 minutes in hot water to remove excess brine salt and improve pliability before rolling
  • Short-grain rice
    Par-cook rice 5 minutes in boiling water before mixing with filling to ensure tender centers after air frying
  • Ground meat
    Lamb adds authentic flavor but beef works-choose 80/20 fat ratio for moisture during cooking
  • Fresh herbs
    Chop herbs finely so they distribute evenly and don't puncture grape leaves during rolling
  • Olive oil
    Brush leaves and spray basket with olive oil to prevent sticking and create crisp edges
  • Lemon juice
    Fresh lemon juice brightens the filling-add to mixture before rolling and serve with extra wedges
  • Tomato paste
    Small amount adds umami depth without making filling wet or loose

Ingredient Swaps

Most swaps change texture more than flavor, so match the swap to what you have on hand. Most people skip tender salmon recipe when serving these, but it balances the meal.

Four swaps that work:

  • Ground meat → cooked lentils or mushrooms: Use 1 cup cooked lentils or finely chopped sautéed mushrooms for vegetarian filling-add 1 extra tablespoon olive oil to compensate for lost fat
  • Short-grain rice → quinoa: Use ½ cup quinoa cooked until just tender-cooks faster but changes texture to nuttier, firmer bite
  • Fresh herbs → dried herbs: Use 1 tablespoon dried parsley and 1 teaspoon dried dill total-less fresh aroma but budget-friendly
  • Jarred grape leaves → cabbage leaves: Blanch cabbage leaves 2 minutes until pliable-requires 5 extra minutes air frying and changes texture to softer, less authentic

Jarred Grape Leaves

Works for: Quick weeknight cooking, authentic Mediterranean flavor, no blanching needed

Skip if: You want to control salt level or prefer fresh leaf texture

Fresh Grape Leaves

Works for: Peak summer when vines are available, milder flavor, less salty

Skip if: You're short on time-requires picking, blanching, and stem removal

Instructions

Par-cooking the rice cuts air fryer time from 25 to 15 minutes without sacrificing tender filling. The juicy homemade chicken recipe uses similar basket arrangement to prevent overcrowding and ensure even cooking.

  1. Prep the grape leaves: Soak jarred grape leaves in hot water for 10 minutes, then rinse under cold water and pat completely dry with paper towels. Trim any thick stems flush with the leaf base.

  2. Par-cook the rice: Bring 1½ cups water to a boil, add rice, cook 5 minutes until grains are slightly softened but still firm, then drain and cool.

  3. Make the filling: Mix par-cooked rice, ground meat, diced onion, minced garlic, chopped herbs, olive oil, lemon juice, tomato paste, salt, pepper, and cinnamon in a bowl until evenly combined.

  4. Roll the leaves: Place one grape leaf smooth side down with stem end closest to you, add 1 tablespoon filling near stem end, fold sides over filling, then roll tightly away from you into a compact cylinder. Repeat with remaining leaves and filling.

  5. Air fry: Brush rolled leaves lightly with olive oil, arrange seam-side down in a single layer in air fryer basket (work in batches if needed), air fry at 350°F for 7 minutes, flip gently with tongs, air fry 8 more minutes until edges are golden and leaves are tender.

Golden Rule
Roll tightly but not so tight leaves burst-you should be able to see the seam but it should stay closed during cooking

What to Serve With It

Stuffed grape leaves work as an appetizer or light dinner but need bright, crunchy sides to cut the richness. For bunless burgers meal planning ideas, the same Mediterranean sides pair well with this dish.

Side Dish Prep Why It Works How to Serve
Greek Salad Easy Crisp cucumbers and tomatoes cut through rich grape leaf filling Chop vegetables, toss with feta and olives, dress with lemon-olive oil
Tzatziki Sauce Easy Cool cucumber yogurt balances warm spiced meat filling Stir grated cucumber into Greek yogurt with garlic, dill, and lemon
Pita Bread Easy Warm bread scoops tzatziki and catches filling if leaves unwrap Warm store-bought pita in air fryer 2 minutes or slice into triangles
Pickled Vegetables Easy Tangy brine cuts richness and adds crunchy contrast Serve store-bought pickled peppers, turnips, or cucumbers on the side
Hummus Platter Easy Creamy chickpea dip adds protein and Mediterranean flavor continuity Spread hummus on plate, drizzle with olive oil, serve with vegetables

Three ways to serve it:

  • As an appetizer: Arrange on a platter with lemon wedges, tzatziki, and warm pita bread for dipping and scooping
  • For meal prep: Pack 4-5 stuffed leaves with Greek salad and hummus in containers for lunch throughout the week
  • For entertaining: Serve warm on a large platter with pickled vegetables, olives, and feta cheese for a Mediterranean mezze spread
Best Pick
Tzatziki sauce is the single best pairing-the cool, tangy yogurt balances the warm spiced filling and adds moisture

Store and Reheat

Stuffed grape leaves hold texture for 3-4 days in the fridge but lose crispness quickly. A good a rich beef on the side reheats similarly-low and slow prevents drying.

Method Time Best For
🔥 Air Fryer 5-7 min at 350°F Restoring crisp edges without drying filling-best texture
🔥 Oven 10-12 min at 325°F Reheating larger batches gently without burning leaf exteriors
📦 Microwave 1-2 min covered Quick weekday lunches-softens leaves but heats filling fast

For best results when storing:

  • Refrigerate cooled stuffed grape leaves in an airtight container in a single layer with parchment paper between stacks to prevent sticking
  • Freeze individual leaves on a baking sheet until solid, then transfer to freezer bags for up to 2 months without clumping
  • Cover with foil when reheating in air fryer or oven after 5 minutes to prevent edges from burning before centers heat through
  • Add 1 tablespoon water to the container when microwaving to create steam and prevent leaves from drying out
  • Serve reheated leaves with fresh lemon wedges and tzatziki since both flavors fade slightly during storage

Frequently Asked Questions

Can I use fresh grape leaves instead of jarred or frozen?

Yes, but blanch fresh leaves in boiling water for 2 minutes until pliable, then trim thick stems. Fresh leaves are less salty but require more prep time and aren't available year-round.

How should I store leftover air fryer stuffed grape leaves?

Refrigerate in an airtight container for 3-4 days, placing parchment paper between layers to prevent sticking. Reheat in the air fryer at 350°F for 5-7 minutes to restore crisp edges.

How do I know when the rice inside is fully cooked?

Par-cook rice 5 minutes before adding to filling-after 15 minutes air frying, the rice should be tender with no hard center when you cut one leaf open to test. If it's still firm, tent with foil and air fry 5 more minutes.

What can I do if my stuffed grape leaves come out soggy?

Pat leaves completely dry after soaking, brush with olive oil before air frying, and avoid overcrowding the basket. If they're already cooked but soggy, air fry uncovered at 375°F for 3-4 more minutes to crisp edges.

How many stuffed grape leaves does the recipe make per serving?

The recipe makes 24 stuffed grape leaves total, which serves 6 people at 4 leaves per serving as an appetizer. For a light dinner, plan on 6-8 leaves per person with sides.

Air Fryer Stuffed Grape Leaves served on a plate

Air Fryer Stuffed Grape Leaves

No ratings yet
Air fryer stuffed grape leaves are a quick, hands-off Mediterranean appetizer that combines tender rice and spiced meat filling wrapped in grape leaves. The air fryer crisps the edges while keeping the filling moist, cutting the traditional cooking time in half. Rolling tightly and brushing with olive oil ensures evenly browned, compact results.
Print Recipe Pin Recipe
Prep Time 25 minutes mins
Cook Time 15 minutes mins
Total Time 40 minutes mins
Servings: 6 servings
Course: Appetizer
Cuisine: Mediterranean
Ingredients Equipment Method Notes

Ingredients
  

  • 24 leaves grape leaves jarred or frozen, soaked and rinsed
  • 0.75 cup short-grain rice par-cooked 5 minutes
  • 1.5 cups water for par-cooking rice
  • 0.5 lb ground beef or ground lamb
  • 1 small onion finely diced
  • 2 cloves garlic minced
  • 0.25 cup fresh parsley chopped
  • 2 tablespoons fresh dill chopped
  • 1 tablespoon fresh mint chopped
  • 2 tablespoons olive oil plus extra for brushing leaves
  • 2 tablespoons lemon juice fresh
  • 1 tablespoon tomato paste
  • 1 teaspoon salt
  • 0.5 teaspoon black pepper
  • 0.25 teaspoon cinnamon

Equipment

  • Air fryer Used for cooking stuffed grape leaves to crisp edges and tender filling
  • Pot Used to par-cook rice before mixing the filling
  • Mixing bowl Used to combine rice, meat, herbs, and spices

Method
 

  1. Soak jarred grape leaves in hot water for 10 minutes to remove excess brine salt. Then rinse under cold water and pat completely dry with paper towels. Trim any thick stems flush with the leaf base.
    24 leaves grape leaves
  2. Bring 1½ cups water to a boil, add ¾ cup short-grain rice, and cook for 5 minutes until grains are slightly softened but still firm. Drain and let cool.
    0.75 cup short-grain rice, 1.5 cups water
  3. In a mixing bowl, combine the par-cooked rice, ground meat, diced onion, minced garlic, chopped parsley, dill, mint, 2 tablespoons olive oil, lemon juice, tomato paste, salt, black pepper, and cinnamon. Mix thoroughly until even.
    0.75 cup short-grain rice, 0.5 lb ground beef, 1 small onion, 2 cloves garlic, 0.25 cup fresh parsley, 2 tablespoons fresh dill, 1 tablespoon fresh mint, 2 tablespoons olive oil, 2 tablespoons lemon juice, 1 tablespoon tomato paste, 1 teaspoon salt, 0.5 teaspoon black pepper, 0.25 teaspoon cinnamon
  4. Place one grape leaf smooth side down with the stem end closest to you. Add 1 tablespoon of filling near the stem end. Fold sides over the filling, then roll tightly away from you into a compact cylinder. Repeat with remaining leaves and filling.
    24 leaves grape leaves
  5. Brush each rolled leaf lightly with olive oil. Arrange them seam-side down in a single layer in the air fryer basket. Air fry at 350°F for 7 minutes, then flip gently with tongs and air fry another 8 minutes until edges are golden and leaves are tender.
    2 tablespoons olive oil, 24 leaves grape leaves

Notes

  • Soak jarred grape leaves thoroughly to remove excess salt and improve pliability for rolling.
  • Roll leaves tightly but not too tight to prevent bursting during cooking.
  • Flip the leaves halfway through air frying to ensure even browning on all sides.

Tried this recipe?

Let us know how it was!

What Is Glycerin? [Taste, Uses & More]

March 30, 2026

Most home bakers reach for glycerin once, get confused by the label, and put it back on the shelf.

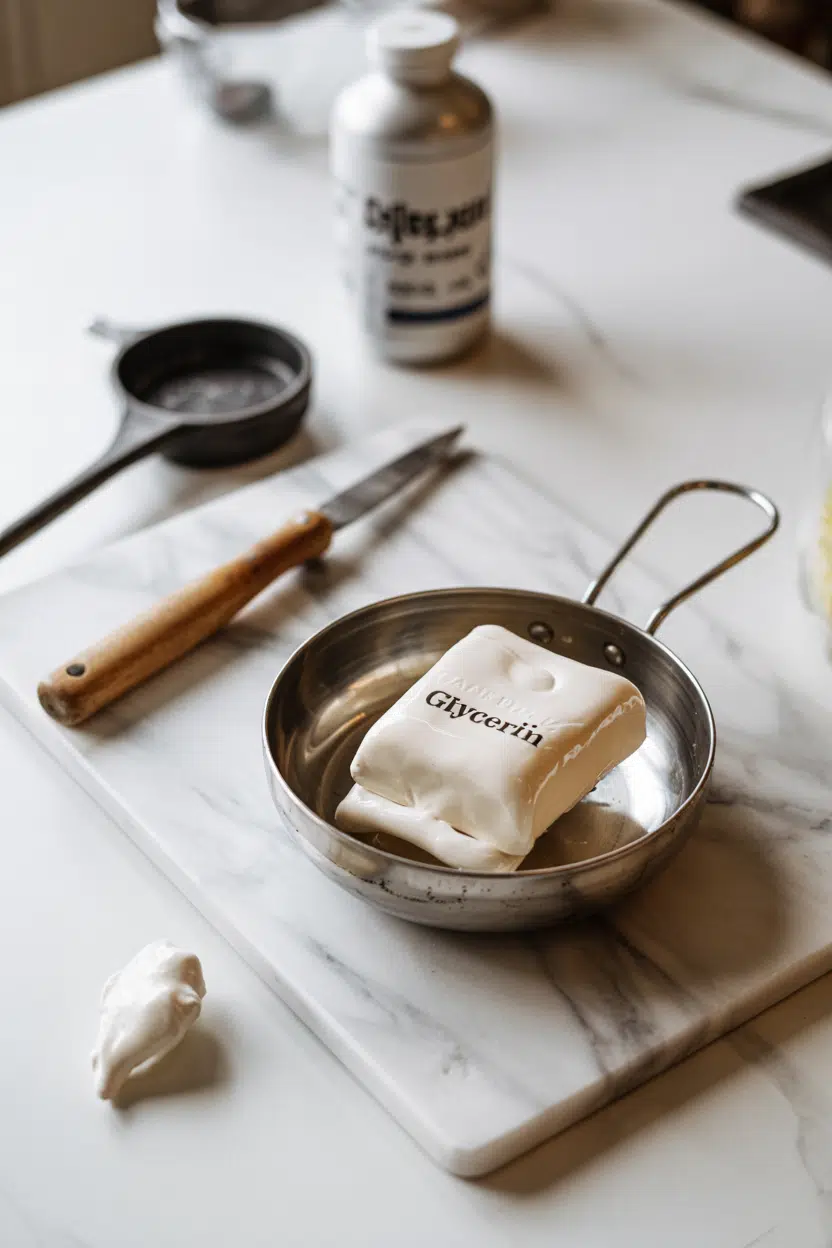
What Is Glycerin

That's a mistake - this clear, syrupy liquid is one of the few ingredients that keeps baked goods soft for days without changing their flavor profile, and it does it through pure chemistry rather than added sugar.

QUICK SUMMARY

Glycerin is a clear, viscous humectant with mild sweetness and a syrupy mouthfeel. Use it in baking, confectionery, and herbal extracts to retain moisture, add body, and replace some sugar. It's shelf-stable for years and available as food-grade vegetable glycerin at most health food stores.

🍬Flavor: Mild, clean sweetness - less sugary than corn syrup with a thicker finish
💧Best Use: Keeping cakes, cookies, and candies moist and soft over time
🏷️Buy: Look for "food grade" or "USP" on the label - 100% glycerin, no additives
📦Shelf Life: Unopened: several years; opened: 1-3 years in a sealed container
⚠️Avoid: Meringues, egg-white foams, and hard candies that depend on sugar crystallization

What Is Glycerin?

Glycerin - also called glycerol, glycerine, or vegetable glycerin - is a trihydroxy sugar alcohol derived from fats and oils during soap-making or biodiesel production. Plant-derived versions, commonly labeled VG (vegetable glycerin), come from soy, palm, or coconut oil and are the standard for food use.

It falls into two overlapping categories: sugar alcohol and humectant. As a sugar alcohol, it provides roughly 4 kcal per gram and offers mild sweetness without spiking blood glucose the way sucrose does.

As a humectant, it attracts and holds water molecules, which is what makes it so useful in food production.

Food-grade glycerin must meet USP (United States Pharmacopeia) purity standards and contain no propylene glycol or synthetic fillers. The two compounds are chemically different - propylene glycol is not a sugar alcohol and has a distinct safety and flavor profile.

Watch Out
Cosmetic or industrial glycerin is NOT safe to eat. Always check the label for "food grade" or "USP" before using glycerin in any recipe.

What Does Glycerin Taste Like?

glycerin - What Is Glycerin

Glycerin tastes like a quieter version of corn syrup - mildly sweet, clean, and slightly thick on the tongue - but with notably less sugar intensity. Think concentrated simple syrup that somehow feels denser without tasting sweeter.

At low doses (1-3 teaspoons in a full batch), the sweetness is barely detectable. You'll notice the slick, mouth-coating texture more than any flavor.

At higher concentrations, a faint caramel-like note emerges, along with a subtle medicinal or bitter finish that signals you've used too much.

Sensory SnapshotModerate Intensity
👅 Flavor
mild sweetcleanfaint caramelslight bitter finish
✋ Texture
thicksyrupymouth-coating
👃 Aroma
nearly odorlessfaint sweet when warm

Warming glycerin gently - as you would when dissolving sugars into a glaze - coaxes out that faint sweetness and makes it easier to blend. Cold glycerin is thicker and can be harder to incorporate evenly into batters.

How to Use Glycerin

Glycerin earns its place in recipes not through bold flavor, but through what it prevents: staling, drying, and crystallization. A small amount goes a long way, and the method of incorporation matters.

How Glycerin Is Used
MethodBest ForTip
🥣 Whisked InCake and cookie batters, muffin mixesAdd with wet ingredients; 1 teaspoon per cup of flour keeps crumb soft for days
🍯 Stirred into SyrupsGlazes, icings, flavored syrupsAdd after heating; gives shine and prevents hardening at room temperature
🌿 Cold ExtractionGlycerites - alcohol-free herbal tincturesUse a 60:40 glycerin-to-water ratio for most dried herbs; steep 4-6 weeks
🍬 Blended into ConfectionsSugar-free candies, caramels, lozengesReplaces some corn syrup; keeps texture chewy without added sugar

Glycerin pairs well with vanilla, chocolate, citrus zest, cinnamon, and cardamom - essentially any flavoring that benefits from extended moisture and a smooth carrier. It also works as a solvent for essential oils and bitters, where alcohol is undesirable.

Two situations call for caution. Skip glycerin entirely in egg-white foams and meringues - its hygroscopic nature pulls water into the foam and collapses structure.

Likewise, avoid it in hard candies where precise sugar crystallization controls texture; glycerin interferes with that process. If you need a different moisture-retaining approach, reviewing glycerin swaps can help you pick the right swap for your recipe.

Golden Rule
Use no more than 1 teaspoon of glycerin per cup of flour in baking. Exceeding this ratio makes the crumb gummy and can introduce that bitter finish.
Try It In
🍫Rich Chocolate Layer CakeA teaspoon of glycerin keeps layers moist even on day two→🍪Small Batch Chocolate Chip CookiesAdds chew and slows drying without extra sugar→🥜Cinnamon Sugar Roasted NutsGlycerin in the glaze gives a glossy, even coat that doesn't harden→

How to Buy and Store Glycerin

At the store, look for bottles labeled "food grade" or "USP vegetable glycerin." The ingredient list should read: glycerin (or vegetable glycerin). Full stop.

If propylene glycol appears anywhere on the label, put it back - that's a different compound with a different safety profile.

Check the bottle itself. Food-grade glycerin should be completely clear and colorless.

Cloudiness or a yellow tint indicates possible contamination or degradation.

  • Where to buy - Health food stores, supplement retailers, and online suppliers carry it reliably. Pharmacy sections sometimes stock USP-grade bottles.
  • Container size - A 4 oz bottle is sufficient for most home bakers; commercial confectioners buy in larger quantities.
  • Storage - Keep in a tightly sealed container away from direct light and heat. Glycerin absorbs moisture from the air, so a loose lid compromises quality fast.

Properly sealed glycerin has an impressively long shelf life - unopened bottles remain stable for several years, and opened ones keep for 1-3 years. For comparison, sugar stored correctly can last indefinitely, but glycerin still outlasts most liquid pantry staples by a wide margin.

Shortcut
Buy a small USP-grade bottle from a supplement retailer rather than a specialty baking shop - it's the same product, usually at half the price.

Start Here If You're New to Glycerin

If you've never used glycerin before, start with baking. Add one teaspoon to your next batch of cookies or a simple loaf cake.

You won't taste a dramatic difference on day one - that's not the point. Pull out a piece on day three and compare it to a batch made without it.

The texture difference will make the case for you.

Once you're comfortable with ratios, try it in a glaze or icing for shine and flexibility. Glycerites - the herbal extraction method - are a longer project better suited to your second or third experiment with the ingredient.

Frequently Asked Questions

Is glycerin safe to eat?

Yes, food-grade and USP-grade glycerin are recognized as safe by the FDA and used widely in commercial food production. The key is buying the correct grade - cosmetic or industrial glycerin is not formulated for consumption.

Does glycerin raise blood sugar?

It can, but its glycemic impact is lower than sucrose. Glycerol is metabolized partly to glucose in the liver, so people managing diabetes or insulin resistance should account for it - it's not a free pass as a sugar substitute.

What is the difference between vegetable glycerin and propylene glycol?

They are chemically distinct compounds. Vegetable glycerin is a sugar alcohol derived from plant fats and is sweet; propylene glycol is a synthetic diol with a faintly bitter taste and no sweetness. They are not interchangeable in food recipes.

Can you use glycerin in royal icing?

Yes, in very small amounts - typically no more than half a teaspoon per batch. A tiny addition prevents royal icing from setting rock-hard, making decorated cookies easier to cut and eat without shattering.

Is vegetable glycerin vegan?

Plant-derived vegetable glycerin is vegan. However, glycerin can also be sourced from animal fats, so checking the label or contacting the manufacturer matters if strict vegan compliance is required.

What Is Jasmine Rice? [Taste, Uses & More]

March 30, 2026

Most cooks assume jasmine rice is just a fancier version of everyday long-grain white rice - same neutral base, different bag. That assumption costs them a lot of aroma, because jasmine rice behaves differently from the moment you open the package, with a warm floral scent that no plain rice variety can replicate.

What Is Jasmine Rice

Understanding what makes it distinct helps you use it correctly - and avoid the common mistakes that flatten its character.

QUICK SUMMARY

Jasmine rice is a fragrant long-grain rice from Thailand with a mild floral aroma, lightly sweet flavor, and soft, slightly clingy texture when cooked. It's the standard rice for Thai and Southeast Asian dishes, and it holds up well to bold, saucy mains.

🌸Flavor: Mild, lightly sweet, with a floral popcorn-like aroma
🍚Texture: Soft, tender grains that cling slightly without becoming gummy
🌍Origin: Thailand; also used across Vietnamese, Laotian, and Cambodian cooking
🍳Best Uses: Thai curries, fried rice, coconut rice, grilled protein pairings
📦Shelf Life: Unopened white jasmine lasts 12-24 months; opened, use within 6-12 months

What Is Jasmine Rice?

Jasmine rice is an aromatic long-grain variety originally bred in Thailand, where it carries the official designation Hom Mali - meaning "good-smelling." It belongs to the same broad category as basmati and other rice swaps but has a character distinctly its own.

The floral quality comes from a naturally occurring compound called 2-acetyl-1-pyrroline (2-AP), the same molecule responsible for the scent of fresh pandanus leaves and popcorn. This compound is highest in freshly harvested rice and fades with age, which is why older bags smell flatter.

You'll find it sold under several names:

  • Hom Mali - the Thai government's certified-origin designation for authentic Thai jasmine
  • Fragrant rice - a generic label used across Southeast Asian markets
  • Thai jasmine or jasmine white rice - common Western retail names
  • Brown jasmine - the whole-grain version, with bran intact and a slightly nuttier edge

White jasmine is the most widely available form. Brown jasmine retains more fiber but has a shorter rice storage life due to its oilier bran layer.

What Does Jasmine Rice Taste Like?

jasmine rice - What Is Jasmine Rice
Sensory SnapshotModerate Intensity
👅 Flavor
florallightly sweetsubtle nutty
✋ Texture
softslightly clingy
👃 Aroma
sweet popcornwarm rice-strawfloral

The flavor of jasmine rice is mild but unmistakably present - you're not eating a neutral backdrop the way you would with plain long-grain white rice. There's a soft sweetness and a warm, almost buttery quality that the aroma amplifies considerably.

Compared to basmati rice, jasmine reads as fruitier and more floral. Basmati tends drier and nuttier, with grains that stay more separate.

Jasmine grains soften more at the edges, giving a slightly creamy quality without turning gummy.

Heat intensifies the 2-AP aroma noticeably. The first minutes of cooking fill a kitchen with that characteristic popcorn-floral scent, which then settles into the cooked grain itself.

Golden Rule
Freshness matters more with jasmine than most rice varieties. The floral aroma fades as the rice ages, so buying smaller bags more frequently gives you noticeably better results than storing a large open bag for months.

How to Use Jasmine Rice

Jasmine rice is built for saucy, bold-flavored cooking - the slight cling in the grains means sauce adheres rather than pooling at the bottom of the bowl. That's why it's the default rice across Thai, Vietnamese, Laotian, and Cambodian kitchens.

For dishes like side dishes for jasmine rice, the pairings are wide: coconut milk, fish sauce, lime, Thai basil, lemongrass, and chili paste all work with its floral base rather than against it.

Lean grilled proteins - chicken thighs, white fish, lemongrass-marinated pork - let the rice's aroma stay present.

How Jasmine Rice Is Used
MethodBest ForTip
🍳 Stovetop absorptionEveryday rice, curries, stir-fry pairingsUse 1.5-1.75:1 water-to-rice ratio; rinse first to reduce surface starch
🍚 Rice cookerConsistent texture, hands-off cookingSlightly less water than stovetop; jasmine absorbs fast
🥥 Coconut milk simmerCoconut rice, rice pudding, dessertsReplace half the water with full-fat coconut milk; watch for scorching
🥘 Fried riceKhao Pad, leftover-rice dishesUse day-old rice; fresh jasmine is too moist and will clump in a wok
🥣 Congee/porridgeSoft, creamy rice porridgeUse a 6:1 water-to-rice ratio; jasmine breaks down into a silkier congee than regular long-grain

Two dishes showcase jasmine rice at its most specific. Khao Mun Gai -

Thai poached chicken served over rice cooked in the chicken stock - depends entirely on the grain's absorbency and aroma carrying the subtle cooking liquid. Green curry served over plain steamed jasmine is the more familiar example: the rice's slight sweetness buffers the heat while the floral note ties into the fresh herb base.

Don't use jasmine for sushi or traditional risotto. It lacks the neutral starch sushi rice needs, and it won't release the starch the way arborio does.

Try It In
🍚Jasmine Rice Perfectly CookedThe stovetop absorption method, calibrated for jasmine's faster water uptake→

How to Buy and Store Jasmine Rice

Look for bags labeled "Hom Mali" or simply "jasmine" with whole, translucent long grains. Open the bag and smell it - genuine jasmine rice has a detectable floral note even raw.

Avoid bags with broken or chalky grains, a musty odor, or no visible packaged-on date.

Watch Out
Strong-smelling pantry neighbors - spices, onions, coffee - can transfer odors into open jasmine rice and dull its aroma permanently. Store it away from them in a sealed container.

Once opened, transfer the rice to an airtight container and keep it in a cool, dark pantry. White jasmine holds well for 6-12 months after opening; brown jasmine, with its oilier bran, turns rancid faster and should be used within 3-6 months.

For full guidance on how long it keeps, see our jasmine rice storage life breakdown.

Where to Start With Jasmine Rice

If you've only ever used it as a side dish, cook it in coconut milk once. That single technique shows what the grain does when paired with something that amplifies its floral quality.

From there, day-old jasmine fried rice is worth learning early - it's one of the most practical uses, and the texture difference from fresh-cooked rice is immediately obvious.

If jasmine isn't available, check the jasmine rice swaps that come closest in aroma and texture without sacrificing the dish.

Best Pick
For everyday cooking, a Thai-imported Hom Mali bag outperforms generic "jasmine" labels. The aroma difference is clear side by side, especially in dishes where the rice is the main event.

Frequently Asked Questions

Is jasmine rice the same as basmati?

No. Both are aromatic long-grain varieties, but jasmine is fruitier and more floral, while basmati is drier and nuttier with grains that stay more separate. They're not interchangeable in dishes where aroma drives the flavor. Check the basmati rice alternatives guide if you need to swap one for the other.

What does jasmine rice taste like compared to regular white rice?

Regular long-grain white rice is largely neutral - it carries the flavor of whatever it's cooked with. Jasmine has a distinct floral, popcorn-like aroma and a mild natural sweetness that's present even plain.

How do you cook jasmine rice so it isn't sticky?

Rinse it until the water runs nearly clear before cooking - this removes surface starch that causes clumping. Use a 1.5:1 water-to-rice ratio and let it rest off heat, covered, for 5 minutes before fluffing.

Can you use jasmine rice for sushi?

It's not suitable. Sushi requires short-grain rice with enough starch to hold together when seasoned with vinegar - jasmine is too long-grain and floral to absorb the vinegar treatment correctly. The flavor profile also conflicts with the clean neutral base sushi needs.

Is brown jasmine rice healthier than white jasmine?

Brown jasmine retains its bran layer, so it has more fiber and micronutrients than the white version. White jasmine has a higher glycemic index and fewer nutrients, though it's naturally gluten-free and low in fat either way.

What Is Half and Half? [Taste, Uses & More] Everyday

March 30, 2026

That first pour of half and half into hot coffee is one of the quieter pleasures of the morning - a thin ribbon of pale cream swirling down through dark liquid, softening the sharpness without masking it.

The texture shifts almost immediately, turning silky where the coffee was thin.

This is what light cream replacements and whole milk alternatives are often measured against - the particular creaminess that half and half delivers at a modest fat level.

QUICK SUMMARY

Half and half is a refrigerated dairy blend of equal parts whole milk and light cream, standardized to around 10-12% milkfat. It adds creamy body to coffee, soups, and sauces without the heaviness of cream - a go-to for everyday richness at a lower fat level.

🥛Flavor: Mildly sweet, lightly buttery, clean dairy taste
🍳Best Uses: Coffee creamer, soups, pan sauces, mashed potatoes
⚠️Avoid: Recipes needing whipping or extended high-heat boiling
🧊Shelf Life: Opened: 7-10 days refrigerated; unopened: 2-3 weeks
🏷️Also Called: Half & half, half-and-half, half n half, half 'n' half

What Is Half and Half?

Half and half is a blended dairy product made from equal parts whole milk and light cream. In the United States, federal standards set its milkfat content between 10.5% and 18%, though most commercial cartons land near 10-12% milkfat.

That places it firmly between whole milk (around 3.5% fat) and light cream (roughly 20%) on the dairy spectrum.

You'll see it labeled several ways - half & half, half-and-half, half n half - but they all refer to the same product. Most cartons are pasteurized, though ultra-pasteurized versions exist with extended refrigerated shelf life at the cost of a slightly cooked dairy note.

Some producers add a small amount of carrageenan as a stabilizer, though many formulas use none.

Half and half does not whip. Its fat content sits too low to trap air and hold structure, which sets a clear boundary on where it works well.

It's also worth knowing that milk alternatives and plant-based half-and-half alternatives behave differently in heat and won't replicate the same body.

What Does Half and Half Taste Like?

half and half - What Is Half And Half

Half and half has a mild, lightly sweet dairy flavor - closer to whole milk than to cream, but noticeably richer than either alone.

There's a subtle butter note that emerges when it's warmed, and the overall profile stays clean without the heavier, almost fatty finish that light cream or heavy cream leaves behind.

Sensory SnapshotMild Intensity
👅 Flavor

mildly sweetcreamyslightly buttery
✋ Texture

silkylightly viscous
👃 Aroma

clean dairysubtle cream

In hot liquids, the silky quality becomes the dominant impression - it smooths and rounds without coating. Cold from the fridge, it tastes closer to whole milk.

The difference between a standard pasteurized carton and an ultra-pasteurized one is real: ultra-pasteurized half and half carries a faint cooked-milk note even before you heat it.

Golden Rule
Add half and half off heat or at the very end of cooking. Prolonged boiling breaks the emulsion and causes visible separation.

How to Use Half and Half

Coffee and tea are the most common destinations - half and half adds creamy body without the weight of cream or the thinness of milk. Beyond the cup, it earns its place across a range of everyday cooking.

How Half and Half Is Used
Method Best For Tip
🥛 Cold Creamer Coffee, tea, hot cereal Pour in after brewing; no heating needed
🍲 Stirred In (off heat) Pan sauces, gravies, soups Add at the end to prevent separation
🥣 Gentle Warming Cream soups, chowders, custards Keep below a simmer; whisk to incorporate
🧁 Folded Into Batters Muffins, scones, quick breads Swap for whole milk when you want more body

In soups, half and half lightens a mushroom bisque or corn chowder without the density that heavy cream brings. For mashed potatoes, it loosens the texture and adds richness while keeping the result lighter than a cream-heavy version.

Quick custards and simple puddings work well too - just don't expect a thick, stable set, since the lower fat limits structure.

Pairings lean toward ingredients that let the dairy note speak: butter, thyme, chives, mild cheddar, chicken, and light seafood all work naturally. In baking, it functions well in scones and muffins where you want reduced-fat creaminess.

If you're short on it mid-recipe, checking half and half swaps or heavy cream replacements can save the dish.

Try It In

🥣Maple Baked OatmealHalf and half adds creaminess without making it heavy→🧈Compound Butter (Herb)A small splash helps loosen the butter blend→🍠Sweet Potato MashUse in place of heavy cream for a lighter mash→

How to Buy and Store Half and Half

Check the sell-by date first - look for the furthest date available and choose a carton that feels cold and undamaged. The color should be a uniform pale cream; any watery pooling or clumping inside suggests the emulsion has broken.

Avoid cartons that are bloated or carry an off-odor when opened.

Watch Out
Ultra-pasteurized half and half lasts longer unopened but develops a faint cooked-milk flavor. For coffee, most people won't notice - in delicate sauces, some will.

Store opened cartons in the coldest part of the refrigerator - not in the door, where temperatures fluctuate. Use within 7-10 days of opening.

Freezing is possible but not recommended; the fat and water separate on thawing, leaving a grainy texture. For more context on how dairy products age, cream storage guide follows similar patterns.

Full guidance on timing is also covered at half and half storage guide.

  • Buying tip - Pasteurized over ultra-pasteurized when freshness matters in cooking.
  • Storage rule - Back of the fridge, sealed tight, away from strong-smelling foods.
  • Discard sign - Sour smell or visible curdling means it's gone, regardless of the date.

Start With the Coffee Cup

Half and half earns its place because it solves a specific problem: you want creaminess, not richness. If your coffee tastes sharp with milk alone but heavy with cream, start here.

The same logic applies in the kitchen - reach for it when a dish needs body without weight.

Shortcut
No half and half on hand? Mix one part whole milk with one part light cream for a near-exact match in fat and texture.

For baking or sauce work, keep a standard pasteurized carton on hand rather than ultra-pasteurized - the flavor holds cleaner under heat.

Frequently Asked Questions

Is half and half the same as cream?

No. Half and half sits at 10-12% milkfat, while light cream starts at 18-20% and heavy cream at 36%+. It's richer than whole milk but noticeably thinner than any true cream product.

Does half and half curdle in coffee?

It can, but usually only when the half and half is close to spoiling or the coffee is extremely acidic. Fresh half and half poured into normal-strength coffee stays smooth and doesn't separate.

Can you substitute milk for half and half?

Yes, with a noticeable drop in creaminess. Whole milk works best for a straight swap; the result will be thinner in sauces and less rich in coffee. Adding a small amount of butter to whole milk closes the gap.

How long does half and half last after opening?

Seven to ten days refrigerated when kept sealed and stored below 40°F. Ultra-pasteurized cartons may push slightly longer, but the sniff test is the most reliable indicator.

Can you whip half and half?

No. Whipping requires at least 30% milkfat to trap air and hold peaks. At 10-12% fat, half and half will only froth slightly and won't hold any structure.

Air Fryer Shrimp Toast

March 30, 2026

Air frying shrimp toast at 350°F creates a crispy golden crust while the shrimp filling stays moist and tender. The high heat renders fat from the bread edges and sets the filling in under 10 minutes.

Air Fryer Shrimp Toast served on a plate

You don't need deep frying or a thermometer. The air fryer basket and circulating heat do the work.

This is what we make for quick weeknight snacks or when people are coming over and you need something that looks intentional but takes 25 minutes start to finish.

QUICK SUMMARY

Air Fryer Shrimp Toast delivers crispy edges and tender shrimp filling without deep frying. The key is removing bread crusts for even crisping and spacing pieces in the basket so air circulates. Flip at 4 minutes for uniform browning.

⏱️Time Reality: 15 min prep, 8-10 min cook, no marinating required
🔪Critical First Move: Pat shrimp dry before chopping to avoid soggy paste
⚠️Watch Out: Overcrowding the basket traps steam - leave 1-inch gaps between pieces

Table of Contents

Toggle
  • Why This Recipe Works
  • What You'll Need
    • Ingredient Details
  • Ingredient Swaps
  • What to Serve With It
  • Store and Reheat
  • Frequently Asked Questions
  • Air Fryer Shrimp Toast
    • Method 
    • Tried this recipe?

Why This Recipe Works

Pulsing shrimp instead of mincing maintains texture while creating enough paste to bind to bread. For something that pairs well as a main, we keep a batch ready for nights like this - a warm potato side dish comes together quickly.

Quick Reference
⏱️
Prep Time
15 min
🔥
Cook Time
8-10 min
⏰
Total Time
25 min
🍽️
Servings
4 servings
📊
Difficulty
Easy
🏷️
Category
Appetizer
💡
Quick Tip
Air fry 350°F 8 min, flip halfway
🎯
Best For
Weeknight | Entertaining | Budget

What makes this work:

  • Removing bread crusts increases crisping surface area and prevents tough edges
  • 350°F temperature crisps bread without burning while cooking shrimp through
  • Egg binder keeps shrimp paste stuck to bread during flipping
  • 1-inch spacing between pieces lets hot air circulate for even browning
  • Flipping at 4-5 minutes ensures both sides turn golden without drying out
Quick Tip
Pulse shrimp 6-8 times for chunky texture - over-processing makes the paste gummy

What You'll Need

Ingredients for Air Fryer Shrimp Toast

Fresh shrimp works best but frozen thawed shrimp saves money without sacrificing texture. For another approach to seafood in the air fryer, a classic cakes dish uses similar technique with different filling.

🦐
Shrimp
  • 8 oz peeled deveined shrimp
🍞
Bread Base
  • 8 slices white bread, crusts removed
🧄
Aromatics
  • 3 green onions, chopped
  • 2 garlic cloves, minced
  • 1 teaspoon fresh ginger, grated
🥢
Seasonings
  • 1 egg
  • 1 tablespoon soy sauce
  • 1 teaspoon sesame oil
  • 2 tablespoon sesame seeds

Ingredient Details

  • Shrimp (peeled, deveined)
    Pat completely dry before chopping to prevent watery paste that slides off bread
  • White bread
    Sandwich bread works best - avoid crusty artisan loaves that resist spreading
  • Egg
    Binds shrimp paste to bread - essential for pieces staying intact during flipping
  • Green onions
    Adds sharp brightness that cuts through rich shrimp - chop fine for even distribution
  • Soy sauce
    Provides salty umami base - use low-sodium if monitoring salt intake
  • Sesame oil
    Toasted sesame oil adds nutty depth regular oil can't match
  • Sesame seeds
    Brush light oil on bread before sprinkling so seeds stick during cooking

Ingredient Swaps

Gluten-free bread works but needs 1-2 extra minutes in the air fryer for crispness. A good glaze can make or break the plate, and for a version that comes together quickly, a homemade glaze recipe uses similar savory-sweet balance.

Common swaps that work:

  • White bread → gluten-free bread: Slightly less crisp, add 1-2 minutes cook time
  • Fresh shrimp → frozen shrimp thawed: Drain well and pat extra dry to remove moisture
  • Soy sauce → tamari: Identical flavor, naturally gluten-free
  • Sesame oil → light olive oil: Less nutty but still aids browning

Egg Substitute

Works for: Aquafaba (3 tablespoon per egg) or flax egg binds adequately

Skip if: Expect slightly looser binding, may need extra 1-2 min cook time

Protein Swap

Works for: Chopped cooked crab or firm crumbled tofu as shrimp replacement

Skip if: Flavor changes significantly, adjust seasoning to compensate

Bread Shape

Works for: Pita or naan cut into triangles instead of sandwich bread

Skip if: Different thickness changes cook time, monitor closely

Instructions

The entire process takes under 30 minutes from start to plating. Chicken adds the contrast this plate needs, but timing matters - for a version that comes together quickly, a juicy chicken side uses the same air fryer setup.

  1. Prep the shrimp paste: Pat shrimp completely dry with paper towels, then pulse in food processor 6-8 times until coarsely chopped. Mix in egg, green onions, garlic, ginger, soy sauce, and sesame oil until just combined - avoid over-mixing or paste gets gummy.

  2. Prepare the bread: Remove crusts from white bread slices using sharp knife. Spread shrimp paste evenly on each slice, about ¼-inch thick layer, pressing gently so it sticks.

  3. Add sesame seeds: Brush tops lightly with water or oil, then sprinkle sesame seeds over shrimp paste. Press seeds gently so they adhere during cooking.

  4. Air fry first side: Preheat air fryer to 350°F. Place shrimp toast in single layer with 1-inch gaps between pieces. Cook 4-5 minutes until edges start turning golden.

  5. Flip and finish: Carefully flip each piece using spatula. Cook another 4-5 minutes until bread is crispy golden and shrimp turns opaque throughout. Let rest 2 minutes before serving.

Watch Out
Don't skip the resting step - letting toast sit 2 minutes helps filling set so it doesn't fall off when you bite

What to Serve With It

Shrimp toast needs something to balance the rich, savory filling and cut through sesame oil. For planning your full spread, weeknight shrimp etouffee meal ideas covers complementary sides that work with seafood appetizers.

Side Dish Prep Why It Works How to Serve
Asian cucumber salad Easy Tangy rice vinegar and crisp cucumber refresh palate between bites Toss sliced cucumbers with rice vinegar, sugar, sesame seeds 10 min before serving
Steamed edamame Easy Simple protein-rich side adds contrast without competing flavors Steam 5 min, toss with coarse salt, serve warm in pods
Quick pickled carrots Easy Acidity cuts through rich shrimp, adds crunch and bright color Marinate julienned carrots in rice vinegar, sugar, salt 15 min minimum
Miso soup Easy Warm umami broth balances crispy toast, light enough not to fill guests Dissolve miso paste in hot dashi, add cubed tofu and green onions
Sweet chili dipping sauce Easy Sweet-spicy contrast enhances savory shrimp without overpowering Serve store-bought or mix chili sauce with rice vinegar, honey

Three ways to serve it:

  • Party appetizer: Arrange on platter with three dipping sauces (soy-ginger, sweet chili, sriracha mayo) and pickled vegetables
  • Light dinner: Serve 4-6 pieces per person with Asian cucumber salad and miso soup for complete meal
  • Casual snack: Cut each toast into quarters, serve with sweet chili sauce for dipping
Best Pick
Soy-ginger dipping sauce (soy sauce, rice vinegar, grated ginger, sesame oil) enhances umami without masking shrimp flavor

Store and Reheat

Shrimp toast stores 3-4 days refrigerated but loses some crispness overnight. The beef works best when it hits the table at the same time as the main, and for a version that comes together quickly, a rich homemade beef recipe reheats using the same air fryer method.

Method Time Best For
🔥 Air Fryer 3-4 min at 350°F Restores crispy texture closest to fresh-made
🍳 Oven 5-7 min at 350°F Reheating multiple pieces at once evenly
📦 Microwave 30-45 sec Fast heat but softens bread - add sauce to compensate

For best results when storing:

  • Cool completely before refrigerating to prevent condensation that makes bread soggy
  • Store in single layer in shallow airtight container with paper towel underneath to absorb moisture
  • Freeze up to 1 month by wrapping individually in plastic wrap, then grouping in freezer bag
  • Reheat from frozen by adding 2-3 minutes to air fryer time, no thawing needed
  • Avoid microwave reheating if you want to maintain any crispness - oven or air fryer only

Frequently Asked Questions

How long to cook shrimp toast at 350°F in air fryer?

Cook 8-10 minutes total at 350°F, flipping halfway at 4-5 minutes. Bread should be golden brown and shrimp fully opaque throughout when done.

Can I make shrimp toast ahead and reheat later?

Yes, assemble completely and refrigerate up to 4 hours before cooking, or freeze up to 1 month. Air fry from frozen by adding 2-3 extra minutes to cook time.

How do I know when shrimp toast is done cooking?

Bread turns golden brown with crispy edges and shrimp filling becomes opaque instead of translucent. Internal temp should reach 145°F if using thermometer.

What causes soggy shrimp toast and how to fix it?

Soggy toast happens from wet shrimp or overcrowding the basket. Pat shrimp completely dry before chopping and leave 1-inch gaps between pieces so air circulates.

What sides or sauces go best with shrimp toast?

Serve with soy-ginger dipping sauce, sweet chili sauce, or sriracha mayo for dipping. Pair with Asian cucumber salad, steamed edamame, or quick pickled vegetables for complete meal.

Air Fryer Shrimp Toast served on a plate

Air Fryer Shrimp Toast

No ratings yet
Air Fryer Shrimp Toast achieves a crispy golden crust with a moist and tender shrimp filling using an air fryer at 350°F. This method eliminates the need for deep frying and comes together quickly, perfect for snacks or entertaining guests.
Print Recipe Pin Recipe
Prep Time 15 minutes mins
Cook Time 10 minutes mins
Total Time 25 minutes mins
Servings: 4 servings
Course: Appetizer
Cuisine: Asian-Inspired
Ingredients Method Notes

Ingredients
  

  • 8 oz shrimp peeled and deveined, pat dry before chopping
  • 8 slices white bread crusts removed
  • 3 units green onions chopped
  • 2 cloves garlic minced
  • 1 teaspoon fresh ginger grated
  • 1 unit egg
  • 1 tablespoon soy sauce
  • 1 teaspoon sesame oil toasted
  • 2 tablespoon sesame seeds use with light brush of oil or water for adhesion

Method
 

  1. Pat shrimp completely dry with paper towels, then pulse in a food processor 6-8 times until coarsely chopped. Mix in egg, green onions, garlic, ginger, soy sauce, and sesame oil until just combined; avoid over-mixing to prevent gummy paste.
    8 oz shrimp, 1 unit egg, 3 units green onions, 2 cloves garlic, 1 tsp fresh ginger, 1 tbsp soy sauce, 1 tsp sesame oil
  2. Remove crusts from white bread slices using a sharp knife. Spread shrimp paste evenly on each slice in a ¼-inch thick layer, pressing gently so it sticks.
    8 slices white bread, 8 oz shrimp
  3. Brush tops of shrimp paste lightly with water or oil, then sprinkle sesame seeds evenly. Press seeds gently to help them adhere during cooking.
    2 tbsp sesame seeds
  4. Preheat air fryer to 350°F. Place shrimp toast in a single layer with 1-inch gaps between pieces. Cook for 4-5 minutes until edges start turning golden.
  5. Carefully flip each piece using a spatula. Cook another 4-5 minutes until the bread is crispy golden and shrimp filling is opaque. Let rest for 2 minutes before serving to set the filling.

Notes

  • Pat shrimp thoroughly dry before pulsing to prevent soggy paste and ensure adhesion to bread.
  • Leave at least 1-inch gaps between pieces in air fryer basket to allow hot air circulation for even crisping.
  • Let shrimp toast rest 2 minutes after cooking to let the filling set and prevent it from falling off when biting.

Tried this recipe?

Let us know how it was!

What Is Ginger Ale? Taste, Uses & More Explained

March 30, 2026

Ginger ale shows up in a whiskey highball, in a nauseous traveler's tray, and in a quiet glaze over braised pears - few drinks cross that many contexts.

What Is Ginger Ale

Unlike club soda's flavor and uses, which stays neutral by design, ginger ale brings a mild, sweet spice that actually interacts with food and spirits.

Understanding where that interaction pays off is what separates a good pour from a wasted one.

QUICK SUMMARY

Ginger ale is a carbonated soft drink with mild ginger warmth and a sweet citrus backbone. Available in dry (lighter) and golden (spicier) styles, it works as a standalone soda, a cocktail mixer, and a light cooking ingredient. Opened bottles last 48-72 hours before carbonation fades.

🌡️Intensity: Moderate - noticeable ginger warmth, but not sharp or hot
🥃Best Use: Whiskey highballs, mocktails, and light pan glazes with fruit
📦Shelf Life: Unopened: up to a year; opened: 2-3 days refrigerated upright

What Is Ginger Ale?

Ginger ale is a carbonated soft drink made from carbonated water, a sweetener - sucrose or high-fructose corn syrup - and ginger flavoring or extract.

Modern commercial production took hold in North America, though the drink's roots trace back to Caribbean and European ginger beverages from earlier centuries.

Two distinct styles dominate the market. Dry ginger ale is pale, mild, and lightly sweet - the style most associated with big brands like Canada Dry. Golden ginger ale, associated with brands like Vernors, runs darker, spicier, and more pronounced in actual ginger character.

You'll also see it labeled as ginger soda or dry ginger ale depending on the producer.

Unlike real ginger root - where ginger in cooking brings sharp, peppery heat - most commercial ginger ale uses flavoring that softens and sweetens the profile considerably.

  • 🧴 Dry style - light, clear, mildly sweet; the default mixer in most bars
  • 🟤 Golden style - darker, fuller-bodied, spicier; closer to craft ginger beer territory
  • 🌿 Craft versions - often use real ginger extract for a sharper, more herbal bite

What Does Ginger Ale Taste Like?

ginger ale - What Is Ginger Ale

Ginger ale lands somewhere between candied ginger in soda form and a diluted ginger beer. The sweetness hits first, followed by a mild spicy warmth - never hot, never aggressive.

Sensory SnapshotModerate Intensity
👅 Flavor
mild ginger warmthsweetcitrus backbonesubtle herbal bite
✋ Texture
light effervescencethin, clean mouthfeel
👃 Aroma
candied gingerlemony citrus

Compared to ginger beer, ginger ale is noticeably softer - less bite, more bubble, and a sweeter finish. The citrus note comes primarily from added flavoring rather than actual juice, which keeps it bright but thin.

Reduced into a glaze, the sweetness concentrates and the ginger character sharpens slightly. Cold, straight from the can, the effervescence dominates, making the spice feel even gentler.

How to Use Ginger Ale

Ginger ale earns its place most reliably as a cocktail mixer. A whiskey highball is the classic pairing - the drink's mild spice lifts the spirit without competing.

For anyone curious about the role whiskey plays in mixed drinks, ginger ale is one of the more forgiving partners.

Golden Rule
Use dry ginger ale for mixing - its lighter body won't overpower spirits. Reserve golden ginger ale for cooking, where its deeper flavor survives heat and reduction.

Beyond the glass, ginger ale works in the kitchen more than most people expect. A gentle reduction with pear or apple slices creates a sparkling glaze that wouldn't come from plain sugar syrup.

It can also deglaze a pan after searing chicken, leaving behind a mild, sweet-ginger fond.

How Ginger Ale Is Used
MethodBest ForTip
🥤 Cold mixerHighballs, mocktails, nonalcoholic sodasUse chilled; add last to preserve carbonation
🍳 Pan deglazeChicken, pork, light pan saucesUse golden style; reduce on medium-low to prevent bitterness
🍐 Fruit glazeBraised pears, apples, sparkling glazesAdd sugar sparingly - ginger ale is already sweet
🥗 Cold macerationQuick fruit ceviche, marinades for fishEffervescence helps tenderize; keep cold and brief

Ginger ale also pairs well in mocktail builds with lime, mint, and cranberry juice - the carbonation provides structure where spirits normally would.

If you need a swap for a recipe, a look at ginger ale stand-ins covers the closest options.

Avoid pairing it with very spicy dishes or delicate dairy emulsions. The mildness disappears against heavy chili heat, and the carbonation can break cream-based sauces.

Try It In
🥗Lemon Garlic Kale SaladA splash in the dressing adds gentle fizz and mild sweetness→🥬Kale Caesar Salad with ParmesanUse in place of some lemon juice for a lighter, sweeter acid→🥧Savory Breakfast Galette with PotatoesReduce with butter for a light ginger-sweet drizzle over the crust→

How to Buy and Store Ginger Ale

Dry ginger ale is the right choice for mixing - it's lighter, clearer, and won't overwhelm. Choose golden ginger ale or labels that specify real ginger extract when you want more pronounced warmth for cooking. Check cans for bloating and bottles for dents; both signal compromised seals.

Watch Out
Opened ginger ale loses most of its carbonation within 48-72 hours even when capped tightly. After that point, it's flat and overly sweet - use it for cooking or discard it.

Store unopened cans and bottles in a cool, dark pantry or refrigerator. Once opened, refrigerate upright with the cap secured and use within two to three days.

Craft and premium versions with real ginger may settle; a gentle swirl before pouring is fine.

Most ginger ales run high in added seasoning with sugar - sucrose or HFCS - so diet and low-sugar versions exist for those watching intake. All standard versions are caffeine-free.

Which Style to Reach For

Dry ginger ale is the default - grab it for mixing drinks, topping mocktails, or anytime you want carbonation with just a hint of spice.

Reach for golden or craft versions when the recipe needs the ginger to actually read through heat or reduction.

Knowing seasoning with tonic water vs ginger ale helps clarify when ginger ale is the right call over other carbonated mixers.

The short version: use it where mild, sweet ginger is an asset, not an afterthought.

Frequently Asked Questions

Is ginger ale alcoholic?

No. Ginger ale is a non-alcoholic carbonated soft drink. It contains no alcohol at any stage of production, which is why it's commonly used as a mixer alongside spirits rather than on its own as a standalone alcoholic drink.

Is ginger ale the same as ginger beer?

No - ginger beer is significantly spicier and often brewed with real ginger, giving it a sharper, more peppery bite. Ginger ale is milder, sweeter, and carbonated with added CO2 rather than fermentation.

Does ginger ale actually help with nausea?

The evidence is thin. Most commercial ginger ales contain very little real ginger, so any benefit is likely from the carbonation settling the stomach rather than the ginger itself. Flat ginger ale, often recommended, removes the one mechanism that may actually help.

How spicy is ginger ale compared to ginger beer?

Considerably milder. Ginger ale registers as a gentle, sweet warmth - ginger beer can be sharp enough to cause a throat tingle. Golden ginger ale closes the gap slightly, however dry ginger ale is firmly in the mild category.

Can you use ginger ale in baking?

Yes, with limitations. Ginger ale works in cake syrups and glazes where its light ginger note adds background flavor. The carbonation dissipates in the oven, so it won't leaven batter - use it for flavor, not lift.

What Is Jarlsberg Cheese? [Taste, Uses & More]

March 30, 2026

You spot it at the cheese counter - a pale-yellow wedge dotted with large, round holes - and wonder if it's just another Swiss stand-in.

What Is Jarlsberg Cheese

Jarlsberg is worth a closer look, especially if you've been reaching for replacements for gruyere cheese or havarti cheese swaps that work and haven't found the right fit.

This Norwegian original has a specific character - nutty, buttery, genuinely mild - that earns its place on a board and in a pan.

QUICK SUMMARY

Jarlsberg is a semi-soft Norwegian cow's-milk cheese with large round eyes, a smooth texture, and a mild nutty-sweet flavor. It melts cleanly, slices well cold, and works across sandwiches, gratins, and cheese boards without overpowering other ingredients.

🧀Flavor: Mild nutty, slightly sweet, clean milky finish
🫨Texture: Smooth, pliant; creamy when warmed
🍳Best Uses: Melting, sandwiches, cheese boards, gratins
🇳🇴Origin: Telemark region, Norway
❄️Shelf Life: Opened wedge lasts 2-3 weeks properly wrapped
🔄Closest Match: Young Emmental or mild Swiss, but sweeter and creamier

What Is Jarlsberg Cheese?

Jarlsberg is a Swiss-type cow's-milk cheese produced in Norway, first made commercially in the Telemark region near the historic Jarlsberg estate.

It belongs to the semi-soft category - firmer than fresh mozzarella, softer than aged cheddar - and is sometimes labeled Jarlsbergost in Norwegian.

Its most recognizable feature is the pattern of large, evenly spaced round holes, called eyes.

These form during fermentation when Propionibacterium freudenreichii bacteria release carbon dioxide gas, the same mechanism behind comte cheese swaps that work when a hole-forming cheese is needed in a recipe.

Standard Jarlsberg is aged around three months and has that pale-yellow interior. A reserve or aged version exists, matured for around 12 months or more, and it develops a drier, firmer texture with slightly sharper flavor.

  • 🧀 Standard (3 months) - mild, moist, and springy; the most common retail format
  • 🧀 Aged Reserve (12+ months) - drier, more complex, with a firmer bite and less residual lactose
  • 🧀 Baby Jarlsberg - smaller wheels, same recipe, often sold sliced in deli packs

What Does Jarlsberg Cheese Taste Like?

jarlsberg cheese - What Is Jarlsberg Cheese

Jarlsberg lands firmly in mild territory. The dominant note is nutty and slightly sweet - closer to almond than hazelnut - with a clean, milky finish that doesn't linger aggressively.

Sensory SnapshotMild Intensity
👅 Flavor
nuttybutterymildly sweetclean umami
✋ Texture
smoothpliantcreamy when warm
👃 Aroma
milkysubtle yeast

Compared to a young Emmental, Jarlsberg is noticeably sweeter and less earthy. It lacks the sharpness of Swiss alpine styles, which makes it approachable but also means it won't assert itself in strongly spiced dishes.

Heat changes it meaningfully. Warmed or melted Jarlsberg turns creamy and glossy, and its sweetness becomes more pronounced - that's the quality that makes it so reliable in hot applications.

Golden Rule
If a recipe calls for a mild, melt-friendly cheese and the flavor should support rather than lead, Jarlsberg is the right call.

How to Use Jarlsberg Cheese

Jarlsberg performs across more contexts than most mild cheeses because its smooth melt and neutral sweetness don't clash with bold companions. Understanding using jarlsberg cheese for creaminess also helps when you want the same result from a different cheese.

Cold applications are straightforward. Sliced thin on a smørbrød - a Norwegian open-faced sandwich - with cured ham or smoked salmon is the traditional starting point.

On a cheese board, cubed Jarlsberg pairs especially well with apple slices, honey, and walnuts, which echo its almond-like notes rather than compete with them.

How Jarlsberg Cheese Is Used
MethodBest ForTip
🥗 Cold/SlicedSandwiches, smørbrød, cheese boardsSlice thin for smørbrød; cube thicker for boards
🍳 Pan-MeltedGrilled cheese, burgers, quesadillasMedium heat prevents oiliness; don't rush the melt
🫕 Baked/BroiledGratins, casseroles, pasta bakesShred finely - it melts faster and more evenly
🥚 Grated Into SaucesMac and cheese, omelettes, quichesAdd off heat to prevent graininess in cream sauces

For baked dishes, a creamy potato gratin recipe is one of the cleaner showcases for Jarlsberg's melting behavior - its milky sweetness balances starchy, savory layers without adding sharpness.

For a different take on melting Swiss-style cheeses in cooked dishes, using emmental cheese for creaminess shows how the category behaves more broadly.

Shortcut
Shred Jarlsberg directly from cold - it grates cleanly without clumping and distributes evenly across casseroles and gratins.

Avoid pairing Jarlsberg with very pungent blue cheeses on the same board; they'll drown its subtle profile completely.

Try It In
🧀Cheddar Cheese StrawsSwap in Jarlsberg for a milder, nuttier pastry bite→🍳Egg and Cheese Breakfast SandwichJarlsberg melts smoothly over egg without overpowering it→

How to Buy and Store Jarlsberg Cheese

At the counter, look for pale-yellow flesh with evenly spaced, round eyes and a clean smell. Dark spots, an excessively oily cut surface, or a sour odor are signs the piece is past its prime.

Younger standard Jarlsberg feels slightly springy when pressed; aged reserve is firmer and drier.

Watch Out
Avoid wrapping cut Jarlsberg directly in cling film - plastic pressed against the surface traps moisture, promotes surface mold, and dulls flavor faster than proper cheese paper.

Wrap opened wedges in cheese paper or parchment, then place loosely inside a resealable bag in the coldest part of your refrigerator.

An opened wedge stored this way holds well for 2-3 weeks.

For more detail on timing and signs of spoilage, jarlsberg cheese's shelf life covers the specifics.

Whole unopened wheels keep significantly longer - several months refrigerated - because the rind acts as a barrier.

Where to Start With Jarlsberg

Buy a standard wedge, not the aged reserve, for your first trial. Cold, it proves itself quickly on a sandwich with ham and mustard.

Melted, try it in a simple grilled cheese before committing to a larger baked dish.

  • First buy - standard wedge from the deli counter, not pre-sliced packs if possible
  • First cold use - open-faced sandwich with rye bread, ham, and a smear of coarse mustard
  • First hot use - grilled cheese on sourdough, medium-low heat, lid on to encourage even melting

Once you've seen how it behaves in both states, scaling up to gratins or cheese boards is straightforward. The role emmental cheese plays in similar recipes is useful context if you're deciding between the two.

Frequently Asked Questions

Is Jarlsberg like Swiss cheese?

They're closely related. Jarlsberg uses the same hole-forming fermentation as Emmental and tastes similar, but it's noticeably sweeter and creamier than most Swiss-style cheeses. Think of it as a milder, more buttery version of young Emmental.

Can Jarlsberg be used for melting?

Yes - it melts cleanly and evenly without separating into greasy puddles, which makes it reliable in gratins, sauces, and grilled cheese. Shredding it cold before applying heat gives the most consistent results.

Does Jarlsberg contain lactose?

It contains low to moderate lactose depending on age. Aged reserve Jarlsberg has less residual lactose than the standard variety because aging breaks down more of the milk sugars. Those with moderate lactose sensitivity often tolerate aged versions better.

Is Jarlsberg gluten-free?

Plain Jarlsberg cheese contains no gluten ingredients. However, cross-contamination is possible at deli counters where bread is also sliced. Buying a sealed pre-packaged wedge reduces that risk.

How long does Jarlsberg cheese last after opening?

An opened wedge wrapped properly in cheese paper lasts 2-3 weeks in the refrigerator. Plastic wrap shortens that window by trapping moisture against the cut face and accelerating surface mold.

German Potato Salad with Vinegar

March 30, 2026

Crispy bacon meets tender potatoes tossed in warm vinegar dressing with a hint of sweetness. That's German potato salad-no mayo, no cold mush, just straightforward flavors that work for picnics or weeknight sides.

German Potato Salad with Vinegar served on a plate

The warm dressing soaks into the potatoes while they're still hot. You get tangy, savory bites without the heaviness of cream-based salads.

This is what you make when you need a side that travels well and tastes better after sitting for 20 minutes. Works for barbecues, potlucks, or Tuesday dinners when plain rice feels boring.

QUICK SUMMARY

German potato salad uses waxy potatoes tossed in a warm bacon-vinegar dressing. Boil the potatoes just until fork-tender to keep them from turning mushy, then toss them in the warm dressing immediately so the flavors soak in. Serve it warm or at room temperature-this salad actually improves as it sits.

⏱️Time Reality: 35 minutes start to finish, mostly hands-off boiling time
🥓Critical First Step: Cook bacon until crisp before starting the dressing
⚠️Watch Out: Overcooking potatoes turns the salad gluey-drain at first sign of tenderness

Table of Contents

Toggle
  • Why This Recipe Works
  • What You'll Need
    • Ingredient Details
  • Ingredient Swaps
  • What to Serve With It
  • Store and Reheat
  • Frequently Asked Questions
  • German Potato Salad with Vinegar
    • Method 
    • Tried this recipe?

Why This Recipe Works

Rich mains need something to cut through, and salad does exactly that. German potato salad brings tang and texture without the mayo slick. For a version that comes together quickly, this fresh homemade salad recipe uses similar bright flavors in a different format.

Quick Reference
⏱️
Prep Time
15 min
🔥
Cook Time
20 min
⏰
Total Time
35 min
🍽️
Servings
6 servings
📊
Difficulty
Easy
🏷️
Category
Side Dish
💡
Quick Tip
Use waxy potatoes for firm texture
🎯
Best For
Weeknight | Entertaining | Picnics

What makes it work:

  • Waxy potatoes hold their shape when boiled and tossed-Yukon golds or red potatoes stay firm instead of crumbling
  • Warm dressing absorption happens when you toss hot potatoes in the vinegar mixture while both are still steaming
  • Bacon fat builds the base for sautéing onions and creates richness that balances the vinegar's sharpness
  • Sugar tempers acidity without making the salad sweet-just enough to round out the tang from white or apple cider vinegar
  • Resting time lets flavors meld as the warm potatoes continue absorbing the dressing off heat for 10 minutes
Quick Tip
Cut potato chunks to 1-inch pieces so they cook evenly in 12-15 minutes without falling apart.

What You'll Need

Ingredients for German Potato Salad with Vinegar

Most people skip salad, but it balances the meal. You need waxy potatoes, bacon, vinegar, and chicken broth-ingredients you likely have or can grab in one trip.

🥔
Potatoes
  • 2 lbs new potatoes or waxy potatoes (Yukon gold, red potatoes)
🥓
Bacon & Fat
  • 6 strips bacon
  • Reserved bacon fat for sautéing
🧅
Aromatics
  • 1 medium yellow onion (or red onion)
  • 2 tablespoon fresh parsley, chopped
🥢
Dressing Base
  • ½ cup white vinegar or apple cider vinegar
  • ½ cup chicken broth or vegetable broth
  • 2 tablespoon sugar
  • 1 tablespoon Dijon or yellow mustard (optional)

Ingredient Details

  • New potatoes or waxy potatoes
    Yukon golds and red potatoes have low starch and hold their shape when boiled-avoid russets which turn mealy
  • White vinegar or apple cider vinegar
    White vinegar gives sharp tang; apple cider vinegar adds fruitier sweetness-both work for the warm dressing
  • Bacon
    Cook until crisp over medium heat for 8-10 minutes to render fat and add smoky crunch to the salad
  • Yellow onion
    Sauté in bacon fat for 3-4 minutes until translucent-red onion adds sharper bite, green onion brings fresh mildness
  • Chicken broth
    Creates the moist dressing base and adds savory depth-vegetable broth works for vegetarian versions
  • Sugar
    Balances vinegar's acidity without making the salad dessert-like-honey can substitute with slight flavor shift
  • Fresh parsley
    Add at the end for fresh herbal notes and bright green color against the golden potatoes

Ingredient Swaps

Salad adds the contrast this plate needs, but timing matters. You can adjust vinegar type, bacon choice, or broth base without losing the warm, tangy core.

Common swaps that work:

  • White vinegar → apple cider vinegar - Fruitier tang with slight sweetness replaces sharp acidity
  • Bacon → turkey bacon - Less fat and lighter texture but keeps the smoky crunch
  • Chicken broth → vegetable broth - Makes it vegetarian while maintaining moisture and savory base
  • Yellow onion → red onion or green onion - Red adds sharper bite; green brings fresh mildness

White Vinegar

Works for: Sharp, clean tang that cuts through bacon fat without added sweetness

Skip if: You want fruitier, less aggressive acidity

Apple Cider Vinegar

Works for: Slightly sweet, mellow tang that still provides acidity but with rounder flavor

Skip if: You prefer sharper, more pronounced vinegar bite

Instructions

A good pork can make or break the plate. German potato salad takes 35 minutes with most of that time spent waiting for potatoes to boil. For a version that comes together quickly, this tender pork side dish uses similar timing for weeknight meals.

  1. Boil potatoes: Cut waxy potatoes into 1-inch chunks. Boil in salted water for 12-15 minutes until fork-tender but still firm. Drain well and transfer to a large bowl.
  2. Cook bacon: Fry bacon in a skillet over medium heat for 8-10 minutes until crisp. Remove, chop into bits, and reserve 2-3 tablespoons of bacon fat in the pan.
  3. Sauté onions: Add diced onion to the bacon fat. Cook for 3-4 minutes until translucent and slightly soft.
  4. Make warm dressing: Add vinegar, chicken broth, sugar, and mustard (if using) to the skillet with onions. Stir and bring to a simmer for 2-3 minutes until sugar dissolves.
  5. Toss and rest: Pour warm dressing over the hot potatoes. Add chopped bacon and parsley. Toss gently to coat. Let rest for 10 minutes off heat so flavors meld before serving warm or at room temperature.
Golden Rule
Toss the potatoes while both they and the dressing are still warm-cold potatoes won't absorb the vinegar mixture properly.

What to Serve With It

Pasta adds the contrast this plate needs, but timing matters. German potato salad pairs with grilled meats, roasted proteins, or hearty mains that need a tangy, non-creamy side. For more pairing ideas, check out these savory chicken dish ideas that work with vinegar-based sides.

Side Dish Prep Why It Works How to Serve
Grilled bratwurst Easy Classic German pairing complements salad flavors Serve warm salad alongside grilled brats with mustard
Steamed green beans Easy Adds fresh crunch contrasting soft potatoes Toss beans with butter and serve on the side
Soft pretzel rolls Easy Traditional carb balancing tangy salad Warm rolls and serve with salted butter
Sautéed sauerkraut Easy Adds tang and texture synergy Heat sauerkraut with caraway seeds and serve warm
Roast pork loin Medium Hearty protein balances tangy potato salad Slice pork and plate with warm salad on the side

Three ways to serve it:

  • For picnics: Make the salad 2-3 hours ahead and let it sit at room temperature-flavors deepen as it rests
  • For barbecues: Serve warm alongside grilled meats and mustard for classic German spread
  • For weeknight meals: Pair with simple proteins like grilled chicken or pan-seared fish that need a tangy contrast
Best Pick
German potato salad tastes better after sitting for 20-30 minutes at room temperature-the vinegar soaks in and the flavors balance out.

Store and Reheat

Most people skip chicken, but it balances the meal. German potato salad keeps in the fridge for 3-4 days and reheats well without turning mushy. For a version that comes together quickly, this juicy chicken uses similar reheating methods.

Method Time Best For
🍳 Stovetop 5-7 min on low Even warming without drying salad
📦 Microwave 1-2 min in short bursts Small portions quickly
🔥 Oven 10 min at 325°F (165°C) Larger portions or reheating bound salad

For best results when storing:

  • Use shallow airtight containers to store salad so it cools evenly and doesn't trap excess moisture
  • Drain any pooled liquid before reheating to prevent sogginess from separated dressing
  • Reheat gently on low heat to warm the salad without cooking the potatoes further
  • Add fresh parsley after reheating to brighten flavor and restore fresh herbal notes
  • Serve at room temperature if reheating isn't possible-the salad tastes good cool or warm

Frequently Asked Questions

How long to cook German potato salad potatoes?

Boil 1-inch potato chunks for 12-15 minutes until fork-tender but still firm. Drain immediately when a fork pierces them with slight resistance-overcooking turns the salad mushy.

Can I make German potato salad ahead?

Yes, make it 2-4 hours ahead and let it sit at room temperature. The flavors deepen as the potatoes absorb the dressing, and it actually tastes better after resting.

What goes with German potato salad?

Grilled bratwurst, roast pork loin, steamed green beans, or sautéed sauerkraut pair well. The tangy salad balances rich, smoky meats and works for picnics or barbecues.

How do I know when German potato salad is done?

The potatoes are done when a fork pierces them easily but they still hold their shape. After tossing with warm dressing, let the salad rest for 10 minutes-it's ready when the dressing is absorbed and flavors have melded.

Can I use red potatoes instead of new potatoes?

Yes, red potatoes work well-they're waxy like new potatoes and hold their shape when boiled. Cut them into 1-inch chunks and cook for the same 12-15 minutes.

German Potato Salad with Vinegar served on a plate

German Potato Salad with Vinegar

No ratings yet
This German potato salad features tender waxy potatoes tossed in a warm, tangy bacon-vinegar dressing with a hint of sweetness. The warm dressing soaks into the potatoes while they're hot, creating a flavorful side that improves after resting and pairs well with grilled meats or hearty mains.
Print Recipe Pin Recipe
Prep Time 15 minutes mins
Cook Time 20 minutes mins
Total Time 35 minutes mins
Servings: 6 servings
Course: Side Dish
Cuisine: German
Ingredients Method Notes

Ingredients
  

  • 2 lbs waxy potatoes cut into 1-inch chunks (Yukon gold or red potatoes)
  • 6 strips bacon cooked until crisp, fat reserved for sautéing
  • 1 medium yellow onion diced
  • 2 tablespoon fresh parsley chopped
  • 0.5 cup white vinegar or apple cider vinegar
  • 0.5 cup chicken broth or vegetable broth
  • 2 tablespoon sugar
  • 1 tablespoon Dijon mustard optional

Method
 

  1. Cut waxy potatoes into 1-inch chunks. Boil in salted water for 12-15 minutes until fork-tender but still firm. Drain well and transfer to a large bowl.
    2 lbs waxy potatoes
  2. Fry bacon strips in a skillet over medium heat for 8-10 minutes until crisp. Remove bacon, chop into bits, and reserve 2-3 tablespoons of bacon fat in the pan.
    6 strips bacon
  3. Add diced onion to the reserved bacon fat in the skillet. Cook for 3-4 minutes until translucent and slightly soft.
    1 medium yellow onion, 6 strips bacon
  4. Add vinegar, chicken broth, sugar, and optional mustard to the skillet with onions. Stir and bring to a simmer for 2-3 minutes until sugar dissolves.
    0.5 cup white vinegar, 0.5 cup chicken broth, 2 tbsp sugar, 1 tbsp Dijon mustard, 1 medium yellow onion
  5. Pour the warm dressing over the hot potatoes. Add chopped bacon and fresh parsley. Toss gently to coat. Let rest off heat for 10 minutes so flavors meld before serving warm or at room temperature.
    2 lbs waxy potatoes, 6 strips bacon, 2 tbsp fresh parsley, 0.5 cup white vinegar, 0.5 cup chicken broth, 2 tbsp sugar, 1 tbsp Dijon mustard

Notes

  • Use waxy potatoes like Yukon gold or red potatoes to keep the salad from becoming mushy.
  • Toss potatoes in the warm dressing immediately while both are still hot to absorb the flavors.
  • Letting the salad rest off heat for 10 minutes enhances flavor melding and improves taste.

Tried this recipe?

Let us know how it was!

What Is Grouper? [Taste, Uses & More]

March 30, 2026

You spot a thick grouper fillet at the fish counter - dense, ivory-white flesh with almost no fishy smell - and it's easy to see why it's a staple in Florida Keys kitchens and Caribbean coastal cooking alike.

What Does Grouper Taste Like

If you've ever reached for swapping out mahi mahi or browsed halibut swaps that work, grouper deserves a serious look as a landing spot on your list.

QUICK SUMMARY

Grouper is a firm, white-fleshed reef fish with a mild, clean flavor and meaty texture. It holds shape well under high heat, suits a wide range of cooking methods, and is best used within 1-2 days of purchase.

🐟Flavor: Mild, lightly briny, clean with a subtle sweet note
🍳Best Methods: Grilling, pan-searing, blackening, baking
🧊Shelf Life: 1-2 days refrigerated; freeze for longer storage
🛒Buy It: Look for moist, translucent flesh with no sour odor
🔄Substitutes: Snapper, mild halibut, or see full list of replacements for grouper

What Is grouper?

Grouper belongs to the family Serranidae and is one of the most commercially significant reef fish caught in the western Atlantic and Gulf of Mexico.

These are bottom-dwelling fish that grow slowly and reach impressive sizes - large individuals can weigh over 100 pounds.

Several species appear at fish markets under distinct regional names. Gag grouper and red grouper dominate Gulf Coast fisheries, while Nassau grouper comes mainly from Caribbean waters; yellowfin grouper is less common but occasionally available.

Understanding fish and its flavor in general helps explain why grouper's thick, dense muscle structure produces such a different eating experience from thinner-fleshed species.

The fillets are thick and bone-white, often sold as large skin-on portions or cross-cut steaks.

It's worth knowing that if grouper is unavailable, many cooks reach for snapper - and you can read about alternatives to red snapper or cod swaps that work depending on what your recipe needs.

What Does grouper Taste Like?

grouper - What Does Grouper Taste Like

Grouper has a mild, clean flavor - lightly briny from its reef habitat, with a subtle natural sweetness and a low-key umami quality that makes it satisfying without tasting assertive. Raw fillets smell faintly of the sea, not fishy.

Sensory SnapshotMild Intensity
👅 Flavor
mildly brinyclean sweetsubtle umami
✋ Texture
firmdense flakesmeaty
👃 Aroma
fresh sea-scentedlow fishiness

Heat intensifies the sweetness slightly and firms the flake structure into large, cohesive chunks rather than the finer shreds you get from cod. Compared to snapper, grouper is denser and meatier; compared to halibut, it's less delicate but similarly clean.

Golden Rule
The milder the fish, the louder the sauce. Grouper's clean profile means heavy, sugary glazes or strong gamey sauces will simply erase what makes it worth buying.

How to Use grouper

Grouper's dense flesh is one of its biggest practical advantages - it doesn't fall apart on the grill or in a braise, which puts it in a different class from more delicate white fish.

Cast iron only; pre-heat until smoking before the fillet goes in
How Grouper Is Used
MethodBest ForTip
🔥 GrillingThick steaks, large skin-on filletsUse high direct heat; oil the grates well to prevent sticking
🍳 Pan-SearingSkin-on fillets finished with brown butterPress fillet flat for the first 90 seconds to crisp the skin evenly
♨️ BlackeningSandwiches, Gulf-style plates
🫙 BakingWhole fillets with tomatoes, olives, or herbsKeep temperature at 400°F; thicker fillets need 14-18 minutes
🍋 Ceviche / RawThinly sliced when exceptionally freshUse only day-of purchase fish; acid-cure at least 20 minutes

In Gulf Coast and Florida Keys cooking, blackened grouper sandwiches on crusty rolls are practically a regional institution. Caribbean preparations lean toward baked whole fish or fillets with tomatoes, capers, and olive oil.

Southeast Asian coastal cooks use chunked grouper in coconut-broth soups and steamed preparations with ginger and scallion.

For pairings, bright acids work best - lemon, lime, or white wine. Garlic, shallot, parsley, and cilantro are classic aromatic companions, while roasted peppers and tomatoes give body without masking the fish.

Mild chiles and blackening spice are the main heat options that don't overwhelm.

Try It In
🍋Air Fryer Lemon Pepper Chicken TendersLemon-pepper seasoning works just as well on grouper fillets→🥦Air Fryer Lemon Pepper CauliflowerA bright, acidic side that balances grouper's mild sweetness→🍋Air Fryer Lemon Pepper MeatballsSame citrus-herb seasoning profile translates directly to fish→

How to Buy and Store grouper

At the counter, look for moist, translucent flesh with no brown edges or slimy surface. Whole fish should have clear, slightly convex eyes and bright red gills - not sunken, cloudy eyes.

A sour odor is an immediate reject.

Watch Out
Grouper is one of the most commonly mislabeled fish in the US market. If price seems low for "fresh grouper," ask for the species name - gag, red, or Nassau - and confirm wild-caught origin.

Once home, store grouper at the coldest part of your fridge, on a plate covered tightly with plastic wrap or in an airtight container.

Use it within 1-2 days for best flavor.

For signs of degradation before you cook, checking reliable grouper spoilage signs can save you from an unpleasant meal.

Freezing is a solid option for longer storage - wrap tightly in plastic, then foil, and use within three months.

Start Here

Grouper suits cooks who want a firm, forgiving white fish that handles high heat and pairs cleanly with simple seasonings.

If you're new to it, a pan-seared skin-on fillet with lemon and brown butter is the fastest way to understand what this fish does well.

If grouper isn't available, what makes red snapper distinct covers another firm reef fish that overlaps significantly in use.

  • 🐟 New to grouper - start with pan-seared fillets; the method is forgiving and results are immediate.
  • 🔥 Grill-first cooks - buy steaks, not thin fillets; they hold on the grate without tearing.
  • 🌶️ Spice lovers - blackening on a cast-iron skillet is the most crowd-reliable preparation.
  • 🍋 Light eaters - thin slices in ceviche, day-of purchase only, show the fish at its cleanest.

Frequently Asked Questions

Is grouper a saltwater fish?

Yes. Grouper lives exclusively in saltwater, typically on or near coral reefs and rocky bottom structures in tropical and subtropical coastal waters. Most commercial supply comes from the Gulf of Mexico and western Atlantic.

Is grouper mild or strong tasting?

Mild. The flavor is clean and lightly briny with a subtle sweetness - noticeably less assertive than salmon or mackerel. It's a good entry point for people who find strongly flavored fish off-putting.

How do you tell if grouper is fresh?

Fresh grouper has moist, translucent flesh, no brown edges, and smells faintly of the sea rather than sour or ammonia-like. On whole fish, eyes should be clear and slightly convex, not sunken.

Can you grill grouper steaks?

Yes, and it's one of the best methods for thick cuts. The dense flesh holds together over high direct heat where thinner fish would break apart. Oil the grates well and avoid moving the steak until it releases naturally.

Is grouper high in mercury?

Grouper falls in the moderate-mercury category - lower than swordfish or tilefish, higher than shrimp or tilapia. The FDA advises pregnant women and young children to limit grouper to one serving per week.

What Is Fuji Apple? Taste, Texture, Uses & More

March 30, 2026

You spot a Fuji apple at the market - deep red blush over a yellow-green base, heavier in the hand than it looks - and it's easy to assume it'll taste like every other supermarket apple.

What Is Fuji Apple

It won't.

Much like the taste of braeburn apple rewards a closer look, the Fuji has a flavor profile that sets it apart from most varieties on the shelf, and knowing what makes it distinct changes how you use it.

If you're reaching for warm baking spices to go with it, a quick check of replacements for apple pie spice can save a mid-recipe scramble.

QUICK SUMMARY

The Fuji apple is a dense, very sweet, crisp pome fruit developed in Japan. It has low acidity, a mild honeyed flavor, and holds its texture well in both raw and baked applications. Best for snacking, salads, and pies where you can cut back on added sugar.

🍎Flavor: Pronounced sweet, mild tang, subtle honeyed notes
✋Texture: Very firm, extremely crisp, dense and juicy
🍽️Best Uses: Fresh snacking, salads, pies, roasted with savory dishes
🧀Pairs With: Sharp cheddar, pork, walnuts, cinnamon, ginger
🛒Buy It: Look for firm feel, bright red blush, no soft spots
📅Shelf Life: Up to 8 weeks refrigerated; 4-7 days at room temperature

What Is Fuji Apple?

Fuji is a late-season apple variety bred at the Tohoku Research Station in Aomori Prefecture, Japan, released commercially in 1962 after roughly three decades of development.

It crosses Ralls Janet - an old American heirloom - with Red Delicious, inheriting sweetness and density from both parents while shedding most of Red Delicious's mealiness.

Classified as a pome fruit under Malus domestica, it's sold in markets under several labels - simply "Fuji," "Fuji Red," or occasionally "Aomori Fuji" for premium Japanese-grown fruit. Outside Japan, most commercial supply comes from Washington State, Chile, and China.

Fuji runs large compared to mid-season varieties. The skin is thin and smooth, showing a characteristic red blush streaked over a yellow-green background.

High natural sugar content - among the highest of any widely grown variety - is the defining trait that separates it from sweeter-seeming but less sugary options like Gala.

Best Pick
For the sweetest Fuji flavor, look for fruit with the deepest red blush coverage. More red typically signals longer time on the tree and higher sugar development.

What Does Fuji Apple Taste Like?

fuji apple - What Is Fuji Apple

Fuji leads with pronounced sweetness - not a simple one-note sugar hit, but a layered quality with a subtle honeyed finish that lingers.

Acidity is low to moderate, giving it only a mild tang rather than the sharp bite you'd find in a Granny Smith.

Think of it as a sweeter, denser cousin to Gala, with more structural integrity and less wateriness than Red Delicious. The honeyed note also edges it toward fruit like Asian pear in character, though the crunch is firmer.

Sensory SnapshotModerate Intensity
👅 Flavor
sweethoneyedmild tang
✋ Texture
very firmextremely crispjuicy
👃 Aroma
mildly florallightly honeyed

Heat softens the sweetness slightly and concentrates the sugars, so baked Fuji reads richer than fresh - useful context if you're adjusting added sugar in a recipe.

Because sugar's shelf life affects final pie sweetness, it's worth keeping pantry sugar fresh when Fuji's natural sugars are doing heavy lifting.

How to Use Fuji Apple

Fuji's firm texture and high sugar content make it genuinely useful across a range of preparations - not just raw snacking. Its density means it holds shape under heat better than softer varieties, which matters in baked applications.

How Fuji Apple Is Used
MethodBest ForTip
🥗 RawCheese boards, salads, lunchbox slices, morning bowlsToss cut pieces in lemon juice to slow browning
🥧 BakedApple pies, crisps, tarts, galettesReduce added sugar by 25% - Fuji brings enough sweetness
🍳 RoastedRoot vegetable trays, alongside pork or chickenQuarter and add in the last 20 minutes to preserve texture
🔥 SautéedCaramelized tarts, pan sauces, galettesMedium-high heat, brief contact - Fuji caramelizes fast
🍢 GrilledSkewers with pork, fruit salsa basesBrush with a ginger-soy glaze for a savory contrast

In American kitchens, Fuji is the go-to for apple pie and apple crisp precisely because the fruit's natural sugar lets bakers dial back added sweeteners.

Japanese fresh fruit culture prizes it for decorative sliced presentations, where cut precision and firm texture matter more than softness.

Modern fusion cooking uses Fuji thinly sliced in slaws and grain salads, where its crunch offsets creamy dressings.

For pairings, sharp cheddar or aged gouda alongside raw Fuji slices is a classic combination - the cheese's salt and funk balance the sweetness cleanly. Pork, bacon, walnuts, cinnamon, and a squeeze of lemon juice all work well.

Avoid pairing Fuji with delicate white fish; its sweetness overwhelms mild proteins.

If you need a swap mid-recipe, knowing your replacements for fuji apple keeps dinner on track. Honeycrisp is the closest match for raw use - though a look at honeycrisp apple stand-ins shows how differently it performs under heat.

Try It In
🍏Caramel Apple CrispFuji's density holds up beautifully under a crisp topping→🍎Caramel Apple NachosThinly sliced Fuji stays crisp under toppings without going mushy→🥣Apple Cinnamon Overnight Oats JarsDiced Fuji adds sweetness without needing extra sugar in the oats→

How to Buy and Store Fuji Apple

A good Fuji feels heavy and solid for its size - any give under light pressure signals internal softening. Skin should be smooth and taut, with a bright red blush spread over a yellow-green base.

Avoid fruit with wrinkled skin, visible bruising near the stem, or dull coloring.

  • 🧊 Refrigerator crisper drawer - best option; keeps Fuji crisp for 4-8 weeks whole and unwashed
  • 🏠 Cool cellar or pantry - works if below 60°F; expect 2-4 weeks maximum
  • 🌡️ Room temperature - fine for 4-7 days, but texture degrades faster than refrigerated
  • 👃 Away from strong aromatics - apples absorb odors; keep away from onions and garlic in storage
Watch Out
Don't store Fuji apples near ethylene-sensitive produce like leafy greens or broccoli. Apples release ethylene gas, which accelerates wilting and yellowing in nearby vegetables.

For longer storage, freezing fuji apple is a practical option - slice first, as whole frozen apples lose their signature crunch on thawing.

Where to Start With Fuji Apple

Fuji is the right apple if you want maximum sweetness and crunch with minimal effort.

Raw is where it excels most - no prep beyond slicing, and the texture holds without any treatment except a lemon juice toss to prevent browning.

Golden Rule
When baking with Fuji, always reduce your recipe's added sugar by at least 20-25%. Ignoring this step produces an overly sweet result that masks the apple's natural character.

Try it on a cheese board first alongside sharp cheddar and walnuts. From there, baking is the natural next step - start with a caramel apple crisp recipe to see how well Fuji holds its shape and sweetness under heat.

Frequently Asked Questions

Are Fuji apples sweet or tart?

Predominantly sweet. Fuji has among the highest natural sugar levels of any widely sold variety, with only mild background acidity. It's noticeably less tart than Granny Smith and less balanced than Honeycrisp.

Are Fuji apples good for baking?

Yes - their density means they hold shape in pies and crisps without turning to mush. The trade-off is high sweetness, so reduce added sugar in your recipe by roughly 20-25% to compensate.

How long do Fuji apples last in the fridge?

Whole, unwashed Fuji apples keep 4-8 weeks in the crisper drawer. Store them away from strong-smelling foods, as the thin skin absorbs odors quickly.

Which apples are most similar to Fuji?

Honeycrisp is the closest for raw eating - similar crunch and sweetness, though with more acidity. For baking, Pink Lady holds its shape comparably and offers a slightly more tart profile.

Can you eat Fuji apple skin?

Yes. Fuji skin is thin and non-waxy compared to some varieties, so it's easy to eat without peeling. Most of the apple's fiber content sits just under the skin, making it worth keeping on.

How Long Does Horseradish Last? [Storage Guide]

March 30, 2026

Buying a fresh horseradish root feels satisfying until you realize you have no plan for the four inches left over after Sunday's prime rib.

Can You Freeze Horseradish

Understanding the role horseradish plays in a dish helps explain why storage matters so much - the heat in horseradish comes from allyl isothiocyanate, a volatile compound that starts escaping the moment you cut or grate the root.

Whole raw roots hold up for weeks in the fridge, while prepared and grated forms fade much faster.

Get storage wrong and you're left with something sharp-smelling but completely flat-tasting.

QUICK SUMMARY

A whole raw root lasts 3-4 weeks in the fridge. Prepared horseradish keeps 1-3 months once opened. For longer storage, freeze grated portions - pungency holds, texture softens. Never store grated horseradish unsealed; air kills the heat fast.

🧊Fridge (whole root): 3-4 weeks, unwashed and wrapped in paper
❄️Freezer (grated): 6-12 months in small airtight portions
🫙Opened jar: 1-3 months refrigerated, sealed tight after each use

How Long Does Horseradish Last?

Fresh horseradish root keeps considerably longer than most people expect - but only when it's left whole and unwashed. Once you peel, slice, or grate it, the exposed flesh oxidizes rapidly and the volatile heat compounds escape into the air.

Prepared and jarred versions behave differently because commercial vinegar stabilizes the grated root and slows enzymatic breakdown. Even so, flavor and heat decline steadily after opening, regardless of what the label says.

Horseradish Shelf Life
MethodStateDurationNotes
🧊 FridgeRaw, whole3-4 weeksKeep unwashed, wrapped in paper or plastic in the crisper
🧊 FridgePeeled/sliced1-2 weeksStore airtight with minimal air; oxidizes and loses heat fast
🧊 FridgePrepared (opened jar)1-3 monthsVinegar extends life; seal tightly and refrigerate immediately
❄️ FreezerGrated, portioned6-12 monthsPungency largely retained; texture becomes softer
🏠 PantryUnopened commercial jar6-12 monthsShelf-stable if pasteurized; refrigerate after opening

Similar pungent roots follow comparable patterns - how long ginger keeps depends on the same whole-versus-cut logic that governs horseradish.

The enzyme myrosinase is what triggers heat production when cell walls break, which is why cutting accelerates both flavor development and flavor loss.

How to Store Horseradish

Storage method depends entirely on what form you're working with. A whole root and an opened jar of prepared horseradish need completely different handling.

Golden Rule
Store fresh roots unwashed. Water trapped against the skin accelerates mold before you even open the crisper drawer.

Whole raw root: Wrap loosely in a dry paper towel or place in a perforated produce bag, then keep in the crisper drawer. Don't wash it until you're ready to use it.

Peeled or sliced root: Transfer immediately to an airtight container, press out excess air, and refrigerate. Use within 1-2 weeks before heat fades noticeably.

Opened prepared horseradish: Seal the jar tightly between uses and keep it at the back of the fridge where temperature is most stable. Label the jar with the date you opened it - prepared horseradish often loses its bite after 1-3 months even when it looks fine.

Unopened commercial jar: A cool, dark pantry works until the best-by date. Once opened, it moves straight to the fridge, no exceptions.

Can You Freeze Horseradish?

Freezing works well for horseradish, with one important caveat: freeze it grated, not whole. Whole roots turn mushy and watery during freezing because the cell structure breaks down unevenly without preparation.

The compound responsible for heat - allyl isothiocyanate - survives freezing much better than it survives weeks in the fridge.

For comparison, keeping wasabi fresh presents similar challenges since wasabi also depends on volatile compounds that degrade quickly at refrigerator temperatures.

  1. Peel and grate the fresh root immediately before freezing to maximize released pungency.
  2. Add a splash of vinegar or lemon juice to stabilize color and slow pungency loss during long-term freezer storage.
  3. Portion into silicone molds or small airtight containers - tablespoon-sized amounts let you grab exactly what you need.
  4. Label and freeze flat, then transfer to a freezer bag once solid. Use within 6-12 months.
  5. Thaw in the fridge for 20-30 minutes, or grate directly from frozen into hot dishes where softened texture won't matter.

Texture after thawing will be softer and slightly watery. That's normal - the pungency holds, which is the part that actually matters for most uses.

Signs Horseradish Has Gone Bad

Fresh root and prepared horseradish both show spoilage, though the signs look different depending on the form.

Signs It's Gone Bad
👀
VisualDarkened or black streaks in the flesh · mold on cut surfaces or jar rims · cloudy, slimy liquid separation in jars
👃
SmellLost sinus-clearing sharpness · stale, sour, or fermented odor replacing normal pungency
✋
TextureSlimy surface on prepared horseradish · soft or mushy root instead of firm and crisp

Oxidation causes the dark streaking in grated or cut root - it's the same process you see in cut apples, and it signals breakdown rather than spoilage by bacteria alone. Mold on jar rims behaves similarly to mold in yogurt: surface mold may seem minor, however the whole container should be discarded once you spot it.

Watch Out
A jar that smells flat and shows no heat when tasted has effectively spoiled for culinary purposes, even if no visible mold is present. Discard it.

Getting the Most From Your Horseradish

Good storage habits extend shelf life, however a few additional practices protect quality between uses.

If a root or jar does reach the end of its run, swapping out horseradish with an appropriate substitute avoids wasting the rest of a dish.

  • 🧂 Grate just before serving - allyl isothiocyanate peaks in the first few minutes after grating and fades quickly at room temperature.
  • 🫙 Date your jars - opened prepared horseradish should be tracked and replaced every 1-3 months for full heat.
  • 🧊 Freeze in tablespoon portions - small portions mean you never thaw more than you need and avoid repeated freeze-thaw cycles.
  • 📄 Keep roots unwashed - washing before storage, not before use, is the single fastest way to encourage mold on a fresh root.

Unlike stable pantry staples - the shelf life of sugar explained shows how shelf life varies enormously by ingredient type - horseradish is fundamentally a perishable that rewards prompt, airtight handling at every stage.

Frequently Asked Questions

Can you freeze horseradish root whole?

No. Whole roots freeze poorly - uneven cell breakdown makes them mushy and watery when thawed. Grate first, add a splash of vinegar, then freeze in small portions for best results.

Why did my horseradish lose its bite?

Allyl isothiocyanate - the compound responsible for heat - is volatile and escapes quickly once the root is cut or grated. Storing horseradish unsealed or for too long after opening accelerates this loss significantly.

Does freezing horseradish remove its heat?

Not significantly, if frozen quickly and properly. Adding vinegar or lemon juice before freezing stabilizes pungency. Texture softens, however the heat-causing compounds survive freezer storage far better than extended fridge storage.

Can you grate frozen horseradish directly?

Yes, for cooked applications. Grating frozen horseradish straight into hot soups or sauces works well. For cold preparations like cocktail sauce, thaw briefly in the fridge first so texture blends properly.

How long does prepared horseradish last in the fridge after opening?

Up to 1-3 months when kept sealed and refrigerated. Heat and flavor decline steadily even within that window, so label the jar with the opening date and replace it if the punch is gone.

Yogurt Mint Raita

March 30, 2026

You need 15 minutes and basic ingredients already in most fridges. The yogurt stays thick if you drain it first, and the mint chops finely enough to distribute evenly without clumping.

Yogurt Mint Raita served on a plate

This works for meal prep or last-minute entertaining when you need something cooling that actually tastes fresh.

QUICK SUMMARY

Yogurt Mint Raita mixes plain yogurt with fresh mint, toasted cumin, and lemon juice into a cooling condiment. Chop the mint finely and add it last so the flavor stays bright. Chill for 15 minutes before serving to thicken and blend the flavors.

⏱️Time: 15 minutes total with 5 minutes for toasting cumin
🔑Method: Whisk yogurt smooth before adding anything else
⚠️Watch Out: Watery raita happens when yogurt isn't strained - drain 30 minutes beforehand

Table of Contents

Toggle
  • Why This Recipe Works
  • What You'll Need
    • Ingredient Details
  • Ingredient Swaps
  • What to Serve With It
  • Store and Reheat
  • Frequently Asked Questions
  • Yogurt Mint Raita
    • Method 
    • Tried this recipe?

Why This Recipe Works

Plain yogurt creates a creamy base that stays thick when you strain it through cheesecloth for 30 minutes before mixing. Rich mains need something to cut through, and fish does exactly that - try a tender fish recipe alongside for balance.

Quick Reference
⏱️
Prep Time
10 min
🔥
Cook Time
5 min
⏰
Total Time
15 min
🍽️
Servings
4 servings
📊
Difficulty
Easy
🏷️
Category
Side
💡
Quick Tip
Use full-fat yogurt for creamier texture
🎯
Best For
Weeknight | Meal prep | Entertaining

Five things that make raita work:

  • Strain yogurt first - Thick yogurt holds herbs and spices without separating into watery liquid
  • Toast cumin seeds lightly - One minute in a dry pan releases aroma without bitterness
  • Chop mint finely - Small pieces distribute flavor evenly and prevent overwhelming bites
  • Add salt gradually - Quarter-teaspoon increments let you taste and adjust without oversalting
  • Chill before serving - 15-30 minutes blends flavors and firms up the texture
Quick Tip
Squeeze fresh lemon juice just before mixing - bottled juice tastes flat and doesn't brighten the yogurt the same way

What You'll Need

Ingredients for Yogurt Mint Raita

Shopping for raita means picking plain unsweetened yogurt and fresh mint leaves from the produce section. A good herb can make or break the plate, so grabbing this quick herb dish when you're already buying mint adds another option to the week.

🧀
Base
  • 2 cups plain yogurt (full-fat preferred)
  • 1 tablespoon lemon juice
🧄
Herbs & Aromatics
  • ¼ cup fresh mint leaves, chopped
  • 2 tablespoons coriander leaves (optional)
  • 1 green chili, finely chopped (optional)
  • 2 tablespoons onion, finely chopped (optional)
🌶️
Spices
  • 1 teaspoon cumin powder (or toasted cumin seeds)
  • ½ teaspoon salt
  • ¼ teaspoon black pepper
🥬
Optional Add-Ins
  • ¼ cup grated carrot

Ingredient Details

  • Plain yogurt
    Full-fat yogurt creates creamier texture - low-fat works but thins out faster when stored
  • Fresh mint leaves
    Chop finely just before mixing to keep bright green color and prevent browning
  • Cumin powder
    Toast seeds in dry pan 1-2 minutes for deeper flavor or use pre-ground for speed
  • Salt
    Add in ¼ teaspoon increments and taste after each - yogurt absorbs salt differently than other bases
  • Lemon juice
    Fresh-squeezed juice brightens the tang - bottled lemon juice tastes flat in comparison
  • Green chili
    Remove seeds and membranes for milder heat or skip entirely for kid-friendly raita
  • Onion
    Soak diced onion in cold water 5 minutes to reduce sharpness before draining and adding

Ingredient Swaps

Plain yogurt sets the baseline, but Greek yogurt works when you thin it with a tablespoon of water or lemon juice. Salad cuts through all that richness - pair with an easy salad side when you want to add crunch to the plate.

Four swaps that work:

  • Dried mint for fresh mint - Use 1 tablespoon dried instead of ¼ cup fresh; flavor is duller but functional
  • Coconut yogurt for plain yogurt - Dairy-free option with slight sweetness; texture stays creamy but flavor shifts
  • Toasted cumin seeds for cumin powder - Grind seeds after toasting for more aromatic flavor and rustic texture
  • White vinegar for lemon juice - Same acidity level but different flavor profile; loses brightness

Full-Fat Yogurt

Works for: Creamiest texture, holds up for 3-4 days without separating

Skip if: Watching fat intake or prefer lighter consistency

Low-Fat Yogurt

Works for: Lower calories, still tangy and fresh-tasting when just mixed

Skip if: Making ahead - thins out faster and separates in storage

Greek Yogurt

Works for: Extra-thick texture, tangier flavor, higher protein

Skip if: You want traditional consistency - needs thinning with water or lemon juice

Instructions

Raita takes 15 minutes from start to finish with 5 minutes spent toasting cumin seeds in a dry pan. The rice works best when it hits the table at the same time as the main - try a simple rice recipe if you're serving this alongside grains.

  1. Strain yogurt - Line a fine-mesh strainer with cheesecloth and pour 2 cups plain yogurt inside. Set over a bowl and let drain 30 minutes in the fridge until thickened.
  2. Toast cumin seeds - Heat a small pan over low heat and add 1 teaspoon cumin seeds. Toast 1-2 minutes, shaking pan frequently, until fragrant but not smoking. Remove from heat immediately.
  3. Whisk yogurt - Transfer strained yogurt to a mixing bowl and whisk with a fork until smooth and creamy. Add ½ teaspoon salt, ¼ teaspoon black pepper, and 1 tablespoon lemon juice, whisking after each addition.
  4. Add herbs and aromatics - Fold in ¼ cup finely chopped fresh mint leaves, 2 tablespoons chopped coriander (optional), 1 finely chopped green chili (optional), and 2 tablespoons finely chopped onion (optional). Stir gently to distribute evenly.
  5. Chill and serve - Cover bowl with plastic wrap and refrigerate 15-30 minutes. Stir once before serving and garnish with extra mint leaves if desired.
Golden Rule
Add herbs last and fold gently - blending or overmixing breaks down the mint and turns the yogurt watery

What to Serve With It

Raita needs something spicy or rich to balance against. Most people skip fish, but it balances the meal - check out light seafood dish planning when you want to build a full plate around cooling yogurt condiments.

Side Dish Prep Why It Works How to Serve
Biryani Medium Cooling yogurt cuts through spicy, aromatic rice layers Serve in small bowls alongside individual rice portions
Grilled Chicken Easy Fresh mint and tang refresh smoky charred flavors Drizzle over sliced chicken or serve as dipping sauce
Vegetable Pulao Easy Creamy texture adds richness to simple spiced rice Spoon on top or mix into rice before serving
Samosas Medium Cool yogurt balances fried pastry and spicy potato filling Serve in shallow dish as dipping sauce
Tandoori Kebabs Involved Mint and cumin complement smoky spice rubs on grilled meat Drizzle over kebabs or serve on the side for dipping

Three ways to serve it:

  • As a dip - Set out with naan, chapati, or pita chips for scooping before the main meal arrives
  • As a sauce - Drizzle over grilled meats, roasted vegetables, or rice bowls for cooling contrast
  • As a side - Spoon into small bowls and serve alongside spicy curries or biryani
Best Pick
Serve raita in shallow bowls instead of deep ones - more surface area means easier scooping with bread or spooning over mains

Store and Reheat

Raita keeps 3-4 days in an airtight container in the fridge but thins out and loses mint brightness after day two. Most people skip chicken, but it balances the meal - try an easy chicken side when you're batch-cooking condiments and mains together.

Method Time Best For
🍳 Stovetop N/A Not recommended - raita is served chilled
📦 Microwave N/A Not recommended - raita is served chilled
🔥 Oven N/A Not recommended - raita is served chilled

For best results when storing:

  • Use shallow containers - Wide, shallow containers let raita chill faster and prevent watery separation
  • Press plastic wrap on surface - Direct contact with plastic wrap prevents skin from forming on top
  • Stir before serving - Yogurt separates slightly in storage; stir once to reincorporate liquid
  • Add fresh herbs - Mint loses color and flavor after 2 days; chop fresh mint and fold in before serving leftovers
  • Don't freeze - Yogurt breaks and turns grainy when frozen and thawed

Frequently Asked Questions

Can I use Greek yogurt instead of plain yogurt for raita?

Yes, but thin it with 1-2 tablespoons water or lemon juice first. Greek yogurt is thicker and tangier than plain yogurt, so it needs diluting to match traditional raita consistency.

How long can I store Yogurt Mint Raita in the fridge?

3-4 days in an airtight container. Mint loses brightness after day two, so add fresh chopped mint before serving leftovers.

Should I add mint leaves fresh or cooked in raita?

Always fresh and chopped finely. Cooking mint turns it brown and kills the bright herbal flavor that makes raita refreshing.

Why is my raita watery and how to fix it?

Watery raita happens when yogurt isn't strained or when vegetables release liquid. Drain yogurt in cheesecloth 30 minutes before mixing, and pat grated vegetables dry with paper towels before adding.

What dishes pair best with Yogurt Mint Raita?

Spicy curries, biryani, grilled meats, samosas, and tandoori dishes. The cool, tangy yogurt balances heat and richness in Indian and Pakistani meals.

Yogurt Mint Raita served on a plate

Yogurt Mint Raita

No ratings yet
Yogurt Mint Raita is a cooling condiment that combines thick strained yogurt with fresh mint, toasted cumin, and lemon juice for a bright and fresh flavor. Chopping the mint finely and chilling the raita before serving ensures an evenly distributed, creamy texture perfect for balancing spicy dishes.
Print Recipe Pin Recipe
Prep Time 10 minutes mins
Cook Time 5 minutes mins
Total Time 15 minutes mins
Servings: 4 servings
Course: Side Dish
Cuisine: Indian
Ingredients Method Notes

Ingredients
  

  • 2 cups plain yogurt full-fat preferred, strained for 30 minutes
  • 1 tablespoon lemon juice fresh squeezed
  • 0.25 cup fresh mint leaves finely chopped
  • 2 tablespoons coriander leaves optional, chopped
  • 1 unit green chili finely chopped, optional
  • 2 tablespoons onion finely chopped, optional
  • 1 teaspoon cumin seeds toasted in dry pan for 1-2 minutes
  • 0.5 teaspoon salt add gradually in ¼ teaspoon increments
  • 0.25 teaspoon black pepper
  • 0.25 cup carrot grated, optional

Method
 

  1. Line a fine-mesh strainer with cheesecloth and pour 2 cups plain yogurt inside. Set over a bowl and let drain 30 minutes in the fridge until thickened.
    2 cups plain yogurt
  2. Heat a small pan over low heat and add 1 teaspoon cumin seeds. Toast 1-2 minutes, shaking pan frequently, until fragrant but not smoking. Remove from heat immediately.
    1 teaspoon cumin seeds
  3. Transfer strained yogurt to a mixing bowl and whisk with a fork until smooth and creamy. Add ½ teaspoon salt, ¼ teaspoon black pepper, and 1 tablespoon fresh lemon juice, whisking after each addition.
    2 cups plain yogurt, 0.5 teaspoon salt, 0.25 teaspoon black pepper, 1 tablespoon lemon juice
  4. Fold in ¼ cup finely chopped fresh mint leaves, 2 tablespoons chopped coriander (optional), 1 finely chopped green chili (optional), and 2 tablespoons finely chopped onion (optional). Stir gently to distribute evenly.
    0.25 cup fresh mint leaves, 2 tablespoons coriander leaves, 1 unit green chili, 2 tablespoons onion
  5. Cover bowl with plastic wrap and refrigerate 15-30 minutes. Stir once before serving and garnish with extra mint leaves if desired.
    0.25 cup fresh mint leaves

Notes

  • Strain yogurt first to prevent watery raita and achieve a thick creamy texture.
  • Toast cumin seeds lightly for 1-2 minutes to release their aroma without burning.
  • Add fresh mint last and fold gently to keep the flavor bright and prevent the yogurt from becoming watery.

Tried this recipe?

Let us know how it was!

What Is Grapefruit? [Taste, Uses & More]

March 30, 2026

Broiled grapefruit halves dusted with raw sugar show up on brunch menus regularly, and they're a good example of what this fruit does well - the heat softens the bitterness, the caramelized crust adds sweetness, and the acidity cuts through anything rich on the plate.

What Does Grapefruit Taste Like

Grapefruit earns its place at every stage of cooking, from fresh juice squeezed into a morning glass to zest folded into marinades.

If you need replacements for grapefruit juice or lemon extract swaps that work in a pinch, those exist - however, understanding what makes grapefruit itself worth using is a better starting point.

QUICK SUMMARY

Grapefruit (Citrus × paradisi) is a thick-rinded citrus with juicy, segmented flesh and a flavor built on bright sourness, distinct bitterness from naringin, and subtle sweetness in pink and red varieties. Eat it raw, juice it, broil it, or supreme it into salads.

🍊Flavor: Tart citrus, bitter back-note, mild sweetness in pink varieties
🍽️Best Uses: Broiled halves, salads, cocktails, marinades, marmalade
🛒Buy It: Heavy for its size, smooth skin, no soft spots
❄️Shelf Life: 5-7 days at room temp; 2-3 weeks refrigerated whole
⚠️Watch Out: Interferes with many prescription medications via CYP3A4 enzymes

What Is Grapefruit?

Grapefruit is a citrus fruit that originated in Southeast Asia as a natural hybrid between a pomelo and a sweet orange, first documented in Barbados in the 18th century. Today, the largest commercial crops come from Florida, Texas, and Israel.

Its botanical name is Citrus × paradisi, and it grows in clusters on the tree - which is where the name "grapefruit" comes from.

The fruit is round, ranges from softball- to cantaloupe-sized, and has a thick, aromatic rind that holds fragrant citrus oils.

Varieties split into two main camps:

  • White/yellow grapefruit - pale yellow flesh, sharper bitterness, higher acidity; includes varieties like Marsh and Duncan
  • Pink and red grapefruit - deeper colored flesh from lycopene and beta-carotene; includes Ruby Red and Star Ruby, both noticeably sweeter and less bitter than white types

Ruby Red, developed in Texas and first patented in 1929, remains the most widely sold variety in the United States.

What Does Grapefruit Taste Like?

grapefruit - What Does Grapefruit Taste Like

Grapefruit hits three notes at once: bright citrus sourness, a clean sweetness (more pronounced in pink and red varieties), and a sharp, lingering bitterness that sets it apart from every other common citrus.

That bitterness comes from naringin, a flavonoid compound concentrated in the pith and membranes.

Sensory SnapshotStrong Intensity
👅 Flavor
tartbitterlightly sweet
✋ Texture
juicysegmented pulp
👃 Aroma
zesty citrus oilslightly floral

Think of it as a tart orange with a sharper edge - closer in acidity to pomelo, however with considerably more bitterness than either.

Heat mellows the naringin noticeably, which is why broiled grapefruit tastes rounder than raw.

Sugar and salt both suppress bitterness on contact, which is why a pinch of flaky salt over a fresh half works so well.

How to Use Grapefruit

Supreming - cutting away the peel, pith, and membranes to release clean, tear-shaped segments - is the most precise way to use grapefruit raw. Those segments fold into salads with avocado, fennel, and olive oil without turning watery. A classic avocado-fennel-grapefruit salad is a good entry point for swapping out grapefruit if you need an alternative that delivers similar acidity.

Golden Rule
Always supreme grapefruit for salads. Leaving the membranes on releases excess juice and makes greens go limp within minutes.

Grapefruit juice is essential in the Paloma, Mexico's most popular tequila cocktail, where it balances the spirit's agave sweetness.

It also appears in marinades for shrimp and other shellfish - the acid tenderizes without overcooking the way lime sometimes can.

Zest from the rind adds concentrated citrus oil to vinaigrettes, baked goods, and glazes.

For baking substitutions, lemon extract swaps that work can sometimes stand in when grapefruit zest isn't available.

How Grapefruit Is Used
MethodBest ForTip
🥗 SupremingSalads, yogurt bowls, tartareCut segments over a bowl to catch the juice for dressings
🔥 Broiling/TorchingBreakfast halves, dessertsSprinkle raw or brown sugar and torch until caramelized
🥤 JuicingCocktails, marinades, reductionsRoll before cutting to maximize juice yield
🍊 ZestingBaked goods, glazes, vinaigrettesZest before cutting - it's far easier on whole fruit
🫙 PreservingMarmalade, candied peelBlanch peel twice to cut bitterness before candying

Grapefruit pairs cleanly with avocado, mint, honey, tequila, gin, and shrimp. Avoid pairing it with highly tannic red wines - the bitterness compounds clash badly.

When building cocktails, knowing replacements for orange bitters can help balance a Paloma variation if your bar cart is missing that bottle.

Try It In
🍹Paloma Tequila GrapefruitThe benchmark cocktail for fresh grapefruit juice→

How to Buy and Store Grapefruit

Pick fruit that feels heavy for its size - that weight signals juice content, not flesh volume. Skin should be smooth and slightly glossy.

Thin-skinned fruit yields more juice; thick-rinded fruit is better for zesting and candied peel projects. Skip anything with soft spots, deep blemishes, or a dried-out stem end.

Watch Out
Grapefruit interacts with dozens of prescription drugs by blocking CYP3A4 enzymes, which affects how your body processes medication. Check with your doctor or pharmacist if you take statins, blood pressure drugs, or immunosuppressants.

For storage, whole fruit keeps 5-7 days at room temperature and up to 2-3 weeks in the refrigerator crisper drawer.

Cut segments or juice last 2-3 days in a sealed container in the fridge.

The full breakdown on keeping grapefruit fresh covers how temperature and packaging affect juiciness over time.

Zest can be frozen in small portions and kept for up to three months - similar to how lime zest swaps that work often rely on frozen zest when fresh citrus isn't on hand.

Start Here With Grapefruit

New to cooking with grapefruit? Start with a broiled half. Cut it crosswise, loosen the segments with a paring knife, scatter raw sugar over the top, and torch or broil until caramelized.

That single preparation shows you what heat does to the bitterness and why this fruit earns a spot beyond the breakfast table.

Once you're comfortable there, move to supreming - that technique opens up salads, seafood dishes, and cocktail garnishes.

Shortcut
No torch? A broiler on high for 4-5 minutes produces the same caramelized crust on a sugared grapefruit half.

Frequently Asked Questions

Is grapefruit bitter or sweet?

Both, depending on the variety. White grapefruit leans strongly bitter and tart, while pink and red varieties like Ruby Red are noticeably sweeter. The bitterness comes from naringin, which is concentrated in the pith and membranes.

Why does grapefruit taste bitter?

The compound naringin causes the bitterness. It's a flavonoid found throughout the fruit but is highest in the white pith and segment membranes. Removing those carefully during supreming reduces bitterness significantly.

What is the difference between grapefruit and pomelo?

Pomelo is larger, has much thicker pith, and tastes milder with less bitterness. Grapefruit is actually a pomelo hybrid, but it's smaller, juicier, and considerably more acidic and bitter than its parent fruit.

Are all grapefruits pink?

No. White and yellow-fleshed varieties like Marsh are the original type - pink and red grapefruits came later through selective breeding. Red flesh color comes from lycopene, which is absent in white varieties.

Can you freeze grapefruit?

Yes, with caveats. Whole grapefruit doesn't freeze well - the texture breaks down badly. Freeze supremed segments or juice in airtight containers instead; both keep well for up to three months and work fine in cooked applications and cocktails.

What Is Flank Steak? [Taste, Uses & More]

March 30, 2026

Fajitas sizzling on a cast iron skillet almost always start with flank steak, and for good reason. This long, flat cut from the cow's abdominal muscles delivers a concentrated, beefy punch that holds up to bold marinades and high heat - qualities that make it one of the hardest-working cuts at the grill.

It sits in the same family as hanger steak and skirt, however flank has a tighter grain and leaner profile that sets it apart in both texture and technique.

QUICK SUMMARY

Flank steak is a lean, coarse-grained beef cut from the abdominal region. It has a robust, iron-forward flavor that rewards marinades and demands slicing against the grain to achieve tenderness. Best grilled hot and fast, then carved thin.

🥩Flavor: Bold, beefy, and slightly mineral with concentrated umami
🔪Texture: Firm and coarse-grained; tender only when sliced thin against the grain
🌮Best Uses: Fajitas, carne asada, steak salads, London broil, stir-fry
🌡️Cooking: High-heat grill or broil; avoid low-and-slow dry roasting
📅Shelf Life: 2-3 days refrigerated; up to 12 months frozen and vacuum-sealed

What Is Flank Steak?

Flank steak comes from the beef flank, the lower abdominal section of the cow, just behind the plate and ahead of the round. It's a single, long flat muscle that works hard during the animal's movement, which explains the visible, pronounced grain running its length.

In some Latin markets you'll find it labeled bife de vacío, though that term can vary by region. In American butcher cases it sometimes gets grouped loosely with London broil - a preparation style, not a cut - which creates confusion worth knowing about.

The difference between London broil and flank steak comes down to cooking method versus cut identity.

The two cuts most often confused with flank are skirt and flap steak:

  • Skirt steak - thinner, fattier, and from the plate section; more loosely grained than flank
  • Flap steak - also called sirloin tip; coarser and chewier, often sold mislabeled as flank
  • Hanger steak - from the diaphragm; more tender than flank but narrower and harder to find

Flank runs larger than skirt, typically one to two pounds per piece, and holds its shape well on a grill.

What Does Flank Steak Taste Like?

flank steak - What Is Flank Steak

Flank steak tastes robustly beefy, with a slightly mineral, iron-forward edge that you notice most when it's cooked simply - just salt, high heat, and a good sear. The leanness concentrates the flavor rather than softening it.

Compared to skirt steak, flank reads cleaner and tighter on the palate. Skirt carries more intramuscular fat, which gives it a richer, more buttery finish.

Flank is more direct - you get the beef, not the fat.

Sensory SnapshotModerate Intensity
👅 Flavor
beefyumami-richiron-forwardlean
✋ Texture
coarse-grainedfirmtender when sliced thin
👃 Aroma
roasted beefiron-likemeaty

Heat changes flank noticeably. A rare-to-medium-rare sear keeps the center slightly sweet and metallic-bright.

Push it past medium and the lean muscle tightens fast, turning dry and livery.

How to Use Flank Steak

High heat and thin slicing are the two non-negotiables with flank. Everything else - marinade, seasoning, sauce - builds around those two rules.

How Flank Steak Is Used
MethodBest ForTip
🔥 GrillingCarne asada, fajitas, whole-steak presentationSear 3-4 min per side over high heat; rest 5-10 min before slicing
🍳 Pan-searSteak sandwiches, weeknight dinnersCast iron, ripping hot; finish in oven if thick
🥘 BraiseStews, slow-cooked fillingsLeave whole; long braise breaks down the tough fibers
⚡ Stir-fryBeef noodle bowls, Asian-style dishesSlice thin across the grain; freeze 20 min first for clean cuts
🔆 BroilingLondon broil-style preparationsPosition 4-6 inches from broiler element; watch timing closely

Acidic marinades - lime juice, red wine vinegar, soy sauce - do more than add flavor here. The acid begins to loosen the tight muscle fibers, which matters on a cut this lean.

Thirty minutes gets you flavor; two hours starts to affect texture.

Flank shows up across Mexican, American, and Argentinian cooking. Carne asada and fajitas are the most obvious applications, however Argentine chimichurri sauce alongside a grilled whole flank is equally at home. Bold sauces - chimichurri, salsa verde, peppercorn - all suit the cut's assertive flavor.

Golden Rule
Always slice flank steak across the grain. Cut parallel to the grain and the long muscle fibers stay intact - making every bite feel like you're chewing rope.

For stir-fry applications, pair flank with aromatics like ginger and scallion, and keep the wok contact time under two minutes per batch. For sides, grilled tortillas, roasted potatoes, and rice all work depending on the preparation.

Try It In
🥢Japanese Steakhouse Yum Yum SauceA rich dipping sauce that balances flank's lean intensity→🧄Air Fryer Garlic Butter Steak TipsHigh-heat method that mirrors flank's quick-cook needs→🥗Grilled Steak and Blue Cheese SaladThin-sliced flank is ideal here — lean enough to let the cheese land→

How to Buy and Store Flank Steak

Look for a deep red color and an even thickness across the whole piece. The long grain should be clearly visible.

Avoid cuts with gray edges, excessive surface moisture, or any brown patches - those signal age.

Watch Out
Flap steak is frequently mislabeled as flank in supermarkets. Ask the butcher to confirm the cut. Flap is coarser and chewier, and won't respond the same way to a hot, quick sear.

At the butcher counter, ask specifically for flank rather than accepting a substitution. If flank isn't available, check our flank steak alternatives guide before settling for something random.

Storage is straightforward:

  • Refrigerator - Keep at or below 40°F, tightly wrapped in butcher paper or vacuum-sealed; use within 2-3 days
  • Freezer - Vacuum-sealed flank holds well for up to 6-12 months; label with the date
  • After cooking - Sliced cooked flank keeps for 3-4 days refrigerated, stored in an airtight container

For a full breakdown on timing and signs of spoilage, see our flank steak storage guide guide.

Start Here If You're New to This Cut

If you've never cooked flank before, start with a simple marinade and a hot grill. You don't need technique beyond two things: don't overcook it, and slice against the grain.

If you want something richer and more forgiving, skirt steak is worth considering - our side dishes for skirt steak covers the pairing side of that cut well. Flank rewards the cook who respects its grain and its leanness.

Do both, and it delivers every time.

Frequently Asked Questions

Is flank steak tough?

It can be, if cooked past medium or sliced with the grain. The long muscle fibers tighten quickly with heat, so keep it rare to medium-rare and always cut perpendicular to the grain for tender results.

Should you marinate flank steak?

Yes, for most preparations. An acidic marinade - lime, vinegar, or soy - loosens the tight fibers and adds depth. Thirty minutes is the minimum; beyond four hours the texture can turn mushy.

How long to grill flank steak?

Three to four minutes per side over high heat for a one-inch-thick piece, targeting 130-135°F internal for medium-rare. Rest it five to ten minutes before slicing - skipping the rest loses juice fast.

Flank steak vs skirt steak: which is better?

Neither is objectively superior - they suit different needs. Skirt has more fat and a looser grain, making it slightly more forgiving and richer-tasting. Flank is leaner and cleaner-flavored, better for dishes where the marinade or sauce carries the richness.

How do you slice flank steak for fajitas?

After resting, cut the steak into strips no wider than a quarter inch, holding your knife at a slight angle across the grain. Thin, angled cuts maximize tenderness and give you strips that fit neatly in a tortilla.

« Previous Page
Next Page »

Primary Sidebar

ForkliftKitchen recipe developer

Welcome!

Recipe Developer · 12+ Yr Kitchen Veteran

I'm the recipe developer behind this site, focused on practical, well-tested dishes and smart ingredient swaps. Every recipe is written to be clear, reliable, and easy to make at home.

650+ Recipes
12+ Yrs Exp.
3x Tested
Our Story →

As Featured In

Allrecipes

TASTE OF HOME

Food52

HUFFPOST

Yahoo! Life

Our Editorial Standards

  • ✓ Every recipe tested at least 3 times before publishing
  • ✓ Substitutes verified by real kitchen trials, not guesswork
  • ✓ Reviewed for accuracy by our editorial team
  • ✓ Updated regularly with seasonal info and reader feedback

Most Popular

  • Creamy Lemon Shrimp Linguine
    Creamy Lemon Shrimp Linguine
  • Creamy Garlic Mushroom Chicken
    Creamy Garlic Mushroom Chicken
  • Sesame Ginger Chicken Noodle Bowls
    Sesame Ginger Chicken Noodle Bowls
  • Baked Lemon Herb Fish Fillets
    Baked Lemon Herb Fish Fillets
  • Veggie Loaded Fried Rice
    Veggie Loaded Fried Rice
  • Spicy Garlic Shrimp Stir Fry
    Spicy Garlic Shrimp Stir Fry

Join 8,000+ Home Cooks

Weekly Kitchen Tips

Easy recipes, smart substitutes, and real cooking shortcuts — every Thursday.

Subscribe Free →


Side Dishes

  • What to Serve With Asian Salmon? 15 Best Side Dishes
    What to Serve With Asian Salmon? 15 Best Side Dishes
  • Side Dishes for Strawberry Spinach Salad
    15 Best Side Dishes for Strawberry Spinach Salad
  • Sides for Grilled Cauliflower Steaks to Complete the Meal
    15 Sides for Grilled Cauliflower Steaks to Complete the Meal
  • 15 Sides To Serve With Calabacitas
    15 Best Sides for Calabacitas – Mexican-Inspired Favorites


Substitutes

  • 7 Best Substitutes for Hot Sauce in Marinades & Stir-Fries
    7 Best Substitutes for Hot Sauce in Marinades & Stir-Fries
  • 9 Best Substitutes for Butter in Baking and Cooking
  • 7 Best Substitutes for Tagliatelle for Italian Pasta Dishes
    7 Best Substitutes for Tagliatelle for Italian Pasta Dishes
  • 7 Best Substitutes for Udon Noodles in Asian Stir-Fries
    7 Best Substitutes for Udon Noodles in Asian Stir-Fries


Browse by Topic

  • Side Dishes320
  • Substitutes785
  • Dinner163
  • Air Fryer77
  • Taste Profiles484
  • Food Storage123


Reader Reviews

★★★★★

"Finally a food blog that tells you exactly why a substitute works instead of just listing options."

— Sarah M., via email

★★★★★

"The side dish recommendations are so specific — saved my dinner party twice this month."

— James R., Pinterest comment

★★★★★

"I trust this site more than most because they actually test everything. You can tell."

— Priya K., blog comment

Footer

↑ Back to Top

Forklift Kitchen

We do the heavy lifting so you can enjoy the cooking. Tested recipes, smart substitutes, and perfect pairings—built for real home cooks.

Content

  • Recipes
  • Substitutes
  • What to Serve With
  • Blog

Company

  • About Us
  • Contact
  • Subscribe

Legal

  • Privacy Policy
  • Terms of Service

As an Amazon Associate I earn from qualifying purchases.

© 2026 Forklift Kitchen.

Rate This Recipe

Your vote:


A rating is required
A name is required
An email is required