• Skip to primary navigation
  • Skip to main content
  • Skip to primary sidebar
  • Recipe Index
    • Air Fryer
  • Side Dishes
  • Substitutes
  • About
  • Contact
  • Subscribe

ForkLiftKitchen

menu icon
go to homepage
  • Recipe Index
    • Air Fryer
  • Side Dishes
  • Substitutes
  • About
  • Contact
  • Subscribe
subscribe
search icon
Homepage link
  • Recipe Index
    • Air Fryer
  • Side Dishes
  • Substitutes
  • About
  • Contact
  • Subscribe
×

Blog

What Is Italian Dressing? [Taste, Uses & More]

March 30, 2026

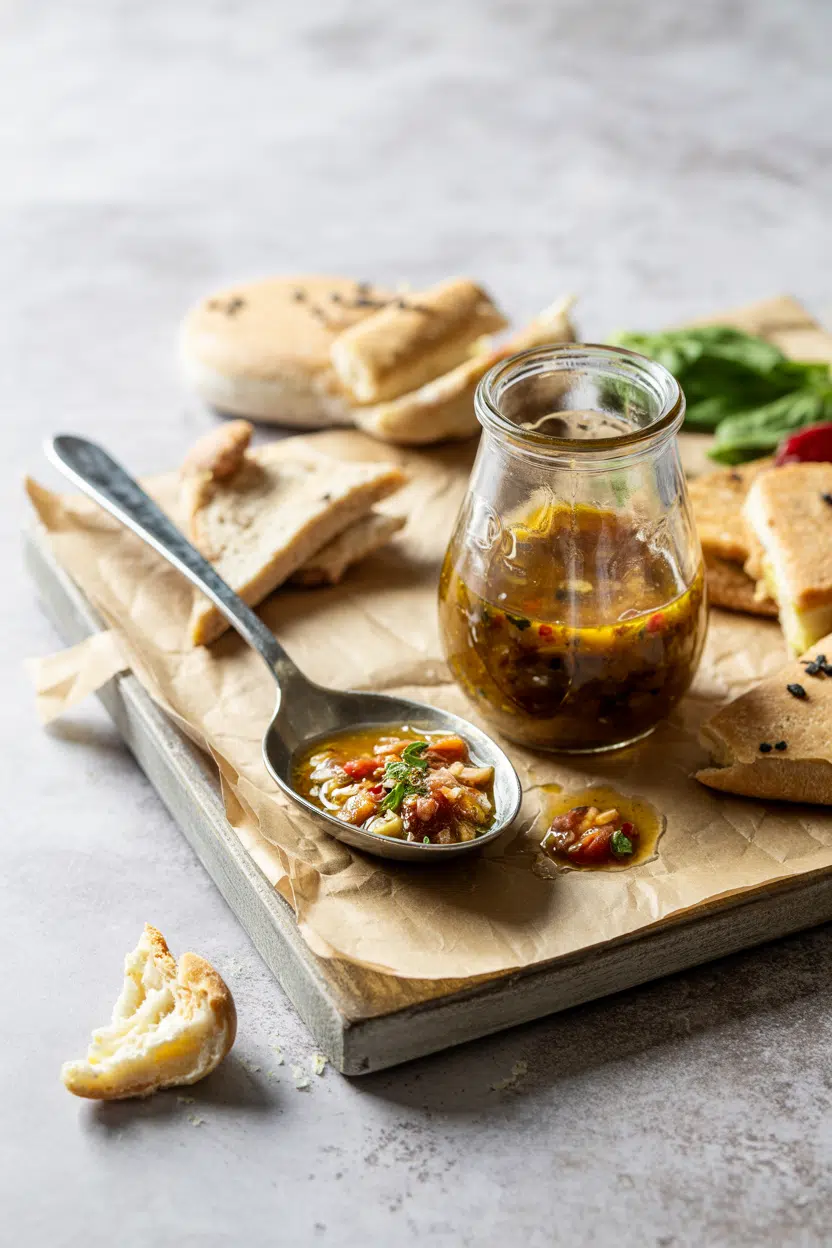
Most people treat Italian dressing as an afterthought - something poured straight from a bottle onto iceberg lettuce without a second thought.
What Is Italian Dressing

The reality is that Italian dressing is a carefully balanced vinaigrette, and understanding what's actually in it changes how you use it.

Unlike what makes ranch dressing distinct with its creamy, dairy-forward base, Italian dressing is oil-and-vinegar at its core, sharpened with dried herbs, garlic, and just enough sweetness to keep the acidity in check.

If you've ever wondered why the bottled version tastes nothing like a homemade a balsamic vinaigrette dressing (homemade) recipe you've made from scratch, the answer lives in the ingredient list.

QUICK SUMMARY

Italian dressing is an oil-and-vinegar vinaigrette seasoned with dried herbs, garlic, and optional sweeteners. It's tangy, herb-forward, and moderately sharp - equally useful as a salad dressing and a short-term marinade.

🫙Category: Vinaigrette-style bottled or homemade salad dressing
🌿Flavor: Tangy, herby, slightly sweet, salty
🍗Best Uses: Salads, pasta salads, chicken and shrimp marinades
📦Shelf Life: Unopened: 12-18 months; opened: 1-6 months
🛒Buy It: Look for olive oil or canola oil and wine vinegar on the label

What Is Italian Dressing?

Italian dressing is an oil-and-vinegar based vinaigrette seasoned with dried herbs, garlic, and sometimes a small amount of sugar or lemon juice.

Despite its name, it's largely an American invention - Italian-American restaurants popularized the style, and bottled versions became a pantry staple across the U.S. from the mid-20th century onward.

The dressing falls into the vinaigrette category, meaning oil is the dominant component, held in loose suspension with an acidic liquid. White wine vinegar or distilled vinegar is most common in commercial versions; better-quality bottles often use red wine vinegar for a slightly deeper flavor.

You'll also see it labeled as Italian vinaigrette or zesty Italian on retail shelves. The main subtypes break down like this:

  • 🫙 Shelf-stable bottled - made with distilled or wine vinegar, stabilizers, and dried herbs; the standard grocery store version
  • ❄️ Fresh refrigerated - shorter shelf life, brighter herb flavor, often found near deli sections
  • 🥣 Homemade - customizable ratio of olive oil to vinegar, fresh or dried herbs, no preservatives

Some commercial versions include parmesan or Romano cheese for added savoriness, while others skip dairy entirely - worth checking if you're cooking for specific diets.

What Does Italian Dressing Taste Like?
italian dressing - What Is Italian Dressing

Italian dressing tastes like a classic oil-and-vinegar vinaigrette with noticeably stronger dried-herb and garlic notes layered on top.

The vinegar hits first - sharp and bright - before the oregano, basil, and parsley round it out with an earthy, slightly dusty herb character.

Sensory SnapshotModerate Intensity
👅 Flavor
tangyherbyslightly sweetsavory
✋ Texture
thinlightly emulsified
👃 Aroma
herbaceousgarlickycitrus-edged

Commercial versions use added sugar or honey to soften the acidity, which is why they taste noticeably rounder than a stripped-down homemade version.

Homemade Italian dressing built with good olive oil and fresh garlic has a brighter, more assertive edge.

The texture is thin - it coats rather than clings, so heavier ingredients like pasta or sturdy greens carry it well.

Golden Rule
If your Italian dressing tastes flat, the vinegar-to-oil ratio is off. A proper vinaigrette runs 1 part vinegar to 3 parts oil - go tighter (1:2) for more punch.

How to Use Italian Dressing

Italian dressing works across more situations than most people try.

Its acidity and herb profile make it particularly strong as a short-term marinade - chicken thighs, shrimp, or tofu left in Italian dressing for 30 to 60 minutes pick up clear herb-and-garlic flavor without becoming mushy.

How Italian Dressing Is Used
MethodBest ForTip
🥗 TossingGreen salads, cold pasta salads with olives and vegetablesDress right before serving to avoid wilting
🍗 MarinatingChicken, shrimp, tofu - before grilling or roasting30-60 min max; longer breaks down protein texture
💧 Finishing drizzleRoasted vegetables, grain bowls, grilled fishAdd after cooking - heat kills the herb brightness

For salads, romaine, iceberg, tomatoes, cucumbers, and pepperoncini are natural partners. Pasta salads are where Italian dressing earns serious mileage - the acidity keeps the dish lively even when chilled, and it coats shapes like rotini or farfalle evenly.

Grain bowls built on farro or barley also benefit from a light drizzle, where the dressing acts as the acidic brightness that ties the bowl together.

Italian dressing pairs predictably well with Italian-American and Mediterranean-inspired dishes: antipasto plates, grilled vegetables like bell peppers and zucchini, and anything featuring mozzarella or parmesan.

If you're running short on a harder cheese, options covered in replacements for parmesan cheese work just as well in a salad or pasta context.

Watch Out
Don't use Italian dressing as a finishing sauce for cream-based dishes. The vinegar acidity will break the cream immediately.

One category to avoid: fruit salads. The dried-herb and garlic notes clash against sweet fruit in a way that no amount of added sugar fixes.

If you want a tangy dressing that leans sweeter, replacements for italian dressing with a honey-citrus base can cover that gap instead.

Try It In
🫙Italian Dressing (Homemade)Build it from scratch and control the herb-to-acid ratio yourself→

How to Buy and Store Italian Dressing

Choose a clear bottle so you can see oil color and sediment. Ingredient labels worth trusting list olive oil or canola oil first, followed by white wine or red wine vinegar - not just "vegetable oil" and distilled vinegar.

Fresh refrigerated versions near the deli counter offer livelier herb aroma; check the use-by date and smell it when opened.

Shortcut
If buying bottled, shake the bottle in the store. Separation is normal, but thick sediment clumped at the bottom can signal poor ingredient quality or age.

Storage is straightforward - unopened commercial bottles sit fine in a cool, dark pantry.

Once opened, refrigerate and use within 3 to 6 months.

Homemade Italian dressing, especially versions using fresh herbs or garlic, lasts only 1 to 3 months refrigerated.

For a detailed breakdown, how long italian dressing keeps covers shelf life across all formats.

The oregano used in the dressing matters more than many people realize - comparing dried oregano vs ground oregano options is worth reading before making a batch from scratch.

Start With the Salad, Then Try the Marinade

If you're new to Italian dressing beyond the salad bowl, start with a simple pasta salad: rotini, cherry tomatoes, black olives, and a generous pour of dressing, chilled for an hour before serving.

That single recipe demonstrates the full flavor range - the vinegar lifts, the herbs settle in, and the oil coats everything evenly.

Once that clicks, the jump to using it as a chicken marinade before grilling is a small and worthwhile step.

Frequently Asked Questions

Is Italian dressing the same as vinaigrette?

Not exactly. Italian dressing is a type of vinaigrette, but it includes a specific dried-herb blend - usually oregano, basil, and parsley - plus garlic. A plain vinaigrette is just oil, acid, and seasoning with no fixed herb profile.

Can Italian dressing be used as a marinade?

Yes, and it works well for chicken, shrimp, and tofu. Keep marinating time to 30-60 minutes - the vinegar acidity begins to break down protein structure beyond that, making the texture grainy.

Is Italian dressing gluten-free?

Most Italian dressings are naturally gluten-free. However, some commercial versions add thickeners or flavor carriers derived from wheat, so checking the label for a certified gluten-free mark is the safest move.

What ingredients are in Italian dressing?

The base is oil and vinegar - typically canola or olive oil with white wine or red wine vinegar. Dried oregano, basil, parsley, garlic, salt, and sometimes sugar or lemon juice round out the flavor.

How do you make Italian dressing thicker?

Blend it briefly with a small amount of Dijon mustard or add a teaspoon of honey - both act as emulsifiers that hold oil and vinegar together longer. A pinch of xanthan gum achieves the same effect without changing the flavor.

Cream Cheese Lox Spread

March 30, 2026

When brunch guests arrive or you're hosting a casual morning spread, having a make-ahead appetizer takes pressure off the kitchen. A cream cheese lox spread gives you that professional deli taste with minimal active work.

Cream Cheese Lox Spread served on a plate

The mixing takes 10 minutes and the fridge does the rest. You chop, fold, season, then chill while the flavors meld into something cohesive.

This works for weekend entertaining, holiday breakfasts, or meal prep when you want something ready to pull out and serve.

QUICK SUMMARY

A quick, creamy spread that blends cream cheese with chopped lox, capers, dill, and red onion. Chill 30 minutes before serving so the flavors meld and the texture firms up for easy spreading. Works for brunch, appetizers, or snack prep.

⏱️Total Time: 40 minutes (10 active + 30 chilling)
🔪Critical Step: Soften cream cheese fully and chop lox finely
⚠️Watch Out: Too much liquid makes it runny - drain capers and pat lox dry

Table of Contents

Toggle
  • Why This Recipe Works
  • What You'll Need
    • Ingredient Details
  • Ingredient Swaps
  • What to Serve With It
  • Store and Reheat
  • Frequently Asked Questions
  • Cream Cheese Lox Spread
    • Method 
    • Tried this recipe?

Why This Recipe Works

The texture stays smooth because you start with fully softened cream cheese. Cold cream cheese creates lumps no amount of stirring can fix. For a version that comes together quickly, a simple spread variation uses a similar folding technique with different herbs.

Quick Reference
⏱️
Prep Time
10 min
🔥
Cook Time
0 min
⏰
Total Time
40 min (includes chilling)
🍽️
Servings
8 servings
📊
Difficulty
Easy
🏷️
Category
Appetizer
💡
Quick Tip
Chill 30 minutes for best spreading texture
🎯
Best For
Weeknight | Entertaining | Meal prep

Five things that determine success:

  • Softened cream cheese - Leave at room temp 30 minutes before mixing for smooth spread
  • Drained capers - Pat dry with paper towel to avoid watery texture
  • Finely chopped lox - Mince to less than ¼ inch pieces for even distribution
  • Gradual lemon juice - Start with 1 teaspoon, taste, add more up to 1 tablespoon
  • 30-minute chill - Refrigerate before serving to meld flavors and firm texture
Quick Tip
Add lemon juice last so you can taste and adjust without over-acidifying the spread

What You'll Need

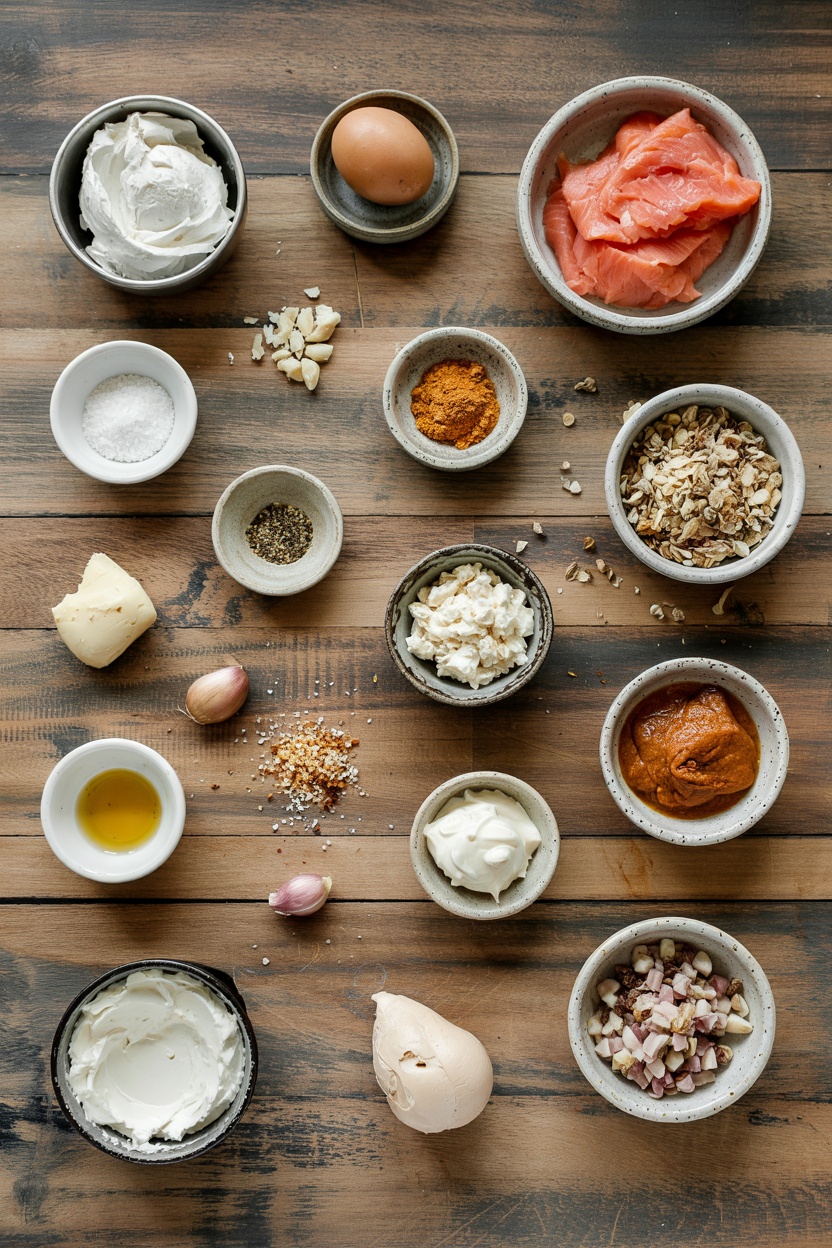
Ingredients for Cream Cheese Lox Spread

The cream cheese base carries everything, so quality matters more than quantity. Rich mains need something to cut through, and another great sauce recipe takes a different approach with tangy mustard and fresh dill to balance smoked fish.

🧀
Dairy Base
  • 8 oz cream cheese (softened)
  • 1-2 tablespoon cream or sour cream (optional)
🦐
Smoked Fish
  • 4 oz lox (or smoked salmon)
🧄
Aromatics
  • 2 tablespoon red onion (finely chopped)
  • 1 tablespoon capers (drained, chopped)
  • 2 tablespoon fresh dill (chopped)
  • 1 tablespoon fresh chives (optional)
🫙
Seasoning
  • 1 teaspoon lemon juice (plus more to taste)
  • Black pepper to taste

Ingredient Details

  • Cream cheese
    Must be fully softened - leave at room temp 30 minutes before mixing to prevent lumps
  • Lox
    Pat dry with paper towel to remove excess brine and prevent watery spread
  • Red onion
    Chop finely (< ¼ inch) for texture without overpowering bite
  • Capers
    Drain well and chop to distribute briny flavor evenly throughout
  • Fresh dill
    Add last to preserve bright green color and fresh herb aroma
  • Lemon juice
    Start with 1 teaspoon, taste, then add more gradually to control acidity
  • Black pepper
    Season after folding in lox and capers to avoid over-salting

Ingredient Swaps

You can adjust the spread for dietary needs or pantry gaps without losing the core texture. Swapping out individual components changes the flavor profile but keeps the method identical.

  • Cream cheese → dairy-free cream cheese - Use Kite Hill or Violife for lactose-free version with slightly firmer texture
  • Lox → smoked salmon - Less salty and smoky, softer texture, more budget-friendly
  • Red onion → scallions - Milder sharpness, less crunch, better for sensitive palates
  • Capers → finely chopped green olives - Less briny, more mellow, similar salty pop

Dairy-Free Cream Cheese

Works for: lactose intolerance, vegan brunch spreads

Skip if: you want classic tangy deli flavor

Greek Yogurt (Partial Swap)

Works for: lighter texture, extra tang, protein boost

Skip if: you need thick spreadable consistency

Smoked Salmon Instead of Lox

Works for: milder fish flavor, softer texture, budget meals

Skip if: you want traditional deli smokiness

Instructions

The mixing takes 10 minutes if your cream cheese is soft. Rich mains need something to cut through, and classic beef dish pairs well with this spread as part of a complete brunch plate with contrasting textures.

  1. Soften cream cheese. Leave 8 oz cream cheese at room temperature for 30 minutes until it yields easily to pressure. Cold cheese creates lumps that won't smooth out.

  2. Prep add-ins. Pat 4 oz lox dry with paper towel, then chop into pieces smaller than ¼ inch. Finely mince 2 tablespoon red onion and chop 1 tablespoon drained capers. Chop 2 tablespoon fresh dill.

  3. Mix base. In a mixing bowl, stir softened cream cheese with a spoon until smooth and creamy. If too thick, fold in 1-2 tablespoon cream or sour cream to loosen.

  4. Fold in add-ins. Add chopped lox, onion, capers, and dill to cream cheese. Fold gently with spatula until evenly distributed. Add 1 teaspoon lemon juice, taste, then add more up to 1 tablespoon total. Season with black pepper.

  5. Chill and serve. Transfer spread to airtight container, cover, and refrigerate 30 minutes minimum to firm texture and meld flavors. Stir before serving if any liquid separates.

Golden Rule
Never skip the 30-minute chill - it's what transforms separate flavors into a cohesive spread

What to Serve With It

The spread needs a sturdy base that won't get soggy or collapse under the weight. Most people skip planning the vessel, but it balances the meal by adding crunch or neutral bulk. For complete meal planning, fish and chips meal planning ideas shows how to build a balanced seafood-focused plate with complementary sides.

Side Dish Prep Why It Works How to Serve
Toasted bagels Easy Classic base balancing creamy spread Slice and toast until golden, serve warm
Crisp cucumber slices Easy Fresh crunch complements richness Slice ¼ inch thick, serve cold
Sliced tomatoes Easy Adds acidity and freshness Slice thick, season with salt
Whole grain crackers Easy Convenient finger food option Arrange on platter around spread
Mini rye toast points Medium Sophisticated vessel matches spread flavor Toast bread, cut into triangles

Three ways to serve it:

  • Brunch platter - Spread on toasted bagels with cucumber, tomato, capers on the side, fresh lemon wedges
  • Appetizer board - Serve in bowl surrounded by rye toast points, radish slices, pickled vegetables
  • Snack prep - Portion into small containers with whole grain crackers for grab-and-go weekday breakfasts
Best Pick
Toasted bagels with the spread, cucumber slices, and fresh dill on top - classic deli combo that never fails

Store and Reheat

The spread keeps 3-4 days in the fridge if stored properly. A good salmon can make or break the plate, and something flaky like salmon works as a main course when you're serving this spread as part of a larger brunch spread. Cover tightly to prevent the surface from drying out or absorbing fridge odors.

Method Time Best For
❄️ Serve Cold N/A Best texture and flavor - never heat this spread

For best results when storing:

  • Use airtight container - Shallow container with tight-fitting lid prevents oxidation and keeps spread fresh
  • Press plastic wrap on surface - Direct contact eliminates air pockets that cause discoloration
  • Store 3-4 days max - Fresh herbs lose brightness after that, lox can develop off flavors
  • Stir before serving - Any separated liquid reincorporates easily with quick stir
  • Don't freeze - Cream cheese breaks down and becomes grainy, herbs turn mushy when thawed

Frequently Asked Questions

How long to chill cream cheese lox spread before serving?

Chill 30 minutes minimum to firm the texture and meld flavors. Longer chilling (up to 2 hours) makes the spread easier to scoop and intensifies the dill and lemon notes.

Can I make cream cheese lox spread ahead and store it?

Yes - make up to 2 days ahead and store in airtight container in fridge. Stir before serving and add fresh dill or chives on top to brighten appearance.

What goes best with cream cheese lox spread?

Toasted bagels are classic, but whole grain crackers, rye toast points, cucumber slices, and sliced tomatoes all work. Pick something with crunch or neutral flavor that won't compete with the smoky fish.

How do I know when my cream cheese is softened enough for lox spread?

Press gently with your finger - it should yield easily without resistance and feel room temperature, not cold. If it's still firm or holds its shape, leave it out another 10-15 minutes.

Can I use smoked salmon instead of lox for the spread?

Yes - smoked salmon works well but has milder flavor and less salt than traditional lox. You may need to add a pinch more salt and extra lemon juice to match the classic deli taste.

Cream Cheese Lox Spread served on a plate

Cream Cheese Lox Spread

No ratings yet
A quick, creamy spread combining softened cream cheese with finely chopped lox, capers, dill, and red onion. Chill 30 minutes before serving to meld flavors and achieve a perfect spreading texture. Ideal for brunch, appetizers, or easy meal prep.
Print Recipe Pin Recipe
Prep Time 10 minutes mins
Cook Time 30 minutes mins
Total Time 40 minutes mins
Servings: 8 servings
Course: Appetizer
Cuisine: American
Ingredients Method Notes

Ingredients
  

  • 8 oz cream cheese softened fully at room temperature
  • 1-2 tablespoon cream or sour cream optional to loosen texture
  • 4 oz lox pat dry and finely chopped
  • 2 tablespoon red onion finely chopped
  • 1 tablespoon capers drained and chopped
  • 2 tablespoon fresh dill chopped
  • 1 teaspoon lemon juice taste and add more up to 1 tbsp
  • black pepper to taste

Method
 

  1. Leave 8 oz cream cheese at room temperature for 30 minutes until it yields easily to pressure. This prevents lumps when mixing.
    8 oz cream cheese
  2. Pat 4 oz lox dry with paper towel, then chop into pieces smaller than ¼ inch. Finely mince 2 tablespoon red onion and chop 1 tablespoon drained capers. Chop 2 tablespoon fresh dill.
    4 oz lox, 2 tbsp red onion, 1 tbsp capers, 2 tbsp fresh dill
  3. In a mixing bowl, stir softened cream cheese with a spoon until smooth and creamy. If too thick, fold in 1-2 tablespoon cream or sour cream to loosen.
    8 oz cream cheese, 1-2 tbsp cream or sour cream
  4. Add chopped lox, red onion, capers, and dill to cream cheese. Fold gently with a spatula until evenly distributed. Add 1 teaspoon lemon juice, taste, then add more up to 1 tablespoon total. Season with black pepper to taste.
    4 oz lox, 2 tbsp red onion, 1 tbsp capers, 2 tbsp fresh dill, 1 tsp lemon juice, black pepper
  5. Transfer spread to an airtight container, cover, and refrigerate at least 30 minutes to firm texture and meld flavors. Stir before serving if any liquid separates.

Notes

  • Always use fully softened cream cheese to avoid lumps.
  • Drain capers and pat lox dry to prevent watery spread.
  • Chill at least 30 minutes before serving for best texture and flavor melding.

Tried this recipe?

Let us know how it was!

What Is Green Bean? [Taste, Uses & More]

March 30, 2026

Green beans do something no dried legume can: they bring live, snapping texture and a clean grassy brightness to a plate without any soaking, long cooking, or prep overhead.

What Is Green Bean

You eat the whole pod - skin, immature seeds, and all - which means the bean delivers both crunch and a mild, slightly sweet flavor in a single bite.

That structural difference is why green beans hold their own blanched and chilled in a salad just as well as they do blistered in a hot wok, and why swapping out snow pea in a stir-fry so often lands on green beans as the obvious next choice.

QUICK SUMMARY

The green bean is a mildly flavored immature pod vegetable with a clean, grassy sweetness and satisfying snap. Raw or cooked, it holds texture well across most methods - blanching, roasting, and stir-frying all work. Use within 5-10 days for best results.

🌿Flavor: Fresh, grassy, mildly sweet with a slight vegetal green note
🍽️Best Uses: Blanched salads, stir-fries, roasting, casseroles, pickling
🛒Buy: Bright green, firm pods that snap cleanly - no limpness or spots
❄️Storage: Unwashed in the fridge produce drawer, away from ethylene emitters
📅Shelf Life: 5-10 days for standard pods; thin haricot vert varieties, 3-5 days

What Is Green Bean?

The green bean is the immature pod of Phaseolus vulgaris, harvested before the seeds inside have fully developed or dried.

That early harvest is what sets it apart from kidney beans or black beans - you're eating the whole structure, pod and seed together, while everything is still tender.

Originally cultivated in the Americas, the plant spread globally after Spanish and Portuguese trade routes carried it across continents in the 16th century. Today it goes by several names depending on region and variety.

  • 🫛 Snap bean / string bean - the most common American names; modern varieties have had the fibrous "string" bred out
  • 🇫🇷 Haricot vert - the French variety; noticeably slender, more tender, and harvested even earlier than standard green beans
  • 🌱 Runner bean - a related but distinct species with a broader, flatter pod and a slightly earthier flavor
  • 🥢 French bean - a broader European term that often refers to haricot vert-style thin pods

Standard green beans and haricot verts are the two forms you'll encounter most in supermarkets. Haricot verts cook faster and have a more delicate texture - worth keeping in mind before you apply the same timing to both.

What Does Green Bean Taste Like?

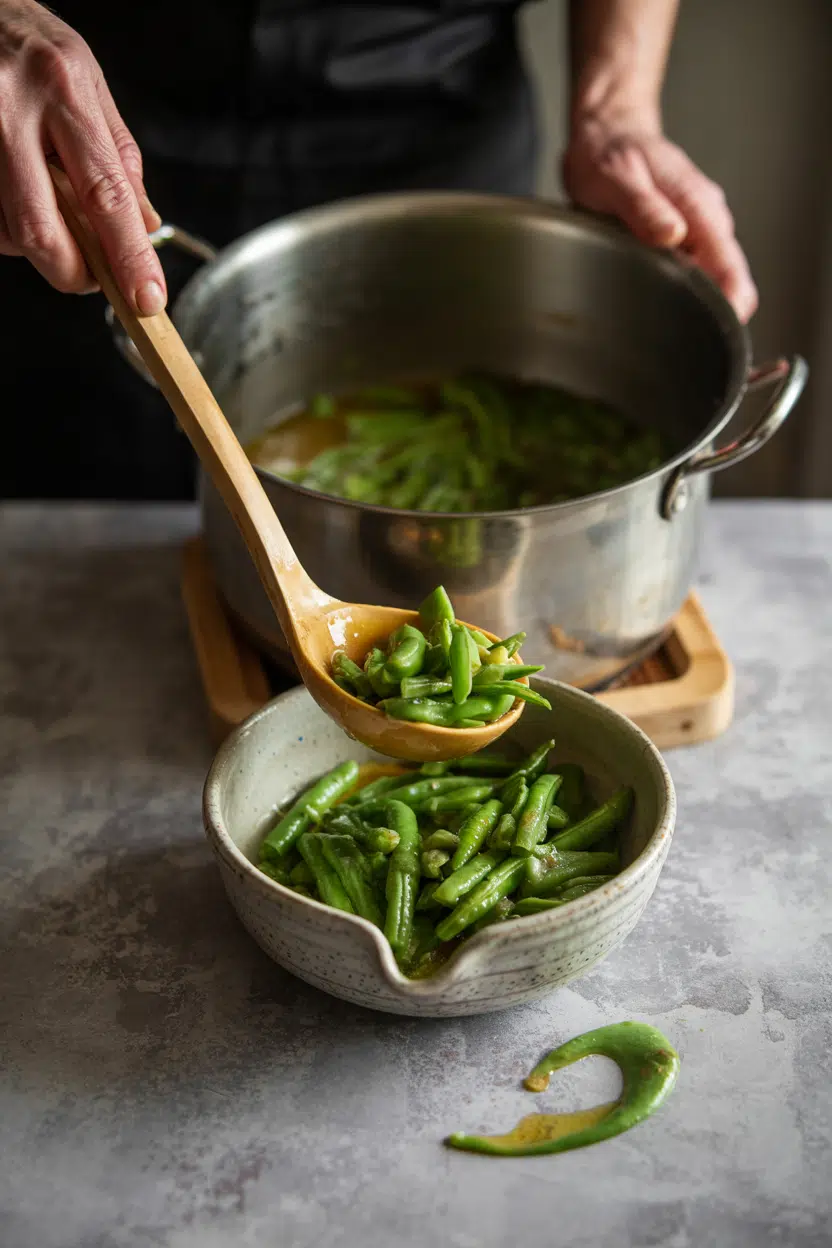
green bean - What Is Green Bean

Green beans taste fresh and mildly grassy, with a sweetness that reads more subtle than snap peas but sits in the same flavor family. Cut one open raw and you get a clean, pea-like scent - understated and vegetal rather than sharp.

Sensory SnapshotMild Intensity
👅 Flavor
grassymildly sweetvegetalslightly nutty (roasted)
✋ Texture
crisp rawfirm-tender blanchedcreamy if overcooked
👃 Aroma
clean greensubtle pea-like

Heat shifts the flavor noticeably. Blanched green beans stay bright and fresh-tasting, close to raw.

Roasted at high heat, the pod edges blister and a mild nuttiness develops - similar to young asparagus when it chars lightly at the tips. Braised or long-boiled, that green note fades and the bean takes on the flavor of whatever liquid surrounds it.

Texture is the real variable. Overcooked green beans lose their structural snap entirely, collapsing to a soft, almost creamy interior that works in a slow-cooked stew but fails everywhere else.

How to Use Green Bean

Green beans work across a wide range of cooking methods without demanding much technique. The challenge is mostly timing - they go from perfectly cooked to mushy in under a minute if you're not watching.

How Green Bean Is Used
MethodBest ForTip
🥗 RawSalads, crudités, adding crunch to grain bowlsTrim ends and slice on the bias for a less fibrous bite
♨️ BlanchedSalads, side dishes, prepping ahead before sautéingShock in ice water immediately to lock color and snap
🔥 Stir-friedChinese dry-fried green beans, garlic-sesame sidesDry the beans well before they hit the wok or they steam
🫙 RoastedBlistered sheet-pan sides, Parmesan-crusted preparationsHigh heat (425°F+) and a single layer - crowding steams instead
🥒 PickledTangy snack, cocktail garnish, relish-style condimentUse whole pods and brine within 24 hours of picking for best snap

Pairings lean toward bright, contrasting flavors. Lemon juice or a splash of vinegar cuts the green vegetal note cleanly. Garlic and shallot add depth without overwhelming the bean's mild flavor, and understanding almonds's flavor and uses explains why toasted slivered almonds work so well tossed over a blanched green bean salad - the fat and crunch contrast directly with the pod's moisture and snap.

In Asian preparations, soy sauce and sesame oil are the standard partners. If you're short on soy sauce, knowing how swapping out soy sauce works can keep a dry-fried green bean dish on track without a last-minute grocery run.

Green beans appear across American, French, Chinese, and Mediterranean kitchens. French haricot vert preparations typically keep things simple - blanched, dressed with vinaigrette, maybe a shallot.

Chinese dry-fried versions char the pods until wrinkled, then hit them with doubanjiang or garlic. Mediterranean cooking often braises them with tomato, olive oil, and onion until just soft.

Try It In
🧀Parmesan Roasted Green BeansHigh-heat roasting brings out the bean's mild nuttiness→🥘Green Bean CasseroleThe classic American preparation, creamy and crisp-topped→🇫🇷Haricots Verts French Green BeansThe slender French variety, blanched and simply dressed→

How to Buy and Store Green Bean

Fresh green beans should snap. Literally - bend one and it should break with an audible crack, not bend. Look for pods that are uniformly bright green with no spotting, limpness, or visible bulging from the seeds inside. Swollen seeds signal the bean has matured past its window and will taste starchy rather than sweet.

Watch Out
Don't store green beans near apples or bananas. Both emit ethylene gas, which accelerates yellowing and softening faster than you'd expect.

For haricot verts specifically, the pods should be uniformly thin - any inconsistency in diameter usually means uneven cooking. Thicker pods take longer to cook through, leaving thinner ones overcooked before the others are done.

Store green beans unwashed and loose in a perforated plastic bag or the produce drawer.

Washing before storage introduces moisture that speeds decay.

Standard green beans last 5-10 days refrigerated; thin haricot vert varieties are more delicate and are best used within 3-5 days.

Much like asparagus's shelf life, the fresher the cut, the shorter the window before texture degrades noticeably.

Watch for green bean spoilage signs like sliminess, off-smell, or rust-colored spotting - any of those and the batch is done.

Start With a Blanch

If you've never cooked green beans before, blanching is where to start.

Two to three minutes in heavily salted boiling water, then straight into ice water, gives you a pod that's bright, snappy, and ready for almost any preparation - dress it simply or use it as the base for something more involved.

Golden Rule
Salt the blanching water generously - it seasons the pod from the inside out and protects the green color during cooking.

From there, the direction you take depends on what you want. Roasting gives you char and nuttiness.

Stir-frying gives you speed and bold seasoning. If you're without green beans entirely, a quick look at green bean stand-ins can keep a recipe moving without sacrificing too much texture or flavor.

Frequently Asked Questions

Can you eat green beans raw?

Yes, though with a caveat. Raw green beans contain lectins, which can irritate digestion in large quantities. A small handful in a salad is fine for most people; cooking breaks down the lectins entirely and eliminates that concern.

How long do green beans last in the fridge?

Standard green beans last 5-10 days stored unwashed in the produce drawer. Thin haricot vert varieties degrade faster - use them within 3-5 days before they lose their snap.

What are haricot verts vs regular green beans?

Haricot verts are the French variety of green bean - thinner, more tender, and harvested earlier. They cook faster than standard green beans and have a more delicate flavor; don't apply the same timing to both.

Are green beans healthy?

Yes. Green beans are low in calories and carbohydrates and provide vitamin C, vitamin K, folate, and dietary fiber. They're naturally gluten-free and suitable for vegan and vegetarian diets.

How do you keep green beans crisp after cooking?

Shock them in ice water immediately after blanching - this stops carryover cooking and locks texture. If you're roasting or stir-frying, serve right away; those methods don't hold well once the beans sit.

How Long Does Focaccia Last? [Storage Guide]

March 30, 2026

Storing focaccia in the fridge right after baking is one of the most common mistakes home cooks make - and it accelerates crumb drying faster than leaving the loaf on the counter.

Can You Freeze Focaccia

The olive oil that keeps focaccia and its flavor so rich and moist evaporates quickly in cold, dry refrigerator air.

Whether you have a rosemary-topped slab fresh from the oven or leftovers from last night's dinner alongside a herb crusted prime rib roast recipe, the right storage method depends entirely on how soon you plan to eat it.

QUICK SUMMARY

Focaccia keeps 1-2 days at room temperature, up to 5-7 days refrigerated, and 2-3 months frozen. Wrap tightly regardless of method. Avoid the fridge for short-term storage - the cold dries the crumb fast. Reheat in the oven to restore texture after chilling or freezing.

🏠Counter: 1-2 days wrapped; eat within 48 hours for best crumb
🧊Fridge: 5-7 days airtight; always reheat before eating
❄️Freezer: 2-3 months; slice first and double-wrap to prevent freezer burn

How Long Does Focaccia Last?

Shelf life for focaccia varies more than most breads because of its high olive oil content and open, airy crumb structure.

The oil slows mold somewhat but also turns rancid if the bread sits too long at room temperature without protection.

Focaccia Shelf Life
MethodStateDurationNotes
🏠 CounterWhole or sliced, wrapped1-2 daysCrust softens after 24 hours; crumb stays acceptable up to 48 hours
📦 Pantry (store-bought)Sealed packagingUp to 5 daysPreservatives extend life; transfer to fridge once opened
🧊 FridgeSliced or whole, wrapped5-7 daysSlows mold but dries crumb; reheat to restore texture
❄️ FreezerSliced or whole, double-wrapped2-3 monthsFreeze within 24-48 hours of baking for best results

Commercially packaged focaccia with preservatives outperforms homemade on the counter, but both types benefit from airtight wrapping at any storage temperature.

Sourdough focaccia - with its natural acidity - tends to resist mold slightly longer than yeast-leavened versions, though the crumb still dries out at the same rate.

Watch Out
Focaccia with fresh toppings like tomatoes or soft herbs spoils faster than plain loaves. The added moisture accelerates mold growth, especially in warm kitchens. Refrigerate topping-heavy focaccia within a few hours of baking.

How to Store Focaccia

Room temperature works well for anything you'll finish within two days. Counter: Keep whole focaccia in its original sealed bag, or wrap tightly in foil and place in a cloth-lined container.

Sliced pieces need extra protection - wrap each one individually to stop the cut surface from drying out.

Fridge: Cool the bread completely before wrapping in plastic wrap or sealing in an airtight container. Skipping the cooling step traps steam, which softens the crust and encourages early mold. The general principles behind storing bread correctly apply here - tight wrapping and minimal air contact are non-negotiable.

Toppings affect your container choice. Rosemary and sea salt hold up fine at room temperature, but tomato-topped focaccia should always go into an airtight container in the fridge.

If you use replacements for rosemary such as thyme or sage, the same storage rules apply - fresh herbs on the surface always shorten your window.

Golden Rule
Don't refrigerate focaccia you plan to eat within 48 hours. Room temperature with tight wrapping keeps the crumb far more tender than a cold fridge ever will.

Can You Freeze Focaccia?

Yes - focaccia freezes well, and it's the best option for anything you won't finish within two days.

The key is freezing while the bread is still fresh, ideally within 24-48 hours of baking, before the olive oil begins to oxidize.

Understanding how salmon freezer burn explained parallels focaccia's freezer risks - air exposure is the main enemy for both. Double-wrapping or vacuum sealing protects the open crumb from drying out during long freezer storage.

  1. Slice before freezing - portion the loaf so you can thaw individual pieces without cutting into a frozen whole.
  2. Cool completely - never freeze warm bread; condensation inside the wrap causes ice crystals that destroy the crumb.
  3. Brush lightly with olive oil - a thin coat on each slice protects the surface and helps restore texture after reheating.
  4. Wrap tightly in plastic wrap, then foil - or place in a heavy-duty freezer bag with air squeezed out; vacuum seal if available.
  5. Label with the date - use within 2-3 months for best texture; up to 6 months is safe but expect a drier crumb.

Thaw slices wrapped at room temperature for 1-2 hours, or a whole loaf for 3-4 hours. Reheat slices in a 350°F oven for 8-12 minutes; a whole loaf needs 12-20 minutes.

Avoid the microwave - it produces a rubbery crumb and soggy crust instead of restoring any crispness.

Signs Focaccia Has Gone Bad

Most focaccia spoilage is visible before you take a bite. The olive oil pooling around toppings and in the dimples creates prime spots for mold to start, so check those areas first.

Signs It's Gone Bad
👀
VisualFuzzy green, white, or blue mold patches · Dark or black spots in crumb not from toppings · Wet or slimy sheen on surface
👃
SmellSharp sour or rancid olive-oil odor · Fermented tang beyond normal yeasty aroma
✋
TextureSticky or slimy topping surface · Crumb that collapses and feels excessively wet

Don't cut around mold. Focaccia's open crumb structure means mold threads spread invisibly through the bread long before surface patches appear. Discard the whole loaf if you see any growth or detect an off smell.

Getting the Most From Your Focaccia

A few consistent habits prevent most storage problems before they start.

  • 🔪 Slice before freezing - thaw only what you need and avoid repeated refreezing, which wrecks the crumb.
  • 🫙 Olive oil reheat trick - brush thawed slices with a little oil and finish in a hot skillet or oven to restore crisp edges.
  • ⏱️ Freeze early - the longer focaccia sits at room temperature, the more the oil oxidizes; don't wait until day two to wrap and freeze.
  • 🌿 Layer herbs carefully - if toppings include fresh herbs, place parchment between layers before freezing to stop darkening and sogginess.

If you've run out and need something similar in a recipe, reading about focaccia swaps that work or exploring ciabatta swaps that work can fill the gap until your next bake.

Proper storage also applies to accompaniments - if you're pairing your focaccia with cheese boards, storing blue cheese crumbles correctly follows similar airtight-container logic.

Frequently Asked Questions

Can you freeze homemade focaccia?

Yes. Slice it first, cool completely, then double-wrap in plastic and foil before freezing. Homemade focaccia holds well for 2-3 months; beyond that, the crumb dries and the olive oil flavor weakens.

How long can focaccia sit out?

Up to 48 hours if tightly wrapped at room temperature. After that, the olive oil starts to oxidize and the crumb becomes dry and unpleasant. Topping-heavy focaccia should not sit out past a few hours.

Does refrigerating focaccia make it last longer?

It extends mold-free life to 5-7 days, but cold air dries the crumb noticeably faster than room temperature storage does. Only refrigerate if you need more than two days; always reheat before eating.

How do you reheat frozen focaccia?

Thaw wrapped at room temperature, then reheat in a 350°F oven - 8-12 minutes for slices, 12-20 minutes for a whole loaf. A light brush of olive oil before reheating helps restore the surface texture.

Can you freeze focaccia with toppings?

Yes, with caveats. Rosemary, sea salt, and olives freeze well; fresh tomatoes and soft herbs turn watery after thawing. Remove or paper-layer delicate toppings before freezing when possible.

How Long Does Homemade Whipped Cream Last? [Storage Guide]

March 30, 2026

You made a batch of fresh whipped cream for a dessert, and now there's more than you need - the real question is how long it will actually keep before it turns.

How Long Does Homemade Whipped Cream Last

Much like keeping milk fresh, the answer depends on fat content, temperature, and how carefully you seal it away, and managing sugar in dairy recipes during whipping affects both texture and how long peaks hold.

QUICK SUMMARY

Homemade whipped cream lasts 24-48 hours in the fridge without stabilizers - stabilized versions push to 2-4 days. Freeze dollops for up to 2 months. Never leave it out past 2 hours, and always store it sealed tight.

🧊Fridge (plain): Best within 24 hours; up to 48 hours in a sealed container
❄️Fridge (stabilized): 2-4 days with gelatin, cornstarch, or mascarpone
🥶Freezer: 1-2 months as piped dollops; use directly on hot desserts or thaw gently

How Long Does Homemade Whipped Cream Last?

Homemade whipped cream is fragile - it starts losing volume and weeping liquid within hours at room temperature. How long it holds in the fridge depends largely on whether you've added a stabilizer.

Unstabilized whipped cream, made from just heavy whipping cream and sugar, peaks around the 24-hour mark in terms of texture and aeration. Beyond that, it begins to deflate and release whey even when chilled. Stabilized versions using gelatin, cornstarch, or mascarpone genuinely hold their structure for several days, making them the right choice for pies or layered desserts.

Homemade Whipped Cream Shelf Life
MethodStateDurationNotes
🧊 FridgeUnstabilized24-48 hoursBest within 24 hours for peak volume; keep at ≤40°F (4°C)
🧊 FridgeStabilized2-4 daysGelatin, cornstarch, or mascarpone extend structure retention
❄️ FreezerPiped or dolloped1-2 monthsFreeze on tray first; slight texture loss after thawing
🏠 CounterAny2 hours maxRapid collapse and bacterial risk after 2 hours

The difference between stabilized and unstabilized isn't just texture - it's the entire storage window. If you're comparing commercial versus homemade, whipped cream's shelf life shifts significantly once preservatives and pasteurization leave the picture.

How to Store Homemade Whipped Cream

Speed matters here. Move whipped cream into storage immediately - every minute at room temperature costs you structure.

Fridge: Transfer to a shallow airtight container, then press plastic wrap directly onto the surface of the cream before sealing. This limits air contact and slows condensation from forming underneath. Avoid storing it loosely covered - the fridge environment dries the top layer and the cream absorbs surrounding odors fast.

Counter: Don't leave it out. Two hours is the hard limit, after which bacterial growth accelerates and the foam collapses anyway.

Golden Rule
Press plastic wrap directly onto the cream's surface before sealing - air gaps between the wrap and cream are where weeping starts.

A few habits that protect your stored batch:

  • 🧊 Chill your bowl and beaters - 10-15 minutes in the freezer before whipping gives you a tighter, more stable foam from the start
  • Use a shallow container - less depth means less weight pressing down on the aerated structure
  • Label the date - unstabilized and stabilized batches have very different windows, and it's easy to confuse them
  • Avoid the fridge door - temperature fluctuates there; a shelf toward the back stays consistently cold

Can You Freeze Homemade Whipped Cream?

Yes - and the method matters more than most people realize. Freezing whipped cream as a solid block ruins the texture on thawing. Piping or spooning individual dollops before freezing is what makes the difference.

  1. Whip to firm peaks - soft peaks won't hold their shape through freezing and thawing
  2. Pipe or spoon dollops onto a parchment-lined tray, spacing them apart so they don't touch
  3. Freeze until solid - 2-4 hours minimum before handling
  4. Transfer to an airtight container or bag - remove as much air as possible, then label with the date
  5. Use within 1-2 months for best flavor and texture retention

Thawing depends on your use. Frozen dollops placed directly onto hot cocoa or warm pie don't need any thaw time at all.

For full thawing, move them to the fridge for 2-4 hours, then briefly re-whip for a few seconds to restore some lost aeration.

Watch Out
Thawed whipped cream will be slightly denser and may show minor graininess - it's fine for toppings, but won't pipe cleanly for decorative work.

Signs Homemade Whipped Cream Has Gone Bad

Whipped cream spoils in recognizable stages. Catching the early signs saves you from a foodborne risk.

Signs It's Gone Bad
👀
VisualClear whey pooling underneath · grayish or dull color · visible mold flecks · excessive yellowing or curd-like lumps
👃
SmellSour or tangy odor · yeasty smell distinct from fresh sweet cream
✋
TextureSliminess · pronounced grainy or curdled feel

Some liquid separation is normal after 24 hours - a small pool of whey collecting under unstabilized cream isn't immediately dangerous. Heavy separation combined with any off smell, however, means discard.

Don't taste it to check.

Tips for Getting More Life from Your Batch

The biggest gains come before you even start whipping. Start cold, finish sealed, and choose your stabilizer based on how long the cream needs to hold.

  • ❄️ Start with cold equipment - chilled beaters and a cold bowl cut whipping time and produce tighter peaks
  • Pick the right stabilizer - gelatin gives the longest hold; [replacements for mascarpone](https://forkliftkitchen.com/mascarpone-substitutes/) work well if you want a richer, softer texture instead
  • Stop at firm peaks - overwhipping into grainy, buttery clumps shortens shelf life and ruins texture; [cornstarch in dairy recipes](https://forkliftkitchen.com/cornstarch-substitutes/) at 1 teaspoon per cup helps prevent this by stabilizing structure
  • Freeze for events - pipe dollops a week ahead and pull them directly onto desserts; [gelatin's shelf life](https://forkliftkitchen.com/gelatin-shelf-life/) is long enough that keeping a packet on hand for stabilizing batches is worth it
Shortcut
Add 1 tablespoon powdered sugar per cup of cream before whipping - it dissolves cleanly, sweetens lightly, and acts as a mild stabilizer without affecting flavor.

Knowing when to use whipped cream in dairy recipes versus a sturdier alternative also helps - some applications genuinely need something that holds longer than even stabilized whipped cream can manage.

Frequently Asked Questions

Can you refrigerate whipped cream overnight?

Yes, but only with airtight storage. Unstabilized whipped cream held overnight will lose some volume and may weep slightly. Press plastic wrap directly onto the surface before sealing to slow both.

How long does stabilized whipped cream last in the fridge?

Stabilized whipped cream holds for 2-4 days when refrigerated in a sealed container. Gelatin gives the longest hold; cornstarch and mascarpone versions are closer to 2-3 days before structure softens.

Can you freeze whipped cream and still use it as a topping?

Yes - frozen dollops work well directly on hot drinks or warm desserts without thawing. They won't pipe cleanly after freezing, so use them only as a casual topping, not for decorative work.

How do you know if whipped cream has gone bad?

A sour or yeasty smell is the clearest sign. Visible mold, heavy whey separation, or a slimy texture also indicate spoilage - discard without tasting if any of these appear.

What temperature is best for whipping cream?

Cold - ideally below 45°F (7°C). Warm cream won't whip properly because the fat globules can't form a stable network. Chill the bowl and beaters alongside the cream for the fastest, most stable result.

Air Fryer Potato Latkes

March 30, 2026

Latkes often turn out soggy or stick to the pan when fried traditionally. The air fryer fixes both problems by circulating hot air around each latke while using minimal oil.

Air Fryer Potato Latkes served on a plate

Grating russet potatoes and draining them thoroughly creates the crisp edges you want. The air fryer basket allows fat to render and steam to escape instead of trapping moisture underneath.

Make these for Hanukkah when you need to feed a crowd without standing over hot oil, or for weeknight dinners when you want something that feels special but doesn't wreck your kitchen.

QUICK SUMMARY

Air fryer potato latkes deliver crispy edges and tender centers in 30 minutes with less oil than traditional frying. The key is draining grated potatoes thoroughly and cooking in a single layer at 375°F. Works for weeknight sides or Hanukkah entertaining.

⏱️Time Reality: 15 minutes prep, 15-20 minutes cooking, works for meal prep
🔑Critical First Step: Squeeze grated potatoes in towel for 2 minutes to remove excess water
⚠️Watch Out: Crowding the basket makes latkes steam instead of crisp-cook in batches

Why This Recipe Works

High heat and circulating air crisp the outside while the starchy potato interior stays tender. For a version that comes together quickly, a simple chicken side dish uses the same method with similar timing.

Quick Reference
⏱️
Prep Time
15 min
🔥
Cook Time
15-20 min
⏰
Total Time
30-35 min
🍽️
Servings
4 servings (8-12 latkes)
📊
Difficulty
Medium
🏷️
Category
Side | Appetizer
💡
Quick Tip
Drain potato liquid thoroughly for crisp latkes
🎯
Best For
Weeknight | Entertaining | Meal prep

What makes this method work:

  • Starchy russet potatoes: High starch content crisps better than waxy varieties and creates the right texture inside
  • Thorough draining: Squeezing grated potatoes removes excess moisture that would create steam and prevent browning
  • Single-layer cooking: Space between latkes allows air to circulate and fat to render instead of trapping steam
  • 375°F temperature: Hot enough to crisp the outside quickly before the inside overcooks or dries out
  • Midway flip: Turning at 8 minutes ensures both sides brown evenly and develop crispy edges
Quick Tip
Preheat your air fryer for 5 minutes before adding latkes-the immediate heat contact starts the crisping process right away.

What You'll Need

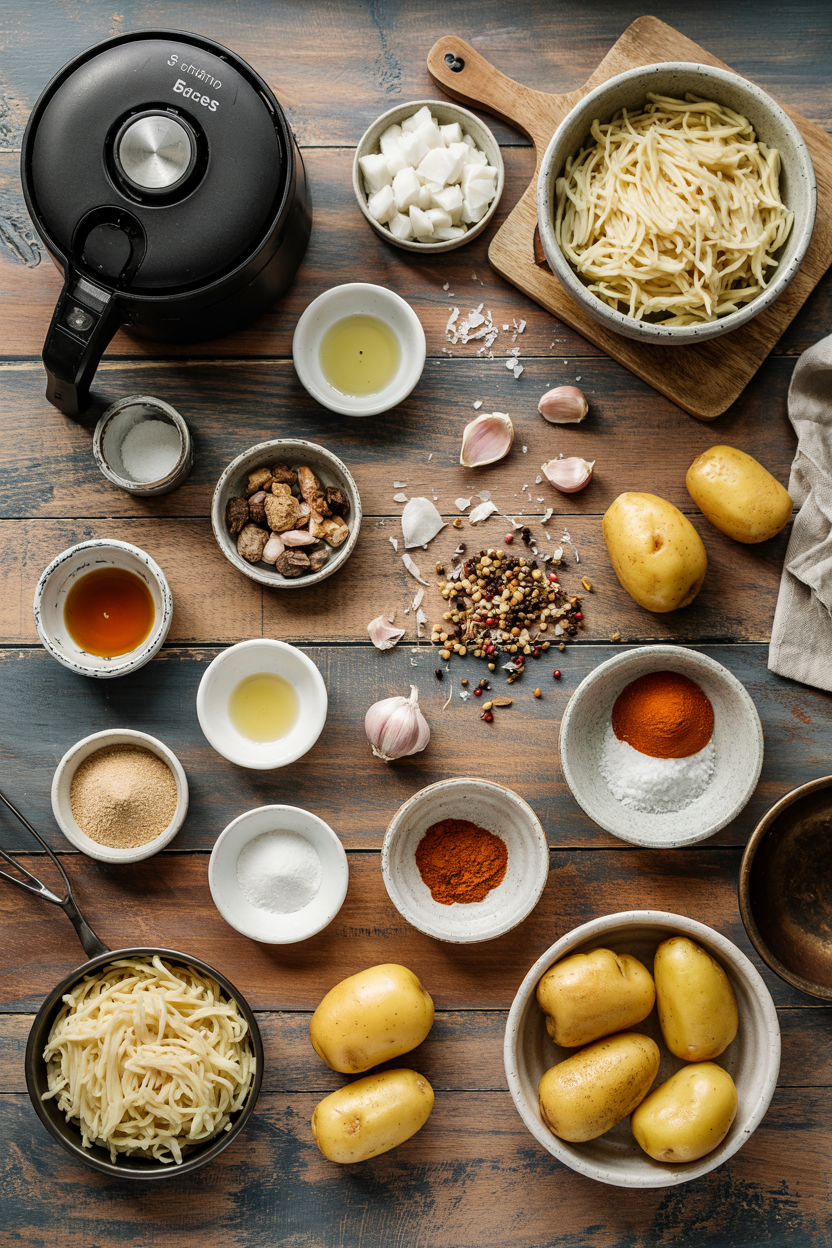
Ingredients for Air Fryer Potato Latkes

Most ingredients sit in your pantry already, and the fresh items work in other weeknight meals. For a version that comes together quickly, a simple fritters variation uses similar binding techniques with fruit instead of potatoes.

🥔
Base
  • Russet potatoes (2 large)
  • Yellow onion (1 small)
🥚
Binders
  • Eggs (2 large)
  • All-purpose flour (3 tbsp)
🧂
Seasonings
  • Salt (1 tsp)
  • Black pepper (½ tsp)
  • Garlic powder (optional, ½ tsp)
🫙
Cooking
  • Vegetable oil spray
  • Baking powder (optional, ¼ tsp)

Ingredient Details

  • Russet potatoes
    Pick firm potatoes without green spots-starch content drops as they age, which affects crisping
  • Yellow onion
    Grate on the large holes of a box grater to match potato texture and distribute moisture evenly
  • All-purpose flour
    Too much flour makes latkes dense-measure level tablespoons and stop at 3
  • Eggs
    Room temperature eggs mix into the batter more smoothly than cold ones straight from the fridge
  • Vegetable oil
    Spray both the basket and the tops of latkes before cooking-double coating ensures crisp edges
  • Baking powder
    Quarter teaspoon adds lightness without altering flavor-skip it if you prefer denser latkes
  • Salt
    Add salt after draining potatoes so it doesn't pull out more moisture during the squeezing step

Ingredient Swaps

Russet potatoes create the classic texture, but sweet potatoes add color and a hint of natural sweetness. We keep a batch ready for nights like this - buttery potato wedges recipe uses similar techniques with different seasoning.

Four swaps that work:

  • All-purpose flour → gluten-free flour blend: Use 1:1 ratio, expect slightly softer texture but latkes still hold together
  • Russet potatoes → sweet potatoes: Grate the same way, add 2-3 minutes to cook time for sweeter, softer latkes
  • Eggs → flax eggs (1 tablespoon ground flax + 3 tablespoon water per egg): Let mixture sit 5 minutes to thicken before mixing-denser texture but fully plant-based
  • All-purpose flour → potato starch: Creates extra-crispy exterior, use 2 tablespoon instead of 3 for the same binding power

Gluten-Free Flour

Works for: Celiac diet or gluten sensitivity without changing method

Skip if: You want the lightest possible texture-gluten creates more structure

Sweet Potatoes

Works for: Adding natural sweetness and orange color to your plate

Skip if: You want traditional savory latkes-sweet potatoes change the flavor profile completely

Instructions

The entire process takes 30 minutes from raw potatoes to crispy latkes on the table. Most people skip shrimp, but it balances the meal - something flaky like shrimp pairs well when you need protein alongside.

  1. Grate and drain: Grate 2 large russet potatoes and 1 small onion using the large holes on a box grater. Place grated mixture in a clean kitchen towel, twist tightly, and squeeze over the sink for 2 full minutes until liquid stops dripping. You should extract about ¼ cup of liquid.

  2. Mix batter: Transfer squeezed potato mixture to a large bowl. Add 2 eggs, 3 tablespoons flour, 1 teaspoon salt, ½ teaspoon black pepper, and optional ¼ teaspoon baking powder. Stir with a fork until everything combines into a shaggy batter with no dry flour pockets visible.

  3. Shape latkes: Preheat air fryer to 375°F for 5 minutes. Scoop 2-3 tablespoons of batter per latke, press into ¼-inch thick patties about 3 inches wide. Spray air fryer basket with oil, place 4-5 latkes in a single layer with 1 inch between each. Spray tops of latkes with oil.

  4. First side: Cook at 375°F for 8 minutes without opening the basket. Edges should look golden and set when you peek through the window. If they're still pale, add 1-2 minutes before flipping.

  5. Flip and finish: Use a thin spatula to flip each latke carefully. Spray tops again with oil. Cook 7-10 minutes more until both sides turn deep golden brown and edges look crispy. Let cool 3 minutes on the counter before serving-texture sets as they rest.

Golden Rule
Never stack latkes or overlap them in the basket-they'll steam instead of crisp. Cook in batches if you're making more than 5 at once.

What to Serve With It

Latkes work as a side dish or appetizer, but they need something with moisture to balance the crispy texture. For planning your potato croquettes dinner, savory chicken dish ideas covers pairing strategies for starchy sides.

Side Dish Prep Why It Works How to Serve
Sour cream Easy Rich tang cuts through crispy fried potato Dollop on top or serve in small bowl for dipping
Applesauce Easy Sweet contrast to savory latkes follows tradition Spoon alongside on plate, not on top
Green salad Easy Fresh greens balance fried starch Dress lightly with vinaigrette, serve on separate plate
Smoked salmon Easy Salty fish adds protein for full meal Layer thin slices on top with capers and dill
Steamed green beans Easy Simple veggie keeps plate from feeling heavy Season with salt and butter, pile next to latkes

Three ways to serve it:

  • Classic Hanukkah plate: Latkes with sour cream and applesauce on the side, fresh herbs scattered on top
  • Brunch spread: Stack latkes with smoked salmon, capers, thinly sliced red onion, and herb-infused cream cheese
  • Weeknight dinner: Serve alongside roasted chicken or pork with steamed vegetables and a light salad
Best Pick
Sour cream and applesauce served together-one spoonful of each per bite gives you the traditional sweet-and-tangy contrast that makes latkes work.

Store and Reheat

Latkes lose some crispness in the fridge but the air fryer brings them back to life quickly. The chicken works best when it hits the table at the same time as the main - juicy chicken side dish reheats using the same method.

Method Time Best For
🔥 Air Fryer 4-5 min at 350°F Recrisping latkes to near-original texture
🔥 Oven 10 min at 375°F Reheating full batch at once on sheet pan
📦 Microwave 30-45 sec Quick warm-up when texture doesn't matter

For best results when storing:

  • Cool completely: Let latkes sit at room temperature 10 minutes before packing-trapping steam makes them soggy
  • Layer with parchment: Place parchment paper between layers in container to prevent sticking
  • Shallow container: Use wide, shallow storage instead of stacking high-less weight keeps latkes from compressing
  • Freeze for later: Arrange cooled latkes on sheet pan, freeze 1 hour until solid, then transfer to freezer bag for up to 2 months
  • Reheat from frozen: Add 2-3 minutes to air fryer time, no need to thaw first

Frequently Asked Questions

Can I substitute sweet potatoes for russet potatoes in air fryer latkes?

Yes, grate sweet potatoes the same way and drain thoroughly. Add 2-3 minutes to the cooking time because sweet potatoes hold more moisture and need extra time to crisp.

How long can I store air fryer potato latkes in the fridge?

Store cooked latkes in an airtight container for 3-4 days in the refrigerator. Reheat in the air fryer at 350°F for 4-5 minutes to restore crispness before serving.

What temperature and time should I cook latkes in the air fryer?

Cook at 375°F for 8 minutes, flip, then cook 7-10 minutes more. Both sides should turn deep golden brown with crispy edges-lighter color means they need more time.

Why are my latkes not crispy after air frying?

Excess moisture is the usual culprit-squeeze grated potatoes for a full 2 minutes until liquid stops dripping. Also spray both basket and latke tops with oil and avoid overcrowding the basket.

Can I double the recipe batch and freeze latkes?

Yes, double all ingredients and cook in multiple batches. Freeze cooked latkes on a sheet pan until solid, then transfer to freezer bags for up to 2 months-reheat from frozen in the air fryer.

Air Fryer Potato Latkes served on a plate

Air Fryer Potato Latkes

No ratings yet
Air fryer potato latkes deliver crispy edges and tender centers with less oil than traditional frying. Key is grating and draining russet potatoes thoroughly before cooking in a single layer at 375°F for perfect crispness. This method works well for quick weeknight sides or Hanukkah entertaining.
Print Recipe Pin Recipe
Prep Time 15 minutes mins
Cook Time 18 minutes mins
Total Time 33 minutes mins
Servings: 4 servings
Course: Appetizer, Side Dish
Cuisine: American, Jewish
Ingredients Equipment Method Notes

Ingredients
  

  • 2 large russet potatoes Grated and squeezed dry
  • 1 small yellow onion Grated using large holes
  • 2 large eggs Room temperature
  • 3 tablespoons all-purpose flour
  • 1 teaspoon salt
  • 0.5 teaspoon black pepper
  • 0.25 teaspoon baking powder Optional
  • vegetable oil Spray for air fryer basket and latke tops
  • 0.5 teaspoon garlic powder Optional

Equipment

  • Air fryer For cooking latkes at 375°F in a single layer
  • Box Grater Grate potatoes and onion using large holes
  • Kitchen Towel To squeeze grated potatoes and remove excess moisture
  • Large bowl For mixing latke batter
  • Fork For stirring batter
  • Thin spatula Used to flip latkes in the air fryer

Method
 

  1. Grate 2 large russet potatoes and 1 small yellow onion using the large holes on a box grater. Place grated mixture in a clean kitchen towel, twist tightly, and squeeze over the sink for 2 full minutes until liquid stops dripping, extracting about ¼ cup of liquid.
    2 large russet potatoes, 1 small yellow onion
  2. Transfer the squeezed potato mixture to a large bowl. Add 2 eggs, 3 tablespoons flour, 1 teaspoon salt, ½ teaspoon black pepper, optional ¼ teaspoon baking powder, and optional ½ teaspoon garlic powder. Stir with a fork until combined into a shaggy batter with no dry flour pockets.
    2 large russet potatoes, 1 small yellow onion, 2 large eggs, 3 tablespoons all-purpose flour, 1 teaspoon salt, 0.5 teaspoon black pepper, 0.25 teaspoon baking powder, 0.5 teaspoon garlic powder
  3. Preheat air fryer to 375°F for 5 minutes. Scoop 2-3 tablespoons of batter per latke, press into ¼-inch thick patties about 3 inches wide. Spray air fryer basket with vegetable oil spray and place 4-5 latkes in a single layer with about 1 inch space between each. Spray tops of latkes with oil.
    vegetable oil
  4. Cook latkes at 375°F for 8 minutes without opening the basket. Edges should look golden and set. If still pale, cook 1-2 minutes longer before flipping.
  5. Use a thin spatula to carefully flip each latke. Spray tops again with vegetable oil spray. Cook for 7-10 minutes more until both sides are deep golden brown with crispy edges. Let latkes cool on the counter for 3 minutes before serving to set texture.
    vegetable oil

Notes

  • Drain grated potatoes thoroughly to avoid soggy latkes.
  • Cook latkes in a single layer and avoid overcrowding the air fryer basket to ensure crispiness.
  • Preheat the air fryer for 5 minutes before cooking to jumpstart the crisping process.

Tried this recipe?

Let us know how it was!

What Is Graham Cracker? [Taste, Uses & More]

March 30, 2026

Most people treat graham crackers as a background ingredient - the thing you crush and forget beneath a cheesecake filling.

What Is Graham Cracker

That undersells them considerably. Graham crackers carry a distinct toasty, lightly sweet character from graham flour that shapes the flavor of every crust, s'more, and icebox layer they appear in, and understanding that character helps you use them better.

If you're also thinking about pairing ideas for cheesecake, knowing what the crust brings to the table is half the work.

QUICK SUMMARY

A slightly sweet whole-wheat cracker with toasty, honey-kissed flavor and a dry, crumbly bite. Used mostly as a crumb crust base, for s'mores, and as a snack. Mild intensity. Not gluten-free. Keeps several weeks once opened.

🌾Type: Sweet whole-grain cracker, made from graham flour
🍯Flavor: Mildly sweet, toasty wheat, light honey or molasses notes
🍰Best Uses: Crumb crusts, s'mores, no-bake bars, yogurt topping
📦Shelf Life: Months unopened; several weeks once opened if stored airtight
⚠️Note: Contains gluten; check labels for trans fats and whole-grain content

What Is Graham Cracker?

Graham crackers are thin, perforated sheets of sweetened whole-wheat cracker, originally developed in the United States in the 19th century.

They take their name from Sylvester Graham, a dietary reformer who promoted whole-wheat flour as a health food - an origin story that makes them one of the few snack foods born from a wellness movement.

The key ingredient is graham flour, a coarsely ground whole-wheat flour that gives the cracker its signature nuttiness and slightly gritty crumb.

Most commercial versions sweeten the dough with honey, molasses, or cane sugar, then add a small amount of fat for structure.

You'll also see them labeled as graham wafers or graham biscuits depending on the brand or region. Flavor varieties include plain (honey), cinnamon, and chocolate, though plain remains the standard for baking applications.

  • 🌾 Plain (honey) - the baseline; lightly sweet, works in any application
  • 🍂 Cinnamon graham - warmer, spiced; adds character to crusts but reduces flavor control
  • 🍫 Chocolate graham - richer, darker; best for brownie-adjacent desserts or campfire use

What Does Graham Cracker Taste Like?

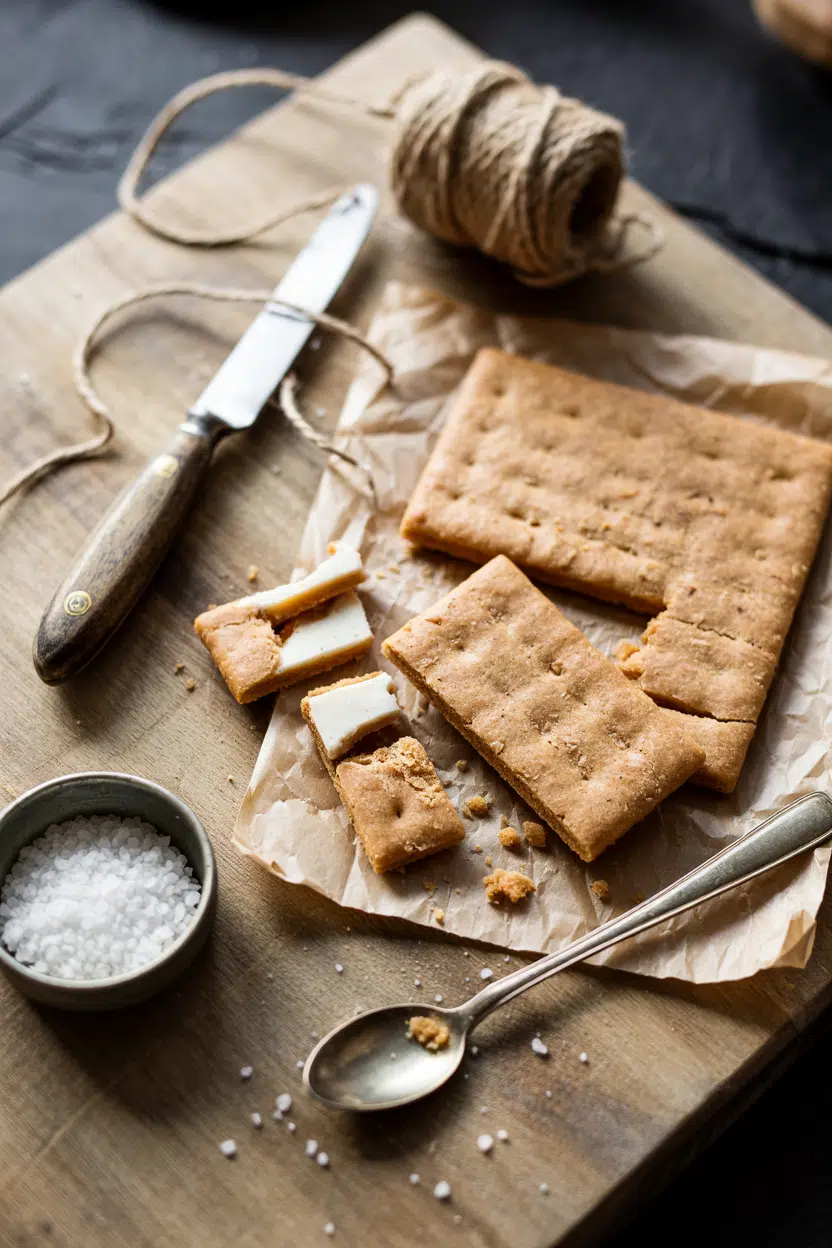
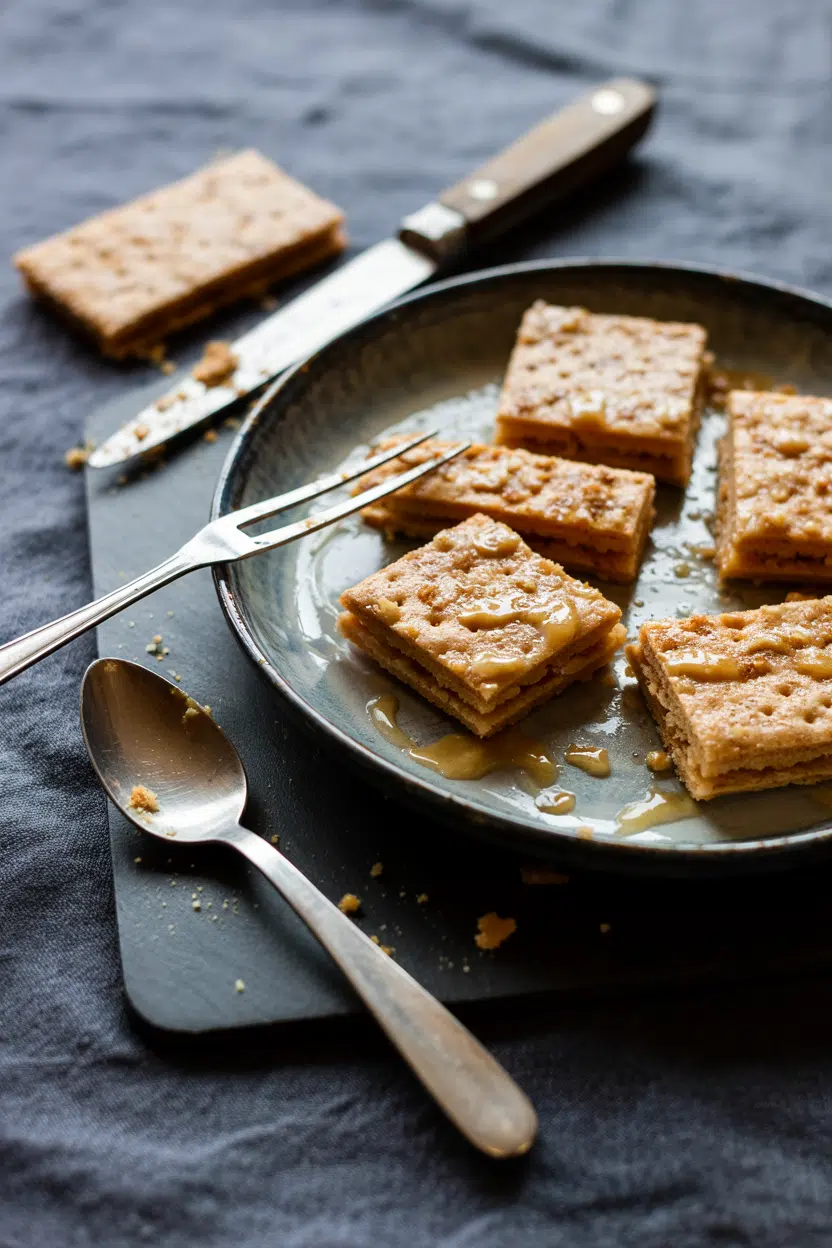
graham cracker - What Is Graham Cracker

Graham crackers taste like a drier, sandier version of a mild whole-wheat biscuit - closer to a digestive biscuit in concept, though less buttery and with a coarser grain.

The sweetness is restrained, sitting somewhere between a plain cracker and a cookie.

Sensory SnapshotMild Intensity
👅 Flavor
toasty wheatlight honeyfaint molasses
✋ Texture
sandycrumblycrisp
👃 Aroma
warm toasted wheatsweet spice

Heat deepens the flavor noticeably. Toasted or baked into a crust with melted butter, the wheat nuttiness intensifies and the honey notes sharpen into something close to caramel at the edges.

Raw, the cracker is mild enough to act as a neutral carrier for stronger toppings.

Moisture changes everything. A graham cracker left in contact with cream, custard, or fruit for a few hours softens into a cake-like layer - which is exactly the point in icebox cakes, but a problem if you need structural crunch.

Golden Rule
If your recipe needs the crust to hold shape after filling, bake the crumb base at 325°F for 8-10 minutes before adding any wet filling. Unbaked crusts turn to paste.

How to Use Graham Cracker

Graham cracker crumbs are the most common prep form, made by pulsing whole sheets in a food processor or crushing them in a zip-lock bag. Combined with melted butter and a little sugar, they press into a firm, cohesive crust for cheesecakes, a key lime pie recipe, and icebox-style tarts. If you need replacements for butter in the crust mix, coconut oil works well in most no-bake versions.

Whole crackers serve a different role. They're the structural layers in no-bake bars and refrigerator cakes, where they absorb moisture from fillings over time.

For s'mores, they provide both the shell and the textural contrast against soft marshmallow and chocolate.

How Graham Cracker Is Used
MethodBest ForTip
🔥 Baked CrustCheesecake, key lime pie, tartsBake 8-10 min at 325°F; press firmly before baking
🥗 No-Bake PressChilled pies, icebox barsUse slightly more butter for structural hold without heat
🪵 Whole/LayeredS'mores, no-bake cakes, snacksLayer with fillings 4+ hours ahead for proper softening
✨ Crumbled ToppingYogurt, ice cream, puddingAdd just before serving to keep texture

Graham crackers pair well with cream cheese, lemon or lime curd, peanut butter, vanilla ice cream, banana slices, and both milk and dark chocolate.

These are all American home-baking staples, which reflects how thoroughly this cracker belongs to that tradition.

If you need to swap the cracker itself, there's a useful guide to swapping out graham cracker that covers digestive biscuits and similar options.

Try It In
🫙Taralli Italian Ring CrackersSee how another cracker tradition handles wheat-forward flavor→🦐Keropok Malaysian CrackersA savory counterpoint to graham's sweet, grain-forward profile→🥜Rempeyek Indonesian Peanut CrackersExplore how peanut and cracker textures combine across traditions→

How to Buy and Store Graham Cracker

Buy whole sheets in sealed boxes with consistent light-brown coloring and no oily spots on the packaging. Avoid boxes that rattle heavily - too many broken pieces means uneven crumb texture when you grind them.

For crust-making, plain or honey varieties give you the most flavor control; heavily spiced cinnamon versions can dominate a filling.

Shortcut
Pre-ground graham cracker crumbs are sold in most supermarkets - worth buying if you make crusts often. They save time and produce consistent particle size.

Store in a cool, dry pantry inside an airtight container or resealed original packaging.

Humidity is the main enemy - even a loosely closed box will go stale and soft within days.

Unopened boxes last several months at room temperature; once opened, expect two to three weeks of good crispness if sealed properly.

For full storage guidance, keeping graham cracker fresh covers the details, including how to revive slightly softened crackers.

Start Here for Graham Cracker

Go with plain honey graham crackers for any baking application - they give you a neutral, wheat-sweet base and won't fight whatever filling sits above them.

If your first project is a baked cheesecake crust, note that cheesecake's shelf life also depends on how well the crust holds, so baking it before filling makes a real difference.

The molasses notes in graham flour develop naturally with heat, so even a brief bake improves any crust.

For flavored applications like s'mores or snacks, cinnamon varieties work well - just know they lead rather than follow.

Frequently Asked Questions

What is graham cracker made of?

Graham crackers are made from graham flour (coarsely ground whole wheat), sugar or honey, a small amount of fat, and leavening. Most commercial brands also add molasses or cinnamon for depth. The whole-wheat base is what separates them from refined-flour cookies.

Are graham crackers the same as digestive biscuits?

Not exactly. Both are whole-wheat-based and mild in sweetness, but digestive biscuits are richer, more buttery, and have a finer crumb. Graham crackers are drier and sandier, with a more pronounced honey or molasses note.

Can you use graham crackers for pie crust?

Yes - a graham cracker crust works for any chilled or baked pie that benefits from a slightly sweet, crumbly base. Key lime pie and cheesecake are the standard applications. Bake the crust before filling for better structure.

What does graham cracker taste like compared to a cookie?

Graham crackers are less sweet and drier than most cookies. The whole-wheat flour gives them a nutty, slightly earthy quality that refined-flour cookies lack. Think of them as sitting halfway between a cracker and a cookie.

Do graham crackers contain molasses?

Many commercial brands include a small amount of molasses, which contributes the faint dark-sweet note in the background. It's rarely listed as a primary ingredient. If a recipe calls for [molasses swaps that work](https://forkliftkitchen.com/molasses-substitutes/), the same logic applies when adapting homemade graham cracker dough.

Slow Cooker Mississippi Pot Roast

March 30, 2026

Layer chuck roast with ranch seasoning, au jus mix, butter, and pepperoncini in a slow cooker. Cook on low for 7-8 hours until the beef shreds with a fork.

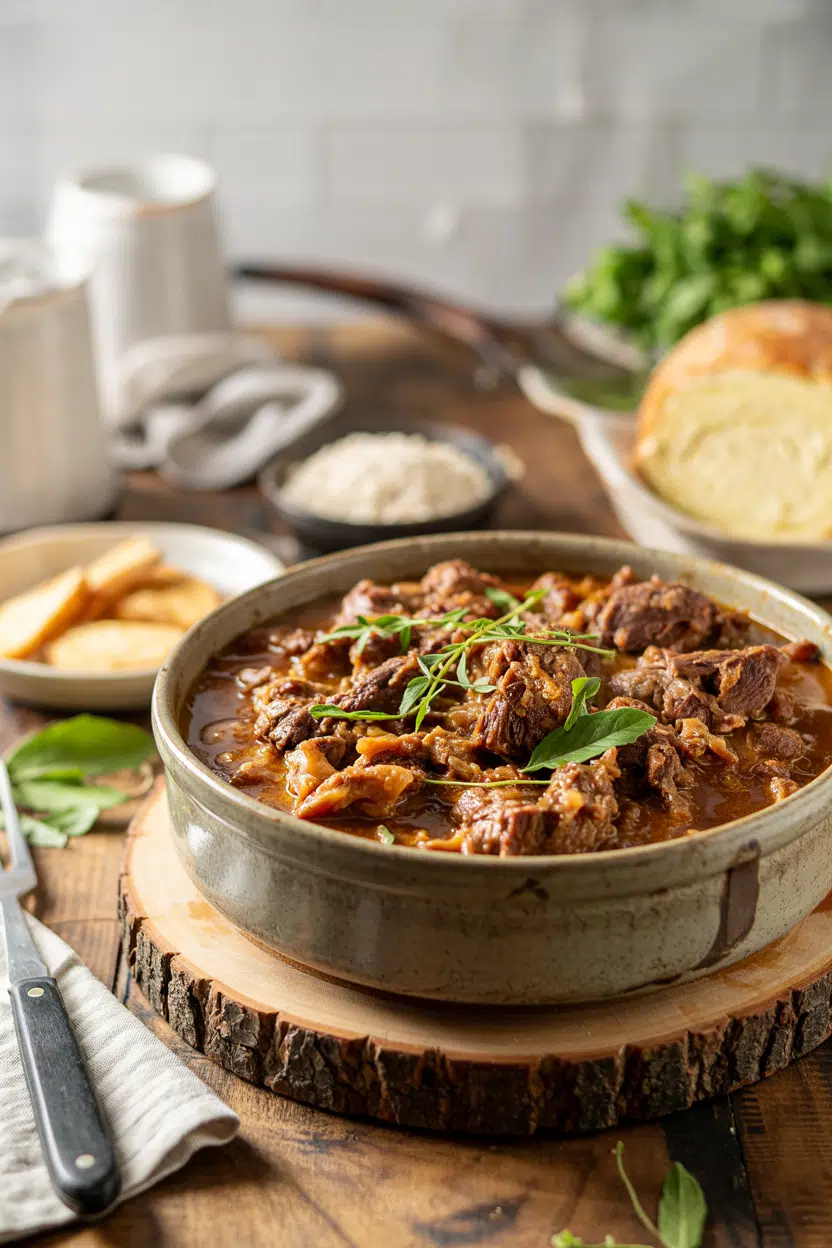
Slow Cooker Mississippi Pot Roast served on a plate

The slow cooker does all the work. You get tender, fall-apart beef without monitoring heat or flipping anything.

This works for weeknight dinners when you need something hands-off that feeds a crowd. Perfect for meal prepping or casual family dinners when cooking feels like a chore.

QUICK SUMMARY

Slow Cooker Mississippi Pot Roast cooks chuck roast with ranch seasoning, au jus mix, butter, and pepperoncini peppers for 7-8 hours on low. The long cook time breaks down tough beef into shreddable, tangy meat with a buttery sauce that pools at the bottom. You layer everything in the pot and walk away.

⏱️Time Reality: 10 minutes prep, then 7-8 hours unattended slow cooking
🔥First Critical Move: Place chuck roast fat-side up and layer seasonings directly on top
⚠️Watch Out: Don't lift the lid during cooking or you'll lose heat and extend cook time

Why This Recipe Works

Chuck roast has enough fat and connective tissue to stay juicy during the long, slow cook. The pepperoncini peppers cut through the richness with acidity while the butter creates a silky sauce. For a version that comes together quickly, homemade orzo recipe works as a starch that soaks up the drippings.

Quick Reference
⏱️
Prep Time
10 min
🔥
Cook Time
7-8 hours low
⏰
Total Time
7 hr 10 min
🍽️
Servings
6-8 servings
📊
Difficulty
Easy
🏷️
Category
Main Dish
💡
Quick Tip
Add pepperoncini whole for tangy flavor
🎯
Best For
Weeknight | Meal prep | Budget

Why the ingredients work together:

  • Chuck roast becomes fork-tender after 7-8 hours on low heat without drying out
  • Ranch seasoning adds herby, garlicky depth while au jus creates a beefy gravy base
  • Butter melts slowly and emulsifies into the sauce for rich mouthfeel
  • Pepperoncini peppers provide acidity that balances the fat and prevents heaviness
  • Low-and-slow cooking renders fat and breaks down collagen into gelatin for silky texture
Quick Tip
Sear the chuck roast for 3-4 minutes per side in a hot skillet before slow cooking to lock in flavor and create a caramelized crust.

What You'll Need

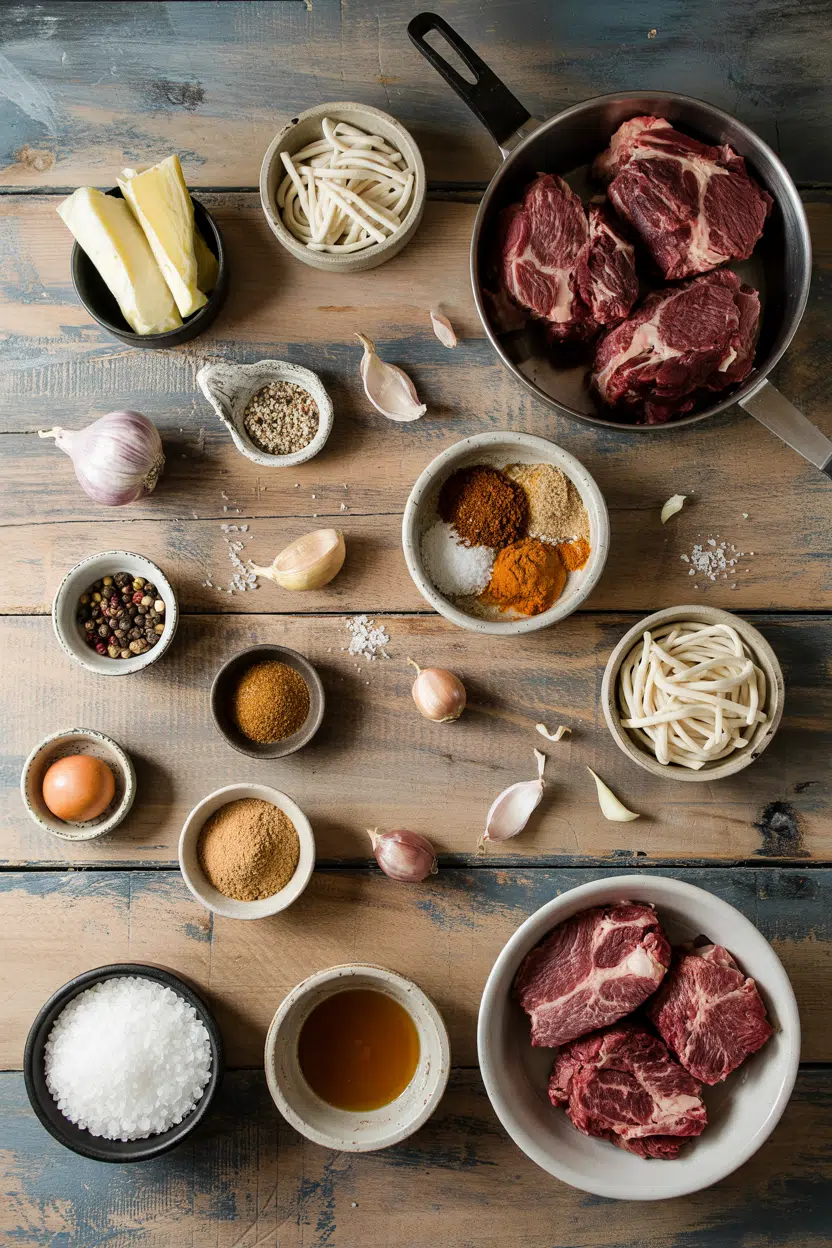
Ingredients for Slow Cooker Mississippi Pot Roast

You need a 3-4 pound chuck roast, two seasoning packets, butter, and pepperoncini peppers. Stock your pantry with ranch and au jus mixes so you can make this any night without a special trip to the store.

🍗
Protein
  • Chuck roast (3-4 lb / 1.4-1.8 kg)
🌶️
Seasonings
  • Ranch seasoning mix (1 packet, dry)
  • Au jus gravy mix (1 packet, dry)
  • Optional: garlic powder
🧀
Dairy
  • Butter (4 tablespoon / 58 g)
🫙
Other
  • Pepperoncini peppers (6-8 whole)
  • Beef broth (½ to 1 cup / 120-240 ml)
  • Optional: Worcestershire sauce

Ingredient Details

  • Chuck roast
    Use chuck roast preferably - tough cut breaks down into tender meat; lean cuts dry out during the long cook time
  • Ranch seasoning mix
    Stick with dry packets for concentrated flavor; homemade blends work but require careful balancing of herbs and spices
  • Au jus gravy mix
    Creates the savory base for the sauce; beef bouillon powder works as a substitute but produces a thinner liquid
  • Butter
    Butter must be whole sticks, not sprays - melts slowly and enriches sauce; sprays lack the fat content needed for richness
  • Pepperoncini peppers
    Do not omit pepperoncini peppers - crucial for acidity that cuts through the butter and balances the flavors
  • Beef broth
    Adjust liquid amount based on your slow cooker size; too much dilutes flavor, too little causes scorching
  • Worcestershire sauce
    Optional umami booster that deepens the beefy flavor; add 1-2 tablespoons if you want extra savory depth

Ingredient Swaps

Some swaps work better than others depending on what you're trying to fix. You can adjust for dietary needs or work with what's in your pantry, but certain ingredients hold the recipe together.

Flexible swaps that work:

  • Boneless brisket or rump roast instead of chuck - still tough but may vary in cooking time and tenderness
  • Homemade ranch blend (dried herbs + garlic powder + onion powder) instead of ranch mix - flavor may be less balanced so adjust amounts carefully
  • Dairy-free margarine or coconut oil instead of butter - slightly different mouthfeel and flavor but still adds necessary fat
  • Banana peppers or mild pickled peppers instead of pepperoncini - less heat and different acidity but maintains the tangy element

Instant Pot Pressure Cooker

Works for: Cutting cook time to 60-90 minutes when you're in a rush

Skip if: You want the most tender, fall-apart texture that only slow cooking achieves

Gluten-Free Ranch Mix

Works for: Maintaining flavor while avoiding gluten; check au jus mix labels too

Skip if: You're not gluten-sensitive; standard mixes are easier to find and cost less

Water Instead of Beef Broth

Works for: Budget cooking when you need to skip an extra ingredient

Skip if: You want maximum beefy depth; you'll need to boost seasoning to compensate

Instructions

The entire recipe happens in one pot with minimal hands-on time. You layer everything and let the slow cooker break down the tough meat into something shreddable and juicy.

  1. Place the chuck roast fat-side up in a 4-6 quart slow cooker and sprinkle both seasoning packets evenly over the top.
  2. Cut the butter into 4 pieces and place them on top of the seasoned roast, then arrange 6-8 whole pepperoncini peppers around the meat.
  3. Pour beef broth around the edges of the roast without washing off the seasonings, then cover and cook on low for 7-8 hours until the beef reaches 195°F internal temperature.
  4. Remove the roast from the slow cooker and let it rest for 10 minutes on a cutting board to redistribute the juices.
  5. Shred the meat with two forks or tongs and return it to the pot, stirring to coat with the sauce before serving.
Golden Rule
Don't lift the lid during cooking - every peek releases heat and adds 15-20 minutes to your cook time.

What to Serve With It

Mississippi pot roast creates a rich, buttery sauce that needs something to soak it up. The tangy pepperoncini flavor pairs well with mild starches and fresh vegetables. For a version that comes together quickly, korean dumplings meal planning ideas can help round out your plate when you're building a complete dinner.

Side Dish Prep Why It Works How to Serve
Mashed potatoes Easy Creamy texture absorbs the rich sauce without competing flavors Spoon beef and sauce over a mound of potatoes for classic comfort food
Rice or egg noodles Easy Mild starch soaks up gravy and stretches the meal for larger groups Pile noodles on the plate first, then top with shredded beef and drippings
Steamed green beans Easy Light vegetable balances the richness and adds crisp texture contrast Toss beans with a little butter and serve alongside the beef
Roasted carrots Medium Natural sweetness contrasts with tangy peppers and cuts through fat Roast with olive oil until caramelized and serve on the side
Buttered dinner rolls Easy Perfect for soaking up every drop of sauce at the bottom of the plate Serve warm in a basket so everyone can tear and dunk as they eat

Three ways to serve it:

  • Pile shredded beef on toasted hoagie rolls with melted provolone for easy sandwiches
  • Spoon beef and sauce over creamy polenta or grits for a Southern-style dinner
  • Layer beef over mashed cauliflower instead of potatoes for a lower-carb option
Best Pick
Mashed potatoes are the classic pairing - they soak up the buttery sauce and balance the tangy peppers without adding competing flavors.

Store and Reheat

Mississippi pot roast holds up well in the fridge and freezer because the fat in the sauce keeps the meat moist. Store the beef in its cooking liquid to prevent drying out when you reheat it later.

Method Time Best For
🍳 Stovetop 5-7 min Even warming with stirring to distribute sauce throughout
📦 Microwave 2-3 min Quick individual servings; cover to trap steam and prevent drying
🔥 Oven 20-25 min at 325°F Large portions; cover with foil to retain moisture

For best results when storing:

  • Cool the beef to room temperature before transferring to airtight containers with the sauce
  • Store in the fridge for 3-4 days in shallow containers so it cools quickly and evenly
  • Freeze for up to 3 months in freezer-safe bags with as much air removed as possible
  • Skim the congealed fat layer from the top after chilling if you want a leaner leftover meal
  • Add a splash of beef broth when reheating if the sauce has thickened too much in storage

Frequently Asked Questions

How long to cook Mississippi Pot Roast in slow cooker?

Cook on low for 7-8 hours until the internal temperature reaches 195°F and the beef shreds easily with a fork. High heat setting takes 4-5 hours but produces less tender results.

Can I make Mississippi Pot Roast ahead and store?

Yes - cook the roast fully, then store it in the fridge for 3-4 days or freeze for up to 3 months. Reheat gently on the stovetop or in the oven with a splash of broth to prevent drying.

How do I know when Mississippi Pot Roast is done?

The beef is done when it reaches 195°F internal temperature and shreds easily with a fork. You should be able to pull it apart without cutting, and the meat will look moist with sauce pooling at the bottom.

Why is my Mississippi Pot Roast dry or bland?

Dry meat means you overcooked it or used a lean cut instead of chuck roast. Bland flavor happens when you skip the pepperoncini peppers or don't use enough seasoning - add more dry mixes or a splash of Worcestershire sauce to boost flavor.

What are good side dishes for Mississippi Pot Roast?

Mashed potatoes, rice, or egg noodles soak up the buttery sauce best. Steamed green beans, roasted carrots, or coleslaw add fresh contrast to balance the rich beef.

Slow Cooker Mississippi Pot Roast served on a plate

Slow Cooker Mississippi Pot Roast

No ratings yet
Slow Cooker Mississippi Pot Roast features tender chuck roast cooked low and slow with ranch seasoning, au jus mix, butter, and pepperoncini peppers. This hands-off recipe yields juicy, shreddable beef with a rich, tangy buttery sauce perfect for easy weeknight dinners or meal prep.
Print Recipe Pin Recipe
Prep Time 10 minutes mins
Cook Time 7 hours hrs
Total Time 7 hours hrs 10 minutes mins
Servings: 7 servings
Course: Main Dish
Cuisine: American
Ingredients Equipment Method Notes

Ingredients
  

  • 3 pound chuck roast preferably 3-4 pounds
  • 1 packet ranch seasoning mix dry packet
  • 1 packet au jus gravy mix dry packet
  • 4 tablespoon butter cut into 4 pieces; use whole sticks, not sprays
  • 7 whole pepperoncini peppers 6-8 whole peppers
  • 0.75 cup beef broth pour around edges, ½ to 1 cup

Equipment

  • Slow cooker Used to cook the roast low and slow

Method
 

  1. Place the chuck roast fat-side up in a 4-6 quart slow cooker and sprinkle both seasoning packets evenly over the top.
    3 pound chuck roast, 1 packet ranch seasoning mix, 1 packet au jus gravy mix
  2. Cut the butter into 4 pieces and place them on top of the seasoned roast, then arrange 6-8 whole pepperoncini peppers around the meat.
    4 tablespoon butter, 7 whole pepperoncini peppers
  3. Pour beef broth around the edges of the roast without washing off the seasonings, then cover and cook on low for 7-8 hours until the beef reaches 195°F internal temperature.
    0.75 cup beef broth
  4. Remove the roast from the slow cooker and let it rest for 10 minutes on a cutting board to redistribute the juices.
  5. Shred the meat with two forks or tongs and return it to the pot, stirring to coat with the sauce before serving.
    3 pound chuck roast

Notes

  • Do not lift the lid during cooking or you will extend the cook time by 15-20 minutes.
  • Searing the chuck roast before slow cooking enhances flavor and crust texture.
  • Store cooked beef in its cooking liquid to keep it moist for reheating.

Tried this recipe?

Let us know how it was!

What Is Halibut? [Taste, Uses & More]

March 30, 2026

You spot it at the fish counter - a thick, bone-white slab resting on ice, uniform and almost sculptural.

What Is Halibut

Halibut isn't a subtle fish, but it's not an aggressive one either, which is exactly why it sells.

Cooks who want the firm, steak-like payoff of something like alternatives to sea bass or alternatives to cod often land on halibut as the answer.

QUICK SUMMARY

Halibut is a large flatfish with dense, flaky white flesh and a clean, mildly sweet flavor. It handles high heat well, holds together on the grill, and pairs with both bright citrus sauces and rich butter preparations. Fresh fillets keep for just 1-2 days in the fridge.

🐟Type: Large flatfish; sold as fillets, steaks, or whole
👅Flavor: Mildly sweet, clean briny, light umami - low fishiness
🍳Best For: Pan-searing, grilling, roasting, poaching, ceviche
🛒Buy It: Look for opaque white flesh, glossy sheen, no ammonia smell
⏱️Shelf Life: Fresh: 1-2 days refrigerated; frozen: up to 6 months

What Is Halibut?

Halibut is a flatfish - both eyes sit on one side of the body, and the fish lies flat along the ocean floor.

Two commercially important species dominate the market: Pacific halibut (Hippoglossus stenolepis), harvested from Alaskan and Pacific Northwest waters, and Atlantic halibut (Hippoglossus hippoglossus), found in the North Atlantic from Norway to the northeastern United States.

Atlantic halibut grows significantly larger, sometimes exceeding 300 kg. Pacific halibut is the more common market fish in North America and tends to be more sustainably managed.

Both species are sold as bone-in steaks, boneless fillets, or occasionally whole for smaller specimens.

You'll also see the name halibut steak used specifically for cross-cut sections through the body - these are thicker and hold up especially well to grilling and roasting.

Halibut fits squarely in the white fish category alongside cod and haddock, though its flesh is noticeably firmer and denser than either.

If you're curious how replacements for salmon stack up against white fish options, halibut sits at the firm, lean end of that comparison.

What Does Halibut Taste Like?

halibut - What Is Halibut

Halibut has a clean, mildly sweet flavor with a faint brine and just enough background umami to keep it interesting. It doesn't taste fishy in the way mackerel or sardines do - the aroma is sea-fresh rather than pungent.

Sensory SnapshotMild Intensity
👅 Flavor
mildly sweetclean brinylight umami
✋ Texture
firmdense flakesmeaty
👃 Aroma
sea-freshlow fishiness

Compared to cod, halibut tastes similar but firmer - cod breaks apart in larger, softer flakes, while halibut holds its structure under heat. Against sea bass, halibut reads leaner and cleaner, with less of the fatty richness.

Heat affects the texture significantly. Overcook halibut and those dense flakes turn dry and chalky fast.

Keep it just at the point where the flesh turns fully opaque and separates cleanly - that's the window.

Golden Rule
Pull halibut from heat when the center just turns opaque. It carries over. A few extra seconds past that point and the flakes go dry.

How to Use Halibut

Halibut's firm flesh makes it one of the most method-flexible white fish available. It won't fall apart on a hot grill, holds together in a braise long enough to absorb flavor, and produces clean, stackable portions when pan-seared.

How Halibut Is Used
MethodBest ForTip
🍳 Pan-SearingThick fillets, restaurant-style crustPat completely dry; use high heat and don't move the fish for 3-4 minutes
🔥 GrillingHalibut steaks, kebabsOil the fish, not the grate; use direct heat over hardwood or charcoal
🫕 RoastingHerb-crusted fillets, en papilloteModerate oven (180-200°C); wrap with root vegetables for moisture
💧 PoachingSalads, gentle preparationsUse court-bouillon; keep liquid just below a simmer
🍋 CevicheThin-cut raw preparationsUse only sashimi-grade fresh fish; citrus acid firms the flesh quickly

Pairings lean in two directions. Bright and acidic - lemon, yuzu, capers, dill - or rich and fatty - brown butter, beurre blanc, or a soy-mirin glaze. Both work because the mild flesh doesn't compete. For a wider look at what works alongside this fish, the pairing ideas for halibut page covers sides, sauces, and wine picks in depth.

Pacific Northwest preparations tend toward simple pan-searing with browned butter and lemon. Scandinavian cooks often poach or cure it.

Japanese-influenced preparations use soy, mirin, and ginger for a clean umami profile. British preparations lean toward baking or battering for fish and chips applications.

Avoid overly sweet sauces - they overwhelm the clean flavor. Long braises also work against halibut; that firm texture breaks down into mush if cooked too slowly for too long.

If the fish counter is out and you need a swap, halibut swaps that work covers the closest alternatives by cooking method. For ceviche specifically, pairing ideas for ceviche helps round out the plate.

Try It In
🧈Compound Butter (Herb)Melt over pan-seared halibut for a quick, rich finish→🍟Oven-Baked Fish and ChipsHalibut's firm flesh holds up perfectly in a chip-shop bake→🥗Crunchy Asian Sesame SaladAdd poached or grilled halibut for a clean protein pairing→

How to Buy and Store Halibut

Fresh halibut should have firm, opaque white flesh with a glossy, slightly translucent sheen - think clean and bright, not dull or yellowing. Brown edges are a clear sign of age.

At the counter, a light sea smell is fine; anything sharper, or any hint of ammonia, means skip it.

Watch Out
An ammonia smell means protein breakdown has started. No marinade fixes that. Walk away and find a fresher source.

For whole fish, check the eyes - they should be clear and slightly bulging, not cloudy or sunken. Halibut steaks should feel springy when pressed and be uniformly thick so they cook evenly.

Storage is straightforward:

  • 🧊 Refrigerate on ice - lay fillets in a container over crushed ice and use within 1-2 days
  • ❄️ Freeze for longer storage - wrap tightly in plastic, then foil; good up to 6 months
  • 🍽️ Cooked leftovers - keep refrigerated in an airtight container for 3-4 days

The guide on keeping halibut fresh goes deeper on icing technique and freezer wrapping methods worth knowing before you stock up.

Where to Start With Halibut

New to halibut? Start with a thick pan-seared fillet - a single piece, dry-patted, into a hot cast iron pan with oil, then finished with compound butter. That single cook teaches you the texture window faster than any other method.

Already comfortable with it? Move to the grill. Halibut steaks over direct heat develop char and hold structure in a way few white fish can match.

From there, ceviche with very fresh thin-cut halibut is the third rung - minimal technique, maximum freshness required.

Shortcut
Buy halibut steaks over fillets for your first grill attempt. They're thicker, harder to overcook, and won't fall through the grate.

Frequently Asked Questions

Is halibut healthy?

Yes. Halibut is lean, high in protein, and provides omega-3 fatty acids (EPA and DHA), vitamin B12, and selenium. Large Atlantic halibut can accumulate moderate mercury levels, so frequent consumption in high quantities warrants checking current dietary guidance.

How do you tell if halibut is fresh?

Fresh halibut has firm, white flesh with a slight gloss and smells of clean sea air - never ammonia. Brown edges, soft spots, or a sour smell all indicate the fish has passed its window.

Are halibut and flounder the same?

No - both are flatfish, but halibut is far larger and has significantly firmer, denser flesh. Flounder fillets are thinner and more delicate, making the two fish behave quite differently in cooking.

Can you grill halibut on a skewer?

Yes, and halibut handles skewers better than most white fish because its dense flesh doesn't fall apart over direct heat. Cut into 4-5 cm cubes, marinate in citrus and olive oil, and grill on high heat for 2-3 minutes per side.

How long does halibut last in the freezer?

Up to 6 months at best quality when wrapped tightly in plastic and then foil to prevent freezer burn. Beyond that window, the fish is technically safe but the texture and flavor deteriorate noticeably.

Air Fryer Chicken Milanese

March 30, 2026

Breaded chicken often ends up soggy or dry when baked in the oven. The trick is using an air fryer at 400°F with panko breadcrumbs and a light spray of oil.

Air Fryer Chicken Milanese served on a plate

Hot circulating air crisps the coating while keeping the chicken tender inside. No flipping oil, no splattering stovetop, no limp crust.

Make this when you want fried chicken texture without the mess or extra calories.

QUICK SUMMARY

Air Fryer Chicken Milanese delivers crispy golden breading and juicy chicken in 25 minutes. Pounding the breasts thin ensures even cooking, while the flour-egg-breadcrumb coating creates restaurant-quality crunch. Works for weeknight dinners or meal prep without heating up the kitchen.

⏱️Time Reality: 15 minutes to pound and bread, then 10-12 minutes hands-off cooking
🔑First Move: Pound chicken to ¼-inch thickness so edges don't dry out before centers cook
⚠️Watch Out: Wet chicken makes breading slide off - pat completely dry before flour coating

Table of Contents

Toggle
  • Why This Recipe Works
  • What You'll Need
    • Ingredient Details
  • Ingredient Swaps
  • What to Serve With It
  • Store and Reheat
  • Frequently Asked Questions
  • Air Fryer Chicken Milanese
    • Method 
    • Tried this recipe?

Why This Recipe Works

Rich mains need something to cut through, and chicken does exactly that. For a version that comes together quickly, something juicy like chicken adds the contrast this plate needs.

Quick Reference
⏱️
Prep Time
15 min
🔥
Cook Time
10-12 min
⏰
Total Time
25-27 min
🍽️
Servings
4 servings
📊
Difficulty
Easy
🏷️
Category
Main Dish
💡
Quick Tip
Pound chicken evenly for uniform crispness
🎯
Best For
Weeknight | Meal prep | Entertaining

Key factors that make this work:

  • Even thickness prevents dry edges - pounding to ¼ inch means the entire breast cooks through at the same rate without overcooking the thinner parts
  • Three-step breading creates layers - flour helps egg stick, egg binds breadcrumbs, and the coating stays put through cooking instead of sliding off
  • Panko adds extra crunch - the larger flakes crisp better than regular breadcrumbs in the air fryer's circulating heat
  • Light oil spray mimics frying - a quick mist before cooking helps the coating brown and crisp without dunking in oil
  • High heat sets the crust fast - 400°F crisps the exterior before moisture escapes from the chicken, keeping it juicy inside
Quick Tip
Preheat the air fryer for 3-5 minutes before adding chicken - the hot basket sears the bottom immediately for better browning

What You'll Need

Ingredients for Air Fryer Chicken Milanese

The cauliflower works best when it hits the table at the same time as the main. We keep a batch ready for nights like this - this quick cauliflower dish adds the contrast this plate needs.

🍗
Protein
  • 4 boneless chicken breasts (6-8 oz each)
🫙
Breading Station
  • 1 cup all-purpose flour
  • 2 large eggs (beaten)
  • 2 cups panko breadcrumbs
  • ½ cup grated Parmesan cheese
🌶️
Seasonings
  • 1 teaspoon salt
  • ½ teaspoon black pepper
  • Olive oil or cooking spray
🍋
Finishing Touch
  • 1 lemon (cut into wedges)
  • Fresh parsley (optional)

Ingredient Details

  • Boneless chicken breasts
    Look for evenly sized pieces around 6-8 oz - easier to pound to uniform thickness without tearing
  • Panko breadcrumbs
    Japanese-style panko has larger, airier flakes that crisp better than Italian breadcrumbs - worth seeking out
  • Parmesan cheese
    Use freshly grated from a block, not the shelf-stable kind - it melts into the coating for better flavor and browning
  • Eggs
    Beat eggs with a fork until completely uniform - streaks of white won't coat evenly and leave bare spots
  • Olive oil spray
    Use a pump sprayer or mister for even light coverage - aerosol cans often contain propellants that can damage air fryer baskets
  • Lemon wedges
    Squeeze right before serving so the acidity cuts through the richness of the breading - not optional
  • All-purpose flour
    The flour layer absorbs surface moisture and creates a dry base for the egg to grip - skipping it means sliding breading

Ingredient Swaps

Different dietary needs call for different moves. Here are four reliable substitutions that keep the crisp coating intact.

Four swaps that work:

  • All-purpose flour → gluten-free flour blend - use cup-for-cup replacement for same texture without gluten (rice flour alone gets gummy)
  • Panko breadcrumbs → crushed cornflakes or gluten-free panko - cornflakes add extra crunch but brown faster, so watch closely after 8 minutes
  • Parmesan cheese → nutritional yeast - use ¼ cup instead of ½ cup for similar savory depth without dairy (slightly less browning)
  • Eggs → aquafaba (chickpea liquid) - 3 tablespoons per egg, whisk until slightly foamy before using (works better than flax eggs for breading)

Regular Breadcrumbs

Works for: Budget cooking when panko isn't available

Skip if: You want maximum crunch - the fine texture doesn't crisp as well

Thin Chicken Cutlets

Works for: Skipping the pounding step entirely - already thin enough

Skip if: You prefer thicker chicken with more surface area for breading

Avocado Oil Spray

Works for: Higher smoke point than olive oil for zero burnt taste

Skip if: You're watching costs - olive oil works just as well here

Instructions

A good salad can make or break the plate. For a version that comes together quickly, a crisp green salad adds the contrast this plate needs.

  1. Pound chicken to even thickness: Place each breast between two sheets of plastic wrap or parchment paper. Use a meat mallet or rolling pin to pound from the center outward until ¼ inch thick throughout. Pat completely dry with paper towels.

  2. Set up breading station: Place flour in first shallow bowl, beaten eggs in second bowl, and panko mixed with Parmesan, salt, and pepper in third bowl. Line them up in order on your counter.

  3. Coat chicken in three layers: Dredge one breast in flour, shake off excess, dip in egg to coat completely, then press into breadcrumb mixture on both sides. Place on a plate and repeat with remaining breasts.

  4. Preheat and spray air fryer: Heat air fryer to 400°F for 3-5 minutes. Spray basket lightly with oil. Place breaded chicken in basket in single layer with 1-inch space between pieces. Spray tops lightly with oil.

  5. Air fry and rest: Cook 6 minutes, flip with tongs, spray again lightly, and cook 4-6 minutes more until golden and internal temperature reaches 165°F. Remove and rest 5 minutes before serving with lemon wedges.

Golden Rule
Don't skip the rest time after cooking - the juices redistribute through the meat instead of running out when you cut into it

What to Serve With It

Fries adds the contrast this plate needs, but timing matters. For a version that comes together quickly, golden fries recipe goes with easy chicken tenders dinner nights where coordination counts.

Side Dish Prep Why It Works How to Serve
Mixed Green Salad Easy Fresh greens cut the richness of breading, lemon vinaigrette echoes citrus finish Toss while chicken rests, serve alongside with extra lemon wedges
Roasted Asparagus Easy Charred edges add smoky contrast to mild chicken, cooks in same timeframe Roast at 400°F for 12-15 minutes, season with salt and lemon zest
Garlic Mashed Potatoes Medium Creamy texture balances crispy coating, starchy base soaks up lemon juice Make ahead and reheat while chicken cooks, serve hot with butter pool
Arugula Tomato Salad Easy Peppery arugula and sweet tomatoes add Italian restaurant feel, no cooking needed Dress with olive oil and balsamic right before plating for elegant presentation
Lemon Rice Pilaf Medium Bright citrus flavor ties into lemon finish, fluffy texture contrasts crisp chicken Start rice first, fluff with fork and add lemon zest when chicken goes in air fryer

Three ways to serve it:

  • Classic Italian style - plate chicken over arugula salad, drizzle with olive oil and balsamic, shave fresh Parmesan on top
  • Weeknight simple - serve with steamed broccoli and a squeeze of lemon, skip extra components when time is tight
  • Entertaining upgrade - top with fresh mozzarella and cherry tomatoes, finish with torn basil leaves for caprese-style presentation
Best Pick
A dollop of this dip takes each bite somewhere more interesting - smooth creamy dip adds tangy richness without heavy mayo base

Store and Reheat

Breaded chicken loses crunch fast in the fridge, but proper storage and reheating bring back most of the texture. Skip plastic wrap - it traps steam and turns the coating soggy within hours.

Method Time Best For
🔥 Air Fryer 4-6 min at 350°F Restoring maximum crispness quickly - flip halfway through for even heating
🍳 Oven 8-10 min at 375°F Reheating multiple pieces at once - place on wire rack over sheet pan
📦 Microwave 1-2 min medium power Speed when texture doesn't matter - breading will soften significantly

For best results when storing:

  • Cool completely before refrigerating - hot chicken creates condensation in the container that soaks into breading and makes it soggy
  • Use shallow airtight containers - stack no more than two pieces with parchment between layers to prevent sticking
  • Store sauce separately - keep lemon wedges or dipping sauces in different container so moisture doesn't transfer to coating
  • Freeze individually first - lay breaded raw or cooked chicken on parchment-lined sheet, freeze solid, then transfer to freezer bag for up to 1 month
  • Reheat from fridge, not freezer - thaw frozen chicken overnight in refrigerator before reheating for even warming and better texture

Frequently Asked Questions

How long to cook Air Fryer Chicken Milanese at 400°F?

Cook for 10-12 minutes total at 400°F, flipping halfway through at the 6-minute mark. Check that internal temperature reaches 165°F with an instant-read thermometer before removing.

Can I make Air Fryer Chicken Milanese ahead of time?

Bread the chicken up to 4 hours ahead and refrigerate uncovered on a plate - this actually helps the coating set better. Cook right before serving for best crisp texture.

What goes with Air Fryer Chicken Milanese?

Serve with arugula salad, roasted vegetables, lemon rice pilaf, or garlic mashed potatoes. Add lemon wedges and a tangy dipping sauce like mustard aioli for classic Italian treatment.

Why is my breading falling off after air frying?

The chicken was too wet before breading or you skipped the flour layer. Pat chicken completely dry, then coat in flour first to create a dry base for the egg to grip.

Can I use almond flour instead of breadcrumbs?

Almond flour works but won't crisp the same way - mix it with grated Parmesan and spray generously with oil for better browning. Expect a denser, less crunchy coating.

Air Fryer Chicken Milanese served on a plate

Air Fryer Chicken Milanese

No ratings yet
Air Fryer Chicken Milanese delivers crispy, golden breading and juicy chicken in just 25 minutes. Pounding the breasts thin ensures even cooking, while the three-step flour-egg-panko coating creates a crunchy texture without the mess of frying. This easy recipe is perfect for weeknight dinners or meal prep.
Print Recipe Pin Recipe
Prep Time 15 minutes mins
Cook Time 12 minutes mins
Total Time 27 minutes mins
Servings: 4 servings
Course: Main Dish
Cuisine: Italian
Ingredients Equipment Method Notes

Ingredients
  

  • 4 pieces boneless chicken breasts 6-8 oz each, pounded to ¼ inch thickness, pat dry
  • 1 cup all-purpose flour for dredging
  • 2 large eggs beaten
  • 2 cups panko breadcrumbs mixed with Parmesan, salt, and pepper
  • 0.5 cup Parmesan cheese grated, freshly grated from block
  • 1 teaspoon salt mixed into breadcrumbs
  • 0.5 teaspoon black pepper mixed into breadcrumbs
  • olive oil or cooking spray lightly sprayed on basket and chicken
  • 1 whole lemon cut into wedges, to serve
  • fresh parsley optional, for garnish

Equipment

  • Air fryer Used for cooking the breaded chicken at 400°F
  • Meat mallet or rolling pin For pounding chicken breasts to even thickness
  • Three shallow bowls To set up breading station with flour, egg, and breadcrumb mixtures
  • Tongs To flip chicken halfway through cooking

Method
 

  1. Place each chicken breast between two sheets of plastic wrap or parchment paper. Use a meat mallet or rolling pin to pound evenly to ¼ inch thickness. Pat dry thoroughly with paper towels.
    4 pieces boneless chicken breasts
  2. Set up three shallow bowls: flour in the first, beaten eggs in the second, and panko combined with Parmesan, salt, and pepper in the third.
    1 cup all-purpose flour, 2 large eggs, 2 cups panko breadcrumbs, 0.5 cup Parmesan cheese, 1 tsp salt, 0.5 tsp black pepper
  3. Dredge each chicken breast in the flour, shaking off excess. Dip into the beaten egg, coating completely. Then press into the breadcrumb mixture on both sides. Place coated breasts on a plate.
    4 pieces boneless chicken breasts, 1 cup all-purpose flour, 2 large eggs, 2 cups panko breadcrumbs, 0.5 cup Parmesan cheese, 1 tsp salt, 0.5 tsp black pepper
  4. Preheat air fryer to 400°F for 3-5 minutes. Lightly spray the air fryer basket with olive oil or cooking spray. Arrange the breaded chicken in a single layer, leaving about 1 inch between pieces. Spray the tops lightly with oil.
    olive oil or cooking spray
  5. Air fry the chicken for 6 minutes. Flip each piece using tongs, spray the tops lightly again, then cook for an additional 4-6 minutes until golden and the internal temperature reaches 165°F. Remove and let rest for 5 minutes before serving with lemon wedges.
    4 pieces boneless chicken breasts, olive oil or cooking spray, 1 whole lemon

Notes

  • Pound chicken evenly to ensure uniform cooking and prevent dry edges.
  • Pat chicken completely dry before breading to prevent coating from sliding off.
  • Light oil spray crisps the coating without adding extra calories or mess of frying.

Tried this recipe?

Let us know how it was!

What Is Goat Cheese? [Taste, Uses & More]

March 30, 2026

You spot a log of chèvre at the cheese counter - bright white, clean-edged, dusted with a thin coat of ash or herbs - and suddenly you're deciding between three nearly identical-looking options. Goat cheese rewards the shopper who knows what they're buying.

What Is Goat Cheese

Fresh arugula and beet salads, warm crostini, weeknight pasta - goat cheese works across all of them, but only if you pick the right style and handle it correctly. Understanding what separates a grassy, lactic-bright fresh chèvre from a firm, crumbly aged wheel changes how you cook with it entirely.

QUICK SUMMARY

Goat cheese is a tangy, lactic-bright cheese made from goat's milk, ranging from spreadable fresh chèvre to firm aged wheels. It carries a distinct brightness that cow's milk cheeses rarely match, pairs with honey, beets, and herbs, and suits everything from salads to baked appetizers.

🐐What It Is: Fresh or aged cheese made from goat's milk, also called chèvre
🍋Flavor: Tangy, citrus-bright acidity with earthy, sometimes goaty depth
🍽️Best Uses: Crumbled over salads, spread on crostini, folded into pasta or quiche
❄️Shelf Life: Fresh: 1-2 weeks opened; aged: up to 6 weeks unopened in fridge
🛒Buy It When: The surface is bright white, clean-smelling, with no ammonia odor or dark streaks

What Is Goat Cheese?

Goat cheese is any cheese produced from goat's milk, and the category spans a wider range than most shoppers realize. At one end sits fresh chèvre - soft, spreadable, mild, and sold in logs or tubs within days of production.

At the other end sit firm aged wheels, dense enough to grate, with a more concentrated earthiness.

The French term chèvre (literally "goat") is used interchangeably with goat cheese in most markets, though regional variants exist across Europe. Italian caprino, Spanish queso de cabra, and aged Bucheron all qualify.

The defining characteristic isn't form or age - it's the milk.

Goat's milk has a different fatty acid profile from cow's milk, which produces that signature brightness and slight caprine aroma no matter how the cheese is aged. Fresh chèvre is the most widely available style in the U.S., followed by semi-aged rounds and ash-coated logs.

  • 🧀 Fresh chèvre - soft, spreadable, mild acidity; best eaten within days of opening
  • 🧀 Semi-aged rounds - firmer exterior rind, creamier center, slightly more complex flavor
  • 🧀 Aged wheels - dry, crumbly, concentrated; holds up to grating or slicing thin
  • 🧀 Ash-coated logs - vegetable ash exterior slows drying and adds subtle mineral notes

What Does Goat Cheese Taste Like?

goat cheese - What Is Goat Cheese

Fresh goat cheese opens with a clean lactic brightness - the same quality you get in plain yogurt, but rounder and creamier. That tangy-citrus acidity is the most recognizable feature. Compared to cow's cream cheese, chèvre reads noticeably sharper; compared to mild sheep ricotta, it's denser and more acidic rather than milky-sweet.

Sensory SnapshotModerate Intensity
👅 Flavor
tangycitrus-brightearthylactic
✋ Texture
creamycrumbly when aged
👃 Aroma
grassyearthygoaty

Age shifts the profile noticeably. Older wheels develop a more pronounced caprine earthiness - what people usually call "goaty" - and the texture moves from spreadable to slightly granular.

Heat softens fresh chèvre into something almost runny, intensifying the tang without adding bitterness.

Golden Rule
The stronger the "goaty" aroma on fresh cheese, the older or more improperly stored it likely is. Truly fresh chèvre should smell clean and grassy, not barnyard-sharp.

How to Use Goat Cheese

Fresh chèvre is the most forgiving style. Crumble it cold over a roasted beet salad with arugula and cinnamon-sugar roasted nuts for a dish that needs nothing else. Spread it on crostini with honey and thyme, or fold it into warm pasta off the heat - the residual warmth melts it into a loose, tangy sauce without breaking it.

Baking works well for whole rounds or thick slices. Place a round in an oven-safe dish with olive oil and rosemary, bake until it softens and just starts to run, then serve immediately with crusty bread.

Goat cheese also fills tarts and quiches cleanly - caramelized onion and goat cheese tart is a French bistro staple precisely because the tang cuts through the sweetness of the onions.

Aged goat cheese functions differently. Grate it over roasted vegetables or shave it thin over warm dishes where you want concentrated flavor without creaminess.

Goat cheese has a natural home in French chèvre preparations and Mediterranean cooking, but Modern American bistro menus and Spanish tapas-style plates use it just as often. It pairs well with honey, fig jam, beets, arugula, roasted walnuts or pistachios, lemon, thyme, and rosemary.

For wine, stick to light-bodied whites or a dry rosé - heavy tannic reds fight the acidity instead of balancing it.

How Goat Cheese Is Used
MethodBest ForTip
🥗 Crumbled RawSalads, grain bowls, flatbreadsAdd at the last moment so it doesn't absorb dressing
🔥 Baked WholeAppetizers, shared starters with breadUse a small oven-safe dish; bake at 375°F until just soft
🍝 Folded InWarm pasta, omelets, frittatasRemove pan from heat first - direct heat makes it grainy
🥧 Tart/Quiche FillingSavory tarts, quiche, stuffed chickenBlend with eggs to smooth out texture before pouring
🧀 Aged and GratedRoasted vegetables, warm dishesUse a microplane for thin, even coverage that melts on contact
Try It In
🥗Roasted Beet and Goat Cheese SaladClassic pairing — the acidity cuts right through the earthy beets→🍞Herbed Goat Cheese SpreadShows how fresh chèvre behaves as a spreadable base with herbs→🫐Roasted Beet Salad with Goat CheeseA second take with different beet prep and a sharper vinaigrette→

How to Buy and Store Goat Cheese

Fresh chèvre should be bright white with a clean, lactic smell. No pink tinge, no dark streaks, no ammonia sharpness.

Avoid packages swimming in liquid - some moisture is normal, but excess pooling suggests age or improper handling. For aged rounds, look for an even rind color and firm texture with no soft spots.

Watch Out
An ammonia smell on fresh goat cheese means it's past its best. That odor doesn't cook out - it intensifies with heat. Skip it.

Storage matters more than most people expect. Wrap it in parchment or wax paper, then place inside a loosely closed container so air can circulate.

Plastic wrap traps moisture and accelerates ammonia buildup. Fresh goat cheese holds about 1-2 weeks once opened; aged varieties last 3-6 weeks unopened.

For a fuller breakdown, see our guide to goat cheese freshness guide. If you run out and need a stand-in, we've covered the best goat cheese replacements as well.

Where to Start with Goat Cheese

If you've never cooked with it, buy a plain fresh chèvre log. Crumble half over a simple salad with beets and dressed arugula.

Use the rest spread on toast with honey. That's the full range of the ingredient in two dishes, no technique required.

From there, try baking a whole round with herbs - it takes about fifteen minutes and shows you exactly what heat does to the texture. Aged styles come later, once you know the fresh baseline well.

Shortcut
A plain chèvre log costs less than specialty aged rounds and teaches you more. Start there before spending on aged varieties.

Frequently Asked Questions

Is goat cheese the same as chèvre?

Technically, chèvre means "goat" in French and refers to any cheese made from goat's milk. In American markets, "chèvre" usually means the soft, fresh log-style specifically. All chèvre is goat cheese, but not all goat cheese is sold as chèvre.

Why does goat cheese taste different from cow cheese?

Goat's milk contains higher concentrations of medium-chain fatty acids - caprylic, capric, and caproic acids - which produce that distinctive tangy, earthy brightness. Cow's milk cheeses have a milder, creamier baseline because those fatty acids are present in much lower amounts.

Can people with lactose intolerance eat goat cheese?

Often yes, in moderate amounts. Goat cheese - especially aged varieties - is lower in lactose than most cow's milk cheeses, and the smaller fat globules in goat's milk make it easier to digest. Individual tolerance still varies, so start with a small portion.

What wines go with goat cheese?

Light, high-acid whites work best - Sancerre and Pouilly-Fumé are the classic regional matches for French chèvre. Dry rosé also pairs well. Avoid heavy tannic reds, which clash with the cheese's acidity rather than complementing it.

Can you freeze goat cheese?

You can freeze fresh chèvre, but the texture turns crumbly and slightly grainy after thawing. It's still usable in cooked dishes - pasta, quiche, baked applications - where texture matters less. Don't freeze it if you plan to serve it raw or spread.

What Is Jerk Seasoning? Taste, Uses & More Explained

March 30, 2026

Jerk seasoning does something no single spice can manage on its own - it builds heat, sweetness, smoke, and floral warmth into one rub that changes everything it touches.

What Is Jerk Seasoning

The blend anchors Jamaican cooking the way ras el hanout in cooking anchors North African food, or the way replacements for taco seasoning remind you how central a seasoning blend is to a whole cuisine.

No other spice mix delivers that specific combination of allspice warmth and Scotch bonnet fire in the same breath.

QUICK SUMMARY

Jerk seasoning is a Jamaican spice blend built on ground allspice and Scotch bonnet pepper. It delivers strong heat, warm sweetness, and smoky depth as a dry rub or wet marinade, and works best on chicken, pork, and roasted vegetables over high heat.

🌶️Flavor: Spicy, warm, slightly sweet with herbal and smoky notes
🍗Best Uses: Grilled chicken, slow-roasted pork, jerk bowls, roasted vegetables
🫙Shelf Life: Dry blend 6-12 months; wet marinade 3-5 days refrigerated
🛒Buy: Look for ground allspice and Scotch bonnet on the label
🌍Cuisine: Jamaican, Caribbean, West Indies fusion, Caribbean-inspired American

What Is jerk seasoning?

Jerk seasoning is a Jamaican spice blend rooted in two non-negotiable ingredients: ground allspice (also called pimento) and Scotch bonnet pepper. You'll also find it sold as Jamaican jerk, jerk rub, jerk spice, or jerk seasoning blend.

The blend traces back to the Maroon communities of Jamaica, who slow-cooked wild boar over pimento wood - a method that embedded both smoke and allspice flavor directly into the meat. Modern versions keep that DNA intact.

It comes in two forms depending on how you use it:

  • Dry rub - a coarse, reddish-brown powder with visible herb flecks, rubbed directly onto meat before cooking
  • Wet marinade - the same spices blended with citrus juice, soy sauce, or vinegar into a thick paste

Beyond allspice and Scotch bonnet, most blends include dried thyme, garlic, ginger, and cinnamon. Some add brown sugar or molasses for sweetness.

Commercial blends vary widely - the best ones list specific peppers and spices rather than vague "natural flavors."

What Does jerk seasoning Taste Like?

jerk seasoning - What Is Jerk Seasoning

Jerk seasoning is strong and complex. The first thing you notice is heat from the Scotch bonnet pepper - sharper and more floral than cayenne, not just blunt fire.

Right behind it comes the warm, clove-like sweetness of ground allspice. That combination is what makes jerk taste unlike any other spice blend.

Think of a peppery barbecue rub crossed with warm baking spices, then sharpened with citrus tang.

Sensory SnapshotStrong Intensity
👅 Flavor
spicywarm-sweetherbalbright-acidic
✋ Texture
coarse-grainypasty (wet form)
👃 Aroma
smokypepperyfloral

Heat intensity changes with cooking method. High, direct heat over charcoal amplifies the smokiness and rounds the sharp pepper edges.

Slow roasting deepens the allspice sweetness and softens the burn slightly.

Watch Out
Scotch bonnet registers 100,000-350,000 Scoville units. If you're heat-sensitive, use a blend made with habanero instead - similar floral note, measurably less fire.

How to Use jerk seasoning

Jerk chicken is the entry point for most people, and it earns that reputation. Rub the dry blend onto bone-in pieces, let them sit overnight, then grill over charcoal.

Understanding the differences between bbq vs smoking matters here - true jerk uses indirect smoke from pimento wood, not direct flame alone.

Pork shoulder is the other classic. A wet jerk marinade - allspice, Scotch bonnet, thyme, garlic, lime juice - penetrates the meat over 12-24 hours before slow roasting or smoking.

If your oven setup needs adjusting, using swapping out roasting rack alternatives can still get you even airflow around the meat.

How Jerk Seasoning Is Used
MethodBest ForTip
🔥 GrillingChicken, pork chops, shrimp skewersUse charcoal or wood for genuine smoke
🫕 Slow-RoastingPork shoulder, whole chickenWet marinade; 12-24 hours before cooking
🍳 Pan-SearingFish, shrimp, tofuMarinate 30-60 minutes; high heat, short time
🥘 BraisingStews, pulled pork, Caribbean braisesAdd wet marinade to braising liquid
🥗 Dry Rub (No Heat)Jerk bowls, roasted vegetables, tofuToss with oil before roasting sweet potato or plantain

Beyond meat, jerk works well tossed with sweet potato or plantain before roasting - the sugar in those vegetables caramelizes against the warm spice.

Stir it into barbecue sauce for a Caribbean-leaning finish, or mix it into ground meat for jerk burgers.

If you can't find the blend locally, these jerk seasoning swaps that work cover the closest alternatives without losing the allspice-forward profile.

Try It In
🍿Popcorn Seasoning BlendsJerk dry rub adds smoky heat to popcorn with zero cooking→

How to Buy and Store jerk seasoning

At the store, read the label before you buy.

A quality dry blend lists ground allspice (pimento) and Scotch bonnet or habanero clearly - not just "spices" or "natural flavors." The powder should be reddish-brown with visible dried herb flecks, and the jar should smell sharp and warm when opened.

Best Pick
Small-batch or freshly blended jerk seasoning will always outperform grocery-store powders that have sat in a warehouse. Check Caribbean specialty stores or spice shops for the real thing.

Dry blends store well in an airtight jar in a cool, dark pantry. Keep wet marinades refrigerated in a sealed container.

Knowing the jerk seasoning spoilage signs helps you tell when a dry blend has faded beyond useful - weak aroma and dull color are the first signals.

  • Dry blend shelf life - 6-12 months at peak flavor; technically safe longer but noticeably weaker
  • Wet marinade shelf life - 3-5 days refrigerated in a sealed container
  • Heat and light - both degrade volatile compounds fast; never store above the stove

Where to Start With Jerk Seasoning

Start with bone-in chicken thighs - they're forgiving, cheap, and hold the seasoning well against high heat. Rub, rest overnight, grill.

That single cook will tell you more about how jerk seasoning behaves than any description can.

From there, move to vegetables or tofu if you want a lighter introduction to the flavor profile.

For comparison against other spice blends, note that cajun seasoning swaps that work also highlights how differently heat-forward blends perform across cooking methods.

Also keep in mind that the differences between broiling vs grilling will affect char and smokiness on your final dish - grilling wins for jerk.

Golden Rule
Always give jerk seasoning time. A 30-minute rub is a starting point - overnight contact is where the allspice and heat actually penetrate.

Frequently Asked Questions

Is jerk seasoning very spicy?

Yes, it's genuinely hot. Scotch bonnet peppers sit between 100,000 and 350,000 Scoville units - significantly hotter than jalapeño. Blends using habanero instead are still spicy but slightly more manageable.

What is in jerk seasoning?

The two core ingredients are ground allspice (pimento) and Scotch bonnet or habanero pepper. Most blends also include dried thyme, garlic, ginger, cinnamon, and sometimes brown sugar or scallion.

What does jerk seasoning taste like?

It tastes like a peppery barbecue rub crossed with warm baking spices and a sharp citrus edge. The allspice gives it a clove-like sweetness that balances the Scotch bonnet heat.

Can you use jerk seasoning as a marinade?

Yes. Blend the dry spices with lime juice, soy sauce, garlic, and a little oil to make a wet paste. It works especially well on pork shoulder with at least 12 hours of contact time.

Does jerk seasoning work on vegetables?

It does, particularly on dense, starchy vegetables. Sweet potato, plantain, and cauliflower hold up well to its strong flavor profile. Toss with oil before roasting at high heat for the best result.

Roasted Cauliflower Tabbouleh

March 30, 2026

Roasting cauliflower at 400°F with olive oil creates golden edges and crisp-tender florets that anchor a bright tabbouleh. The heat caramelizes the natural sugars while fresh herbs and lemon juice add sharp contrast.

Roasted Cauliflower Tabbouleh served on a plate

Fresh parsley and mint go in after roasting to keep their color and snap. Toss everything while the cauliflower is still warm so the dressing clings without pooling.

Make this for weeknight sides or meal prep bowls when you need something that tastes intentional but doesn't require babysitting.

QUICK SUMMARY

Roasted cauliflower replaces bulgur in this Mediterranean salad. Golden florets get tossed with fresh parsley, mint, tomatoes, cucumber, and lemon juice. The result is a bright, herbaceous side that works for weeknight dinners or entertaining.

⏱️Time Reality: 35 minutes total-15 for prep, 20 for roasting, no marinating needed
🔥Method Shortcut: Cut uniform 1-inch florets so everything roasts evenly without rotating the pan
⚠️Watch Out: Overdressing makes it soggy-add lemon juice and olive oil gradually, taste between additions

Table of Contents

Toggle
  • Why This Recipe Works
  • What You'll Need
    • Ingredient Details
  • Ingredient Swaps
  • What to Serve With It
  • Store and Reheat
  • Frequently Asked Questions
  • Roasted Cauliflower Tabbouleh
    • Method 
    • Tried this recipe?

Why This Recipe Works

Roasting at 400°F renders the cauliflower's moisture while building caramelized edges that add nutty depth. Most people skip tabbouleh, but it balances the meal. For a version that comes together quickly, a fresh potato salad variation works when you need something tangy on the table.

Quick Reference
⏱️
Prep Time
15 min
🔥
Cook Time
20 min
⏰
Total Time
35 min
🍽️
Servings
4 servings
📊
Difficulty
Easy
🏷️
Category
Side
💡
Quick Tip
Roast cauliflower until golden edges appear
🎯
Best For
Weeknight | Meal prep | Entertaining

Five things that make it work:

  • Uniform florets: Cut cauliflower into 1-inch pieces so they roast evenly without some burning while others stay raw
  • Single layer on the sheet: Leave 1-inch gaps between florets so hot air circulates and edges crisp instead of steaming
  • Fresh herbs added off heat: Mix parsley and mint after roasting to preserve their bright green color and fresh snap
  • Lemon juice at the end: Add citrus after cooling so the acid doesn't cook the herbs or turn them brown
  • 10-minute rest before serving: Let the salad sit after tossing so the flavors meld and the lemon juice penetrates the cauliflower
Quick Tip
Roast cauliflower until edges turn golden brown and a fork slides through easily-18 to 22 minutes at 400°F depending on your oven.

What You'll Need

Ingredients for Roasted Cauliflower Tabbouleh

Stock your cutting board with fresh vegetables and herbs. The tabbouleh works best when it hits the table at the same time as the main. We keep a batch ready for nights like this-something simple like tabbouleh adds brightness without requiring a stove.

🥬
Vegetables
  • Cauliflower (1 medium head)
  • Tomatoes (2 medium)
  • Cucumber (1 medium)
🧄
Aromatics & Herbs
  • Parsley (1½ cups chopped)
  • Mint (½ cup chopped)
  • Green onions (3, sliced)
🥢
Dressing
  • Lemon juice (¼ cup)
  • Olive oil (3 tablespoons)
  • Salt (½ teaspoon)
  • Black pepper (¼ teaspoon)

Ingredient Details

  • Cauliflower
    Cut into 1-inch florets-larger pieces roast unevenly and smaller ones burn before the centers cook through
  • Parsley
    Use flat-leaf parsley for the best texture-curly parsley works but has a tougher stem and less vibrant flavor
  • Lemon juice
    Juice lemons immediately before mixing-bottled juice lacks the brightness that makes tabbouleh taste fresh
  • Olive oil
    Use extra-virgin for roasting and dressing-it adds fruity depth that neutral oils can't replicate
  • Tomatoes
    Dice into ½-inch pieces and drain excess juice so the salad doesn't get watery
  • Mint
    Chop mint leaves just before serving-they bruise easily and turn brown if prepped too early
  • Green onions
    Slice both white and green parts thinly for mild onion bite without overpowering the herbs

Ingredient Swaps

Swap cauliflower for broccoli if you want firmer texture and slightly stronger flavor. Rich mains need something to cut through, and tabbouleh does exactly that. For a version that comes together quickly, something rich like beef pairs with the bright citrus and fresh herbs without competing.

Four swaps that work:

  • Broccoli instead of cauliflower: Roast the same way-firmer texture and slightly stronger flavor but still caramelizes well
  • Cilantro instead of parsley: Different herb profile, less traditional but adds bright citrus notes if you like cilantro
  • Lime juice instead of lemon: More tart and sharper citrus-use the same amount but expect a punchier acid bite
  • Roasted red peppers instead of tomatoes: Adds sweetness and smokiness, less juicy so the salad stays drier

Fresh Cauliflower

Works for: Even roasting, crisp-tender texture, golden caramelized edges

Skip if: You only have frozen-it releases too much water and gets soggy unless patted completely dry

Frozen Cauliflower

Works for: Budget-friendly option when fresh isn't available

Skip if: You want the best texture-requires thawing and thorough patting dry to avoid steaming instead of roasting

Instructions

The salad comes together in 35 minutes with minimal hands-on work. The chicken works best when it hits the table at the same time as the main. We keep a batch ready for nights like this-a juicy chicken on the side balances the bright herbs without weighing down the plate.

  1. Preheat oven to 400°F and cut cauliflower into 1-inch florets. Toss florets with 2 tablespoons olive oil, salt, and pepper on a baking sheet. Spread in a single layer with 1-inch gaps between pieces.
  2. Roast 18-22 minutes until edges turn golden brown and florets are crisp-tender. Check doneness by piercing with a fork-it should slide through easily without mushing. Remove from oven and let cool 10 minutes.
  3. Chop parsley, mint, tomatoes, cucumber, and green onions while cauliflower cools. Dice tomatoes and cucumber into ½-inch pieces. Drain excess tomato juice. Chop herbs roughly-no need for precision.
  4. Transfer cooled cauliflower to a large mixing bowl. Add chopped vegetables and herbs. Drizzle with remaining 1 tablespoon olive oil and lemon juice.
  5. Toss everything gently until evenly coated. Taste and adjust salt if needed. Let rest 10 minutes before serving so flavors meld and lemon juice penetrates the cauliflower.
Golden Rule
Don't crowd the pan-leave space between florets or they'll steam instead of roast, and you'll lose the caramelized edges that make this work.

What to Serve With It

This side needs a protein or grain to round out the meal. Chicken adds the contrast this plate needs, but timing matters. For a version that comes together quickly, planning your chicken salad dinner helps you build a balanced plate without overthinking the sides.

Side Dish Prep Why It Works How to Serve
Grilled Chicken Breast Easy Adds lean protein, mild flavor complements bright herbs Slice chicken and arrange over tabbouleh, drizzle with extra lemon
Hummus and Pita Easy Classic Mediterranean pairing, creamy texture contrasts fresh salad Serve hummus in a bowl with warm pita wedges on the side
Quinoa Pilaf Easy Nutty grain balances the acidity, gluten-free base for the meal Spoon tabbouleh over warm quinoa, mix gently before eating
Falafel Medium Traditional Middle Eastern complement, crispy exterior adds texture Serve falafel alongside tabbouleh with tahini drizzle
Grilled Lamb Kebabs Medium Rich protein contrasts fresh herbs, makes it a complete meal Plate kebabs next to tabbouleh, garnish with mint leaves

Three ways to serve it:

  • As a side salad: Pair with grilled chicken, lamb, or fish for a light weeknight dinner
  • In a grain bowl: Spoon over quinoa or rice with roasted chickpeas for a plant-based meal
  • As an appetizer: Serve with pita chips and hummus for entertaining or summer gatherings
Best Pick
Serve with tahini dressing on the side-the creamy texture pairs with roasted cauliflower notes without overpowering the fresh herbs.

Store and Reheat

Roasted cauliflower tabbouleh keeps in the fridge for 3-4 days in an airtight container. Soup adds the contrast this plate needs, but timing matters. For a version that comes together quickly, warm soup side dish balances the crisp vegetables without stealing focus.

Method Time Best For
🍳 Stovetop 3-4 min on medium heat Reviving roasted cauliflower without sogginess-stir gently in a skillet
📦 Microwave 1-2 min on medium power Quick reheating-may soften texture but works for meal prep lunches
🔥 Oven 5-7 min at 350°F Warming larger portions evenly-spread on a baking sheet in a single layer

For best results when storing:

  • Store in a shallow airtight container: Keeps herbs fresh and prevents crushing the cauliflower florets
  • Add extra lemon juice before serving: Acidity fades in the fridge-a squeeze of fresh lemon brings back brightness
  • Keep dressing separate for meal prep: Toss salad with lemon and olive oil right before eating to prevent sogginess
  • Drain excess liquid after storage: Pat with paper towels if moisture pools at the bottom of the container
  • Don't freeze roasted cauliflower tabbouleh: Freezing breaks down the texture of the vegetables and herbs turn mushy when thawed

Frequently Asked Questions

How long to roast cauliflower for tabbouleh at 400°F?

Roast cauliflower 18-22 minutes at 400°F until edges turn golden brown and a fork slides through easily. Check at 18 minutes-smaller florets may finish faster and burn if left too long.

Can I make roasted cauliflower tabbouleh ahead and store it?

Yes, store in the fridge for 3-4 days in an airtight container. Add fresh lemon juice and olive oil before serving to revive the flavors-acidity fades after a day or two.

What goes well with roasted cauliflower tabbouleh for dinner?

Pair with grilled chicken, lamb kebabs, or falafel for a complete meal. Hummus and pita also work well for a lighter, vegetarian option.

How do I know when roasted cauliflower is done for this salad?

Look for golden brown edges and pierce with a fork-it should slide through easily without the floret falling apart. If the cauliflower is still hard or white, roast another 3-5 minutes.

Can I use frozen cauliflower instead of fresh for this recipe?

Yes, but thaw and pat completely dry first-frozen cauliflower releases water during roasting and can get soggy instead of crispy. Expect slightly softer texture even when fully dried.

Roasted Cauliflower Tabbouleh served on a plate

Roasted Cauliflower Tabbouleh

No ratings yet
Roasted cauliflower replaces bulgur in this bright Mediterranean salad featuring golden florets tossed with fresh parsley, mint, tomatoes, cucumber, and lemon juice. The roasting caramelizes the cauliflower's natural sugars, complemented by fresh herbs and a tangy dressing for a flavorful side dish.
Print Recipe Pin Recipe
Prep Time 15 minutes mins
Cook Time 20 minutes mins
Total Time 35 minutes mins
Servings: 4 servings
Course: Side Dish
Cuisine: Mediterranean
Ingredients Method Notes

Ingredients
  

  • 1 medium head cauliflower cut into 1-inch florets
  • 2 medium tomatoes diced into ½-inch pieces, drained
  • 1 medium cucumber diced into ½-inch pieces
  • 1.5 cups parsley flat-leaf, chopped
  • 0.5 cup mint chopped
  • 3 pieces green onions sliced, include white and green parts
  • 0.25 cup lemon juice freshly squeezed
  • 3 tablespoons olive oil extra-virgin
  • 0.5 teaspoon salt
  • 0.25 teaspoon black pepper

Method
 

  1. Preheat oven to 400°F and cut cauliflower into 1-inch florets. Toss florets with 2 tablespoons olive oil, salt, and pepper on a baking sheet. Spread in a single layer with 1-inch gaps between pieces.
    1 medium head cauliflower, 3 tablespoons olive oil, 0.5 teaspoon salt, 0.25 teaspoon black pepper
  2. Roast 18-22 minutes until edges turn golden brown and florets are crisp-tender. Check doneness by piercing with a fork-it should slide through easily without mushing. Remove from oven and let cool 10 minutes.
    1 medium head cauliflower
  3. Chop parsley, mint, tomatoes, cucumber, and green onions while cauliflower cools. Dice tomatoes and cucumber into ½-inch pieces and drain excess tomato juice. Chop herbs roughly.
    2 medium tomatoes, 1 medium cucumber, 1.5 cups parsley, 0.5 cup mint, 3 pieces green onions
  4. Transfer cooled cauliflower to a large mixing bowl. Add chopped vegetables and herbs. Drizzle with remaining 1 tablespoon olive oil and lemon juice.
    1 medium head cauliflower, 2 medium tomatoes, 1 medium cucumber, 1.5 cups parsley, 0.5 cup mint, 3 pieces green onions, 0.25 cup lemon juice, 3 tablespoons olive oil
  5. Toss everything gently until evenly coated. Taste and adjust salt if needed. Let rest 10 minutes before serving so flavors meld and lemon juice penetrates the cauliflower.
    0.5 teaspoon salt, 0.25 cup lemon juice

Notes

  • Cut cauliflower into uniform 1-inch florets for even roasting without burning.
  • Leave space between florets on the baking sheet to allow hot air circulation and crisp edges.
  • Add fresh herbs after roasting to keep their vibrant color and texture.

Tried this recipe?

Let us know how it was!

How Long Does Gruyere Cheese Last? [Storage Guide]

March 30, 2026

Buying a wedge of Gruyère and not knowing how long it will stay good is a frustrating position - especially for a cheese this expensive.

Can You Freeze Gruyere Cheese

Wrapped correctly and refrigerated, opened Gruyère lasts 2-3 weeks, while an unopened vacuum-sealed block can hold for 4-6 weeks.

Much like about salmon freezer burn, the biggest threat to quality here isn't time alone - it's improper wrapping that lets air and moisture do damage fast.

QUICK SUMMARY

Properly wrapped opened Gruyère lasts 2-3 weeks in the fridge. Unopened vacuum-sealed blocks last up to 6 weeks. Freeze in small portions for cooked use - expect a crumblier texture after thawing. Always wrap in cheese paper, not tight plastic.

🧊Fridge (opened): 2-3 weeks in breathable wrap, sliced pieces up to 2 weeks
❄️Freezer: 2-3 months opened, up to 6 months vacuum sealed
⚠️Key Rule: Never wrap tightly in plastic - it causes sweating and speeds up off-odors

How Long Does Gruyere Cheese Last?

Gruyère is an aged Swiss-style alpine hard cheese, and its density works in its favor - the lower moisture content means slower spoilage compared to soft cheeses.

That said, how long it lasts depends heavily on whether the package has been opened and how well you control airflow in storage.

Gruyere Cheese Shelf Life
MethodStateDurationNotes
🧊 FridgeOpened wedge2-3 weeksWrap in cheese paper; sliced pieces shorten to 1-2 weeks
🧊 FridgeUnopened (vacuum sealed)4-6 weeksRefrigerate immediately; use by package date
❄️ FreezerOpened block2-3 monthsBest for cooked use after thaw; texture turns crumbly
❄️ FreezerUnopened (vacuum sealed)3-6 monthsVacuum seal limits freezer burn; expect creaminess loss
🏠 CounterWhole wheel1-2 days maxShort bench rest for serving only; never in a warm room past 2 hours

Pre-sliced Gruyère ages faster because the cut surface exposes more of the paste to air. If you're buying from a deli counter, plan to use it within the shorter window.

Understanding gruyere cheese's flavor and uses also helps you decide how much to buy at once - there's rarely a reason to stock more than you'll use in two weeks.

How to Store Gruyere Cheese

Wrapping method matters more for Gruyère than for most hard cheeses because its natural rind is part of what protects the paste underneath.

Leave the rind intact on any wedge and wrap only the cut face - this slows drying significantly.

Golden Rule
Wrap the cut face in waxed cheese paper or parchment first, then loosely in plastic. Tight plastic alone causes sweating and locks in off-odors within days.

Fridge: Wrap in cheese paper or parchment with a loose outer layer of plastic wrap to allow slight airflow. Place the wedge in a partially sealed shallow container with a folded paper towel underneath to manage humidity and prevent the paste from sitting in moisture.

Freezer: Portion into 8-12 oz blocks before freezing - thawing only what you need protects the rest. Wrap each block tightly in plastic, then in foil or a vacuum bag, and label with the date. Like swapping out cheddar cheese in a recipe, frozen Gruyère works best in cooked applications where texture matters less.

Counter: A brief bench rest - up to two hours - is fine for a serving board. Anything longer risks the paste drying unevenly.

Can You Freeze Gruyere Cheese?

Yes, with conditions. Freezing works, but Gruyère's melting creaminess takes a hit - the ice crystals that form during freezing break down the fat structure, leaving a grainier, more crumbly texture after thaw.

Flavor holds up well, which is why frozen Gruyère still earns its place in gratins, quiches, and French onion soup.

Shortcut
Grate Gruyère before freezing and store in a zip bag. It thaws faster and goes straight into cooked dishes without needing to be cut or crumbled.
  1. Portion first - cut into 8-12 oz blocks, or grate if you plan to cook with it.
  2. Double-wrap - plastic wrap first, then foil or a vacuum-sealed bag to guard against freezer burn.
  3. Label and freeze flat - write the date on the outer layer; freeze flat for even temperature exposure.
  4. Thaw in the fridge - transfer to the fridge 24-48 hours before use, keeping the wrap on so the cheese reabsorbs surface moisture.
  5. Rest before serving - unwrap an hour before eating to let the paste come to room temperature.

Note that freezing vacuum sealed salmon follows a similar double-wrap logic - vacuum sealing dramatically limits freezer burn and extends frozen life for protein-rich foods.

Signs Gruyere Cheese Has Gone Bad

Not every mark or spot on Gruyère signals spoilage, and knowing the difference saves good cheese from the bin.

The most commonly mistaken sign is tyrosine crystals - those hard, crunchy white specks throughout the paste are a normal byproduct of protein aging, not mold.

Signs It's Gone Bad
👀
VisualBlue-green fuzzy mold on cut surfaces · Dark brown spots not part of the rind · Excessive cracking and drying across the paste
👃
SmellSharp ammonia or putrid rotten odor (distinct from the normal nutty aged aroma)
✋
TextureSticky or slimy rind · Unusually dry, chalky interior throughout the block

Small surface mold on a hard cheese like Gruyère can often be cut away with a 1-inch margin in every direction.

Discard the whole wedge if mold covers more than a localized spot, or if the smell and texture are clearly off.

Watch Out
A strong ammonia smell from Gruyère is not a sign of better aging - it signals protein breakdown. Don't taste-test to confirm. Discard it.

Keeping Gruyere Fresh Longer

A few consistent habits make the difference between two weeks of good cheese and four. If you're running low and need a stand-in, check the options covered in replacements for gruyere cheese - some hard Swiss-style alternatives store similarly.

  • 🧀 Rewrap after every use - fresh cheese paper each time keeps the humidity balance right and prevents odor transfer from the fridge.
  • 📅 Label every package - note the date opened and, if freezing, the freeze date; rotate older wedges to the front.
  • ❄️ Portion before freezing - freeze in recipe-sized amounts so you thaw only what you'll cook, never refreeze thawed cheese.
  • 🔍 Inspect before storing - check for any existing mold before rewrapping; catching it early limits spread to the rest of the wedge.

Frequently Asked Questions

Can you freeze Gruyère without changing texture?

Not entirely. Freezing makes Gruyère noticeably more crumbly and grainy once thawed. The flavor stays intact, but it loses some of its characteristic melting creaminess - stick to cooked dishes after freezing.

How long does Gruyère last unopened in the fridge?

A vacuum-sealed block lasts 4-6 weeks refrigerated. Keep it sealed until use and refrigerate immediately after purchase - don't let it sit at room temperature.

Are white crystals on Gruyère mold or safe to eat?

Safe. Those hard, crunchy white specks are tyrosine crystals - a natural sign of protein aging in well-aged alpine cheeses. Fuzzy or powdery growth is mold; crystals are firm and embedded in the paste.

Can frozen Gruyère be used for melting in recipes?

It melts, but not as smoothly. Frozen-then-thawed Gruyère works well in gratins, quiches, and soups where it blends into the dish. Avoid it in fondues or sauces where a silky melt is essential.

How do you store a wedge of Gruyère after opening?

Wrap the cut face in cheese paper or parchment, add a loose layer of plastic, and place in a partially sealed container with a paper towel underneath. Rewrap with fresh paper after each use.

Israeli Chopped Salad

March 30, 2026

Uniform dice across every vegetable, tossed with lemon and olive oil. That's the foundation of Israeli chopped salad - crisp, bright, and balanced in every bite.

Israeli Chopped Salad served on a plate

The knife work matters more than the dressing. Cut everything to the same size and the flavors blend without one ingredient taking over.

This works for weeknight dinners, meal prep, or summer entertaining when you need something fresh that holds up.

QUICK SUMMARY

Israeli chopped salad uses uniform ¼-inch dice across all vegetables to create balanced texture and flavor. The fresh lemon dressing goes on last to prevent wilting. Success comes from consistent knife work and adding dressing right before serving.

⏱️Time Reality: 15 minutes total, all in the chopping - no cooking or waiting
🔪First Critical Move: Cut everything into ¼-inch cubes so each bite tastes the same
⚠️Watch Out: Dress too early and it turns soggy - wait until 10 minutes before serving

Why This Recipe Works

Uniform chopping creates the right texture. The salad works best when it hits the table at the same time as a classic rice dish.

Quick Reference
⏱️
Prep Time
15 min
🔥
Cook Time
0 min
⏰
Total Time
15 min
🍽️
Servings
4
📊
Difficulty
Easy
🏷️
Category
Side
💡
Quick Tip
Chop uniformly for balanced texture and flavor
🎯
Best For
Weeknight | Meal prep | Entertaining

Key success factors:

  • Consistent ¼-inch dice ensures every forkful tastes balanced - oversized chunks dominate while tiny pieces disappear
  • Fresh lemon juice adds brightness that bottled versions can't match
  • Dressing the salad 5-10 minutes before serving lets flavors meld without turning vegetables soggy
  • Sharp knife cuts cleanly through vegetables without bruising or releasing excess moisture
  • Pat-drying chopped vegetables prevents watery dressing from pooling at the bottom of the bowl
Quick Tip
Use a sharp chef's knife and cut vegetables on a stable cutting board to maintain consistent ¼-inch cubes throughout.

What You'll Need

Ingredients for Israeli Chopped Salad

Pick firm vegetables without soft spots. Rich mains need something to cut through, and salad does exactly that - for a version that comes together quickly, try a juicy salad side.

🥬
Vegetables
  • Cucumber
  • Tomato
  • Red onion
  • Green bell pepper
🧄
Herbs
  • Fresh parsley
  • Fresh mint
🥢
Dressing
  • Lemon juice
  • Olive oil
  • Salt
  • Black pepper

Ingredient Details

  • Cucumber
    Use English or Persian cucumbers for crisp texture and minimal seeds - regular cucumbers work if you scoop out the watery center
  • Tomato
    Pick firm Roma or plum tomatoes that don't release excess liquid - squeeze out seeds if using juicy varieties
  • Red Onion
    Slice thinly and dice small to distribute sharpness evenly - soak in cold water for 5 minutes if too pungent
  • Fresh Parsley
    Flat-leaf parsley has more flavor than curly - chop leaves coarsely and add stems for extra herbal bite
  • Lemon Juice
    Juice fresh lemons right before mixing for bright acidity - bottled juice tastes flat and won't balance the salad
  • Olive Oil
    Use regular olive oil instead of extra-virgin to avoid overpowering the fresh vegetable flavors
  • Green Bell Pepper
    Remove all seeds and white ribs to prevent bitterness - substitute with mini sweet peppers for milder flavor

Ingredient Swaps

Start with what's fresh at the market. Rich mains need something to cut through, and salad cuts through all that richness - we keep a batch ready for nights like this with this easy salad recipe.

Common substitutions:

  • Use zucchini instead of cucumber for similar crunch with milder flavor - slightly less juicy but holds up well
  • Swap lime juice for lemon juice to get comparable acidity with a citrus twist
  • Replace red onion with shallot for milder sharpness and less pungent bite
  • Try cherry tomatoes instead of regular tomatoes for sweeter, juicier pieces that need smaller dice

Cilantro Instead of Parsley

Works for: stronger herbal flavor, Mexican or Southwest variations

Skip if: you want traditional Middle Eastern profile or dislike cilantro's soapy taste

Avocado Oil Instead of Olive Oil

Works for: neutral flavor, lighter texture, dairy-free diets

Skip if: you prefer classic Mediterranean richness or already have olive oil

Sumac Instead of Black Pepper

Works for: tangy brightness, authentic Middle Eastern touch, gluten-free seasoning

Skip if: you don't have sumac on hand or prefer traditional mild heat

Instructions

Chop first, dress last. Most people skip salad, but it balances the meal - for a version that comes together quickly, pair with simple homemade salmon.

  1. Chop all vegetables into uniform ¼-inch cubes using a sharp chef's knife on a stable cutting board. Keep pieces consistent so every bite tastes balanced.

  2. Pat chopped vegetables dry with paper towels to remove excess moisture. This prevents watery dressing from pooling at the bottom.

  3. Whisk together lemon juice, olive oil, salt, and black pepper in a small bowl until the dressing emulsifies. Taste and adjust salt if needed.

  4. Combine chopped vegetables in a large mixing bowl and toss gently to distribute evenly. Add fresh parsley and mint, folding them in last.

  5. Pour dressing over vegetables 5-10 minutes before serving and toss thoroughly to coat. Let rest briefly so flavors meld without vegetables wilting.

Golden Rule
Cut everything to the same ¼-inch size - inconsistent chopping means some bites taste like pure onion while others are all cucumber.

What to Serve With It

Fresh salads need protein on the plate. The salad works best when it hits the table at the same time as the main - for more ideas, check out healthy veggie main dishes.

Side Dish Prep Why It Works How to Serve
Grilled Chicken Breast Easy Adds protein with simple prep Slice and serve alongside salad with warm pita
Pita Bread Easy Complements fresh salad and adds carbs Warm in oven and serve with hummus for dipping
Hummus Easy Creamy contrast to crisp salad Serve in small bowl with drizzle of olive oil
Rice or Couscous Easy Balanced meal with grains Fluff grains and serve warm next to salad
Falafel Medium Vegetarian protein and Middle Eastern classic Serve hot falafel with tahini dressing on the side

Three ways to serve it:

  • Stuff into warm pita pockets with grilled chicken and tahini dressing for quick lunch wraps
  • Spoon over couscous or rice as a base layer, then top with shawarma or roasted vegetables
  • Serve alongside falafel and labneh for a complete Mediterranean-style dinner spread
Best Pick
Pair with grilled chicken and warm pita for a balanced weeknight meal that comes together in under 30 minutes.

Store and Reheat

This salad tastes best fresh. A good pork can make or break the plate - we keep a batch ready for nights like this with homemade pork recipe.

Store undressed salad in an airtight container in the fridge for up to 3 days. Add dressing right before serving to keep vegetables crisp.

Method Time Best For
🥗 Serve Cold 0 min Best texture and flavor - no reheating needed
🔄 Re-toss 1 min Stored salad that needs refreshing with new dressing
❄️ Chill Briefly 5 min Salad that sat at room temp - chill to restore crispness

For best results when storing:

  • Keep chopped vegetables separate from dressing in the fridge to prevent sogginess
  • Store in a shallow airtight container so vegetables don't compress and release moisture
  • Pat vegetables dry again before adding fresh dressing if they've released liquid during storage
  • Add fresh herbs right before serving instead of storing them with the salad
  • Toss stored salad with extra lemon juice and olive oil to refresh flavors before serving

Frequently Asked Questions

Can I make Israeli chopped salad ahead and store it?

Chop vegetables up to 1 day ahead and store undressed in an airtight container in the fridge. Add dressing 5-10 minutes before serving to keep the salad crisp and prevent sogginess.

How do I know when the salad is properly chopped and fresh?

All vegetables should be cut into uniform ¼-inch cubes with no oversized chunks. Fresh salad looks colorful and vibrant with crisp vegetables that snap when you bite them, not limp or watery pieces.

What substitutes work for cucumber or tomato in this salad?

Use zucchini instead of cucumber for similar crunch with milder flavor. Swap cherry tomatoes for regular tomatoes to get sweeter, juicier pieces that need smaller dice.

Why is my Israeli salad soggy and how to fix it?

Sogginess happens when dressing is added too early or watery vegetables aren't drained. Pat vegetables dry with paper towels before dressing, and add fresh chopped cucumber or herbs to absorb excess liquid.

What dishes pair best with Israeli chopped salad for dinner?

Serve with grilled chicken, shawarma, or falafel for protein. Add warm pita bread, hummus, and rice or couscous to complete a balanced Mediterranean-style meal.

Israeli Chopped Salad served on a plate

Israeli Chopped Salad

No ratings yet
Israeli chopped salad features uniform ¼-inch diced vegetables tossed with a fresh lemon and olive oil dressing. The crisp, balanced texture depends on consistent knife work and dressing added just before serving to prevent sogginess.
Print Recipe Pin Recipe
Prep Time 15 minutes mins
Cook Time 1 minute min
Total Time 16 minutes mins
Servings: 4 servings
Course: Side Dish
Cuisine: Mediterranean, Middle Eastern
Ingredients Equipment Method Notes

Ingredients
  

  • 1 cup cucumber English or Persian, diced ¼-inch; scoop out watery center if regular cucumber
  • 1 cup tomato Firm Roma or plum, diced ¼-inch; squeeze out seeds if juicy
  • ¼ cup red onion Thinly sliced and diced small; soak in cold water 5 minutes if too pungent
  • ½ cup green bell pepper Remove seeds and white ribs; diced ¼-inch
  • ¼ cup fresh parsley Flat-leaf, coarsely chopped with stems
  • 2 tablespoons fresh mint Coarsely chopped
  • 3 tablespoons lemon juice Freshly squeezed just before dressing
  • 3 tablespoons olive oil Regular olive oil (not extra virgin) for mild flavor
  • ½ teaspoon salt
  • ¼ teaspoon black pepper

Equipment

  • Chef's knife Used for chopping vegetables into uniform cubes
  • Cutting board Stable surface for uniform chopping
  • Mixing bowl Combine and toss vegetables
  • Small bowl Whisk dressing ingredients

Method
 

  1. Chop all vegetables into uniform ¼-inch cubes using a sharp chef's knife on a stable cutting board. Keep pieces consistent so every bite tastes balanced.
    1 cup cucumber, 1 cup tomato, ¼ cup red onion, ½ cup green bell pepper
  2. Pat chopped vegetables dry with paper towels to remove excess moisture and prevent watery dressing from pooling at the bottom.
    1 cup cucumber, 1 cup tomato, ¼ cup red onion, ½ cup green bell pepper
  3. Whisk together lemon juice, olive oil, salt, and black pepper in a small bowl until the dressing emulsifies. Taste and adjust salt if needed.
    3 tablespoons lemon juice, 3 tablespoons olive oil, ½ teaspoon salt, ¼ teaspoon black pepper
  4. Combine chopped vegetables in a large mixing bowl and toss gently to distribute evenly. Add fresh parsley and mint, folding them in last.
    1 cup cucumber, 1 cup tomato, ¼ cup red onion, ½ cup green bell pepper, ¼ cup fresh parsley, 2 tablespoons fresh mint
  5. Pour dressing over vegetables 5-10 minutes before serving and toss thoroughly to coat. Let rest briefly so flavors meld without vegetables wilting.
    3 tablespoons lemon juice, 3 tablespoons olive oil, ½ teaspoon salt, ¼ teaspoon black pepper

Notes

  • Use a sharp chef's knife and stable cutting board to maintain consistent ¼-inch cubes.
  • Add dressing only 5-10 minutes before serving to prevent sogginess.
  • Pat vegetables dry before dressing to avoid watery salad.

Tried this recipe?

Let us know how it was!

What Is Gruyere Cheese? [Taste, Uses & More]

March 30, 2026

French onion soup earns its reputation on one thing: the cheese pull. That golden, bubbling crust comes from Gruyère, a firm Alpine cow's-milk cheese that melts unlike almost anything else in the dairy case.

What Is Gruyere Cheese

It's not just a Swiss cheese stand-in - it's a specific, aged wheel with a flavor profile worth understanding before you cook with it.

QUICK SUMMARY

Gruyère is a firm, aged Alpine cheese with a nutty, savory, buttery flavor that deepens with age. It melts cleanly into gratins, fondues, and sauces, and holds its own on a cheese board. Aged 4-12+ months, it ranges from mild and springy to sharp and crumbly.

🧀Type: Aged hard cow's-milk cheese, Swiss Alpine origin
👅Flavor: Nutty, savory, buttery with faint fruity sweetness
🔥Best For: Gratins, fondue, French onion soup, quiche
❄️Shelf Life: Cut wedge stays fresh 2-4 weeks refrigerated
🔁Closest Sub: Comté or Emmental for similar melt and nuttiness

What Is Gruyere Cheese?

Gruyère originates from the Fribourg region of Switzerland, where it has been produced since at least the 12th century. It carries Gruyère AOP status - a protected designation that restricts authentic Swiss production to specific cantons and mandates traditional methods.

The cheese is made from raw cow's milk and aged on wooden boards in cool cellars. Wheels typically weigh around 35 kg and develop a firm, natural rind during aging.

Age determines nearly everything about how it behaves:

  • Young (4-6 months) - pale, springy paste with a mild, milky nuttiness and smooth melt
  • Réserve (8-10 months) - deeper savory notes, firmer body, still excellent for melting
  • Vieux/Aged (12+ months) - crumbly and crystalline, sharp and complex, better for shaving than melting

Gruyère is often confused with Emmental cheese because both are Swiss Alpine wheels, but Emmental has larger, more pronounced holes and a sweeter, milder taste. Gruyère has smaller, irregular holes and considerably more savory depth.

For similar flavor without the Swiss origin, aged Comté cheese is the closest comparison.

What Does Gruyere Cheese Taste Like?

gruyere cheese - What Is Gruyere Cheese

Gruyère's flavor sits at the intersection of toasted almonds, beef broth, and cultured butter - nutty on the front, umami-rich in the middle, with a clean, slightly salty finish. It's moderate in intensity, meaning it reads clearly without overwhelming a dish.

Sensory SnapshotModerate Intensity
👅 Flavor
nuttysavory/umamibutteryfaintly fruity
✋ Texture
firmspringy when youngcreamy-stretchy when melted
👃 Aroma
hay-likeearthycellar-like when aged

Heat changes the experience noticeably. Under a broiler, Gruyère browns to a deeply savory, almost caramelized crust - that's the Maillard reaction working on the cheese's proteins and residual milk sugars.

Low, slow heat (as in fondue) produces a stretchy, creamy pool with the nuttiness still present but smoother.

Age sharpens and dries the flavor. Well-aged wheels develop a faint crystalline crunch from tyrosine clusters - the same texture you find in aged Parmigiano.

How to Use Gruyere Cheese

Gruyère's exceptional melt behavior makes it a workhorse in hot applications. It doesn't break into greasy pools under heat the way younger, wetter cheeses often do - the fat and protein structure holds together until you want it to give.

How Gruyère Is Used
MethodBest ForTip
🫕 GratinatingFrench onion soup, potato dauphinoise, vegetable gratinBroil in the final 3-5 minutes for maximum browning
🍲 FondueClassic Swiss fondue, cheese dipsBlend with Emmental; add a splash of dry white wine to stabilize
🥧 BakingQuiche Lorraine, gougères, savory tartsShred finely so it distributes evenly through custard or dough
🥗 Raw/ShavedCheese boards, shaved over roasted vegetablesUse young or réserve; aged wheels shave better than they slice
🥪 MeltingCroque-monsieur, paninis, mac and cheeseCombine with a milder cheese to stretch cost without losing flavor

Swiss and French Alpine cooking claim Gruyère most firmly. A traditional fondue moitié-moitié (half-and-half) blends Gruyère with Fribourg Vacherin.

French bistro cooking leans on it for croque-monsieur and the French onion soup gratinée that defines the format.

Beyond those roots, it fits anywhere a sturdy, flavorful melt matters. Stir shredded Gruyère into mac and cheese alongside a sharper cheddar, or layer it into potato dauphinoise for a richer mouthfeel.

For cheese boards, pair it with apples, cornichons, walnuts, cured ham, and a dry Riesling or Savoie white.

Golden Rule
For fondue, always shred Gruyère rather than cube it. Smaller surface area melts faster and prevents the stringy clumping that happens when large chunks hit hot wine.

If you need a swap, aged Gruyère substitutes exist - though the melt profile is hard to match exactly. Similarly, Comté substitutes work in reverse when a recipe calls for Comté but you only have Gruyère.

Try It In
🧀Cheddar Cheese StrawsSwap in shredded Gruyère for a nuttier, more savory result→🍳Egg and Cheese Breakfast SandwichGruyère melts cleanly and adds savory depth to the egg layer→

How to Buy and Store Gruyere Cheese

At the counter, look for a wedge with a dry, natural rind and a uniform pale-golden paste. Avoid anything with large oily spots, sticky or wet surfaces, or an ammonia smell - those signal poor storage or over-age.

Best Pick
For melting (fondue, gratin), choose a young or réserve Gruyère (4-10 months). For a cheese board or shaving, go for a vieux (12+ months) - the crystalline texture and sharpened nuttiness hold up without heat.

Check the label for an age range if possible - this tells you what you're actually buying, not just "Gruyère." Pre-shredded bags skip this detail and often contain anti-caking agents that interfere with clean melting. Buy a block and shred it yourself.

Once cut, wrap the exposed surface in cheese paper or parchment, then loosely in plastic. Store in the refrigerator's cheese drawer or vegetable crisper, where humidity stays higher than the main shelf.

Properly wrapped, a cut wedge holds well for 2-4 weeks. Check the full shelf life guide for vacuum-packed wheels and freezing notes.

Where to Start With Gruyere

Gruyère earns its place fastest in hot applications. Start with a gratin or French onion soup if you've never cooked with it - the browning under a broiler shows you exactly what this cheese does that no mild supermarket Swiss can replicate.

  • New to Gruyère? Buy a young or réserve wedge, shred it over a gratin, and broil until golden.
  • Want more complexity? Try a vieux wheel shaved thin onto a cheese board with apples and dark rye.
  • Building a fondue? Combine equal parts Gruyère and Emmental, add dry white wine, and keep heat low.

The flavor is assertive enough to define a dish but controlled enough not to dominate it. That balance is rare.

Frequently Asked Questions

Is gruyere the same as Swiss cheese?

No. "Swiss cheese" in the U.S. typically refers to a mild, mass-produced Emmental-style cheese with large holes. Gruyère is a distinct AOP-protected cheese with smaller holes, deeper savory flavor, and a more complex aging profile.

How does gruyere taste compared to cheddar?

Gruyère is nuttier and more savory where cheddar is sharper and more acidic. Cheddar sharpens with a tangy bite as it ages; Gruyère deepens toward a meatier, almond-like richness without the same acidity.

Is gruyere good for melting?

Yes - it's one of the better melting cheeses available. Young and réserve-aged Gruyère melts to a smooth, stretchy consistency without breaking into grease. Older aged wheels melt less cleanly and are better shaved raw.

What age gruyere is best for gratin?

Réserve (8-10 months) hits the sweet spot - enough savory depth to brown well and flavor the dish, but still supple enough to melt evenly. Very aged wheels (12+ months) can dry out and resist smooth browning.

Does gruyere contain lactose?

Only trace amounts. The aging process breaks down most of the lactose, making Gruyère one of the lower-lactose cheeses. Many people with mild lactose sensitivity tolerate it, though it still contains dairy proteins.

What Is Furikake? [Taste, Uses & More]

March 30, 2026

Most people treat furikake like a niche condiment-something reserved for Japanese cooking or restaurant rice bowls. That framing undersells it badly, and it also misses what furikake actually is: a dry seasoning blend that functions as a one-step umami punch for almost anything savory.

What Is Furikake

Once you understand what's inside the packet, you'll stop sprinkling it only on steamed rice rolls and start reaching for it constantly.

QUICK SUMMARY

Furikake is a Japanese dry seasoning blend of toasted sesame, dried nori, and bonito flakes. It delivers umami, salt, and light crunch in a single sprinkle. Use it on rice, eggs, avocado, or popcorn. Opened jars stay fresh for up to six months when kept dry.

🌊Flavor: Salty, savory-smoky, umami-rich with light seafood notes
🍚Best Use: Finishing sprinkle on rice, eggs, or grilled fish
🧂Sodium: High - use sparingly on low-salt diets
📦Shelf Life: Unopened 6-12 months; opened 3-6 months kept dry
🐟Dietary Note: Usually contains bonito (fish) and sesame - check label for vegan blends

What Is Furikake?

Furikake (ふりかけ) is a Japanese dry seasoning blend designed to be sprinkled directly onto food at the table. The core ingredients are toasted sesame seeds, dried nori flakes, salt, and some form of dried fish-most commonly katsuobushi (bonito flakes).

Sugar, soy, and MSG appear in many commercial blends too.

The category is broader than a single recipe. Dozens of regional and commercial varieties exist in Japan, ranging from simple sesame-salt mixes to blends with dried shiso leaves, salmon flakes, or wasabi.

Outside Japan, you'll see it labeled as furikake seasoning, rice furikake, or furikake sprinkle-all the same idea.

Here's what to know about the main types:

  • Bonito furikake - The classic. Contains katsuobushi for a deep, smoky umami base.
  • Vegetarian/nori furikake - Fish-free blends built around sesame and nori; check for the word "vegetarian" on the label.
  • Salmon furikake - Uses dried salmon instead of bonito; slightly milder and less smoky.
  • Shiso furikake - Includes dried perilla leaf, which adds a herbal, slightly anise-like note.

What Does Furikake Taste Like?

furikake - What Is Furikake

Furikake lands closest to a toasted sesame-salt mix with seafood undertones. The sesame brings nuttiness and a gentle roasted quality.

Nori adds a briny, oceanic depth that reads as savory rather than fishy. Bonito flakes push the whole blend toward a smoky umami character similar to dashi broth, but in concentrated dry form.

Sensory SnapshotModerate Intensity
👅 Flavor
umami-richsaltysavory-smokynutty
✋ Texture
dry flakeslight crunch
👃 Aroma
toastyseaweed-briny

Heat doesn't change furikake's flavor dramatically when used as a finishing sprinkle. However, brief toasting in a dry pan intensifies the sesame and nori aromas noticeably.

At moderate intensity, it seasons without overwhelming-which is exactly what makes it work across so many applications.

Golden Rule
Add furikake after cooking, not during. High sustained heat drives off the toasty sesame aroma and dulls the nori's briny edge.

How to Use Furikake

Furikake's primary role is as a no-cook finishing sprinkle, and steamed white or brown rice is the most natural starting point. A light coating on warm rice gives you salt, crunch, and umami in one move.

It's also the traditional filling and coating for onigiri, the Japanese rice balls where furikake gets folded into or pressed onto the outside of the rice.

Beyond rice, the blend crosses into everyday cooking with minimal effort.

How Furikake Is Used
MethodBest ForTip
✋ Finishing SprinkleRice, eggs, avocado toast, popcornAdd after plating so texture stays dry and crunchy
🍳 Stirred Into SpreadsFurikake mayo, cream cheese, dipsMix 1 teaspoon per 2 tablespoon mayo; let sit 5 min to hydrate
🧂 Dry RubGrilled fish, chicken thighs, tofuPress gently onto surface before grilling on high heat
🥗 Folded Into DishesCold noodle salads, grain bowlsAdd just before serving to keep flakes from going soggy

Japanese and Japanese-American fusion cooking use furikake most heavily. However, the blend fits pan-Asian preparations well too-scattered over a sesame noodle bowl or used as a coating for nori chips.

It pairs well with eggs, avocado, grilled fish, tofu, and even plain popcorn.

If you're working without it, check our guide to furikake swaps for blends that approximate the umami-sesame profile. Avoid furikake with strongly sweet glazes or dessert applications-its salty, seafood-forward notes fight sweetness rather than complement it.

Try It In
🐟Sheet Pan Fish and ChipsFurikake as a dry rub adds umami crust to the fish→🍳Skillet Fish and ChipsPress furikake onto fillets before pan-searing→🥘One-Pot Fish and ChipsFinish with a sprinkle for salt and texture contrast→

How to Buy and Store Furikake

Best Pick
Look for blends with visible dark green nori flakes and whole sesame seeds. Powdery or clumped mix means moisture has already degraded the blend.

Check the label for katsuobushi if you want the full smoky umami profile. If you need a fish-free option, look specifically for "vegetarian" on the packaging-standard blends almost always contain bonito or dried fish.

Storage is straightforward:

  • Pantry storage - Keep in an airtight container away from heat and humidity; this covers most kitchens.
  • Humid climates - Transfer to a sealed jar and refrigerate to prevent clumping.
  • Shelf life - Unopened commercial packets hold for 6-12 months; opened containers stay at their best for 3-6 months.

For a full breakdown of signs of spoilage and expiration timelines, see our furikake freshness guide guide.

Where to Start With Furikake

Start with a bonito blend on plain steamed rice - that's the format this seasoning was built around. Once you know the flavor, move to eggs or avocado toast for a fast weekday application.

Shortcut
Mix 1 teaspoon furikake into 2 tablespoon mayo for an instant umami spread - no cooking required. Works on sandwiches, grain bowls, or as a dipping sauce for vegetables.

If fish-based blends aren't an option, a vegetarian nori-sesame version still delivers most of the character. Onigiri rice balls are the best vehicle for exploring how furikake changes with different rice-to-seasoning ratios - start there before branching into dry rubs or snack coatings.

Frequently Asked Questions

Is furikake vegan?

Most commercial furikake is not vegan - bonito (dried tuna) is a standard ingredient. Look for blends labeled "vegetarian" or check ingredients for katsuobushi-free versions built on nori and sesame only.

What is in furikake seasoning?

The base is toasted sesame seeds, dried nori flakes, katsuobushi (bonito), salt, and sugar. Many commercial blends add soy sauce powder, MSG, or dried shiso depending on the variety.

How long does furikake last once opened?

Opened furikake keeps for 3-6 months in an airtight container stored away from heat and moisture. Clumping or a loss of toasty aroma are the clearest signs it's past its best.

Can you use furikake on anything other than rice?

Yes - eggs, avocado toast, popcorn, grilled fish, and cold noodle salads all work well. It functions as a finishing salt with added umami, so any dish needing a savory, crunchy finish is a candidate.

Does furikake contain MSG?

Many commercial blends do include MSG as a flavor enhancer, though it's not universal. Check the ingredient list - artisan or natural-label versions often skip it in favor of higher katsuobushi content for umami.

What Is Hyssop? [Taste, Uses & More]

March 30, 2026

Hyssop hits the nose before it reaches the tongue - a rush of camphor and pine that sits somewhere between a herb garden and a medicine cabinet.

What Is Hyssop

That edge is exactly what makes it interesting: used correctly, it cuts through fat, lifts a braise, and adds a resinous depth that neither thyme nor mint quite matches.

Cooks who reach for replacements for tarragon or other anise-adjacent herbs often stumble onto hyssop and don't know what to do with it.

This profile covers everything you need.

QUICK SUMMARY

Hyssop is a resinous, strongly aromatic herb from the mint family with a flavor profile that blends menthol, camphor, and a faint licorice note. Use it sparingly - in teas, syrups, slow-cooked meats, and finishing garnishes - and store fresh stems no longer than 10 days.

🌿Flavor: Resinous, minty-camphor with a faint licorice and bitter-green edge
🔥Intensity: Strong - a small amount goes a long way in any dish
🍳Best Uses: Herbal teas, infused syrups, lamb braises, finishing garnish
🛒Buy It: Look for firm gray-green stems with a clean piney scent
📦Storage: Damp paper towel, fridge; dried in airtight jar away from light
⏱️Shelf Life: Fresh 5-10 days refrigerated; dried 6-12 months in a sealed jar

What Is hyssop?

Hyssopus officinalis is a woody-stemmed perennial herb native to the Mediterranean and Western Asia. It belongs to the Lamiaceae family - the same family as mint, rosemary, and thyme - and grows in dense, shrubby clumps with narrow gray-green leaves and tall spikes of small blue, pink, or white flowers.

Both the leaves and flowers are edible and used in cooking. The plant goes by several names: garden hyssop, hyssop herb, and hisop in some regional spellings.

Unlike its mint-family relatives, hyssop contains volatile oils - primarily pinocamphone and isopinocamphone - that give it a distinctly resinous, camphoraceous character. That chemistry separates it from softer herbs immediately.

  • 🌱 Species: Hyssopus officinalis - the standard culinary variety
  • 🌸 Edible parts - both narrow leaves and flower spikes go into food and drink
  • 🌍 Culinary range - Mediterranean cooking, Middle Eastern herb blends, Eastern European herbal traditions, and liqueur production (Chartreuse uses it)
  • 📜 Historical use - recorded as a strewing herb and medicinal plant for centuries before entering the modern spice rack

What Does hyssop Taste Like?

hyssop - What Is Hyssop

Hyssop tastes like mint and eucalyptus collided, with a thread of anise running underneath. The camphor-resin note is the loudest element - sharp and slightly medicinal on first contact.

A faint bitterness follows, then a cooling menthol finish that lingers.

Heat softens the camphor edge but doesn't erase it. In a long braise, the harshest volatiles cook off, leaving behind a gentler herbal warmth closer to savory or marjoram.

Fresh leaves are more aggressive; dried hyssop mellows slightly but keeps its piney backbone.

Sensory SnapshotStrong Intensity
👅 Flavor
resinousbitter-greenmintyanise hint
✋ Texture
delicate freshslightly coarse dried
👃 Aroma
camphoraceouspiney-herbaceous
Golden Rule
Start with half the amount you think you need. Hyssop's volatile oils are potent, and overdoing it turns any dish medicinal.

How to Use hyssop

Hyssop rewards restraint. A few fresh leaves or flowers add resinous depth without overwhelming a dish; a whole handful will make it taste like cough drops.

The most forgiving application is herbal tea - steep two or three fresh stems in hot water for five minutes, then remove. Blending with black tea or green tea softens the camphor edge considerably.

How Hyssop Is Used
MethodBest ForTip
🥗 Fresh GarnishSalads, cottage cheese, finishing herb over roasted vegUse flowers for visual appeal and milder bite than leaves
🍲 Braise / Slow CookLamb, goat, hearty bean stewsAdd in the last 20 minutes - long cooking concentrates bitterness
☕ SteepingHerbal tea, infused syrups, cordials, cocktail mixersRemove stems before serving; steep no longer than 5 minutes
🧈 Herb ButterRoasted chicken, lamb chops, grilled vegetablesCombine with lemon zest and garlic to balance the resin
🫙 Infused Oil / VinegarSalad dressings, marinadesInfuse for 24-48 hours maximum; taste and strain early

In savory cooking, hyssop pairs naturally with lamb, lemon, garlic, honey, and fennel. Some za'atar recipes from the Levant incorporate hyssop leaves alongside thyme and sumac, though this varies by region and tradition.

Mediterranean and Eastern European herb traditions use it most consistently in cooked applications.

Avoid pairing hyssop with delicate custard-based desserts - the camphor note clashes with cream in a way that's hard to rescue. For dishes where you need something anise-forward but less resinous, alternatives to hyssop include tarragon, savory, and fresh marjoram.

Try It In
🍗Air Fryer Honey Garlic Chicken TendersHyssop herb butter pairs well with the honey-garlic glaze→🍖Air Fryer Honey Garlic MeatballsA pinch of dried hyssop deepens the herbal background→🥔Air Fryer Honey Garlic Potato WedgesFinishing with hyssop flowers adds a subtle resinous note→

How to Buy and Store hyssop

At a nursery or farmers' market, look for stems with firm, gray-green leaves and no yellowing or brown spotting. The cut end should smell piney and clean - not musty.

Dried hyssop should have uniform color and release that same piney aroma when rubbed; skip any jar with powdery dust or faded color.

Watch Out
Hyssop's volatile oils degrade fast once leaves yellow or dry out improperly. Learn to spot the hyssop spoilage signs before the herb loses its punch entirely.

Fresh storage is straightforward:

  • Refrigerator method - wrap stems loosely in a damp paper towel, place in a perforated plastic bag, and store in the crisper drawer
  • Shelf life fresh - 5 to 10 days before leaves soften and flavor fades
  • Dried storage - airtight glass jar, away from light and direct heat; good for 6 to 12 months
  • Drying at home - tie small bunches and hang upside down in a dry, ventilated space for 1 to 2 weeks, then strip leaves from stems before jarring

Start Here With hyssop

Hyssop is not a background herb. Its camphor-resin character announces itself, so the best first move is one where that intensity is an asset rather than a risk.

Shortcut
Steep two fresh stems in a simple syrup (1:1 sugar and water), strain after 5 minutes, and use it in cocktails or sparkling water. Low commitment, immediate reward.

From there, a small pinch folded into herb butter for roasted lamb is the natural next step.

Understanding mint's flavor and uses helps clarify where hyssop overlaps and where it diverges - they share the cooling finish but not much else.

If it still feels too aggressive, swapping out mint logic applies in reverse: softer herbs like savory can stand in until you're ready to work with hyssop directly.

Frequently Asked Questions

Is hyssop safe to eat?

Yes, in culinary amounts. The volatile oils pinocamphone and isopinocamphone become problematic only at high medicinal doses. Pregnant people and those with epilepsy should avoid concentrated hyssop extracts or supplements entirely.

Can hyssop substitute for thyme or oregano?

It can in small amounts, but hyssop is more resinous and camphoraceous than either. Use about half the quantity called for and add it later in cooking to prevent the camphor note from dominating.

What are hyssop flowers used for?

Hyssop flowers are milder than the leaves and work well as a finishing garnish on salads, grain bowls, or soft cheeses. They're also steeped into teas and infused syrups for their color and gentler flavor.

How strong is hyssop flavor compared to common herbs?

Stronger than thyme or marjoram, and more resinous than fresh mint. Its camphor notes place it closer to rosemary in intensity, though the flavor profile is distinctly different.

How do you dry hyssop at home?

Cut stems just before flowering for the strongest volatile oil content. Tie in small bunches and hang upside down in a dry, well-ventilated spot for one to two weeks, then strip and jar the dried leaves.

Anchovy Caper Butter

March 30, 2026

When you need a spreadable compound butter for entertaining or weeknight bread, anchovy caper butter delivers big flavor in 10 minutes. The salty anchovies and briny capers melt into softened butter for a spread that works on everything from grilled bread to roasted vegetables.

Anchovy Caper Butter served on a plate

This works because the butter base lets you control the salt level. Chill it for 30 minutes and you've got something ready to slice or spread.

Perfect for casual gatherings when store-bought feels lazy but you don't have time for complicated appetizers.

QUICK SUMMARY

Anchovy caper butter is a quick flavored spread made by mixing softened unsalted butter with minced anchovies, drained capers, garlic, and fresh parsley. The key is using room-temperature butter so everything combines smoothly without grainy lumps. Chill the mixture for 30 minutes and you get a spreadable compound butter that adds umami punch to bread, vegetables, or seafood.

⏱️Time Reality: 10 minutes active, 30 minutes chilling - no cooking required.
🔪First Critical Action: Soften butter at room temp 20-30 minutes before mixing.
⚠️Watch Out: Drain capers completely or you'll end up with watery butter that won't hold shape.

Table of Contents

Toggle
  • Why This Recipe Works
  • What You'll Need
    • Ingredient Details
  • Ingredient Swaps
  • What to Serve With It
  • Store and Reheat
  • Frequently Asked Questions
  • Anchovy Caper Butter
    • Method 
    • Tried this recipe?

Why This Recipe Works

The anchovies and capers carry enough salt and tang that you barely need seasoning. Rich mains need something to cut through, and a tender salad recipe does exactly that - the butter melts into warm food and creates instant sauce.

Quick Reference
⏱️
Prep Time
10 min
🔥
Cook Time
0 min
⏰
Total Time
10 min plus chilling
🍽️
Servings
8 servings
📊
Difficulty
Easy
🏷️
Category
Appetizer
💡
Quick Tip
Chill butter 30 min for spreadable texture
🎯
Best For
Weeknight | Entertaining

What makes it work:

  • Room-temperature butter mixes smoothly - cold butter creates lumps that won't incorporate evenly with the other ingredients
  • Unsalted butter lets you control salt - anchovies and capers are already salty so you avoid an overpowering brine
  • Mincing anchovies finely distributes umami - large chunks create uneven flavor pockets instead of balanced richness
  • Draining capers prevents watery texture - excess brine dilutes the butter and makes it impossible to shape into a log
  • Chilling firms the butter for slicing - 30 minutes in the fridge gives you clean rounds that hold their shape on the plate
Quick Tip
Leave butter on the counter 20-30 minutes before mixing - it should dent easily when pressed with a finger but not be greasy or melted.

What You'll Need

Ingredients for Anchovy Caper Butter

Most people skip spread, but it balances the meal. For a version that comes together quickly, simple homemade spread keeps a batch ready for nights like this.

🧈
Butter Base
  • 1 cup unsalted butter, softened
🐟
Salty Components
  • 6 anchovy fillets, minced
  • 2 tablespoons capers, drained and chopped
🧄
Aromatics
  • 2 garlic cloves, minced
  • 2 tablespoons fresh parsley, chopped
🍋
Brightness
  • 1 teaspoon lemon zest
  • ¼ teaspoon black pepper

Ingredient Details

  • Unsalted butter
    Provides neutral fat base that lets you control saltiness - salted butter risks overpowering the other flavors since anchovies and capers are already briny.
  • Anchovy fillets
    Delivers deep umami and salt - mince them finely with a sharp knife so they disappear into the butter instead of staying chunky.
  • Capers
    Adds briny tang and slight texture contrast - drain them completely and pat dry with paper towels to avoid watery butter.
  • Garlic
    Provides sharp aromatic punch - use fresh cloves minced fine, not jarred or powdered, for clean flavor.
  • Fresh parsley
    Brings freshness and green color - chop it fine so it distributes evenly through the pale butter.
  • Lemon zest
    Optional brightness that lifts the richness - avoid the white pith underneath which tastes bitter.
  • Black pepper
    Adds gentle spice without heat - adjust the amount based on how peppery you want the final spread.

Ingredient Swaps

Spread adds the contrast this plate needs, but timing matters. We keep a batch ready for nights like this - simple homemade spread comes together quickly.

Common substitutions that work:

  • Swap anchovy fillets for anchovy paste - use 1½ teaspoons paste instead of 6 fillets for smoother texture but stronger concentrated flavor
  • Swap capers for finely chopped green olives - gives milder brine and less tang but maintains salty punch and Mediterranean vibe
  • Swap fresh parsley for dried parsley - use 2 teaspoons dried instead of 2 tablespoons fresh but expect less vibrant color and muted herb flavor
  • Swap garlic for minced shallot - use 1 small shallot for sweeter, milder allium flavor that's less sharp than raw garlic

Anchovy Paste

Works for: Quick mixing, smoother spread, no visible fish bits

Skip if: You want texture contrast or milder anchovy presence

Dairy-Free Butter

Works for: Vegan diets, dairy allergies, plant-based meals

Skip if: You want classic butter richness or firmest hold when chilled

White Anchovies

Works for: Milder fish flavor, less aggressive salt, lighter color

Skip if: You want bold umami punch or budget-friendly option

Instructions

The butter works best when it hits the table at the same time as the main. For a version that comes together quickly, this quick shrimp dish pairs perfectly with compound butter.

  1. Soften the butter. Leave 1 cup unsalted butter at room temperature for 20-30 minutes until it dents easily when pressed but isn't greasy or melted.

  2. Prep the add-ins. Mince 6 anchovy fillets finely with a sharp knife until they're nearly paste. Drain 2 tablespoons capers, pat them dry with paper towels, then chop coarsely. Mince 2 garlic cloves and chop 2 tablespoons fresh parsley.

  3. Mix everything together. Put softened butter in a mixing bowl and add minced anchovies, chopped capers, minced garlic, chopped parsley, 1 teaspoon lemon zest, and ¼ teaspoon black pepper. Stir gently with a spoon until all ingredients are evenly distributed throughout the butter - you should see small green and brown specks but no large chunks.

  4. Shape and wrap. Spoon the butter mixture onto a piece of plastic wrap and shape it into a log about 1½ inches in diameter. Roll the plastic wrap around the log tightly, twisting the ends to seal.

  5. Chill until firm. Refrigerate the wrapped butter log for at least 30 minutes until it's firm enough to slice cleanly. The butter should hold its shape when unwrapped but still be spreadable at room temperature.

Golden Rule
Mix the butter gently just until combined - overworking it can make the texture grainy or break the emulsion, especially if the butter starts warming up from your hands.

What to Serve With It

A good spread makes everything else on the plate better, but most people default to plain crackers. The rice works best when it hits the table at the same time as the main - simple homemade rice turns the butter into a savory side dish instead of just an appetizer.

Side Dish Prep Why It Works How to Serve
Grilled bread Easy Buttery crunch with anchovy spread creates savory toast Slice butter into rounds, place on warm bread, let melt
Steamed green beans Easy Fresh snap balances rich salty butter Toss hot beans with slice of butter, serve immediately
Roasted potatoes Medium Starchy base soaks up melted anchovy butter Place butter pat on hot potatoes, let it pool in crevices
Sliced cucumber Easy Cool crisp contrast cuts through butter richness Spread thin layer on cucumber rounds as appetizer
Grilled shrimp Medium Seafood pairs naturally with anchovy umami Top hot shrimp with butter slice, let melt over surface

Three ways to serve it:

  • As an appetizer spread - slice into rounds and arrange on a board with crackers, crusty bread, and raw vegetables for dipping or spreading
  • Melted over proteins - place a pat on hot grilled chicken, steak, or fish and let it melt into a quick pan sauce
  • Tossed with vegetables - stir a spoonful through hot roasted Brussels sprouts, asparagus, or broccoli for instant flavor
Best Pick
Grilled sourdough or ciabatta gives you the best vehicle - the craggy surface catches the melted butter and the tangy bread balances the salty spread.

Store and Reheat

Compound butter keeps longer than you'd think because the salt acts as a preservative. Pork adds the contrast this plate needs, but timing matters - tender homemade pork recipe pairs well with make-ahead spreads like this.

Method Time Best For
🏠 Room temperature rest 10 min Softening butter before spreading on bread or crackers
📦 Microwave 5-10 seconds Quick softening when you forgot to take it out - use low power to avoid melting

For best results when storing:

  • Wrap tightly in plastic wrap or foil - prevents the butter from absorbing other fridge odors and keeps it from drying out
  • Store in airtight container - use a small covered dish if you don't want to keep it wrapped, especially if using within 2-3 days
  • Keep in fridge up to 4 days - the anchovy and garlic flavors stay bright for about this long before they start tasting off
  • Freeze in portions for up to 3 months - slice the log into rounds, wrap individually, and freeze so you can pull out single servings as needed
  • Let frozen butter thaw in fridge overnight - slow thawing prevents the butter from separating or getting watery when it comes back to room temperature

Frequently Asked Questions

Can I use salted anchovies instead of unsalted in anchovy caper butter?

Yes, but use unsalted butter to balance the extra salt from the anchovies. Salted anchovies are more intense, so start with 4-5 fillets instead of 6 and taste before adding more.

How long can I store anchovy caper butter in the fridge?

Keep it wrapped tightly in plastic or an airtight container for 3-4 days. The garlic and anchovy flavors start to fade after that, and the butter can pick up fridge odors.

What is the best way to tell when anchovy caper butter is mixed properly?

The butter should be pale yellow with small green and brown specks evenly distributed throughout. You shouldn't see large chunks of anchovy or pockets of plain butter.

Why is my anchovy caper butter grainy and how do I fix it?

Grainy texture means the butter was too cold when you mixed it or you overworked it. Let it warm up slightly, then gently remix with a fork or blend briefly until smooth.

Can I make a large batch of anchovy caper butter and freeze it?

Yes, slice the log into individual rounds, wrap each one separately in plastic wrap, and freeze up to 3 months. Thaw in the fridge overnight before using.

Anchovy Caper Butter served on a plate

Anchovy Caper Butter

No ratings yet
Anchovy caper butter is a quick, flavorful compound butter made by mixing softened unsalted butter with minced anchovies, capers, garlic, parsley, lemon zest, and black pepper. The mixture chills into a spreadable, umami-rich butter perfect for bread, vegetables, or seafood. This easy recipe takes just 10 minutes of active prep and requires no cooking.
Print Recipe Pin Recipe
Prep Time 10 minutes mins
Cook Time 1 minute min
Total Time 11 minutes mins
Servings: 8 servings
Course: Appetizer
Cuisine: Mediterranean
Ingredients Method Notes

Ingredients
  

  • 1 cup unsalted butter softened to room temperature
  • 6 fillets anchovy minced finely
  • 2 tablespoons capers drained completely, chopped coarsely
  • 2 cloves garlic minced
  • 2 tablespoons fresh parsley chopped
  • 1 teaspoon lemon zest avoid white pith
  • 0.25 teaspoon black pepper freshly ground

Method
 

  1. Leave 1 cup unsalted butter at room temperature for 20-30 minutes until it dents easily when pressed but isn't greasy or melted.
    1 cup unsalted butter
  2. Mince 6 anchovy fillets finely with a sharp knife until nearly paste. Drain 2 tablespoons capers and pat dry with paper towels, then chop coarsely. Mince 2 garlic cloves and chop 2 tablespoons fresh parsley.
    6 fillets anchovy, 2 tablespoons capers, 2 cloves garlic, 2 tablespoons fresh parsley
  3. In a mixing bowl, combine softened butter with minced anchovies, chopped capers, minced garlic, chopped parsley, 1 teaspoon lemon zest, and ¼ teaspoon black pepper. Stir gently until evenly distributed with no large chunks.
    1 cup unsalted butter, 6 fillets anchovy, 2 tablespoons capers, 2 cloves garlic, 2 tablespoons fresh parsley, 1 teaspoon lemon zest, 0.25 teaspoon black pepper
  4. Spoon the butter mixture onto plastic wrap and shape into a log about 1½ inches in diameter. Roll tightly in plastic wrap, twisting ends to seal.
  5. Refrigerate the wrapped butter log for at least 30 minutes until firm enough to slice cleanly but still spreadable at room temperature.

Notes

  • Use room-temperature unsalted butter to ensure smooth mixing and control saltiness.
  • Drain capers thoroughly to avoid watery, unshaped butter.
  • Chill butter at least 30 minutes for spreadable yet sliceable texture.

Tried this recipe?

Let us know how it was!

What Is Grater? [Taste, Uses & More]

March 30, 2026

A grater does one thing knives cannot: it converts firm, dense ingredients into shreds, flakes, or fine particles that melt, blend, or distribute in ways chunks never will.

What Is Grater

Drop finely grated Parmigiano-Reggiano over hot pasta and it dissolves instantly into the sauce - coarsely sliced, it just sits there.

Understanding comparing lemon extract vs lemon zest options shows exactly why fresh zest - produced by a microplane - carries aromatic oils that no liquid extract can fully replicate.

The same logic applies when comparing allspice vs nutmeg options - freshly grated whole nutmeg outperforms pre-ground every time.

QUICK SUMMARY

A grater is a metal shearing tool - not a food - that converts firm ingredients into shreds, zest, or fine particles. It contributes no flavor of its own when clean and in good condition. Choose the right face for the job: microplane for zest and hard spices, box grater for cheese and vegetables.

🔧Category: Kitchen tool - handheld or box-style metal shearing implement
🧀Best For: Hard cheeses, citrus zest, fresh ginger, nutmeg, and raw vegetables
⚠️Avoid: Soft or wet foods - they smear and clog the teeth rather than shred cleanly
📦Types: Box grater (multi-function), microplane/rasp grater (fine zesting, spices)
♾️Shelf Life: Indefinite with proper care - replace only when teeth dull or metal corrodes

What Is a Grater?

A grater is a handheld or box-style metal tool with sharp perforations that shear food against an abrasive surface.

Each hole is stamped or punched to create a raised cutting edge - the food passes across those edges and breaks into fine particles, ribbons, or coarse shreds depending on hole size.

The tool falls into a few distinct types worth knowing:

  • 🔲 Box grater - Four faces with different hole sizes; handles shredding, slicing, and fine grating in one tool
  • 🔪 Microplane / rasp grater - Long, narrow, ultra-sharp teeth; produces feather-light flakes from citrus zest, hard cheeses, ginger, and whole spices
  • 🥄 Flat / paddle grater - Single-face tool, compact and easy to store, suitable for table-side grating
  • 🫙 Rotary grater - A drum mechanism that turns against food; popular for tableside Parmigiano service

The terms zester and microplane are often used interchangeably, though a microplane refers specifically to the rasp-style tool developed from woodworking rasps.

A classic zester produces long, thin strips of peel - a different result from the fine dust a microplane creates.

What Does a Grater Taste Like?

grater - What Is Grater

A clean, well-maintained grater contributes nothing to flavor. That's exactly the point - it's a mechanical tool, not an ingredient.

The one exception is a rusty or heavily worn grater. Corroded teeth can transfer a faint metallic note to food, similar to the faint off-taste from a new, unseasoned baking sheet or a worn stainless pan.

Sensory SnapshotMild Intensity
👅 Flavor
NeutralFaint metallic (if corroded)
✋ Texture output
Fine dust (microplane)Coarse ribbons (box grater)
👃 Aroma
None (clean tool)Faint metallic (worn tool)

What the grater does affect is the sensory experience of the food it processes. Finely grated nutmeg releases volatile oils immediately - coarsely chopped nutmeg does not.

The tool changes the surface area, and surface area changes flavor intensity.

Watch Out
Never use a rusty or pitted grater on food. Corroded metal can transfer trace metal ions and produce an off-flavor that ruins delicate dishes like zested vinaigrettes or cream sauces.

How to Use a Grater

The right face for the job matters more than the brand.

Using the wrong hole size wastes food, clogs the tool, and produces uneven texture.

For raw carrots destined for coleslaw - if you're working with carrot swaps that work like parsnip or kohlrabi - the large-hole face of a box grater gives you the even bite-sized shreds you need.

For grating garlic directly into dressings, a microplane distributes it smoothly without visible chunks, which is useful when building chili garlic sauce swaps that work at home.

How a Grater Is Used
MethodBest ForTip
🥗 Raw FinishingCitrus zest, hard cheese over pasta, grated garlic into dressingsGrate directly over the dish so volatile oils don't evaporate
🍳 Pre-Cook ShreddingPotato latkes, carrot fritters, zucchini bread batterSalt and squeeze shredded vegetables to remove excess moisture before cooking
🍞 Into Batters & DoughsGrated stale bread for breadcrumbs, grated butter into pastryFreeze butter briefly before grating - it shreds instead of smearing
✨ GarnishingChocolate curls over tarts, nutmeg over drinks, fine cheese snowUse a cold microplane for chocolate - warmth melts the surface and clogs teeth

A few pairings consistently show what the tool does best. Parmigiano-Reggiano on a microplane becomes a snow-light cloud that melts into cacio e pepe without clumping.

Whole nutmeg grated fresh delivers immediate aromatic punch. Chocolate shaved over a tart or hot drink gives visual contrast and a melt-on-contact texture that pre-bought chocolate flakes won't match.

Potato latkes rely entirely on the large-hole box grater face - the coarse shreds hold together in the pan while the interior stays tender.

After grating, squeeze the potato shreds firmly in a cloth to remove starch water; this step decides whether the latke crisps or steams.

For advice on keeping latkes fresh after the batch is cooked, storage method matters as much as technique.

Don't reach for a grater with soft spreadable cheeses like brie or ricotta - they smear against the teeth and clog immediately. Very wet produce like ripe tomatoes does the same.

When you genuinely don't have the tool on hand, checking out alternatives to grater will show which workarounds actually produce comparable results.

Try It In
🥔Air Fryer Garlic Parmesan Potato WedgesMicroplane-grated Parmesan coats evenly and crisps in the air fryer→🍯Air Fryer Honey Garlic Potato WedgesGrated garlic distributes into the glaze without visible chunks→🥗Blue Cheese Dressing (Homemade)A grater handles the lemon zest that sharpens this dressing→

How to Buy and Store a Grater

Look for crisp, uniformly punched holes with no jagged burrs along the edges - burrs tear food rather than shear it, and they're nearly impossible to fix.

The frame should feel rigid; a grater that flexes under moderate pressure will bend further with use.

Best Pick
A stainless steel box grater with a rubber-grip base covers most kitchen tasks. Add a dedicated microplane if you regularly zest citrus or grate whole spices - the result is noticeably finer than any box grater face.

Storage is straightforward but important.

Hang the grater or store it upright so air circulates around the teeth - cramming it under heavy items bends the plate and dulls the edges.

Rinse it immediately after use, before food dries into the holes, and dry it fully before putting it away.

For more detail on keeping grater fresh long-term, proper drying is the single most important habit.

A well-maintained grater lasts indefinitely. Replace it when shredding requires noticeably more force or produces bent, torn shreds rather than clean cuts.

Start Here

If you're deciding which grater to reach for first, box grater plus microplane covers nearly every task in a home kitchen.

Use the box grater's large holes for potatoes and carrots, the medium holes for block mozzarella and cheddar, and the microplane for Parmigiano, citrus zest, fresh ginger, and whole spices.

Understanding the differences between parmesan vs parmigiano reggiano will also clarify why the choice of cheese affects which grater face works best.

  • 🧀 Start with cheese - Use the medium or fine box grater face; reserve the microplane for aged hard cheeses like Parmigiano or Pecorino
  • 🍋 Start with zest - A microplane is non-negotiable here; box grater fine holes produce strips, not fine dust
  • 🥔 Start with vegetables - Large-hole box grater for latkes and slaws; salt and drain after grating

Frequently Asked Questions

Does a grater change the taste of food?

Not directly - a clean grater adds no flavor. However, it increases surface area dramatically, which intensifies how strongly a food's existing flavor registers. Finely grated nutmeg or garlic tastes sharper than the same amount coarsely chopped.
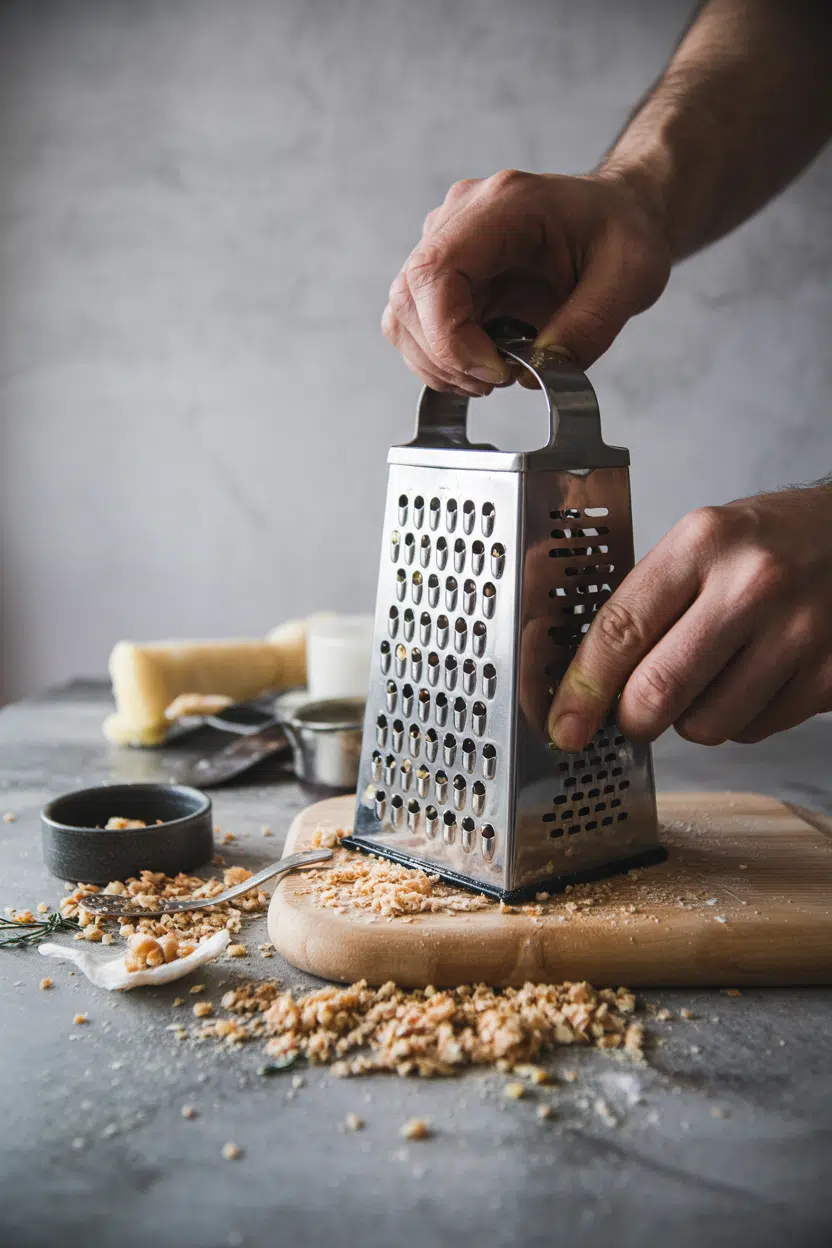
Is a microplane the same as a grater?

A microplane is a type of grater - specifically a rasp-style tool with extremely fine, sharp teeth. Standard box graters have larger holes and produce coarser results. Use a microplane when you need feather-light texture, like cheese snow or citrus zest dust.

Grater vs zester - what's the difference?

A classic zester has small holes that pull long thin strips of peel, while a microplane grater produces fine, powdery zest. Most cooks prefer the microplane result for cooking since it distributes more evenly into batters, sauces, and dressings.

How do you clean a grater safely?

Rinse immediately after use before food dries and clogs the holes. Scrub with a stiff brush - never a cloth, which catches on the teeth. Dry fully before storing to prevent rust.

Can you grate cheese without a grater?

Yes - a food processor with a shredding disc works for block cheeses, and a sharp knife can produce rough crumbles from hard aged cheeses. Neither matches the fine, even texture of a microplane for finishing dishes like pasta or risotto.

« Previous Page
Next Page »

Primary Sidebar

ForkliftKitchen recipe developer

Welcome!

Recipe Developer · 12+ Yr Kitchen Veteran

I'm the recipe developer behind this site, focused on practical, well-tested dishes and smart ingredient swaps. Every recipe is written to be clear, reliable, and easy to make at home.

650+ Recipes
12+ Yrs Exp.
3x Tested
Our Story →

As Featured In

Allrecipes

TASTE OF HOME

Food52

HUFFPOST

Yahoo! Life

Our Editorial Standards

  • ✓ Every recipe tested at least 3 times before publishing
  • ✓ Substitutes verified by real kitchen trials, not guesswork
  • ✓ Reviewed for accuracy by our editorial team
  • ✓ Updated regularly with seasonal info and reader feedback

Most Popular

  • Creamy Lemon Shrimp Linguine
    Creamy Lemon Shrimp Linguine
  • Creamy Garlic Mushroom Chicken
    Creamy Garlic Mushroom Chicken
  • Sesame Ginger Chicken Noodle Bowls
    Sesame Ginger Chicken Noodle Bowls
  • Baked Lemon Herb Fish Fillets
    Baked Lemon Herb Fish Fillets
  • Veggie Loaded Fried Rice
    Veggie Loaded Fried Rice
  • Spicy Garlic Shrimp Stir Fry
    Spicy Garlic Shrimp Stir Fry

Join 8,000+ Home Cooks

Weekly Kitchen Tips

Easy recipes, smart substitutes, and real cooking shortcuts — every Thursday.

Subscribe Free →


Side Dishes

  • What to Serve With Asian Salmon? 15 Best Side Dishes
    What to Serve With Asian Salmon? 15 Best Side Dishes
  • Side Dishes for Strawberry Spinach Salad
    15 Best Side Dishes for Strawberry Spinach Salad
  • Sides for Grilled Cauliflower Steaks to Complete the Meal
    15 Sides for Grilled Cauliflower Steaks to Complete the Meal
  • 15 Sides To Serve With Calabacitas
    15 Best Sides for Calabacitas – Mexican-Inspired Favorites


Substitutes

  • 7 Best Substitutes for Hot Sauce in Marinades & Stir-Fries
    7 Best Substitutes for Hot Sauce in Marinades & Stir-Fries
  • 9 Best Substitutes for Butter in Baking and Cooking
  • 7 Best Substitutes for Tagliatelle for Italian Pasta Dishes
    7 Best Substitutes for Tagliatelle for Italian Pasta Dishes
  • 7 Best Substitutes for Udon Noodles in Asian Stir-Fries
    7 Best Substitutes for Udon Noodles in Asian Stir-Fries


Browse by Topic

  • Side Dishes320
  • Substitutes785
  • Dinner163
  • Air Fryer77
  • Taste Profiles484
  • Food Storage123


Reader Reviews

★★★★★

"Finally a food blog that tells you exactly why a substitute works instead of just listing options."

— Sarah M., via email

★★★★★

"The side dish recommendations are so specific — saved my dinner party twice this month."

— James R., Pinterest comment

★★★★★

"I trust this site more than most because they actually test everything. You can tell."

— Priya K., blog comment

Footer

↑ Back to Top

Forklift Kitchen

We do the heavy lifting so you can enjoy the cooking. Tested recipes, smart substitutes, and perfect pairings—built for real home cooks.

Content

  • Recipes
  • Substitutes
  • What to Serve With
  • Blog

Company

  • About Us
  • Contact
  • Subscribe

Legal

  • Privacy Policy
  • Terms of Service

As an Amazon Associate I earn from qualifying purchases.

© 2026 Forklift Kitchen.

Rate This Recipe

Your vote:


A rating is required
A name is required
An email is required