• Skip to primary navigation
  • Skip to main content
  • Skip to primary sidebar
  • Recipe Index
    • Air Fryer
  • Side Dishes
  • Substitutes
  • About
  • Contact
  • Subscribe

ForkLiftKitchen

menu icon
go to homepage
  • Recipe Index
    • Air Fryer
  • Side Dishes
  • Substitutes
  • About
  • Contact
  • Subscribe
subscribe
search icon
Homepage link
  • Recipe Index
    • Air Fryer
  • Side Dishes
  • Substitutes
  • About
  • Contact
  • Subscribe
×

Blog

How Long Does Italian Sausage Last? [Storage Guide]

March 30, 2026

Leaving raw Italian sausage on the counter while you prep the rest of dinner is one of the most common storage mistakes home cooks make - and it puts the meat in the bacterial danger zone within minutes.

How Long Does Italian Sausage Last In The Fridge

Fresh Italian pork sausage is more perishable than most people expect, largely because it's made from ground pork packed with moisture-rich seasonings like fennel seed and garlic.

Understanding italian sausage's flavor and uses gives you a sense of what you're working with, and managing it correctly is just as important as how you season it.

Much like keeping chorizo fresh, the rules are simple - but easy to ignore.

QUICK SUMMARY

Fresh Italian sausage lasts just 1-2 days in the fridge, whether opened or not. Cooked links extend to 3-4 days. Freeze raw sausage for up to 2 months and cooked for up to 3 months - label everything and never refreeze after a full thaw.

🧊Fridge (raw): 1-2 days; keep in original sealed pack near the coldest zone
🍳Fridge (cooked): 3-4 days in a sealed airtight container
❄️Freezer: Raw up to 2 months; cooked up to 3 months; vacuum-seal to prevent freezer burn

How Long Does Italian Sausage Last?

Fresh sausage is a high-moisture, high-protein product - conditions that accelerate spoilage faster than most refrigerated proteins.

Raw links and bulk Italian sausage share the same short fridge window regardless of whether the packaging has been opened, because the ground pork inside was never cured or shelf-stabilized. Cooked meat's shelf life follows different rules, and that holds true here: fully cooked sausage nearly doubles the fridge window compared to raw.

Italian Sausage Shelf Life
MethodStateDurationNotes
🧊 FridgeRaw, unopened1-2 daysUse within 48 hours; keep in original vacuum or sealed commercial pack
🧊 FridgeRaw, opened1-2 daysReseal tightly; hand-ground or partially thawed packs degrade faster
🧊 FridgeCooked3-4 daysStore sliced, crumbled, or whole links in airtight container
❄️ FreezerRaw1-2 monthsBest quality window; vacuum-sealed packs reduce freezer burn significantly
❄️ FreezerCooked2-3 monthsSlice or crumble before freezing for faster, even thawing

The gap between raw and cooked shelf life comes down to surface area and internal temperature history. Cooked sausage has eliminated the active bacterial load, whereas raw ground pork carries bacteria throughout every particle of the grind.

How to Store Italian Sausage

Where and how you store sausage matters as much as when you use it. Raw Italian sausage links belong at the back of the fridge, in the coldest section - typically the lowest shelf or the meat drawer - away from ready-to-eat foods.

Watch Out
Never leave raw Italian sausage at room temperature for more than 2 hours. The range between 40°F and 140°F is the bacterial danger zone - ground pork reaches unsafe bacterial levels faster than whole cuts.

Storage specifics by form:

  • 🥩 Raw, unopened - Leave in original vacuum packaging; place on a plate to catch drips and position at the back of the lowest shelf.
  • 🥩 Raw, opened - Transfer to a heavy-duty zip-top bag, press out all air, and use within 24 hours of opening to avoid oxidation and off-odors.
  • 🍳 Cooked sausage - Cool completely within 2 hours of cooking, then store in a shallow airtight container; shallow depth speeds cooling and prevents moisture buildup.
  • 🌡️ Mixed flavors (hot vs. mild) - Keep varieties separated in the fridge or freezer; fennel-forward mild sausage can absorb heat from spicy varieties through shared packaging.

Cooked Italian sausage should never sit in the pan on the stove overnight, regardless of how low the heat. Cool it down fast and get it into a sealed container.

Can You Freeze Italian Sausage?

Yes - freezing is the most practical way to extend the life of bulk packs or links you won't use within two days.

The process differs slightly between raw and cooked, and skipping a few key steps leads to freezer burn and crumbly texture once thawed.

  1. Portion before freezing. Divide raw bulk Italian sausage into meal-sized amounts - typically 4-6 oz blocks - so you thaw only what you need.
  2. Wrap tightly. For raw links already in a vacuum seal, freeze in the original pack. Otherwise, wrap links individually in plastic wrap, then overwrap in foil or a zip-top freezer bag with air pressed out.
  3. Flatten bulk portions. Press ground-style sausage flat in a zip-top bag before freezing - this speeds freezing, reduces ice crystals, and makes stacking easier.
  4. Cool cooked sausage first. Pat sliced or crumbled cooked sausage dry, cool completely, then freeze flat in labeled bags.
  5. Label with the freeze date. Mark each bag with the date and variety (hot or mild) - the aromas blend after several weeks and become difficult to distinguish.

Thaw overnight in the fridge whenever possible. For faster results, submerge the sealed bag in cold water for 30-60 minutes rather than leaving it out at room temperature.

Cook immediately if you use the microwave to thaw.

Fennel-seasoned pork sausage can become drier and more crumbly after long freezing. Natural casings may split during the freeze-thaw cycle, which affects texture but not safety.

If a recipe gives you flexibility, italian sausage swaps that work can help when your frozen batch isn't performing as expected.

Golden Rule
Never refreeze fully thawed Italian sausage without cooking it first. Refreezing raw links degrades both texture and safety if the thaw was handled at room temperature.

Signs Italian Sausage Has Gone Bad

Fresh raw Italian sausage should be pinkish-red with visible white fat - color can vary slightly by brand and spice blend, but certain changes signal spoilage clearly.

When evaluating bratwurst spoilage signs, the approach is similar - a useful benchmark since both are fresh pork sausages with comparable spoilage patterns, as covered in bratwurst spoilage signs.

Signs It's Gone Bad
👀
VisualGrayish or greenish tinge on raw meat · Slimy or tacky film on links · Mold spots on casings or cut surfaces
👃
SmellSharp sour or putrid odor · Ammonia-like smell distinct from normal garlic or fennel aroma
✋
TextureSticky or slippery surface on raw links · Mushy feel on cooked sausage instead of springy resistance

One clarification worth making: white mold on some cured or dry-aged sausages is expected.

Fresh Italian sausage is not cured, so any mold is a discard signal. Don't taste-test to confirm - if two or more spoilage signs appear together, discard immediately.

Getting the Most Out of Every Pack

Smart habits at the point of purchase carry forward through storage. If you buy bulk Italian sausage links and won't cook them within a day, freeze them the same day rather than refrigerating and waiting.

  • 🌡️ Hit 160°F - Always cook fresh Italian pork sausage to 160°F (71°C) internal temperature; use an instant-read thermometer to confirm, not color alone.
  • 🏷️ Label everything - Include the freeze date and flavor variety (hot vs. mild) on every bag; [alternatives to fennel seed](https://forkliftkitchen.com/fennel-seed-substitutes/) exist if your batch loses aromatic intensity after a long freeze.
  • ❄️ Freeze fresh, not faded - The fennel and garlic aroma that defines fresh Italian sausage diminishes quickly; freezing an already-aging pack locks in a degraded baseline, not a fresh one.
  • 💧 Cold-water thaw for speed - A sealed bag submerged in cold water thaws links in under an hour without risking the surface temperature creeping into the danger zone.

Follow these steps and very little goes to waste.

Frequently Asked Questions

Can you freeze Italian sausage raw?

Yes. Raw links freeze well for up to 2 months at best quality. Vacuum-sealed original packaging works directly; otherwise wrap tightly in plastic then foil to prevent freezer burn on the casings.

How long can cooked Italian sausage sit out?

No more than 2 hours at room temperature. After that, bacterial growth accelerates to unsafe levels. In warm conditions above 90°F, that window drops to 1 hour.

Does Italian sausage go bad faster than other sausages?

Fresh Italian sausage spoils at roughly the same rate as other fresh ground pork sausages. It degrades faster than cured or smoked varieties because it contains no preservatives - just seasoned raw pork.

Can you refreeze Italian sausage after thawing?

Only if it was thawed in the fridge and never warmed above 40°F. Cook it first whenever possible - refreezing raw thawed sausage degrades texture noticeably and carries food-safety risk if thawing was uncontrolled.

Is the gray color on Italian sausage a spoilage sign?

Not always on its own - surface oxidation can cause slight graying in fresh pork. However, gray combined with a sour smell or slimy texture is a clear discard signal.
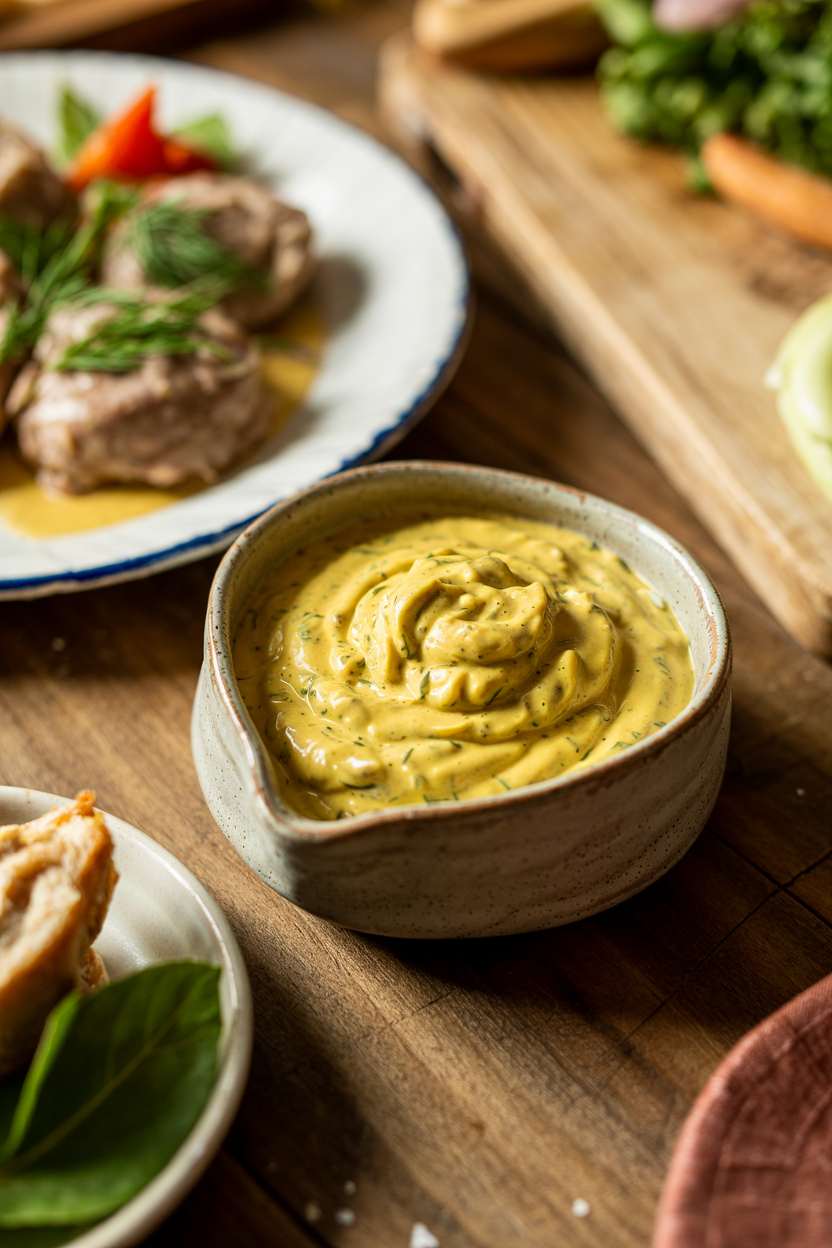
Mustard Dill Sauce

March 30, 2026

You need a fast condiment that works for meal prep, weeknight dinners, or last-minute entertaining. Mustard dill sauce takes 10 minutes to whisk together and keeps in the fridge for days.

Mustard Dill Sauce served on a plate

The creamy base balances tangy mustard with bright fresh dill. No cooking required-just chop, whisk, and chill.

Perfect for busy weeks when you want homemade flavor without turning on the stove.

QUICK SUMMARY

Mustard dill sauce combines Dijon mustard, fresh dill, and mayonnaise into a creamy condiment. The key is whisking thoroughly and chilling 30 minutes to let flavors meld. Works for salmon, chicken, vegetables, or sandwiches.

⏱️Time: 10 minutes active, 30 minutes chilling optional
🥄Method: Chop dill finely, whisk all ingredients together until smooth
⚠️Watch Out: Too much mustard overpowers-add in small amounts and taste as you go

Table of Contents

Toggle
  • Why This Recipe Works
  • What You'll Need
    • Ingredient Details
  • Ingredient Swaps
  • What to Serve With It
  • Store and Reheat
  • Frequently Asked Questions
  • Mustard Dill Sauce
    • Method 
    • Tried this recipe?

Why This Recipe Works

Whisking creates a stable emulsion that won't separate in the fridge. For a version that comes together quickly, something rich like beef brings contrast to the creamy sauce.

Quick Reference
⏱️
Prep Time
10 min
🔥
Cook Time
0 min
⏰
Total Time
10 min (+30 min chilling optional)
🍽️
Servings
6 servings
📊
Difficulty
Easy
🏷️
Category
Sauce | Condiment
💡
Quick Tip
Chill 30 minutes to meld flavors fully
🎯
Best For
Weeknight | Entertaining | Meal prep

Five things that guarantee success:

  • Chop dill into 1-2 mm pieces so every bite gets even herb flavor without overwhelming chunks
  • Whisk for at least 1 minute to create a smooth emulsion that won't separate when stored
  • Add lemon juice in ½ teaspoon increments and taste after each addition to avoid harsh acidity
  • Chill the sauce 30 minutes before serving to let mustard mellow and dill infuse fully
  • Season after chilling because cold dulls flavors-adjust salt and pepper right before serving
Quick Tip
Use a shallow container for chilling-the sauce cools faster and flavors meld more evenly than in a tall jar.

What You'll Need

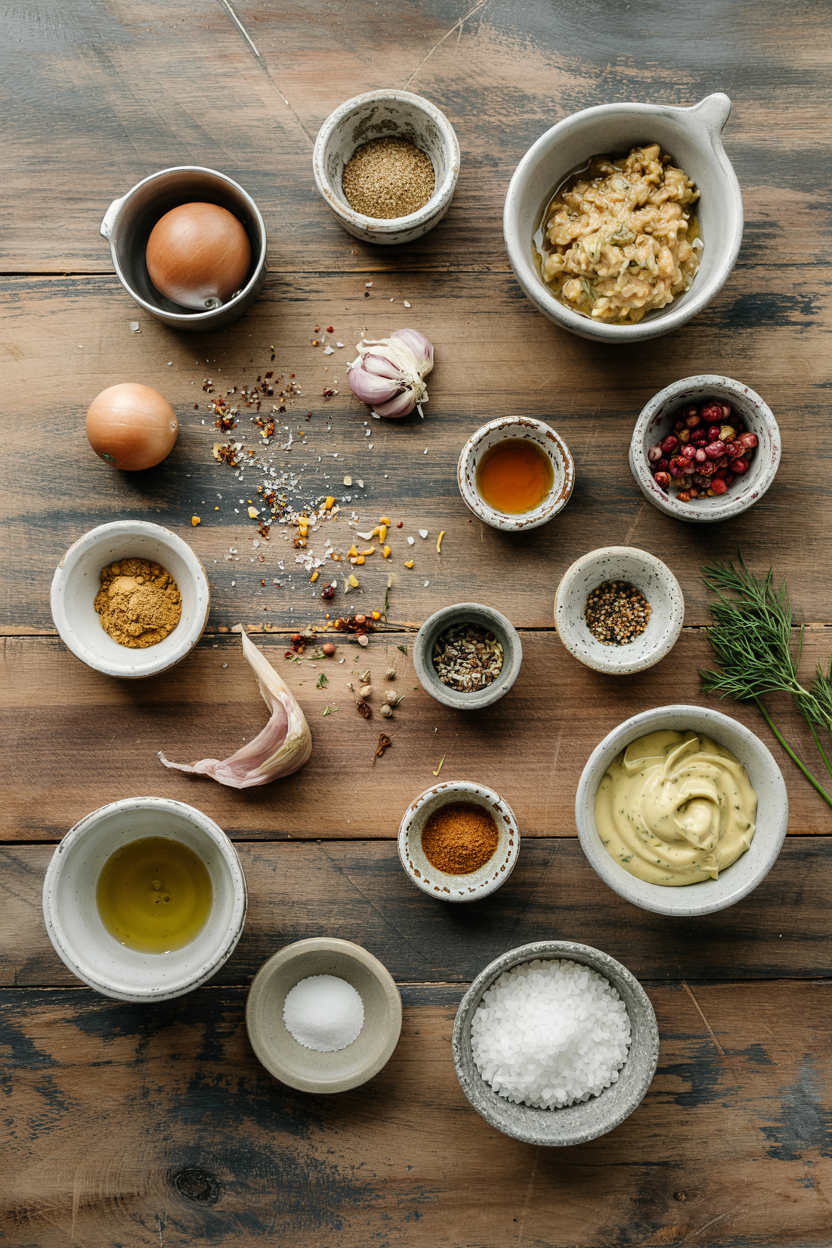
Ingredients for Mustard Dill Sauce

Shop for fresh dill and good Dijon mustard. For a version that comes together quickly, homemade caesar salad recipe balances tangy and herby flavors the same way.

🧀
Creamy Base
  • Mayonnaise (½ cup)
  • Greek yogurt (¼ cup, optional)
🧄
Tangy & Sharp
  • Dijon mustard (2 tbsp)
  • Lemon juice (1 tbsp)
  • Garlic (1 clove, minced, optional)
🌶️
Herbs & Seasoning
  • Fresh dill (3 tbsp, chopped)
  • Honey (½ tsp, optional)
  • Salt (¼ tsp)
  • Black pepper (⅛ tsp)

Ingredient Details

  • Dijon mustard
    Use grainy Dijon for texture or smooth for silky finish-measure precisely to avoid overpowering sharpness
  • Fresh dill
    Look for bright green fronds without yellowing-dried dill won't give the same vibrant flavor
  • Mayonnaise
    Full-fat mayo creates the creamiest texture-light mayo works but yields a thinner sauce
  • Greek yogurt
    Adds tang and lightens the sauce-substitute sour cream for smoother consistency
  • Lemon juice
    Fresh lemon juice balances richness better than bottled-add gradually to control acidity
  • Garlic
    Mince finely or use garlic powder (⅓ teaspoon per clove) for even distribution without texture
  • Honey
    Balances mustard sharpness-add dropwise (¼ teaspoon at a time) to prevent oversweetening

Ingredient Swaps

Swap ingredients based on what's in your pantry or dietary needs. For a similar deli recipe that uses yogurt as a base, try the same substitution strategy here.

Four swaps that work:

  • Greek yogurt replaces all or half the mayonnaise for a tangier, lighter sauce-texture will be thinner but still creamy
  • Dried dill (1 tablespoon) replaces fresh dill (3 tablespoons) but lacks brightness-increase dried amount gradually and taste as you go
  • White vinegar or apple cider vinegar replaces lemon juice using half the amount-more pungent, so add conservatively
  • Vegan mayo replaces regular mayonnaise for a dairy-free version with identical texture and creaminess

Greek Yogurt Base

Works for: lighter texture, extra tang, protein boost

Skip if: you want maximum creaminess or thicker consistency

Dried Dill

Works for: pantry convenience, longer shelf life

Skip if: you want bright, vibrant herb flavor that tastes fresh

Instructions

The whole process takes 10 minutes of active work. We keep a batch ready for nights like this-classic chicken dish pairs perfectly with tangy mustard dill on the side.

  1. Chop the fresh dill finely using a sharp chef's knife on a cutting board. Cut fronds into 1-2 mm pieces for even distribution-large chunks overpower individual bites.

  2. Whisk mayonnaise, Greek yogurt, and Dijon mustard in a mixing bowl for 1 minute until smooth. The emulsion should look creamy with no streaks or lumps.

  3. Add lemon juice in ½ teaspoon increments, whisking after each addition. Taste after each pour-stop when acidity balances the richness without tasting harsh.

  4. Stir in chopped dill, garlic, honey, salt, and black pepper using a fork or whisk. Fold gently to avoid bruising the herbs-overmixing dulls the bright dill flavor.

  5. Chill the sauce 30 minutes in a shallow airtight container before serving. The cold rest mellows mustard sharpness and lets flavors meld-taste again and adjust seasoning if needed.

Golden Rule
Always adjust seasoning after chilling-cold temperatures dull flavors, so the sauce needs more salt and acid once it hits fridge temperature.

What to Serve With It

Mustard dill sauce works best with mild proteins that won't compete with the tangy dill. When planning your caponata dinner, pair this sauce with fish or chicken for balanced flavors.

Side Dish Prep Why It Works How to Serve
Steamed green beans Easy Fresh, crisp texture contrasts creamy sauce Drizzle warm beans with chilled sauce
Roasted potatoes Easy Starchy base absorbs tangy dressing well Toss hot potatoes with sauce or serve on side
Grilled chicken breasts Medium Mild protein lets mustard dill shine Spoon over sliced chicken immediately
Cucumber salad Easy Light, cooling vegetable balances richness Toss cucumbers with sauce 10 min before serving
Smoked salmon platter Easy Rich seafood pairs perfectly with herby tang Serve sauce in small bowl alongside salmon

Three ways to serve it:

  • With grilled or baked salmon for a Scandinavian-inspired meal that highlights the dill's brightness against rich fish
  • As a dip for vegetable crudités at parties-carrots, bell peppers, and snap peas all work
  • On sandwiches or wraps in place of mayonnaise for extra flavor without changing texture
Best Pick
Serve with cold poached salmon for the most authentic Scandinavian pairing-the chilled fish and sauce temperatures match perfectly.

Store and Reheat

Store mustard dill sauce in a shallow airtight container for faster cooling. A good homemade can make or break the plate-simple pork recipe benefits from tangy sauce spooned over at serving time.

Method Time Best For
🌡️ Room temperature 15-20 min Restoring flavor without texture change
🍳 Stovetop Not recommended Avoid-heat causes separation and flavor loss
📦 Microwave Not recommended Avoid-texture breaks down and dill turns bitter

For best results when storing:

  • Keep in the fridge 3-4 days in a shallow airtight container-wider surface area prevents condensation buildup
  • Stir before serving to recombine any separation that happens during storage
  • Don't freeze the full batch-mayo-based sauces separate when thawed, though freezing up to 1 month is possible
  • Store away from strong-smelling foods like onions or fish-the sauce absorbs odors easily through the container
  • Check for separation or off smell before using leftover sauce-discard if texture looks watery or grainy

Frequently Asked Questions

Can I substitute dried dill for fresh in mustard dill sauce?

Use 1 tablespoon dried dill to replace 3 tablespoons fresh dill-the flavor will be less vibrant and slightly more muted. Add dried dill gradually and taste as you go since it concentrates differently than fresh.

How long can I store mustard dill sauce in the fridge?

Store in an airtight container for 3-4 days. Check for separation or off smells before using-discard if the texture looks watery or the sauce smells sour.

How do I know when mustard dill sauce is seasoned properly?

The sauce should taste tangy without harsh acidity, creamy without feeling heavy, and herby without overwhelming dill flavor. Season after chilling since cold temperatures dull flavors-you'll likely need more salt and lemon juice once it's cold.

What causes mustard dill sauce to separate and how do I fix it?

Separation happens from undermixing or adding too much liquid at once. Fix it by whisking vigorously for 30 seconds or adding 1 teaspoon of mayonnaise to re-emulsify-the extra fat binds the ingredients back together.

What foods pair best with mustard dill sauce for serving?

Serve with grilled or baked salmon, roasted chicken, steamed vegetables, new potatoes, or as a dip for crudités. The tangy, herby flavor works best with mild proteins that won't compete with the mustard and dill.

Mustard Dill Sauce served on a plate

Mustard Dill Sauce

No ratings yet
Mustard Dill Sauce is a creamy condiment combining Dijon mustard, fresh dill, and mayonnaise for balanced flavor. This no-cook sauce is whisked together in 10 minutes and chills for 30 minutes to let flavors meld, perfect for salmon, chicken, and vegetables.
Print Recipe Pin Recipe
Prep Time 10 minutes mins
Cook Time 1 minute min
Total Time 11 minutes mins
Servings: 6 servings
Course: Condiment, Sauce
Cuisine: American, Scandinavian
Ingredients Method Notes

Ingredients
  

  • 0.5 cup mayonnaise full-fat for creamiest texture
  • 0.25 cup Greek yogurt optional, adds tang and lightens sauce
  • 2 tablespoon Dijon mustard use grainy or smooth; measure precisely
  • 1 tablespoon lemon juice fresh, add gradually to balance acidity
  • 1 clove garlic minced, optional
  • 3 tablespoon fresh dill chopped finely into 1-2 mm pieces
  • 0.5 teaspoon honey optional, balances mustard sharpness
  • 0.25 teaspoon salt
  • 0.125 teaspoon black pepper

Method
 

  1. Chop the fresh dill finely using a sharp chef's knife on a cutting board. Cut fronds into 1-2 mm pieces for even distribution without large chunks.
    3 tbsp fresh dill
  2. Whisk mayonnaise, Greek yogurt (if using), and Dijon mustard in a mixing bowl for 1 minute until smooth and creamy with no streaks or lumps.
    0.5 cup mayonnaise, 0.25 cup Greek yogurt, 2 tbsp Dijon mustard
  3. Add lemon juice in ½ teaspoon increments, whisking after each addition. Taste after each pour and stop when acidity balances richness without harshness.
    1 tbsp lemon juice
  4. Stir in chopped dill, garlic, honey, salt, and black pepper using a fork or whisk. Fold gently to avoid bruising the herbs and dulling the dill flavor.
    3 tbsp fresh dill, 1 clove garlic, 0.5 tsp honey, 0.25 tsp salt, 0.125 tsp black pepper
  5. Chill the sauce 30 minutes in a shallow airtight container before serving. The cold rest mellows mustard sharpness and lets flavors meld. Adjust seasoning after chilling.

Notes

  • Chop dill finely into small pieces for balanced herb flavor.
  • Whisk thoroughly for at least 1 minute to create a stable emulsion.
  • Add lemon juice slowly and taste to avoid harsh acidity.

Tried this recipe?

Let us know how it was!

What Is Grenadine? [Taste, Uses & More]

March 30, 2026

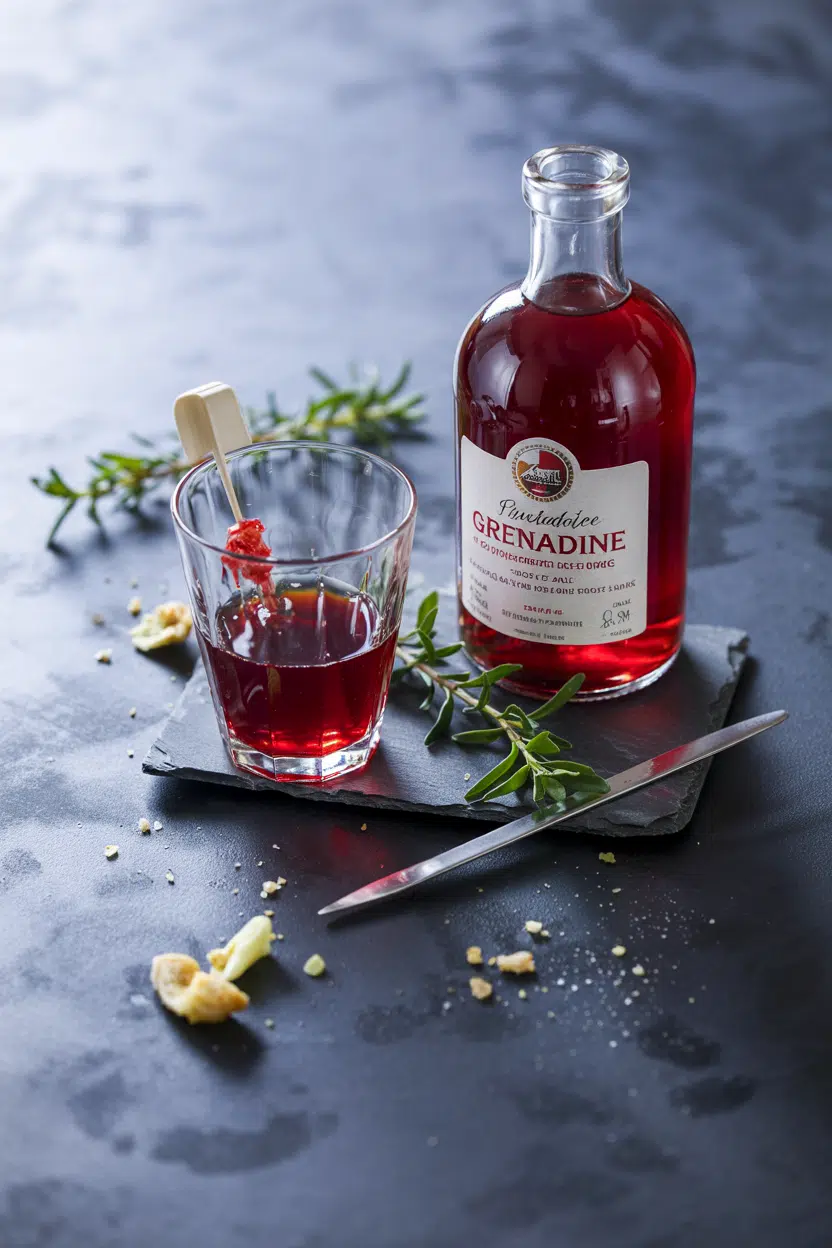
Pouring grenadine into a Tequila Sunrise is one of those rare kitchen moments where technique doubles as theater - the heavy syrup sinks through orange juice in a slow red bloom before anyone even stirs. That visual is no accident: grenadine's density and deep ruby color are as essential as its flavor, which is something most people underestimate.

What Is Grenadine

Far more than a sweetener, it carries a concentrated sweet-tart pomegranate character that shapes everything from cocktails to glazes, and knowing which bottle to grab - or when to reach for pomegranate alternatives - makes a genuine difference.

QUICK SUMMARY

Grenadine is a sweet-tart pomegranate syrup used in cocktails, mocktails, and desserts. Quality varies widely - real pomegranate juice versions taste noticeably fresher and more complex than artificial alternatives. Use it for color, sweetness, and a faint tangy backnote.

🍹Category: Non-alcoholic fruit-based syrup and cocktail mixer
🌹Flavor: Sweet, tangy pomegranate with a candied finish
🍽️Best Uses: Tequila Sunrise, Shirley Temple, glazes, dessert drizzles
❄️Storage: Refrigerate after opening; best within 4-6 months
🛒Buying Tip: Choose bottles listing pomegranate juice first, not corn syrup

What Is Grenadine?

Grenadine takes its name from the French word for pomegranate - grenade - and was originally made by reducing pomegranate juice with sugar into a thick, shelf-stable syrup.

It developed mainly through French bar and café culture before becoming a staple in American cocktail mixing through the 20th century.

Today, grenadine covers a wide spectrum of products. At one end sit artisanal and homemade versions made from real pomegranate juice or concentrate; at the other sit mass-market commercial bottles built almost entirely from high-fructose corn syrup and artificial red coloring, with no pomegranate at all.

Both carry the grenadine label, which is why ingredient lists matter.

You may also find it labeled pomegranate syrup, grenadine cordial, or grenadine concentrate, depending on the country and brand. It's worth distinguishing grenadine from pomegranate molasses, its thicker, more acidic Middle Eastern cousin - that syrup is far less sweet and noticeably more bitter.

  • 🍊 Classic grenadine - pomegranate juice reduced with sugar, balanced sweet-tart
  • 🧪 Commercial artificial grenadine - corn syrup and dye, sweet without fruit complexity
  • 🫙 Artisanal or homemade grenadine - freshest flavor, shorter shelf life, often richer color

What Does Grenadine Taste Like?

Grenadine at its best tastes like a sweeter, more viscous version of concentrated pomegranate juice - leading with candied fruit sweetness and following with a mild tartness that keeps it from being cloying.

There's a faint floral and berry-like backnote that recalls tart cherry or cranberry rather than any single fruit.

Sensory SnapshotModerate Intensity
👅 Flavor
SweetPomegranate-tartCandied finishFaint berry
✋ Texture
ViscousMouth-coating
👃 Aroma
Pomegranate-fruitySugary

Artificial versions taste noticeably flatter - pure sugar sweetness with a vaguely medicinal red-fruit note and no real tartness. Heat concentrates the sweetness further and softens whatever tartness remains, which is worth accounting for when reducing grenadine into a glaze.

Golden Rule
If your grenadine tastes like cherry candy with no tartness, it's an artificial formulation. A real pomegranate-based syrup should have a distinct tangy finish even at room temperature.

How to Use Grenadine

Grenadine earns most of its reputation in bar applications, and rightly so - its density makes it uniquely useful for layered drinks. In a Tequila Sunrise, a slow pour over the back of a spoon lets it sink below orange juice without mixing.

The classic Shirley Temple mocktail uses it as both sweetener and colorant in ginger ale or lemon-lime soda.

Beyond the glass, grenadine works in several cooking contexts that most people overlook.

How Grenadine Is Used
MethodBest ForTip
🍹 StirredCocktails, mocktails, lemonadeAdd last to layered drinks; stir only when full mixing is intended
🍳 ReducedGlazes for duck, carrots, or porkSimmer over medium-low heat; sweetness intensifies quickly
🥗 WhiskedVinaigrettes and fruit salad dressingsBalance with lime juice or apple cider vinegar to cut sweetness
🍨 DrizzledVanilla ice cream, panna cotta, yogurtUse sparingly - a tablespoon adds color and tang without overwhelming

Grenadine pairs well with citrus - lime and orange in particular - and holds its own against dark spirits like rum and whiskey. It also works alongside ginger and cinnamon, which sharpen its pomegranate notes rather than competing with them.

For savory cooking, roasted root vegetables like carrots benefit from a grenadine glaze the same way they do from a honey-based one, though the tartness reads differently.

If you're out of stock mid-recipe, a grenadine substitute can work in a pinch - cranberry juice concentrate with a little sugar comes close for color and tartness.

Avoid using it alongside delicate herbal teas or recipes that require subtle unsweetened acidity; the syrup's body will overwhelm both.

Try It In
🍫Passion Fruit Hot ChocolateA splash of grenadine deepens the fruit-chocolate contrast→🌰Cinnamon Sugar Roasted NutsUse as a glaze base alongside cinnamon for sweet-tart crunch→🍠Roasted Sweet Potato and Black Bean SaladWhisk into the dressing for a fruity tang alongside lime→

How to Buy and Store Grenadine

Read the label before buying. Pomegranate juice or concentrate should appear first in the ingredient list - anything leading with high-fructose corn syrup and artificial coloring will taste thin and overly sweet. Good grenadine runs deep ruby red and pours with visible viscosity; watery, bright red liquid is a reliable sign of a heavily artificial product.

Watch Out
Many widely available brands contain zero pomegranate. The label "grenadine" carries no legal definition requiring real fruit - always check the ingredient list, not the front of the bottle.

Store unopened bottles in a cool, dark pantry for up to 12-24 months. Once opened, move the bottle to the refrigerator with the cap tight.

For a full breakdown of how long grenadine stays usable, see our guide to grenadine freshness guide.

  • Opened commercial grenadine - refrigerated, best within 4-6 months
  • Fresh or artisanal grenadine - refrigerated, use within 2-4 weeks
  • Signs it's turned - dulled color, off-odor, or watery separation that doesn't remix

Start Here With Grenadine

Pick up a pomegranate juice-based bottle first and use it in a Shirley Temple or a simple citrus sour before committing to more complex recipes. That straightforward test tells you immediately whether the flavor is worth using in glazes or dressings.

Once you've tasted the real-fruit version, the difference from artificial grenadine becomes obvious - and choosing becomes easy. If you're building out a home bar, the Tequila Sunrise is the clearest showcase for what good grenadine actually does.

Frequently Asked Questions

Is grenadine actually made from pomegranates?

Not always. Traditional grenadine is made from pomegranate juice and sugar, but many commercial brands use only high-fructose corn syrup and artificial coloring. Check the ingredient list - pomegranate juice or concentrate should appear first.

What cocktails use grenadine?

The Tequila Sunrise and Shirley Temple are the most recognizable. It also appears in the Singapore Sling, the Jack Rose, and various whiskey sours where it adds sweetness and body alongside citrus.

Is grenadine vegan?

Most commercial grenadines are vegan - the standard ingredients are sugar, water, and fruit juice or flavoring. However, some brands use carmine (a red dye from insects) for color, so check the label if that matters to you.

How do you make grenadine at home?

Combine equal parts pomegranate juice and sugar in a saucepan over medium heat, stir until dissolved, then cool. Add a small amount of pomegranate molasses for extra depth. Homemade versions last 2-4 weeks refrigerated.

Can you substitute pomegranate juice for grenadine?

You can, but the result will be thinner and less sweet. Pomegranate juice lacks the syrup's viscosity and sugar concentration, so drinks won't layer the same way and dressings will be more tart than intended.

What Is Fontinella Cheese? [Taste, Uses & More]

March 30, 2026

You spot it at the cheese counter wedged between more familiar names - maybe next to a block of Asiago or a wedge of Taleggio - and the label just reads "fontinella." It's pale, slightly springy, and the price is reasonable. Worth picking up?

What Is Fontinella Cheese

Almost certainly yes.

QUICK SUMMARY

Fontinella is a semi-soft Italian cow's milk cheese from the Alpine foothills with a mild, nutty, buttery flavor and a creamy melt. It sits between young Fontina and Emmental in style - approachable enough for everyday cooking, and reliable in anything that needs even, gentle heat.

🧀Category: Semi-soft cow's milk cheese, northern Italian Alpine style
👅Flavor: Mildly nutty, buttery, slightly sweet, lightly earthy
🔥Best For: Melting into gratins, sandwiches, fondue, and polenta finishes
❄️Shelf Life: Opened wedge lasts 2-3 weeks wrapped and refrigerated
🔄Substitute: Young Fontina or mild Emmental work closest; see fontinella substitutes for more options

What Is Fontinella Cheese?

Fontinella is a semi-soft cow's milk cheese made in the Alpine foothills of northern Italy, particularly associated with the Piedmont region. You'll sometimes see it labeled fontinella piemontese or fontinella di valle, though these names are used loosely rather than as protected designations.

The cheese has a pale straw-yellow interior with small, evenly spaced eyes - those tiny holes you see throughout the paste. Its rind is thin and fully edible, without the waxy coating you'd find on some supermarket alternatives.

Fontinella sits between young Fontina and mild Alpine-style cheeses in character. It's softer and creamier than aged Fontina, and less assertive than anything approaching a pungent washed-rind style like Robiola.

Think of it as the approachable, everyday member of that northern Italian family.

  • Form: Sold as whole wheels or cut wedges, typically 1-5 lb portions at retail
  • Rind: Thin, natural, pale tan - edible and not overpowering
  • Eyes: Small and irregular, not the large holes of Swiss-style cheeses
  • Milk: Pasteurized cow's milk in most commercial versions

What Does Fontinella Cheese Taste Like?

fontinella cheese - What Is Fontinella Cheese

Fontinella leads with mild nuttiness - think toasted hazelnuts at low volume rather than the punchy walnut bite of a harder aged cheese. A gentle butteriness follows, with just enough sweetness to keep it from feeling flat.

Sensory SnapshotMild Intensity
👅 Flavor
nuttybutteryslightly sweetlightly earthy
✋ Texture
semi-softpliantcreamy when warm
👃 Aroma
mild hayclean milk

Compared to young Fontina, fontinella is milder and less grassy. Young Emmental has a similar nutty sweetness but with more pronounced holes and a firmer bite.

Fontinella sits creamier than both at room temperature.

Heat changes it noticeably. Cold from the fridge, the nuttiness dominates.

Warmed or melted, the butteriness opens up and the earthy edge softens almost entirely. It's a cheese that improves with a little warmth.

Golden Rule
Pull fontinella from the fridge 20-30 minutes before serving. At room temperature, the full buttery flavor comes through - straight from the cold, it tastes flatter than it really is.

How to Use Fontinella Cheese

Fontinella's reliable, even melt is its main kitchen asset. It doesn't seize, doesn't turn greasy, and doesn't fight other ingredients for attention - which makes it a practical choice across a wide range of dishes.

How Fontinella Cheese Is Used
MethodBest ForTip
🫕 Melted into sauceMac and cheese, polenta finish, risottoAdd off heat or at low temp to prevent graininess
🥘 BakedPotato gratins, casseroles, layered bakesLayer mid-dish, not just on top - it melts into the layers evenly
🥪 Pan-meltedGrilled sandwiches, paninisMedium heat only; high heat makes it rubbery before it melts through
🧀 Raw / cheese boardBoards with mild accompaniments, omelets, frittatasPair with pear slices, honey, or toasted walnuts for contrast
🫙 Fondue / dipLow-heat cheese dips, warm fondue blendsCombine with a sharper cheese for depth - fontinella alone can taste thin in fondue

Northern Italian and Alpine-influenced dishes are its natural home - think polenta with melted cheese, potato gratins, and baked pasta. It also slides comfortably into modern European comfort cooking anywhere a neutral, creamy melt is needed.

For pairings, fontinella works well alongside pear or apple slices, a light Barbera, honey or quince paste, and toasted hazelnuts. Avoid pairing it with very high-acid dressings or strong blue cheeses - both flatten or overwhelm its mild profile.

Shortcut
For a fast weeknight gratin, layer sliced fontinella directly over par-cooked potatoes before baking. No sauce needed - the cheese melts into a creamy coating on its own.
Try It In
🍳Egg and Cheese Breakfast SandwichFontinella melts evenly without going greasy — ideal for a breakfast stack→🧀Cheddar Cheese StrawsSwap in fontinella for a milder, butterier version of this classic snack→

How to Buy and Store Fontinella Cheese

Look for a pale straw-yellow interior with small, evenly distributed eyes when buying fontinella by the wedge. Press lightly - it should feel slightly springy, not crumbly and not overly soft or sticky.

A sharp ammonia smell is a red flag; fresh fontinella smells clean and mildly milky.

Watch Out
A slimy or sticky rind and a strong ammonia smell mean the cheese is past its best. Don't assume it's just "strong" - fontinella should never smell pungent.

For storage, wrap the cut face in wax or parchment paper first, then loosely in plastic. Store in the crisper drawer, away from strong-smelling foods that the semi-soft paste can absorb.

For full detail on how long it keeps under different conditions, see our guide to fontinella cheese freshness guide.

  • Unopened: 3-6 weeks refrigerated in original packaging
  • Opened wedge: 2-3 weeks with proper wrapping in the crisper
  • Freezing: Not recommended - the semi-soft texture turns crumbly after thawing

Where to Start with Fontinella

If you've never cooked with fontinella before, start with a grilled sandwich or a simple potato gratin. Both showcase the melt without requiring any technique.

From there, try it stirred into polenta off the heat - one of the cleanest ways to understand what this cheese actually does.

It won't replace a bold Fontina in a dish that needs depth. However, for everyday cooking where you need a cooperative, mild melting cheese, fontinella earns its counter space.

Frequently Asked Questions

Is fontinella the same as fontina?

No. Fontinella is a distinct cheese - milder, creamier, and softer than most Fontina. True Fontina Val d'Aosta carries a protected designation and has a stronger, earthier flavor that fontinella doesn't match.

Can you substitute fontinella for fontina?

Yes, in most melting applications. The swap works well in gratins, sandwiches, and sauces. Fontinella is milder, so the finished dish will taste a little less earthy and more buttery.

How do you melt fontinella for a grilled cheese?

Use medium-low heat and cover the pan for the first two minutes. This traps steam and melts the cheese through before the bread over-browns. High heat makes fontinella rubbery before it fully melts.

Does fontinella have a rind?

Yes - a thin, natural, pale tan rind that's fully edible. It's much thinner and less assertive than rinds on aged or washed-rind cheeses, so most people eat it without noticing.

Is fontinella lactose free?

No, not reliably. Fontinella is a semi-soft cheese and retains more lactose than aged hard cheeses. People with lactose intolerance should treat it the same way they would other fresh semi-soft dairy.

How Long Does Hominy Last? [Storage Guide]

March 30, 2026

Picking up a can of hominy at the store is easy - figuring out what to do with it before it turns is less so.

Can You Freeze Hominy

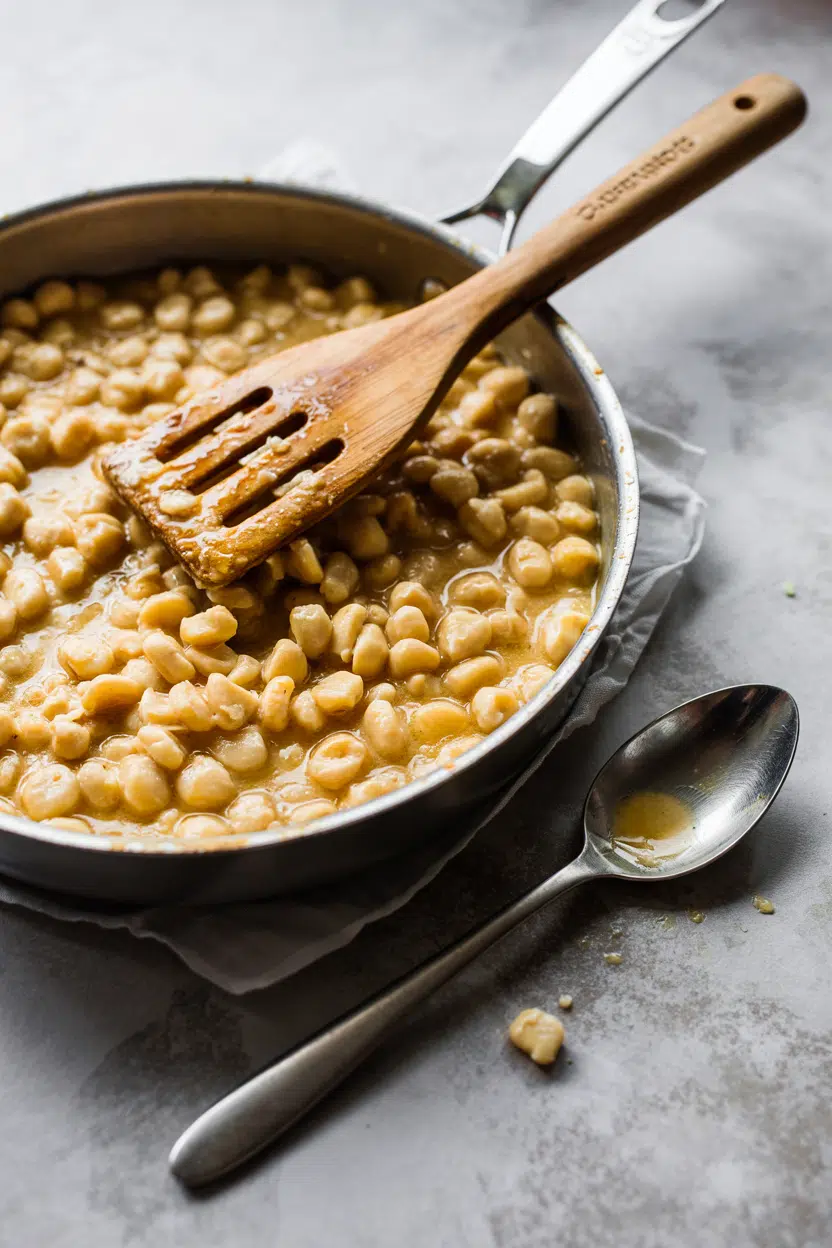
Canned hominy, made from nixtamalized corn treated with calcium hydroxide or lime, has a pleasantly mild, starchy flavor and holds up in soups and stews far better than regular corn.

Understanding what makes hominy distinct helps explain why its storage works differently from other canned vegetables.

Opened, it lasts 3-5 days in the fridge; unopened, a can sits safely for over a year.

QUICK SUMMARY

Unopened canned hominy lasts 12-18 months in the pantry. Once opened, transfer to an airtight container with liquid and refrigerate for 3-5 days. Cooked hominy freezes well for up to 12 months. Dry hominy grits keep 12-24 months in a sealed container away from moisture.

🥫Pantry (unopened): 12-18 months if can is intact and undented
🧊Fridge (opened): 3-5 days in airtight container covered in liquid
❄️Freezer (cooked): 6-12 months; expect slightly softer kernels after thawing

How Long Does Hominy Last?

Shelf life for hominy varies more than most pantry staples because it comes in three distinct forms: unopened canned, opened or cooked, and dry grits.

The nixtamalization process gives hominy a denser, more resilient kernel than plain corn, which helps it hold up longer once cooked - but opened canned hominy still follows the same bacterial clock as any other moist, starchy food.

Hominy Shelf Life
MethodStateDurationNotes
🏠 PantryUnopened canned12-18 monthsKeep can intact; avoid dented or bulging cans
🏠 PantryRaw dried (hominy grits)12-24 monthsAirtight container away from heat and moisture
🏠 PantryOpened cannedNot recommendedTransfer to fridge immediately in sealed container
🧊 FridgeOpened canned3-5 daysCover kernels in canning liquid or fresh water
🧊 FridgeCooked (inc. pozole)3-5 daysCool quickly before refrigerating
❄️ FreezerCooked6-12 monthsKernels may soften slightly; best in soups and stews
❄️ FreezerOpened canned (drained)6 monthsPortion into freezer-safe containers before freezing

Dry hominy grits outlast every other form because moisture is the main enemy here. Just like keeping rice fresh depends on sealing out humidity, grits stored loosely in a cardboard box will degrade well before the two-year mark.

How to Store Hominy

Storage method matters most once a can is cracked open. Never leave opened hominy sitting in the original can - metal contact accelerates flavor changes and introduces off-odors within a day or two.

Pantry: Keep unopened cans in a cool, dry spot away from direct heat sources like the stovetop or oven. For dry hominy grits, use an airtight container and add a bay leaf or whole dried chili to discourage pantry pests - remove it before cooking.

Fridge: Transfer opened hominy to a shallow airtight glass or BPA-free plastic container. Cover the kernels with their canning liquid, or use fresh water if you've discarded it - submerging them slows drying and oxidation noticeably.

Counter: Skip it entirely for opened canned hominy. Two hours at room temperature is the outer limit, and that window closes faster in a warm kitchen.

Golden Rule
Reserve the canning liquid when you open a can. Storing hominy kernels submerged in it keeps texture and flavor better than water alone.

Can You Freeze Hominy?

Yes - and cooked hominy handles freezing better than most people expect. Cooked kernels stay intact through the freeze-thaw cycle, though they do soften slightly and may split at the seam.

That textural shift matters most if you're adding them to a grain salad; it barely registers in a simmering pozole or casserole.

The process is straightforward but portioning upfront saves a lot of frustration later. Freezing in one large block means uneven thawing and a soggy center - skip that entirely.

  1. Cool completely - bring cooked hominy to room temperature before freezing; hot kernels create condensation that degrades texture.
  2. Portion by meal - divide into meal-sized amounts using freezer bags or rigid containers, leaving ½ inch of headspace.
  3. Remove excess air - press bags flat or use a container with a tight lid to minimize freezer burn.
  4. Label with date - mark the freeze date and use cooked hominy within 12 months, or opened canned within 6 months for best results.
  5. Freeze flat - lay bags on a flat surface until solid to set shape and speed freezing.

To thaw, move containers to the fridge overnight. For soups and stews, adding frozen hominy directly to the simmering pot works well.

Avoid rapid microwave defrost for large portions - it causes uneven heating and turns outer kernels mushy before the center is ready.

Watch Out
Thawed hominy turns soft quickly at room temperature. Use it within the same cooking session - don't refreeze it.

Signs Hominy Has Gone Bad

Hominy gives clear signals when it's past its window. Slimy liquid and off-smells are the two most reliable red flags, and either one alone is enough to discard the batch.

Signs It's Gone Bad
👀
VisualCloudy or slimy liquid · mold on kernels or container rim · kernels turning grayish-brown
👃
SmellSour or fermented odor · yeasty smell unlike mild corn aroma
✋
TextureKernels collapse when prodded · gritty or slimy surface in canned product

Discard hominy if any of these signs appear - mold, sour smell, or slimy texture means it's gone. The alkaline treatment used in nixtamalization doesn't protect against spoilage once the product is opened and exposed to air and moisture.

Getting the Most from Your Hominy

Good storage habits make a bigger difference with hominy than with most pantry staples. A few consistent practices prevent waste without much extra effort.

  • 🧊 Submerge in liquid - kernels stored dry in the fridge degrade faster; always keep them covered.
  • 📦 Portion before freezing - meal-sized amounts thaw evenly and avoid repeated freezing of the same batch.
  • 🏷️ Label every container - six months passes quickly, and unlabeled containers get pushed to the back.
  • 🍲 Redirect thawed hominy - if texture has softened post-freeze, use it in recipes where that's an asset; [hominy swaps that work](https://forkliftkitchen.com/hominy-substitutes/) can help if you need a firmer result in a specific dish.
  • 🌶️ Protect your grits - an airtight seal and a bay leaf in the jar go a long way toward a full two-year pantry life.

Cooked dishes like pozole also store well using these same rules - if you're planning a batch, knowing what pairs with pozole ahead of time helps you cook the right amount from the start.

Shortcut
Cook a full can at once, portion into freezer bags, and freeze flat. You'll have ready-to-go hominy for soups and stews without opening a new can each time.

Frequently Asked Questions

Can you freeze canned hominy?

Yes, but drain it first. Freeze drained kernels in portioned freezer-safe containers for up to 6 months. Cooked hominy frozen in broth or liquid lasts up to 12 months with better texture.

How long is opened canned hominy good for?

Three to five days in the fridge, stored in a sealed container covered with liquid. Beyond five days, check for sour smell or slimy texture before using.

Does freezing change hominy texture?

Slightly. Kernels soften and may split at the seam after thawing. The change is minimal in soups and stews but noticeable in cold dishes or salads.

How do you store dry hominy grits long-term?

Keep them in an airtight container in a cool, dry pantry away from heat and light. Properly sealed, they last 12-24 months; a bay leaf in the jar discourages pantry pests.

Can you freeze pozole with hominy in it?

Yes. Pozole freezes well for up to 3 months in airtight containers. The hominy softens slightly but holds its shape in the broth, making it one of the better soups for freezing.

What Is Green Onion? [Taste, Uses & More]

March 30, 2026

Slice the white base of a green onion and something sharp and clean hits your nose - lightly pungent, almost grassy.

What Is Green Onion

The green tops carry a brighter, fresher note that disappears quickly under heat, which is exactly why most recipes add them last.

Cooks who've tried swapping out leek or reaching for red onion swaps that work often land back here, because green onion fills a specific gap that stronger alliums can't.

QUICK SUMMARY

Green onion is a mild, crisp allium used raw or lightly cooked. The white base gives a gentle sharpness; the green tops add fresh, bright onion flavor. Both parts are edible. Use as a garnish, stir-fry aromatic, or salad ingredient.

🌿Flavor: Mild and clean, white base sharper than the green tops
🔪Best Uses: Raw garnish, stir-fry base, salads, pickling
🌍Cuisines: Chinese, Korean, Japanese, Mexican, American
❄️Shelf Life: 5-10 days refrigerated, tops fade first
🥗Also Known As: Scallion, spring onion, salad onion, bunched onion

What Is Green Onion?

Green onion is the immature form of the common onion, harvested before the bulb fully develops. The white base is small, narrow, and not yet rounded - still hollow inside - while the long, hollow green stalks extend upward from it.

Originating in East Asia and now cultivated globally, it belongs to the allium family alongside garlic, leek, and chives.

Several names refer to the same thing. Scallion is the most common American term; spring onion and salad onion appear more often in British and Australian usage. Green shallot and bunched onion also circulate depending on region.

Not every variety is identical, however. True scallions (Allium fistulosum) never form a bulb, while spring onions are sometimes allowed to develop a small rounded base before harvest.

For everyday cooking, the distinction rarely matters - both work the same way.

If you're ever short on supply, there are alternatives to scallion that cover most of what green onion does in a dish.

What Does Green Onion Taste Like?

green onion - What Is Green Onion

Green onion tastes like a milder, fresher version of a standard onion - closer in character to chives, though with a bit more bite. The two parts of the plant taste noticeably different from each other.

Sensory SnapshotMild Intensity
👅 Flavor
mildly sharpbrightslightly sweet
✋ Texture
crisp rawtender cooked
👃 Aroma
freshgrassylightly pungent

The white base carries most of the sharpness - a clean, oniony heat that softens when cooked. The green tops are brighter and more delicate, with a grassy quality that vanishes quickly over direct heat.

Cooked, both parts turn slightly sweet and lose the raw edge. For a sense of how closely related flavors compare, chive's flavor and uses maps out where that milder cousin lands on the same spectrum.

How to Use Green Onion

Raw applications are where green onion does its clearest work. Thinly sliced green tops scattered over miso soup or chicken noodle broth add a fresh, aromatic finish that heat would erase.

Folded into cold noodle salads, salsas, or grain bowls, the crisp texture adds contrast.

Cooked applications shift the flavor profile considerably. Sweating the white ends with garlic builds the aromatic foundation for stir-fries and noodle dishes across Chinese and Korean cooking. Added late to fried rice, both parts keep their color and stay bright-tasting rather than going limp and sulfurous.

Golden Rule
Add green tops in the last 30 seconds of cooking. Extended heat kills the color and the fresh flavor you're cooking them for.

A few less obvious uses are worth knowing:

  • 🧈 Compound butter - Fold finely chopped green tops into softened butter with a pinch of salt for a quick steak or bread finish.
  • 🥒 Quick pickle - A 20-minute rice vinegar brine turns sliced green onion into a bright, tangy topping for rice bowls and sandwiches.
  • 🔥 Grilled whole - White ends charred over high heat develop a smoky sweetness; this is the basis for Spanish calçots and Korean pa-gui.
  • 🧀 Cream cheese spread - Stirred into softened cream cheese with a little lime zest, green onion makes a clean, simple bagel or cracker spread.

Avoid long dry roasting - the tops burn and turn bitter before the white base has time to soften properly.

How Green Onion Is Used
MethodBest ForTip
🥗 RawGarnish, salads, salsas, cold noodlesSlice thin on the bias for cleaner presentation
🍳 Quick SautéStir-fry base, fried rice, noodle dishesAdd white ends first, green tops last 30 seconds
🫙 PickledRice bowls, sandwiches, tacosRice vinegar + sugar brine, 15-20 minutes minimum
🔥 GrilledSide vegetable, char-based dishesUse whole bunches; oil well before high-heat grill
Try It In
🧅Crispy Sweet Chili Onion RingsA crunchy way to see allium flavor with heat and char→🥩Pork Chops with Apples and OnionsShows how alliums sweeten when cooked low and slow→🥗Lentil Salad with Red Onion and HerbsRaw allium used as a flavor anchor in a cold salad→

How to Buy and Store Green Onion

At the store, look for firm white bases with no soft spots or hollow collapse, and green tops that are bright, dry, and unbruised. Slimy collars where the green meets the white are a reliable sign of age.

Skip bunches with yellowing or wilted tips.

Shortcut
Stand trimmed bunches in a jar with an inch of water, cover loosely with a bag, and refrigerate. They stay crisp for up to a week - and the white ends will regrow.

For standard fridge storage, wrap unwashed bunches in a lightly damp paper towel and seal in a perforated bag.

Green onion lasts 5-10 days this way, though the green tops degrade before the white base does.

Full guidance on green onion spoilage signs is worth a read before you toss a bunch that might still be usable.

For comparison, keeping chives fresh follows almost the same method - damp wrap, fridge, use within a week.

Start With the Garnish

New to green onion? Slice the green tops thin and scatter them over the next bowl of soup, fried rice, or scrambled eggs you make. No cooking required, no technique to learn.

Once you've seen how much that small addition changes the aroma and finish of a dish, it becomes instinct.

From there, try the white ends sweated in oil as your stir-fry base - you'll notice how the same ingredient shifts character entirely depending on how you handle it.

Frequently Asked Questions

Are green onions the same as scallions?

Yes, in most practical contexts. Both refer to immature onions harvested before the bulb develops. The term "scallion" is standard in the US; "green onion" is used interchangeably across North America and beyond.

Do you eat the green parts of green onion?

Yes - the green tops are fully edible and widely used as a garnish or flavor boost. They're more delicate than the white base and best added raw or at the very end of cooking to preserve their color and fresh flavor.

How long do green onions last in the fridge?

About 5-10 days when stored in a damp paper towel inside a perforated bag. The green tops degrade faster than the white base, so check those first for sliminess or yellowing.

Can green onions be frozen?

Yes, but only for cooked applications afterward. Slice them first, spread on a tray to freeze individually, then transfer to a bag. Frozen green onion turns limp on thawing and won't work as a raw garnish.

Are scallions good raw?

Yes - raw is actually their strongest role. The crisp texture and mild sharpness come through clearly without cooking, making them effective in salads, salsas, and as a finishing garnish on hot dishes.

What Is Fontina Cheese? [Taste, Uses & More]

March 30, 2026

You spot a wedge of fontina at the cheese counter and pause - it looks like a dozen other pale, semi-soft cheeses in the case. What sets it apart is what happens when heat hits it: fontina melts into a silk-smooth, cohesive pool that holds its body better than mozzarella and carries more flavor than Emmental.

What Is Fontina Cheese

That combination of clean melt and genuine nuttiness is why Italian cooks have been reaching for it since at least the 13th century.

QUICK SUMMARY

Fontina is a semi-soft cow's milk cheese from Italy's Aosta Valley with a mild, nutty flavor and a reliably smooth melt. It bridges fresh and aged cheeses, works across fonduta, gratins, and sandwiches, and keeps well for several weeks when properly wrapped.

🧀Category: Semi-soft cow's milk cheese, natural rind
👅Flavor: Buttery, nutty, lightly earthy with sweet cream notes
🍳Best For: Fonduta, gratins, risotto, panini, pizza
❄️Shelf Life: 3-6 weeks unopened; 2-3 weeks once cut
🏷️Buy This: Look for PDO-labeled Fontina Val d'Aosta for authentic flavor

What Is fontina cheese?

Fontina Val d'Aosta is a PDO-protected cheese produced in the Aosta Valley, a narrow Alpine region in the far northwest of Italy. It's made from the raw whole milk of Valdostana cattle, pressed into wheels, and aged for a minimum of three months under cool, humid conditions that develop its distinctive thin natural rind.

The paste is pale yellow, semi-soft, and springy with small, irregular holes scattered throughout. Wheels typically weigh between 7 and 18 kg, though you'll almost always buy it by the wedge.

A few important distinctions:

  • Fontina Val d'Aosta PDO - the original, raw-milk version from Italy; strongest flavor, firmer texture
  • Danish or Swedish "fontina" - a milder, pasteurized imitation; more rubbery and far less complex
  • Fontina Valtellina - a related but distinct northern Italian cheese, sometimes used as a substitute

For the most part, when a recipe calls for fontina, it means the Italian PDO version. The Scandinavian copies melt fine, however they lack the earthy depth that makes the real thing worth buying.

What Does fontina cheese Taste Like?

fontina cheese - What Is Fontina Cheese

Fontina's flavor sits in a comfortable middle ground - more complex than fresh mozzarella, less assertive than aged Gruyère. The first impression is buttery and mildly sweet, followed quickly by a gentle nuttiness that lingers on the finish.

Sensory SnapshotModerate Intensity
👅 Flavor
butterynuttyearthysweet cream
✋ Texture
semi-softspringyelastic when melted
👃 Aroma
mildly grassycellar earthy

Under heat, the flavor opens up noticeably. The mushroomy, earthy undernotes become more pronounced in a hot gratin or a bowl of fonduta, where fontina stretches into a glossy, cohesive sauce rather than breaking into greasy threads.

Cold on a board, it reads creamier and more restrained - closer to a young Emmental in tone.

Golden Rule
Always taste fontina at room temperature before cooking. Cold straight from the fridge mutes the nuttiness - 20 minutes on the counter reveals the full flavor profile.

How to Use fontina cheese

Fontina earns its place most reliably as a melting cheese. It's the traditional base of fonduta, the Aosta Valley version of fondue, where it's whisked with egg yolks, butter, and milk into a rich dipping sauce.

The same melting behavior makes it excellent in gratins, potato bakes, and risotto - stir shredded fontina into a finished risotto off the heat and it pulls the dish together without clumping.

Sandwiches and panini also work well. Layer slices with prosciutto or country ham and press until the cheese melts into the bread.

For pizza or flatbreads, add fontina near the end of baking rather than from the start - prolonged oven heat can cause it to brown faster than harder cheeses.

On a cheese board, cube it alongside pears, apples, or walnuts. Dry white wines - Pinot Grigio and Soave especially - cut through the fat without competing with the nuttiness.

Mushroom-based dishes pair particularly well; porcini or cremini echo fontina's earthy undertone.

If you can't find it, fontina cheese swaps include Gruyère, Taleggio, or Raclette depending on the application.

How Fontina Cheese Is Used
MethodBest ForTip
🫕 MeltedFonduta, risotto, cheese saucesKeep heat low; high heat can cause graininess
🍕 BakedGratins, pizza, casserolesAdd in the last 10 minutes to prevent over-browning
🧀 Cold/SlicedCheese boards, panini assemblyServe at room temperature for full flavor
🥄 GratedFinished pasta, soups, warm dishesGrate over hot food just before serving
Try It In
🥨Cheddar Cheese StrawsSwap half the cheddar for fontina for a nuttier, creamier straw→🍳Egg and Cheese Breakfast SandwichFontina melts smoothly and pairs well with cured meats here→

How to Buy and Store fontina cheese

At the counter, look for a smooth, pale-yellow paste with small, irregular holes and a slightly elastic give when pressed. Avoid wedges with large cracks, dry edges, or a crumbly texture - those signs point to over-aged or poorly stored cheese.

For authentic flavor, check for the PDO mark ("Fontina Val d'Aosta"); without it, you're likely buying a milder Scandinavian-style copy.

Watch Out
Traditional Fontina Val d'Aosta is made from raw milk, which may carry import or sale restrictions in some regions. Check the label for pasteurization status before purchasing, especially if serving to pregnant individuals or immunocompromised guests.

Storage is straightforward:

  • Wrap correctly - use breathable cheese paper or waxed paper, then a loose layer of plastic wrap over that
  • Keep it whole - buy wedges rather than pre-sliced; cut surface dries out faster
  • Use the crisper - consistent cool humidity slows moisture loss better than the main fridge shelf
  • Grated fontina - use within 5-7 days; shredding accelerates drying and mold

For more detail on how long it holds, see our fontina cheese storage guide guide. If you've already used part of a wedge and need a substitute for the rest of a recipe, Gruyère substitutes overlap significantly with fontina's flavor profile.

Start With the Melt

If you're new to fontina, buy a small wedge and make one dish: a simple gratin or a stovetop fonduta. That first melt tells you everything about why this cheese has a 700-year reputation.

Once you're comfortable with how it behaves under heat, expand to cold applications - boards, sandwiches, pasta finishes. The earthy, nutty flavor works across more formats than most semi-soft cheeses at this price point.

Best Pick
Fontina Val d'Aosta PDO is the version to buy for cooking. The raw-milk version from Italy melts cleaner and carries more depth than any pasteurized imitation.

Frequently Asked Questions

What does fontina cheese taste like?

Buttery and mildly nutty, with earthy undertones and a hint of sweet cream. The flavor is more complex than fresh mozzarella but less sharp than Gruyère - closer to a young Emmental with added creaminess.

Is fontina good for melting?

Yes - it's one of the better melting cheeses available. Fontina melts into a smooth, elastic pool without breaking into grease, which is why it's the traditional base for Italian fonduta.

What is the difference between fontina and mozzarella?

Fontina is aged, semi-soft, and nutty; mozzarella is fresh, milky, and very mild. Both melt well, however fontina holds more structural body and delivers a more complex flavor in cooked dishes.

Can vegetarians eat fontina?

Traditional Fontina Val d'Aosta uses animal rennet, making it unsuitable for most vegetarians. Some domestic or Scandinavian-style fontinas use microbial rennet - check the label if this matters to you.

How long does fontina last in the fridge?

An uncut wedge keeps 3-6 weeks when properly wrapped in cheese paper. Once opened, use it within 2-3 weeks; grated fontina should be used within 5-7 days.

What Is Hominy? Taste, Texture, Uses & More

March 30, 2026

You spot it on the shelf between the canned beans and the corn - a can labeled "hominy" with those large, swollen, ivory-colored kernels floating in cloudy liquid. If you've only cooked with grits swaps or fresh sweet corn, hominy will read as something unfamiliar, almost alien.

It's worth grabbing.

QUICK SUMMARY

Hominy is whole field corn treated with alkali to remove its hull and deepen its flavor. The result is a chewy, starchy kernel with a mellow, slightly nutty taste - used in pozole, grits, stews, and casseroles across Mexican, Southern, and Native American cooking.

🌽What It Is: Nixtamalized whole field corn, sold canned or dried
👅Flavor: Mildly sweet, starchy, earthy, with a subtle nuttiness
🍲Best Use: Simmered in pozole or braised low and slow with pork
🏪Buying: Choose plump, intact kernels - canned or dried both work
📅Shelf Life: Canned unopened: years; opened: 3-5 days refrigerated; dried: up to 12 months

What Is Hominy?

Hominy starts as field corn - a hard, starchy variety grown for drying, not for eating fresh off the cob.

The kernels go through nixtamalization, an ancient Mesoamerican process in which dried corn soaks in an alkaline solution, typically water mixed with calcium hydroxide (slaked lime) or wood ash lye.

That soak loosens the tough outer hull, softens the kernel, and dramatically changes the corn's chemistry.

Niacin - vitamin B3 - becomes biologically available in a way it simply isn't in untreated corn, which is one reason nixtamalization became so important across cultures that depended on corn as a dietary staple.

After processing, the kernels puff up and take on a characteristic pearly, swollen appearance. You'll find hominy sold two ways:

  • 🥫 Canned hominy - pre-cooked, ready to use after draining and rinsing; white or golden varieties are both common
  • 🌾 Dried hominy - raw nixtamalized kernels requiring several hours of simmering or pressure cooking before they're tender

Elsewhere it goes by nixtamal (particularly in Mexico), hominy corn, or granos de elote nixtamalizados. Ground dried hominy becomes masa harina, the flour behind tortillas and tamales - a related but distinct product.

What Does Hominy Taste Like?

hominy - What Is Hominy
Sensory SnapshotModerate Intensity
👅 Flavor
mildly sweetstarchynuttyearthy
✋ Texture
chewytender inside
👃 Aroma
toastysubtle corn

Hominy tastes nothing like fresh sweet corn. The sugars are muted, the starch is front and center, and the alkali process adds a mineral depth that anchors the whole flavor profile.

Think toasted polenta rather than a summer ear of corn. There's a light nuttiness that emerges with heat, and an earthy undercurrent that makes hominy absorb surrounding flavors - broth, fat, chiles - without disappearing into the background.

Golden Rule
Hominy's flavor intensifies with long, slow cooking. Quick heating it in a pan yields a mild, starchy kernel; simmering it for an hour in seasoned broth gives you something much more developed.

Dried hominy that's been pressure-cooked carries more complexity than canned. Canned hominy is convenient but slightly blander - rinsing away the canning liquid before using makes a noticeable difference.

How to Use Hominy

Hominy is built for long cooking and bold companions. Its chewy, starchy body holds together through hours of braising, making it the ideal base for soups and stews that need a filling, substantial grain element.

The most iconic application is pozole, the Mexican stew where hominy kernels "bloom" open and soak up a rich chile-laden broth. Anyone deciding pairings for pozole will find that the hominy itself does most of the structural work in the bowl.

How Hominy Is Used
MethodBest ForTip
🍲 SimmeredPozole, braised stews, soups with pork or chickenUse low, steady heat and give it at least 30-45 minutes in the pot
🔥 Pan-ToastedSalad toppers, grain bowls, crunchy texture contrastDrain and dry canned hominy well before hitting a hot dry skillet
🫕 BakedCasseroles, tamale-style bakes, cheesy gratinsMix with sharp cheese and fat; hominy needs richness to sing in the oven
⚙️ GroundHominy grits, polenta-style porridge, masa doughsGrind dried nixtamalized corn coarsely for grits or fine for a masa-adjacent dough

Pairings are direct: pork is the classic match - slow-braised shoulder, smoked ham hock, or carnitas-style pulled meat. Ancho and guajillo chiles build the broth that hominy was made to absorb.

Lime and cilantro cut through the starch at the finish, while cotija or sharp cheddar melt into the mix when you're going the casserole route.

In Southern cooking, hominy grits anchor the breakfast table in a way that masa harina swaps can't quite replicate - the kernel's processing history gives grits a specific mineral note that stone-ground cornmeal lacks.

Try It In
🍗Air Fryer Chili-Lime Chicken WingsServe alongside hominy simmered in chile broth for a complete plate→🧄Air Fryer Garlic Parmesan Chicken TendersPair with creamy hominy grits instead of mashed potato→🍯Air Fryer Honey Garlic Chicken TendersSet over pan-toasted hominy for a chewy, caramelized grain base→

How to Buy and Store Hominy

Look for canned hominy with whole, plump, ivory-colored kernels and minimal cloudy liquid. Avoid cans where kernels look broken or the liquid is thick and slimy - that signals poor processing or age.

Watch Out
Dried hominy that smells musty or shows any discoloration should be discarded. Mold can develop on improperly stored dried corn, and no amount of cooking will fix off-flavors baked in from the start.

For dried hominy, inspect the packaging for a recent processing date and choose kernels that are uniform in size and color - consistency means even cooking.

  • Canned, unopened - store in a cool pantry; shelf-stable for months to years
  • Canned, opened - refrigerate submerged in fresh water in an airtight container; replace the water every 24-48 hours and use within 3-5 days
  • Dried hominy - airtight container in a cool, dark pantry; use within 6-12 months
  • Cooked hominy - refrigerate in broth or cooking liquid; holds 3-5 days

Start With the Can

If you haven't cooked with hominy before, canned is the right entry point. It needs no soaking, no multi-hour simmer, and fits into a weeknight pozole or a quick skillet with smoked sausage without much planning.

Once you're comfortable with how hominy behaves in a pot - how it absorbs liquid, how it holds texture - move to dried.

The flavor payoff is real, though if you need alternatives along the way, solid hominy swaps can fill in while you get your footing.

Frequently Asked Questions

Is hominy the same as masa?

No. Hominy is whole nixtamalized kernels; masa is the wet dough made by grinding those kernels. Masa harina is the dried, powdered version of that dough - a separate product you rehydrate to make tortillas or tamales.

How long does it take to cook dried hominy?

Expect 4-6 hours of stovetop simmering after an overnight soak. A pressure cooker cuts that to roughly 45-60 minutes at high pressure without pre-soaking, which is the more practical approach for most home kitchens.

Are canned and dried hominy interchangeable?

They swap in the same dishes, but not cup-for-cup by volume. Dried hominy roughly triples in size once cooked. Canned is already cooked and will have a milder flavor than dried hominy simmered low and slow in seasoned broth.

Can you make hominy from sweet corn?

No. Sweet corn has the wrong starch structure - its kernels are too tender and high in sugar to survive the nixtamalization process intact. True hominy requires dried field corn, which is hard enough to hold its shape through the alkali soak.

Does hominy contain gluten?

Hominy is naturally gluten-free - corn contains no gluten proteins. However, canned hominy processed in facilities that also handle wheat may carry cross-contamination risk, so check the label if gluten sensitivity is a concern.

Chicken Salad Coronation-Style

March 30, 2026

Output

When meal prep needs to feel intentional but you're short on time, Coronation chicken salad fits the window. One poached chicken breast, mild curry powder, and a handful of pantry staples turn into a creamy lunch that works for packed sandwiches, afternoon tea spreads, or quick weeknight dinners.

Chicken Salad Coronation-Style served on a plate

The British-inspired dressing does all the work. Mayonnaise binds tender chicken with toasted nuts, golden raisins, and a hit of lemon juice for brightness.

Make this when you need something that tastes special but doesn't require multiple pans or complicated steps.

QUICK SUMMARY

Coronation chicken salad combines poached chicken with a mild curry-spiced dressing, toasted nuts, and sultanas. Poach the chicken to exactly 165°F, chill before mixing, and add nuts last to keep them crunchy.

⏱️Time: 30 minutes total - 15 min poach, 15 min assembly
🔪First Move: Poach chicken breasts 12-15 min to 165°F internal
⚠️Watch Out: Dry chicken ruins texture - pull at temp, never overcook

Why This Recipe Works

Poaching keeps the chicken tender while you prep the dressing. For a version that comes together quickly, a tender pork on the side balances the curry spice.

Quick Reference
⏱️
Prep Time
15 min
🔥
Cook Time
15 min
⏰
Total Time
30 min
🍽️
Servings
4-6 servings
📊
Difficulty
Easy
🏷️
Category
Main Dish | Lunch
💡
Quick Tip
Poach chicken gently for tender texture
🎯
Best For
Weeknight | Meal prep | Entertaining

Five things that make this work:

  • Gentle poaching - Simmer chicken breasts 12-15 minutes to 165°F for tender, juicy meat
  • Room-temperature dressing - Cold mayo clumps; warm dressing blends smooth
  • Fresh lemon juice - Squeeze 1-2 tablespoons to cut through the creamy richness
  • Toasted nuts - Dry-pan almonds or cashews 3-4 minutes until fragrant for maximum crunch
  • 30-minute chill - Refrigerate assembled salad before serving so flavors meld
Quick Tip
Dice onions and celery to ¼ inch so every bite has even texture

What You'll Need

Ingredients for Chicken Salad Coronation-Style

Fondue adds the contrast this plate needs, but timing matters. For a version that comes together quickly, simple homemade fondue recipe balances the curry spice.

🍗
Protein
  • Cooked chicken breast (or thighs)
🧀
Dairy
  • Mayonnaise
  • Greek yogurt (optional)
🌶️
Spices & Flavor
  • Curry powder
  • Lemon juice
  • Fresh cilantro or parsley
🫙
Mix-Ins
  • Almonds or cashews
  • Sultanas or golden raisins
  • Celery
  • Red onion

Ingredient Details

  • Cooked chicken breast
    Base protein - neutral flavor, tender when poached to 165°F
  • Mayonnaise
    Creamy binder - traditional dressing base, use full-fat for best texture
  • Curry powder
    Signature spice - start with 1 tsp, add more for stronger flavor
  • Sultanas or golden raisins
    Sweetness and chew - balances curry warmth with juicy bursts
  • Almonds or cashews
    Crunch - toast 3-4 min until fragrant, add last to stay crisp
  • Lemon juice
    Fresh acidity - 1-2 tablespoon cuts creaminess, use fresh-squeezed
  • Greek yogurt
    Optional swap - replaces half the mayo for tanginess, lower fat

Ingredient Swaps

The homemade works best when it hits the table at the same time as the main. For a version that comes together quickly, simple homemade recipe adds brightness.

Four swaps that work:

  • Mayonnaise → Greek yogurt or vegan mayo - Lighter texture, tangier flavor, use 50/50 ratio for balance
  • Cooked chicken breast → Rotisserie chicken - Faster prep, more flavor, shred meat off bones
  • Almonds → Cashews or sunflower seeds - Different crunch profile, sunflower seeds for nut-free option
  • Curry powder → Garam masala - Changes spice profile, slightly sweeter and less heat

Greek Yogurt

Works for: Lighter dressing, tangier flavor, meal-prep lunches

Skip if: You want traditional richness or creamier texture

Rotisserie Chicken

Works for: Quick weeknight assembly, no poaching needed

Skip if: You want precise moisture control or milder flavor

Garam Masala

Works for: Sweeter spice profile, less curry intensity

Skip if: You want classic Coronation flavor or bold curry warmth

Instructions

Poach chicken first, then prep the dressing while it cools. A good homemade can make or break the plate, and this easy homemade recipe adds brightness.

  1. Poach the chicken. Place chicken breasts in saucepan, cover with cold water by 1 inch. Bring to simmer over medium heat, reduce to low, cook 12-15 minutes until internal temp hits 165°F. Remove chicken, let cool 10 minutes, then dice into ½-inch pieces.

  2. Toast the nuts. Heat dry skillet over medium, add almonds or cashews. Toast 3-4 minutes, shaking pan, until fragrant and lightly golden. Transfer to plate to cool.

  3. Mix the dressing. Whisk mayonnaise, curry powder, lemon juice, and salt in large bowl until smooth. If using Greek yogurt, add now and whisk until combined. Taste and adjust curry or lemon.

  4. Combine everything. Add diced chicken, chopped celery, diced red onion, and sultanas to dressing. Toss until evenly coated. Fold in toasted nuts just before serving.

  5. Chill before serving. Cover bowl, refrigerate 30 minutes so flavors meld. Serve cold on sandwich bread, lettuce cups, or over mixed greens. Garnish with fresh cilantro or parsley.

Golden Rule
Pull chicken at exactly 165°F - five degrees over and it dries out

What to Serve With It

Most people pair this with plain bread, but it needs contrast. Mexican chicken meal planning ideas show how to build balanced plates.

Side Dish Prep Why It Works How to Serve
Mixed green salad Easy Fresh greens cut through creamy dressing Toss with lemon vinaigrette, serve alongside
Crusty baguette Easy Crisp bread scoops salad, adds texture contrast Slice thick, toast lightly, serve warm
Cucumber slices Easy Hydrating crunch balances rich dressing Slice thin, season with salt, chill before serving
Roasted sweet potatoes Medium Sweet, hearty contrast to curry spice Roast cubed at 425°F for 25 min, serve warm
Puff pastry vol-au-vents Medium Elegant vessel for entertaining or afternoon tea Fill baked shells with chilled salad, garnish with herbs

Three ways to serve it:

  • Sandwich filling - Spread on toasted whole-grain bread with lettuce, tomato
  • Lettuce wraps - Spoon into butter lettuce cups for low-carb lunch
  • Stuffed tomatoes - Scoop salad into hollowed cherry tomatoes for finger food
Shortcut
Use store-bought rotisserie chicken to skip poaching - shred meat and mix directly into dressing

Store and Reheat

Chicken salad keeps 3-4 days in the fridge, but texture matters. The bread works best when it hits the table at the same time as the main, and this quick bread dish fits busy weeks.

Method Time Best For
🍳 Stovetop 2-3 min on low heat Gently warming chicken before mixing (not assembled salad)
📦 Microwave 1-2 min at 50% power Quickly warming chicken before mixing (avoid overheating)
🧊 Serve Cold No reheating needed Maintaining crisp texture and creamy dressing consistency

For best results when storing:

  • Refrigerate in airtight container - Use shallow container so salad cools evenly, keeps 3-4 days
  • Store nuts separately - Add toasted nuts just before serving to keep crunchy
  • Freeze chicken only - Poached chicken freezes up to 1 month, freeze before mixing with dressing
  • Drain excess liquid - If salad gets watery, drain briefly before serving or stir in extra mayo
  • Taste before serving - Curry and lemon flavors dull when cold, adjust seasoning after chilling

Frequently Asked Questions

Can I use leftover rotisserie chicken for Coronation salad?

Yes - shred rotisserie chicken off the bones and mix directly into the dressing. Skip the poaching step entirely, which cuts 15 minutes off total time.

How long does Coronation chicken salad keep in the fridge?

3-4 days in an airtight container. Store nuts separately and add just before serving to keep them crunchy.

What internal temperature should chicken reach for this salad?

165°F - pull chicken from heat exactly at this temp to keep it tender. Five degrees over and it dries out.

Why is my Coronation chicken salad sometimes too dry or bland?

Overcooked chicken dries out the salad, and cold dressing dulls spice. Poach chicken gently to 165°F, then taste dressing before mixing and adjust curry powder or lemon juice.

Can I scale this recipe for a large group easily?

Yes - double or triple all ingredients proportionally. Poach chicken in batches if needed, and mix dressing in a large bowl to coat everything evenly.

Chicken Salad Coronation-Style served on a plate

Chicken Salad Coronation-Style

No ratings yet
Chicken Salad Coronation-Style pairs tender poached chicken with a mild curry-spiced mayo dressing, toasted nuts, and golden raisins for a creamy, flavorful lunch. This easy recipe comes together in 30 minutes and works great for sandwiches, wraps, or over greens.
Print Recipe Pin Recipe
Prep Time 15 minutes mins
Cook Time 15 minutes mins
Total Time 30 minutes mins
Servings: 5 servings
Course: Lunch, Main Dish
Cuisine: British
Ingredients Equipment Method Notes

Ingredients
  

  • 1 breast chicken breast poached to 165°F, diced into ½-inch pieces
  • 0.5 cup mayonnaise full-fat preferred, room temperature
  • 1 teaspoon curry powder mild, adjust to taste
  • 1 tablespoon lemon juice fresh squeezed
  • 0.25 cup celery chopped into ¼ inch pieces
  • 0.25 cup red onion diced into ¼ inch pieces
  • 0.25 cup sultanas or golden raisins
  • 0.25 cup almonds or cashews, toasted 3-4 minutes until fragrant
  • salt to taste
  • 0.25 cup Greek yogurt optional, use to replace half mayo
  • 0.25 cup fresh cilantro or parsley, for garnish

Equipment

  • Saucepan For poaching chicken
  • Dry skillet To toast nuts
  • Large bowl To mix dressing and salad

Method
 

  1. Place chicken breasts in a saucepan and cover with cold water by 1 inch. Bring to a simmer over medium heat, then reduce to low. Poach chicken for 12-15 minutes until internal temperature reaches 165°F. Remove chicken and let cool for 10 minutes, then dice into ½-inch pieces.
    1 breast chicken breast
  2. Heat a dry skillet over medium heat. Add almonds or cashews and toast for 3-4 minutes, shaking the pan frequently, until fragrant and lightly golden. Transfer to a plate to cool.
    0.25 cup almonds
  3. In a large bowl, whisk together mayonnaise, curry powder, lemon juice, and salt until smooth. If using Greek yogurt, add it now and whisk until fully combined. Taste and adjust curry powder or lemon juice as desired.
    0.5 cup mayonnaise, 1 tsp curry powder, 1 tbsp lemon juice, salt, 0.25 cup Greek yogurt
  4. Add diced chicken, chopped celery, diced red onion, and sultanas to the dressing. Toss everything until evenly coated. Just before serving, fold in the toasted nuts to keep them crunchy.
    1 breast chicken breast, 0.25 cup celery, 0.25 cup red onion, 0.25 cup sultanas, 0.25 cup almonds
  5. Cover the bowl and refrigerate the salad for 30 minutes to allow flavors to meld. Serve cold on sandwich bread, in lettuce cups, or over mixed greens. Garnish with fresh cilantro or parsley.
    0.25 cup fresh cilantro

Notes

  • Pull chicken exactly at 165°F to maintain tenderness and avoid dryness.
  • Chill the assembled salad before serving for best flavor melding.
  • Add toasted nuts last to keep them crunchy and flavorful.

Tried this recipe?

Let us know how it was!

What Is Graham Flour? [Taste, Uses & More]

March 30, 2026

Graham crackers might be the most recognized product in American baking, but the flour behind them rarely gets its own moment -

What Is Graham Flour

even though all purpose flour in grain dishes and graham cracker in grain dishes come up constantly as swaps when it's not on hand. Graham flour is a coarsely milled whole-wheat flour with a character all its own: tan, speckled with bran, and built for rustic baking where a fine, powdery crumb would miss the point entirely.

QUICK SUMMARY

Graham flour is a coarsely ground whole-wheat flour milled from the entire wheat kernel. It has a toasty, mildly nutty flavor with a slight cracker-like sweetness. Best in cookies, cracker crusts, and quick breads. Shorter shelf life than refined flours due to its bran and germ content.

🌾Category: Coarsely ground whole-wheat flour, milled from the full kernel
👅Flavor: Toasty, nutty, mildly sweet with a slight bitter bran note
🍪Best Uses: Graham crackers, cracker crusts, muffins, quick breads, streusel
📦Shelf Life: 2-3 months pantry; 6-12 months refrigerated or frozen
⚠️Avoid In: Delicate sponge cakes or fine-crumb pastries requiring smooth texture

What Is graham flour?

Graham flour takes its name from Sylvester Graham, a 19th-century American dietary reformer who advocated for unrefined whole grains at a time when white flour was increasingly the norm.

His influence seeded what became a small but distinct category of American baking ingredients.

The flour itself is milled from the entire wheat kernel - bran, germ, and endosperm - but what separates it from standard whole-wheat flour is the milling method.

Rather than grinding all three components together into a uniform powder, graham flour mills the endosperm finely and the bran and germ more coarsely, then recombines them.

This produces a tan, speckled flour with a visibly gritty texture you won't see in finely milled whole-wheat alternatives. It goes by several names depending on the brand or region:

  • 🌾 Graham meal - common in older American recipes; typically the coarsest grind
  • Graham-wheat flour - a more descriptive label found on specialty bags
  • Graham wheat - used interchangeably in some New England baking traditions

Because the germ is retained, graham flour carries a higher natural oil content than refined flours - a detail that matters more for storage than for flavor.

If you've ever swapped out bread flour or considered swapping out self rising flour in a hearty bake, graham flour occupies a similar substitution space but brings more textural character than either.

What Does graham flour Taste Like?

graham flour - What Is Graham Flour
Sensory SnapshotModerate Intensity
👅 Flavor
toasty wheatymild nuttycracker-like sweetnesslight bran bitterness
✋ Texture
coarseslightly grittycrumbly when baked
👃 Aroma
toasted grainwarm wheaty

Graham flour tastes closer to a whole-wheat cracker than to bread.

The bran brings a mild earthiness and a very faint bitter edge, while the germ contributes a nutty warmth that standard whole-wheat flour doesn't quite replicate at the same coarseness.

Heat sharpens those toasty grain notes noticeably. Baked goods made with graham flour tend to smell richer coming out of the oven than they do in the raw dough stage.

Compared to all-purpose flour, the difference is pronounced - graham is grittier, less neutral, and more assertive in recipes where you use more than a quarter cup.

Against standard whole-wheat flour, the gap narrows, though graham skews slightly drier and more cracker-forward rather than bready.

For a full breakdown of graham cracker and its flavor, it's useful context for understanding what the flour is trying to achieve in baked form.

Golden Rule
The coarser the grind, the more pronounced the bran bitterness. If your recipe feels too sharp, choose a finer-labeled graham flour rather than reducing the quantity.

How to Use graham flour

Graham flour performs best when paired with finer flours rather than used alone. On its own, it produces a dense, crumbly result that works for crackers but falls flat in most quick breads or muffins.

A blend of 25-40% graham flour with all-purpose or bread flour gives structure without sacrificing lift.

How Graham Flour Is Used
MethodBest ForTip
🍪 Baking (pure)Graham crackers, cracker-style cookiesKeep fat content high to offset the dry bran
🥧 Blended bakingMuffins, quick breads, pancakes, wafflesReplace no more than 40% of the finer flour
🥣 CrumblingStreusel toppings, cobbler crustsMix with cold butter and brown sugar for best texture
🍳 CoatingBreaded fish or chicken with spice mixCombine with breadcrumbs for even browning
🔥 Toasting dryDeepening aroma before adding to no-bake crustsToast in a dry pan over medium heat, 3-4 minutes max

Butter, brown sugar, and cinnamon are its closest allies. Those pairings reinforce the natural cracker sweetness of the flour and show up together in classic graham cracker crust recipes for cheesecakes and cream pies. Molasses or honey can substitute for refined sugar and push the flavor in a richer, slightly darker direction.

Buttermilk or sour cream helps tenderize quick breads made with graham flour, counteracting the bran's tendency to tighten the crumb. Chopped pecans or walnuts mixed into a graham-flour batter add compatible nuttiness without competing.

For pancakes, blending graham flour with a lighter flour produces a breakfast stack with a wheaty depth - similar in spirit to the approach used in besan flour pancakes recipe, where a denser flour carries the flavor and structure while a finer one keeps the texture open.

Try It In
🥞Besan Flour PancakesSee how a coarser flour blends into a light batter for a hearty breakfast stack→

How to Buy and Store graham flour

Look for bags with a uniform tan color and visible bran specks throughout. Clumping or dark smudges inside the bag indicate moisture exposure - skip those.

The label's grind description matters: "meal" or "coarse" suits cracker crusts and toppings, while a slightly finer grind works better in quick breads where a gritty crumb would be noticeable.

Watch Out
Graham flour contains the wheat germ, which has natural oils that turn rancid faster than refined flour. A stale, faintly bitter smell before baking is a reliable sign it's past its best.

Storage method depends on how often you bake with it:

  • Pantry - Keep sealed in an airtight container away from heat and light; good for about 2-3 months
  • Refrigerator - Extends shelf life to roughly 6 months; best for moderate bakers who restock every few weeks
  • Freezer - The longest option; [freezing graham flour](https://forkliftkitchen.com/graham-flour-shelf-life/) in a sealed bag keeps it stable for up to 12 months without flavor loss

Bring refrigerated or frozen flour to room temperature before measuring - cold flour can affect hydration in sensitive recipes.

Start With the Crust

If you're new to baking with graham flour, a no-bake cheesecake crust is the lowest-friction entry point.

Mix it with melted butter and brown sugar, press into a pan, and you'll see exactly what the flour does - a crumbly, lightly sweet base with real grain character that store-bought cracker crumbs can't replicate.

From there, try replacing 30% of the flour in your next muffin batch.

Shortcut
No graham flour on hand? Our guide to replacements for graham flour covers which whole-grain and cracker-based swaps hold up best in crusts and quick breads.

If you want to explore other flour options, the guide to alternatives to whole wheat flour is a useful reference for mapping where graham flour sits in the broader grain landscape.

Frequently Asked Questions

What is graham flour made from?

It's milled from the entire wheat kernel - bran, germ, and endosperm. What makes it distinct from standard whole-wheat flour is the method: the endosperm is ground fine while the bran and germ are milled coarser, then recombined.

Can I substitute graham flour for whole wheat flour?

Yes, in most hearty baked goods. Graham flour is coarser, so expect a slightly grittier crumb and drier feel. Adding a tablespoon of extra liquid per cup used helps compensate.

Does graham flour contain sugar?

No added sugar. The mild sweetness comes from the natural starches in the wheat endosperm, which read as faintly cracker-like. Commercial graham crackers add sugar separately.

Is graham flour the same as graham cracker crumbs?

No. Graham cracker crumbs are crushed finished crackers - already sweetened and baked. Graham flour is the raw ingredient used to make those crackers, with no added sugar or fat.

Why does graham flour go bad faster than all-purpose flour?

The retained wheat germ contains natural oils that oxidize over time. All-purpose flour has the germ removed, which dramatically extends its pantry life. Refrigerating or freezing graham flour slows that oxidation significantly.

What Is Halloumi Cheese? [Taste, Uses & More]

March 30, 2026

Grilled halloumi arrives at the table making a faint squeak against the fork, golden on the outside and still springy within - a behavior no standard cheese shares.

What Is Halloumi Cheese

Understanding keeping halloumi fresh matters almost as much as knowing how to cook it, because texture degrades fast once the block dries out.

This is the firm, brined cheese from Cyprus that browns without melting, and it earns a permanent spot in any cook's rotation for that reason alone.

QUICK SUMMARY

Halloumi is a firm, brined Cypriot cheese made from sheep, goat, or cow milk that holds its shape under high heat. It tastes salty and mildly tangy raw, then develops a crisp, caramelized crust when grilled or pan-fried. Best used for grilling, frying, and grain salads.

🧀Category: Brined, unripened grilling cheese from Cyprus
🔥Best Use: Grilled or pan-fried in thick slices until golden
🧂Flavor: Salty, mildly tangy, milky, with nutty browning notes
❄️Shelf Life: Unopened: weeks to months; opened in brine: up to 2 weeks
⚠️Watch Out: High sodium - rinse or soak before cooking to reduce saltiness

What Is halloumi cheese?

Halloumi originates from Cyprus, where it has been produced for centuries as a staple of Cypriot and broader Eastern Mediterranean cooking.

It belongs to a small category of brined, unripened grilling cheeses - firm enough to slice cleanly and heat-stable enough to hold its structure on a grill or in a hot skillet.

Traditional halloumi is made from sheep and goat milk, often in combination, though modern commercial blocks frequently include cow milk to reduce cost and increase yield.

The curd is cooked, pressed, then stored in whey or salt brine, which firms the texture further and builds the characteristic saltiness.

It also goes by hellim in Turkish Cypriot communities, and "haloumi" in some regional spellings.

Two broad styles exist worth knowing:

  • Traditional Cypriot halloumi - sheep and goat milk only, denser flavor, often sold with a sprig of dried mint folded inside the block.
  • Commercial blend halloumi - includes cow milk, milder, softer texture, more widely available in supermarkets.

Understanding what makes milk distinct across animal sources helps explain why the milk blend shifts the final flavor and firmness of the block.

What Does halloumi cheese Taste Like?

halloumi cheese - What Is Halloumi Cheese

Raw halloumi is salty and clean, with a milky baseline and a faint tang from the brine. The texture squeaks against the teeth - a characteristic shared with fresh paneer or very firm mozzarella, though halloumi is denser than both.

Heat changes everything. Once browned, a caramelized, slightly smoky edge develops on the crust while the interior softens just enough to turn yielding without collapsing.

That contrast - crisp shell, springy center - is what separates halloumi from every other cheese in a hot pan.

Sensory SnapshotModerate Intensity
👅 Flavor
saltymildly tangymilkynutty when browned
✋ Texture
firm and springysqueaky rawcrisp exterior when cooked
👃 Aroma
clean milkylight briny

Older or drier blocks taste saltier and more concentrated. Soaking slices in water for 20-30 minutes before cooking pulls out enough brine to dial the salt back without flattening the flavor entirely.

How to Use halloumi cheese

Halloumi's defining trait - it doesn't melt - makes it the right tool for cooking situations where other cheeses would turn liquid and disappear.

A dry skillet over medium-high heat is all it takes to get a deep golden crust; no oil is needed because the cheese releases enough fat as it warms.

Golden Rule
Cut halloumi at least 1 cm thick before grilling or frying. Thinner slices dry out before the exterior properly browns.

The most direct route is grilling thick slices and finishing them with lemon and oregano - the classic Cypriot preparation.

Knowing the difference between comparing dried oregano vs ground oregano options matters here, since dried leaf oregano gives a more distinct herbal hit than powder on hot cheese. Beyond that, the range of uses is broad:

How Halloumi Is Used
MethodBest ForTip
🔥 GrillingClassic Cypriot serving, kebabs, flatbreadsOil the cheese, not the grill grate
🍳 Pan-FryingGrain salads, bowls, sandwichesDry skillet, medium-high heat, don't move it early
🥗 RawSliced over salads, with watermelon or figsSlice thin; soak if block is very salty
🍤 Battered and FriedCrispy appetizer, sharing platesLight batter only - the cheese is already dense
🍢 Broiled on SkewersVegetable kebabs, mezze plattersThread between dense vegetables to buffer heat

Halloumi works across Cypriot, Greek, and Middle Eastern meals, and it moves easily into modern grain bowls and street food formats.

Sweet pairings - honey, figs, or watermelon - exploit the salt contrast and are worth trying before assuming halloumi only belongs in savory applications.

For ideas on using halloumi cheese for creaminess in broader meal contexts, the pairing combinations extend well beyond the grill.

Try It In
🔥Cypriot Halloumi Cheese GrilledThe traditional preparation — thick slices, hot grill, lemon finish→

How to Buy and Store halloumi cheese

At the store, look for a block with even white color and a moist surface inside its packaging. Chalky, dry edges suggest the brine has evaporated; excessive sliminess points to age.

For traditional style, choose blocks labeled "Cyprus" or single-origin - these are more likely to use sheep and goat milk rather than a full cow milk blend.

Watch Out
Once opened, halloumi dries out quickly in the fridge. Store it submerged in fresh salted water, not just wrapped in plastic, to preserve the texture.

Unopened vacuum-packed blocks keep for weeks to months per the sell-by date.

Once opened, submerge the remainder in fresh salted water and refrigerate; it holds well for up to two weeks that way.

Cooked halloumi keeps in the fridge for 2-4 days, though the crust softens.

For longer storage, details on freezing halloumi cheese cover what to expect from texture after a freeze-thaw cycle.

On the topic of dairy freshness more broadly, guidance on milk in dairy recipes applies to the whey-based brining liquid as well.

Start Here for Halloumi

First block of halloumi? Grill or pan-fry it plain - no marinade, no batter - just thick slices in a dry skillet until both sides are deeply golden.

That single cook tells you what the cheese does and how much salt it carries.

From there, squeeze lemon over the top and decide if you need to soak future slices before cooking.

If the flavors of halloumi don't land for you, exploring alternatives to halloumi cheese gives a clear map of what else holds up under heat.

Frequently Asked Questions

Does halloumi melt when cooked?

No. Halloumi is specifically made to resist melting at high heat. The cooking process that forms the curd - heating the whey to a high temperature before pressing - denatures the proteins so they hold structure rather than flow. You get browning and softening, not pooling.

Can halloumi be eaten raw?

Yes, and it's common in Cypriot mezze. Raw halloumi is firm, squeaky, and saltier-tasting than cooked slices because the brine flavor hasn't been tempered by heat. Thin slices pair well with watermelon or tomatoes straight from the block.

How salty is halloumi compared to other cheeses?

It's notably saltier than mozzarella or paneer, closer to feta in sodium level. Brining throughout production means the salt penetrates the whole block, not just the rind. Soaking slices in cold water for 20-30 minutes reduces saltiness if needed.

What is the difference between halloumi and paneer?

Both are firm, heat-stable cheeses, but paneer is made from cow milk without brine and tastes mild and unsalted. Halloumi is brined, much saltier, and browns more aggressively. Paneer also crumbles more readily; halloumi holds a slice under direct flame.

How do you grill halloumi without it sticking?

Brush oil onto the cheese itself, not the grill grates, and make sure the grill is fully preheated before the slices go on. Don't attempt to move halloumi for the first 2 minutes - once a crust forms, it releases cleanly on its own.

Air Fryer Beef Kibbeh

March 30, 2026

When weeknight meal prep feels repetitive, shape crispy air fryer beef kibbeh. These Middle Eastern bites deliver protein and warm spices without the frying mess or hour-long oven commitment.

Air Fryer Beef Kibbeh served on a plate

The air fryer crisps the outside while keeping the filling tender. You mix bulgur with ground beef, shape into footballs, and cook at 375°F for 15 minutes.

This works for casual gatherings when you want finger food that actually fills people up, or batch cooking for lunches when you're tired of sandwiches.

QUICK SUMMARY

Air fryer beef kibbeh combines bulgur wheat with spiced ground beef, shaped into crispy footballs that cook in 15 minutes. The key is soaking bulgur completely before mixing so the dough holds together during shaping and air frying. Skip this if you're intimidated by shaping-these require hands-on molding.

⏱️Time Reality: 25 min prep includes shaping each piece individually plus 10 min chill
🔑Critical First Move: Soak bulgur 15 min then drain completely before mixing with meat
⚠️Watch Out: Overcrowding basket = soggy kibbeh. Cook in batches with 1-inch gaps between pieces

Table of Contents

Toggle
  • Why This Recipe Works
  • What You'll Need
    • Ingredient Details
  • Ingredient Swaps
  • What to Serve With It
  • Store and Reheat
  • Frequently Asked Questions
  • Air Fryer Beef Kibbeh
    • Method 
    • Tried this recipe?

Why This Recipe Works

The air fryer crisps kibbeh exteriors without submerging them in oil while bulgur wheat binds the meat mixture into a cohesive dough. For a version that comes together quickly, another great beef recipe uses similar air fryer technique with different seasoning.

Quick Reference
⏱️
Prep Time
25 min
🔥
Cook Time
15 min
⏰
Total Time
40 min
🍽️
Servings
6 servings
📊
Difficulty
Medium
🏷️
Category
Appetizer
💡
Quick Tip
Do not overcrowd basket; maintain crispiness.
🎯
Best For
Weeknight | Meal prep | Entertaining
  • High heat + circulated air crisps the bulgur-beef shell without the grease and splatter of traditional frying methods
  • Fine bulgur soaks up moisture from onion and meat then creates a binding network that holds the football shape through cooking
  • 15-20% fat ground beef keeps the filling moist while lean meat dries out during the 15-minute cook time
  • Allspice and cumin deliver Levantine spice balance without needing a dozen different jars from the pantry
  • Chilling shaped kibbeh for 10 minutes firms the dough so pieces hold together when you flip them halfway through air frying
Quick Tip
Toast pine nuts 3-5 minutes over medium-low heat, stirring constantly. They burn in seconds once they start browning.

What You'll Need

Ingredients for Air Fryer Beef Kibbeh

Shop for fine bulgur wheat specifically-coarse bulgur breaks the dough structure and prevents smooth shaping. For a version that comes together quickly, this easy dip recipe pairs with these kibbeh for a complete Middle Eastern spread.

🍗
Protein Base
  • 1 lb ground beef (15-20% fat)
🍜
Binding Grain
  • 1 cup fine bulgur wheat
  • 1 cup cold water (for soaking)
🧄
Aromatics & Texture
  • 1 medium onion (yellow or white)
  • ¼ cup pine nuts
  • 2 tablespoon fresh parsley (chopped)
🌶️
Spices & Seasoning
  • 1 teaspoon allspice
  • 1 teaspoon cumin
  • 1 teaspoon salt
  • ½ teaspoon black pepper
  • 2 tablespoon olive oil

Ingredient Details

  • Fine bulgur wheat
    Coarse bulgur prevents smooth dough formation and causes kibbeh to crack during shaping. Look for #1 grade bulgur in Middle Eastern markets.
  • Ground beef (15-20% fat)
    Leaner than 15% dries out during air frying. Fattier than 20% makes greasy kibbeh that doesn't hold shape.
  • Cold water for soaking
    Cold water hydrates bulgur without cooking it. Hot water turns bulgur mushy and impossible to shape.
  • Yellow or white onion
    Grate onion on box grater's large holes. Minced onion creates texture lumps that break the smooth dough.
  • Pine nuts
    Toast before adding to filling. Raw pine nuts stay soft and don't provide the expected crunch contrast.
  • Allspice
    This single spice delivers the warm, slightly sweet backbone of Levantine kibbeh seasoning. Don't skip.
  • Olive oil
    Brush or mist shaped kibbeh before air frying. Oil creates the golden crispy exterior without deep frying.

Ingredient Swaps

Bulgur wheat defines traditional kibbeh texture, but gluten-free cooks need alternatives that still bind the meat. Shallots soften faster than onions if you're short on prep time.

  • Swap bulgur wheat for quinoa or gluten-free flour - texture turns less chewy and slightly softer but dough still holds shape for shaping and cooking
  • Swap ground beef for ground lamb - richer flavor with slightly higher fat content creates more tender filling
  • Swap pine nuts for toasted slivered almonds or omit entirely - similar crunch with milder flavor, keeps budget lower if pine nuts feel expensive
  • Swap olive oil for neutral oil spray - minimal flavor change but may reduce exterior crispness slightly during air frying

Ground Lamb vs Ground Beef

Works for: Traditional kibbeh recipes, richer flavor preference, higher fat tolerance

Skip if: You want milder taste, watching fat intake, lamb isn't available locally

Quinoa vs Fine Bulgur

Works for: Gluten-free diets, faster cook time, lighter texture preference

Skip if: You want authentic chewy texture, prefer traditional kibbeh binding, concerned about shape holding

Instructions

The entire process takes 40 minutes including chill time, with most effort spent shaping individual pieces. The air fryer crisps exteriors while keeping filling tender without constant monitoring or oil temperature management.

  1. Soak bulgur in cold water for 15 minutes then drain completely through fine-mesh strainer. Press bulgur with back of spoon to remove excess water. Wet bulgur creates sticky dough that won't hold shape.
  2. Mix drained bulgur with ground beef, grated onion, allspice, cumin, salt, and pepper until just combined. Overmixing toughens meat texture. Stop when ingredients distribute evenly through mixture.
  3. Shape mixture into 2.5-inch footballs about 1 inch thick then chill for 10 minutes. Wet hands prevent sticking during shaping. Chilling firms dough so pieces don't flatten in basket.
  4. Brush shaped kibbeh with olive oil then arrange in air fryer basket with 1-inch gaps between pieces. Overcrowding traps steam and prevents crisping. Cook in batches if needed.
  5. Air fry at 375°F for 12-15 minutes, flipping halfway through. Check internal temperature reaches 160°F with instant-read thermometer. Exterior should look golden brown with slight char marks.
Golden Rule
Drain soaked bulgur completely before mixing. Excess water makes dough too wet to shape and causes kibbeh to fall apart during cooking.

What to Serve With It

Kibbeh needs cooling contrast and something to scoop with since they're eaten with hands at casual gatherings. For a version that comes together quickly, complete beef bulgogi meal ideas suggests similar protein-forward spreads with complementary sides.

Side Dish Prep Why It Works How to Serve
Tabbouleh Easy Fresh herbs and lemon cut through rich spiced beef Serve chilled in separate bowl for scooping alongside kibbeh
Hummus Easy Creamy texture contrasts crispy exterior, adds protein Spread on plate or serve in shallow bowl for dipping
Pita Bread Easy Neutral base for scooping kibbeh and catching drips Warm briefly then tear into wedges for sharing
Cucumber Yogurt Salad Easy Cooling contrast balances warm spices from allspice and cumin Dice cucumbers small, mix with yogurt, serve chilled
Roasted Vegetables Medium Adds fiber and warmth, uses same cooking method Roast carrots, zucchini, peppers at 400°F while kibbeh cooks

Three ways to serve it:

  • For weeknight meals: Plate kibbeh with tabbouleh and warm pita, skip elaborate presentations
  • For entertaining: Arrange on platter with hummus center, surround with kibbeh and cucumber salad
  • For meal prep: Pack individual containers with 3 kibbeh, portion of roasted vegetables, small hummus cup
Best Pick
Tahini sauce adds nutty richness that complements spiced beef without overpowering the allspice and cumin flavors.

Store and Reheat

Kibbeh stores better than most fried foods because the bulgur shell protects the meat filling from drying out. The air fryer restores exterior crispness faster than oven reheating for single servings.

Method Time Best For
🔥 Air Fryer 5-7 min at 350°F Single servings when you want crispy exterior restored quickly
🔥 Oven 10 min at 350°F Multiple servings, even reheating across batch
📦 Microwave 1-2 min low power Fast reheating when crispy texture isn't priority

For best results when storing:

  • Cool completely before refrigerating - trapping steam in container makes kibbeh soggy within hours
  • Layer parchment between stacked kibbeh - prevents pieces from sticking together during storage
  • Freeze uncooked shaped kibbeh on sheet pan first - transfer to freezer bag once solid, air fry from frozen adding 3-5 minutes
  • Store in shallow airtight container - stacking too many layers crushes bottom pieces and affects texture
  • Reheat from fridge not room temperature - cold kibbeh crisps better than room-temp pieces that warm unevenly

Frequently Asked Questions

Can I use ground lamb instead of beef for air fryer kibbeh?

Yes, ground lamb creates richer flavor with slightly higher fat content that keeps filling extra moist. Use the same 15-20% fat ratio and follow identical shaping and cooking instructions.

How should I store and reheat leftover air fryer kibbeh?

Refrigerate in shallow airtight container for 3-4 days with parchment between layers. Reheat in air fryer at 350°F for 5-7 minutes to restore crispy exterior, or microwave 1-2 minutes on low power when speed matters more than texture.

What internal temperature indicates kibbeh is fully cooked?

Insert instant-read thermometer into center of thickest kibbeh piece-it should reach 160°F. Exterior will look golden brown with slight char marks when properly cooked.

Why does my kibbeh turn out soggy in the air fryer and how to fix?

Soggy kibbeh comes from overcrowded basket or excess moisture in dough. Space pieces 1 inch apart, drain soaked bulgur completely before mixing, and pat filling dry before shaping.

Can I prepare and freeze uncooked kibbeh before air frying?

Yes, freeze shaped kibbeh on sheet pan until solid then transfer to freezer bag for up to 2 months. Air fry from frozen at 375°F for 18-20 minutes, no thawing needed.

Air Fryer Beef Kibbeh served on a plate

Air Fryer Beef Kibbeh

No ratings yet
Air fryer beef kibbeh blends bulgur wheat with spiced ground beef, shaped into crispy footballs for a protein-packed Middle Eastern appetizer. The air fryer crisps the exterior while keeping the filling tender, offering a quick, less messy alternative to traditional frying.
Print Recipe Pin Recipe
Prep Time 25 minutes mins
Cook Time 15 minutes mins
Total Time 40 minutes mins
Servings: 6 servings
Course: Appetizer
Cuisine: Middle Eastern
Ingredients Method Notes

Ingredients
  

  • 1 lb ground beef 15-20% fat
  • 1 cup bulgur wheat fine, soaked in cold water
  • 1 cup water cold, for soaking bulgur
  • 1 medium onion yellow or white, grated
  • 0.25 cup pine nuts toasted
  • 2 tablespoon parsley fresh, chopped
  • 1 teaspoon allspice
  • 1 teaspoon cumin
  • 1 teaspoon salt
  • 0.5 teaspoon black pepper
  • 2 tablespoon olive oil for brushing shaped kibbeh

Method
 

  1. Soak bulgur in cold water for 15 minutes, then drain completely through a fine-mesh strainer. Press with back of spoon to remove excess water to ensure dough holds shape.
    1 cup bulgur wheat, 1 cup water
  2. Mix drained bulgur with ground beef, grated onion, allspice, cumin, salt, and black pepper until just combined. Avoid overmixing to keep the meat tender.
    1 lb ground beef, 1 medium onion, 1 tsp allspice, 1 tsp cumin, 1 tsp salt, 0.5 tsp black pepper
  3. Shape the mixture into 2.5-inch football shapes about 1 inch thick. Use wet hands to prevent sticking. Chill shaped pieces in refrigerator for 10 minutes to firm up the dough.
    1 lb ground beef, 1 cup bulgur wheat, 1 medium onion, 1 tsp allspice, 1 tsp cumin, 1 tsp salt, 0.5 tsp black pepper
  4. Brush each shaped kibbeh generously with olive oil. Arrange kibbeh in air fryer basket with at least a 1-inch gap between pieces to avoid overcrowding and sogginess.
    2 tbsp olive oil
  5. Air fry kibbeh at 375°F for 12-15 minutes, flipping halfway through. Check that internal temperature reaches 160°F and the exterior is golden brown with slight char marks.

Notes

  • Drain soaked bulgur completely to prevent soggy dough and falling apart during cooking.
  • Do not overcrowd the air fryer basket; leave 1-inch gaps to allow crisping.
  • Chill shaped kibbeh for 10 minutes to firm dough and maintain shape while air frying.

Tried this recipe?

Let us know how it was!

How Long Does Goat Cheese Last? [Storage Guide]

March 30, 2026

Freezing goat cheese is something many home cooks wonder about, especially when a large log gets opened for one recipe and the rest sits in the fridge.

Can You Freeze Goat Cheese

Unlike using ricotta for creaminess, where short fridge windows push you toward freezing fast, goat cheese gives you a bit more time - but knowing exactly how long depends on whether you've opened the package and what style of chèvre you're working with. Fresh soft goat cheese and aged logs behave differently in storage, and confusing one for the other leads to waste.

QUICK SUMMARY

Unopened goat cheese keeps 2-3 weeks in the fridge. Once opened, use within 7-10 days with proper wrapping. Freezing extends life to 2-3 months but softens fresh chèvre into a crumbly texture - fine for cooking, less ideal for serving on a board.

🧊Fridge (opened): 7-10 days wrapped in wax paper and sealed
❄️Freezer: 2-3 months; crumble or portion before freezing
⚠️Key Rule: Never leave cut goat cheese unwrapped - it dries and forms a tough rind fast

How Long Does Goat Cheese Last?

Shelf life for goat cheese shifts based on two factors: whether it's been opened and whether it's soft fresh chèvre or a firmer aged log.

Soft fresh goat cheese in sealed packaging holds well for 2-3 weeks unopened, but once that seal breaks, you're working with a shorter window.

The role goat cheese plays in both savory and sweet dishes explains why so many people buy it by the log - which makes knowing these numbers practical, not just academic.

Goat Cheese Shelf Life
MethodStateDurationNotes
🧊 FridgeUnopened2-3 weeksFresh chèvre logs; aged versions lean toward the 3-week end
🧊 FridgeOpened7-10 daysWrap in wax/parchment and seal in an airtight container
❄️ FreezerOpened2-3 monthsTexture turns crumbly; best for cooking or baking after thaw
🏠 CounterOpened2-4 hours maxShort sit for serving; firmer aged chèvre tolerates this better

Aged logs handle ambient conditions better than soft fresh chèvre, which softens and becomes unsafe quickly at room temperature.

For comparison, cream cheese's shelf life follows a similar opened-versus-unopened split, though cream cheese lacks the same natural tang that can mask early spoilage in goat cheese.

How to Store Goat Cheese

Opened goat cheese needs two layers of protection: a breathable wrap against the surface, then an airtight seal around that. Plastic wrap alone traps moisture unevenly and can make the rind rubbery.

Golden Rule
Always re-wrap cut surfaces in wax or parchment paper before sealing. Direct contact with an airtight lid draws moisture out and turns edges chalky within a day.

Here's how to store goat cheese by method:

  • 🧊 Fridge (soft chèvre): Wrap the cut end in wax or parchment paper, place in a shallow airtight container with a small piece of parchment between the cheese and lid.
  • 🧊 Fridge (aged logs): Re-wrap in original paper or wax paper; aged formats breathe better and don't need as tight a seal, but still benefit from a container to block odor transfer.
  • 🏠 Counter: Soft fresh goat cheese should not sit out beyond 2-4 hours. Firmer aged chèvre can handle slightly longer at a cool room temperature during a sit-down meal.
  • 📦 Dedicated container: Goat's tang transfers easily to neighboring foods. A dedicated cheese box keeps the flavor contained.

Pantry storage is not recommended for soft fresh chèvre. Vacuum-sealed aged formats can manage a cool, dark pantry short-term, but the fridge remains more reliable.

Can You Freeze Goat Cheese?

Yes - with the right preparation. Freezing goat cheese works best when you treat it as a cooking ingredient after thaw rather than a serving cheese.

The texture of soft fresh chèvre becomes crumbly and slightly grainy once frozen and thawed; firmer aged logs hold shape better but will be noticeably drier.

Shortcut
Crumble fresh goat cheese before freezing and spread flat in a freezer bag. You can grab exactly what you need for pasta, eggs, or flatbreads without thawing the whole batch.
  1. Portion first - Crumble or slice into usable amounts before wrapping. Freezing a whole log makes thawing awkward and wastes more cheese.
  2. Wrap tightly - Press plastic wrap directly against the surface of each portion to push out air pockets.
  3. Double-wrap - Add a layer of foil or place the wrapped portions into a freezer-safe airtight container or vacuum bag.
  4. Label and date - Mark the date and freeze flat for even temperature distribution.
  5. Thaw in the fridge - Move to the fridge 24 hours before use, still sealed. Use within 3 days of thawing and do not refreeze.

When texture loss won't matter - think baked pasta, stuffed peppers, or a warm flatbread - using goat cheese for creaminess after freezing is a practical workaround that preserves the flavor even if the consistency shifts.

Signs Goat Cheese Has Gone Bad

Fresh chèvre has a naturally tangy, slightly funky scent that can mislead you, so rely on multiple indicators together rather than smell alone. A faint acidic edge is normal; a sharp ammonia hit is not.

Signs It's Gone Bad
👀
VisualBlue-green or black mold · Excessive liquid separation · Slimy surface or darkened cut edges
👃
SmellStrong rancid sourness · Ammonia-like sharpness beyond normal tang
✋
TextureSlimy surface · Excessively dry and cracked interior

Note that some aged chèvre has an intentional white bloom on the rind - that's not a spoilage sign. Discolored mold (blue, green, or black) that appears on fresh soft goat cheese is a different matter entirely.

Discard the whole piece; soft cheese mold can't be safely cut away the way it can on hard block cheeses.

Watch Out
Don't confuse an intentional white rind with mold. If the growth is blue, green, or black on a fresh chèvre log, discard the entire piece - soft cheeses are not safe to trim and eat.

Practical Tips for Getting More Life Out of Goat Cheese

Small habits extend goat cheese further without any extra effort. The two most common reasons it goes to waste early are improper wrapping and freezing whole logs without portioning first.

  • Store in portions - Wrap smaller amounts in parchment individually so you open only what you need and keep the rest sealed.
  • Use parchment, not plastic alone - Wax or parchment paper against the surface keeps moisture balanced; plastic alone creates a wet microenvironment that accelerates spoilage.
  • Crumble from frozen - For salads or grain bowls, crumble partially frozen goat cheese straight from the freezer for clean, fine crumbles without thawing.
  • Bake with older stock - If your goat cheese is nearing the end of its fridge window, bake or melt it. Heat sidesteps texture concerns and the flavor holds.

Frequently Asked Questions

How long does opened goat cheese last in the fridge?

Opened goat cheese lasts 7-10 days refrigerated when wrapped in wax or parchment paper and stored in an airtight container. Leaving it unwrapped cuts that window significantly - exposed edges dry out and harden within a day or two.

Does freezing change goat cheese texture?

Yes. Soft fresh chèvre turns crumbly and slightly grainy after freezing and thawing. Firmer aged goat cheese holds shape better but becomes drier - both styles remain usable in cooked dishes.

Can you eat goat cheese after mold appears?

Not if the mold is discolored (blue, green, or black) on a fresh soft log. Soft cheeses cannot be safely trimmed - mold penetrates the paste. Intentional white blooms on aged rinds are a separate matter and are safe.

Can you freeze goat cheese for later use?

Yes, and it keeps for 2-3 months in the freezer. Portion and crumble before freezing for easier use; thaw in the fridge for 24 hours and use within 3 days of thawing.

Is it safe to store goat cheese in its original packaging after opening?

Only for a day or two. Original packaging isn't designed to reseal tightly after opening. Transfer to a wax-paper wrap inside an airtight container to maintain moisture and block fridge odors from affecting the cheese.

What Is Jim Beam? [Taste, Uses & More]

March 30, 2026

Vanilla hits first - warm, unhurried, and faintly sweet before the grain even registers.

What Is Jim Beam

Jim Beam delivers a soft aromatic entry that what makes bourbon distinct helps explain: charred new oak and a corn-heavy mash bill working together over years of Kentucky aging.

It's one of the most recognizable American bourbons on the shelf, and understanding what it actually tastes like makes it far more useful in both a glass and a pan.

QUICK SUMMARY

Jim Beam is a Kentucky Straight Bourbon with a corn-forward mash bill and moderate intensity. Its flavor runs vanilla, caramel, and light spice - smooth enough for cocktails, structured enough to hold up in cooking.

🌽Category: Kentucky Straight Bourbon Whiskey, sour mash process
🍬Flavor: Vanilla, brown sugar, mild caramel, light baking spice
🥃Best Uses: Cocktails, pan sauces, glazes, marinades, barbecue
📦Shelf Life: Unopened: years; opened: best within 1-2 years
🌡️Storage: Upright, cool and dark; keep cap sealed after opening

What Is Jim Beam?

Jim Beam is a Kentucky Straight Bourbon produced in Clermont, Kentucky, by the Beam Suntory company.

It's made from a sour mash process using a mash bill of approximately 77% corn, 13% rye, and 10% malted barley - the grain proportions that define its sweeter, lighter character compared to rye-dominant bourbons.

All bourbon must be matured in new charred oak barrels, and Jim Beam ages its standard expression for at least four years. The result qualifies as Kentucky Straight Bourbon under U.S. federal regulations.

It's also sold under names like Jim Beam White Label, JB bourbon, and Beam Bourbon.

The lineup extends well beyond the flagship bottle.

  • 🥃 Jim Beam White Label - the entry-level standard, 40% ABV (80 proof)
  • Jim Beam Black - aged longer, deeper oak and richer caramel
  • Jim Beam Bottled-in-Bond - 100 proof, aged at least four years per federal bonding rules
  • Jim Beam Double Oak - finished in a second charred barrel for extra wood character
  • Jim Beam Single Barrel - small-batch, one-barrel selection for more nuance

What Does Jim Beam Taste Like?

jim beam - What Is Jim Beam

Jim Beam White Label opens with vanilla and toasted oak on the nose, followed by a mild ethanol sharpness that fades quickly.

On the palate, it's corn-sweet and approachable - brown sugar and caramel in the front, with light baking spice (clove, cinnamon) arriving in the mid-palate.

The finish is short to medium, with a gentle warming heat rather than a sharp alcohol burn. Compared to Evan Williams, another entry-level Kentucky bourbon, Jim Beam runs slightly sweeter and a touch lighter.

It sits noticeably softer than rye-forward bourbons like Wild Turkey, which carry more pepper and bite.

Sensory SnapshotModerate Intensity
👅 Flavor
vanillabrown sugarcaramellight baking spicegrainy corn
✋ Texture
thin-bodiedsmoothwarming finish
👃 Aroma
sweet vanillatoasted oaksubtle ethanol

Heat softens Jim Beam's spice notes and amplifies its sweetness - useful to know before adding it to a hot pan or reducing it in a sauce.

How to Use Jim Beam

Jim Beam earns its place in cooking largely because of its vanilla and caramel backbone, which integrates cleanly into sweet-savory applications without demanding premium-bottle restraint.

It belongs most naturally in American barbecue and Southern cooking, where its corn sweetness echoes the flavor register of molasses, smoked pork, and maple glaze.

Golden Rule
Always add bourbon off the heat or at a controlled simmer - adding it to a screaming-hot pan risks flaring up and cooking off all the aromatic character before it can do any work.
How Jim Beam Is Used in Cooking
MethodBest ForTip
🍳 Pan SaucePork chops, chicken thighs, duck breastDeglaze off-heat, then reduce by half to mellow alcohol sharpness
🥩 MarinadeGrilled pork ribs, chicken wings, skirt steakCombine with brown sugar, soy, and black pepper; marinate 2-4 hours
🍖 BBQ SauceSlow-cooked ribs, pulled pork, brisketStir in near the end of cooking to preserve bourbon aroma
🔥 FlambéBananas foster, crêpes, peach dessertsUse a long lighter; tilt pan slightly away before igniting
☕ Warm DrinksHot chocolate, coffee, apple ciderAdd after removing from heat; 1-1.5 oz per serving is plenty

Jim Beam pairs especially well with maple syrup, dark chocolate, and rosemary - flavors that echo or contrast its vanilla-spice core.

A bourbon-glazed pear compote, for instance, benefits from the same caramel sweetness as making caramel apple nachos at home, where that brown-sugar register carries the whole dessert.

Avoid pairing Jim Beam with delicate green salads or highly herbal sauces, where its sweetness creates an awkward clash.

If a recipe calls for a richer or spicier bourbon, consider swapping out jim beam for a higher-rye expression instead.

Try It In
🍗Air Fryer Lemon Pepper Chicken TendersA bourbon-based glaze adds caramel depth to the citrus crust→☕Passion Fruit Cold Brew CoffeeJim Beam's vanilla note bridges coffee and tropical fruit→🍫Passion Fruit Hot ChocolateA splash of bourbon deepens chocolate and balances tartness→

How to Buy and Store Jim Beam

The Jim Beam White Label is the standard buy - widely available, consistently produced, and priced for everyday use.

For named expressions like Bottled-in-Bond or the 8-Year, check for an intact bottle seal and, where present, an age statement on the label.

Watch Out
Avoid bottles stored near a window or behind a bar with direct light exposure - UV and heat degrade bourbon flavor faster than time alone.

Store Jim Beam upright in a cool, dark location.

Unlike wine, it doesn't benefit from being laid on its side, and the high alcohol content can degrade the cork if it stays in contact long-term.

Knowing the jim beam spoilage signs helps you judge whether an older opened bottle is still worth cooking with.

An unopened bottle remains stable for years.

Once opened, best flavor holds for 1-2 years before subtle oxidation starts to dull the vanilla and caramel notes.

Where to Start with Jim Beam

Jim Beam White Label is the right entry point if you're building a home bar or stocking a kitchen for bourbon-based cooking.

It costs less than most comparable bourbons and delivers a consistent, approachable baseline.

If the lighter sweetness feels thin for your recipe, bourbon swaps that work can point you toward richer or spicier alternatives.

Start with the White Label, cook with it freely, and step up to Jim Beam Black or Bottled-in-Bond once you know what more oak and proof does for a dish.

Frequently Asked Questions

Is Jim Beam a bourbon or a whiskey?

Both - all bourbon is whiskey, but not all whiskey is bourbon. Jim Beam meets the U.S. legal requirements for Kentucky Straight Bourbon: at least 51% corn mash, new charred oak aging, and distilled within proof limits.

How strong is Jim Beam in terms of proof?

Jim Beam White Label is 80 proof, meaning 40% ABV. The Bottled-in-Bond expression steps up to 100 proof (50% ABV), which gives it noticeably more heat and intensity on the finish.

What does Jim Beam taste like compared to Jack Daniel's?

Jack Daniel's is Tennessee whiskey filtered through charcoal before aging, which gives it a smoother, slightly woody character with less sweetness. Jim Beam reads sweeter and more vanilla-forward, with a lighter oak presence overall.

Can you cook with Jim Beam?

Yes - its vanilla and caramel notes hold up well in pan sauces, glazes, and marinades. The White Label is cost-effective enough to cook with regularly without reserving it only for drinking.

How long does an opened bottle of Jim Beam last?

An opened bottle stays at peak flavor for 1-2 years if stored upright with the cap sealed tightly. After that, oxidation gradually mutes the vanilla and caramel notes, though the bourbon remains safe to drink.

Grilled Peach and Burrata Salad

March 30, 2026

When summer hits and you want something that feels light but still looks intentional for entertaining or a quick weeknight side, grilled peach and burrata salad delivers. The grill caramelizes the peaches in under 10 minutes while the creamy burrata stays cold until you plate it.

Grilled Peach and Burrata Salad served on a plate

High heat creates char marks without turning the fruit to mush. The balsamic glaze ties together the sweet peaches, peppery arugula, and rich cheese without overpowering any one flavor.

Perfect for backyard dinners, picnics, or when you need a side that works for brunch through dinner.

QUICK SUMMARY

This grilled peach and burrata salad combines charred ripe peaches with creamy burrata cheese and peppery arugula, finished with balsamic glaze. Medium-high heat grills peaches in 6-8 minutes while keeping their shape. Assemble right before serving to prevent soggy greens and weeping cheese.

⏱️Time Reality: 18 minutes start to finish, grill peaches while prepping greens
🔥Method Shortcut: Oil peach halves before grilling to prevent sticking and promote caramelization
⚠️Watch Out: Add burrata last or it melts and weeps-wait until you're ready to serve

Why This Recipe Works

Grilling peaches at medium-high heat caramelizes their natural sugars while creating char marks that add smoky depth. The combination of hot fruit and cold cheese creates textural contrast that makes each bite different. For a version that comes together quickly, something tender like pork rounds out the plate with protein that complements the sweet and tangy flavors.

Quick Reference
⏱️
Prep Time
10 min
🔥
Cook Time
6-8 min
⏰
Total Time
18 min
🍽️
Servings
4 servings
📊
Difficulty
Easy
🏷️
Category
Appetizer
💡
Quick Tip
Grill peaches 3-4 min each side for best char
🎯
Best For
Weeknight | Entertaining | Summer

Success markers:

  • Peaches show clear grill marks and soften slightly while holding their shape
  • Burrata stays cold and creamy until plating, not melted or weeping
  • Arugula remains crisp with no wilting from warm ingredients
  • Balsamic glaze coats evenly without pooling at the bottom
  • Toasted nuts add crunch without tasting stale or soggy
Quick Tip
Brush peaches with 1 teaspoon olive oil per half to prevent sticking and promote even caramelization on the grill.

What You'll Need

Ingredients for Grilled Peach and Burrata Salad

Choose ripe but firm peaches that give slightly when pressed near the stem. A good homemade salad recipe starts with quality fruit and cheese that can stand alone without heavy dressing.

🍑
Fresh Fruit
  • 4 ripe peaches, halved and pitted
🧀
Cheese & Base
  • 8 oz burrata cheese
  • 4 cups arugula or mixed greens
🧄
Flavor & Finish
  • 3 tablespoon olive oil
  • 2 tablespoon balsamic glaze or vinegar
  • ¼ cup pine nuts or walnuts
  • ¼ cup fresh basil leaves
  • Salt and black pepper to taste
  • 1 teaspoon honey (optional)

Ingredient Details

  • Ripe peaches
    Choose fruit that yields slightly to pressure but isn't mushy-unripe peaches won't soften or caramelize properly on the grill
  • Burrata cheese
    Keep refrigerated until right before serving to maintain creamy texture-room temperature burrata melts and weeps liquid onto greens
  • Olive oil for grilling
    Brush oil directly on peach halves, not the grill grates, to prevent flare-ups and ensure even coating
  • Arugula or mixed greens
    Peppery arugula contrasts best with sweet peaches, but baby spinach or mixed spring greens work if you want milder flavor
  • Balsamic glaze
    Store-bought glaze is thicker and sweeter than regular balsamic vinegar-if using vinegar, add ½ teaspoon honey to match consistency
  • Pine nuts or walnuts
    Toast in a dry skillet over medium heat for 3-4 minutes until fragrant and golden-raw nuts taste flat and lack crunch
  • Fresh basil
    Tear leaves by hand instead of chopping to preserve aroma and prevent bruising-add right before serving for vibrant color

Ingredient Swaps

Burrata can be pricey and sometimes hard to find, so fresh mozzarella works in most situations. Salad adds the contrast this plate needs, but timing matters. For a version that comes together quickly, a fresh potato salad side cuts through the richness with tangy mustard dressing and crisp vegetables.

Four swaps that work:

  • Swap burrata for fresh mozzarella if you want firmer texture and milder flavor-it won't weep as much but lacks the creamy center
  • Use walnuts or pecans instead of pine nuts for stronger, woodsy flavor and budget-friendly option
  • Replace arugula with baby spinach or mixed spring greens if peppery bite is too strong
  • Try grilled nectarines or plums when peaches aren't in season-they caramelize similarly with slightly different sweetness

Balsamic Glaze vs. Balsamic Vinegar + Honey

Works for: Glaze is thicker and sweeter, clings to ingredients better, no mixing required

Skip if: You already have balsamic vinegar-just add ½ teaspoon honey and whisk for similar consistency

Burrata vs. Vegan Ricotta

Works for: Dairy-free diets, similar creamy texture when using quality tofu-based ricotta

Skip if: You want that signature burrata cream center-vegan versions won't replicate it exactly

Instructions

Preheat your grill or grill pan to medium-high heat while you prep the peaches and toast the nuts. Rich mains need something to cut through, and potato salad does exactly that. For a version that comes together quickly, a fresh potato salad side complements the smoky char with tangy dressing and crisp celery.

  1. Prep and oil the peaches: Cut 4 ripe peaches in half and remove pits. Brush each half with 1 teaspoon olive oil on both sides, then season lightly with salt and black pepper.

  2. Grill the peaches: Place peach halves cut-side down on preheated grill or grill pan over medium-high heat. Grill for 3-4 minutes without moving until clear char marks appear, then flip and grill another 3-4 minutes until softened but still holding shape. Remove and let rest 2 minutes.

  3. Toast the nuts: While peaches grill, add ¼ cup pine nuts or walnuts to a dry skillet over medium heat. Toast for 3-4 minutes, stirring frequently, until fragrant and golden. Transfer to a plate to cool.

  4. Assemble the base: Spread 4 cups arugula or mixed greens on a large platter or in a shallow serving bowl. Slice grilled peaches into wedges and arrange over greens while still slightly warm.

  5. Add cheese and finish: Tear 8 ounces burrata into large chunks and scatter over salad. Drizzle 2 tablespoons balsamic glaze in thin ribbons over everything. Top with toasted nuts, torn fresh basil leaves, and a final sprinkle of salt and pepper. Serve immediately.

Best Pick
Let grilled peaches rest for 2 minutes before slicing-this prevents juices from flooding the greens and keeps the salad from getting soggy.

What to Serve With It

This salad works as an appetizer for summer entertaining or a light lunch paired with grilled protein. A good salad can make or break the plate. For weeknight grilled salmon meal ideas, check out combinations that balance the sweet peaches with citrus and herbs.

Side Dish Prep Why It Works How to Serve
Crusty baguette slices Easy Adds crunch and soaks up balsamic glaze and burrata cream Toast lightly and serve on the side for scooping
Grilled chicken breast Easy Light protein complements sweet fruit without overpowering it Slice thinly and place atop salad or serve alongside
Quinoa salad Medium Adds nutty flavor and texture, makes salad more filling Toss cooked quinoa with lemon juice and serve under greens
Prosciutto or cured ham Easy Salty richness pairs perfectly with sweet peaches and creamy cheese Drape slices over salad or serve on the side
Simple cucumber salad Easy Refreshing contrast with creamy burrata and grilled fruit Toss cucumbers with vinegar and serve in separate bowl

Three ways to serve it:

  • As an appetizer for 6-8 people, plate individual portions on small dishes with one peach half and burrata chunk per person
  • For a light lunch, add 4 ounces grilled chicken or shrimp per serving and serve with crusty bread
  • At a cookout, make it a platter-style salad where guests can assemble their own portions buffet-style
Shortcut
Use pre-washed arugula and store-bought balsamic glaze to cut prep time in half-focus your effort on grilling the peaches perfectly.

Store and Reheat

Assembled salad doesn't store well because greens wilt and burrata weeps. Keep components separate if making ahead. The salad works best when it hits the table at the same time as the main. For a version that comes together quickly, this juicy chicken pairs with the sweet peaches and creamy cheese without competing for attention.

Method Time Best For
🍳 Stovetop 2-3 minutes Warming grilled peaches only in a skillet over medium heat
📦 Microwave 30 seconds low power Quickly warming small portions of peach slices before adding to salad
🔥 Oven 5 minutes at 300°F Warming larger batch of peach slices without drying them out

For best results when storing:

  • Store grilled peaches separately in an airtight container in the fridge for up to 3 days-keep them away from greens to prevent wilting
  • Keep unwashed arugula in its original container with a paper towel to absorb moisture, use within 2 days for best crispness
  • Store burrata in its original liquid in the fridge and use within 1-2 days of opening for optimal creamy texture
  • Toast nuts fresh before serving rather than storing them with other components-they lose crunch quickly when exposed to moisture
  • Assemble salad right before serving by combining stored components-add burrata and balsamic glaze last to prevent sogginess

Frequently Asked Questions

How long to grill peaches at medium-high heat?

Grill peach halves for 3-4 minutes per side at medium-high heat. You'll see clear char marks and the fruit will soften slightly while still holding its shape.

Can I make grilled peach and burrata salad ahead of time?

Grill peaches up to 3 days ahead and store them separately. Assemble the salad right before serving to prevent greens from wilting and burrata from weeping liquid.

What goes well as a side with grilled peach and burrata salad?

Crusty baguette, grilled chicken breast, or prosciutto work best. The bread soaks up balsamic glaze, while protein makes it a complete meal.

How do I know when grilled peaches are done without burning?

Look for visible grill marks and slight softening when you press the flesh gently with tongs. The peaches should hold their shape but give slightly, taking about 6-8 minutes total.

Can fresh mozzarella replace burrata in this salad?

Yes, fresh mozzarella works but lacks burrata's creamy center. It's firmer, milder, and doesn't weep as much, making it easier to prep ahead.

Grilled Peach and Burrata Salad served on a plate

Grilled Peach and Burrata Salad

No ratings yet
This grilled peach and burrata salad combines smoky charred peaches with creamy burrata and peppery arugula, finished with a sweet balsamic glaze. Grilling peaches for 6-8 minutes softens them while keeping shape, creating a delicious contrast with cool cheese. Assemble just before serving to keep greens crisp and cheese fresh.
Print Recipe Pin Recipe
Prep Time 10 minutes mins
Cook Time 8 minutes mins
Total Time 18 minutes mins
Servings: 4 servings
Course: Appetizer, Side Dish
Cuisine: American, Summer
Ingredients Equipment Method Notes

Ingredients
  

  • 4 count ripe peaches halved and pitted
  • 8 oz burrata cheese keep refrigerated until serving
  • 4 cups arugula or mixed greens
  • 3 tablespoon olive oil use 1 teaspoon per peach half for grilling
  • 2 tablespoon balsamic glaze
  • 0.25 cup pine nuts or walnuts toasted
  • 0.25 cup fresh basil leaves torn by hand
  • salt and black pepper to taste
  • 1 teaspoon honey optional, to thin balsamic vinegar if using

Equipment

  • Grill or Grill Pan For grilling peaches
  • Dry skillet For toasting nuts

Method
 

  1. Cut peaches in half and remove pits. Brush each half with 1 teaspoon olive oil on both sides, then season lightly with salt and black pepper.
    4 count ripe peaches, 3 tbsp olive oil, salt and black pepper
  2. Preheat grill to medium-high heat. Place peach halves cut-side down on grill. Grill for 3-4 minutes without moving until char marks appear. Flip and grill another 3-4 minutes until softened but holding shape. Remove and let rest 2 minutes.
    4 count ripe peaches
  3. While peaches grill, toast pine nuts or walnuts in a dry skillet over medium heat for 3-4 minutes, stirring frequently, until fragrant and golden. Transfer to a plate to cool.
    0.25 cup pine nuts or walnuts
  4. Spread arugula or mixed greens on a platter or serving bowl. Slice grilled peaches into wedges and arrange over greens while warm.
    4 cups arugula or mixed greens, 4 count ripe peaches
  5. Tear burrata into large chunks and scatter over salad. Drizzle balsamic glaze in thin ribbons over everything. Top with toasted nuts, torn basil leaves, and a final sprinkle of salt and pepper. Serve immediately.
    8 oz burrata cheese, 2 tbsp balsamic glaze, 0.25 cup pine nuts or walnuts, 0.25 cup fresh basil leaves, salt and black pepper

Notes

  • Brush peaches with olive oil directly, not the grill, to prevent sticking and flare-ups.
  • Assemble salad just before serving to keep greens crisp and burrata from melting.
  • Toast nuts fresh to maintain crunch and avoid sogginess in salad.

Tried this recipe?

Let us know how it was!

What Is Guanciale? [Taste, Uses & More]

March 30, 2026

You spot it at the deli counter - a thick ivory-and-rose block labeled guanciale - and hesitate. It looks like pancetta or even bacon, but it costs more and comes with less explanation. Guanciale is cured pork jowl, air-dried with salt and spices until the fat turns dense and waxy.

What Is Guanciale

It's the fat that matters most here - richer, silkier, and more intensely porky than anything smoked or leaner could produce.

QUICK SUMMARY

Guanciale is cured pork jowl from central Italy. Its high fat content renders silky in a hot pan, building the base for Roman pasta dishes like carbonara and amatriciana. Raw, it slices firm and clean. Cooked, it delivers deep umami and subtle pepper.

🐷What It Is: Salt-cured, air-dried pork cheek from Lazio and Umbria
🧂Flavor: Savory, umami-rich, porky, with faint black pepper and slight sweetness
🍝Best Uses: Carbonara, amatriciana, braised dishes, antipasto boards
❄️Shelf Life: Whole jowl: weeks refrigerated; sliced: 1-2 weeks; frozen: 2-3 months
🛒Buy It: Look for ivory-white fat, rosy lean meat, and a light powdery curing bloom

What Is Guanciale?

Guanciale comes from the pig's cheek and jaw - the Italian word itself derives from guancia, meaning cheek. Unlike lardo, which is pure back fat, guanciale has ribbons of lean meat running through a dominant fat layer. That ratio sets it apart from most other cured pork.

The cure typically involves coarse salt, black pepper, and dried herbs - thyme, rosemary, or chili depending on the region. After curing, the jowl hangs to air-dry for several weeks.

Lazio and Umbria both claim strong traditions, with subtle regional differences in seasoning.

Guanciale is sometimes confused with pancetta, which comes from the belly, not the cheek. The cheek fat has a different fatty-acid composition - more monounsaturated fat - which contributes to how smoothly it melts.

No smoking is involved at any stage, keeping the flavor clean and unobstructed.

  • Whole jowl - the intact cured piece, best for slicing to order and longest fridge life
  • Pre-sliced packs - convenient but oxidize faster; use within a week or two of opening
  • Cubed/lardons - sold diced, ready for rendering; check for excessive moisture or off smell

What Does Guanciale Taste Like?

guanciale - What Is Guanciale

Raw guanciale tastes deeply savory and porky, with a faint sweetness that comes from fat breakdown during the cure. Black pepper is present but not sharp - it sits in the background as warmth rather than heat.

Compared to pancetta, the flavor is noticeably richer and more concentrated.

Sensory SnapshotStrong Intensity
👅 Flavor
umami-richsavory-porkyfaintly sweetpeppery
✋ Texture
firm rawsilky renderedchewy lean ribbons
👃 Aroma
cured porkwarm pepperslightly nutty

Heat changes everything. When guanciale renders in a pan, the fat liquefies into a glossy, almost creamy liquid with a nutty, toasted-pork scent.

The lean sections crisp at the edges and turn pleasantly chewy. That shift - from waxy block to silky rendered fat - is exactly why Roman cooks refuse to substitute it.

Golden Rule
Render guanciale over medium-low heat, not high. Rushing it browns the outside before the interior fat releases, leaving you with greasy, chewy pieces instead of a smooth fat base.

How to Use Guanciale

Roman cooking treats guanciale as infrastructure, not garnish. It goes in the pan first, rendering slowly until the fat pools and the meat crisps. That fat becomes the cooking medium - everything else builds on it.

For spaghetti carbonara, guanciale renders in a dry skillet until the fat is liquid and the edges have color. The heat is cut before eggs and Pecorino Romano go in, so the residual fat helps emulsify the sauce without scrambling the yolks.

In amatriciana, the rendered fat carries tomato passata and fuses them into one cohesive, porky sauce.

How Guanciale Is Used
MethodBest ForTip
🍳 RenderedCarbonara, amatriciana, bean dishesStart in a cold pan; let fat release gradually over medium-low heat
🔥 CrispedTopping soups, adding crunch to greensFinish on slightly higher heat once most fat has rendered out
🥗 Raw/SlicedAntipasto boards, charcuterie platesSlice thin and serve at room temperature for best fat texture
🥘 BraisedLayering into stews, braises, ribollitaAdd diced pieces early so fat integrates into the braising liquid

Beyond pasta, guanciale works well diced into ribollita or white bean soups, where it adds fat and salinity without smoke. Layered under root vegetables before roasting, it bastes them as it renders.

Pairs that hold up to its richness include Pecorino Romano, egg yolks, black pepper, tomato, and cannellini beans. Avoid floral or citrus-forward herbs - they disappear against cured pork's weight.

If you need a substitute, pancetta or other cured options cover most situations, though the fat profile won't be identical.

Try It In
🥘Slow Cooker Beef Stew with VegetablesAdd diced guanciale early for a richer, porkier braise base→🍖Slow Cooker Pot RoastLayer under the roast to baste and season from below→

How to Buy and Store Guanciale

At a good Italian deli or specialty butcher, ask for a whole cured jowl rather than pre-sliced. Whole pieces last longer, slice cleaner, and give you control over thickness.

Look for thick ivory or cream-white fat with a rosy-pink lean section - avoid anything with gray tinges, slimy surfaces, or dried-out crumbly edges. A faint powdery white bloom on the surface is normal and harmless; it's part of the cure.

Watch Out
Pre-sliced guanciale sold in clear packs oxidizes quickly once opened. If the fat looks yellow or the lean turns gray-brown within a few days of opening, discard it - that's oxidation, not just air exposure.

Store an unopened whole jowl wrapped in butcher paper inside the fridge - it can last several weeks. Once cut, wrap the exposed face tightly and use within one to two weeks.

For detailed guidance on guanciale storage life, the rules shift depending on whether it's vacuum-sealed or hand-wrapped. Freeze portions in plastic wrap plus foil for up to three months without significant quality loss.

Where to Start with Guanciale

Buy a small whole piece first. Render half in a dry skillet, taste the fat that pools, and you'll immediately understand why Roman cooks won't accept a swap. Start with carbonara or amatriciana - both are short recipes where guanciale is the backbone, not a background note.

From there, every other use follows logic.

Shortcut
Cut guanciale into lardons and freeze them in a single layer on a tray, then bag them. You can drop frozen pieces directly into a cold pan and render from frozen - no thawing needed.

Frequently Asked Questions

Is guanciale the same as pancetta?

No. Pancetta comes from the belly; guanciale comes from the cheek and jaw. Guanciale has a higher fat-to-lean ratio and a richer, more intense flavor because cheek fat renders more smoothly than belly fat.

Can I use bacon instead of guanciale in carbonara?

Bacon works in a pinch, but smoked bacon changes the flavor profile significantly. The smokiness competes with Pecorino Romano and egg yolks instead of complementing them. Pancetta is a closer substitute.

How do you render guanciale fat properly?

Place it in a cold, dry skillet and set the heat to medium-low. As the pan warms, the fat releases gradually - this takes 6-10 minutes for lardons. Rushing with high heat crisps the exterior before the interior fat can escape.

Where can I buy guanciale?

Italian delis, specialty butchers, and some well-stocked grocery stores carry it. Online retailers like Eataly or specialty charcuterie shops ship vacuum-sealed whole jowls. Call ahead - many stores stock it only occasionally.

Is guanciale eaten raw?

Yes - it's a cured, not cooked, product, so thin slices are safe to eat without heating. Serve at room temperature on an antipasto board so the fat softens slightly and the flavor opens up.

What Is Galliano? [Taste, Uses & More]

March 30, 2026

Galliano does something most spirits can't - it holds a cocktail together without demanding center stage.

What Is Galliano

The liqueur's blend of anise's flavor and uses and vanilla pulls sweet, herbal, and bright citrus notes into one layered pour, which is why bartenders reach for it when a drink needs depth without bitterness.

Understanding that role makes every decision around it - what to mix, what to cook, how to store - much easier.

QUICK SUMMARY

Galliano is a golden Italian herbal liqueur from Livorno, built on vanilla, anise, juniper, and citrus. It's sweet, syrupy, and moderate in intensity - most at home floating over cocktails or folded into cream-based desserts. Opened bottles hold peak flavor for 12-24 months.

🌿Flavor: Vanilla-forward with anise, citrus, and a herbal-resinous finish
🍹Best Use: Harvey Wallbanger, tiki cocktails, cream desserts, coffee drinks
📦Shelf Life: Opened: 12-24 months at peak; unopened: 5+ years
🇮🇹Origin: Livorno, Italy - late 19th century
🔢ABV: 30-42% depending on variant
⚠️Avoid With: Delicate salads, raw acidic fish preparations - flavor overwhelms

What Is Galliano?

Galliano is a tall, golden Italian liqueur first produced in Livorno in 1896 by distiller Arturo Vaccari.

He named it after Giuseppe Galliano, an Italian military hero - the distinctive elongated bottle made it immediately recognizable on back bars across Europe.

At its core, Galliano is a sweet herbal liqueur (sometimes classified as a digestif) built from a proprietary blend of over 30 botanical ingredients.

Vanilla and star anise dominate, with juniper, citrus peel, and a resinous herbal undercurrent running beneath.

The most widely available version is labeled Galliano L'Autentico, and it's the standard reference for any recipe that just says "Galliano."

Comparing its botanical architecture to benedictine liqueur swaps that work or comparing allspice vs juniper berries options shows how differently herbal liqueurs can be weighted - Galliano skews unmistakably sweet and vanilla-dominant rather than spiced or medicinal.

  • 🏷️ Galliano L'Autentico - the flagship, around 42.3% ABV, full botanical complexity
  • 🏷️ Galliano Vanilla - lower ABV (30%), sweeter and less herbal, aimed at casual mixing
  • 🏷️ Galliano Ristretto - coffee-focused expression with espresso notes

What Does Galliano Taste Like?

galliano - What Is Galliano

Vanilla leads every sip. It's a warm, almost custardy sweetness that arrives first and lingers longest, which explains why Galliano works so naturally with cream and coffee.

Beneath that vanilla layer sits a clear anise note - not as sharp as pastis or ouzo, but unmistakably present.

Citrus peel adds a brief brightness at the top of the palate, and then the juniper and herbal botanicals land as a slightly resinous finish.

The overall effect resembles a vanilla-forward anisette with citrus and piney depth - sweeter and rounder than most anise spirits, less aggressive than replacements for anise that lean toward harder licorice profiles.

Sensory SnapshotModerate Intensity
👅 Flavor
vanilla-sweetanisecitrusherbal-resinous
✋ Texture
syrupyviscoussmooth
👃 Aroma
warm vanillasweet aniseherbal spice

Heat dulls some of the citrus brightness but amplifies the vanilla. In hot drinks or warm custards, Galliano reads richer and more dessert-like than in cold cocktails.

How to Use Galliano

The Harvey Wallbanger is the drink that made Galliano famous in America - a simple float of Galliano over vodka and orange juice that defined 1970s cocktail culture.

That float technique is deliberate: Galliano's viscous, syrupy body lets it sit on top of lighter liquids and slowly integrate as the drink is consumed.

Beyond the Harvey Wallbanger, Galliano adds a vanilla-anise lift to tiki drinks like the Yellow Bird, and it works as a stirred finish in espresso cocktails.

In the kitchen, it folds cleanly into custards and cream - tiramisu variants and affogato drizzles are natural fits.

For baking, use it sparingly in orange or almond batters where swapping out vanilla sugar would otherwise carry the vanilla note.

Golden Rule
Add Galliano off heat in hot drinks - boiling drives off the volatile vanilla and citrus aromatics that make it worth using.
How Galliano Is Used
MethodBest ForTip
🍹 FloatHarvey Wallbanger, tiki cocktailsPour slowly over the back of a spoon to keep layers distinct
☕ StirredEspresso drinks, hot chocolate, warm milkAdd after removing from heat to preserve aromatics
🍮 FoldedCustards, cream fillings, tiramisuUse 1-2 tablespoon per portion - vanilla is already potent
🍨 DrizzleIce cream, affogato, warm dessertsServe immediately - syrup absorbs fast into soft textures
🧁 BakedAlmond or orange battersUse sparingly - anise can dominate at high quantities

Galliano pairs best with vodka, light rum, fresh orange juice, heavy cream, espresso, and dark chocolate. It holds up well alongside amaretti cookies, nutmeg, and cinnamon.

Keep it away from delicate green salads or raw acidic fish - the sweetness overwhelms anything subtle.

Try It In
🍪Small Batch Chocolate Chip CookiesA few drops in the batter add vanilla depth without extract→🍫Raspberry Chocolate Chunk CookiesThe citrus note in Galliano plays well against raspberry's tartness→🥜Chocolate Dipped Peanut Butter CookiesVanilla-forward liqueur echoes the sweet, nutty base→

How to Buy and Store Galliano

Look for bottles labeled Galliano L'Autentico with a clear, bright golden color. The liquid should be transparent and consistent - any sediment or a dull, faded color suggests age or poor storage.

ABV near 42% indicates the full-botanical version; the 30% Vanilla expression is lighter and notably sweeter.

Watch Out
Galliano's tall, narrow bottle tips easily - store it horizontally in a wine rack or upright where it won't be knocked over on a high shelf.

Store upright in a cool, dark cabinet away from heat sources and direct sunlight.

Once opened, reseal tightly after each use.

Refrigeration is optional but does help preserve the more volatile citrus and herbal aromatics over time.

Check galliano spoilage signs if a bottle has been open for over two years - color shift and flat aroma are the first signals.

  • 📅 Unopened - 5+ years at room temperature with no quality loss
  • 📅 Opened - peak flavor for 12-24 months; still potable well beyond that
  • 🌡️ Temperature - consistent room temp or refrigerated; avoid repeated heat cycling

Start With the Harvey Wallbanger

If Galliano is new to you, build a Harvey Wallbanger first. Equal parts vodka and orange juice, then a careful float of Galliano on top - it shows the liqueur at its most transparent, nothing competing with its vanilla-anise character.

From there, move into cream desserts and espresso drinks.

When a recipe calls for something adjacent but you're out of stock, galliano swaps that work and even sambuca swaps that work can cover the anise side of the equation, though nothing exactly replicates the vanilla weight. Start simple, then branch out.

Frequently Asked Questions

Is Galliano sweet or bitter?

Galliano is distinctly sweet, not bitter. High residual sugar and a dominant vanilla note drive the flavor, with herbal and anise elements adding complexity rather than bitterness. It sits firmly in dessert-liqueur territory.

Does Galliano taste like licorice?

It has a clear anise note that reads as mild licorice, but vanilla leads the palate. Unlike pastis or sambuca, the licorice quality stays in the background rather than defining the whole experience.

What is the alcohol content of Galliano?

Galliano L'Autentico is 42.3% ABV. The Galliano Vanilla variant is lower at 30% ABV and noticeably sweeter. Always check the label - the ABV signals which expression you're buying.

Can you cook with Galliano?

Yes, and it works well in cold applications like custards and cream fillings. In hot recipes, add it off heat - prolonged cooking strips the vanilla and citrus aromatics that give Galliano its character.

How long does an open bottle of Galliano last?

Peak flavor holds for 12-24 months after opening. High sugar and alcohol slow degradation, so the bottle remains drinkable beyond that window - but citrus and herbal brightness will gradually fade.

What Is Italian Sausage? [Taste, Uses, Recipes & More]

March 30, 2026

Italian sausage does something no other fresh pork sausage quite replicates: it seasons itself.

What Is Italian Sausage

The fennel seed blooms into the fat as it renders, pulling garlic and savory pork into a single, cohesive hit of flavor that lands before any sauce or accompaniment even registers.

Unlike what makes chorizo distinct or bratwurst's flavor and uses, Italian sausage carries a defining botanical note - fennel - that shapes every dish it touches from the inside out.

QUICK SUMMARY

Italian sausage is a coarsely ground fresh pork sausage seasoned with fennel seed and garlic. It comes in sweet (dolce) and hot (piccante) varieties, sold as links or bulk. Expect rich, savory pork flavor with a strong anise-like finish and juicy, slightly crumbly texture when cooked.

🌿Flavor: Savory pork-umami with fennel, garlic, and fat richness
🔥Heat: Sweet variety is mild; hot variety adds chili and black pepper
🍳Best Uses: Pasta sauces, pizza, sausage and peppers, stuffed vegetables
❄️Shelf Life: 1-2 days opened raw; up to 3 months frozen
🛒Buy It As: Fresh links or bulk, vacuum-packed or loose from the butcher case

What Is Italian Sausage?

Italian sausage - known in Italy as salsiccia - is a fresh, coarsely ground pork sausage seasoned primarily with fennel seed and garlic. It originated across the regional cooking traditions of central and southern Italy, where fresh sausages were made from pork shoulder and fat trimmings packed into natural casings.

Two main varieties dominate the market. Sweet Italian sausage (dolce) relies on fennel seed for its signature flavor, with no added heat.

Hot Italian sausage (piccante) adds crushed red pepper and black pepper on top of the fennel base.

Beyond the sweet-hot divide, Italian sausage is sold in two formats. Links are individual portions in a natural or collagen casing; bulk is the same seasoned mixture loose, without casing.

Understanding what makes pork distinct as a base protein helps explain why the fat content here is not incidental - it's structural to how the sausage behaves in a pan.

  • 🔗 Links - whole, cased portions best for grilling or slicing
  • 📦 Bulk - loose meat ideal for crumbling into sauces or fillings
  • 🌿 Sweet (dolce) - fennel-forward, no heat, broadly compatible
  • 🌶️ Hot (piccante) - adds chili heat and pepper over the fennel base

What Does Italian Sausage Taste Like?

italian sausage - What Is Italian Sausage

Salsiccia delivers a strong, layered flavor - savory pork-umami in the base, rendered-fat richness in the middle, and warm fennel-anise on the finish. It lands closer to a more fennel-forward pork breakfast sausage than to mild bratwurst, and the hot variety edges toward a milder chorizo when chili heat is factored in.

Heat changes the profile. Raw, the fennel is sharp and grassy.

Once seared, the fat renders and the fennel blooms into something warmer and rounder, closer to licorice than raw anise seed.

Sensory SnapshotStrong Intensity
👅 Flavor
savory-umamifennel-anisegarlicfat-rich
✋ Texture
coarsejuicyslightly crumbly
👃 Aroma
toasted fennelwarm garlicmeaty sear

The coarse grind means visible fat flecks throughout - those white specks are intentional, not a flaw.

They baste the meat from the inside as it cooks, which is why crumbled Italian sausage in a sauce stays juicy where leaner meats dry out.

Golden Rule
Don't skip the sear. Browning Italian sausage - links or crumbled - is what unlocks the toasted fennel aroma. Simmering it straight in sauce skips that flavor layer entirely.

How to Use Italian Sausage

Italian sausage works across more preparations than most fresh pork products because of how its fennel-and-garlic seasoning integrates with fat during cooking. It pairs naturally with tomato and crushed red pepper, creamy cheeses like ricotta and pecorino, bell peppers and onions, polenta, and cannellini beans.

Sturdy red wines - Chianti-style - hold up to its weight.

How Italian Sausage Is Used
MethodBest ForTip
🔥 Pan-Sear + SimmerPasta sauces, ragù, Bolognese-styleBrown first for crust, then add liquid to finish cooking through
🔥 GrillWhole links with polenta or greensMedium-high heat; rest 3 minutes before slicing to retain juices
🔥 Brown + CrumblePizza topping, meatballs, stuffed pastaUse bulk or remove casing from links; break apart in a hot pan
🫙 BakeStuffed peppers, stuffed mushrooms, dough-wrappedPar-cook filling before baking to avoid undercooked centers

Italian-American cooking is the natural home for this sausage - spaghetti with crumbled sausage and tomato, hoagies loaded with sautéed peppers and onions, or pizza topped with sliced links.

For something closer to a skillet meal, a breakfast sausage potato skillet recipe shows how well this type of sausage holds alongside starchy, absorptive ingredients.

Keep it away from delicate seafood - the fennel-garlic weight overpowers light fish completely.

Try It In
🫑Sausage and Peppers Italian-StyleClassic pairing that lets sweet links and peppers do the work→⚡Air Fryer Italian Sausage LinksFast method that crisps the casing without drying out the interior→🍽️Italian Sausage and PeppersOne-pan version with a rich, simplified sauce→

How to Buy and Store Italian Sausage

At the butcher case or grocery aisle, look for tightly packed links with a fresh pink-to-red color and clearly visible white fat specks throughout.

The fat marbling is not an indicator of poor quality - it's what makes the sausage behave correctly in a pan.

Smell before buying: a faint herbed pork aroma is correct; sour or metallic odors mean skip it.

Check the ingredient label for pork listed first and fennel or anise somewhere in the seasoning.

Watch Out
Some brands label turkey or chicken sausage as "Italian-style." The fennel is there, but the fat content differs significantly - crumbling behavior and sauce richness won't match what pork delivers.

Once home, keep unopened raw links refrigerated at 34-40°F in their original packaging. Use opened raw sausage within 1-2 days.

Vacuum-packed links last up to 1-2 weeks unopened. For anything beyond a few days, freezing italian sausage in tightly wrapped or vacuum-sealed portions keeps quality intact for up to 3 months.

Where to Start With Italian Sausage

Start with sweet Italian links if you're new to the ingredient - the flavor is assertive but not divisive, and grilling or pan-searing a link whole requires no prep beyond a hot surface.

If you cook pasta sauces regularly, try bulk sausage crumbled into a tomato base; it builds a ragù-like depth faster than ground beef alone.

If you run into availability issues or dietary restrictions, a quick review of replacements for italian sausage covers the most practical swaps. Similarly, understanding what makes kielbasa sausage distinct puts Italian sausage's fennel profile in sharper context by comparison.

Shortcut
Remove the casing from sweet links and you have bulk sausage without buying a separate package. Pinch the end, squeeze, and it crumbles straight into the pan.

Frequently Asked Questions

What is Italian sausage made of?

Coarsely ground pork - typically shoulder and fat trimmings - seasoned with fennel seed and garlic. Most recipes also include black pepper, salt, and sometimes white wine. Hot varieties add crushed red pepper to that base.

Is Italian sausage spicy?

It depends on the variety. Sweet Italian sausage has no added heat - the fennel can read as sharp, but there's no chili burn. Hot Italian sausage adds crushed red pepper and delivers a noticeable, sustained heat.

What does sweet vs hot Italian sausage mean?

"Sweet" refers to the absence of chili heat, not added sugar - the flavor is savory and fennel-forward. "Hot" means crushed red pepper has been added to the same base blend, increasing heat without changing the fennel character.

Can you freeze Italian sausage?

Yes. Wrap links tightly in plastic then foil, or use vacuum-sealed bags, and freeze for up to 3 months. Texture holds well at that window; beyond it, the fat can oxidize and the flavor flattens.

How do you cook Italian sausage links without them bursting?

Don't pierce the casing. Start links in a cold pan or over medium heat to let the interior temperature rise gradually. High heat from the start causes steam buildup inside the casing, which splits it.

Blue Cheese Walnut Dip

March 30, 2026

Mixing cream cheese, crumbled blue cheese, and toasted walnuts creates a chunky dip with balanced tang and crunch. The cream cheese smooths the sharp blue cheese while the nuts add texture that holds up against chips or vegetables.

Blue Cheese Walnut Dip served on a plate

Toast the walnuts first so they stay crisp in the dip. Room temperature dairy mixes faster and prevents lumps.

This works for weeknight appetizers when you need something ready in 15 minutes or casual parties where you want a dip that tastes homemade.

QUICK SUMMARY

Blue Cheese Walnut Dip combines tangy blue cheese, toasted walnuts, and cream cheese for a creamy appetizer with crunchy texture. Toast the nuts at 350°F for 5 minutes, crumble the cheese finely, and chill the dip 30 minutes before serving so the flavors meld.

⏱️Time: 15 minutes total with 5 minutes toasting nuts
🔥Method: Toast walnuts first, mix all ingredients, chill before serving
⚠️Watch Out: Add lemon juice slowly-too much makes the dip runny and sour

Table of Contents

Toggle
  • Why This Recipe Works
  • What You'll Need
    • Ingredient Details
  • Ingredient Swaps
  • What to Serve With It
  • Store and Reheat
  • Frequently Asked Questions
  • Blue Cheese Walnut Dip
    • Method 
    • Tried this recipe?

Why This Recipe Works

Toasting walnuts before mixing amplifies their nutty flavor and keeps them crunchy in the creamy base. For a version that comes together quickly, a juicy salad side uses similar ingredients with a different texture balance.

Quick Reference
⏱️
Prep Time
10 min
🔥
Cook Time
5 min
⏰
Total Time
15 min
🍽️
Servings
8 servings
📊
Difficulty
Easy
🏷️
Category
Appetizer
💡
Quick Tip
Toast walnuts for crunch and enhanced flavor
🎯
Best For
Entertaining | Weeknight

Five things that make this dip work:

  • Toast walnuts at 350°F for 5 minutes - stirring halfway creates even browning without bitterness
  • Use room temperature dairy - cream cheese and sour cream mix faster and smoother when not cold
  • Crumble blue cheese finely - small pieces distribute evenly instead of clumping in pockets
  • Add lemon juice gradually - 1 teaspoon at a time prevents overshooting the acidity balance
  • Chill 30-60 minutes before serving - cold time melds the flavors and thickens the texture
Quick Tip
Add fresh herbs just before serving to preserve their bright green color and prevent wilting in the dip

What You'll Need

Ingredients for Blue Cheese Walnut Dip

Blue cheese is already salty, so measure carefully and taste as you season. A dollop of something creamy like homemade takes each bite somewhere more interesting.

🧀
Dairy Base
  • 8 oz cream cheese
  • ½ cup sour cream
  • ¼ cup mayonnaise
  • 4 oz blue cheese
🌰
Nuts & Aromatics
  • ¾ cup walnuts
  • 2 cloves garlic
  • 2 tablespoon fresh herbs (chives or parsley)
🍋
Seasoning
  • 1 tablespoon lemon juice
  • ¼ teaspoon salt
  • ¼ teaspoon black pepper

Ingredient Details

  • Blue cheese
    Use firm, crumbly cheese for best texture - older cheese tastes bitter and ruins the balance
  • Walnuts
    Toast nuts until golden and fragrant but watch closely after 4 minutes to prevent burning
  • Cream cheese
    Let cream cheese sit at room temperature 20 minutes before mixing to avoid lumps
  • Sour cream
    Full-fat sour cream creates the creamiest texture - low-fat works but tastes thinner
  • Mayonnaise
    Mayonnaise binds the ingredients and adds richness without extra tang
  • Lemon juice
    Fresh lemon juice tastes brighter than bottled and won't overpower the cheese
  • Fresh herbs
    Chives or parsley add color and freshness - add right before serving to prevent browning

Ingredient Swaps

Greek yogurt replaces sour cream for a tangier, thicker texture with less fat. For a version that comes together quickly, this quick beef dish pairs well with creamy dips when you need a complete plate.

Four swaps that work:

  • Pecans or toasted almonds for walnuts - different crunch with similar richness, toast the same way at 350°F for 5 minutes
  • Gorgonzola or roquefort for blue cheese - gorgonzola tastes milder, roquefort sharper, adjust amount to match your preference
  • Greek yogurt for sour cream - adds extra tang and thicker body with lighter fat content
  • Vegan mayonnaise for regular mayonnaise - keeps texture and richness for dairy-free diets without changing the method

Gorgonzola Blue Cheese

Works for: milder tang, creamier texture, less assertive flavor

Skip if: you want sharp blue cheese punch or crumbly texture

Roquefort Blue Cheese

Works for: intense tang, sharper flavor, firmer crumble

Skip if: you prefer mild cheese or need budget-friendly option

Greek Yogurt

Works for: extra tang, thicker body, lighter fat content

Skip if: you want classic creamy sour cream flavor and texture

Instructions

The dip comes together in 10 minutes once the nuts are toasted. Rich mains need something to cut through, and flaky homemade garlic shrimp recipe balances the creamy richness with bright acidity.

  1. Toast walnuts at 350°F for 5 minutes - spread nuts on a baking sheet in a single layer, stir halfway through, remove when golden and fragrant

  2. Chop toasted walnuts coarsely - let nuts cool 2 minutes, then chop into chunky pieces with a knife for texture contrast in the dip

  3. Mix cream cheese, sour cream, and mayonnaise in a bowl - stir with a spoon or spatula until smooth and no lumps remain, about 1 minute

  4. Crumble blue cheese and fold into dairy mixture - break cheese into small pieces with your fingers, add chopped walnuts, minced garlic, lemon juice, salt, and pepper, stir gently to combine

  5. Chill dip 30-60 minutes before serving - cover bowl and refrigerate so flavors meld and texture thickens, top with fresh chopped herbs right before serving

Watch Out
Add lemon juice 1 teaspoon at a time and taste after each addition - too much makes the dip runny and overpowers the blue cheese

What to Serve With It

Crisp vegetables and crunchy chips balance the creamy texture. Gravy adds the contrast this plate needs, but timing matters for quick gravy recipe when you need a complete meal ready fast.

Side Dish Prep Why It Works How to Serve
Celery sticks Easy Crisp, neutral vessel contrasts dip texture Cut into 4-inch sticks, serve cold
Carrot sticks Easy Natural sweetness balances tangy blue cheese Peel and slice, chill before serving
Pita chips Easy Light crunch complements creamy dip Serve at room temperature in a bowl
Sliced cucumber Easy Refreshing, mild flavor balances richness Slice into rounds, keep chilled
Toasted baguette slices Medium Crunchy, fancy base elevates presentation Brush with olive oil, toast until golden

Three ways to serve it:

  • With grilled vegetables - charred zucchini, peppers, or asparagus add smoky contrast to the creamy dip
  • As a burger topping - spread on beef or turkey burgers instead of mayo for tangy blue cheese flavor
  • With hot wings - the cooling creaminess balances spicy buffalo sauce on chicken wings

When planning your appetizer spread, check savory steak meal ideas for more party-ready combinations that work with rich dips.

Shortcut
Make the dip a day ahead and store covered in the fridge - the flavors improve overnight and save you prep time before guests arrive

Store and Reheat

The dip keeps 3-4 days in an airtight container in the fridge and tastes better the next day. A good something tender like pork can make or break the plate when you're serving leftovers.

Method Time Best For
🌡️ Room temperature 20 min Softening texture after refrigeration without heat
🍳 Stovetop 2-3 min low heat Gently warming without separating dairy
📦 Microwave 30 sec intervals Quick warming but watch closely to prevent separation

For best results when storing:

  • Use shallow containers - spreads dip thin so it chills evenly and faster in the fridge
  • Press plastic wrap directly on surface - prevents a skin from forming on top of the dip
  • Store 3-4 days maximum - dairy-based dips lose freshness and develop off flavors after that
  • Freeze up to 1 month - texture changes slightly when thawed but flavor remains intact
  • Stir before serving - dairy separates slightly when stored, mix to restore creamy texture

Frequently Asked Questions

Can I make Blue Cheese Walnut Dip ahead and store it?

Yes, make the dip up to 24 hours ahead and store covered in the fridge. The flavors improve overnight and the texture thickens, just add fresh herbs right before serving.

How do I properly toast walnuts for the dip?

Spread walnuts in a single layer on a baking sheet and toast at 350°F for 5 minutes, stirring halfway through. Remove when golden and fragrant to avoid bitterness from overtoasting.

What is the best way to know when the dip is ready to serve?

The dip is ready when it's cold, thick, and the blue cheese flavor tastes balanced with the acidity. Chill at least 30 minutes so the flavors meld and the texture firms up.

How can I fix a dip that tastes too bitter or sour?

Add more cream cheese or sour cream to mellow bitter blue cheese, or fold in a pinch of sugar to balance excess acidity from lemon juice. Taste after each adjustment until the flavor smooths out.

What are some good food pairings with Blue Cheese Walnut Dip?

Serve with celery sticks, carrot sticks, pita chips, sliced cucumber, toasted baguette, grilled vegetables, or hot wings. The dip also works as a burger topping or spread for sandwiches.

Blue Cheese Walnut Dip served on a plate

Blue Cheese Walnut Dip

No ratings yet
Blue Cheese Walnut Dip blends tangy blue cheese, toasted walnuts, and creamy dairy for a flavorful appetizer with crunch. Toasting the walnuts enhances their flavor and keeps them crisp, while chilling the dip melds the flavors and thickens the texture.
Print Recipe Pin Recipe
Prep Time 10 minutes mins
Cook Time 5 minutes mins
Total Time 15 minutes mins
Servings: 8 servings
Course: Appetizer
Ingredients Method Notes

Ingredients
  

  • 8 oz cream cheese room temperature
  • 0.5 cup sour cream full-fat preferred
  • 0.25 cup mayonnaise
  • 4 oz blue cheese crumbled finely
  • 0.75 cup walnuts toasted
  • 2 cloves garlic minced
  • 2 tablespoon fresh herbs chives or parsley, chopped
  • 1 tablespoon lemon juice add gradually
  • 0.25 teaspoon salt
  • 0.25 teaspoon black pepper

Method
 

  1. Preheat oven to 350°F (177°C). Spread walnuts in a single layer on a baking sheet and toast for 5 minutes, stirring halfway through, until golden and fragrant.
    0.75 cup walnuts
  2. Let toasted walnuts cool for 2 minutes, then chop coarsely with a knife to add texture contrast.
    0.75 cup walnuts
  3. In a bowl, stir together room temperature cream cheese, sour cream, and mayonnaise until smooth and free of lumps, about 1 minute.
    8 oz cream cheese, 0.5 cup sour cream, 0.25 cup mayonnaise
  4. Crumble the blue cheese finely and fold it into the dairy mixture along with chopped walnuts, minced garlic, lemon juice, salt, and pepper. Stir gently to combine.
    4 oz blue cheese, 0.75 cup walnuts, 2 cloves garlic, 1 tbsp lemon juice, 0.25 tsp salt, 0.25 tsp black pepper
  5. Cover the bowl and refrigerate the dip for 30 to 60 minutes to meld flavors and thicken texture. Add fresh chopped herbs just before serving.
    2 tbsp fresh herbs

Notes

  • Toast walnuts at 350°F for 5 minutes, stirring halfway to avoid burning.
  • Use room temperature cream cheese to ensure a smooth, lump-free dip.
  • Add lemon juice gradually, tasting to avoid making the dip sour or runny.

Tried this recipe?

Let us know how it was!

What Is Galangal? [Taste, Uses & More]

March 30, 2026

You spot it at the market, wedged between the fresh ginger and the lemongrass - a pale, knobby rhizome that looks almost familiar but isn't quite right.

What Is Galangal

Galangal is Southeast Asia's answer to ginger, though calling it a ginger substitute undersells what it actually does in a broth or curry paste.

Cooks who rely on it for tom kha or red curry paste know it brings something ginger simply can't - a piney, almost medicinal sharpness that anchors a dish without sweetness.

If your recipe also calls for aromatics like kaffir lime leaf stand-ins or replacements for lemongrass, galangal is the third pillar in that aromatic trio.

QUICK SUMMARY

Galangal is a firm, woody rhizome from Southeast Asia with a peppery, pine-forward flavor sharper than ginger. It steeps in broths and gets pounded into curry pastes - rarely eaten directly. Fresh whole rhizomes keep 2-3 weeks refrigerated, or up to 6 months frozen.

🌿Flavor: Peppery, piney, camphor-tinged - sharper and less sweet than ginger
🍲Best Uses: Tom kha broth, curry pastes, coconut milk curries, seafood poaches
🛒Buy It: Firm, pale-beige rhizome; avoid soft spots or wrinkled skin
❄️Storage: Crisper drawer 2-3 weeks; freeze sliced for up to 6 months
⚠️Skip It When: A recipe calls for sweetly spiced ginger warmth - galangal won't substitute cleanly

What Is galangal?

Galangal belongs to the Zingiberaceae family - the same family as ginger - but it's a separate species, Alpinia galanga, native to the Malay Archipelago and widely cultivated across Thailand, Indonesia, and Malaysia.

It goes by several names: greater galangal, laos in Thai cooking, and lengkuas in Indonesian and Malay kitchens.

Lesser galangal (Alpinia officinarum) is a smaller, more pungent relative, though it's rarely what markets stock.

The rhizome itself is notably denser and harder than ginger. Raw galangal has a pale beige exterior with faint rings, and a cross-section reveals white-to-pinkish flesh with a distinctly fibrous grain.

Two sub-types appear in most markets:

  • 🌱 Greater galangal (Alpinia galanga) - the standard culinary form; large, mild enough to use in volume
  • 🌱 Lesser galangal (Alpinia officinarum) - smaller rhizome, sharper and more medicinal, primarily used in traditional medicine or spice blends

Fresh galangal is the preferred form for serious cooking. Dried or powdered galangal loses much of its pine-bright character.

What Does galangal Taste Like?

galangal - What Is Galangal
Sensory SnapshotStrong Intensity
👅 Flavor
PepperyPine-likeCitrusyCamphor
✋ Texture
Very firmFibrous
👃 Aroma
Bright pineHerbal pepperCamphor-tinged

Compared to ginger, galangal hits differently from the first second. Where ginger is warm and slightly sweet, galangal leads with pine resin and pepper, followed by a mild cooling note - almost like a whisper of camphor or eucalyptus.

There's a faint citrus lift at the top, but no sugar-like warmth underneath.

Heat changes it. Simmering mellows the sharpness considerably, releasing the aromatic compounds into surrounding liquid - which is exactly why it works in tom kha. Eaten raw, galangal can feel almost aggressive; steeped long in broth, it becomes a background hum of herbal depth.

How to Use galangal

Galangal rarely gets eaten directly. Its job is to flavor the medium - the broth, the paste, the oil - and step aside.

That structural role shapes how you prep it.

How Galangal Is Used
MethodBest ForTip
🍲 Sliced & SimmeredTom kha, pho-style broths, stock basesCut thick slices; remove before serving - it stays fibrous
🪨 Pounded into pasteThai red and green curry pastesPeel and chop first; mortar gives better texture than blender alone
🐟 Poaching liquidFish and shrimp, delicate seafoodPair with [keeping coconut milk fresh](https://forkliftkitchen.com/coconut-milk-shelf-life/) guidance for coconut-based poaches
🥗 Julienned & sautéedStir-fries needing aromatic textureAdd at the end - brief heat preserves the bright top notes
🫙 Whole in pickles/acharAromatic backbone for preserved vegetablesBruise lightly before adding to brine

In Thai cooking, galangal anchors the aromatic trio alongside lemongrass and kaffir lime leaves. Indonesian and Malaysian curries pound it into rempah paste with chili, shallots, and turmeric.

Vietnamese cooks bruise it into simmering stocks for a pine-herbal note that sits behind the star anise.

Galangal pairs cleanly with coconut milk, fish sauce, lime, and chili.

It also works well against shrimp and firm white fish - what makes fish distinct in texture is part of why delicate proteins benefit from this kind of aromatic steeping rather than direct seasoning.

Golden Rule
Never substitute galangal directly for ginger in baked goods or Western cream sauces - the pine-camphor notes clash hard with dairy and sweet spice blends.
Try It In
🍗Air Fryer Chili-Lime Chicken WingsA marinade base where galangal's peppery lift works alongside lime and chili→🍋Air Fryer Lemon Pepper Chicken TendersThe bright citrus angle suits galangal-infused marinades well→🌶️Air Fryer Chili-Lime Chicken TendersGalangal in the marinade adds a piney depth behind the chili-lime heat→

How to Buy and Store galangal

At the market, look for rhizomes that feel dense and completely firm when pressed - no give whatsoever.

The skin should be smooth and pale beige, and a fresh-cut end shows white-to-pinkish flesh.

Walk away from anything with soft nodes, wrinkled skin, or a sour smell.

Much like checking ginger spoilage signs, the nose test matters: fresh galangal smells sharply herbal, not fermented.

Shortcut
Freeze galangal sliced on a tray first, then bag the frozen pieces. You can grate or drop slices straight into simmering liquid without thawing.

Storage by timeline:

  • 🧊 Short-term (up to 3 weeks) - wrap unwashed in a paper towel, place in a perforated bag, store in the crisper
  • ❄️ Long-term (3-6 months) - slice first, freeze flat, then transfer to a sealed bag; see [storing galangal correctly](https://forkliftkitchen.com/galangal-shelf-life/) for step-by-step guidance
  • ⚠️ Peeled or sliced, refrigerated - use within one week; cut surfaces deteriorate quickly

Start With the Broth

If this is your first time with galangal, tom kha soup is the clearest entry point. Slice three or four thick coins, simmer them in coconut milk broth for twenty minutes, then pull them out before serving.

That single step shows you exactly what galangal contributes - and why nothing else in the pot replicates it.

Once you're comfortable with ginger and its flavor as a baseline, the differences become easier to navigate. If you can't find fresh rhizome locally, a look at alternatives to galangal will walk you through your closest options.

Frequently Asked Questions

What does galangal taste like in Thai food?

In Thai dishes like tom kha, it reads as a background piney-herbal depth rather than a forward flavor. Most diners notice it as an almost medicinal warmth without being able to name it specifically - it's rarely eaten directly.

How do you tell galangal from ginger?

Galangal is noticeably harder and denser, with pale beige skin and faint ring markings. Ginger is softer, more golden-tan, and smells warm and sweet - galangal smells sharp, piney, and slightly medicinal.

Can you substitute ginger for galangal?

In a pinch, yes - but the result shifts noticeably toward sweetness and loses the pine-camphor edge. A small amount of ginger combined with a little black pepper gets closer, though it still won't replicate galangal's specific aromatic signature.

Is galangal spicy or bitter?

Neither, exactly. It's peppery and sharp with a mild cooling bite - not chili-hot and not truly bitter. The camphor-like note can read as slightly medicinal, which some people misidentify as bitterness.

What dishes actually require galangal rather than ginger?

Tom kha gai, Thai green and red curry pastes, Indonesian rendang, and Malaysian laksa all depend on galangal's specific pine-pepper character. Swapping ginger into these produces a noticeably different - and less authentic - result.

« Previous Page
Next Page »

Primary Sidebar

ForkliftKitchen recipe developer

Welcome!

Recipe Developer · 12+ Yr Kitchen Veteran

I'm the recipe developer behind this site, focused on practical, well-tested dishes and smart ingredient swaps. Every recipe is written to be clear, reliable, and easy to make at home.

650+ Recipes
12+ Yrs Exp.
3x Tested
Our Story →

As Featured In

Allrecipes

TASTE OF HOME

Food52

HUFFPOST

Yahoo! Life

Our Editorial Standards

  • ✓ Every recipe tested at least 3 times before publishing
  • ✓ Substitutes verified by real kitchen trials, not guesswork
  • ✓ Reviewed for accuracy by our editorial team
  • ✓ Updated regularly with seasonal info and reader feedback

Most Popular

  • Creamy Lemon Shrimp Linguine
    Creamy Lemon Shrimp Linguine
  • Creamy Garlic Mushroom Chicken
    Creamy Garlic Mushroom Chicken
  • Sesame Ginger Chicken Noodle Bowls
    Sesame Ginger Chicken Noodle Bowls
  • Baked Lemon Herb Fish Fillets
    Baked Lemon Herb Fish Fillets
  • Veggie Loaded Fried Rice
    Veggie Loaded Fried Rice
  • Spicy Garlic Shrimp Stir Fry
    Spicy Garlic Shrimp Stir Fry

Join 8,000+ Home Cooks

Weekly Kitchen Tips

Easy recipes, smart substitutes, and real cooking shortcuts — every Thursday.

Subscribe Free →


Side Dishes

  • What to Serve With Asian Salmon? 15 Best Side Dishes
    What to Serve With Asian Salmon? 15 Best Side Dishes
  • Side Dishes for Strawberry Spinach Salad
    15 Best Side Dishes for Strawberry Spinach Salad
  • Sides for Grilled Cauliflower Steaks to Complete the Meal
    15 Sides for Grilled Cauliflower Steaks to Complete the Meal
  • 15 Sides To Serve With Calabacitas
    15 Best Sides for Calabacitas – Mexican-Inspired Favorites


Substitutes

  • 7 Best Substitutes for Hot Sauce in Marinades & Stir-Fries
    7 Best Substitutes for Hot Sauce in Marinades & Stir-Fries
  • 9 Best Substitutes for Butter in Baking and Cooking
  • 7 Best Substitutes for Tagliatelle for Italian Pasta Dishes
    7 Best Substitutes for Tagliatelle for Italian Pasta Dishes
  • 7 Best Substitutes for Udon Noodles in Asian Stir-Fries
    7 Best Substitutes for Udon Noodles in Asian Stir-Fries


Browse by Topic

  • Side Dishes320
  • Substitutes785
  • Dinner163
  • Air Fryer77
  • Taste Profiles484
  • Food Storage123


Reader Reviews

★★★★★

"Finally a food blog that tells you exactly why a substitute works instead of just listing options."

— Sarah M., via email

★★★★★

"The side dish recommendations are so specific — saved my dinner party twice this month."

— James R., Pinterest comment

★★★★★

"I trust this site more than most because they actually test everything. You can tell."

— Priya K., blog comment

Footer

↑ Back to Top

Forklift Kitchen

We do the heavy lifting so you can enjoy the cooking. Tested recipes, smart substitutes, and perfect pairings—built for real home cooks.

Content

  • Recipes
  • Substitutes
  • What to Serve With
  • Blog

Company

  • About Us
  • Contact
  • Subscribe

Legal

  • Privacy Policy
  • Terms of Service

As an Amazon Associate I earn from qualifying purchases.

© 2026 Forklift Kitchen.

Rate This Recipe

Your vote:


A rating is required
A name is required
An email is required