• Skip to primary navigation
  • Skip to main content
  • Skip to primary sidebar
  • Recipe Index
    • Air Fryer
  • Side Dishes
  • Substitutes
  • About
  • Contact
  • Subscribe

ForkLiftKitchen

menu icon
go to homepage
  • Recipe Index
    • Air Fryer
  • Side Dishes
  • Substitutes
  • About
  • Contact
  • Subscribe
subscribe
search icon
Homepage link
  • Recipe Index
    • Air Fryer
  • Side Dishes
  • Substitutes
  • About
  • Contact
  • Subscribe
×

Blog

Warm Lentil Salad with Mustard Vinaigrette

March 30, 2026

Boiling lentils until tender but not mushy, then tossing them warm with a sharp Dijon vinaigrette creates a salad that actually holds up. The key is timing: pull the lentils at 20 minutes when they still have gentle resistance, then drain fast so they don't overcook in residual heat.
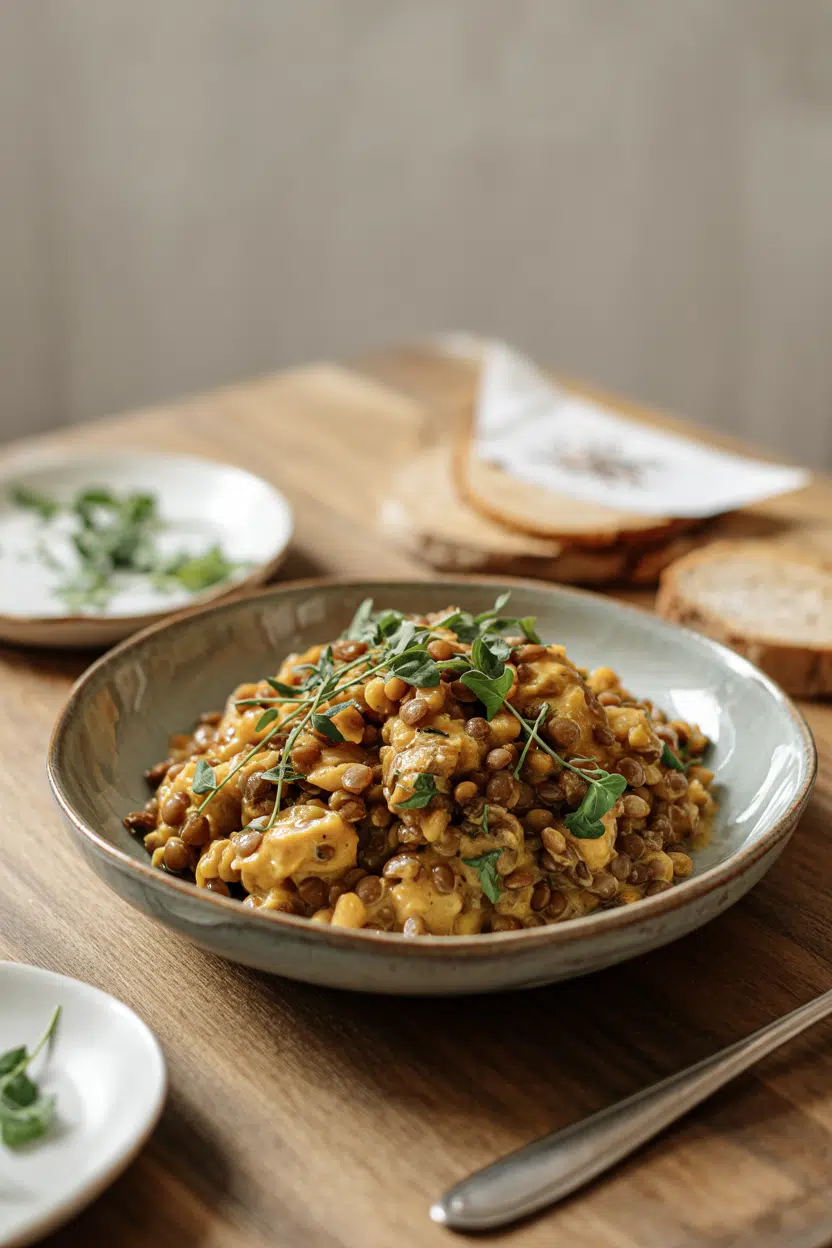
Warm Lentil Salad with Mustard Vinaigrette served on a plate

Whisking mustard and vinegar together before slowly drizzling in olive oil creates an emulsified dressing that coats every lentil instead of pooling at the bottom of the bowl. Add diced vegetables and fresh herbs while the lentils are still warm so the dressing soaks in.

This works for meal prep or a quick weeknight side when you need something that tastes intentional without requiring constant attention.

QUICK SUMMARY

Brown or green lentils simmer for 20-25 minutes, then get tossed warm with a tangy Dijon vinaigrette. The warm lentils absorb the dressing better than cold ones, and letting the salad rest for 10 minutes before serving helps the flavors combine. Use lentils that hold their shape-skip red lentils, which turn mushy.

⏱️Time Reality: 35 minutes start to finish, most of it hands-off simmering
🥄Critical Move: Whisk mustard and vinegar first, then add oil slowly for proper emulsion
⚠️Watch Out: Mushy lentils ruin texture-taste at 20 minutes and drain immediately when tender

Why This Recipe Works

Simmering lentils in a 3:1 water ratio prevents them from absorbing too much liquid and turning to mush. Testing doneness at 20 minutes gives you control-lentils should break gently between your fingers but still hold their shape. A good salad can make or break the plate. For a version that comes together quickly, try a juicy salad side that works for quick lunches or meal prep.

Quick Reference
⏱️
Prep Time
10 min
🔥
Cook Time
25 min
⏰
Total Time
35 min
🍽️
Servings
4 servings
📊
Difficulty
Easy
🏷️
Category
Side
💡
Quick Tip
Cook lentils al dente to hold shape
🎯
Best For
Weeknight | Meal prep | Budget

Five reasons this recipe delivers:

  • Brown or green lentils maintain texture during cooking-French green lentils work even better if you want firmer bite
  • Emulsifying Dijon mustard with red wine vinegar before adding olive oil creates a dressing that clings instead of separating
  • Tossing warm lentils with vinaigrette lets them absorb flavors while they're still hot and slightly open
  • Dicing carrots and celery to match lentil size ensures every forkful has balanced texture and crunch
  • Resting the salad for 10 minutes after mixing allows the tangy dressing to mellow and coat evenly
Quick Tip
Rinse lentils under cold water for 30 seconds before cooking to remove debris and excess starch that can make the cooking liquid cloudy.

What You'll Need

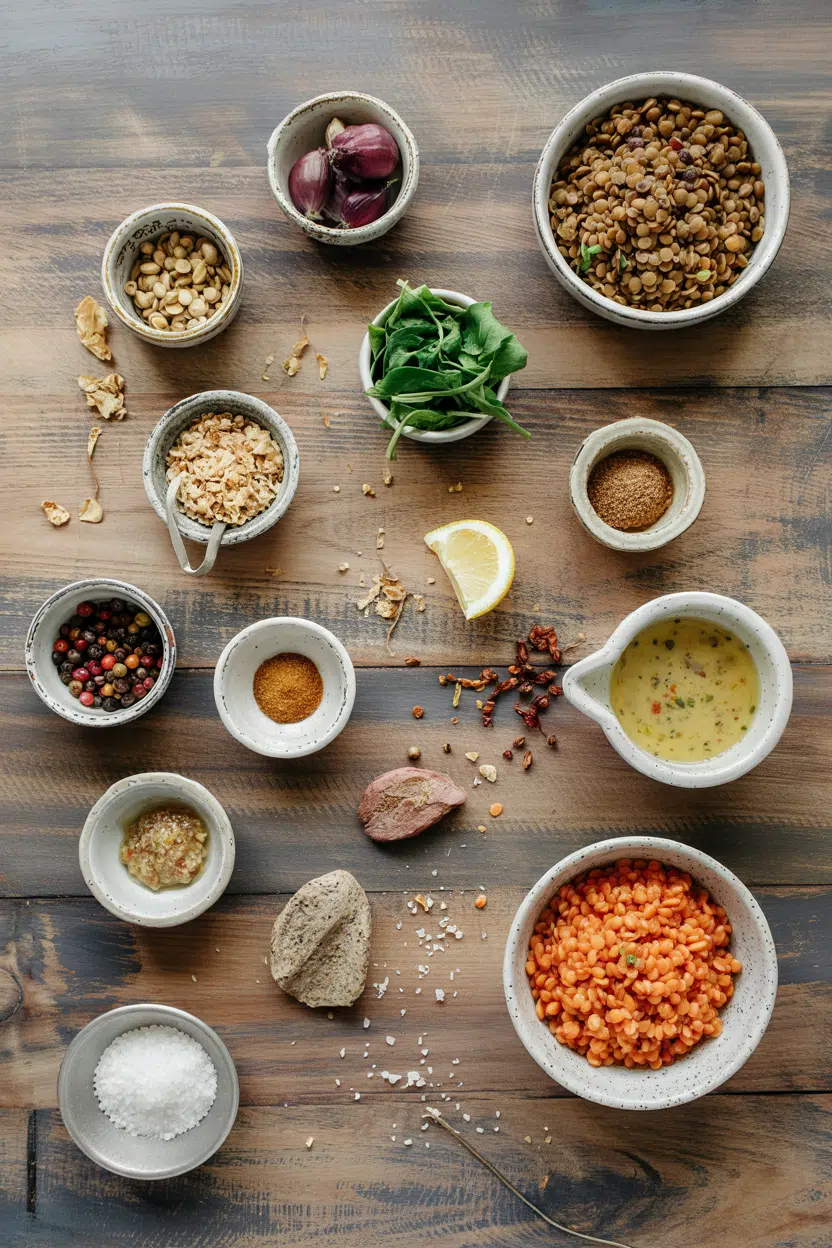
Ingredients for Warm Lentil Salad with Mustard Vinaigrette

Brown or green lentils cost less than $2 per pound and store in your pantry for months. Most people skip salad, but it balances the meal. For a version that comes together quickly, use quick salad dish strategies to streamline weeknight prep.

🫘
Lentils
  • 1 cup brown or green lentils
  • 3 cups water
  • 1 teaspoon salt
🥢
Vinaigrette
  • 3 tablespoon Dijon mustard
  • 3 tablespoon red wine vinegar
  • ⅓ cup olive oil
  • 1 teaspoon honey (optional)
🥬
Vegetables
  • 1 large carrot, diced
  • 2 celery stalks, diced
  • 1 shallot or small red onion, minced
🧄
Aromatics & Herbs
  • 2 cloves garlic, minced
  • ¼ cup fresh parsley, chopped
  • 1 tablespoon fresh thyme (optional)
  • Salt and black pepper to taste

Ingredient Details

  • Brown or green lentils
    Choose lentils with uniform size and color-avoid any that look shriveled or cracked, which can cook unevenly
  • Dijon mustard
    Use smooth Dijon for even emulsification-whole grain mustard works but creates grainy texture in the dressing
  • Red wine vinegar
    Taste your vinegar before using-some brands are sharper than others, so adjust amount based on acidity level
  • Olive oil
    Use regular olive oil, not extra virgin-strong fruity notes can overpower the tangy mustard dressing
  • Shallots
    Mince shallots finely so they distribute evenly-large chunks create pockets of sharp onion flavor
  • Fresh herbs
    Chop parsley just before adding to preserve bright green color and prevent wilting from residual heat
  • Carrots and celery
    Dice vegetables to ¼-inch pieces to match lentil size-larger chunks throw off the texture balance

Ingredient Swaps

You can adjust this recipe based on what's in your pantry without losing the core texture or tangy flavor profile. The salad works best when it hits the table at the same time as the main. We keep a batch ready for nights like this-this quick pork dish pairs well when you need a hearty protein.

Four practical swaps:

  • Brown or green lentils → French green (Puy) lentils: Firmer texture that holds shape even better, add 3-5 minutes to cooking time
  • Dijon mustard → whole grain mustard: Creates grainy vinaigrette with more textured bite, same tangy flavor
  • Red wine vinegar → apple cider vinegar: Milder acidity with subtle sweetness, use same amount
  • Olive oil → avocado oil: Neutral flavor for those who don't like strong olive taste, same smooth texture

French Green Lentils

Works for: Meal prep when you need lentils that stay firm for days

Skip if: You're cooking in under 25 minutes-they need longer

Apple Cider Vinegar

Works for: Milder dressing when red wine vinegar tastes too sharp

Skip if: You want traditional French-style tangy punch

Whole Grain Mustard

Works for: Rustic presentation with visible mustard seeds

Skip if: You prefer smooth, evenly coated dressing

Instructions

Lentils cook in 25 minutes on the stovetop with minimal stirring. Most people skip chicken, but it balances the meal. For a version that comes together quickly, pair with this juicy chicken for a complete weeknight dinner.

  1. Rinse and simmer the lentils: Rinse 1 cup lentils under cold water for 30 seconds in a fine mesh strainer. Add to medium saucepan with 3 cups water and 1 teaspoon salt. Bring to boil over high heat, then reduce to gentle simmer. Cook uncovered for 20-25 minutes, stirring once halfway through.

  2. Test for doneness: At 20 minutes, taste a lentil-it should break gently between your fingers but still hold shape with slight resistance. When ready, drain immediately in strainer and rinse briefly with cold water to stop cooking. Let drain for 2 minutes.

  3. Make the vinaigrette: While lentils cook, whisk 3 tablespoon Dijon mustard and 3 tablespoon red wine vinegar in mixing bowl for 20 seconds until combined. Slowly drizzle in ⅓ cup olive oil while whisking constantly in circular motion. The dressing should look glossy and thick, not separated. Add 1 teaspoon honey if using, plus salt and pepper to taste.

  4. Combine warm salad: Transfer drained lentils to large bowl while still slightly warm. Add diced carrot, celery, minced shallot, and garlic. Pour vinaigrette over and toss gently with spoon for 30 seconds until everything is coated. The warm lentils help the dressing soak in.

  5. Rest and finish: Let salad sit for 10 minutes at room temperature so flavors combine. Just before serving, fold in chopped parsley and thyme. Taste and adjust seasoning with more salt, pepper, or vinegar if needed.

Shortcut
Make vinaigrette up to 3 days ahead and store in jar-shake vigorously before using if it separates in the fridge.

What to Serve With It

This salad works as a side for protein-heavy mains or as a light lunch on its own when topped with a fried egg. A good shrimp can make or break the plate. We keep a batch ready for nights like this-try this easy shrimp recipe when you need quick protein that doesn't compete with the tangy dressing.

Side Dish Prep Why It Works How to Serve
Roasted chicken Medium Earthy lentils balance rich roasted poultry Serve warm salad alongside carved chicken pieces
Crusty bread Easy Soaks up tangy vinaigrette, adds textural contrast Toast bread slices and serve on the side for dipping
Grilled vegetables Easy Smoky char complements mustard's sharp tang Arrange grilled zucchini and peppers around salad bowl
Goat cheese crostini Medium Creamy cheese mellows acidic dressing Pass crostini separately so guests can top their salad
Mixed green salad Easy Light greens add freshness to hearty lentils Serve greens in separate bowl with simple lemon dressing

Three ways to serve it:

  • As a weeknight side: Pair with grilled chicken or seared salmon for protein, keep it simple with steamed green beans
  • For meal prep: Pack in containers with hard-boiled eggs and extra vegetables, dressing stays emulsified for 3 days
  • For hosting: Serve at room temperature on large platter with goat cheese crumbles and toasted walnuts scattered on top

Need more ideas? Check out savory chicken dish ideas that work with tangy grain salads.

Best Pick
This salad shines as part of a Mediterranean spread with hummus, olives, and flatbread-the lentils soak up other flavors from the plate.

Store and Reheat

This salad keeps in the fridge for 3-4 days but tastes best within 2 days while vegetables stay crisp. Most people skip beef, but it balances the meal. For a version that comes together quickly, serve alongside rich beef side dish for cold-weather dinners.

Store in shallow airtight container so lentils cool quickly and evenly. The vinaigrette may separate slightly in the fridge-just stir before reheating.

Method Time Best For
🍳 Stovetop 3-4 min on low heat Small portions when you want to maintain texture and add fresh dressing
📦 Microwave 1-2 min, stir halfway Quick single servings-watch closely to prevent drying out
🔥 Oven 8-10 min at 300°F Larger batches that need even gentle warming without losing moisture

For best results when storing:

  • Let salad cool to room temperature before refrigerating to prevent condensation that makes lentils soggy
  • Store dressing separately if making more than 2 days ahead-toss just before serving to keep vegetables crisp
  • Refresh leftovers with squeeze of fresh lemon juice and drizzle of olive oil before reheating
  • Add fresh herbs after reheating, not before-parsley and thyme lose color and wilt when stored
  • Freeze plain cooked lentils without dressing for up to 1 month, thaw overnight and dress fresh for best texture

Frequently Asked Questions

How long to cook lentils for warm salad?

Cook brown or green lentils for 20-25 minutes at a gentle simmer. Test at 20 minutes-they should break gently between your fingers but still hold their shape with slight resistance.

Can I make warm lentil salad ahead?

Yes, make it up to 3 days ahead and store in the fridge. The salad tastes best within 2 days while vegetables stay crisp. Store dressing separately if holding longer than 2 days and toss just before serving.

What goes with warm lentil salad?

Serve it with roasted chicken, grilled salmon, or seared lamb chops. Crusty bread and simple steamed vegetables round out the plate without competing with the tangy dressing.

How do I know when lentils are done for salad?

Taste a lentil at 20 minutes-it should break gently between your fingers but maintain shape with slight resistance. Drain immediately when you reach this texture to prevent mushiness from residual heat.

Can I use red lentils in warm lentil salad?

No, red lentils break down and turn mushy when cooked, creating a paste-like texture. Stick with brown, green, or French green lentils that hold their shape during cooking and tossing.

Warm Lentil Salad with Mustard Vinaigrette served on a plate

Warm Lentil Salad with Mustard Vinaigrette

No ratings yet
This warm lentil salad features tender yet firm brown or green lentils tossed in a tangy Dijon mustard vinaigrette that clings well due to emulsification. The salad's flavor deepens as it rests, making it a perfect side or meal prep option with fresh diced vegetables and herbs.
Print Recipe Pin Recipe
Prep Time 10 minutes mins
Cook Time 25 minutes mins
Total Time 35 minutes mins
Servings: 4 servings
Course: Side Dish
Cuisine: Mediterranean
Ingredients Equipment Method Notes

Ingredients
  

  • 1 cup brown or green lentils rinsed
  • 3 cups water for simmering lentils
  • 1 teaspoon salt for cooking lentils
  • 3 tablespoon Dijon mustard
  • 3 tablespoon red wine vinegar
  • ⅓ cup olive oil
  • 1 teaspoon honey optional
  • 1 large carrot diced
  • 2 stalks celery diced
  • 1 shallot or small red onion minced
  • 2 cloves garlic minced
  • ¼ cup fresh parsley chopped
  • 1 tablespoon fresh thyme optional
  • salt and black pepper to taste

Equipment

  • Medium saucepan For cooking lentils
  • Fine-mesh strainer For rinsing and draining lentils
  • Mixing bowl For making vinaigrette and tossing salad
  • Whisk For emulsifying vinaigrette
  • Spoon For tossing salad

Method
 

  1. Rinse 1 cup lentils under cold water for 30 seconds using a fine mesh strainer. Add lentils to a medium saucepan with 3 cups water and 1 teaspoon salt. Bring to a boil over high heat, then reduce to a gentle simmer. Cook uncovered for 20-25 minutes, stirring once halfway through.
    1 cup brown or green lentils, 3 cups water, 1 tsp salt
  2. After 20 minutes, taste a lentil to check. It should break gently between your fingers but still hold its shape with slight resistance. When ready, immediately drain lentils in a strainer and rinse briefly with cold water to stop cooking. Let drain for 2 minutes.
    1 cup brown or green lentils
  3. While lentils cook, whisk together 3 tablespoon Dijon mustard and 3 tablespoon red wine vinegar in a mixing bowl for about 20 seconds until combined. Slowly drizzle in ⅓ cup olive oil while whisking constantly in a circular motion to create an emulsified dressing. Add 1 teaspoon honey if using, plus salt and pepper to taste.
    3 tbsp Dijon mustard, 3 tbsp red wine vinegar, ⅓ cup olive oil, 1 tsp honey, salt and black pepper
  4. Transfer drained lentils to a large bowl while still warm. Add diced carrot, diced celery, minced shallot, and minced garlic. Pour vinaigrette over the mixture and toss gently with a spoon for about 30 seconds until everything is coated.
    1 cup brown or green lentils, 1 large carrot, 2 stalks celery, 1 shallot or small red onion, 2 cloves garlic, 3 tbsp Dijon mustard, 3 tbsp red wine vinegar, ⅓ cup olive oil
  5. Let the salad sit at room temperature for 10 minutes so the flavors combine. Just before serving, fold in chopped parsley and optional thyme. Taste and adjust seasoning with additional salt, pepper, or vinegar if needed.
    ¼ cup fresh parsley, 1 tbsp fresh thyme, salt and black pepper

Notes

  • Cook lentils al dente to maintain texture and prevent mushiness.
  • Whisk mustard and vinegar first before slowly adding oil for a well-emulsified vinaigrette.
  • Dice vegetables finely to match lentil size for balanced texture in every bite.
Tried this recipe?

Let us know how it was!

What Is Habanero Pepper? [Taste, Uses & More]

March 30, 2026

Cochinita pibil without habanero is just pulled pork - technically fine, but missing the volatile citrus heat that makes the dish unmistakable.

What Is Habanero Pepper

The habanero is a small, lantern-shaped chili that runs 100,000 to 350,000 Scoville heat units, putting it far beyond replacements for jalapeno pepper or even serrano pepper swaps that work in terms of raw firepower.

What separates it from other high-heat chiles isn't just the burn - it's the floral, citrus-forward aroma that arrives before the heat does, making it a specific tool, not just a generic spice.

QUICK SUMMARY

The habanero pepper is a pungent, fruity hot chile native to the Yucatán and Caribbean. It delivers bright citrus flavor alongside intense capsaicin heat, and works best pureed into sauces, roasted for salsas, or used sparingly in fruit-based dishes.

🌶️Heat Level: 100,000-350,000 Scoville - well above jalapeño range
🍋Flavor: Bright citrus, floral notes, clean intense heat
🍳Best Uses: Hot sauces, Yucatán salsas, marinades, fruit salsas
🛒Buy: Firm, glossy, brightly colored with tight stem
📅Shelf Life: 1-2 weeks refrigerated; up to 6 months frozen

What Is habanero pepper?

The habanero (Capsicum chinense) traces its roots to the Amazon basin, with the Yucatán Peninsula becoming its most important commercial growing region over centuries. Despite the species name, it has no Chinese origin - the name is a botanical misnomer from early classification.

It's also widely sold under the names aji habanero and chile habanero, and frequently misspelled as "habenero."

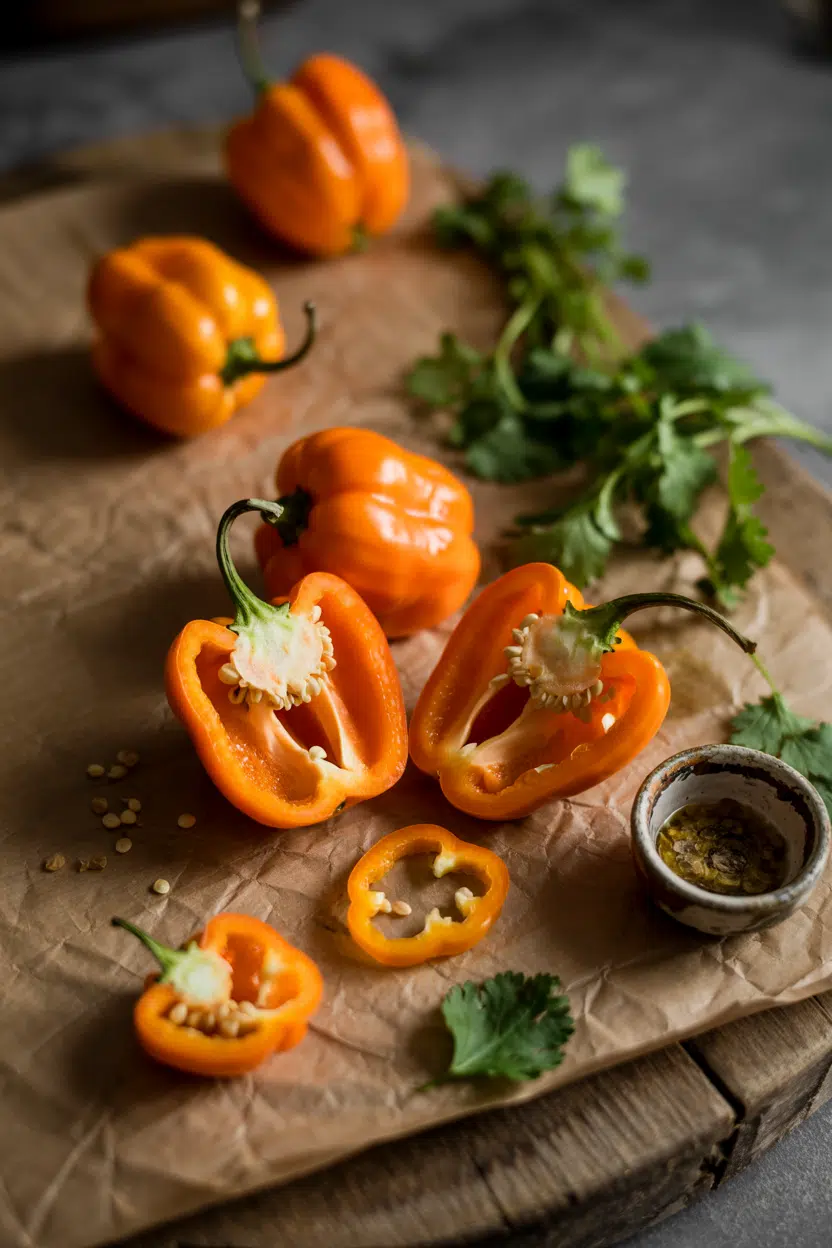
The pepper is small and lantern-shaped, typically 1-2 inches long. Ripe fruit comes in orange, red, chocolate, or even white, depending on variety, with orange being the most common in North American markets.

For context on how different high-heat chiles compare at the extreme end of the spectrum, comparing ghost pepper vs scotch bonnet options shows where habanero sits relative to its fiercer cousins.

Scotch bonnet is its closest botanical relative - similar heat range, same species - though the flavor profiles diverge noticeably.

What Does habanero pepper Taste Like?

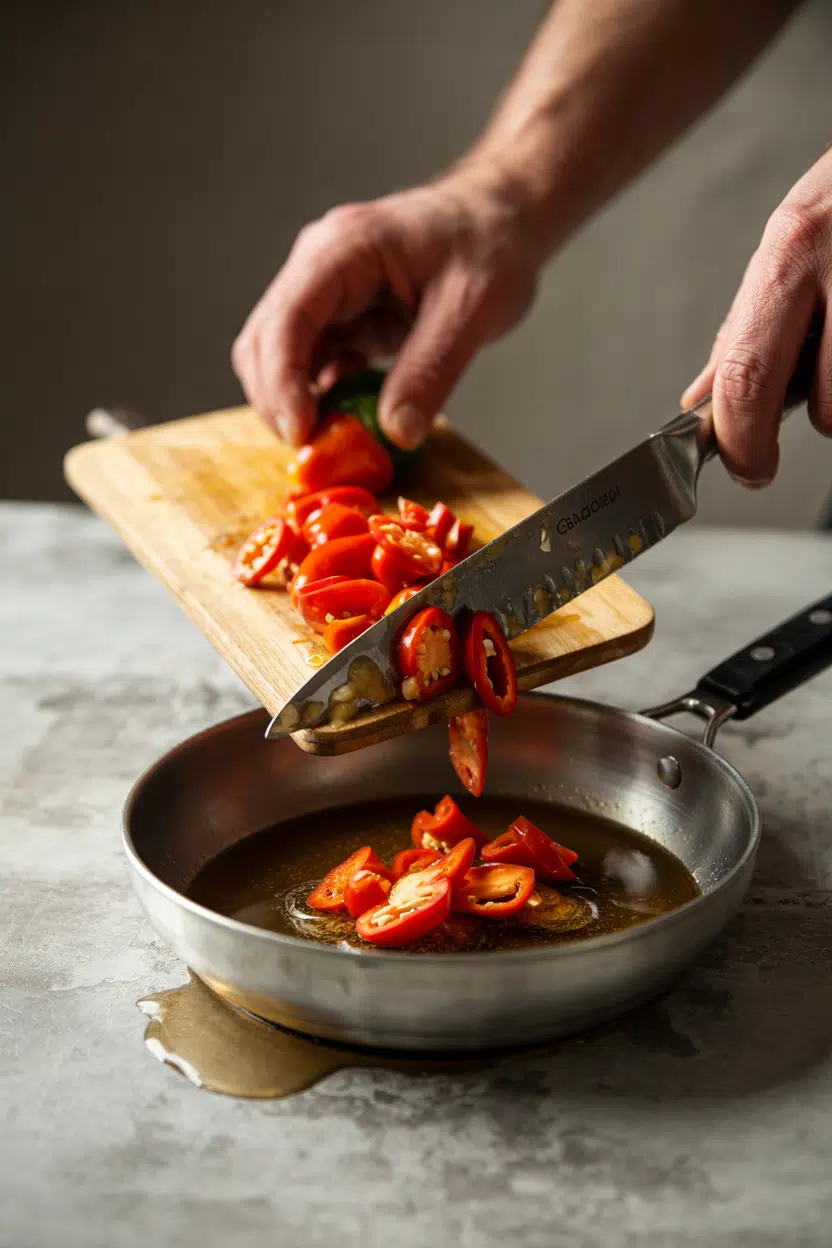
habanero pepper - What Is Habanero Pepper

The habanero hits with tangy, bright citrus first - almost like orange zest mixed with floral notes - before the capsaicin wave arrives. That heat is clean and high-climbing, not muddy or smoky the way dried anchos or chipotles read.

Sensory SnapshotPungent Intensity
👅 Flavor
bright citrusfloralclean heatsubtle smoke (roasted)
✋ Texture
crisp rawsilky pureedchewy roasted
👃 Aroma
tangy citrusfloralsharp

Roasting shifts the profile: some of the sharpness mellows, and a subtle smokiness emerges without softening the heat much.

Think of it as a very hot, more citrus-driven jalapeño crossed with a floral Scotch bonnet - sharper and more piercing than most fresh chiles you'll find at a standard grocery store.

Watch Out
Habanero heat peaks after you swallow, not on first contact. That delayed burn catches people off guard - especially when tasting sauces mid-cook.

How to Use habanero pepper

Raw habanero sliced thin works in pico de gallo and fruit salsas - mango and pineapple both soften the pepper's aggression while the citrus notes amplify the fruit's sweetness.

Use it sparingly; one pepper per batch is usually enough.

The habanero's heat also distributes unevenly in large chunks, so thin slices or fine mince are better for raw applications than rough chopping.

Roasting over an open flame or dry skillet is the standard move for Yucatán-style habanero salsa, which accompanies cochinita pibil and grilled seafood across the region. Charring softens the walls and deepens the flavor without eliminating the heat.

How Habanero Pepper Is Used
MethodBest ForTip
🥗 Raw (sliced/minced)Fruit salsas, pico de gallo, ceviche garnishMince finely for even heat distribution
🔥 Roasted/CharredYucatán habanero salsa, taco condimentsChar until blistered; don't fully blacken
🌀 Pureed/BlendedCaribbean hot sauces, marinades, jerk rubsBlend with citrus or vinegar to balance heat
🫙 PickledTaco toppings, sandwich condimentsBrine mutes heat slightly; halve for faster infusion
🫗 InfusedChili oils, vinegar dressings, finishing oilsRemove pepper after 24-48 hours to control intensity

The habanero pairs tightly with garlic, lime, cilantro, shrimp, and black beans across Yucatán and Caribbean cooking. Slow stewing - as in a black bean soup - mellows the heat noticeably, making it more approachable without eliminating the fruity edge.

Avoid pairing it with delicate milk-based desserts or raw mild greens where large pieces cause uneven, jarring bites.

When the habanero is unavailable, knowing your replacements for habanero pepper matters - most substitutes trade some citrus character for easier sourcing.

Try It In
🍗Air Fryer Lemon Pepper Chicken TendersAdd a habanero-citrus rub for extra heat→🥦Air Fryer Lemon Pepper CauliflowerHabanero pairs well with the citrus notes here→🍖Air Fryer Lemon Pepper MeatballsA small minced habanero deepens the spice profile→

How to Buy and Store habanero pepper

Choose peppers that are firm and glossy with no soft spots, split skin, or shriveling - those signs indicate age or dehydration. Color alone doesn't signal ripeness; habaneros are fully ripe across orange, red, chocolate, and white varieties.

A tight, green stem is a reliable freshness indicator regardless of pod color.

Golden Rule
Never wash habaneros before storing. Moisture speeds mold. Rinse only right before you use them.

Refrigerate unwashed in a breathable bag or paper-wrapped in the produce drawer - they'll hold for 1 to 2 weeks that way.

Room temperature is fine for a couple of days maximum.

For anything beyond two weeks, freeze sliced or pureed in airtight containers; frozen product holds well for up to 6 months.

A deeper look at storing habanero pepper correctly covers the signs of degradation and freezing methods worth knowing.

Scotch bonnet, which shares the habanero's thin walls and moisture content, follows similar rules - the role scotch bonnet pepper plays in Caribbean cooking also explains why storage precision matters for both chiles.

Note that habanero-based salsas have their own clock - understanding salsa's shelf life keeps your prepared sauces safe.

Start With One

  • 🌶️ First-time users - Add a quarter of one deseeded habanero to a mango salsa and taste before adding more.
  • 🔥 Heat-comfortable cooks - Roast one whole pepper and blend into a small-batch Caribbean hot sauce with lime and garlic.
  • 🫙 Low-commitment entry - Buy a pickled habanero jar; it's the gentlest version and works immediately as a taco condiment.
  • 🔄 Need a swap? - Scotch bonnet is the closest match in heat and aroma; [replacements for scotch bonnet pepper](https://forkliftkitchen.com/scotch-bonnet-pepper-substitutes/) covers the full list if that's also unavailable.

One habanero goes a long way. Start smaller than you think you need.

Frequently Asked Questions

How hot is a habanero compared to a jalapeño?

Significantly hotter. Jalapeños average 2,500-8,000 Scoville units; habaneros run 100,000-350,000. That's roughly 12 to 140 times the heat, depending on the specific specimens being compared.

Can you eat habanero raw?

Yes - raw habanero is common in salsas and ceviche. Mince it finely for even distribution, and remove the seeds and white membrane first to reduce heat without losing the citrus flavor.

How do you remove habanero heat from a dish?

Add acid (lime juice, vinegar) or fat (avocado, oil) to bind capsaicin and dull the burn. Dairy works too - sour cream or crema added to the finished dish cuts perceived heat quickly.

Are habaneros the same as Scotch bonnet?

No, though they're the same species (*Capsicum chinense*) and similar in heat. Scotch bonnet has a sweeter, slightly earthier flavor; habanero reads sharper and more citrus-forward. They're close but not interchangeable without noticing a difference.

Do habaneros lose heat when cooked?

Slightly, yes. Prolonged simmering disperses capsaicin through the liquid, making the overall dish milder while the pepper itself remains hot. Roasting reduces perceived sharpness without dramatically lowering Scoville content.

How Long Does Garlic Cloves Last? [Storage Guide]

March 30, 2026

You peeled half a head last night and now the fridge is holding a small jar of exposed cloves - the question is whether they'll still be worth using by the weekend.

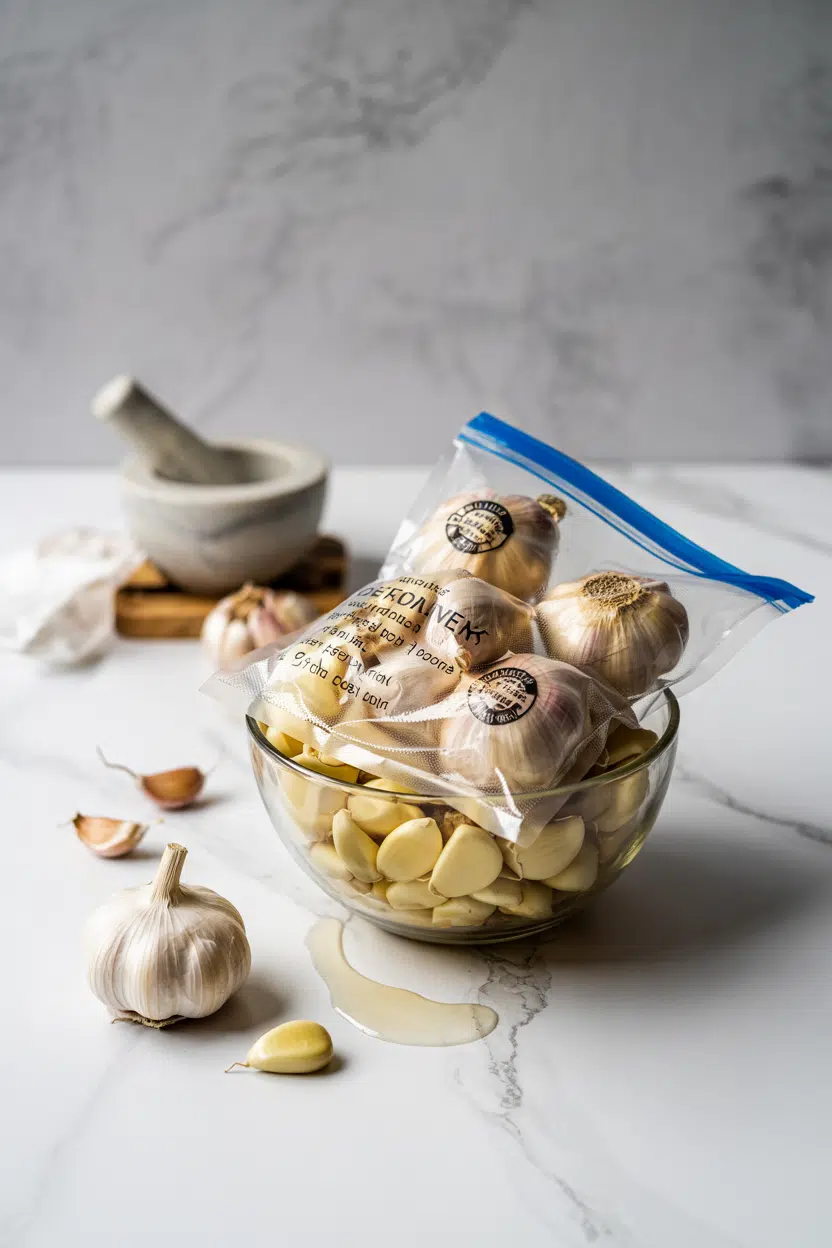
Can You Freeze Garlic Cloves

Garlic cloves are one of those kitchen staples where storage method makes a significant difference: whole heads can sit out for weeks, while peeled cloves have a much shorter window before quality drops.

Getting the details right means less waste and no guessing at the cutting board.

QUICK SUMMARY

Whole garlic heads keep 3-5 weeks at room temperature. Peeled cloves last 1-2 weeks refrigerated. Frozen garlic - whole or minced - holds for 3-6 months but softens after thawing. Never store peeled cloves in oil at room temperature.

🧄Pantry/Counter: Whole unbroken heads last 3-5 weeks in a ventilated spot
🧊Fridge: Peeled cloves in an airtight container, use within 1-2 weeks
❄️Freezer: Whole or minced, up to 6 months; best for cooked dishes only

How Long Does Garlic Last?

Storage method and the state of the cloves - whole, peeled, or minced - are the main variables driving shelf life.

A garlic head with its papery skin intact is essentially in its own protective packaging, while a peeled clove is exposed and aging from the moment it loses that skin.

Understanding the taste of garlic cloves also helps here: sprouted or deteriorating cloves turn bitter and harsh, so shelf life isn't just a food-safety question.

Garlic Cloves Shelf Life
MethodStateDurationNotes
🏠 CounterWhole head (unbroken)3-5 weeksBreathable container, away from sunlight; not for peeled cloves
🏠 PantryWhole head (papery skin on)3-5 weeksCool, dark, ventilated - mesh bag or wire basket works best
🧊 FridgePeeled raw cloves1-2 weeksAirtight container; oil-packed garlic must stay under 40°F (4°C)
❄️ FreezerWhole or minced3-6 monthsTexture softens; use only in cooked applications after thawing

Once you break a head apart and separate individual cloves, the countdown accelerates even before peeling begins. Separated but unpeeled cloves won't hold as long as an intact head.

How to Store Garlic Cloves

The right method depends entirely on whether the head is intact or already broken down. Whole heads and peeled cloves need completely different environments.

Pantry/Counter: Keep whole heads with their papery outer skins undisturbed. Store in a mesh bag, wire basket, or any container that allows airflow - sealed plastic bags trap moisture and trigger mold fast. A cool, dry spot away from the stove works well.

Fridge: Only refrigerate peeled cloves or prepared garlic. Place them in a small airtight glass jar and use within a week or two.

Watch Out
Never store peeled cloves submerged in oil at room temperature. Garlic-in-oil creates anaerobic conditions that can support botulism growth. Refrigerate oil-packed garlic immediately and use it within one week.

Good fridge habits for garlic mirror advice you'd apply to keeping fresh herbs fresh - sealed containers, consistent cold, and no lingering moisture.

Can You Freeze Garlic Cloves?

Yes, and it's one of the most practical ways to extend a large batch. The trade-off is texture: frozen garlic becomes noticeably softer after thawing and loses its raw bite entirely.

That's fine for soups, sauces, stir-fries, and braises - not ideal for dishes where raw crunch matters.

Golden Rule
Flash-freeze peeled cloves individually on a tray before bagging. This prevents them from fusing into a solid block, so you can pull out exactly what you need later.
  1. Peel the cloves - remove all papery skin before freezing; it doesn't protect during freezing and makes the cloves harder to use later.
  2. Flash-freeze (whole cloves) - spread cloves in a single layer on a parchment-lined tray and freeze for 1-2 hours until solid.
  3. OR portion (minced) - mince the garlic, press it into an ice-cube tray with a small splash of water or oil, and freeze until solid.
  4. Transfer and label - move frozen cloves or cubes into a freezer bag, press out as much air as possible, and label with the date and form (whole vs. minced).
  5. Use within 6 months - thaw in the fridge for 24 hours or drop frozen cloves directly into a hot pan for cooked applications.

Signs Garlic Cloves Have Gone Bad

Most spoilage in garlic is visible before you need to smell or touch anything. Catching it early means you don't waste a whole jar or bag of cloves.

Signs It's Gone Bad
👀
VisualGreen sprout emerging from center · dark brown or black spots · fuzzy mold on skin or clove surface · shriveled or translucent cloves
👃
SmellSharp sour or putrid odor · off fermented smell (distinct from normal sulfurous garlic scent)
✋
TextureSlimy or mushy cloves that collapse under slight pressure

Green sprouts are worth a separate note - a sprouted clove isn't dangerous, however the green center tastes bitter and sharp. Remove the sprout before using, or compost the clove entirely if it's mostly hollow. Similar logic applies when checking ginger spoilage signs: visible growth and off-smells are reliable discard signals across most alliums and aromatics.

Discard any clove showing mold, a slimy surface, or a strong off-odor. Don't taste-test - it's not worth it.

Practical Tips for Less Waste

Most garlic waste comes from one or two avoidable habits. A small adjustment to how you buy and portion makes the biggest difference.

  • 🧄 Leave the skin on - whole cloves with papery skin intact last significantly longer; peel only what you'll use that week.
  • 📦 Freeze the overflow - if you've peeled more than you'll use in a week, freeze small portions using the tray method rather than letting them sit in the fridge.
  • 🏷️ Label freezer bags clearly - note whole vs. minced and the date; garlic looks identical at 1 month and 6 months, so labels prevent over-keeping.
  • 🚫 Skip sealed plastic on the counter - it traps moisture against whole heads and accelerates mold well before the natural 3-5 week window closes.

Using frozen minced garlic works well in garlic cloves in spice blends and cooked sauces where raw texture isn't the point.

Shortcut
Mince a full head at once, freeze it in an ice-cube tray with a splash of oil, and store the cubes in a labeled bag. Each cube equals roughly 1 teaspoon - drop one straight into the pan.

Frequently Asked Questions

Can you freeze whole garlic cloves?

Yes. Peel them first, flash-freeze in a single layer on a tray, then transfer to a freezer bag. Frozen whole cloves keep up to 6 months but become soft after thawing, so use them in cooked dishes only.

How long do garlic cloves last in the fridge?

Peeled cloves in an airtight container last 1-2 weeks at or below 40°F (4°C). Whole unbroken heads don't benefit from refrigeration and do better stored at room temperature in a ventilated spot.

Is it safe to freeze garlic in oil?

Freezing garlic in oil is safe - the freezing process halts bacterial growth that makes room-temperature oil-packed garlic risky. Keep the frozen cubes sealed and use within 3 months for best flavor.

Do frozen garlic cloves taste the same?

Flavor holds well, however texture changes noticeably - thawed cloves are softer and won't have raw crunch. For cooked applications like sauces, stews, and braises, frozen garlic performs nearly identically to fresh.

How do I stop garlic from sprouting?

Keep whole heads cool, dry, and well-ventilated - warmth and humidity accelerate sprouting. Don't break the head apart until you need individual cloves, since intact heads sprout more slowly than separated ones.

What Is Italicus Liqueur? [Taste, Uses & More]

March 30, 2026

Italicus opens with a wave of bergamot - that same aromatic citrus rind that defines Earl Grey tea - lifted by jasmine and a soft, almost powdery floral finish.

What Is Italicus Liqueur

It sits in a category of Italian rosolio liqueurs that most drinkers outside Italy have only recently encountered, landing somewhere between an elderflower liqueur and a bitter-edged citrus aperitivo.

If you already navigate drinks like replacements for aperol or campari swaps that work, Italicus rewards the same kind of curious attention.

QUICK SUMMARY

Italicus is an Italian rosolio di bergamotto - a floral-citrus liqueur built around bergamot rind and jasmine. Silky, moderately sweet, and gently bitter at the finish, it works in cocktails, aperitivo spritzes, and as a light dessert accent. Use it the way you'd reach for elderflower liqueur, but expect brighter citrus.

🍋Flavor: Bright bergamot citrus, floral jasmine, gentle bitter-mandarin finish
🍹Best Use: Stirred cocktails, Prosecco spritzes, and light dessert glazes
🏪Buy: Look for "Rosolio di Bergamotto" on the label; mid-teens to low-twenties ABV
📦Storage: Cool, dark place; use opened bottles within 12-24 months
⚠️Avoid: Briny fish dishes and heavy red-meat reductions - both clash with the floral notes

What Is Italicus Liqueur?

Italicus is a rosolio di bergamotto - a modern Italian liqueur released in 2016 by bartender Giuseppe Gallo, drawing on the ancient rosolio tradition of Piedmont while centering its flavor on bergamot, the fragrant citrus grown along Calabria's Ionian coast and the Amalfi region.

Rosolio itself is one of Italy's oldest liqueur styles, historically made with rose petals and grain spirit, though modern expressions range widely in their botanical base.

This particular bottle builds on bergamot peel as its primary flavor, then layers in floral botanicals - jasmine, chamomile, lavender, and gentian among them.

The result sits firmly in the aromatic citrus liqueur category alongside elderflower-forward expressions like St‑Germain, though Italicus is distinctly more citrus-forward and carries a clean bitter edge that most elderflower liqueurs lack.

It's also known as Italicus Rosolio di Bergamotto or simply bergamot liqueur, and it typically runs between 17-20% ABV - lower than most spirits, closer to vermouth territory.

Unlike amaro averna, which leans toward dark bitter herbs, Italicus stays light, bright, and floral throughout.

What Does Italicus Liqueur Taste Like?

italicus liqueur - What Is Italicus Liqueur
Sensory SnapshotModerate Intensity
👅 Flavor
bergamot citrusfloralbitter-mandarin finishherbal mint
✋ Texture
silkylightly viscous
👃 Aroma
bergamot peeljasminecitrus blossom

The easiest reference point is St‑Germain meets bergamot tea - floral sweetness up front, then a bright citrus wave, then a slightly bitter mandarin note that cleans the finish.

It's not aggressively sweet, and that bitter tail keeps it from reading as cloying.

On the palate, the texture is silky and lightly viscous, which helps it integrate into stirred drinks without going watery. A faint herbal-mint thread runs underneath the dominant bergamot, adding complexity without announcing itself.

Served cold and neat, it tastes closer to a sophisticated citrus aperitivo than a dessert liqueur.

Golden Rule
Taste it cold before you mix with it. The floral top notes open up at refrigerator temperature and tell you exactly how much to pour.

How to Use Italicus Liqueur

Italicus earns its place in cocktails the same way vermouth does - as a modifier, not the base. A small measure shifts the whole drink's register toward floral-citrus without dominating.

Start with 15-20ml wherever you'd reach for elderflower liqueur or a light amaro.

  • 🍸 Negroni variation - Replace half the sweet vermouth with Italicus; the bergamot cuts through the bitterness of Campari cleanly. Check the guide to [making classic italian negroni at home](https://forkliftkitchen.com/negroni/) before adjusting ratios.
  • 🥂 Prosecco spritz - 20ml Italicus, 90ml Prosecco, a splash of sparkling water, and a strip of lemon peel. Serve over ice.
  • 🍋 Gin and tonic lift - A small pour alongside gin adds floral-citrus depth without competing with botanical-heavy gins.
  • 🍮 Dessert glaze - Reduce gently with a little sugar to make a syrup for drizzling over citrus panna cotta or roasted pears.
  • 🍧 Boozy granita or sorbet - Fold a splash into a lemon or bergamot granita base; the alcohol lowers the freeze point slightly for a softer texture.
How Italicus Liqueur Is Used
MethodBest ForTip
🍹 Stirred/ShakenCocktail modifier, Negroni riffs, gin drinksStart at 15ml; add more to taste - floral notes intensify fast
🍯 Reduced to SyrupGlazing fruit, finishing pastry, drizzling over tartsReduce at low heat; high heat kills the top-note aromatics
🍦 Folded InBoozy creams, custards, granita basesAdd after cooking, not during, to preserve floral character

For drinks that need a non-alcoholic direction, the guide to italicus liqueur swaps that work covers the closest alternatives - including options for mocktail menus.

The overlap with limoncello-style liqueurs is closer than most expect, so the limoncello swaps that work list is worth a cross-reference if you're building a bottle-light bar.

Try It In
🥃Irish Cream Liqueur HomemadeShows how liqueur ratios shift flavor in cream-based drinks→

How to Buy and Store Italicus Liqueur

At the bottle shop, confirm the label reads "Rosolio di Bergamotto" - that tells you the bergamot base is genuine, not a bergamot-flavored approximation. Check the liquid color: it should be a clean pale amber, free of sediment or cloudiness.

ABV typically sits between 17-20%.

Watch Out
Avoid bottles that have been stored near a window or under direct lighting - bergamot aromatics degrade quickly with UV exposure, and the floral top notes go flat before any other sign of spoilage appears.

Once opened, store upright in a cool, dark cupboard with the decorative stopper firmly in place.

The floral aromatics are the first thing to fade, so regular openers will notice a duller nose within 18 months.

For a full breakdown of timelines and signs of decline, how long italicus liqueur keeps covers the detail.

Unopened bottles stay sound for several years if kept away from heat.

Where to Start With Italicus

New to the bottle? Build a Prosecco spritz first. It uses a small pour, needs no mixing skill, and shows you exactly what bergamot and jasmine do together before you commit it to a more complex drink.

  • Already use elderflower liqueur - Swap Italicus in directly; expect more citrus brightness and a cleaner, drier finish.
  • Building a Negroni riff - Replace half the sweet vermouth; don't cut the Campari, which the bergamot actually complements.
  • Cooking with it - Reduce it into a glaze at low heat only; high temperatures destroy the top-note aromatics that make it worth using.

If it's not available locally, the guide to alternatives to st germain liqueur lists the closest shelf-ready replacements across the floral-citrus category.

Frequently Asked Questions

Is Italicus sweet or bitter?

Primarily sweet, but with a genuine bitter edge. The bergamot rind and gentian botanical contribute a clean, bitter-mandarin finish that prevents it from reading as purely sweet. It's closer to semi-sweet in practice.

Does Italicus contain real bergamot?

Yes - bergamot peel is the primary botanical. The "Rosolio di Bergamotto" classification on the label confirms this, distinguishing it from liqueurs that use bergamot flavoring rather than the actual citrus rind.

Can you substitute Italicus for vermouth?

Partially, and only as a modifier. Italicus lacks vermouth's wine base and savory herbaceous notes, so a full swap changes the drink significantly. Use it to replace half the sweet vermouth in stirred cocktails rather than the whole measure.

How do you drink Italicus on its own?

Serve it cold, neat or over a large ice cube in a stemmed glass. A strip of lemon peel or a few green olives alongside - the classic Italian rosolio accompaniment - frames the floral bitterness well.

Is Italicus gluten-free and vegan?

Generally yes - no dairy, eggs, or gluten-containing grains are used in production. However, check the current producer notes directly, as botanical sourcing and processing aids can vary between batches.

Roasted Garlic Yogurt Dip

March 30, 2026

Most dips rely on packets or raw garlic that overpowers everything else. Roasting garlic at 400°F turns sharp cloves into caramelized sweetness that melts into thick Greek yogurt without bitterness.

Roasted Garlic Yogurt Dip served on a plate

The oven does the work while you prep the rest. Squeeze soft garlic straight from the skin into yogurt, season with lemon and salt, and chill.

This is what we make for weeknight snacks when store-bought hummus feels boring but you still want something that looks intentional.

QUICK SUMMARY

Roasted Garlic Yogurt Dip combines caramelized garlic with tangy Greek yogurt for a creamy, balanced appetizer ready in 45 minutes. The key is roasting whole garlic bulbs until soft so they squeeze out easily and blend smooth without bitterness. Perfect for meal prep or entertaining when you need something that holds in the fridge for days.

⏱️Time Reality: 40 minutes hands-off roasting plus 5 minutes mixing
🔥Method Shortcut: Roast garlic whole in skin to prevent burning and develop sweetness
⚠️Watch Out: Under-roasted garlic tastes raw - roast full 40 minutes until cloves squeeze out soft

Why This Recipe Works

Roasting garlic bulbs whole at high heat turns sharp bite into mild sweetness that blends smooth with tangy yogurt. Greek yogurt's thick texture holds the dip together without watering out. For a version that comes together quickly, this simple crema adds similar richness with less roasting time.

Quick Reference
⏱️
Prep Time
5 min
🔥
Cook Time
40 min
⏰
Total Time
45 min
🍽️
Servings
6 servings
📊
Difficulty
Easy
🏷️
Category
Appetizer
💡
Quick Tip
Roast garlic 400°F (200°C) 40 min until soft
🎯
Best For
Weeknight | Meal prep | Entertaining

Five reasons this dip delivers:

  • Roasting temperature: Roast garlic bulbs at 400°F (200°C) for 40 minutes until soft and golden so cloves squeeze out like butter
  • Yogurt texture: Whisk Greek yogurt 30 seconds before mixing for creamy base that holds shape on a platter
  • Cooling time: Cool roasted garlic 10 minutes before squeezing to avoid hot mush that waters down the dip
  • Season gradually: Add salt and lemon juice gradually, taste every 30 seconds to avoid over-salting or too much tang
  • Chill dip: Chill dip 30 minutes uncovered to set texture before serving so flavors meld and thicken
Shortcut
Squeeze roasted garlic directly from skin into yogurt - no knife needed and cloves slide out soft.

What You'll Need

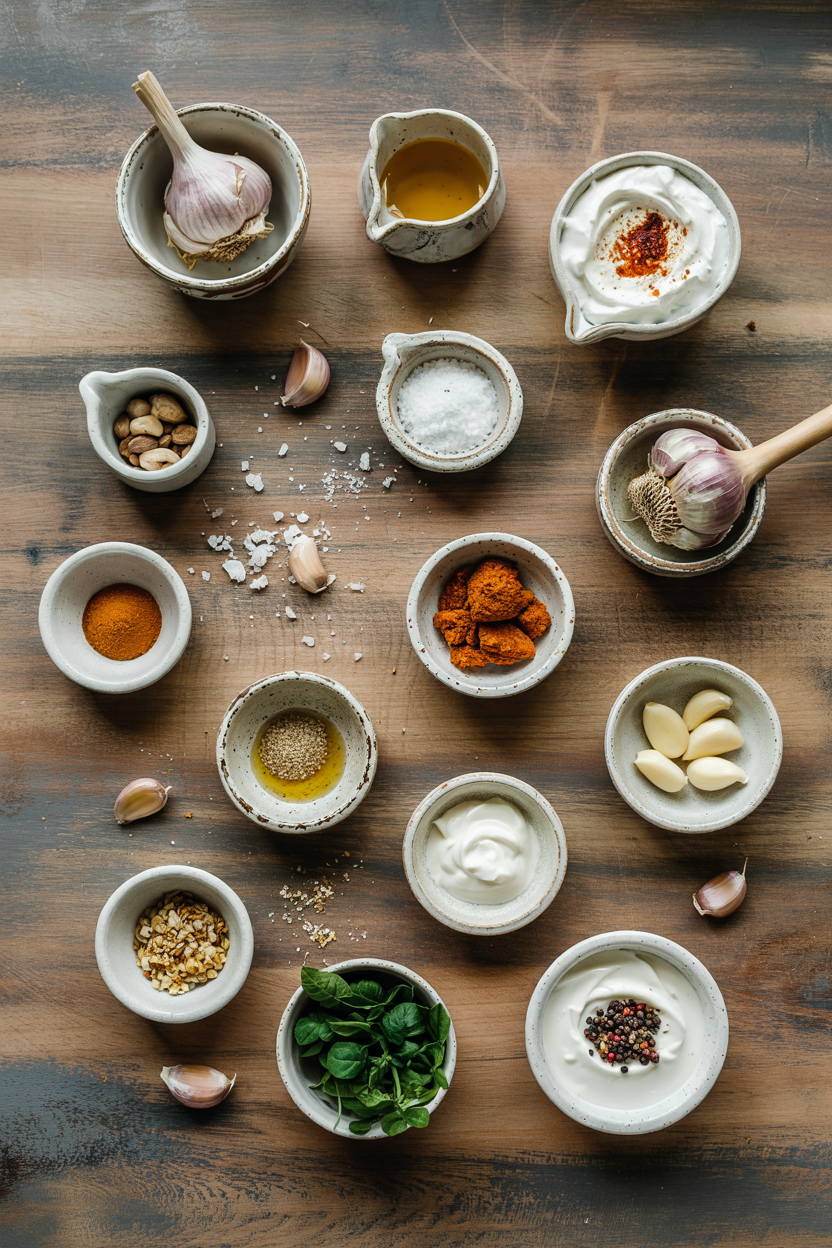
Ingredients for Roasted Garlic Yogurt Dip

Most ingredients sit in your fridge already. Rich mains need something to cut through, and a creamy dip on the side does exactly that.

🧄
Aromatics
  • 2 garlic bulbs (whole)
🧀
Dairy Base
  • 1 cup plain Greek yogurt
🥢
Seasonings
  • 2 tablespoon olive oil
  • 1 tablespoon lemon juice
  • ½ teaspoon salt
  • ¼ teaspoon black pepper
🫙
Optional
  • Fresh herbs (parsley or dill)
  • Paprika or cumin

Ingredient Details

  • Garlic bulbs
    Fresh bulbs with tight cloves roast sweeter - skip old dried-out heads
  • Plain Greek yogurt
    Full-fat Greek yogurt holds texture best - low-fat works but thins out slightly
  • Olive oil
    Extra virgin adds fruity notes that balance garlic - avocado oil works for neutral flavor
  • Lemon juice
    Fresh lemon brightens heavy yogurt - bottled juice works but tastes flat
  • Fresh herbs
    Chop parsley or dill just before serving to keep green flecks vibrant
  • Salt
    Kosher salt dissolves faster than table salt - start with half the amount and taste
  • Black pepper
    Freshly ground adds more bite than pre-ground - adjust heat to preference

Ingredient Swaps

Substitutions work when you're short on ingredients or adjusting for dietary needs. This dip adds the contrast this plate needs, but timing matters.

Four swaps that hold up:

  • Greek yogurt → dairy-free coconut or almond yogurt - slightly different tang with softer texture but still creamy (dairy-free)
  • Olive oil → avocado oil or neutral oil - mild flavor change that still adds creaminess without grassy notes (budget)
  • Fresh herbs → dried herbs (reduce amount by half) - flavor less vibrant with slightly dry texture instead of fresh (budget)
  • Whole garlic bulb roasting → microwave roasted garlic (wrap in damp paper) - faster method with less caramelization and softer flavor (method-swap)

Dairy-Free Yogurt

Works for: Vegan diets or lactose intolerance when you need similar creamy texture

Skip if: You want maximum tang and thick body that only Greek yogurt delivers

Microwave Roasting

Works for: Quick weeknight prep when 40 minutes in the oven feels too long

Skip if: You want deep caramelized sweetness that only oven roasting develops

Low-Fat Yogurt

Works for: Calorie reduction or lighter texture when serving with rich mains

Skip if: You need thick dip that holds shape on a platter without watering out

Instructions

Total time runs 45 minutes with most spent hands-off in the oven. For a version that comes together quickly, tender homemade pork recipe pairs well when you need a full meal.

  1. Roast the garlic: Preheat oven to 400°F (200°C). Slice off top quarter-inch of garlic bulbs to expose cloves, drizzle with 1 tablespoon olive oil, wrap in foil, and roast 40 minutes until cloves squeeze out soft and golden.

  2. Cool and squeeze: Remove garlic from oven and let cool 10 minutes. Squeeze softened cloves directly into a small bowl, discarding papery skins.

  3. Mix the base: Add Greek yogurt to bowl with roasted garlic. Whisk 30 seconds until creamy and garlic blends smooth with no large chunks.

  4. Season to taste: Stir in remaining tablespoon olive oil, lemon juice, salt, and black pepper. Taste after each addition and adjust seasoning until balanced - garlic should taste sweet, not sharp.

  5. Chill and serve: Transfer dip to shallow container, cover, and chill 30 minutes uncovered. Stir before serving and top with chopped fresh herbs if using.

Best Pick
Roast two extra garlic bulbs at once - they keep refrigerated for a week and speed up your next batch.

What to Serve With It

This dip pairs with vegetables, bread, or grilled proteins when you need something fresh that doesn't compete with heavy mains. We keep a batch ready for nights like this - easy chicken meal planning takes less guesswork when your sides are already prepped.

Side Dish Prep Why It Works How to Serve
Vegetable crudités Easy Fresh crunch balances creamy yogurt without adding heaviness Arrange carrot sticks, cucumber slices, and bell pepper strips around dip bowl
Pita bread or chips Easy Sturdy texture holds thick dip without breaking or getting soggy Toast pita triangles 5 minutes at 375°F or serve store-bought chips
Roasted potatoes Medium Warm crispy texture contrasts cool creamy dip Roast baby potatoes 425°F for 25 minutes, serve hot alongside chilled dip
Grilled chicken skewers Medium Lean protein needs rich dip to add moisture and flavor Grill seasoned chicken cubes 10 minutes, let rest, then serve with dip for dunking
Fresh tomato slices Easy Acidity cuts through rich yogurt and adds bright freshness Slice ripe tomatoes thick, season with salt, and serve as scoops for dip

Three ways to serve it:

  • Appetizer platter: Arrange dip in center bowl surrounded by pita chips, cucumber slices, and cherry tomatoes for easy grab-and-dip snacking
  • Sandwich spread: Smear thick layer on toasted bread with sliced turkey and crisp lettuce for creamy tangy contrast
  • Bowl topper: Dollop on grain bowls with roasted vegetables and quinoa to add richness without heavy sauces
Quick Tip
Add fresh herbs just before serving instead of mixing them in - keeps color bright and flavor sharp.

Store and Reheat

Yogurt-based dips hold in the fridge for days but lose texture if frozen solid. Rich mains need something to cut through, and homemade shrimp recipe pairs well when meal planning for the week.

Method Time Best For
🚫 No Reheating N/A Serve chilled or room temperature for best creamy texture
📦 Microwave 10-15 sec low power Softening dip if too cold but avoid overheating which thins yogurt

For best results when storing:

  • Fridge storage: Store in shallow airtight container up to 4 days so flavors stay fresh and yogurt doesn't absorb fridge odors
  • Texture maintenance: Stir dip before serving if liquid separates on top - yogurt naturally releases whey but mixes back smooth
  • Herb timing: Add fresh herbs right before serving instead of storing them mixed in to prevent wilting and color loss
  • Freezing caution: Freeze up to 1 month in portions but expect slightly grainy texture after thawing as yogurt separates when frozen
  • Temperature serving: Let dip sit 10 minutes at room temperature before serving if refrigerated - cold dulls flavor and thickens texture too much

Frequently Asked Questions

How long to roast garlic for best dip flavor?

Roast whole garlic bulbs at 400°F (200°C) for 40 minutes until cloves squeeze out soft and golden with caramelized sweetness. Under-roasting leaves raw bite that overpowers the yogurt.

Can I make roasted garlic yogurt dip ahead and store it?

Make dip up to 4 days ahead and store in shallow airtight container in the fridge. Stir before serving if liquid separates and add fresh herbs at the last minute.

What goes best with roasted garlic yogurt dip as sides?

Serve with vegetable crudités, pita chips, roasted potatoes, grilled chicken skewers, or fresh tomato slices. Anything with crunch or mild flavor lets the garlic shine.

How do I know when roasted garlic is fully done for dip?

Roasted garlic is ready when cloves squeeze out soft like butter with golden color and no resistance. If cloves feel firm or look white, roast 10 more minutes.

Can I use regular yogurt instead of Greek yogurt in this dip?

Regular yogurt works but creates thinner texture that doesn't hold shape on a platter. Drain regular yogurt through cheesecloth for 30 minutes to thicken before mixing.

Roasted Garlic Yogurt Dip served on a plate

Roasted Garlic Yogurt Dip

No ratings yet
Roasted Garlic Yogurt Dip combines sweet caramelized garlic with thick Greek yogurt for a creamy, balanced appetizer. Roasting the garlic at high heat softens cloves for easy squeezing into yogurt, creating a smooth, mild dip perfect for snacking or entertaining.
Print Recipe Pin Recipe
Prep Time 5 minutes mins
Cook Time 40 minutes mins
Total Time 45 minutes mins
Servings: 6 servings
Course: Appetizer
Cuisine: Mediterranean
Ingredients Equipment Method Notes

Ingredients
  

  • 2 bulbs garlic bulbs whole
  • 1 cup plain Greek yogurt full-fat recommended
  • 2 tablespoon olive oil divided
  • 1 tablespoon lemon juice fresh preferred
  • 0.5 teaspoon salt
  • 0.25 teaspoon black pepper freshly ground
  • fresh herbs parsley or dill, optional for garnish
  • paprika or cumin optional seasoning

Equipment

  • Oven Roast garlic bulbs at 400°F
  • Foil Wrap garlic bulbs for roasting
  • Whisk Whisk yogurt and roasted garlic
  • Bowl Mix dip ingredients

Method
 

  1. Preheat oven to 400°F (200°C). Slice off the top quarter-inch of garlic bulbs to expose cloves. Drizzle with 1 tablespoon olive oil, wrap bulbs in foil, and roast for 40 minutes until cloves are soft and golden and squeeze out easily.
    2 bulbs garlic bulbs, 2 tbsp olive oil
  2. Remove garlic from oven and let cool for 10 minutes. Squeeze softened cloves directly into a small bowl, discarding the papery skins.
    2 bulbs garlic bulbs
  3. Add Greek yogurt to the bowl with roasted garlic. Whisk for 30 seconds until creamy and smooth with no large chunks.
    1 cup plain Greek yogurt
  4. Stir in remaining 1 tablespoon olive oil, lemon juice, salt, and black pepper gradually. Taste after each addition and adjust seasoning until balanced with a sweet garlic flavor without sharpness.
    2 tbsp olive oil, 1 tbsp lemon juice, 0.5 tsp salt, 0.25 tsp black pepper
  5. Transfer dip to a shallow container, cover, and chill uncovered for 30 minutes to set texture and meld flavors. Stir before serving and top with chopped fresh herbs if using.
    fresh herbs

Notes

  • Roast garlic fully until cloves squeeze out soft and golden for best sweetness.
  • Whisk yogurt before mixing for a creamier, thicker dip texture.
  • Chill dip uncovered to thicken and meld flavors before serving.

Tried this recipe?

Let us know how it was!

What Is Ground Cloves? [Taste, Uses & More]

March 30, 2026

That sharp, almost medicinal warmth hitting your nose when you open a jar of ground cloves - that's eugenol, the compound responsible for nearly everything distinctive about this spice.

What Is Ground Cloves

A small pinch goes surprisingly far, which is why recipes rarely call for more than a quarter teaspoon at a time.

If you've ever reached for replacements for clove mid-recipe, you already know how hard it is to fake that particular heat.

Nothing else quite replicates it.

QUICK SUMMARY

Ground cloves is a finely milled warm spice made from dried clove buds. It delivers intense spicy-sweet heat with a bitter, resinous edge. Use it in baked goods, spice blends, braises, and simmered drinks - in small amounts only.

🌶️Flavor: Warmly sweet, peppery, bitter backbone, sharp eugenol heat
👃Aroma: Intense, camphor-like, resinous, slightly medicinal
🍽️Best Uses: Pumpkin pie spice, garam masala, mulled wine, gingerbread
🕐Shelf Life: Peak at 6-12 months; usable up to 2 years
🛒Buy It: Look for a recent grind date and a sharp, immediate aroma on opening

What Is ground cloves?

Ground cloves is the finely milled powder of dried, unopened flower buds harvested from Syzygium aromaticum, a tropical evergreen native to the Maluku Islands of Indonesia.

The buds are picked before they bloom, dried until dark brown, then milled into a uniform fine powder.

You'll also see it labeled clove powder, clove spice, or ground clove bud depending on the brand.

No significant variety differences exist the way they do with chiles or pepper - the spice is defined by its source tree and how recently it was ground. However, quality varies sharply with freshness.

Older powder loses its volatile oil content and turns flat well before the jar expires.

  • 🌍 Origin - Maluku Islands, Indonesia; now also grown in Zanzibar, Sri Lanka, and Madagascar
  • 🌸 Plant part used - Dried, unopened flower bud (not the stem or leaf)
  • 🧪 Key compound - Eugenol, a phenolic compound that gives cloves most of their aroma and heat
  • 📦 Category - Dried spice (ground flower bud), part of the warm spice family alongside nutmeg and allspice

What Does ground cloves Taste Like?

ground cloves - What Is Ground Cloves

Ground cloves hits with warmly sweet heat up front, followed quickly by a bitter backbone and a faintly astringent finish.

That progression is eugenol doing its work - it creates a spicy sensation closer to pepper than to cinnamon, but with a floral, almost medicinal edge that neither pepper nor cinnamon has.

It tastes similar to nutmeg and cinnamon but sharper and more pronounced. Compared with nutmeg in particular, comparing fresh nutmeg vs ground nutmeg options shows how much subtler nutmeg's heat is next to cloves.

Heat amplifies ground cloves significantly - blooming the powder in hot fat deepens its resinous quality and rounds out the bitterness.

Sensory SnapshotStrong Intensity
👅 Flavor
spicy-sweetbitterastringentpeppery
✋ Texture
fine powderdisperses quickly
👃 Aroma
camphor-likeresinousmedicinal warmth

How to Use ground cloves

Ground cloves works best in small amounts, typically a pinch to a quarter teaspoon in most home recipes. Its eugenol content is intense enough that even a slight overuse can push a dish from warmly spiced to medicinal and bitter.

South Asian cooking relies on it as a core component of garam masala - if you ever need garam masala stand-ins, ground cloves is usually part of why those blends fall short.

Indonesian cooking uses it in savory rice dishes and braised meats.

European holiday baking - gingerbread, spice cookies, pumpkin pie - leans on it for depth.

North African spice blends add it in trace amounts for complexity.

Ground cloves pairs well with cinnamon, nutmeg, allspice, star anise, ginger, brown sugar, and apples. Keep it away from delicate floral herbs like basil, which it will simply overpower.

How Ground Cloves Is Used
MethodBest ForTip
🥣 Dry BlendPumpkin pie spice, garam masala, pickling brines, chai blendsMix with other ground spices first to distribute evenly before adding wet ingredients
🍳 Bloomed in FatCurry bases, braised pork or beef, savory rice dishesUse 30 seconds max in hot fat - eugenol turns acrid if it scorches
🧁 Stirred into BatterGingerbread, spice cookies, quick breads, muffinsAdd with other dry ingredients; overmixing after adding won't dull the flavor
🫖 Steeped in LiquidMulled wine, mulled cider, chai, poaching liquidsAdd early in the simmer - 20+ minutes gives the liquid full extraction
Golden Rule
Start with half the amount a recipe calls for if you're new to ground cloves. You can always add more; you cannot take it back.

Mulled wine is one of the clearest showcases for steeped cloves, and planning sides for mulled wine around its spice profile means keeping the food warm-spiced and not competing.

Try It In
🍷Warm Spiced Mulled WineGround cloves steeped low and slow for full aroma extraction→🥜Cinnamon Sugar Roasted NutsA pinch of cloves deepens the warm spice coating→🥩Beef and Broccoli Stir FryTrace amounts add savory depth to the sauce base→

How to Buy and Store ground cloves

Smell before you buy whenever possible. Fresh ground cloves releases an immediate, sharp, warm hit when the jar is opened. Flat, musty, or barely-there aroma means the volatile eugenol has already degraded - the powder will underperform in any recipe.

Watch Out
Clumping in the powder signals moisture exposure. Even if the aroma seems fine, a clumpy jar should stay on the shelf.

For keeping ground cloves fresh, an opaque, airtight container in a cool, dry pantry is the standard approach - away from the stove and direct light. Peak potency runs 6-12 months from the grind date.

The powder stays usable up to 2 years, however aroma and heat fade considerably in the second year.

  • Grind date - Prioritize jars with a printed grind or pack date, not just a best-by date
  • Container - Opaque glass or tin over clear glass; light degrades volatile oils
  • Location - Cool, dry pantry shelf - not above the stove or beside the oven
  • Clumping - Discard if moisture has caked the powder, regardless of date

Where to Start With Ground Cloves

Ground cloves rewards restraint.

If you're building a spice rack, add it specifically for pumpkin pie, gingerbread, or a homemade garam masala - those three uses cover most of what it does well.

For swapping out ground cloves in a pinch, allspice is the closest structural match, though swapping out allspice itself shows how much each warm spice carries distinct character.

Buy small.

Refresh annually.

Best Pick
For first-time buyers, a small 1-2 oz jar from a spice-focused retailer with a printed grind date beats a large supermarket jar with no date every time.

Frequently Asked Questions

How much ground cloves should I use in pumpkin pie?

Most pumpkin pie recipes call for ¼ teaspoon or less per pie. Ground cloves is one of the strongest spices in pumpkin pie spice, so exceeding that amount easily tips the flavor toward bitter and medicinal rather than warm.

Can you substitute ground cloves for whole cloves?

Yes, but the ratio matters: use ¾ teaspoon of ground cloves for every 1 teaspoon of whole cloves called for. Whole cloves also infuse slowly and can be removed, while ground cloves disperses fully and can't be taken back out.

What is eugenol in cloves?

Eugenol is the primary phenolic compound in clove buds, making up 70-90% of the spice's essential oil. It produces the characteristic sharp warmth and mild numbing sensation, and it's the same compound used in dental products for its mild anesthetic effect.

Are ground cloves and clove powder the same thing?

Yes - clove powder, ground clove bud, and ground cloves all refer to the same product. The naming varies by brand and region, but all are milled from the same dried flower bud of Syzygium aromaticum.

Does ground cloves interact with any medications?

At normal cooking amounts, no interaction is expected. At concentrated supplemental doses, eugenol may affect blood-thinning medications like warfarin. Standard recipe quantities - a pinch to a quarter teaspoon - are far below any level of concern.

What Is Frangelico? [Taste, Uses & More]

March 30, 2026

Tiramisu made with Frangelico instead of plain rum hits differently - the hazelnut and cocoa notes sink into the mascarpone layer and round out every bite.

What Is Frangelico

That shift in depth is what what makes hazelnut distinct as a flavor: it carries sweetness without being cloying, and warmth without sharpness. Frangelico is the Italian liqueur that bottles that character cleanly, and it's worth knowing how to use it well.

If you need an alternative in a pinch, a quick look at swapping out hazelnut can point you in the right direction.

QUICK SUMMARY

Frangelico is an Italian hazelnut liqueur from Piedmont, flavored with cocoa, vanilla, and botanicals. It has a syrupy, silky texture and a moderate-intensity flavor of toasted hazelnuts, caramel, and mild dark chocolate. Use it in coffee drinks, desserts, and cocktails.

🌰Flavor: Toasted hazelnut, caramelized sugar, cocoa, vanilla, mild bitter finish
🍾ABV: 20% alcohol by volume - moderate strength for a liqueur
☕Best Uses: Coffee drinks, espresso cocktails, chocolate desserts, glazes
🗄️Shelf Life: Unopened: many years; opened: best within 12-24 months
🇮🇹Origin: Piedmont, Italy - a region known for its prized Tonda Gentile hazelnuts

What Is Frangelico?

Frangelico is a hazelnut liqueur produced in Piedmont, Italy, a region historically prized for its Tonda Gentile hazelnut crop.

The liqueur is made by macerating toasted hazelnuts in alcohol, then blending that infusion with cocoa, vanilla, and a mix of botanicals to create a layered, amber-colored spirit.

The bottle itself is unmistakable - shaped like a Franciscan friar, complete with a rope belt, a nod to the legend of a hermit monk named Fra Angelico who supposedly developed early versions of the recipe.

At 20% ABV, it sits in the mid-range for liqueurs: sweeter and lower in alcohol than a spirit like bourbon, but stronger and more complex than a cream liqueur.

It's sometimes grouped with other Italian digestifs like amaretto, though the two are distinct. Amaretto is almond-forward and often sharper; Frangelico stays rounder, nuttier, and less aggressive on the palate.

You may see it labeled as "Frangelico liqueur" or simply "Italian hazelnut liqueur" on cocktail menus.

  • 🌰 Base ingredient - Toasted Piedmont hazelnuts, macerated in neutral spirit
  • 🍫 Flavor additions - Cocoa, vanilla extract, and undisclosed botanicals
  • 📦 ABV - 20%, lower than most base spirits but higher than wine
  • 🏺 Bottle design - Friar-shaped glass, instantly recognizable on a back bar

What Does Frangelico Taste Like?

frangelico - What Is Frangelico

Frangelico tastes closest to toasted hazelnuts folded into crème anglaise, with a chocolate-hazelnut spread quality and a clear, clean alcohol warmth underneath.

It's sweet without being cloying, and the finish carries a mild bitter-chocolate edge that prevents it from reading as candy-like.

Sensory SnapshotModerate Intensity
👅 Flavor
toasted hazelnutcaramelized sugarcocoavanillabitter chocolate finish
✋ Texture
syrupysilky
👃 Aroma
warm hazelnutsvanillacocoa

Heat changes its behavior slightly. Reduced into a glaze or stirred into warm liquid, the top-note sweetness intensifies and the bitter finish softens.

Served cold over ice or in a shaken cocktail, the hazelnut character stays forward and the texture feels more viscous.

Golden Rule
Taste Frangelico at room temperature before using it in a recipe - chilling mutes the aroma and can make it harder to judge how much to add.

How to Use Frangelico

Frangelico earns its place in both the bar and the kitchen.

Its moderate ABV means it adds flavor without overpowering a dish the way a full-proof spirit might, and its syrupy body means it integrates smoothly into creams, batters, and glazes.

In coffee and cocktails, it's most commonly stirred into espresso for an affogato-style drink or used to build a Hazelnut White Russian or Espresso Martini.

It pairs naturally with dark chocolate and cocoa, aged rum, and bourbon - spirits that share its caramel and roasted-nut register.

How Frangelico Is Used
MethodBest ForTip
🥃 Stirred ColdCocktails, coffee drinks, ice cream sauceAdd after building the drink so alcohol doesn't cook off
🍳 ReducedGlazes for pork loin, roasted pears, cake syrupsReduce over low heat - it scorches quickly at high temp
🎂 Folded InGanache, tiramisu, mascarpone cream, trufflesAdd after cooling the base to preserve aroma
🖌️ Brushed OnMoistening cake layers before frostingDilute 1:1 with simple syrup to avoid over-soaking

For dessert pairings, mascarpone-based recipes respond particularly well to Frangelico - mascarpone swaps that work if you're adapting a recipe that calls for it alongside this liqueur. Roasted hazelnuts and almonds used as garnish reinforce its base flavor without redundancy.

Avoid pairing it with delicate seafood or light acidic vinaigrettes, where its sweetness reads as a mismatch.

Try It In
🌰Cinnamon Sugar Roasted NutsFrangelico glaze adds hazelnut depth to the caramel coating→

How to Buy and Store Frangelico

Look for the signature friar-shaped bottle with a clear, rich amber color visible through the glass - cloudiness or unusual sediment can signal age or improper storage.

Check the label for natural hazelnut extract in the ingredients and confirm the cork or screw cap is intact before buying.

Watch Out
Avoid bottles stored near a heat source or in direct light on a back shelf - UV exposure degrades the aroma compounds faster than age alone.

Store an unopened bottle in a cool, dark pantry - no refrigeration needed. Once opened, keep it upright and away from temperature swings.

Refrigeration isn't required, however it does slow flavor loss noticeably. Knowing the frangelico spoilage signs helps you catch a bottle that's past its prime before using it in a recipe.

Opened Frangelico holds best within 12 to 24 months. The hazelnut oils in the infusion oxidize over time, dulling the aroma first before the flavor follows.

Starting With Frangelico

New to the bottle? Start with espresso.

A shot of Frangelico stirred into a double espresso is the fastest way to understand its flavor range before committing it to a full recipe.

From there, the move is chocolate. Its caramel and bitter-chocolate finish pairs cleanly with dark cocoa ganache, and that combination covers most of what it does well.

If you run out mid-recipe, a review of replacements for frangelico covers the closest options by use case - cocktails and baking have different needs.

For anyone working through Italian-style desserts, Frangelico fills a specific niche that replacements for amaretto won't always cover, since the two liqueurs differ significantly in base flavor.

Frequently Asked Questions

Is Frangelico sweet or dry?

Sweet. Frangelico has significant added sugar and reads as dessert-forward on the palate. The mild bitter-chocolate finish stops it from tasting cloying, however it is not a dry spirit by any measure.

How strong is Frangelico?

Frangelico is 20% ABV - roughly half the strength of most base spirits. That's strong enough to feel the alcohol warmth, but low enough to use generously in desserts without overpowering other ingredients.

Can you cook with Frangelico?

Yes, and it holds up well to heat when used carefully. Reduce it over low heat for glazes, or fold it into cooled cream and ganache to keep the hazelnut aroma intact. High direct heat scorches the sugar quickly.

Does Frangelico contain real nuts?

Yes. Frangelico is made from macerated toasted hazelnuts, so it contains tree nut derivatives. Anyone with a tree nut allergy should avoid it and consult the label for current allergen declarations.

What cocktails use Frangelico?

The Hazelnut White Russian and Espresso Martini are the most common. It also works in a Nutty Irishman (Frangelico and Irish cream) and can replace simple syrup in bourbon-based cocktails for a nutty sweetness.

What Is Honeycrisp Apple? [Taste, Uses & More]

March 30, 2026

Most people assume a Honeycrisp apple tastes sweeter than other varieties - but the real draw is its balance, not its sugar level.

What Is Honeycrisp Apple

That sweet-tart tension, built on a honeyed note backed by citrus-like acidity, is what makes it so distinctive.

If you've reached for fuji apple swaps that work when Honeycrisp sold out, you already know how hard this apple is to replace.

QUICK SUMMARY

The Honeycrisp apple is a Minnesota-bred pome fruit with explosive crunch, sweet-tart flavor, and a light floral aroma. Eat it raw, slice it into salads, or bake it into pies where it holds shape well. Refrigerate for up to 4-6 weeks.

🍎Category: Pome fruit, apple variety bred at University of Minnesota
👅Flavor: Sweet-tart with honeyed sweetness and citrus-like acidity
✋Texture: Extremely crisp, very juicy, thin but resilient skin
🍽️Best Uses: Raw snacking, salads, pies, roasting with vegetables
🛒Buy When: Flesh is firm with no give; red blush over yellow ground color
❄️Shelf Life: 4-6 weeks refrigerated; 5-7 days at room temperature

What Is Honeycrisp Apple?

Honeycrisp is a pome fruit developed at the University of Minnesota and released commercially in 1991. Its breeding code was MN 1711, and it's sometimes written as "Honey Crisp" - though Honeycrisp is the correct single-word form.

The variety's signature crunch comes from unusually large, juice-filled cells in the flesh. When you bite through, those cells rupture all at once - producing a snap and spray of juice that most other apples simply can't match.

Visually, Honeycrisp apples show a bright red blush over a yellow-green background. You'll often see small lenticel spots on the skin, which are normal and not a defect.

The skin itself is thin but holds up to slicing without tearing.

There are no widely sold sub-varieties of Honeycrisp, though breeders at Minnesota have since released SweeTango and Rave as spiritual descendants.

If you've run out and need a close stand-in, a guide to honeycrisp apple stand-ins can help you match the texture and acidity.

What Does Honeycrisp Apple Taste Like?

honeycrisp apple - What Is Honeycrisp Apple

Honeycrisp lands at a moderate intensity - assertive enough to stand out in a dish, but not overwhelming.

The sweetness is real and honeyed, but it's kept in check by a bright, citrus-like acidity that stops the flavor from going flat.

Sensory SnapshotModerate Intensity
👅 Flavor
honeyed sweetcitrus-tartfloral
✋ Texture
explosive crunchvery juicy
👃 Aroma
light floralfresh orchard

Compared to Gala, Honeycrisp has a similar sweetness level but noticeably more acidity and a far crisper bite. Against Fuji, Honeycrisp tastes brighter and less starchy, with a juicier, more forceful snap.

McIntosh is softer and milder - closer to applesauce texture even when fresh.

With heat, the floral notes fade first. Brief roasting concentrates the sweetness while retaining some acidity.

Long cooking dissolves that crunch entirely, leaving behind a mild, lightly sweet apple flavor with little character left.

How to Use Honeycrisp Apple

Raw applications are where Honeycrisp earns its reputation. Thin-sliced in green salads - especially alongside arugula, walnuts, and sharp cheddar - the sweet-tart contrast cuts through bitter greens without dressing overload.

Cubed into a slaw or fruit salsa, it holds its shape far longer than softer varieties.

For baking, Honeycrisp is a reliable choice. It keeps structure in pies and tarts because its dense flesh doesn't turn to mush at oven temperatures the way McIntosh does.

When you're building your spice mix, knowing the alternatives to apple pie spice helps you control the seasoning without masking the apple's natural acidity.

How Honeycrisp Apple Is Used
MethodBest ForTip
🥗 RawSalads, slaws, snacking, fruit salsasToss slices in lemon juice to slow browning
🥧 BakedPies, tarts, apple crispsSkip pre-cooking the filling - it holds shape on its own
🍳 RoastedSheet-pan sides with pork or root vegetablesHigh heat, short time - 15 minutes max to preserve acidity
🫧 PoachedElegant desserts, breakfast compotesBrief poach in wine or cider keeps aroma intact
🔥 GrilledChar-marked slices for grain bowls or saladsBrush with oil and grill over high heat for 2 minutes per side

Pairing-wise, Honeycrisp works naturally with pork roasts and chops, where its acidity balances fat. Maple and cinnamon amplify the honeyed notes.

Sharp mustard alongside thin slices cuts the sweetness and adds edge.

  • 🥗 Waldorf-style salads - use Honeycrisp instead of Red Delicious for crunch that lasts through dressing
  • 🧀 Cheese boards - pair with aged sharp cheddar or manchego; the tart edge offsets salt
  • 🍖 Roasted pork sides - wedges alongside root vegetables pick up caramelized edges without losing identity
  • 🥣 Breakfast grains - diced raw over oatmeal or farro where the crisp texture contrasts soft grains

Avoid long, slow stews and heavily sugared jams - both erase the acidity and crunch that make Honeycrisp worth using.

Try It In
🥗Waldorf Salad with Apples and WalnutsHoneycrisp's crunch holds through the dressing→🥧Old-Fashioned Apple PieFirm flesh means slices hold shape in the filling→🌾Breakfast Farro with Apples and CinnamonRaw Honeycrisp cubes add snap to soft cooked farro→

How to Buy and Store Honeycrisp Apple

Press the flesh with your thumb - a fresh Honeycrisp yields no give at all. Look for that red blush over a yellow-green ground color, with no soft spots or bruising.

Small lenticel dots on the skin are harmless. Smell near the stem: a light floral, orchard scent signals peak ripeness.

Golden Rule
Never store Honeycrisp at room temperature for longer than a week. The crunch - its defining quality - degrades fast outside the fridge.

Store them unwashed in the refrigerator crisper, either in a perforated plastic bag or loose in the drawer. Washing before storage introduces moisture that accelerates softening.

A full breakdown of the honeycrisp apple's shelf life covers edge cases like partial cuts and bulk storage. In general: refrigerated and unwashed, expect 4-6 weeks of firm texture.

At room temperature, plan to use them within 5-7 days.

Where to Start with Honeycrisp

If you've never cooked with Honeycrisp before, start raw. Slice one thin, lay it over arugula with sharp cheddar and walnuts, and taste the balance before heat changes anything.

From there, move to baking - a simple apple crisp or pie shows you how well it holds structure in the oven.

Roasting alongside pork comes last; that's where you learn how its acidity functions as a seasoning, not just a flavor.

Shortcut
If Honeycrisp isn't available, SweeTango is the closest match for crunch and acidity - it's a direct descendant from the same Minnesota program.

Frequently Asked Questions

Are Honeycrisp apples sweeter than Gala?

Not significantly. Both varieties have similar sugar levels, but Honeycrisp's more pronounced acidity makes the sweetness taste brighter and more complex. Gala reads as gentler and more one-dimensional by comparison.

Why are Honeycrisp apples so crunchy?

Honeycrisp was specifically bred to have unusually large, juice-filled cells in the flesh. When you bite, all those cells rupture simultaneously, producing that explosive snap. No other widely available apple variety has the same cell structure.

How long do Honeycrisp apples last in the fridge?

Stored unwashed in the crisper drawer, they last 4-6 weeks before texture softens noticeably. Keep them away from ethylene-producing produce like bananas, which speeds ripening.

Are Honeycrisp apples good for baking?

Yes, for pies, tarts, and crisps where you want slices that hold shape. They're less suited to applesauce or butter, where a softer apple like McIntosh breaks down more efficiently.

Do Honeycrisp apples turn brown quickly after cutting?

They brown at a moderate rate - faster than some varieties but slower than Fuji. A light toss in lemon juice or cold water slows oxidation for up to two hours after slicing.

Ham Salad with Pickles

March 30, 2026

When you need a hands-off lunch that works for meal prep or a last-minute picnic, ham salad delivers. One bowl, minimal chopping, and enough tang to make plain crackers worth eating.

Ham Salad with Pickles served on a plate

Dice the ham and pickles to the same size and the texture stays consistent. The mayonnaise and mustard do all the binding work while you chill it.

Perfect for weeknight lunches when you're tired of the same sandwich rotation or need something quick for casual entertaining.

QUICK SUMMARY

Ham salad with pickles mixes diced cooked ham, crunchy pickles, and creamy mayonnaise into a chunky, tangy spread. Uniform ¼-inch cubes keep every bite balanced. Chill at least an hour so the flavors meld before serving on bread or crackers.

⏱️Time: 15 minutes active, 1 hour chilling minimum
🔪First Move: Dice ham into ¼-inch cubes for even texture
⚠️Watch Out: Drain pickles completely or salad turns watery and bland

Table of Contents

Toggle
  • Why This Recipe Works
  • What You'll Need
    • Ingredient Details
  • Ingredient Swaps
  • What to Serve With It
  • Store and Reheat
  • Frequently Asked Questions
  • Ham Salad with Pickles
    • Method 
    • Tried this recipe?

Why This Recipe Works

The chopping size determines everything. Rich mains need something to cut through, and cheese does exactly that - we keep a batch ready for nights like this with a classic cheese dish on rotation.

Quick Reference
⏱️
Prep Time
15 min
🔥
Cook Time
0 min
⏰
Total Time
1 hr 15 min
🍽️
Servings
6 servings
📊
Difficulty
Easy
🏷️
Category
Main Dish | Appetizer | Lunch
💡
Quick Tip
Chill ham salad at least 1 hour for flavor meld
🎯
Best For
Weeknight | Meal prep | Casual entertaining
  • Uniform ¼-inch cubes create balanced texture - every forkful has ham, pickle crunch, and creamy coating instead of random chunks
  • Draining pickles for 5 minutes prevents watery salad - excess liquid dilutes the mayonnaise and makes everything slide off crackers
  • Mixing mayo and mustard first distributes tang evenly - whisking them together before adding to ham coats every piece consistently
  • Chilling minimum 1 hour lets flavors meld - cold temps mute seasoning, so the wait period balances salt, tang, and richness
  • Adding black pepper gradually avoids overpowering - start with ⅛ teaspoon and taste before adding more since pepper dominates quickly
Quick Tip
Transfer pickles to paper towels after draining and pat dry - removes surface moisture that clings even after 5 minutes in the colander.

What You'll Need

Ingredients for Ham Salad with Pickles

Shop for cooked ham at the deli counter or use leftovers from a holiday roast. Most people skip homemade, but it balances the meal - for a creamy addition, try this classic homemade dish on the side.

🍗
Protein
  • 2 cups cooked ham (diced)
  • 2 hard-boiled eggs (optional, chopped)
🥬
Vegetables
  • ½ cup dill or sweet pickles (diced)
  • ¼ cup celery (finely chopped)
  • 2 tablespoons onion (minced)
🥢
Binders & Seasonings
  • ⅓ cup mayonnaise
  • 1 tablespoon mustard (yellow or Dijon)
  • 1 tablespoon pickle juice
  • ¼ teaspoon black pepper
  • Salt to taste

Ingredient Details

  • Cooked Ham
    Use deli ham or leftover baked ham - slice into strips then dice into ¼-inch cubes for consistent texture
  • Pickles
    Dill pickles add sharp tang while sweet pickles bring milder flavor - drain completely in colander for 5+ minutes
  • Mayonnaise
    Full-fat mayo creates creamiest texture - start with ⅓ cup and add more if salad looks dry after mixing
  • Celery
    Chop finely so crunch distributes throughout instead of big chunks - aim for ⅛-inch pieces
  • Mustard
    Yellow mustard adds mild tang, Dijon brings sharper bite - whisk with mayo before adding to ham
  • Hard-Boiled Eggs
    Optional but adds creamy protein - chop into ½-inch pieces so they stay visible in the salad
  • Black Pepper
    Freshly ground works best - add ⅛ teaspoon at a time since pepper flavor intensifies as salad chills

Ingredient Swaps

Dill versus sweet pickles changes the flavor profile completely. A good homemade can make or break the plate, so when you want a creamy swap, reach for a classic homemade dish instead.

  • Greek yogurt replaces half the mayo - cuts richness while keeping creamy texture, adds slight tang that works with pickles
  • Sweet pickles swap for dill - brings milder, sweeter flavor instead of sharp brine, reduces overall tang intensity
  • Smoked turkey replaces ham - leaner protein with different flavor, less salty so adjust seasoning after mixing
  • Jicama swaps for celery - same crisp crunch with hint of sweetness, stays firm even after overnight storage

Dill Pickles

Works for: sharp tang, classic deli flavor, cutting through rich mayonnaise

Skip if: you prefer milder sweetness or feeding kids who dislike brine

Sweet Pickles

Works for: milder flavor, kid-friendly lunches, less acidic bite

Skip if: you want traditional tangy ham salad or serving with rich sides

Greek Yogurt (Half Mayo)

Works for: lighter texture, extra protein, slight tang boost

Skip if: you want classic creamy texture or serving at picnics (yogurt separates faster)

Instructions

You need 15 minutes of chopping and mixing, then wait an hour while it chills. The chicken works best when it hits the table at the same time as the main - for a version that comes together quickly, try this simple chicken recipe alongside.

  1. Dice the ham into ¼-inch cubes - stack ham slices, cut into strips, then dice into uniform cubes using a sharp chef's knife on a cutting board
  2. Drain and dice the pickles - transfer pickles to colander, let drain 5 minutes, pat dry with paper towels, then chop into ¼-inch pieces matching ham size
  3. Whisk mayonnaise and mustard together - combine mayo, mustard, and pickle juice in a large mixing bowl until smooth and fully blended
  4. Mix all ingredients - add diced ham, pickles, celery, onion, and optional chopped eggs to bowl, stir gently until evenly coated, season with pepper and salt
  5. Chill before serving - cover bowl with plastic wrap or transfer to airtight container, refrigerate minimum 1 hour so flavors meld and texture sets
Golden Rule
Taste and adjust seasoning after chilling - cold temps mute flavors, so add extra mustard, pepper, or pickle juice right before serving if needed.

What to Serve With It

Ham salad sits between side and main, so pair it with something that fills the plate. The chicken works best when it hits the table at the same time as the main, especially when you're planning your weekly meals around fresh vegetable dinner ideas.

Side Dish Prep Why It Works How to Serve
Leafy Green Salad Easy Fresh greens cut through creamy ham salad richness Toss mixed greens with vinaigrette, serve alongside on plate
Fresh Bread or Crackers Easy Provides crunchy vehicle for scooping salad Arrange sliced bread or crackers on platter around ham salad
Raw Vegetable Sticks Easy Extra crunch complements creamy texture Cut carrots, celery, bell peppers into sticks, serve cold
Coleslaw Medium Adds crisp, acidic counterpoint to rich ham Toss shredded cabbage with vinegar dressing, chill before serving
Deviled Eggs Medium Classic pairing for Southern-style gatherings Boil eggs, fill with yolk mixture, serve chilled on same platter

Three ways to serve it:

  • On crackers for appetizers - spread ham salad on sturdy crackers like Ritz or Triscuits, top with pickle slice
  • In sandwich for lunch - pile between bread slices with lettuce, serve with chips and pickle spear
  • On lettuce cups for low-carb - scoop ham salad onto butter lettuce leaves, fold and eat like tacos
Shortcut
Buy pre-diced ham from the deli counter or use cubed ham steak - skips the chopping step and saves 5 minutes of prep time.

Store and Reheat

Ham salad lasts 3-4 days in the fridge if you store it right. A good homemade can make or break the plate, especially when paired with something tender like this smoky pork recipe on busy nights.

Method Time Best For
📦 Serve Chilled 0 min (straight from fridge) Maintaining texture and creamy consistency
🍳 Room Temp 15-20 min on counter Softening cold mayo bite slightly before serving
📦 Microwave 10-15 seconds Emergency warming only (texture suffers)

For best results when storing:

  • Use shallow airtight container - chills faster and keeps surface from drying out, press plastic wrap directly on surface before sealing lid
  • Store no longer than 4 days - mayonnaise-based salads spoil quickly, discard if you see separation or smell sour
  • Keep refrigerated at all times - never leave at room temp over 2 hours, bacteria multiply rapidly in mayo
  • Stir before serving leftovers - liquids settle to bottom overnight, mixing redistributes moisture and seasoning evenly
  • Taste and re-season after storage - cold dulls flavors, add pinch of salt or splash of pickle juice before serving day-old salad

Frequently Asked Questions

How long to chill ham salad before serving?

Chill ham salad minimum 1 hour so flavors meld and texture sets. The mayo firms up and the pickle brine distributes evenly throughout the ham during this time.

Can I make ham salad ahead and store?

Yes, ham salad lasts 3-4 days in an airtight container in the fridge. Stir before serving and add extra pickle juice or mustard if it tastes bland after storage since cold mutes seasoning.

What is the best way to know ham salad is properly seasoned?

Taste a spoonful after mixing - you should taste tangy pickles, mild ham saltiness, and creamy mayo in every bite. If it tastes flat, add more mustard or pickle juice; if too salty, mix in extra celery or an egg.

Why is my ham salad watery and how to fix?

Watery ham salad comes from undrained pickles or excess pickle juice. Drain pickles in colander for 5+ minutes, pat dry with paper towels, and add pickle juice one teaspoon at a time instead of pouring it in.

Can I use turkey instead of ham in ham salad?

Yes, smoked turkey works as a leaner swap with different flavor. Turkey is less salty than ham, so taste and add extra mustard or salt after mixing to balance the milder protein.

Ham Salad with Pickles served on a plate

Ham Salad with Pickles

No ratings yet
Ham salad with pickles is a creamy, tangy spread made with diced cooked ham, crunchy pickles, and a smooth mayonnaise-mustard binder. Uniform ¼-inch cubes ensure every bite is balanced and flavorful. Chill at least one hour so the flavors meld perfectly.
Print Recipe Pin Recipe
Prep Time 15 minutes mins
Cook Time 1 minute min
Total Time 16 minutes mins
Servings: 6 servings
Course: Appetizer, Lunch, Main Dish
Cuisine: American
Ingredients Equipment Method Notes

Ingredients
  

  • 2 cups cooked ham diced into ¼-inch cubes
  • 2 hard-boiled eggs optional, chopped into ½-inch pieces
  • ½ cup dill or sweet pickles diced into ¼-inch pieces, well drained and patted dry
  • ¼ cup celery finely chopped into about ⅛-inch pieces
  • 2 tablespoons onion minced
  • ⅓ cup mayonnaise full-fat recommended
  • 1 tablespoon mustard yellow or Dijon, whisk with mayo
  • 1 tablespoon pickle juice
  • ¼ teaspoon black pepper freshly ground, add gradually

Equipment

  • Chef's knife For dicing ham and pickles
  • Cutting board To dice ingredients on
  • Mixing bowl To combine ingredients
  • Whisk To blend mayonnaise and mustard
  • Colander To drain pickles
  • Paper towels To pat pickles dry after draining

Method
 

  1. Stack ham slices and cut into strips, then dice into uniform ¼-inch cubes using a sharp chef's knife on a cutting board.
    2 cups cooked ham
  2. Transfer pickles to a colander and let drain for 5 minutes. Then pat dry with paper towels and chop into ¼-inch pieces matching the ham size.
    ½ cup dill or sweet pickles
  3. In a large mixing bowl, whisk together mayonnaise, mustard, and pickle juice until smooth and fully blended.
    ⅓ cup mayonnaise, 1 tablespoon mustard, 1 tablespoon pickle juice
  4. Add diced ham, pickles, celery, onion, and optional chopped eggs to the bowl. Stir gently until evenly coated. Season with black pepper and salt to taste.
    2 cups cooked ham, 2 hard-boiled eggs, ½ cup dill or sweet pickles, ¼ cup celery, 2 tablespoons onion, ¼ teaspoon black pepper
  5. Cover the bowl with plastic wrap or transfer to an airtight container and refrigerate for a minimum of 1 hour to allow flavors to meld and texture to set.

Notes

  • Dice ham and pickles into uniform ¼-inch cubes for consistent texture in every bite.
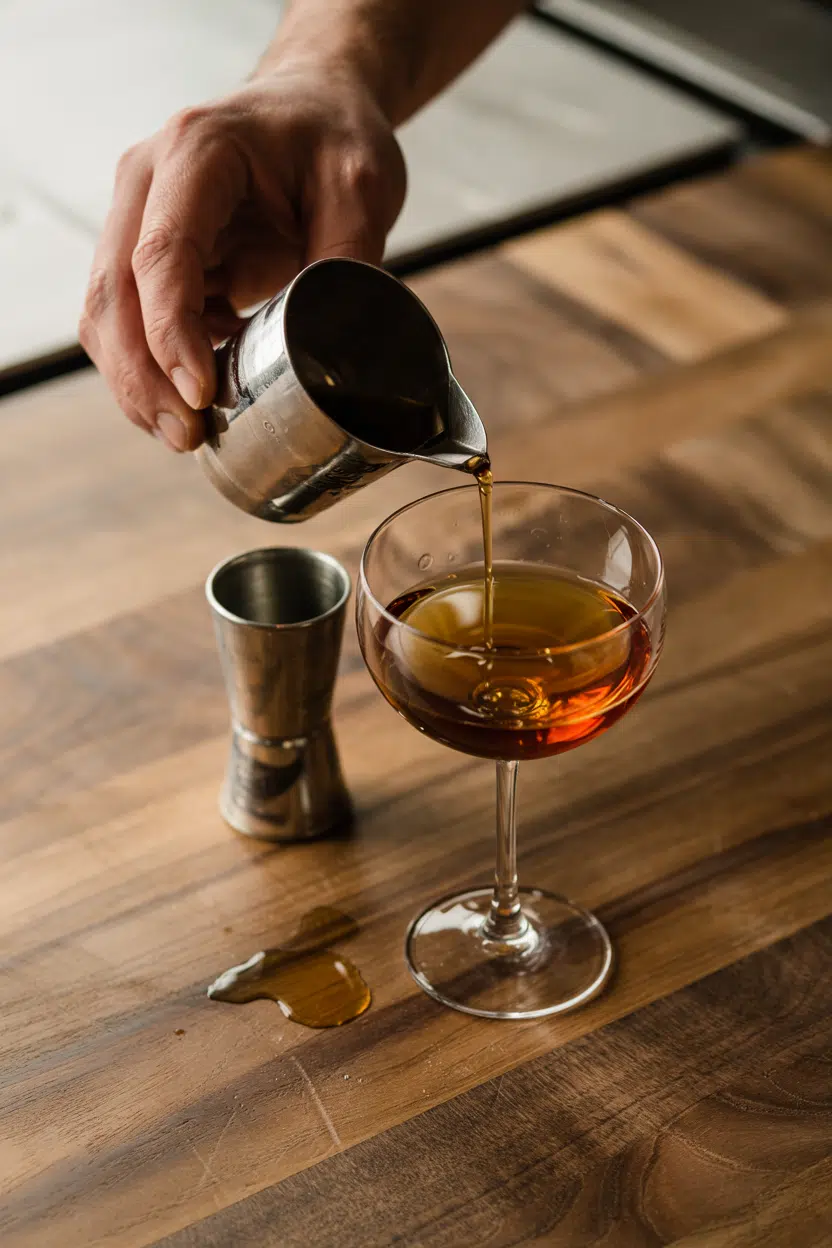
  • Drain and pat dry pickles thoroughly to prevent watery salad.
  • Chill at least 1 hour before serving to meld flavors and balance seasoning.

Tried this recipe?

Let us know how it was!

What Is Grand Marnier? [Taste, Uses & More]

March 30, 2026

Crêpes Suzette wouldn't be what they are without Grand Marnier - that amber pour that turns a simple folded pancake into a tableside spectacle. If you've ever wondered why crêpes turn up on fine-dining menus alongside a liqueur rather than plain orange juice, the answer is complexity.

What Is Grand Marnier

Grand Marnier brings bitter orange peel, warm Cognac depth, and a hint of vanilla to any recipe, and that combination is harder to replicate than it sounds.

QUICK SUMMARY

Grand Marnier is a French orange liqueur built on Cognac and bitter orange essence. It reads sweet-citrus up front, then delivers warm brandy heat and a faint caramel finish. Use it in cocktails, flambé desserts, glazes, and ganache.

🍊Flavor: Bitter orange peel, sweet marmalade, vanilla-caramel, brandy warmth
🥃Category: Brandy-based orange liqueur, Cognac region, France
🍳Best Uses: Flambé, glazes, cocktails, ganache, macerations
📦Shelf Life: Opened: best within 1-3 years; unopened: several years
⚠️Note: ~40% ABV - not suitable for children or those avoiding alcohol

What Is Grand Marnier?

Grand Marnier is a French liqueur created in Normandy in 1880 by Louis-Alexandre Marnier Lapostolle. It blends aged Cognac brandy from the Charente region with the essence of bitter wild oranges - specifically Citrus bigaradia, a variety distinct from the sweet oranges you'd eat fresh.

The flagship expression is the Cordon Rouge, recognizable by its red ribbon and amber color. It sits in a category often labeled orange liqueur or curaçao, though it differs from most triple sec products because the Cognac base replaces neutral grain spirit.

That distinction gives it noticeably more depth.

Several expressions exist beyond Cordon Rouge:

  • Cordon Rouge - the standard; ~40% ABV, the one most recipes call for
  • Cuvée du Centenaire - aged longer in oak, richer and more spirit-forward
  • Quintessence - a premium release using very old Cognac, rare and expensive
  • Grand Marnier Raspberry Peach - flavored line, lighter and less traditional

Most cooking and cocktail recipes mean Cordon Rouge when they say Grand Marnier.

What Does Grand Marnier Taste Like?

grand marnier - What Is Grand Marnier

Grand Marnier opens with bright bitter orange, the kind that registers closer to dried peel than fresh juice.

Beneath that citrus note sits a layer of sweet marmalade, then warmth from the Cognac oak - faint vanilla, a touch of caramel, and a brandy heat that lingers well after the sip.

Sensory SnapshotStrong Intensity
👅 Flavor
Bitter OrangeSweet MarmaladeVanilla-CaramelBrandy Heat
✋ Texture
SyrupySilky
👃 Aroma
Citrus BlossomDried Orange PeelOak and Brandy Steam

Compared to Cointreau, Grand Marnier is richer and heavier - Cointreau reads crisper and more neutral because it uses grain spirit. Grand Marnier also tastes distinctly warmer than blue curaçao, which is lighter and far sweeter.

In cooking, the alcohol cooks off but the bitter orange and caramel notes stay behind.

Golden Rule
If a recipe just says "orange liqueur," Grand Marnier will add more richness than Cointreau or triple sec - account for that depth, especially in delicate desserts.

How to Use Grand Marnier

Grand Marnier works across a wider range of cooking applications than most spirits, because the Cognac backbone holds up to heat and fat in ways that lighter liqueurs don't.

How Grand Marnier Is Used
MethodBest ForTip
🔥 FlambéCrêpes Suzette, cherries jubilee, bananas Foster riffTilt pan away from you; use a long match or lighter
🍳 DeglazePan sauces for duck, pork, foie grasAdd off-heat first, then return to flame to reduce
🍒 MacerateCherries, citrus segments, stone fruits30 minutes minimum; overnight intensifies the flavor
🎂 BakeBrownie batter, chocolate ganache, orange cake2-3 tablespoons per batch; alcohol bakes off, orange stays
🫙 GlazeRoasted duck, pork tenderloinBrush on during the final 10-15 minutes to avoid burning
🍐 PoachPears or apples in spiced syrupCombine with water, sugar, and spices; simmer gently

In cocktails, a splash of Grand Marnier upgrades a standard Sidecar or adds citrus-brandy weight to Margarita-style drinks. It pairs especially well with dark chocolate, heavy cream, vanilla, coffee, and almonds - flavors that echo or complement the Cognac's oak character.

If you need a swap, consider options from our guide to grand marnier alternatives - some situations call for a lighter touch and a different citrus profile.

Shortcut
For ganache or brownies, swap 2 tablespoons of vanilla extract for Grand Marnier. The orange note reads as depth, not obviously citrus, once chocolate is involved.
Try It In
🍅Roasted Garlic Marinara SauceA base worth experimenting with orange-braised pork alongside→🥩Roasted Garlic Béarnaise SauceRich sauce that pairs with the same cuts Grand Marnier glazes→🧋Passion Fruit Iced TeaCitrus-forward drinks that take well to a liqueur float→

How to Buy and Store Grand Marnier

Cordon Rouge is the right starting point for almost every recipe. Look for the signature red ribbon, clear amber liquid, and a sealed cork - cloudy liquid or a cracked wax seal are both reasons to pass.

Store the bottle upright in a cool, dark place, away from direct sunlight or a hot stovetop. Heat degrades both the citrus oils and the Cognac character faster than anything else.

Watch Out
An opened bottle kept near a stove will lose its bright orange aroma within months. Keep it in a cabinet, not on a display shelf above the range.

Unopened, Grand Marnier holds well for several years. Once opened, the grand marnier storage guide is best within one to three years - it won't spoil, however the citrus notes dull noticeably after that window.

Where to Start with Grand Marnier

Grand Marnier earns its place if you cook with duck or pork, bake with dark chocolate, or mix cocktails that call for orange liqueur with backbone.

Start with the Crêpes Suzette flambé if you want the full experience - it shows off every layer the liqueur has.

If you already own Cointreau or a brandy substitute and are weighing whether Grand Marnier is worth a separate purchase, the answer depends on the recipe. Cognac-forward dishes and richer desserts justify it.

Simple cocktails that need clean citrus brightness often don't.

Frequently Asked Questions

Is Grand Marnier the same as Cointreau?

No. Grand Marnier uses aged Cognac as its base spirit; Cointreau uses neutral grain spirit. That makes Grand Marnier richer and warmer, while Cointreau tastes cleaner and crisper. They're not interchangeable in recipes where depth matters.

What is Grand Marnier made of?

It's made from aged Cognac brandy, the essence of bitter wild oranges (Citrus bigaradia), and sugar. The Cognac comes from the Charente region of France and is blended with the orange distillate before bottling.

How does Grand Marnier taste compared to triple sec?

Grand Marnier is noticeably richer and more spirit-forward than most triple sec products. Triple sec tends to be sweeter and one-dimensional by comparison. The Cognac base in Grand Marnier adds vanilla, caramel, and oak notes that triple sec lacks entirely.

Can you cook with Grand Marnier?

Yes - it's well suited to flambé, glazes, deglazing pan sauces, and baking. The alcohol burns or cooks off during heat application, leaving behind bitter orange and caramel flavor. Use 2-3 tablespoons in most baking applications.

How long does Grand Marnier last after opening?

Peak flavor holds for one to three years after opening when stored properly. It won't become unsafe beyond that point, however the bright citrus aroma fades and the overall character flattens noticeably over time.

Smoked Trout Spread

March 30, 2026

Crispy crackers piled with creamy, smoky trout that melts into tangy bites with every scoop. That's what happens when you flake smoked trout fillets into cream cheese with lemon juice and fresh dill.

Smoked Trout Spread served on a plate

The mixing bowl does most of the work. You get a spreadable dip without cooking or waiting for anything to cool.

This works for weeknight snacks when you need something fast that looks like you actually planned ahead. Also perfect for holiday brunches or picnics where you want protein without turning on the stove.

QUICK SUMMARY

Smoked trout spread combines flaked smoked trout fillets with cream cheese, lemon juice, and fresh dill for a no-cook appetizer ready in 15 minutes. Chill at least 1 hour so flavors meld and the texture firms up enough to spread cleanly on crackers or bread.

⏱️Time Reality: 15 min active, 1+ hour chill before serving
🔪First Move: Flake trout with a fork into even pieces before mixing
⚠️Watch Out: Too much lemon curdles cream cheese - add 1 teaspoon at a time

Table of Contents

Toggle
  • Why This Recipe Works
  • What You'll Need
    • Ingredient Details
  • Ingredient Swaps
  • What to Serve With It
  • Store and Reheat
  • Frequently Asked Questions
  • Smoked Trout Spread
    • Method 
    • Tried this recipe?

Why This Recipe Works

Most people skip potato, but it balances the meal. For a version that comes together quickly, this warm potato keeps the plate interesting without extra prep.

Quick Reference
⏱️
Prep Time
15 min
🔥
Cook Time
0 min
⏰
Total Time
1 hr 15 min
🍽️
Servings
6-8 servings
📊
Difficulty
Easy
🏷️
Category
Appetizer
💡
Quick Tip
Chill at least 1 hour for best flavor
🎯
Best For
Weeknight | Entertaining | Meal prep

Flaking the trout before mixing keeps the texture spreadable. Breaking the fillets into even pieces with a fork takes 2-3 minutes and prevents large chunks that won't spread cleanly. Cream cheese binds everything together while lemon juice cuts through the richness without turning the spread watery. Fresh dill and capers add herby, briny contrast that complements the smoky fish. Chilling for at least 1 hour firms the texture and lets flavors meld so the spread tastes balanced instead of one-note.

  • Use fully flaked fish - Pat trout dry before flaking to avoid watery texture, then break into small, even pieces with a fork
  • Add lemon juice gradually - Pour in 1 teaspoon at a time and mix fully between additions to prevent curdled cream cheese
  • Chop onions finely - Dice red onion into tiny pieces or soak in ice water 5 minutes to reduce sharp, overpowering bites
  • Fold gently when mixing - Stir ingredients just enough to combine so trout flakes stay visible and intact instead of turning mushy
  • Taste after chilling - Flavors intensify as the spread sits, so adjust salt, lemon, or pepper once it's cold
Quick Tip
Chill the spread in a shallow, airtight container so it firms up faster and flavors blend evenly throughout.

What You'll Need

Ingredients for Smoked Trout Spread

A good salad can make or break the plate. For a version that comes together quickly, a fresh salad variation works when you need something light that doesn't compete with richer mains.

🦐
Protein
  • 8 oz smoked trout fillets
🧀
Dairy Base
  • 8 oz cream cheese (softened)
  • 2 tablespoon mayonnaise
🧄
Aromatics
  • 3 tablespoon fresh dill (chopped)
  • 2 tablespoon red onion (finely diced)
  • 1 tablespoon chives (optional)
🫙
Seasonings
  • 2 tablespoon lemon juice
  • 1 tablespoon capers (drained)
  • ½ teaspoon black pepper
  • Hot sauce (optional)

Ingredient Details

  • Smoked trout fillets
    Look for vacuum-sealed packages with no fishy smell - skin-on or skinless both work, just remove skin if present
  • Cream cheese
    Let sit at room temperature 15-20 minutes so it mixes smoothly without lumps or requires extra stirring
  • Lemon juice
    Fresh-squeezed tastes brighter than bottled and won't turn the spread bitter or metallic
  • Fresh dill
    Chop stems and fronds together for maximum herby flavor - dried dill works but use half the amount
  • Capers
    Drain and pat dry before adding to avoid watery texture - chop if you want smaller bursts of brine
  • Red onion
    Soak diced onion in ice water 5 minutes, then drain and pat dry to reduce sharpness without losing crunch
  • Mayonnaise
    Adjust amount based on how creamy you want the spread - start with 2 tablespoons and add more if needed

Ingredient Swaps

Most people skip scratch, but it balances the meal. For a version that comes together quickly, more recipe ideas give you flexibility when the pantry runs low.

  • Cream cheese → Greek yogurt - Use full-fat for best texture; results are tangier and lighter but less creamy
  • Fresh dill → dried dill or parsley - Use 1 tablespoon dried dill or double the parsley for a milder herby note
  • Capers → chopped green olives - Provides similar salty, briny flavor with slightly less intensity
  • Smoked trout → smoked salmon - Stronger smokiness and firmer texture but costs more per pound

Greek Yogurt Instead of Cream Cheese

Works for: lighter texture, higher protein, tangier flavor

Skip if: you want traditional creamy richness or don't like tangy spreads

Smoked Salmon Instead of Trout

Works for: stronger smoky flavor, firmer flakes, widely available

Skip if: you're on a budget or prefer milder fish taste

Instructions

Rich mains need something to cut through, and peas does exactly that. For a version that comes together quickly, simple homemade peas keeps prep minimal without sacrificing flavor.

  1. Flake the trout: Remove skin if present, then use a fork to break trout into small, even pieces in a mixing bowl - takes 2-3 minutes and prevents large chunks.
  2. Mix dairy base: Add softened cream cheese and mayonnaise to the bowl, then stir with a spatula until smooth and fully combined with no lumps.
  3. Add aromatics and seasonings: Fold in diced red onion, chopped dill, capers, black pepper, and lemon juice - stir gently so trout flakes stay visible instead of turning mushy.
  4. Taste and adjust: Sample a small spoonful and add more lemon juice, salt, or pepper if needed - flavors should taste balanced, not one-note.
  5. Chill before serving: Transfer spread to an airtight container, cover, and refrigerate at least 1 hour so texture firms up and flavors meld - taste again after chilling and adjust seasoning if needed.
Golden Rule
Pat trout completely dry before flaking to avoid watery spread that won't hold its shape on crackers.

What to Serve With It

The chicken works best when it hits the table at the same time as the main. For a version that comes together quickly, simple homemade chicken keeps the plate interesting without extra prep. If you're planning a fuller spread with beef, check weeknight corned beef hash meal ideas for more options.

Side Dish Prep Why It Works How to Serve
Crisp cucumber slices Easy Fresh crunch complements creamy spread without competing flavors Slice thin on a bias, serve chilled alongside crackers
Whole grain crackers Easy Adds texture and mild flavor base that lets trout shine Arrange on platter, let guests scoop spread themselves
Sliced baguette Easy Neutral bread pairs well with strong smoked fish without clashing Toast lightly for crunch, serve warm or room temperature
Fresh veggie sticks Easy Light and refreshing contrast cuts richness of cream cheese base Carrot, celery, bell pepper - serve cold with ice water nearby
Crostini with olive oil Medium Elegant bite-sized base for party entertaining or holiday brunch Brush baguette slices with olive oil, toast until golden, top with spread

Three ways to serve it:

  • Picnic platter: Pack spread in a sealed container with crackers, cucumber slices, and cherry tomatoes - keeps cold in a cooler up to 4 hours
  • Holiday brunch board: Arrange spread in a small bowl surrounded by toasted crostini, lemon wedges, fresh dill sprigs, and capers for garnish
  • Quick weeknight snack: Spread on whole grain toast, top with sliced radish and a squeeze of lemon juice for a light lunch
Best Pick
Serve spread slightly chilled (not ice-cold) so it spreads easily but still holds its shape on crackers or bread.

Store and Reheat

Store smoked trout spread in an airtight, shallow container in the fridge for 3-4 days. Consume chilled and check for off smells before serving - discard if the spread smells sour or fishy.

Method Time Best For
🍳 Room Temperature Rest 15-20 min Bringing chilled spread to serving temp without warming
📦 Microwave 10-15 sec low power Slightly warming spread before serving (not recommended)

For best results when storing:

  • Fridge storage: Press plastic wrap directly onto spread surface before sealing container to prevent drying out or absorbing other fridge smells
  • Freezing partial batches: Freeze up to 1 month in airtight container - texture changes slightly after thawing but flavor stays strong
  • Thawing frozen spread: Move to fridge 4-6 hours before serving, stir well once thawed to re-emulsify texture
  • Serving chilled leftovers: Let spread sit at room temperature 10 minutes before serving so it softens enough to spread easily
  • Check for freshness: Discard if spread develops sour smell, changes color, or tastes off - smoked fish spoils faster than fresh

Frequently Asked Questions

Can I make smoked trout spread ahead of time?

Yes - make up to 3 days ahead and store in an airtight container in the fridge. Flavors actually improve after a day as they meld together.

How should I store leftover smoked trout spread?

Store in a shallow, airtight container in the fridge for 3-4 days. Press plastic wrap directly onto the spread surface before sealing to prevent drying out.

How do I know when smoked trout spread has the right texture?

It should be creamy and spreadable with visible trout flakes - not watery, mushy, or too stiff. If it's runny, add more cream cheese; if too thick, stir in a teaspoon of mayonnaise.

What can I do if the spread tastes too bland or too acidic?

If bland, add more salt, capers, or lemon juice 1 teaspoon at a time. If too acidic, stir in extra cream cheese or a pinch of sugar to balance the tang.

Can I substitute cream cheese with dairy-free alternatives?

Yes - use plant-based cream cheese or thick cashew cream for a dairy-free version. Texture won't be as rich but flavor stays close to the original.

Smoked Trout Spread served on a plate

Smoked Trout Spread

No ratings yet
Smoked Trout Spread combines flaked smoked trout fillets with cream cheese, lemon juice, and fresh dill for a no-cook appetizer ready in 15 minutes. The creamy spread blends smoky fish and tangy lemon with herby dill and capers, perfect for crackers or bread. Chill at least 1 hour to firm up the texture and meld flavors for the best results.
Print Recipe Pin Recipe
Prep Time 15 minutes mins
Cook Time 1 minute min
Total Time 16 minutes mins
Servings: 7 servings
Course: Appetizer
Cuisine: American
Ingredients Method Notes

Ingredients
  

  • 8 oz smoked trout fillets skin removed if present; patted dry
  • 8 oz cream cheese softened to room temperature
  • 2 tablespoon mayonnaise
  • 3 tablespoon fresh dill chopped, stems and fronds
  • 2 tablespoon red onion finely diced; soaked in ice water 5 minutes to reduce sharpness (optional)
  • 1 tablespoon chives optional, chopped
  • 2 tablespoon lemon juice add gradually, 1 teaspoon at a time to prevent curdling
  • 1 tablespoon capers drained and patted dry
  • 0.5 teaspoon black pepper
  • hot sauce optional

Method
 

  1. Remove skin if present from smoked trout fillets. Pat trout dry and use a fork to break into small, even pieces in a mixing bowl. This takes about 2-3 minutes and prevents large chunks.
    8 oz smoked trout fillets
  2. Add softened cream cheese and mayonnaise to the bowl, then stir with a spatula until smooth and fully combined with no lumps.
    8 oz cream cheese, 2 tbsp mayonnaise
  3. Fold in diced red onion, chopped fresh dill, chopped chives (if using), capers, black pepper, and lemon juice. Stir gently so trout flakes stay visible and do not turn mushy. Add lemon juice 1 teaspoon at a time to avoid curdling.
    3 tbsp fresh dill, 2 tbsp red onion, 1 tbsp chives, 2 tbsp lemon juice, 1 tbsp capers, 0.5 tsp black pepper
  4. Taste a small spoonful and adjust seasoning as needed, adding more lemon juice, salt, or pepper to achieve balanced flavor.
    2 tbsp lemon juice, 0.5 tsp black pepper
  5. Transfer spread to an airtight container, cover, and refrigerate for at least 1 hour so texture firms up and flavors meld. Taste again after chilling and adjust seasoning if necessary.

Notes

  • Use fully flaked and patted dry fish to prevent a watery spread.
  • Add lemon juice gradually to avoid curdling the cream cheese.
  • Chill spread in a shallow, airtight container to firm up texture and blend flavors evenly.

Tried this recipe?

Let us know how it was!

What Is Grana Padano? [Taste, Uses & More]

March 30, 2026

Risotto alla Milanese barely needs finishing - a handful of finely grated Grana Padano stirred in off the heat binds the starchy rice into something glossy and cohesive, the kind of result that makes you understand why northern Italian cooks reach for this wheel before almost anything else.

What Is Grana Padano

It earns that instinct, and it works far beyond risotto.

Much like discovering that replacements for tamarind puree can shift a whole recipe, understanding what Grana Padano actually brings to a dish changes how you stock your fridge.

QUICK SUMMARY

Grana Padano is a hard, aged Italian cow's-milk cheese with a grainy texture, mild nutty-savory flavor, and DOP-protected origin in the Po Valley. It grates, shaves, and melts well, making it a reliable finisher across pasta, grains, and salads.

🧀Category: Hard aged cow's-milk cheese, PDO protected
👅Flavor: Umami-savory, mildly nutty, buttery, salty finish
🍽️Best Uses: Grating over pasta, shaving onto salads, rind in broth
❄️Shelf Life: Cut wedge lasts 3-6 weeks wrapped in the fridge
🛒Buy It: Look for the DOP stamp, pale straw paste, and visible crystals

What Is Grana Padano?

Grana Padano DOP is a hard, partially skimmed cow's-milk cheese produced in the Po Valley of northern Italy, where it has been made since at least the 12th century. "Grana" refers to the granular, slightly sandy texture you feel when the paste crumbles between your fingers.

Production follows strict PDO rules - the milk, the aging environment, the timing, and the wheel dimensions are all regulated. Wheels are aged a minimum of nine months, though many reach 16 months or more before sale.

Three broad age categories shape what you bring home:

  • 🧀 Grana Padano (9-16 months) - paler paste, moist crumb, milder flavor, melts most smoothly
  • 🧀 Grana Padano Oltre 16 Mesi (over 16 months) - deeper gold paste, more concentrated savory notes, firmer grind
  • 🧀 Grana Padano Riserva (over 20 months) - the most complex category, drier and most crystalline

Every authentic wheel carries a dotted diamond pattern stamped into the rind alongside the DOP mark - that rind stamp is the quickest authentication check at the counter.

If you ever need a stand-in, our guide to grana padano stand-ins covers the closest options by age and use.

What Does Grana Padano Taste Like?

grana padano - What Is Grana Padano

Grana Padano lands in moderate-intensity territory - present and savory without the sharper, more assertive bite that a long-aged Parmigiano-Reggiano delivers. The baseline flavor is umami-forward, with a clean buttery quality and faint fruity notes underneath.

Sensory SnapshotModerate Intensity
👅 Flavor
umami-savorymildly nuttybutterysalty-tangy finish
✋ Texture
firm and granularcrumblycrunchy crystals
👃 Aroma
mild grassy milktoasted hay

The crunchy white specks scattered through an older wheel are tyrosine crystals - an amino acid that forms during extended aging. They signal a well-aged cheese and add a subtle mineral crunch distinct from salt.

Heat mellows the tangy finish and pulls the buttery notes forward, which is why stirring it into hot risotto or polenta tastes richer than eating the same amount cold off a board.

Golden Rule
Younger Grana Padano (9-16 months) melts more smoothly into sauces. Reserve the Oltre 16 Mesi and Riserva for grating or shaving, where their sharper complexity reads clearly.

How to Use Grana Padano

Grana Padano earns its keep across a wider range of applications than most hard cheeses.

Northern Italian cooking built entire categories of dishes around it - risotto alla Milanese being the most iconic, where it binds and enriches in the final stir.

How Grana Padano Is Used
MethodBest ForTip
🥗 Shaving rawArugula and pear salads, cheese boardsUse a vegetable peeler for wide, thin curls
🍳 Grating to finishPasta, polenta, roasted vegetablesAdd off-heat to prevent graininess
🫕 Rind simmeringMinestrone, broths, bean soupsRinse rind first; remove before serving
🥘 Melting into grainsPolenta, baked gratins, stuffed vegetablesYounger wheels melt cleaner than Riserva

Pairing the cheese well sharpens every application. A glass of Lambrusco or another dry sparkling red cuts through the fat and lets the umami register cleanly. Aged balsamic vinegar drizzled over a wedge on a board is a five-minute course on how acidity and salt interact.

Fruit pairings - ripe pears, crisp apples - work because their natural sugar contrasts the salty-tangy finish without masking the crystals. Walnuts and hazelnuts echo the nutty mid-notes already present in the cheese.

Avoid pairing Grana Padano with overly sweet glazes or syrups. They drown the savory complexity that makes the cheese worth using in the first place.

Try It In
🍚Risotto alla MilaneseThe classic finish — stirred in off-heat for a glossy, cohesive result→

How to Buy and Store Grana Padano

At the counter, check for the DOP stamp pressed into the rind - that diamond dot pattern confirms authenticity. The paste should run pale straw to deep gold depending on age, with visible white crystalline specks and no sticky or slimy surface.

An ammonia smell means it's past its window.

Quick Tip
Ask the cheesemonger to cut from a fresh wheel rather than buying pre-wrapped wedges that have been sitting in film - the exposed paste dries and oxidizes faster.

Once home, wrap wedges in breathable cheese paper or parchment, then loosely in plastic. Store in the vegetable drawer, where humidity is slightly higher than the main shelf.

A cut wedge at proper age lasts three to six weeks - for more detail on keeping it at its best, grana padano's shelf life covers the full window by age category.

Starting Points for New Buyers

Two decisions simplify your first purchase. Go younger (9-16 months) if you plan to melt or stir the cheese into hot dishes - the paste is more cooperative and the flavor integrates without dominating.

  • For melting and stirring - standard Grana Padano (9-16 months), any reliable fromagerie or good supermarket deli counter
  • For grating or shaving - Oltre 16 Mesi gives noticeably more depth on a finished plate without the price of a full Riserva
  • For a cheese board - crack off irregular shards rather than slicing; the crystalline texture reads better than a clean cut

Anyone comparing Grana Padano's value against similar aged wheels will find comparing parmesan vs parmigiano reggiano options a useful reference point for price-to-flavor trade-offs.

Best Pick
Grana Padano Oltre 16 Mesi hits the sweet spot for most cooks - enough aging for complex flavor and crystal texture, without the premium price of Riserva.

Frequently Asked Questions

Is Grana Padano the same as Parmesan?

No. Both are hard Italian cow's-milk cheeses, however Parmigiano-Reggiano has a stricter production zone, longer minimum aging, and a sharper, more complex flavor. Grana Padano is milder, creamier, and considerably less expensive.

How long does Grana Padano last in the fridge?

A cut wedge properly wrapped in cheese paper keeps three to six weeks in the vegetable drawer. Older, drier wheels tolerate the longer end of that range better than younger ones.

Can lactose-intolerant people eat Grana Padano?

Often, yes. Extended aging breaks down most of the lactose, leaving levels low enough for many lactose-sensitive people to tolerate. Sensitivity varies, so start with a small amount.

How do you use a Grana Padano rind?

Drop a clean rind into simmering minestrone, bean soup, or broth. It releases savory depth over 30-60 minutes without dissolving fully. Remove it before serving.

What wine pairs best with Grana Padano?

Lambrusco is the regional match - its dry, lightly sparkling character cuts the fat and balances the salty finish cleanly. A crisp Franciacorta or other dry sparkling white works equally well with younger wheels.

What Is Fig Jam? Taste, Uses, Pairings & More

March 30, 2026

Opening a jar of fig jam, you get that first warm hit - honey, molasses, and something faintly earthy underneath. Fig jam is one of the few preserves that works equally well on a breakfast table and a charcuterie board, and understanding why starts with what's actually inside the jar.

What Is Fig Jam

The seeds, the sugar concentration, the occasional dash of lemon juice - each element shapes how it behaves in cooking.

QUICK SUMMARY

Fig jam is a cooked fruit preserve made from figs, sugar, and lemon juice. It delivers honeyed sweetness with caramel depth, works across sweet and savory dishes, and keeps up to 6 months refrigerated after opening.

🍯Flavor: Honeyed, caramel-forward, mildly earthy, with citrus tang
🧀Best With: Goat cheese, prosciutto, roast pork, walnuts, balsamic vinegar
📦Shelf Life: 12-24 months unopened; 3-6 months refrigerated after opening

What Is Fig Jam?

Fig jam is a cooked fruit preserve from the Mediterranean and Middle East, regions where figs have been cultivated for thousands of years.

At its core, it's fresh or dried figs broken down with sugar and usually lemon juice until the mixture gels and concentrates.

The result is thick, spreadable, and dotted with the small, crunchy seeds figs are known for. Those seeds aren't a flaw - they're a textural signature that distinguishes fig jam from smoother preserves like jelly or curd.

You'll find it sold under several names depending on origin.

French labels say confiture de figue, Italian ones say marmellata di fichi, and American packaging often alternates between fig jam, fig spread, and fig preserves - all referring to roughly the same product.

  • 🫙 Fig jam - cooked with sugar until it gels; spreadable, seed-studded
  • 🫙 Fig conserve - tends to have larger fruit pieces or added nuts; chunkier texture
  • 🫙 Fig spread - often a lower-sugar, sometimes smoother commercial product
  • 🫙 Fig preserves - typically contains more whole or large fig pieces suspended in syrup

What Does Fig Jam Taste Like?

fig jam - What Is Fig Jam

The dominant note is honeyed sweetness, but fig jam carries more complexity than most fruit jams.

Caramel undertones develop during cooking as the sugars deepen, and there's a mild tannic quality - a faint dryness on the finish - that comes from the fig skin and seeds.

Think of it as somewhere between a sweeter apricot jam and a honeyed prune spread, with an earthiness that neither of those has.

When lemon juice is included, a bright citrus note cuts through the richness and keeps the sweetness from feeling heavy.

Sensory SnapshotModerate Intensity
👅 Flavor
honeyedcaramelearthymildly tannic
✋ Texture
thick gelseededsoft-pulpy
👃 Aroma
warm honeydried fruitmolasses

Warmed in a pan, the caramel and molasses notes intensify noticeably. Cold from the jar, the sweetness is rounder and the earthiness more present.

How to Use Fig Jam

Fig jam spans a wider range of applications than most people expect from a jar of preserves.

Its moderate intensity means it holds up in savory cooking without overwhelming other ingredients, and it adds depth where blander sweeteners would fall flat.

Golden Rule
Pair fig jam with something salty, something fatty, or something acidic - it needs a counterpoint to avoid reading as one-dimensional sweetness.

On the savory side, glazing roasted or grilled meats is where fig jam earns the most respect. Brushed over pork loin in the last 15 minutes of roasting, it caramelizes into a lacquered crust.

Heated with a splash of balsamic vinegar swaps that work the same way balsamic does, fig jam becomes a pan sauce for duck breasts in minutes.

The cheese board application is well-known for good reason.

Spooned next to goat cheese or a sharp blue, fig jam bridges the gap between tangy dairy and cured meat.

If you're working without goat cheese, our guide to replacements for goat cheese covers options that hold up equally well alongside fig jam. Prosciutto in cooking pairs naturally with fig jam - layered in a sandwich with arugula, it's one of the simplest combinations that consistently works.

For sweet applications, swirl fig jam into ricotta or Greek yogurt, bake it into thumbprint cookies, or layer it inside pastry tarts.

Jam bars are a natural fit - the same technique used in raspberry jam bars translates directly with fig jam for a richer, earthier result.

How Fig Jam Is Used
MethodBest ForTip
🥗 Cold/SpreadCheese boards, toast, yogurt bowlsServe at room temperature - flavor opens up as it warms
🍳 GlazePork loin, duck breast, grilled chickenApply in the last 10-15 minutes to avoid burning
🍳 Pan SauceDuck, lamb, pork chopsDeglaze with vinegar or wine first, then stir in jam
🥧 BakedTarts, jam bars, thumbprint cookiesReduce sugar elsewhere in the recipe - jam adds plenty
Try It In
🍫Raspberry Jam BarsSwap in fig jam for a richer, earthier bar cookie→

How to Buy and Store Fig Jam

At the store, check the ingredient list before anything else. Good fig jam lists figs first, followed by sugar and lemon juice - nothing else is required.

Avoid jars where "fig puree concentrate" leads the list, or where the jam looks watery and pale rather than deep amber.

Watch Out
Watery separation at the top of the jar isn't always a spoilage sign, but thin texture and off-color (grey or very pale) jam usually means low fruit content or old stock. Know your [sugar spoilage signs](https://forkliftkitchen.com/sugar-shelf-life/) to distinguish quality issues from actual spoilage.

At farmer's markets, look for visible whole seeds and a natural amber color - signs the jam was made from real fruit at proper concentration. Storage is straightforward once you're home:

  • Unopened jars - store in a cool, dark pantry; commercially sealed jars last 12-24 months
  • After opening - refrigerate in the original jar with the lid tight; keeps 3-6 months
  • Extended storage - [freezing fig jam](https://forkliftkitchen.com/fig-jam-shelf-life/) extends shelf life beyond the fridge window if you have surplus

Where to Start With Fig Jam

If you've never cooked with fig jam before, start on a cheese board - it requires no technique and shows you exactly how the flavors behave.

Once you understand its sweetness and depth, move to glazing pork or stirring it into yogurt.

If a recipe calls for it and you don't have any, a rundown of alternatives to fig jam covers what holds up in both sweet and savory contexts.

Fig jam rewards people who treat it as an ingredient rather than a condiment.

Frequently Asked Questions

What is fig jam made of?

Fresh or dried figs, sugar, and usually lemon juice - that's the standard formula. Some commercial versions add pectin to speed up gelling, but high-quality jams rely on the fruit's natural pectin and long cooking time.

Is fig jam sweet or savory?

It's sweet by default, but it functions well in savory cooking. The earthy, tannic undertones and moderate intensity make it compatible with cured meats, aged cheeses, and roasted meats without tasting like dessert.

How is fig jam different from fig conserve?

Fig conserve typically has larger fruit chunks and sometimes includes nuts or spices. Fig jam is cooked until smoother and more uniformly gelled, making it easier to spread.

What cheeses pair best with fig jam?

Goat cheese and blue cheese are the strongest pairings - their sharpness and funk contrast the sweetness directly. Aged manchego, pecorino, and sharp cheddar also work well on a cheese board.

Can you use dried figs to make fig jam?

Yes. Dried figs work well when rehydrated first in water or juice before cooking. The resulting jam is darker and more intensely flavored than fresh-fig versions, with less natural pectin activity.

What Is Hanger Steak? [Taste, Uses & More]

March 30, 2026

Most home cooks treat hanger steak like a second-tier cut - something to grab when ribeye is too expensive or flank steak is sold out. That's the wrong read entirely. Hanger steak delivers a depth of beefy, iron-forward flavor that strip and flank rarely match, and it cooks fast enough for a weeknight without sacrificing anything to the process.

What Is Hanger Steak

Once you understand what this cut is and how it behaves, it becomes a deliberate choice rather than a fallback.

QUICK SUMMARY

Hanger steak is a diaphragm muscle cut with an unusually intense, beefy flavor and coarse grain. Cook it fast over high heat, slice it against the grain, and it rewards you with tender, juicy results. Don't overcook it - medium-rare is the ceiling.

🥩Flavor: Bold, iron-forward, umami-rich with slight sweetness after resting
🔪Best Uses: Steak frites, grilled whole, tacos, chimichurri, bistro sandwiches
🌡️Cook Temp: Rare to medium-rare; stop at 130-135°F internal
🧊Shelf Life: 1-2 days raw in fridge; 6-12 months frozen
⚠️Key Rule: Always slice against the grain - the coarse fibers make this non-negotiable

What Is Hanger Steak?

Hanger steak comes from the diaphragm muscle - a U-shaped piece of meat that literally hangs between the rib and loin, suspended from the last rib. There is only one per animal, which partly explains why it stayed a butcher's secret for so long.

French butchers called it onglet and kept it for themselves rather than selling it to customers. That habit earned it the name "butcher's steak" in English, a label that still sticks in American markets.

The cut runs roughly 1 to 1.5 pounds and has a visible central seam of connective tissue dividing two lobes. Unlike a ribeye or strip, it has a pronounced, coarse grain that runs at an angle across each lobe.

  • Also called: onglet, onglet de boeuf, hanging tender, butcher's steak
  • Comes from: The diaphragm, not a locomotive muscle - so it's tender despite its beefy look
  • Cut size: One cut per animal, typically serving two people
  • Key feature: Central connective tissue seam that a butcher trims before cooking

What Does Hanger Steak Taste Like?

hanger steak - What Is Hanger Steak

Hanger steak has a flavor intensity closer to offal than to a strip steak - that's not a criticism, it's the point.

The iron-forward, mineral edge is more pronounced here than in skirt steak or flank, and the umami depth holds up against strong sauces without disappearing.

Raw, it carries a robust, slightly metallic aroma that cooks off quickly under high heat. Once rested, a mild sweetness emerges beneath the beefy base note - the kind of finish that makes a simple salt-and-pepper preparation feel complete.

Sensory SnapshotStrong Intensity
👅 Flavor
beefyiron-forwardumami-richslightly sweet
✋ Texture
coarse-grainedjuicytender when sliced correctly
👃 Aroma
robust beefmineral/iron when raw

Compared to flank steak, hanger is noticeably more tender and carries more flavor per bite. It's less fatty than ribeye but more assertive - the cut that makes the strongest case for beef without excess marbling.

How to Use Hanger Steak

High heat is the rule. Cast-iron searing and direct grilling are the two methods that work best, both relying on a hard crust to lock in the cut's natural juices and build a savory exterior against the beefy interior.

How Hanger Steak Is Used
MethodBest ForTip
🔥 Cast-Iron SearSteak frites, butter-basted bistro steakPat dry before cooking; sear 3-4 min per side
🍖 Direct GrillWhole grilled steak, chimichurri serviceUse high direct heat; rest 5-7 min before slicing
🌮 Marinate + GrillTacos, steak salads, stir-fry stripsAcid-based marinades work in 30-60 min; don't go longer
🫕 Pan-FinishGarlic butter and thyme finish, bistro sandwichesAdd butter, garlic, thyme in the last 2 min; baste constantly

French bistro cooking built its reputation partly on this cut - steak frites with hanger steak remains a standard for good reason. The bold flavor carries through fries, wine sauces, and shallot reductions without being muted.

Across Latin traditions, the cut works in tacos and alongside Argentine chimichurri sauce, where the herb-acid combination cuts through the iron-forward profile cleanly. For sides, side dishes for grilled ribeye steak gives useful pairing direction that translates directly to hanger.

Golden Rule
Always slice hanger steak against the grain at a 45-degree angle. The grain runs at a bias across each lobe - cut with it and you'll end up chewing through long, tough fibers.

Avoid braising or slow-cooking this cut. Long, moist heat destroys what makes it worth buying - the quick-cook intensity collapses into a bland, fibrous result.

Try It In
🥗Grilled Steak and Blue Cheese SaladHanger's bold flavor holds up against pungent blue cheese→🧄Air Fryer Garlic Butter Steak TipsSame garlic-butter finish technique applies to hanger steak strips→🌶️Japanese Steakhouse Yum Yum SauceWorks as a dipping sauce for sliced hanger steak→

How to Buy and Store Hanger Steak

Look for a deep red, single U-shaped piece with a visible central seam and a thin fat cap along one side. Avoid packages with excess liquid pooling or a sharp metallic odor - both signal age.

Ask your butcher to trim the silver membrane but leave the fat cap intact for cooking.

Watch Out
Hanger steak is not always in the display case - many retailers grind it into burger meat instead of selling it whole. Call ahead or ask the butcher directly; it's usually available on request.

Shelf life is short once refrigerated. Keep it at 32-36°F and use it within 1-2 days of purchase.

For details on how long it stays safe, see our hanger steak storage guide guide - and check the skirt steak storage life page if you're comparing storage behavior across similar cuts.

Vacuum-sealing extends refrigerated life to around 5 days and frozen life to 6-12 months. Store it away from strong-smelling foods - the cut absorbs odors faster than thicker, denser cuts like brisket.

Start Here for Best Results

If you're cooking hanger steak for the first time, keep it simple: coarse salt, cracked pepper, hot cast iron, and a rest period. That setup gives you the clearest read on what this cut actually tastes like before you layer in marinades or sauces.

If the bold, iron-forward profile isn't for you, hanger steak swaps covers the closest alternatives by flavor and texture. For those who want sides before the protein decision is even finalized, pairings for skirt steak applies well here too.

Medium-rare is the target. Pull it at 130-135°F, rest it five minutes minimum, and slice on the bias.

Frequently Asked Questions

Why is hanger steak called butcher's steak?

Butchers traditionally kept this cut for themselves rather than selling it, because its intense flavor was considered a trade perk. There's only one per animal, which made it easy to absorb into personal use before it reached the display case.

Is hanger steak tender?

Yes, when sliced correctly. The coarse grain requires cutting against the fibers at a bias - skip that step and the same cut feels tough. Cooked to medium-rare and sliced properly, it's more tender than flank steak.

Hanger steak vs skirt steak - which is better?

Hanger has a deeper, beefier flavor and slightly more tenderness. Skirt steak has more fat marbling and a looser texture that some prefer for tacos. Both need high heat and cross-grain slicing.

What internal temperature should hanger steak reach?

Pull it at 130-135°F for medium-rare. Above 140°F the texture tightens significantly and the juicy quality of the cut diminishes - medium-well and well-done are not recommended for this cut.

Can you marinate hanger steak overnight?

Avoid it. Acid-based marinades work in 30-60 minutes on this cut; overnight exposure breaks down the surface fibers and produces a mushy exterior. A short, high-acid marinade is enough to add flavor without damaging texture.

Air Fryer Spinach and Cheese Bourekas

March 30, 2026

Crispy pastry with spinach-cheese filling that doesn't leak or turn soggy. The trick is draining the spinach completely and sealing edges before you brush on egg wash.

Air Fryer Spinach and Cheese Bourekas served on a plate

Air frying at 350°F crisps the pastry without burning the edges. You skip the oven preheat and the cleanup that comes with sheet pans.

Make these for weeknight appetizers when you need something that looks intentional but comes together in under 30 minutes. They work for meal prep too-freeze unbaked bourekas and air fry straight from frozen when guests show up.

QUICK SUMMARY

Spinach and cheese bourekas air fry in 10-12 minutes with crispy golden edges and a tender filling. Drain spinach thoroughly after sautéing to prevent soggy pastry. The egg wash creates the golden crust that makes these look bakery-level.

⏱️Timing: 15 minutes prep, 12 minutes air frying, 5 minutes cooling before serving
🔑Method: Press spinach dry after sautéing, seal edges firmly before egg washing
⚠️Watch Out: Wet filling leaks and burns-squeeze spinach in colander for 5 minutes

Table of Contents

Toggle
  • Why This Recipe Works
  • What You'll Need
    • Ingredient Details
  • Ingredient Swaps
  • What to Serve With It
  • Store and Reheat
  • Frequently Asked Questions
  • Air Fryer Spinach and Cheese Bourekas
    • Method 
    • Tried this recipe?

Why This Recipe Works

Air frying bourekas at 350°F crisps the puff pastry without the oil spatter or extended bake time of traditional methods. For simple sticks side dish nights when you want something Mediterranean, this delivers crispy edges and a filling that stays put.

Quick Reference
⏱️
Prep Time
15 min
🔥
Cook Time
10-12 min
⏰
Total Time
25-27 min
🍽️
Servings
6-8 bourekas
📊
Difficulty
Easy
🏷️
Category
Appetizer
💡
Quick Tip
Air fry 350°F for 10-12 minutes, crisp edges
🎯
Best For
Weeknight | Entertaining | Meal prep

What makes these work:

  • Cold puff pastry folds cleanly without tearing when you shape triangles or rectangles
  • Sautéing spinach first removes excess moisture that would otherwise leak during air frying
  • 1:1 feta-to-ricotta ratio balances salty crumbles with creamy texture
  • Egg wash on edges and tops creates the golden-brown crust that looks bakery-made
  • 350°F for 10-12 minutes crisps pastry without burning corners or leaving raw centers
Quick Tip
Press sautéed spinach in a colander for 5 minutes to remove moisture that causes soggy pastry and leaking filling

What You'll Need

Ingredients for Air Fryer Spinach and Cheese Bourekas

Most ingredients sit in your fridge already-puff pastry from the freezer section, spinach, feta, ricotta. For more steak ideas that use similar Mediterranean flavors, the same filling base works across different applications.

🥐
Pastry Base
  • Puff pastry sheets (thawed, cold)
  • Phyllo dough (alternative)
🥬
Vegetables
  • Fresh spinach (8 oz)
  • Onion (1 small, diced)
🧀
Cheese Filling
  • Feta cheese (crumbled)
  • Ricotta or cream cheese
🫙
Finishing
  • Egg (for wash)
  • Olive oil
  • Salt, black pepper
  • Sesame seeds (optional)

Ingredient Details

  • Puff Pastry
    Keep cold until just before filling-warm dough tears and won't puff properly
  • Fresh Spinach
    Sauté until wilted, then press in colander for 5 minutes to remove excess water
  • Feta Cheese
    Use block feta and crumble yourself-pre-crumbled contains anti-caking agents that dry out filling
  • Ricotta
    Whole milk ricotta creates creamier filling than part-skim varieties
  • Egg Wash
    Beat with 1 tablespoon water for easier brushing and better shine
  • Onion
    Dice small and sauté until translucent to add sweetness without crunch
  • Olive Oil
    Use for sautéing spinach-adds Mediterranean flavor that butter doesn't provide

Ingredient Swaps

Puff pastry works best for beginners, but phyllo creates thinner, crispier layers if you want traditional texture. For homemade beef recipe nights when you're already cooking Mediterranean sides, the same cheese filling adapts to different pastry types.

Four swaps that work:

  • Phyllo dough instead of puff pastry - Creates thinner, crispier layers with more traditional texture (brush each sheet with melted butter)
  • Frozen spinach instead of fresh - Use 10 oz frozen, thawed, and squeeze completely dry in cheesecloth (no sautéing needed)
  • Cream cheese instead of ricotta - Creates denser, tangier filling that holds shape better during folding
  • Dairy-free feta instead of regular - Less tangy with slightly different crumble texture but seals and cooks the same way

Puff Pastry

Works for: Beginners who want flaky, buttery layers without layering multiple sheets

Skip if: You want ultra-crispy, thin traditional bourekas with more crunch

Phyllo Dough

Works for: Traditional texture with thinner, crispier layers and authentic appearance

Skip if: You're short on time-phyllo requires brushing each layer with butter

Instructions

Total active time runs about 25 minutes from mixing filling to pulling finished bourekas from the air fryer. For quick chicken dish menus where you need appetizers ready fast, these air fry while you finish the main.

  1. Sauté the filling. Heat 2 tablespoons olive oil in a sauté pan over medium heat, add diced onion, cook 3 minutes until translucent. Add fresh spinach, stir until wilted (2-3 minutes), transfer to colander. Press spinach firmly for 5 minutes to remove moisture, then chop roughly.

  2. Mix the cheese filling. Combine pressed spinach, crumbled feta, ricotta, salt, and black pepper in a mixing bowl. Mix until evenly distributed but feta still has visible chunks. Taste and adjust salt-feta adds plenty of salt already.

  3. Fill and fold the pastry. Cut cold puff pastry into 4-inch squares. Place 2 tablespoons filling in center of each square, leaving ½-inch border. Fold into triangle, press edges firmly with fork tines to seal completely. Repeat with remaining squares.

  4. Egg wash and air fry. Beat egg with 1 tablespoon water. Brush egg wash on all exposed pastry surfaces. Sprinkle with sesame seeds if using. Place bourekas 2 cm apart in preheated air fryer basket at 350°F. Air fry 10-12 minutes until golden brown and puffed.

  5. Cool before serving. Remove bourekas to cooling rack. Let rest 5 minutes so filling sets and cheese stops bubbling. Serve warm-reheating later won't achieve the same crisp texture as fresh from the air fryer.

Watch Out
Don't skip the 5-minute spinach draining step-wet filling leaks during air frying and burns on the basket

What to Serve With It

Bourekas work as appetizers before Mediterranean mains or as part of a mezze spread with dips and salads. For weeknight chicken dinner ideas when you need sides that balance rich proteins, these add crispy, cheesy contrast without competing for attention.

Side Dish Prep Why It Works How to Serve
Greek Salad Easy Fresh cucumbers, tomatoes, and olives cut through rich cheese filling Toss right before serving to keep vegetables crisp
Tzatziki Sauce Easy Cool, minty yogurt dip balances salty feta and provides moisture Serve in small bowls for dipping warm bourekas
Roasted Cherry Tomatoes Easy Bursts of acid and sweetness contrast creamy cheese Roast at 400°F for 15 minutes, drizzle with olive oil
Hummus Platter Easy Adds protein and another dip option for guests who want variety Arrange with olives, pita, and vegetables on large plate
Lemon Wedges Easy Fresh citrus brightens rich, cheesy pastry and cuts fat Cut into wedges, serve alongside for squeezing over hot bourekas

Three ways to serve it:

  • Appetizer spread: Arrange bourekas on platter with tzatziki, hummus, olives, and fresh vegetables for casual entertaining
  • Light lunch: Serve 3-4 bourekas per person with Greek salad and lemon wedges for complete meal
  • Mezze night: Include bourekas alongside stuffed grape leaves, baba ganoush, and warm pita bread
Shortcut
Buy pre-made tzatziki and hummus from the deli section-focus your time on the bourekas instead

Store and Reheat

Bourekas store well in the fridge for 3-4 days but lose crispness. For a flaky shrimp on the side meal planning weeks when you batch-cook appetizers, freeze unbaked bourekas on a sheet pan before transferring to freezer bags.

Method Time Best For
🔥 Air Fryer 5-7 min at 350°F Restoring crispness to refrigerated bourekas
🔥 Oven 8-10 min at 350°F Reheating multiple bourekas at once without drying out
📦 Microwave 30-45 seconds Fast reheating when you don't care about crispy texture

For best results when storing:

  • Cool completely before storing - Warm bourekas create condensation that makes pastry soggy when refrigerated
  • Layer with parchment paper - Prevents bourekas from sticking together and tearing when separating
  • Freeze unbaked for best texture - Air fry frozen bourekas at 350°F for 15-18 minutes without thawing
  • Skip the microwave for reheating - Creates chewy, soft pastry instead of crisp golden exterior
  • Reheat in single layer - Overlapping bourekas steam instead of crisp when reheating in air fryer

Frequently Asked Questions

How long to cook air fryer spinach and cheese bourekas at 350°F?

Air fry bourekas at 350°F for 10-12 minutes until golden brown and puffed. Check at 10 minutes-if edges are pale, continue cooking for 2 more minutes until pastry reaches deep golden color.

Can I make air fryer spinach and cheese bourekas ahead and freeze them?

Freeze unbaked bourekas on a sheet pan for 2 hours, then transfer to freezer bags for up to 2 months. Air fry frozen at 350°F for 15-18 minutes without thawing-they come out crispier than refrigerated and reheated versions.

What goes well as sides or dips with spinach and cheese bourekas?

Serve bourekas with tzatziki sauce, hummus, or lemon garlic aioli for dipping. Add Greek salad, roasted cherry tomatoes, or stuffed grape leaves to complete a Mediterranean appetizer spread.

How do I know when the bourekas are fully cooked and crisp?

Look for deep golden-brown color on all surfaces and visible puffing of pastry layers. The edges should feel firm and crisp when touched-if they're still pale or soft, continue air frying for 2 more minutes.

Can I use frozen spinach instead of fresh in bourekas?

Use 10 oz frozen spinach, thawed completely and squeezed dry in cheesecloth. Skip the sautéing step-frozen spinach is already cooked and just needs thorough draining to prevent soggy filling.

Air Fryer Spinach and Cheese Bourekas served on a plate

Air Fryer Spinach and Cheese Bourekas

No ratings yet
These air fryer spinach and cheese bourekas offer crispy golden puff pastry with a tender, flavorful filling. The key to success is thoroughly draining the sautéed spinach to prevent soggy pastry and sealing the edges before brushing with egg wash. Air frying at 350°F crisps the bourekas in just 10-12 minutes without burning the edges.
Print Recipe Pin Recipe
Prep Time 15 minutes mins
Cook Time 12 minutes mins
Total Time 27 minutes mins
Servings: 6 bourekas
Course: Appetizer
Cuisine: Mediterranean
Ingredients Equipment Method Notes

Ingredients
  

  • 2 tablespoons olive oil for sautéing spinach and onion
  • 1 small onion diced
  • 8 oz fresh spinach sautéed and well drained
  • 4 oz feta cheese crumbled
  • 4 oz ricotta cheese or cream cheese
  • 1 package puff pastry sheets thawed and kept cold
  • 1 large egg beaten with 1 tablespoon water for egg wash
  • to taste salt adjust after mixing filling
  • to taste black pepper adjust after mixing filling
  • optional sesame seeds for sprinkling on top

Equipment

  • Sauté pan Used for cooking spinach and onion filling
  • Colander Used to drain sautéed spinach thoroughly
  • Air fryer Used to crisp the bourekas at 350°F
  • Mixing bowl To mix the cheese and spinach filling
  • Fork To seal pastry edges
  • Pastry brush To apply egg wash

Method
 

  1. Heat olive oil in a sauté pan over medium heat. Add diced onion and cook 3 minutes until translucent. Add fresh spinach and stir until wilted, about 2-3 minutes. Transfer spinach to a colander and press firmly for 5 minutes to remove moisture, then chop roughly.
    2 tablespoons olive oil, 1 small onion, 8 oz fresh spinach
  2. In a mixing bowl, combine the pressed spinach, crumbled feta, ricotta, salt, and black pepper. Mix until evenly distributed but with visible feta chunks. Taste and adjust salt as needed.
    8 oz fresh spinach, 4 oz feta cheese, 4 oz ricotta cheese, to taste salt, to taste black pepper
  3. Cut cold puff pastry into 4-inch squares. Place 2 tablespoons of filling in the center of each square, leaving a ½-inch border. Fold the pastry into a triangle and press edges firmly with fork tines to seal completely. Repeat with remaining squares.
    1 package puff pastry sheets
  4. Beat egg with 1 tablespoon water. Brush egg wash on all exposed surfaces of the bourekas. Sprinkle with sesame seeds if using. Place bourekas 2 cm apart in a preheated air fryer basket at 350°F. Air fry for 10-12 minutes until golden brown and puffed.
    1 large egg, optional sesame seeds
  5. Remove bourekas to a cooling rack and let rest for 5 minutes so the filling sets and cheese stops bubbling. Serve warm for best texture.

Notes

  • Press sautéed spinach in a colander for 5 minutes to remove excess moisture and prevent soggy pastry.
  • Keep puff pastry cold until just before filling to avoid tearing and ensure puffiness.
  • Seal edges firmly with fork tines before applying egg wash to prevent filling leaks during air frying.

Tried this recipe?

Let us know how it was!

What Is Gochugaru? [Taste, Uses & More]

March 30, 2026

Gochugaru does one job no other chili product quite replicates: it delivers heat, color, and a faint smokiness all at once without overwhelming what it seasons.

What Is Gochugaru

Understanding what makes kimchi distinct starts here, because this single ingredient anchors that ferment's flavor from first mix to final bite.
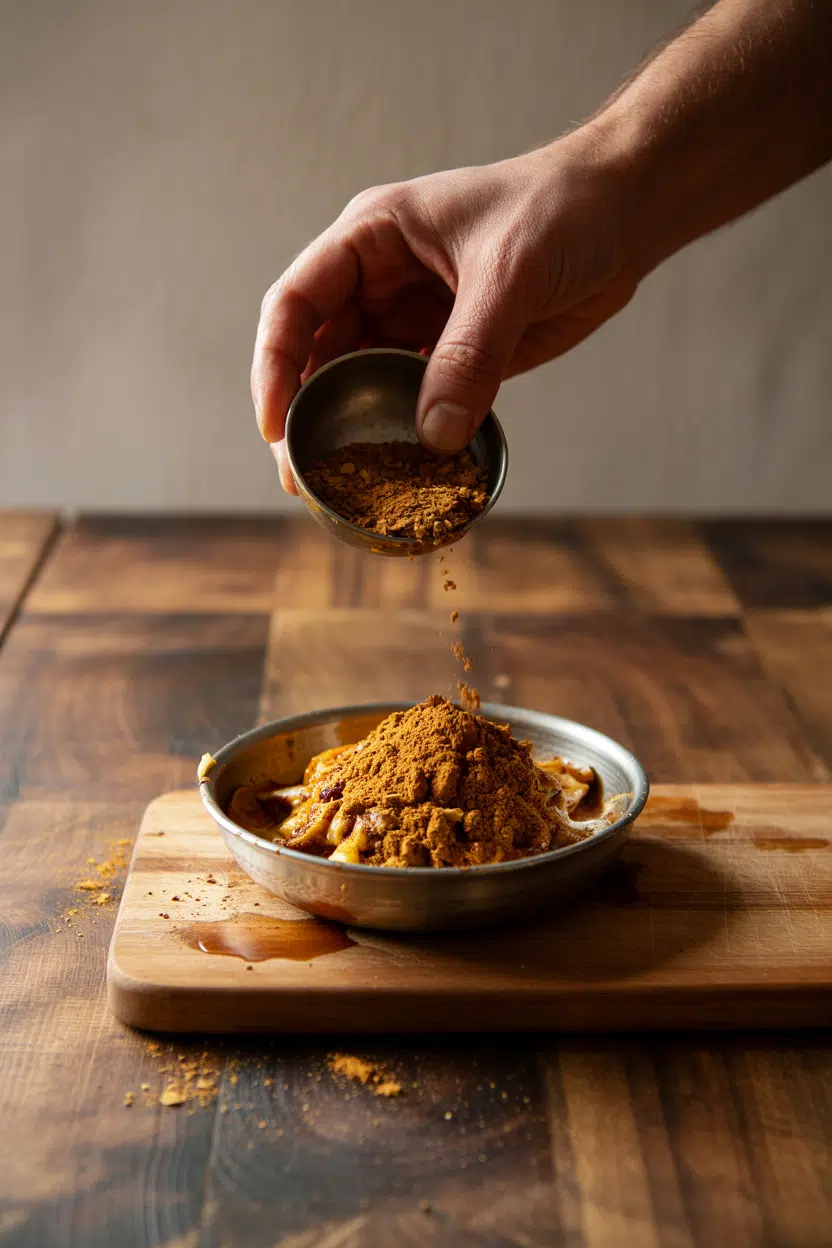
Most cooks reach for replacements for chili powder when their pantry runs short, not realizing gochugaru is its own category entirely.

QUICK SUMMARY

Gochugaru is coarsely crushed Korean red chili pepper flakes with mild-to-moderate heat, fruity sweetness, and a light smokiness. It's the backbone of kimchi, stews, and marinades - irreplaceable in Korean cooking for its texture and color as much as its heat.

🌶️Flavor: Fruity, mildly smoky, gently hot with a lingering warmth
🍽️Best Uses: Kimchi paste, stews, dry rubs, marinades, finishing spice
🛒Buying Tip: Choose bright brick-red flakes; faded color signals staleness
📦Shelf Life: 6-12 months unopened; up to 18 months refrigerated
🌡️Intensity: Moderate - milder than cayenne, warmer than smoked paprika

What Is gochugaru?

Gochugaru comes from the Korean Peninsula, where sun-dried red chili peppers are seeded and coarsely ground into irregular, rust-red flakes.

The name roughly translates to "red pepper powder," though "flakes" is more accurate - the texture is nothing like a fine powder.

You may also see it spelled kochukaru or labeled "Korean red pepper flakes" on import packaging. Both names point to the same product, so don't get tripped up by the variation.

It comes in two grinds worth knowing about:

  • 🔴 Coarse grind - the standard for kimchi; large flakes hold their texture in fermentation and give pastes visible body
  • 🔴 Fine grind - used in soups, sauces, and marinades where a smoother consistency matters

Gochugaru is distinct from generic chili flakes (which include seeds and have sharper heat) and from gochujang (a fermented paste that already contains salt, sugar, and fermented soy). These are not interchangeable, even though they share the same chili base.

What Does gochugaru Taste Like?

gochugaru - What Is Gochugaru

The closest comparison is a milder, fruitier cayenne blended with smoked paprika - but that description only gets you partway there. Gochugaru's heat is slow, building at the back of the throat rather than hitting the front of the palate immediately.

Sensory SnapshotModerate Intensity
👅 Flavor
fruitymildly smokynuttygently sweet
✋ Texture
coarseflaky
👃 Aroma
bright red pepperlightly smokyfresh

That fruity sweetness comes from the pepper variety itself - Korean chilis are selectively bred for lower capsaicin and higher sugar content than most Western chili cultivars. Toasting gochugaru briefly in a dry pan deepens the nutty and smoky notes considerably, shifting the flavor closer to a roasted pepper profile.

Heat from gochugaru lingers rather than spikes. That warmth is what makes it work in fermented applications like kimchi, where the chili flavor mellows and integrates over weeks.

How to Use gochugaru

Gochugaru works at every stage of cooking - raw in cold pastes, simmered into hot broths, and scattered as a finishing spice. Its coarse texture means it suspends well in wet mixtures without turning pastes gummy or thin.

In Korean cooking, it's the foundation. The kimchi seasoning paste wouldn't function without it, and for good reason: gochugaru supplies heat, red pigment, and enough body to coat vegetables evenly.

If you're making kimchi jjigae kimchi stew at home, gochugaru is what gives the broth its characteristic red color and depth - gochujang alone won't replace it.

Golden Rule
For kimchi and fermented pastes, always use coarse-grind gochugaru. Fine grind dissolves into the brine and loses its structural role in the ferment.

It pairs tightly with garlic, ginger, sesame oil, scallions, and fish sauce - the core flavor architecture of Korean cooking.

It also works alongside doenjang (Korean fermented soybean paste); if you're ever short on that ingredient, guidance on swapping out doenjang can help you rebuild the flavor profile.

Outside Korean cooking, gochugaru holds up well in dry rubs for pork belly or chicken thighs, stirred into vinaigrettes, or used in marinades where you want warm color and moderate heat.

However, keep it away from delicate white fish or dishes built around subtle floral flavors - the pigment and heat will dominate.

How Gochugaru Is Used
MethodBest ForTip
🥗 Raw in pasteKimchi, dipping sauces, cold marinadesUse coarse grind; mix with sesame oil first to bloom color
🍲 SimmeredStews, broths, kimchi jjigaeAdd early for deep color; fine grind integrates faster
🔥 Dry rubPork belly, chicken, grilled meatsCombine with salt and garlic powder; press firmly into meat
✨ FinishingRoasted vegetables, noodle bowls, eggsAdd after cooking to preserve bright color and fresh aroma
Try It In
🍗Air Fryer Garlic Parmesan Chicken TendersAdd gochugaru to the seasoning mix for a gentle heat layer→🍯Air Fryer Honey Garlic Chicken TendersSweet-savory base pairs well with gochugaru's fruity heat→🔥Crispy Honey Garlic Chicken WingsGochugaru in the dry rub adds color and warmth before saucing→

How to Buy and Store gochugaru

Look for bright, brick-red flakes with visible irregularity - consistent fine powder is a sign of poor quality or wrong product. The color tells you everything: faded orange-brown flakes have lost their pigment and flavor both.

Watch Out
Avoid packages with visible dust settling at the bottom - that fine sediment means the flakes have degraded. An off or musty smell on opening is a firm sign to discard and replace.

Packaging labeled "Korean gochugaru" with a country of origin listed is more reliable than generic "Korean chili flakes," which may blend in other chili varieties.

For keeping gochugaru fresh beyond a few months, the refrigerator is your best option - cold storage slows color fade and oil degradation noticeably.

  • 🧊 Pantry storage - airtight container, away from light and heat; best within 3-6 months once opened
  • ❄️ Refrigerator storage - extends opened shelf life to 12-18 months with minimal quality loss
  • 📦 Unopened - good for 6-12 months at room temperature in a cool, dark spot

Where to Start With gochugaru

New to it? Buy the coarse grind first. It's the more forgiving format - it works in pastes, rubs, and as a finisher without any adjustment.

If you find yourself short mid-recipe, options for swapping out gochugaru exist, though none replicate the exact color-heat-smoke combination.

For dishes built around fermented ingredients, knowing your alternatives to chili paste and options for swapping out kimchi gives you a more complete picture of where gochugaru fits in the larger Korean pantry.

Start with kimchi seasoning paste or a simple pork belly rub. From there, its role in broths and marinades becomes obvious quickly.

Frequently Asked Questions

Is gochugaru spicy?

Mildly to moderately so. Heat builds slowly at the back of the throat rather than hitting upfront - most people with average spice tolerance handle it comfortably. It rates well below cayenne on most heat scales.

Can I substitute cayenne for gochugaru?

Not directly - cayenne is significantly hotter, finer, and has none of gochugaru's fruity sweetness. Use roughly one-quarter the amount and combine with smoked paprika to approximate both heat level and color.

What is the difference between gochugaru and chili flakes?

Standard chili flakes include seeds and skins from mixed chili varieties, producing sharper, more aggressive heat. Gochugaru is seeded before grinding, which removes much of the capsaicin and leaves a sweeter, fruitier result.

Does gochugaru contain seeds?

No - properly processed gochugaru is seeded before drying and grinding. That seeding step is key to its milder heat, since most capsaicin in chili peppers concentrates in the membrane and seeds.

Can I use gochugaru in non-Korean dishes?

Yes, and it works well anywhere smoked paprika or mild chili flakes would go. It performs reliably in roasted vegetables, vinaigrettes, egg dishes, and spice rubs without requiring any other Korean ingredients alongside it.

What Is Kabocha Squash? [Taste, Uses & More]

March 30, 2026

Kabocha squash earns its place in the kitchen through sheer substance - dense, starchy flesh that cooks down to a creamy, almost custard-like texture while its natural sugars caramelize into something deeply nutty and sweet.

What Is Kabocha Squash

It does what alternatives to acorn squash and sweet potato stand-ins only approximate: it holds structure through long braises, soaks up bold seasonings without disappearing, and brings a richness that lighter squash varieties can't match.

QUICK SUMMARY

Kabocha is a Japanese winter squash with dark green knobbly skin and bright orange flesh. It tastes sweet and nutty - closer to chestnut than most squash - with a dry, dense starch that becomes creamy when cooked. Use it roasted, simmered, pureed, or fried.

🌏Origin: Japan; widely used across East and Southeast Asia
👅Flavor: Sweet, nutty, earthy - brown sugar meets chestnut
✋Texture: Dense raw; creamy, smooth, and dry when cooked
🍳Best Uses: Roasting, nimono, soups, tempura, curries
🛒Buy It: Hard dark-green rind, dry corky stem, hollow tap sound
📅Shelf Life: Whole: 3-6 weeks; Cut: 3-5 days refrigerated; Cooked: 3-4 days

What Is Kabocha Squash?

Kabocha is a winter squash native to Japan, though its roots trace back to Central America - Portuguese traders introduced it to Japan in the 16th century, where it was refined into what we know today.

Also called Japanese pumpkin, it belongs to the Cucurbita maxima species alongside other large, dense squash varieties.

The exterior is dark green, hard, and knobbly - sometimes streaked with pale green or grayish patches. Inside, the flesh is a vivid deep orange, significantly drier and denser than butternut squash.

It's a compact squash, typically weighing between two and four pounds.

You'll also see it labeled kuri kabocha or simply "kaboccha" in Japanese markets. There are green-rind varieties, which are most common, and red-skinned cultivars that appear occasionally in specialty stores.

All share that same hallmark: starchy, firm flesh that collapses into a smooth, thick puree when heat is applied.

What Does Kabocha Squash Taste Like?

kabocha squash - What Is Kabocha Squash

Kabocha tastes sweet in a way that feels roasted even before it hits the oven. The natural sugars lean toward brown sugar and caramel rather than the fresh, mild sweetness of butternut.

Underneath that sweetness sits a nutty, chestnut-like depth with a subtle earthy umami note that keeps it from tasting one-dimensional.

Sensory SnapshotModerate Intensity
👅 Flavor
brown sugar sweetchestnut-nuttyearthy umami
✋ Texture
creamydry-starchy
👃 Aroma
toasty sweetlightly vegetal

Compared to sweet potato's flavor and uses, kabocha is nuttier and drier with less residual moisture - it won't weep liquid into a filling or soup.

Heat intensifies everything: roasted kabocha develops caramelized edges with a toasty aroma that raw squash only hints at.

The profile of the taste of pumpkin overlaps loosely, however kabocha is notably richer and less watery in both taste and texture.

How to Use Kabocha Squash

Kabocha's dry, dense flesh makes it one of the few squash types that holds its shape through long cooking - an important quality in stews and braises where waterlogged squash turns to mush.

Start by halving it and scooping the seeds; a sharp, heavy knife is essential since the rind is very hard.

Golden Rule
Always soften the whole squash in the microwave for 2-3 minutes before cutting - it significantly reduces the effort needed to break through that hard green rind.
How Kabocha Squash Is Used
MethodBest ForTip
🔥 RoastingWedges, side dishes, grain bowlsHigh heat (425°F) caramelizes sugars; season with soy and sesame
🍲 SimmeringNimono, curries, stewsUse mirin and soy broth; add late so it absorbs flavor without dissolving
♨️ SteamingPurees, soups, fillingsRetains color and shape better than boiling; great base for potage
🍤 TempuraAppetizers, Japanese menusThin slices fry fast; sweet flesh contrasts well with light batter
🥧 BakingTarts, pies, mashed fillingsMashed kabocha is drier than pumpkin - less likely to make soggy pastry

Pairing kabocha with soy sauce, mirin, and ginger is the Japanese baseline - it's the foundation of nimono, a simmered dish where the squash absorbs a savory-sweet broth. Miso and brown butter both amplify the nutty undertones. Coconut milk with curry spices is a natural Southeast Asian direction; the richness of the milk balances kabocha's dense starch without overwhelming it.

For cooks outside those traditions, roasted kabocha works well with brown butter and sage, maple glaze, or simply roasted garlic and thyme. It fits naturally into grain bowls and risotto where its sweetness creates contrast.

If you're short on kabocha, swapping out kabocha squash with butternut or sweet potato is possible, though neither replicates its dry, nutty texture exactly.

Try It In
🎃Stuffed Acorn SquashSame dense-squash technique; swap in kabocha for a nuttier result→🍵Butternut Squash SoupKabocha's drier flesh makes an even thicker, richer pureed soup→🐟Salmon and Squash RecipesRoasted kabocha holds its own against bold, fatty fish→

How to Buy and Store Kabocha Squash

Pick up a kabocha and look for a hard, unblemished rind in deep green - soft patches or a wet stem are signs of overripeness. Tap it: a hollow sound suggests the flesh inside is properly dry and ripe.

The stem should feel corky and dry, not damp.

Watch Out
A cracked rind or wet, dark stem means the squash has likely started to rot internally. Don't buy it regardless of how the rest looks.

Whole kabocha stores exceptionally well.

Keep it in a cool, dry spot away from direct sunlight - a pantry shelf or basement works.

Once cut, wrap tightly in plastic or store in an airtight container in the fridge.

For full guidance on keeping kabocha squash fresh through each stage, storage conditions matter more than most people realize.

Cooked kabocha keeps for 3-4 days refrigerated.

Where to Start with Kabocha

If this is your first kabocha, roast it. Cut into wedges, toss with oil, soy sauce, and a pinch of sesame, and roast at high heat until the edges caramelize.

That single preparation shows you everything the squash does well.

From there, butternut squash stand-ins can help you understand what makes kabocha distinct - its drier starch and nuttier finish are apparent the moment you put the two side by side.

Cooks who enjoy sweet potato in savory dishes will find kabocha a natural next step.

It rewards seasoning, handles heat confidently, and keeps its shape when other squash falls apart.

Frequently Asked Questions

Is kabocha the same as pumpkin?

No. Both are winter squash, however kabocha is a different species (*Cucurbita maxima*) from most pie pumpkins (*Cucurbita pepo*). Kabocha is significantly drier, nuttier, and denser than common pumpkin flesh.

Can you eat kabocha skin?

Yes - the skin softens fully when cooked and is edible. Roasted kabocha skin turns slightly crisp at the edges and has a mild, earthy flavor that most people find pleasant rather than tough.

What does kabocha taste like compared to butternut?

Kabocha is nuttier, drier, and sweeter than butternut squash. Butternut has a milder, more watery sweetness; kabocha delivers a chestnut-like depth with less moisture in the finished flesh.

How long does kabocha last?

A whole, unblemished kabocha lasts 3-6 weeks at cool room temperature. Once cut, refrigerate it in an airtight container and use within 3-5 days.

Do you need to peel kabocha before cooking?

Not always. For roasting and simmering, the skin softens and is edible - peeling is optional. For smooth soups or pureed fillings, peeling after steaming or roasting is easier and gives a cleaner result.

Sardine and Tomato Salad

March 30, 2026

Flaky sardines with juicy tomatoes and a sharp lemon dressing. That's what happens when you layer fresh fish with ripe produce and let the olive oil pull everything together.

Sardine and Tomato Salad served on a plate

The fish cooks in under two minutes per side. You get tender sardines that stay moist while the tomatoes add acidity that cuts through the richness.

This works for light summer meals when you want protein without turning on the oven. Most people skip this seafood, but it balances the meal. For a version that comes together quickly, a flaky sauce side dish adds another layer without extra effort.

QUICK SUMMARY

Sardine and tomato salad combines pan-seared sardines with ripe tomatoes, red onion, and fresh herbs in a lemon-olive oil dressing. The key is cooking the sardines briefly at medium heat so they stay flaky instead of dry, then dressing the salad right before serving to keep everything crisp.

⏱️Time Reality: 15 minutes total-10 minutes prep, 5-7 minutes cooking
🔥Critical Move: Heat skillet 2 minutes, cook sardines 1.5 minutes per side at medium
⚠️Watch Out: Dressing too early causes soggy tomatoes-dress 10 minutes before serving max

Table of Contents

Toggle
  • Why This Recipe Works
  • What You'll Need
    • Ingredient Details
  • Ingredient Swaps
  • What to Serve With It
  • Store and Reheat
  • Frequently Asked Questions
  • Sardine and Tomato Salad
    • Method 
    • Tried this recipe?

Why This Recipe Works

Pan-searing sardines at medium heat creates flaky fish without the dryness that comes from high-heat cooking. A good salad can make or break the plate. For a version that comes together quickly, this simple salad adds Mediterranean flavors without complicated technique.

Quick Reference
⏱️
Prep Time
10 min
🔥
Cook Time
5-7 min
⏰
Total Time
15-17 min
🍽️
Servings
2-3 servings
📊
Difficulty
Easy
🏷️
Category
Appetizer | Light Lunch
💡
Quick Tip
Use ripe tomatoes and fresh lemon juice
🎯
Best For
Weeknight | Budget

What makes this work:

  • Medium heat prevents overcooking: Sardines cook through in 3 minutes total without drying out or turning tough
  • Ripe tomatoes add natural acidity: The juice balances the oily richness of the fish without extra vinegar
  • Cold water soak tames onions: Seven minutes in ice water removes the harsh bite while keeping the crunch
  • Fresh herbs at the end: Adding parsley or basil last preserves the bright aroma that wilts under heat
  • Lemon juice right before serving: Citrus brightens all the flavors and keeps the salad from tasting flat
Quick Tip
Season sardines after cooking, then again when assembling the salad-salt layered at different stages builds deeper flavor than one heavy dose at the end.

What You'll Need

Ingredients for Sardine and Tomato Salad

Ripe tomatoes and fresh sardines form the base, with lemon juice cutting through the richness. Salad cuts through all that richness. For a version that comes together quickly, this easy salad recipe uses pantry staples you probably have on hand.

🦐
Protein
  • Fresh sardines (or canned sardines in olive oil)
🥬
Vegetables
  • Ripe tomatoes (heirloom or Roma)
  • Red onion
🧄
Aromatics & Herbs
  • Fresh parsley, basil, or cilantro
  • Lemon juice
🥢
Dressing
  • Extra virgin olive oil
  • Salt
  • Black pepper
  • Optional: capers

Ingredient Details

  • Fresh sardines
    Look for firm flesh with clear eyes-avoid any fishy smell; canned sardines in olive oil work as a time-saving substitute
  • Ripe tomatoes
    Use heirloom for sweetness or Roma for less juice-slice into ½-inch wedges for consistent bite size
  • Red onion
    Slice thin and soak in ice water for 7 minutes to remove sharpness while keeping the crunch
  • Lemon juice
    Fresh-squeezed adds brightness that bottled juice can't match-use 2 tablespoons for balanced acidity
  • Extra virgin olive oil
    Measure precisely at 2 tablespoons-more creates an oily salad, less leaves it dry
  • Fresh herbs
    Chop parsley or basil finely and add in the last minute for maximum aroma-dried herbs taste flat in this dish
  • Capers
    Optional but adds briny notes that complement sardines-rinse before using to reduce saltiness

Ingredient Swaps

Canned sardines cut prep time when fresh fish isn't available. Salad adds the contrast this plate needs, but timing matters. For a version that comes together quickly, a simple salad side dish works without extra shopping.

Four swaps that work:

  • Fresh sardines → canned sardines in olive oil: Skip the cooking step entirely-drain and flake the canned fish directly into the salad for lighter texture and faster assembly
  • Red onion → shallots or green onions: Use when you want milder onion flavor without the sharp bite-no soaking required but you lose some crunch
  • Lemon juice → white wine vinegar or red wine vinegar: Switch when you're out of lemons-use slightly less (1.5 tablespoons) since vinegar has sharper acidity
  • Fresh herbs → dried Italian seasoning: Use ½ teaspoon maximum when fresh herbs aren't available-any more overpowers the delicate fish

Fresh Sardines

Works for: Flaky texture, control over doneness, maximum freshness

Skip if: Short on time, uncomfortable handling raw fish, limited to canned options

Canned Sardines

Works for: Quick assembly, consistent quality, no cooking needed

Skip if: Want firmer texture, prefer less oily flavor, need specific seasoning control

Instructions

The salad takes 15 minutes from start to finish if you prep while the skillet heats. Rich mains need something to cut through, and this seafood does exactly that. For a version that comes together quickly, this quick pork dish pairs well with light Mediterranean flavors.

  1. Heat the skillet and soak the onion: Place a non-stick or cast iron pan over medium heat for 2 minutes while you slice the red onion thin and soak it in ice water for 7 minutes-this removes the harsh bite without losing crunch.

  2. Cook the sardines: Pat fresh sardines dry with paper towels, season with salt, then cook 1.5 minutes per side until the flesh turns opaque and flakes easily when pressed gently with a fork-don't flip more than once or they'll fall apart.

  3. Prep the tomatoes and herbs: While sardines cook, cut tomatoes into ½-inch wedges and chop fresh parsley or basil finely-keep herbs separate until the last step so they stay bright.

  4. Assemble the salad: Drain the onion slices, then layer tomatoes and onions in a shallow bowl-flake the cooked sardines on top, drizzle with 2 tablespoons olive oil and 2 tablespoons lemon juice.

  5. Season and serve: Add chopped herbs, season with salt and black pepper, toss gently once to coat everything without breaking up the sardines-serve within 10 minutes before the tomatoes release too much juice.

Golden Rule
Never dress the salad more than 10 minutes before serving-the lemon juice and salt draw water from the tomatoes, creating a watery pool that dilutes all the flavors.

What to Serve With It

Light salads like this need something to fill out the plate without competing with the delicate fish. Potatoes adds the contrast this plate needs, but timing matters. For a version that comes together quickly, this quick potatoes dish rounds out the meal with minimal effort.

Side Dish Prep Why It Works How to Serve
Crusty bread Easy Absorbs the lemon-olive oil dressing and adds substance without competing flavors Slice and toast lightly, serve warm on the side for dipping
Simple green salad Easy Adds crunch and freshness without overwhelming the sardines Toss mixed greens with light vinaigrette, serve alongside
Steamed green beans Easy Provides a mild vegetable complement that doesn't clash with lemon Steam 5 minutes until crisp-tender, season with salt only
Cooked quinoa Medium Adds fiber and healthy carbs to make the meal more filling Cook according to package, serve at room temperature
Grilled polenta slices Medium Offers smoky flavor and sturdy base for the juicy salad Slice pre-made polenta, grill 3 minutes per side until golden

Three ways to serve it:

  • As a light lunch: Serve with crusty bread and a simple green salad for a complete Mediterranean-style meal that takes 20 minutes total
  • For weeknight dinner: Add cooked quinoa or grilled polenta to make the plate more substantial without heavy proteins
  • As an appetizer: Portion into smaller servings on individual plates with toasted crostini for casual entertaining
Best Pick
Crusty bread is the easiest side that actually improves the dish-it soaks up the flavorful dressing that pools at the bottom and turns every bite more satisfying.

Store and Reheat

This salad keeps for 3-4 days but tastes best within 24 hours when the tomatoes stay firm. Store components separately if you're meal prepping-keep cooked sardines, sliced vegetables, and dressing in individual containers to assemble fresh portions throughout the week.

Method Time Best For
🍳 Stovetop 2-3 min on low heat Warming sardines without drying-heat gently and remove from pan immediately
📦 Microwave 30-45 seconds on medium Quick warming of small portions-risk of dryness if overheated
🔥 Oven 5 min at 300°F Gentle warming that preserves texture-wrap in foil to prevent moisture loss

For best results when storing:

  • Use shallow containers: Store in a wide, flat container instead of a deep bowl so the salad doesn't compress and release excess liquid from the tomatoes
  • Keep dressing separate: Mix lemon juice and olive oil in a small jar, add only when ready to eat so the salad stays crisp
  • Drain before storing: If you dressed the salad and have leftovers, drain any pooled liquid at the bottom before refrigerating to prevent soggy vegetables
  • Reheat sardines only: Warm the fish separately and add to room-temperature vegetables for better texture than reheating everything together
  • Refresh with lemon: Day-old salad benefits from a squeeze of fresh lemon juice and a pinch of salt to brighten flavors that dull in the fridge

Frequently Asked Questions

Can I use canned sardines instead of fresh in this salad?

Yes, canned sardines in olive oil work well and cut prep time significantly. Drain them, flake gently into the salad, and skip the cooking step entirely-the texture will be slightly softer but the flavor remains authentic.

How long can sardine and tomato salad be stored in the fridge?

Store in an airtight container for 3-4 days maximum. The salad tastes best within 24 hours-after that, tomatoes become softer and release more liquid, diluting the dressing.

What indicates sardines are cooked properly for the salad?

Cooked sardines turn opaque throughout and flake easily when pressed gently with a fork. They should take 1.5 minutes per side at medium heat-any longer and they dry out.

Why does my sardine salad taste bland and how to fix it?

Bland salad usually means insufficient salt, lemon juice, or fresh herbs. Add more lemon juice 1 teaspoon at a time, season with salt gradually, and make sure you're using fresh herbs instead of dried-taste after each addition until the flavors brighten.

How can I scale this recipe for more servings?

Double or triple all ingredients proportionally, but cook sardines in batches to avoid overcrowding the pan-too many fish at once lowers the temperature and causes steaming instead of searing. Keep finished sardines warm while you cook the rest.

Sardine and Tomato Salad served on a plate

Sardine and Tomato Salad

No ratings yet
Sardine and tomato salad combines pan-seared sardines with ripe tomatoes, red onion, and fresh herbs in a lemon-olive oil dressing. Cooking sardines briefly at medium heat keeps them flaky and moist, while the fresh produce adds acidity and brightness.
Print Recipe Pin Recipe
Prep Time 10 minutes mins
Cook Time 4 minutes mins
Total Time 14 minutes mins
Servings: 3 servings
Course: Appetizer, Light Lunch
Cuisine: Mediterranean
Ingredients Equipment Method Notes

Ingredients
  

  • 6 pieces fresh sardines patted dry and seasoned with salt before cooking
  • 2 ripe tomatoes sliced into ½-inch wedges
  • 0.5 cup red onion sliced thin and soaked in ice water for 7 minutes
  • 2 tablespoon extra virgin olive oil for dressing
  • 2 tablespoon lemon juice freshly squeezed, added before serving
  • 2 tablespoon fresh parsley or basil chopped finely, added last
  • to taste salt season sardines after cooking and salad before serving
  • to taste black pepper season salad before serving
  • 1 tablespoon capers optional, rinsed before use

Equipment

  • Non-stick or cast iron skillet Used for pan-searing sardines
  • Bowl For soaking onion in ice water

Method
 

  1. Place a non-stick or cast iron pan over medium heat for 2 minutes while you slice the red onion thin and soak it in ice water for 7 minutes to remove the harsh bite but keep crunch.
    0.5 cup red onion
  2. Pat fresh sardines dry with paper towels, season with salt, then cook 1.5 minutes per side until the flesh turns opaque and flakes easily when pressed gently with a fork. Do not flip more than once to avoid falling apart.
    6 pieces fresh sardines, to taste salt
  3. While sardines cook, cut tomatoes into ½-inch wedges and chop fresh parsley or basil finely. Keep herbs separate until the last step to preserve brightness.
    2 ripe tomatoes, 2 tbsp fresh parsley or basil
  4. Drain the soaked onion slices, then layer tomatoes and onions in a shallow bowl. Flake the cooked sardines on top and drizzle with 2 tablespoons olive oil and 2 tablespoons lemon juice.
    2 ripe tomatoes, 0.5 cup red onion, 6 pieces fresh sardines, 2 tbsp extra virgin olive oil, 2 tbsp lemon juice
  5. Add chopped herbs, season with salt and black pepper, and toss gently once to coat everything without breaking up the sardines. Serve within 10 minutes before tomatoes release too much juice.
    2 tbsp fresh parsley or basil, to taste salt, to taste black pepper

Notes

  • Never dress the salad more than 10 minutes before serving to avoid soggy tomatoes.
  • Season sardines after cooking and again when assembling to build layered flavor.
  • Soak red onions in ice water for 7 minutes to reduce sharpness but retain crunch.

Tried this recipe?

Let us know how it was!

What Is Guar Gum? [Taste, Uses & More]

March 30, 2026

Guar gum does one thing exceptionally well: it thickens and binds without needing heat. A fraction of a teaspoon can transform a watery salad dressing into a pourable, stable emulsion, or give a gluten-free loaf the structure that wheat flour normally provides.

What Is Guar Gum

Unlike tapioca starch or xanthan gum, guar gum activates at cold temperatures, which makes it genuinely useful in ways most other stabilizers aren't. If you've ever wondered why your ice cream stays creamy or your store-bought yogurt doesn't separate, guar gum is often the reason.

QUICK SUMMARY

Guar gum is a seed-derived powder that thickens, stabilizes, and binds foods at very low doses. It's nearly flavorless, works cold, and is a staple in gluten-free baking and frozen dessert production. Use it sparingly - a little goes a long way.

🌿Origin: Ground from guar seed endosperm, primarily grown in India and Pakistan
👅Flavor: Nearly neutral; faint beany note, barely detectable in most recipes
🍦Best Uses: Gluten-free baking, ice cream stabilization, cold sauces, non-dairy yogurts
📦Shelf Life: 2-3 years unopened; 12-18 months once opened if kept dry
✅Diet: Gluten-free, vegan, and used in small enough amounts that caloric impact is negligible

What Is Guar Gum?

Guar gum is a fine, off-white powder milled from the endosperm of the guar seed (Cyamopsis tetragonoloba), a legume crop grown primarily in India and Pakistan.

You may also see it labeled as guaran or guar flour, though food-grade applications typically use the term "guar gum powder."

It belongs to a class of seed-derived thickeners and stabilizers - the same broad family as locust bean gum.

Unlike animal-derived stabilizers such as gelatin, guar gum is fully plant-based and functions through hydration: when the powder contacts liquid, it swells and forms a viscous gel.

One important variant worth knowing is partially hydrolyzed guar gum (PHGG), a processed form where the molecular chains are shortened. PHGG dissolves more easily, produces less viscosity, and functions primarily as a soluble prebiotic fiber rather than a structural thickener.

Standard guar gum and PHGG are not interchangeable in recipes.

  • Guar gum powder - full-strength thickener; used in baking and industrial food production
  • PHGG - lower viscosity; sold as a fiber supplement and used in clinical nutrition
  • Guar flour - a coarser grind with more residual fiber; less common in food applications

What Does Guar Gum Taste Like?

Guar gum is functionally flavorless in most applications. At the low concentrations used in cooking - typically 0.1% to 1% by weight - any inherent flavor is undetectable.

At higher concentrations, a faint powdered-bean quality can emerge, similar to a very mild neutral starch. It's far less noticeable than xanthan gum, which can carry a slight fermented or tangy edge depending on the recipe.

Sensory SnapshotMild Intensity
👅 Flavor
neutralfaintly beanystarchy
✋ Texture
slickviscousmucilaginous at high dose
👃 Aroma
barely perceptiblefaint earth

What guar gum does affect is mouthfeel. A properly hydrated solution feels slick and full-bodied, which is why it works so well in low-fat formulations - it restores the round, coating sensation that fat normally provides.

Heat doesn't intensify its flavor, but high heat combined with aggressive blending can cause the viscosity to break down.

How to Use Guar Gum

Guar gum's most practical advantage over other thickeners is that it hydrates in cold liquid. You don't need to cook it to activate it - whisk or blend it directly into cold sauces, dressings, and smoothie bases.

That cold-activation capability makes it the stabilizer of choice for applications where heat would damage other ingredients or alter texture.

Golden Rule
Always disperse guar gum in dry ingredients or fat before adding liquid. Direct contact with water causes it to clump instantly - dispersion first prevents lumps every time.

In gluten-free baking, guar gum acts as a structural binder, compensating for the missing protein network that gluten provides. Standard usage is around ¼ teaspoon per cup of gluten-free flour for cakes, and up to ½ teaspoon per cup for bread doughs that need more chew.

It's frequently combined with xanthan gum replacements or tapioca starch to balance elasticity and tenderness.

For ice cream and frozen desserts, guar gum is used at concentrations as low as 0.1-0.2% to inhibit ice crystal growth and maintain a smooth scoop after refreezing. Non-dairy yogurts and plant-based milks use it similarly to prevent separation and improve creaminess.

How Guar Gum Is Used
MethodBest ForTip
❄️ Cold BlendDressings, cold sauces, smoothiesWhisk vigorously or blend; guar hydrates with shear
🍞 Dry MixGluten-free breads, cakes, flour blendsBlend into dry ingredients before any liquid contacts it
🍦 Frozen ApplicationIce cream, frozen yogurt, sorbetUse at 0.1-0.2%; combine with locust bean gum for best texture
🥛 Dairy/Non-DairyPlant-based milks, yogurt, creamersAdd during processing; prevents syneresis and improves body

Guar gum is stable in acidic environments - vinegar and citrus don't degrade it - so it works reliably in vinaigrettes and fruit pie fillings.

It's worth noting that overuse produces a distinctly slippery, gel-like texture that most people find unpleasant; start at the low end of any recommended range.

Try It In
🍲Crockpot Chicken and Sausage GumboA thickened stew where stabilizer technique matters→🦐Gumbo Louisiana StyleClassic base where texture and body are everything→🥘Slow Cooker Cajun GumboLow-and-slow cooking where a stabilizer keeps texture consistent→

How to Buy and Store Guar Gum

Look for packaging labeled "food-grade guar gum powder" - not industrial or pharmaceutical grade. The powder should be off-white, fine-textured, and clump-free.

Avoid bags with visible moisture damage or yellowing, which signals degraded quality. If you're buying for fiber intake rather than thickening, choose PHGG (partially hydrolyzed guar gum) specifically, as the label distinction matters.

Watch Out
Humidity is guar gum's enemy. Even brief exposure to moisture causes premature hydration and clumping that can't be reversed. Reseal the container immediately after every use.

Store guar gum in an airtight container in a cool, dry pantry - away from the stovetop, dishwasher, or any steam source. The guar gum storage life runs about 2-3 years unopened and 12-18 months once opened, provided it stays dry.

For context, that's a longer run than most gluten-free flour blends stored under the same conditions. A small bag goes a long way - most home bakers use under a teaspoon per recipe.

Starting With Guar Gum

New to it? Start with gluten-free baking before attempting frozen dessert applications.

The tolerances in baking are more forgiving - a small measurement error won't ruin a loaf the way it might over-gel an ice cream base. Once you're comfortable with how it disperses and how much body it adds, scaling to other uses becomes straightforward.

If you decide it's not the right fit, our guide to guar gum swaps covers the closest alternatives by application type.

Shortcut
Mix guar gum with sugar or another dry ingredient before adding to any liquid. Sugar granules physically separate the powder particles, nearly eliminating clumping.

For most home kitchens, a 4-8 oz bag will last months. Buy small, store airtight, and measure by weight when precision matters.

Frequently Asked Questions

Is guar gum the same as xanthan gum?

No. Guar gum comes from a seed; xanthan gum is produced by bacterial fermentation. Guar performs better in cold applications and costs less, while xanthan holds up better under heat and high-shear mixing. They're often combined for synergistic results.

How much guar gum should I use per cup of liquid?

For a light sauce or dressing, start with ⅛ teaspoon per cup. For a thicker gel or binding in baked goods, use ¼ to ½ teaspoon. Always start at the low end - adding more is easy, fixing an over-gelled mixture is not.

Can you use guar gum in cold sauces?

Yes - cold is actually where guar gum performs best. It hydrates with mechanical shear (whisking or blending) at room or refrigerator temperature, no heat required. This makes it ideal for vinaigrettes, cold dips, and raw sauce applications.

Does guar gum have side effects?

At the trace amounts used in recipes, side effects are unlikely. PHGG taken as a fiber supplement can cause gas or bloating in sensitive individuals, particularly at higher doses. People with legume allergies should check with a doctor before using it regularly.

Can guar gum replace eggs in baking?

Partially. Guar gum can replicate the binding function of eggs but not their leavening, fat content, or emulsification. It works best as an egg substitute in dense baked goods like muffins or quick breads - not in recipes where eggs provide lift or structure through aeration.

What Is Garam Masala? [Taste, Uses & More]

March 30, 2026

Most cooks treat garam masala like a background spice - a pinch tossed in early and forgotten. That's the wrong move. Garam masala is a finishing spice, added in the last few minutes of cooking to deliver its full aromatic punch without burning off.

QUICK SUMMARY

Garam masala is a dry spice blend of toasted whole spices - cardamom, cinnamon, cloves, cumin, coriander, and black pepper - ground to a fine powder. It delivers warm, sweet-spicy, and earthy notes and works best added late in cooking or stirred into finished dishes.

🌶️Flavor: Warm-spicy, sweetly aromatic, mildly earthy with a slight pungent edge
🍳Best Use: Finishing curries, lentil dishes, marinades, and spice rubs
📦Shelf Life: Opened ground blend: 3-6 months; whole-spice blend: up to 24 months

What Is garam masala?

Garam masala translates roughly to "hot spice mixture" in Hindi, though "hot" here refers to warmth rather than chili heat. It originates from the Indian subcontinent, with deep roots in North Indian cooking - particularly Punjabi and Awadhi cuisines - and later Mughlai court cooking.

Unlike a single-note spice, garam masala is a blend. Most versions combine cardamom, cinnamon, cloves, cumin, coriander, and black pepper, with some regional recipes adding mace, bay leaf, or nutmeg.

The ratio shifts dramatically depending on who's grinding it.

That variation matters. A Kashmiri blend leans heavily on cardamom and fennel, producing a sweeter, floral result.

A Punjabi blend tilts toward cumin and pepper, landing earthier and sharper. There's no single canonical recipe, which means two jars labeled "garam masala" can taste noticeably different.

It's sold as a pre-ground powder or as whole-spice blends you grind yourself. The whole-spice version holds aroma far longer.

You may also see it spelled "garam masaala" or labeled as garam masala powder - same product, different packaging conventions.

Golden Rule
Freshly ground garam masala from whole toasted spices will always outperform a pre-ground jar that's been sitting open for months. If your blend smells flat, it's spent.

What Does garam masala Taste Like?

garam masala - What Is Garam Masala

Garam masala tastes closest to a warm cinnamon-pepper blend with savory cumin running underneath. It's aromatic before it's spicy - the first note you get is resinous and sweet from cardamom and cinnamon, followed by a mild, earthy bitterness from cumin and coriander.

Sensory SnapshotModerate Intensity
👅 Flavor
warm-spicysweetly aromaticmildly bitterslightly pungent
✋ Texture
fine dry powdersilky when fresh
👃 Aroma
warm and resinousbright citrusy top notes

Heat changes the blend's behavior. Added early, the volatile aromatics from cardamom and cloves burn off, leaving only the duller base notes of pepper and cumin.

Added late - or stirred into a warm finished sauce - the full spectrum stays intact.

Compared to curry powder, garam masala is more aromatic and less savory. It has no turmeric, which means it contributes no color and very little of that earthy, slightly medicinal note that curry powder carries.

Think of it as the fragrant layer on top, not the foundation.

How to Use garam masala

Garam masala earns its place as a late-stage spice. The standard approach is to add it in the last 3-5 minutes of cooking, or directly over a finished dish just before serving.

This preserves the cardamom's bright citrus lift and the clove's resinous depth.

It also works as a dry rub component or marinade ingredient, especially for tandoori-style chicken or roasted cauliflower. In marinades, it sits against yogurt and acid, which moderate its intensity before the meat ever hits heat.

How Garam Masala Is Used
MethodBest ForTip
🍲 FinishingCurries, dal, graviesAdd in last 3-5 minutes; stir and taste
🥣 MarinadeChicken, lamb, paneerCombine with yogurt and acid to temper intensity
🥄 Tadka/BloomedLentil dishes, rice, saucesBloom briefly in hot ghee - no more than 20-30 seconds
🥦 Dry RubRoasted vegetables, potatoesMix with oil and salt; coat evenly before roasting

Garam masala pairs naturally with yogurt, tomato, ghee, lentils, chicken, and lamb. It also lifts biryani and pilaf when stirred into the rice just before the lid goes on for its final steam.

Avoid it in very sweet desserts or delicate floral teas - the clove and black pepper clash rather than complement. For dishes that need a different warm-spice direction, ras el hanout is a North African blend worth comparing.

If you're thinking about what to pair your finished curry with, the right side dishes make a real difference in how the spice blend reads on the plate.

Try It In
🍗Chicken Tikka MasalaClassic use as a finishing layer over a rich tomato-cream sauce→🍳Indian Masala OmeletQuick, everyday use — shows how little you need for impact→🫘Indian Chana MasalaStirred in late with chickpeas to round the sauce without overpowering→

How to Buy and Store garam masala

At the store, look for jars that list cardamom, cinnamon, cloves, cumin, and coriander near the top of the ingredient list - that signals a balanced blend, not filler-heavy powder. A fresh jar, when lightly tapped, should release an immediate warm, resinous smell.

Watch Out
A flat or musty smell means the aromatic compounds have already degraded. No amount of cooking will recover lost fragrance - buy a fresh jar.

Whole-spice blends you grind at home last 12-24 months unopened. Pre-ground blends are best within 3-6 months of opening.

Store either format in an airtight container, away from heat and direct light - above the stove is the worst spot in the kitchen.

For a deeper look at freshness timelines, the full breakdown on garam masala storage guide covers how to test potency before cooking.

  • Buy whole-spice - grind small batches to order for maximum aroma
  • Check the date - look for a packaging or best-by date; skip undated bulk jars
  • Smell before buying - if the store lets you open the jar, that's your best quality test

Where to Start With garam masala

If you haven't cooked with garam masala before, start with dal. Add a half-teaspoon to simmering lentils in the last five minutes, finish with a pat of butter.

That single step shows exactly what this blend does: it rounds harsh edges and adds depth without announcing itself.

From there, use it as a finishing spice on any curry or roasted vegetable. If you find you want a bolder or different warm-spice character, the garam masala swaps page maps out what works and when.

Shortcut
Half a teaspoon stirred into finished dal or scrambled eggs is the fastest way to understand what garam masala actually contributes - no full recipe needed.

Frequently Asked Questions

What is garam masala made of?

Most blends combine cardamom, cinnamon, cloves, cumin, coriander, and black pepper. Regional versions add mace, nutmeg, bay leaf, or fennel, which is why two different brands can taste noticeably distinct.

Is garam masala the same as curry powder?

No. Curry powder contains turmeric, giving it color and a distinctly earthy, savory flavor. Garam masala has no turmeric - it's more aromatic and is typically added at the end of cooking, not the beginning.

When should you add garam masala to a dish?

Add it in the last 3-5 minutes of cooking, or directly over the finished dish. Early addition burns off the volatile aromatics - the cardamom and clove notes that make the blend worth using.

Can you substitute garam masala for curry powder?

In a pinch, yes - but the result will be sweeter, more aromatic, and lack the golden color turmeric provides. Reduce the quantity by about a third, since garam masala is more concentrated in fragrance.

How long does garam masala last once opened?

A pre-ground blend stays at peak aroma for 3-6 months after opening. Beyond that, it won't spoil, but the fragrance fades significantly - smell it before use to gauge whether it's still worth adding.

« Previous Page
Next Page »

Primary Sidebar

ForkliftKitchen recipe developer

Welcome!

Recipe Developer · 12+ Yr Kitchen Veteran

I'm the recipe developer behind this site, focused on practical, well-tested dishes and smart ingredient swaps. Every recipe is written to be clear, reliable, and easy to make at home.

650+ Recipes
12+ Yrs Exp.
3x Tested
Our Story →

As Featured In

Allrecipes

TASTE OF HOME

Food52

HUFFPOST

Yahoo! Life

Our Editorial Standards

  • ✓ Every recipe tested at least 3 times before publishing
  • ✓ Substitutes verified by real kitchen trials, not guesswork
  • ✓ Reviewed for accuracy by our editorial team
  • ✓ Updated regularly with seasonal info and reader feedback

Most Popular

  • Creamy Lemon Shrimp Linguine
    Creamy Lemon Shrimp Linguine
  • Creamy Garlic Mushroom Chicken
    Creamy Garlic Mushroom Chicken
  • Sesame Ginger Chicken Noodle Bowls
    Sesame Ginger Chicken Noodle Bowls
  • Baked Lemon Herb Fish Fillets
    Baked Lemon Herb Fish Fillets
  • Veggie Loaded Fried Rice
    Veggie Loaded Fried Rice
  • Spicy Garlic Shrimp Stir Fry
    Spicy Garlic Shrimp Stir Fry

Join 8,000+ Home Cooks

Weekly Kitchen Tips

Easy recipes, smart substitutes, and real cooking shortcuts — every Thursday.

Subscribe Free →


Side Dishes

  • What to Serve With Asian Salmon? 15 Best Side Dishes
    What to Serve With Asian Salmon? 15 Best Side Dishes
  • Side Dishes for Strawberry Spinach Salad
    15 Best Side Dishes for Strawberry Spinach Salad
  • Sides for Grilled Cauliflower Steaks to Complete the Meal
    15 Sides for Grilled Cauliflower Steaks to Complete the Meal
  • 15 Sides To Serve With Calabacitas
    15 Best Sides for Calabacitas – Mexican-Inspired Favorites


Substitutes

  • 7 Best Substitutes for Hot Sauce in Marinades & Stir-Fries
    7 Best Substitutes for Hot Sauce in Marinades & Stir-Fries
  • 9 Best Substitutes for Butter in Baking and Cooking
  • 7 Best Substitutes for Tagliatelle for Italian Pasta Dishes
    7 Best Substitutes for Tagliatelle for Italian Pasta Dishes
  • 7 Best Substitutes for Udon Noodles in Asian Stir-Fries
    7 Best Substitutes for Udon Noodles in Asian Stir-Fries


Browse by Topic

  • Side Dishes320
  • Substitutes785
  • Dinner163
  • Air Fryer77
  • Taste Profiles484
  • Food Storage123


Reader Reviews

★★★★★

"Finally a food blog that tells you exactly why a substitute works instead of just listing options."

— Sarah M., via email

★★★★★

"The side dish recommendations are so specific — saved my dinner party twice this month."

— James R., Pinterest comment

★★★★★

"I trust this site more than most because they actually test everything. You can tell."

— Priya K., blog comment

Footer

↑ Back to Top

Forklift Kitchen

We do the heavy lifting so you can enjoy the cooking. Tested recipes, smart substitutes, and perfect pairings—built for real home cooks.

Content

  • Recipes
  • Substitutes
  • What to Serve With
  • Blog

Company

  • About Us
  • Contact
  • Subscribe

Legal

  • Privacy Policy
  • Terms of Service

As an Amazon Associate I earn from qualifying purchases.

© 2026 Forklift Kitchen.

Rate This Recipe

Your vote:


A rating is required
A name is required
An email is required