• Skip to primary navigation
  • Skip to main content
  • Skip to primary sidebar
  • Recipe Index
    • Air Fryer
  • Side Dishes
  • Substitutes
  • About
  • Contact
  • Subscribe

ForkLiftKitchen

menu icon
go to homepage
  • Recipe Index
    • Air Fryer
  • Side Dishes
  • Substitutes
  • About
  • Contact
  • Subscribe
subscribe
search icon
Homepage link
  • Recipe Index
    • Air Fryer
  • Side Dishes
  • Substitutes
  • About
  • Contact
  • Subscribe
×

Blog

What Is Kale? [Taste, Uses & More]

March 30, 2026

Bite into a raw kale leaf and the first thing you notice is resistance - a fibrous chew, a sharp green smell, and a bitterness that lands somewhere between collard greens and black pepper.

What Does Kale Taste Like

That combination puts some people off, yet the same qualities make kale one of the most useful greens in a cook's arsenal.

Knowing how to work with its intensity rather than against it changes everything.

QUICK SUMMARY

Kale is a cruciferous leafy green with bitter, earthy, and slightly peppery flavor. It holds up to heat better than most greens and works raw when massaged with acid. Shelf life runs 5-10 days in the fridge.

🌿Flavor: Bitter, earthy, peppery raw; nuttier and milder when cooked
🍳Best Uses: Massaged salads, sautéed with garlic, braised stews, kale chips
🧊Shelf Life: 5-10 days whole; 2-4 days pre-cut in the fridge

What Is Kale?

Kale is a cruciferous leafy green in the same botanical family as cabbage, broccoli, and Brussels sprouts, with roots tracing back to the Eastern Mediterranean and Asia Minor.

It was a staple crop across Europe for centuries before it fell out of fashion and then returned, hard.

Several varieties appear in markets today, and each one behaves slightly differently in the kitchen.

  • 🌀 Curly kale - the most common type; ruffled, deep green leaves with a pronounced bite and firm texture
  • 🦕 Lacinato kale - also called dinosaur kale or cavolo nero; long, dark blue-green leaves with a more tender chew and earthier flavor
  • 🟣 Red Russian kale - flat, oak-shaped leaves with purple-tinged stems; milder and sweeter than curly kale
  • 🌍 Borecole - an older European term for kale varieties grown for winter hardiness

Lacinato kale, known in Italy as cavolo nero, anchors Tuscan ribollita and other slow-braised preparations. It's also the variety most likely to work if you're swapping out collard green in a recipe that calls for sturdy, dark greens.

What Does Kale Taste Like?
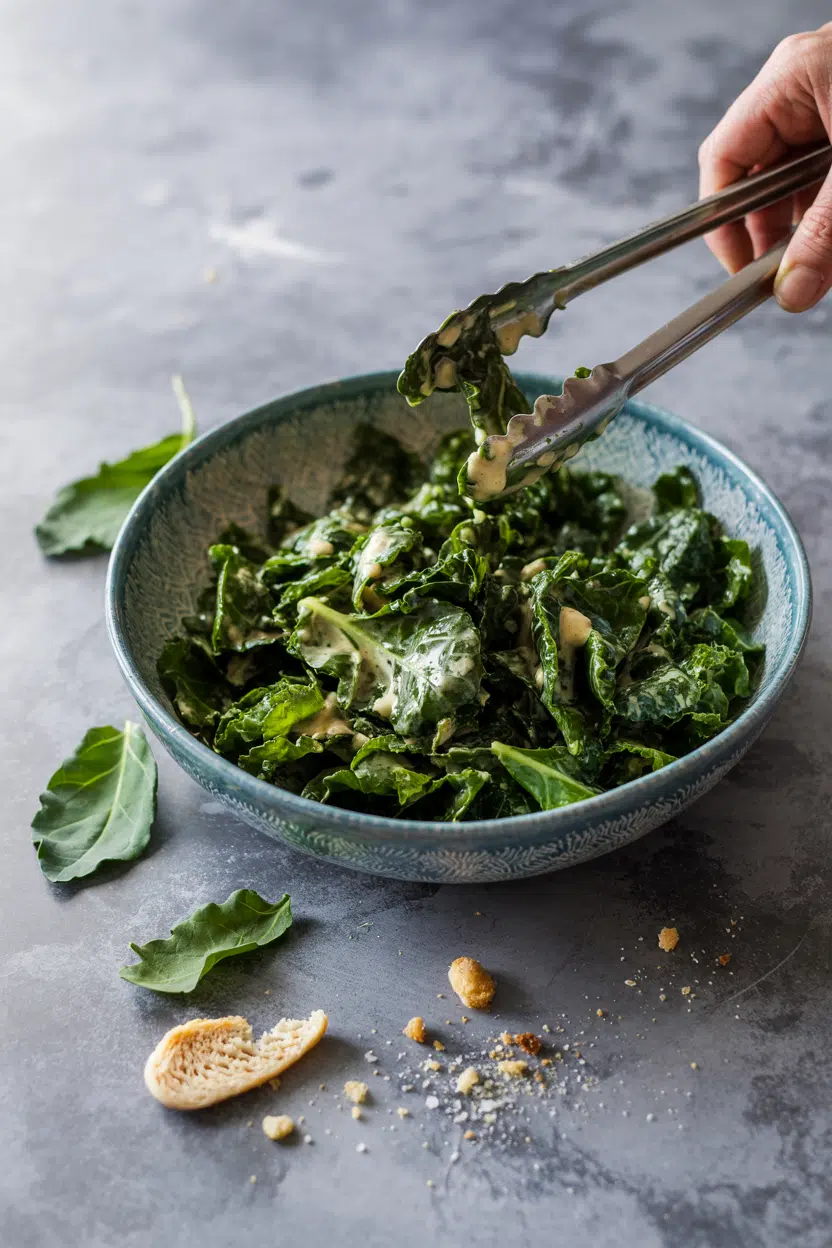
kale - What Does Kale Taste Like

Raw kale is genuinely bitter - sharper and more assertive than spinach, and closer in character to collard greens or cabbage. Underneath the bitterness sits an earthy, faintly peppery note that reads as almost mineral.

Heat changes the equation noticeably. Sautéed or braised kale softens that sharp edge into something nuttier and more rounded, while the texture shifts from fibrous and chewy to silky.

Massaging raw leaves with lemon juice or vinegar for a few minutes collapses some of the cell structure and tempers the bitterness without any heat at all.

Sensory SnapshotModerate Intensity
👅 Flavor
bitterearthypepperynutty (cooked)
✋ Texture
fibrous rawsilky braised
👃 Aroma
greengrassyfresh cabbage

Kale lands noticeably more bitter than spinach - if you're searching for alternatives to spinach that hold up to cooking, kale works well but expect more assertiveness.

How to Use Kale

Kale is one of those greens that responds differently to almost every cooking method, which makes choosing the right approach worth a moment's thought.

How Kale Is Used
MethodBest ForTip
🥗 Raw (Massaged)Salads, grain bowlsRub with lemon juice and salt for 2-3 minutes to soften leaves
🍳 SautéSide dishes, pasta, eggsAdd a splash of water to steam through after browning garlic
🍲 BraiseStews, soups, bean dishesLonger cooking makes leaves silky; add near the last 20 minutes
🔥 RoastKale chips, crispy garnishLow heat (300°F/150°C) prevents burning before crisping
🥤 Puree/SmoothieBlended drinks, soupsBlanch first to reduce bitterness in cold smoothies

Garlic, lemon, and olive oil are kale's most reliable partners - they cut bitterness and add enough richness to balance the leaf's natural sharpness. Sharp cheeses like Parmesan, smoked pork, white beans, and red pepper flakes all reinforce that pattern.

Portuguese cuisine uses kale heavily in caldo verde, a potato-based soup where thinly sliced couve (kale) floats in a smoky broth alongside chouriço.

Italian cooks fold cavolo nero into ribollita and braise it low and slow with olive oil and garlic.

Southern US cooks treat it much like collard greens - long-simmered with a ham hock until the bitterness falls away entirely.

For ideas on rounding out a kale-based meal, sides for kale covers pairings that hold up to the green's boldness.

Making kale chips is one of the more forgiving techniques - our guide to crispy baked kale chips cooking methods walks through the oven variables that matter most.

Golden Rule
Always strip kale leaves from their stems before cooking. The stems are fibrous and bitter, and they don't soften at the same rate as the leaves - keeping them in rarely improves a dish.
Try It In
🥗Lemon Garlic Kale SaladA massaged raw kale base with bright acid to cut bitterness→🧀Kale Caesar Salad with ParmesanShaved Parmesan and Caesar dressing balance kale's sharp edge→🥬Kale Caesar SaladClassic Caesar format built for a sturdier, heartier green→

How to Buy and Store Kale

At the market, look for deep green or blue-green leaves that are crisp and firm all the way to the stem. Yellowing leaves, slimy spots, or limp stalks signal age - pass on those bunches.

Pre-cut bagged kale is convenient but deteriorates faster, so check the sell-by date carefully.

Watch Out
Don't wash kale before storing it. Surface moisture accelerates breakdown in the fridge - wash leaves only just before use.

Whole unwashed bunches stay fresh in a perforated plastic bag or damp towel in the crisper drawer, where they'll last 5-10 days.

Pre-cut bags drop to 2-4 days.

For a full breakdown of timing and conditions, the guide on storing kale correctly covers what actually extends shelf life. Preparing collard green properly follows similar logic if you're handling both greens at once - keep them dry, cold, and intact until you're ready to cook.

Starting With Kale

Raw kale with acid is the lowest-commitment entry point - massage curly kale with lemon juice, let it sit five minutes, and the bitterness pulls back considerably.

From there, a quick sauté with garlic takes less than ten minutes and produces a reliable side dish.

Lacinato kale is worth trying early. Its texture is more forgiving than curly kale, and its flavor is earthier without the same sharpness that puts people off raw preparations.

Frequently Asked Questions

Is kale bitter?

Yes, especially raw. The bitterness comes from glucosinolates - sulfur compounds common to cruciferous vegetables. Cooking, massaging with acid, or blanching all reduce it noticeably.

How do you make kale less bitter?

Massage raw leaves with lemon juice or vinegar for 2-3 minutes to break down cell structure. Alternatively, blanch briefly in salted boiling water, then shock in cold water before using in salads or cooked dishes.

Can you eat kale raw?

Yes. Massaging the leaves with acid and salt first makes raw kale far more pleasant to eat. Lacinato kale is the easiest variety to eat raw because its leaves are more tender than curly kale.

How long does kale last in the fridge?

Whole unwashed bunches last 5-10 days in the crisper drawer. Pre-cut or bagged kale deteriorates faster, typically 2-4 days, because cut edges oxidize and trap moisture.

Is kale healthier than spinach?

Both are nutrient-dense, but they differ. Kale is significantly higher in vitamin K and vitamin C, while spinach has more iron and folate. People on blood-thinning medication should monitor kale intake due to its very high vitamin K levels.
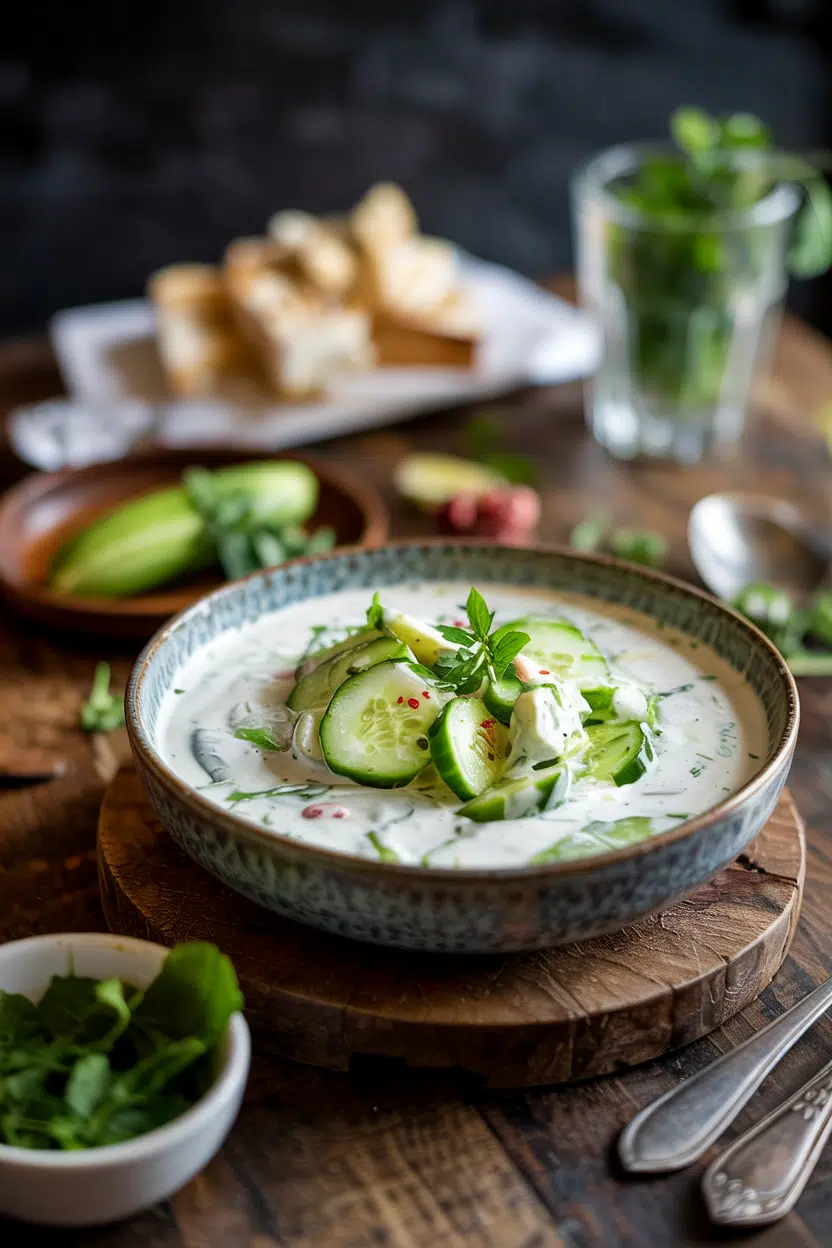
Cucumber Yogurt Salad (Raita-Style)

March 30, 2026

When you need a cooling side dish that works for meal prep or a last-minute weeknight, cucumber yogurt salad delivers. One bowl, minimal prep, and enough fresh herb flavor to make plain rice or grilled chicken feel complete.

Cucumber Yogurt Salad (Raita-Style) served on a plate

The yogurt base stays creamy while the cucumber adds crisp texture. Toasted cumin and fresh cilantro do all the flavor work.

Perfect for summer dinners when cooking feels like a chore or entertaining when you need something that holds up in the fridge.

QUICK SUMMARY

This cucumber yogurt salad combines crisp cucumber with creamy yogurt, toasted cumin, and fresh herbs for a cooling side dish. The key is salting the cucumber first to prevent excess water from thinning the yogurt. Chill at least 30 minutes before serving so the flavors meld properly.

⏱️Total time: 40 minutes including chilling - 10 minutes active work
🧂Salt the cucumber first: Draws out moisture for 15 minutes before mixing
⚠️Watch out: Skip draining cucumber and you'll get watery yogurt - add herbs last to keep them bright

Why This Recipe Works

The yogurt base stays thick and creamy because salting the cucumber first pulls out excess water. Toast cumin seeds in a dry pan for two minutes and the aroma changes everything. For a version that comes together quickly, a fresh salad variation pairs well with grilled proteins.

Quick Reference
⏱️
Prep Time
10 min
🔥
Cook Time
0 min (optional 2-3 min spice toasting)
⏰
Total Time
40 min (includes chilling)
🍽️
Servings
4 servings
📊
Difficulty
Easy
🏷️
Category
Side
💡
Quick Tip
Chill at least 30 minutes before serving
🎯
Best For
Weeknight | Entertaining | Meal prep

Five reasons this works:

  • Salting cucumber first removes 80% of the water - prevents watery yogurt that breaks down after an hour
  • Toasted cumin seeds release essential oils - creates deeper, nuttier flavor than ground cumin straight from the jar
  • Greek yogurt keeps the texture thick - higher protein content means less separation in the fridge
  • Fresh herbs added at the end stay bright green - mixing cilantro or mint too early bruises the leaves and turns them dark
  • Chilling 30 minutes lets spices bloom - cold temperature mellows the raw garlic bite and blends flavors
Golden Rule
Always drain cucumber after salting - excess moisture turns creamy raita into soup within two hours

What You'll Need

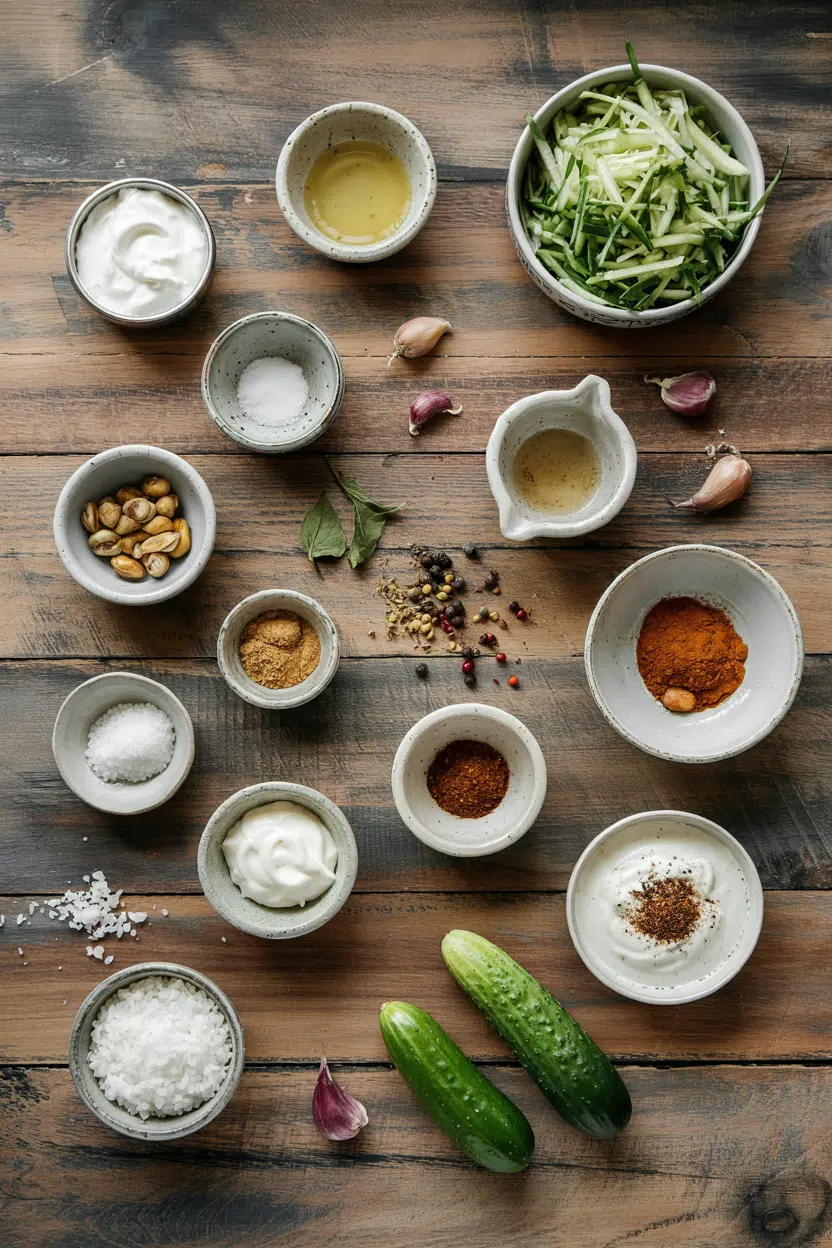
Ingredients for Cucumber Yogurt Salad (Raita-Style)

Fresh cucumber and thick yogurt form the base, but the spices matter more than you'd think. Most people skip salad, but it balances the meal. We keep a batch ready for nights like this - a fresh salad variation works when you want something bright on the side.

🥒
Fresh Produce
  • 2 medium cucumbers (firm, no soft spots)
  • ¼ cup fresh cilantro or mint (packed)
  • 1 green chili (optional, seeds removed for mild heat)
🥛
Dairy Base
  • 1½ cups plain yogurt (whole milk or Greek)
🌶️
Spices & Seasonings
  • 1 teaspoon cumin seeds (or ¾ teaspoon ground cumin)
  • 1 teaspoon salt (plus more for salting cucumber)
  • ½ teaspoon black pepper
  • 1 tablespoon fresh lemon juice

Ingredient Details

  • Cucumber
    Pick firm cucumbers with no soft spots - peel if the skin tastes bitter or is waxed
  • Plain yogurt
    Greek yogurt creates thicker texture; regular yogurt works but may need draining through cheesecloth for 30 minutes
  • Cumin seeds
    Toast in dry pan over medium heat for 2 minutes until aromatic, then crush with mortar or spice grinder - skip toasting if using ground cumin
  • Fresh cilantro or mint
    Cilantro adds herbaceous brightness; mint gives cooling effect - use what you prefer or mix both
  • Green chili
    Remove seeds and white membranes for milder heat - substitute ¼ teaspoon chili powder if fresh chili isn't available
  • Salt
    Use 1 teaspoon for salting cucumber separately, then add another teaspoon when mixing - don't skip the pre-salting step
  • Lemon juice
    Fresh lemon juice adds brighter acidity than bottled - add at the end so it doesn't curdle the yogurt

Ingredient Swaps

Yogurt type changes texture more than any other swap, but most substitutions work without changing the method. The fish works best when it hits the table at the same time as the main. For a version that comes together quickly, simple homemade fish pairs well with cooling sides.

Four swaps that work:

  • Plain yogurt → dairy-free coconut yogurt - expect coconut flavor and slightly thinner texture; add 1 tablespoon coconut cream to thicken
  • Cumin seeds → ground cumin - use ¾ teaspoon ground instead of 1 teaspoon seeds; skip toasting step but flavor will be less complex
  • Fresh cilantro → fresh mint - mint creates more cooling effect; use same amount but chop just before adding
  • Lemon juice → white vinegar or lime juice - vinegar adds sharper tang; lime juice works 1:1 but tastes less bright

Greek Yogurt

Works for: Thicker texture, holds up for 3-4 days without separating

Skip if: You prefer lighter, more pourable consistency

Regular Yogurt

Works for: Traditional thinner texture, easier to mix with rice

Skip if: You want it to hold shape when scooped - may need draining first

Low-Fat Yogurt

Works for: Lower calorie option, still creamy enough

Skip if: You want richest flavor - lacks fat for full mouthfeel

Instructions

The mixing order prevents watery texture and keeps herbs bright green. Beef adds the contrast this plate needs, but timing matters. For a version that comes together quickly, this rich beef balances cooling yogurt perfectly.

  1. Prep and salt the cucumber: Dice 2 cucumbers into ¼-inch pieces (peel if skin is bitter). Toss with 1 teaspoon salt in a bowl, let sit 15 minutes. Drain in fine mesh strainer, pressing gently to remove excess water.
  2. Toast the cumin seeds: Heat small dry pan over medium heat. Add 1 teaspoon cumin seeds, toast 2 minutes until fragrant and slightly darkened, shaking pan occasionally. Transfer to plate to cool, then crush with mortar or grind in spice grinder.
  3. Mix the yogurt base: Whisk 1½ cups yogurt in mixing bowl with crushed toasted cumin, ½ teaspoon black pepper, 1 teaspoon salt. Taste and adjust salt if needed before adding other ingredients.
  4. Combine cucumber and herbs: Add drained cucumber to yogurt mixture. Finely chop ¼ cup cilantro or mint and 1 green chili (seeds removed). Fold herbs and chili into yogurt gently with spoon. Add 1 tablespoon fresh lemon juice, stir once.
  5. Chill before serving: Cover bowl with plastic wrap, refrigerate minimum 30 minutes (up to 2 hours is better). Stir once before serving. Garnish with extra cilantro leaves if desired.
Shortcut
Skip toasting cumin seeds and use ¾ teaspoon ground cumin mixed directly into yogurt - saves 5 minutes but flavor will be less complex

What to Serve With It

Rich mains need something to cut through, and this salad does exactly that. The fish works best when it hits the table at the same time as the main. We keep planning your black bean salad dinner simple when cucumber yogurt salad is on the menu.

Side Dish Prep Why It Works How to Serve
Basmati rice Easy Neutral base balances cooling yogurt and absorbs extra liquid Serve rice warm in shallow bowl with raita spooned on top
Grilled chicken or paneer Medium Smoky charred protein contrasts creamy cold yogurt Plate protein beside rice with raita on the side as cooling dip
Chapati or naan Easy Soft bread scoops up yogurt and cucumber pieces Warm bread in dry pan 30 seconds per side, serve folded in basket
Lentil dal Medium Hearty legumes with earthy spices balanced by fresh yogurt Ladle dal over rice, spoon raita on side to cool each bite
Samosas Involved Spiced fried pastries need cooling dip to cut richness Serve raita in small bowl as dipping sauce alongside samosas

Three ways to serve it:

  • As a dip: Set out bowl of raita with crispy papadum, naan pieces, or raw vegetable sticks for scooping
  • On the side: Spoon raita into small bowls and place beside main course as cooling contrast to spiced dishes
  • Mixed in: Stir raita directly into warm basmati rice for instant flavor and creamy texture
Best Pick
Pair with tandoori chicken or beef curry - the yogurt's cooling effect balances heat from spiced mains better than any other side

Store and Reheat

Cucumber raita lasts 3-4 days in the fridge but texture changes after day two. The stew works best when it hits the table at the same time as the main. For a version that comes together quickly, simple homemade stew pairs well with chilled salads.

Method Time Best For
🥶 No reheating recommended N/A Best served chilled fresh from fridge
🌡️ Room temperature rest 10-15 min If too cold from fridge, bring to room temp before serving
🥄 Stir and add fresh herbs 0 min To freshen raita after refrigeration, fold in 1 tablespoon chopped herbs

For best results when storing:

  • Transfer to shallow airtight container - reduces surface area exposed to air and prevents yogurt from absorbing fridge odors
  • Press plastic wrap directly on surface - creates barrier that prevents skin from forming on top of yogurt
  • Store up to 3-4 days maximum - cucumber releases more water over time and eventually makes yogurt too thin
  • Drain excess liquid before serving - if water pools on top after storage, pour it off and stir raita once before plating
  • Add fresh herbs when reusing - stored herbs wilt and darken, so chop and fold in 1-2 tablespoon fresh cilantro or mint before serving leftovers

Frequently Asked Questions

Can I make cucumber raita ahead and how long does it keep?

Make raita up to 4 hours ahead for best texture - beyond that, cucumber releases water and thins the yogurt. Store in airtight container in fridge for 3-4 days, but drain any pooled liquid and stir before serving leftovers.

How do I prevent cucumber raita from getting watery?

Salt diced cucumber with 1 teaspoon salt and let sit 15 minutes, then drain in fine mesh strainer and press gently to remove moisture. Use thick Greek yogurt instead of regular, and add cucumber just before chilling so it doesn't sit in yogurt too long.

Is it necessary to toast cumin seeds before adding?

Toasting cumin seeds releases essential oils that create deeper, nuttier flavor compared to ground cumin added raw. Skip it if you're short on time - use ¾ teaspoon ground cumin mixed directly into yogurt instead, but expect milder spice notes.

What are signs the cucumber yogurt salad is ready to serve?

Raita is ready when it's thoroughly chilled (30+ minutes in fridge), herbs stay bright green, and yogurt holds creamy texture without water pooling on top. Taste for balanced tang and salt - add pinch more salt or lemon juice if needed.

Can I double the recipe for a large group easily?

Double all ingredients except salt - use 1½ teaspoon for salting cucumber and 1½ teaspoon in yogurt, then taste before adding more. Mix in large bowl and chill in shallow container so it cools evenly in 30-40 minutes.

Cucumber Yogurt Salad (Raita-Style) served on a plate

Cucumber Yogurt Salad (Raita-Style)

No ratings yet
This cucumber yogurt salad combines crisp cucumber with creamy yogurt, toasted cumin, and fresh herbs for a cooling side dish. Salting the cucumber removes excess water to keep the yogurt thick, while toasting cumin seeds adds a deeper flavor. Chill at least 30 minutes before serving to let the flavors meld pleasantly.
Print Recipe Pin Recipe
Prep Time 10 minutes mins
Cook Time 1 minute min
Total Time 40 minutes mins
Servings: 4 servings
Course: Side Dish
Cuisine: Indian
Ingredients Equipment Method Notes

Ingredients
  

  • 2 medium cucumber peeled if skin is bitter, diced into ¼-inch pieces
  • 0.25 cup fresh cilantro or mint packed, finely chopped
  • 1 green chili optional, seeds removed and finely chopped
  • 1.5 cups plain yogurt whole milk or Greek yogurt
  • 1 teaspoon cumin seeds toasted and crushed (or ¾ teaspoon ground cumin, add directly)
  • 1 teaspoon salt plus 1 teaspoon additional for salting cucumber
  • 0.5 teaspoon black pepper
  • 1 tablespoon fresh lemon juice added last to prevent curdling

Equipment

  • Small dry pan For toasting cumin seeds
  • Fine-mesh strainer For draining salted cucumber
  • Mortar and pestle or spice grinder For crushing toasted cumin seeds
  • Mixing bowl For combining yogurt and other ingredients

Method
 

  1. Dice the cucumbers into ¼-inch pieces. Toss them with 1 teaspoon salt in a bowl and let sit for 15 minutes. Drain in a fine mesh strainer, pressing gently to remove excess water.
    2 medium cucumber, 1 tsp salt
  2. Heat a small dry pan over medium heat. Add cumin seeds and toast for 2 minutes until fragrant and slightly darkened, shaking pan occasionally. Transfer to a plate to cool, then crush with a mortar and pestle or spice grinder.
    1 tsp cumin seeds
  3. Whisk yogurt in a mixing bowl with crushed toasted cumin seeds, black pepper, and 1 teaspoon salt. Taste and adjust salt if needed before proceeding.
    1.5 cups plain yogurt, 1 tsp cumin seeds, 0.5 tsp black pepper, 1 tsp salt
  4. Add drained cucumber to the yogurt mixture. Finely chop cilantro or mint and green chili (if using). Gently fold herbs and chili into the yogurt. Add fresh lemon juice and stir gently once.
    2 medium cucumber, 0.25 cup fresh cilantro or mint, 1 green chili, 1 tbsp fresh lemon juice
  5. Cover the bowl with plastic wrap and refrigerate for a minimum of 30 minutes (up to 2 hours recommended). Stir once before serving. Garnish with extra cilantro leaves if desired.
    0.25 cup fresh cilantro or mint

Notes

  • Always drain cucumbers thoroughly after salting to prevent watery yogurt.
  • Toasting cumin seeds enhances flavor but can be skipped using ground cumin for faster prep.
  • Chill salad at least 30 minutes before serving to allow flavors to meld and mellow raw garlic bite.

Tried this recipe?

Let us know how it was!

What Is Haddock? Taste, Texture, Uses & More Today

March 30, 2026

Haddock earns its place in the kitchen by doing something most proteins struggle with: it disappears into a dish without disappearing from it.

What Is Haddock

The flesh is mild enough to let butter, cream, or smoke take the lead, yet firm enough to hold structure in a chowder, a batter, or a herb crust - which explains why it anchors everything from New England seafood counters to British chip shops.

Understanding the role fish plays in a recipe helps clarify why haddock, specifically, keeps showing up as the first choice rather than the fallback.

QUICK SUMMARY

Haddock is a mild, slightly sweet white fish from the North Atlantic. Its fine flake and clean flavor make it a reliable choice for frying, baking, smoking, and chowder. Fresh fillets keep only 1-2 days; smoked haddock lasts up to 5 days refrigerated.

🐟Flavor: Mildly sweet, clean, briny, with subtle umami
🍳Best Uses: Fish and chips, chowder, smoked fish pie, baked fillets
🛒Buy: Look for translucent, shiny flesh with a fresh sea smell
❄️Shelf Life: Raw 1-2 days fridge; smoked 3-5 days; frozen 6 months
⚠️Avoid With: Strong fermented fish sauces and pungent blue cheeses

What Is Haddock?

Haddock (Melanogrammus aeglefinus) is a lean, white-fleshed saltwater fish native to the Northeast Atlantic and North Sea.

It belongs to the cod family, which explains why young haddock is sometimes sold under the name scrod - a term that overlaps with young cod depending on where you're shopping.

Fresh haddock is typically sold as skinless fillets or skin-on loins. Smoked haddock, sold as Finnan haddie, is a cured and cold-smoked version with a long history in Scottish and Northern English cooking.

Wild-caught haddock from certified sustainable fisheries dominates the market in both the UK and the U.S. The fish reaches roughly 1-3 kg at market size, yielding firm, boneless fillets that handle most cooking methods cleanly.

Understanding the role fish plays in different cuisines shows why haddock sits near the top of the white fish category - its structure and neutral profile make it widely applicable without requiring much technique to cook well.

What Does Haddock Taste Like?

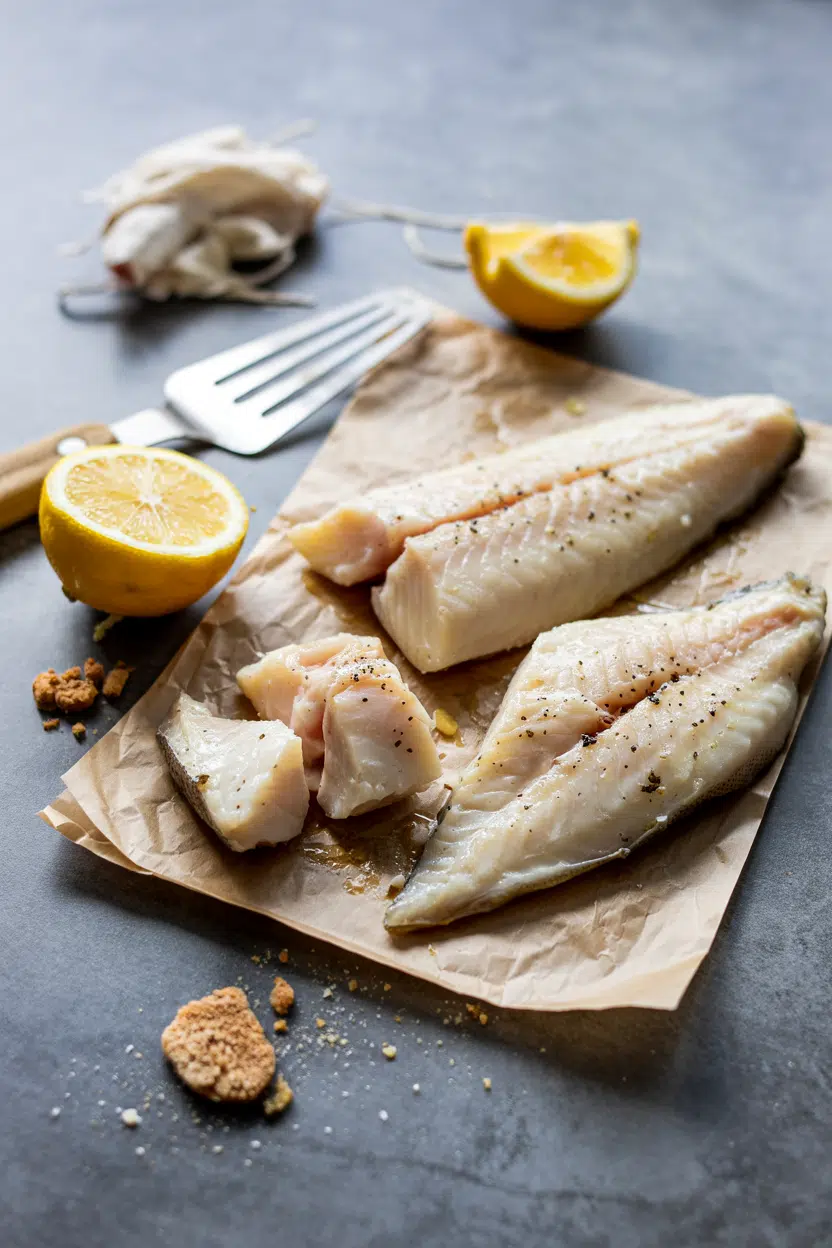
haddock - What Is Haddock

Haddock is mild, slightly sweet, and cleanly briny - closer to the sea than to a fishmonger's counter. Raw fillets smell faintly oceanic; well-sourced fish carries almost no sharp or "fishy" edge at all.

Sensory SnapshotMild Intensity
👅 Flavor
mildly sweetclean brinesubtle umami
✋ Texture
firm rawlarge moist flakes
👃 Aroma
sea-kissedsmoky when cured

Compared to cod, haddock is noticeably sweeter and finer-flaked - cod has a slightly earthier, more robust taste. Pollock falls somewhere in between, leaning starchy and neutral.

If you're already working with similar white fish, swapping out pollock can give you a reference point for how these flavors shift.

Heat tightens haddock's flake but doesn't muddy its sweetness - if anything, a quick sear or gentle poach makes the flavor cleaner. Smoked haddock moves in a different direction entirely: smoke and salt amplify the umami, and the flesh takes on a golden color and a denser, meatier character.

How to Use Haddock

Fresh haddock fillets are adaptable across a wide range of cooking methods - from quick weeknight pans to long-simmered pots. The mild flavor responds well to fat-based sauces, acidic finishes, and smoky treatments alike.

How Haddock Is Used
MethodBest ForTip
🍟 Deep-FriedBritish fish and chips, beer-battered filletsPat fillets bone-dry before battering to prevent steam pockets
🫙 BakedBreadcrumb-herb crust, Ritz crumb toppingBake at high heat (200°C/400°F) briefly - 12-15 min prevents drying
🥘 PoachedNew England chowder, kedgeree, cold plattersUse milk or light stock; water alone strips flavor
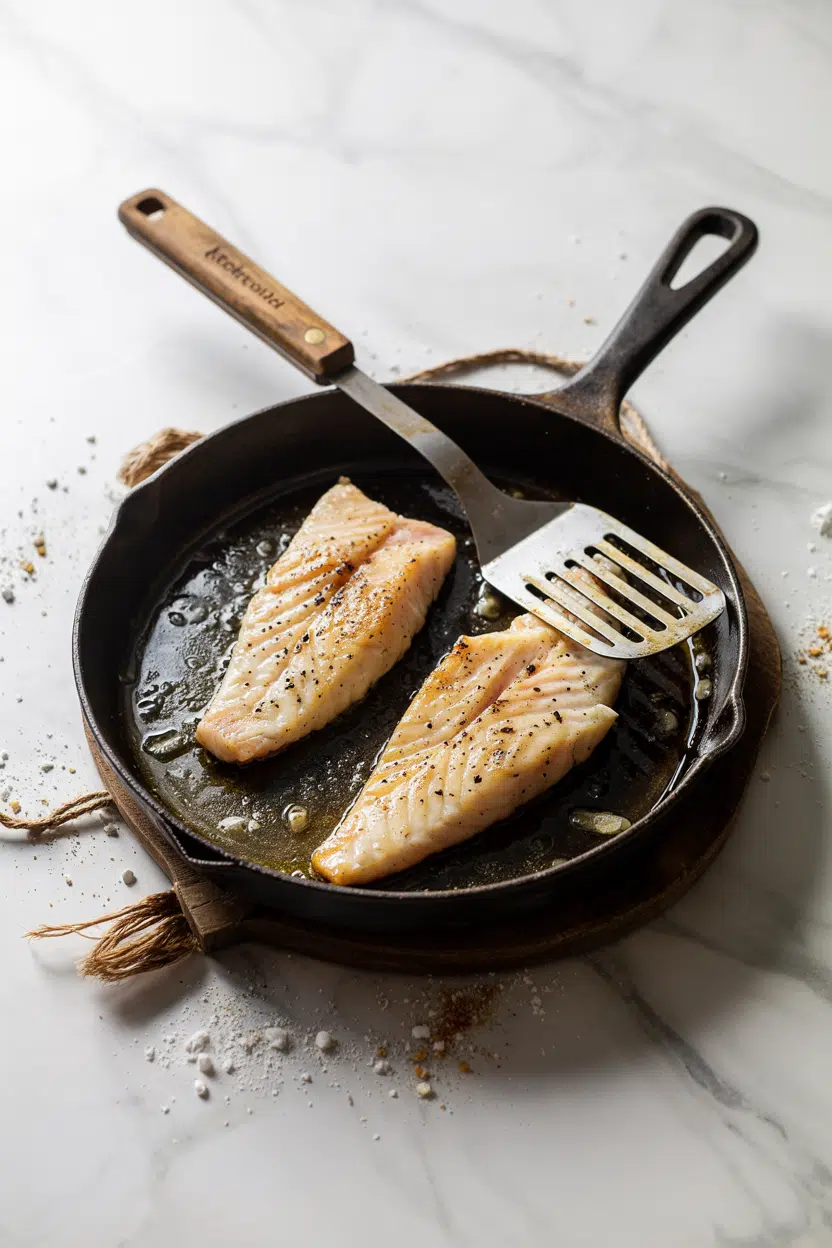
🍳 Pan-SearedLemon-butter fillets, quick weeknight mealsSkin-side down first; don't move the fillet for the first 2 minutes
🫕 StewedTomato-potato one-pot, Scandinavian fish stewsAdd haddock last - it only needs 5-7 minutes in simmering liquid

Haddock sits at the center of British and New England cooking more than almost any other white fish.

In the UK, it's the preferred fish for battered chips in northern England and Scotland, where knowing what pairs with fish and chips is practically a regional skill.

In New England, it replaces cod in many chowder recipes, bringing a sweeter note to a cream-based broth.

Smoked haddock (Finnan haddie) drives kedgeree - the Anglo-Indian rice dish built on curried smoked fish, boiled eggs, and cream. It also defines the filling layer in a traditional British fish pie.

For broader pairing decisions, pairing ideas for haddock covers both classic and less obvious combinations worth trying.

Try It In
🐟Baked Haddock with Ritz Crumb ToppingA simple baked fillet that showcases haddock's mild sweetness under a buttery crust→
Golden Rule
Don't overcook haddock. The window between perfectly flaked and dry is narrow - pull it from heat when the thickest part just turns opaque, then rest for 90 seconds.

How to Buy and Store Haddock

Fresh fillets should look translucent and slightly shiny, not chalky or grey. A mild sea smell is correct; anything sharp or ammonia-like means the fish is past its window.

Avoid fillets that pull apart in the display case - that mushy separation is a sign of age or poor handling.

Watch Out
Whole fish with cloudy eyes or a thick slime coat are past their prime - even if the fillets cut from them look passable, the flavor won't be.

For smoked haddock loins, look for firm, evenly golden flesh with no chemical or rancid smell. Buy vacuum-packed when possible - it extends fridge life reliably.

At home, store fresh haddock in the coldest part of the refrigerator, wrapped airtight, and use it within 1-2 days. Smoked haddock keeps 3-5 days refrigerated.

For longer storage, keeping haddock fresh covers freezing in detail - whole fillets hold well for up to 6 months frozen.

Start Here With Haddock

Fresh haddock fillets are the straightforward entry point - pan-sear skin-side down with butter and lemon and you'll understand what the fish does at its baseline.

From there, smoked haddock opens a completely different register worth exploring.

If haddock isn't available, swapping out haddock outlines which alternatives hold up in which dishes, and cod swaps that work covers the nearest neighbor in the white fish family.

Frequently Asked Questions

Is haddock the same as cod?

No, though they're closely related. Haddock is sweeter and finer-flaked than cod; cod has a slightly earthier flavor and larger, thicker flake. Both can often substitute for each other, but the texture difference becomes more noticeable in delicate preparations like chowder.

What does smoked haddock taste like?

Smokier, saltier, and meatier than fresh haddock, with more pronounced umami. The cold-smoking process deepens the fish's natural sweetness rather than masking it. Finnan haddie specifically has a gentler smoke than hot-smoked varieties.

How long does fresh haddock last in the fridge?

One to two days, maximum, when stored airtight in the coldest part of the refrigerator. If you can't cook it within that window, freeze it immediately - don't wait until day two to decide.

Is haddock high in mercury?

No. Haddock is classified as a low-to-moderate mercury fish, well below larger predatory species like swordfish or albacore tuna. It's generally considered safe for regular weekly consumption, including for pregnant women following standard seafood guidelines.

How do you cook haddock so it doesn't dry out?

Pull it from heat the moment the flesh turns opaque all the way through - residual heat finishes the job. For baking, high heat for a short time (400°F / 200°C for 12-15 minutes) outperforms low-and-slow, which draws out moisture without building flavor.

Air Fryer Vegetable Spring Rolls

March 30, 2026

Crispy spring rolls with golden edges and a tender vegetable filling. That's what happens when you air fry them at 400°F with a light oil coating instead of deep-frying.

Air Fryer Vegetable Spring Rolls served on a plate

The air fryer does all the work. You get the crunch without standing over hot oil or dealing with splatter.

This works for weeknight appetizers when you want something that feels restaurant-worthy but comes together in 30 minutes. Make a batch for meal prep and reheat them crispy all week.

QUICK SUMMARY

Air fryer vegetable spring rolls deliver crispy wrappers and savory filling without deep-frying. Sauté cabbage, carrots, and aromatics, wrap tightly in spring roll wrappers, then air fry at 400°F for 10-12 minutes. Light oil on the wrappers creates golden edges while keeping the filling moist.

⏱️Time Reality: 20 minutes prep, 10-12 minutes cook - make filling ahead to cut active time
🔑Critical Move: Dry filling thoroughly before wrapping to prevent soggy wrappers
⚠️Watch Out: Overcrowding the basket causes uneven browning - leave ½ inch between rolls and flip halfway

Table of Contents

Toggle
  • Why This Recipe Works
  • What You'll Need
    • Ingredient Details
  • Ingredient Swaps
  • What to Serve With It
  • Store and Reheat
  • Frequently Asked Questions
  • Air Fryer Vegetable Spring Rolls
    • Method 
    • Tried this recipe?

Why This Recipe Works

Air frying creates crispy wrappers without submerging them in oil because high heat circulates around each roll. For a version that comes together quickly, this easy rolls recipe uses a similar technique with different filling options.

Quick Reference
⏱️
Prep Time
20 min
🔥
Cook Time
10-12 min
⏰
Total Time
30-35 min
🍽️
Servings
8-10 rolls
📊
Difficulty
Easy
🏷️
Category
Appetizer
💡
Quick Tip
Lightly oil wrappers for extra crispiness.
🎯
Best For
Weeknight | Meal prep | Entertaining

What makes this technique reliable:

  • Preheating the air fryer jump-starts the crisping process so wrappers brown evenly in 10-12 minutes
  • Flipping halfway prevents one side from burning while the other stays pale
  • Light oil coating helps wrappers turn golden instead of staying dry and paper-like
  • Leaving space between rolls allows hot air to circulate and crisp all sides at once
  • Using fresh wrappers prevents cracking during rolling and tearing during cooking
Quick Tip
Pat sautéed vegetables dry with paper towels before wrapping to eliminate excess moisture that makes wrappers soggy.

What You'll Need

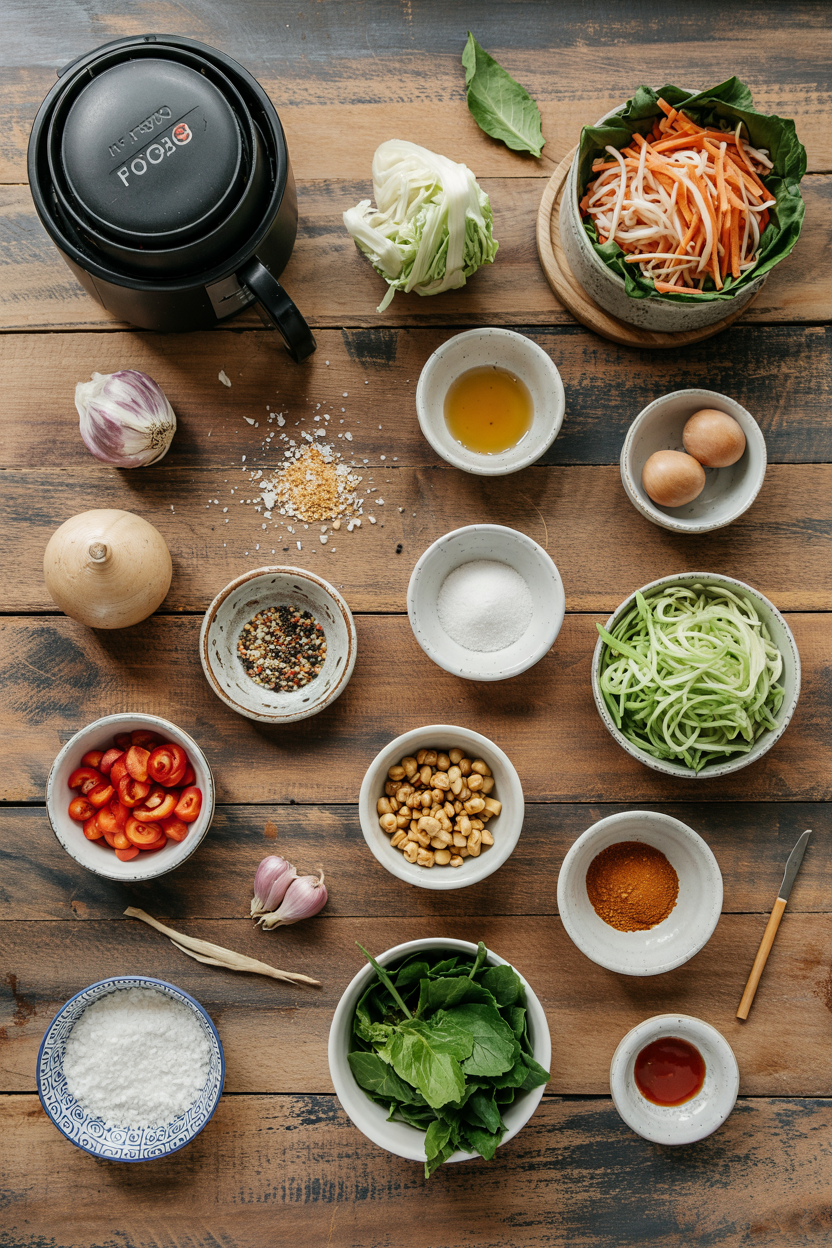
Ingredients for Air Fryer Vegetable Spring Rolls

Most of these ingredients sit in your pantry or crisper drawer already. Rolls exists to mop up what is left on the plate. For a version that comes together quickly, easy crust side pairs well when you need something to round out the meal.

🥬
Vegetables
  • shredded cabbage
  • carrot (julienned)
  • green onion (chopped)
🧄
Aromatics
  • garlic (minced)
  • ginger (grated)
🥢
Seasonings
  • soy sauce
  • sesame oil
🫙
Wrapper + Oil
  • spring roll wrappers
  • vegetable oil spray

Ingredient Details

  • Spring roll wrappers
    Use wheat-based wrappers for air frying - rice paper turns brittle and doesn't crisp the same way
  • Cabbage
    Shred finely so it cooks quickly and rolls tightly without tearing the wrapper
  • Carrot
    Julienne into thin matchsticks - thick chunks poke through wrappers and create uneven texture
  • Garlic and ginger
    Mince both fine so they distribute evenly and don't create lumps in the filling
  • Soy sauce
    Adds umami and seasoning but too much makes filling watery - stick to 2 tablespoons
  • Sesame oil
    Use toasted sesame oil for nutty flavor - plain sesame oil tastes flat
  • Vegetable oil spray
    Spray or brush wrappers lightly before air frying - oil creates golden, crispy edges

Ingredient Swaps

You can adjust vegetables based on what you have without losing the crisp texture. Most people skip kofta, but it balances the meal. For a version that comes together quickly, a simple kofta variation uses the same air fryer method with spiced meat filling.

Four practical swaps:

  • Soy sauce → tamari - Same savory depth but gluten-free and slightly less salty
  • Spring roll wrappers → rice paper wrappers - Different texture, requires soaking, less crispy but still works
  • Cabbage → bok choy - Milder flavor, more tender, cooks faster in the filling
  • Carrots → bell peppers - Different sweetness, adds color, slightly softer when cooked

Tamari Instead of Soy Sauce

Works for: Gluten-free diets, less salty flavor preference

Skip if: You want traditional salty umami punch

Rice Paper Instead of Wheat Wrappers

Works for: Gluten-free needs, softer chewier texture

Skip if: You want maximum crispness and sturdy structure

Instructions

The filling cooks in one skillet and takes 5 minutes to sauté before wrapping. A good soup can make or break the plate. For a version that comes together quickly, homemade soup recipe pairs well when you want something warming alongside crispy appetizers.

  1. Sauté the filling. Heat a skillet over medium-high, add garlic and ginger, stir 30 seconds until fragrant. Add cabbage and carrots, cook 3-4 minutes until softened. Stir in soy sauce and sesame oil, cook 1 minute more. Transfer to a bowl and let cool 5 minutes.

  2. Wrap the spring rolls. Lay one wrapper on a clean surface with a corner pointing toward you. Place 2-3 tablespoons filling in the center. Fold the bottom corner over the filling, tuck tightly, fold in the sides, then roll up snugly. Brush the top corner with water to seal. Repeat with remaining wrappers and filling.

  3. Prep the air fryer. Preheat air fryer to 400°F for 3-4 minutes. Lightly spray or brush each spring roll with oil on all sides - this creates the golden crispy exterior.

  4. Air fry in batches. Place spring rolls in a single layer in the basket, leaving ½ inch space between each. Cook 6 minutes, flip each roll, cook 4-6 minutes more until golden brown and crispy. Work in batches if needed.

  5. Rest before serving. Transfer cooked rolls to a plate and let rest 2-3 minutes so the filling sets and doesn't leak when you bite in. Serve with sweet chili sauce or soy-ginger dipping sauce.

Golden Rule
Never skip drying the filling - wet vegetables steam the wrappers from the inside and prevent crisping no matter how much oil you use.

What to Serve With It

Spring rolls work as an appetizer or light lunch but need something filling to make a complete meal. Rich mains need something to cut through, and soup does exactly that. When planning your bunless burgers dinner, these crispy rolls add variety to the plate without competing for attention.

Side Dish Prep Why It Works How to Serve
Steamed jasmine rice Easy Neutral base that soaks up dipping sauce and balances crispy texture Serve warm in small bowls alongside rolls
Simple cucumber salad Easy Cool, tangy crunch contrasts fried wrapper and warm filling Toss sliced cucumbers with rice vinegar, serve chilled
Edamame pods Easy Adds protein and salty bite without extra cooking Steam 5 minutes, sprinkle with sea salt
Miso soup Easy Warm, savory soup complements crispy texture and adds comfort Make ahead, reheat, serve in small bowls
Mixed greens salad Easy Fresh, light contrast balances fried appetizer Dress lightly with sesame-ginger vinaigrette

Three ways to serve it:

  • For weeknight dinners: Pair with jasmine rice and cucumber salad for a light meal that feels complete
  • For entertaining: Serve as finger food with three dipping sauces - sweet chili, peanut sauce, soy-ginger
  • For meal prep: Pack rolls with edamame and mixed greens for grab-and-go lunches all week
Best Pick
Sweet chili sauce gives the best flavor balance - sweet, tangy, mildly spicy without overpowering the vegetable filling.

Store and Reheat

Cooked spring rolls stay crispy for 3-4 days when stored properly in the fridge. The crust works best when it hits the table at the same time as the main. For a version that comes together quickly, tender pork side dish reheats just as easily and pairs well with Asian-inspired appetizers.

Method Time Best For
🔥 Air Fryer 5-7 min at 350°F Restoring crispness - wrappers stay golden and crunchy
🔥 Oven 10 min at 375°F Reheating larger batches evenly without crowding
📦 Microwave 30-45 sec Quick reheating but wrappers turn soft and chewy

For best results when storing:

  • Cool completely before storing - Hot rolls create steam in the container and turn wrappers soggy
  • Use shallow airtight containers - Stack no more than two layers with parchment between to prevent sticking
  • Refrigerate within 2 hours - Cooked vegetable filling spoils quickly at room temperature
  • Freeze for longer storage - Wrap individually in plastic, freeze up to 1 month, air fry from frozen at 375°F for 12-15 minutes
  • Skip the microwave when possible - It heats fast but turns crispy wrappers soft and rubbery

Frequently Asked Questions

Can I use rice paper wrappers instead of spring roll wrappers?

Yes, but the texture changes - rice paper stays softer and chewier in the air fryer. Soak wrappers briefly in warm water until pliable, then wrap and air fry at 375°F for 8-10 minutes.

How long do air fryer vegetable spring rolls stay fresh?

Cooked rolls last 3-4 days in the fridge in an airtight container. Reheat in the air fryer at 350°F for 5-7 minutes to restore crispness.

What temperature and time yields the crispiest spring rolls?

400°F for 10-12 minutes with a flip halfway through creates golden, crispy wrappers without burning. Preheat the air fryer for 3-4 minutes before cooking.

Why are my spring rolls soggy after air frying?

Wet filling or no oil on the wrappers causes sogginess. Pat sautéed vegetables dry with paper towels before wrapping, and spray or brush wrappers with oil before air frying.

Can I double the recipe and freeze spring rolls?

Yes - wrap uncooked rolls individually in plastic wrap, freeze up to 1 month. Air fry from frozen at 375°F for 15-18 minutes, flipping halfway, until golden and heated through.

Air Fryer Vegetable Spring Rolls served on a plate

Air Fryer Vegetable Spring Rolls

No ratings yet
Air fryer vegetable spring rolls deliver crispy wrappers and a savory vegetable filling without deep-frying. Using a light oil coating and air frying at 400°F for 10-12 minutes creates golden edges and a tender interior. This easy appetizer is perfect for weeknight meals or meal prep with minimal active cooking time.
Print Recipe Pin Recipe
Prep Time 20 minutes mins
Cook Time 12 minutes mins
Total Time 32 minutes mins
Servings: 9 rolls
Course: Appetizer
Cuisine: Asian-Inspired
Ingredients Equipment Method Notes

Ingredients
  

  • 2 cups cabbage shredded finely
  • 1 cup carrot julienned into thin matchsticks
  • 0.25 cup green onion chopped
  • 2 teaspoons garlic minced finely
  • 1 teaspoon ginger grated finely
  • 2 tablespoons soy sauce adds umami seasoning
  • 1 teaspoon sesame oil toasted for nutty flavor
  • 8 pieces spring roll wrappers wheat-based preferred for air frying
  • vegetable oil spray to lightly coat wrappers before air frying

Equipment

  • Air fryer Used to crisp spring rolls at 400°F without deep-frying
  • Skillet Used to sauté vegetable filling
  • Brush or oil spray To lightly oil spring roll wrappers before air frying

Method
 

  1. Heat a skillet over medium-high heat. Add garlic and ginger and stir for 30 seconds until fragrant. Add shredded cabbage and julienned carrots and cook for 3-4 minutes until softened. Stir in soy sauce and sesame oil, then cook 1 minute more. Transfer the filling to a bowl and let cool for 5 minutes.
    2 teaspoons garlic, 1 teaspoon ginger, 2 cups cabbage, 1 cup carrot, 2 tablespoons soy sauce, 1 teaspoon sesame oil
  2. Lay one spring roll wrapper on a clean surface with a corner pointing toward you. Place 2-3 tablespoons of filling in the center. Fold the bottom corner over the filling, tuck tightly, fold in the sides, then roll up snugly. Brush the top corner with water to seal. Repeat with remaining wrappers and filling.
    8 pieces spring roll wrappers
  3. Preheat the air fryer to 400°F for 3-4 minutes. Lightly spray or brush each spring roll with vegetable oil on all sides to promote golden crispiness.
    vegetable oil spray
  4. Place spring rolls in a single layer in the air fryer basket, leaving about ½ inch space between each. Cook for 6 minutes, then flip each roll and cook for 4-6 more minutes until golden brown and crispy. Work in batches if needed.
    8 pieces spring roll wrappers
  5. Transfer the cooked spring rolls to a plate and let rest for 2-3 minutes so the filling sets and doesn't leak when bitten. Serve with your choice of dipping sauce like sweet chili or soy-ginger.

Notes

  • Pat sautéed vegetables dry before wrapping to avoid soggy wrappers.
  • Preheat the air fryer to ensure even browning and crispiness.
  • Leave space between rolls in the air fryer basket for better air circulation.

Tried this recipe?

Let us know how it was!

What Is Ginger? Taste, Uses, Flavor Profile & More

March 30, 2026

Sharp, citrusy, and unmistakably warm - the smell of fresh ginger hit before you even touch the knife. That first slice releases a burst of zesty aroma that's part lemon, part pepper, part something entirely its own.

What Is Ginger

A golden milk turmeric latte owes much of its depth to ginger's heat, and a proper bowl of beef pho depends on it for that warming, almost medicinal backbone. Few ingredients pull off that range - raw or cooked, ground or candied - and do it this consistently.

QUICK SUMMARY

Ginger is a knobby aromatic rhizome with a sharp, peppery heat and bright citrus undertone. Used fresh, dried, pickled, or candied, it anchors dishes from stir-fries to baked goods. Fresh whole ginger keeps 2-4 weeks refrigerated and up to 6 months frozen.

🌶️Flavor: Warm spicy heat with a peppery, slightly sweet citrus edge
🍽️Best Uses: Stir-fries, broths, baked goods, teas, pickling, marinades
🛒Buy: Firm rhizomes with taut, smooth skin and no soft spots
❄️Storage: Unpeeled in fridge 2-4 weeks; freeze whole up to 6 months
🌍Cuisines: Chinese, Indian, Japanese, Thai, Korean, Caribbean

What Is Ginger?

Ginger is the rhizome - an underground stem, not a true root - of the plant Zingiber officinale, native to Maritime Southeast Asia. It has been cultivated for thousands of years and now appears in kitchens across Asia, the Caribbean, and beyond.

The rhizome grows in knobby, branching segments with thin, papery skin ranging from pale tan to light brown. Flesh color runs from pale yellow to a slightly golden hue depending on maturity.

Fresh ginger is commonly labeled "ginger root" at markets, though that's technically imprecise. It's sometimes confused with galangal, a related rhizome with a sharper, more piney flavor - they're botanically similar but not interchangeable.

You can read more about galangal if you want to understand where the two diverge.

Two main forms dominate home cooking:

  • 🌱 Fresh ginger - the whole rhizome, used grated, sliced, or minced; boldest and most aromatic
  • 🟤 Ground ginger - dried and powdered; warmer and earthier, less citrusy brightness; standard in baking

Baby ginger, harvested young, has thinner skin, a milder bite, and is often used for gari - the pickled ginger served alongside sushi.

What Does Ginger Taste Like?

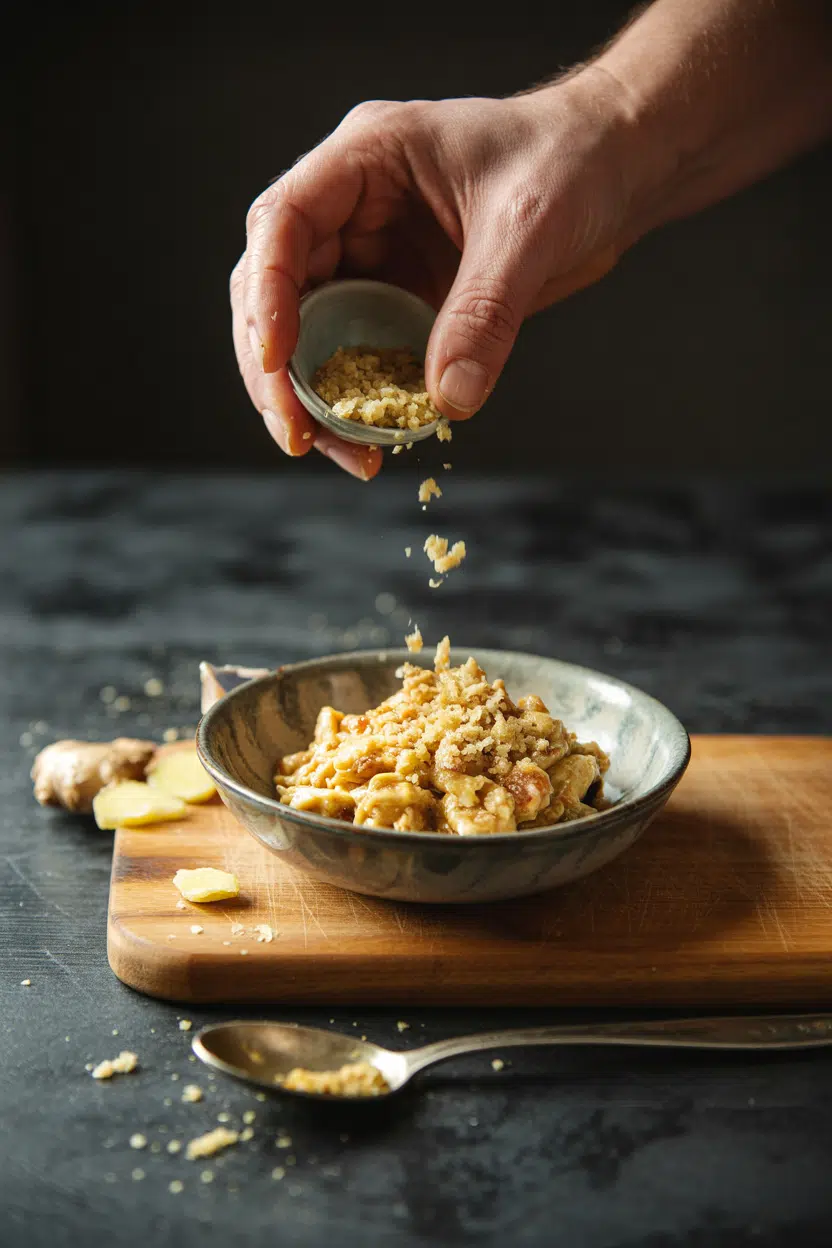
ginger - What Is Ginger
Sensory SnapshotPungent Intensity
👅 Flavor
warm spicypepperylemony brightearthy base
✋ Texture
fibrous rawfirm slicedtender cooked
👃 Aroma
zestyfresh citrus-gingerpungent

Fresh ginger's heat comes from gingerol, the bioactive compound responsible for that sharp, almost stinging warmth. The sensation is closer to a peppery lemon than to chili heat - it builds quickly but doesn't linger the way capsaicin does.

Cooking transforms it. Heat converts gingerol into shogaol, which is actually hotter and more pungent, and into zingerone, which is softer and almost sweet.

That's why ginger in a long-simmered broth tastes milder and more rounded than raw grated ginger in a dressing.

Ground ginger skips the citrus brightness entirely. It reads as warmer, drier, and more earthy - which is why lebkuchen and German gingerbread rely on the ground version, not fresh.

Golden Rule
Fresh and ground ginger are not 1:1 swaps. Fresh is brighter and sharper; ground is warmer and drier. Use each where its character fits the dish.

How to Use Ginger

Ginger's real strength is its adaptability across preparation methods - each one pulls out a different character from the same rhizome. Grating on a microplane gives you the most juice and heat; slicing or smashing releases aroma more gently into broths.

Mincing distributes the bite evenly through sauces and marinades.

It anchors dishes across Chinese, Indian, Japanese, Thai, and Korean kitchens, often paired with garlic, soy sauce, and chili as a foundational trio. In Caribbean cooking, it appears in jerk blends and rum-based drinks.

It pairs cleanly with lime, honey, fish sauce, turmeric, and scallion.

How Ginger Is Used
MethodBest ForTip
🥗 GratedDressings, marinades, stir-fry saucesMicroplane produces the most juice and heat
🍲 Sliced/SmashedBroths, pho, soupsRemove pieces before serving if texture is unwanted
🥘 MincedCurries, stir-fries, fried riceCook in oil first to bloom the flavor
🍞 Ground/DriedBaked goods, spice blends, dry rubsAdd early - it needs heat to open up
🥒 Pickled (gari)Sushi palate cleanser, grain bowlsUse baby ginger for thinner slices and milder bite
🍬 Candied/SyrupDesserts, cocktails, glazesChop candied ginger fine to avoid chewy chunks

Smoothies benefit from a small knob of fresh ginger - it adds a peppery kick without overpowering fruit. Steeped in hot water, it makes a clean, sharp tea.

For dishes to build around ginger's presence, see our what to serve with stir-fry guide for pairing ideas.

Try It In
🥗Sesame Ginger Dressing (Homemade)Fresh ginger grated in for full heat and brightness→☕Ginger Cold Brew CoffeePeppery ginger offsets coffee's bitterness cleanly→🍲Tinola Chicken Ginger SoupGinger smashed and simmered for a warm, aromatic broth→

How to Buy and Store Ginger

Fresh ginger should feel firm and heavy, with taut, smooth skin and no soft spots or visible mold. Wrinkled skin means it has dried out and the flavor will be dull. A fresh sheen and clean snap when broken are good signs.

Best Pick
Mature ginger with tight, firm knobs stores longer. Baby ginger has thinner skin and brighter aroma - better for pickling or eating raw.

At home, keep unpeeled ginger in the fridge wrapped in a paper towel inside a resealable bag. Peeled or cut pieces need an airtight container to prevent drying.

For longer-term storage, freeze the whole unpeeled rhizome - you can grate it directly from frozen without thawing, which makes it easier to work with.

  • Refrigerated (whole, unpeeled) - 2 to 4 weeks
  • Refrigerated (peeled or cut) - 1 to 2 weeks
  • Frozen - up to 6 months

Full details on ginger freshness guide cover signs of spoilage and freezer method.

Start Fresh, Then Branch Out

If you've only used ground ginger in baking, fresh is worth trying first in a simple application - grated into a stir-fry sauce or steeped into hot water with honey. Those two uses show the full range of what the rhizome does.

From there, ginger replacements can help when you're mid-recipe and out of stock, or when you need a milder stand-in for a dish.

Frequently Asked Questions

Is ginger a root or a rhizome?

It's a rhizome - an underground stem, not a true root. The distinction matters botanically, though "ginger root" is common in grocery stores and recipes. Rhizomes grow horizontally and can sprout new plants, unlike roots.

Why does ginger taste spicy?

The heat comes from gingerol, a bioactive compound concentrated in the flesh. Unlike capsaicin in chili, gingerol produces a sharper, shorter-lasting warmth with a citrusy edge rather than a prolonged burn.

Can you substitute ground ginger for fresh?

Yes, but they're not equal. Use about ¼ teaspoon ground ginger for every tablespoon of fresh grated. Ground ginger is earthier and lacks the citrus brightness of fresh, so the result will taste noticeably different in raw applications.

What does pickled ginger taste like?

Pickled ginger (gari) is mild, slightly sweet, and tangy from the vinegar brine. The pickling process softens ginger's raw heat considerably, which is why it works as a palate cleanser between bites of sushi rather than a flavor addition.

Does ginger go bad in the fridge?

Yes. Signs of spoilage include soft or mushy spots, mold, and a loss of sharp aroma. Unpeeled whole ginger lasts 2-4 weeks refrigerated; cut pieces degrade faster, typically within 1-2 weeks.

What Is Jaggery? Taste, Uses & More for Cooking

March 30, 2026

Most cooks assume jaggery is just a rustic stand-in for brown sugar - something to reach for when you can't find the real thing.

What Is Jaggery

That assumption undersells it badly. Jaggery brings molasses depth, a toasted caramel character, and trace minerals that refined sugar processes out entirely - and understanding that distinction changes how you use it.

If you're swapping out molasses or even swapping out brown sugar in a recipe, jaggery is worth knowing on its own terms.

QUICK SUMMARY

Jaggery is an unrefined cane sweetener from South Asia with a rich, molasses-caramel flavor and toasty finish. It comes as a solid block or paste, melts into sauces and desserts, and keeps for up to a year when stored dry.

🍬Flavor: Deep caramel, molasses tang, slight smoky-bitter finish
🍳Best Uses: Dals, chutneys, chai, halwa, chikki, glazes
🌍Origin: South Asia - India, Pakistan, Sri Lanka, Bangladesh
📦Storage: Airtight container, cool and dry; refrigerate in humid climates
⏳Shelf Life: Solid blocks last 6-12 months; soft date jaggery needs use within 3-6 months

What Is Jaggery?

Jaggery is made by boiling freshly pressed sugarcane juice until most of the water evaporates, then pouring the thick concentrate into molds to set.

Unlike refined white sugar, no molasses is removed during processing - what you get retains its natural color, minerals, and complexity.

It's sold primarily as firm golden or dark brown blocks, though a soft paste form also exists in some regions.

In India and Pakistan it's widely called gur.

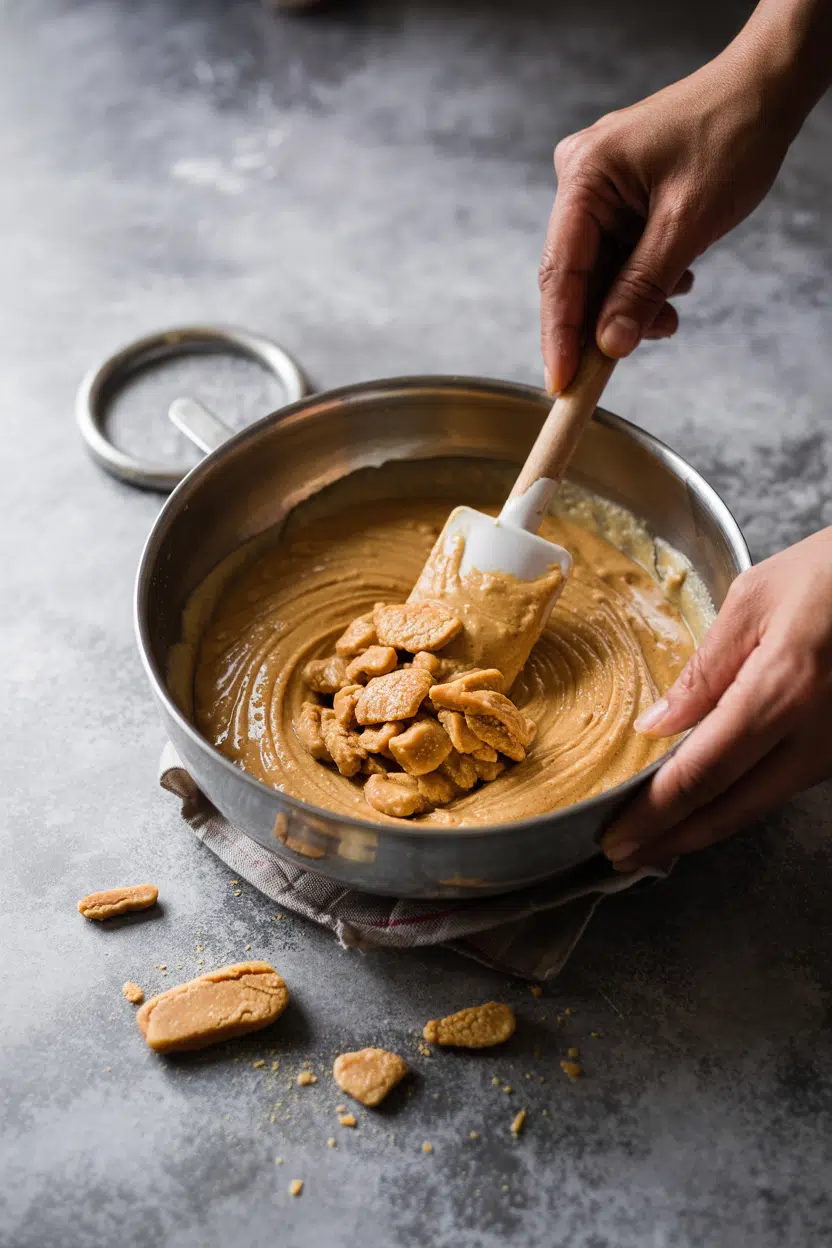
Across South Asia you'll find it in markets under different grades - lighter blocks tend to be younger and milder, while darker ones have spent more time over wood-fired evaporators and carry a smokier, more bitter edge.

Date jaggery is a notable variant, made from date palm sap rather than sugarcane. It's softer, darker, and more perishable - common in Bangladesh and West Bengal. Jaggery also has cousins in Latin America: panela and piloncillo follow similar production logic, though comparing coconut sugar vs brown sugar options illustrates how differently these unrefined sweeteners behave in recipes despite their shared caramel character.

What Does Jaggery Taste Like?

jaggery - What Is Jaggery

Jaggery doesn't taste like raw sugar. It has a layered sweetness - the first note is cooked caramel, warm and slightly toasty, followed quickly by a molasses-like tang that adds complexity without tipping into bitterness.

Most solid cane jaggery lands somewhere between dark brown sugar and a light unsulphured molasses, but with a smokier depth that neither quite matches.

Sensory SnapshotStrong Intensity
👅 Flavor
CaramelMolasses tangToasted sugarBitter finish
✋ Texture
Firm blockSyrupy when melted
👃 Aroma
Warm molassesCooked cane

Heat changes how jaggery reads. Melted into a dal or simmered into a syrup, the bitter edge softens and the caramel note expands - it becomes rounder and more background.

Date jaggery runs darker and more mineral throughout, with less of the bright caramel and more of an earthy, almost fudge-like finish.

How to Use Jaggery

In Indian cooking, jaggery earns its place in savory dishes as much as sweet ones.

A small piece melted into a tamarind dal balances the acid and adds body without making the dish taste like dessert.

South Indian cooks stir it into sambars and chutneys for exactly that reason - it rounds hard edges that tamarind or dried chilies can leave behind.

Golden Rule
Add jaggery off-heat or at low heat first. Direct high heat scorches its natural sugars fast, turning the caramel note acrid.

For sweets, chikki (a peanut brittle made with jaggery syrup) and jaggery halwa show how well it pairs with ghee, cardamom, and coconut.

In chai, a broken piece replaces refined sugar and gives each cup a warmer, more complex sweetness.

It also works grated into fermented batters - idli and dosa batter benefits from the added color and slight browning it encourages during cooking.

In baking, jaggery substitutes for brown sugar where moisture and a darker crumb are acceptable.

The alternatives to jaggery include muscovado and dark brown sugar, though neither brings the same cooked-cane depth.

Avoid it in meringues or any recipe where precise sugar structure matters - its molasses content disrupts those processes.

For glazes, melt jaggery slowly with butter or ghee, add ginger or chilies, and you have a glaze that works across roasted vegetables and grilled meats alike.

How Jaggery Is Used
MethodBest ForTip
🔥 MeltedDals, chutneys, chai, syrupsUse low heat and stir constantly to avoid scorching
🍯 SimmeredGlazes, toffee, chikki brittleTest syrup stage by dropping into cold water
🥣 Grated or crumbledBatters, baked goods, dessertsGrate from a cold block for cleaner shreds
🫖 Slow infusionChai, tonics, decoctionsAdd whole chunk to simmering liquid, remove before serving
Try It In
🧅Crispy Sweet Chili Onion RingsJaggery glaze adds caramel depth to the sweet chili coating→☕Ginger Cold Brew CoffeeDissolve jaggery in warm water first for easy cold-brew sweetening→🥜Cinnamon Sugar Roasted NutsSwap refined sugar for grated jaggery for a smokier brittle-style coating→

How to Buy and Store Jaggery

At a South Asian grocery, you'll find jaggery in a few forms - look for dense, uniformly colored blocks with a slight earthy sheen. Deep golden blocks are standard cane jaggery; darker, softer blocks signal date jaggery.

Avoid anything crumbly with a powdery white surface bloom or any off-smell - both indicate moisture damage or age.

Watch Out
White surface bloom on a jaggery block isn't mold - it's dried sugar crystals. However, soft spots with a sour smell indicate actual spoilage. Discard those.

Store solid jaggery in an airtight container in a cool, dry spot. In humid kitchens, move it to a sealed jar in the refrigerator to prevent sticky clumping. For a detailed breakdown of how conditions affect longevity, jaggery's shelf life covers the full picture by form and storage method. Solid cane jaggery keeps well for 6-12 months; date jaggery should be used within 3-6 months.

Where to Start With Jaggery

If you've never cooked with jaggery before, start with chai or a dal - both are forgiving and let the flavor land clearly without risk of waste.

One small chunk in your next pot of lentils will show you what refined sugar can't do in that context.

  • 🪨 Solid block jaggery - best first buy; stable, widely available, works in most recipes
  • 🌴 Date jaggery - try once you want a darker, more mineral flavor for desserts or tonics
  • 🫙 Jaggery powder - convenient for baking swaps, though flavor is slightly milder than block form

Cooks who enjoy unrefined sweeteners like maple syrup swaps that work will find jaggery fits a similar role - character-forward, not neutral. Use it where the sweetener's own flavor is part of the dish, not background noise.

Frequently Asked Questions

Is jaggery healthier than sugar?

Marginally, in one respect: jaggery retains trace iron, calcium, and potassium that refining removes. However, it's still predominantly sucrose and glucose - calorie for calorie, it behaves like sugar in the body.

Can diabetics eat jaggery?

No - not freely. Jaggery has a glycemic index close to white sugar and raises blood glucose similarly. Its unrefined status doesn't make it a safe substitute for people managing blood sugar.

How do you substitute jaggery for sugar in recipes?

Use roughly ¾ cup of grated or packed jaggery for every 1 cup of white sugar, then reduce added liquids slightly - jaggery holds more moisture. Expect a darker color and stronger flavor in the finished dish.

What is the difference between panela and jaggery?

Both are unrefined cane sugars, but panela (and piloncillo) comes from Latin American production traditions and typically has a milder, cleaner sweetness. Jaggery from South Asia often carries more molasses depth and a slightly smokier character from wood-fired processing.

How do you melt jaggery without burning it?

Add grated or broken jaggery to a pan over low heat with a splash of water. Stir continuously - it melts within two to three minutes. Remove from heat as soon as it's fully liquid.

Salade Niçoise with Seared Tuna

March 30, 2026

Searing tuna at high heat gives you a crisp crust while keeping the center rare. The trick is a hot pan, dry fish, and exactly 90 seconds per side.

Salade Niçoise with Seared Tuna served on a plate

This salad doesn't need marinating or complicated prep. You boil potatoes and eggs, blanch green beans, then arrange everything on a platter with the seared tuna sliced on top.

Make this for weeknight dinners when you want something filling that doesn't feel heavy. The bright vinaigrette and crisp vegetables balance the rich tuna without weighing you down.

QUICK SUMMARY

Salade Niçoise layers seared tuna with boiled potatoes, blanched green beans, hard-boiled eggs, and olives. High-heat searing creates a golden crust while the inside stays rare. Use fresh tuna and room-temperature ingredients for the brightest flavor.

⏱️Time Reality: 35 minutes total; 20 minutes active prep while water boils
🔥Critical Move: Preheat pan 3-5 minutes before adding tuna for proper crust
⚠️Watch Out: Overcooking tuna turns it dry and gray; pull at 1-2 minutes per side

Table of Contents

Toggle
  • Why This Recipe Works
  • What You'll Need
    • Ingredient Details
  • Ingredient Swaps
  • What to Serve With It
  • Store and Reheat
  • Frequently Asked Questions
  • Salade Niçoise with Seared Tuna
    • Method 
    • Tried this recipe?

Why This Recipe Works

Searing tuna at medium-high heat creates a caramelized exterior while the center stays pink and tender. For a different protein approach, try a fresh homemade salad recipe that uses a different base but similar assembly technique.

Quick Reference
⏱️
Prep Time
20 min
🔥
Cook Time
15 min
⏰
Total Time
35 min
🍽️
Servings
4 servings
📊
Difficulty
Medium
🏷️
Category
Main Dish
💡
Quick Tip
Use room temp ingredients for brighter flavor
🎯
Best For
Weeknight | Entertaining | Meal prep

Five things that make this work:

  • High-heat searing creates a golden crust in 90 seconds per side while keeping the tuna rare inside
  • Blanching green beans for exactly 2-3 minutes then shocking in ice water keeps them bright green and crisp-tender
  • Room-temperature ingredients let the vinaigrette coat everything evenly and bring out fuller flavor
  • Boiling eggs for 9 minutes produces fully set whites and creamy yolks without the gray-green ring
  • Emulsifying the vinaigrette by whisking acid first, then adding oil slowly, prevents separation on the plate
Quick Tip
Pat tuna completely dry before searing - surface moisture prevents browning and creates steam instead of crust

What You'll Need

Ingredients for Salade Niçoise with Seared Tuna

Stock up on fresh tuna, small potatoes, and green beans before you start. If you want another salad approach, check out a tender salad variation that uses different proteins but similar plating techniques.

🦐
Protein
  • 1-1.5 lb fresh tuna steak (1-inch thick)
  • 4 hard-boiled eggs
  • Optional: 6-8 anchovy fillets
🥬
Vegetables
  • 8 oz green beans (haricots verts)
  • 1 lb small new potatoes or fingerlings
  • 2 cups mixed salad greens or lettuce
  • 2 ripe medium tomatoes
🫙
Pantry
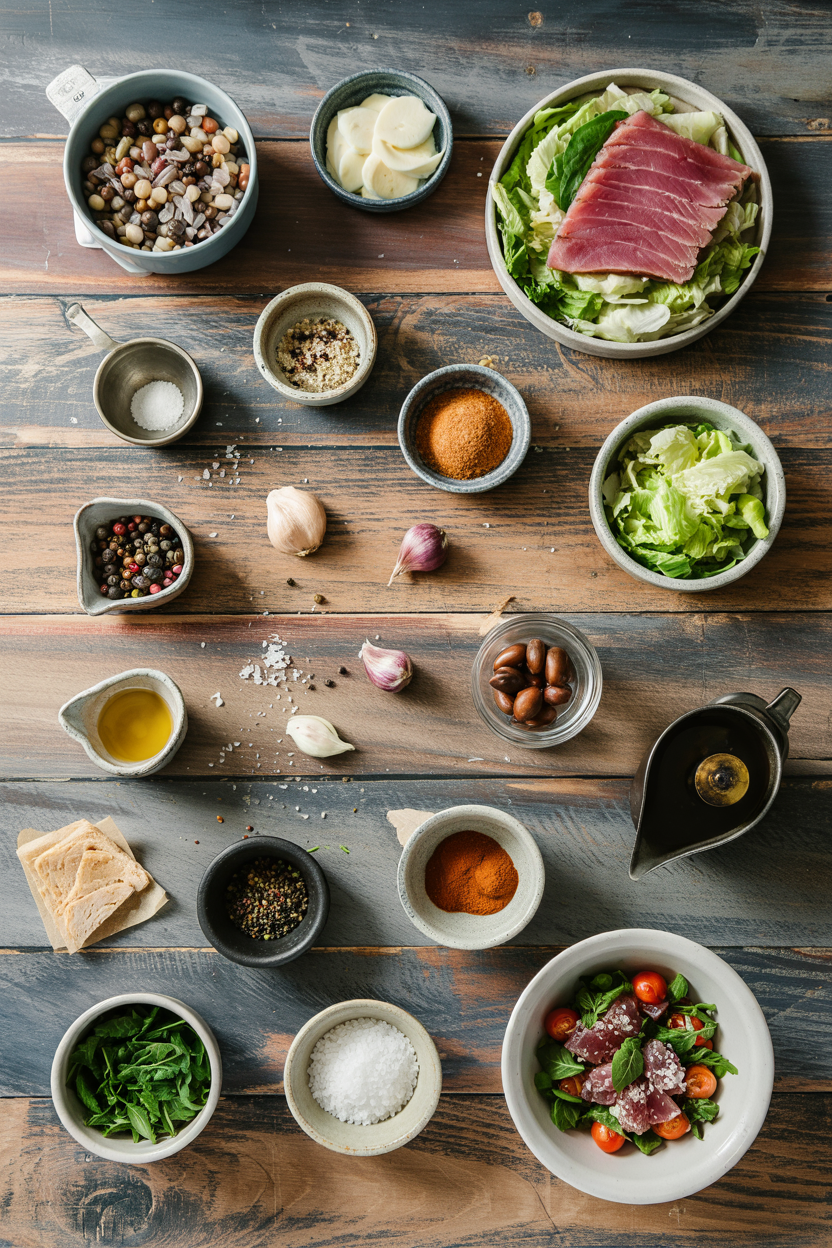
  • ⅓ cup Niçoise olives
  • ¼ cup olive oil (for searing and dressing)
  • 2 tablespoon lemon juice or red wine vinegar
  • 1 teaspoon Dijon mustard (for emulsifying)
  • Salt and black pepper

Ingredient Details

  • Fresh tuna steak
    Choose deep red tuna with no brown spots; frozen loses texture and moisture when seared
  • Green beans
    Haricots verts are thinner and more tender; regular green beans work but need 1 extra minute blanching
  • Small new potatoes
    Waxy potatoes hold their shape better than russets; cut larger ones in half for even cooking
  • Hard-boiled eggs
    Start eggs in cold water, boil exactly 9 minutes, then ice bath immediately to prevent green yolks
  • Niçoise olives
    Small, briny black olives from southern France; Kalamata works but has stronger flavor
  • Olive oil
    Use regular olive oil for searing (higher smoke point), save extra-virgin for the vinaigrette
  • Lemon juice or red wine vinegar
    Lemon is brighter and more traditional; red wine vinegar adds deeper, fruitier acidity

Ingredient Swaps

Fresh tuna gives the best texture, but canned works when you're short on time. If you need more variations, see simple homemade beef for a heartier protein approach that still plates well with vegetables.

Four swaps that work:

  • Fresh tuna → seared salmon or canned tuna: Salmon sears the same way; canned tuna skips cooking entirely but lacks the crisp crust (budget-friendly, method swap)
  • Green beans → snap peas or asparagus: Both stay crisp-tender; snap peas need 2 minutes blanching, asparagus needs 3-4 minutes (flexible, similar crunch)
  • New potatoes → baby fingerlings or waxy potatoes: Same texture and boiling time; avoid russets which get mealy and fall apart (flexible)
  • Anchovies → capers or omit entirely: Capers add similar briny punch without fishy flavor; omitting makes the salad milder (flexible, dietary)

Fresh Tuna vs Canned

Fresh works for: seared crust, rare center, restaurant presentation

Canned works for: quick assembly, meal prep, budget cooking, no-cook option

Lemon Juice vs Red Wine Vinegar

Lemon works for: bright citrus flavor, traditional Niçoise style, lighter finish

Vinegar works for: deeper acidity, slightly sweeter notes, longer shelf life

Instructions

You'll spend 15 minutes boiling and blanching, then 5 minutes searing. Rich plates need balance, and homemade fried rice recipe provides a starchy base if you want something more filling than salad greens.

  1. Boil potatoes and eggs together: Fill a pot with cold water, add potatoes and eggs, bring to a boil, then reduce to simmer. Cook potatoes 15-20 minutes until fork-tender, remove eggs at 9 minutes and transfer to ice water. Drain potatoes and slice in half while warm.

  2. Blanch green beans: Bring a separate pot of salted water to a boil, add green beans, cook exactly 2-3 minutes until bright green and crisp-tender, then immediately transfer to ice water for 1 minute. Drain and pat completely dry.

  3. Make vinaigrette: Whisk lemon juice (or vinegar), Dijon mustard, salt, and pepper in a small bowl until combined. Slowly drizzle in olive oil while whisking constantly until emulsified and thick. Taste and adjust salt or acid as needed.

  4. Sear tuna: Heat a cast iron or heavy skillet over medium-high for 3-5 minutes until very hot. Pat tuna dry with paper towels, season both sides with salt and pepper, add 1 tablespoon oil to pan, then sear tuna 1-2 minutes per side until golden crust forms but center stays rare. Remove to cutting board, tent with foil, rest 5 minutes, then slice crosswise into ¼-inch pieces.

  5. Assemble salad: Arrange greens on a large platter, then add separate sections of potatoes, green beans, quartered eggs, and tomato wedges. Top with sliced tuna, scatter olives and anchovies (if using), drizzle vinaigrette over everything, and serve immediately.

Golden Rule
Never flip tuna more than once - multiple flips tear the crust and overcook the fish

What to Serve With It

Salade Niçoise is a complete meal, but crusty bread soaks up the vinaigrette nicely. For more ideas on building a complete plate, see complete corn salad meal ideas that pair vegetable-forward salads with filling sides.

Side Dish Prep Why It Works How to Serve
Crusty baguette Easy Absorbs vinaigrette and adds texture without competing Slice and toast lightly, serve warm alongside
Steamed asparagus Easy Light green vegetable adds more crunch without heaviness Steam 3-4 minutes, season with lemon and salt
Simple lentil salad Medium Adds fiber and heartiness for hungrier appetites Toss cooked lentils with vinaigrette, serve cold
Chilled white wine Easy Crisp, dry wine cuts through rich tuna and salty olives Serve Sauvignon Blanc or Pinot Grigio chilled
Herbed focaccia bread Medium Shareable bread with herbs complements Mediterranean flavors Warm briefly in oven, cut into squares

Three ways to serve it:

  • As a light dinner: Serve the salad as-is with crusty bread and white wine for a complete meal
  • For summer entertaining: Arrange on a large platter family-style so guests can choose their favorite components
  • For meal prep: Keep components separate in containers, assemble portions daily with fresh vinaigrette
Best Pick
Room-temperature salad tastes brighter than chilled - pull components from fridge 20 minutes before serving

Store and Reheat

Assembled salad gets soggy within hours because the vinaigrette wilts the greens. The potato works best when it hits the table at the same time as the main, and simple potato recipe offers an alternative if you want a warm starch instead of cold salad components.

Method Time Best For
🍳 Stovetop 1-2 min per side Quickly warming tuna slices in a hot pan without overcooking
🔥 Oven 3-5 min at 275°F Gentle reheating of tuna without drying it out or graying the center
📦 Microwave 30 sec low power Quick warm-up but high risk of overcooking and turning tuna rubbery

For best results when storing:

  • Store components separately: Keep seared tuna, vegetables, eggs, and vinaigrette in separate airtight containers for up to 2 days
  • Don't dress greens ahead: Add vinaigrette only when serving to prevent wilting and sogginess
  • Reheat tuna gently: Warm sliced tuna briefly in a hot pan or low oven to avoid overcooking the already-seared fish
  • Pat vegetables dry: Before storing blanched beans or sliced tomatoes, pat completely dry to reduce moisture that makes salad watery
  • Skip freezing assembled salad: Greens, tomatoes, and hard-boiled eggs don't freeze well; only tuna can be frozen separately for up to 1 month

Frequently Asked Questions

How long to sear tuna steak for Salade Niçoise?

Sear tuna for exactly 1-2 minutes per side in a very hot pan. The center should stay rare and red while the outside develops a golden-brown crust.

Can I make Salade Niçoise with canned tuna?

Yes, use oil-packed canned tuna and skip the searing step entirely. Drain the tuna, break it into chunks, and arrange on the salad with the other components.

What goes with Salade Niçoise?

Serve crusty baguette to soak up the vinaigrette, or add a simple lentil salad for extra heartiness. Chilled white wine like Sauvignon Blanc pairs well with the salty olives and rich tuna.

How do I know when tuna is perfectly seared?

Look for a golden-brown crust on the outside and bright red color in the center when you slice it. The tuna should feel firm on the edges but still give slightly in the middle when pressed.

Can I make Salade Niçoise ahead and store it?

Store all components separately in airtight containers for up to 2 days, then assemble just before serving. Don't dress the salad until you're ready to eat or the greens will wilt.

Salade Niçoise with Seared Tuna served on a plate

Salade Niçoise with Seared Tuna

No ratings yet
Salade Niçoise combines seared tuna with boiled potatoes, blanched green beans, hard-boiled eggs, and olives for a bright, filling meal. High-heat searing creates a crisp crust while keeping the tuna rare inside, balanced by a tangy emulsified vinaigrette and fresh vegetables. This dish is perfect for weeknight dinners when you want a flavorful meal that feels light and fresh.
Print Recipe Pin Recipe
Prep Time 20 minutes mins
Cook Time 15 minutes mins
Total Time 35 minutes mins
Servings: 4 servings
Course: Main Dish
Cuisine: French
Ingredients Equipment Method Notes

Ingredients
  

  • 1 to 1.5 lb fresh tuna steak about 1-inch thick, dry before searing
  • 4 pieces hard-boiled eggs boiled exactly 9 minutes
  • 6 to 8 anchovy fillets optional
  • 8 oz green beans haricots verts preferred, blanched 2-3 minutes
  • 1 lb small new potatoes or fingerlings, boiled until fork tender
  • 2 cups mixed salad greens or lettuce
  • 2 medium tomatoes ripe, cut into wedges
  • 0.33 cup Niçoise olives
  • 0.25 cup olive oil for searing and dressing
  • 2 tablespoon lemon juice or red wine vinegar
  • 1 teaspoon Dijon mustard for emulsifying vinaigrette
  • salt to taste
  • black pepper to taste

Equipment

  • cast iron or heavy skillet Used for searing the tuna steak.
  • Pot Used for boiling potatoes and eggs.
  • Pot Used for blanching green beans.
  • Whisk Used for emulsifying vinaigrette.
  • Bowl For mixing vinaigrette.
  • Cutting board For slicing tuna and vegetables.
  • Paper towels For patting tuna dry before searing.

Method
 

  1. Fill a pot with cold water, add potatoes and eggs, bring to a boil, then reduce to simmer. Cook potatoes 15-20 minutes until fork-tender. Remove eggs at 9 minutes and transfer to ice water immediately. Drain potatoes and slice in half while warm.
    4 pieces hard-boiled eggs, 1 lb small new potatoes
  2. Bring a separate pot of salted water to a boil. Add green beans and cook for exactly 2-3 minutes until bright green and crisp-tender. Immediately transfer to ice water for 1 minute. Drain and pat completely dry.
    8 oz green beans
  3. Whisk lemon juice or vinegar, Dijon mustard, salt, and pepper in a small bowl until combined. Slowly drizzle in the olive oil while whisking constantly until emulsified and thick. Taste and adjust seasoning as needed.
    0.33 cup Niçoise olives, 0.25 cup olive oil, 2 tbsp lemon juice, 1 tsp Dijon mustard, salt, black pepper
  4. Heat a cast iron or heavy skillet over medium-high heat for 3-5 minutes until very hot. Pat tuna dry with paper towels. Season both sides with salt and pepper. Add 1 tablespoon olive oil to the pan. Sear tuna 1-2 minutes per side until a golden crust forms, but the center remains rare. Remove to cutting board, tent with foil, rest 5 minutes, then slice crosswise into ¼-inch pieces.
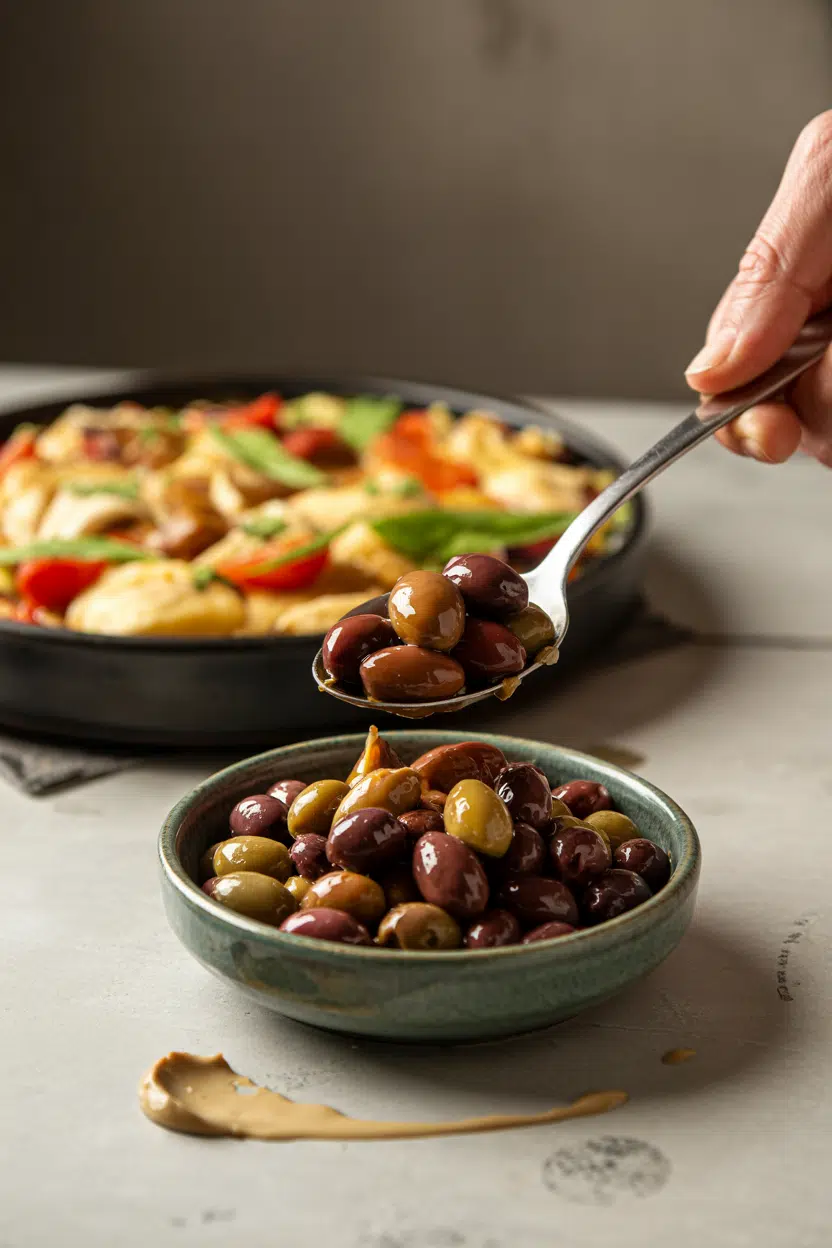
    1 to 1.5 lb fresh tuna steak, 0.25 cup olive oil, salt, black pepper
  5. Arrange mixed greens on a large platter. Add separate sections of sliced potatoes, green beans, quartered eggs, and tomato wedges. Top with sliced tuna, scatter olives and anchovies if desired, drizzle vinaigrette over the entire salad, and serve immediately.
    1 to 1.5 lb fresh tuna steak, 4 pieces hard-boiled eggs, 6 to 8 anchovy fillets, 8 oz green beans, 1 lb small new potatoes, 2 cups mixed salad greens, 2 medium tomatoes, 0.33 cup Niçoise olives, 2 tbsp lemon juice, 1 tsp Dijon mustard

Notes

  • Pat tuna completely dry before searing to ensure a crispy crust without steaming.
  • Blanch green beans precisely 2-3 minutes for bright color and tender-crisp texture.
  • Store salad components separately and add vinaigrette just before serving to prevent sogginess.

Tried this recipe?

Let us know how it was!

What Is Ground Mustard? [Taste, Uses & More]

March 30, 2026

Ground mustard does something no other spice quite replicates: it adds concentrated heat, sharpness, and emulsifying power all at once.

What Is Ground Mustard

Understanding mustard seed and its flavor helps explain why the ground form carries such intensity - the volatile compounds responsible for that sinus-clearing punch only activate when the powder meets liquid.

Cooks who rely on brown mustard swaps that work quickly learn that finding a true like-for-like is harder than expected, because ground mustard's dry heat behaves differently from any condiment or paste.

QUICK SUMMARY

Ground mustard is a dried, powdered spice made from yellow, brown, or black mustard seeds. It delivers sharp, pungent heat that only fully activates with liquid. Use it in rubs, sauces, glazes, and cheese dishes. Best within 6-12 months.

🌡️Flavor: Sharp, sinus-clearing heat with a bitter-green base note
🍖Best Uses: Dry rubs, cheese sauces, vinaigrettes, ham glazes
🧂Also Known As: Mustard powder, dry mustard, mustard flour
📦Buy It: Sealed, pale yellow powder - no clumping, no musty smell
⏳Shelf Life: Peak potency at 6-12 months; usable up to 24 months with declining heat

What Is ground mustard?

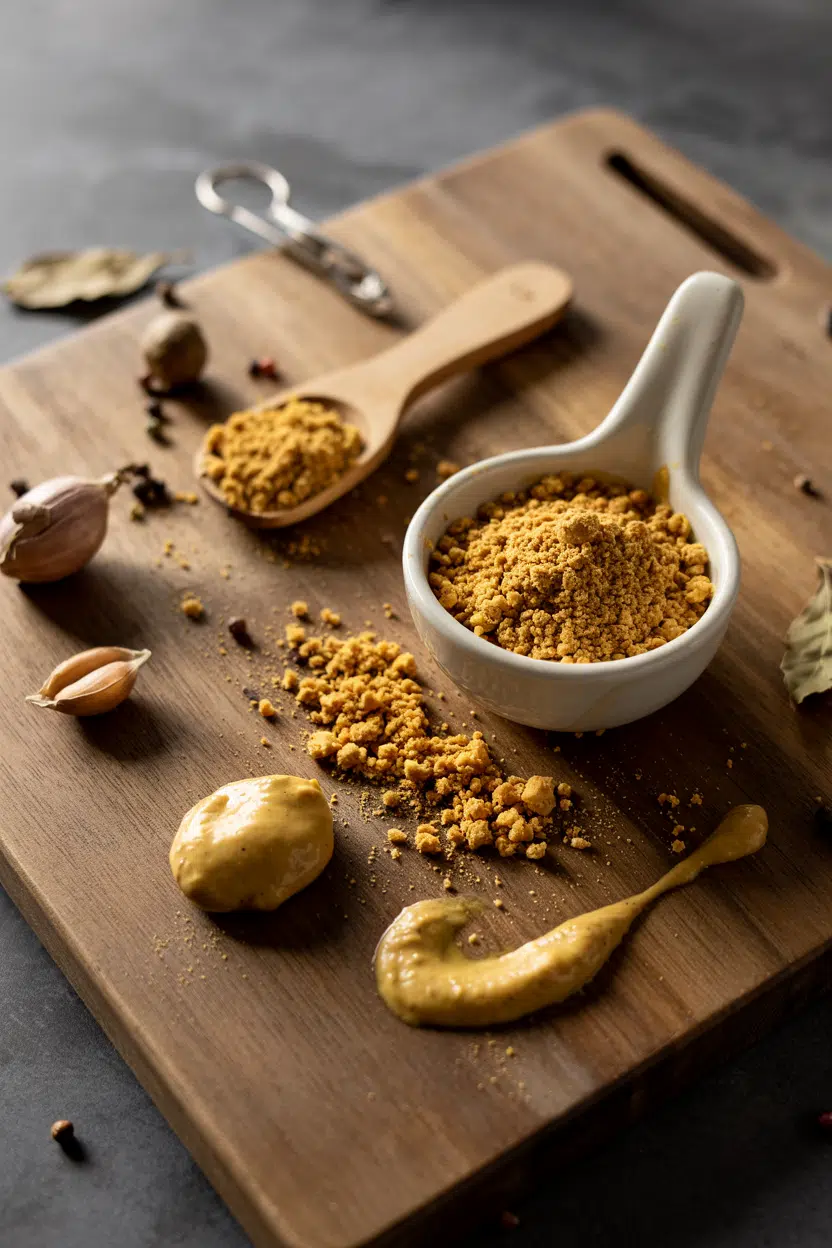
Ground mustard is the powdered form of dried mustard seeds - yellow, brown, or black - ground fine enough to dissolve smoothly into liquids, sauces, and batters.

It goes by several names: mustard powder, dry mustard, mustard flour, and ground mustard seed are all the same product.

The distinction between comparing mustard flour vs mustard powder options comes down largely to grind texture and commercial labeling, not meaningful flavor differences.

Yellow mustard seeds produce the mildest, brightest powder. Brown and black seeds yield a sharper, more pungent result - these are common in Indian cooking, where ground mustard forms part of spice blends and tempering mixtures.

The spice originated in the ancient Mediterranean and South Asia, making it one of the oldest documented condiment ingredients on record.

  • 🌱 Yellow mustard seed - mild, pale, standard in American and British products
  • 🌿 Brown mustard seed - sharper and more aromatic, used heavily in Indian cuisine
  • ⚫ Black mustard seed - most pungent, less common in ground form commercially

Unlike whole seeds, the ground form has no heat at rest. The enzyme reaction that creates pungency only triggers when water contacts the powder - a fact worth knowing before adding it to a dry rub.

What Does ground mustard Taste Like?

ground mustard - What Is Ground Mustard

Raw from the jar, ground mustard tastes bitter and faintly sulfurous - not much like the heat it promises. The real flavor emerges fast once liquid is introduced.

Sensory SnapshotPungent Intensity
👅 Flavor
sharp heattangybitter-green
✋ Texture
fine powdersmooth when hydrated
👃 Aroma
pungentsulfurousfreshly peppery

Activated mustard heat sits closer to horseradish than chili - it's nasal and upward-moving rather than mouth-coating.

Cold water produces the sharpest result; hot water or vinegar tempers it.

Mixed with cream or butter, the bitterness softens significantly while the tang stays present.

Compared to a prepared mustard condiment, the dry form hits faster and more directly - there's no vinegar or brine diluting the initial punch.

Golden Rule
Mix ground mustard with cold water and let it sit 10 minutes before adding acid or heat - this window locks in maximum pungency. Skip it and you get a fraction of the flavor.

How to Use ground mustard

Ground mustard earns its place across a wide range of cooking methods, and the approach you choose changes the final intensity noticeably.

How Ground Mustard Is Used
MethodBest ForTip
🧪 Rehydrated PasteDressings, marinades, sandwich spreadsUse cold water; rest 10 min before adding acid
🍳 Whisked into Hot LiquidBéchamel, cheese sauces, graviesAdd early so it fully dissolves; heat mellows sharpness
🧂 Dry RubBraised meats, grilled pork, sausage blendsActivates on contact with meat juices during cooking
🫙 Bloomed in OilIndian-style tempering, spiced butter saucesKeep heat low - ground mustard scorches faster than seeds

In French cooking, mustard-based vinaigrettes use dry mustard or Dijon interchangeably - the powder gives a cleaner, less sweet result.

German charcuterie relies on it heavily in sausage seasoning blends, where it contributes heat without moisture.

American barbecue rubs almost always include dry mustard alongside paprika and brown sugar, and British recipes lean on it in cheese sauce and baked ham glazes.

Cheese sauce is one of dry mustard's most practical homes. A half-teaspoon stirred into a cheddar béchamel cuts the dairy richness without announcing itself as mustard at all. If you run short, a look at replacements for ground mustard shows which condiments and spices come closest - though none replicate the emulsifying effect exactly.

Ground mustard also works in pickling brines, where it sharpens the overall flavor without clouding the liquid the way whole seeds can. Avoid it with delicate white fish or dessert applications - the bitterness clashes rather than complements.

Try It In
🥗Honey Mustard Dressing (Homemade)Ground mustard gives the dressing clean heat without extra vinegar→🍖Air Fryer Honey Mustard Pork ChopsDry mustard in the rub activates against pork juices during cooking→🫙Honey Mustard Dipping SauceShows how powder balances sweet and sharp in a simple sauce→

How to Buy and Store ground mustard

At the store, look for a pale yellow to tan powder in a well-sealed container - no clumping, no dark specks, no musty smell. A recent pack date matters more than the brand.

Bulk bins are convenient but expose the powder to moisture and light, both of which degrade pungency fast.

Watch Out
Dark specks in the powder indicate older or toasted seed pieces that have begun to oxidize. A musty rather than sharp aroma means the volatile compounds have largely gone - the powder will add color but little heat.

Storage is straightforward:

  • Container - Airtight and opaque; a sealed spice jar inside a dark cabinet is ideal
  • Location - Cool, dry pantry away from the stove and any direct light
  • Shelf life - Best within 6-12 months; potency drops noticeably after that, though it stays safe to use up to 24 months

If you've had a tin for over a year, rub a pinch between your fingers and smell it. Weak aroma means weak heat - use more, or replace it.

For long-term storage questions, freezing ground mustard can extend potency beyond what the pantry allows.

Start Here if You're New to dry mustard

Ground mustard rewards cooks who understand one rule: activate before you assess. Mix a small amount with cold water, wait ten minutes, then taste - that's what you're actually adding to a dish.

Start with cheese sauce or a vinaigrette.

Both are forgiving, and both show immediately how the powder performs.

If you're out and need a fast fix, alternatives to yellow mustard or a look at swapping out mustard seed covers the closest options for specific recipes.

Once you've cooked with it a few times, dry mustard stops being a supporting spice and starts being a first-reach ingredient.

Frequently Asked Questions

How do you activate ground mustard?

Mix it with cold water and let it rest for 10 minutes before adding any acid or heat. This window allows the enzyme reaction to complete. Adding vinegar or heat too early halts the process and reduces final pungency.

Can you substitute ground mustard for prepared mustard?

Yes, with adjustment. Use 1 teaspoon of ground mustard per tablespoon of prepared mustard, then add a small amount of water or vinegar. The dry form is more concentrated and lacks the brine or vinegar of condiment mustards.

Is ground mustard the same as mustard seed?

No. Ground mustard is mustard seed that has been dried and milled to a fine powder. Whole mustard seeds release flavor more slowly and don't dissolve into sauces the way the ground form does.

How spicy is ground mustard compared to horseradish?

Both deliver nasal, sinus-clearing heat rather than mouth-coating spice. Freshly activated ground mustard hits at a similar intensity to mild prepared horseradish, though horseradish tends to fade faster once exposed to air.

How long does ground mustard last?

Peak pungency lasts 6-12 months from the pack date when stored in an airtight, opaque container. It remains safe to use up to 24 months but loses significant heat and aroma in the second year.

What Is Frisee? [Taste, Uses & More]

March 30, 2026

You spot a head of frisée at the grocery store and pause - it looks like a salad green that couldn't decide what it wanted to be.

What Is Frisee

The outer leaves are dramatically frilly, nearly white at the core, and unlike anything sitting next to the romaine.

If you're already comparing it to similar leaves, comparing endive vs belgian endive options helps clarify where frisée lands in the chicory family - and swapping out endive gives you practical backup when it's not available.

QUICK SUMMARY

Frisée is a curly endive with pale yellow-green leaves and a clean, pronounced bitterness. It's best known as the base of the French classic salade frisée aux lardons, where warm bacon fat and a poached egg temper its sharp bite.

🌿Type: Curly endive; chicory family leafy green
👅Flavor: Clean bitter, peppery undertone, mildly nutty at center
✋Texture: Crisp outer leaves, tender and slightly creamy inner heart
🍳Best Use: Raw in salads, wilted briefly in warm bacon dressing
🛒Buy It: Look for firm pale center and tightly curled, crisp outer leaves
📅Shelf Life: 5-10 days refrigerated, unwashed and dry in crisper drawer

What Is Frisee?

Frisée - also sold as curly endive or chicory frisée - is a member of the chicory family grown primarily in France and Western Europe.

Its tightly curled, frilly leaves range from dark green on the outside to a pale straw-yellow at the heart, where the leaves grow densest and most tender.

Unlike its close relative radicchio, frisée forms a loose, open head rather than a tight round one.

The inner yellow-white heart is the most prized part - lower in chlorophyll, which means less bitterness and a slightly softer texture than the outer fringe.

It's botanically the same species as broad-leafed endive, though the name "frisée" typically refers specifically to the fine-leafed, tightly curled French type.

Cooks sometimes confuse it with Belgian endive, which is a different growth form entirely - compact, torpedo-shaped, and grown in darkness to blanch the leaves.

  • 🇫🇷 French curly type - the fine-leafed variety most common in bistro cooking
  • Broad-leaf curly endive - coarser, darker, more assertively bitter
  • Inner heart / frisée heart - pale, tender center sold separately in some markets

What Does Frisee Taste Like?

frisee - What Is Frisee

Frisée's bitterness is clean and green - not the roasted or medicinal bitterness you get from some chicories, but a sharp, clear bite that hits the back of the palate. There's a peppery undertone running through the outer leaves, and the pale inner core softens into something almost nutty.

Compared to other bitter greens, it sits between romaine (mild, barely bitter) and radicchio (deeply astringent).

For context on how arugula and its flavor compares, arugula delivers a sharper, more peppery punch - frisée is more uniformly bitter with less spice.

Sensory SnapshotStrong Intensity
👅 Flavor
bitterpepperymildly nutty
✋ Texture
crisptender at center
👃 Aroma
freshgreenslightly earthy

Heat softens frisée's bitterness noticeably. A few seconds in warm bacon fat - the classic chaud-froid approach - rounds the edges without turning it limp.

How to Use Frisee

Salade frisée aux lardons is the French bistro benchmark: frisée tossed with warm lardons, a soft-poached egg, and a sharp mustard vinaigrette. The warm fat gently wilts the outer leaves while the egg yolk folds into the dressing, coating every curl. It's a study in contrast - bitter green against fatty, salty pork.

Beyond that classic, frisée earns its place as a textural counterpoint in composed plates. It holds crunch under roasted meats, adds a bitter lift inside sandwiches, and won't go limp the moment a warm grain bowl touches it.

Golden Rule
Balance frisée's bitterness with fat, acid, or salt - warm bacon fat, citrus, mustard, and goat cheese are all built for this job.

Pairing-wise, frisée responds best to bold flavors that can hold their own: sharp mustards, citrus segments, blue or goat cheese, and toasted hazelnuts or walnuts. Overly sweet dressings flatten its character and leave nothing interesting in the bowl.

How Frisée Is Used
MethodBest ForTip
🥗 RawSalads, sandwiches, composed platesUse inner heart for milder bitterness; outer fringe for more punch
🍳 WiltedWarm salads, grain bowls, bistro-style dressingsAdd frisée off the heat - residual warmth is enough to wilt without cooking
🍽️ GarnishUnder roasted meats, composed restaurant platesPlace last so heat from the plate doesn't collapse the leaves
🥣 Tossed InGrain bowls, pasta saladsTear rather than chop - cut edges brown faster

For dressings that work well here, a sharp Balsamic Vinaigrette Dressing (Homemade) handles the bitterness cleanly. If you're going the cheese route, Blue Cheese Dressing (Homemade) doubles down on the richness.

A Greek Vinaigrette Dressing (Homemade) adds bright acidity that cuts right through the outer leaves.

Try It In
🧀Blue Cheese Dressing (Homemade)Bold enough to stand up to frisée's bitterness→🍶Balsamic Vinaigrette Dressing (Homemade)Bright acidity that pairs with lardons or shaved fennel→🫒Greek Vinaigrette Dressing (Homemade)Herby and sharp — lifts citrus-forward frisée salads→

How to Buy and Store Frisee

A good head of frisée has a firm, pale straw-yellow center and tightly curled outer leaves that spring back when pressed.

Avoid anything with brown tips, limp fringe, or slimy spots at the base - those signal age and poor storage.

Watch Out
Keep frisée away from ethylene-producing fruits like apples and pears. Even brief exposure accelerates browning and leaf collapse.

Store it unwashed - moisture speeds deterioration.

Wrap the head loosely in a dry paper towel, place it in a perforated bag, and keep it in the crisper drawer.

Used this way, it holds well for 5-10 days, with the inner heart lasting toward the longer end.

Check the frisee spoilage signs guide before using older heads, since the outer leaves brown before the center deteriorates.

Start Here With Frisee

If you've never cooked with frisée before, start with the lardons salad. It's the most forgiving entry point - the warm fat, mustard, and egg do the balancing work, and you'll immediately understand how this green operates.

Once you're comfortable, use it where you'd normally reach for a milder leaf.

Anywhere you want crunch and a bitter edge - grain bowls, composed plates, sandwiches - frisée holds its own.

When you need a substitute in either direction, frisee swaps that work covers the most practical options.

If you're curious how its broader chicory relatives compare, the differences between radicchio vs red cabbage shows how dramatically bitterness varies across the family.

Frequently Asked Questions

Is frisee the same as endive?

They're related but not the same. Frisée is a curly-leafed form of endive with frilly, tightly curled leaves and a pale yellow heart. Belgian endive is a separate growth form - compact, torpedo-shaped, and blanched in darkness to reduce bitterness.

How do you cook frisee without losing its crunch?

Don't apply direct heat. Add frisée to the bowl off the burner and let warm dressing or bacon fat do the wilting. Ten to fifteen seconds of residual heat softens the bitterness while keeping the leaves from going limp.

What does frisee taste like compared to radicchio?

Both are bitter, however frisée is less astringent and has a cleaner, greener bite. Radicchio carries a deeper, more wine-like bitterness. Frisée is also crisper in texture where radicchio is firmer and more substantial.

How long does frisee last in the fridge?

Stored unwashed and dry in a paper towel in the crisper, frisée holds for 5-10 days. The pale inner heart stays fresh longer than the outer fringe, which browns first.

Can you use frisee in cooked dishes?

Yes, with care. Brief wilting in warm bacon fat or [lard swaps that work](https://forkliftkitchen.com/lard-substitutes/) keeps texture intact for warm salads. Full cooking turns it waterlogged and very bitter - avoid simmering or roasting it.

What Is Hoop Cheese? [Taste, Uses & More]

March 30, 2026

Most people dismiss hoop cheese as a primitive forerunner to "real" cheese - something that disappeared when supermarket dairy took over.

What Is Hoop Cheese

That assumption misses the point entirely.

Hoop cheese never stopped being useful, and cooks who grew up with it in Appalachian kitchens or Midwestern farm communities know it holds its own against any fresh dairy product.

It fits naturally alongside the kind of dishes alongside cornbread that built American farmhouse cooking, and it earns a place on modern boards and skillets with equal confidence.

QUICK SUMMARY

Hoop cheese is a fresh pressed cow's milk cheese with a mild lactic tang, clean finish, and firm but yielding texture. It's sliceable straight from the wheel, takes light heat without falling apart, and suits everything from sandwiches to scrambled eggs. Best used within two weeks.

🧀Type: Fresh pressed whole-milk cheese, non-aged
👅Flavor: Mild lactic tang, milky sweetness, clean acidic finish
🍽️Best Uses: Sandwiches, pan-frying, salads, eggs, cheese boards
🛒Where to Buy: Farmers' markets, small dairies, Southern grocery stores
📅Shelf Life: 7-14 days refrigerated when tightly wrapped and kept cold

What Is hoop cheese?

Hoop cheese comes from one of the oldest cheesemaking traditions in American farm life. Whole cow's milk curds are ladled into a cheese hoop or mold, then drained and pressed until the whey is expelled and the paste firms into a sliceable wheel.

No aging, no rind, no added cultures beyond what produces the initial lactic fermentation.

It originated in Southern and Appalachian communities and Midwestern farm households where fresh, unaged cheese was a practical staple - made quickly, eaten quickly.

You'll still find it sold in rounds or wedges at farmstead dairies and regional markets, often wrapped simply in wax paper.

Regional naming gets confusing fast. Some grocers label it farmer's cheese, which is accurate in spirit but imprecise - farmer's cheese can refer to several pressed fresh styles. "Pressed cheese curd" is a more literal description.

Whatever the label, the defining feature is its production method: a hoop mold, minimal processing, and whole milk.

  • 🧀 Milk source - whole cow's milk, not skimmed or blended
  • 🔄 Production - curd is pressed in a hoop mold, not stirred or cultured like cottage cheese
  • 📍 Origin - Southern U.S., Appalachia, and Midwestern farm communities
  • 🏷️ Alternate names - farmer's cheese (regional), pressed cheese curd

What Does hoop cheese Taste Like?

hoop cheese - What Is Hoop Cheese

Hoop cheese reads mild on every level, but mild doesn't mean flat. The dominant note is a clean lactic tang - the same brightness you get from good plain yogurt, but gentler and backed by a soft milky sweetness.

The finish is slightly acidic without puckering.

Sensory SnapshotMild Intensity
👅 Flavor
lactic tangmilky sweetnessclean acid finish
✋ Texture
firmdense pastesmooth
👃 Aroma
fresh milkfaint lactic

Compared to its closest relatives, hoop cheese sits between pressed ricotta and farmer's cheese in texture - firmer than either, without the crumble of dry ricotta or the moisture pooling of cottage cheese.

It's far less salty than feta, which means the natural dairy character comes through unmasked.

Heat doesn't melt it the way cheddar melts. It softens at the edges and warms through, but holds its shape - a quality that makes it reliable in the pan.

Golden Rule
Hoop cheese's mildness is its function, not its flaw. Pair it with ingredients that complement rather than overpower - cured meats, fresh produce, and light acids work best.

How to Use hoop cheese

Hoop cheese doesn't require much. Its firm, smooth texture makes it a natural for slicing straight onto a sandwich - ham or smoked turkey are the traditional pairings, and they still work.

The cheese holds together cleanly without tearing or crumbling mid-bite.

How Hoop Cheese Is Used
MethodBest ForTip
🥗 Raw/SlicedSandwiches, cheese boards, saladsSlice at room temperature for cleanest cuts
🍳 Pan-FriedWarm side with grits or cornmeal, quesadillasUse medium heat - it softens but won't fully melt
🥚 Crumbled/StirredScrambled eggs, omelets, mashed potatoesAdd at the end of cooking to preserve tang
🧂 Crumbled as ToppingTomato and cucumber salads, grain bowlsPairs well with pickled onions or crisp vegetables

On a country-style cheese board, hoop cheese earns its place alongside crisp pickles, fig or peach preserves, and raw apple or pear slices.

The slight tang cuts through sweet preserves; the mild dairy body softens the brine of a good pickle.

Cornbread and buttermilk biscuits are natural companions - if you want to round out the spread, ideas for dishes alongside cornbread extend that pairing further.

It crumbles readily into scrambled eggs or omelets, adding creaminess without the richness of cream cheese. Stirred into mashed potatoes near the end of cooking, it contributes body and a mild tang that works like a less assertive sour cream.

Avoid strongly spiced preparations - heavy curry or chili blends erase its character entirely.

If you can't find it locally, hoop cheese swaps that work can keep a recipe on track without sacrificing much texture or flavor.

Try It In
🧀Cheddar Cheese StrawsSwap in hoop cheese for a milder, less sharp version→🍳Egg and Cheese Breakfast SandwichSliced hoop cheese holds its shape under heat→

How to Buy and Store hoop cheese

A good wheel of hoop cheese looks uniformly white or pale cream with no slimy sheen on the cut face. Press it lightly - it should spring back slightly.

Dry, cracked edges signal it's past its window, and excess moisture pooling in the package points to poor handling.

Watch Out
Avoid any piece with a sour ammonia smell or a grayish tint at the edges - those are signs of spoilage, not just age. A clean lactic scent is what you want.

At home, wrap it first in wax paper, then loosely in plastic or transfer it to an airtight container.

Keep it in the coldest part of the refrigerator - not the door.

This method prevents both flavor transfer from other foods and surface drying.

Rules for keeping ricotta fresh follow similar logic, since both are fresh dairy cheeses that degrade quickly once exposed to air.

Hoop cheese is best within 7-14 days of purchase. For a detailed breakdown of signs it's turned, hoop cheese's shelf life covers the specifics.

Storage principles for storing cottage cheese correctly apply here too - both cheeses share the same vulnerability to air exposure and temperature swings.

Start Here

Hoop cheese rewards a simple first approach.

Slice it cold, put it on a sandwich with salt-cured ham, and add a crisp pickle on the side.

That combination shows you exactly what this cheese does well - clean dairy flavor, firm slice, no fuss.

From there, try it pan-fried alongside grits, or crumbled into eggs the next morning.

Both moves take under ten minutes and confirm whether it earns a permanent spot in your refrigerator.

Frequently Asked Questions

What is hoop cheese made from?

Whole cow's milk curds are ladled into a hoop mold and pressed to expel the whey. No aging or added cultures beyond the initial lactic fermentation - it's one of the simplest cheese styles produced.

Is hoop cheese the same as farmer's cheese?

Not exactly. They're similar fresh pressed styles, but "farmer's cheese" is a broad regional term that covers several textures and production methods. Hoop cheese specifically refers to cheese pressed in a hoop mold from whole milk curds.

How long does hoop cheese last in the fridge?

Well-wrapped and kept in the coldest part of the refrigerator, it holds for 7-14 days. Once it develops an off smell or slimy surface, it's done - don't try to salvage it by trimming.

Can you melt hoop cheese?

Not in the way cheddar or mozzarella melts. It softens with heat and becomes creamy at the edges, but it won't turn fluid or stretch. For a warm application, pan-frying works better than broiling or baking.

Is hoop cheese lower in sodium than other cheeses?

Yes, noticeably so. Because it's not brined or aged with salt as a preservative, hoop cheese has significantly less sodium than feta, aged cheddar, or parmesan. That's part of why its dairy flavor reads so clean.

Cheese and Walnut Spread

March 30, 2026

Cheese and Walnut Spread Recipe Article

A creamy base with toasted walnuts folded in. That's what happens when you mix softened cream cheese with garlic, lemon juice, and chopped nuts.

Cheese and Walnut Spread served on a plate

The food processor does most of the work. You pulse until the texture hits that spreadable-but-chunky sweet spot.

This works for quick snacks when you need something that looks like you tried but takes 15 minutes start to finish.

QUICK SUMMARY

Cheese and walnut spread combines softened cream cheese with toasted walnuts, garlic, and lemon juice for a creamy yet chunky texture. The key is toasting the nuts just until golden and adding liquids gradually to control the consistency. Make this when you need a no-cook appetizer that works for crackers, vegetables, or toast.

⏱️Timing: 10 minutes prep, 5 minutes toasting nuts, no marinating needed
🔪First Move: Toast walnuts in 350°F oven for 5 minutes, stirring halfway
⚠️Watch Out: Add lemon juice 1 teaspoon at a time to avoid runny texture

Why This Recipe Works

Toasting nuts before mixing releases their oils and amplifies that nutty flavor. For a version that comes together quickly, a creamy dip side dish uses similar technique but different base ingredients.

Quick Reference
⏱️
Prep Time
10 min
🔥
Cook Time
5 min
⏰
Total Time
15 min
🍽️
Servings
6
📊
Difficulty
Easy
🏷️
Category
Appetizer
💡
Quick Tip
Toast nuts just until fragrant for crunch
🎯
Best For
Entertaining | Weeknight | Meal prep

Why it works:

  • Cream cheese at room temperature blends smoothly - cold cream cheese creates lumps and uneven texture no matter how long you mix
  • Toasting walnuts at 350°F for 5 minutes releases oils - this creates crisp texture and prevents the raw, bitter taste that untreated nuts bring
  • Fresh lemon juice adds brightness without overpowering - bottled juice tastes flat and can't balance the richness of cream cheese the same way
  • Pulsing nuts in a food processor controls texture - 5 quick pulses give you chunky bits while 10+ pulses turn the mixture pasty
  • Chilling for 30 minutes after mixing melds flavors - the garlic mellows, herbs bloom, and the spread firms to perfect spreading consistency
Quick Tip
Stir nuts halfway through toasting so edges don't burn while centers stay pale

What You'll Need

Ingredients for Cheese and Walnut Spread

Shop for fresh walnuts in the baking aisle and check cream cheese expiration dates. We keep a batch ready for nights like this - a simple style side dish works with similar pantry items but different technique.

🧀
Dairy Base
  • 8 oz cream cheese, softened
  • 2 tablespoon olive oil
🌰
Nuts & Aromatics
  • 1 cup walnuts
  • 2 cloves garlic, minced
🌿
Seasonings
  • 2 tablespoon fresh parsley or thyme
  • 2 teaspoon lemon juice
  • ½ teaspoon salt
  • ¼ teaspoon black pepper
  • 1 teaspoon honey (optional)

Ingredient Details

  • Cream Cheese
    Let sit at room temperature for 20 minutes before mixing so it blends without lumps
  • Walnuts
    Toast in single layer on sheet pan, watching closely after 3 minutes when they start to smell nutty
  • Garlic
    Mince finely or use garlic press so you don't bite into large chunks in the finished spread
  • Lemon Juice
    Use fresh-squeezed rather than bottled for brightness that doesn't taste artificial
  • Olive Oil
    Add slowly while mixing to control final texture - too much makes the spread separate
  • Fresh Herbs
    Chop fine and add at the end so they stay bright green instead of bruising during processing
  • Honey
    Drizzle in last if using, stirring just until swirled through for sweet-savory contrast

Ingredient Swaps

Different nuts change the flavor but keep the same crunchy-creamy balance. A good something rich like beef can make or break the plate, but when you're building a spread, texture matters more than matching proteins.

Four swaps that work:

  • Cream cheese → Neufchâtel - Slightly less fat but still spreadable, works 1:1 with no other changes needed
  • Walnuts → Pecans - Sweeter, less earthy flavor but same crunch when toasted at 350°F for 5 minutes
  • Olive oil → Canola oil - Less fruity taste but same smooth texture, use same amount
  • Lemon juice → White wine vinegar - Similar tang but slightly sharper, start with 1 teaspoon and taste

Food Processor Method

Works for: Smooth, uniform texture with small walnut chunks evenly distributed

Skip if: You want rustic, hand-chopped texture with larger nut pieces

Hand-Mix Method

Works for: Chunky texture with visible walnut pieces and softer consistency

Skip if: Cream cheese is cold or you want perfectly smooth spread

Instructions

The spread comes together in three stages: toast, mix, chill. Rich mains need something to cut through, and this dip does exactly that - serve it alongside crackers or vegetables while the main finishes cooking.

  1. Toast walnuts at 350°F for 5 minutes. Spread nuts in single layer on sheet pan, stir at 3-minute mark, pull when golden and fragrant.
  2. Chop toasted walnuts into small pieces. Let cool 2 minutes, then pulse in food processor 5 times or chop by hand into quarter-inch pieces.
  3. Mix cream cheese with garlic and herbs. Beat softened cream cheese with minced garlic and chopped herbs until combined, about 30 seconds.
  4. Fold in walnuts and season. Stir chopped walnuts into cream cheese base, add salt, pepper, lemon juice, and olive oil gradually, tasting between additions.
  5. Chill spread for 30 minutes before serving. Cover bowl with plastic wrap and refrigerate until firm enough to hold shape on cracker.
Golden Rule
Add lemon juice 1 teaspoon at a time - you can always add more but can't remove excess tang

What to Serve With It

Crackers and vegetables work, but pairing with a substantial main turns this into a proper meal. The pork works best when it hits the table at the same time as the main - try something tender like pork for balanced plates that don't feel heavy.

Side Dish Prep Why It Works How to Serve
Crackers Easy Neutral base lets walnut flavor shine Arrange on board with spread in center bowl
Sliced Cucumbers Easy Fresh crunch contrasts creamy texture Cut into rounds, dollop spread on each
Carrot Sticks Easy Sweet vegetable pairs with nutty richness Slice into batons, serve with spread for dipping
Toast Points Easy Warm bread enhances spread temperature Cut toast into triangles, spread while warm
Fresh Pear Slices Easy Fruit sweetness balances garlic punch Slice thin, top with small spoonful of spread

Three ways to serve it:

  • On a charcuterie board - place spread in small bowl surrounded by crackers, cured meats, and dried fruit for entertaining
  • As a sandwich spread - layer on crusty bread with turkey, lettuce, and tomato for lunch with crunch
  • With roasted vegetables - dollop on warm roasted Brussels sprouts or cauliflower for savory contrast
Best Pick
Serve with water crackers or thin baguette slices to keep focus on the spread's nutty-creamy flavor

Store and Reheat

Cheese spreads keep longer than you think when stored properly. A dollop of this dip takes each bite somewhere more interesting, and leftovers work for weekday lunches when you prep them right.

Method Time Best For
🌡️ Room Temperature 10-15 min Softening chilled spread before serving
📦 Microwave 10 seconds at 50% power Softening small portions without melting

For best results when storing:

  • Refrigerate in airtight container for 3-4 days - press plastic wrap directly on surface to prevent drying before sealing lid
  • Freeze for up to 1 month in shallow container - texture changes slightly after thawing but flavor stays intact
  • Thaw frozen spread overnight in fridge - bring to room temperature 10 minutes before serving for best consistency
  • Stir before serving if oil separates - mix vigorously with spoon to re-emulsify if olive oil pools on top
  • Don't leave at room temperature longer than 2 hours - dairy base spoils quickly in warm conditions, refrigerate promptly after serving

Frequently Asked Questions

Can I use different nuts besides walnuts in cheese spread?

Pecans and almonds both work using the same 1 cup measurement and 5-minute toasting time. Pecans give sweeter flavor while almonds add more crunch with less earthy taste.

How long does cheese and walnut spread keep in the fridge?

Store in airtight container for 3-4 days refrigerated. Press plastic wrap directly on surface before sealing to prevent drying and flavor loss.

How do I know when the walnut spread is properly seasoned?

Taste after each addition of salt, pepper, and lemon juice. The spread should taste balanced with nutty richness, tangy brightness, and just enough salt to make flavors pop without tasting salty.

What if my cheese spread is too runny or too stiff?

For runny spread, stir in more chopped walnuts or refrigerate 15 minutes to firm up. For stiff spread, let sit at room temperature 10 minutes or stir in olive oil 1 teaspoon at a time.

Can cheese and walnut spread be made ahead and frozen?

Freeze in shallow airtight container for up to 1 month. Thaw overnight in fridge, let sit at room temperature 10 minutes before serving, and stir well if oil separates.

Cheese and Walnut Spread served on a plate

Cheese and Walnut Spread

No ratings yet
Cheese and walnut spread combines softened cream cheese with toasted walnuts, garlic, and lemon juice for a creamy yet chunky texture. Toasting the nuts enhances their flavor, and pulsing in a food processor controls the perfect spreadable consistency. This no-cook appetizer is quick to prepare and works well with crackers, vegetables, or toast.
Print Recipe Pin Recipe
Prep Time 10 minutes mins
Cook Time 5 minutes mins
Total Time 15 minutes mins
Servings: 6 servings
Course: Appetizer
Cuisine: American
Ingredients Equipment Method Notes

Ingredients
  

  • 8 oz cream cheese softened to room temperature
  • 2 tablespoon olive oil add gradually while mixing
  • 1 cup walnuts toasted until golden
  • 2 cloves garlic minced finely
  • 2 tablespoon fresh parsley or thyme chopped finely
  • 2 teaspoon lemon juice fresh, added 1 teaspoon at a time
  • 0.5 teaspoon salt
  • 0.25 teaspoon black pepper
  • 1 teaspoon honey optional, drizzle at end

Equipment

  • Oven To toast the walnuts at 350°F
  • Food processor To pulse the walnuts and mix ingredients
  • Sheet pan Used to spread walnuts for toasting

Method
 

  1. Preheat oven to 350°F. Spread walnuts in a single layer on a sheet pan. Toast for 5 minutes, stirring at the 3-minute mark, until golden and fragrant.
    1 cup walnuts
  2. Let toasted walnuts cool for 2 minutes. Chop into small pieces by hand or pulse in a food processor about 5 times to achieve chunky texture.
    1 cup walnuts
  3. Beat softened cream cheese with minced garlic and chopped fresh parsley or thyme until combined, about 30 seconds.
    8 oz cream cheese, 2 cloves garlic, 2 tbsp fresh parsley or thyme
  4. Stir chopped walnuts into cream cheese base. Add salt, pepper, lemon juice (1 teaspoon at a time), and olive oil gradually, tasting between additions. Add honey last if using, stirring just until swirled through.
    1 cup walnuts, 0.5 tsp salt, 0.25 tsp black pepper, 2 tsp lemon juice, 2 tbsp olive oil, 1 tsp honey
  5. Cover bowl with plastic wrap and refrigerate spread for 30 minutes to firm up and meld flavors before serving.

Notes

  • Use room temperature cream cheese to avoid lumps and ensure smooth blending.
  • Toast walnuts just until fragrant, stirring halfway through to prevent burning.
  • Add lemon juice gradually to avoid making the spread runny and preserve bright flavor.

Tried this recipe?

Let us know how it was!

What Is Granola? [Taste, Uses & More]

March 30, 2026

Granola does one thing in a kitchen that no other cereal quite manages: it delivers both crunch and warmth simultaneously, whether straight from the jar at room temperature or scattered over a bowl of yogurt still cold from the fridge.

What Is Granola

That contrast - brittle golden clusters against something creamy or cool - is why it shows up across breakfast tables, café menus, and snack mixes without much fanfare, just consistent results.

QUICK SUMMARY

Granola is a baked oat cluster with a toasty, lightly caramelized flavor and satisfying crunch. Made from rolled oats, sweeteners, and oil, it works as a cereal, parfait layer, snack, or topping - and keeps well in an airtight container for weeks.

👅Flavor: Toasty, sweet, nutty, with light caramel notes
✋Texture: Crunchy clusters; chewy when dried fruit is included
🍽️Best Uses: Parfaits, cereal bowls, smoothie bowl toppings, snack bars
📦Shelf Life: Opened: 6-8 weeks airtight; unopened: up to 12 months
🛒Buy It: Look for uniformly golden clusters with whole rolled oats listed first

What Is Granola?

Granola originated in the United States in the late 19th century, developed as a health food reform product before evolving into the sweetened, clustered cereal we recognize today.

At its core, it's rolled oats bound with a sweetener - honey, maple syrup, or brown sugar - and an oil, then baked on a sheet pan until golden and crisp.

The baking process is what sets granola apart from raw muesli. Heat caramelizes the sugars, binds the oats into clusters, and develops that characteristic toasted flavor throughout.

Common add-ins include:

  • Nuts - almonds and pecans add richness and extra crunch
  • Seeds - pumpkin and sunflower seeds increase density and texture variation
  • Dried fruit - raisins, cranberries, or apricots introduce chewiness after the bake
  • Spices - cinnamon and vanilla are the most common flavor additions

You'll also find specialty varieties: low-sugar blends, coconut-oil-based granola, nut-free versions for allergy-conscious households, and pressed granola bars where the same mixture is compacted and re-baked.

What Does Granola Taste Like?

granola - What Is Granola

Granola tastes like toasted oatmeal with a caramel-forward sweetness layered on top - richer and more complex than plain cereal, less sugary than most boxed puffed cereals. The oats themselves contribute a mild, slightly nutty base note.

Sensory SnapshotModerate Intensity
👅 Flavor
toastycaramelizednuttysweet
✋ Texture
crunchy clusterschewy bits
👃 Aroma
warm toasted oatsbaked-sweet

The sweetness level shifts considerably by brand or recipe. Honey-based granola reads warmer and more floral; maple syrup lends a deeper, almost smoky-sweet note; brown sugar versions tend to be the most straightforwardly sweet.

Texture plays a significant role in how granola registers on the palate. A dry, freshly opened cluster crunches cleanly.

Add milk or yogurt, and within a few minutes the outer edges soften while the dense center holds, creating two textures at once - which many people prefer over keeping everything uniformly crisp.

Golden Rule
If you want granola to stay crunchy in yogurt or a bowl, add it right before eating - not during prep.

How to Use Granola

Granola's primary role is textural. It brings crunch to soft or liquid bases - yogurt parfaits, smoothie bowls, warm stewed fruit - where no other ingredient would do the same job without altering the flavor profile significantly.

For a quick breakfast, layer it with Greek yogurt and fresh berries; the fruit's acidity offsets the sweetness of the clusters.

As a topping, granola functions as a ready-made streusel. Scatter it over baked pumpkin dishes or fruit crisps in the last five minutes of baking to preserve crunch without overcooking.

It also compresses into no-bake energy balls when mixed with peanut butter and dark chocolate chips, or gets pressed and re-baked into homemade granola bars.

How Granola Is Used
MethodBest ForTip
🥗 Raw/DrySnacking, trail mix, energy ballsMix with peanut butter or dark chocolate chips for binding
🍳 Baked (sheet pan)Making homemade granola from scratchStir every 10-12 min for even browning; pull while still soft - it crisps as it cools
🍫 Pressed & BakedGranola barsUse enough honey or syrup to bind; press firmly before baking
✨ ToppingParfaits, smoothie bowls, fruit crispsAdd at the last moment to prevent sogginess

Granola pairs well with milk alternatives like oat or almond milk, which complement its flavor without overpowering the toasty notes. Avoid combining it with very wet sauces or dressings - the clusters dissolve quickly and lose the textural point entirely.

Try It In
🍫Homemade Granola BarsPress and bake clusters into portable, chewy-crunchy bars→🍓Layered Yogurt Granola ParfaitThe classic contrast of cold yogurt against crunchy clusters→🥭Tropical Smoothie Bowl with GranolaScattered over a thick blended base for crunch on every spoonful→

How to Buy and Store Granola

Good granola clusters are uniformly golden - not pale and underbaked, not dark brown at the edges. Check the ingredient list: whole rolled oats should appear first, followed by a named sweetener (honey, maple syrup, or brown sugar) and an oil. Packages loaded with mostly flakes and little else are a sign of a low-density product.

Best Pick
Resealable pouches or bulk bins with high turnover are the two most reliable sources for fresh, crisp granola.

Once opened, transfer granola to an airtight container - a glass jar works well - and keep it away from heat and direct sunlight. For full details on how long it holds up, see our guide to granola storage life.

  • Opened, room temp: 6-8 weeks at peak crunch in a sealed container
  • Unopened commercial: 6-12 months before quality declines
  • Avoid: storing near the stove or in humid spaces, which softens clusters fast

Where to Start with Granola

If you've never made it from scratch, a basic sheet-pan bake is the fastest way to understand what granola actually does - you'll watch the oats brown, the clusters form, and the kitchen fill with that warm toasted-oat smell.

Start with rolled oats, a neutral oil, and honey or maple syrup; add nuts and seeds once you have the base right.

If you're buying rather than baking, a plain, low-add-in variety gives you the most flexibility. Use it as a parfait base first - yogurt, berries, granola - then work outward from there.

Anyone looking for a different texture or flavor base should check out our roundup of granola alternatives before committing to a full bag.

Frequently Asked Questions

What is granola made of?

The base is always rolled oats, a fat (usually oil or butter), and a sweetener like honey, maple syrup, or brown sugar. Most commercial versions also include nuts, seeds, and dried fruit, with spices like cinnamon added for flavor.

How is granola different from muesli?

Muesli is raw and unsweet - oats, dried fruit, and nuts mixed without baking. Granola is baked with oil and sweetener, which creates the crunchy clusters and caramelized flavor muesli doesn't have.

Is granola healthy?

It depends heavily on the recipe. Granola provides fiber, plant protein, and unsaturated fats from oats and nuts, however many commercial varieties are high in added sugar and calories. Low-sugar blends or homemade batches give you more control over both.

Does granola go bad?

It doesn't spoil quickly, but it does go stale. Granola exposed to air or humidity loses its crunch within days; sealed in an airtight container it stays crisp for 6-8 weeks. Rancid-smelling nuts or oil are the clearest sign it's past its best.

Can you eat granola with yogurt every day?

Yes, and it's one of the most common daily breakfast combinations. Watch portion size - a typical serving is ¼ to ½ cup - since calories from granola add up faster than the volume suggests.

What Is File Powder? [Taste, Uses & More]

March 30, 2026

Filé powder does something no other spice in the Southern pantry can do - it thickens and seasons at the same time.

What Is File Powder

Added off heat, it pulls a bowl of gumbo from thin broth to something with body and depth, while leaving behind a quiet, herbal finish that defines the dish.

It pairs alongside bold ingredients like andouille sausage - and if you're curious how the taste of andouille sausage sits against filé's more restrained earthiness, the contrast is what makes gumbo work.

QUICK SUMMARY

Filé powder is a dried sassafras leaf seasoning from Gulf Coast Creole and Cajun cooking. It thickens off heat and adds an earthy, mildly herbal finish to gumbo and stews. Use it sparingly - a little goes far.

🌿What It Is: Ground dried sassafras leaves, used as a thickener and seasoning
👅Flavor: Earthy, faintly piney-citrus, mildly astringent with a soft herbal finish
🍲Best Use: Stirred into gumbo off heat to thicken and finish the flavor
📦Shelf Life: Best within 6-12 months; usable up to 18 months if sealed and dry
⚠️Key Rule: Never simmer filé - add it after the heat is off or it turns stringy and bitter

What Is Filé Powder?

Filé powder is made from dried, ground sassafras leaves - not the root or bark, just the leaves - harvested and ground into a fine, olive-green powder.

It originates from Gulf Coast foodways, where the Choctaw people used ground sassafras as a seasoning and thickener long before European settlement.

Creole and Cajun cooks later adopted it as a staple of Louisiana cooking, and gumbo became its most famous home.

The powder goes by several names: filé, gumbo filé, or simply ground sassafras. It falls into its own category as a leaf-based seasoning that doubles as a cold-water thickener - meaning it binds liquid without heat, unlike cornstarch or roux.

Watch Out
Sassafras root oil contains safrole, a restricted compound. Filé powder is made from the leaves only and is considered safe for culinary use by food safety authorities.

Unlike most spice-rack staples, filé has no close equivalent in other cuisines. It occupies a narrow but irreplaceable role in Creole and Cajun cooking specifically.

What Does Filé Powder Taste Like?

file powder - What Is File Powder

The closest shorthand: dried bay leaf crossed with mild lemony pine. It's earthy and slightly sweet-tannic, with a green-woody note and a faint citrusy-resinous edge that reads herbal without being sharp.

Nothing about it resembles thyme, oregano, or any Mediterranean herb.

Sensory SnapshotModerate Intensity
👅 Flavor
earthypiney-citrusmildly astringentsweet-tannic
✋ Texture
fine powdersilky when dissolved
👃 Aroma
green-woodyfaint citrusy-resinous

Heat changes it. Simmered too long, filé loses its herbal brightness and can turn bitter or develop a faint rope-like texture in the liquid. Added off heat, the flavor integrates quietly - present but not dominant.

That restraint is the point.

How to Use Filé Powder

Filé belongs at the end of cooking, not the beginning. The standard approach in gumbo is to pull the pot off heat, let it stop boiling, then stir in filé powder just before serving.

It thickens the broth softly and adds a low herbal note that sits under the louder flavors of andouille, shrimp, or chicken.

How Filé Powder Is Used
MethodBest ForTip
🍲 Off-Heat FinishGumbo, bean stews, okra-based dishesStir in after removing from heat; never let it boil
🧂 Dry Rub BlendSmoked meats, Gulf-style BBQUse sparingly - strong in concentrated spice blends
✨ Table SeasoningIndividual bowls of gumbo or stewLet each person add their own at the table
🧈 Compound ButterSouthern-style finishing butter for seafood or grainsMix into softened butter with herbs for a mild earthy note

Okra and filé are both traditional gumbo thickeners, though most recipes choose one or the other - using both can make the texture overly thick. When okra is in the pot, filé plays a lighter seasoning role rather than a structural one.

In dry rubs, filé works in small quantities alongside smoked paprika and black pepper for Gulf-style smoked meats. The piney-citrus note reads as background complexity, not a standalone flavor.

For file powder stand-ins when your jar runs out, the options are limited - nothing replicates both functions at once.

Try It In
🧈Compound Butter (Herb)Stir in a pinch of filé for a Southern-style finishing butter→🧄Compound Butter (Garlic)Filé adds earthy depth alongside roasted garlic→🥩Slow Cooker Beef Stew with VegetablesAdd filé off heat for a Gulf-style herbal finish→

How to Buy and Store Filé Powder

Look for powder that is uniformly olive-to-dull-green and finely milled. Gray or brownish filé has aged past its peak - the aroma fades first, then the flavor goes flat.

Clumping with a musty smell means moisture has gotten in. Skip it.

Best Pick
Small sealed jars from Creole or Cajun specialty brands turn over stock more reliably than generic grocery spice aisle filé, which may sit on shelves for months before you buy it.
  • 🫙 Container: Airtight glass jar, kept away from strong-smelling spices that it can absorb
  • 📍 Location: Cool, dark pantry - not near the stove or in direct light
  • 📅 Peak window: 6-12 months after opening for best aroma and flavor
  • ⏳ Usable limit: Up to 18 months if sealed and kept dry

Filé doesn't freeze well as a standard practice - the powder can absorb moisture during thaw - though freezing file powder in vacuum-sealed conditions is possible if you're storing bulk quantities long-term.

Start With Gumbo

If you've never used filé before, gumbo is the right entry point.

Add half a teaspoon per serving to your finished bowl, stir once, and taste before adding more.

The herbal note should be subtle - a background layer, not the lead.

Filé alongside okra and a southern fried okra recipe shows how sassafras-family flavors fit the broader Southern flavor palette.

Once you understand its restraint, the other uses - dry rubs, compound butters, bean stews - make immediate sense.

Frequently Asked Questions

What is filé powder made from?

Dried, ground sassafras leaves. The leaves are harvested separately from the root - root oil contains safrole, but leaf-derived filé powder is safe for culinary use at normal spice quantities.

When do you add filé to gumbo?

After the heat is off. Adding filé while the pot is still simmering causes it to turn stringy and can make the broth taste bitter. Stir it in just before serving.

How much filé powder should you use in gumbo?

Start with half a teaspoon per serving and adjust from there. Using too much produces an overly thick, slightly bitter result - filé is easier to add than to correct.

Can filé powder be substituted with something else?

No single substitute replicates both the thickening and flavor roles. Okra thickens but doesn't add filé's herbal note; dried bay leaf adds a similar earthiness but won't thicken liquid at all.

Is filé powder gluten-free?

Yes. Pure filé powder contains only ground sassafras leaves and is naturally gluten-free. Check blended spice mixes that include filé, as those may contain other ingredients.

What Is Havarti Cheese? [Taste, Uses & More]

March 30, 2026

A grilled cheese sandwich built with havarti doesn't pull apart in rubbery strings or pool into a greasy puddle - it melts into a smooth, creamy layer that holds the bread together from the inside. That clean, buttery melt is what makes havarti a fixture in sandwich shops, home kitchens, and cheese boards across the country.

What Is Havarti Cheese

It's mild enough to work with almost any pairing, yet distinct enough to notice. If you've been reaching for colby jack cheese alternatives when you want a gentle melt, havarti deserves a closer look.

QUICK SUMMARY

Havarti is a Danish semi-soft cow's milk cheese with a buttery, lightly tangy flavor and a smooth melt. It works well sliced, melted, or cubed, and pairs with fruit, cured meats, and rye bread. Mild enough for everyday use, it stores for up to two weeks once opened.

🧀Type: Semi-soft pasteurized cow's milk cheese from Denmark
👅Flavor: Buttery, mildly tangy, creamy with a light nutty note
🍽️Best Uses: Grilled cheese, burgers, cheese boards, casseroles
❄️Shelf Life: Up to 6 weeks sealed; about 2 weeks once opened
💡Best Pairing: Rye bread, smoked ham, apples, dill, and dry riesling

What Is Havarti Cheese?

Havarti originated in Denmark in the mid-1800s, developed by cheesemaker Hanne Nielsen after she traveled through Europe studying dairy techniques.

It falls under the semi-soft cheese category, made from pasteurized whole cow's milk with a pale yellow interior and a thin rind that's often waxed in commercial production.

One of its most recognizable features is its small, irregular eyes - tiny holes scattered throughout the paste. These form during fermentation and distinguish havarti from smoother, eyeless cheeses like cream havarti blends.

Several varieties exist beyond the plain block you'll find at most delis:

  • Plain havarti - the base style, pale yellow with a clean milky flavor
  • Havarti dill - flecked with dill weed, common in Scandinavian-style sandwiches
  • Jalapeño havarti - includes pepper pieces for heat, popular in American deli prep
  • Aged havarti - sharper and firmer than young versions, less common but worth seeking

Young havarti contains more lactose than longer-aged cheeses, so people with lactose sensitivity should test their individual tolerance before eating freely.

What Does Havarti Cheese Taste Like?

havarti cheese - What Is Havarti Cheese

Havarti leads with butter. The base flavor is a mild, lactic creaminess - clean and slightly sweet - with a gentle tang that builds toward the finish.

A faint nutty note appears, though it's subtle enough that most people register it as richness rather than a distinct flavor.

Sensory SnapshotMild Intensity
👅 Flavor
butterymildly tangylactic sweetnesslight nuttiness
✋ Texture
smoothpliantspringy
👃 Aroma
milkylightly grassy

Compared to young gouda, havarti is creamier and less firm, with a softer tang. Heat pushes the buttery quality forward and the tang recedes - which is exactly why it works so well in cooked applications.

Aged havarti shifts toward a sharper, more assertive flavor, closer to a mild cheddar.

Golden Rule
Don't pair havarti with high-acidity sauces like wine reductions or citrus-heavy dressings - the acid masks its milky character entirely.

How to Use Havarti Cheese

Havarti's melting behavior is its strongest asset in the kitchen. It softens evenly without breaking into grease, making it reliable across both stovetop and oven applications.

How Havarti Cheese Is Used
MethodBest ForTip
🥗 Sliced ColdSandwiches, cheese boards, open-faced ryeSlice thin for layering; thicker for platters
🍳 Stovetop MeltGrilled cheese, burgers, omelets, frittatasMedium-low heat keeps melt smooth and even
🥘 BakedCasseroles, panini, baked pastaGrate for even coverage; avoid direct top heat
🫕 Fondue BlendMixed cheese fondue, dipping saucesCombine with gruyère to add creaminess

On a cheese board, cube havarti alongside sliced apples or pears, smoked ham or turkey, and plain crackers or sourdough. The mild flavor gives stronger cheeses room to stand out without competing.

Dill havarti belongs on a Scandinavian open-faced sandwich - thin slices over buttered rye with mustard and pickles. Jalapeño havarti melts cleanly onto burgers.

Both flavored varieties follow the same melting rules as plain havarti.

For a richer mac and cheese, grate havarti into the sauce alongside a sharper cheese like cheddar. It adds body and a smooth consistency without sharpening the flavor.

Riesling is the standard wine pairing - its slight sweetness and acidity cut through the dairy without overwhelming it.

Need something with more bite? Havarti substitutes and gouda substitutes both cover situations where you want a similar melt profile with more flavor.

Try It In
🥚Egg and Cheese Breakfast SandwichHavarti melts into the egg layer for a clean, creamy finish→🧀Cheddar Cheese StrawsSwap half the cheddar for havarti to soften the flavor→

How to Buy and Store Havarti Cheese

At the counter, look for blocks or wedges with an off-white to pale yellow color and a clean, slightly springy feel when pressed. Avoid anything with a slimy or sticky surface - that signals moisture damage or age.

Flavored havarti (dill, jalapeño) should have visible inclusions throughout the paste, not just along the edges.

Shortcut
Vacuum-sealed wedges from a refrigerated cheese counter keep longer than pre-sliced deli packs - buy the block and slice at home for better shelf life.

Wrap opened havarti in waxed paper or cheese paper, then loosely in plastic, and store in the crisper drawer at 34-40°F. Rewrap after every use.

  • Unopened, vacuum-sealed - lasts 3-6 weeks refrigerated
  • Opened, tightly wrapped - stays fresh for about 2 weeks
  • Pre-sliced or shredded - use within 5-7 days; surface area accelerates drying

For the full breakdown of timing and signs of spoilage, the havarti cheese freshness guide guide covers edge cases in more detail.

Start Here With Havarti

New to havarti? Buy a plain block, slice it onto a grilled cheese or burger first - that's where its melt quality is most obvious. Once you know the base flavor, try dill havarti on rye with smoked turkey.

If you want a sharper edge, move toward aged havarti or blend it with a stronger cheese in cooked applications. For everyday use, plain havarti covers most situations where you'd reach for a mild, reliable melting cheese.

Frequently Asked Questions

Is havarti a hard or soft cheese?

Neither. Havarti is a semi-soft cheese - firmer than brie but much more pliable than cheddar or aged gouda. It slices cleanly cold and softens into a smooth melt under heat.

Can you melt havarti on a burger?

Yes - it's one of havarti's strongest uses. Place a slice on the patty during the last 60 seconds of cooking, covered, and it melts into a smooth, even layer without separating.

Is havarti similar to gouda?

Young gouda is the closest comparison - both are mild, buttery, and melt well. Havarti is generally creamier and slightly less firm, with a more pronounced lactic note than young gouda's caramel-adjacent sweetness.

What wine pairs with havarti?

Dry riesling is the standard pairing - its acidity cuts through havarti's creaminess without clashing. Light pinot gris or unoaked chardonnay also work if riesling isn't available.

How long does havarti last in the fridge?

An unopened vacuum-sealed block keeps 3-6 weeks. Once opened and rewrapped in cheese paper, plan to use it within two weeks - pre-sliced havarti shortens to about 5-7 days.

Air Fryer Seafood Croquettes

March 30, 2026

Air frying seafood croquettes at 375°F creates crispy, golden outsides while keeping the centers moist and tender. The hot circulating air crisps the breadcrumb coating in 12-15 minutes without deep frying.

Air Fryer Seafood Croquettes served on a plate

The basket does the work-no flipping required until halfway through. You get restaurant-style texture with less oil and faster cleanup.

Make these for weeknight appetizers, meal prep batches, or party spreads when you need something that looks impressive but takes under 30 minutes.

QUICK SUMMARY

Air fryer seafood croquettes deliver crispy exteriors and creamy interiors in 12-15 minutes at 375°F. Shape uniform croquettes and coat them twice with breadcrumbs for maximum crunch. Chill shaped croquettes before air frying to prevent falling apart.

⏱️Time Reality: 15 min prep, 12-15 min cook, 30 min total with chilling
🔥Critical Move: Preheat air fryer to 375°F for 5 minutes before cooking
⚠️Watch Out: Overcrowding makes soggy croquettes-leave 1 inch space between pieces

Table of Contents

Toggle
  • Why This Recipe Works
  • What You'll Need
    • Ingredient Details
  • Ingredient Swaps
  • What to Serve With It
  • Store and Reheat
  • Frequently Asked Questions
  • Air Fryer Seafood Croquettes
    • Method 
    • Tried this recipe?

Why This Recipe Works

High heat air frying creates the crispy coating without submerging croquettes in oil. The circulating air crisps breadcrumbs evenly while the mashed potato base keeps the seafood moist. For another quick weeknight option, try this classic salmon dish that uses the same basket method.

Quick Reference
⏱️
Prep Time
15 min
🔥
Cook Time
12-15 min
⏰
Total Time
27-30 min
🍽️
Servings
4 servings
📊
Difficulty
Easy
🏷️
Category
Appetizer
💡
Quick Tip
Don't overcrowd air fryer basket for crisp croquettes
🎯
Best For
Weeknight | Meal prep | Entertaining

Five reasons this method works:

  • Preheating creates instant crust: The hot basket sets the breadcrumb coating immediately, locking in moisture while crisping the outside
  • Double coating adds crunch: Two dips in egg and breadcrumbs create thicker armor that stays crispy even after cooling
  • Chilling firms the shape: 15-20 minutes in the fridge lets the potato binder set, preventing croquettes from falling apart mid-cook
  • Uniform sizing ensures even cooking: 2-inch croquettes cook through in the same timeframe, hitting 145°F internal temp together
  • Flipping halfway browns both sides: Turning at 7 minutes exposes all surfaces to direct heat for golden color
Quick Tip
Pat cooked seafood dry with paper towels before mixing-excess moisture makes the coating slide off during air frying.

What You'll Need

Ingredients for Air Fryer Seafood Croquettes

Stock cooked seafood, mashed potatoes, and breadcrumbs-those three build the structure. Everything else adds flavor but won't wreck the batch if you swap it out.

🦐
Seafood Base
  • 1 lb cooked seafood (crab, shrimp, or fish)
  • Flaked or chopped fine
🥔
Binder
  • 1½ cups mashed potatoes (smooth)
  • 2 eggs (beaten)
  • 2 tablespoon mayonnaise
🍞
Coating
  • 1½ cups breadcrumbs (panko works best)
  • Extra for double coating
🧄
Aromatics & Seasoning
  • 1 small onion (diced fine)
  • 2 garlic cloves (minced)
  • 2 tablespoon fresh parsley (chopped)
  • 1 tablespoon lemon juice
  • Salt, pepper, paprika to taste

Ingredient Details

  • Cooked seafood
    Canned crab or cooked shrimp work fine-drain well and squeeze out excess liquid before mixing
  • Mashed potatoes
    Use cold leftover mash or instant mash prepared thick-warm potatoes make the mixture too loose
  • Breadcrumbs
    Panko creates crispier texture than regular breadcrumbs; gluten-free panko works identically
  • Eggs
    Beat eggs until frothy for better coating adhesion-add 1 tablespoon water to thin if needed
  • Mayonnaise
    Adds moisture and richness; Greek yogurt substitutes at 1:1 for tangier flavor
  • Onion
    Dice very fine or the pieces poke through the coating and burn during air frying
  • Lemon juice
    Brightens the seafood flavor-add at the end to prevent potatoes from turning gray

Ingredient Swaps

Most swaps work as long as you keep the ratios-binder to seafood needs to stay balanced or the croquettes fall apart. Switch breadcrumbs or potatoes freely, but keep the egg for structure.

Four swaps that work:

  • Swap breadcrumbs for gluten-free panko - Maintains identical crispness without gluten; coat and air fry the same way
  • Swap mayonnaise for Greek yogurt - Keeps moisture but adds tang; use same amount and expect slightly firmer texture
  • Swap mashed potatoes for mashed cauliflower - Cuts carbs by half; mixture will be slightly looser so chill 30 minutes before shaping
  • Swap fresh parsley for cilantro or dill - Changes herb profile but works equally well; use same quantity

Gluten-Free Panko

Works for: Maintaining crispy texture without gluten; same crunch as regular panko

Skip if: You want the lightest, airiest coating-gluten-free can be slightly denser

Mashed Cauliflower

Works for: Cutting carbs while keeping creamy texture; works for low-carb diets

Skip if: You need firm structure-cauliflower makes softer croquettes that need longer chilling

Greek Yogurt

Works for: Reducing fat while adding protein; tangier flavor than mayo

Skip if: You want rich, neutral moisture-yogurt adds distinct tang

Instructions

Mix everything, shape into uniform croquettes, coat twice, then air fry at 375°F for 12-15 minutes. The double coating creates the crispy shell that makes these worth eating.

  1. Mix the base: Combine cooked seafood, mashed potatoes, onion, garlic, parsley, mayonnaise, lemon juice, salt, pepper, and paprika in a mixing bowl. Use a fork to mash everything until evenly distributed but still slightly chunky. Chill mixture 15-20 minutes to firm up.

  2. Shape croquettes: Scoop 2-3 tablespoons of mixture and roll into oval or cylinder shapes about 2 inches long. Keep size uniform so they cook at the same rate. Place shaped croquettes on a plate and refrigerate while you set up coating station.

  3. Double coat: Set up two shallow bowls-beaten eggs in one, breadcrumbs in the other. Dip each croquette in egg, roll in breadcrumbs, dip in egg again, then roll in breadcrumbs a second time. Press gently so coating sticks. Place on a clean plate.

  4. Preheat and arrange: Preheat air fryer to 375°F for 5 minutes. Spray basket lightly with oil. Place croquettes in basket with at least 1 inch space between each piece. Don't stack or crowd-work in batches if needed.

  5. Air fry: Cook 7 minutes, then flip croquettes carefully with tongs. Cook another 5-8 minutes until golden brown all over and internal temperature reaches 145°F. Let cool 3-5 minutes before serving so the center sets.

Golden Rule
Flip at exactly 7 minutes-earlier and the coating tears, later and one side overcooks before the other browns.

What to Serve With It

Croquettes need something to balance the richness-crisp vegetables or starchy sides soak up any dipping sauce. The french fries works best when it hits the table at the same time as the main. For nights when you need more options, check out complete pan fried salmon meal ideas that pair well with any fried seafood.

Side DishPrepWhy It WorksHow to Serve
Mixed green saladEasyFresh greens cut through fried coatingDress with lemon vinaigrette, serve on the side
Steamed vegetablesEasyLight fiber balances rich croquettesSteam broccoli or green beans, season with salt
Rice pilafMediumNeutral starch complements seafood flavorsServe warm alongside croquettes
ColeslawEasyCrunchy acidity contrasts creamy interiorUse tangy vinegar-based slaw, not mayo-heavy
Lemon aioliEasyCreamy, tangy dip adds richnessServe in small bowl for dipping

Three ways to serve it:

  • As appetizers: Arrange on a platter with cocktail sauce and lemon wedges for party spreads or game day snacks
  • Over greens: Place croquettes on mixed greens with vinaigrette for a light lunch that still feels substantial
  • With dipping sauces: Serve alongside garlic lemon aioli, tartar sauce, or spicy remoulade for variety
Shortcut
Buy rotisserie chicken and shred the meat instead of cooking seafood-chicken croquettes work the same way at lower cost.

Store and Reheat

Store cooked croquettes in a single layer in an airtight container for up to 4 days in the fridge. Stack them and the coating gets soggy. Most people skip the oven, but it balances the meal. Reheat in the air fryer at 375°F for 5-7 minutes to restore the crispy texture-microwaving makes them soft and rubbery.

MethodTimeBest For
🔥 Air fryer5-7 min at 375°F (190°C)Restoring crispy coating after refrigeration
🔥 Oven8-10 min at 375°F (190°C)Reheating larger batches without crowding
📦 Microwave30-60 secQuick reheating when you don't care about crispness

For best results when storing:

  • Freeze uncooked croquettes: Shape and coat them, then freeze on a baking sheet before transferring to freezer bags-cook from frozen, adding 3-5 minutes
  • Use shallow containers: Stack croquettes no more than 2 layers deep with parchment between to prevent sticking
  • Refrigerate within 2 hours: Let croquettes cool to room temp first so condensation doesn't form and make coating soggy
  • Reheat from fridge, not freezer: Thaw frozen cooked croquettes overnight in the fridge before reheating for even warming
  • Skip the microwave for leftovers: Air fryer or oven brings back crispness; microwave makes the coating rubbery and soft

Frequently Asked Questions

Can I use frozen cooked seafood for croquettes?

Yes, thaw frozen cooked seafood completely and drain well before using. Squeeze out excess moisture with paper towels or the mixture will be too wet and fall apart during shaping.

How do I store and reheat seafood croquettes without losing crispiness?

Store in a single layer in an airtight container in the fridge for up to 4 days. Reheat in the air fryer at 375°F for 5-7 minutes or in the oven at 375°F for 8-10 minutes-skip the microwave to keep the coating crispy.

What internal temperature ensures seafood croquettes are safe and cooked?

Seafood croquettes should reach 145°F (63°C) internal temperature. Since the seafood is already cooked, you're mainly heating through and crisping the coating-check with an instant-read thermometer inserted into the center.

Why are my croquettes falling apart when air frying?

The mixture is too wet or lacks enough binder. Drain seafood thoroughly, use cold mashed potatoes, and make sure you include eggs-chill shaped croquettes for 15-20 minutes before coating to firm them up.

How many croquettes does this recipe make per serving?

This recipe makes about 12-16 croquettes total, serving 4 people at 3-4 croquettes each. Size depends on how much mixture you scoop-aim for 2-3 tablespoons per croquette for uniform cooking.

Air Fryer Seafood Croquettes served on a plate

Air Fryer Seafood Croquettes

No ratings yet
Air Fryer Seafood Croquettes deliver crispy, golden exteriors with tender, moist centers thanks to a mashed potato binder. Double coating with breadcrumbs and chilling before air frying at 375°F ensures restaurant-quality crispness without deep frying.
Print Recipe Pin Recipe
Prep Time 15 minutes mins
Cook Time 15 minutes mins
Total Time 30 minutes mins
Servings: 4 servings
Course: Appetizer
Cuisine: American
Ingredients Method Notes

Ingredients
  

  • 1 lb cooked seafood flaked or chopped fine
  • 1.5 cups mashed potatoes smooth, cold or thick instant, for binder
  • 2 units eggs beaten
  • 2 tablespoon mayonnaise
  • 1.5 cups breadcrumbs panko recommended; extra for double coating
  • 1 small onion diced fine
  • 2 cloves garlic minced
  • 2 tablespoon fresh parsley chopped
  • 1 tablespoon lemon juice
  • salt to taste
  • pepper to taste
  • paprika to taste

Method
 

  1. Combine cooked seafood, mashed potatoes, diced onion, minced garlic, parsley, mayonnaise, lemon juice, salt, pepper, and paprika in a mixing bowl. Mash with a fork until evenly distributed but still slightly chunky. Chill the mixture for 15-20 minutes to firm up.
    1 lb cooked seafood, 1.5 cups mashed potatoes, 1 small onion, 2 cloves garlic, 2 tbsp fresh parsley, 2 tbsp mayonnaise, 1 tbsp lemon juice, salt, pepper, paprika
  2. Scoop 2-3 tablespoons of mixture and shape into uniform oval or cylinder-shaped croquettes about 2 inches long. Place shaped croquettes on a plate and refrigerate while preparing coating.
    1 lb cooked seafood, 1.5 cups mashed potatoes
  3. Set up two shallow bowls: one with beaten eggs and the other with breadcrumbs. Dip each croquette in egg, roll in breadcrumbs, then dip in egg again and roll in breadcrumbs for a second coating. Press gently so coating sticks. Place coated croquettes on a clean plate.
    2 units eggs, 1.5 cups breadcrumbs
  4. Preheat air fryer to 375°F (190°C) for 5 minutes. Lightly spray the basket with oil. Arrange croquettes in the basket leaving at least 1 inch space between each to avoid overcrowding.
  5. Air fry croquettes for 7 minutes. Using tongs, carefully flip each croquette and continue cooking for another 5-8 minutes until golden brown all over and internal temperature reaches 145°F (63°C). Let croquettes cool for 3-5 minutes before serving.

Notes

  • Chill shaped croquettes before coating to prevent breaking apart during frying.
  • Do not overcrowd the air fryer basket to keep croquettes crispy.
  • Flip croquettes exactly at 7 minutes for even browning and to avoid coating tears.

Tried this recipe?

Let us know how it was!

How Long Does Fig Last? [Storage Guide]

March 30, 2026

Finding a fig that looked fine yesterday but has gone soft, syrupy, and strange-smelling overnight is a common shock - fresh figs are far more perishable than most fruit, and the window between perfectly ripe and overripe is narrow.

Can You Freeze Fig

Knowing the taste of fig helps set the right expectation: a good one is honey-sweet with a jammy interior, and any sharp, fermented edge is a warning sign. Ripe figs last 5-7 days refrigerated, while unripe ones need a day or two at room temperature first.

QUICK SUMMARY

Fresh figs are highly perishable. Ripe figs last 5-7 days in the fridge; unripe figs need 1-3 days on the counter first. Freeze for up to 12 months - expect softer, jammier texture after thawing. Never wash before storing, and never stack them.

🏠Counter: 1-3 days to ripen; move to fridge once ripe
🧊Fridge: 5-7 days whole and ripe; 1-2 days once cut
❄️Freezer: 8-12 months raw or cooked; tray-freeze first to prevent clumping

How Long Do Figs Last?

Fresh figs have one of the shortest shelf lives of any common fruit.

Variety plays a small role - Black Mission figs tend to be softer and go faster, while Kadota and Brown Turkey hold their shape slightly longer - however, ripeness at purchase matters far more than variety.

Fig Shelf Life
MethodStateDurationNotes
🏠 CounterWhole, unripe1-3 daysSingle layer, away from direct sun; ripens at room temp
🏠 PantryWhole, very ripe1-2 daysOnly if eating same day or next; otherwise refrigerate
🧊 FridgeWhole, ripe5-7 daysSingle layer, shallow container; stems may leak juice
🧊 FridgeSliced or cut1-2 daysCover tightly; cut surface dries and picks up fridge odors
❄️ FreezerWhole or sliced, raw8-12 monthsTray-freeze first; texture becomes soft and jammy after thaw
❄️ FreezerCooked (jam or compote)6-12 monthsFreeze in airtight containers or portioned ice-cube trays

One detail that catches people off guard: refrigerating unripe figs stops ripening entirely. A starchy, underripe fig that goes straight into the fridge will still taste starchy, underripe weeks later - cold doesn't improve it.

How to Store Figs

The single most important rule is to skip washing until you're ready to eat. Moisture on the fig skin accelerates mold, and fresh figs are already prone to it.

Golden Rule
Never wash figs before refrigerating. Water shortens fridge life significantly - rinse them right before eating.

For counter storage, lay unripe figs in a single layer on a plate or shallow tray away from heat sources. Once they yield slightly to gentle pressure and smell sweet, move them to the fridge immediately.

Fridge: Line a shallow container with paper towel, arrange figs in a single layer without touching, and cover loosely with plastic wrap or a vented lid. The paper towel absorbs any juice leakage from the stems, which is common with very ripe fruit. Freezer: Handled in the next section - the process matters here more than the container. Counter: Suitable only for finishing ripening; don't leave ripe figs out longer than a day.

  • 🚫 Don't stack - figs bruise easily, and bruised spots break down within hours
  • Trim damaged stems - a leaking stem spreads moisture and speeds up spoilage neighbors
  • Isolate any overripe figs - one deteriorating fig in the container can pull others down with it

Can You Freeze Figs?

Yes - figs freeze well for cooked applications. Raw frozen figs thaw into soft, mealy, syrupy fruit; the seeds stay intact, however the flesh collapses completely.

That texture works well in compotes, baked goods, sauces, and smoothies - it doesn't work for fresh eating.

Watch Out
Freezing whole figs without tray-freezing first causes them to clump into a solid mass. Once frozen together, they're nearly impossible to portion without thawing the whole batch.
  1. Wash and dry thoroughly - pat dry with paper towels; any remaining moisture causes freezer burn patches
  2. Prep as needed - leave whole, or remove stems and halve; halved figs thaw faster and freeze more evenly
  3. Tray-freeze cut-side down - spread in a single layer on a lined baking sheet for 2-4 hours until solid
  4. Transfer and seal - pack into airtight freezer bags or vacuum-seal bags; remove as much air as possible before sealing
  5. For purees and compotes - cool completely, then portion into airtight containers or ice-cube trays for easy measured use

To thaw, move the bag to the fridge overnight. For smoothies or cooked dishes, you can use them straight from frozen without thawing at all.

Signs Figs Have Gone Bad

Fresh figs deteriorate fast and the signs are easy to read once you know what to look for. Mold spreads quickly on fig skin - don't assume a small patch is safe to cut around.

Signs It's Gone Bad
👀
VisualWhite or green-blue fuzzy mold on skin or stem · Large brown-black soft spots with juice leakage · Skin collapse and excessive shriveling with dark syrup pooling
👃
SmellFermented, vinegary, or alcoholic odor · Sour rather than sweet aroma
✋
TextureFlesh collapses under light pressure · Slimy or wet surface · Stem detaches without resistance

A very ripe fig will be soft - that's normal.

The line is crossed when the smell turns fermented or the flesh is actively wet and slimy rather than just yielding. Discard any fig with mold, a sour odor, or slimy texture without taste-testing it.

Getting the Most From Fresh Figs

Fresh figs are worth the attention they need - a few consistent habits keep them from going to waste.

  • Ripen on the counter first - refrigerate only once they reach the softness and sweetness you want
  • Use underripe figs in heat - grilling or roasting softens the starchy texture that cold storage can't fix
  • Freeze surplus as compote - very ripe figs cook down in minutes and freeze for months in portioned containers
  • Check the container daily - remove any fig showing early spoilage before it affects the rest

If fresh figs aren't available or have run their season, there are fig swaps that work in most recipes - helpful when a dish calls for them and the market is out.

Storage habits for other short-shelf-life produce follow similar logic; if you've been careful about storing turkey correctly, the same discipline of single-layer storage and moisture control applies here.

Shortcut
Very ripe figs going soft? Cook them into a quick compote in 10 minutes - it resets the clock to 6-12 months in the freezer.

Frequently Asked Questions

Do figs ripen after picking?

Yes, but only if they were close to ripe when harvested. Figs don't produce ethylene like bananas, so truly unripe figs won't develop full sweetness off the tree. Leave them on the counter 1-2 days if they need softening.

Can you eat figs with white mold?

No. White fuzzy mold on fig skin is a sign of active spoilage and the mold penetrates soft fruit quickly. Discard the fig entirely - cutting around the spot doesn't make the rest safe.

Can you freeze figs whole or sliced?

Both work. Halved figs tray-freeze faster and are easier to portion later. Whole figs take longer to freeze through and are harder to use in measured amounts once bagged.

How long do dried figs last compared to fresh?

Far longer. Dried figs last 6-12 months in an airtight container at room temperature, or up to 2 years in the freezer. The low moisture content prevents the rapid mold and fermentation that affects fresh figs.

How to freeze figs for baking?

Halve them, tray-freeze cut-side down for 2-4 hours, then transfer to airtight freezer bags. For baking, use them straight from frozen - no need to thaw, as oven heat handles the texture change.

What Is Harissa Paste? Taste, Uses & How to Use It

March 30, 2026

Most cooks assume harissa paste is just another hot sauce - something to shake onto food and forget.

What Is Harissa Paste

That assumption sells it short. Harissa paste is a concentrated, oil-rich chili paste from North Africa, and it behaves more like a spice blend than a condiment, adding smoke, depth, and layered heat that alternatives to sambal oelek or generic chili sauces rarely match.

Understanding what it actually does - and what it contains - changes how you cook with it.

QUICK SUMMARY

Harissa paste is a North African chili paste built on roasted chilies, garlic, olive oil, and spices like cumin and caraway. It delivers smoky, spicy, and earthy flavor - used as a marinade base, stirred into stews, or swirled into dips. Strong heat, dense texture, long shelf life.

🌶️Flavor: Smoky, spicy, earthy, with a hint of tang
🫙Texture: Dense, oily, spreadable paste with chili flecks
🍽️Best Uses: Marinades, stews, dips, roasted vegetables, grain bowls
📍Origin: Tunisia, Algeria, Morocco - North Africa
❄️Shelf Life: Opened jar: 2-3 months refrigerated with oil seal
✅Dietary: Typically vegan and gluten-free; check labels for additives

What Is harissa paste?

Harissa paste (هريسة) originated in Tunisia and spread across North Africa through Algeria and Morocco, where each region developed its own version.

At its core, it's a blend of roasted or dried red chilies, garlic, olive oil, and a specific spice trio: cumin, coriander, and caraway. Some versions include preserved lemon or a splash of vinegar for acidity.

It belongs to the chili-based paste category alongside condiments like gochujang and sambal, though harissa skews drier and more spice-forward than either. You'll also see it spelled harrisa or labeled simply as Tunisian chili paste on imports.

Commercially, harissa comes in two main formats:

  • 🫙 Jarred or canned paste - the most widely available form; ranges from coarse and chunky to smooth depending on the brand
  • 🥫 Tube-packaged harissa - more concentrated, popular in European markets, and easier to dispense in small amounts
  • 🌶️ Rose harissa - a milder Tunisian variant made with rose petals that softens the heat and adds floral notes

Tunisian harissa tends to be the hottest and most straightforward; Moroccan versions are often milder and sweeter from roasted pepper-forward recipes.

What Does harissa paste Taste Like?

harissa paste - What Is Harissa Paste

Harissa hits with layered intensity - not just heat, but smoke from the dried chilies, earthiness from cumin and caraway, and a trailing warmth that builds rather than spikes. The olive oil carries those spice oils across the palate, making the heat feel full-bodied rather than sharp.

Sensory SnapshotStrong Intensity
👅 Flavor
smokyspicyearthytangy
✋ Texture
dense pasteoilyspreadable
👃 Aroma
toasted chilicumin-forwardgarlicky

Compared to other chili pastes, harissa tastes like a garlicky, smokier sambal or a drier alternative to gochujang - minus the fermented sweetness. When used sparingly, the tang from preserved lemon or vinegar comes forward; in larger amounts, the chili and cumin dominate.

Heat level varies by brand, however, so a small taste test before cooking saves you from overshooting.

Watch Out
Some commercial harissa pastes list "chili blend" without specifying variety - these can range from mild to face-scorching. Always taste before adding to a dish without adjusting.

How to Use harissa paste

Harissa works across a wider range of cooking roles than most single-ingredient condiments. It functions as a raw finishing paste, a marinade base, and a stew ingredient - each method pulling out a different aspect of its flavor.

How Harissa Paste Is Used
MethodBest ForTip
🥗 Raw / FinishingBread dip, swirled into hummus, dolloped on eggsMix with olive oil and lemon to mellow the raw garlic edge
🍳 SimmeredTomato stews, shakshuka base, soup enrichmentFry the paste in oil for 60 seconds first to bloom the spices
🔥 Marinade / RubLamb chops, chicken thighs, fish fillets before grilling or broilingAdd yogurt to the marinade to balance heat and help browning
🫕 RoastingCarrots, potatoes, chickpeas tossed before oven roastingCoat evenly and roast at high heat - the paste chars slightly and concentrates

In Tunisian cooking, harissa folds into couscous and grain bowls to add heat and color - if you're exploring grain swaps, note that replacements for couscous carry harissa just as well as the original.

Mixed with plain yogurt, it becomes a cooling dipping sauce for roasted vegetables or a drizzle for grilled lamb.

Folded into tomato stews, it deepens the base; keeping shakshuka fresh is worth knowing if you make a big batch with harissa already stirred in.

Swirled into plain hummus and its flavor shifts dramatically with just a tablespoon of paste.

Harissa pairs tightly with lamb, chickpeas, tomatoes, eggs, and roasted vegetables. It fits comfortably into Tunisian, Moroccan, Algerian, and Levantine cooking, and has been adopted heavily in modern fusion menus.

Try It In
🥧Portuguese Pastéis de NataCompare how spiced pastes shape flavor in other traditions→🌶️Korean Ssamjang PasteAnother bold chili paste — see how it compares in structure and use→

How to Buy and Store harissa paste

Look for a deep, brick-red color with visible chili flecks and a glossy olive oil sheen on the surface. A good jar smells of toasted pepper and garlic - sharp but not sour. Avoid anything with a metallic odor or an aggressively vinegary smell, which usually signals low-quality additives rather than preserved lemon.

Golden Rule
After each use, press a thin layer of olive oil across the surface before resealing. This limits air contact and keeps the paste from drying out or oxidizing between uses.

Storage is straightforward:

  • Unopened jars - shelf-stable for several months to a year; store in a cool, dark place
  • Opened and refrigerated - lasts about 2-3 months with the oil-seal method; always use a clean spoon
  • Freezing - [freezing harissa paste](https://forkliftkitchen.com/harissa-paste-shelf-life/) in ice cube trays works well for long-term storage; thaw only what you need

If you're monitoring chili freshness more broadly, the same principles behind keeping chili fresh apply to any open jar of harissa.

Start Here If You're New to Harissa

If you've never cooked with harissa, start with a yogurt dip: one tablespoon of paste stirred into half a cup of plain yogurt, served alongside roasted vegetables or flatbread.

That ratio lets you taste what the paste actually does - heat, smoke, earthiness - without overwhelming a dish.

From there, work it into a marinade for chicken thighs or smear it onto lamb before grilling.

For cooks swapping between chili pastes, the harissa paste swaps that work are more nuanced than a simple 1:1 ratio - heat levels and texture differ.

Similarly, if a recipe calls for gochujang and you're reaching for harissa, check replacements for gochujang first to calibrate amounts correctly.

Shortcut
Buy rose harissa for your first jar. It's milder and more forgiving while you dial in how much heat your recipes can handle.

Frequently Asked Questions

Is harissa paste very spicy?

Heat level varies significantly by brand and region. Tunisian harissa tends to be the hottest; rose harissa is noticeably milder. Always taste before using - a small spoonful tells you where a jar sits on the heat scale.

Can you substitute harissa for chili paste?

Yes, but harissa brings cumin, caraway, and garlic that most generic chili pastes don't have. Use slightly less than the recipe calls for and taste as you go - the spice profile shifts the dish noticeably.

Is harissa paste vegan?

Most harissa paste is vegan - standard ingredients are chilies, garlic, olive oil, and spices. Check labels on flavored or specialty versions, which occasionally add honey or dairy-based ingredients.

How long does harissa paste last after opening?

About 2-3 months in the refrigerator when kept sealed with an olive oil layer on top. Signs it's gone off: off-smell, mold, or a color that's shifted from brick-red to dull brown.

What is the difference between Tunisian and Moroccan harissa?

Tunisian harissa is typically hotter and more chili-forward, often made with bird's eye or baklouti peppers. Moroccan versions lean sweeter and milder, with a higher ratio of roasted red pepper and sometimes added tomato.

Air Fryer Chicken Kofta

March 30, 2026

You need 30 minutes and one air fryer basket. No marinating, no pan-searing, no watching the stove while oil splatters.

Air Fryer Chicken Kofta served on a plate

Ground chicken mixed with warm spices crisps in the air fryer while staying tender inside. The basket's circulating heat does what a grill does-caramelized edges without the hassle.

This is what we make when we want Middle Eastern flavors but skipped the grocery run for lamb. Works for weeknight dinners or meal prep that actually tastes good reheated.

QUICK SUMMARY

Air fryer chicken kofta cook in 12-15 minutes at 375°F, giving you crispy edges and juicy centers without a grill. The key is shaping uniform pieces so they cook evenly and leaving space in the basket for air to circulate. Perfect for weeknights when you want flavor without standing over a hot pan.

⏱️Time Reality: 15 min prep, 12-15 min cook-no marinating or precooking needed
🔥First Critical Move: Preheat air fryer to 375°F for 3 min before cooking
⚠️Watch Out: Overcrowding causes steaming-leave 1-inch gaps between pieces or cook in batches

Table of Contents

Toggle
  • Why This Recipe Works
  • What You'll Need
    • Ingredient Details
  • Ingredient Swaps
  • What to Serve With It
  • Store and Reheat
  • Frequently Asked Questions
  • Air Fryer Chicken Kofta
    • Method 
    • Tried this recipe?

Why This Recipe Works

Ground chicken needs help staying juicy since it's lean. Rich mains need something to cut through, and chicken does exactly that. For a version that comes together quickly, this juicy chicken adds richness with minimal effort.

Quick Reference
⏱️
Prep Time
15 min
🔥
Cook Time
12-15 min
⏰
Total Time
27-30 min
🍽️
Servings
4 servings
📊
Difficulty
Easy
🏷️
Category
Main Dish | Appetizer
💡
Quick Tip
Use thermometer for juicy, fully cooked kofta
🎯
Best For
Weeknight | Meal prep | Entertaining

What makes this work:

  • Fresh ground chicken mixed with onion adds moisture - pre-ground meat from the store can be dry and affects how juicy the kofta stays
  • Cumin and coriander create the warm spice base - these are essential for authentic kofta flavor and balance the mild chicken
  • Air fryer at 375°F crisps the outside while keeping the inside tender - high heat renders fat and sets the crust in under 15 minutes
  • Shaping pieces 1.5 inches thick ensures even cooking - thicker pieces stay juicy, thinner ones dry out before browning
  • Resting the meat mixture for 10 minutes lets spices meld - the flavors distribute evenly and the texture holds together better when shaping
Quick Tip
Preheat your air fryer for 3 minutes before adding kofta-it jump-starts the browning and prevents sticking to the basket

What You'll Need

Ingredients for Air Fryer Chicken Kofta

A good kofta can make or break the plate. Most people skip kofta, but it balances the meal. For a version that comes together quickly, homemade kofta recipe keeps things simple with lamb.

🍗
Protein
  • 1 lb ground chicken
🧄
Aromatics
  • ½ medium onion, finely minced
  • 3 garlic cloves, minced
  • ¼ cup fresh parsley, chopped
🌶️
Spices
  • 1½ teaspoon ground cumin
  • 1 teaspoon ground coriander
  • 1 teaspoon paprika
  • 1 teaspoon salt
  • ½ teaspoon black pepper
🫙
Other
  • 1 tablespoon olive oil (optional)
  • Oil spray for basket

Ingredient Details

  • Ground chicken
    Use fresh ground from the butcher counter-pre-ground can be dry and affects how juicy the kofta stays
  • Onion
    Mince it fine so it distributes evenly and adds moisture without creating chunks that fall apart
  • Fresh parsley
    Dried doesn't add the same bright flavor-chop it fine and squeeze out excess moisture before mixing
  • Ground cumin
    This is the backbone of kofta spice-don't skip it or the flavor falls flat
  • Salt
    Season the mixture well before shaping-under-seasoned kofta tastes bland even with sauce
  • Olive oil
    Optional but helps with browning-one tablespoon mixed into the meat or a light spray on shaped kofta works
  • Oil spray
    Spray the basket lightly before adding kofta to prevent sticking and improve crust development

Ingredient Swaps

Most swaps work if you keep the moisture balance right. Too dry and the kofta crumbles, too wet and it steams instead of crisps.

Four swaps that work:

  • Ground chicken → ground turkey - similar texture but slightly drier, cook times stay the same, works on a budget
  • Fresh parsley → cilantro - gives a different herbal note, slightly stronger flavor, use the same amount
  • Breadcrumbs → almond flour - makes it gluten-free, adds slight nuttiness, texture gets denser but still works
  • Ground cumin → garam masala - richer spice profile with slight sweetness, changes the character but still tastes good

Ground Turkey

Works for: Budget meals, slightly firmer texture, same cook time

Skip if: You want the juiciest result-turkey runs drier than chicken

Cilantro Instead of Parsley

Works for: Fresh herbal flavor, pairs well with Middle Eastern spices, adds brightness

Skip if: You're in the "cilantro tastes like soap" camp-no substitute fixes that

Almond Flour Binder

Works for: Gluten-free needs, adds nutty flavor, helps hold shape

Skip if: You want traditional texture-almond flour makes it slightly denser

Instructions

The whole process takes under 30 minutes once you preheat. Slaw adds the contrast this plate needs, but timing matters. For a version that comes together quickly, homemade slaw recipe adds crunch with minimal effort.

  1. Mix the kofta base: Combine ground chicken, minced onion, garlic, parsley, cumin, coriander, paprika, salt, and pepper in a mixing bowl. Use your hands to mix until everything distributes evenly but don't overmix-stop when you no longer see streaks of spice. Let the mixture rest for 10 minutes so the spices meld and the texture firms up.

  2. Shape uniform pieces: Divide the mixture into 8 equal portions (about 2 oz each). Roll each portion into a log shape about 4 inches long and 1.5 inches thick. If using skewers, thread the meat onto them and press to form an oval shape around the stick. Keep the thickness consistent so they cook evenly.

  3. Preheat and prep the air fryer: Set the air fryer to 375°F and preheat for 3 minutes. Spray the basket lightly with oil. Lightly spray each kofta with oil-one quick spray per side helps with browning.

  4. Cook in batches: Place kofta in the basket with 1-inch gaps between pieces. Cook for 6-7 minutes, then flip and cook another 6-8 minutes. The outside should look golden-brown with slight char marks. Check internal temp with a thermometer-it should read 165°F in the thickest part.

  5. Rest before serving: Transfer cooked kofta to a plate and let rest for 5 minutes. This locks in the juices and firms up the texture so they don't fall apart when you cut into them.

Watch Out
Don't skip the rest after cooking-cutting into kofta immediately causes juices to run out and the meat dries out faster

What to Serve With It

Kofta on its own is protein-heavy and needs something to balance the richness. A dollop of this dip takes each bite somewhere more interesting. For a version that comes together quickly, smooth creamy dip pairs perfectly with warm spices. For more ideas on rounding out the meal, check out easy peruvian chicken dinner nights for similar protein-forward plates.

Side Dish Prep Why It Works How to Serve
Cucumber yogurt salad Easy Cool freshness cuts through warm spices and richness Chop cucumbers, mix with yogurt, lemon, salt-serve cold
Pita bread Easy Traditional accompaniment for scooping, soaks up juices Warm in oven or air fryer for 2 min, cut into wedges
Simple tomato salad Easy Acidity and crunch balance the tender protein Dice tomatoes, toss with olive oil, salt, herbs
Roasted vegetables Medium Adds fiber and complements protein without competing Roast bell peppers, zucchini, onions at 400°F for 20 min
Hummus platter Easy Creamy, garlicky dip adds richness and works for scooping Serve store-bought or homemade with olive oil drizzle

Three ways to serve it:

  • Weeknight plate: Serve kofta over rice with a simple cucumber salad and warm pita-everything cooks while the air fryer runs
  • Meal prep bowls: Pack kofta with roasted vegetables, hummus, and pita for lunches that reheat well
  • Appetizer spread: Serve kofta on a platter with tzatziki, tabbouleh, and grilled flatbread for entertaining
Best Pick
Tzatziki is the classic pairing-cool cucumber yogurt balances the warm spices and adds moisture without overpowering the kofta

Store and Reheat

Cooked kofta holds well in the fridge for quick lunches or meal prep. Most people skip salad, but it balances the meal. For a version that comes together quickly, this fresh salad adds brightness with minimal effort. Store in a shallow airtight container and reheat gently to keep the texture right.

Method Time Best For
🔥 Air Fryer 3-5 min at 350°F Retains crispy exterior and juicy interior-best texture
🍳 Oven 5-7 min at 350°F Preserves crust when reheating multiple servings at once
📦 Microwave 1-2 min medium power Quick but softens the crust-cover with damp paper towel

For best results when storing:

  • Cool completely before sealing - putting warm kofta in a container traps steam and makes the crust soggy
  • Store in shallow containers - spreads out the pieces so they cool faster and reheat more evenly
  • Separate sauce and kofta - store tzatziki or other sauces in a different container to prevent sogginess
  • Freeze in single layers - lay kofta on a sheet pan, freeze until solid, then transfer to a freezer bag for up to 2 months
  • Reheat from frozen in the air fryer - add 2-3 minutes to the cook time and check internal temp reaches 165°F before serving

Frequently Asked Questions

Can I use ground turkey instead of chicken for kofta?

Yes-ground turkey works with the same cook times and temperatures. It runs slightly drier than chicken, so add an extra tablespoon of olive oil to the mixture or serve with extra sauce.

How long can cooked chicken kofta be stored in the fridge?

Cooked kofta lasts 3-4 days in an airtight container in the fridge. Store them in a shallow container so they cool quickly and reheat evenly.

How do I know when air fryer chicken kofta is fully cooked?

Use a kitchen thermometer-insert it into the thickest part and look for 165°F. The outside should be golden-brown with slight char marks, and the juices should run clear when you cut into one.

What causes chicken kofta to fall apart and how to fix it?

Kofta falls apart when the mixture is too wet or doesn't have enough binder. Add 2 tablespoons of breadcrumbs or let the mixture rest for 10 minutes before shaping-this helps everything hold together better.

Can I double the recipe and cook kofta in one air fryer batch?

Only if your air fryer basket is large enough to leave 1-inch gaps between pieces. Overcrowding causes steaming instead of crisping-cook in two batches if needed to get the right texture.

Air Fryer Chicken Kofta served on a plate

Air Fryer Chicken Kofta

No ratings yet
Air Fryer Chicken Kofta delivers Middle Eastern flavors with crispy edges and juicy centers using fresh ground chicken and warm spices. This easy recipe skips marinating and pan-searing, perfect for flavorful weeknight dinners or meal prep that reheats well.
Print Recipe Pin Recipe
Prep Time 15 minutes mins
Cook Time 15 minutes mins
Total Time 30 minutes mins
Servings: 4 servings
Course: Appetizer, Main Dish
Cuisine: Middle Eastern
Ingredients Equipment Method Notes

Ingredients
  

  • 1 lb ground chicken use fresh ground from the butcher counter for moisture
  • 0.5 medium onion finely minced for even moisture distribution
  • 3 cloves garlic minced
  • 0.25 cup fresh parsley chopped and squeezed to remove excess moisture
  • 1.5 teaspoon ground cumin essential for authentic kofta flavor
  • 1 teaspoon ground coriander
  • 1 teaspoon paprika
  • 1 teaspoon salt season well before shaping
  • 0.5 teaspoon black pepper
  • 1 tablespoon olive oil optional, helps browning
  • oil spray spray basket and kofta to prevent sticking and improve crust

Equipment

  • Air fryer Used to cook the kofta with circulating hot air for crispiness

Method
 

  1. Combine ground chicken, minced onion, garlic, parsley, cumin, coriander, paprika, salt, and pepper in a mixing bowl. Use your hands to mix until uniformly distributed without overmixing. Let rest for 10 minutes to meld spices and firm texture.
    1 lb ground chicken, 0.5 medium onion, 3 cloves garlic, 0.25 cup fresh parsley, 1.5 tsp ground cumin, 1 tsp ground coriander, 1 tsp paprika, 1 tsp salt, 0.5 tsp black pepper
  2. Divide mixture into 8 equal portions (~2 oz each) and roll each into a 4-inch long, 1.5-inch thick log. For skewers, thread and form oval around the stick. Maintain consistent thickness for even cooking.
    1 lb ground chicken
  3. Preheat the air fryer to 375°F for 3 minutes. Lightly spray the basket with oil.
    oil spray
  4. Lightly spray each kofta with oil on all sides. Place in the basket with 1-inch gaps. Cook for 6-7 minutes, then flip and cook for another 6-8 minutes until golden-brown with slight char marks. Check internal temperature reaches 165°F.
    1 Tbsp olive oil, oil spray
  5. Transfer kofta to a plate and let rest for 5 minutes to lock in juices and firm texture before serving.

Notes

  • Preheat air fryer for best browning and to prevent sticking.
  • Leave 1-inch gaps between kofta pieces to avoid steaming.
  • Rest cooked kofta to retain juiciness and prevent crumbling when cut.

Tried this recipe?

Let us know how it was!

What Is Gochujang? [Taste, Uses & More]

March 30, 2026

Most people assume gochujang is just a hot sauce - something to add pure fire and step back from. That's the wrong read.

The heat is real, but it's the slowest, most layered part of what this paste does, sitting beneath waves of fermented sweetness, salt, and a deep umami you'd normally associate with aged cheese or miso paste. Getting gochujang wrong usually means using too little of it, or treating it as a finishing garnish when it's built to be the backbone.

QUICK SUMMARY

Gochujang is a fermented Korean red chile paste with a thick, sticky texture and a flavor profile that combines umami depth, mild-to-medium heat, natural sweetness from fermented glutinous rice, and salt. It functions as a marinade base, stew seasoning, and sauce ingredient across Korean and fusion cooking.

🌶️Flavor: Umami-rich, mildly sweet, moderately spicy, salty, slightly tangy
🥣Texture: Thick, sticky paste - smooth with slight graininess from gochugaru
🍽️Best Uses: Marinades, stews, braises, glazes, dipping sauces, noodle dishes
❄️Shelf Life: Opened: 6-12 months refrigerated in a sealed container
🛒Buy It: Look for a deep red, glossy paste with gochugaru listed high in the ingredients

What Is Gochujang?

Gochujang is a fermented red chile paste from Korea, made from four core ingredients: cooked glutinous rice, fermented soybean powder (meju), salt, and gochugaru - Korean red chile flakes.

The Gyeongsang and Jeolla regions both claim strong historical ties to the paste, and regional recipes still differ in sweetness levels and fermentation time.

Traditional production involved clay pots and months of outdoor aging. Modern commercial versions compress that timeline, though the fermentation still drives the flavor.

It's categorized alongside doenjang - a fermented soybean paste - as part of Korea's foundational jang condiment family.

You'll see it sold under alternate names including Korean red pepper paste, kochujang, and gochu-jang. Heat level varies by brand - some labels use a spice rating scale from 1 (mild) to 5 (very hot), so check before buying if heat tolerance matters.

  • 🌶️ Mild versions - sweeter, more fermented rice flavor forward, less gochugaru heat
  • 🔥 Hot versions - higher gochugaru content, sharper finish, still sweet but less so
  • 🌾 Gluten-free formulations - exist but require label-checking; most standard versions contain gluten

What Does Gochujang Taste Like?

gochujang - What Is Gochujang

Think of it as a cross between fermented miso and a sweet chile paste, but more complex than either. Sambal oelek is sharper and more acidic.

Miso is earthier but lacks heat. Gochujang sits between them - rounded, warm, with a finish that lingers rather than spikes.

Sensory SnapshotStrong Intensity
👅 Flavor
UmamiFermented-sweetChile heatSaltySlightly tangy
✋ Texture
Thick pasteStickySlightly grainy
👃 Aroma
Fermented-earthyRoasted pepperWarm

Heat from gochujang builds slowly - it doesn't hit immediately the way raw chile does. Cooking mellows both the sweetness and the spice slightly, pushing the fermented umami forward.

Eaten raw in a dressing or dip, the sweet-heat contrast is sharper and more immediate.

Golden Rule
Never substitute gochujang 1:1 with straight hot sauce. Hot sauce adds acid and capsaicin heat with no fermented sweetness or body - the flavor profile is completely different.

How to Use Gochujang

Gochujang works across four distinct cooking approaches, each pulling out a different aspect of its flavor.

In stews and braises, the fermentation deepens over heat - it's a standard addition to kimchi jjigae and spicy braised short ribs (galbijjim), where it provides both color and body to the braising liquid.

For marinades, mix it with sesame oil, soy sauce, garlic, and a small amount of sugar for a bulgogi-style pork marinade. The sugars in the paste also help achieve caramelization when glazed meats hit a hot grill or oven.

Keep the glaze layer thin - too thick and the sugars scorch before the protein cooks through.

Raw applications are where gochujang's tang shines. Thin it with rice vinegar and sesame oil for a dipping sauce, or blend it with mayonnaise for a sandwich spread with real depth.

The ratio matters: start with one part gochujang to three parts mayo and adjust.

Shortcut
Gochujang mayo takes 60 seconds - whisk one tablespoon of paste into three tablespoons of mayo, add a few drops of sesame oil, done. Works on burgers, grain bowls, and roasted vegetable wraps.
How Gochujang Is Used
MethodBest ForTip
🥗 Raw / MixedDressings, dipping sauces, mayo blendsThin with rice vinegar or sesame oil to adjust thickness
🍲 SimmeringStews, braises, kimchi jjigae, galbijjimAdd early - long heat deepens the umami and mellows sweetness
🥩 MarinatingPork, chicken, tofu, bulgogi-style dishesInclude sugar or honey to balance salt; marinate at least 30 minutes
🔥 GlazingRoasted or grilled chicken, ribs, vegetablesApply in the last 10-15 minutes to prevent the sugars from burning

Pairs best with soy sauce, garlic, ginger, scallions, and sesame seeds. Avoid pairing it with delicate raw white fish - the fermented paste overwhelms subtle seafood completely.

Try It In
🍗Air Fryer Garlic Parmesan Chicken TendersSwap the parmesan glaze for gochujang mayo for a Korean-style finish→🍯Air Fryer Honey Garlic Chicken TendersAdd a teaspoon of gochujang to the honey garlic sauce for heat and depth→🍖Crispy Honey Garlic Chicken WingsGochujang cuts the sweetness and adds a fermented backbone to the wing glaze→

How to Buy and Store Gochujang

Look for a deep red, glossy paste in a sealed tub - separated liquid or a pale, dull color signals low quality or degraded product. Check that gochugaru appears near the top of the ingredient list, not buried after starches or artificial colorings.

If you need a gochujang substitute in a pinch, options exist, but no single ingredient replicates the fermented complexity.

Watch Out
Surface mold on opened gochujang is a sign of improper storage or a broken seal. Skim a thin layer if it's just surface oxidation and the paste below smells right - discard if mold has penetrated or the smell is off.

Store an unopened tub in a cool pantry. Once opened, refrigerate in a tightly sealed container - this slows active fermentation and prevents surface mold.

Shelf life for refrigerated gochujang runs 6-12 months when kept properly sealed. For a full breakdown, see our guide on gochujang storage guide.

High sodium content means it preserves well, but it doesn't last forever after opening.

Start with One Dish

If gochujang is new to your kitchen, don't start with a stew.

Mix one tablespoon into softened butter or mayo and use it as a spread - that's the fastest way to understand the balance of sweetness, heat, and fermented depth before committing it to a longer cook.

From there, move to a simple marinade: gochujang, sesame oil, garlic, and a splash of soy sauce for chicken thighs. That single formula covers the paste's core strengths without overcomplicating the first attempt.

Frequently Asked Questions

Is gochujang spicy?

Mild to moderately spicy, depending on the brand. The heat builds slowly rather than hitting immediately, and fermented sweetness tempers the overall burn. Brands label heat level from 1 to 5 - most everyday cooking uses a 2 or 3.

Can I substitute gochujang with miso?

Not directly. Miso shares the fermented umami base but has no chile heat and lacks sweetness. A closer improvised substitute combines miso with a small amount of sriracha and a pinch of sugar - still not identical, but structurally closer.

How do you store gochujang after opening?

Refrigerate it in a tightly sealed container. Press a small piece of plastic wrap directly onto the paste surface before sealing - this reduces oxidation and slows surface mold formation significantly.

Does gochujang contain gluten?

Most standard formulations do - glutinous rice and fermented soybean (meju) are both common gluten sources in the paste. Certified gluten-free versions exist; check the label explicitly rather than assuming.

Can you eat gochujang raw without cooking it?

Yes - it's commonly eaten raw in dipping sauces and dressings. The flavor is sharper and sweeter uncooked. Thin it with a liquid like rice vinegar or sesame oil first; straight from the tub it's too dense for most raw applications.

What Is Kalamata Olives? [Taste, Uses & More]

March 30, 2026

Bite into a kalamata olive and you get three things at once: salt, fruit, and a faint winey bitterness that lingers at the back of the mouth.

What Is Kalamata Olives

Unlike the mild, almost neutral castelvetrano olive's flavor and uses, kalamatas lead with intensity.

They're not a background ingredient - they shape every dish they touch, and knowing how to use them well changes the way you approach Mediterranean cooking.

If you make tapenade regularly, it's also worth understanding olive tapenade spoilage signs so nothing goes to waste.

QUICK SUMMARY

Kalamata olives are dark purple, almond-shaped table olives from Greece's Peloponnese region, cured in red wine vinegar or brine. They deliver a briny, fruity, tangy punch with a meaty texture - best used raw as a finishing ingredient, not cooked down.

🫒Type: Brine-cured Greek table olive, also called Kalamon
👅Flavor: Briny, fruity, tangy with a bitter almond finish
🍽️Best Uses: Greek salad, tapenade, pasta, mezze boards, grilled fish
🌡️Intensity: Strong - a little goes a long way
🛒Buy: Look for plump, dark purple olives labeled Kalamon or Product of Greece
⏱️Shelf Life: Unopened up to 2 years; opened and refrigerated in brine, 1-2 months

What Is Kalamata Olives?

Kalamata olives come from a specific olive variety - the Kalamon - grown in the Peloponnese region of southern Greece, particularly around the city of Kalamata.

They carry a Protected Designation of Origin (PDO), which means authentic Kalamata olives must be grown and processed in that region.

These are table olives, not pressing olives. The fruit is harvested ripe and dark, then cured in red wine vinegar or red wine brine - a process that gives them their distinctive tang.

You'll see them sold pitted or whole, sometimes packed in olive oil, sometimes in brine.

Shape sets them apart from other dark olives. Kalamatas are almond-shaped with a pointed tip, noticeably longer and more tapered than round canned black olives.

They're also sometimes called Kalamata Greek olives or, outside Greece, simply "kalamatas" - though "kalamatta" is a common misspelling.

  • 🫒 Kalamon - the Greek varietal name for the same olive
  • 🌍 PDO status - production is legally tied to the Peloponnese region
  • 🍷 Red wine vinegar cure - what separates their flavor from brine-only olives
  • 🫙 Packed formats - sold in brine, olive oil, or dry-salt packs

What Does Kalamata Olives Taste Like?

kalamata olives - What Is Kalamata Olives

Kalamata olives taste nothing like the canned black olives found on pizza or in salad bars.

Those are processed with lye for uniform color and taste mild, almost flat. Kalamatas are fruit-forward - the ripe plum note hits first, then brine, then a tangy edge from the wine-vinegar cure.

Sensory SnapshotStrong Intensity
👅 Flavor
briny-saltyripe plumtangybitter finish
✋ Texture
meatyfirmslight chew
👃 Aroma
fermented-fruitywiney brine

The finish has a subtle almond-like bitterness - not harsh, more of a dry close that lingers.

Texture matters here, too: the flesh is meaty and firm, which means kalamatas hold their shape in salads and on boards rather than collapsing into the surrounding ingredients.

Heat softens that tang. Stirred into a warm tomato sauce, the sharpest edges round off while the briny-savory quality deepens.

Eaten straight from the jar at room temperature, the full fruit-forward intensity is most apparent.

How to Use Kalamata Olives

Kalamatas are a finishing ingredient first.

Adding them at the end of cooking, rather than simmering them down, preserves the fruit and tang that make them distinctive.

This is the approach used in pasta puttanesca - the olives go in during the last few minutes alongside capers, and the caper and its flavor works in tandem with kalamatas to build the sauce's signature sharpness.

Golden Rule
Add kalamata olives in the final 2-3 minutes of any cooked dish. Prolonged heat dulls their fruity edge and makes them taste flat.

They're a natural anchor on a mezze board, served whole alongside feta and cured meats.

For tapenade, pit and blend them with capers, anchovy, garlic, and olive oil - if you're skipping the fish, a replacements for anchovy guide covers the best umami swaps.

Chopped kalamatas scattered over grilled fish or roasted vegetables need no preparation beyond draining and roughly cutting.

How Kalamata Olives Are Used
MethodBest ForTip
🥗 Raw / WholeGreek salad, mezze boards, sandwichesDrain and pat dry so they don't waterlog other ingredients
🍳 Warmed in SaucePasta puttanesca, tomato-based braisesAdd in the final 2-3 minutes only
🫙 BlendedTapenade, hummus topping, labneh garnishPit fully before blending - stone fragments are sharp
🔥 RoastedAlongside vegetables, stuffed and baked as appetizersUse oil-packed olives for roasting - they brown better

Pairings that work consistently: feta and sheep's milk cheeses, tomato, cucumber, oregano, lemon, and grilled lamb. Red wine or dry rosé alongside a mezze spread is a pairing that holds up well.

Avoid sweet glazes - the brine tang clashes rather than complements.

Try It In
🥗Greek Salad with Feta and OlivesThe classic application — kalamatas whole, feta crumbled, no dressing needed beyond oil and lemon→🍗Chicken Provençal with Tomatoes and OlivesShows how kalamatas add depth to a braise without disappearing into the sauce→🍝Chicken Puttanesca with OlivesA sharp, briny sauce where kalamatas go in last and do the most work→

How to Buy and Store Kalamata Olives

Look for olives that are uniformly dark purple to mahogany and visibly plump. Shriveled flesh or cloudy brine with surface mold are both signs to skip the jar - a quick check of olives spoilage signs covers what to watch for.

For best authenticity, choose jars labeled "Kalamon" or "Product of Greece."

Watch Out
Cloudy brine alone isn't always a problem - slight cloudiness can be natural fermentation. Surface mold or a sour-rancid smell is the real red flag.

Storage after opening is straightforward: keep olives submerged in their brine or olive oil in a sealed container in the refrigerator. Don't drain and store them dry - they'll oxidize and toughen within days.

The guide to storing kalamata olives correctly goes deeper on both opened and unopened timelines.

  • 🛒 Unopened shelf life - months to 2 years depending on pack date and label
  • ❄️ Opened, refrigerated in brine - peak quality for 1-2 months
  • 🫙 Best container - glass jar with a tight lid, olives fully submerged
  • 🧀 Paired storage tip - store away from strong-smelling items; brine absorbs odors

If you're also working with feta in the same dish, knowing feta spoilage signs keeps both components fresh through the week.

Where to Start with Kalamata Olives

Start with a Greek salad - no cooking required, and the olive's full character comes through undiluted. From there, pit and rough-chop them over hummus or labneh to see how they work as a garnish.

If the intensity feels like too much straight, look at alternatives to kalamata olives for milder options that still carry brine and body.

These olives are high in sodium, so portion accordingly if that's a concern. A small handful - six to eight olives - is enough to anchor most dishes without overwhelming them.

Frequently Asked Questions

Are Kalamata olives salty?

Yes, but they're not purely salty - the wine-vinegar cure adds a distinct tang alongside the salt. Oil-packed versions tend to taste slightly less sharp than those stored in straight brine.

What is the difference between Kalamata and black olives?

Canned black olives are typically lye-processed California olives with a mild, flat flavor. Kalamatas are naturally ripened, wine-vinegar cured, and noticeably more fruity, tangy, and complex.

Do Kalamata olives need to be rinsed before eating?

Not necessarily. Rinsing reduces surface saltiness, which helps if they're going into a dish with other salty components like feta or anchovy. Eaten on their own or on a board, skip the rinse.

Can you eat Kalamata olive pits?

No - the pit is a hard stone, not edible. Always pit kalamatas before blending into tapenade or adding to dishes where someone might bite down unexpectedly.

How long do Kalamata olives last after opening?

Kept submerged in brine or olive oil in a sealed container in the fridge, they hold peak quality for 1-2 months. Olives left exposed to air deteriorate faster and may develop off-flavors within days.

« Previous Page
Next Page »

Primary Sidebar

ForkliftKitchen recipe developer

Welcome!

Recipe Developer · 12+ Yr Kitchen Veteran

I'm the recipe developer behind this site, focused on practical, well-tested dishes and smart ingredient swaps. Every recipe is written to be clear, reliable, and easy to make at home.

650+ Recipes
12+ Yrs Exp.
3x Tested
Our Story →

As Featured In

Allrecipes

TASTE OF HOME

Food52

HUFFPOST

Yahoo! Life

Our Editorial Standards

  • ✓ Every recipe tested at least 3 times before publishing
  • ✓ Substitutes verified by real kitchen trials, not guesswork
  • ✓ Reviewed for accuracy by our editorial team
  • ✓ Updated regularly with seasonal info and reader feedback

Most Popular

  • Creamy Lemon Shrimp Linguine
    Creamy Lemon Shrimp Linguine
  • Creamy Garlic Mushroom Chicken
    Creamy Garlic Mushroom Chicken
  • Sesame Ginger Chicken Noodle Bowls
    Sesame Ginger Chicken Noodle Bowls
  • Baked Lemon Herb Fish Fillets
    Baked Lemon Herb Fish Fillets
  • Veggie Loaded Fried Rice
    Veggie Loaded Fried Rice
  • Spicy Garlic Shrimp Stir Fry
    Spicy Garlic Shrimp Stir Fry

Join 8,000+ Home Cooks

Weekly Kitchen Tips

Easy recipes, smart substitutes, and real cooking shortcuts — every Thursday.

Subscribe Free →


Side Dishes

  • What to Serve With Asian Salmon? 15 Best Side Dishes
    What to Serve With Asian Salmon? 15 Best Side Dishes
  • Side Dishes for Strawberry Spinach Salad
    15 Best Side Dishes for Strawberry Spinach Salad
  • Sides for Grilled Cauliflower Steaks to Complete the Meal
    15 Sides for Grilled Cauliflower Steaks to Complete the Meal
  • 15 Sides To Serve With Calabacitas
    15 Best Sides for Calabacitas – Mexican-Inspired Favorites


Substitutes

  • 7 Best Substitutes for Hot Sauce in Marinades & Stir-Fries
    7 Best Substitutes for Hot Sauce in Marinades & Stir-Fries
  • 9 Best Substitutes for Butter in Baking and Cooking
  • 7 Best Substitutes for Tagliatelle for Italian Pasta Dishes
    7 Best Substitutes for Tagliatelle for Italian Pasta Dishes
  • 7 Best Substitutes for Udon Noodles in Asian Stir-Fries
    7 Best Substitutes for Udon Noodles in Asian Stir-Fries


Browse by Topic

  • Side Dishes320
  • Substitutes785
  • Dinner163
  • Air Fryer77
  • Taste Profiles484
  • Food Storage123


Reader Reviews

★★★★★

"Finally a food blog that tells you exactly why a substitute works instead of just listing options."

— Sarah M., via email

★★★★★

"The side dish recommendations are so specific — saved my dinner party twice this month."

— James R., Pinterest comment

★★★★★

"I trust this site more than most because they actually test everything. You can tell."

— Priya K., blog comment

Footer

↑ Back to Top

Forklift Kitchen

We do the heavy lifting so you can enjoy the cooking. Tested recipes, smart substitutes, and perfect pairings—built for real home cooks.

Content

  • Recipes
  • Substitutes
  • What to Serve With
  • Blog

Company

  • About Us
  • Contact
  • Subscribe

Legal

  • Privacy Policy
  • Terms of Service

As an Amazon Associate I earn from qualifying purchases.

© 2026 Forklift Kitchen.

Rate This Recipe

Your vote:


A rating is required
A name is required
An email is required