• Skip to primary navigation
  • Skip to main content
  • Skip to primary sidebar
  • Recipe Index
    • Air Fryer
  • Side Dishes
  • Substitutes
  • About
  • Contact
  • Subscribe

ForkLiftKitchen

menu icon
go to homepage
  • Recipe Index
    • Air Fryer
  • Side Dishes
  • Substitutes
  • About
  • Contact
  • Subscribe
subscribe
search icon
Homepage link
  • Recipe Index
    • Air Fryer
  • Side Dishes
  • Substitutes
  • About
  • Contact
  • Subscribe
×

Blog

What Is Meringue Powder? [Taste, Uses & More]

March 31, 2026

You spot it on the baking aisle - a small tin or tub labeled meringue powder, tucked between the food coloring and the piping bags.
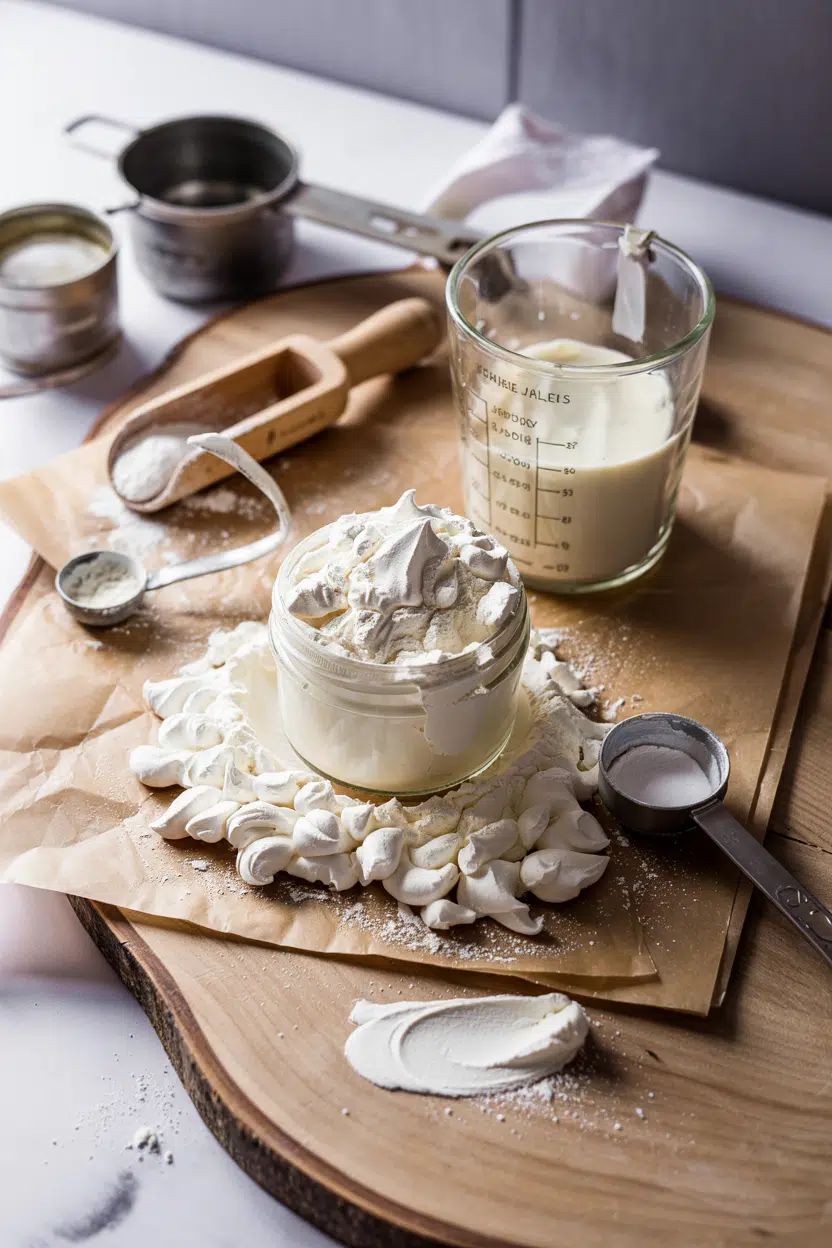
What Is Meringue Powder

It's not an ingredient most home bakers reach for daily, yet it solves a specific problem: producing stable, food-safe whipped whites without cracking a single shell.

Just as understanding butter spoilage signs helps you avoid ruined frosting, knowing what meringue powder actually does makes it far easier to use correctly.

Whether you need royal icing that dries hard enough to stack, or a stabilized meringue that won't weep in humidity, this is the ingredient that handles it.

QUICK SUMMARY

**Meringue powder** is a shelf-stable dried egg white blend used to whip meringue, make royal icing, and stabilize frostings without raw eggs. It has a mild, slightly eggy flavor that disappears once whipped with sugar and flavorings. Shelf life runs 12-24 months unopened.

🥚What It Is: Dried egg whites with stabilizers, sometimes sugar or cornstarch
👅Flavor: Mildly eggy, neutral base that takes on added extracts easily
🎂Best Uses: Royal icing, stabilized meringue, buttercream firming, piped decorations
📦Shelf Life: 12-24 months sealed; 6-12 months once opened
⚠️Watch Out: Contains egg - not vegan; won't replace yolk in custards or emulsions

What Is Meringue Powder?

Meringue powder is a dried egg derivative made primarily from pasteurized, spray-dried egg whites, with added stabilizers such as cornstarch, gum, or cream of tartar. Some commercial blends also include sugar, which matters when you're comparing labels.

It's the same fundamental ingredient as fresh egg white - dried to a shelf-stable powder and treated for food safety.

You might also see it labeled powdered egg whites, dried egg albumen, or meringue mix, though these names aren't always interchangeable. Plain dried egg albumen contains no additives, while a true meringue powder blend includes the stabilizers already built in.

The ingredient was commercialized in the United States primarily as a food-safety solution.

Large-scale cake decorators, bakeries, and home bakers who work with royal icing or delicate meringue-based components all rely on it when raw egg whites pose a salmonella concern.

If you ever find yourself without it, a quick look at meringue powder stand-ins shows which alternatives hold up in icing versus which fall short under heat.

What Does Meringue Powder Taste Like?
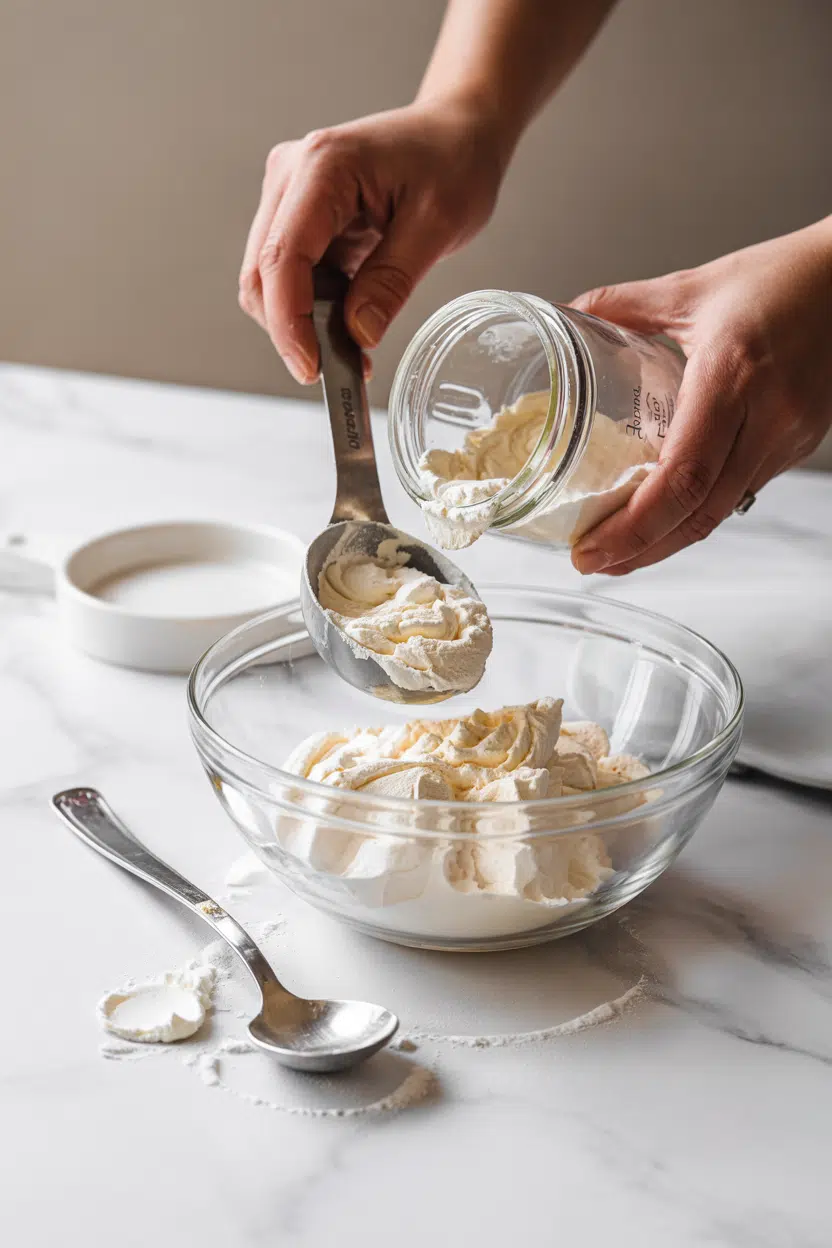
meringue powder - What Is Meringue Powder

Straight from the container, meringue powder has a faint dried-egg note - mild and slightly chalky, not unpleasant, but noticeable if you taste it dry. Some blends carry a light sweetness from added powdered sugar in the mix.

Once whipped with water and sugar, that dried-egg note largely disappears. The result tastes much like fresh whipped egg whites: clean, lightly sweet, and neutral enough to carry vanilla, almond extract, or citrus without competing.

Heat doesn't dramatically change the flavor - baked meringue cookies taste the same whether made from powder or fresh whites.

Sensory SnapshotMild Intensity
👅 Flavor
mildly eggylightly sweetneutral base
✋ Texture
powdery dryairy and glossy when whipped
👃 Aroma
faint dried-egg powderneutral after whipping

How to Use Meringue Powder

Royal icing is the most common application, and meringue powder handles it reliably. Whisk one to two tablespoons of powder with water and sifted powdered sugar until the icing reaches stiff peaks - it dries hard, holds clean lines, and is safe at room temperature on finished cookies.

Beyond icing, the powder has several distinct roles in a baker's toolkit.

How Meringue Powder Is Used
MethodBest ForTip
💧 WhippedRoyal icing, meringue toppings, stabilized frostingsUse room-temperature water; cold water slows hydration
🔥 Piped & Low-BakedMeringue cookies, piped flowers, sugar decorationsBake at 200°F / 93°C to dry out rather than brown
🧈 Folded InStabilizing American or Swiss buttercreamAdd dry powder directly - no need to rehydrate first
🍬 CoatingCandied nuts, glazed fruit, glossy shellsRehydrate lightly before tossing with nuts and sugar

Stabilizing buttercream with a teaspoon or two of dry meringue powder is a trick that holds up especially well in warm rooms. It firms the peaks without altering the flavor.

Note that replacements for butter in buttercream can affect how well the meringue powder stabilizes the final texture - fat content matters.

Meringue powder is central to American cookie-decorating culture, British sugarcraft, and French-influenced patisserie components.

It pairs naturally with powdered sugar, vanilla or almond extract, cream of tartar for added peak stability, and food coloring for piped decorations.

Cornstarch - already present in many blends - helps prevent clumping and adds body.

Knowing the replacements for cornstarch is useful if you're working with a plain egg-albumen powder and need to add your own stabilizer.

Try It In
🌰Cinnamon Sugar Roasted NutsUses rehydrated meringue powder for a crisp, glossy coating→🍪Small Batch Chocolate Chip CookiesA good base recipe for testing royal icing decoration→🍫No-Bake Chocolate Peanut Butter BarsShows how meringue powder adds structure without baking→

How to Buy and Store Meringue Powder

At the store, look for a free-flowing powder with no hard clumps and a best-by date at least six months out. Check the ingredient list: "dried egg whites" should appear first.

If you need an unsweetened blend for controlling sugar levels yourself, confirm no powdered sugar is listed.

Golden Rule
Reseal the container tightly after every use. Humidity is meringue powder's main enemy - even brief exposure causes clumping and weakens whipping performance.

Store the sealed container in a cool, dry pantry, away from the stove or any steam source.

Unopened, most brands last 12-24 months.

Once opened, aim to use it within 6-12 months for reliable stiff peaks.

For guidance on keeping paired ingredients in good shape, both keeping meringue powder fresh and keeping sugar fresh affect whether your royal icing sets properly.

Start Here If You're New to It

First-time users should begin with royal icing - it's the most forgiving application and shows quickly whether the powder is still active. Mix one tablespoon of meringue powder with two tablespoons of warm water and one cup of sifted powdered sugar, then whip on medium-high until stiff and glossy.

Shortcut
If your icing won't reach stiff peaks after three minutes of whipping, the powder is likely old or was exposed to moisture. Open a fresh container.

If the icing sets hard and holds clean lines, the powder is performing correctly. From there, stabilizing buttercream and piped flower decorations are natural next steps.

Frequently Asked Questions

Can you replace egg whites with meringue powder?

Yes, in most applications that call for whipped or stabilizing egg whites. Use one tablespoon of meringue powder plus two tablespoons of water to replace two large egg whites. It won't work where yolk function - emulsification or richness - is required.

Does meringue powder taste like eggs?

Faintly, when tasted dry. Once whipped with water and powdered sugar, the dried-egg note is barely detectable. Vanilla or almond extract covers any residual egginess completely.

Is meringue powder pasteurized?

Yes. The spray-drying process used to produce commercial meringue powder pasteurizes the egg whites, eliminating salmonella risk. That food-safety advantage is the primary reason bakers use it over raw whites.

How long does opened meringue powder last?

Six to twelve months, stored tightly sealed in a cool, dry pantry. After that window, the powder may still look fine but lose its ability to whip to stiff peaks reliably.

Can vegans use meringue powder?

No. Meringue powder is made from dried egg whites, making it unsuitable for vegan diets. Aquafaba powder or commercially produced vegan royal icing mixes are the closest plant-based alternatives.

What Is Limoncello? [Taste, Uses & More]

March 31, 2026

You spot it at the back of the freezer at a dinner party - a frosty yellow bottle with an Italian label, short and squat.

Limoncello is one of those bottles people own but rarely know what to do with beyond pouring a cold shot after dinner.

That's a waste. Limoncello works across cocktails, desserts, and marinades once you understand what makes it different from other citrus liqueurs.

QUICK SUMMARY

Limoncello is a sweet, intensely lemony Italian liqueur made from lemon zest steeped in neutral spirit. It delivers concentrated citrus oil flavor - not juice - with a silky mouthfeel and clean alcoholic warmth. Serve chilled, stir into cocktails, or drizzle over gelato.

🍋Flavor: Intense lemon zest, sweet syrup, subtle bitter peel notes
🥃Best Use: Chilled digestif, cocktails, dessert drizzle, cake soak
📍Origin: Amalfi Coast and Sorrento, Southern Italy
🌡️Strength: 25-35% ABV - moderately strong for a liqueur
🗓️Shelf Life: Opened bottles keep peak flavor 6-12 months when stored in the freezer

What Is Limoncello?

Limoncello is a citrus-based liqueur from Southern Italy, produced by steeping lemon zest in a neutral spirit - traditionally grain alcohol or grappa - then blending with simple syrup.

The result is a bottled infusion of lemon oil, not lemon juice, which is what sets it apart from other citrus spirits.

The liqueur's identity is tied to the Amalfi Coast and Sorrento, where sfusato amalfitano and Sorrento lemons are prized for their thick, fragrant rinds. Those rinds are the product, not the fruit inside.

Understanding that one fact explains the flavor entirely.

You'll also find it labeled as lemoncello or limoncello di Capri, depending on the region and producer. Cream-based versions - limoncello crema - blend the liqueur with dairy for a richer, dessert-style drink, though that's a separate category with a shorter shelf life.

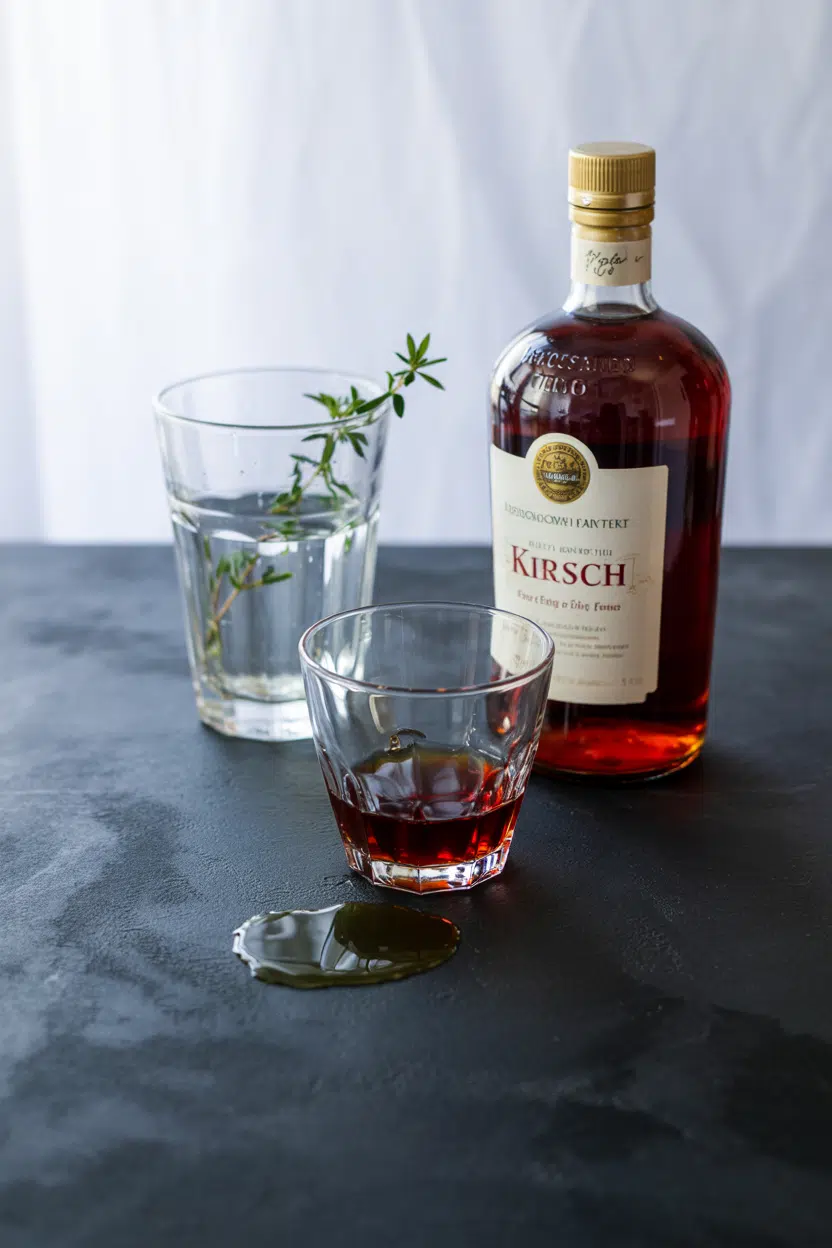
Unlike creme de cassis alternatives or similar sweet liqueurs, limoncello has a distinctly oily, aromatic quality that comes directly from citrus essential oils in the peel.

Best Pick
For the most authentic flavor, choose bottles made with Sorrento or Amalfi lemons and a neutral grain base rather than grappa - the grain spirit keeps the lemon oil front and center.

What Does Limoncello Taste Like?

limoncello - What Is Limoncello

Limoncello doesn't taste like lemonade. Lemonade is juice-forward, tart, and watery; limoncello is concentrated lemon oil folded into sweet syrup with a clean alcoholic warmth underneath.

Sensory SnapshotStrong Intensity
👅 Flavor
lemon zestsweet syrupbitter peelclean warmth
✋ Texture
slicksilky-sweet
👃 Aroma
bright citrus peelfloral lemon zest

The texture is notably slick and oily on the tongue - that's the citrus essential oil at work, not a manufacturing additive. It gives limoncello a mouthfeel closer to a liqueur than a spirit, lingering slightly after each sip.

Serve it ice-cold and the sweetness recedes, letting the bitter peel notes sharpen. At room temperature, the sugar becomes more dominant and the alcoholic warmth is more noticeable.

Chilled is the correct way to drink it.

How to Use Limoncello

Limoncello earns its place at the table in more ways than a post-dinner shot. Southern Italian cooking and Mediterranean-inspired menus use it as both a flavoring and a finishing liquid.

How Limoncello Is Used
MethodBest ForTip
🥂 Chilled PourDigestif, after-dinner shotKeep the bottle in the freezer; serve in a frosted glass
🍸 CocktailsSpritzes, martinis, daiquiri variantsStir cold - don't shake hard or the citrus oils turn cloudy and flat
🍰 BakingCake soak, sponge syrup, tart fillingReduce on low heat only; high heat destroys the lemon oil aroma
🍨 DrizzleVanilla gelato, panna cotta, sorbetAdd at the last second - heat kills the fresh citrus character
🍓 MacerationBerries, stone fruit compotesToss fruit with a tablespoon and let sit 20 minutes before serving

Pairing-wise, limoncello works naturally with vanilla, mascarpone, and prosecco. It also bridges sweet and savory - a tablespoon in a citrus vinaigrette with olive oil, or stirred into a marinade for grilled shrimp, adds aroma without sourness.

Think of it as a seasoning that happens to have alcohol.

Avoid cooking it hard. Long reductions or high heat strip out the essential oils that define limoncello's character, leaving behind flat sweetness.

A brief low-heat reduction for a cake soak is fine; anything beyond that, reach for lemon juice or a limoncello substitute instead.

What to serve with limoncello beyond the glass matters more than most people realize - the right pairing doubles its impact on the table.

Try It In
🍋Italian Limoncello SpritzThe simplest way to show off limoncello's citrus oil in a glass→

How to Buy and Store Limoncello

Label reading matters here. Look for bottles that list real lemon zest or natural lemon oil in the ingredients, and an ABV between 25-35%. Pale to bright yellow color is a good sign; avoid bottles with heavy artificial coloring or labels listing only "artificial flavor."

Watch Out
Some budget limoncello uses artificial lemon flavoring instead of real zest infusion. The flavor is noticeably flatter and lacks the oily, aromatic quality of the real thing - check the label before buying.

Storage is straightforward once opened:

  • Freezer is best - the cold preserves the citrus aromatics and keeps the liqueur viscous and pourable
  • Unopened bottles - store upright in a cool, dark place and they'll last years without degradation
  • Opened and chilled - expect peak quality for 6-12 months; after that, the aroma fades even if the alcohol remains stable

The limoncello storage life depends more on aroma preservation than safety - it won't go bad, but it will go dull if left at room temperature after opening.

Where to Start With Limoncello

New to the bottle? Pour it cold over vanilla gelato first - no prep, no recipe, and you'll immediately understand what the liqueur does and why people love it.

From there, try it in a simple spritz with prosecco and soda water before moving into dessert baking or cocktail work. The vodka base in many homemade recipes is interchangeable, but commercially bottled limoncello is more consistent for learning with.

Start tasting, adjust from there.

Golden Rule
Always serve limoncello cold. Room temperature flattens the citrus oil character and makes the sweetness overwhelming - the freezer is where this bottle lives.

Frequently Asked Questions

Does limoncello taste like lemonade?

No. Lemonade is tart and juice-forward; limoncello tastes of concentrated lemon zest oil with added sweetness and alcoholic warmth. The flavor is richer, more aromatic, and notably less acidic than lemonade.

How strong is limoncello?

Most commercial bottles sit between 25-35% ABV. That's weaker than vodka or grappa but stronger than wine - it's a moderately strong liqueur, not a sipping spirit.

Can you cook with limoncello?

Yes, with limits. Low-heat applications like cake soaks, cold drizzles, and marinades work well. High heat destroys the citrus essential oils, leaving only flat sweetness behind.

What's the difference between limoncello and limoncello cream?

Limoncello crema adds dairy cream to the base liqueur, producing a thicker, richer dessert-style drink with lower ABV. It has a much shorter shelf life and must be refrigerated at all times.

Is limoncello made from lemon juice or lemon peel?

Peel only. The zest is steeped in neutral spirit to extract the citrus essential oils; the juice is never used. This is why limoncello tastes aromatic and oily rather than tart or acidic.

What Is Onion Powder? [Taste, Uses & More]

March 31, 2026

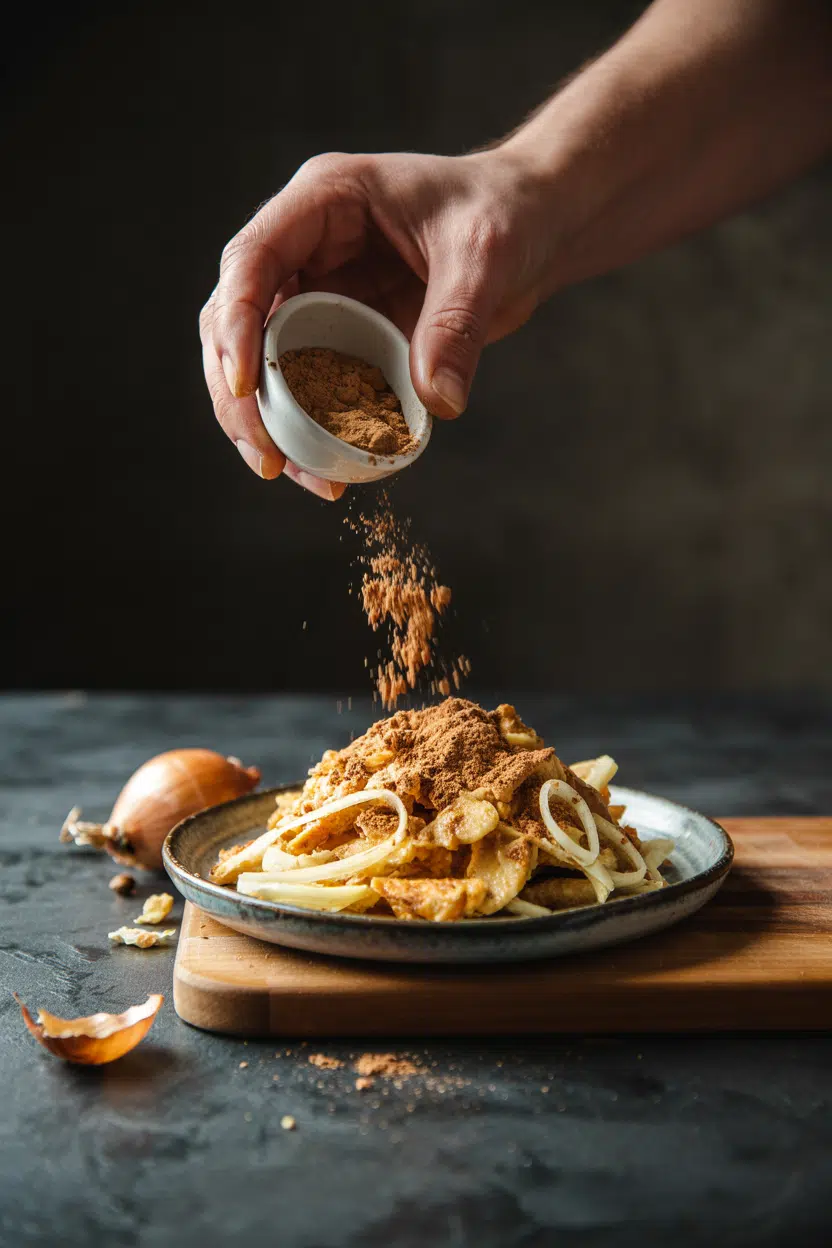
Dry rubs for ribs, ranch dip mix, a bowl of seasoned burger meat - onion powder shows up in all of them, quietly doing the work that a raw onion never could.

What Is Onion Powder

It dissolves into spice blends and sauces without adding moisture, texture, or the bite of fresh alliums.

Understanding preparing onion salt vs onion powder properly helps clarify exactly where each belongs in your pantry.

If you've ever wondered why your homemade spice blend tastes flat compared to a store-bought version, onion powder is often what's missing.

QUICK SUMMARY

Onion powder is a dehydrated, finely ground spice with a concentrated savory-sweet onion flavor. It blends invisibly into dry rubs, sauces, and meat mixtures. Shelf life runs 2-4 years unopened. Gluten-free and vegan at typical seasoning amounts.

🧅Flavor: Savory, mildly sweet, moderate pungency - like caramelized onion in dry form
🍳Best Uses: Dry rubs, seasoning blends, soups, burger mixes, breading
🥄Texture: Fine powder - disperses smoothly, no fiber or crunch
📦Shelf Life: Unopened 2-4 years; opened 6-12 months at best potency
⚠️Watch For: Clumping and dark specks signal moisture damage or over-toasted powder

What Is Onion Powder?

Onion powder is a dehydrated powdered seasoning made by drying whole onions - usually at low heat - then grinding them into a fine, shelf-stable powder. It originates from Central Asia, where onions were first cultivated, though modern commercial production is global.

You'll see it labeled as dried onion powder, ground onion, or onion seasoning depending on the brand.

Most versions are made from yellow or white onions, though some specialty blends use sweet onion varieties for a milder profile.

It sits in a different category from comparing onion flakes vs minced onion options - those retain more texture and rehydrate when cooked, while powder disperses completely. Onion salt is a separate product that combines onion powder with salt, which matters when you're managing sodium in a recipe.

  • 🧅 Dried onion powder - standard label, fine grind, all-purpose use
  • Onion seasoning blends - may include salt, garlic, or anti-caking agents; check labels
  • Toasted onion powder - heat-treated for a nuttier, deeper flavor; less common
  • Sweet onion powder - made from Vidalia-type onions; lower pungency

What Does Onion Powder Taste Like?

onion powder - What Is Onion Powder

Onion powder tastes like a concentrated version of cooked or caramelized onion - savory, mildly sweet, with a background pungency that never reaches the sharpness of raw fresh onion.

The dehydration process drives off the volatile sulfur compounds responsible for that sharp bite, leaving a rounder, more mellow flavor behind.

Sensory SnapshotModerate Intensity
👅 Flavor
savorymildly sweetumamilightly pungent
✋ Texture
fine powdersmooth dispersion
👃 Aroma
dried onionslightly sweet roasted note

Heat changes it further. Added early to a hot pan, onion powder toasts slightly and picks up a nutty, almost Maillard-adjacent depth that raw powder doesn't have.

In liquid-based recipes - soups, braises - it softens into the background, acting more like a flavor foundation than a featured note.

Golden Rule
Onion powder isn't a substitute for the textural role of fresh onion - it replaces only the flavor. Use it when you want onion taste without onion presence.

How to Use Onion Powder

Dry rubs are where onion powder earns its reputation. Unlike fresh onion, it won't release moisture into a spice crust, so the bark on making memphis dry rub ribs at home stays intact through the full cook. It pairs directly with garlic powder, paprika, and salt - a combination that shows up in almost every BBQ blend for good reason.

Beyond grilling, the powder excels anywhere uniform flavor matters more than texture.

Folded into meatloaf or burger mixes, it seasons every bite evenly.

Stirred into soups and sauces, it adds an onion base without visible pieces.

It's also a standard component in ranch-style dip blends and taco seasoning - and preparing popcorn seasoning blends properly often calls for it as a savory backbone.

How Onion Powder Is Used
MethodBest ForTip
🥗 Cold BlendDry rubs, seasoning mixes, dipsMix with fat-based ingredients to help it adhere
🍳 Early Pan ToastStir-fries, sautéed basesAdd to hot oil for 30-60 seconds before adding other ingredients
🍲 Simmered in LiquidSoups, stews, braises, saucesDissolves fully - no straining needed
🥩 Folded Into MeatBurgers, meatloaf, meatballsDistributes evenly; use less than you think - it concentrates as it cooks
🍞 Mixed Into BreadingFried chicken, coated vegetablesCombine with flour or breadcrumbs before dredging

American BBQ and dip culture leans heaviest on onion powder, but Middle Eastern spice blends and Eastern European soups also use it as a background layer.

It pairs well with soy sauce in Asian-influenced marinades, and with butter and cream in potato-based dishes.

When you run out mid-recipe, options like replacements for onion powder cover the most practical swaps - just as alternatives to garlic powder are worth knowing for the spice that most often sits next to it.

Try It In
🍗Air Fryer Garlic Parmesan Chicken TendersOnion powder anchors the dry seasoning on the crust→🍯Air Fryer Honey Garlic Chicken TendersBalances the sweetness in the honey-garlic coating→🥔Air Fryer Garlic Parmesan Potato WedgesAdds savory depth to the seasoning before roasting→

How to Buy and Store Onion Powder

Good onion powder looks uniformly light tan - almost beige - with a fine, even grind. Dark brown powder suggests over-toasting during processing, which dulls the savory notes and pushes toward bitterness.

Check the best-by date and avoid jars with clumping, which signals moisture exposure.

Watch Out
Storing onion powder above the stove is the fastest way to shorten its life. Heat and steam from cooking accelerate clumping and flavor loss - keep it in a cool, dry cabinet instead.

Storage is straightforward once you know the rules. An airtight, opaque container in a cool pantry is all it needs - light and humidity are the two main enemies.

For guidance on preparing onion powder properly to maximize its shelf life, the full breakdown covers signs of spoilage and when to replace.

  • Unopened shelf life - 2 to 4 years at best quality
  • Opened shelf life - 6 to 12 months before noticeable potency loss
  • Signs to replace - clumped solid mass, faded aroma, grey or very dark color
  • Anti-caking agents - some brands include silicon dioxide; not harmful, but signals a processed product

Start Here for Onion Powder

New to using this spice? Start with a simple dry rub - one part onion powder, one part garlic powder, one part paprika, plus salt.

That ratio works on chicken, pork, and roasted potatoes alike. From there, use it anywhere a recipe calls for onion flavor but where fresh onion pieces would be inconvenient or unwanted.

Shortcut
One teaspoon of onion powder approximates the flavor of a medium onion in cooked dishes - but it won't replicate texture. Use it for flavor only, not as a structural replacement.

If fresh onion is what a recipe actually needs - salsas, raw slaws, anything where texture matters - don't reach for the powder. It solves a specific problem, and knowing when that problem doesn't apply saves the dish.

Frequently Asked Questions

What does onion powder taste like?

It tastes like concentrated caramelized onion - savory, mildly sweet, with moderate pungency but none of the sharp bite of raw onion. The dehydration process removes most of the harsh sulfur compounds responsible for raw onion's intensity.

Is onion powder the same as onion salt?

No - onion salt is a blend of onion powder and table salt, typically in a 1:3 ratio. Swapping one for the other without adjusting your salt levels will throw off the seasoning balance of a dish.

How much onion powder equals one onion?

One teaspoon approximates the flavor of a medium onion in cooked applications. Start there and adjust up - the powder's intensity varies by brand and how long the jar has been open.

Can onion powder replace fresh onion?

For flavor only, yes. It cannot replicate the texture, moisture, or structural role of fresh onion in dishes like salsas, caramelized onion toppings, or raw salads. Use it as a flavor substitute, not a full ingredient swap.

Is onion powder safe for low-FODMAP diets?

Generally no - it contains concentrated fructans, which are high-FODMAP compounds. Even small amounts used in seasoning blends can trigger symptoms in people following a strict low-FODMAP protocol.

Turkish Simit with Cheese and Olives

March 31, 2026

Most homemade bread recipes demand hours of rising time and turn out dense or flavorless. Turkish simit skips the complicated shaping and uses a molasses dip that creates a crispy, sesame-coated crust in under two hours.

Turkish Simit with Cheese and Olives served on a plate

The molasses-water bath does the heavy lifting. It sticks sesame seeds to the dough and gives the crust its deep golden color without any egg wash or extra steps.

Make this when you want weekend breakfast that feels intentional but doesn't require sourdough starter or professional baking skills. The cheese and olive filling makes it a complete meal.

QUICK SUMMARY

Turkish simit with cheese and olives is a ring-shaped bread with a crispy sesame crust and chewy interior. The molasses dip creates the signature coating and golden color without fussy techniques. Proof the dough fully and dip rings generously before coating with seeds.

⏱️Time Reality: 1 hour 45 minutes total - 60-90 minutes is just proofing time
🔑Key Move: Mix molasses with water first so it coats evenly and holds seeds
⚠️Watch Out: Thin molasses coating loses sesame seeds - dip twice if needed

Why This Recipe Works

High heat baking at 400°F crisps the sesame-coated crust while keeping the interior soft and chewy. For a breakfast option that works just as well for meal prep, a similar breakfast recipe offers an entirely different texture and requires zero baking time.

Quick Reference
⏱️
Prep Time
20 min
🔥
Cook Time
15-20 min
⏰
Total Time
1 hr 45 min (including proofing)
🍽️
Servings
6-8 servings
📊
Difficulty
Medium
🏷️
Category
Breakfast | Snack
💡
Quick Tip
Dip rings in molasses water before sesame coating
🎯
Best For
Weeknight | Entertaining | Meal prep

Success markers:

  • Bread flour provides the gluten structure that creates the chewy interior characteristic of traditional simit
  • Molasses mixed with water sticks sesame seeds to the dough and caramelizes during baking for deep golden color
  • Shaping into rings allows even heat circulation so the crust crisps uniformly without soft spots
  • Fresh sesame seeds add nutty crunch - old seeds taste flat and don't toast properly
  • Deep golden crust with hollow sound when tapped signals fully baked interior without cutting it open
Quick Tip
Mix 1 cup water with 2 tablespoons molasses before shaping - thicker coating means better sesame coverage

What You'll Need

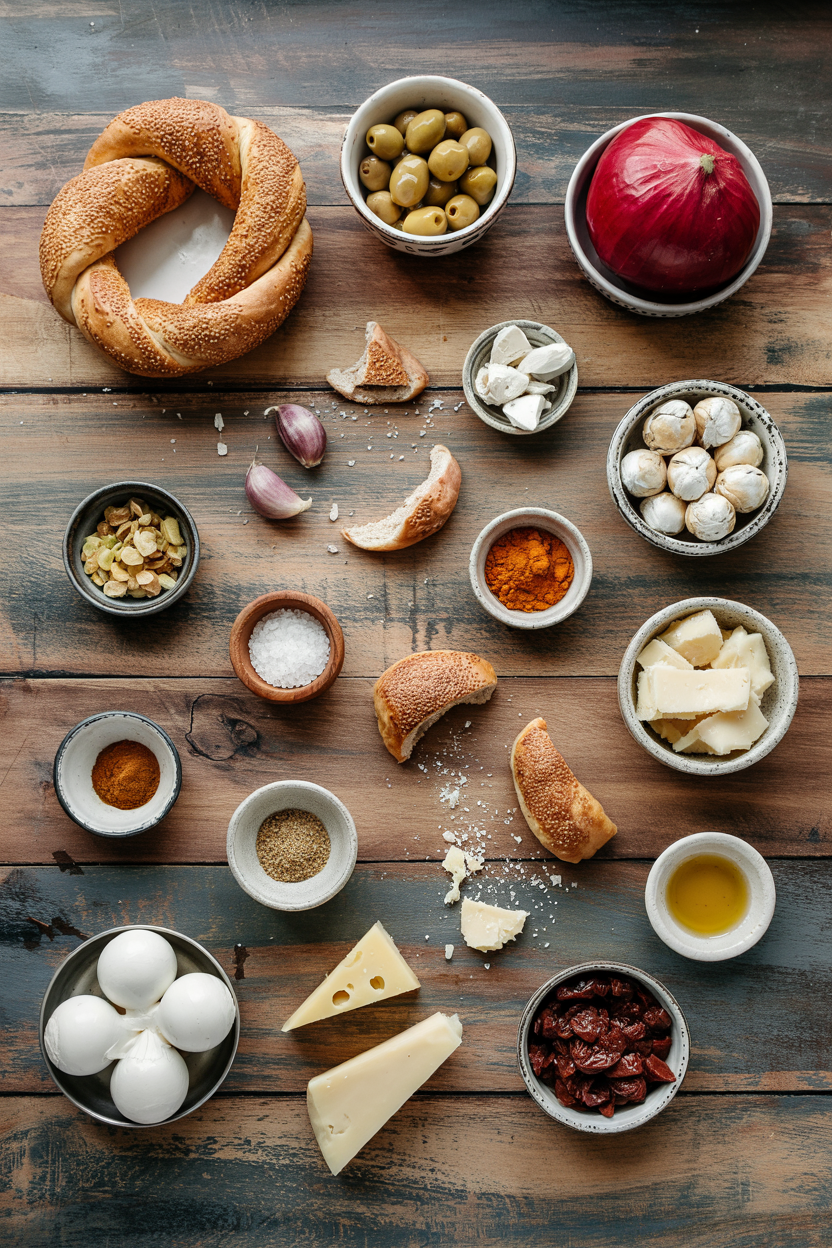
Ingredients for Turkish Simit with Cheese and Olives

The ingredient list is short but each item serves a specific purpose in creating the crispy crust and chewy crumb. When planning other breakfast options, this quick salad dish pairs well with warm bread and doesn't require any cooking.

🍞
Dough Base
  • Bread flour (3½ cups)
  • Active dry yeast (2¼ tsp)
  • Warm water (1¼ cups)
  • Salt (1½ tsp)
🥢
Coating
  • Molasses (2 tbsp)
  • Water for dip (1 cup)
  • Sesame seeds (1 cup)
🧀
Filling
  • White cheese (beyaz peynir or feta, 8 oz)
  • Olives, pitted and chopped (½ cup)

Ingredient Details

  • Bread flour
    Higher protein content creates chewier texture - all-purpose works but produces softer crumb
  • Active dry yeast
    Water temperature must be 105-110°F or yeast won't activate properly
  • Molasses
    Creates sticky surface for sesame seeds and adds subtle sweetness that balances salty cheese
  • Sesame seeds
    Use fresh seeds - old ones don't toast properly and taste stale after baking
  • Beyaz peynir or feta
    Crumble finely and drain excess liquid so filling doesn't leak during baking
  • Olives
    Chop small and pat dry - large pieces create air pockets that leak cheese
  • Salt
    Moderate amount since cheese and olives already add saltiness

Ingredient Swaps

Bread flour gives the chewiest texture but all-purpose flour works when that's what you have in the pantry. If you need more breakfast options that use similar Mediterranean flavors, this quick drink dish requires just three ingredients and five minutes of active time.

Four swaps that work:

  • All-purpose flour instead of bread flour - produces softer, less chewy interior but still bakes into proper rings with crispy crust
  • Feta cheese instead of beyaz peynir - slightly creamier texture with similar salty tang, easier to find in most grocery stores
  • Instant yeast instead of active dry yeast - skip the proofing step and mix directly into flour, saves 10 minutes
  • Dark corn syrup or honey instead of molasses - lighter color and milder sweetness but still creates sticky coating for sesame seeds

All-Purpose Flour

Works for: softer crumb, easier dough handling, what most home bakers stock

Skip if: you want authentic chewy texture or professional-looking rings

Instant Yeast

Works for: faster prep, no proofing step, less chance of killing yeast

Skip if: you have active dry on hand or prefer traditional timing

Instructions

The dough needs time to rise but active work is under 15 minutes. The molasses dip and shaping happen quickly once the dough has proofed.

  1. Mix warm water (105-110°F) with yeast and let sit 5 minutes until foamy. Add flour and salt, then knead 8-10 minutes until smooth and elastic. Cover bowl and let rise 60-90 minutes until doubled.

  2. Divide dough into 6-8 equal pieces and roll each into 15-inch ropes. Overlap ends by 2 inches and press firmly to seal into rings. Cover shaped rings and rest 15 minutes.

  3. Mix molasses with 1 cup water in shallow bowl. Dip each ring completely in molasses water, then press both sides into sesame seeds on a plate. Place on parchment-lined baking sheet.

  4. Bake at 400°F for 15-20 minutes until deep golden brown. Crust should sound hollow when tapped on bottom. Rotate pan halfway through for even browning.

  5. Cool on rack 20 minutes before slicing horizontally and filling with crumbled cheese and chopped olives. Serve warm or at room temperature.

Golden Rule
Proof dough until it springs back slowly when poked - underproofed dough bakes into dense, heavy rings

What to Serve With It

Simit needs something fresh and cooling to balance the rich sesame crust and salty cheese filling. For more breakfast plate ideas that work with bread-based mains, planning your belgian waffles dinner offers similar pairing strategies for weekend mornings.

Side Dish Prep Why It Works How to Serve
Sliced tomatoes and cucumbers Easy Fresh crunch cuts through rich sesame and cheese Slice thick, sprinkle with salt, drizzle olive oil
Plain yogurt Easy Cool creamy texture balances salty cheese and briny olives Serve in small bowl for dipping or dolloping
Hard boiled eggs Easy Extra protein makes breakfast more filling Peel and halve, sprinkle with paprika and salt
Herbal tea Easy Traditional pairing that cleanses palate between bites Brew strong black tea or mint tea, serve hot
Fresh fruit Easy Natural sweetness contrasts savory bread and cheese Slice melon, grapes, or citrus segments

Three ways to serve it:

  • Weekend breakfast spread - arrange simit rings on board with small bowls of yogurt, olives, tomatoes, cucumbers, and cheese for build-your-own plates
  • Grab-and-go meal prep - slice and fill rings ahead, wrap individually in parchment, store in fridge up to 3 days
  • Tea time snack - serve whole rings with creamy homemade dip recipe and sliced vegetables for casual afternoon gathering
Best Pick
Serve simit warm or at room temperature - reheating can make the crust tough and dry out the cheese filling

Store and Reheat

Simit tastes best the day you bake it but stores well for quick weekday breakfasts. The crust softens in storage but crisps back up with proper reheating.

Method Time Best For
🔥 Oven 8-10 min at 350°F Restoring crispy crust without drying interior
🍳 Stovetop 3-5 min on medium heat Quick weekday mornings when oven feels like too much
📦 Microwave 30-45 sec Speed when texture doesn't matter - crust goes soft

For best results when storing:

  • Wrap unfilled rings individually in plastic wrap then store in airtight container at room temperature up to 2 days
  • Freeze baked rings up to 2 months - thaw at room temperature 1 hour before filling and serving
  • Store cheese filling separately in fridge up to 4 days so bread doesn't get soggy
  • Skip reheating filled simit - cheese melts and leaks, making the bread messy and greasy
  • Refresh day-old rings in 350°F oven 5-7 minutes before slicing and filling for almost-fresh texture

Frequently Asked Questions

How long to bake Turkish Simit at 400°F?

Bake 15-20 minutes until deep golden brown and the crust sounds hollow when tapped. Rotate the pan halfway through for even browning and check at 15 minutes to prevent over-baking.

Can I make Simit dough ahead and refrigerate?

Yes - after the first rise, punch down dough and refrigerate up to 24 hours in covered bowl. Bring to room temperature 30 minutes before shaping into rings.

What goes best with Turkish Simit with cheese?

Serve with sliced tomatoes, cucumbers, plain yogurt, hard boiled eggs, or fresh fruit. The fresh, cooling sides balance the rich sesame crust and salty cheese filling.

How do I know when Simit is done baking?

Look for deep golden brown crust and tap the bottom - it should sound hollow. The sesame seeds will be toasted and fragrant, not pale or raw-looking.

Can I use mozzarella instead of beyaz peynir?

Mozzarella works but lacks the salty tang of beyaz peynir or feta. Use fresh mozzarella and add a pinch of salt to the filling to compensate for the milder flavor.

Turkish Simit with Cheese and Olives

No ratings yet
Turkish Simit with Cheese and Olives is a ring-shaped bread featuring a crispy sesame-coated crust and chewy interior. The molasses-water dip creates the signature sticky, deep golden crust while the cheese and olive filling makes it a satisfying meal for breakfast or snack.
Print Recipe Pin Recipe
Prep Time 20 minutes mins
Cook Time 20 minutes mins
Total Time 40 minutes mins
Servings: 6 servings
Course: Breakfast, Snack
Cuisine: Turkish
Ingredients Method Notes

Ingredients
  

  • 3.5 cups bread flour higher protein content creates chewier texture
  • 2.25 teaspoon active dry yeast water temperature must be 105-110°F to activate properly
  • 1.25 cups warm water 105-110°F for yeast activation
  • 1.5 teaspoon salt moderate amount since cheese and olives add saltiness
  • 2 tablespoon molasses creates sticky surface for sesame seeds and adds subtle sweetness
  • 1 cup water for molasses dip
  • 1 cup sesame seeds use fresh seeds for best toasting and flavor
  • 8 oz white cheese beyaz peynir or feta, crumbled and drained
  • 0.5 cup olives pitted, chopped small, and patted dry

Method
 

  1. Mix warm water (105-110°F) with yeast and let sit for 5 minutes until foamy. Add bread flour and salt, then knead for 8-10 minutes until smooth and elastic. Cover the bowl and let the dough rise for 60-90 minutes until doubled in size.
    2.25 tsp active dry yeast, 1.25 cups warm water, 3.5 cups bread flour, 1.5 tsp salt
  2. Divide the risen dough into 6-8 equal pieces and roll each piece into a 15-inch rope. Overlap the ends by 2 inches and press firmly to seal into rings. Cover the shaped rings and let them rest for 15 minutes.
    3.5 cups bread flour
  3. Mix molasses with 1 cup water in a shallow bowl. Dip each dough ring completely in the molasses water, then press both sides into sesame seeds on a plate. Place the coated rings on a parchment-lined baking sheet.
    2 tbsp molasses, 1 cup water, 1 cup sesame seeds
  4. Bake the simit rings at 400°F for 15-20 minutes until deep golden brown. The crust should sound hollow when tapped on the bottom. Rotate the pan halfway through baking for even browning.
  5. Cool the baked rings on a rack for 20 minutes before slicing horizontally. Fill each ring with crumbled cheese and chopped olives. Serve warm or at room temperature.
    8 oz white cheese, 0.5 cup olives

Notes

  • Ensure water temperature is between 105-110°F to activate the yeast properly.
  • Dip rings twice in molasses water if sesame seeds don't stick well the first time.
  • Proof dough fully until it springs back slowly when poked to avoid dense, heavy rings.

Tried this recipe?

Let us know how it was!

What Is Marjoram? [Taste, Uses & More]

March 31, 2026

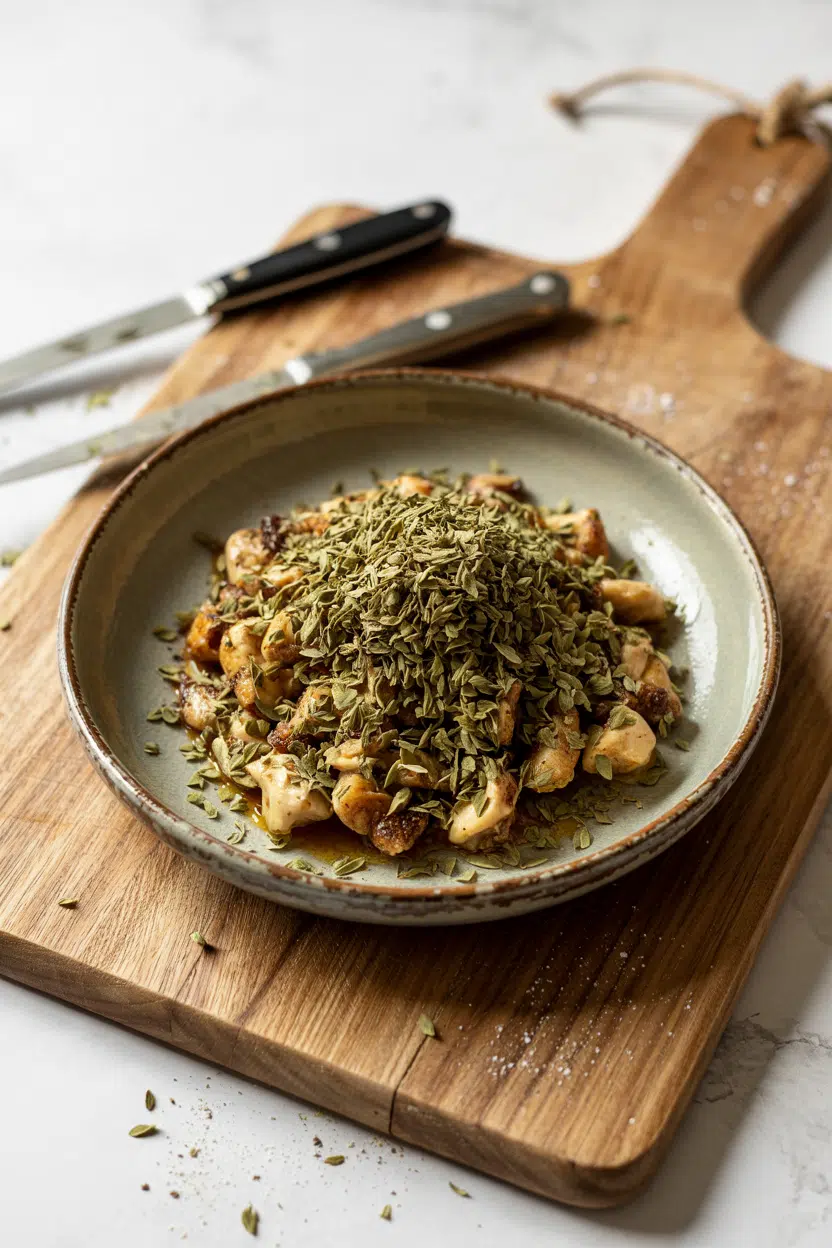
Rub a fresh sprig of marjoram between your fingers and you get it immediately - a warm, faintly sweet scent with a whisper of pine and something almost floral underneath. It's quieter than oregano, softer than thyme.

What Is Marjoram

That restraint is exactly what makes it useful.

QUICK SUMMARY

Marjoram is a mild Mediterranean herb with a sweet, lightly piney flavor. Use fresh leaves as a finishing herb or add dried marjoram late in cooking to preserve its delicate aroma. It suits lamb, pork, beans, tomatoes, and butter-based dishes especially well.

🌿Flavor: Mildly sweet, herbaceous, faint citrus-pine and floral warmth
🍽️Best Uses: Stuffings, bean soups, compound butter, tomato dishes, herb crusts
🛒Buy: Look for intact gray-green leaves; avoid yellowing or wilted sprigs
⏱️Shelf Life: Fresh: 5-10 days refrigerated; Dried: 6-12 months airtight
⚠️Avoid: High-heat searing and strong anise-forward spice blends

What Is Marjoram?

Marjoram (Origanum majorana) is a tender perennial herb in the mint family, native to the Eastern Mediterranean and Cyprus region. It grows small, oval gray-green leaves on slender stems and has been used in kitchens across the Mediterranean since ancient times.

You'll see it sold as sweet marjoram, pot marjoram, or knotted marjoram - the last name coming from the tight, knotted clusters of flower buds it produces. All three refer to the same species.

The herb sits in the same genus as oregano, which explains the frequent mix-ups at the store. Botanically close, yes - but marjoram is noticeably milder and sweeter, with none of oregano's sharp, peppery punch.

Both fresh and dried forms are widely available. Fresh leaves are thin, delicate, and bruise easily.

Dried marjoram concentrates the flavor but also amplifies the sweetness slightly, making it the more common pantry option for home cooks.

Best Pick
If you cook Central European dishes - German sausage, Austrian potato soups - dried marjoram is the traditional form to reach for. It handles slow-cooked applications better than fresh.

What Does Marjoram Taste Like?

marjoram - What Is Marjoram

Sweet marjoram tastes like a gentler, more floral version of oregano. Think soft thyme with a lifted, almost citrusy top note and a quiet warmth that lingers without bitterness.

The flavor is mild in intensity - it adds presence without dominating a dish. Fresh leaves carry the citrus-pine note most clearly, with a faint floral quality that's easy to lose if you're not paying attention.

Sensory SnapshotMild Intensity
👅 Flavor
sweetherbaceouscitrus-pinefloral
✋ Texture
delicatethin-leafed
👃 Aroma
warmsweet-herblight pine

Heat changes how it behaves. Prolonged cooking fades the floral top notes first, leaving the sweeter, warmer base behind.

That's why most cooks add dried marjoram late in simmering dishes rather than at the start.

How to Use Marjoram

Marjoram works best when it doesn't fight other flavors. It shines in dishes where a gentle herbal warmth is the goal rather than a bold aromatic statement.

For fresh leaves, treat them like a finishing herb. Scatter them over a tomato salad or sliced feta just before serving, fold them into compound butter for roasted chicken, or toss with warm roasted vegetables right off the tray.

Dried marjoram is more forgiving - stir it into bean soups, lentil stews, and sausage mixes, adding it in the last 15-20 minutes of cooking.

How Marjoram Is Used
MethodBest ForTip
🥗 Fresh/FinishSalads, feta, roasted vegetables, compound butterAdd after cooking; heat kills delicate floral notes fast
🍲 Stirred InBean soups, lentil stews, tomato sauces, braised meatsAdd in the last 15-20 minutes to preserve aroma
🥩 Stuffing/MixPork sausage, lamb stuffing, herb-bread crusts on fishDried works better here - holds up through oven heat
🫙 InfusedHerb oils, marinades, dressings with lemonSteep in warm olive oil off heat; strain before using

The cuisines that rely on it most - Greek, Italian, Middle Eastern, North African, and German - tend to pair marjoram with lamb, pork, tomatoes, white beans, and potatoes. It loves fat: olive oil, butter, and cream all carry its sweetness well.

Lemon brings out the citrusy lift; garlic adds depth without overpowering it.

Steer clear of pairing marjoram with heavy licorice-forward spices like anise or tarragon in the same dish. The flavors don't harmonize.

For a similar herb with a bolder profile, check our guide to marjoram alternatives.
Try It In
🍗Air Fryer Garlic Parmesan Chicken TendersFinish with fresh marjoram for a soft herbal note against the parmesan crust→🍋Air Fryer Lemon Pepper Chicken TendersLemon and marjoram are a natural pair — stir dried marjoram into the seasoning mix→🍯Air Fryer Honey Garlic Chicken TendersAdd dried marjoram to the coating for gentle warmth behind the honey-garlic glaze→

How to Buy and Store Marjoram

Fresh marjoram should have small, firm, gray-green leaves with no yellowing or browning at the stem ends. The sprigs should smell sweet and piney the moment you handle them - that aroma is your quality check.

Watch Out
Dried marjoram sold in clear jars near bright windows loses its aroma fast. Shake the jar before buying - if it barely smells, the flavor is already gone.

For dried marjoram, choose finely crumbled, olive-green leaves in an opaque or dark container. Pale gray-green or dusty brown color signals age.

  • Fresh storage - Wrap loosely in a damp paper towel, place in a perforated bag, and refrigerate. Lasts about 5-10 days.
  • Dried storage - Keep in an airtight container away from heat and light. Good for 6-12 months; after that, flavor fades noticeably.

Full guidance on how long it keeps is available in our marjoram storage guide guide.

Start Here With Marjoram

New to this herb? Go dried first.

Stir a teaspoon into a pot of white beans or a simple tomato sauce in the last 15 minutes of cooking and taste the difference it makes.

Once you're comfortable with the dried form, move to fresh leaves as a finisher. Fold them into herb-seasoned roasted nuts or scatter over a warm potato dish right before serving.

That's where its floral delicacy becomes most apparent - and hardest to replace with anything else.

Frequently Asked Questions

Is marjoram the same as oregano?

No. Both are in the Origanum genus, but marjoram is noticeably milder and sweeter. Oregano carries a sharper, more peppery heat that marjoram lacks entirely.

Can you substitute oregano for marjoram?

Yes, but use about two-thirds the amount - oregano's intensity can easily overpower a dish that calls for marjoram's softness. Fresh thyme is a closer substitute if you want to preserve the floral note.

When should you add marjoram when cooking?

Add dried marjoram in the last 15-20 minutes of cooking. Fresh leaves should go in at the very end, off the heat, or used raw as a garnish to preserve aroma.

Does marjoram lose flavor when dried?

It loses the fresh citrus-floral top notes but retains - and even concentrates - the sweet, warm base flavor. Dried marjoram is well-suited to cooked applications where fresh would fade anyway.

What dishes traditionally use marjoram?

German bratwurst and liver sausage rely heavily on dried marjoram. Greek bean soups, Italian tomato-based sauces, and North African lamb stews also use it as a core background herb.

What Is Lime Zest? [Taste, Uses & More]

March 31, 2026

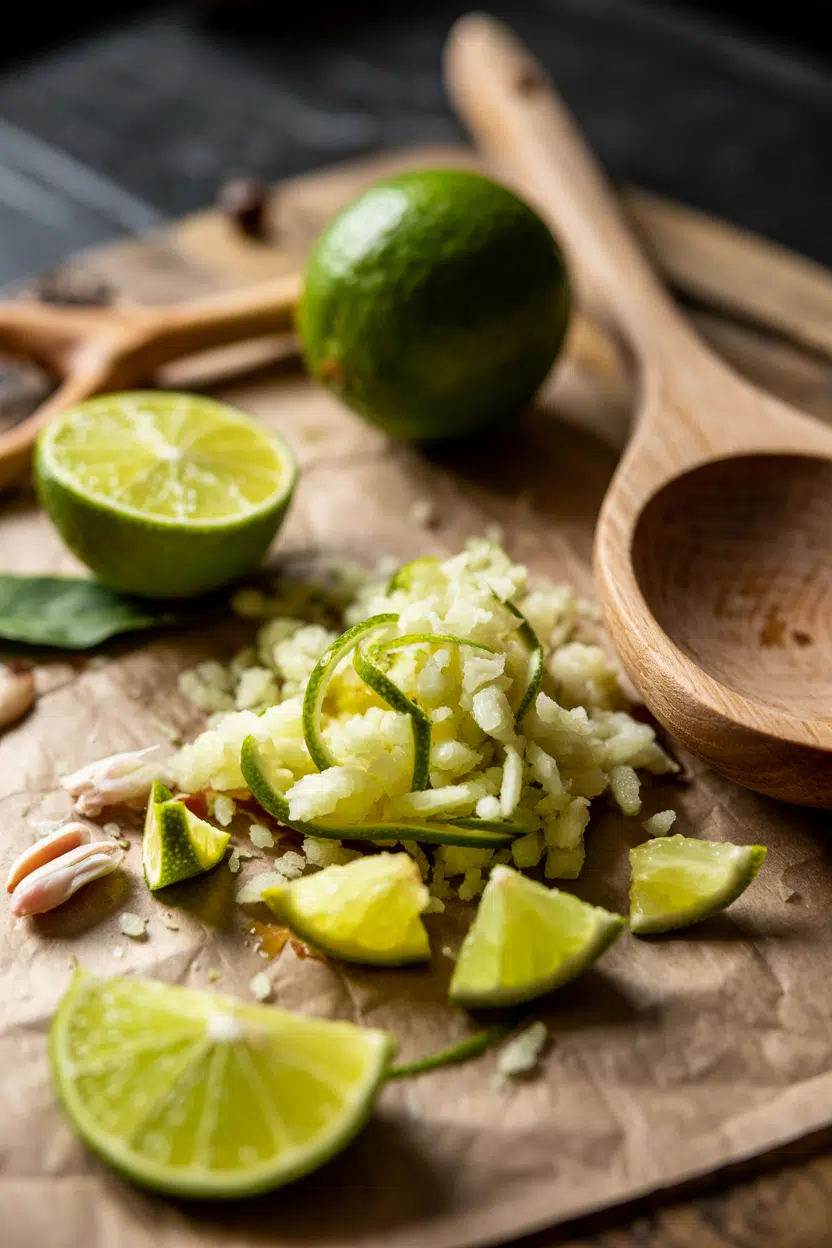
You spot a bag of limes at the store and grab them for juice - but the real flavor is in the peel. Lime zest, that thin strip of bright green skin scraped free with a microplane, holds the fruit's concentrated aromatic oils in a way juice never does.

What Is Lime Zest

Unlike alternatives to lime juice that replicate acidity, zest delivers something different: a clean, floral citrus hit with no liquid, no dilution, and no sourness.

The same logic applies when you look at comparing dried orange zest vs fresh options - freshness determines how much aroma actually makes it onto your food.

QUICK SUMMARY

Lime zest is the grated outer peel of a lime, packed with citrus oils that deliver bright, slightly floral flavor without juice's acidity. Use it fresh for maximum aroma - it works in everything from marinades to cocktail garnishes, baked goods, and compound butters.

🍋Flavor: Bright citrus, lightly floral, faint bitter green finish
🔪Tool: Microplane or zester; avoid the white pith beneath
🌍Used In: Mexican, Thai, Vietnamese, Caribbean, Southeast Asian cooking
❄️Shelf Life: 3-5 days refrigerated; up to 3 months frozen
💡Best Use: Add at the end of cooking to preserve the volatile aromatic oils

What Is Lime Zest?

Lime zest is the outermost colored layer of the lime peel - specifically the thin green skin of Citrus aurantiifolia - removed with a microplane, box grater, or dedicated zester.

It belongs to the broader category of citrus zest, alongside lemon, orange, and grapefruit equivalents.

You'll also see it labeled as grated lime rind, lime peel, lime skin, or simply zest of lime. The name shifts depending on the recipe's origin and whether the piece is grated fine or cut into strips.

Lime cultivation traces back to tropical Southeast Asia and the Americas, and the fruit now grows throughout every tropical and subtropical region. What makes zest distinct from the rest of the peel is what lies just beneath the surface.

  • 🟢 The green layer - contains the essential oils, primarily limonene, that produce lime's aroma
  • ⚪ The white pith below - spongy, bitter, and worth avoiding entirely when zesting
  • 🔬 Limonene content - the dominant compound responsible for lime's sharp, clean citrus scent
  • 🌿 Kaffir lime zest - a related but distinct product with a leathery, more complex aroma than standard lime zest

What Does Lime Zest Taste Like?

lime zest - What Is Lime Zest

Lime zest tastes citrusy, bright, and slightly floral - closer to the smell of a freshly cut lime than to its juice. There's a faint bitter green note underneath, which is what separates it from the cleaner sweetness of lemon zest.

Compared to lemon zest, lime reads greener and more aromatic, with a floral top-note that lingers. For a full side-by-side on how zest differs from extract, comparing lemon extract vs lemon zest options covers the same principle.

Heat changes the equation fast. Added early in cooking, the volatile oils dissipate and the flavor flattens - sometimes turning mildly bitter.

Added at the finish, those same oils stay bright and forward on the palate.

Sensory SnapshotStrong Intensity
👅 Flavor
bright citruslightly floralbitter green
✋ Texture
fine dry shredsoily when fresh
👃 Aroma
intensely citrusygreen and floral

How to Use Lime Zest

Timing is the core rule: zest added at the end of cooking preserves the aromatic oils. Add it early and you lose most of what makes it worth using.

It works across Mexican, Thai, Vietnamese, and Caribbean cooking - anywhere acidity and freshness matter.

Zest folds into guacamole for a floral top note without extra liquid, and it lifts ceviche without pushing more sourness into the dish.

Making compound lime butter is one of the simplest applications - the same method used for making compound butter (herb) at home works directly with zest as the main aromatic.

Golden Rule
Zest finishes dishes - it doesn't cook in them. Add it in the last 60 seconds, or stir it in after the heat is off.

Strong pairings include cilantro, fresh chili, coconut milk, ginger, garlic, avocado, fish, shellfish, and rum. One technique worth knowing: blend zest with sugar to make lime sugar, which stores well and adds citrus aroma to cocktail rims, whipped cream, and baked goods.

If you're out and need a swap, the guide on alternatives to lime zest covers what actually works.

How Lime Zest Is Used
MethodBest ForTip
🥗 Fresh GratingGarnish on tacos, ceviche, grilled shrimpZest directly over the dish so oils land on the food
🍳 Folded InBatters, doughs, compound butter, dressingsMix in last so heat doesn't kill the aroma
🧴 InfusedSyrups, oils, lime sugar for cocktails and bakingUse low heat; steep briefly to avoid bitterness
🥩 MarinadeFish, chicken, shrimp before grilling or roastingCombine with oil so the oils emulsify and coat evenly

Avoid using large amounts in long braises - the oils fade and can turn bitter over extended heat.

White chocolate is another awkward pairing in quantity; a small amount is fine, however a heavy hand reads sharp against the cocoa butter.

Try It In
🍤Zesty Shrimp Cocktail SauceLime zest sharpens the sauce without thinning it→

How to Buy and Store Lime Zest

Choose limes with smooth, bright green skin that feels slightly springy when rubbed. The peel should release a faint citrus smell under light finger pressure - that's the oil content signaling a productive zest.

Watch Out
Wrinkled, dull, or heavily pitted limes have dried out. Their peel yields little oil and flat-tasting zest - not worth buying for zesting.

Store whole limes in the refrigerator crisper in a perforated bag; they'll hold for 2-4 weeks.

Once zested, keep the lime or collected zest in an airtight container - for a full breakdown of how long lime zest keeps under different conditions, refrigerated zest lasts 3-5 days and frozen zest up to 3 months.

Freeze zest in small portions - a teaspoon per cube in an ice tray works well. Thawed zest loses some brightness, however it still performs in cooked applications and baked goods.

Starting with Lime Zest

New to using zest regularly? Start with a finishing move: grate half a lime's worth over your next taco plate or bowl of rice. No recipe required.

From there, kaffir lime leaf swaps that work shows how standard lime zest can stand in when the more aromatic leaf isn't available.

Once you're comfortable with fresh grating, move to infused syrups and lime sugar - both are low-effort ways to build zest's aromatic oils into a format you can use all week.

Frequently Asked Questions

Is lime zest the same as lime peel?

Not exactly. Lime peel includes the white pith underneath the green skin, while lime zest refers only to the thin colored outer layer. The pith is bitter and spongy - zest recipes want only the green part.

How do you zest a lime without getting the white pith?

Use a microplane and apply light pressure, rotating the lime as you go. Stop as soon as you see white - that's the pith boundary. A few short strokes per section keeps you in the oil-rich green layer.

Can you substitute lime zest for lemon zest?

Yes, in equal amounts. Lime zest reads greener and slightly more floral than lemon zest, so the swap shifts the flavor profile subtly. In most savory dishes and baked goods, the difference is minor.

How long does lime zest last in the fridge?

Freshly grated lime zest keeps 3-5 days in an airtight container in the refrigerator. For longer storage, freeze it - zest holds well for up to 3 months frozen with minimal flavor loss in cooked dishes.

Can you use dried lime zest instead of fresh?

Dried lime zest works in baked goods and spice blends, however the volatile oils that create lime's floral aroma are largely gone. Use about half the amount, and don't expect the same brightness on finished dishes.

How Long Does Olive Oil Last? [Storage Guide]

March 31, 2026

Rancid olive oil is one of those kitchen disappointments that sneaks up on you - the bottle looks fine, the color seems okay, and then one sniff or taste tells you everything went wrong months ago.

Can You Freeze Olive Oil

Unlike shelf life of vegetable oil explained, olive oil - especially extra virgin - carries polyphenols and aromatic compounds that degrade faster once air gets in. Oxidation is the real enemy, not visible mold or slime.

Knowing how long your oil realistically lasts, and how storage conditions change that window, is the difference between cooking with something vibrant and cooking with something flat.

QUICK SUMMARY

Unopened olive oil keeps 12-24 months in the pantry. Once opened, use extra virgin within 6 months for best flavor; refined blends stretch to 12. Refrigeration slows oxidation but causes temporary cloudiness - that's normal, not spoilage.

🫙Pantry (unopened): Up to 24 months from harvest date in cool, dark storage
🧊Fridge (opened): 12-18 months; cloudiness is harmless - let it clear before using
❄️Freezer: 12-18 months; portion first; thaw gently before use

How Long Does Olive Oil Last?

Shelf life depends on two things: whether the bottle is open, and what kind of olive oil you're dealing with. Extra virgin olive oil has more polyphenols and volatile aromatics than refined blends - that complexity is exactly what makes it degrade faster once exposed to air and light.

Olive Oil Shelf Life
MethodStateDurationNotes
🫙 PantryUnopened12-24 monthsDark glass or tin; count from harvest date, not best-by
🫙 PantryOpened6-12 monthsExtra virgin best within 6 months; refined blends up to 12
🧊 FridgeOpened12-18 monthsCloudiness and partial solidification are normal; clear before use
❄️ FreezerOpened12-18 monthsFlavor holds for cooking; texture becomes slushy when frozen
🏠 CounterOpened3-6 monthsNear heat or light accelerates oxidation significantly

One number worth paying attention to: the harvest date, not the printed best-by. A bottle labeled "best by 2026" could have been pressed years ago and already lost most of its character.

Fresher harvest dates mean more flavor compounds still intact.

Watch Out
A distant best-by date does not mean the oil is fresh. Always check for a harvest or production date and aim to buy within 12 months of that date.

How to Store Olive Oil

The biggest mistake most cooks make is keeping olive oil next to the stove. Heat and light are the two fastest routes to rancidity, so placement matters as much as the container.

Pantry: Store upright in a cool, dark cabinet - ideally below 65°F - with the cap fully tightened after every use. If your bottle is clear glass, transfer the oil to a dark glass bottle or tin immediately to block light exposure.

Fridge: Seal the bottle tightly and refrigerate if you use it infrequently or if you're storing a delicate extra virgin for raw applications like dressings. Cloudiness and partial solidification will happen - let the oil return to room temperature before drizzling. Much like keeping butter fresh, cold storage buys time but requires a little patience before use.

Counter near heat: Avoid it entirely. Proximity to the stove or a sunny windowsill compresses that 6-month pantry window down to weeks.

  • 🛒 Buy smaller bottles - if you cook daily with extra virgin, a 500ml bottle keeps consumption within 3-6 months after opening.
  • Use the right container - original dark glass or tin with a tight-sealing screw-top or pourer works well; if your closure leaks, transfer to an airtight jar.
  • One bottle at a time - don't open a second bottle until the first is nearly gone; air exposure begins the clock immediately.

Can You Freeze Olive Oil?

Yes, and it works better than most people expect. Freezing olive oil slows oxidation almost completely, making it a practical option for large quantities or infrequently used bottles. Flavor holds well for cooking applications after thawing.

Golden Rule
Never freeze an entire large bottle. Portion oil first - repeated thaw-and-refreeze cycles degrade flavor faster than just storing it in the pantry.

The texture changes are real but harmless. Frozen olive oil turns cloudy and may solidify into a slushy or firm block.

Gentle warming restores clarity and pours. Use any thawed portion within 1-2 weeks for best results.

  1. Portion first - pour measured amounts into small airtight containers or silicone ice cube trays sized for recipe use.
  2. Minimize headspace - fill containers as fully as practical to reduce air contact before sealing.
  3. Freeze flat - lay trays or flat containers level in the freezer so portions stack neatly once solid.
  4. Thaw gently - move a portion to the fridge for several hours, or leave at room temperature; avoid rapid heating, which can alter aroma.
  5. Use promptly - once thawed, use within 1-2 weeks and do not refreeze.

If you're already portioning other kitchen staples for the freezer, the same logic that applies to the blanch kale for freezing technique holds here - small, labeled portions mean you thaw only what you need.

Signs Olive Oil Has Gone Bad

Rancid olive oil won't make you sick in most cases, however it tastes terrible and has lost any nutritional benefit. Knowing the specific signs prevents you from unknowingly cooking with degraded oil.

Signs It's Gone Bad
👀
VisualDarkened to brownish hue from original green-gold · Excessive cloudiness in a non-refrigerated bottle · Unusual sediment in a recently purchased clear-bottle product
👃
SmellStale, musty odor · Paint-thinner or crayon-like rancid notes · Metallic sharpness replacing grassy, peppery aroma
✋
TextureSticky or gummy film when spooned and cooled · Unusually thick or waxy mouthfeel

A quick smell test settles most doubts. Fresh extra virgin has a grassy, slightly peppery edge - if that's gone and something chemical or stale has replaced it, discard the bottle.

Getting the Most from Every Bottle

Good storage habits start at the point of purchase, not after the bottle is already open. Choosing oil with a recent harvest date and a dark, airtight bottle gives you a meaningful head start.

  • Check the harvest date - prefer bottles pressed within the last 12 months; a distant best-by date tells you very little about actual freshness.
  • Dark container from day one - if your bottle is clear, move the oil into a dark glass or tin immediately after buying.
  • Refrigerate delicate oils - flavored or high-quality extra virgin oils used infrequently benefit most from cold storage; wait until the oil clears before using in raw dressings.
  • Know your rate of use - if a 750ml bottle takes you eight months to finish, you're consistently cooking with degraded oil; buy 500ml instead.

For times when your olive oil has run out or you're experimenting with a recipe, knowing your olive oil swaps that work means you're never stuck mid-cook.

Frequently Asked Questions

Does freezing olive oil ruin it?

No. Frozen olive oil turns cloudy and may solidify, however flavor remains usable for cooking after gentle thawing. Extra virgin loses some aromatic delicacy, so thawed oil is better suited to sautéing than finishing.

How long is olive oil good for after opening?

Extra virgin olive oil is best within 6 months of opening when stored in a cool, dark pantry. Refined blends can stretch to 12 months. Refrigeration extends either type to 12-18 months.

Why does olive oil turn cloudy in the fridge?

Cold temperatures cause the natural waxes and long-chain fatty acids in olive oil to partially solidify. It's harmless - bring the bottle to room temperature and clarity returns within an hour or two.

Is it safe to cook with old olive oil?

Rancid olive oil isn't toxic, however it tastes unpleasant and offers no nutritional benefit from polyphenols. If the oil smells stale, metallic, or crayon-like, discard it rather than cook with it.

Can you store olive oil in a plastic bottle long-term?

Not ideally. Plastic is permeable to oxygen and can leach compounds into the oil over time. Dark glass or tin is the standard for preserving flavor past a few weeks.

Jamaican Callaloo and Eggs

March 31, 2026

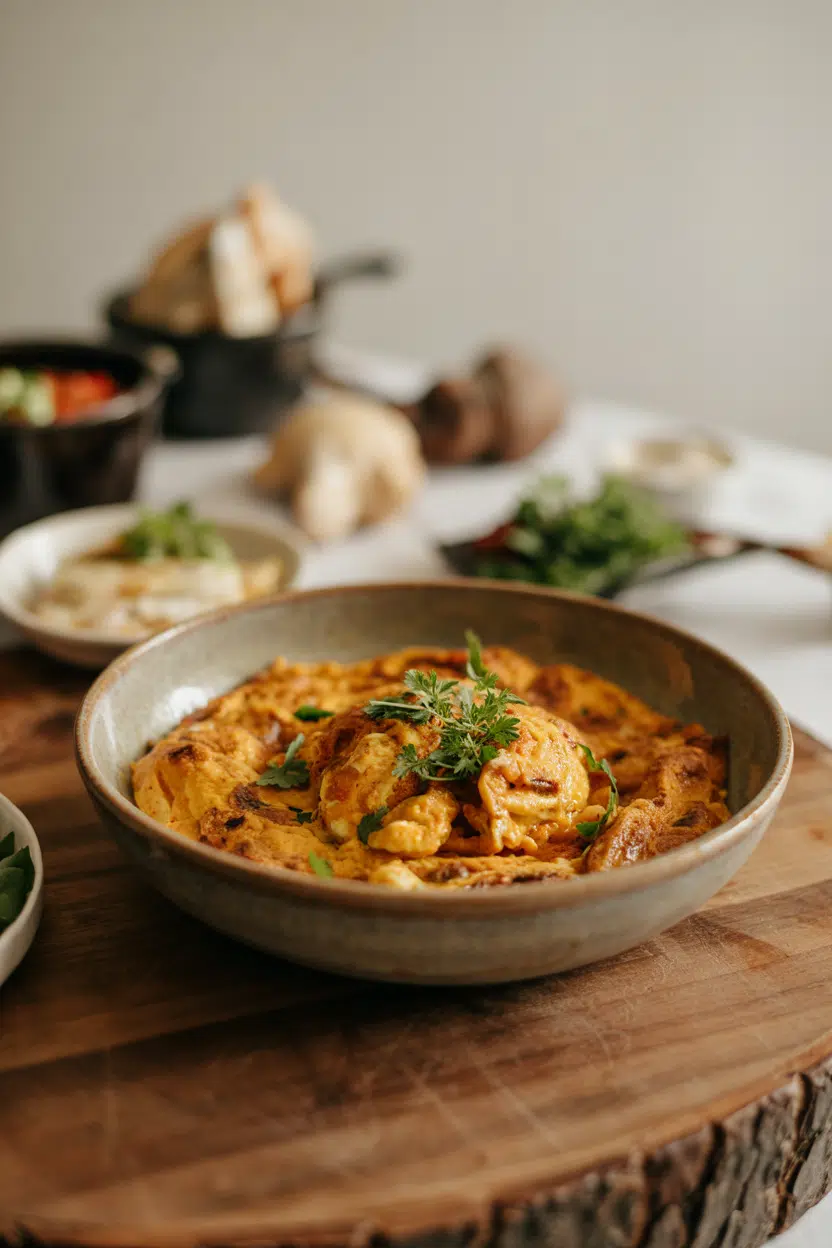
Crispy edges on fried callaloo with soft scrambled eggs folded through the greens. That's what happens when you cook the leaves first, then add beaten eggs off heat.

Jamaican Callaloo and Eggs served on a plate

The pan does most of the work. You sauté onions and garlic, wilt the callaloo in 3-5 minutes, then gently fold in eggs for a creamy scramble.

This works for quick weeknights when you need breakfast that holds up for meal prep or brunch.

QUICK SUMMARY

Jamaican Callaloo and Eggs combines tender wilted greens with creamy scrambled eggs in one skillet. Cook callaloo leaves until just softened, then add beaten eggs off heat to prevent rubbery texture. The dish comes together in 20 minutes with minimal cleanup.

⏱️Time Reality: 20 minutes total - 10 minutes prep, 10 minutes cooking
🔥Critical First Step: De-stem callaloo leaves before cooking for even tenderness
⚠️Watch Out: Add eggs off heat or they turn rubbery - let pan cool 30 seconds first

Table of Contents

Toggle
  • Why This Recipe Works
  • What You'll Need
    • Ingredient Details
  • Ingredient Swaps
  • What to Serve With It
  • Store and Reheat
  • Frequently Asked Questions
  • Jamaican Callaloo and Eggs
    • Method 
    • Tried this recipe?

Why This Recipe Works

Wilting greens before scrambling eggs creates distinct layers of texture instead of a mushy mix. Most people skip spinach, but it balances the meal - for a fluffy spinach on the side, try a poached version that pairs with hollandaise.

Quick Reference
⏱️
Prep Time
10 min
🔥
Cook Time
10 min
⏰
Total Time
20 min
🍽️
Servings
2-3 servings
📊
Difficulty
Easy
🏷️
Category
Main Dish
💡
Quick Tip
Wilt greens before adding eggs for best texture
🎯
Best For
Weeknight

What makes this work:

  • Medium heat sautés onions translucent in 3-4 minutes - creates aromatic base without burning garlic
  • De-stemming callaloo before cooking ensures even tenderness - stems take twice as long and stay fibrous
  • Adding eggs off heat prevents overcooking - residual pan heat gently sets eggs for creamy texture
  • Scotch bonnet pepper distributes heat evenly - chopping finely spreads spice throughout instead of random hot bites
  • Wide skillet evaporates moisture quickly - prevents soggy greens by giving water room to steam off
Quick Tip
Use fresh callaloo leaves - older leaves turn tough and bitter, ruining the dish's texture

What You'll Need

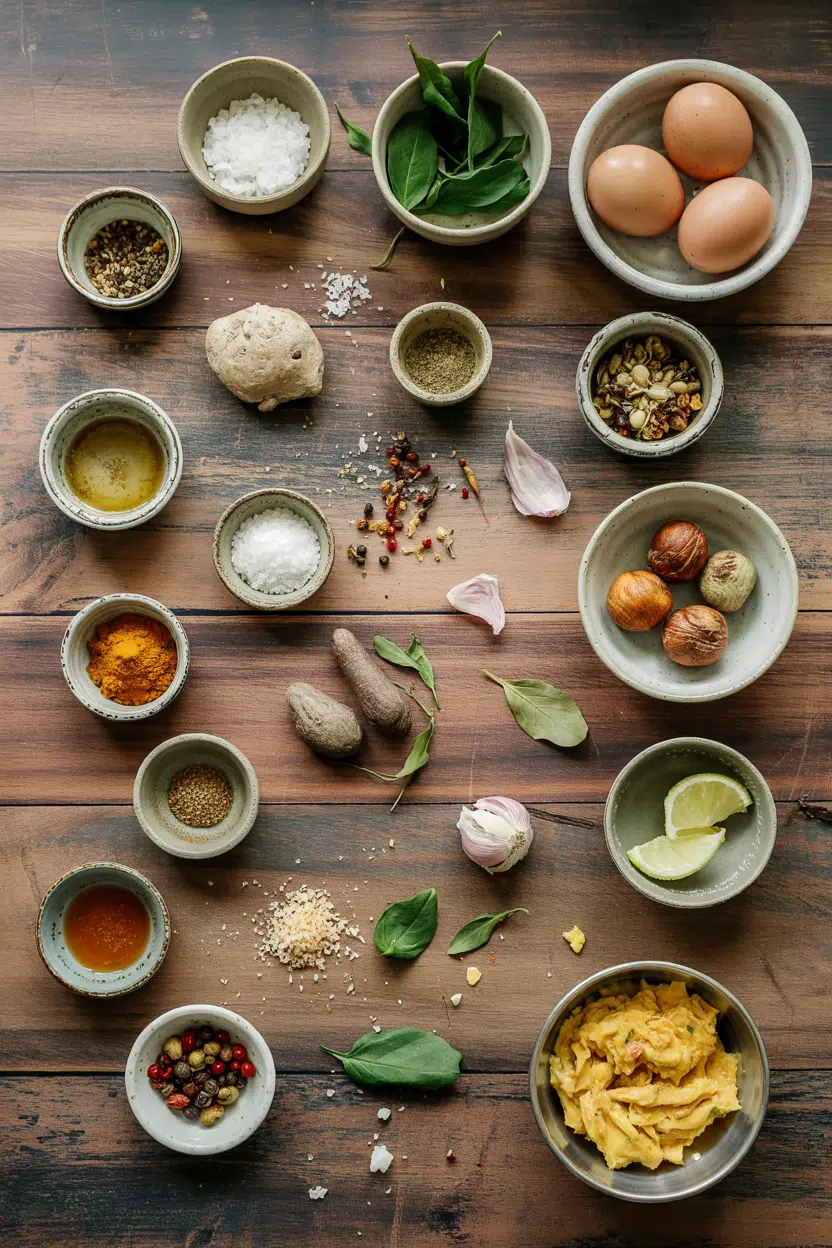
Ingredients for Jamaican Callaloo and Eggs

Shopping for this takes one trip to a Caribbean market or well-stocked grocery. Rich mains need something to cut through, and breakfast does exactly that - for a simple breakfast recipe, try a full plate with black pudding and beans.

🥬
Greens
  • 1 bunch callaloo leaves (or spinach)
🥚
Protein
  • 4 large eggs
🧄
Aromatics
  • 1 medium onion, diced
  • 3 cloves garlic, minced
  • 1 scotch bonnet pepper, minced
  • 2 sprigs fresh thyme
🍅
Vegetables
  • 1 medium tomato, diced (optional)
🫙
Pantry
  • 2 tablespoons vegetable or coconut oil
  • Salt and black pepper to taste

Ingredient Details

  • Callaloo leaves
    De-stem before cooking - stems cook slower and stay tough while leaves turn mushy
  • Scotch bonnet pepper
    Mince finely and add early to distribute heat evenly throughout the dish
  • Fresh thyme
    Strip leaves from stems before adding - woody stems don't break down during cooking
  • Eggs
    Beat eggs in a bowl before adding - ensures even scramble without raw pockets
  • Oil choice
    Coconut oil adds subtle Caribbean flavor while vegetable oil stays neutral
  • Onion
    Cook onions translucent before adding garlic - prevents garlic from burning
  • Tomato
    Optional but adds acidity and moisture - skip if you prefer drier texture

Ingredient Swaps

Most swaps work if you match texture and adjust cook time. A good slaw can make or break the plate - for something crunchy like slaw, try a sesame version that holds up in the fridge.

Four swaps that work:

  • Fresh spinach or kale for callaloo - Less earthy flavor; cook spinach 2-3 minutes, kale 5-7 minutes for similar tenderness
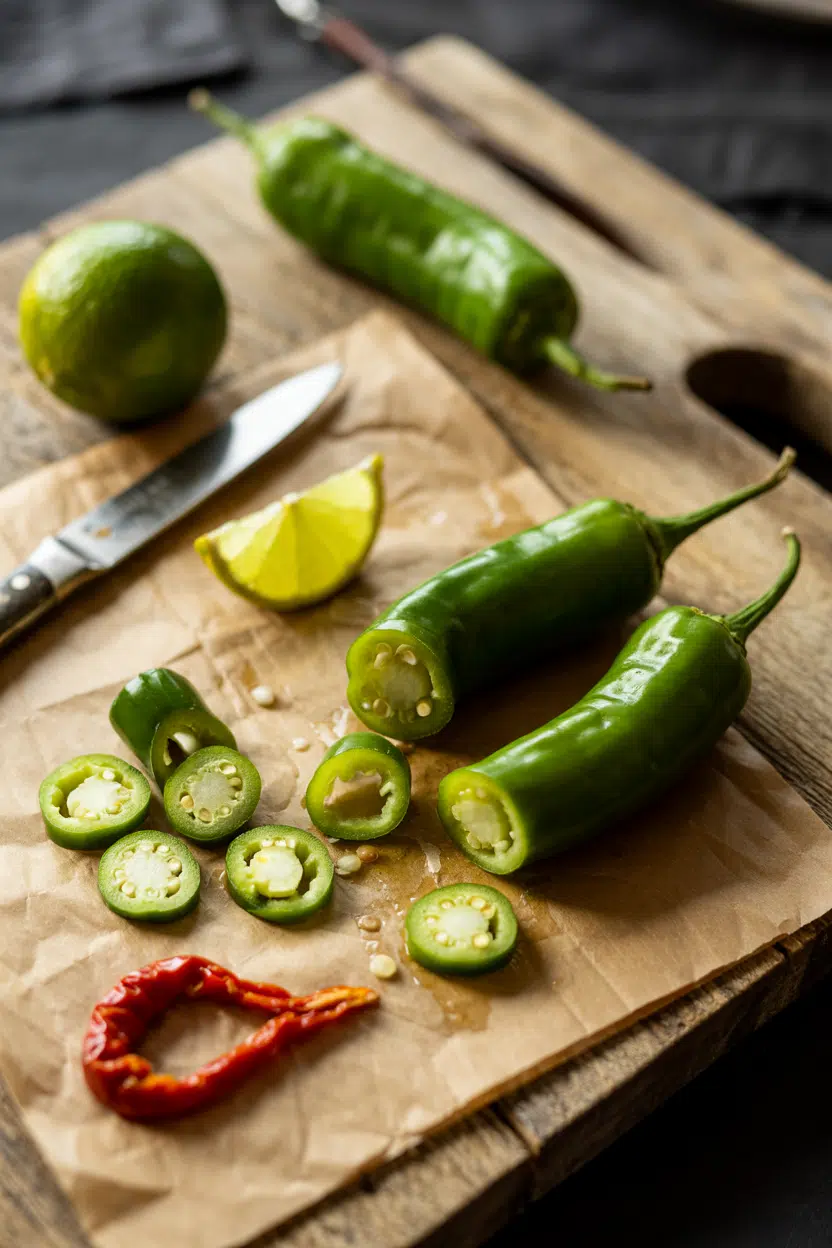
  • Jalapeño or serrano for scotch bonnet - Milder heat and less fruity; use whole jalapeño or half serrano to match intensity
  • Coconut oil for vegetable oil - Adds subtle coconut aroma that complements Caribbean flavors without overpowering
  • Dried thyme for fresh - Use 1 teaspoon dried for every 2 sprigs fresh; less vibrant but still herby

Fresh Callaloo

Works for: Authentic flavor, tender texture, traditional presentation

Skip if: Can't find at Caribbean markets or specialty stores

Fresh Spinach

Works for: Budget-friendly, widely available, quick-cooking greens

Skip if: You want earthier Caribbean flavor profile

Scotch Bonnet Pepper

Works for: Authentic Jamaican heat, fruity undertone, traditional recipe

Skip if: Heat-sensitive palate or feeding kids under 10

Instructions

The whole dish cooks in one skillet in 10 minutes once your mise is ready. Salad cuts through all that richness - for this easy salad recipe, try a quinoa version with feta that meal preps well.

Five steps to creamy eggs with tender greens:

  1. Heat oil in wide skillet over medium heat for 1 minute. Add diced onion and cook 3-4 minutes, stirring occasionally, until translucent with soft edges. Add minced garlic, scotch bonnet, and thyme leaves - cook 1 minute until fragrant but not browned.

  2. Add de-stemmed callaloo leaves to skillet. Stir to coat with aromatics, then cook 3-5 minutes, stirring every 30 seconds, until leaves wilt and turn bright green with no raw crunch. Add diced tomato if using and cook 1 minute more until tomato softens slightly.

  3. Remove skillet from heat and let cool 30 seconds. Beat 4 eggs in bowl with pinch of salt and black pepper. Pour beaten eggs over wilted greens in pan off heat.

  4. Gently fold eggs into greens using spatula. Stir continuously for 1-2 minutes, scraping bottom and sides of pan, until eggs form soft curds with no liquid remaining. Eggs will continue cooking from residual heat.

  5. Taste and adjust seasoning with salt and pepper. Serve immediately while eggs are creamy and greens stay tender. Garnish with fresh thyme if desired.

Golden Rule
Add eggs off heat - the residual pan heat gently sets them for creamy texture without turning rubbery

What to Serve With It

This needs starch to soak up the soft eggs and juices from the greens. Most people skip this dip, but it balances the meal - for a creamy dip on the side, try roasted garlic yogurt that works hot or cold.

Side Dish Prep Why It Works How to Serve
Fried Plantains Easy Sweet caramelized edges cut spicy heat from scotch bonnet Slice ripe plantains on diagonal, fry 2-3 minutes per side until golden
Boiled Dumplings Easy Neutral starch soaks egg juices without competing flavors Boil dough rounds 15-20 minutes until fluffy, serve alongside
White Rice Easy Classic Jamaican staple absorbs all pan drippings Cook 1 cup rice, fluff with fork, serve in bowl under eggs
Festival (Fried Dough) Medium Crispy-chewy texture contrasts creamy eggs and soft greens Fry cornmeal dough sticks 3-4 minutes until golden, serve hot
Fried Saltfish Involved Adds protein and authentic Jamaican briny flavor pairing Soak saltfish overnight, shred, fry with onions and peppers

Three ways to serve it:

  • Breakfast plate: Serve with fried plantains and festival for sweet-savory Caribbean breakfast spread
  • Brunch bowl: Spoon over white rice with hot pepper sauce for build-your-own bowl
  • Quick lunch: Pair with boiled dumplings and side salad for light midday meal
Best Pick
Fried plantains with hot pepper sauce - the sweet-spicy combo works for weeknights or weekend brunch

Store and Reheat

Eggs dry out fast in the fridge but hold up better than you'd think for 3-4 days. The breakfast works best when it hits the table at the same time as the main - for a version that comes together quickly, keep extra greens prepped for fast assembly.

Method Time Best For
🍳 Stovetop 5 min over medium-low Retains creamy egg texture without rubberiness
🔥 Oven 10 min at 300°F (150°C) Even warming for larger portions without hot spots
📦 Microwave 1-2 min on medium power Quick single servings - stir halfway to prevent edges drying

For best results when storing:

  • Cool completely before refrigerating - store in shallow airtight container to prevent condensation from making eggs soggy
  • Separate greens from eggs if meal prepping - combine when reheating to keep textures distinct
  • Add splash of water when reheating - 1 tablespoon per serving keeps eggs moist and prevents drying
  • Freeze up to 1 month in portions - thaw overnight in fridge, reheat gently on stovetop for best texture
  • Eat within 3-4 days refrigerated - eggs lose creamy texture and greens turn mushy after that

Frequently Asked Questions

Can I use spinach instead of callaloo in Callaloo and Eggs?

Yes - fresh spinach works as a direct swap with less earthy flavor. Cook spinach 2-3 minutes instead of 3-5 since it wilts faster than callaloo.

How should I store leftovers and reheat Jamaican Callaloo and Eggs?

Store in airtight container in fridge for 3-4 days. Reheat on stovetop over medium-low heat for 5 minutes with 1 tablespoon water per serving to keep eggs creamy.

What indicates properly cooked callaloo and eggs doneness?

Greens should be wilted with no raw crunch but not mushy. Eggs form soft curds with no liquid pooling in pan - they'll look slightly wet but set up as they cool.

Why is my Callaloo and Eggs watery or bland and how to fix?

Watery dish means greens weren't cooked long enough to evaporate moisture - return to pan over medium heat for 2-3 minutes. Bland flavor means under-seasoning - add salt gradually while tasting until flavors pop.

How do I scale the recipe for more servings?

Double all ingredients for 4-6 servings and use a larger 12-inch skillet. Cook in batches if needed - overcrowding the pan creates steam instead of sautéing, making greens soggy.

Jamaican Callaloo and Eggs served on a plate

Jamaican Callaloo and Eggs

No ratings yet
Jamaican Callaloo and Eggs features tender wilted callaloo greens combined with creamy scrambled eggs cooked off heat for perfect texture. The recipe comes together quickly in one skillet with simple aromatic sautéing.
Print Recipe Pin Recipe
Prep Time 10 minutes mins
Cook Time 10 minutes mins
Total Time 20 minutes mins
Servings: 3 servings
Course: Breakfast, Main Dish
Cuisine: Caribbean, Jamaican
Ingredients Equipment Method Notes

Ingredients
  

  • 1 bunch callaloo leaves de-stemmed
  • 4 large eggs beaten with pinch of salt and pepper
  • 1 medium onion diced
  • 3 cloves garlic minced
  • 1 whole scotch bonnet pepper minced finely
  • 2 sprigs fresh thyme leaves stripped from stems
  • 1 medium tomato diced, optional
  • 2 tablespoons vegetable oil or coconut oil
  • salt and black pepper to taste

Equipment

  • Wide skillet For sautéing and cooking callaloo and eggs
  • Mixing bowl For beating eggs
  • Spatula For folding eggs into greens

Method
 

  1. Heat oil in a wide skillet over medium heat for 1 minute. Add diced onion and cook for 3-4 minutes, stirring occasionally, until translucent and soft. Add minced garlic, scotch bonnet, and thyme leaves, cooking 1 minute until fragrant but not browned.
    1 medium onion, 3 cloves garlic, 1 whole scotch bonnet pepper, 2 sprigs fresh thyme, 2 tablespoons vegetable oil
  2. Add de-stemmed callaloo leaves to skillet. Stir to coat with aromatics and cook 3-5 minutes, stirring every 30 seconds, until leaves are wilted and bright green with no raw crunch. Add diced tomato if using and cook 1 more minute until slightly softened.
    1 bunch callaloo leaves, 1 medium tomato
  3. Remove skillet from heat and let cool for 30 seconds. In a bowl, beat the 4 eggs with a pinch of salt and black pepper. Pour the beaten eggs over the wilted greens off heat.
    4 large eggs, salt and black pepper
  4. Using a spatula, gently fold eggs into greens continuously for 1-2 minutes, scraping bottom and sides of pan, until soft curds form and no liquid remains. Eggs will continue cooking with residual heat.
    4 large eggs
  5. Taste and adjust seasoning with salt and pepper as needed. Serve immediately while eggs are creamy and greens tender. Garnish with fresh thyme if desired.
    salt and black pepper, 2 sprigs fresh thyme

Notes

  • Add eggs off heat to prevent rubbery texture and achieve creamy scramble.
  • De-stem callaloo to ensure even cooking and tender greens.
  • Use fresh callaloo leaves for best flavor and texture; older leaves become tough and bitter.

Tried this recipe?

Let us know how it was!

How Long Does Marinara Sauce Last? [Storage Guide]

March 31, 2026

Buying a jar of marinara sauce is easy - knowing what to do with the leftovers is where most people hesitate.

How Long Does Marinara Sauce Last In The Fridge

Whether you opened a commercial jar last Tuesday or simmered a batch from scratch, the clock starts immediately, and the rules differ depending on how the sauce was made.

Just as alternatives to canned tomato affect a recipe's base flavor, the ingredients in your sauce affect how long it stays safe and good.

This guide covers every storage method, real shelf life numbers, and the signs that tell you it's time to toss.

QUICK SUMMARY

Opened jarred or homemade marinara sauce keeps 5-7 days in the fridge in an airtight container. Freeze it for up to 6 months - best quality within 3. Unopened commercial jars are shelf-stable for 12-18 months in the pantry.

🥫Pantry (unopened): 12-18 months; keep cool, dark, and upright
🧊Fridge (opened): 5-7 days in a sealed airtight container
❄️Freezer: Best at 3 months; safe up to 6 with gradual flavor loss

How Long Does Marinara Sauce Last?

Shelf life depends on three factors: whether the jar has been opened, how the sauce was made, and where you store it. Commercial marinara is formulated with acidity and preservatives that extend pantry life significantly.

Homemade versions - which is where understanding marinara sauce in cooking matters - typically lack those stabilizers, so they move through the fridge window faster.

Marinara Sauce Shelf Life
MethodStateDurationNotes
🏠 PantryUnopened (commercial)12-18 monthsCool, dark location; follow manufacturer date
🏠 PantryOpenedNot recommendedRefrigerate after opening; acidity drops fast
🧊 FridgeOpened or homemade5-7 daysHomemade may drop to 3-4 days; airtight container required
🧊 FridgeCooked/leftover5-7 daysCool to room temp first; refrigerate within 2 hours
❄️ FreezerCooked or opened3-6 monthsBest quality within 3 months; flavor fades after that
🏠 CounterOpened2 hours maxFood safety limit; discard if left out longer

The 2-hour counter rule applies year-round, not just in summer. The same principles behind about food safety raw meat apply to cooked sauces - the danger zone between 40°F and 140°F allows rapid bacterial growth.

How to Store Marinara Sauce

Pantry: Keep unopened commercial jars upright in a spot between 50-70°F, away from the stove, direct sunlight, or any heat source. Rotate older jars to the front so you use them first.

Fridge: Transfer opened or freshly made marinara to a clean, airtight container within two hours. For smaller portions, pressing a layer of plastic wrap directly onto the sauce surface reduces air contact and slows oxidation. Glass jars with tight lids or BPA-free airtight containers work best - shallow containers also cool faster, which keeps the sauce out of the danger zone sooner.

Golden Rule
Label every container with the date it was opened or made. The 5-7 day fridge window is easy to lose track of without it.

Avoid returning a used spoon or fork to the jar between uses. Introducing bacteria from a utensil that touched food shortens the sauce's fridge life noticeably - use a clean spoon each time you scoop.

Can You Freeze Marinara Sauce?

Yes, and it holds up reasonably well.

Tomato-based sauces freeze better than cream-based ones because they don't split the same way.

Expect some separation when thawed - the tomato solids may water out slightly, giving a grainier texture - however, a gentle simmer reincorporates everything.

If you're planning meals around it, knowing what pairs with marinara sauce helps you decide which dishes are worth freezing a batch for.

  1. Cool completely - bring sauce to room temperature before freezing; never freeze hot sauce directly.
  2. Portion by meal - divide into single-serving or recipe-sized amounts so you thaw only what you need.
  3. Pack and seal - use freezer-safe bags or rigid containers, leaving ½-1 inch of headspace for expansion; remove excess air from bags.
  4. Label and lay flat - write the date on each bag and freeze flat for faster, more even freezing.
  5. Thaw in the fridge - allow 24 hours for larger portions, or use a gentle microwave defrost for single servings.
  6. Reheat to a simmer - bring sauce to a rolling simmer before serving to restore texture and ensure food safety.
Watch Out
Don't refreeze thawed marinara that sat at room temperature - the texture degrades badly and the safety risk isn't worth it.

Signs Marinara Sauce Has Gone Bad

Tomato sauce gives clear warnings before it becomes a real hazard. Check the surface, smell, and texture before reheating - don't rely on taste if advanced spoilage is suspected.

Signs It's Gone Bad
👀
VisualGreen/white/black fuzzy mold on surface · dark or unusual film with gas bubbles beneath · cloudy or slimy residue on container walls
👃
SmellSharp sour or fermented smell · nothing like fresh tomato-herb aroma
✋
TextureSlimy consistency · excessively grainy with visible gas pockets

Some separation is normal after refrigeration - thin liquid pooling on top is just water and oils settling, not spoilage.

Stir it and see if it recombines. Mold, off-smells, and gas bubbles are not recoverable - discard the whole container, including any sauce that hasn't visibly changed color.

Getting the Most Out of Every Batch

Good habits at the start of storage pay off by the end of the week. A few practical steps make a measurable difference.

  • 🧂 Boost acidity for homemade batches - add 1 tablespoon of lemon juice or ½-1 teaspoon citric acid per quart when canning; it increases shelf stability significantly.
  • 🍝 Separate sauce from pasta before storing - pasta absorbs sauce overnight and the combined leftovers lose texture faster than sauce stored alone.
  • 🔁 Simmer gently when reheating - low, steady heat reincorporates separated tomato solids and restores a cohesive texture without scorching.
  • 🗓️ Rotate pantry stock - unopened jars past 18 months may still be technically safe, however quality drops and it's worth replacing them.

If you run out before your next shop, several marinara sauce stand-ins cover pasta nights without missing much. For broader swaps, tomato sauce swaps that work goes deeper on texture and acidity differences.

Shortcut
Freeze marinara in an ice cube tray first, then transfer the cubes to a bag - single-tablespoon portions are ready for pizza, eggs, or dipping without thawing a full batch.

Frequently Asked Questions

How long is jarred marinara good after opening?

5-7 days in the fridge in an airtight container. Transfer it out of the original jar if the lid no longer seals tightly, and label it with the date you opened it.

Does homemade marinara last longer than jarred?

No - it typically lasts less. Homemade sauce lacks the commercial preservatives and precise pH control of jarred versions, so it often falls closer to 3-4 days rather than 7.

How long can you keep pasta with marinara in the fridge?

3-4 days, though texture suffers by day two because the pasta absorbs the sauce. Storing them separately extends usable quality to the full 5-7 day window for the sauce.

Can you refrigerate marinara sauce overnight after it's been warm?

Yes, as long as it wasn't sitting out longer than 2 hours. Cool it to room temperature first, then seal it in an airtight container before refrigerating.

Can you freeze marinara sauce directly in the glass jar it came in?

Not recommended. Glass jars can crack as sauce expands during freezing, especially if filled near the top. Transfer to a freezer-safe container or bag with headspace left for expansion.

What Is Lardo? [Taste, Uses & More]

March 31, 2026

Lardo arrives at the table in translucent ribbons - pale, almost luminous, draped over warm bread where the fat begins to soften the moment it lands.

What Is Lardo

Unlike what makes guanciale distinct as a cured jowl, or the leaner, more familiar character of pancetta's flavor and uses, lardo is pure fatback: nothing but the back fat of the pig, cured and aged until it becomes something genuinely refined.

QUICK SUMMARY

Lardo is cured pork fatback aged with salt, rosemary, and garlic until silky and firm. It's served paper-thin over warm bread, shaved onto hot pasta, or used as a basting layer around lean roasting meats. Rich, buttery, and herb-scented - a little goes a long way.

🐷What It Is: Salt-cured pork fatback, aged with herbs and spices
🧈Flavor: Buttery, salty, clean pork fat with herbal sweetness
🍞Best Uses: Warm crostini, pasta, wrapping lean meats before roasting
❄️Storage: Refrigerated, tightly wrapped; opened within 2-3 weeks
📍Origin: Tuscany (Colonnata) and Aosta Valley, Italy

What Is lardo?

Lardo is cured pork fatback - the thick layer of fat running along the pig's back - salted and packed with herbs, then left to age.

The most celebrated version is Lardo di Colonnata, made in the marble quarry town of Colonnata in Tuscany, where slabs are cured in carved marble basins with sea salt, rosemary, garlic, and black pepper.

Understanding comparing rock salt vs sea salt options matters here, since the mineral quality of the curing salt directly shapes the final flavor.

A second protected regional type, Lardo di Arnad, comes from the Aosta Valley in the Italian Alps and uses a slightly different herb blend that includes bay leaf and clove. Both are regulated under Italian geographic indication laws.

Elsewhere in Italy, producers make undesignated cured fatback under the broad name lardo, aged anywhere from a few weeks to several months.

Unlike cured meats with significant muscle fiber - think prosciutto or salami - lardo has essentially no lean tissue. It is pure fat, deliberately aged, not a by-product or trim.

That distinction makes it a different category of cured product entirely.

What Does lardo Taste Like?

lardo - What Is Lardo

Lardo's flavor is quieter than most cured meats, which surprises people expecting something aggressively porky. The dominant note is clean, sweet fat - not grease, but something closer to very good cultured butter with a saline edge.

Sensory SnapshotModerate Intensity
👅 Flavor
butterysaltyherb-sweetclean pork
✋ Texture
silky when slicedmelts on heat
👃 Aroma
piney rosemarycured-saltyfaint bay

Rosemary and garlic from the cure come through as a background note, never sharp or raw.

Heat changes things: a slice laid on warm toast softens into the bread and the herb character opens up, releasing that piney aroma.

It tastes similar to the role prosciutto plays as a cured fat accent, however lardo is purer - no lean meat to interrupt the texture, no caramel notes from the aging of muscle.

Golden Rule
Serve lardo at room temperature - refrigerator-cold fat is firm and waxy. Pull it from the fridge 15 minutes before slicing or plating.

How to Use lardo

Lardo's role in cooking falls into two distinct modes: served raw and paper-thin, or melted as a cooking medium. Raw service is the more classical approach - ribbons draped over a warm surface so the fat softens without fully rendering.

How Lardo Is Used
MethodBest ForTip
🥗 Raw / SlicedCrostini, warm bread, cheese boards with pecorino and picklesSlice paper-thin; the thinner the cut, the faster it softens
🍳 Melted Over HeatHot pasta, gnocchi, roasted vegetablesLay slices directly on the hot dish; don't use a pan
🍖 Wrapped / BardedChicken breast, pork loin, lean roastsSecure with kitchen twine; the fat bastes as it renders
🥘 Rendered / DicedBean braises, sauté bases, slow-cooked greensKeep heat low; high heat turns the fat acrid and loses the herb character

On a cheese board, lardo earns its place alongside aged pecorino, pickled gherkins, and black pepper - the fat's sweetness cuts through the cheese's sharpness.

Pair it with a glass of amaro or a medium-bodied red and the combination makes sense immediately.

When swapping out lardo isn't possible, the dish simply won't have the same uniform fat coating - substitutes work but change the character.

Avoid pairing lardo with delicate fish. The fat overwhelms mild white fish entirely and the herb notes clash.

High-acid fresh fruit has the same problem - the fatty texture and sharp acidity fight without resolving.

Try It In
🍗Air Fryer Garlic Parmesan Chicken TendersWrap the tenders in thin lardo slices before cooking to baste and crisp→🍯Air Fryer Honey Garlic Chicken TendersThe sweetness of the glaze balances lardo's salty herb notes well→🍋Air Fryer Lemon Pepper Chicken TendersBlack pepper and lemon already pair naturally with lardo's flavor profile→

How to Buy and Store lardo

At a good Italian deli or specialty butcher, look for a firm, uniformly white slab with a faint ivory tint and visible seasoning layers pressed into the surface.

Yellowing fat, tacky texture, or a sour smell are signs the piece has oxidized or been stored poorly.

Regional labels like Lardo di Colonnata IGP signal controlled production and consistent quality - worth seeking out if available.

Watch Out
Avoid pre-sliced lardo sold loosely in a case unless you'll use it within days. Exposed surface area speeds oxidation and the delicate herb aroma fades quickly.

Buy a whole piece and slice at home, or ask the vendor to cut it paper-thin to order.

Store it vacuum-sealed or wrapped tightly in parchment then plastic, in the coldest part of the fridge.

Opened pieces hold well for 2-3 weeks; for a detailed breakdown of timing by packaging type, see lardo's shelf life.

If your cure recipe calls for specific aromatics and rosemary isn't available, alternatives to rosemary can fill the piney, herbal role in a pinch.

Start Here With Lardo

If you've never used lardo before, begin with warm bread and a sharp cheese. Lay a paper-thin slice on a crostini straight from the oven, wait thirty seconds, and eat it immediately.

That single experience tells you everything about how lardo works: the fat softens, the herbs open up, and the salt and richness resolve cleanly.

From there, wrapping a lean chicken breast before roasting is the logical next step - the fat bastes from the outside in and the result is noticeably more moist than the same cut cooked without it.

Use it sparingly; a few slices carry a lot of flavor and fat, and the goal is accent, not saturation.

Shortcut
No mandoline? Ask your deli counter to slice lardo for you - paper-thin is the target. Anything thicker than 1mm stays too firm and waxy at room temperature.

Frequently Asked Questions

Is lardo the same as pancetta?

No. Pancetta is cured pork belly, which contains both fat and lean muscle. Lardo is pure back fat with no muscle tissue - the texture, use, and flavor are different categories of cured pork product.

What is Lardo di Colonnata?

It's a geographically protected lardo from Colonnata, Tuscany, cured in carved marble basins with sea salt, rosemary, garlic, and black pepper. The marble's mineral properties and cool quarry temperatures are part of what defines the cure.

Can you cook with lardo?

Yes - it works as a barding fat around lean roasts, melted over hot pasta, or slowly rendered as a sauté base. Keep heat low when rendering; high heat destroys the herb character.

How do you serve lardo?

Paper-thin slices on warm crostini is the classic approach. It also works shaved over hot gnocchi, layered on a cheese board with pickles and pecorino, or wrapped around chicken before roasting.

How long does lardo last in the fridge?

An unopened vacuum pack keeps for several months refrigerated. Once opened and well-wrapped in parchment and plastic, plan to use it within 2-3 weeks for best quality.

What Is Naan Bread? [Taste, Uses & Pairings]

March 31, 2026

You spot it at the grocery store - soft, slightly puffy, with visible scorch marks across its surface - and it looks nothing like the sliced bread a few shelves over. Naan bread sits in a category of its own among leavened flatbreads: enriched with yogurt or milk, baked at intense heat, and finished with a brush of ghee or butter that gives it a richness most breads don't have.

What Is Naan Bread

Understanding what makes it distinct helps you use it well.

QUICK SUMMARY

Naan is a soft, leavened flatbread from the Indian subcontinent - chewy, mildly tangy, and rich from ghee or butter. It's traditionally baked in a clay tandoor oven, which gives it signature charred blisters. Best with curries, dips, or kebabs. Fresh naan lasts 1-2 days at room temperature.

👅Flavor: Mildly tangy, slightly sweet, buttery, with faint smoky char
✋Texture: Chewy, pillowy center with lightly crisped, blistered edges
🍽️Best Uses: Scooping curries, wrapping kebabs, flatbread pizza base, dipping
🛒Buy It: Look for visible blistering, soft feel, mild fermented aroma
📦Storage: Room temp 1-2 days, fridge up to 7 days, freeze up to 3 months
⚠️Note: Contains gluten and usually dairy - not vegan or gluten-free by default

What Is naan bread?

Naan is a leavened flatbread originating from the Punjab region of the Indian subcontinent, now central to North Indian, Pakistani, and Afghan cooking. The word itself simply means "bread" in several South and Central Asian languages.

What sets naan apart from other flatbreads is its enriched dough. Traditional recipes use all-purpose flour (maida), yogurt, milk, a little oil or ghee, and either yeast or baking powder as the leavening agent - sometimes both.

That combination produces a dough that's softer and richer than most flatbreads.

The defining cooking method is the tandoor, a cylindrical clay oven that reaches temperatures above 480°C (900°F). Bakers slap the raw dough directly onto the inner wall, where it bakes in under two minutes, puffing and charring into its signature blistered shape.

Home cooks and restaurants without a tandoor use a cast-iron skillet or tawa at high heat, or a broiler, to approximate that char.

Common variations include garlic naan, stuffed with minced garlic and herbs; butter naan, finished generously with melted butter; and peshwari naan, filled with nuts and dried fruit.

What Does naan bread Taste Like?

naan bread - What Is Naan Bread

Naan has a flavor that's mild but layered. The yogurt or fermented starter in the dough contributes a gentle tang - noticeable but not sharp, closer to a mild sourdough note than anything acidic.

Underneath that tang sits a slight sweetness from the wheat flour and milk, which keeps the bread from tasting austere. Then there's the finish: a brush of ghee or butter after baking adds richness that lingers across the whole piece.

Pita is the closest structural comparison, but naan is richer and tangier. Its center chew is more like focaccia.

Sensory SnapshotModerate Intensity
👅 Flavor
mildly tangyslightly sweetbutterysmoky char
✋ Texture
chewy centerpillowycrisp edges
👃 Aroma
warm yeastsmoky charbuttery

Cold or day-old naan loses most of its smoky aroma and the edges turn leathery. A quick reheat on a dry skillet or directly over a gas flame brings back the char and softens the center again.

How to Use naan bread

Naan's structure - chewy but pliable, thick enough to hold weight - makes it genuinely useful across a wide range of meals, not just as a side bread.

Its most traditional role is as a scoop. Tear a piece and use it to pull up butter chicken, dal makhani, or paneer tikka from the plate.

The bread's body holds up to thick, saucy curries without collapsing. It also wraps well around tandoori meats and kebabs, functioning as a handheld sandwich with sliced onions and mint chutney tucked inside.

Golden Rule
Always serve naan warm. Cold naan loses its pliability and most of its aroma - 30 seconds on a hot dry skillet fixes both.

Beyond Indian cooking, naan works well as a flatbread pizza base - its thickness holds toppings better than thin pita, and the existing char on the surface adds depth. Toast it briefly under a broiler with toppings, and it's done in under five minutes.

How Naan Is Used
MethodBest ForTip
🫓 TornScooping curries, dipping in raita or chutneyTear across the grain for wider, sturdier pieces
🔥 Skillet-heatedWrapping kebabs, reheating leftoversDry skillet, 30 seconds per side - no oil needed
🍕 Oven-bakedFlatbread pizza base, topped and broiledBroil at high heat; naan is thick enough to hold toppings
🌮 WrappedHandheld kebab wraps, naan sandwichesWarm first so it bends without cracking at the edges

Avoid pairing naan with very watery broths - the bread goes soggy fast and loses its texture advantage. For a version made from scratch, this homemade naan recipe walks through the full process.

Try It In
🫓Naan Bread HomemadeMake it from scratch with yogurt dough and a hot skillet→

How to Buy and Store naan bread

Good naan has visual tells. Visible blistering and slight charring on the surface indicate proper high-heat baking - a pale, uniformly beige naan has likely been baked at too low a temperature and won't have much flavor.

Give packaged naan a gentle squeeze; it should feel soft but springy, not dense or stiff.

Watch Out
Avoid naan that feels sticky or shows cracked, dry edges - both signal that the bread is past its prime, even if the best-by date hasn't passed.

On packaged naan, check the ingredient list for yogurt or milk, which confirms traditional enrichment. Check the best-by date carefully - packaged naan has a shorter margin than most bagged breads.

  • Room temperature - Seal in a bag and use within 1-2 days. Longer than that and the edges dry out.
  • Refrigerated - Airtight container keeps naan fresh for up to 7 days, though texture firms up slightly.
  • Frozen - Wrap individual pieces in plastic, then place in a heavy-duty freezer bag. Good for up to 3 months with no significant quality loss.

Reheat straight from frozen on a skillet over medium heat - no thawing required.

Start With the Skillet

If you're new to naan, skip the oven entirely. A hot, dry cast-iron skillet is the fastest route to properly blistered bread at home.

Warm packaged naan for 30 seconds per side, brush with garlic butter immediately after, and serve alongside a simple dal or yogurt raita. That single combination covers what makes naan worth buying over any other flatbread on the shelf.

Frequently Asked Questions

How is naan different from roti?

Roti is unleavened and made from whole wheat flour, giving it a thinner, drier texture. Naan uses all-purpose flour, yogurt, and a leavening agent, making it thicker, softer, and richer. Roti is an everyday bread; naan is typically reserved for restaurant meals or special occasions in South Asian households.

Why does naan taste tangy?

The tang comes from yogurt in the dough, which contains lactic acid from fermentation. Some recipes also use a longer rest time, allowing yeast to develop additional acidity. The result is a mild sourness similar to a light sourdough - not sharp, just present.

Can naan be made without yogurt?

Yes - milk or a dairy-free alternative like coconut yogurt can substitute for plain yogurt. The bread will be slightly less tangy and may have a softer rise. The core texture remains similar as long as a leavening agent is still used.

How long does store-bought naan last?

Unopened packaged naan typically lasts until its printed best-by date, often 1-2 weeks from purchase. Once opened, use within 1-2 days at room temperature or refrigerate for up to 7 days in an airtight container.

Is naan a good substitute for pita bread?

For dipping and wrapping, naan works well in place of pita - it's thicker and richer, so it holds up to heavier fillings. It won't pocket like pita does, so stuffed sandwiches need a fold-and-wrap approach instead. See [pita bread substitutes](https://forkliftkitchen.com/pita-bread-substitutes/) for a full comparison.

Indian Masala Omelet

March 31, 2026

Soft eggs folded around spiced vegetables and fresh herbs, cooked until the edges turn golden. That's what happens when you beat eggs well and cook them on medium heat with finely chopped onions, tomatoes, and green chilies.

Indian Masala Omelet served on a plate

The pan does most of the work. You get a fluffy interior with lightly crisped edges without flipping constantly or babysitting the stove.

This works for quick breakfast mornings when you need something filling that looks like you put in effort. It's also solid for simple brunch gatherings or budget-friendly weeknight meals.

QUICK SUMMARY

Indian masala omelet combines beaten eggs with finely chopped onions, tomatoes, green chilies, and fresh coriander, cooked on medium heat until the edges crisp and the interior stays soft. The key is chopping vegetables uniformly and cooking at a steady temperature to avoid burning while ensuring the eggs set completely.

⏱️Ready Fast: 15-17 minutes total, including 10 minutes of chopping and mixing
🔥Critical Step: Heat pan to medium before adding oil; prevents sticking and burning
⚠️Watch Out: Too much tomato moisture makes it soggy; drain excess liquid before mixing

Table of Contents

Toggle
  • Why This Recipe Works
  • What You'll Need
    • Ingredient Details
  • Ingredient Swaps
  • What to Serve With It
  • Store and Reheat
  • Frequently Asked Questions
  • Indian Masala Omelet
    • Method 
    • Tried this recipe?

Why This Recipe Works

Beating eggs thoroughly for 30 seconds incorporates air that creates fluffiness when heat hits the pan. Medium heat sets the eggs without toughening the proteins while giving the edges time to crisp. For a version that comes together quickly, quick easy side dish adds warmth without extra cooking time.

Quick Reference
⏱️
Prep Time
10 min
🔥
Cook Time
5-7 min
⏰
Total Time
15-17 min
🍽️
Servings
2 servings
📊
Difficulty
Easy
🏷️
Category
Main Dish
💡
Quick Tip
Cook on medium heat; avoid high heat for softness
🎯
Best For
Weeknight

What makes it work:

  • Non-stick pan prevents sticking - reduces oil needed and makes flipping or folding easier without tearing the eggs
  • Uniform vegetable pieces cook evenly - 0.25-inch cuts ensure onions and tomatoes soften at the same rate as eggs set
  • Turmeric adds color and earthy depth - half a teaspoon gives golden hue without overpowering the fresh vegetable flavors
  • Resting after cooking finishes the center - covering the pan for 1 minute off heat uses residual heat to firm up any soft spots
  • Medium heat maintains texture balance - around 300°F crisps edges while keeping the interior moist and tender
Quick Tip
Add salt to the egg mixture right before cooking to prevent watery separation that makes the omelet soggy

What You'll Need

Ingredients for Indian Masala Omelet

Fresh eggs and finely chopped vegetables form the base, with spices adding the characteristic flavor. Rich mains need something to cut through, and rice does exactly that. For a version that comes together quickly, this quick rice dish balances the plate without competing with the spiced eggs.

🥚
Base
  • 3 large eggs
  • Pinch of salt
🥬
Vegetables
  • ½ medium onion, finely chopped
  • 1 small tomato, finely chopped
  • 1 green chili, finely chopped
  • 2 tablespoons fresh coriander, chopped
  • Optional: ¼ green bell pepper, finely chopped
🌶️
Spices
  • ½ teaspoon turmeric powder
  • ¼ teaspoon red chili powder
  • Optional: pinch of black pepper
🫙
Cooking Fat
  • 1-2 tablespoons oil or ghee

Ingredient Details

  • Eggs
    Use fresh eggs at room temperature for better volume when beaten; cold eggs don't whip as well
  • Onion
    Chop into 0.25-inch pieces so they soften during the short cook time without staying crunchy
  • Green chili
    Remove seeds if you want less heat; the white ribs hold most of the spice
  • Tomato
    Squeeze out excess liquid and seeds before chopping to prevent a watery omelet
  • Fresh coriander
    Chop just before cooking to preserve the bright green color and fresh aroma
  • Turmeric powder
    Half a teaspoon colors the eggs golden without adding bitterness; more turns it muddy
  • Oil or ghee
    Ghee adds richer flavor but oil works fine; need enough to coat the pan and prevent sticking

Ingredient Swaps

You can adjust heat levels or work around missing ingredients without losing the core texture. Salad adds the contrast this plate needs, but timing matters. For a version that comes together quickly, fresh salad side dish keeps prep simple while adding crisp freshness.

Common substitutions:

  • Green chili → jalapeño or mild chili - reduces heat but keeps the fresh veggie crunch and bright flavor (use same amount)
  • Oil or ghee → olive oil or avocado oil - changes the richness slightly but still prevents sticking and aids browning (1:1 ratio)
  • Turmeric powder → saffron or yellow mustard powder - alters color intensity and adds different earthy notes (start with half the amount)
  • Fresh coriander → fresh parsley or dried cilantro flakes - loses some brightness but still adds herbal freshness (use 1 tablespoon dried for 2 tablespoons fresh)

Using egg whites only

Works for: Lower fat and calorie count, lighter texture if you want less richness

Skip if: You need the binding strength and richness that yolks provide for holding vegetables together

Adding cheese

Works for: Extra richness and creamy texture, melts into pockets of savory flavor

Skip if: You want to keep it dairy-free or prefer the lighter, vegetable-forward flavor profile

Instructions

Total cooking time runs 5-7 minutes once the pan is hot and vegetables are prepped. A dollop of this dip takes each bite somewhere more interesting. We keep a batch ready for nights like this - a creamy sauce on the side adds tangy depth without extra stovetop time.

  1. Beat eggs with spices - crack 3 eggs into a bowl, add ½ teaspoon turmeric, ¼ teaspoon red chili powder, and a pinch of salt, then whisk vigorously for 30 seconds until the mixture turns pale yellow and slightly frothy
  2. Chop vegetables finely - dice ½ onion, 1 tomato, and 1 green chili into 0.25-inch pieces, squeeze excess liquid from tomatoes, then chop 2 tablespoons fresh coriander and stir all vegetables into the beaten eggs
  3. Heat pan and add oil - place a non-stick skillet over medium heat for 1-2 minutes until warm, add 1-2 tablespoons oil or ghee and swirl to coat the entire surface evenly
  4. Pour egg mixture and cook - pour the egg-vegetable mixture into the hot pan, spread it evenly with a spatula, and let it cook undisturbed for 3-4 minutes until the edges set and turn golden brown while the center stays slightly soft
  5. Fold or flip and finish - use a spatula to fold the omelet in half or flip it carefully to cook the other side for 1-2 minutes, then remove from heat, cover the pan for 1 minute to let residual heat finish cooking the center
Golden Rule
Keep heat at medium throughout cooking; high heat burns the bottom before the center sets, while low heat makes it rubbery

What to Serve With It

Most people skip thinking about what goes next to the omelet, but it balances the meal. The plate feels incomplete without something to contrast the spiced eggs or soak up the flavors. For planning around similar dishes, easy breakfast burritos dinner nights offers more ideas for quick morning meals that hold up through the week.

Side Dish Prep Why It Works How to Serve
Buttered toast Easy Adds carbs to balance protein-heavy omelet and soaks up any runny egg Toast bread until golden, spread butter while warm, serve alongside omelet
Mint yogurt raita Easy Cools down spice from chilies and adds creamy contrast to soft eggs Mix plain yogurt with chopped mint, salt, cumin; dollop on plate or dip omelet
Simple fresh salad Easy Crisp lettuce or cucumber balances the rich, cooked texture of the eggs Toss greens with lemon juice and salt; place next to omelet for crunch
Masala chai Easy Warm spiced tea complements the savory spices in the omelet Brew chai with milk and spices; serve hot in a mug alongside breakfast plate
Tamarind chutney Easy Sweet-tangy flavor cuts through the richness and adds another layer of spice Drizzle over omelet or serve in a small bowl for dipping each bite

Three ways to serve it:

  • For quick weekday breakfasts: Pair with buttered toast and mint yogurt raita to keep prep under 5 minutes while adding cooling contrast
  • For filling brunch plates: Serve with masala potatoes and assorted chutneys to create a more substantial meal that works for hosting
  • For lighter mornings: Add a simple fresh salad and green coriander chutney to keep it refreshing without feeling too heavy
Best Pick
Plain yogurt or raita is the most practical side because it cools the spice, adds creaminess, and requires zero cooking time

Store and Reheat

Omelets hold in the fridge for 3-4 days when stored properly in an airtight container. They lose some fluffiness after sitting but still taste good when reheated correctly. Most people skip bread, but it balances the meal. We keep a batch ready for nights like this - fresh baked bread side soaks up any leftover sauce or yogurt on the plate.

Method Time Best For
🍳 Stovetop 2-3 min on medium-low heat Restoring crisp edges and maintaining soft interior texture
🔥 Oven 8-10 min at 325°F (165°C) Gentle heating without drying when reheating multiple servings at once
📦 Microwave 30-45 seconds on medium power Fastest option when you need breakfast immediately but texture gets softer

For best results when storing:

  • Cool completely before refrigerating - wait 10-15 minutes at room temperature to prevent condensation that makes the omelet soggy
  • Use shallow airtight containers - prevents stacking pressure that flattens the eggs and keeps odors from other foods out
  • Layer with parchment paper - place sheets between multiple omelets to stop them from sticking together
  • Reheat with added moisture - cover the pan or add a teaspoon of water when reheating to prevent the eggs from drying out
  • Freeze in portions if needed - wrap individual servings in plastic wrap, then foil, and freeze up to 1 month; thaw in the fridge overnight before reheating

Frequently Asked Questions

Can I make Indian masala omelet ahead and store it?

Yes, cook the omelet fully, let it cool completely, then store in an airtight container in the fridge for 3-4 days. Reheat on the stovetop or in the oven to restore texture better than the microwave.

How do I reheat Indian masala omelet without drying it out?

Reheat on the stovetop over medium-low heat with a lid for 2-3 minutes, or add a teaspoon of water to the pan to create steam that keeps the eggs moist.

What ingredients indicate Indian masala omelet is fully cooked?

The edges turn golden brown and pull away slightly from the pan, the center sets without jiggling when you shake the pan, and no raw liquid pools on the surface.

Why does my Indian masala omelet turn soggy sometimes?

Too much moisture from tomatoes or other watery vegetables causes sogginess. Squeeze out excess liquid from chopped tomatoes before mixing them with the eggs, and avoid overloading the omelet with vegetables.

Can I double the recipe to serve more people?

Yes, but cook the omelets in batches instead of one large pan to maintain even cooking. A thick, overcrowded omelet cooks unevenly and stays raw in the center while the edges burn.

Indian Masala Omelet served on a plate

Indian Masala Omelet

No ratings yet
Indian masala omelet features beaten eggs mixed with finely chopped onions, tomatoes, green chilies, and fresh coriander, cooked on medium heat to create a fluffy interior with crisp edges. The key is uniform vegetable chopping and steady temperature control to prevent sogginess and ensure even cooking.
Print Recipe Pin Recipe
Prep Time 10 minutes mins
Cook Time 7 minutes mins
Total Time 17 minutes mins
Servings: 2 servings
Course: Breakfast, Main Dish
Cuisine: Indian
Ingredients Equipment Method Notes

Ingredients
  

  • 3 large eggs Use fresh eggs at room temperature for better volume when beaten
  • 0.5 medium onion Finely chopped into 0.25-inch pieces to soften quickly
  • 1 small tomato Finely chopped, excess liquid squeezed out before adding
  • 1 unit green chili Finely chopped; remove seeds for less heat if desired
  • 2 tablespoons fresh coriander Chopped just before cooking to preserve freshness
  • 0.25 unit green bell pepper Optional, finely chopped
  • 0.5 teaspoon turmeric powder Adds color without bitterness
  • 0.25 teaspoon red chili powder
  • pinch black pepper Optional
  • 1-2 tablespoons oil or ghee To coat the pan and prevent sticking; ghee adds richer flavor
  • pinch salt Add to egg mixture just before cooking to prevent separation

Equipment

  • Non-stick skillet Used for cooking the omelet evenly without sticking
  • Mixing bowl To beat eggs and mix with vegetables and spices
  • Spatula For spreading and folding the omelet

Method
 

  1. Crack 3 eggs into a bowl, add ½ teaspoon turmeric powder, ¼ teaspoon red chili powder, and a pinch of salt. Whisk vigorously for 30 seconds until the mixture is pale yellow and slightly frothy.
    3 large eggs, 0.5 teaspoon turmeric powder, 0.25 teaspoon red chili powder, pinch salt
  2. Dice ½ medium onion, 1 small tomato, and 1 green chili into 0.25-inch pieces. Squeeze excess liquid from tomatoes. Chop 2 tablespoons fresh coriander and optionally ¼ green bell pepper. Stir all vegetables into the beaten eggs.
    0.5 medium onion, 1 small tomato, 1 unit green chili, 2 tablespoons fresh coriander, 0.25 unit green bell pepper
  3. Place a non-stick skillet over medium heat and warm for 1-2 minutes. Add 1-2 tablespoons oil or ghee and swirl to coat the entire surface evenly.
    1-2 tablespoons oil or ghee
  4. Pour the egg-vegetable mixture into the hot pan. Spread evenly with a spatula and cook undisturbed for 3-4 minutes until edges set and turn golden brown, while the center stays slightly soft.
    3 large eggs, 0.5 medium onion, 1 small tomato, 1 unit green chili, 2 tablespoons fresh coriander, 0.25 unit green bell pepper, 0.5 teaspoon turmeric powder, 0.25 teaspoon red chili powder, 1-2 tablespoons oil or ghee, pinch salt
  5. Use a spatula to fold the omelet in half or carefully flip it to cook the other side for 1-2 minutes. Remove from heat and cover the pan for 1 minute to let residual heat finish cooking the center.

Notes

  • Use a non-stick pan and medium heat to avoid sticking and burning.
  • Squeeze excess tomato liquid to prevent soggy texture.
  • Cover pan after cooking to let residual heat finish the omelet.

Tried this recipe?

Let us know how it was!

What Is Mahlab? [Taste, Uses & More]

March 31, 2026

Mahlab does one thing in a baked good that no other spice can replicate: it turns a plain enriched dough into something that smells faintly of cherry blossoms and tastes of warm almond with a sharp, fruity edge.

What Is Mahlab

Bakers across Greece, Lebanon, Turkey, and Iran have relied on it for centuries - a quarter teaspoon folded into tsoureki dough or ma'amoul filling is enough to notice.

Much like almond flour spoilage signs become obvious once you know what fresh smells like, understanding what fresh mahlab should offer makes a real difference at the spice counter.

QUICK SUMMARY

Mahlab is a ground cherry-pit spice with bitter almond, marzipan, and tangy cherry notes. Used in small amounts in sweet breads and pastries, it's common in Greek, Levantine, and Persian baking. Whole kernels keep up to two years; ground powder fades within six to twelve months.

🍒Flavor: Bitter almond, marzipan, tangy cherry-pit with a resinous edge
🌿Origin: Eastern Mediterranean - Levant, Anatolia, and Iran
🍞Best Uses: Enriched sweet breads, shortbread cookies, nut-filled pastries
📦Shelf Life: Whole: 12-24 months; ground: best within 6-12 months
🛒Where to Buy: Middle Eastern specialty markets or reputable online spice sellers

What Is mahlab?

Mahlab - also spelled mahlep, mahlepi, or mahaleb - is the dried, ground kernel found inside the pit of the St. Lucie cherry (Prunus mahaleb), a small wild cherry native to the eastern Mediterranean.

It is classified as a spice, not a nut, though its oily, cream-colored kernel behaves similarly to almond in its aromatic compounds.

The spice originates in the Levant and Anatolia and spread through Persian, Armenian, and Greek cooking traditions over centuries. Today it appears regularly in Greek, Lebanese, Syrian, Turkish, and Iranian recipes.

Whole kernels look like small, pale ellipses, roughly the size of a peppercorn. Ground mahlab is a fine, slightly off-white powder with a faint oiliness.

You may also find it sold coarsely crushed, which has a slightly gritty texture and more aggressive aroma.

Two forms reach market:

  • Whole kernels - longest shelf life, best aroma when freshly ground just before use
  • Pre-ground powder - convenient but loses potency faster; check packaging dates carefully

What Does mahlab Taste Like?

mahlab - What Is Mahlab

Mahlab tastes closest to a hybrid of bitter almond extract and concentrated cherry-pit - think marzipan sharpened with a sour, almost citric edge. The bitterness is real but not harsh at culinary doses; it resolves into a warm, floral finish.

Sensory SnapshotStrong Intensity
👅 Flavor
bitter almondtangy cherry-pitmarzipanresinous
✋ Texture
powderyslightly oily
👃 Aroma
cherry blossomwarm almond extract

Heat softens the bitterness and amplifies the floral, almond-like side. Raw in cookie dough, the tangy cherry note is more forward.

Because the intensity is strong, a little goes a long way - most recipes call for no more than half a teaspoon per batch.

If you need to work without it, look into swapping out mahlab before deciding on an alternative, since no single ingredient fully replicates the cherry-pit sharpness alongside the almond warmth.

How to Use mahlab

Mahlab belongs almost entirely to sweet baking, though a few savory applications exist. Greek Easter bread (tsoureki) is its most recognizable home - the spice goes directly into the dough during kneading, usually paired with mastic, orange zest, and cardamom.

Lebanese ma'amoul shortbread cookies use it in the dough, sometimes alongside rose water and semolina.

Golden Rule
Always grind whole mahlab kernels fresh. The volatile oils that carry the aroma dissipate quickly once ground, and pre-ground powder can taste flat by comparison.

Standard amounts run from ¼ to ½ teaspoon per batch of dough. For stronger presence, toast whole kernels in a dry pan for 30 seconds before grinding - this rounds out the bitterness and deepens the cherry note.

How Mahlab Is Used
MethodBest ForTip
🔥 Toasted then groundEnriched breads, yeast doughsGrind fine immediately after toasting; don't let it sit
🥄 Ground into doughShortbread, cookie dough, pastryBlend with flour or sugar first for even distribution
♨️ Steeped in syrupSemolina cakes, drizzled pastriesSteep briefly, then strain; extended steeping turns bitter
🫙 Mixed into fillingsNut-and-butter pastry fillingsNo heat needed; fat carries the aroma well

Mahlab pairs with orange and lemon zest, sesame and tahini, honey, cardamom, cinnamon, and dried sour cherries. It also works in savory flatbreads pounded with sesame seeds.

Avoid it alongside heavy cumin-forward spice blends - the flavors fight each other - and skip it entirely with delicate seafood.

For bakers who love this flavor register, almond extract swaps that work can also point you toward related flavor compounds worth experimenting with.

Try It In
🥗Greek Salad with Feta and OlivesA classic base that welcomes mahlab-toasted flatbreads alongside→🍋Lemon Bars with Shortbread CrustAdd ¼ teaspoon mahlab to the shortbread dough for a cherry-almond undertone→🍯Honey Cinnamon Cream CheeseA pinch of mahlab deepens the almond-warm notes already in this spread→

How to Buy and Store mahlab

Buy whole kernels over pre-ground powder whenever possible. Fresh kernels smell nutty and cherry-forward; musty or dusty-smelling jars signal age.

Middle Eastern specialty markets carry it reliably, as do reputable online spice retailers.

Watch Out
Mahlab kernels contain trace cyanogenic glycosides - a compound common to Prunus seeds. Culinary amounts are considered safe, however avoid large concentrated doses and do not give kernel preparations to infants or during pregnancy.

Store whole kernels or ground mahlab in an airtight container away from heat and light. Move it to the refrigerator if you buy in bulk or live somewhere humid.

Whole kernels stay potent for 12-24 months; ground powder is best within 6-12 months. Knowing the mahlab spoilage signs helps you catch a stale batch before it flattens an entire bake.

Start Here if You're New to Mahlab

Buy whole kernels first.

Toast a small amount, grind them fresh, and stir just ¼ teaspoon into a simple shortbread or butter cookie dough.

That single test batch is enough to understand the flavor and decide how far you want to push it.

If the marzipan-cherry combination resonates, recipes like tsoureki and ma'amoul are the logical next step.

Those who enjoy this flavor profile may also find alternatives to marzipan worth exploring for related baking projects.

Frequently Asked Questions

What does mahlab taste like?

It tastes like bitter almond extract blended with a sharp, tangy cherry-pit note - similar to marzipan but with a sour edge. Heat softens the bitterness and brings the floral, almond side forward.

How much mahlab should I add to bread dough?

Most recipes use ¼ to ½ teaspoon per batch. Start at the lower end - the flavor is strong and builds further once the bread bakes.

Where can I buy mahleb?

Middle Eastern specialty grocery stores stock it most reliably, usually in the spice aisle or bulk section. Reputable online spice retailers are the next best source, especially for whole kernels.

Is mahlab safe to eat?

Yes, at culinary amounts. The trace cyanogenic glycosides in Prunus kernels are not a concern at the small doses used in baking. Avoid large concentrated amounts and keep kernel preparations away from infants.

What is the difference between mahlab and bitter almond?

Both share benzaldehyde, the compound responsible for the almond-like aroma. Mahlab adds a distinct tangy cherry-pit note that bitter almond lacks, making it more complex and slightly sour in baked goods.

What Is Kirsch? Taste, Uses, Pairings & More

March 31, 2026

Sharp, clean, and unmistakably cherry - the first nose of kirsch stops you before the glass even reaches your lips.

What Is Kirsch

That dry stone-fruit rush, threaded with something almost almond-like, is nothing like the sweet cherry liqueurs you've poured over ice cream.

Kirsch is a serious eau-de-vie, and understanding what it brings to a dish or a drink will change how you use it entirely.

If you've worked with alternatives to apricot or experimented with flambéed desserts like a flambéed crêpes suzette with orange recipe, kirsch operates in that same concentrated-spirit territory - but with a flavor entirely its own.

QUICK SUMMARY

Kirsch is a clear, unsweetened cherry eau-de-vie from Central Europe with dry stone-fruit flavor, a bitter-almond edge, and strong alcohol presence. Use it in small amounts for baking, flambéing, sauces, and cocktails where sweetness would be wrong.

🍒Flavor: Dry cherry, bitter almond, faint floral lift
🥃Category: Fruit brandy (eau-de-vie), unsweetened
🍰Best Uses: Black Forest cake, flambé, cherry sauces, cocktails
📦Shelf Life: Indefinite sealed; best within 3-5 years opened
🛒Buy It: Look for clear liquid labeled Kirschwasser from European producers

What Is kirsch?

Kirsch - full name kirschwasser, meaning "cherry water" in German - is a clear, unsweetened fruit brandy distilled from fermented Morello or black cherries, pits included.

It originates from the Alsace region of France and the Black Forest (Schwarzwald) of Germany, where cherry orchards and distilling tradition overlap.

Unlike Cognac or Armagnac, kirsch is an eau-de-vie: it's not aged in oak, so it stays completely colorless and retains the raw character of the fruit.

The pits matter here. Fermenting whole cherries - flesh and stone together - releases benzaldehyde, a compound responsible for the bitter-almond note that distinguishes kirsch from every other cherry spirit.

This is not a sweet liqueur; it's closer to brandy in structure, though brandy's flavor and uses cover a much wider stylistic range than this focused, fruit-forward spirit.

Protected-origin kirsch from Alsace or the Black Forest carries stricter production standards. Outside Europe, bottles labeled simply "cherry brandy" may be sweetened imitations - read the label carefully.

  • 🍒 Kirschwasser - the full German name, used on quality European bottles
  • ⚠️ Cherry liqueur - a sweetened product; not a substitute for kirsch
  • 🌍 Alsatian kirsch - French-style, often lighter; Black Forest style is slightly more robust

What Does kirsch Taste Like?

kirsch - What Is Kirsch

Kirsch tastes dry, sharp, and intensely cherry - but not like fresh fruit. The dominant note is sour cherry stone-fruit, concentrated through distillation, followed almost immediately by a bitter-almond undercurrent from benzaldehyde.

There's a faint herbal, floral lift mid-palate that keeps the profile from being one-dimensional.

The mouthfeel is clean and thin, with a warming alcohol presence typical of a spirit bottled around 40-45% ABV. It reads nothing like sweet cherry liqueur on the tongue - no syrupy body, no sugar coating the finish.

Think closer to a dry grappa or a marc, but with cherry at the center rather than grape.

Sensory SnapshotStrong Intensity
👅 Flavor
dry cherrybitter almondstone-fruit
✋ Texture
cleanthinwarming
👃 Aroma
dark cherrytoasted almond

Heat drives off some of the sharper alcohol notes, leaving the fruit and almond more pronounced. In a baked cake layer or a warm sauce, kirsch registers as aromatic depth rather than raw spirit.

How to Use kirsch

Kirsch earns its place in both the kitchen and the bar, though always in small quantities. A splash is usually enough - two to three tablespoons at most in most recipes.

Golden Rule
Kirsch is a finishing and flavoring spirit, not a cooking liquid. Add it at the end of heat applications or use it cold in batters and custards to preserve its aromatic edge.

In the pastry kitchen, kirsch is inseparable from Schwarzwälder Kirschtorte - the Black Forest cake tradition calls for soaking each sponge layer until the spirit and sour cherry syrup are indistinguishable.

Working through a black forest cake recipe shows exactly how much kirsch to use without overwhelming the cream layers.

Beyond that, stir a tablespoon into chocolate ganache for depth, or fold it cold into an ice cream base before churning.

Savory cooking is underrated territory for kirsch. Use it to deglaze a pan after searing duck breast or pork tenderloin - the alcohol lifts the fond while the cherry note builds a sauce with no extra effort.

A cherry compote for game meats benefits from a small finish of kirsch just before serving.

How Kirsch Is Used
MethodBest ForTip
🎂 SoakingBlack Forest cake layers, dried cherriesAdd gradually - layers absorb unevenly
🔥 FlambéCherry jubilee, dessert cherriesWarm the kirsch slightly before igniting
🍳 DeglazingDuck, pork, game pan saucesAdd off heat, then return to reduce
🥃 Cold stirredCustards, batters, cocktails, ganacheAdd last - heat destroys top notes

Kirsch pairs naturally with dark chocolate, marzipan, vanilla cream, and sour cherries. German and Alsatian cuisine claim it most strongly, but its role in classic cocktail culture - the Kirsch Sour, European bitters builds - is well established.

If you can't find it, a guide to replacements for kirsch covers the closest dry and sweet-spirit options.

Try It In
🍰Black Forest Cherry CakeClassic Schwarzwälder Kirschtorte using kirsch-soaked layers→

How to Buy and Store kirsch

Buy kirsch from a reputable European producer and look for the word Kirschwasser on the label.

The liquid should be completely colorless - any tint suggests additives or blending.

Protected-origin bottles from Alsace or the Black Forest indicate stricter distillation standards.

Avoid anything labeled "cherry liqueur" or "cherry brandy" without further qualification; those are sweetened products and will ruin a recipe calling for true kirsch.

Watch Out
Sweet cherry liqueurs like Cherry Heering are NOT interchangeable with kirsch. Substituting them adds significant sugar and alters the flavor balance of any dish or cocktail.

Store kirsch upright in a cool, dark location with the cap sealed tightly.

Volatile aroma compounds evaporate slowly once opened, dulling the almond-cherry edge over time.

A full guide to storing kirsch correctly covers the signs of fading quality and whether a very old bottle is still usable.

Unopened bottles last indefinitely; opened ones are best used within three to five years for peak aroma.

Where to Start with kirsch

Skip the cocktail glass first. The fastest way to understand kirsch is to soak a slice of chocolate cake in it - the spirit's dry cherry and bitter-almond character against fat and sugar makes the balance immediately clear.

Best Pick
For a first bottle, choose an Alsatian Kirschwasser from Massenez or a Black Forest producer like Schladerer - both are widely available and represent the style well.

If the spirit itself is too sharp to drink neat, use it in a cherry compote or ganache before committing to cocktails or flambé. That small-quantity kitchen use is where most cooks first recognize what kirsch actually does.

Frequently Asked Questions

Is kirsch sweet or dry?

Dry. True kirschwasser contains no added sugar and tastes nothing like cherry liqueur. The fruit character comes entirely from distilling fermented Morello cherries, not from sweetening.

What does kirsch taste like compared to cherry liqueur?

Kirsch is dry, sharp, and bitter-almond forward; cherry liqueur is sweet and syrupy. They share cherry as a base note, but the alcohol structure and sugar level make them behave completely differently in recipes.

Can kirsch replace brandy in recipes?

Yes, in most contexts - both are unsweetened spirits at similar ABV. Kirsch adds a distinct cherry note, so it works best when the recipe already involves cherry, chocolate, or almond flavors. Check [alternatives to brandy](https://forkliftkitchen.com/brandy-substitutes/) if you need a neutral swap instead.

Does kirsch actually contain cherry pits?

Not literally - it's distilled, so no solids carry through. However, fermenting whole cherries with their pits releases benzaldehyde, which survives distillation and creates the signature bitter-almond note in the finished spirit.

How much kirsch should you use in cooking?

Two to three tablespoons is standard for most cake or sauce recipes. Kirsch is potent - more than that can overpower the dish rather than complement it.

How Long Does Mint Last? [Storage & Freezing Guide]

March 31, 2026

Freezing mint is often an afterthought - something you do with the leftover bunch when a recipe only called for a handful of leaves.

Can You Freeze Mint

Understanding storing herbs in ice cube trays correctly can change how you think about mint's long-term value.

Fresh mint is more perishable than most cooks expect, and knowing the difference between counter life, fridge life, and freezer life means less waste and better flavor when you actually reach for it.

The same wilting mistakes that affect parsley spoilage signs apply here too - moisture management is everything.

QUICK SUMMARY

Fresh mint lasts 5-10 days in the fridge when stored upright with stems in water. Freezing extends it to 6-12 months - chopped in oil cubes for cooked uses, or flash-frozen whole leaves for hot applications. Thawed leaves will be limp; don't count on them for garnishes.

🧊Fridge: 5-10 days; stems upright in water, loosely covered
❄️Freezer (oil cubes): 6-12 months; best for sauces and soups
🍃Freezer (whole leaves): 3-6 months; cooked uses only after thawing
⚠️Key Rule: Never seal wet mint in a bag - sliminess sets in fast

How Long Does Mint Last?

Fresh mint's shelf life depends heavily on variety and how you store it from day one. Spearmint, with its thinner, more delicate leaves, tends to fade faster than peppermint, which has a slightly sturdier cell structure and more volatile menthol content.

Mint Shelf Life
MethodStateDurationNotes
🧊 FridgeRaw stems5-10 daysUnwashed stems in damp paper towel or upright jar; spearmint skews shorter
🏠 CounterCut stems in water1-3 daysBouquet-style in a glass; fine short-term but degrades fast at room temp
❄️ FreezerChopped in oil6-12 monthsIce cube tray method; best color and flavor retention
❄️ FreezerWhole leaves (flash-frozen)3-6 monthsTurns limp on thaw; cooked or blended uses only

Counter storage is really a short-term holding pattern, not a strategy.

For anything beyond two days, the fridge is the right call - and the gap between a well-stored bunch and a poorly stored one can be nearly a week of usable life.

How to Store Mint

The single biggest mistake with fresh mint is trapping moisture against the leaves. Wet mint in a sealed plastic bag will turn slimy within two days, while properly dried and ventilated mint can last the full 5-10 day window.

Golden Rule
Don't wash mint until you're ready to use it. Surface moisture is the main driver of rapid decay.

For fridge storage, trim the stem ends, strip any discolored leaves, and stand the bunch upright in a jar with 1-2 cm of water.

Cover the leaves loosely with a plastic bag - not sealed - and change the water every two days.

This method, similar to how basil's shelf life is extended with the jar method, keeps mint crisp and aromatic far longer than the paper towel approach alone.

For shorter-term counter use, the same upright-in-water method works without refrigeration. Counter life tops out at 1-3 days, so use this only when you're cooking with the mint the same day or next.

Can You Freeze Mint?

Yes - and it's worth doing when you have more than you can use fresh.

The method you choose determines how you'll use the mint later; the role mint plays in cooking (sauces, infusions, drinks, blended dressings) maps directly to which freeze method makes sense.

Watch Out
Thawed mint leaves are always limp. Never freeze mint expecting it to work as a fresh garnish or raw salad herb.

Oil cube method - the stronger choice for flavor and color retention - involves chopping leaves and mixing them with olive oil before freezing. If you want to skip the oil, olive oil stand-ins like melted butter or even water work in the tray; water-frozen cubes are better for smoothies and cocktails, oil cubes for cooked dishes.

Here's how to freeze mint properly:

  1. Wash and dry thoroughly - rinse leaves gently, then spin dry and blot with paper towels; any leftover moisture causes ice crystals and browning.
  2. Choose your method - for oil cubes, chop leaves and mix with roughly 1 teaspoon olive oil per tablespoon of mint, then spoon into an ice cube tray; for whole leaves, spread in a single layer on a baking sheet.
  3. Flash-freeze whole leaves - if going the whole-leaf route, freeze the baking sheet uncovered for 1-2 hours before transferring to a sealed bag; this prevents clumping.
  4. Label with date and use - note intended use (e.g., "mint-oil cubes - sauces") so you pull the right format later.

To use, drop oil cubes directly into warm sauces or soups without thawing. Whole frozen leaves go straight into hot liquids or blended applications - no need to defrost first.

Signs Mint Has Gone Bad

Fresh mint gives clear signals when it's past its prime. Discard immediately if you see mold - it spreads fast on herbs and isn't limited to the visible spot.

Signs It's Gone Bad
👀
VisualDark brown or black leaf edges · Slimy translucent patches on stems or leaves · White fuzzy mold spots
👃
SmellSour or fermented odor replacing fresh menthol · Musty damp-basement smell if mold is present
✋
TextureLeaves slimy or mushy rather than crisp · Stems collapse and snap instead of bending

Slightly wilted mint that still smells clean isn't necessarily bad. A quick trim of the stem ends and 30 minutes in cold water can revive lightly wilted leaves.

For similar spoilage patterns in woody herbs, rosemary spoilage signs follow a different timeline but show comparable mold and texture cues.

Four Habits That Keep Mint Fresh

Most storage failures with mint come down to a handful of repeatable mistakes - fix these, and you'll consistently hit the upper end of the shelf life window.

  • 🌿 Store upright in water - treat cut stems like cut flowers; change the water every two days for maximum fridge life.
  • 💧 Skip washing until use - wet leaves in any container accelerate rot; rinse only right before you need them.
  • 📦 Ventilate, don't seal - a perforated bag or loosely covered jar prevents trapped humidity without drying the leaves out.
  • 🧊 Freeze with a plan - label oil cubes and whole-leaf bags with intended use; if you're regularly [swapping out mint](https://forkliftkitchen.com/mint-substitutes/) in recipes, freezing gives you a reliable fallback without the last-minute store run.
Shortcut
Batch-freeze mint oil cubes at the start of the season. They last up to 12 months and go straight into soups, sauces, and dressings with no prep.

Frequently Asked Questions

How long does fresh mint last in the refrigerator?

Fresh mint lasts 5-10 days refrigerated. Spearmint falls closer to the 5-day end; peppermint can push toward 10. Upright jar storage with 1-2 cm of water consistently outperforms the damp paper towel method.

Can you freeze mint leaves?

Yes, but thawed leaves won't be crisp. Flash-freeze whole leaves on a baking sheet before bagging to avoid clumping. Use them directly from frozen in hot dishes - don't thaw first.

Does frozen mint lose flavor?

Some menthol volatility is lost during freezing, but the oil cube method retains the most flavor. Whole frozen leaves fade faster - use within 3-6 months for the best result.

Can you freeze mint in ice cubes?

Yes - this is the preferred long-term method. Chop leaves, mix with olive oil or water, and freeze in an ice cube tray. Oil cubes suit cooked dishes; water cubes work well in drinks and smoothies.

How do you revive wilted mint?

Trim the stem ends and submerge the bunch in cold water for 20-30 minutes. This works only for lightly wilted leaves that still smell clean - slimy or sour-smelling mint is past saving.

Crockpot Thai Massaman Curry

March 31, 2026

Cooking Thai Massaman curry in a slow cooker turns five minutes of prep into six hours of deep, layered flavor. The curry paste blooms in coconut milk while chicken thighs break down into tender, pull-apart pieces.

Crockpot Thai Massaman Curry served on a plate

The Crockpot does all the simmering while you're at work. Potatoes soften, peanuts add texture, and tamarind paste brings that signature sweet-tangy punch.

This works for weeknight meal prep when you want something more interesting than plain chicken and rice.

QUICK SUMMARY

Crockpot Thai Massaman Curry slow-cooks chicken thighs with coconut milk, curry paste, and potatoes for six to eight hours. The key is using full-fat coconut milk and bone-in thighs so the sauce stays creamy and the meat stays tender. Searing the chicken first adds depth.

⏱️Timing: Set on low for 6-8 hours, check doneness at 6-hour mark
🔥First Move: Sear chicken thighs 3-4 minutes per side before adding to slow cooker
⚠️Watch Out: Light coconut milk makes watery curry-use full-fat canned, shake before opening

Table of Contents

Toggle
  • Why This Recipe Works
  • What You'll Need
    • Ingredient Details
  • Ingredient Swaps
  • What to Serve With It
  • Store and Reheat
  • Frequently Asked Questions
  • Crockpot Thai Massaman Curry
    • Method 
    • Tried this recipe?

Why This Recipe Works

Slow cooking Massaman curry lets the spices from the paste infuse into every bite while keeping the chicken juicy. For a version that comes together quickly, try a similar dinner recipe like a similar dinner recipe that uses different protein.

Quick Reference
⏱️
Prep Time
15 min
🔥
Cook Time
6-8 hours low
⏰
Total Time
6 hr 15 min
🍽️
Servings
4-6 servings
📊
Difficulty
Easy
🏷️
Category
Main Dish
💡
Quick Tip
Sear chicken for richer curry flavor
🎯
Best For
Weeknight | Meal prep

Why it works:

  • Dark meat handles long cooking: Bone-in chicken thighs stay moist after eight hours while breasts dry out
  • Curry paste blooms in fat: The coconut milk's fat carries the spices through every ingredient
  • Layering prevents mush: Potatoes sit below chicken so they cook evenly without overcooking
  • Low heat builds depth: Six to eight hours on low lets tamarind, fish sauce, and brown sugar meld
  • Fat adds richness: Don't skim all the oil-it carries flavor and makes the sauce silky
Quick Tip
Shake the coconut milk can before opening-the cream separates and you want it mixed back in

What You'll Need

Ingredients for Crockpot Thai Massaman Curry

Shopping for Massaman curry means hitting the international aisle for curry paste and tamarind. Most people skip simple homemade rolls, but it balances the meal.

🍗
Protein
  • 2 lbs bone-in chicken thighs
🥔
Vegetables
  • 3-4 medium potatoes (cubed)
  • 1 large onion (sliced)
🥥
Sauce Base
  • 1 can (13.5 oz) full-fat coconut milk
  • 3-4 tablespoon Massaman curry paste
  • 2 tablespoon fish sauce
  • 1 tablespoon tamarind paste
  • 2 tablespoon brown sugar
🥜
Finishing
  • ½ cup roasted peanuts
  • 1 cinnamon stick

Ingredient Details

  • Massaman curry paste
    Mae Ploy or Thai Kitchen brands work-check the spice level on the label
  • Chicken thighs (bone-in)
    Skin-on adds flavor but creates excess fat-trim if you want a cleaner sauce
  • Full-fat coconut milk
    Shake the can hard before opening to mix the separated cream back in
  • Potatoes
    Yukon Gold or russet both work-cut into 1.5-inch cubes for even cooking
  • Tamarind paste
    Sold in jars in the Asian aisle-adds sour tang that lime juice can't replicate
  • Fish sauce
    Red Boat or Three Crabs brands-adds umami and salt without tasting fishy
  • Peanuts
    Roasted unsalted peanuts or 2 tablespoon peanut butter stirred in during last 30 minutes

Ingredient Swaps

Four swaps that work:

  • Chicken breast for thighs: Check doneness at four hours instead of six-breast dries out faster
  • Sweet potatoes for russet: Adds sweetness and cooks slightly faster, check at five hours
  • Lime juice plus brown sugar for tamarind: Use 2 tablespoon lime juice and 1 teaspoon extra sugar-less complex but still tangy
  • Red curry paste plus cinnamon for Massaman paste: Mix 3 tablespoon red curry paste with ½ teaspoon cinnamon and ¼ cup peanut butter

Chicken Breast

Works for: Lower-fat option, quicker cooking

Skip if: You want tender, shreddable meat after long cooking

Light Coconut Milk

Works for: Cutting calories, lighter sauce

Skip if: You want creamy, rich curry that coats rice

Soy Sauce for Fish Sauce

Works for: Gluten-free (use tamari), easier to find

Skip if: You want authentic umami depth-soy tastes different

Instructions

The curry cooks itself once you layer the ingredients in the slow cooker. The slaw adds the contrast this plate needs, but timing matters-make this easy slaw recipe while the curry finishes.

Here's how to make it:

  1. Sear the chicken: Heat a cast iron skillet over medium-high heat, sear bone-in chicken thighs 3-4 minutes per side until golden, then transfer to slow cooker.

  2. Layer ingredients: Add cubed potatoes (1.5-inch pieces) to the bottom of the Crockpot, place seared chicken on top, scatter sliced onion around chicken, drop in cinnamon stick.

  3. Mix the sauce: Whisk coconut milk, Massaman curry paste, fish sauce, tamarind paste, and brown sugar in a bowl until smooth, pour over chicken and potatoes.

  4. Cook low and slow: Cover and cook on low for 6-8 hours-check chicken at 6 hours (internal temp 165°F), potatoes should be fork-tender but not mushy.

  5. Finish and serve: Skim excess fat from surface with a spoon, stir in roasted peanuts or peanut butter during last 30 minutes, taste and adjust fish sauce and sugar as needed.

Golden Rule
Cut potatoes smaller than you think-they need to cook through in the same time as the chicken

What to Serve With It

Massaman curry needs something to soak up the sauce and balance the richness. For more pairing ideas beyond rice, try planning your caprese dinner for weeknight chicken meal strategies.

Side Dish Prep Why It Works How to Serve
Jasmine rice Easy Soaks up curry sauce, neutral flavor Serve hot in bowl, ladle curry over top
Steamed green beans Easy Adds fresh crunch, cuts richness Steam 5 min, toss with salt, serve alongside
Cucumber salad Easy Cool and tangy, resets palate Slice thin, dress with rice vinegar and sugar
Thai sticky rice Medium Traditional pairing, holds curry better than regular rice Soak 4 hours, steam 20 min, serve warm
Steamed broccoli Easy Mild, quick veggie that doesn't compete Steam 4 min until crisp-tender, serve plain

Three ways to serve it:

  • Over jasmine rice with lime wedges: Classic combo-squeeze lime over curry for extra brightness
  • With cucumber salad and sticky rice: Adds cool crunch and traditional texture contrast
  • In bowls with steamed greens on the side: Keeps it simple when you don't want to fuss with multiple dishes
Shortcut
Use frozen microwave rice-cook it while the curry finishes so everything hits the table hot

Store and Reheat

Curry thickens as it sits, so add a splash of coconut milk when reheating. Cool and crunchy, slaw resets your palate between bites-make fresh homemade salad recipe to go with leftovers.

Method Time Best For
🍳 Stovetop 5-7 min Even reheating, keeps texture intact
📦 Microwave 2-3 min Single portions, quick lunch reheating
🔥 Oven 15-20 min at 350°F Reheating large batches, prevents splatter

For best results when storing:

  • Cool completely before storing: Let curry sit at room temp 30 minutes, then transfer to shallow airtight containers
  • Store sauce and chicken together: Keeps meat moist and prevents drying out in fridge
  • Add liquid when reheating: Stir in 2-3 tablespoon coconut milk or water to thin sauce back to original consistency
  • Freeze in portions: Divide into single-serving containers, label with date, freeze up to 3 months
  • Skim fat before reheating: Refrigerated curry develops a fat layer on top-scoop it off or stir back in depending on preference

Frequently Asked Questions

How long to cook Crockpot Thai Massaman Curry at low?

Cook on low for 6-8 hours until chicken reaches 165°F internal temp and potatoes are fork-tender. Check doneness at the 6-hour mark-if potatoes are still firm, continue cooking another 1-2 hours.

Can I make Crockpot Massaman Curry ahead?

Yes-make it up to 3 days ahead and store in airtight containers in the fridge. Reheat on the stovetop with a splash of coconut milk to restore the sauce consistency.

What goes with Massaman Curry?

Serve with jasmine rice, Thai sticky rice, steamed green beans, cucumber salad, or steamed broccoli. The rice soaks up the sauce while fresh vegetables cut through the richness.

How do I know when Massaman Curry is done?

Chicken should reach 165°F internal temp and shred easily with a fork, potatoes should be fork-tender but not mushy, and sauce should be thick and creamy. Check at 6 hours-if meat or potatoes need more time, cook another 1-2 hours.

Can I use chicken breast instead of thighs?

Yes, but reduce cooking time to 4-5 hours on low since breast meat dries out faster than thighs. Check internal temp at 4 hours and stop cooking as soon as it hits 165°F.

Crockpot Thai Massaman Curry served on a plate

Crockpot Thai Massaman Curry

No ratings yet
This Crockpot Thai Massaman Curry slow-cooks bone-in chicken thighs with full-fat coconut milk, Massaman curry paste, and potatoes for a rich, tender, and flavorful dish. The curry simmers for 6-8 hours, building deep layers of spice and sweetness perfect for weeknight meal prep. Searing the chicken before slow cooking ensures extra depth of flavor.
Print Recipe Pin Recipe
Prep Time 15 minutes mins
Cook Time 6 hours hrs
Total Time 6 hours hrs 15 minutes mins
Servings: 6 servings
Course: Dinner
Cuisine: Thai
Ingredients Equipment Method Notes

Ingredients
  

  • 2 lbs chicken thighs bone-in, skin-on optional
  • 3 medium potatoes cubed into 1.5-inch pieces
  • 1 large onion sliced
  • 13.5 oz coconut milk full-fat canned, shaken well
  • 4 tablespoon Massaman curry paste Mae Ploy or Thai Kitchen brand recommended
  • 2 tablespoon fish sauce Red Boat or Three Crabs brands recommended
  • 1 tablespoon tamarind paste found in Asian aisle
  • 2 tablespoon brown sugar
  • 0.5 cup roasted peanuts or substitute 2 tablespoon peanut butter
  • 1 stick cinnamon stick

Equipment

  • Cast iron skillet For searing chicken thighs before slow cooking
  • Slow cooker For slow cooking the Massaman curry
  • Mixing bowl To whisk sauce ingredients together

Method
 

  1. Heat a cast iron skillet over medium-high heat and sear the bone-in chicken thighs for 3-4 minutes per side until golden brown. Transfer the seared chicken to the slow cooker.
    2 lbs chicken thighs
  2. Place the cubed potatoes at the bottom of the slow cooker. Top with the seared chicken thighs. Scatter the sliced onion around the chicken and add the cinnamon stick.
    3 medium potatoes, 1 large onion, 1 stick cinnamon stick
  3. In a mixing bowl, whisk together the full-fat coconut milk, Massaman curry paste, fish sauce, tamarind paste, and brown sugar until smooth. Pour the sauce evenly over the chicken and potatoes.
    13.5 oz coconut milk, 4 tbsp Massaman curry paste, 2 tbsp fish sauce, 1 tbsp tamarind paste, 2 tbsp brown sugar
  4. Cover and cook on low for 6 to 8 hours. Check for doneness at 6 hours: chicken should reach an internal temperature of 165°F and potatoes should be fork-tender but not mushy.
  5. Spoon off any excess fat from the surface of the curry. Stir in the roasted peanuts or peanut butter during the last 30 minutes of cooking. Taste and adjust the fish sauce and brown sugar if needed before serving.
    0.5 cup roasted peanuts

Notes

  • Use bone-in chicken thighs for moist, shreddable meat after slow cooking.
  • Shake the coconut milk can vigorously before opening to mix separated cream back in for a rich sauce.
  • Cut potatoes into 1.5-inch cubes to ensure even cooking with the chicken.

Tried this recipe?

Let us know how it was!

What Is Longhorn Cheese? [Taste, Uses & More]

March 31, 2026

Grilled cheese is where longhorn cheese earns its reputation - laid flat in the pan, it melts fast, stretches cleanly, and never pulls bitter or sharp the way aged cheddar can.

What Is Longhorn Cheese

It's a fixture on diner menus and backyard cookouts across the American Southwest, and it shows up just as naturally on a snack board as it does stuffed into a breakfast burrito.

If you're building comfort-food meals, dishes alongside bologna sandwiches often call for exactly this kind of mild, melty cheese.

QUICK SUMMARY

Longhorn cheese is a mild, semi-firm American cheese cut from large wheel or slab forms. It melts smoothly, tastes like a cross between mild cheddar and Colby, and suits everything from quesadillas to casual snack boards.

🧀Type: Semi-firm cow's milk cheese, American style
👅Flavor: Mild tangy, slightly creamy, clean milky finish
🔥Best Use: Melting over burgers, grilled cheese, quesadillas
🛒Buy: Block or slab; shred yourself for best melt
📅Shelf Life: Unopened 4-6 weeks; opened block 2-3 weeks wrapped

What Is Longhorn Cheese?

Longhorn cheese is an American semi-firm cheese made from cow's milk, shaped into a large cylindrical wheel and typically sold as a half-wheel or rectangular slab.

It originated in the Southwestern United States and carries names like longhorn cheddar, longhorn Colby-style, or Texas longhorn cheese depending on the producer.

It sits at the intersection of two familiar styles. Most versions follow a Colby-style process - washed-curd production that keeps the texture slightly open and springy - though some producers lean more toward a mild cheddar base.

The result is a pale-yellow, lightly ripened cheese that hasn't been aged long enough to develop the sharp bite of mature cheddar.

Because the wheel is large, slices tend to be wide, which makes it practical for sandwiches and burgers where coverage matters.

  • 🧀 Shape origin - the long cylindrical wheel is where the name comes from
  • Primary milk - whole cow's milk, typically pasteurized
  • Ripening period - brief, usually under 3 months
  • Alternate names - longhorn cheddar, Texas longhorn cheese, long horn cheese

What Does Longhorn Cheese Taste Like?

longhorn cheese - What Is Longhorn Cheese

Longhorn cheese lands somewhere between mild cheddar and Colby - a profile most people find approachable and undemanding. There's a light tang on entry, followed by a creamy sweetness, and the finish is clean and milky without any sharpness lingering.

Sensory SnapshotMild Intensity
👅 Flavor
mild tangycreamy sweetclean milky
✋ Texture
firm, slightly springymelts creamy
👃 Aroma
mild dairylightly nutty

Heat changes its character noticeably. Cold, it has enough body to slice cleanly without crumbling.

Melted, it goes smooth and stretchy, with the creaminess becoming more pronounced and the tang nearly disappearing.

That mild profile means it won't overpower whatever surrounds it - an asset in layered dishes, less useful when you want the cheese to be the dominant flavor.

Golden Rule
Use longhorn cheese where you want melt and creaminess to support other flavors, not compete with them. Reach for sharp cheddar when you need the cheese to carry the dish.

How to Use Longhorn Cheese

Longhorn cheese handles both cold and hot applications without issue. Its mild profile makes it one of the more forgiving cheeses for everyday cooking, and its wide-cut slab shape is built for coverage.

How Longhorn Cheese Is Used
MethodBest ForTip
🥗 Cold SlicedDeli sandwiches, snack boards, cracker pairingsWide slabs cover bread edge-to-edge without extra slices
🔥 Pan MeltGrilled cheese, burger topping, cheese friesLow-to-medium heat; it flows quickly and can scorch if rushed
🫕 Oven/BroilerCasseroles, breakfast burritos, baked taco dishesShred first for even coverage; blocks melt unevenly in dry oven heat
🧂 Cubed ColdPicnic trays, salads, snack plattersCut into uniform cubes for clean presentation on boards

For Tex-Mex applications - quesadillas, tacos, breakfast burritos - longhorn cheese works well because it melts without releasing excess grease.

Pair it with tortillas and pico de gallo, or layer it into an omelette where Colby-style melt gives a smooth, even finish.

On a cheese board, it pairs cleanly with sliced apples or pears for contrast, sweet pickles, mild chutneys, and crackers. A darker beer or a lighter-bodied red wine both hold up against its mild tang without overwhelming it.

Skip longhorn cheese alongside delicate seafood - the dairy weight doesn't belong there. Very spicy sauces also tend to erase its flavor entirely, which wastes the cheese.

For anyone after using longhorn cheese for creaminess in a dish where longhorn isn't available, mild cheddar or Colby are the closest replacements.

When those are also out of reach, monterey jack swaps that work can fill the same role in melted applications.

Try It In
🧀Cheddar Cheese StrawsLonghorn's mild tang bakes into a crisp, snackable straw→🍳Egg and Cheese Breakfast SandwichMelts evenly over egg without sharpness competing→🥗Blue Cheese Dressing (Homemade)Good reference when pairing mild cheeses on boards→

How to Buy and Store Longhorn Cheese

At the counter or deli case, look for a uniform pale-yellow color with no dry cracks along the cut face and no excess liquid pooling in the package. A sour or sharp smell beyond normal dairy tang signals the cheese has turned.

Buy the block or slab over pre-shredded bags - anti-caking agents in shredded versions interfere with clean melting.

Watch Out
Pre-shredded longhorn cheese contains anti-caking agents that prevent it from melting smoothly. For quesadillas, burgers, or any application where melt matters, shred the block yourself.

Wrap opened blocks tightly in wax or parchment paper, then seal inside an airtight bag or container. Keep it away from strong-smelling foods in the fridge - it absorbs odors readily.

  • Unopened block - about 4-6 weeks refrigerated
  • Opened, wrapped block - 2-3 weeks with proper wrapping
  • Shredded - use within 1-2 weeks; shredding speeds moisture loss

For longer projects or batch cooking, tracking longhorn cheese in dairy recipes alongside your fridge schedule helps avoid waste. Freezing is possible but softens the texture, making it better suited to melted applications after thawing.

Where Longhorn Cheese Fits Best

Longhorn cheese is a practical everyday choice - not a showpiece, but not a compromise either. Try it first if you need a cheese that melts reliably, slices wide without crumbling, and stays out of the way of other flavors.

It's a better fit for casual, comfort-driven cooking than for dishes that need a strong, sharp cheese presence.

Start with a grilled cheese, a burger, or a quesadilla to get a feel for how it behaves, then work it into casseroles and snack boards from there.

Shortcut
Keep a wrapped block in the fridge and shred to order. It takes 30 seconds and gives you cleaner melt than any pre-shredded bag.

Frequently Asked Questions

Is longhorn cheese the same as Colby?

Not exactly. Longhorn refers to the wheel shape and size, while Colby describes the style and production method. Many longhorn cheeses are made Colby-style, but some producers use a mild cheddar base instead.

Can you melt longhorn cheese for mac and cheese?

Yes, and it works well. Its mild, creamy melt produces a smooth sauce without any sharpness. Shred it fresh from the block for the cleanest incorporation into a béchamel base.

How long does longhorn cheese last in the fridge?

An unopened block lasts about 4-6 weeks. Once opened and properly wrapped in wax or parchment paper, expect 2-3 weeks before quality drops.

What substitutes for longhorn cheese work in tacos?

Mild cheddar and Colby are the closest matches for melt and flavor. Monterey Jack is also a solid option, melting even more smoothly with a slightly buttery finish.

Does longhorn cheese come in aged versions?

Rarely. Longhorn is defined by its brief ripening period, which keeps the flavor mild. Some specialty producers age it longer, but aged longhorn is not a standard commercial offering.

Spanish Fabada Asturiana

March 31, 2026

Most bean stews turn out mushy or bland because cooks rush the process or skip the overnight soak. The trick is slow simmering with chorizo and morcilla-Spanish sausages that release fat and smoky depth into the broth.

Spanish Fabada Asturiana served on a plate

Fabes beans stay intact when you keep the heat low and patient. The pork shoulder breaks down over 2-3 hours, making the liquid silky without needing cream or flour.

This is what you make when you want comfort food that tastes like effort but mostly just needs time. Perfect for cold weather nights or when you're cooking for a crowd.

QUICK SUMMARY

Spanish Fabada Asturiana is a slow-simmered white bean stew with chorizo, morcilla, and pork shoulder. The beans soak overnight, then simmer gently for 2-3 hours until creamy but intact. Low heat and gradual cooking create a rich, smoky broth without splitting the beans or toughening the meat.

⏰Time Reality: Plan for 12+ hours total (8-hour soak + 3-hour simmer)
🔥Critical Move: Simmer at 180°F-never boil-to keep beans whole
⚠️Watch Out: Skim foam after 30 minutes or the broth stays greasy

Table of Contents

Toggle
  • Why This Recipe Works
  • What You'll Need
    • Ingredient Details
  • Ingredient Swaps
  • What to Serve With It
  • Store and Reheat
  • Frequently Asked Questions
  • Spanish Fabada Asturiana
    • Method 
    • Tried this recipe?

Why This Recipe Works

Dried fabes break down slowly in a gentle simmer, releasing starch that thickens the broth naturally. For a quick chicken option when you're craving something rich, easy vin side delivers similar depth without the long cook time.

Quick Reference
⏱️
Prep Time
12 hours (including soaking)
🔥
Cook Time
2.5-3 hours
⏰
Total Time
3-4 hours
🍽️
Servings
6-8 servings
📊
Difficulty
Medium
🏷️
Category
Main Dish
💡
Quick Tip
Simmer low and slow for creamy beans
🎯
Best For
Weeknight | Cold weather | Entertaining

What makes this work:

  • Smoked paprika goes in halfway through-too early and it burns, too late and it tastes raw
  • Chorizo and morcilla render fat that coats every bean-the broth stays silky instead of watery
  • Sautéing onion and garlic first caramelizes the sugars-this adds sweetness that balances the smoky sausage
  • Skimming foam after 30 minutes removes impurities-the final broth stays clear instead of cloudy and greasy
  • Resting off-heat for 15-20 minutes lets flavors marry-beans absorb more seasoning and the stew thickens slightly
Quick Tip
If you skip the overnight soak, add 1-2 hours to the simmer time and check beans every 30 minutes

What You'll Need

Ingredients for Spanish Fabada Asturiana

Most supermarkets stock cannellini beans if you can't find fabes-they're close enough in texture. When shopping for sides that balance the richness, this quick coleslaw dish brings the crunch and brightness you need.

🫘
Beans
  • 1 lb dried fabes (Asturian white beans)
🥓
Meats
  • 8 oz chorizo sausage
  • 8 oz morcilla (Spanish blood sausage)
  • 12 oz pork shoulder or bacon
🧄
Aromatics
  • 1 yellow onion, diced
  • 4 garlic cloves, minced
  • 2 bay leaves
🌶️
Seasoning
  • 2 tablespoon smoked paprika (pimentón)
  • 2 tablespoon olive oil
  • Salt to taste

Ingredient Details

  • Fabes (Asturian white beans)
    Large, creamy beans that hold shape-cannellini work if you can't find them
  • Chorizo sausage
    Spanish chorizo (not Mexican)-look for firm, cured links with smoky paprika
  • Morcilla (blood sausage)
    Adds earthy richness-substitute black pudding or omit if unavailable
  • Pork shoulder
    Cut into 1-inch cubes-bacon or pancetta work but add more salt
  • Smoked paprika (pimentón)
    Spanish smoked paprika is essential-regular paprika plus liquid smoke works in a pinch
  • Onion and garlic
    Sauté until translucent (5 minutes)-this sweetens the base before adding liquid
  • Bay leaves
    Two leaves add subtle herbal notes-remove before serving

Ingredient Swaps

Fabes can be hard to source outside specialty stores, but cannellini beans deliver similar creaminess. If you're swapping proteins or seasonings to stretch your budget, simple homemade french fries make a satisfying side that doesn't compete with the stew's richness.

Four swaps that work:

  • No fabes? Use cannellini or great northern beans-soak and simmer the same way, texture will be slightly less creamy
  • Can't find morcilla? Try black pudding or leave it out entirely-you lose earthy depth but chorizo carries the smoky flavor
  • Pork shoulder too much? Swap in bacon or pancetta-cut into chunks, expect saltier and fattier results
  • No smoked paprika? Mix regular paprika with 2-3 drops liquid smoke-not as nuanced but gets the job done

Cannellini Beans

Works for: Budget cooking, easier to find, similar texture

Skip if: You want authentic Asturian creaminess and size

Kielbasa or Andouille

Works for: When Spanish chorizo isn't available, adds smoke

Skip if: You want traditional Spanish paprika flavor

Chicken Broth Instead of Water

Works for: Extra savory depth, richer final broth

Skip if: You want the traditional bean-forward taste

Instructions

Plan for 3 hours of mostly hands-off simmering once the beans are soaked. If you want a potato side that cooks faster than the stew, something creamy like potato wedges takes 20 minutes and adds textural contrast without extra pots.

  1. Soak beans overnight: Place 1 lb dried fabes in a large bowl, cover with cold water by 3 inches, soak 8-12 hours at room temperature.
  2. Sauté aromatics: Heat 2 tablespoon olive oil in a large Dutch oven over medium heat, add diced onion and minced garlic, cook 5 minutes until translucent.
  3. Add meats and beans: Drain soaked beans, add to pot with 8 oz chorizo (sliced), 8 oz morcilla (sliced), 12 oz pork shoulder (cubed), and 2 bay leaves, cover with 8 cups water.
  4. Simmer low and slow: Bring to a bare simmer (180°F), reduce heat to low, cook uncovered 2-3 hours, skimming foam after 30 minutes, stirring gently every 45 minutes.
  5. Finish and rest: Add 2 tablespoon smoked paprika halfway through cooking, salt to taste in final 30 minutes, remove from heat and rest 15-20 minutes before serving.
Golden Rule
Never let the stew boil-bubbles should barely break the surface or beans split and meats toughen

What to Serve With It

Fabada is rich and filling, so you want sides that add crunch or brightness without competing. For ideas on building out the full meal when serving this for company, weeknight chicken dinner ideas walks through options that balance hearty stews.

Side Dish Prep Why It Works How to Serve
Crusty rustic bread Easy Soaks up rich broth, no cooking needed Slice thick, warm in oven 5 minutes, serve alongside
Simple green salad Easy Fresh greens cut through the richness Toss with lemon vinaigrette, serve chilled
Roasted seasonal vegetables Medium Adds fiber and textural contrast Roast at 400°F for 25 minutes, season with olive oil and salt
Pan con tomate Easy Traditional Spanish pairing, bright tomato flavor Rub toasted bread with garlic and fresh tomato, drizzle olive oil
Manchego cheese platter Easy Salty, nutty contrast for hosting Slice cheese, serve with olives and marcona almonds

Three ways to serve it:

  • Weeknight bowl: Ladle fabada into wide bowls, serve with crusty bread for dipping, add a simple green salad on the side
  • Casual dinner party: Present in a large serving dish family-style, set out pan con tomate and a Manchego platter, let guests help themselves
  • Meal prep portions: Divide into individual containers, pack sliced bread separately, reheat on stovetop for lunches
Shortcut
Make the stew a day ahead-flavors deepen overnight and you just reheat gently before serving

Store and Reheat

Fabada stores well and often tastes better the next day as flavors meld. For soups and stews with dairy or cream that need gentler storage, tangy sauce recipe offers tips on keeping sauces fresh without separation.

Method Time Best For
🍳 Stovetop 10-15 minutes Even warming without breaking beans
🔥 Oven 20 minutes at 325°F (160°C) Large portions, preserves texture
📦 Microwave 3-5 minutes, stirring halfway Small portions, speed over perfection

For best results when storing:

  • Cool quickly: Divide into shallow containers so stew cools within 2 hours-this prevents bacterial growth
  • Fridge storage: Keep covered for 3-4 days-beans absorb more flavor as they sit
  • Freeze in portions: Use freezer-safe containers, leave 1 inch headspace for expansion, label with date, use within 3 months
  • Reheat gently: Add 2-3 tablespoon water or broth when reheating-stew thickens as it sits and needs thinning
  • Skim fat after chilling: If you refrigerate overnight, a fat layer hardens on top-lift it off before reheating for a cleaner broth

Frequently Asked Questions

Can I substitute canned beans for dried fabes in fabada asturiana?

Canned beans break down and turn mushy in the long simmer. Stick with dried fabes or cannellini soaked overnight for the right texture.

How should I store leftover fabada and reheat it safely?

Cool in shallow containers within 2 hours, refrigerate up to 4 days. Reheat on stovetop over low heat for 10-15 minutes, adding water to thin.

How do I know when the beans and meats in fabada are fully cooked?

Beans should be tender but intact when pressed with a spoon, pork should shred easily with a fork after 2-3 hours of simmering.

What should I do if my fabada turns out too watery or bland?

Simmer uncovered for 30 more minutes to reduce liquid. Add more smoked paprika and salt gradually-taste after each addition.

Can fabada asturiana be scaled up for a large group or meal prep?

Double the recipe easily in a large stockpot-cooking time stays the same. Portion into individual containers for meal prep; freezes well up to 3 months.

Spanish Fabada Asturiana served on a plate

Spanish Fabada Asturiana

No ratings yet
Spanish Fabada Asturiana is a slow-simmered white bean stew featuring chorizo, morcilla, and pork shoulder. The beans soak overnight then simmer gently for 2-3 hours until creamy yet intact, resulting in a rich, smoky broth without splitting the beans or toughening the meat.
Print Recipe Pin Recipe
Prep Time 8 hours hrs
Cook Time 2 hours hrs 30 minutes mins
Total Time 10 hours hrs 30 minutes mins
Servings: 8 servings
Course: Main Dish
Cuisine: Spanish
Ingredients Equipment Method Notes

Ingredients
  

  • 1 lb fabes (Asturian white beans) soaked overnight
  • 8 oz chorizo sausage sliced
  • 8 oz morcilla (Spanish blood sausage) sliced
  • 12 oz pork shoulder cut into 1-inch cubes
  • 1 medium yellow onion diced
  • 4 cloves garlic minced
  • 2 bay leaves
  • 2 tablespoon smoked paprika
  • 2 tablespoon olive oil
  • to taste salt
  • 8 cups water to cover beans

Equipment

  • Large bowl For soaking beans overnight
  • Large Dutch oven For sautéing and simmering the stew

Method
 

  1. Place 1 lb dried fabes in a large bowl, cover with cold water by 3 inches and soak 8-12 hours at room temperature.
    1 lb fabes (Asturian white beans)
  2. Heat 2 tablespoon olive oil in a large Dutch oven over medium heat, add diced onion and minced garlic, cook for 5 minutes until translucent.
    1 medium yellow onion, 4 cloves garlic, 2 tbsp olive oil
  3. Drain soaked beans and add to the pot along with sliced chorizo, sliced morcilla, cubed pork shoulder, and 2 bay leaves. Cover with 8 cups water.
    1 lb fabes (Asturian white beans), 8 oz chorizo sausage, 8 oz morcilla (Spanish blood sausage), 12 oz pork shoulder, 2 bay leaves, 8 cups water
  4. Bring to a bare simmer at about 180°F. Reduce heat to low and cook uncovered for 2-3 hours. Skim foam after 30 minutes and stir gently every 45 minutes.
  5. Add 2 tablespoon smoked paprika halfway through cooking and salt to taste during the final 30 minutes. Remove from heat and let rest for 15-20 minutes before serving.
    2 tbsp smoked paprika, to taste salt

Notes

  • Simmer gently at 180°F and never boil to keep beans intact and meat tender.
  • Skim foam after 30 minutes to prevent greasy, cloudy broth.
  • Resting the stew off heat for 15-20 minutes lets flavors deepen and the stew thicken.

Tried this recipe?

Let us know how it was!

How Long Does Kale Last? [Storage Guide]

March 31, 2026

Storing kale wet is the fastest way to ruin it, and most people do it without thinking - rinsing the bunch and dropping it straight into a sealed bag before refrigerating.

How To Freeze Kale

Kale is more moisture-sensitive than many other leafy greens; unlike arugula in cooking where wilting is a slow creep, kale can turn slimy within two days when sealed damp.

The same way lettuce spoilage signs often trace back to trapped condensation, kale's shortest shelf lives almost always come down to wet storage and sealed bags.

QUICK SUMMARY

Whole raw kale keeps 5-7 days in the fridge when dry and stored in a perforated bag. Blanched and sealed, it freezes for up to 12 months. The non-negotiable rule: never refrigerate wet leaves in a sealed container.

🧊Fridge (whole): 5-7 days dry in a perforated bag in the crisper
❄️Freezer (blanched): 8-12 months vacuum-sealed or in airtight bags
⚠️Key rule: Pat dry before storing; trapped moisture causes slime within days

How Long Does Kale Last?

Raw kale shelf life depends heavily on whether it's whole or chopped, and which variety you're working with. Lacinato kale (also called dinosaur kale) holds up longer in the fridge than curly kale, whose ruffled edges wilt and trap moisture faster.

Kale Shelf Life
MethodStateDurationNotes
🧊 FridgeRaw, whole5-7 daysPerforated bag in crisper; keep dry; lacinato outlasts curly
🧊 FridgeRaw, chopped3-5 daysChopped leaves oxidize faster; line bag with paper towel
🧊 FridgeCooked3-4 daysAirtight shallow container; cool fully before sealing
❄️ FreezerBlanched, chopped8-12 monthsVacuum-seal or airtight bag; best color and texture
❄️ FreezerRaw, flash-frozen6-9 monthsWorks for smoothies; mushy when thawed for salads
🏠 CounterWhole bunch1 day maxShort-term only; stems draw moisture and leaves wilt fast

Chopped leaves lose their window faster because cutting exposes more surface area to oxidation. If your timeline is tight, leave the bunch whole and chop just before cooking.

How to Store Kale

Dry storage is the foundation - everything else is secondary. Before refrigerating, preparing kale properly means trimming any damaged outer leaves and patting the rest completely dry, or spinning them in a salad spinner before lining bags with paper towel.

Fridge: Place whole or chopped leaves in a perforated plastic bag or produce keeper with a dry paper towel to absorb residual moisture. Rinse only if you're using the kale within 24 hours; otherwise, store dry and rinse right before cooking. Baby kale is the most tender and delicate variety - handle it like salad greens and use it within 3 days.

Counter: A whole bunch can stand stem-down in a glass of water for up to a day, the way you'd store cut flowers. Beyond that, move it to the fridge.

Golden Rule
Never seal wet kale in an airtight bag. Trapped moisture creates the conditions for slime and rot within 48 hours - a paper towel inside the bag is non-negotiable.

Cooked kale should cool fully before going into a container. Store it in a shallow airtight vessel so it chills evenly and doesn't generate condensation at the bottom.

Can You Freeze Kale?

Yes, and it holds well - but only if you prep it correctly first. Freezing whole unblanched bunches is the most common mistake; the thick kale stems freeze rock-hard, the leaves brown, and the result is barely usable.

Blanching before freezing is strongly recommended. The technique for freezing kale without blanching is possible but shortens the freezer window to 6-9 months and produces mushier results. For anything beyond smoothie use, blanch first.

  1. Strip and chop Remove thick central ribs - they trap water and freeze hard - then chop leaves into roughly equal pieces.
  2. Blanch briefly Drop into boiling water: 2-3 minutes for curly kale, 1-2 minutes for lacinato. Over-blanching destroys color.
  3. Shock and drain Transfer immediately to ice water to stop cooking, then drain thoroughly and pat completely dry.
  4. Flash-freeze Spread leaves in a single layer on a tray and freeze until solid, using the same logic behind [doing flash freeze meatballs properly](https://forkliftkitchen.com/flash-freeze-meatballs/) - individual pieces won't clump in the bag.
  5. Bag and label Transfer to airtight freezer bags or vacuum-seal. Mark the variety and date; lacinato and curly kale have different blanching tolerances.

Thaw frozen kale in the fridge for a few hours before adding to cooked dishes. For soups, stews, or smoothies, skip thawing entirely and add it straight from frozen.

Watch Out
Thawed kale will always be limp. Don't expect it to hold up in a raw salad - use frozen kale for cooked applications only.

Signs Kale Has Gone Bad

Fresh kale has a firm, slightly waxy feel and a grassy, faintly bitter smell. Spoilage is usually visible before it's a safety crisis, but knowing the specific signals helps you act faster.

Signs It's Gone Bad
👀
VisualSlime or darkening near the stem base · Large brown or black spots · Widespread yellowing on curly ruffles · Mold in tight folds or along the central rib
👃
SmellSour or fermented odor · Musty, earth-like smell indicating decomposition
✋
TextureSlippery or mushy leaves · Central ribs gone limp and bendable · Stems with no snap

Wilting alone isn't a death sentence. Limp leaves with no slime and no off-odor can sometimes be revived with a 10-minute soak in ice water.

However, any combination of slime, mold, or sour smell means discard - don't try to rinse it off or salvage the unaffected parts.

Make Your Kale Last

A few habits at the start of the week make the difference between kale that lasts five days and kale that's slimy by day two. These apply whether you're storing curly kale, lacinato, or baby kale.

  • 🧻 Dry first, store second - Spin or pat leaves completely dry before any refrigerator storage.
  • 🏷️ Label your freezer bags - Note the variety and freeze date; lacinato tolerates longer fridge and freezer windows than tender baby kale.
  • ✂️ Strip the ribs before freezing - Central ribs hold water and freeze hard; removing them before the tray step produces a cleaner result.
  • 🥤 Pre-portion for smoothies - Flash-freeze chopped raw kale in single-serving layers, then bag by portion to avoid a frozen block.

If you're planning meals around it, check our pairing ideas for kale to use stored kale before the window closes.

Storage-wise, kale behaves similarly to other hearty greens - the same dry-and-perforated approach works for collard green stand-ins and bold greens like preparing spinach properly.

Shortcut
Buy lacinato over curly if shelf life matters - its flatter leaves stay drier, wilt slower, and tolerate the fridge an extra day or two beyond curly varieties.

Frequently Asked Questions

How long does kale last in the fridge?

Whole raw kale lasts 5-7 days stored dry in a perforated bag in the crisper. Chopped kale shortens that to 3-5 days because cut surfaces oxidize faster.

Can you freeze kale without blanching?

Yes, but the freezer window drops to 6-9 months and texture suffers more. Unblanched frozen kale works fine in smoothies but turns noticeably mushy in cooked dishes.

How do you store curly kale vs. lacinato kale?

Both need dry storage in the crisper. Lacinato's flatter leaves stay drier longer, so it typically outlasts curly kale by a day or two. Curly kale needs more paper towel coverage because its ruffles trap moisture.

Can you freeze kale stems?

Technically yes, but it's not recommended - stems are fibrous and freeze very hard. Strip them before freezing leaves; they're better used fresh in stocks or discarded.

How do you revive wilted kale?

Submerge the leaves in ice water for 10-15 minutes, then drain and dry. This works only for wilted-but-not-slimy kale; if there's any slime or off-odor, discard it.

How Long Does Gochujang Last? [Storage Guide]

March 30, 2026

Leftover gochujang sitting in your fridge after a batch of bibimbap is a familiar situation - and the question of how long it stays usable matters more than most people expect.

How Long Does Gochujang Last In The Fridge

This Korean fermented red pepper paste, built from kochugaru, glutinous rice, meju, and soy, keeps fermenting slowly after you open it, which means storage conditions directly affect both safety and flavor.

Understanding what makes gochujang distinct from other pastes - its live cultures, high sugar content, and dense fermented base - explains why it behaves differently from, say, alternatives to miso paste on the shelf.

Done right, a single tub can last a year in your fridge.

QUICK SUMMARY

Opened gochujang lasts 6-12 months refrigerated in an airtight container. Unopened tubs keep 6-12 months in the pantry or up to 18 months in the fridge. Freezing extends shelf life further but changes texture slightly. Always use a clean, dry spoon to avoid early spoilage.

🧊Fridge (opened): 6-12 months in a sealed, airtight container
🏠Pantry (unopened): 6-12 months; refrigerate after opening
❄️Freezer: Up to 12 months; texture thins slightly after thawing

How Long Does Gochujang Last?

Shelf life for gochujang depends heavily on whether the tub is opened and where you store it. An unopened commercial tub often outlasts its best-by date when kept refrigerated - sometimes by months.

Gochujang Shelf Life
MethodStateDurationNotes
🏠 PantryUnopened6-12 monthsCheck best-by; keep away from heat and light
🏠 PantryOpened2-4 weeks maxOver-fermentation and surface separation accelerate at room temp
🧊 FridgeUnopened9-18 monthsRefrigerating before opening extends quality well past label date
🧊 FridgeOpened6-12 monthsFlavor deepens over time; remains safe and usable
❄️ FreezerOpened6-12 monthsTexture becomes slightly grainier after thaw

The wide range on fridge life - six to twelve months - comes down to handling.

Every time you introduce moisture or bacteria via a wet spoon, you shorten that window considerably.

Gochujang's high sugar and salt content slow microbial growth, which is why properly handled paste lasts so long, similar to how keeping kimchi fresh relies on limiting air exposure to a live-culture product.

Golden Rule
Move opened gochujang to the fridge immediately. Two to four weeks at room temperature is the ceiling - not a comfortable default.

How to Store Gochujang

Once you crack open a tub, your storage routine determines how long the paste stays at its best. The method is straightforward, however the details make a real difference.

Pantry: Keep unopened tubs in original sealed packaging in a cool, dark spot away from the stove or any heat source. Don't open a tub and then leave it on the counter - even a few days accelerates over-fermentation and can cause surface darkening and liquid separation.

Fridge: After opening, scrape clean the container rim and use a clean, dry spoon every time without exception. Smooth the surface flat, then press a sheet of plastic wrap directly onto the paste before sealing the lid - this limits air contact and slows oxidation. A wide-mouth glass jar with a silicone or metal lid works well as a transfer container; the original opaque plastic tub with its tight-fitting lid is also fine. Portioning into smaller jars after opening is worth the extra step - it means most of your supply stays sealed while only a small jar faces repeated air exposure.

Label your tubs. Write the date opened on the lid so you know when to prioritize older paste for cooked applications like marinades and sauces. Just as storing doenjang correctly calls for airtight sealing and cold storage, the same logic applies here - Korean fermented pastes share this core requirement. The keeping rice fresh principle of cool, dry, sealed conditions also applies to the glutinous rice base that contributes to gochujang's texture and fermentation.

Can You Freeze Gochujang?

Yes - gochujang freezes well, and it's a practical option if you bought a large tub or won't cook with it regularly. Freezing halts active fermentation and keeps the paste safe for up to twelve months.

Expect some texture change after thawing. The paste may thin slightly and feel a bit grainier than fresh - this is normal and doesn't affect its performance in sauces, glazes, or marinades.

It's less ideal for applications where you'd use it raw and want that thick, glossy consistency.

Shortcut
Freeze gochujang in ice cube tray portions. Each cube equals roughly one tablespoon - a useful measure for most marinade and sauce recipes.
  1. Portion it - Spoon gochujang into an ice cube tray or small airtight freezer-safe containers; tablespoon-sized amounts work best.
  2. Freeze solid - Leave in the freezer until fully set, typically four to six hours or overnight.
  3. Transfer and label - Pop frozen cubes into a labeled freezer bag, press out excess air, and seal tightly.
  4. Thaw as needed - Move portions to the fridge overnight or leave at room temperature for a few hours; stir to reincorporate any separated liquid.
  5. Use promptly - Consume thawed gochujang within one week; don't refreeze.

Signs Gochujang Has Gone Bad

Gochujang's deep red color and fermented smell are normal - don't confuse its natural tang with spoilage. Knowing what to actually look for prevents unnecessary waste.

Signs It's Gone Bad
👀
VisualGray or green fuzzy mold spots on surface · Powdery mold patches · Large dark liquid pockets with unnatural sheen that won't reincorporate
👃
SmellSharp rotten odor beyond normal fermented tang · Ammonia-like or putrid smell
✋
TextureSlimy or excessively watery paste that won't blend back · Sliminess on container walls

Some darkening on the surface and minor oil separation are expected after weeks in the fridge - these are not spoilage signs. Mold, however, means discard the entire tub. Don't scrape it off and continue; the dense paste can harbor contamination below the visible surface.

If the smell has shifted from sour-fermented to genuinely rotten or ammonia-like, discard without tasting.

Watch Out
Never taste-test to confirm spoilage. If mold is visible, the smell is rotten, or the texture is slimy, throw it out immediately.

Getting the Most from Every Tub

Good habits at the jar extend your supply and keep the paste performing well in everything from bulgogi marinades to dipping sauces. A few non-negotiables are worth building into your routine.

  • ✔️ Dry spoon, always - moisture is the main accelerant for early spoilage; wipe or dry your spoon before every use.
  • ✔️ Plastic wrap on the surface - pressing wrap directly onto the paste before sealing is the single most effective step against oxidation and mold.
  • ✔️ Date the tub - opened containers are easy to lose track of; a label keeps you honest about how long it's been in there.
  • ✔️ Small-jar portioning - split a large tub into two or three smaller containers so most of your supply stays unexposed.

If your supply runs low or you need a different heat profile, knowing your options for swapping out gochujang or finding replacements for gochugaru can help you keep cooking without interruption.

Frequently Asked Questions

Does gochujang go bad in the fridge?

Yes, eventually - however properly sealed, opened gochujang typically lasts 6-12 months refrigerated. The paste continues fermenting slowly, so flavor deepens over time without the product being unsafe. Spoilage requires actual mold, rotten odor, or slimy texture.

How long does unopened gochujang last?

An unopened commercial tub lasts 6-12 months in a cool pantry or 9-18 months when refrigerated from purchase. It often remains usable past the best-by date if stored cold and the seal is intact.

Can you scrape mold off gochujang?

No - discard the entire tub. Mold roots can penetrate the dense paste well below the visible surface, making surface removal unreliable. This differs from hard cheeses, where limited surface mold can sometimes be trimmed safely.

Why does my gochujang have liquid on top?

Minor liquid separation is normal - it's moisture and oil releasing from the fermented paste over time. Stir it back in before use. If the liquid is dark with an unnatural sheen and won't reincorporate, that's a spoilage indicator.

Can you freeze gochujang more than once?

Refreezing is not recommended. Each freeze-thaw cycle thins the texture further and degrades quality noticeably. Portioning into single-use amounts before the first freeze prevents the need to refreeze entirely.

« Previous Page
Next Page »

Primary Sidebar

ForkliftKitchen recipe developer

Welcome!

Recipe Developer · 12+ Yr Kitchen Veteran

I'm the recipe developer behind this site, focused on practical, well-tested dishes and smart ingredient swaps. Every recipe is written to be clear, reliable, and easy to make at home.

650+ Recipes
12+ Yrs Exp.
3x Tested
Our Story →

As Featured In

Allrecipes

TASTE OF HOME

Food52

HUFFPOST

Yahoo! Life

Our Editorial Standards

  • ✓ Every recipe tested at least 3 times before publishing
  • ✓ Substitutes verified by real kitchen trials, not guesswork
  • ✓ Reviewed for accuracy by our editorial team
  • ✓ Updated regularly with seasonal info and reader feedback

Most Popular

  • Creamy Lemon Shrimp Linguine
    Creamy Lemon Shrimp Linguine
  • Creamy Garlic Mushroom Chicken
    Creamy Garlic Mushroom Chicken
  • Sesame Ginger Chicken Noodle Bowls
    Sesame Ginger Chicken Noodle Bowls
  • Baked Lemon Herb Fish Fillets
    Baked Lemon Herb Fish Fillets
  • Veggie Loaded Fried Rice
    Veggie Loaded Fried Rice
  • Spicy Garlic Shrimp Stir Fry
    Spicy Garlic Shrimp Stir Fry

Join 8,000+ Home Cooks

Weekly Kitchen Tips

Easy recipes, smart substitutes, and real cooking shortcuts — every Thursday.

Subscribe Free →


Side Dishes

  • What to Serve With Asian Salmon? 15 Best Side Dishes
    What to Serve With Asian Salmon? 15 Best Side Dishes
  • Side Dishes for Strawberry Spinach Salad
    15 Best Side Dishes for Strawberry Spinach Salad
  • Sides for Grilled Cauliflower Steaks to Complete the Meal
    15 Sides for Grilled Cauliflower Steaks to Complete the Meal
  • 15 Sides To Serve With Calabacitas
    15 Best Sides for Calabacitas – Mexican-Inspired Favorites


Substitutes

  • 7 Best Substitutes for Hot Sauce in Marinades & Stir-Fries
    7 Best Substitutes for Hot Sauce in Marinades & Stir-Fries
  • 9 Best Substitutes for Butter in Baking and Cooking
  • 7 Best Substitutes for Tagliatelle for Italian Pasta Dishes
    7 Best Substitutes for Tagliatelle for Italian Pasta Dishes
  • 7 Best Substitutes for Udon Noodles in Asian Stir-Fries
    7 Best Substitutes for Udon Noodles in Asian Stir-Fries


Browse by Topic

  • Side Dishes320
  • Substitutes785
  • Dinner163
  • Air Fryer77
  • Taste Profiles484
  • Food Storage123


Reader Reviews

★★★★★

"Finally a food blog that tells you exactly why a substitute works instead of just listing options."

— Sarah M., via email

★★★★★

"The side dish recommendations are so specific — saved my dinner party twice this month."

— James R., Pinterest comment

★★★★★

"I trust this site more than most because they actually test everything. You can tell."

— Priya K., blog comment

Footer

↑ Back to Top

Forklift Kitchen

We do the heavy lifting so you can enjoy the cooking. Tested recipes, smart substitutes, and perfect pairings—built for real home cooks.

Content

  • Recipes
  • Substitutes
  • What to Serve With
  • Blog

Company

  • About Us
  • Contact
  • Subscribe

Legal

  • Privacy Policy
  • Terms of Service

As an Amazon Associate I earn from qualifying purchases.

© 2026 Forklift Kitchen.

Rate This Recipe

Your vote:


A rating is required
A name is required
An email is required