• Skip to primary navigation
  • Skip to main content
  • Skip to primary sidebar
  • Recipe Index
    • Air Fryer
  • Side Dishes
  • Substitutes
  • About
  • Contact
  • Subscribe

ForkLiftKitchen

menu icon
go to homepage
  • Recipe Index
    • Air Fryer
  • Side Dishes
  • Substitutes
  • About
  • Contact
  • Subscribe
subscribe
search icon
Homepage link
  • Recipe Index
    • Air Fryer
  • Side Dishes
  • Substitutes
  • About
  • Contact
  • Subscribe
×

Blog

Crockpot Mexican Pozole Rojo

March 31, 2026

Tender pork shoulder simmering in red chile broth with chewy hominy kernels. That's what happens when you roast dried guajillo chiles and let the crockpot handle the rest.

Crockpot Mexican Pozole Rojo served on a plate

The slow cooker does the heavy lifting. You get fall-apart meat and deep, layered flavor without standing over the stove.

This works for weeknight dinners when you want something warming that feeds a crowd, or for meal prep when you need lunches sorted for the week.

QUICK SUMMARY

Crockpot Mexican Pozole Rojo is a slow-cooked stew with pork shoulder, hominy, and red chile sauce. Toasting dried guajillo chiles before blending builds the rich, complex base. The crockpot tenderizes the meat while you handle other tasks.

⏱️Time Reality: 20 minutes prep, then 6-8 hours hands-off cooking in the crockpot
🔥Key Move: Toast dried chiles 2-3 minutes per side before soaking and blending
⚠️Watch Out: Add hominy in the last 2 hours or it turns mushy

Table of Contents

Toggle
  • Why This Recipe Works
  • What You'll Need
    • Ingredient Details
  • Ingredient Swaps
  • What to Serve With It
  • Store and Reheat
  • Frequently Asked Questions
  • Crockpot Mexican Pozole Rojo
    • Method 
    • Tried this recipe?

Why This Recipe Works

Slow cooking breaks down the collagen in pork shoulder while dried guajillo chiles deliver concentrated red chile flavor that fresh peppers can't match. The fat from the pork enriches the broth as it renders, and the hominy holds its shape if you time it right. For another slow-cooked stew with bold spice, try this classic gumbo dish that layers flavors the same way.

Quick Reference
⏱️
Prep Time
20 min
🔥
Cook Time
6-8 hours
⏰
Total Time
6-8 hours 20 min
🍽️
Servings
6-8 servings
📊
Difficulty
Easy
🏷️
Category
Main Dish
💡
Quick Tip
Toast chiles before blending for rich flavor
🎯
Best For
Weeknight | Meal prep | Entertaining

Five reasons this recipe delivers:

  • Pork shoulder's fat marbling keeps the meat tender - lean cuts dry out during long cooking, but shoulder stays moist and pulls apart easily
  • Toasting dried guajillo chiles for 2-3 minutes per side - wakes up the chile oils and deepens the flavor before you soak and blend them
  • Adding hominy in the last 2 hours - prevents the kernels from turning to mush while still giving them time to soak up the broth
  • Searing pork shoulder for 3-4 minutes per side - creates a caramelized crust that adds depth to the final broth
  • Using pre-cooked or canned hominy - skips the overnight soak and cuts hours off the cooking timeline
Quick Tip
Check that pork pulls apart easily or hits 195-205°F internal temp before shredding - underdone pork stays stringy no matter how long you simmer it after.

What You'll Need

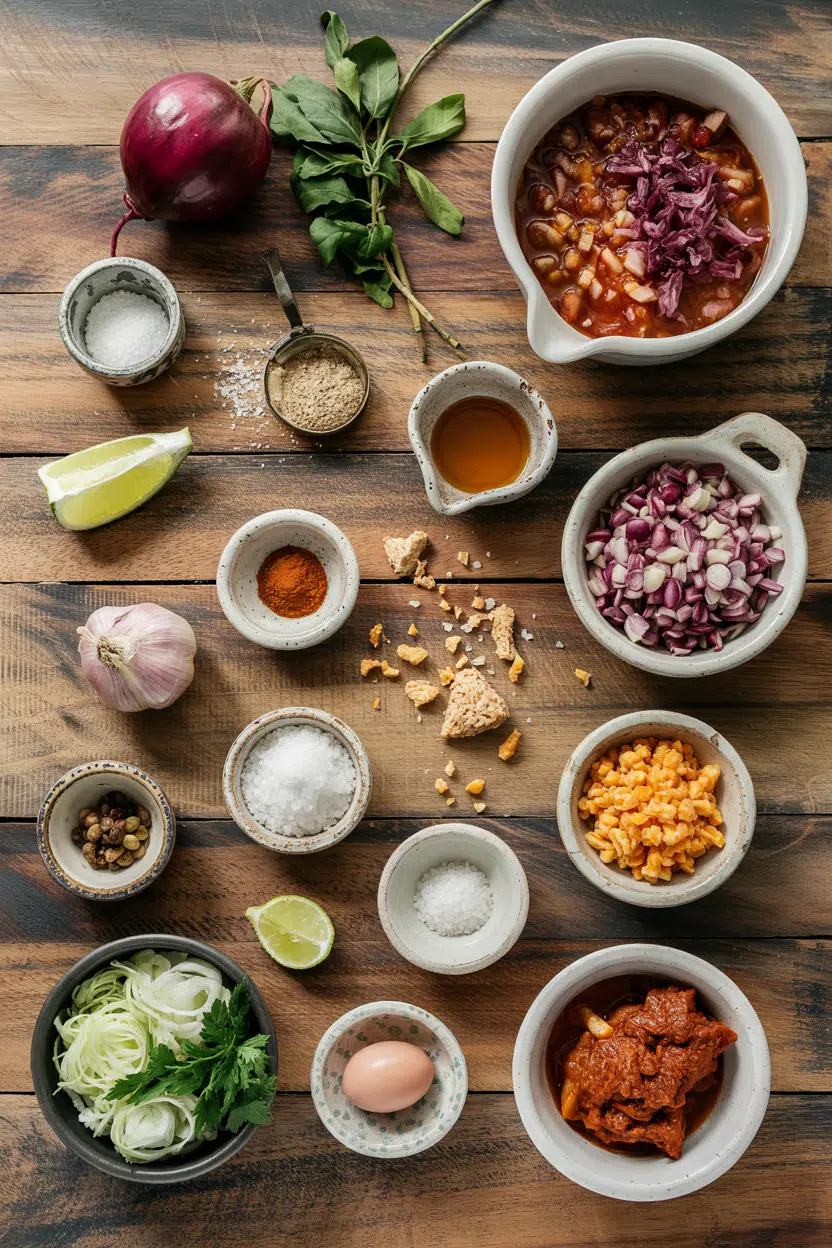
Ingredients for Crockpot Mexican Pozole Rojo

Stock up on dried guajillo chiles and canned hominy if you don't already have them - most grocery stores carry both in the Latin section or online. The rest of the ingredients are standard pantry and fridge items.

🍗
Protein
  • Pork shoulder (2-3 lbs, cut into 2-inch chunks)
🍜
Base
  • Hominy (2 cans, 15 oz each, drained)
  • Chicken or pork broth (6 cups)
🌶️
Chile Sauce
  • Dried guajillo chiles (6-8, stems and seeds removed)
  • Garlic (4 cloves)
  • Oregano (1 tsp)
  • Cumin (1 tsp)
🧄
Aromatics
  • Onion (1 medium, chopped)
🍋
Finishing
  • Lime (for serving)

Ingredient Details

  • Pork shoulder
    Look for cuts with visible white fat marbling - lean shoulder roasts dry out during long cooking
  • Dried guajillo chiles
    Skip pre-ground chile powder - toasting whole dried chiles before blending builds richer, more complex flavor
  • Hominy
    Buy pre-cooked or canned to avoid overnight soaking - raw dried hominy adds hours to your timeline
  • Chicken or pork broth
    Low-sodium broth gives you control over salt levels - you can always add more, but you can't take it out
  • Garlic
    Fresh cloves blend smoother than jarred minced - the texture difference shows up in the finished sauce
  • Onion
    Yellow or white onions work equally well - save sweet onions for raw garnishes where their mildness shines
  • Lime
    Squeeze fresh lime juice right before serving - bottled juice lacks the bright, sharp acidity that balances the rich broth

Ingredient Swaps

Swap pork shoulder for chicken thighs if you want a lighter stew, or use dried ancho chiles instead of guajillo for a milder, earthier flavor. Both changes adjust cooking time and heat level while keeping the core recipe intact.

Four swaps that work:

  • Chicken thighs instead of pork shoulder - boneless thighs cook in 4-5 hours on low, bone-in takes 5-6 hours, and the meat stays tender without as much fat
  • Dried ancho chiles instead of guajillo - ancho brings chocolate and raisin notes with less heat, use the same quantity and toast the same way
  • Canned white corn kernels instead of hominy - you lose the signature chewy texture and the cook time drops to 4-5 hours total, but it still tastes good
  • Vegetable broth instead of chicken or pork broth - the stew gets lighter and less rich, but it stays flavorful if you boost the garlic and cumin slightly

Chicken Thighs

Works for: Lighter texture, shorter cook time (4-6 hours), less fat to skim

Skip if: You want the richness and fall-apart texture that only pork shoulder delivers

Dried Ancho Chiles

Works for: Milder heat, earthier flavor with chocolate notes, easier to find than guajillo

Skip if: You want the brighter, fruitier red chile flavor that defines traditional pozole rojo

Instructions

Start by toasting the chiles and searing the pork before everything goes into the crockpot - those two steps build the flavor base that simmering alone can't create. The rest happens on its own while you handle other tasks.

  1. Toast dried guajillo chiles in a dry cast iron pan over medium heat for 2-3 minutes per side until fragrant but not blackened. Remove stems and seeds, then soak chiles in hot water for 20 minutes until softened. Blend soaked chiles with garlic, oregano, cumin, and 1 cup of soaking liquid until smooth, then simmer the sauce in a pan for 10 minutes to marry the flavors.

  2. Heat a heavy pan over medium-high heat and sear pork shoulder chunks for 3-4 minutes per side until golden brown. Don't crowd the pan - work in batches if needed so the meat browns instead of steams. Transfer seared pork to the crockpot.

  3. Add chopped onion, blended chile sauce, and chicken or pork broth to the crockpot with the pork. Stir to combine, then cover and cook on low for 6-8 hours. The pork should pull apart easily when done - if it doesn't, cook another hour.

  4. Add drained canned hominy to the crockpot during the last 2 hours of cooking. Stir gently to distribute the hominy throughout the broth without breaking up the tender pork. Cover and continue cooking until hominy is heated through and tender but still holds its shape.

  5. Remove the lid for the last 30 minutes of cooking to let the broth reduce slightly and thicken. Shred the pork directly in the crockpot using two forks, mixing it back into the broth. Taste and adjust salt if needed. Serve with fresh lime wedges, chopped onion, cilantro, and sliced radishes.

Golden Rule
Skim any fat that rises to the surface during cooking or chill the finished pozole overnight and remove the solidified fat layer before reheating - this keeps the broth clear and prevents an oily mouthfeel.

What to Serve With It

The rich, chile-forward broth needs something crisp and acidic to balance it - fresh garnishes do most of that work, but a side salad or simple carb rounds out the meal. For more ideas on planning your pickled beets dinner, that guide covers similar flavor pairings for tangy, bold mains.

Side Dish Prep Why It Works How to Serve
Corn tortillas Easy Mild, starchy base soaks up broth without competing Warm in a dry pan for 30 seconds per side
Sliced radishes Easy Peppery crunch cuts through rich, fatty broth Slice thin and serve raw on the side
Chopped white onion and cilantro Easy Fresh, sharp bite brightens every spoonful Chop fine and let guests add their own
Lime wedges Easy Fresh tartness balances the richness and heat Squeeze over individual bowls right before eating
Avocado slices Easy Creamy texture contrasts with chewy hominy Slice and add to bowls just before serving

Three ways to serve it:

  • With tostadas on the side - pile pozole on crisp tostadas or crumble them into the bowl for texture contrast that holds up to the hot broth
  • Over white rice - a scoop of plain rice stretches the meal and soaks up extra broth for those who want more starch than hominy provides
  • With pickled jalapeños and crumbled queso fresco - spicy tang from the jalapeños and mild, salty cheese add layers without overwhelming the chile sauce
Best Pick
Set up a garnish station with radishes, onion, cilantro, lime, and avocado so everyone can customize their bowl - pozole tastes different with every combination.

Store and Reheat

Pozole keeps well in the fridge for 3-4 days and freezes for up to 3 months without losing texture or flavor. The broth may separate as it cools, but stirring while reheating brings it back together. Rich mains need something to cut through, and fresca does exactly that - for a version that comes together quickly, try this simple fresca recipe that pairs with any bold stew.

Method Time Best For
🍳 Stovetop 10-15 min over medium heat, stirring occasionally Even heating that keeps pork tender and broth smooth
📦 Microwave 3-5 min on high in 1-minute intervals, stirring between Quick single servings when you need lunch fast
🔥 Oven 20 min at 325°F covered in an oven-safe dish Large portions that reheat gently without drying out

For best results when storing:

  • Cool pozole to room temperature before refrigerating - hot liquid in a sealed container creates condensation that dilutes the broth and speeds up spoilage
  • Store broth and garnishes separately - cilantro, onion, lime, and radishes get soggy in the broth, so keep them fresh and add right before serving
  • Freeze in single-serving portions - flat freezer bags stack easily and thaw faster than large containers, making weekday lunches effortless
  • Add a splash of broth when reheating - pozole thickens as it sits, so thin it back out with a few tablespoons of stock or water
  • Reheat only what you'll eat - repeated heating breaks down the pork texture and makes the hominy mushy, so portion it out instead

Frequently Asked Questions

How long to cook pozole rojo in crockpot?

Cook on low for 6-8 hours until the pork pulls apart easily or hits 195-205°F internal temp. Add hominy during the last 2 hours to prevent it from turning mushy.

Can I make crockpot pozole rojo ahead and store?

Yes - pozole keeps in the fridge for 3-4 days or freezes for up to 3 months. Store garnishes separately and add them fresh when you reheat.

What garnishes and sides go with pozole rojo?

Serve with sliced radishes, chopped white onion, fresh cilantro, lime wedges, and avocado slices. Corn tortillas, tostadas, or a bright salad recipe round out the meal.

How do I know when the pork in pozole rojo is done?

The pork should pull apart easily with two forks or register 195-205°F on an instant-read thermometer. If it's still tough or stringy, cook another hour on low.

Can I use dried ancho chiles instead of guajillo in pozole rojo?

Yes - ancho chiles work but deliver a milder, earthier flavor with chocolate notes instead of the brighter, fruitier heat guajillo brings. Use the same quantity and toast them the same way.

Crockpot Mexican Pozole Rojo served on a plate

Crockpot Mexican Pozole Rojo

No ratings yet
Crockpot Mexican Pozole Rojo is a flavorful slow-cooked stew combining tender pork shoulder, chewy hominy, and a rich red chile sauce made by toasting guajillo chiles. The crockpot creates fall-apart meat with deep, layered flavors while you handle other tasks.
Print Recipe Pin Recipe
Prep Time 20 minutes mins
Cook Time 8 hours hrs
Total Time 8 hours hrs 20 minutes mins
Servings: 8 servings
Course: Main Dish
Cuisine: Mexican
Ingredients Equipment Method Notes

Ingredients
  

  • 2 to 3 lbs pork shoulder cut into 2-inch chunks, look for visible white fat marbling
  • 2 cans hominy 15 oz each, drained, pre-cooked or canned
  • 6 cups chicken or pork broth low-sodium for salt control
  • 6-8 dried guajillo chiles stems and seeds removed, toasted before soaking
  • 4 cloves garlic fresh cloves for smooth blending
  • 1 teaspoon oregano
  • 1 teaspoon cumin
  • 1 medium onion chopped, yellow or white onion
  • 1 lime for serving, squeeze fresh juice before serving

Equipment

  • Cast iron pan To toast dried guajillo chiles
  • Crockpot Slow cooking the stew
  • Heavy pan Searing pork shoulder chunks
  • Blender Blending soaked chiles and spices into sauce

Method
 

  1. Toast dried guajillo chiles in a dry cast iron pan over medium heat for 2-3 minutes per side until fragrant but not blackened. Remove stems and seeds, then soak chiles in hot water for 20 minutes until softened.
    6-8 dried guajillo chiles
  2. Blend the soaked chiles with garlic, oregano, cumin, and 1 cup of the soaking liquid until smooth. Simmer the blended sauce in a pan for 10 minutes to marry the flavors.
    6-8 dried guajillo chiles, 4 cloves garlic, 1 tsp oregano, 1 tsp cumin
  3. Heat a heavy pan over medium-high heat and sear pork shoulder chunks for 3-4 minutes per side until golden brown. Work in batches if needed. Transfer seared pork to the crockpot.
    2 to 3 lbs pork shoulder
  4. Add chopped onion, blended chile sauce, and chicken or pork broth to the crockpot with the pork. Stir to combine, then cover and cook on low for 6 to 8 hours, until pork pulls apart easily.
    6 cups chicken or pork broth, 1 medium onion
  5. Add drained canned hominy to the crockpot during the last 2 hours of cooking. Stir gently to distribute the hominy throughout the broth.
    2 cans hominy
  6. Remove the lid for the last 30 minutes of cooking to let the broth reduce slightly and thicken. Shred the pork directly in the crockpot with two forks and mix back into the broth. Taste and adjust salt if needed.
    2 to 3 lbs pork shoulder
  7. Serve pozole rojo with fresh lime wedges and optional garnishes like chopped onion, cilantro, sliced radishes, or avocado slices.
    1 lime, 1 medium onion

Notes

  • Toast dried chiles to deepen flavor before blending for best taste.
  • Add hominy in the last 2 hours to keep kernels from becoming mushy.
  • Skim fat during cooking or chill and remove fat layer before reheating to avoid oily broth.
Tried this recipe?

Let us know how it was!

How Long Does Macaroni Salad Last? [Storage Guide]

March 31, 2026

Freezing macaroni salad sounds like a reasonable plan until you pull it out and find a watery, limp mess where a creamy salad used to be.

Can You Freeze Macaroni Salad

It can work - but only if you know what to remove before it goes in and how to revive it after it comes out.

Mix-ins like swapping out celery flakes or swapping out bell pepper become important decisions when you're building a salad meant to store well. Macaroni salad kept cold and properly sealed stays fresh for 3-5 days, and handled right, the freezer adds another month or two.

QUICK SUMMARY

Macaroni salad lasts 3-5 days in the fridge in an airtight container. Mayo-based versions with eggs stay closer to 3 days; vinegar-forward recipes push toward 5. Freezing works for up to 2 months, but expect softer pasta and separated dressing on the thaw.

🧊Fridge: 3-5 days in a sealed container; egg-heavy versions use within 3
❄️Freezer: 1-2 months; best texture if reworked after thawing
⚠️Counter: 2 hours max - discard after that, no exceptions

How Long Does Macaroni Salad Last?

Shelf life depends heavily on what's in the dressing. A mayonnaise-based salad that also contains hard-boiled eggs is the most time-sensitive version - plan to finish it within 3 days. Vinegar-forward dressings add acidity that slows spoilage, stretching fridge life closer to 5 days.

Knowing how long egg salad keeps gives useful context here - both dishes share the same vulnerability: cooked starch plus mayo plus eggs in a cold, sealed environment.

Temperature consistency matters too; a salad that gets pulled out and set on the counter repeatedly will degrade faster than the table below suggests.

Macaroni Salad Shelf Life
MethodStateDurationNotes
🧊 FridgeCooked3-5 days3 days for mayo/egg versions; up to 5 days for vinegar-based
❄️ FreezerCooked1-2 monthsBest within 1 month; pasta softens and dressing may separate
🏠 CounterCooked2 hours max1 hour if ambient temp exceeds 90°F
🗄️ PantryAnyNot safeNever store at room temperature - perishable dressing and cooked pasta

Fresh dill in the mix has its own clock - checking how long dill keeps can help you time the salad's overall freshness window more accurately.

How to Store Macaroni Salad

The two most common mistakes happen before the container even gets sealed. Many cooks refrigerate the salad while it's still warm, which raises fridge temperature and slows the chilling of everything around it.

Others pack it into a deep bowl, trapping heat at the center.

Golden Rule
Cool macaroni salad to room temperature within 1 hour, then refrigerate immediately. Don't leave it sitting out while guests finish eating.

Once cooled, here's how to store it for maximum life:

  • 🥣 Use a shallow airtight container - shallower depth means faster, more even chilling throughout.
  • 📦 Press plastic wrap directly onto the salad surface - this limits air contact and slows oxidation of the mayo.
  • 🏷️ Label with the prep date and a use-by date - 3 days for egg-heavy versions, 5 days for vinegar-forward recipes.
  • 🥬 Keep pickled or acidic components high in the mix - dill pickle, relish, and vinegar dressing all add acidity that extends fridge life slightly.

Counter storage is never acceptable for macaroni salad - the combination of cooked pasta, mayonnaise, and eggs creates ideal conditions for bacterial growth the moment it warms up. Two hours is the hard limit, one hour when it's hot outside.

Can You Freeze Macaroni Salad?

You can, but the result won't be the same salad you put in. Cooked elbow macaroni absorbs moisture during freezing and thaws out noticeably softer. Mayonnaise-based dressing breaks during the freeze-thaw cycle, leaving a watery, separated layer that takes effort to fix.

The better approach is to treat frozen macaroni salad as a base to rework, not a ready-to-serve dish.

Watch Out
Remove celery, bell pepper, and hard-boiled egg yolks before freezing. These become limp, watery, or grainy after thawing - add fresh replacements when you serve.
  1. Cool quickly - spread salad in a shallow pan and refrigerate until fully cold before freezing.
  2. Remove crunchy mix-ins - pull out celery, bell pepper, and hard-boiled eggs; freeze only the pasta and dressing base.
  3. Pack into freezer-safe containers - use heavy-duty freezer bags or airtight containers; remove as much air as possible and label with date.
  4. Freeze flat - laying bags flat speeds both freezing and future thawing.
  5. Thaw overnight in the fridge - never on the counter; drain any pooled liquid after thawing.
  6. Re-emulsify the dressing - whisk or fold in 1-2 tablespoons of fresh mayo or sour cream per cup of salad; let it rest 30-60 minutes before serving.

Pasta salads with vegetables follow similar rules - if you've wondered about how to freeze pasta salad with vegetables, the short answer is always: separate the fragile elements first.

Signs Macaroni Salad Has Gone Bad

Off smell is the fastest indicator. Spoiled mayonnaise mixed with cooked eggs produces a sour, rotten-egg odor that's hard to miss. If it smells at all wrong, don't taste-test it.

The visual and texture signs are just as reliable, though - the spoilage card below covers the key ones.

Signs It's Gone Bad
👀
VisualGrayish or brown pasta · Mold spots (fuzzy white or green, often at container edges) · Curdled, pooled cloudy liquid in the dressing
👃
SmellSour or rotten-egg odor · Tangy off-smell from oxidized mayo
✋
TextureSlimy coating on pasta or vegetables · Dressing broken into grainy chunks

Similar spoilage patterns show up in other cold, mayo-based salads - the potato salad spoilage signs guide covers comparable indicators if you're storing both at once. Any single sign - smell, slime, or mold - is enough reason to discard.

Don't second-guess it.

Storing Macaroni Salad the Right Way

A few habits make the difference between a salad that stays fresh all week and one that gets dumped after day two.

Shortcut
Undercook your pasta by 1-2 minutes when prepping ahead. It continues to absorb dressing in the fridge, and firmer pasta holds up much better if you decide to freeze it later.
  • 🧊 Chill before sealing - never refrigerate hot or warm salad; cool it first in a shallow pan.
  • 🥄 Boost acidity for longer fridge life - vinegar dressing or extra dill pickle relish adds a preserving edge.
  • 📋 Label every container - include both prep date and use-by date so there's no guessing later.
  • 🍽️ Rework thawed salad before serving - fresh mayo, a rest period, and any fresh crunchy add-ins bring it back close to its original state.

Planning what to serve alongside it is easier when the salad is safely stored - our pairing ideas for macaroni salad cover the full spread.

For hard-boiled eggs already in the mix, checking hard boiled eggs spoilage signs is worth a quick look before you pack leftovers away.

Frequently Asked Questions

Can you freeze macaroni salad with mayonnaise?

Yes, but the mayo will separate and turn watery after thawing. Whisk in 1-2 tablespoons of fresh mayo per cup of salad after draining excess liquid to restore creaminess.

Is it safe to eat macaroni salad after 5 days?

Only if it's vinegar-forward and stored correctly in a sealed container at consistent fridge temperature. Mayo-and-egg versions should be discarded at 3 days - don't push to 5.

How long does macaroni salad last in the fridge?

3-5 days, depending on the dressing. Mayo-based versions with hard-boiled eggs are safest at 3 days; vinegar-dressed salads without eggs can stretch to 5.

Can you freeze pasta salad with vegetables still in it?

Not recommended. Celery and bell pepper turn limp and watery after freezing; hard-boiled egg yolks go grainy. Remove them before freezing and add fresh ones after thawing.

How do you restore creamy texture to thawed macaroni salad?

Drain pooled liquid first, then fold in 1-2 tablespoons of fresh mayo or sour cream per cup of salad. Let it rest 30-60 minutes in the fridge before serving so the dressing redistributes.

Thai Basil Chicken (Pad Krapow Gai)

March 31, 2026

When you need dinner in 15 minutes that still tastes like you ordered takeout, stir-fried ground chicken with Thai basil delivers. One hot skillet, five minutes of cooking, and a handful of aromatics turn pantry staples into a spicy, fragrant meal.

Thai Basil Chicken (Pad Krapow Gai) served on a plate

The high heat does all the work. Ground chicken cooks through in under five minutes while garlic and chilies bloom into the oil.

Perfect for weeknights when you want something fast that doesn't taste like you rushed it.

QUICK SUMMARY

Thai Basil Chicken (Pad Krapow Gai) is a fast stir-fry with ground chicken, Thai holy basil, and a salty-sweet sauce. The key is cooking over high heat for 3-5 minutes to keep the meat tender while building caramelized edges. Best served over jasmine rice with a fried egg on top.

⏱️Time Reality: 10 minutes prep, 5 minutes cooking, no marinating required
🔥Critical Move: Heat wok to medium-high before adding chicken to prevent steaming
⚠️Watch Out: Add basil in the last 30 seconds or it loses bright color and aroma

Why This Recipe Works

High-heat stir-frying sears ground chicken quickly while keeping it tender instead of dry. The combination of fish sauce, oyster sauce, and a touch of sugar creates the balanced umami flavor that defines authentic Pad Krapow Gai.

Quick Reference
⏱️
Prep Time
10 min
🔥
Cook Time
5 min
⏰
Total Time
15 min
🍽️
Servings
4 servings
📊
Difficulty
Easy
🏷️
Category
Main Dish
💡
Quick Tip
Cook chicken hot and fast; add basil last
🎯
Best For
Weeknight | Meal prep | Budget

Five things that make this work:

  • Hot wok sears quickly: Heating the pan to 375°F before adding chicken prevents steaming and creates caramelized edges
  • Ground meat cooks fast: Using ground chicken instead of sliced cuts the cook time to 3-5 minutes with no marinating
  • Sauce goes in early: Adding fish sauce and oyster sauce while the chicken cooks lets the liquid reduce into a glossy coating
  • Basil stays bright: Stirring in fresh Thai holy basil during the last 30 seconds preserves its peppery, clove-like aroma
  • Balance salty and sweet: A pinch of white sugar offsets the fish sauce's saltiness and rounds out the umami flavor
Golden Rule
Never crowd the pan - cook chicken in a single layer so it sears instead of steams.

What You'll Need

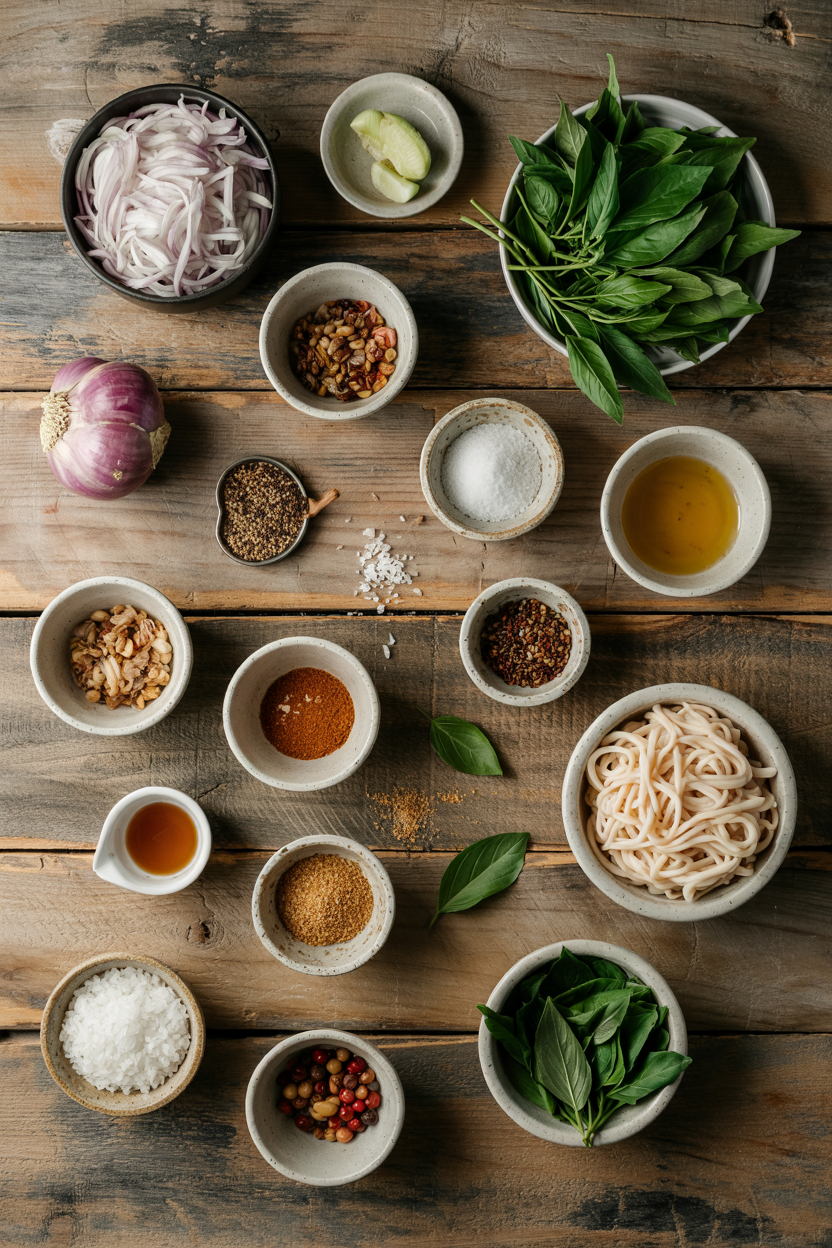
Ingredients for Thai Basil Chicken (Pad Krapow Gai)

Thai holy basil and fresh bird's eye chilies define this dish, but you can substitute sweet basil and dried chili flakes if that's what you have. For something juicy like sauce that uses similar aromatics, we make this grilled version with peanut dipping sauce when the weather's warm.

🍗
Protein
  • 1 lb ground chicken
🧄
Aromatics
  • 4-5 cloves garlic, minced
  • 2-4 bird's eye chilies, sliced thin
  • 1 shallot or small onion (optional)
🥢
Sauce
  • 2 tablespoon fish sauce
  • 1 tablespoon soy sauce
  • 1 tablespoon oyster sauce
  • 1 teaspoon white sugar
🥬
Fresh Herbs
  • 1 cup Thai holy basil leaves
  • ½ cup green beans, cut 1-inch (optional)

Ingredient Details

  • Ground chicken
    Use ground thigh meat for more flavor and moisture than breast meat
  • Thai holy basil
    Look for dark green leaves with purple stems at Asian markets; Thai sweet basil works but tastes milder
  • Bird's eye chilies
    Start with 2 chilies and taste before adding more; remove seeds to reduce heat
  • Fish sauce
    Brands like Red Boat or Three Crabs provide the cleanest salty umami flavor
  • Oyster sauce
    Lee Kum Kee is the standard; mushroom stir-fry sauce substitutes for vegetarian versions
  • Garlic
    Mince garlic just before cooking to preserve its sharp aroma; avoid pre-minced jarred garlic
  • White sugar
    Granulated white sugar balances fish sauce without adding molasses flavor like brown sugar does

Ingredient Swaps

You can swap proteins or adjust the heat level without losing the core flavor. For weeknight chicken dinner ideas that pair well with this style of fast stir-fry, we batch-cook simple sides that hold up in the fridge for quick plating.

Four swaps that work:

  • Ground chicken → ground turkey: Use 93% lean ground turkey for a slightly drier but still tender texture; cook 1 minute less to prevent drying
  • Thai holy basil → Thai sweet basil: Swap 1:1 with Thai sweet basil for a milder, anise-like flavor instead of peppery bite
  • Bird's eye chilies → red chili flakes: Replace each fresh chili with ¼ teaspoon red pepper flakes for heat without fresh aroma
  • Oyster sauce → mushroom stir-fry sauce: Use mushroom stir-fry sauce in equal amounts for a vegetarian version with earthy depth

Ground Pork or Beef

Works for: richer flavor and more fat for moisture

Skip if: you want quick cooking and mild poultry taste

Regular Sweet Basil

Works for: when Thai basil isn't available and you need fresh herbs

Skip if: you want the authentic peppery, clove-like flavor of holy basil

Instructions

The entire dish cooks in five minutes once the pan is hot. Most people skip a tender cauliflower on the side for stir-fries, but roasted vegetables add the texture contrast this plate needs without extra stovetop time.

  1. Heat wok or large skillet over medium-high heat for 2 minutes. Add 1 tablespoon neutral oil and swirl to coat the pan. The oil should shimmer but not smoke.
  2. Add minced garlic and sliced chilies to hot oil. Stir constantly for 20 seconds until fragrant but not browned. Burnt garlic tastes bitter and ruins the sauce.
  3. Add ground chicken and break into small pieces with a spatula. Stir-fry for 3-4 minutes until chicken turns opaque with no pink remaining. Don't stir constantly - let it sear for 30 seconds between stirs.
  4. Pour in fish sauce, soy sauce, oyster sauce, and sugar. Toss chicken to coat evenly and cook 1 minute until sauce reduces slightly and clings to the meat. Add green beans now if using.
  5. Turn off heat and stir in Thai basil leaves. Toss for 30 seconds using residual heat to wilt basil without cooking it fully. Serve immediately over jasmine rice.
Quick Tip
Taste the sauce after step 4 and adjust with ¼ teaspoon increments of fish sauce for more salt or sugar for sweetness.

What to Serve With It

Most people serve this over jasmine rice and stop there, but adding one more element turns it into a complete meal. For a cold milk side that balances the heat, we keep a pitcher of this sweetened Thai tea ready when making spicy stir-fries.

Side Dish Prep Why It Works How to Serve
Steamed jasmine rice Easy Neutral base absorbs spicy sauce and balances heat Spoon chicken directly over hot rice
Fried egg (sunny side up) Easy Runny yolk adds richness and traditional Thai touch Place egg on top of chicken, break yolk before eating
Quick cucumber salad Easy Cool, crisp contrast cuts through rich, spicy meat Serve on the side in small bowl
Thai papaya salad (som tam) Medium Tangy, spicy flavors complement main dish heat Serve family-style on large platter
Stir-fried morning glory Easy Simple green vegetable adds freshness without competing Plate alongside chicken or serve in separate bowl

Three ways to serve it:

  • Classic Thai style: Spoon chicken over jasmine rice, top with fried egg, serve cucumber slices on the side
  • Meal prep bowls: Divide rice and chicken into containers, pack fried egg separately to add when reheating
  • Lettuce wraps: Skip rice and spoon chicken into butter lettuce cups with fresh herbs and lime wedges
Best Pick
The fried egg isn't optional if you want the authentic version - runny yolk balances the salty sauce better than any side dish.

Store and Reheat

This holds well for meal prep if you store the rice separately from the chicken. For a creamy dip side that works with leftovers, we make this yogurt-based version to cool down reheated spicy stir-fries when the original heat feels too intense.

Method Time Best For
🍳 Stovetop 3-5 min on medium heat Best texture retention and even heating
📦 Microwave 1-2 min on high power Quick single servings, slight moisture loss
🔥 Oven 8-10 min at 350°F Reheating multiple portions at once

For best results when storing:

  • Cool quickly: Spread chicken in shallow container and refrigerate within 2 hours to prevent bacterial growth
  • Store rice separately: Keep cooked jasmine rice in separate airtight container so chicken doesn't get soggy
  • Reheat with moisture: Add 1-2 tablespoon water or chicken broth when reheating to restore sauce consistency
  • Skip freezing basil: Thai basil turns black and mushy when frozen; add fresh basil after reheating instead
  • Use within 3-4 days: Ground chicken spoils faster than whole cuts; toss if it smells off or develops slime

Frequently Asked Questions

Can I substitute ground turkey or pork for chicken in Pad Krapow?

Yes - ground turkey works but cooks drier, so reduce cook time by 1 minute. Ground pork adds richer flavor and more fat but needs 1-2 minutes longer to cook through completely.

How do I store and reheat leftover Thai Basil Chicken safely?

Store in airtight container in fridge for 3-4 days. Reheat on stovetop with 1-2 tablespoon water for 3-5 minutes or microwave for 1-2 minutes. Add fresh basil after reheating since frozen basil turns black.

How do I know when the chicken is fully cooked in Pad Krapow?

Ground chicken is done when it turns completely opaque with no pink remaining and reaches 165°F internal temperature. This takes 3-5 minutes over medium-high heat with constant stirring.

What should I do if my Pad Krapow is too salty or too spicy?

For too salty, add ½ teaspoon sugar or serve with extra rice to absorb sauce. For too spicy, stir in 1 tablespoon coconut milk or top with extra fried egg to mellow the heat.

What is the difference between holy basil and Thai basil?

Holy basil has a peppery, clove-like flavor and purple stems, while Thai sweet basil tastes milder with anise notes. Authentic Pad Krapow uses holy basil, but Thai basil works in a pinch.

Thai Basil Chicken (Pad Krapow Gai) served on a plate

Thai Basil Chicken (Pad Krapow Gai)

No ratings yet
Thai Basil Chicken (Pad Krapow Gai) is a quick and flavorful stir-fry featuring ground chicken, Thai holy basil, and a balanced salty-sweet sauce. Cooking over high heat sears the chicken in under five minutes, preserving tenderness and adding caramelized edges. Serve it hot over jasmine rice with a fried egg for an authentic meal.
Print Recipe Pin Recipe
Prep Time 10 minutes mins
Cook Time 5 minutes mins
Total Time 15 minutes mins
Servings: 4 servings
Course: Dinner, Main Dish
Cuisine: Thai
Ingredients Equipment Method Notes

Ingredients
  

  • 1 lb ground chicken Use ground thigh meat for more flavor and moisture
  • 4-5 cloves garlic minced fresh
  • 2-4 piece bird's eye chilies sliced thin; remove seeds to reduce heat
  • 1 each shallot small, optional
  • 2 tablespoon fish sauce use quality brand like Red Boat
  • 1 tablespoon soy sauce
  • 1 tablespoon oyster sauce or mushroom stir-fry sauce for vegetarian
  • 1 teaspoon white sugar granulated
  • 1 cup Thai holy basil leaves
  • 0.5 cup green beans cut into 1-inch pieces, optional

Equipment

  • Wok or large skillet Used for high-heat stir-frying the chicken and aromatics
  • Spatula For breaking up and stirring ground chicken

Method
 

  1. Heat wok or large skillet over medium-high heat for 2 minutes. Add 1 tablespoon neutral oil and swirl to coat the pan. The oil should shimmer but not smoke.
  2. Add minced garlic and sliced bird's eye chilies to the hot oil. Stir constantly for 20 seconds until fragrant but not browned.
    4-5 cloves garlic, 2-4 piece bird's eye chilies
  3. Add ground chicken and break into small pieces with a spatula. Stir-fry for 3-4 minutes until the chicken turns opaque with no pink remaining. Let it sear for 30 seconds between stirs to build caramelized edges.
    1 lb ground chicken
  4. Pour in fish sauce, soy sauce, oyster sauce, and white sugar. Toss chicken to coat evenly and cook for 1 minute until the sauce reduces slightly and clings to the meat. Add green beans now if using.
    2 tbsp fish sauce, 1 tbsp soy sauce, 1 tbsp oyster sauce, 1 tsp white sugar, 0.5 cup green beans
  5. Turn off heat and stir in Thai holy basil leaves. Toss for 30 seconds using residual heat to wilt the basil without cooking it fully. Serve immediately over jasmine rice.
    1 cup Thai holy basil leaves

Notes

  • Cook chicken in a single layer to prevent steaming and ensure caramelization.
  • Add basil last to preserve its bright flavor and aroma.
  • Taste the sauce after adding and adjust saltiness or sweetness with small increments of fish sauce or sugar.

Tried this recipe?

Let us know how it was!

How Long Does Kefir Last? [Storage Guide]

March 31, 2026

Pouring kefir straight from the fridge door is one of the most common mistakes people make with this fermented drink - temperature swings from opening and closing accelerate quality loss faster than most realize.

Can You Freeze Kefir

Like milk's shelf life, kefir follows strict cold-chain rules, and breaking that chain even briefly chips away at usable time.

Knowing the real limits - opened versus sealed, commercial versus home-fermented - means less waste and safer drinking.

QUICK SUMMARY

Unopened commercial kefir lasts 2-3 weeks in the fridge past its printed date. Once opened, use it within 7-14 days. Freeze for up to 3 months, but expect texture changes. Store cold, sealed, and away from the fridge door.

🧊Fridge (opened): 7-14 days, sealed tightly and stored on a shelf
❄️Freezer: 2-3 months best quality; up to 4 months if continuously frozen
⚠️Key Rule: Never store in the fridge door - consistent cold is critical for kefir

How Long Does Kefir Last?

Shelf life depends heavily on whether the bottle has been opened and whether you're dealing with commercial pasteurized kefir or a home-fermented batch. Commercial kefir is the more forgiving of the two.

Kefir Shelf Life
MethodStateDurationNotes
🧊 FridgeUnopened2-3 weeks past dateCheck 'use by'; smell before drinking
🧊 FridgeOpened7-14 daysSeal tightly after every pour
❄️ FreezerUnopened3-4 monthsLeave headspace if bottle is full
❄️ FreezerOpened2-3 monthsTexture changes; best for cooking or smoothies
🏠 CounterOpened4-6 hours maxDiscard if left out more than 8 hours in warm conditions

Home-fermented kefir made with kefir grains ferments and acidifies more aggressively than its commercial counterpart.

Taste it daily once it hits 24 hours in the fridge - use it sooner if you prefer a milder tang, as it won't hold for two weeks the way pasteurized versions do.

Watch Out
Home-fermented kefir does not follow commercial shelf life rules. Raw batches ferment continuously in the fridge and can become sharply sour or over-acidified well before the 7-14 day window.

How to Store Kefir

Cold storage is non-negotiable for kefir, and container choice matters more than most people expect. Whether you use kefir in cooking or drink it straight, keeping it properly sealed determines how long the bottle stays usable.

Fridge: Store on a middle or lower shelf where temperature stays most consistent - never in the door. Keep the original opaque bottle tightly capped, or transfer to an airtight glass jar after opening. Decanting into a clean jar each time you pour reduces oxygen exposure compared to dipping into the original bottle repeatedly.

Freezer: Pour into a freezer-safe container and leave 1-2 inches of headspace for expansion. Freezing in bulk works, but single-use portions are more practical.

Counter: Room temperature is only safe for the short time it takes to pour a glass. Beyond 4-6 hours, active lactic acid bacteria and yeast push fermentation into overdrive.

  • 🧴 Cap it tight - every pour exposes kefir to air and contaminants; reseal immediately.
  • 🥄 No double-dipping - avoid putting used spoons or straws back into the bottle.
  • 🏷️ Label opened bottles - write the date you opened it so you're not guessing at the two-week mark.

For container ideas, the glass sourdough starter storage jar guide covers airtight glass options that work just as well for decanting kefir portions.

Can You Freeze Kefir?

Yes - with one honest caveat. Freezing kefir is safe and extends its life by months, however the texture will not be the same after thawing.

Expect the whey to separate, leaving a grainy or watery consistency rather than the smooth, creamy pour you started with.

The drink also tends to become tangier and more effervescent as culture activity can spike during thawing.

Golden Rule
Freeze kefir for smoothies, pancake batter, soups, or baking - not for straight drinking. The texture shift is too pronounced for most people to enjoy it plain after thawing.

Here's how to freeze it properly:

  1. Portion it out - Fill silicone ice cube trays for single-use smoothie portions, or use freezer-safe containers for larger cooking batches.
  2. Leave headspace - Kefir expands when frozen; leave 1-2 inches of space at the top to prevent cracked containers.
  3. Label clearly - Write the freeze date and batch size; prioritize older batches for cooking first.
  4. Thaw in the fridge overnight - Never thaw on the counter. Slow, cold thawing limits further bacterial overactivation.
  5. Stir before using - Shake or stir gently after thawing to recombine separated whey. Use within 24-48 hours and do not refreeze.

Frozen kefir works especially well stirred into a belgian yeast waffles recipe batter, where its acidity and live cultures contribute to the lift even after freezing.

Signs Kefir Has Gone Bad

Normal kefir has a tangy, slightly yeasty smell and mild natural effervescence - those are not red flags. What you're looking for are changes that go clearly beyond that baseline.

The yogurt spoilage signs overlap somewhat, however kefir has a few markers specific to its higher yeast and bacterial activity.

Signs It's Gone Bad
👀
VisualFuzzy green, black, or blue mold patches · Brownish or off-colored streaks in curd · Slimy floating film that won't recombine after stirring
👃
SmellSharp putrid or rotten odor clearly distinct from normal tangy-yeasty scent
✋
TextureSlimy or excessively stringy mouthfeel · Doesn't smooth out when stirred

Some whey separation is entirely normal - thin liquid pooling at the top is just physics, not spoilage. If color, smell, or sliminess seems genuinely off, discard without tasting.

Getting the Most From Every Bottle

The difference between kefir lasting a week or nearly two often comes down to a few consistent habits rather than special equipment.

  • 🧊 Middle-shelf storage - consistent cold prevents the micro-temperature swings that erode quality faster than age does.
  • 🫙 Decant for portion control - pour what you need into a glass jar, then seal the original bottle immediately to cut oxygen exposure.
  • 🧪 Taste home-fermented batches daily - acidity climbs faster than commercial timelines suggest; use at your preferred tang level before it over-acidifies.
  • 🥤 Use frozen portions strategically - thawed kefir goes into smoothies, soups, or baking, where a grainy texture is unnoticeable.

If your bottle runs out before its window closes, alternatives to kefir can fill the gap in most recipes without losing the acidic lift.

The separated whey that drains from thawed kefir also has uses of its own - the whey brine for feta guide shows exactly how to put it to work rather than pouring it down the drain.

Frequently Asked Questions

How long does opened kefir last in the fridge?

Opened commercial kefir keeps 7-14 days when sealed tightly and stored on a middle shelf. Home-fermented kefir ferments faster and should be used sooner - taste it daily to gauge acidity.

Does freezing kill kefir cultures?

Freezing doesn't kill most lactic acid bacteria and yeast in kefir - it suspends them. Culture activity can actually increase when the kefir thaws, making it tangier than before freezing.

Can you freeze kefir for smoothies?

Yes - it's the best use for frozen kefir. Freeze in silicone ice cube trays for portion-ready smoothie cubes. The grainy texture after thawing blends out completely.

Is thawed kefir safe to drink straight?

It's safe, however the texture becomes grainy and the flavor sharpens noticeably. Most people find thawed kefir unpleasant to drink plain and prefer using it in cooked or blended applications.

Can you store kefir in the fridge door?

Avoid it. Door shelves experience repeated temperature swings every time the fridge opens, which speeds quality loss. A middle or lower shelf holds more consistent cold.

What Is Midori? [Taste, Uses & More]

March 31, 2026

Midori shows up in one of the most recognizable cocktails on any bar menu - the Midori Sour - yet most people have never thought much about what's actually in the bottle.

What Is Midori

That neon green color is hard to ignore, and neither is the sweetness it brings to everything it touches.

If you're drawn to liqueurs like alternatives to chambord or the citrus profile behind swapping out triple sec, Midori occupies its own lane as a melon-forward spirit unlike either of them.

QUICK SUMMARY

Midori is a sweet Japanese melon liqueur made with muskmelon, producing a syrupy, candy-bright flavor used in cocktails and desserts. Its neon green color and pronounced honeyed melon taste make it one of the most recognizable liqueurs behind any bar.

🍈Flavor: Sweet honeyed muskmelon with a candied citrus lift
🍸Best Uses: Cocktails, melon mousses, sponge soaks, dessert syrups
📦Shelf Life: Unopened: years; opened: 6-12 months at best flavor
🌡️Storage: Cool, dark place; refrigerate after opening
⚠️Note: High sugar and alcohol content - not suitable for all diets

What Is Midori?

Midori is a melon liqueur first introduced in 1978 at Studio 54 in New York City - launched by Japanese drinks company Suntory.

The name means "green" in Japanese, which explains both the color and the branding.

It's produced in Japan from two prized Japanese muskmelon varieties, yubari and musk, which are blended with neutral grain spirit and sweeteners to create the finished liqueur.

The result is a bright, neon green bottle that has become iconic in Western cocktail culture. Alcohol by volume sits around 20-21%, placing it firmly in the lower-proof liqueur category - sweeter and less boozy than base spirits.

Unlike fruit liqueurs made from berry or citrus, Midori is specifically built around the rich, almost syrupy character of premium Japanese melon.

No major alternate varieties exist - it's a single product line - however some bartenders compare the flavor profile to homemade melon simple syrup, and understanding the differences between agave vs simple syrup helps clarify why Midori reads sweeter and denser than either.

What Does Midori Taste Like?

midori - What Is Midori

Midori tastes like ripe cantaloupe syrup that's been given a candy-bright edge and a faint citrus lift on the finish. The sweetness is forward and immediate - there's no mistaking it for a dry spirit.

Sensory SnapshotModerate Intensity
👅 Flavor
honeyed meloncandied citruslight floral
✋ Texture
syrupysmooth
👃 Aroma
pronounced melonfloral candy

A common question is whether Midori tastes like watermelon - it doesn't. Watermelon is lighter and more watery; muskmelon delivers that denser, honeyed richness that Midori replicates well.

The floral note is subtle, emerging more in the aroma than on the palate, and it fades quickly once Midori is mixed into a drink.

Golden Rule
The sweeter the mixer, the more Midori disappears - pair it with tart citrus or sparkling dry wine to let the melon flavor read clearly.

How to Use Midori

Cocktails are Midori's home territory. The Midori Sour - shaken with fresh lime juice and a touch of simple syrup - is the standard entry point, balancing the liqueur's sweetness against sharp citrus. Tropical builds like the Green Hawaiian layer Midori with light rum and pineapple juice. Even a simple melon spritz, built with Midori and dry sparkling wine, shows how well it performs with minimal effort.

Beyond the bar, Midori works in dessert applications with some care. Brushing it onto sponge cake layers adds both moisture and melon flavor without making the crumb soggy, similar to how a flavored simple syrup would be used.

Folded cold into lightly whipped cream or mascarpone, it produces a melon mousse that sets well and holds the flavor.

How Midori Is Used
MethodBest ForTip
🍸 Shaken/StirredMidori Sour, tropical cocktails, melon spritzUse fresh citrus - bottled juice flattens the melon note
🔥 Reduced to SyrupGlazing pastries, drizzling over fruit saladsReduce gently on low heat; high heat burns off aroma quickly
🎂 Sponge SoakMelon trifle, layered cakesBrush lightly - Midori is very sweet and can oversaturate
🍨 Folded ColdMelon mousse, whipped cream, mascarponeKeep the base cold so the mousse sets without separating

Fresh berries, mint, and lime are its closest flavor allies.

Midori also pairs cleanly with vodka, tequila blanco, and light rum - spirits without much barrel influence that let the melon come through.

If you can't source Midori, a guide to swapping out midori covers the closest alternatives for both cocktail and dessert use.

Avoid pairing it with heavily savory reductions or bitter amaro-style spirits - the sweetness clashes badly.

Try It In
🍋Lemon Mint Iced TeaThe citrus-mint base pairs well with a Midori splash→☕Lemon Mint Cold Brew CoffeeBright citrus notes echo Midori's lift in cold drinks→🍫Lemon Mint Hot ChocolateShows how sweet liqueurs layer into warm dessert drinks→

How to Buy and Store Midori

Genuine Midori is labeled as a product of Japan - check the bottle's back label if you're unsure.

The color should be a consistent, bright neon green throughout; avoid any bottle showing cloudiness or visible sediment, as these indicate quality issues.

Similar due diligence applies when shopping for other fruit liqueurs: the same principles used when swapping out cointreau - checking proof, country of origin, and clarity - apply here.

Quick Tip
Refrigerate Midori after opening. The aroma fades faster at room temperature, and cool storage slows evaporation through the seal.

Store unopened bottles upright in a cool, dark place, away from direct light or heat sources.

Once opened, Midori holds best flavor for 6-12 months, though it remains safe to use longer if kept sealed and cool.

For a full breakdown of what changes over time, check our guide to midori spoilage signs before using a bottle that's been sitting open.

Starting Points for Midori

If you're new to it, build a Midori Sour first - fresh lime juice, a measure of Midori, and ice. That single drink shows the liqueur's range more clearly than any description can.

For dessert use, start with a melon soak on plain sponge cake - it's low risk and the flavor lands well.

  • 🍸 First cocktail - Midori Sour with fresh lime; no other mixer needed to start
  • 🎂 First dessert use - brush diluted Midori onto sponge cake as a soak
  • 🍈 Flavor reference - think ripe cantaloupe with extra sweetness; if fresh melon isn't your thing, consider [cantaloupe swaps that work](https://forkliftkitchen.com/cantaloupe-substitutes/) for a milder route
  • ⚠️ Use restraint - one ounce is usually enough; more tips the balance too sweet
Watch Out
Midori is high in sugar. Stacking it with sugary mixers - sodas, juice blends, sweet wines - produces a drink that masks the melon and tastes flat.

Frequently Asked Questions

Is Midori alcoholic?

Yes. Midori contains approximately 20-21% ABV, placing it in the standard liqueur range. It's lower proof than most base spirits but still a significant alcohol source in cocktails.

Does Midori taste like watermelon?

No - Midori is based on Japanese muskmelon, not watermelon. The flavor is denser, sweeter, and more honeyed than watermelon's lighter, watery profile.

Can Midori be used in desserts?

Yes. It works well folded into whipped cream, used as a sponge soak, or reduced gently into a glaze for pastries. Keep quantities small - it's very sweet and can dominate.

What cocktails use Midori?

The Midori Sour is the most common, built with lime juice and optional simple syrup. It also appears in the Green Hawaiian, Japanese Slipper, and various tropical layered drinks.

How long does Midori last once opened?

Opened Midori holds best flavor for 6-12 months when refrigerated and sealed. The melon aroma degrades first, followed by a flattening of the overall flavor.

What Is Linseed Oil? [Taste, Uses & More]

March 31, 2026

Drizzle linseed oil over a bowl of roasted beets and watch it settle into the crevices - nutty, faintly green, with a sharpness that olive oil never delivers.

What Is Linseed Oil

This is a finishing oil, not a cooking medium, and knowing that distinction is what separates a ruined pan from a genuinely good dressing.

It shares some common ground with walnut oil stand-ins and swapping out hemp oil when exploring cold-pressed seed oils, but linseed oil has its own character worth understanding on its own terms.

QUICK SUMMARY

Linseed oil (also sold as flaxseed oil) is a cold-pressed seed oil with a nutty, grassy flavor and a bitter finish. Use it raw as a finishing oil - over vegetables, in dressings, or stirred into purees. It degrades at heat, so keep it refrigerated and use it within six to eight weeks of opening.

🌿Flavor: Nutty and grassy with a sharp, slightly bitter finish
🫙Best Use: Finishing oil for salads, roasted vegetables, and cold sauces
🚫Avoid: High-heat cooking - it smokes and breaks down quickly
❄️Storage: Refrigerate after opening; use within 6-8 weeks
💊Nutrition: Rich in plant omega-3 ALA; calorie-dense pure fat, no EPA/DHA

What Is linseed oil?

Linseed oil is cold-pressed from the seeds of flax (Linum usitatissimum), a plant cultivated across temperate Eurasia for thousands of years.

The food-grade version - often labeled flaxseed oil on retail shelves - is pressed without heat to preserve its polyunsaturated fat profile and distinct flavor compounds.

The two names refer to the same oil. "Linseed" is the traditional industrial term used for paints and wood treatments, while "flaxseed oil" signals the edible, food-grade product. Always confirm you're buying the edible version.

Most bottles are golden-amber in color and sold in dark glass to slow light-induced oxidation. A few varieties differ slightly in flavor intensity depending on the flax variety and pressing conditions, however the core profile remains consistent.

  • 🌱 Origin - Temperate Eurasia; now cultivated globally in Canada, Russia, and Kazakhstan
  • 🏷️ Also called - Flaxseed oil, flax oil, edible linseed oil
  • 🧴 Category - Cold-pressed seed oil, high in polyunsaturated fats
  • ⚠️ Key distinction - Industrial linseed oil is NOT edible; always buy food-grade

What Does linseed oil Taste Like?

linseed oil - What Is Linseed Oil

Linseed oil leads with a nutty, slightly grassy flavor - not the mild, buttery roundness you get from olive oil, but something greener and more assertive.

The mid-palate is slick and coating, and then a bitter, slightly astringent finish arrives that lingers longer than most oils.

It tastes closest to raw walnut oil but with a sharper herbal edge, or to fresh hemp oil but without the earthy depth. Freshness matters enormously here.

An oil past its prime develops a fishy or paint-like off-note - a sign of oxidation, not a normal characteristic of the oil.

Sensory SnapshotModerate Intensity
👅 Flavor
nuttygrassybitter finishastringent
✋ Texture
viscouspalate-coating
👃 Aroma
fresh-cut haymildly nutty
Watch Out
A fishy or paint-like smell is oxidation, not normal flavor. If your opened bottle smells off, discard it - rancid oil won't improve in a dish.

How to Use linseed oil

Linseed oil belongs in cold and room-temperature applications only. Its low smoke point and high polyunsaturated fat content mean it degrades fast under heat, losing both flavor and nutritional value.

Add it after cooking, not during.

In Northern and Eastern European kitchens - Baltic and Scandinavian especially - it appears as a finishing drizzle over boiled potatoes, rye bread, and beet salads.

Those pairings work because the oil's grassy bitterness cuts through starchy, earthy vegetables without overwhelming them.

If you need a swap for a different finishing oil, ideas for swapping out olive oil apply to similar low-heat contexts.

How Linseed Oil Is Used
MethodBest ForTip
🥗 Raw DrizzleRoasted beets, boiled potatoes, rye breadAdd just before serving; heat kills the flavor
🥣 Stirred InMashed potatoes, purees, yogurt bowlsSwirl in off-heat for sheen and omega-3 boost
🫙 DressingsVinaigrettes, gremolata-style cold saucesPair with lemon or apple cider vinegar to balance bitterness
🥤 BlendedSmoothies, cold marinades for smoked fishUse sparingly - flavor is assertive in liquid preparations

Linseed oil pairs naturally with dill, lemon, and smoked fish - a combination that appears across Scandinavian-inspired cooking. For anyone exploring alternatives, a look at linseed oil stand-ins covers oils that can approximate the same nutty-grassy profile in dressings.

Try It In
🍰Olive Oil CakeSwap a portion of olive oil to add a nutty, grassy edge→🍋Ricotta with Lemon and Olive OilFinish with linseed oil for a sharper, greener note→🫙Labneh with Olive Oil and Za'atarLinseed oil's bitterness plays well against tangy labneh→

How to Buy and Store linseed oil

At the store, look for bottles labeled "cold-pressed" and "food-grade" - both terms should appear on the label. A good bottle is golden-amber, clear, and housed in dark glass.

Avoid anything cloudy, very dark brown, or with a smell you can detect through the sealed cap.

Best Pick
Cold-pressed flaxseed oil in a dark glass bottle, refrigerated at the store, is the freshest option - it's already been stored correctly before you buy it.

Once opened, refrigerate immediately and keep the cap tight. Oxidation is the main enemy, and **storing linseed oil correctly](https://forkliftkitchen.com/linseed-oil-shelf-life/) makes a significant difference to both flavor and omega-3 retention over time.

  • Unopened - Store in a cool, dark place; good for roughly 6-12 months
  • Opened - Refrigerate and use within 6-8 weeks for best flavor
  • Discard if - You detect any fishy, painty, or sour off-smell

Start With a Small Bottle

Linseed oil is a commitment only if you buy more than you'll use.

Start with the smallest available bottle, keep it cold, and reach for it over roasted root vegetables or stirred into a vinaigrette with lemon and dill.

Understanding walnut oil in cooking helps frame how linseed oil fits - both are delicate, cold-use oils, however linseed is sharper and more nutritionally focused.

Use it cold, use it fresh, and use it within weeks of opening.

Golden Rule
Never heat linseed oil. Add it after cooking, not before. That single rule covers almost every mistake people make with this oil.

Frequently Asked Questions

Is linseed oil the same as flaxseed oil?

Yes, they're the same oil from the same plant. "Linseed" is the traditional industrial term; "flaxseed oil" signals the food-grade, edible product. Always confirm the label says food-grade or edible before using it in cooking.

Can you cook with linseed oil?

Not with direct heat. Its low smoke point and high polyunsaturated fat content cause it to break down quickly when heated, producing off-flavors. Use it only as a finishing oil, added after cooking is done.

How long does flaxseed oil last once opened?

About 6-8 weeks when refrigerated and tightly sealed. Unopened bottles kept in a cool, dark place last 6-12 months. Discard earlier if you detect any fishy or paint-like smell.

Does linseed oil taste fishy?

Fresh linseed oil doesn't taste fishy - that smell indicates oxidation and rancidity. A good, fresh bottle tastes nutty and grassy with a bitter edge. The fishy note is a sign to discard it.

How do you tell if linseed oil is rancid?

Smell it. Rancid linseed oil develops a distinct fishy, painty, or sour odor that's easy to identify. Taste confirmation isn't needed - if the smell is off, the oil is past use.

Mexican Chilaquiles Rojos

March 31, 2026

When brunch calls for something bright and comforting but you only have 30 minutes, chilaquiles rojos delivers. Crispy fried tortilla chips tossed in smoky red chile sauce with creamy cheese and fresh toppings. The sauce soaks in just enough to soften the chips without turning them mushy.

Mexican Chilaquiles Rojos served on a plate

You need one skillet and a blender. The tortillas fry in 2-3 minutes, the sauce simmers for 10, and the final toss takes 1 minute.

Perfect for weekend mornings when you want a hearty Mexican breakfast that feels special but doesn't require planning ahead.

QUICK SUMMARY

Mexican chilaquiles rojos starts with crispy fried corn tortilla chips tossed in a smoky red chile sauce until the edges soften but the centers stay slightly firm. The key is maintaining 350°F oil temperature when frying and simmering the sauce until it thickens enough to coat each chip without pooling at the bottom.

⏱️Time Reality: 15 minutes prep, 15-20 minutes cooking - doable on a weekday morning if you prep the sauce the night before
🔥Critical First Move: Heat oil to exactly 350°F before adding tortilla triangles - too cool makes them greasy, too hot burns them
⚠️Watch Out: Toss chips in sauce for only 1-2 minutes off heat - longer soaking turns them soggy instead of tender

Table of Contents

Toggle
  • Why This Recipe Works
  • What You'll Need
    • Ingredient Details
  • Ingredient Swaps
  • What to Serve With It
  • Store and Reheat
  • Frequently Asked Questions
  • Mexican Chilaquiles Rojos
    • Method 
    • Tried this recipe?

Why This Recipe Works

Frying corn tortillas in 350°F oil for 2-3 minutes creates crispy edges that hold up when tossed with sauce. Simmering the red chile sauce for 10-15 minutes concentrates the flavors and thickens it enough to cling without making the chips waterlogged. Rich mains need something to cut through, and corn does exactly that. For a version that comes together quickly, try this easy corn side.

Quick Reference
⏱️
Prep Time
15 min
🔥
Cook Time
15-20 min
⏰
Total Time
30-35 min
🍽️
Servings
4 servings
📊
Difficulty
Medium
🏷️
Category
Main Dish
💡
Quick Tip
Fry tortillas until crisp but not dark brown
🎯
Best For
Weeknight | Brunch | Budget meals

Here's what makes it work:

  • Day-old corn tortillas fry crispier - fresh tortillas contain too much moisture and turn limp instead of crunchy when fried
  • Medium oil temperature prevents greasy chips - oil at 350°F crisps the exterior before the interior absorbs excess fat
  • Simmering the sauce uncovered concentrates flavor - 10-15 minutes of gentle bubbling reduces water content and deepens the smoky chile taste
  • Tossing chips in sauce off heat preserves texture - residual heat softens the chips just enough without turning them mushy
  • Adding cheese and toppings last keeps them fresh - queso fresco and cilantro sprinkled right before serving stay distinct instead of melting into the sauce
Quick Tip
Cut tortillas into 1.5-inch triangles for even frying - smaller pieces burn, larger ones stay floppy in the center

What You'll Need

Ingredients for Mexican Chilaquiles Rojos

Most people skip burritos, but it balances the meal. The chips need firm structure to survive the sauce, so use corn tortillas that have been sitting out for a day or bake fresh ones at 350°F for 5 minutes to dry them. We keep a batch ready for nights like this - try this quick burritos dish.

🌽
Base
  • 8-10 corn tortillas (day-old or dried)
  • 1 cup vegetable oil for frying
🌶️
Red Chile Sauce
  • 4-5 dried guajillo or ancho chiles
  • 1 medium onion, chopped
  • 3 garlic cloves
  • 1 cup chicken or vegetable broth
🧀
Toppings
  • ½ cup queso fresco or cotija cheese
  • ¼ cup Mexican crema (optional)
  • 2 eggs per serving (optional)
🌿
Fresh Garnish
  • ½ cup cilantro, chopped
  • ¼ white onion, thinly sliced
  • 1 lime, cut into wedges

Ingredient Details

  • Corn tortillas
    Use day-old tortillas or dry fresh ones in a 350°F oven for 5 minutes - they fry crispier and absorb less oil
  • Dried guajillo or ancho chiles
    Toast in a dry skillet for 30 seconds per side until fragrant, then soak in hot water for 10 minutes before blending
  • Vegetable oil
    Heat to 350°F measured with a thermometer - drop a tortilla scrap in to test, it should sizzle immediately
  • Queso fresco or cotija
    Crumble cheese fresh and add right before serving so it stays distinct instead of melting into the sauce
  • Mexican crema
    Drizzle sparingly - 1 tablespoon per serving cools the chile heat without drowning the chips
  • Eggs
    Fry or scramble separately on medium-low heat for 3-4 minutes - add to the plate at the end to avoid overcooking
  • Cilantro and onion
    Chop 10 minutes before serving and keep at room temperature for maximum aroma and crunch

Ingredient Swaps

Day-old corn tortillas give the best texture, but fresh ones work if you dry them first. If you need to make substitutions, focus on keeping the sauce thick and the chips crispy. Swap flour tortillas only as a last resort - they soften too fast and lose the traditional corn flavor.

Four swaps that work:

  • Corn tortillas → flour tortillas - softer texture and less authentic, but usable in a pinch if you reduce sauce-tossing time to 30 seconds
  • Dried chiles → store-bought enchilada sauce - skip the blending step but expect sweeter, less smoky flavor and check salt levels
  • Vegetable oil → olive oil for frying - stronger flavor that may overpower the chiles, and burns faster above 375°F
  • Queso fresco → feta or ricotta salata - similar saltiness but feta is tangier and ricotta salata is firmer, both crumble well

Frying vs. Baking Tortillas

Works for: Baking cuts oil and time (400°F for 10 minutes) if you want a lighter dish

Skip if: You want maximum crispiness - baked chips turn leathery when tossed in sauce

Fresh Tomatoes vs. Dried Chiles

Works for: Fresh tomatoes add brightness and skip the soaking step if you blend with onion and garlic

Skip if: You want smoky depth - tomatoes make a lighter, sweeter sauce that tastes more like salsa

Instructions

Frying the tortillas takes 2-3 minutes per batch, simmering the sauce takes 10-15 minutes, and the final toss happens in 1 minute. The tea works best when it hits the table at the same time as the main. We keep a batch ready for nights like this - try a simple complementary side.

  1. Cut tortillas into triangles and heat oil to 350°F in a large skillet - stack 2-3 tortillas, slice into 6-8 wedges, then heat oil over medium-high heat for 3-4 minutes until a tortilla scrap sizzles immediately when dropped in
  2. Fry tortilla triangles in batches for 2-3 minutes until golden and crisp - add 8-10 pieces at a time without crowding, flip halfway through, then drain on paper towels and sprinkle with salt while hot
  3. Blend toasted chiles with onion, garlic, and broth until smooth - toast dried chiles in a dry pan for 30 seconds per side, soak in hot water for 10 minutes, then blend with sautéed onion, garlic, and 1 cup broth for 60 seconds
  4. Simmer sauce in the skillet for 10-15 minutes until thickened - pour blended sauce into the same skillet used for frying (wipe clean first), cook over medium heat uncovered, stirring occasionally until reduced by one-third
  5. Toss fried chips in sauce off heat for 1-2 minutes - remove skillet from burner, add all fried chips, toss with tongs until edges soften but centers stay slightly firm, then plate immediately and top with cheese, crema, cilantro, onion, and optional fried eggs
Watch Out
Don't leave chips in the sauce longer than 2 minutes - they continue softening on the plate, and over-tossing turns them into mush

What to Serve With It

Chilaquiles rojos needs sides that add freshness or protein without competing with the chile sauce. A dollop of dare takes each bite somewhere more interesting, but timing matters. For a version that comes together quickly, check out these hash browns meal planning ideas.

Side Dish Prep Why It Works How to Serve
Fresh sliced avocado Easy Creamy texture cools the chile heat Slice 1 avocado, fan on the side of the plate
Black beans Easy Adds protein and earthy flavor Warm 1 cup canned beans with cumin, serve in a small bowl
Simple green salad Easy Fresh crunch balances the rich sauce Toss romaine with lime juice and olive oil
Pico de gallo Medium Fresh tomato brightness cuts through richness Chop tomatoes, onion, cilantro, lime - serve chilled
Refried beans Medium Traditional comfort pairing with creamy texture Heat canned beans with a splash of broth, mash smooth

Three ways to serve it:

  • Weekend brunch spread - plate chilaquiles with fried eggs on top, refried beans on the side, and a pitcher of jamaica (hibiscus tea)
  • Quick weeknight breakfast - serve chilaquiles alone with sliced avocado and a squeeze of lime for a 10-minute meal
  • Brunch gathering - set out bowls of crema, cheese, cilantro, and pickled jalapeños so guests can build their own plates
Best Pick
Pair chilaquiles with Mexican crema and pickled jalapeños - the cool dairy and tangy heat balance the smoky chile sauce without adding bulk

Store and Reheat

Chilaquiles rojos lasts 3-4 days in the fridge but loses crispiness after the first day. Store fried chips and sauce separately in airtight containers to slow the softening process. A good chocolate can make or break the plate. For a version that comes together quickly, try this simple chocolate recipe.

Method Time Best For
🍳 Stovetop 5-7 min Small portions - heat sauce in a skillet, add chips, toss for 2 minutes
🔥 Oven 10 min at 350°F Larger batches - spread on a sheet pan, bake until edges crisp slightly
📦 Microwave 1-2 min Quick reheating when texture doesn't matter - chips will soften completely

For best results when storing:

  • Separate chips from sauce - store fried tortilla chips in an airtight container at room temperature for up to 2 days, sauce in the fridge for 4 days
  • Reheat sauce first, then toss - warm sauce in a skillet before adding chips so you control how much they soften
  • Add fresh toppings after reheating - cheese, crema, cilantro, and onion should go on right before serving to maintain texture and flavor
  • Freeze sauce only - red chile sauce freezes well for up to 1 month, but fried chips turn soggy when frozen and thawed
  • Skip reheating eggs - if you stored chilaquiles with eggs on top, discard the eggs and fry fresh ones when serving leftovers

Frequently Asked Questions

Can I make chilaquiles ahead and reheat?

Store the fried chips and sauce separately - chips at room temperature in an airtight container for up to 2 days, sauce in the fridge for 4 days. Reheat the sauce in a skillet, then toss the chips in right before serving to control texture.

How do I keep the tortillas crispy after mixing with sauce?

Toss the fried chips in sauce off heat for only 1-2 minutes - this softens the edges while keeping the centers slightly firm. Serve immediately because chips continue softening on the plate.

What temperature is ideal for frying tortillas?

Heat oil to 350°F measured with a thermometer - oil that's too cool makes greasy chips, too hot burns them. Drop a tortilla scrap in to test; it should sizzle immediately and turn golden in 2-3 minutes.

Can I substitute flour tortillas for corn in chilaquiles rojos?

Flour tortillas work as a last resort but soften too fast and lack the traditional corn flavor. If you use them, reduce sauce-tossing time to 30 seconds and serve immediately.

What sides traditionally accompany chilaquiles?

Fresh sliced avocado, refried beans, and fried eggs are the most common sides. For brunch gatherings, add pico de gallo and Mexican crema so guests can customize their plates.

Mexican Chilaquiles Rojos served on a plate

Mexican Chilaquiles Rojos

No ratings yet
Mexican Chilaquiles Rojos features crispy fried corn tortilla chips tossed in smoky red chile sauce with creamy cheese and fresh toppings. The sauce softens the edges of the chips without making them soggy, creating a bright and comforting breakfast or brunch dish.
Print Recipe Pin Recipe
Prep Time 15 minutes mins
Cook Time 15 minutes mins
Total Time 30 minutes mins
Servings: 4 servings
Course: Breakfast, Brunch, Main Dish
Cuisine: Mexican
Ingredients Equipment Method Notes

Ingredients
  

  • 8-10 count corn tortillas day-old or dried
  • 1 cup vegetable oil for frying; heat to 350°F
  • 4-5 count dried guajillo or ancho chiles toasted and soaked
  • 1 medium onion chopped
  • 3 cloves garlic
  • 1 cup chicken or vegetable broth
  • 0.5 cup queso fresco or cotija cheese crumbled, add before serving
  • 0.25 cup Mexican crema optional, drizzle sparingly
  • 8 count eggs optional, 2 per serving
  • 0.5 cup cilantro chopped fresh
  • 0.25 cup white onion thinly sliced
  • 1 count lime cut into wedges

Equipment

  • Skillet Used for frying tortillas and simmering the sauce
  • Blender Used to blend toasted chiles with onion, garlic, and broth

Method
 

  1. Cut tortillas into 1.5-inch triangles by stacking 2-3 tortillas and slicing each into 6-8 wedges. Heat vegetable oil to 350°F in a large skillet over medium-high heat, testing by dropping a tortilla scrap-it should sizzle immediately.
    8-10 count corn tortillas, 1 cup vegetable oil
  2. Fry tortilla triangles in batches, adding 8-10 pieces at a time without crowding. Fry for 2-3 minutes until golden and crisp, flipping halfway through. Drain on paper towels and sprinkle with salt while hot.
    8-10 count corn tortillas, 1 cup vegetable oil
  3. Toast dried chiles in a dry skillet for 30 seconds per side until fragrant. Soak in hot water for 10 minutes. Sauté chopped onion and garlic, then blend soaked chiles, onion, garlic, and broth until smooth (about 60 seconds).
    4-5 count dried guajillo or ancho chiles, 1 medium onion, 3 cloves garlic, 1 cup chicken or vegetable broth
  4. Pour blended sauce into the cleaned skillet used for frying. Simmer uncovered over medium heat for 10-15 minutes, stirring occasionally until the sauce thickens and reduces by one-third.
  5. Remove skillet from heat. Add all fried tortilla chips to the sauce and toss gently with tongs off heat for 1-2 minutes, until edges soften but centers stay slightly firm.
  6. Plate the chilaquiles immediately and top with crumbled queso fresco, Mexican crema if using, chopped cilantro, thinly sliced onion, lime wedges, and optionally served with fried or scrambled eggs.
    0.5 cup queso fresco or cotija cheese, 0.25 cup Mexican crema, 8 count eggs, 0.5 cup cilantro, 0.25 cup white onion, 1 count lime

Notes

  • Use day-old or dried corn tortillas for crispier chips; fresh tortillas dry-baked at 350°F for 5 minutes also work.
  • Keep oil temperature at 350°F for optimal crispiness and to avoid greasy or burnt chips.
  • Toss chips in sauce off heat for only 1-2 minutes to maintain firm centers and prevent sogginess.

Tried this recipe?

Let us know how it was!

What Is Marshmallow? [Taste, Uses & More]

March 31, 2026

Most people assume marshmallow is just sugar in pillow form - a one-note sweetness with nothing interesting going on beneath the surface.

What Is Marshmallow

That reading misses the point.

The aerated structure, the vanilla-forward baseline, and how dramatically the flavor shifts under heat make marshmallow one of the more nuanced confections in everyday cooking.

Whether it's floating in a lemon mint hot chocolate recipe or forming the sticky base of a no-bake bar, marshmallow behaves differently depending on how you treat it - and comparing vanilla extract vs vanilla powder options shows just how much the vanilla note in marshmallow can anchor or compete with other ingredients.

QUICK SUMMARY

Marshmallow is a pillowy aerated sugar confection with a mild vanilla flavor and a spongy, dissolve-on-the-tongue texture. It comes as soft pillows, minis, roasting-size pieces, or spreadable creme. Best used in s'mores, hot chocolate, no-bake bars, and sweet potato toppings.

🍬Category: Aerated sugar confection, confectionery
👅Flavor: Sweet, vanilla-forward, light caramel when toasted
✋Texture: Pillowy, springy, dissolves on tongue; chewy when melted
🔥Best Uses: S'mores, hot chocolate, rice krispie treats, sweet potato
📦Shelf Life: Months unopened; several weeks once opened if kept dry
🌱Dietary Note: Contains gelatin - not vegetarian; vegan versions use agar or carrageenan

What Is Marshmallow?

Marshmallow is an aerated sugar confection built from sugar, water, air, and a gelling agent - traditionally gelatin, which gives it the characteristic springy, foam-like structure.

The name traces back to Althaea officinalis, the marshmallow plant, whose root sap was used in early medicinal confections in ancient Mediterranean cultures.

Modern marshmallow as we know it developed in France and the United States, where corn syrup replaced plant extract and industrial whipping made mass production possible.

Standard marshmallows come in several forms. Regular pillows and oversized roasting marshmallows suit campfire or torch applications.

Mini marshmallows dissolve faster in hot drinks and mix evenly into baked goods.

Marshmallow creme - sold in jars under names like Fluff - is a stabilized, spreadable version without the same gelatin structure. It pipes into frostings, folds into mousses, and layers directly onto desserts without needing to melt first. If you're working without the standard product, knowing your replacements for marshmallow matters, since creme and solid forms aren't always interchangeable.

Watch Out
Standard marshmallows contain gelatin derived from animal collagen. They are not vegetarian or vegan. Look for brands using agar or carrageenan if you need a plant-based version.

Vegan marshmallows have improved significantly in texture, though some brands using agar agar behave differently under heat - agar agar's flavor and uses explains why it sets firmer and may not melt as smoothly as gelatin-based products.

What Does Marshmallow Taste Like?

marshmallow - What Is Marshmallow

At room temperature, marshmallow tastes like clean, sweet sugar with a mild vanilla custard undertone. It's not sharp or acidic - the sweetness is round and soft, closer to spun sugar than hard candy.

There's a faint dairy-like note, likely from the combination of gelatin and vanilla flavoring used in most commercial versions.

Sensory SnapshotMild Intensity
👅 Flavor
SweetVanilla-forwardLight caramel (toasted)Creamy undertone
✋ Texture
PillowySpringyDissolves on tongue
👃 Aroma
Sweet vanillaToasted sugar (when browned)

Heat changes everything. Toasted marshmallow develops a browned outer shell through the Maillard reaction, producing flavors that genuinely resemble light caramel or crème brûlée.

The interior stays molten and stretchy, creating a contrast between the caramelized crust and the hot, sticky core.

That shift - from one-dimensional sweetness to something with real depth - is why roasting marshmallows over an open flame remains compelling well past childhood.

How to Use Marshmallow

Marshmallow functions as both a standalone ingredient and a structural component in no-bake recipes. How you apply heat determines which role it plays.

How Marshmallow Is Used
MethodBest ForTip
🥗 No HeatHot chocolate topping, cake decorating, garnishUse minis for faster melt in drinks; keep pieces dry to prevent sticking
🔥 Roasting / TorchS'mores, campfire desserts, torch-finished tartsRotate slowly for even browning; don't rush or the outside burns before the core melts
🍳 Stovetop MeltRice krispie treats, marshmallow frosting, candy barsLow heat and constant stirring prevent scorching; add butter first to coat the pan
🍠 Oven / BroilSweet potato casserole, baked s'mores barsBroil on high for 60-90 seconds only - they brown fast and collapse if left too long

Classic pairings lean on contrast. Milk or dark chocolate cuts through the sweetness with bitterness; graham crackers add crunch and a faint honey note that balances the foam. Peanut butter adds fat and salt.

Espresso works particularly well with marshmallow creme in frosting, since the bitterness grounds the sugar without overpowering it.

American cooking owns most marshmallow applications - s'mores, sweet potato casserole, and rice krispie treats are all distinctly American. However, pastry and confectionery traditions worldwide use marshmallow-style aerated sugar under different names.

Modern dessert menus sometimes feature torch-finished marshmallow as a plated component, borrowing from s'more aesthetics without the campfire context.

Avoid pairing marshmallow with strong savory herbs or acidic dressings. Both collapse the foam structure and clash with the vanilla base.

If you're building a s'more variation and the cracker base isn't available, swapping out graham cracker opens up useful alternatives without disrupting the overall balance.

Try It In
🍠Sweet Potato MashA base that pairs naturally with broiled marshmallow topping→🍫Rice Krispie TreatsClassic stovetop melt where marshmallow is the binding agent→🌰Cinnamon Sugar Roasted NutsWarm spice notes that complement toasted marshmallow's caramel edge→

How to Buy and Store Marshmallow

Choose bags where the marshmallows are plump, evenly white, and not clumped together. Sticky masses or powdered-sugar-damp clumps signal moisture exposure.

For roasting, buy oversized or labeled "roasting" marshmallows - they hold their shape longer on a skewer. Minis work for drinks and baking.

Marshmallow creme should look glossy and spreadable, not separated or grainy.

Shortcut
Add a piece of parchment or wax paper inside an opened bag before resealing. It prevents the pieces from fusing together and saves you from pulling apart a brick of marshmallows later.

Store unopened bags in a cool, dry pantry away from humidity. Once opened, reseal tightly or transfer to an airtight container.

A detailed breakdown of marshmallow's shelf life covers the full timeline, but the short version is: commercial marshmallows last months unopened and several weeks once the bag is open, provided they stay dry.

Most commercial recipes use corn syrup to prevent crystallization and keep texture smooth; if you're making marshmallows from scratch, alternatives to corn syrup covers what works and what doesn't in aerated confections.

Start Here Based on What You Need

Marshmallow is not a single-use ingredient, and the form you choose matters more than most people realize.

  • 🔥 For roasting and s'mores - Buy oversized roasting marshmallows and use an open flame or culinary torch; minis burn too fast.
  • 🍫 For no-bake bars and rice krispie treats - Regular marshmallows melted over low heat with butter produce the cleanest, most consistent result.
  • 🎂 For frosting or mousse - Use marshmallow creme directly from the jar; it incorporates without remelting and holds structure better than melted solids.
  • 🌱 For vegan cooking - Check labels specifically for agar- or carrageenan-based versions, since performance under heat differs from gelatin marshmallows.

The right form, treated correctly, does exactly what you need. The wrong one makes a mess.

Frequently Asked Questions

What is marshmallow made of?

Sugar, water, air, and a gelling agent - typically gelatin - are the core components. Corn syrup is added to prevent crystallization, and vanilla flavoring gives it the signature taste.

Are marshmallows vegetarian?

Standard marshmallows are not. They contain gelatin derived from animal collagen, making them unsuitable for vegetarians or vegans. Plant-based versions using agar or carrageenan are available and widely labeled as vegan.

What does toasted marshmallow taste like?

The browned exterior develops a caramelized, slightly smoky note similar to crème brûlée. The inside stays sweet and vanilla-forward, creating a strong contrast between the crust and the molten core.

Can you freeze marshmallows?

Yes, and they freeze well for up to three months. Coat pieces lightly in cornstarch or powdered sugar before sealing to prevent clumping, and thaw at room temperature before use.

What's the difference between marshmallow and marshmallow creme?

Marshmallow creme is a stabilized, spreadable version that skips the full gelatin structure of solid marshmallows. It doesn't need melting and incorporates directly into frostings or fillings, but won't toast or hold a shape on a skewer.

How Long Does Lemon Juice Last? [Storage Guide]

March 31, 2026

Leftover lemon juice is one of those kitchen orphans that sits in the fridge until you're not sure it's still good.

How Long Does Lemon Juice Last In The Fridge

Fresh-squeezed juice lasts around 7 days refrigerated, while commercially bottled juice can hold for 2-3 months unopened in the fridge - and the gap between those two is wider than most people expect.

Knowing that difference keeps you from tossing usable juice or, worse, using juice that's quietly turned.

The same portioning logic behind herbs in ice cube trays's shelf life applies here: freeze in small amounts and you always have what you need.

For a broader look at lemon juice's flavor and uses, including which recipes actually benefit from fresh versus bottled, that's a separate conversation.

QUICK SUMMARY

Fresh-squeezed lemon juice lasts about 7-10 days refrigerated in an airtight container. Bottled juice keeps up to 2-3 months in the fridge once opened. Freeze in portions for up to 3-6 months.

🧊Fridge (fresh): 7-10 days in a sealed glass or plastic container
❄️Freezer: 3-6 months portioned in an ice-cube tray
🏠Pantry (unopened): 6-12 months for shelf-stable commercial bottles only

How Long Does Lemon Juice Last?

Fresh-squeezed juice and bottled juice age on completely different timelines, and treating them the same is where most waste starts.

Citric acid slows bacterial growth, but it doesn't stop it - especially once juice is exposed to air and ambient bacteria from juicing or pouring.

Lemon Juice Shelf Life
MethodStateDurationNotes
🏠 PantryUnopened (commercial)6-12 monthsStore away from heat and sunlight; check manufacturer date
🧊 FridgeUnopened (refrigerated commercial)2-3 monthsFollow "best by" date; keep at 34-40°F
🧊 FridgeOpened or fresh-squeezed7-10 daysAirtight container; avoid metal lids long-term
❄️ FreezerOpened or fresh-squeezed3-6 monthsCube portions; quality and color decline beyond 6 months
🏠 CounterJuiced (exposed)2 hours maxFresh juice at room temperature spoils rapidly

Pulp is a meaningful variable here. Filtered juice holds its quality longer in the fridge because pulp introduces more surface area for bacteria to colonize.

If your fresh juice still has a lot of pulp in it, plan to use it within 5-6 days rather than the full 10.

How to Store Lemon Juice

The container choice matters more than most people realize, especially for fresh-squeezed juice.

Metal lids can react with the acid over time, leaving a faint metallic off-flavor - a glass jar with a plastic screw cap or a BPA-free plastic bottle works better.

Fridge: Transfer fresh juice into a clean, airtight container immediately after squeezing. Pour it through a strainer if you want cleaner juice with a longer fridge life. Store on a middle or back shelf - not the door, where temperatures fluctuate and shorten usable life.

Pantry: Only shelf-stable bottled lemon juice or concentrate belongs here, and only while unopened. Once you crack that seal, it moves to the fridge.

Counter: Don't leave fresh juice out. Even if the kitchen is cool, two hours is the limit before bacterial growth becomes a concern.

Golden Rule
Label every container with the date it was squeezed or opened. Seven days passes faster than you think, and unlabeled juice is always a guessing game.

A few habits that protect quality:

  • 🍋 Filter the pulp - reduces bacteria surface area, extends fridge life by 2-3 days
  • Skip the door - middle or back shelf keeps temperature stable
  • Use glass or BPA-free plastic - metal reacts with citric acid over days
  • Save the zest first - lemon zest loses its oils quickly after juicing, so strip it before you squeeze

Can You Freeze Lemon Juice?

Yes - and it's one of the most practical ways to avoid waste. The flavor stays acidic and useful for cooking, though it will lose some of the bright fresh top notes you'd taste in juice squeezed minutes ago.

Shortcut
Freeze in 1 tablespoon or ¼ cup portions. That maps directly to most baking and dressing recipes - no thawing a full batch to use a tablespoon.
  1. Strain Remove pulp through a fine-mesh strainer for cleaner cubes that last longer.
  2. Pour Fill an ice-cube tray to just below the top - juice expands slightly when frozen.
  3. Freeze solid Leave in the tray for at least 4-6 hours or overnight before transferring.
  4. Transfer and seal Move cubes into a labeled freezer bag or airtight container; press out excess air before sealing.
  5. Thaw correctly Overnight in the fridge, or drop a frozen cube directly into a hot pan or warm drink. Use within 48 hours of thawing - do not refreeze.

Frozen juice may darken slightly and will separate on thawing - give it a quick stir. That's a cosmetic issue, not a safety one.

For context, the same approach works well when you're freezing other citrus juices; lime juice spoilage signs follow a nearly identical pattern once thawed.

Signs Lemon Juice Has Gone Bad

Fresh juice starts pale yellow and smells sharply citrus. Once either of those changes noticeably, treat it as a spoilage indicator rather than a quirk.

Signs It's Gone Bad
👀
VisualDark brown or heavy clouding · surface mold or fuzzy growth · film or scum combined with heavy sediment
👃
SmellFermented, yeasty, or boozy odor · anything without bright citrus sharpness
✋
TextureSlimy surface film · stickiness on interior container walls

Some light settling or mild cloudiness is normal, particularly in fresh-squeezed juice. The problem signals are the yeasty or fermented smell and any visible mold - both mean discard, no tasting test needed.

Watch Out
Juice left at room temperature for more than 2 hours should be discarded, regardless of how it looks. Bacterial growth happens before visible spoilage appears.

Getting the Most From Every Squeeze

These habits add up, especially if you buy lemons in bulk or juice a large batch for the week. None require extra equipment - just a different order of operations.

  • 🍋 Juice in batches - squeeze everything at once and freeze what you won't use in 5 days
  • Portion for real use - 1 tablespoon and ¼ cup cubes cover most cocktail, baking, and dressing needs; [comparing lemon extract vs lemon zest options](https://forkliftkitchen.com/lemon-extract-vs-lemon-zest/) is worth reading if you need lemon flavor without the juice
  • Don't refreeze - thawed juice loses brightness fast; use it within 48 hours
  • Know your substitutes - if your juice has turned and you need it now, [lemon juice swaps that work](https://forkliftkitchen.com/lemon-juice-substitutes/) covers which alternatives hold up in cooking

Frequently Asked Questions

Can you drink lemon juice after 2 weeks in the fridge?

Not safely, for fresh-squeezed juice. Fresh juice peaks at 7-10 days refrigerated; by two weeks, bacterial growth and flavor degradation are both likely. Opened commercial bottled juice may still be within its window - check the label date.

Does bottled lemon juice go bad?

Yes, eventually. Unopened shelf-stable bottles last 6-12 months in the pantry. Once opened and refrigerated, quality holds for about 2-3 months - after that, flavor weakens even if it looks fine.

Can you freeze lemon juice in an ice cube tray?

Yes, and it's the most practical freezing method. Strain the juice first, freeze solid in the tray, then transfer cubes to a sealed freezer bag. Each standard cube holds roughly 2 tablespoons.

How long does fresh-squeezed lemon juice last?

About 7-10 days in the fridge in a sealed, non-metal container. Filtering out the pulp before storing pushes it closer to the 10-day end; juice with pulp left in degrades faster.

Is it safe to use lemon juice that has separated or looks cloudy?

Light separation and mild cloudiness are normal - stir and check the smell. If the odor is yeasty, fermented, or flat rather than citrus-sharp, discard it regardless of appearance.

What Is Navy Bean? Taste, Texture, Uses & More

March 31, 2026

Navy beans are the quiet foundation of some of the most enduring dishes in American cooking - the bean that holds a baked bean pot together and thickens a ham-and-vegetable soup without you ever noticing how it got there.

What Is Navy Bean

Unlike the earthier great northern bean and its flavor or the bold, almost iron-like richness of the taste of kidney bean, the navy bean works by stepping back.

Its mild, creamy character absorbs whatever surrounds it, making it indispensable without ever demanding attention.

QUICK SUMMARY

The navy bean is a small, oval white legume with a mild, slightly nutty flavor and a creamy texture when cooked. It anchors baked beans, bean soups, and white bean purees. Dry beans store for 1-2 years; canned beans keep unopened for up to 5 years.

🫘Category: Small white dry bean, legume, also called haricot or pea bean
👅Flavor: Mild, slightly nutty, earthy, subtly sweet - absorbs surrounding flavors readily
🍲Best Uses: Baked beans, slow-simmered soups, white bean purees, stews
📦Shelf Life: Dry: 1-2 years; canned unopened: 3-5 years; cooked: 3-5 days refrigerated
⚠️Watch Out: Avoid high-heat stir-frying - they need slow simmering to develop their creamy texture

What Is a Navy Bean?

The navy bean is a small, oval legume belonging to the Phaseolus vulgaris species, native to North America and now cultivated worldwide. Its name traces to the U.S.

Navy, which relied on dried beans as a shelf-stable protein source for sailors in the 19th century.

You'll also find it sold under the names haricot, pea bean, or white pea bean - the same bean, just different regional labels. In Britain, it's the haricot that fills a tin of classic baked beans.

In New England, it's the navy bean that goes into a slow-baked pot with molasses and salt pork.

Unlike black bean and its flavor or pinto bean in cooking, the navy bean has no visible skin pigment and stays creamy white through cooking.

Its skin is thin and its interior is dense, which explains why it breaks down so readily into a smooth, starchy puree.

  • 🫘 Size - Smaller than cannellini or great northern beans, roughly the size of a large pea
  • 🌱 Origin - North America; cultivated commercially across the US, Canada, and Europe
  • 📋 Alternate names - Haricot (UK/Europe), pea bean, white pea bean, navy pea bean
  • 🏺 Category - Dry bean, legume; sold dried or canned

What Does a Navy Bean Taste Like?

navy bean - What Is Navy Bean

The flavor of a navy bean is genuinely mild - not bland, but restrained. A fully cooked bean delivers a soft nuttiness with a faint earthiness and a hint of sweetness underneath.

Sensory SnapshotMild Intensity
👅 Flavor
Slightly nuttyEarthySubtly sweet
✋ Texture
CreamyDenseSmooth when pureed
👃 Aroma
Mild starchyLightly beany

That mildness is precisely what makes navy beans such strong flavor absorbers. Slow-cooked in a braise with bay leaf, thyme, and smoked pork, they pull every aromatic note into themselves.

Compared to the taste of cannellini bean, the navy bean is denser and slightly less buttery. Both are mild, however, and either works in white bean purees - the navy bean simply holds a thicker, more pasty consistency.

Golden Rule
The longer and slower you cook navy beans, the more their flavor opens up. A quick boil gives you a starchy result; a 90-minute simmer gives you something genuinely rich and creamy.

How to Use Navy Beans

Navy beans shine most in low-and-slow cooking environments where their dense flesh has time to soften all the way through. The classic New England baked beans recipe - beans slow-baked with molasses, brown sugar, mustard, and salt pork for several hours - exists almost entirely because of how navy beans hold their shape at the edge while going creamy at the center.

How Navy Beans Are Used
MethodBest ForTip
🍲 Slow SimmerSoups, stews, ham-and-beanAdd aromatics from the start; salt near the end
🫙 BakedTraditional baked beans in sauceUse low heat (300°F/150°C) for 4-6 hours
⚡ Pressure CookedFast weeknight beans from dryNo soaking required; cook 25-30 min at high pressure
🥗 Cold SaladVinaigrette-dressed bean saladsUse canned or pre-cooked; dress while still slightly warm
🫧 PureedWhite bean dips, creamy saucesAdd olive oil and lemon; blend while warm for smoothest result

In Mediterranean-style cooking, pureed navy beans become a spread not unlike hummus - blended with olive oil, garlic, and lemon. For thickening a chowder or stew, mash a handful of cooked beans against the pot wall rather than adding flour.

Smoked pork is the classic pairing: understanding the taste of ham hock helps explain why this combination has endured so long - the fat and smoke saturate the beans during a long braise. For weeknight cooking, bacon or smoked sausage delivers a similar result in less time.

Try It In
🍲Crockpot Navy Bean SoupHands-off slow cooker method for a ham-and-bean soup that builds deep flavor→

How to Buy and Store Navy Beans

For dry beans, look for uniform, hard beans with smooth, unbroken skins. Shriveled or discolored beans usually indicate age - old beans take far longer to cook and may never fully soften.

For canned navy beans, check for no bulging lids and scan the sodium level if that matters in your diet.

Watch Out
Dry navy beans stored past 2 years won't spoil, but they harden significantly. Even prolonged soaking and cooking may not produce a fully creamy result - discard and buy fresh.
  • 🫙 Dry storage - Keep in an airtight container in a cool, dark pantry; best quality within 1-2 years
  • ❄️ Cooked beans - Refrigerate in a sealed container and use within 3-5 days
  • 🥫 Canned, unopened - Shelf-stable for 3-5 years; after opening, treat like cooked beans

A full breakdown of navy bean's shelf life covers date labels, freezing, and when to discard cooked batches. For anyone swapping between bean types, navy bean swaps that work covers which varieties hold up in soups versus purees.

Start With Baked Beans or a Soup

If you're new to cooking navy beans, pick one of two entry points. The baked bean route shows you how the bean responds to long, slow oven heat - it's forgiving, and the molasses sauce covers any textural imperfection.

The soup route (ham hock, mirepoix, bay leaf, a long simmer) shows you the bean's real strength: absorbing a broth until the whole pot tastes unified. Either dish will tell you more about navy beans than a recipe summary can.

Shortcut
Use canned navy beans for your first batch of white bean puree or a bean salad. Save the dry-bean simmer for soups or baked beans where the long cook time pays off in flavor.

Frequently Asked Questions

Are navy beans the same as cannellini beans?

No. Both are white beans with mild flavor, however cannellini are larger, creamier, and slightly more buttery. Navy beans are denser and break down faster, making them better for baked beans and thick soups.

Do navy beans need to be soaked before cooking?

Soaking isn't required but it shortens cook time by 30-45 minutes and reduces the oligosaccharides that cause gas. For pressure cooker methods, skip the soak - high pressure compensates without it.

How long do navy beans take to cook from dry?

Soaked navy beans simmer to creamy in 60-90 minutes on the stovetop. Unsoaked, expect 90-120 minutes. A pressure cooker cuts that to 25-30 minutes at high pressure.

How do navy beans compare to great northern beans?

Great northern beans are larger with a slightly firmer texture and hold their shape better in long braises. Navy beans are smaller, break down faster, and produce a thicker, pastier result when mashed or pureed.

Can you use navy beans in any baked beans recipe?

Yes - navy beans are the traditional choice for American and British baked beans recipes. Their small size and tendency to soften gradually under prolonged heat makes them the standard, not a substitute.

What Is Lemon Juice? [Taste, Uses & More]

March 31, 2026

That first hit of lemon juice - sharp, clean, and almost electric on the tongue - is one of the fastest ways to wake up a dish that's fallen flat. Fresh-squeezed lemon juice does something no other acid quite replicates: it cuts richness, lifts sweetness, and signals freshness all at once.

What Is Lemon Juice

If you've ever reached for apple cider vinegar swaps that work when you ran out of lemons, you already know the gap.

This profile covers flavor, uses, and storage so you get the most out of every squeeze.

QUICK SUMMARY

Lemon juice is a bright, strongly acidic citrus liquid used raw and cooked to add tang, balance fat, and prevent browning. It's a staple in Mediterranean, Middle Eastern, and Latin American cooking - and one of the most reliable finishing acids in any kitchen.

🍋Flavor: Sharp citrus sour with mild bitter citrus oil notes
🔥Best Uses: Dressings, marinades, finishing soups, cocktails, citrus curd
🧪Intensity: Strong - a little goes a long way in cooked dishes
🛒Buying Tip: Heavy-for-size lemons with glossy skin yield the most juice
🧊Shelf Life: Fresh juice lasts 3-4 days refrigerated; bottled lasts months unopened

What Is Lemon Juice?

Lemon juice is the acidic, translucent liquid pressed from the pulp of Citrus limon, a small evergreen fruit tree with roots in Southeast Asia and a long cultivation history across the Mediterranean.

It sits in the category of citrus juices alongside lime, grapefruit, and orange - though it stands apart for its high citric acid content, which gives it a sharper, more sustained sourness than most of its relatives.

The two most common commercial lemon varieties are Eureka and Lisbon, both producing juice with similar acidity. Meyer lemons, a hybrid, yield sweeter, lower-acid juice and aren't a straight swap in savory recipes.

You'll also see lemon juice listed as limón in Spanish-language recipes or juiced lemon in older cookbooks.

Worth noting: lemon extract is not the same product - it's an alcohol-based flavoring made from lemon oil, and comparing lemon extract vs lemon zest options shows exactly how they behave differently in baking.

Lemon juice is available freshly squeezed at home, sold as pasteurized bottled juice, or found as frozen concentrate. Fresh is the reference point for everything below.

What Does Lemon Juice Taste Like?

lemon juice - What Is Lemon Juice

Lemon juice hits hard and fast. The dominant note is bright, sharp sourness - a clean citrus tang driven by citric acid at roughly 5-8% concentration in fresh juice.

Sensory SnapshotStrong Intensity
👅 Flavor
Bright sourSharp citrus tangMild bitter
✋ Texture
WaterySlightly pulpy
👃 Aroma
ZestyFresh citrus peel

Compared to lime juice, lemon is less floral and slightly less sharp. Against straight white vinegar, it's noticeably softer and more rounded - though still plenty acidic for balancing a rich dish.

Mild bitterness from the citrus peel oils can come through when lemons are over-squeezed or when the juice sits. Heat dulls the brightness noticeably, which is why most recipes add lemon at the finish rather than early in cooking.

How to Use Lemon Juice

Lemon juice earns its place at nearly every stage of cooking. Its primary job is acid balance - correcting dishes that taste flat, fatty, or overly sweet with a measured squeeze.

How Lemon Juice Is Used
MethodBest ForTip
🥗 RawVinaigrettes, marinades, cocktails, dipsWhisk with olive oil immediately - it won't emulsify long without an emulsifier
🍳 FinishSoups, pan sauces, grilled proteinsAdd off-heat or in the last 30 seconds to preserve brightness
🧁 BakedLemon curd, cakes, tartsCombine with eggs and butter carefully - high heat causes curdling
🧴 Browning preventionAvocado, cut apples, artichokesCoat cut surfaces immediately; citric acid slows enzymatic browning

In Mediterranean cooking, lemon juice pairs with olive oil and garlic constantly - in dressings, over roasted vegetables, or squeezed onto grilled fish to cut through its richness. Middle Eastern recipes rely on it to brighten hummus and tahini sauces.

In Greek avgolemono soup, it's stirred in at the finish with egg yolk for a silky, tangy broth.
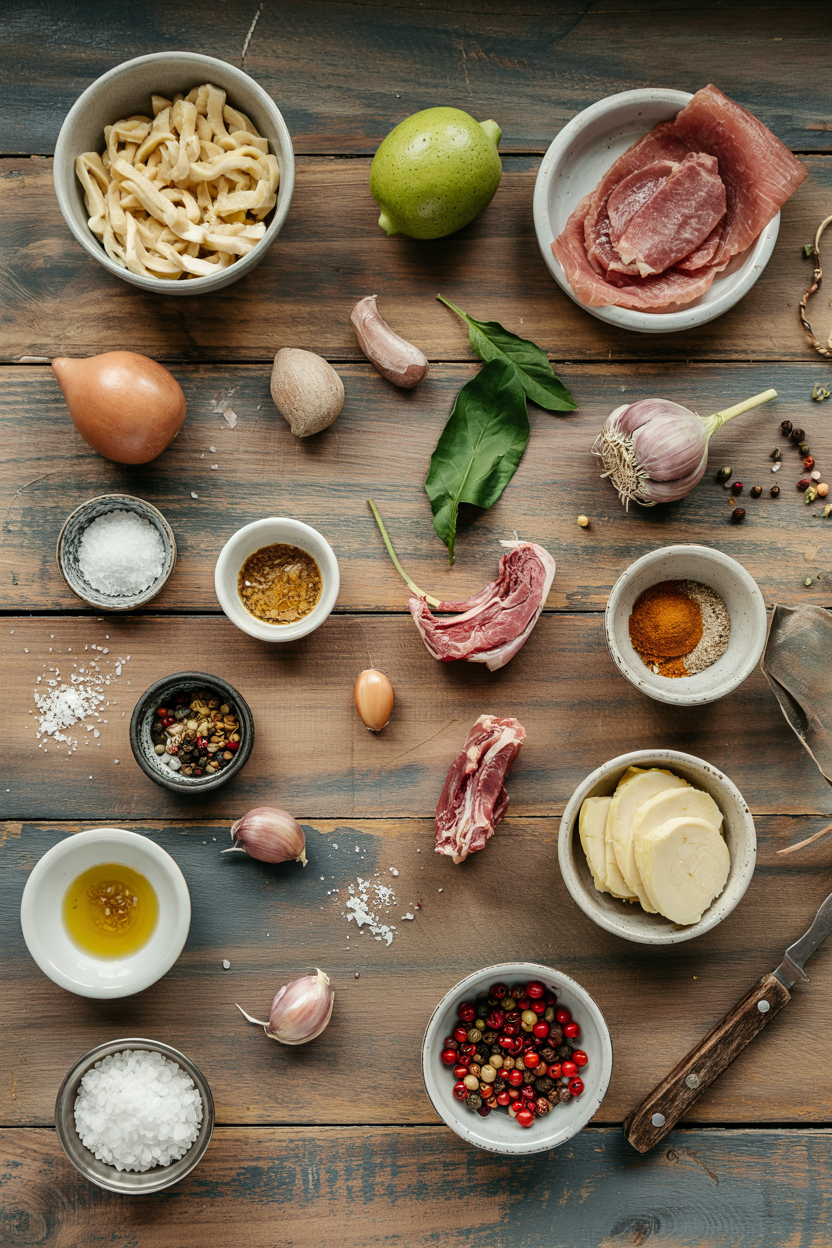
Latin American cooks use it in marinades alongside chili and herbs.

Southeast Asian preparations sometimes call for lemon as a stand-in for lime - though if you need to go the other direction, a look at alternatives to lime juice can help you decide.

Lemon juice pairs well with honey, cream, parsley, soy sauce, and seafood.

It handles most kitchen duties where you'd reach for a mild acid, and knowing the replacements for lemon juice that hold up helps on the nights lemons run out.

Watch Out
Don't add lemon juice to egg-based sauces over high heat - the acid destabilizes the proteins and curdles the sauce fast. Add it off-heat and stir gently.
Try It In
🍗Air Fryer Chili-Lime Chicken WingsLemon juice works alongside lime for extra citrus punch→🍋Air Fryer Garlic Parmesan Chicken TendersA squeeze of lemon cuts through the parmesan richness→🍯Air Fryer Honey Garlic Chicken TendersLemon juice balances the sweetness of the honey glaze→

How to Buy and Store Lemon Juice

At the store, weight matters more than size. A firm, heavy lemon with thin, glossy skin has more juice than a large, puffy one with thick rind.

Avoid any lemon with soft spots or dull, wrinkled skin.

Best Pick
Eureka and Lisbon lemons are the most widely available and most juice-dense. Either works for cooking - skip the oversized decorative lemons, which tend to be mostly pith.

For bottled lemon juice, check the ingredient list and choose pasteurized 100% lemon juice with no added preservatives if possible. It won't match fresh in brightness, however it's a reasonable backup for cooked applications.

Once squeezed, store the juice in a sealed glass container at the coldest part of your fridge - not the door.

Freshly squeezed juice holds well for 3-4 days before the flavor degrades.

The full breakdown of storing lemon juice correctly covers freezing options and when bottled juice genuinely holds up.

For browning prevention specifically, comparing fruit fresh vs citric acid options explains how lemon juice stacks up against commercial products.

Start With a Squeeze

Lemon juice is one of the last things you add and the first thing you'll miss when it's absent.

  • 🍋 New to it? - Squeeze over grilled fish or roasted vegetables right before serving.
  • 🥗 For dressings - Use a 3:1 ratio of olive oil to lemon juice as a base, then adjust.
  • 🍲 For soups and stews - Add a small squeeze at the finish; taste before adding more.
  • 🧪 For baking - Measure precisely - too much acid in curd or cake batter shifts the texture.

Fresh, used at the right moment, lemon juice does more work per drop than almost any other ingredient.

Frequently Asked Questions

What is lemon juice made of?

Fresh lemon juice is the liquid extracted from the pulp of Citrus limon. Its sourness comes primarily from citric acid, which makes up 5-8% of the juice, along with water, small amounts of vitamin C, and trace sugars.

How sour is lemon juice compared to vinegar?

Lemon juice is less aggressive than white vinegar. White vinegar runs 5-8% acetic acid, which tastes sharper and more astringent; lemon juice's citric acid is perceived as softer and more rounded despite similar pH levels.

Can lemon juice replace vinegar in recipes?

Yes, in most cases. Use a 1:1 swap in dressings, marinades, and sauces. The flavor shifts toward citrus rather than fermented tang, which changes the profile slightly but doesn't break the dish.

How long does freshly squeezed lemon juice last?

Fresh juice lasts 3-4 days refrigerated in a sealed glass container. After that, the bright citrus character fades and the juice takes on a flatter, slightly off flavor.

Does lemon juice have vitamin C?

Yes. A single fluid ounce of fresh lemon juice provides roughly 14-18mg of vitamin C, about 15-20% of a typical daily target. Heat and prolonged storage both degrade vitamin C content noticeably.

How Long Does Napa Cabbage Last? [Storage Guide]

March 31, 2026

Half a head of napa cabbage sitting in the crisper after a stir-fry is a familiar sight - and if you've ever wondered how long it stays usable before the outer leaves turn translucent and slimy, you're not alone.

Can You Freeze Napa Cabbage

Whole heads hold up well under refrigeration, but once cut, the clock moves faster.

If you're planning to use it in fermented dishes, knowing how long kimchi keeps can help you time your prep and storage together.

QUICK SUMMARY

A whole napa cabbage lasts 1-2 weeks in the fridge. Once cut, use it within 3-5 days. Blanched and shredded, it freezes well for up to 12 months. Keep it unwashed, wrapped loosely, and away from ethylene-producing fruit.

🧊Fridge (whole): 1-2 weeks in a perforated bag in the crisper drawer
🔪Fridge (cut): 3-5 days in an airtight container with a paper towel
❄️Freezer (blanched): 8-12 months; texture softens, best for cooked dishes only

How Long Does Napa Cabbage Last?

Shelf life depends heavily on whether the head is whole or cut and how well moisture is controlled.

A whole, uncut head is structurally intact and loses moisture slowly - that's why it outlasts a sliced portion by more than a week.

Napa Cabbage Shelf Life
MethodStateDurationNotes
🧊 FridgeWhole1-2 weeksUnwashed, perforated bag, crisper drawer; shorter if stem was cut
🧊 FridgeSliced3-5 daysAirtight container with paper towel to absorb moisture
🧊 FridgeCooked3-4 daysCool quickly; store in a sealed container and reheat thoroughly
❄️ FreezerBlanched & shredded8-12 monthsBlanch first; texture becomes limp but fine for cooked dishes
❄️ FreezerRaw whole or large piecesNot recommendedHigh water content causes cell rupture and mushy texture
🏠 CounterWhole1-2 days maxCool, shaded area only; deteriorates faster than fridge storage

The napa leaf is around 95% water, which is why cut surfaces brown and dry out quickly. Cooked napa follows a similar pattern to sliced raw - use it within a few days and don't leave it at room temperature.

How to Store Napa Cabbage

Starting with a fresh, firm head makes a real difference. Buy heads with tight, pale-green leaves and firm white cores; floppy outer leaves signal age.

If you want a broader sense of what you're working with, the taste of napa cabbage helps explain why its mild, watery character makes moisture management so important in storage.

Fridge (whole): Remove any bruised outer leaves, keep the head unwashed, and wrap the base loosely in a paper towel. Place it in a perforated produce bag in the crisper drawer and keep it away from apples, pears, or other ethylene-producing fruit - ethylene accelerates yellowing and leaf decay.

Fridge (cut): Press a piece of plastic wrap directly onto the cut surface to minimize moisture loss, then transfer to the crisper. For shredded or sliced portions, an airtight container lined with paper towel absorbs excess moisture and extends usable life to 3-5 days.

Counter: A whole head survives 1-2 days in a cool, shaded spot - fine for overnight, not for longer.

Watch Out
Never store a cut, unwrapped head directly in the crisper. The exposed surface loses moisture fast and browns within hours, affecting both texture and flavor of the inner leaves.

Can You Freeze Napa Cabbage?

Yes, with the right preparation. Raw whole leaves or large wedges are not worth freezing - the high water content causes cell rupture during freezing, and the result is an unpleasantly mushy texture.

Blanching before freezing solves this by partially breaking down cell walls in a controlled way, so the thawed product behaves predictably in cooked dishes.

  1. Trim and separate Remove the tough core and either shred the cabbage or separate it into individual leaves.
  2. Blanch briefly Boil shredded napa for 1 minute, or whole leaves for 2 minutes, then immediately plunge into ice water to stop cooking.
  3. Dry thoroughly Drain and pat very dry - excess moisture leads to ice crystals and clumping in the bag.
  4. Pack and seal Transfer to freezer bags, remove as much air as possible, and freeze flat for even freezing and easier thawing.
  5. Label with date Blanched napa holds well for 8-12 months; beyond that, quality drops noticeably.

For kimchi prep specifically, shred and lightly salt the napa before freezing - salting draws out cell water and improves the final texture after thawing.

Pre-freezing shredded pieces on a tray before bagging keeps them loose, which speeds thawing significantly.

Thaw overnight in the refrigerator, or add frozen napa directly to soups and stews.

Just as storing kale without blanching correctly leads to poor results, skipping the blanching step here has the same effect on texture.

Golden Rule
Frozen napa works well in stir-fries, braises, soups, and kimchi - but it won't recover the crunch needed for raw slaws or fresh salads. Plan your use before you freeze.

Signs Napa Cabbage Has Gone Bad

Napa cabbage gives fairly clear warnings before it becomes unsafe. Checking the napa core and the base of the ribs first is the most reliable approach - that's where decay usually starts and spreads outward.

Signs It's Gone Bad
👀
VisualOuter leaves brown, translucent, or collapsed · Black or dark streaks along white ribs or core · Slimy sheen spreading from the base upward
👃
SmellSharp sour or fermented odor from the leaves · Rotten-vegetable smell concentrated at cut stem or core
✋
TextureMushy, waterlogged ribs that bend instead of snap · Leaves that smear slimily when touched

A few yellowed or limp outer leaves don't condemn the whole head - peel them off and check what's underneath. However, discard the entire head if you detect widespread sliminess, a strong sour smell, or large areas of dark rot.

Don't taste-test to decide.

Getting the Most from Every Head

Napa cabbage rewards a little planning at the start. These habits reduce waste and keep every portion usable through the full storage window.

  • 🥬 Use leaves strategically - tender inner leaves work raw in slaws; save tougher outer ribs for braising or kimchi where softening is fine.
  • 🛒 Buy fresh, store fast - heads with tight, compact leaves and no yellowing last longest; get them into the crisper the same day.
  • ❄️ Freeze in portions - shred and freeze in meal-sized bags rather than one large block for faster, more flexible thawing.
  • 🚫 Separate from ethylene sources - keeping napa away from apples and pears in the crisper meaningfully slows leaf yellowing.

If you run short before your next shop, replacements for napa cabbage cover the closest options for both raw and cooked applications.

For broader brassica swaps in Asian cooking, options like swapping out bok choy or replacements for savoy cabbage overlap with many of the same dishes.

Shortcut
If you use napa regularly, keep one whole head unwashed in the crisper and shred portions as needed. This beats pre-shredding the whole head and watching it wilt in days.

Frequently Asked Questions

Can you freeze napa cabbage for kimchi?

Yes, but shred and lightly salt it first before freezing. Salting draws out excess cell water, which improves texture after thawing. Add directly to your kimchi base without fully thawing to avoid sogginess.

How long does cut napa cabbage last in the fridge?

Cut napa lasts 3-5 days in an airtight container lined with paper towel. Press plastic wrap directly onto any exposed cut surface to slow browning and moisture loss.

Can you eat napa cabbage with brown spots?

Small surface brown spots on outer leaves are usually fine - remove those leaves and check underneath. Discard the head if browning reaches the ribs or the core shows dark streaks or sliminess.

Does napa cabbage need to be refrigerated?

Yes for any storage beyond a day or two. A whole head survives 1-2 days on a cool counter, but the crisper drawer extends that to 1-2 weeks and prevents wilting.

Is it safe to eat napa cabbage that smells slightly sour?

A faint earthiness is normal, but a sharp sour or fermented smell signals active breakdown. Discard it - that odor indicates bacterial activity, especially if concentrated near the core or stem.

Spanish Tortilla Española with Potatoes

March 31, 2026

You need 40 minutes and one skillet to make Spanish tortilla. No marinating, no complicated techniques, just slow-fried potatoes folded into beaten eggs.

Spanish Tortilla Española with Potatoes served on a plate

The potatoes cook low and slow in olive oil until they're tender enough to break with a fork. Then you drain them, mix with eggs, and cook the whole thing until the edges set but the center stays slightly creamy.

This works for weeknight breakfast, meal prep, or when you're feeding guests who expect something more than scrambled eggs.

QUICK SUMMARY

Spanish tortilla española is a thick egg and potato cake cooked in olive oil. The key is slow-frying thinly sliced potatoes until soft, then folding them into beaten eggs and cooking on medium-low heat. The result is tender potatoes bound by creamy, set eggs with a golden crust.

⏱️Time Reality: 40-45 minutes total - 20 minutes for potatoes, 12-15 for eggs
🔪Critical First Move: Slice potatoes ⅛ inch thick so they cook evenly without browning
⚠️Watch Out: Don't skip draining the potatoes or you'll end up with an oily, soggy tortilla

Table of Contents

Toggle
  • Why This Recipe Works
  • What You'll Need
    • Ingredient Details
  • Ingredient Swaps
  • What to Serve With It
  • Store and Reheat
  • Frequently Asked Questions
  • Spanish Tortilla Española with Potatoes
    • Method 
    • Tried this recipe?

Why This Recipe Works

Slow-frying the potatoes in olive oil creates a soft, almost creamy texture that scrambled or baked potatoes can't match. For a version that comes together quickly, this quick potato dish uses a similar technique with less oil.

Quick Reference
⏱️
Prep Time
15 min
🔥
Cook Time
25-30 min
⏰
Total Time
40-45 min
🍽️
Servings
4-6 servings
📊
Difficulty
Medium
🏷️
Category
Main Dish
💡
Quick Tip
Cook potatoes low and slow for tender texture
🎯
Best For
Weeknight | Meal prep | Entertaining
  • Thin slicing ensures even cooking: ⅛-inch potato slices cook through without developing hard centers or burnt edges
  • Low heat prevents browning: Frying potatoes at medium-low for 20 minutes keeps them pale and soft instead of crispy
  • Thorough egg beating avoids curdling: Whisking eggs for a full minute creates a smooth mixture that sets evenly
  • Draining removes excess oil: Resting fried potatoes on paper towels for 5 minutes prevents a greasy final texture
  • Medium-low heat sets eggs gently: Cooking the tortilla slowly for 5-6 minutes per side creates a tender interior with firm edges
Quick Tip
Use a nonstick or well-seasoned cast-iron skillet to make flipping easier - the tortilla slides right off onto your plate.

What You'll Need

Ingredients for Spanish Tortilla Española with Potatoes

You're shopping for basic pantry items plus fresh potatoes and eggs. The coleslaw works best when it hits the table at the same time as the main, so for a version that comes together quickly, quick coleslaw dish takes less than 10 minutes with no waiting.

🥔
Main Starch
  • 2 lbs potatoes (Yukon Gold or russet)
  • 1 medium onion
🥚
Binding
  • 6 large eggs
🫒
Fat & Seasoning
  • 1 cup olive oil
  • 1 teaspoon salt
  • ½ teaspoon black pepper
🌿
Optional Flavor
  • 2 tablespoon fresh parsley
  • 2 garlic cloves

Ingredient Details

  • Potatoes
    Yukon Gold holds shape better than russet but either works - peel them and slice uniformly at ⅛ inch
  • Olive Oil
    Use regular olive oil, not extra virgin - you need enough to almost cover the potatoes during frying
  • Eggs
    Room temperature eggs mix more smoothly - pull them from the fridge 30 minutes before cooking
  • Onion
    Yellow onion adds sweetness as it cooks - slice thin so it softens at the same rate as potatoes
  • Salt
    Season the potatoes while frying and the eggs before mixing - double salting prevents bland spots
  • Skillet Size
    8-10 inch nonstick or cast-iron works best - smaller creates a thicker tortilla, larger makes flipping harder
  • Parsley
    Optional garnish adds color and freshness - chop fine and sprinkle on just before serving

Ingredient Swaps

Most swaps change texture or flavor but still work if you adjust cooking time. A good potatoes can make or break the plate, so we keep a batch ready for nights like this - creamy potatoes side dish uses similar technique with different seasonings.

  • Sweet potatoes instead of regular potatoes: Adds natural sweetness and softer texture - cook 5 minutes longer since they break down faster
  • Vegetable oil instead of olive oil: Less pronounced Mediterranean flavor but fries the same way - use any neutral oil you have
  • Shallots instead of onion: Milder, sweeter taste with same cooking time - use 2-3 large shallots for one medium onion
  • Paprika instead of black pepper: Adds smokiness and color - start with ½ teaspoon smoked paprika and adjust to taste

Nonstick Skillet

Works for: Easy flipping, less oil needed, beginner-friendly cleanup

Skip if: You want a crispier crust or more traditional browned edges

Cast-Iron Skillet

Works for: Better heat retention, crispier bottom, authentic Spanish method

Skip if: Your pan isn't well-seasoned or you're worried about sticking during flip

Instructions

The whole process takes about 40 minutes with most of that being hands-off potato cooking. Most people skip dip, but it balances the meal, so for a version that comes together quickly, this creamy dip takes 10 minutes with pantry ingredients.

  1. Slice potatoes and onion thinly: Peel potatoes and cut into ⅛-inch rounds. Slice onion into thin half-moons. Pat everything dry with paper towels.

  2. Slow-fry potatoes and onion: Heat olive oil in 8-10 inch skillet over medium-low heat. Add potatoes, onion, and ½ teaspoon salt. Cook 20 minutes, stirring occasionally, until potatoes are fork-tender but not browned. Use a slotted spoon to transfer to paper towels and drain 5 minutes. Reserve 2 tablespoon oil, discard the rest.

  3. Beat eggs and combine: Crack eggs into large bowl, add remaining ½ teaspoon salt and black pepper. Whisk 1 minute until completely smooth. Gently fold drained potatoes and onions into eggs, keeping potato slices intact.

  4. Cook first side: Heat reserved 2 tablespoon oil in same skillet over medium-low. Pour in egg-potato mixture, spreading evenly. Cook 5-6 minutes without stirring until edges are set and bottom is golden. Center should still look slightly wet.

  5. Flip and finish: Place large plate over skillet. Flip quickly so tortilla lands on plate. Slide tortilla back into pan, uncooked side down. Cook 4-5 minutes until center feels just firm when pressed gently. Slide onto serving plate and rest 5 minutes before slicing.

Watch Out
Don't rush the potato frying - if they brown or crisp, they won't create the soft, creamy interior that makes Spanish tortilla work.

What to Serve With It

Spanish tortilla works as breakfast, brunch, or light lunch depending on what you pair it with. Rich mains need something to cut through, and for easy chicken meal planning you'll find options that balance the plate without adding another hour of cooking.

Side Dish Prep Why It Works How to Serve
Green Salad Easy Bright acidity cuts through rich eggs and olive oil Dress with lemon vinaigrette, serve room temperature alongside warm tortilla
Crusty Bread Easy Soaks up any loose egg, adds textural contrast Toast lightly, rub with garlic clove, serve with olive oil for dipping
Roasted Peppers Medium Sweet smokiness complements onions, adds color Char under broiler 8 minutes, peel, slice, drizzle with olive oil and salt
Simple Tomato Salad Easy Refreshing acidity balances potato heaviness Slice ripe tomatoes, season with salt and basil, serve at room temperature
Garlic Aioli Easy Creamy garlic sauce enhances every bite Whisk mayo, minced garlic, lemon juice - serve in small bowl for dipping

Three ways to serve it:

  • For breakfast or brunch: Serve warm with green salad and crusty bread - the tortilla is filling enough to be the main event
  • As tapas for entertaining: Cut into small squares, serve room temperature with marinated olives and chorizo slices for a Spanish spread
  • For meal prep lunches: Pack cold slices with simple tomato salad and aioli - the tortilla tastes better the next day
Best Pick
Serve Spanish tortilla at room temperature, not piping hot - the flavors develop and the texture improves as it cools for 10-15 minutes.

Store and Reheat

Spanish tortilla keeps well and actually improves after a day in the fridge as the flavors meld. The sangria works best when it hits the table at the same time as the main, so for a version that comes together quickly, quick easy side dish uses just fruit and wine with no complicated muddling.

Method Time Best For
🍳 Stovetop 5 min in skillet over medium-low Restoring crisp edges and even warmth throughout
🔥 Oven 10 min at 350°F Reheating multiple slices without sogginess
📦 Microwave 1-2 min at 50% power Quick reheating single portions - edges soften but center warms through

For best results when storing:

  • Cool completely before refrigerating: Let tortilla sit at room temperature 30 minutes so condensation doesn't make it soggy
  • Wrap tightly in plastic or foil: Prevents drying out and absorbing fridge odors - store in shallow airtight container
  • Refrigerate up to 4 days: Flavor actually improves day 2-3 as potatoes absorb egg seasoning
  • Serve cold or room temperature: Spanish tortilla is traditionally eaten this way - skip reheating for picnics or packed lunches
  • Freeze up to 1 month: Wrap individual slices in plastic, then foil - thaw overnight in fridge before serving

Frequently Asked Questions

Can I use sweet potatoes instead of regular potatoes?

Yes, sweet potatoes work but they're softer and sweeter. Cook them 5 minutes longer during frying since they break down faster than regular potatoes.

How should I store leftover Spanish tortilla?

Wrap cooled tortilla tightly in plastic or store in airtight container. Refrigerate up to 4 days - it tastes better after a day as flavors meld.

How do I tell when the Spanish tortilla is fully cooked?

Press the center gently - it should feel just firm, not jiggly. Edges will be set and golden, center slightly moist but cooked through, not runny.

What if the tortilla breaks when I try to flip it?

Push broken pieces back together in the pan and cook covered for 2-3 minutes. The eggs will re-set and hold it together - it'll taste the same even if it looks rustic.

How many does a standard Spanish tortilla serve?

One tortilla made in an 8-10 inch skillet serves 4-6 people. Cut into wedges for breakfast or brunch, or into smaller squares for tapas-style serving.

Spanish Tortilla Española with Potatoes served on a plate

Spanish Tortilla Española with Potatoes

No ratings yet
Spanish tortilla española is a classic thick egg and potato dish made by slow-frying thinly sliced potatoes in olive oil until tender, then folding them into beaten eggs and cooking gently until set. The result is a creamy, golden-crusted tortilla perfect for breakfast, brunch, or entertaining.
Print Recipe Pin Recipe
Prep Time 15 minutes mins
Cook Time 30 minutes mins
Total Time 45 minutes mins
Servings: 6 servings
Course: Main Dish
Cuisine: Spanish
Ingredients Equipment Method Notes

Ingredients
  

  • 2 lbs potatoes Yukon Gold or russet, peeled and sliced ⅛ inch thick
  • 1 medium onion thinly sliced into half-moons
  • 6 large eggs room temperature
  • 1 cup olive oil regular olive oil for frying
  • 1 teaspoon salt divided for potatoes and eggs
  • 0.5 teaspoon black pepper freshly ground
  • 2 tablespoon fresh parsley optional, chopped for garnish
  • 2 cloves garlic optional, minced

Equipment

  • Skillet 8-10 inch nonstick or cast-iron skillet for frying potatoes and cooking tortilla
  • Slotted spoon For transferring fried potatoes from oil to paper towels
  • Large bowl For beating eggs and combining ingredients
  • large plate For flipping the tortilla during cooking

Method
 

  1. Peel the potatoes and slice into ⅛-inch thick rounds. Slice the onion into thin half-moons. Pat the potato and onion slices dry thoroughly with paper towels to remove excess moisture.
    2 lbs potatoes, 1 medium onion
  2. Heat the olive oil in an 8 to 10 inch skillet over medium-low heat. Add the potatoes, onion, and half the salt (½ tsp). Cook gently for about 20 minutes, stirring occasionally, until the potatoes are fork-tender but not browned. Use a slotted spoon to transfer the potatoes and onions to a plate lined with paper towels and drain for 5 minutes. Reserve 2 tablespoons of the oil and discard the rest.
    1 cup olive oil, 1 tsp salt, 2 lbs potatoes, 1 medium onion
  3. Crack the eggs into a large bowl. Add the remaining salt (½ tsp) and black pepper. Whisk vigorously for 1 minute until the mixture is completely smooth and homogenous. Gently fold the drained potatoes and onions into the beaten eggs, being careful to keep the potato slices intact.
    6 large eggs, 1 tsp salt, 0.5 tsp black pepper, 2 lbs potatoes, 1 medium onion
  4. Heat the reserved 2 tablespoons of olive oil in the same skillet over medium-low heat. Pour in the egg and potato mixture, spreading it evenly. Cook without stirring for 5 to 6 minutes until the edges are set and the bottom has a golden crust. The center should look slightly wet but not runny.
    6 large eggs, 1 cup olive oil
  5. Place a large plate over the skillet and quickly flip the tortilla so it lands on the plate. Slide the tortilla back into the skillet, uncooked side down. Cook an additional 4 to 5 minutes until the center feels just firm when pressed gently. Slide the tortilla onto a serving plate and let it rest for 5 minutes before slicing and serving.
    6 large eggs

Notes

  • Slice potatoes uniformly at ⅛ inch thickness to ensure even cooking without browning.
  • Drain fried potatoes well on paper towels to avoid soggy, oily tortilla.
  • Cook on medium-low heat and don't rush flipping to achieve creamy interior and golden crust.

Tried this recipe?

Let us know how it was!

What Is Maida Flour? Taste, Uses & Baking Tips

March 31, 2026

Most people assume maida flour is just a South Asian rebranding of standard white flour - same product, different label.

What Is Maida Flour

That assumption misses why samosa shells stay crisp without going greasy, why bhature puffs to a hollow pillow in hot oil, and why Indian bakery biscuits break with that specific short snap.

QUICK SUMMARY

Maida flour is a finely milled, highly refined wheat flour made from the endosperm alone. It has a very mild, neutral flavor and produces crisp fried shells, soft puffed breads, and tender baked goods - a staple across South Asian kitchens and bakeries.

🌾Category: Refined wheat flour, endosperm only, no bran or germ
👅Flavor: Mild, slightly sweet grain note, neutral backbone
🍳Best Uses: Samosa pastry, bhature, pakora batter, cakes, biscuits
📦Shelf Life: Unopened 6-12 months; opened 3-6 months at room temperature
⚠️Note: Contains gluten; low fiber, higher glycemic index than whole wheat

What Is Maida Flour?

Maida is a refined wheat flour produced by milling only the starchy endosperm of the wheat grain and discarding the bran and germ entirely.

The result is a powder far finer than most Western all-purpose flours - silky to the touch, pale white, and almost uniform in particle size.

The flour originates from the Indian subcontinent and remains a foundational ingredient across Indian, Pakistani, and Bangladeshi cooking. You'll sometimes see it labeled all-purpose Indian flour or simply refined wheat flour, and the occasional misspelling "maidaa" appears on imported packaging.

Understanding how cooking wheat perfectly affects starch behavior helps explain why maida's extra refinement matters - finer particles hydrate faster and form a smoother, more elastic gluten network.

That network is what gives samosa wrappers their thin, taut stretch before frying.

Unlike cooking bread flour perfectly where high protein content drives structure, maida sits at a moderate protein level, giving it enough gluten for dough-based work without the toughness of a high-protein bread flour.

  • 🌾 Origin - Indian subcontinent; still milled and used across South Asia daily
  • 🔬 Composition - Endosperm only; no fiber from bran, no fat from germ
  • 🏷️ Also called - All-purpose Indian flour, refined wheat flour, white flour
  • ⚗️ Protein level - Moderate; sufficient for elastic dough, not overpowering

What Does Maida Flour Taste Like?

maida flour - What Is Maida Flour

Maida's flavor is deliberately minimal. A faint sweetness from the starch and a low background grain note are all you'll detect on its own - the flour is engineered to stay out of the way of spices, ghee, and fillings.

Compared to U.S. all-purpose flour, the flavor is slightly milder and the mouthfeel of baked goods is notably finer in crumb. Raw dough made from maida has that clean, starchy quality with no wheaty bitterness that whole-grain flours carry.

Heat changes the picture. Frying pushes maida toward a light golden, subtly toasty note - which is part of why a well-fried samosa shell smells more interesting than it tastes alone.

Baking at moderate temperatures keeps the crumb pale and neutral, while over-baking introduces a faint biscuity edge.

Sensory SnapshotMild Intensity
👅 Flavor
neutralslightly sweetlow grain note
✋ Texture
silky powderelastic doughcrisp when fried
👃 Aroma
mildly flourylow grain

How to Use Maida Flour

Maida earns its place across a wider range of cooking methods than most single-purpose flours.

The flour's fine particle size and moderate gluten mean it responds differently depending on how you handle it - rest the dough long enough and it becomes extensible; work it quickly in a cold fat and it turns short and flaky.

South Asian cooks use maida as the default wrapper flour. Samosa and kachori pastry relies on it for that thin, non-greasy shell that holds filling without cracking.

For what pairs with samosas, the neutral flavor of the maida shell means chutneys and dips define the plate, not the pastry itself.

How Maida Flour Is Used
MethodBest ForTip
🍳 Deep-FryingSamosa shells, kachori, bhature, pakora batterRest the dough at least 20 minutes for a more extensible, even shell
🥖 BakingCakes, biscuits, cookies, Indian bakery breads, kulchaSift once before measuring to keep crumb fine and even
🥘 Pan-FryingLayered parathas, flatbreads needing tender layersUse ghee between laminated layers for maximum flakiness
🥣 BattersPakora, fritter coatings, light tempura-style dipsAdd ajwain or cumin to the batter - maida's neutral base won't fight them
🥄 SaucesRoux-based white sauces, thickening graviesCook the roux fully to remove any raw flour taste

Ghee, yogurt, and baking powder are maida's most common companions. Yogurt adds acidity that relaxes the gluten for softer breads; baking powder gives bhature and pav bhaji buns their lift. Eggs and milk extend its use into Western-style baking with no adjustment needed.

If you're experimenting with swaps, checking alternatives to maida flour or all purpose flour swaps that work covers both directions - substituting maida out and substituting it in.

Try It In
🥞Besan Flour PancakesSee how a fine-milled flour works in a light, quick batter→

How to Buy and Store Maida Flour

Good maida should look uniformly pale white - no gray, yellow, or off-white patches that signal age or poor milling. Smell the bag before you buy if you can; fresh maida is neutral, nearly odorless.

A musty or sour smell means oxidized fat from inadequate endosperm separation.

Watch Out
Clumps or small holes in the packaging are signs of moisture exposure or insect activity. Don't buy those bags, regardless of the manufacture date.

Check the manufacture or milling date rather than just the best-before date. Prefer recently milled stock when your store turns over inventory slowly.

Understanding how long flour keeps helps you decide whether a near-dated bag is still worth buying.

  • Unopened - 6-12 months in a cool, dry pantry away from direct light
  • Opened - Transfer to an airtight container; use within 3-6 months at room temperature
  • Humid climates - Refrigerate after opening to prevent clumping and slow rancidity
  • Freezing - Works well for long storage; bring to room temperature before using to avoid condensation

For more detail on shelf life and signs of spoilage, maida flour in grain dishes covers the storage window in depth.

Where to Start With Maida Flour

Start with samosa pastry or a simple bhature dough if you're new to maida - both recipes reveal exactly what the flour does differently from regular all-purpose. The samosa shell teaches you how resting time affects extensibility; bhature shows you how maida takes a leavened dough from dense to dramatically puffed.

If you've already cooked with maida and want a comparison, the taste of all purpose flour breaks down how the two flours differ in flavor and performance. The gap is subtle but it shows up clearly in fried applications.

Golden Rule
Rest maida dough for at least 20 minutes after kneading. The gluten needs time to relax - skipping this step is why shells crack or bread turns tough.

Once you're comfortable with the basics, move into laminated flatbreads or a simple Indian bakery-style biscuit where the fine crumb becomes the point rather than the background.

Frequently Asked Questions

Is maida the same as all-purpose flour?

Close, but not identical. Maida is milled finer and typically has a slightly lower protein content than U.S. all-purpose flour. In most recipes they're interchangeable, but maida produces a noticeably smoother dough and finer crumb.

Can maida be used for cakes?

Yes, and it works well. Its fine particle size produces a tender, tight crumb similar to cake flour. No special adjustments are needed - just measure by weight for consistency.

Is maida healthy?

It's low in fiber and has a higher glycemic index than whole wheat flour. Enriched versions add back some iron, but maida is not a nutritional substitute for whole-grain flours.

How do you substitute maida in Indian recipes?

U.S. all-purpose flour is the closest swap at a 1:1 ratio. For fried applications, sifting all-purpose flour once brings the texture closer to maida's fine grind.

Why does maida make bhature puff up so dramatically?

Maida's moderate gluten develops a strong, elastic network that traps steam when the dough hits hot oil. The absence of bran means nothing interrupts that network, so the steam expands it fully before the crust sets.

What Is Kohlrabi? [Taste, Uses & More]

March 31, 2026

Most people spot kohlrabi at a farmers' market, assume it's some kind of alien turnip, and walk right past it.

What Is Kohlrabi

That's the wrong call - kohlrabi isn't a root at all, but a swollen stem that sits above the soil, and its flavor is far gentler than its strange silhouette suggests.

If you've ever swapped in radish swaps that work or experimented with swapping out broccoli in a recipe, kohlrabi deserves the same attention.

QUICK SUMMARY

Kohlrabi is a mild, crisp stem vegetable in the cabbage family with a lightly sweet, peppery flavor. It works raw in slaws, roasted until creamy, or braised as a potato stand-in. Small bulbs are sweetest. Leaves are edible and cook like greens.

🌱What It Is: Swollen stem of Brassica oleracea, not a root vegetable
👅Flavor: Mildly sweet, lightly peppery, green and slightly nutty
🔪Best Uses: Raw slaws, roasting, braising, fritters, quick pickling
❄️Shelf Life: Whole bulb 1-3 weeks refrigerated; leaves 2-4 days
✅Dietary: Vegan, gluten-free, low-carb; high in vitamin C and fiber

What Is kohlrabi?

Kohlrabi (Brassica oleracea var. gongylodes) is a crucifer in the cabbage family, cultivated for its enlarged above-ground stem rather than its roots or florets.

It originated in Central Europe - most likely northern Germany and the Balkans - and remains a fixture in German and Eastern European cooking.

The name comes from the German Kohl (cabbage) and Rabi (turnip), which explains the common alias "German turnip."

Other names include knoll-kohl and kohl rabi, though the single-word spelling is now standard.

Two main varieties exist: pale green and purple. The purple skin is striking, however both have the same ivory-white flesh inside with nearly identical flavor.

Bulbs range from golf-ball to softball size; the smaller ones (roughly 2-3 inches across) are consistently more tender and sweet. Older, larger bulbs can turn woody at the core.

The entire plant is edible.

Leaves cook like collards or kale, and the swollen bulb is the main event - peeled and used raw or cooked.

Unlike turnip, which is a true root, kohlrabi's bulb is botanically a stem, which matters for texture: it's denser and less fibrous than turnip flesh.

If you're weighing options, our guide to replacements for green cabbage covers several related brassicas worth knowing.

What Does kohlrabi Taste Like?

kohlrabi - What Is Kohlrabi

Kohlrabi sits at the mild end of the brassica spectrum. Raw, it tastes like a cross between a cabbage heart, a young broccoli stem, and a mild radish - green, faintly peppery, with a quiet sweetness underneath.

There's a slight nuttiness that comes through when you eat it fresh and cold.

Sensory SnapshotMild Intensity
👅 Flavor
mildly sweetlightly pepperynuttygreen
✋ Texture
crisp rawcreamy when roasted
👃 Aroma
freshvegetallightly cabbage-like

Heat changes it noticeably.

Roasting concentrates the natural sugars and softens the pepper notes, producing a tender, slightly creamy interior with caramelized edges.

Braising takes it further toward mellow and starchy - closer in feel to a soft potato than a crunchy crudité.

It doesn't develop the sharp bitterness that cabbage or turnip can under prolonged heat, which makes it more forgiving in the oven.

Golden Rule
The peppery bite fades with cooking. If you want that edge, keep it raw or add kohlrabi near the end of a sauté.

How to Use kohlrabi

Raw kohlrabi is the fastest route in.

Peel the bulb, slice or julienne it thinly, and it's ready for slaws - it pairs naturally with apple and carrot for crunch and bright contrast, plus a splash of lemon or vinegar to lift the green notes.

Understanding what pairs with broccoli gives useful crossover ideas, since many of the same partners (acid, butter, mustard) work equally well here.

Roasting is where most cooks become converts. Cut the bulb into cubes or wedges, toss with oil and salt, and roast at high heat until the edges brown.

The interior turns soft and slightly creamy while the outside crisps - caraway or dill alongside pork fat is a classic northern European combination worth trying.

How Kohlrabi Is Used
MethodBest ForTip
🥗 RawSlaws, salads, cruditésJulienne thin; dress just before serving to keep crunch
🔥 RoastedSide dishes, sheet-pan mealsHigh heat (425°F/220°C); don't crowd the pan
🍲 BraisedMash, potato substitute sidesFinish with butter or cream to round the flavor
🥘 SautéedSabzi, hash with leaves and bulbAdd leaves last - they cook faster than the bulb
🧇 FrittersLighter latke-style starch substituteSqueeze out moisture after grating before mixing
🫙 PickledCondiment, sandwich toppingQuick-pickle in vinegar brine; ready in 30 minutes

Don't discard the kohlrabi leaves. Sautéed with bacon or pancetta, they cook like sturdy greens - slightly chewy, mildly bitter, and good alongside the bulb.

In Indian cooking, both bulb and leaves go into a spiced sabzi with mustard seeds and cumin, a regional preparation common in parts of northern India.

Watch Out
Avoid prolonged high-heat pan-frying. Extended direct heat can make kohlrabi fibrous and dry rather than tender.
Try It In
🍋Air Fryer Lemon Pepper Chicken TendersServe alongside raw kohlrabi slaw — the lemon and pepper echo each other→🥦Air Fryer Lemon Pepper CauliflowerSwap half the cauliflower for kohlrabi wedges — same brassica logic applies→🍖Air Fryer Lemon Pepper MeatballsRoasted kohlrabi makes a low-carb side that holds up against bold seasoning→

How to Buy and Store kohlrabi

At the market, size is your best guide. Choose bulbs that are firm and smooth-skinned, roughly 2-3 inches in diameter - these will be sweeter and less likely to have a woody core.

Avoid bulbs with deep cracks, soft spots, or shriveled skin. If the leaves are still attached, check them: bright, upright greens mean the kohlrabi was harvested recently.

Shortcut
No leaves attached? No problem. Leaves detach quickly after harvest - a bare bulb isn't a quality signal on its own.

Store the unwashed bulb in a perforated plastic bag or your crisper drawer. Keep the leaves separate - they wilt faster than the bulb and should be used within 2-4 days.

Our full guide on how long kohlrabi keeps breaks down fridge and freezer windows in detail.

  • 🥬 Whole bulb - up to 1-3 weeks refrigerated, unwashed
  • 🔪 Cut or sliced - 3-5 days in an airtight container
  • 🌿 Leaves - 2-4 days; store wrapped in a damp paper towel

Start Here With Kohlrabi

New to it? Buy one small green bulb and eat half raw - thinly sliced with salt, lemon, and olive oil.

Roast the other half at high heat with a little butter. Those two preparations reveal everything this vegetable does well, and they take under 30 minutes combined.

If you can't find it, check our list of replacements for kohlrabi - several brassica neighbors get close. For readers coming from turnip territory, the guide to alternatives to turnip explains where kohlrabi fits in that swap.

And if you want a sharper flavor reference point, what makes radish distinct puts kohlrabi's milder pepper notes in useful context.

Frequently Asked Questions

Can you eat kohlrabi raw?

Yes - raw is one of its best formats. Peel the outer skin, then slice or grate directly into salads and slaws. The crunch holds well for several hours after dressing.

What does kohlrabi taste like compared to turnip?

Kohlrabi is noticeably milder and sweeter than turnip. Turnip has a sharper, more bitter edge - especially when raw - while kohlrabi stays gentle and green-tasting at any size.

How do you cook kohlrabi leaves?

Sauté them in oil or butter over medium-high heat for 3-5 minutes, like you would kale or collards. They're slightly more tender than kale, so they need less time.

Is kohlrabi healthy?

It's a solid source of vitamin C, dietary fiber, and potassium with very few calories. As a crucifer, it also contains glucosinolates - phytochemicals studied for their health associations.

How do you prepare kohlrabi for roasting?

Peel the bulb with a sharp knife or vegetable peeler, then cut into 1-inch cubes or wedges. Toss with oil, salt, and any spice, then roast at 425°F (220°C) for 25-30 minutes.

What Is Miso Paste? [Taste, Uses & More Explained]

March 31, 2026

Most cooks treat miso paste as a single ingredient when it's actually a spectrum - and reaching for the wrong type can make a dish taste muddy instead of complex. Understanding where miso sits on that spectrum changes how you cook with it entirely.

What Is Miso Paste

It's not just a soup base; it's a fermented condiment that works as a glaze, a marinade anchor, and a finishing agent in ways that even soy sauce alternatives rarely replicate.

QUICK SUMMARY

Miso paste is a fermented soybean paste from Japan with umami-rich, salty, and nutty flavor. Lighter varieties are mild and subtly sweet; darker types run deeper and more intense. Use it in soups, glazes, dressings, and marinades.

🍶Flavor: Umami-forward, salty, nutty, mild sweetness in light misos
🌾Category: Fermented soybean paste, made with koji and salt
🍲Best Uses: Miso soup, glazes, dressings, marinades, noodle broths
❄️Storage: Refrigerate after opening; lasts 3-12 months depending on type
⚠️Watch For: Barley or wheat koji means many misos contain gluten - check labels

What Is miso paste?

Miso is a fermented paste originating in Japan, made from soybeans, salt, and koji - a mold culture (Aspergillus oryzae) grown on rice, barley, or the soybeans themselves.

Producers vary the grain base, soybean ratio, and fermentation length to produce wildly different results from the same core process.

The main varieties break down like this:

  • Shiro (white) miso - Short fermentation, high rice-koji ratio; pale yellow and mildly sweet
  • Aka (red) miso - Long fermentation, higher soybean ratio; deep brown-red and intensely savory
  • Mugi (barley) miso - Made with barley koji; earthier and slightly rustic in character
  • Hatcho miso - A regional specialty from Aichi, Japan; aged soybean paste, almost black, very dense
  • Chickpea miso - A soy-free alternative; milder and less complex, common in vegan kitchens

Miso goes by several names depending on type - soybean miso, mugi miso, or simply "fermented soybean paste" on Western labels.

Barley-based versions are worth flagging for anyone avoiding gluten; the fermentation process doesn't always break it down fully, so it's worth reading about what happens to gluten during fermentation before assuming it's safe.

What Does miso paste Taste Like?

miso paste - What Is Miso Paste

Miso tastes like a compressed version of several fermented foods at once - think concentrated soy sauce crossed with the savory depth of aged Parmesan, with a warm, toasted grain quality underneath. That combination is umami at its most direct.

Sensory SnapshotModerate Intensity
👅 Flavor
umamisaltynuttysubtle sweet
✋ Texture
thick pastecreamy when whisked
👃 Aroma
earthy-fermentedwarm toasted grain

Light misos carry a genuine sweetness that makes them approachable straight from the tub. Red and hatcho misos, by contrast, have almost no sweetness - just dense, salt-forward intensity that softens when diluted into hot liquid.

Heat affects the paste too: a rolling boil drives off aromatic compounds, leaving a flat, one-dimensional saltiness rather than the layered fermented note you want.

Golden Rule
Add miso off the heat or in the final minute of cooking. Boiling it strips the aromatic complexity that makes it worth using.

How to Use miso paste

Miso functions as a finisher, a glaze, and a flavor base - three distinct roles that require different handling. Knowing which role you need stops the paste from overpowering a dish.

How Miso Paste Is Used
MethodBest ForTip
🥗 Raw / UnheatedDressings, vinaigrettes, compound butterWhisk into oil or acid first to break up the paste evenly
🍲 Dissolved in liquidMiso soup, ramen broth, noodle saucesAdd after removing from heat; strain through a fine mesh ladle
🔥 Glaze / broiledMiso-yaki fish, eggplant dengaku, tofuMix with mirin and sake; broil until just caramelized - watch closely
🧂 MarinadeMeats, mushrooms, firm tofuSalt content is high - reduce or skip added salt elsewhere
🥒 MisozukeQuick-pickled vegetables, fish filletsPack ingredient in paste for 4-24 hours; rinse before eating

Miso pairs naturally with dashi or kombu stock, where its salt and umami lock into the stock's own glutamates. Ginger, scallion, and sesame oil are reliable partners.

More surprising: miso and butter work well together - a spoonful stirred into compound butter gives roasted vegetables and steak a savory, rounded finish. Yuzu or lemon cuts the saltiness when the paste feels heavy in a sauce.

For fish dishes, white miso is the safer starting point - its sweetness complements delicate flesh without overwhelming it. Red miso handles richer proteins like salmon, pork belly, or beef short rib.

If you're building a broth and don't have dashi powder replacements on hand, a small amount of red miso stirred into plain water gives a surprisingly grounded base.

Try It In
🌶️Korean Ssamjang PasteMiso-like fermented depth meets gochujang heat→

How to Buy and Store miso paste

Look for miso in sealed tubs or vacuum-packed blocks, not loose or in unsealed containers. Good paste has a firm, slightly oily surface with uniform color - avoid anything with large dark patches or a dry, cracked top.

Best Pick
Labels that list the koji source and a production date are a reliable sign of quality. Shorter ingredient lists usually mean fewer additives and cleaner flavor.
  • For beginners - Start with shiro (white) miso; it's the most forgiving and widely available
  • For deeper flavor - Mugi or red miso; look for versions without added alcohol or MSG if you want cleaner fermented notes
  • For the longest shelf life - Red miso; higher salt content slows further fermentation after opening

Once opened, keep miso tightly sealed and refrigerated. Press a piece of plastic wrap directly onto the surface before closing the lid to limit oxidation.

Unopened miso stores for up to a year; opened and refrigerated, white miso holds for around 3 months, while red miso can last up to 12. For a full breakdown, see the guide to miso paste storage life.

If you ever run out mid-recipe, miso paste alternatives can work in a pinch, though none replicate the fermented complexity exactly.

Watch Out
Many misos use barley or wheat as the koji grain. If gluten is a concern, look specifically for rice-koji (kome miso) or certified gluten-free labels - not just "soy-based."

Start with White, Build from There

New to miso? White miso is the entry point - mild enough to use generously without second-guessing, sweet enough to work in dressings and compound butter without the dish tasting pickled. Once you're comfortable with how the paste dissolves and where its salt lands in a recipe, move to mugi or yellow miso for everyday soups and braises.

Red miso and hatcho are for when you want the fermented note front and center - ramen bases, long marinades, bold glazes. Think of the variety spectrum as a volume knob, not a quality scale.

Frequently Asked Questions

What is the difference between white and red miso?

Fermentation time is the main difference. White (shiro) miso ferments for weeks to a few months and tastes mild and slightly sweet. Red (aka) miso ferments for one to three years, producing a saltier, more intense flavor with less residual sweetness.

Is miso paste vegan?

Most miso paste is vegan - it contains soybeans, salt, and koji grain with no animal products. However, some brands add bonito (fish flakes) to dashi-style blended misos, so check ingredient labels if strict veganism matters.

Can you cook miso paste directly in boiling liquid?

Technically yes, but the flavor suffers. Prolonged boiling breaks down volatile aromatic compounds, leaving a flat, overly salty result. Add miso off the heat or in the final 30 seconds for best results.

Does miso paste contain probiotics?

Unpasteurized miso does contain live cultures, including lactic acid bacteria. Most commercially sold miso in Western supermarkets is pasteurized, which kills those cultures - look for "unpasteurized" or "nama miso" on the label if live probiotics are the goal.

How much miso paste should you use per serving?

For miso soup, one tablespoon per 250ml of dashi is a standard starting point. Glazes and marinades typically use one to two tablespoons per four portions, since the salt concentrates during cooking.

Slow Cooker Beef Shank Soup

March 31, 2026

Cooking beef shanks low and slow in a crockpot turns tough cuts into tender, fall-off-the-bone meat with a rich, beefy broth. The slow cooker handles everything - no babysitting, no constant stirring, just set it and walk away for 7-8 hours.

Slow Cooker Beef Shank Soup served on a plate

This is what you make when you want comfort food without the work. The beef develops deep flavor while the vegetables soften into the soup without turning to mush.

Good for meal prep, weeknight dinners, or cold weather when you need something hearty. The broth gets richer as it cooks, pulling flavor from the bone marrow and collagen.

QUICK SUMMARY

Slow cooker beef shank soup builds a rich, gelatinous broth from bone marrow and collagen over 7-8 hours on low heat. Brown the shanks first for deeper flavor, add vegetables in stages so they don't overcook, and skim the fat halfway through for a cleaner broth.

⏱️Hands-on time: 15 minutes prep, then the slow cooker does the rest
🔥Critical first step: Sear the beef shanks 4-5 minutes per side for caramelized flavor
⚠️Watch out: Adding vegetables too early turns them to mush - add root veggies midway, soft ones last 30 minutes

Table of Contents

Toggle
  • Why This Recipe Works
  • What You'll Need
    • Ingredient Details
  • Ingredient Swaps
  • What to Serve With It
  • Store and Reheat
  • Frequently Asked Questions
  • Slow Cooker Beef Shank Soup
    • Method 
    • Tried this recipe?

Why This Recipe Works

Beef shanks release collagen during slow cooking, which creates a velvety, slightly thick broth that coats your spoon. For a version that comes together quickly, this quick beef dish uses a similar slow-cooker method with wine for added depth.

Quick Reference
⏱️
Prep Time
15 min
🔥
Cook Time
7 hours (low) or 4 hours (high)
⏰
Total Time
7-8 hours
🍽️
Servings
6 servings
📊
Difficulty
Easy
🏷️
Category
Main Dish
💡
Quick Tip
Brown meat first for richer flavor
🎯
Best For
Weeknight | Meal prep

Five reasons this works:

  • Browning the meat before slow cooking locks in a caramelized crust that adds depth you can't get from raw meat hitting the pot
  • Low sodium broth gives you control over salt levels since the liquid reduces over 7 hours and concentrates
  • Staging vegetables by texture keeps carrots and celery intact while potatoes soften but don't dissolve
  • Skimming fat every 2 hours removes the greasy layer that forms as collagen breaks down from the shanks
  • Bone marrow melts into the broth during the long cook, creating a silky mouthfeel you don't get from lean cuts
Quick Tip
Add vegetables in stages - root vegetables 4 hours in, potatoes last 1 hour - to avoid mushy texture

What You'll Need

Ingredients for Slow Cooker Beef Shank Soup

Beef shanks cost less than tenderloin but deliver more flavor from the bone and marrow. For another slow-cooked beef option with similar prep ease, this quick beef dish uses chuck roast for a slightly different texture.

🍖
Protein
  • Beef shanks (3-4 pounds, bone-in)
🥬
Vegetables
  • Onion (1 large, diced)
  • Carrots (3 medium, sliced)
  • Celery (3 stalks, chopped)
  • Potatoes (2 medium, cubed)
  • Tomatoes (1 can diced, or 2 fresh)
🧄
Aromatics
  • Garlic (4 cloves, minced)
  • Bay leaves (2)
  • Fresh thyme or parsley
🥢
Liquid
  • Beef broth (6 cups, low sodium)
  • Red wine (½ cup, optional for deglazing)

Ingredient Details

  • Beef shanks
    Look for cross-cut shanks 1.5-2 inches thick with visible marrow in the center - the marrow melts into the broth
  • Low sodium beef broth
    Regular broth concentrates salt as it cooks down; low sodium lets you adjust seasoning at the end
  • Carrots and celery
    Cut into 1-inch pieces so they hold their shape after 4 hours of cooking
  • Potatoes
    Yukon Golds hold up better than russets; cut into 1.5-inch chunks to prevent falling apart
  • Bay leaves
    Remove before serving - they add subtle herbal flavor but turn bitter if left too long
  • Fresh herbs
    Add thyme at the start for background flavor, parsley at the end for brightness
  • Red wine for deglazing
    Optional but scrapes up the browned bits from searing for deeper flavor

Ingredient Swaps

Some substitutions change the texture more than the flavor, especially when swapping beef cuts. For another slow-cooked beef option with similar prep ease, this quick beef dish uses chuck roast for a slightly different texture.

Four swaps that work:

  • Beef shanks → beef brisket or chuck - Brisket shreds instead of falling off the bone; chuck gives tender chunks but less gelatinous broth (budget)
  • Potatoes → sweet potatoes - Adds natural sweetness and softer texture; cut into larger chunks since they cook faster (flavor)
  • Tomatoes → tomato paste - Use 2 tablespoons paste for concentrated acidity and thicker broth without chunks (method-swap)
  • Celery → fennel - Brings mild anise flavor that pairs well with beef; changes the soup profile slightly (flavor variation)

Beef Brisket or Chuck

Works for: Budget cooking when shanks aren't available; still tender after 7 hours

Skip if: You want that bone-marrow richness and gelatinous mouthfeel

Sweet Potatoes

Works for: Adding natural sweetness; holds shape better than russets

Skip if: You want traditional savory soup flavor without sweet notes

Instructions

The slow cooker needs 7-8 hours on low to break down the collagen in beef shanks fully. For another slow-cooked beef option with similar prep ease, this quick beef dish uses chuck roast for a slightly different texture.

  1. Sear the beef shanks: Heat a skillet over medium-high heat with 1 tablespoon oil. Brown shanks 4-5 minutes per side until deep golden crust forms. Transfer to slow cooker.

  2. Deglaze and build the base: Add ½ cup broth or wine to hot skillet, scrape up browned bits with a wooden spoon. Pour over shanks. Add remaining broth, onion, garlic, bay leaves, and thyme to slow cooker.

  3. Cook on low: Cover and cook on low 4 hours. Add carrots and celery. Cook another 2 hours on low.

  4. Add potatoes and finish: Stir in potatoes. Cook 1 more hour until beef falls off bone and potatoes are fork-tender. Skim fat from surface with a ladle.

  5. Season and serve: Remove bay leaves. Taste broth and add salt, pepper, or a splash of vinegar if needed. Stir in fresh parsley right before serving.

Golden Rule
Test meat doneness by pulling it with a fork - if it shreds easily around the bone, it's ready

What to Serve With It

Most hearty soups need something on the side to balance the richness and soak up the broth. Planning your beef tenderloin dinner works here too - many of the same sides pair well with this soup. For savory steak meal ideas, check that guide for more options.

Side DishPrepWhy It WorksHow to Serve
Crusty breadEasySops up rich broth without competing with beef flavorSlice thick, toast lightly, serve warm on the side
Simple green saladEasyAdds freshness and crunch to contrast soft soup textureToss greens with lemon vinaigrette, serve before or alongside
Steamed riceEasyFills out meal with neutral starch that absorbs brothScoop rice into bowl first, ladle soup over top
Roasted root vegetablesMediumEchoes soup flavors with caramelized edges for contrastRoast parsnips, turnips at 400°F for 25 min, serve on the side
Garlic breadEasyBold garlic flavor complements beefy brothButter bread, add minced garlic, broil 2-3 min until golden

Three ways to serve it:

  • Weeknight bowl: Ladle soup over steamed rice in a deep bowl, serve with crusty bread on the side for dipping
  • Meal-prep lunch: Pack soup in containers with bread separately so it doesn't get soggy; reheat and add fresh parsley before eating
  • Cold-weather dinner: Serve in wide bowls with roasted root vegetables and a simple green salad to balance the richness
Best Pick
Crusty bread is the easiest side - it requires zero cooking and soaks up every drop of broth

Store and Reheat

Beef shank soup thickens as it sits because the collagen continues to gel in the fridge. The potato wedges works best when it hits the table at the same time as the main. For a version that comes together quickly, something creamy like potato wedges pairs well as a side.

MethodTimeBest For
🍳 Stovetop10-15 min over medium heat, stirring occasionallyEven reheating without drying meat; adds water if too thick
📦 Microwave3-5 min in 1-minute intervals, stirring betweenQuick single servings; cover loosely to prevent splatter
🔥 Oven20 min at 325°F in covered dishLarge portions in oven-safe dish; stir halfway through

For best results when storing:

  • Cool soup quickly by dividing into shallow containers so it drops below 40°F within 2 hours
  • Skim hardened fat after chilling overnight - it solidifies on top and lifts off easily with a spoon
  • Store broth separately from meat and vegetables if meal-prepping to prevent vegetables from getting mushier
  • Freeze in portions using freezer-safe bags laid flat; thaw overnight in fridge before reheating
  • Add fresh herbs after reheating since parsley and thyme lose flavor during freezer storage

Frequently Asked Questions

How long to cook slow cooker beef shank soup at low?

Cook on low for 7-8 hours total. The meat should fall off the bone easily when pulled with a fork.

Can I make slow cooker beef shank soup ahead?

Yes - the soup tastes better the next day as flavors meld. Store in the fridge up to 4 days or freeze up to 3 months.

What goes with slow cooker beef shank soup?

Crusty bread, steamed rice, or a simple green salad work best. The bread soaks up broth while the salad adds freshness.

How do I know when slow cooker beef shank soup is done?

The beef should shred easily with a fork and the vegetables should be soft but not mushy. Potatoes should pierce cleanly with a knife.

Can I use other beef cuts instead of shank?

Yes - beef brisket or chuck roast work. Brisket shreds nicely while chuck gives tender chunks, but you lose the bone-marrow richness.

Can I freeze slow cooker beef shank soup?

Yes - freeze in portions for up to 3 months. Thaw overnight in the fridge and reheat on the stovetop, adding water if it's too thick.

How to thicken slow cooker beef shank soup broth?

Mix 1 tablespoon cornstarch with 2 tablespoons cold water, stir into soup during the last 10 minutes of cooking. Let it simmer to thicken.

Slow Cooker Beef Shank Soup served on a plate

Slow Cooker Beef Shank Soup

No ratings yet
Slow Cooker Beef Shank Soup yields a rich, gelatinous broth by cooking beef shanks low and slow for 7-8 hours. Brown the shanks first for caramelized flavor and add vegetables in stages to keep perfect texture without mushiness.
Print Recipe Pin Recipe
Prep Time 15 minutes mins
Cook Time 7 hours hrs
Total Time 7 hours hrs 15 minutes mins
Servings: 6 servings
Course: Main Dish
Cuisine: American
Ingredients Equipment Method Notes

Ingredients
  

  • 3-4 pounds beef shanks bone-in, cross-cut 1.5-2 inches thick
  • 1 large onion diced
  • 3 medium carrots sliced into 1-inch pieces
  • 3 stalks celery chopped into 1-inch pieces
  • 2 medium potatoes cubed into 1.5-inch chunks, preferably Yukon Gold
  • 1 can tomatoes diced, or 2 fresh tomatoes
  • 4 cloves garlic minced
  • 2 bay leaves
  • 1 bunch fresh thyme or parsley thyme added at start, parsley added at end
  • 6 cups beef broth low sodium
  • 0.5 cup red wine optional for deglazing
  • 1 tablespoon oil for searing beef

Equipment

  • Slow cooker Used for long, low heat cooking
  • Skillet Used to sear beef shanks and deglaze
  • Wooden spoon Used for scraping browned bits during deglazing
  • ladle Used for skimming fat from surface

Method
 

  1. Heat a skillet over medium-high heat with 1 tablespoon oil. Brown beef shanks 4-5 minutes per side until a deep golden crust forms. Transfer seared shanks to the slow cooker.
    3-4 pounds beef shanks, 1 tablespoon oil
  2. Add ½ cup beef broth or red wine to the hot skillet and scrape up the browned bits with a wooden spoon. Pour the liquid over beef shanks in the slow cooker. Then add remaining broth, diced onion, minced garlic, bay leaves, and fresh thyme to the slow cooker.
    6 cups beef broth, 0.5 cup red wine, 1 large onion, 4 cloves garlic, 2 bay leaves, 1 bunch fresh thyme or parsley
  3. Cover and cook the soup on low heat for 4 hours in the slow cooker.
  4. Add sliced carrots and chopped celery to the slow cooker. Continue cooking on low for another 2 hours.
    3 medium carrots, 3 stalks celery
  5. Stir in cubed potatoes and cook for 1 more hour until beef shanks fall off the bone and potatoes are fork-tender. Using a ladle, skim fat from the surface of the soup.
    2 medium potatoes
  6. Remove bay leaves from the soup. Taste broth and add salt, pepper, or a splash of vinegar if needed. Stir in fresh parsley just before serving.
    2 bay leaves, 1 bunch fresh thyme or parsley

Notes

  • Brown the beef shanks thoroughly before slow cooking for deeper flavor.
  • Add vegetables in stages to avoid mushy texture: root vegetables after 4 hours, potatoes last hour.
  • Skim fat from soup every 2 hours to keep broth clean and less greasy.

Tried this recipe?

Let us know how it was!

What Is Macadamia Nuts? [Taste, Uses & More]

March 31, 2026

Macadamia nuts show up in white chocolate cookies and Hawaiian desserts so often that it's easy to overlook what makes them distinct among tree nuts - a fat content so high the kernel almost melts on the tongue.

What Is Macadamia Nuts

Unlike hazelnut in cooking, which brings forward roasted, slightly bitter depth, macadamias offer a quieter, cream-forward richness that rarely competes with other flavors.

Understanding coconut butter swaps that work can also shed light on why macadamia butter lands differently - the fat profiles diverge in ways that matter in baking and spreads.

This profile covers how macadamias taste, how to cook with them well, and what to look for at the store.

QUICK SUMMARY

Macadamia nuts are rich, buttery tree nuts native to Australia with a mild, cream-forward flavor. Sold raw, roasted, or as butter and oil, they work in baking, crusts, salads, and confections. Shelf life runs up to a year refrigerated.

🌰Category: Tree nut, native to eastern Australia
🧈Flavor: Rich, buttery, mildly sweet, nutty-cream
🍪Best Uses: Cookies, nut crusts, nut butter, ice cream, salads
❄️Shelf Life: 1-3 months pantry, 6-12 months refrigerated
⚠️Watch For: Common tree-nut allergen; high calorie density per serving

What Is Macadamia Nuts?

The macadamia kernel comes from Macadamia integrifolia and a closely related species, both native to the subtropical rainforests of eastern Australia. Commercial production shifted heavily to Hawaii in the twentieth century, and today South Africa is also a major supplier.

The nut itself is small and round with a pale ivory color and a smooth, almost porcelain-like surface. Its shell is famously hard - among the hardest of any nut - and is removed before the kernel reaches retail.

Macadamias are sold in several forms:

  • 🌰 Raw shelled kernels - mild flavor, creamy texture, longest ingredient flexibility
  • Dry-roasted - deepened aroma, slightly firmer bite, ready to eat
  • Roasted and salted - common snack form, stronger salty-sweet contrast
  • Macadamia butter - blended whole kernels, used like peanut or almond butter
  • Macadamia oil - pressed from kernels, used in dressings and low- to medium-heat cooking

No other common nut matches their fat-to-protein ratio. Macadamias are roughly 75% fat by weight, which is what drives both their signature texture and their price.

What Does Macadamia Nuts Taste Like?

macadamia nuts - What Is Macadamia Nuts

Raw macadamias taste rich and mildly sweet with a cream note that sits between a cashew and actual butter. The sweetness is subtle - nothing like a pecan - and there's almost no bitterness.

Sensory SnapshotMild Intensity
👅 Flavor
butterymildly sweetnutty-cream
✋ Texture
densetender-crispcreamy when chewed
👃 Aroma
lightly sweetwarm roastedsubtle dairy-like

Heat changes the profile noticeably. Dry-roasting for 3-5 minutes develops a warm, faintly dairy-like aroma and firms the texture just enough to create a satisfying snap.

Compared to cashews - the closest flavor neighbor - macadamias are creamier and less starchy.

They're also milder than hazelnuts or pecans, which is why they pair well with ingredients like white chocolate and coconut rather than bolder flavors that would bury their character.

Golden Rule
Don't roast macadamias above 300°F for more than 8-10 minutes. Their high fat content makes them go from toasted to burned faster than most other nuts.

How to Use Macadamia Nuts

Baking is where macadamias are most recognized, particularly the white chocolate chip and macadamia cookie - a combination where the nut's buttery softness and the chocolate's sweetness reinforce each other. Finely chopping the kernels distributes flavor through the dough without creating large, hard chunks.

Crushed macadamias also work as a crust for fish or chicken, pressed into a coating before pan-frying or baking. The fat in the nut browns well and delivers flavor without a heavy breadcrumb layer.

In salads, toasted macadamias add richness alongside citrus vinaigrettes, where the acidity cuts through the nut's natural creaminess.

For savory applications, consider what the role pistachio plays in Middle Eastern dishes - macadamias fill a similar structural role in Australian and Hawaiian cooking, adding texture to both sweet and savory preparations.

How Macadamia Nuts Are Used
MethodBest ForTip
🥗 RawNut butter, ice cream mix-ins, no-bake barsBlend with a neutral oil if the paste is too thick
🍳 ToastedSalad topping, confections, brittleUse a dry skillet on medium-low; stir constantly
🥐 BakedCookies, crusted proteins, granolaChop fine for even distribution in dough
🫙 PressedMacadamia oil for dressings and low-heat sautésDon't use for high-heat frying - smoke point is moderate

Macadamia oil deserves mention on its own. Pressed from the kernels, it has a clean, mild flavor and works well as a finishing oil for dressings or light sautés. It's not suited for deep-frying. If you're serving the nuts alongside a Hawaiian-inspired spread, what pairs with hawaiian chicken kabobs covers side dishes where toasted macadamias would fit naturally.

Macadamias pair cleanly with white chocolate, coconut, lime, honey, brown sugar, sea salt, and dark chocolate. They clash with strong fishy sauces and long, high-moisture braises, which destroy their texture and mute their flavor entirely.

Try It In
🌰Cinnamon Sugar Roasted NutsShows how dry-roasting deepens the nut's aroma→🥗Waldorf Salad with Apples and WalnutsSwap walnuts for macadamias for a creamier texture→🍗Chicken Salad with Grapes and WalnutsMacadamias work in place of walnuts for less bitterness→

How to Buy and Store Macadamia Nuts

Look for pale ivory kernels that appear plump and uniform. Shriveled, darkened, or oily-looking nuts are a sign of age or improper storage.

When buying pre-packaged, favor vacuum-sealed or nitrogen-flushed bags - oxygen is the main driver of rancidity given the nut's high fat content.

Watch Out
Macadamias go rancid faster than lower-fat nuts. If you detect any sour, paint-like, or sharp chemical smell, discard the batch. Rancid nuts can't be rescued by roasting.

For storage, keep raw shelled macadamias in an airtight container away from heat and light. Opened packs belong in the refrigerator.

For longer holds, sealed macadamias freeze well past the one-year mark - a full breakdown of how long macadamia nuts keeps covers every storage scenario in detail.

Roasted macadamias have a shorter fridge life than raw because the heat accelerates oxidation. Buy roasted in smaller quantities unless you're working through them quickly.

Where to Start with Macadamia Nuts

Start with dry-roasting a small batch in a skillet over medium-low heat for 3-5 minutes. That single step shows you the full range of the nut's flavor - from the mild, creamy raw kernel to the warm, aromatic toasted version.

Once you're familiar with the flavor, the white chocolate cookie is the logical first bake.

From there, the crushed crust on fish or chicken is a quick next step with a very different application.

If you want to branch into other nuts with comparable richness, reviewing swapping out macadamia nuts will point you toward the closest alternatives for each use case.

Frequently Asked Questions

Are macadamia nuts healthy?

Yes, in moderation. Most of their fat is monounsaturated, including oleic and palmitoleic acids linked to cardiovascular health. They're calorie-dense - around 200 calories per ounce - so portion size matters.

Why are macadamia nuts so expensive?

Two reasons: the trees take 7-10 years to bear fruit, and the shell is extraordinarily hard, requiring industrial cracking equipment. Yield per tree is also lower than most commercial nut crops.

Can you substitute macadamia nuts for cashews?

Yes, in most applications. Macadamias are creamier and slightly richer, so the swap works well in baking, nut butter, and salads. Expect a milder, less starchy result.

Are macadamia nuts safe for dogs?

No. Macadamia nuts are toxic to dogs and can cause weakness, vomiting, tremors, and fever. Even small amounts can trigger a reaction, so keep them well out of reach.

Do macadamia nuts need to be refrigerated after opening?

Yes, once opened. Their high fat content makes them vulnerable to rancidity at room temperature, especially in warm climates. Seal tightly and refrigerate for up to 12 months.

Italian Saltimbocca alla Romana

March 31, 2026

You need 25 minutes and one skillet. No marinating, no breading, no sauce from scratch.

Italian Saltimbocca alla Romana served on a plate

Veal cutlets sear in butter while sage crisps onto prosciutto. The pan sauce comes together when you deglaze with white wine after the meat lifts out.

This is what you make on a weeknight when you want something that looks like you tried but doesn't need an hour of prep.

QUICK SUMMARY

Italian Saltimbocca alla Romana layers thin veal cutlets with prosciutto and fresh sage, then sears them in butter until golden. The high heat crisps the edges while keeping the meat tender. Use toothpicks to hold the layers together and cook fast - 1-2 minutes per side.

⏱️Time Reality: 15 minutes prep, 10 minutes cooking, no waiting between steps
🔥Critical Move: Pat veal dry before layering so it sears instead of steaming
⚠️Watch Out: Overcooking dries the veal - pull it at 145°F and rest 3 minutes

Table of Contents

Toggle
  • Why This Recipe Works
  • What You'll Need
    • Ingredient Details
  • Ingredient Swaps
  • What to Serve With It
  • Store and Reheat
  • Frequently Asked Questions
  • Italian Saltimbocca alla Romana
    • Method 
    • Tried this recipe?

Why This Recipe Works

Thin veal cooks in under 2 minutes per side, which means you get browning without drying out the meat. The prosciutto adds salt and richness while the sage crisps in the pan. Rich mains need something to cut through, and veal does exactly that. For a version that comes together quickly, try this classic veal dish that uses similar timing principles.

Quick Reference
⏱️
Prep Time
15 min
🔥
Cook Time
10 min
⏰
Total Time
25 min
🍽️
Servings
4 servings
📊
Difficulty
Medium
🏷️
Category
Main Dish
💡
Quick Tip
Thin veal, sear quick, deglaze for sauce
🎯
Best For
Weeknight | Entertaining

Five things that make this work:

  • Pound veal to ¼ inch thickness so it cooks evenly in 90 seconds per side
  • Sear in a hot pan at medium-high heat to brown the prosciutto without burning the sage
  • Secure layers with toothpicks so the prosciutto and sage stay flat against the veal
  • Deglaze with ⅓ cup white wine after removing the veal to build a quick pan sauce
  • Rest the cooked saltimbocca for 3 minutes so the juices redistribute before slicing
Quick Tip
Pat the veal completely dry with paper towels before layering - wet meat steams instead of searing and you lose the crispy edges

What You'll Need

Ingredients for Italian Saltimbocca alla Romana

Buy veal cutlets already sliced thin or ask the butcher to pound them for you. Fresh sage matters here - dried doesn't crisp the same way and loses the herbal punch. We keep a batch ready for nights like this - a creamy potato wedges side rounds out the plate without extra pan work.

🥩
Protein
  • 4 veal cutlets (4-6 oz each)
  • 4 thin slices prosciutto
🧄
Aromatics
  • 8-12 fresh sage leaves
🥢
Sauce & Fat
  • 3 tablespoon unsalted butter
  • 2 tablespoon olive oil
  • ⅓ cup dry white wine
  • 2 tablespoon lemon juice
🌶️
Seasoning
  • Salt and black pepper
  • Toothpicks or kitchen twine

Ingredient Details

  • Veal cutlets
    Look for pale pink meat with minimal fat - darker red means older veal that cooks tougher
  • Prosciutto
    Use thinly sliced Italian prosciutto, not thick-cut deli ham - it should be almost translucent
  • Fresh sage
    Pick leaves that are green without brown edges - dried sage turns bitter when seared
  • Unsalted butter
    Unsalted lets you control the salt level since prosciutto is already salty
  • Dry white wine
    Use Pinot Grigio or Sauvignon Blanc - avoid sweet wines that caramelize too fast
  • Olive oil
    Regular olive oil works fine - save extra virgin for finishing since high heat kills the flavor
  • Toothpicks
    Soak wooden toothpicks in water for 10 minutes so they don't burn in the pan

Ingredient Swaps

Veal isn't always stocked at regular grocery stores, so chicken breast works if you pound it thin enough. The texture changes slightly but the method stays the same. Most people skip dressing, but it balances the meal. For a version that comes together quickly, try this simple homemade dressing that works as a drizzle over the top.

Four swaps that work:

  • Veal cutlets → thin chicken breast or pork loin: Pound to ¼ inch thickness and cook for the same 1-2 minutes per side - texture is slightly different but method identical
  • Prosciutto → thin ham or pancetta: Less salt and different fat content but still adds savory richness - increase cooking time by 30 seconds if using thicker slices
  • Fresh sage → fresh thyme or rosemary: Changes the herbal note but maintains aromatic intensity - use half the amount since both are stronger than sage
  • Dry white wine → chicken broth with lemon juice: Use ⅓ cup broth plus 1 tablespoon lemon juice for alcohol-free option - sauce will be milder and less acidic

Chicken Breast

Works for: Budget meals, easier to find than veal, cooks in same time when pounded thin

Skip if: You want the traditional tender texture - chicken is slightly firmer even when cooked properly

Pork Loin

Works for: Similar mild flavor to veal, tenderizes well when pounded, holds prosciutto layers

Skip if: You're cooking for guests expecting authentic Roman style - pork changes the dish identity

Instructions

Cook no more than 3 cutlets at once so they have room to sear instead of steam. The salad works best when it hits the table at the same time as the main. We keep a batch ready for nights like this - a crisp green salad with crusty bread soaks up the pan sauce.

Five steps to tender saltimbocca:

  1. Prep the veal: Pound each cutlet to ¼ inch thickness using a meat mallet or rolling pin between two sheets of plastic wrap. Pat completely dry with paper towels. Season both sides lightly with salt and black pepper.

  2. Layer and secure: Place 2-3 sage leaves on one side of each cutlet. Lay one slice of prosciutto over the sage, pressing to adhere. Secure with 1-2 toothpicks through all layers to keep them flat during cooking.

  3. Sear the saltimbocca: Heat 1 tablespoon butter and 1 tablespoon olive oil in a large skillet over medium-high heat until butter foams. Add cutlets prosciutto-side down, cook 1-2 minutes until golden and slightly crispy. Flip, cook another 1-2 minutes until veal reaches 145°F internal temperature. Remove to a plate and rest.

  4. Build the pan sauce: Add remaining 2 tablespoon butter to the skillet. Pour in ⅓ cup white wine, scraping up browned bits from the bottom. Simmer 2-3 minutes until reduced by half and slightly thickened. Stir in 2 tablespoon lemon juice.

  5. Finish and serve: Remove toothpicks from rested veal. Spoon pan sauce over each cutlet. Serve immediately while edges are still crispy.

Watch Out
Don't overcrowd the pan - cook 3 cutlets max at once with at least 1 inch of space between them or the prosciutto steams instead of crisping

What to Serve With It

You need something mild that won't compete with the prosciutto salt and sage punch. Starchy sides soak up the wine sauce without overwhelming the delicate veal. A good potato wedges can make or break the plate. For a version that comes together quickly, check out these savory chicken dish ideas that work with similar Roman-style plates.

Side DishPrepWhy It WorksHow to Serve
Garlic sautéed spinachEasyQuick, light, cuts through rich prosciuttoSauté 5 min with garlic, serve warm on the side
Roasted baby potatoesEasyCrispy, filling, soaks up wine sauceRoast at 425°F for 25 min, toss with herbs
Simple arugula saladEasyPeppery contrast balances salty prosciuttoDress with lemon juice and olive oil
Risotto alla milaneseInvolvedLuxurious, creamy, complements delicate vealServe in shallow bowl with veal on top
Steamed green beansEasyFresh, mild, adds crunch and colorSteam 4 min, toss with butter and lemon

Three ways to serve it:

  • Weeknight plate: Pair with roasted baby potatoes and steamed green beans for a balanced meal that takes 30 minutes total
  • Date night: Serve over creamy polenta with sautéed spinach and a glass of white wine
  • Entertaining: Plate on risotto alla milanese with roasted asparagus and extra pan sauce drizzled over the top
Best Pick
Roasted baby potatoes with herbs - they soak up the wine sauce and cook while you prep the veal with no extra attention needed

Store and Reheat

Saltimbocca tastes best fresh when the prosciutto is still slightly crispy. Leftovers work for lunch the next day but lose some texture. The potato works best when it hits the table at the same time as the main. We keep a batch ready for nights like this - this quick potato dish reheats faster than the veal and stays crispy.

MethodTimeBest For
🍳 Stovetop3-4 min low heatRetains most texture, add 1 tablespoon butter to pan for moisture
🔥 Oven8-10 min at 325°FEven warming without drying, cover with foil for first 5 minutes
📦 Microwave1-2 min low powerQuick reheating, watch for dryness - add sauce to moisten

For best results when storing:

  • Store in airtight container in fridge for 3-4 days max - veal texture degrades after that
  • Place parchment between stacked cutlets so prosciutto doesn't stick together
  • Keep pan sauce separate in small jar - reheat sauce separately and pour over warmed veal
  • Freeze for up to 1 month in single layer on parchment, then transfer to freezer bag
  • Thaw frozen saltimbocca in fridge overnight before reheating - don't microwave from frozen or veal turns rubbery

Frequently Asked Questions

Can I make saltimbocca alla romana ahead and refrigerate?

You can assemble the veal with prosciutto and sage up to 4 hours ahead, then cover and refrigerate until ready to cook. Don't sear in advance - the prosciutto gets soggy and the veal dries out when reheated.

What is the best way to reheat saltimbocca without drying out the veal?

Use the stovetop method - heat 1 tablespoon butter in a pan over low heat for 3-4 minutes, covered. The butter adds moisture back while gentle heat prevents overcooking.

How do I know when the veal in saltimbocca is fully cooked but still tender?

Check with an instant-read thermometer - pull the veal at 145°F internal temperature and rest for 3 minutes. It should feel firm but spring back when pressed, not rubbery or mushy.

What causes soggy prosciutto and how can I fix it?

Wet veal and low heat are the main causes - pat the cutlets completely dry before layering and use medium-high heat so the prosciutto crisps in the first 60 seconds. If it's already soggy, you can't fix it, but next time increase the pan temperature.

Can I substitute chicken breast instead of veal cutlets in saltimbocca?

Yes - pound chicken breast to ¼ inch thickness and cook for the same 1-2 minutes per side. The texture is slightly firmer than veal but the method and timing stay identical.

Italian Saltimbocca alla Romana served on a plate

Italian Saltimbocca alla Romana

No ratings yet
Italian Saltimbocca alla Romana features thin veal cutlets layered with prosciutto and fresh sage, seared in butter for a crisp exterior while keeping the meat tender. A quick pan sauce made by deglazing with white wine brightens the dish, perfect for a flavorful weeknight meal.
Print Recipe Pin Recipe
Prep Time 15 minutes mins
Cook Time 10 minutes mins
Total Time 25 minutes mins
Servings: 4 servings
Course: Main Dish
Cuisine: Italian
Ingredients Equipment Method Notes

Ingredients
  

  • 4 veal cutlets thin, 4-6 oz each, pounded to ¼ inch thickness
  • 4 slices prosciutto thinly sliced Italian prosciutto
  • 8-12 leaves fresh sage green, without brown edges
  • 3 tablespoon unsalted butter divided
  • 2 tablespoon olive oil divided
  • 0.33 cup dry white wine Pinot Grigio or Sauvignon Blanc recommended
  • 2 tablespoon lemon juice
  • salt and black pepper to lightly season veal
  • toothpicks soaked for 10 minutes to prevent burning

Equipment

  • Skillet Used for searing veal and cooking pan sauce
  • Meat mallet Used to pound veal cutlets to ¼ inch thickness

Method
 

  1. Pound each veal cutlet to ¼ inch thickness using a meat mallet or rolling pin between two sheets of plastic wrap. Pat dry completely with paper towels. Season both sides lightly with salt and black pepper.
    4 veal cutlets, salt and black pepper
  2. Place 2-3 fresh sage leaves on one side of each cutlet. Lay one slice of prosciutto over the sage, pressing to adhere. Secure all layers with 1-2 soaked toothpicks to keep them flat during cooking.
    4 slices prosciutto, 8-12 leaves fresh sage, toothpicks
  3. Heat 1 tablespoon butter and 1 tablespoon olive oil in a large skillet over medium-high heat until butter foams. Add cutlets prosciutto-side down, cooking 1-2 minutes until golden and slightly crispy. Flip and cook another 1-2 minutes until veal reaches 145°F internal temperature. Remove cutlets to a plate and let rest.
    3 tbsp unsalted butter, 2 tbsp olive oil
  4. Add remaining 2 tablespoon butter to the skillet. Pour in ⅓ cup dry white wine, scraping browned bits from the bottom. Simmer 2-3 minutes until reduced by half and thickened slightly. Stir in 2 tablespoon lemon juice.
    3 tbsp unsalted butter, 0.33 cup dry white wine, 2 tbsp lemon juice
  5. Remove toothpicks from the rested veal cutlets. Spoon the pan sauce over each cutlet and serve immediately while edges remain crispy.
    toothpicks

Notes

  • Pat veal dry before cooking to ensure proper searing and crispy edges.
  • Do not overcrowd the pan; cook max 3 cutlets at a time for best texture.
  • Pull veal at 145°F internal temperature and allow rest for 3 minutes to retain juiciness.

Tried this recipe?

Let us know how it was!

What Is Kefir? [Taste, Uses & More]

March 31, 2026

You spot it in the refrigerated aisle - a bottle labeled kefir, sometimes next to the yogurt drinks, sometimes near the buttermilk. It pours like drinkable yogurt, smells faintly of fermented bread, and has a slight fizz that catches first-timers off guard.

What Is Kefir

Most people assume it's just a thinner version of yogurt. It isn't - kefir grains, the living starter culture behind it, introduce yeasts alongside bacteria, which changes both the flavor and the function of this drink in cooking.

QUICK SUMMARY

Kefir is a fermented dairy drink made with live yeast-and-bacteria cultures. It's tangy, slightly fizzy, and thinner than yogurt - built for drinking, marinating, and baking. Shelf life runs 7-14 days opened, and the flavor grows tarter as it ages.

🥛What It Is: Fermented milk inoculated with kefir grains - yeast and bacteria
👅Flavor: Tangy, lightly effervescent, with a faint bready yeast note
🍳Best Uses: Drinking plain, marinating meat, baking quick breads, cold dressings
❄️Storage: Sealed in the coldest fridge spot; shake before using
📅Shelf Life: Unopened 2-3 weeks; opened 7-14 days with increasing tartness

What Is Kefir?

Kefir is a fermented dairy drink originating in the Caucasus and Central Asia, where it has been made for centuries using kefir grains - soft, cauliflower-like clumps of lactic acid bacteria and wild yeasts.

Those grains ferment fresh milk over 24 hours or more, producing a pourable, tangy drink sometimes called kephir or milk kefir depending on the region.

Unlike yogurt, fermentation here involves both bacterial and yeast activity. That dual fermentation is what produces kefir's mild natural carbonation and trace alcohol - typically under 1%.

Standard store-bought milk kefir comes from cow's milk, however goat and sheep milk versions exist in traditional markets. You'll also find water kefir, which uses different grains and a sugar-water base - a separate product entirely, with no dairy.

  • 🌾 Kefir grains - the active starter, reusable indefinitely if fed regularly
  • 🫧 Long-fermented kefir - sharper and more alcoholic, common in Russian and Central Asian households
  • 🧀 Kefir cheese - made by straining kefir until thick, similar to [labneh](https://forkliftkitchen.com/labneh-cheese-substitutes/) in texture
  • 🌱 Plant-milk kefir - made from oat, coconut, or almond milk using kefir grains; lower in probiotics than the dairy original

What Does Kefir Taste Like?

Kefir's flavor sits between drinkable yogurt and a very mild, fizzy cultured buttermilk. The dominant note is bright lactic acidity - clean and sharp without being harsh.

Underneath that is a subtle yeasty undertone, similar to the background of a good sourdough or a mild kombucha, though far less assertive.

Fresh kefir has a light creaminess that rounds out the tang. By day 10 or 12 after opening, the tartness intensifies and the effervescence builds - still edible, but noticeably sharper.

Sensory SnapshotModerate Intensity
👅 Flavor
tangylacticfaintly yeasty
✋ Texture
pourablelightly effervescent
👃 Aroma
fresh milky tangfermented bread

Heat changes things fast. Warm kefir too aggressively and the proteins tighten, the whey separates, and the fresh tang turns sharp and grainy.

Use it cold or barely warmed.

How to Use Kefir

Kefir's best role is cold. Drink it straight for the probiotic benefit, blend it into smoothies with berries and banana, or whisk it into salad dressings for creaminess without heaviness. Its tang sharpens cucumber-dill cold soups - a staple in Eastern European kitchens - and works as a direct swap for buttermilk in pancakes and quick breads.

For meat, kefir is a strong marinade base. The lactic acid tenderizes chicken or lamb without the harshness of vinegar.

Use it with garlic, lemon, and olive oil for a Caucasian-style marinade; it works particularly well on tenders and thighs.

Watch Out
Don't boil kefir. High heat causes grainy curdling as the proteins seize and the whey splits out. If a recipe calls for warm kefir, heat it gently off direct flame and pull it before it steams.
How Kefir Is Used
MethodBest ForTip
🥗 Cold/RawDrinking, smoothies, dressings, cold soupsShake the bottle first - whey settles at the bottom
🫙 MarinadeChicken, lamb, pork - any cut that benefits from tenderizingMarinate 4-8 hours; overnight can over-tenderize
🥞 BakingPancakes, quick breads, waffles, muffinsSub 1:1 for buttermilk; adds slight tang and lift
🍲 Lightly WarmedWarm sauces, soups finished off heatAdd at the end; never let it boil

Kefir pairs cleanly with cucumber and dill, roasted beets and chives, and honey with any berry. Avoid strongly bitter greens - their edge clashes with kefir's own acidity rather than balancing it.

If you've used kefir in Belgian yeast waffles or quick breads, the same logic applies to the chicken marinades below.

Try It In
🧄Air Fryer Garlic Parmesan Chicken TendersKefir marinade tenderizes the chicken before the parmesan crust goes on→🍯Air Fryer Honey Garlic Chicken TendersThe tang of kefir balances the sweetness of honey in the glaze→🍋Air Fryer Lemon Pepper Chicken TendersKefir and lemon together make a bright, citrus-forward marinade→

How to Buy and Store Kefir

At the store, check labels for "live cultures" or "contains kefir grains" - this confirms active fermentation rather than a pasteurized-after-culturing product. A bottle with slight separation or a gentle fizz when opened is normal and expected.

A rancid smell is not - that means it's past usable.

Golden Rule
Store kefir in the coldest part of the fridge - back of a shelf, not the door. The door's temperature swings accelerate souring and shorten how long opened kefir lasts.

Opened kefir holds for 7-14 days, though tartness and carbonation both increase toward the end. Unopened bottles last 2-3 weeks from production - check the date on the kefir's shelf life rather than the purchase date.

Shake gently before pouring to redistribute settled whey.

If you're comparing freshness timelines, sour cream follows similar refrigerated rules, though it doesn't carbonate further in storage the way kefir does.

Start Here With Kefir

New to kefir? Drink it plain first, ideally a fresh bottle within a day or two of purchase. That's when the flavor is mildest and most representative of what the ingredient can do.

From there, use it as a buttermilk substitute in your next batch of pancakes - a direct 1:1 swap with no adjustment. Once you understand how it behaves with heat and acid, the marinades and dressings follow naturally.

If kefir isn't available, see our roundup of kefir alternatives for the closest options by use case.

Frequently Asked Questions

Is kefir the same as yogurt?

No. Both are fermented dairy, however kefir uses a mixed yeast-and-bacteria starter while yogurt uses bacteria only. That difference gives kefir its mild effervescence, thinner consistency, and faint yeasty note that yogurt doesn't have.

Can lactose intolerant people drink kefir?

Many can, in moderate amounts. Fermentation breaks down a significant portion of lactose, leaving less than you'd find in regular milk. Tolerance still varies by individual - start with a small amount and assess your response.

How fizzy is kefir compared to kombucha?

Much less fizzy. Kefir has a gentle effervescence you mostly feel on the finish rather than in big bubbles. Kombucha is actively carbonated - more like a light sparkling drink. Kefir's carbonation also increases the longer it sits after opening.

How to use kefir in baking?

Substitute it 1:1 for buttermilk in any quick bread, muffin, or pancake recipe. The acidity reacts with baking soda the same way buttermilk does, producing lift. Don't use it in recipes that require extended heat above a simmer - it will curdle.

Does kefir taste sour right from the start, or does it get more sour over time?

Both. Fresh kefir has a mild, clean tang. It sharpens noticeably after opening as live cultures continue fermenting in the bottle. By the end of its 14-day window, the tartness is considerably more pronounced than day one.

« Previous Page
Next Page »

Primary Sidebar

ForkliftKitchen recipe developer

Welcome!

Recipe Developer · 12+ Yr Kitchen Veteran

I'm the recipe developer behind this site, focused on practical, well-tested dishes and smart ingredient swaps. Every recipe is written to be clear, reliable, and easy to make at home.

650+ Recipes
12+ Yrs Exp.
3x Tested
Our Story →

As Featured In

Allrecipes

TASTE OF HOME

Food52

HUFFPOST

Yahoo! Life

Our Editorial Standards

  • ✓ Every recipe tested at least 3 times before publishing
  • ✓ Substitutes verified by real kitchen trials, not guesswork
  • ✓ Reviewed for accuracy by our editorial team
  • ✓ Updated regularly with seasonal info and reader feedback

Most Popular

  • Creamy Lemon Shrimp Linguine
    Creamy Lemon Shrimp Linguine
  • Creamy Garlic Mushroom Chicken
    Creamy Garlic Mushroom Chicken
  • Sesame Ginger Chicken Noodle Bowls
    Sesame Ginger Chicken Noodle Bowls
  • Baked Lemon Herb Fish Fillets
    Baked Lemon Herb Fish Fillets
  • Veggie Loaded Fried Rice
    Veggie Loaded Fried Rice
  • Spicy Garlic Shrimp Stir Fry
    Spicy Garlic Shrimp Stir Fry

Join 8,000+ Home Cooks

Weekly Kitchen Tips

Easy recipes, smart substitutes, and real cooking shortcuts — every Thursday.

Subscribe Free →


Side Dishes

  • What to Serve With Asian Salmon? 15 Best Side Dishes
    What to Serve With Asian Salmon? 15 Best Side Dishes
  • Side Dishes for Strawberry Spinach Salad
    15 Best Side Dishes for Strawberry Spinach Salad
  • Sides for Grilled Cauliflower Steaks to Complete the Meal
    15 Sides for Grilled Cauliflower Steaks to Complete the Meal
  • 15 Sides To Serve With Calabacitas
    15 Best Sides for Calabacitas – Mexican-Inspired Favorites


Substitutes

  • 7 Best Substitutes for Hot Sauce in Marinades & Stir-Fries
    7 Best Substitutes for Hot Sauce in Marinades & Stir-Fries
  • 9 Best Substitutes for Butter in Baking and Cooking
  • 7 Best Substitutes for Tagliatelle for Italian Pasta Dishes
    7 Best Substitutes for Tagliatelle for Italian Pasta Dishes
  • 7 Best Substitutes for Udon Noodles in Asian Stir-Fries
    7 Best Substitutes for Udon Noodles in Asian Stir-Fries


Browse by Topic

  • Side Dishes320
  • Substitutes785
  • Dinner163
  • Air Fryer77
  • Taste Profiles484
  • Food Storage123


Reader Reviews

★★★★★

"Finally a food blog that tells you exactly why a substitute works instead of just listing options."

— Sarah M., via email

★★★★★

"The side dish recommendations are so specific — saved my dinner party twice this month."

— James R., Pinterest comment

★★★★★

"I trust this site more than most because they actually test everything. You can tell."

— Priya K., blog comment

Footer

↑ Back to Top

Forklift Kitchen

We do the heavy lifting so you can enjoy the cooking. Tested recipes, smart substitutes, and perfect pairings—built for real home cooks.

Content

  • Recipes
  • Substitutes
  • What to Serve With
  • Blog

Company

  • About Us
  • Contact
  • Subscribe

Legal

  • Privacy Policy
  • Terms of Service

As an Amazon Associate I earn from qualifying purchases.

© 2026 Forklift Kitchen.

Rate This Recipe

Your vote:


A rating is required
A name is required
An email is required