• Skip to primary navigation
  • Skip to main content
  • Skip to primary sidebar
  • Recipe Index
    • Air Fryer
  • Side Dishes
  • Substitutes
  • About
  • Contact
  • Subscribe

ForkLiftKitchen

menu icon
go to homepage
  • Recipe Index
    • Air Fryer
  • Side Dishes
  • Substitutes
  • About
  • Contact
  • Subscribe
subscribe
search icon
Homepage link
  • Recipe Index
    • Air Fryer
  • Side Dishes
  • Substitutes
  • About
  • Contact
  • Subscribe
×

Blog

Spanish Flan Caramel

March 31, 2026

When you need a dessert that works for weeknight meals or family gatherings, flan delivers with minimal hands-on time. One custard base, caramel made right in the pan, and the oven handles the rest while you clean up.
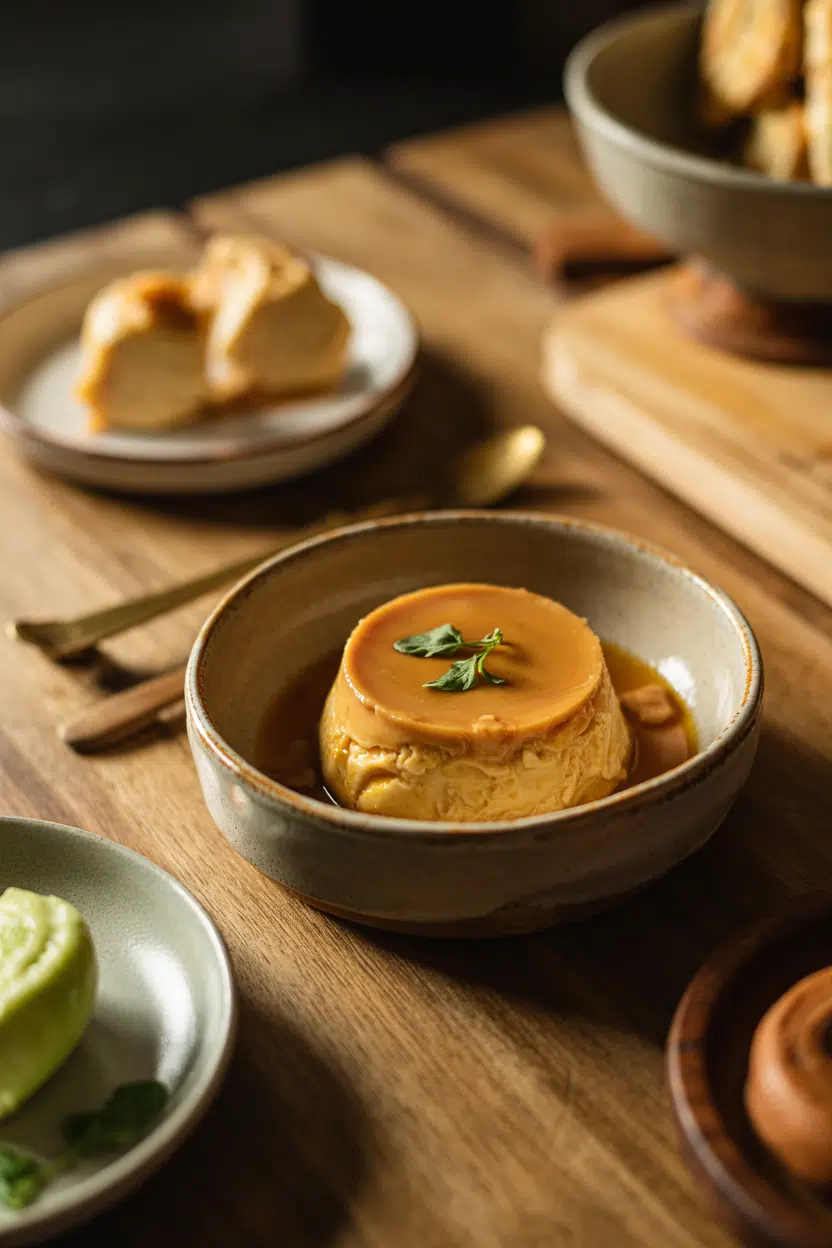
Spanish Flan Caramel served on a plate

The water bath does the heavy lifting. It keeps the custard smooth and prevents cracks while the caramel forms a glassy top layer.

Perfect for budget cooking when you want something impressive without specialty ingredients or advanced techniques.

QUICK SUMMARY

Spanish flan caramel is a smooth custard dessert with a glassy caramel top that bakes in a water bath. The water bath prevents cracking and curdling while the eggs set into silky texture. Make it ahead - it needs at least 4 hours to chill and firm up completely.

⏱️Time Reality: 15 min prep, 50 min baking, 4+ hours chilling before serving
🔥Critical Move: Temper eggs slowly with warm milk to avoid scrambling the custard
⚠️Watch Out: Stop caramel at amber color or it turns bitter - remove pan from heat immediately

Why This Recipe Works

The water bath creates gentle, even heat that cooks custard without bubbles or cracks. For a version that comes together quickly, this juicy chicken side dish uses the same baking method with different timing.

Quick Reference
⏱️
Prep Time
15 min
🔥
Cook Time
50 min
⏰
Total Time
1 hr 10 min
🍽️
Servings
6 servings
📊
Difficulty
Easy
🏷️
Category
Dessert
💡
Quick Tip
Use water bath to avoid cracked custard
🎯
Best For
Weeknight | Entertaining | Budget

What makes this work:

  • Baking at 325°F keeps custard smooth - higher temps cause bubbles and rubbery texture
  • Whole milk creates creamy base - low-fat versions turn watery and lack richness
  • Tempering eggs prevents scrambling - adding hot milk slowly keeps proteins from seizing
  • Straining custard removes lumps - catches any cooked egg bits before baking
  • Caramel stops at amber color - darker means bitter, lighter means it won't set properly
Quick Tip
Fill water bath halfway up ramekins with hot tap water before sliding pan into oven - cold water delays cooking

What You'll Need

Ingredients for Spanish Flan Caramel

Stock your pantry with basic dairy and eggs, and you're halfway there. We keep a batch ready for nights like this - this simple homemade sauce uses similar pantry staples with different timing.

🥛
Dairy Base
  • 3 cups whole milk
  • 1 can sweetened condensed milk (optional)
  • ½ cup heavy cream (optional)
🥚
Structure
  • 6 large eggs
  • Pinch of salt
🍬
Sweeteners
  • 1 cup granulated sugar (caramel)
  • ⅓ cup granulated sugar (custard)
  • ¼ cup water
🌿
Flavor
  • 2 teaspoon vanilla extract
  • Lemon peel (optional)

Ingredient Details

  • Whole milk
    Use full-fat for creamy texture - 2% or skim turns watery and lacks body
  • Large eggs
    Room temp eggs blend smoother and temper faster than cold ones straight from fridge
  • Granulated sugar for caramel
    White sugar makes clear amber caramel - brown sugar works but darkens color and flavor
  • Vanilla extract
    Add after milk cools slightly to preserve vanilla compounds that evaporate in high heat
  • Water for caramel
    Helps sugar dissolve evenly before boiling - skip it and sugar scorches in patches
  • Sweetened condensed milk
    Optional but makes richer, denser flan - standard version uses only whole milk
  • Salt
    Tiny pinch enhances sweetness without tasting salty - balances caramel and custard

Ingredient Swaps

Swapping dairy changes texture more than flavor, so pick based on what you want. For a version that comes together quickly, homemade nougat recipe uses similar sweetening techniques with different base ingredients.

Four swaps that work:

  • Almond milk or oat milk instead of whole milk - dairy-free option with lighter body and slight nut or grain taste, texture less creamy
  • Evaporated milk plus sugar instead of sweetened condensed milk - budget swap that cuts sweetness slightly, similar richness
  • Vanilla bean paste instead of extract - more intense vanilla flavor with visible specks, no texture change
  • Brown sugar instead of white for caramel - deeper molasses notes and darker amber color, same sweetness level

Whole Milk Only

Works for: classic texture, lighter custard, budget-friendly

Skip if: you want ultra-rich, dense flan

With Sweetened Condensed Milk

Works for: richer texture, firmer set, holiday or party desserts

Skip if: you prefer lighter, less sweet custard

With Heavy Cream

Works for: silkiest texture, most luxurious mouthfeel

Skip if: you want standard flan or watching calories

Instructions

Caramel takes 8 minutes, custard assembly takes 5, then the oven does the rest. Most people skip this side, but it balances the meal - rich beef side dish uses similar oven technique with savory ingredients instead.

  1. Make caramel: Heat 1 cup sugar and ¼ cup water in saucepan over medium heat without stirring until amber color appears, 6-8 minutes. Pour immediately into ramekins or flan mold, swirl to coat bottom evenly, and let cool 5 minutes while caramel hardens.

  2. Warm milk: Heat whole milk in saucepan over medium heat until steaming but not boiling, about 5 minutes. Remove from heat, stir in vanilla extract and salt, and let cool 3 minutes so it won't scramble eggs.

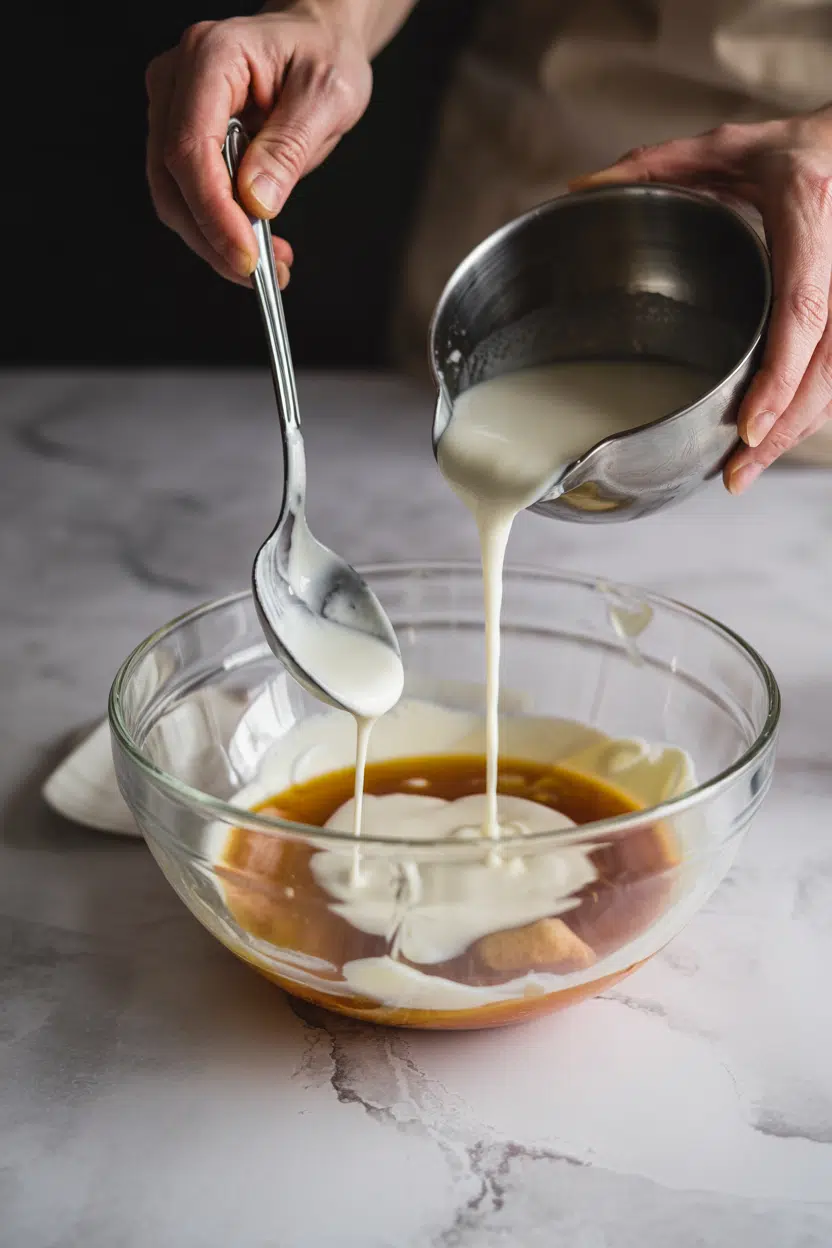
  3. Temper eggs: Whisk eggs and ⅓ cup sugar in large bowl until blended but not frothy. Pour warm milk into eggs in slow, steady stream while whisking constantly, taking 1-2 minutes to avoid curdling. Strain custard through fine mesh strainer into clean bowl.

  4. Bake in water bath: Pour custard into caramel-coated ramekins. Place ramekins in baking dish, fill dish with hot water halfway up sides of ramekins, and bake at 325°F for 45-55 minutes until edges set firmly but center jiggles slightly when shaken.

  5. Cool and chill: Remove ramekins from water bath carefully and cool on wire rack 30 minutes. Cover with plastic wrap and refrigerate at least 4 hours or overnight until custard firms completely and caramel liquefies.

Watch Out
Stop whisking eggs once combined - overbeating incorporates air bubbles that create spongy texture instead of smooth custard

What to Serve With It

Flan needs something bright or crunchy to cut through the creamy sweetness. A good nougat can make or break the plate, but flan pairs best with lighter sides that refresh the palate between bites.

Side Dish Prep Why It Works How to Serve
Fresh berries Easy Tart berries cut through caramel sweetness and add bright color Scatter around plate or pile on top of flan slice
Whipped cream Easy Airy texture lightens dense custard without adding much sweetness Dollop on side or swirl on top before serving
Espresso or coffee Easy Bitter coffee balances caramel vanilla notes and cleanses palate Serve hot in small cups alongside plated flan
Citrus salad Easy Acidic citrus refreshes mouth and contrasts creamy texture Plate orange and grapefruit segments on the side
Almond biscotti Easy Crunchy texture contrasts soft custard, nutty flavor complements caramel Stand two cookies upright on plate or serve on side for dipping

Three ways to serve it:

  • For weeknight desserts: Serve flan with fresh berries and mint leaves for quick garnish that adds color and freshness
  • For holiday meals: Add whipped cream and extra caramel sauce drizzled over top for richer presentation
  • For parties: Plate individual ramekins with citrus salad and sparkling wine to cleanse palate between courses
Best Pick
Serve flan with espresso and almond biscotti - bitter coffee and crunchy cookies balance creamy sweetness perfectly

Store and Reheat

Flan keeps well in the fridge and actually improves after a day when caramel fully liquefies. Rich mains need something to cut through, and this side does exactly that - for a simple tahini on the side with similar make-ahead benefits.

Method Time Best For
🍳 Room Temp 15-20 min Best texture - pull from fridge before serving, no reheating needed
📦 Microwave 20-30 sec low power Single servings when you want slightly warm custard, watch closely to avoid curdling
🔥 Double Boiler 5 min gentle warming Warming multiple servings without texture loss, keeps custard smooth

For best results when storing:

  • Cover tightly: Wrap ramekins with plastic wrap pressed directly on surface to prevent skin from forming on custard
  • Fridge life: Store up to 3-4 days in airtight container or covered ramekins, texture stays smooth throughout
  • Unmold before storing: Run thin knife around edge and flip onto plate, then cover - caramel stays liquid when stored upside down
  • Avoid freezing solid custard: Texture turns grainy and watery when thawed, caramel separates from custard
  • Serve cold or room temp: Flan tastes best chilled straight from fridge or after sitting 15 minutes at room temp

Frequently Asked Questions

Can I substitute evaporated milk for whole milk in Spanish flan?

Yes, evaporated milk makes richer custard with firmer texture. Use 1 can (12 oz) evaporated milk plus 1½ cups whole milk to replace 3 cups whole milk, and add 2 tablespoons sugar to match sweetness.

How should I store leftover flan and how long does it last?

Cover ramekins tightly with plastic wrap and refrigerate 3-4 days. Unmold onto plates before storing to keep caramel liquid, or leave in ramekins and unmold when ready to serve.

What are the visual cues that indicate Spanish flan is fully cooked?

Edges should be set firmly and pull slightly from sides of ramekin, while center jiggles like gelatin when you shake pan gently. Custard continues cooking as it cools, so slight jiggle in center is correct.

Why did my flan turn out rubbery and how can I avoid it?

Rubbery texture comes from overbaking or overmixing eggs. Bake at 325°F exactly, remove when center still jiggles, and whisk eggs gently just until combined without beating in air bubbles.

How do I scale the Spanish flan recipe for larger groups?

Double all ingredients and use 12 ramekins or two 9-inch flan molds. Baking time stays the same for individual ramekins but increases to 65-75 minutes for larger molds until edges set and center jiggles.

Spanish Flan Caramel served on a plate

Spanish Flan Caramel

No ratings yet
Spanish flan caramel is a smooth custard dessert baked in a water bath to ensure a silky texture and prevent cracks. It features a glassy caramel top and requires minimal hands-on time, making it perfect for weeknight meals or family gatherings.
Print Recipe Pin Recipe
Prep Time 15 minutes mins
Cook Time 50 minutes mins
Total Time 1 hour hr 5 minutes mins
Servings: 6 servings
Course: Dessert
Cuisine: Spanish
Ingredients Equipment Method Notes

Ingredients
  

  • 3 cups whole milk Use full-fat for creamy texture; low-fat or skim may turn watery
  • 1 can sweetened condensed milk Optional for richer, denser flan
  • 0.5 cup heavy cream Optional for silkiest texture
  • 6 large eggs Room temperature recommended for smoother blending
  • 1 pinch salt Enhances sweetness without tasting salty
  • 1 cup granulated sugar For caramel
  • 0.33 cup granulated sugar For custard
  • 0.25 cup water For caramel
  • 2 teaspoon vanilla extract Add after milk cools slightly to preserve flavor
  • 1 lemon peel Optional for flavor

Equipment

  • Saucepan For making caramel and warming milk
  • Ramekins To bake individual flan portions
  • Fine-mesh strainer To strain custard mixture
  • Large mixing bowl For whisking eggs and sugar
  • Baking dish To hold ramekins and water for water bath
  • Whisk For blending eggs and tempering custard
  • Wire rack To cool baked flan

Method
 

  1. Heat 1 cup sugar and ¼ cup water in a saucepan over medium heat without stirring until amber color appears, about 6-8 minutes. Pour immediately into ramekins or flan mold, swirl to coat the bottom evenly, and let cool 5 minutes to harden.
    1 cup granulated sugar, 0.25 cup water
  2. Heat whole milk in a saucepan over medium heat until steaming but not boiling, about 5 minutes. Remove from heat, stir in vanilla extract and salt, and let cool 3 minutes to prevent scrambling eggs.
    3 cups whole milk, 1 pinch salt, 2 tsp vanilla extract
  3. Whisk eggs and ⅓ cup sugar in a large bowl until blended but not frothy. Slowly pour warm milk into eggs in a steady stream while whisking constantly for 1-2 minutes to avoid curdling. Strain custard through a fine mesh strainer into a clean bowl.
    6 large eggs, 0.33 cup granulated sugar, 3 cups whole milk
  4. Pour custard into caramel-coated ramekins. Place ramekins in a baking dish, fill dish with hot water halfway up sides of ramekins, and bake at 325°F for 45-55 minutes until edges are set firmly but center jiggles slightly when shaken.
  5. Remove ramekins from water bath carefully and cool on a wire rack for 30 minutes. Cover with plastic wrap and refrigerate at least 4 hours or overnight until custard firms completely and caramel becomes liquid.

Notes

  • Tempering eggs slowly with warm milk prevents scrambled custard.
  • Stop caramel cooking at amber color to avoid bitterness.
  • Use a water bath filled halfway with hot water to ensure even gentle baking and avoid cracks.
Tried this recipe?

Let us know how it was!

What Is Kumquat? Taste, Uses, Storage & More

March 31, 2026

Kumquat pulls off something no other citrus can: the rind is sweet and the flesh is tart, which means eating it whole, skin and all, gives you both sensations in a single bite.

That reversal of the usual citrus logic is exactly why it earns a real place in cooking - not just as a garnish, but as a functional ingredient that adds layered acidity, fragrant citrus oil, and gentle bitterness to everything from duck braises to cheese boards.

QUICK SUMMARY

Kumquat is a small whole-edible citrus with a sweet rind and tart flesh. Eaten raw, candied, or simmered into marmalade, it contributes bright acidity and fragrant citrus oil. Refrigerate unwashed; whole fruits keep 1-2 weeks.

🍊Flavor: Sweet rind, sharply tart flesh, mild bitter finish
🔪Best Uses: Candied, sliced in salads, relishes, marmalade, braised with poultry
🧊Shelf Life: 1-2 weeks refrigerated; 2-4 days at room temperature

What Is Kumquat?

Kumquat is a small citrus fruit native to Southeast Asia, first cultivated in China and now grown across subtropical and warm-temperate regions worldwide.

Unlike most citrus, the entire fruit is edible - rind, pith, and flesh together - which sets it apart from every other member of its family.

It belongs to the genus Fortunella, though modern classification folds it into Citrus. Three varieties appear most often in markets:

  • Nagami - the most widely sold variety; oval-shaped, predominantly tart, with the classic sweet-rind contrast
  • Meiwa - rounder and noticeably sweeter throughout, with softer pulp; good for eating raw
  • Marumi - small and round, sharper in flavor, less common outside specialty growers

Nagami is the one you'll most likely find at a grocery store. Meiwa is worth seeking out at farmers' markets if you want less pucker.

Best Pick
Meiwa kumquats are the sweetest variety and the most approachable eaten raw. For cooking - especially marmalade and relishes - Nagami's stronger tartness gives you more working flavor.

What Does Kumquat Taste Like?

kumquat - What Is Kumquat

Bright and assertive - that's the honest summary. The rind delivers sweetness alongside fragrant citrus oil, while the flesh hits back with a sharp, lemon-leaning sourness. A small amount of bitterness from the pith rounds out the finish.

The closest comparison is eating orange peel and sour orange flesh simultaneously, except the rind oils here have a floral, almost orange-blossom quality. Heat mellows the tartness considerably - simmered or roasted kumquats taste softer and more jammy, with the bitterness fading to background.

Sensory SnapshotStrong Intensity
👅 Flavor
sweet rindtart fleshmildly bitterfloral
✋ Texture
firmjuicythin waxy rind
👃 Aroma
zestyorange blossomcitrus oil

Variety matters here. Meiwa stays sweeter even raw; Nagami stays sharp until cooked down.

If a recipe reads too bitter on first taste, you've likely included too many seeds - remove them before slicing.

How to Use Kumquat

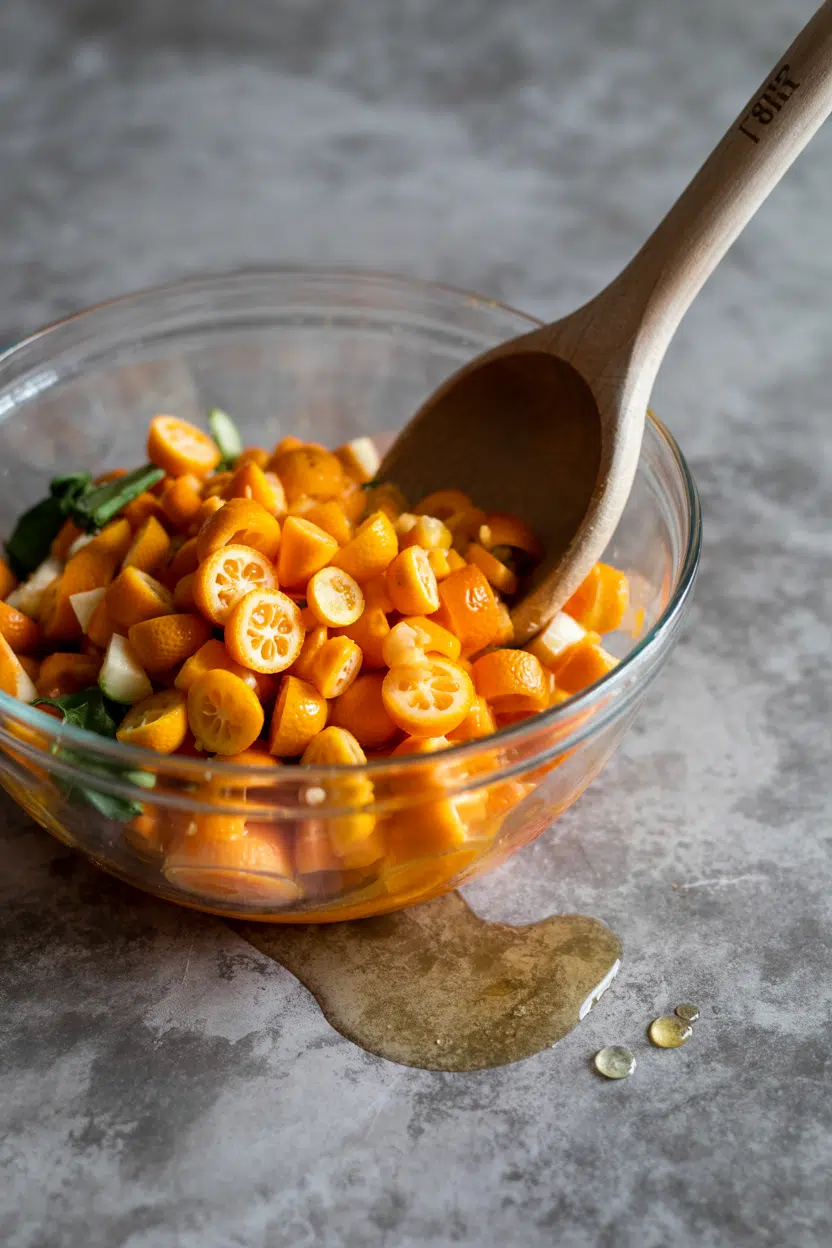
Raw and uncooked is the simplest entry point. Slice thin, skin-on, and layer into salads with arugula, fennel, and goat cheese - the rind's oil coats the greens and the flesh sharpens the dressing. Chop roughly and you have a fast relish for roast pork or duck.

Cooking opens up more range. Here's how each method changes the fruit:

How Kumquat Is Used
MethodBest ForTip
🥗 RawSalads, salsas, relishes, cheese boardsRemove seeds first; slice thin for even bitter distribution
🍳 SimmeredMarmalade, compote, pan saucesAdd honey or sugar early to balance tartness as it reduces
🍰 CandiedCake decoration, cheese boards, dessertsBlanch once before candying to cut bitterness from the pith
🍗 Roasted/BraisedPoultry pan sauces, glazes for porkAdd in the last 20 minutes - prolonged heat destroys the rind's fragrance
🍹 InfusedSyrups, cocktails, iced teaMuddle or halve before steeping to release rind oils fully

In Asian-influenced cooking, preserved kumquats and ginger-based chutneys appear alongside rice and congee. Mediterranean-leaning preparations lean on olive oil, rosemary, and kumquat vinaigrette.

Duck and fatty pork are the natural meat partners - the fruit's acidity cuts the richness without the flat sharpness of straight lemon juice.

Watch Out
Avoid kumquat in preparations that need a clean, neutral citrus note - like lime-only ceviche or delicate white fish. The rind oils and background bitterness will compete with the dish rather than support it.
Try It In
🥗Balsamic Vinaigrette Dressing (Homemade)Swap in kumquat juice and rind oil for a sharper, more complex dressing base→

How to Buy and Store Kumquat

At the store, reach for fruits that feel heavy for their size with a smooth, glossy rind. Wrinkling signals dehydration and age - those fruits will have lost volatile oil from the rind, which is exactly where the flavor lives.

A quick smell near the stem end should give you a clear citrus fragrance.

Shortcut
Skip bagged kumquats if you can - buying loose lets you check each fruit individually for soft spots and verify the rind is uniformly firm and bright orange.

Storage is straightforward:

  • Refrigerator - unwashed, in a breathable container or perforated bag; keeps 1-2 weeks
  • Room temperature - fine for 2-4 days if you're using them quickly
  • Preserved or candied - dramatically extended shelf life; kumquat marmalade and pickled forms keep for months when properly sealed

Keep them whole until you're ready to use them. Cutting exposes the flesh and accelerates moisture loss, especially from the rind.

For a full breakdown of how long kumquats last across storage conditions, see our guide on kumquat storage guide.

Where to Start with Kumquat

New to the fruit? Eat one raw first. That single bite - sweet rind folding into tart flesh - tells you everything about how it behaves in a dish.

From there, slice a few into a simple arugula salad or stir them into a pan sauce for roast chicken.

If you want a lower-commitment entry, look for candied kumquats at specialty food shops. They show the sweet side of the fruit without the sharp raw punch.

Once you've placed the flavor, you'll recognize where it fits: any dish that needs bright acidity, fragrant citrus oil, or a contrast against rich, fatty ingredients.

Frequently Asked Questions

Are kumquats edible whole?

Yes - the rind, pith, and flesh are all edible. Remove the seeds before eating, as they're bitter and add nothing. This whole-fruit eating is what makes kumquat unique among citrus.

How do kumquats differ from oranges in flavor?

The flavor ratio is reversed: an orange has sweet flesh and bitter rind, while a kumquat has sweet rind and sour flesh. Kumquats are also more intensely aromatic and noticeably more tart overall.

Can you use kumquats as a substitute for other citrus?

In relishes, marmalades, and pan sauces, yes - they substitute for bitter orange or mandarin with added complexity. They don't work as a drop-in for lime or lemon in recipes relying on clean, neutral acidity.

Are kumquats healthy?

Each fruit is low in calories and provides vitamin C, fiber, and potassium. The edible rind adds oil-based phytonutrients and flavonoids not found in peeled citrus. Candied preparations significantly increase the sugar content.

Why do kumquats taste bitter sometimes?

Bitterness comes primarily from the seeds and the white pith layer just inside the rind. Removing seeds before eating reduces it sharply. Blanching before candying or cooking draws out most of the remaining bitterness.

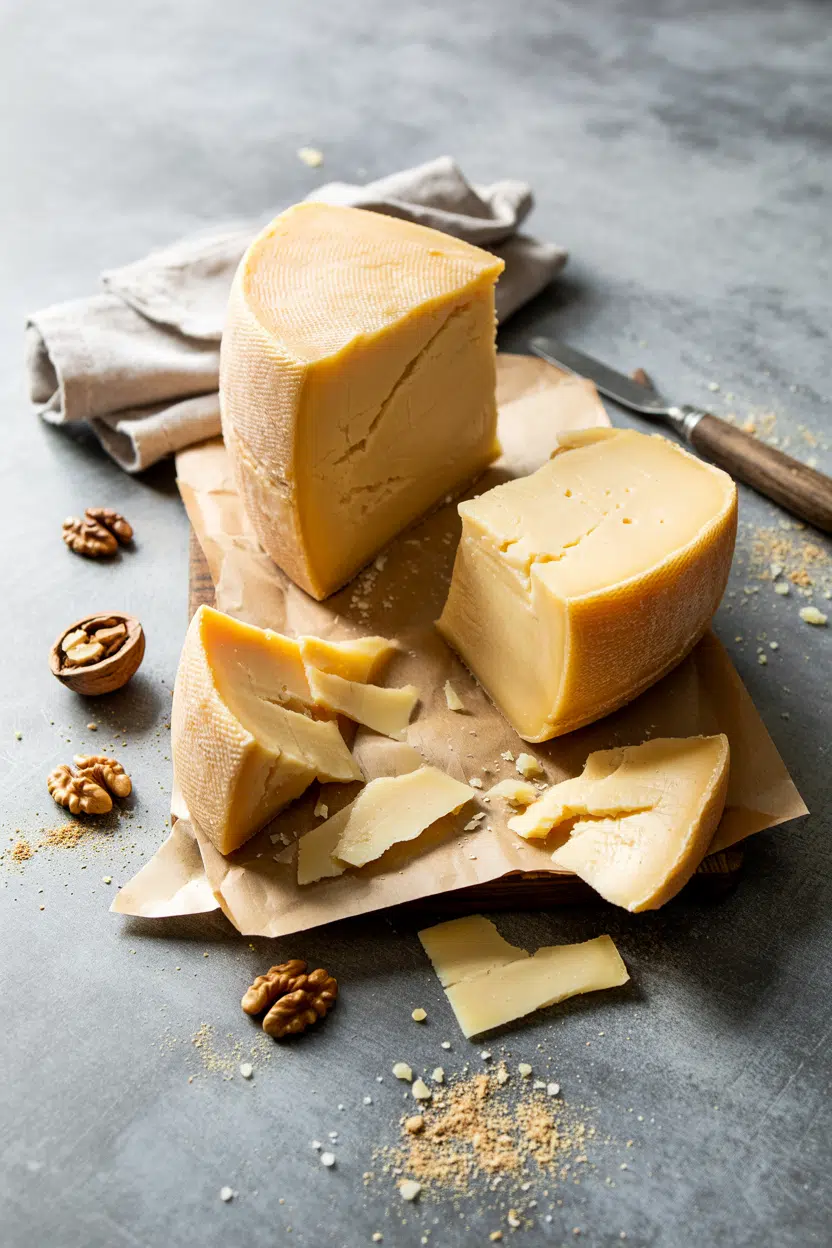
What Is Muenster Cheese? [Taste, Uses & More]

March 31, 2026

Slice into a wedge of muenster and the first thing you notice is how gentle it is - a soft, milky scent, a pale ivory paste, and that signature orange rind ringing the edge like a frame.

What Is Muenster Cheese

The flavor follows the same quiet logic: buttery, faintly tangy, and smooth enough to disappear into a sandwich or anchor a cheese board without demanding attention.

If you've worked with havarti cheese swaps that work or browsed alternatives to monterey jack, muenster likely came up - and for good reason.

QUICK SUMMARY

Muenster cheese is a semi-soft, cow's-milk cheese with a thin orange annatto rind, mild buttery flavor, and excellent melt quality. It's the American adaptation of French Munster - milder, creamier, and built for everyday cooking and snacking.

🧀Type: Semi-soft cow's milk cheese, American-style
👅Flavor: Mild, buttery, faintly tangy with lactic sweetness
🔥Best Use: Melting - grilled cheese, burgers, mac and cheese
🛒Buy: Look for smooth rind, moist pale interior, no dark spots
📅Shelf Life: Opened wedge keeps 2-3 weeks refrigerated; use sliced within one week

What Is muenster cheese?

Muenster is an American-style semi-soft cheese made from pasteurized cow's milk, developed by European immigrants who adapted the aged French Munster from the Alsace region. The two are related by name and little else.

French Münster is pungent, washed-rind, and protected by a PDO designation. American muenster is milder, smoother, and produced at much larger commercial scale.

The most recognizable feature is the thin orange rind, which gets its color from annatto - a natural seed-based dye, not a sign of aging. Beneath it, the paste is pale ivory, semi-soft, and slightly elastic at room temperature.

Most supermarket muenster is the mild, young version. Some specialty producers offer an aged muenster with a sharper, more complex character, though it remains far less assertive than its French ancestor.

  • 🧀 Category - Semi-soft, cow's milk, American-style
  • 🌍 Origin - Adapted from Alsace's Munster valley tradition
  • 🟠 Rind - Thin, annatto-dyed orange; edible but often trimmed
  • 🥛 Milk - Pasteurized whole cow's milk

What Does muenster cheese Taste Like?

muenster cheese - What Is Muenster Cheese

Muenster lands on the mild end of the cheese spectrum - buttery and slightly tangy, with a faint nuttiness and what dairy people call lactic sweetness. It doesn't assert itself, which is partly why it works so well in cooking.

Sensory SnapshotMild Intensity
👅 Flavor
butterylightly tangyfaint nuttinesslactic sweetness
✋ Texture
semi-softslightly elasticcreamy when warmed
👃 Aroma
mild milkyfaint earth (aged)

Raw, it reads closest to young Havarti or Monterey Jack - but with a softer, more rounded finish and less of the subtle sharpness those cheeses carry.

Heat changes it meaningfully: muenster melts into a glossy, creamy pull rather than the greasy or grainy result you get with harder cheeses.

Aged muenster adds a faint barnyard note and more pronounced tang, but even then it stays well short of assertive. Don't expect blue-cheese complexity - this is a cheese built for approachability.

How to Use muenster cheese

Muenster's greatest strength is its melt behavior. It goes silky and smooth under heat without breaking into grease, which makes it the practical choice for any application where texture matters.

Golden Rule
Use low to medium heat when melting muenster. High heat causes it to separate and turn oily - the opposite of that smooth, creamy pull you're after.
How Muenster Cheese Is Used
MethodBest ForTip
🍳 Pan-MeltGrilled cheese, burgers, omeletsMedium heat; flip once the edges start to soften
🔥 Oven-BroiledOpen-face sandwiches, roasted vegetablesPlace rind-side up; broil just until bubbling
🍲 Sauce MeltingMac and cheese, cheese saucesAdd off-heat or on very low heat to keep sauce smooth
🥗 Raw/SlicedCold sandwiches, cheese boardsSlice thin for deli-style; pair with fruit and mustard

On a cheese board, muenster pairs well with apple or pear slices, stone-ground mustard, and smoked ham or turkey. A crisp baguette or sourdough carries it cleanly, and a light Riesling won't compete with its mellow character.

For sandwiches that need reliable structure, a air fryer grilled cheese recipe shows how muenster handles quick, high-circulated heat without going rubbery.

One thing to avoid: strong blue cheeses alongside muenster - they overwhelm it entirely, and you lose the point of using muenster at all.

When you need a substitute, a look at replacements for muenster cheese covers the closest options across all cooking contexts.

Try It In
🧀Cheddar Cheese StrawsSwap in muenster for a softer, creamier bite→🍳Egg and Cheese Breakfast SandwichMuenster melts clean without overpowering the egg→

How to Buy and Store muenster cheese

At the counter or in the cheese case, look for a smooth, moist interior with even pale color and an intact orange rind.

Avoid pieces with dark spots, dried edges, or a sticky surface - those signal age or improper storage.

Watch Out
A slimy rind or ammonia smell means the cheese has turned. Don't confuse normal mild earthiness (acceptable in aged muenster) with sharp off-odors.

For storage, wrap the cheese tightly in parchment or cheese paper, then place it in an airtight container in the coldest part of your refrigerator. Plastic wrap works in a pinch but traps moisture unevenly and can affect the rind.

Full guidance on keeping muenster cheese fresh covers the detail, but the short version: an opened wedge lasts 2-3 weeks refrigerated, and sliced muenster is best used within one week for reliable melt quality.

Unopened commercial packaging typically holds for 3-4 weeks.

Start with the Melt

If you're new to muenster, start with a grilled cheese or burger - those two applications show exactly what the cheese does well. From there, the transition to mac and cheese or a cheese board is straightforward.

Cooks who already use havarti cheese in cooking will find muenster behaves similarly but with a slightly softer texture and less pronounced flavor.

Anyone reaching for replacements for monterey jack cheese will find muenster sits in the same mild, melt-friendly lane.

Best Pick
For most home cooks, mild American-style muenster from a supermarket deli block is the right starting point - consistent, affordable, and predictably smooth under heat.

Frequently Asked Questions

Is muenster cheese the same as munster?

No. American muenster is mild and creamy with an annatto rind; French Münster is a pungent, washed-rind cheese with PDO protection. They share a name and regional ancestry, but the flavor and production differ substantially.

Does muenster cheese melt well?

Yes - it's one of the better melting cheeses in the semi-soft category. It goes smooth and glossy rather than grainy, as long as you keep heat moderate. High heat causes separation.

Is muenster cheese strong or mild?

Mild, in supermarket form. Aged or "mature" muenster develops more tang and a faint earthy note, but it never reaches the intensity of sharp cheddar or blue cheese.

What wine pairs with muenster cheese?

Light-bodied whites work best - Riesling is the classic match, echoing muenster's mild tang without overwhelming it. A dry Alsatian Pinot Blanc is another solid option for the same reason.

Can you eat the orange rind on muenster cheese?

Yes, it's edible - the color comes from annatto, a natural dye, not wax or synthetic coating. Most people trim it for texture reasons rather than safety, especially when melting.

Italian Cannoli with Ricotta Filling

March 31, 2026

Cannoli filling often turns runny or the shells get soggy before you serve them. The trick is draining your ricotta overnight and filling the shells within 20 minutes of serving.

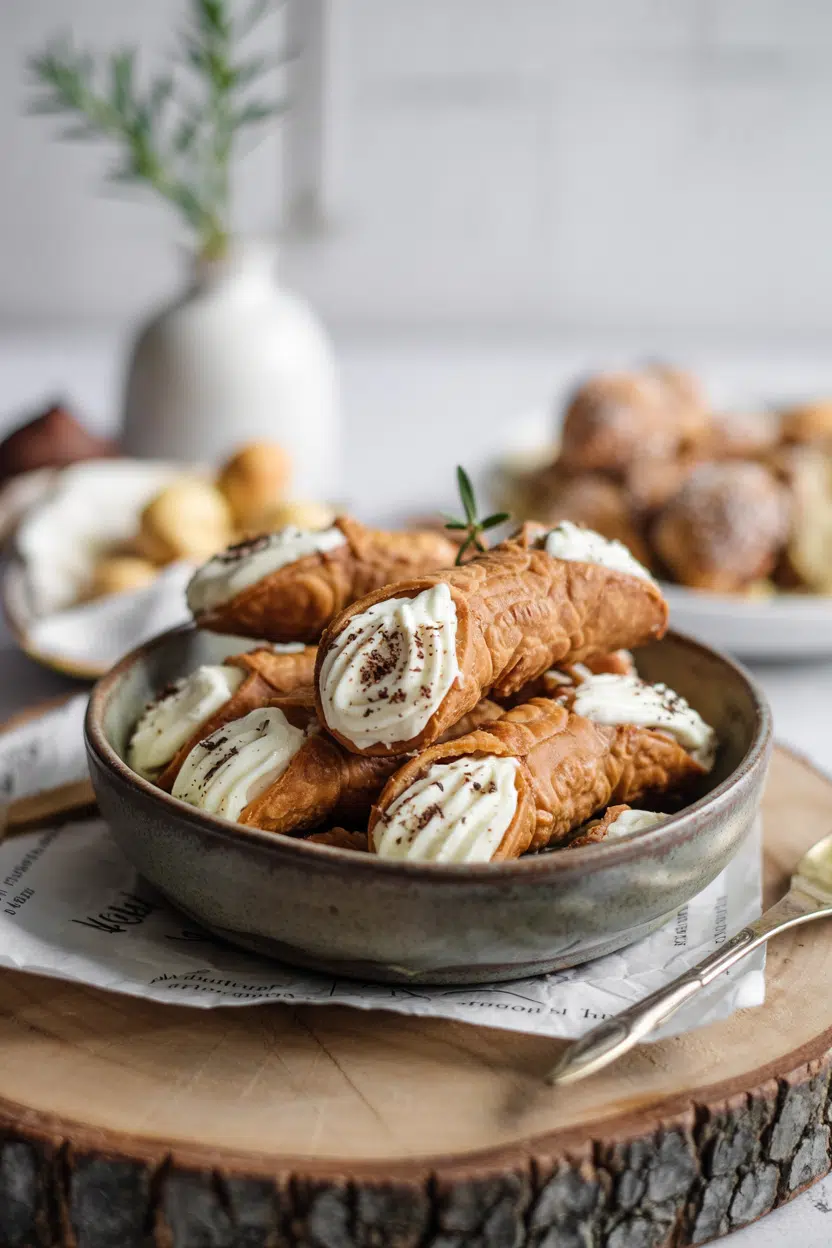
Italian Cannoli with Ricotta Filling served on a plate

High-quality ricotta makes the difference. A sieve and some patience create that thick, creamy filling that holds its shape.

This works for dinner parties when you need a dessert that looks impressive but doesn't require baking skills.

QUICK SUMMARY

Italian cannoli with ricotta filling delivers crispy shells packed with smooth, sweetened ricotta. The key is draining the ricotta thoroughly so the filling stays thick and doesn't make the shells soggy. Fill shells just before serving for maximum crunch.

⏱️Timeline: Drain ricotta overnight, mix filling in 10 minutes, fill shells last minute
🎯Critical Move: Use a fine sieve to drain ricotta 8-12 hours before mixing
⚠️Watch Out: Filling shells too early makes them soggy-wait until 20 minutes before serving

Why This Recipe Works

The filling stays creamy because you drain the ricotta before mixing. For a version that comes together quickly, a similar dessert recipe uses store-bought pastry shells and skips the overnight drain.

Quick Reference
⏱️
Prep Time
20 min
🔥
Cook Time
5 min
⏰
Total Time
25 min
🍽️
Servings
6-8 servings
📊
Difficulty
Medium
🏷️
Category
Dessert
💡
Quick Tip
Drain ricotta well for creamy, not runny filling
🎯
Best For
Entertaining | Weekend treat

What makes this work:

  • Overnight draining removes excess moisture - Ricotta loses 20-30% of its liquid weight, which keeps the filling thick and prevents soggy shells
  • Powdered sugar dissolves completely - Granulated sugar leaves a grainy texture, but powdered sugar creates a smooth, velvety filling
  • Chilling the filling for one hour sets the texture - Cold ricotta holds its shape better when you pipe it into the shells
  • Mini chocolate chips stay crunchy - Folding them in at the end keeps them from breaking down or melting into the filling
  • Filling shells just before serving preserves crispness - Store-bought cannoli shells absorb moisture within 30 minutes of contact with the filling
Quick Tip
Place ricotta in a fine-mesh sieve lined with cheesecloth, set it over a bowl, and refrigerate overnight-you'll drain off about ¼ cup of liquid

What You'll Need

Ingredients for Italian Cannoli with Ricotta Filling

Most ingredients come from your pantry except the shells. The ricotta works best when it hits the table at the same time as the main, so for a classic beef dish or weeknight dinner, keep a batch ready for nights like this.

🧀
Dairy Base
  • 16 oz ricotta cheese (whole milk)
🫙
Sweetener
  • 1 cup powdered sugar
🥖
Shells
  • 12-16 store-bought cannoli shells
🌶️
Flavor + Texture
  • 1 teaspoon vanilla extract
  • ½ cup mini chocolate chips
  • ½ teaspoon cinnamon (optional)
  • 1 teaspoon lemon zest (optional)
  • Pinch of salt

Ingredient Details

  • Ricotta cheese
    Use whole-milk ricotta for richness-part-skim ricotta creates a thinner, less creamy filling
  • Powdered sugar
    Sift the sugar if it has lumps to avoid a gritty texture in the finished filling
  • Cannoli shells
    Store shells in an airtight container at room temperature-moisture makes them lose their snap
  • Vanilla extract
    Pure vanilla extract tastes cleaner than imitation, which can leave a chemical aftertaste
  • Mini chocolate chips
    Regular-sized chips are too heavy and can crack the shells-mini chips distribute evenly
  • Cinnamon
    A small amount adds warmth without overpowering the ricotta-skip it if you want pure vanilla flavor
  • Lemon zest
    Fresh zest brightens the filling-dried lemon peel doesn't have the same punch

Ingredient Swaps

Rich mains need something to cut through, and ricotta does exactly that. We keep a batch ready for nights like this, so for this quick chicken dish or weekend entertaining, swap ingredients based on what's in your fridge.

Four swaps that work:

  • Mascarpone for ricotta - Richer and denser texture, slightly sweeter flavor, use the same 16 oz amount but drain it for 4 hours instead of overnight
  • Gluten-free shells for regular cannoli shells - May be more fragile and slightly different in texture, but they work for guests with gluten restrictions
  • Powdered erythritol for powdered sugar - Reduces sugar content significantly, may leave a slight cooling aftertaste, use ¾ cup instead of 1 cup
  • Chopped pistachios for mini chocolate chips - Adds a nutty crunch and traditional Sicilian flavor, toast them lightly first for extra depth

Mascarpone

Works for: Richer, creamier filling with a silkier texture

Skip if: You want traditional flavor or a lighter dessert

Dairy-Free Cashew Ricotta

Works for: Vegan guests or dairy sensitivities

Skip if: You need authentic Italian flavor or don't have a high-speed blender

Cream Cheese (Softened)

Works for: Tangy, thicker filling that holds shape well

Skip if: You want light, airy texture-cream cheese makes it denser

Instructions

Most of the work happens in the mixing bowl. The filling works best when it hits the table at the same time as the main, so for a classic sauce dish or holiday dinners, follow this timeline exactly.

  1. Drain the ricotta overnight - Place ricotta in a fine-mesh sieve lined with cheesecloth, set over a bowl, and refrigerate for 8-12 hours until about ¼ cup of liquid collects in the bowl
  2. Mix the filling - In a medium bowl, whisk together drained ricotta, powdered sugar, vanilla extract, salt, and optional cinnamon and lemon zest until smooth and fluffy, about 2 minutes by hand
  3. Fold in chocolate chips - Add mini chocolate chips to the filling and gently fold with a spatula until evenly distributed without crushing the chips
  4. Chill the filling - Cover the bowl with plastic wrap and refrigerate for at least 1 hour to firm up the texture
  5. Fill the shells - Transfer filling to a piping bag or a plastic bag with one corner snipped off, then pipe filling into both ends of each cannoli shell from the center outward until filled but not overflowing
Golden Rule
Never fill shells more than 20 minutes before serving-they lose their crispness fast once the ricotta touches them

What to Serve With It

Cannoli are rich and sweet, so pair them with something light or acidic. This side adds the contrast this plate needs, so for a simple tahini on the side or casual gatherings, timing matters.

Side Dish Prep Why It Works How to Serve
Fresh Berries Easy Bright acidity cuts through the creamy, sweet filling Rinse and drain strawberries, raspberries, or blueberries, serve on the side
Espresso or Strong Coffee Easy Traditional Italian pairing that balances the sweetness Brew espresso or strong drip coffee, serve hot alongside cannoli
Light Whipped Cream Easy Adds airy texture without making the plate too heavy Whip heavy cream with a touch of sugar, dollop on the plate
Simple Fruit Salad Easy Fresh acidity and juice cleanse the palate between bites Toss orange segments, kiwi, and grapes with lemon juice
Amaretto or Almond Liqueur Easy Enhances nutty flavor notes and adds sophistication Pour 1 oz into a small glass, sip between bites

Three ways to serve it:

  • For dinner parties: Dust filled cannoli with powdered sugar, arrange on a platter with candied orange peel, and serve with espresso
  • For casual gatherings: Plate individual cannoli with a handful of fresh berries and a drizzle of chocolate sauce
  • For weekend treats: Serve cannoli with a scoop of vanilla gelato and a light raspberry coulis on the side
Best Pick
Serve cannoli at cool room temperature, not cold-the filling tastes richer and the shells stay crisper when they're not straight from the fridge

Store and Reheat

Cannoli filling stores well but shells don't. The filling works best when it hits the table at the same time as the main, so keep ricotta and shells separate until you're ready to fill and serve.

Method Time Best For
🔥 Oven 3-5 min at 350°F Restoring crispness to slightly softened shells
🍳 Stovetop 1-2 min on low heat Gently warming shells wrapped in foil without drying them out
📦 Microwave Avoid Not recommended-microwaving makes shells chewy and soft

For best results when storing:

  • Store filling separately in an airtight container - Ricotta filling keeps for 2-3 days in the fridge, but don't fill shells until you're ready to serve
  • Keep shells at room temperature in a dry container - Store-bought shells stay crisp for up to 1 week if they're sealed tightly and kept away from humidity
  • Freeze filling for up to 1 month - Transfer filling to a freezer-safe container, thaw overnight in the fridge, then stir gently before using
  • Dust with powdered sugar just before serving - Apply the sugar topping within 5 minutes of serving so it doesn't melt or dissolve into the filling
  • Don't refrigerate filled cannoli - Once filled, cannoli shells absorb moisture from the ricotta and turn soggy within 30-60 minutes even when chilled

Frequently Asked Questions

Can I make cannoli filling ahead and store it?

Yes, you can make the filling up to 2-3 days ahead. Store it in an airtight container in the fridge and stir gently before filling shells.

How do I keep cannoli shells crispy after filling?

Fill shells no more than 20 minutes before serving. The longer the filling sits in the shells, the faster they absorb moisture and lose their crunch.

What is the best way to drain ricotta for cannoli?

Line a fine-mesh sieve with cheesecloth, place ricotta inside, and set it over a bowl in the fridge for 8-12 hours. You'll drain off about ¼ cup of liquid.

Why is my cannoli filling runny and how can I fix it?

Runny filling usually means the ricotta wasn't drained long enough. Drain it again for a few more hours, or fold in extra powdered sugar to thicken it.

Can I use mascarpone instead of ricotta in cannoli?

Yes, mascarpone creates a richer, creamier filling with a slightly sweeter flavor. Drain it for 4 hours instead of overnight since it's already thicker than ricotta.

Italian Cannoli with Ricotta Filling served on a plate

Italian Cannoli with Ricotta Filling

No ratings yet
Italian cannoli with ricotta filling features crisp shells filled with smooth, sweetened ricotta. The key to success is draining the ricotta overnight to create a thick filling that prevents soggy shells. Fill the shells just before serving to preserve the crunch.
Print Recipe Pin Recipe
Prep Time 20 minutes mins
Cook Time 5 minutes mins
Total Time 25 minutes mins
Servings: 7 servings
Course: Dessert
Cuisine: Italian
Ingredients Equipment Method Notes

Ingredients
  

  • 16 oz ricotta cheese whole milk, drained overnight
  • 1 cup powdered sugar sifted
  • 12-16 count cannoli shells store-bought
  • 1 teaspoon vanilla extract
  • 0.5 cup mini chocolate chips
  • 0.5 teaspoon cinnamon optional
  • 1 teaspoon lemon zest optional
  • pinch salt

Equipment

  • Fine-mesh sieve For draining ricotta overnight
  • Cheesecloth Lined in the sieve for draining ricotta
  • Mixing bowl For mixing the filling
  • Whisk To whisk the ricotta filling
  • Spatula For folding in mini chocolate chips
  • Plastic wrap To cover and chill filling
  • Piping bag or plastic bag To fill the cannoli shells

Method
 

  1. Place the ricotta in a fine-mesh sieve lined with cheesecloth. Set it over a bowl and refrigerate for 8 to 12 hours until about ¼ cup of liquid collects in the bowl.
    16 oz ricotta cheese
  2. In a medium bowl, whisk together the drained ricotta, powdered sugar, vanilla extract, salt, and optional cinnamon and lemon zest until smooth and fluffy, about 2 minutes by hand.
    16 oz ricotta cheese, 1 cup powdered sugar, 1 tsp vanilla extract, 0.5 tsp cinnamon, 1 tsp lemon zest, pinch salt
  3. Add mini chocolate chips to the filling and gently fold with a spatula until evenly distributed without crushing the chips.
    0.5 cup mini chocolate chips
  4. Cover the bowl with plastic wrap and refrigerate for at least 1 hour to allow the filling to firm up.
  5. Transfer filling to a piping bag or a plastic bag with one corner snipped off. Pipe filling into both ends of each cannoli shell from the center outward until filled but not overflowing. Fill just before serving for maximum crunch.
    12-16 count cannoli shells

Notes

  • Drain ricotta overnight to prevent soggy cannoli shells and maintain a thick filling.
  • Use powdered sugar for a smooth, velvety texture in the filling without graininess.
  • Fill cannoli shells no more than 20 minutes before serving to keep shells crisp.

Tried this recipe?

Let us know how it was!

What Is Mace? Taste Profile, Uses & Flavor Guide

March 31, 2026

Mace does something in a dish that allspice alternatives and blunt-edged spices can't quite replicate - it sharpens a sauce without dominating it, adds warmth without the heaviness of whole nutmeg, and brings a faintly floral, resinous lift to everything from béchamel to braised pork.

What Is Mace

It's the spice most cooks overlook and then wonder what's been missing.

QUICK SUMMARY

Mace is the lacy aril surrounding the nutmeg seed, dried into brittle blades or ground into orange-brown powder. It tastes like nutmeg - sharper, more aromatic, slightly floral. Use it in cream sauces, baked goods, spice blends, and mulled drinks. Whole blades last 2-3 years; ground mace fades within a year.

🌿Type: Tree spice - dried aril of the Myristica fragrans seed
👅Flavor: Warm, peppery, floral, and resinous with a citrus hint
🍳Best Uses: Cream sauces, sausage rubs, custards, mulled drinks, curries
📦Shelf Life: Blades 2-3 years; ground mace 6-12 months before losing aroma
⚠️Note: Contains myristicin - use in culinary quantities only, avoid in pregnancy

What Is Mace?

Mace is the aril - a thin, lacy membrane - that wraps around the nutmeg seed of Myristica fragrans, a tropical tree native to the Maluku Islands of Indonesia.

Fresh off the tree, it's vivid red-orange; once dried, it becomes brittle, amber-colored ribbons known as mace blades.

Both mace and nutmeg come from the same fruit, making Myristica fragrans one of the rare plants that yields two distinct commercial spices.

Mace has been traded globally since the spice routes of the 15th century, when Dutch and Portuguese merchants competed fiercely for control of the Maluku Islands.

You'll find it sold two ways:

  • Whole mace blades - the intact dried aril, used for steeping in liquids or toasting in fat
  • Ground mace - milled blades, ready to fold into dry mixes or finish a sauce

It's also called mace spice or simply blades in older European recipes. Some spice suppliers label it the aril of nutmeg, though that phrasing is rare in grocery contexts.

What Does Mace Taste Like?

mace - What Is Mace

Mace tastes like a sharper, brighter version of nutmeg - warm and slightly sweet, with a peppery edge and a resinous, camphor-like finish that nutmeg doesn't carry as cleanly. Freshly ground mace adds a noticeable citrus flicker that fades once the spice ages.

Sensory SnapshotModerate Intensity
👅 Flavor
warmpepperyfloralresinouscitrus hint
✋ Texture
brittle bladesfine powder
👃 Aroma
pineycamphoraceousresinous

Heat softens the camphor edge and pushes the floral notes forward, which is why mace works so well in cooked cream sauces. Used raw - stirred into a cold custard or dusted over eggnog - the peppery quality is more pronounced.

It shares some piney, resinous notes with allspice and clove, though mace reads brighter and less sweet than either.

How to Use Mace

Mace earns its place in both savory and sweet cooking, and the form you use - whole blades vs. ground - changes the approach significantly.

In savory cooking, bloom a blade or two in hot butter or oil before building a béchamel or cream-based pasta sauce. The fat pulls out the essential oils fast, giving the sauce a warm depth without visible specks of spice.

Indonesian and Malay cooks do the same when starting a curry base, where mace pairs well with lemongrass, galangal, and coconut milk.

Golden Rule
Add ground mace in the final few minutes of cooking - prolonged heat drives off its aromatic oils and flattens the flavor.

Ground mace works best when folded into dry mixes: cake batters, sausage rubs, spice blends for meat. A pinch in a pork sausage mix is a classic European technique that lifts the overall seasoning without any single note standing out.

It also belongs in holiday baking - cakes, custards, and eggnog benefit from it the same way Swedish cardamom buns use cardamom: as a background warmth, not a headline flavor.

For drinks, whole mace blades steep beautifully in mulled wine, cider, and chai without turning bitter. Drop one or two into the simmering liquid and pull them before serving.

How Mace Is Used
MethodBest ForTip
🧈 Bloomed in FatCream sauces, curry bases, sautéed dishesUse whole blades; remove before serving
🎂 Ground into Dry MixCakes, custards, sausage rubs, spice blendsAdd at the end; measure carefully - it's potent
🫖 Steeped in LiquidMulled wine, poaching liquids, syrups, stocksWhole blades only; steep 10-20 minutes, then strain
✨ Finished DishEggnog, béchamel, custard, warm beveragesFreshly ground gives the brightest citrus note

Mace doesn't suit delicate green herbs or light white fish - it will simply overpower them. Keep it away from dishes where fresh basil or dill carries the flavor.

Try It In
🍷Warm Spiced Mulled WineWhole mace blades steep into the wine for resinous warmth→🍠Savory Breakfast Sweet Potato BowlsA pinch of ground mace deepens the warm spice layer→🍎Apple Cinnamon Overnight Oats JarsMace complements apple and cinnamon without overwhelming them→

How to Buy and Store Mace

Whole mace blades are the smarter purchase for most cooks. Look for deep red-orange pieces that feel slightly waxy rather than completely desiccated. Pale, powdery flakes with no scent have already lost most of their value.

Watch Out
Ground mace labeled simply "spice powder" or blended into mixed spice jars often contains fillers or aged stock. Buy single-ingredient ground mace from a reputable spice supplier and check the grind date.

For ground mace, the color should be a rich orange-brown - not beige. Lift the lid and smell it: resinous and piney means it's still viable; musty or flat means skip it.

Store whole blades in an airtight container away from heat and light. Ground mace needs the same conditions but has a shorter window.

Check our mace storage guide guide for specifics on when to replace your stock.

  • Whole blades - up to 2-3 years in an airtight jar
  • Ground mace - 6-12 months before aroma fades significantly
  • Both lose potency, not safety - they won't spoil, they'll just become inert

Start With the Blades

If you're new to mace, buy whole blades first. Drop one into your next batch of mulled wine or simmer it in a cream sauce - no grinding, no measuring, easy to remove.

Once you understand the flavor, reach for mace replacements only when you're completely out; nothing matches it exactly. Ground mace comes next, once you know how much warmth your cooking can carry.

Shortcut
If a recipe calls for ground mace and you only have blades, snap off a small piece and grind it in a spice grinder or mortar. Use the same measured amount.

Frequently Asked Questions

What does mace taste like compared to nutmeg?

Mace is sharper and more aromatic than nutmeg, with a peppery edge and a camphor-like finish. Nutmeg is earthier and sweeter. Both come from the same plant, but mace carries a brighter, more floral character.

Can you substitute nutmeg for mace?

Yes, in most recipes. Use about three-quarters of the amount called for, since nutmeg is slightly stronger in sweetness but less aromatic. The dish will taste similar but lose mace's floral, citrusy edge.

Is mace safe to eat during pregnancy?

Normal culinary amounts - a pinch in a sauce or baked good - are generally considered low risk. However, mace contains myristicin, which can be harmful in large doses, so medicinal use or concentrated supplementation is not recommended during pregnancy.

How do you store whole mace blades?

Keep them in an airtight glass jar, away from heat, light, and moisture. A cool, dark pantry is sufficient - no need for the refrigerator. Stored correctly, blades hold aroma for 2-3 years.

Does mace work well in drinks like mulled wine?

Yes - it's one of mace's best applications. Whole blades steep into hot wine or cider without turning bitter the way ground spices can. Pull them after 15-20 minutes; check what to serve with mulled wine for pairing ideas once your batch is ready.

Malaysian Beef Rendang

March 31, 2026

You need 2.5 to 3.5 hours and a heavy-bottomed pot. No quick fixes, no shortcuts, no pressure cooker hacks that promise the same result.

Malaysian Beef Rendang served on a plate

Beef chuck breaks down slowly in coconut milk, building layers of spice while the sauce reduces to a thick, dark coating. The long simmer is what makes rendang work - tender meat with concentrated flavor that sticks to every piece.

This is what you make for meal prep, special occasions, or when you want something that tastes like effort but mostly just needs time. Rich mains need something to cut through, and a fresh salad on the side does exactly that. For a version that comes together quickly, we keep a batch ready for nights like this - a fresh salad on the side that balances the richness without competing for attention.

QUICK SUMMARY

Malaysian Beef Rendang is a slow-cooked beef curry where beef chuck simmers in coconut milk with aromatic spices until the sauce reduces to a thick, caramelized coating. The gentle simmer prevents the coconut milk from splitting while the beef breaks down over 2-3 hours. Make this when you want tender, richly flavored beef that works for meal prep or entertaining.

⏱️Time Reality: 2.5-3.5 hours total, mostly hands-off simmering with occasional stirring
🔥First Move: Sear beef cubes on medium-high for 3 minutes per side before adding spice paste
⚠️Watch Out: Keep heat below 200°F to prevent coconut milk from curdling-gentle simmer only

Table of Contents

Toggle
  • Why This Recipe Works
  • What You'll Need
    • Ingredient Details
  • Ingredient Swaps
  • What to Serve With It
  • Store and Reheat
  • Frequently Asked Questions
  • Malaysian Beef Rendang
    • Method 
    • Tried this recipe?

Why This Recipe Works

Beef chuck has enough fat and connective tissue to survive a long simmer without drying out. The coconut milk provides the creamy base while the spice paste builds layers of heat, sweetness, and aromatic depth that develop over hours. Most people skip hearty beef recipe options, but understanding how different cuts respond to slow cooking changes what you can pull off on a weeknight.

Quick Reference
⏱️
Prep Time
30 min
🔥
Cook Time
2 to 3 hours
⏰
Total Time
2.5 to 3.5 hours
🍽️
Servings
4 to 6 servings
📊
Difficulty
Involved
🏷️
Category
Main Dish
💡
Quick Tip
Slow simmer until sauce thickens and beef is tender
🎯
Best For
Meal prep | Entertaining | Weeknight

What makes this different from other beef curries:

  • Searing creates the foundation - browning beef cubes on medium-high for 3 minutes per side develops the base layer of flavor before the spices go in
  • Fresh spice paste matters - grinding shallots, garlic, galangal, and chilies into a paste releases oils that transform during the long simmer
  • Low heat prevents splitting - keeping the temperature below 200°F lets coconut milk reduce without breaking into oil and solids
  • Reduction creates the coating - the sauce thickens over 2-3 hours until it clings to the beef with a dark, caramelized finish
  • Lime leaves add fragrance late - tossing kaffir lime leaves in during the last 30 minutes preserves the citrus aroma without bitterness
Golden Rule
Stir every 10 minutes once the sauce starts to thicken - the bottom will stick and burn if you walk away during the final hour.

What You'll Need

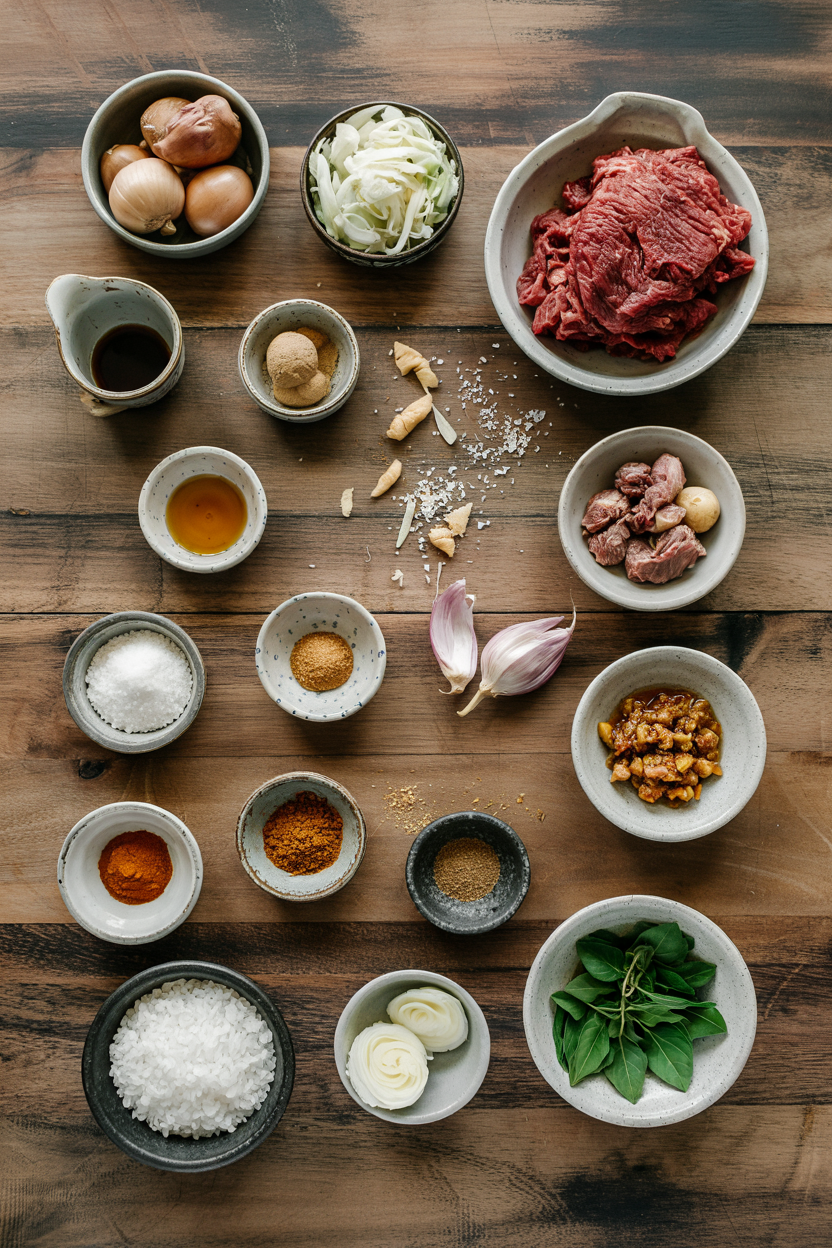
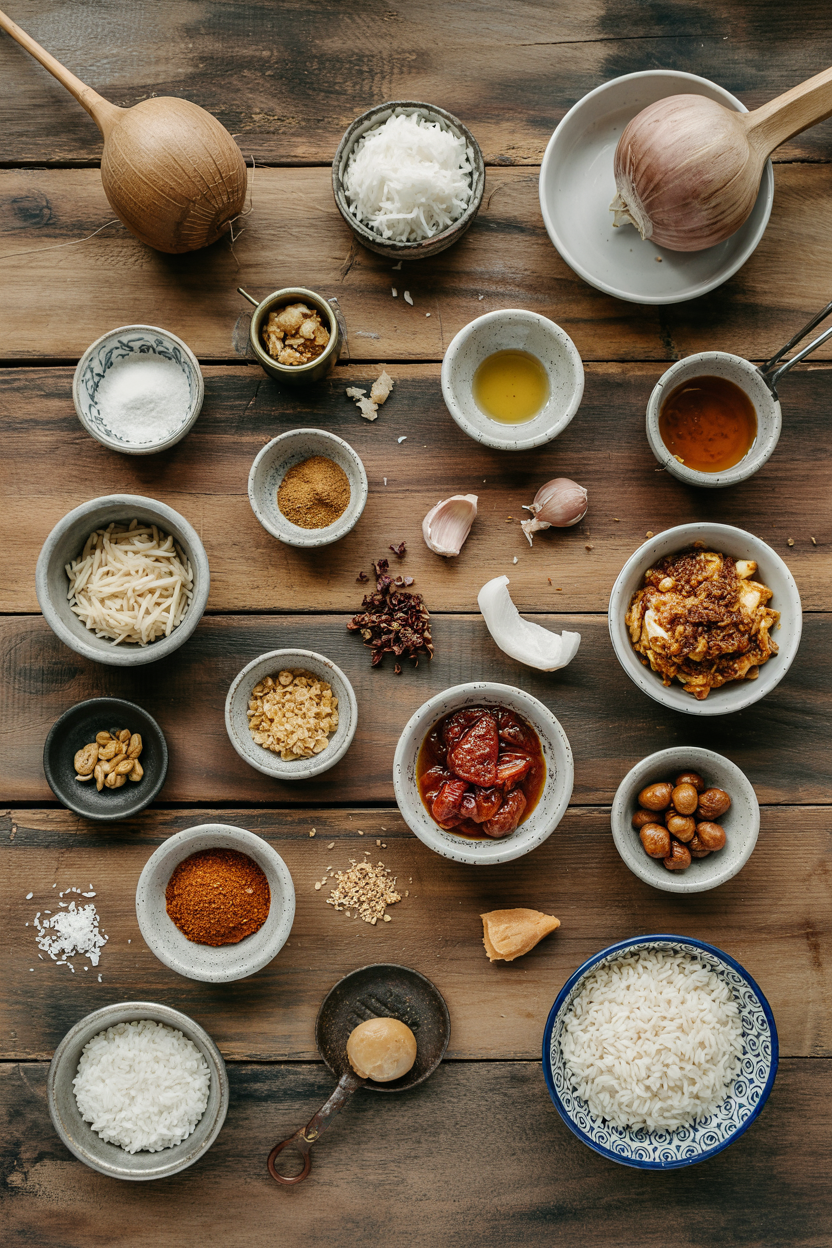
Ingredients for Malaysian Beef Rendang

Shop for beef chuck at the meat counter, not pre-cubed stew meat which often comes from tougher cuts. Fresh galangal and kaffir lime leaves are worth tracking down at an Asian market - dried versions lose the aromatic punch that makes rendang distinctive.

🍖
Beef
  • 2 lbs beef chuck, cubed
🧄
Aromatics
  • 6 shallots
  • 6 cloves garlic
  • 2-inch piece ginger
  • 2-inch piece galangal
  • 2 stalks lemongrass
  • 4 kaffir lime leaves
🌶️
Spices & Heat
  • 1 teaspoon turmeric
  • 6-8 dried chilies or 3 tablespoon chili paste
🥥
Base
  • 2 (13.5 oz) cans coconut milk
  • 2 tablespoon palm sugar or brown sugar
  • 1 teaspoon salt

Ingredient Details

  • Beef chuck
    Look for pieces with visible marbling and connective tissue - they'll break down into tender, flavorful bites during the long simmer
  • Galangal
    Similar to ginger but more floral and less sharp - this is what gives rendang its distinctive earthy background note that ginger can't replicate
  • Coconut milk
    Full-fat only - the fat content is what creates the thick, glossy coating as the sauce reduces over hours
  • Kaffir lime leaves
    Add these during the last 30 minutes to keep the citrus fragrance bright - longer cooking turns them bitter
  • Lemongrass
    Bruise the stalks with the back of a knife before adding to release the aromatic oils without breaking them apart
  • Dried chilies
    Rehydrate in hot water for 10 minutes before blending - this softens them and makes the paste smoother
  • Palm sugar
    Adds subtle caramel notes that brown sugar approximates but doesn't fully match - use what you can find

Ingredient Swaps

You can adjust the heat level and work around missing ingredients without losing the core texture and flavor. The spice paste is flexible - start with less chili and taste as you go.

Four swaps that work:

  • Galangal → fresh ginger - more sharp and less earthy, but keeps the aromatic base intact without changing technique
  • Palm sugar → brown sugar - slightly more molasses-forward, less caramel depth, but sweetness level stays consistent
  • Fresh lemongrass → lemongrass paste - loses the fibrous texture but maintains the citrus aroma with 1 tablespoon paste per stalk
  • Kaffir lime leaves → lime zest - more citrus-forward without the floral oil complexity, use zest from 2 limes added at the end

Coconut Milk vs Coconut Cream

Works for: Coconut cream diluted 1:1 with water gives similar consistency and fat content for the sauce reduction

Skip if: You want the exact balance - cream can make the sauce slightly thicker and richer than traditional rendang

Beef Chuck vs Beef Brisket

Works for: Brisket has more connective tissue and needs an extra 30-60 minutes of simmering but produces similarly tender results

Skip if: You're short on time - chuck breaks down faster and is more forgiving with timing variations

Instructions

The first hour is active - searing beef, frying the spice paste, and getting the simmer started. After that, you're stirring every 15-20 minutes until the sauce thickens in the final hour when it needs attention every 10 minutes.

  1. Sear the beef. Heat a heavy-bottomed pot or Dutch oven over medium-high heat with 2 tablespoon oil. Add beef cubes in a single layer and sear for 3 minutes per side until browned. Remove beef and set aside - don't skip this step or you'll lose the caramelized foundation.

  2. Make the spice paste. Blend shallots, garlic, ginger, galangal, rehydrated chilies, and turmeric in a blender or food processor for 2 minutes until smooth. Lower heat to medium and add the paste to the pot. Fry for 5-7 minutes, stirring constantly, until the paste darkens and smells fragrant without burning.

  3. Start the simmer. Return beef to the pot and add coconut milk, lemongrass, palm sugar, and salt. Stir to combine and bring to a gentle simmer. Once bubbling, reduce heat to low - you want lazy bubbles breaking the surface, not a rolling boil. Keep the temperature below 200°F to prevent the coconut milk from splitting into oil and solids.

  4. Simmer low and slow. Cook uncovered for 2-3 hours, stirring every 15-20 minutes during the first 90 minutes. As the sauce thickens in the final hour, stir every 10 minutes to prevent sticking. Add kaffir lime leaves during the last 30 minutes. The beef is done when it breaks apart easily with a fork and the sauce has reduced to a thick, dark coating that clings to the meat.

  5. Rest and adjust. Turn off heat and let the rendang rest for 15 minutes - this lets the flavors settle and the sauce thicken slightly as it cools. Taste and add more salt or sugar if needed before serving.

Shortcut
If you're short on time, use a pressure cooker for 45 minutes at high pressure - but the sauce won't reduce as much, so you'll need to simmer uncovered for 20-30 minutes after to thicken it properly.

What to Serve With It

Rendang is rich and intensely flavored, so it needs something neutral to soak up the sauce and something fresh to cut through the richness. The slaw works best when it hits the table at the same time as the main. For nights when you need more variety, savory steak meal ideas walk through how to build a complete plate without overcomplicating the sides.

Side Dish Prep Why It Works How to Serve
Steamed jasmine rice Easy Neutral base that soaks up the thick sauce without competing for attention Serve hot in a bowl with rendang spooned over the top
Cucumber salad Easy Cool, crisp contrast to the rich, spicy beef - refreshes the palate between bites Dress with rice vinegar and a pinch of sugar, serve chilled on the side
Sautéed green beans Easy Adds fresh crunch and color without heavy flavors that clash with the spice paste Toss in garlic and oil, serve warm alongside the rice
Nasi lemak (coconut rice) Medium Fragrant rice cooked in coconut milk and pandan - traditional pairing that amplifies the coconut notes Pack into a bowl and invert onto the plate for presentation
Roti canai with dhal Medium Flaky flatbread with lentil curry - complements the savory and creamy flavors without duplicating them Serve warm with dhal in a small bowl for dipping

Three ways to serve it:

  • Weeknight plate: Steamed jasmine rice, cucumber salad, and sautéed green beans - everything comes together in under 20 minutes while the rendang finishes
  • Meal prep bowls: Pack rendang over rice with pickled vegetables in separate containers - reheat the beef and rice together, add fresh pickles when serving
  • Hosting spread: Nasi lemak, roti canai with dhal, assorted pickled vegetables, and sambal belacan on the side - let guests build their own plates
Best Pick
Steamed jasmine rice is the most practical option - it's neutral, quick, and does the one thing rendang needs: soaks up the thick, reduced sauce without diluting the flavor.

Store and Reheat

Rendang improves after a day in the fridge as the flavors meld and the sauce thickens further. Cool it quickly in a shallow container before refrigerating - this prevents bacterial growth and keeps the beef tender.

Method Time Best For
🍳 Stovetop 10-15 min on low heat Best texture and even heating - add a splash of water if sauce is too thick
🔥 Oven 20 min at 325°F (163°C) Large batches - cover with foil to prevent drying, stir halfway through
📦 Microwave 3-5 min, stir halfway Single portions when you're short on time - heat in 1-minute intervals to avoid hot spots

For best results when storing:

  • Transfer to shallow containers - this cools the rendang faster and prevents it from sitting in the danger zone (40-140°F) where bacteria multiply
  • Store for 3-4 days in the fridge - the sauce thickens as it sits, so it may need a splash of water when reheating
  • Freeze for up to 3 months - portion into individual servings for easy defrosting, thaw overnight in the fridge before reheating
  • Reheat gently on the stovetop - low heat prevents the coconut milk from breaking and keeps the beef tender without overcooking
  • Add kaffir lime leaves fresh when reheating - frozen leaves lose their aromatic punch, so toss in fresh ones if you have them

Frequently Asked Questions

Can I make Malaysian beef rendang ahead?

Yes - rendang actually improves after sitting for 24 hours as the spices meld and the sauce thickens. Cook it fully, cool quickly in a shallow container, and refrigerate for up to 4 days or freeze for up to 3 months.

How do I know when beef rendang is done?

The beef should break apart easily with a fork and the sauce should coat the meat with a thick, dark glaze. If the sauce is still watery after 2.5 hours, increase the heat slightly and simmer uncovered, stirring every 10 minutes, until it reduces.

What side dishes go well with beef rendang?

Steamed jasmine rice or nasi lemak (coconut rice) are traditional choices that soak up the thick sauce. Add cucumber salad or pickled vegetables for a refreshing contrast to the rich, spicy beef.

Can I use a slow cooker for beef rendang?

Yes, but you'll need to reduce the sauce separately. Sear the beef and fry the spice paste on the stovetop first, then transfer everything to a slow cooker on low for 6-8 hours. Finish by simmering uncovered on the stovetop for 20-30 minutes to thicken the sauce.

How to store and reheat beef rendang correctly?

Cool quickly in a shallow container and refrigerate for 3-4 days or freeze for up to 3 months. Reheat gently on the stovetop over low heat with a splash of water if the sauce is too thick - this prevents the coconut milk from breaking.

Malaysian Beef Rendang served on a plate

Malaysian Beef Rendang

No ratings yet
Malaysian Beef Rendang is a slow-cooked beef curry where beef chuck simmers gently in coconut milk and a fresh spice paste for 2.5 to 3.5 hours until the sauce thickens and coats the tender meat. This long simmer ensures a rich, caramelized coating and deeply layered flavor, perfect for meal prep or special occasions.
Print Recipe Pin Recipe
Prep Time 30 minutes mins
Cook Time 2 hours hrs 30 minutes mins
Total Time 3 hours hrs
Servings: 5 servings
Course: Dinner
Cuisine: Malaysian
Ingredients Equipment Method Notes

Ingredients
  

  • 2 lb beef chuck cubed, with visible marbling and connective tissue
  • 6 shallots
  • 6 cloves garlic
  • 2 inch ginger fresh
  • 2 inch galangal fresh, for earthy floral background note
  • 2 stalks lemongrass bruised with back of knife
  • 4 leaves kaffir lime leaves added in last 30 minutes for fragrance
  • 1 teaspoon turmeric
  • 6 to 8 dried chilies or 3 tablespoon chili paste; rehydrate dried chilies in hot water 10 minutes before blending
  • 27 oz coconut milk full-fat, about 2 cans (13.5 oz each)
  • 2 tablespoon palm sugar or brown sugar as substitute
  • 1 teaspoon salt
  • 2 tablespoon oil for searing beef

Equipment

  • Heavy-bottomed pot or Dutch oven Used for searing and slow simmering the beef
  • Blender or food processor To blend the shallots, garlic, ginger, galangal, chilies, and turmeric into a spice paste

Method
 

  1. Heat a heavy-bottomed pot or Dutch oven over medium-high heat with 2 tablespoons of oil. Add beef cubes in a single layer and sear for 3 minutes per side until browned. Remove beef and set aside.
    2 lb beef chuck, 2 tbsp oil
  2. Blend shallots, garlic, ginger, galangal, rehydrated chilies, and turmeric in a blender or food processor for 2 minutes until smooth. Lower heat to medium and add the paste to the pot. Fry for 5-7 minutes, stirring constantly until the paste darkens and becomes fragrant without burning.
    6 shallots, 6 cloves garlic, 2 inch ginger, 2 inch galangal, 6 to 8 dried chilies, 1 tsp turmeric
  3. Return beef to the pot and add coconut milk, bruised lemongrass stalks, palm sugar, and salt. Stir to combine and bring to a gentle simmer. Once bubbling, reduce heat to low to maintain lazy bubbles without boiling. Keep temperature below 200°F to prevent coconut milk from splitting.
    2 lb beef chuck, 27 oz coconut milk, 2 stalks lemongrass, 2 tbsp palm sugar, 1 tsp salt
  4. Cook uncovered for 2 to 3 hours, stirring every 15-20 minutes during the first 90 minutes. In the final hour, stir every 10 minutes to prevent sticking. Add kaffir lime leaves during the last 30 minutes. The beef is ready when it breaks apart easily with a fork and the sauce has reduced to a thick, dark coating.
    4 leaves kaffir lime leaves
  5. Turn off heat and let the rendang rest for 15 minutes to settle flavors and thicken the sauce. Taste and add more salt or sugar if needed before serving.
    1 tsp salt, 2 tbsp palm sugar

Notes

  • Use full-fat coconut milk to achieve a thick, glossy sauce.
  • Maintain gentle simmer below 200°F to prevent splitting of coconut milk.
  • Stir frequently during the final hour to avoid burning the sauce.

Tried this recipe?

Let us know how it was!

What Is Ketchup? [Taste, Uses & More]

March 31, 2026

Most people assume ketchup is just a basic table condiment - something you squeeze on fries without thinking.

What Is Ketchup

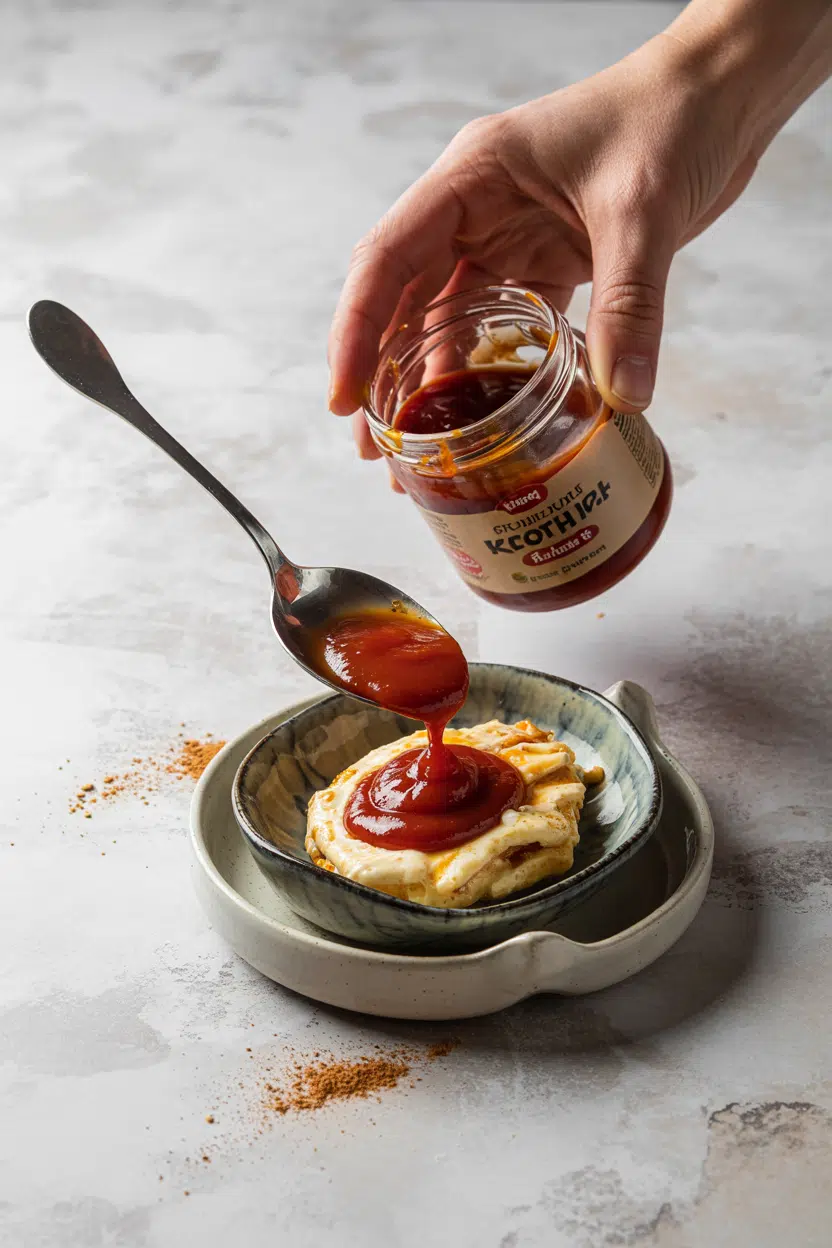
That assumption causes it to get overlooked as a cooking ingredient, which is a mistake, since ketchup functions as a concentrated flavor shortcut in pan sauces, glazes, and baked dishes that tomato sauce swaps that work can rarely replicate with the same sweet-acid balance.

QUICK SUMMARY

Ketchup is a thick, tomato-based condiment made from tomato concentrate, vinegar, sweetener, and spices. It delivers a sweet-tangy, mildly savory flavor at moderate intensity. Use it as a dipping sauce, sandwich layer, pan sauce base, or baked-in ingredient for ground beef dishes.

🍅Category: Tomato-based condiment, table sauce
👅Flavor: Sweet, tangy, mildly savory with warm spice
🍟Best Uses: Dipping, burgers, meatloaf, pan sauces, BBQ base
❄️Storage: Pantry unopened; refrigerate after opening
📅Shelf Life: Up to 1 year unopened; 6-12 months refrigerated after opening

What Is Ketchup?

Ketchup is a smooth, pourable condiment built on tomato concentrate, distilled vinegar, a sweetener, salt, and warm spices such as onion, garlic, clove, and allspice.

It originated in various fermented fish sauces before Dutch traders brought a proto-version to the West - the name traces back to the Hokkien Chinese word kecap or kechap, meaning a seasoned sauce.

The modern commercial form is an American invention, with Heinz standardizing the tomato-and-vinegar recipe in the late 19th century. That formula - tomato paste backbone, vinegar tang, sweetener balance - is now the global default.

You'll see it labeled catsup in older American recipes and regional contexts; it's the same product. A few distinct variants exist:

  • 🍅 Standard tomato ketchup - the classic red, vinegar-sweetened version found worldwide
  • 🍌 Banana ketchup - a Filipino variant made from banana, tomato paste, vinegar, and spices, with a sweeter and slightly fruitier profile
  • 🌿 Reduced-sugar or organic versions - made with cane sugar instead of high-fructose corn syrup, or with lower added sugar overall

If you're tracking sweetener sources, it's worth comparing labels - swapping out corn syrup is relevant for anyone choosing between standard and natural-sweetener versions.

What Does Ketchup Taste Like?

ketchup - What Is Ketchup

Ketchup tastes like concentrated tomato with a sharp vinegar backbone and noticeable sweetness - closer to a sweet-tangy tomato glaze than a fresh tomato sauce.

The flavor is rounder and more uniform than raw tomato, because the tomato concentrate cooks down the bright, grassy notes and leaves a caramel-adjacent depth.

The spice blend - clove, allspice, onion - adds a mild warmth that you notice more in the aroma than on the palate.

Sensory SnapshotModerate Intensity
👅 Flavor
sweettangysavorywarm spice
✋ Texture
thicksmoothpourable
👃 Aroma
tomato-forwardvinegarywarm spice

Heat changes ketchup noticeably. Baked or reduced, it loses some of its sharpness and the sugars caramelize into a stickier, more jammy glaze.

Straight from the bottle, the acidity is more pronounced - that's the version most people know from the diner table.

Golden Rule
If ketchup tastes too sharp straight from the bottle, a brief reduction in a hot pan rounds out the acidity and deepens the tomato flavor into something closer to a glaze.

How to Use Ketchup

Ketchup works across a wider range of preparations than most people use it for. At the table, it's a dipping sauce and finishing condiment - fries, potato wedges, burgers, hot dogs, eggs.

That's the easy part.

Where it gets more interesting is in cooking.

Mixed into raw ground beef before forming patties or a meatloaf, ketchup adds moisture, sweetness, and a subtle tang that seasons the meat from the inside.

It also works as a quick BBQ sauce base - combine it with brown sugar, liquid smoke, and a splash of vinegar and you have a usable glaze in under five minutes.

How Ketchup Is Used
MethodBest ForTip
🥗 Raw (condiment)Dipping fries, topping burgers and hot dogsServe cold or room temp; don't warm unnecessarily
🍳 Reduced (pan sauce)Glazing meatballs, making quick pan sauces for pork or chickenKeep heat medium; sugars burn fast on high
🔥 Baked inMeatloaf topping, baked beans, casserolesSpread a layer on top of meatloaf before the last 20 minutes
🥣 Mixed inBBQ sauce base, cocktail sauce, burger sauceCombine with mustard, mayo, or horseradish for compound sauces

In American diner-style cooking, ketchup is almost structural - it shows up in meatloaf, baked beans, and Thousand Island-adjacent dressings.

British and Australian casual dining uses it heavily alongside chips and fried breakfasts.

Filipino cuisine takes ketchup in a different direction entirely; banana ketchup is the dominant local variant, though standard tomato ketchup has influenced the flavor baseline of many pantry sauces.

Ketchup pairs well with potatoes in any form, ground beef, cheddar, mustard, mayonnaise, pickles, and eggs.

When you need a quick layered condiment, mixing ketchup with mayonnaise swaps that work or replacements for brown mustard gives you a fast burger or sandwich sauce without much effort.

Avoid using it with delicate raw seafood or alongside a well-made fresh tomato sauce - the sweetness and vinegar will drown out subtler flavors.

Try It In
🌶️Air Fryer Buffalo Potato WedgesA spicy wedge dip where ketchup anchors the sauce base→🧄Air Fryer Garlic Parmesan Potato WedgesClassic wedge pairing — ketchup on the side for dipping→🍖Air Fryer BBQ Potato WedgesUses ketchup as the BBQ sauce base ingredient→

How to Buy and Store Ketchup

Look for a smooth, uniformly red product with no oil separation or watery pooling at the top. Check the ingredient list - tomato concentrate and vinegar should appear near the top.

If you're avoiding high-fructose corn syrup, compare labels carefully; many brands now offer cane sugar versions as a direct alternative.

Best Pick
Glass bottles preserve color and flavor better than plastic and tend to have fewer additives - worth the slight price difference if you use ketchup regularly.

Storage is straightforward:

  • 🧴 Unopened bottles - store in a cool, dark pantry; shelf life runs up to a year from production
  • ❄️ After opening - refrigerate immediately; quality holds for 6 to 12 months
  • 🔒 Cap and position - keep the cap sealed and bottle upright to minimize surface exposure and slow oxidation

Knowing the ketchup spoilage signs is useful once a bottle has been open for several months - separation, off smell, and darkened color are the main signals that quality has dropped.

If you run out mid-recipe, there are solid replacements for ketchup that work across most cooking applications, though the sweet-acid balance will shift slightly.

Similarly, if a recipe calls for tomato paste as a starting point, tomato paste swaps that work covers the closest alternatives when the pantry is bare.

When to Reach for Ketchup

Start with the bottle in the fridge if you need a quick flavor fix for ground beef, a dipping sauce for potatoes, or a five-minute BBQ glaze base.

Move to it in cooking - not just at the table - when a recipe needs concentrated tomato flavor with built-in acid and sweetness.

Skip it where fresh tomato brightness matters or where delicate seafood flavors would get buried.

Shortcut
Two tablespoons of ketchup stirred into a pan after browning ground beef or meatballs gives you an instant sweet-tangy glaze with no extra ingredients needed.

Frequently Asked Questions

Is ketchup a sauce or a condiment?

It's both - technically a condiment by use and a sauce by composition. Most food categories define it as a table condiment, however it functions as a cooking sauce when reduced or baked into dishes like meatloaf or baked beans.

Why does ketchup taste sweet and tangy?

The sweetness comes from added sugar or high-fructose corn syrup combined with natural tomato sugars that concentrate during processing. Distilled vinegar provides the tangy backbone - the ratio of these two elements is what defines each brand's flavor signature.

What is the difference between ketchup and catsup?

Nothing - they're the same product with different spellings. "Catsup" is an older American variant that appeared on early commercial labels; "ketchup" became the dominant spelling by the mid-20th century and is now standard.

Is ketchup high in sugar?

By tablespoon, yes - a standard serving contains roughly 4 grams of sugar, most of it added. Reduced-sugar versions cut that in half, and organic versions often swap high-fructose corn syrup for cane sugar without significantly lowering total sugar content.

Can you use ketchup as a tomato paste substitute?

Yes, with adjustments. Ketchup is thinner and much sweeter than tomato paste, so reduce the added sugar in your recipe and expect a slightly tangier result. It works best in sauces and braises where the extra liquid and acidity won't unbalance the dish.

What Is Milk? Taste, Uses & What It Tastes Like

March 31, 2026

Milk does something in cooking that water never can: it builds structure, adds richness, and carries fat-soluble flavor all at once.

What Is Milk

A béchamel without milk is just a roux paste.

Custard without it is scrambled eggs.

Whether you're reaching for whole milk, skim, or butter in dairy recipes, understanding what milk contributes helps you make better decisions at every step - and knowing how long yogurt keeps is a useful parallel for tracking milk's own short window.

QUICK SUMMARY

Milk is a mild, creamy dairy liquid with a subtle lactic sweetness and light tang. It functions as a liquid base, tenderizer, and fat carrier in cooking. Whole milk is the most kitchen-useful form. Opened, it lasts 5-7 days in the fridge.

🥛Flavor: Mild creamy sweetness with a soft lactic tang
🍳Best Uses: Sauces, custards, batters, hot drinks, fresh cheeses
🌍Cuisines: French, Indian, American, Italian
📅Shelf Life: Unopened up to 2-3 weeks; opened within 5-7 days
🧊Storage: Refrigerate at or below 40°F in its original sealed container

What Is Milk?

Milk is the liquid produced by female mammals to nourish their young, and the version we use in kitchens almost always comes from cows.

It's an animal-derived dairy liquid made up of water, fat (butterfat), proteins (casein and whey), lactose, and minerals - a composition that makes it uniquely functional in cooking.

Processing matters more than most people realize. Pasteurization kills pathogens through heat without changing flavor much. Homogenization breaks fat globules into uniform size so cream doesn't separate.

Raw milk skips both steps, retaining a slightly grassier, more complex flavor - though food safety agencies advise against it for vulnerable populations.

Fat percentage defines the common types:

  • 🥛 Whole milk - roughly 3.25% fat; the standard for cooking and baking
  • 2% (reduced fat) - lighter mouthfeel, still works well in most recipes
  • Skim (nonfat) - watery texture, low richness; best in lower-fat applications
  • UHT (ultra-pasteurized) - shelf-stable unopened; slightly cooked flavor, longer life
  • Raw milk - unprocessed, sold in limited regions; grassier, more perishable

The whey brine for feta guide shows how whey - one of milk's core proteins - continues to work after the cheesemaking process ends.

What Does Milk Taste Like?

milk - What Is Milk

Fresh whole milk is mildly sweet with a clean lactic undertone - not aggressively tangy, not rich like cream. The fat carries a soft, slightly coating quality on the palate that skim milk simply doesn't replicate.

Sensory SnapshotMild Intensity
👅 Flavor
creamy sweetlactic tangmilky umami
✋ Texture
silkylightly coating
👃 Aroma
fresh sweetgrassy (raw)

Heat changes the flavor noticeably. Scalded milk - brought just below a simmer - develops a slightly caramelized, rounder sweetness as lactose begins to concentrate. Reduced long enough, it moves toward dulce de leche territory: dark, dense, and nutty.

Cold milk straight from the fridge reads cleaner, closer to that fresh green-sweet note that raw milk amplifies further.

Compared to light cream, milk is thinner and less fatty, with more obvious lactic brightness. Think of it as cream's restrained sibling - present but not dominant.

Golden Rule
If a recipe calls for whole milk and you sub skim, add a teaspoon of butter per cup to compensate for lost fat - the structure and mouthfeel will be closer to the original.

How to Use Milk

Milk's fat and protein content make it a functional workhorse across cooking methods, not just a background liquid.

In French cooking, it's the base of béchamel - heated with a roux of flour and butter to create a sauce that coats pasta, binds gratins, or forms the foundation of a soufflé.

Indian kitchens use whole milk curdled with lemon juice or vinegar to produce fresh paneer, while simmered and spiced milk forms the base of masala chai and lassi.

In baking and batters, milk tenderizes gluten while adding protein for structure.

Pancake batter relies on it for a soft, slightly springy crumb - and where you'd normally reach for dairy, using milk for creaminess covers the best non-dairy swaps when you're working around restrictions.

How Milk Is Used
MethodBest ForTip
🔥 ScaldingCustards, béchamel, infused creamsHeat to just below simmer (180°F); don't boil
♨️ Steaming/FrothingLattes, cappuccinos, flat whitesWhole milk froths best; skim collapses quickly
🫧 ReducingDulce de leche, milk caramel, condensed milkStir regularly - milk scorches fast on high heat
🧪 CurdlingPaneer, ricotta, fresh cheeseAdd acid off heat; stir gently and once
🧁 BattersPancakes, tempura, crepesDon't overmix - milk activates gluten quickly

Avoid pairing milk with high-acid raw fruit at high heat - the acid coagulates the proteins and breaks the sauce. Strong iodine-forward fish can also react with dairy fat to produce a metallic off-note.

Try It In
🥞Fluffy Buttermilk PancakesWhere milk's tenderizing role is front and center→☕Iced Brown Sugar Oat Milk LatteA side-by-side look at how dairy and oat milk differ→🍵Iced Matcha Oat Milk LatteShows how milk alternatives perform in cold drinks→

How to Buy and Store Milk

At the store, check the sell-by date first and choose the most recent carton from the back of the shelf - those are newest. Look for intact, sealed containers with no dents or swelling.

A brief sniff at the cap before purchase is reasonable; sour or off smells before opening signal a problem.

Watch Out
Don't store milk in the fridge door - temperature there fluctuates every time it opens. Keep it on a middle or lower shelf where the cold stays consistent.

Storage and shelf life by type:

  • Pasteurized whole/skim - up to 2-3 weeks unopened; use within 5-7 days of opening
  • UHT (ultra-pasteurized) - shelf-stable for months unopened; refrigerate after opening and use within 7-10 days
  • Raw milk - most perishable; best within 7-10 days even unopened

Off-milk smells sour and looks either curdled or slightly yellow. For related spoilage signals, the cream spoilage signs guide covers what to watch for across high-fat dairy.

A full rundown on milk in dairy recipes also breaks down shelf life across fat levels in more detail.

Where to Start With Milk

Whole milk is the right default for most home cooks. It performs across every method - sauces, batters, custards, hot drinks - without compromise.

  • 🥛 New to cooking with milk? - Start with béchamel: equal parts butter and flour, then add warm milk slowly
  • Lactose concerns? - Lactose-free milk behaves identically in cooking; the [is goat cheese lactose free guide](https://forkliftkitchen.com/is-goat-cheese-lactose-free/) covers related dairy tolerance nuances
  • Need longer shelf life? - Buy UHT if you use milk infrequently; flavor is slightly less fresh but functionally identical
  • Avoiding dairy entirely? - Oat milk is the closest structural stand-in; [clotted cream stand-ins](https://forkliftkitchen.com/clotted-cream-substitutes/) covers the richer end of the spectrum

Frequently Asked Questions

What does milk taste like compared to cream?

Milk is lighter and more lactic, with less fat-driven richness. Cream coats the palate heavily; milk leaves a cleaner, slightly sweet finish. The difference becomes most obvious in coffee - cream mutes bitterness more aggressively than milk does.

Is raw milk safe to drink?

Food safety agencies including the FDA classify raw milk as a higher-risk product due to potential pathogens like Salmonella and E. coli. Pasteurization removes those risks without significantly altering flavor for most uses. Sale of raw milk is restricted or banned in many U.S. states.

How long does milk last after opening?

Opened pasteurized milk stays fresh for 5-7 days when kept below 40°F. UHT milk, once opened, lasts 7-10 days. Smell and texture are more reliable indicators than the date - sour smell or visible clumping means discard.

Why does milk curdle when heated?

Casein proteins in milk destabilize when exposed to acid or excessive heat, clumping together and separating from the liquid. Adding lemon juice or vinegar triggers this deliberately for paneer. Unintended curdling usually means the milk was near spoiled or heat was too high.

Can you freeze milk?

Yes - milk freezes well for up to 3 months. Thaw it in the fridge and shake or stir well, since fat separates during freezing. Texture is slightly grainier after thawing, so frozen milk works better in cooked applications than for drinking straight.

Crockpot Chicken and Sausage Gumbo

March 31, 2026

Letting your slow cooker build a dark roux while you're at work changes how gumbo fits into a Tuesday. The crockpot does the stirring and watching, creating that deep chocolate-brown base without you standing over a hot stove for 45 minutes.

Crockpot Chicken and Sausage Gumbo served on a plate

You get restaurant-quality gumbo from a countertop appliance. The chicken falls apart into tender shreds, the andouille releases its smoky fat, and the vegetables melt into a thick, rich stew.

This is what we make when we want real Louisiana cooking without the babysitting. The whole thing happens while you're doing other things, and you come home to a pot of gumbo that tastes like you've been cooking all day.

QUICK SUMMARY

This crockpot version builds a proper dark roux slowly, giving you authentic gumbo texture and flavor without constant stirring. The slow cooker maintains the exact low heat needed to develop that chocolate-brown color while the chicken and sausage cook down into tender bites. Make this when you want genuine Louisiana comfort food but need the appliance to do the work.

⏱️Time Reality: 6-8 hours on low, 15 minutes of actual hands-on prep
🔥Method Shortcut: Toast flour and oil together first for faster roux development
⚠️Watch Out: Don't skip the roux toasting step or you'll get pasty gumbo instead of rich

Why This Recipe Works

The slow cooker's steady low heat develops the roux without burning, which is exactly what gumbo needs. Most stovetop versions require constant attention to prevent scorching, but the crockpot's even temperature does that work for you. For something juicy like chicken, this method keeps the meat tender while the flavors marry together over hours.

Quick Reference
⏱️
Prep Time
15 minutes
🔥
Cook Time
6-8 hours
⏰
Total Time
6 hours 15 minutes
🍽️
Servings
8 servings
📊
Difficulty
Medium
🏷️
Category
Main Dish
💡
Quick Tip
Toast the roux ingredients first for deeper flavor
🎯
Best For
Weeknight dinner, meal prep

Five things that make this work:

  • The roux toasts in a dry pan first - Heating flour and oil separately, then combining them in the crockpot, speeds up the browning process and prevents raw flour taste
  • Andouille sausage renders fat as it cooks - That smoky pork fat becomes part of the base, adding depth you can't get from spices alone
  • Bone-in chicken thighs stay juicy - Dark meat holds up to long cooking without drying out, and the bones add body to the liquid
  • The holy trinity cooks down completely - Onions, celery, and bell peppers dissolve into the base, thickening the gumbo naturally without cornstarch
  • Low heat prevents separation - The slow simmer keeps the roux suspended in the broth instead of breaking into greasy pools
Golden Rule
Never add cold liquid to a hot roux - let your chicken stock come to room temperature first or the roux will seize and clump

What You'll Need

Ingredients for Crockpot Chicken and Sausage Gumbo

The ingredient list looks long, but most of it is pantry staples you probably have. The only special items are andouille sausage and file powder, and even those have workable substitutes. We keep these basics stocked for this easy homemade recipe and other slow cooker meals that need minimal shopping.

🍗
Protein
  • 2 lbs bone-in chicken thighs
  • 1 lb andouille sausage, sliced
🥬
Holy Trinity
  • 1 large onion, diced
  • 2 celery stalks, diced
  • 1 green bell pepper, diced
  • 4 garlic cloves, minced
🥢
Base & Seasoning
  • ½ cup all-purpose flour
  • ½ cup vegetable oil
  • 4 cups chicken stock
  • 1 (14.5 oz) can diced tomatoes
  • 2 bay leaves
  • 1 tablespoon Cajun seasoning
  • 1 teaspoon dried thyme
  • 1 teaspoon file powder
  • Salt and black pepper
🍜
For Serving
  • Cooked white rice
  • Sliced green onions
  • Hot sauce

Ingredient Details

  • Andouille Sausage
    Look for authentic Louisiana andouille with visible garlic and spices - the pre-cooked links in the refrigerated section work best
  • Bone-In Chicken Thighs
    The bones add gelatin to the broth as they cook, creating that silky texture real gumbo has - boneless won't give you the same body
  • All-Purpose Flour
    Regular bleached flour browns faster than unbleached, which matters when you're trying to build a dark roux in a slow cooker
  • File Powder
    Ground sassafras leaves that thicken and add earthy flavor - add it at the very end or it gets stringy and bitter
  • Cajun Seasoning
    Use a blend with paprika, cayenne, garlic powder, and oregano - avoid versions with salt as the first ingredient or you'll over-season
  • Chicken Stock
    Homemade or low-sodium boxed - the sausage adds plenty of salt, so starting with less gives you control
  • Bay Leaves
    Two is enough for this pot size - more than that and you'll get a medicinal taste that overpowers the other seasonings

Ingredient Swaps

You can adjust the heat level and protein mix without changing the fundamental gumbo structure. The roux and holy trinity stay the same - those aren't negotiable if you want authentic texture.

  • Instead of andouille: Use kielbasa or smoked sausage plus ½ teaspoon cayenne pepper - you'll get the smoke but need to add back the heat
  • Instead of chicken thighs: Use 1½ pounds bone-in thighs plus ½ pound peeled shrimp added in the last 30 minutes - the shrimp cooks fast and gets rubbery if it goes in early
  • Instead of file powder: Add 2 cups sliced okra with the vegetables - okra thickens the same way but adds a slightly vegetal flavor
  • Instead of fresh holy trinity: Use 2 cups frozen diced onion-celery-pepper mix - it breaks down the same way and saves knife work

Bone-In Chicken Thighs

Works for: Maximum flavor and authentic texture from bone gelatin

Skip if: You need faster cook time - boneless cuts 2 hours off

Andouille Sausage

Works for: True Louisiana flavor with built-in smoke and spice

Skip if: You can't find it locally - kielbasa plus cayenne works

File Powder

Works for: Traditional thickening and earthy sassafras flavor

Skip if: You're using okra for thickening - they don't work together

Low Heat (6-8 Hours)

Works for: Full flavor development and tender meat that falls off the bone

Skip if: You're in a rush - high heat for 4 hours works but the roux won't be as dark

Instructions

You'll spend 15 minutes on the stovetop toasting the roux, then the crockpot takes over for 6-8 hours. The timing is flexible - if you start it in the morning, it'll be ready by dinner with no adjustments needed. We follow this homemade potato wedges recipe on the side for something crispy to balance the stew.

  1. Toast the roux base. Heat vegetable oil in a large skillet over medium heat. Add flour and stir constantly for 8-10 minutes until the mixture turns chocolate brown and smells nutty. The color should match dark peanut butter. Transfer to your crockpot immediately so it stops cooking.

  2. Brown the proteins. In the same skillet, sear the chicken thighs skin-side down for 4 minutes until golden. Flip and cook 3 minutes more. Add andouille slices to the pan and cook 2 minutes to render some fat. Transfer everything to the crockpot, leaving the fat in the pan.

  3. Cook the vegetables. Add diced onion, celery, bell pepper, and garlic to the hot skillet. Cook 5 minutes, scraping up any browned bits, until the vegetables soften. Add Cajun seasoning, thyme, salt, and pepper. Stir for 1 minute until fragrant, then transfer to the crockpot.

  4. Build the gumbo. Pour chicken stock and diced tomatoes over everything in the crockpot. Add bay leaves. Stir well to combine the roux with the liquid - it should look thick and muddy brown. Cover and cook on low for 6-8 hours until the chicken pulls apart easily with a fork.

  5. Finish and serve. Remove chicken pieces and shred the meat, discarding skin and bones. Return shredded chicken to the pot. Stir in file powder and let sit 5 minutes uncovered. Taste and add salt or hot sauce as needed. Serve over white rice with sliced green onions.

Shortcut
Skip the stovetop roux entirely - put flour and oil directly in the crockpot, cook on high uncovered for 1 hour stirring every 15 minutes, then add everything else and switch to low

What to Serve With It

Gumbo needs something to soak up the rich broth and something to cut through all that fat. Rice handles the soaking, but you also want a bright or crunchy side to balance the plate. When planning your chicken fricassee dinner, the same pairing logic applies - starch plus contrast.

Side Dish Prep Why It Works How to Serve
White Rice Easy Soaks up the broth and stretches the serving size Scoop rice into bowls first, ladle gumbo over top
Cornbread Easy Adds sweet contrast to the spicy gumbo Serve warm squares on the side for dipping
Coleslaw Easy Crisp, tangy crunch cuts through the richness Small side portion, vinegar-based dressing
Collard Greens Medium Traditional Louisiana pairing with bitter-savory balance Cook with bacon, serve in separate bowl
Potato Salad Medium Creamy and cool, offsets the heat Make ahead and serve cold from the fridge

Three ways to serve it:

  • Weeknight bowl: Ladle gumbo over rice in wide bowls, top with green onions and hot sauce, serve with hot salty fries on the side
  • Game day spread: Set up a gumbo bar with rice, cornbread, coleslaw, and hot sauce stations so people build their own bowls
  • Meal prep containers: Pack rice in the bottom of containers, gumbo on top, keep toppings separate until you're ready to eat
Best Pick
White rice is non-negotiable for authentic serving - jasmine or long-grain white, cooked with slightly less water so it stays firm enough to hold up under the broth

Store and Reheat

Gumbo tastes better the next day after the flavors marry overnight in the fridge. The roux continues to thicken as it cools, so you might need to thin it with a splash of stock when reheating. We batch-cook this with simple homemade potato for lunches all week.

Method Time Best For
🍳 Stovetop 15 minutes over medium-low heat Full batches - stir frequently and add stock if too thick
📦 Microwave 3-4 minutes on 70% power Single servings - stir halfway through and add a tablespoon of water
🔥 Crockpot 2 hours on low Reheating for a crowd - gentle heat keeps the texture right

For best results when storing:

  • Cool it fast: Divide into shallow containers within 2 hours of finishing - gumbo is dense and takes forever to cool in a deep pot
  • Separate the rice: Store gumbo and rice in different containers so the rice doesn't turn to mush and absorb all the liquid
  • Freeze in portions: Use 2-cup containers for individual servings - they thaw faster and you can heat exactly what you need
  • Add file powder fresh: The sassafras gets stringy after freezing, so add it when you reheat instead of before storing
  • Skim the fat: After chilling overnight, the andouille fat rises to the top and solidifies - scrape most of it off before reheating for cleaner flavor

Frequently Asked Questions

Can I make gumbo without a roux?

Not if you want authentic texture. The roux is what makes gumbo gumbo - it thickens the broth and adds the deep toasted flavor that defines the dish. Skip it and you have spicy chicken stew.

How dark should the roux be?

Aim for dark chocolate brown, not black. It should smell nutty and toasted, not burnt. If it smells acrid or looks closer to black than brown, dump it and start over - burnt roux ruins the whole pot.

Can I cook this on high to speed it up?

Yes, but the roux won't develop as much depth. Cook on high for 4-5 hours instead of low for 6-8. The meat will be tender but the overall flavor won't be as rich.

Why is my gumbo greasy?

The andouille renders a lot of fat during cooking. Either skim it off the top before serving, or chill the gumbo overnight so the fat solidifies and you can lift it off easily.

Can I add shrimp to this recipe?

Add peeled shrimp in the last 30 minutes of cooking on low. Any earlier and they turn rubbery. Use 1 pound of large shrimp to keep the protein balance right.

Crockpot Chicken and Sausage Gumbo served on a plate

Crockpot Chicken and Sausage Gumbo

No ratings yet
This crockpot chicken and sausage gumbo uses a slow cooker to develop a deep, chocolate-brown roux without the need for constant stirring. The combination of tender bone-in chicken thighs and smoky andouille sausage creates an authentic Louisiana comfort food that simmers gently for hours, producing rich flavor and texture.
Print Recipe Pin Recipe
Prep Time 15 minutes mins
Cook Time 6 hours hrs
Total Time 6 hours hrs 15 minutes mins
Servings: 8 servings
Course: Main Dish
Cuisine: Louisiana, Southern
Ingredients Equipment Method Notes

Ingredients
  

  • 2 lbs chicken thighs bone-in
  • 1 lb andouille sausage sliced
  • 1 large onion diced
  • 2 stalks celery diced
  • 1 medium green bell pepper diced
  • 4 cloves garlic minced
  • 0.5 cup all-purpose flour regular bleached
  • 0.5 cup vegetable oil
  • 4 cups chicken stock room temperature
  • 14.5 oz diced tomatoes canned
  • 2 bay leaves
  • 1 tablespoon Cajun seasoning avoid high salt blends
  • 1 teaspoon dried thyme
  • 1 teaspoon file powder add at end of cooking
  • salt to taste
  • black pepper to taste
  • white rice cooked, for serving
  • green onions sliced, for serving
  • hot sauce for serving

Equipment

  • Large skillet Used for toasting the roux, browning chicken and sausage, and cooking vegetables
  • Crockpot Used for slow cooking the gumbo

Method
 

  1. Heat vegetable oil in a large skillet over medium heat. Add flour and stir constantly for 8-10 minutes until the mixture turns chocolate brown and smells nutty, like dark peanut butter. Transfer to the crockpot immediately to stop cooking.
    0.5 cup all-purpose flour, 0.5 cup vegetable oil
  2. In the same skillet, sear chicken thighs skin-side down for 4 minutes until golden. Flip and cook 3 minutes more. Add sliced andouille sausage and cook 2 minutes to render fat. Transfer chicken and sausage to the crockpot, leaving fat in the pan.
    2 lbs chicken thighs, 1 lb andouille sausage
  3. Add diced onion, celery, bell pepper, and minced garlic to the skillet. Cook 5 minutes, scraping up browned bits, until vegetables soften. Add Cajun seasoning, dried thyme, salt, and pepper. Stir 1 minute until fragrant, then transfer to crockpot.
    1 large onion, 2 stalks celery, 1 medium green bell pepper, 4 cloves garlic, 1 tbsp Cajun seasoning, 1 tsp dried thyme, salt, black pepper
  4. Pour chicken stock and diced tomatoes over ingredients in the crockpot. Add bay leaves and stir well to combine roux with the liquid until thick and muddy brown. Cover and cook on low for 6-8 hours until chicken pulls apart easily.
    4 cups chicken stock, 14.5 oz diced tomatoes, 2 bay leaves
  5. Remove chicken pieces from crockpot. Shred meat discarding skin and bones. Return shredded chicken to pot. Stir in file powder and let sit uncovered for 5 minutes. Taste and adjust salt or hot sauce. Serve gumbo over white rice topped with sliced green onions.
    1 tsp file powder, white rice, green onions, hot sauce

Notes

  • Toast the roux ingredients first for deeper, nutty flavor and to prevent raw flour taste.
  • Use bone-in chicken thighs for gelatin-rich broth and juicy meat.
  • Never add cold stock directly to hot roux to avoid clumping; bring stock to room temperature first.

Tried this recipe?

Let us know how it was!

What Is Liquid Smoke? [Taste, Uses & More]

March 31, 2026

Most people treat liquid smoke like a shortcut and reach for too much of it.

What Is Liquid Smoke

One drop too many and a BBQ sauce turns acrid; the smoke stops tasting like a wood fire and starts tasting like an ashtray.

Understanding this concentrate - and exactly how restrained to be with it - is what separates a convincing smoked dish from an unpleasant one.

Unlike smoked salt and its flavor, which spreads smoke evenly through seasoning, or smoked paprika swaps that work built around dried chile heat, liquid smoke delivers pure condensed wood vapor with nothing else underneath it.

QUICK SUMMARY

Liquid smoke is a wood smoke condensate used in tiny amounts to replicate pit-smoke flavor indoors. It's intensely smoky, slightly bitter, and faintly sweet. Use it in sauces, marinades, and braises - a few drops at a time.

🔥Flavor: Smoky, bitter-char, faintly sweet from wood sugars
🧪Category: Flavoring concentrate, water-soluble smoke extract
🍖Best Uses: BBQ sauces, marinades, baked beans, vegan dishes
🪵Common Types: Hickory, mesquite, apple wood
📦Shelf Life: 2-3 years unopened; 6-12 months after opening
⚠️Watch Out: A little goes a long way - overuse turns flavor acrid fast

What Is Liquid Smoke?

Liquid smoke is a flavoring concentrate produced by burning hardwood, then channeling the smoke through cold water to condense it into a dark, syrupy liquid.

That process captures the volatile aromatic compounds - primarily phenols, carbonyls, and acids - responsible for the flavor we associate with slow-smoked meat.

It has been commercialized in North America since the late 1800s and is widely available under names like smoke concentrate, wood smoke extract, or liquid-smoke seasoning. The wood type determines the character of the final product.

  • 🪵 Hickory - the most common variety; bold, bacon-like smoke with a dry finish
  • 🌵 Mesquite - sharper, earthier, and more intense than hickory
  • 🍎 Apple wood - lighter, slightly sweet, better for poultry and pork

Undiluted, the liquid is thin but feels almost syrupy and stains everything it contacts. Diluted in a sauce or marinade, it disperses invisibly while the aroma does the work.

What Does Liquid Smoke Taste Like?

liquid smoke - What Is Liquid Smoke

Liquid smoke tastes like concentrated cold-smoke - specifically the outer bark and char of smoked wood, not the fatty drippings or meat juices from an actual pit.

The flavor hits in layers: sharp smoke upfront, a bitter-char middle note, then a faint sweetness from natural wood sugars that lingers at the back of the palate.

Sensory SnapshotStrong Intensity
👅 Flavor
SmokyBitter-charFaintly sweetPhenolic
✋ Texture
Syrupy undilutedWatery when diluted
👃 Aroma
Cold smokeToasty wood char

The phenolic backnote is the detail most people notice when something is over-smoked.

That earthy, almost medicinal edge amplifies sharply with heat - which is why adding liquid smoke after cooking, or early in a long braise where it mellows, matters more than most recipes acknowledge.

Watch Out
Heat intensifies liquid smoke. Adding it to a hot pan over high heat concentrates the phenols fast and can turn a measured amount overwhelming. Stir it into sauces off heat, or add it early in a slow cook so the flavor has time to integrate.

How to Use Liquid Smoke

Start with 1-2 drops, not teaspoons. That single rule prevents most overcooking mistakes.

Liquid smoke belongs in dishes that benefit from low, slow smoke flavor without the equipment.

American BBQ-style cooking is the home territory here.

Stir a drop or two into homemade BBQ sauce alongside tomato, brown sugar, and mustard.

For baked beans, a small measure stirred into the pot during cooking adds the smoked-meat backbone that a vegetarian version lacks - and if you're thinking about what to serve alongside, what pairs with baked beans covers the full spread.

Vegan and vegetarian applications are where liquid smoke earns its keep most clearly. Brush a diluted solution onto keeping tofu fresh isn't the concern here - it's about getting liquid smoke to adhere before pan-searing, which a quick dry-press and thin coat handles well. Mixed into a vegetarian chili with soy sauce, smoked paprika, and onion, it creates a convincing smoked-meat illusion without any animal product.

How Liquid Smoke Is Used
MethodBest ForTip
🥫 Stirred inBBQ sauce, baked beans, chiliAdd off heat so phenols don't amplify
🧴 MarinadePork shoulder, tofu, seitan1 teaspoon per cup of marinade is plenty
🍳 Braise/slow-cookPulled meats, beans, collardsAdd early - long cook time mellows bitterness
🖌️ Finishing brushSteaks, tofu slabs, roasted vegDilute 1:4 with water or oil before brushing
🥄 Condiment blendSmoked mayo, aioli, dressingsOne drop per 4 tablespoons of base

Liquid smoke pairs naturally with tomato-based sauces, molasses, mustard, soy sauce, and garlic. Avoid using it with delicate raw seafood or light green salads where it will simply overpower everything else present.

Try It In
🍳Sheet Pan Smoked Sausage and PotatoesA good test for smoke-forward seasoning balance→🥯Smoked Salmon and Cream Cheese BagelShows how smoke flavor works with rich dairy→🐟Smoked Salmon Dip with Cream CheeseSee how cold smoke translates into a blended dip→

How to Buy and Store Liquid Smoke

Read the ingredient label before buying. A clean product lists water and natural smoke flavor - nothing else.

Avoid bottles with vague "flavorings" or added caramel color, which can mask lower-quality smoke extract. Prefer glass bottles over plastic; they hold aroma longer and don't absorb the concentrated phenols into the container walls.

Best Pick
Look for a bottle that names the wood type - hickory, mesquite, or apple - on the front label. Generic "smoke flavor" gives you no control over the flavor profile, and the wood type significantly changes how liquid smoke behaves in a recipe.

Store unopened bottles upright in a cool, dark pantry; they keep well for 2-3 years.

After opening, cap tightly and refrigerate if the label recommends it, or keep in a dark pantry away from heat sources.

For a full breakdown of timeline and signs of degradation, keeping liquid smoke fresh covers the details.

Opened bottles hold their quality for 6-12 months before the aroma starts to flatten.

Start Here if You're New to Liquid Smoke

If you've never used it before, hickory is the right entry point. It's forgiving, widely available, and matches the flavor profile most people already associate with BBQ.

Your first use should be a simple one: stir a single drop into a store-bought BBQ sauce and taste the difference.

That comparison teaches you what the concentrate actually contributes before you add it to anything you've built from scratch.

If you find you'd rather skip it entirely, liquid smoke stand-ins covers the closest alternatives - and bbq sauce swaps that work helps if you need to rethink the whole base.

Golden Rule
Always measure liquid smoke. Never free-pour it. One accidental extra drop changes the dish. A dropper bottle or a measuring spoon - use one every time.

Frequently Asked Questions

What is liquid smoke made from?

Hardwood is burned and the smoke is passed through cold water, condensing the volatile compounds into a concentrated liquid. Most commercial versions filter out heavier particles, leaving primarily water, phenols, carbonyls, and organic acids.

Is liquid smoke natural or artificial?

Real liquid smoke is natural - it's actual wood smoke condensed into water. Products listing "natural smoke flavor" on the label use this process; those listing vague "flavorings" may use synthetic approximations instead.

How much liquid smoke should I use?

Start with 1-2 drops per cup of sauce or marinade, then taste before adding more. Most recipes that call for a teaspoon actually need far less - the concentrate is significantly stronger than its volume suggests.

Does liquid smoke contain carcinogens?

Commercial liquid smoke is filtered to remove most polycyclic aromatic hydrocarbons (PAHs), which are the compounds of concern in direct smoke. The FDA considers filtered liquid smoke safe at normal culinary quantities.

Can liquid smoke be used directly on food without cooking?

Yes, but dilute it first - straight concentrate brushed on cold food is almost always too strong. A 1:4 ratio with water or a neutral oil works well as a no-cook finishing application on cured meats or firm vegetables.

Indonesian Coconut Rice Breakfast (Nasi Lemak)

March 31, 2026

When you need a coconut-rich breakfast that works for meal prep or a weekend brunch spread, this Indonesian rice dish delivers. One pot of fluffy grains infused with pandan and ginger, crispy fried anchovies on top, and sliced cucumber on the side-enough components to make plain toast feel boring.

Indonesian Coconut Rice Breakfast (Nasi Lemak) served on a plate

The rice cooks in coconut milk instead of water, and the aromatics infuse while it simmers. You don't flip or stir. The pot does the work while you fry anchovies and boil eggs.

Perfect for mornings when you want something warming that still feels light. This scales up for weekend family meals or preps for grab-and-go weekday breakfasts.

QUICK SUMMARY

Indonesian Coconut Rice Breakfast (Nasi Lemak) cooks jasmine rice in coconut milk with pandan leaves and ginger for fluffy, fragrant grains. Simmer the rice gently without stirring to avoid clumping. Serve with crispy fried anchovies, boiled eggs, and cucumber for a complete breakfast plate.

⏱️Time Reality: 35 minutes total-10 to prep, 25 for rice to cook and aromatics to infuse.
🔥Critical First Move: Rinse rice thoroughly until water runs clear to prevent sticky, clumped grains.
⚠️Watch Out: Stirring rice mid-cook breaks grains and creates mush-cover tightly and leave it alone for 20 minutes.

Table of Contents

Toggle
  • Why This Recipe Works
  • What You'll Need
    • Ingredient Details
  • Ingredient Swaps
  • What to Serve With It
  • Store and Reheat
  • Frequently Asked Questions
  • Indonesian Coconut Rice Breakfast (Nasi Lemak)
    • Method 
    • Tried this recipe?

Why This Recipe Works

Coconut milk replaces water to give the rice its signature creamy richness while pandan leaves and lemongrass infuse subtle fragrance as it simmers. For a similar approach to building flavor in another breakfast grain dish, this simple beans works with warm spices and aromatics too.

Quick Reference
⏱️
Prep Time
10 min
🔥
Cook Time
25 min
⏰
Total Time
35 min
🍽️
Servings
4 servings
📊
Difficulty
Medium
🏷️
Category
Main Dish
💡
Quick Tip
Simmer rice gently with aromatics for best flavor
🎯
Best For
Weeknight | Meal prep | Entertaining

What makes this work:

  • Rinsing rice removes excess starch so grains stay separate instead of clumping into a sticky mass
  • Long-grain or jasmine rice yields fluffy texture with distinct grains that hold up to the creamy coconut milk
  • Simmering covered on low heat for 20 minutes without stirring prevents broken grains and mushy texture
  • Fresh coconut milk gives richer flavor than canned-freshness impacts how creamy and fragrant the final rice tastes
  • Frying anchovies at 350°F for 2-3 minutes creates crispy texture that contrasts with the soft rice
Quick Tip
Tie pandan leaves and bruised lemongrass together before adding to the pot-they infuse while rice cooks and pull out easily after.

What You'll Need

Ingredients for Indonesian Coconut Rice Breakfast (Nasi Lemak)

Shopping for this takes one trip to an Asian market for pandan and ikan bilis, then your regular grocery run for rice and coconut milk. We grab something fresh like salad on the same trip for a contrasting side that balances the richness.

🍜
Base Grain
  • 2 cups long-grain rice or jasmine rice
  • 2 cups coconut milk
  • 1 cup water
🧄
Aromatics
  • 3-4 pandan leaves
  • 1-inch piece fresh ginger
  • 2 shallots
  • 1 stalk lemongrass
  • 1 teaspoon salt
🍗
Protein & Toppings
  • ½ cup fried anchovies (ikan bilis)
  • 4 eggs
  • 1 cucumber, sliced

Ingredient Details

  • Coconut Milk
    Use fresh or good quality canned with high fat content-watery versions won't give the creamy richness you need. Check the ingredient list for just coconut and water.
  • Pandan Leaves
    Fresh pandan adds fragrant, slightly vanilla-like aroma that's hard to replicate. Frozen leaves work if fresh aren't available. Skip pandan extract-it tastes artificial.
  • Long-Grain or Jasmine Rice
    Both yield fluffy separate grains. Jasmine adds subtle floral notes. Avoid short-grain or sticky rice varieties-they'll turn gummy in coconut milk.
  • Fried Anchovies (Ikan Bilis)
    Look for dried anchovies in Asian markets, then fry them yourself for maximum crunch. Pre-fried versions lose texture quickly after opening the package.
  • Ginger
    Fresh ginger adds warming spice without heat. Slice it thick so you can fish it out before serving. Ground ginger doesn't infuse the same way.
  • Lemongrass
    Bruise the stalk with the back of a knife before adding-this releases oils for better flavor. Remove the tough outer layers first.
  • Shallots
    Slice shallots thin and sauté until golden for topping, or add whole to rice for subtle sweetness during cooking. They add depth either way.

Ingredient Swaps

Jasmine rice works like long-grain but adds a hint of floral fragrance that pairs well with pandan. Brown rice needs longer cooking time and more liquid-expect 40-45 minutes instead of 25.

Four swaps that work:

  • Pandan leaves → lime zest: Add 1 teaspoon zest at the end for citrus brightness instead of fragrant aroma-different profile but still lifts the rice
  • Fried anchovies → crispy shallots: Maintains crunch and savory hit without the fishy flavor-slice thin, fry until golden and crisp
  • Coconut milk → coconut cream diluted with water: Use ½ cup cream plus 1½ cups water to match consistency-too thick without dilution
  • Boiled eggs → tofu cubes: Pan-fry firm tofu until golden for protein that's not egg-based-different texture but absorbs sambal well

Fresh Coconut Milk

Works for: Maximum creaminess and authentic coconut flavor-worth the effort for special brunches

Skip if: You need something shelf-stable or can't find fresh coconut in your area

Canned Coconut Milk

Works for: Quick weekday prep with consistent results-shake can well before opening

Skip if: The brand you have is watery or has gums and stabilizers-check ingredient list first

Brown Rice

Works for: Nutty flavor and more fiber-adds chew and substance to the dish

Skip if: You want fluffy, separate grains or don't have 40+ minutes for cooking time

Instructions

Total cook time runs 25 minutes once you start simmering-the rice needs 20 minutes covered without opening the lid, then 5 to rest and fluff. Crisp slaw recipe comes together while the rice cooks if you want another side ready at the same time.

  1. Rinse rice in cold water 3-4 times until water runs clear. Drain well. This removes surface starch that causes clumping and sticky texture.

  2. Combine rice, coconut milk, water, salt, sliced ginger, tied pandan leaves, and bruised lemongrass in medium saucepan. Bring to boil over medium-high heat, then immediately reduce to low simmer.

  3. Cover pot tightly with lid and simmer 20 minutes without stirring or lifting lid. Steam cooks the rice evenly-opening the lid releases heat and adds time. Rice is done when liquid is absorbed and grains are tender.

  4. While rice cooks, heat 2 tablespoons oil in frying pan over medium-high heat to 350°F. Fry dried anchovies 2-3 minutes until golden and crisp. Drain on paper towels. Boil eggs 7-8 minutes, then transfer to ice bath immediately.

  5. Remove pot from heat and let rice rest covered 5 minutes. Fluff gently with fork to separate grains. Remove and discard pandan, lemongrass, and ginger slices before serving.

Golden Rule
Never stir rice while it simmers-this breaks grains and creates mushy texture instead of fluffy separate grains you want.

What to Serve With It

This needs something crunchy and something cooling to balance the rich coconut rice. Fried anchovies add crunch, cucumber brings freshness, but you still want a proper side that completes the plate. For more protein-focused breakfast combinations, check out these weeknight chicken dinner ideas that work for morning meals too.

Side Dish Prep Why It Works How to Serve
Sliced cucumbers Easy Fresh crunch balances creamy rice Slice thick on diagonal, serve cold on side
Hard-boiled eggs Easy Simple protein addition fits quick meals Halve or quarter, place on rice, sprinkle salt
Fried peanuts Easy Adds texture and nuttiness Scatter over rice, serve sambal on side
Sambal chili sauce Easy Provides heat and depth Serve in small bowl, let people add to taste
Ayam goreng (fried chicken) Involved Classic protein pairing enhances meal Marinate chicken in turmeric-ginger paste, fry until golden

Three ways to serve it:

  • Weekend brunch spread: Plate rice in center, arrange fried anchovies, boiled egg halves, cucumber slices around edges, serve sambal and fried shallots on side
  • Meal prep containers: Divide rice into portions, pack anchovies and eggs separately to keep crisp, add cucumber right before eating
  • Traditional celebration plate: Serve with ayam goreng, keropok crackers, spicy sambal belacan, and extra fried peanuts for full Nasi Lemak experience
Best Pick
Sambal chili sauce is non-negotiable-the spicy, sweet, smoky paste cuts through coconut richness and brings the whole plate together.

Store and Reheat

Coconut rice holds texture for 3-4 days in the fridge but loses fluffiness as it cools. Store rice, anchovies, and eggs in separate airtight containers-keeping components apart prevents anchovies from going soggy and eggs from making rice wet. For another make-ahead option with similar aromatic infusion, this quick aioli dish preps ahead and stores just as well.

Method Time Best For
🍳 Stovetop 4-5 min Restoring fluffiness-add 2 tablespoons water, cover, heat on low until steaming
📦 Microwave 1-2 min Quick single portions-sprinkle water on top, cover with damp paper towel, heat on high
🔥 Oven 10 min at 350°F Warming larger batches evenly-cover with foil, add splash of water before heating

For best results when storing:

  • Spread rice on baking sheet to cool quickly before transferring to containers-prevents condensation that makes rice soggy
  • Pack fried anchovies in paper towel-lined container to absorb any moisture and maintain crunch
  • Store boiled eggs in shell until ready to serve to keep whites from getting rubbery in the fridge
  • Freeze coconut rice up to 1 month in portion-sized bags with air pressed out-thaw overnight in fridge before reheating
  • Refry anchovies briefly in hot oil if they've lost crispness-30 seconds at 350°F brings back crunch

Frequently Asked Questions

Can I make Nasi Lemak ahead and reheat without losing texture?

Yes, but store components separately. Rice keeps 3-4 days in airtight container and reheats well with a splash of water on stovetop or microwave. Pack fried anchovies separately in paper towel-lined container to maintain crunch-they go soggy if stored with rice.

What is the ideal cooking time for coconut rice to ensure fluffiness?

Simmer covered on low heat for exactly 20 minutes without lifting lid or stirring. Opening the pot releases steam and adds time. Rice is done when liquid is fully absorbed and grains are tender with no hard center when you bite one.

Can I substitute jasmine rice with brown rice in Nasi Lemak?

Yes, but increase liquid to 2½ cups coconut milk and 1½ cups water, and cook 40-45 minutes instead of 25. Brown rice has nutty flavor and chewier texture compared to fluffy white rice-it's heartier but less traditional.

How do I prevent fried anchovies from becoming soggy?

Pat dried anchovies completely dry before frying, then fry in oil heated to 350°F for 2-3 minutes until golden. Drain on paper towels and store separately from rice in paper towel-lined container. If they soften, refry briefly in hot oil to restore crunch.

What are good side dishes to serve with Nasi Lemak for breakfast?

Sliced cucumber adds fresh crunch, hard-boiled eggs provide simple protein, and sambal chili sauce brings heat that cuts through the creamy rice. For bigger meals, add ayam goreng (fried chicken) or keropok (shrimp crackers) for traditional presentation.

Indonesian Coconut Rice Breakfast (Nasi Lemak) served on a plate

Indonesian Coconut Rice Breakfast (Nasi Lemak)

No ratings yet
Indonesian Coconut Rice Breakfast, or Nasi Lemak, features jasmine rice cooked in coconut milk with pandan leaves and ginger to create fluffy, fragrant grains. This simple one-pot dish simmers gently without stirring, served with crispy fried anchovies, boiled eggs, and fresh cucumber for a complete light breakfast.
Print Recipe Pin Recipe
Prep Time 10 minutes mins
Cook Time 25 minutes mins
Total Time 35 minutes mins
Servings: 4 servings
Course: Breakfast, Main Dish
Cuisine: Indonesian, Southeast Asian
Ingredients Method Notes

Ingredients
  

  • 2 cups long-grain rice can substitute with jasmine rice
  • 2 cups coconut milk fresh or good quality canned with high fat content
  • 1 cup water
  • 3-4 leaves pandan leaves tie together for infusion
  • 1 inch fresh ginger sliced thick for easy removal
  • 2 units shallots sliced thin or whole for cooking
  • 1 stalk lemongrass bruised and outer layers removed
  • 1 teaspoon salt
  • 0.5 cup fried anchovies ikan bilis, fry in oil to crisp
  • 4 units eggs hard-boiled
  • 1 unit cucumber sliced, served fresh

Method
 

  1. Rinse rice in cold water 3-4 times until water runs clear. Drain well to remove surface starch that causes sticking.
    2 cups long-grain rice
  2. Combine the rinsed rice, coconut milk, water, salt, sliced ginger, tied pandan leaves, bruised lemongrass, and shallots in a medium saucepan. Bring to a boil over medium-high heat.
    2 cups long-grain rice, 2 cups coconut milk, 1 cup water, 1 teaspoon salt, 1 inch fresh ginger, 3-4 leaves pandan leaves, 1 stalk lemongrass, 2 units shallots
  3. Immediately reduce heat to low simmer. Cover the pot tightly with lid and simmer for 20 minutes without stirring or lifting the lid to ensure even cooking.
  4. While rice cooks, heat 2 tablespoons oil in a frying pan over medium-high heat to 350°F (175°C). Fry dried anchovies for 2-3 minutes until golden and crisp. Drain on paper towels. Boil eggs for 7-8 minutes, then transfer to an ice bath immediately.
    0.5 cup fried anchovies, 4 units eggs
  5. Remove pot from heat and let rice rest, covered, for 5 minutes. Fluff gently with a fork to separate grains and remove pandan leaves, lemongrass, and ginger slices before serving.
    2 cups long-grain rice, 3-4 leaves pandan leaves, 1 inch fresh ginger, 1 stalk lemongrass

Notes

  • Rinse rice thoroughly to prevent sticky, clumped grains.
  • Simmer rice covered without stirring to avoid broken grains and mushy texture.
  • Fry anchovies at 350°F for 2-3 minutes for maximum crispness and store separately to maintain crunch.

Tried this recipe?

Let us know how it was!

How Long Does Marshmallow Last? [Storage Guide]

March 31, 2026

You just bought a bag of marshmallows for hot cocoa, grabbed a few, and now the half-open bag is sitting on your counter - and you're not sure how long it's safe to keep them.

Can You Freeze Marshmallow

Marshmallows last surprisingly long for a sugar-based food, since their main ingredients - sugar, corn syrup, and gelatin - are all shelf-stable on their own (much like how long sugar keeps on its own, which is effectively indefinite).

An unopened bag can stay pantry-fresh for months, while an opened one needs more attention if you want it to stay soft and usable.

QUICK SUMMARY

Unopened marshmallows keep 6-9 months in the pantry. Once opened, use within 2-4 weeks in the pantry or 3-6 months in the freezer. The key rule: keep air and moisture out at every stage.

🏠Pantry (unopened): Up to 6-9 months in a cool, dry spot
📦Pantry (opened): 2-4 weeks in a sealed airtight container
🧊Freezer: 3-6 months; flash-freeze first to prevent clumping
⚠️Watch for: Slimy texture or sour smell - discard immediately

How Long Does Marshmallow Last?

Shelf life varies mainly by whether the bag has been opened and how it's stored after that.

Unopened marshmallows are protected by the sealed commercial packaging, which keeps air and humidity away from the gelatin and sugar structure that gives them their bounce.

Once you break the seal, moisture and air get in fast. Exposure causes the surface to dry out, the sugar to crystallize, and the texture to turn stiff and stale within weeks.

Marshmallow Shelf Life
MethodStateDurationNotes
🏠 PantryUnopened6-9 monthsSealed bag in a cool, dry spot away from heat
🏠 PantryOpened2-4 weeksReseal tightly or transfer to an airtight container
🧊 FridgeOpened2-3 weeksAirtight container only; fridge promotes stickiness
❄️ FreezerOpened3-6 monthsFlash-freeze first; quality declines past 6 months
🏠 CounterUnopened6-9 monthsSame as pantry when kept from heat and humidity

Homemade marshmallows - made without commercial preservatives - move faster. Expect 3-5 days at room temperature and up to a week refrigerated when stored in an airtight container dusted with powdered sugar or cornstarch to prevent sticking.

How to Store Marshmallow

The pantry is the right default for most people. Pantry: Keep unopened bags in their original sealed packaging in a cool, dry spot away from the stove or any humid area.

Once opened, transfer to an airtight container or press as much air out of the original bag as possible before clipping it shut.

Fridge: Refrigerating marshmallows isn't necessary, and it comes with trade-offs. The cold environment slows any bacterial activity, but it also pulls moisture into the bag - making marshmallows sticky and difficult to separate. If you do refrigerate, layer them between sheets of parchment paper inside a tightly sealed container, and be sure you're storing parchment paper correctly so it's dry and uncontaminated before use.

Watch Out
Never put marshmallows in the fridge without sealing them first. Unsealed, they absorb ambient moisture within hours and turn into a sticky, unworkable mass.

A few habits worth keeping:

  • 🧻 Layer with parchment - separates pieces and prevents fused clusters in storage
  • 📦 Use a rigid container - protects the bag from being crushed, which compresses the marshmallows
  • 🌡️ Avoid heat sources - a warm pantry near the oven will melt the sugar structure faster than air exposure
  • 🍫 Store flavored varieties separately - chocolate-coated or flavored marshmallows can transfer taste to plain ones in the same container

Can You Freeze Marshmallow?

Yes - and freezing is actually one of the better long-term options. The sugar and gelatin base freezes well without breaking down the way dairy or egg-heavy foods do.

Texture may shift slightly toward chewier and denser after a longer freeze, but flash-freezing first minimizes that effect considerably.

Golden Rule
Flash-freeze marshmallows individually before bagging. Skipping this step leads to one solid frozen cluster that tears apart on thaw.
  1. Arrange in a single layer on a parchment-lined baking sheet, making sure pieces don't touch.
  2. Flash-freeze for 1-2 hours until each marshmallow is firm and holds its shape independently.
  3. Transfer to a freezer bag or airtight container, pressing out excess air before sealing.
  4. Label with the date - quality is best within 3-6 months, though they stay safe beyond that window.
  5. Thaw in the sealed bag at room temperature for 20-60 minutes; if condensation forms on the outside, blot it dry before opening.

Frozen marshmallows work well for hot cocoa and baked applications where texture matters less. For s'mores, fresh or pantry-stored marshmallows will brown and toast more evenly than ones that have been frozen and thawed.

Signs Marshmallow Has Gone Bad

Marshmallows rarely go dangerously bad - their high sugar content makes them hostile to most bacterial growth. However, a few specific signs mean the bag should go in the bin.

Signs It's Gone Bad
👀
VisualVisible mold spots (green, black, or fuzzy) · white granular crystallization on surface (staling, not mold - still safe)
👃
SmellSour or fermented odor · absence of the expected faint sweet aroma
✋
TextureSlimy or excessively sticky surface that clings when pieces are separated

The most common confusion is sugar bloom - that white, granular coating that appears on older marshmallows. It looks alarming but it's just crystallized sugar migrating to the surface, and it poses no safety risk.

Mold, on the other hand, appears as distinct fuzzy colonies, usually green or black.

If you spot mold, smell anything sour, or feel sliminess, discard the whole bag. Don't try to pick out affected pieces - mold spreads through contact even where it isn't visible yet.

Getting the Most from Every Bag

A few targeted habits extend marshmallow life well past the average.

If your marshmallows have gone slightly stale but show no spoilage signs, seal them in a container with one slice of bread or an apple wedge for 12-24 hours - the added moisture rehydrates them noticeably.

Understanding the taste of marshmallow at its best helps you recognize when one has degraded enough to skip.

For toasted or roasted marshmallows, cool them fully before storing and consume within 1-2 days. Once heat has been applied, the structure weakens quickly, and no storage method fully recovers the texture.

  • 🍞 Stale rescue method - one bread slice in a sealed container rehydrates marshmallows in under a day
  • 📅 Date your bags - opened bags look identical to fresh ones; labeling removes all guesswork
  • ❄️ Freeze in portions - pull only what you need so the rest stays undisturbed in the freezer
  • 🔄 Check your swaps - if marshmallows run out before the recipe is done, [alternatives to marshmallow](https://forkliftkitchen.com/marshmallow-substitutes/) can cover many applications without a texture compromise

Marshmallow fluff and spreadable versions follow similar rules - airtight lid, cool storage, and a watchful eye for any sourness.

Like storing gelatin correctly, the principle is the same: keep moisture and air away and the product stays stable far longer than most people expect.

Shortcut
Skip the fridge unless your pantry runs hot or humid. The pantry, sealed tight, is simpler and avoids the stickiness that refrigeration causes.

Frequently Asked Questions

Can you freeze marshmallows for s'mores?

Yes, but results are better for hot drinks than for s'mores. Frozen and thawed marshmallows lose a little loft, so they don't toast as evenly over an open flame. Pantry-fresh ones give a better char and pull.

How long do marshmallows last unopened?

6-9 months in a cool, dry pantry or counter away from heat. The sealed commercial bag locks out humidity, which is the main thing that degrades marshmallow texture over time.

Do marshmallows go bad in the fridge?

They don't spoil faster in the fridge, but the quality drops. Cold air draws moisture into the marshmallows, making them sticky and clumped - an airtight container with parchment layers reduces that effect.

Will marshmallows harden in the freezer?

They firm up when frozen but return to a soft texture on thawing. Extended freezing beyond 6 months can make them slightly denser and chewier, though they remain safe to eat.

How do you soften stale marshmallows?

Seal them in an airtight container with a slice of bread or an apple wedge for 12-24 hours. The moisture from the bread migrates into the marshmallows and restores most of the softness.

What Is Lentil? [Taste, Uses & More]

March 31, 2026

Lentils have a quiet, grounding quality the moment they hit a hot pan - that faint toasty, beany aroma that signals something substantial is on the way. They sit somewhere between a grain and a pea in flavor, earthy and nutty, with just enough body to anchor a bowl on their own.

What Is Lentil

Unlike black beans or mung beans, lentils come in several distinct forms that cook and taste noticeably differently from one another. Knowing which type to reach for changes the dish entirely.

QUICK SUMMARY

Lentils are dried lens-shaped pulses with earthy, nutty flavor. Red and split varieties cook down creamy; green, brown, and Puy hold their shape. They work in soups, salads, stews, and as a plant-protein base across Indian, French, and Middle Eastern cooking.

👅Flavor: Earthy and nutty, mildly sweet when red and cooked down
🍳Best Uses: Dal, lentil soup, salads, meatless loaves, stews
🌍Cuisines: Indian, French, Middle Eastern, Mediterranean
📦Shelf Life: Dried: 1-2 years; cooked: 3-5 days refrigerated
🥗Pairs With: Cumin, garlic, lemon, olive oil, smoked meats, root vegetables

What Is Lentil?

Lentils are small, lens-shaped seeds from the legume family - a pulse, technically, meaning they're the dried edible seed of a pod plant. They originated in South Asia and the eastern Mediterranean, where they've been cultivated for over 8,000 years.

You'll find them sold whole or split, across several color categories that behave quite differently in cooking.

  • Brown lentils - The most common type in Western markets; hold their shape and suit soups and stews.
  • Green lentils and Puy lentils - Firm, slightly peppery; Puy (from France's Le Puy region) are smaller and more mineral in flavor.
  • Red lentils (masoor) - Usually sold split; cook down fast into a soft, creamy consistency ideal for dal.
  • Black beluga lentils - Dense, glossy, and firm; hold shape even after prolonged cooking.
  • Split lentils (dal) - Any variety with the hull removed and seed halved; cook much faster than whole lentils.

In South Asian cooking, the word dal refers to split lentils and also to the dish made from them - context usually makes clear which is meant.

What Does Lentil Taste Like?

lentil - What Is Lentil

The flavor depends heavily on the variety. Brown and green lentils carry an earthy, faintly nutty taste - think cooked brown rice in body, but with a slightly more complex, pea-like finish.

Sensory SnapshotModerate Intensity
👅 Flavor
earthynuttymildly sweetlightly peppery
✋ Texture
firm (green/brown/Puy)creamy (red/split)
👃 Aroma
mildly beanytoasty when dry-roasted

Puy lentils push the pepper note further - they have a more mineral edge that holds up well against acidic dressings. Red lentils shift the profile almost entirely: cooked down, they turn mildly sweet and almost savory-bland, which is why they need assertive spicing.

Heat softens the raw, faintly chalky edge all dried lentils share, replacing it with a rounder, more cohesive depth.

How to Use Lentil

Lentils span an unusually wide range of cooking applications for a single ingredient, largely because different varieties behave so differently once cooked.

How Lentils Are Used
MethodBest ForTip
🍲 SimmerSoups, dal, stews, mujaddara-adjacent dishesStart in cold water; skim foam in the first few minutes
🥘 Sauté then simmerFrench lentil salad, side dishes with vinaigretteUse Puy or green; undercook slightly before dressing
⚡ Pressure cookFast weeknight dal, batch cooking for meal prepRed lentils: 5-6 min; brown/green: 10-12 min
🔥 BakeLentil loaves, terrines, meatless burgersMash well and cool before combining with oats or binder

In Indian cooking, red lentil dal is built by blooming cumin, coriander, and garlic in oil before adding the split lentils - a technique called tadka. French preparations lean the other way: Puy lentils simmered until just tender, then tossed warm with a mustard vinaigrette and shallots.

Middle Eastern cooks combine lentils with caramelized onion and rice for mujaddara, where the earthiness anchors sweet, deeply browned alliums.

For texture contrast, pair firm lentils with roasted root vegetables - carrot, parsnip - or smoked paprika and bacon where fat carries the lentil's flavor deeper into the dish.

Lemon or a splash of red wine vinegar added at the end brightens the earthy base without masking it.

Watch Out
Don't dress firm lentils with high-acid vinaigrette before they finish cooking. Acid can cause the outer layer to tighten, leaving the centers chalky even with continued heat.
Try It In
🥗Herbed Lentil and Feta SaladShows how Puy lentils hold shape and absorb an herby dressing→🌿Lentil Salad with Red Onion and HerbsA simple template for any firm lentil variety→🍖Slow Cooker Sausage and LentilsBrown lentils holding firm through long, low heat with smoked meat→

How to Buy and Store Lentil

Buy lentils in clear packaging whenever possible. Whole green and Puy lentils should look glossy and uniform in size; split red lentils should be a bright orange-red, not dull or dusty.

Avoid bags with broken pieces, uneven color, or a stale odor - age doesn't make lentils unsafe, however it does extend cook time and flatten flavor.

Shortcut
No soaking needed for any lentil variety. Unlike other pulses, lentils cook from dry in 20-35 minutes on the stovetop - red and split types in as little as 15.

Store dried lentils in airtight containers in a cool, dark pantry - away from heat near the stove. Check the lentil storage guide if you're unsure about older stock: dried lentils last 1-2 years, cooked lentils keep 3-5 days refrigerated, and frozen cooked lentils hold for 3 months.

As a plant protein source, cooked lentils deliver roughly 9 g of protein per 100 g - alongside meaningful dietary fiber, iron, and folate.

Start With Red or Puy

New to lentils? Red lentils are the most forgiving entry point - they cook fast, need no soaking, and collapse into creamy dal with minimal effort.

If you want a salad or a side dish where texture matters, reach for Puy or green lentils and pull them from the heat while they still have a little resistance.

Both varieties reward simple seasoning - garlic, cumin, and a squeeze of lemon cover most situations.

Frequently Asked Questions

Are lentils a bean or a grain?

Neither, strictly. Lentils are a pulse - the dried seed of a legume plant, botanically distinct from both grains and beans. They share the legume family with [chickpeas](https://forkliftkitchen.com/chickpea/) and beans but have their own genus: Lens culinaris.

Do lentils need soaking?

No. Lentils cook through without soaking, unlike chickpeas or dried beans. A quick rinse to remove dust and any debris is all they need before going into the pot.

Which lentils are best for salads?

Puy lentils are the standard choice - they hold shape after cooking and absorb dressing without turning mushy. Green and black beluga lentils work well too, for the same reason.

How long do lentils take to cook?

Red and split lentils soften in 15-20 minutes on the stovetop. Brown and green lentils take 25-35 minutes; Puy lentils can run up to 40 minutes if you want them fully tender.

Can you sprout lentils?

Yes, and whole brown or green lentils sprout reliably in 2-3 days with just water and a jar. Split lentils won't sprout since the seed is already broken and the germ removed.

What Is Neufchatel Cheese? [Taste, Uses & More]

March 31, 2026

Most people assume the tubbed version at the grocery store and the chalky, heart-shaped wheel from Normandy are basically the same cheese - they're not. Neufchâtel has a documented history stretching back to the sixth century in the Neufchâtel-en-Bray region of France, and the AOC-protected wheel shares little more than a name with the American-style fresh tub.

What Is Neufchatel Cheese

Cooks who reach for it only as a stand-in for cream cheese in dairy recipes are missing half the picture, just as those exploring aged soft cheeses often overlook swapping out camembert cheese when something leaner and tangier is what they actually need.

QUICK SUMMARY

A soft cow's-milk cheese from Normandy, France, neufchâtel comes in two distinct forms: an aged, bloomy-rind wheel and a fresh-style spreadable tub. Both share a tangy, lactic character - mild enough for everyday use, interesting enough for a cheese board.

🧀What It Is: Soft cow's-milk cheese, aged wheel or fresh tub style
👅Flavor: Tangy, lactic, mildly salty with faint earthy and buttery notes
🍽️Best Uses: Spreads, tarts, cheese boards, folded into warm dishes
❄️Shelf Life: Aged wheel: 1-2 weeks cut; fresh tub: 7-10 days after opening
🛒Buy It: Look for AOC wheels with clean white rinds or tubs with no excess whey

What Is Neufchatel Cheese?

Neufchâtel is one of the oldest known French cheeses, originating in the Normandy town of Neufchâtel-en-Bray. It holds AOC (Appellation d'Origine Contrôlée) status, meaning authentic French production follows strict geographic and production rules.

The aged wheel is a bloomy-rind cheese - its thin white exterior comes from Penicillium candidum mold, the same culture used on Brie and Camembert.

Inside sits a soft, slightly grainy or chalky paste that firms toward the rind.

Unlike those more famous neighbors, Neufchâtel is made with less cream, giving it a leaner, tangier profile than the taste of brie cheese at a similar stage of ripeness.

Its most recognizable form is heart-shaped - the coeur - though it also comes as a cylinder, brick, or square. Fresh-style tubbed neufchâtel, common in American supermarkets, is a different product entirely.

It skips the ripening stage, has no rind, and sits closer to a lighter cream cheese in form and function.

  • 🇫🇷 AOC Neufchâtel - aged, heart-shaped or cylindrical, bloomy rind, made in Normandy
  • Fresh-style tub - unripened, spreadable, sold widely in the US as a lower-fat cream cheese alternative
  • Neufchâtel-en-Bray - the specific Norman town that gives the cheese its name and protected status

What Does Neufchatel Cheese Taste Like?

neufchatel cheese - What Is Neufchatel Cheese

The two styles taste noticeably different, so it helps to know which one you're working with. Fresh tubbed neufchâtel is clean and milky with a bright lactic tang - milder than most cream cheeses and without any rind-driven earthiness.

AOC wheel neufchâtel goes further. The bloomy rind contributes faint mushroomy, barnyard undertones, and the paste itself carries a slightly nutty finish that deepens as the wheel ages. It's leaner and tangier than Brie; if you're already familiar with pairing ideas for camembert, the AOC wheel fits into similar territory but with more acidity and less fat-driven richness.

Sensory SnapshotMild Intensity
👅 Flavor
tangylacticbutteryearthy (aged)nutty finish
✋ Texture
softspreadableslightly grainy (aged wheel)
👃 Aroma
clean lactic (fresh)mild mushroom (aged rind)

Heat changes fresh-style neufchâtel less dramatically than the aged wheel. Warmed too hard, the aged paste can break and turn grainy - a detail worth keeping in mind before it goes anywhere near a high oven.

How to Use Neufchatel Cheese

Fresh tubbed neufchâtel slots in wherever cream cheese would go, with a lighter result. It works cold on a toasted baguette or crackers, and it holds up well whipped with fresh chives or tarragon as a sandwich spread.

Golden Rule
Fold neufchâtel into hot preparations off the heat - residual warmth is enough to melt it into sauces or mashed potatoes without breaking the curd.

For the aged AOC wheel, treat it more like a young Brie.

Serve it at room temperature on a cheese board alongside crisp apples, honey, or fig preserves, and pair it with a glass of Chablis or dry sparkling wine.

It fits wherever brie cheese swaps that work are being discussed, though its leaner texture means it won't melt quite as luxuriously under heat.

How Neufchatel Cheese Is Used
MethodBest ForTip
🥗 Cold/SpreadCrackers, baguette, sandwich spreads, cheese boardsBring to room temperature for 15 minutes for easier spreading
🍳 Folded InMashed potatoes, warm sauces, scrambled eggsAdd off the heat; stir gently to avoid graininess
🥧 BakedSavory tarts, quiches, puff pastry parcelsUse fresh-style tub; avoid prolonged high heat above 375°F
🔥 Soft MeltFinishing over roasted vegetables, low-heat gratinsKeep heat low and time short - the curd structure is delicate

Avoid pairing either style with very aggressive chili heat; the subtle tang disappears fast. Long, high-heat boiling is similarly unkind - it fractures the curd structure and leaves a grainy, weepy mess.

Try It In
🧀Cheddar Cheese StrawsSwap in neufchâtel for a tangier, lighter pastry bite→🥚Egg and Cheese Breakfast SandwichUse as a spreadable base instead of cream cheese→🥗Blue Cheese Dressing (Homemade)Whisk in neufchâtel for a milder, creamier dressing base→

How to Buy and Store Neufchatel Cheese

For the AOC wheel, look for a thin, uniform white rind with no deep cracks and a pale, slightly grainy paste inside. Deep yellowing or an ammonia smell signals it's past its window.

For a tubbed neufchâtel, check that the ingredient list leads with pasteurized milk and cream - and skip any container with pooled watery whey sitting on top.

Watch Out
If you're pregnant or immunocompromised, check that the AOC wheel is made from pasteurized milk - some traditional French versions are raw-milk cheeses.

Store an opened wheel wrapped in cheese paper or parchment in the coldest part of the fridge. Fresh tubs stay sealed and refrigerated.

The guidance on storing neufchatel cheese correctly covers both styles in detail, but the short version is: aged wheels hold for 1-2 weeks after cutting, and fresh tubs are best within 7-10 days of opening.

Where Neufchatel Fits in Your Kitchen

If you already cook with cream cheese, the fresh tub is the easier swap - use it anywhere you want less fat and a brighter tang, from frostings to quiches.

Those looking at using cream cheese for creaminess or exploring neufchatel cheese swaps that work will find the transition straightforward.

The AOC wheel is a different decision. Start with it on a simple cheese board - no cooking, just fruit, bread, and wine - so the rind character comes through without distraction.

Once you know what it tastes like at its best, using it in savory tarts or baked dishes makes much more sense.

Frequently Asked Questions

Is neufchatel cheese the same as cream cheese?

No. American-style tubbed neufchâtel is similar but made with less cream, giving it lower fat and a slightly tangier flavor. The traditional French AOC wheel is an aged, bloomy-rind cheese with no real resemblance to cream cheese at all.

Why is neufchatel heart-shaped?

The heart shape (*coeur*) is the most iconic traditional mold for AOC Neufchâtel, though the cheese also comes as cylinders and bricks. Legend ties the shape to Norman cheesemakers gifting hearts to English soldiers - romantic, though historically unverified.

Can neufchatel be baked?

Yes, with conditions. Fresh tubbed neufchâtel bakes well in tarts and quiches at moderate oven temperatures. Keep heat under 375°F and avoid prolonged baking - both styles can turn grainy and weepy under sustained high heat.

How long does neufchatel last in the fridge?

A cut AOC wheel holds for 1-2 weeks wrapped in cheese paper. An opened fresh tub lasts about 7-10 days sealed and refrigerated - discard it if watery whey pools heavily or any off smell develops.

Does neufchatel melt well?

It melts, but not as smoothly as high-fat cheeses. Fresh-style neufchâtel softens well under low heat and folds cleanly into warm dishes off the burner. The aged wheel is better served at room temperature than melted - the lean curd breaks more easily.

Persian Saffron Milk Rice (Sholeh Zard)

March 31, 2026

Saffron-scented rice pudding with rose water and toasted almonds on top. That's what you get when you simmer short-grain rice low and slow until it turns creamy and golden.

Persian Saffron Milk Rice (Sholeh Zard) served on a plate

The pot does all the heavy lifting. You just need to stir every few minutes and wait for the rice to break down into silk.

Make this for Persian New Year celebrations or weekend mornings when you want something that feels special without much active work.

QUICK SUMMARY

Persian Saffron Milk Rice (Sholeh Zard) is a creamy rice pudding flavored with saffron threads and rose water. Low simmering and frequent stirring prevent sticking while the rice releases starch to thicken naturally. The pudding sets as it cools and works for festive meals or budget-friendly desserts.

⏱️Time Reality: 55-60 minutes total with 10 minutes hands-off cooling
🔑Key Move: Steep saffron in hot water for 15 minutes before adding to release full color and flavor
⚠️Watch Out: Adding sugar too fast causes clumping - add gradually after rice softens and stir constantly

Table of Contents

Toggle
  • Why This Recipe Works
  • What You'll Need
    • Ingredient Details
  • Ingredient Swaps
  • What to Serve With It
  • Store and Reheat
  • Frequently Asked Questions
  • Persian Saffron Milk Rice (Sholeh Zard)
    • Method 
    • Tried this recipe?

Why This Recipe Works

Saffron needs time to bloom in warm water before it hits the rice. That 15-minute steep pulls out the golden color and floral aroma that make Sholeh Zard distinct from plain rice pudding.

Quick Reference
⏱️
Prep Time
10 min
🔥
Cook Time
45-50 min
⏰
Total Time
55-60 min
🍽️
Servings
6 servings
📊
Difficulty
Medium
🏷️
Category
Dessert
💡
Quick Tip
Cook slow, stir often to prevent sticking
🎯
Best For
Weeknight | Entertaining | Special occasions

Five reasons this method works:

  • Short-grain rice releases more starch - creates the creamy pudding texture without adding cornstarch or eggs
  • Low simmering at 180-200°F - keeps rice grains intact while they soften and prevents scorching on the pan bottom
  • Adding sugar after rice softens - prevents hard grains and lets sugar dissolve evenly into the liquid
  • Stirring every 5 minutes - scrapes up any rice that tries to stick and distributes heat throughout the pot
  • Cooling uncovered first - lets excess steam escape before covering so condensation doesn't thin the pudding
Quick Tip
Use a heavy-bottom saucepan to distribute heat evenly and reduce the chance of burning

What You'll Need

Ingredients for Persian Saffron Milk Rice (Sholeh Zard)

Short-grain rice and saffron threads are the only non-negotiables here. If you're making a homemade sandwich recipe for brunch, this dessert rounds out the meal with something sweet and fragrant that doesn't require last-minute attention.

🍜
Rice Base
  • arborio or short-grain rice
  • water
  • sugar
🌶️
Aromatics
  • saffron threads
  • rose water
  • cardamom powder
🧀
Richness
  • butter or ghee
🫙
Garnish
  • slivered almonds
  • ground cinnamon
  • pistachios

Ingredient Details

  • Short-grain rice (arborio or sushi rice)
    Rinse 2-3 times until water runs clear to remove excess surface starch that can make pudding gummy
  • Saffron threads
    Steep ¼ teaspoon in 2 tablespoons hot water for 15 minutes before adding - don't skip this or flavor stays muted
  • Sugar
    Add gradually after rice softens (about 30 minutes in) and stir constantly until fully dissolved
  • Rose water
    Start with 1 tablespoon and taste - rose water strength varies by brand and too much tastes soapy
  • Butter or ghee
    Stir in at the end for glossy finish - ghee adds nuttier flavor, butter works fine if that's what you have
  • Slivered almonds
    Toast lightly in a dry pan before garnishing for deeper flavor and crunch
  • Ground cinnamon
    Dust on top right before serving - add too early and it sinks into the pudding and looks muddy

Ingredient Swaps

Arborio rice is closest to traditional Persian short-grain rice, but sushi rice works almost as well. If you're making this dairy-free, unsweetened almond or coconut milk replaces regular milk with only a slight texture difference.

Four practical swaps:

  • Milk → unsweetened almond or coconut milk - use the same amount, expect slightly thinner consistency and milder flavor (dairy-free)
  • Sugar → honey or maple syrup - reduces to ¾ cup, adds darker color and different sweetness profile (sweetener swap)
  • Rose water → orange blossom water - same floral vibe with citrus undertone, use slightly less to start (flavor variation)
  • Slivered almonds → chopped walnuts or hazelnuts - changes texture and taste but still adds crunch and richness (budget garnish)

Arborio Rice

Works for: traditional creamy texture, widely available, consistent results

Skip if: you want firmer grains or have only long-grain rice on hand

Sushi Rice

Works for: similar starch content, slightly stickier texture, easy to find

Skip if: you prefer less clingy pudding or want exact traditional texture

Basmati Rice

Works for: what you already have, distinct aroma, less expensive

Skip if: you want creamy pudding - long-grain stays separate and won't thicken properly

Instructions

The whole process takes about 55 minutes with most of that being low simmering. You'll stir every 5 minutes to scrape the bottom and check thickness.

  1. Rinse 1 cup short-grain rice under cold water 2-3 times until water runs clear. Combine rice and 4 cups water in a heavy-bottom saucepan. Bring to a boil over medium-high heat, then reduce to low simmer. Cook uncovered for 30 minutes, stirring every 5 minutes. Rice should start breaking down and liquid should reduce by half.

  2. While rice cooks, steep ¼ teaspoon saffron threads in 2 tablespoons hot water in a small bowl. Let sit for 15 minutes. The water turns deep golden and the saffron blooms fully. Add steeped saffron (threads and liquid) to the rice after the first 15 minutes of cooking.

  3. After 30 minutes, add ¾ cup sugar gradually, stirring constantly. Sprinkle in a few tablespoons at a time and stir until each addition dissolves before adding more. Continue simmering on low for another 10-15 minutes. Pudding thickens as sugar dissolves and rice releases more starch.

  4. Stir in 1 tablespoon rose water, ¼ teaspoon cardamom powder (if using), and 2 tablespoons butter or ghee. Mix thoroughly and cook for 2 more minutes. Pudding should coat the back of a wooden spoon and hold its shape when you draw a line through it. If too thin, simmer uncovered for 3-5 more minutes.

  5. Remove from heat and pour into a shallow serving dish or individual bowls. Let cool uncovered for 10 minutes, then cover and refrigerate for at least 1 hour before serving. Garnish with toasted slivered almonds, chopped pistachios, and a dusting of ground cinnamon right before serving.

Golden Rule
Maintain low simmer throughout cooking - high heat makes rice stick and burn before it softens

What to Serve With It

Sholeh Zard sits on the sweeter end of the dessert spectrum, so you need something tangy or fresh to balance it. For complete belgian waffles meal ideas that work with similar flavor profiles, pair this with mint tea or unsweetened yogurt to cut through the richness.

Side Dish Prep Why It Works How to Serve
Mint tea Easy Refreshing herbal notes balance sweet pudding and aid digestion Brew hot and serve alongside in small glasses
Fresh berries Easy Tart acidity cuts through creamy sweetness and adds color contrast Scatter raspberries or sliced strawberries on top before serving
Unsweetened yogurt Easy Tangy creaminess provides savory contrast without adding more sugar Dollop on the side or swirl into individual portions
Light fruit salad Easy Fresh fruit keeps meal light and complements floral rose water Serve in small bowls before or after pudding
Cardamom spiced cookies Medium Warm spice echoes saffron aroma and adds crunchy texture Arrange on plate next to pudding or serve with tea

Three ways to serve it:

  • Chilled for summer - refrigerate for 2+ hours and top with cold rose syrup drizzle and pistachios
  • Warm for winter - serve straight from the stove with toasted almonds and a pinch of cinnamon
  • Meal prep dessert - portion into jars, refrigerate up to 4 days, garnish fresh before eating
Best Pick
Serve at room temperature for the best balance of creamy texture and saffron aroma

Store and Reheat

Sholeh Zard thickens as it cools, so expect a firmer texture after refrigeration. You can thin it with a splash of warm milk if needed when reheating.

Method Time Best For
🍳 Stovetop 5-7 min on low heat Gentle reheating without texture separation or burning
📦 Microwave 1-2 min medium power Quick warm up with stirring midway to prevent hot spots
🔥 Oven 10 min at 325°F Even reheating for larger portions in oven-safe dish

For best results when storing:

  • Use shallow airtight containers - pudding cools faster and more evenly, reducing condensation buildup
  • Press plastic wrap directly on surface - prevents skin from forming on top during refrigeration
  • Refrigerate within 2 hours of cooking - keeps pudding food-safe and preserves texture quality
  • Stir gently before serving cold - redistributes any liquid that separated during storage
  • Add garnishes fresh each time - toasted nuts turn soggy if stored with pudding, cinnamon streaks if mixed in early

Frequently Asked Questions

Can I make Sholeh Zard ahead and how to store it?

Yes, make it up to 4 days ahead and store in an airtight container in the fridge. The pudding thickens as it cools, so you may need to stir in a tablespoon of warm milk before serving if it gets too stiff.

How long should I cook Sholeh Zard to achieve the right texture?

Cook for 45-50 minutes total at a low simmer, stirring every 5 minutes. The pudding is done when it coats the back of a spoon and holds a line when you draw through it with your finger.

Can I substitute basmati rice for short-grain rice in Sholeh Zard?

No, basmati is long-grain and won't release enough starch to create the creamy pudding texture. Stick with arborio, sushi rice, or another short-grain variety that breaks down as it cooks.

What should I do if Sholeh Zard becomes too thin or too thick?

If too thin, continue simmering uncovered to evaporate excess liquid. If too thick, stir in warm milk or water one tablespoon at a time until you reach the right consistency.

How do I keep Sholeh Zard from sticking or burning during cooking?

Use a heavy-bottom saucepan and maintain a low simmer around 180-200°F throughout cooking. Stir every 5 minutes, scraping the bottom each time to prevent rice from sticking and scorching.

Persian Saffron Milk Rice (Sholeh Zard)

No ratings yet
Persian Saffron Milk Rice, or Sholeh Zard, is a creamy rice pudding flavored with saffron threads and rose water. Low simmering and frequent stirring prevent sticking while the rice releases starch to thicken naturally. This fragrant pudding sets as it cools and is perfect for festive meals or budget-friendly desserts.
Print Recipe Pin Recipe
Prep Time 10 minutes mins
Cook Time 50 minutes mins
Total Time 1 hour hr
Servings: 6 servings
Course: Dessert
Cuisine: Persian
Ingredients Equipment Method Notes

Ingredients
  

  • 1 cup short-grain rice arborio or sushi rice, rinsed 2-3 times until water runs clear
  • 4 cups water
  • 0.25 teaspoon saffron threads steeped in 2 tablespoons hot water for 15 minutes
  • 0.75 cup sugar added gradually after rice softens
  • 1 tablespoon rose water start with 1 tablespoon and adjust to taste
  • 0.25 teaspoon cardamom powder optional
  • 2 tablespoons butter or ghee stir in at the end for glossy finish
  • 2 tablespoons slivered almonds toast lightly in a dry pan before garnishing
  • to taste ground cinnamon dust on top just before serving
  • as needed pistachios chopped, for garnish

Equipment

  • Heavy-bottom saucepan Distributes heat evenly and reduces chance of burning

Method
 

  1. Rinse 1 cup short-grain rice under cold water 2-3 times until water runs clear. Combine rice and 4 cups water in a heavy-bottom saucepan. Bring to a boil over medium-high heat, then reduce to low simmer. Cook uncovered for 30 minutes, stirring every 5 minutes. Rice should start breaking down and liquid should reduce by half.
    1 cup short-grain rice, 4 cups water
  2. While rice cooks, steep ¼ teaspoon saffron threads in 2 tablespoons hot water in a small bowl. Let sit for 15 minutes until the water turns deep golden and saffron blooms fully. Add steeped saffron (threads and liquid) to the rice after the first 15 minutes of cooking.
    0.25 teaspoon saffron threads
  3. After 30 minutes, add ¾ cup sugar gradually, stirring constantly. Sprinkle in a few tablespoons at a time and stir until each addition dissolves before adding more. Continue simmering on low for another 10-15 minutes until pudding thickens and rice releases more starch.
    0.75 cup sugar
  4. Stir in 1 tablespoon rose water, ¼ teaspoon cardamom powder (if using), and 2 tablespoons butter or ghee. Mix thoroughly and cook for 2 more minutes. Pudding should coat the back of a wooden spoon and hold its shape when you draw a line through it. If too thin, simmer uncovered for 3-5 more minutes.
    1 tablespoon rose water, 0.25 teaspoon cardamom powder, 2 tablespoons butter or ghee
  5. Remove from heat and pour into a shallow serving dish or individual bowls. Let cool uncovered for 10 minutes, then cover and refrigerate for at least 1 hour before serving. Garnish with toasted slivered almonds, chopped pistachios, and a dusting of ground cinnamon right before serving.
    2 tablespoons slivered almonds, to taste ground cinnamon, as needed pistachios

Notes

  • Use a heavy-bottom saucepan to distribute heat evenly and prevent burning.
  • Add sugar gradually after rice softens to prevent clumping.
  • Toast nuts before garnishing to maintain crunch and flavor.

Tried this recipe?

Let us know how it was!

What Is Manchego Cheese? [Taste, Uses & More]

March 31, 2026

Manchego does something few cheeses manage - it holds its shape on a tapas board, melts cleanly into warm grains, and shaves neatly over pasta, all without losing its distinct sheep's milk character.

What Is Manchego Cheese

That range comes from how it ages, where it's made, and the specific breed behind every wheel.

If you've been reaching for it out of habit, understanding what makes PDO Manchego work will help you use it with intention.

QUICK SUMMARY

Manchego is a Spanish sheep's milk cheese from La Mancha with a buttery, nutty flavor and firm texture. Aged versions grow saltier and more crumbly. It's a staple on tapas boards, works well grated over pasta, and pairs closely with membrillo and jamón ibérico.

🧀Type: Sheep's milk, semi-firm, PDO-protected Spanish cheese
👅Flavor: Buttery, nutty, slightly tangy, savory with mild salt
🍽️Best Uses: Tapas boards, shaved over pasta, stirred into risotto
❄️Shelf Life: Opened wedge keeps 2-4 weeks, properly wrapped in fridge
⚠️Note: Made from sheep's milk - higher fat, naturally lower in lactose than cow's milk cheese

What Is Manchego Cheese?

Manchego is produced exclusively from the milk of Manchega sheep raised on the central plateau of La Mancha, Spain.

PDO certification means the name is legally protected - any cheese labeled Manchego must come from that region and meet strict production standards.

The rind carries a distinctive zigzag or crosshatch pattern, originally pressed in using esparto grass molds, now typically replicated with modern food-grade molds. That pattern is one of the most recognizable markers of authenticity.

Aging stage shapes everything about how Manchego behaves in cooking:

  • 🧀 Joven (fresco) - Aged up to 2 months; pale, springy, mild flavor with more moisture
  • 🧀 Curado - Aged 3-6 months; the most common style, firmer with developing nuttiness
  • 🧀 Viejo - Aged over 1 year; deep yellow paste, crumbly texture, visible salt crystals, and an intensified savory bite

Outside Spain, it sometimes appears labeled as Queso Manchego or informally as manchego sheep cheese. Misspellings like "manchengo" are common in online searches but refer to the same cheese.

What Does Manchego Cheese Taste Like?

manchego cheese - What Is Manchego Cheese

Young Manchego is buttery and mild, with just enough tang to remind you it's sheep's milk.

As aging progresses through curado and into viejo, that butter note stays but gets layered with toasted nuttiness, a clean saltiness, and a faintly earthy finish.

Sensory SnapshotModerate Intensity
👅 Flavor
butterynuttytangysavory
✋ Texture
firmcrumbly when aged
👃 Aroma
mildly grassytoasty

Compared to pecorino romano, Manchego is noticeably softer in sharpness - less aggressive salt, rounder fat, and a gentler tang.

The sheep's milk fat content gives it a richness that cow's milk cheeses at the same age rarely match.

Heat deepens the nuttiness, which is why even a brief melt makes it taste more complex than it does straight from the block.

How to Use Manchego Cheese

Manchego's natural home is a Spanish tapas spread, sliced thin alongside membrillo (quince paste), jamón ibérico, and a small pile of Marcona almonds.

The contrast between the cheese's savory salt and the sweet, dense quince paste is one of the defining flavor pairings in Castilian cooking.

Beyond the board, it works hard in warm applications.

Shaved over pasta dressed with good olive oil and black pepper, it behaves similarly to pecorino but with less sharpness.

Stirring it into risotto or warm chickpea dishes just off the heat lets it melt without breaking.

For a quick starter, pan-sear thin slices briefly until the edges brown - the fat caramelizes and the flavor shifts noticeably.

Golden Rule
Add Manchego off-heat when stirring into hot dishes. Direct sustained heat turns sheep's milk fat greasy and can make the texture grainy.
How Manchego Cheese Is Used
MethodBest ForTip
🥗 Shaved/Sliced RawTapas boards, pasta, saladsUse a vegetable peeler for thin curls that melt on contact with warm food
🍳 Stirred In Off-HeatRisotto, warm grain dishes, chickpea stewRemove pan from heat first - keeps texture smooth, not grainy
🔥 Light Melt / GratinationCrostini, open-faced toastsWatch closely - Manchego browns faster than cow's milk cheeses
🍳 Pan-Seared SlicesWarm tapas, quick startersUse a very hot dry pan; sear quickly on each side for a caramelized crust

Good pairings extend beyond the tapas board - dry fino sherry, fresh pears or apples, and smoky pimentón all work with Manchego's profile.

If you're looking for manchego cheese in dairy recipes that move beyond snacking, there are solid options across warm dishes and entertaining spreads.

Try It In
🥨Cheddar Cheese StrawsSwap in Manchego for a nuttier, more savory bite→🍳Egg and Cheese Breakfast SandwichManchego melts cleanly and adds more character than mild cheddar→🥗Blue Cheese Dressing (Homemade)See how aged cheeses build flavor in cold dressings→

How to Buy and Store Manchego Cheese

At a cheese counter or specialty shop, ask for curado if you want the most adaptable style - it slices cleanly, shaves well, and melts without fuss.

Joven suits mild palates; viejo suits anyone who wants the cheese to carry a dish on its own.

A healthy wedge has a firm, slightly waxy paste - avoid anything sticky or dried out at the cut edge.

Quick Tip
Wrap Manchego in wax paper or cheese paper first, then place it loosely inside a sealed container. Direct plastic wrap traps moisture and accelerates mold on the cut face.

Shelf life depends on whether the wedge is cut or whole. For guidance on using manchego cheese for creaminess without waste, understanding its fridge timeline matters:

  • Unopened / vacuum-sealed - Up to 4-6 weeks refrigerated
  • Opened wedge, wrapped properly - 2-4 weeks in the fridge
  • Grated or shredded - Use within 1-2 weeks; dries out quickly

Manchego freezes reasonably well but loses some texture. Freeze in small portions and use directly from frozen in cooked applications - not for boards or raw serving.

Where to Start With Manchego

Start with a curado wedge, a jar of membrillo, and whatever cured ham you can find. That combination alone shows you what Manchego actually does - salt, fat, tang, and contrast in a single bite.

Once you have that baseline, moving into warm dishes makes sense.

Manchego's moderate intensity means it rarely overwhelms, but it does need a counterpart. The nuttiness of the taste of almonds mirrors what's already in aged Manchego, which is why Marcona almonds appear on nearly every Spanish cheese board.

If Manchego isn't available, manchego cheese swaps that work in a pinch include aged Roncal or younger pecorino.

Best Pick
Curado is the most useful everyday style. It balances mild enough for snacking with enough structure to grate, melt, or slice cleanly.

Frequently Asked Questions

How is Manchego cheese made?

Manchego is pressed from Manchega sheep's milk, then aged in humidity-controlled cellars. The distinctive rind pattern comes from molds that replicate traditional esparto grass baskets. PDO rules govern every step, from the sheep's diet to minimum aging time.

Is Manchego cheese strong?

Not especially - it sits at moderate intensity. Viejo aged over a year is the sharpest style, with noticeable salt crystals and a longer finish, but it won't hit as hard as aged pecorino or a sharp cheddar.

Can you melt Manchego cheese?

Yes, but it needs gentle heat. Joven and curado melt better than viejo, which can turn oily under direct heat. Stir it into hot dishes off the burner, or use low oven heat for gratination.

Is Manchego cheese gluten free?

Yes. Manchego contains no wheat or gluten-containing ingredients. Always check the label on pre-sliced or processed versions, where cross-contamination in packaging facilities is occasionally a concern.

How long does Manchego last in the fridge?

An opened wedge keeps 2-4 weeks when wrapped in cheese paper and stored in a loosely sealed container. Grated Manchego degrades faster - use it within 1-2 weeks before it dries out and loses flavor.

Korean Gyeran Bap Egg Rice

March 31, 2026

Frying an egg sunny-side up over hot rice creates a self-saucing meal in under 20 minutes. The runny yolk mixes with soy sauce and sesame oil to coat every grain.

Korean Gyeran Bap Egg Rice served on a plate

This is what you make when you want something filling but don't feel like actual cooking. One pan, minimal cleanup, and enough flavor to make leftovers taste intentional.

Perfect for mornings when breakfast needs to happen fast or late nights when the fridge is nearly empty.

QUICK SUMMARY

Korean Gyeran Bap is fried eggs over seasoned rice with soy sauce, sesame oil, and scallions. Day-old rice works best because it's drier and won't turn mushy when you mix in the egg. The yolk stays runny to create a creamy sauce that coats the rice.

⏱️Timing: 20 minutes total - cook eggs last so yolks stay jiggly
🔥Method: Fry eggs on medium heat for 2-3 minutes until whites set but yolk stays soft
⚠️Watch Out: Fresh rice turns gummy - use cold day-old rice or spread hot rice on a pan to dry

Table of Contents

Toggle
  • Why This Recipe Works
  • What You'll Need
    • Ingredient Details
  • Ingredient Swaps
  • What to Serve With It
  • Store and Reheat
  • Frequently Asked Questions
  • Korean Gyeran Bap Egg Rice
    • Method 
    • Tried this recipe?

Why This Recipe Works

Day-old rice stays separate instead of clumping into a sticky mass when you stir in the egg. Cold rice has less moisture, so each grain holds its shape. For a version that comes together quickly, a similar breakfast recipe uses the same technique with hash browns instead of rice.

The egg cooks in just enough oil to crisp the edges while leaving the yolk soft. High heat would overcook the whites before the yolk warms through.

Quick Reference
⏱️
Prep Time
5 min
🔥
Cook Time
15 min
⏰
Total Time
20 min
🍽️
Servings
2 servings
📊
Difficulty
Easy
🏷️
Category
Main Dish
💡
Quick Tip
Use fresh eggs for best runny yolks
🎯
Best For
Weeknight | Quick Meal | Meal Prep

Why it works:

  • Short-grain white rice creates the sticky texture that clings to the egg instead of staying in separate piles
  • Room temperature eggs cook evenly without cold centers that stay raw while the whites overcook
  • Medium heat sets the whites in 2-3 minutes while keeping the yolk jiggly and pourable
  • Soy sauce and sesame oil add umami without extra ingredients or steps
  • Fluffing rice before mixing breaks up clumps so every grain gets coated with yolk and seasoning
Golden Rule
Add soy sauce after mixing the egg - if you pour it directly on rice first, some grains soak up too much and taste overly salty while others stay bland

What You'll Need

Ingredients for Korean Gyeran Bap Egg Rice

Most of this lives in your pantry year-round except for the eggs and scallions. The sambar works best when it hits the table at the same time as the main, so for a version that comes together quickly, a simple sambar variation uses canned lentils to cut the simmering time in half.

🍚
Base
  • 2 cups cooked short-grain white rice (day-old, cold)
🥚
Protein
  • 2 large eggs (room temperature)
🥢
Seasoning
  • 1 tablespoon vegetable oil
  • 2 teaspoons soy sauce
  • 1 teaspoon sesame oil
  • ¼ teaspoon salt
  • ⅛ teaspoon black pepper
🧄
Garnish
  • 2 tablespoons sliced scallions
  • 1 teaspoon sesame seeds
  • Optional: ¼ cup kimchi

Ingredient Details

  • Short-grain white rice
    Use rice cooked at least 6 hours before and refrigerated - cold rice stays separate instead of turning gummy when mixed with hot egg
  • Eggs
    Pull eggs from the fridge 15 minutes before cooking so whites set evenly without cold spots that stay runny
  • Vegetable oil
    Use 1 tablespoon per 2 eggs to crisp the edges without making the pan slick - too much oil and the whites slide instead of browning
  • Soy sauce
    Add 1 teaspoon per serving after mixing rice with egg - adjust by quarter-teaspoons to avoid oversalting
  • Sesame oil
    Mix directly into warm rice before adding egg so the nutty aroma spreads evenly instead of pooling
  • Scallions
    Slice just before serving to keep the bite fresh - chopping in advance makes them limp and dull
  • Kimchi (optional)
    Chop coarsely and stir-fry for 1-2 minutes to mellow the raw fermented punch before mixing with rice

Ingredient Swaps

Long-grain rice works if you need to use what's in the cupboard, but the grains stay more separate. Medium-grain splits the difference between sticky and fluffy.

  • Short-grain white rice → medium or long-grain rice - less sticky, may not clump as well with egg (use an extra teaspoon of sesame oil to add cohesion)
  • Soy sauce → tamari - same salty umami, gluten-free (use same amount)
  • Vegetable oil → butter - richer egg flavor with slightly browned edges (use 1 tablespoon per 2 eggs)
  • Eggs → tofu scramble - different texture, soy-based protein (crumble firm tofu, season with turmeric and nutritional yeast)

Brown Rice

Works for: Higher fiber, nuttier flavor, firmer bite

Skip if: You want sticky texture - brown rice stays separate even when day-old

Quinoa

Works for: Higher protein, gluten-free grain alternative

Skip if: You want authentic Korean flavor - quinoa tastes grassy and doesn't absorb soy sauce the same way

Instructions

The whole thing takes 15 minutes of active cooking once your rice is ready. Rich mains need something to cut through, and this dip does exactly that, so for a version that comes together quickly, simple homemade sauce uses pantry lentils to skip the meat browning step.

  1. Heat 1 tablespoon vegetable oil in a nonstick skillet over medium heat for 1 minute. Crack eggs into the pan 2 inches apart and cook for 2-3 minutes until whites turn opaque and edges start to crisp. Yolk should jiggle when you shake the pan.
  2. Fluff cold rice with a fork to break up clumps. Add 1 teaspoon sesame oil and ¼ teaspoon salt, then stir until rice looks glossy and separates into individual grains.
  3. Divide seasoned rice between two bowls. Press rice into an even layer with the back of a spoon to create a flat surface.
  4. Slide one fried egg on top of each rice bowl. Drizzle 1 teaspoon soy sauce over each egg, letting it run down into the rice.
  5. Sprinkle with sliced scallions, sesame seeds, and black pepper. Serve immediately while yolk is still runny - break yolk with chopsticks or fork and mix into rice before eating.
Shortcut
No day-old rice? Spread freshly cooked hot rice on a sheet pan and refrigerate uncovered for 20 minutes to dry the surface - it won't be perfect but it keeps rice from turning gummy

What to Serve With It

Most people skip sides entirely and eat this as a complete meal. For weeknight chicken dinner ideas that round out the plate, add something crunchy or acidic to cut through the richness of the egg yolk.

Side Dish Prep Why It Works How to Serve
Kimchi Easy Spicy fermented crunch cuts through rich egg yolk Serve cold straight from jar, chop if pieces are large
Steamed Spinach Easy Mild leafy green balances salty soy-seasoned rice Blanch 2 minutes, squeeze dry, season with sesame oil
Pickled Radish Easy Tangy crunch refreshes palate between bites Slice thin, serve cold in small dish on the side
Miso Soup Easy Warm broth adds liquid to otherwise dry rice bowl Make with instant miso paste, serve in separate bowl
Seaweed Salad Easy Briny oceanic flavor contrasts with savory egg Buy pre-seasoned or toss wakame with sesame dressing

Three ways to serve it:

  • For breakfast: Add crispy bacon strips on the side and swap scallions for chives
  • For lunch: Mix in leftover stir-fried vegetables or shredded chicken before adding the egg
  • For dinner: Serve with quick-pickled cucumbers and a drizzle of gochujang for heat
Best Pick
Kimchi is the most authentic pairing - the fermented tang and spice balance the rich egg yolk better than any fresh vegetable

Store and Reheat

Gyeran Bap tastes best fresh when the yolk is still runny, but you can save leftovers if you're meal prepping. The rice works best when it hits the table at the same time as the main, so we keep a batch ready for nights like this - quick rice dish uses the rice cooker's keep-warm function to maintain texture without overcooking.

Method Time Best For
🍳 Stovetop 3-5 min Restoring crisp edges and keeping egg tender
📦 Microwave 1-2 min at 70% power Quick heating when you don't mind softer egg texture
🔥 Oven 10 min at 350°F (175°C) Even reheating for multiple servings, cover with foil

For best results when storing:

  • Store rice and egg separately if possible - refrigerate rice in airtight container, cook egg fresh when reheating
  • Reheat rice first until steaming hot, then top with fresh fried egg for best texture
  • Add extra soy sauce or sesame oil when reheating to refresh dried-out rice
  • Store up to 3-4 days in shallow airtight container in the fridge - egg yolk will firm up but dish stays edible
  • Freeze just the seasoned rice (without egg) for up to 1 month in portion-sized bags, then fry fresh egg when ready to eat

Frequently Asked Questions

Can I use brown rice for Gyeran Bap?

Yes, but the texture changes - brown rice stays firmer and doesn't clump with the egg as well. Use day-old brown rice and add an extra teaspoon of sesame oil to help bind it together.

How long can I store leftover Gyeran Bap in the fridge?

3-4 days in an airtight container. The egg yolk will firm up, so reheat gently and consider adding a fresh fried egg on top when serving.

How do I know when the egg is cooked properly?

Whites should be completely opaque with no translucent patches, and the yolk should jiggle like gelatin when you shake the pan. Cook 2-3 minutes on medium heat.

My egg whites are still runny-what went wrong?

Your pan wasn't hot enough or you pulled the egg too early. Cover the skillet with a lid for the last 30 seconds to steam-cook the top of the whites without overcooking the yolk.

Can I double the recipe for more servings?

Yes, but fry eggs in batches of two to avoid crowding the pan. Crowded eggs cook unevenly and won't develop crispy edges.

Korean Gyeran Bap Egg Rice served on a plate

Korean Gyeran Bap Egg Rice

No ratings yet
Korean Gyeran Bap is a quick and flavorful dish of fried eggs over seasoned day-old rice with soy sauce, sesame oil, and scallions. The runny yolk creates a creamy sauce that coats the rice, making it a perfect filling meal with minimal cleanup. This dish works well for breakfast or late-night meals when you want something fast and satisfying.
Print Recipe Pin Recipe
Prep Time 5 minutes mins
Cook Time 15 minutes mins
Total Time 20 minutes mins
Servings: 2 servings
Course: Main Dish
Cuisine: Korean
Ingredients Equipment Method Notes

Ingredients
  

  • 2 cups short-grain white rice cooked, day-old, cold
  • 2 large eggs room temperature
  • 1 tablespoon vegetable oil
  • 2 teaspoons soy sauce divided, 1 teaspoon per serving, add after mixing egg and rice
  • 1 teaspoon sesame oil added to rice before mixing egg
  • 0.25 teaspoon salt add to rice
  • 0.125 teaspoon black pepper for sprinkling
  • 2 tablespoons scallions sliced fresh, for garnish
  • 1 teaspoon sesame seeds for garnish
  • 0.25 cup kimchi optional, chopped and stir-fried 1-2 min

Equipment

  • Nonstick skillet Used to fry eggs
  • Fork To fluff rice and break clumps
  • Spoon To press rice in bowls

Method
 

  1. Heat 1 tablespoon vegetable oil in a nonstick skillet over medium heat for 1 minute. Crack eggs into the pan about 2 inches apart and cook for 2-3 minutes until whites are opaque and edges start to crisp. The yolk should jiggle when shaking the pan.
    1 tablespoon vegetable oil, 2 large eggs
  2. Fluff cold rice with a fork to break up clumps. Add 1 teaspoon sesame oil and ¼ teaspoon salt, then stir until the rice looks glossy and separates into individual grains.
    2 cups short-grain white rice, 1 teaspoon sesame oil, 0.25 teaspoon salt
  3. Divide the seasoned rice evenly between two bowls. Press the rice into an even layer using the back of a spoon to create a flat surface.
    2 cups short-grain white rice
  4. Slide one fried egg on top of each rice bowl. Drizzle 1 teaspoon soy sauce over each egg, letting it run down into the rice.
    2 large eggs, 2 teaspoons soy sauce
  5. Sprinkle sliced scallions, sesame seeds, and black pepper over the bowls. Serve immediately while the yolk is still runny. Break the yolk with chopsticks or a fork and mix into the rice before eating.
    2 tablespoons scallions, 1 teaspoon sesame seeds, 0.125 teaspoon black pepper

Notes

  • Use day-old, cold rice to prevent gumminess and keep grains separate.
  • Cook eggs on medium heat for perfect whites and runny yolk.
  • Add soy sauce after mixing eggs and rice to avoid uneven salting.

Tried this recipe?

Let us know how it was!

What Is Malt Vinegar? [Taste, Uses & More]

March 31, 2026

That first hit of malt vinegar over a basket of hot chips is all bready sharpness and faint caramel, closer to a dark ale than a clean acid.

What Is Malt Vinegar

Unlike white vinegar swaps that work or alternatives to balsamic vinegar - both built around brighter, cleaner profiles - malt vinegar carries a grain-forward warmth that marks it as something distinct.

It's the condiment that built British chip-shop culture, and once you understand its fermented-grain foundation, you'll know exactly when to reach for it.

QUICK SUMMARY

Malt vinegar is an amber, fermented-grain vinegar with a toasty, bready acidity and a subtle caramel note. Made from malted barley, it's milder than distilled white vinegar and a fixture of British cooking - especially fish and chips, quick-pickles, and chutneys.

🌾Made From: Fermented wort of malted barley converted to acetic acid
🍺Flavor: Toasty, bready, tangy with a rounded caramel-like finish
🐟Best Use: Splashed over fish and chips, quick-pickling onions, chutneys
📦Storage: Cool, dark pantry, tightly capped; best quality within 2-3 years
⚠️Gluten Note: Derived from barley; check label for gluten-free distilled versions

What Is Malt Vinegar?

Malt vinegar starts with wort - the liquid extracted from malted barley during brewing.

That wort is fermented into a low-alcohol beer, then converted to acetic acid by acetobacter bacteria, giving you the sharp, amber liquid sold in chip shops and supermarkets.

It falls under the category of fermented grain vinegars, which sets it apart from fruit-based vinegars like apple cider. You may also see it labeled malted barley vinegar, and the common misspelling "malt vinager" still turns up on recipe searches.

There are two main commercial forms worth knowing:

  • 🟤 Brown (unfiltered) malt vinegar - deeper color, richer grain flavor, may show sediment; preferred for condiment use and pickling
  • ⚪ Distilled malt vinegar - clear or pale, harsher and sharper; used in commercial pickles and some sauces, gluten typically removed in distillation
  • 🪶 Spirit-blended versions - cheaper blends that dilute the malt character; less common but worth avoiding if grain flavor is the goal

Much like rice vinegar and its flavor reflect the grain it comes from, malt vinegar's barley origin is present in every pour.

What Does Malt Vinegar Taste Like?

malt vinegar - What Is Malt Vinegar

Malt vinegar tastes tangy with a rounded, bready depth that separates it clearly from sharper vinegars. The acidity hits first, but it doesn't have the raw bite of distilled white vinegar - it's rounder, almost ale-like.

Sensory SnapshotModerate Intensity
👅 Flavor
maltytoastytangycaramel
✋ Texture
thinslightly syrupy
👃 Aroma
bready maltbeer-like

Compared to apple cider vinegar, which shares a similar acidity level, malt vinegar has a darker grain note instead of fruit.

The caramel undertone comes from maltose in the original barley wort - a sugar that doesn't fully ferment and leaves a trace of sweetness.

Heat softens its sharper edges, making it well-suited to cooked applications like pan sauces and braises. Cold, it stays bright and tangy, which is why it works so well splashed directly onto hot fried food.

Golden Rule
Use malt vinegar when you want acidity that carries grain flavor with it. For clean, neutral sharpness, distilled white is the better call.

How to Use Malt Vinegar

British cooking built its identity around malt vinegar, and fish and chips is the obvious starting point - a generous splash over battered cod and thick-cut potatoes is still the benchmark use.

Beyond the chip shop, its application range is broader than most people expect.

How Malt Vinegar Is Used
MethodBest ForTip
🧂 FinishingFish and chips, fried potatoes, pub snacksApply just before eating so acidity stays bright
🫙 Quick-PicklingShallots, red onion, cucumbers for sandwichesUse brown malt for deeper color and flavor in the brine
🍳 DeglazingBraised pork, beef stews, pan saucesAdd in small amounts - a tablespoon goes a long way
🥗 VinaigretteBitter greens, grain salads, slawsPair with a neutral oil so the malt note leads

Chutneys and relishes rely on malt vinegar for both preservation and that distinctly British tangy-sweet backbone - think brown sugar or molasses alongside caramelized onions.

It pairs naturally with beef and lamb, where the bready acidity cuts through fat without overpowering the meat.

The differences between brown ale vs stout matter here too: stout-reduced sauces and malt vinegar share a family resemblance, and using both in a braised beef dish reinforces that grain character rather than clashing.

For the shallot and onion side of things, you can round out a fish and chips spread by checking sides for fish and chips for ideas that align with this flavor profile.

Skip it on delicate seafood where you want clean, neutral acidity - a mild white fish ceviche, for example, would be muddied by the grain note.

If you don't have a bottle on hand, our guide to alternatives to malt vinegar covers the closest practical swaps.

Try It In
🫘Three-Bean Salad with Vinegar DressingMalt's bready note rounds out the dressing without sharpness→🥔German Potato Salad with VinegarThe grain-forward acidity holds up well against warm potato→

How to Buy and Store Malt Vinegar

Brown malt vinegar is the one to reach for at the store. Look for a deep amber color and a faint bready smell through the cap - both signal that the malt character is intact. Unfiltered bottles may show light sediment at the bottom, which is normal and not a defect.

Watch Out
A musty or heavily sour smell at the store means the vinegar has been stored poorly. The acidity is still there, but the malt aroma - the quality that makes it worth buying - is gone.

Store it tightly capped in a cool, dark pantry. Refrigeration is optional; the acidity keeps it stable at room temperature for years.

The question of freezing malt vinegar comes up occasionally - it's unnecessary given its indefinite acidic stability, though peak aroma holds best within the first two to three years.

Malt vinegar is derived from barley, so it may contain gluten traces. People managing celiac disease should look for bottles specifically labeled gluten-free, which use distillation to remove gluten proteins.

Where to Start With Malt Vinegar

New to this vinegar? Splash it over fried potatoes first. That single use shows exactly what it does: it adds an acidic hit with grain warmth that salt alone can't provide.

From there, try a quick-pickled shallot brine for sandwiches - it takes ten minutes and demonstrates the vinegar's depth in a cold application.

If you're already familiar with apple cider vinegar, our guide on replacements for apple cider vinegar shows where malt vinegar can step in and where it can't.

The grain note is an asset in the right dish and a mismatch in the wrong one.

Shortcut
A splash of malt vinegar in a store-bought brown sauce or gravy adds the bready depth that makes it taste house-made. Start with one teaspoon, taste, and adjust.

Frequently Asked Questions

What is malt vinegar made from?

It's made by fermenting the wort from malted barley into a low-alcohol beer, then converting that alcohol into acetic acid. The barley origin gives it the toasty, grain-forward character that distinguishes it from fruit-based vinegars.

Is malt vinegar gluten-free?

Standard malt vinegar is not - it's derived from barley and may carry gluten traces. Some commercial versions are distilled to remove gluten proteins; look for bottles explicitly labeled gluten-free if celiac disease is a concern.

Can I substitute apple cider vinegar for malt vinegar?

Yes, in most recipes. Apple cider vinegar matches the acidity level and has a similar mild sweetness, though it lacks the bready grain note. For chip-shop-style dishes, the swap is noticeable but workable.

Why is malt vinegar brown?

The color comes from the malted barley used in fermentation - the same roasting process that darkens barley for beer gives the vinegar its amber tone. Distilled malt vinegar, which is filtered after production, runs clear or pale.

Does malt vinegar need to be refrigerated after opening?

No. Its acidity keeps it stable at room temperature. A tightly capped bottle in a cool, dark pantry is sufficient, and peak aroma holds well for two to three years.

How Long Does Kombucha Last? [Storage Guide]

March 31, 2026

You just grabbed a bottle of kombucha from the grocery shelf - or finished your first glass from a freshly opened bottle - and now you're wondering how long the rest will hold up.

How Long Does Kombucha Last In The Fridge

The short answer: refrigerated and sealed, most kombucha lasts 7-21 days after opening, but raw, pasteurized, and homemade versions each follow different rules.

Understanding what makes kombucha distinct - its live cultures, active fermentation, and acidity - is exactly why storage matters more here than with most bottled drinks.

QUICK SUMMARY

Opened kombucha lasts 7-21 days refrigerated when kept sealed and upright. Unopened commercial bottles hold 3-6 months in the fridge. Freezing is possible but kills carbonation and reduces live cultures. When in doubt, check for fuzzy mold or a putrid smell - not just cloudiness.

🧊Fridge (opened): 7-21 days sealed, upright, away from door
🧊Fridge (unopened): 3-6 months for raw; longer for pasteurized
❄️Freezer: 3-6 months in plastic only - expect flat, more vinegary flavor after thaw

How Long Does Kombucha Last?

Shelf life depends heavily on whether the bottle has been opened, whether the kombucha is raw or pasteurized, and how it's stored. Raw kombucha contains live cultures that keep fermenting even in the fridge, so flavor shifts over time regardless of how carefully you seal it.

Kombucha Shelf Life
MethodStateDurationNotes
🧊 FridgeUnopened (raw)3-6 monthsLive cultures active; carbonation preserved while sealed
🧊 FridgeOpened7-21 daysFlavor sours progressively; keep tightly capped and upright
🏠 PantryUnopened (pasteurized)6-12 monthsShelf-stable commercial bottles only; raw/unpasteurized must stay refrigerated
❄️ FreezerOpened (plastic)3-6 monthsCarbonation lost; live cultures reduced; flavor becomes muted
🏠 CounterContinuous brew (SCOBY)7-14 daysBetween feedings; monitor pH and SCOBY health closely

Pasteurized commercial kombucha loses its live cultures during heat treatment, which is why it holds longer at room temperature but offers less probiotic benefit.

Homemade kombucha, by contrast, behaves more like raw bottled versions - refrigerate it promptly after bottling and expect it to peak in flavor within the first two weeks.

How to Store Kombucha

Where you store kombucha matters less than how consistently you maintain the right conditions. Fermentation doesn't stop in the fridge - it only slows - so every day counts once that seal is broken.

Golden Rule
Never leave raw or opened kombucha at room temperature for more than a few hours. Fermentation accelerates rapidly, pressure builds in sealed glass, and flavor turns harshly vinegary far faster than most people expect.

Fridge: Store all raw, unpasteurized, and opened kombucha in the coldest part of your fridge - not the door. Keep bottles upright and tightly capped to slow fermentation and hold carbonation. If you transfer to a different container, use an airtight glass or PET bottle with a secure cap.

Pantry: Reserve pantry storage strictly for commercially sealed, pasteurized kombucha with shelf-stable labeling. Raw or unpasteurized bottles left at room temperature continue fermenting, build pressure, and risk overpressurizing glass.

Counter (continuous brew): A continuous-brew system with an active SCOBY can sit at room temperature, but it needs sugar and tea inputs every 7-14 days. Maintain pH between 2.8 and 3.5, and refrigerate finished bottles immediately once pulled from the vessel.

Label any opened or homemade bottle with the date - yeast strands and sediment are normal, so the date is the only reliable way to know where you stand.

Can You Freeze Kombucha?

Freezing kombucha is possible, and it makes sense for one specific purpose: preserving excess liquid for cooking or smoothies. Don't freeze it expecting to drink it straight afterward.

Watch Out
Never freeze kombucha in glass bottles. The liquid expands as it freezes and can crack or shatter the glass entirely - transfer to plastic before anything goes in the freezer.
  1. Transfer to plastic Pour kombucha into a freezer-safe plastic container, leaving at least an inch of headspace for expansion.
  2. Seal tightly Press out excess air if using a flexible container, then cap firmly.
  3. Freeze upright Store flat or upright depending on your container shape; either works as long as it's sealed.
  4. Thaw in the fridge Allow 24-48 hours in the refrigerator. Do not thaw at room temperature.
  5. Release pressure carefully Once mostly thawed, gently open the container to release any built-up gas before drinking or using.

After thawing, expect the carbonation to be largely gone, flavor to be flatter and more vinegary, and sediment separation to increase. Live culture viability also drops significantly.

For anything beyond cooking use, fresh refrigerated kombucha is a better option - and if you've run out entirely, knowing some swapping out kombucha options can bridge the gap in recipes.

Signs Kombucha Has Gone Bad

Some cloudiness is completely normal. Stringy yeast strands floating in the bottle are part of raw kombucha's character, not a warning sign. What you're watching for is something distinctly different.

Signs It's Gone Bad
👀
VisualFuzzy blue-green, black, or white mold on liquid surface · Heavy murky brown discoloration with SCOBY rot · Unusual sediment clumping beyond normal yeast strands
👃
SmellPutrid or rotten-vegetable odor · Sulfur or egg-like smell rather than sharp vinegar tang
✋
TextureSlimy or powdery film on surface · Unusual coating inconsistent with a normal rubbery SCOBY pellicle

Sharp, vinegary smell is expected - that's acetic acid from active fermentation. Putrid or sulfurous odor is not.

If you see fuzzy mold or smell anything rotten, discard the batch entirely without tasting it first.

Keeping Your Kombucha at Its Best

Good storage habits make the biggest difference in flavor and safety over time. These four practices cover the situations where most kombucha goes to waste.

  • 🧊 Store upright, always - Tilting or shaking an opened bottle releases dissolved CO2 and accelerates souring faster than most people realize.
  • 📅 Label everything - Write the batch or open date on homemade and opened commercial bottles; flavor changes fast and dates remove guesswork.
  • 🔁 Revive flat fizz carefully - Tighten the cap and rest the bottle 1-2 days in the fridge to allow natural CO2 to re-dissolve; skip re-fermenting in sealed glass at room temperature.
  • 🧪 Monitor continuous brews actively - pH drift and SCOBY health signal when fermentation is running off track, well before any visible mold appears.

Fermented drinks share some of the same storage logic - if you keep other cultured beverages on hand, the kefir swaps that work guide covers similar freshness considerations worth knowing.

Understanding what happens to gluten during fermentation explained is also useful context if you brew at home with grain-based additives.

Frequently Asked Questions

How long does opened kombucha last in the fridge?

7-21 days, kept sealed and upright. Flavor sours progressively as live cultures continue fermenting even at refrigerator temperatures, so earlier is better for taste.

How long does homemade kombucha last refrigerated?

Up to 1-3 months sealed, but flavor peaks in the first 1-2 weeks. Homemade kombucha behaves like raw commercial versions - refrigerate immediately after bottling and label with the date.

Does kombucha go bad after the best-by date?

Not immediately - best-by dates indicate peak flavor, not safety cutoffs. Unopened refrigerated raw kombucha past its date is often still safe but more sour and less carbonated.

Can you freeze kombucha bottles?

Not glass ones - expansion during freezing can crack or shatter glass. Transfer to plastic with headspace before freezing, and expect flat, more vinegary flavor after thawing.

Is cloudy kombucha safe to drink?

Yes, in most cases. Cloudiness from yeast strands and sediment is normal in raw kombucha. Only discard if you see fuzzy colored mold or smell a putrid, sulfurous odor.

How Long Does Miso Paste Last? [Storage Guide]

March 31, 2026

You just picked up a tub of miso paste and now you're wondering how long it will actually stay good - that's a fair question for a paste that can sit quietly in your fridge for nearly a year.

Can You Freeze Miso Paste

Miso is a salt-heavy, fermented soy product built from soybeans, koji culture, and time, and understanding about what happens to gluten during fermentation helps explain why opened miso lasts so much longer than most refrigerated condiments.

The short answer: stored correctly, it stays safe and flavorful for 6 to 12 months after opening.

QUICK SUMMARY

Miso paste keeps 6-12 months in the fridge once opened. Unopened, it holds 6-12 months refrigerated or 3-6 months in a cool pantry. Freezing works and extends life without major flavor loss. Always press plastic wrap against the surface after each use.

🧊Fridge (opened): 6-12 months in an airtight container with surface wrap
❄️Freezer: 6-12 months; texture gets slightly grainier but flavor holds
⚠️Key Rule: Use a clean spoon every time - contamination shortens shelf life fast

How Long Does Miso Paste Last?

Miso's high salt content does most of the preservation work, which is why shelf life numbers here are longer than you might expect.

The type matters too - white miso (shiro) is lower in salt and will mellow or change flavor faster than a deeper red miso (aka) or barley miso (mugi).

Cooked preparations are a different story. Any miso soup, dressing, or marinade follows standard cooked-food rules and should be used within 3-5 days.

Miso Paste Shelf Life
MethodStateDurationNotes
🏠 PantryUnopened3-6 monthsCool, dark spot only; heat accelerates fermentation and flavor shift
🧊 FridgeUnopened6-12 monthsStore sealed; flavor deepens slowly but product stays safe
🧊 FridgeOpened6-12 monthsPress surface wrap, reseal tightly; white miso may mellow faster
❄️ FreezerOpened6-12 monthsTexture changes slightly after thaw; salt and umami remain intact
🧊 FridgeCooked3-5 daysSoups, dressings, and marinades follow standard cooked-food rules

Just like storing soy sauce correctly depends on whether the bottle is opened or sealed, miso's clock only really starts once you break the seal and expose the paste to air.

How to Store Miso Paste

Once opened, the fridge is the only sensible home for miso paste. Pantry storage is only appropriate for a factory-sealed, unopened tub held short-term - and even then, keep it away from warm spots near the stove.

Golden Rule
After every scoop, press a sheet of plastic wrap directly onto the miso surface before sealing the lid. This cuts air contact and slows surface yeast growth between uses.

A few habits make a real difference here:

  • 🥄 Use a clean, dry spoon - every single time. Double-dipping or using a wet utensil pushes moisture and bacteria into the paste.
  • 📦 Container matters - a small wide-mouth glass jar or the original opaque tub both work. Sterilize a glass jar before transferring.
  • 🏷️ Label it - write the open date and miso type (e.g., "white miso - opened 2026-03-10") directly on the container.

Understanding miso paste in cooking also helps here, because lighter styles used in delicate dressings are more sensitive to flavor drift than the robust pastes used in braises or ramen.

Can You Freeze Miso Paste?

Freezing miso works, and it's a smart move when a large tub is sitting half-used. Salt and umami survive freezing intact; the main trade-off is texture - thawed miso can be slightly grainier or more crumbly than fresh paste.

Shortcut
Freeze miso in tablespoon-sized portions using a silicone mold. Once solid, transfer the cubes to a freezer bag. You can drop a cube straight into hot soup without thawing.

Follow these steps for the best results:

  1. Portion it out Scoop miso into silicone molds or small freezer-safe bags in tablespoon or ¼-cup amounts.
  2. Remove air Flatten bags to push out air before sealing, or press wrap directly onto molds.
  3. Label with date and type Miso varieties look similar once frozen; marking the container saves guesswork later.
  4. Freeze up to 12 months Quality is best within this window, though safety extends beyond it.
  5. Thaw in the fridge Move the container or portioned block to the fridge 12-24 hours before use. Small cubes dissolve straight into hot liquid from frozen.

White miso loses a little of its subtle sweetness after freezing. Red miso and barley miso hold up better because their stronger flavor profiles mask minor texture shifts.

Signs Miso Paste Has Gone Bad

Miso is a fermented product, so some surface changes are completely normal. Knowing the difference between harmless activity and genuine spoilage avoids wasting a good tub - or worse, ignoring a real problem.

Signs It's Gone Bad
👀
VisualGreen, blue or black fuzzy mold · Pink or orange streaks · Cloudy off-colored brine pooling on top
👃
SmellSharp rotten or putrid odor · Ammonia-like smell indicating bacterial spoilage
✋
TextureSlimy film that won't scrape away · Extremely dry cracked lumps with off color throughout

A white or off-white film on the surface is usually harmless koji yeast - scrape it away and the paste beneath is fine.

This is similar to how kimchi spoilage signs require distinguishing normal fermentation activity from actual rot. Fuzzy colored mold (green, blue, black) or any ammonia smell means discard the whole tub.

Watch Out
Don't confuse normal surface darkening with spoilage. Miso naturally oxidizes and deepens in color over time - that's not a reason to throw it out. Color combined with foul odor is the real warning.

Keeping Miso Paste in Good Shape

Good miso habits take about five seconds per use and save the whole tub. These four practices cover most situations:

  • Surface wrap every time - press plastic wrap directly onto the paste before closing the lid, not just on top of the container.
  • Clean spoon only - never scoop with a spoon that touched another food or has any moisture on it.
  • Freeze in small portions - if you won't finish the tub within a few months, portion and freeze early rather than waiting until it starts declining.
  • Know your miso type - white miso drifts in flavor faster; red and barley miso are more forgiving under the same storage conditions.

If a recipe calls for a specific variety you've run out of, your options aren't as limited as they seem - a look at miso paste stand-ins covers what works and what doesn't in a pinch.

And if you're working with barley miso specifically, knowing about alternatives to barley can help when that variety isn't available.

Frequently Asked Questions

How long does opened miso paste last in the fridge?

Opened miso lasts 6-12 months refrigerated when stored in an airtight container with plastic wrap pressed onto the surface. White miso may mellow in flavor faster than red or barley varieties due to its lower salt content.

Is the white film on miso mold or normal?

A white or pale film is usually harmless koji yeast - scrape it off and use the paste beneath. Only discard if the growth is fuzzy and colored (green, blue, black) or if the smell is sharp and rotten.

Does freezing change miso paste flavor?

Salt and umami survive freezing with no meaningful loss. White miso may lose some subtle sweetness after thawing; red and barley miso hold up better because their flavors are more robust to begin with.

How do you thaw frozen miso for soup?

Move the container to the fridge 12-24 hours before use. If you froze miso in small cubes, skip thawing entirely - the cubes dissolve directly into hot broth without affecting the final dish.

Can you store miso paste at room temperature after opening?

No - room temperature storage after opening accelerates fermentation, causes faster flavor change, and raises the risk of spoilage. Refrigerate immediately after the first use and keep it there.

« Previous Page
Next Page »

Primary Sidebar

ForkliftKitchen recipe developer

Welcome!

Recipe Developer · 12+ Yr Kitchen Veteran

I'm the recipe developer behind this site, focused on practical, well-tested dishes and smart ingredient swaps. Every recipe is written to be clear, reliable, and easy to make at home.

650+ Recipes
12+ Yrs Exp.
3x Tested
Our Story →

As Featured In

Allrecipes

TASTE OF HOME

Food52

HUFFPOST

Yahoo! Life

Our Editorial Standards

  • ✓ Every recipe tested at least 3 times before publishing
  • ✓ Substitutes verified by real kitchen trials, not guesswork
  • ✓ Reviewed for accuracy by our editorial team
  • ✓ Updated regularly with seasonal info and reader feedback

Most Popular

  • Creamy Lemon Shrimp Linguine
    Creamy Lemon Shrimp Linguine
  • Creamy Garlic Mushroom Chicken
    Creamy Garlic Mushroom Chicken
  • Sesame Ginger Chicken Noodle Bowls
    Sesame Ginger Chicken Noodle Bowls
  • Baked Lemon Herb Fish Fillets
    Baked Lemon Herb Fish Fillets
  • Veggie Loaded Fried Rice
    Veggie Loaded Fried Rice
  • Spicy Garlic Shrimp Stir Fry
    Spicy Garlic Shrimp Stir Fry

Join 8,000+ Home Cooks

Weekly Kitchen Tips

Easy recipes, smart substitutes, and real cooking shortcuts — every Thursday.

Subscribe Free →


Side Dishes

  • What to Serve With Asian Salmon? 15 Best Side Dishes
    What to Serve With Asian Salmon? 15 Best Side Dishes
  • Side Dishes for Strawberry Spinach Salad
    15 Best Side Dishes for Strawberry Spinach Salad
  • Sides for Grilled Cauliflower Steaks to Complete the Meal
    15 Sides for Grilled Cauliflower Steaks to Complete the Meal
  • 15 Sides To Serve With Calabacitas
    15 Best Sides for Calabacitas – Mexican-Inspired Favorites


Substitutes

  • 7 Best Substitutes for Hot Sauce in Marinades & Stir-Fries
    7 Best Substitutes for Hot Sauce in Marinades & Stir-Fries
  • 9 Best Substitutes for Butter in Baking and Cooking
  • 7 Best Substitutes for Tagliatelle for Italian Pasta Dishes
    7 Best Substitutes for Tagliatelle for Italian Pasta Dishes
  • 7 Best Substitutes for Udon Noodles in Asian Stir-Fries
    7 Best Substitutes for Udon Noodles in Asian Stir-Fries


Browse by Topic

  • Side Dishes320
  • Substitutes785
  • Dinner163
  • Air Fryer77
  • Taste Profiles484
  • Food Storage123


Reader Reviews

★★★★★

"Finally a food blog that tells you exactly why a substitute works instead of just listing options."

— Sarah M., via email

★★★★★

"The side dish recommendations are so specific — saved my dinner party twice this month."

— James R., Pinterest comment

★★★★★

"I trust this site more than most because they actually test everything. You can tell."

— Priya K., blog comment

Footer

↑ Back to Top

Forklift Kitchen

We do the heavy lifting so you can enjoy the cooking. Tested recipes, smart substitutes, and perfect pairings—built for real home cooks.

Content

  • Recipes
  • Substitutes
  • What to Serve With
  • Blog

Company

  • About Us
  • Contact
  • Subscribe

Legal

  • Privacy Policy
  • Terms of Service

As an Amazon Associate I earn from qualifying purchases.

© 2026 Forklift Kitchen.

Rate This Recipe

Your vote:


A rating is required
A name is required
An email is required