• Skip to primary navigation
  • Skip to main content
  • Skip to primary sidebar
  • Recipe Index
    • Air Fryer
  • Side Dishes
  • Substitutes
  • About
  • Contact
  • Subscribe

ForkLiftKitchen

menu icon
go to homepage
  • Recipe Index
    • Air Fryer
  • Side Dishes
  • Substitutes
  • About
  • Contact
  • Subscribe
subscribe
search icon
Homepage link
  • Recipe Index
    • Air Fryer
  • Side Dishes
  • Substitutes
  • About
  • Contact
  • Subscribe
×

Blog

What Is Mustard Green? [Taste, Uses & More]

March 31, 2026

Raw mustard greens hit the back of your throat like a mild flash of heat - that sharp, peppery bite is the first clue that this leafy green is doing something different from the taste of arugula or kale.

What Is Mustard Green

Drop the same leaves into a hot pan, though, and that heat softens into a deep, slightly bitter savory flavor that cooks across Southern US kitchens and East Asian households have relied on for centuries.

If you're familiar with keeping turnip greens fresh or working with replacements for bok choy, mustard greens belong to the same leafy family - just with considerably more attitude.

QUICK SUMMARY

Mustard greens are peppery, slightly bitter leafy greens from the Brassica juncea plant. Raw, they sting with wasabi-like heat. Cooked, they mellow into a savory, earthy green. Best in braises, stir-fries, and soups - and a staple in Southern US and Chinese cooking.

🌿Flavor: Peppery, sharp, and bitter with a mustardy heat
🍳Best Uses: Braising, stir-frying, soups, and pickling
🛒Buy: Look for crisp, deep green leaves with firm, unbroken stems
❄️Storage: Wrap in damp paper towel, refrigerate in crisper drawer
📅Shelf Life: Baby leaves 4-7 days; mature bunches 3-5 days refrigerated

What Is Mustard Green?

Mustard greens are the edible leaves of Brassica juncea, a plant native to the Himalayan region and widely cultivated across East Asia, particularly in China, before spreading globally. They fall squarely in the leafy green category alongside collards and turnip greens, though their flavor profile sets them apart from both.

Leaves vary considerably by variety. Southern US types tend to be darker, curly, and heavily ruffled; Asian types such as gai choy (Chinese mustard) run broader, smoother, and paler green.

Both have fibrous central ribs on mature leaves that are usually stripped before cooking.

The plant also goes by leaf mustard and Brassica juncea in botanical contexts, and it's the same species whose seeds produce prepared mustard - which explains the characteristic heat.

That shared chemistry with mustard seed is one of the more interesting botanical connections in the leafy green family.

  • 🌱 Plant family - Brassica (same family as kale, cabbage, and arugula)
  • 🌍 Regional names - gai choy (Cantonese), leaf mustard (English), Chinese mustard
  • 🍃 Leaf types - curly/ruffled (Southern US) or broad and flat (Asian varieties)
  • 🔪 Rib note - fibrous stems on large leaves should be removed before cooking tender preparations

What Does Mustard Green Taste Like?
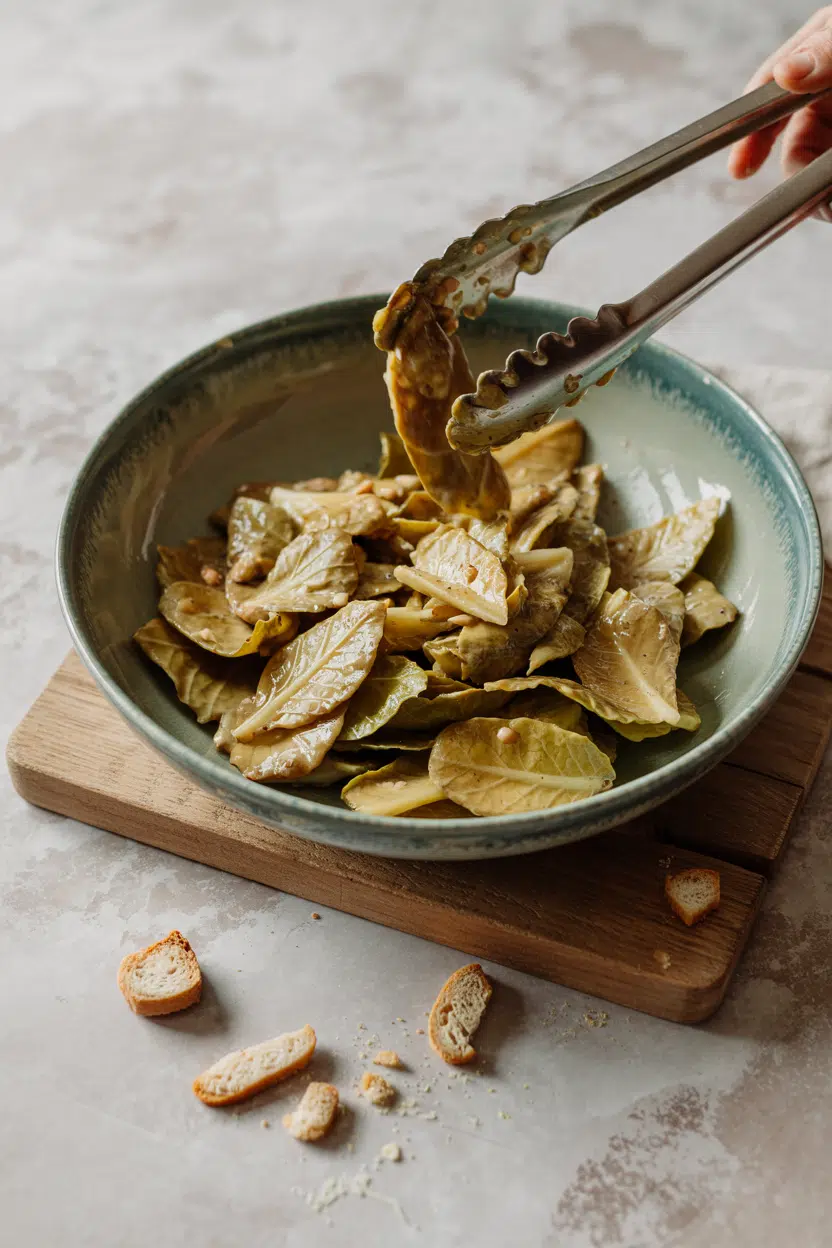
mustard green - What Is Mustard Green

Bite into a raw mustard green leaf and the first sensation is sharp, wasabi-like heat - a pungent, almost horseradish-note that sits at the back of the palate. That heat comes from glucosinolates, the same compounds responsible for the bite in mustard seeds.

There's a leafy bitterness underneath, too, more pronounced than kale but less acidic than radicchio.

Sensory SnapshotStrong Intensity
👅 Flavor
pepperysharpbittermustardy
✋ Texture
tender when cookedfibrous raw ribs
👃 Aroma
pungentgreenhorseradish-like

Heat transforms the leaf significantly. Braising pulls out deep, savory notes and cuts the raw sting to a mellow warmth; a quick sauté keeps more bite intact.

Baby leaves are notably milder than mature bunches - a useful distinction if you want the flavor without the full-force heat.

Golden Rule
The longer mustard greens cook, the milder they get. A 2-minute sauté keeps the pepper. A 45-minute braise trades it for earthy depth.

How to Use Mustard Green

Braising is the most forgiving method and the one most closely associated with Southern US cooking. Long-cooked mustard greens with smoked pork or bacon - fat, acid, and time working together - produce a pot liquor that's nearly as valued as the greens themselves. Smoked meat also balances the bitterness in a way that plain stock won't.

For faster preparations, a stir-fry with garlic, ginger, and soy sauce keeps the leaves bright and retains more of their peppery character. Chinese recipes often add sesame oil at the end and finish with chili flakes.

This is classic gai choy territory - high heat, short time, punchy result.

How Mustard Green Is Used
MethodBest ForTip
🥗 RawSalads, slaws with sharp dressingsUse baby leaves only; slice thinly to reduce intensity
🍲 BraisedSouthern-style greens, stewsAdd smoked pork and a splash of vinegar for balance
🥘 Stir-FriedChinese-style sides, quick weeknight dishesHigh heat, short cook - 2-3 minutes maximum
🍜 Soup/BrothPeppery green notes in noodle soupsAdd near the end so leaves wilt without turning gray
🫙 PickledCondiments, dumplings, savory pancakesVinegar tames heat; short-brine for crunch, long-brine for funk

Mustard greens also appear in Indian cooking - Punjabi sarson da saag pairs them with fenugreek leaves and maize flatbread (makki di roti), a dish where the greens are the star rather than a supporting player.

Korean cuisine uses them in kimchi preparations and pickled banchan.

Beyond Asian and Southern traditions, blanched leaves work as a sharp counterpoint in grain bowls; they pair especially well with eggs, grits, and rice.

If a recipe specifically calls for this leaf and you can't find it, checking replacements for mustard green will show which greens can step in without losing all the peppery character.

Turnip greens and mature arugula are the closest swap; collard green swaps that work can also apply when the goal is texture rather than heat.

Try It In
🍛Punjabi Sarson da Saag Mustard GreensA slow-cooked Indian classic where mustard greens are the main event→

How to Buy and Store Mustard Green

Fresh mustard greens should look crisp and deeply green, with no heavy yellowing, slimy patches, or bruised edges. Stems need to be firm - a limp or hollow stem signals the bunch has been sitting too long. At farmers markets you'll often find both the curly Southern variety and the broader Asian gai choy type in the same season.

Watch Out
Avoid bunches with more than a few yellow leaves - yellowing accelerates quickly and the remaining leaves won't hold long once it starts.

At home, trim the stem ends, wrap the bunch loosely in a damp paper towel, and store in a perforated plastic bag in the fridge crisper.

For a detailed breakdown of exactly how long mustard green keeps under different conditions, the timing differences between baby leaves and mature bunches matter more than most people expect.

Baby leaves typically hold 4-7 days; larger, more mature bunches are best used within 3-5 days.

Where to Start with Mustard Greens

New to this green? Start with a quick sauté. Heat olive oil, add sliced garlic, toss in roughly chopped leaves, and cook for two to three minutes.

That single method shows you both the heat of the raw leaf and how fast it softens under fire.

From there, the braised Southern route - long, slow, with smoked pork - is the natural next step. It's the preparation that convinced generations of cooks this bitter, peppery leaf was worth keeping on the menu.

You won't need a recipe to understand why after you try it.

Frequently Asked Questions

Are mustard greens spicy?

Not spicy in the chili sense, however they carry a sharp, wasabi-like heat from glucosinolates. Raw leaves are the most intense; cooking reduces that heat noticeably. Mature leaves run hotter than baby leaves.

Can you eat mustard greens raw?

Yes, but use baby leaves. Mature leaves are fibrous and intensely peppery raw, which overwhelms most dishes. Thinly sliced baby mustard greens work well in salads with bold, acidic dressings.

How do you reduce bitterness in mustard greens?

Blanch them briefly in salted boiling water, then drain and proceed with your recipe. Adding an acid - vinegar or lemon - and a fat like smoked pork also rounds out bitterness in braised preparations.

Are mustard greens the same as collard greens?

No. Both are Southern staples, however collards are much milder and have thicker, waxy leaves with no peppery heat. Mustard greens are sharper and cook faster; they come from a different Brassica species entirely.

Should people on blood thinners avoid mustard greens?

Not necessarily avoid, however consistency matters. Mustard greens are high in vitamin K, which affects anticoagulant medication like warfarin. Keeping intake steady rather than suddenly increasing it is the standard guidance.

German Black Forest Cake

March 31, 2026

Complete German Black Forest Cake Article

Beating egg whites to stiff peaks and folding them into chocolate batter creates a light sponge that won't collapse under whipped cream and cherries. The high ratio of eggs to flour gives you airy layers that soak up Kirsch syrup without turning soggy.

German Black Forest Cake served on a plate

The springform pan makes layer removal clean and simple. You bake two or three thin layers instead of one thick cake, which means faster baking and easier assembly.

This works for birthdays and holidays when you need something impressive that doesn't require pastry school skills.

QUICK SUMMARY

German Black Forest Cake layers chocolate sponge, whipped cream, and sour cherries soaked in Kirsch. The trick is whipping egg whites separately for airy layers that stay stable under cream and fruit. Make this when you need a showstopper dessert that holds up for hours at room temperature.

⏱️Time Reality: 40 min prep plus 25-30 min baking, then 2 hours chilling before slicing
🥄First Move: Chill your mixing bowl and whisk 20 minutes before whipping cream
⚠️Watch Out: Over-soaking layers with Kirsch syrup makes them fall apart - brush with 2-3 tablespoon max

Why This Recipe Works

Whipping egg whites separately and folding them into the batter gives you a sponge that's sturdy enough to hold cream and cherries but light enough to cut cleanly. For a version that comes together quickly, try a simple homemade cake that skips the layering step.

Quick Reference
⏱️
Prep Time
40 min
🔥
Cook Time
25-30 min
⏰
Total Time
1 hr 10 min
🍽️
Servings
8-10 servings
📊
Difficulty
Medium
🏷️
Category
Dessert
💡
Quick Tip
Chill whipped cream before whipping for stability
🎯
Best For
Entertaining | Special occasions

Here's what makes it work:

  • Room temperature eggs whip to higher volume - Cold eggs won't incorporate as much air when you beat the whites, which means a denser sponge
  • Chilled cream and bowl prevent over-whipping - Warm cream turns grainy or separates before it reaches soft peaks
  • Baking at 350°F for 25-30 minutes gives you a springy crumb - Higher temps dry out the sponge; lower temps make it dense and gummy
  • Draining cherries for 15 minutes stops soggy layers - Excess juice seeps into the cake and makes it collapse when you slice
  • Folding egg whites in 10 gentle strokes max keeps air in the batter - Over-mixing deflates the whites and gives you a flat, heavy cake
Quick Tip
Refrigerate the assembled cake at least 2 hours before slicing - this firms up the cream and gives you clean cuts without smearing

What You'll Need

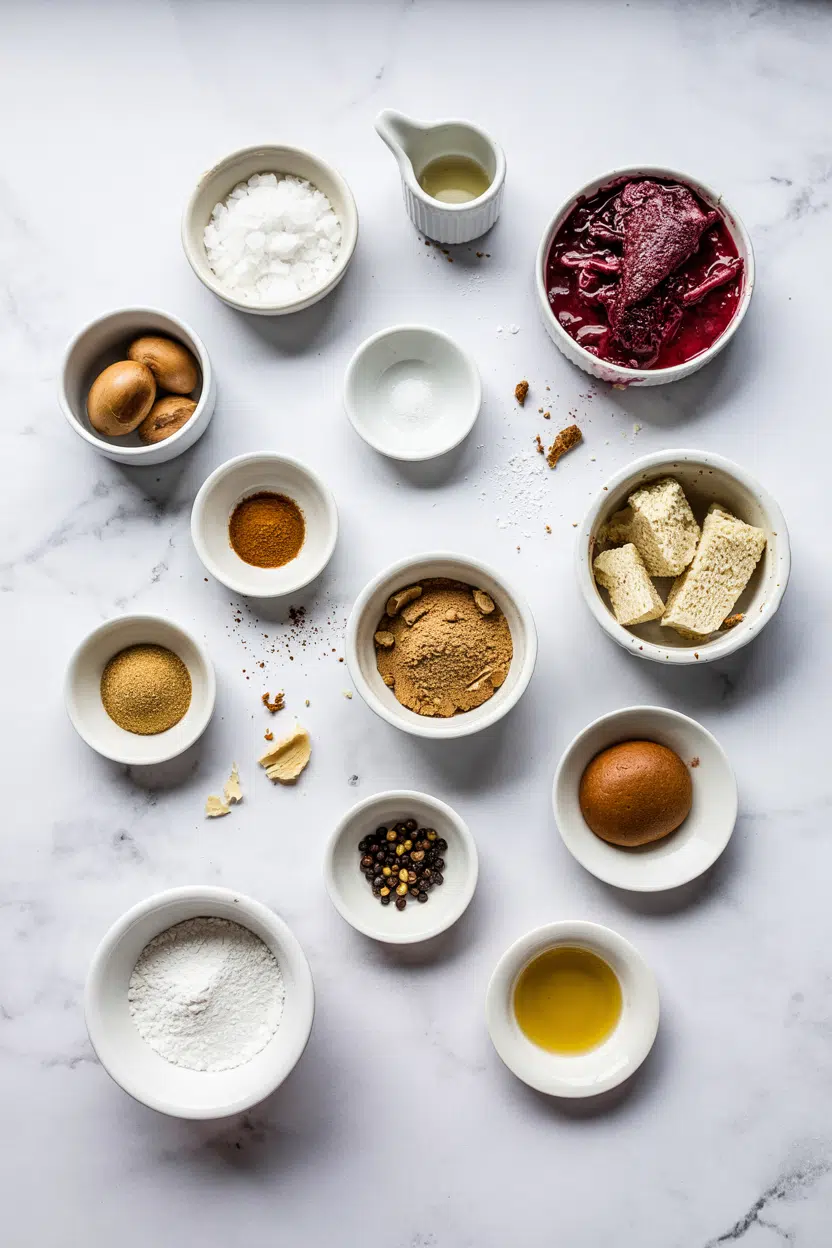
Ingredients for German Black Forest Cake

Shopping for this means hitting the baking aisle and the refrigerated section for cream and eggs. Rich mains need something to cut through, and bread does exactly that - for a lighter option alongside, check out this simple bread side dish.

🍫
Chocolate Base
  • Dark chocolate (6 oz / 170g, chopped)
  • Cocoa powder (2 tbsp, optional for extra depth)
🥚
Batter Structure
  • All-purpose flour (1 cup / 125g)
  • Sugar (¾ cup / 150g)
  • Eggs (4 large, separated)
  • Baking powder (1 tsp)
  • Butter (¼ cup / 60g, melted)
🥛
Cream Filling
  • Whipping cream (2 cups / 480ml, cold)
  • Powdered sugar (¼ cup / 30g)
🍒
Fruit & Flavor
  • Sour Morello cherries (1 jar / 24 oz, drained)
  • Kirsch (3-4 tablespoon cherry brandy)

Ingredient Details

  • Dark chocolate
    Use 60-70% cocoa - higher percentages turn bitter once baked; milk chocolate makes the cake too sweet
  • Eggs
    Room temp eggs separate cleaner and whip faster - set them out 30 minutes before baking
  • Whipping cream
    Heavy cream (35%+ fat) whips stiffer and holds longer than light cream - skip ultra-pasteurized if possible
  • Sour Morello cherries
    Jarred or canned work fine - drain them on paper towels for 15 minutes to remove excess syrup
  • Kirsch
    Cherry brandy adds authentic flavor - if skipping alcohol, use cherry syrup with a splash of almond extract
  • All-purpose flour
    Measure by weight (125g) or spoon-and-level method - scooping packs the flour and makes a dense cake
  • Butter
    Melt and cool to lukewarm before adding to batter - hot butter deflates the egg whites

Ingredient Swaps

Most swaps change texture or flavor intensity but won't wreck the cake. The cake works best when it hits the table at the same time as the main - if you're planning a full meal, consider weeknight crawfish pie meal ideas for pairing options.

Four swaps that work:

  • Kirsch → Cherry syrup or cherry juice with a splash of rum - Gives mild cherry flavor without the booze kick; brush layers lightly to avoid sogginess
  • All-purpose flour → Gluten-free flour blend - Use a 1:1 baking blend with xanthan gum; expect slightly denser crumb and less rise
  • Whipping cream → Coconut cream - Adds coconut aroma and firmer texture; chill the can overnight and scoop only the solid top layer
  • Fresh sour cherries → Frozen cherries (thawed and drained) - Thaw completely and drain on paper towels 20 minutes; they'll be softer but still work

Gluten-Free Flour

Works for: Celiac or gluten-sensitive guests who still want traditional flavor

Skip if: You need a super-light, airy crumb - GF blends make a tighter texture

Coconut Cream

Works for: Dairy-free diets or when you want a subtle tropical note

Skip if: You hate coconut flavor or need a stable frosting for warm rooms - it melts faster than dairy cream

Instructions

You'll need 40 minutes of active work, then 25-30 minutes of baking time while you prep the cream and cherries. This side adds the contrast this plate needs, but timing matters - for a no-fuss protein option, try an easy sauce side that you can make ahead.

  1. Beat egg whites to stiff peaks. Separate eggs while cold, then let whites reach room temp (20 min). Beat on medium-high 3-4 minutes until they hold firm peaks when you lift the whisk - they should look glossy, not dry or grainy.

  2. Mix chocolate batter and fold in whites. Whisk melted butter, egg yolks, sugar, flour, cocoa powder, and baking powder until smooth. Fold in one-third of the egg whites with a spatula using 10 gentle strokes, then fold in remaining whites just until no white streaks remain - over-mixing deflates the batter.

  3. Bake sponge layers at 350°F for 25-30 minutes. Pour batter into a greased 8-9 inch springform pan. Bake until the top springs back when pressed lightly and a toothpick comes out clean - check at 25 minutes to avoid over-baking. Cool in pan 10 minutes, then turn out onto a rack.

  4. Whip cream and drain cherries. Chill bowl and whisk 20 minutes before whipping. Beat cold cream with powdered sugar on medium-high until soft peaks form (2-3 min) - stop before it turns grainy. Drain cherries on paper towels 15 minutes.

  5. Assemble layers with Kirsch soak. Slice cooled sponge horizontally into 2-3 even layers. Brush each layer with 1-2 tablespoon Kirsch syrup. Spread whipped cream on first layer, add drained cherries, repeat with remaining layers. Frost sides and top with remaining cream, then press chocolate shavings onto sides. Chill 2 hours before slicing.

Golden Rule
Use a vegetable peeler on a cold block of dark chocolate to create even shavings - warm chocolate crumbles instead of curling

What to Serve With It

Black Forest Cake needs something to cut its richness or contrast the chocolate and cream. A good cake can make or break the plate, so pair it with drinks or light sides that won't compete for attention.

Side Dish Prep Why It Works How to Serve
Black coffee Easy Cuts through cream and balances sweet chocolate Serve hot alongside slices
Fresh berries Easy Adds bright, tart contrast to rich layers Pile on plate or scatter on top
Espresso Easy Strong coffee accentuates cherry and chocolate Serve in small cups after dessert
Vanilla ice cream Easy Creaminess complements texture and adds cold contrast Scoop alongside warm or chilled slices
Cherry coulis Medium Enhances fruitiness and adds visual contrast Drizzle on plate before placing slice

Three ways to serve it:

  • For birthdays: Top with candles and serve with vanilla ice cream on the side for kids and adults
  • For dinner parties: Drizzle plates with cherry coulis and add a mint leaf for color
  • For holiday gatherings: Pair with espresso or amaretto liqueur for after-dinner drinks
Shortcut
Make the sponge layers a day ahead and wrap them tightly in plastic - assemble the cake the morning of serving for fresh cream

Store and Reheat

Assembled Black Forest Cake holds in the fridge for 3-4 days but tastes best within 48 hours while the cream stays fluffy. The pie works best when it hits the table at the same time as the main - for other crowd-pleasing options, check out a sweet pie side dish that reheats well.

Method Time Best For
🌡️ Room temperature 20-30 min Restoring texture after refrigeration - cream softens and flavors brighten
📦 Microwave 15 sec bursts Single slices when you want them slightly warm - stop before cream melts

For best results when storing:

  • Wrap assembled cake tightly in plastic wrap or store in an airtight cake box - exposed cream absorbs fridge odors and dries out
  • Keep in the coldest part of the fridge (back of bottom shelf) - door storage lets temp fluctuate and softens cream faster
  • Freeze unfrosted sponge layers up to 1 month - wrap each layer separately in plastic, then foil; thaw at room temp 2 hours before assembling
  • Don't freeze assembled cake with whipped cream - cream weeps and separates when thawed, leaving watery puddles
  • Let chilled slices sit at room temp 20 minutes before serving - cold dulls chocolate and cherry flavors

Frequently Asked Questions

Can I make Black Forest cake a day ahead?

Yes - bake the sponge layers a day ahead, wrap them tightly in plastic, and store at room temp. Assemble the cake with cream and cherries the morning of serving, then chill 2 hours before slicing so the cream sets but stays fresh.

How should I store leftover Black Forest cake?

Store assembled cake in an airtight container or wrapped tightly in plastic in the fridge for 3-4 days. Let slices sit at room temp 20 minutes before serving so the cream softens and flavors come back.

How do I know when the sponge cake layers are fully baked?

Press the top lightly with your finger - it should spring back without leaving an indent. A toothpick inserted in the center should come out clean or with just a few moist crumbs, not wet batter.

What causes the whipped cream to weep or separate?

Whipping warm cream or over-whipping past soft peaks makes it separate and leak liquid. Always chill the bowl and cream 20 minutes before whipping, and stop as soon as soft peaks form - grainy texture means you've gone too far.

Can I scale the recipe for a smaller cake?

Yes - use a 6-inch pan and cut all ingredient amounts in half. Bake at 350°F for 20-25 minutes instead of 25-30, checking for doneness at 20 minutes with the spring-back test.

German Black Forest Cake served on a plate

German Black Forest Cake

No ratings yet
German Black Forest Cake features airy chocolate sponge layers made by folding whipped egg whites into batter, layered with whipped cream and sour cherries soaked in Kirsch. This recipe balances lightness with rich flavors to create a showstopper dessert perfect for special occasions.
Print Recipe Pin Recipe
Prep Time 40 minutes mins
Cook Time 30 minutes mins
Total Time 1 hour hr 10 minutes mins
Servings: 8 servings
Course: Dessert
Cuisine: German
Ingredients Equipment Method Notes

Ingredients
  

  • 6 oz dark chocolate chopped, use 60-70% cocoa
  • 2 tablespoon cocoa powder optional for extra depth
  • 1 cup all-purpose flour 125g, spoon-and-level method
  • 0.75 cup sugar 150g
  • 4 large eggs separated, room temperature
  • 1 teaspoon baking powder
  • 0.25 cup butter 60g, melted and cooled to lukewarm
  • 2 cups whipping cream 480ml, cold
  • 0.25 cup powdered sugar 30g
  • 24 oz sour Morello cherries drained
  • 3 tablespoon Kirsch cherry brandy

Equipment

  • Springform pan Used to bake thin sponge layers cleanly
  • Mixing bowl Chilled before whipping cream for stability
  • Whisk Used for whipping egg whites and cream
  • Spatula Used to gently fold egg whites into batter

Method
 

  1. Separate eggs while cold, then let whites come to room temperature for 20 minutes. Beat egg whites on medium-high speed for 3-4 minutes until stiff, glossy peaks form.
    4 large eggs
  2. Whisk melted butter, egg yolks, sugar, flour, cocoa powder, and baking powder until smooth. Fold in one-third of the egg whites gently with 10 strokes using a spatula, then fold in the remaining whites just until no streaks remain.
    2 tbsp cocoa powder, 1 cup all-purpose flour, 0.75 cup sugar, 4 large eggs, 1 tsp baking powder, 0.25 cup butter
  3. Pour batter into greased 8-9 inch springform pan. Bake at 350°F for 25-30 minutes until top springs back and a toothpick comes out clean. Cool in pan 10 minutes, then turn out onto a rack to cool completely.
  4. Chill mixing bowl and whisk for 20 minutes. Beat cold whipping cream with powdered sugar on medium-high until soft peaks form, about 2-3 minutes. Drain sour cherries on paper towels for 15 minutes.
    2 cups whipping cream, 0.25 cup powdered sugar, 24 oz sour Morello cherries
  5. Slice cooled sponge horizontally into 2-3 even layers. Brush each layer lightly with 1-2 tablespoon Kirsch. Spread whipped cream on the first layer, add drained cherries, then repeat with remaining layers. Frost sides and top with remaining cream, pressing chocolate shavings on sides. Chill for 2 hours before slicing.
    2 cups whipping cream, 24 oz sour Morello cherries, 3 tbsp Kirsch

Notes

  • Use room temperature eggs to achieve higher volume in egg whites.
  • Chill cream and bowl before whipping to prevent graininess and over-whipping.
  • Brush cake layers lightly with Kirsch to avoid soggy layers.

Tried this recipe?

Let us know how it was!

What Is Madeira Wine? [Taste, Uses & More]

March 31, 2026

Madeira wine hits the glass with an intensity that stops you mid-pour - a wave of toasted caramel, dried citrus peel, and something almost nutty underneath.

What Is Madeira Wine

Unlike most wines, it's been deliberately cooked and oxidized during production, which gives it a flavor profile unlike anything else in a wine rack.

If you've encountered port spoilage signs and worried about opened bottles going to waste, Madeira largely sidesteps that problem - its unique aging process makes it one of the most stable wines you can keep in a kitchen.

QUICK SUMMARY

Madeira is a fortified Portuguese wine from Madeira island, known for high acidity, caramel-toasty flavor, and exceptional shelf life after opening. It ranges from bone-dry (Sercial) to very sweet (Malmsey) and works as both a cooking wine and a sipping wine.

🍷Category: Fortified wine, oxidatively aged, Portuguese origin
🍊Flavor: Tangy, caramelized, nutty, dried fruit in sweeter styles
🍳Best For: Pan sauces, deglazing, stews, desserts, aperitif
🛒Buying Tip: Label style by grape - Sercial dry, Malmsey sweet
📅Shelf Life: Opened bottles stay good for months to over a year refrigerated

What Is Madeira Wine?

Madeira is a fortified wine produced exclusively on the Portuguese island of Madeira, located in the Atlantic Ocean off the northwest coast of Africa.

Fortification means grape spirit is added during or after fermentation, raising alcohol content and halting fermentation at the desired sweetness level.

What sets Madeira apart from other fortified wines is its deliberate heat and oxygen exposure during aging - a process called estufagem (using heated tanks) or canteiro (aging in barrels in warm lofts).

This intentional "cooking" creates the wine's signature oxidized, caramelized character that no other wine replicates.

Four noble grape varieties define the main styles:

  • 🍇 Sercial - the driest style, high acid, lean and citrusy
  • 🍇 Verdelho - medium-dry, slightly smoky with honeyed edges
  • 🍇 Bual (Boal) - medium-rich, fuller body, more dried fruit
  • 🍇 Malmsey (Malvasia) - the sweetest style, thick and raisin-rich

Blended "cooking Madeira" is also widely sold and labeled simply as Vinho da Madeira.

What Does Madeira Wine Taste Like?

madeira wine - What Is Madeira Wine

High acidity is the first thing you notice - it's sharper and more persistent than sherry or tawny port, cutting through the sweetness in even the richest Malmsey styles. Behind that comes a wave of caramelized sugar, baked orange peel, and walnut.

Sensory SnapshotStrong Intensity
👅 Flavor
caramelizedtangy citrusdried fruitwalnut
✋ Texture
silkymedium to viscous
👃 Aroma
toasty caramelburnt sugarnutty oxidation

The canteiro aging method - slowly maturing barrels in warm rooftop lofts - concentrates dried fig and almond notes you won't find in heated-tank versions.

Texture shifts significantly across styles: Sercial is almost medium-bodied and brisk, while Malmsey coats the palate with a syrupy, lingering finish.

Golden Rule
Acidity is Madeira's defining trait. Even sweet Malmsey has enough brightness to cut fat and lift heavy sauces - lean into that balance when cooking.

How to Use Madeira Wine

Deglazing is where Madeira earns its place on a professional stove. Pour it into a hot pan after searing beef or pork, and it lifts the fond instantly - the acidity and residual sugar reduce into a glossy, deeply savory Madeira sauce in minutes.

For braises and stews, stir a generous splash into beef daube or game dishes late in the cooking process rather than at the start, which preserves the wine's aromatic complexity.

Mushrooms and caramelized onions absorb Madeira beautifully when added to the pan after softening.

How Madeira Wine Is Used
MethodBest ForTip
🥩 DeglazingRoast beef, pork, game pan saucesUse medium-dry Verdelho for balanced acidity and body
🍲 BraisingBeef daube, venison, root vegetablesAdd near the end to keep aromatic depth
🫙 ReducingGlazes for mushrooms, roasted vegSimmer low and slow - it scorches quickly at high heat
🍰 Baking & DessertsPoached pears, fruit cakes, cream saucesMalmsey adds caramel and dried-fruit depth with no extra sugar needed
🥂 SippingAperitif (Sercial) or dessert wine (Malmsey)Serve slightly chilled for dry styles, room temp for sweet

Avoid pairing Madeira with delicate fish or fresh green salads - its intensity overwhelms subtle flavors. Dry Sercial is the exception, used sparingly with leaner seafood preparations.

For dishes where Madeira isn't available, knowing your alternatives to madeira wine prevents a recipe from stalling entirely.

Try It In
🍷Fruity Red Wine SangriaA splash of Verdelho adds caramel depth to fruit-forward sangria→☕Warm Spiced Mulled WineMalmsey's dried-fruit richness pairs naturally with warming spices→🍐Red Wine Poached PearsSwap in Bual for a nuttier, more complex poaching liquid→

How to Buy and Store Madeira Wine

Read the label for style, not just price. Sercial means dry and brisk; Malmsey means sweet and rich. For everyday cooking, a younger blended bottle or one labeled "Reserve" (aged a minimum of five years) is entirely sufficient. For sipping, look for a named single-grape variety, check cork condition, and verify the fill level is close to the neck.

Best Pick
For all-purpose kitchen use, a Verdelho or blended Reserve Madeira handles both savory pan sauces and lighter dessert applications without committing to one extreme.

Storage is straightforward.

Unopened bottles keep upright in a cool, dark place for years - vintage bottles can hold for decades.

After opening, cork the bottle and refrigerate it; the guidance on storing madeira wine correctly confirms that most opened bottles remain in good condition for six months to over a year.

This is far longer than most wines and stems directly from the high acidity and alcohol developed during heat aging.

Where to Start With Madeira

Madeira rewards specific choices. Don't buy a random bottle - pick the style that matches your first use case.

  • First cooking bottle - Go Verdelho or a blended Reserve; it handles sauces and braises without pushing too sweet or too sharp.
  • First sip - Try a Bual; it shows off Madeira's dried-fruit and caramel character without the full intensity of Malmsey.
  • Cheese board pairing - Malmsey alongside aged hard cheese or blue cheese is the format where this wine makes the strongest case for itself.

If sherry is already in your kitchen, understand that the two overlap - but Madeira's higher acidity and cooked caramel note make it distinctly bolder in cooked applications, and the difference becomes clear when you explore replacements for sherry in a recipe.


Frequently Asked Questions

Is Madeira wine sweet or dry?

Both exist. Sercial is the driest style, Verdelho is medium-dry, Bual is medium-rich, and Malmsey is the sweetest. Even sweet Malmsey retains noticeable acidity, which keeps it from tasting cloying.

Can you cook with Madeira wine?

Yes, and it performs well in hot pans. Its high acidity and caramel notes hold up through deglazing and reduction without turning bitter, which makes it better suited to cooked sauces than many other fortified wines.

How long does Madeira last after opening?

Most opened Madeira keeps well for six months to a year or more when corked and refrigerated. Its heat-aged oxidative structure means exposure to air after opening causes far less deterioration than in standard table wines.

What is the difference between Madeira and sherry?

Both are fortified and oxidatively aged, however Madeira has distinctly higher acidity and a "cooked" caramel note from estufagem heating that sherry lacks. Sherry tends to be nuttier and less tangy in equivalent sweetness levels.

Does the grape variety on the label actually matter?

For cooking, a blended bottle is fine and usually cheaper. For sipping, named varieties like Bual or Sercial signal both sweetness level and higher-quality production with longer canteiro aging than basic blends.

Ethiopian Doro Wat

March 31, 2026

Slow-simmering chicken drumsticks in berbere-spiced sauce creates layers of heat and richness that build over time. The trick is caramelizing onions for 40 minutes before adding spices so the base stays sweet instead of bitter.

Ethiopian Doro Wat served on a plate

You don't need fancy equipment or hard-to-find ingredients. A heavy-bottomed pot and patience deliver tender meat that falls off the bone and a sauce thick enough to cling to hard-boiled eggs.

Make this for special occasions when cooking feels like part of the celebration, not just another task.

QUICK SUMMARY

Ethiopian Doro Wat is a slow-simmered chicken stew with berbere spice and niter kibbeh that delivers complex heat and tender meat. The key is caramelizing onions low and slow before layering in spices and chicken. Plan for 1 hour 45 minutes total when you want a dish that tastes like effort but mostly cooks itself.

⏱️Time Reality: 30 min prep, 1 hr 15 min cook, mostly hands-off simmer time
🔥First Move: Cook onions over low heat 40-50 min until golden and sweet
⚠️Watch Out: High heat burns spices and creates bitter flavor - keep flame medium-low

Table of Contents

Toggle
  • Why This Recipe Works
  • What You'll Need
    • Ingredient Details
  • Ingredient Swaps
  • What to Serve With It
  • Store and Reheat
  • Frequently Asked Questions
  • Ethiopian Doro Wat
    • Method 
    • Tried this recipe?

Why This Recipe Works

Caramelizing onions before adding berbere spice prevents burnt flavors and builds a sweet foundation that balances the heat. For contrast on the plate, we keep a batch ready for nights like this - this quick slaw dish adds crunch and cuts richness.

Quick Reference
⏱️
Prep Time
30 min
🔥
Cook Time
1 hr 15 min
⏰
Total Time
1 hr 45 min
🍽️
Servings
4-6 servings
📊
Difficulty
Involved
🏷️
Category
Main Dish
💡
Quick Tip
Slow simmer for tender chicken, thick sauce
🎯
Best For
Hosting | Special Occasion

What makes this version reliable:

  • Skin-on chicken stays moist - Fat renders during the long simmer and keeps meat tender
  • Berbere blooms in onions - Toasting the spice blend for 2-3 minutes releases oils and deepens flavor
  • Hard-boiled eggs soak up sauce - Adding them in the last 15 minutes lets them absorb heat and turn glossy
  • Tomato paste thickens naturally - Concentrate cooks down into a clingy sauce without flour or cornstarch
  • Resting melds layers - Sitting off heat for 10 minutes lets flavors settle and sauce tighten
Golden Rule
Stir every 5 minutes during the simmer to prevent sticking and scorching on the bottom of the pot

What You'll Need

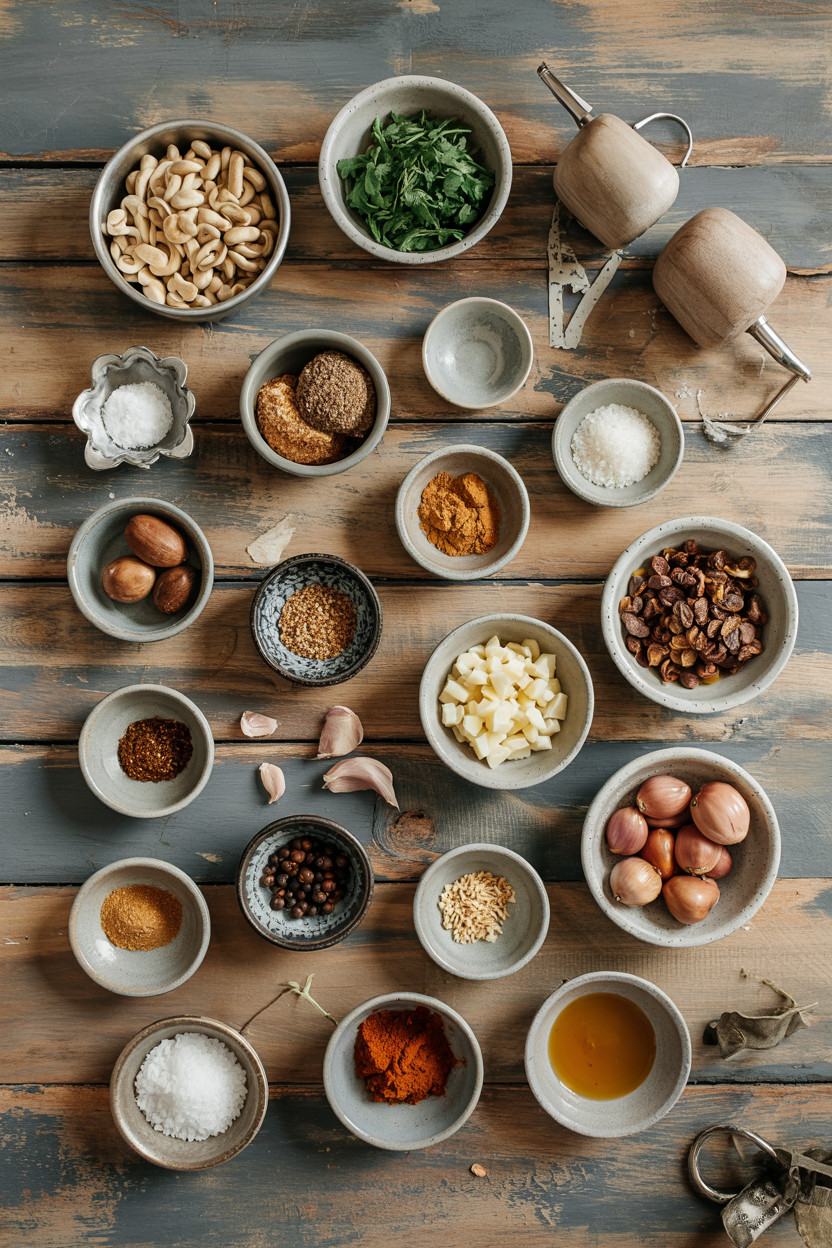
Ingredients for Ethiopian Doro Wat

Stock your pantry with berbere spice and niter kibbeh if you plan to make this more than once. The bread works best when it hits the table at the same time as the main, so for a version that comes together quickly, quick bread recipe handles the base.

🍗
Protein
  • Chicken drumsticks or thighs (skin-on)
  • Hard-boiled eggs
🧄
Aromatics
  • Yellow onions (finely chopped)
  • Garlic
  • Ginger
🌶️
Spices & Seasoning
  • Berbere spice blend
  • Niter kibbeh (Ethiopian spiced butter)
  • Tomato paste
  • Lemon juice
🫙
Base
  • Water or chicken broth

Ingredient Details

  • Berbere spice blend
    Check freshness before using - old spice loses heat and smells flat instead of aromatic
  • Onions (yellow, finely chopped)
    Chop small for faster caramelization and smoother sauce texture
  • Niter kibbeh
    Ethiopian spiced clarified butter adds layers store-bought butter can't match
  • Chicken drumsticks or thighs
    Skin-on pieces stay juicy through long cooking - breast dries out too fast
  • Hard-boiled eggs
    Boil 10 minutes, cool in ice bath, peel before adding to sauce
  • Tomato paste
    Use double concentrate for deeper color and thicker body
  • Garlic and ginger
    Fresh only - dried versions taste flat and lack punch

Ingredient Swaps

Most substitutions work if you adjust cooking time and expect slight flavor shifts. Slaw adds the contrast this plate needs, but timing matters, so we keep a batch ready for nights like this - this quick slaw dish balances heat with crunch.

Four swaps that work:

  • Niter kibbeh → unsalted butter with fenugreek - Mix ½ teaspoon ground fenugreek per ¼ cup butter for similar spiced depth
  • Chicken drumsticks → thighs or breast - Thighs cook the same, breast needs 15 minutes less simmer to stay moist
  • Berbere spice → homemade blend - Combine 2 tablespoon paprika, 1 teaspoon cayenne, 1 teaspoon cumin, ½ teaspoon fenugreek, ½ teaspoon coriander
  • Water → chicken broth - Adds umami and richness without changing method

Store-Bought Berbere

Works for: Quick prep when you're short on time

Skip if: Spice smells musty or has been open 6+ months

Homemade Berbere

Works for: Maximum freshness and customized heat level

Skip if: You're missing key spices like fenugreek or ajwain

Chicken Breast

Works for: Leaner meal with less rendered fat

Skip if: You want fall-off-the-bone texture and rich sauce

Instructions

Expect 1 hour 45 minutes from start to table with most of that time hands-off. A dollop of homemade takes each bite somewhere more interesting, so for a version that comes together quickly, this creamy homemade works as a cooling contrast.

  1. Cook onions low and slow - Heat niter kibbeh in a heavy-bottomed pot over medium-low heat, add finely chopped onions, stir every 5 minutes for 40-50 minutes until golden and caramelized (not burnt).

  2. Bloom the spices - Add garlic, ginger, and berbere spice blend to the onions, stir constantly for 2-3 minutes until fragrant and oil separates from the mixture.

  3. Brown the chicken - Push onions to the sides, add chicken pieces skin-side down, brown 5-7 minutes per side until golden, then nestle into the onions.

  4. Simmer until tender - Stir in tomato paste and water (or broth), bring to a gentle simmer, cover partially, cook 45-60 minutes until chicken is tender and sauce thickens (stir every 10 minutes to prevent sticking).

  5. Add eggs and finish - Peel hard-boiled eggs, score with shallow cuts, nestle into sauce, simmer uncovered 15 minutes until eggs absorb color and sauce clings, finish with lemon juice, rest 10 minutes off heat before serving.

Shortcut
Use rotisserie chicken and skip the browning step - add shredded meat in the last 20 minutes just to heat through

What to Serve With It

Most plates need something to soak up the sauce and cut the heat. Most people skip salad, but it balances the meal, so for a version that comes together quickly, classic salad dish adds brightness without stealing focus.

Side Dish Prep Why It Works How to Serve
Injera bread Medium Traditional spongy flatbread soaks up sauce perfectly Tear pieces and use as edible utensil
Steamed rice Easy Mild base lets spiced chicken shine without competing Serve alongside or under chicken pieces
Steamed collard greens Easy Bitter greens balance rich sauce and add freshness Pile on the side, drizzle with sauce
Cucumber salad Easy Cool crunch offsets heat and cleanses palate Toss with lemon juice and serve cold
Spiced lentils (Misir Wat) Medium Vegetarian option adds variety to the plate Serve in separate bowl or alongside chicken

Three ways to serve it:

  • Family-style platter - Arrange chicken and eggs over injera, pour sauce on top, serve greens on the side
  • Individual plates - Portion rice or injera first, top with chicken and one egg, spoon extra sauce around edges
  • Traditional spread - Set out wat with multiple vegetable sides and let everyone build their own plate
Best Pick
Injera soaks up sauce better than any other bread and keeps the meal authentic

Store and Reheat

Doro Wat holds well in the fridge and freezes partially since eggs turn rubbery when frozen. The rolls works best when it hits the table at the same time as the main, so for a version that comes together quickly, this easy rolls recipe reheats quickly alongside leftover stew.

Method Time Best For
🍳 Stovetop 8-10 min over medium-low Best flavor, even heating, maintains sauce texture
🔥 Oven 15 min at 325°F (163°C) covered Reheating multiple portions without drying out
📦 Microwave 3-4 min in 1-min increments Quick single servings when you're in a rush

For best results when storing:

  • Cool completely before refrigerating - Hot stew in a sealed container creates condensation that dilutes sauce
  • Store in shallow airtight containers - Speeds cooling and prevents bacterial growth in thick stew
  • Separate eggs if freezing - Pull eggs out before freezing since they turn grainy and rubbery when thawed
  • Add splash of water when reheating - Sauce thickens in the fridge and needs liquid to loosen up again
  • Reheat gently to avoid drying chicken - Low heat keeps meat tender instead of stringy and overcooked

Frequently Asked Questions

Can I make Ethiopian Doro Wat ahead and reheat?

Yes - make the full recipe up to 3 days ahead and store in the fridge. Flavors deepen overnight as spices meld together. Reheat gently on the stovetop with a splash of water to loosen the sauce.

How do I know when the chicken in Doro Wat is fully cooked?

Pierce the chicken near the bone with a fork - juices should run clear, not pink, and meat should pull away easily. If using a thermometer, aim for 175°F (79°C) for dark meat.

Is it possible to substitute niter kibbeh with regular butter?

Yes - use unsalted butter and add ½ teaspoon ground fenugreek per ¼ cup butter to mimic some of the spiced depth. The flavor won't be identical but it works in a pinch.

What should I do if my Doro Wat is too spicy or not spicy enough?

If too spicy, stir in a spoonful of tomato paste or add more water to dilute the heat. If too mild, bloom extra berbere spice in a little niter kibbeh and stir it into the sauce, then simmer 10 more minutes.

What side dishes go best with Doro Wat for an authentic meal?

Injera (spongy Ethiopian flatbread) is traditional and soaks up sauce perfectly. Steamed collard greens, spiced lentils (Misir Wat), and cucumber salad round out the plate with cooling contrasts.

Ethiopian Doro Wat served on a plate

Ethiopian Doro Wat

No ratings yet
Ethiopian Doro Wat is a slow-simmered chicken stew featuring berbere spice and niter kibbeh that creates complex heat and rich flavors. The key is caramelizing onions slowly before adding spices and chicken for a sweet foundation that balances the spice. Tender chicken and hard-boiled eggs simmered in thick tomato sauce make this dish special for celebrations.
Print Recipe Pin Recipe
Prep Time 30 minutes mins
Cook Time 1 hour hr 15 minutes mins
Total Time 1 hour hr 45 minutes mins
Servings: 5 servings
Course: Main Dish
Cuisine: Ethiopian
Ingredients Equipment Method Notes

Ingredients
  

  • 8 pieces chicken drumsticks or thighs skin-on
  • 4 pieces hard-boiled eggs peeled and scored
  • 4 cups yellow onions finely chopped
  • 3 cloves garlic minced
  • 1 tablespoon ginger minced
  • 3 tablespoons berbere spice blend fresh and aromatic
  • 4 tablespoons niter kibbeh Ethiopian spiced clarified butter
  • 3 tablespoons tomato paste double concentrate
  • 2 cups water or chicken broth
  • 1 tablespoon lemon juice freshly squeezed

Equipment

  • Heavy-bottomed pot Used for caramelizing onions and slow simmering the stew

Method
 

  1. Heat niter kibbeh in a heavy-bottomed pot over medium-low heat. Add finely chopped onions and stir every 5 minutes. Cook low and slow for 40-50 minutes until onions are golden and caramelized without burning.
    4 cups yellow onions, 4 tablespoons niter kibbeh
  2. Add minced garlic, ginger, and berbere spice blend to the caramelized onions. Stir constantly for 2-3 minutes until fragrant and the oil starts separating from the mixture.
    3 cloves garlic, 1 tablespoon ginger, 3 tablespoons berbere spice blend
  3. Push the onion-spice mixture to the sides of the pot and add chicken pieces skin-side down. Brown chicken for 5-7 minutes per side until golden, then nestle chicken into the onions.
    8 pieces chicken drumsticks or thighs
  4. Stir in tomato paste and water or chicken broth. Bring to a gentle simmer, partially cover the pot, and cook for 45-60 minutes until chicken is tender and sauce thickens. Stir every 10 minutes to prevent sticking.
    3 tablespoons tomato paste, 2 cups water or chicken broth
  5. Peel and score the hard-boiled eggs. Nestle them into the sauce and simmer uncovered for 15 minutes so the eggs absorb the color and the sauce clings to them. Finish by stirring in lemon juice. Remove from heat and let the stew rest for 10 minutes before serving.
    4 pieces hard-boiled eggs, 1 tablespoon lemon juice

Notes

  • Stir every 5 minutes during simmer to prevent sticking and scorching.
  • Use skin-on chicken pieces for moist, tender meat.
  • Resting off the heat allows flavors to meld and sauce to thicken.

Tried this recipe?

Let us know how it was!

What Is Kidney Bean? [Taste, Uses & More]

March 31, 2026

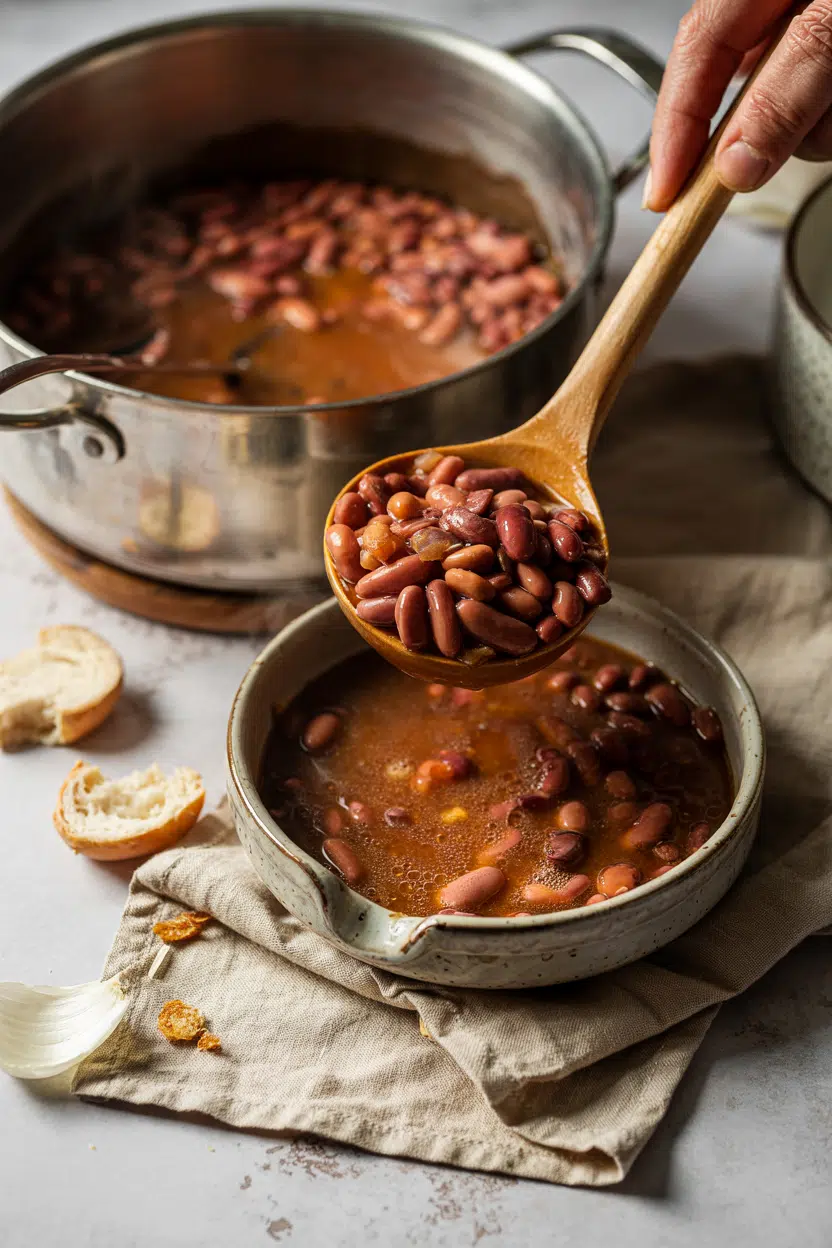
Kidney beans do something in a pot that few other legumes manage: they hold their shape through long braises, absorb spice without dissolving, and still deliver a creamy interior bite that thickens every bowl around them.

What Is Kidney Bean

That structural reliability is why they anchor dishes as different as a slow cooker chili con carne recipe and North Indian rajma curry.

If you've cooked with the taste of pinto bean before, kidney beans will feel familiar - earthier, meatier, and with a deeper color that changes how a dish looks.

QUICK SUMMARY

The kidney bean is a dense, meaty legume with a mildly sweet, earthy flavor and a firm-yet-creamy texture when cooked. Used dried or canned, it suits chili, curry, soups, and salads. Dried beans last 1-2 years; canned, up to 5. Always cook thoroughly - raw beans contain harmful lectins.

👅Flavor: Mildly sweet, earthy, slightly nutty with a subtle beany undertone
✋Texture: Firm skin, dense and creamy interior - holds shape in long cooks
🍳Best Uses: Chili, rajma curry, three-bean salads, burger binders, rice bowls
🛒Buying: Choose unbroken dried beans; check canned for no dents or bulging
📦Shelf Life: Dried 1-2 years; canned up to 5 years unopened; cooked 3-5 days refrigerated

What Is Kidney Bean?

Kidney beans belong to Phaseolus vulgaris, the same species as black beans, pinto beans, and navy beans - making them one branch of a large and well-traveled family.

They originated in Central and South America and spread globally after European contact in the 16th century.

The name comes from their shape: curved and elongated, resembling a human kidney.

Two main market forms exist - dark red kidney beans, with a deep burgundy skin and robust flavor, and light red kidney beans, slightly milder with a brighter color.

White kidney beans - sold as cannellini - are a distinct variety common in Italian and Mediterranean cooking.

In South Asia, the standard dark red form is called rajma, and the dish by the same name has become a staple across Punjab and North India.

  • 🌱 Species - Phaseolus vulgaris, same as black and pinto beans
  • 🎨 Varieties - dark red, light red, and white (cannellini)
  • 🌍 Regional names - rajma (South Asia), red beans (Caribbean and Southern US)
  • 📏 Size - larger than most common beans; plump and glossy when fresh stock

What Does Kidney Bean Taste Like?

kidney bean - What Is Kidney Bean

The flavor is mildly sweet and earthy with a subtle nuttiness - present but never sharp. Think of it as the quieter, creamier counterpart to black bean in cooking: similar earthiness, none of the smokiness.

Raw, dried kidney beans smell faintly beany and neutral. Heat changes that.

Sautéing cooked beans in a dry or lightly oiled pan adds Maillard notes - a toasty edge that lifts their otherwise mild character.

Sensory SnapshotModerate Intensity
👅 Flavor
earthymildly sweetslightly nuttybeany
✋ Texture
firm skincreamy interiormeaty
👃 Aroma
neutral-mildtoasty when sautéed

Compared to chickpeas, kidney beans feel creamier when mashed and carry less of a grassy note. Long braises deepen the earthiness without making the bean taste heavy.

How to Use Kidney Bean

Chili con carne is the most recognizable application - kidney beans hold their shape through an hour of simmering and soak up chile, cumin, and tomato without going mushy. Rajma curry works similarly: the beans cook in a spiced tomato-onion gravy until each one is fully tender but still intact, best served over rice. Both dishes rely on the bean's density.

Beyond stews, kidney beans work well in cold preparations. Three-bean salads use them for color and body alongside green and wax beans.

Mashed, they bind vegetarian burger patties without the wet, sticky texture that some other legumes produce.

Golden Rule
Add canned kidney beans in the last 10-15 minutes of a soup or stew - they're already cooked, and extended heat makes them mealy.

Key pairings worth knowing:

  • Tomato and onion - acidity cuts through starchy mouthfeel; forms the base of both chili and rajma
  • Smoked paprika or cumin - warm spices amplify the bean's earthy undertone without overpowering it
  • Lime or lemon - a squeeze at serving brightens the whole bowl
  • Ground beef or pork - fat from the meat coats each bean and ties the dish together
  • Bay leaf and oregano - low-background aromatics that extend through long cooking

For a tested version, a punjabi rajma kidney bean curry recipe shows how the spiced tomato base builds around the bean's natural texture.

Try It In
🥗Black Bean SaladSwap in kidney beans for extra body and color→🍠Roasted Sweet Potato and Black Bean SaladKidney beans hold up well against roasted vegetables→

How to Buy and Store Kidney Bean

For dried beans, look for evenly colored, unbroken skins with no powdery residue. Wrinkled skin or a dusty film signals old stock - the beans will cook unevenly and take longer to soften.

For canned, reject any dented or bulging cans; low-sodium labels give you better control over seasoning.

Watch Out
Raw or undercooked kidney beans contain phytohaemagglutinin - a lectin that causes severe nausea and vomiting. Always boil dried beans at a full rolling boil for at least 10 minutes before simmering.

Storage by form:

  • Dried beans - airtight container in a cool, dark pantry; best quality within 1-2 years
  • Canned beans (unopened) - pantry-stable for 3-5 years; check the best-by date
  • Cooked or opened canned - sealed container in the fridge, use within 3-5 days

For a full breakdown of timelines and signs of spoilage, the guide on how long kidney bean keeps covers each form in detail.

Start Here for Best Results

If you're new to kidney beans, open a can first.

Rinse it well, toss the beans into a chili or grain bowl, and get a feel for how they hold heat and absorb seasoning.

Dried beans give better texture and flavor, but they require planning - soak overnight, then simmer 60-90 minutes, or use a pressure cooker; comparing pressure cooker vs multi cooker options helps you decide which tool fits your kitchen.

If you want a swap that cooks similarly but tastes different, replacements for kidney bean lays out the closest options by texture and dish type. Start with canned, graduate to dried - that's the straightforward path.

Frequently Asked Questions

Are kidney beans poisonous raw?

Yes, raw kidney beans contain high levels of phytohaemagglutinin, a lectin that causes rapid-onset nausea and vomiting. A full rolling boil for at least 10 minutes destroys it - slow cookers alone don't reach a high enough temperature.

How do kidney beans compare to black beans?

Both are earthy and starchy, but kidney beans are milder and less smoky, with a creamier texture when cooked. Black beans are smaller and hold slightly less liquid, making them better suited to drier preparations.

How long should you soak kidney beans?

Soak in cold water for 8-12 hours, or use the quick-soak method: boil for 2 minutes, remove from heat, and rest for 1 hour. Drain and discard the soaking water before cooking.

Can you pressure cook kidney beans without soaking?

Yes. Unsoaked dried kidney beans pressure-cook in about 25-35 minutes at high pressure. Soaking shortens that to 15-20 minutes and produces slightly more even texture throughout.

Are cannellini beans the same as kidney beans?

Cannellini are white kidney beans - same species, different color and a slightly milder, nuttier flavor. They're common in Italian dishes like minestrone and white bean stews, where the red variety would be too assertive.

What Is Milnot? Taste, Uses & More Explained

March 31, 2026

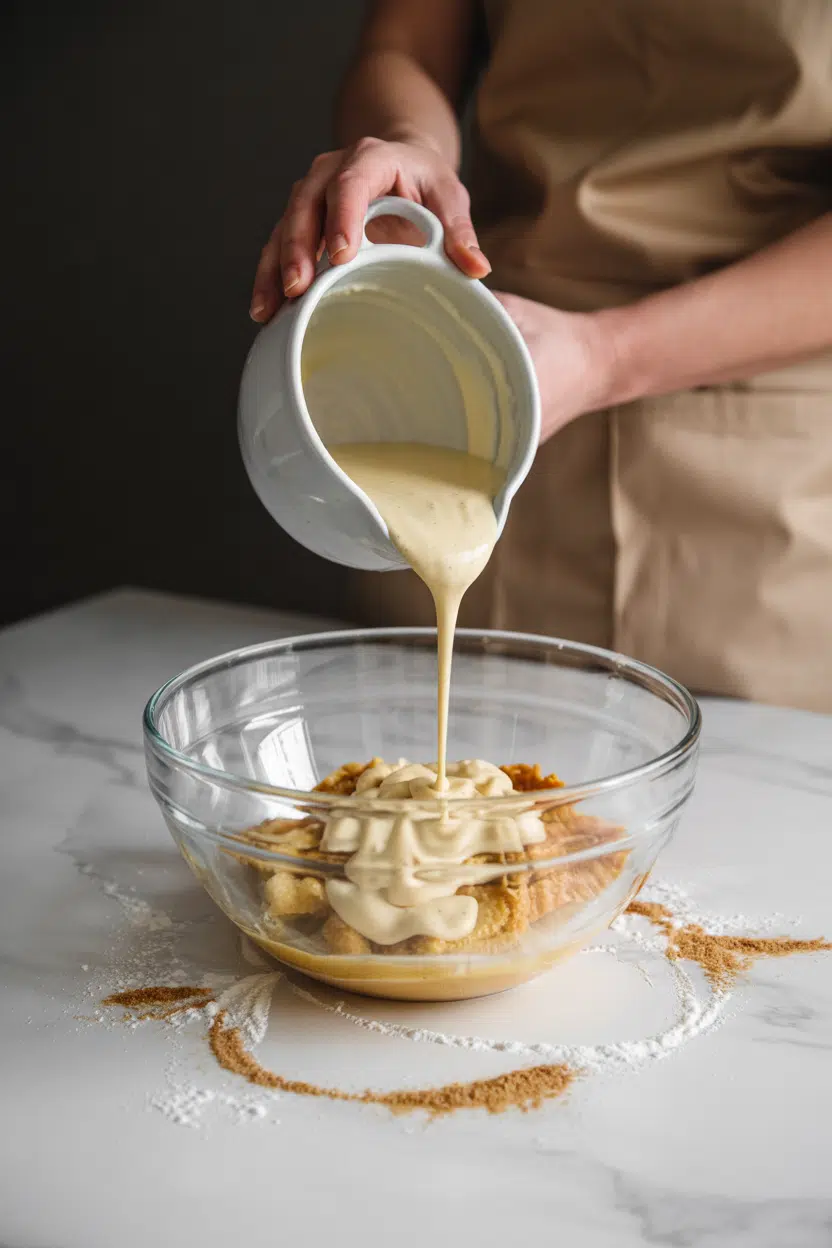
Tres leches cake is one of those desserts where the dairy does all the heavy lifting - and Milnot is exactly the kind of ingredient that makes it work.

What Is Milnot

This U.S. shelf-stable canned brand covers two distinct products: a thick, sugar-loaded sweetened condensed milk and a neutral, concentrated evaporated milk.

Both forms share the same fundamental logic of milk and its flavor distilled down to something denser, longer-lasting, and more structurally useful in cooking.

If you're building recipes around concentrated dairy or looking at replacements for milk in baked goods, Milnot shows up as a practical, pantry-stable answer.

QUICK SUMMARY

Milnot is a canned dairy brand producing both sweetened condensed and evaporated milk. The sweetened form is thick, very sweet, and caramel-toned. The evaporated form is neutral and concentrated. Both are shelf-stable for months and useful across desserts, sauces, and beverages.

🍬Flavor: Very sweet and caramelized (condensed); mild and milky (evaporated)
🥄Texture: Thick, syrupy (condensed) or silky and viscous (evaporated)
🍮Best Uses: Tres leches, fudge, no-bake pies, dulce de leche, cream sauces
📦Shelf Life: Years unopened; 3-5 days refrigerated once opened
🛒Buy It: Check for undented, rust-free cans; verify sweetened vs. unsweetened on the label

What Is Milnot?

Milnot is an American commercial dairy brand that produces canned milk in two forms: sweetened condensed and evaporated.

Both are shelf-stable products made by concentrating milk under heat, removing a significant portion of the water content before sealing the product in cans.

The sweetened condensed variety has sugar added during processing, which both preserves the product and gives it the thick, syrup-like consistency most people recognize.

The evaporated form contains no added sugar - it's simply concentrated whole milk, unsweetened, with roughly 60% of the water removed.

Milnot sits in the same commercial category as Carnation, the better-known national brand, and functions identically in recipes. You'll see it shelved as Milnot condensed milk, Milnot evaporated milk, or simply Milnot brand milk depending on the retailer.

  • 🥛 Sweetened condensed Milnot - sugar added, thick, intensely sweet, used in desserts and confections
  • 🫙 Evaporated Milnot - no added sugar, concentrated whole milk, used in savory and baking applications
  • 📍 Origin - United States commercial dairy processing, shelf-stable format developed for pantry convenience

What Does Milnot Taste Like?

milnot - What Is Milnot

Sweetened condensed Milnot tastes intensely sweet with a distinct caramelized dairy quality - the kind of baked-milk warmth you get when sugars and milk proteins cook together slowly. There's a toasted sugar undercurrent that sets it apart from plain sugar or fresh cream.

The evaporated form is a different experience. It tastes like concentrated whole milk: mildly rich, slightly fatty, and clean on the palate without any sweetness.

Heat deepens its milky density without pushing it into caramel territory.

Sensory SnapshotStrong Intensity
👅 Flavor
caramelized dairyvery sweettoasted sugarmilky richness
✋ Texture
thick and syrupysilky
👃 Aroma
warm baked-milktoasted sugar

Lime and coffee both perform well against the sweetened form - their acidity and bitterness give the caramelized dairy notes somewhere to land. That's why tres leches, key lime pie, and café de olla all rely on this pairing logic.

How to Use Milnot

Sweetened condensed Milnot does structural work in desserts - it doesn't just add sweetness, it sets the texture.

In no-bake pies and fudge, it provides enough body to hold the filling without baking.

In tres leches cake, it's one of three milks in the soaking liquid, responsible for the syrupy weight that makes the sponge collapse in exactly the right way.

For those needing a swap, milnot swaps that work covers the options that hold up in each application.

Dulce de leche is one of the most rewarding single-ingredient transformations you can do with sweetened condensed Milnot. Low, slow heat - either simmered in the sealed can or baked in a water bath - converts the sugars into a deep amber caramel used in flans, alfajores, and layered cakes.

Watch Out
Don't use sweetened condensed Milnot in recipes calling for unsweetened dairy - the sugar load will throw off balance in savory sauces and most baked goods that control their own sweetness.

Evaporated Milnot substitutes for cream in coffee, curry gravies, and chowders. It holds stable under heat without breaking, making it more reliable than fresh cream in long-simmered sauces.

It also reconstitutes with water as a fresh-milk stand-in in baking - useful when keeping milk fresh isn't practical.

How Milnot Is Used
MethodBest ForTip
🥗 Direct MixBatters, custards, soaking liquids, fudgeAdd sweetened condensed last - it's heavy and sinks unevenly if added too early
🍳 Low SimmerDulce de leche, caramel saucesKeep heat low; caramelized sugars burn fast above a gentle simmer
🫙 Baked InPies, flans, tres leches spongeEvaporated form stays stable at oven temps; sweetened form browns faster
☕ Whisked InCoffee, hot cocoa, milkshakesEvaporated Milnot adds creaminess without the sugar spike of the condensed form
Try It In
🍰Tres Leches CakeSweetened condensed Milnot is one of three milks that soak the sponge→

How to Buy and Store Milnot

Check the can before you buy. Dents along the seam, bulges, or surface rust are all rejection criteria - any of these compromise the seal and potentially the contents. Verify the label wording carefully: sweetened condensed and evaporated Milnot look similar on the shelf but behave completely differently in recipes.

Best Pick
If your recipe doesn't specify, evaporated Milnot is the more flexible of the two - you can control sweetness yourself and it won't overwhelm savory applications.

Unopened cans store in a cool, dry pantry for many months to years - for a full breakdown, see keeping milnot fresh.

Once opened, transfer to a sealed container and refrigerate; both forms keep 3-5 days.

Cream cheese pairings, such as in no-bake cheesecakes, also follow a short refrigerated window - knowing keeping cream cheese fresh helps plan the full dessert timeline.

Where to Start With Milnot

New to this ingredient? Start with the sweetened condensed form in a no-bake pie or fudge - both require no special equipment and show you immediately how the product sets and sweetens.

  • For dessert builders - sweetened condensed Milnot in fudge, no-bake cheesecake, or tres leches soaking liquid
  • For savory cooks - evaporated Milnot in chowders or cream-based pasta sauces where heat stability matters
  • For beverage use - either form works in coffee or smoothies; sweetened adds sugar, evaporated adds body only

Once you've used one form, the other follows naturally - they share the same shelf logic but serve different kitchens.

Frequently Asked Questions

Is Milnot the same as condensed milk?

Not exactly - Milnot is a brand, not a product type. It makes both sweetened condensed milk and evaporated milk. The sweetened condensed version is functionally identical to Carnation's condensed milk in recipes.

Can Milnot replace heavy cream?

Evaporated Milnot can substitute for cream in cooked sauces and soups - it holds under heat without breaking. However, it won't whip, and its fat content is lower, so texture will be slightly thinner.

How sweet is Milnot sweetened condensed milk?

Very sweet - sugar is added during processing and makes up a large portion of the product by weight. A single tablespoon carries significantly more sweetness than the same volume of whole milk or cream.

How do you make dulce de leche from Milnot?

Pour sweetened condensed Milnot into an oven-safe dish, cover tightly with foil, and bake in a water bath at 425°F for about 60-75 minutes until deep amber. Alternatively, simmer the sealed can in water for two to three hours.

Does evaporated Milnot work in Filipino desserts like halo-halo?

Both forms are used in Filipino desserts, but sweetened condensed Milnot is more common for halo-halo - it provides the signature sweetness drizzled over the shaved ice. Evaporated Milnot suits applications where you want creaminess without extra sugar.

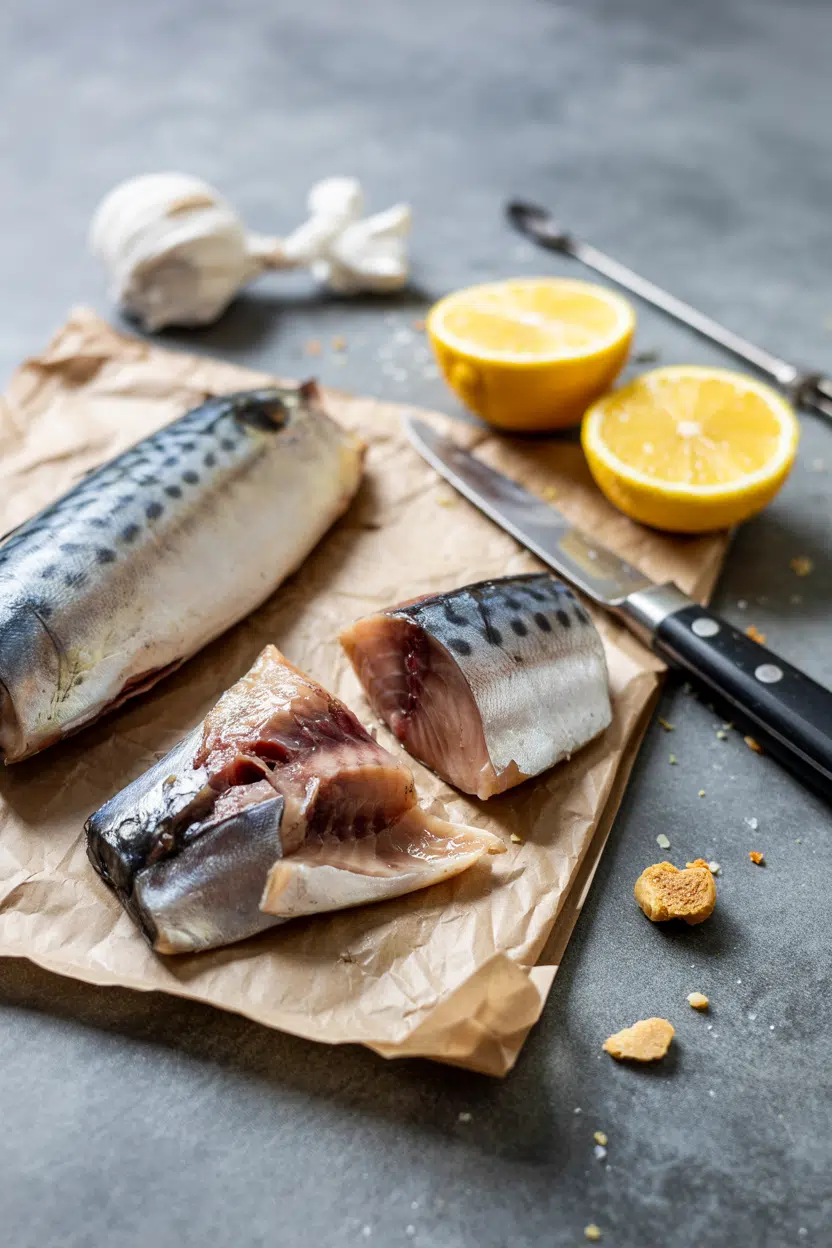
What Is Mackerel? Taste, Uses & Flavor Guide 2026

March 31, 2026

Mackerel does something in a dish that lean fish simply can't: it holds its own against bold sauces, high heat, and sharp acids without fading into the background.

What Is Mackerel

Its high oil content makes it self-basting on the grill and rich enough to anchor a meal without cream or butter.

Cooks who routinely reach for alternatives to tuna or replacements for sardine often find mackerel does the job more robustly than either.

Understanding how this fish behaves - across fresh, smoked, canned, and cured forms - changes how you shop for it, cook it, and pair it.

QUICK SUMMARY

Mackerel is a bold, oily pelagic fish with rich umami flavor, firm-flaky texture, and a pronounced marine aroma. Sold fresh, smoked, canned, or cured, it shines with bright acids and salty condiments. Smaller species like Atlantic and Pacific mackerel are the everyday choice; king mackerel is best used occasionally.

🐟Category: Oily pelagic fish, sold fresh, smoked, canned, or cured
👅Flavor: Rich umami, briny, oily, savory with a faint sweet finish
🔥Best For: Grilling, smoking, sushi curing, braising in bold sauces
🛒Buying Tip: Clear eyes, firm flesh, deep pink fillets - species label matters
📅Shelf Life: Fresh 1-2 days; smoked 5-7 days; canned unopened, months to years

What Is Mackerel?

Mackerel is an oily pelagic fish - meaning it lives and feeds near the ocean surface - found across the North Atlantic, Mediterranean, and Pacific coasts.

It travels in dense schools and is one of the fastest-swimming fish in commercial fisheries.

Several species fall under the mackerel name, and they vary considerably in size and fat content. The main ones worth knowing are listed below.

  • 🐟 Atlantic mackerel (Scomber scombrus) - The most common market fish in Europe and North America; moderate size, high oil, strong flavor.
  • 🐟 Pacific mackerel (Scomber japonicus) - Similar to Atlantic but slightly leaner; widely used in Asian markets.
  • 🐟 Spanish mackerel (Scomberomorus maculatus) - Milder and less oily than Atlantic; popular in the American South.
  • 🐟 King mackerel (Scomberomorus cavalla) - Largest of the group, lowest in fat relative to size, highest in mercury; best eaten sparingly.
  • 🐟 Saba - The Japanese name for chub mackerel (Pacific mackerel), central to Japanese cuisine.

All share the same visual markers: blue-green striped skin on top, silver-white belly, and dark, oily flesh. The common misspelling "mackeral" doesn't reflect any separate species - it's just one fish with many names.

What Does Mackerel Taste Like?

mackerel - What Is Mackerel

Mackerel has a strong, savory, umami-forward flavor backed by noticeable brininess and a faint sweetness at the finish. The high fat content gives it a silky, coating quality on the palate that milder fish don't produce.

Sensory SnapshotStrong Intensity
👅 Flavor
rich umamibrinyoily-savoryfaint sweet finish
✋ Texture
firm yet flakysilky-moist
👃 Aroma
strong marinepronounced fishy

Compared to sardines and anchovies - its closest flavor relatives - mackerel is meatier and less sharply saline. It's more intense than salmon but without salmon's buttery sweetness.

Cooks who regularly handle alternatives to anchovy will recognize the same umami depth here, though mackerel delivers it in a much larger, flakeable fillet rather than a dissolving paste.

Heat changes the texture noticeably. Raw mackerel (as in vinegar-cured saba shime-saba) has a denser, almost translucent bite.

Cooked through, it opens into large, moist flakes.

Golden Rule
Fresh mackerel should smell like the sea - strong but clean. Any sour or ammonia-like odor means it's past its window. Mackerel goes off faster than almost any fish in the case.

How to Use Mackerel

Mackerel's high fat content means it can withstand high, direct heat without drying out - a quality lean fish lacks.

It also means it actively needs acid or something sharp to balance its richness on the plate.

Knowing what to serve alongside matters: a good acid component lifts the whole dish, and you'll find plenty of tested ideas for dishes alongside mackerel worth bookmarking.

How Mackerel Is Used
MethodBest ForTip
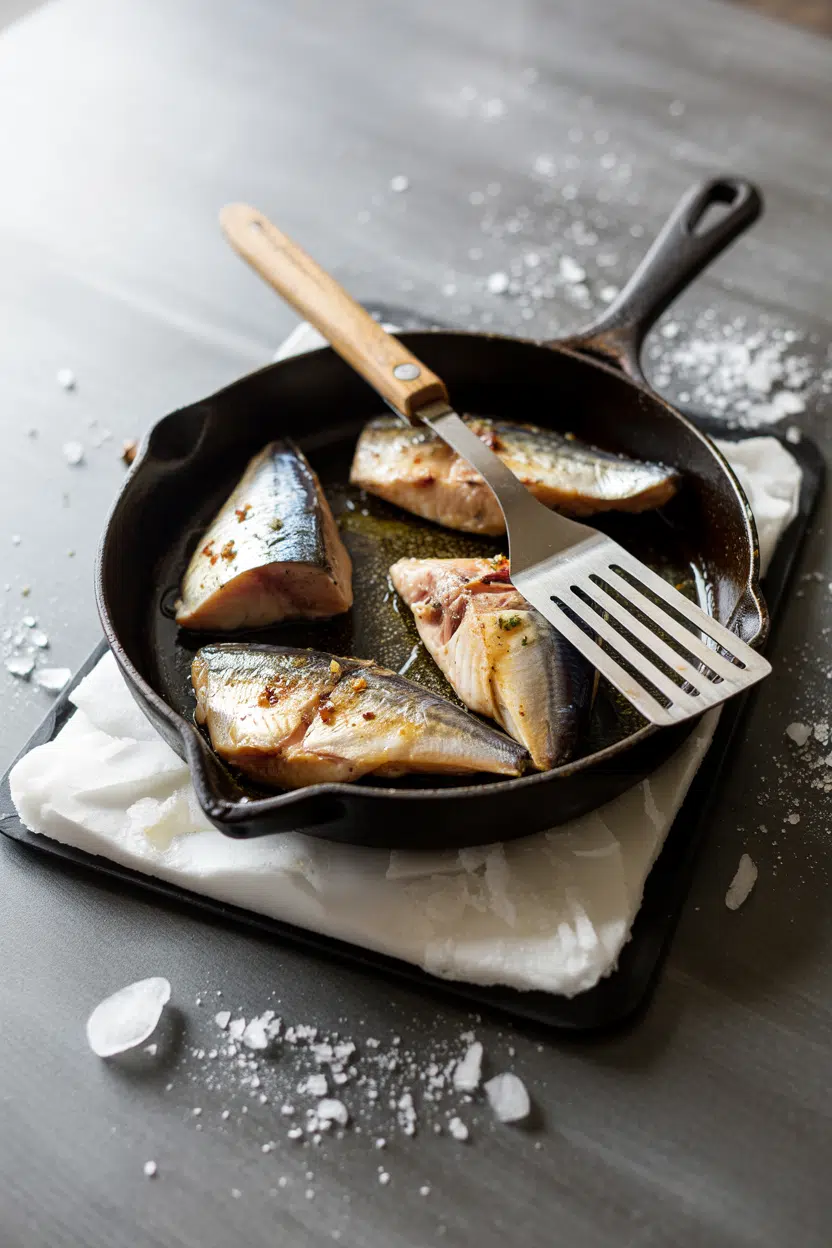
🔥 GrillingWhole fish or skin-on fillets; Japanese saba shioyakiScore the skin before grilling to prevent curling
🍳 Pan-searingCrispy-skin fillets with lemon and capersDry the skin thoroughly and press flat for the first 30 seconds
💨 SmokingFlaking into salads, pâtés, or spreading on breadHot-smoked fillets hold together; cold-smoked slices thinner
🧪 Curing/picklingSaba shime-saba (vinegar cure) for sushi; escabeche for tapasUse very fresh fish only - acidity doesn't kill all pathogens
🫕 BraisingTomato or mustard sauces; canned mackerel in stewsDon't overcook - the flesh breaks apart quickly in liquid

Across cuisines, mackerel shows up differently but consistently. Japanese cooking uses it as saba in shioyaki (salt-grilled with grated daikon) and shime-saba (vinegar-cured for sushi). Scandinavian and British traditions lean on smoking and pickling, while Mediterranean cuisines - Spanish and Portuguese especially - preserve it in olive oil or work it into escabeche.

Korean cooks typically salt-grill or braise it with gochujang.

Pairings follow a clear logic: bright acids first (lemon, rice vinegar, pickled ginger), then something salty and pungent (soy sauce, mustard, capers), then a neutral starch to carry it (boiled potatoes, crusty bread, steamed rice).

Delicate floral wines and mild neutral herbs get overwhelmed; go with dill, parsley, or chives instead.

Try It In
🐟Japanese Saba Shioyake Grilled MackerelThe salt-grill technique that lets mackerel's flavor do the work→

How to Buy and Store Mackerel

Fresh mackerel spoils fast. Buy it the day you plan to cook it, and look for these signals at the counter:

  • Skin - Glossy, unbroken, and tightly striped. Dull or slipping skin is a red flag.
  • Eyes - Clear and bulging. Sunken, cloudy eyes mean age.
  • Flesh - Deep pink to reddish and springy to the touch, not mushy.
  • Smell - Strong and marine, never sour or ammonia-sharp.
  • Species label - Buy fish labeled by species (Atlantic, Pacific, Spanish) to know what fat level and size you're getting.
Watch Out
King mackerel carries higher mercury levels than smaller species. Pregnant women, nursing mothers, and young children should choose Atlantic or Pacific mackerel instead and check current advisories.

For canned mackerel, check the can for dents or bulging and verify the expiry.

At home, keep fresh mackerel on ice or in the coldest part of the fridge - proper guidance on keeping mackerel fresh is worth reviewing before you shop.

Opened canned mackerel moves to a sealed container and keeps for two days refrigerated.

For smoked mackerel, expect 5-7 days in the fridge.

If you know you won't cook it same-day, freeze fillets immediately; quality holds for 2-3 months frozen.

Where to Start With Mackerel

Mackerel rewards cooks who lean into its intensity rather than fight it.

If the strong flavor is unfamiliar, start with smoked mackerel flaked into a potato salad with lemon and dill - the acid and starch do the balancing work for you.

From there, try a pan-seared skin-on fillet.

Grilling whole and vinegar-curing for suba shime-saba are worth attempting once you're confident with the fish's behavior.

If mackerel still isn't your match, a guide to alternatives to mackerel covers the closest options by flavor and fat level.

Frequently Asked Questions

Is mackerel a fatty fish?

Yes. Atlantic and Pacific mackerel have among the highest fat levels of any commonly eaten fish. That fat is predominantly omega-3 fatty acids (EPA and DHA), which is why mackerel appears frequently in nutrition guidance for heart health.

How do you cook mackerel without it tasting too fishy?

Use it very fresh and pair it with sharp acid - lemon juice, rice vinegar, or capers. Cooking the skin crispy also helps, since rendering the fat reduces the raw marine intensity. Avoid low-heat, slow methods, which can amplify the smell.

What is the difference between king and Atlantic mackerel?

King mackerel is significantly larger and carries higher mercury levels, making frequent consumption inadvisable. Atlantic mackerel is smaller, oilier relative to its size, and lower in mercury - the better everyday choice for most people.

Can you eat mackerel raw (saba) safely?

Only if it has been commercially frozen first, which kills parasites. The vinegar cure in shime-saba changes the texture but does not eliminate parasites on its own. Sushi-grade saba at reputable Japanese restaurants has been properly frozen before service.

Is smoked mackerel the same as fresh mackerel in terms of nutrition?

Mostly, though smoked mackerel is significantly higher in sodium. The omega-3 content and protein remain largely intact after smoking. Check labels on commercial smoked mackerel - salt levels vary widely by brand and style.

Korean Samgyetang Ginseng Chicken Soup

March 31, 2026

A whole chicken simmering in ginger-scented broth with sticky rice tucked inside. That's Samgyetang-Korean ginseng chicken soup that warms from the inside out.

Korean Samgyetang Ginseng Chicken Soup served on a plate

The pot does most of the work. You stuff the bird, simmer it gently, and walk away for 90 minutes.

This is what we make when we need something nourishing that doesn't require constant attention. The rice cooks inside the chicken while the ginseng-infused broth builds flavor on its own.

QUICK SUMMARY

Samgyetang is a Korean chicken soup where a whole young bird gets stuffed with glutinous rice, ginseng, and jujubes, then simmered until tender. The key is a gentle simmer-not a rolling boil-to keep the broth clear and the meat from toughening. You'll know it's ready when the chicken meat pulls easily from the bone and the rice inside is soft but intact.

⏱️Time reality: 20 minutes prep, 90 minutes hands-off simmering-plan 2 hours total
🔑First critical move: Soak glutinous rice 45 minutes before stuffing to ensure even cooking
⚠️Watch out: Boiling turns broth cloudy and toughens chicken-keep at gentle simmer

Table of Contents

Toggle
  • Why This Recipe Works
  • What You'll Need
    • Ingredient Details
  • Ingredient Swaps
  • What to Serve With It
  • Store and Reheat
  • Frequently Asked Questions
  • Korean Samgyetang Ginseng Chicken Soup
    • Method 
    • Tried this recipe?

Why This Recipe Works

Simmering a whole chicken at low heat extracts collagen without breaking down the meat fibers too quickly. The glutinous rice inside absorbs the herbal broth while releasing starch that gives the soup body. For a different approach to tender chicken with bold flavor, try this classic chicken dish-it uses high heat instead of slow simmering.

Quick Reference
⏱️
Prep Time
20 min
🔥
Cook Time
90 min
⏰
Total Time
110 min
🍽️
Servings
2-4 servings
📊
Difficulty
Medium
🏷️
Category
Main Dish
💡
Quick Tip
Simmer gently; avoid boiling for clear broth
🎯
Best For
Weeknight | Health Recovery | Special Occasion

What makes this work:

  • Young whole chicken gives tender meat - Cornish hens or small fryers have less connective tissue and cook evenly in 90 minutes
  • Pre-soaked glutinous rice absorbs broth without bursting - 45 minutes of soaking softens the grains so they cook through inside the chicken cavity
  • Gentle simmer keeps broth golden and clear - temperatures between 180-200°F extract flavor without creating foam or cloudiness
  • Ginseng and jujubes build herbal sweetness slowly - the long cooking time mellows the bitterness and releases aromatic oils
  • Skimming foam every 15 minutes removes impurities - this step is what separates restaurant-quality broth from murky home versions
Quick Tip
Fill the chicken cavity just under the neck opening-overstuffing causes the rice to burst out during simmering and makes the broth starchy.

What You'll Need

Ingredients for Korean Samgyetang Ginseng Chicken Soup

Grab a whole young chicken (2-3 pounds), glutinous rice, and fresh ginseng root at an Asian market. Everything else-garlic, jujubes, ginger-keeps in your pantry for weeks. If you want something with shorter cook time and bolder spice, check out this quick pakoras dish that skips the long simmer entirely.

🍗
Protein
  • 1 whole young chicken (2-3 lbs) or Cornish hen
🍜
Starch
  • ½ cup glutinous rice (sticky rice)
🧄
Aromatics
  • 1-2 fresh ginseng roots
  • 6-8 garlic cloves
  • 1-inch ginger knob
  • 2 scallions
🫙
Other
  • 6-8 jujubes (dried red dates)
  • Salt and black pepper
  • 8 cups water or chicken broth

Ingredient Details

  • Whole young chicken
    Use a 2-3 pound bird or Cornish hen-larger chickens take longer and the meat dries out before the rice cooks through
  • Glutinous rice
    Soak 45 minutes minimum-dry rice won't cook fully inside the chicken and will stay crunchy in spots
  • Fresh ginseng root
    Look for firm, unblemished roots at Asian markets-dried ginseng works but needs a 2-hour soak and tastes less aromatic
  • Jujubes (dried red dates)
    These add natural sweetness without sugar-skip them and the broth tastes flat and one-note
  • Garlic cloves
    Leave whole and unpeeled-they soften during simmering and can be squeezed out and eaten with the chicken
  • Water vs. chicken broth
    Water is traditional and lets the ginseng shine-broth adds richness but can overpower the herbal notes
  • Scallions
    Add just before serving to keep them bright green-cooking them in the broth turns them drab and mushy

Ingredient Swaps

You can adapt this based on what's in stock at your local market or what you already have. Most swaps work without changing the cooking method. For a completely different comfort meal with similar warming qualities, try a fluffy mashed potato dish that takes half the time.

Four swaps that work:

  • Fresh ginseng root → dried ginseng - Soak dried ginseng in warm water for 2 hours before adding to the pot; flavor is slightly less aromatic but still herbal
  • Glutinous rice → short grain white rice - The stuffing won't be as sticky but it still absorbs the broth; cooking time stays the same
  • Whole young chicken → Cornish hen - Perfect for single servings; reduce simmer time to 60-75 minutes and check doneness earlier
  • Jujubes → dried cranberries - Sweetness level is similar but the flavor profile shifts to tart instead of mellow; use half the amount

Fresh ginseng

Works for: Traditional flavor, aromatic broth, special occasions

Skip if: Can't find at Asian markets or budget is tight-dried works fine

Dried ginseng

Works for: Longer shelf life, easier to find, budget-friendly

Skip if: You want maximum aromatic punch-fresh has stronger herbal notes

Instructions

Plan for 20 minutes of active prep, then 90 minutes of simmering while you do other things. The chicken cooks at a gentle bubble-not a rolling boil-so the broth stays clear. If you need a side that comes together during the simmer, this homemade dressing recipe takes 10 minutes and adds tangy contrast to the rich broth.

  1. Soak the rice and prep the chicken. Rinse ½ cup glutinous rice under cold water until the water runs clear, then soak in a bowl for 45 minutes. Rinse the whole chicken inside and out, pat dry with paper towels, and trim any excess fat from the cavity opening.

  2. Stuff the chicken. Drain the soaked rice and stuff it into the chicken cavity along with 4-6 garlic cloves (unpeeled), 1-2 fresh ginseng roots, and 4-5 jujubes. Don't pack it tight-leave about an inch of space at the top so the rice has room to expand.

  3. Start the simmer. Place the stuffed chicken in a large pot and add 8 cups of water or chicken broth. Add the remaining garlic cloves, jujubes, ginger, and 1 scallion (cut in half). Bring to a boil over high heat, then immediately reduce to low so the broth barely bubbles.

  4. Simmer and skim. Let the chicken simmer for 90 minutes, skimming foam from the surface every 15 minutes with a ladle or strainer. The broth should never boil hard-adjust the heat as needed to maintain a gentle simmer. Check doneness at the 60-minute mark by pulling on a leg; if the meat resists, continue simmering.

  5. Rest and serve. Turn off the heat and let the soup rest for 10 minutes. Remove the chicken to a cutting board, slice or pull apart the meat, and serve in bowls with the broth, rice, and softened garlic cloves. Garnish with chopped scallions and serve with salt and black pepper on the side for seasoning.

Golden Rule
Keep the broth at a temperature where you see small bubbles breaking the surface-180-200°F on a thermometer. Boiling makes the broth cloudy and toughens the chicken meat.

What to Serve With It

Samgyetang is already a complete meal, but banchan (small side dishes) add variety to the table. For more ideas on building a full Korean spread, check out these teriyaki chicken meal planning ideas-many of the same principles apply.

Side Dish Prep Why It Works How to Serve
Kimchi Easy Acidity cuts through the rich broth and adds crunch Serve cold in a small dish on the side
Steamed rice Easy Soaks up extra broth and adds neutral bulk Spoon broth over rice in individual bowls
Pickled vegetables Easy Bright, tangy contrast to the herbal soup Arrange on a small plate alongside the main bowl
Blanched spinach with sesame Easy Adds freshness and a different texture Drizzle with sesame oil and serve at room temperature
Korean pancakes (jeon) Medium Hearty and shareable for special occasions Slice and serve with soy-vinegar dipping sauce

Three ways to serve it:

  • As a health tonic meal - Serve the soup with just salt and pepper on the side; let diners season to taste and eat the softened garlic cloves whole
  • For weeknight comfort - Add a side of steamed rice and quick-pickled cucumbers; the rice soaks up broth while the pickles add crunch
  • For special occasions - Set out assorted banchan (kimchi, seasoned bean sprouts, pickled radish) and serve with ginseng tea or barley tea
Best Pick
A simple salt-and-pepper dipping mix is all you need-the broth is already seasoned. Mix coarse salt with freshly ground black pepper and let diners sprinkle it on their chicken pieces.

Store and Reheat

Leftover soup keeps its clarity and flavor for 3-4 days in the fridge. The rice inside the chicken will absorb more broth as it sits, so you may need to add water when reheating. If you're looking for another make-ahead option with similar comfort appeal, this simple homemade fry reheats well and adds crunch to any meal.

Method Time Best For
🍳 Stovetop 10-15 min over low heat Preserving delicate texture and flavor-add ¼ cup water if broth is too thick
📦 Microwave 3-5 min medium power Quick warming of single servings-cover to prevent splattering
🔥 Oven 15 min at 325°F (160°C) Even reheating of whole chicken portions-cover with foil to prevent drying

For best results when storing:

  • Cool the soup quickly - Transfer to shallow containers and refrigerate within 2 hours to prevent bacterial growth
  • Store chicken and broth separately if possible - The chicken meat stays firmer when not sitting in liquid for days
  • Add water when reheating - The rice absorbs broth over time, so thin it out with ¼-½ cup water or fresh broth
  • Freeze only the broth - The chicken and rice get mushy after freezing; freeze strained broth for up to 1 month and use for other soups
  • Reheat only what you'll eat - Repeated reheating breaks down the chicken texture and dulls the ginseng flavor

Frequently Asked Questions

Can I substitute dried ginseng for fresh in Samgyetang?

Yes-soak dried ginseng in warm water for 2 hours before adding it to the pot. The flavor is slightly less aromatic but still delivers the herbal notes you want.

How should I store and reheat leftover Samgyetang soup?

Store in an airtight container in the fridge for 3-4 days. Reheat on the stovetop over low heat for 10-15 minutes, adding ¼ cup water if the broth has thickened-the rice absorbs liquid as it sits.

How do I know when the chicken and rice are fully cooked?

Pull gently on a chicken leg at the 60-minute mark-if the meat pulls away easily from the bone, it's done. The rice inside should be soft but still hold its shape when you spoon it out.

My broth turned cloudy; how can I prevent this?

Keep the soup at a gentle simmer-small bubbles breaking the surface, not a rolling boil. Skim foam every 15 minutes and lower the heat if the broth starts boiling hard.

What side dishes pair well with Samgyetang for serving?

Kimchi, pickled vegetables, and blanched spinach with sesame oil add acidity and crunch. Steamed rice works if you want to soak up extra broth.

Korean Samgyetang Ginseng Chicken Soup served on a plate

Korean Samgyetang Ginseng Chicken Soup

No ratings yet
Samgyetang is a Korean chicken soup featuring a whole young chicken stuffed with glutinous rice, ginseng, and jujubes, then gently simmered until tender. This slow simmer method creates a clear, flavorful broth and soft meat that pulls from the bone easily.
Print Recipe Pin Recipe
Prep Time 20 minutes mins
Cook Time 1 hour hr 30 minutes mins
Total Time 1 hour hr 50 minutes mins
Servings: 4 servings
Course: Main Dish
Cuisine: Korean
Ingredients Method Notes

Ingredients
  

  • 1 whole young chicken 2-3 pounds or Cornish hen, rinsed and dried
  • 0.5 cup glutinous rice soaked 45 minutes
  • 1-2 pieces fresh ginseng root firm, unblemished
  • 6-8 cloves garlic unpeeled, divided
  • 1 inch ginger knob, sliced
  • 2 pieces scallions 1 used in broth plus chopped for garnish
  • 6-8 pieces jujubes dried red dates
  • 8 cups water or chicken broth
  • salt for seasoning
  • black pepper for seasoning

Method
 

  1. Rinse glutinous rice under cold water until clear, then soak for 45 minutes. Rinse the chicken inside and out, pat dry, and trim excess fat from cavity.
    0.5 cup glutinous rice, 1 whole young chicken
  2. Drain soaked rice and stuff inside chicken cavity along with 4-6 unpeeled garlic cloves, 1-2 ginseng roots, and 4-5 jujubes. Leave about an inch space at the cavity opening to allow rice expansion.
    0.5 cup glutinous rice, 6-8 cloves garlic, 1-2 pieces fresh ginseng root, 6-8 pieces jujubes, 1 whole young chicken
  3. Place stuffed chicken in a large pot and add 8 cups water or chicken broth. Add remaining garlic cloves, jujubes, sliced ginger, and 1 scallion cut in half.
    1 whole young chicken, 8 cups water, 6-8 cloves garlic, 6-8 pieces jujubes, 1 inch ginger, 2 pieces scallions
  4. Bring broth to a boil over high heat, then immediately reduce to low so it simmers gently with only small bubbles. Skim foam every 15 minutes for 90 minutes. At 60 minutes, check chicken doneness by pulling a leg; continue simmering if needed.
    1 whole young chicken, 8 cups water
  5. Turn off heat and let soup rest for 10 minutes. Remove chicken, slice or pull apart meat, and serve with broth, rice, softened garlic cloves, and chopped scallions. Season with salt and black pepper as desired.
    1 whole young chicken, 8 cups water, 6-8 cloves garlic, 2 pieces scallions, salt, black pepper

Notes

  • Keep broth at gentle simmer with small bubbles to maintain clarity and tender meat.
  • Soak glutinous rice at least 45 minutes to ensure it cooks fully inside the chicken.
  • Skim foam every 15 minutes during simmer to remove impurities and keep broth clear.

Tried this recipe?

Let us know how it was!

How Long Does Ketchup Last? [Storage Guide]

March 31, 2026

Leftover ketchup from last weekend's cookout is sitting on your counter, and now you're wondering whether it belongs in the fridge or the trash.

Can You Freeze Ketchup

That question has a clear answer - but the right storage method depends heavily on whether the bottle is opened or still sealed.

The vinegar and sugar in ketchup act as natural preservatives, which is why the taste of ketchup carries that sharp, sweet tang even after months on a shelf.

Just as mold in yogurt explained shows how quickly dairy can turn, condiments have their own failure timeline worth knowing.

QUICK SUMMARY

An unopened bottle lasts 6-18 months in the pantry. Once opened, refrigerate it - 6 months in the fridge is the safe window, with peak flavor in the first 3 months. Freezing is possible but changes texture. Never leave an opened bottle at room temperature long-term.

🥫Pantry (unopened): 6-18 months, until printed best-by date
🧊Fridge (opened): Up to 6 months; best within first 3 months
❄️Freezer: 6-12 months; expect texture separation after thawing

How Long Does Ketchup Last?

Ketchup's shelf life splits cleanly into two phases: before you break the seal and after.

An unopened bottle relies on the airtight seal plus the natural preservative power of vinegar and sugar, so room temperature is fine until the best-by date.

Once that seal is broken, oxygen and repeated dipping enter the picture, which accelerates color and flavor changes. Frequent exposure to warm kitchen air shortens quality faster than most people expect.

Ketchup Shelf Life
MethodStateDurationNotes
🏠 PantryUnopened6-18 monthsKeep until printed best-by date; cool, dark spot
🏠 PantryOpened1-2 months maxQuality drops fast; warm air speeds darkening
🧊 FridgeOpenedUp to 6 monthsBest within 3 months for peak tang and color
❄️ FreezerOpened6-12 monthsTexture separates; stir or blend after thawing

Opened ketchup left on the counter for more than a month or two isn't dangerous immediately, but flavor and color will have noticeably declined.

Refrigeration is the straightforward fix - it preserves that characteristic deep red and keeps the vinegar-forward tang intact far longer.

How to Store Ketchup

The container and location both matter more than most people realize. Glass bottles outperform thin plastic for long pantry storage because glass limits flavor transfer and slows oxidation - a real difference after several months on the shelf.

Golden Rule
Write the opening date on the cap. Ketchup quality declines gradually even though preservatives extend safety, and that date tells you exactly where you stand.

For day-to-day use, here's what to do at each stage:

  • 🏠 Pantry (unopened) - Store bottles upright in a cool, dark spot away from the stove or sunlight; heat accelerates color loss.
  • 🧊 Fridge (opened) - Refrigerate promptly after first use; keep the original bottle sealed tightly, and wipe the rim and cap threads after each pour to block mold.
  • 🔄 Squeeze bottles - Invert briefly before use to bring ketchup toward the spout, but store upright long-term to protect the cap seal.
  • 📦 Container swap - Only transfer to a clean glass jar if the original bottle is cracked or damaged; unnecessary transfers introduce air.

Much like how long mayonnaise keeps depends on airtight storage after opening, ketchup quality hinges on minimizing oxygen exposure every single use.

Can You Freeze Ketchup?

Freezing ketchup is possible, and it works - with one major trade-off. Tomato solids and liquid separate during freezing, so what comes out of the freezer rarely squeezes the same way it did before going in.

Watch Out
Don't assume frozen and thawed ketchup will behave like fresh from the bottle. Squeezing it often yields a watery, separated stream - blend first, then use.

If you have a large quantity to preserve, freezing still beats throwing it out. The process is straightforward:

  1. Portion it Pour ketchup into a freezer-safe airtight container, leaving about 1 inch of headspace for expansion; heavy-duty freezer bags with air pressed out also work.
  2. Label and seal Write the date on the container - frozen ketchup holds best quality for 6-12 months, and that label keeps you honest.
  3. Freeze flat Lay bags flat to freeze, which speeds the process and makes thawing more even.
  4. Thaw overnight Move the container to the fridge the night before you need it; never thaw at room temperature.
  5. Blend before use Use an immersion blender after thawing to reincorporate separated tomato solids and restore a smoother texture.

The approach is similar in principle to freezing soy sauce - both condiments survive the freezer, but separation after thawing requires an extra step to fix.

Signs Ketchup Has Gone Bad

Ketchup spoils more slowly than most condiments, but it does spoil. Trust your eyes and nose before anything else - never taste-test suspected ketchup to decide, because mold can produce toxins that aren't detectable by flavor alone.

Signs It's Gone Bad
👀
VisualBlack, green, or fuzzy mold near the cap · Significant darkening to brown or black · Liquid separation that won't re-emulsify after shaking
👃
SmellSharp fermented off-odor · Rotten smell distinct from normal vinegar tang
✋
TextureSlimy film on the surface · Gritty or grainy consistency from bacterial breakdown

Discard immediately if you spot mold, persistent sliminess, or that fermented off-smell.

Color darkening alone - without smell or texture changes - can be a quality issue rather than a safety one, but it signals the ketchup is well past its peak.

Keeping Ketchup at Its Best

Good storage habits extend both safety and quality without much effort. If your bottle is past its prime or you're running low, swapping out ketchup for a tomato-based alternative is always an option worth considering.

Shortcut
Prefer glass bottles over thin plastic when buying unopened ketchup - glass slows oxidation and won't transfer off-flavors during long pantry storage.

A few habits that make a real difference:

  • 🧽 Wipe the rim and cap - After every use, clean the bottle threads; mold targets residue left on the cap more than the ketchup itself.
  • 📅 Respect the 3-month fridge window - Ketchup stays safe up to 6 months refrigerated, but tang and color are noticeably better in the first half of that window.
  • 🌡️ Keep it away from heat sources - Storing an opened bottle near the stove is the fastest route to flavor loss and darkening.
  • 🧂 Know your preservatives - The [shelf life of sugar guide](https://forkliftkitchen.com/shelf-life-of-sugar/) explains why sugar is so effective at slowing microbial growth, which is why ketchup lasts as long as it does.

Frequently Asked Questions

How long does opened ketchup last in the fridge?

Up to 6 months, though flavor and color are best in the first 3 months. After that, the ketchup remains safe if there are no mold or off-smell signs, but the tang and deep red noticeably fade.

Can you freeze store-bought ketchup?

Yes, for 6-12 months of best quality. Expect tomato solids and liquid to separate after thawing - blending with an immersion blender before use partially restores the texture.

Is expired ketchup safe to eat?

Usually, if the bottle is still sealed and stored properly - best-by dates on unopened ketchup indicate quality, not a hard safety cutoff. Once opened, inspect for mold, off-smells, or sliminess regardless of the date.

Does homemade ketchup need refrigeration?

Yes, always. Homemade ketchup lacks the precise vinegar concentration and commercial processing that give store-bought versions pantry stability. Refrigerate immediately and use within 2-3 weeks.

Can ketchup go bad if left out overnight?

One night at room temperature won't spoil it - the vinegar and sugar create a hostile environment for bacteria. However, repeated overnight exposure adds up and accelerates quality loss well before the 2-month opened-pantry limit.

What Is Milk Powder? [Taste, Uses & More]

March 31, 2026

Open a tin of milk powder and the scent that rises is unmistakably dairy - warm, faintly sweet, with a subtle cooked-cream note that fresh milk never quite delivers.

What Is Milk Powder

That concentrated character is exactly what makes it useful far beyond emergency pantry backup.

Bakers add it dry to enrich bread dough; confectioners rely on it for stable ganache; South Asian cooks fold it into burfi and peda where it becomes the structural backbone of the sweet.

If you're already navigating shelf-stable dairy, understanding sweetened condensed milk stand-ins or buttermilk powder swaps that work gives you a clearer picture of where milk powder sits in that landscape.

QUICK SUMMARY

Milk powder is dehydrated dairy - liquid milk reduced to a fine, shelf-stable powder via spray or drum drying. It tastes like concentrated, slightly cooked milk, reconstitutes easily with water, and works both dry and liquid in a wide range of recipes.

🥛Flavor: Clean milky sweetness with a mild cooked-cream or caramel edge
🍞Best Uses: Baking enrichment, confectionery, yogurt boosting, spice rubs
📦Shelf Life: Unopened 6-24 months; opened best within 3-6 months sealed airtight
🌡️Storage: Cool, dry, away from light; airtight container after opening
⚠️Dietary: Contains lactose and milk proteins - not suitable for dairy allergies or lactose intolerance

What Is milk powder?

Milk powder is liquid cow's milk with virtually all moisture removed, leaving behind milk solids - protein, fat, lactose, and minerals - in a dry, free-flowing form.

Two main methods produce it: spray drying, which atomizes liquid milk into a hot-air chamber and is the global standard, and drum drying, which presses milk onto heated rollers and yields a slightly coarser product.

Several distinct types exist, and the label matters for cooking:

  • 🥛 Nonfat dry milk (NFDM) - Fat removed; longest shelf life; standard for baking and protein shakes.
  • 🧈 Whole milk powder (WMP) - Full fat retained; richer flavor with nutty caramel notes; shorter shelf life due to fat oxidation.
  • ⚡ Instant milk powder - Agglomerated particles for faster, lump-free dissolution; the type most commonly sold for household drinking use.

It's also sold under the names powdered milk and, in industrial contexts, NFDM or WMP. Unlike evaporated milk, which retains moisture, milk powder is fully dry and shelf-stable at room temperature until opened.

What Does milk powder Taste Like?

milk powder - What Is Milk Powder

Reconstituted milk powder tastes like a slightly cooked version of fresh whole milk - the heat used in processing creates mild dairy-caramel notes that fresh milk lacks.

Think of it as sitting between fresh milk and evaporated milk on a flavor scale: more concentrated than the former, less intensely cooked than the latter.

Sensory SnapshotModerate Intensity
👅 Flavor
milky sweetcooked creammild caramel
✋ Texture
fine powder drycreamy when reconstituted
👃 Aroma
mild dairynutty

Whole milk powder leans noticeably nuttier and creamier because its retained fat carries more volatile aromatic compounds.

Nonfat dry milk is cleaner and more neutral - useful precisely because it doesn't introduce extra flavor.

One important caveat: oxidized or stale milk powder develops a flat, cardboard-like taste that no amount of reconstitution will mask, which is why storage conditions matter as much as expiry date.

Golden Rule
If reconstituted milk powder tastes flat or papery rather than mildly sweet, the powder has oxidized. Don't use it in delicate applications - the off-note will carry through to your finished dish.

How to Use milk powder

Milk powder works in two distinct modes: dry, added directly to a mix, and reconstituted into liquid milk before use. Which route you choose changes both the texture and flavor contribution.

Adding it dry to bread dough is one of the most efficient applications - the lactose accelerates browning via Maillard reaction, and the casein and whey proteins tighten gluten structure without adding extra liquid.

The same logic applies to dry spice rubs and soup mixes, where it adds dairy body with zero moisture.

How Milk Powder Is Used
MethodBest ForTip
🧂 Dry additionBread, cake batter, pancake mix, spice rubsSift in with dry ingredients; 2-4 tablespoon per cup of flour is standard
💧 ReconstitutedDrinking, coffee, sauces, yogurt boostingUse warm water (40-50°C) and whisk well; instant powder dissolves faster
🍫 Bloomed in warm liquidGanache, chocolate tempering, confectioneryWhisk into warm cream or melted chocolate before adding other solids
🥛 Boosted into dairyHomemade yogurt, ricotta, paneerAdd 2-4 tablespoon per litre of fresh milk to increase solids and improve yield

In South Asian sweets, whole milk powder is the primary ingredient in burfi and peda - cooked with ghee and sugar until the mixture forms a fudge-like mass.

When you don't have fresh milk on hand, swapping out milk entirely is also an option, but reconstituted milk powder handles most baking jobs cleanly.

It pairs naturally with cocoa, cardamom, cinnamon, butter, and yeast-based doughs.

Shortcut
For homemade yogurt, stir 3 tablespoons of nonfat dry milk per litre of fresh milk before heating. It boosts solids without affecting culture activity and gives you a thicker, Greek-style set without straining.
Try It In
🥗Blue Cheese Dressing (Homemade)Milk powder boosts creamy body without thinning the dressing→🌿Dill Yogurt Dressing (Homemade)Use powder-boosted yogurt for a thicker, more stable base→🌰Cinnamon Sugar Roasted NutsA pinch of milk powder in the coating deepens caramel browning→

How to Buy and Store milk powder

Start with the label. Instant milk powder dissolves fastest and suits everyday household use; NFDM works better for baking and protein applications; WMP delivers richer flavor for confectionery.

Before buying, check for visible clumping through the packaging - clumps signal moisture exposure, which degrades both flavor and solubility.

Watch Out
Whole milk powder oxidizes faster than nonfat varieties because of its fat content. Buy it in smaller quantities if you don't use it regularly, and check the expiry date - older stock from bulk bins is a risk.

Storage follows the same principles as storing milk correctly in its liquid form: keep it away from heat, light, and moisture.

Unopened, NFDM lasts up to 24 months; WMP closer to 6-12 months due to fat oxidation.

After opening, transfer to an airtight container and use within 3-6 months.

Watch for the early milk powder spoilage signs - off aroma, yellow tinge, or persistent clumping - before using an older batch.

Start Here With Milk Powder

Not sure which type to reach for first?

Buy nonfat dry milk - it's neutral, lasts longer, and handles baking, yogurt, and reconstitution without adding fat variables.

Move to whole milk powder once you're making confectionery or South Asian sweets where the richer flavor matters.

If you're dairy-free or lactose-sensitive, this ingredient won't work for you - the is goat cheese lactose free guide is a good starting point for understanding which dairy products pose fewer issues, and milk powder stand-ins covers your best non-dairy alternatives.

Frequently Asked Questions

Is milk powder the same as powdered milk?

Yes - the two names refer to the same product. "Powdered milk" is the common consumer term; "milk powder" is more standard in commercial and industrial contexts. Both describe dehydrated milk solids regardless of fat content.

How much milk powder equals 1 cup of milk?

Most brands recommend 3-4 tablespoons of powder per 1 cup (240ml) of warm water. Check your specific package - instant varieties often dissolve at a lower powder-to-water ratio than regular NFDM.

Can milk powder be used in coffee?

Yes, and instant milk powder dissolves most reliably in hot coffee without clumping. The flavor is slightly sweeter and more cooked than fresh milk but works well in strong espresso or filter coffee where the difference is subtle.

Can you use milk powder instead of fresh milk in baking?

Yes - reconstituted milk powder substitutes 1:1 for fresh milk in most baked goods. Added dry, it actually improves browning and structure in bread due to its concentrated lactose and protein content.

Does milk powder go bad?

It does, though the timeline varies by type. Nonfat dry milk lasts up to 24 months unopened; whole milk powder degrades faster due to fat oxidation. The clearest spoilage signal is a flat, cardboard-like smell rather than a clean dairy scent.

Slow Cooker Korean Beef Short Ribs

March 31, 2026

Beef short ribs simmering in soy sauce, brown sugar, and garlic until the meat falls off the bone. That's what happens when you let the slow cooker do the heavy lifting for 7-8 hours.

Slow Cooker Korean Beef Short Ribs served on a plate

The searing step before slow cooking locks in flavor. Skip it and you get bland, gray meat instead of caramelized edges.

This works for weeknight dinners when you want something that tastes like you tried, or for meal prep when you need protein sorted for the week. The sauce thickens into a glossy coating that makes plain rice worth eating.

QUICK SUMMARY

Slow Cooker Korean Beef Short Ribs deliver fall-off-the-bone tender meat with a savory-sweet glaze that balances soy sauce, brown sugar, and aromatics. The key is searing the ribs first to lock in flavor, then letting low heat work for 7-8 hours. Use well-marbled ribs and limit liquid to prevent a watery sauce.

⏱️Time Reality: 15 minutes prep, then walk away for 6-8 hours while the slow cooker works.
🔥Critical First Step: Sear ribs in a hot skillet for 2-3 minutes per side before slow cooking.
⚠️Common Mistake: Too much liquid dilutes the sauce-use just enough to barely cover the ribs.

Table of Contents

Toggle
  • Why This Recipe Works
  • What You'll Need
    • Ingredient Details
  • Ingredient Swaps
  • What to Serve With It
  • Store and Reheat
  • Frequently Asked Questions
  • Slow Cooker Korean Beef Short Ribs
    • Method 
    • Tried this recipe?

Why This Recipe Works

Rich mains need something to cut through, and ribs does exactly that. For a version that comes together quickly, a tender ribs variation uses the grill instead of the slow cooker for char in under 30 minutes.

Quick Reference
⏱️
Prep Time
15 min
🔥
Cook Time
6-8 hours
⏰
Total Time
6 hr 15 min
🍽️
Servings
4-6 servings
📊
Difficulty
Medium
🏷️
Category
Main Dish
💡
Quick Tip
Sear ribs before slow cooking for flavor
🎯
Best For
Weeknight | Meal prep | Entertaining
  • Searing before slow cooking locks in flavor and creates a caramelized crust that stays even after hours in liquid
  • Well-marbled ribs render fat slowly, keeping meat tender and adding richness to the sauce
  • Brown sugar caramelizes gently during the long cook, balancing the salty soy sauce without burning
  • Garlic and ginger penetrate the meat over hours, creating warmth without overwhelming the savory base
  • Minimal liquid prevents dilution-just enough to steam and coat, not drown the ribs
Quick Tip
Heat your skillet over medium-high for 3 full minutes before adding ribs-proper searing needs a hot pan.

What You'll Need

Ingredients for Slow Cooker Korean Beef Short Ribs

Most people skip ribs, but it balances the meal. We keep a batch ready for nights like this - easy salad side takes 10 minutes and cuts through all that richness.

🍗
Protein
  • Beef short ribs (bone-in, well-marbled)
🥢
Sauce Base
  • Soy sauce
  • Brown sugar
  • Sesame oil
  • Rice vinegar (optional)
🧄
Aromatics
  • Garlic (minced)
  • Ginger (fresh, grated)
  • Green onions (garnish)
🌶️
Heat & Seasoning
  • Gochujang (optional, for spice)
  • Black pepper

Ingredient Details

  • Beef short ribs
    Look for ribs with visible marbling and a thick fat cap-lean cuts dry out and get tough after hours of cooking.
  • Soy sauce
    Use regular soy sauce for deeper color and salt, or tamari if you need gluten-free. Low-sodium works but you'll need to adjust seasoning.
  • Brown sugar
    Dark brown sugar adds molasses depth; light brown works but tastes slightly less complex. Either caramelizes slowly without burning.
  • Garlic
    Fresh garlic minced fine infuses the sauce over hours. Jarred garlic works in a pinch but lacks the sharp bite of fresh.
  • Ginger
    Fresh ginger grated on a microplane gives warmth without fibrous texture. Ground ginger doesn't penetrate meat the same way.
  • Sesame oil
    Toasted sesame oil added at the end keeps its nutty aroma. Adding it too early makes the flavor fade.
  • Gochujang
    This Korean chili paste adds fermented depth and heat. Start with 1 tablespoon if you're heat-sensitive-you can always add more.

Ingredient Swaps

A good rolls can make or break the plate. For a version that comes together quickly, homemade rolls recipe takes 20 minutes in the air fryer and adds crunch to the plate.

  • Soy sauce → tamari for gluten-free-same umami punch, no wheat
  • Brown sugar → honey or maple syrup for different sweetness-may caramelize faster, watch the broiler
  • Beef short ribs → boneless chuck roast for budget stretch-less fat means slightly less tender, reduce cook time by 1 hour
  • Gochujang → sriracha or chili paste for heat without fermented funk-adjust to taste, start with less

Slow Cooker

Works for: Hands-off cooking, deep flavor development over 6-8 hours, forgiving timing

Skip if: You need dinner in under 2 hours or want charred, crispy edges

Pressure Cooker/Instant Pot

Works for: Fast cooking (45-60 minutes), same tender texture, weeknight-friendly

Skip if: You want maximum flavor penetration or worry about overcooking (less margin for error)

Instructions

Rolls adds the contrast this plate needs, but timing matters. We keep a batch ready for nights like this - smooth creamy dip balances the savory ribs with tangy creaminess.

  1. Sear the ribs. Heat a large skillet over medium-high for 3 minutes. Pat ribs dry, season with black pepper, then sear 2-3 minutes per side until browned. Don't crowd the pan-work in batches if needed.
  2. Build the sauce. In the slow cooker, whisk together soy sauce, brown sugar, minced garlic, grated ginger, and gochujang if using. Stir until sugar dissolves.
  3. Slow cook low. Add seared ribs to the slow cooker, turning to coat in sauce. Cook on low 7-8 hours until meat pulls easily from the bone but doesn't shred completely.
  4. Reduce the sauce. Transfer ribs to a plate. Pour sauce into a skillet and simmer over medium heat 5-7 minutes until thickened and glossy. Skim off excess fat if needed.
  5. Finish and serve. Return ribs to the thickened sauce, turn to coat. Drizzle with sesame oil, garnish with sliced green onions. Optional: broil 2-3 minutes 6 inches from heat for caramelized edges.
Golden Rule
Don't skip the searing step-it adds a caramelized crust that stays intact even after hours in the slow cooker, preventing flat, gray meat.

What to Serve With It

Vegetables brings the color this plate needs. For a version that comes together quickly, quick vegetables dish builds a balanced meal without turning on the oven-or check bacon wrapped asparagus meal planning ideas for more options that work with rich, saucy mains.

Side Dish Prep Why It Works How to Serve
Steamed white rice Easy Neutral base absorbs rich sauce without competing Serve in bowls, spoon extra sauce over rice
Sautéed spinach or bok choy Easy Adds freshness and cuts through fatty richness Cook quickly with garlic, serve alongside ribs
Kimchi Easy Provides acidity and crunch to balance soft meat Serve cold in a small dish on the side
Cucumber salad Easy Adds cool, crisp contrast to warm, saucy ribs Toss with rice vinegar and sesame seeds
Korean scallion pancakes Medium Complementary savory bites for entertaining Slice into wedges, serve with dipping sauce

Three ways to serve it:

  • Over rice bowls with kimchi and sautéed greens for a complete weeknight meal
  • With japchae (Korean glass noodles) and pickled vegetables for entertaining
  • As meal prep protein over cauliflower rice with steamed broccoli
Shortcut
Use store-bought kimchi and pre-cooked rice to get dinner on the table in 5 minutes once the ribs are done.

Store and Reheat

Salad cuts through all that richness. For a version that comes together quickly, a fresh salad on the side adds crunch and brightness without extra cooking.

Method Time Best For
🍳 Stovetop 5-7 min over low heat Maintaining texture, slowly reheating without drying
🔥 Oven 15-20 min at 300°F Even reheating without overcooking, batch portions
📦 Microwave 2-3 min on medium power Quick single servings, watch to avoid toughness

For best results when storing:

  • Let ribs cool completely before refrigerating to prevent condensation that dilutes sauce
  • Store in shallow airtight containers-ribs keep 3-4 days in the fridge, up to 3 months frozen
  • Chill sauce 30 minutes, then skim off solidified fat layer before reheating for cleaner flavor
  • Reheat gently over low heat with a splash of water if sauce looks too thick
  • Freeze ribs and sauce separately for easier portioning and faster thawing

Frequently Asked Questions

How long to cook slow cooker Korean beef short ribs?

Cook on low 7-8 hours until meat pulls easily from the bone without shredding completely. High heat (4-5 hours) works but yields slightly less tender meat.

Can I make slow cooker Korean beef short ribs ahead?

Yes-cook fully, cool, then refrigerate up to 3 days or freeze up to 3 months. Reheat gently on the stovetop over low heat to avoid drying out the meat.

Can I substitute boneless beef short ribs?

Boneless ribs work but cook faster (6-7 hours on low) and may turn out less tender than bone-in. Check for doneness an hour earlier to avoid overcooking.

How do I know when slow cooker ribs are tender enough?

Meat should pull away from the bone with gentle pressure from a fork but still hold its shape. If it falls apart into shreds, it's overcooked.

Why are my slow cooker Korean short ribs bland?

You likely skipped searing or used too much liquid, which dilutes the sauce. Always brown ribs first and use just enough liquid to barely cover them-then reduce the sauce after cooking.

Slow Cooker Korean Beef Short Ribs served on a plate

Slow Cooker Korean Beef Short Ribs

No ratings yet
Slow Cooker Korean Beef Short Ribs deliver tender, fall-off-the-bone meat glazed with a savory-sweet sauce made from soy sauce, brown sugar, and aromatics. Searing the ribs before slow cooking locks in flavor and creates a caramelized crust. The slow cooker works low and slow for 7-8 hours, making this dish perfect for easy weeknight dinners or meal prep.
Print Recipe Pin Recipe
Prep Time 15 minutes mins
Cook Time 7 hours hrs
Total Time 7 hours hrs 15 minutes mins
Servings: 5 servings
Course: Dinner, Main Dish
Cuisine: Asian-Inspired, Korean
Ingredients Equipment Method Notes

Ingredients
  

  • 3 pounds beef short ribs bone-in, well-marbled
  • 1 cup soy sauce
  • ½ cup brown sugar packed, can use dark or light brown
  • 4 cloves garlic minced fresh
  • 1 tablespoon fresh ginger grated
  • 1 tablespoon gochujang optional, for spice
  • 1 teaspoon black pepper freshly ground
  • 1 teaspoon sesame oil to drizzle at end
  • 2 tablespoons green onions sliced, for garnish

Equipment

  • Large skillet For searing ribs before slow cooking
  • Slow cooker For slow cooking ribs low and slow
  • Skillet For reducing sauce after slow cooking

Method
 

  1. Heat a large skillet over medium-high heat for 3 minutes. Pat ribs dry with paper towels and season with black pepper. Sear ribs in the hot skillet for 2-3 minutes per side until browned and caramelized. Work in batches if the pan is crowded.
    3 pounds beef short ribs, 1 teaspoon black pepper
  2. In the slow cooker, whisk together soy sauce, brown sugar, minced garlic, grated ginger, and gochujang if using until the sugar dissolves.
    1 cup soy sauce, ½ cup brown sugar, 4 cloves garlic, 1 tablespoon fresh ginger, 1 tablespoon gochujang
  3. Add the seared ribs to the slow cooker and turn them to coat in the sauce. Cover and slow cook on low for 7-8 hours until the meat pulls easily from the bone but is not falling apart.
    3 pounds beef short ribs
  4. Carefully transfer the ribs to a plate. Pour the leftover sauce into a skillet and simmer over medium heat for 5-7 minutes until thick and glossy. Skim off any excess fat if needed.
  5. Return the ribs to the thickened sauce and turn to coat well. Drizzle sesame oil over the ribs and garnish with sliced green onions. Optionally, broil ribs for 2-3 minutes about 6 inches from the heat to caramelize edges before serving.
    1 teaspoon sesame oil, 2 tablespoons green onions

Notes

  • Do not skip searing the ribs; it creates a caramelized crust that prevents bland gray meat after slow cooking.
  • Use just enough liquid to barely cover the ribs to avoid a watery sauce-reduce sauce after cooking for concentration.
  • Well-marbled ribs render fat slowly, keeping meat tender and enriching the sauce.

Tried this recipe?

Let us know how it was!

What Is Little Gem Lettuce? [Taste, Uses & More]

March 31, 2026

Most people reach for romaine or iceberg without a second thought, treating little gem lettuce as a specialty item reserved for restaurant menus.

What Is Little Gem Lettuce

That's a mistake - this compact, sweet-hearted green is one of the few lettuces that holds its structure under heat, supports whole-leaf presentation without shredding, and still delivers better flavor raw than either of those standbys.

If you've ever wondered why a wedge salad with blue cheese recipe looks so neat on the plate, or why restaurant Caesar salads use perfect single leaves instead of torn chunks, little gem is likely behind it.

It's also a smarter choice for lettuce cups than the iceberg lettuce stand-ins most home cooks default to.

QUICK SUMMARY

Little gem lettuce is a compact, romaine-type leafy green with a sweet, mildly nutty flavor and firm, crunchy leaves. It's suited to raw salads, grilled halves, and whole-leaf presentations. Whole heads keep about 5-8 days refrigerated.

🌱Type: Compact romaine-type leafy green, also called mini romaine
👅Flavor: Sweet, buttery, mildly nutty with light bitterness at outer leaves
🔪Best Uses: Lettuce boats, grilled halves, wedge salads, raw composed salads
🛒Buy It: Look for compact, heavy heads with a pale, creamy heart
📅Shelf Life: 5-8 days whole; 1-2 days once cut or dressed

What Is little gem lettuce?

Little gem lettuce is a miniature romaine-type variety that originated in Western Europe, with roots in 19th- and 20th-century English and French growing traditions.

Each head grows to roughly the size of a large fist - tightly packed, upright, and dense enough to feel heavy for its size.

Also sold as mini romaine, gem lettuce, or baby romaine, it sits between a full romaine heart and a butterhead in form.

The outer leaves are darker green and firm; the inner leaves pale into a creamy, almost ivory heart that's notably tender.

Unlike loose-leaf varieties, little gem holds its shape when cut or separated. That structural integrity is what makes it so well-suited to single-serving formats.

It's worth knowing your alternatives to little gem lettuce if you can't source it locally, though no substitute fully replicates its combination of crunch and compact size.

What Does little gem lettuce Taste Like?

little gem lettuce - What Is Little Gem Lettuce
Sensory SnapshotMild Intensity
👅 Flavor
sweetbutterymildly nuttylight bitter
✋ Texture
firm crunchtender heart
👃 Aroma
fresh greenmildly sweet

Little gem tastes like romaine with the watery dilution removed. The sweetness is more concentrated, the bitterness is softer, and the overall impression is cleaner than a full romaine heart.

Raw, the outer leaves snap with real crunch and carry a faint nuttiness that iceberg never achieves. The inner heart reads as almost buttery - a contrast in the same head that makes it interesting in composed plates.

Heat changes things noticeably. A brief char on the grill caramelizes the cut surface, deepening the sweetness and adding a light smokiness while the core stays just barely warm and still crisp.

Long cooking collapses the structure, so heat works here only in short bursts.

Golden Rule
Keep cooking time under 3 minutes per side when grilling little gem. Any longer and the tight head softens past the point of recovery.

How to Use little gem lettuce

Whole-leaf service is where little gem earns its reputation. The cup shape of each leaf is self-contained and sturdy enough to hold fillings like tuna salad, spiced ground lamb, or quinoa without tearing - making it a natural for Korean Beef Lettuce Wraps or Larb Lettuce Cups where leaf integrity matters from plate to mouth.

Grilling is the second major technique. Halve the heads lengthwise, brush with olive oil, and place cut-side down over direct heat.

Understanding the differences between broiling vs grilling matters here - grilling gives direct char on the cut face, while broiling tends to wilt the outer leaves before the center warms through.

Raw in salads, little gem offers something most lettuces don't: both crunch and tenderness in the same bite, depending on which part of the head you're eating. It holds dressing without wilting quickly, which is why it works in anchovy vinaigrette and Caesar-style applications.

If anchovy isn't an option, swapping out anchovy in a dressing still produces a well-balanced result.

  • 🥗 Raw whole leaves - use as cups for canapés, tacos, or single-bite salad portions
  • 🔥 Grilled halves - char cut-side down 2-3 minutes, dress warm with sherry vinaigrette or shaved Parmesan
  • 🧈 Quick butter sauté - wilts in under 2 minutes, pairs with poached eggs or soft herbs for a warm salad
  • 🥩 Wedge-style service - halve or quarter the head and treat like a mini wedge with blue cheese or anchovy dressing

Pairing-wise, little gem aligns with lemon and sherry vinaigrettes, goat cheese, crispy pancetta, toasted almonds or pine nuts, and fresh herbs like tarragon or chives.

A Marouli Greek Lettuce Salad shows how well it carries olive oil and herb dressings without losing its body.

Try It In
🥩Korean Beef Lettuce WrapsThe cup shape holds spiced filling without tearing→🌿Larb Lettuce CupsFirm leaves carry the herby filling intact to the table→🥗Marouli Greek Lettuce SaladShows how well the leaves hold olive oil dressings→

How to Buy and Store little gem lettuce

At the market, weight is the best indicator of quality. A good head feels dense and heavy relative to its small size, with tightly packed leaves and no visible browning at the edges.

Avoid heads where the outer leaves are limp or where you can see darkened, slimy patches between layers.

Quick Tip
Don't wash little gem heads before storing. Moisture trapped between tightly packed leaves speeds up rot. Wash only what you're about to use.

Store whole heads unwashed in a perforated bag or loosely wrapped in a damp paper towel in the crisper drawer.

For a broader look at keeping lettuce fresh across different varieties, the approach for little gem is the same: cold, slightly humid, and unwashed until serving.

A detailed breakdown of how long little gem lettuce keeps under different conditions is worth reviewing - but the short answer is 5-8 days whole, and no more than 1-2 days once cut or dressed.

Where to Start with Little Gem

Little gem makes the most sense if you need structure. It's the right choice when whole-leaf presentation matters, when you're grilling a salad, or when a wedge format needs a smaller, sweeter head than full romaine provides.

If those romaine lettuce swaps that work aren't hitting the texture you want, little gem is the natural next step.

Start with the simplest use: halved raw, dressed with lemon vinaigrette and shaved Parmesan. From there, try a quick grill.

Both formats show exactly what this lettuce does that others don't.

Frequently Asked Questions

Is little gem lettuce the same as romaine?

No - they're related but different. Little gem is a compact, separate variety bred for smaller heads and a sweeter, more concentrated flavor. Full romaine grows longer and looser with a more neutral, slightly bitter taste throughout.

Can you cook little gem lettuce?

Yes, briefly. Grilling cut-side down for 2-3 minutes caramelizes the surface while keeping the center crisp. Quick butter sautés and shallow braising also work, but anything over 5 minutes collapses the head's tight structure.

How long does little gem lettuce last in the fridge?

Whole, unwashed heads last 5-8 days in the crisper drawer. Once cut or dressed, use within 1-2 days - the dense inner heart holds up slightly better than loose-leaf types once exposed.

Is little gem lettuce healthier than iceberg?

Nutritionally, yes. Little gem provides more vitamin A, vitamin K, and folate per serving than iceberg. Its compact heart is also more nutrient-dense per bite than iceberg's water-heavy leaves.

Can you use little gem lettuce in place of iceberg for lettuce cups?

Yes, and it generally works better. Little gem leaves are firmer and cup-shaped naturally, so they hold fillings without splitting. They also add more flavor than the neutral taste of iceberg.

Italian Chicken Scarpariello

March 31, 2026

Crispy chicken skin with tangy heat from cherry peppers and bright vinegar. That's what happens when you sear bone-in thighs in a hot skillet and simmer them with Italian sausage and garlic.

Italian Chicken Scarpariello served on a plate

The pan builds layers of flavor as you go. Searing renders the fat, deglazing pulls up the browned bits, and simmering melds everything into a glossy sauce.

Make this for weeknight dinners when you want something that looks impressive but mostly cooks itself. It works for casual entertaining too-just double the batch.

QUICK SUMMARY

Italian Chicken Scarpariello combines crispy-skinned chicken thighs with spicy Italian sausage, hot cherry peppers, and red wine vinegar in a tangy pan sauce. The key is searing the chicken skin-side down until deeply golden, then simmering everything together so the sauce reduces and coats each piece. Best for weeknight dinners or casual entertaining when you want bold flavor without complicated technique.

⏱️Timing: 45 minutes total-15 to prep, 30 to cook, no marinating required
🔥Critical Move: Sear chicken skin-side down 6-8 minutes undisturbed for crispy golden crust
⚠️Watch Out: Harsh vinegar taste means you added it too early-add after searing, simmer gently

Why This Recipe Works

A good chicken can make or break the plate. For a version that comes together quickly, try a juicy chicken on the side when you need variety without starting from scratch.

Quick Reference
⏱️
Prep Time
15 min
🔥
Cook Time
30 min
⏰
Total Time
45 min
🍽️
Servings
4 servings
📊
Difficulty
Medium
🏷️
Category
Main Dish
💡
Quick Tip
Sear chicken skin until golden and crisp
🎯
Best For
Weeknight | Entertaining

Key techniques that deliver results:

  • Dark meat stays juicy under high heat - bone-in thighs with skin crisp up while the meat stays tender through simmering
  • Deglazing captures browned bits - red wine vinegar pulls flavor from the pan and adds bright acidity to balance rich sausage
  • Sausage seasons as it cooks - Italian sausage releases fat and spices into the sauce, building depth without extra steps
  • Gentle simmer concentrates sauce - 15 minutes uncovered reduces liquid to a glossy coating that clings to chicken
  • Internal temp 165°F guarantees doneness - check with an instant thermometer so you don't rely on timing alone
Quick Tip
Let chicken sit at room temperature 15 minutes before cooking-cold meat seizes when it hits the hot pan and won't brown evenly

What You'll Need

Ingredients for Italian Chicken Scarpariello

Rich mains need something to cut through, and this dip does exactly that. For a version that comes together quickly, try a creamy sauce side when you need contrast without extra steps.

🍗
Chicken
  • 4 bone-in skin-on chicken thighs or drumsticks
🌭
Sausage
  • 2 links Italian sausage, sliced
🧄
Aromatics
  • 4 cloves garlic, sliced
  • 1 sprig fresh rosemary
🌶️
Heat & Acid
  • ½ cup hot cherry peppers, halved
  • ¼ cup red wine vinegar
  • ½ teaspoon crushed red pepper flakes
🫙
Liquids
  • 1 cup chicken broth
  • 1 lemon, halved

Ingredient Details

  • Chicken thighs or drumsticks
    Use bone-in skin-on cuts-bones add flavor to the sauce and skin crisps during searing; boneless dries out and lacks depth
  • Italian sausage
    Sweet or hot both work-hot adds more spice, sweet balances the vinegar; slice into ½-inch rounds so they brown evenly
  • Hot cherry peppers
    Look for jarred peppers in the pickle aisle-they add tangy heat; banana peppers work if you want milder flavor
  • Red wine vinegar
    Adds bright acidity that cuts through rich meat-white wine vinegar or lemon juice work but change the flavor slightly
  • Fresh rosemary
    One sprig is enough-too much tastes piney; dried rosemary works in a pinch, use 1 teaspoon and add with the broth
  • Chicken broth
    Low-sodium gives you control over salt-water works if that's what you have, but the sauce won't be as savory
  • Garlic
    Slice instead of mincing-sliced garlic sweetens as it simmers and won't burn as easily when you deglaze

Ingredient Swaps

This dip adds the contrast this plate needs, but timing matters. For a version that comes together quickly, try crispy fries side dish when you need something that finishes fast.

Common swaps that work:

  • Banana peppers instead of hot cherry peppers - milder heat with less tang, good for spice-sensitive eaters
  • White wine vinegar or lemon juice instead of red wine vinegar - slightly different acid profile but still bright and cutting
  • Chorizo instead of Italian sausage - more robust smoky flavor, possibly spicier depending on the brand
  • Chicken breasts instead of thighs - less juicy, cook 5-8 minutes less to avoid drying out

Hot Cherry Peppers

Works for: Bold heat lovers, authentic Scarpariello flavor, adds tangy brine to sauce

Skip if: You avoid spice, can't find jarred peppers, serving kids

Banana Peppers

Works for: Mild heat preference, family meals, still adds tang without burn

Skip if: You want traditional spicy kick, prefer sharper acidity in sauce

Chicken Thighs

Works for: Juicy tender meat, forgiving cook time, crispy skin, rich flavor

Skip if: You prefer white meat, watching fat intake, need faster cooking

Chicken Breasts

Works for: Leaner option, faster cook time, milder flavor

Skip if: You want juicy dark meat, crispy skin matters, prefer forgiving cuts

Instructions

Potato wedges adds the contrast this plate needs, but timing matters. For a version that comes together quickly, try golden roasted potatoes when you need something that bakes while you cook.

  1. Sear the chicken skin-side down in a heavy-bottom skillet over medium-high heat for 6-8 minutes undisturbed. The skin should release easily when it's ready-if it sticks, wait another minute. Flip and cook 3-4 minutes on the other side, then remove to a plate.
  2. Cook sliced Italian sausage in the same pan for 4-5 minutes until browned. Stir occasionally so the rounds crisp on both sides. Push sausage to the edges, add sliced garlic, and cook 30 seconds until fragrant-don't let it burn.
  3. Add red wine vinegar and scrape the pan with a wooden spoon to pull up browned bits. Simmer 2-3 minutes until the vinegar reduces by half and smells less sharp. This step builds the base flavor of the sauce.
  4. Stir in chicken broth, hot cherry peppers, crushed red pepper flakes, and rosemary sprig. Nestle the chicken pieces back into the pan skin-side up. Simmer uncovered 15 minutes until the sauce reduces by about one-third and the chicken reaches 165°F internal temperature.
  5. Turn off the heat, squeeze lemon over the chicken, and let it rest 5 minutes in the sauce. This rehydrates the meat and lets the flavors settle. Discard the rosemary sprig before serving.
Golden Rule
Add vinegar only after searing the chicken-adding it too early makes the meat tough and the sauce harsh; simmer gently to mellow the acidity

What to Serve With It

Most people skip caesar salad, but it balances the meal. For complete savory chicken dish ideas, check the full pairing guide for more options that work.

Side Dish Prep Why It Works How to Serve
Roasted Potatoes Easy Absorbs tangy sauce, adds comforting starch to balance spice Toss cubed potatoes with olive oil and roast at 425°F for 25 min
Steamed Green Beans Easy Fresh crunch cuts richness from sausage and chicken fat Steam 5 min until bright green, toss with butter and salt
Garlic Bread Easy Scrapes up every drop of sauce, adds buttery contrast Toast sliced baguette with garlic butter under broiler 2-3 min
Creamy Polenta Medium Smooth base soaks up sauce, feels luxurious for entertaining Simmer polenta 20 min, stir in butter and parmesan before serving
Arugula Salad Easy Peppery greens cut through rich spicy chicken Toss arugula with lemon juice, olive oil, shaved parmesan

Three ways to serve it:

  • Weeknight plate: Scarpariello over roasted potatoes with steamed green beans on the side
  • Casual entertaining: Serve family-style in the skillet with creamy polenta and garlic bread for dipping
  • Meal prep bowls: Portion chicken and sauce over rice with a simple arugula salad
Best Pick
Roasted potatoes soak up the tangy sauce without competing with the bold flavors-toss them in the oven while you cook the chicken

Store and Reheat

The caesar salad works best when it hits the table at the same time as the main. We keep a batch ready for nights like this-try easy caesar salad side for something that holds up well.

Method Time Best For
🍳 Stovetop 8-10 min over medium-low heat Reheating evenly without drying out, keeps sauce glossy
🔥 Oven 15 min at 350°F (175°C) Maintaining crispy skin and warming sauce through
📦 Microwave 2-3 min covered with sauce Quick reheating for one portion, may soften skin

For best results when storing:

  • Cool chicken to room temperature within 30 minutes-spread pieces in a shallow container so they chill faster
  • Store in an airtight container with all the sauce-chicken dries out if stored separately
  • Fridge storage lasts 3-4 days-reheat only what you'll eat to preserve texture
  • Freeze up to 2 months in freezer-safe bags-squeeze out air, label with date, thaw overnight in fridge
  • Add a splash of chicken broth when reheating-restores moisture and loosens the sauce if it thickened

Frequently Asked Questions

Can I substitute chicken breasts in Scarpariello?

Yes, but reduce cook time by 5-8 minutes since breasts dry out faster than thighs. Check internal temp at 165°F and rest in the sauce to keep meat moist.

How long can leftover Scarpariello be stored in the fridge?

Store in an airtight container with sauce for 3-4 days. Reheat on the stovetop over medium-low heat, adding a splash of broth if the sauce thickened.

How do I know when the chicken is cooked thoroughly?

Check with an instant-read thermometer-chicken is done at 165°F in the thickest part. Juices should run clear, not pink, when you pierce the meat.

What if my sauce tastes too vinegary or bitter?

Simmer the sauce 3-5 minutes longer to mellow the acid, or add a pinch of sugar and extra chicken broth to balance. Next time, add vinegar only after searing and keep heat at gentle simmer.

Can I scale this recipe for larger groups?

Double the ingredients and use two skillets or work in batches-overcrowding prevents proper searing. Keep finished chicken warm in a 200°F oven while you cook the rest.

Italian Chicken Scarpariello served on a plate

Italian Chicken Scarpariello

No ratings yet
Italian Chicken Scarpariello features crispy skin-on bone-in chicken thighs simmered with spicy Italian sausage, hot cherry peppers, and tangy red wine vinegar. The searing and simmering create a rich, glossy sauce perfect for weeknight dinners or casual entertaining.
Print Recipe Pin Recipe
Prep Time 15 minutes mins
Cook Time 30 minutes mins
Total Time 45 minutes mins
Servings: 4 servings
Course: Main Dish
Cuisine: Italian
Ingredients Equipment Method Notes

Ingredients
  

  • 4 pieces chicken thighs bone-in, skin-on
  • 2 links Italian sausage sliced into ½-inch rounds
  • 4 cloves garlic sliced
  • 1 sprig fresh rosemary
  • 0.5 cup hot cherry peppers halved
  • 0.25 cup red wine vinegar
  • 0.5 teaspoon crushed red pepper flakes
  • 1 cup chicken broth low sodium recommended
  • 1 whole lemon halved, for squeezing at end

Equipment

  • Heavy-bottom skillet Used for searing and simmering the chicken and sausage
  • Wooden spoon Used to scrape the pan during deglazing
  • Instant-read thermometer To check chicken internal temperature for doneness

Method
 

  1. Sear the chicken skin-side down in a heavy-bottom skillet over medium-high heat for 6-8 minutes undisturbed. The skin should release easily when ready; if it sticks, wait another minute. Flip and cook 3-4 minutes on the other side, then remove to a plate.
    4 pieces chicken thighs
  2. Cook sliced Italian sausage in the same pan for 4-5 minutes until browned, stirring occasionally to crisp both sides. Push sausage to the edges of the pan, add sliced garlic, and cook for 30 seconds until fragrant without burning.
    2 links Italian sausage, 4 cloves garlic
  3. Add red wine vinegar and scrape the pan with a wooden spoon to lift browned bits. Simmer for 2-3 minutes until the vinegar reduces by half and the sharpness mellows.
    0.25 cup red wine vinegar
  4. Stir in chicken broth, hot cherry peppers, crushed red pepper flakes, and rosemary sprig. Nestle the chicken pieces back into the pan skin-side up. Simmer uncovered for 15 minutes until the sauce reduces by about one-third and chicken reaches 165°F internal temperature.
    1 cup chicken broth, 0.5 cup hot cherry peppers, 0.5 teaspoon crushed red pepper flakes, 1 sprig fresh rosemary, 4 pieces chicken thighs
  5. Turn off the heat, squeeze lemon over the chicken, and let it rest in the sauce for 5 minutes. Discard the rosemary sprig before serving.
    1 whole lemon, 4 pieces chicken thighs

Notes

  • Sear chicken skin-side down undisturbed for a crispy golden crust.
  • Add vinegar only after searing to avoid harsh acidity.
  • Simmer gently to reduce and concentrate sauce flavors.

Tried this recipe?

Let us know how it was!

What Is Masa Harina? [Taste, Uses & More]

March 31, 2026

Masa harina is the ingredient that makes corn tortillas possible without a corn grinder or a day's worth of prep. Nixtamalized corn flour - dried and finely ground - is what you hydrate, knead, and press into the dough that Central American and Mexican kitchens have relied on for generations.

What Is Masa Harina

Unlike plain corn flour replacements, masa harina carries a distinct alkaline character that no other flour replicates.

QUICK SUMMARY

Masa harina is a dried nixtamalized corn flour used to make tortillas, tamales, and pupusas. It has an earthy, nutty flavor with a mild alkaline tang. Just add water to hydrate into workable dough. Naturally gluten-free and shelf-stable up to a year.

🌽Flavor: Earthy corn, nutty, with a subtle alkaline tang
🍽️Best Uses: Tortillas, tamales, pupusas, gorditas, corn cakes
📦Shelf Life: 6-12 months unopened; 6-9 months once opened
🌿Dietary: Gluten-free, vegan, higher in bioavailable niacin and calcium
🛒Buy It: Look for "nixtamalized" on the label - not cornmeal or fresh masa

What Is masa harina?

Masa harina comes from Mesoamerica, where nixtamalization - the process of soaking dried corn in an alkaline solution of calcium hydroxide (lime) - has been practiced for thousands of years. That treatment transforms hominy from simple starch into something nutritionally and chemically different.

The treated corn is then dried and ground into the fine, pale off-white powder sold as masa harina.

You might see it labeled masa flour, masa de maíz, or just "corn masa harina." Don't confuse it with cornmeal, which skips nixtamalization entirely and lacks the alkaline character that defines this flour.

Several varieties exist: white corn masa harina is the most common, blue corn versions offer a slightly deeper, earthier note, and yellow corn falls somewhere between the two.

The nixtamalization step is what separates this flour from everything else on the shelf. It unlocks bound niacin, adds calcium when lime residues remain, and restructures the corn's starch so it binds into pliable dough without any gluten.

Watch Out
Cornmeal and masa harina are not interchangeable. Cornmeal is not nixtamalized, so it won't hydrate into pliable dough and lacks the alkaline flavor that tortillas and tamales depend on.

What Does masa harina Taste Like?

masa harina - What Is Masa Harina

Masa harina has a moderate intensity that's distinctive but not aggressive. Dry from the bag, it smells of toasty corn with a warm, grainy note.

Once hydrated and cooked, that aroma deepens into something closer to a fresh corn tortilla - earthy and faintly sweet, with a nutty undertone from the nixtamalization process.

The alkaline tang is real but subtle. It's the same mild mineral note you detect in a warm tortilla straight off the comal, distinct from anything cornmeal or polenta delivers.

Cooked masa harina forms a soft, slightly gritty texture that firms as it cools.

Sensory SnapshotModerate Intensity
👅 Flavor
earthy cornnuttymild alkaline tang
✋ Texture
fine powder (dry)soft, slightly gritty (hydrated)
👃 Aroma
toasty cornwarm grainy

How to Use masa harina

Hydration is the first step every time. Add warm water gradually - roughly ¾ cup per cup of flour - kneading until the dough feels like soft clay and doesn't crack at the edges when pressed. A small amount of lard or vegetable shortening worked into tamale dough adds richness and improves the texture once steamed.

From there, the applications branch widely. Tortillas go straight onto a hot comal or cast-iron pan - no oil needed, two minutes per side.

Tamales require a softer, more enriched dough that steams inside corn husks for 60-90 minutes. Pupusas and gorditas are thicker, formed by hand and griddled until the outside crisps and the inside stays tender.

How Masa Harina Is Used
MethodBest ForTip
🫓 GriddleCorn tortillas, pupusas, gorditas, sopesMedium-high heat, dry comal; flip when edges lift
♨️ SteamTamales, masa dumplingsAdd lard or shortening for a lighter, tender crumb
🍳 Pan-fryCorn cakes, tlacoyos, masa pattiesA thin film of oil gives a crispier crust than dry-griddling
🥣 Stir inThickening pozole-style stews, corn battersWhisk into warm liquid first to prevent lumps

Masa harina pairs naturally with fresh chiles like ancho, guajillo, and jalapeño, as well as cotija or queso fresco, black beans, lime, and salsa verde. It anchors Mexican, Salvadoran, Honduran, and Guatemalan kitchens equally.

If you're building a filling-based dish, pairings for tamales is worth a look for pairing ideas.

Try It In
🫙Roasted Tomatillo Salsa VerdeA natural match for masa-based dishes like tortillas and sopes→🫘Black Bean SaladServe alongside pupusas or gorditas for a complete plate→🍲Slow Cooker Chicken Tortilla SoupMasa harina can thicken the broth and deepen the corn flavor→

How to Buy and Store masa harina

Read the label carefully. The bag should say "nixtamalized" or "masa harina" - not simply cornmeal, corn flour, or fresh masa. A fine, pale off-white powder with a fresh corn aroma is what you want. Avoid bags with hard clumps (a sign of moisture exposure) or any sour, musty smell.

Golden Rule
Transfer opened masa harina to an airtight container immediately. Exposure to ambient moisture is the main reason it goes stale or clumps before its time.

Storage is straightforward:

  • Pantry (unopened) - keeps 6-12 months in a cool, dry spot away from direct light
  • Pantry (opened) - 6-9 months in an airtight container; check for off-odors before use
  • Refrigerator - extends shelf life in humid climates; bring to room temperature before hydrating

For a full breakdown of signs of spoilage and whether refrigeration is worth it, the masa harina freshness guide guide covers it in detail.

Start Here

New to masa harina? Make tortillas first. The ratio is simple, the cook time is under five minutes, and nothing demonstrates the flour's character faster than a fresh tortilla off a hot pan.

Once that clicks, tamales and pupusas follow the same logic - just more water, more fat, and more time.

If you can't find it locally or need a workaround, masa harina alternatives lists what actually works and what doesn't. For the best results, though, there's no real shortcut - this flour is the ingredient.

Shortcut
For first-time tortillas, use a 1:¾ ratio of masa harina to warm water. Mix, rest 5 minutes, press between plastic wrap, and griddle on high. No tortilla press required.

Frequently Asked Questions

Is masa harina the same as cornmeal?

No. Cornmeal is ground from untreated dried corn and won't hydrate into dough. Masa harina is made from nixtamalized corn, giving it a distinct alkaline character and the binding properties cornmeal lacks.

Does masa harina contain gluten?

Masa harina is naturally gluten-free. However, cross-contact during processing is possible, so check the label if you have celiac disease or a serious gluten sensitivity.

How do you hydrate masa harina?

Add warm water gradually - start with ¾ cup per cup of flour - and knead until the dough holds together without cracking. Let it rest for five minutes before pressing or shaping.

What is nixtamalized corn?

Nixtamalized corn is dried corn soaked and cooked in an alkaline solution, traditionally calcium hydroxide (lime). The process softens the kernels, loosens the hull, and increases the bioavailability of niacin and calcium.

Can masa harina be used in place of wheat flour for tortillas?

Not as a direct swap. Masa harina produces corn tortillas, not flour tortillas - the texture, flavor, and hydration ratio are all different. Use it specifically when you want nixtamalized corn flavor and a gluten-free result.

What Is Lettuce? [Taste, Uses & More]

March 31, 2026

Most people treat lettuce as a neutral backdrop - the thing that fills space around the "real" ingredients.

What Is Lettuce

That's a mistake.

Lettuce has its own flavor profile, structural purpose, and variety-specific behavior that directly affects how a dish comes together.

If you've ever wondered why the taste of arugula feels sharper or why what pairs with kale differs so much from what works with iceberg, the answer starts with understanding each green on its own terms.

QUICK SUMMARY

Lettuce is a mild, crisp leafy green used primarily raw in salads, sandwiches, and wraps. Flavor ranges from clean and watery in iceberg to slightly bitter in romaine and buttery-soft in butterhead. It's low in calories, high in water content, and best eaten fresh.

🌿Flavor: Mildly sweet, clean, watery, occasionally bitter
🥗Best Uses: Salads, sandwiches, wraps, grilled romaine
🛒Buy: Firm core, crisp unblemished leaves, no sliminess
❄️Storage: Unwashed in a damp paper towel, fridge crisper
📅Shelf Life: 5-10 days; iceberg and romaine outlast loose-leaf types

What Is Lettuce?

Lettuce (Lactuca sativa) is a fast-growing leafy vegetable native to the Mediterranean and Near East, cultivated for thousands of years across Egypt, Greece, and Rome.

It belongs to the daisy family and grows either as a loose-leaf cluster or a compact, layered head.

The four main types behave differently in the kitchen. Iceberg forms a tight, pale head with a high water content and firm crunch.

Romaine grows in elongated heads with thicker ribs and a slightly more assertive flavor.

Butterhead (Boston or Bibb) has soft, cupped leaves with a tender texture.

Loose-leaf varieties - red leaf, green leaf - spread outward without forming a head, offering ruffled, fragile leaves.

All types share the botanical name Lactuca sativa, and you'll sometimes see romaine labeled cos lettuce, especially in British and Australian markets.

If a recipe calls for "salad greens," any of these types can work, though the texture and flavor shift considerably between them.

For moments when none are available, a guide to alternatives to lettuce covers the closest options across different use cases.

Best Pick
Romaine and butterhead are the most kitchen-flexible types. Romaine holds up to heat and dressings; butterhead works where you need soft, pliable leaves for wrapping or layering.

What Does Lettuce Taste Like?

lettuce - What Is Lettuce

Lettuce is mild by design. The dominant impression is clean, slightly sweet, and watery - closer to cucumber in wateriness than to anything sharp or green-forward.

Romaine leans slightly bitter along its ribs, which firms up that profile without becoming unpleasant. Butterhead reads almost neutral, with a soft richness that makes it feel more substantial than its thin leaves suggest.

Sensory SnapshotMild Intensity
👅 Flavor
mildly sweetcleanslightly bitterwatery
✋ Texture
crisptenderfragile
👃 Aroma
fresh greensubtle vegetal

Heat changes everything. Raw lettuce has a mild grassiness that's barely there.

Apply direct heat - say, grilling romaine hearts - and that green note cooks off, leaving a faint sweetness and char that feels nothing like salad. Quick wilting in a hot pan softens the texture and mutes any bitterness without turning the leaves to mush.

How to Use Lettuce

Lettuce does the most work raw, where its crunch and water content provide contrast against heavier ingredients.

In a well-built sandwich or burger, a thick romaine or iceberg leaf separates moist fillings from the bread and keeps everything from going soggy.

In a tossed salad, lighter leaf varieties catch dressing without becoming saturated - especially important when you're working with a making balsamic vinaigrette dressing (homemade) at home.

Whole leaves work as edible containers. Korean ssam uses large romaine or leaf lettuce to wrap grilled meat, rice, and fermented paste.

Vietnamese banh mi lines the bread with lettuce for fresh contrast against the pickled daikon and rich protein. Both applications treat the leaf as structure, not garnish.

How Lettuce Is Used
MethodBest ForTip
🥗 Raw (salads)Mixed green salads, grain bowls, chopped saladsDress just before serving - lettuce wilts fast once coated
🥙 Raw (wraps)Lettuce cups, ssam, taco shells, rice paper rollsButterhead cups hold fillings best; romaine ribs add crunch
🔥 GrilledRomaine hearts as a warm side or salad baseHalve lengthwise, brush with oil, grill 2-3 minutes per side
♨️ WiltedWarm salads, quick sautés, hot-plate garnishAdd at the last second - 30 seconds of heat is enough

Pairing works best when you match dressing weight to lettuce type.

Iceberg handles creamy, heavy dressings like ranch or blue cheese without collapsing.

Delicate leaf lettuces need lighter vinaigrettes.

Romaine sits in the middle - it holds oil-based dressings well but won't handle a thick sauce.

Feta, shaved Parmesan, avocado, bacon, grilled chicken, and shrimp all pair cleanly against lettuce's mild base.

Skip heavy cream sauces and avoid any method involving prolonged liquid contact. Lettuce braised or simmered for more than a couple of minutes disintegrates into a slippery, unpleasant texture with zero structural value.

Try It In
🥩Korean Beef Lettuce WrapsShows how whole leaves replace a carb wrapper without losing structure→🌿Larb Lettuce CupsButterhead cups carrying herb-heavy Thai filling — contrast at its clearest→🇬🇷Marouli Greek Lettuce SaladA Mediterranean take where romaine is the star, not the base→

How to Buy and Store Lettuce

Firm core, crisp leaves, no brown edges - that's the buying standard. For whole heads, squeeze gently; it should feel dense and spring back. Loose-leaf bunches should stand upright, not slump. For prewashed bags, check the sell-by date and look inside the bag for pooled moisture, which accelerates decay.

Storage is straightforward but matters. Keep lettuce unwashed - moisture on the leaves triggers rot faster than anything else.

Wrap in a slightly damp paper towel and store in a perforated plastic bag or an open bag in the crisper drawer. Knowing the early lettuce spoilage signs saves you from discovering a slippery mess at the back of the fridge.

  • 🥬 Iceberg and romaine - last up to 10 days stored correctly
  • 🌿 Butterhead and loose-leaf - best within 5-7 days; more fragile
  • 📦 Prewashed bags - use within 2-3 days of opening regardless of sell-by date
Watch Out
Never store lettuce near apples, bananas, or pears. These fruits emit ethylene gas, which speeds browning and turns leaves limp within days.

Where to Start With Lettuce

Start with romaine if you're new to cooking with lettuce intentionally. It tolerates dressings without wilting immediately, holds its shape under heat, and its mild bitterness adds just enough contrast to keep a dish from tasting flat.

From there, butterhead is worth trying for wraps - its cupped leaves are more functional than any loose-leaf type for holding fillings.

If you want something with more bite alongside your greens, swapping out endive covers the bitter end of the leafy green spectrum.

For dishes where you want a green with more iron and structure, swapping out spinach lays out which options hold up best under different conditions.

Lettuce rewards deliberate variety choice. Pick the right type for the job and it stops being a filler ingredient.

Frequently Asked Questions

Why is my lettuce bitter?

Bitterness increases when lettuce bolts - meaning it begins to flower due to heat or stress. Romaine and leaf lettuces bitter faster than iceberg. Removing the thick inner ribs of romaine reduces most of the sharp edge.

What is the difference between romaine and iceberg?

Romaine has elongated leaves, thicker ribs, and a slightly bitter flavor that holds up under dressings and light heat. Iceberg forms a dense, pale head with a milder flavor and higher water content, better suited to cold, crunchy applications.

Can you eat lettuce raw?

Yes - raw is the standard preparation. Lettuce is almost always eaten uncooked; its crunch and freshness are its main contribution to a dish. Washing thoroughly before eating is important, as leaves can carry soil or surface bacteria.

Is lettuce healthy?

It's low in calories and provides vitamin K, vitamin A, and folate. Fat-soluble vitamins absorb better when paired with a small amount of oil - a basic vinaigrette actually makes the nutrients more available.

Can you freeze lettuce?

Not for raw use. Freezing ruptures the cell walls and produces a limp, watery leaf that won't work in salads or wraps. Frozen lettuce is only usable blended into smoothies or cooked down into soups.

What Is Nigella Seed? [Taste, Uses & More]

March 31, 2026

Crack a pod of nigella seeds in your palm and the smell hits before the taste does - warm, herbal, faintly onion-like, with something almost baked underneath.

What Is Nigella Seed

That aroma is the first clue to how this small matte-black seed punches above its size in the kitchen.

It shares a shelf with cumin in cooking but plays a different game entirely, bringing a sharper, slightly bitter edge that cumin never quite delivers.

Even ghee-rich dishes like the ones behind ghee rice's shelf life debates show how seriously South Asian cooking treats its seeds - and nigella is no exception.

QUICK SUMMARY

Nigella seed - also called kalonji - is a small matte-black spice seed with a sharp onion-herb bite and mild peppery bitterness. Used whole in breads, tempering, and spice blends, it's a staple in North Indian, Pakistani, and Middle Eastern kitchens.

👅Flavor: Sharp onion-like, mildly bitter, earthy with a faint nuttiness
🌍Origin: Southwest Asia and the eastern Mediterranean
🍞Best Uses: Flatbreads, tempering in hot oil, pickles, spice blends
📦Shelf Life: Whole seeds last 6-12 months in an airtight pantry container
🛒Buy It: Look for small, matte-black, tear-shaped seeds in sealed spice pouches

What Is Nigella Seed?

Nigella seed comes from Nigella sativa, a flowering plant native to Southwest Asia and the eastern Mediterranean. The seeds are tiny - roughly 1-2mm - tear-drop shaped, matte-black, and angular, with a surface that looks almost faceted under close inspection.

The plant belongs to the buttercup family (Ranunculaceae), which surprises most people expecting a relation to cumin or pepper. Despite that, the seed has accumulated a long list of common names over centuries of trade routes and regional use.

Known across South Asia as kalonji, it also goes by black caraway, black cumin, and Roman coriander in various markets.

The black cumin label is the most persistently confusing - it's a different plant entirely from true black cumin (Bunium bulbocastanum), so checking botanical names when buying matters.

Two forms exist in most kitchens: whole seeds, used for tempering, breads, and finishing; and lightly crushed or ground, used in spice blends. Whole is the standard - grinding is typically done just before use.

  • 🌿 Botanical name - Nigella sativa, unrelated to cumin or caraway despite shared common names
  • 📍 Regional names - kalonji (India/Pakistan), habbatus sauda (Arabic), çörek otu (Turkish)
  • 🔬 Active compound - thymoquinone, found in the seed's volatile oil, drives much of its aroma

What Does Nigella Seed Taste Like?

nigella seed - What Is Nigella Seed

The closest single-ingredient comparison is a cross between raw onion, dried oregano, and a mild black pepper - sharp and herbal up front, with a slow, slightly bitter finish.

That combination is unusual enough that nigella has no true single-seed equivalent.

Sensory SnapshotModerate Intensity
👅 Flavor
sharp onionmild bitterearthyfaintly nutty
✋ Texture
small and crunchyoily when toasted
👃 Aroma
warm herbalbaked onionmildly pungent

Heat changes everything. Raw seeds have a quieter, greener edge - pleasant but restrained.

Toasting or dropping them into hot ghee opens the volatile oils and turns that restrained note into something warmer, rounder, and more insistent.

The bitterness stays mild throughout cooking, rarely becoming harsh unless the seeds are burnt. That balance is what makes them so dependable in both bread doughs and oil-based tempering.

Watch Out
Nigella's bitter edge intensifies fast over high heat. Keep tempering oil at medium heat and pull the pan the moment the seeds crackle - burnt nigella turns acrid and won't recover.

How to Use Nigella Seed

Nigella seed works in two fundamental modes: surface application and fat-based tempering. Both extract different qualities from the same seed.

On bread surfaces - naan, pita, Turkish çörek, Bengali shobji ruti - the seeds toast in oven heat and release their oils directly onto the dough crust. This is one of the most efficient ways to use them.

No prep needed, no grinding.

How Nigella Seed Is Used
MethodBest ForTip
🍞 Baked on doughNaan, flatbreads, savory pastriesPress lightly into surface so seeds don't fall off
🔥 Tempering in fatDals, curries, vegetable stir-friesUse medium heat; crackle for 30-45 seconds max
🥗 Added rawRaitas, yogurt sauces, picklesAdd just before serving to keep crunch intact
🧂 Ground into blendsPanch phoron, garam masala variantsCrush lightly - full grinding mutes the onion top-note

In Bengali cooking, nigella is one of the five seeds in panch phoron, tempered whole in mustard oil before vegetables or fish are added.

That tadka method - crackling seeds in hot fat - is the backbone of how this spice integrates into North Indian and Pakistani dals.

Pairings worth knowing: eggplant and potatoes absorb the oniony bitterness particularly well; plain yogurt softens the sharp edge and makes nigella approachable as a finishing seed. Cumin and coriander both work alongside it without competing.

If a recipe calls for an onion-forward spice and you're out, the guide to alternatives to nigella seed covers the closest swaps.

Avoid pairing nigella with overtly sweet desserts or floral teas - the pungency clashes rather than contrasts.

Try It In
🥗Poppy Seed Dressing (Homemade)See how small seeds change a dressing's texture and depth→

How to Buy and Store Nigella Seed

Good nigella seeds are uniformly matte-black and tear-shaped, with no pale or grey seeds mixed in. Pale coloring signals age, exposure, or adulteration. Smell before buying when possible - fresh seeds have an immediate warm, herbal scent even before toasting.

Best Pick
Buy from a South Asian or Middle Eastern spice shop in small sealed pouches - turnover is faster than supermarket shelves, which means fresher stock and fuller aroma.

Skip bulk open bins, where seeds sit exposed to air and light. Sealed glass jars or foil pouches from dedicated spice shops are the reliable choice.

Once home, store in an airtight container away from direct heat and sunlight. Whole seeds hold their aroma for 6-12 months under pantry conditions.

Toasted or ground seeds fade faster - use within 2-3 months. For long-term storage, freezing nigella seed preserves volatile oils well past the pantry window.

Where to Start With Nigella Seed

Nigella rewards a narrow entry point before you branch out. Start with bread - press a pinch onto naan or homemade flatbread dough before baking.

No technique needed, and the result is immediate.

If swapping out naan bread is already on your radar, adding nigella to the replacement dough still works.

Once you're comfortable with the flavor, move to tempering: a few seeds crackled in ghee before adding onions to a dal changes the base note of the whole dish.

From there, raitas and pickles are natural next steps - no heat, just crunch and contrast.

Golden Rule
Use whole seeds, not pre-ground. Grinding kills the volatile onion-herbal top-note that makes nigella distinct. Crush only if a recipe specifically demands a finer texture.

Frequently Asked Questions

Is nigella seed the same as black cumin?

No. Nigella seed is Nigella sativa; true black cumin is Bunium bulbocastanum, a different plant entirely. The shared name persists because both seeds are small and dark, but their flavor profiles are distinct - nigella has that onion-herb edge that black cumin lacks.

Can you eat nigella seeds raw?

Yes, raw nigella seeds are safe and commonly eaten that way in raitas, yogurt sauces, and sprinkled over salads. The flavor is milder uncooked - the sharp onion-herb note sharpens noticeably once heat is applied.

How do you toast nigella seed without burning it?

Use a dry pan over medium-low heat and keep the seeds moving for 60-90 seconds. Pull the pan as soon as they become fragrant - nigella burns quickly and turns bitter well before it shows visual browning.

What dishes traditionally use kalonji?

Kalonji appears in Bengali panch phoron spice blends, North Indian achar (pickles), naan bread, and Pakistani dals tempered in ghee. Middle Eastern and North African recipes also use it on savory pastries and seed-crusted flatbreads.

Does nigella seed contain any notable nutrients?

Nigella seeds contain unsaturated fats, dietary fiber, iron, and calcium, plus thymoquinone - a bioactive compound in the seed's volatile oil. Culinary amounts are small, so nutritional impact is modest compared to traditional medicinal doses.

Breakfast Khachapuri with Egg and Cheese

March 31, 2026

Complete Recipe Article

Most breakfast breads turn out dry or bland. The trick is using a yeast dough that proofs properly and topping it with cheese that actually melts.

Breakfast Khachapuri with Egg and Cheese served on a plate

High heat sets the egg while the dough crisps at the edges. The suluguni cheese creates a creamy pool that holds the runny yolk without spilling.

Make this for weekend brunch when you want something that feels special but doesn't require flipping or constant watching.

QUICK SUMMARY

Breakfast Khachapuri with Egg and Cheese is a Georgian boat-shaped bread with melted cheese and a runny egg center. Proof the dough for 1-1.5 hours until doubled, then bake at 450°F for crispy edges and a soft interior. Add the egg 8 minutes into baking so the whites set while the yolk stays runny.

⏱️Time Reality: 20 minutes active, 1.5 hours total with proofing
🔥Method Shortcut: Preheat a pizza stone or baking sheet for 30 minutes for even browning
⚠️Watch Out: Add eggs too early and they overcook - wait until the 8-minute mark

Why This Recipe Works

Yeast dough creates soft, tender bread that crisps at the edges without drying out. High heat at 450°F sets the structure fast while the cheese melts into a creamy layer. For a similar take on breakfast bread, try a fluffy yogurt side that uses tangy yogurt to balance the richness.

Quick Reference
⏱️
Prep Time
20 min (plus 1-1.5 hr proofing)
🔥
Cook Time
12-15 min
⏰
Total Time
1 hr 35 min
🍽️
Servings
4 servings
📊
Difficulty
Medium
🏷️
Category
Main Dish
💡
Quick Tip
Use room temp eggs for even baking
🎯
Best For
Weeknight | Brunch | Entertaining

Five things that make this work:

  • Proofing for 1-1.5 hours at 75°F - Dough doubles in size and develops structure without dense spots
  • Grating and draining cheese 10 minutes ahead - Removes excess moisture so the crust doesn't turn soggy
  • Folding dough edges ½ inch thick - Creates a sturdy boat rim that holds the cheese and egg without collapsing
  • Adding eggs after 8 minutes of baking - Whites set while yolks stay runny instead of turning hard
  • Brushing melted butter on warm bread immediately - Adds glossy finish and rich flavor to the crust
Quick Tip
Preheat your pizza stone or baking sheet for 30 minutes before baking - it creates a crisp bottom crust that stays firm under the cheese.

What You'll Need

Ingredients for Breakfast Khachapuri with Egg and Cheese

Stock up on yeast, flour, and suluguni cheese - you can't skip these. The yeast creates the soft texture while the cheese melts into a creamy layer that holds the egg. If you're planning a full breakfast spread, pair this with something creamy like potatoes for a hearty plate.

🍜
Dough Base
  • All-purpose flour
  • Yeast
  • Water
  • Milk (optional)
  • Sugar
  • Salt
🧀
Cheese & Toppings
  • Suluguni cheese
  • Eggs
  • Butter

Ingredient Details

  • Suluguni cheese
    Traditional Georgian melting cheese with mild tang - grate fresh and drain 10 minutes before using to remove excess moisture
  • Yeast
    Check expiration date - old yeast won't rise properly and leads to dense dough
  • All-purpose flour
    Measure accurately by spooning into cup and leveling - too much flour makes the dough stiff and dry
  • Eggs
    Use room temperature eggs for even baking - cold eggs can undercook in the center
  • Butter
    Melt right before serving and brush on warm bread - adds glossy finish and rich flavor
  • Water
    Use lukewarm (about 110°F) to activate yeast - too hot kills yeast, too cold slows proofing
  • Sugar
    Feeds yeast for better rise - don't omit unless you're adjusting proofing time

Ingredient Swaps

Most swaps change texture or flavor but still work. Mozzarella replaces suluguni if you can't find it at specialty stores, though it melts differently.

Four practical swaps:

  • Suluguni cheese → Mozzarella with a bit of feta - Less tangy, similar melt; slightly different flavor profile but still creamy
  • Butter → Vegan margarine or oil - Less rich, softer crust texture but still glossy when brushed on warm
  • All-purpose flour → Gluten-free baking flour blend - Different texture, may need xanthan gum added for structure
  • Milk → Water or plant-based milk - Less tender dough, flavor changes slightly but still rises properly

Mozzarella + Feta Blend

Works for: Budget-friendly swap when suluguni isn't available

Skip if: You want authentic tangy flavor - mozzarella is milder and feta can overpower

Baking Powder Instead of Yeast

Works for: Skipping 1.5 hours of proofing time when you're in a rush

Skip if: You want soft, tender texture - baking powder creates denser, biscuit-like dough

Gluten-Free Flour Blend

Works for: Gluten-free diets with xanthan gum added for binding

Skip if: You want classic chewy texture - gluten-free dough is more crumbly

Instructions

Timing matters here - proof the dough fully before shaping or you'll end up with dense bread. The egg goes in late so the yolk stays runny while the whites set.

  1. Mix dough ingredients and knead 8-10 minutes until smooth. The dough should bounce back when poked and feel slightly tacky but not sticky. Let it rest 10 minutes to relax the gluten before proofing.
  2. Proof dough in a warm spot (75°F) for 1-1.5 hours until doubled. Cover with a damp towel to prevent drying. Preheat your oven to 450°F with a pizza stone or baking sheet inside for 30 minutes.
  3. Divide dough into 4 pieces and shape each into a boat with ½-inch thick edges. Roll out the center thinner than the rim so the cheese sits in a well. Pinch the pointed ends tight to prevent leaking.
  4. Fill boats with grated cheese and bake 8 minutes until edges start browning. Remove from oven, crack an egg into the center of each boat, and return to oven for 4-7 minutes until whites set but yolks stay runny.
  5. Brush warm khachapuri with melted butter immediately after baking. Serve hot - the cheese and egg cool fast and lose their creamy texture.
Watch Out
Don't overbake the egg - check at 4 minutes and pull when whites are just set. Carryover heat will finish cooking the edges while the yolk stays runny.

What to Serve With It

Khachapuri is rich and filling, so you need something fresh or tangy to cut through the cheese and butter. A bright salad or pickled vegetables balance the plate without competing for attention. For complete meal planning around this dish, check out hard boiled eggs meal planning ideas for more pairing options.

Side Dish Prep Why It Works How to Serve
Simple green salad Easy Fresh acidity balances rich bread and cheese Toss greens with lemon vinaigrette, serve cold
Sliced tomatoes Easy Adds brightness and moisture contrast Drizzle with olive oil and flaky salt
Light yogurt Easy Cool, creamy complement to warm bread Serve in small bowls with herbs
Fresh fruit Easy Sweet contrast for savory flavors Slice melons or berries, serve chilled
Pickled vegetables Medium Adds tang and cuts richness Quick-pickle cucumbers or carrots, serve cold

Three ways to serve it:

  • For brunch gatherings - Set out adjika (spicy Georgian dip) or garlic yogurt sauce for dipping the bread edges
  • On weeknight mornings - Pair with black tea or coffee and sliced tomatoes for a simple plate
  • For entertaining - Serve with roasted potatoes and herbed butter spread for a hearty spread
Best Pick
Pickled vegetables are the traditional Georgian pairing - their sharp tang cuts through the butter and cheese without adding heaviness to the plate.

Store and Reheat

Khachapuri is best eaten fresh, but leftovers keep for 3-4 days if stored properly. The crust softens in the fridge, so reheating in the oven brings back some crispness. For more hearty breakfast options that reheat well, try a fresh salad side to round out your meal prep.

Method Time Best For
🍳 Stovetop 3-5 min low heat covered Retaining crisp edges on leftover slices
🔥 Oven 8-10 min at 350°F Reheating whole khachapuri without sogginess
📦 Microwave 1-2 min Quick reheat but may soften crust

For best results when storing:

  • Wrap tightly in foil or store in an airtight container within 2 hours of baking
  • Refrigerate up to 3-4 days - longer and the dough turns rubbery
  • Freeze unbaked boats (without eggs) for up to 1 month - thaw and bake fresh
  • Reheat in a 350°F oven for 8-10 minutes to restore crisp edges
  • Skip microwaving if possible - it makes the crust soggy and the cheese rubbery

Frequently Asked Questions

How long to cook khachapuri at 450°F?

Bake for 8 minutes without the egg, then add the egg and bake another 4-7 minutes. Total time is 12-15 minutes depending on how runny you want the yolk.

Can I make khachapuri dough ahead?

Yes - proof the dough, shape into boats, then refrigerate up to 24 hours. Let them sit at room temperature 20 minutes before baking.

What goes with khachapuri for breakfast?

Serve with simple green salad, sliced tomatoes, or light yogurt. Fresh fruit or pickled vegetables balance the richness.

How do I know when khachapuri egg is done?

The egg whites should be set and opaque while the yolk stays bright and jiggly. Check at 4 minutes after adding the egg - pull when whites are just firm.

Can I use mozzarella instead of suluguni cheese?

Yes - blend mozzarella with a bit of feta for similar melt and tang. Mozzarella alone is milder but still creates the creamy cheese layer.

Breakfast Khachapuri with Egg and Cheese served on a plate

Breakfast Khachapuri with Egg and Cheese

No ratings yet
Breakfast Khachapuri with Egg and Cheese is a Georgian boat-shaped bread featuring a yeast dough topped with melted suluguni cheese and a runny egg yolk. The dough proofs for 1-1.5 hours and bakes at 450°F to create a crispy edge and soft interior, with the egg added partway through baking to set the whites but keep the yolk runny.
Print Recipe Pin Recipe
Prep Time 20 minutes mins
Cook Time 15 minutes mins
Total Time 35 minutes mins
Servings: 4 servings
Course: Breakfast, Main Dish
Cuisine: Georgian
Ingredients Equipment Method Notes

Ingredients
  

  • 3 cups all-purpose flour measured accurately by spooning into cup and leveling
  • 2 teaspoons active dry yeast check expiration date to ensure proper rise
  • 1 cup lukewarm water about 110°F to activate yeast
  • ¼ cup milk optional, adds tenderness
  • 1 tablespoon sugar feeds yeast for better rise
  • 1 teaspoon salt
  • 8 ounces suluguni cheese grate and drain 10 minutes ahead to remove moisture
  • 4 eggs use room temperature for even baking
  • 2 tablespoons butter melt right before serving to brush warm bread

Equipment

  • Oven Preheat to 450°F with pizza stone or baking sheet inside for even browning
  • pizza stone or baking sheet Used for baking bread with crispy bottom crust
  • Mixing bowl For mixing and proofing dough

Method
 

  1. Mix all-purpose flour, yeast, lukewarm water, milk (if using), sugar, and salt in a mixing bowl. Knead the dough for 8-10 minutes until smooth and slightly tacky but not sticky. Let dough rest for 10 minutes to relax gluten before proofing.
    3 cups all-purpose flour, 2 teaspoons active dry yeast, 1 cup lukewarm water, ¼ cup milk, 1 tablespoon sugar, 1 teaspoon salt
  2. Cover the dough with a damp towel and proof in a warm spot (about 75°F) for 1 to 1.5 hours until doubled in size. Meanwhile, preheat your oven to 450°F with a pizza stone or baking sheet inside for 30 minutes.
  3. Divide the proofed dough into 4 equal pieces. Roll each piece into a boat shape, folding the edges about ½ inch thick to create a sturdy rim while thinning the center for the cheese filling. Pinch the pointed ends tightly to prevent leaking.
  4. Fill each shaped dough boat with grated suluguni cheese. Bake in the preheated oven for 8 minutes until the edges start to brown and the cheese begins melting.
    8 ounces suluguni cheese
  5. Remove breads from oven and crack one room temperature egg into the center of each boat. Return to oven and bake for 4 to 7 minutes until egg whites are set but yolks stay runny. Check at 4 minutes to avoid overcooking.
    4 eggs
  6. Brush warm khachapuri immediately with melted butter for a glossy, rich crust. Serve hot to preserve creamy cheese and runny yolk.
    2 tablespoons butter

Notes

  • Proof dough fully at 75°F to ensure a tender but structured loaf.
  • Grate and drain suluguni cheese 10 minutes before baking to avoid soggy crusts.
  • Add eggs after initial cheese bake for runny yolks and set whites.

Tried this recipe?

Let us know how it was!

What Is Maple Syrup? [Taste, Uses & More]

March 31, 2026

Maple syrup does something no other liquid sweetener quite manages: it carries the full flavor of its source - the sugar maple tree - into every dish it touches.

What Is Maple Syrup

Where agave nectar stand-ins focus on mild sweetness and neutral flavor, maple syrup brings caramel depth, woody warmth, and a faintly smoky finish that changes the character of a dish.

That's not decorative.

It's functional.

QUICK SUMMARY

Maple syrup is a tree sugar syrup made by boiling down sugar maple sap. It has a moderate-intensity caramel flavor with woody, buttery notes. Use it to sweeten, glaze, and finish - from oatmeal and vinaigrettes to pork glazes and baked goods.

🌳Origin: Northeastern North America, especially Quebec and New England
🍯Flavor: Caramelized sugar, woody warmth, buttery finish, faint vanilla
🍳Best Uses: Glazing, baking, drizzling, vinaigrettes, sauces for pork or duck
❄️Shelf Life: Up to 2 years unopened; 1 year refrigerated after opening
✅Dietary Notes: Vegan, gluten-free, and high in sucrose - use in moderation

What Is Maple Syrup?

Maple syrup is a tree sugar syrup made by collecting the watery sap of sugar maples (Acer saccharum) and related species, then boiling it down until roughly 40 liters of raw sap become 1 liter of finished syrup.

Sap flows only during early spring, when freezing nights and warm days create the pressure differential that pushes liquid through the tree.

Production is concentrated in Quebec - which accounts for around 70% of global supply - and across New England states. It's also sold as pure maple syrup or sirop d'érable in French-Canadian markets.

Grade matters when buying. The current North American system uses a single "Grade A" designation across four color classes:

  • 🟡 Golden, Delicate Taste - lightest color, subtle flavor, best for drizzling fresh
  • 🟠 Amber, Rich Taste - the most common; balanced caramel and maple character
  • 🟤 Dark, Robust Taste - stronger, more assertive; suits baking and glazing
  • ⬛ Very Dark, Strong Taste - harvested late season; intense flavor, often used commercially

Understanding these grades helps you choose the right bottle for the right job - a topic worth exploring if you're also researching alternatives to maple syrup and want to match flavor intensity.

What Does Maple Syrup Taste Like?

maple syrup - What Is Maple Syrup

Maple syrup tastes like light caramel with brown-sugar depth and a woody undercurrent that reminds you it came from a tree, not a factory. It's less cloying than corn syrup, and less aggressively sweet than refined sugar dissolved in water.

Sensory SnapshotModerate Intensity
👅 Flavor
caramelized sugarwoodybutteryfaint vanilla
✋ Texture
viscousslickpourable
👃 Aroma
warm carameltoasty wood

Heat intensifies the caramel notes noticeably. Reduced into a glaze, the woody undertones concentrate and the syrup takes on a faintly smoky edge.

Darker grades amplify all of this; golden grades stay mild enough that the maple character almost disappears in complex recipes.

Golden Rule
Match grade to purpose: golden for fresh drizzle, amber for everyday cooking, dark for glazes and baking where strong maple flavor holds up.

How to Use Maple Syrup

Drizzling is the most familiar use, but it's the least interesting one. Maple syrup earns its keep as a working ingredient across a wide range of preparations.

How Maple Syrup Is Used
MethodBest ForTip
🍯 Drizzle/FinishPancakes, oatmeal, yogurt, cheese boardsUse golden or amber grade to keep flavor clean
🔥 Reduction/GlazeRoasted carrots, parsnips, pork, duckDark grade stands up to high heat and savory fat
🥐 Folded Into BatterCookies, quick breads, muffinsReduce other liquids slightly - maple syrup adds moisture
🥗 Vinaigrette/SauceSalad dressings, mustard-based saucesPair with cider vinegar and Dijon for balance

Maple syrup anchors Québécois comfort cooking - think tourtière glazed with dark syrup or baked beans sweetened with it instead of molasses.

In New England and modern North American bistro cooking, it shows up in duck breast glazes, walnut vinaigrettes, and sweet potato preparations alongside thyme and butter.

It pairs well with bacon and smoked pork, walnuts and pecans, cinnamon and vanilla, and mustard.

Just as the role honeycrisp apple plays in a salad depends on balancing sweet and tart, maple syrup in a dressing works because the woody sweetness offsets sharp vinegar without flattening it.

Avoid pairing it with delicate white fish. The woody notes overpower mild protein rather than complementing it.

Try It In
🍮Indian Gulab Jamun Rose Syrup BallsSwap the sugar syrup for maple to add caramel depth→

How to Buy and Store Maple Syrup

Always check the label first. Any bottle worth buying says "100% pure maple syrup" - nothing else. Skip anything labeled "pancake syrup" or listing high-fructose corn syrup as an ingredient; those are flavored corn syrups, not maple.

Watch Out
The words "maple-flavored" or "maple-style" signal a corn syrup product. Real maple syrup has one ingredient: maple syrup.

Color tells you flavor strength. Lighter amber bottles deliver milder flavor; darker bottles mean more robust, assertive taste.

Both are Grade A - the difference is when in the season the sap was tapped.

For storage:

  • Unopened - keep in a cool, dark pantry for up to 2 years
  • Opened - refrigerate immediately; stays good for about 1 year
  • Unrefrigerated after opening - lasts several months, but check for mold regularly

Mold can grow on the surface of opened syrup left at room temperature. Knowing the maple syrup spoilage signs helps you catch problems early and avoid wasting a good bottle.

Where to Start With Maple Syrup

New to cooking with it? Start with amber grade - it's the most forgiving, with enough maple character to notice without overpowering a dish.

Try it first in a simple vinaigrette or as a glaze on roasted carrots. Both applications are short, controlled, and show you exactly how the caramel and woody notes behave with heat and acid.

From there, dark grade glazes for pork or duck are the natural next step.

Shortcut
One bottle of amber grade covers almost every home cooking use - drizzle, glaze, bake, dress. Buy dark grade only once you know you want stronger flavor.

Frequently Asked Questions

Is maple syrup just sugar?

Not exactly. Sucrose is its main carbohydrate, but maple syrup also contains trace minerals - manganese, zinc, and calcium - that refined sugar lacks. It still has a high sugar content and should be used in moderation.

How is maple syrup made?

Producers tap sugar maples in early spring and collect the watery sap that flows from the trees. That sap is boiled down at a roughly 40:1 ratio - 40 liters of sap yields about 1 liter of finished syrup.

What are the grades of maple syrup?

All retail maple syrup is Grade A, divided into four color classes: Golden (delicate), Amber (rich), Dark (robust), and Very Dark (strong). Color reflects harvest timing - earlier tapping produces lighter, milder syrup.

Does maple syrup taste like caramel?

It's close, but not identical. Maple syrup has caramelized sugar notes alongside a woody, forest-like undertone that pure caramel doesn't have. That distinction becomes more obvious when you reduce it into a glaze.

Is pure maple syrup healthier than pancake syrup?

Pure maple syrup has a simpler ingredient list and contains trace minerals absent from corn-syrup-based pancake syrups. Both are high in sugar, however, so neither qualifies as a health food - the difference is mostly ingredient quality.

What Is Labneh Cheese? [Taste, Uses & More]

March 31, 2026

Labneh does something no other spread quite manages: it brings the tang of fermented dairy and the body of a soft cheese together in a single ingredient. Spread thick under olive oil, rolled into herb-coated balls, or swirled into a hot bowl of lentil soup, it anchors a dish without overpowering it.

What Is Labneh Cheese

If you're familiar with yogurt storage life or how feta ages, labneh occupies its own lane - fresher than cheese, denser than yogurt, and more functional than either.

QUICK SUMMARY

Labneh is a strained fermented dairy from the Levant - thick, tangy, and mildly salty. It spreads like cream cheese, dips like hummus, and works across mezze, baked dishes, and breakfast. Made from whole-milk yogurt, it's higher in protein than regular yogurt and lower in lactose after straining.

🫙Category: Strained fermented dairy, soft yogurt cheese from the Levant
👅Flavor: Tangy, mildly salty, lactic sourness with a clean finish
🍽️Best Uses: Mezze spread, dip base, soup finish, sandwich spread, baked filling
❄️Shelf Life: Opened tub 7-10 days; homemade 5-7 days; unopened up to 3 weeks
🛒Buy It: Look for a glossy, uniform surface and live cultures on the label

What Is labneh cheese?

Labneh is yogurt strained through cheesecloth or a fine mesh until most of the whey drains away, leaving a thick, spreadable curd. It originated in the Levant - Lebanon, Syria, Palestine - and has been a staple of Middle Eastern tables for centuries.

You'll also see it spelled labne or labni, and in Arabic it's written لبنة.

The result sits somewhere between strained yogurt and fresh farmer's cheese, though it's neither. Unlike Greek yogurt, which stops straining early, labneh drains longer - sometimes 24 to 48 hours - producing a denser, more cheese-like texture.

Leave it even longer and it firms enough to roll into balls.

Two main forms appear at market:

  • Spreadable tub labneh - soft and spoonable, ready to use straight from the container
  • Labneh balls in olive oil - firmer, drier, often coated in za'atar or chili flakes, sold jarred or from deli counters
  • Homemade labneh - strained overnight from full-fat yogurt, yielding the freshest flavor and the most control over consistency

What Does labneh cheese Taste Like?

Labneh leads with bright lactic acidity - the same tang you get from good yogurt, but more concentrated. That sourness settles into a mild, clean saltiness at the finish, without the sharpness you'd associate with aged cheese.

Sensory SnapshotModerate Intensity
👅 Flavor
tangylacticmildly salty
✋ Texture
thick and creamysilky when whipped
👃 Aroma
fresh cultured dairyslight lactic sweetness

Think of a thicker Greek yogurt crossed with fresh farmer's cheese - that's the closest comparison. Whipping labneh with a drizzle of good olive oil softens the acidity slightly and produces a silkier, more spreadable texture.

Cold from the fridge, the tang is sharpest; at room temperature, the flavor rounds out.

Golden Rule
Pull labneh from the fridge 15 minutes before serving. Room temperature labneh spreads more evenly and tastes noticeably smoother than cold-straight-from-the-container.

How to Use labneh cheese

Labneh's most iconic role is as a mezze spread: spooned onto a flat plate, pooled with olive oil, and dusted with za'atar or sumac. Toasted pita, fresh cucumber, and mint alongside it make a complete opening course.

It's a format that asks almost nothing of you.

Beyond mezze, labneh works across a wider range of applications than most people expect.

How Labneh Is Used
MethodBest ForTip
🥗 SpreadMezze plates, sandwiches, flatbreadsDrizzle olive oil over the top to prevent surface drying
🫙 Preserved in oilLabneh balls, long-storage appetizerRoll in za'atar or chili flakes before submerging in oil
🍲 Soup finishLentil soup, roasted tomato soupsSwirl in at the end - do not boil or it splits
🥧 Baked fillingSavory tarts, börek-style pastriesMix with egg and herbs to stabilize during baking
🍯 Sweet applicationsBreakfast bowls, dessert platesPair with honey, fresh fruit, and crushed pistachios

Labneh also substitutes well for ricotta on pizza - it holds its shape during baking and adds a tangy note that ricotta doesn't. As a dip base, it replaces mayonnaise cleanly, carrying herbs and garlic without the heaviness.

One pairing to avoid: very sweet, syrup-heavy sauces overwhelm labneh's delicate acidity and make the whole dish taste flat. Honey works because it adds sweetness without masking flavor.

Heavy dessert syrups don't.

Try It In
🧀Cheddar Cheese StrawsSwap in labneh for a tangier, softer cheese base→🍳Egg and Cheese Breakfast SandwichUse labneh instead of cream cheese for a sharper spread→🥗Blue Cheese Dressing (Homemade)Thin labneh with buttermilk as a lighter dressing base→

How to Buy and Store labneh cheese

At the store, look for a tub where the surface appears uniformly creamy and slightly glossy. A small pool of whey at the edge is normal; excessive liquid suggests the product has been sitting too long or was poorly handled.

Press the lid gently - good labneh yields without feeling watery. Always check the label for live cultures and a valid sell-by date.

Watch Out
Avoid labneh tubs with a grayish tint or sour smell beyond normal dairy tang - both signal spoilage. Once opened, the clock moves fast.

At home, store labneh in an airtight container in the coldest part of your fridge. Press a piece of plastic wrap directly onto the surface to limit whey separation and slow oxidation.

For a deeper look at how long it keeps, see our guide to labneh cheese freshness guide.

  • Opened commercial tub - 7-10 days
  • Homemade labneh - 5-7 days
  • Unopened commercial tub - up to 2-3 weeks until the sell-by date

Start Here With Labneh

New to labneh? Start with the mezze spread. Spoon it onto a plate, pour over olive oil, dust with za'atar, and serve with pita. That single preparation shows you what labneh does better than any description can.

Once you're comfortable with the flavor, move to using it as a Greek yogurt substitute in dips or as a soup finish - those are the next natural steps without any extra technique required.

Shortcut
No labneh at your store? Strain full-fat Greek yogurt through cheesecloth overnight in the fridge. By morning you have a workable substitute - not identical, but close enough for most applications. Check our roundup of labneh cheese replacements for more options.

Frequently Asked Questions

Is labneh the same as Greek yogurt?

No. Both start from strained yogurt, but labneh strains far longer - often 24 to 48 hours - making it noticeably thicker and more cheese-like. Greek yogurt retains more whey and has a looser, spoonable texture.

How do you make labneh at home?

Line a colander with cheesecloth, spoon in full-fat plain yogurt, tie the corners, and refrigerate for 12 to 24 hours. Salt lightly before straining for better flavor. The longer it drains, the firmer the result.

Can labneh be used in baking?

Yes, with one caveat. Labneh bakes well as a filling in tarts or pastries when mixed with egg to stabilize it. Avoid using it in recipes that expose it to direct high heat - it splits and becomes grainy.

Is labneh healthy?

It's higher in protein than regular yogurt by volume and lower in lactose after straining, making it easier for some people to digest. Fat content depends entirely on whether whole-milk or low-fat yogurt was used as the base.

How long does labneh last after opening?

An opened tub keeps about 7 to 10 days refrigerated. Pressing plastic wrap directly onto the surface slows whey separation and extends freshness by a day or two.

What Is Mung Bean? Taste, Texture, Uses & More

March 31, 2026

Khichdi - that humble one-pot of rice and legumes - would be unrecognizable without a handful of whole green mung beans stirred in.

What Is Mung Bean

The mung bean sits quietly in the same category as the role chickpea plays in stews and the role adzuki bean plays in sweets, yet it covers more ground than either. Split, whole, or sprouted, it shows up from Indian dals to Chinese congee to Korean bindaetteok pancakes.

QUICK SUMMARY

The mung bean is a small green legume with a mildly sweet, nutty, earthy flavor. Use it whole in dal and khichdi, split as moong dal, or sprouted in salads. Dried beans keep for months; cooked or sprouted forms last a few days in the fridge.

🌿Flavor: Mildly sweet, nutty, and earthy with a gentle grassy aroma
🫘Forms: Whole green beans, split yellow moong dal, or sprouted
🍲Best Uses: Dal, khichdi, congee, sprout salads, mung bean paste
⏱️Shelf Life: Dried beans last many months; cooked lasts 3-4 days refrigerated
🌍Cuisines: Indian, Chinese, Southeast Asian - one of the most widely used legumes in Asia

What Is Mung Bean?

The mung bean (Vigna radiata) is a small round legume native to South Asia, cultivated across the Indian subcontinent and Southeast Asia for thousands of years.

It belongs to the same family as lentils and black-eyed peas, though it cooks faster than most dried legumes and tolerates skipping the overnight soak.

You'll find it sold under several names depending on form. Whole green mung retains its thin olive-green skin. Split and hulled, it becomes split yellow moong dal - pale yellow, flat, and quick-cooking.

Sprouted, it transforms into the familiar white bean sprouts common in stir-fries and spring rolls.

  • 🫘 Mung / moong bean - the whole dried green form, used in soups and khichdi
  • 🟡 Moong dal - split and hulled; cooks to a creamy, porridge-like texture
  • 🌱 Mung bean sprouts - germinated for 2-3 days; crisp, mild, and eaten raw or lightly cooked
  • 🍮 Mung bean paste - cooked, sweetened, and used as a filling in Asian desserts

Unlike lentil's flavor and uses, which vary widely by variety, mung bean stays consistently mild across all its forms - making it one of the most approachable legumes for new cooks.

What Does Mung Bean Taste Like?

mung bean - What Is Mung Bean

Mung bean has a mildly sweet, nutty, earthy flavor that stays subtle regardless of how you prepare it.

The closest comparison is edamame, though mung is softer and less grassy - understanding what makes edamame distinct helps clarify exactly where mung bean sits on the legume flavor spectrum.

Heat deepens the earthy note. Fully cooked whole beans turn soft and creamy, absorbing spices and aromatics without losing their identity.

Split moong dal goes even further - it collapses into a smooth, almost silky texture with a faint sweetness at the finish.

Sensory SnapshotMild Intensity
👅 Flavor
mildly sweetnuttyearthy
✋ Texture
soft and creamy (cooked)firm and tender (sprouted)
👃 Aroma
grassylightly beany

Sprouted mung is a different experience - crisper, fresher, and noticeably lighter in flavor than the cooked bean. The grassy note is more present in raw sprouts, though it mellows quickly with even brief heat.

How to Use Mung Bean

Indian and Chinese cooking use mung bean more than any other cuisine, though Southeast Asian and Korean kitchens have their own strong traditions with it. The bean's mild flavor means it takes on surrounding aromatics well - ginger, garlic, turmeric, and coconut milk all amplify it without competing.

Golden Rule
Always add delicate herbs at the end. Cilantro, green chilies, or curry leaves dropped in too early go dull before the beans are done.
How Mung Bean Is Used
MethodBest ForTip
🫕 SimmeredDal, khichdi, soups, congeeSoak whole beans 4-6 hours to cut cook time significantly
⚡ Pressure-cookedSplit moong dal, fast weeknight dinnersNo soak needed; 8-10 minutes at pressure gives a creamy result
🌱 SproutedSalads, stir-fries, spring rollsRinse twice daily; sprouts are ready in 2-3 days
🥞 Pan-friedMung bean chilla, bindaetteok pancakesSoak, grind wet, and season the batter before cooking
🍮 PureedMung bean paste fillings for dessertsCook until very soft, sweeten, then blend smooth

A congee rice porridge recipe that adds whole mung beans gets body and protein without changing the congee's delicate character.

For a spiced dal, split yellow moong dal with turmeric, cumin, and a mustard seed tadka is the simplest entry point - a dal tadka yellow lentils recipe follows the same technique and spice logic.

If mung bean isn't available, a brief look at alternatives to mung bean will show which legumes come closest for each specific use case.

Try It In
🥗Black Bean SaladSwap in sprouted mung beans for a lighter, crisper take→🍠Roasted Sweet Potato and Black Bean SaladMung beans echo the sweet, earthy notes of sweet potato→🫛Parmesan Roasted Green BeansSee how a simple roast technique works across green vegetables→

How to Buy and Store Mung Bean

At the store, whole green mung beans should look uniformly olive-green with smooth, uncracked skins and no sign of insect holes.

For split yellow moong dal, look for pale yellow pieces that are consistent in size and free of black specks, which signal old stock or moisture damage.

Watch Out
Dull, faded green whole beans or moong dal with a stale smell have usually been sitting too long - they'll cook unevenly and taste flat.

Storage is straightforward. Keep dried whole or split beans in an airtight container in a cool, dark pantry, away from heat and humidity.

Cooked mung and fresh sprouts go in a sealed container in the fridge. Refer to our guide on how long mung bean keeps for exact timelines by form - dried, cooked, and sprouted all differ considerably.

Start Here With Mung Bean

Split yellow moong dal is the fastest way in - no soak, pressure-cooked in under ten minutes, and forgiving enough for a first attempt. Once you're comfortable with that, move to whole green mung for texture, or try a three-day sprouting jar for a raw application.

The bean rewards patience. Long, slow simmering with aromatics unlocks the creamiest result.
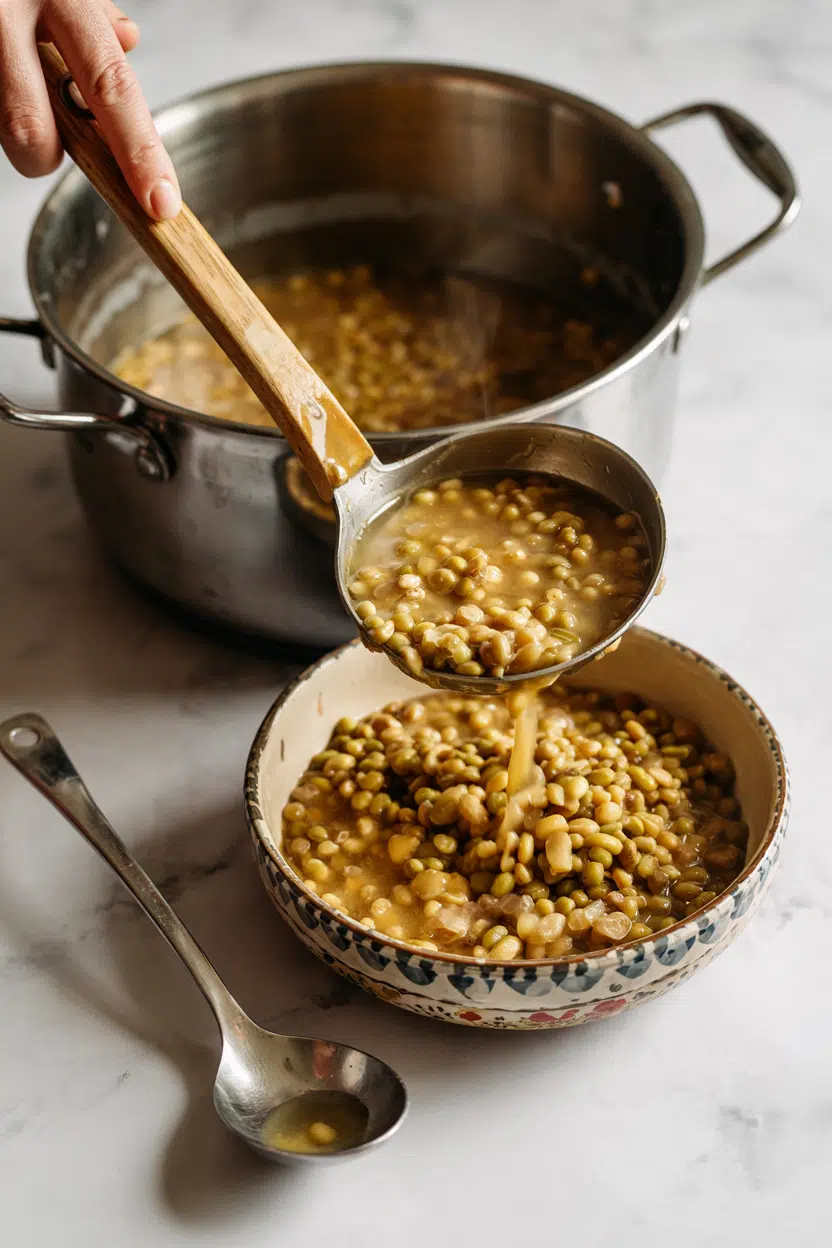
Frequently Asked Questions

What is the difference between mung bean and moong dal?

Same legume, different processing. Whole mung beans are the green, skin-on dried bean. Moong dal is mung bean split in half and hulled, resulting in pale yellow pieces that cook faster and break down into a creamy texture.

Are mung beans healthy?

Yes. They provide plant protein, fiber, folate, and iron in a low-fat, gluten-free package. Sprouting increases vitamin C content and reduces antinutrients, which improves iron and zinc absorption.

How do mung beans taste when sprouted?

Sprouted mung is noticeably fresher and crisper than the cooked bean, with a mild grassy note and subtle sweetness. The earthy depth of the dried bean largely disappears once it germinates.

How long do mung beans take to cook?

Soaked whole mung beans simmer soft in about 30-40 minutes. Split moong dal takes 15-20 minutes on the stovetop, or 8-10 minutes under pressure - no soaking required.

Can you eat mung beans raw?

Dried raw mung beans are not safe to eat - they need cooking to break down antinutrients and improve digestibility. Sprouted mung beans, however, are commonly eaten raw in salads once fully germinated.

« Previous Page
Next Page »

Primary Sidebar

ForkliftKitchen recipe developer

Welcome!

Recipe Developer · 12+ Yr Kitchen Veteran

I'm the recipe developer behind this site, focused on practical, well-tested dishes and smart ingredient swaps. Every recipe is written to be clear, reliable, and easy to make at home.

650+ Recipes
12+ Yrs Exp.
3x Tested
Our Story →

As Featured In

Allrecipes

TASTE OF HOME

Food52

HUFFPOST

Yahoo! Life

Our Editorial Standards

  • ✓ Every recipe tested at least 3 times before publishing
  • ✓ Substitutes verified by real kitchen trials, not guesswork
  • ✓ Reviewed for accuracy by our editorial team
  • ✓ Updated regularly with seasonal info and reader feedback

Most Popular

  • Creamy Lemon Shrimp Linguine
    Creamy Lemon Shrimp Linguine
  • Creamy Garlic Mushroom Chicken
    Creamy Garlic Mushroom Chicken
  • Sesame Ginger Chicken Noodle Bowls
    Sesame Ginger Chicken Noodle Bowls
  • Baked Lemon Herb Fish Fillets
    Baked Lemon Herb Fish Fillets
  • Veggie Loaded Fried Rice
    Veggie Loaded Fried Rice
  • Spicy Garlic Shrimp Stir Fry
    Spicy Garlic Shrimp Stir Fry

Join 8,000+ Home Cooks

Weekly Kitchen Tips

Easy recipes, smart substitutes, and real cooking shortcuts — every Thursday.

Subscribe Free →


Side Dishes

  • What to Serve With Asian Salmon? 15 Best Side Dishes
    What to Serve With Asian Salmon? 15 Best Side Dishes
  • Side Dishes for Strawberry Spinach Salad
    15 Best Side Dishes for Strawberry Spinach Salad
  • Sides for Grilled Cauliflower Steaks to Complete the Meal
    15 Sides for Grilled Cauliflower Steaks to Complete the Meal
  • 15 Sides To Serve With Calabacitas
    15 Best Sides for Calabacitas – Mexican-Inspired Favorites


Substitutes

  • 7 Best Substitutes for Hot Sauce in Marinades & Stir-Fries
    7 Best Substitutes for Hot Sauce in Marinades & Stir-Fries
  • 9 Best Substitutes for Butter in Baking and Cooking
  • 7 Best Substitutes for Tagliatelle for Italian Pasta Dishes
    7 Best Substitutes for Tagliatelle for Italian Pasta Dishes
  • 7 Best Substitutes for Udon Noodles in Asian Stir-Fries
    7 Best Substitutes for Udon Noodles in Asian Stir-Fries


Browse by Topic

  • Side Dishes320
  • Substitutes785
  • Dinner163
  • Air Fryer77
  • Taste Profiles484
  • Food Storage123


Reader Reviews

★★★★★

"Finally a food blog that tells you exactly why a substitute works instead of just listing options."

— Sarah M., via email

★★★★★

"The side dish recommendations are so specific — saved my dinner party twice this month."

— James R., Pinterest comment

★★★★★

"I trust this site more than most because they actually test everything. You can tell."

— Priya K., blog comment

Footer

↑ Back to Top

Forklift Kitchen

We do the heavy lifting so you can enjoy the cooking. Tested recipes, smart substitutes, and perfect pairings—built for real home cooks.

Content

  • Recipes
  • Substitutes
  • What to Serve With
  • Blog

Company

  • About Us
  • Contact
  • Subscribe

Legal

  • Privacy Policy
  • Terms of Service

As an Amazon Associate I earn from qualifying purchases.

© 2026 Forklift Kitchen.

Rate This Recipe

Your vote:


A rating is required
A name is required
An email is required