• Skip to primary navigation
  • Skip to main content
  • Skip to primary sidebar
  • Recipe Index
    • Air Fryer
  • Side Dishes
  • Substitutes
  • About
  • Contact
  • Subscribe

ForkLiftKitchen

menu icon
go to homepage
  • Recipe Index
    • Air Fryer
  • Side Dishes
  • Substitutes
  • About
  • Contact
  • Subscribe
subscribe
search icon
Homepage link
  • Recipe Index
    • Air Fryer
  • Side Dishes
  • Substitutes
  • About
  • Contact
  • Subscribe
×

Blog

What Is Olive Oil? [Taste, Uses, Varieties & More]

March 31, 2026

Olive oil is the one fat that changes the character of a dish depending on when you add it.

What Is Olive Oil

A drizzle over warm white beans at the table does something a pre-cook addition never will - it stays bright, grassy, and present.

That timing instinct, and knowing which grade to reach for, is what separates a flat dish from one that holds together.

If you're already comparing cooking fats, our guide to replacements for canola oil shows where olive oil fits in that broader swap picture.

QUICK SUMMARY

Olive oil is a pressed plant oil from the Mediterranean, graded by acidity and processing. Extra virgin is cold-pressed with distinct flavor; refined blends are neutral and better for heat. Best used for dressings, finishing, and medium-heat cooking.

🫒Category: Pressed plant oil, Mediterranean origin
👅Flavor: Green-grassy, peppery, lightly fruity or nutty
🍳Best Uses: Finishing, cold dressings, medium-heat sautéing
⏱️Shelf Life: Unopened 12-24 months; opened, best within 3-6 months
🌡️Heat Limit: Use refined grades for roasting; keep extra virgin for cold or finishing

What Is Olive Oil?

Olive oil comes from pressing the fruit of the Olea europaea tree, which has been cultivated across the Mediterranean basin for at least 6,000 years.

It is a pressed plant oil, which sets it apart from seed oils extracted by solvents or high heat.

Grade determines everything about how it tastes and where it works in cooking. The grade system is built around two factors: acidity level and how much processing the oil undergoes.

  • 🫒 Extra virgin olive oil (EVOO) - Cold-pressed, acidity below 0.8%, no heat or chemical refining; highest polyphenol content and strongest flavor.
  • Virgin olive oil - Also cold-pressed but with slightly higher acidity (up to 2%) and a milder flavor profile.
  • Refined olive oil - Heat- or solvent-processed to neutralize defects; very low flavor, higher smoke point, sold in blends.
  • Pure or light olive oil - Marketing terms for refined blends; "light" refers to color and flavor, not calories.

Olive variety matters too. Arbequina (Spain) produces a buttery, mild oil; Picual (also Spanish) is robust and bitter; Koroneiki (Greece) leans grassy and pungent. These are the same differences you find between apple varieties - same category, meaningfully different character.

What Does Olive Oil Taste Like?
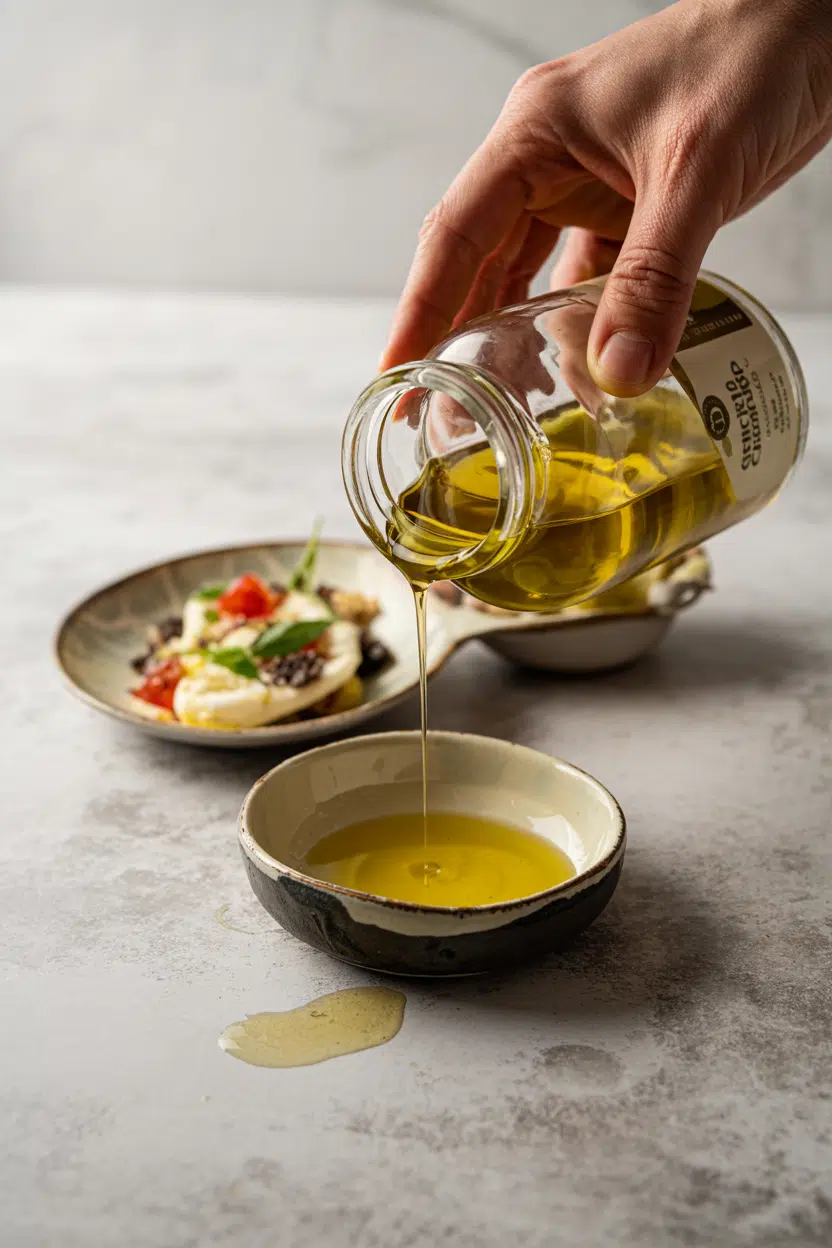
olive oil - What Is Olive Oil

Extra virgin olive oil has a layered flavor that most refined cooking oils simply don't have. The front of the palate picks up green, grassy notes - sometimes fresh-cut grass or green apple in early-harvest oils. The back of the throat gets a distinct peppery bite, which is the polyphenol oleuropein finishing the sip.

Sensory SnapshotModerate Intensity
👅 Flavor
green-grassypepperyfruitynutty
✋ Texture
silkyviscous
👃 Aroma
herbaceousfresh-cut grassgreen apple

Mouthfeel is silky and viscous - closer to avocado oil than to any seed oil, and notably heavier on the tongue than canola.

Heat strips those grassy, fruity notes quickly, which is why high-polyphenol EVOO tastes muted or flat when cooked hard.

Refined blends, by contrast, taste almost neutral with only faint olivey undertones. That difference is not a quality failure - it's just grade doing its job.

If you ever need olive oil stand-ins when a bottle runs out, the choice of replacement should match the grade you're replacing, not just the category.

Watch Out
Bitter and peppery are signs of quality in fresh EVOO, not defects. A flat, waxy, or crayon-like taste means the oil has gone rancid - that's when to discard it.

How to Use Olive Oil

Olive oil works across a wide range of preparations, and the grade you use should follow the cooking method.

For cold applications, swapping out sesame oil in a dressing is one situation where a bold EVOO can actually replicate some of that nutty intensity.

How Olive Oil Is Used
MethodBest ForTip
🥗 Cold / FinishingVinaigrettes, bread dipping, finishing soups and grainsUse your best EVOO here - flavor is fully exposed
🍳 SautéingSoftening garlic, onions, aromatics over medium heatRefined or virgin grades hold up better; EVOO works under 375°F
🔥 RoastingRoot vegetables, chicken, fish in the ovenUse a blended or refined grade; EVOO loses its point at high temps
🫙 InfusingHerb oils, chili oil, garlic-infused oilWarm over very low heat - never simmer; bottle and refrigerate
🥩 MarinatingChicken, lamb, vegetables with herbs and lemonEVOO's bitterness softens overnight and carries herb flavor well

Italian and Greek cooking rely on olive oil as the foundational fat for almost everything from braised greens to grilled fish. Spanish and North African traditions use it heavily in cold preparations - alioli, charmoula, and herb-heavy table sauces.

Levantine cooks finish hummus, labneh, and fattoush with a visible pool of good oil.

Pairings that work consistently: fresh tomatoes, garlic, lemon, parsley, feta or pecorino, roasted eggplant, and seafood. These ingredients all have enough acidity or salinity to balance the oil's bitterness and fat weight.

Skip olive oil for high-heat deep frying and for desserts that call for a neutral base - butter swaps that work in baking usually point toward neutral oils, not EVOO, for good reason.

Try It In
🍰Olive Oil CakeShows how EVOO's fruity bitterness becomes an asset in baking→🍋Ricotta with Lemon and Olive OilA cold finish where a grassy EVOO is the whole point→🫙Labneh with Olive Oil and Za'atarClassic Levantine finish — the oil carries herb flavor to every bite→

How to Buy and Store Olive Oil

Label reading is the real skill here. A harvest date is more useful than a best-by date alone - look for oils pressed within the last 12 months. Dark glass bottles or tins block light; clear plastic does not, and it accelerates oxidation.

Best Pick
For everyday use, choose a single-estate or PDO-certified extra virgin with a harvest date and country of origin clearly printed. These oils are traceable and held to stricter acidity standards.

What to check before buying:

  • ✅ Harvest date - printed on label, ideally within 12 months of purchase
  • ✅ Packaging - dark glass, tin, or BPA-free opaque bottles only
  • ✅ "First cold-pressed" or "cold-extracted" - confirms no heat processing for EVOO
  • ❌ Clear plastic jugs - expose oil to light; avoid regardless of grade
  • ❌ No origin listed - "packed in EU" without a source country is a red flag

Store in a cool, dark place with the cap sealed tight. Proper guidance on storing olive oil correctly covers the full timeline - but the short version is: opened bottles are best used within three to six months.

Unlike avocado oil's shelf life, which tracks similarly, olive oil's polyphenols degrade faster once air enters the bottle.

Shortcut
Buy smaller bottles more often rather than one large jug. A 500ml bottle used in two months beats a 1-liter bottle that sits oxidizing for six.

Where to Start With Olive Oil

Two bottles cover most situations. A mid-range EVOO with a harvest date handles finishing, dressings, and bread dipping - this is where flavor earns its cost.

A refined or blended olive oil handles everyday sautéing and oven roasting without waste.

If you've only ever used one bottle for everything, start by reserving your EVOO strictly for cold and finishing use for two weeks. The difference in those applications will be immediate and convincing.


Frequently Asked Questions

What is extra virgin olive oil?

Extra virgin is the highest grade of olive oil - cold-pressed without heat or solvents, with acidity below 0.8%. It retains the most polyphenols and has the strongest, most distinct flavor of any grade.

Can you cook with extra virgin olive oil?

Yes, for low-to-medium heat cooking under roughly 375°F. Its smoke point is lower than refined grades, but the bigger issue is that heat destroys the grassy, peppery flavor you're paying for.

Why is my olive oil bitter or peppery?

That's polyphenols - specifically oleuropein and oleocanthal - and it's a sign of freshness, not a flaw. Early-harvest and high-polyphenol varieties like Picual are most pronounced; the bite softens as the oil ages.

How does olive oil taste compared to canola?

Canola is almost completely neutral with a faint waxy note. Olive oil - especially extra virgin - has obvious grassy, bitter, and sometimes fruity character that canola never develops regardless of grade.

How long does olive oil last after opening?

Three to six months for peak flavor in an opened bottle stored correctly. It won't become unsafe quickly, however the polyphenols and aromatic compounds degrade and the oil eventually turns rancid.

Middle Eastern Ful Medames Breakfast

March 31, 2026

You need 75-100 minutes start to finish if you use dried beans, or just 25 minutes with canned. Either way, this is a protein-packed breakfast that fills you up and costs almost nothing per serving.

Middle Eastern Ful Medames Breakfast served on a plate

Fava beans simmer until tender, then you mash them slightly and stir in lemon, garlic, and cumin. The texture should be creamy with some chunks, not baby food smooth.

This works for meal prep mornings, lazy weekend breakfast, or when you want something that feels substantial without meat or eggs. The beans hold in the fridge for days and taste better the next morning once the flavors blend.

QUICK SUMMARY

Middle Eastern Ful Medames is a warm fava bean breakfast mashed with olive oil, lemon, and cumin. The key is simmering beans gently until tender but whole, then mashing them lightly while still warm. Works for weeknight breakfast, meal prep, or budget-friendly entertaining brunch.

⏱️Plan Ahead: Soak dried beans 8-12 hours or use canned to skip this step entirely
🔥First Move: Simmer at low heat around 190°F so beans cook evenly without bursting
⚠️Watch Out: Add salt in the last 15 minutes only-early salt toughens beans and extends cook time

Table of Contents

Toggle
  • Why This Recipe Works
  • What You'll Need
    • Ingredient Details
  • Ingredient Swaps
  • What to Serve With It
  • Store and Reheat
  • Frequently Asked Questions
  • Middle Eastern Ful Medames Breakfast
    • Method 
    • Tried this recipe?

Why This Recipe Works

Gentle simmering at low heat keeps the beans intact while cooking them through. Rich mains need something to cut through, and this creamy dip does exactly that. For a version that comes together quickly, this creamy dip uses roasted garlic and parmesan for depth.

Quick Reference
⏱️
Prep Time
10 min (plus soaking if dried beans)
🔥
Cook Time
60-90 min (dried) or 10-15 min (canned)
⏰
Total Time
75-100 min (with soaking)
🍽️
Servings
4 servings
📊
Difficulty
Medium
🏷️
Category
Main Dish
💡
Quick Tip
Simmer beans gently until tender but whole
🎯
Best For
Weeknight | Meal prep | Entertaining

What makes ful medames work:

  • Soaking dried beans overnight softens them for even cooking and cuts the simmer time by 20-30 minutes
  • Low steady heat around 190°F cooks beans through without breaking them apart or making them mushy
  • Mashing while warm creates a creamy base that holds the chunky beans in suspension instead of separating
  • Fresh lemon juice added off heat keeps the brightness sharp instead of cooking it dull
  • Olive oil drizzled at serving coats the beans and adds richness without making them greasy
Quick Tip
Test beans after 45 minutes by pressing one between your fingers-it should mash easily but still hold its shape

What You'll Need

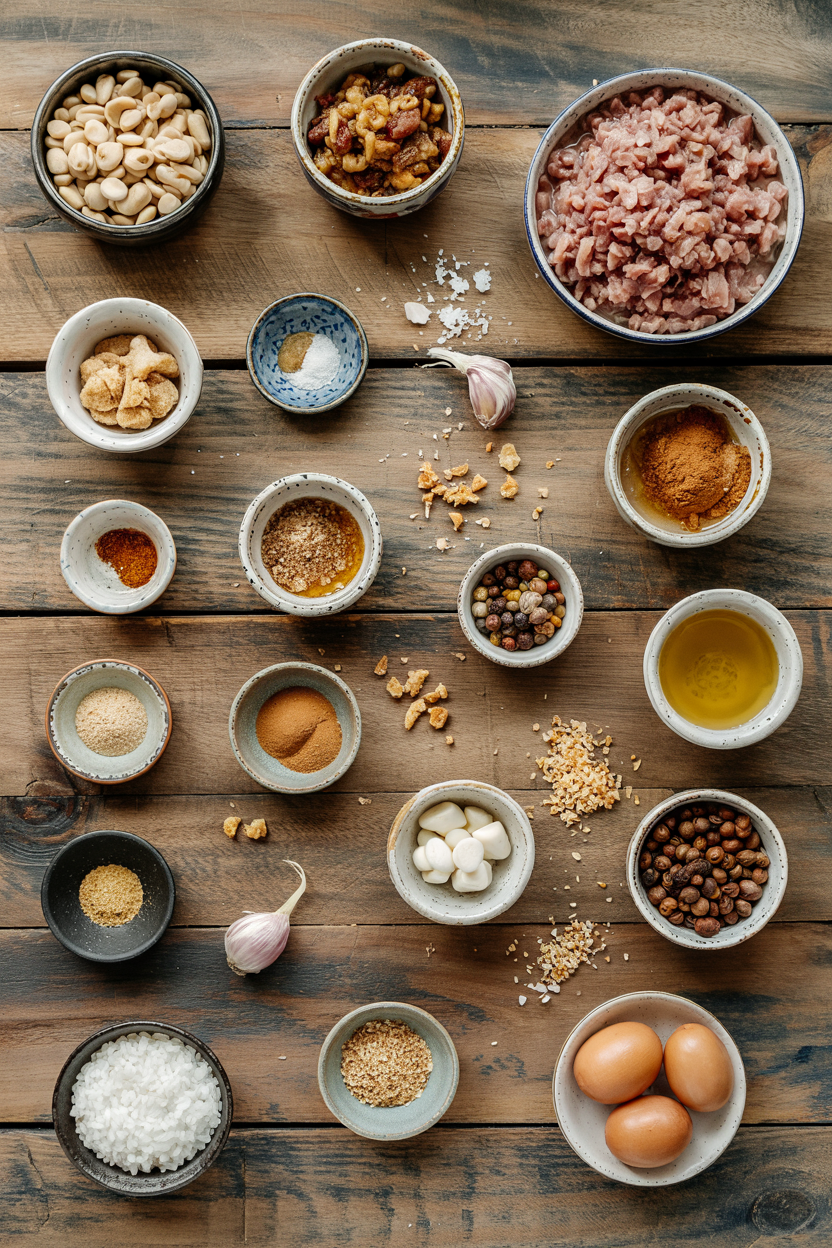
Ingredients for Middle Eastern Ful Medames Breakfast

The beans are the only thing you can't skip. A good cold drink side dish can make or break the plate. For a version that comes together quickly, cold drink side dish uses rose water and sugar for a refreshing contrast.

🫘
Base
  • Dried fava beans (or canned)
🥢
Flavor
  • Olive oil
  • Lemon juice
  • Cumin
  • Salt
🧄
Aromatics
  • Garlic
🥬
Garnish
  • Fresh parsley
  • Tomatoes
  • Onion
  • Chili pepper (optional)

Ingredient Details

  • Dried fava beans
    Look for split or whole dried fava beans-split cook faster but whole hold shape better for chunky texture
  • Olive oil
    Use extra virgin for the most flavor-it's drizzled raw at the end so quality matters here
  • Lemon juice
    Fresh only-bottled lacks the brightness that cuts through the rich beans
  • Garlic
    Mince finely and let rest 5 minutes before adding to mellow the raw bite
  • Cumin
    Ground cumin works fine but toasting whole seeds and grinding fresh adds deeper earthiness
  • Fresh parsley
    Flat-leaf parsley has more flavor than curly-chop it just before serving to keep it bright green
  • Canned fava beans
    Rinse well to remove the tinny taste-texture will be slightly softer than dried but still works

Ingredient Swaps

Canned beans cut the active time to under 30 minutes total. Rich mains need something to cut through, and salad does exactly that. For a version that comes together quickly, this quick salad dish uses cucumber and tomatoes for a crisp contrast.

Four swaps that work:

  • Dried fava beans → canned fava or white navy beans - reduces cooking time to 10-15 minutes and skips the overnight soak; texture will be slightly softer but still creamy
  • Olive oil → avocado or sunflower oil - milder flavor without the peppery olive oil bite; less traditional but keeps the dish dairy-free
  • Fresh parsley → cilantro or mint - changes the herbaceous note but still adds freshness; mint works especially well with lemon
  • Cumin → ground coriander - milder and slightly citrusy instead of earthy-warm; use the same amount
Instead OfUseRatio
Dried fava beansCanned fava beans (drained)1:1
Fresh lemon juiceLime juice1:1
Fresh garlic (3 cloves)Garlic powder¾ tsp
Ground cumin (1 tsp)Ground coriander1 tsp

Instructions

If you start with dried beans, budget 90 minutes including soaking time. Cool and crunchy, slaw resets your palate between bites. For a version that comes together quickly, crunchy homemade slaw recipe uses sesame dressing for a tangy crunch.

  1. Soak dried fava beans overnight in cold water covering them by 2 inches-discard the soaking water before cooking and rinse the beans in a strainer.

  2. Simmer beans in fresh water over low heat at around 190°F for 60-90 minutes until they mash easily between your fingers but still hold their shape-add more water if the level drops below the beans.

  3. Add salt in the last 15 minutes of cooking and stir gently-drain the beans immediately when tender and reserve ¼ cup of the cooking liquid.

  4. Mash beans gently while still warm using a fork or potato masher to break up about half of them-stir in minced garlic, cumin, lemon juice, and a splash of reserved cooking liquid until creamy with chunks.

  5. Drizzle with olive oil and top with chopped parsley, diced tomatoes, and onion-serve warm with extra lemon wedges on the side.

Shortcut
Use canned fava beans to skip steps 1-2 entirely-just drain, rinse, warm them in a saucepan for 5 minutes, then start at step 4

What to Serve With It

This needs warm bread for scooping and something cool or tangy to cut the richness. The slaw works best when it hits the table at the same time as the main. We keep a batch ready for nights like this - savory chicken dish ideas shows how to plan a balanced plate with protein and sides.

Side Dish Prep Why It Works How to Serve
Warm pita bread Easy Traditional pairing for scooping beans Warm in oven or skillet, tear into quarters
Sliced cucumbers and tomatoes Easy Adds fresh crisp contrast to creamy beans Slice thin, sprinkle with salt, serve chilled
Labneh or plain yogurt Easy Cool creamy balance to warm spices Dollop on the side or swirl into beans
Hard-boiled eggs Easy Extra protein complements beans Slice in half, season with salt and cumin
Pickled vegetables Easy Tangy bite cuts through rich olive oil Serve turnips, cucumbers, or peppers on the side

Three ways to serve it:

  • As a breakfast bowl with warm pita, sliced hard-boiled eggs, and diced cucumbers arranged around the beans for scooping
  • For brunch entertaining with a spread of labneh, pickled vegetables, olives, and za'atar bread on the side
  • Meal prep style portioned into containers with pita wedges and cucumber salad packed separately to stay crisp
Best Pick
Warm pita bread is the most traditional side-it soaks up the olive oil and makes every bite feel complete

Store and Reheat

Ful medames holds well in the fridge and actually tastes better the next day once the garlic mellows. Portion it into shallow containers so it cools fast and reheats evenly without drying out at the edges.

Method Time Best For
🍳 Stovetop 5-7 min over low heat Retaining creamy texture without drying
🔥 Oven 10-15 min at 325°F (160°C) Larger portions, gentle reheating
📦 Microwave 1-2 min, stirring halfway Quick warm-up for single servings

For best results when storing:

  • Cool completely before sealing so condensation doesn't make the beans watery or cause the container to sweat
  • Store in shallow airtight containers for up to 4 days in the fridge-glass works better than plastic for preventing odor transfer
  • Freeze in portions for up to 1 month but expect slightly softer texture after thawing; add fresh lemon juice when reheating
  • Add a splash of water or olive oil when reheating to restore creaminess if the beans look dry or thick
  • Reheat garnishes separately since tomatoes, parsley, and onion turn mushy and lose their fresh bite when warmed

Frequently Asked Questions

Can I use canned fava beans instead of dried for ful medames?

Yes-drain and rinse them well, then warm in a saucepan for 5 minutes before mashing. The texture will be slightly softer than dried beans but the flavor stays close, and you skip the overnight soak and 90-minute simmer.

How do I store and reheat leftover ful medames without losing texture?

Store in shallow airtight containers for up to 4 days in the fridge. Reheat on the stovetop over low heat for 5-7 minutes, adding a splash of water or olive oil to restore creaminess-skip the microwave if you can since it dries out the edges.

How do I know when the fava beans are fully cooked and ready?

Press a bean between your fingers-it should mash easily but still hold its shape without turning to mush. Start testing after 45 minutes of simmering and keep checking every 10 minutes until they reach that tender but intact texture.

What do I do if my ful medames turns out too dry or too watery?

If it's too dry, stir in reserved bean cooking liquid or warm water a tablespoon at a time until creamy. If it's too watery, simmer uncovered for 5 minutes to evaporate excess liquid, or mash more beans to thicken the base.

Can I scale ful medames recipe for larger groups and how?

Yes-double or triple the beans and aromatics but use the same pot size and simmer time since more beans don't cook faster. Keep the salt ratio consistent and taste as you go, adjusting lemon juice and olive oil at the end based on the larger batch.

Middle Eastern Ful Medames Breakfast served on a plate

Middle Eastern Ful Medames Breakfast

No ratings yet
Middle Eastern Ful Medames is a warm fava bean breakfast mashed with olive oil, lemon, and cumin. The key is gently simmering beans until tender but whole, then mashing them lightly while warm to create a creamy, chunky texture. This protein-packed dish is perfect for weeknight breakfasts, meal prep, or a budget-friendly brunch.
Print Recipe Pin Recipe
Prep Time 10 minutes mins
Cook Time 1 hour hr 15 minutes mins
Total Time 1 hour hr 25 minutes mins
Servings: 4 servings
Course: Breakfast, Main Dish
Cuisine: Middle Eastern
Ingredients Method Notes

Ingredients
  

  • 1 cup dried fava beans soaked overnight in cold water
  • 1 tablespoon olive oil extra virgin, for drizzling at serving
  • 2 tablespoons fresh lemon juice add off heat
  • 3 cloves garlic minced finely and rested 5 minutes before adding
  • 1 teaspoon ground cumin toasted seeds ground fresh preferred, or ground cumin
  • 0.5 teaspoon salt added in last 15 minutes of cooking
  • 2 tablespoons fresh parsley flat-leaf, chopped for garnish
  • 0.5 cup tomatoes diced for garnish
  • 0.25 cup onion diced for garnish
  • 1 chili pepper optional, chopped for garnish

Method
 

  1. Soak dried fava beans overnight in cold water covering them by 2 inches; discard soaking water and rinse beans before cooking.
    1 cup dried fava beans
  2. Simmer beans in fresh water over low heat at around 190°F for 60-90 minutes until they mash easily but still hold shape; add water as needed to keep beans covered.
    1 cup dried fava beans
  3. Add salt in the last 15 minutes of cooking and stir gently. Drain beans immediately when tender and reserve ¼ cup cooking liquid.
    0.5 teaspoon salt
  4. Mash beans gently while still warm to break up about half of them. Stir in minced garlic, ground cumin, fresh lemon juice, and a splash of reserved cooking liquid until creamy with chunks.
    3 cloves garlic, 1 teaspoon ground cumin, 2 tablespoons fresh lemon juice
  5. Drizzle olive oil over the beans and top with chopped parsley, diced tomatoes, onion, and optional chili pepper. Serve warm with extra lemon wedges on the side.
    1 tablespoon olive oil, 2 tablespoons fresh parsley, 0.5 cup tomatoes, 0.25 cup onion, 1 chili pepper

Notes

  • Soak dried beans overnight to reduce cooking time and soften evenly.
  • Simmer at low heat to keep beans intact and avoid mushiness.
  • Add salt late in cooking to prevent toughening the beans.

Tried this recipe?

Let us know how it was!

What Is Marinara Sauce? [Taste, Uses & More]

March 31, 2026

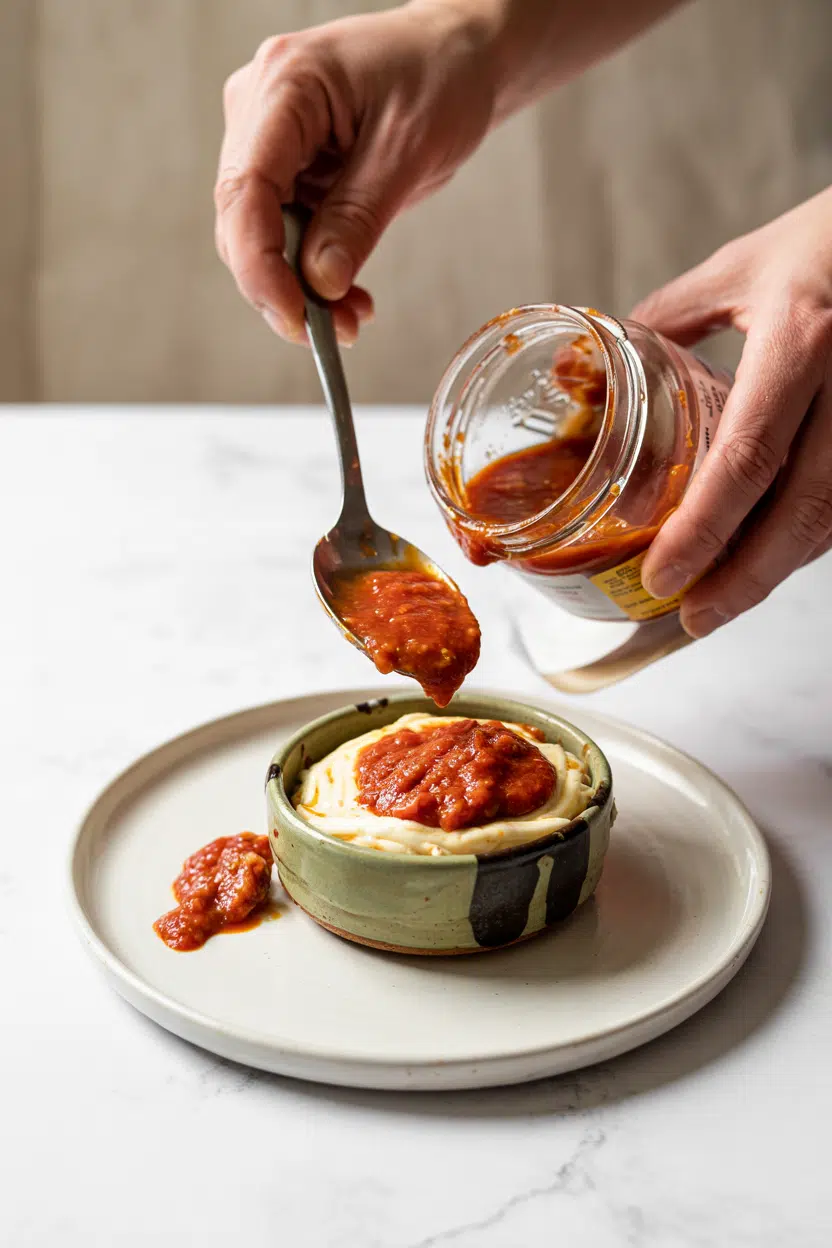
Spoon marinara over a bowl of spaghetti on a weeknight and you're working with one of the most straightforward sauces in Italian cooking - crushed tomatoes, garlic, olive oil, and a handful of herbs brought together in under 30 minutes. That simplicity is the point.

What Is Marinara Sauce

Unlike a slow-cooked ragù, marinara sauce stays bright and acidic, letting good tomatoes do most of the work. It pulls double duty on a pizza base or alongside fried calamari just as easily as it coats pasta - and knowing how to pick, cook, and store it makes all the difference.

QUICK SUMMARY

Marinara sauce is a short-cooked, tomato-forward sauce from southern Italy, built on crushed tomatoes, garlic, olive oil, and herbs. It's bright, lightly acidic, and intentionally simple - closer to a dressed passata than a heavy cooked sauce.

🍅Flavor: Bright tomato acidity, garlic umami, mild basil or oregano
🫙Texture: Light, slightly chunky, not heavily reduced
🍽️Best Uses: Pasta, pizza base, dipping, quick seafood braises
❄️Shelf Life: Refrigerated 3-5 days; frozen up to 3-4 months
🌿Origin: Neapolitan tradition, southern Italy - now a staple of Italian-American cooking

What Is Marinara Sauce?

Marinara sauce is a tomato-based sauce rooted in the Neapolitan and Campanian cooking traditions of southern Italy. The name likely traces back to la marinara - the sailor's wife - though some accounts connect it to preserved tomato sauces kept aboard ships for long voyages.

At its core, it's crushed or pureed tomatoes cooked briefly with olive oil, garlic, and herbs like basil or oregano. That's the full ingredient list in most traditional versions.

It goes by a few names - sugo semplice, pomodoro marinara, or just marinara - but the category stays consistent: a fast, minimally cooked sauce that preserves the tomato's acidity and body.

It's worth distinguishing from a plain pomodoro sauce, which sometimes skips the garlic and herbs entirely, and from a slow ragù, which has a fundamentally different structure.

Several subtypes exist depending on region and preference:

  • Classic Neapolitan - crushed San Marzano tomatoes, raw garlic slices, dried oregano, olive oil, finished with fresh basil
  • Italian-American style - slightly longer cook time, often with more garlic and a pinch of red pepper flakes
  • Chunky hand-crushed - whole peeled tomatoes broken by hand for a rustic, uneven body
  • Smooth blended - passed through a food mill or blended for a saucy, uniform texture closer to passata

What Does Marinara Sauce Taste Like?

marinara sauce - What Is Marinara Sauce

Marinara sauce tastes bright and tomato-forward, with a clean acidity that sets it apart from heavier cooked sauces. The tomato sweetness comes through without being sugary, balanced by the sharpness of raw or lightly sweated garlic and the mild herbal lift of basil or oregano.

Sensory SnapshotModerate Intensity
👅 Flavor
bright aciditygarlic umamitomato sweetnessherbal
✋ Texture
light-bodiedslightly chunky
👃 Aroma
fresh crushed tomatotoasted garlicwarm olive oil

Heat and cook time shift the profile noticeably.

A 10-minute simmer keeps the sauce lively and sharp; push past 30 minutes and the acidity rounds out, the garlic softens, and you lose some of that fresh-tomato character. Finishing with fresh basil off the heat - rather than cooking it in - preserves the herbal note that would otherwise cook away entirely.

Watch Out
Adding heavy cream to marinara rounds out the acidity but flattens the tomato brightness that defines the sauce. If you want a creamier tomato sauce, that's a different recipe entirely.

How to Use Marinara Sauce

Marinara works across a wider range of dishes than most people use it for. The short cook time means it fits weeknight cooking without much planning, and its light body pairs with proteins and vegetables without drowning them.

The most direct use is spaghetti alla marinara - pasta tossed with the sauce and finished with good olive oil and fresh basil. Mozzarella on a pizza base needs a thin, not-too-wet layer of sauce, and marinara's restrained consistency works well there.

For something more substantial, braising mussels or clams directly in the sauce takes less than 15 minutes and gives the seafood a bright, garlicky broth to soak into.

How Marinara Sauce Is Used
MethodBest ForTip
🥗 As-IsDipping calamari, garlic bread, mozzarella sticksWarm gently; don't reboil or the texture thins
🍳 Short SimmerPasta, pizza, polenta, chicken marinara10-20 minutes max to hold tomato brightness
🦪 Seafood BraiseMussels, clams, shrimpAdd shellfish directly to simmering sauce; cover and cook until opened
🫕 Baked DishesBaked ziti, eggplant parmigianaUse a slightly thicker batch - oven time will reduce it further

Paired ingredients worth knowing: parmigiano-reggiano grated over the top adds a sharp, salty depth; anchovies or capers stirred in early create a richer umami base without making the sauce taste fishy. Roasted eggplant or zucchini folded in before serving keeps the sauce light while adding substance.

For full pairing ideas, side dishes for marinara sauce covers the options in detail.

Try It In
🧄Roasted Garlic Marinara SauceDeeper, sweeter garlic flavor without the sharpness of raw→🍝Turkey Meatballs in Marinara SauceLean meatballs simmered directly in the sauce for juicy results→

How to Buy and Store Marinara Sauce

San Marzano tomatoes are the standard reference point for authentic marinara. They're lower in water content than most round tomatoes, with a thicker flesh and a natural sweetness that doesn't need correcting with added sugar.

Best Pick
Look for DOP-certified San Marzano cans - the label should say "Pomodoro San Marzano dell'Agro Sarnese-Nocerino." Non-certified cans using the San Marzano name vary widely in quality.

For fresh tomatoes, choose deeply colored plum tomatoes with slight give at the stem end. Avoid any with green shoulders or mealy flesh - both signal underdevelopment and thin flavor.

Skip cans with dents along the seam or any visible bulging.

Storage is straightforward:

  • Unopened cans - cool, dry pantry; shelf-stable for a year or more
  • Opened or homemade sauce - airtight container in the fridge; use within 3-5 days
  • Frozen sauce - portion into freezer bags flat; good for 3-4 months

For a full breakdown of marinara sauce freshness guide across storage conditions, including jarred commercial versions, see our dedicated guide. Jarred marinara varies significantly in sodium and added sugar content - check the label before buying if either matters to you.

Start Here for the Best Results

If you're making marinara for the first time, start with good canned tomatoes - that single choice matters more than technique. Crush them by hand into the pan for texture, sweat the garlic gently in olive oil before the tomatoes go in, and simmer for no more than 20 minutes.

Add the basil last, off the heat.

That version - four or five ingredients, under 30 minutes - is the benchmark. Once you have that down, the variations follow naturally.

Frequently Asked Questions

Is marinara sauce the same as tomato sauce?

No. Marinara is a specific short-cooked style with garlic and herbs; plain tomato sauce is often cooked longer and may include onion, carrot, or celery. In Italian-American diners, "tomato sauce" sometimes refers to a heavier, slower-cooked version closer to a basic ragù base.

How long should you simmer marinara sauce?

Ten to twenty minutes is enough for most versions. Longer cooking rounds the acidity and softens garlic, but it also fades the fresh tomato character that defines marinara. Stop simmering before it starts to taste flat.

Does marinara sauce contain meat?

Traditional marinara contains no meat - it's tomatoes, olive oil, garlic, and herbs. Some Italian-American recipes add anchovies for depth, but the sauce itself is plant-based and typically suitable for vegetarians.

What tomatoes are best for marinara?

DOP San Marzano tomatoes are the traditional choice for their low water content and thick flesh. High-quality canned plum tomatoes work well as a substitute - look for a short ingredient list with no added citric acid or puree padding.

Is marinara sauce gluten free?

Homemade marinara made from tomatoes, olive oil, garlic, and herbs contains no gluten. Jarred commercial versions are usually gluten free, but check the label for thickeners or modified starch that some brands add.

How Long Does Lard Last? [Storage Guide]

March 31, 2026

Opening the fridge to find a jar of lard turned murky yellow with a faint acrid smell is one of those moments where you genuinely can't tell if it's still safe or just past its prime. Rendered pork fat keeps longer than most people expect, however the conditions matter enormously - pantry, fridge, and freezer each deliver very different timelines.

Can You Freeze Lard

If you rely on lard for pastry shortening or deep frying, knowing shortening swaps that work when your batch goes bad is useful, however the bigger win is keeping lard stable long enough to use it fully.

Understanding lard and its flavor profile also helps you recognize when oxidation has started to dull it.

QUICK SUMMARY

Unopened commercial lard lasts 6-12 months in the fridge and up to 2 years in the freezer. Once opened, refrigerate in an airtight container and use within 6 months. Pantry storage is only suitable short-term for sealed jars in cool, dark conditions.

🧊Fridge (opened): Up to 6 months in an airtight container
❄️Freezer: 12-24 months depending on seal quality
⚠️Key Rule: Never seal warm homemade lard - cool it fully first to prevent condensation and mold

How Long Does Lard Last?

Lard's shelf life swings significantly based on two factors: whether it's been opened and where you store it. Commercially rendered lard contains antioxidants that extend pantry stability, while homemade rendered fat from back fat or leaf lard lacks those additives and degrades faster at room temperature.

Leaf lard - the prized fat from around the kidneys - is particularly prone to oxidation if left unsealed, so it benefits most from cold storage. Opened pantry lard stored near a stove can turn rancid in under two weeks.

Lard Shelf Life
MethodStateDurationNotes
🏠 PantryUnopened1-2 monthsCommercially rendered only; cool, dark location required
🏠 PantryOpened2-4 weeksOxidizes quickly; refrigerate after opening for best results
🧊 FridgeOpened6 monthsAirtight container essential; leaf lard stays closer to 6 months
🧊 FridgeUnopened6-12 monthsCommercial tubs retain best quality up to a year when sealed
❄️ FreezerOpened12-18 monthsWrap tightly to prevent freezer burn and flavor loss
❄️ FreezerUnopened18-24 monthsFactory-sealed or vacuum-packed jars approach the upper range

Comparing these timelines to butter's shelf life shows that rendered pork fat actually holds up longer under cold storage. The trade-off is that lard is far more sensitive to heat and oxygen exposure than butter once opened.

How to Store Lard

The single biggest storage mistake is sealing warm homemade lard before it cools - trapped steam creates condensation inside the container, which accelerates mold growth. Always cool rendered lard to room temperature before transferring it to a storage vessel.

Watch Out
Never store opened lard in thin disposable tubs near the stove. Heat speeds rancidity dramatically - even a few degrees of ambient warmth above 70°F can cut pantry life from weeks to days.

Fridge: Transfer cooled lard into a glass jar or heavy-duty plastic tub with a gasketed lid. Press a layer of plastic wrap directly onto the fat surface to reduce air contact, then seal the lid. For homemade batches, pouring a thin layer of neutral oil over the surface creates an additional oxygen barrier.

Freezer: Portion before freezing in 1-2 cup blocks so you only thaw what each recipe requires. Vacuum-seal bags extend quality toward the 18-month mark. For storing bacon correctly, the same principle applies - airtight sealing and consistent cold are non-negotiable.

Pantry: Reserve pantry storage for commercially rendered, factory-sealed jars only. Keep them away from heat sources and use within two months of purchase.

Label every container with both the rendered date and the freeze or refrigeration date. Rotate older batches to the front so nothing lingers past its window.

Can You Freeze Lard?

Freezing lard is straightforward and one of the most practical ways to extend a large batch without quality loss. Functionality for baking and frying remains fully intact after freezing, though very long storage can make the texture slightly grainier -

something worth knowing if you plan to use it raw in a compound fat.

Golden Rule
Freeze lard in a loosely closed tub and you'll get freezer burn within weeks. A vacuum-seal bag or double-wrapped block - plastic wrap then foil - is the minimum standard.
  1. Portion the lard into 1-2 cup blocks or pack into silicone molds for small-batch use.
  2. Wrap tightly in plastic wrap first, then a second layer of foil, or use vacuum-seal bags to eliminate air pockets.
  3. Label each parcel with the date and freeze flat for efficient stacking.
  4. Thaw in the fridge overnight before use; avoid room-temperature thawing, which promotes condensation on the fat surface.

For pastry work specifically, you can slice or grate frozen lard directly into dough without thawing - this actually preserves flaky layers better than softened fat.

The same care applied to salmon freezer burn guide principles applies here: packaging integrity determines how long quality holds.

Signs Lard Has Gone Bad

Rancidity in rendered pork fat follows a predictable pattern, and most signs are visible or detectable by smell before you risk a bad batch. Don't taste lard to confirm spoilage - rancid pork fat can cause stomach upset.

Signs It's Gone Bad
👀
VisualYellowing or browning tint from oxidation · Gray or greenish streaks indicating microbial growth · Moisture rings or surface mold from water contamination
👃
SmellSharp, acrid or 'painty' odor from rancidity · Sour or putrid smell if contaminated
✋
TextureSticky or slimy film on top · Excessively grainy or crumbly texture when chilled

Good lard should smell clean and neutral - faintly porky at most. An acrid or "painty" smell is the clearest signal of oxidative rancidity and means the batch is done.

Mold growth indicates water was introduced, which is a common result of the warm-sealing mistake covered in storage above.

Getting the Most From Your Lard

Proper storage isn't complicated, however small lapses - warm sealing, thin containers, pantry heat - compound quickly with rendered pork fat because of how readily it absorbs surrounding odors and oxidizes. These four habits close most of the risk:

  • 🧊 Pre-portion before freezing - pull only what a recipe needs without exposing the whole batch to air.
  • 🫙 Use a gasketed glass jar - it seals better than a loose-lidded tub and doesn't absorb fat odors over time.
  • 🛢️ Oil barrier for homemade batches - a thin neutral-oil layer over fridge-stored lard limits direct oxygen contact on the fat surface.
  • 🗓️ Date and rotate - always bring older containers forward; lard stored beyond 12 months even in the freezer starts losing frying performance.

If a batch does go bad before you finish it, knowing your replacements for lard means you're never stuck mid-recipe. For broader fat swaps in pastry, replacements for beef tallow covers similar ground.

Proper rotation and airtight storage should mean you rarely need either.

Shortcut
For pastry, skip thawing entirely - grate frozen lard directly into flour for colder, flakier layers than you'd get from fridge-soft fat.

Frequently Asked Questions

How long does lard last in the fridge?

Opened lard lasts up to 6 months refrigerated in an airtight container. Unopened commercial tubs can hold best quality for 6-12 months. Leaf lard sits at the shorter end of that range.

Can you freeze lard for baking?

Yes - frozen lard performs as well as fresh in pastry and frying. You can grate it directly from frozen into dough, which actually produces flakier results than using softened fat.

Is homemade lard safe after a month in the fridge?

Yes, if it was cooled before sealing and stored in an airtight container. Homemade rendered lard is safe for up to 6 months refrigerated - check for any acrid smell or surface mold before use.

Does lard go bad and how can you tell?

It does. The clearest sign is a sharp, acrid or "painty" smell indicating rancidity. Yellowing, gray streaks, or surface mold are visual confirms - discard any batch showing these.

How do you thaw lard without affecting texture?

Thaw overnight in the fridge rather than at room temperature. Room-temp thawing causes condensation on the fat surface, which introduces moisture and can accelerate spoilage in the next storage cycle.

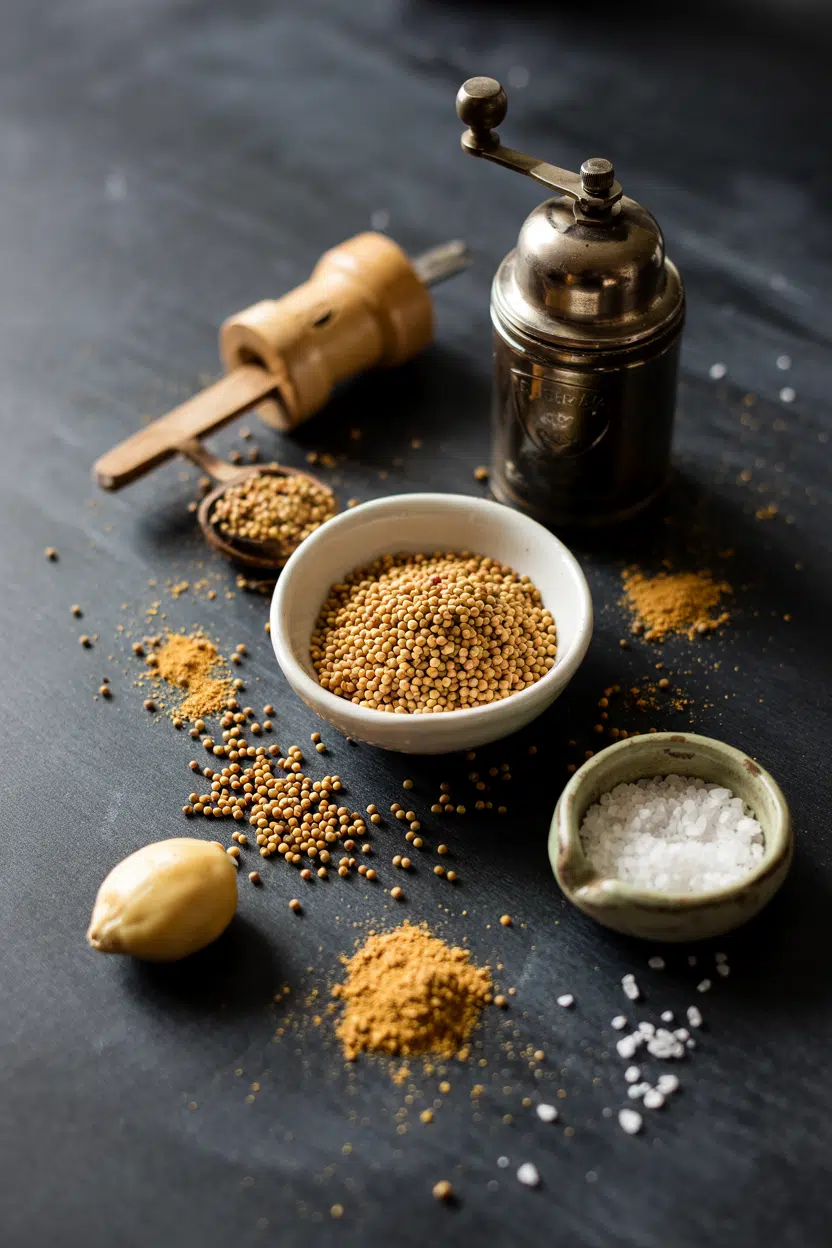
What Is Mustard Seed? [Taste, Uses, Varieties & More]

March 31, 2026

You spot a small jar of mustard seeds on the spice aisle and wonder which color to grab - yellow, brown, or black - and whether whole seeds will actually do anything useful in your cooking.

What Is Mustard Seed

Each type behaves differently once heat or liquid gets involved, and that gap matters when you're deciding between a dal temper and a homemade condiment.

If your recipe calls for prepared condiment rather than seed, our guide to alternatives to dijon mustard covers that ground, and if the leaves are what you need, the mustard green swaps that work page is the better starting point.

This article is about the seeds themselves.

QUICK SUMMARY

Mustard seed is a seed spice used whole, cracked, or ground. It ranges from mildly sharp to intensely pungent depending on color and preparation. Use it in tempering oils, pickling brines, dry rubs, and homemade mustard condiments.

🌿Category: Seed spice from Brassica and Sinapis genera
🔥Flavor: Pungent and sharp when activated, nutty when toasted
🍳Best Uses: Tempering, pickling, dry rubs, prepared mustards
📦Shelf Life: Whole seeds 1-3 years pantry; ground 3-6 months
⚠️Watch: Mustard is a labeled allergen in several countries - check before serving

What Is Mustard Seed?

Mustard seed comes from annual plants in two closely related genera - Sinapis and Brassica - and has been cultivated across the Mediterranean and South Asia for thousands of years.

It sits at a useful crossroads between oilseed and spice, since the same seed pressed yields mustard oil and crushed yields the base for condiments.

Three main varieties dominate the spice world. Yellow mustard seed (Sinapis alba) is the mildest and most common in North American and European condiment production. Brown mustard seed (Brassica juncea) carries more heat and is central to South Asian cooking -

particularly Bengali and Punjabi cuisines. Black mustard seed (Brassica nigra) is the sharpest, though it has largely been replaced commercially by brown seed because the plant doesn't mechanically harvest as easily.

Beyond the seed itself, the plant produces mustard greens and mustard oil, making the entire plant economically significant across cultures.

  • 🟡 Yellow (Sinapis alba) - Mild, straw-colored; standard in American yellow mustard and pickling blends
  • 🟤 Brown (Brassica juncea) - Medium-hot; used in Dijon-style mustards and Indian tadka
  • ⚫ Black (Brassica nigra) - Sharpest variety; widely used historically, now rarer commercially

What Does Mustard Seed Taste Like?

mustard seed - What Is Mustard Seed

Raw whole seeds are almost inert on the tongue - hard, faintly bitter, with little aroma. The real character only appears when enzymes inside the seed are activated by crushing, grinding, or contact with liquid.

Once activated, the sharpness resembles horseradish or wasabi: fast-hitting, sinus-clearing heat that fades relatively quickly.

Add acid - vinegar or wine - and that heat stabilizes into the rounded sharpness of a prepared mustard.

Skip the acid, and the heat is sharper but also more fleeting.

Toasting dry in a pan takes the flavor in a completely different direction: the pungency softens, and a nutty, almost sesame-like warmth comes forward instead.

Sensory SnapshotPungent Intensity
👅 Flavor
sharp heatbitter-greennutty (toasted)
✋ Texture
hard & spherical rawcreamy when ground
👃 Aroma
sharp & musty rawtoasty & warm fried

How to Use Mustard Seed

Indian cooking relies on tempering - dropping brown or black mustard seeds into hot oil (a technique called tadka) and waiting for them to pop and crackle before adding other ingredients.

That popping signals the seeds have released their volatile compounds into the fat, flavoring the entire dish. Dals, potato sabzis, and chutneys all start this way.

Outside South Asia, ground mustard seed mixed with vinegar forms the base of nearly every prepared mustard, from a sharp Dijon to a coarse-grain country mustard.

The ratio of seed to acid and the temperature at which you grind determines the final heat level.

If you run short mid-recipe, knowing your mustard seed stand-ins keeps the dish on track, and a separate guide on swapping out ground mustard is worth bookmarking for condiment-based recipes.

Golden Rule
Cold liquid locks in heat; hot liquid (or heat alone) mellows it. Choose your preparation based on how sharp you want the final result.

Whole seeds add textural bite to pickling brines, sausages, and charcuterie. Crack them coarsely and mix with flaky salt for a finishing sprinkle on roasted carrots or parsnips.

Powdered mustard seed works well in dry rubs for pork and beef, where it helps form a crust during high-heat roasting.

How Mustard Seed Is Used
MethodBest ForTip
🫕 Bloomed in oilDal, vegetable dishes, chutneysWait for the pop - it signals the flavor has released
🍳 Toasted drySpice blends, finishing sprinkleLow heat only; seeds burn fast and turn bitter
🥣 Ground with liquidPrepared mustards, marinades, saucesUse cold liquid for maximum heat; vinegar stabilizes it
🫙 Whole in brinePickles, sausages, charcuterieBlack seeds hold up better in long brines than yellow

Mustard pairs naturally with vinegar, pork, honey, and root vegetables. In spice blends, cumin and fenugreek are frequent companions.

Avoid adding whole seeds to delicate fruit salads - the sharpness once activated clashes with mild fruit.

Try It In
🥗Poppy Seed Dressing (Homemade)Ground mustard adds background heat to balance the sweetness→

How to Buy and Store Mustard Seed

Buy seeds that are uniformly colored - bright yellow, deep brown, or near-black depending on variety - with no visible moisture clumping or debris. Smell the jar if the store allows it; fresh seeds carry a sharp, clean bite, not a stale or dusty smell.

Sealed glass jars or airtight tin packaging keeps moisture out better than loosely sealed sacks.

Watch Out
Mustard is a declared allergen in the EU, Canada, and several other countries. Always label dishes that include any form of mustard seed - whole, ground, or infused.

Storage conditions split by form:

  • 🫙 Whole seeds - Airtight container, cool dark pantry; stays viable for 1-3 years
  • 🥄 Ground mustard powder - Pantry or fridge; best within 3-6 months before volatile heat compounds fade
  • 🧴 Prepared mustard - Refrigerate after opening; good for 6-12 months, though heat softens over time

The question of freezing mustard seed comes up for bulk buyers - whole seeds tolerate freezing well without meaningful flavor loss.

If a recipe calls for mustard oil rather than seed, our page on replacements for mustard oil lists workable alternatives.

Where to Start With Mustard Seed

New to the spice? Start with yellow seeds and a simple pickle brine - low stakes, clear results.

Once you've seen how toasting changes the flavor, move to tempering brown seeds in oil for a dal. From there, grinding with vinegar for a homemade condiment is a natural next step.

Best Pick
Brown mustard seed is the most useful all-round variety - hot enough for real impact, milder than black, and available in most grocery stores.

Keep whole seeds in the pantry as your default. Ground mustard powder is worth stocking separately for dry rubs and quick sauces where texture isn't needed.


Frequently Asked Questions

Are mustard seeds spicy?

Yes, but only when activated. Whole raw seeds have almost no heat until crushed or mixed with liquid. Brown and black varieties are significantly hotter than yellow once ground.

What is the difference between yellow and brown mustard seeds?

Yellow seeds (Sinapis alba) are milder and form the base of American-style mustard. Brown seeds (Brassica juncea) carry more heat and are preferred in Dijon-style mustards and Indian tempering.

Can you use mustard seeds whole, or must they be ground?

Whole seeds work well in pickling brines, tempering oil, and sausages - no grinding needed. Grinding is only necessary when you want the heat to fully integrate into a sauce, paste, or condiment.

What is mustard seed used for in Indian cooking?

Brown or black seeds are dropped into hot oil at the start of cooking in a technique called tadka (tempering). The seeds pop and infuse the fat with flavor before vegetables, lentils, or spices are added.

Are mustard seeds gluten-free?

Yes, mustard seeds are naturally gluten-free. However, mustard is itself a labeled allergen in the EU and Canada, so people with Brassicaceae allergy should still check before consuming.

Swedish Cardamom Buns

March 31, 2026

You need about 2 hours start to finish, but most of that is proofing time while you do other things. Active work is 30 minutes of mixing, kneading, shaping - then the oven handles the rest.

Swedish Cardamom Buns served on a plate

The dough doubles twice before baking, which builds the soft, airy texture. First rise takes 60-90 minutes, second rise 30-45 minutes after shaping.

This works for weekend mornings when you want something warm and impressive but don't want to stand in the kitchen all day. Make these when you're hosting brunch or just want the house to smell like a Swedish bakery.

QUICK SUMMARY

Soft Swedish cardamom buns with buttery dough and warm spice flavor. Two proofing stages create the tender crumb - first rise until doubled (60-90 min), second rise after shaping (30-45 min). Fresh ground cardamom makes the difference between flat and fragrant.

⏱️Time Reality: 30 min active work plus 1.5-2 hours proofing in warm spot
🔑Critical First Step: Proof yeast in 100-110°F milk for 5-10 min until foamy
⚠️Watch Out: Too much flour makes dense buns - spoon and level or weigh for accuracy

Table of Contents

Toggle
  • Why This Recipe Works
  • What You'll Need
    • Ingredient Details
  • Ingredient Swaps
  • What to Serve With It
  • Store and Reheat
  • Frequently Asked Questions
  • Swedish Cardamom Buns
    • Method 
    • Tried this recipe?

Why This Recipe Works

Cardamom buns rely on active dry yeast to create air pockets and soft texture without turning chewy. For a version that comes together quickly, this simple sauce works as a side when you want something savory to balance the sweet.

Quick Reference
⏱️
Prep Time
30 min (plus 1.5-2 h proofing)
🔥
Cook Time
12-15 min
⏰
Total Time
2 hr
🍽️
Servings
12 buns
📊
Difficulty
Medium
🏷️
Category
Dessert | Breakfast
💡
Quick Tip
Use fresh yeast and warm milk for best rise
🎯
Best For
Weeknight | Entertaining

What makes these buns work:

  • Lukewarm milk activates yeast without killing it - 100-110°F creates the right environment for fermentation and air pocket development
  • Two proofing stages build soft texture - first rise develops gluten structure, second rise after shaping creates the final airy crumb
  • Fresh ground cardamom delivers pronounced floral warmth - older spice loses volatile oils and results in flat, barely-there flavor
  • Egg wash creates golden shine and slight crust - beaten egg applied 10 minutes before baking sets during heat for uniform color
  • Kneading for 8-10 minutes develops gluten network - proper gluten structure holds air pockets and prevents dense, heavy buns
Quick Tip
Proof dough in a turned-off oven with the light on - creates a consistent 75-80°F environment without drafts

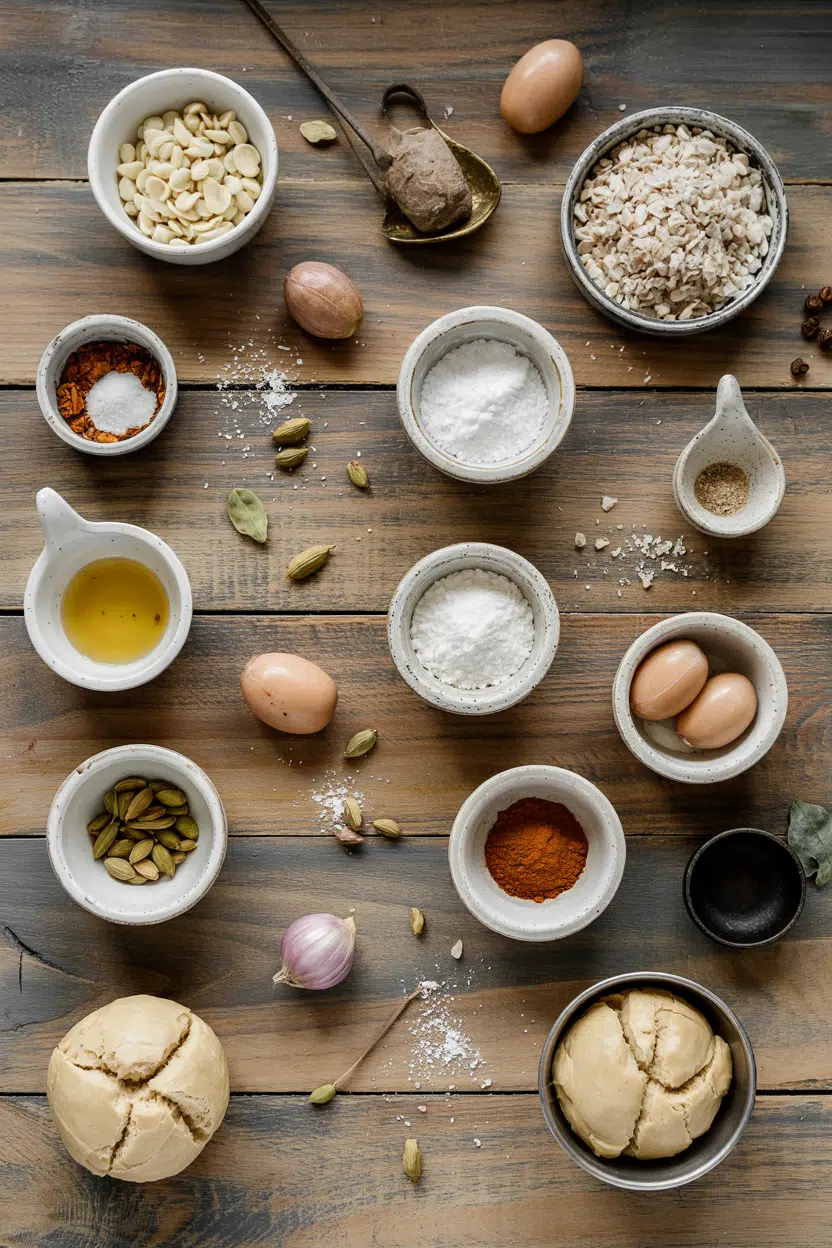
What You'll Need

Ingredients for Swedish Cardamom Buns

Most ingredients are pantry staples except fresh cardamom and active dry yeast. Nata adds the contrast this plate needs, but timing matters - this easy nata recipe works when you want something custard-based on the side.

🧈
Dough Base
  • all-purpose flour
  • unsalted butter
  • milk
  • egg
🌶️
Leavening & Spice
  • active dry yeast
  • ground cardamom
  • granulated sugar
  • salt
🍯
Glaze
  • powdered sugar
  • vanilla extract
  • milk (for glaze)

Ingredient Details

  • Active dry yeast
    Must be proofed in lukewarm milk (100-110°F) for 5-10 minutes until foamy - cold kills it, hot kills it
  • Ground cardamom
    Buy whole pods and grind fresh if possible - pre-ground loses aroma within months and results in flat flavor
  • All-purpose flour
    Spoon into measuring cup and level off, or weigh for accuracy - too much creates dense, dry buns
  • Unsalted butter
    Softened to room temperature for easier mixing - cold butter won't incorporate and creates uneven texture
  • Milk
    Whole milk adds richness and moisture - skim works but produces slightly less tender crumb
  • Egg
    Room temperature egg mixes more evenly - reserve one egg for wash before baking
  • Powdered sugar
    Sift before mixing glaze to prevent lumps - granulated sugar won't dissolve properly for smooth coating

Ingredient Swaps

Butter and cardamom define the flavor, but milk and flour type have flexibility. Most people skip tahini, but it balances the meal - simple tahini recipe works when you want a savory contrast to sweet buns.

Four swaps that work:

  • Coconut oil for butter - use refined (not virgin) to avoid coconut flavor, adds slight chewiness instead of pure tenderness
  • Plant-based milk for dairy milk - almond or oat work equally well for yeast activation, buns lose about 10% richness
  • Instant yeast for active dry - skip the proofing step and mix directly into flour, reduces total time by 10 minutes
  • Flax egg for regular egg - mix 1 tablespoon ground flaxseed with 3 tablespoon water, dough browns less and loses some structure

All-Purpose Flour

Works for: Standard tender crumb with reliable gluten development

Skip if: Need gluten-free option - use 1:1 blend with xanthan gum but expect denser texture

Granulated Sugar

Works for: Balanced sweetness that feeds yeast without overpowering cardamom

Skip if: Want less sweet - reduce by half or swap with honey (reduce milk by 1 tbsp)

Instructions

Kneading takes 8-10 minutes by hand or 5 minutes in a stand mixer, then dough proofs twice before baking. The chicken works best when it hits the table at the same time as the main - a juicy chicken side keeps things interesting when you're serving multiple courses.

  1. Proof the yeast. Heat milk to 100-110°F (lukewarm to touch, not hot). Sprinkle yeast and 1 teaspoon sugar over milk, stir once, let sit 5-10 minutes until foamy on top. If it doesn't foam, yeast is dead - start over with fresh yeast.

  2. Mix and knead the dough. Add flour, remaining sugar, cardamom, salt, softened butter, and egg to yeast mixture. Stir until shaggy dough forms, turn onto floured surface, knead 8-10 minutes until smooth and elastic (poke it - dough should spring back slowly). Place in greased bowl, cover with damp towel, let rise 60-90 minutes until doubled.

  3. Shape the buns. Punch down dough, roll into 12x16-inch rectangle on floured surface. Cut into 12 strips (each about 1 inch wide). Twist each strip into a loose knot or coil, tuck ends under. Place on parchment-lined baking sheet 2 inches apart.

  4. Second proof and egg wash. Cover shaped buns loosely with plastic wrap or towel. Let rise 30-45 minutes until puffy and nearly doubled. Beat remaining egg with 1 tablespoon water, brush over tops 10 minutes before baking (skip if using milk wash).

  5. Bake and glaze. Preheat oven to 375°F. Bake 12-15 minutes until light golden brown - tap bottom of one bun, should sound hollow. Cool 10 minutes on rack. Whisk powdered sugar, vanilla, and 1-2 tablespoon milk until smooth glaze forms. Drizzle over warm (not hot) buns.

Golden Rule
Don't skip the second proofing after shaping - buns need that 30-45 minutes to develop the soft, fluffy crumb that defines Swedish cardamom buns

What to Serve With It

Swedish cardamom buns work for breakfast, afternoon coffee break, or dessert - they need something to balance the sweetness. Rich mains need something to cut through, and beef does exactly that - hearty beef recipe works when you want a savory counterpoint to the sweet buns.

Side Dish Prep Why It Works How to Serve
Swedish coffee (bryggkaffe) Easy Traditional pairing with bitterness that cuts sweetness Brew strong coffee, serve hot alongside warm buns
Plain yogurt Easy Tang balances buttery richness and cardamom spice Serve cold in small bowl for dipping or spreading
Fresh berries Easy Bright acidity adds color and freshness Wash and serve whole or sliced on the side
Fruit preserves Easy Adds fruity sweetness and spreadable texture Strawberry or lingonberry jam in small dish
Sliced cheese Easy Classic Scandinavian combo with mild or sharp cheese Thin slices of cheddar or mild cheese on side

Three ways to serve it:

  • Coffee break setup - serve buns warm with strong coffee and small dish of butter for spreading
  • Brunch spread - arrange on platter with yogurt bowl, berry bowl, and cheese slices for building your own plate
  • Dessert plate - drizzle extra vanilla glaze over buns, add whipped cream and fresh berries on side
Best Pick
Serve buns slightly warm (not hot) so glaze stays intact - reheat 5 minutes at 325°F if made ahead

Store and Reheat

Cardamom buns stay soft for 3-4 days in an airtight container at room temperature. For a version that comes together quickly, we keep a batch ready for nights like this - they reheat better than most baked goods without drying out.

Method Time Best For
🔥 Oven 5-8 min at 325°F (165°C) Restoring crisp edges and warming through without drying
📦 Microwave 15-20 sec per bun Quick softening for single serving, avoid longer or texture turns rubbery
🍳 Stovetop 2-3 min wrapped in foil Warming without drying when oven isn't worth preheating

For best results when storing:

  • Room temperature storage - keep buns in airtight container or wrapped tightly in plastic wrap for 3-4 days, don't refrigerate (dries them out)
  • Freezing for longer storage - freeze unglazed buns in freezer bag up to 3 months, thaw at room temp 1-2 hours before reheating
  • Refresh glaze after reheating - warm buns can cause glaze to melt and slide off, cool 5 minutes before adding fresh glaze if needed
  • Revive stale buns - brush lightly with melted butter or milk before reheating to add back moisture
  • Individual wrapping for grab-and-go - wrap each bun separately in plastic wrap before storing so they stay soft and are ready to reheat one at a time

Frequently Asked Questions

Can I make Swedish cardamom buns ahead of time and freeze them?

Freeze unglazed buns in an airtight freezer bag for up to 3 months. Thaw at room temperature for 1-2 hours, reheat at 325°F for 5-8 minutes, then add fresh glaze.

What is the best way to reheat cardamom buns without drying them out?

Reheat at 325°F for 5-8 minutes wrapped loosely in foil, or microwave for 15-20 seconds. Brush with melted butter or milk before reheating if buns feel dry.

How do I know when the buns are perfectly risen and ready for baking?

Buns should be nearly doubled in size and look puffy after 30-45 minutes. Gently poke the dough - if the indent springs back slowly (not immediately), they're ready to bake.

My buns turned out dense and heavy; what went wrong?

Too much flour or underproofed dough causes dense buns. Measure flour by spooning and leveling (not scooping), and make sure dough fully doubles during both proofing stages.

Can I replace butter with oil or margarine in the recipe?

Use refined coconut oil (same amount as butter) for slightly chewier texture. Margarine works but produces less rich flavor - avoid liquid oils, which make the dough too soft to shape.

Swedish Cardamom Buns served on a plate

Swedish Cardamom Buns

No ratings yet
Soft Swedish cardamom buns feature a tender crumb achieved through two proofing stages and fresh ground cardamom for fragrant warmth. The dough is kneaded until elastic, then shaped into knots, proofed again, baked to golden perfection, and finished with a vanilla glaze.
Print Recipe Pin Recipe
Prep Time 30 minutes mins
Cook Time 15 minutes mins
Total Time 45 minutes mins
Servings: 12 buns
Course: Breakfast, Dessert
Cuisine: Swedish
Ingredients Method Notes

Ingredients
  

  • 4 cups all-purpose flour spooned and leveled or weighed for accuracy
  • 2 cups milk lukewarm, 100-110°F for proofing yeast
  • 2 teaspoon active dry yeast proofed in lukewarm milk for 5-10 minutes until foamy
  • 1 tablespoon granulated sugar for proofing and dough
  • 1 teaspoon ground cardamom freshly ground for best flavor
  • 1 teaspoon salt
  • ½ cup unsalted butter softened to room temperature
  • 1 large egg room temperature; one reserved for egg wash
  • 1 large egg beaten with 1 tablespoon water for egg wash (applied before baking)
  • 1 cup powdered sugar sifted for glaze
  • 1 teaspoon vanilla extract for glaze
  • 1 tablespoon milk for glazing, adjust for consistency

Method
 

  1. Heat milk to 100-110°F. Sprinkle yeast and 1 teaspoon sugar over milk, stir once, and let sit 5-10 minutes until foamy. If no foam appears, the yeast is dead-start over with fresh yeast.
    2 cups milk, 2 tsp active dry yeast, 1 tbsp granulated sugar
  2. Add flour, remaining sugar, ground cardamom, salt, softened butter, and one egg to yeast mixture. Stir until a shaggy dough forms. Turn onto floured surface and knead for 8-10 minutes until smooth and elastic. Place dough in greased bowl, cover, and let rise 60-90 minutes until doubled.
    4 cups all-purpose flour, 1 tbsp granulated sugar, 1 tsp ground cardamom, 1 tsp salt, ½ cup unsalted butter, 1 large egg
  3. Punch down dough and roll into a 12x16-inch rectangle on a floured surface. Cut into 12 strips about 1 inch wide. Twist each strip into a loose knot or coil, tucking the ends underneath. Place buns 2 inches apart on a parchment-lined baking sheet.
  4. Cover shaped buns loosely with plastic wrap or towel. Let rise 30-45 minutes until puffy and nearly doubled. Beat remaining egg with 1 tablespoon water and brush over tops 10 minutes before baking. Skip egg wash if using milk wash instead.
    1 large egg
  5. Preheat oven to 375°F. Bake buns for 12-15 minutes until light golden brown and hollow sounding when tapped. Cool on a rack for 10 minutes. Whisk powdered sugar, vanilla extract, and milk until smooth glaze forms and drizzle over warm buns.
    1 cup powdered sugar, 1 tsp vanilla extract, 1 tbsp milk

Notes

  • Proof yeast in warm milk between 100-110°F for best rise.
  • Measure flour accurately to avoid dense buns.
  • Don't skip the second proofing; it develops light, airy crumb.

Tried this recipe?

Let us know how it was!

What Is Madras Curry Powder? [Taste, Uses & More]

March 31, 2026

Most people assume Madras curry powder is simply a hotter version of the generic yellow curry powder sitting in their spice rack.

What Is Madras Curry Powder

That assumption misses the point - this blend has a distinct identity built around turmeric-forward earthiness, sharp chili heat, and toasty coriander brightness that generic blends rarely match.

Knowing what pairs with curry helps, but knowing what's actually in your spice jar matters first.

Watch for curry spoilage signs too - a flat, dusty smell is the first clue your blend has gone stale.

QUICK SUMMARY

Madras curry powder is a British-Indian ground spice blend with South Indian roots. It's hotter and more turmeric-forward than standard curry powder, with chili heat, citrusy coriander, and a fenugreek backdrop. Use it in curries, marinades, and dal - best within 6-12 months of opening.

🌶️Flavor: Earthy turmeric, bright coriander, pronounced chili heat, bitter-sweet fenugreek
🍳Best Uses: Tomato curries, yogurt marinades, coconut-milk sauces, dal, roasted vegetables
📦Shelf Life: Opened ground blend: 6-12 months; unopened: up to 24 months
🥄Intensity: Strong - hotter and sharper than standard curry powder
✅Dietary: Naturally vegan and gluten-free; check labels for mustard or trace wheat in commercial blends

What Is Madras Curry Powder?

Madras curry powder is a ground spice blend that takes its name from Madras - now Chennai - in South India. British traders and colonists brought South Indian spice ideas back to Britain, and commercial spice companies developed standardized blends to approximate those flavors.

The result is an Anglo-Indian hybrid: rooted in South Indian spicing, but shaped by British convenience.

It isn't a traditional Indian recipe with a fixed formula. Every brand proportions the blend differently, though most share a core set of spices.

  • 🌿 Turmeric - the dominant base note, responsible for the deep reddish-yellow color
  • 🌿 Coriander and cumin - the aromatic backbone, adding earthiness and warmth
  • 🌶️ Chili powder - higher levels than standard curry powder, giving it the Madras signature heat
  • 🌱 Fenugreek - adds a bitter-sweet backdrop, one of the blend's most distinctive notes
  • 🫚 Mustard seed and black pepper - depth and bite, common in South Indian spicing

You may also see it labeled Madras powder, Madras masala, or Madras curry mix - all the same product. Some premium suppliers sell whole-spice versions intended for toasting and grinding at home.

What Does Madras Curry Powder Taste Like?

madras curry powder - What Is Madras Curry Powder

Madras curry powder leads with warm turmeric earthiness and follows quickly with a sharp chili heat that lingers.

The coriander adds a citrusy brightness that lifts the blend above the mud of pure heat, while fenugreek rounds the back end with a slightly bitter, maple-adjacent note.

Sensory SnapshotStrong Intensity
👅 Flavor
earthy turmericcitrusy corianderchili heatbitter-sweet fenugreek
✋ Texture
fine powderslightly gritty
👃 Aroma
pungent spicetoasty cuminwarm coriander

Compared to standard curry powder, Madras runs noticeably hotter and more turmeric-saturated. It shares warm spice notes with garam masala in cooking but diverges sharply - garam masala skews sweeter and more fragrant, without the same chili punch.

Heat increases with cooking time, so dishes simmered long taste significantly spicier than quick stir-throughs.

Watch Out
Fenugreek bitterness intensifies if you burn the powder. Keep heat moderate when blooming Madras curry powder in oil - 30 seconds is usually enough before adding liquid.

How to Use Madras Curry Powder

Blooming the powder in hot oil or ghee first is the most important technique. This tadka step releases the volatile oils in cumin, coriander, and mustard seed, giving the finished dish a depth you won't get from stirring the powder into cold liquid.

How Madras Curry Powder Is Used
MethodBest ForTip
🫕 Bloomed in oilCurry bases, dal, stewsAdd onion and tomato immediately after - don't let it sit dry in the pan
🥗 Marinade mixLamb, chicken, tofuCombine with yogurt or oil; let protein rest at least 30 minutes
🍲 Simmered in sauceCoconut-milk or tomato curriesAdd early and simmer low - heat amplifies over time
🥔 Dry rub / roastPotatoes, eggplant, root vegetablesToss with oil before roasting; the powder crusts nicely at high heat

Coconut milk is the natural partner here - its fat mellows the chili heat and carries turmeric's color through the whole sauce. Tomatoes work differently, their acidity sharpening the coriander brightness.

A yogurt-based marinade for lamb or chicken is one of the most direct uses; if you're making that ahead, knowing how long yogurt keeps helps you plan timing safely.

Roasted potatoes and eggplant absorb the blend deeply, and how long roasted vegetables keeps is worth knowing if you're prepping ahead for the week.

For plant-based cooking, chickpea dal or rubbed tofu both stand up to the bold spice level without competing flavors getting lost.

Golden Rule
Don't use Madras curry powder on delicate white fish in large amounts - the chili and turmeric will overpower the flesh. A small pinch in a batter or breadcrumb mix is fine; building a whole sauce from it is not.

If you need to swap it mid-recipe, the guide on swapping out madras curry powder covers which alternatives preserve the heat level and which sacrifice it.

Try It In
🥔Potato Salad Dressing with MustardMadras powder adds warmth to the mustardy dressing→🍖Slow Cooker Chuck Roast with VegetablesLong cook time lets the blend fully meld into the braising liquid→🥕Crockpot Beef Stew with Carrots and PotatoesRoot vegetables absorb the spice blend deeply over hours→

How to Buy and Store Madras Curry Powder

Good Madras curry powder should look deep reddish-brown, not pale yellow. Sniff before you buy when possible - a strong, pungent hit of cumin and chili means the volatile oils are still active.

Clumped powder or a weak, dusty scent means the blend is already past its best.

Best Pick
Whole-spice blends you toast and grind yourself give the freshest results. If buying pre-ground, choose small jars from a high-turnover spice seller over large economy bags that may sit for months.

Store the jar sealed and away from heat and light - the counter beside the stove is the worst possible spot. A cool, dark cupboard is enough; no refrigeration needed.

  • Opened ground blend - best within 6-12 months; still safe after but flavor fades fast
  • Unopened jar - up to 12-24 months before aromatics begin to drop off
  • Whole-spice blend - longer shelf life; grind as needed for peak potency

The full breakdown of storing madras curry powder correctly covers how to test if your jar is still worth using.

Where to Start With Madras Curry Powder

New to the blend? Open with a simple tomato-based chicken curry - it's the most forgiving format and shows you exactly how much heat the powder contributes.

Use half the amount you'd use of standard curry powder until you've gauged your tolerance.

Already comfortable with the heat? Move to a yogurt marinade for lamb shoulder, or bloom it in oil for a chickpea dal.

Those two methods show the full range - raw spice infusion versus cooked-down depth. For building out garam masala comparisons, the breakdown of garam masala swaps that work is useful context.

Frequently Asked Questions

Is Madras curry powder the same as curry powder?

No. Madras curry powder contains higher levels of chili and turmeric than standard curry powder, giving it more heat and a deeper color. Standard blends are milder and more generic in profile.

How hot is Madras curry powder?

It sits in the medium-hot range - noticeably spicier than standard curry powder but milder than vindaloo masala. Heat level varies by brand depending on how much chili powder the blend contains.

Can I use Madras curry powder in place of garam masala?

Not directly - they have different profiles. Madras powder adds chili heat and turmeric color; garam masala is warmer and sweeter without the same heat. Use half the amount and expect a spicier, yellower result.

How do you reduce bitterness from fenugreek in Madras curry?

Add an acid - tamarind, lemon juice, or tomatoes - early in cooking. Acid balances fenugreek's bitter edge. Avoid burning the powder in oil, which sharpens bitterness rather than mellowing it.

Does Madras curry powder contain turmeric?

Yes - turmeric is the dominant base spice in virtually every Madras blend. It's responsible for the reddish-yellow color and the characteristic earthy warmth of the finished dish.

How Long Does Kimchi Last? [Storage Guide]

March 31, 2026

Leftover kimchi sitting in the back of your fridge raises a fair question: is it still good, or has it crossed the line? Kimchi keeps longer than most fermented foods, but that longevity comes with caveats - flavor sharpens, texture softens, and the line between "beautifully sour" and "past its prime" is easy to miss.

How Long Does Kimchi Last In The Fridge

Understanding the role kimchi plays in a dish helps you decide whether the jar you have is still worth eating raw or better reserved for cooking.

Kimchi is made with ingredients like gochugaru, fish sauce, and salted seafood - if you ever need gochugaru swaps that work, that context matters too.

QUICK SUMMARY

Opened kimchi lasts 3-6 months in the fridge at peak quality and up to 12 months safely. Unopened commercial jars hold 3-6 months in the pantry. Freezing works but softens texture - best for cooked dishes after thawing.

🧊Fridge (opened): 3-6 months peak; up to 12 months safe but very sour
🏠Pantry (unopened): 3-6 months in a cool, dark place before opening
❄️Freezer: 6-12 months; expect softer texture - use in stews or fried rice

How Long Does Kimchi Last?

Kimchi's shelf life depends heavily on whether the jar is opened, how it was made, and where you store it. Commercial kimchi is often pasteurized and may contain preservatives, giving it a longer and more predictable window than homemade batches fermented with live cultures.

Homemade kimchi, including napa cabbage kimchi and radish kimchi, continues to ferment actively in the fridge. That ongoing lactic acid fermentation means flavor evolves - and eventually overshoots - even under refrigeration.

Kimchi Shelf Life
MethodStateDurationNotes
🏠 PantryUnopened3-6 monthsCommercial sealed jars only; cool, dark place away from heat
🧊 FridgeOpened3-6 months (peak); up to 12 monthsFlavor sharpens and texture softens progressively over time
❄️ FreezerOpened6-12 monthsBest within 6 months; texture loss is significant after thawing
🏠 CounterRaw/fermenting1-3 days maxIntentional fast fermentation only; moves quickly at room temp

Room-temperature storage is a deliberate fermentation technique, not a practical storage option. Active fermentation at counter temps accelerates souring fast - one to three days is the limit before flavor becomes extreme.

How to Store Kimchi

Once a jar is opened, the goal is to slow fermentation without stopping it entirely. Brine coverage is the single most important factor: solids exposed to air oxidize quickly and invite unwanted surface growth.

Golden Rule
Press kimchi solids down after every use so they stay submerged under brine. A small glass or fermentation weight works well here.

Fridge: Transfer opened kimchi to a smaller glass jar with an airtight lid to minimize air space, keep solids fully submerged in brine, and use a clean dry utensil every time. Store it on a middle shelf - not the door, where temperature fluctuates and fermentation accelerates unpredictably.

Pantry: Only unopened commercial kimchi belongs here. Keep the jar upright, sealed, and away from direct light or heat sources. Once opened, move it to the fridge immediately - there's no safe middle ground.

Counter: Leaving kimchi out intentionally for a day or two produces a faster, tangier ferment. Just know it moves quickly, so taste it daily and refrigerate once it hits the sourness you want.

A few habits protect the batch every time:

  • 🧴 Use clean, dry utensils - moisture or outside bacteria accelerate spoilage.
  • Label the jar with the date you opened it; memory isn't reliable over months.
  • Reserve very sour kimchi for cooking - kimchi stew (kimchi-jjigae), pancakes, and fried rice handle heavy tang well.

Can You Freeze Kimchi?

Freezing is a legitimate option, especially for large batches. Flavor holds reasonably well in the freezer; it's texture that takes the hit - napa cabbage leaves and radish both soften significantly after thawing, making frozen kimchi much better suited for cooked applications than raw eating.

Watch Out
Brine may separate after thawing - that's normal. Stir it back in. Do not refreeze kimchi once thawed; the texture deteriorates beyond use.
  1. Portion first - divide kimchi into meal-sized amounts so you only thaw what you need.
  2. Pack tightly - use airtight, freezer-safe containers or heavy-duty bags, leaving about half an inch of headspace for expansion.
  3. Remove air - press bags flat or squeeze out excess air before sealing; label each with the date.
  4. Thaw in the fridge - overnight is ideal; for stews or fried rice, frozen kimchi can go straight into a hot pan without thawing.

Texture loss is unavoidable, so plan accordingly. If you're looking for replacements for kimchi in a specific recipe, knowing that frozen kimchi behaves more like cooked kimchi helps narrow down the right swap.

Signs Kimchi Has Gone Bad

Kimchi is naturally sour, tangy, and sometimes sharp-smelling - that's fermentation, not spoilage. The signs that signal a real problem are distinct and specific.

A thin white film on the surface is often kahm yeast, a harmless byproduct of fermentation. Skim it off and check the kimchi underneath.

Colored mold - gray, black, or green colonies - is a different matter entirely and means the batch should be discarded.

Signs It's Gone Bad
👀
VisualGray or black mold colonies · Bulging or swollen lid · Unusual color shift to dull brown or neon orange
👃
SmellRotten-egg or putrid odor · Ammonia-like smell in seafood-based varieties (jeotgal or fish sauce kimchi)
✋
TextureSlimy mucous-like film · Leaves that disintegrate when stirred

A bulging lid signals gas buildup beyond normal fermentation pressure - open carefully or discard. When in doubt, toss it.

Kimchi is inexpensive enough that the risk isn't worth taking.

Getting the Most Out of Every Jar

The biggest waste with kimchi isn't letting it go bad - it's using it wrong at the wrong stage. Fresh kimchi (under two weeks old) works best as a side dish or topping.

Older, more sour kimchi belongs in cooked recipes where heat mellows the sharpness.

Shortcut
Aging kimchi doesn't mean bad kimchi. Very sour batches make excellent kimchi pancakes (kimchijeon) and add depth to fried rice without any extra seasoning.

A few habits that extend usefulness across the whole jar's life:

  • Downsize the container as the jar empties - less air means slower oxidation and a longer peak window.
  • Keep scallion pieces submerged; exposed green tops deteriorate faster than cabbage. If you're low on scallions for other recipes, check these [alternatives to scallion](https://forkliftkitchen.com/scallion-substitutes/) that hold up similarly in fermented contexts.
  • Don't mix old and new batches - combining them disrupts the fermentation timeline and makes it harder to track freshness.

Frequently Asked Questions

How long does homemade kimchi last in the fridge?

Homemade kimchi lasts 3-6 months at peak quality and up to 12 months safely. Because it contains live cultures and no preservatives, fermentation continues in the fridge and flavor sharpens faster than commercial varieties.

Is white mold on kimchi safe?

A thin white film is usually kahm yeast, which is harmless - skim it off and the kimchi underneath is fine. Colored mold (gray, black, or green) is not safe and the batch should be discarded.

Can you freeze kimchi and how does it affect texture?

Yes, kimchi freezes well for 6-12 months. Napa cabbage leaves soften noticeably after thawing, so frozen kimchi works best in cooked dishes like stews and fried rice rather than eaten raw.

How to store kimchi after opening?

Keep opened kimchi in a glass jar with an airtight lid, solids submerged under brine, in the coldest part of the fridge (not the door). Use clean, dry utensils every time to avoid introducing unwanted microbes.

Does very old kimchi need to be thrown out?

Not automatically. Old kimchi that smells tangy (not putrid), looks normal, and has no mold is still usable - just cook it rather than eating it raw. Sourness alone is not a spoilage indicator.

What Is Mint? [Taste, Uses & More]

March 31, 2026

Mint does something no other leafy herb quite manages: it cools the dish while it flavors it.

What Is Mint

That dual action - menthol chill layered over a bright, grassy note - is why it appears in everything from parsley in cooking contexts to cocktail bars, and why a sprig of it over a bowl of yogurt changes the whole experience.

Much like a creamy cilantro lime dressing recipe depends on fresh herb oils for its lift, mint's impact depends entirely on how and when you add it.

QUICK SUMMARY

Mint is a fast-growing aromatic herb with a cooling menthol flavor and bright green character. Use it fresh - heat kills its essential oils fast. It anchors tabbouleh, mojitos, lamb sauce, and raita, and keeps 5-10 days refrigerated with the water-jar method.

🌿Flavor: Cooling menthol top note, bright herbaceous green, mildly sweet
🍽️Best Uses: Tabbouleh, mojitos, raita, lamb sauce, fruit salads, desserts
🛒Buying Tip: Bright green leaves, firm square stems, immediate cool aroma when pinched
❄️Storage: Stems in water, loosely covered, refrigerated - up to 10 days fresh
⚠️Avoid: Long braises and heavy cinnamon spice mixes that clash with menthol

What Is Mint?

Mint - genus Mentha - is a perennial herb native to the Mediterranean and Western Asia, now grown in gardens and on farms worldwide.

It's recognizable by its square stems, serrated oval leaves, and a volatile essential oil content so high that brushing the leaves releases scent immediately.

The two varieties most home cooks encounter are spearmint and peppermint. Spearmint (Mentha spicata) has a softer, sweeter profile and is the standard in cooking; peppermint (Mentha × piperita) carries more menthol and a sharper bite, making it better suited to confectionery and teas.

Garden mint, sold in most produce sections, is typically spearmint or a close hybrid.

Other names vary by region - "mint leaves," "nana" in Arabic-speaking kitchens, and simply "Mentha" in botanical references. Dozens of cultivars exist, including chocolate mint and apple mint, though these are niche.

For most cooking decisions, spearmint is the default.

Best Pick
For savory cooking, reach for spearmint - its sweeter, milder menthol suits food better than peppermint's sharp pharmaceutical edge.

What Does Mint Taste Like?

mint - What Is Mint

Mint leads with a cooling menthol top note that triggers cold receptors on the tongue - that's a physical effect, not just a flavor perception.

Underneath that chill sits a bright, grassy green character similar to basil, though cooler and without basil's peppery heat.

Sensory SnapshotModerate Intensity
👅 Flavor
cooling mentholbright greenmildly sweetslight anise bite
✋ Texture
tenderslightly fibrous (older leaves)
👃 Aroma
sharp fresh greenmenthol

There's also a mild sweetness underneath - more noticeable in spearmint - and some varieties carry a faint anise or pepper edge.

Heat collapses the volatile oils almost instantly, which is why cooked mint tastes flat compared to fresh.

Dried mint, by contrast, loses the menthol brightness and takes on a more muted, slightly musty herb character - useful in some Middle Eastern spice blends, less so as a direct fresh-mint substitute.

If you need a swap, mint swaps that work covers the options with realistic expectations.

How to Use Mint

Add mint late or not at all - that's the core rule. Because its essential oils evaporate quickly, mint contributes most when torn or chopped and added at the very end, or kept entirely raw.

In Middle Eastern cooking, torn mint leaves go into tabbouleh alongside parsley and bulgur, where they add a cooling counterpoint to lemon and tomato.

Yogurt-based sauces like raita rely on chopped mint to cut through dairy richness.

British mint sauce - mint, vinegar, and sugar - pairs with roasted lamb, a combination that works because the herb's cool brightness offsets the fat.

A well-made a lamb chops with mint sauce recipe shows exactly how little mint you need for the pairing to land.

How Mint Is Used
MethodBest ForTip
🥗 Raw (torn/chopped)Tabbouleh, salads, raita, fruit saladsTear by hand - a knife bruises the leaf and speeds browning
🍹 Muddled/bruisedMojitos, mint juleps, cocktail basesPress gently - over-muddling releases bitter chlorophyll
♨️ Infused (then strained)Simple syrups, mint oil, hot teasSteep 5-10 minutes max; longer steeping dulls the bright note
✨ GarnishHot dishes, plated desserts, drinksAdd at the last second - heat wilts leaves within a minute

Mint pairs strongly with lamb, citrus, yogurt and cucumber, peas, chocolate, and berries.

Southeast Asian cooking - particularly Vietnamese - uses fresh mint leaves alongside other herbs as a table condiment with grilled meats and noodle dishes. Infused mint syrup is one of the most practical preparations: steep mint briefly in a hot sugar-water base, strain, and refrigerate for use across cocktails and desserts.

Try It In
🍋Lemon Mint Iced TeaClassic infusion that lets mint's cooling oils carry the flavor→☕Lemon Mint Cold Brew CoffeeMint brightens cold brew's bitterness without overpowering it→🍫Lemon Mint Hot ChocolateMint-chocolate pairing done with a citrus twist→

How to Buy and Store Mint

At the market, look for bunches with bright, unblemished green leaves and firm square stems. Pinch a leaf - fresh mint releases a sharp menthol scent immediately; a weak or absent aroma means low essential oil content and a flat flavor.

Avoid yellowing leaves, soft stems, or any slimy spots.

Shortcut
Trim the stems and stand the bunch upright in a jar with an inch of water, then drape a loose plastic bag over the top and refrigerate. This keeps mint fresh for up to 10 days.

Alternatively, wrap leaves loosely in a damp paper towel and store in a perforated bag - effective but slightly shorter-lived than the water method.

For a full breakdown, mint's shelf life covers both methods side by side, plus what to do when leaves start to spot.

Dried mint lasts 6-12 months airtight and away from light - useful in spice rubs, though it behaves differently than fresh.

Compare this to basil's shelf life, which is shorter and even more sensitive to cold temperatures.

Start Here With Mint

Fresh mint is most reliably useful torn into a salad, stirred into yogurt, or briefly infused into a syrup. Those three entry points cover Middle Eastern, sauce-based, and drink applications without any cooking skill required.

  • 🥗 First salad attempt - Add a small handful of torn leaves to tabbouleh or a cucumber-tomato mix for immediate impact.
  • 🥛 Easiest sauce - Stir chopped mint into plain yogurt with salt and a squeeze of lemon; done in two minutes.
  • 🍹 Drinks baseline - Simmer equal parts sugar and water, steep mint 8 minutes, strain. Use that syrup all week.

When you're comfortable with fresh mint's behavior, dried mint in spice rubs or comparing dried oregano vs ground oregano options gives useful context for thinking about how dried herbs differ from their fresh counterparts.

Mint rewards restraint - a little goes further than most cooks expect.

Frequently Asked Questions

What does mint taste like in food?

Cooling and bright, with a menthol chill that sits over a grassy, mildly sweet base. It reads as refreshing rather than spicy, and the effect is more physical - triggering cold receptors - than purely flavor-based.

Is mint spicy or sweet?

Neither, exactly. Spearmint leans mildly sweet; peppermint has a sharp edge some describe as near-spicy. The dominant sensation is cooling from menthol, which overrides both sweetness and heat.

What is the difference between spearmint and peppermint taste?

Spearmint is sweeter and milder - better for food. Peppermint has a higher menthol concentration and a sharper, more medicinal bite that suits candy, tea, and extracts more than savory cooking.

Can you cook with mint?

Yes, but only briefly. Mint's volatile oils evaporate fast under heat, so add it at the very end of cooking or not at all. Long braises destroy its character entirely.

What pairs well with mint?

Lamb, yogurt, cucumber, lemon, lime, chocolate, and peas are the strongest pairings. Mint also works alongside berries and light grilled fish, where its cooling quality balances richness or sweetness.

Slow Cooker Chicken Pho

March 31, 2026

Most chicken pho recipes take forever and need constant attention. This slow cooker version simmers all day while you're at work, then you just shred the chicken and boil noodles before serving.

Slow Cooker Chicken Pho served on a plate

The broth gets its depth from toasted spices and charred aromatics. No stirring, no skimming, no babysitting required.

Make this when you want the payoff of homemade pho without standing over a pot for hours.

QUICK SUMMARY

Slow Cooker Chicken Pho simmers bone-in chicken thighs with toasted star anise, charred ginger, and onion for 6-8 hours on low. The slow cooker extracts rich flavor without any stirring, and you strain the broth before serving over fresh rice noodles and herbs.

⏱️Time Reality: 15 minutes prep, then 6-8 hours unattended cooking before assembly
🔥Critical First Step: Toast star anise and cinnamon 3-5 minutes until fragrant before adding to slow cooker
⚠️Watch Out: Cook noodles separately right before serving or they turn to mush in the broth

Table of Contents

Toggle
  • Why This Recipe Works
  • What You'll Need
    • Ingredient Details
  • Ingredient Swaps
  • What to Serve With It
  • Store and Reheat
  • Frequently Asked Questions
  • Slow Cooker Chicken Pho
    • Method 
    • Tried this recipe?

Why This Recipe Works

The slow cooker keeps the broth at a gentle simmer that extracts gelatin from bone-in chicken without boiling it cloudy. For a juicy homemade chicken recipe that takes a different approach, we keep a batch ready for nights like this - the contrast works.

Quick Reference
⏱️
Prep Time
15 min
🔥
Cook Time
6-8 hours
⏰
Total Time
6 hr 15 min - 8 hr 15 min
🍽️
Servings
6 servings
📊
Difficulty
Easy
🏷️
Category
Main Dish
💡
Quick Tip
Toast spices for richer broth flavor
🎯
Best For
Weeknight | Meal prep | Comfort

Why it works:

  • Bone-in thighs release collagen during the long simmer, creating a silky broth that coats your spoon
  • Charring the onion and ginger under the broiler adds caramelized depth you can't get from raw aromatics
  • Toasting star anise and cinnamon sticks before they hit the liquid releases essential oils that perfume the entire pot
  • Low heat prevents the violent bubbling that turns broth cloudy and breaks down proteins too fast
  • Straining the finished broth through cheesecloth removes stray spice bits and fat for restaurant-clear liquid
Quick Tip
Add fish sauce in the last 15 minutes of cooking so you can taste and adjust salt levels precisely before serving

What You'll Need

Ingredients for Slow Cooker Chicken Pho

Shop for bone-in chicken thighs, whole star anise, and fresh ginger at any grocery store. The creamy homemade potato recipe that pairs with this takes 20 minutes and uses what's already in your pantry - for a version that comes together quickly, we turn to it on weeknights.

🍗
Protein
  • 2 lbs bone-in chicken thighs
🧄
Aromatics
  • 1 large onion, halved
  • 4-inch piece fresh ginger
  • 4 cloves garlic
🌶️
Spices
  • 5 whole star anise
  • 2 cinnamon sticks
🥢
Broth Base
  • 8 cups chicken broth
  • 3 tablespoons fish sauce
🍜
Noodles
  • 14 oz dried rice noodles
🥬
Fresh Toppings
  • Fresh cilantro
  • Thai basil
  • Bean sprouts
  • Lime wedges
  • Sliced jalapeños

Ingredient Details

  • Bone-in chicken thighs
    Bones and dark meat create richer broth than breasts; boneless thighs work but reduce depth
  • Star anise
    Signature pho spice with licorice notes; use whole pods and toast them first for maximum aroma
  • Fresh ginger
    Char the unpeeled ginger under the broiler until blackened on both sides before adding to slow cooker
  • Fish sauce
    Provides essential umami and saltiness; add it near the end so you control the seasoning level
  • Rice noodles
    Banh pho noodles are traditional; soak in warm water 20-30 minutes then drain before serving
  • Thai basil
    Has a stronger anise flavor than regular basil; if unavailable, use regular basil or extra cilantro
  • Onion
    Char cut-side down under broiler until deeply caramelized; the charred bits add sweet, smoky depth

Ingredient Swaps

Chicken breasts cook faster and stay leaner, but they dry out easily in the slow cooker. Swapping techniques matters more than swapping ingredients here - the homemade fry recipe adapts just as easily when you adjust cooking time - for a version that comes together quickly, we make it whenever the timing shifts.

Four swaps that work:

  • Chicken thighs → chicken breasts: Use boneless breasts and reduce cook time to 4-5 hours on low; check at 165°F and pull immediately or they turn dry and stringy
  • Fish sauce → soy sauce or tamari: Use 2 tablespoons soy sauce instead of 3 tablespoons fish sauce; adds salt but less funk and umami depth
  • Star anise → Chinese five spice: Use 1 teaspoon five spice powder instead of whole star anise; easier but less complex aromatic punch
  • Rice noodles → shirataki noodles: Swap for low-carb option; rinse well and don't soak since they're already hydrated and ready to serve

Slow Cooker (6-8 hours low)

Works for: Set-it-and-forget-it cooking, extracting maximum gelatin and flavor from bones, weekday meal prep

Skip if: You need dinner in under 2 hours or want more control over broth clarity

Instant Pot (40 minutes high pressure)

Works for: Quick weeknight version, same rich broth in under an hour, less planning required

Skip if: You prefer traditional overnight simmering or want ultra-clear restaurant-style broth

Instructions

The slow cooker runs for 6-8 hours while you're at work or asleep. When you're planning your chicken puttanesca dinner and need similar hands-off timing, this method delivers - we keep a batch ready for nights like this, and the contrast works.

  1. Toast the spices: Heat a dry skillet over medium heat and toast star anise and cinnamon sticks for 3-5 minutes, shaking the pan occasionally, until fragrant and slightly darkened. Set aside.
  2. Char the aromatics: Place onion halves cut-side up and whole ginger on a foil-lined baking sheet. Broil 5 minutes per side until deeply charred and blackened in spots. Let cool, then peel ginger.
  3. Load the slow cooker: Add chicken thighs, toasted spices, charred onion and ginger, garlic cloves, and chicken broth to the slow cooker. Set to low and cook 6-8 hours until chicken is tender and shreds easily with a fork.
  4. Strain and season: Remove chicken and shred meat, discarding bones and skin. Strain broth through cheesecloth or a fine-mesh strainer into a clean pot. Stir in fish sauce, taste, and adjust seasoning with more fish sauce or salt as needed.
  5. Prepare noodles and serve: Soak rice noodles in warm water 20-30 minutes until pliable, then drain. Divide noodles among bowls, top with shredded chicken, ladle hot broth over, and serve with fresh cilantro, Thai basil, bean sprouts, lime wedges, and jalapeños.
Golden Rule
Cook noodles separately and add them to individual bowls right before serving - never simmer them in the slow cooker or they'll disintegrate into mush

What to Serve With It

Pho is a complete meal, but fresh sides cut through the rich broth. The right pairing brings texture contrast and acidity - when planning your chicken puttanesca dinner, the same approach applies to balancing richness with brightness.

Side Dish Prep Why It Works How to Serve
Vietnamese Spring Rolls Easy Cold, fresh rice paper rolls with shrimp or vegetables add light crunch Roll rice paper wrappers with lettuce, herbs, vermicelli, and serve with hoisin-peanut sauce
Pickled Vegetables Easy Tangy quick-pickled carrots and daikon cut through broth richness Thinly slice vegetables, pickle in rice vinegar, sugar, and salt for 30 minutes before serving
Herb Salad Easy Bright mix of fresh herbs and greens adds crisp texture Toss cilantro, mint, Thai basil, and lettuce with lime juice
Steamed Asian Greens Easy Bok choy or gai lan brings mild, tender vegetable balance Steam 3-4 minutes until tender, drizzle with sesame oil and soy sauce
Chili Garlic Sauce Easy Spicy condiment lets diners customize heat level Serve store-bought sambal oelek or sriracha in small bowls

Three ways to serve it:

  • Weeknight bowl: Ladle pho over noodles, top with chicken and bean sprouts, squeeze lime, and serve with steamed greens on the side
  • Meal prep lunch: Store broth, chicken, and noodles separately; reheat broth, add fresh noodles and toppings when ready to eat
  • Entertaining spread: Set up a pho bar with bowls of herbs, lime wedges, jalapeños, hoisin, and sriracha so guests build their own bowls
Shortcut
Skip the spring rolls and serve store-bought shrimp chips or prawn crackers for instant crunch with zero prep

Store and Reheat

Broth and chicken store separately from noodles and fresh toppings. Never store cooked noodles in broth - they absorb liquid and turn to paste overnight. For this creamy dip that needs similar storage planning, rich mains need something to cut through - we keep a batch ready for nights like this, for a version that comes together quickly.

Method Time Best For
🍳 Stovetop 5-7 min Reheating broth gently without scorching; best flavor retention
📦 Microwave 2-3 min Quick single-serving broth reheat; always add noodles fresh
🔥 Oven Not recommended N/A - broth-based soups don't reheat well in the oven

For best results when storing:

  • Separate components immediately: Store broth and shredded chicken together in one container, but keep noodles completely separate and cook fresh when serving
  • Cool broth quickly: Transfer hot broth to shallow containers and refrigerate within 2 hours to prevent bacterial growth
  • Freeze broth only: Freeze broth and chicken for up to 3 months in freezer bags; thaw overnight in fridge before reheating
  • Refresh herbs: Always add fresh cilantro, Thai basil, bean sprouts, and lime right before serving - they wilt and lose flavor if stored with broth
  • Reheat gently: Warm broth over medium-low heat, stirring occasionally, until steaming but not boiling to preserve clarity and prevent bitterness

Frequently Asked Questions

How long to cook slow cooker chicken pho?

Cook on low for 6-8 hours until chicken is tender and shreds easily with a fork. Bone-in thighs need the full time to release gelatin and flavor into the broth.

Can I make slow cooker chicken pho ahead and store?

Store broth and chicken together in the fridge for 3-4 days or freeze for up to 3 months. Cook noodles fresh when you're ready to serve - never store them in the broth.

What goes best as sides for chicken pho?

Vietnamese spring rolls, pickled vegetables, and fresh herb salad cut through the rich broth. Serve lime wedges, jalapeños, hoisin sauce, and sriracha on the side so everyone can customize their bowl.

How do I know when the chicken in pho is done?

Chicken is done when it reaches 165°F and shreds easily with a fork. If using thighs, cook the full 6-8 hours for maximum gelatin release; breasts need only 4-5 hours or they dry out.

Can I use chicken breasts instead of thighs for pho?

Use boneless breasts and reduce cook time to 4-5 hours on low. Check temperature at 165°F and remove immediately - breasts dry out quickly in the slow cooker without the fat and collagen that thighs provide.

Slow Cooker Chicken Pho served on a plate

Slow Cooker Chicken Pho

No ratings yet
Slow Cooker Chicken Pho uses bone-in chicken thighs simmered gently with toasted star anise, cinnamon, and charred aromatics for 6-8 hours to build rich, clear broth. This set-it-and-forget-it recipe extracts deep flavors without stirring, then you assemble with fresh rice noodles and herbs for an authentic Vietnamese meal.
Print Recipe Pin Recipe
Prep Time 15 minutes mins
Cook Time 7 hours hrs
Total Time 7 hours hrs 15 minutes mins
Servings: 6 servings
Course: Main Dish
Cuisine: Vietnamese
Ingredients Equipment Method Notes

Ingredients
  

  • 2 lbs chicken thighs bone-in
  • 1 onion large, halved
  • 4 inch ginger fresh piece, to be charred
  • 4 cloves garlic
  • 5 whole star anise
  • 2 sticks cinnamon sticks
  • 8 cups chicken broth
  • 3 tablespoons fish sauce add in last 15 minutes of cooking
  • 14 oz rice noodles dried
  • cilantro fresh, for serving
  • Thai basil fresh, for serving
  • bean sprouts fresh, for serving
  • lime wedges for serving
  • jalapeños sliced, for serving

Equipment

  • Slow cooker For simmering broth and chicken
  • Dry skillet To toast star anise and cinnamon sticks
  • Broiler To char onion and ginger
  • cheesecloth or fine-mesh strainer To strain broth

Method
 

  1. Heat a dry skillet over medium heat and toast star anise and cinnamon sticks for 3-5 minutes, shaking the pan occasionally, until fragrant and slightly darkened. Remove and set aside.
    5 whole star anise, 2 sticks cinnamon sticks
  2. Place onion halves cut-side up and whole ginger on a foil-lined baking sheet. Broil for 5 minutes per side until deeply charred and blackened in spots. Let cool, then peel ginger.
    1 onion, 4 inch ginger
  3. Add chicken thighs, toasted spices, charred onion and peeled ginger, garlic cloves, and chicken broth to the slow cooker. Set to low and cook for 6 to 8 hours until chicken is tender and shreds easily.
    2 lbs chicken thighs, 5 whole star anise, 2 sticks cinnamon sticks, 1 onion, 4 inch ginger, 4 cloves garlic, 8 cups chicken broth
  4. Remove chicken and shred the meat, discarding bones and skin. Strain broth through cheesecloth or fine-mesh strainer into a clean pot. Stir in fish sauce, taste, and adjust seasoning with more fish sauce or salt if needed.
    2 lbs chicken thighs, 3 tablespoons fish sauce
  5. Soak rice noodles in warm water for 20-30 minutes until pliable, then drain. Divide noodles among bowls, top with shredded chicken, ladle hot broth over, and serve with fresh cilantro, Thai basil, bean sprouts, lime wedges, and sliced jalapeños.
    14 oz rice noodles, cilantro, Thai basil, bean sprouts, lime wedges, jalapeños

Notes

  • Toast spices before adding to the slow cooker to release essential oils for a more aromatic broth.
  • Char onion and ginger under the broiler to add caramelized depth and smoky flavor.
  • Cook noodles separately and add to bowls right before serving to prevent mushy texture.

Tried this recipe?

Let us know how it was!

What Is Locatelli Cheese? [Taste, Uses & More]

March 31, 2026

Most people assume Locatelli is just a brand name slapped on generic Italian cheese - something you grab when Parmesan is out of stock.

What Is Locatelli Cheese

That assumption costs them a lot of flavor. Locatelli is a specific sheep's milk cheese, aged and sharp in ways that cow's milk hard cheeses simply aren't, and knowing how to use it changes what you pull off the stove.

If you've been treating it as a one-to-one Parmesan swap, you're missing most of what it does - including why what pairs with cacio e pepe matters so much when this cheese is the one doing the work.

QUICK SUMMARY

Locatelli is a Pecorino Romano sold under the Locatelli brand - a hard, aged sheep's milk cheese with a salty, sharp, sheepy bite. It's best grated over hot pasta, stirred into broths, or shaved onto salads. Stronger than Parmesan, lower in moisture, and deeply umami.

🐑What It Is: Aged sheep's milk hard cheese, Pecorino Romano PDO
🧂Flavor: Salty, sharp, nutty, pungent with lanolin notes
🍝Best Uses: Grated over pasta, stirred into sauces, shaved on salads
❄️Shelf Life: Opened wedge: 3-6 weeks wrapped; grated: 1-2 weeks
⚠️Watch For: Very high sodium - not a mild background cheese

What Is Locatelli Cheese?

Locatelli is the brand name most Americans know for Pecorino Romano, a hard, aged cheese produced from sheep's milk under Italy's PDO (Protected Designation of Origin) rules.

The cheese itself traces back to the pastoral traditions of Lazio and Sardinia - Roman shepherds were salting and aging sheep's milk wheels long before Parmesan existed.

The Locatelli company, founded in the early 20th century, became the dominant importer of Pecorino Romano into the U.S. market.

That gave the brand such recognition that many home cooks now use "Locatelli" as a generic term for the cheese itself. Pecorino Romano PDO requires aging of at least five months for table cheese and eight months for grating.

The result is a very firm, dry paste with visible white crystalline specks - tyrosine crystals that signal proper aging. You'll also see it labeled Locatelli Romano or simply Locatelli Pecorino at delis and Italian grocers.

  • 🧱 Form factor - compact, dense wheels or wedges with a natural or waxed rind
  • 🐑 Milk source - 100% sheep's milk, which raises protein and fat density compared to cow's milk cheeses
  • 📍 PDO origin - Lazio, Sardinia, and the province of Grosseto (Tuscany) are the approved production zones

What Does Locatelli Cheese Taste Like?

locatelli cheese - What Is Locatelli Cheese

Sharp and salty are the two words that land first, but they only tell part of the story. Pecorino Romano is significantly saltier than Parmigiano-Reggiano - the curing process involves direct salting of the curd, not just brine immersion.

Sensory SnapshotStrong Intensity
👅 Flavor
saltysharpnuttyumami
✋ Texture
granularcrumbly
👃 Aroma
lanolinpungent aged-dairy

That sheep-forward character - a faint lanolin note that aged gouda or Parmesan simply don't carry - defines Locatelli's personality. Heat softens the sharpness slightly, letting the nuttier, more umami-forward tones come forward.

Eaten cold off a board, the salt and bite are front and center.

Compared to Parmigiano-Reggiano, Locatelli lands noticeably more aggressive in both salt and sheep funk. It's not a subtle backdrop cheese - it's the one doing the talking.

How to Use Locatelli Cheese

Locatelli earns its place in Roman pasta dishes above all else. Cacio e pepe relies on its high-fat, low-moisture structure to emulsify with pasta water and black pepper into a glossy sauce.

Grate it finely - not chunky - and add it off direct heat to prevent clumping.

Golden Rule
Always grate Locatelli to order. Pre-grated cheese dries out fast and loses the oil content that makes it melt cleanly into sauces.

Beyond pasta, it earns its spot in soups, on roasted vegetables, and in meatballs where a salty, sheepy edge sharpens the whole dish. Shaved thin with a peeler, it holds up on Caesar salad as a firmer, more pungent alternative to Parmesan.

For a cheese board, snap it into rough shards and serve with raw honey and dried figs.

How Locatelli Cheese Is Used
MethodBest ForTip
🧀 ShavedCaesar salad, cheese boardsUse a vegetable peeler for thin, clean shards
🍝 GratedCacio e pepe, pasta, pizza finishFine microplane grate emulsifies better in sauces
🥣 Stirred inSoups, broths, gratinsAdd at the end - salt builds fast with heat
🥩 RubbedMeat crusts before roastingCombine with herbs and breadcrumbs for texture

Note that locatelli cheese swaps that work are fewer than most guides suggest - the sheep's milk fat profile is hard to replicate exactly with cow's milk alternatives.

Try It In
🧀Southern Pimento Cheese SpreadSwap in Locatelli for a sharper, saltier spread→🥗Blue Cheese Dressing with ButtermilkSee how bold aged cheese behaves in a cold dressing→🥐Ham and Cheese Croissant Breakfast BakeLocatelli adds punch where mild cheeses disappear→

How to Buy and Store Locatelli Cheese

Buy a wedge, not a jar.

Pre-grated Locatelli loses aromatic oils quickly and often contains anti-caking agents that interfere with sauce emulsification.

Look for a wedge with a hard, dry paste, visible crystalline granules, and a rind stamped with "Pecorino Romano" or the Locatelli brand mark.

Skip anything with a wet or sticky surface, or any wedge carrying an ammonia smell.

Watch Out
An ammonia smell in aged cheese signals over-aging or improper storage - that batch won't improve. Don't buy it.

At home, wrap the wedge in wax paper first, then loosely in a plastic bag or cheese paper to allow minimal airflow. Keep it in the warmest part of the fridge - the vegetable drawer works well.

Properly wrapped, an opened wedge holds 3-6 weeks.

The mechanics of using locatelli cheese for creaminess in sauces are closely tied to freshness - older, drier wedges emulsify less cleanly.

Start Here With Locatelli

New to this cheese? Grate it over a simple bowl of pasta with olive oil and black pepper first.

That single use demonstrates its salt level, its melt behavior, and its sheep-forward bite all at once - and tells you immediately how much restraint the dish needs.

From there, scale up to cacio e pepe or roasted vegetables.

The comparison between Locatelli and its cow's milk counterpart is worth understanding too - using parmesan vs parmigiano reggiano for creaminess shows exactly where the textures diverge.

Frequently Asked Questions

Is Locatelli the same as Pecorino Romano?

Yes. Locatelli is the brand name; the cheese itself is Pecorino Romano PDO. The Locatelli company became the dominant U.S. importer of this cheese, which is why the brand name stuck as a shorthand.

Can I use Locatelli instead of Parmesan?

You can, but use about 25% less - Locatelli runs significantly saltier than Parmesan. The sheep's milk also gives it a sharper, more assertive edge that reads differently in mild dishes.

How salty is Locatelli cheese?

Very salty. Pecorino Romano is one of the saltiest aged cheeses in common use - the curd is directly salted during production, not just brined. One ounce can contain 200-250 mg of sodium.

Does Locatelli contain animal rennet?

Traditionally, yes. Pecorino Romano PDO uses animal rennet, making it unsuitable for strict vegetarians. Check the label if this matters - some producers now offer vegetarian-rennet versions.

Can you freeze Locatelli cheese?

You can freeze grated Locatelli for up to three months - it thaws well for cooking but turns too crumbly to shave. Wedges freeze acceptably, though the texture becomes slightly more granular after thawing.

Crockpot Hungarian Goulash

March 31, 2026

Beef chuck simmering in paprika-rich broth for 7 hours creates fork-tender meat with deep, smoky flavor. The slow cooker does the work while you're at work or running errands.

Crockpot Hungarian Goulash served on a plate

You don't need to hover over the stove. Sear the beef, layer everything in the crockpot, and walk away.

Make this when you want comfort food that tastes like it took all day but only needed 20 minutes of actual work. Perfect for meal prep or weeknight dinners when you plan ahead.

QUICK SUMMARY

This Crockpot Hungarian Goulash turns tough beef chuck into tender, paprika-soaked pieces in 6-8 hours. Sear the meat first to lock in flavor, then let the slow cooker handle the rest. Don't skip the searing step - it's the difference between rich, layered flavor and bland, watery stew.

⏱️Timeline: 20 minutes prep, 6-8 hours on low, minimal active work
🔥Critical Move: Brown beef cubes 3-4 minutes per side before slow cooking
⚠️Watch Out: Add sour cream off heat at the end or it curdles

Table of Contents

Toggle
  • Why This Recipe Works
  • What You'll Need
    • Ingredient Details
  • Ingredient Swaps
  • What to Serve With It
  • Store and Reheat
  • Frequently Asked Questions
  • Crockpot Hungarian Goulash
    • Method 
    • Tried this recipe?

Why This Recipe Works

Searing beef before slow cooking creates a flavor base that water and spices can't replicate. The browned bits dissolve into the sauce during the long cook, giving you depth without extra steps. If you're looking for another hands-off dinner that delivers similar tender results, try a simple buco recipe that uses the same slow-cooking approach.

Quick Reference
⏱️
Prep Time
20 min
🔥
Cook Time
6-8 hours low or 3-4 hours high
⏰
Total Time
6-8 hours 20 min
🍽️
Servings
6 servings
📊
Difficulty
Easy
🏷️
Category
Main Dish
💡
Quick Tip
Sear beef first for deeper flavor
🎯
Best For
Weeknight | Meal prep | Comfort food

Five reasons this works every time:

  • Beef chuck breaks down perfectly in 6-8 hours - the connective tissue melts into gelatin, keeping each piece tender but intact instead of dry and stringy
  • Fresh paprika delivers authentic smoky-sweet flavor - old paprika tastes flat and won't give you the signature Hungarian taste
  • Deglazing the searing pan captures browned bits - those caramelized spots dissolve into the broth and create a richer sauce
  • Adding potatoes in the last 2 hours prevents mush - firm vegetables need less time than meat, so layer them strategically
  • Sour cream goes in at the end off heat - high temperatures curdle dairy, so stir it in after cooking to keep the sauce silky
Golden Rule
Set the crockpot to low for 7-8 hours for the most tender beef - high heat works in 3-4 hours but doesn't break down connective tissue as well

What You'll Need

Ingredients for Crockpot Hungarian Goulash

Chuck roast, paprika, and beef broth form the base. Everything else adds texture or balances the richness without complicating the shopping list.

🍗
Protein
  • 2 lbs beef chuck roast, cut into 1.5-inch cubes
🥬
Vegetables
  • 1 large onion, diced
  • 2 bell peppers, sliced (red or green)
  • 2 medium potatoes, cubed
🧄
Aromatics + Spices
  • 4 garlic cloves, minced
  • 3 tablespoon paprika (sweet or smoked)
  • 1 teaspoon caraway seeds
🥢
Liquid + Thickeners
  • 2 cups beef broth
  • 2 tablespoon tomato paste
  • ¼ cup sour cream (optional garnish)

Ingredient Details

  • Beef chuck roast
    Cut into even 1.5-inch cubes so all pieces cook at the same rate - smaller chunks dry out, larger ones stay tough
  • Paprika
    Use fresh paprika from a recently opened jar - old paprika loses its smoky sweetness and leaves the sauce tasting flat
  • Caraway seeds
    Adds a subtle licorice note that's traditional in Hungarian cooking - skip if you can't find it, but the flavor won't be as authentic
  • Beef broth
    Low-sodium broth works best so you control the salt level - add more seasoning at the end instead of starting too salty
  • Tomato paste
    Thickens the sauce and adds acidity to balance the rich beef - don't use crushed tomatoes, they're too watery
  • Potatoes
    Yukon Gold or red potatoes hold their shape better than russets - add them in the last 2 hours so they don't turn to mush
  • Sour cream
    Stir in ¼ cup at the end off heat for a creamy finish - skip if you want to keep it dairy-free

Ingredient Swaps

Beef chuck is ideal, but stew meat or brisket work if you adjust the timing. Smoked paprika changes the flavor profile from sweet to smoky without losing authenticity.

Four swaps that work:

  • Beef chuck roast → stew meat or brisket - Stew meat cooks faster (5-6 hours low), brisket needs longer (8-9 hours) and adds more fat. Both change texture slightly but stay tender.
  • Sweet paprika → smoked paprika - Smoked paprika adds deeper, smokier flavor instead of sweet. Use the same amount but taste at the end and adjust with a pinch of sugar if needed.
  • Beef broth → vegetable broth or water with bouillon - Vegetable broth works but loses some beefy depth. Bouillon cubes are convenient but can make it too salty - use half the recommended amount.
  • Sour cream → coconut cream or dairy-free yogurt - Coconut cream adds richness without dairy but changes the tang. Dairy-free yogurt keeps the tangy finish but may separate if too hot.

Chuck Roast vs. Stew Meat

Works for: Chuck roast delivers richer flavor and stays tender longer; stew meat cooks faster if you're short on time

Skip if: You need it done in under 5 hours - stew meat dries out past that point

Sweet Paprika vs. Smoked Paprika

Works for: Sweet paprika gives traditional Hungarian flavor; smoked paprika adds depth without extra steps

Skip if: You want mild, sweet flavor - smoked paprika can overpower if you use too much

Instructions

Sear the beef, layer everything in the crockpot, and set it to low. The slow cooker handles the rest while you do other things.

  1. Sear the beef cubes in a hot skillet. Heat 2 tablespoons oil over medium-high heat. Add beef cubes in a single layer (work in batches if needed) and brown 3-4 minutes per side until deep golden. Don't move them too much - a good sear locks flavor in. Transfer to the crockpot.
  2. Cook the onions and paprika in the same pan. Lower heat to medium, add diced onion, and cook 3-4 minutes until soft. Remove pan from heat, stir in paprika and minced garlic, and cook 30 seconds off-burner to prevent bitterness. Scrape everything into the crockpot.
  3. Deglaze the pan with beef broth. Pour ½ cup broth into the hot pan and scrape up browned bits with a wooden spoon. Add the rest of the broth, tomato paste, and caraway seeds. Stir until tomato paste dissolves, then pour over beef in the crockpot.
  4. Cook on low for 6 hours, then add vegetables. Set crockpot to low and cook covered for 6 hours. After 6 hours, add sliced bell peppers and cubed potatoes. Cook another 2 hours until beef shreds easily with a fork and potatoes are fork-tender.
  5. Stir in sour cream off heat and adjust seasoning. Turn off the crockpot. Let sit 5 minutes, then stir in sour cream if using. Taste and add salt or a splash of vinegar if it needs brightness. Serve over egg noodles or with crusty bread.
Watch Out
Don't overfill the crockpot past the two-thirds mark - overfilling prevents even cooking and extends the time by an hour or more

What to Serve With It

Egg noodles soak up the sauce, but buttered potatoes or crusty bread work just as well. For more ideas on building a complete meal around rich, saucy dishes, check out easy watermelon gazpacho dinner nights for pairing strategies that balance heavy mains with lighter sides.

Side Dish Prep Why It Works How to Serve
Egg noodles Easy Mild base soaks up paprika sauce without competing flavors Toss hot noodles with butter, spoon goulash over top
Buttered potatoes Easy Classic pairing adds heartiness and stretches servings Boil until tender, toss with butter and parsley
Steamed green beans Easy Light vegetable contrast cuts through rich sauce Steam 5 minutes, season with salt and lemon juice
Rustic bread Easy Perfect for mopping up every bit of sauce on the plate Slice thick, toast lightly, serve on the side
Cucumber salad Medium Refreshing counterbalance to heavy, paprika-rich stew Toss sliced cucumbers with vinegar, dill, and salt

Three ways to serve it:

  • Over egg noodles with a dollop of sour cream - the noodles soak up the sauce and the sour cream adds tangy richness that balances the paprika
  • With crusty bread and a simple green salad - bread mops up the sauce while the salad adds crunch and brightness to cut through the heaviness
  • Alongside roasted root vegetables and mashed potatoes - turns it into a full comfort meal with extra vegetables for texture and color
Best Pick
Egg noodles win every time - they're quick, neutral, and soak up the paprika sauce better than rice or potatoes

Store and Reheat

Cool the goulash completely, then transfer to shallow airtight containers. The sauce thickens in the fridge, so add a splash of broth when reheating.

Method Time Best For
🍳 Stovetop 5-10 min over medium heat Even reheating that maintains texture and flavor
🔥 Oven 20 min at 325°F covered Larger portions or reheating straight from the fridge
📦 Microwave 2-3 min on 50% power Quick single servings when you're short on time

For best results when storing:

  • Cool within 2 hours of cooking - transfer to shallow containers so it cools faster and prevents bacterial growth
  • Store in the fridge for 3-4 days - use airtight containers to keep the sauce from drying out or absorbing other flavors
  • Freeze for up to 3 months in freezer-safe containers - leave 1 inch of headspace for expansion and label with the date
  • Add sour cream after reheating, not before freezing - dairy separates when frozen and reheated, so stir it in fresh
  • Reheat stovetop with a splash of broth - the sauce thickens as it sits, so thin it out with 2-3 tablespoons broth while warming

Frequently Asked Questions

Can I make Crockpot Hungarian Goulash ahead?

Yes, make it up to 2 days ahead and store in the fridge. Reheat on the stovetop with a splash of broth to thin the sauce, and stir in sour cream fresh before serving.

How long to cook Crockpot Hungarian Goulash at low?

Cook on low for 7-8 hours total - 6 hours for the beef alone, then add potatoes and peppers for the last 2 hours. The beef should shred easily with a fork when done.

What goes with Crockpot Hungarian Goulash?

Serve it over egg noodles, with buttered potatoes, or alongside crusty bread. Add a simple green salad or steamed vegetables to balance the richness.

How do I know when Crockpot Hungarian Goulash is done?

The beef should shred easily with a fork and the potatoes should be fork-tender. The sauce should coat the back of a spoon and look deep reddish-brown.

Can I use ground beef instead of beef chuck?

Yes, but the texture changes completely. Brown ground beef first, drain excess fat, then cook on low for 4-5 hours. It won't have the same tender, fall-apart texture as chuck roast.

Crockpot Hungarian Goulash served on a plate

Crockpot Hungarian Goulash

No ratings yet
This Crockpot Hungarian Goulash transforms beef chuck into tender, paprika-rich stew through slow cooking with a crucial searing step to build deep flavor. The recipe requires just 20 minutes of prep before letting the slow cooker work its magic for a comforting, set-it-and-forget-it meal perfect for weeknights or meal prep.
Print Recipe Pin Recipe
Prep Time 20 minutes mins
Cook Time 7 hours hrs
Total Time 7 hours hrs 20 minutes mins
Servings: 6 servings
Course: Main Dish
Cuisine: Hungarian
Ingredients Equipment Method Notes

Ingredients
  

  • 2 lbs beef chuck roast cut into 1.5-inch cubes
  • 1 large onion diced
  • 2 bell peppers sliced, red or green
  • 2 medium potatoes cubed
  • 4 cloves garlic minced
  • 3 tablespoon paprika sweet or smoked
  • 1 teaspoon caraway seeds
  • 2 cups beef broth low sodium preferred
  • 2 tablespoon tomato paste
  • 0.25 cup sour cream optional garnish, stir in off heat at end

Equipment

  • Skillet For searing beef and cooking onions
  • Crockpot For slow cooking the goulash
  • Wooden spoon For deglazing pan and stirring

Method
 

  1. Heat 2 tablespoons oil in a skillet over medium-high heat. Add beef cubes in a single layer and brown for 3-4 minutes per side without moving much. Transfer browned beef to the crockpot.
    2 lbs beef chuck roast
  2. Lower heat to medium and add diced onion to the skillet. Cook 3-4 minutes until soft. Remove from heat, stir in paprika and minced garlic, and cook for 30 seconds off the burner to reduce bitterness. Scrape mixture into the crockpot.
    1 large onion, 3 tbsp paprika, 4 cloves garlic
  3. Pour ½ cup beef broth into the hot skillet and scrape browned bits with a wooden spoon. Add remaining beef broth, tomato paste, and caraway seeds. Stir until tomato paste dissolves, then pour over beef in the crockpot.
    2 cups beef broth, 2 tbsp tomato paste, 1 tsp caraway seeds
  4. Cover and cook on low for 6 hours in the crockpot.
  5. Add sliced bell peppers and cubed potatoes to the crockpot. Cook for an additional 2 hours on low until beef is fork-tender and vegetables are cooked through.
    2 bell peppers, 2 medium potatoes
  6. Turn off the crockpot and let the goulash sit for 5 minutes. Stir in sour cream if using, off heat. Taste and adjust seasoning with salt or vinegar. Serve over egg noodles or with crusty bread.
    0.25 cup sour cream

Notes

  • Always sear the beef first to develop rich, deep flavor.
  • Add potatoes in the last 2 hours to prevent them from turning mushy.
  • Stir in sour cream off heat at the end to avoid curdling and keep sauce creamy.

Tried this recipe?

Let us know how it was!

What Is Lo Mein Noodle? [Taste, Uses & More]

March 31, 2026

Soft, springy, and quick to soak up whatever sauce you pour over them - lo mein noodles have a way of making a stir-fry feel complete in minutes.

What Is Lo Mein Noodle

They're mild enough to stay out of the way of bold seasonings, yet substantial enough that you notice when something cheaper or starchier replaces them.

If you've explored cooking ramen noodles perfectly or worked through cooking udon noodles perfectly, lo mein sits in a different lane - softer than udon, less brothy than ramen, and built for the toss.

QUICK SUMMARY

Lo mein noodles are soft, slightly chewy wheat-and-egg noodles from China, best used in saucy stir-fries. They have a mild, wheaty flavor that carries soy, sesame, and oyster sauce well. Available fresh or dried, they cook fast and stay tender without falling apart.

🌾Type: Wheat egg noodle, mild flavor, soft and springy texture
🍜Best For: Saucy stir-fries, takeout-style noodle bowls, cold sesame salads
🧄Pairs With: Soy sauce, oyster sauce, sesame oil, garlic, green onions
📦Shelf Life: Dried: up to a year; fresh: 2-5 days; cooked: 3-4 days refrigerated

What Is Lo Mein Noodle?

Lo mein noodles are a wheat-based egg noodle originating from northern China, now eaten widely across the country and throughout the Chinese diaspora.

The name roughly translates to "stirred noodles" - a clue to how they're meant to be used.

In the United States, they're closely associated with American-Chinese takeout, though the Cantonese tradition of tossing cooked noodles in sauce predates the takeout era by centuries.

These noodles come in two main forms: fresh refrigerated and dried. Fresh lo mein has a pale yellow color from the egg content, a softer bite, and a slightly bready aroma straight out of the package.

Dried lo mein packs longer shelf life and a firmer initial texture that softens on boiling.

You'll find them sold under several names - la mein, Chinese egg noodle, or simply stir-fry noodle. They're round and medium-thick, though some regional varieties run thinner or slightly flat.

For cooks already comfortable with cooking lo mein perfectly, the fresh version is usually worth seeking out first.

  • 🌾 Fresh lo mein - pale yellow, springy, best within 2-5 days of purchase
  • 📦 Dried lo mein - shelf-stable, slightly firmer, widely available in Asian grocery stores
  • 🏷️ Alternate names - la mein, Chinese egg noodle, stir-fry noodle

What Does Lo Mein Noodle Taste Like?

lo mein noodle - What Is Lo Mein Noodle

Lo mein noodles have a mild, wheaty flavor with a faint richness from the egg - closer to Italian fresh egg pasta than to ramen or soba.

On their own, they're neutral enough that the sauce does most of the talking.

Sensory SnapshotMild Intensity
👅 Flavor
wheatylightly eggyneutral
✋ Texture
softspringyslick when sauced
👃 Aroma
breadysubtle egg

Heat changes them noticeably. A quick toss in a hot wok gives the exterior a very light chew while the center stays tender - not crispy, but with more structure than they had straight from the boil.

Once sauced, they turn slick and glossy, coating the palate with whatever seasoning they're carrying.

Cold lo mein, as in a sesame noodle salad, reads differently again. The springiness tightens slightly, and the neutral wheat base lets acidic or nutty dressings come forward cleanly.

Golden Rule
Don't oversauce cold lo mein - the noodles keep absorbing liquid as they sit, and a lightly dressed bowl straight from the fridge will taste just right an hour later.

How to Use Lo Mein Noodle

Boiling first, then saucing is the standard move. Cook the noodles until just tender - usually 3 to 5 minutes for fresh, longer for dried - then drain and toss immediately into the wok. That hot-pan toss is what gives lo mein its signature coating rather than a watery, pooled sauce at the bottom of the bowl.

Soy sauce, sesame oil, and oyster sauce form the classic trio.

If you need a workaround, knowing your alternatives to oyster sauce keeps the dish on track without sacrificing depth.

Garlic, green onions, bok choy, and thin strips of beef, chicken, or shrimp are the most common add-ins - each one cooks fast enough to finish alongside the noodles in the same pan.

How Lo Mein Noodle Is Used
MethodBest ForTip
🔥 Boil + Stir-fryClassic takeout-style lo mein with protein and vegetablesDrain well before the wok - excess water breaks the sauce
🥗 Cold TossSesame noodle salads, make-ahead lunch bowlsToss with a little sesame oil right after boiling to prevent clumping
🍲 Brothy BowlLight soups where noodles sit briefly in brothAdd noodles last - they soften fast and absorb liquid quickly
🥘 Pan-fry + SauceSlightly crisped noodle base under a sauced toppingUse medium-high heat and minimal oil to firm the exterior

Lo mein fits naturally in Cantonese cooking and American-Chinese kitchens, and travels well into pan-Asian fusion dishes pairing hoisin with roasted vegetables.

For cooks exploring what to serve alongside this style of noodle dish, the dishes alongside chow mein page shows how these two classics share common companions.

When a recipe calls for lo mein and you don't have any, a round-up of lo mein noodle stand-ins covers which options hold up in the wok.

Try It In
🍜Vegetable Lo Mein NoodlesA straightforward wok toss that shows how sauce coats every strand→

How to Buy and Store Lo Mein Noodle

Fresh lo mein should look pale yellow and feel pliable, not sticky or wet-clumped. Avoid packages with visible condensation pooling inside - that moisture accelerates spoilage. For dried noodles, look for strands labeled "lo mein" or "egg noodle" that are unbroken and even in thickness.

Watch Out
Brittle, cracked dried noodles have usually been stored in fluctuating humidity - they'll cook unevenly and break apart in the wok.

Keep dried lo mein in a cool, dry pantry - unopened, it stays good for up to a year.

Fresh noodles belong in the fridge in their original packaging or an airtight container and should be used within 2 to 5 days.

Cooked lo mein keeps for 3 to 4 days refrigerated; a guide to storing lo mein noodle correctly covers edge cases like freezing and reheating.

If your sauce uses soy sauce and you're out, checking your swapping out soy sauce options saves the dish before it starts.

Start with Fresh, Adjust from There

Fresh refrigerated lo mein is the clearest starting point - it needs less cooking time, delivers better springiness, and shows you exactly what the noodle should feel like before you commit to dried.

Once you know the texture you're after, dried lo mein becomes a reliable pantry backup.

  • New to lo mein - buy fresh from the refrigerated section and boil for 3 minutes, then wok-toss
  • Stocking a pantry - dried lo mein or egg noodles labeled for stir-fry keep for months and perform reliably
  • No lo mein available - fresh linguine or spaghetti works in a pinch, though the texture is less springy

Frequently Asked Questions

What is lo mein noodle made of?

Wheat flour and egg, typically. The egg adds a faint richness and contributes to the springy texture. Some dried versions use only wheat flour with egg listed as a minor ingredient, so check the label if egg content matters.

Is lo mein noodle the same as chow mein?

No - the noodles are similar, but the preparation differs. Lo mein noodles are boiled then tossed in sauce; chow mein noodles are typically fried until some strands crisp up. Both start from a similar wheat egg noodle base.

Can you substitute spaghetti for lo mein?

Yes, in a pinch. Spaghetti lacks the egg richness and springiness of lo mein, so the texture is slightly less elastic. It absorbs sauce similarly and works well enough for a weeknight stir-fry.

How do you cook lo mein noodles for stir-fry?

Boil until just tender - about 3 minutes for fresh, 5-7 for dried - then drain thoroughly. Add directly to a hot wok with your sauce; the residual heat finishes the noodles while the sauce coats every strand.

Do lo mein noodles contain gluten?

Yes. Lo mein noodles are made from wheat flour and are not suitable for gluten-free diets. Rice noodles or certified gluten-free noodles are the standard swap for anyone avoiding gluten.

Spanish Pollo al Ajillo

March 31, 2026

You need 40 minutes and one heavy skillet. No marinating, no precooking, just crispy-skinned chicken thighs in garlicky white wine sauce.

Spanish Pollo al Ajillo served on a plate

The pan does most of the work. Sear the skin until golden, cook the garlic low and slow, deglaze with wine and let everything simmer together.

This works for weeknight dinners when you want something that tastes intentional without the fuss. Perfect for casual entertaining or meal prep that actually keeps well.

QUICK SUMMARY

Spanish Pollo al Ajillo delivers crispy chicken skin with tender, juicy thighs in a fragrant garlic-wine pan sauce. The key is searing skin-side down undisturbed and cooking garlic slowly to golden-not brown-for sweet roasted garlic flavor without bitterness.

⏱️Time Reality: 40 minutes total with 10 minutes of actual hands-on prep
🔥Critical First Step: Preheat your skillet for 3 minutes before adding oil to prevent sticking
⚠️Watch Out: Garlic burns fast-cook it on low heat until golden, not brown, or it turns bitter

Why This Recipe Works

High heat sears chicken skin to crispy while dark meat stays juicy inside. For a similar approach with creamy sides, try a simple risotto on the side that uses the same one-pan method.

Quick Reference
⏱️
Prep Time
10 min
🔥
Cook Time
25-30 min
⏰
Total Time
35-40 min
🍽️
Servings
4 servings
📊
Difficulty
Medium
🏷️
Category
Main Dish
💡
Quick Tip
Sear skin first for crisp texture
🎯
Best For
Weeknight | Entertaining | Meal prep

Why it delivers:

  • Skin-on thighs stay juicy - dark meat has more fat than breast, won't dry out even if you cook it a minute too long
  • Garlic cooks in stages - starts in oil at low heat, finishes in wine sauce, builds layered roasted flavor without burning
  • Wine deglazes and reduces - lifts browned bits from the pan, concentrates into a glossy sauce with acidity that cuts richness
  • High initial heat sets the crust - searing skin-side down for 6-8 minutes undisturbed creates golden, crispy texture
  • Resting redistributes juices - 5 minutes off heat lets meat reabsorb moisture so it doesn't run out when you cut in
Quick Tip
Use a meat thermometer and pull chicken at exactly 165°F-carryover heat will finish the job while it rests

What You'll Need

Ingredients for Spanish Pollo al Ajillo

Shop for skin-on chicken thighs and fresh garlic-those two ingredients define this dish. Salad cuts through all that richness with this simple salad recipe that takes 5 minutes to assemble.

🍗
Protein
  • chicken thighs (skin-on, bone-in)
🧄
Aromatics
  • garlic cloves
  • fresh parsley
  • bay leaves (optional)
🥢
Sauce Base
  • olive oil
  • dry white wine
  • lemon juice (optional)
🌶️
Seasonings
  • salt
  • black pepper
  • smoked paprika (optional)

Ingredient Details

  • Chicken thighs (skin-on, bone-in)
    Dark meat has more fat and connective tissue-stays tender even if slightly overcooked, unlike lean breast meat
  • Garlic cloves
    Slice cloves thick (⅛-inch) so they cook evenly without burning-thin slices turn bitter in seconds
  • Olive oil
    Use regular olive oil, not extra-virgin-EVOO has a lower smoke point and can turn bitter under high heat
  • Dry white wine
    Sauvignon blanc or pinot grigio work best-avoid oaked chardonnay which adds unwanted sweetness
  • Fresh parsley
    Add parsley off heat just before serving-cooking it kills the bright green color and fresh flavor
  • Smoked paprika (optional)
    Spanish pimentón adds subtle smokiness-start with ½ teaspoon, add more only if you want pronounced smoke flavor
  • Bay leaves (optional)
    Add 1-2 leaves when you deglaze with wine-remove before serving or they'll overpower the garlic

Ingredient Swaps

Chicken thighs deliver the best texture, but you can adapt this recipe for what's in your fridge. The coleslaw works best when it hits the table at the same time as the main with this crunchy coleslaw that balances the rich garlic sauce.

Four swaps that work:

  • Chicken drumsticks instead of thighs - add 5 minutes to cooking time, check internal temp at thickest part near bone
  • Chicken broth + white vinegar instead of wine - use ¾ cup broth with 1 teaspoon vinegar for alcohol-free version with similar acidity
  • Vegetable oil instead of olive oil - neutral flavor, higher smoke point, costs less but loses Mediterranean character
  • Dried parsley instead of fresh - use 1 tablespoon dried for every ¼ cup fresh, add it earlier in cooking since it needs time to rehydrate

Chicken Breast (Boneless, Skinless)

Works for: Quick cooking (15-18 minutes total), leaner protein, easier to slice for serving

Skip if: You want crispy skin texture, juicy results without watching the clock, or forgiving meat that stays tender

Garlic Powder

Works for: Pantry cooking when fresh garlic isn't available, even distribution of garlic flavor

Skip if: You want the signature look of golden garlic slices, roasted garlic sweetness, or traditional Spanish presentation

Instructions

Searing takes 8 minutes, simmering another 15-the rest is resting time. Potatoes adds the contrast this plate needs, but timing matters with this easy potatoes side you can start while the chicken simmers.

Here's how to build it:

  1. Preheat your skillet for 3 minutes over medium-high heat. Add 2 tablespoons olive oil and wait until it shimmers. Pat chicken thighs completely dry with paper towels, season both sides with salt and pepper, then place skin-side down in the hot pan. Leave at least 1 inch between pieces.

  2. Sear skin-side down for 6-8 minutes without moving the chicken. The skin will release from the pan when it's ready-if it sticks, wait another minute. Flip chicken, cook 2 minutes on the other side, then transfer to a plate.

  3. Reduce heat to medium-low and add remaining 2 tablespoons oil. Add sliced garlic and cook 2-3 minutes, stirring constantly, until garlic turns golden but not brown. If garlic starts to darken too fast, pull the pan off heat for 30 seconds.

  4. Pour in 1 cup dry white wine and scrape up browned bits with a wooden spoon. Return chicken to pan skin-side up, add bay leaves if using, and simmer uncovered for 12-15 minutes until internal temperature reaches 165°F. The wine will reduce by half and turn glossy.

  5. Remove pan from heat and let chicken rest 5 minutes in the sauce. Discard bay leaves, stir in chopped fresh parsley, and squeeze lemon juice over the top if you want extra brightness.

Watch Out
Don't flip the chicken early-skin needs 6 full minutes of contact with the hot pan to release naturally and develop a golden crust

What to Serve With It

This chicken comes with its own sauce, so you need sides that soak it up or cut through the richness. A good this dip can make or break the plate-for planning multiple dishes together, check out ideas for easy lettuce cups dinner nights that share similar timing.

Side Dish Prep Why It Works How to Serve
Crusty bread Easy Soaks up garlic-wine sauce, no cooking required Slice thick, toast lightly, serve warm on the side
Spanish saffron rice Medium Neutral base that absorbs sauce, traditional pairing Spoon rice on plate first, place chicken on top, drizzle sauce over
Steamed green beans Easy Light vegetable cuts richness, cooks in 5 minutes Steam while chicken rests, toss with olive oil and salt
Roasted potatoes Medium Crispy edges contrast with tender chicken, hearty filler Start potatoes 10 minutes before chicken, both finish together
Mixed leaf salad with sherry vinegar Easy Acidity cleanses palate between bites, refreshing contrast Dress salad after plating chicken so greens stay crisp

Three ways to serve it:

  • Family-style platter - arrange chicken on a large serving dish, pour sauce over, scatter extra parsley and lemon wedges around the edges
  • Individual plates - place one thigh per plate with a scoop of rice, spoon sauce over both, add green vegetable on the side
  • Tapas-style small plates - shred the chicken off the bone, pile on crusty bread slices, drizzle with sauce for handheld portions
Best Pick
Crusty bread is the fastest, most traditional pairing-it handles the sauce perfectly and you can buy it ready to slice

Store and Reheat

Chicken keeps 3-4 days in the fridge and freezes for up to 3 months. The garlic flavor intensifies overnight, which some people love and others find too strong.

Method Time Best For
🍳 Stovetop 5-7 min Keeping skin crispy and sauce glossy-add 2 tablespoons water if sauce is too thick
📦 Microwave 2-3 min Speed when you don't care about texture-skin softens but meat stays juicy
🔥 Oven 10-12 min at 350°F Reheating multiple servings at once with even heat and decent skin crispness

For best results when storing:

  • Let chicken cool 15 minutes before refrigerating - hot food creates condensation that makes skin soggy faster
  • Store in shallow containers - single layer of chicken pieces cools evenly and reheats better than stacked pieces
  • Keep sauce separate if possible - pour sauce into a small container, reheat separately and spoon over just before serving
  • Freeze in portions - individual servings thaw faster and you can reheat only what you need
  • Re-crisp skin in a hot pan - after reheating, sear skin-side down for 2 minutes over high heat to restore crunch

Frequently Asked Questions

Can I use chicken breast instead of thighs for Pollo al Ajillo?

Yes, but reduce cooking time to 15-18 minutes total and watch the temperature closely-breast meat dries out above 165°F. Skip the initial sear and cook breast pieces entirely in the simmering wine sauce to keep them moist.

How should I store leftovers of Pollo al Ajillo and for how long?

Store in an airtight container in the fridge for 3-4 days or freeze for up to 3 months. Keep sauce and chicken together so the meat doesn't dry out, and reheat on the stovetop with a splash of water to restore the glossy texture.

What is the best way to tell when Pollo al Ajillo chicken is fully cooked?

Insert a meat thermometer into the thickest part of the thigh without touching bone-it should read 165°F. If you don't have a thermometer, pierce the meat and check that juices run clear, not pink or cloudy.

My garlic tastes bitter in Pollo al Ajillo; how can I avoid that?

Cook garlic on medium-low heat for 2-3 minutes until golden, not brown-high heat burns it in seconds. If garlic starts darkening too fast, pull the pan off heat immediately and add the wine to stop the cooking.

Can I double or halve this Pollo al Ajillo recipe easily?

Halving works fine-just use a smaller skillet so chicken pieces still fit in one layer without gaps. Doubling requires cooking in batches since overcrowding prevents browning, or use two skillets side by side.

Spanish Pollo al Ajillo

No ratings yet
Spanish Pollo al Ajillo features crispy-skinned chicken thighs cooked in a fragrant garlic and dry white wine sauce. The technique of searing the skin undisturbed and slowly cooking the garlic ensures a perfect balance of roasted garlic sweetness without bitterness. This recipe is ideal for flavorful weeknight dinners or easy meal prep.
Print Recipe Pin Recipe
Prep Time 10 minutes mins
Cook Time 30 minutes mins
Total Time 40 minutes mins
Servings: 4 servings
Course: Main Dish
Cuisine: Spanish
Ingredients Equipment Method Notes

Ingredients
  

  • 4 pieces chicken thighs skin-on, bone-in
  • 6 cloves garlic sliced about ⅛ inch thick
  • 4 tablespoon olive oil regular, not extra-virgin
  • 1 cup dry white wine such as Sauvignon blanc or Pinot Grigio
  • 1 tablespoon fresh parsley chopped
  • 1-2 leaves bay leaves optional
  • to taste salt
  • to taste black pepper
  • 1 teaspoon lemon juice optional, to squeeze over chicken before serving
  • 0.5 teaspoon smoked paprika optional

Equipment

  • Heavy skillet Used for searing chicken and simmering sauce
  • Wooden spoon For scraping browned bits during deglazing

Method
 

  1. Preheat your heavy skillet over medium-high heat for 3 minutes. Add 2 tablespoons of olive oil and heat until shimmering. Pat chicken thighs dry with paper towels, season both sides with salt and pepper, then place skin-side down in the hot pan leaving at least 1 inch between pieces.
    4 pieces chicken thighs, 4 tbsp olive oil, to taste salt, to taste black pepper
  2. Sear the chicken skin-side down for 6 to 8 minutes without moving it. The skin will release from the pan when ready; if it sticks, wait another minute. Flip the chicken and cook for 2 minutes more, then transfer to a plate.
    4 pieces chicken thighs
  3. Reduce heat to medium-low and add the remaining 2 tablespoons of olive oil. Add the sliced garlic and cook, stirring constantly, for 2 to 3 minutes until the garlic turns golden but not brown. If garlic darkens too fast, remove the pan from heat for 30 seconds.
    6 cloves garlic, 4 tbsp olive oil
  4. Pour in 1 cup dry white wine and scrape up browned bits from the pan with a wooden spoon. Return chicken to the pan skin-side up, add bay leaves if using, and simmer uncovered for 12 to 15 minutes until the internal temperature reaches 165°F and the wine reduces by half to form a glossy sauce.
    4 pieces chicken thighs, 1 cup dry white wine, 1-2 leaves bay leaves
  5. Remove the pan from heat and let chicken rest in the sauce for 5 minutes. Discard bay leaves, stir in chopped fresh parsley, and squeeze lemon juice over the top if desired before serving.
    1 tbsp fresh parsley, 1 tsp lemon juice

Notes

  • Preheat the skillet well to prevent chicken sticking and ensure a crispy crust.
  • Cook garlic slowly on low heat to golden, not brown, to avoid bitterness.
  • Use a meat thermometer to pull chicken at 165°F for perfect juiciness and safety.

Tried this recipe?

Let us know how it was!

What Is Matzo Meal? Taste, Texture, Uses & More

March 31, 2026

Most cooks treat matzo meal as a seasonal swap-in - something you buy once for Passover, make matzo balls, and forget about.

What Is Matzo Meal

That's a narrow read on an ingredient that works hard in fish in cooking, stuffings, kugels, and fried coatings year-round, and if you're already careful about storing kugel correctly, keeping matzo meal on the shelf costs you almost nothing.

QUICK SUMMARY

Matzo meal is finely ground matzah - unleavened flatbread dried and milled to a sandy crumb. It tastes like plain dry breadcrumbs with a mild toasted-wheat note, and works as a binder, breading, or thickener wherever a neutral, yeast-free grain base is needed.

🌾Category: Pantry staple - ground unleavened bread
👅Flavor: Mild toasty wheat, slightly nutty, subtle savory backbone
🍳Best Uses: Matzo balls, meatballs, breading, kugel, thickening gravies
📦Shelf Life: Unopened many months; opened 6-12 months in airtight container
⚠️Watch Out: Contains wheat gluten - not suitable for celiac or gluten-free diets

What Is Matzo Meal?

Matzo meal is ground matzah - the flat, crisp, unleavened bread traditionally eaten during Passover, pulverized into a coarse-to-fine grain.

It sits in the pantry staple category alongside dried breadcrumbs and cracker crumbs, but it's made without any leavening agents, yeast, or additives.

Its roots are in Ashkenazi Jewish and Eastern European Jewish home cooking, where every part of matzah was put to use across the eight days of Passover.

You'll see it labeled matzah meal, matzoh meal, or matzo cake meal depending on grind size - cake meal is finer and better suited to delicate batters.

The coarsest form goes by matzo farfel, which are irregular broken pieces rather than uniform granules.

Standard matzo meal comes from wheat flour and water alone, baked fast and hard, then ground down.

If you ever need to make it at home, you can break plain matzah sheets and pulse them in a food processor - the same way you'd approach making fresh breadcrumbs, though matzo meal's shelf life far outpaces bread's shelf life in a standard pantry.

What Does Matzo Meal Taste Like?

matzo meal - What Is Matzo Meal

Matzo meal tastes close to unseasoned dry breadcrumbs - mild, faintly wheaty, with a clean toasted-grain note that doesn't carry the yeasty depth of regular breadcrumbs.

The slight nuttiness comes from how quickly matzah bakes at high heat, which toasts the surface without browning it deeply.

Raw, it has a dry, dusty quality. Once hydrated and cooked - in a matzo ball or a pan-fried fritter - it softens into a tender, slightly grainy crumb that holds its structure without becoming dense or gummy.

Sensory SnapshotMild Intensity
👅 Flavor
toasty wheatlightly nuttysubtle savory
✋ Texture
dry and sandy rawtender when hydrated
👃 Aroma
light toasted wheatfaint oven-baked

Its neutrality is the point. Unlike seasoned breadcrumbs, matzo meal won't compete with schmaltz, stock, or spice - it amplifies the surrounding flavors rather than adding its own.

How to Use Matzo Meal

Matzo meal's main job is structural: it binds, coats, and thickens without contributing strong flavor. That neutrality makes it adaptable across several methods.

The most iconic application is matzo balls - the soft dumplings simmered in chicken soup where matzo meal acts as the primary structure, held together by eggs and fat like schmaltz.

Getting the fat right matters; if you're working without rendered chicken fat, look into alternatives to schmaltz before adjusting the batter.

For chicken soup inspiration beyond the Ashkenazi tradition, a korean samgyetang ginseng chicken soup recipe shows how grain and dumpling elements cross into other soup cultures as well.

Golden Rule
Rest your matzo ball batter for at least 30 minutes in the fridge before forming. The meal needs time to fully hydrate, or the dumplings will fall apart in the pot.

Beyond soup, it works well in a range of applications:

  • 🥩 Meat binder - Mix into ground meat for meatloaf, meatballs, or gefilte fish to lock in moisture without changing the flavor profile.
  • 🍗 Breading and coating - Press onto chicken or fish for a Passover-legal crust; it fries and bakes to a dry, even crunch.
  • 🥚 Matzo brei - Soak broken matzah pieces (or use farfel), mix with beaten eggs, and pan-fry for a fast, satisfying breakfast dish.
  • 🍲 Thickener - Stir small amounts into gravies, kugel custards, or stuffings to absorb liquid and set structure during baking.

When swapping out matzo meal in non-Passover recipes, plain dry breadcrumbs match most applications gram-for-gram, though they add a faint yeasty note matzo meal doesn't carry.

How Matzo Meal Is Used
MethodBest ForTip
🍲 SimmerMatzo ball dumplings in soupChill batter before forming; don't overcrowd the pot
🥩 Mix & BakeMeatloaf, meatballs, gefilte fishUse 2-3 tablespoon per pound of meat as starting ratio
🍳 Coat & FrySchnitzel, fish fillets, frittersPress firmly so coating adheres before hitting the pan
🧁 Mix & BakeKugel custard, stuffing, pancake batterLet mixture rest so meal absorbs liquid before baking
Try It In
🥣Maple Baked OatmealSee how a grain base sets structure in a baked custard→🍌Banana Nut Baked Oatmeal CupsCompact, portioned bake where binding matters→🫐Blueberry Almond Baked OatmealFruit-forward bake with a firm, sliceable crumb→

How to Buy and Store Matzo Meal

Look for a sealed bag with pale-golden, even granules - no hard clumps, no dusty residue caking the bottom.

Near Passover, packaging marked "certified kosher for Passover" confirms the production line meets religious standards; outside the holiday season, standard matzo meal is widely available in the international or baking aisle.

Watch Out
Matzo meal contains wheat gluten. It is not suitable for celiac disease or gluten-free diets, even when labeled kosher for Passover.

Once opened, moisture is the only real enemy. Transfer the remainder to an airtight container and keep it in a cool, dry pantry away from the stove.

A full guide to storing matzo meal correctly covers what to check for before using older stock.

Unopened bags stay shelf-stable for many months. Opened and sealed properly, quality holds for 6-12 months - far longer than most fresh pantry items.

Start Here for Matzo Meal

If you're new to matzo meal, start with matzo balls. The recipe is forgiving, the ingredient behaves predictably, and the result makes the function immediately clear - you'll understand what it does to texture and structure after one batch.

Shortcut
No matzo meal on hand? Pulse plain matzah sheets in a food processor for 20-30 seconds. You get the same product, coarser or finer depending on how long you run it.

From there, use it anywhere a neutral binder or dry coating is needed. If you already make oven-baked cod with breadcrumbs at home, swapping in matzo meal gives you a cleaner, yeast-free crust with near-identical crunch.

Frequently Asked Questions

What is matzo meal made of?

Ground matzah - a flatbread made from only wheat flour and water, baked without any leavening. The dried matzah is milled to a coarse or fine crumb depending on the intended use.

Can I substitute breadcrumbs with matzo meal?

Yes, in most cooked applications the swap is nearly 1:1. Matzo meal produces a slightly drier, less yeasty result - which works well for breading and binding but may be noticeable in recipes where breadcrumbs add flavor.

Is matzo meal gluten free?

No. Standard matzo meal is made from wheat and contains gluten. Some brands produce oat-based matzo for Passover use, but those are not gluten-free either - oats carry cross-contamination risk unless certified.

How long does matzo meal last?

An unopened bag stays shelf-stable for many months past purchase. Once opened, transfer to an airtight container - quality holds for 6-12 months before the toasty wheat flavor starts to go flat.

What is the difference between matzo meal and matzo cake meal?

Grind size. Cake meal is milled much finer - closer to flour - and is used for delicate batters and baked goods where standard matzo meal would produce a gritty texture. They are not interchangeable in most recipes.

What Is Licor 43? [Taste, Uses & More]

March 31, 2026

Licor 43 does something few other sweet liqueurs manage: it adds vanilla and citrus warmth to a drink or dessert without flattening everything else in the glass.

What Is Licor 43

Bartenders reach for it when a cocktail needs body and a hint of spice that alternatives to grand marnier or replacements for amaretto can't quite replicate.

It's the bottle that earns its shelf space quickly.

QUICK SUMMARY

Licor 43 is a Spanish sweet liqueur from Cartagena, built on a secret blend of 43 botanicals. Its flavor centers on vanilla, orange peel, and warm spice. Use it in cocktails, stir it into espresso, or drizzle it over ice cream. Opened bottles stay at peak for up to 18 months.

🍊Flavor: Sweet vanilla, bright citrus peel, warm cinnamon and clove
🍶Texture: Syrupy, smooth, slightly oily from botanical extraction
🍹Best Uses: Carajillo, creamy cocktails, dessert drizzle, cake batter
🏪Buying Tip: Look for golden amber color, intact foil, and a clear batch code
⏳Shelf Life: Unopened: years; opened: best flavor within 6-18 months

What Is Licor 43?

Licor 43 - also sold under its Spanish name Licor Cuarenta y Tres - is a golden amber liqueur produced in Cartagena, in the Murcia region of southeastern Spain.

The Zamora Company has made it there since 1946, though the recipe claims roots in ancient Roman-era Cartagena herb and spice traditions.

The name refers to the 43 botanicals and spices in the formula, which remains proprietary.

What's confirmed: vanilla and citrus peel dominate the blend, with supporting layers of dried spices that vary in prominence depending on how the liqueur is served.

At 31% ABV, it sits in the mid-range for liqueurs - stronger than most cordials, lighter than most base spirits.

  • 🇪🇸 Category - Sweet herbal liqueur; Spanish in origin, now sold globally
  • 🌿 Botanical base - 43 ingredients, with vanilla and citrus as the confirmed anchors
  • 🥃 ABV - 31%, making it lower-proof than whisky or rum but fully alcoholic
  • 🎨 Appearance - Clear golden amber; natural color from the botanical infusion

What Does Licor 43 Taste Like?

licor 43 - What Is Licor 43

The first thing you notice is sweetness and vanilla - it's unmistakable and forward.

Then the citrus peel steps in, something like orange zest more than fresh juice, with a slight bitterness at the edge that keeps it from tasting flat.

Sensory SnapshotModerate Intensity
👅 Flavor
sweet vanillaorange peelcinnamonclove
✋ Texture
syrupyslightly oily
👃 Aroma
vanillaorange zest

Warming the liqueur - stirred into hot espresso, for example - amplifies the spice layer noticeably. Cinnamon and clove move to the front while the citrus softens.

Chilled or over ice, it leans harder into vanilla and becomes almost dessert-like in sweetness.

It tastes closest to a rum-based vanilla liqueur crossed with an orangey curaçao, but with a lighter, cleaner spice backbone than either.

If you've worked with swapping out creme de cacao in recipes, you'll recognize a similar vanilla-forward sweetness - though Licor 43 brings considerably more citrus brightness.

How to Use Licor 43

Espresso and coffee are the most natural partners. The Carajillo - hot espresso poured over Licor 43 - is the classic Spanish bar order from Cartagena and beyond. The heat opens up the spice notes, and the bitterness of the coffee cuts through the sweetness cleanly.

Golden Rule
Use one part Licor 43 to two parts espresso for a Carajillo. More liqueur and the coffee loses its edge entirely.

In cocktails, it works as a sweet vanilla-orange modifier rather than a base spirit.

Pair it with tequila reposado for a quick two-ingredient highball, or shake it with heavy cream for a creamy 43 - a simple, crowd-friendly drink.

When substituting in orange liqueur applications, keep in mind that triple sec stand-ins follow a similar logic: you're balancing sweetness and citrus against the base spirit.

How Licor 43 Is Used
MethodBest ForTip
🥃 Straight / On IceDigestif, simple sipper after dinnerServe in a small glass; the sweetness is filling in larger pours
☕ Stirred into Hot LiquidCarajillo, spiked hot chocolate, spiced custardAdd after pulling espresso; don't boil or top flavors fade
🎂 Baked InCake batters, sponge soaks, tiramisu layersUse in place of vanilla extract - reduce added sugar slightly
🍦 Drizzled / GlazedVanilla ice cream topping, baked custard glazeDrizzle cold from the bottle; heat reduces too fast on frozen desserts

In baking, it replaces vanilla extract with a more complex result - the citrus note lifts spice cakes and custard-based desserts noticeably. Adding it to a sponge soak alongside espresso is a reliable move for tiramisu variations.

Note that it's not suited to savory applications: raw fish and delicate green salads will clash badly with its sweetness.

Try It In
☕Ginger Cold Brew CoffeeA splash of Licor 43 deepens the spice against cold brew's bitterness→🍫Rich Chocolate Layer CakeUse in the soak syrup for a vanilla-citrus layer between chocolate tiers→🎂Cinnamon Streusel Coffee CakeAdd to batter to reinforce the cinnamon and add a faint citrus warmth→

How to Buy and Store Licor 43

Always buy bottles labeled Licor 43 with Spanish-origin labeling, intact foil seal, and a legible batch code on the base.

The color should be a clear golden amber - avoid any bottle showing cloudiness or visible sediment, which signals improper storage in the supply chain.

Shortcut
For regular cocktail use, the 700-750 ml bottle is the practical buy. For occasional baking only, a 375 ml keeps waste low.

Store the bottle upright in a cool, dark pantry - not in the freezer, which can dull the botanical aromatics over time.

Reseal tightly after every use.

If you notice fading aroma or a flat, syrupy sweetness without the citrus lift, check the licor 43 spoilage signs before using it in anything you're serving to guests.

Unopened, it keeps for years; once opened, aim to use it within 6-18 months for peak flavor.

Start Here With Licor 43

If you have the bottle and no plan, pour it over vanilla ice cream first.

That single use - two ingredients, thirty seconds - gives you an accurate read of how its vanilla-citrus-spice profile behaves before you commit it to a cocktail or a cake.

From there, the Carajillo is the next logical step: espresso, Licor 43, done.

When you're ready to branch into substitutions, swapping out licor 43 covers the closest options, and knowing whether to replace swapping out vanilla sugar in a recipe helps when Licor 43 is doing double duty as both sweetener and flavoring.

Frequently Asked Questions

Is Licor 43 sweet or dry?

It's firmly sweet. The sugar content is high, and vanilla leads the flavor rather than any dry botanical bitterness. It has no dry finish comparable to an amaro or dry vermouth.

Can you drink Licor 43 straight?

Yes - it's commonly served as a digestif in Spain, either neat at room temperature or over ice. Keep pours small; the sweetness becomes heavy in larger servings.

How much alcohol is in Licor 43?

Licor 43 is 31% ABV. That's lower than most base spirits like whisky or rum, but significantly higher than wine or beer - fully alcoholic in any meaningful amount.

What cocktails use Licor 43?

The Carajillo (espresso and Licor 43) is the most recognized. It also appears in creamy cocktails shaken with heavy cream, tequila highballs, and as a vanilla-orange modifier in original builds.

Does Licor 43 contain dairy?

No. The liqueur itself contains no dairy - it's a botanical and spirit-based product. Dairy enters only when a recipe adds cream or milk, as in a creamy 43 cocktail.

What Is Oaxaca Cheese? [Taste, Uses & More]

March 31, 2026

Pulling a quesadilla apart and watching cheese stretch into long, glistening strands is one of those moments that makes Oaxaca cheese impossible to substitute on a whim -

What Is Oaxaca Cheese

though guides on swapping out panela cheese or chihuahua cheese swaps that work show just how different each Mexican cheese behaves in the pan. Oaxaca cheese earns its reputation not from sharp flavor but from extraordinary melt - a quality built into its structure from the start.

QUICK SUMMARY

A mild, stretchy Mexican cheese made by pulling curds into ribbons and winding them into balls. Pale ivory, semi-soft, and built for melting - it delivers long, gooey pull inside quesadillas, queso fundido, and tlayudas. Closest in flavor to low-salt mozzarella, but with more elastic stretch.

🧀Type: Stretched-curd cheese from Oaxaca, southern Mexico
👅Flavor: Mild, milky, buttery with a soft lactic tang
🔥Best Use: Melting in quesadillas, queso fundido, or over enchiladas
🛒Buy It: Latin grocery stores, well-stocked supermarkets, online
📅Shelf Life: 1-2 weeks opened in fridge; longer sealed in vacuum pack

What Is Oaxaca Cheese?

Oaxaca cheese - also called queso Oaxaca, quesillo, or Oaxaca string cheese - originates from the state of Oaxaca in southern Mexico, where it has been made for centuries.

It belongs to the stretched-curd family, the same broad category as Italian mozzarella, though its production and texture differ in key ways.

Cheesemakers heat fresh curds, then pull and stretch them into long, thin ribbons before winding those ribbons into dense balls or braids.

That winding process creates the cheese's signature layered structure, which is what produces such dramatic pull when it melts.

Queso de hebra - "thread cheese" - is another name you'll see in markets, referencing the ribbon-like strands. Sold whole in balls, braided ropes, or vacuum-sealed pre-shredded packs, it's one of the most widely used cheeses across Oaxacan home cooking and street food alike.

Best Pick
At a Latin grocery, buy Oaxaca cheese sold loose in ball form rather than pre-shredded - the intact strands melt more evenly and taste noticeably fresher.

What Does Oaxaca Cheese Taste Like?

oaxaca cheese - What Is Oaxaca Cheese

Fresh Oaxaca cheese tastes mild and milky, with a gentle buttery note and just enough lactic tang to remind you it's a young curd cheese.

The salt level is low - lower than most supermarket mozzarellas - which keeps the flavor clean rather than sharp.

Heat changes the experience significantly. Once it melts, the tangy edge softens further and a richer, creamier quality comes forward.

If you're familiar with swapping out monterey jack in cooked dishes, you'll recognize that Oaxaca sits in a similar mild zone - though its pull and stretch far exceed Monterey Jack's.

Sensory SnapshotModerate Intensity
👅 Flavor
milkybutterylactic tanglightly salty
✋ Texture
semi-softelasticstringy when melted
👃 Aroma
fresh milklight dairy

How to Use Oaxaca Cheese

Oaxaca cheese performs best when heat is involved. Its stretched-curd structure melts into long, gooey strands rather than a flat puddle, which makes it the right call for dishes where visible pull matters.

How Oaxaca Cheese Is Used
MethodBest ForTip
🫓 Griddle-MeltQuesadillas, folded tacosUse medium heat - high heat makes it greasy before it fully melts
🔥 BakedEnchiladas, chiles rellenos, empanadasShred finely so it melts evenly across the surface
🥘 Skillet DipQueso fundido with chorizoAdd cheese last, off direct heat, and stir once to keep strands intact
🥗 Cold/RawSalads, tortas, pulled ribbon garnishTear by hand along the natural grain for clean, thin strips

Beyond those methods, Oaxaca cheese layers beautifully into a tlayuda - the large, crisped Oaxacan flatbread - where the cheese softens against the warm base without fully losing its structure.

If you want to try one at home, making oaxacan tlayuda large tortilla at home is a good starting point for the bread itself.

It pairs naturally with charred poblano and pasilla chiles, fresh corn tortillas, chorizo, black beans, and pico de gallo. Avoid pairing it with strong blue cheeses or very sweet, fruit-forward elements - both overwhelm its mild lactic profile entirely.

  • 🧀 Queso fundido - melt with chorizo in a cast-iron skillet and serve immediately for maximum strand pull
  • 🌮 Folded quesadillas - a few torn ribbons inside a tortilla on a dry comal gives better melt than pre-shredded
  • 🫑 Chiles rellenos - stuff inside roasted poblanos before baking; the cheese holds its shape better than jack cheese does
  • 🌽 Corn dishes - torn over grilled elote-style corn as a creamy, mild contrast to spicy toppings
Try It In
🧀Cheddar Cheese StrawsSwap Oaxaca for a stretchier, milder twist on the classic→🍳Egg and Cheese Breakfast SandwichOaxaca melts beautifully between egg and toasted bread→

How to Buy and Store Oaxaca Cheese

Look for pale ivory cheese with moist, tightly wound strands and a clean milky scent. Any dry or cracked edges suggest it's lost moisture; a sharp ammonia smell means it's past its window.

Pre-shredded packs are convenient, however, the strands melt less evenly than hand-torn fresh balls.

Watch Out
Avoid pre-shredded Oaxaca packages with excess syrupy liquid pooling at the bottom - that liquid signals the cheese has started breaking down and will turn greasy under heat.

Once opened, wrap the cheese in wax or parchment paper, then place it in a loose plastic bag or airtight container. Keep it away from strong-smelling fridge companions - its mild aroma absorbs odors quickly.

For shelf-life comparisons with similar soft cheeses, keeping mozzarella fresh follows nearly identical rules.

Opened Oaxaca lasts about 1-2 weeks refrigerated; sealed vacuum packs can run several weeks past purchase. Full details on storing oaxaca cheese correctly cover how to extend that window without losing texture.

Where to Start With Oaxaca Cheese

If you've never cooked with it before, start with a quesadilla on a dry comal - medium heat, a few torn ribbons, and nothing else.

That single test shows you exactly what this cheese does that no other cheese in your fridge replicates.

  • 🔰 First-time cook - make a simple griddle quesadilla; the melt tells you everything
  • 🔄 Substituting in a recipe - read up on [swapping out oaxaca cheese](https://forkliftkitchen.com/oaxaca-cheese-substitutes/) before reaching for mozzarella or jack, since melt behavior differs
  • 🛒 Can't find it locally - low-moisture mozzarella is the closest swap, though you'll lose some of the characteristic strand pull

Frequently Asked Questions

Is Oaxaca cheese the same as mozzarella?

No, though both are stretched-curd cheeses. Oaxaca is wound into tighter ribbons, which produces more dramatic pull when melted. Its flavor is slightly tangier and less milky-neutral than fresh mozzarella.

Can you substitute Oaxaca cheese for mozzarella?

Yes, in most cooked applications. Oaxaca melts with more stretch than mozzarella but matches it well in flavor. Use it in baked pasta, flatbreads, or any dish where melt matters more than browning.

How do you melt Oaxaca cheese without it turning greasy?

Use medium heat and avoid prolonged direct contact with a very hot surface. Adding it off direct heat - as with queso fundido - keeps the fat from separating before the strands fully melt.

Is Oaxaca cheese vegetarian?

Not always. Some producers use traditional animal rennet. Check the label - brands using vegetarian or microbial rennet will specify it, especially on imported or specialty-market packs.

Can you eat Oaxaca cheese cold, without melting it?

Yes. Torn into thin ribbons, it works well in tortas, alongside salsas, or in salads where you want a mild dairy note without heat. The texture is supple and slightly chewy straight from the fridge.

Chinese Savory Soy Milk with Youtiao

March 31, 2026

When you want a traditional Chinese breakfast that feels special without complicated prep, savory soy milk with youtiao delivers. The silky homemade soy milk takes less than an hour from dried soybeans, and the crispy fried dough makes it feel like a weekend treat even on a Tuesday.

Chinese Savory Soy Milk with Youtiao served on a plate

You don't need special equipment beyond a blender and a pot. Soak the beans overnight, blend until smooth, simmer gently, and season with ginger and white pepper.

This works for casual weekend mornings when you're craving something warm and comforting that isn't sweet.

QUICK SUMMARY

Fresh soy milk starts with soaked dried soybeans blended until completely smooth, then simmered gently to cook off the raw bean taste. The key is straining twice for silky texture and keeping the heat low to avoid bitterness. Serve warm with crispy youtiao for dipping.

⏱️Time Reality: 8-12 hours soaking, then 30 minutes active work
🔥Critical Move: Blend soaked beans with water until no graininess remains
⚠️Watch Out: Hard boiling makes soy milk bitter-simmer gently at medium-low heat

Table of Contents

Toggle
  • Why This Recipe Works
  • What You'll Need
    • Ingredient Details
  • Ingredient Swaps
  • What to Serve With It
  • Store and Reheat
  • Frequently Asked Questions
  • Chinese Savory Soy Milk with Youtiao
    • Method 
    • Tried this recipe?

Why This Recipe Works

Fresh soy milk tastes cleaner and more delicate than store-bought because you control the soak time and seasoning. For another breakfast with traditional roots, another great oatmeal recipe uses similar hands-off timing-try it when you want warm comfort food that cooks while you get ready for the day.

Quick Reference
⏱️
Prep Time
12 min soaking + 10 min prep
🔥
Cook Time
20 min simmer
⏰
Total Time
42 min
🍽️
Servings
4 servings
📊
Difficulty
Medium
🏷️
Category
Breakfast
💡
Quick Tip
Blend soaked soybeans until very smooth
🎯
Best For
Weeknight | Weekend breakfast

Five things that make this work:

  • Soaking soybeans 8-12 hours softens them completely so the blender can break them down into smooth milk instead of grainy pulp
  • Straining twice through fine mesh removes all soy pulp and gives you the silky texture that makes this feel special
  • Simmering at 185°F for 20 minutes cooks off the raw bean taste without boiling hard, which creates bitterness
  • Adding ginger and white pepper after cooking prevents curdling and keeps the savory flavor balanced
  • Serving youtiao on the side keeps it crispy until the moment you dip it into the warm soy milk
Quick Tip
Use 1 cup dried soybeans to 6 cups water for soy milk that's thick enough to coat the back of a spoon but still pourable

What You'll Need

Ingredients for Chinese Savory Soy Milk with Youtiao

Most ingredients sit in your pantry already if you cook Asian food regularly. Grab dried soybeans from any Asian grocery or online, and pick up fresh youtiao from a Chinese bakery the morning you plan to serve this-it tastes best within hours of frying.

🫘
Base
  • 1 cup dried soybeans
  • 6 cups water
🧄
Aromatics
  • 3-4 slices fresh ginger
  • 2 scallions, chopped
🌶️
Seasoning
  • 1 teaspoon salt
  • ½ teaspoon white pepper
  • 1 tablespoon soy sauce (optional)
  • Chili oil to taste (optional)
🥖
Accompaniment
  • 4-6 pieces youtiao (fried dough sticks)

Ingredient Details

  • Dried soybeans
    Choose organic if possible-they blend smoother and taste cleaner. Rinse well before soaking to remove dust.
  • Water
    Use filtered water if your tap water tastes metallic or chlorinated-it affects the final flavor.
  • Fresh ginger
    Slice thin so it releases flavor quickly during the simmer. Skip if you don't like spicy warmth.
  • White pepper
    Adds mild heat without changing the color. Black pepper works but tastes more pungent.
  • Youtiao
    Buy fresh from a Chinese bakery the morning you serve this. Day-old youtiao gets chewy and dense.
  • Soy sauce
    Use light soy sauce for saltiness without darkening the milk. Add after cooking to prevent curdling.
  • Chili oil
    Drizzle at the table so everyone can adjust heat level. Sichuan chili oil adds numbing spice.

Ingredient Swaps

Store-bought plain soy milk cuts the soaking and blending time but tastes flatter and less fresh. If you need a faster breakfast on a weekday, use unsweetened soy milk from a carton and just warm it with ginger and seasonings-it won't be authentic but it gets you most of the way there.

Four swaps that work:

  • Youtiao → gluten-free fried dough or rice crackers: Different texture but keeps the crispy dipping element without gluten
  • White pepper → black pepper: More pungent and visible in the milk, but adds the same mild heat
  • Fresh ginger → ¼ teaspoon ground ginger: Less aromatic and slightly bitter, but works if fresh isn't available
  • Soy sauce → tamari or coconut aminos: Gluten-free options with slightly different umami depth

Store-Bought Soy Milk

Works for: Weekday mornings when you don't have time to soak and blend dried soybeans

Skip if: You want the fresh, clean taste of homemade soy milk without preservatives

Gluten-Free Fried Dough

Works for: Anyone avoiding gluten but still wanting crispy dipping texture

Skip if: You can find fresh youtiao from a Chinese bakery-traditional tastes best

Instructions

The whole process takes about 30 minutes of active work once the beans finish soaking. Most of that time is hands-off simmering while the soy milk cooks and develops flavor, so you can prep other breakfast items or clean up the blender while it bubbles gently on the stove.

  1. Soak 1 cup dried soybeans in 4 cups water for 8-12 hours at room temperature. Drain and rinse the soaked beans until the water runs clear-this removes excess starch that can make the milk taste chalky.

  2. Blend the soaked beans with 6 cups fresh water on high speed for 2-3 minutes until completely smooth with no visible graininess. Stop and scrape down the sides halfway through so all the beans get processed evenly.

  3. Strain the blended mixture through a fine-mesh strainer or nut milk bag into a large pot, pressing the pulp with a spoon to extract all the liquid. Strain a second time through cheesecloth or a clean dish towel for the silkiest texture.

  4. Bring the strained soy milk to a gentle simmer over medium-low heat with ginger slices, stirring occasionally to prevent sticking. Let it bubble softly for 20 minutes-the milk will thicken slightly and lose the raw bean smell.

  5. Remove from heat and stir in salt, white pepper, and scallions. Taste and adjust seasoning, then ladle into bowls and serve immediately with warm youtiao on the side for dipping.

Golden Rule
Keep the simmer gentle-bubbles should barely break the surface. Hard boiling creates bitter flavors you can't fix.

What to Serve With It

Savory soy milk needs something acidic or crunchy to break up the creamy richness. Traditional Chinese breakfasts pair this with pickled vegetables or soft-boiled eggs, but you can also add quick stir-fried greens if you want more vegetables on the plate. When planning your hash browns dinner, use similar pairing logic-balance rich with bright, soft with crisp-and this whole approach works for quick morning meals that feel intentional.

Side Dish Prep Why It Works How to Serve
Pickled vegetables Easy Sharp acidity cuts through creamy soy milk Serve chilled in a small dish on the side
Soft-boiled eggs Easy Adds protein and creamy yolk texture Peel and halve, season with soy sauce
Steamed rice rolls Medium Mild flavor doesn't compete with soy milk Drizzle with soy sauce, serve warm
Stir-fried bok choy Easy Fresh green crunch balances soft textures Cook with garlic, season with salt
Century egg Easy Classic savory topping with silky texture Slice and arrange on top of soy milk

Three ways to serve it:

  • Traditional Chinese breakfast: Serve with youtiao, pickled mustard greens, and soft-boiled eggs for the full dim sum experience
  • Quick weekday version: Pair with toasted sesame rice crackers and a handful of roasted peanuts for crunch
  • Protein-boosted bowl: Add cubed silken tofu and a drizzle of chili oil for a more filling meal
Shortcut
Buy pickled vegetables from an Asian grocery instead of making them-they keep for weeks and add instant brightness to any breakfast bowl

Store and Reheat

Fresh soy milk tastes best the day you make it but keeps in the fridge for 3-4 days in an airtight container. A skin forms on top when it cools-just stir it back in when you reheat or skim it off if you don't like the texture. Youtiao doesn't store well-it gets chewy and loses all crispness within hours, so only buy what you'll eat that morning or re-fry briefly in a pan to revive some texture.

Method Time Best For
🍳 Stovetop 5-7 min on low heat Reheating soy milk gently without forming skin
📦 Microwave 1-2 min, stir halfway Quick single-serving warm-up
🔥 Oven Not recommended N/A

For best results when storing:

  • Pour soy milk into a glass or plastic container within 2 hours of cooking-metal can give it a metallic taste
  • Store youtiao in a paper bag at room temperature if eating within 4 hours-plastic makes it soggy
  • Stir soy milk well before reheating to redistribute settled solids and prevent scorching on the bottom
  • Reheat only the amount you'll drink since repeated heating breaks down the smooth texture
  • Add fresh seasonings after reheating because salt and pepper fade during storage

Frequently Asked Questions

Can I use store-bought soy milk instead of making fresh?

Yes, use unsweetened plain soy milk and warm it gently with ginger and seasonings. It won't taste as fresh or clean as homemade, but it cuts prep time to under 10 minutes for busy mornings.

How should I store leftover soy milk and youtiao?

Soy milk keeps in an airtight container in the fridge for 3-4 days-reheat gently on the stovetop. Youtiao doesn't store well and gets chewy within hours, so only buy what you'll eat fresh or re-fry briefly to restore some crispness.

How do I know when the savory soy milk is done cooking?

The milk is done when it thickens slightly and loses the raw bean smell after 20 minutes of gentle simmering. It should coat the back of a spoon but still pour easily.

Why is my soy milk bitter or grainy and how can I fix it?

Bitterness comes from boiling too hard-keep the simmer gentle with barely breaking bubbles. Graininess means you didn't blend long enough or soak the beans fully-strain twice and blend for at least 2-3 minutes on high speed.

Can I make this recipe ahead for breakfast the next day?

Yes, make the soy milk the night before and store it in the fridge, then reheat gently in the morning. Buy youtiao fresh that morning since it doesn't hold up overnight-stale youtiao tastes chewy and dense.

Chinese Savory Soy Milk with Youtiao served on a plate

Chinese Savory Soy Milk with Youtiao

No ratings yet
This traditional Chinese savory soy milk is made from soaked dried soybeans blended and gently simmered for a smooth, delicate flavor. Served warm with crispy youtiao on the side, it makes a comforting breakfast that is simple to prepare and satisfying.
Print Recipe Pin Recipe
Prep Time 12 minutes mins
Cook Time 20 minutes mins
Total Time 32 minutes mins
Servings: 4 servings
Course: Breakfast
Cuisine: Chinese
Ingredients Equipment Method Notes

Ingredients
  

  • 1 cup dried soybeans rinsed and soaked 8-12 hours
  • 6 cups water fresh for blending soybeans
  • 3 to 4 slices fresh ginger sliced thin
  • 2 scallions chopped
  • 1 teaspoon salt
  • 0.5 teaspoon white pepper
  • 1 tablespoon soy sauce optional, add after cooking to avoid curdling
  • to taste chili oil optional, add at table
  • 4-6 pieces youtiao fresh fried dough sticks

Equipment

  • Blender Used to blend soaked soybeans and water until smooth
  • Pot Used to gently simmer the soy milk
  • fine-mesh strainer or nut milk bag Used for straining blended soy milk
  • cheesecloth or clean dish towel Used for second straining to achieve silky texture

Method
 

  1. Soak 1 cup dried soybeans in 4 cups water for 8-12 hours at room temperature. Drain and rinse the soaked beans until water runs clear to remove excess starch.
    1 cup dried soybeans
  2. Blend the soaked soybeans with 6 cups fresh water on high speed for 2-3 minutes until completely smooth and uniform, scraping down the sides halfway through.
    1 cup dried soybeans, 6 cups water
  3. Strain the blended mixture through a fine-mesh strainer or nut milk bag into a large pot, pressing the pulp to extract all liquid. Then strain a second time through cheesecloth or a clean dish towel for a silky texture.
    1 cup dried soybeans, 6 cups water
  4. Bring the strained soy milk to a gentle simmer over medium-low heat with sliced ginger, stirring occasionally to prevent sticking. Let it bubble softly for 20 minutes until thickened and raw bean smell dissipates.
    3 to 4 slices fresh ginger
  5. Remove from heat and stir in salt, white pepper, and chopped scallions. Taste and adjust seasonings, then ladle into bowls and serve immediately with warm youtiao on the side for dipping.
    1 tsp salt, 0.5 tsp white pepper, 2 scallions, 4-6 pieces youtiao

Notes

  • Soak soybeans 8-12 hours to soften completely for smooth blending.
  • Strain soy milk twice for the silkiest texture and to remove pulp.
  • Simmer gently at medium-low heat to avoid bitterness from hard boiling.

Tried this recipe?

Let us know how it was!

What Is Maraschino Cherry? [Taste, Uses & More]

March 31, 2026

Bite into a classic ice cream sundae and you already know what's perched on top before you look - that glossy, candy-red sphere sitting in a pool of syrup.

What Is Maraschino Cherry

The maraschino cherry is one of those ingredients so embedded in American food culture that most people never stop to think about what it actually is, where it came from, or why the commercial version tastes nothing like a fresh cherry.

QUICK SUMMARY

The maraschino cherry is a pitted, preserved cherry steeped in sweetened syrup or liqueur. Commercial versions are dyed bright red and intensely sugary; liqueur-cured styles like Luxardo offer a richer, more complex flavor. Used as a garnish in cocktails, desserts, and baked goods.

🍒Category: Preserved stone fruit, cocktail garnish
🍬Flavor: Sugary-candied, mild almond tang in liqueur-cured types
🥃Best For: Manhattan garnish, sundae topping, fruitcake, Shirley Temple
🕰️Shelf Life: Unopened 1-3 years; refrigerate after opening, use within 2-3 months
🛒Buy: Look for "marasca" or "Luxardo-style" for better flavor; standard jars for garnish use

What Is a Maraschino Cherry?

The maraschino cherry traces its roots to Dalmatia, a coastal region of what is now Croatia, where a small, tart wild cherry called the marasca cherry grew abundantly.

Producers there preserved the fruit in marasca liqueur - a bitter almond-scented spirit distilled from the cherry's pulp and pits - creating a sophisticated preserved fruit popular with European fine dining.

That original product looks almost nothing like what fills most American jars today.

Commercial maraschino cherries became widespread in the early 20th century, when U.S.

Prohibition-era regulations pushed producers away from alcohol-based curing.

The modern version uses a process of bleaching fresh cherries in sulfur dioxide or calcium chloride brine, then re-dyeing them with Red 40 and soaking them in heavily sweetened syrup.

Two distinct styles now exist side by side:

  • 🍒 Commercial/American-style - Bright red, dyed, sugar-syrup cured; the grocery staple used for garnish
  • 🫙 Luxardo-style / marasca-cured - Dark, almost burgundy, preserved in actual marasca liqueur; richer and more complex
  • 🌸 Homemade cocktail cherries - Pitted fresh cherries steeped in bourbon or brandy with spices; increasingly popular among home bartenders

What Does a Maraschino Cherry Taste Like?

maraschino cherry - What Is Maraschino Cherry

Commercial maraschino cherries taste primarily of sugar and artificial cherry candy - bright, uniform sweetness with almost no resemblance to fresh fruit.

The flavor is closer to a glacé cherry or a sweet cherry preserve than to any raw cherry variety.

Liqueur-cured types are a different story entirely. The marasca cherry's natural bitterness comes through in Luxardo-style versions, layered with a distinct almond note derived from the pits during distillation.

Sensory SnapshotStrong Intensity
👅 Flavor
Sugary-candiedArtificial cherryAlmond tang
✋ Texture
SoftSilkySlightly chewy
👃 Aroma
Sweet syrupCherry liqueur

Texture is soft and syrup-soaked with just enough chew to hold up as a garnish.

Heat doesn't improve the commercial version much - it simply intensifies the sugar - however, warming a Luxardo cherry briefly in brandy or a pan glaze coaxes out its more complex, bitter-fruit character.

How to Use Maraschino Cherries

Most people reach for maraschino cherries straight from the jar. That's where commercial varieties work best - as a visual garnish that adds a pop of color and sweetness without asking you to think too hard about it.

Golden Rule
Match the cherry to the job: commercial red-dyed cherries for casual garnishes and kid-friendly drinks; Luxardo-style for cocktails and baked goods where the flavor actually matters.

For cocktails, the gap between styles matters most.

A Manhattan or Old Fashioned deserves a Luxardo-style cherry - its bitter almond depth holds its own against rye whiskey and vermouth.

The Shirley Temple, on the other hand, calls for that bright red commercial cherry; it's part of the aesthetic.

If you're swapping out maraschino cherry in a recipe, the style you're replacing determines which substitute makes sense.

How Maraschino Cherries Are Used
MethodBest ForTip
🫙 Straight from jarCocktail garnish, sundae topping, mocktail decorationPat dry before placing - excess syrup can bleed into whipped cream
🔥 Heated in glazeDessert sauces, cheesecake topping, baked Alaska finishUse Luxardo-style; commercial cherries turn cloying when reduced
🎂 Baked inFruitcake, upside-down cake, cupcake decoration, ambrosiaHalve and blot dry first to prevent sinking or excess moisture
🍸 Poached in liqueurUpgrading commercial cherries for cocktails or chocolate dessertsSimmer briefly in marasca liqueur or brandy with a strip of orange peel

In baking, maraschino cherries pair naturally with brown sugar, warm spices, vanilla, and cream cheese. They work well folded into frostings, pressed into the tops of cupcakes, or layered into a classic pineapple upside-down cake.

Avoid using them anywhere a delicate or herb-forward flavor profile needs space - their candy sweetness will dominate.

Try It In
🍮French Cherry ClafoutisUse Luxardo-style cherries for a richer, less sweet result→🥧Homemade Cherry PieMaraschino cherries add concentrated sweetness to the filling→🎂Black Forest Cherry CakeClassic decoration with a cherry that holds its shape and color→

How to Buy and Store Maraschino Cherries

Standard grocery jars work fine for garnish - just check the ingredient list if you're avoiding Red 40, sulfites, or artificial sweeteners. For cocktails or baking where flavor matters, look for jars labeled "marasca" or products from brands like Luxardo; they're darker, less sweet, and cost noticeably more.

Watch Out
Many commercial maraschino cherries contain sulfites and artificial red dye (Red 40). Some liqueur-cured varieties contain alcohol - check labels if either is a concern.

Storage is simple:

  • 🏪 Unopened jars - Keep in a cool, dark pantry; commercially sealed jars last 1-3 years
  • ❄️ After opening - Refrigerate in their syrup in a sealed container; use within 2-3 months
  • 🥄 Keep cherries submerged - Syrup acts as the preservative; cherries exposed to air deteriorate faster

For a more detailed breakdown, the guide on how long maraschino cherry keeps covers signs of spoilage and whether freezing is worth attempting.

Where to Start With Maraschino Cherries

Buy a jar of commercial maraschino cherries for drinks and dessert toppings - they do that job reliably and cheaply.

Grab a jar of Luxardo-style the moment you're building a serious cocktail or a baked good where cherry flavor should actually show up.

Best Pick
For cocktails like the Manhattan, Luxardo marasca cherries are worth the price. For everything else - sundaes, Shirley Temples, frosted cakes - the standard grocery jar is the right call.

Anyone making classic manhattan cocktail at home will notice the difference a proper marasca cherry makes immediately. Start there if you want a benchmark for what a good cocktail cherry actually tastes like.

Frequently Asked Questions

Are maraschino cherries real cherries?

Yes, they start as real cherries. Commercial versions are typically made from Royal Anne or other light cherries that are bleached in brine, stripped of their natural color, and then re-dyed and re-sweetened. Luxardo-style versions use actual marasca cherries preserved in liqueur.

Why are maraschino cherries red?

The red color is artificial. Cherries are first bleached to remove their natural pigment, then dyed with Red 40 or other food coloring. The original marasca-cured varieties were never dyed - they're naturally dark burgundy.

Do maraschino cherries contain alcohol?

Standard commercial jars contain no alcohol - they're preserved in sugar syrup. Luxardo-style and other liqueur-cured varieties do contain alcohol from the marasca spirit used in curing. Check the label if this matters.

How long do maraschino cherries last after opening?

Refrigerated in their syrup, opened maraschino cherries keep for 2-3 months. Keep the cherries submerged - the syrup is what preserves them. Discard if they smell off or the syrup turns cloudy.

Can maraschino cherries be used in baking?

Yes, and they're a classic addition to fruitcakes, upside-down cakes, and cupcakes. Blot them dry before folding into batter to avoid excess moisture, and halve them if the recipe calls for even distribution.

What Is Lard? [Taste, Uses & More]

March 31, 2026

Rendered slowly from fatty pork tissue, lard coats the back of a spoon with a clean, ivory-white richness that carries almost no odor at room temperature. That neutrality is partly why bakers once reached for it instinctively - it melts at body temperature, fats coat flour without tightening gluten, and the finish is gentler than butter.

What Is Lard

If you've been relying on shortening alternatives or butter substitutes without getting quite the right texture, lard is likely what your recipe originally called for.

QUICK SUMMARY

Lard is rendered pork fat with a mild, clean richness and faint savory finish. Leaf lard - the purest grade - is almost flavor-neutral, making it the top choice for pastry. Use it for flaky pie crusts, tamales, frying, and roasting.

🐖What It Is: Slowly rendered pork fat, sold as a solid white block or tub
👅Flavor: Mild porky richness, slightly sweet finish, cleaner than butter
🥧Best Uses: Pie crusts, tamales, frying, roasting vegetables, laminated doughs
❄️Shelf Life: Up to 6 months refrigerated; up to 1 year frozen
🛒Buy It: Look for clean white fat labeled "fully rendered" or "leaf lard" - no grey streaks

What Is Lard?

Lard is rendered pork fat - fatty pork tissues, most often from around the kidneys or back, slowly heated until the fat melts free, then strained and cooled into a smooth solid.

It belongs to the same family of rendered animal fats as duck fat and beef tallow, each drawn from a different animal and carrying its own flavor character.

Not all lard is equal. Leaf lard, rendered from the dense fat surrounding the kidneys, is the most prized grade - nearly white, almost odorless, and with the mildest flavor. Back fat lard, rendered from the fat layer beneath the skin, has a slightly stronger pork note.

You'll also see "pork drippings," which are pan-collected rather than slow-rendered and carry more roasted pork flavor.

Watch the terminology - lardo is an Italian cured fatback eaten as a charcuterie product, not a cooking fat. The two are different products despite the similar name.

Here's what distinguishes the main types:

  • 🌿 Leaf lard - kidney-surrounding fat; palest color, mildest flavor, best for pastry
  • Back fat lard - subcutaneous fat; slightly more pork-forward, good for frying and savory cooking
  • Rendered lard (commercial) - often a blend, sometimes partially hydrogenated; check the label
  • Pork drippings - pan-collected, roasted flavor; a different product used more as a condiment

What Does Lard Taste Like?

Lard's flavor is best described as mild porky umami with a clean, slightly sweet finish that fades quickly on the palate.

It doesn't linger the way butter does - there's no dairy tang, no sharpness, just a rounded fatty richness that recedes once the food hits temperature.

Sensory SnapshotModerate Intensity
👅 Flavor
mild porky umamiclean fatty richnessslightly sweet finish
✋ Texture
smooth and spreadablesilky when melted
👃 Aroma
mildly pork-scented coldneutral when rendered

Compared to unsalted butter, lard has similar richness but a cleaner finish - less dairy, no milky sweetness. Compared to olive oil, it's far more neutral and solid at room temperature.

Heat changes it: at frying temperatures, lard becomes essentially odorless, which is why fried food cooked in lard doesn't taste "porky" unless the fat is old or oxidized.

Watch Out
Old or poorly stored lard smells sulfurous or rancid. If your lard has any yellow tint, grey streaks, or off-smell, discard it - that flavor will transfer directly into your food.
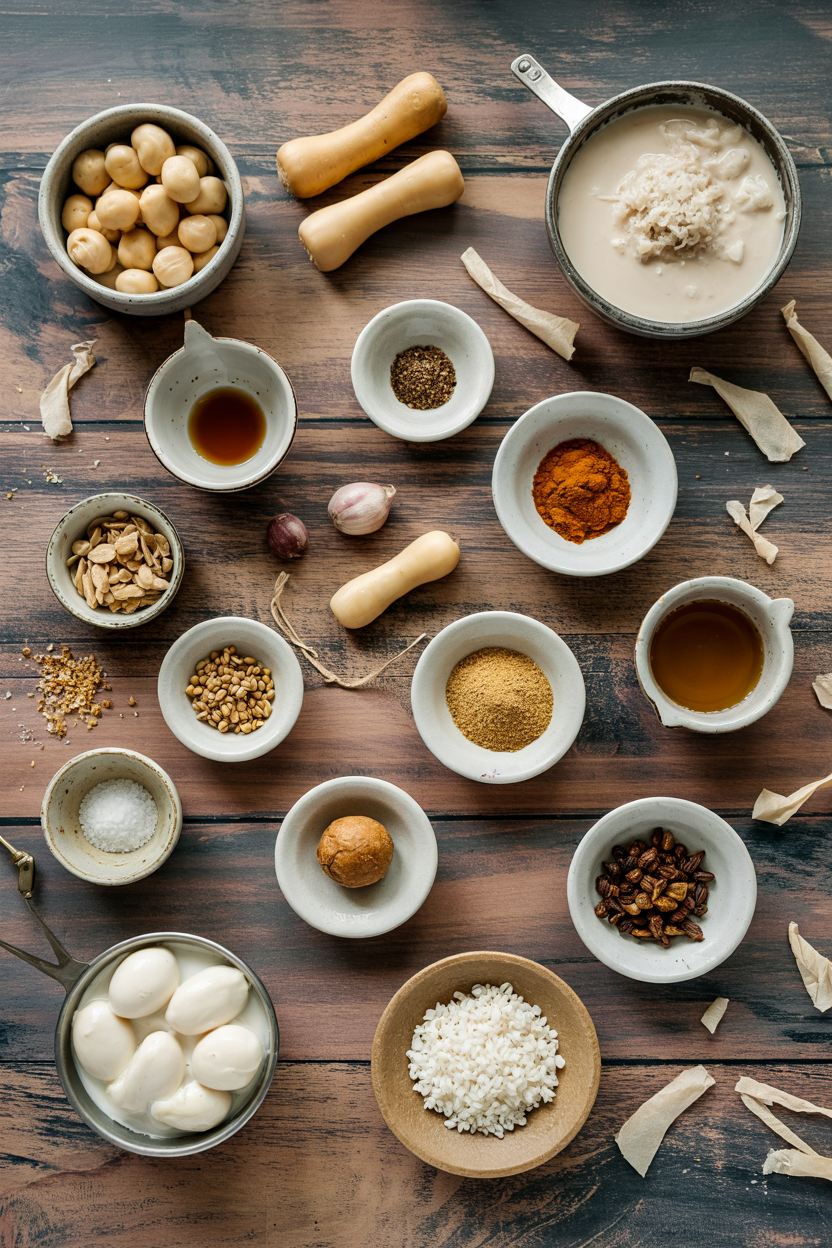
Leaf lard, specifically, is so mild that most tasters can't identify it in a blind pastry test. That's intentional - it's bred for texture, not flavor.

How to Use Lard

Pastry and baking are where lard earns its strongest reputation. The fat coats flour proteins differently than butter, disrupting gluten formation more completely and producing a crisper, more shattering crust. That's the reason traditional pie dough recipes favor it, and why Mexican tamale masa relies on lard for its characteristic moist, slightly dense texture.

How Lard Is Used
MethodBest ForTip
🥧 PastryPie crusts, tamale masa, laminated doughsUse leaf lard cold; don't overwork the dough
🍳 Pan-fryingLatkes, schnitzel, shallow-fried chickenHigh smoke point handles sustained heat well
🫕 RoastingPotatoes, root vegetables, cast-iron cookingThin coat gives a glossy, even browning
🫘 SimmeringRefried beans, slow-cooked greens, confitAdds mouthfeel and sheen without dominating flavor
🫓 SpreadingWarm tortillas, crusty bread (regional)Use back fat lard here - leaf lard is wasted at this role

Lard works across Mexican, Southern U.S., British, Filipino, and Eastern European traditions - typically anywhere rendered animal fat was the practical cooking medium before vegetable shortening became widespread. Sage, thyme, garlic, and onion all pair cleanly with lard's savory base.

Potatoes and corn masa are its most natural partners. Avoid pairing it with delicate floral herbs like tarragon or with strongly flavored oily fish, where the pork note can clash.

One practical swap worth knowing: lard and shortening perform similarly in laminated doughs, though lard has higher plasticity at cool temperatures, which makes it marginally easier to work with.

Try It In
🥬Southern Collard GreensA small spoonful of lard adds body and a savory base note→🍖Southern Collard Greens with Ham HockClassic Southern fat pairing — lard doubles down on the pork richness→

How to Buy and Store Lard

Look for clean, white fat with no grey or brown discoloration. Leaf lard appears almost translucent when very fresh.

For packaged products, check the label for "fully rendered" and confirm whether it's hydrogenated - traditional rendered lard is not, and that distinction matters for flavor and cooking behavior.

Best Pick
Leaf lard from a butcher or farmers market is the cleanest option. It's unhydrogenated, minimally processed, and has the most neutral flavor - exactly what pastry demands.

Storage is straightforward. Unopened commercial lard keeps in a cool pantry for several months. Once opened, move it to an airtight container in the refrigerator where it holds for 3-6 months.

For longer storage, freeze it - lard keeps up to a year in the freezer without flavor loss. Check the full guide on lard storage life if you're unsure how to assess freshness before using older stock.

Starting With Lard

If you've never cooked with lard, start with a pie crust or roasted potatoes - these two applications show off what lard does differently than any other fat. You'll notice the texture before you notice the flavor.

Shortcut
No specialty store nearby? Ask your butcher for fresh pork fat and render it yourself in a slow cooker - low heat, 4-6 hours, then strain through cheesecloth into a sealed jar.

For baking specifically, use leaf lard and keep it cold right up until it goes into the dough. For everything else - frying, roasting, bean dishes - standard back fat lard is the right call.

If you can't find lard, the lard swaps guide covers the closest alternatives by application.

Frequently Asked Questions

Does lard have a strong flavor?

No. Properly rendered lard is mild and nearly neutral, especially leaf lard. Back fat lard has a slightly more noticeable pork note, but it's subtle - most people can't identify it in finished baked goods.

What is leaf lard and why use it?

Leaf lard comes from the fat surrounding the pig's kidneys. It's the mildest, whitest grade - preferred for pastry because it has the least pork flavor and the smoothest texture when cold-worked into dough.

Can you substitute lard for shortening?

Yes, in a 1:1 ratio for most recipes. Lard has slightly less water content than butter-based shortenings, so pastry made with lard often comes out crisper. The main difference is lard is not hydrogenated, which makes it more plastic at cold temperatures.

How long does lard last in the fridge?

Opened lard keeps 3-6 months refrigerated in an airtight container. Discard it if you notice yellowing, grey streaks, or any sulfurous smell - those are signs of oxidation, not just age.

Is lard healthier than vegetable shortening?

Traditional unhydrogenated lard contains no trans fats, unlike older hydrogenated shortenings. It's higher in monounsaturated fat than butter and contains some vitamin D, particularly from pasture-raised pigs. Moderation still applies - it's calorie-dense.

« Previous Page
Next Page »

Primary Sidebar

ForkliftKitchen recipe developer

Welcome!

Recipe Developer · 12+ Yr Kitchen Veteran

I'm the recipe developer behind this site, focused on practical, well-tested dishes and smart ingredient swaps. Every recipe is written to be clear, reliable, and easy to make at home.

650+ Recipes
12+ Yrs Exp.
3x Tested
Our Story →

As Featured In

Allrecipes

TASTE OF HOME

Food52

HUFFPOST

Yahoo! Life

Our Editorial Standards

  • ✓ Every recipe tested at least 3 times before publishing
  • ✓ Substitutes verified by real kitchen trials, not guesswork
  • ✓ Reviewed for accuracy by our editorial team
  • ✓ Updated regularly with seasonal info and reader feedback

Most Popular

  • Creamy Lemon Shrimp Linguine
    Creamy Lemon Shrimp Linguine
  • Creamy Garlic Mushroom Chicken
    Creamy Garlic Mushroom Chicken
  • Sesame Ginger Chicken Noodle Bowls
    Sesame Ginger Chicken Noodle Bowls
  • Baked Lemon Herb Fish Fillets
    Baked Lemon Herb Fish Fillets
  • Veggie Loaded Fried Rice
    Veggie Loaded Fried Rice
  • Spicy Garlic Shrimp Stir Fry
    Spicy Garlic Shrimp Stir Fry

Join 8,000+ Home Cooks

Weekly Kitchen Tips

Easy recipes, smart substitutes, and real cooking shortcuts — every Thursday.

Subscribe Free →


Side Dishes

  • What to Serve With Asian Salmon? 15 Best Side Dishes
    What to Serve With Asian Salmon? 15 Best Side Dishes
  • Side Dishes for Strawberry Spinach Salad
    15 Best Side Dishes for Strawberry Spinach Salad
  • Sides for Grilled Cauliflower Steaks to Complete the Meal
    15 Sides for Grilled Cauliflower Steaks to Complete the Meal
  • 15 Sides To Serve With Calabacitas
    15 Best Sides for Calabacitas – Mexican-Inspired Favorites


Substitutes

  • 7 Best Substitutes for Hot Sauce in Marinades & Stir-Fries
    7 Best Substitutes for Hot Sauce in Marinades & Stir-Fries
  • 9 Best Substitutes for Butter in Baking and Cooking
  • 7 Best Substitutes for Tagliatelle for Italian Pasta Dishes
    7 Best Substitutes for Tagliatelle for Italian Pasta Dishes
  • 7 Best Substitutes for Udon Noodles in Asian Stir-Fries
    7 Best Substitutes for Udon Noodles in Asian Stir-Fries


Browse by Topic

  • Side Dishes320
  • Substitutes785
  • Dinner163
  • Air Fryer77
  • Taste Profiles484
  • Food Storage123


Reader Reviews

★★★★★

"Finally a food blog that tells you exactly why a substitute works instead of just listing options."

— Sarah M., via email

★★★★★

"The side dish recommendations are so specific — saved my dinner party twice this month."

— James R., Pinterest comment

★★★★★

"I trust this site more than most because they actually test everything. You can tell."

— Priya K., blog comment

Footer

↑ Back to Top

Forklift Kitchen

We do the heavy lifting so you can enjoy the cooking. Tested recipes, smart substitutes, and perfect pairings—built for real home cooks.

Content

  • Recipes
  • Substitutes
  • What to Serve With
  • Blog

Company

  • About Us
  • Contact
  • Subscribe

Legal

  • Privacy Policy
  • Terms of Service

As an Amazon Associate I earn from qualifying purchases.

© 2026 Forklift Kitchen.

Rate This Recipe

Your vote:


A rating is required
A name is required
An email is required