• Skip to primary navigation
  • Skip to main content
  • Skip to primary sidebar
  • Recipe Index
    • Air Fryer
  • Side Dishes
  • Substitutes
  • About
  • Contact
  • Subscribe

ForkLiftKitchen

menu icon
go to homepage
  • Recipe Index
    • Air Fryer
  • Side Dishes
  • Substitutes
  • About
  • Contact
  • Subscribe
subscribe
search icon
Homepage link
  • Recipe Index
    • Air Fryer
  • Side Dishes
  • Substitutes
  • About
  • Contact
  • Subscribe
×

Blog

Air Fryer Vegetable Katsu

April 1, 2026

When meal prep feels tedious but you still need real food ready for the week, crispy vegetable katsu delivers. One batch in the air fryer gives you golden-crusted eggplant or sweet potato slices that reheat better than takeout.

Air Fryer Vegetable Katsu served on a plate

This works for vegetarian weeknight dinners when you want something that feels intentional without requiring deep-frying or multiple pans.

You slice firm vegetables, coat them in flour, egg, and panko, then air fry at 400°F until the crust sets and the inside turns tender.

QUICK SUMMARY

Vegetable katsu gives you crispy panko-coated slices of eggplant, sweet potato, or zucchini without deep-frying. The air fryer crisps the coating in 10-15 minutes while keeping the vegetable tender inside. Dry your vegetables completely before breading or the coating slides off.

⏱️Timing: 25-30 minutes total with 15 minutes prep and 10-15 minutes air frying
🔪First Move: Slice vegetables to ¼ inch thickness so they cook evenly in the air fryer
⚠️Watch Out: Wet vegetables make soggy coating - pat dry thoroughly with paper towels before flour step

Why This Recipe Works

High heat air frying creates the crispy crust without submerging vegetables in oil. The three-step breading process locks in moisture while the panko coating crisps up in circulating hot air. For a version that comes together quickly, this quick samosas dish uses similar breading techniques with different spices.

Quick Reference
⏱️
Prep Time
15 min
🔥
Cook Time
10-15 min
⏰
Total Time
25-30 min
🍽️
Servings
4 servings
📊
Difficulty
Easy
🏷️
Category
Main Dish
💡
Quick Tip
Pat dry veggies for crispier coating
🎯
Best For
Weeknight | Meal prep

What makes this work:

  • Preheating the air fryer to 400°F creates immediate contact heat that sets the panko coating before moisture seeps through
  • Uniform ¼-inch slices cook at the same rate so you don't end up with burnt edges and raw centers
  • Fresh panko breadcrumbs stay separate and crisp instead of clumping into dense patches
  • Oil spray applied directly to breaded vegetables promotes browning without adding excess grease
  • Flipping halfway through cooking ensures both sides develop golden-brown color and crunch
Quick Tip
Leave 1 inch of space between vegetable pieces in the basket - overcrowding traps steam and makes soggy coating

What You'll Need

Ingredients for Air Fryer Vegetable Katsu

Firm vegetables hold their shape during air frying while developing tender interiors. Shopping for this takes one trip through the produce section plus pantry staples you likely have. For a homemade meatballs recipe that uses similar breading steps, the coating technique translates directly to protein.

🥬
Vegetables
  • Eggplant (1 medium)
  • Sweet potato (1 large)
  • Zucchini (2 medium)
🫙
Breading Station
  • All-purpose flour (1 cup)
  • Eggs (2 large)
  • Panko breadcrumbs (2 cups)
🌶️
Seasonings
  • Salt (1 tsp)
  • Black pepper (½ tsp)
  • Vegetable oil spray
🥢
Serving
  • Katsu sauce (½ cup)

Ingredient Details

  • Firm vegetables
    Choose eggplant, sweet potato, or zucchini - they hold shape when fried and develop tender interiors without turning mushy
  • Panko breadcrumbs
    Use fresh panko, not stale - old crumbs clump together and lose their crisp texture in the air fryer
  • All-purpose flour
    Dries the vegetable surface so the egg wash sticks properly - skip this step and the coating slides off
  • Eggs
    Create the wet layer that binds panko to flour - beat them thoroughly so coating applies evenly
  • Vegetable oil spray
    Spray directly on breaded pieces before and during air frying - this promotes golden browning without deep-frying
  • Katsu sauce
    Sweet-tangy sauce balances the fried coating - serve on the side so the crust stays crispy
  • Cornstarch or potato starch (optional)
    Mix with flour for lighter, crunchier coating - use ¼ cup starch to ¾ cup flour

Ingredient Swaps

You can adjust the breading ingredients for dietary needs without losing the crispy texture. Gluten-free and vegan versions work as long as you follow the flour, wet layer, panko order exactly.

Common swaps:

  • Swap all-purpose flour for gluten-free flour blend - coating texture changes slightly but still adheres properly to vegetables
  • Replace eggs with 3 tablespoons aquafaba - vegan binding that keeps coating intact though it sets softer than egg
  • Use gluten-free panko or crushed cornflakes instead of regular panko - maintains crispness if you coat evenly and spray with oil
  • Substitute olive oil spray or avocado oil spray for vegetable spray - minor flavor shift but same crisping effect

Eggplant

Works for: Classic katsu texture with creamy interior when cooked through

Skip if: You want faster cook time - eggplant takes 12-15 minutes to fully soften

Sweet Potato

Works for: Naturally sweet flavor that pairs well with tangy katsu sauce

Skip if: You're in a rush - dense sweet potato needs full 15 minutes in the air fryer

Zucchini

Works for: Quick cooking (10 minutes) and mild flavor that takes on coating seasonings

Skip if: You want hearty texture - zucchini stays lighter and more delicate than eggplant

Instructions

The breading process takes 10 minutes once you set up three shallow bowls in order. Coat each vegetable slice completely in flour, then egg, then panko without skipping steps. Most people skip the flour coating, but it balances the meal. For a version that comes together quickly, homemade noodles recipe pairs well when you want to serve katsu over something substantial.

  1. Preheat air fryer to 400°F for 3-5 minutes. Slice vegetables into ¼-inch thick rounds or planks using a sharp knife - uniform thickness ensures even cooking.

  2. Pat vegetable slices dry with paper towels for 1-2 minutes. Set up three shallow bowls: flour in the first, beaten eggs in the second, panko breadcrumbs in the third.

  3. Coat each vegetable slice in flour, shake off excess, dip in egg wash until covered, then press into panko to coat both sides. Place breaded pieces on a clean plate while you finish the batch.

  4. Arrange vegetables in a single layer in the air fryer basket with 1 inch of space between pieces. Spray tops lightly with oil spray and air fry for 7 minutes.

  5. Flip katsu pieces with tongs, spray the second side with oil, and air fry for 3-8 more minutes. Check doneness by piercing with a fork - vegetable should be tender inside with golden-brown crust outside.

Watch Out
Don't skip the oil spray - without it, panko stays pale instead of developing the golden-brown color you want

What to Serve With It

Vegetable katsu needs sides that add contrast without competing with the crispy coating. Japanese-inspired pairings work best - steamed rice soaks up katsu sauce while pickled vegetables cut through the fried richness. For croissants meal planning ideas that include similar Asian-fusion combinations, the serving concepts translate directly to katsu nights.

Side DishPrepWhy It WorksHow to Serve
Steamed white riceEasyNeutral base that balances savory katsu without adding competing flavorsServe hot in individual bowls, drizzle extra katsu sauce over rice
Simple green saladEasyFresh greens and light vinaigrette add crunch contrast to fried coatingToss mixed greens with rice vinegar dressing, serve on the side
Miso soupEasyWarm, umami-rich broth complements Japanese flavors without heavinessMake with instant miso paste, serve in small bowls before main course
Pickled vegetablesMediumAcidity cuts fried richness and adds palate-cleansing brightnessQuick-pickle cucumbers or radishes in rice vinegar, serve as condiment
Edamame with sea saltEasyEasy finger food that adds protein without requiring extra cookingSteam frozen edamame 5 minutes, toss with coarse salt

Three ways to serve it:

  • Over steamed rice with katsu sauce drizzled on top - the rice soaks up extra sauce and stretches the meal for four people
  • Inside a sandwich with shredded cabbage and spicy mayo - crispy vegetable katsu works like a burger patty between soft bread
  • Alongside quick salmon dish for a complete Japanese-inspired dinner - the glazed fish adds protein while the vegetables provide different texture
Best Pick
Serve katsu immediately after air frying - the coating stays crispiest in the first 5 minutes and gets softer as it sits

Store and Reheat

Leftover katsu lasts three days in the fridge but the coating softens with storage. Air fryer reheating brings back most of the original crispness in 5-7 minutes without turning the oven on. For meal prep purposes, this tender pork stores similarly and reheats well alongside katsu for weeknight dinners.

MethodTimeBest For
🔥 Air Fryer5-7 min at 375°FRestoring crispy coating - flip halfway through
🍳 Oven10 min at 375°FReheating larger batches while maintaining texture
📦 Microwave30-45 secFast reheating when you don't care about crispy coating

For best results when storing:

  • Cool katsu completely before refrigerating - hot vegetables create condensation that makes coating soggy in storage
  • Store in shallow airtight container with paper towels between layers - absorbs excess moisture to preserve crispness
  • Keep katsu sauce separate from fried vegetables - sauce makes coating soft if stored together
  • Freeze breaded but uncooked vegetable slices for up to 1 month - air fry straight from frozen, adding 3-5 minutes to cook time
  • Reheat only what you'll eat immediately - coating gets softer each time you heat and cool it

Frequently Asked Questions

Can I use gluten-free panko for air fryer vegetable katsu?

Yes, gluten-free panko works the same as regular panko if you coat vegetables evenly and spray with oil. The texture stays crispy though some brands brown faster, so check at 8 minutes instead of waiting the full 10.

How should I store and reheat leftover vegetable katsu?

Store cooled katsu in an airtight container in the fridge for up to 3 days with paper towels between layers. Reheat in the air fryer at 375°F for 5-7 minutes to restore crispness - microwave works for speed but makes coating soft.

What is the best way to know when vegetable katsu is done in the air fryer?

Pierce the vegetable with a fork at 10 minutes - it should slide through easily without resistance. The coating should be golden brown on both sides, and the interior should feel tender when you press gently with the fork.

Why does my vegetable katsu coating get soggy and how do I fix it?

Wet vegetables before breading cause soggy coating - pat slices completely dry with paper towels for 1-2 minutes. If coating is already soggy after cooking, air fry for 2-3 more minutes at 400°F to crisp it up.

How many servings does this recipe yield, and can I scale it up?

This makes 4 servings as a main dish or 6-8 as a side. You can double the recipe but cook in batches - overcrowding the basket traps steam and prevents proper crisping.

Air Fryer Vegetable Katsu served on a plate

Air Fryer Vegetable Katsu

No ratings yet
Air Fryer Vegetable Katsu delivers crispy panko-coated eggplant, sweet potato, or zucchini slices without deep-frying. The air fryer crisps the coating in 10-15 minutes while keeping the vegetables tender inside, perfect for easy weeknight meals or meal prep.
Print Recipe Pin Recipe
Prep Time 15 minutes mins
Cook Time 15 minutes mins
Total Time 30 minutes mins
Servings: 4 servings
Course: Main Dish
Cuisine: Japanese
Ingredients Method Notes

Ingredients
  

  • 1 medium eggplant firm, sliced ¼ inch thick
  • 1 large sweet potato firm, sliced ¼ inch thick
  • 2 medium zucchini firm, sliced ¼ inch thick
  • 1 cup all-purpose flour for coating
  • 2 large eggs beaten
  • 2 cups panko breadcrumbs fresh for crispy coating
  • 1 teaspoon salt for seasoning
  • 0.5 teaspoon black pepper for seasoning
  • vegetable oil spray spray directly on breaded vegetables
  • 0.5 cup katsu sauce served on the side

Method
 

  1. Preheat the air fryer to 400°F for 3-5 minutes. Slice all vegetables into ¼-inch thick rounds or planks using a sharp knife to ensure even cooking.
  2. Pat the vegetable slices dry thoroughly with paper towels for 1-2 minutes to prevent soggy coating. Set up three shallow bowls: one with all-purpose flour, one with beaten eggs, and one with panko breadcrumbs.
  3. Coat each vegetable slice first in flour, shaking off any excess. Dip into the egg wash until fully coated, then press into the panko breadcrumbs to cover both sides. Place the breaded pieces on a clean plate as you finish coating the batch.
  4. Arrange the breaded vegetable slices in a single layer inside the air fryer basket, leaving about 1 inch of space between pieces to prevent steaming. Lightly spray the tops with vegetable oil spray. Air fry for 7 minutes at 400°F.
  5. Flip the katsu pieces using tongs, spray the other side lightly with vegetable oil spray, and air fry for an additional 3 to 8 minutes, checking for a golden-brown crust and tender interior by piercing with a fork.
  6. Serve immediately with katsu sauce on the side to keep the coating crispy.

Notes

  • Pat vegetable slices dry completely before breading to ensure a crispy coating.
  • Use fresh panko breadcrumbs for best texture and avoid clumping.
  • Do not overcrowd the air fryer basket; leave space between pieces for even crisping.
Tried this recipe?

Let us know how it was!

What Is Provolone Cheese? [Taste, Uses & More]

April 1, 2026

Most people grab provolone without a second thought - it's just "the Italian cheese" in the deli case.

What Is Provolone Cheese

What they miss is that provolone dolce and provolone piccante are almost different cheeses entirely, and choosing the wrong one can make a sandwich taste flat or a melt turn greasy.

QUICK SUMMARY

Provolone is a stretched-curd Italian cow's milk cheese that comes in mild (dolce) and sharp (piccante) styles. It slices cleanly, melts smoothly, and suits everything from deli sandwiches to baked pasta - with the style you pick changing the flavor significantly.

🧀Type: Semi-hard, stretched-curd cow's milk cheese
👅Flavor: Mild and milky (dolce) or sharp and tangy (piccante)
🍳Best For: Melting on sandwiches, baked dishes, antipasto, pasta bakes
🛒Buy: Look for even pale-yellow color and a firm, springy feel
📅Shelf Life: Opened wedge lasts 2-3 weeks refrigerated; shredded 7-10 days

What Is provolone cheese?

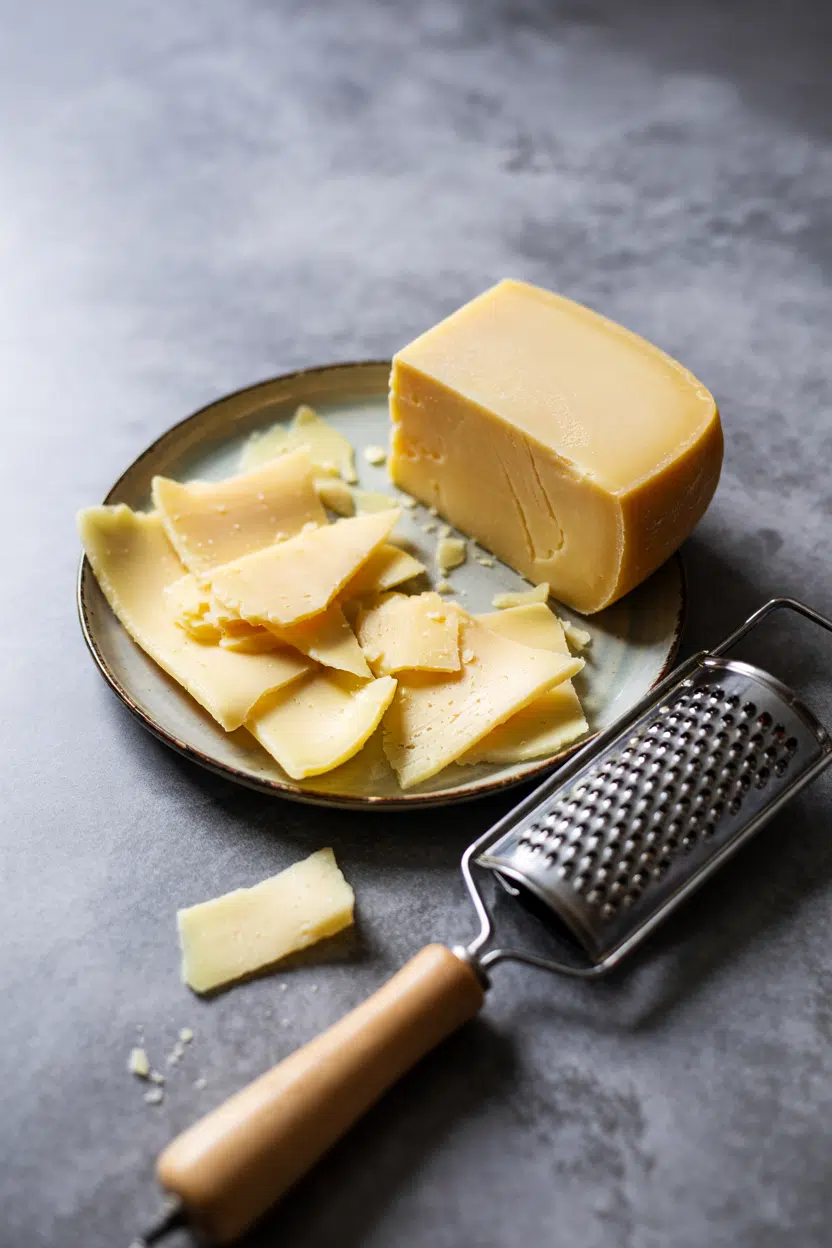
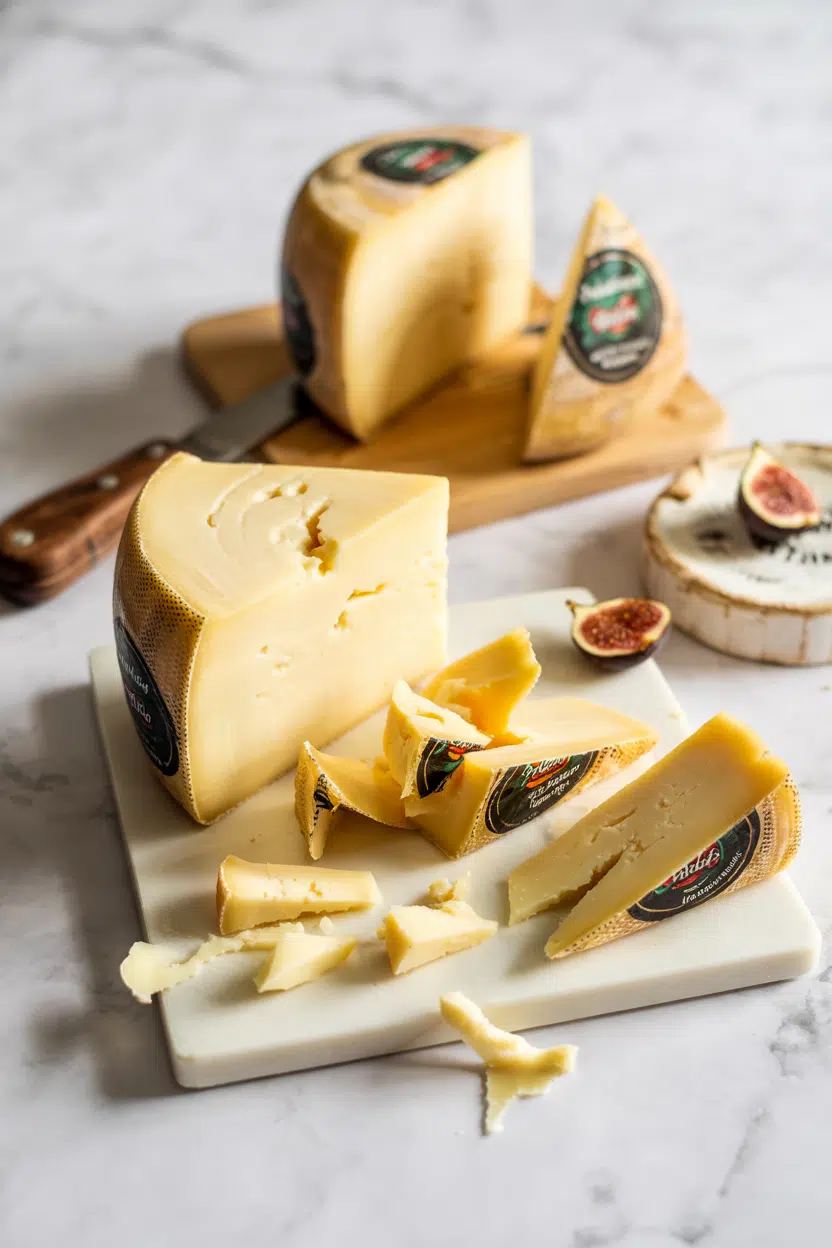
Provolone is a stretched-curd (pasta filata) cheese made from whole cow's milk, originating in Southern Italy and later standardized in Northern Italy's Po Valley. The name covers a family of related cheeses, not a single recipe.

You'll see it labeled as provolone Valpadana (the protected PDO version), provola (a smaller regional form), and provolone affumicato, which is cold-smoked after molding.

The two main styles are dolce and piccante. Dolce ages for about two to three months, producing a pale, smooth paste with a mild flavor. Piccante ages six months to over a year, developing a firmer texture, a deeper yellow color, and a noticeably sharper bite.

Both styles share the same elastic, waxy rind and the characteristic pulled-curd structure that gives provolone its clean slice and smooth melt.

That stretched-curd method - the same used for mozzarella - is why provolone and mozzarella are often compared, though provolone is firmer and more aged.

What Does provolone cheese Taste Like?

provolone cheese - What Is Provolone Cheese
Sensory SnapshotModerate Intensity
👅 Flavor
milkycreamy umamisharp-tangysmoky (affumicato)
✋ Texture
firm and springysmooth melt
👃 Aroma
mild dairynuttyslightly sharp

Dolce tastes closest to a mild cheddar or young gouda - soft milkiness with a gentle cream finish. Piccante is a different story.

It has the sharper, drier bite of aged manchego or a medium cheddar, with a faint nuttiness that develops from the extended aging.

Heat changes both styles meaningfully. Melted provolone turns creamy and develops a savory, almost buttery umami quality that you don't fully get when eating it cold. Piccante holds more of its sharpness through heat, while dolce softens into a nearly neutral richness.

Affumicato adds a light wood-smoke layer that comes through clearly on warm dishes.

Golden Rule
Match the style to the job: dolce for melting and mild layering, piccante for boards and dishes where you want the cheese to register as its own flavor.

How to Use provolone cheese

Provolone's most well-known role in American kitchens is as the melting cheese on a Philly-style cheesesteak. Dolce is the standard choice there - it melts fast, stays creamy, and doesn't compete with the beef and onions.

Beyond sandwiches, provolone works across several distinct cooking contexts.

How Provolone Is Used
MethodBest ForTip
🥗 Raw/SlicedAntipasto platters, deli sandwiches, cheese boardsUse piccante for boards; dolce for sandwiches with cured meats
🔥 BakedChicken parm, veal parm, pasta bakes, pizza toppingLayer over sauce - it browns without turning rubbery
🍳 Pan-MeltedOpen-face melts, grilled sandwiches, egg dishesMedium heat; high heat can cause the cheese to separate
🧂 Shredded/GratedMac and cheese, pasta bakes, risotto finishMix with mozzarella for extra stretch and mild flavor depth

Provolone pairs well with prosciutto, salami, and roasted red peppers - flavors strong enough to stand alongside piccante's sharpness. On the drink side, it goes with bold reds like Chianti and holds its own against a cold lager.

Avoid pairing aged piccante with very sweet fruit or dessert accompaniments; the salt-and-sharpness clash is noticeable.

If you need a swap, there are solid provolone cheese replacements that cover both the melt and the flavor profile depending on your dish.

Try It In
🧀Cheddar Cheese StrawsSwap in piccante for a sharper, saltier pastry bite→🍳Egg and Cheese Breakfast SandwichDolce melts cleanly over eggs without overwhelming them→

How to Buy and Store provolone cheese

Best Pick
For melting and sandwiches, buy dolce sliced fresh from the deli counter. For boards or bold flavor, look for a labeled piccante wedge - aging time should be visible on the packaging.

At the counter, check for even pale-yellow color and a smooth, intact rind. The surface should feel firm and slightly springy under light pressure.

Avoid pieces with sticky patches or a greasy film - both signal improper storage or age.

Once opened, wrap the cut surface tightly in parchment first, then plastic wrap or foil. This two-layer method keeps moisture in without trapping condensation directly against the cheese.

  • Whole unopened wheel - several months refrigerated, depending on style
  • Opened wedge or slices - 2-3 weeks; check our provolone cheese storage life guide for specifics on signs of spoilage
  • Shredded provolone - 7-10 days; use sooner for best melt quality

Which Provolone Should You Buy?

The choice comes down to what you're cooking. Two quick rules cover most decisions.

Go with dolce if you're melting the cheese, building a mild sandwich, or cooking for people who find sharp cheeses too strong. It's the lower-commitment option and the safer default for hot dishes.

Reach for piccante if you want the cheese to contribute its own flavor -

on a board, grated into a pasta bake, or layered into something that needs sharpness to cut through richness. Affumicato fits the same sharp-flavor situations but adds a smoky edge that works especially well on grilled sandwiches and flatbreads.

Frequently Asked Questions

Is provolone the same as mozzarella?

No. Both are stretched-curd cheeses made from cow's milk, but provolone is aged, firmer, and significantly sharper in flavor. Mozzarella is fresh, higher in moisture, and much milder - the two aren't interchangeable in most recipes.

What is provolone piccante?

Piccante is the long-aged style of provolone, typically matured for six months to over a year. It has a firmer texture, drier paste, and a pronounced sharp, nutty bite that intensifies with age.

Does provolone melt well?

Yes - dolce melts smoothly and evenly, making it a reliable choice for hot sandwiches and baked dishes. Piccante melts too, but its lower moisture content means it can turn slightly oily at very high heat.

Is provolone vegetarian?

Most traditional provolone is made with animal rennet, so it's not suitable for vegetarians. Some commercial versions use microbial rennet - check the label if this matters for your diet.

What wine pairs with provolone?

Bold reds work best with piccante - Chianti and Barbera d'Asti both complement its sharpness. Dolce is flexible enough for lighter reds, dry whites, or a cold lager.

How Long Does Prosciutto Last? [Storage Guide]

April 1, 2026

Pulling a pack of prosciutto from the fridge only to find slimy edges or an off smell is a frustrating waste - and with prosciutto, the signs of spoilage aren't always obvious.

Can You Freeze Prosciutto

Unlike cooked deli meats, prosciutto crudo is dry-cured, which means its shelf life behaves differently depending on whether it's whole, sliced, or already opened.

Understanding the role prosciutto plays in both raw and cooked preparations helps explain why proper storage matters so much here.

Much like storing vacuum sealed salmon correctly, the method and packaging state make an enormous difference in how long you get.

QUICK SUMMARY

Sliced prosciutto lasts 3-7 days in the fridge once opened, and up to 3-6 weeks vacuum-sealed. Whole cured legs keep 2-4 months in a cool pantry. Freezing is possible but damages the delicate texture of thin slices.

🧊Fridge (opened): 3-7 days tightly wrapped or in an airtight container
❄️Freezer (sliced): 1-2 months; best used in cooked dishes after thawing
🏠Pantry (whole leg): 2-4 months in a cool, dry space with rind intact

How Long Does Prosciutto Last?

Shelf life for prosciutto spans a wide range because the curing state and packaging make all the difference.

A whole Prosciutto di Parma leg with its rind intact is a living pantry product - the outer casing slows moisture loss and keeps the interior protected.

Sliced prosciutto is a different story entirely; thin slices expose far more surface area to air, which accelerates oxidation and bacterial activity.

Prosciutto Shelf Life
MethodStateDurationNotes
🏠 PantryWhole (uncut)2-4 monthsCool, dry space; rind must stay intact; depends on producer's cure time
🧊 FridgeUnopened (vacuum-sealed)3-6 weeksKeep in deli drawer; artisan-wrapped legs may be shorter
🧊 FridgeOpened/sliced3-7 daysWrap tightly; thin slices oxidize fast
🧊 FridgeCooked/crisped3-4 daysCool fully before sealing in an airtight container
❄️ FreezerSliced (opened)1-2 monthsTexture softens; use in cooked dishes only after thawing
❄️ FreezerWhole leg3-6 monthsWrap heavily; slicing behavior and texture will change

One important distinction: prosciutto crudo is not interchangeable with cooked ham or prosciutto cotto when it comes to storage rules - the dry-curing process affects how it ages, not just how it tastes.

How to Store Prosciutto

The right container and environment make the biggest difference once you've broken the seal. Sliced prosciutto should go straight into the coldest part of your fridge - the deli drawer if you have one - and never left loosely wrapped where air can dry out the edges within a day.

Golden Rule
Never store opened sliced prosciutto loosely in the fridge. Unprotected thin slices oxidize and dry out within 24-48 hours regardless of how cold your fridge runs.

Fridge (sliced): Wrap slices tightly in plastic wrap or transfer to an airtight container lined with a paper towel to absorb excess moisture. Separate layers with a single sheet of parchment - and if you're wondering how long that supply of parchment lasts, parchment paper's shelf life is indefinite when stored dry. Fridge (whole leg): Keep the rind on and slice only what you need; the rind acts as the primary barrier against moisture loss and surface oxidation. Pantry (whole leg): A cool, dry location away from direct sunlight works well - traditional producers hang whole legs at controlled room temperature, which is the environment the cure was designed for.

The same logic applies to similar cured meats: storing pancetta correctly follows many of the same principles around airtight wrapping and fridge placement, since both are Italian cured pork products sensitive to air exposure.

Can You Freeze Prosciutto?

Yes, but go in with realistic expectations. Freezing sliced prosciutto is safe, and it works - however, the thin fat layers that give prosciutto its silky mouthfeel break down during freezing, and they won't recover when thawed.

Raw-serve applications are effectively off the table after freezing.

Watch Out
Don't freeze thin prosciutto slices expecting raw-serve quality on the other side. The fat softens and the texture turns fragile. Reserve frozen prosciutto for pasta, sauces, and omelets where the texture loss is hidden.

For sliced prosciutto, the freeze process matters:

  1. Layer with parchment - place a sheet between every 2-3 slices to prevent them fusing into a solid block.
  2. Stack and seal - transfer the stack to a heavy-duty freezer bag, press out all air, or vacuum-seal for best results.
  3. Freeze flat and label - lay the bag flat until frozen solid, then label with the date; use within 1-2 months for sliced, 3-6 months for a whole leg.

To thaw, move the sealed bag to the fridge overnight. Once unwrapped, use within 24 hours.

For cooked uses, a 30-60 minute rest at room temperature before reheating is enough.

Signs Prosciutto Has Gone Bad

Fresh prosciutto has a specific aroma - gently nutty, faintly savory, and clean. Anything sharply sour, ammonia-like, or putrid is a hard stop.

Signs It's Gone Bad
👀
VisualGray-green coloring on slices · fuzzy white, green, or colored mold on interior (not rind) · slimy sheen · leathery, shrunken edges
👃
SmellSour or putrid odor · sharp ammonia note distinct from natural cured aroma
✋
TextureStickiness or sliminess on slice surface · brittle, crumbling fat indicating oxidation

One nuance worth knowing: small white surface molds on the outer rind of a whole leg are completely normal and common in traditional curing.

Clean them off with a cloth dipped in vinegar and let the rind dry - that's not spoilage.

Colored mold or any mold on the interior slices is a different situation entirely, and the safest move is to discard.

Getting the Most From Every Pack

A few habits will consistently extend how long your prosciutto stays in good shape.

  • 🍖 Slice to order - keep the whole leg with rind on and only cut what you need; the uncut interior stays moist and silky far longer.
  • 📄 Pre-portion before freezing - separate slices with parchment now so you can pull single servings later without thawing the entire batch.
  • 🌡️ Temper before serving - bring fridge-cold sliced prosciutto to near room temperature for 15-20 minutes; fat-forward cured meats release their aroma and soften to the right texture only when slightly warm.
  • 🍳 Redirect frozen portions - thawed prosciutto belongs in pasta, eggs, or sauces where structural texture isn't the point; if you need a raw-serve swap, check [prosciutto swaps that work](https://forkliftkitchen.com/prosciutto-substitutes/) for alternatives that hold up better.
Shortcut
Trim and clean white surface mold from a whole leg's rind with a vinegar-dampened cloth - no need to discard the leg. Only interior mold or off smells warrant throwing it out.

Frequently Asked Questions

Does prosciutto need to be refrigerated?

Sliced and opened prosciutto must be refrigerated. A whole, uncut leg with the rind intact can hang in a cool, dry pantry - that's how traditional producers store it - but once cut, refrigeration is non-negotiable.

Is white mold on prosciutto normal?

On the outer rind of a whole leg, yes - white surface mold is a normal byproduct of the curing environment. Wipe it clean with a vinegar-dampened cloth. Any mold on interior slices is not normal and means the prosciutto should be discarded.

How long does prosciutto last once opened?

Opened sliced prosciutto lasts 3-7 days in the fridge when wrapped tightly or stored in an airtight container. Loose storage cuts that window to 1-2 days due to oxidation.

Can you refreeze prosciutto after thawing?

No. Refreezing breaks down the fat and muscle fibers a second time, producing a mushy, unpleasant texture. Thaw only what you plan to use within 24 hours.

How do you thaw prosciutto without ruining the texture?

Thaw in the fridge overnight while still sealed - slow, cold thawing minimizes moisture loss. For cooked uses, 30-60 minutes at room temperature after fridge thawing is fine, but don't expect raw-serve texture to return regardless of method.

What Is Pernod? [Taste, Uses & More Guide]

April 1, 2026

You spot a bottle of Pernod on the shelf - pale straw, that distinctive anise label - and wonder whether it belongs in your glass, your stockpot, or both.

What Is Pernod

The answer is genuinely both, and understanding what makes anise distinct helps explain why this French spirit punches well above its small-measure use in cooking.

Pernod sits closer to pastis than to sambuca, and if you've ever needed replacements for sambuca in a recipe, you've likely already brushed against this category.

QUICK SUMMARY

Pernod is a French anise spirit with a licorice-forward, herbal flavor. Used in cocktails and cooking, it adds a sweet anise note to seafood, cream sauces, and vinaigrettes. Store sealed in a cool, dark spot and use within 12-24 months of opening.

🌿Flavor: Licorice-forward, sweet herbal, faintly bitter aniseed finish
🍶Best Use: Deglazing mussels, finishing bouillabaisse, anise-forward cocktails
🛒Buy: Look for pale straw color, ~40% ABV, intact seal
📦Storage: Cool, dark place; use opened bottles within 12-24 months
⚠️Avoid With: Delicate herbs like mint or basil - the licorice overwhelms them

What Is Pernod?

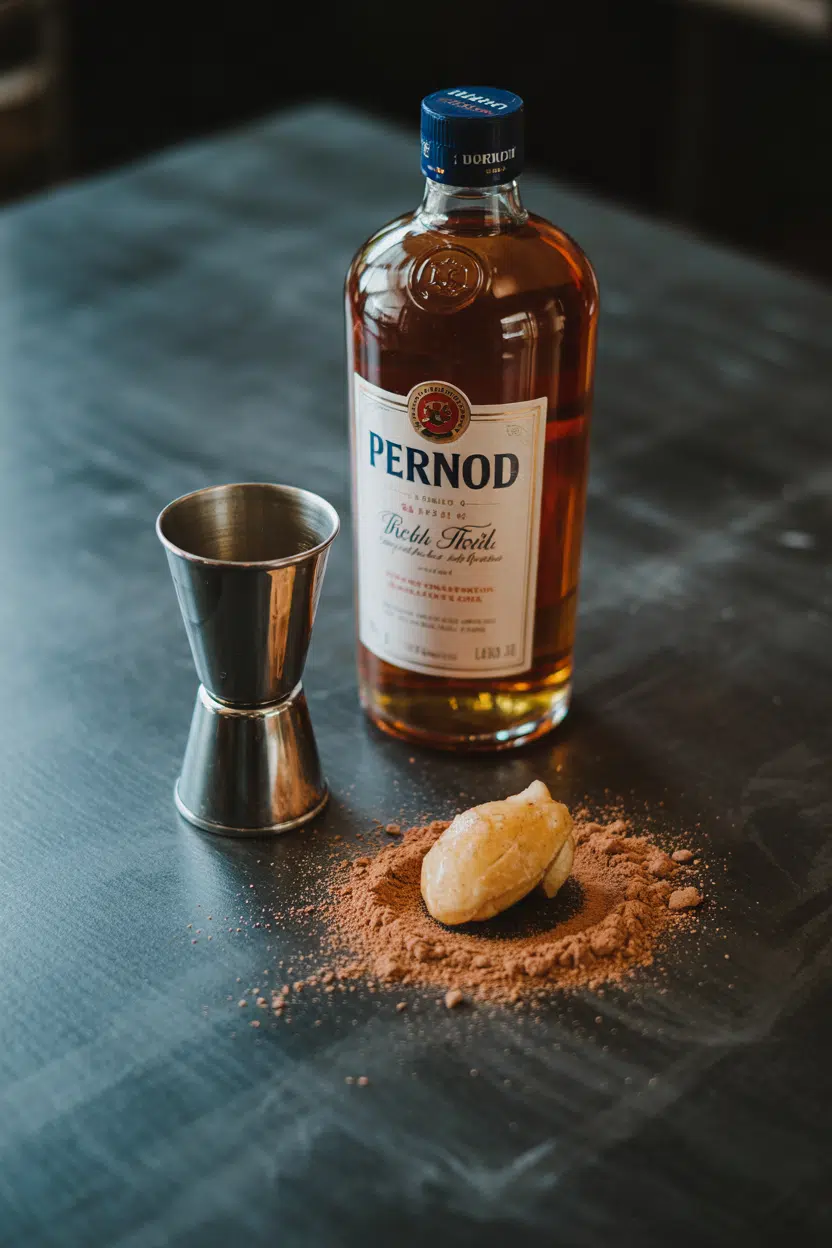
Pernod is a French anise-flavored spirit produced under the Pernod Ricard brand, sitting firmly in the pastis family of aperitifs rooted in Provençal drinking culture.

Its key flavoring compound is anethole, the same molecule responsible for the characteristic taste in star anise and fennel.

The spirit runs at roughly 40% ABV, which places it in standard liqueur territory rather than high-proof digestif land.

Botanicals beyond star anise - including angelica root and citrus peel - give Pernod a more layered profile than a single-note anise extract would.

It's sometimes confused with pastis, ouzo, or sambuca, but each is distinct in origin and production. If you're navigating that confusion, our guide to ouzo swaps that work covers where these spirits overlap and where they don't.

  • 🇫🇷 Origin - Provence, France; part of the pastis aperitif tradition
  • Main botanical - Star anise (anethole compound)
  • Supporting botanicals - Angelica root, citrus peel, fennel
  • ABV - Approximately 40%, standard for the category
  • Common aliases - Pastis-style liqueur, anise spirit; sometimes misspelled as "pernods"

What Does Pernod Taste Like?

pernod - What Is Pernod

Pernod leads with licorice, full stop. The sweetness is present but not cloying - it reads herbal rather than candy-like, with fennel and angelica adding a subtle bitterness on the back end.

Heat changes it noticeably. In a hot pan during deglazing, the sharpest alcohol edges cook off quickly, leaving a rounded anise sweetness that melds with butter or cream far better than the raw spirit suggests.

Served neat or diluted with water, it goes pleasantly cloudy - the louche effect - and the flavor softens considerably.

Sensory SnapshotStrong Intensity
👅 Flavor
licoricesweet herbalbitter aniseedmildly medicinal
✋ Texture
syrupy neatbright diluted
👃 Aroma
strong aniseherbalfaint citrus peel

Compared to sambuca it's less syrupy, and compared to ouzo it's more herbal with less raw alcohol heat. Pastis is its closest relative - see our replacements for pastis if you need a direct swap in either direction.

How to Use Pernod

Pernod earns its place in French coastal cooking because anise and seafood have a natural affinity.

The spirit lifts briny flavors without masking them, which is why a small splash goes into bouillabaisse near the end of cooking rather than at the start.

Golden Rule
Use Pernod in small measures - 1-2 tablespoons is usually enough. More than that and the anise note dominates everything else on the plate.
How Pernod Is Used
MethodBest ForTip
🔥 DeglazingMussels, clams, white wine saucesAdd off heat briefly, then return to flame to cook off alcohol
🍳 FlambéShrimp, scallops, pork medallionsWarm gently first; cold spirit flambés unevenly
🥘 Finishing splashBouillabaisse, cream sauces for vealStir in at the very end - heat kills aroma if added too early
🥗 VinaigretteFennel salads, citrus-dressed dishesA few drops balance a sharp lemon base
🍹 Cocktail baseRicard-style aperitifs, anise spritzesDilute 1:5 with cold water; add ice after dilution

Pernod pairs especially well with fennel, orange, and black pepper - combinations that echo its own botanical makeup. For mussels specifically, it slots into white-wine broth cleanly, and the pairing ideas for mussels on this site show how anise-forward sides reinforce that broth character.

When you need a swap mid-recipe, pernod swaps that work covers the closest functional alternatives.

Try It In
🍋Air Fryer Lemon Pepper Chicken TendersA citrus-forward base that takes a Pernod brush glaze well→🥦Air Fryer Lemon Pepper CauliflowerAnise wash on roasted veg amplifies the lemon-pepper profile→🍖Air Fryer Lemon Pepper MeatballsPernod in a cream dipping sauce bridges the lemon and meat→

How to Buy and Store Pernod

At the store, look for bottles labeled Pernod with a clear ABV around 40% and a pale straw color.

Avoid bottles with murky sediment unless the label explicitly credits natural botanicals - cloudiness in an unopened bottle usually signals age or poor storage, not craft production.

Watch Out
Pernod's anise aroma fades faster than most spirits after opening. An opened bottle left for over two years won't taste off, but it will taste flat - the whole point of the spirit is gone.

Store upright in a cool, dark spot away from direct light; heat accelerates aroma loss faster than almost anything else. Full guidance on storing pernod correctly covers edge cases like partial bottles and long-term pantry storage.

  • Unopened shelf life - Years, if the seal is intact and storage is cool and dark
  • Opened shelf life - Best within 12-24 months; aroma fades after that
  • Signs of decline - Flat anise, dull color, weak louche when water is added

Where to Start with Pernod

Pernod is a single-bottle answer to a range of Provençal cooking needs, but it doesn't belong in every dish.

Start with mussels or a cream sauce for pork - those two uses show off what the spirit actually does without requiring much technique.

Best Pick
For a first use, deglaze a pan of mussels with a splash of Pernod and white wine. It's the clearest demonstration of how anise lifts seafood without overwhelming it.

If you're making a fish stew and wondering about bouillabaisse's shelf life after cooking ahead, note that a Pernod-finished broth holds its flavor about as well as one without - the alcohol cooks off and doesn't affect storage.

One bottle, used with restraint, goes a long way.

Frequently Asked Questions

Is Pernod the same as pastis?

Not exactly. Both are French anise spirits, however Pernod uses a slightly different botanical blend and has a cleaner, less aggressively sweet profile than some traditional pastis styles. Ricard is the pastis most often compared directly to Pernod.

Can you cook with Pernod?

Yes, and it's one of its strongest uses. A tablespoon or two deglazes seafood pans, finishes cream sauces, or adds anise depth to bouillabaisse. The alcohol cooks off quickly, leaving only the herbal-anise flavor.

Does Pernod contain licorice?

Pernod is flavored with star anise, not licorice root, though the two share the same anethole compound - which is why they taste similar. Traditional absinthe used wormwood alongside anise; modern Pernod skips wormwood entirely.

How strong does Pernod taste?

Very strong neat, but water tames it fast. The standard French serve is one part Pernod to five parts cold water, which drops the intensity to a soft, herbal drink. In cooking, even less is needed - start with one tablespoon.

How do you substitute Pernod in recipes?

Pastis or a dry anise-flavored spirit works closest in cooking applications. For alcohol-free substitutions, a small amount of fennel frond juice or star anise-steeped water can stand in for the anise note, though intensity will be lower.

What Is Rice Paper? [Taste, Uses & More]

April 1, 2026

Rice paper does something no other wrapper can quite replicate: it disappears into the roll.

What Is Rice Paper

Unlike dough-based wrappers that add their own flavor and chew, a hydrated sheet of bánh tráng contributes almost nothing but structure - and that's exactly the point.

It keeps the focus on herbs, protein, and crunch rather than competing with them.

Much like understanding rice's shelf life reveals how stable dried rice products can be, rice paper rewards patience and proper technique far more than it rewards improvisation.

QUICK SUMMARY

Rice paper is a dried, translucent wrapper made from rice flour and tapioca starch. Neutral in flavor, it hydrates in seconds to become a pliable sheet for fresh rolls or fries into a glassy, crisp shell. Gluten-free, low in fat, and shelf-stable for up to two years.

🌾Made From: Rice flour and tapioca starch, sold dried and brittle
👅Flavor: Mild, neutral, slight starchy sweetness; toasty when fried
🍽️Best For: Fresh Vietnamese spring rolls, deep-fried rolls, pan-fried snack chips
📦Shelf Life: Unopened up to 24 months; opened, months if kept completely dry
✅Dietary: Gluten-free and low in fat; pair with vegetables and protein for balance

What Is Rice Paper?

Rice paper is a dried edible sheet made primarily from rice flour, water, and salt - most commercial versions also include tapioca starch, which increases translucency and adds a slight chew once hydrated.

Sold in round discs or squares, the sheets are brittle and semi-opaque straight from the package.

Its Vietnamese name, bánh tráng, roughly translates to "cake spread," a reference to the traditional method of spreading rice slurry over a mesh frame and sun-drying it.

You'll also see it labeled as rice wrappers, rice paper wrappers, or spring roll rice paper depending on the brand and market.

The tapioca ratio matters more than most shoppers realize. Higher tapioca content produces a chewier, more translucent sheet that holds fillings longer without tearing.

Lower tapioca yields a more delicate, starchier wrapper - better for lighter applications or quick frying.

  • 🌏 Origin: Vietnam; also used widely across Thai, Cambodian, and Filipino cooking
  • 📐 Forms: Round discs (22 cm most common), square sheets, small cocktail-size rounds
  • 🏷️ Also called: Bánh tráng, rice wrappers, spring roll rice paper

What Does Rice Paper Taste Like?

rice paper - What Is Rice Paper

On its own, a hydrated rice paper sheet tastes like very little. The flavor is mild, starchy, and faintly sweet - comparable to plain rice noodles or an unseasoned crepe made from rice flour.

There's no yeast, no fermentation, no oil. The wrapper is a neutral canvas.

Texture is where rice paper communicates most. Hydrated correctly, it's silky and slightly chewy - tender without being gummy, pliable without tearing.

Under-soaked, it stays rubbery and resists folding. Over-soaked, it turns sticky and collapses under filling weight.

Sensory SnapshotMild Intensity
👅 Flavor
neutralstarchyfaintly sweettoasty (fried)
✋ Texture
brittle (dry)silky & chewy (hydrated)glassy & crisp (fried)
👃 Aroma
almost none (raw)light toasted rice (fried)

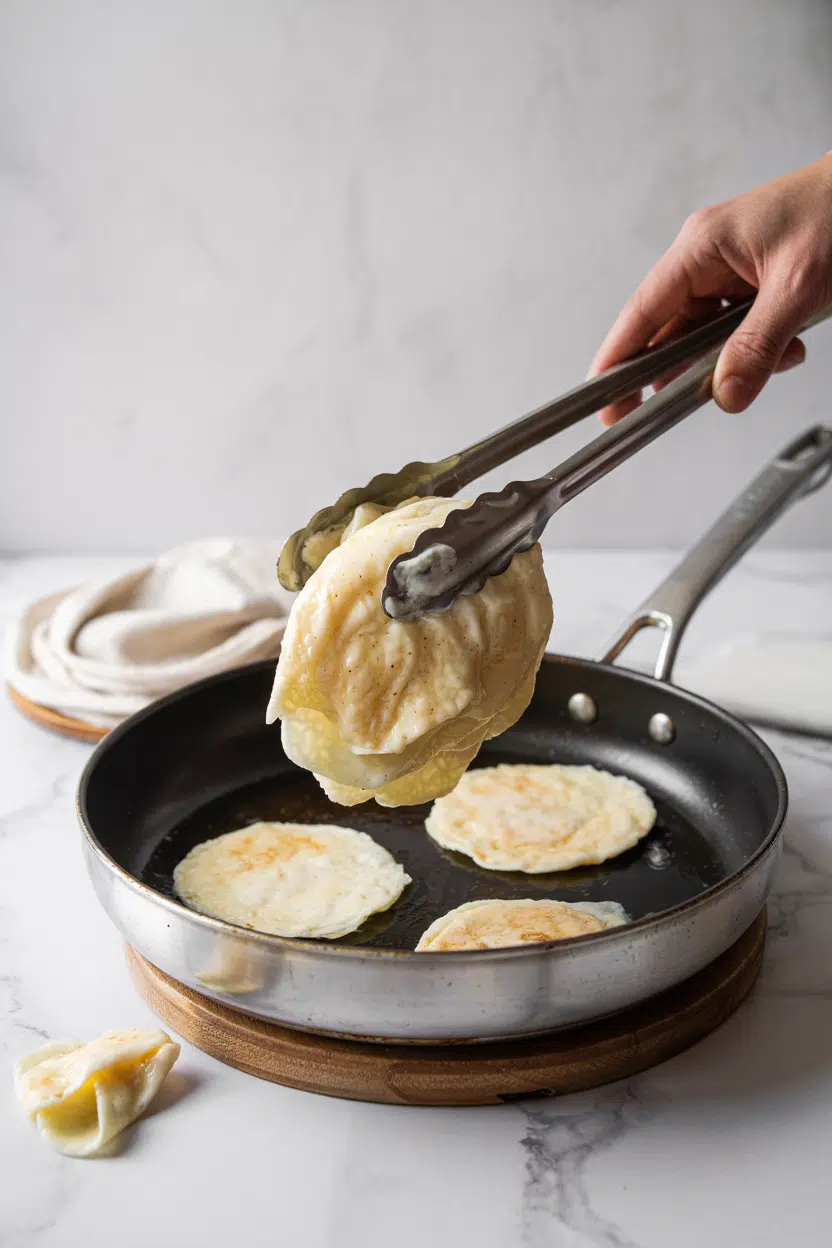
Heat changes everything. Fried rice paper turns glassy and shatters on the bite - close to a thin rice cracker but lighter and more airy.

That toasted rice aroma that was absent from the raw sheet becomes genuinely appetizing when the wrapper hits hot oil.

Golden Rule
Soak rice paper in warm (not hot) water for 8-12 seconds only. It continues softening on the plate - pull it early and let carryover do the rest.

How to Use Rice Paper

Rice paper's job shifts completely depending on whether it's hydrated or fried. Understanding both modes is the difference between a wrapper that holds and one that tears or dissolves.

For readers curious about cooking rice paper perfectly, the gap between fresh and fried applications is wider than it looks.

Fresh rolling is the most common use. In gỏi cuốn - Vietnamese fresh spring rolls - a hydrated sheet wraps rice vermicelli, shrimp or pork, fresh herbs, and julienned vegetables into a tight, translucent parcel. Understanding the role vermicelli plays as a bulking layer helps explain why the noodles sit inside rather than on the edge, where they'd cause tearing. Choosing sides for spring rolls matters too - nuoc cham and hoisin-peanut sauce both offset the wrapper's neutrality in different ways.

Fried applications run from deep-fried spring rolls (crispier and lighter than wonton-based versions) to pan-fried snack chips brushed with oil and seasoned after crisping. The distinction between rice paper and wheat-based wrappers is worth knowing - what makes wonton wrapper distinct from rice paper comes down to gluten content and how the two wrappers brown under heat.
How Rice Paper Is Used
MethodBest ForTip
🥗 Fresh RollGỏi cuốn, herb-forward cold rolls, grilled shrimp wrapsRoll on a damp surface; seal edge-side down to hold shape
🍳 Deep-FriedCrisp spring rolls, glassy fried shellsDouble-wrap for sturdier crunch; fry at 175°C / 350°F
🥘 Pan-FriedSnack chips, low-carb taco shell alternativesBrush with oil before contact with pan; season immediately after
🔥 GrilledSmoky char on assembled fresh rollsGrill briefly over medium heat - 30 seconds per side maximum

Avoid packing wet, saucy fillings directly against the wrapper. A layer of lettuce or noodles acts as a moisture barrier, keeping the sheet intact long enough to eat.

Try It In
🌿Goi Cuon Fresh Spring RollsThe definitive fresh roll — herbs, shrimp, and vermicelli in a hydrated rice paper wrapper→🐟Sheet Pan Fish and ChipsA lighter bake where rice paper's crunch adds structure without heavy breading→🍟Skillet Fish and ChipsPan-fried application that showcases the glassy crisp rice paper achieves in hot oil→

How to Buy and Store Rice Paper

At the store, check sheets for consistent translucency and clean, unbroken edges. Excessive powder residue at the bottom of the package signals breakage inside - those fragments are still usable in fried applications but won't roll cleanly.

Check the ingredient label: rice flour and tapioca starch should be the first two items.

Watch Out
Even a small amount of moisture in storage will make sheets stick together permanently. Once stuck, they tear - not bend - and can't be separated without damage.

Storage is straightforward but unforgiving about humidity.

Unopened packages keep in a cool, dry pantry for 6-24 months.

Opened, reseal the bag tightly - an airtight container works better in humid climates.

Watch for rice paper spoilage signs like yellowing, persistent mildew smell, or sheets that feel damp and won't separate cleanly.

No refrigeration needed; cold air can introduce condensation that ruins the sheets faster than a warm pantry would.

  • ✅ Buy: Unbroken sheets, clear labeling of rice flour + tapioca, no powder buildup
  • 📦 Opened storage: Airtight bag or container, away from humidity and direct light
  • 📅 Shelf life: Up to 24 months unopened; opened, months if kept fully dry

Start With a Fresh Roll

Fresh spring rolls are the right entry point for anyone new to rice paper.

The hydration step is quick to learn, the fillings are forgiving, and a goi cuon fresh spring rolls recipe shows exactly how proteins, herbs, and noodles layer inside the wrapper without tearing it.

Once fresh rolling feels comfortable, try double-wrapping and deep-frying. The glassy crunch that results is unlike anything a wheat-based wrapper produces - and it's the clearest demonstration of what rice paper actually does that nothing else can.

Shortcut
For your first batch, use warm water in a wide, shallow bowl and soak one sheet at a time. Rolling two at once while learning leads to sticking and frustration.

Frequently Asked Questions

What is rice paper made of?

Rice flour and tapioca starch, plus water and a small amount of salt. The tapioca ratio varies by brand - more tapioca means a chewier, more translucent sheet that holds up longer once filled.

Can you eat rice paper raw?

Yes, after hydration. The dried sheet itself isn't harmful, however it's papery and indigestible in that state. A brief soak in warm water is all it takes to make it ready to eat.

Is rice paper gluten-free?

Yes. Standard rice paper contains only rice flour, tapioca starch, salt, and water - no wheat. Always check the label on flavored or specialty varieties, as some may be processed on shared equipment.

How long do rice paper sheets last once opened?

Months, if kept in an airtight container away from humidity. Moisture is the only real threat - sheets that stay dry remain perfectly usable well past a standard pantry staple window.

Why does my rice paper tear when I roll it?

Usually over-soaking. A sheet pulled too early may feel stiff, however it softens on the board - tearing typically happens when the wrapper is saturated and can't bear filling pressure. Soak for 8-12 seconds, then roll immediately.

Vietnamese Bun Bo Hue

April 1, 2026

When you need a soul-warming Vietnamese soup that delivers deep, spicy broth with tender beef and chewy noodles, Bun Bo Hue shows up. This Central Vietnamese specialty cooks low and slow for 2-3 hours while you do other things.

Vietnamese Bun Bo Hue served on a plate

One stockpot simmers beef shank and pork hock with lemongrass and shrimp paste until the broth tastes like you've been cooking all day. The aromatics char first for smokiness, the meat tenderizes on its own, and assembly takes five minutes per bowl.

Perfect for weekend meal prep when you want comfort food that feels traditional and feeds a crowd.

QUICK SUMMARY

Bun Bo Hue simmers beef shank and pork hock with charred lemongrass and shrimp paste for 2-3 hours to build a spicy, aromatic broth. The gentle simmer keeps the broth clear while the meat turns fork-tender. Assemble bowls with rice vermicelli, sliced meat, and chili oil just before serving for the right texture balance.

⏱️Time Reality: 30 minutes prep, then 3 hours mostly hands-off simmering while broth builds flavor.
🔥Critical Move: Char lemongrass and onion over direct heat for 2-3 minutes before adding to broth-skipping this dulls the flavor.
⚠️Watch Out: Boiling the broth rapidly clouds it and toughens the meat-keep it at a bare simmer and skim foam every 15 minutes.

Table of Contents

Toggle
  • Why This Recipe Works
  • What You'll Need
    • Ingredient Details
  • Ingredient Swaps
  • What to Serve With It
  • Store and Reheat
  • Frequently Asked Questions
  • Vietnamese Bun Bo Hue
    • Method 
    • Tried this recipe?

Why This Recipe Works

The long simmer extracts collagen from pork hock and breaks down beef shank until both turn spoon-tender. Charring the aromatics before adding them creates smoky depth that raw lemongrass can't deliver, and for a version that comes together quickly, try this quick asada recipe when time is tight but you still want something substantial.

Quick Reference
⏱️
Prep Time
30 min
🔥
Cook Time
180 min
⏰
Total Time
210 min
🍽️
Servings
6 servings
📊
Difficulty
Involved
🏷️
Category
Main Dish
💡
Quick Tip
Simmer broth gently for depth and clarity
🎯
Best For
Weeknight | Entertaining

Success markers you can see:

  • Clear reddish broth with a sheen of chili oil floating on top signals proper simmering and skimming
  • Beef shank pulls apart with a fork after 2.5 hours and stays moist instead of stringy
  • Rice vermicelli noodles remain slippery and springy, not clumped or mushy in the bowl
  • Lemongrass aroma hits you when the bowl arrives at the table, not buried under other flavors
  • Pork hock meat slides off the bone in tender chunks that add body to each bite
Quick Tip
Skim foam every 15 minutes during the first hour-this keeps the broth clean-tasting and visually clear.

What You'll Need

Ingredients for Vietnamese Bun Bo Hue

Stock up on fresh aromatics and proteins with good collagen content-stale lemongrass or low-quality beef shank will make a flat broth. The shopping list splits into proteins that need time, aromatics that need charring, and noodles that need soaking, so plan your prep around those three stages.

🍗
Proteins
  • 2 lbs beef shank (bone-in)
  • 1 lb pork hock
  • ½ cup pork blood cubes (optional)
🍜
Noodles
  • 1 lb rice vermicelli noodles (bun)
🧄
Aromatics
  • 4 stalks lemongrass
  • 1 white onion
  • 3 slices galangal
🥢
Seasonings
  • 2 tablespoon shrimp paste
  • ¼ cup fish sauce
  • 3 tablespoon chili oil

Ingredient Details

  • Beef shank
    Bone-in cuts release marrow and collagen during the long simmer-boneless cooks faster but makes thinner broth.
  • Pork hock
    The gelatinous skin and connective tissue add body and silky mouthfeel to the finished broth.
  • Lemongrass
    Fresh stalks with no brown spots deliver the brightest citrus aroma-dried lemongrass tastes flat by comparison.
  • Shrimp paste
    Vietnamese mam ruoc works best for authentic funk-substitute fermented soy paste if allergic but expect milder umami.
  • Rice vermicelli
    Look for round noodles labeled "bun" at Asian markets-flat rice noodles won't give you the right springy texture.
  • Galangal
    Galangal tastes sharper and more medicinal than ginger-swap fresh ginger if unavailable but the flavor shifts noticeably.
  • Chili oil
    Vietnamese chili oil (sa te) packs lemongrass and shallot for layered heat-plain chili oil works but loses some complexity.

Ingredient Swaps

Most swaps work if you're chasing budget savings or clearing out the fridge, but changing the proteins affects broth richness the most. Rich mains need something to cut through, and this quick potato dish balances heavier bowls when you want a lighter side.

Four swaps that work:

  • Beef brisket instead of beef shank - less collagen means slightly thinner broth but faster cooking (2 hours vs 3)
  • Pork neck bones instead of pork hock - similar gelatin content but less meat to pick off before serving
  • Fresh ginger instead of galangal - milder spice and different aroma but still delivers warmth to the broth
  • Glass noodles instead of rice vermicelli - chewier texture and gluten-free but loses the classic slippery mouthfeel

Beef Brisket

Works for: Shorter cooking time (2 hours), easier to slice evenly, still tender and flavorful

Skip if: You want maximum broth body-brisket has less collagen than bone-in shank

Fermented Soy Paste

Works for: Shellfish allergies, milder funk, easier to find at standard grocery stores

Skip if: You want authentic pungent umami-soy paste tastes cleaner and less complex

Fresh Chili Slices

Works for: Controlling exact heat level, bright pepper flavor, no added oil

Skip if: You want integrated spice throughout the broth-fresh chilies float and deliver uneven heat

Instructions

You'll spend 30 minutes prepping and charring, then the pot simmers mostly unattended for 3 hours while you handle other tasks. The trick is keeping the heat low enough that bubbles barely break the surface-any faster and the broth clouds while the meat toughens.

  1. Char the aromatics. Hold lemongrass stalks and halved onion directly over a gas flame or under a broiler for 2-3 minutes until blackened in spots. Smash lemongrass with the side of a knife to release oils, then add both to a large stockpot with 12 cups water.

  2. Start the broth. Add beef shank, pork hock, galangal, and shrimp paste to the pot. Bring to a boil over high heat, then immediately reduce to low so the surface just simmers. Skim foam every 15 minutes for the first hour.

  3. Simmer until tender. Let the broth cook at a bare simmer for 2.5-3 hours, skimming occasionally. The beef shank should pull apart with a fork and the pork hock meat should slide off the bone when ready. Remove both and let rest 10 minutes before slicing.

  4. Season and strain. Add fish sauce 1 tablespoon at a time, tasting after each addition until the broth tastes balanced. Strain through a fine-mesh strainer to remove solids, then return clear broth to the pot.

  5. Assemble bowls. Soak rice vermicelli in cold water for 10 minutes, drain, then divide among bowls. Top with sliced beef and pork, ladle hot broth over everything, and drizzle with chili oil. Serve immediately with bean sprouts, lime wedges, and fresh herbs on the side.

Golden Rule
Never let the broth boil hard-gentle simmering keeps it clear and the meat tender instead of stringy.

What to Serve With It

Bun Bo Hue delivers enough richness and spice that sides should add crunch or freshness without competing for attention. A good da can make or break the plate, and for planning your main spread, check out easy a tagine dinner nights when you're building a full Vietnamese meal with multiple components.

Side Dish Prep Why It Works How to Serve
Fresh Bean Sprouts Easy Adds crunch and cools down the spicy broth Serve raw in a bowl so everyone adds their own
Lime Wedges Easy Brightens the rich broth and cuts through pork fat Squeeze directly into bowls just before eating
Fresh Herbs (Thai Basil, Mint) Easy Complements lemongrass with layered aromatics Tear leaves and stir into hot broth to release oils
Spring Rolls Medium Light appetizer that doesn't fill you up before the soup Serve with smooth creamy dip on the side
Pickled Vegetables Easy Tangy crunch cuts through the richness of broth Spoon a small amount into each bowl or eat between bites

Three ways to serve it:

  • Weeknight bowl: Keep it simple with just bean sprouts, lime, and herbs-the broth does all the work.
  • Hosting spread: Add spring rolls and a cold da on the side for a traditional Vietnamese meal setup.
  • Meal prep: Store broth and toppings separately, then assemble individual bowls throughout the week with fresh noodles each time.
Best Pick
Fresh Thai basil and mint together deliver the most authentic herb combination-cilantro alone doesn't match the traditional flavor.

Store and Reheat

The broth keeps for days and actually tastes better the next day after flavors meld, but noodles and toppings need separate storage or they turn to mush. Store cooked beef and pork submerged in broth so they don't dry out, and never freeze assembled bowls-the noodles break down completely.

Method Time Best For
🍳 Stovetop 5-7 min Reheating broth gently without overcooking meat-add fresh noodles at the end
📦 Microwave 2-3 min, stir halfway Single servings when you need speed-heat broth only, then pour over fresh noodles
🔥 Oven 10 min at 300°F Larger portions of broth in an oven-safe container covered with foil

For best results when storing:

  • Store broth and solids separately in shallow airtight containers for up to 4 days in the fridge
  • Keep sliced meat submerged in broth to prevent drying-the fat layer seals in moisture
  • Freeze broth only (no meat or noodles) for up to 3 months in freezer-safe containers
  • Cook fresh noodles each time you reheat instead of storing cooked ones-they clump and turn gummy
  • Add chili oil and fresh herbs right before serving, never to stored broth-they lose potency over time

Frequently Asked Questions

How long should I simmer Bun Bo Hue broth for optimal flavor?

Simmer for at least 2.5 hours at a bare simmer-3 hours gives you deeper flavor and more tender meat. The broth should look clear with a light sheen of fat on top when it's ready.

Can I make Bun Bo Hue broth ahead and freeze it?

Yes, freeze the strained broth only (no meat or noodles) for up to 3 months in airtight containers. Thaw overnight in the fridge, then reheat gently and add fresh components when serving.

What is the traditional noodle used in Bun Bo Hue?

Round rice vermicelli noodles labeled "bun" at Asian markets give you the authentic slippery, springy texture. Flat rice noodles or glass noodles work in a pinch but change the mouthfeel.

How do I know when the beef shank is cooked properly?

The meat should pull apart easily with a fork after 2.5-3 hours of gentle simmering. If it's still tough or chewy, keep simmering-rushing this step makes stringy, dry meat.

Can I use a pressure cooker to speed up broth cooking?

Yes, pressure cook on high for 45-60 minutes after charring the aromatics. The flavor won't be quite as deep as the long simmer method, but the meat will still turn tender and the broth will taste balanced.

Vietnamese Bun Bo Hue served on a plate

Vietnamese Bun Bo Hue

No ratings yet
Bun Bo Hue is a traditional Central Vietnamese soup simmered for 2-3 hours to develop a deep, spicy, and aromatic broth with tender beef shank, pork hock, and chewy rice vermicelli noodles. Charring the lemongrass and onion before simmering adds smoky depth, while gentle simmering keeps the broth clear and meat tender. This recipe is perfect for a comforting weekend meal or feeding a crowd with authentic flavor.
Print Recipe Pin Recipe
Prep Time 30 minutes mins
Cook Time 3 hours hrs
Total Time 3 hours hrs 30 minutes mins
Servings: 6 servings
Course: Dinner, Main Dish
Cuisine: Vietnamese
Ingredients Equipment Method Notes

Ingredients
  

  • 2 lbs beef shank bone-in
  • 1 lb pork hock
  • 0.5 cup pork blood cubes optional
  • 1 lb rice vermicelli noodles round "bun" style
  • 4 stalks lemongrass fresh, charred
  • 1 whole onion white, halved and charred
  • 3 slices galangal fresh
  • 2 tablespoon shrimp paste Vietnamese mam ruoc preferred
  • 0.25 cup fish sauce
  • 3 tablespoon chili oil Vietnamese style chili oil or plain as substitute

Equipment

  • Large stockpot Used for simmering broth and cooking meat.
  • Fine-mesh strainer Used to strain broth after simmering.
  • Knife Used to smash lemongrass stalks before adding to broth.

Method
 

  1. Hold lemongrass stalks and halved white onion directly over a gas flame or under a broiler for 2-3 minutes until blackened in spots. Smash lemongrass with the side of a knife to release oils.
    4 stalks lemongrass, 1 whole onion
  2. Add charred lemongrass, onion, beef shank, pork hock, galangal, shrimp paste, and 12 cups water to a large stockpot. Bring to a boil over high heat, then immediately reduce heat to a bare simmer.
    2 lbs beef shank, 1 lb pork hock, 4 stalks lemongrass, 1 whole onion, 3 slices galangal, 2 tbsp shrimp paste
  3. Simmer gently for 2.5 to 3 hours, skimming foam every 15 minutes during the first hour. Keep broth at a bare simmer to maintain clear broth and tender meat. The beef shank should pull apart easily and pork hock meat should slide off the bone.
  4. Remove beef shank and pork hock from broth and let rest for 10 minutes before slicing.
    2 lbs beef shank, 1 lb pork hock
  5. Add fish sauce to broth one tablespoon at a time, tasting after each addition until balanced. Strain broth through a fine-mesh strainer to remove solids, then return broth to the pot.
    0.25 cup fish sauce
  6. Soak rice vermicelli noodles in cold water for 10 minutes, then drain well.
    1 lb rice vermicelli noodles
  7. Divide soaked noodles among bowls. Top with sliced beef and pork, ladle hot broth over, and drizzle with chili oil. Serve immediately with bean sprouts, lime wedges, and fresh herbs on the side.
    1 lb rice vermicelli noodles, 2 lbs beef shank, 1 lb pork hock, 3 tbsp chili oil

Notes

  • Always maintain a bare simmer-avoid boiling to keep broth clear and meat tender.
  • Skim foam every 15 minutes during the first hour to ensure clean-tasting broth.
  • Store broth and solids separately in the fridge; reheat broth gently and add fresh noodles when serving to preserve texture.

Tried this recipe?

Let us know how it was!

What Is a Pork Chop? [Taste, Uses & More]

April 1, 2026

Bite into a well-seared pork chop and the first thing you notice is the crust - deeply browned, faintly sweet, with a savory richness that carries through to the juicy center.

What Is Pork Chop

Understanding pork's flavor and uses helps explain why this cut holds such a central place across so many cooking traditions.

Fat content, bone placement, and thickness all shift the experience dramatically from one chop to the next.

QUICK SUMMARY

A pork chop is a loin-section cut with mild porky umami, a slightly sweet sear, and firm-yet-juicy texture when cooked correctly. Best used pan-seared, grilled, or braised, it suits everything from weeknight dinners to slow braises. Raw chops last 1-3 days refrigerated.

🐖Category: Pork loin cut, fresh red meat
🔥Flavor: Mild umami, slightly sweet, savory roasted notes when seared
🍳Best Uses: Pan-sear, grill, braise, stir-fry
🌡️Safe Temp: Cook to 145°F internal, then rest 3 minutes
🧊Shelf Life: Raw: 1-3 days refrigerated; frozen: 4-6 months
🔪Also Known As: Rib chop, loin chop, center-cut chop, blade chop

What Is a Pork Chop?

A pork chop is a single-serving cut taken from the loin, the long muscle running along the pig's back between the shoulder and hip.

Most chops include a portion of rib or vertebra bone, though boneless versions are sliced from the same region.

Four main subtypes matter for cooking decisions:

  • 🥩 Rib chop - cut from the rib section, well-marbled, mild flavor, stays juicy under high heat
  • 🥩 Center-cut chop - from the middle loin, leaner, the most widely sold variety in American markets
  • 🥩 Loin chop - includes both loin and tenderloin muscle separated by a T-bone; can dry out quickly
  • 🥩 Blade chop - from near the shoulder, more fat and connective tissue, best for braising; its richness is similar to [pork shoulder and its flavor](https://forkliftkitchen.com/pork-shoulder/)

Thickness is a critical variable. Chops cut under ¾-inch are prone to overcooking in minutes, while bone-in chops at 1-1½ inches give more room for error.

The bone itself slows heat transfer at the center, helping the meat stay juicy while the exterior browns.

What Does a Pork Chop Taste Like?

pork chop - What Is Pork Chop

A pork chop delivers mild porky umami - not as neutral as chicken breast, not as assertive as lamb. Raw, it smells faintly sweet and metallic.

Cooked, a good sear produces a caramelized crust with roasted, slightly sweet top notes.

Sensory SnapshotModerate Intensity
👅 Flavor
mild umamislightly sweetsavory roasted
✋ Texture
firmmeatyjuicy when rested
👃 Aroma
browned meatporky-sweet

Compared to other meats, a pork chop tastes closer to lean veal or chicken thigh - richer and slightly sweeter than most white meat cuts, however.

A blade chop braised low and slow develops deeper, fattier notes that the leaner center-cut never reaches.

Brining changes things noticeably. A salt-and-sugar brine for even two hours pulls moisture into the muscle fibers, making the cooked chop more forgiving and adding a subtle background sweetness that amplifies the natural flavor.

How to Use a Pork Chop

Pan-searing followed by an oven finish is the most reliable method for thick bone-in chops. You build the crust on the stovetop in a cast iron or stainless pan, then transfer to a 400°F oven to bring the center up to temperature without burning the exterior. Good cooking pork chops right relies heavily on understanding carryover cooking - pull the chop at 140°F, rest it three minutes, and it will reach the safe 145°F on its own.

How Pork Chops Are Used
MethodBest ForTip
🍳 Pan-Sear + OvenThick bone-in or center-cut chopsUse cast iron; finish at 400°F
🔥 Grill (Direct)Brined chops, rib chopsHigh heat, flip once; watch for flare-ups
🫕 BraiseBlade chops with connective tissueLow heat, long time, liquid halfway up chop
🥢 Stir-FryThin-sliced boneless loin meatSlice thin against grain; high-heat wok only
🧄 Stuffed + RoastedThick loin chops with pocket cutPack filling tightly; tie or skewer shut

For pairings, apple or pear compote cuts through the fat cleanly, while mustard-and-vinegar pan sauces sharpen the umami. Rosemary, thyme, garlic, and smoked paprika all amplify the savory notes.

Root vegetables roasted alongside absorb the drippings well.

Pork chops appear across many cooking traditions. American barbecue relies on direct grill heat with spice rubs, while Filipino adobo-style preparations braise chops in vinegar and soy for a sharp, concentrated result.

French loin preparations often pair chops with a classic pan sauce, and Chinese stir-fries use thin-sliced loin in high-heat wok cooking.

Golden Rule
Never skip the rest. Cutting into a pork chop straight from the pan loses the juices immediately - a 3-minute rest at room temperature lets them redistribute through the muscle.

For pork chop preparation tips when a specific cut isn't available, knowing the fat content and thickness of your chop guides every substitution decision.

Similarly, if you want a leaner loin-section cut entirely, reviewing pork tenderloin preparation tips gives a useful side-by-side contrast.

Try It In
🍽️Sheet Pan Pork ChopsHands-off oven method for thick bone-in chops→🫕Slow Cooker Pork ChopsBest for blade chops needing long, moist heat→⚡Instant Pot Pork ChopsFast pressure braise that keeps lean chops moist→

How to Buy and Store Pork Chops

Look for chops with a pale pink color and clean white fat at the edge. Avoid grayish edges or any sour smell - both indicate age.

For the juiciest result, choose a rib chop or a center-cut bone-in chop with visible marbling rather than a uniformly pale, lean slice.

Watch Out
Pre-brined or "enhanced" pork chops - labeled with added water and sodium - can hit 400-600mg sodium per serving before you add any seasoning. Check the label before you salt.

Store raw chops in the original vacuum packaging or wrap tightly in plastic and refrigerate at 40°F or below. Knowing the pork chop spoilage signs helps you judge when refrigerated chops are still usable versus past their window.

  • Refrigerator (raw) - 1-3 days; keep in original wrap or airtight container
  • Freezer (raw) - 4-6 months for best quality; wrap in freezer paper or vacuum-seal
  • Refrigerator (cooked) - 3-4 days; store in a sealed container with any cooking juices

Start Here for the Best Chop

Thickness and cut determine everything. Grab a bone-in rib chop or center-cut chop, at least 1 inch thick, for your first cook - these give you the most margin before the meat dries out.

If you're new to the cut, use a simple brine and the pan-sear-then-oven method. From there, blade chops braised in liquid are the next step up in richness.

Reserve thin boneless chops for quick stir-fries where speed, not juiciness, is the goal.

Frequently Asked Questions

What is a pork chop cut from?

Pork chops are cut from the loin, the muscle running along the pig's back between the shoulder and hip. Depending on position along the loin, you get rib chops, center-cut chops, loin chops, or blade chops near the shoulder end.

Are pork chops red or white meat?

Scientifically, pork is classified as red meat due to its myoglobin content. The USDA historically marketed it as "the other white meat," however, which caused lasting confusion about its actual classification.

What temperature are pork chops safe at?

The USDA safe internal temperature for pork chops is 145°F, followed by a 3-minute rest. This replaced the older 160°F guideline and allows for a slightly pink center, which is safe and noticeably juicier.

What does a pork chop taste like compared to chicken?

A pork chop tastes richer and slightly sweeter than chicken breast, with more pronounced umami. It's closer in character to a chicken thigh, though pork has a distinct meatier depth that chicken doesn't replicate.

Can you cook pork chops from frozen?

Yes, though cooking time increases by roughly 50 percent and achieving an even sear is harder on a frozen surface. Thawing overnight in the refrigerator produces significantly better browning and more even doneness.

Mexican Salsa Roja

April 1, 2026

Most jarred salsas taste flat or overly vinegary. The fix is roasting fresh tomatoes, peppers, and onion until they char before blending into a bright, smoky salsa.

Mexican Salsa Roja served on a plate

High heat develops flavor without adding cream or complicated steps. You get caramelized edges on the tomatoes and blistered pepper skins that add depth without bitterness.

Make this for weeknight tacos, meal prep bowls, or casual gatherings when you need something fresh that actually tastes homemade.

QUICK SUMMARY

Mexican Salsa Roja is a roasted tomato salsa with charred peppers, onion, and garlic blended into a bright red sauce that's smoky, tangy, and mildly spicy. Roasting the vegetables until blistered creates depth without needing long cooking times. It works for dipping, topping tacos, or layering into enchiladas when you want fresh flavor that doesn't taste like it came from a jar.

⏱️Time Reality: 25 minutes total - 10 minutes prep, 15 minutes roasting
🔥First Critical Move: Roast tomatoes and peppers until charred but not burnt
⚠️Watch Out: Over-charring peppers turns salsa bitter - stop when you see black spots

Why This Recipe Works

Roasting concentrates the tomato sugars and adds smokiness without needing chipotle or liquid smoke. Fresh serrano peppers bring heat that mellows as they roast, creating a balanced spice level that doesn't dominate the sauce.

The homemade works best when it hits the table at the same time as the main. For a version that comes together quickly, simple homemade recipe options keep prep under 10 minutes and deliver creamy contrast.

Quick Reference
⏱️
Prep Time
10 min
🔥
Cook Time
15 min
⏰
Total Time
25 min
🍽️
Servings
6 servings
📊
Difficulty
Easy
🏷️
Category
Side / Condiment
💡
Quick Tip
Roast until tomatoes lightly charred
🎯
Best For
Weeknight | Entertaining | Meal prep

Why it delivers:

  • Roasting at high heat caramelizes the tomato sugars - creates sweet, smoky depth without adding sugar or cooking for hours
  • Charring peppers develops smoky flavor - black spots on the skin add complexity without turning the salsa bitter
  • Blending while warm creates a smoother texture - hot ingredients break down faster and blend into a silky consistency
  • Lime juice added after blending preserves brightness - heat destroys vitamin C and citrus aroma, so add it at the end
  • Resting 30 minutes melds the flavors - gives salt time to dissolve and spices time to bloom before serving
Golden Rule
Roast tomatoes until blistered and soft but not blackened - you want caramelization, not ash.

What You'll Need

Ingredients for Mexican Salsa Roja

Shop for firm Roma tomatoes and fresh serrano peppers. Most people skip spread, but it balances the meal. For a version that comes together quickly, quick spread dish options use simple seasonings and deliver creamy contrast to the smoky salsa heat.

🥬
Vegetables
  • 4-5 Roma tomatoes
  • ½ white onion (quartered)
  • 2-3 garlic cloves (unpeeled)
🌶️
Peppers & Spices
  • 2-3 serrano or jalapeño peppers
  • ¼ teaspoon ground cumin (optional)
  • ½ teaspoon salt
🫙
Finishing
  • Juice of 1 lime
  • ¼ cup fresh cilantro (optional)
  • 1-2 tablespoon vegetable oil (optional)

Ingredient Details

  • Roma tomatoes
    Firm, meaty texture holds up to roasting without turning watery - avoid overripe tomatoes that collapse into mush
  • Serrano or jalapeño peppers
    Serranos deliver more heat; jalapeños are milder - remove seeds and membranes for less spice
  • White onion
    Roasting sweetens the sharp bite and adds caramelized depth - yellow or red onion works in a pinch
  • Garlic cloves
    Roast unpeeled to soften the pungency - peel after roasting when they're soft and mellow
  • Lime juice
    Add after blending to preserve brightness - heat destroys the citrus aroma
  • Cilantro
    Optional but adds fresh, herbaceous notes - skip if you're in the cilantro-tastes-like-soap camp
  • Vegetable oil
    Creates a smoother, silkier texture when blended - skip for a lighter, brighter salsa

Ingredient Swaps

Most jarred salsas use canned tomatoes, which work but lose the fresh brightness. Beef adds the contrast this plate needs, but timing matters. For a version that comes together quickly, this quick beef dish delivers smoky, hearty protein that pairs with the salsa's tangy heat.

Four swaps that work:

  • Canned whole peeled tomatoes instead of fresh Roma - Drains some liquid before roasting to prevent watery salsa; roast 5 minutes longer to concentrate flavor
  • Jalapeño peppers instead of serranos - Milder heat with similar flavor profile; add one extra pepper if you want more spice
  • Red onion instead of white - Slightly sweeter and less sharp when roasted; works the same way in the blender
  • Chipotle in adobo instead of fresh peppers - Adds smokiness and deeper heat; use 1-2 chipotles and skip the roasting step for the peppers

Fresh Roma Tomatoes

Works for: Bright, fresh flavor with natural sweetness and firm texture that roasts without turning mushy

Skip if: You're cooking in winter when fresh tomatoes are pale and flavorless

Canned Whole Peeled Tomatoes

Works for: Budget cooking or off-season when fresh tomatoes lack flavor; consistent results year-round

Skip if: You want the brightest, freshest-tasting salsa - canned never matches peak-season fresh

Instructions

Roasting takes 15 minutes total - tomatoes need 10-12 minutes, peppers and onion need the full time. Most people skip pork, but it balances the meal. For a version that comes together quickly, this tender pork delivers rich, savory contrast to the salsa's bright acidity.

  1. Heat a cast iron skillet or comal over medium-high heat. Place whole tomatoes, quartered onion, unpeeled garlic cloves, and whole peppers directly in the dry pan. Roast for 10-12 minutes, turning occasionally with tongs, until tomatoes are blistered and soft, peppers have black spots, and onion edges caramelize. Watch the garlic - pull it after 8 minutes when it softens.

  2. Remove roasted ingredients from heat and let cool for 5 minutes. Peel the garlic cloves by squeezing out the soft insides. Remove stems from the peppers. For less heat, slice peppers open and scrape out seeds and white membranes with a spoon.

  3. Add roasted tomatoes, peppers, onion, and garlic to a blender. Pulse 6-8 times for chunky salsa, or blend continuously for 20 seconds for smooth texture. Scrape down the sides halfway through to catch any unblended pieces.

  4. Pour salsa into a bowl and stir in salt, lime juice, and cilantro if using. Taste and adjust seasoning - add more salt if it tastes flat, more lime juice if it needs brightness. If the salsa is too thick, stir in 1-2 tablespoons of water until it reaches pourable consistency.

  5. Cover and refrigerate for 30 minutes before serving. This resting time lets the flavors meld and the salsa cool to serving temperature. Stir once more before serving to redistribute any separated liquid.

Shortcut
Skip the comal and roast everything on a sheet pan at 425°F for 12-15 minutes - same charred flavor with less babysitting.

What to Serve With It

A good bowls can make or break the plate. Rich mains need something to cut through, and tortilla does exactly that. For a version that comes together quickly, a simple tortilla side delivers crispy, toasted edges that scoop up every drop of salsa without falling apart.

Side Dish Prep Why It Works How to Serve
Tortilla chips Easy Crispy, salty base that scoops up the salsa without getting soggy Serve in a shallow bowl alongside warm chips
Grilled chicken tacos Medium Smoky chicken pairs with the roasted tomato flavors; salsa adds brightness and moisture Spoon salsa directly on top of grilled chicken in warm tortillas
Rice and beans Easy Starchy base absorbs the salsa; adds fresh contrast to mild beans Drizzle salsa over warm rice and beans or mix it into the rice
Scrambled eggs Easy Tangy salsa cuts through rich, creamy eggs; adds color and spice to breakfast Spoon salsa on top of scrambled eggs or fold it into the eggs while cooking
Quesadillas Easy Cheese and salsa create a salty-tangy-creamy balance; salsa adds moisture to crispy tortillas Serve salsa in a bowl for dipping or drizzle it inside the quesadilla before folding

Three ways to serve it:

  • As a dip for chips - Pour into a shallow bowl and serve with warm tortilla chips at room temperature
  • Layered into enchiladas - Spread salsa between layers of tortillas and cheese before baking for smoky depth
  • Drizzled over eggs - Spoon warm salsa over scrambled eggs or fried eggs for breakfast tacos or huevos rancheros
Best Pick
Pair with grilled chicken tacos - the smoky salsa adds moisture and brightness without overwhelming the meat.

Store and Reheat

Salsa lasts 3-4 days in the fridge in an airtight container. The flavors deepen after a day, so make it ahead if you're planning for entertaining or meal prep. A good bowls can make or break the plate. For a version that comes together quickly, a tender bowls on the side delivers fresh vegetables and grains that soak up the salsa without turning mushy.

Method Time Best For
🍳 Stovetop 2-3 min on low heat Warming without cooking or losing fresh flavor
📦 Microwave 30-60 sec at medium power Quick warming for small portions before serving
🌡️ Room temperature 15 min on counter Bringing chilled salsa to serving temp without heating

For best results when storing:

  • Refrigerate in a shallow, airtight container - Glass or plastic works; shallow containers cool faster and prevent bacterial growth in warm salsa
  • Press plastic wrap directly on the salsa surface - Prevents oxidation and keeps the bright red color from turning brown
  • Stir before serving after storage - Liquid separates naturally; a quick stir brings back the smooth texture
  • Freeze in ice cube trays for portioned servings - Pop out cubes and transfer to a freezer bag; thaw individual portions as needed
  • Use within 3 months if frozen - Texture stays smooth but flavor fades after 3 months in the freezer

Frequently Asked Questions

Can I make salsa roja ahead and how long will it last?

Make it up to 3 days ahead - the flavors deepen after resting. Store in an airtight container in the fridge and stir before serving.

What is the best way to roast salsa ingredients evenly?

Use a cast iron skillet or comal over medium-high heat and turn ingredients every 3-4 minutes with tongs. Pull garlic after 8 minutes, then let peppers, tomatoes, and onion roast the full 10-12 minutes.

How do I know when the salsa ingredients reach doneness?

Tomatoes should be blistered with soft, collapsing skins. Peppers need black spots but no full blackening. Onion edges turn golden-brown and caramelized.

My salsa tastes bitter, what caused this and how to fix?

Over-charred peppers or vegetables turn bitter. Remove any fully blackened pieces before blending, or add more fresh tomatoes and a pinch of sugar to balance the bitterness.

Can I use canned tomatoes instead of fresh in salsa roja?

Canned whole peeled tomatoes work but need draining first to prevent watery salsa. Roast them 5 minutes longer than fresh to concentrate flavor and reduce moisture.

Mexican Salsa Roja served on a plate

Mexican Salsa Roja

No ratings yet
Mexican Salsa Roja is a smoky, tangy roasted tomato salsa made by charring fresh tomatoes, peppers, onion, and garlic before blending. Roasting the ingredients brings out caramelized flavors and a bright texture, perfect for dipping, tacos, or enchiladas.
Print Recipe Pin Recipe
Prep Time 10 minutes mins
Cook Time 15 minutes mins
Total Time 25 minutes mins
Servings: 6 servings
Course: Condiment, Side Dish
Cuisine: Mexican
Ingredients Equipment Method Notes

Ingredients
  

  • 4-5 whole Roma tomatoes firm, meaty texture
  • 0.5 whole white onion quartered
  • 2-3 cloves garlic unpeeled
  • 2-3 whole serrano peppers or jalapeño, remove seeds for less heat
  • 0.25 teaspoon ground cumin optional
  • 0.5 teaspoon salt
  • 1 whole lime juice only, added after blending
  • 0.25 cup fresh cilantro optional
  • 1-2 tablespoon vegetable oil optional, adds silkier texture

Equipment

  • Cast iron skillet or comal Used to roast tomatoes, peppers, onion, and garlic
  • Blender For blending roasted ingredients into salsa
  • Tongs To turn vegetables while roasting

Method
 

  1. Heat a cast iron skillet or comal over medium-high heat. Place whole tomatoes, quartered onion, unpeeled garlic cloves, and whole peppers directly in the dry pan.
    4-5 whole Roma tomatoes, 0.5 whole white onion, 2-3 cloves garlic, 2-3 whole serrano peppers
  2. Roast for 10-12 minutes, turning occasionally with tongs, until tomatoes are blistered and soft, peppers have black spots, and onion edges caramelize. Remove garlic after 8 minutes when it softens.
    4-5 whole Roma tomatoes, 0.5 whole white onion, 2-3 cloves garlic, 2-3 whole serrano peppers
  3. Remove roasted ingredients from heat and let cool for 5 minutes. Peel the garlic cloves by squeezing out the soft insides. Remove stems from the peppers and scrape out seeds and membranes to reduce heat if desired.
    2-3 cloves garlic, 2-3 whole serrano peppers
  4. Add roasted tomatoes, peppers, onion, and garlic to a blender. Pulse 6-8 times for chunky salsa, or blend continuously for 20 seconds for smooth texture. Scrape down the sides halfway through blending.
    4-5 whole Roma tomatoes, 0.5 whole white onion, 2-3 cloves garlic, 2-3 whole serrano peppers
  5. Pour salsa into a bowl and stir in salt, lime juice, cilantro, and vegetable oil if using. Adjust seasoning as needed and add 1-2 tablespoons of water if salsa is too thick.
    0.25 tsp ground cumin, 0.5 tsp salt, 1 whole lime, 0.25 cup fresh cilantro, 1-2 tbsp vegetable oil
  6. Cover and refrigerate for 30 minutes before serving to let flavors meld. Stir once more before serving to redistribute any separated liquid.

Notes

  • Roast tomatoes until blistered and soft but avoid blackening completely to prevent bitterness.
  • Add lime juice after blending to keep salsa bright and fresh.
  • Rest salsa in fridge for at least 30 minutes to meld flavors and mellow heat.

Tried this recipe?

Let us know how it was!

What Is Peanut Butter? Taste, Uses & More Explained

April 1, 2026

Crack open a fresh jar and that warm, toasty hit reaches you before the spoon does. Peanut butter carries a roasted earthiness that sits somewhere between a dry-roasted peanut and a more refined nut paste - recognizable, grounding, and surprisingly complex once you start cooking with it.

What Is Peanut Butter

It works equally well spread cold on bread or whisked into a hot Thai-style sauce, and using peanuts for creaminess explains why the ground paste adds body to dishes in a way whole nuts simply can't.

Whether you're debating natural versus stabilized or figuring out how far a jar will take you, this guide covers the full picture.

QUICK SUMMARY

Peanut butter is a roasted-nut spread with a rich, earthy flavor, moderate intensity, and a texture ranging from silky smooth to coarsely crunchy. Natural varieties offer purer flavor; stabilized commercial jars trade complexity for convenience. Both work across baking, sauces, and savory applications.

🥜Flavor: Roasted-nutty, slightly sweet, salty, with a mild bitter edge
🍽️Best Uses: Sandwiches, satay sauce, baked goods, groundnut stews
🌍Cuisines: American, Thai, West African, Caribbean
📦Shelf Life: Opened natural: 1-3 months refrigerated; stabilized: 3-6 months pantry
⚠️Watch Out: Major allergen; natural varieties need refrigeration after opening to prevent rancidity

What Is Peanut Butter?

Peanut butter is a ground nut paste made by roasting peanuts and milling them until the natural oils release and bind the solids into a cohesive spread.

Its roots trace back to pre-Columbian South America, where peanuts were first domesticated in the Andes, though the modern jarred product was commercialized in North America in the late nineteenth century.

Two main forms exist in most kitchens. Natural peanut butter contains only peanuts (and sometimes salt) -

the oils separate and float to the top when the jar sits undisturbed, which signals no added stabilizers. Stabilized commercial versions use partially hydrogenated or fully hydrogenated oils to keep the spread homogeneous straight from the shelf.

Beyond those two camps, texture creates further distinctions:

  • 🥜 Creamy / smooth - finely milled, no peanut pieces; best for sauces and baking where texture uniformity matters
  • 🥜 Crunchy / chunky - creamy base with chopped peanut pieces folded in; adds bite to cookies and sandwiches
  • Powdered peanut butter - defatted peanut flour pressed into powder; lower calories, dissolves easily into smoothies or sauces
  • Peanut paste - often darker, less sweetened, and less processed than commercial spreads; common in African and Southeast Asian cooking

You may also see it labeled groundnut paste or peanut spread, depending on the country of origin.

What Does Peanut Butter Taste Like?

peanut butter - What Is Peanut Butter

The dominant note is warm, roasted nuttiness - a flavor built from the Maillard reaction during roasting, which develops earthy, slightly caramelized tones you don't get from raw peanuts.

Salted varieties layer in a savory contrast that amplifies the roast.

Sweetened commercial jars push the profile toward candy-adjacent, while unsweetened natural versions let a mild, almost bitter edge from roasted skins come through.

Sensory SnapshotModerate Intensity
👅 Flavor
roasted-nuttyearthysaltymildly bitter
✋ Texture
smooth & creamyor coarse & crunchy
👃 Aroma
toastywarmslightly fatty

Compared to other nut pastes, it sits close to toasted almond butter or hazelnut paste in richness.

The difference is in the peanut-specific savory quality - a pronounced earthiness that almond and hazelnut spreads don't fully match.

Heat intensifies the roasted notes; cold dulls them slightly, which is why peanut sauce made with warm liquid tastes noticeably deeper than one stirred together cold.

How to Use Peanut Butter

Peanut butter moves between sweet and savory with very little effort, which is part of why it appears across so many distinct food cultures.

In American kitchens, the classic application is the PB&J - peanut butter on bread, paired with jam - and it also shows up folded into cookie and brownie batters for dense, nutty baked goods.

For baking applications where you need a fat substitute, butter swaps that work can inform how peanut butter stands in for other fats when you want added flavor.

In Thai and Southeast Asian cooking, it's whisked with soy sauce, lime, and chili into satay dipping sauce or cold noodle dressings. West and Central African groundnut stews use peanut paste as a thickener and flavor base - a very different technique from the Western sandwich spread.

Caribbean cooks use it in peanut-based sauces and snacks where the earthy base grounds sweeter or spicier elements.

Golden Rule
Always add peanut butter to sauces off direct heat, or thin it with warm liquid first. Exposing it directly to high heat in a dry pan causes it to seize and scorch before it incorporates.
How Peanut Butter Is Used
MethodBest ForTip
🥗 SpreadToast, sandwiches, crackersRoom-temperature butter spreads without tearing bread
🍳 Stirred into sauceSatay, noodle dressing, groundnut stewAdd off-heat; thin with warm broth or coconut milk
🫙 Baked inCookies, brownies, blondies, barsUse creamy for even dispersion; crunchy adds texture pockets
🥤 BlendedSmoothies, oatmeal, ice cream basePowdered peanut butter blends cleaner without fat separation
🍗 GlazedRoasted chicken or porkMix with soy and honey; apply in the last 15 minutes of roasting

Strong pairings include chocolate, jam, banana, chili or sriracha, honey, soy sauce, and rice vinegar.

If your dish calls for a different nut spread, a quick look at alternatives to peanut butter lays out what substitutes hold up in both sweet and savory contexts.

Avoid using it near delicate fish - the roasted, fatty profile overwhelms mild white fish without exception.

Try It In
🍫No-Bake Chocolate Peanut Butter BarsClassic chocolate-peanut butter combination with no oven required→🌀Peanut Butter Swirl BrowniesRibbons of peanut butter cut through a fudgy chocolate base→🍪Peanut Butter Chocolate Chip BlondiesChewy blondies with peanut butter as the primary fat and flavor→

How to Buy and Store Peanut Butter

At the store, check the ingredient list first.

A natural peanut butter should list only peanuts - or peanuts and salt.

If you see hydrogenated oils, sugar high on the list, or multiple stabilizers, you're buying a sweetened commercial spread, which behaves differently in recipes.

For commercial stabilized jars, look for even color and no pooled oil under the lid, which can signal age.

Watch Out
Natural peanut butter left at room temperature after opening goes rancid faster than you'd expect. Refrigerate it once opened to keep it fresh for up to 3 months and prevent the oils from turning.

Storage splits along type:

  • Unopened commercial jars - pantry, up to 9-12 months; no refrigeration needed
  • Opened natural peanut butter - refrigerate immediately; good for 1-3 months; stir before each use
  • Opened stabilized commercial jars - pantry is fine for 3-6 months; refrigerating extends that further

Know the peanut butter spoilage signs before relying on a jar that's been sitting open for a while - off smell, grayish color, or a very dry, crumbly texture all signal the oils have oxidized.

Where to Start With Peanut Butter

If you've only ever used it in sandwiches, start with a simple peanut sauce - equal parts peanut butter, soy sauce, and lime juice, thinned with warm water.

That single test reveals how the roasted notes shift when acid and salt enter the picture.

From there, the divide that matters most is natural versus stabilized.

Natural gives you purer flavor in sauces and savory dishes.

Stabilized commercial versions hold their texture better in baked goods and don't require refrigeration.

Pick based on how you cook, not just what's familiar.

Just as replacements for cashew butter hinge on how the butter is being used, the same logic applies here - context drives the choice.

Frequently Asked Questions

Why does peanut butter separate?

Oil separation happens in natural peanut butter because there are no stabilizers binding the oils to the solids. Gravity pulls the liquid peanut oil to the top over time. Stirring before use recombines them; storing the jar upside-down slows separation between uses.

What does natural peanut butter taste like compared to commercial?

Natural peanut butter tastes more intensely roasted and earthy, with a subtle bitter note from peanut skins. Commercial stabilized versions taste milder, sweeter, and slightly saltier due to added sugar and salt smoothing out the sharper edges.

Can you freeze peanut butter?

Yes - peanut butter freezes well for up to 6 months without significant texture or flavor loss. Thaw it in the refrigerator overnight; natural varieties may need a stir after thawing as some oil can separate during the freeze-thaw cycle.

What is the difference between peanut paste and peanut butter?

Peanut paste is typically coarser, darker, and less sweet than commercial peanut butter - it's closer to a pure ground-peanut product. Peanut butter, especially stabilized commercial versions, includes added oil, sugar, and salt to produce a smoother, milder, shelf-stable spread.

Is peanut butter healthy?

It provides about 7-8 g of protein and substantial monounsaturated fats per two-tablespoon serving, along with vitamin E and magnesium. Natural varieties with no added sugar or hydrogenated oils offer the cleanest nutritional profile, though all forms are calorie-dense.

How Long Do Raspberries Last? [Storage Guide]

April 1, 2026

Raspberries turn fast - sometimes faster than you'd expect, given the taste of raspberries fresh off the cane.

Can You Freeze Raspberries

You pull a container from the fridge and spot that first gray fuzz nestled between the drupelets, and suddenly the whole pint feels suspect.

That's not an overreaction: mold on raspberries spreads quickly through their hollow cores, and one bad berry genuinely threatens the rest.

Stored correctly, though, you can extend their window and even lock them away for months if you freeze them right.

QUICK SUMMARY

Raspberries last 2-4 days in the fridge and up to 12 months in the freezer. Don't wash them before storing, remove any soft berries immediately, and always line the container with a paper towel to absorb excess moisture.

🧊Fridge: 2-4 days; best within 48 hours for whole, unwashed berries
❄️Freezer: 8-12 months when flash-frozen in a single layer first
⚠️Key Rule: Never store wet - moisture in drupelet crevices triggers mold fast

How Long Do Raspberries Last?

Raspberries are among the most perishable fresh fruits you'll bring home.

Their hollow center and thin-skinned drupelets give mold an easy entry point, which is why they deteriorate faster than, say, how long blueberries keeps - typically several days longer for that sturdier berry.

Raspberry Shelf Life
MethodStateDurationNotes
🧊 FridgeRaw (whole)2-4 daysBest within 48 hours; high humidity shortens life
🧊 FridgeOpened container (paper towel)2-3 daysRemove soft berries; single layer limits mold spread
❄️ FreezerRaw (flash-frozen)8-12 monthsTexture softens on thaw; best for smoothies and baking
❄️ FreezerCooked (sauce, jam)6-12 monthsRetains more structure than thawed raw berries
🏠 CounterWhole, unrefrigeratedSame day - 24 hrsRoom temp speeds spoilage rapidly; eat same day only

High humidity is a specific enemy here. If your fridge runs cold and damp, berries at the outer edge of that 4-day window may not make it.

Plan to check them at 48 hours regardless.

How to Store Raspberries

The biggest mistake most people make happens before the berries ever reach the fridge.

Washing raspberries before storage lodges water inside the drupelet crevices, and that trapped moisture is exactly what mold feeds on - skip the rinse until you're ready to eat.

Golden Rule
Don't wash raspberries until the moment before eating. Water in the hollow core and drupelet gaps is the fastest route to mold.

Fridge: Transfer berries to a shallow container lined with a paper towel, then lay another paper towel on top. Leave the lid slightly ajar or use a ventilated berry box - trapped air becomes trapped moisture fast. Freezer: Flash-freeze on a tray first, then bag (full process in the next section). Counter: Only viable if you're eating them the same day; room temperature accelerates breakdown within hours.

The same single-layer logic applies to keeping blackberries fresh - both berries suffer when stacked deep in sealed containers.

  • 🔍 Inspect on arrival - pull out any bruised or damaged berries before storing; one soft berry spreads mold through the batch.
  • Single layer matters - stacking berries deep traps moisture and crushes the bottom layer under weight.
  • Ventilation over sealing - a cracked lid or breathable container consistently outperforms an airtight seal for fresh berries.

Can You Freeze Raspberries?

Yes, and freezing is genuinely the right call if you can't finish them within 2 days.

The process requires one extra step that most people skip - and skipping it is why you end up with a brick of fused, mushy berries instead of individual ones you can scoop by the handful.

Watch Out
Never bag wet or room-temperature raspberries directly for the freezer. They'll freeze into one solid clump and turn to mush on thaw.

The flash-freeze step is non-negotiable for usable results. The same tray method that works for doing flash freeze meatballs properly applies here - individual pieces frozen solid before they touch each other.

  1. Rinse and dry thoroughly - gently rinse berries, then spread on a clean towel and pat dry; any residual moisture causes ice crystals that collapse drupelets.
  2. Spread in a single layer - arrange berries on a baking sheet with space between each one so they freeze without touching.
  3. Flash-freeze 2-4 hours - leave in the freezer until every berry is completely solid before moving to the next step.
  4. Transfer to freezer bags - remove excess air, seal tightly, and label with the date; use within 8-12 months for best quality.

On thaw, raspberries lose firmness - their hollow center collapses as ice crystals break down the cell walls. Thaw in the fridge for several hours when you need softened whole berries, or use them frozen directly in smoothies and baking.

For sauces and compotes, thaw briefly at room temperature and cook from there.

Signs Raspberries Have Gone Bad

Raspberries signal spoilage clearly if you know what you're looking for. Check the whole container, not just the top layer - mold travels fast through the hollow cores.

Signs It's Gone Bad
👀
VisualWhite or gray fuzzy mold between drupelets · Dark leaking spots with collapsed drupelets · Blackened or translucent berries indicating cell collapse
👃
SmellSour or fermented odor · Yeasty smell distinct from normal fruity aroma
✋
TextureSlimy or mushy when touched · Berries that fall apart with minimal pressure

Don't try to salvage a moldy container by picking around the bad spots. Mold spores spread invisibly between drupelets before you can see them, and a fermented smell means the whole batch has turned. Discard it.

Getting the Most From Your Raspberries

A few habits make a real difference with berries this perishable. If your stock has turned and a recipe calls for them, look at replacements for raspberries - several work well in baked goods and sauces.

  • Buy only what you'll use in 2 days - freshness at purchase is unpredictable; smaller, more frequent buys beat bulk for this fruit.
  • Freeze the overflow immediately - don't wait until berries start softening; freeze the surplus on day one for the best texture outcome.
  • Use thawed berries strategically - softened raspberries work well in muffins, compotes, smoothies, and as a sauce base where texture doesn't matter.
  • Paper towels above and below - refresh the paper towel layer if it becomes saturated; a wet towel stops absorbing and starts contributing to the problem.
Shortcut
Freeze surplus raspberries on day one - before they soften - and you'll always have a usable supply for smoothies, sauces, and baking without the pressure of eating them fast.

Frequently Asked Questions

Do raspberries go bad quickly?

Yes - faster than most fresh fruit. Their hollow center and fragile drupelets make them vulnerable to mold within 2-4 days in the fridge. Washing before storage or packing them deep in sealed containers shortens that window further.

Can you eat raspberries with white fuzz?

No. White or gray fuzz between the drupelets is mold, and it spreads invisibly before it's visible. Discard the affected berries and inspect the rest of the container carefully before eating any of them.

How should I store raspberries in the fridge?

Don't wash them first. Transfer to a shallow container lined with paper towel, add another layer on top, and leave the lid slightly open for ventilation. Use within 2-4 days.

Can you freeze raspberries, and how long do they last frozen?

Yes. Flash-freeze them in a single layer on a tray first, then transfer to sealed freezer bags. They keep 8-12 months at best quality, though texture softens significantly on thaw.

How do you prevent raspberries from molding in the fridge?

Store them dry and unwashed in a single layer with paper towels above and below to absorb condensation. Remove any damaged berries immediately - one moldy berry releases spores that spread through the batch within hours.

Italian Cacio e Pepe

April 1, 2026

Fine-grate Pecorino Romano with cracked black pepper and starchy pasta water. Those three ingredients create the silky sauce that makes Cacio e Pepe work without cream or butter.

Italian Cacio e Pepe served on a plate

The hot pasta water emulsifies the cheese into a coating instead of clumps. You toss everything off the heat so the cheese melts smoothly instead of seizing.

Make this when you want something that tastes intentional but needs less than 20 minutes from start to finish.

QUICK SUMMARY

Cacio e Pepe combines al dente pasta with finely grated Pecorino Romano and toasted black pepper. The key is using hot pasta water to create a smooth, creamy sauce without dairy or flour. Toss everything off the heat to prevent the cheese from clumping or turning grainy.

⏱️Timeline: 15 minutes total - boil pasta, toast pepper, toss sauce
🔑Critical Move: Reserve 1 cup pasta water before draining for sauce emulsification
⚠️Watch Out: Sauce turns grainy if cheese hits direct heat - always toss off burner

Table of Contents

Toggle
  • Why This Recipe Works
  • What You'll Need
    • Ingredient Details
  • Ingredient Swaps
  • What to Serve With It
  • Store and Reheat
  • Frequently Asked Questions
  • Italian Cacio e Pepe
    • Method 
    • Tried this recipe?

Why This Recipe Works

Toasting cracked black pepper releases oils that coat the pasta instead of sitting on top. For a version that comes together quickly, this tender minestrone side dish adds color without extra work.

Quick Reference
⏱️
Prep Time
5 min
🔥
Cook Time
10-12 min
⏰
Total Time
15-17 min
🍽️
Servings
2-4 servings
📊
Difficulty
Medium
🏷️
Category
Main Dish
💡
Quick Tip
Use hot pasta water to emulsify cheese sauce
🎯
Best For
Weeknight | Casual entertaining
  • Starchy pasta water acts like glue - the starch binds with cheese fat to create a smooth coating instead of separated clumps
  • Fine-grated cheese melts faster - smaller pieces dissolve into the hot water before they can seize or turn grainy
  • Toasted pepper releases aroma - 45 seconds in a dry pan wakes up the oils without burning or creating bitterness
  • Al dente pasta holds sauce better - firm noodles have texture that grips the coating instead of getting mushy
  • Tossing off heat prevents curdling - removing the pan from direct flame keeps the cheese from breaking into greasy lumps
Quick Tip
Save pasta water in a measuring cup before you drain - you need the starchy liquid hot to emulsify properly

What You'll Need

Ingredients for Italian Cacio e Pepe

Shop for finely gratable Pecorino Romano and whole black peppercorns. A good asada can make or break the plate, but this simple asada recipe offers another weeknight option when you need variety.

🍜
Pasta
  • Spaghetti or tonnarelli (8-12 oz)
  • Salt for pasta water
🧀
Cheese
  • Pecorino Romano (1-1½ cups finely grated)
🌶️
Pepper
  • Black peppercorns (1-2 tbsp, cracked)
🫙
Optional
  • Olive oil (1 tbsp)
  • Reserved pasta water (1 cup)

Ingredient Details

  • Pecorino Romano
    Grate on the smallest holes of a box grater or use a microplane - large shreds won't melt smoothly
  • Black peppercorns
    Crack them coarsely with a mortar and pestle or the bottom of a heavy pan - pre-ground loses aroma
  • Spaghetti or tonnarelli
    Tonnarelli is traditional but spaghetti works just as well - both have surface area for sauce to cling
  • Pasta water
    Scoop out 1 cup before draining - you need it hot to emulsify the cheese properly
  • Salt for pasta water
    Use enough to make the water taste like the ocean - this is your only chance to season the pasta itself
  • Olive oil
    Optional but helps the sauce come together if you're worried about clumping - use sparingly

Ingredient Swaps

Parmesan works if you can't find Pecorino but the flavor shifts from sharp and salty to mild and nutty. Most people skip asada, but it balances the meal with this simple asada recipe when you want something different.

  • Swap Pecorino Romano for Parmesan - less sharp, creamier sauce, slightly milder overall taste
  • Use gluten-free pasta instead of spaghetti - texture varies, sauce may not cling as tightly to noodles
  • Replace black pepper with white pepper - milder heat, less visual contrast, different aromatic profile
  • Try Grana Padano instead of Pecorino - milder flavor, less salty, affects the sharpness you expect

Pecorino Romano

Works for: Sharp, salty flavor that defines classic Cacio e Pepe

Skip if: You prefer milder cheese or can't find authentic imported options

Parmesan

Works for: Budget-friendly swap with creamier, less aggressive taste

Skip if: You want the traditional peppery sharpness and salty punch

Gluten-Free Pasta

Works for: Celiac or gluten intolerance without changing the sauce method

Skip if: Texture matters - gluten-free can be softer and sauce adherence suffers

Instructions

You need 15 minutes from boiling water to plated pasta. A good salad can make or break the plate, and this bright salad recipe adds crunch without stealing focus from the pepper.

  1. Boil salted water and cook pasta 1-2 minutes less than package directions. Test at 8 minutes for spaghetti - it should be firm with a tiny white center. Reserve 1 cup pasta water in a measuring cup before draining.

  2. Toast cracked black pepper in a dry skillet over low heat for 45 seconds, stirring constantly. The pepper should smell fragrant but not smoky - pull it off heat as soon as the aroma hits you.

  3. Drain pasta and add it to a large mixing bowl or the skillet off the burner. Toss with half the toasted pepper and a few tablespoons of the hot pasta water to start loosening everything.

  4. Add finely grated Pecorino Romano gradually, tossing with tongs while adding pasta water in small splashes. The cheese should melt into a creamy coating, not clump - keep the mixture moving and off direct heat the entire time.

  5. Adjust consistency with more pasta water until the sauce coats each strand smoothly. Taste and add more pepper or cheese if needed, then serve immediately while the sauce is still silky.

Watch Out
Never add cold cheese or let the mixture sit on direct heat - both cause the sauce to break into grainy, separated clumps

What to Serve With It

Rich mains need something to cut through, and salad does exactly that. For a version that comes together quickly, this this quick potato wedges dish works when you want something starchy on the side.

Side Dish Prep Why It Works How to Serve
Simple Green Salad Easy Fresh greens cut through the creamy, peppery richness Toss with lemon vinaigrette, serve alongside
Garlic Bread Easy Soaks up leftover sauce, adds crispy texture contrast Toast with butter and garlic, slice into strips
Steamed Broccoli Easy Light vegetable balances the heavy cheese coating Steam until tender-crisp, drizzle with olive oil
Roasted Cherry Tomatoes Medium Adds acidity and sweetness to balance salty cheese Roast at 400°F for 15 minutes, serve warm
Grilled Asparagus Medium Elegant vegetable pairing for entertaining nights Grill 3-4 minutes, season with salt and lemon

Three ways to serve it:

  • Weeknight plate: Serve with garlic bread and a simple green salad for a fast, balanced meal
  • Date night: Pair with grilled asparagus and a crisp white wine for something that feels intentional
  • Meal prep: Divide into portions with roasted cherry tomatoes for easy reheating throughout the week
Best Pick
Lemon vinaigrette on greens adds brightness without overpowering the peppery cheese - squeeze fresh lemon just before serving

Store and Reheat

Leftover Cacio e Pepe holds for 3-4 days but the sauce thickens as it cools. Homemade adds the contrast this plate needs, but timing matters with this creamy homemade homemade recipe when you're planning ahead.

Method Time Best For
🍳 Stovetop 3-5 minutes on low Restoring creamy texture gently with added pasta water
📦 Microwave 1-2 minutes in short bursts Quick reheating - stir halfway and add water to loosen
🔥 Oven 10 minutes at 300°F Large portions - add splash of water, cover with foil

For best results when storing:

  • Transfer to shallow airtight containers within 2 hours - this stops bacterial growth and keeps the pasta from drying out
  • Add a tablespoon of olive oil before storing - helps prevent the noodles from sticking together in the fridge
  • Reheat with splashes of water or broth - the sauce thickens when cold so you need liquid to bring back the creamy texture
  • Stir frequently while reheating on stovetop - prevents hot spots that can make the cheese seize or turn grainy again
  • Skip freezing - the cheese sauce separates and turns watery when thawed, losing the silky consistency entirely

Frequently Asked Questions

Can I use Parmesan instead of Pecorino Romano in Cacio e Pepe?

Yes, but the flavor shifts from sharp and salty to milder and creamier. Parmesan works in a pinch but you lose the traditional peppery punch that defines authentic Cacio e Pepe.

How do I store and reheat leftover Cacio e Pepe without separating sauce?

Store in airtight containers for 3-4 days and reheat gently on the stovetop with splashes of water or broth. Stir constantly over low heat - the added liquid brings back the creamy texture without breaking the cheese.

What is the best way to know when Cacio e Pepe sauce is properly emulsified?

The sauce should coat each strand of pasta in a smooth, glossy layer without any visible clumps or pools of liquid. If you see separated cheese or watery liquid, keep tossing and add more hot pasta water gradually.

Why does my Cacio e Pepe sauce become grainy or clump?

Grainy sauce happens when cheese hits direct heat or you add it too fast without enough hot pasta water. Always toss off the burner and add cheese gradually while stirring - the starchy water helps the cheese melt smoothly instead of seizing.

How can I scale Cacio e Pepe recipe for more servings?

Double or triple the pasta, cheese, and pepper but work in smaller batches when tossing the sauce. Large amounts of pasta cool the water too quickly, making emulsification harder - toss half at a time for best results.

Italian Cacio e Pepe served on a plate

Italian Cacio e Pepe

No ratings yet
Italian Cacio e Pepe combines al dente pasta with finely grated Pecorino Romano and toasted cracked black pepper. The silky sauce is emulsified with starchy hot pasta water and tossed off the heat to ensure a creamy, clump-free coating without cream or butter.
Print Recipe Pin Recipe
Prep Time 5 minutes mins
Cook Time 12 minutes mins
Total Time 17 minutes mins
Servings: 4 servings
Course: Main Dish
Cuisine: Italian
Ingredients Method Notes

Ingredients
  

  • 8 oz spaghetti or tonnarelli pasta cook 1-2 minutes less than package directions
  • 1 tablespoon salt for pasta water, enough to taste like ocean
  • 1 cup Pecorino Romano cheese finely grated on smallest holes of a grater or microplane
  • 1 tablespoon black peppercorns cracked coarsely before toasting
  • 1 cup pasta water reserved hot starchy water for sauce emulsification
  • 1 tablespoon olive oil optional, helps prevent clumping

Method
 

  1. Boil salted water and cook pasta 1-2 minutes less than package directions until al dente. Reserve 1 cup of hot pasta water before draining.
    8 oz spaghetti or tonnarelli pasta, 1 tbsp salt, 1 cup pasta water
  2. Toast cracked black peppercorns in a dry skillet over low heat for 45 seconds, stirring constantly until fragrant but not smoky. Remove from heat immediately.
    1 tbsp black peppercorns
  3. Add drained pasta to a large mixing bowl or the skillet off the burner. Toss with half the toasted pepper and a few tablespoons of reserved hot pasta water to loosen the pasta.
    8 oz spaghetti or tonnarelli pasta, 1 tbsp black peppercorns, 1 cup pasta water
  4. Gradually add finely grated Pecorino Romano cheese while tossing with tongs. Add reserved pasta water in small splashes continuously to create a creamy sauce that coats the pasta smoothly without clumping. Keep mixture moving off direct heat.
    1 cup Pecorino Romano cheese, 1 cup pasta water
  5. Adjust sauce consistency by adding more pasta water as needed. Taste and add remaining toasted pepper or more cheese if desired. Serve immediately while sauce is silky smooth.
    1 cup Pecorino Romano cheese, 1 tbsp black peppercorns, 1 cup pasta water

Notes

  • Scoop out 1 cup of hot pasta water before draining to emulsify the sauce properly.
  • Always toss pasta and sauce off direct heat to prevent cheese from clumping or becoming grainy.
  • Toast cracked pepper briefly over low heat to release aroma without bitterness.

Tried this recipe?

Let us know how it was!

What Is Polenta? [Taste, Uses & More]

April 1, 2026

Warm polenta has a scent that lands somewhere between fresh corn and a faint cornbread from the oven - before you've even tasted it. That mild, sweet-corn aroma is the first signal that you're working with something genuinely comforting rather than neutral.

What Is Polenta

It pools soft and pale gold in the bowl, and if you've only ever reached for cornmeal swaps in a pinch, polenta deserves its own place in your pantry.

QUICK SUMMARY

Polenta is coarse-ground cornmeal cooked into a porridge that's creamy when hot and firm when chilled. It tastes mildly sweet with nutty undertones, and browns to a toasty finish when seared or grilled. Use it as a side, a base, or slice it into cakes.

🌽Flavor: Mild sweet corn, slightly nutty, toasty when browned
🍲Best Uses: Creamy side, grilled cakes, polenta fries, layered bakes
🌾Varieties: Stone-ground, instant, polenta taragna (buckwheat blend)
⏱️Shelf Life: Up to 12 months unopened; 2-3 months once opened
✅Diet: Naturally gluten-free; higher in carbs, lower in protein unless enriched

What Is Polenta?

Polenta is ground dried corn - specifically coarse or medium-ground cornmeal - cooked in water or stock until it thickens into a porridge.

It originates from Northern Italy, particularly the regions of Lombardy and Veneto, where it served as a staple starch for centuries before pasta gained dominance there.

The cornmeal used for polenta is typically yellow corn (polenta gialla), though white corn varieties (polenta bianca) appear in Venetian cooking with a milder, more delicate flavor.

A regional variant called polenta taragna blends cornmeal with buckwheat flour, producing a darker, earthier result common in Alpine cooking.

Outside Italy, polenta appears in Eastern European cuisines under different names, and in the American South it runs nearly parallel to grits - same ingredient category, slightly different tradition and grind.

  • Stone-ground polenta - coarser texture, more pronounced corn flavor, requires 30-45 minutes of cooking
  • Instant polenta - pre-cooked and dried, ready in 5 minutes, smoother but less complex
  • Polenta taragna - buckwheat blend, darker color, earthier and more robust than standard yellow polenta

What Does Polenta Taste Like?

Polenta's flavor is mild and sweet-corn forward, with a soft nuttiness that intensifies as it cooks. Think of it as somewhere between grits and a corn-based mashed potato - starchy and slightly creamy, but with that unmistakable sweetness that comes from dried corn.

Sensory SnapshotMild Intensity
👅 Flavor
sweet cornnuttytoastymildly savory
✋ Texture
creamysmoothfirm when chilled
👃 Aroma
fresh corncornbread when seared

Heat changes polenta's character noticeably. Freshly cooked, it's subtle and gentle - a blank canvas that absorbs fat and seasoning readily.

Sear or grill a chilled slice and the outer crust develops a toasty depth that echoes light cornbread, while the interior stays soft. That contrast is where polenta earns its most interesting moments.

Golden Rule
Season polenta aggressively while it's still hot. It absorbs salt, butter, and cheese as it cooks - add them at the end and taste before it sets.

How to Use Polenta

Polenta's mild flavor means it functions as both a standalone side and a structural base. Served creamy, it pairs with braised meats better than almost any other starch - short ribs, lamb shoulder, and Italian sausage all benefit from the way polenta soaks up braising liquid without becoming heavy.

Options for pairings for polenta range from simple roasted vegetables to full ragù.

How Polenta Is Used
MethodBest ForTip
🍲 Creamy (stovetop)Braised meats, sausage, roasted chickenFinish with Parmesan and butter off heat
🔥 Baked loafSliced layers, lasagna-style bakesPour into a lined pan while hot; chill overnight
🍳 Pan-fried cakesTopped with mushrooms, cheese, or eggsSlice cold polenta 1cm thick for a stable crust
🔥 Grilled slicesBase for seafood or roasted vegetablesBrush with olive oil before grilling to prevent sticking
🍟 Polenta friesSnacks, sides, appetizersBake at high heat or shallow-fry for crispness

Northern Italian cooking leans on polenta as a daily starch, typically stirred with butter and Parmesan for a rich side or left plain as a base for wild mushrooms with balsamic.

In American cooking, it slots into the same role as grits alternatives - both work under shrimp, stews, and eggs.

For cheese pairings, Parmesan and Pecorino melt cleanly into hot polenta. Gorgonzola stirred in at the end adds a sharp, pungent counterpoint that works well alongside roasted root vegetables or a drizzle of honey.

Sage browned in butter is the most classic finishing touch in Northern Italian kitchens.

Avoid pairing polenta with highly acidic dressings or raw fruit salsas - the bright acidity cuts against the sweet corn base in a way that feels unbalanced rather than contrasting.

Try It In
🍳Breakfast Polenta with Eggs and ParmesanA simple creamy base that shows how polenta handles dairy and eggs→

How to Buy and Store Polenta

Look for bags with a bright golden or pale yellow color - dull or grayish cornmeal signals age. Smell the bag if possible; fresh polenta has a clean corn aroma, not musty or stale.

Coarse or medium grind gives the best texture for traditional preparations; avoid packages that feel damp or show clumping.

Watch Out
Stone-ground polenta contains more natural oils than instant, so it goes rancid faster once opened. Refrigerate it if your kitchen runs warm, especially in summer.

Stone-ground delivers more corn flavor and a slightly irregular texture that many cooks prefer. Instant polenta sacrifices some depth for speed - useful on weeknights, not ideal when the polenta is the centerpiece. For polenta storage guide specifics, grind type matters considerably.

Store opened polenta in an airtight container away from moisture and strong odors. Pantry storage works for most climates, though stone-ground benefits from the fridge in warmer months.

  • Unopened - 6-12 months in the pantry
  • Opened stone-ground - 2-3 months at best quality
  • Opened instant - up to 12 months if kept dry

Where to Start With Polenta

If you've never cooked polenta before, start creamy. Cook it low and slow with stock, finish with butter and Parmesan, and serve it under something braised.

That single preparation will show you more about the ingredient than any other method.

Once you're comfortable there, pour leftover creamy polenta into a loaf pan, chill it overnight, then slice and pan-fry it. The contrast between the crisp exterior and the soft interior changes the whole experience.

If polenta still feels unfamiliar, reviewing a shortlist of polenta swaps or even the broader grits comparison can help you understand where it fits in your cooking.

Shortcut
Instant polenta works fine for pan-fried cakes. Make it the night before, chill it firm, and it slices and fries just as well as the slow-cooked version.

Frequently Asked Questions

How is polenta different from grits?

Both are ground corn cooked in liquid, but they use different corn varieties. Polenta is typically made from flint corn, which gives a firmer, slightly chewier texture. Grits are usually made from dent corn and tend to be softer and creamier by comparison.

How do you make firm polenta for slicing?

Pour freshly cooked polenta into a lightly oiled loaf pan or baking dish while still hot. Let it cool to room temperature, then refrigerate for at least 2 hours - overnight is better. It will set firm enough to slice cleanly with a sharp knife.

What grind of cornmeal is best for polenta?

Coarse or medium grind gives the most authentic texture - slightly toothsome and irregular in a good way. Fine-ground cornmeal cooks faster but produces a smoother, blander result that lacks the characteristic body of traditional polenta.

Can polenta be made dairy-free?

Yes - polenta itself contains no dairy. Cook it in vegetable or chicken stock for extra flavor, then finish with a drizzle of good olive oil instead of butter. Nutritional yeast can stand in for Parmesan if you need a fully dairy-free version.

How long does cooked polenta keep in the fridge?

Cooked polenta keeps for 4-5 days refrigerated in an airtight container. It will firm up considerably - reheat creamy polenta gently with a splash of water or stock, stirring to loosen it back to a pourable consistency.

Air Fryer Cheese and Onion Pasties

April 1, 2026

Chilling pastry dough before rolling creates flaky layers that shatter when you bite through. Sautéed onions and sharp cheddar bake into a gooey filling that stays put without leaking.

Air Fryer Cheese and Onion Pasties served on a plate

The air fryer crisps the exterior in 15 minutes while keeping the inside tender. You skip the oven preheat and get golden pastry with less oil than traditional frying.

Make these for weeknight dinners when you want something handheld that feels intentional but doesn't require multiple pans.

QUICK SUMMARY

Cold butter layered into flour creates flaky pastry that crisps at 350°F in an air fryer. Sautéing onions first prevents soggy filling, and pressing edges with water seals the pasties so cheese stays inside. Chill dough 30 minutes before shaping for best results.

⏱️Time Reality: 25 min prep plus 30 min chill, 15 min cook
🔪First Critical Move: Cook onions 8-10 min until caramelized, drain liquid
⚠️Watch Out: Warm butter ruins flakiness - keep everything cold and chill dough

Why This Recipe Works

Cold butter stays solid during mixing, creating pockets that steam into flaky layers when the pastry bakes. Most people skip bites, but it balances the meal. For a version that comes together quickly, this related bites recipe uses the same air fryer method with less prep.

Quick Reference
⏱️
Prep Time
25 min
🔥
Cook Time
15 min
⏰
Total Time
40 min
🍽️
Servings
4 pasties
📊
Difficulty
Medium
🏷️
Category
Main Dish
💡
Quick Tip
Chill dough 30 min for flakier crust
🎯
Best For
Weeknight | Meal prep | Casual entertaining

Five reasons this method delivers:

  • Preheat the air fryer - Three minutes at 350°F sets the temperature so pastry starts crisping immediately instead of steaming
  • Chill dough before rolling - Thirty minutes in the fridge relaxes gluten and keeps butter cold for flaky layers
  • Sauté onions first - Eight to ten minutes on the stove caramelizes natural sugars and evaporates moisture that would make soggy filling
  • Seal edges with water - Brushing the rim before pressing creates a glue that prevents leaks during cooking
  • Flip halfway through - Turning at seven minutes ensures both sides brown evenly in the circulating air
Golden Rule
Never skip chilling the dough - warm butter melts early and ruins the flaky texture you're working for

What You'll Need

Ingredients for Air Fryer Cheese and Onion Pasties

Sharp cheddar melts with enough flavor to stand up to caramelized onions, and all-purpose flour creates sturdy pastry that holds its shape. The leaves works best when it hits the table at the same time as the main. For a version that comes together quickly, a simple leaves variation uses similar filling techniques with different wrappers.

🍜
Pastry Base
  • 2 cups all-purpose flour
  • ½ cup cold butter, cubed
  • ½ cup cold water
  • 1 teaspoon salt
🥬
Filling
  • 1 large yellow onion, diced
  • 1 ½ cups sharp cheddar cheese, shredded
  • ½ teaspoon black pepper
  • ¼ teaspoon mustard powder (optional)
🫙
Finishing
  • 1 egg, beaten (for wash)

Ingredient Details

  • All-Purpose Flour
    Creates sturdy dough that rolls thin without tearing - bread flour makes too tough, cake flour too delicate
  • Cold Butter
    Cut into small cubes and keep refrigerated until mixing - cold fat creates steam pockets for flaky layers
  • Yellow Onion
    Dice into ¼-inch pieces for even cooking - larger chunks stay crunchy, smaller ones turn mushy
  • Sharp Cheddar Cheese
    Shred from a block instead of buying pre-shredded - coating additives prevent smooth melting
  • Cold Water
    Ice water works best to keep butter from melting during mixing - add slowly until dough just comes together
  • Egg Wash
    Beat one egg with a fork and brush lightly over pastry - creates golden, glossy crust without sogginess
  • Mustard Powder
    Optional but adds depth to cheese filling - use ¼ teaspoon for subtle tang without overpowering

Ingredient Swaps

Gluten-free flour blends work if you add a binder like xanthan gum, but the crust texture turns denser. Rich mains need something to cut through, and leaves does exactly that. For a version that comes together quickly, a simple leaves variation uses similar components with different preparation methods.

Four practical swaps:

  • All-purpose flour → gluten-free flour blend: Crust texture slightly denser, may need binder - gluten-free option
  • Sharp cheddar cheese → dairy-free cheese: Flavor less sharp, melts less smoothly - dairy-free option
  • Cold butter → vegetable shortening: Flakiness retained, flavor less rich - dairy-free and budget option
  • Yellow onion → shallots or leeks: Taste sweeter or milder, affects filling flavor - variation for different profiles

Gluten-Free Flour Blend

Works for: celiac or gluten sensitivity, similar rolling properties with binder

Skip if: you want traditional flaky texture, some blends taste gritty

Dairy-Free Cheese

Works for: vegan diets, lactose intolerance, melts enough to stay cohesive

Skip if: you need sharp cheddar bite, some brands don't melt at all

Vegetable Shortening

Works for: dairy-free baking, creates similar flaky layers, shelf-stable

Skip if: you want buttery flavor, mouthfeel slightly waxy

Instructions

Mixing takes 10 minutes, chilling takes 30, and air frying takes 15 with one flip at the midpoint. A good chicken can make or break the plate. For a version that comes together quickly, easy chicken side pairs well with these pasties for a complete meal.

  1. Mix the dough: Combine 2 cups flour and 1 teaspoon salt in a bowl, cut in ½ cup cold cubed butter with a fork until mixture looks like coarse crumbs, add ½ cup ice water gradually and stir until dough just comes together without overmixing - knead 3-4 times, wrap in plastic, chill 30 minutes.

  2. Cook the filling: Heat a skillet over medium heat, sauté 1 diced yellow onion for 8-10 minutes until translucent and slightly caramelized, drain excess liquid if any, transfer to a bowl and let cool 5 minutes, stir in 1 ½ cups shredded sharp cheddar, ½ teaspoon black pepper, and ¼ teaspoon mustard powder if using.

  3. Shape the pasties: Roll chilled dough on a floured surface to ⅛-inch thickness, cut into 4 circles using a 6-inch plate as a guide, place ¼ of the filling on one half of each circle leaving a ½-inch border, brush edges with water and fold dough over to create a half-moon shape, press edges firmly with a fork to seal.

  4. Prepare for air frying: Preheat air fryer to 350°F for 3 minutes, cut parchment paper into squares and place beneath each pasty, beat 1 egg and brush lightly over the top of each pasty for golden color, place pasties in air fryer basket 1-2 inches apart to allow air circulation.

  5. Air fry and finish: Cook at 350°F for 7 minutes, flip pasties carefully with tongs, cook another 7-8 minutes until pastry is golden brown and crispy, check that edges are sealed and no filling leaks out, let rest 3-4 minutes before serving so filling sets slightly and doesn't burn your mouth.

Shortcut
Use store-bought pie dough to skip the mixing and chilling - still brush edges with water for proper sealing and get crispy results in the same time

What to Serve With It

These pasties work best with sides that add brightness or crunch to balance the rich cheese filling. Chicken adds the contrast this plate needs, but timing matters. We keep a batch ready for nights like this - weeknight chicken dinner ideas that round out handheld meals without adding extra pans.

Side Dish Prep Why It Works How to Serve
Mixed Green Salad Easy Light contrast cuts richness, adds fresh crunch Toss greens with vinaigrette, serve cold alongside
Tomato Soup Easy Comforting pairing, pastry dips well into broth Heat soup, serve in bowls for dunking pasties
Roasted Potato Wedges Medium Complements savory flavors, adds hearty starch Air fry or roast wedges, season with salt and herbs
Coleslaw Easy Adds crunch and acidity to balance cheese Shred cabbage, toss with tangy dressing, chill
Steamed Vegetables Easy Adds balance and nutrients without competing Steam broccoli or carrots, season lightly

Three ways to serve it:

  • For casual entertaining: Set out mustard mayonnaise and chutney for dipping, arrange pasties on a platter with pickled vegetables for brightness
  • For weeknight meals: Pair with a simple green salad or coleslaw, serve warm with ketchup or hot sauce on the side
  • For meal prep: Make a batch Sunday, refrigerate in airtight containers, reheat in air fryer at 350°F for 6-8 minutes throughout the week
Best Pick
Tomato soup turns these into a complete comfort meal - the acidity cuts through the cheese and the dipping makes it feel special without extra work

Store and Reheat

Refrigerate cooled pasties in an airtight container for 3-4 days or freeze up to 2 months. The beef works best when it hits the table at the same time as the main. For a version that comes together quickly, rich homemade beef recipe reheats well alongside these pasties for full dinners.

Method Time Best For
🔥 Air Fryer 6-8 min at 350°F Crispy reheat retaining texture, single servings
🔥 Oven 10-12 min at 350°F Larger portions, even reheating without sogginess
📦 Microwave 1-2 min on medium Quick soft reheats, loses crispness but faster

For best results when storing:

  • Cool completely - Let pasties rest at room temperature 10-15 minutes before storing to prevent condensation that makes pastry soggy
  • Layer with parchment - Place parchment paper between stacked pasties in containers to prevent sticking and maintain shape
  • Freeze individually - Wrap each pasty in foil before freezing so you can reheat one at a time without thawing the batch
  • Skip microwave for crispy texture - Air fryer or oven reheating restores flaky crust, microwave makes pastry chewy
  • Reheat from frozen - Add 3-4 minutes to air fryer time when cooking from frozen, no need to thaw first

Frequently Asked Questions

Can I make air fryer cheese and onion pasties ahead of time?

Yes, assemble pasties completely, cover with plastic wrap, and refrigerate up to 24 hours before air frying. You can also freeze unbaked pasties for up to 2 months and cook directly from frozen, adding 3-4 minutes to the air fryer time.

How should I store and reheat leftover pasties?

Store cooled pasties in an airtight container in the fridge for 3-4 days. Reheat in the air fryer at 350°F for 6-8 minutes to restore crispiness, or use the oven at 350°F for 10-12 minutes for larger batches.

How do I know when the pasties are fully cooked in the air fryer?

Look for golden brown pastry with crispy edges and check that cheese is fully melted inside. The pastry should feel firm when you press lightly, and sealed edges should stay intact without leaking filling.

Why are my pasties soggy and how can I fix that?

Soggy crust happens when you skip cooking the onions first or use too much filling. Always sauté onions 8-10 minutes to evaporate moisture, drain any liquid, and avoid overfilling so steam doesn't build up inside the pastry.

Can I scale this recipe for more servings without changing cook times?

Yes, double or triple the ingredient amounts but cook in batches to maintain proper air circulation. Keep finished pasties warm in a 200°F oven while you cook the remaining batches - don't overcrowd the air fryer basket or pastry won't crisp properly.

Air Fryer Cheese and Onion Pasties served on a plate

Air Fryer Cheese and Onion Pasties

No ratings yet
These air fryer cheese and onion pasties feature flaky pastry made from cold butter dough and a savory filling of sautéed onions and sharp cheddar. The air fryer crisps the exterior in just 15 minutes for a golden, tender handheld meal that's perfect for weeknight dinners.
Print Recipe Pin Recipe
Prep Time 25 minutes mins
Cook Time 15 minutes mins
Total Time 40 minutes mins
Servings: 4 pasties
Course: Main Dish
Cuisine: British
Ingredients Equipment Method Notes

Ingredients
  

  • 2 cups all-purpose flour creates sturdy dough
  • 0.5 cup butter cold, cubed
  • 0.5 cup water cold or ice water
  • 1 teaspoon salt
  • 1 large yellow onion diced
  • 1.5 cups sharp cheddar cheese shredded
  • 0.5 teaspoon black pepper
  • 0.25 teaspoon mustard powder optional
  • 1 egg egg beaten for egg wash

Equipment

  • Air fryer For cooking the pasties to a crispy finish
  • Skillet For sautéing the onions
  • Mixing bowl For combining the dough ingredients

Method
 

  1. Combine flour and salt in a bowl. Cut in cold cubed butter with a fork until mixture resembles coarse crumbs. Gradually add ice water and stir until dough just comes together. Knead 3-4 times, wrap in plastic wrap, and chill in refrigerator for 30 minutes.
    2 cups all-purpose flour, 1 tsp salt, 0.5 cup butter, 0.5 cup water
  2. Heat a skillet over medium heat and sauté diced onion for 8 to 10 minutes until translucent and slightly caramelized. Drain any excess liquid. Transfer onions to a bowl, let cool 5 minutes, then stir in shredded cheddar, black pepper, and optional mustard powder.
    1 large yellow onion, 1.5 cups sharp cheddar cheese, 0.5 tsp black pepper, 0.25 tsp mustard powder
  3. Roll chilled dough on a floured surface to ⅛-inch thickness. Cut into four 6-inch circles using a plate as a guide. Place one quarter of filling on one half of each circle, leaving a ½-inch border. Brush edges with water and fold dough over to form half-moons. Press edges firmly with a fork to seal.
    2 cups all-purpose flour, 1 large yellow onion, 1.5 cups sharp cheddar cheese, 0.5 tsp black pepper, 0.25 tsp mustard powder
  4. Preheat air fryer to 350°F for 3 minutes. Cut parchment paper squares to place under each pasty. Brush the tops of pasties lightly with beaten egg for a golden finish. Place pasties in air fryer basket, spaced 1-2 inches apart.
    1 egg egg
  5. Cook at 350°F for 7 minutes, then carefully flip pasties with tongs. Cook for another 7 to 8 minutes until pastry is golden brown and crispy. Check edges are sealed with no leaks. Let rest 3 to 4 minutes before serving.
    1 egg egg

Notes

  • Always chill dough 30 minutes to ensure flaky pastry.
  • Sauté onions fully to avoid soggy filling and drain liquids.
  • Flip pasties halfway through air frying for even browning.

Tried this recipe?

Let us know how it was!

How Long Does Parmesan Cheese Last? [Storage Guide]

April 1, 2026

Leftover parmesan from last night's pasta - half a wedge sitting in the fridge, rewrapped loosely in the original plastic - is one of the most common refrigerator gambles in a home kitchen.

Can You Freeze Parmesan Cheese

Knowing how long it actually lasts, and what form it's in, changes how you handle it every time.

Hard aged parmesan, including true Parmigiano-Reggiano, behaves differently from softer cheeses, and that distinction matters for storage decisions.

If you enjoy the taste of parmesan cheese and want to preserve it properly, the method is as important as the timeline.

QUICK SUMMARY

An unopened wedge lasts 6-8 months in the fridge. Once opened, a hard wedge stays good for 3-6 weeks - grated parmesan only 1-2 weeks. Freeze it for up to 6 months, but expect crumblier texture best suited to cooked dishes.

🧊Fridge (unopened): Up to 6-8 months in original vacuum seal
🧀Fridge (opened wedge): 3-6 weeks wrapped in parchment then plastic
❄️Freezer: 3-6 months; grated can go straight from frozen into hot pans

How Long Does Parmesan Cheese Last?

Parmesan's shelf life depends heavily on whether it's been opened and what form it's in.

A factory-sealed or vacuum-packed wedge stored at 34-40°F can last 6-8 months untouched - the low moisture content and tight seal do most of the work.

Once you cut into it, oxygen becomes the enemy.

Parmesan Cheese Shelf Life
MethodStateDurationNotes
🧊 FridgeUnopened wedge6-8 monthsKeep in original vacuum seal at 34-40°F
🧊 FridgeOpened wedge3-6 weeksRewrap in parchment then plastic; check weekly
🧊 FridgePre-grated (opened)1-2 weeksGreater surface area speeds moisture loss and staling
❄️ FreezerGrated or portioned3-6 monthsBest for cooking use after thaw; texture changes
🏠 PantryWhole rind or waxed wheel1-2 weeks maxCool, dark location only; humidity accelerates spoilage

Pre-grated parmesan ages out fast because the increased surface area exposes more of the cheese to air and fridge moisture. Grana Padano, a close relative with similar aging, follows the same general timeline.

How to Store Parmesan Cheese

The single most common mistake is sealing a wedge directly in plastic wrap without a breathable layer underneath. That trapped moisture creates a sweaty surface that accelerates spoilage - sometimes within days.

Golden Rule
Always wrap a parmesan wedge in parchment or wax paper first, then add a layer of plastic wrap or a zip-lock bag over the top. The breathable inner layer prevents moisture buildup while the outer layer blocks air.

Here's how to handle each form correctly:

  • 🧀 Wedge in the fridge - Remove any original plastic that sweats, wrap in parchment or wax paper, then seal in plastic wrap or an airtight container.
  • 🥄 Pre-grated in the fridge - Transfer to an airtight container with a folded paper towel inside; the towel absorbs moisture that would otherwise clump and stale the cheese.
  • 🏠 Pantry (short-term only) - A whole rind or unopened waxed wheel can sit in a cool, dark pantry for up to two weeks; heat and humidity shorten that window fast.
  • 💡 Rind storage - Keep leftover rinds in a sealed bag in the fridge or freezer; they're ideal for infusing into broths and soups to pull out umami before discarding.

For context, storing ricotta correctly follows a different set of rules entirely - soft cheeses have far less tolerance for temperature swings than a hard, aged wedge does.

Can You Freeze Parmesan Cheese?

Freezing parmesan works, with one honest caveat: it won't come back with the same texture. The tyrosine crystals that give aged Parmigiano-Reggiano its satisfying crunch will largely disappear, and the cheese becomes more crumbly after thawing.

That makes frozen parmesan best suited for sauces, soups, and casseroles - not fresh shaving over salads.

Watch Out
Don't freeze a whole wedge and expect to shave it afterward. Freeze in grated portions or small usable chunks so you only thaw what you need.
  1. Grate or portion - Grate the wedge entirely, or cut it into meal-sized chunks before freezing; this prevents the need to refreeze after thawing.
  2. Wrap tightly - For chunks, wrap each portion in plastic wrap first, pressing out air. For grated, portion into small freezer bags and press flat before sealing.
  3. Label and freeze - Mark the date; quality holds best within 3-6 months, after which flavor gradually fades.
  4. Thaw or use from frozen - Thaw wedge portions in the fridge for 12-24 hours in a sealed bag. Grated parmesan can go directly into a hot pan or sauce without thawing.

Much like keeping vacuum sealed salmon fresh, the key to frozen parmesan is airtight packaging - any freezer burn will strip the nutty aroma the cheese is known for.

Signs Parmesan Cheese Has Gone Bad

Hard cheeses like parmesan are more forgiving than soft ones, but they do spoil. Knowing what to look for prevents both waste and a bad meal.

Signs It's Gone Bad
👀
VisualBlue-green or black mold beyond the natural rind · Slimy or wet surface on wedge or grated cheese · Dark brown cracks with powdery white spots on rind
👃
SmellPutrid or sour odor clearly different from the normal nutty, savory aroma
✋
TextureSticky or slimy surface on wedge · Chalky powdery interior beyond normal crystalline texture

Mold on a hard wedge doesn't always mean the whole piece is lost. Cut at least 1 inch around and below any mold spot, rewrap immediately in fresh parchment, and use the remainder soon.

However, grated parmesan or any softened portions showing mold or an off smell should be discarded entirely - there's no safe salvage there.

Getting the Most from Every Wedge

Good storage habits add weeks to a wedge and prevent waste on an ingredient that earns its price. These four practices make the biggest difference:

  • 🧀 Buy with rind intact - The rind signals authentic aging and helps slow moisture loss during storage; avoid pre-cut wedges already stripped of rind.
  • 🥄 Grate only what you'll use - Pre-grated parmesan loses aroma within days as it absorbs fridge odors and dries out; grating fresh keeps flavor sharper.
  • ❄️ Freeze for cooking, not finishing - Frozen parmesan works well stirred into a risotto or melted into a cream sauce, but it won't hold up as a garnish or shaved topping.
  • 🍲 Save the rinds - Drop a saved rind into a simmering broth or minestrone for 20-30 minutes; it adds depth you'd otherwise lose.

If a wedge runs out before the dish is done, a quick look at parmesan cheese stand-ins can help you find a hard aged cheese that bridges the gap. Using mozzarella for creaminess is a different strategy - worth knowing when the dish calls for melt rather than sharp bite.

Frequently Asked Questions

Can you freeze Parmigiano-Reggiano?

Yes, but texture will suffer. The crystalline crunch that defines authentic Parmigiano-Reggiano breaks down in the freezer, leaving the cheese crumbly after thawing. Reserve frozen Parmigiano-Reggiano for cooked applications like sauces or baked pasta.

How long does grated parmesan last in the fridge?

Freshly grated parmesan lasts about 1-2 weeks refrigerated in an airtight container. Store-bought pre-grated in a shaker should be used within a week of opening, as the large exposed surface area stales quickly.

Can you eat moldy parmesan?

On a hard wedge, cut at least 1 inch around the mold and the cheese underneath is generally safe to eat. Discard grated parmesan entirely if mold appears - the loose structure lets mold spread through the batch unseen.

Does freezing parmesan change the flavor?

Flavor holds reasonably well within the first 3 months, though subtle aromatic notes do fade. The bigger change is textural - crumblier, less crystalline - which is why frozen parmesan suits cooked dishes better than fresh applications.

How do you store a parmesan rind?

Seal rinds in a zip-lock bag and refrigerate for up to a month, or freeze for up to 6 months. Frozen rinds go directly into simmering soups or broths without thawing first.

What Is Queso Fresco? [Taste, Uses & More]

April 1, 2026

You spot it in the refrigerated cheese section - a compact block or tub labeled simply "queso fresco," often tucked between queso blanco and panela. It's unassuming, bright white, and easy to pass over if you don't know what it does.

What Is Queso Fresco

What it does, specifically, is finish a dish - crumbled over tacos at the last second, scattered across a bowl of esquites, or pressed into a warm sope - in a way that no aged cheese can replicate.

QUICK SUMMARY

Queso fresco is a fresh, unaged Mexican cheese with a mild lactic tang and crumbly, moist texture. It's used almost exclusively as a finishing cheese - crumbled over hot dishes just before serving. It won't melt and stretch, but that's not what it's for.

🧀Category: Fresh unripened soft cheese, made from cow milk
👅Flavor: Mild lactic tang, clean milky sweetness, lightly salty
✋Texture: Crumbly yet moist, softens when warmed but won't fully melt
🍳Best Uses: Finishing garnish on tacos, soups, grilled vegetables, sopes
🛒Buy It: Refrigerated dairy section, sold in blocks or tubs
📅Shelf Life: Unopened 2-3 weeks; opened 5-7 days refrigerated

What Is Queso Fresco?

Queso fresco - literally "fresh cheese" - is a fresh, unripened Mexican cheese made primarily from cow's milk, sometimes blended with goat's milk for a slightly sharper edge.

It belongs to the same category as farmer's cheese or fresh ricotta: no aging, no rind, no bacterial cultures developing over time.

The name also appears as queso de mesa (table cheese) in some regions, which hints at how central it is to everyday eating across central and southern Mexico.

Unlike ricotta, which is smooth and spreadable, queso fresco holds a loose, crumbly structure that falls apart easily when pressed between your fingers.

It's worth separating queso fresco from its closest relative, cotija. Cotija is aged, significantly saltier, and drier - a comparison worth understanding if you've seen both in the same store aisle.

Panela is another common fresh Mexican cheese, though it's firmer and less crumbly.

  • 🧀 Cow's milk base - sometimes blended with goat's milk for added tang
  • Uncooked and unaged - no rind, no curing, no stretching
  • Regional names - queso de mesa is the most common alternate label
  • Texture category - sits between ricotta and farmer's cheese in firmness

What Does Queso Fresco Taste Like?

queso fresco - What Is Queso Fresco
Sensory SnapshotMild Intensity
👅 Flavor
lactic tangmilky sweetlightly saltybright acidity
✋ Texture
crumblymoistslightly grainy
👃 Aroma
fresh milksubtle lactic

Queso fresco tastes clean. The dominant note is a mild lactic tang - the same bright dairy acidity you get from fresh yogurt or buttermilk, but far gentler.

Underneath that sits a quiet milky sweetness and a low-level salt that seasons without dominating.

The closest comparison is fresh farmer's cheese or a much milder ricotta salata. Cotija pushes saltier and sharper; queso fresco stays soft in flavor even when it crumbles sharp in texture.

Golden Rule
Queso fresco's mildness is the point - it cools heat, adds dairy contrast, and lifts a dish without competing with bold salsas or chiles.

Warmed slightly - say, crumbled over a hot bowl of pozole - the cheese softens and the lactic notes mellow further. It won't melt into the broth, however.

The structure holds, which is what makes it useful as a finishing layer rather than a cooking ingredient.

How to Use Queso Fresco

Queso fresco belongs at the end of cooking, not the beginning. Most applications call for crumbling it directly over a finished dish at the table - that's its core job, and it does that job in a wide range of contexts.

In traditional Mexican cooking, it's scattered over tacos and tostadas just before serving, folded into Mexican street corn salads, or pressed into the filling cavities of sopes and gorditas where it adds moisture.

It also works stirred gently into soups at the final moment - the heat softens the crumbles without dissolving them.

How Queso Fresco Is Used
MethodBest ForTip
🥗 Raw CrumbleTacos, tostadas, salads, grilled vegAdd at the very last second to keep texture distinct
🍲 Warmed in soupPozole, black bean soup, enchilada brothStir in off heat - the residual warmth softens without dissolving
🫓 Pressed into fillingSopes, gorditas, stuffed chilesCombine with refried beans or roasted corn to stretch the filling
🌿 Cheese boardFruit, honey, warm tortillasPair with lime zest or fresh herbs to sharpen its mild flavor

Avoid using queso fresco anywhere you need stretch or full melt. High-heat applications like a grilled cheese or a bubbling enchilada sauce will leave you with a curdled, dry result rather than a smooth pull.

Watch Out
Don't try to melt queso fresco into a sauce. It curdles at high heat rather than incorporating - use a true melting cheese like Oaxacan string cheese or Chihuahua instead.

Fresh cilantro and lime, roasted corn, poblano or jalapeño chiles, and black beans are its strongest pairings - each one amplifies the cheese's dairy brightness without drowning it.

Try It In
🫘Black Bean SaladCrumble queso fresco over the top just before serving→🌽Summer Corn SaladThe mild tang balances sweet roasted corn perfectly→🍅Tomato Cucumber SaladAdds creamy crumble texture to a bright acidic base→

How to Buy and Store Queso Fresco

Look for a block or tub that's uniformly white with no yellowing or gray patches. The surface should be moist but not slimy, and a quick smell should confirm clean fresh milk - nothing sour or sharp beyond a gentle lactic note.

Shortcut
Can't find it at a regular grocery store? Check the refrigerated case at a Latin grocery - you'll find fresher blocks with a better texture and shorter time since production.

Avoid any package with pooled watery liquid beyond minor whey separation, a slimy film on the surface, or a pungent sour odor. Once opened, wrap the block in wax paper or parchment, then transfer to an airtight container.

Don't leave it exposed in its original packaging - it absorbs fridge odors quickly. For a detailed breakdown of how long it stays good, see our guide to queso fresco storage life.

  • Unopened tub: 2-3 weeks refrigerated, check sell-by date
  • Opened block: 5-7 days maximum, wrapped and sealed
  • Freezing: Not recommended - the texture crumbles excessively on thaw

Start Here With Queso Fresco

If you've never used it before, buy a block and crumble it over tacos. That single use will show you exactly what the cheese does - a cool, milky counterpoint to spiced meat and bright salsa.

From there, try it over panela-style dishes or scattered into a warm soup off the heat. If you need a stand-in for a recipe, our guide to queso fresco replacements covers the closest options.

Frequently Asked Questions

Is queso fresco the same as cotija?

No. Cotija is aged, much saltier, and drier - it holds its crumble even when warmed and has a sharper, more pungent flavor. Queso fresco is unaged with a mild lactic taste and higher moisture content.

Can queso fresco melt?

Not in the way that stretching cheeses do. It softens and warms through, but the proteins are structured to hold their shape rather than flow - making it unsuitable for sauces or grilled cheese applications.

How long does queso fresco last in the fridge?

An unopened tub keeps about 2-3 weeks. Once opened, use it within 5-7 days stored in an airtight container wrapped in wax paper.

Is queso fresco salty?

It's lightly salted - noticeably less so than cotija or feta. The salt level is low enough that queso fresco rarely over-seasons a dish even when crumbled generously as a garnish.

What can I substitute for queso fresco?

Fresh farmer's cheese is the closest match in texture and mild flavor. Mild feta (rinsed to reduce saltiness) works in a pinch. Avoid ricotta salata as a direct swap - it's significantly drier and saltier.

What Is Pisco? [Taste, Uses & More]

April 1, 2026

Pisco does something in a glass that no other spirit quite replicates: it carries the raw, perfumed character of fresh grape must into a clear, high-proof liquid without the softening effect of oak.

What Is Pisco

That directness is the whole point. No barrel aging, no color, no disguise - what you taste is almost entirely the grape and the distiller's hand, which makes choosing and using pisco far more specific than reaching for a generic brandy.

QUICK SUMMARY

Pisco is a clear, unaged grape brandy from Peru and Chile, distilled once from fermented grape must. It delivers bright floral and fresh-grape aromas, a clean dry finish, and a slightly oily mouthfeel - built for cocktails but capable in the kitchen too.

🍇Flavor: Fresh white grape, floral citrus notes, subtle peppery finish
🥃Best Use: Pisco Sour, Chilcano, ceviche marinades, pan sauces
🌡️ABV: Typically 38-48%, stronger than wine, lighter than many whiskies
🏷️Buy: Look for stated grape varietal and origin (Peru or Chile) on label
📦Shelf Life: Indefinite unopened; 12-24 months of peak aroma once opened

What Is pisco?

Pisco is a grape brandy distilled once from fermented grape must, produced in designated regions of Peru and Chile. Both countries claim it as their national spirit, and the two versions differ in meaningful ways - more on that below.

Peruvian pisco must be made from one of eight approved grape varieties, distilled to proof without adding water, and rested in neutral containers so no wood flavor enters the spirit. Chilean pisco allows water dilution after distillation and permits some light barrel contact, which can introduce faint color and softer aromatics.

Style labels on the bottle tell you a lot:

  • Pisco Puro - single-varietal, made from one grape type; shows the most direct varietal character
  • Pisco Acholado - a blend of two or more grape varieties, often more complex and layered
  • Aromáticas - made from Muscat-family grapes like Italia or Torontel, the most intensely floral style
  • Quebranta - a non-aromatic variety, producing a rounder, earthier, more neutral base

The grape you're drinking matters as much as the country of origin, which is why reading the label before buying is worth the extra thirty seconds.

What Does pisco Taste Like?

pisco - What Is Pisco
Sensory SnapshotModerate Intensity
👅 Flavor
fresh white grapefloral citruslight stone fruitpeppery finish
✋ Texture
clean and dryslightly oily
👃 Aroma
intense grape esterjasmine-like floralcitrus peel

The closest reference point is a high-quality grappa or marc - except pisco is generally cleaner, less rustic, and without the slight bitterness that comes from pomace distillation. It doesn't taste like aged brandy at all.

Aromatic varietals like Italia and Torontel hit the nose first with jasmine and fresh citrus peel, then land dry and almost grape-juicy on the palate. Quebranta-based pisco reads earthier: rounded, slightly herbal, with less perfume and more body. A peppery or faintly herbal finish is common across styles, especially in Peruvian pisco, where distillation proof is higher.

Heat in cooking tightens the floral top notes quickly, leaving the grape ester base. That's useful - it means pisco adds a clean aromatic lift to a sauce without going flabby or bitter.

Golden Rule
Smell it before you cook with it. An aromatic pisco (Italia, Torontel) adds perfumed complexity; a Quebranta adds body and weight. They're not interchangeable in a recipe.

How to Use pisco

Pisco's strongest application is the Pisco Sour - shaken with fresh lime juice, simple syrup, egg white, and a dash of Angostura bitters. The egg white creates a dense foam that carries the floral aroma directly to the nose before the first sip.

For a longer, lower-effort drink, a Chilcano builds pisco over ice with ginger ale, lime, and bitters - the ginger amplifies the peppery finish naturally.

In the kitchen, pisco is underused. A small pour into a ceviche marinade adds a boozy, aromatic lift without the sweetness of wine.

It deglazes a hot pan after searing seafood cleanly, leaving a grape-bright base for a quick sauce. Flambéing fruit - peaches, apricots, figs - with pisco keeps the flame brief and the aroma intact once the alcohol burns off.

How Pisco Is Used
MethodBest ForTip
🍹 ShakenPisco Sour, citrus cocktailsUse fresh lime only - bottled juice kills the floral top notes
🥂 Built/stirredChilcano, cold syrupsAdd bitters last to preserve aroma layering
🔥 DeglazedSeafood pan sauces, ceviche basesUse a Quebranta-style for body; aromatic styles burn off too fast
🍑 FlambéedStone fruit desserts, crepesWarm the pisco slightly before flambéing for a cleaner ignition

Pisco pairs naturally with fresh lime and lemon, stone fruits like peach and apricot, seafood, ginger, and a restrained pinch of cinnamon or cloves in compotes.

Avoid pairing it with strong aged cheeses or heavily oaked wines - those flavors overwhelm its delicate grape character completely.

Try It In
🍋Pisco Sour Peruvian CocktailThe foundational recipe — shows exactly how lime, egg white, and bitters frame the grape spirit→

How to Buy and Store pisco

Start with the label. Origin and grape variety are the two most useful pieces of information - country of production shapes the legal production rules, and the grape varietal tells you whether you're getting a floral, aromatic spirit or a drier, earthier one.

A bottle that states only "pisco" without listing a varietal or style is worth skipping for a first purchase.

Best Pick
For cocktails, start with an Acholado or an Italia-based Aromáticas pisco - both offer enough floral complexity to shine in a Pisco Sour without requiring a high budget.

Clarity is a reliable quality indicator. Most pisco is fully clear; a faint gold tint signals short resting in neutral containers, which is acceptable under Peruvian regulations, not barrel aging.

If the bottle shows deep amber, it's likely a Chilean pisco with some wood contact.

For storage, keep bottles upright in a cool, dark spot away from direct sunlight and heat sources. The pisco storage guide is solid - 12 to 24 months before the aromatic top notes start to dull.

An unopened bottle stored correctly lasts indefinitely.

Start Here With Pisco

New to pisco? Buy a bottle of Acholado or Italia-based pisco and make a Pisco Sour first.

That single recipe shows you the spirit's floral intensity, how it handles acid, and whether you want to explore more aromatic styles or move toward the earthier Quebranta. From there, a pan sauce with seafood is the most accessible kitchen application.

Anyone already comfortable with brandy as a cooking spirit will find the swap intuitive - just expect more perfume and less wood.

Frequently Asked Questions

Is pisco a brandy?

Yes - pisco is a grape brandy distilled from fermented grape must. The key difference from most brandies is that it's unaged in wood, so it retains raw grape aroma rather than developing the vanilla and caramel notes of barrel-aged spirits.

How does Peruvian pisco differ from Chilean pisco?

Peruvian pisco must be distilled to proof without water addition and rested only in neutral containers. Chilean pisco allows post-distillation dilution and light wood contact, which produces a softer, sometimes faintly golden spirit with less raw varietal intensity.

What grapes are used to make pisco?

Peruvian pisco uses eight approved varieties, most commonly Quebranta, Italia, Torontel, and Albilla. Quebranta is non-aromatic and produces a rounder spirit; Italia and Torontel are Muscat-family grapes that deliver intense floral and citrus character.

Can you cook with pisco?

Yes, though it's best used where its grape aroma can register - deglazing seafood pans, flambéing stone fruit, or adding a small amount to ceviche marinades. High heat burns off the floral notes quickly, so add it late and use a smaller quantity than you would wine.

How strong is pisco in alcohol content?

Most pisco falls between 38% and 48% ABV. Peruvian regulations require a minimum of 38% and no water dilution after distillation, so bottles often land toward the higher end of that range compared with Chilean expressions.

Air Fryer Chicken Schnitzel Rolls

April 1, 2026

Breaded chicken that turns soggy in the oven or takes 30 minutes you don't have. Air fryer schnitzel rolls solve both problems-crispy coating in 12 minutes, no oil puddles, no flipping stress.

Air Fryer Chicken Schnitzel Rolls served on a plate

The air fryer crisps the breading while keeping the chicken juicy inside. You pound the breasts thin so they cook through before the crust burns.

This works for weeknight dinners when you want something that feels special but doesn't wreck your evening.

QUICK SUMMARY

Pound chicken breasts to ¼ inch, bread them in flour-egg-breadcrumb sequence, then air fry at 400°F for 10-12 minutes. The thin cutlets cook fast and stay tender while the coating crisps. Pat the chicken dry before breading or the coating slides off.

⏱️Time reality: 15 min prep, 12 min cooking, no marinating required
🔨Critical first step: Pound chicken to uniform ¼ inch thickness before breading
⚠️Watch out: Wet chicken makes soggy breading-pat completely dry with paper towels

Table of Contents

Toggle
  • Why This Recipe Works
  • What You'll Need
    • Ingredient Details
  • Ingredient Swaps
  • What to Serve With It
  • Store and Reheat
  • Frequently Asked Questions
  • Air Fryer Chicken Schnitzel Rolls
    • Method 
    • Tried this recipe?

Why This Recipe Works

The high heat of the air fryer sets the breading before moisture from the chicken softens it. Most people skip a batch ready for nights like this-simple shrimp recipe uses the same breading method.

Quick Reference
⏱️
Prep Time
15 min
🔥
Cook Time
10-12 min
⏰
Total Time
25-27 min
🍽️
Servings
4
📊
Difficulty
Easy
🏷️
Category
Main Dish
💡
Quick Tip
Pound chicken thin for even cooking
🎯
Best For
Weeknight | Meal prep | Casual entertaining

Five things that make this work:

  • Thin cutlets cook evenly - ¼ inch thickness means the center hits 165°F before the edges dry out
  • Three-stage breading sticks - flour grabs moisture, egg binds, breadcrumbs create the crispy shell
  • Oil spray crisps without frying - light coating on both sides promotes browning in circulating air
  • 400°F is the sweet spot - hot enough to crisp the coating, gentle enough to keep chicken juicy
  • Flipping halfway prevents pale spots - 5-6 minutes per side ensures golden color all around
Quick Tip
Use a meat mallet or rolling pin to pound chicken breasts-cover with plastic wrap first to prevent splatter

What You'll Need

Ingredients for Air Fryer Chicken Schnitzel Rolls

The shopping list is short because this relies on pantry staples and basic technique. Cakes adds the contrast this plate needs, but timing matters-for a version that comes together quickly, this related cakes recipe uses a similar breading approach.

🍗
Protein
  • 4 boneless skinless chicken breasts (6-8 oz each)
  • 2 large eggs
🍜
Breading
  • 1 cup all-purpose flour
  • 1½ cups breadcrumbs (panko or regular)
🌶️
Seasonings
  • 1 teaspoon salt
  • ½ teaspoon black pepper
  • Oil spray
🫙
Assembly
  • 4 soft rolls or buns
  • Mayonnaise or sauce (optional)
  • Lettuce or greens (optional)

Ingredient Details

  • Chicken breasts
    Look for even thickness or buy cutlets-saves pounding time and ensures uniform cooking
  • Breadcrumbs
    Panko creates a lighter, crispier crust; regular breadcrumbs give a denser coating
  • Eggs
    Beat with 1 tablespoon water to thin slightly-helps coating stick evenly
  • Oil spray
    Use neutral oil (canola, vegetable) not olive oil which can burn at high heat
  • Rolls
    Soft potato rolls or brioche buns hold up to juices without getting soggy
  • Salt
    Season both the flour and breadcrumbs-double salting prevents bland coating
  • Black pepper
    Freshly ground has sharper bite but pre-ground works fine for breading

Ingredient Swaps

You can adjust based on what's in the pantry or dietary needs. Meatballs adds the contrast this plate needs, but timing matters-for a version that comes together quickly, this related meatballs recipe gives you another air fryer option.

Four reliable swaps:

  • Gluten-free flour + gluten-free breadcrumbs - use fine-ground versions for texture closest to traditional breading, coating may be slightly less crispy
  • Chicken thighs instead of breasts - juicier and more forgiving if overcooked but harder to pound to uniform thickness
  • Crushed cornflakes for breadcrumbs - crunchier texture, sweeter flavor, use unsweetened flakes and crush finely
  • Lettuce wraps instead of rolls - skips bread entirely, works for low-carb but loses the soft bun contrast

Regular Breadcrumbs

Works for: denser, more traditional schnitzel coating that holds up to sauce

Skip if: you want extra crispy texture or lighter crunch

Panko Breadcrumbs

Works for: lighter, airier crust with more crunch and better browning

Skip if: you prefer thicker, more substantial coating or traditional schnitzel texture

Instructions

The entire process takes 25 minutes if you work in batches. The chicken works best when it hits the table at the same time as the main-we keep a batch ready for nights like this with this quick pork dish for variety.

  1. Pound chicken to ¼ inch thickness. Place each breast between two sheets of plastic wrap and use a meat mallet or rolling pin to pound evenly, working from center outward. Pat completely dry with paper towels-any moisture prevents breading from sticking.

  2. Set up breading station. Place flour mixed with half the salt and pepper in first shallow bowl, beaten eggs in second bowl, breadcrumbs mixed with remaining salt and pepper in third bowl. Line them up in order: flour, egg, breadcrumbs.

  3. Bread each cutlet. Dredge chicken in flour, shake off excess. Dip in egg for 30 seconds, let drip briefly. Press into breadcrumbs firmly on both sides. Set on plate while you finish remaining pieces.

  4. Air fry at 400°F for 10-12 minutes. Spray basket with oil, place cutlets in single layer with 1-inch gap between pieces (work in batches if needed). Spray tops lightly with oil. Cook 5-6 minutes, flip, spray again, cook 5-6 minutes more until golden and internal temp reaches 165°F.

  5. Toast rolls and assemble. While chicken rests 2 minutes, toast rolls cut-side down in air fryer for 1-2 minutes. Spread mayo or sauce on bottom bun, add lettuce if using, top with schnitzel, close with top bun.

Golden Rule
Do not overcrowd the air fryer basket-schnitzels need air circulation on all sides to crisp properly

What to Serve With It

These rolls are rich enough to anchor a meal but light sides keep the plate balanced. Rich mains need something to cut through, and chicken does exactly that-for a version that comes together quickly, weeknight chicken dinner ideas gives you more pairing options.

Side Dish Prep Why It Works How to Serve
Coleslaw Easy Tangy crunch cuts richness of fried chicken Serve cold on the side or pile on top of schnitzel
Fries or sweet potato fries Easy Classic pairing, cook in air fryer before chicken Serve hot alongside rolls with ketchup or aioli
Pickles Easy Acidity balances fried coating and mayo Slice dill pickles thin and layer inside roll
Simple green salad Easy Light contrast to heavy fried roll Toss greens with vinaigrette, serve on the side
Potato salad Medium Make-ahead side that complements fried chicken Serve cold on the side with creamy or vinegar dressing

Three ways to serve it:

  • Classic German style - serve schnitzel with lemon wedges on the side, squeeze over chicken before eating for bright acid hit
  • Loaded roll - add pickles, tomato slices, shredded lettuce, and garlic mayo for a complete sandwich meal
  • Meal prep version - keep breaded cutlets and toasted rolls separate, assemble fresh when ready to eat so bread stays crisp
Shortcut
Toast all buns at once while chicken rests-they stay warm enough for 5 minutes while you assemble

Store and Reheat

Breaded chicken loses crispness quickly but reheats better than most fried foods. Store cutlets and rolls separately so bread doesn't get soggy-the air fryer restores crunch in minutes.

Method Time Best For
🔥 Air fryer 4-5 min at 350°F Restoring crispness, best texture
🔥 Oven 8-10 min at 350°F Reheating multiple cutlets at once
📦 Microwave 1-2 min low power Quick reheat when texture doesn't matter

For best results when storing:

  • Refrigerate within 2 hours - place cooled cutlets in airtight container lined with paper towel to absorb moisture, store up to 3-4 days
  • Freeze for longer storage - wrap each cutlet individually in plastic wrap, then place in freezer bag, freeze up to 2 months
  • Thaw in fridge overnight - don't microwave-thaw or breading gets soggy, plan ahead for gradual defrost
  • Store rolls separately - keep toasted buns in paper bag at room temp for 1 day, freeze for longer storage
  • Assemble fresh after reheating - never store assembled rolls or bread turns mushy, build sandwich right before eating

Frequently Asked Questions

How long to cook air fryer chicken schnitzel at 400°F?

Cook for 10-12 minutes total, flipping halfway through at the 5-6 minute mark. Internal temperature should reach 165°F and coating should be golden brown.

Can I make air fryer chicken schnitzel rolls ahead and store?

Bread the cutlets up to 4 hours ahead and refrigerate on a plate covered loosely with plastic wrap. Cook just before serving for crispiest results-breading loses crunch if cooked too far in advance.

What goes well with chicken schnitzel rolls for sides?

Coleslaw, fries, pickles, and simple green salads work best. The tangy or crisp sides cut through the richness of fried chicken and creamy mayo.

How do I know when chicken schnitzel rolls are cooked through?

Use a probe thermometer inserted into thickest part-chicken must reach 165°F. The coating should be golden brown and crispy, and juices should run clear when pierced.

Can I use chicken thighs instead of chicken breasts for schnitzel rolls?

Yes, boneless skinless thighs work but they're harder to pound to uniform thickness. They stay juicier than breasts and are more forgiving if slightly overcooked-same cooking time and temp.

Air Fryer Chicken Schnitzel Rolls served on a plate

Air Fryer Chicken Schnitzel Rolls

No ratings yet
Air Fryer Chicken Schnitzel Rolls feature breaded, thinly pounded chicken breasts cooked quickly in the air fryer to achieve a crispy crust and juicy interior. The rolls assemble easily for a delicious weeknight meal with minimal fuss and no oil puddles.
Print Recipe Pin Recipe
Prep Time 15 minutes mins
Cook Time 12 minutes mins
Total Time 27 minutes mins
Servings: 4 servings
Course: Main Dish
Cuisine: German-Inspired
Ingredients Equipment Method Notes

Ingredients
  

  • 4 chicken breasts boneless, skinless, about 6-8 oz each
  • 1 cup all-purpose flour mixed with ½ teaspoon salt and ¼ teaspoon black pepper
  • 2 large eggs beaten with 1 tablespoon water
  • 1.5 cups breadcrumbs panko or regular, mixed with ½ teaspoon salt and ¼ teaspoon black pepper
  • oil spray neutral oil such as canola or vegetable oil
  • 4 soft rolls or buns potato rolls or brioche recommended
  • mayonnaise or sauce optional, for spreading on rolls
  • lettuce or greens optional, for assembly
  • 1 teaspoon salt divided for flour and breadcrumbs
  • 0.5 teaspoon black pepper divided for flour and breadcrumbs

Equipment

  • Air fryer For cooking the schnitzel cutlets and toasting rolls
  • Meat mallet or rolling pin To pound chicken breasts evenly
  • 3 shallow bowls To set up flour, egg, and breadcrumb breading stations
  • Paper towels To pat dry chicken breasts before breading

Method
 

  1. Place each chicken breast between two sheets of plastic wrap and pound evenly with a meat mallet or rolling pin to about ¼ inch thickness. Pat chicken completely dry with paper towels to ensure breading sticks.
    4 chicken breasts
  2. Set up breading station with three shallow bowls: mix flour with half the salt and pepper in first bowl; beat eggs with water in second bowl; mix breadcrumbs with remaining salt and pepper in third bowl.
    1 cup all-purpose flour, 2 large eggs, 1.5 cups breadcrumbs, 1 tsp salt, 0.5 tsp black pepper
  3. Dredge each chicken cutlet in flour, shaking off excess. Dip in beaten eggs for 30 seconds and let excess drip off. Press firmly into breadcrumbs on both sides and place on a plate.
    4 chicken breasts, 1 cup all-purpose flour, 2 large eggs, 1.5 cups breadcrumbs
  4. Preheat air fryer to 400°F and spray the basket with oil. Arrange breaded cutlets in a single layer with 1-inch gaps. Spray tops lightly with oil. Cook for 5-6 minutes, then flip, spray again, and cook another 5-6 minutes until golden and internal temperature reaches 165°F.
    oil spray
  5. While chicken rests for 2 minutes, toast rolls cut-side down in air fryer for 1-2 minutes. Spread mayonnaise or sauce on bottom buns if using, add lettuce or greens, top with schnitzel, and close with top buns.
    4 soft rolls or buns, mayonnaise or sauce, lettuce or greens

Notes

  • Pound chicken to uniform ¼ inch thickness for even cooking and tenderness.
  • Pat chicken dry completely before breading to prevent soggy coating.
  • Do not overcrowd air fryer basket; allow space for air circulation for crispy crust.

Tried this recipe?

Let us know how it was!

Portuguese Pork and Clams (Carne de Porco à Alentejana)

March 31, 2026

You need 50 minutes and a single large pan. No multi-hour braises, no complicated reductions, no precooking proteins separately.

Portuguese Pork and Clams (Carne de Porco à Alentejana) served on a plate

Pork shoulder sears while you prep the clams and potatoes. The garlic-paprika marinade does flavor work overnight, then the pan finishes everything in one go.

Make this for weeknight entertaining when you want something that looks harder than it actually is.

QUICK SUMMARY

Portuguese pork and clams combines tender marinated pork shoulder with briny steamed clams and crispy fried potatoes. High-heat searing on the pork creates caramelized edges while keeping the inside juicy, and the clams steam open in white wine for a garlicky pan sauce. Marinate the pork at least an hour or the paprika flavor stays flat.

⏱️Time Reality: 20 minutes active work, 30 minutes hands-off cooking, plus 1-hour minimum marination
🔥Critical First Move: Dry pork cubes completely with paper towels before searing or they steam instead of browning
⚠️Watch Out: Overcrowding the pan when frying potatoes causes soggy cubes - fry in batches with space between pieces

Table of Contents

Toggle
  • Why This Recipe Works
  • What You'll Need
    • Ingredient Details
  • Ingredient Swaps
  • What to Serve With It
  • Store and Reheat
  • Frequently Asked Questions
  • Portuguese Pork and Clams (Carne de Porco à Alentejana)
    • Method 
    • Tried this recipe?

Why This Recipe Works

Marinating pork shoulder in paprika and garlic overnight breaks down muscle fibers and infuses smoky flavor into every bite. Searing over medium-high heat creates a caramelized crust while the fat content keeps the meat moist through cooking.

The clams steam in white wine for 5-7 minutes, releasing briny liquid that becomes the pan sauce. If you need a quick pork dish with similar marinating benefits, the overnight rest works the same way.

Quick Reference
⏱️
Prep Time
20 min
🔥
Cook Time
30 min
⏰
Total Time
50 min
🍽️
Servings
4 servings
📊
Difficulty
Medium
🏷️
Category
Main Dish
💡
Quick Tip
Sear pork well before adding clams and sauce
🎯
Best For
Weeknight | Entertaining | Family dinner

Five reasons this works:

  • Pork shoulder stays tender - Fat marbling melts during cooking, keeping meat juicy even at 145°F internal temperature
  • Paprika marinade penetrates overnight - Smoky flavor reaches center of meat cubes instead of staying on surface
  • Clams open in 5-7 minutes - White wine steam cooks shellfish without overcooking pork already in the pan
  • Fried potatoes add starch - Crispy cubes soak up garlicky pan sauce and balance briny clams
  • Single-pan method reduces cleanup - Sear pork first, then add clams and potatoes to same pan for layered flavors
Golden Rule
Remove pork at 145°F and rest 5 minutes - carryover cooking brings it to 150°F without drying out the meat

What You'll Need

Ingredients for Portuguese Pork and Clams (Carne de Porco à Alentejana)

Pork shoulder shows up at most butcher counters already cubed, or buy a 2-pound roast and cut 1-inch pieces yourself. Fresh clams need a 30-minute saltwater soak before cooking to purge sand from the shells.

Waxy potatoes hold their shape during frying better than russets. For something similar that uses easy rolls side instead of fried potatoes, the contrast still works.

🍗
Protein
  • 2 lbs pork shoulder, cut into 1-inch cubes
  • 2 lbs fresh littleneck or cherrystone clams
🥬
Aromatics & Produce
  • 6 garlic cloves, minced
  • 1 lb waxy potatoes, cut into 1-inch cubes
  • Fresh cilantro for garnish
  • 1 lemon, cut into wedges
🥢
Marinade & Sauce
  • ¾ cup dry white wine
  • 3 tablespoons olive oil, divided
  • 2 tablespoons smoked paprika
  • 2 bay leaves
  • Salt and white pepper to taste

Ingredient Details

  • Pork shoulder
    Fat content keeps meat moist during high-heat searing - leaner pork loin dries out faster
  • Fresh clams
    Discard any with cracked shells or that don't close when tapped - sign they're already dead
  • Smoked paprika
    Provides signature smoky flavor - sweet paprika tastes flat in comparison
  • Dry white wine
    Sauvignon Blanc or Pinot Grigio work best - avoid oaked Chardonnay which adds unwanted butter notes
  • Waxy potatoes
    Yukon Gold or red potatoes hold shape when fried - russets fall apart into mush
  • Garlic
    Mince fresh cloves instead of jarred - jarred garlic burns faster and tastes bitter
  • Cilantro
    Flat-leaf parsley swaps directly if you hate cilantro's soapy taste

Ingredient Swaps

Pork shoulder delivers the best texture, but pork loin works when you need a leaner cut. Mussels cook in the same timeframe as clams if littlenecks aren't available at the fish counter.

Chicken broth replaces white wine when you're skipping alcohol. The sauce loses acidity, so add 1 tablespoon lemon juice to compensate.

Four swaps that work:

  • Pork loin for pork shoulder - Less fat means faster drying, so pull it at 140°F instead of 145°F
  • Mussels for clams - Slightly softer texture but identical 5-7 minute steaming time in white wine
  • Chicken broth for white wine - Add 1 tablespoon lemon juice to restore brightness the wine provides
  • Smoked chili powder for paprika - Spicier heat with similar smoky notes, use half the amount first

Pork Shoulder

Works for: Slow cooking, high heat, marinating overnight

Skip if: You need ultra-lean protein or faster cooking times

Pork Loin

Works for: Lean eating, faster searing, less rendered fat

Skip if: You want juicy results without constant temperature monitoring

Instructions

The pork needs a full sear before clams hit the pan or the meat steams instead of browning. Potatoes fry separately in batches so they crisp instead of getting soggy.

Pat pork cubes completely dry with paper towels before the first sear. Surface moisture creates steam that prevents caramelization.

  1. Marinate the pork - Combine pork cubes with 2 tablespoons olive oil, smoked paprika, 4 minced garlic cloves, salt, and white pepper in a mixing bowl. Cover and refrigerate minimum 1 hour, maximum overnight. Remove from fridge 20 minutes before cooking to bring to room temperature.

  2. Sear the pork - Heat 1 tablespoon olive oil in a large cast iron skillet or sauté pan over medium-high heat until shimmering. Add pork cubes in a single layer without crowding, working in batches if needed. Sear 3-4 minutes per side until golden-brown crust forms. Transfer to a plate and tent with foil to rest.

  3. Fry the potatoes - Add remaining oil to the same pan and heat to 350°F. Fry potato cubes in batches for 5-6 minutes, stirring occasionally, until golden and crisp on all sides. Transfer to paper towels to drain excess oil.

  4. Steam the clams - Return pork to the pan over medium heat. Add remaining 2 minced garlic cloves, bay leaves, and white wine. Nestle clams into the pan, cover with a lid, and cook 5-7 minutes until all shells open. Discard any clams that remain closed.

  5. Finish and serve - Remove bay leaves. Add fried potatoes to the pan and toss gently to coat in sauce. Garnish with fresh cilantro and serve with lemon wedges on the side.

Watch Out
Don't add clams before pork finishes searing - they release liquid immediately and prevent browning

What to Serve With It

Portuguese pork and clams already combines protein, starch, and briny sauce in one pan. The plate needs something fresh to cut through richness or crusty bread to soak up extra liquid.

A crisp salad resets your palate between bites of smoky pork. When planning weeknight balsamic pork tenderloin meal ideas, the same balance principle applies - add something acidic or crunchy.

Side Dish Prep Why It Works How to Serve
Simple green salad Easy Fresh greens and vinaigrette balance rich pork and salty clams Toss mixed greens with olive oil, lemon juice, salt
Crusty bread Easy Soaks up garlicky pan sauce without competing flavors Slice thick, toast lightly, serve warm on the side
Steamed rice Easy Neutral base absorbs sauce and stretches the meal for more servings White or jasmine rice, cooked plain, served in bowls
Roasted vegetables Medium Adds fiber and texture contrast to tender pork and soft clams Roast carrots, bell peppers, zucchini at 425°F for 20 minutes
Garlic sautéed greens Easy Earthy bitterness complements smoky paprika in the pork marinade Sauté kale or Swiss chard with garlic and olive oil until wilted

Three ways to serve it:

  • Weeknight plate - Pork and clams over steamed rice with this fresh salad on the side
  • Entertaining spread - Serve family-style in the cast iron pan with crusty bread and a crunchy slaw on the side for crunch
  • Meal prep bowls - Divide pork, clams, and potatoes into containers with roasted vegetables and a tangy dipping sauce packed separately
Best Pick
Crusty Portuguese rolls or sourdough bread - they're traditional and perfect for mopping up every drop of garlicky sauce

Store and Reheat

The pork stays tender for 3-4 days in the fridge, but clams toughen when reheated. Eat leftover clams cold or discard them and reheat just the pork and potatoes.

Potatoes lose crispness after refrigeration no matter the reheating method. For best texture, fry fresh potatoes when you reheat instead of storing them.

Method Time Best For
🍳 Stovetop 5-7 min Reheating pork and sauce gently without drying meat
🔥 Oven 10 min at 325°F Even heating for multiple servings without texture loss
📦 Microwave 2-3 min Quick single portions but softens potatoes completely

For best results when storing:

  • Refrigerate in shallow airtight containers - Wide surface area cools pork faster and prevents bacterial growth
  • Store clams separately from pork - Reheated clams turn rubbery, so eat them within 24 hours or discard
  • Freeze pork only, not clams or potatoes - Pork freezes up to 1 month, but shellfish and fried potatoes don't survive freezing
  • Add fresh lemon juice when reheating - Brightens flavors that dull during storage
  • Reheat on stovetop with 2 tablespoons water - Steam keeps pork moist and loosens thickened sauce

Frequently Asked Questions

Can I make Carne de Porco à Alentejana ahead and reheat?

Marinate and sear the pork up to 1 day ahead, then refrigerate until ready to finish cooking. Add clams and potatoes fresh when serving - reheated clams turn rubbery and potatoes lose all crispness.

How do I know when the clams are fully cooked?

Clams are done when shells open completely after 5-7 minutes of covered steaming. Discard any that remain closed - they were dead before cooking and unsafe to eat.

Can I substitute chicken for pork in this recipe?

Chicken thighs work but cook faster than pork shoulder - sear 3 minutes per side and pull at 165°F internal temperature. The paprika marinade still penetrates overnight the same way.

What is the best way to prevent potatoes from getting soggy?

Fry potatoes in batches with space between cubes so they crisp instead of steam. Heat oil to 350°F before adding potatoes and drain on paper towels immediately after frying.

How long should the pork marinate for optimal flavor?

Minimum 1 hour for basic paprika penetration, but overnight marination delivers the deepest smoky flavor. Maximum 24 hours - longer causes the meat to break down too much and turn mushy.

Portuguese Pork and Clams (Carne de Porco à Alentejana)

No ratings yet
Portuguese pork and clams combines tender marinated pork shoulder with briny steamed clams and crispy fried potatoes. High-heat searing creates caramelized edges while keeping the pork juicy, and the clams steam in white wine to make a flavorful garlicky pan sauce.
Print Recipe Pin Recipe
Prep Time 20 minutes mins
Cook Time 30 minutes mins
Total Time 50 minutes mins
Servings: 4 servings
Course: Main Dish
Cuisine: Portuguese
Ingredients Equipment Method Notes

Ingredients
  

  • 2 lbs pork shoulder cut into 1-inch cubes
  • 2 lbs fresh littleneck or cherrystone clams soaked in saltwater for 30 minutes to purge sand
  • 6 cloves garlic minced, divided
  • 1 lb waxy potatoes cut into 1-inch cubes
  • for garnish fresh cilantro
  • 1 whole lemon cut into wedges for serving
  • 0.75 cup dry white wine
  • 3 tablespoons olive oil divided
  • 2 tablespoons smoked paprika
  • 2 whole bay leaves
  • to taste salt
  • to taste white pepper

Equipment

  • large sauté pan or cast iron skillet Used for searing pork, frying potatoes, and steaming clams
  • Paper towels For drying pork cubes before searing

Method
 

  1. Combine pork cubes with 2 tablespoons olive oil, smoked paprika, 4 minced garlic cloves, salt, and white pepper in a bowl. Cover and refrigerate for at least 1 hour or up to overnight. Remove from fridge 20 minutes before cooking to bring to room temperature.
    2 lbs pork shoulder, 6 cloves garlic, 3 tablespoons olive oil, 2 tablespoons smoked paprika, to taste salt, to taste white pepper
  2. Heat 1 tablespoon olive oil in a large sauté pan or cast iron skillet over medium-high heat until shimmering. Pat pork cubes dry with paper towels. Add pork in a single layer without crowding, searing 3-4 minutes per side until golden-brown crust forms. Work in batches if necessary. Transfer pork to a plate and tent with foil to rest.
    2 lbs pork shoulder, 3 tablespoons olive oil
  3. Add remaining olive oil to the same pan and heat oil to 350°F. Fry potato cubes in batches for 5-6 minutes, stirring occasionally, until golden and crisp on all sides. Transfer to paper towels to drain excess oil.
    1 lb waxy potatoes, 3 tablespoons olive oil
  4. Return pork to the pan over medium heat. Add remaining 2 minced garlic cloves, bay leaves, and white wine. Nestle clams into pan, cover with lid, and steam 5-7 minutes until shells open. Discard any clams that remain closed.
    2 lbs pork shoulder, 2 lbs fresh littleneck or cherrystone clams, 6 cloves garlic, 0.75 cup dry white wine, 2 whole bay leaves
  5. Remove bay leaves. Add fried potatoes to the pan and gently toss to coat in pan sauce. Garnish with fresh cilantro and serve with lemon wedges on the side.
    1 lb waxy potatoes, for garnish fresh cilantro, 1 whole lemon

Notes

  • Dry pork cubes completely before searing to ensure caramelization rather than steaming.
  • Fry potatoes in batches with space between pieces to keep them crisp and avoid sogginess.
  • Remove pork from heat at 145°F and rest 5 minutes for perfect juiciness; carryover cooking will bring temperature to 150°F.

Tried this recipe?

Let us know how it was!

What Is Mayonnaise? Taste, Texture, Uses & More

March 31, 2026

Crack open a jar of mayonnaise and the first impression is understated: pale, glossy, almost odorless. Spread it on bread and that changes fast - a cool, rich creaminess coats the palate with a quiet tang that somehow sharpens everything around it.

What Is Mayonnaise

It's the condiment behind tartar sauce, the binding agent in tuna salad, and the secret to a restaurant-quality crust on pan-seared chicken. Mayonnaise is more functional than people give it credit for, and understanding what it is and how it behaves makes you a better cook.

QUICK SUMMARY

Mayonnaise is a thick, oil-and-egg emulsion with a rich, tangy flavor. Used cold as a spread, binder, and sauce base, it adds creaminess without overpowering other ingredients. Commercial jars keep 1-2 months refrigerated once opened; homemade lasts just a few days.

🥄Flavor: Rich, creamy, tangy, mildly eggy with an oil-forward finish
🧪What It Is: Emulsified condiment made from egg yolk, oil, and acid
🍽️Best Uses: Spreads, salad binders, sauce bases, quick protein browning
🌡️Shelf Life: Opened jar: 1-2 months refrigerated; homemade: 3-5 days
🛒Buy It: Look for "real" or "egg yolk" on the label; try Kewpie for umami depth

What Is Mayonnaise?

Mayonnaise is an emulsified condiment built from three core ingredients: egg yolk, a neutral vegetable oil, and an acid - either vinegar or lemon juice.

The egg yolk acts as the emulsifier, holding oil and water-based ingredients in a stable, creamy suspension that doesn't separate under normal conditions.

Its origins trace to 18th-century Western Europe, with both French and Spanish culinary traditions claiming a role in its development. The name likely derives from mayonnaise in French, though the Spanish word mayonesa reflects a parallel history.

Commercial production standardized the recipe, but meaningful variety still exists today:

  • Classic American mayo - neutral, slightly sweet, made with whole eggs or yolks and distilled vinegar
  • Kewpie (Japanese-style) - uses only egg yolks (not whites), rice vinegar, and MSG for a richer, umami-forward profile
  • Aioli - traditionally a Provençal garlic-and-oil emulsion, now widely used as a synonym for flavored mayo; the two are not identical
  • Olive oil mayo - greener hue, fruitier aroma, softer flavor than standard versions
  • Vegan mayo - replaces egg yolk with aquafaba or other plant-based emulsifiers

What Does Mayonnaise Taste Like?

mayonnaise - What Is Mayonnaise

Mayonnaise tastes rich and oil-forward, with a mild tang from vinegar or lemon that keeps the fat from feeling heavy. There's a subtle egg note - not sharp or sulfurous, just quiet and round - that distinguishes it from a plain cream dressing.

Think of it as somewhere between sour cream and a light vinaigrette: creamier than the latter, less sharp than the former.

Sensory SnapshotModerate Intensity
👅 Flavor
richtangymildly eggyoil-forward
✋ Texture
silkythickspreadable
👃 Aroma
neutralfaint eggvinegar-bright

Flavor shifts noticeably by brand. Kewpie reads sweeter and more savory simultaneously, thanks to the extra yolk and rice vinegar.

Standard American mayo is blander by comparison - useful when you don't want the condiment to compete.

Watch Out
Heat breaks the emulsion. Mayonnaise used as a thin crust for pan-searing works because it's a light coating - not because mayo is a frying medium. Direct high heat or boiling will cause it to split and turn greasy.

How to Use Mayonnaise

Mayonnaise is almost always used cold or at room temperature as a functional base. Its emulsion structure means it coats without watering out - a key reason it holds tuna salad and potato salad together for hours without turning soupy.

French cooking uses it as a foundation for cold sauces - rémoulade and its relatives are built on a mayo base with capers, herbs, and mustard. American applications lean toward spreads and binders.

Japanese cuisine deploys Kewpie on okonomiyaki, sushi rolls, and as a dipping sauce for fried foods.

How Mayonnaise Is Used
MethodBest ForTip
🥗 Cold SpreadSandwiches, burgers, wrapsSpread to the edges - it acts as a moisture barrier against the bread
🥣 BinderTuna, chicken, egg, pasta saladsAdd in stages; too much early makes it wet as ingredients release liquid
🧴 Sauce BaseTartar sauce, rémoulade, ranch, aioliWhisk in acid and aromatics cold; never heat the base directly
🍳 Pan-Sear CoatChicken breasts, fish filletsBrush on thinly; the emulsion browns faster than butter and sticks better
🥄 Dressing EmulsifierCreamy vinaigrettes, coleslaw dressingStir in mustard and vinegar - the mayo stabilizes the whole mixture

Mustard is mayo's closest partner. Lemon, dill, tarragon, garlic, and pickles or capers all pull out its tangy side.

Cold seafood - shrimp, crab, smoked salmon - pairs particularly well because mayo's fat softens the brininess without masking it. For pairings for aioli (mayo's garlicky cousin), roasted potatoes and grilled vegetables are the most reliable pairing.

Try It In
🍝Macaroni Salad with MayonnaiseA textbook binder application — mayo coats every piece without pooling→

How to Buy and Store Mayonnaise

Read labels before buying. "Real mayonnaise" or "egg yolk" on the label signals a traditional formula - these taste noticeably richer than reduced-fat or "sandwich spread" versions. For deeper flavor, reach for Kewpie; for a fruitier profile, try an olive oil variety.

Avoid any jar with visible separation or an off-yellow color through the seal.

Golden Rule
Store opened mayo toward the back of the fridge, not in the door. Door placement means constant temperature swings, which degrades the emulsion and shortens the safe window.

Shelf life varies significantly by type. Full details are covered in our mayonnaise storage life guide, but the working numbers are:

  • Unopened commercial jar - months to a year, per the label date
  • Opened, refrigerated - 1 to 2 months
  • Homemade mayo - 3 to 5 days refrigerated; uses raw or lightly cooked yolks, so food-safety risk is higher

If you need a swap due to dietary restrictions or running out mid-recipe, mayonnaise swaps range from Greek yogurt to silken tofu depending on the application.

Start With the Basics

If you're new to cooking with mayonnaise, use it cold first. Spread it, fold it into a salad, or whisk it into a dressing - those three applications cover 90% of everyday use.

Once you're comfortable with how it behaves, try the pan-sear technique on a chicken breast: brush a thin coat on, then cook as normal. The browning is noticeably better.

From there, building toward crab cakes with rémoulade or homemade tartar sauce is a short step.

Frequently Asked Questions

What is mayonnaise made of?

The core ingredients are egg yolk, a neutral oil, and an acid - either vinegar or lemon juice. The yolk acts as the emulsifier, holding oil and water together in a stable suspension. Commercial versions often add stabilizers like xanthan gum and use pasteurized eggs.

Is mayonnaise the same as aioli?

No, though the terms are used interchangeably in casual contexts. Traditional aioli is a Provençal emulsion of garlic and olive oil - no egg yolk required. What most restaurants serve as "aioli" is flavored mayo.

Does mayonnaise taste like eggs?

Only faintly. The egg note is quiet and rounds out the flavor rather than dominating. Homemade mayo made with fresh yolks tends to read eggier than commercial versions, which are blander overall.

How long does mayonnaise last in the fridge?

Opened commercial mayo keeps 1-2 months refrigerated when stored properly. Homemade mayo should be used within 3-5 days due to raw egg yolks and no added preservatives.

Can you use mayonnaise instead of butter for grilled cheese?

Yes - it's a well-known swap. Mayo's higher smoke point and emulsified fat spread more evenly than butter, producing a uniformly golden crust. Use the same thin layer you would with softened butter.

What Is Lillet Blanc? [Taste, Uses & More]

March 31, 2026

You spot it on the shelf next to the vermouths-a pale-gold bottle labeled Lillet Blanc, origin Bordeaux, with an elegant understated label that gives almost nothing away.

What Is Lillet Blanc

It's not wine exactly, not spirits, not quite a mixer in the conventional sense, yet bartenders and home cooks who know it reach for it constantly.

This aromatized aperitif sits in a category all its own, built on citrus botanicals and a subtle bitter backbone that makes it one of the more useful bottles you can own.

QUICK SUMMARY

Lillet Blanc is a Bordeaux aromatized wine - pale-gold, lightly fortified, and flavored with citrus peels and botanicals. It drinks bright and gently sweet with a soft bitter finish. Sip it over ice, mix it into cocktails, or use it in the kitchen for sauces and fruit preparations.

🍊Flavor: Bright citrus peel, honeyed sweetness, soft bitter finish
🍾Category: Aromatized wine, Bordeaux aperitif, ~16% ABV
🍸Best Use: Vesper martinis, aperitif over ice, citrus sauces
❄️Storage: Refrigerate after opening; use within 4-6 weeks
🔄Closest Swap: Cocchi Americano or a dry white vermouth in a pinch

What Is Lillet Blanc?

Lillet Blanc comes from the Bordeaux region of France, where the Lillet house has produced it since 1872.

It's classified as an aromatized wine - a base of Bordeaux white wines fortified with a small amount of fruit liqueurs and infused with a blend of citrus peels, herbs, and botanicals.

Historically, the product was sold as Kina Lillet and contained a more pronounced quinine note, which is why it appears by that name in James Bond's original Vesper martini recipe.

The formula was reformulated in 1986 into the lighter, less bitter version sold today.

Lillet Blanc sits in a category alongside products like Cocchi Americano and sweet white vermouth, though it has its own distinct character. A few distinctions worth knowing:

  • 🍷 Base - Made from Bordeaux Sauvignon Blanc and Sémillon wines, not a neutral wine base
  • 🍊 Botanicals - Citrus peels (sweet orange, bitter orange) and quinine bark are the primary flavor drivers
  • 🏷️ Also labeled as - Simply "Lillet" on older bottles; "Kina Lillet" is the discontinued historic version
  • 🔢 ABV - Typically 17%, landing between table wine and fortified wine

What Does Lillet Blanc Taste Like?

lillet blanc - What Is Lillet Blanc

Lillet Blanc leads with citrus - specifically sweet orange and a hint of bergamot - followed by a honeyed mid-palate that never tips into cloying territory. The finish carries a soft bitter note from quinine, though it's far gentler than its historic Kina predecessor.

Sensory SnapshotModerate Intensity
👅 Flavor
sweet orangebergamothoneysoft quinine
✋ Texture
light-bodiedsilky
👃 Aroma
orange blossomhoneyed citrus

Against a sweet white vermouth, Lillet Blanc reads cleaner - less herbal weight, more direct citrus brightness. Chilled over ice, those citrus and floral notes sharpen noticeably.

In a warm reduction, the sweetness concentrates while the quinine edge softens into the background.

Golden Rule
Serve Lillet Blanc well chilled - at room temperature, the sweetness flattens and the citrus aromatics lose their lift.

How to Use Lillet Blanc

Cocktails are where Lillet Blanc earns its reputation. The Vesper martini - gin, vodka, and Lillet Blanc - is the classic entry point, though the bottle works in any cocktail that calls for a lightly bitter, citrus-forward modifier. It pairs naturally with gin, vodka, and sparkling wine for spritzes.

If recipes call for white vermouth and you're considering swapping out lillet blanc, note that the substitution changes the drink's bitterness profile and sweetness level in ways worth planning for.

In the kitchen, Lillet Blanc is more capable than most people expect. Its citrus-botanical profile gives it a specific usefulness:

How Lillet Blanc Is Used
MethodBest ForTip
🍸 CocktailVesper martini, spritzes, aperitif over iceAlways chill the bottle; serve with a citrus twist
🐟 DeglazingPan sauces for fish or chickenUse over moderate heat; don't let it reduce to syrup
🍑 MaceratingPoached pears, apricots, stone fruitAdd a strip of orange peel to reinforce the botanicals
🍋 GlazingRoasted salmon, pork tenderloinBrush on in the last 5-8 minutes only
🥗 VinaigretteSalads with goat cheese or fennelWhisk with olive oil, Dijon, and lemon juice

French and modern European cooking are its natural homes, especially preparations that want brightness without adding straight acid. Avoid it in long, heavily reduced braises - concentrated alcohol bitterness doesn't flatter deep, meaty sauces.

Try It In
🌰Mont Blanc Chestnut DessertLillet Blanc's apricot-honey notes pair well with chestnut's earthiness→

How to Buy and Store Lillet Blanc

Look for a clear, pale-gold color in the bottle - any cloudiness or visible sediment is a red flag. The label should read "Blanc" specifically; Lillet also produces Rosé and Rouge expressions, each with a different flavor profile.

Watch Out
An opened bottle left at room temperature loses its citrus aromatics within days. The flavor doesn't turn dangerous - it just goes flat and stale.

Storing lillet blanc correctly matters more than most people realize - proper handling of an opened bottle is the difference between a bright, lively pour and something dull. For full guidance, storing lillet blanc correctly covers shelf life across opened and unopened conditions in detail.

  • Unopened - Store upright in a cool, dark pantry; lasts many years
  • Opened - Reseal tightly and refrigerate immediately after each use
  • Use window - Best aromatics within 4-6 weeks of opening

Where to Start with Lillet Blanc

New to the bottle? Pour it over a large ice cube with an orange twist first - no mixing required, no recipe. That single serve tells you exactly what you're working with before you commit it to a cocktail or sauce.

Once you know its citrus-bitter character, the Vesper martini is the logical next step. From there, a quick pan deglaze for salmon or a fruit maceration shows the kitchen side.

Best Pick
For first-time buyers: a standard 750ml bottle is enough to cover cocktail experiments and one or two kitchen uses. No need to hunt specialty sizes.

It won't replace vermouth entirely, and it won't work in every sauce. However, for dishes and drinks that want clean citrus-botanical brightness without heavy herbal weight, few bottles cover the ground as efficiently.

Frequently Asked Questions

Is Lillet Blanc a wine or a liqueur?

It's an aromatized wine, not a liqueur. The base is actual Bordeaux white wine - Sauvignon Blanc and Sémillon - fortified with fruit liqueurs and infused with citrus peels and botanicals. Its ABV (~17%) places it between table wine and spirits.

How sweet is Lillet Blanc compared to vermouth?

Lillet Blanc is sweeter than dry vermouth but less sweet than sweet (rosso) vermouth. It has a cleaner, more citrus-forward sweetness rather than the herbal-bitter complexity you get from most vermouths.

Can you substitute Lillet Blanc for vermouth?

Yes, in many cocktails - with adjustments. Lillet Blanc has less herbal bitterness and more citrus sweetness than dry vermouth, so the drink will come out slightly sweeter and less complex. Cocchi Americano is a closer match where the quinine note matters.

What cocktails use Lillet Blanc?

The Vesper martini is the most famous - gin, vodka, and Lillet Blanc shaken together. It also works in spritzes with tonic or sparkling wine, and as a vermouth stand-in in gin-based cocktails that want a citrus-bright modifier.

Is Kina Lillet the same as Lillet Blanc?

No - Kina Lillet was the original, discontinued formula with a sharper quinine bitterness. The current Lillet Blanc uses a reformulated recipe introduced in 1986 that is noticeably lighter and less bitter than the original.

« Previous Page
Next Page »

Primary Sidebar

ForkliftKitchen recipe developer

Welcome!

Recipe Developer · 12+ Yr Kitchen Veteran

I'm the recipe developer behind this site, focused on practical, well-tested dishes and smart ingredient swaps. Every recipe is written to be clear, reliable, and easy to make at home.

650+ Recipes
12+ Yrs Exp.
3x Tested
Our Story →

As Featured In

Allrecipes

TASTE OF HOME

Food52

HUFFPOST

Yahoo! Life

Our Editorial Standards

  • ✓ Every recipe tested at least 3 times before publishing
  • ✓ Substitutes verified by real kitchen trials, not guesswork
  • ✓ Reviewed for accuracy by our editorial team
  • ✓ Updated regularly with seasonal info and reader feedback

Most Popular

  • Creamy Lemon Shrimp Linguine
    Creamy Lemon Shrimp Linguine
  • Creamy Garlic Mushroom Chicken
    Creamy Garlic Mushroom Chicken
  • Sesame Ginger Chicken Noodle Bowls
    Sesame Ginger Chicken Noodle Bowls
  • Baked Lemon Herb Fish Fillets
    Baked Lemon Herb Fish Fillets
  • Veggie Loaded Fried Rice
    Veggie Loaded Fried Rice
  • Spicy Garlic Shrimp Stir Fry
    Spicy Garlic Shrimp Stir Fry

Join 8,000+ Home Cooks

Weekly Kitchen Tips

Easy recipes, smart substitutes, and real cooking shortcuts — every Thursday.

Subscribe Free →


Side Dishes

  • What to Serve With Asian Salmon? 15 Best Side Dishes
    What to Serve With Asian Salmon? 15 Best Side Dishes
  • Side Dishes for Strawberry Spinach Salad
    15 Best Side Dishes for Strawberry Spinach Salad
  • Sides for Grilled Cauliflower Steaks to Complete the Meal
    15 Sides for Grilled Cauliflower Steaks to Complete the Meal
  • 15 Sides To Serve With Calabacitas
    15 Best Sides for Calabacitas – Mexican-Inspired Favorites


Substitutes

  • 7 Best Substitutes for Hot Sauce in Marinades & Stir-Fries
    7 Best Substitutes for Hot Sauce in Marinades & Stir-Fries
  • 9 Best Substitutes for Butter in Baking and Cooking
  • 7 Best Substitutes for Tagliatelle for Italian Pasta Dishes
    7 Best Substitutes for Tagliatelle for Italian Pasta Dishes
  • 7 Best Substitutes for Udon Noodles in Asian Stir-Fries
    7 Best Substitutes for Udon Noodles in Asian Stir-Fries


Browse by Topic

  • Side Dishes320
  • Substitutes785
  • Dinner163
  • Air Fryer77
  • Taste Profiles484
  • Food Storage123


Reader Reviews

★★★★★

"Finally a food blog that tells you exactly why a substitute works instead of just listing options."

— Sarah M., via email

★★★★★

"The side dish recommendations are so specific — saved my dinner party twice this month."

— James R., Pinterest comment

★★★★★

"I trust this site more than most because they actually test everything. You can tell."

— Priya K., blog comment

Footer

↑ Back to Top

Forklift Kitchen

We do the heavy lifting so you can enjoy the cooking. Tested recipes, smart substitutes, and perfect pairings—built for real home cooks.

Content

  • Recipes
  • Substitutes
  • What to Serve With
  • Blog

Company

  • About Us
  • Contact
  • Subscribe

Legal

  • Privacy Policy
  • Terms of Service

As an Amazon Associate I earn from qualifying purchases.

© 2026 Forklift Kitchen.

Rate This Recipe

Your vote:


A rating is required
A name is required
An email is required