• Skip to primary navigation
  • Skip to main content
  • Skip to primary sidebar
  • Recipe Index
    • Air Fryer
  • Side Dishes
  • Substitutes
  • About
  • Contact
  • Subscribe

ForkLiftKitchen

menu icon
go to homepage
  • Recipe Index
    • Air Fryer
  • Side Dishes
  • Substitutes
  • About
  • Contact
  • Subscribe
subscribe
search icon
Homepage link
  • Recipe Index
    • Air Fryer
  • Side Dishes
  • Substitutes
  • About
  • Contact
  • Subscribe
×

Blog

Air Fryer Beef Wellington Bites

April 1, 2026

When game day or date night hits and you want something that looks like you hired a caterer, these bite-sized beauties deliver. Crispy puff pastry wrapped around tender beef with savory mushroom duxelles takes 30 minutes from counter to table.

Air Fryer Beef Wellington Bites served on a plate

The air fryer crisps the pastry while keeping the beef medium-rare. No oven preheating, no babysitting, no flipping halfway through.

Perfect for entertaining when you need appetizers that actually impress without spending three hours in the kitchen.

QUICK SUMMARY

Air Fryer Beef Wellington Bites turn the classic French dish into shareable appetizers. Sear the beef quickly to lock in juices, wrap with prosciutto and mushroom duxelles in chilled puff pastry, then air fry at 400°F for 10-12 minutes. The high heat crisps the pastry while the beef stays medium-rare at 130-135°F.

⏱️Time Reality: 20 minutes prep, 10-12 minutes cooking-no marinating or multi-step prep required
🔥Critical First Move: Sear beef 1-2 minutes per side at medium-high heat for color without cooking through
⚠️Common Mistake: Wet mushrooms make soggy pastry-pat mushrooms dry after chopping and cook until moisture evaporates

Table of Contents

Toggle
  • Why This Recipe Works
  • What You'll Need
    • Ingredient Details
  • Ingredient Swaps
  • What to Serve With It
  • Store and Reheat
  • Frequently Asked Questions
  • Air Fryer Beef Wellington Bites
    • Method 
    • Tried this recipe?

Why This Recipe Works

The air fryer circulates hot air around each bite, creating golden puff pastry without the oil splatter of pan-frying. Prosciutto acts as a moisture barrier between the beef and pastry so the exterior stays crisp while the center cooks to medium-rare. For more beef ideas when you're meal planning, try this simple beef recipe that works with similar quick-cooking methods.

Quick Reference
⏱️
Prep Time
20 min
🔥
Cook Time
10-12 min
⏰
Total Time
30-32 min
🍽️
Servings
8-12 pieces
📊
Difficulty
Medium
🏷️
Category
Appetizer
💡
Quick Tip
Sear beef well; don't overcrowd air fryer
🎯
Best For
Entertaining | Weeknight | Game day

Five things that make this work:

  • Quick searing locks in juices - 1-2 minutes per side at medium-high heat creates a crust without cooking the beef through, so it stays tender during air frying
  • Mushroom duxelles adds moisture and umami - finely chopped mushrooms cooked until dry create a savory paste that seasons the beef and prevents dryness
  • Prosciutto keeps pastry crisp - thin slices act as a barrier between wet beef and puff pastry, preventing sogginess while adding salty richness
  • Air fryer spacing ensures even browning - leaving 1-2 inches between bites lets hot air circulate fully, creating golden crust on all sides
  • Resting redistributes juices - 5 minutes off heat lets the beef relax and reabsorb moisture so it doesn't spill out when you bite in
Quick Tip
Use a kitchen thermometer to check beef doneness at 130-135°F internal temp for medium-rare-visual cues alone can mislead when meat is wrapped in pastry.

What You'll Need

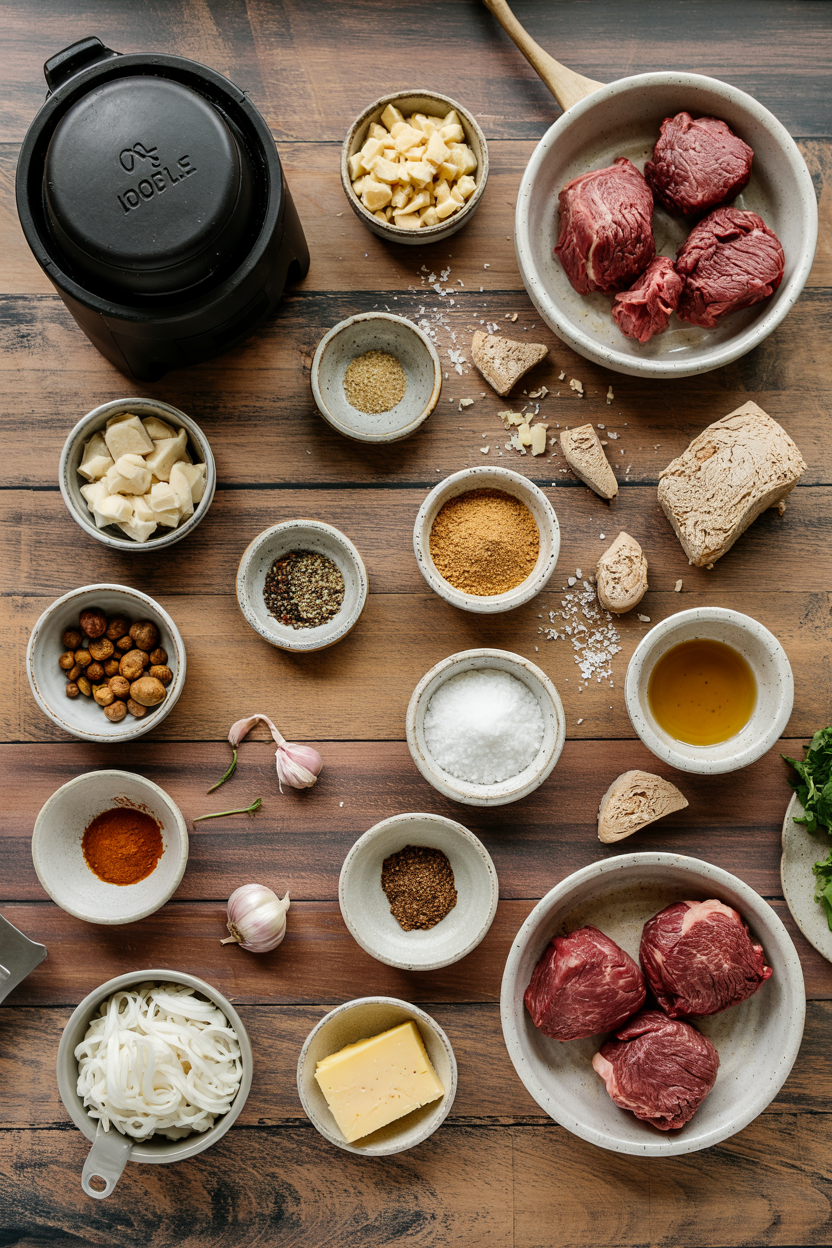
Ingredients for Air Fryer Beef Wellington Bites

Shopping for this takes one trip with mostly pantry staples and fresh beef from the butcher counter. For another air fryer approach to tender meat, check out this easy croquettes side that uses similar wrapping and crisping techniques.

🥩
Beef
  • 8 oz beef tenderloin, cut into 1-inch cubes
  • 4 thin prosciutto slices
🍄
Mushroom Duxelles
  • 8 oz mushrooms, finely chopped
  • 2 cloves garlic, minced
  • 1 tablespoon butter
  • 1 teaspoon fresh thyme leaves
🥐
Pastry & Coating
  • 1 sheet frozen puff pastry, thawed
  • 2 tablespoon Dijon mustard
  • 1 egg, beaten (for wash)
🧂
Seasonings
  • Salt and black pepper to taste

Ingredient Details

  • Beef tenderloin
    Cut into uniform 1-inch cubes so each bite cooks at the same rate-uneven sizes mean some pieces overcook while others stay raw
  • Mushrooms
    Use button or cremini mushrooms-shiitake adds earthiness but releases more moisture, requiring extra cooking time to dry out
  • Puff pastry
    Thaw frozen sheets in the fridge overnight, not on the counter-warm pastry tears during wrapping and shrinks in the air fryer
  • Prosciutto
    Paper-thin slices work best-thick-cut prosciutto adds chewiness and prevents even browning of the pastry
  • Dijon mustard
    Spread a thin layer directly on the beef before wrapping-too much makes the duxelles slide off during assembly
  • Egg wash
    Beat egg with 1 teaspoon water for easier brushing-straight egg is thick and clumps on the pastry surface
  • Fresh thyme
    Strip leaves from stems before adding to mushrooms-woody stems don't break down during cooking and create hard bits

Ingredient Swaps

Substitutions let you adjust for dietary needs or what's in the fridge. Most swaps work without changing cooking time or method, though texture and flavor shift slightly.

Four swaps that work:

  • Puff pastry → gluten-free puff pastry - brands like Schar work but produce slightly denser, less flaky layers-add 1-2 minutes to air fryer time for full crispness
  • Butter → olive oil or vegan butter - reduces dairy content with milder flavor-use same quantity and cook mushrooms until all moisture evaporates
  • Beef tenderloin → sirloin or ribeye cubes - more marbling means richer flavor but longer cook time-check at 12 minutes and add time in 2-minute increments to avoid overcooking
  • Prosciutto → thin turkey or ham slices - less salty and leaner-brush pastry with extra egg wash to compensate for missing fat that helps browning
Instead OfUseRatio
Dijon mustardWhole grain or horseradish1:1
Fresh thymeDried thyme1 teaspoon fresh = ⅓ teaspoon dried
Egg washPlant milk + maple syrup2 tablespoon milk + 1 teaspoon syrup
Air fryerConvection oven at 400°FAdd 3-5 min cook time

Instructions

The entire process takes 30 minutes with most of that spent on assembly, not active cooking. Use a kitchen thermometer to check doneness instead of guessing-beef wrapped in pastry hides visual cues like color changes.

  1. Sear the beef. Heat a cast iron skillet over medium-high heat with 1 tablespoon oil. Pat beef cubes dry with paper towels, season with salt and pepper, then sear 1-2 minutes per side until browned but still raw inside. Transfer to a plate and cool completely.

  2. Make the mushroom duxelles. Add butter to the same skillet over medium heat. Add minced garlic and cook 30 seconds until fragrant. Add finely chopped mushrooms, thyme, salt, and pepper. Cook 8-10 minutes, stirring occasionally, until all moisture evaporates and mushrooms form a thick paste. Cool completely.

  3. Assemble the bites. Roll out thawed puff pastry and cut into 3-inch squares. Brush each beef cube with Dijon mustard, wrap with a half-slice of prosciutto, then spread 1 tablespoon mushroom duxelles on each pastry square. Place beef in the center and fold pastry corners over the top, pinching seams to seal. Brush all sides with beaten egg wash.

  4. Air fry the bites. Preheat air fryer to 400°F for 3 minutes. Place bites seam-side down in the basket with 1-2 inches of space between each piece. Air fry 10-12 minutes until pastry is golden brown and puffed. Check internal beef temp at 10 minutes-look for 130-135°F for medium-rare.

  5. Rest and serve. Transfer bites to a wire rack and rest 5 minutes before serving. The pastry stays crisp while beef juices redistribute. Serve immediately with dipping sauce on the side.

Golden Rule
Space bites at least 1 inch apart in the air fryer basket-crowding traps steam and creates soggy bottoms instead of crisp golden pastry.

What to Serve With It

These bites need sides that balance richness without competing for attention. When planning a complete beef-forward meal, explore ideas for rich beef dish planning that work across cooking methods.

Side DishPrepWhy It WorksHow to Serve
Simple green saladEasyCuts through rich pastry with bright acidityToss mixed greens with lemon vinaigrette, serve chilled
Roasted asparagusEasyAdds earthy flavor and crisp texture contrastRoast at 425°F for 12-15 min with olive oil and salt
Garlic mashed potatoesMediumCreamy comfort food that soaks up extra sauceServe warm with butter melting on top
Steamed green beansEasyLight, crunchy veggie adds color and freshnessSteam 5-7 min until tender-crisp, season with salt
Horseradish cream sauceEasyClassic pairing adds tangy kick that cuts richnessMix sour cream with prepared horseradish, serve cold

Three ways to serve it:

  • Appetizer spread - arrange bites on a platter with horseradish cream sauce, Dijon mustard, and red wine reduction in small bowls for dipping
  • Small plate dinner - serve 3-4 bites per person with roasted asparagus and a crisp green salad on the side
  • Game day snack - pair with a quick french fries dish and creamy dipping sauces for a crowd-friendly setup
Best Pick
Horseradish cream sauce balances the buttery pastry and rich beef-mix 3 parts sour cream with 1 part prepared horseradish and a squeeze of lemon.

Store and Reheat

Beef Wellington Bites hold up better than full-sized Wellington when stored, but the pastry loses crispness after a day. Reheat in the air fryer to restore texture-microwaving turns pastry soggy and ruins the dish.

MethodTimeBest For
🍳 Air Fryer4-5 min at 350°FRestores crispy pastry without drying beef
🔥 Oven10 min at 350°FGentle reheating for multiple servings at once
📦 Microwave30-45 sec low powerQuick heat but pastry softens-only use if desperate

For best results when storing:

  • Fridge storage: Cool bites completely before storing in an airtight container with parchment between layers-stacking warm bites creates condensation that makes pastry soggy
  • Freeze partially cooked: Assemble bites fully but air fry only 8 minutes, then freeze on a baking sheet before transferring to freezer bags-cook from frozen at 375°F for 12-15 minutes when ready to serve
  • Reheat from cold: Let refrigerated bites sit at room temp 10 minutes before reheating so the center warms evenly without overcooking edges
  • Skip the microwave: Even 30 seconds softens puff pastry and turns it gummy-always use air fryer or oven for reheating
  • Serve within 3-4 days: Beef quality declines after day 4 in the fridge-pastry stays acceptable but beef develops off flavors and dries out at the edges

Frequently Asked Questions

Can I make Air Fryer Beef Wellington Bites ahead and reheat?

Assemble bites completely, wrap tightly, and refrigerate up to 24 hours before air frying. Air fry straight from cold at 400°F for 12-14 minutes, checking internal temp at 12 minutes for 130-135°F doneness.

How do I know when the beef inside is perfectly cooked?

Insert an instant-read thermometer through the pastry into the center of the beef-medium-rare reads 130-135°F, medium reads 140-145°F. Visual cues don't work when meat is wrapped, so a thermometer is essential.

Can frozen puff pastry be used straight from freezer?

No-frozen pastry tears when you try to wrap it and shrinks dramatically during cooking. Thaw in the fridge overnight or on the counter for 40 minutes until pliable but still cold to the touch.

How to prevent soggy puff pastry when cooking Beef Wellington Bites?

Pat mushrooms dry after chopping and cook until all moisture evaporates-wet duxelles soaks through pastry. Wrap beef with prosciutto to create a moisture barrier, and space bites 1-2 inches apart in the air fryer so steam escapes instead of collecting.

What side dishes pair best with Air Fryer Beef Wellington Bites?

Serve with a crisp green salad for freshness, roasted asparagus for earthy contrast, or garlic mashed potatoes for comfort. A creamy sauce side like horseradish cream cuts through the rich pastry and beef.

Air Fryer Beef Wellington Bites served on a plate

Air Fryer Beef Wellington Bites

No ratings yet
Air Fryer Beef Wellington Bites turn the classic French dish into crispy, tender appetizers by searing beef cubes and wrapping them with prosciutto, mushroom duxelles, and puff pastry. The air fryer crisps the pastry perfectly while keeping the beef medium-rare, making these ideal for entertaining without long prep or cook times.
Print Recipe Pin Recipe
Prep Time 20 minutes mins
Cook Time 12 minutes mins
Total Time 32 minutes mins
Servings: 10 pieces
Course: Appetizer
Cuisine: French
Ingredients Equipment Method Notes

Ingredients
  

  • 8 oz beef tenderloin cut into 1-inch cubes
  • 4 slices prosciutto thin slices
  • 8 oz mushrooms finely chopped button or cremini
  • 2 cloves garlic minced
  • 1 tablespoon butter
  • 1 teaspoon fresh thyme leaves leaves stripped from stems
  • 1 sheet frozen puff pastry thawed
  • 2 tablespoon Dijon mustard for brushing beef
  • 1 egg egg beaten with 1 teaspoon water for egg wash
  • salt to taste
  • black pepper to taste

Equipment

  • Air fryer For crisping the pastries
  • Cast iron skillet To sear beef and cook mushroom duxelles
  • Wire rack To rest cooked bites before serving

Method
 

  1. Heat a cast iron skillet over medium-high heat with 1 tablespoon oil. Pat beef cubes dry with paper towels, season with salt and pepper, then sear 1-2 minutes per side until browned but still raw inside. Transfer to a plate and cool completely.
    8 oz beef tenderloin, salt, black pepper
  2. Add butter to the same skillet over medium heat. Add minced garlic and cook 30 seconds until fragrant. Add finely chopped mushrooms, thyme, salt, and pepper. Cook 8-10 minutes, stirring occasionally, until all moisture evaporates and mushrooms form a thick paste. Cool completely.
    8 oz mushrooms, 2 cloves garlic, 1 tbsp butter, 1 tsp fresh thyme leaves, salt, black pepper
  3. Roll out thawed puff pastry and cut into 3-inch squares. Brush each beef cube with Dijon mustard, wrap with a half-slice of prosciutto, then spread 1 tablespoon mushroom duxelles on each pastry square. Place beef in the center and fold pastry corners over the top, pinching seams to seal. Brush all sides with beaten egg wash.
    8 oz beef tenderloin, 4 slices prosciutto, 8 oz mushrooms, 1 sheet frozen puff pastry, 2 tbsp Dijon mustard, 1 egg egg
  4. Preheat air fryer to 400°F for 3 minutes. Place bites seam-side down in the basket with 1-2 inches of space between each piece. Air fry 10-12 minutes until pastry is golden brown and puffed. Check internal beef temperature at 10 minutes aiming for 130-135°F for medium-rare.
  5. Transfer bites to a wire rack and rest for 5 minutes before serving. This keeps the pastry crisp while beef juices redistribute. Serve immediately with dipping sauce on the side.

Notes

  • Sear beef quickly to lock in juices without cooking through.
  • Pat mushrooms dry and cook until moisture evaporates to prevent soggy pastry.
  • Space bites 1-2 inches apart in air fryer basket for even crisping.

Tried this recipe?

Let us know how it was!

What Is Onion Soup Mix? Taste, Uses & Everyday Info

April 1, 2026

Crack open a packet of onion soup mix and the smell hits you immediately - sharp dried onion, a deep roasted-savory undertone, and something almost bouillon-like that signals salt and umami before you've added a drop of liquid.

What Is Onion Soup Mix

That concentrated aroma is the whole point.

Unlike swapping out bouillon cube for something fresher, onion soup mix brings a specific character - caramelized onion sweetness layered over MSG-driven depth - that's hard to replicate from scratch in under five minutes.

QUICK SUMMARY

Onion soup mix is a shelf-stable dry seasoning blend combining dehydrated onion, salt, and umami-boosting agents. It tastes like concentrated French onion broth - salty, savory, and lightly sweet. Use it for dips, braises, meatloaf, roasted potatoes, and quick soups.

🧅Flavor: Salty, umami-rich, sweet caramelized onion with mild herbs
🥣Best Uses: Dips, pot roast, meatloaf, rice, roasted potatoes
📦Shelf Life: Unopened 12-24 months; opened airtight 6-12 months
⚠️Watch For: Very high sodium; some blends contain MSG or gluten
🛒Buy It: Sealed packets or jars; check for clumping and readable ingredients

What Is Onion Soup Mix?

Onion soup mix is an American convenience product that emerged in the mid-20th century as dry seasoning blend designed to make instant onion soup with nothing more than hot water.

The core formula hasn't changed much: dehydrated onion flakes, salt, a umami source (MSG or hydrolyzed vegetable protein), and background dried herbs like parsley and thyme.

You'll also see it labeled as dry onion soup mix, packet onion soup mix, onion bouillon mix, or onion soup powder - they all refer to essentially the same product.

Most retail versions come in single-serve foil packets (roughly one ounce each) or resealable jars for bulk cooking.

For context on what the mix replaces in savory depth, it's worth understanding alternatives to onion powder - plain onion powder is just one component here, not the full picture.

  • 🧅 Dehydrated onion flakes - the bulk of the mix; provide texture and sweet-savory onion flavor when rehydrated
  • 🧂 Salt - the dominant seasoning agent, contributing the majority of the sodium load
  • 🔬 MSG or hydrolyzed vegetable protein - the umami driver; some brands use both, some swap in yeast extract
  • 🌿 Dried herbs - parsley and thyme most commonly; amounts are small but add aromatic background

What Does Onion Soup Mix Taste Like?

onion soup mix - What Is Onion Soup Mix

The closest reference point is a concentrated French onion broth - think of the deeply savory, slightly sweet liquid at the bottom of a bowl of freezing french onion soup after it's been sitting under melted cheese.

Now compress that into a powder, amp up the salt, and add an instant-bouillon sharpness.

Sensory SnapshotStrong Intensity
👅 Flavor
saltyumamicaramelized onionmildly herbal
✋ Texture
powdery-granular dryslightly gritty rehydrated
👃 Aroma
sharp dried onionroasted savorybouillon

Heat softens the mix's sharpness and pulls the sweet caramelized onion notes forward.

Used dry - rubbed into meat or stirred into a dip - the salt and MSG hit first, with the onion sweetness coming through as a secondary note.

Watch Out
Tasting the dry powder straight from the packet overstates the saltiness. In a finished dish, that sodium disperses across the full recipe - the balance reads differently once it's mixed in.

How to Use Onion Soup Mix

Onion soup mix is most famous for one thing: sour cream onion dip. Fold one packet into 16 ounces of sour cream or Greek yogurt, chill for 30 minutes, and the mix softens into a smooth, deeply savory dip.

Our guide to about greek yogurt sour cream dip shows exactly how that version comes together with a lighter base.

It also belongs in meat applications.

Stirring the mix into ground beef for meatloaf adds both seasoning and a savory backbone - if you want a complete approach, the method for making veggie packed turkey meatloaf at home works the same way with the mix subbed in.

For chicken in cooking applications, the mix makes a fast dry rub or breading seasoning for baked pieces.

How Onion Soup Mix Is Used
MethodBest ForTip
🥗 Folded InSour cream or yogurt dip, spreadsChill at least 30 minutes before serving
🍖 Mixed Into MeatMeatloaf, burger patties, meatballsUse half a packet per pound to avoid oversalting
🍲 Braised/Slow-CookedPot roast, stews, casserolesAdd to braising liquid early; sodium concentrates as it reduces
🥔 SprinkledRoasted potatoes, vegetable hashes, riceToss with oil first so the powder coats evenly

Beyond dips and meat, the mix seasons roasted potatoes exceptionally well - toss cubed potatoes in olive oil, add half a packet, and roast at 425°F. It also works stirred into pilaf liquid or sprinkled over breadcrumb toppings before baking.

Try It In
🥜Homemade Trail MixUse a pinch of mix for a savory-salty snack variation→🍯Honey Roasted Chickpea Snack MixSwap in onion mix seasoning for a savory-sweet twist→🧀Cheddar Ranch Snack MixOnion mix layers well with ranch seasoning in snack blends→

How to Buy and Store Onion Soup Mix

At the store, check that packets or jars are fully sealed with no visible clumping - moisture is the only real enemy at this stage.

Read the label for sodium content and umami source: some brands use MSG, others use hydrolyzed vegetable protein, and a few use both.

If gluten is a concern, check the hydrolyzed protein source, since wheat-based HVP shows up in some formulas.

Best Pick
Packets listing dehydrated onion, salt, and named spices in the first few ingredients tend to have cleaner onion flavor than blends leading with starch fillers or vague "natural flavors."

Once opened, transfer to an airtight container away from heat and steam - a drawer near the stove will shorten its life fast.

Unopened packets hold flavor for 12-24 months; opened and properly stored, expect 6-12 months before the onion aroma fades noticeably.

For extended storage questions, the details on freezing onion soup mix cover shelf life edge cases worth knowing.

Start Here for Onion Soup Mix

If you have one packet and no plan, start with the dip.

It shows you exactly how the flavor behaves - salt upfront, onion sweetness in the background - before you commit it to a slow-cooked dish where adjustments are harder.

Golden Rule
Treat onion soup mix as a seasoning blend, not a sodium afterthought. Account for its salt content before adding any other salt to the recipe.

For something more complex, pot roast is the clearest demonstration of what it does in heat: the dehydrated onion rehydrates into the braising liquid and the MSG and hydrolyzed proteins deepen the beef flavor in a way plain onion can't.

If you want to move away from it entirely, swapping out onion soup mix with fresh aromatics and a bouillon option is straightforward once you understand what the packet is contributing.

Frequently Asked Questions

What is onion soup mix made of?

The base is dehydrated onion flakes, salt, and an umami agent - typically MSG, hydrolyzed vegetable protein, or both. Most blends add small amounts of dried parsley, thyme, and sometimes onion powder to round out the flavor.

Does onion soup mix contain MSG?

Many brands do, yes - it's what drives the pronounced umami note. Others substitute hydrolyzed vegetable protein or yeast extract instead. Check the ingredient label if you're avoiding MSG specifically.

Is onion soup mix the same as onion powder?

No. Onion powder is a single-ingredient spice. Onion soup mix is a multi-component blend that includes onion powder or flakes alongside salt, umami agents, and dried herbs - the flavor profile is much more complex and far saltier.

Can you use onion soup mix to make dip?

Yes - it's one of its most reliable uses. Stir one packet into 16 ounces of sour cream or Greek yogurt and refrigerate for at least 30 minutes before serving so the dehydrated onion softens fully.

What can I substitute for onion soup mix?

A workable swap is onion powder, a crumbled beef bouillon cube, salt, and a pinch of thyme - combined to taste. The result won't be identical since you're approximating the umami layer, but it functions in most braises and dips.

How Long Does Provolone Cheese Last? [Storage Guide]

April 1, 2026

Wrapping provolone directly in plastic - cut face against the cling film - is the single most common storage mistake, and it shortens the cheese's life faster than most people expect. Moisture trapped between the plastic and the cut surface turns into a sweating environment that encourages mold and stickiness within days.

Can You Freeze Provolone Cheese

A single layer of wax or parchment paper against the cut face changes everything.

Understanding the taste of provolone cheese helps explain why proper storage matters - the semi-firm texture and mild tang of provolone dolce or the sharper bite of aged provolone piccante are easily compromised by poor wrapping.
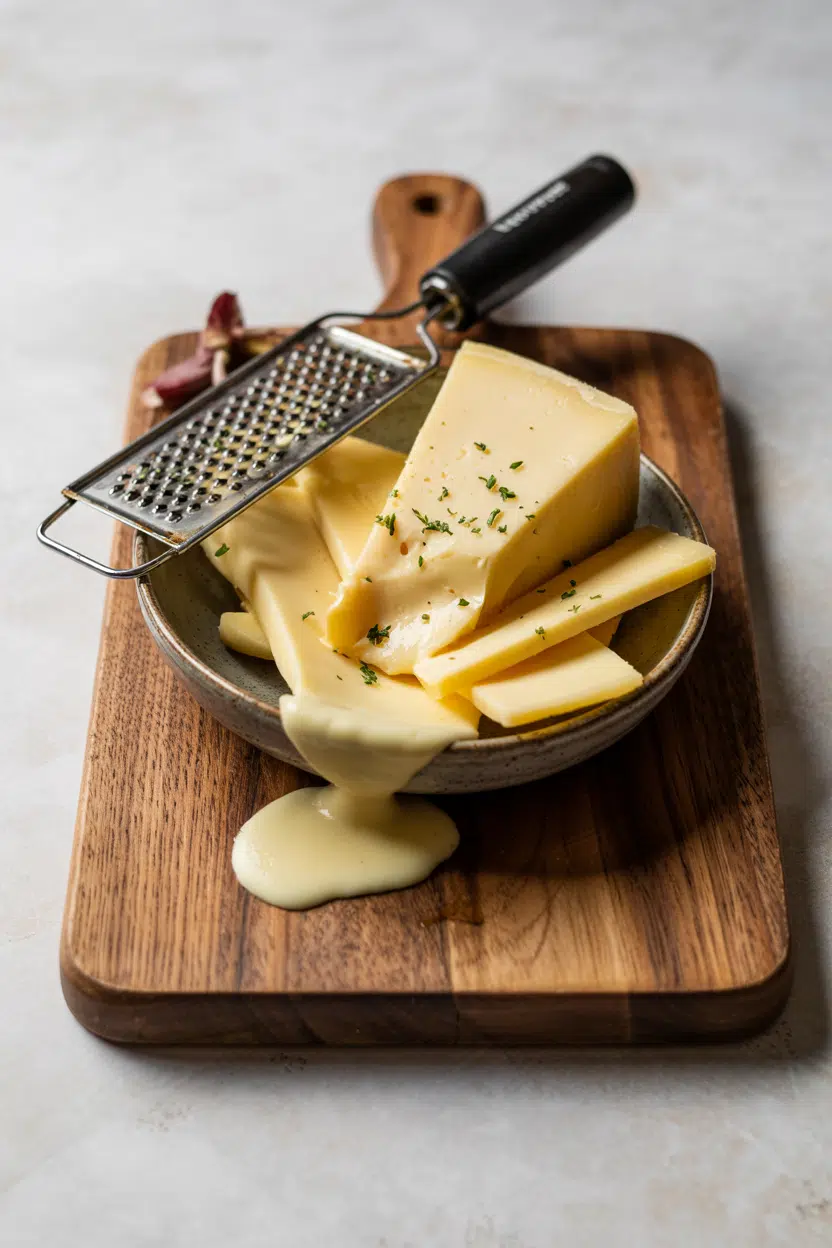
QUICK SUMMARY

Opened provolone lasts 2-3 weeks in the fridge when wrapped properly in parchment then plastic. Pre-sliced deli provolone shortens to 5-7 days. Freezing works but changes texture - plan to cook rather than slice raw after thawing.
🧊Fridge (opened): 2-3 weeks wrapped in parchment, then plastic or a resealable bag
❄️Freezer: 2-4 months depending on cut; shredded or sliced lasts longest
📌Key Rule: Always put parchment or wax paper against the cut face before any plastic wrapping

How Long Does Provolone Cheese Last?

Provolone's shelf life shifts considerably depending on how it's been processed and whether the package has been opened. Vacuum-sealed commercial blocks hold well toward the longer end because oxygen - the main driver of mold and oxidation - is excluded entirely.

Once opened, the cut surface is exposed and the clock accelerates. Pre-sliced deli provolone is particularly short-lived because each slice has more exposed surface area and picks up refrigerator odors faster than a solid block.

Provolone Cheese Shelf Life
MethodStateDurationNotes
🧊 FridgeUnopened (vacuum-sealed)3-6 weeksKeep at 34-38°F (1-3°C); don't open until needed
🧊 FridgeOpened block2-3 weeksRewrap in parchment then plastic or use airtight container
🧊 FridgeSliced (deli)5-7 daysLayer slices with parchment; keep away from strong-smelling foods
❄️ FreezerWhole block2-3 monthsTexture becomes crumbly; best used for melting or baking after thaw
❄️ FreezerShredded or sliced3-4 monthsIndividually frozen slices thaw more evenly than a whole block

The cheese drawer is the right spot - it runs slightly warmer and more humid than the main fridge shelf, which suits semi-hard cheeses like provolone.

Just as mozzarella in dairy recipes needs controlled moisture to stay fresh, provolone needs a stable, cold environment to hold its structure.

How to Store Provolone Cheese

The wrapping method matters more than the container for provolone. Start with parchment or wax paper pressed directly against any cut surface, then add a layer of plastic wrap or a resealable bag over the top.

Golden Rule
Parchment first, plastic second - always. Plastic against the cut face traps condensation, speeds up surface mold, and causes the slice to stick and tear.

Fridge: Wrap the cut face in wax or parchment paper, follow with plastic wrap or a resealable bag, and store in the cheese drawer at 34-38°F. Smoked provolone needs an airtight container or bag to contain its smoke aroma - stored loosely, it will transfer that smell to nearby cheeses and absorb odors from the fridge in return. Sliced deli provolone should be layered with parchment between slices and kept away from onions, fish, or any open-cut vegetables.

A few additional storage habits that extend provolone's life:

  • 💡 Keep it cold consistently - temperature swings cause condensation on the surface and speed mold growth.
  • Separate varieties - smoked and dolce provolone stored together will exchange aromas within a few days.
  • Use an airtight container for opened slices - a loose bag lets the edges dry out and harden faster than needed.
  • 💡 Don't store near strong foods - aged provolone piccante picks up refrigerator odors noticeably, especially fish or onion.

Can You Freeze Provolone Cheese?

Freezing provolone is worth doing - with the right expectations.

The semi-firm texture will change after thawing; expect a slightly crumbly or mealy interior on a block that was once springy and smooth. Melting ability is largely preserved, which makes frozen provolone perfectly suited for gratins, sandwiches, and baked pasta.

Watch Out
Don't freeze a large whole round expecting to serve it as-is after thawing. Portion first, freeze in meal-sized amounts, and plan to cook rather than slice raw.
Shredded or individually separated slices freeze and thaw more evenly than a solid block.

Labeling each pack with the date and intended use - for example, "melting only" - prevents the temptation to serve thawed provolone on a charcuterie board, where the texture change will be obvious.

  1. Portion - Divide the cheese into meal-sized pieces; shred if possible, or cut into slices or small blocks.
  2. Wrap the cut face - Press parchment paper firmly against any cut surface before adding the outer wrap.
  3. Double-wrap - Wrap tightly in plastic wrap, then add a layer of foil or place in a vacuum-seal bag to prevent freezer burn.
  4. Label - Mark the package with the freeze date and planned use (e.g., melting, baking).
  5. Thaw in the fridge - Thaw overnight still wrapped to minimize condensation; use within 3-5 days of thawing.

Much like freezing vacuum sealed salmon, double-wrapping before freezing provolone makes a measurable difference in preventing freezer burn on the outer surface.

Signs Provolone Cheese Has Gone Bad

Most provolone spoilage is easy to identify if you know what's normal versus what's a problem. White crystalline specks on aged provolone are tyrosine crystals - a natural byproduct of aging - not mold. Don't discard a cheese for that.

Signs It's Gone Bad
👀
VisualBlue-green fuzzy mold on cut surfaces · Darkened, oil-streaked surface · Dried, cracked edges on slices
👃
SmellSharp ammonia or sour odor · Rancid or metallic smell from the surface
✋
TextureSticky or slimy film on the cut face · Excessive crumbling on a cheese that should be semi-firm

Small surface mold on a firm block isn't automatically a discard situation. Cut a 1-inch margin around the visible mold and rewrap immediately.

However, if mold appears across most of the surface, accompanies a slimy texture, or if an ammonia smell is present, discard the entire piece without tasting.

Practical Tips for Getting the Most Out of Provolone

Three habits consistently extend provolone's usable life and protect its character - whether you're buying provolone dolce for sandwiches or aged piccante for provolone cheese in dairy recipes.

  • Buy blocks over pre-sliced - A solid block offers more storage flexibility and a longer fridge window than deli slices.
  • Portion before freezing - Freeze only what you'll use in one batch; re-freezing after partial thaw is not recommended.
  • Rewrap after every use - Fresh parchment each time prevents moisture buildup on the cut face and slows mold significantly.
  • Keep the vacuum seal intact - An unopened commercial block at 34-38°F is the single longest-lasting format provolone comes in.

Using swiss cheese for creaminess in baked dishes follows similar storage logic - semi-hard cow's milk cheeses benefit from the same parchment-first wrapping method when cut blocks need to last across multiple uses.

Shortcut
Shred a portion of your provolone block before it hits the 2-week mark and freeze it - shredded provolone lasts longer in the freezer and goes straight into recipes without thawing.

Frequently Asked Questions

Can you freeze provolone cheese and use it after thawing?

Yes, but expect a texture change. Thawed provolone becomes crumbly and loses its smooth sliceability, though it still melts well. Plan to cook with it rather than serve it cold or raw.

How long does provolone last in the refrigerator unopened?

A vacuum-sealed commercial block lasts 3-6 weeks at 34-38°F. Check the sell-by date as the outer limit, and refrigerate immediately after purchase.

Is it safe to eat provolone with a little mold?

On a firm block, yes - cut at least 1 inch around and beneath the mold and rewrap with fresh parchment. Discard if the mold is widespread, fuzzy blue-green, or accompanied by a slimy surface.

Does freezing provolone change the melt?

Not significantly. Provolone retains most of its melting ability after freezing, even though the raw texture becomes crumbly. It works well in gratins, melts, and baked dishes straight from the thaw.

How should smoked provolone be stored to keep its flavor?

Keep it in an airtight container or sealed bag, separate from other cheeses. Smoked provolone's aroma transfers easily and it absorbs surrounding odors, which dulls the smoke character quickly.

What Is Pink Lady Apple? [Taste, Uses & More]

April 1, 2026

Bite into a Pink Lady apple and two things hit at once: a sharp, satisfying snap, then a wave of bright, honeyed sweetness undercut by real acidity.

What Is Pink Lady Apple

That balance - firm crunch with a wine-like tartness - is exactly what separates this cultivar from the sweeter, rounder profiles of the taste of fuji apple and its relatives.

If you're weighing alternatives to fuji apple for a sharper, more complex option, Pink Lady is the one worth reaching for first.

QUICK SUMMARY

The Pink Lady apple (Cripps Pink cultivar) is a firm, bi-colored apple with sweet-tart flavor, pronounced crunch, and floral notes. Bred in Western Australia, it holds its shape raw or cooked, making it strong across salads, tarts, and cheeseboards.

🍎Also Known As: Cripps Pink, Cripps' Pink - Pink Lady is the registered brand name
👅Flavor: Sweet with bright acidity, subtle honey and floral notes
✋Texture: Very firm, snappy crunch that holds even after light cooking
🍽️Best Uses: Raw salads, cheeseboards, apple tarts, roasting, fresh slaws
🗓️Shelf Life: Up to 6-8 weeks refrigerated whole; 1-2 weeks at room temperature

What Is Pink Lady Apple?

Pink Lady is the registered trade name for the Cripps Pink cultivar, developed in the 1970s by John Cripps at the Western Australia Department of Agriculture. It's a cross between Lady Williams and Golden Delicious, and only apples that meet specific sugar, color, and firmness standards earn the Pink Lady brand label.

Visually, it's easy to spot: a bright pink-to-red blush over yellow-green skin, with firm, pale cream flesh inside. Some apples sold as Cripps Pink don't meet the coloring threshold for the Pink Lady label, though flavor is essentially the same.

It's a late-season variety, typically harvested in autumn and available in stores from late fall through spring. That extended availability is partly why it's become one of the most commercially prominent apple varieties worldwide.

  • 🍎 Cultivar name - Cripps Pink; "Pink Lady" is the licensed brand for qualifying fruit
  • Parent varieties - Lady Williams × Golden Delicious
  • Origin - Western Australia, bred in the 1970s
  • Season - Late harvest; peak retail availability from late fall through early spring
  • Alternate names - Cripps Pink, Cripps' Pink

What Does Pink Lady Apple Taste Like?

pink lady apple - What Is Pink Lady Apple

Pink Lady lands at a genuinely interesting intersection of sweet and tart. The initial sweetness is pronounced - dense apple sugar with honeyed, faintly floral undertones - but a wine-like acidity cuts through before any cloying finish.

Sensory SnapshotModerate Intensity
👅 Flavor
sweettarthoneyedfloral
✋ Texture
very firmsnappy
👃 Aroma
fresh orchardlight floralfaint citrus

Compared to Honeycrisp, Pink Lady is noticeably more tart and slightly less sweet - both share that satisfying snap. Against Fuji, the acidity gap is wider; Fuji reads sweeter and milder.

Heat mellows the tartness somewhat, concentrating the sugar and pushing the floral notes forward, though the apple never turns jammy in the way softer varieties do.

Golden Rule
Pink Lady holds its shape and acidity through moderate heat - use it anywhere you need an apple that won't dissolve into mush.

How to Use Pink Lady Apple

Raw applications are where Pink Lady performs most distinctly. The crunch lasts even after slicing and light acid treatment, making it the right call for salads dressed with vinaigrette - a chopped kale salad with walnuts, sharp cheddar, and thinly sliced Pink Lady is a reliable weeknight formula. On a cheeseboard, halved or sliced alongside aged gouda or Manchego, the acidity does real work cutting through fat.

For baking, its structure is the advantage. It holds shape through tart and galette recipes where soft apples would collapse - making french apple tarte tatin at home benefits from a firm cultivar that doesn't lose form during caramelization.

Roasting alongside root vegetables brings out caramelized sweetness while the flesh stays intact.

Pink Lady also presses well for juice and fits naturally into small-batch cider blends where bright acidity is a building block rather than an afterthought. If a recipe calls for apple cider and you need options, swapping out apple cider covers workable alternatives.

Thin slices on crostini with Brie and walnut honey round out the savory side.

How Pink Lady Apple Is Used
MethodBest ForTip
🥗 RawSalads, cheeseboards, slaws, open-faced sandwichesToss slices in lemon juice or cider vinegar to hold color and crunch
🥧 BakedTarts, galettes, crispsNo need to pre-cook; slices hold their shape through oven time
🍳 RoastedSheet-pan sides with pork or root vegetablesHigh heat (400°F+) caramelizes sugars without making the flesh mushy
🫕 SautéedButter compotes, pan sauces for pork or chickenKeep pieces large and cook briefly to preserve some texture
Try It In
🍏Caramel Apple NachosPink Lady's crunch and tartness hold up under caramel without going limp→🥣Apple Cinnamon Overnight Oats JarsDiced Pink Lady adds a sweet-tart snap against creamy oats→

How to Buy and Store Pink Lady Apple

Look for apples with a deep, uniform pink blush covering most of the yellow-green skin. The flesh should feel rock-solid - no give when you press near the stem.

Light green patches near the stem cavity are normal and don't affect flavor. Avoid any apple showing shriveled skin, soft spots, or brown bruising around the core.

Quick Tip
Store Pink Lady apples away from onions, garlic, or other strong-smelling produce - the flesh readily absorbs surrounding aromas in the crisper drawer.
  • Refrigerator (whole) - Up to 6-8 weeks in the crisper drawer in a perforated plastic bag
  • Room temperature (whole) - 1-2 weeks; expect faster softening in warm kitchens
  • Sliced - 1-3 days in an airtight container after treating cut surfaces with lemon juice or cider vinegar
  • Freezing - Possible for cooked applications; [freezing pink lady apple](https://forkliftkitchen.com/pink-lady-apple-shelf-life/) requires blanching or acid treatment first to prevent browning

Start Here If You Have One Pink Lady

Eat the first one raw, unpeeled, at room temperature. That's the clearest read on what the apple actually offers - the full snap, the acidity, the floral back note that heat softens away.

From there, a cheeseboard with aged cheddar or a simple galette are the highest-leverage moves.

If you need a swap, swapping out pink lady apple covers the closest cultivar matches - and if you've been working with Honeycrisp and want to compare, honeycrisp apple's flavor and uses lays out where the two diverge.

Similarly, replacements for honeycrisp apple lists options when neither is available.

Pink Lady is a firm starting point. Use it where texture matters.

Frequently Asked Questions

Are Pink Lady apples sweet or tart?

Both. Pink Lady has pronounced sweetness with a sharp, wine-like acidity that prevents it from tasting one-dimensional. The tartness is more noticeable than in Fuji but softer than in Granny Smith.

Are Pink Lady and Cripps Pink the same apple?

Same cultivar, different label. Pink Lady is a licensed brand name - only Cripps Pink apples meeting specific color, sugar, and firmness standards are sold under it. Apples that don't qualify are sold as Cripps Pink.

Can you bake Pink Lady apples?

Yes - it's one of the better baking apples because the firm flesh holds its shape rather than collapsing. Tarts and galettes work especially well; avoid long slow braises where even firm apples eventually break down.

What apples are similar to Pink Lady?

Honeycrisp is the closest match for crunch and balanced flavor. Braeburn shares the sweet-tart profile with similar firmness. Fuji is sweeter and less acidic but works as a substitute in most raw applications.

When are Pink Lady apples in season?

Pink Lady is a late-harvest variety, picked in autumn (October-November in the Northern Hemisphere). Controlled-atmosphere storage means retail availability typically extends through late spring, making it one of the longer-season apple options.

What Is Rock Sugar? Taste, Uses & Cooking Tips

April 1, 2026

You spot it at the Asian grocery - a bag of glassy, amber-colored lumps sitting quietly near the granulated sugar, and it's genuinely unclear what to do with one.

What Is Rock Sugar

Rock sugar has none of the instant familiarity of white sugar, and that's part of the reason it gets overlooked.

If you're keeping tabs on how different sugars age and behave, understanding sugar spoilage signs is a good starting point - but rock sugar operates by its own rules.

It dissolves slowly, sweetens gently, and has a very specific job in the kitchen that granulated sugar only partly covers.

QUICK SUMMARY

Rock sugar is cane-derived sugar crystallized into hard, irregular lumps. It dissolves slowly in heat, giving a clean, mild sweetness to braises, teas, and syrups. It's not a direct swap for granulated sugar in most baking, but it's indispensable in Chinese and East Asian cooking.

🍬What It Is: Crystallized cane sugar sold in amber or clear lumps
👅Flavor: Mild, rounded sweetness - less sharp than white sugar
🍵Best Uses: Chinese braises, chrysanthemum tea, clear syrups, congee
🛒Where to Buy: Asian grocery stores, labeled rock sugar or bingtang
📅Shelf Life: Indefinite when stored dry; best quality within 2-3 years

What Is rock sugar?

Rock sugar goes by several names - bingtang in Mandarin, pang tang in other regional dialects, and rock candy in English-speaking markets.

It starts as cane sugar, which is dissolved, purified, and then allowed to cool and crystallize very slowly, forming the irregular, glassy lumps it's known for.

The result is a product that's purer than raw sugar and less processed-tasting than refined white.

Two main varieties exist. Single-crystal rock sugar forms as large, clear individual chunks, while polycrystalline rock sugar - the most common commercial form - clusters into uneven amber-toned lumps.

Both behave the same in cooking. You'll also see it sold under the label rock sugar crystals or sometimes just "Chinese rock sugar" in specialty stores.

It's a staple across Chinese, Taiwanese, Indian, and Southeast Asian food traditions, and British confectionery has its own version used mostly as a garnish or stirrer.

For anyone curious about replacements for brown sugar in Asian recipes, rock sugar is sometimes a better fit than brown sugar itself - it's cleaner and less molasses-forward.

What Does rock sugar Taste Like?

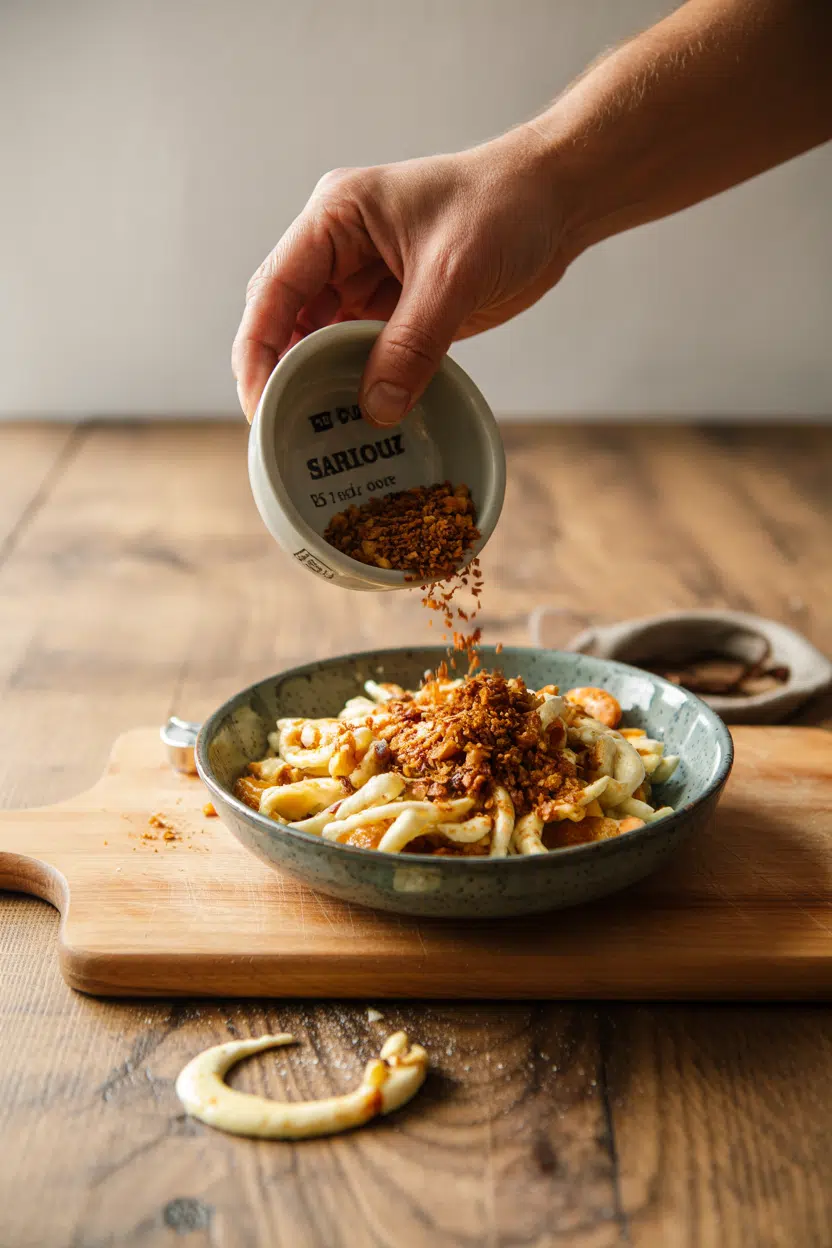
rock sugar - What Is Rock Sugar
Sensory SnapshotModerate Intensity
👅 Flavor
clean sweetroundedfaint caramel
✋ Texture
hard crystallineslow-dissolving
👃 Aroma
neutralwarm caramel when heated

The sweetness here is genuinely milder than granulated sugar - less sharp at the front of the palate, with a softer finish. Think of light simple syrup more than table sugar, even when you're eating it straight.

Heat changes it slightly. As rock sugar melts into a braise or simmering tea, it releases a faint, warm caramel note that granulated sugar doesn't quite match at the same temperatures.

That background warmth is subtle enough not to compete with other flavors. It rounds out the dish rather than announcing itself - which is exactly the point.

Golden Rule
Rock sugar's mildness is an asset, not a weakness. Use it where you want sweetness that blends into the background and lets aromatics like star anise or ginger take the lead.

How to Use rock sugar

Rock sugar earns its place most clearly in slow-cooked applications.

Drop a few lumps into a Cantonese braise or red-cooking liquid - the classic Shanghai-style hong shao rou, for example - and they melt gradually, contributing a glossy, balanced sweetness that doesn't overwhelm the soy and aromatics.

Granulated sugar can stand in, but it dissolves too fast and lacks the same rounded quality.

Chrysanthemum tea and other Chinese herbal teas are another core use. One or two lumps drop into the hot tea and dissolve slowly as you drink, sweetening progressively.

It's a deliberate contrast to pre-sweetened drinks, and the clean flavor doesn't muddy the floral notes of the tea.

Beyond those roles, rock sugar works well in:

  • 🍚 Congee and porridge - stir in a small lump near the end; it melts smoothly without graininess
  • 🍑 Poached fruits and clear syrups - produces a very clean, transparent syrup with no off-notes
  • 🍗 Glazes for poultry - melt gently in a pan to form a light caramel base before adding other liquids
  • 🍪 Crunchy garnish - large crystals pressed onto cookies or confections add texture without melting
  • 🍵 Asian desserts (tong sui) - stirred in after simmering to sweeten without clouding the broth

When you need something quick-dissolving for a cold drink or vinaigrette, rock sugar is the wrong tool - and swapping out rock sugar for something finer-grained makes more sense in those situations.

For cocktail syrups, comparing agave vs simple syrup options is worth the read if you want to weigh faster-dissolving alternatives.

Try It In
🥜Cinnamon Sugar Roasted NutsRock sugar crystals add crunch and slow-release sweetness→☕Iced Brown Sugar Oat Milk LatteSee how rock sugar compares as a milder swap→🍩Cinnamon Sugar Donut MuffinsCrushed rock sugar works as a coarse topping here→

How to Buy and Store rock sugar

At the store, look for translucent amber or clear crystals with a clean, glassy surface. Avoid bags with a heavy accumulation of fine powder at the bottom - that dust signals moisture damage, meaning the crystals have started breaking down.

Asian grocery stores stock it reliably under the names rock sugar or bingtang; general supermarkets rarely carry it.

Watch Out
Don't buy bags where many crystals have fused into one solid mass. That's a sign the product was stored in high humidity, and the texture and slow-dissolve quality will be compromised.

Storage is simple. Keep rock sugar in an airtight container, away from heat and moisture - a pantry shelf works fine.

Humidity is the only real enemy; it causes crystals to stick together or, in severe cases, partially dissolve.

For the long view on how it holds up, rock sugar's shelf life is effectively indefinite when stored dry, though best flavor and texture lands within the first two to three years.

Start With One Dish

If you've never cooked with rock sugar, don't start by working through every use at once.

Pick one Cantonese braise - pork belly or chicken thighs with soy sauce, Shaoxing wine, star anise, and two or three lumps of bingtang.

Watch how they melt into the liquid, how the sauce takes on a gentle sheen, and how the sweetness sits quietly under everything else.

That single dish teaches you more about how rock sugar works than a list of applications ever could.

From there, caster sugar swaps that work can fill in gaps when rock sugar isn't what a recipe needs.

Frequently Asked Questions

What is rock sugar made of?

It's pure cane sugar - sucrose - dissolved, clarified, and re-crystallized slowly into hard lumps. The process removes impurities, which is why rock sugar tastes cleaner and milder than raw or turbinado sugar.

Is rock sugar healthier than white sugar?

No. Both are sucrose with the same caloric load and negligible micronutrients. Rock sugar doesn't offer any nutritional advantage - it's simply a different physical form of the same compound.

Does rock sugar melt faster than granulated sugar?

No - it melts considerably slower. The large crystal mass means less surface area exposed to heat or liquid. That slow dissolution is a feature in braises and teas, not a drawback.

Can you substitute rock sugar for granulated sugar in baking?

Not directly. Rock sugar won't cream into butter or dissolve fast enough for most baked goods. Crush it fine first, then use it in equal weight - but results vary depending on the recipe.

How much rock sugar equals one tablespoon of granulated sugar?

By weight, the ratio is 1:1. However, rock sugar lumps are denser and irregular, so volume measurements don't translate reliably. Weigh it for accuracy, especially in drinks or syrups.

Indian Butter Chicken (Murgh Makhani)

April 1, 2026

You need 55 minutes and one heavy-bottomed skillet. No overnight marinating, no tandoor oven, no multi-day prep.

Indian Butter Chicken (Murgh Makhani) served on a plate

Chicken thighs simmer in spiced tomato-cream sauce while you cook rice or warm naan. The garam masala builds flavor in layers-bloomed in butter first, then stirred into the sauce at the end.

This is the kind of recipe you make when you want restaurant-level Indian food but only have an hour and a regular stovetop.

QUICK SUMMARY

Indian butter chicken delivers tender dark meat in a rich tomato-cream sauce spiked with garam masala and finished with crushed kasuri methi. Sear the chicken first for color, then simmer gently in sauce-no boiling or the cream curdles. One-hour marinate builds flavor; skip it and you lose tenderizing time.

⏱️Timing: 55 minutes total-20 min prep, 35 min cook
🔥Method: Sear chicken on medium-high, then simmer sauce at 185°F to prevent splitting
⚠️Watch Out: Boiling cream curdles the sauce-keep heat gentle after adding dairy

Table of Contents

Toggle
  • Why This Recipe Works
  • What You'll Need
    • Ingredient Details
  • Ingredient Swaps
  • What to Serve With It
  • Store and Reheat
  • Frequently Asked Questions
  • Indian Butter Chicken (Murgh Makhani)
    • Method 
    • Tried this recipe?

Why This Recipe Works

Dark meat chicken stays juicy through the 35-minute simmer while breast dries out in half that time. Rich mains need something to cut through, and salad does exactly that. For a version that comes together quickly, this simple salad recipe works with the same spices-just swap the dressing base.

Quick Reference
⏱️
Prep Time
20 min
🔥
Cook Time
35 min
⏰
Total Time
55 min
🍽️
Servings
4 servings
📊
Difficulty
Medium
🏷️
Category
Main Dish
💡
Quick Tip
Marinate chicken at least 1 hour for tenderness
🎯
Best For
Weeknight | Meal prep | Entertaining

Five things that make this work:

  • Toasting spices in butter before adding tomato unlocks aroma compounds that raw garam masala can't deliver
  • Searing chicken on medium-high for 3-4 minutes per side builds golden color that deepens sauce flavor
  • Simmering at 185°F instead of boiling keeps cream smooth and prevents protein separation
  • Crushing kasuri methi between your palms releases essential oils that give the sauce its signature earthy note
  • Resting cooked chicken 5 minutes off heat lets juices redistribute so meat stays tender when you bite in
Quick Tip
Marinate chicken 1-4 hours for tender, flavorful meat-longer than 4 hours and the yogurt's acid starts breaking down texture too much.

What You'll Need

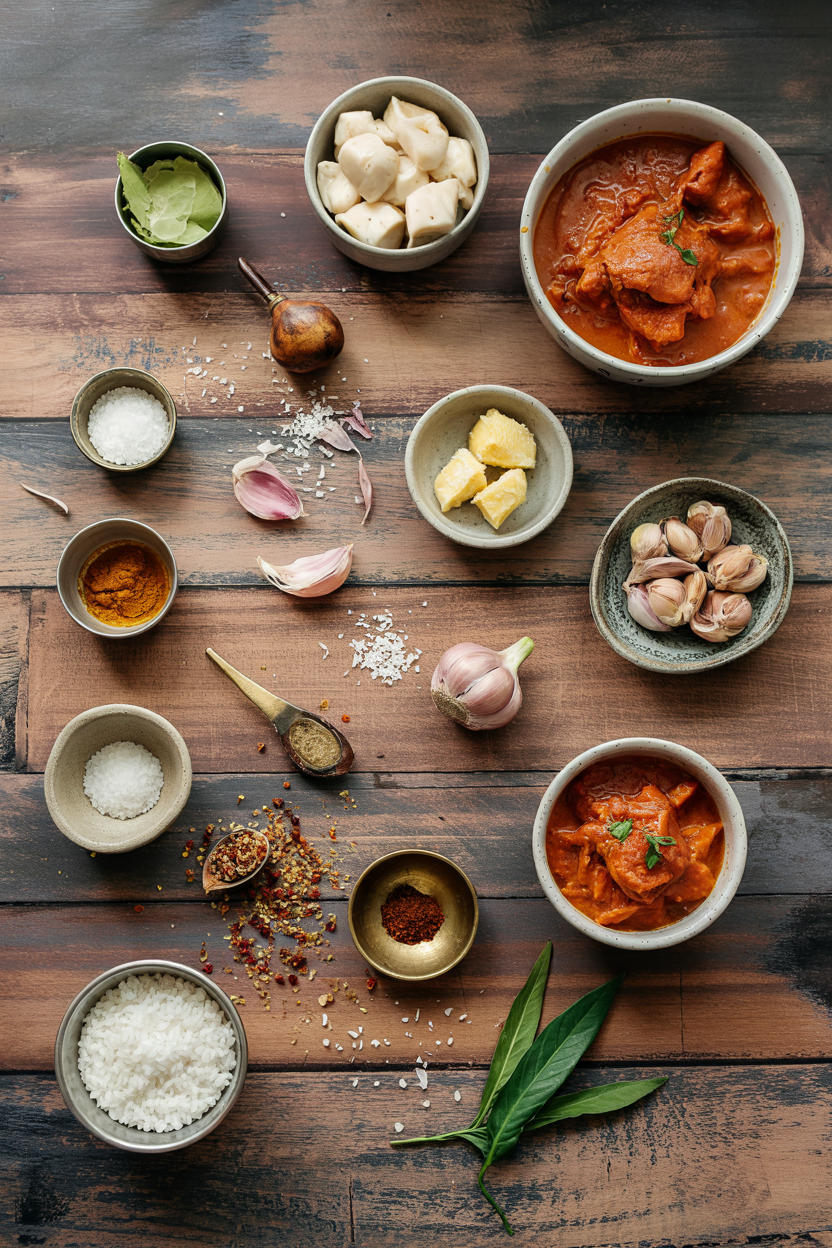
Ingredients for Indian Butter Chicken (Murgh Makhani)

Most ingredients sit in your spice drawer or fridge already-garam masala and kasuri methi are the only specialty items. A good chicken can make or break the plate. We keep a batch ready for nights like this-more chicken ideas use the same marinating technique with different spice blends.

🍗
Protein
  • 2 lbs chicken thighs, bone-in or boneless
  • ¼ cup plain yogurt (for marinade)
🧄
Aromatics
  • 6 cloves garlic, minced
  • 2 inches fresh ginger, grated
  • 1 medium onion, finely diced
🥢
Sauce Base
  • 1 cup tomato puree
  • ½ cup heavy cream
  • 4 tablespoon butter
  • 2 tablespoon kasuri methi (dried fenugreek leaves)
🌶️
Spices
  • 2 teaspoon garam masala
  • 1 teaspoon chili powder
  • 1 teaspoon salt
  • ½ teaspoon turmeric

Ingredient Details

  • Chicken thighs
    Dark meat stays moist during the 35-minute simmer; breast dries out in half that time-if using breast, cut cook time to 18-20 minutes.
  • Butter
    Use unsalted so you control sodium levels; ghee works too but adds nuttier flavor-regular butter gives cleaner dairy richness.
  • Tomato puree
    Smooth puree creates silky sauce; crushed tomatoes work but add 5 minutes to cooking time for chunky bits to break down.
  • Heavy cream
    Fat content prevents curdling during simmer; half-and-half splits easier-full-fat coconut milk works for dairy-free but changes flavor profile.
  • Garam masala
    Buy fresh within 6 months or make your own-stale spice blend tastes dusty instead of aromatic and warm.
  • Kasuri methi
    Dried fenugreek leaves add earthy, slightly bitter note; skip fresh leaves which taste too intense-crush dried between palms before adding.
  • Yogurt
    Marinade tenderizes chicken and adds tang; Greek yogurt works but regular plain is thinner and coats better-avoid flavored varieties.

Ingredient Swaps

Most swaps change texture or heat level without breaking the recipe. Chicken adds the contrast this plate needs, but timing matters. For a version that comes together quickly, another great chicken recipe uses coconut milk instead of cream-just adjust simmer time by 3 minutes.

Four swaps that work:

  • Heavy cream → full-fat coconut milk: Adds tropical sweetness and thins sauce slightly-still creamy but with different base note (dairy-free, similar richness)
  • Butter → ghee: Nuttier flavor, higher smoke point for searing-closest match to traditional method (clarified dairy, no milk solids)
  • Chicken thighs → chicken breast: Leaner protein cooks faster-reduce simmer to 18-20 minutes or meat dries out (watch internal temp closely)
  • Kasuri methi → 1 teaspoon fenugreek powder: Less aromatic but delivers mild bitterness-use half the amount or sauce tastes too strong (budget-friendly)

Full-Fat Coconut Milk

Works for: dairy-free meals, tropical flavor fans, similar creamy texture

Skip if: you want traditional buttery taste, sauce will be slightly thinner

Chicken Breast

Works for: leaner protein preference, faster cooking (18-20 min total)

Skip if: you want foolproof juicy results, breast dries out easily with timing errors

Crushed Canned Tomatoes

Works for: chunkier sauce texture, pantry staple when puree unavailable

Skip if: you want silky smooth sauce, requires 5 extra minutes to break down

Instructions

The entire dish cooks in one skillet-sear chicken, build sauce, simmer together. A good vindaloo can make or break the plate. We keep a batch ready for nights like this-homemade vindaloo recipe uses the same spice blooming technique with different base vegetables.

  1. Marinate the chicken: Mix yogurt, 1 teaspoon garam masala, ½ teaspoon chili powder, and salt in a bowl. Coat chicken pieces and refrigerate 1-4 hours. Pat chicken dry before searing-excess moisture steams instead of browns.

  2. Sear the chicken: Heat 2 tablespoon butter in a heavy-bottomed skillet over medium-high until it foams. Add chicken and sear 3-4 minutes per side until golden brown. Remove chicken and set aside-don't cook through yet, just build color.

  3. Build the sauce base: Lower heat to medium, add remaining 2 tablespoon butter. Sauté onion 5 minutes until soft, then add garlic and ginger. Cook 1 minute until fragrant. Add remaining garam masala and chili powder, toast 30 seconds, then stir in tomato puree and ½ cup water.

  4. Simmer the chicken: Return chicken to skillet, nestle into sauce. Bring to gentle simmer (185°F), reduce heat to medium-low, cover, and cook 25 minutes. Check internal temp hits 165°F-dark meat should be tender, not rubbery.

  5. Finish with cream and kasuri methi: Remove from heat. Stir in heavy cream and crushed kasuri methi. Return to low heat for 2 minutes to warm through-don't boil or cream curdles. Rest 5 minutes before serving so flavors meld and chicken stays juicy.

Golden Rule
Never boil the sauce after adding cream-keep it at a gentle simmer below 190°F or dairy proteins separate and sauce looks broken.

What to Serve With It

Butter chicken needs something to soak up the sauce and something crisp to cut the richness. Most people skip tea, but it balances the meal. For a version that comes together quickly, this quick easy side dish works with the same spices-just swap the dressing base.

Side Dish Prep Why It Works How to Serve
Basmati Rice Easy Neutral base absorbs sauce without competing flavors Mound rice on plate, spoon chicken and sauce over top
Garlic Naan Easy Buttery bread scoops up sauce, adds textural contrast Warm naan in skillet 30 seconds per side, serve folded on the side
Cucumber Raita Easy Cool yogurt-cucumber mix cuts through rich cream sauce Grate cucumber, mix with yogurt and cumin, chill 10 minutes
Jeera Rice Medium Cumin-spiced rice echoes garam masala without overwhelming Toast cumin seeds in butter, cook rice in spiced liquid
Pickled Onions Easy Acidic crunch balances creamy, spiced chicken Slice onions thin, toss with vinegar and salt, let sit 15 minutes

Three ways to serve it:

  • Weeknight plate: Serve over basmati rice with warmed naan on the side-keep it simple and let the sauce be the star
  • Meal prep bowls: Pack chicken, rice, and steamed vegetables in containers-reheat sauce separately to prevent rice from getting soggy
  • Entertaining spread: Plate with jeera rice, garlic naan, cucumber raita, and mango chutney for a full Indian dinner experience
Shortcut
Buy pre-minced garlic and ginger paste in jars-1 tablespoon paste equals 3 cloves garlic or 1 inch ginger, saves 5 minutes of prep.

Store and Reheat

Butter chicken holds up better than most cream-based dishes because the fat content stabilizes during cooling. This dip adds the contrast this plate needs, but timing matters. We keep a batch ready for nights like this-a creamy sauce side uses the same base technique with different flavor profile.

Method Time Best For
🍳 Stovetop 5-7 min on medium-low Even heating, prevents sauce separation, best overall method
📦 Microwave 2-3 min, stirring halfway Single servings, quick lunch reheats, stir to prevent hot spots
🔥 Oven 10-12 min at 325°F Larger portions in baking dish, cover with foil to retain moisture

For best results when storing:

  • Let chicken cool 30 minutes before refrigerating in shallow airtight containers-sauce thickens as it cools, thins again when reheated
  • Store sauce and chicken together so meat stays moist-separating them dries out the chicken
  • Freeze in portion-sized containers for up to 3 months-thaw overnight in fridge, reheat gently on stovetop
  • Add splash of cream or water when reheating if sauce looks too thick-original consistency returns with gentle stirring
  • Avoid reheating more than once or chicken turns rubbery and sauce loses silky texture

Frequently Asked Questions

Can I make butter chicken ahead and freeze it?

Yes-freeze up to 3 months in airtight containers. Thaw overnight in fridge, reheat gently on stovetop over medium-low, stirring occasionally. Add splash of cream if sauce looks separated.

How do I know when butter chicken is fully cooked?

Check internal temperature hits 165°F with instant-read thermometer inserted into thickest part of chicken. Meat should be tender and pull apart easily-if rubbery, it's overcooked.

What can I serve with butter chicken for weeknight dinner?

Serve over basmati rice with warmed naan on the side. Add cucumber raita or pickled onions for crunch and acidity-keeps the plate balanced without extra cooking.

Can I substitute chicken breast instead of thighs?

Yes, but reduce simmer time to 18-20 minutes-breast dries out faster than dark meat. Check internal temp at 18 minutes to avoid rubbery texture.

How do I prevent butter chicken sauce from curdling?

Remove skillet from heat before adding cream, then return to low heat-never boil after cream goes in. Keep simmer temperature below 190°F and stir gently to prevent protein separation.

Indian Butter Chicken (Murgh Makhani) served on a plate

Indian Butter Chicken (Murgh Makhani)

No ratings yet
Indian Butter Chicken delivers tender chicken thighs simmered in a rich, spiced tomato-cream sauce with toasted garam masala and crushed kasuri methi. The recipe focuses on searing chicken for color, gentle simmering to keep cream smooth, and resting for juicy meat in under an hour.
Print Recipe Pin Recipe
Prep Time 20 minutes mins
Cook Time 35 minutes mins
Total Time 55 minutes mins
Servings: 4 servings
Course: Main Dish
Cuisine: Indian
Ingredients Equipment Method Notes

Ingredients
  

  • 2 lbs chicken thighs bone-in or boneless
  • 0.25 cup plain yogurt for marinade
  • 6 cloves garlic minced
  • 2 inches ginger grated
  • 1 medium onion finely diced
  • 1 cup tomato puree
  • 0.5 cup heavy cream
  • 4 tablespoon butter
  • 2 tablespoon kasuri methi dried fenugreek leaves, crushed
  • 2 teaspoon garam masala
  • 1 teaspoon chili powder
  • 1 teaspoon salt
  • 0.5 teaspoon turmeric

Equipment

  • Heavy-bottomed skillet Used for searing chicken and simmering sauce

Method
 

  1. In a bowl, mix yogurt, 1 teaspoon garam masala, ½ teaspoon chili powder, and salt. Coat chicken pieces evenly and refrigerate for 1 to 4 hours. Before cooking, pat chicken dry to ensure proper searing.
    0.25 cup plain yogurt, 2 tsp garam masala, 1 tsp chili powder, 1 tsp salt, 2 lbs chicken thighs
  2. Heat 2 tablespoons butter in a heavy-bottomed skillet over medium-high until foaming. Add chicken and sear for 3-4 minutes per side until golden brown. Remove chicken and set aside. Do not cook through yet.
    4 tbsp butter, 2 lbs chicken thighs
  3. Reduce heat to medium and add remaining 2 tablespoons butter. Sauté diced onion for 5 minutes until soft. Add minced garlic and grated ginger and cook for 1 minute until fragrant. Stir in remaining garam masala and chili powder and toast for 30 seconds. Add tomato puree and ½ cup water, stir to combine.
    4 tbsp butter, 1 medium onion, 6 cloves garlic, 2 inches ginger, 2 tsp garam masala, 1 tsp chili powder, 1 cup tomato puree
  4. Return chicken pieces to skillet, nestling them into the sauce. Bring to a gentle simmer at about 185°F. Reduce heat to medium-low, cover, and cook for 25 minutes until chicken's internal temperature reaches 165°F and meat is tender.
    2 lbs chicken thighs
  5. Remove skillet from heat and stir in heavy cream and crushed kasuri methi. Return to low heat for 2 minutes to warm through without boiling. Let rest for 5 minutes off heat before serving to allow flavors to meld and juices to redistribute.
    0.5 cup heavy cream, 2 tbsp kasuri methi

Notes

  • Marinate chicken at least 1 hour for best tenderness and flavor.
  • Keep simmer temperature below 190°F to prevent cream curdling.
  • Rest cooked chicken 5 minutes off heat to retain juicy texture.

Tried this recipe?

Let us know how it was!

What Is Pork Tenderloin? [Taste, Uses & More]

April 1, 2026

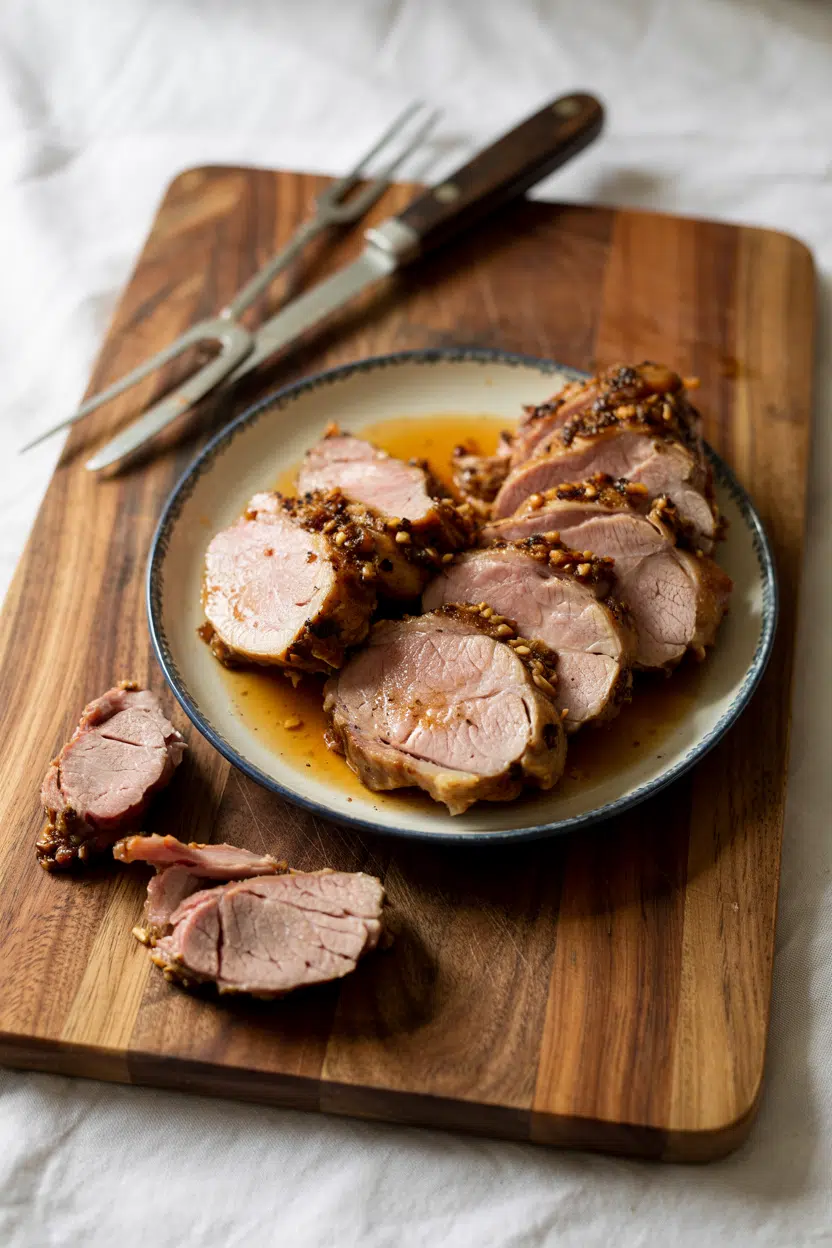
Roasted whole and sliced at the table, pork tenderloin looks like it took hours - it rarely takes more than thirty minutes.

What Is Pork Tenderloin

Unlike the role pork chop plays as a thick weeknight slab, tenderloin is lean, fast, and quietly elegant, a cut that rewards restraint over heavy technique.

Knowing how to season and cook it correctly matters more than any special equipment, much like understanding cooking rosemary right changes how an herb performs at heat. Pork tenderloin is the most forgiving high-quality pork cut you'll regularly find at a grocery store, and it deserves more attention than it typically gets.

QUICK SUMMARY

Pork tenderloin is the leanest, most tender muscle on the pig - mildly sweet, faintly savory, and fine-grained in texture. It cooks quickly, suits pan sauces and roasting equally well, and pairs cleanly with fruit, mustard, and herbs. Best cooked to 145°F and rested before slicing.

🐖Category: Lean pork cut, loin primal muscle
👅Flavor: Mild pork sweetness, clean, faintly savory
✋Texture: Very tender, fine-grained, low fat
🔥Best Cooked: Sear then oven-finish or roast whole
🕐Shelf Life: Fridge 1-2 days raw; frozen up to 12 months
🍎Pairs With: Apples, mustard, rosemary, maple glaze, soy and ginger

What Is Pork Tenderloin?

Pork tenderloin is the long, narrow muscle that runs along the backbone inside the loin section of the pig.

It does almost no physical work, which is precisely why it stays so tender - no weight-bearing, no heavy movement, no connective tissue buildup.

Most supermarkets sell it whole as a cylindrical roast, typically weighing between ¾ pound and 1.5 pounds. You'll also find it pre-trimmed into medallions, though buying whole gives you more control over thickness and less water retention from processing.

It goes by several names depending on the country or butcher:

  • 🥩 Pork fillet - common in the UK and Australia
  • Pork filet - French-influenced labeling in North America
  • Pork tender - informal American term
  • Filet mignon of pork - a nod to its position on the animal and its tenderness

One thing to watch before cooking: the silverskin, a thin, tough membrane running along one side. It doesn't break down with heat and should be trimmed with a boning knife before any cooking method.

Leave it on and the tenderloin curls unevenly and chews tough in spots.

What Does Pork Tenderloin Taste Like?

pork tenderloin - What Is Pork Tenderloin

Pork tenderloin has a mild, clean flavor - gentle porky sweetness with a faint savory depth that never overwhelms.

Understanding the taste of pork across its different cuts helps put this in perspective: tenderloin sits at the mild end of the spectrum, closer to chicken breast in neutrality but with more recognizable pork character.

Sensory SnapshotMild Intensity
👅 Flavor
mild pork sweetnessclean savorylightly nutty when seared
✋ Texture
fine-grainedvery tenderlean
👃 Aroma
mild meaty sweetnesslight pork scent

Heat changes the flavor noticeably. A proper sear develops a lightly nutty, caramelized crust through the Maillard reaction, adding depth that raw tenderloin completely lacks.

Overcooked tenderloin, on the other hand, turns dry and chalky fast - this cut has almost no intramuscular fat to bail you out past 160°F.

Golden Rule
Pull pork tenderloin at an internal temp of 145°F and rest it for 3 minutes. That's the USDA safe threshold - and it keeps the meat juicy and faintly pink in the center, which is correct, not underdone.

How to Use Pork Tenderloin

Tenderloin's mild flavor makes it one of the most adaptable pork cuts in the kitchen. It absorbs marinades quickly, responds well to bold glazes, and cooks fast enough for a weeknight dinner without shortcuts.

Just as cooking pork tenderloin right means knowing when to sear versus when to roast, understanding which method suits your dish shapes the final result.

How Pork Tenderloin Is Used
MethodBest ForTip
🔥 Sear + OvenMedallions with pan sauce, weeknight roastSear 2-3 min per side, finish at 425°F for 10-12 min
🍖 Roast WholeDinner party centerpiece, stuffed tenderloinButterfly and stuff before tying; roast at 400°F
🔥 GrillCharred exterior, smoky flavorBrine 2-4 hours first to protect against drying out
🥢 Stir-FryQuick Asian-style dishes with soy and gingerSlice thin against the grain; high heat, fast toss
💧 Sous Vide + SearMaximum tenderness, precise donenessCook at 140°F for 1-2 hours, then sear for crust

Glazes and pan sauces are where tenderloin shines brightest. A maple or brown sugar glaze - similar to the caramelized coating used in making maple glazed roasted pecans at home - clings to the seared surface and builds a lacquered finish in the oven. Dijon or whole-grain mustard makes an excellent base for French bistro-style pan sauces, and brown mustard stand-ins work well if you're out of the real thing.

For pairings, apples and apple compote are the most classic match - the fruit acidity cuts through the richness of any added fat. Garlic and butter, rosemary, thyme, and soy with ginger all work cleanly with the cut's neutral base.

Try It In
🌿Garlic Herb Roasted Pork TenderloinA sear-then-roast method with garlic butter and fresh herbs→🍎Pork Tenderloin with Apple GlazeClassic fruit pairing with a sticky, caramelized finish→🫙Herb-Roasted Pork TenderloinSimple whole-roast approach with a fresh herb crust→

How to Buy and Store Pork Tenderloin

Good tenderloin is pale pink with fine-grained muscle and a thin strip of white fat along one edge. Avoid gray edges, excessive blood pooling, or packages where the diameter varies widely - uneven thickness means uneven cooking.

Buying whole is worth it; pre-cut medallions often sit in liquid and lose texture before you get them home.

Watch Out
Some supermarket tenderloins are pre-injected with a sodium solution to extend shelf life. Check the label - if sodium is above 100mg per serving on a plain tenderloin, it's been enhanced. Factor that in before adding any brine or salt rub.

For storage, keep raw tenderloin on the bottom shelf or meat drawer, and use it within 1-2 days of purchase.

Proper storing pork tenderloin correctly extends its life significantly when freezing is necessary - wrap tightly in plastic, then foil, and freeze for up to 12 months at best quality. Cooked leftovers hold 3-4 days refrigerated.

Where to Start With Pork Tenderloin

If you haven't cooked this cut before, start with a simple sear-then-oven-finish method. Season generously with salt and pepper, sear in a hot oven-safe skillet, and finish in a 425°F oven.

From there, the technique branches naturally:

  • Want a sauce? - Deglaze the pan with cider or white wine and finish with butter and Dijon.
  • Cooking for a crowd? - Butterfly, stuff with a herb or apple filling, and tie before roasting.
  • Grilling instead? - Brine it for two hours first; that small step prevents the dryness that lean cuts are prone to on direct heat.

The cut is thin and cooks through fast - checking the internal temperature at the 20-minute mark is always the right move. A meat thermometer here isn't optional; it's the difference between juicy and dry.

Frequently Asked Questions

What is the difference between pork tenderloin and pork loin?

They are two different muscles. Pork tenderloin is small, narrow, and very lean - typically under 1.5 pounds - while pork loin is a large, broad roast that can weigh 4 to 8 pounds. Cooking times and methods differ significantly between them.

Can pork tenderloin be cooked medium rare?

The USDA sets the safe minimum at 145°F with a 3-minute rest, which leaves the center faintly pink - that's not medium rare, but it's not fully gray either. Cooking below 145°F is not recommended for food safety reasons.

Is pork tenderloin lean or fatty?

Very lean - it's one of the leanest cuts from any animal, comparable to skinless chicken breast. That's why it dries out quickly when overcooked; there's almost no intramuscular fat to compensate.

How long does pork tenderloin take to cook?

A whole tenderloin takes roughly 20-25 minutes total using a sear-then-oven method at 425°F. Thickness varies, so a meat thermometer at the thickest point is the only reliable way to confirm doneness.

What sauces go with pork tenderloin?

Pan sauces built from the drippings work best - deglaze with apple cider, white wine, or chicken stock, then whisk in Dijon mustard or butter. Fruit-based sauces like apple compote or cherry reduction also pair well with its mild flavor.

What Is Piloncillo? Taste, Uses & Cooking Tips

April 1, 2026

Cracking open a piloncillo cone releases a scent that stops you mid-step - warm molasses layered with something smokier and more complex than any brown sugar you've handled before.

What Is Piloncillo

That depth isn't an accident.

Piloncillo is unrefined whole cane sugar that skips the refinement process that strips most sweeteners of character, and its flavor lands closer to alternatives to molasses or brown sugar stand-ins than to the granulated white sugar it often replaces.

QUICK SUMMARY

Piloncillo is an unrefined Mexican cane sugar pressed into solid cones. It delivers deep molasses and caramelized brown-sugar flavor with a slightly bitter finish. Use it grated, melted, or dissolved in syrups for traditional drinks, sauces, and baked goods.

🍬Flavor: Deep molasses, caramelized brown sugar, faint burnt-sugar bitterness
🌎Origin: Mexico and Central America; also called panela or chancaca
🍳Best Uses: Champurrado, café de olla, mole sauces, glazes, and baked goods
📦Shelf Life: Whole cones last years when sealed dry; grated piloncillo lasts months
🛒Buy It: Look for dense, mahogany-brown cones with a glossy surface and no powdery bloom

What Is piloncillo?

Piloncillo is unrefined cane sugar produced by boiling fresh-pressed sugarcane juice and pouring it into cone-shaped molds to harden.

It originates in Mexico and Central America, where it has been a pantry staple for centuries.

Understanding the role brown sugar plays in baking helps put piloncillo in context - both carry molasses, however piloncillo is far less processed and more intensely flavored.

The cone shape is functional, not decorative. Solid cones resist moisture and pests far better than loose crystals, which is why the form persisted long before modern packaging.

Piloncillo goes by several names depending on region:

  • 🌎 Panela - the most common name across Colombia, Venezuela, and much of Latin America
  • 🌎 Chancaca - used primarily in Peru, Chile, and Bolivia
  • 🌎 Piloncillo de caña - the full formal name used in Mexican markets
  • 🌎 Rapadura - the Brazilian Portuguese equivalent, same product

Two grades exist in Mexican markets. Piloncillo blanco is a lighter, less intense version pressed from younger cane juice. Piloncillo oscuro is the darker, fuller variety most recipes call for by default.

What Does piloncillo Taste Like?

piloncillo - What Is Piloncillo

Piloncillo tastes like dark brown sugar stirred with molasses, but more layered than either ingredient alone. The initial sweetness hits fast, followed by a warm caramel body, and then a faint bitter edge that keeps it from cloying.

Sensory SnapshotStrong Intensity
👅 Flavor
deep molassescaramelized brown sugarburnt-sugar bittervegetal cane
✋ Texture
hard solidgritty when gratedsyrupy when melted
👃 Aroma
warm molassessmoky caramel

Heat changes everything. Grated over cold fruit, piloncillo reads as sharp and almost raw-tasting.

Dissolved into hot liquid or melted in a pan, those bitter vegetal edges mellow into a rounder, deeper sweetness.

Golden Rule
Piloncillo oscuro (dark grade) delivers the full molasses punch most recipes expect. Reach for piloncillo blanco only when you want a gentler sweetness that won't overwhelm lighter dishes.

How to Use piloncillo

Grating or shaving is the most common starting point. A box grater or microplane reduces a hard cone into coarse crumbles that dissolve quickly in hot drinks or sauces. For larger batches, cooks chip pieces off with a heavy knife before melting them directly in a pan.

Piloncillo anchors several iconic Mexican drinks.

It sweetens champurrado, the thick masa-thickened hot chocolate served at markets and family celebrations.

The a atole corn drink recipe also relies on piloncillo's molasses depth to balance the raw corn flavor in a way white sugar simply can't. Café de olla, Mexico's spiced pot coffee, dissolves a full piloncillo cone with cinnamon sticks directly in the brewing pot.

Beyond drinks, piloncillo works hard in savory cooking. It melts into mole and adobo sauces where its bittersweet character reinforces chile and chocolate notes.

Caramelized in a hot pan, it forms a glossy glaze for pork or roasted poultry. Shaved over roasted sweet potatoes or carrots, it creates a sweet-salty contrast that refined sugar cannot replicate.

How Piloncillo Is Used
MethodBest ForTip
🧀 GratedHot drinks, atole, quick saucesUse a microplane for fine crumbles that dissolve faster
🍳 Dissolved in syrupCafé de olla, drizzles, pancake syrupsSimmer with cinnamon and orange zest for depth
🔥 Melted/caramelizedGlazes for pork, mole, adobo basesKeep heat medium-low - it burns faster than refined sugar
🫓 Baked inPan de muerto, bizcochos, cookiesGrate finely and use 1:1 by weight in place of dark brown sugar
Try It In
🌽Atole Corn DrinkPiloncillo is the sweetener that gives this masa drink its signature warmth→☕Passion Fruit Cold Brew CoffeeA piloncillo syrup base works beautifully as the sweetener here→

How to Buy and Store piloncillo

Dense, glossy, mahogany-brown cones are what you want. Tap the cone lightly - a solid thud signals good moisture content and tight pressing. Skip any cone that feels hollow, crumbles at the edges, or shows a white powdery bloom across the surface, which indicates heavy recrystallization.

Watch Out
Large white crystals or a dry, chalky surface mean the cone was exposed to humidity and then dried out unevenly. The flavor dulls noticeably in degraded cones.

Whole cones stored in an airtight container away from heat and light last many months - often years.

Grated piloncillo loses complexity faster, so keep it in a sealed jar and use it within a few months.

Piloncillo syrup refrigerates well for several weeks.

For general guidance on how sugar-based products degrade, the article on sugar spoilage signs covers the core principles.

For piloncillo-specific spoilage, check piloncillo spoilage signs before using an old cone.

Start Here If You're New to Piloncillo

If you've never cooked with piloncillo, start by making a simple syrup.

Combine one cone with water and a cinnamon stick, then simmer until dissolved.

That syrup unlocks most of what this sugar does - pour it into coffee, drizzle it over desserts, or stir it into braising liquid.

Anyone comfortable with molasses and its flavor will recognize the profile immediately.

Shortcut
No piloncillo? A mix of dark brown sugar and a small pour of molasses gets close. Our guide to alternatives to piloncillo has ratios and options for every recipe type.

Frequently Asked Questions

What is the difference between piloncillo and panela?

Same product, different regional names. Piloncillo is the Mexican term; panela is standard across Colombia, Venezuela, and much of South America. Both are unrefined whole cane sugar pressed into solid forms, though shape and size vary by country.

How do you substitute piloncillo for brown sugar?

Use piloncillo at a 1:1 weight ratio in place of dark brown sugar. Because piloncillo is harder and less sweet by volume, grate it finely first. Expect a deeper, slightly more bitter result than brown sugar delivers.

How do you melt piloncillo cones?

Place a roughly chopped cone in a saucepan with a small amount of water over medium-low heat. Stir occasionally until fully dissolved, about 5-10 minutes. Don't rush it with high heat - piloncillo scorches quickly.

Is piloncillo healthier than refined sugar?

Marginally. Piloncillo retains trace minerals - iron, calcium, potassium - that refining removes, however the amounts are too small to be nutritionally significant. It's still primarily sucrose and carries the same caloric load as white sugar.

Can you use piloncillo in cold drinks?

Not directly - the cone won't dissolve in cold liquid. Make a piloncillo syrup first by simmering it with water, then cool the syrup before adding it to iced drinks, cold brew, or agua frescas.

What Is Ricotta Cheese? [Taste, Uses & More]

April 1, 2026

Ricotta does something no other fresh cheese quite manages: it disappears into a dish without competing with it. It holds lasagna layers together, keeps cannoli cream light, and stretches pasta fillings without overwhelming the other ingredients.

What Is Ricotta Cheese

Where mascarpone adds richness and cream cheese alternatives add tang, ricotta adds body while staying neutral - and that restraint is exactly what makes it useful. Knowing ricotta's shelf life and how to handle it well unlocks the most from every tub.

QUICK SUMMARY

Ricotta is a mild, fresh whey cheese with soft, moist curds and a light milky sweetness. It works in both sweet and savory cooking, from lasagna fillings to dessert spreads, and stays stable when baked or gently heated. Opened tubs keep 5-7 days refrigerated.

🧀Type: Fresh unripened whey cheese, white and moist with soft curds
👅Flavor: Mild milky sweetness with a faint lactic tang
🍝Best For: Pasta fillings, lasagna, cannoli cream, dessert spreads
❄️Shelf Life: Unopened 2-3 weeks; opened best within 5-7 days refrigerated
🛒Buy It: Look for bright white color, tight seal, and minimal whey separation

What Is Ricotta Cheese?

Ricotta originates in southern Italy - Sicily and Campania in particular - where cheesemakers discovered they could reheat leftover whey from mozzarella or provolone production to yield a second crop of fine, delicate curds.

The name itself means "recooked" in Italian, which describes the process precisely.

As a fresh whey cheese, ricotta is unripened and sold within days of production. It has no rind, no aging, and no added cultures to develop sharpness.

Several distinct varieties exist beyond the standard supermarket tub:

  • Ricotta di bufala - made from water buffalo whey, richer and creamier than cow's milk versions
  • Ricotta di pecora - sheep's milk whey base, slightly more pronounced in flavor
  • Ricotta salata - pressed, salted, and dried into a firm block used for grating rather than spreading
  • Whole milk vs. part-skim - the most common distinction in American grocery stores, affecting fat content and richness

Standard ricotta sits somewhere between cottage cheese and a very soft, unsalted cream cheese in both texture and flavor intensity.

What Does Ricotta Cheese Taste Like?

ricotta cheese - What Is Ricotta Cheese

Ricotta leads with mild milky sweetness - not sugary, but the clean, fresh dairy note you get from warm whole milk. A faint lactic tang follows, the kind that signals freshness rather than sourness.

Sensory SnapshotMild Intensity
👅 Flavor
milky sweetlactic tangcreamy
✋ Texture
soft curdsgrainyspreadable
👃 Aroma
fresh milkfaint lactic

Heat changes ricotta noticeably. Baked into lasagna or manicotti, the curds tighten slightly and the sweetness pulls back, leaving a subtly savory, creamy richness that holds its shape without tasting heavy.

Whipping ricotta - with lemon, honey, or both - smooths the graininess into something closer to a light mousse. The flavor brightens and the tang becomes more present.

Cold ricotta straight from the tub is the mildest expression; everything else builds from there.

How to Use Ricotta Cheese

Ricotta's neutrality is its strength. It absorbs surrounding flavors without fighting them, which makes it functional across a wide range of dishes and preparations.

How Ricotta Cheese Is Used
MethodBest ForTip
🥗 Cold/SpreadToast toppings, dips, dessert spreads with lemon and honeyDrain excess whey first for a cleaner spread
🔥 BakedLasagna, manicotti, stuffed shells, cheesecake basesMix with egg to bind and prevent watery separation
🍳 Stirred into saucesCream sauces, mashed potatoes, pasta finishesAdd off-heat or at low temperature to avoid graininess
🌀 WhippedCannoli cream, mousse-style desserts, light fillingsWhip with cold ricotta; whole milk version gives best texture

Savory pairings reward ricotta's restraint. Spinach and nutmeg is the classic filling combination for ravioli and stuffed pasta. Prosciutto, arugula, and a drizzle of olive oil turn a simple spread into something worth eating. Zucchini, garlic, and lemon are a strong supporting cast for a summer pasta or pizza dollop.

Sweet applications are equally straightforward. Dark chocolate and citrus work well in cannoli cream. Lemon zest and honey whipped into ricotta make a fast dessert that needs nothing else.

Watch Out
Avoid pairing ricotta with strongly alcoholic reductions or very acidic dressings left in direct contact - both can break the texture and produce a flat, watery result.

One underused move: fold ricotta into mashed potatoes instead of cream. It adds body and a mild richness without the heaviness.

Try It In
🧀Homemade Fresh Ricotta CheeseMake it from scratch — the texture beats most store-bought tubs→

How to Buy and Store Ricotta Cheese

Start with the seal. A tight, undamaged lid matters because ricotta degrades quickly once exposed to air.

Inside the container, look for bright white curds sitting in a thin milky whey - not large separated pools of liquid, which signal age or mishandling.

Best Pick
Whole milk ricotta gives the best texture for both cooking and spreading. Reach for part-skim only when a recipe specifically calls for it or you're tracking fat intake.

Avoid containers with yellowing curds or any sour smell beyond the normal faint tang. For recipes that need a firm, grating cheese - scattered over roasted vegetables or pasta - buy ricotta salata instead of fresh.

Storage is simple:

  • Keep it cold - refrigerate promptly and store below 40°F at all times
  • Seal it well - transfer to an airtight container once opened; keep it in its own whey if possible
  • Watch the clock - unopened tubs last 2-3 weeks; opened ricotta is best within 5-7 days

For a full breakdown of timelines and signs of spoilage, the ricotta cheese storage life guide covers every scenario. If you're also working with mozzarella - ricotta's frequent kitchen companion - the storage rules differ significantly.

Where to Start With Ricotta

Ricotta rewards even a first-time user. If you've never cooked with it, start cold: spread it on toast with olive oil and chili flakes, or whip it with lemon and honey for a fast dessert.

Once you're comfortable with the texture, move to baked fillings. A simple lasagna layer - ricotta mixed with egg, spinach, and nutmeg - is the most instructive recipe this cheese has.

It shows exactly how ricotta holds together under heat and why it's irreplaceable in that context.

When you need to adjust for dietary needs or availability, ricotta cheese swaps and cottage cheese alternatives both cover the most practical swaps with honest trade-offs.

Frequently Asked Questions

What is the difference between ricotta and cottage cheese?

Ricotta is made from whey and has smaller, finer curds with a milder, sweeter flavor. Cottage cheese uses whole or skim milk, has larger curds, and tastes slightly saltier and tangier. In cooking, ricotta holds together better when baked.

Can ricotta be used instead of cream cheese?

Yes, with caveats. Ricotta is wetter and less tangy than cream cheese, so drain it first and expect a lighter, less dense result. It works in cheesecake bases and dips but won't firm up the same way in frostings.

Can you freeze ricotta?

Technically yes, but the texture becomes grainy and watery after thawing. Frozen-then-thawed ricotta is only acceptable in cooked applications like lasagna or baked pasta - never in spreads or whipped desserts.

Is ricotta healthy?

It's a solid source of protein and calcium with moderate fat, lower than cream cheese. Part-skim ricotta cuts fat further without sacrificing much protein. It's not lactose-free, so those with dairy sensitivity should account for that.

What is ricotta made from?

Traditional ricotta is made by reheating whey left over from mozzarella or provolone production - the heat causes remaining proteins to coagulate into fine curds. Many commercial versions now use whole or skim milk directly, which produces a slightly richer result.

Korean Galbi Jjim

April 1, 2026

You need just under 3 hours and a heavy pot. No stovetop babysitting, no complicated techniques, just slow simmering that turns tough beef short ribs into fork-tender meat with glossy sauce.

Korean Galbi Jjim served on a plate

The long cook time does all the work. You brown the ribs, add liquid, then let low heat break down the collagen while Korean radish and carrots soak up every bit of that sweet-savory broth.

This is what we make for cold weather dinners or when we want something that feels special without requiring constant attention. The house smells incredible after the first hour.

QUICK SUMMARY

Korean Galbi Jjim is braised beef short ribs simmered with soy sauce, garlic, ginger, and brown sugar until the meat falls off the bone. The key is maintaining a bare simmer for 2+ hours so the ribs tenderize without falling apart. Uniform vegetable cuts ensure everything finishes at the same time.

⏱️Time reality: 20 minutes prep, then 2.5 hours mostly hands-off simmering
🔪First move: Soak ribs in cold water for 1 hour to remove blood and prevent cloudy broth
⚠️Watch out: Add vegetables after 90 minutes or they turn to mush - radish and carrots need less time than meat

Table of Contents

Toggle
  • Why This Recipe Works
  • What You'll Need
    • Ingredient Details
  • Ingredient Swaps
  • What to Serve With It
  • Store and Reheat
  • Frequently Asked Questions
  • Korean Galbi Jjim
    • Method 
    • Tried this recipe?

Why This Recipe Works

Low heat and time break down tough connective tissue in beef short ribs without drying out the meat. Rich mains need something to cut through, and soft buttery dinner bread does exactly that.

Quick Reference
⏱️
Prep Time
20 min
🔥
Cook Time
2 hours 30 min
⏰
Total Time
2 hours 50 min
🍽️
Servings
6 servings
📊
Difficulty
Medium
🏷️
Category
Main Dish
💡
Quick Tip
Soak ribs, simmer low, skim, finish with sesame oil
🎯
Best For
Weeknight | Entertaining | Meal prep

Five reasons this works:

  • Soaking removes blood - One hour in cold water pulls out impurities that would make the broth cloudy and metallic-tasting
  • Browning builds flavor - Searing the ribs 3-4 minutes per side creates caramelized bits that dissolve into the braising liquid
  • Low simmer tenderizes - Maintaining 180°F keeps collagen breaking down steadily without boiling the meat into dry strings
  • Vegetables absorb sauce - Korean radish and carrots act like sponges, soaking up the sweet-savory broth while staying tender but intact
  • Skimming keeps it clean - Removing foam and fat every 30 minutes results in a glossy, rich sauce instead of greasy slick
Golden Rule
Never let the pot come to a rolling boil - bubbles should barely break the surface or the meat will seize up and turn stringy

What You'll Need

Ingredients for Korean Galbi Jjim

Stock your pantry with soy sauce, brown sugar, garlic, and ginger. For a version that comes together quickly, a similar dinner recipe uses the same braising technique with different aromatics and shorter cook time.

🥩
Protein
  • 3 lbs beef short ribs
🧄
Aromatics
  • 8 cloves garlic, minced
  • 2-inch piece ginger, sliced
  • 4 green onions
🥬
Vegetables
  • 1 lb Korean radish (mu), cut in 1.5-inch chunks
  • 2 large carrots, cut in 1.5-inch chunks
🥢
Sauce Base
  • ½ cup soy sauce
  • ⅓ cup brown sugar or honey
  • 1 tablespoon sesame oil
  • 1 teaspoon black pepper
  • 4 cups water

Ingredient Details

  • Beef short ribs
    Look for English-cut ribs with good marbling - the fat renders during braising and keeps the meat moist while adding richness to the sauce
  • Soy sauce
    Use regular soy sauce, not low-sodium - the long simmer concentrates flavors but also reduces saltiness naturally
  • Korean radish (mu)
    Cut into uniform 1.5-inch chunks so they finish cooking at the same time as carrots - smaller pieces turn mushy, larger pieces stay crunchy
  • Brown sugar or honey
    Add gradually and taste as you go - too much sweetness masks the savory depth from the beef and soy sauce
  • Garlic
    Mince it fresh instead of using jarred - raw garlic mellows during the long braise and adds aromatic depth that powder can't match
  • Sesame oil
    Add this off the heat at the very end - cooking sesame oil makes it bitter and kills the nutty aroma that defines the dish
  • Ginger
    Slice it thick so you can fish out the pieces before serving - thin slices dissolve into mush and add fibrous texture

Ingredient Swaps

Most swaps work if you match cooking time to the protein. A good creamy homemade homemade recipe helps balance the richness when you're making substitutions that change the fat content.

Four swaps that work:

  • Beef short ribs → pork ribs or beef chuck - Pork ribs cook faster (90 minutes instead of 2.5 hours) and beef chuck needs cutting into 2-inch cubes but delivers similar tender texture
  • Soy sauce → tamari or coconut aminos - Tamari keeps it gluten-free with almost identical saltiness, coconut aminos taste slightly sweeter and less umami-forward
  • Korean radish → daikon or regular white radish - Daikon has the same mild peppery bite and holds its shape during braising, white radish works but turns softer
  • Brown sugar or honey → maple syrup or white sugar - Maple syrup adds earthy sweetness, white sugar tastes cleaner but lacks the molasses depth that rounds out soy sauce

Pork Ribs

Works for: Budget cooking, faster meals (90 min vs 2.5 hours), leaner option

Skip if: You want the rich marrow flavor and gelatinous texture that only beef short ribs deliver

Tamari

Works for: Gluten-free diets, identical saltiness, nearly the same umami depth

Skip if: You can use regular soy sauce - tamari costs more and the flavor difference is negligible here

Instructions

Plan for 20 minutes of active prep, then 2.5 hours of mostly hands-off simmering. Salad cuts through all that richness with bright acidity and crunch.

  1. Soak the ribs - Submerge beef short ribs in cold water for 1 hour, changing the water after 30 minutes to draw out blood and prevent cloudy broth
  2. Brown the meat - Pat ribs dry, then sear them in a heavy pot over medium-high heat for 3-4 minutes per side until deeply golden, working in batches to avoid crowding
  3. Build the braise - Add garlic, ginger, soy sauce, brown sugar, black pepper, and 4 cups water to the pot, bring to a boil, then reduce to a bare simmer where bubbles just break the surface
  4. Skim and add vegetables - Skim foam and fat every 30 minutes for the first 90 minutes, then add Korean radish and carrots cut into uniform 1.5-inch chunks and simmer another hour until meat is fork-tender
  5. Finish and reduce - Remove lid and simmer 20 more minutes to thicken the sauce, turn off heat, stir in 1 tablespoon sesame oil, and let rest 5 minutes before serving
Shortcut
Use pre-cut short ribs from the butcher counter and skip the soaking step if you're pressed for time - the broth will be slightly cloudier but the flavor stays intact

What to Serve With It

This needs steamed rice to soak up the sauce and something acidic to cut the richness. For more complete fresh vegetable dinner ideas that work with braised mains, we keep a rotation of banchan ready in the fridge.

Side Dish Prep Why It Works How to Serve
Steamed white rice Easy Neutral base that soaks up the glossy sauce without competing for attention Mound 1 cup rice per person in shallow bowls, ladle ribs and sauce over top
Kimchi Easy Sharp fermented tang and crunch balance the sweet-savory richness of the braise Serve ½ cup per person on the side, let people adjust spice level to taste
Blanched spinach with garlic Easy Mild, tender greens add freshness without overwhelming the main dish Blanch 1 minute, squeeze dry, toss with minced garlic and sesame oil
Japchae (glass noodles) Medium Slightly sweet, chewy texture contrasts with fork-tender ribs and makes it feel like a feast Serve room temperature or warm, 1 cup per person alongside the ribs
Pickled radish Easy Tart, crunchy cubes cleanse your palate between bites of rich meat Quick-pickle radish in vinegar-sugar brine for 30 minutes, serve chilled

Three ways to serve it:

  • Weeknight bowl - Pile ribs over rice, add kimchi and blanched spinach, drizzle extra sauce over everything
  • Family-style platter - Arrange ribs and vegetables on a large plate, surround with banchan, serve rice in a separate bowl so people can build their own plates
  • Meal prep containers - Portion ribs with vegetables and sauce into containers, pack rice separately so it doesn't get soggy when reheated
Best Pick
Steamed rice and kimchi are non-negotiable - the rice soaks up sauce and kimchi cuts through fat with tangy crunch that makes every bite better

Store and Reheat

Galbi jjim actually improves after a day in the fridge as flavors meld and the sauce thickens. Potato soaks up every drop of sauce on the plate, which is why we always make extra portions.

Method Time Best For
🍳 Stovetop 10-15 min Even reheating that preserves tender texture and glossy sauce without drying out the meat
🔥 Oven 20 min at 325°F Large portions when you're reheating the whole batch - cover with foil to trap steam
📦 Microwave 3-5 min Single servings in a hurry - add 2 tablespoon water and cover to prevent meat from drying out

For best results when storing:

  • Cool quickly - Spread ribs and vegetables in a shallow container so they drop to fridge temp in under 2 hours, preventing bacterial growth
  • Remove fat layer - Refrigerate overnight, then peel off the solidified fat cap before reheating for cleaner sauce without greasiness
  • Store with sauce - Keep meat and vegetables submerged in braising liquid so they stay moist during storage
  • Use shallow containers - Stack no more than 2 inches deep for even cooling and easier portioning when you reheat
  • Freeze in portions - Divide into single-serving containers with sauce, freeze up to 3 months, thaw in fridge overnight before reheating

Frequently Asked Questions

How long to cook Korean Galbi Jjim at simmer?

Simmer beef short ribs for 2 to 2.5 hours at a bare simmer (around 180°F) until the meat pulls away from the bone with a fork. Add vegetables after 90 minutes so they don't turn to mush.

Can I make Korean Galbi Jjim ahead?

Yes - make it up to 2 days ahead and refrigerate in the braising liquid. The flavors deepen and you can easily remove the solidified fat layer before reheating on the stovetop for 10-15 minutes.

What goes with Korean Galbi Jjim?

Serve it with steamed white rice to soak up the sauce, plus kimchi for acidic crunch and blanched spinach with garlic for a mild green contrast. Japchae or pickled radish round out the meal.

How do I know when Korean Galbi Jjim is done?

The meat is done when it pulls away from the bone easily with a fork and the sauce has thickened to coat the back of a spoon. Vegetables should be tender but still hold their shape.

Can I use pork ribs instead of beef ribs for Galbi Jjim?

Yes - pork ribs work but need only 90 minutes of simmering instead of 2.5 hours since they're leaner and more tender. The flavor will be milder and less rich than beef short ribs.

Korean Galbi Jjim served on a plate

Korean Galbi Jjim

No ratings yet
Korean Galbi Jjim is braised beef short ribs simmered with soy sauce, garlic, ginger, and brown sugar until the meat falls off the bone. The long, slow simmer tenderizes the ribs while vegetables soak up the savory-sweet broth. This recipe requires minimal hands-on time but delivers rich, fork-tender results.
Print Recipe Pin Recipe
Prep Time 20 minutes mins
Cook Time 2 hours hrs 30 minutes mins
Total Time 2 hours hrs 50 minutes mins
Servings: 6 servings
Course: Main Dish
Cuisine: Korean
Ingredients Equipment Method Notes

Ingredients
  

  • 3 lbs beef short ribs English-cut with good marbling
  • 8 cloves garlic minced fresh
  • 2 inch ginger sliced thick
  • 4 stalks green onions
  • 1 lb Korean radish cut in 1.5-inch chunks
  • 2 large carrots cut in 1.5-inch chunks
  • 0.5 cup soy sauce regular, not low-sodium
  • 0.33 cup brown sugar or honey; add gradually to taste
  • 1 tablespoon sesame oil added off heat at end
  • 1 teaspoon black pepper
  • 4 cups water

Equipment

  • heavy pot for browning ribs and braising

Method
 

  1. Submerge the beef short ribs in cold water for 1 hour, changing the water after 30 minutes to remove blood and prevent cloudy broth.
    3 lbs beef short ribs
  2. Pat the ribs dry. Heat a heavy pot over medium-high heat and sear the ribs for 3-4 minutes per side until deeply golden. Work in batches to avoid crowding.
    3 lbs beef short ribs
  3. Add garlic, ginger, soy sauce, brown sugar, black pepper, and 4 cups water to the pot. Bring to a boil, then reduce heat to maintain a bare simmer with bubbles just breaking the surface.
    8 cloves garlic, 2 inch ginger, 0.5 cup soy sauce, 0.33 cup brown sugar, 1 tsp black pepper, 4 cups water
  4. Skim off foam and fat every 30 minutes for the first 90 minutes. Then add the Korean radish and carrots cut into uniform 1.5-inch chunks. Continue simmering for another hour until the meat is fork-tender.
    1 lb Korean radish, 2 large carrots
  5. Remove the lid and simmer an additional 20 minutes to thicken the sauce. Turn off the heat, stir in sesame oil, and let the dish rest for 5 minutes before serving.
    1 tbsp sesame oil

Notes

  • Soak ribs in cold water for an hour to prevent cloudy broth and remove blood.
  • Maintain a bare simmer around 180°F to tenderize meat without drying it out.
  • Add vegetables late in cooking to keep them tender but intact and skim fat regularly for a glossy sauce.

Tried this recipe?

Let us know how it was!

What Is Pork Shoulder? [Taste, Uses & More]

April 1, 2026

Pulling a slow-cooked pork shoulder apart with two forks - the meat collapsing into ribbons, fat glistening, steam rising - is one of the most unmistakable sensory moments in cooking.

What Is Pork Shoulder

The smell hits before the plate does, a dense, meaty warmth that signals hours of low heat doing exactly what it should.

Understanding the differences between bbq vs smoking matters here, because how you apply heat shapes how that aroma and texture develop.

Whether you reach for a Dutch oven or a smoker, knowing your way around cooking braising pan vs dutch oven right makes a real difference with a cut this forgiving yet uncompromising.

QUICK SUMMARY

Pork shoulder is a heavily marbled, collagen-rich cut from the upper foreleg that becomes tender and shreddable after long, slow cooking. Its rich, porky flavor suits smoked barbecue, braised stews, and carnitas equally well.

🐖Cut: Upper foreleg and shoulder, bone-in or boneless
🌡️Best Method: Low-and-slow - smoking, braising, or slow roasting
🍖Flavor: Rich, savory umami with a mild sweetness from rendered fat
🧊Shelf Life: Raw 2-4 days refrigerated; frozen up to 12 months
🍽️Best Uses: Pulled pork, carnitas, cochinita pibil, red-cooked pork, cassoulet

What Is Pork Shoulder?

Pork shoulder comes from the upper foreleg and shoulder area of the hog - a section that works hard, building dense muscle threaded with fat and collagen. That connective tissue is exactly why this cut rewards patience.

Two distinct sub-cuts fall under the umbrella name. Boston butt (confusingly, from the upper shoulder, not the rear) is typically square, well-marbled, and sold bone-in or boneless. Picnic shoulder sits just below it, is more triangular, and often comes with the skin on.

The cut is also called shoulder roast or simply pork butt depending on the region.

Across European traditions it appears in rustic braises and roasts; in North America it anchors pulled pork culture; and worldwide it shows up in preparations from Filipino adobo to Chinese red-cooked pork.

  • 🐖 Boston butt - square roast, upper shoulder, ideal for pulling and smoking
  • 🐖 Picnic shoulder - lower, skin-on option, better for slow roasting whole
  • 🐖 Bone-in vs boneless - bone-in retains more moisture during long cooks; boneless is easier to portion

What Does Pork Shoulder Taste Like?

pork shoulder - What Is Pork Shoulder

Raw pork shoulder smells meaty and fatty, and that directness doesn't disappear with cooking - it deepens.

The final flavor is a rich, porky umami layered with a quiet sweetness that comes from the rendered fat cap melting into the meat.

Understanding the taste of pork broadly helps here, because shoulder sits at the richer end of the spectrum compared to loin or tenderloin.

Think of it next to lamb shoulder: comparable richness, but milder and without the lanolin edge.

Against beef chuck, pork shoulder is noticeably sweeter and less iron-forward. Smoke adds a cured-meat depth that the raw cut doesn't have - a whole different register.

Sensory SnapshotModerate Intensity
👅 Flavor
rich umamislightly sweetsavorymild smokiness
✋ Texture
firm rawtender and shreddable when slow-cooked
👃 Aroma
meatyfattysmoky when barbecued

How to Use Pork Shoulder

Pork shoulder's collagen-to-gelatin conversion is the key mechanism behind every great preparation. Below a certain internal temperature - around 195-205°F - that collagen stays tough.

Push through it, and the meat becomes something you can pull apart with almost no effort.

Golden Rule
Never rush pork shoulder. The collagen converts to gelatin only after extended time above 190°F - pulling it early gives you chewy, not tender.

American barbecue relies on low-and-slow smoking, typically a Boston butt held at 225-250°F for 10-16 hours.

Mexican carnitas braises the shoulder in its own fat with citrus and spice, while cochinita pibil wraps it in achiote and slow-cooks it in banana leaves.

Chinese red-cooked pork adds soy, rice wine, and sugar for a lacquered, braised result.

Filipino adobo simmers it in vinegar and garlic until the meat is fork-tender.

It pairs well with vinegar-based sauces, apple or pear (fruit acidity cuts the fat cleanly), garlic, onion, smoky paprika, chipotle, mustard, and pickled vegetables. Avoid pairing it with delicate herbal salads or light white sauces - the fat overwhelms both.

For cooking pork shoulder right, matching the cooking method to the dish makes the difference between average and excellent results.

How Pork Shoulder Is Used
MethodBest ForTip
🔥 SmokingPulled pork, BBQ sandwichesWrap in foil after 165°F internal to push through the stall faster
🍲 BraisingRagu, adobo, red-cooked pork, stewsBrown the fat cap first; liquid should come only halfway up the meat
🫕 Slow RoastingCrispy-skin picnic shoulder, European roastsScore the fat cap deeply and start at high heat to render, then drop temperature
⚡ Pressure CookingQuick shredded pork for tacos or bowlsAdd at least one cup of liquid; release pressure naturally for juicier results
Try It In
🍖Slow Cooker Pulled Pork ShoulderHands-off method that lets the collagen do all the work→

How to Buy and Store Pork Shoulder

Look for shoulders with even, white marbling running through the meat and a fat cap that's firm and cream-colored. Pale, dry-looking meat or any greenish tint means skip it.

Boston butt gives you a compact, square roast; picnic shoulder is more triangular and sometimes skin-on - both are correct choices depending on the recipe.

Watch Out
A grey surface color on raw shoulder can indicate age or oxidation - that's different from a light pink interior. When in doubt, ask the butcher when it was cut.

Store raw shoulder at the back of the fridge, in original packaging or a resealable bag, away from ready-to-eat foods.

For anything beyond four days, freeze it tightly wrapped with minimal air exposure - proper handling for keeping pork shoulder fresh is especially important with a cut this large.

  • Refrigerated raw - 2-4 days; keep at 40°F or below
  • Frozen whole - 6-12 months; double-wrap to prevent freezer burn
  • Cooked shoulder - 3-4 days in the fridge; note that [how long carnitas keeps](https://forkliftkitchen.com/carnitas-shelf-life/) depends on how it was finished and stored

Where to Start With Pork Shoulder

If you've never cooked a pork shoulder, the slow cooker is the most forgiving entry point. Season generously, add a splash of liquid, and let time handle the rest.

Once you're comfortable with texture and timing, move to smoking or oven-braising for more layered results.

A bbq pulled pork sliders recipe is a practical next step - it teaches portioning, sauce balance, and how the fat interacts with an acidic condiment.

Best Pick
Boston butt is the most consistent starting point - reliable marbling, easier to find boneless, and forgiving across smoking, braising, and slow-cooker methods.

Frequently Asked Questions

Is pork shoulder the same as pork butt?

Not exactly. Both come from the shoulder area, but Boston butt is the upper portion - square, well-marbled, and ideal for pulling. Picnic shoulder is the lower section, more triangular, and often sold skin-on.

How long does pork shoulder take to cook?

At 225-250°F on a smoker, plan roughly 1.5-2 hours per pound. A 7-pound Boston butt typically runs 10-14 hours. A pressure cooker cuts that to around 90 minutes for a shredable result.

What is the best way to shred pork shoulder?

Rest the meat for at least 20-30 minutes after cooking, then use two forks or your hands (with heat-proof gloves). Meat that won't shred easily hasn't reached sufficient internal temperature - return it to heat rather than forcing it.

Can you roast pork shoulder at high heat?

Yes, but only for a specific result. High heat at the start renders and crisps the fat cap. Sustained high heat, however, tightens the collagen before it can convert - you end up with chewy rather than tender meat.

Does pork shoulder have more fat than pork loin?

Significantly more. Pork shoulder's heavy marbling and fat cap make it one of the fattier primal cuts, while loin is lean by comparison. That fat is precisely why shoulder stays moist through long cooking where loin would dry out.

Japanese Sesame Dressing (Goma Dare)

April 1, 2026

Toast sesame seeds for 3-5 minutes and grind them into a coarse powder, then whisk in soy sauce, rice vinegar, and sesame oil. That's how you make goma dare-Japan's nutty, creamy salad dressing.

Japanese Sesame Dressing (Goma Dare) served on a plate

The ratio of toasted seeds to liquid controls thickness. More seeds create a richer coating; more dashi thins it for drizzling.

This works for weeknight meal prep when you want one dressing that goes on everything from cold noodles to grilled vegetables.

QUICK SUMMARY

Goma dare is a Japanese sesame dressing made by toasting seeds, grinding them into powder, and whisking with soy sauce, rice vinegar, mirin, and sesame oil. Toast the seeds until golden to avoid bitterness, grind them finely to prevent graininess, and add oil gradually to emulsify the dressing into a creamy consistency.

⏱️Timeline: 15 minutes total-5 for toasting, 10 for mixing and emulsifying
🔥Critical move: Toast seeds over medium heat, stirring constantly until golden brown
⚠️Watch out: Over-toasting burns the seeds and creates bitter flavor-remove at first sign of color

Table of Contents

Toggle
  • Why This Recipe Works
  • What You'll Need
    • Ingredient Details
  • Ingredient Swaps
  • What to Serve With It
  • Store and Reheat
  • Frequently Asked Questions
  • Japanese Sesame Dressing (Goma Dare)
    • Method 
    • Tried this recipe?

Why This Recipe Works

Ground toasted sesame seeds create a nutty base that thickens and flavors the dressing at the same time. Rich mains need something to cut through, and raita does exactly that. For a version that comes together quickly, this related raita recipe uses similar mixing techniques.

Quick Reference
⏱️
Prep Time
10 min
🔥
Cook Time
5 min
⏰
Total Time
15 min
🍽️
Servings
4-6 servings
📊
Difficulty
Easy
🏷️
Category
Dressing | Sauce
💡
Quick Tip
Toast seeds until golden, grind finely, emulsify well
🎯
Best For
Weeknight | Meal prep

Five reasons this works:

  • Toasting unlocks aroma: Heating sesame seeds for 3-5 minutes releases oils and deepens nutty flavor without bitterness
  • Fine grinding creates texture: Grinding toasted seeds into coarse powder thickens the dressing naturally without flour or cornstarch
  • Emulsification builds creaminess: Whisking sesame oil in gradually over 1-2 minutes creates a stable, glossy dressing that doesn't separate
  • Balance matters: The ratio of soy sauce, rice vinegar, mirin, and sugar hits all five taste elements-salty, sour, sweet, bitter, umami
  • Chilling melds flavors: Refrigerating for 20-30 minutes lets the ground sesame hydrate and the dressing thicken to coating consistency
Quick Tip
Add sugar last and adjust ½ teaspoon at a time to balance acidity-too much makes it cloying, too little leaves it sharp.

What You'll Need

Ingredients for Japanese Sesame Dressing (Goma Dare)

Most ingredients sit in your pantry already if you cook Japanese or Asian food regularly. A good this creamy dip works best when it hits the table at the same time as the main.

🌶️
Seeds & Oils
  • Toasted sesame seeds
  • Sesame oil
🥢
Liquids
  • Soy sauce
  • Rice vinegar
  • Mirin
  • Dashi or water
🫙
Sweetener & Emulsifier
  • Sugar
  • Mayonnaise (optional)

Ingredient Details

  • Toasted sesame seeds
    Toast raw seeds yourself for maximum aroma-pre-toasted seeds lose intensity sitting on the shelf
  • Soy sauce
    Use regular soy sauce, not low-sodium-you need the salt to balance sweetness and acidity
  • Rice vinegar
    Plain unseasoned rice vinegar works best-seasoned versions add unwanted sugar and salt
  • Mirin
    Real mirin (hon-mirin) adds subtle sweetness-avoid "mirin-style" seasonings with added corn syrup
  • Sesame oil
    Use toasted sesame oil for intense flavor-clear sesame oil has no aroma and won't work
  • Sugar
    Granulated white sugar dissolves fastest-add it last so you can adjust sweetness to taste
  • Mayonnaise
    Optional for extra creaminess-skip it for a lighter, dairy-free version that's still smooth

Ingredient Swaps

Most swaps work if you're missing one ingredient or adjusting for dietary restrictions. Pork adds the contrast this plate needs, but timing matters. For a version that comes together quickly, tender pork side dish uses similar mixing techniques.

Four swaps that work:

  • Soy sauce → Tamari: Use 1:1 ratio for gluten-free version-flavor stays nearly identical with same umami depth
  • Mirin → Dry sherry + sugar: Mix 1 tablespoon sherry with ½ teaspoon sugar to replace 1 tablespoon mirin-slightly less sweet but close
  • Mayonnaise → Silken tofu: Blend 2 tablespoons silken tofu per tablespoon mayo for dairy-free creaminess without changing flavor
  • Toasted sesame seeds → Tahini: Use 3 tablespoons tahini to replace ¼ cup ground seeds-richer, smoother, but less textured

Rice vinegar vs. apple cider vinegar

Works for: Budget cooking when rice vinegar isn't available

Skip if: You want traditional delicate flavor-apple cider vinegar tastes sharper and more assertive

Honey vs. sugar

Works for: Natural sweetener preference, adds floral notes

Skip if: You want clean sesame flavor-honey adds distinct taste that competes with nuttiness

Instructions

The entire process takes 15 minutes from start to stored jar. Most people skip chicken, but it balances the meal. We keep a batch ready for nights like this - a juicy chicken side makes meal prep easier.

  1. Toast sesame seeds: Heat a small pan over medium heat and add sesame seeds in a single layer. Stir constantly for 3-5 minutes until seeds turn golden brown and smell nutty-watch closely because they burn fast once color develops.

  2. Grind seeds: Transfer toasted seeds to a mortar and pestle or spice grinder while still warm. Grind for 15-30 seconds until seeds become a coarse powder with some visible pieces-don't grind to paste or you'll make tahini instead of dressing.

  3. Mix base: Whisk ground sesame, soy sauce, rice vinegar, and mirin in a bowl until combined. The mixture looks grainy and separated at this stage-that's normal before emulsification.

  4. Emulsify with oil: Add sesame oil in a thin stream while whisking vigorously for 1-2 minutes. The dressing gradually turns glossy and creamy as oil incorporates-keep whisking until no oil pools on the surface.

  5. Adjust and chill: Whisk in sugar ½ teaspoon at a time, tasting after each addition until sweetness balances acidity. Add dashi or water 1 tablespoon at a time if dressing is too thick for drizzling. Transfer to an airtight jar and chill for 20-30 minutes before serving.

Golden Rule
Toast seeds until golden, not brown-once they darken past tan, bitter flavor sets in and ruins the batch.

What to Serve With It

This dressing works on anything that needs nutty richness without heaviness. The noodles works best when it hits the table at the same time as the main. For weeknight savory steak meal ideas, keep sides simple so prep stays quick.

Side Dish Prep Why It Works How to Serve
Steamed broccoli Easy Mild vegetable lets sesame flavor shine without competing Drizzle warm dressing over hot florets right before serving
Mixed green salad Easy Light fresh greens balance creamy richness of goma dare Toss greens with dressing at table so leaves stay crisp
Cold soba noodles Easy Nutty dressing enhances earthy buckwheat noodle flavor Mix chilled noodles with dressing, garnish with scallions
Grilled chicken strips Medium Creamy sesame sauce adds umami dip contrast to plain chicken Serve dressing in small bowl for dipping hot grilled meat
Blanched snap peas Easy Crisp snap peas provide crunch against smooth dressing Toss warm peas with dressing while still hot for best coating

Three ways to serve it:

  • As a salad dressing: Toss with mixed greens, shredded cabbage, or cucumber slices for quick weeknight sides
  • As a noodle sauce: Mix with cold soba, udon, or somen noodles for meal-prep lunches that keep 3 days
  • As a vegetable dip: Serve alongside raw carrots, cucumbers, or blanched green beans for appetizers or picnics
Shortcut
Use a fine mesh strainer to remove excess seed grit if texture feels too grainy-one pass creates smoother dressing without losing flavor.

Store and Reheat

Goma dare keeps in the fridge for 3-4 days in an airtight container. Beef adds the contrast this plate needs, but timing matters. We keep a batch ready for nights like this - a rich beef side stays fresh longer than you'd expect.

Method Time Best For
🍳 Room temperature 10-15 min Restoring creamy texture without heating-best for salads
📦 Microwave 10-15 seconds Warming thicker dressing gently-watch closely to prevent separation
🔥 Stovetop Not typical Warming small amount gently if you want hot dressing for cooked vegetables

For best results when storing:

  • Use glass jar: Store in airtight glass container to prevent oil from absorbing plastic odors over 3-4 days
  • Stir before using: Dressing separates slightly in fridge-whisk vigorously for 30 seconds to re-emulsify before serving
  • Don't freeze: Freezing breaks emulsion and creates grainy texture that doesn't recover when thawed
  • Add liquid when thick: If dressing thickens too much after chilling, whisk in dashi or water 1 teaspoon at a time until pourable
  • Taste before serving: Flavors mellow in fridge-add pinch of salt or sugar if dressing tastes flat after storage

Frequently Asked Questions

Can I use tahini instead of toasted sesame seeds in goma dare?

Yes-use 3 tablespoons tahini to replace ¼ cup ground toasted seeds. The dressing will be richer and smoother but lack the slight texture that ground seeds provide.

How long can I store Japanese sesame dressing in the fridge?

Store goma dare in an airtight glass jar for 3-4 days refrigerated. Stir well before using since it separates slightly-don't freeze because emulsion breaks and creates grainy texture.

How do I know when goma dare is fully emulsified and ready?

The dressing looks glossy and creamy with no oil pooling on the surface. It should coat the back of a spoon in a thin, even layer without running off immediately-this takes 1-2 minutes of vigorous whisking.

Why does my goma dare separate and how do I fix it?

Separation happens when you add oil too fast or don't whisk hard enough during mixing. Fix it by whisking vigorously for 1 minute or pulsing in a blender for 10 seconds to re-emulsify.

What dishes pair well with Japanese sesame dressing?

Use goma dare on mixed green salads, cold soba or udon noodles, blanched vegetables like broccoli or snap peas, grilled chicken or tofu, and as a dip for raw vegetables. Noodles adds the contrast this plate needs, but timing matters. For a version that comes together quickly, classic noodles dish keeps meal prep simple.

Japanese Sesame Dressing (Goma Dare) served on a plate

Japanese Sesame Dressing (Goma Dare)

No ratings yet
Goma dare is a Japanese sesame dressing made by toasting sesame seeds, grinding them into a coarse powder, and whisking with soy sauce, rice vinegar, mirin, and sesame oil. Toasting the seeds unlocks a nutty aroma, while gradual emulsification with oil creates a creamy texture. This versatile dressing works well for salads, cold noodles, and grilled vegetables.
Print Recipe Pin Recipe
Prep Time 10 minutes mins
Cook Time 5 minutes mins
Total Time 15 minutes mins
Servings: 5 servings
Course: Dressing, Sauce
Cuisine: Japanese
Ingredients Equipment Method Notes

Ingredients
  

  • ¼ cup toasted sesame seeds toast raw seeds until golden, then grind coarsely
  • 2 tablespoons soy sauce use regular soy sauce, not low-sodium
  • 1 tablespoon rice vinegar use plain unseasoned rice vinegar
  • 1 tablespoon mirin use real mirin (hon-mirin)
  • 2 tablespoons toasted sesame oil add gradually for emulsification
  • 1 teaspoon sugar add gradually and adjust to taste
  • 2 tablespoons dashi or water optional, add to thin dressing if needed

Equipment

  • Small pan To toast sesame seeds
  • Mortar and pestle or spice grinder To grind toasted sesame seeds
  • Whisk To mix and emulsify dressing
  • Bowl To combine ingredients

Method
 

  1. Heat a small pan over medium heat and add sesame seeds in a single layer. Stir constantly for 3-5 minutes until seeds turn golden brown and smell nutty. Watch closely to avoid burning.
    ¼ cup toasted sesame seeds
  2. Transfer toasted seeds to a mortar and pestle or spice grinder while still warm. Grind for 15-30 seconds to a coarse powder with some visible pieces. Avoid grinding into a paste.
    ¼ cup toasted sesame seeds
  3. Whisk ground sesame seeds, soy sauce, rice vinegar, and mirin in a bowl until combined. The mixture may look grainy and separated at this stage.
    ¼ cup toasted sesame seeds, 2 tablespoons soy sauce, 1 tablespoon rice vinegar, 1 tablespoon mirin
  4. Add sesame oil in a thin stream while whisking vigorously for 1-2 minutes until the dressing turns glossy, creamy, and no oil pools on the surface.
    2 tablespoons toasted sesame oil
  5. Whisk in sugar in ½ teaspoon increments, tasting after each addition until balanced. Add dashi or water 1 tablespoon at a time if the dressing is too thick for drizzling. Transfer to an airtight jar and chill for 20-30 minutes before serving.
    1 teaspoon sugar, 2 tablespoons dashi or water

Notes

  • Toast sesame seeds until golden to avoid bitterness.
  • Grind seeds coarsely, not into a paste, to preserve texture.
  • Add sesame oil gradually while whisking to create a creamy emulsified dressing.

Tried this recipe?

Let us know how it was!

What Is Peanuts? Taste, Uses & More Explained

April 1, 2026

Pad thai arrives at the table, and those scattered crushed peanuts on top aren't garnish - they're structural. They add crunch, a round toasty flavor, and a hint of richness that pulls the whole dish together.

What Is Peanuts

Peanuts do that across dozens of cuisines, from West African groundnut stews to American peanut butter cookies, and understanding what makes them work is the starting point for using them well.

QUICK SUMMARY

Peanuts are edible legume seeds with a rich, toasty, earthy flavor that deepens with roasting. Used in snacks, sauces, and baked goods across multiple cuisines, they're one of the most widely applied plant proteins in the world.

🥜Type: Legume seed, commonly grouped and sold with tree nuts
👅Flavor: Toasty, earthy, slightly sweet, savory when roasted or salted
🍳Best Uses: Sauces, stir-fries, baked goods, snacking, peanut butter
⏱️Shelf Life: Weeks to months depending on form and storage conditions
⚠️Note: Common allergen - severe reactions possible; naturally gluten-free

What Are Peanuts?

Peanuts are the seeds of Arachis hypogaea, a legume plant native to the Paraguay region of South America.

Unlike tree nuts, the plant flowers above ground and then sends its pods downward into the soil to mature - which is why peanuts are also called groundnuts, particularly in West Africa, India, and the UK.

Four main commercial varieties exist. Each has slightly different characteristics in the kitchen:

  • Runner - The most common U.S. variety; consistent size, widely used for peanut butter
  • Virginia - Large kernels, preferred for roasted in-shell snacking
  • Spanish - Smaller, higher oil content, used in candy and peanut oil production
  • Valencia - Typically three kernels per pod; sweet flavor, good for boiling

Despite being a legume, peanuts behave like tree nuts in cooking. Their high fat content, dense texture, and concentrated flavor make them interchangeable with almonds or cashews in many applications - and they're often shelved and marketed alongside them.

What Do Peanuts Taste Like?

peanuts - What Is Peanuts

Raw peanuts have a mild, slightly beany flavor with an earthy undertone. Roasting changes everything. Heat drives off moisture and triggers the Maillard reaction, building that familiar toasted nuttiness with warm, almost brown-sugar edges.

Sensory SnapshotModerate Intensity
👅 Flavor
toastyearthyslightly sweetsavory
✋ Texture
crunchycreamy (as butter)oily-crumbly (chopped)
👃 Aroma
warm roastedtoastybrown sugar notes

Compared to almonds or hazelnuts, peanuts have a more pronounced legume earthiness underneath the toasted layer. Salting amplifies the savory and umami notes considerably.

Boiled peanuts - a Southern staple - take on a completely different profile: soft, salty, and almost bean-like, with none of the crunch.

Golden Rule
If your peanuts smell sharp, sour, or like old cooking oil, they're rancid. The oils in peanuts oxidize over time - no amount of roasting or seasoning rescues them.

How to Use Peanuts

Peanuts cross more cuisines than almost any other single ingredient. West African cooking relies on them heavily - groundnut stew builds a thick, savory base from blended peanuts, tomatoes, and aromatics, closely related to the Ghanaian groundnut soup tradition.

In Southeast Asia, roasted peanuts ground into satay sauce or a Thai peanut dressing are non-negotiable anchors of flavor.

How Peanuts Are Used
MethodBest ForTip
🥗 RawBoiled Southern-style, sprouting, light saladsUse Valencia or Spanish varieties for boiling - they soften evenly
🍳 Dry-RoastedSnacking, crushing for garnish, stir-fry toppingRoast at 350°F (175°C) for 10-15 min; shake the pan halfway
🛢️ Oil-RoastedCoated snacks, peanut brittle, confectionsAdds sheen and crunch; drain on paper towel to avoid sogginess
🥣 BlendedPeanut butter, satay sauce, peanut dressingsProcess with a pinch of salt; add neutral oil only if needed
🍪 BakedCookies, brownies, energy barsChop roughly - fine crumbs get lost, whole nuts stay distinct

American applications lean sweet: peanut brittle, peanut butter cookies, and Reese's-style chocolate combinations are the dominant tradition. Brazilian paçoca - a crumbly pressed peanut candy - shows the same instinct with a drier, less sweet result.

Peanuts pair tightly with soy sauce and lime in savory sauces, with chocolate in desserts, and with chilies and garlic in spicy preparations. Fresh herbs like cilantro and mint cut through the richness in salads and noodle bowls.

If you need a swap in a sauce application, check these peanut butter substitutes for workable alternatives.

Try It In
🌶️Masala Peanuts Indian SpicedDry-roasted peanuts coated in spiced chickpea flour — shows how heat and seasoning reshape the nut's flavor→

How to Buy and Store Peanuts

Look for shelled kernels that are plump and uniform in color, with no dark spots or powdery coating. A rancid or sharp smell at the store is a hard no.

Vacuum-sealed or nitrogen-flushed packages extend shelf life meaningfully - they're worth the slight price premium.

Watch Out
Peanuts stored at room temperature in open containers go rancid faster than most nuts due to their high polyunsaturated fat content. Once opened, move them to an airtight container in the fridge.

Storage by form:

  • Unshelled raw peanuts - Cool, dry pantry; last several months
  • Shelled roasted kernels - Airtight container, refrigerated; use within 1-3 months
  • Peanut butter (opened) - Refrigerate; natural varieties separate but stay fresh for months

For a full breakdown of how long each form lasts, the peanut shelf life guide covers every storage scenario in detail.

Where to Start With Peanuts

Start with dry-roasted whole peanuts if you're new to cooking with them. Crush them over noodles or grain bowls to understand the texture and flavor contribution before committing to a full sauce.

Once comfortable, the next move is a simple peanut sauce - peanut butter thinned with soy sauce, lime, garlic, and a little water. It works on everything from grilled chicken to cold noodles.

From there, the range opens up considerably.

Frequently Asked Questions

Are peanuts a nut or a legume?

Botanically, they're a legume - seeds that grow in pods underground, related to lentils and chickpeas. Culinarily and nutritionally, they're grouped with tree nuts because their fat content, flavor, and kitchen behavior closely match walnuts and almonds.

What does a peanut taste like compared to almonds?

Both share a roasted nuttiness, however peanuts have a deeper earthy, legume-forward character that almonds lack. Almonds lean cleaner and slightly more bitter; peanuts read as richer and more savory.

How do you roast peanuts at home?

Spread raw shelled peanuts in a single layer on a baking sheet and roast at 350°F (175°C) for 10-15 minutes, shaking once halfway through. Pull them before they look fully done - carryover heat darkens them further as they cool.

Why do peanuts get rancid so quickly?

Their polyunsaturated fats oxidize when exposed to air, heat, or light - producing that sharp, paint-like smell. Roasted peanuts go rancid faster than raw because the roasting process breaks down some of the natural antioxidant compounds.

Can you freeze peanuts?

Yes - both raw and roasted peanuts freeze well in airtight bags for up to a year with no significant texture loss. Peanut butter also freezes, though natural varieties may need stirring after thawing.

What Is Raw Salmon? Taste, Texture & Uses Explained

April 1, 2026

Most people assume raw salmon needs nothing more than a clean slice and a bowl of soy sauce - and while that's not wrong, it misses why this fish earns its place at the center of Japanese, Hawaiian, and Nordic food traditions.

What Does Raw Salmon Taste Like

The fat marbling and silky texture that define a good keeping salmon fresh practice start long before the fish hits your plate, and knowing what separates a great piece from a mediocre one changes how you shop, store, and serve it.

Whether you're spotting poke spoilage signs or pulling a gravlax from the cure, raw salmon rewards attention.

QUICK SUMMARY

Raw salmon is uncooked oily fish with a mildly sweet, buttery flavor and silky texture. It's used in sashimi, poke, and gravlax, and requires sushi-grade or flash-frozen sourcing for safe raw consumption. Use within 24-48 hours of purchase.

🐟Flavor: Mildly sweet, buttery, with a clean briny undertone
✋Texture: Silky, tender, firm-but-yielding with visible fat
🍣Best Uses: Sashimi, nigiri, poke bowls, gravlax, tartare
❄️Shelf Life: 24-48 hours raw; 3-4 days cooked; months frozen
⚠️Key Note: Confirm flash-freeze history before consuming raw

What Is Raw Salmon?

Raw salmon is the uncooked flesh of salmon species harvested from the North Atlantic and North Pacific.

It belongs to the oily fish category, meaning its fat is distributed throughout the muscle tissue rather than concentrated in the liver - a distinction that drives both flavor and texture.

Several species appear in raw preparations, and they're not interchangeable. Atlantic salmon (Salmo salar) dominates farmed supply worldwide and has consistent fat marbling.

Among wild Pacific species, Chinook (King) salmon carries the highest fat content and commands the highest price at sushi counters.

Coho is leaner and milder.

Sockeye has the deepest red color and a more pronounced flavor - worth understanding if the taste of sockeye salmon is new territory for you.

In Japanese kitchens, raw salmon is called sake (鮭). It's offered as sashimi, hand-pressed into nigiri, or featured in omakase menus.

Outside Japan, it appears in Hawaiian poke, Nordic gravlax, and modern tartare and carpaccio preparations. The fish is also commonly misspelled as "raw salomn" in search queries - same fish, different fingers.

What Does Raw Salmon Taste Like?

raw salmon - What Does Raw Salmon Taste Like

Raw salmon has a mild, clean sweetness with a creamy, buttery quality that comes directly from its fat marbling. The flavor isn't sharp or aggressively oceanic - it sits closer to a gentle brine with a subtle umami depth underneath.

Sensory SnapshotModerate Intensity
👅 Flavor
mildly sweetbuttery umamiclean brine
✋ Texture
silkyfirm-but-yielding
👃 Aroma
oceanicmarine sweetness

Compared to tuna, raw salmon is creamier and milder - think avocado-forward rather than meaty. Darker cuts near the bloodline carry a faint iron note that not everyone notices but some find pronounced.

The aroma should always read as fresh ocean, never ammonia. That distinction matters - if it smells off, it is off.

Cooking changes the profile significantly. Heat firms the muscle fibers and cooks off the volatile fats responsible for that butter-meets-ocean character.

What makes this fish distinct in raw form is precisely what what makes fish distinct overall - the fat structure and freshness window working together.

How to Use Raw Salmon

Raw salmon isn't one preparation - it spans a range of techniques from pure slicing to multi-day curing. The throughline is preserving the fat and texture that set it apart.

How Raw Salmon Is Used
MethodBest ForTip
🥗 Sashimi / NigiriShowcasing pure flavor, Japanese serviceSlice against the grain; chill the knife first
🥣 PokeCubed bowls with soy, sesame, scallionToss just before serving to avoid texture loss
🧂 Gravlax / LoxNordic cured preparations, brunch boardsA 1:1 salt-to-sugar cure ratio with dill for 24-48 hrs
🍋 Tartare / CarpaccioModern European raw platesAdd acid (lemon, yuzu) right before plating
🔥 TatakiSeared exterior, raw center - Japanese styleSear on high heat for 15-20 seconds per side only

Pairing matters here. Soy sauce or tamari, wasabi, and pickled ginger are the classic Japanese frame. For poke, sesame oil and scallion do most of the work. Gravlax leans on dill, crème fraîche, and rye. Tartare opens to citrus - yuzu, lemon, or even a light acidic element the way non alcohol red wine stand-ins can provide brightness in a sauce without the alcohol.

Avocado is the most reliable partner across formats - its fat complements rather than competes. Avoid strong dairy sauces and overly sweet glazes, which override the subtle brine that makes raw salmon worth eating in the first place.

Golden Rule
Acid goes on last. Whether it's citrus juice for carpaccio or a yuzu dressing for tartare, adding acid too early breaks down the protein structure and turns silky texture grainy.
Try It In
🍣Raw Salmon RecipesFrom sashimi to poke — preparations that let the fish lead→🥗Raw Salmon Salad RecipesLight, acid-forward builds where texture stays center stage→

How to Buy and Store Raw Salmon

Start at the counter. Good raw salmon has bright, consistent color - orange to deep red depending on species - with visible white fat lines running through the flesh.

Press gently: it should feel firm, not sticky. The smell should be clean ocean, nothing sour or ammonia-sharp.

Watch Out
Not all fish labeled "sashimi-grade" meets a legal standard - the term isn't federally regulated in the US. Ask your fishmonger directly about flash-freeze history, which kills parasites and is the actual safety indicator for raw consumption.

For raw use, flash-frozen or previously frozen farmed or wild salmon is safer than never-frozen fresh.

At home, store it sealed on crushed ice or in an airtight container at 38°F (3°C) or below.

Use it same-day when possible - the raw window is short.

The same discipline applies to other raw fish: how long tuna keeps follows a similar refrigerator logic, and cooking raw salmon right covers the exact timing windows in detail.

  • 🧊 Refrigerated raw - Use within 24-48 hours; same-day is ideal
  • 🔥 Cooked leftovers - Safe for 3-4 days in an airtight container
  • ❄️ Frozen raw - Quality holds for several months at 0°F (−18°C)

Where to Start With Raw Salmon

Atlantic salmon is the most accessible entry point - its fat content is consistent, it's widely available sushi-grade, and it takes well to every format from sashimi to gravlax. If atlantic salmon and its flavor profile appeals to you, that's the reliable starting place.

For more complexity, step up to Chinook. The fat is richer, the flavor deeper, and a well-sourced piece needs nothing beyond a clean slice and good soy.

Sockeye suits those who want more pronounced flavor and don't mind a leaner texture.

Shortcut
Buy from a fishmonger who sells volume - high turnover means fresher stock. A busy sushi counter on a weekday morning is a better source than a supermarket case on a Sunday evening.

Skip ceviche-style citrus cures as your first raw salmon project - acid doesn't reliably kill pathogens. Start with sashimi or a simple poke bowl, where the fish quality speaks for itself.

Frequently Asked Questions

Is raw salmon safe to eat?

Yes, with conditions. Salmon intended for raw consumption should have been flash-frozen to kill parasites - ask your fishmonger to confirm this. Pregnant individuals and those who are immunocompromised should avoid raw salmon entirely.

What does sashimi-grade salmon mean?

"Sashimi-grade" is a marketing term, not a legal standard in the US. In practice, it signals that the fish was handled with raw consumption in mind - typically flash-frozen to FDA parasite-destruction guidelines. Always verify the freeze history directly.

How does raw salmon differ from cooked salmon in taste?

Raw salmon is noticeably creamier and more delicate - the buttery fat flavor is front and center. Cooking firms the texture, drives off volatile fats, and produces a mealier, more opaque flavor that loses the clean ocean note.

Which salmon species is best for sushi?

Chinook (King) salmon is the richest choice - highest fat content and deepest flavor. Atlantic salmon is the most consistent and widely available. Sockeye works well for those who prefer a leaner, more pronounced profile.

Can you eat salmon raw straight from the supermarket?

Not reliably. Most supermarket salmon is not labeled for raw consumption and may not have been flash-frozen to parasite-kill standards. Buy from a fishmonger or sushi supplier who can confirm sashimi-grade handling.

Chinese Red-Braised Pork Belly (Hong Shao Rou)

April 1, 2026

Most braises take patience, but red-braised pork belly rewards it with fork-tender meat and a glossy, caramelized sauce that clings to every piece. The method is simple: blanch the pork to clean it, caramelize rock sugar until amber, then simmer everything low and slow for 90 minutes.

Chinese Red-Braised Pork Belly (Hong Shao Rou) served on a plate

The fat renders completely during the long braise, leaving silky, tender meat instead of greasy chunks. Dark and light soy sauce build the savory base while Shaoxing wine adds depth and star anise gives that signature warming aroma.

Make this when you want dinner that tastes like you spent all day cooking but only needed 15 minutes of active work.

QUICK SUMMARY

Chinese red-braised pork belly simmers in soy sauce, rock sugar, and aromatics until the fat renders and the meat turns spoon-tender. The key is caramelizing sugar before adding liquids - it creates the glossy, mahogany sauce that coats every bite. Plan for 90 minutes of gentle simmering and you'll get restaurant-quality results.

⏱️Time Reality: 15 minutes prep, then 90 minutes hands-off simmering while you prep sides
🔥Critical First Step: Blanch pork belly 3-5 minutes in boiling water to remove impurities before searing
⚠️Watch Out: Burnt sugar tastes bitter - use medium heat and stop when amber, not brown

Table of Contents

Toggle
  • Why This Recipe Works
  • What You'll Need
    • Ingredient Details
  • Ingredient Swaps
  • What to Serve With It
  • Store and Reheat
  • Frequently Asked Questions
  • Chinese Red-Braised Pork Belly (Hong Shao Rou)
    • Method 
    • Tried this recipe?

Why This Recipe Works

Pork belly has enough fat to stay moist during the long braise, and the heavy-bottomed pot distributes heat evenly so nothing scorches. For a complete meal with contrasting textures, pair it with a fresh salad side - the acidity cuts through all that richness.

Quick Reference
⏱️
Prep Time
15 min
🔥
Cook Time
90 min
⏰
Total Time
1 hr 45 min
🍽️
Servings
4 servings
📊
Difficulty
Medium
🏷️
Category
Main Dish
💡
Quick Tip
Caramelize sugar before adding liquids
🎯
Best For
Weeknight | Meal prep | Entertaining

What makes this work:

  • Blanching removes impurities and helps the pork sear better without foaming or splattering
  • Caramelizing rock sugar first builds a deep, glossy base that colors the sauce mahogany
  • Low simmering heat gently breaks down fat and connective tissue over 90 minutes without toughening the meat
  • Star anise and ginger cut through the richness with warming spice and brightness
  • Removing the lid during the last 20 minutes reduces the sauce to a thick, sticky glaze
Quick Tip
Pat pork dry with paper towels before searing - moisture prevents caramelization and creates steam instead of browning

What You'll Need

Ingredients for Chinese Red-Braised Pork Belly (Hong Shao Rou)

Shop for pork belly with even fat distribution and a good meat-to-fat ratio. If you want more ideas for working with pork, check out this easy pork recipe that uses similar braising principles with different spices.

🍗
Protein
  • Pork belly (skin-on or skinless)
🥢
Sauce Base
  • Light soy sauce
  • Dark soy sauce
  • Shaoxing wine
  • Water or broth
🧄
Aromatics
  • Ginger (sliced)
  • Green onion (scallions)
  • Star anise
🫙
Sweetener & Spice
  • Rock sugar or brown sugar
  • Cinnamon stick (optional)

Ingredient Details

  • Pork belly
    Look for pieces with even fat layers - too much fat makes the dish greasy, too little makes it dry
  • Rock sugar
    Creates a cleaner, glossier caramel than granulated sugar; find it at Asian markets or use brown sugar instead
  • Dark soy sauce
    Adds deep color and mild sweetness; don't skip it or the sauce stays pale and lacks complexity
  • Shaoxing wine
    Adds aromatic depth; substitute dry sherry if unavailable, avoid cooking wine with added salt
  • Star anise
    Use 2-3 whole stars for balanced warmth; more than that turns medicinal
  • Ginger
    Slice thick coins so you can fish them out easily; thin slices disappear and create bitter bits
  • Water vs broth
    Water keeps the focus on pork and soy; chicken broth adds richness but can compete with the base flavors

Ingredient Swaps

You can adjust this recipe based on what you have or your texture preferences. The braise is forgiving as long as you keep the simmering low and the sugar caramelized properly.

Common swaps that work:

  • Rock sugar → brown sugar: Slightly less smooth caramel, but still creates good gloss and sweetness; use the same amount
  • Shaoxing wine → dry sherry: Similar aromatic quality with a touch more sweetness; mirin works too but adds more sugar so cut back on rock sugar
  • Pork belly → pork shoulder: Leaner cut with less fat; texture will be drier but still tender with longer cooking time (add 30 minutes)
  • Light soy sauce → tamari: Gluten-free option with nearly identical flavor; check sodium levels and adjust to taste

Pork Belly

Works for: Silky texture, rich flavor, classic result

Skip if: You want leaner meat or can't render fat fully

Pork Shoulder

Works for: Budget cooking, leaner option, more meat-to-fat ratio

Skip if: You want that signature melt-in-mouth belly texture

Instructions

Expect 15 minutes of active work, then 90 minutes of hands-off simmering. If you're looking for another dish with similar braising techniques but different flavor profiles, try easy sauce side that uses low-heat cooking to develop depth.

  1. Blanch the pork: Bring a large pot of water to a boil. Add pork belly chunks and simmer 3-5 minutes until scum rises to the surface. Drain, rinse under cold water, and pat completely dry with paper towels.

  2. Caramelize the sugar: Heat a heavy-bottomed pot or wok over medium heat. Add rock sugar and cook 3-5 minutes, stirring constantly, until it melts into an amber liquid. Watch closely - it goes from perfect to burnt in seconds.

  3. Sear the pork: Add blanched pork belly to the caramelized sugar. Sear 2-3 minutes per side until browned and coated in caramel. The sugar will seize up at first, then melt again as the pork releases moisture.

  4. Build the braise: Add ginger slices, star anise, green onion, light soy sauce, dark soy sauce, and Shaoxing wine. Pour in enough water or broth to barely cover the pork. Bring to a boil, then reduce to the lowest simmer. Cover and cook 70 minutes, stirring every 20 minutes.

  5. Reduce the sauce: Remove the lid and increase heat slightly. Simmer 20 more minutes until sauce thickens to a glossy glaze that coats the back of a spoon. Taste and adjust seasoning with more soy or sugar if needed. Rest 10 minutes off heat before slicing.

Golden Rule
Keep the simmer gentle - bubbles should barely break the surface. High heat toughens the meat and evaporates liquid too fast, leaving you with burnt sauce and undercooked fat.

What to Serve With It

The richness of red-braised pork belly needs something light and neutral to balance the plate. Most people reach for steamed rice, but you can add vegetables or pickles to cut through the fat. For more complete meal ideas, browse these peppercorn pork tenderloin meal planning ideas that work with other braised pork dishes too.

Side Dish Prep Why It Works How to Serve
Steamed white rice Easy Neutral base soaks up sauce without competing Spoon pork and sauce over hot rice
Blanched bok choy Easy Fresh, tender vegetable contrasts fatty richness Drizzle with soy sauce, serve alongside
Cucumber salad Easy Cool, crunchy texture cuts through heavy sauce Dress with rice vinegar and sesame oil
Stir-fried greens Easy Adds bright, garlicky contrast to sweet-savory pork Cook with garlic and serve hot
Pickled mustard greens Easy Tangy acidity balances richness and refreshes palate Serve cold as a palate cleanser

Three ways to serve it:

  • Spoon pork and sauce over steamed jasmine rice with a side of blanched bok choy drizzled with sesame oil
  • Slice pork thin and serve with cold cucumber salad dressed in rice vinegar and a sprinkle of sesame seeds
  • Pair with stir-fried snow peas or green beans and steamed buns for soaking up extra sauce
Best Pick
Steamed white rice is the go-to for a reason - it soaks up the glossy sauce and balances the richness without adding competing flavors. Make extra rice; you'll want it.

Store and Reheat

Red-braised pork belly keeps well and often tastes better the next day as the flavors meld. Store it in shallow containers so it cools quickly and reheats evenly. If you're planning to meal prep similar braised dishes, try pairing it with a tender cauliflower on the side that reheats just as easily.

Method Time Best For
🍳 Stovetop 7-10 min over low heat, stirring occasionally Preserves sauce gloss and tender texture
🔥 Oven 15 min at 325°F (160°C) covered Even warming for multiple servings without drying
📦 Microwave 2-3 min on medium power, covered Quick reheating when you're short on time

For best results when storing:

  • Let pork cool to room temperature before refrigerating to prevent condensation from thinning the sauce
  • Store pork and sauce together in an airtight container so the meat stays coated and doesn't dry out
  • Refrigerate up to 4 days; the flavors deepen overnight as the sauce penetrates the meat
  • Freeze portioned servings up to 2 months; thaw overnight in the fridge before reheating
  • Add a splash of water when reheating if the sauce thickened too much in storage - it will loosen and regain its gloss

Frequently Asked Questions

How long to cook Chinese red-braised pork belly at simmering heat?

Simmer covered for 70 minutes on the lowest heat setting, then uncover and cook 20 more minutes to reduce the sauce. The pork is done when a fork slides through with no resistance and the fat looks translucent instead of opaque.

Can I make Chinese red-braised pork belly ahead?

Yes - it tastes better the next day as the flavors soak into the meat. Cook completely, cool to room temperature, then refrigerate up to 4 days. Reheat gently on the stovetop with a splash of water to loosen the sauce.

What goes with Chinese red-braised pork belly?

Serve it with steamed white rice to soak up the sauce, plus blanched bok choy or a cucumber salad to cut the richness. Pickled mustard greens or stir-fried snow peas add tangy, crunchy contrast.

How do I know when Chinese red-braised pork belly is done?

The pork is done when a fork slides through easily and the fat looks translucent and jiggly, not firm and white. The sauce should coat the back of a spoon and look glossy, not thin or watery.

Can I use chicken instead of pork belly for red-braising?

Chicken works but cook it for only 30-40 minutes or it dries out - dark meat thighs hold up better than breasts. The texture won't be as rich or silky without the fat from pork belly.

Chinese Red-Braised Pork Belly (Hong Shao Rou) served on a plate

Chinese Red-Braised Pork Belly (Hong Shao Rou)

No ratings yet
Chinese red-braised pork belly simmers low and slow in caramelized rock sugar, soy sauces, and aromatics to develop a glossy, tender, and richly flavored dish. The method includes blanching to clean and searing the pork belly in caramel before simmering it for 90 minutes until fork-tender. This recipe provides restaurant-quality results with only 15 minutes of active prep time.
Print Recipe Pin Recipe
Prep Time 15 minutes mins
Cook Time 1 hour hr 30 minutes mins
Total Time 1 hour hr 45 minutes mins
Servings: 4 servings
Course: Main Dish
Cuisine: Chinese
Ingredients Equipment Method Notes

Ingredients
  

  • 2 pounds pork belly skin-on or skinless, cut into chunks
  • ¼ cup rock sugar or brown sugar as substitute
  • 3 tablespoons light soy sauce
  • 2 tablespoons dark soy sauce
  • ⅓ cup Shaoxing wine
  • 1 cup water or broth, to barely cover pork
  • 4 slices ginger thick sliced
  • 2 whole star anise whole
  • 2 stalks green onion scallions, whole
  • 1 stick cinnamon stick optional

Equipment

  • Large pot For blanching the pork belly
  • Heavy-bottomed pot or wok For caramelizing sugar and braising

Method
 

  1. Bring a large pot of water to a boil. Add pork belly chunks and simmer 3-5 minutes until foam rises to the surface. Drain, rinse the pork under cold water, and pat completely dry with paper towels.
    2 pounds pork belly
  2. Heat a heavy-bottomed pot or wok over medium heat. Add rock sugar and cook 3-5 minutes, stirring constantly until it melts into an amber liquid. Watch closely to reach perfect caramel without burning.
    ¼ cup rock sugar
  3. Add the blanched pork belly to the caramelized sugar. Sear 2-3 minutes per side until browned and coated in caramel. The sugar may seize at first, but will melt again as pork releases moisture.
    2 pounds pork belly, ¼ cup rock sugar
  4. Add ginger slices, star anise, green onion, light soy sauce, dark soy sauce, and Shaoxing wine. Pour in water or broth just to barely cover pork. Bring to a boil, then reduce to the lowest simmer. Cover and cook for 70 minutes, stirring every 20 minutes.
    3 tablespoons light soy sauce, 2 tablespoons dark soy sauce, ⅓ cup Shaoxing wine, 1 cup water, 4 slices ginger, 2 whole star anise, 2 stalks green onion, 1 stick cinnamon stick
  5. Remove the lid and increase heat slightly. Simmer another 20 minutes until the sauce thickens to a glossy glaze that coats the back of a spoon. Taste and adjust seasoning if needed. Let rest 10 minutes off heat before slicing and serving.
    3 tablespoons light soy sauce, 2 tablespoons dark soy sauce, ⅓ cup Shaoxing wine, 1 cup water

Notes

  • Pat the pork dry before searing to ensure proper caramelization without steaming.
  • Keep the simmer gentle to prevent tough meat and burnt sauce.
  • Use whole star anise and thick ginger slices to avoid bitter bits in the sauce.

Tried this recipe?

Let us know how it was!

What Is Pollock? [Taste, Uses & More]

April 1, 2026

Pollock turns up everywhere - inside every fish stick your kids demand, folded into the surimi that fills grocery store seafood salads, and at the center of a quietly good weeknight fillet that most home cooks overlook.

What Is Pollock

It does the work of cod or haddock at a lower price and with pairing ideas for haddock that translate almost directly to this fish.

If your usual go-to is mild white fish for tacos or swapping out tilapia, pollock deserves a closer look.

QUICK SUMMARY

Pollock is a lean, mild white fish from the cod family. It has clean, lightly sweet flavor, fine delicate flakes, and a very low fat content. Used in fish sticks, surimi, tacos, and baked fillets, it suits nearly any simple preparation.

🐟Category: Lean white fish, cod family, North Pacific and Atlantic
👅Flavor: Mild, clean, lightly sweet with a faint briny undertone
🍳Best Uses: Frying, baking, pan-searing, poaching, surimi production
❄️Shelf Life: 1-2 days fresh; 3-6 months frozen
💡Watch: Overcooks quickly - pull it early to keep flakes moist and intact

What Is Pollock?

Alaska pollock (also called walleye pollock) is the most commercially fished species on the planet, pulled primarily from the Bering Sea and Gulf of Alaska. Atlantic pollock is a related but distinct species caught in the North Atlantic, slightly richer in flavor, and less common in supermarkets.

Both belong to the cod family - the same group that includes haddock and true cod.

Wild Alaska pollock in particular drives two massive industries: the frozen white-fish fillet market and surimi production, where processed pollock paste is shaped and flavored to mimic crab legs and other shellfish.

You'll see it sold under several names - pollack, walleye pollock, or simply "white fish" on processed labels.

Understanding walleye's shelf life gives useful context for how all lean white fish behave after harvest, since the handling rules are nearly identical.

  • 🐟 Alaska pollock - the dominant commercial species; fine flakes, very mild
  • 🌊 Atlantic pollock - slightly stronger flavor; less widely available fresh
  • 🦀 Surimi base - the raw material behind most imitation crab and seafood sticks
  • 📦 Processed labels - often listed as "white fish" in frozen meals and fish sticks

What Does Pollock Taste Like?

pollock - What Is Pollock

Pollock sits at the mild end of the white-fish spectrum. The flavor is clean and lightly sweet, with a very faint brine that signals the ocean without announcing it.

Raw, it smells almost neutral - a slight sea scent, nothing more. A quick pan-sear over high heat coaxes out a subtle savory depth that the raw fillet doesn't show.

It tastes closest to cod or haddock, with finer flakes and a slightly less pronounced flavor than either.

Sensory SnapshotMild Intensity
👅 Flavor
cleanlightly sweetfaint brinesubtle umami
✋ Texture
fine flakesdelicateslightly springy
👃 Aroma
very mildfaint sea scent

Overcooking is where things go wrong. The flakes firm up fast, then turn dry and chalky - a texture problem, not a flavor one.

Pull pollock off heat the moment it turns opaque.

Golden Rule
Pollock is done when the thickest part just turns opaque. That's your window - 30 seconds past it and the flakes start to separate and dry out.

How to Use Pollock

Pollock handles nearly every standard white-fish preparation well. Its neutral flavor means it absorbs marinades, coatings, and sauces without competing - making it one of the better choices when a sauce or crust is the focus.

Pan-searing is the fastest route to real flavor. A hot skillet, a little butter, and two minutes per side builds a golden crust while keeping the center moist. Baking with a panko-herb crust adds texture without the oil of deep-frying and works well for weeknight meals.

How Pollock Is Used
MethodBest ForTip
🍟 FriedFish and chips, fish sticks, tacosUse panko or seasoned cornmeal for a crisp crust that holds
🫙 BakedHerb-crusted fillets, family dinners375°F for 12-15 min; brush with butter to prevent drying
🍳 Pan-SearedQuick weeknight fillet with saucePat very dry before hitting the pan - moisture kills the sear
💧 PoachedLight broths, fish stews, flaking into chowderKeep the liquid below a simmer; boiling toughens the flesh

For cuisines, pollock covers a lot of ground. American fish-and-chips and Korean braised fish dishes both rely on it.

Japanese surimi production uses it as the primary base, and Northern European coastal cooks bake or poach it with root vegetables.

Strong, heavily spiced sauces tend to overwhelm what makes pollock useful - its clean neutrality. Keep pairings simple: lemon, butter, dill, capers, or a light white wine sauce.

Mild root vegetables like potato or parsnip sit alongside it without conflict.

Shortcut
No breadcrumbs? A light dust of seasoned flour plus a hot buttered pan gives pollock a serviceable golden crust in under five minutes.
Try It In
🧈Compound Butter (Herb)Melts over a hot pan-seared fillet in seconds→🍟Oven-Baked Fish and ChipsPollock holds the crust well with less oil→🌽Summer Corn SaladA clean side that doesn't compete with the mild fish→

How to Buy and Store Pollock

Fresh pollock fillets should look translucent white with a slight sheen. Avoid anything with dried-out edges, browning, or a strong odor - fresh pollock smells barely of anything.

The flesh should spring back when pressed. For whole fish, clear bright eyes and red gills are the reliable markers; cloudy eyes and brownish gills mean age.

At the counter, most pollock is sold as frozen-at-sea fillets, which is actually a quality advantage - modern vessels freeze within hours of catch.

The guidance on storing pollock correctly covers the fridge-to-freezer transition in detail, including vacuum-sealing tips that extend frozen shelf life to six months.

Watch Out
Processed products like fish sticks use pollock as the base - check labels for additives, fillers, or allergen cross-contamination if you're buying for dietary restrictions. The guidance on keeping fish sticks fresh is worth reading before stocking the freezer.
  • Fridge - Use fresh fillets within 1-2 days, kept on ice or at the coldest shelf
  • Freezer - Wrap tightly or vacuum-seal; best texture within 3-6 months
  • Thawing - Overnight in the fridge; never on the counter at room temperature

Start Here for Mild White Fish

If you're deciding between pollock and a similar species, go with pollock when price and availability matter and the recipe uses a coating, sauce, or broth.

Its neutral flavor and low cost make it the practical call for high-volume cooking - fish tacos, fish cakes, chowder.

When you want something with a bit more character on its own, browsing alternatives to pollock or replacements for cod will show where the flavor steps up.

For a direct swap into haddock recipes, checking alternatives to haddock confirms pollock fits in most cases without adjustment.

Pollock rewards simplicity. Keep the heat short, the seasoning clean, and the sauce light.

Frequently Asked Questions

Is pollock the same as cod?

No, though both belong to the cod family. Pollock has finer flakes and a milder, slightly less pronounced flavor than true cod. They swap well in most recipes, but pollock costs less and cooks a little faster due to thinner fillets.

What does Alaska pollock taste like?

Very mild and clean, with a faint sweetness and almost no fishy character. It's one of the most neutral white fish available, which is why it's used as the base for surimi and processed seafood products.

Is pollock healthy to eat?

Yes. Pollock is a lean, high-protein fish with good levels of vitamin B12 and selenium. It contains omega-3 fatty acids, though at lower levels than oily fish like salmon or mackerel.

How do you cook pollock without drying it out?

Pull it off heat the moment the flesh turns opaque - that's the cutoff. Basting with butter during a pan-sear or covering loosely during baking also helps retain moisture in the thin fillets.

Can you grill pollock?

Yes, on thicker portions with care. Use a well-oiled grill grate or a grill basket - pollock's fine flakes make it prone to sticking and breaking apart on open grates. Keep the heat medium-high and flip only once.

Air Fryer Chicken Shawarma Flatbread

April 1, 2026

When you need something that works for meal prep and last-minute dinners, air fryer chicken shawarma delivers crispy edges and juicy meat in under 30 minutes. The high heat crisps the chicken while you warm flatbread and chop vegetables.

Air Fryer Chicken Shawarma Flatbread served on a plate

Perfect for weeknight dinners when you want actual Middle Eastern flavor without grilling or standing over a stove. The air fryer handles the hard part while you assemble toppings.

QUICK SUMMARY

Air Fryer Chicken Shawarma Flatbread uses marinated chicken thighs cooked at 400°F for crispy edges and tender meat. Marinate at least 1 hour for flavor and cook in a single layer for even browning. Assemble on warm flatbread with yogurt sauce and fresh vegetables right before serving.

⏱️Time Reality: 15 minutes active, 15 minutes air frying, plus 1+ hour marinating
🔥Critical Step: Pat chicken dry before air frying to get crispy edges instead of steamed texture
⚠️Watch Out: Overcrowding the basket makes chicken soggy - space pieces ½ inch apart

Why This Recipe Works

The air fryer circulates heat around marinated chicken thighs at 400°F, creating crispy edges without flipping or adding extra oil. For a version that comes together quickly, this easy chicken side uses the same spice blend with faster prep.

Quick Reference
⏱️
Prep Time
15 min
🔥
Cook Time
15 min
⏰
Total Time
30 min
🍽️
Servings
4 servings
📊
Difficulty
Easy
🏷️
Category
Main Dish
💡
Quick Tip
Marinate 1+ hour for best flavor
🎯
Best For
Weeknight | Meal prep | Casual entertaining

Five reasons this method works:

  • Thighs stay juicy - Dark meat has more fat than breast, so it stays tender even if you cook it an extra minute
  • Single layer cooking - Spacing chicken pieces with ½ inch between them lets hot air circulate for even browning
  • High heat crisps edges - 400°F renders fat and caramelizes the marinade without drying out the meat
  • Resting retains juice - Five minutes off heat lets muscle fibers relax and reabsorb moisture before slicing
  • Marination builds flavor - One hour minimum gives shawarma spices time to penetrate the meat and tenderize it with acid
Quick Tip
Pat chicken dry with paper towels before air frying to remove excess marinade that causes steaming instead of crisping

What You'll Need

Ingredients for Air Fryer Chicken Shawarma Flatbread

Stock your pantry with shawarma spice blend and keep boneless chicken thighs in the freezer for nights when you need dinner fast. Mignon adds the contrast this plate needs, but timing matters - for a version that comes together quickly, this simple mignon recipe uses the same air fryer method with different seasonings.

🍗
Protein
  • 1.5 lbs boneless skinless chicken thighs
🥢
Marinade
  • 2 tablespoon shawarma spice blend
  • 3 cloves garlic, minced
  • 2 tablespoon lemon juice
  • 2 tablespoon olive oil
🍜
Base
  • 4 flatbreads (pita or naan)
🥬
Toppings
  • 1 cup yogurt or tahini sauce
  • 1 tomato, diced
  • ½ cucumber, diced
  • ¼ red onion, sliced thin

Ingredient Details

  • Boneless skinless chicken thighs
    Cut into ½ inch thick strips for even cooking - thicker pieces take longer and smaller ones dry out
  • Shawarma spice blend
    Look for blends with cumin, coriander, paprika, turmeric, and cinnamon or make your own with equal parts of each
  • Garlic
    Fresh cloves add sharp pungency that garlic powder can't match - mince fine so it distributes evenly
  • Lemon juice
    Fresh lemon juice tenderizes chicken and adds brightness - bottled juice works but tastes flat
  • Olive oil
    Coats chicken for even crisping and helps spices stick - don't skip or chicken will dry out
  • Flatbread
    Pita pockets hold fillings better, naan has richer flavor - warm in air fryer for 2 minutes at 350°F before assembling
  • Yogurt or tahini sauce
    Greek yogurt is thicker and tangier than regular, tahini is nuttier and dairy-free - both cut through spiced chicken

Ingredient Swaps

Chicken breast works if you prefer lean protein, but thighs stay juicier and more forgiving in the air fryer. Potato wedges adds the contrast this plate needs, but timing matters - for a version that comes together quickly, this simple potato wedges recipe uses similar spices with a crispy texture.

Four practical swaps:

  • Chicken breast for thighs - Leaner with less fat, cooks 2-3 minutes faster but dries out easily if overcooked
  • Gluten-free flatbread for regular pita - Same assembly method, slightly different texture depending on brand
  • Tahini sauce for yogurt - Nuttier and thicker, dairy-free option with similar cooling effect on spices
  • Apple cider vinegar for lemon juice - Less bright citrus flavor, same acidity for tenderizing chicken

Chicken Thighs

Works for: juicy texture, forgiving cook time, rich flavor

Skip if: you want lean protein or faster cook time

Chicken Breast

Works for: lean protein, faster cooking, milder flavor

Skip if: you tend to overcook chicken or want foolproof results

Instructions

Set the air fryer to 400°F and cook chicken in a single layer for 12-15 minutes, flipping halfway through for even browning. A good pasta can make or break the plate - for a version that comes together quickly, this a creamy pasta side uses Mediterranean spices that complement shawarma.

  1. Mix marinade and coat chicken - Combine shawarma spice, minced garlic, lemon juice, and olive oil in a bowl, add chicken thighs cut into ½ inch strips, toss to coat evenly, cover and refrigerate for 1-2 hours

  2. Preheat air fryer and prep chicken - Set air fryer to 400°F, remove chicken from marinade and pat dry with paper towels to remove excess liquid, arrange pieces in single layer with ½ inch space between each

  3. Air fry chicken - Cook for 12-15 minutes, flipping pieces halfway through at 7 minute mark, check internal temperature reaches 165°F with instant-read thermometer inserted into thickest part

  4. Rest and slice chicken - Remove chicken to cutting board and let rest for 5 minutes, slice into thin strips against the grain for tender bites

  5. Warm flatbread and assemble - Air fry flatbread for 2 minutes at 350°F until warm and slightly crisp, spread yogurt or tahini sauce on each flatbread, top with sliced chicken, diced tomato, cucumber, and sliced onion, fold and serve immediately

Golden Rule
Use an instant-read thermometer to hit exactly 165°F - guessing leads to dry or undercooked chicken

What to Serve With It

Fresh vegetables and grain-based sides balance the spiced chicken and cut through the richness of yogurt sauce. If you're planning your rotisserie chicken dinner, these same sides work equally well with shawarma-spiced meat for a complete Middle Eastern meal.

Side Dish Prep Why It Works How to Serve
Cucumber salad Easy Fresh crunch cuts through rich spiced chicken Dice cucumber, toss with lemon juice and salt
Tabbouleh Easy Bright herbs and bulgur add freshness Chop parsley, mint, tomato, mix with soaked bulgur
Roasted potatoes Medium Hearty starch makes the meal more filling Cube potatoes, toss with oil, roast at 425°F for 30 minutes
Hummus platter Easy Creamy dip adds protein without cooking Serve store-bought or homemade with warm pita
Pickled vegetables Easy Sharp acidity balances spiced meat Drain jarred pickles or quick-pickle onions in vinegar

Three ways to serve it:

  • As flatbread wraps - Fold filled flatbread in half and eat like a taco for handheld weeknight meals
  • Over rice bowls - Skip the bread and serve sliced chicken over basmati rice with all the toppings for a grain bowl
  • On a platter - Arrange sliced chicken, warm flatbread, and all toppings separately so everyone builds their own
Shortcut
Buy pre-cut vegetables from the salad bar to skip all the chopping on busy nights

Store and Reheat

Cooked chicken keeps for 3-4 days in an airtight container in the fridge, but store flatbread and fresh vegetables separately to prevent sogginess. Rich mains need something to cut through, and chicken does exactly that - for a version that comes together quickly, this a rich beef on the side uses similar cooking methods with different seasonings.

Method Time Best For
🍳 Stovetop 3-5 minutes Retaining crispiness on chicken edges
🔥 Oven 8-10 minutes at 350°F Warming chicken and flatbread together evenly
📦 Microwave 1-2 minutes Quick reheating when texture doesn't matter

For best results when storing:

  • Keep components separate - Store cooked chicken, sauce, flatbread, and vegetables in different containers to prevent soggy bread
  • Refrigerate within 2 hours - Cool chicken to room temperature, then refrigerate in shallow airtight container for even cooling
  • Freeze chicken only - Freeze sliced cooked chicken in freezer bags for up to 2 months, but don't freeze assembled flatbreads or fresh vegetables
  • Reheat flatbread separately - Warm flatbread in air fryer at 350°F for 2 minutes before assembling to restore crispness
  • Add fresh toppings - Chop new vegetables when reheating instead of using stored ones that get watery and limp

Frequently Asked Questions

Can I cook chicken shawarma flatbread in the oven instead of air fryer?

Bake chicken on a sheet pan at 425°F for 18-22 minutes, flipping halfway through. The oven takes longer and won't crisp edges as much as the air fryer, but it works when cooking for more than 4 people.

How do I store leftovers and reheat without losing crispiness?

Store chicken separately from flatbread and vegetables in an airtight container for 3-4 days. Reheat chicken in the air fryer at 350°F for 3-4 minutes to restore crispy edges, or use a hot skillet for 3-5 minutes.

What internal temperature indicates chicken shawarma is safely cooked?

Chicken must reach 165°F measured with an instant-read thermometer inserted into the thickest part. Check multiple pieces since air fryer hot spots can cook unevenly.

What to do if chicken turns out dry or bland?

Slice dry chicken thin and toss with extra yogurt or tahini sauce to add moisture. For bland chicken, squeeze fresh lemon juice over sliced meat and sprinkle with flaky salt before serving.

Can I use chicken breast instead of thighs?

Chicken breast works but cooks 2-3 minutes faster and dries out more easily than thighs. Cut breasts into ½ inch strips, check temperature at 10 minutes, and pull them at exactly 165°F.

Air Fryer Chicken Shawarma Flatbread served on a plate

Air Fryer Chicken Shawarma Flatbread

No ratings yet
Air Fryer Chicken Shawarma Flatbread delivers crispy, juicy chicken thighs cooked quickly with authentic Middle Eastern spices. The air fryer crisps the edges at high heat while warming flatbread and prepping fresh vegetable toppings. It's perfect for easy weeknight dinners or meal prep without the need for grilling or stovetop cooking.
Print Recipe Pin Recipe
Prep Time 15 minutes mins
Cook Time 15 minutes mins
Total Time 30 minutes mins
Servings: 4 servings
Course: Main Dish
Cuisine: Middle Eastern
Ingredients Method Notes

Ingredients
  

  • 1.5 lbs boneless skinless chicken thighs cut into ½ inch thick strips
  • 2 tablespoon shawarma spice blend contains cumin, coriander, paprika, turmeric, cinnamon
  • 3 cloves garlic minced
  • 2 tablespoon lemon juice fresh
  • 2 tablespoon olive oil for coating chicken
  • 4 flatbreads pita or naan
  • 1 cup yogurt or tahini sauce
  • 1 tomato diced
  • 0.5 cucumber diced
  • 0.25 red onion sliced thin

Method
 

  1. Combine shawarma spice blend, minced garlic, lemon juice, and olive oil in a bowl. Add chicken thighs cut into ½ inch strips, toss to coat evenly, cover and refrigerate for 1-2 hours.
    2 tbsp shawarma spice blend, 3 cloves garlic, 2 tbsp lemon juice, 2 tbsp olive oil, 1.5 lbs boneless skinless chicken thighs
  2. Set air fryer to 400°F. Remove chicken from marinade and pat dry with paper towels to remove excess liquid. Arrange pieces in a single layer with ½ inch space between each piece.
    1.5 lbs boneless skinless chicken thighs
  3. Cook chicken for 12-15 minutes at 400°F, flipping pieces halfway through at the 7-minute mark. Check the internal temperature reaches 165°F using an instant-read thermometer inserted into the thickest part.
    1.5 lbs boneless skinless chicken thighs
  4. Remove chicken to a cutting board and let rest for 5 minutes. Slice into thin strips against the grain for tender bites.
    1.5 lbs boneless skinless chicken thighs
  5. Air fry flatbread for 2 minutes at 350°F until warm and slightly crisp. Spread yogurt or tahini sauce on each flatbread, top with sliced chicken, diced tomato, cucumber, and sliced red onion. Fold and serve immediately.
    4 flatbreads, 1 cup yogurt or tahini sauce, 1.5 lbs boneless skinless chicken thighs, 1 tomato, 0.5 cucumber, 0.25 red onion

Notes

  • Pat chicken dry before air frying to get crispy edges instead of steamed texture.
  • Do not overcrowd air fryer basket; space chicken pieces ½ inch apart for even cooking.
  • Use an instant-read thermometer to ensure chicken reaches 165°F for safety and juiciness.

Tried this recipe?

Let us know how it was!

What Is Parsley? Taste, Culinary Uses, and More

April 1, 2026

Tabbouleh is mostly parsley - not bulgur, not tomato - and that distinction matters once you actually taste a well-made version.

What Is Parsley

Parsley is one of the most recognizable herbs in Western cooking, yet it gets reduced to a garnish more often than it deserves.

It belongs in the same conversation as chervil's flavor and uses and other underused leafy herbs - and like keeping basil fresh, knowing how to handle parsley properly changes what you get out of it.

This profile covers what it tastes like, how to cook with it, and how to buy a bunch worth using.

QUICK SUMMARY

Parsley is a mild leafy herb with fresh green, slightly bitter, and mildly peppery flavor. Used raw or added at the finish, it brightens soups, sauces, and grain dishes. Flat-leaf is sharper in flavor; curly is milder. Refrigerated bunches last 5-10 days with proper storage.

🌿Category: Leafy herb, Mediterranean origin, used fresh or as a finish
👅Flavor: Fresh, grassy, slightly bitter with mild pepper and faint anise
🍳Best Uses: Tabbouleh, chimichurri, gremolata, persillade, finishing herb
❄️Shelf Life: 5-10 days fresh; frozen chopped parsley holds up to 6 months
🛒Buy It: Look for bright green, crisp stems - skip anything yellowing or limp

What Is Parsley?

Parsley (Petroselinum crispum) is a biennial herb native to the Mediterranean and Eurasian regions, grown widely across the globe and used in cooking for over two thousand years.

It belongs to the Apiaceae family - the same group as celery, dill, and carrot - which explains its clean, slightly vegetal character.

Two varieties dominate in kitchens: flat-leaf parsley (Italian parsley) and curly parsley. Flat-leaf has broader, darker leaves and a more pronounced aroma; curly has tightly ruffled leaves and a milder, slightly watered-down flavor.

A third type worth knowing is Hamburg parsley (parsley root), grown for its edible root rather than its leaves. It's common in Eastern European cooking but rarely found in standard Western supermarkets.

  • 🌱 Flat-leaf (Italian) parsley - sharper flavor, preferred for cooking and sauces
  • 🌀 Curly parsley - milder, mostly used as a plate garnish
  • 🫚 Hamburg parsley - grown for the root; tastes like parsley-meets-parsnip

The stems are edible and hold concentrated flavor - many cooks chop them into stocks and soffritto rather than discarding them.

What Does Parsley Taste Like?

parsley - What Is Parsley

Raw parsley tastes fresh and green, with a mild bitterness that reads as clean rather than sharp.

There's a faint peppery edge underneath and a very soft anise note - nothing like tarragon or fennel, just a whisper of sweetness at the finish.

Compared to cilantro, parsley is quieter. It lacks the citrus-soapy top notes that make cilantro polarizing, sitting closer to celery leaves in its grassy, slightly bitter register.

Basil is sweeter and more floral; parsley is drier and more neutral.

Sensory SnapshotMild Intensity
👅 Flavor
fresh greenmildly bitterfaint aniselight pepper
✋ Texture
tender leavesslightly fibrous stems
👃 Aroma
grassymildly peppery

Heat flattens parsley fast. Added mid-cook, it loses its brightness and turns slightly bitter; added at the end, it keeps that clean, grassy lift that makes finishing herbs worth using.

If you need something with a similar role but different flavor, a guide to alternatives to parsley covers the closest swaps for each context.

How to Use Parsley

Parsley works hardest when added late or raw. Its brightness is volatile - the compounds responsible for that grassy freshness dissipate quickly under heat, so the most effective uses keep it out of prolonged cooking.

In Middle Eastern cooking, flat-leaf parsley is the structural backbone of tabbouleh, chopped fine and combined with bulgur, tomato, lemon, and olive oil.

The herb isn't a garnish there - it's the majority of the dish, and what pairs well alongside it matters as much as the parsley itself (what pairs with tabbouleh gives a solid starting point).

In French cooking, it anchors persillade - a raw blend of parsley and garlic used to finish roasted meats - and gremolata, where lemon zest joins the mix specifically for osso buco.

South American chimichurri relies on parsley's neutral green base to carry heat and acidity without competing with the vinegar and chili.

Compound butters, herb sauces, and green blends all lean on the same quality: parsley doesn't dominate.

Similar logic applies when comparing it to cilantro - a creamy cilantro lime dressing recipe shows how much bolder cilantro behaves in a dressing context.

How Parsley Is Used
MethodBest ForTip
🥗 Raw, choppedTabbouleh, salads, garnishUse flat-leaf for flavor; curly for visual garnish
🫙 BlendedChimichurri, gremolata, persilladeAdd a splash of cold water to keep the color green
🧈 Compound butterGrilled steak, roasted fish, cornFold in at room temp; chilled butter loses aroma
🍲 Finish on hot dishesSoups, stews, roasted vegAdd off heat - 30 seconds of residual steam is enough
🫕 Lightly wiltedPan sauces, sautéed greens30 seconds max; longer and the bright note goes flat

Parsley pairs cleanly with lemon, garlic, olive oil, butter, lamb, fish, and tomato. It bridges fat-heavy dishes by cutting richness without adding competing flavor.

Avoid pairing it with strong anise herbs like tarragon in delicate preparations - the faint anise note in parsley collides.

Try It In
🌿Tabbouleh with Parsley and BulgurShows how parsley carries a whole dish rather than just finishing it→🥗Lebanese Parsley TabboulehClassic ratios with a heavy parsley-to-grain lean→

How to Buy and Store Parsley

At the market, look for bright, uniformly green leaves with no yellowing or translucent patches. Stems should snap crisply, not bend.

Flat-leaf bunches tend to have more fragrance at point of purchase - give them a quick press and smell before buying if you can.

Golden Rule
Treat a parsley bunch like cut flowers: trim the stems and stand them in a jar with an inch of water, then loosely tent with a bag and refrigerate. It lasts twice as long this way versus a sealed bag alone.

For full detail on timelines and signs of spoilage, parsley's shelf life breaks it down by storage method. The same logic applies to other leafy herbs - keeping dill fresh follows nearly identical rules.

  • Refrigerator (water jar method) - 7-10 days; change the water every 2-3 days
  • Refrigerator (damp paper towel) - 5-7 days; works when jar space is limited
  • Frozen (chopped) - up to 6 months; freeze in a thin layer on a tray, then bag it
  • Cut-and-washed containers - 3-5 days; convenient but loses flavor faster
Watch Out
High vitamin K content in parsley can interact with anticoagulant medications like warfarin. If you're eating large amounts regularly, check with a doctor - a garnish portion is fine, but a tabbouleh-scale serving adds up.

Start with Flat-Leaf

Flat-leaf parsley is the right starting point for anyone cooking with parsley seriously for the first time. Its sharper aroma and cleaner flavor make a bigger difference in finished dishes than curly, which is best reserved for visual garnish work.

Try it first in gremolata - just parsley, lemon zest, and garlic stirred together and scattered over braised meat or fish right before serving. Three ingredients, no cooking required, and the result is noticeably brighter than the dish without it.

From there, chimichurri and persillade follow the same logic.

Shortcut
Freeze leftover parsley the day you buy it rather than letting it go limp in the fridge. Chop, spread flat on a tray to freeze, then transfer to a bag. Frozen parsley works in any cooked application and lasts months.

Frequently Asked Questions

Is flat-leaf or curly parsley better for cooking?

Flat-leaf is better for cooking. It has a stronger, more defined flavor and holds up slightly better when blended or chopped into sauces. Curly parsley's tightly ruffled structure traps water and delivers less aroma per gram.

Is parsley the same as coriander?

No. They look similar but taste very different. Parsley is mild, grassy, and faintly bitter; coriander (cilantro) has strong citrus and soapy notes that make it polarizing. They're not interchangeable in most dishes.

Can you cook parsley or only use it fresh?

You can cook it briefly, but prolonged heat kills its flavor. Parsley stems work well in stocks and braises; the leaves are best added at the very end of cooking or raw as a finish.

Can you eat parsley stems?

Yes. The stems are edible and more intensely flavored than the leaves. Most cooks chop tender stems into dishes directly and save thicker stems for stocks, where they release flavor slowly over long cooking.

Does dried parsley taste the same as fresh?

No - dried parsley loses most of its bright, grassy character during dehydration and tastes noticeably flat by comparison. It works in slow-cooked dishes where the fresh note would cook off anyway, but never as a finishing herb.

What Is Raclette Cheese? [Taste, Uses & More]

April 1, 2026

Raclette cheese earns its place at the table not through cold flavor alone but through what happens the moment heat touches it - a slow, creamy melt that pools and browns at the edges in a way no other cheese quite replicates.

What Is Raclette Cheese

That behavior is the reason dishes alongside raclette have stayed unchanged for centuries: the cheese does something structural, not just flavorful.

If you've browsed alternatives to emmental cheese and found yourself circling back to raclette, that's because the melt profile here is genuinely different.

QUICK SUMMARY

Raclette is a semi-hard, washed-rind cow's milk cheese from the Swiss and French Alps, built for melting. It tastes buttery, nutty, and mildly tangy - closer to mild Gruyère than anything sharp - and forms a creamy, lightly browned melt that is central to traditional Alpine service.

🧀Flavor: Buttery, nutty, mildly tangy, with soft umami depth
🔥Best Use: Melted over new potatoes, cornichons, and cured meats
🛒Buying Tip: Look for pale to deep yellow paste, smooth oily rind, no deep cracks
❄️Shelf Life: 2-4 weeks refrigerated once opened; vacuum-sealed lasts longer
🍷Pairs With: Dry white wine, cornichons, prosciutto, crusty bread, boiled potatoes

What Is raclette cheese?

Raclette originates from the Alpine regions of Switzerland and the Savoie in France, where mountain dairy traditions shaped an entire category of high-fat, melt-ready cheeses.

The name itself comes from the French verb racler - to scrape - which describes the traditional method of heating a half-wheel near an open flame and scraping the softened surface directly onto food.

It falls into the category of washed-rind, semi-hard cow's milk cheeses, though the rind washing is typically mild rather than aggressive, which keeps the aroma at moderate rather than full-on pungent.

You'll also see it labeled as raclette de Savoie, fromage à raclette, or simply raclette cheese in retail packaging.

Wheels typically run 6-8 kg and are sold in wedges or sliced portions for home use.

Unlike swiss cheese stand-ins that mimic the style, authentic raclette - particularly AOC-certified Swiss raclette - has specific production controls tied to Alpine milk quality.

  • 🏔️ Swiss raclette - the original, often with a more pronounced cellar aroma and slightly firmer paste
  • 🇫🇷 Raclette de Savoie - French Alpine version, marginally creamier and milder in rind character
  • 🏪 Industrial raclette - widely available, consistent melt behavior, milder overall flavor

What Does raclette cheese Taste Like?

raclette cheese - What Is Raclette Cheese

Cold raclette tastes buttery and nutty, with a mild tang that sits somewhere between young Gruyère and fresh Emmental - though creamier than either when sliced thin.

There's a quiet umami depth that becomes more obvious when the cheese warms.

For a closer look at how the benchmark compares, emmental cheese's flavor and uses shows where the two diverge in practice.

Heat changes the profile noticeably. Melted raclette softens its tang, pushes the buttery notes forward, and develops a faint toasty quality at the browned edge - that edge is where most of the flavor payoff lives.

Sensory SnapshotModerate Intensity
👅 Flavor
butterynuttymildly tangyumami
✋ Texture
semi-firm coldcreamy meltedlightly elastic
👃 Aroma
cellar notestoasty when melted

How to Use raclette cheese

Raclette's primary role is melting, and the traditional service method remains the most effective way to showcase it.

A tabletop raclette grill - or a salamander broiler in a restaurant - heats the cheese in small individual pans (coupelles) until it bubbles and browns, then you tip it directly over boiled new potatoes.

Golden Rule
Always serve melted raclette immediately. It tightens and loses its creamy pull within two minutes off heat.

Beyond traditional service, raclette works well wherever you need a reliable, creamy melt with browning character.

It holds together under a broiler without breaking or turning greasy, which makes it a good fit for gratins, open-face sandwiches, and burgers.

Swiss and French Alpine cooking lean on it heavily in potato bakes and vegetable gratins, and it layers well into macaroni-style pasta dishes where stretch and creaminess matter.

If you can't source it, understanding swapping out raclette cheese helps narrow down the closest alternative for each method.

How Raclette Cheese Is Used
MethodBest ForTip
🔥 Raclette GrillTraditional service over potatoes and cornichonsUse individual coupelles; don't let it sit once melted
🍳 Broiled/SalamanderBurgers, open-face toasts, gratinsPosition close to the element for quick browning without drying
🫕 Low OvenPotato bakes, pasta gratinsKeep oven under 180°C/355°F to melt evenly without separating
🥗 Cold/SlicedSandwiches, paninis, cheese boardsSlice thin - the paste compresses when pressed on a panini grill

Cornichons, pickled onions, and cured meats like prosciutto or air-dried ham are the classic flavor counterpoints - their acidity cuts through the cheese's richness.

Dry, acidic white wine (think Chasselas or Fendant from Valais) is the traditional pairing, though a light lager works equally well.

Try It In
🧀Swiss Raclette Melted CheeseThe classic method — scraped hot over potatoes and pickles→

How to Buy and Store raclette cheese

At the counter, look for a wedge with a smooth, slightly oily natural rind and paste that ranges from pale cream to deep yellow. A thin, faintly tacky rind and small even holes in the paste are both normal.

Walk away from wedges with deep cracks, excessive dryness, or sour sticky patches on the cut face.

Watch Out
Never store raclette in airtight plastic wrap. Trapped moisture intensifies the rind aroma and can create off-flavors within days.

Wrap it in cheese paper or waxed paper and keep it in the fridge's cheese drawer or vegetable crisper where humidity stays higher. For a full breakdown of timelines and signs of spoilage, raclette cheese's shelf life covers the detail.

Vacuum-sealed, unopened wheels keep considerably longer - always check the producer's date rather than guessing.

Start Here for Raclette

Raclette rewards specificity.

If you're new to it, buy a small wedge of Swiss raclette (not the pre-sliced industrial variety) and melt it under a home broiler over halved boiled potatoes - that single test run shows you exactly what the cheese does.

If you want to compare flavor relatives, the taste of gruyere cheese and gruyere cheese swaps that work are useful benchmarks.

Raclette is less sharp, more yielding, and built entirely around the melt.

Frequently Asked Questions

Is raclette the same as fondue?

No. Fondue blends cheese with wine in a communal pot for dipping. Raclette is melted in individual portions - traditionally by scraping a heated wheel - and served directly over food rather than used as a dipping medium.

Can you melt raclette in the oven?

Yes, and it works well at low to moderate heat. Keep the oven under 180°C (355°F) to melt evenly without the fat separating. Higher temperatures can cause the cheese to break and turn greasy rather than creamy.

How salty is raclette cheese?

Moderately salty - noticeably so, but not briny like feta. The salt level is part of why it pairs so well with unseasoned boiled potatoes, which absorb the cheese's seasoning during service.

What wine pairs with raclette cheese?

Dry, high-acid white wines are the traditional match - Chasselas (Fendant) from Switzerland's Valais region is the classic choice. Dry Alsatian Pinot Blanc or a crisp Savoie white also work well without overwhelming the cheese.

Is raclette lactose-free?

Not fully, though aging reduces lactose significantly. Most people with mild lactose sensitivity tolerate raclette without issue, but those with high sensitivity or a diagnosed intolerance should treat it as a lactose-containing food.

What Is Pistachio? [Taste, Uses & More]

April 1, 2026

Cracking open a pistachio, you notice the smell first - warm, faintly grassy, with a resinous edge that hints at the flavor to come. The kernel itself is strikingly green, ranging from pale jade to deep emerald, and that color signals something real: a fat profile rich in oleic acid and chlorophyll that makes this nut behave differently from the rest.

What Is Pistachio

Pistachios land in pistachio gelato and baklava as naturally as they do in lamb crusts and savory rice dishes - a range few other nuts can match.

QUICK SUMMARY

The pistachio is a tree nut with a buttery, sweet-nutty flavor and a distinctive green kernel. Eaten raw, roasted, or ground into paste, it appears in desserts, savory crusts, pilafs, and confectionery across Middle Eastern, Mediterranean, and Italian cooking traditions.

🌿Flavor: Buttery, sweet-nutty, earthy with a mild resinous pine note
🍽️Best Uses: Gelato, baklava, lamb crusts, pesto, pilafs, pistachio paste
🌍Origin: Central and Western Asia - Iran, Turkey, Eastern Mediterranean
❄️Shelf Life: Shelled, refrigerated: up to 3 months; frozen: 6-12 months
🛒Buy It: Look for vibrant green kernels and naturally split shells with no sticky residue

What Is Pistachio?

Pistachio is the seed of the pistachio tree (Pistacia vera), a small, hardy tree native to Central and Western Asia. Iran and Turkey remain the world's largest producers, though Sicilian and Californian pistachios have carved out distinct regional identities.

Botanically speaking, the pistachio is a drupe - the shell is actually the hardened endocarp of the fruit, and the kernel inside is the seed. Most retailers sell them either in-shell or shelled, and further processed into roasted, salted, or ground forms.

The kernel's signature green color comes from chlorophyll in the cotyledons. Deeper green generally means a younger harvest and more pronounced flavor - which is why premium pistachio paste made for confectionery often specifies a high green-pigment grade.

You may also see this nut labeled pista in South Asian markets, pistache in French contexts, or simply "pistachio nut" in packaged goods.

Key forms you'll find at retail:

  • 🟢 Raw in-shell - mildest flavor, longest shelf life unshelled
  • 🔥 Dry-roasted - nuttiness deepens, color darkens slightly
  • 🧴 Pistachio paste - blanched, skinned, and ground; used in gelato and pastry
  • 🥄 Pistachio meal/flour - coarser grind, used in batters and crusts

What Does Pistachio Taste Like?

pistachio - What Is Pistachio

Think of a richer, less astringent almond with a mild pine or green note layered underneath. That resinous, slightly grassy quality is what separates pistachio from other sweet tree nuts - it reads almost herb-like at first, then settles into a clean, buttery finish.

Raw pistachios are subtler. Dry-roasting amplifies the nuttiness considerably and pushes the resinous note into the background, which is why roasted pistachios taste sweeter and more straightforward.

Grinding the nut into paste releases its oils fully, producing a dense, almost creamy richness that carries well in ice cream and ganache.

Sensory SnapshotModerate Intensity
👅 Flavor
butterysweet-nuttyearthyresinous
✋ Texture
firm-crunchycreamy when ground
👃 Aroma
warm-nuttygrassy-resinous

Compared to hazelnut, pistachio is lighter in roasted depth but more complex in its raw, green character. Walnut carries a notable tannin bite that pistachio simply doesn't have.

How to Use Pistachio

Pistachios cross between sweet and savory more cleanly than almost any other nut. In Middle Eastern and Persian cooking, they're folded into rice pilafs whole, chopped over Turkish baklava, and pressed into confectionery alongside rosewater and cardamom.

Golden Rule
Blanch and skin pistachios before making paste if you want that vivid emerald color - the papery brown skin dulls both color and flavor in finished desserts.

In Italian and Sicilian traditions, pistachio paste anchors gelato, financiers, and tart fillings. Roughly chopped pistachios work as a crust for lamb rack or pan-seared fish, pressed on before roasting.

Ground pistachio meal integrates into cookie dough, batters, and savory sauces in ways that add body without overwhelming.

How Pistachio Is Used
MethodBest ForTip
🥗 RawPilafs, garnishes, snacking, saladsUse the freshest kernels - staleness shows most when unroasted
🔥 Dry-RoastedNut mixes, brittle, chopped toppings for pastryWatch carefully - pistachios go from toasted to bitter fast
🧴 Ground/PasteGelato, financiers, tart fillings, pesto-style saucesBlanch and skin first for the brightest green and cleanest flavor
🍖 Crust/CoatingLamb rack, chicken, fish filletsCombine with breadcrumbs to help the crust bind and brown evenly

Pistachios pair exceptionally well with honey, cardamom, saffron, and orange blossom on the sweet side. Savory pairings include lamb, rich cheeses, olive oil, and lemon zest.

If you need a swap in a recipe, check pistachio replacements before reaching for a different nut entirely - the green color and fat content matter more than people expect.

Try It In
🍗Air Fryer Honey Garlic Chicken TendersPress a pistachio-breadcrumb crust onto tenders before air frying→🍋Air Fryer Lemon Pepper Chicken TendersLemon zest and pistachio meal add crunch to the coating→🍯Crispy Honey Garlic Chicken WingsFinish with crushed pistachios for crunch and color→

How to Buy and Store Pistachio

Green is your guide at the nut counter. Kernels with a pale or yellowed interior are older and will taste flat; vibrant jade to emerald signals freshness and higher oil quality. For in-shell nuts, look for shells that have split naturally along the seam - a closed shell on a mature pistachio is rare, and forced-open shells often indicate immature harvest.

Watch Out
Pistachios with a sticky residue on the shell or a sharp, paint-like smell have gone rancid. The high fat content makes them more prone to rancidity than lower-fat nuts like almonds.

Storage breaks down simply:

  • In-shell, pantry - cool, dry spot; use within 2-4 weeks
  • Shelled, airtight fridge - up to 3 months; keeps oils fresh
  • Shelled, freezer - 6-12 months with no meaningful flavor loss

For a full breakdown of signs of spoilage and freezing tips, the pistachio freshness guide guide covers every scenario in detail.

Where to Start With Pistachio

Start raw if you're new to the nut - a handful of fresh shelled pistachios straight from the fridge tells you exactly what you're working with. Move to dry-roasting next: ten minutes at 325°F sharpens the nuttiness and makes them snackable without masking that resinous character.

From there, pistachio paste opens up gelato, pastry fillings, and savory sauces.

If you only do one thing, chop and scatter roasted pistachios over a dish that already has honey or citrus - the contrast of crunch, color, and that mild pine note will do the rest.

Frequently Asked Questions

Are pistachios nuts or seeds?

Botanically, pistachios are seeds - the kernel inside a drupe fruit. Culinary and legal classification treats them as tree nuts, which is why they appear on allergen labels alongside almonds and cashews.

Why are pistachios green?

The green color comes from chlorophyll concentrated in the cotyledons of the seed. Higher chlorophyll levels generally indicate earlier harvest and more pronounced flavor - premium paste grades specify minimum green pigment content.

Can pistachios be eaten raw?

Yes, raw pistachios are safe and have a milder, grassier flavor than roasted ones. Most commercial in-shell pistachios are already dried post-harvest, so "raw" at retail means unroasted, not truly fresh off the tree.

What does pistachio flavor taste like in ice cream?

Authentic pistachio gelato made with real paste tastes buttery and gently sweet with a clean, slightly grassy finish. Artificially flavored versions lean heavily on almond extract, which is why they taste sharper and less complex than the real thing.

Are pistachios lower in calories than other nuts?

Per gram, pistachios are comparable to most tree nuts, but they have fewer calories per nut count than denser nuts like macadamias or pecans. Eating them in-shell also naturally slows consumption, reducing overall intake.

« Previous Page
Next Page »

Primary Sidebar

ForkliftKitchen recipe developer

Welcome!

Recipe Developer · 12+ Yr Kitchen Veteran

I'm the recipe developer behind this site, focused on practical, well-tested dishes and smart ingredient swaps. Every recipe is written to be clear, reliable, and easy to make at home.

650+ Recipes
12+ Yrs Exp.
3x Tested
Our Story →

As Featured In

Allrecipes

TASTE OF HOME

Food52

HUFFPOST

Yahoo! Life

Our Editorial Standards

  • ✓ Every recipe tested at least 3 times before publishing
  • ✓ Substitutes verified by real kitchen trials, not guesswork
  • ✓ Reviewed for accuracy by our editorial team
  • ✓ Updated regularly with seasonal info and reader feedback

Most Popular

  • Creamy Lemon Shrimp Linguine
    Creamy Lemon Shrimp Linguine
  • Creamy Garlic Mushroom Chicken
    Creamy Garlic Mushroom Chicken
  • Sesame Ginger Chicken Noodle Bowls
    Sesame Ginger Chicken Noodle Bowls
  • Baked Lemon Herb Fish Fillets
    Baked Lemon Herb Fish Fillets
  • Veggie Loaded Fried Rice
    Veggie Loaded Fried Rice
  • Spicy Garlic Shrimp Stir Fry
    Spicy Garlic Shrimp Stir Fry

Join 8,000+ Home Cooks

Weekly Kitchen Tips

Easy recipes, smart substitutes, and real cooking shortcuts — every Thursday.

Subscribe Free →


Side Dishes

  • What to Serve With Asian Salmon? 15 Best Side Dishes
    What to Serve With Asian Salmon? 15 Best Side Dishes
  • Side Dishes for Strawberry Spinach Salad
    15 Best Side Dishes for Strawberry Spinach Salad
  • Sides for Grilled Cauliflower Steaks to Complete the Meal
    15 Sides for Grilled Cauliflower Steaks to Complete the Meal
  • 15 Sides To Serve With Calabacitas
    15 Best Sides for Calabacitas – Mexican-Inspired Favorites


Substitutes

  • 7 Best Substitutes for Hot Sauce in Marinades & Stir-Fries
    7 Best Substitutes for Hot Sauce in Marinades & Stir-Fries
  • 9 Best Substitutes for Butter in Baking and Cooking
  • 7 Best Substitutes for Tagliatelle for Italian Pasta Dishes
    7 Best Substitutes for Tagliatelle for Italian Pasta Dishes
  • 7 Best Substitutes for Udon Noodles in Asian Stir-Fries
    7 Best Substitutes for Udon Noodles in Asian Stir-Fries


Browse by Topic

  • Side Dishes320
  • Substitutes785
  • Dinner163
  • Air Fryer77
  • Taste Profiles484
  • Food Storage123


Reader Reviews

★★★★★

"Finally a food blog that tells you exactly why a substitute works instead of just listing options."

— Sarah M., via email

★★★★★

"The side dish recommendations are so specific — saved my dinner party twice this month."

— James R., Pinterest comment

★★★★★

"I trust this site more than most because they actually test everything. You can tell."

— Priya K., blog comment

Footer

↑ Back to Top

Forklift Kitchen

We do the heavy lifting so you can enjoy the cooking. Tested recipes, smart substitutes, and perfect pairings—built for real home cooks.

Content

  • Recipes
  • Substitutes
  • What to Serve With
  • Blog

Company

  • About Us
  • Contact
  • Subscribe

Legal

  • Privacy Policy
  • Terms of Service

As an Amazon Associate I earn from qualifying purchases.

© 2026 Forklift Kitchen.

Rate This Recipe

Your vote:


A rating is required
A name is required
An email is required