• Skip to primary navigation
  • Skip to main content
  • Skip to primary sidebar
  • Recipe Index
    • Air Fryer
  • Side Dishes
  • Substitutes
  • About
  • Contact
  • Subscribe

ForkLiftKitchen

menu icon
go to homepage
  • Recipe Index
    • Air Fryer
  • Side Dishes
  • Substitutes
  • About
  • Contact
  • Subscribe
subscribe
search icon
Homepage link
  • Recipe Index
    • Air Fryer
  • Side Dishes
  • Substitutes
  • About
  • Contact
  • Subscribe
×

Blog

What Is Rainbow Trout? [Taste, Uses & More]

April 1, 2026

Pan-seared rainbow trout with brown butter and capers is one of those weeknight dinners that looks far more composed than the effort behind it - and that simplicity is no accident.

What Does Rainbow Trout Taste Like

Rainbow trout earns that reputation because its flesh is forgiving, its flavor clean, and its cook time short.

Learning trout in cooking broadly helps frame where this species sits, though rainbow trout has its own distinct character worth understanding on its own terms.

Watching the speckling on its skin curl away from a hot pan is a small pleasure that's hard to replicate with most other freshwater fish.

QUICK SUMMARY

Rainbow trout is a mildly sweet, clean-flavored coldwater fish with delicate flaky flesh. Milder than salmon, more complex than tilapia, it suits quick pan-searing, grilling, smoking, and baking. Use fresh within 1-2 days; frozen keeps up to 3 months.

🐟Flavor: Mildly sweet, clean, slightly briny, lightly nutty when seared
🍳Best Methods: Pan-sear skin-on, grill, smoke, bake en papillote, poach
🛒Buying Tip: Look for translucent pink-orange flesh and no strong fishy smell
❄️Shelf Life: Fresh 1-2 days refrigerated; frozen up to 3 months
🥗Pairs With: Lemon, dill, brown butter, almonds, capers, crème fraîche

What Is Rainbow Trout?

Rainbow trout (Oncorhynchus mykiss) is a coldwater freshwater fish native to Pacific coastal streams and inland rivers of North America. It belongs to the salmonid family, placing it alongside salmon and Arctic char in both biology and table quality.

The fish is named for the pink-to-red lateral stripe running along its flanks, paired with fine black speckles on the skin and fins.

Two forms exist: the landlocked rainbow trout raised commercially in freshwater farms, and the steelhead - the same species in its anadromous form, which migrates to the ocean and returns to rivers to spawn, developing firmer flesh and a deeper color in the process.

Farm-raised rainbow trout now dominates commercial supply in North America and Europe.

It's a controlled, efficient aquaculture fish with consistent size and mild flavor.

Wild-caught specimens, including steelhead, tend to show more pronounced color and slightly firmer texture.

Understanding how keeping salmon with the skin on fresh differs from trout helps clarify why skin-on storage matters for this family of fish.

  • 🐟 Scientific name - Oncorhynchus mykiss
  • 🌊 Steelhead - the ocean-run form; firmer, deeper-colored flesh
  • 🌿 Farm-raised - consistent size, mild fat lines, widely available year-round
  • 🎣 Wild-caught - more variable texture and color depending on season and habitat

What Does Rainbow Trout Taste Like?
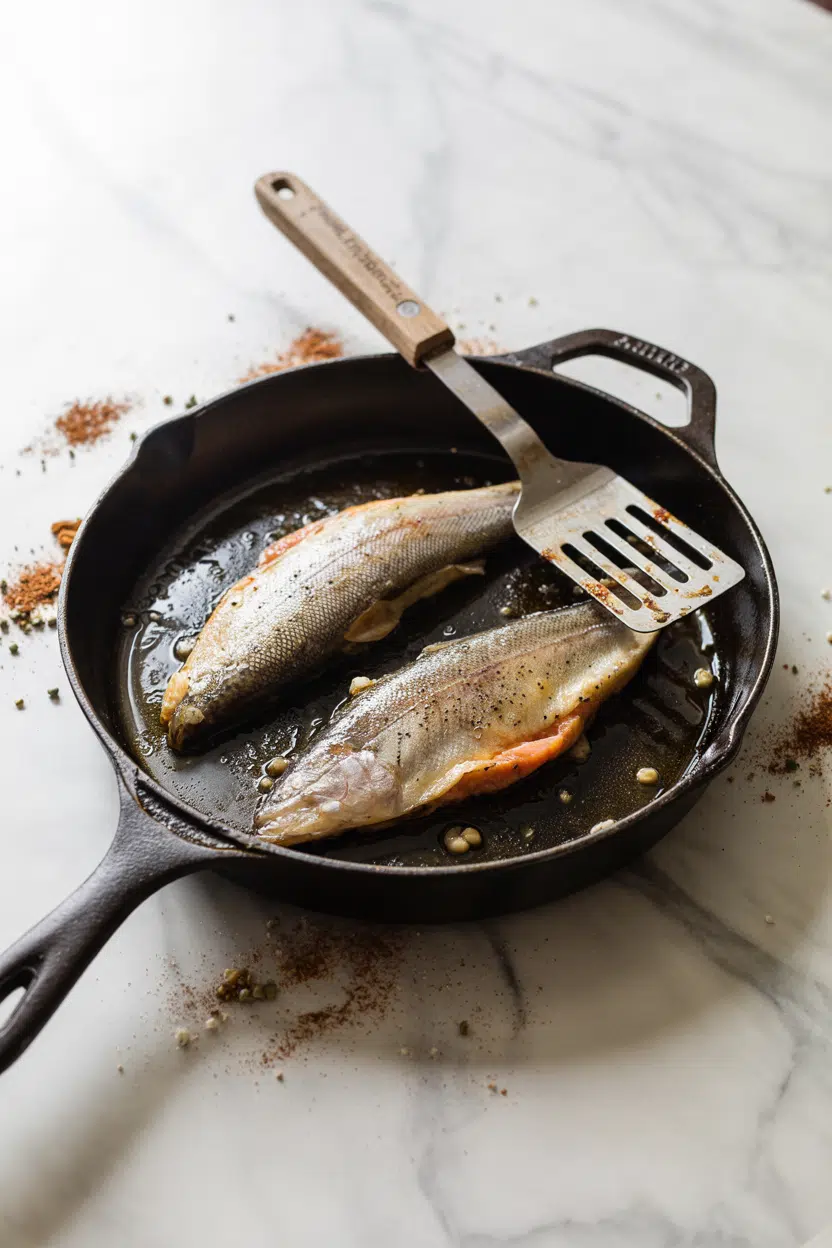
rainbow trout - What Does Rainbow Trout Taste Like

Rainbow trout has a mild, clean sweetness with a faint brininess and a subtle mineral edge that reflects its river origins. It sits clearly between two better-known fish: less rich and fatty than salmon, more nuanced and layered than tilapia.

Sensory SnapshotModerate Intensity
👅 Flavor
mildly sweetslightly brinylightly nutty
✋ Texture
delicatefine flakymoist
👃 Aroma
freshriver-likemildly mineral

Heat shifts the character noticeably. Pan-searing skin-on draws out a lightly nutty quality - particularly with brown butter in the pan - that raw or poached trout simply doesn't have.

Steelhead pulls slightly richer and more assertive than farmed rainbow, reflecting its higher fat content from ocean feeding.

Smoked rainbow trout is a different proposition entirely: the smoke amplifies the fish's natural sweetness and gives it a denser, more concentrated flavor that holds up well on crackers or as a pâté base.

How to Use Rainbow Trout

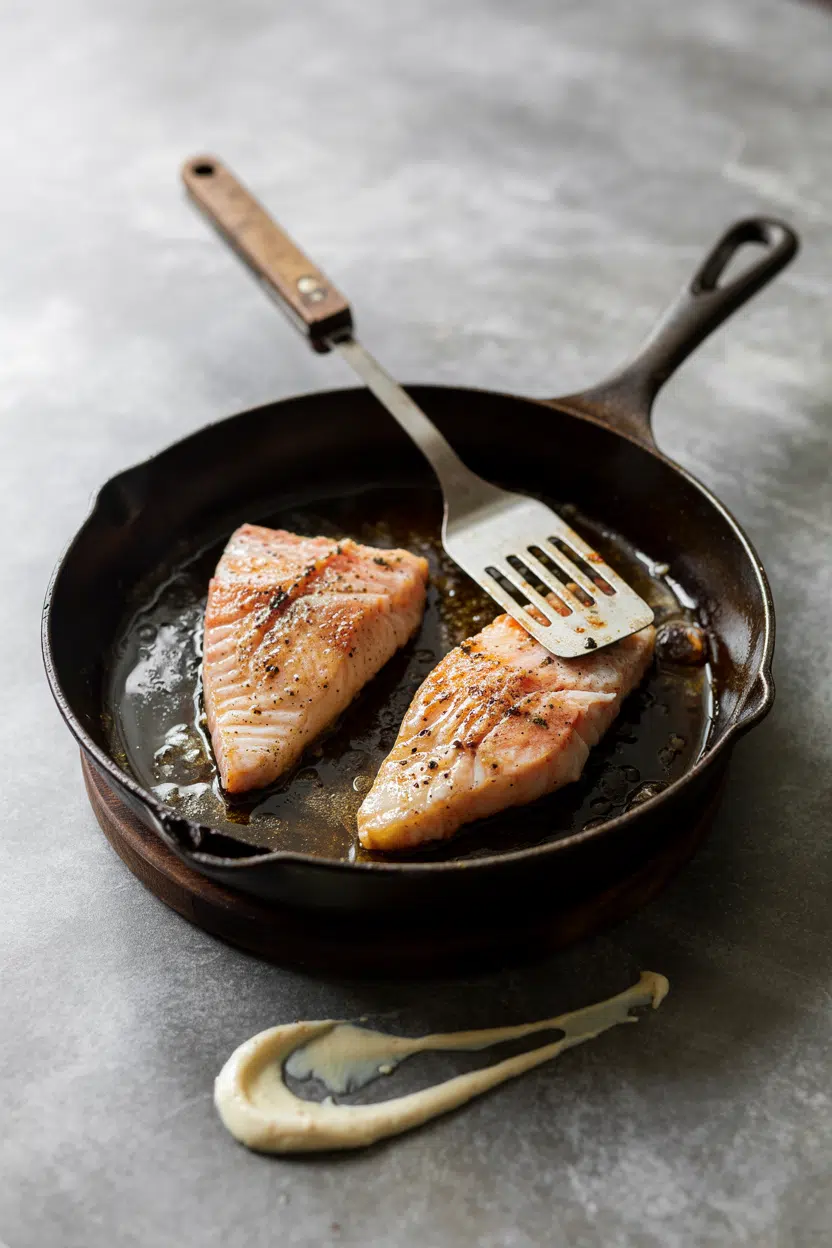
Rainbow trout is a fast-cooking fish, which makes technique selection matter more than it might with forgiving proteins. Skin-on fillets over high heat reward patience - press the fillet flat for the first 30 seconds to prevent curling, then leave it alone until the skin crisps.

How Rainbow Trout Is Used
MethodBest ForTip
🍳 Pan-SearSkin-on fillets, weeknight dinnersHigh heat, butter baste at the end; skin should release cleanly
🔥 GrillWhole fish or thick filletsSkin-side down on oiled grates; don't flip more than once
💨 SmokePâté, salads, spreads, appetizersHot-smoke until just opaque; cold-smoke for gravlax-style texture
🫙 BakeTrout almondine, en papilloteEn papillote keeps moisture; almonds toast separately for crunch
🥣 PoachCold salads, composed platesCourt-bouillon with lemon and herbs; cook just below a simmer

Trout almondine - baked with sliced almonds, herbs, and brown butter - is the French bistro benchmark for this fish. Pacific Northwest preparations lean toward grilling over wood with fresh herbs, while Scandinavian kitchens treat rainbow trout like salmon for curing and smoking. Japanese-influenced preparations, particularly shioyaki-style (salt-grilled), showcase the fish's clean flavor with almost no interference.

For pairing, sides for rainbow trout that work consistently are new potatoes, barley, and lightly dressed greens - nothing heavy enough to compete.

A technique like a pan-seared salmon with dill sauce recipe translates cleanly to rainbow trout given how similar both fish behave in a hot skillet.

Avoid heavy tannic red wine sauces and overtly sweet glazes; they overpower what makes rainbow trout worth eating.

Golden Rule
Don't overcook it. Rainbow trout fillets are thin - 3-4 minutes skin-side down, 1 minute flipped, and the fish is done. Pull it the moment the flesh turns opaque and flakes at gentle pressure.
Try It In
🐟Smoked Trout SpreadUses smoked rainbow trout as the base — easy appetizer or cracker topping→

How to Buy and Store Rainbow Trout

Fresh quality is easy to read. Look for flesh that's translucent pink-orange, moist without being wet, with no gray tinge or brown edges.

The skin should show clean, bright speckling and, on a whole fish, eyes must be clear and slightly convex - not sunken or cloudy.

Watch Out
A strong fishy odor is a hard pass. Fresh rainbow trout smells faintly mineral and clean - like a cold river, not a fish market. Any ammonia or sour smell means the fish is past its window.

At home, wrap fillets tightly in plastic or seal in an airtight container and place in the coldest part of the fridge - ideally over a bed of ice.

Use within 1-2 days for peak quality.

The guide on keeping rainbow trout fresh covers the full fridge-to-freezer timeline in detail, including signs of spoilage that apply equally to salmon spoilage signs given their shared biology.

Cooked rainbow trout holds 3-4 days refrigerated. For freezing, wrap tightly in plastic then foil and use within 3 months - texture degrades noticeably beyond that point.

Where to Start With Rainbow Trout

Buy a skin-on farmed fillet first. It's the most forgiving cut, the most consistent product, and the best way to get the technique - high heat, skin down, short time - locked in before moving to steelhead or whole fish.

Once comfortable with a basic pan-sear, try a baked lemon herb fish fillets recipe as a low-stress next step before attempting trout almondine.

If the fish isn't available, rainbow trout stand-ins like Arctic char or small salmon fillets behave similarly in most methods.

Frequently Asked Questions

Is rainbow trout the same as salmon?

No, though they're close relatives in the salmonid family. Rainbow trout is milder, leaner, and smaller than Atlantic salmon. Steelhead - the ocean-run form of the same species - comes closer in richness and is often sold alongside salmon in markets.

Can you eat rainbow trout skin?

Yes. Crisped skin-on is one of the best parts of a pan-seared fillet - it turns thin and crackly with high heat. The skin from farmed rainbow trout is clean-tasting and safe to eat when cooked through.

What does smoked rainbow trout taste like?

Richer and more concentrated than fresh, with the fish's natural sweetness amplified by smoke. Hot-smoked versions flake like cooked fish; cold-smoked or cured preparations have a silkier, denser texture closer to lox.

Is rainbow trout healthy to eat?

Yes. It's a strong source of omega-3 fatty acids (EPA and DHA), high-quality protein, vitamin D, and B12. Rainbow trout also tests consistently low in mercury compared to larger predatory fish, making it suitable for regular consumption.

How do you tell if rainbow trout has gone bad?

Trust your nose first - fresh trout smells clean and faintly mineral; spoiled fish smells sour or ammonia-like. Visually, gray or dull flesh, slimy surface, or sunken eyes on a whole fish all confirm it's past usable.
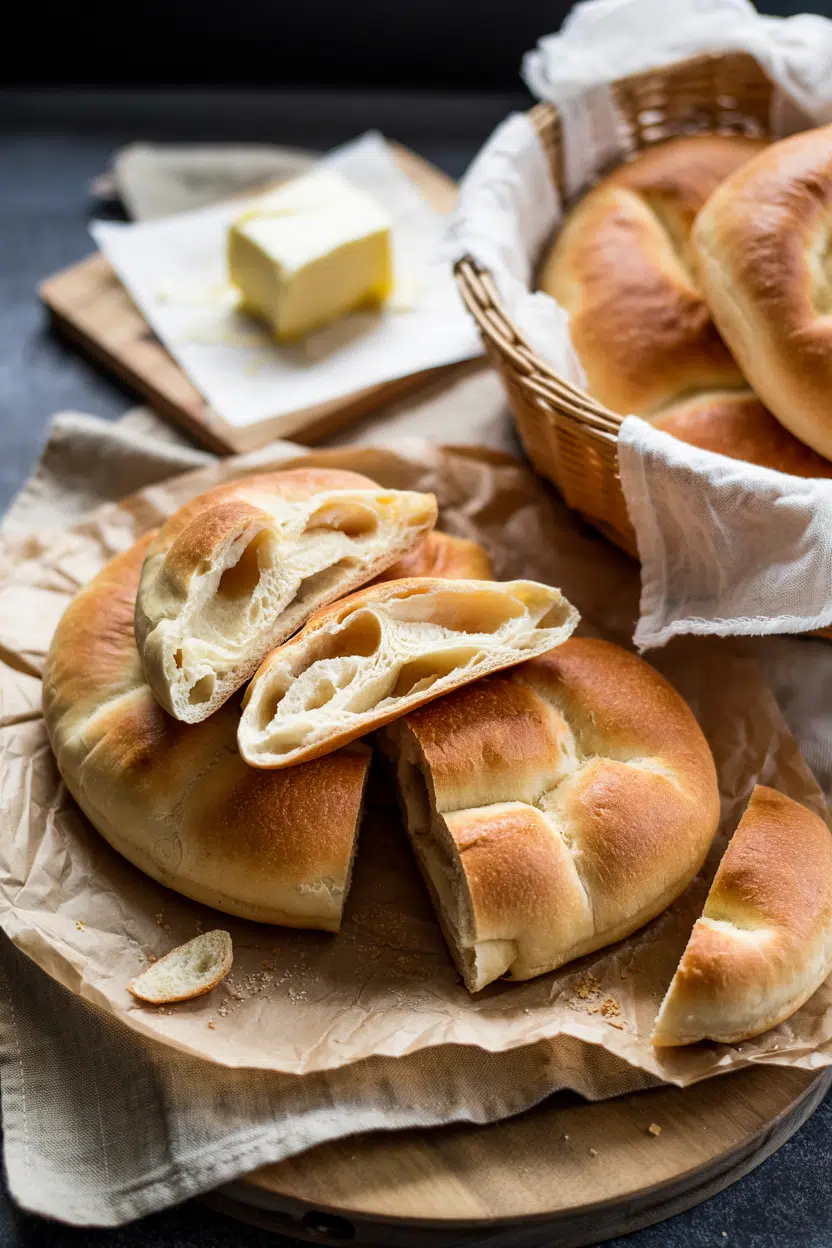
How Long Does Pita Bread Last? [Storage Guide]

April 1, 2026

Finding a bag of pita bread at the back of the counter - slightly stiff, maybe spotted - raises the same question every time: is this still good?

Can You Freeze Pita Bread

Much like the situation with mold in yogurt, the answer depends on what you're actually looking at.

Pita bread is a yeast-leavened flatbread with a hollow pocket, and that thin dough makes it more vulnerable to both staling and mold than a standard loaf.

The good news for planning purposes: with the right storage, pita rounds stay soft and usable for weeks.

QUICK SUMMARY

Pita bread lasts 1-3 days at room temperature once opened, up to 2 weeks in the fridge, and 3-6 months in the freezer. Always keep it sealed - the thin dough dries and molds faster than most breads.

🏠Pantry (sealed): 3-5 days in original bag at room temperature
🧊Fridge (opened): 1-2 weeks tightly wrapped to prevent drying
❄️Freezer: Best within 3 months; safe up to 6 with parchment separators

How Long Does Pita Bread Last?

Shelf life for pita bread shifts significantly based on whether the bag has been opened and where you're keeping it.

Commercial pita rounds contain preservatives that push pantry life toward the 5-day end; homemade pita has no such buffer and stales within a day or two at room temperature.

Understanding pita bread and its flavor helps explain why freshness matters - the pocket lift collapses as the crumb dries, and that changes the whole eating experience.

One variable worth noting: once you've halved a round into pita pockets for sandwiches, the exposed interior dries out fast. Consume split pita the same day.

Pita Bread Shelf Life
MethodStateDurationNotes
🏠 PantryUnopened3-5 daysKeep in original sealed bag; commercial pitas last toward the longer end
🏠 PantryOpened1-3 daysAir exposure dries thin rounds fast; reseal after each use
🧊 FridgeOpened1-2 weeksSlows mold but speeds staling; tightly seal to limit moisture loss
❄️ FreezerAny3-6 monthsBest quality within 3 months; separate rounds with parchment
🏠 CounterSliced/halvedSame dayExposed pocket dries rapidly; microbial risk increases quickly

How to Store Pita Bread

Proper storage comes down to one principle: pita's thin dough loses moisture faster than thicker breads, so every gap in your seal shortens its life.

For general guidance on keeping bread at its best, our cooking bread perfectly resource covers the broader principles.

  • 🏠 Pantry - Keep pita in its original sealed bag or transfer to an airtight container; store away from heat sources like the stove and away from high-humidity spots near the sink, where the thin dough traps moisture and molds faster.
  • 🧊 Fridge - Wrap the stack tightly in plastic wrap or press it into a resealable bag with the air squeezed out; label with the date so you're not guessing two weeks later.
  • 🌡️ Avoid warm pita in sealed bags - Letting pita cool completely before sealing prevents trapped steam from softening the crumb and creating mold conditions inside the pocket.
Watch Out
Never refrigerate pita unwrapped. The fridge environment is dry, and uncovered pita rounds become leathery within hours - a texture problem specific to thin flatbreads.

For the fridge, a heavy-duty resealable freezer bag works better than standard zip bags because it limits both drying and fridge odors from absorbing into the dough.

Can You Freeze Pita Bread?

Freezing is the most reliable way to extend pita bread well beyond its pantry window. The process is straightforward, and frozen pita rounds revive well enough for most uses - wraps, pockets, and dipping all hold up fine.

Golden Rule
Always separate pita rounds with parchment or wax paper before freezing. Stacked rounds fuse together and tear the pocket when pulled apart - you lose the one structural feature that makes pita useful.

Note that cooking parchment paper perfectly has a long shelf life itself, so keeping a roll on hand costs nothing long-term.

  1. Cool completely - Bring warm or fresh pita to room temperature before sealing to avoid trapped steam.
  2. Separate rounds - Place a sheet of parchment or wax paper between each pita in the stack.
  3. Bag and seal - Stack separated rounds in a heavy-duty resealable freezer bag; press out as much air as possible or vacuum-seal.
  4. Label and freeze flat - Write the freeze date on the bag and lay it flat in the freezer to preserve shape.

Thawing is equally important. Transfer to the fridge for a few hours for a gradual thaw, or leave sealed at room temperature for 30-60 minutes. For a fast fix, microwave individual rounds for 10-20 seconds between paper towels, then finish in a hot skillet to restore pliability. Frozen pita may lose some pocket lift and become slightly drier - brief toasting or steaming brings most of it back.

Signs Pita Bread Has Gone Bad

Pita's thin structure means spoilage signals show up in specific ways. Mold can appear on both flat faces and inside the pocket itself, so check both surfaces before use.

Signs It's Gone Bad
👀
VisualGreen, blue, or black fuzzy spots on either face · Dark wet or translucent patches indicating bacterial growth · Discoloration inside the pocket
👃
SmellSour or sharp off-odor · Yeasty smell that differs from mild baked-wheat
✋
TextureSlimy or tacky surface · Unusually hard, brittle crust from severe staling
Shortcut
Don't try to cut mold away from pita. The thin dough means mold threads spread through the crumb faster than in denser bread - discard the whole round.

Severe staling - hard and brittle rounds - isn't a safety issue on its own. However, if staling combines with any sour smell or sticky feel, that's spoilage, not just dryness.

Making the Most of What You Have

A few habits separate pita that stays soft for two weeks from pita that's chalky and cracked by day three.

Slightly stale pita can often be revived - sprinkle with water and heat in a 350°F (175°C) oven for 3-5 minutes to steam the crumb back to pliability.

If you're meal prepping, check out what pairs with pita bread to plan fillings that won't compromise storage.

  • Fill at serving time - Prefilled pita releases moisture into the pocket, shortening shelf life and making the dough soggy before you eat it.
  • Flash-freeze individually - Freeze single rounds on a tray before bagging to keep shapes intact and prevent fusing.
  • Rotate your stock - Label bags with freeze dates and use oldest rounds first; after 3 months, texture starts declining even if safety isn't an issue.
  • No pita available? - Our guide to [replacements for pita bread](https://forkliftkitchen.com/pita-bread-substitutes/) covers what works in a pinch for wraps and dipping.

Frequently Asked Questions

How long does pita bread last in the fridge?

Opened pita lasts 1-2 weeks refrigerated when tightly sealed. Refrigeration slows mold but accelerates staling, so pita stored this way is best reheated briefly in a skillet before eating.

Can you freeze pita bread?

Yes. Freeze rounds separated by parchment paper in a heavy-duty resealable bag with the air pressed out. Quality is best within 3 months; rounds remain safe up to 6.

How do you thaw frozen pita without ruining the pocket?

Thaw sealed at room temperature for 30-60 minutes, then reheat briefly in a hot dry skillet. This restores pliability without collapsing the pocket structure from excess steam.

Can stale pita be revived?

Yes, if it's just stale and not spoiled. Sprinkle with a little water and heat at 350°F for 3-5 minutes - the steam re-softens the crumb. This won't work on pita that smells sour or feels slimy.

Is it safe to eat pita bread that has mold on one spot?

No. Unlike hard cheeses, pita's thin porous dough allows mold threads to spread invisibly through the entire round. Discard it whole rather than cutting around the visible spot.

Air Fryer Chicken Pasties

April 1, 2026

You need 40 minutes and one air fryer basket. No deep frying, no grease cleanup, and puff pastry does the hard part for you.

Air Fryer Chicken Pasties served on a plate

The air fryer crisps the crust without heating your kitchen. Chicken and vegetables cook in a creamy sauce before assembly, so everything inside is ready when the pastry turns golden.

Make these for weeknight dinners when you want something hearty that travels well for packed lunches tomorrow.

QUICK SUMMARY

Golden air fryer chicken pasties with flaky puff pastry and creamy chicken-vegetable filling cook in 15 minutes at 375°F. Pre-cook the filling and thicken it with a roux to prevent soggy crust. Chill assembled pasties 10 minutes before air frying for even browning and crisp edges.

⏱️Time Reality: 25 min prep plus 15 min air frying - filling must cool before assembly
🔑Critical First Step: Make thick filling with roux so pastry stays crisp, not soggy
⚠️Watch Out: Don't skip chilling - warm filling melts pastry before crust sets

Table of Contents

Toggle
  • Why This Recipe Works
  • What You'll Need
    • Ingredient Details
  • Ingredient Swaps
  • What to Serve With It
  • Store and Reheat
  • Frequently Asked Questions
  • Air Fryer Chicken Pasties
    • Method 
    • Tried this recipe?

Why This Recipe Works

The air fryer crisps puff pastry without the mess of deep frying or the time of oven baking. For a version that comes together quickly, this easy fries recipe uses the same method and timing.

Quick Reference
⏱️
Prep Time
25 min
🔥
Cook Time
15 min
⏰
Total Time
40 min
🍽️
Servings
4-6 servings
📊
Difficulty
Medium
🏷️
Category
Main Dish
💡
Quick Tip
Chill filled pasties 10 min before air frying
🎯
Best For
Weeknight | Meal prep | Casual entertaining

What makes these pasties work:

  • Roux-thickened filling creates a creamy base that holds shape inside the pastry instead of leaking or making the crust soggy
  • Pre-cooked chicken ensures even doneness and prevents undercooked filling or overdone crust
  • 375°F air frying crisps the pastry exterior while the circulating air browns all sides without flipping
  • Egg wash on puff pastry promotes golden color and adds shine to the finished crust
  • 10-minute chill time lets butter in the pastry firm up so layers separate during cooking for flaky texture
Quick Tip
Cut chicken into ¼-inch cubes for faster, more even cooking in the filling

What You'll Need

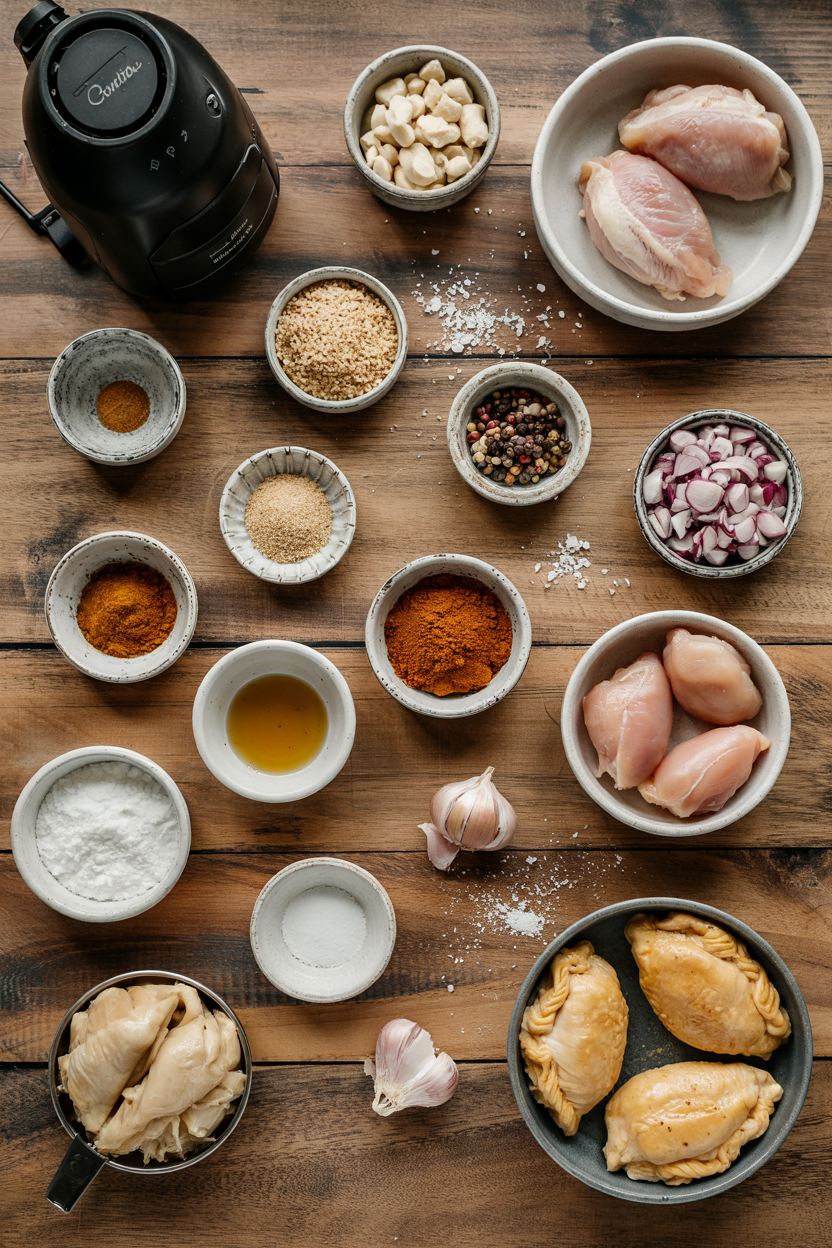
Ingredients for Air Fryer Chicken Pasties

Grocery store puff pastry and one pound of chicken breast cover the main components. For a version that comes together quickly, juicy homemade chicken recipe uses similar timing and technique.

🍗
Protein
  • 1 lb chicken breast, diced small
  • 1 large egg (for wash)
🥬
Vegetables
  • 1 medium onion, diced
  • 2 medium carrots, diced
  • 2 celery stalks, diced
🧀
Dairy & Fat
  • 3 tablespoon butter
  • ¾ cup whole milk
🫙
Pastry & Pantry
  • 1 package puff pastry (2 sheets)
  • 3 tablespoon all-purpose flour
  • Salt and black pepper

Ingredient Details

  • Chicken breast
    Dice into ¼-inch pieces so they cook through quickly and blend into the creamy filling without dry spots
  • Puff pastry
    Keep frozen until ready to use, then thaw in fridge overnight - room-temp pastry gets sticky and won't crisp properly
  • Butter and flour
    Cook the roux for 2 minutes to eliminate raw flour taste before adding milk for a smooth, thick sauce
  • Onion, carrots, celery
    Sauté 5-7 minutes until softened - raw vegetables release water during cooking and make filling watery
  • Milk
    Add gradually to the roux while whisking to prevent lumps - whole milk creates the creamiest filling
  • Egg wash
    Beat one egg with 1 tablespoon water and brush only the tops - egg on seams makes them harder to crimp shut
  • Salt and pepper
    Season filling generously since puff pastry has no salt - taste before assembly and adjust

Ingredient Swaps

Most swaps change texture or richness but still deliver a crispy pastry with savory filling. Rich mains need something to cut through, and this quick caesar salad dish balances the plate.

Four swaps that work:

  • Chicken thighs for breast - moister filling with deeper flavor, but add 2-3 minutes to initial cooking time since dark meat takes longer
  • Unsweetened almond or oat milk for dairy milk - slightly thinner sauce with milder flavor, works for dairy-free diets without major texture loss
  • Gluten-free puff pastry for regular - less rise and slightly denser crust, but still crisps in the air fryer with similar timing
  • Frozen mixed vegetables for fresh carrots and celery - softer texture and milder flavor, but cuts 5 minutes from prep time

Convection Oven (Method Swap)

Works for: Cooking 8+ pasties at once with similar crispness

Skip if: You only need 4-6 pasties and want faster cooking (oven adds 5-8 minutes)

Pie Crust (Budget Swap)

Works for: Cutting cost when puff pastry isn't on sale

Skip if: You want flaky layers - pie crust gives a denser, less crispy texture

Instructions

Total cooking time breaks into 10 minutes for filling, 10 minutes for assembly, and 15 minutes in the air fryer. Most people skip a creamy potato side, but it balances the meal.

  1. Sauté vegetables and chicken: Heat 1 tablespoon butter in a skillet over medium heat, add diced onion, carrots, and celery, cook 5-7 minutes until softened, then add diced chicken and cook 3-4 minutes until no longer pink.
  2. Make roux and sauce: Push chicken and vegetables to the side of the pan, add remaining 2 tablespoon butter to the empty space, sprinkle flour over melted butter, whisk 2 minutes, then gradually pour in milk while whisking until sauce thickens (2-3 minutes), season with salt and pepper, and let filling cool 10 minutes.
  3. Prepare pastry: Roll out thawed puff pastry sheets on a floured surface, cut each sheet into 4 squares (8 total), place 2-3 tablespoon cooled filling on one half of each square, leaving ½-inch border.
  4. Seal pasties: Fold pastry over filling to form triangles, press edges with a fork to seal tightly, brush tops with beaten egg wash (avoid brushing seams), then chill assembled pasties in the fridge for 10 minutes.
  5. Air fry: Preheat air fryer to 375°F, place pasties in a single layer with 1-inch gaps between each, cook 12-15 minutes until golden brown and puffed, checking at 10 minutes, then rest 5 minutes before serving.
Watch Out
Don't overfill pasties - too much filling forces pastry open during cooking and leaks into the basket

What to Serve With It

The rich, creamy filling needs bright or tangy sides to cut through the heaviness. For more plate-completing ideas, check these chicken saltimbocca meal planning ideas that work with any savory pastry main.

Side Dish Prep Why It Works How to Serve
Simple green salad Easy Crisp greens and light vinaigrette cut richness Toss mixed greens with lemon juice and olive oil, serve chilled
Steamed green beans Easy Tender-crisp texture and mild flavor balance creamy filling Steam 5 minutes, toss with butter and garlic
Coleslaw Easy Tangy, crunchy contrast complements savory pastry Use store-bought or mix shredded cabbage with vinegar dressing
Roasted potatoes Medium Heartier option for bigger appetites, adds crunch Cube potatoes, toss with oil, roast 25 minutes at 425°F
Pickled vegetables Easy Sharp acidity cuts through butter and cream Serve store-bought pickles or quick-pickle cucumbers in vinegar

Three ways to serve it:

  • Weeknight dinner - pair with simple green salad and serve hot from the air fryer with a side of mustard for dipping
  • Packed lunch - let pasties cool completely, pack with coleslaw in a separate container, reheat in office microwave 1-2 minutes
  • Casual entertaining - arrange on a platter with pickled vegetables and creamy mustard sauce for dipping, serve warm or room temperature
Shortcut
Use rotisserie chicken and frozen mixed vegetables to cut prep time to 10 minutes

Store and Reheat

Cooked pasties last 3-4 days in the fridge in an airtight container. Caesar salad cuts through all that richness, and we keep a batch ready for nights like this - a creamy sauce on the side adds another layer.

Method Time Best For
🔥 Oven 10 min at 350°F Restoring crisp crust and even heating throughout
🍳 Stovetop 5 min over medium heat Quick warming with slight crisp on bottom crust
📦 Microwave 1-2 min on high Fast reheating when you don't care about crispy texture

For best results when storing:

  • Cool completely before refrigerating - warm pasties create condensation in the container that makes crust soggy
  • Store in shallow, airtight containers - stacking pasties traps steam and softens the bottom crust
  • Freeze unbaked pasties up to 2 months - assemble, brush with egg wash, freeze on a tray, then transfer to freezer bags and air fry directly from frozen (add 3-5 minutes)
  • Reheat in air fryer for best texture - 5 minutes at 350°F crisps the crust better than oven or microwave
  • Avoid reheating more than once - pastry gets progressively softer and loses flakiness with each reheat cycle

Frequently Asked Questions

How long to cook air fryer chicken pasties at 375°F?

Cook 12-15 minutes until the crust turns golden brown and puffs up. Check at 10 minutes and add time if needed based on your air fryer model.

Can I make air fryer chicken pasties ahead and freeze them?

Yes, assemble pasties completely with egg wash, freeze on a tray until solid, then transfer to freezer bags for up to 2 months. Air fry directly from frozen at 375°F for 18-20 minutes.

What goes well with chicken pasties for sides or sauces?

Serve with simple green salad, coleslaw, or steamed green beans for lighter options, or roasted potatoes for heartier meals. Creamy mustard sauce or brown gravy work as dipping options.

How do I know when chicken pasties are thoroughly cooked and safe?

The crust should be deep golden brown and puffed, and since you pre-cook the chicken filling to 165°F before assembly, the air frying step just heats it through. Check that filling is steaming hot in the center.

Can I substitute chicken thighs or frozen puff pastry in this recipe?

Chicken thighs work but need 2-3 extra minutes of cooking time in the filling since dark meat takes longer. Frozen puff pastry works perfectly - just thaw it in the fridge overnight before using.

Air Fryer Chicken Pasties served on a plate

Air Fryer Chicken Pasties

No ratings yet
Air fryer chicken pasties feature golden, flaky puff pastry filled with a creamy, roux-thickened chicken and vegetable mixture. Pre-cooking the filling and chilling assembled pasties ensures a crisp crust and tender interior, all ready in 40 minutes.
Print Recipe Pin Recipe
Prep Time 25 minutes mins
Cook Time 15 minutes mins
Total Time 40 minutes mins
Servings: 6 servings
Course: Main Dish
Cuisine: American
Ingredients Equipment Method Notes

Ingredients
  

  • 1 lb chicken breast diced into ¼-inch pieces
  • 1 medium onion diced
  • 2 medium carrots diced
  • 2 stalks celery diced
  • 3 tablespoon butter divided, for sautéing and roux
  • 0.75 cup whole milk added gradually to roux
  • 1 package puff pastry 2 sheets, thawed
  • 3 tablespoon all-purpose flour
  • 1 large egg beaten with 1 tablespoon water for egg wash
  • salt for seasoning filling generously
  • black pepper for seasoning filling generously

Equipment

  • Air fryer basket Used to cook pasties evenly without deep frying
  • Skillet For sautéing vegetables and chicken and making roux

Method
 

  1. Heat 1 tablespoon butter in a skillet over medium heat. Add diced onion, carrots, and celery and cook for 5-7 minutes until softened. Add diced chicken and cook 3-4 minutes until no longer pink.
    1 lb chicken breast, 1 medium onion, 2 medium carrots, 2 stalks celery, 3 tbsp butter
  2. Push chicken and vegetables to the side of the pan. Add remaining 2 tablespoons butter to empty space, sprinkle flour over melted butter, and whisk for 2 minutes to cook roux. Gradually pour in milk while whisking until the sauce thickens, about 2-3 minutes. Season with salt and black pepper. Let filling cool for 10 minutes before assembly.
    3 tbsp butter, 0.75 cup whole milk, 3 tbsp all-purpose flour, salt, black pepper
  3. Roll out thawed puff pastry sheets on a floured surface. Cut each sheet into 4 squares, making 8 total. Place 2-3 tablespoons cooled filling on one half of each square leaving a ½-inch border.
    1 package puff pastry
  4. Fold pastry over filling to form triangles. Press edges with a fork to seal tightly. Brush tops with beaten egg wash, avoiding seams. Chill assembled pasties in the fridge for 10 minutes.
    1 large egg
  5. Preheat air fryer to 375°F. Place pasties in a single layer with 1-inch gaps between them. Cook for 12-15 minutes until golden brown and puffed, checking at 10 minutes to adjust time if needed. Let rest 5 minutes before serving.

Notes

  • Cool the filling completely before assembly to prevent soggy pastry.
  • Chill assembled pasties for 10 minutes to help them puff and brown evenly.
  • Cut chicken into small pieces for faster and more even cooking inside the filling.

Tried this recipe?

Let us know how it was!

What Is Orange Juice? [Taste, Uses & More]

April 1, 2026

That first glass of freshly squeezed orange juice - poured cold, slightly pulpy, carrying a sharp citrus lift that bottled versions rarely match - sets a high bar.

What Is Orange Juice

Orange juice brings both sweetness and acidity to everything it touches, from morning smoothies to pan sauces.

If you cook with it regularly, understanding what drives its flavor changes how you use it.

And if you reach for replacements for orange marmalade in citrus-forward recipes, fresh OJ is often the bridge ingredient that makes those swaps work.

QUICK SUMMARY

Orange juice is the pressed liquid of sweet orange varieties - bright, tart, and lightly floral. Fresh-squeezed tastes noticeably cleaner than concentrate. Use it in glazes, marinades, baked goods, and cocktails. Refrigerate after opening and use within 7-10 days for pasteurized bottled OJ, or 48-72 hours for fresh-squeezed.

🍊Flavor: Sweet-tart citrus with mild bitter finish and floral notes
🔥Best Uses: Glazes, marinades, vinaigrettes, baking, cocktails
🧊Shelf Life: 48-72 hrs fresh-squeezed; 7-10 days opened bottled OJ
🛒Buy: Not-from-concentrate for best flavor; check pasteurization date
⚠️Avoid: Long marinades on delicate fish; hot dairy without tempering

What Is Orange Juice?

Orange juice is the liquid extracted from sweet oranges (Citrus sinensis), a species domesticated in ancient Southeast Asia and later commercialized across the Mediterranean and the Americas. Today it's one of the most widely consumed fruit juices in the world.

You'll find it under several labels. Fresh-squeezed or freshly squeezed OJ comes straight from the fruit with no processing. Not-from-concentrate (NFC) is pasteurized but never dehydrated, making it the closest bottled version to fresh.

From-concentrate OJ is dehydrated to remove water for shipping, then rehydrated before bottling - a process that blunts some aromatics.

The orange variety matters too. Navel oranges are sweet and low in acid, while Valencia oranges are the commercial standard - balanced and reliably juicy.

Blood oranges produce a deeper, more raspberry-tinged juice, and cara cara varieties lean toward honey-sweet with less sharpness.

When a recipe leans on citrus character, knowing comparing dried orange zest vs fresh options helps round out how the whole orange - not just its juice - contributes to a dish's flavor profile.

What Does Orange Juice Taste Like?

orange juice - What Is Orange Juice

Orange juice tastes sweet-tart, with bright citrus up front and a mild bitter note on the finish.

That bitterness traces back to pith contact during pressing - more pith means more bitter compounds, which is why commercial juicing equipment is calibrated precisely.

Some varieties, particularly cara cara and Valencia, offer subtle floral or honey undertones that set them apart from generic supermarket blends.

Compared to tangerine juice, OJ is slightly less fragrant and a touch sharper - though if you're weighing those two, reading about alternatives to tangerine puts the differences in useful context.

Heat changes things. Reduced orange juice concentrates both sweetness and acidity, pushing the bitterness forward.

Fresh-squeezed has a clean, rounded brightness that fades within 48 hours as citric acid and volatile aromatics degrade.

Sensory SnapshotModerate Intensity
👅 Flavor
sweet-tartbright citrusmild bitterfloral
✋ Texture
watery to pulpysilkylightly astringent
👃 Aroma
zesty citrusfloral

How to Use Orange Juice

Orange juice pulls double duty in the kitchen - it's both a liquid ingredient and an acid source. That combination makes it useful across a wider range of cooking methods than most fruit juices.

How Orange Juice Is Used
MethodBest ForTip
🥗 RawVinaigrettes, smoothies, cocktail mixers, punchesWhisk with olive oil and Dijon for a quick citrus dressing
🍳 ReductionGlazes for duck, chicken, or pork; pan saucesReduce by half before adding stock; bitterness intensifies, so balance with honey
🍳 DeglazeLifting browned fond from skillet for quick saucesAdd off direct heat first, then return to medium to control splattering
🧁 BakedOrange loaf, muffins, citrus syrups poured over cakeReplace some liquid in the recipe; zest amplifies the orange character
🥣 MarinadePork tenderloin, chicken thighs, Cuban mojoKeep marinating time under 2 hours - the acid breaks down protein texture fast

In French cooking, orange juice builds gastrique (a sweet-sour reduction with vinegar) and classic beurre à l'orange. Latin kitchens use it as the backbone of Cuban mojo, blended with garlic, cumin, and olive oil for roasted pork.

OJ pairs well with soy sauce, garlic, and ginger in sweet-savory glazes. It also works alongside thyme, rosemary, and star anise in braised or roasted meats.

For cocktails, its natural sweetness balances sparkling wine in a mimosa without added sugar.

Watch Out
Don't use orange juice for long acidic fish cures - it's too sweet and mild for conventional ceviche, and it softens delicate flesh into mush before any meaningful cure occurs. Stick to lime or lemon for that application.

When you need a citrus stand-in mid-recipe, knowing your orange juice stand-ins keeps cooking on track without a trip to the store.

Try It In
🍗Air Fryer Garlic Parmesan Chicken TendersA citrus-forward marinade brightens the garlic base→🍯Air Fryer Honey Garlic Chicken TendersOJ in the glaze balances sweetness with acidity→🍖Crispy Honey Garlic Chicken WingsSqueeze in OJ to cut through the honey's richness→

How to Buy and Store Orange Juice

Fresh-squeezed OJ should look bright orange with no cloudiness from fermentation and smell cleanly of citrus - not yeasty or sharp. For bottled OJ, "not-from-concentrate" is the call for flavor; check the pasteurization date rather than the best-by date alone.

Golden Rule
Refrigerate orange juice immediately after opening. Never leave it at room temperature for more than two hours - acidity does not prevent bacterial growth at room temp the way people assume.

Avoid bottles with bulging caps, off-odors, or visible separation that won't recombine with shaking. Once opened, store in the original sealed container or a covered glass bottle.

  • 🧃 Fresh-squeezed - best within 48-72 hours; flavor and vitamin C drop fast after that
  • 🛒 Pasteurized bottled (NFC) - 7-10 days after opening; discard if it smells fermented
  • 📦 Shelf-stable UHT or concentrate - months unopened; use within 7-10 days once open

For a deeper look at what affects OJ past its window, the full breakdown of how long orange juice keeps covers signs of spoilage by type.

If you're curious how citric acid preservation compares across products, comparing fruit fresh vs citric acid options puts the chemistry in plain terms.

Start With What You Have

Fresh-squeezed is the standard to aim for - but not-from-concentrate bottled OJ is a reliable daily substitute that handles glazes, marinades, and baking without compromise.

Reserve from-concentrate for smoothies and punches where the flavor difference matters least.

If you're building a sauce or a marinade, use what you have cold from the fridge, taste as you go, and adjust acidity with a small squeeze of lemon if the orange reads too sweet.

Frequently Asked Questions

What does orange juice taste like?

Sweet-tart and bright, with mild bitterness on the finish from pith contact during pressing. Fresh-squeezed also carries subtle floral or honey notes that bottled versions lose during pasteurization.

Why does orange juice taste bitter?

Bitterness comes from compounds in the pith and seeds released during pressing. It intensifies when OJ is reduced by heat, because those bitter compounds concentrate as water evaporates.

What is the difference between fresh and from concentrate orange juice?

From-concentrate OJ is dehydrated to remove water, shipped, then rehydrated before bottling - a process that dulls aromatics. Not-from-concentrate is pasteurized but never dehydrated, so it retains more of the fresh citrus character.

Can you freeze orange juice?

Yes. Pour into an airtight container leaving headspace for expansion, and freeze for up to 3 months. Thaw in the fridge overnight - separation is normal and resolves with shaking.

Is orange juice healthy?

It provides vitamin C, potassium, and folate, but lacks the fiber of whole oranges and is high in natural sugars. It's nutritionally denser than many juices, however whole fruit delivers more for fewer calories.

What Is a Prune? Taste Profile, Uses & More Explained

April 1, 2026

Bite into a prune and you get something richer and more layered than fresh fruit - a dense, almost jammy sweetness with a low note of caramel and a clean plum tang underneath.

What Is Prune

Much like the role currant plays in baking or replacements for date in sweetener swaps, prunes work across both sweet and savory territory in ways most dried fruits don't.

That range is exactly why they deserve a closer look.

QUICK SUMMARY

A prune is a dried European plum - dark, chewy, and sweet-tart with deep caramel and molasses notes. It works as a natural sweetener, a moisture agent in baking, and a fruity counterweight in braises and tagines.

🍑Category: Dried stone fruit from European plum varieties
👅Flavor: Sweet-tart, caramel-rich, with mild molasses depth
🍳Best Uses: Braises, compotes, baking, tagines, cheese boards
❄️Shelf Life: Pantry (unopened): months; fridge (opened): 3-6 months
⚠️Watch Out: High heat burns them fast - add late in high-temp cooking

What Is Prune?

A prune is a dried plum - specifically from Prunus domestica, the European plum, rather than from the softer Asian varieties.

France's Agen region and California's Central Valley produce the majority of commercial prunes, both relying on high-sugar freestone varieties that dry without fermenting.

You may see them sold as dried plums in some markets, which is the same thing - the name shift was a marketing move in the early 2000s.

Other names include French prune and prune plum, the latter sometimes used to describe the fresh fruit before drying.

Understanding alternatives to plum helps put the prune's concentrated character in context - fresh plum is mild where its dried form is intense. Two main styles appear in stores:

  • 🟣 Pitted prunes - the standard option, ready to chop or use whole in most recipes
  • ⚫ Unpitted (whole) prunes - slightly more moisture-retentive, preferred for poaching and stuffing

What Does Prune Taste Like?

prune - What Is Prune

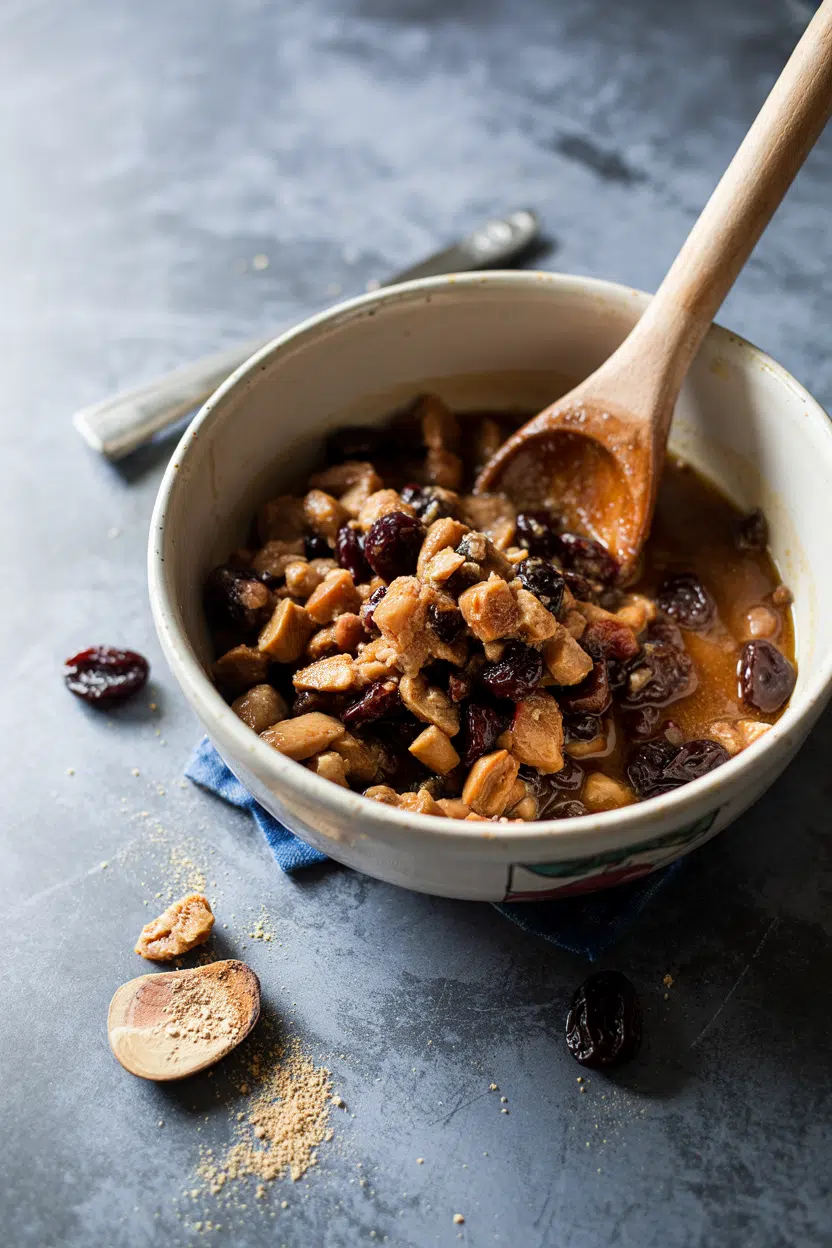
Prune flavor is concentrated plum - but cooked plum, not fresh. The drying process drives off water and intensifies natural sugars, pushing the fruit toward caramel and molasses territory rather than the bright, juicy acidity of fresh fruit.

There's also a mild earthy, almost smoky undercurrent that sets prunes apart from other dried fruits. A rehydrated prune softens back toward stewed-plum territory - the tang returns and the sweetness spreads more evenly.

Sensory SnapshotModerate Intensity
👅 Flavor
sweet-tartcaramelmolassesearthy
✋ Texture
dense-chewysticky when rehydrated
👃 Aroma
stewed plumwarm caramel

Heat deepens the flavor further. Slow-braised prunes lose their chew and collapse into the sauce, contributing body and sweetness without tasting like fruit candy.

How to Use Prune

Prunes work in more cooking contexts than most people expect. The natural sugars and sorbitol content make them reliable for adding moisture and depth without extra fat.

How Prune Is Used
MethodBest ForTip
🍲 BraisingTagines, pork stews, duck legsAdd in the last 30-40 minutes to prevent complete breakdown
🧁 BakingQuick breads, muffins, browniesFold in chopped or use prune puree to replace up to half the fat
🍯 PureeingGlazes, barbecue sauces, marinadesBlend with vinegar or mustard to balance sweetness
♨️ PoachingTarts, dessert syrups, compotesSimmer in red wine, port, or spiced syrup for richer flavor
🧀 Raw / stuffedCheese boards, devils on horsebackPair with goat cheese or blue cheese to cut the sweetness

Prunes are a natural fit with pork, duck, and lamb - the fruit's acidity cuts through fat while the sweetness adds contrast.

French cuisine leans on them in tartes and compotes; Moroccan cooking folds them into tagines with warm spices like cinnamon, clove, and star anise.

For a straightforward party bite, a devils on horseback prunes bacon recipe captures exactly how prune's richness balances salty, smoky flavors.

Golden Rule
Don't add prunes at the start of high-heat cooking - natural sugars caramelize fast and turn bitter. Add them in the final stage of braises, or fold into batters rather than the pan.

Prune puree also stands in for fat in baked goods, which is why you'll see it in low-fat brownie recipes.

If you're comparing substitutes, knowing the alternatives to prune or even swapping out apricot in a tagine can help you decide when prune is truly the right call.

Try It In
🍮Far Breton Prune FlanClassic Breton custard where prunes are the star — shows their texture at its best→

How to Buy and Store Prune

Good prunes are plump and slightly glossy, yielding gently under light finger pressure.

Avoid packs where the fruit feels rock-hard, looks shriveled to the point of brittleness, or shows a white crystalline bloom (that's surface sugar - harmless, however it signals age and dryness).

Watch Out
Check the ingredient list. Some packaged prunes include added sugar or preservatives. If you want the fruit's natural sweetness only, look for packs listing dried plum as the sole ingredient.
  • 🛒 Unopened bags - store in a cool, dark pantry for several months
  • 🧊 Opened prunes - transfer to an airtight container and refrigerate; keeps 3-6 months
  • ❄️ Freezer - extends shelf life up to 12 months with minimal quality loss

A deeper look at prune's shelf life covers the signs of spoilage and whether refrigerating them is always necessary. Once you've opened a bag, the fridge is the right call - room-temperature storage speeds stickiness and eventual mold.

Start Here if You're New to Prunes

If prunes are unfamiliar territory, start with a braise. Add a handful to a slow-cooked pork or lamb dish and they'll dissolve into the background - all depth, no obvious fruitiness.

Once you're comfortable there, move to baking. Folded into muffin batter or quick bread, chopped prunes add moisture and a subtle sweetness that doesn't read as "prune" to most people.

For making chicken tagine with apricots at home, swapping some apricot for prune gives a darker, richer result - a useful experiment once you know both fruits.

Frequently Asked Questions

Are prunes the same as dried plums?

Yes - they're the same fruit. "Dried plum" became a preferred label in some markets after 2000 to modernize the product's image. Both names refer to dried Prunus domestica, typically the Agen or d'Ente variety.

What does a prune taste like compared to a fresh plum?

Prunes taste like cooked plum, not fresh. Drying concentrates the sugars and shifts flavor toward caramel and molasses - the bright, juicy acidity of fresh plum is replaced by a deeper, slower sweetness with a mild earthy note.

How do you rehydrate prunes for recipes?

Simmer prunes in water, red wine, or juice for 10-15 minutes until softened. For a lighter rehydration, soak in hot liquid for 20-30 minutes off heat - this preserves more structure for tarts or stuffing applications.

Can prunes be substituted for dates in baking?

Yes, with caveats. Prunes are tangier and less caramel-sweet than dates, so the result will have more acidity. The moisture contribution is similar, making them a workable swap in most quick breads and energy-style bars.

Do prunes have added sugar?

Not always - many brands sell unsweetened dried plums with no additives. However, some packs do include added sugar or preservatives, so checking the ingredient list is the only reliable way to know.

What Is Pink Peppercorn? Taste, Uses & More, Explained

April 1, 2026

You spot a small jar of rosy berries at the spice shop and reach for it, half-convinced it's just decorative pepper - but pink peppercorn earns a place in your pantry on its own terms.

What Is Pink Peppercorn

Unlike the differences between allspice vs juniper berries, which sit in a well-mapped flavor territory, pink peppercorns occupy a stranger, brighter corner of the spice world.

They bring fruity warmth and a resinous lift that black pepper simply doesn't offer.

QUICK SUMMARY

Pink peppercorn is a dried rosy berry from South American trees, not a true pepper. It tastes bright and fruity with mild heat and a piney edge - best used as a finishing spice rather than a cooking base.

🌿Type: Dried berry from Schinus trees, not true Piper nigrum pepper
👅Flavor: Fruity, mildly peppery, resinous, with light citrus tang
🍳Best Uses: Finishing spice on fish, cream infusions, compound butters
📦Shelf Life: Whole berries best within 6-12 months; ground within 2-3 months
⚠️Note: Belongs to the cashew family - potential allergen for those with tree nut sensitivities

What Is Pink Peppercorn?

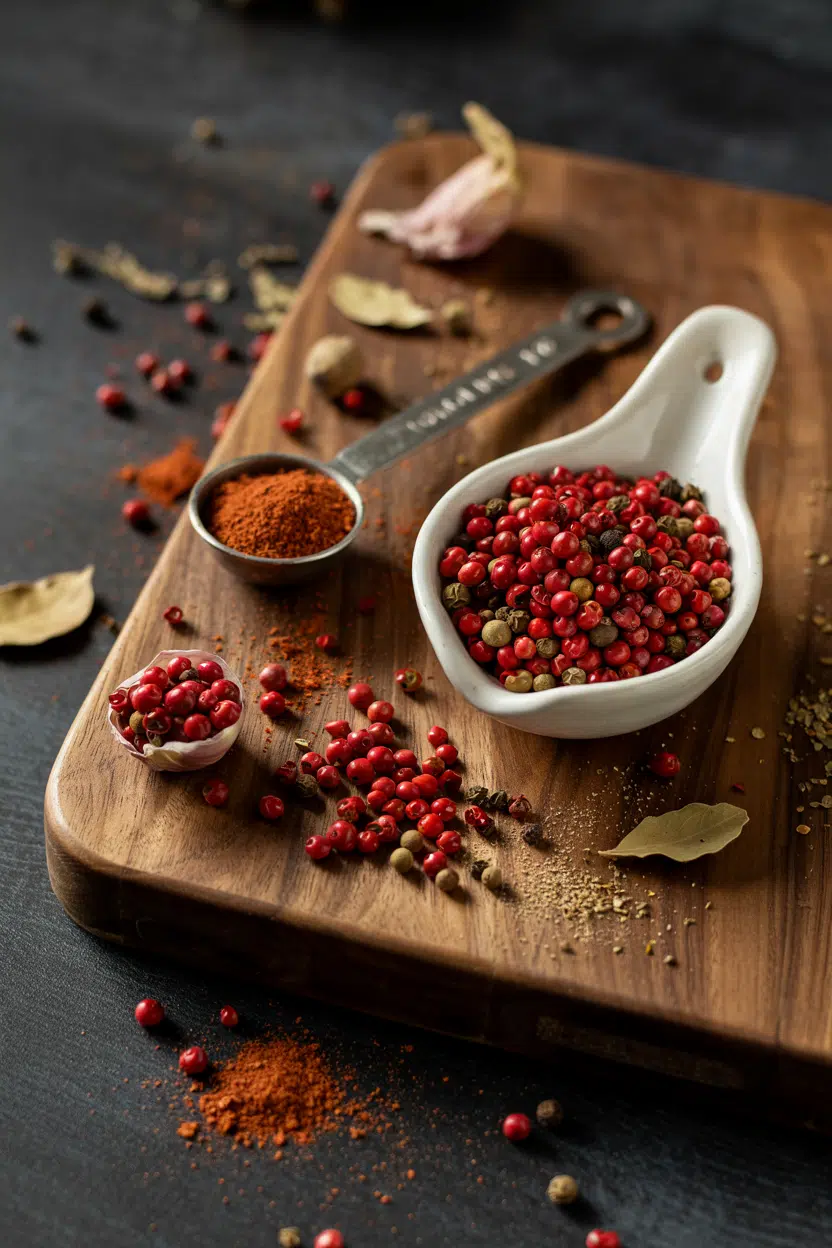
Pink peppercorn is the dried berry of Schinus molle or Schinus terebinthifolius, two trees native to South America and widely cultivated in Madagascar and Réunion.

Despite the name, these berries are not related to black pepper - they belong to the Anacardiaceae family, the same family as cashews and mangoes.

The berries go by several names: pink pepper berry, Schinus molle berry, or simply pink peppercorns (you'll also see it written as "pink pepper corns," though that's a misspelling).

Two main species are commercially sold, with Schinus terebinthifolius (Brazilian pepper tree) being the one most common in spice blends.

Each berry is small, about the size of a true peppercorn, with a thin, brittle outer skin and a woody seed inside. You'll find them sold whole in jars, in mixed peppercorn blends, or - less ideally - pre-ground.

  • 🌍 Primary origins - Peru and Brazil, with commercial cultivation in Madagascar and Réunion
  • Cashew family member - botanically unrelated to black, white, or green pepper
  • Common misnaming - often sold in "four-peppercorn" blends alongside true Piper nigrum varieties

What Does Pink Peppercorn Taste Like?

pink peppercorn - What Is Pink Peppercorn

Pink peppercorn tastes like a milder, fruitier cousin of black pepper with a resinous, pine-like edge that recalls juniper. The heat is gentle - noticeable but never sharp - and there's a dried-berry sweetness and light citrus tang underneath it.

Sensory SnapshotModerate Intensity
👅 Flavor
fruity-sweetmild peppery heatresinouslight citrus
✋ Texture
crispy outer skinpapery-chewy seed
👃 Aroma
fruity-resinouspiney-bright

Heat does this berry no favors. Long cooking mutes the fruitiness and strips the aroma, leaving a thin, vaguely bitter background note.

That's why the best applications keep it raw or barely warmed - cracked over a finished dish, or infused briefly into cream.

The outer skin is where most of the aroma lives. Crack the berry just before use and you'll get a noticeably brighter hit than pre-ground versions sitting in a jar.

How to Use Pink Peppercorn

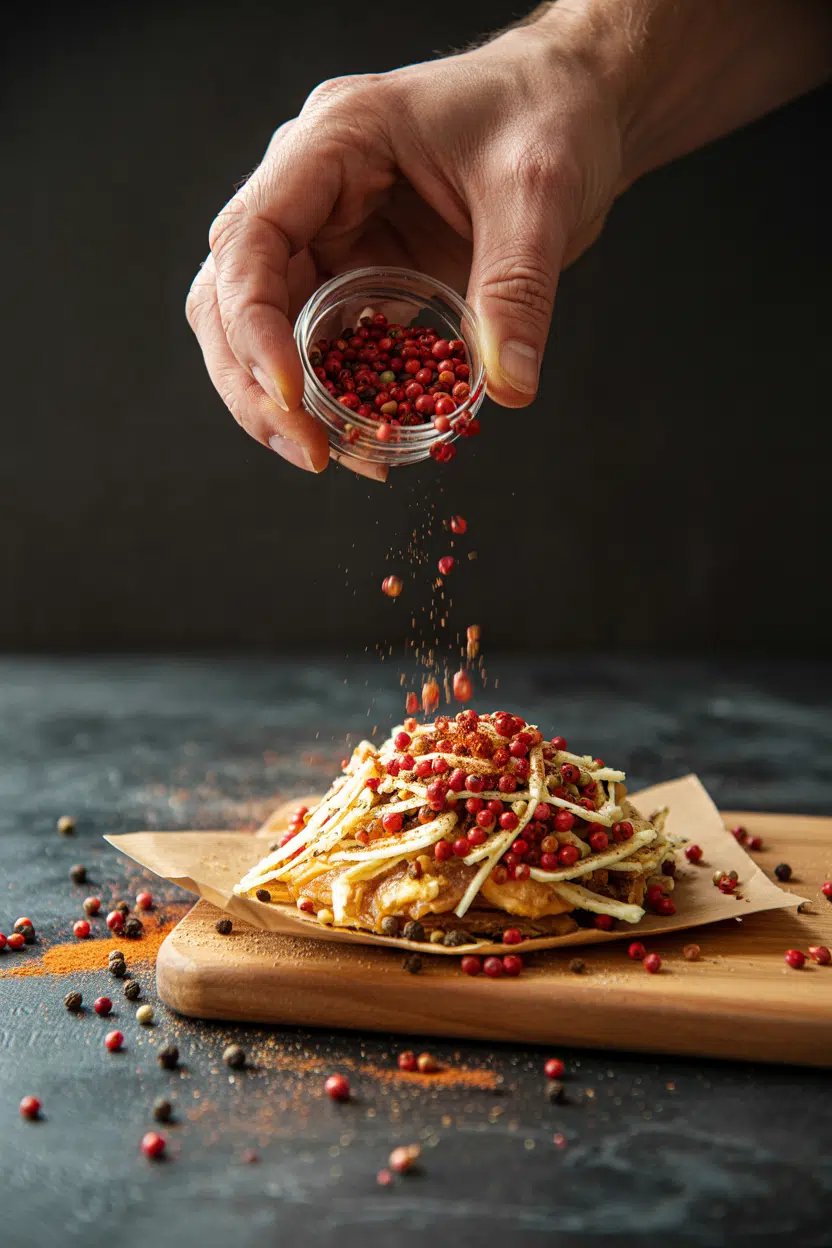
Pink peppercorn is a finishing spice first. Its fruity warmth works best added at the end of cooking or pressed directly into food before serving.

French cuisine has used it as a classic finishing touch for decades, and modern American and New World fusion cooking has expanded that role considerably.

Golden Rule
Always crack pink peppercorns just before using. The thin outer skin holds most of the aroma - pre-grinding or buying ground loses that brightness fast.

It pairs especially well with fatty fish - seared salmon or tuna are the most common matches - and with cream-based sauces and dairy.

Infusing the berries into warm cream for panna cotta or ice cream is one of the more interesting dessert applications.

For a savory spin, pressing cracked berries into a compound butter (herb) recipe alongside lemon zest produces a finishing butter that works on steak and grilled fish equally well.

In salads, whole berries tossed with citrus segments and a drizzle of oil add a floral, spiced note without overwhelming the greens - though if you're adapting the dressing and need to swap fats, checking alternatives to olive oil can help.

Pink peppercorns also go into pickling brines and work well in spice rubs for duck or pork, where the fruity lift cuts through richer meat.

Avoid pairing with strong bitter herbs like arugula or fenugreek, which overwhelm the delicate fruitiness. Avoid long braises for the same reason.

How Pink Peppercorn Is Used
MethodBest ForTip
🥗 Raw / CrackedFinishing seared fish, salads, cheese boardsCrack with a flat knife - don't grind too fine
🍳 InfusedCream sauces, panna cotta, flavored syrupsWarm gently; don't boil or bitterness creeps in
🧈 Pressed / BlendedCompound butters, spice rubs for duck and porkCombine with citrus zest to amplify the fruity note
🫙 In BrinePickled vegetables, fruit picklesAdd whole berries - they release slowly over time
Try It In
🍋Air Fryer Lemon Pepper Chicken TendersSwap some black pepper for pink to add a fruity, floral edge→🥦Air Fryer Lemon Pepper CauliflowerPink peppercorn brightens the lemon-pepper profile on roasted veg→🍖Air Fryer Lemon Pepper MeatballsA finishing crack of pink peppercorn adds color and berry warmth→

How to Buy and Store Pink Peppercorn

Look for whole dried berries that are uniformly rosy to deep-pink and firm when pressed. Faded, brownish, or soft berries are past their best - moisture and age both dull the color and kill the aroma. Buy small quantities from a reputable spice shop, since a full jar you barely use will be flat within a year.

Watch Out
Pink peppercorn belongs to the cashew family. Anyone with a cashew or poison ivy sensitivity should check with their doctor before using it - cross-reactivity has been reported.

Store whole berries in an airtight, opaque container in a cool, dark cupboard away from heat and steam. Ground berries lose their bright aroma within 2-3 months, so grind only what you need.

For a full breakdown of what degraded berries look and smell like, the guide on pink peppercorn spoilage signs covers what to watch for.

  • Shelf life whole - best within 6-12 months; still usable after, just duller
  • Shelf life ground - 2-3 months before significant aroma loss
  • Avoid - clear glass jars near the stove; light and heat are the main enemies

Where to Start With Pink Peppercorn

Pink peppercorn isn't a replacement for black pepper - it's a different tool. For context on black pepper's flavor and uses, the profiles make a useful side-by-side read.

If you want to substitute in a pinch, pink peppercorn stand-ins covers your best options, and swapping out black pepper addresses the reverse situation. Start simple: crack a few berries over seared salmon with a squeeze of lemon.

That one application shows exactly what this spice does - and why it belongs in your rotation.

Frequently Asked Questions

Are pink peppercorns real pepper?

No. Pink peppercorns are dried berries from Schinus molle or Schinus terebinthifolius trees, not Piper nigrum. They're sold alongside true pepper but belong to an entirely different plant family.

Can you substitute pink peppercorn for black pepper?

Not directly - pink peppercorn is milder and fruitier, so it won't match black pepper's sharp heat in cooked dishes. It works as a one-for-one swap only in finishing applications where fruitiness is welcome.

Do pink peppercorns have allergens?

Yes, potentially. The Schinus tree is in the Anacardiaceae family, which includes cashews. People with cashew or poison ivy allergies may experience cross-reactive symptoms and should consult a doctor first.

How do you use pink peppercorn in desserts?

Infuse whole berries into warm cream before making panna cotta, ice cream, or a simple sauce. The fruity, resinous note pairs well with honey, vanilla, and dairy without overpowering sweetness.

Where do pink peppercorns come from?

Originally from Peru and Brazil, where Schinus molle and Schinus terebinthifolius grow natively. Commercial supply today also comes from Madagascar and Réunion, where the trees were introduced.

What Is Romaine Lettuce? [Taste, Uses & More]

April 1, 2026

Caesar salad built romaine lettuce's reputation in American kitchens, but the leaf does far more than anchor a bowl of croutons and dressing. Romaine's thick central rib delivers a crunch that holds up where softer greens collapse, and its mild green bitterness gives dishes a backbone that iceberg simply doesn't offer.

What Is Romaine Lettuce

Understanding what this lettuce actually tastes like - and how to treat it - separates a good salad from a forgettable one.

QUICK SUMMARY

Romaine lettuce is a crisp, mildly bitter leafy green from the Eastern Mediterranean. Its sturdy leaves and pale heart work raw in salads and wraps, or briefly grilled for smoky depth. Shelf life runs 7-10 days for a whole head, shorter once cut.

🥬Category: Leafy green, Eastern Mediterranean origin
👅Flavor: Mild bitter, clean, slightly sweet toward the heart
✋Texture: Crisp, juicy rib, sturdy enough to hold dressings
🍳Best Uses: Caesar salads, grilled halves, wraps, chopped salads
🛒Buy It: Look for firm pale hearts and bright, unblemished outer leaves
⏱️Shelf Life: Whole head 7-10 days; romaine hearts 3-5 days once cut

What Is romaine lettuce?

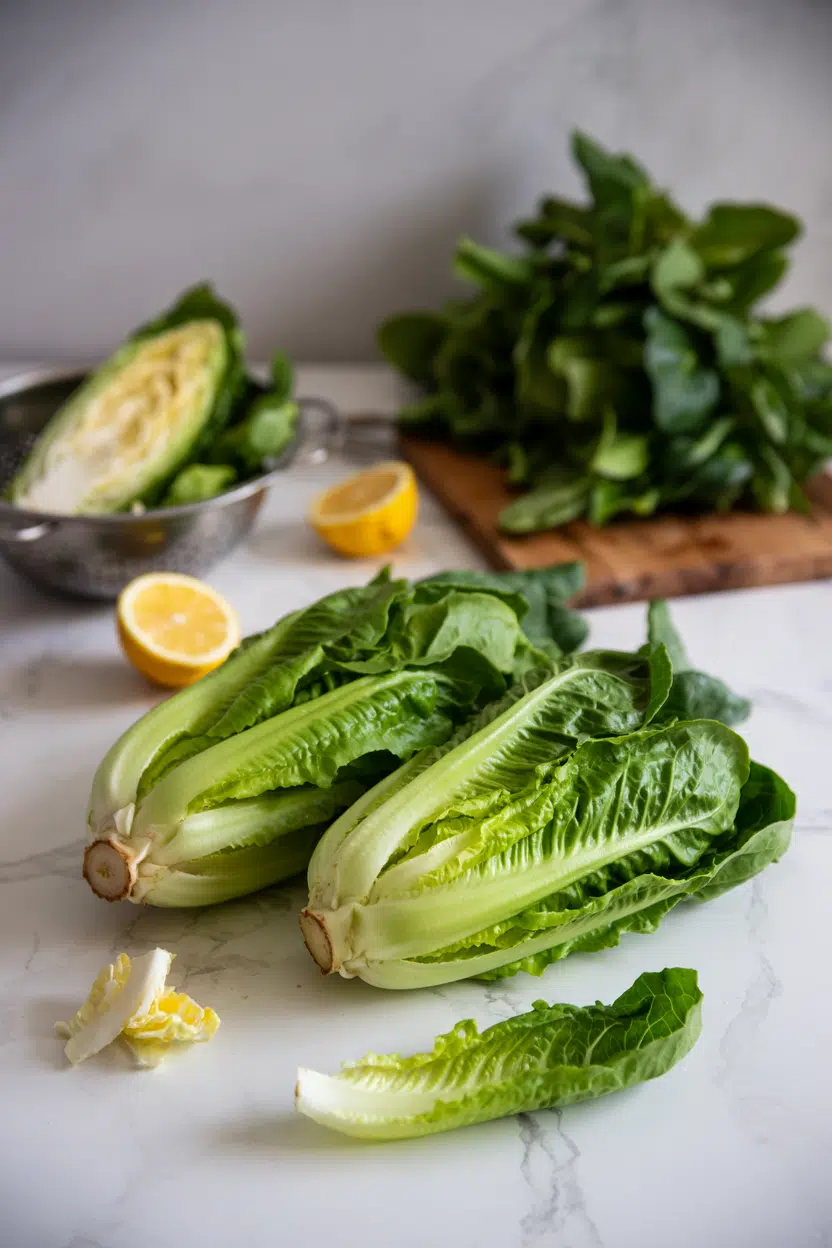
Romaine - also called cos lettuce or Roman lettuce - is a tall, elongated head lettuce with long, upright leaves and a prominent pale midrib running the full length of each leaf.

It originated in the Eastern Mediterranean and Near East, with its name tracing to Rome through trade routes that carried it west.

Today it's one of the most widely grown lettuces in the world.

The plant is typically harvested as a full head with tightly packed inner leaves forming the romaine heart - the portion sold separately in most supermarkets. Those heart leaves are paler, more tender, and slightly sweeter than the dark outer leaves.

The outer leaves carry more of the green bitterness that defines the variety's character.

Romaine hearts are what most Caesar salad recipes call for, since they offer concentrated crunch with less soil and less sharp bitterness. You'll also see romaine sold whole, pre-chopped, or as individual large leaves.

The spelling "romain" occasionally appears but is simply a common misspelling - the correct form retains the final "e."

What Does romaine lettuce Taste Like?

romaine lettuce - What Is Romaine Lettuce

Romaine reads as mild and clean on first bite, with the bitterness arriving as a gentle green note rather than anything harsh. That bitterness concentrates near the core and in the inner base of each leaf - the pale yellow section closest to the stem.

Mid-leaf, the flavor softens and turns slightly sweet.

Sensory SnapshotMild Intensity
👅 Flavor
mild bittercleanlightly sweetsubtle nutty
✋ Texture
crispjuicy ribsturdy
👃 Aroma
fresh greenslightly earthy

Compared to iceberg, romaine has noticeably more depth - iceberg is neutral to the point of being watery, while romaine gives you a real green flavor to work with.

Butterhead is softer and more delicate; romaine sits between the two in intensity.

When grilled or briefly charred, the outer leaves take on a smoky bitterness that works well against fatty dressings and rich proteins.

Heat doesn't mellow the flavor so much as add a second layer to it.

How to Use romaine lettuce

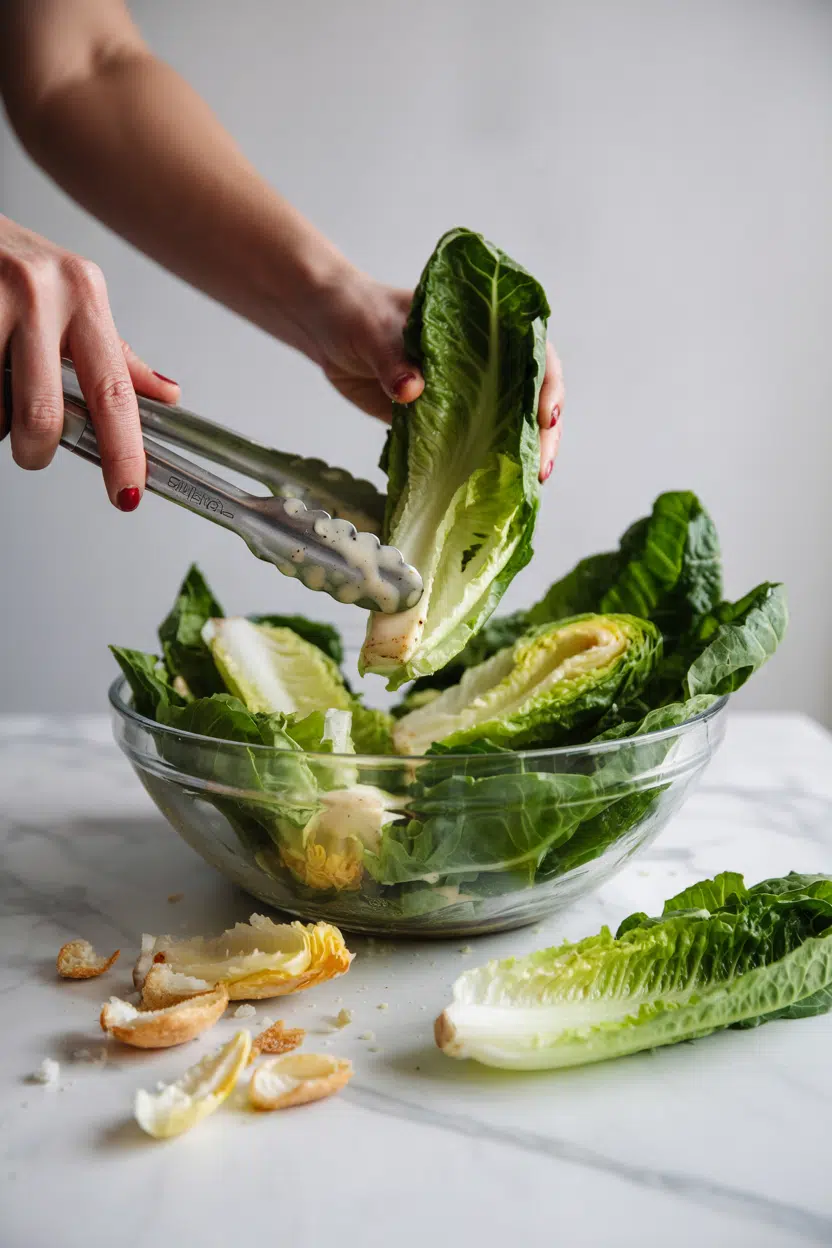
Raw preparation is where romaine performs best, and the Caesar salad is the obvious benchmark. Romaine hearts torn or roughly chopped hold Parmesan and anchovy dressing without going limp - if you're working without the cheese, parmesan cheese stand-ins can preserve that salty, umami edge in the bowl. Beyond Caesar, whole leaves work as sturdy cups for fillings like spiced ground meat or grain-based salads.

Grilling is romaine's most underused method.

Halving a head lengthwise, brushing it with olive oil - or, if needed, using olive oil stand-ins like avocado oil - and charring it on a hot grill produces something genuinely different: smoky, slightly wilted outer leaves with a warm, crisp rib at the center.

It pairs well with lemon juice and a sharp vinaigrette.

Golden Rule
Don't dress romaine early. Its crispness survives raw, but dressing too far ahead softens the rib and flattens the bitterness that makes it worth using.
How Romaine Lettuce Is Used
MethodBest ForTip
🥗 RawCaesar salad, chopped salads, wraps, tacos, sandwichesTear rather than cut hearts to preserve crunch at the edges
🔥 GrilledWarm salads, side dishes with grilled meatsUse high direct heat, 2-3 minutes per side max; don't move it
🍳 BraisedQuick warm side dish with broth and olive oilKeep it under 5 minutes or leaves turn mushy and lose structure
🥙 Wrap leafLettuce cups, hand-held wraps for meze or Asian fillingsUse large outer leaves - they cup better than heart leaves

Romaine pairs cleanly with bacon and blue cheese, avocado and tomato, grilled chicken or steak, and toasted nuts for textural contrast. Creamy dressings and yogurt-based sauces work well because the leaf's bitterness cuts the richness.

Avoid very sweet dressings - they flatten everything this lettuce has to offer.

Try It In
🥩Korean Beef Lettuce WrapsLarge romaine leaves hold bold, saucy filling without tearing→🌿Larb Lettuce CupsCrisp cups that carry herby, lime-dressed meat without collapsing→🫒Marouli Greek Lettuce SaladA Mediterranean-style preparation that lets romaine's clean flavor lead→

How to Buy and Store romaine lettuce

Choose heads with bright green outer leaves, firm pale yellow hearts, and thick central ribs that show no browning. Limp outer leaves, brown-edged tips, or any foul smell at the stem base are all reasons to skip it.

Romaine hearts sold pre-packaged are worth buying when you want concentrated crunch and less prep work.

Watch Out
Romaine is on the Environmental Working Group's higher-pesticide list. Washing thoroughly before use is non-negotiable - or choose organic if that's a concern for you.

Store romaine unwashed in the fridge crisper, wrapped loosely in a paper towel to absorb excess moisture, then placed in a perforated bag.

The paper towel step makes a real difference.

For full guidance on storing lettuce correctly, the method extends to most leafy greens.

A whole head stays good for 7-10 days; for specifics on how long romaine lettuce keeps under different conditions, the window tightens once you've cut or separated the leaves.

Start With the Heart

If romaine is new to your rotation, buy a bag of hearts first.

They're cleaner, less bitter, and immediately ready for a Caesar or a quick grilled half.

Once you're comfortable with the flavor, move to whole heads - the outer leaves add more bitter character and work well shredded into tacos or sandwiches.

When you need a swap, replacements for romaine lettuce cover the closest structural matches, and replacements for iceberg lettuce are worth checking if crunch - rather than flavor - is the priority.

Frequently Asked Questions

Is romaine lettuce healthy?

Yes. Romaine is low in calories and high in vitamin A (as beta-carotene), vitamin K, and folate. Its high water content also contributes to hydration, and it fits vegan, keto, and paleo diets without modification.

Why is romaine lettuce bitter?

The bitterness comes from lactucin, a naturally occurring compound in lettuce. It concentrates in the inner base and core - which is why heart leaves near the stem taste more bitter than mid-leaf sections.

What is the difference between romaine and iceberg?

Romaine has more flavor - mild bitterness and a subtle nutty note - while iceberg is nearly neutral and mostly water. Romaine's leaves are longer, sturdier, and hold dressings better than iceberg's thin, round leaves.

Can you cook romaine lettuce?

Yes - grilling and quick braising both work well. Grilled halves hold their shape under direct heat and develop a smoky flavor. Avoid long cooking; anything past 5 minutes turns the leaves mushy and dull.

How long do romaine hearts last once opened?

Three to five days in the fridge, wrapped in a paper towel inside a loose bag. Once the cut ends brown or the leaves feel wet and limp, texture and flavor have already declined past the point of using them raw.

Spanish Caldereta de Cordero

April 1, 2026

When you need a one-pot dinner that gets better the next day, Spanish lamb stew makes sense. One heavy pot, 2 hours mostly hands-off, and you get tender meat with smoky depth that feeds six for under $20.

Spanish Caldereta de Cordero served on a plate

The lamb shoulder breaks down into soft pieces while potatoes thicken the sauce naturally. No cream, no flour, no babysitting.

Perfect for Sunday meal prep or weeknight comfort when you want something that tastes slow-cooked without constant stirring.

QUICK SUMMARY

Spanish Caldereta de Cordero is a braised lamb stew with smoked paprika, tomatoes, and potatoes. Brown the lamb well before adding liquid - that's where the depth comes from. Works for family dinners when you need something that holds in the fridge for 3-4 days.

⏱️Time Reality: 20 min prep, 1 hr 45 min simmer - mostly unattended once it's going
🔥Critical Move: Brown lamb in batches without crowding - steaming breaks the flavor base
⚠️Watch Out: Keep it at a simmer, not a boil - high heat toughens lamb instead of tenderizing

Table of Contents

Toggle
  • Why This Recipe Works
  • What You'll Need
    • Ingredient Details
  • Ingredient Swaps
  • What to Serve With It
  • Store and Reheat
  • Frequently Asked Questions
  • Spanish Caldereta de Cordero
    • Method 
    • Tried this recipe?

Why This Recipe Works

The lamb shoulder carries enough fat to stay tender through a long braise while bone marrow adds body to the sauce. Smoked paprika builds the backbone - it's not just seasoning, it's the thread that holds tomato and lamb together. For a version that comes together quickly, a simple roast side uses similar braising technique in less time.

Quick Reference
⏱️
Prep Time
20 min
🔥
Cook Time
1 hr 45 min
⏰
Total Time
2 hr 5 min
🍽️
Servings
6 servings
📊
Difficulty
Medium
🏷️
Category
Main Dish
💡
Quick Tip
Brown lamb well for deep flavor
🎯
Best For
Weeknight | Family Meal | Comfort Food

Why it works:

  • Bone-in lamb shoulder releases gelatin during the braise - that's what makes the sauce coat the meat instead of pooling at the bottom
  • Browning in batches develops a fond on the pan that becomes the flavor foundation when you deglaze with wine
  • Smoked paprika added early blooms in the fat and infuses the entire pot instead of sitting on top like a garnish
  • Low simmer at 180-190°F breaks down connective tissue without boiling the meat dry - you want gentle bubbles, not a rolling boil
  • Potatoes in the last 30 minutes thicken the sauce as they break down while staying intact enough to hold their shape
Quick Tip
Rest the stew 10 minutes off heat before serving - flavors settle and the sauce thickens slightly as it cools

What You'll Need

Ingredients for Spanish Caldereta de Cordero

Lamb shoulder shows up bone-in at most butchers for $6-8 per pound - that's your main grocery line. Smoked paprika sits in the spice aisle near regular paprika, and you need the smoked version for this to taste right, not sweet paprika or hot paprika.

🍗
Protein
  • 2 lbs bone-in lamb shoulder, cut into 2-inch chunks
🥬
Vegetables
  • 1 large onion, diced
  • 2 red bell peppers, chopped
  • 3 medium tomatoes, diced
  • 3 medium potatoes, cut into chunks
🧄
Aromatics
  • 4 garlic cloves, minced
  • 2 bay leaves
🫙
Pantry
  • 3 tablespoon olive oil
  • 1 cup white wine
  • 2 teaspoon smoked paprika
  • Salt and pepper

Ingredient Details

  • Lamb shoulder (bone-in)
    Fatty cut that stays tender through long braises - boneless dries out faster and lacks gelatin from marrow
  • Smoked paprika
    Pimentón de la Vera gives authentic Spanish smoky depth - regular paprika tastes flat by comparison
  • White wine
    Dry white like Sauvignon Blanc or Pinot Grigio - sweetness throws off the balance
  • Onions
    Yellow or white onions break down into sweetness - red onions stay sharper and don't melt as well
  • Potatoes
    Yukon Gold or russets hold shape while releasing starch to thicken sauce - waxy potatoes stay too firm
  • Tomatoes
    Fresh Roma or canned whole tomatoes crushed by hand - paste concentrates too much and tastes metallic
  • Bay leaves
    Dried Turkish bay leaves have more depth than California bay - remove before serving, they don't soften

Ingredient Swaps

Stock works when you don't have wine open - the braise just needs liquid to keep the pot from scorching. Lamb leg runs leaner so it cooks faster but dries out if you push it past 1.5 hours, unlike shoulder which forgives longer times.

Four swaps that work:

  • Chicken stock for white wine - use 1 cup stock plus 1 tablespoon lemon juice to replace acidity the wine brings
  • Lamb leg for lamb shoulder - reduce cook time to 1-1.5 hours and check tenderness at 1 hour to avoid drying
  • Regular paprika + chipotle powder for smoked paprika - use 2 teaspoon regular paprika plus ¼ teaspoon chipotle for approximate smokiness
  • Carrots or parsnips for potatoes - cut into similar-sized chunks, add at same time, both soften and sweeten the sauce

Lamb Shoulder (Bone-In)

Works for: Long braises, meal prep, forgiving timing, rich gelatin-thickened sauce

Skip if: You need dinner in under 90 minutes or want leaner meat

Lamb Leg

Works for: Faster cook time (1-1.5 hrs), leaner protein, similar lamb flavor

Skip if: You're making this ahead - it dries out faster when reheated

White Wine

Works for: Authentic depth, deglazes pan effectively, balances richness

Skip if: No open bottle - use stock plus acid instead

Chicken Stock

Works for: Budget cooking, non-alcoholic option, similar braising liquid

Skip if: You want traditional Spanish flavor - wine adds complexity stock can't match

Instructions

The whole thing happens in one pot with two temperature stages - high heat for browning, then low simmer for 1 hour 45 minutes. Resist stirring too much once the simmer starts - you want the meat to braise undisturbed, not fall apart from agitation.

  1. Brown the lamb in batches: Heat 2 tablespoon olive oil in a heavy-bottomed pot over medium-high. Add lamb pieces in a single layer without crowding, brown 3-4 minutes per side until deep golden crust forms. Remove to a plate and repeat with remaining lamb, adding more oil if pan looks dry.

  2. Sauté aromatics: Lower heat to medium, add remaining 1 tablespoon olive oil. Cook onions 4 minutes until softened, add garlic and cook 1 minute until fragrant. Stir in smoked paprika and cook 30 seconds to bloom the spice.

  3. Deglaze and build base: Pour in white wine, scrape up browned bits from bottom of pot with wooden spoon for 2 minutes. Add tomatoes, bay leaves, salt, and pepper. Return browned lamb and any accumulated juices to pot.

  4. Simmer the stew: Bring to a boil, then reduce to low simmer. Cover and cook 1 hour 15 minutes, maintaining gentle bubbles at 180-190°F. Add potatoes and red peppers, cover and cook 30 minutes more until lamb reaches 195°F internal temp and potatoes are fork-tender.

  5. Finish and rest: Remove lid, simmer uncovered 15 minutes to thicken sauce. Check seasoning, adjust salt if needed. Turn off heat, let rest 10 minutes before serving.

Golden Rule
If sauce looks thin after 1 hour 45 minutes, uncover and simmer 15-20 minutes to reduce - don't add thickeners, the potatoes and gelatin do the work

What to Serve With It

A good stew needs something to soak up the sauce and something crisp to cut through the richness. Rice works, but crusty bread does it better because you can tear and dunk. For more savory chicken dish ideas that pair with bold stews, we keep a rotation of sides that don't compete with strong flavors.

Side Dish Prep Why It Works How to Serve
Crusty bread Easy Soaks up smoky tomato sauce without adding competing flavors Warm slices, serve on the side for dunking
Steamed white rice Easy Neutral base that stretches the stew and balances richness Spoon stew over rice, let sauce soak in
Simple green salad Easy Crisp lettuce and acidic vinaigrette refresh palate between bites Dress lightly with lemon vinaigrette, serve alongside
Roasted vegetables Medium Adds textural contrast and vitamins without heaviness Roast carrots or zucchini at 400°F for 25 min, season with olive oil
Garlic aioli Easy Cool creamy garlic cuts through smoky paprika heat Dollop on top of stew or serve on the side for dipping bread

Three ways to serve it:

  • Weeknight bowl: Ladle stew over steamed rice, top with chopped parsley, serve with crusty bread for soaking up sauce
  • Family-style platter: Spoon stew onto large serving dish, surround with roasted vegetables, pass garlic aioli at the table
  • Meal prep container: Pack stew with rice in separate compartment, reheat together, add fresh salad when serving
Shortcut
Make the stew through step 4, cool completely, refrigerate overnight - flavors deepen and fat rises to surface for easy removal before reheating

Store and Reheat

This holds 3-4 days in the fridge and tastes better the second day after flavors settle. Cool completely before storing - putting hot stew in the fridge raises the internal temp and risks everything else spoiling. For a version that comes together quickly, crispy homemade potato recipe reheats well alongside leftover stew for quick weeknight meals.

Method Time Best For
🍳 Stovetop 10-15 min over low heat Best flavor retention, lets you adjust sauce consistency with splash of stock
🔥 Oven 20-25 min at 325°F covered Even heating for large portions, maintains texture without drying
📦 Microwave 3-5 min in 1-min intervals, stirring between Quick single portions, risk of drying edges - cover with damp paper towel

For best results when storing:

  • Cool in shallow containers: Spread stew in wide shallow containers to cool faster and prevent bacterial growth in warm centers
  • Leave headspace: Fill containers only ¾ full - liquid expands when frozen and will crack sealed containers
  • Separate potatoes if freezing: Potatoes get grainy when frozen - store them separately or omit when making ahead for freezer
  • Skim fat before reheating: Refrigerate overnight, scrape solidified fat off top before warming - reduces greasiness without losing flavor
  • Add liquid when reheating: Stew thickens in fridge - add ¼ cup stock or water when reheating to restore original consistency

Frequently Asked Questions

Can I use lamb leg instead of shoulder for Caldereta de Cordero?

Yes, but reduce cook time to 1-1.5 hours since leg is leaner and dries out faster. Check tenderness at 1 hour - it should fall apart with a fork at 195°F internal temp.

How long does Caldereta de Cordero keep refrigerated and can I freeze it?

Refrigerate in airtight containers for 3-4 days or freeze up to 3 months. Remove potatoes before freezing since they get grainy - add fresh potatoes when reheating if desired.

What internal temperature shows lamb is tender and done in Caldereta?

Lamb hits 195°F (90°C) when fully braised and tender - it should break apart easily with a fork. Lower temps mean it needs more time to break down connective tissue.

What causes Caldereta sauce to be watery and how to fix it?

Too much liquid or not enough reduction time creates watery sauce. Remove lid and simmer 15-20 minutes over medium heat to reduce - potatoes will break down and naturally thicken as liquid evaporates.

What sides pair best with Caldereta de Cordero for a family dinner?

Crusty bread for soaking up sauce, steamed white rice as a neutral base, or a simple green salad with lemon vinaigrette to cut richness. Roasted vegetables or garlic aioli add variety without competing with the smoky paprika.

Spanish Caldereta de Cordero served on a plate

Spanish Caldereta de Cordero

No ratings yet
Spanish Caldereta de Cordero is a hearty braised lamb stew featuring smoked paprika, tomatoes, and potatoes that naturally thicken the sauce. The lamb shoulder is browned for deep flavor before slow simmering until tender, making this one-pot dish perfect for family dinners and meal prep.
Print Recipe Pin Recipe
Prep Time 20 minutes mins
Cook Time 1 hour hr 45 minutes mins
Total Time 2 hours hrs 5 minutes mins
Servings: 6 servings
Course: Main Dish
Cuisine: Spanish
Ingredients Equipment Method Notes

Ingredients
  

  • 2 lbs lamb shoulder bone-in, cut into 2-inch chunks
  • 1 large onion diced
  • 2 red bell peppers chopped
  • 3 tomatoes diced
  • 3 potatoes cut into chunks
  • 4 cloves garlic minced
  • 2 bay leaves
  • 3 tablespoon olive oil
  • 1 cup white wine dry variety like Sauvignon Blanc
  • 2 teaspoon smoked paprika pimentón de la Vera
  • salt to taste
  • black pepper to taste

Equipment

  • Heavy-bottomed pot Used for browning lamb and simmering stew
  • Wooden spoon Used to scrape up browned bits during deglazing

Method
 

  1. Heat 2 tablespoon olive oil in a heavy-bottomed pot over medium-high heat. Brown lamb pieces in a single layer without crowding for 3-4 minutes per side until deep golden crust forms. Remove to a plate and repeat with remaining lamb, adding more oil if pan looks dry.
    2 lbs lamb shoulder, 3 tbsp olive oil
  2. Lower heat to medium, add remaining 1 tablespoon olive oil. Cook diced onions for 4 minutes until softened. Add minced garlic and cook 1 minute until fragrant. Stir in smoked paprika and cook for 30 seconds to bloom the spice.
    1 large onion, 4 cloves garlic, 3 tbsp olive oil, 2 tsp smoked paprika
  3. Pour in white wine and scrape up browned bits from bottom of pot with a wooden spoon for 2 minutes. Add diced tomatoes, bay leaves, salt, and pepper. Return browned lamb and any accumulated juices to the pot.
    1 cup white wine, 3 tomatoes, 2 bay leaves, salt, black pepper, 2 lbs lamb shoulder
  4. Bring to a boil, then reduce heat to low simmer at 180-190°F. Cover and cook for 1 hour 15 minutes. Add potatoes and red peppers, cover and cook an additional 30 minutes until lamb reaches 195°F internal temperature and potatoes are fork-tender.
    3 potatoes, 2 red bell peppers
  5. Remove lid, simmer uncovered for 15 minutes to thicken sauce. Adjust seasoning with salt if needed. Turn off heat and let stew rest for 10 minutes before serving.

Notes

  • Brown lamb in batches without crowding to develop deep flavor and avoid steaming.
  • Maintain a gentle simmer (180-190°F) to tenderize meat without drying it out.
  • Rest stew off heat before serving to let flavors settle and sauce thicken.

Tried this recipe?

Let us know how it was!

What Is Port Wine? Taste, Uses & Food Pairings

April 1, 2026

Rich, dark, and unmistakably sweet, port wine stops you with its scent before the glass even reaches your lips - a wave of dried fruit, warm spice, and something faintly nutty that signals this is nothing like a standard red. That first sip confirms it: thick, rounded, and deeply concentrated, with sweetness that feels earned rather than added.

What Is Port Wine

Knowing side dishes for port makes the difference between a clumsy pairing and one that locks perfectly into place.

QUICK SUMMARY

Port wine is a fortified wine from Portugal's Douro Valley, made by halting fermentation with grape spirit to preserve residual sugar. Ruby styles lead with fruit; tawny styles offer nutty, oxidative depth. Both work as dessert wines and cooking ingredients.

🍷Category: Fortified wine, 19-21% ABV, high residual sugar
👅Flavor: Dark fruit, raisin, caramel, cocoa, dried fig
🍽️Best Uses: Dessert pairing, pan sauces, reductions, poaching liquid
🧀Classic Pairings: Stilton, dark chocolate, roasted duck, dried fruits
📅Shelf Life: Opened ruby lasts 2-4 weeks; tawny holds 1-3 months refrigerated

What Is Port Wine?

Port wine - formally Vinho do Porto - is a fortified wine produced exclusively in Portugal's Douro Valley, where steep schist terraces and extreme summer heat concentrate the grapes intensely. Winemakers add a neutral grape spirit (aguardente) partway through fermentation, killing the yeast before all sugar converts to alcohol. The result is a wine with roughly 19-21% ABV and substantial residual sweetness.

Style is the first thing to understand about port. Each variety follows a distinct aging path:

  • Ruby port - aged briefly in large tanks, preserving deep red color and fresh black-cherry, plum, and raisin fruit
  • Tawny port - aged in small oak casks with deliberate oxidation, developing amber color and nutty, caramel, dried-apricot character
  • Vintage port - made from a single exceptional year, bottle-aged for decades, showing layered fig, cocoa, and molasses intensity
  • Colheita - a single-harvest tawny, cask-aged at least seven years, bridging tawny nuttiness with vintage-level complexity

Ruby is the entry point for most people. Tawny rewards those who want something more contemplative.

What Does Port Wine Taste Like?

port wine - What Is Port Wine
Sensory SnapshotStrong Intensity
👅 Flavor
raisinblack cherrycaramelcocoadried fig
✋ Texture
syrupyvelvetyfull-bodied
👃 Aroma
dried fruitwarm spiceoxidative nuttiness

Ruby port leads with raisin and black-cherry sweetness, backed by hints of chocolate and warm baking spice. Tawny shifts the profile entirely - oxidative aging introduces walnut, toffee, and dried apricot, with the fruit receding into the background.

Aged Vintage and Colheita ports deepen further into molasses, fig, and cocoa, with a long, warming finish.

Port sits in a category alongside Madeira wine and late-harvest sherries, though it's generally sweeter and fuller-bodied than both. Heat during cooking concentrates its sweetness and burns off some alcohol, leaving behind a richer, more jammy character that integrates well into sauces.

Golden Rule
Don't substitute ruby for tawny in a recipe without adjusting expectations - ruby brings bright fruit; tawny brings nuttiness. They perform differently in the pan.

How to Use Port Wine

Port earns its place in both the glass and the pan. As a dessert wine, serve ruby port slightly chilled alongside dark chocolate or a wedge of Stilton; tawny works beautifully at room temperature next to crème brûlée or vanilla ice cream.

The classic British pairing of port and blue cheese isn't just tradition - the wine's sweetness cuts the cheese's salt and funk with precision.

In the kitchen, port reduces into glossy glazes and pan sauces faster than most wines because of its existing sugar content. Deglaze a hot pan after searing duck breast or lamb chops, scrape up the fond, and reduce by half for a sauce that needs almost nothing else.

For poaching, a low simmer of port with spices creates a rich liquid for pears or figs that concentrates as the fruit cooks.

Shortcut
Stir a tablespoon of tawny port into chocolate ganache before it sets - it adds depth without visibly changing the texture or requiring any extra reduction step.
How Port Wine Is Used
MethodBest ForTip
🍷 Served neatCheese boards, chocolate pairings, after-dinner glassServe ruby lightly chilled; tawny at room temperature
🥩 DeglazePan sauces for duck, lamb, beefReduce by at least half; the sugar scorches quickly over high heat
🍐 PoachingPears, figs, dried plumsKeep at a low simmer; boiling drives off aroma fast
🍫 Stirred inGanache, truffles, chocolate frostingAdd off-heat to preserve the wine's fruit character
🍲 BraiseBeef stews, game dishesUse small quantities - a few tablespoons deepens color without overpowering

Avoid port with delicate white-flesh fish or fresh green salads - the sweetness and weight overwhelm anything light and bright. If you're out of port mid-recipe, port wine alternatives can cover most cooking applications without losing the dish.

Try It In
🍷Fruity Red Wine SangriaA splash of ruby port deepens the fruit and adds body→☕Warm Spiced Mulled WinePort's spice notes integrate seamlessly with warming mulling spices→🍐Red Wine Poached PearsSwap part of the red wine for ruby port for a richer poaching syrup→

How to Buy and Store Port Wine

Choose by style first. Labels will say Ruby, Tawny, Vintage, or Colheita - each signals a distinct flavor profile and aging method. Inspect the bottle for a clean, intact cork and an unmarked neck; active seepage or staining around the cork indicates a compromised seal. For casual cooking and sipping, a mid-range ruby or tawny in the $15-25 range performs reliably.

Watch Out
Vintage port opened for a dinner party won't hold. Drink it within 1-3 days - aeration accelerates oxidation rapidly in bottle-aged styles.

Storage follows the style:

  • Unopened ruby/tawny - store upright in a cool, dark place; drink within months to a few years
  • Unopened vintage - store on its side at 55-65°F (13-18°C) to keep the natural cork moist during long aging
  • Opened ruby - reseal and refrigerate; holds 2-4 weeks
  • Opened tawny - already partially oxidized, so it holds longer: 1-3 months refrigerated

Full details on timing and spoilage signs are covered in our guide to port wine freshness guide.

Start with Ruby, Then Branch Out

If this is your first bottle, buy a ruby port. It shows the style's fruit-forward core without the complexity cost of aged tawny or the commitment of vintage.

Pair it with dark chocolate or a strong cheese - a Stilton substitute works if Stilton isn't available - and you'll understand immediately why port has anchored dessert tables for centuries. Once you know ruby, tawny makes sense as the natural next step.

Frequently Asked Questions

Is port wine sweet?

Yes - port is significantly sweeter than regular table wine because fermentation is stopped early, leaving substantial residual sugar. Ruby styles are the sweetest; aged tawnies taste less overtly sweet because oxidation develops nutty, drier-seeming complexity.

What is the difference between tawny and ruby port?

Ruby port ages in large tanks with minimal oxygen exposure, keeping its deep red color and fresh dark-fruit flavors. Tawny ages in small oak casks for years, oxidizing slowly into amber hues with nutty, caramel, and dried-apricot notes.

How long does port wine last after opening?

Ruby port holds 2-4 weeks refrigerated after opening; tawny lasts 1-3 months because it's already oxidized. Vintage port is the exception - drink it within a few days of opening before aeration flattens the flavor.

Can you cook with cheap port wine?

Yes. A basic ruby or tawny in the $12-18 range works well in reductions, glazes, and braises. Avoid anything labeled "cooking port" - these often contain added salt and produce noticeably harsher results.

Does port wine need to be refrigerated?

Once opened, yes - refrigerate it with the bottle resealed. Unopened bottles don't require refrigeration; a cool, dark cupboard at 55-65°F (13-18°C) is sufficient for short to medium-term storage.

How Long Does Pecans Last? [Storage Guide]

April 1, 2026

Picking up a fresh bag of pecans is easy - figuring out whether the half-empty bag in your pantry is still good three months later is less so. Pecan halves are unusually high in unsaturated fats, which means they go rancid faster than most other nuts if stored carelessly.

Can You Freeze Pecans

The good news is that with the right container and the right spot, pecans can last well over a year without any drop in quality.

QUICK SUMMARY

Shelled pecans last 2-3 months in the pantry, up to 12 months in the fridge, and 1-2 years in the freezer. The freezer is the best long-term option. Rancidity from oxidized oils is the main enemy - airtight packaging and cold temperatures slow it significantly.

🥜Pantry (opened): 2-3 months in a cool, dark spot before oils turn
🧊Fridge (opened): 6-9 months in an airtight container away from the door
❄️Freezer: 1-2 years; vacuum-sealed bags push quality close to 2 years

How Long Do Pecans Last?

Shelf life for pecans swings widely depending on whether they're shelled or still in the shell, and how they're packaged.

Understand pecans and its flavor and you'll also understand the fat profile that makes storage so critical - those rich, buttery oils oxidize on contact with air, light, and warmth.

Pecan Shelf Life
MethodStateDurationNotes
🏠 PantryOpened2-3 monthsShelled halves; oils oxidize slowly at room temp
🏠 PantryUnopened6-9 monthsVacuum- or nitrogen-packed commercial bags hold longer
🧊 FridgeOpened6-9 monthsAirtight container; slows unsaturated fat rancidity
🧊 FridgeUnopened12 monthsFactory-sealed bags keep well when refrigerated
❄️ FreezerOpened1-2 yearsBest long-term method; proper packaging prevents freezer burn
❄️ FreezerUnopened2 yearsVacuum-sealed store bags maintain quality at peak

In-shell pecans outlast shelled ones by a significant margin. The shell acts as a natural oxygen barrier, protecting the oil-rich kernel from the oxidation that causes off flavors long before mold appears.

How to Store Pecans

Where you keep pecans matters more than it does for most pantry staples. Their high unsaturated fat content - higher than almonds or cashews - means heat, light, and air accelerate rancidity faster than you'd expect.

Pantry: Store in a cool, dark spot in an airtight container and use within 2-3 months of opening. Thin original packaging lets in oxygen, so transfer shelled pecans to a glass jar or heavy resealable bag immediately.

Fridge: An airtight container or vacuum-sealed bag in the coldest part of the fridge - not the door - will keep opened pecans fresh for 6-9 months. Pecans absorb surrounding odors easily through their thin skin, so keep them away from garlic, onions, or strong spices.

Pantry (long-haul): If you plan to store pecans for months without refrigeration, buy them in-shell. The shell delays oxidation and extends pantry life well beyond what shelled halves can manage.

Golden Rule
Write the pack or open date on the bag before you put it away. Rancidity builds gradually - you won't notice it until the flavor is already off, so tracking dates is your only reliable early warning.

Similar nut families share this sensitivity, which is why how long almonds keeps follows nearly the same fridge-first logic as pecans.

Can You Freeze Pecans?

Yes - freezing is the single best storage method for pecans you won't use within a few months. Properly frozen pecan halves hold peak quality for 1-2 years, and vacuum-sealed bags push that closer to 2 years with no meaningful flavor loss.

  1. Quick-freeze on a tray Spread pecan halves in a single layer on a baking sheet and freeze for 1-2 hours to prevent clumping.
  2. Transfer and seal Move to heavy-duty freezer bags or vacuum-sealed pouches, press out all air, and seal tightly.
  3. Label with the date Write the freeze date on the bag - rancidity is invisible until it's tasted.
  4. Thaw only what you need Move the required portion to the fridge for 8-12 hours, or thaw at room temperature for 1-2 hours inside the sealed bag to prevent moisture condensation.

After thawing, pecans may feel slightly drier or less crisp. A quick 5-7 minutes at 300°F (150°C) on a baking sheet revives them.

Moisture management during the thaw is key - the same principle applies to proteins like fish, where about salmon freezer burn explains how ice crystals and air exposure damage texture over time.

Watch Out
Don't refreeze thawed pecans. Repeated freeze-thaw cycles dry out the kernel and accelerate off-flavors from the oxidized oils. Thaw only the portion you intend to use.

Signs Pecans Have Gone Bad

Rancidity is the primary concern with pecans, not bacterial spoilage. Oxidized pecan oils develop off-flavors before any visible change appears, so smell is often your first and most reliable indicator.

Signs It's Gone Bad
👀
VisualOverall dull brown color · black spots on halves · fuzzy mold where thin skin attaches
👃
SmellSharp, painty or soapy odor · no nutty aroma
✋
TextureOily sticky surface · shriveled or rubbery halves · breaks unevenly

A soapy or painty smell means the fats have oxidized past the point of use. Discard any pecans with visible mold or that smell sour, regardless of the date on the bag.

Similar fat-heavy nuts follow the same spoilage pattern - hazelnut spoilage signs mirror what you'd look for here, with the same emphasis on smell over appearance.

Keeping Pecans at Their Best

Four habits will protect your pecans from the rancidity that cuts shelf life short.

  • 🥜 Portion before freezing - divide into recipe-sized amounts so you only thaw what you need each time.
  • 🌡️ Toast before using stale nuts - 5-7 minutes at 300°F sharpens the nutty aroma and masks mild staleness in baked goods.
  • 📦 Upgrade the container immediately - transfer from original thin plastic to a glass jar or vacuum-sealed bag the day you open them.
  • 🛒 Buy in-shell for bulk storage - the shell keeps oxygen away from the kernel, extending pantry life well past what shelled halves offer.

If a recipe calls for a different nut entirely, knowing about swapping out pecans can help you substitute with confidence when your supply runs low.

Shortcut
Keep a small fridge stash for the next few weeks and freeze the rest in one step. You'll never wonder if the pantry bag is still good.

Frequently Asked Questions

Should you refrigerate pecans after opening?

Yes, for any bag you won't finish within 2-3 weeks. Refrigeration slows oxidation of pecans' high unsaturated fats and extends shelf life to 6-9 months. The pantry is fine short-term only if the container is genuinely airtight.

Can you refreeze thawed pecans?

No. Repeated freeze-thaw cycles dry out the kernel and speed up off-flavors from oxidized oils. Freeze in small portions from the start so you thaw only what you need.

How do I tell if pecans are rancid?

Smell them first - rancid pecans have a sharp, soapy, or painty odor instead of a clean nutty scent. Sticky surfaces and rubbery texture confirm it. Discard immediately; rancid nuts won't improve with toasting.

Do in-shell pecans last longer than shelled ones?

Yes, considerably. The shell acts as a natural oxygen barrier that slows the oxidation driving rancidity. In-shell pecans can last 6-12 months in a cool pantry versus 2-3 months for shelled halves.

Can pecans absorb odors from other foods?

Yes - their thin skin readily absorbs strong odors from nearby garlic, onions, or spices. Always store pecans in a sealed glass jar or airtight bag, away from pungent pantry or fridge neighbors.

What Is Red Snapper? [Taste, Uses & More]

April 1, 2026

Red snapper fills a role in the kitchen that few other fish can match: firm enough to grill whole, mild enough to absorb almost any seasoning, and fresh-tasting enough to stand alone with little more than olive oil and salt.

What Does Red Snapper Taste Like

Cooks who want something more assertive than tilapia but lighter than salmon often land here, and the fish earns that trust - whether replacements for sea bass or alternatives to halibut come up in conversation, red snapper is usually the answer hiding in plain sight.

QUICK SUMMARY

Red snapper is a firm, mildly sweet saltwater fish with clean oceanic flavor and low fishiness. It suits grilling, pan-searing, baking, and light curing. Fresh fillets last 1-2 days in the fridge; frozen up to 6 months.

🐟Category: Saltwater white fish, Western Atlantic and Gulf of Mexico
👅Flavor: Mildly sweet, lightly briny, faint nuttiness - not fishy
🍳Best Uses: Grilling whole, pan-searing fillets, baking, ceviche
⏱️Shelf Life: 1-2 days refrigerated; 3-6 months frozen
⚠️Note: Moderate mercury - limit servings for pregnant people and young children

What Is Red Snapper?

Red snapper (Lutjanus campechanus) is a saltwater white fish native to the western Atlantic and Gulf of Mexico, where it lives in reef and rocky-bottom habitats down to several hundred feet.

Its name comes from its distinctive pink-to-red skin, bright reddish eyes, and sharp canine teeth - features that make it one of the most recognizable fish at the market counter.

A few details worth knowing before you buy:

  • Scientific name - Lutjanus campechanus; true red snapper is often mislabeled in markets, where other snapper species get sold under the same name.
  • Flesh - white to pinkish-white before cooking, turning opaque white once heat is applied.
  • Size - adults typically run 1-8 lbs in markets; larger fish yield thicker fillets with more even texture.
  • Relatives - Indo-Pacific snappers (vermilion, yellowtail) share the family but differ slightly in flavor and fat content.
  • Also called - sea snapper or simply snapper; "redfish" is misleading and refers to a separate species (red drum).

For a broader look at fish's flavor and uses across species, it helps to understand where snapper sits on the spectrum - closer to mild and clean than to rich and oily.

What Does Red Snapper Taste Like?

red snapper - What Does Red Snapper Taste Like

Red snapper has a mild, slightly sweet flavor with a clean oceanic quality that doesn't veer into the aggressively fishy territory that puts some people off white fish.

There's a subtle nuttiness - noticeable especially in pan-seared fillets where the skin browns and crisps - that sets it apart from blander options like tilapia (those looking to step up from tilapia will find swapping out tilapia a useful reference point).

Heat affects the flavor noticeably. Raw snapper in ceviche reads briny and delicate, while grilled or roasted snapper develops a slightly richer, more savory edge as the proteins caramelize.

Sensory SnapshotMild Intensity
👅 Flavor
mildly sweetlightly brinyfaintly nutty
✋ Texture
firmflakymoist
👃 Aroma
cleanoceaniclow fishiness

Compared to sea bass, snapper is slightly milder and sweeter. Against halibut, it's less neutral - that faint brininess and nuttiness make it more characterful without being bold.

How to Use Red Snapper

Red snapper's firm texture and mild sweetness make it one of the more adaptable white fish in the kitchen.

It holds together on a grill grate, stays moist in the oven, and cures cleanly for ceviche - a range that few similarly mild fish match.

How Red Snapper Is Used
MethodBest ForTip
🥗 CevicheLight appetizers, raw preparationsUse firm fillets; short cure of 10-15 minutes keeps texture intact
🔥 GrillingWhole fish, skin-on filletsOil skin well and grill over high heat to prevent sticking
🍳 Pan-searingFillets with crispy skinPat skin dry, press fillet flat for first 30 seconds
🫙 BakingSnapper al forno, en papilloteTomatoes, olives, and capers complement without overpowering
🥣 Soups/StewsBouillabaisse-style dishesAdd in the final 5-7 minutes - flesh dissolves with prolonged heat

Gulf Coast and Caribbean cooks often roast or fry snapper whole, leaning on scotch bonnet, allspice, and lime to season the flesh through slashed cuts. Mediterranean preparations tend toward baking fillets with tomatoes, capers, and olive oil - snapper al forno is a reliable weeknight dish that takes under 30 minutes.

For pairings, bright acidic elements like lemon or lime balance the fish's natural sweetness, while light herb sauces - gremolata, chimichurri - add freshness without masking flavor.

A full guide to what pairs with red snapper covers side dishes and sauces in more depth. Avoid heavy braises or cream-dominant sauces - they compete with, rather than complement, the delicate flesh.

Golden Rule
Don't overcook it. Red snapper turns dry and chalky past an internal temperature of 145°F (63°C). Pull it off heat when the thickest part just turns opaque.
Try It In
🍅Roasted Garlic Marinara SauceSpoon over baked snapper fillets for a quick Mediterranean-style dinner→🧈Roasted Garlic Béarnaise SaucePairs with pan-seared fillets where you want richness without masking the fish→🌿Compound Butter (Herb)Melt over a grilled whole snapper straight off the grate→

How to Buy and Store Red Snapper

Fresh red snapper at its best has bright, vivid red-pink skin, clear and bulging eyes, and flesh that springs back immediately when pressed. Fillets should look glossy and moist with no brown edges or dried-out surface.

A strong ammonia smell or dull, faded coloring means pass - genuinely fresh snapper smells clean and barely oceanic.

Watch Out
Mislabeling is common. Studies have found other snapper species - or entirely different fish - sold as "red snapper." Buy from a trusted fishmonger and ask to see the whole fish if possible.

Storage is straightforward, however it requires attention to temperature:

  • 🧊 Refrigerator - Store on ice or at 32-38°F (0-3°C); use fillets and whole fish within 1-2 days.
  • ❄️ Freezer - Wrap tightly in plastic then foil or vacuum-seal; quality holds for 3-6 months.
  • 🐟 After cooking - Cooked snapper keeps 3-4 days refrigerated in an airtight container.

A detailed breakdown of keeping red snapper fresh covers ice-packing methods and freeze-thaw guidance. For handling other species alongside it, storing fish correctly applies the same principles across the board.

Where to Start with Red Snapper

If you're new to the fish, a pan-seared skin-on fillet with brown butter and lemon is the fastest way to understand what makes it worth buying - the skin crisps, the flesh stays moist, and the flavor doesn't need help.

From there, a whole roasted snapper with herbs and olive oil shows the fish at its most impressive.

If red snapper isn't available or is outside the budget, red snapper swaps that work lays out the closest options by texture and flavor.

The fish rewards simple treatment and penalizes overcooking - keep that in mind, and it rarely disappoints.

Frequently Asked Questions

Is red snapper good to eat?

Yes - it's widely regarded as one of the cleaner-tasting white fish available. Mild sweetness and firm texture make it approachable for people who don't typically enjoy seafood. Its low fat content also makes it easy to digest.
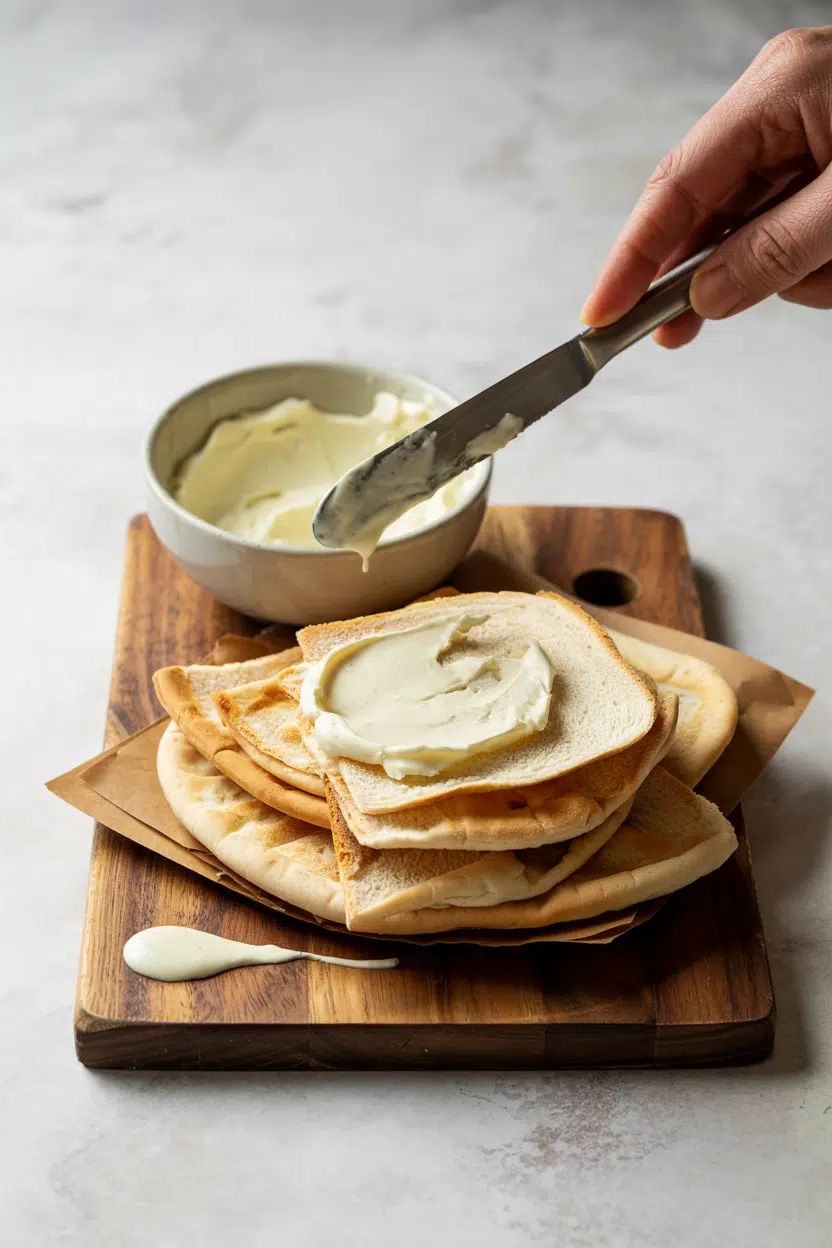
Is red snapper high in mercury?

It has moderate mercury levels - higher than salmon or tilapia, but lower than swordfish or king mackerel. The FDA advises pregnant people and young children to limit servings to 1 per week.

Does red snapper have bones?

Yes. Fillets contain pin bones running along the centerline, which a fishmonger can remove or you can pull with tweezers before cooking. Whole fish have a full bone structure, but the flesh lifts cleanly off once cooked.

How do you tell if red snapper is fresh?

Look for clear, bulging eyes, firm flesh that springs back when pressed, and a clean oceanic smell - not ammonia or strong fishiness. Dull skin color and sunken eyes are reliable signs of age.

Can you eat red snapper skin?

Yes, and it's worth eating when properly cooked. Pan-searing or grilling skin-side down renders the fat and crisps the surface into a thin, slightly savory layer. Scale the skin thoroughly before cooking if buying whole.

Italian Pasta alla Norma

April 1, 2026

When you need a weeknight pasta that delivers on flavor without the fuss, Pasta alla Norma hits the mark. Golden-fried eggplant, bright tomato sauce, and salty ricotta salata come together in under an hour.

Italian Pasta alla Norma served on a plate

The eggplant gets salted first so it stays tender instead of waterlogged. High heat caramelizes the edges while the sauce simmers down to something thick enough to cling to spaghetti.

Perfect for casual entertaining when you want something that looks intentional but doesn't tie you to the stove.

QUICK SUMMARY

Sicilian Pasta alla Norma pairs pan-fried eggplant with fresh tomato sauce and ricotta salata. Salt the eggplant 30 minutes before cooking to pull out moisture and prevent sogginess. The sauce simmers uncovered for 15-20 minutes until it thickens but stays saucy.

⏱️Plan ahead: Salt eggplant 30 minutes before frying; sauce takes 20 minutes to reduce properly
🔥Start here: Fry eggplant in batches over medium heat - crowding the pan steams instead of crisps
⚠️Watch out: Garlic burns fast; add tomatoes within 30 seconds or start over with fresh garlic

Table of Contents

Toggle
  • Why This Recipe Works
  • What You'll Need
    • Ingredient Details
  • Ingredient Swaps
  • What to Serve With It
  • Store and Reheat
  • Frequently Asked Questions
  • Italian Pasta alla Norma
    • Method 
    • Tried this recipe?

Why This Recipe Works

Pan-frying salted eggplant creates caramelized edges that hold up in sauce. Simmering tomatoes uncovered concentrates their natural sweetness without turning the sauce into paste. For a version that comes together quickly, classic gnocchi dish uses similar techniques but swaps the eggplant for pillowy dumplings.

Quick Reference
⏱️
Prep Time
20 min
🔥
Cook Time
30 min
⏰
Total Time
50 min
🍽️
Servings
4 servings
📊
Difficulty
Medium
🏷️
Category
Main Dish
💡
Quick Tip
Salt eggplant 30 min, sauté until golden
🎯
Best For
Weeknight | Casual entertaining

Why it works:

  • Salting eggplant for 30 minutes pulls out bitter moisture - rinse and pat dry before frying
  • Pan-frying in batches over medium heat gives you golden edges without steaming the eggplant
  • Ripe tomatoes simmered uncovered for 15-20 minutes thicken naturally without tomato paste
  • Cooking pasta al dente (8-10 minutes) prevents mushiness when tossed with sauce
  • Adding ricotta salata off heat preserves its crumbly texture and salty bite
Quick Tip
Test eggplant doneness with a fork - it should slide through without resistance but the slice should still hold its shape.

What You'll Need

Ingredients for Italian Pasta alla Norma

The eggplant takes center stage here, so buy firm ones with smooth skin and no soft spots. We keep a batch ready for nights like this - a creamy noodles variation swaps eggplant for coconut curry but uses the same timing strategy.

🥬
Vegetables
  • 1 large eggplant (about 1 lb), sliced into ½-inch rounds
  • 1½ lbs ripe tomatoes, chopped
  • 3 garlic cloves, minced
🍜
Pasta
  • 12 oz spaghetti or rigatoni
🧀
Dairy
  • ⅓ cup ricotta salata, grated
🧄
Seasonings
  • ¼ cup olive oil
  • Fresh basil leaves
  • Salt and black pepper
  • Red pepper flakes (optional)

Ingredient Details

  • Eggplant
    Choose firm, glossy eggplants with no soft spots - small to medium sizes have fewer seeds and less bitterness
  • Ripe tomatoes
    Use peak-season tomatoes for balanced sweet-tart flavor; off-season, swap for one 28-oz can whole peeled tomatoes, crushed by hand
  • Ricotta salata
    This aged ricotta crumbles like feta but tastes milder - find it at Italian markets or sub Pecorino Romano for sharper bite
  • Olive oil
    Use enough to coat the pan for frying - eggplant soaks up oil, so add more between batches if the pan looks dry
  • Garlic
    Mince garlic just before cooking so it stays sharp - pre-minced or jarred garlic turns bitter when sautéed
  • Basil
    Add torn basil leaves at the end - cooking destroys the fresh, anise-like aroma that defines this dish
  • Pasta
    Spaghetti or rigatoni work best - ridged shapes hold sauce, long noodles twirl with eggplant chunks

Ingredient Swaps

Most swaps here change the flavor but keep the method intact. Most people skip noodles, but it balances the meal. For a version that comes together quickly, a creamy noodles variation delivers similar comfort with different technique.

Four swaps that work:

  • Ricotta salata → Pecorino Romano: Stronger salty punch, same crumbly texture - use 2-3 tablespoons since it's sharper
  • Eggplant → zucchini: Lighter bite, no salting needed - slice thick and sauté 2-3 minutes per side until golden
  • Fresh tomatoes → canned whole peeled tomatoes: Simmer 5 minutes longer to break down; crush by hand before adding for chunky texture
  • Spaghetti → gluten-free pasta: Cook 1-2 minutes less than package directions; gluten-free pasta turns mushy fast

Pan-Frying Eggplant

Works for: Caramelized edges, firm texture, traditional method

Skip if: You want to use less oil or prefer hands-off cooking

Air-Frying Eggplant

Works for: Crispier texture, less oil, easier cleanup

Skip if: You don't have an air fryer or want classic flavor

Ricotta Salata

Works for: Mild salty-tangy finish, authentic Sicilian taste, crumbly texture

Skip if: Hard to find locally or dairy-free; sub Pecorino or nutritional yeast

Instructions

The sauce simmers while the pasta cooks, so time them to finish together. A good noodles can make or break the plate. For a version that comes together quickly, a similar dinner recipe uses parallel timing but different ingredients.

  1. Salt the eggplant: Slice eggplant into ½-inch rounds, sprinkle both sides with salt, and let sit in a colander for 30 minutes. Rinse under cold water and pat completely dry with paper towels.

  2. Fry the eggplant: Heat 2 tablespoons olive oil in a large skillet over medium heat. Fry eggplant in batches (don't crowd) for 3-4 minutes per side until golden brown. Transfer to a paper towel-lined plate and set aside.

  3. Make the sauce: In a medium saucepan, heat remaining 2 tablespoons olive oil over medium heat. Add minced garlic and cook 30 seconds until fragrant. Add chopped tomatoes, season with salt and pepper, and simmer uncovered 15-20 minutes, stirring occasionally, until thickened but still saucy.

  4. Cook the pasta: Bring a large pot of salted water to a boil. Cook spaghetti 8-10 minutes until al dente. Drain, reserving 1 cup pasta water.

  5. Combine everything: Add cooked pasta to the tomato sauce off heat, tossing to coat. Fold in fried eggplant gently. If the sauce looks dry, add pasta water 2 tablespoons at a time. Top with torn basil and grated ricotta salata just before serving.

Watch Out
Garlic burns in seconds - if it turns dark brown or smells bitter, toss it and start the sauce over with fresh garlic.

What to Serve With It

Rich tomato-based pasta needs something crisp or fresh to cut through. The salad works best when it hits the table at the same time as the main. For meal planning ideas that work beyond pasta, complete ramen noodles meal ideas covers timing strategies for multiple sides.

Side Dish Prep Why It Works How to Serve
Simple mixed green salad Easy Light, crisp greens balance rich sauce Dress with lemon and olive oil right before serving
Garlic bread Easy Soaks up extra tomato sauce on the plate Toast until golden, serve warm in a basket
Steamed green beans Easy Adds fresh, snappy texture contrast Steam 3-4 minutes, season with salt and butter
Roasted bell peppers Medium Smoky sweetness complements eggplant Roast at 450°F for 20 minutes, serve warm
Caprese salad Easy Fresh tomatoes and mozzarella echo pasta flavors Layer sliced tomatoes, mozzarella, and basil

Three ways to serve it:

  • Family-style weeknight: Toss pasta, sauce, and eggplant in a large bowl at the table with extra ricotta salata on the side
  • Plated for guests: Twirl pasta onto plates, arrange eggplant slices on top, finish with torn basil and cheese
  • Meal-prep bowls: Divide pasta into containers with eggplant and sauce separate; combine and reheat gently when ready to eat
Best Pick
Serve with crusty bread and a simple arugula salad for a complete Sicilian-style dinner.

Store and Reheat

Pasta holds for 3-4 days but the texture changes slightly. Store in shallow airtight containers so it cools fast and reheats evenly. We keep a batch ready for nights like this - this quick salad dish reheats just as easily and uses similar storage timing.

Method Time Best For
🍳 Stovetop 4-6 min Preserving eggplant texture and sauce consistency
🔥 Oven 10-15 min at 325°F Reheating multiple servings evenly without drying out
📦 Microwave 1-2 min, stir halfway Quick single servings when you're short on time

For best results when storing:

  • Cool pasta completely before refrigerating - hot pasta in a sealed container creates condensation and soggy texture
  • Store in shallow containers (2 inches deep max) so pasta cools evenly and reheats without hot spots
  • Add a drizzle of olive oil before storing to prevent noodles from clumping together
  • Keep eggplant and pasta together in the same container - separating them doesn't improve texture
  • Freeze in single-serving portions for up to 2 months; thaw overnight in the fridge before reheating on the stovetop

Frequently Asked Questions

Can I make Pasta alla Norma ahead and reheat?

Yes, but the eggplant softens more after sitting in sauce. Cook pasta and sauce separately, combine right before serving for best texture. Refrigerate up to 3 days and reheat gently on the stovetop with a splash of water.

How do I know when the eggplant is cooked perfectly?

The eggplant should have golden-brown edges and feel tender when pierced with a fork but still hold its shape. If it collapses or turns mushy in the pan, you've cooked it too long or the heat was too low.

What are good cheese substitutes for ricotta salata?

Pecorino Romano adds sharper, saltier bite - use less (2-3 tablespoons). For dairy-free, nutritional yeast gives cheesy flavor but no crumbly texture. Feta works in a pinch but tastes brinier and wetter than ricotta salata.

Why is my eggplant soggy and how can I fix it?

Skipping the salting step or crowding the pan steams the eggplant instead of frying it. Salt for 30 minutes, rinse and dry thoroughly, then fry in batches with space between slices. If already soggy, drain excess oil and broil 2-3 minutes to crisp the edges.

How long should I cook the tomato sauce for Pasta alla Norma?

Simmer uncovered for 15-20 minutes over medium-low heat until the sauce thickens but stays pourable. If it looks watery after 20 minutes, increase heat slightly and cook 5 more minutes. If it gets too thick, add a splash of pasta water.

Italian Pasta alla Norma served on a plate

Italian Pasta alla Norma

No ratings yet
Pasta alla Norma is a classic Sicilian dish featuring golden-fried eggplant, fresh tomato sauce, and salty ricotta salata. The recipe highlights salting the eggplant to ensure a tender texture and simmering the sauce until thick enough to coat the pasta beautifully. Perfect for a flavorful weeknight dinner that works for casual entertaining.
Print Recipe Pin Recipe
Prep Time 20 minutes mins
Cook Time 30 minutes mins
Total Time 50 minutes mins
Servings: 4 servings
Course: Dinner, Main Dish
Cuisine: Italian, Sicilian
Ingredients Equipment Method Notes

Ingredients
  

  • 1 large eggplant sliced into ½-inch rounds
  • 1.5 lbs ripe tomatoes chopped
  • 3 cloves garlic minced
  • 12 oz spaghetti or rigatoni
  • ⅓ cup ricotta salata grated
  • ¼ cup olive oil
  • to taste fresh basil leaves torn
  • to taste salt
  • to taste black pepper
  • optional red pepper flakes

Equipment

  • Large skillet For frying eggplant
  • Medium saucepan For simmering tomato sauce
  • Large pot For cooking pasta
  • Colander For salting and draining eggplant

Method
 

  1. Slice eggplant into ½-inch rounds. Sprinkle both sides evenly with salt and place slices in a colander. Let sit for 30 minutes to draw out moisture. Rinse under cold water and pat completely dry with paper towels.
    1 large eggplant, to taste salt
  2. Heat 2 tablespoons olive oil in a large skillet over medium heat. Fry eggplant slices in batches without crowding the pan, about 3-4 minutes per side, until golden brown and caramelized. Transfer cooked slices to a paper towel-lined plate and set aside.
    1 large eggplant, ¼ cup olive oil
  3. In a medium saucepan, heat remaining 2 tablespoons olive oil over medium heat. Add minced garlic and cook for 30 seconds until fragrant, being careful not to burn it. Add chopped tomatoes, season with salt and black pepper, and simmer uncovered for 15-20 minutes, stirring occasionally, until the sauce thickens but remains saucy.
    3 cloves garlic, 1.5 lbs ripe tomatoes, ¼ cup olive oil, to taste salt, to taste black pepper
  4. Bring a large pot of salted water to a boil. Cook spaghetti for 8-10 minutes until al dente. Drain pasta, reserving 1 cup of the pasta cooking water.
    12 oz spaghetti, to taste salt
  5. Add cooked pasta to the tomato sauce off heat and toss to coat evenly. Gently fold in the fried eggplant. If the sauce is too dry, add reserved pasta water 2 tablespoons at a time until desired consistency is reached. Top with torn fresh basil and grated ricotta salata just before serving. Add red pepper flakes if desired.
    1 large eggplant, 12 oz spaghetti, ⅓ cup ricotta salata, to taste fresh basil leaves, optional red pepper flakes

Notes

  • Salt eggplant for 30 minutes and rinse to prevent sogginess.
  • Fry eggplant in batches over medium heat to get golden edges without steaming.
  • Simmer tomatoes uncovered for 15-20 minutes to thicken naturally without paste.

Tried this recipe?

Let us know how it was!

What Is Pecans? [Taste, Uses & More]

April 1, 2026

Pecans do something in cooking that few other nuts manage: they melt slightly into whatever surrounds them, lending fat and sweetness without announcing themselves the way the taste of hazelnut does or demanding the neutral backdrop that macadamia nuts in cooking often require.

What Is Pecans

That quiet richness is why they anchor pecan pie, hold praline together, and show up crusted on fish without overwhelming it.

QUICK SUMMARY

Pecans are oil-rich tree nuts native to North America with a buttery, sweetly nutty flavor and moderate intensity. Toasting deepens their caramel notes. Use them in pies, pralines, salads, and crusts. Shelled pecans keep 3-6 months refrigerated or over a year frozen.

🌰Category: Tree nut, native to southeastern United States and Mexico
👅Flavor: Buttery, sweetly nutty, caramel-like when toasted
🔥Best Methods: Dry-toasting, roasting, grinding, candying in syrup
🥗Best Uses: Pecan pie, pralines, salad topping, nut crusts, quick breads
📦Shelf Life: Shelled: 3-6 months refrigerated; frozen 12+ months; in-shell pantry 3-6 months

What Is Pecans?

Carya illinoinensis - the pecan tree - is native to the river valleys of the southeastern United States and northeastern Mexico, making the pecan North America's only commercially significant native tree nut. Kernels are two-lobed, oblong, and covered in a papery brown skin that carries mild tannins.

Most pecans sold in the US come from Georgia, Texas, and New Mexico. Varieties range from Desirable and Stuart (large, easy-to-crack shells common in retail) to Elliot and Schley (smaller, with more concentrated oil).

Shell-on nuts are often labeled by variety at specialty stores; shelled nuts rarely are.

The name traces back to an Algonquian word meaning "nut that requires a stone to crack." Alternate names include American pecan and pecan nut; pican is a regional misspelling, not a distinct variety.

  • 🌱 Wild vs. cultivated - Wild trees still grow along river floodplains; commercial orchards produce the uniform halves you find at grocery stores.
  • 🥜 Size grading - Halves are graded by count per pound; fewer per pound means larger nuts with more intact meat.
  • 🛢️ Oil content - Pecans contain roughly 72% fat by weight, among the highest of any tree nut, which drives both their richness and their rancidity risk.

What Does Pecans Taste Like?

pecans - What Is Pecans

Raw pecans open with a clean, buttery sweetness and settle into a gently nutty finish with a faint bitterness from the skin's tannins.

That bitterness is mild - nothing like the sharp astringency in walnuts - which is exactly why pecans read as sweeter and more approachable to most palates.

Sensory SnapshotModerate Intensity
👅 Flavor
butterysweetly nuttycaramel (toasted)mildly bitter
✋ Texture
firm-crisp (raw)creamy when chewed
👃 Aroma
warm and toasty (roasted)subtle green note (raw)

Heat changes them considerably. Dry-toasting pulls forward caramel and vanilla-adjacent notes while softening the skin bitterness.

That's the version that makes pecan pie smell like it does straight from the oven.

Compared to almonds - which lean drier and more neutral, as covered in what makes almonds distinct - pecans have a noticeably higher perceived sweetness and far more fat-forward character.

How to Use Pecans

Pecans work across a wider range of applications than most cooks use them for.

Southern United States cooking claims them most famously - pecan pie and pecan praline are the canonical examples - but their fat content and moderate flavor make them useful far outside dessert territory.

Golden Rule
Toast pecans before adding them to any uncooked application - salads, granola, cheese boards. Ten minutes at 325°F (163°C) is enough to bring out their caramel notes without making them bitter.

In savory cooking, ground or finely chopped pecans coat chicken and fish fillets, forming a crust that browns well in a hot pan. They fold into quick breads and muffins without sinking when cut into small pieces.

Blended with a little oil, they produce a pecan butter that works in sauces, dressings, and as a spread.

How Pecans Are Used
MethodBest ForTip
🥗 RawSalads, cheese boards, trail mix, battersChop small so they distribute evenly in batters
🔥 Dry-toastedGranola, pie filling, snacking, salad toppersWatch closely - they burn fast after minute 8
🍞 BakedPecan pie, muffins, cookies, crustsWhole halves on top; chopped into batter
🍯 Candied/simmeredPralines, glazed nuts, dessert garnishesUse a candy thermometer - syrup stage matters
⚙️ GroundNut meal for crusts, pecan butter, saucesPulse in short bursts to avoid turning into paste

Pecans pair naturally with maple syrup, brown sugar, and bourbon, which is why they anchor so many fall and winter recipes. Dark chocolate, sharp cheddar, sweet potatoes, and fresh pear all work well alongside them.

Rosemary and thyme can steer pecans toward savory territory when used in spiced roasted nut blends.

If a recipe calls for pecans and you don't have them, pecans swaps that work covers which alternatives hold up in pies, crusts, and candied preparations.

Try It In
🍁Maple Glazed Roasted PecansShows how toasting and syrup together pull out peak caramel flavor→

How to Buy and Store Pecans

Smell before you buy. Rancid pecans have a sharp, paint-like or musty odor that no amount of toasting will fix. With shelled halves, look for uniform color with no dark interior spots; a grayish tinge inside signals oxidation.

Watch Out
Pecans' high fat content makes rancidity a real risk at room temperature. Never store shelled pecans in an open bowl on the counter - even a few days of warmth and light can push them over.

For shelled pecans, vacuum-sealed or nitrogen-flushed packaging extends freshness significantly. Once opened, transfer to an airtight container and refrigerate.

For in-shell pecans, intact shells without cracks or mold at the seams are what you want - heavy nuts for their size signal full, oil-rich kernels.

Full detail on how long pecans keeps by storage method is worth checking before buying in bulk.

The short version: shelled nuts last 3-6 months refrigerated and over a year frozen; in-shell nuts hold 3-6 months in a cool, dry pantry.

Start Here With Pecans

If you haven't cooked with pecans before, dry-toast a small handful first - no oil, no sugar, just a dry skillet over medium heat.

That single step shows you exactly what they become with heat and sets up every recipe after it.

From there, try them chopped into a salad with sharp cheddar and a maple vinaigrette. That combination hits every pairing note at once and takes about three minutes.

Shortcut
Batch-toast a full bag at once and refrigerate. They keep for weeks and are ready to add to anything without extra prep.

Frequently Asked Questions

Are pecans a type of walnut?

No. Both belong to the Juglandaceae family, but pecans are a distinct species - Carya illinoinensis - native to North America. Walnuts come from the Juglans genus and have a sharper, more tannic flavor than pecans.

Can you eat pecans raw?

Yes, raw pecans are safe to eat and commonly used in salads, trail mix, and batters. The flavor is milder than toasted - buttery with a faint green note - and the skin's tannins are slightly more noticeable.

How do pecans differ from walnuts in baking?

Pecans are sweeter and less astringent, so they blend into batters without adding bitterness. Walnuts hold their flavor more aggressively, which can compete with delicate baked goods - pecans rarely do.

Do pecans go bad quickly?

Faster than most nuts, because of their high fat content. Shelled pecans left at room temperature can turn rancid within weeks. Refrigerating or freezing them extends shelf life dramatically.

Are pecans high in omega-3?

Not significantly. Pecans are rich in monounsaturated fat - mainly oleic acid - not omega-3s. Walnuts are a far better source of plant-based omega-3 (ALA) among tree nuts.

What Is Red Leicester Cheese? [Taste, Uses & More]

April 1, 2026

You spot a thick wedge of Red Leicester at the cheese counter - that unmistakable deep orange color setting it apart from the pale yellows and whites around it.

What Is Red Leicester Cheese

It looks bold, almost assertive, yet most people reaching past it have no idea what it actually tastes like or what to do with it at home.

If using stilton cheese for creaminess is one end of the British cheese spectrum, Red Leicester sits comfortably in the middle: approachable, nutty, and quietly distinctive.

QUICK SUMMARY

Red Leicester is a firm, annatto-colored English cow's milk cheese with nutty, mildly tangy flavor and a slightly crumbly texture. It melts well, works on cheese boards and in baked dishes, and keeps for 2-4 weeks once opened and wrapped properly.

🧀Type: Hard cow's milk cheese, Leicestershire, England
👅Flavor: Nutty, mildly tangy, buttery-sweet when young
🍽️Best Uses: Cheese boards, gratin, mac and cheese, toasted sandwiches
❄️Shelf Life: Unopened 3-6 weeks; opened and wrapped 2-4 weeks
🛒Buy It For: Nutty melt and vivid orange color in British-style baked dishes

What Is Red Leicester Cheese?

Red Leicester is a hard cow's milk cheese originating in Leicestershire, England, where it has been made since at least the 17th century.

It belongs to the same broad family as English territorial cheeses - think Cheshire or Double Gloucester - and is aged anywhere from a few months up to about a year.

Its most recognizable feature is its deep orange color, which comes entirely from annatto, a natural dye extracted from the seeds of the achiote tree. That color is not an indicator of flavor intensity; it's a traditional marker of origin.

Younger wheels are sometimes called Leicester cheese or Leicester Red, and the lowercase spelling "red leicester" is also widely accepted. Maturation time splits the cheese into two broad styles:

  • ⏳ Young Red Leicester (2-4 months) - creamier, softer crumb, sweeter and more buttery in flavor
  • 🧀 Aged Red Leicester (6-12 months) - firmer, drier, noticeably sharper with a more pronounced nuttiness

Most supermarket blocks fall toward the younger end of that range. Specialty cheesemongers are the better source for longer-aged versions with more character.

What Does Red Leicester Cheese Taste Like?

red leicester cheese - What Is Red Leicester Cheese

Red Leicester lands at moderate intensity - assertive enough to hold its own on a board but mild enough that most people find it immediately likeable.

The base flavor is nutty and slightly sweet, with a mild tanginess that builds at the back of the palate.

Sensory SnapshotModerate Intensity
👅 Flavor
nuttymildly tangybuttery-sweetslightly sharp
✋ Texture
firmcrumbly
👃 Aroma
mild farmhousewarm nutty

The closest comparison most people reach for is mature cheddar, though Red Leicester is sweeter and less sharp.

A young wheel is closer to Colby in its creamy mildness; an aged wheel pushes toward the savory depth of a mild English cheddar without the pronounced acidity.

Heat changes things notably. Melted under a grill, the cheese loosens quickly and turns glossy, releasing more of its buttery fat and amplifying the nutty notes.

Aged Red Leicester holds its shape a little longer when baked, making it useful in tarts and gratins where you want structure before melt.

Golden Rule
Don't substitute young Red Leicester for aged in a gratin - the younger version releases more moisture and can turn the dish watery. Age matters here.

How to Use Red Leicester Cheese

Red Leicester earns its place across a wide range of British cooking, from pub-style cold plates to hot baked dishes.

Its nutty melt and vivid color make it a practical choice wherever you'd use a firm English cheese but want more visual interest on the plate.

How Red Leicester Is Used
MethodBest ForTip
🥗 Sliced ColdPloughman's lunch, cheese boards, sandwichesPair with chutney, pickled onions, or sliced apple
🍳 Melted/GrilledToasted cheese sandwiches, baked potatoes, burgersUse medium heat - high heat can separate the fat
🥧 BakedSavory tarts, leek-and-potato gratin, mac and cheeseGrate finely for even distribution and color payoff
🍳 Stirred InOmelettes, savory scones, cheese sauceAdd off the heat to prevent graininess in sauces

On a cheese board, cube it alongside walnuts, toasted hazelnuts, and a spoonful of apple or onion chutney. Brown ale or a mild ale complements the nuttiness better than most wines, though a crisp cider works equally well.

For baking, grated Red Leicester is excellent stirred into a leek-and-potato gratin - it adds savory depth and turns the dish a warm amber color that looks deliberate rather than accidental.

It also holds up well in savory scones and cheese straws, where a firm, flavorful English cheese is exactly what the recipe needs.

Avoid pairing it with delicate seafood or lightly dressed green vegetables, where the cheese's salt and orange color become distracting rather than complementary.

Try It In
🧀Cheddar Cheese StrawsSwap in Red Leicester for color and nutty depth→🍳Egg and Cheese Breakfast SandwichMelts cleanly and adds warm color to the stack→🥗Blue Cheese Dressing (Homemade)See how British cheeses compare in creamy dressings→

How to Buy and Store Red Leicester Cheese

At the counter, look for a consistent deep orange color across the cut face and a smooth, dry rind with no cracks that expose the interior.

A small amount of white crystallization on an aged wedge is normal and signals proper maturation - excessive surface bloom or an ammonia smell means the cheese is past its best.

Watch Out
An ammonia or sour smell means the wedge has deteriorated. Surface mold on the paste (not just the rind) is also a sign to skip it.

For storage, cheese paper is the best wrapping - it lets the cheese breathe without drying it out. If cheese paper isn't available, waxed paper followed by a loose layer of plastic wrap works well.

Keep it in the main body of the fridge, away from strong-smelling foods.

  • 📦 Unopened wedge - up to 3-6 weeks refrigerated
  • ✂️ Opened, tightly wrapped - 2-4 weeks, depending on how aged the piece is

Exploring red leicester cheese in dairy recipes will give you a clearer picture of how storage conditions affect the cheese across different applications.

Where to Start With Red Leicester

Pick young Red Leicester if you want something approachable for a first cheese board or a quick weeknight melt.

Go for an aged wedge - six months or longer - if you're building a gratin or a savory tart where firm texture and a sharper finish matter.

If Red Leicester isn't available, look at alternatives to red leicester cheese before defaulting to cheddar, since the color and sweetness profile differs enough to change a dish.

Alternatively, the guide to alternatives to cheddar cheese covers several firm English cheeses that overlap in function.

For something closer to the young, mild end, colby jack cheese in dairy recipes shows how that cheese behaves under heat - useful context when Red Leicester is unavailable.

Best Pick
For most home cooks, a 4-6 month aged Red Leicester hits the sweet spot - creamy enough to melt well, firm enough to hold structure in baked dishes.

Frequently Asked Questions

Is Red Leicester the same as cheddar?

No. Both are firm English cow's milk cheeses, however Red Leicester uses a different production method that produces a sweeter, less acidic flavor profile. It's also colored with annatto, which cheddar traditionally is not.

Why is Red Leicester orange?

The color comes from annatto, a natural dye from the seeds of the achiote tree. Cheesemakers in Leicestershire began adding it centuries ago to distinguish their product from other regional cheeses, and the practice has continued as a mark of identity.

How long does Red Leicester last in the fridge?

An unopened wedge keeps for 3-6 weeks. Once cut and rewrapped in cheese paper, expect 2-4 weeks before quality drops - older, drier pieces last toward the longer end of that range.

Can vegetarians eat Red Leicester?

Not always. Traditional Red Leicester uses animal rennet, which isn't suitable for vegetarians. However, many supermarket versions now use microbial or vegetarian rennet - check the label before buying.

What wine pairs with Red Leicester?

A light to medium-bodied red - like a Pinot Noir or a young Merlot - works best, since heavier tannins can clash with the cheese's mild sweetness. Dry cider or a mild ale is arguably the more natural match for this English cheese.

Moroccan Harira Soup

April 1, 2026

When you need a hands-off dinner that works for meal prep or a slow weeknight, Moroccan harira delivers. One pot simmers while you handle other tasks, and the warm spices with fresh herbs make plain bread feel like an intentional meal.

Moroccan Harira Soup served on a plate

The lentils and chickpeas do most of the thickening work. Simmering the meat low and slow ensures tender chunks without constant supervision.

Perfect for cold evenings when you want something that feels substantial without requiring active cooking time.

QUICK SUMMARY

Moroccan Harira Soup layers tender beef or lamb with chickpeas, lentils, and warm spices in a slightly thick broth. Gentle simmering for 90 minutes ensures even cooking across all ingredients. Plan for overnight chickpea soaking and add fresh herbs only in the last 5 minutes.

⏱️Time Reality: 20 minutes active, then 90 minutes mostly hands-off simmering.
🔥First Critical Move: Soak chickpeas 8-12 hours or they'll cook unevenly.
⚠️Watch Out: Add flour slurry slowly or you'll get lumps-whisk it in over 2-3 minutes.

Table of Contents

Toggle
  • Why This Recipe Works
  • What You'll Need
    • Ingredient Details
  • Ingredient Swaps
  • What to Serve With It
  • Store and Reheat
  • Frequently Asked Questions
  • Moroccan Harira Soup
    • Method 
    • Tried this recipe?

Why This Recipe Works

The lentils break down slightly during cooking, which naturally thickens the broth without needing heavy cream or excess flour. For a version that comes together quickly, this simple pot recipe uses similar one-pot logic with less soaking time.

Quick Reference
⏱️
Prep Time
20 min
🔥
Cook Time
1 hr 30 min
⏰
Total Time
1 hr 50 min
🍽️
Servings
6 servings
📊
Difficulty
Medium
🏷️
Category
Main Dish
💡
Quick Tip
Simmer gently, avoid overcooking legumes
🎯
Best For
Weeknight | Meal prep | Entertaining

Why it works:

  • Soaking chickpeas overnight ensures they cook at the same rate as the lentils and meat
  • Simmering meat for 90 minutes at low heat breaks down connective tissue without drying it out
  • Adding fresh cilantro and parsley in the last 5 minutes preserves their bright, herbaceous flavor
  • Toasting dry spices for 1-2 minutes before adding liquid deepens their warmth and complexity
  • The flour slurry creates a slightly creamy texture without masking the individual ingredients
Quick Tip
Stir the pot every 10 minutes to prevent the bottom from burning-especially once the lentils start breaking down.

What You'll Need

Ingredients for Moroccan Harira Soup

Shopping for this means hitting the dried goods aisle and the meat counter. Most people skip salad, but it balances the meal-we keep a batch of classic salad dish ready for nights like this.

🍗
Protein
  • 1 lb beef or lamb stew meat, cubed
🥬
Vegetables & Aromatics
  • 1 large onion, diced
  • 2 celery stalks, chopped
  • 1 cup fresh cilantro, chopped
  • 1 cup fresh parsley, chopped
🫙
Legumes & Grains
  • 1 cup dried chickpeas, soaked overnight
  • ¾ cup lentils
🌶️
Spices & Seasonings
  • 2 tablespoon tomato paste
  • 1 teaspoon cinnamon
  • 1 teaspoon ginger
  • 1 teaspoon turmeric
  • 1 teaspoon black pepper
  • 3 tablespoon all-purpose flour

Ingredient Details

  • Dried chickpeas
    Soak 8-12 hours in cold water-they'll double in size and cook evenly with the lentils.
  • Lentils
    Use brown or green lentils, not red-red lentils dissolve too quickly and turn the soup mushy.
  • Beef or lamb stew meat
    Cut into 1-inch cubes so they cook through in 90 minutes without falling apart.
  • Fresh cilantro and parsley
    Chop finely and add in the last 5 minutes-earlier and they'll wilt into muddy green bits.
  • Tomato paste
    Toast it in the pot for 2 minutes before adding liquid to deepen the flavor and color.
  • Flour slurry
    Mix flour with cold water until smooth before adding-lumps won't dissolve once they hit hot soup.
  • Spices (cinnamon, ginger, turmeric, black pepper)
    Toast dry spices in the pot for 1-2 minutes to release their oils before adding liquid.

Ingredient Swaps

Most swaps here adjust cooking time more than flavor. Rich mains need something to cut through, and rolls does exactly that-for a version that comes together quickly, quick rolls dish works without needing yeast or rising time.

Four practical swaps:

  • Swap beef or lamb for chicken or turkey thighs-lighter flavor, but reduce simmering to 45-60 minutes or the meat dries out
  • Swap dried chickpeas for two 15-oz cans, drained-cuts cooking time by 30 minutes, though texture softens slightly
  • Swap all-purpose flour for a gluten-free flour blend-thickens the same way, no ratio changes needed
  • Swap fresh herbs for 2 tablespoons dried (less ideal)-use half the amount and add them with the spices, not at the end

Dried Chickpeas

Works for: Firmer texture, better bite, traditional flavor

Skip if: You forgot to soak them or need dinner in under an hour

Canned Chickpeas

Works for: Faster cooking, no planning required, still tender

Skip if: You want the firmest texture or authentic chew

Instructions

Expect 20 minutes of chopping and stirring, then the pot simmers mostly unattended. The slaw works best when it hits the table at the same time as the main-we keep a batch of crisp slaw recipe ready for nights like this.

Step-by-step:

  1. Drain soaked chickpeas and add to a large pot or Dutch oven with 8 cups water, diced onion, chopped celery, and cubed meat. Bring to a boil, then reduce to a gentle simmer. Cover partially and cook for 60 minutes, stirring every 10 minutes to prevent sticking.

  2. Add lentils, tomato paste, cinnamon, ginger, turmeric, and black pepper to the pot. Stir well to distribute spices evenly. Continue simmering for 30 more minutes until lentils soften but stay intact and meat pierces easily with a fork.

  3. Mix flour with ½ cup cold water until smooth, then slowly whisk the slurry into the soup over 2-3 minutes. Stir constantly as you add it to avoid lumps. Simmer for 10 more minutes until the broth thickens slightly and coats the back of a spoon.

  4. Stir in finely chopped cilantro and parsley during the last 5 minutes of cooking. Keep the heat low so the herbs stay bright green and don't wilt into the broth.

  5. Turn off heat and let the soup rest for 10 minutes before serving. This lets the flavors meld and the broth settle into a silky, slightly creamy consistency. Taste and adjust salt or add lemon juice if needed.

Golden Rule
If the soup thickens too much as it sits, add water ¼ cup at a time and simmer for 5 minutes-don't just dump liquid in cold.

What to Serve With It

Harira is thick enough to eat on its own, but most Moroccan meals include bread for dipping or a fresh side to balance the richness. A dollop of this dip takes each bite somewhere more interesting-for a version that comes together quickly, simple homemade dip works without needing roasted garlic or advance prep.

Side Dish Prep Why It Works How to Serve
Warm crusty bread Easy Soaks up the thick broth and balances the spices Slice and serve alongside in a basket
Simple green salad Easy Adds crisp freshness to contrast the rich soup Toss greens with lemon and olive oil
Lemon wedges Easy Brightens the warm spices with acidity Squeeze over each bowl right before eating
White rice Easy Extends the meal and absorbs the broth Spoon rice into bowls, ladle soup over top
Traditional Moroccan dates Easy Classic Ramadan accompaniment, sweet contrast Serve on a small plate on the side

Three ways to serve it:

  • Ladle soup into wide bowls with warm bread on the side for dipping and mopping up the broth
  • Spoon cooked white rice into each bowl first, then ladle soup over top so the rice absorbs the broth
  • Serve alongside harissa and lemon wedges so everyone can adjust heat and brightness to taste
Shortcut
If you're meal prepping for the week, consider pairing ideas from easy cucumber soup dinner nights that work for any thick, warm soup.

Store and Reheat

Harira thickens as it sits because the lentils keep absorbing liquid. Store it in shallow containers so it cools quickly and doesn't spend hours in the temperature danger zone.

Method Time Best For
🍳 Stovetop 8-10 min Even heating and texture maintenance
📦 Microwave 3-4 min, stir halfway Quick reheating of single portions
🔥 Oven 20 min at 325°F, covered Large quantities to warm evenly

For best results when storing:

  • Cool soup to room temperature within 2 hours, then refrigerate in airtight containers for 3-4 days
  • Add ¼ cup water per serving when reheating-the lentils absorb liquid overnight and the soup thickens considerably
  • Freeze in 2-cup portions for up to 3 months in freezer-safe containers, leaving 1 inch headspace for expansion
  • Thaw frozen soup in the fridge overnight, not on the counter, to avoid bacterial growth
  • Stir fresh chopped herbs into reheated soup just before serving-the original herbs lose brightness after storage

Frequently Asked Questions

Can I use canned chickpeas instead of dried in Harira?

Yes-drain and rinse two 15-oz cans, then add them with the lentils instead of at the start. This cuts cooking time by 30 minutes, though the texture will be slightly softer than dried chickpeas.

How do I store and reheat Moroccan Harira Soup for best texture?

Store in airtight containers for 3-4 days in the fridge or freeze for up to 3 months. Reheat on the stovetop with ¼ cup water per serving-the lentils absorb liquid overnight and thicken the soup considerably.

What is the best way to know when Harira is done cooking?

The meat should pierce easily with a fork without resistance, lentils should be softened but still hold their shape, and the broth should coat the back of a spoon without being gluey. Total simmer time is about 90 minutes.

My soup is too thick or lumpy-how can I fix it?

For lumps, blend a portion of the soup with an immersion blender or strain it through a fine-mesh sieve. For overly thick soup, add water ¼ cup at a time and simmer for 5 minutes until it reaches the right consistency.

Can I double the recipe for large groups without issues?

Yes-use a larger pot (at least 8 quarts) and stir every 10 minutes to prevent burning at the bottom. Cooking time stays the same, but you may need to add 15-20 more minutes if the pot is very crowded.

Moroccan Harira Soup served on a plate

Moroccan Harira Soup

No ratings yet
Moroccan Harira Soup combines tender beef or lamb with chickpeas, lentils, and warm spices in a mildly thickened broth. Slow simmering for 90 minutes creates tender meat and evenly cooked legumes, while fresh herbs added last preserve brightness.
Print Recipe Pin Recipe
Prep Time 20 minutes mins
Cook Time 1 hour hr 30 minutes mins
Total Time 1 hour hr 50 minutes mins
Servings: 6 servings
Course: Main Dish
Cuisine: Moroccan
Ingredients Method Notes

Ingredients
  

  • 1 lb beef stew meat cubed into 1-inch pieces
  • 1 onion large, diced
  • 2 stalks celery chopped
  • 1 cup cilantro fresh, chopped, added last 5 minutes
  • 1 cup parsley fresh, chopped, added last 5 minutes
  • 1 cup dried chickpeas soaked overnight for 8-12 hours
  • 0.75 cup lentils brown or green lentils
  • 2 tablespoon tomato paste toasted before adding liquid
  • 1 teaspoon cinnamon dry, toasted with spices
  • 1 teaspoon ground ginger dry, toasted with spices
  • 1 teaspoon turmeric dry, toasted with spices
  • 1 teaspoon black pepper dry, toasted with spices
  • 3 tablespoon all-purpose flour mixed with ½ cup cold water to form slurry

Method
 

  1. Drain soaked chickpeas and add to a large pot or Dutch oven with 8 cups water, diced onion, chopped celery, and cubed meat. Bring to a boil, then reduce to a gentle simmer. Cover partially and cook for 60 minutes, stirring every 10 minutes to prevent sticking.
    1 lb beef stew meat, 1 onion, 2 stalks celery, 1 cup dried chickpeas
  2. Add lentils, tomato paste, cinnamon, ginger, turmeric, and black pepper to the pot. Stir well to distribute spices evenly. Continue simmering for 30 more minutes until lentils soften but stay intact and meat pierces easily with a fork.
    0.75 cup lentils, 2 tbsp tomato paste, 1 tsp cinnamon, 1 tsp ground ginger, 1 tsp turmeric, 1 tsp black pepper
  3. Mix flour with ½ cup cold water until smooth, then slowly whisk the slurry into the soup over 2-3 minutes. Stir constantly as you add it to avoid lumps. Simmer for 10 more minutes until the broth thickens slightly and coats the back of a spoon.
    3 tbsp all-purpose flour
  4. Stir in finely chopped cilantro and parsley during the last 5 minutes of cooking. Keep the heat low so the herbs stay bright green and don't wilt into the broth.
    1 cup cilantro, 1 cup parsley
  5. Turn off heat and let the soup rest for 10 minutes before serving. This lets the flavors meld and the broth settle into a silky, slightly creamy consistency. Taste and adjust salt or add lemon juice if needed.

Notes

  • Soak chickpeas overnight to ensure even cooking with lentils and meat.
  • Toast dry spices and tomato paste briefly to deepen flavor before adding liquid.
  • Whisk flour slurry slowly to prevent lumps and achieve a creamy broth consistency.

Tried this recipe?

Let us know how it was!

What Is Pomegranate? [Taste, Uses & More]

April 1, 2026

Scatter a handful of pomegranate arils over a spinach salad with feta and walnuts, and something shifts. The jewel-red seeds add a sharp, juicy burst that no dressing can replicate.

What Does Pomegranate Taste Like

That's the pull of this fruit - it's a finishing ingredient that does serious work. Used across Persian, Middle Eastern, and Mediterranean cooking for thousands of years, pomegranate earns its place in everything from breakfast yogurt to slow-cooked lamb.

QUICK SUMMARY

Pomegranate is a tart-sweet fruit prized for its juicy arils and bright acidity. Raw arils crunch and pop. Pomegranate molasses concentrates that tartness into a thick, deeply sour syrup. Both forms work across savory and sweet dishes in Persian, Middle Eastern, and Mediterranean cooking.

🍎Category: Berry-like fruit (Punica granatum), not a true berry
👅Flavor: Bright tart-sweet with an astringent pucker and citrus-like lift
🍳Best Uses: Raw arils on salads, reduced to molasses, garnish on stews and pilafs
🛒Buy It: Choose heavy, taut-skinned fruits - weight signals more juice inside
⏳Shelf Life: Whole fruit: 4-6 weeks refrigerated; extracted arils: 3-7 days

What Is Pomegranate?

Pomegranate (Punica granatum) originated in the Persian region and spread west across the Mediterranean and east into the Indian subcontinent over millennia. It goes by anar in Hindi and Urdu, rumman in Arabic, and Granatapfel in German - names that track its long path across cultures.

Botanically, it's classified as a berry-like fruit, though it shares almost nothing visually with a blueberry or strawberry.

The fruit itself is round with a thick, leathery rind that ranges from pale yellow to deep crimson. Inside, hundreds of arils - small seed sacs - are arranged in clusters separated by bitter white pith.

Each aril holds sweet-tart juice wrapped around a small, edible inner seed.

Two forms appear most in cooking:

  • Fresh arils - extracted from the whole fruit and used raw or as a garnish
  • Pomegranate molasses - arils reduced to a thick, concentrated syrup used in marinades, dressings, and dips; if you ever need a swap, pomegranate molasses replacements worth knowing

Dozens of cultivars exist, but the most widely available in Western markets is the Wonderful variety - large, deeply red, and reliably tart.

What Does Pomegranate Taste Like?

pomegranate - What Does Pomegranate Taste Like
Sensory SnapshotModerate Intensity
👅 Flavor
tart-sweetastringentfloral bittercitrus-like
✋ Texture
juicy popcrunchy seed
👃 Aroma
fresh floralgreen-citrus

Think of tart cranberry crossed with sweet cherry, then add a lemony zip that lingers. That's the core experience of a fresh aril.

The flavor is bright but never one-dimensional - a subtle floral bitterness sits underneath the acidity, keeping it from tasting sharp or flat.

Texture matters here as much as taste. Each aril delivers a small burst of juice, followed by a light crunch from the inner seed.

Most people eat the seed without thinking about it.

Heat changes things significantly. Reduced into molasses, the sweetness concentrates but so does the tartness, producing something almost sour and deeply complex. Fresh arils added at the end of cooking retain their brightness; added early, they lose it fast.

Watch Out
Pomegranate juice stains immediately and permanently on fabric and cutting boards. Use dark surfaces or work over a bowl of water when extracting arils.

How to Use Pomegranate

Raw arils are the easiest entry point. Scatter them over grain bowls with farro or quinoa, fold into yogurt or labneh for a meze spread, or toss over roasted vegetables - beets and carrots in particular pick up the contrast well. A spinach salad with feta, walnuts, and pomegranate arils is one of the most straightforward pairings in this cuisine zone.

Pomegranate works just as well in savory mains. In Persian cooking, arils or juice finish dishes like khoresh (braised stews), adding a sharp lift that cuts through rich meat.

Duck and lamb both take well to pomegranate glazes built from reduced juice or molasses mixed with honey.

How Pomegranate Is Used
MethodBest ForTip
🥗 Raw ArilsSalads, yogurt, grain bowls, garnishAdd just before serving to preserve crunch and brightness
🧃 JuicedCocktails, mocktails, marinades, dressingsStrain well; even a little pith makes juice bitter
🍯 Reduced to MolassesGlazes, dips, meat braises, muhammaraKeep heat low and stir often - it scorches quickly
✨ Finishing GarnishRice pilafs, stews, roasted dishesAdd at the last moment; long cooking kills the fresh note

Sumac is the spice that echoes pomegranate's tartness most closely across these same cuisines - if you ever run short, understanding sumac swaps can help you maintain that acidic balance.

Pairings that consistently work: lamb and duck, feta and goat cheese, walnuts and pistachios, mint, honey, and roasted eggplant with olive oil.

One thing to avoid: don't combine fresh pomegranate juice with delicate fresh ricotta in a hot dish. The high acidity causes curds to over-sour and break down.

Try It In
🥗Strawberry Spinach Salad with FetaSwap strawberries for arils or use both for a sharper contrast→🌰Cinnamon Sugar Roasted NutsScatter arils over the finished nuts for a tart-sweet finish→

How to Buy and Store Pomegranate

Pick up the fruit before you put it in your cart. Weight is the best quality signal - a heavier pomegranate holds more juice.

The rind should feel taut and look glossy; slight surface blemishes are fine, however deep splits that expose arils mean the fruit has dried out or begun to ferment inside.

Best Pick
A slightly angular, almost square-shaped pomegranate has been allowed to fully ripen on the tree - rounder fruits are often picked earlier and may be less developed in flavor.

Storage breaks down simply:

  • Whole fruit - refrigerator crisper drawer, up to 4-6 weeks; a well-stored pomegranate outlasts most fresh fruit by a wide margin
  • Extracted arils - airtight container in the fridge, 3-7 days; pat dry before storing to reduce moisture buildup
  • Fresh juice - refrigerated, 5-7 days; for pomegranate freshness guide beyond that, freeze juice in ice cube trays

Pomegranate molasses, once opened, keeps refrigerated for several months without significant quality loss.

Where to Start With Pomegranate

If you've never cooked with it, begin with raw arils. No cooking, no technique - just open the fruit and scatter them somewhere they'll contrast.

A grain bowl, a cheese board, or yogurt with honey are all low-effort first moves.

Once you're comfortable with the raw form, try reducing juice into a quick molasses at home. It's four ingredients at most and unlocks a completely different flavor register.

From there, glazed lamb or a walnut-pomegranate dip like muhammara are natural next steps.

Golden Rule
Add pomegranate at the end. Heat is its enemy - the bright, tart-floral character fades fast under sustained cooking.

If fresh pomegranates aren't available, knowing your pomegranate replacements keeps you from losing that acidic counterpoint entirely.

Frequently Asked Questions

Are pomegranate seeds edible?

Yes - the small inner seed inside each aril is fully edible. Most people chew right through it without noticing. It adds a mild, slightly woody crunch that some prefer to spit out, but there's no harm in eating it.

How do you open a pomegranate without making a mess?

Score the rind shallowly around the crown and along the ridges, then submerge the fruit in a bowl of cold water and break it apart with your hands. The arils sink, the pith floats, and the water contains the juice splatter.

What does pomegranate molasses taste like compared to fresh arils?

Pomegranate molasses is intensely sour, thick, and almost tangy-bitter - far more concentrated than fresh arils. The bright floral note mostly disappears; what remains is a deep, jammy tartness closer to tamarind than fresh fruit.

Is pomegranate healthy?

It's a strong source of vitamin C, potassium, and polyphenols called punicalagins. One caution: pomegranate may interact with blood-thinning medications due to its tannin content - check with a healthcare provider if that applies to you.

Can you freeze pomegranate arils?

Yes. Spread arils in a single layer on a lined tray, freeze until solid, then transfer to a sealed bag. They keep well for up to three months and work directly from frozen in smoothies, sauces, or cooked dishes.

Air Fryer Savory Bread Pudding

April 1, 2026

When you need a hands-off brunch centerpiece that handles both meal prep and entertaining, savory bread pudding delivers. One dish, leftover bread, and a simple custard create crispy edges with a tender center that works for weekend hosting or weekday breakfasts.

Air Fryer Savory Bread Pudding served on a plate

Air frying cuts the time in half compared to baking. The circulating heat crisps the top and edges while the custard sets without drying out.

Perfect for family brunch or budget meals when you want something that looks intentional without hours of prep.

QUICK SUMMARY

Air Fryer Savory Bread Pudding turns stale bread into crispy-edged comfort food in 40 minutes. The high-heat air frying crisps the surface while keeping the custard center moist. Toast the bread cubes first to prevent sogginess.

⏱️Time: 40 min total (15 min prep, 25 min cook)
🔑Key Move: Toast bread 5-7 min before adding custard to avoid mushy texture
⚠️Watch Out: Too much custard makes it soggy-use 1 egg per ½ cup milk and check doneness at 18 min

Table of Contents

Toggle
  • Why This Recipe Works
  • What You'll Need
    • Ingredient Details
  • Ingredient Swaps
  • What to Serve With It
  • Store and Reheat
  • Frequently Asked Questions
  • Air Fryer Savory Bread Pudding
    • Method 
    • Tried this recipe?

Why This Recipe Works

Most people skip bread pudding, but it balances the meal. For a version that comes together quickly, this warm soup side dish uses similar custard techniques with different results.

Quick Reference
⏱️
Prep Time
15 min
🔥
Cook Time
20-25 min
⏰
Total Time
40 min
🍽️
Servings
4 servings
📊
Difficulty
Medium
🏷️
Category
Breakfast | Brunch | Main
💡
Quick Tip
Avoid soggy: toast bread before custard soak
🎯
Best For
Weeknight | Meal prep | Entertaining

What makes this work:

  • Air frying at 320-350°F creates crispy edges without drying the center - the circulating heat crisps the top while setting the custard underneath
  • Stale bread absorbs custard without turning mushy - fresh bread gets gummy, but day-old cubes hold their structure through soaking and cooking
  • Sautéing aromatics before mixing builds depth - cooking onions until translucent releases their sweetness and prevents raw flavor
  • Using shallow dishes ensures even cooking - pudding in 1.5-2 inch containers cooks through without burnt edges or raw centers
  • Resting 5 minutes after cooking lets the custard fully set - serving immediately can make the texture loose and wet
Quick Tip
Check doneness at 18 minutes by pressing the center-it should spring back gently with no liquid pooling. Add 5-7 more minutes if still jiggly.

What You'll Need

Ingredients for Air Fryer Savory Bread Pudding

The cheese works best when it hits the table at the same time as the main. For a version that comes together quickly, this quick cauliflower dish offers similar air fryer techniques with lighter results.

🍞
Bread Base
  • 4 cups stale bread cubes (country or sourdough)
  • 1 tablespoon olive oil or butter for toasting
🥚
Custard
  • 4 large eggs
  • 2 cups milk or cream
  • 1 cup shredded cheese (cheddar, gruyere, or mozzarella)
  • ½ teaspoon salt
  • ¼ teaspoon black pepper
🧄
Aromatics & Herbs
  • 1 medium onion or 2 shallots, diced
  • 2 tablespoon fresh herbs (thyme, parsley, or chives)
  • 2 cloves garlic, minced (optional)
🥓
Optional Add-Ins
  • 4 oz cooked bacon or sausage, crumbled
  • ½ cup bell pepper, diced

Ingredient Details

  • Stale bread cubes
    Day-old country or sourdough works best-avoid soft sandwich bread which turns gummy. Cut into 1-inch cubes for even cooking.
  • Eggs
    Room temperature eggs mix smoother into custard. Use 1 egg per ½ cup milk to get the right texture.
  • Milk or cream
    Whole milk creates tender custard; heavy cream makes it richer. Don't use skim-it produces watery results.
  • Cheese
    Shredded melts faster than cubed. Sharp cheddar adds tang, gruyere brings nuttiness, mozzarella keeps it mild.
  • Onion or shallots
    Cook until translucent, not browned. Shallots give milder flavor; yellow onions add more bite.
  • Fresh herbs
    Thyme and parsley handle heat best. Add chives after cooking for bright flavor. Dried herbs work-use half the amount.
  • Cooked meat
    Bacon or sausage adds smoky depth. Cook and drain before adding to prevent greasiness.

Ingredient Swaps

Meatballs adds the contrast this plate needs, but timing matters. For a version that comes together quickly, simple homemade meatballs use the same air fryer method with different protein.

Four swaps that work:

  • Milk or cream → unsweetened almond or oat milk: Use plant milk for dairy-free versions-expect slightly thinner custard and less richness, but the texture still sets properly
  • Stale bread → gluten-free bread: Swap in gluten-free bread for celiac needs-toast it longer (8-10 minutes) since it absorbs differently and can get mushy faster
  • Cheese → nutritional yeast or dairy-free cheese: Replace with 3 tablespoons nutritional yeast for nutty flavor without dairy-won't melt the same but adds savory depth
  • Bacon or sausage → mushrooms or smoked paprika: Use sautéed mushrooms plus ½ teaspoon smoked paprika for umami without meat-adds earthiness and smoky notes

Country Bread

Works for: Sturdy texture, holds custard well, creates crispy edges

Skip if: You want lighter texture or don't have day-old bread available

Sourdough

Works for: Tangy flavor, dense crumb absorbs custard without falling apart

Skip if: You prefer mild flavor or want softer, less chewy texture

Gluten-Free Bread

Works for: Celiac diets, lighter crumb, works with same method

Skip if: You want traditional texture-absorbs faster and can get soggy quicker

Instructions

You need 40 minutes and one air fryer-safe dish. A good chicken can make or break the plate, and classic chicken dish timing pairs perfectly with this bread pudding's cook time.

  1. Toast the bread cubes: Toss 4 cups bread cubes with 1 tablespoon olive oil, spread in air fryer basket at 350°F for 5-7 minutes until edges turn golden and crisp. Transfer to mixing bowl.

  2. Sauté the aromatics: Heat skillet over medium heat, cook 1 diced onion 3-5 minutes until translucent and soft. Add minced garlic if using, cook 30 seconds until fragrant. Set aside to cool slightly.

  3. Mix the custard: Whisk 4 eggs, 2 cups milk, ½ teaspoon salt, ¼ teaspoon pepper in bowl until combined. Stir in 1 cup shredded cheese, sautéed aromatics, 2 tablespoons fresh herbs, and cooked meat if using.

  4. Combine and soak: Pour custard over toasted bread cubes, fold gently with spatula to coat evenly. Let sit 5 minutes so bread absorbs liquid. Transfer to air fryer-safe dish (1.5-2 inches deep), leaving ½ inch from rim for expansion.

  5. Air fry until set: Place dish in air fryer basket at 320°F for 20-25 minutes. Check at 18 minutes-center should spring back gently when pressed, with no liquid pooling. If still jiggly, cook 5-7 more minutes. Rest 5 minutes before serving.

Golden Rule
Don't skip the resting time after cooking-the custard continues to set as it cools, and cutting immediately can make the texture loose and wet.

What to Serve With It

Pork adds the contrast this plate needs, but timing matters. When planning brunch menus, sausage and cabbage meal planning ideas offers complete pairings for similar savory dishes.

Side Dish Prep Why It Works How to Serve
Simple mixed greens salad Easy Light greens cut richness of custard and cheese Toss with lemon vinaigrette, serve alongside warm pudding
Steamed green beans Easy Fresh crunch balances soft texture without heaviness Steam 5-7 min, season with salt and butter
Roasted cherry tomatoes Easy Sweet acidity refreshes palate between bites Roast at 400°F for 15 min, sprinkle with herbs
Fresh fruit slices Easy Natural sweetness cleanses palate after savory richness Arrange melon, berries, or citrus on separate plate
Garlic roasted asparagus Medium Elegant presentation adds color and flavor contrast Roast at 425°F for 12-15 min with garlic and olive oil

Three ways to serve it:

  • For weekend brunch: Pair with herb crème fraîche on the side-the tangy cream enhances the savory custard and adds brightness without overwhelming
  • For weeknight dinners: Serve with simple mixed greens and quick vinaigrette-the light salad balances the richness and keeps prep minimal
  • For entertaining: Add charcuterie platter with pickled vegetables-the variety of textures and acidic elements complement the pudding's richness
Best Pick
Roasted cherry tomatoes work best for busy nights-they cook at the same temperature while the pudding rests, and the sweet acidity cuts through the cheese perfectly.

Store and Reheat

Leftovers keep 3-4 days when stored properly. The salmon works best when it hits the table at the same time as the main, and this flaky salmon uses similar reheating methods for meal prep batches.

Method Time Best For
🔥 Oven 10-15 min at 350°F Best texture-restores crisp edges and even heat throughout
🍳 Air Fryer 5-8 min at 320°F Quick reheating with restored crisp top and edges
📦 Microwave 1-2 min Fastest option but softens texture-works for quick lunches

For best results when storing:

  • Cool completely before refrigerating: Let pudding reach room temperature (30-45 minutes) to prevent condensation that makes it soggy
  • Use shallow airtight containers: Store in containers no deeper than 2 inches so it reheats evenly without drying edges
  • Separate into portions for meal prep: Cut into 4 squares, store individually to grab single servings and reheat only what you need
  • Cover with foil when reheating in oven: Wrap loosely to prevent top from burning before center warms through
  • Add splash of milk if dry: Drizzle 1-2 tablespoons milk over portions before reheating if custard looks dry or cracked

Frequently Asked Questions

Can I use gluten-free bread for air fryer savory bread pudding?

Yes, gluten-free bread works but toast it 8-10 minutes instead of 5-7 since it absorbs custard faster and can turn mushy quicker. Use sturdy gluten-free bread, not soft sandwich varieties.

How should I store and reheat leftover bread pudding?

Store in airtight container in fridge for 3-4 days. Reheat in air fryer at 320°F for 5-8 minutes for crispy edges, or oven at 350°F for 10-15 minutes covered with foil.

How do I know when the air fryer bread pudding is done?

Press the center gently-it should spring back with no liquid pooling. The edges will be golden brown and pulling away slightly from the dish. Check at 18 minutes, then add 5-7 more if needed.

What causes soggy bread pudding and how to fix it?

Too much custard or skipping the bread toasting step causes sogginess. Fix by using 1 egg per ½ cup milk ratio, toasting bread first, and cooking longer to evaporate excess moisture.

Can I scale this recipe for larger groups or mini portions?

Yes, double the recipe and cook in batches, or use muffin tins for individual portions at 320°F for 12-15 minutes. Mini versions cook faster and create more crispy edges per serving.

Air Fryer Savory Bread Pudding served on a plate

Air Fryer Savory Bread Pudding

No ratings yet
Air Fryer Savory Bread Pudding transforms stale bread into crispy-edged, tender custard comfort food in about 40 minutes. Toasting the bread cubes before soaking prevents sogginess, while the air fryer crisps the top and edges without drying the center. This dish is perfect for hands-off brunches, meal prep, or entertaining.
Print Recipe Pin Recipe
Prep Time 15 minutes mins
Cook Time 25 minutes mins
Total Time 40 minutes mins
Servings: 4 servings
Course: Breakfast, Brunch, Main
Cuisine: American
Ingredients Equipment Method Notes

Ingredients
  

  • 4 cups bread stale, cut into 1-inch cubes (country or sourdough)
  • 1 tablespoon olive oil for toasting bread cubes
  • 4 large egg room temperature
  • 2 cups milk whole milk or cream
  • 1 cup cheese shredded cheddar, gruyere, or mozzarella
  • 0.5 teaspoon salt
  • 0.25 teaspoon black pepper
  • 1 medium onion diced, or 2 shallots diced
  • 2 tablespoon fresh herbs thyme, parsley, or chives
  • 2 cloves garlic minced, optional
  • 4 oz cooked bacon or sausage crumbled, optional add-in
  • 0.5 cup bell pepper diced, optional add-in

Equipment

  • Air fryer Used to toast bread cubes and cook bread pudding
  • Skillet Used to sauté aromatics
  • Whisk Used to mix custard
  • Mixing bowl Used for combining bread and custard
  • Air fryer-safe baking dish Used to cook bread pudding in air fryer

Method
 

  1. Toss stale bread cubes with olive oil and spread in air fryer basket. Air fry at 350°F for 5-7 minutes until edges are golden and crisp. Transfer toasted bread to a mixing bowl.
    4 cups bread, 1 tbsp olive oil
  2. Heat a skillet over medium heat. Cook diced onion (or shallots) for 3-5 minutes until translucent and soft. Add minced garlic if using and cook for 30 seconds until fragrant. Remove from heat and let cool slightly.
    1 medium onion, 2 cloves garlic
  3. In a bowl, whisk eggs, milk, salt, and pepper until combined. Stir in shredded cheese, sautéed aromatics, fresh herbs, and cooked meat or bell pepper if using.
    4 large egg, 2 cups milk, 0.5 tsp salt, 0.25 tsp black pepper, 1 cup cheese, 2 tbsp fresh herbs, 4 oz cooked bacon or sausage, 0.5 cup bell pepper
  4. Pour custard mixture over toasted bread cubes. Fold gently with spatula to coat evenly. Let sit for 5 minutes to allow bread to absorb the custard. Transfer mixture to an air fryer-safe dish about 1.5-2 inches deep, leaving ½ inch from rim for expansion.
  5. Place the dish in the air fryer basket and cook at 320°F for 20-25 minutes. Check doneness at 18 minutes by pressing the center - it should spring back gently with no liquid pooling. If still jiggly, cook 5-7 more minutes. Let pudding rest for 5 minutes before serving to allow custard to fully set.

Notes

  • Toast bread cubes first to avoid soggy pudding.
  • Use 1 egg per ½ cup milk ratio for firm custard texture.
  • Let pudding rest 5 minutes after cooking to set custard fully.

Tried this recipe?

Let us know how it was!

How Long Does Parsley Last? [Storage Guide]

April 1, 2026

You bought a bunch of parsley for one recipe, used three sprigs, and now the rest sits in the fridge doing who-knows-what.

How To Freeze Parsley

Understanding how long it actually lasts - and what storage method keeps it going - helps you skip the wasted bunch and the mid-week grocery run.

Fresh parsley typically lasts 7-14 days in the fridge with the right setup, or up to a year in the freezer.

The gap between a wilted bundle after three days and one that's still crisp at two weeks comes down almost entirely to how you store it - the same way scallion swaps that work only matter if you've kept your herbs in usable condition. The role parsley plays in bright sauces, tabbouleh, and finishing oils makes it worth treating properly.

QUICK SUMMARY

Fresh parsley lasts 7-14 days in the fridge using the jar method, or 6-12 months in the freezer. Dry leaves before storing, keep them upright in water, and freeze in oil cubes for cooked dishes.

🧊Fridge: 7-14 days in a jar; 4-7 days wrapped in paper towel
❄️Freezer: 6-12 months in oil cubes or freezer bags
⚠️Key Rule: Moisture is the enemy - dry thoroughly before bagging or wrapping

How Long Does Parsley Last?

Shelf life varies significantly depending on the storage method and whether you're working with flat-leaf or curly parsley.

Flat-leaf holds up slightly longer - up to 14 days in the fridge - while curly parsley typically tops out a few days earlier.

Parsley Shelf Life
MethodStateDurationNotes
🏠 CounterRawA few hoursWilts rapidly; not recommended for storage
🧊 FridgeRaw, upright in jar with water7-14 daysFlat-leaf reaches 14 days; trim stems and change water every few days
🧊 FridgeRaw, wrapped in paper towel4-7 daysPerforated bag or loosely sealed container; excess moisture shortens life
❄️ FreezerChopped in oil or water cubes6-12 monthsFlavor holds well; texture unsuitable for raw use after thawing

Room temperature is essentially not a storage method for parsley - browning and wilting begin within hours.

Compare that with basil's shelf life, which actually suffers in the fridge and does better at room temperature, making parsley the exception among common fresh herbs.

Golden Rule
The jar method consistently outperforms wrapping. Trimmed stems submerged in cold water, loosely covered, and refrigerated upright will give you the maximum 7-14 days every time.

How to Store Parsley

The fridge is always the right call for fresh parsley. You have two reliable methods, and the one you choose depends on how quickly you'll use it.

Fridge (jar method): Trim about half an inch off the stem ends, stand the bunch upright in a jar with 1-2 inches of fresh cold water, and cover the top loosely with a plastic bag. Change the water every two to three days and re-trim stems if they look brown.

Fridge (wrapped method): Dry the parsley thoroughly - any surface moisture will accelerate rot. Wrap loosely in a dry paper towel, place in a perforated plastic bag or an airtight container with a fresh paper towel, and store toward the back of the fridge where temperature is most stable. Avoid the fridge door; temperature swings there cause faster wilting.

Counter: Skip it. Parsley at room temperature is a display arrangement, not storage.

A few mistakes account for most early spoilage:

  • 🚫 Storing wet parsley in a sealed bag - trapped moisture rots leaves within days
  • 🚫 Placing parsley in the fridge door - inconsistent temperature shortens life
  • 🚫 Skipping the paper towel - condensation inside the bag has nowhere to go

Can You Freeze Parsley?

Yes - with one honest caveat. Frozen parsley loses its crisp texture on thawing, which rules it out for raw garnishes. For soups, stews, sauces, and sautés, the flavor holds up well enough that freezing is genuinely useful.

Best Pick
The oil cube method. Chopped parsley mixed with neutral oil, frozen in an ice cube tray, then transferred to a freezer bag gives you pre-portioned flavor drops that go straight into a hot pan - no thawing required.

For more detail on the technique, freezing herbs in ice cube trays covers portion sizing and oil ratios that apply directly to parsley. The three methods worth knowing:

  1. Wash and dry thoroughly - spread on a clean towel and pat dry; ice crystals from surface moisture destroy cell structure and accelerate color loss.
  2. Chop and choose your method - Method A: pack loosely into freezer bags, remove air, and flash-freeze flat. Method B: mix chopped parsley with neutral oil or melted butter and spoon into an ice cube tray. Method C: freeze whole sprigs on a tray first, then transfer to bags for quick garnish use.
  3. Label with date and portion - note the approximate amount per cube (typically 1 tablespoon) so you don't overuse; transfer tray-frozen cubes to a sealed bag within 24 hours.
  4. Use directly from frozen - drop oil cubes straight into a hot pan or pot; for bag-frozen parsley, add directly to cooked dishes or thaw briefly in the fridge in a sealed container.

Flat-leaf parsley is the stronger choice for freezing. Its flavor holds better than curly parsley, which is better reserved for fresh garnishes where texture matters.

Signs Parsley Has Gone Bad

Fresh parsley gives clear signals when it's past its usable point. Don't taste-test to decide - sliminess or off-odor means discard immediately.

Signs It's Gone Bad
👀
VisualDark brown or black slimy spots on leaf blades · Yellowing and translucent tips starting from stem base · Mushy, water-soaked stems at the cut end
👃
SmellMusty or rotten vegetal odor with no green note · Slight sulfurous scent as decomposition advances
✋
TextureLeaves collapse into soft, slimy sheets · Stems feel mushy rather than crisp

Yellowing alone doesn't automatically mean spoilage - a few yellow leaves at the base are normal aging. Pull those off and check the rest of the bunch.

If the majority of leaves are discolored or the stems are mushy, the bunch is done.

Watch Out
A bunch that smells fine but has widespread sliminess is still unsafe to use - decomposition in parsley produces surface bacteria before the odor becomes obvious. Discard the whole bunch.

Getting the Most From Your Parsley

Four habits separate the people who use every leaf from those who throw out half the bunch.

These apply whether you're storing flat-leaf for cooking or curly parsley for presentation, and they're equally relevant if you ever need parsley swaps that work when the bunch runs out before the week does.

  • ✅ Jar method first - trimmed stems in cold water, loosely covered, toward the back of the fridge maximizes lifespan
  • ✅ Dry before you store - surface moisture is the single biggest cause of early fridge spoilage
  • ✅ Freeze flat-leaf in oil cubes - pre-portioned and ready for direct pan use, no thawing needed
  • ✅ Label freezer packs with date and amount - prevents overuse and helps you rotate through older stock first

Frequently Asked Questions

How long does parsley last in the fridge?

Up to 14 days using the jar method - trimmed stems upright in water, loosely covered. The wrapped paper towel method gives 4-7 days. Flat-leaf parsley consistently outlasts curly parsley by a few days in both setups.

Should you wash parsley before refrigerating?

No - wash it just before use. Refrigerating wet parsley accelerates rot because moisture trapped against the leaves creates the right conditions for surface bacteria. If you do wash ahead, dry it completely before wrapping.

Does freezing parsley change its flavor?

Not significantly when frozen correctly in oil cubes. Texture degrades - thawed parsley won't work as a fresh garnish - but the herbaceous flavor survives well enough for soups, stews, and sauces.

Can you store parsley in water at room temperature like flowers?

Only for a few hours. Room temperature causes rapid wilting and browning in parsley - the fridge is required for any storage beyond short-term display. The jar method works the same way but must stay refrigerated.

Is yellowing parsley safe to eat?

A few yellow outer leaves are normal aging - remove them and use the rest. Widespread yellowing across the bunch, especially combined with soft stems or off odor, signals the parsley has degraded past the point of use.

What Is Radish? Taste, Texture, Uses & More

April 1, 2026

Sliced thin and scattered over a bowl of ramen, radishes add a sharp, cooling contrast that no other root vegetable quite replicates.

What Does Radish Taste Like

That peppery snap - the same quality that makes cooks reach for alternatives to horseradish - comes from a distinct chemical reaction inside the bulb itself. Understanding that helps you use radish far more intentionally.

QUICK SUMMARY

Radish is a crisp, peppery root vegetable with a sharp bite when raw and a mellow, sweet character when cooked. Small red salad types and long white daikon are the most common forms. Use raw, pickled, roasted, or braised.

🌱Category: Root vegetable, Brassicaceae family
👅Flavor: Sharp, peppery, mildly sweet when young
🔪Best Uses: Raw in salads, quick-pickled, roasted, braised
❄️Shelf Life: 1-2 weeks refrigerated; daikon up to 3 weeks
🌍Key Cuisines: Japanese, Korean, Chinese, French, Mexican

What Is Radish?

Radish belongs to the Brassicaceae family, the same group that gives us mustard, cabbage, and horseradish. Originally cultivated across Central Asia and later developed extensively in Europe and East Asia, it's one of the oldest root vegetables in recorded agriculture.

The part we eat is the swollen hypocotyl - a thickened section just below the soil line, not a true root. Shape and size vary widely across varieties.

  • 🔴 Red salad radish - small, round, and sharp; the classic grocery store type
  • ⬜ Daikon - long white Japanese radish, milder and denser; works well as a [swapping out jicama](https://forkliftkitchen.com/jicama-substitutes/) candidate in raw preparations requiring crunch
  • 🌸 Watermelon radish - green outside, vivid pink inside; milder bite, striking on a plate
  • 🥕 French breakfast radish - elongated, pale-tipped, with a gentler heat than round types

The peppery bite in all varieties comes from isothiocyanates, compounds released when the cell walls break during cutting or chewing. Daikon produces fewer of these than small salad types, which is why it reads as noticeably milder.

What Does Radish Taste Like?

radish - What Does Radish Taste Like

Raw radish delivers a sharp, mustard-like bite up front, followed by a faint sweetness that lingers. The heat resembles mild horseradish, though lighter and more watery - somewhere between that and a crisp cucumber.

Sensory SnapshotModerate Intensity
👅 Flavor
PepperyMildly SweetMustardyEarthy (roasted)
✋ Texture
Crisp & JuicyTender when cooked
👃 Aroma
PungentFresh green

Heat is the main variable. Roasting or braising breaks down the isothiocyanates responsible for that sharp kick, leaving a sweeter, slightly nutty character instead.

Daikon leans toward mild turnip or jicama with a cleaner bite - consulting alternatives to turnip can show you how closely they align in cooked dishes.

Young radishes pulled early are the mildest of all. As the bulb matures and the weather warms, the peppery heat intensifies noticeably.

How to Use Radish

Raw preparations are where radish shows the most range. Thinly sliced into salads and slaws, it contributes crunch and a bright, peppery note that cuts through creamy dressings. Julienned into tacos alongside pork or braised meats, it does the same job a pickled vegetable would - but faster.

Shortcut
To soften radish's raw heat without cooking, salt thin slices and let them sit 10 minutes, then rinse. You get crunch with less bite.

Pickling transforms radish entirely. Quick-pickled daikon in a vinegar-sugar brine is a staple condiment across Korean and Vietnamese cooking, adding tangy brightness to rice bowls and banh mi. For daikon specifically, daikon oroshi - finely grated raw - is served alongside grilled fish and tempura in Japanese cooking as a palate-clearing garnish.

How Radish Is Used
MethodBest ForTip
🥗 RawSalads, slaws, tacos, sandwichesSlice thin; pairs well with butter, dill, crème fraîche
🫙 PickledCondiments, banh mi, rice bowlsUse rice vinegar and sugar for a cleaner, milder brine
🍳 RoastedSide dishes, sheet-pan mealsHigh heat (425°F) caramelizes the cut face; flip once
🥘 BraisedSoups, stews, oden brothAdd daikon early - it needs 30+ minutes to soften through

Radish also works as a spread ingredient - grated into compound butter with chives, it gives a sharp, herbal finish on crusty bread.

If you don't have it on hand, a look at alternatives to radish can point you toward the closest match for each method.

Try It In
🥗Musaengchae Korean Radish SaladA quick banchan showing raw radish's sharp, sesame-laced side→🫙Quick Pickled Daikon RadishSweet-tart brine that mellows daikon into a versatile condiment→

How to Buy and Store Radish

Pick bulbs that feel firm and heavy for their size, with smooth, uncracked skin. Soft spots or a hollow feeling when pressed indicate the flesh has dried out inside.

If greens are attached, they should stand upright and look fresh - limp, slimy tops mean the radish has been sitting too long.

Watch Out
Leaving greens attached after purchase pulls moisture from the bulb. Remove them as soon as you get home and store separately.

For daikon, choose straight, uniformly white roots with no brown patches or soft sections at the stem end. Yellowing skin is a reliable sign of age.

  • Refrigerate unwashed - store in a perforated bag in the crisper drawer to maintain crunch
  • Small salad radishes - last 7-14 days with greens removed
  • Daikon - keeps up to 2-3 weeks refrigerated; wrap cut ends in damp paper towel

For a full breakdown of timing by variety, radish's shelf life covers each type in detail.

The peppery compounds that give radish its bite - the same mustard oils you'd look to replace when replacements for mustard oil are needed - also fade with age, so fresher is sharper.

Start Here Based on What You Need

New to radish? Buy small red salad radishes, slice thin, and serve with butter and sea salt on good bread. That's the fastest way to understand what you're working with.

Golden Rule
Match variety to method: small red radishes for raw crunch, daikon for pickling and braising, watermelon radish where visual impact matters.

If you want heat, go raw and skip the salting step. If you want sweetness, roast at high heat until the cut faces caramelize.

Radish rewards the cook who knows which version they're after before it hits the cutting board.

Frequently Asked Questions

Are radishes spicy?

They're peppery rather than spicy - the heat comes from isothiocyanates, not capsaicin. Small red radishes are the sharpest; daikon is considerably milder and closer to a mild turnip.

How do you mellow radish heat?

Salt thin slices, rest 10 minutes, then rinse - this draws out moisture and softens the bite without cooking. Roasting or braising removes most of the heat entirely.

What is a daikon radish?

Daikon is a long, white Japanese radish with a mild, clean flavor and dense flesh. It's widely used grated raw as daikon oroshi, pickled, or braised in soups like oden.

Can you eat radish greens?

Yes - radish greens are edible and mildly peppery, similar to arugula. Use them in salads when very young, or sauté with garlic and olive oil when more mature.

Do radishes lose their crunch when stored?

Yes, over time they go spongy as moisture evaporates. Storing unwashed in a perforated bag in the crisper, with greens removed, keeps them firm the longest.

What Is Pita Bread? Taste, Uses & How to Use It

April 1, 2026

Pita bread does something no other flatbread quite manages: it creates its own container.

What Is Pita Bread

That hollow pocket - formed by a rapid burst of steam inside a very hot oven - makes it the structural backbone of dishes like falafel wraps, gyros, and shawarma.

If you've landed here after browsing sides for pita chips or hunting for a filling to pair with a crispy baked falafel patties recipe, you're already thinking about pita the right way - as a functional, food-delivery tool.

QUICK SUMMARY

Pita is a round, leavened flatbread from the Levant with a mild wheaty flavor and a signature hollow pocket. It's pliable fresh, crisps well when toasted, and works as a wrap, scoop, or chip base across dozens of dishes.

🌾Flavor: Mild wheaty, slightly yeasty, subtly tangy
✋Texture: Soft and pliable fresh; crunchy when toasted
🍽️Best Uses: Stuffed pockets, dip scoops, pita chips, flatbread pizzas
🌍Origin: Levant and Eastern Mediterranean
📦Shelf Life: 1-2 days fresh; up to 7 days packaged; 2-3 months frozen
⚠️Note: Contains gluten; whole-wheat version adds more fiber and lowers glycemic impact

What Is Pita Bread?

Pita is a round, leavened flatbread originating in the Levant and broader Eastern Mediterranean - a region that includes Lebanon, Israel, Jordan, Syria, and Greece.

It's made from wheat flour, water, yeast, salt, and a small amount of oil, then baked at very high heat for a short time.

You'll also hear it called pocket bread, Arabic pita, or khubz in Arabic-speaking countries.

What sets pita apart from other flatbreads is the pocket. Steam trapped inside the dough during baking forces the layers apart, forming a hollow interior.

Not all pita puffs reliably - older dough or low oven heat can produce a flat round instead.

There are two main styles worth knowing:

  • ⬜ White pita - Made with refined flour; softer, more neutral in flavor, the most common commercial form.
  • 🟤 Whole-wheat pita - Denser crumb, slightly nutty flavor, higher fiber, and a lower glycemic impact than the white version.
  • 🫓 Thicker Greek-style pita - Softer, less pocket-focused, used for wrapping souvlaki rather than stuffing.

If a recipe calls for pocket bread but you're out, swapping out pita bread covers which flatbreads hold up in its place.

What Does Pita Bread Taste Like?

pita bread - What Is Pita Bread

Pita is mild - and intentionally so. Its flavor sits somewhere between a plain soft baguette interior and a naan without the dairy richness or char. The wheaty base is gentle, yeasty warmth comes through on the nose more than the palate, and a longer proof adds a faint tang.

Sensory SnapshotMild Intensity
👅 Flavor
mild wheatyslightly yeastysubtly tangy
✋ Texture
soft and pliablethin crustcrisps when toasted
👃 Aroma
warm breadygentle yeast

That mildness is a feature, not a flaw. Pita's neutral profile lets bold fillings - spiced lamb, pickled turnips, herbed falafel - lead without interference.

Heat changes the texture more than the flavor: toasted pita goes from soft and chewy to snappily crunchy, while a quick warm on a dry pan keeps it pliable and brings the yeasty aroma forward.

Golden Rule
Fresh pita from a bakery should be eaten within a day or two. The pocket collapses and the bread stales fast - that's when toasting into chips saves it.

How to Use Pita Bread

Pita earns its place across Levantine, Greek, Turkish, and broader Mediterranean cooking - and it handles multiple jobs well. The pocket format drives most of those jobs, but the bread also works flat.

Understanding what pairs with pita bread opens up the full range of options beyond the obvious pocket sandwich.

How Pita Bread Is Used
MethodBest ForTip
🫓 Fresh/StuffedGyros, falafel pockets, shawarma wrapsWarm briefly before stuffing so it folds without tearing
🔥 GrilledCharred flatbread alongside grilled meatsGrill directly on hot grates for 30-60 seconds per side
🥗 Torn/ScoopedHummus, baba ganoush, labneh, olive oil dipsTear into uneven wedges - rough edges scoop better
🍕 As a pizza basePersonal flatbread pizzas, za'atar snacksBrush with olive oil before topping for a crisper base
🔪 Pita chipsDipping, snacking, party plattersSlice into wedges, toss in oil, bake at 200°C/400°F until golden

Za'atar and olive oil brushed onto a whole pita and baked is one of the simplest preparations - five minutes and it becomes a snack worth making. On the heavier side, laying toasted pita under grilled lamb lets it soak up the dripping meat juices. If you're planning a build-your-own wrap night, cooking shawarma perfectly explains how to time and rest the meat before it goes into the bread.

One combination to avoid: very watery soups. Pita soaks through within minutes, losing both structure and appeal.

Similarly, heavily sweet spreads overpower its mildness without adding anything useful.

Try It In
🍮Warm Bread Pudding with Vanilla SauceDay-old pita absorbs custard beautifully→🧄Garlic Herb Pull Apart BreadSee how layered breads handle herb-and-oil glazes→

How to Buy and Store Pita Bread

At the store, look for pitas with an evenly puffed shape, pale golden color, and light blistering on the surface.

Skip any bag where the pitas feel hard at the edges or show a starchy white powder coating - both signal over-proofed or stale product.

At a bakery counter, press lightly: fresh pita yields and springs back; a stale one crumbles.

Shortcut
Buying in bulk? Freeze pitas individually wrapped in plastic, then pull out one at a time. They thaw in minutes at room temperature or 20 seconds in a microwave.

Storage by situation:

  • 🏠 Unopened commercial pita - Keep in the sealed bag at room temperature, up to 5-7 days.
  • 🧊 Opened or bakery pita - Move to a resealable bag and refrigerate; use within a week.
  • ❄️ Frozen pita - Holds well for 2-3 months; freeze flat to prevent tearing.

For guidance on timing your meals, cooking pita bread perfectly covers how freshness affects pocketability and texture.

If you're serving pita alongside hummus, check storing hummus correctly - the dip often outlasts the bread in the fridge, and knowing both timelines helps reduce waste.

Start With the Pocket

If you're new to cooking with pita, start with the pocket.

Stuff it with whatever's on hand - leftover roast chicken, a spoon of hummus, pickled cucumber - and it works.

From there, try tearing wedges for dipping, then graduate to baking chips when a batch starts going stale.

Whole-wheat pita is worth trying once you're comfortable: the added fiber and slightly earthier flavor hold up especially well against bold, spiced fillings.

Frequently Asked Questions

What is pita bread made of?

Pita is made from wheat flour, water, yeast, salt, and a small amount of oil. Enriched commercial flour adds B vitamins and iron. Whole-wheat versions swap in some or all whole-grain flour for extra fiber.

How does pita get a pocket?

High oven heat - typically above 230°C/450°F - rapidly converts moisture inside the dough to steam. That steam inflates the bread and separates the layers, creating the hollow pocket. Lower heat or overworked dough often produces a flat round instead.

How do you warm pita without drying it out?

Wrap it in a damp paper towel and microwave for 15-20 seconds, or place it directly on a dry skillet over medium heat for 30 seconds per side. Both methods restore softness without pulling moisture out of the bread.

Can you freeze pita bread?

Yes - pita freezes well for up to 2-3 months. Stack with parchment between rounds so they don't fuse together. Thaw at room temperature or reheat directly from frozen in a warm oven for about 5 minutes.

Is pita bread healthy?

White pita is a moderate-carbohydrate food with some protein and B vitamins. Whole-wheat pita adds fiber and has a lower glycemic impact, making it a better choice for blood sugar management. Both contain gluten and aren't suitable for celiac disease.

« Previous Page
Next Page »

Primary Sidebar

ForkliftKitchen recipe developer

Welcome!

Recipe Developer · 12+ Yr Kitchen Veteran

I'm the recipe developer behind this site, focused on practical, well-tested dishes and smart ingredient swaps. Every recipe is written to be clear, reliable, and easy to make at home.

650+ Recipes
12+ Yrs Exp.
3x Tested
Our Story →

As Featured In

Allrecipes

TASTE OF HOME

Food52

HUFFPOST

Yahoo! Life

Our Editorial Standards

  • ✓ Every recipe tested at least 3 times before publishing
  • ✓ Substitutes verified by real kitchen trials, not guesswork
  • ✓ Reviewed for accuracy by our editorial team
  • ✓ Updated regularly with seasonal info and reader feedback

Most Popular

  • Creamy Lemon Shrimp Linguine
    Creamy Lemon Shrimp Linguine
  • Creamy Garlic Mushroom Chicken
    Creamy Garlic Mushroom Chicken
  • Sesame Ginger Chicken Noodle Bowls
    Sesame Ginger Chicken Noodle Bowls
  • Baked Lemon Herb Fish Fillets
    Baked Lemon Herb Fish Fillets
  • Veggie Loaded Fried Rice
    Veggie Loaded Fried Rice
  • Spicy Garlic Shrimp Stir Fry
    Spicy Garlic Shrimp Stir Fry

Join 8,000+ Home Cooks

Weekly Kitchen Tips

Easy recipes, smart substitutes, and real cooking shortcuts — every Thursday.

Subscribe Free →


Side Dishes

  • What to Serve With Asian Salmon? 15 Best Side Dishes
    What to Serve With Asian Salmon? 15 Best Side Dishes
  • Side Dishes for Strawberry Spinach Salad
    15 Best Side Dishes for Strawberry Spinach Salad
  • Sides for Grilled Cauliflower Steaks to Complete the Meal
    15 Sides for Grilled Cauliflower Steaks to Complete the Meal
  • 15 Sides To Serve With Calabacitas
    15 Best Sides for Calabacitas – Mexican-Inspired Favorites


Substitutes

  • 7 Best Substitutes for Hot Sauce in Marinades & Stir-Fries
    7 Best Substitutes for Hot Sauce in Marinades & Stir-Fries
  • 9 Best Substitutes for Butter in Baking and Cooking
  • 7 Best Substitutes for Tagliatelle for Italian Pasta Dishes
    7 Best Substitutes for Tagliatelle for Italian Pasta Dishes
  • 7 Best Substitutes for Udon Noodles in Asian Stir-Fries
    7 Best Substitutes for Udon Noodles in Asian Stir-Fries


Browse by Topic

  • Side Dishes320
  • Substitutes785
  • Dinner163
  • Air Fryer77
  • Taste Profiles484
  • Food Storage123


Reader Reviews

★★★★★

"Finally a food blog that tells you exactly why a substitute works instead of just listing options."

— Sarah M., via email

★★★★★

"The side dish recommendations are so specific — saved my dinner party twice this month."

— James R., Pinterest comment

★★★★★

"I trust this site more than most because they actually test everything. You can tell."

— Priya K., blog comment

Footer

↑ Back to Top

Forklift Kitchen

We do the heavy lifting so you can enjoy the cooking. Tested recipes, smart substitutes, and perfect pairings—built for real home cooks.

Content

  • Recipes
  • Substitutes
  • What to Serve With
  • Blog

Company

  • About Us
  • Contact
  • Subscribe

Legal

  • Privacy Policy
  • Terms of Service

As an Amazon Associate I earn from qualifying purchases.

© 2026 Forklift Kitchen.

Rate This Recipe

Your vote:


A rating is required
A name is required
An email is required