• Skip to primary navigation
  • Skip to main content
  • Skip to primary sidebar
  • Recipe Index
    • Air Fryer
  • Side Dishes
  • Substitutes
  • About
  • Contact
  • Subscribe

ForkLiftKitchen

menu icon
go to homepage
  • Recipe Index
    • Air Fryer
  • Side Dishes
  • Substitutes
  • About
  • Contact
  • Subscribe
subscribe
search icon
Homepage link
  • Recipe Index
    • Air Fryer
  • Side Dishes
  • Substitutes
  • About
  • Contact
  • Subscribe
×

Blog

What Is Rambutan? [Taste, Uses & More]

April 1, 2026

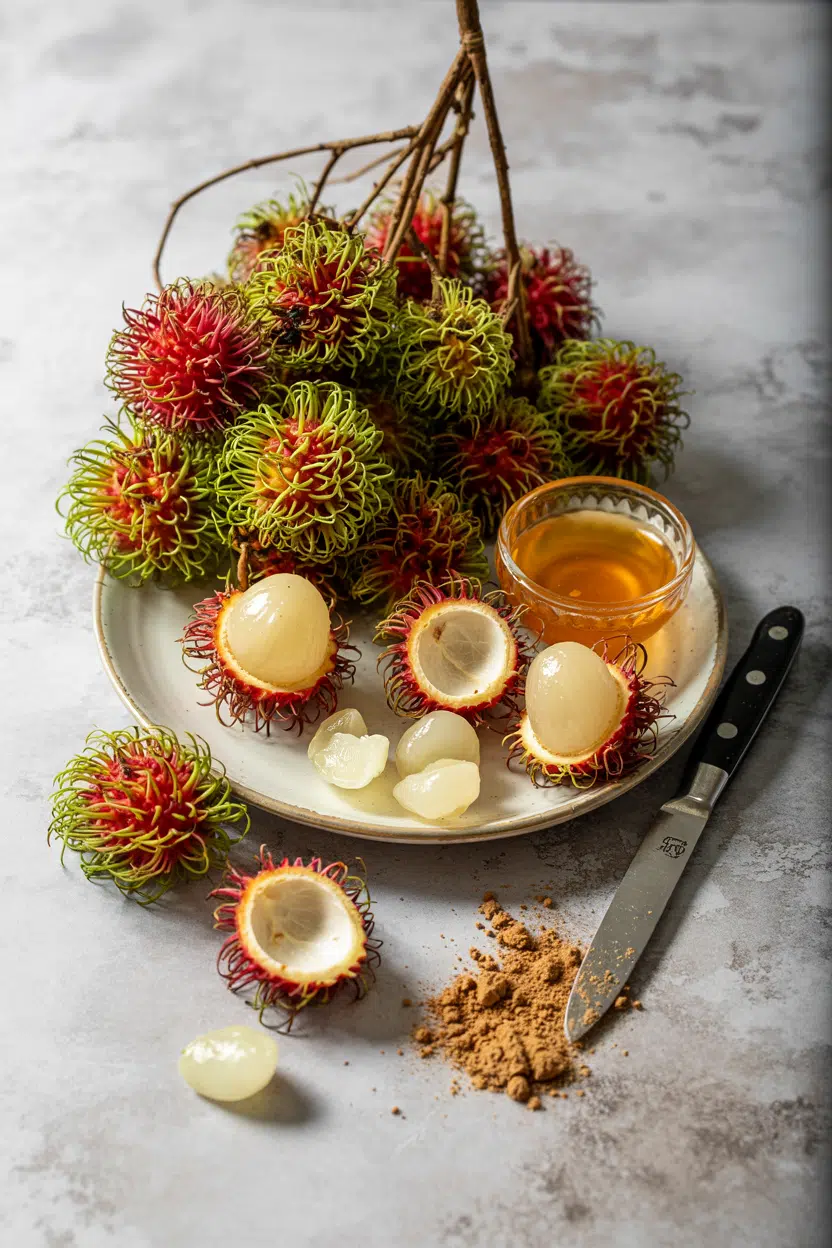
You spot rambutan at an Asian grocery and pause - the fruit looks almost fictional, a red globe bristling with soft rubbery spines like something designed by a special effects crew.
What Does Rambutan Taste Like

Peel back the leathery shell, though, and you'll find clean, translucent flesh that works in fruit salads, sorbets, and sweet-sour sauces with equal ease.

If you're already comfortable making retro ambrosia fruit salad at home, rambutan slots in naturally as a more tropical alternative to the usual canned fruit.

Acidic citrus pairings are central to how this fruit is used - if you're ever short on calamansi, the guide to swapping out calamansi covers your options.

QUICK SUMMARY

Rambutan is a tropical Southeast Asian fruit with juicy, translucent flesh and a mildly sweet, floral flavor. Eat it fresh, macerate it with citrus for drinks, or simmer it in syrup for desserts. Refrigerate whole and peel just before eating to keep its aroma intact.

👅Flavor: Mildly sweet, floral, with a light creamy-citrus finish
🍽️Best Uses: Fresh snacking, sorbets, sauces, coconut milk desserts
🌏Cuisines: Malaysian, Indonesian, Thai, Filipino, Vietnamese
❄️Shelf Life: Whole: up to 7 days refrigerated; puree: 3 months frozen
⚠️Note: Single inedible seed must be discarded before eating

What Is Rambutan?

Rambutan (Nephelium lappaceum) is a tropical fruit native to the Malay Archipelago and widely grown across Southeast Asia, including Malaysia, Indonesia, Thailand, and the Philippines.

It belongs to the Sapindaceae family, which puts it in the same botanical neighborhood as lychee and longan - both close relatives in flavor and structure.

The fruit is small and round, roughly the size of a golf ball. Its most distinctive feature is the leathery outer shell covered in soft, hair-like spines, which is exactly what the name signals: rambut means "hair" in Malay.

Inside, the edible portion is the translucent white pulp that clings around a single glossy brown seed. You may also see it called buah rambutan in Malay or rambután in Spanish-speaking markets.

Two main color forms exist in commerce:

  • 🔴 Red rambutan - the most common type; bright crimson shell, widely available fresh and canned
  • 🟡 Yellow rambutan - milder and slightly less sweet; found more often at specialty markets and farm stalls in Southeast Asia

Canned rambutan in syrup is the easiest form to find outside Southeast Asia, though fresh fruit appears seasonally at Asian groceries year-round.

What Does Rambutan Taste Like?
rambutan - What Does Rambutan Taste Like

Rambutan flesh is mildly sweet with a light floral note and a finish that leans creamy and citrusy rather than sharply tangy.

The sweetness is gentle - think of a grape that's been softened by a faint perfume and a squeeze of something bright.

The closest comparison is lychee, though rambutan is noticeably less intensely floral and more subtly creamy.

The lychee fruit taste explained in detail, but the short version is that lychee hits harder on the rose-water note where rambutan stays quieter and rounder.

Sensory SnapshotModerate Intensity
👅 Flavor
mildly sweetfloralcreamy-citrus
✋ Texture
juicyfirm-suppleslippery
👃 Aroma
lightly floralfreshslightly perfumed

Heat dulls rambutan's floral character quickly. Short cooking in syrup preserves sweetness while softening the flesh; anything longer strips out the delicate fragrance that makes it worth using.

How to Use Rambutan

Fresh rambutan needs no preparation beyond peeling and removing the seed. That makes it a natural fit for fruit platters, chilled desserts, and anything where you want clean tropical flavor without cooking. Indonesian es buah - a cold fruit and coconut milk drink - uses rambutan alongside jackfruit and grass jelly for a sweet, cooling effect.

Watch Out
Avoid adding rambutan to long slow braises or milky stews. Prolonged heat destroys its floral notes, and its mild acidity can curdle dairy-based sauces.
How Rambutan Is Used
MethodBest ForTip
🥗 RawSnacking, fruit salads, garnish for cevichePeel just before serving to preserve juice and aroma
🍳 MaceratedCocktails, mocktails, lime-sugar syrupsLet sit 20-30 minutes with lime and sugar; don't over-macerate or flesh turns mushy
🫕 SimmeredFruit syrup, minatamis-style candied rambutan, chutneysKeep to a short simmer (5-8 minutes) to retain floral flavor
🧊 Pureed/FrozenSorbets, sherbets, frozen dessertsFreeze puree in flat layers; thaws faster and blends more evenly

Rambutan pairs especially well with coconut milk, lime, chili, and ginger - the flavor profile common across Malaysian and Thai preparations.

A simple sweet-sour sauce with rambutan, ginger, and rice vinegar works well spooned over roasted pork or grilled prawns.

Coconut milk desserts like panna cotta benefit from rambutan's light acidity cutting through the richness - though if you're working with extra coconut milk, the guide to freezing coconut milk will help you avoid waste.

Try It In
🍗Air Fryer Chili-Lime Chicken WingsRambutan's citrus-sweet notes balance the chili-lime glaze→🍗Air Fryer Chili-Lime Chicken TendersAdd fresh rambutan alongside for a tropical contrast→🥦Air Fryer Chili-Lime CauliflowerMacerated rambutan makes a bright finishing sauce→

How to Buy and Store Rambutan

Fresh rambutan signals quality through its spines. Flexible, vividly colored hairs mean the fruit was recently harvested; dry, brown, or brittle spines indicate age. Pass on anything with blackened tips, large soft spots, or visible seeping liquid.

Golden Rule
Don't peel rambutan until you're ready to eat it. The shell acts as a protective barrier - once removed, the flesh loses juice and floral fragrance within hours.

For storage, keep whole rambutans unwashed in a breathable bag in the fridge. Sealed plastic traps moisture and accelerates mold.

Peeled flesh keeps for one to two days refrigerated but fades fast. For longer storage, puree the flesh and freeze it flat in bags.

  • Whole, refrigerated - 3 to 7 days depending on freshness at purchase
  • Peeled flesh, refrigerated - 1 to 2 days maximum
  • Pureed, frozen - up to 3 months with minimal flavor loss

Canned rambutan in syrup keeps unopened for over a year and is a reliable off-season option - rinse before using to reduce sweetness.

Where to Start With Rambutan

New to this fruit? Eat it fresh first. Peel one, remove the seed, and taste the flesh as-is before building any recipe around it.

That baseline tells you how sweet and floral your batch is, which matters when you're balancing it with lime, chili, or coconut milk.

Best Pick
Fresh red rambutan in peak season offers the best flavor. If fresh isn't available, canned rambutan in light syrup is the next best option for most recipes.

From there, maceration with lime and sugar is the lowest-effort way to build real flavor. Use that syrupy result in cocktails, spoon it over vanilla ice cream, or stir it into a coconut panna cotta.

Once you're comfortable with those applications, the step up to sweet-sour sauces and sorbets is a short one.

Frequently Asked Questions

Is rambutan the same as lychee?

No, though both belong to the Sapindaceae family and share a similar structure. Lychee has a more intense floral flavor; rambutan is milder, creamier, and slightly less sweet. The outer skin is completely different - rambutan has soft spines, lychee has a rough, bumpy shell.

Can you eat the rambutan seed?

No. The raw seed contains compounds that are mildly toxic and should be discarded. Some traditional preparations roast or boil the seed to neutralize these compounds, but for everyday eating, remove and discard it.

How do you eat rambutan step by step?

Score the skin around the middle with a knife and twist the two halves apart. Pull away the shell, then pop the flesh into your mouth and work around the seed - or cut the flesh away from the seed before serving.

How long does rambutan last in the fridge?

Whole, unpeeled rambutan lasts 3 to 7 days refrigerated in a breathable bag. Peeled flesh deteriorates quickly - use within 1 to 2 days. Pureed rambutan frozen in an airtight bag holds for up to 3 months.

Is canned rambutan as good as fresh?

Not quite. Canned rambutan in syrup loses most of its floral aroma during processing and tastes notably sweeter. It works fine in cooked desserts and sauces, however fresh rambutan is far better for raw applications where fragrance matters.

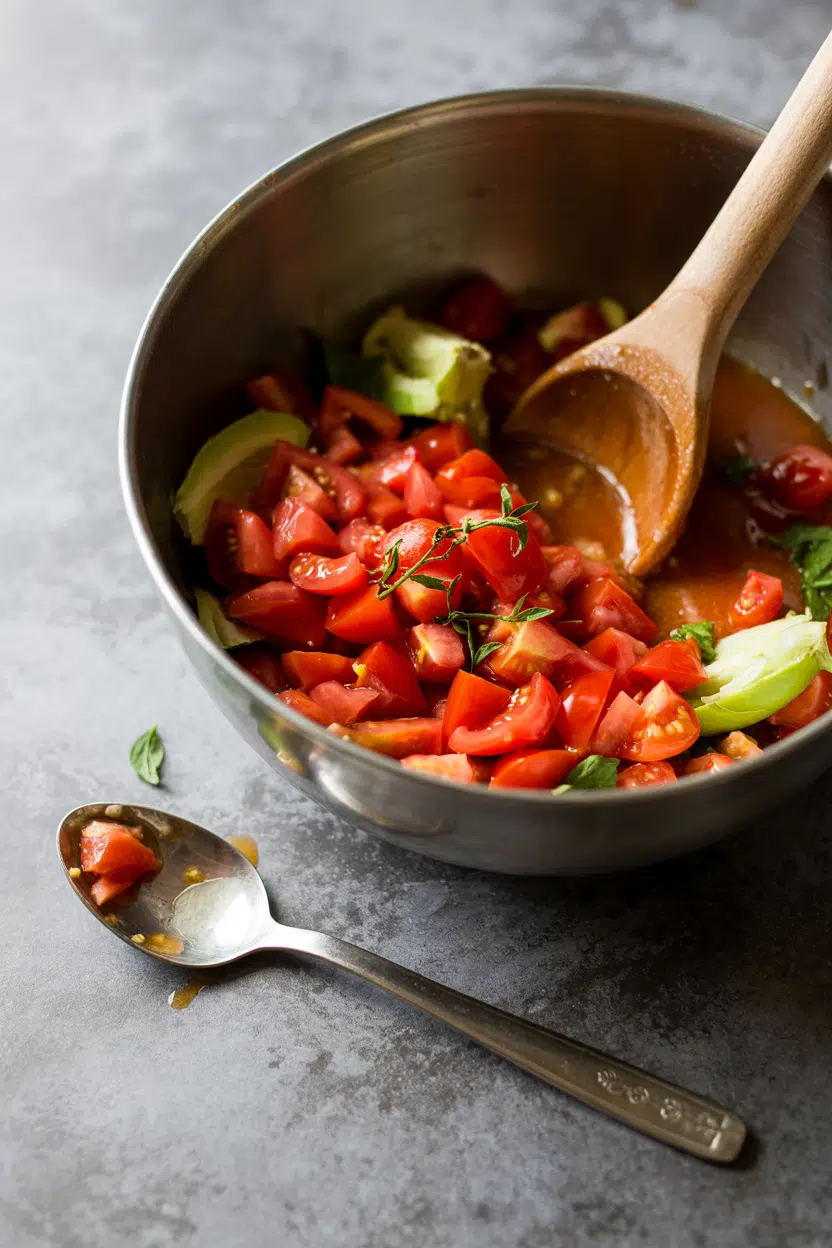
What Is a Plum Tomato? Taste, Uses & More for Sauces

April 1, 2026

Bite into a ripe plum tomato and you notice the difference immediately - firm flesh, low juice, and a clean, concentrated tomato flavor that slicing varieties can't match.

What Is Plum Tomato

That density is exactly why cooks reach for them when building a sauce that needs to cling rather than pool.

If you've ever wondered why your homemade marinara turns watery, switching to plum tomatoes is usually the fix.

For times when fresh aren't available, knowing your alternatives to canned tomato saves the recipe.

QUICK SUMMARY

The plum tomato is a small, oval paste variety prized for its thick, meaty flesh and low seed count. It delivers concentrated, tangy-sweet flavor with clean umami - ideal for sauces, roasting, and canning. Fresh ones last up to a week; canned versions work year-round.

🍅Also Called: Roma tomato, paste tomato, prune tomato
👅Flavor: Tangy, mildly sweet, clean umami - concentrated and low-acid
🍳Best For: Marinara, passata, roasting, tomato paste, salsa
🛒Buy: Firm, taut skin, heavy for size - no soft spots or splits
⏱️Shelf Life: 3-7 days fresh; ripe ones keep 2-3 days refrigerated

What Is Plum Tomato?

Plum tomatoes are a paste variety - bred specifically for dense flesh, few seeds, and low moisture rather than the juicy eating qualities of slicing types.

They originated in Central and South America, where tomatoes were first domesticated, and were later refined in Italy into varieties prized for processing.

The most recognized names are Roma tomato and plum roma, though canned San Marzano tomatoes - a prized Italian cultivar - also belong to this category. "Paste tomato" and "prune tomato" are older trade names you'll still see at farmers' markets.

Supermarkets typically stock Roma-type plums year-round.

What separates them from round slicing tomatoes is structure. The flesh-to-seed ratio runs much higher, with thick walls of tomato solids and relatively small, dry seed cavities.

  • 🍅 Shape - Oval, egg-sized, typically 2-3 inches long
  • 🌱 Origin - Mesoamerica; commercially refined in Italy
  • 📦 Varieties - Roma, San Marzano, Amish Paste, Viva Italia
  • 🥫 Canned form - Sold whole peeled, crushed, or as crushed tomato pulp

What Does Plum Tomato Taste Like?

plum tomato - What Is Plum Tomato

Fresh plum tomatoes taste like a concentrated, cleaner version of a standard slicing tomato. The flavor sits in tangy-acidic territory with a mild sweetness underneath and a savory, umami finish that becomes more pronounced as the tomato ripens.

Sensory SnapshotModerate Intensity
👅 Flavor
tangy-acidicmild sweetnessclean umamislightly savory
✋ Texture
firmmeatylow moisture
👃 Aroma
bright tomato-scentherbaceous undertone

Heat changes the profile noticeably. Roasting caramelizes the natural sugars and deepens the color to brick-red, while long simmering drives off moisture and pushes the umami forward.

Raw, the flesh is firmer and more muted than a beefsteak - closer to canned San Marzano tomatoes in flavor, but brighter and less processed-tasting.

Golden Rule
Taste one before you cook. An underripe plum tomato leans sour and flat; a properly ripe one gives you that balanced tang-sweet flavor that makes a sauce taste built - not corrected.

How to Use Plum Tomato

Plum tomatoes are built for heat and reduction. Their low water content means they break down into thick, clingy sauces without the long evaporation time that juicy slicing tomatoes require.

How Plum Tomatoes Are Used
MethodBest ForTip
🔥 SimmeringMarinara, passata, ragù, chiliSkip the lid - open pot reduces faster
🌡️ RoastingConcentrated purée, bruschetta toppingHalve cut-side up; [roasting rack stand-ins](https://forkliftkitchen.com/roasting-rack-substitutes/) work fine on a sheet pan
🥗 Raw/ChoppedSalsa, panzanella, fresh bruschettaSalt and drain briefly to sharpen flavor
🫙 Blanching & CanningWhole peeled tomatoes, winter passataScore an X, blanch 30 seconds, ice bath peels cleanly
⚡ Pressure CookingFast thick sauces, tomato paste baseNo added water needed - flesh provides enough liquid

Pairing them with olive oil, garlic, and basil is the classic Italian approach - the fat carries the tomato's fat-soluble lycopene and rounds out the acidity. Anchovies, parmesan rinds, and crushed red pepper all amplify the umami without masking the tomato.

In Mexican cooking, plum tomatoes give salsa and stewed dishes firmer, less watery texture than round tomatoes would.

For slow-cooked meat dishes, the solids from plum tomatoes give beef in cooking - particularly braises and ragùs - a sauce body that holds up over hours without turning thin.

Basil is the natural finishing herb; knowing how long basil keeps helps you plan so you're not reaching for wilted leaves at the end of a long simmer.

Try It In
🍞Tomato Basil Italian BruschettaFirm plum tomato holds its shape on toasted bread→🍳One-Pan Tomato Shakshuka with EggsThick plum tomato sauce cradles eggs without watering down→🥗Tuscan Tomato Panzanella SaladMeaty flesh stays intact even after tossing with bread→

How to Buy and Store Plum Tomato

Good plum tomatoes feel dense and heavy for their size - that weight signals the thick tomato solids you're buying them for.

Look for even red-to-deep-pink coloring, taut unbroken skin, and a stem end that isn't shriveled or sunken.

Soft spots, splits, or mealy patches mean the flesh has started breaking down and won't give you a clean, firm sauce base.

Watch Out
Don't refrigerate unripe plum tomatoes - cold halts ripening permanently and turns the flesh grainy. Leave them stem-side down at room temperature until fully ripe, then refrigerate only if you can't use them within 48 hours.

Storage follows a two-step rule: room temperature first, refrigerator second.

  • Unripe or firm - Counter at room temp, 1-3 days until ripe
  • Ripe and ready - Use within 48 hours, or refrigerate up to 2-3 days
  • Before cooking - Return refrigerated tomatoes to room temp first; cold suppresses aroma
  • Spoilage signals - Soft, sunken flesh, mold near stem, or fermented smell; see a full list of plum tomato spoilage signs before using questionable ones

Start With Plum Tomatoes If You Want Real Sauce

If your goal is a sauce that reduces quickly and clings, plum tomatoes are the right starting point - not cherry tomatoes, not beefsteaks.

They're also the most forgiving for first-time canners, since the low moisture reduces processing time.

When fresh ones aren't available, knowing your plum tomato swaps that work keeps a recipe on track.

Most dishes that call for them also use olive oil; if you've run out, there are solid replacements for olive oil that won't wreck a sauce.

Shortcut
No time to roast? Halve plum tomatoes, squeeze out any seeds, and simmer cut-side down in olive oil for 10 minutes. You'll get most of the concentrated flavor in a fraction of the oven time.

Frequently Asked Questions

Are plum tomatoes the same as Roma tomatoes?

Roma is the most common commercial variety of plum tomato, so the names are often used interchangeably in stores. Technically, "plum tomato" covers the broader category - Roma, San Marzano, and Amish Paste all qualify.

Can I substitute plum tomatoes for canned tomatoes?

Yes - roughly 1.5 lbs of fresh plum tomatoes replaces one 14-oz can of whole peeled tomatoes. Blanch and peel them first, then crush by hand. Add a small pinch of salt to compensate for the brine missing from canned.

How many plum tomatoes make a pound?

Typically 4-6 medium Roma-type plum tomatoes weigh one pound. Smaller varieties run closer to 6-8. Weight varies with moisture content, so dense, ripe ones will be heavier than underripe ones of the same size.

Do plum tomatoes have more solids than slicing tomatoes?

Yes, significantly. Plum tomatoes have thicker walls and smaller seed cavities, so tomato solids make up a higher percentage of total weight. That's why sauce made from them reduces faster and clings better than sauce from beefsteak or globe tomatoes.

When are plum tomatoes in season?

Peak season runs late July through September in most of North America and Europe. That's the best window for canning or making passata. Supermarket Roma tomatoes are available year-round from greenhouse or southern-hemisphere growing operations.

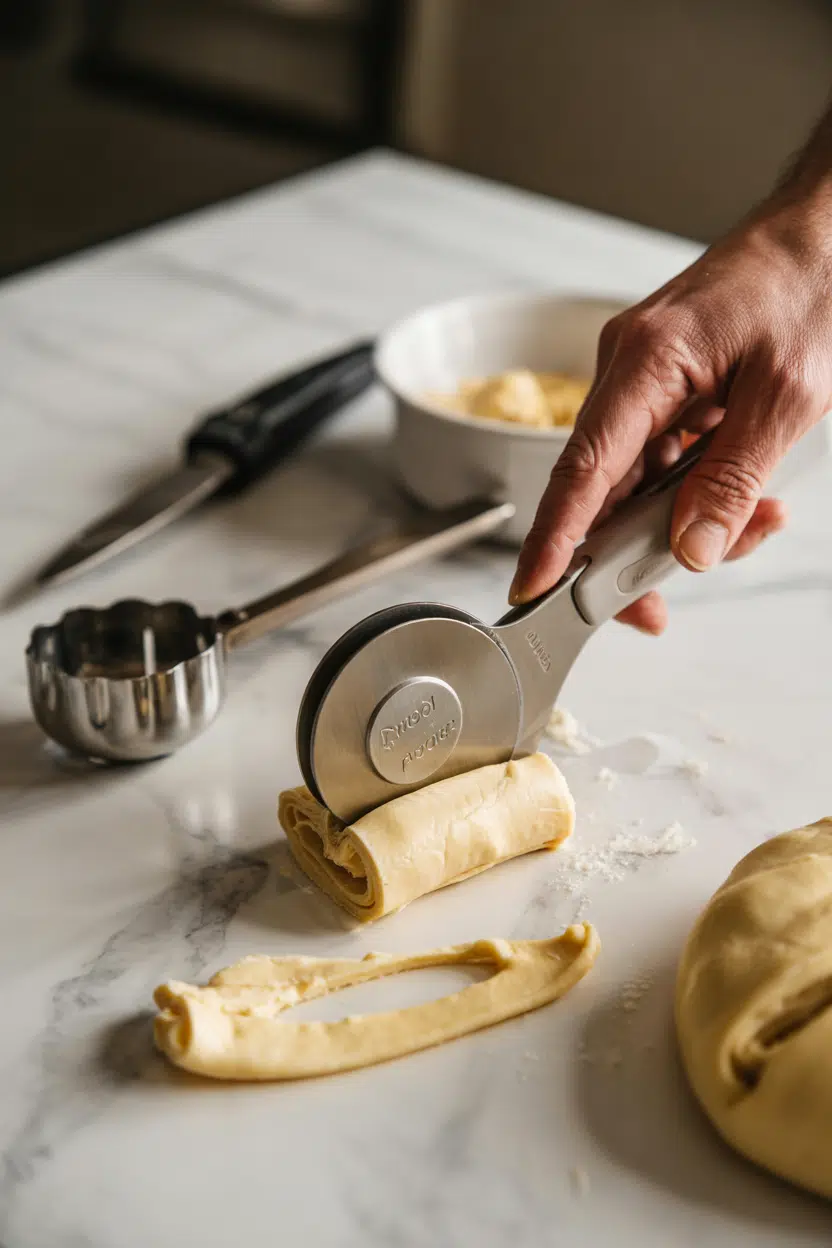
What Is Pastry Cutter? [Taste, Uses & More]

April 1, 2026

Most people assume a pastry cutter is optional - that cold fingers or a fork will do the same job just as well.

What Is Pastry Cutter

They're not entirely wrong, but they're missing what the tool actually controls: the size and distribution of fat pieces inside the dough, which directly determines whether a pie crust shatters into flaky layers or bakes into a dense, chewy disc.

Like a rolling pin and its flavor profile, a pastry cutter brings no taste of its own - and unlike a what makes food processor distinct from manual tools, it keeps heat out of the equation.

Understanding why that matters changes how you approach every pastry you make.

QUICK SUMMARY

A pastry cutter is a handheld metal tool that cuts cold fat into flour for flaky pastry. It contributes no flavor to dough - its value is entirely structural, controlling fat-piece size for pie crusts, biscuits, and scones.

🍽️Category: Kitchen tool - dough blender, not food
🧈Primary Use: Cutting cold butter or shortening into flour
🥧Best For: Pie crusts, biscuit dough, scones, shortcrust
⏳Shelf Life: Indefinite (stainless steel); handles wear in 2-5 years
🌡️Key Rule: Always use with cold fat and chilled ingredients to preserve flakiness

What Is a Pastry Cutter?

A pastry cutter - also called a pastry blender or dough cutter - is a handheld baking tool built from a rigid handle attached to a row of parallel metal blades or curved wires.

Its entire job is mechanical: press it down through cold fat and flour, rock it forward, repeat until the butter or shortening breaks into roughly pea-sized pieces coated in flour.

The tool sits firmly in European baking tradition, where French tart doughs and British shortcrusts demanded a method for incorporating fat without warming it.

American bakers adopted it for pie crusts and biscuit dough, where fat distribution is what separates a flaky result from a tough one.

Two main styles exist:

  • 🔧 Multi-blade style - rigid stainless-steel blades in parallel; cuts through firm cold butter efficiently and holds its shape under pressure
  • 🌀 Wire loop style - flexible looped wires; gentler on softer fats like shortening, though blades can bend over time

Both styles are also called a pastry masher in some older recipe books. Neither adds flavor - the ingredient is metal, not food.

What Does a Pastry Cutter Taste Like?

pastry cutter - What Is Pastry Cutter

This is a tool, not a food, so the flavor answer is straightforward: it has none. A pastry cutter contributes nothing to the taste of dough - no fat, no salt, no sweetness.

A new tool may carry a faint metallic or manufacturing-oil scent fresh out of packaging. Rinse and dry it before first use, and that fades completely.

Sensory SnapshotNeutral - Tool Only
👅 Flavor
nonemetallic if new
✋ Texture
rigidcreates pea-sized fat pieces
👃 Aroma
neutralfaint metal when new

What the tool shapes absolutely changes how the finished pastry tastes in texture terms. Properly cut-in cold unsalted butter produces visible steam pockets during baking - that's flakiness.

Overworked fat, whether from warm hands or too many passes with the cutter, melts into the flour and produces density instead.

How to Use a Pastry Cutter

Start cold. That's the rule the tool is built around.

Chill your butter, your flour, even your mixing bowl if your kitchen runs warm. The pastry cutter works by keeping solid fat intact long enough to coat in flour before it hits the oven.

Golden Rule
Cold fat is non-negotiable. If butter softens mid-session, return the bowl to the fridge for 10 minutes before continuing - don't rush through warm fat.

The standard technique is a press-and-rock motion: grip the handle, push the blades straight down through the fat-flour mixture, then rock slightly forward and lift. Rotate the bowl a quarter turn and repeat.

Stop when the largest pieces are roughly pea-sized, with some sand-textured smaller bits throughout - that contrast in fat-piece sizes creates layering.

How a Pastry Cutter Is Used
MethodBest ForTip
🥧 Cutting-InPie crusts, shortcrust tart basesStop at pea-sized pieces; do not overwork
🧇 Biscuit BlendingFlaky biscuits with shortening or lardWork faster - biscuit dough tolerates less handling
🫐 Scone MixingBritish-style scones, cream sconesCube butter small (1 cm) before starting
🍓 Fruit MashingCooked fruit fillings, rough mashingUse only on soft, fully cooked fruit

Cuisines that rely on this method span French tart dough, British shortcrusts and scones, American pie crusts, and Scandinavian buttery tart bases.

The pastry cutter fits anywhere cold fat and flour meet - if you're working with replacements for shortening in biscuit dough, the technique stays the same regardless of which fat you choose.

Similarly, exploring alternatives to butter can point you toward fats with different melting points that affect how aggressively you need to cut.

Try It In
🍹Passion Fruit Iced TeaA chilled drink to keep nearby while your pastry dough rests→☕Passion Fruit Cold Brew CoffeeSomething cold to sip during the fridge rest between dough stages→

How to Buy and Store a Pastry Cutter

Stainless-steel multi-blade cutters hold up best over time. Look for tight rivets where blades meet the handle - any wobble there means the tool will flex under pressure and cut unevenly. A gap between blade and handle traps dough and is nearly impossible to clean properly. Brushed stainless finishes resist sharp burrs better than polished versions.

Watch Out
Avoid cutters where blades are glued rather than riveted to the handle. Adhesive joints fail under repeated pressure and washing.

Handle material matters for longevity. Wood looks appealing but absorbs moisture and can crack.

Molded non-slip plastic or rubber grips are more practical for repeated use and dishwasher cycles.

For storage, keep the tool dry - moisture corrodes blade joints even on stainless steel.

The basics of keeping ingredients fresh apply to tools too: knowing how long flour keeps before it goes stale is as useful as knowing your pastry cutter stays usable indefinitely when stored right.

Blade life is essentially permanent on quality stainless steel; plastic or wood handles wear within 2-5 years under heavy use.

On the ingredient side, always check for butter spoilage signs before cutting it in - rancid butter ruins dough regardless of technique.

Where to Start With a Pastry Cutter

Skip the wire-loop style on your first purchase.

A rigid multi-blade cutter handles cold butter more reliably, and cold butter is what you'll use most.

Start with a simple all-butter pie crust: 2.5 cups flour, 1 cup cold butter cubed, ice water added tablespoon by tablespoon.

Cut until pea-sized.

That one exercise will show you exactly what the tool does that hands and forks cannot.

If you're working without one for now, the guide to replacements for pastry cutter covers the best hand methods and tool swaps.

For long-term care, notes on freezing pastry cutter environments and moisture damage are worth a read before you store it.

Shortcut
If your dough gets warm mid-session, freeze the whole bowl for 5 minutes - don't keep cutting. Cold dough is recoverable; overworked dough isn't.

Frequently Asked Questions

What is a pastry cutter used for?

It cuts cold fat - butter, shortening, or lard - into flour without warming it. The goal is pea-sized fat pieces that create steam pockets during baking, which produce flaky layers in pie crusts, biscuits, and scones.

Does a pastry cutter change the taste of dough?

No - the tool is metal and contributes zero flavor. It does affect texture, which registers as flakiness or tenderness when you eat the finished pastry.

Pastry cutter vs. food processor for pie crust - which is better?

A food processor is faster but harder to control - it can overprocess fat in seconds. A pastry cutter is slower and gives you direct feedback on fat-piece size, which most bakers find produces more consistently flaky results.

Can you use a fork instead of a pastry cutter?

Yes, though a fork is less efficient and harder to control at depth. It works for small batches of scone or biscuit dough, but transferring more heat from your hand into the fat is a real risk.

How do you clean a pastry cutter properly?

Rinse immediately after use - dried dough between blades is difficult to remove. A thin brush or toothpick clears trapped bits; dry thoroughly before storing to prevent blade-joint corrosion.

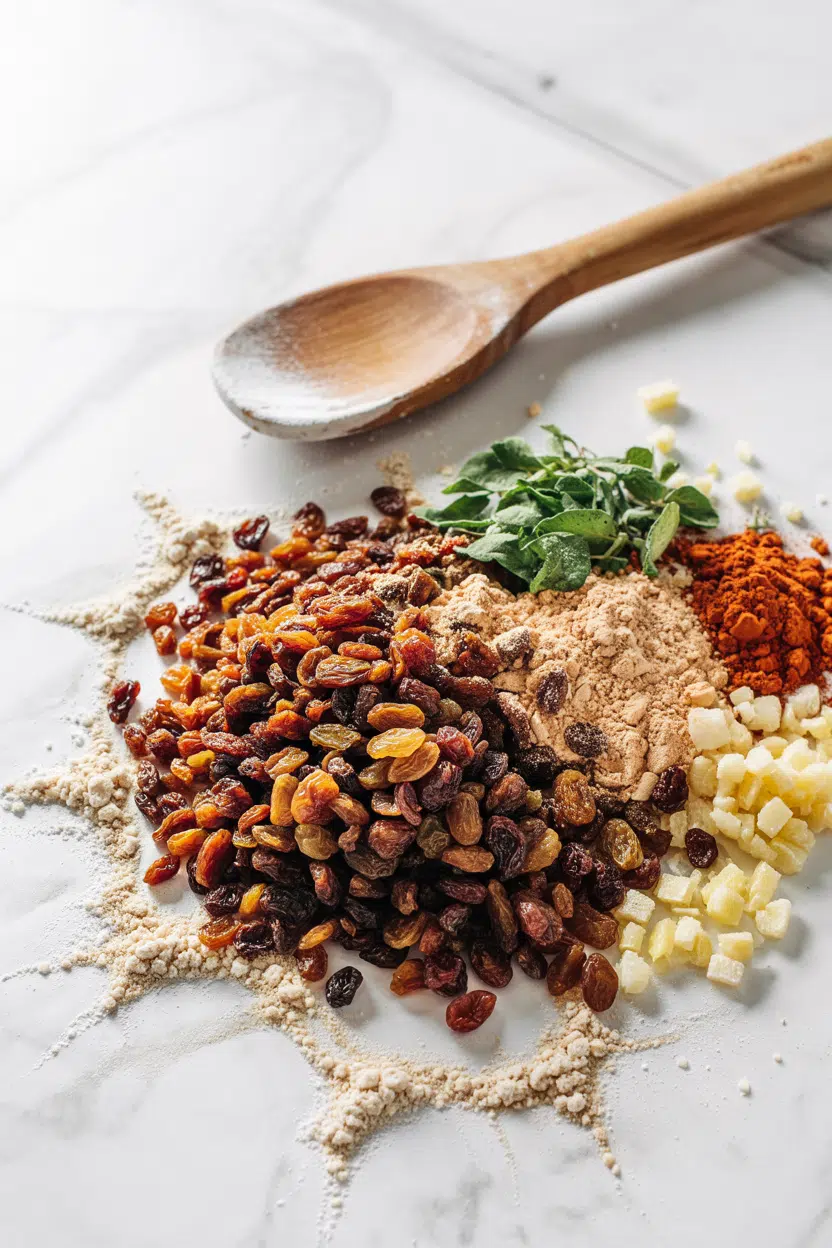
What Is Raisins? [Taste, Uses & More]

April 1, 2026

Raisins do one thing no fresh fruit can: concentrate weeks of sweetness into a single, chewy bite. That depth of caramelized grape sugar is what makes them so useful in both sweet and savory cooking - not as a garnish, but as a structural flavor element.

What Is Raisins

A handful stirred into pilaf or folded into cookie dough changes the texture and flavor profile in a way that fresh or dried alternatives simply can't replicate.

QUICK SUMMARY

Raisins are dried grapes with concentrated sweetness, a chewy texture, and mild acidity. They work across baking, grain dishes, and slow-cooked savory recipes. Varieties include dark Thompson seedless, golden sultanas, and tiny Zante currants. Stored properly, they last up to a year or more.

👅Flavor: Concentrated sweet, caramelized grape, light tangy undercurrent
✋Texture: Chewy, slightly sticky, can turn leathery when dry
🍽️Best Uses: Baked goods, pilafs, tagines, chutneys, salads
🧅Pairs With: Cinnamon, walnuts, sharp cheddar, orange zest, lamb
🗓️Shelf Life: Up to 6-12 months refrigerated, 12+ months frozen
🌍Origin: Mediterranean and Near East, now grown worldwide

What Are Raisins?

Raisins are grapes dried either in the sun or through mechanical dehydration, a process that removes most of their water content and concentrates both sugar and flavor.

They originated in the Mediterranean and Near East, where sun-drying grapes on drying trays was common practice thousands of years ago.

The most widely sold variety in the US is the Thompson seedless raisin -

dark brown, moderately sweet, and made from the Thompson Seedless grape. Sultanas are a close relative, typically lighter in color and slightly tangier, often treated with a drying agent to speed the process and preserve their golden hue.

A few key types worth knowing:

  • Thompson seedless (standard dark raisin) - The most common; deep brown with a rich, sweet flavor and chewy bite.
  • Golden raisins (sultanas) - Treated with sulfur dioxide before drying; lighter in color, softer, and slightly more tart.
  • Zante currants - Tiny dried Black Corinth grapes, not true currants at all; more intense flavor in a smaller package.
  • Muscat raisins - Made from Muscat grapes; larger, floral, and often sold on the stem for eating.

What Do Raisins Taste Like?

raisins - What Is Raisins

Raisins taste like concentrated grape jam pushed toward caramel - with none of the bright freshness of the original fruit.

The drying process converts much of the fructose and glucose into deeper, almost prune-like sweetness, with a mild tangy undercurrent that keeps them from tasting flat.

Sensory SnapshotModerate Intensity
👅 Flavor
concentrated sweetcaramelized grapelight plummild tang
✋ Texture
chewystickyslightly leathery
👃 Aroma
warm carameldried fruitfaint ferment

Golden raisins and sultanas lean more noticeably acidic - closer to a dried apricot than a dried plum. Heat amplifies their sweetness further, which is why rehydrated raisins in a sauce taste richer than raw ones from the bag.

Golden Rule
Soak raisins in warm liquid before adding them to cooked sauces or grain dishes. They'll plump, soften, and release sweetness more evenly than dry raisins dropped straight into the pan.

How to Use Raisins

Raisins earn their place in a recipe by adding concentrated sweetness and chew - two textural and flavor notes that punch above their volume. They work raw, soaked, or baked, each method shifting how much sweetness they release and how they sit against other ingredients.

How Raisins Are Used
MethodBest ForTip
🥗 RawCereals, muesli, salads, trail mixToss with sharp cheese or citrus to balance sweetness
🍞 BakedRaisin bread, scones, oatmeal cookies, cinnamon loavesCoat in a little flour first to prevent sinking in batter
🍲 Soaked/StewedChutneys, compotes, tagines, pilafsSoak in hot water, tea, or port for 10-15 minutes before adding
✨ GarnishCouscous, rice dishes, roasted vegetablesAdd at the end to preserve chew and visual contrast

In Middle Eastern and Moroccan cooking, raisins are a standard ingredient in lamb tagines and couscous, pairing their sweetness against savory meat and warm spices like cumin and cinnamon.

British baking uses them heavily - spotted dick, hot cross buns, and tea cakes all rely on raisins for moisture and flavor pockets inside enriched doughs.

Raisins pair well with walnuts and pecans, cinnamon and allspice, orange zest, sharp cheddar or blue cheese, and slow-cooked lamb or chicken. They also work in wine-based pan sauces, where they plump and dissolve slightly into the reduction.

Try It In
🧀Blue Cheese Dressing (Homemade)Pair with raisins and walnuts in a salad for sharp-sweet contrast→🌰Cinnamon Sugar Roasted NutsMix in raisins after roasting for a classic trail mix base→🥗Roasted Sweet Potato and Black Bean SaladScattered raisins add a pop of sweetness against smoky roasted flavors→

How to Buy and Store Raisins

Plump and glossy is what you're looking for at the store. Raisins should feel soft when pressed through the bag and carry a clean, sweet smell - a musty or fermented aroma signals age or poor storage. White sugar bloom on the surface is harmless but indicates they've been exposed to temperature swings.

Watch Out
A white powdery coating on raisins is sugar crystallization - not mold. It's safe to eat, but the texture will be grittier. Soaking them in warm water will dissolve the crystals and restore softness.

Store opened raisins in an airtight container, away from heat and direct light. Refrigeration keeps them soft and extends shelf life significantly; for long-term storage, freeze in sealed bags.

Knowing the raisins storage life matters more than most people expect, since improperly stored raisins harden well before they spoil.

  • Pantry (unopened): Several months; check the best-by date.
  • Refrigerated (opened): Up to 6-12 months in an airtight container.
  • Frozen: 12+ months with no significant quality loss.

Start Here With Raisins

New to cooking with raisins? Baked goods are the lowest-risk entry point. Fold them into oatmeal cookie dough or a cinnamon loaf and you'll immediately understand how they function - sweet pockets that hold moisture and interrupt an otherwise uniform crumb.

Once that clicks, try them soaked and stirred into a grain dish with lamb or chicken. That's where raisins show their range: not just a baking ingredient, but a genuine sweet-savory tool that works across cuisines.

Frequently Asked Questions

What is the difference between sultanas and raisins?

Both are dried grapes, however sultanas come specifically from seedless white grapes and are typically treated with an oil-based solution before drying to keep them lighter and softer. Standard dark raisins are usually sun-dried without that treatment, producing a chewier, deeper-flavored result.

Why are some raisins golden?

Golden raisins are treated with sulfur dioxide before drying, which prevents the browning reaction that darkens standard raisins. The result is a lighter color, softer texture, and slightly more tart flavor compared to dark raisins.

How do you soften hard raisins?

Soak them in hot water, tea, juice, or liquor for 10-15 minutes. For faster results, microwave them in a small dish of water for 30-45 seconds, then let them sit covered for a few minutes.

Can you freeze raisins?

Yes - raisins freeze well for 12 months or more with no meaningful quality loss. Seal them in a freezer-safe bag, press out the air, and they'll thaw at room temperature within 30 minutes.

Are raisins healthy?

They provide fiber, potassium, and plant-sourced iron, making them a reasonable addition to most diets. The concentrated natural sugars are high relative to portion size, so people managing blood sugar should keep servings small - around a small handful.

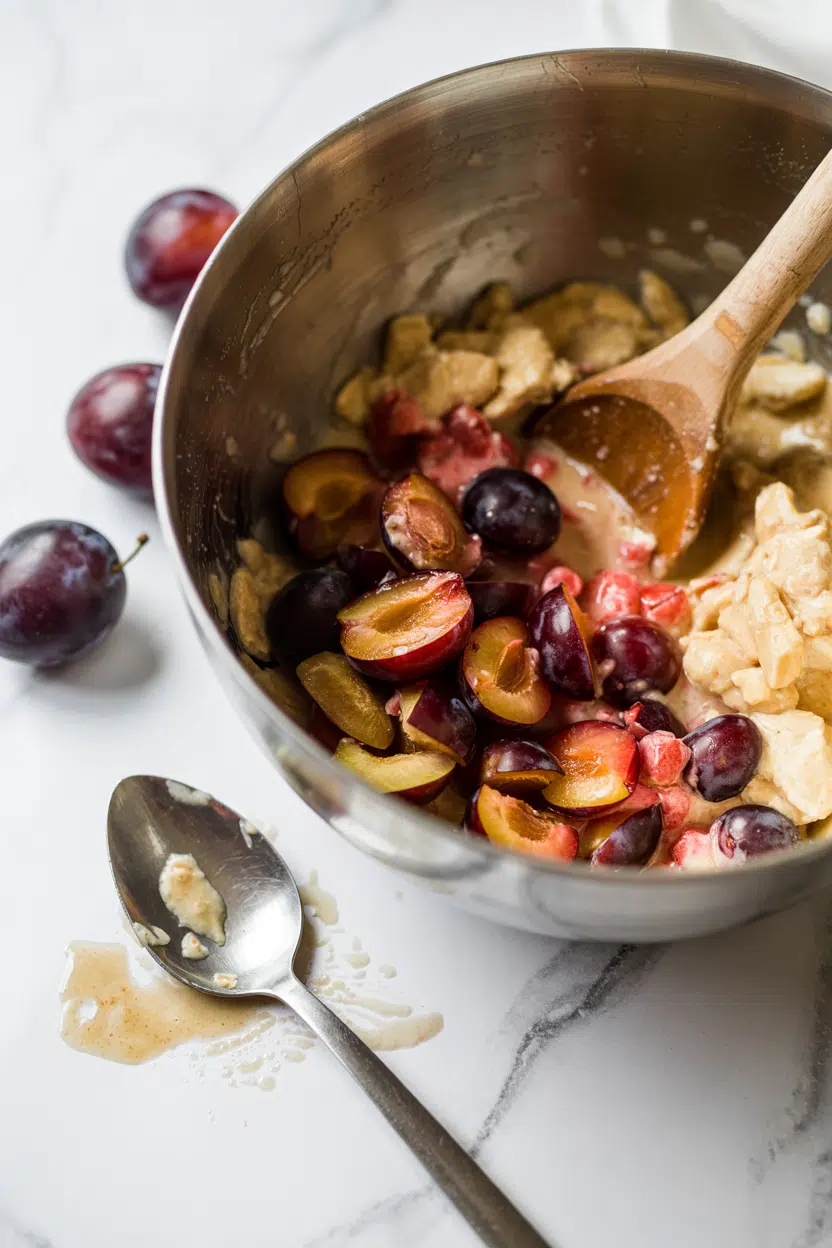
What Is Plum? [Taste, Uses & More]

April 1, 2026

Plum does something in the kitchen that most fruit can't - it crosses between dessert and main course without losing credibility.

What Is Plum

Ripe, it brings stone-fruit sweetness with enough acidity to balance rich meats; cooked down, it becomes the kind of jammy, concentrated base that anchors glazes, tarts, and compotes.

If you're already familiar with swapping out apricot in recipes, plum offers a darker, more tannic alternative worth having in your rotation.

QUICK SUMMARY

Plum is a stone fruit with sweet-tart flesh that shifts from bright and acidic when underripe to rich and jammy when cooked or fully ripe. It works raw in salads, roasted with meat, or preserved as jam and sauce.

🍑Flavor: Sweet with tangy acidity; jammy and deep when cooked
🍽️Best Uses: Tarts, compotes, plum sauce, roasted with pork or duck
🌍Cuisines: Chinese, Japanese, Central European, Mediterranean
❄️Shelf Life: Ripe fruit keeps 3-7 days refrigerated; unripe ripens in 2-7 days
🛒Buy When: Skin is smooth, fruit gives slightly to pressure, aroma is fragrant near stem

What Is Plum?

Plum belongs to the stone fruit family - botanically Prunus domestica for the European type and Prunus salicina for the Japanese type - both sharing a smooth skin, fleshy body, and hard central pit.

Domesticated first in China, the fruit spread westward along trade routes and eventually took root across Europe and the Mediterranean.

Dozens of named varieties exist, ranging from small, tart damson plums to large, sweet Santa Rosa and Black Amber types.

Skin color runs from deep purple and burgundy to red, yellow, and green, with flesh that can be golden, red, or anything between.

A few related names come up in recipes:

  • 🔵 Prunus spinosa (sloe) - a wild, intensely bitter plum used mainly for sloe gin
  • 🟡 Greengage - a sweet, green-fleshed European variety with low acidity
  • 🟤 Damson - small, dark, and notably tart; favored for jam and preserves
  • 🍂 Prune plum - a high-sugar variety bred specifically for drying into prunes

Understanding alternatives to prune is useful when a recipe calls for dried plum but you only have fresh - the substitution affects both texture and sugar content.

What Does Plum Taste Like?

plum - What Is Plum

A ripe plum tastes closest to a sweet apricot crossed with a cherry - stone-fruit sugar up front, a distinct floral note mid-palate, and a clean tangy finish from its natural acidity.

Underripe fruit skews sharply toward tart green apple territory, with almost no sweetness detectable.

Sensory SnapshotModerate Intensity
👅 Flavor
sweettangyjammyfloral
✋ Texture
yieldingjammy when cooked
👃 Aroma
fruity-floralslightly resinous

Heat changes the profile considerably. Roasting or stewing concentrates the sugars, softens the acidity, and pushes the flesh into a deep, almost winey richness that raw plum never reaches.

That transformation is exactly why plum works in savory glazes and slow-cooked sauces - the raw fruit and the cooked version are functionally different ingredients.

Golden Rule
Taste your plums before committing to a recipe. A very tart fruit needs more sugar in a compote; a very sweet one can overpower a savory sauce without added acid like balsamic or citrus.

How to Use Plum

Plum's range across sweet and savory cooking is wider than most stone fruits. Raw, sliced plum adds color and bright acidity to salads - particularly alongside goat cheese and toasted walnuts, where the fat softens its tartness.

The cherry pepper and its flavor profile shows a similar balance of sweetness and bite that works in the same salad applications.

Roasting is where plum earns its savory credentials. Halved and roasted with honey, ginger, and a little balsamic, plum pairs directly with pork tenderloin or duck breast - the rendered fat and the jammy fruit work together the way a classic sauce would.

Star anise and cinnamon extend that direction further.

How Plum Is Used
MethodBest ForTip
🥗 RawSalads, cheese boards, fresh salsasSlice thin; remove skin if texture is a concern
🍳 RoastedMeat glazes, dessert with yogurt or ricottaHigh heat caramelizes skin; add honey in last 10 minutes
🥘 StewedCompote, plum sauce, jam baseLow heat preserves tartness; high heat deepens sweetness
🥧 BakedTarts, galettes, clafoutis, cakesStone-in baking adds flavor; remove pit for clean slices
🔥 GrilledSide for grilled meats, smoky dessertsGrill cut-side down only; flesh softens fast

Plum sauce in Chinese cooking uses the fruit with vinegar, ginger, and soy to produce the sweet-sour dipping sauce served with duck and spring rolls. Central and Eastern European traditions lean into tart varieties for compotes and dumplings, while French baking relies on firm plums in galettes and clafoutis. For preserved forms, the distinction between comparing plum butter vs plum jam options matters - butter is smoother and more concentrated, while jam retains more texture.

Try It In
🧀Fruit & Cheese Snack BoxFresh plum slices alongside soft cheese — the acidity cuts through fat cleanly→

How to Buy and Store Plum

At the market, press gently near the stem end - a ripe plum yields slightly without feeling mushy or grainy. Smooth, unbroken skin and a noticeable fragrance near the stem are the best signs of fruit ready to eat.

Avoid any with shriveled skin, brown soft spots, or no scent at all.

Shortcut
Buy firm plums for later use and leave them on the counter. They ripen faster near other fruit - especially bananas - due to ethylene gas exposure.

Store unripe plums at room temperature, away from direct sun, until they soften. Once ripe, move them to the fridge's crisper drawer.

Full guidance on keeping plum fresh covers exact timelines for whole, halved, and cooked fruit.

  • Unripe, room temp - ripens in 2-7 days depending on starting firmness
  • Ripe, refrigerated - holds 3-7 days in the crisper
  • Cut fruit - store in an airtight container; use within 3 days
  • Cooked or jammed - refrigerate and use within 2 weeks; longer if properly canned

If your plum haul is more than you can use fresh, alternatives to plum lists which fruits step in for fresh or cooked applications when supply runs short.

Where to Start With Plum

Start raw if you want to understand the fruit - slice a ripe plum over yogurt or into a salad and you'll read its acidity and sweetness clearly.

Move to roasting once you're ready to use it in cooking: halved with honey and heat, the fruit reveals the jammy depth that makes it useful in sauces and baked goods.

New to plum-based preserves? The plum jam and compote route is forgiving - the fruit breaks down easily and the flavor payoff is significant.

From there, savory applications like glazes and plum sauce follow naturally.

Best Pick
For first-time cooking, Santa Rosa or Black Amber plums are widely available, balanced in sweetness and acidity, and hold their shape well when roasted or baked.

Frequently Asked Questions

What is the difference between a plum and a prune?

A prune is simply a dried plum - most often from high-sugar varieties like the d'Agen or Italian prune plum. Fresh plums and prunes differ significantly in texture, sugar concentration, and sorbitol content, which gives prunes their well-known digestive effect.

Are plums high in sugar?

Fresh plums are moderate in sugar - around 7-10 grams per 100g, lower than grapes or mangoes. Dried plums (prunes) are far more concentrated, with roughly 38 grams of sugar per 100g.

How do you ripen plums faster?

Leave them at room temperature in a paper bag with a banana or apple. The trapped ethylene gas speeds ripening noticeably - check after 24 hours, as firm fruit can go soft quickly.

Can you use plums in savory dishes?

Yes - roasted or reduced plum works well with duck, pork, and lamb. The key is adding an acidic element like vinegar or citrus to prevent the sweetness from overwhelming the dish.

Does plum flavor work in drinks?

It does, particularly in East Asian liqueurs and European fruit brandies. The flavor profile is close enough to peach-family spirits that understanding peach schnapps and its flavor helps predict how plum-based liqueurs will behave in cocktails.

Air Fryer Halloumi Fries

April 1, 2026

When you need a crispy appetizer that works for both weeknight snacking and entertaining guests, air fryer halloumi fries deliver. One block of cheese, a quick flour coating, and 12 minutes in the air fryer creates golden sticks with a crunchy exterior and tender, slightly squeaky interior.

Air Fryer Halloumi Fries served on a plate

The high heat crisps the coating while the halloumi stays moist. You don't need deep frying or constant monitoring.

Perfect for quick snacks when you want something more substantial than chips but faster than a full meal.

QUICK SUMMARY

Air fryer halloumi fries turn a block of halloumi cheese into crispy, golden sticks in 10-12 minutes. The seasoned flour coating creates a crunchy crust while the cheese stays tender inside. Cut evenly and flip halfway for uniform browning.

⏱️Time: 20 minutes total - 10 minutes prep, 10-12 minutes cooking
🔪First Move: Cut halloumi into ½-inch sticks for even cooking and consistent crispness
⚠️Watch Out: Overcrowding makes fries steam instead of crisp - leave 1 inch between pieces

Table of Contents

Toggle
  • Why This Recipe Works
  • What You'll Need
    • Ingredient Details
  • Ingredient Swaps
  • What to Serve With It
  • Store and Reheat
  • Frequently Asked Questions
  • Air Fryer Halloumi Fries
    • Method 
    • Tried this recipe?

Why This Recipe Works

The air fryer crisps the flour coating without deep frying while the halloumi's firm texture holds its shape at high heat. For a version that comes together quickly, this simple homemade chicken recipe uses the same quick method with minimal cleanup.

Quick Reference
⏱️
Prep Time
10 min
🔥
Cook Time
10-12 min
⏰
Total Time
20-22 min
🍽️
Servings
2-3 servings
📊
Difficulty
Easy
🏷️
Category
Appetizer
💡
Quick Tip
Cut halloumi equally for even cooking
🎯
Best For
Weeknight | Entertaining | Quick snack
  • Preheating the air fryer to 400°F creates immediate contact heat that starts crisping the coating before the cheese softens too much
  • Uniform ½-inch cuts ensure every piece cooks at the same rate - thinner pieces burn while thicker ones stay pale
  • Light flour coating with olive oil creates a crunchy crust that sticks to the cheese instead of falling off during cooking
  • Flipping at the 5-6 minute mark browns all sides evenly and prevents one side from staying soft and pale
  • Resting 2-3 minutes after cooking lets the coating firm up so it doesn't slough off when you bite into the fries
Quick Tip
Preheat your air fryer for 3-5 minutes before adding the halloumi - the immediate heat sets the coating fast and creates better crispness.

What You'll Need

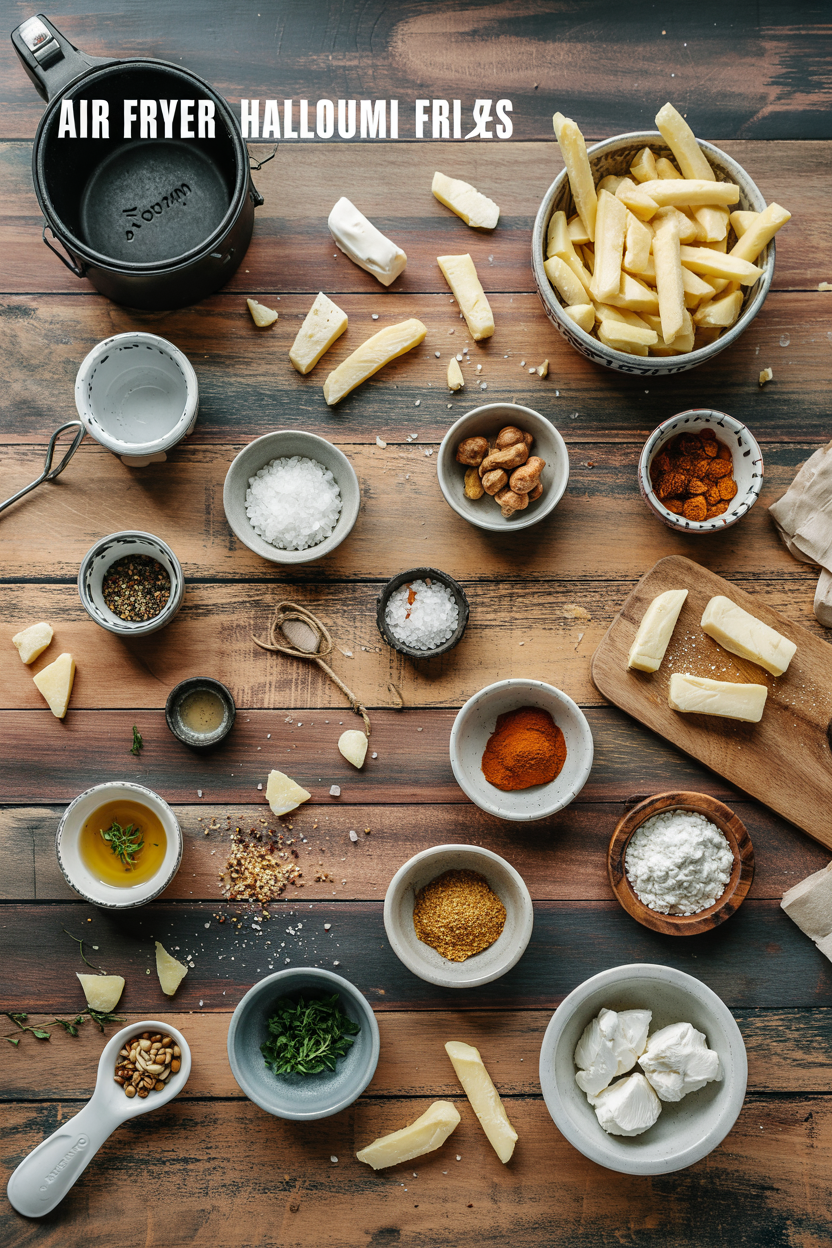
Ingredients for Air Fryer Halloumi Fries

One block of halloumi and pantry spices are all you need. Rich mains need something to cut through, and tender homemade brussels recipe does exactly that with the same quick air fryer method.

🧀
Cheese
  • 8 oz halloumi cheese
  • 1 tablespoon olive oil
🫙
Coating
  • ¼ cup all-purpose flour
  • 1 teaspoon paprika
  • ½ teaspoon garlic powder
  • ¼ teaspoon black pepper
  • ¼ teaspoon salt
🍋
Garnish
  • Lemon wedges
  • Fresh herbs (optional)

Ingredient Details

  • Halloumi cheese
    Use semi-firm halloumi - too fresh stays rubbery, while firmer blocks hold their shape better and develop a golden crust
  • All-purpose flour
    Creates the crispy coating - too much clumps and burns, too little leaves bare spots that stay soft
  • Olive oil
    Helps the flour stick and promotes browning - spray or toss lightly, don't drench or the coating gets soggy
  • Paprika
    Adds color and subtle smoky flavor without overpowering the mild halloumi - smoked paprika intensifies the taste
  • Garlic powder
    Enhances savory notes without the moisture of fresh garlic that would make the coating wet
  • Lemon wedges
    Squeeze right before eating to cut through the richness and balance the salty cheese
  • Black pepper
    Adds mild heat - use cayenne for spicier fries or skip entirely if serving to kids

Ingredient Swaps

Most swaps work as long as you maintain the light coating. A good potato wedges can make or break the plate, and this easy potato wedges side uses similar seasoning with a different base.

  • All-purpose flour - swap rice flour for a lighter, crispier gluten-free crust that browns faster
  • Halloumi - use paneer for a less salty, softer texture that cooks slightly faster but doesn't crisp as much
  • Olive oil - avocado oil works with a higher smoke point and neutral flavor for crispier results
  • Paprika - smoked paprika adds a stronger, smokier taste if you want more depth

Rice Flour

Works for: Gluten-free diets, crispier coating, lighter texture

Skip if: You prefer a thicker crust or want a neutral flavor

Paneer

Works for: Less salty option, softer interior, milder taste

Skip if: You want the signature squeaky texture or crispy edges

Smoked Paprika

Works for: Stronger smoky flavor, more complex taste, appealing color

Skip if: You want mild seasoning or are serving to picky eaters

Instructions

The entire process takes 20 minutes from cutting to serving. Rich mains need something to cut through, and a rich beef side does exactly that with similar Mediterranean flavors.

  1. Preheat the air fryer to 400°F for 3-5 minutes while you prep the halloumi - immediate heat sets the coating fast and starts crisping right away.

  2. Cut halloumi into ½-inch thick sticks about 3-4 inches long - measure with a ruler if needed so every piece cooks at the same rate and finishes golden at the same time.

  3. Mix flour, paprika, garlic powder, black pepper, and salt in a shallow bowl, then toss halloumi sticks with olive oil in a separate bowl until lightly coated before dredging in the seasoned flour - shake off excess flour to prevent clumping and burnt spots.

  4. Arrange fries in a single layer in the air fryer basket with at least 1 inch of space between pieces, then cook for 5-6 minutes before flipping each stick with tongs and cooking another 5-6 minutes until golden brown on all sides.

  5. Remove fries and rest on a plate for 2-3 minutes to let the coating firm up, then serve immediately with lemon wedges and optional fresh herbs while still hot and crispy.

Watch Out
Don't skip the rest after frying - the coating needs 2-3 minutes to set or it slides off when you bite into the fries.

What to Serve With It

Halloumi fries work as an appetizer or side but need something to balance the richness. If you're planning easy spaghetti and meatballs dinner nights, check out easy spaghetti and meatballs dinner nights for more complete meal ideas that pair well with crispy sides.

Side Dish Prep Why It Works How to Serve
Mixed greens salad Easy Fresh, light contrast cuts through fried cheese Toss greens with lemon vinaigrette, serve alongside
Tzatziki sauce Easy Cool, tangy yogurt balances salty halloumi Serve in small bowl for dipping
Roasted vegetables Medium Adds color and earthiness to balance richness Roast at 425°F while fries cook, serve warm
Pita bread Easy Complements Mediterranean flavors, adds bulk Warm briefly, tear into pieces, serve on side
Harissa dip Easy Spicy kick contrasts mild cheese perfectly Dollop in small bowl, drizzle olive oil on top

Three ways to serve it:

  • As an appetizer - plate with tzatziki and harissa on the side, garnish with fresh herbs, squeeze lemon over the top
  • With a main - pair with grilled chicken or lamb, add roasted vegetables and pita bread for a complete Mediterranean spread
  • For snacking - serve warm with marinara or yogurt dill dip, keep lemon wedges nearby for squeezing
Best Pick
Lemon garlic aioli cuts through the richness better than ketchup and complements the Mediterranean flavors without overpowering the mild halloumi.

Store and Reheat

Halloumi fries lose crispness quickly but reheat better than most fried foods. A good beef can make or break the plate, and this juicy chicken side dish reheats just as well using similar methods.

Method Time Best For
🍳 Air Fryer 3-5 min at 350°F Restoring crispness - best texture results
🔥 Oven 10 min at 375°F Reheating larger batches while maintaining some crispness
📦 Microwave 30-60 seconds Quick reheating when texture doesn't matter

For best results when storing:

  • Refrigerate in a shallow airtight container with paper towels between layers to absorb moisture and prevent sogginess for 3-4 days
  • Freeze in a single layer on a parchment-lined tray until solid, then transfer to a freezer bag for up to 1 month
  • Reheat from frozen by adding 2-3 minutes to air fryer time without thawing - thawed fries get mushy
  • Skip the microwave for crispy results - it steams the coating and makes the cheese rubbery
  • Serve reheated fries within 10 minutes - the coating softens again as they cool and loses the just-cooked crispness

Frequently Asked Questions

How long to cook air fryer halloumi fries at 400°F?

Cook halloumi fries for 10-12 minutes total at 400°F - flip at the 5-6 minute mark for even browning. Thinner pieces need 8-10 minutes while thicker cuts require the full 12 minutes.

Can I make air fryer halloumi fries ahead and reheat?

Yes, refrigerate cooked fries for up to 4 days and reheat in the air fryer at 350°F for 3-5 minutes. The texture won't match fresh-cooked but comes close if you avoid the microwave.

What goes best with air fryer halloumi fries?

Serve with tzatziki, harissa, or lemon garlic aioli for dipping. Pair with a mixed greens salad and pita bread for a complete Mediterranean-style meal.

How do I know when air fryer halloumi fries are done?

Look for golden brown color on all sides and a slightly firm texture when you press gently with tongs. The coating should be crispy and the cheese should feel warm but not melted.

Can I use feta or paneer instead of halloumi for fries?

Paneer works but has a softer texture and less salty flavor - reduce cook time by 2-3 minutes. Skip feta because it crumbles and melts too easily in the air fryer.

Air Fryer Halloumi Fries served on a plate

Air Fryer Halloumi Fries

No ratings yet
Air fryer halloumi fries deliver crispy, golden sticks with a crunchy seasoned flour coating and a tender, slightly squeaky interior. The quick 12-minute air frying method crisps the coating without deep frying, making it perfect for quick snacks or entertaining guests. Evenly cut fries flipped halfway ensure uniform browning.
Print Recipe Pin Recipe
Prep Time 10 minutes mins
Cook Time 12 minutes mins
Total Time 22 minutes mins
Servings: 3 servings
Course: Appetizer
Cuisine: Mediterranean
Ingredients Equipment Method Notes

Ingredients
  

  • 8 oz halloumi cheese semi-firm block, cut into ½-inch thick sticks
  • 1 tablespoon olive oil light coating to help flour stick and promote browning
  • 0.25 cup all-purpose flour for crispy coating
  • 1 teaspoon paprika adds color and subtle smoky flavor
  • 0.5 teaspoon garlic powder enhances savory notes without moisture
  • 0.25 teaspoon black pepper adds mild heat
  • 0.25 teaspoon salt seasoning for coating
  • to taste lemon wedges for serving
  • optional fresh herbs optional garnish

Equipment

  • Air fryer Used to crisp and cook the halloumi fries at 400°F
  • Mixing bowls One for tossing halloumi in oil and one for dredging in seasoned flour
  • Tongs For flipping fries halfway through cooking

Method
 

  1. Preheat the air fryer to 400°F for 3-5 minutes to ensure immediate heat for crisping.
  2. Cut the halloumi cheese into ½-inch thick sticks about 3-4 inches long to ensure even cooking.
    8 oz halloumi cheese
  3. Mix the all-purpose flour, paprika, garlic powder, black pepper, and salt in a shallow bowl. In a separate bowl, toss the halloumi sticks with olive oil until lightly coated.
    1 tbsp olive oil, 0.25 cup all-purpose flour, 1 tsp paprika, 0.5 tsp garlic powder, 0.25 tsp black pepper, 0.25 tsp salt
  4. Dredge the olive oil-coated halloumi sticks in the seasoned flour mixture, shaking off excess flour to prevent clumping and burnt spots.
    8 oz halloumi cheese, 1 tbsp olive oil, 0.25 cup all-purpose flour, 1 tsp paprika, 0.5 tsp garlic powder, 0.25 tsp black pepper, 0.25 tsp salt
  5. Arrange the coated halloumi fries in a single layer in the air fryer basket with at least 1 inch of space between them. Cook for 5-6 minutes.
    8 oz halloumi cheese
  6. Flip each fry using tongs and cook for another 5-6 minutes until golden brown and crispy on all sides.
    8 oz halloumi cheese
  7. Remove the fries and let them rest on a plate for 2-3 minutes to allow the coating to firm up. Serve immediately with lemon wedges and optional fresh herbs.
    to taste lemon wedges, optional fresh herbs

Notes

  • Preheat the air fryer to 400°F before adding halloumi to set the coating quickly and improve crispness.
  • Cut fries uniformly ½-inch thick to ensure even cooking and avoid burning or undercooked pieces.
  • Do not overcrowd the basket; leave space between fries to prevent steaming and ensure crispy texture.

Tried this recipe?

Let us know how it was!

How Long Does Orange Juice Last? [Storage Guide]

April 1, 2026

Finding a carton of orange juice in the fridge that smells faintly like champagne is not a pleasant morning surprise - that fermented odor is a clear sign bacterial activity and yeast have already taken over.

Can You Freeze Orange Juice

Orange juice spoils faster than most people expect, especially once opened, and the rules differ sharply depending on whether you're dealing with what makes orange juice distinct - fresh-squeezed, pasteurized refrigerated, or shelf-stable UHT.

Knowing which type you have, and how to store it properly, is the difference between safe juice and a wasted carton.

QUICK SUMMARY

Opened refrigerated orange juice lasts 3-7 days in the fridge. Unopened shelf-stable cartons keep up to 12 months in the pantry. Fresh-squeezed juice is the most perishable - 3-4 days maximum. Freeze opened juice for up to 8-12 months, but expect some texture changes after thawing.

🧊Fridge (opened): 3-7 days for commercial; 3-4 days for fresh-squeezed
❄️Freezer: Best quality at 6-8 months; safe up to 12 months
⚠️Key Rule: Never leave opened refrigerated juice on the counter for more than 2-8 hours

How Long Does Orange Juice Last?

Orange juice shelf life varies significantly by type and whether the container has been opened. Shelf-stable UHT cartons and pasteurized refrigerated bottles are not the same product - treating them as interchangeable is one of the most common storage mistakes.

Orange Juice Shelf Life
MethodStateDurationNotes
🏬 PantryUnopened (UHT/aseptic)6-12 monthsStore at room temp; follow printed best-by date
🧊 FridgeUnopened (pasteurized)2-3 weeksSome brands list longer; always use printed date
🧊 FridgeOpened (commercial)3-7 daysCap tightly; minimize time open to limit oxidation
🧊 FridgeOpened (fresh-squeezed)3-4 daysMost perishable; no preservatives slow bacterial growth
❄️ FreezerOpened8-12 monthsBest flavor quality within 6-8 months
🏠 CounterOpened2-8 hours maxRefrigerate promptly; fermentation begins quickly at room temp

Fresh-squeezed juice degrades fastest because it lacks the pasteurization and preservatives that slow microbial growth in commercial products.

The natural citric acid provides some protection, but not enough to extend countertop time safely - much like milk spoilage signs develop rapidly once temperature control is lost.

Watch Out
A refrigerated bottle stored in the door - where temperatures fluctuate with every opening - loses freshness faster than one kept on a middle shelf at consistent cold.

How to Store Orange Juice

The correct storage method depends entirely on which type of orange juice you have. Shelf-stable vs. refrigerated - these two categories have completely different rules, and the label tells you which applies.

Pantry: Only store unopened UHT or aseptic cartons here, upright in a cool dark spot. Once opened, any shelf-stable carton moves to the fridge immediately.

Fridge: Refrigerate commercial juice the moment you open it, capping it tightly after every pour. Oxidation starts working against flavor as soon as juice meets air, so minimize how long the bottle sits open. For fresh-squeezed juice, transfer it to an airtight glass jar - original plastic containers absorb odors and accelerate off-flavor development.

Counter: This is not a storage location. Opened juice sitting at room temperature for more than two hours enters the risk zone for bacterial growth.

  • 🧊 Middle fridge shelf - Keeps temperature stable; avoid the door entirely for refrigerated juice.
  • Opaque container - Blocks light that degrades vitamin C and accelerates oxidation.
  • Tight cap after every pour - Limits air contact and slows flavor loss between uses.

Can You Freeze Orange Juice?

Yes - and it's a practical move when a large carton is close to its use-by date.

Both commercial pasteurized juice and fresh-squeezed orange juice freeze well enough for cooking and smoothies, though texture changes are normal and more pronounced in fresh-squeezed.

  1. Leave headspace Pour juice into freezer-safe containers, leaving 1 to 1.5 inches of space at the top for expansion during freezing.
  2. Use ice-cube trays for portions Freeze juice in trays first, then transfer cubes to airtight bags - this lets you thaw only what you need.
  3. Label clearly Mark containers with the date and type (fresh-squeezed vs. commercial) since quality timelines differ between them.
  4. Thaw overnight in the fridge Move frozen juice to the fridge the night before use. Stir gently after thawing to recombine separated solids.
  5. Use within 3-5 days Thawed juice degrades quickly - do not refreeze it after thawing.

Freezing causes some pulp separation and can mute citrus aroma.

Thawed juice works well in marinades, baking, and smoothies even when texture has softened.

If you add a small amount of citric acid to fresh-squeezed juice before freezing, it helps preserve both color and flavor - for a deeper look at that option, the guide on comparing fruit fresh vs citric acid options covers the tradeoffs clearly.

Golden Rule
Never refreeze thawed orange juice. The second freeze-thaw cycle causes significantly worse texture degradation and speeds up flavor loss.

Signs Orange Juice Has Gone Bad

Spoiled orange juice isn't always dramatic. Sometimes the signs are subtle - a slight fizz, a faint smell - but they're reliable. Don't taste questionable juice to check; the indicators below are enough to make the call.

Signs It's Gone Bad
👀
VisualGrayish or green fuzzy mold on surface · Darkened color vs. fresh bright orange · Excessively separated layers with cloudy appearance
👃
SmellSour or vinegary odor · Yeasty or fermented smell · Champagne-like fizz scent indicating active fermentation
✋
TexturePersistent sliminess · Fizzing when gently shaken beyond normal pulp movement

Pulp naturally settles in refrigerated juice - that's normal. What's not normal is fizzing that persists after a gentle swirl, or a smell that resembles something alcoholic or fermented.

Discard immediately if any of those appear, and don't rely on taste alone to confirm safety.

Getting the Most from Your Orange Juice

A few habits separate juice that lasts the full week from juice that's sour by day four. The goal is limiting the two main enemies: air and temperature fluctuation.

  • Freeze in ice-cube trays - Portion-sized cubes mean you thaw only what you need for a smoothie or marinade, reducing waste.
  • Label frozen batches - Note whether it's fresh-squeezed or commercial concentrate, since quality timelines differ by several months.
  • Shallow containers for freezing - Wider, shallower vessels freeze juice faster and form smaller ice crystals, which means better texture after thawing.
  • Thawed juice for cooking first - When texture has degraded, redirecting it to baking, sauces, or marinades avoids disappointment; if you need a different flavor profile in a recipe, options for [swapping out orange juice](https://forkliftkitchen.com/orange-juice-substitutes/) and [swapping out apple juice](https://forkliftkitchen.com/apple-juice-substitutes/) both apply depending on the dish.
Shortcut
Add a squeeze of lemon juice or a pinch of citric acid to fresh-squeezed orange juice before freezing. It slows color loss and keeps flavor sharper through the freeze cycle.

Frequently Asked Questions

How long does fresh-squeezed orange juice last in the fridge?

Fresh-squeezed orange juice lasts 3-4 days refrigerated in an airtight container. It degrades faster than commercial juice because it has no pasteurization or preservatives to slow bacterial activity.

Can you freeze orange juice in plastic bottles?

Yes, but only in freezer-safe plastic - regular bottles can crack under expansion pressure. Always leave 1 to 1.5 inches of headspace, and never freeze a completely full sealed bottle.

Does freezing orange juice change the taste?

Somewhat. Citrus aroma becomes muted and pulp separates after thawing, making the texture slightly grainy. The flavor change is minor in commercial juice but more noticeable in fresh-squeezed.

Can you store an unopened refrigerated bottle of orange juice in the pantry?

No. Refrigerated-labeled pasteurized juice must stay cold even before opening. Only UHT or aseptic shelf-stable cartons are safe at room temperature - the label tells you which type you have.

Is it safe to drink orange juice that has separated in the fridge?

Separation alone is normal and safe - pulp settles naturally in refrigerated juice. Check smell and color before drinking; if either is off, discard it regardless of how recently you opened it.

How Long Does Puff Pastry Last? [Storage Guide]

April 1, 2026

Leftover puff pastry sitting in your fridge after a weekend bake is either fine or already past saving - and the difference comes down to how it was wrapped. The taste of puff pastry depends entirely on those intact butter layers, and once those layers dry out or warm unevenly, the dough loses its lift before it ever hits the oven.

Can You Freeze Puff Pastry

Much like parchment paper spoilage signs tell you more than you'd expect, the condition of the wrapper around your dough tells you a lot about what's waiting inside.

Store-bought refrigerated puff pastry keeps 4-7 days unopened; opened sheets drop to just 2-3 days.

QUICK SUMMARY

Puff pastry keeps 4-7 days refrigerated unopened, 2-3 days once opened, and up to 6-12 months frozen in airtight wrapping. Thaw overnight in the fridge. Never let raw dough turn warm before shaping - that collapses the butter layers.

🧊Fridge (unopened): Up to 4-7 days from purchase, check package date
❄️Freezer: Best quality 6-12 months unopened, 2-3 months cut portions
⚠️Key Rule: Keep dough cold and flat; warm butter kills the lamination

How Long Does Puff Pastry Last?

Store-bought puff pastry shelf life varies depending on whether it's been opened and how it's stored. Refrigerated rolls that stay sealed in their original packaging sit comfortably in the fridge for 4-7 days from purchase, but that window shrinks the moment you cut into the sheet.

Frozen formats last significantly longer. Commercially frozen puff pastry blocks or sheets hold their best quality for 6-12 months unopened - the factory wrapping does most of the work here.

Cut or portioned dough loses quality faster, capping out around 2-3 months even when bagged properly.

Baked items follow different rules. Cooked puff pastry goods stay acceptable for 2-3 days refrigerated, though crispness starts fading after the first day.

Puff Pastry Shelf Life
MethodStateDurationNotes
🧊 FridgeUnopened4-7 daysCheck 'use by' on pack; keep in original wrapper
🧊 FridgeOpened2-3 daysWrap tightly; exposed edges dry fast and lose rise
❄️ FreezerUnopened6-12 monthsAirtight double-wrap prevents freezer burn
❄️ FreezerOpened/cut portions2-3 monthsLonger storage risks flakiness and layer collapse
🏠 CounterThawing/raw1-2 hours maxPliable but still cool - don't let butter warm through
🧊 FridgeBaked2-3 daysAirtight container; re-crisp in oven, not microwave

How to Store Puff Pastry

Proper wrapping is the single biggest factor in how long your dough stays usable. Lamination - those stacked butter layers that create flake and lift - breaks down from two enemies: air and warmth.

Fridge (unopened): Leave the dough in its original packaging until you're ready to use it. Fridge (opened): Layer sheets with parchment, then press-wrap the entire stack tightly in plastic wrap and slide it into a resealable bag. Counter: Acceptable only during thawing, and only for 1-2 hours maximum.

  • ✅ Use parchment separators - prevents sheets from fusing and preserves the lamination between layers
  • ✅ Press out air before sealing - trapped moisture inside the bag leads to soggy, stuck dough
  • ✅ Keep sheets flat - folding or rolling refrigerated dough before baking stresses the layers prematurely
  • ❌ Don't store near strong-smelling foods - butter absorbs odors quickly in the fridge
Golden Rule
Dough should feel cold and firm when you shape it. If it feels soft or greasy, refrigerate for 15-20 minutes before continuing.

Can You Freeze Puff Pastry?

Yes - freezing is the best long-term option for store-bought puff pastry, and it works well for homemade too.

The caveat is that improper wrapping allows butter crystal damage during freezing, which flattens layers and reduces oven rise.

Similar to how keeping vacuum sealed salmon fresh requires removing all air contact, the goal with frozen puff pastry is zero exposure to air.

The freeze process differs slightly depending on what you're working with.

  1. Whole blocks (store-bought): Keep the factory wrap intact, then add a layer of foil and place in a heavy-duty freezer bag. Squeeze out all air before sealing.
  2. Sheets: Separate each sheet with parchment, stack them, then vacuum-seal or use a heavy-duty freezer bag with as much air removed as possible.
  3. Cut portions: Flash-freeze on a flat tray for 20-30 minutes until firm, then transfer to a labelled freezer bag. This stops pieces from fusing together.
  4. Label with date and portion size so you pull only what you need - refreezing thawed dough damages structure further.

Thawing: Move frozen dough to the fridge 6-12 hours before use, ideally overnight on a flat tray. Room-temperature thawing (1-2 hours) works in a pinch. Never use the microwave - uneven heat melts the butter unevenly and ruins the layers entirely.

Watch Out
Don't refreeze puff pastry that has been fully thawed and shaped. Refreeze only raw, sealed, unshaped portions - reshaped or folded dough loses structural integrity after a second freeze.

Signs Puff Pastry Has Gone Bad

Most spoilage in puff pastry dough is visible before you unwrap the whole thing. Checking the dough before preheating the oven saves both time and a ruined dish.

Signs It's Gone Bad
👀
VisualGrey or green mold spots · dark wet butter streaks · chalky, cracked, excessively dry sheets
👃
SmellRancid or sharp buttery odor · sour fermented smell
✋
TextureSticky or slimy surface after thawing · crumbly and powdery from extreme drying

Mold, rancid smell, or slimy dough means discard - no exceptions. If dough carries a faint freezer odor without other signs, trim the outer ⅛ inch and bake a small test piece first.

Keeping Your Pastry Working for You

Good storage habits cost nothing and protect the one quality that makes puff pastry worth using: that layered, airy lift.

The salmon freezer burn guide makes the same point about fat-rich proteins - air contact is the root cause of most freezer disappointments.

  • Re-crisp baked items in the oven - 5-8 minutes at 350°F (175°C) restores texture that the microwave destroys
  • Divide before freezing - portion dough into bake-sized amounts so you never thaw more than you need
  • Check the butter, too - if you're working with homemade laminated dough, the same principles around [keeping butter fresh](https://forkliftkitchen.com/butter-shelf-life/) apply directly to how long your dough stays viable
  • Have a backup plan - if your stored dough underperforms, knowing about [swapping out puff pastry](https://forkliftkitchen.com/puff-pastry-substitutes/) keeps your recipe on track
Shortcut
Freeze puff pastry in single-use portions on a parchment-lined tray before bagging. You get instant grab-and-go access without thawing a full block.

Frequently Asked Questions

Can you freeze baked puff pastry?

Yes, but texture suffers. Baked puff pastry goes soggy after freezing because moisture from thawing softens the layers. Re-crisp in a 350°F oven for 5-8 minutes - it won't fully restore crunch, but it's usable.

How long can you keep puff pastry dough in the fridge?

Unopened store-bought dough keeps 4-7 days refrigerated. Once opened and rewrapped tightly, use it within 2-3 days before the edges dry and the layers lose structure.

Is frozen puff pastry already cooked?

No. Frozen store-bought puff pastry is raw dough that has been shaped and frozen before baking. Thaw it, shape as needed, then bake according to your recipe's temperature and time.

Can you refreeze thawed puff pastry?

Only if it was thawed in the fridge and is still raw and unshaped. Refreezing already-shaped or folded dough collapses the lamination and results in poor oven rise.

Does homemade puff pastry last as long as store-bought?

No. Homemade dough lacks the stabilizers in commercial versions and typically keeps only 2-3 days refrigerated. Freeze homemade portions immediately if you're not baking within that window.

What Is Pinot Grigio? [Taste, Uses & More]

April 1, 2026

You spot it on the shelf - a slender bottle labeled Pinot Grigio, probably from somewhere in northern Italy - and you're not entirely sure if it'll work for drinking, cooking, or both.

What Does Pinot Grigio Taste Like

The answer is yes to all of it, and knowing white wine stand-ins helps clarify just how much of the work this grape actually does in a kitchen.

QUICK SUMMARY

Pinot Grigio is a dry white wine from northern Italy, known for crisp acidity and clean citrus-driven flavor. Lighter Italian styles suit shellfish and pan sauces; richer Alsace Pinot Gris handles spiced or cream-based dishes. Opened bottles keep 3-5 days refrigerated.

🍷Type: Dry white wine, light to medium body
🍋Flavor: Green apple, lemon-citrus, pear, stone minerality
🍽️Best Uses: Shellfish, pan sauces, risotto, poaching fish
📍Origin: Friuli-Venezia Giulia and Veneto, northeastern Italy
🕐Shelf Life: Opened: 3-5 days; unopened: 1-7 years by tier
🛒Buy It: Look for Friuli or Alto Adige DOC labels for best quality

What Is Pinot Grigio?

Pinot Grigio is a dry white table wine made from the Pinot Gris grape, grown most prominently in northeastern Italy - particularly the regions of Friuli-Venezia Giulia and the Veneto.

The grape itself has grayish-blue skin, which puts it in an unusual middle ground between white and red wine grapes.

Two major styles exist, and they're distinct enough to behave differently at the table. Italian Pinot Grigio runs lean, high-acid, and pale straw in color.

Alsace Pinot Gris - same grape, French name - is fuller, richer, and sometimes carries faint spice.

The name confusion is common but easy to sort out:

  • 🇮🇹 Pinot Grigio - Italian name; expect a crisp, lighter style
  • 🇫🇷 Pinot Gris - Alsatian (French) name; expect more body and aromatic complexity
  • P. gris - shorthand used on some wine labels
  • Pinotgrigio - common misspelling, same wine

Quality Italian bottlings carry DOC or DOCG designations, with Alto Adige and Friuli labels generally outperforming bulk supermarket versions by a wide margin.

What Does Pinot Grigio Taste Like?

pinot grigio - What Does Pinot Grigio Taste Like

Italian Pinot Grigio lands on the palate as clean and bright - crisp green apple and lemon-citrus arrive first, followed by a quiet note of pear or white stone fruit.

The finish is dry with a mineral edge that some describe as wet stone or chalk.

Richer Alsace Pinot Gris shifts the profile noticeably. The acidity softens, an oily midpalate texture appears, and faint almond or spice can surface.

That's a different drinking and cooking experience than the standard Italian bottle.

Sensory SnapshotModerate Intensity
👅 Flavor
green applelemon-citruspearstone minerality
✋ Texture
light-bodiedrefreshing acidity
👃 Aroma
citrus blossomgreen pearwet stone

Understanding the role sauvignon blanc plays in acidity-forward cooking helps put Pinot Grigio in context - the two overlap on clean citrus, though Pinot Grigio stays more restrained and less grassy.

How to Use Pinot Grigio

Pinot Grigio earns its place at the stove as well as the table. Its high acidity and dry profile make it a reliable deglazing wine - it lifts pan fond cleanly without adding sweetness or muddying a sauce.

How Pinot Grigio Is Used in Cooking
MethodBest ForTip
🍳 DeglazingChicken piccata, sole meunière pan saucesAdd off heat briefly, then return to medium to reduce by half
🦪 SteamingMussels, clams (linguine alle vongole)Use a full splash - the wine reduces into the broth
🐟 PoachingHalibut or cod in light citrus brothCombine with lemon and fresh herbs; keep heat low
🥗 MarinatingFirm white fish before grilling or roastingLimit to 30 minutes - acid can break down delicate flesh
🍚 Risotto baseSeafood risotto with asparagusAdd one ladle of wine early, let it absorb before adding stock

Pairings skew toward Mediterranean and northern Italian cooking: shellfish (clams, mussels, shrimp, scallops), light white fish like cod or sole, lemon, capers, fresh herbs, and goat cheese all work well.

It also holds up next to sushi and sashimi, where its clean finish clears the palate between bites.

Watch Out
Avoid pairing Pinot Grigio with fatty red meats or strong blue cheeses - the wine's lean acidity gets overwhelmed and tastes flat or sour against those flavors.

For lighter proteins, try stirring a small amount into a lemon vinaigrette - the acidity reinforces the dressing without adding richness. It also works added to a homemade dressing much the way acid does in any balanced vinaigrette.

Try It In
🍋Air Fryer Lemon Pepper Chicken TendersPinot Grigio's citrus notes complement the lemon-pepper glaze→🦐Air Fryer Lemon Pepper ShrimpUse a splash in the marinade before air frying→🥗Lemon Vinaigrette Dressing (Homemade)Add a small pour of Pinot Grigio for extra acidity and brightness→

How to Buy and Store Pinot Grigio

Label geography matters more than price here. Bottles from Friuli-Venezia Giulia or Alto Adige with DOC or DOCG markings consistently outperform generic "Italian Pinot Grigio" at a similar price. Check that ABV sits between 11-13% and avoid anything labeled sweet or late-harvest if you want the standard dry profile.

Quick Tip
Alsace labels say "Pinot Gris" - if you see that, expect a fuller, spicier wine. Italian bottles say "Pinot Grigio." They're the same grape but behave differently at the table.

Storage is straightforward:

  • Unopened bottles - store on their side at 50-55°F in a dark spot; inexpensive bottles are best within 1-3 years
  • Higher-quality examples - can hold 5-7 years under proper conditions
  • Opened bottles - reseal with a stopper and refrigerate upright; drink within 3-5 days

For anything beyond short-term storage, the details on freezing pinot grigio cover your options if a bottle has been open longer than expected.

Which Bottle to Reach For

Start with a Friuli or Alto Adige DOC for any recipe that calls for white wine - the acidity does the work without announcing itself. If the dish is richer or spiced, an Alsace Pinot Gris gives you more structure.

When you can't find either, look at replacements for pinot grigio - dry, high-acid whites handle most of the same cooking tasks well.

Golden Rule
Don't cook with a bottle you wouldn't drink. Pinot Grigio reduces in the pan - any off-flavors concentrate rather than cook away.

Frequently Asked Questions

Is Pinot Grigio sweet or dry?

Dry. Standard Italian Pinot Grigio contains little to no residual sugar and finishes clean. Only bottles specifically labeled "late harvest" or "vendange tardive" are sweet.

How should you serve Pinot Grigio?

Serve chilled at 45-50°F - about 30 minutes in the refrigerator from room temperature. Serving it too cold mutes the fruit; too warm and the acidity reads as harsh.

Is Pinot Grigio lighter than Chardonnay?

Yes, typically. Italian Pinot Grigio is lighter-bodied with sharper acidity, while Chardonnay - especially oaked versions - is fuller and creamier. Unoaked Chardonnay narrows the gap.

Can you use Pinot Grigio in any white wine recipe?

For most seafood, chicken, and vegetable-based recipes, yes. It falls short in cream-heavy or very rich dishes where a fuller white like Chardonnay holds up better.

Is Pinot Grigio vegan?

Not always. Some producers use animal-derived fining agents like isinglass or casein during production. Bottles labeled vegan have used alternative fining methods - check the label or producer's website.

How Long Does Romaine Lettuce Last? [Storage Guide]

April 1, 2026

Leftover romaine from last night's Caesar always raises the same question: how much longer will it actually stay crisp?

Can You Freeze Romaine Lettuce

The answer depends almost entirely on whether the head is whole or already cut, and how it's been stored since you bought it. Romaine lettuce (Lactuca sativa var. longifolia) has large, water-filled ribs that make it more sensitive to moisture and ethylene than most salad greens - meaning even small storage mistakes accelerate browning fast.

If the head is already looking questionable, lettuce swaps that work may save your meal plan without a grocery run.

QUICK SUMMARY

A whole, unwashed romaine head lasts 7-10 days in the fridge. Once chopped, expect 3-5 days. Freezing extends shelf life to 6-8 months, but texture turns limp - use frozen romaine in cooked dishes only.

🧊Fridge (whole): 7-10 days unwashed, wrapped in paper towel, crisper drawer
🥗Fridge (cut): 3-5 days sealed and dry; moisture speeds browning
❄️Freezer: 6-8 months after flash-freezing; cooked uses only after thawing

How Long Does Romaine Lettuce Last?

Romaine holds up longer than softer greens, but the whole versus cut distinction matters more than most people expect.

A whole romaine head kept dry in the crisper drawer is far more stable than chopped leaves sitting in a sealed bag.

Romaine Lettuce Shelf Life
MethodStateDurationNotes
🧊 FridgeWhole head7-10 daysUnwashed, wrapped in paper towel, stored in perforated bag in crisper
🧊 FridgeChopped or torn3-5 daysKeep dry and sealed; wet leaves brown and go limp much faster
❄️ FreezerRaw, flash-frozen6-8 monthsBest after blanching; use in soups or cooked dishes only
🏠 CounterWhole head1-2 days maxShort-term only; keep shaded and cool - not recommended long-term

Cut leaves expose more surface area and release moisture faster, which is why chopped romaine drops nearly half its fridge life compared to a full head.

Romaine hearts, once opened, follow the same 3-5 day window as chopped leaves - the protective outer leaves are gone, so the inner ribs are exposed.

How to Store Romaine Lettuce

The biggest mistake people make is washing romaine before storing it. Surface moisture is the main driver of sliminess and rib blackening, so hold off on rinsing until just before you eat.

For guidance on how romaine is used across recipes, romaine lettuce in cooking gives useful context on why texture matters so much.

Fridge (whole head): Remove any damaged outer leaves, then wrap the head loosely in a dry paper towel - this wicks ambient moisture without drying the leaves out. Place it in a perforated plastic bag or a produce container with a vent, then store in the crisper drawer. Replace the paper towel when it feels damp.

Fridge (cut leaves): Spin or pat the leaves completely dry before sealing. Line the container with a fresh paper towel and layer leaves loosely on top. Keep romaine away from high-ethylene fruits like apples and pears - ethylene speeds yellowing and rib blackening noticeably.

Counter: Only viable for one to two days in a cool, shaded spot. Skip this for anything longer.

Golden Rule
Never store romaine wet. Moisture trapped inside a sealed bag is the fastest route to slimy, blackened leaves.

Can You Freeze Romaine Lettuce?

You can freeze romaine, but go in with clear expectations. Romaine's thick, water-filled ribs collapse when frozen - cell walls rupture, and the thawed result is soft and limp.

It's completely unsuitable for salads, however it works well in soups, stews, and blended sauces where texture isn't the point.

The same flash-freeze principle used in the flash freeze meatballs technique applies here - spreading pieces in a single layer prevents them clumping into one frozen block.

  1. Trim and wash Remove the core and separate leaves; rinse under cold water.
  2. Blanch (optional) Submerge leaves in boiling water for 30-60 seconds, then transfer immediately to an ice bath to preserve color.
  3. Dry thoroughly Spread leaves on a clean towel and pat until no surface moisture remains.
  4. Flash-freeze Arrange in a single layer on a baking sheet and freeze for 1-2 hours until solid.
  5. Bag and label Transfer to an airtight freezer bag, press out all air, and write the date.

Thaw frozen romaine in the fridge for several hours before using. Add it directly to soups or stir-fries without worrying about the texture change - at that point, it won't matter.

Watch Out
Don't freeze romaine expecting salad results. The large ribs hold water that destroys structure on thawing - no amount of chilling restores crispness.

Signs Romaine Lettuce Has Gone Bad

Romaine gives clear signals before it becomes a food safety concern. Start at the ribs and base - that's where spoilage shows up first.

Signs It's Gone Bad
👀
VisualBrowning or blackened central rib edges · Slimy, translucent leaves starting at the base · Yellowing inner leaves
👃
SmellSour or slightly fermented odor near the core · Off smell at the cut stem
✋
TextureSoft, mushy ribs · Water-soaked base · Overall limpness that won't recover

Rinsing won't fix slimy leaves - discard any romaine that shows sliminess or smells sour near the core.

Light edge browning on outer leaves is cosmetic and safe to trim away, however a mushy base or foul odor means the whole head should go.

Making Romaine Last Through the Week

Good habits set early make a real difference by day seven. These apply whether you're storing a full head or prepping romaine hearts for the week ahead.

  • 🧻 Swap the paper towel - replace it when damp, not on a schedule; a wet towel actively traps moisture.
  • 🍎 Separate from ethylene sources - keep romaine away from apples, pears, and bananas in the crisper.
  • ✂️ Trim the core lightly - remove discolored base without cutting too far up or loose leaves will dry out at the edges.
  • ❄️ Freeze what you won't eat - chopped romaine flash-frozen now is ready for winter soups in months.

If your romaine has already passed its window, romaine lettuce swaps that work can fill the gap in most recipes.

For a broader look at keeping lettuce fresh across different varieties, the same core principles apply - dry, sealed, cold, and away from ethylene.

Handling iceberg lettuce stand-ins follows different rules, since iceberg has no thick ribs and handles moisture differently.

Shortcut
Prep romaine hearts immediately after opening - dry the leaves, layer with paper towel in a sealed container, and they'll hold for the full 3-5 days without any extra work.

Frequently Asked Questions

Can you freeze romaine lettuce for salads?

No. Romaine's thick water-filled ribs rupture when frozen, leaving thawed leaves limp and watery. Frozen romaine only works in cooked applications like soups or stews.

Why does romaine lettuce go slimy?

Sliminess starts when trapped moisture breaks down leaf cells, usually at the base or inner leaves first. Storing romaine wet or in an unvented sealed bag accelerates this significantly.

How long do romaine hearts last once opened?

Opened romaine hearts last 3-5 days in the fridge. Without their outer leaves, the inner ribs are exposed and dry out or brown faster than a whole head.

Can you freeze lettuce without blanching?

Yes, though blanching helps preserve color. Skipping blanching is fine if you plan to use romaine in blended dishes where color won't show - see [storing kale without blanching correctly](https://forkliftkitchen.com/kale-without-blanching-shelf-life/) for how the same tradeoff applies to other greens.

Is slightly wilted romaine still safe to eat?

Yes, if there's no sliminess or sour smell. Wilted romaine can be revived by soaking in ice water for 15-20 minutes - the ribs reabsorb water and firm back up.

Laotian Larb Gai

April 1, 2026

Complete Recipe Article Output

When you need a fast, high-protein meal that doesn't require turning on the oven, ground chicken with fresh herbs and lime delivers. This Lao classic takes 20 minutes from start to finish and works for weeknight dinners or casual entertaining.

Laotian Larb Gai served on a plate

The skillet handles the cooking while you prep the herbs. Toast rice in a dry pan until golden, cook the chicken until just done, then toss everything with lime juice and fish sauce right before serving.

Perfect for hot summer nights when you want something bright and satisfying without heating up the kitchen.

QUICK SUMMARY

Laotian larb gai is ground chicken cooked until just done (8-10 minutes at medium heat), then tossed with lime juice, fish sauce, toasted rice powder, and fresh herbs. The toasted rice adds crunch and nutty flavor while the herbs keep it bright. Make this when you need a protein-packed meal that feels light and fresh.

⏱️Time Reality: 20 minutes total, most of it hands-off toasting and cooling
🔥Critical Move: Cook chicken to 165°F then remove immediately to prevent drying
⚠️Watch Out: Add lime juice last or the mixture turns watery and loses brightness

Why This Recipe Works

Ground chicken cooks fast and stays tender when you pull it at exactly 165°F. For a version that comes together quickly, a simple rice variation on the side turns this into a full meal.

Quick Reference
⏱️
Prep Time
10 min
🔥
Cook Time
8-10 min
⏰
Total Time
18-20 min
🍽️
Servings
4 servings
📊
Difficulty
Easy
🏷️
Category
Main Dish | Appetizer
💡
Quick Tip
Toast rice powder for crunch and aroma
🎯
Best For
Weeknight | Entertaining

What makes this work:

  • Toasted rice powder adds texture and nutty depth - sticky rice toasted until golden and ground creates crunch that soaks up dressing without getting mushy
  • Fresh lime juice brightens without making it watery - adding acid last preserves the herbaceous lift and prevents the mixture from releasing excess moisture
  • Cooking chicken to exactly 165°F keeps it moist - pulling the skillet off heat the moment it reaches temp prevents the dry, crumbly texture that ruins ground poultry
  • Paper-thin shallots distribute sharp sweetness evenly - slicing them thin means you get flavor in every bite without overpowering chunks
  • Generous fresh herbs make the dish - at least half a cup of mint and cilantro adds the bright, cooling contrast that balances the salty-sour-spicy base
Golden Rule
Toast rice over medium heat, stirring constantly for 5 minutes until golden - any darker and it tastes burnt, any lighter and it lacks crunch

What You'll Need

Ingredients for Laotian Larb Gai

Shop for fresh herbs with no wilting and firm shallots. For a version that comes together quickly, creamy sauce side dish adds richness if you're serving this as part of a bigger spread.

🍗
Protein
  • 1 lb ground chicken
🧄
Aromatics
  • 3 shallots, thinly sliced
  • 2 scallions, chopped
  • 1-2 fresh chilies, minced
🌶️
Seasonings
  • 3 tablespoon fish sauce
  • 3 tablespoon fresh lime juice
  • ¼ cup toasted rice powder
  • 1 teaspoon sugar (optional)
🥬
Herbs & Greens
  • ½ cup fresh mint, chopped
  • ½ cup fresh cilantro, chopped
  • Lettuce leaves for serving

Ingredient Details

  • Ground chicken
    Use 93% lean or leaner - fattier grinds make the mixture greasy and heavy
  • Toasted rice powder
    Toast ¼ cup raw sticky rice in a dry skillet for 5 minutes, then grind in a spice grinder or mortar and pestle until coarse
  • Fish sauce
    Use Three Crabs or Red Boat brand for clean umami without overwhelming fishiness
  • Fresh lime juice
    Squeeze limes right before adding - bottled juice tastes bitter and flat
  • Shallots
    Slice paper-thin with a sharp knife so they soften slightly when mixed but keep their crunch
  • Fresh herbs
    Chop herbs right before serving to prevent wilting and browning
  • Chilies
    Remove seeds for less heat or use dried chili flakes if fresh aren't available

Ingredient Swaps

Ground turkey works if chicken isn't available, though it runs leaner and dries out faster. Rich mains need something to cut through, and simple homemade potato does exactly that when you're building a full plate.

Four swaps that work:

  • Ground turkey for ground chicken - leaner protein with similar texture, watch it closer since it dries out 1-2 minutes faster
  • Soy sauce or tamari for fish sauce - less umami depth but still salty, use 2 tablespoons to start and add more to taste
  • Lemon juice for lime juice - slightly less aromatic but still provides necessary sourness, use same amount
  • Red onion for shallots - stronger sharp flavor, slice extra thin and soak in cold water for 5 minutes to mellow the bite

Ground Turkey

Works for: leaner option, meal prep, similar cooking time

Skip if: you want the most tender texture since turkey dries faster

Soy Sauce

Works for: gluten-free with tamari, vegetarian-friendly flavor base

Skip if: you want authentic Lao flavor since it lacks the fermented funk

Instructions

Cook the chicken in one skillet while the toasted rice cools. Katsu brings the color this plate needs, so a tender katsu on the side adds visual contrast when you're serving a crowd.

  1. Toast the rice: Heat a dry skillet over medium heat and add ¼ cup raw sticky rice. Stir constantly for 5 minutes until golden and fragrant. Transfer to a plate to cool, then grind in a spice grinder or mortar and pestle until coarse powder forms.

  2. Cook the chicken: In the same skillet over medium heat, add ground chicken and break it up with a spoon. Cook for 8-10 minutes, stirring frequently, until no pink remains and internal temp hits 165°F. Remove from heat immediately and let cool for 2-3 minutes.

  3. Prep the aromatics: While chicken cools, slice shallots paper-thin, chop scallions, mince chilies, and roughly chop mint and cilantro. Keep herbs separate until final assembly.

  4. Mix the dressing: In a large mixing bowl, combine fish sauce, lime juice, and sugar if using. Stir until sugar dissolves.

  5. Assemble the larb: Add cooled chicken, toasted rice powder, shallots, scallions, chilies, and herbs to the bowl with dressing. Toss gently with a spoon until everything is coated but herbs aren't crushed. Taste and adjust lime, fish sauce, or chilies. Serve immediately in lettuce cups or over rice.

Shortcut
Skip toasting rice and use store-bought rice powder (khao khua) from Asian markets - saves 5 minutes and tastes nearly identical

What to Serve With It

The salad works best when it hits the table at the same time as the main. If you're planning sides strategically, light seafood dish planning shows how to balance textures across the plate.

Side Dish Prep Why It Works How to Serve
Steamed jasmine rice Easy Neutral base soaks up lime dressing and balances spicy heat Serve warm in bowls with larb spooned over top
Crisp lettuce leaves Easy Adds refreshing crunch and turns meal into hands-on wraps Use butter lettuce or romaine hearts for scooping
Sliced cucumbers Easy Cool contrast to spicy heat with clean, hydrating crunch Slice thin and arrange on platter around larb
Sticky rice Medium Traditional pairing that encourages eating with hands Form into small balls and use to scoop up larb
Simple cucumber salad Easy Adds acidity and crisp texture that mirrors larb's brightness Dress with rice vinegar and serve chilled on the side

Three ways to serve it:

  • Weeknight meal: Spoon larb over jasmine rice with sliced cucumbers on the side for a 20-minute dinner that hits protein and vegetable targets
  • Party appetizer: Set out lettuce leaves, larb in a bowl, and herb garnishes so guests build their own wraps
  • Meal prep option: Pack larb separately from rice and lettuce, then assemble day-of so herbs stay fresh and rice doesn't get soggy
Best Pick
Butter lettuce cups are the easiest serving vessel - they're sturdy enough to hold larb without tearing and mild enough to let the seasoning shine

Store and Reheat

Larb tastes best fresh but holds for 3-4 days if you store it right. A good potato can make or break the plate, so if you're building meals for the week, something fresh and light adds contrast when you reheat leftovers.

Method Time Best For
🍳 Stovetop 3-4 min low-medium heat Quick reheating without drying out the chicken
📦 Microwave 1-2 min medium power Small portions when you need it fast
🔥 Oven 8 min at 300°F Larger portions that need even warming

For best results when storing:

  • Store larb in shallow airtight containers - spread it thin so it cools fast and prevents bacterial growth
  • Keep fresh herbs separate - add chopped mint and cilantro right before serving so they don't wilt or brown in storage
  • Refrigerate within 2 hours of cooking - ground chicken is high-risk for bacteria if left at room temp
  • Add a squeeze of fresh lime after reheating - brightens the flavor that dulls in the fridge
  • Don't freeze assembled larb - herbs and lettuce turn mushy, but you can freeze cooked chicken alone for up to 1 month

Frequently Asked Questions

Can I make larb gai ahead and refrigerate?

Yes, but keep herbs separate. Store cooked chicken mixture in an airtight container for up to 3-4 days, then add fresh mint and cilantro right before serving so they stay bright and don't wilt.

How long should I cook ground chicken for larb gai?

Cook for 8-10 minutes over medium heat, stirring frequently, until internal temp hits 165°F. Pull it off heat immediately - overcooking makes it dry and crumbly instead of moist and tender.

What are good substitutes for fish sauce?

Use soy sauce or tamari in a pinch, starting with 2 tablespoons and adding more to taste. It won't have the same fermented depth, but it still provides the salty umami base the dish needs.

Why is my larb soggy and how do I fix it?

Soggy larb comes from adding lime juice too early or overdressing. Add dressing gradually, taste as you go, and mix in extra toasted rice powder or fresh herbs to absorb excess liquid.

What sides pair well with larb gai for entertaining?

Sticky rice and crisp lettuce leaves are traditional, but grilled vegetables and cucumber salad add color and texture. Set everything out buffet-style so guests can build their own plates.

Laotian Larb Gai served on a plate

Laotian Larb Gai

No ratings yet
Laotian larb gai is a quick ground chicken dish cooked to tender perfection and tossed with fresh herbs, lime juice, fish sauce, and toasted rice powder for nutty crunch. This protein-packed meal comes together in 20 minutes, ideal for weeknight dinners or casual entertaining. The toasted rice adds texture while fresh lime juice brightens without watering down the flavors.
Print Recipe Pin Recipe
Prep Time 10 minutes mins
Cook Time 10 minutes mins
Total Time 20 minutes mins
Servings: 4 servings
Course: Appetizer, Main Dish
Cuisine: Laotian
Ingredients Equipment Method Notes

Ingredients
  

  • 1 lb ground chicken use 93% lean or leaner
  • 3 pieces shallots thinly sliced paper-thin
  • 2 stalks scallions chopped
  • 1 to 2 fresh chilies minced, seeds removed for less heat
  • 3 tablespoon fish sauce use brand with clean umami like Three Crabs or Red Boat
  • 3 tablespoon fresh lime juice squeeze right before adding
  • ¼ cup toasted sticky rice toasted and ground into coarse powder
  • 1 teaspoon sugar optional
  • ½ cup fresh mint chopped just before serving
  • ½ cup fresh cilantro chopped just before serving
  • lettuce leaves for serving as wraps

Equipment

  • Skillet Used for toasting rice and cooking chicken
  • spice grinder or mortar and pestle For grinding toasted rice into coarse powder
  • Knife For slicing shallots and chopping herbs
  • Mixing bowl For combining dressing and mixing larb

Method
 

  1. Heat a dry skillet over medium heat and add ¼ cup raw sticky rice. Stir constantly for 5 minutes until golden and fragrant. Transfer to a plate to cool, then grind in a spice grinder or mortar and pestle until coarse powder forms.
    ¼ cup toasted sticky rice
  2. In the same skillet over medium heat, add ground chicken and break it up with a spoon. Cook for 8-10 minutes, stirring frequently, until no pink remains and the internal temperature reaches 165°F. Remove from heat immediately and let cool for 2-3 minutes.
    1 lb ground chicken
  3. While chicken cools, slice shallots paper-thin, chop scallions, mince chilies, and roughly chop mint and cilantro. Keep herbs separate until final assembly.
    3 pieces shallots, 2 stalks scallions, 1 to 2 fresh chilies, ½ cup fresh mint, ½ cup fresh cilantro
  4. In a large mixing bowl, combine fish sauce, fresh lime juice, and sugar if using. Stir until sugar dissolves.
    3 tbsp fish sauce, 3 tbsp fresh lime juice, 1 tsp sugar
  5. Add cooled chicken, toasted rice powder, shallots, scallions, chilies, and herbs to the bowl with dressing. Toss gently with a spoon until everything is coated but herbs are not crushed. Taste and adjust lime, fish sauce, or chilies to preference. Serve immediately in lettuce cups or over rice.
    1 lb ground chicken, ¼ cup toasted sticky rice, 3 pieces shallots, 2 stalks scallions, 1 to 2 fresh chilies, ½ cup fresh mint, ½ cup fresh cilantro

Notes

  • Toast sticky rice until golden but not burnt for best texture and aroma.
  • Cook chicken to exactly 165°F and remove from heat immediately to keep it moist.
  • Add fresh lime juice last to avoid watering down and losing brightness.

Tried this recipe?

Let us know how it was!

How Long Does Potato Salad Last? [Storage Guide]

April 1, 2026

Leftover potato salad from a cookout raises an immediate question: how long does it actually stay safe in the fridge?

How Long Is Potato Salad Good For

The answer depends on a few key factors - whether it's mayonnaise-based or vinaigrette-based, how quickly it was chilled after serving, and how long it sat out before it went in.

Most homemade and store-bought versions hold for 3-5 days refrigerated, but that window shrinks fast if handling was careless.

Your choice of potato matters too - preparing russet vs idaho potatoes properly affects how they absorb dressing and hold up over time, and a pommes anna layered potatoes recipe shows just how differently potatoes behave depending on prep method.

QUICK SUMMARY

Potato salad lasts 3-5 days in the fridge in an airtight container. It can be frozen for 1-2 months, though mayonnaise-based versions lose texture. Never leave it at room temperature beyond 2 hours.

🧊Fridge: 3-5 days in a shallow airtight container at 40°F or below
❄️Freezer: 1-2 months; best quality when dressing is added after thawing
⚠️Counter: 2 hours maximum - discard after 1 hour if temperature exceeds 90°F

How Long Does Potato Salad Last?

Refrigeration is the only safe storage method for prepared potato salad. Both homemade and store-bought versions follow the same basic timeline once they're opened or made.

Potato Salad Shelf Life
MethodStateDurationNotes
🧊 FridgeHomemade (cooked)3-5 daysKeep at 40°F or below; shallow container speeds chilling
🧊 FridgeStore-bought (opened)3-5 daysUse package use-by date as upper limit
❄️ FreezerCooked (any style)1-2 monthsTexture declines; oil-based dressings freeze better than mayo
🏠 CounterCooked2 hours maxReduces to 1 hour above 90°F; discard after

The mayonnaise and hard-cooked eggs in creamy potato salad create a high-protein environment where bacteria multiply quickly above 40°F. Vinaigrette-based versions are slightly more forgiving, however they still fall within the same 3-5 day window once refrigerated.

Store-bought prepared potato salad is subject to the same limits after opening - the printed use-by date assumes an unopened, uncontaminated container.

Watch Out
Never leave potato salad out overnight and assume it's still safe. Foodborne bacteria can multiply to dangerous levels within 2 hours at room temperature - refrigeration is non-negotiable.

How to Store Potato Salad

Getting potato salad into the fridge correctly is just as important as how long it stays there. The cooling process itself determines whether the 3-5 day window holds.

Cool it quickly first. Spread freshly made potato pieces in a single layer on a sheet pan to drop the temperature fast before combining with dressing. This step cuts the bacterial growth window significantly.

Fridge: Transfer the finished salad to a shallow airtight container - no more than 1-2 inches deep - so it chills evenly. Deep containers stay warm in the center longer, shortening safe storage life. A resealable container with a tight lid also prevents the salad from picking up fridge odors.

Counter: Keep a strict 2-hour limit during serving. If you're using it for a party that ran long, label the container with the actual time it came out of the fridge, not the time you made it. The same discipline that goes into storing egg salad correctly applies here - both dishes share the same mayonnaise-and-egg risk profile.

Pantry: Not an option for prepared potato salad. Room temperature storage is unsafe without exception.

Golden Rule
Label every container with the date it was refrigerated - not the date you served it. If it sat out intermittently at a gathering, count 3 days from when it first went into the fridge.

Can You Freeze Potato Salad?

Freezing potato salad is possible, however mayonnaise-based versions suffer the most. Mayo and cooked eggs separate when frozen and often turn watery after thawing, altering the dressing's texture entirely.

Oil-based or vinaigrette potato salads freeze with noticeably better results.

The best strategy for freezing creamy potato salad is to separate the components before they go into the freezer.

  1. Portion the potatoes into airtight, freezer-safe containers, leaving minimal headspace to reduce ice crystal formation.
  2. Toss with a little oil and freeze the potatoes plain if possible - skip the dressing entirely at this stage.
  3. Label with date and a use-by date 2 months out; best quality declines after that even if technically safe.
  4. Thaw in the refrigerator for 24-48 hours; never thaw at room temperature.
  5. Add fresh dressing after thawing - whisk mayo-based dressing into the potatoes at this point for the closest approximation of original texture.

If the dressing was frozen with the salad, inspect it after thawing.

Drain any pooled liquid, then whisk to re-emulsify or stir in a small amount of fresh dressing to restore creaminess. Potatoes may still turn mealy and grainy - Yukon gold potatoes tend to hold up better than russets in this process, as knowing about preparing yukon gold potato properly confirms their waxier texture resists breakdown.

Signs Potato Salad Has Gone Bad

Don't rely on taste to check potato salad - discard it before it reaches your fork if any of these signs appear.

Signs It's Gone Bad
👀
VisualDull-gray or brown discoloration on potato pieces · Mold spots (white, green, or black flecks) on surface or edges · Cloudy or foamy liquid pooling on top
👃
SmellSour or fermented off-odor · Rotten-egg or ammonia notes
✋
TextureSlimy film on potato pieces · Sticky or slick dressing · Potatoes crumbling into mealy paste when stirred

Any single sign above is enough to discard the entire batch. Mold visible on one spot means it's throughout. The same rule applies regardless of whether it's homemade or store-bought - 5 days is the cutoff, and questionable samples should never be tasted to test.

Storing Potato Salad the Right Way

A few practical habits protect the full 3-5 day fridge window. These tips apply whether you're dealing with leftovers or a batch made fresh for the week.

  • 🧊 Chill fast - spread cooked potatoes on a sheet pan before mixing; this drops the temperature in minutes rather than hours.
  • 📦 Use shallow containers - 1-2 inch depth ensures even, rapid chilling throughout the salad.
  • 🥗 Freeze plain potatoes - add mayonnaise only after thawing to avoid separation and preserve creaminess.
  • 🌡️ Watch the clock at gatherings - set a timer for 2 hours; if it's been out longer, discard it.

Planning what you'll serve at a cookout? Pairing it well is part of the picture - a look at dishes alongside potato salad helps round out the meal without duplicating similar creamy sides.

If you're building a spread that also includes macaroni salad cooking methods, the same storage rules apply to both.

Shortcut
Use pasteurized hard-cooked eggs in potato salad destined for picnics or outdoor events - they reduce food safety risk when refrigeration access is limited.

Frequently Asked Questions

Can you leave potato salad out overnight?

No - discard it. Potato salad left out more than 2 hours enters the bacterial danger zone and is unsafe to eat, regardless of how it looks or smells. The 2-hour limit drops to 1 hour above 90°F.

How long does store-bought potato salad last in the fridge?

After opening, 3-5 days refrigerated - the same window as homemade. Use the printed use-by date as an upper limit, not a guarantee; once opened, the clock resets regardless of that date.

Can you freeze potato salad with mayonnaise?

Yes, but texture changes significantly. Mayo separates and turns watery after thawing, and potatoes often become mealy. Freezing the potatoes plain and adding fresh dressing after thawing gives much better results.

Is potato salad safe after 5 days in the fridge?

Five days is the outer limit - day 6 and beyond is not recommended. If it was stored correctly from the start in an airtight container at 40°F, day 5 is acceptable; if there's any doubt about handling, discard it sooner.

Does vinaigrette potato salad last longer than mayo-based?

Marginally, because it lacks eggs and dairy. Both still fall within the 3-5 day fridge window, however vinaigrette versions tolerate slight temperature fluctuation slightly better and freeze without the separation problem.

What Is Pepper Jack Cheese? [Taste, Uses & More]

April 1, 2026

Pepper jack does something that plain Monterey Jack cannot - it brings heat to the melt.

What Is Pepper Jack Cheese

That combination of creamy, smooth texture and fresh jalapeño bite makes it one of the few cheeses that works equally well on a burger, inside a quesadilla, or folded into scrambled eggs, whether you're relying on using air fryer grilled cheese for creaminess or keeping things simple with using quesadillas for creaminess.

QUICK SUMMARY

Pepper jack is a semi-soft American cheese built on a Monterey Jack base, flavored with chopped jalapeño or anaheim peppers. It melts smoothly, carries mild-to-moderate heat, and works across Tex-Mex, grilled, and casual cooking formats.

🧀Category: Semi-soft peppered Monterey Jack, California origin
🌶️Flavor: Creamy, milky tang with fresh jalapeño heat and subtle herbal notes
🍳Best Uses: Melting on burgers, quesadillas, nachos, mac and cheese
❄️Shelf Life: Opened block lasts 2-3 weeks wrapped; shredded about 1 week
🛒Buy It: Look for pale ivory with evenly distributed green pepper flecks, no slimy surface

What Is pepper jack cheese?

Pepper jack is a semi-soft American cheese originating in California, produced from the same Monterey Jack base as its milder cousin. Makers fold chopped fresh or roasted peppers - most commonly jalapeño, sometimes anaheim - into the curd before pressing.

The result is a pale ivory cheese studded with visible green flecks throughout. Some producers add roasted or smoked peppers for a deeper, earthier heat, and a few versions include herbs or serrano peppers for extra punch.

It falls under the broader peppered Monterey Jack category and is sold under several names: pepper jack, pepper-jack, and pepperjack are all the same product. Moisture content sits higher than cheddar, which gives it that springy-when-cold, creamy-when-melted character.

  • 🧀 Base cheese - Monterey Jack curd, pressing style, and moisture level
  • 🌶️ Heat source - jalapeño most common; anaheim, serrano, or roasted peppers in some versions
  • 🌿 Optional additions - herbs, garlic, or smoked peppers depending on the producer
  • 📍 Origin - California, now produced across the United States

What Does pepper jack cheese Taste Like?

pepper jack cheese - What Is Pepper Jack Cheese

The first thing you notice is mild lactic creaminess - the same clean, milky tang you get from straight Monterey Jack. Then the pepper heat arrives, bright and fresh rather than scorching.

Sensory SnapshotModerate Intensity
👅 Flavor
milkytangyfresh heatherbal
✋ Texture
springy coldsmooth melted
👃 Aroma
mild dairyvegetal pepper

It's less sharp than cheddar and milder than peppered queso fresco. Versions made with roasted or smoked peppers develop an earthier, slightly smoky undertone that reads more complex than the standard jalapeño variety.

Heat level varies by brand. Standard pepper jack sits at mild-to-moderate - most people sensitive to spice can handle it, though versions labeled "hot" with serrano or habanero additions climb noticeably higher.

Golden Rule
Melting intensifies the creaminess and softens the pepper heat slightly - if you want the jalapeño bite to stay prominent, keep it cold or add it to a dish after cooking.

How to Use pepper jack cheese

Melting is where pepper jack earns its place. The high moisture content of its Monterey Jack base means it flows smoothly without breaking into greasy puddles, making it a natural for stovetop and oven applications.

How Pepper Jack Cheese Is Used
MethodBest ForTip
🔥 MeltedBurgers, quesadillas, mac and cheese, nachosLow-to-medium heat keeps it smooth; high heat can separate the fat
🫕 BakedEnchiladas, casseroles, breakfast bakesShred finely so it melts evenly across the surface
🥗 Sliced coldSandwiches, burgers, charcuterie boardsBuy a block and slice thick - pre-sliced packs dry out faster
🍳 Folded inScrambled eggs, omelets, frittatasAdd off heat so it melts gently without rubbery streaks

Southwestern American and Tex-Mex cooking use it most heavily - inside burritos and enchiladas, shredded over nachos, or tucked into a quesadilla alongside roasted chiles. It also fits comfortably in American casual formats like grilled cheese and cheeseburgers.

Pairing it well means leaning into contrast. Avocado or guacamole softens the heat with fat; tomato salsa or pico de gallo matches its brightness. On a board, cured or smoked sausages work better than delicate charcuterie.

For a savory breakfast, a migas tex-mex eggs recipe folds pepper jack into eggs alongside fried tortilla strips for a textured, spicy bite.

If a recipe calls for jack cheese and you want some heat, pepper jack is the obvious move - though if you need something without the spice, understanding using jack cheese for creaminess covers the plain alternatives.

Equally, if you're working around a dietary restriction or can't source it, swapping out pepper jack cheese gives you workable replacements that keep the melt.

Try It In
🧀Cheddar Cheese StrawsSwap in pepper jack for a spicy, crisp variation→🍳Egg and Cheese Breakfast SandwichAdds creamy heat to a classic morning build→🥗Blue Cheese Dressing (Homemade)Serve alongside pepper jack on a bold cheese board→

How to Buy and Store pepper jack cheese

A good block of pepper jack should look pale ivory with evenly distributed green flecks. Avoid anything with wet or slimy surfaces, dried-out edges that have gone brown, or a rind that looks cracked and dull.

Watch Out
Pre-shredded pepper jack dries out much faster than a block - it typically lasts only about 1 week once opened, compared to 2-3 weeks for a properly wrapped block.

Buy a whole block or large wedge when you can, then shred or slice as needed. For storage, wrap the cut face in waxed paper or parchment first, then add a loose layer of plastic wrap or slide it into a resealable bag.

Keep it in the cheese drawer or on the coldest refrigerator shelf.

An unopened package holds for 4-6 weeks in the fridge.

Once opened, aim to use a wrapped block within 2-3 weeks.

Learn to spot the difference between normal surface dryness and actual pepper jack cheese spoilage signs before deciding whether to trim or toss.

If the recipe calls for anaheim pepper and you've run out, swapping out anaheim pepper lists the closest heat-level alternatives.

Start with the Melt

If you're new to pepper jack, a quesadilla or simple cheeseburger is the right entry point. Both applications let the cheese melt fully, which shows off the smooth texture and keeps the heat approachable.

Once you're comfortable with it, move toward baked dishes - enchiladas, breakfast casseroles, or mac and cheese - where the pepper flavor disperses through the whole dish. Those formats reveal how well it performs beyond the obvious applications.

Frequently Asked Questions

Is pepper jack spicy?

Mildly to moderately. Standard pepper jack with jalapeño sits low enough for most people, including those who don't typically eat spicy food. Versions labeled "hot" that use serrano or habanero peppers climb considerably higher.

What is the difference between pepper jack and Monterey Jack?

Monterey Jack is plain and mild with no added heat. Pepper jack uses the same base cheese but includes chopped jalapeño or other peppers folded into the curd, adding heat and visible green flecks.

Does pepper jack contain real peppers?

Yes - most producers use real chopped jalapeño or anaheim pepper mixed into the curd. A few lower-cost products use pepper flavoring or dried flakes instead, so check the ingredient list if freshness matters.

Can you freeze pepper jack cheese?

You can, but the texture suffers. Freezing causes the semi-soft structure to become crumbly on thawing, which makes it better suited for melting applications than cold slicing afterward. Wrap tightly and use within two months.

How long does pepper jack last in the fridge?

An unopened block keeps for 4-6 weeks. Once opened and wrapped properly in waxed paper and plastic, expect 2-3 weeks. Shredded pepper jack is the most perishable - use it within about one week.

What Is Refined Sugar? [Taste, Uses & More]

April 1, 2026

You spot it at the back of the baking aisle - a five-pound bag of white granulated sugar, often overlooked because it's always been there. Refined sugar is one of the most familiar ingredients in any kitchen, yet most of us have never thought much about where it comes from, how it behaves under heat, or why sugar storage life is essentially infinite when stored properly.

What Is Refined Sugar

This profile covers what it actually is, what it tastes like, and how to put it to work.

QUICK SUMMARY

Refined sugar is purified crystalline sucrose made from sugarcane or sugar beet. It tastes clean and neutral-sweet with no molasses undertone. Use it for baking, caramelizing, beverage sweetening, and meringues. Stored dry and sealed, it keeps indefinitely.

🍬Flavor: Clean, neutral sweet - no bitter, floral or molasses notes
🧁Best Uses: Baking, caramel, meringues, simple syrup, beverages
🛒Buy: Fine, free-flowing white granules in a sealed bag or canister
📦Store: Airtight container, cool dry pantry away from strong odors
⏳Shelf Life: Indefinite if kept dry and sealed; humidity causes clumping

What Is Refined Sugar?

Refined sugar is purified sucrose - a disaccharide of glucose and fructose - extracted from sugarcane or sugar beet juice through repeated washing, filtration, and crystallization. The refining process strips out nearly all molasses, color, and plant compounds, leaving white, neutral crystals.

You'll also see it labeled table sugar, white sugar, or granulated sugar, and occasionally as refined sucrose on ingredient lists. Those names all describe the same product.

Several grades exist, and crystal size is the practical difference:

  • Standard granulated - the everyday workhorse for baking and cooking
  • Superfine (caster sugar) - finer crystals that dissolve faster, preferred for meringues and cold drinks
  • Powdered (confectioners') sugar - ground to a powder with added cornstarch, used for icings and dustings
  • Coarse (sanding) sugar - larger crystals that hold shape and sparkle on baked surfaces

Unlike brown sugar, refined white sugar contains no residual molasses, which is why it contributes sweetness without flavor complexity.

What Does Refined Sugar Taste Like?

refined sugar - What Is Refined Sugar

Pure, clean sweetness is the defining characteristic - no bitterness, no earthiness, no spice. At everyday concentrations in coffee or a cake batter, the flavor is simply sweet and neutral.

Sensory SnapshotModerate Intensity
👅 Flavor
clean sweetneutralfaintly floral
✋ Texture
dry fine crystalsslick when dissolved
👃 Aroma
virtually odorlessfaint sweet warmth

Heat changes things significantly. As sucrose approaches 320°F (160°C), caramelization begins - the neutral sweetness gives way to bitter, nutty, and butterscotch-like compounds.

That transformation is entirely a product of thermal breakdown, not anything present in the raw crystal.

Compared to honey or brown sugar, refined sugar tastes noticeably simpler. That neutrality is a feature in recipes where you want clean sweetness without interference from secondary flavors.

Golden Rule
If your recipe depends on caramel color and depth, push your dry-heat sugar past 340°F. Below that, you get sweetness with no complexity.

How to Use Refined Sugar

Refined sugar does several structurally distinct jobs in cooking, and understanding them helps you use it precisely.

In baking, creaming granulated sugar with butter creates air pockets that give cakes lift. Crystal size matters - standard granulated gives a slightly coarser crumb than superfine. For cookies, the sugar-to-fat ratio directly controls spread.

In beverages and syrups, sugar dissolves cleanly into hot liquid. For cold drinks, agave vs simple syrup comparisons come up often, but a basic 1:1 refined sugar syrup remains the bar standard for consistent sweetness.

How Refined Sugar Is Used
MethodBest ForTip
🥄 DissolvingCoffee, tea, simple syrup, poaching liquidHeat the liquid first; cold water dissolves sugar slowly
🧈 CreamingCakes, cookies, buttercreamBeat at least 3 minutes to maximize aeration
🔥 CaramelizingCaramel sauce, pralines, crème brûléeUse a light-colored pan to monitor color accurately
🍞 Feeding yeastBread doughs, brioche, sweet rollsSmall amounts activate yeast; large amounts slow it
⚖️ BalancingTomato sauces, vinaigrettes, marinadesStart with a pinch; it rounds acidity without sweetening noticeably

Refined sugar pairs tightly with butter, vanilla, cocoa, lemon, and eggs - these are the core flavor relationships in Western baking and French confectionery.

In Latin American sweets like tres leches or alfajores, and across Asian desserts from mochi to pandan cake, granulated sugar provides the structural backbone without asserting its own flavor.

Shortcut
Need a quick acid fix in a tomato sauce? A quarter teaspoon of granulated sugar stirred in during the last two minutes of cooking cuts sharpness without reading as sweet.
Try It In
🥜Cinnamon Sugar Roasted NutsWhere granulated sugar forms the crystallized coating→☕Iced Brown Sugar Oat Milk LatteContrast refined vs. brown sugar sweetness in one drink→🍩Cinnamon Sugar Donut MuffinsClassic creaming method with standard granulated sugar→

How to Buy and Store Refined Sugar

Look for fine, free-flowing white granules in a sealed bag or rigid canister. Skip any bag with visible clumping or a yellowish tint - both signal moisture exposure or age.

For specific tasks, buy superfine (caster) sugar for meringues and Swiss buttercream, or powdered sugar for icings.

Watch Out
Don't store refined sugar near spices, coffee, or onions. It readily absorbs odors through thin or open packaging.

Transfer opened bags into an airtight container in a cool, dry pantry. Humidity is the only real enemy - moisture causes clumping, and odors from nearby foods absorb easily through thin plastic.

The refined sugar storage life is indefinite under proper conditions, making it one of the few pantry staples that genuinely never goes bad.

If you're comparing it to less-processed refined sugar swaps, note that alternatives like coconut sugar, honey, and maple syrup bring their own flavors and behave differently in baked goods.

Start Here

Granulated refined sugar is the right starting point if you need clean, predictable sweetness with no flavor interference. Use standard granulated for most baking, switch to caster when fast dissolving matters, and reach for caramelization when you want depth and color.

Those three moves cover the vast majority of recipes that call for white sugar.

Frequently Asked Questions

What is refined sugar made from?

Sugarcane or sugar beet. Both are processed identically - juice is extracted, filtered, and crystallized until only pure sucrose remains. The finished product is chemically identical regardless of source.

How does refined sugar taste compared to brown sugar?

Refined sugar tastes clean and one-dimensional. Brown sugar carries molasses undertones - caramel-like, slightly bitter, more complex. The difference is obvious in side-by-side tasting.

Can you substitute honey for refined sugar in baking?

Yes, with adjustments. Honey is sweeter and adds moisture, so reduce it by 25% and cut other liquids slightly. It also browns faster, so lower your oven temperature by about 25°F.

Why does refined sugar clump, and how do you fix it?

Humidity. Moisture absorbed between crystals fuses them together. Break up clumps by spreading the sugar on a baking sheet and drying it at 200°F for 15 minutes, then sifting.

Does refined sugar help or hurt yeast activity?

Both, depending on amount. Small quantities (1-2%) feed yeast and speed fermentation. Above roughly 10% of flour weight, sugar draws water away from yeast cells and slows the rise significantly.

Mexican Cochinita Pibil

April 1, 2026

Slow-roasted pork that shreds with a fork often turns dry or bland when made at home. The key is marinating fatty pork shoulder in achiote paste and bitter orange juice, then wrapping it in banana leaves to lock in moisture during a low-temp roast.

Mexican Cochinita Pibil served on a plate

You get tender, citrus-soaked meat with deep red-orange color and earthy spice notes. No babysitting required.

This works for meal prep when you need protein that reheats well, or for entertaining when you want something that looks impressive but doesn't keep you in the kitchen.

QUICK SUMMARY

Cochinita pibil is slow-roasted pork shoulder marinated in achiote paste and bitter orange juice, then wrapped in banana leaves. The fat content in pork shoulder keeps the meat tender during a 3-4 hour roast at 325°F. Marinate at least 1 hour, but 4-24 hours deepens the flavor and color.

⏰Timing: 20 min prep, 3-4 hours roasting, 15 min resting - plan ahead
🔥First Move: Mix achiote marinade and coat pork shoulder thoroughly before wrapping
⚠️Watch Out: Lean cuts dry out - use pork shoulder or butt with visible fat marbling

Table of Contents

Toggle
  • Why This Recipe Works
  • What You'll Need
    • Ingredient Details
  • Ingredient Swaps
  • What to Serve With It
  • Store and Reheat
  • Frequently Asked Questions
  • Mexican Cochinita Pibil
    • Method 
    • Tried this recipe?

Why This Recipe Works

Achiote paste delivers authentic earthy spice while bitter orange juice tenderizes the pork and creates tangy depth. For a version that comes together quickly, another great sauerkraut recipe uses similar slow-roasting principles with different flavor profiles.

Quick Reference
⏱️
Prep Time
20 min
🔥
Cook Time
3-4 hours
⏰
Total Time
3 hr 20 min - 4 hr 20 min
🍽️
Servings
6-8 servings
📊
Difficulty
Medium
🏷️
Category
Main Dish
💡
Quick Tip
Marinate pork 1-24 hours for best flavor
🎯
Best For
Weeknight | Meal prep | Entertaining

What makes this work:

  • High-fat pork shoulder stays moist during long roasting and breaks down into fork-tender shreds
  • Banana leaf wrapping traps steam and aromatics while preventing surface drying
  • Low-and-slow roasting at 325°F melts collagen without toughening meat fibers
  • Internal temp of 195-205°F signals complete collagen breakdown for easy shredding
  • 15-minute rest after cooking redistributes juices throughout the meat before pulling
Quick Tip
Pass banana leaves over an open flame for 10 seconds to soften them and release subtle aromatic oils

What You'll Need

Ingredients for Mexican Cochinita Pibil

Stock achiote paste, pork shoulder, and citrus before starting. For a version that comes together quickly, simple homemade sauerkraut recipe delivers similar depth with different aromatics.

🍗
Main Protein
  • 3-4 lbs pork shoulder (with fat cap)
🥢
Marinade Base
  • 4 oz achiote paste
  • 1 cup bitter orange juice
  • 6 garlic cloves
  • 2 teaspoon cumin
  • 2 teaspoon oregano
🧄
Aromatics
  • 1 white onion (sliced)
  • 2 teaspoon salt
🫙
Wrapping
  • 4-6 banana leaves (or foil)

Ingredient Details

  • Pork shoulder
    Look for visible fat marbling and a thick fat cap - this renders during cooking and keeps meat moist
  • Achiote paste
    Sold in blocks in Mexican grocery sections - authentic brands contain annatto seeds, garlic, cumin, and oregano
  • Bitter orange juice
    Also called Seville orange or naranja agria - substitute with 3 parts regular orange juice to 1 part lime juice
  • Banana leaves
    Found frozen in Latin markets - thaw before use and wipe clean with damp cloth
  • Cumin
    Use whole seeds toasted and ground for deeper flavor, or pre-ground for convenience
  • Garlic
    Fresh cloves blended into marinade create sharper flavor than garlic powder
  • White onion
    Slice thick rounds to layer under pork - they caramelize and add moisture to the pan

Ingredient Swaps

Most swaps work if you adjust for texture and liquid balance. The dressing works best when it hits the table at the same time as the main - classic dressing dish adds tangy contrast without extra steps.

Four reliable swaps:

  • No bitter orange juice? Mix 3 parts regular orange juice with 1 part fresh lime juice - slightly sweeter but close acidity
  • No banana leaves? Wrap tightly in heavy-duty aluminum foil - retains moisture but loses subtle aromatic layer
  • Prefer slow cooker? Cook on low 6-8 hours - produces moister texture with less caramelization on edges
  • Using achiote powder? Blend 3 tablespoon powder with 2 tablespoon oil, 1 teaspoon cumin, 1 teaspoon oregano - similar color and flavor

Pork Shoulder

Works for: Long slow roasting, high fat content keeps meat tender, shreds easily

Skip if: You need lean protein or faster cooking time under 2 hours

Pork Loin

Works for: Leaner option, faster cooking at 1.5-2 hours

Skip if: You want fork-tender shredded texture - loin dries out during slow roasting

Instructions

The entire process takes 3-4 hours but only 20 minutes of hands-on work. Rich mains need something to cut through, and empanadas does exactly that - a simple empanadas on the side adds starchy balance without competing flavors.

Follow these steps:

  1. Make the marinade: Blend achiote paste, bitter orange juice, garlic, cumin, oregano, and salt until smooth. Score pork shoulder in 1-inch crosshatch pattern and rub marinade into all surfaces. Marinate 1-24 hours in the fridge.

  2. Prep the wrapping: Preheat oven to 325°F. Pass banana leaves over open flame 10 seconds to soften. Layer leaves in Dutch oven, overlapping edges. Spread sliced onions on leaves.

  3. Wrap and seal: Place marinated pork on onions. Fold banana leaves over pork, overlapping to seal completely. Cover Dutch oven with lid or heavy foil.

  4. Roast low and slow: Cook 3-4 hours until internal temp reaches 195-205°F and meat shreds easily with a fork. Check at 3 hours - if not tender, continue cooking in 30-minute increments.

  5. Rest and shred: Remove from oven, keep wrapped, rest 15 minutes. Unwrap carefully (steam burns), transfer pork to cutting board. Shred with two forks into medium-fine pieces. Mix with pan juices before serving.

Golden Rule
Never rush the roasting - meat needs time at low temp to break down collagen into gelatin for tender texture

What to Serve With It

Cochinita pibil needs something to balance the rich, citrusy pork. For a version that comes together quickly, simple tea recipe cuts through the richness without adding heaviness to the plate.

Side Dish Prep Why It Works How to Serve
Corn tortillas Easy Neutral base absorbs pork juices and marinade Warm on comal or skillet, serve stacked in towel
Pickled red onions Easy Acidic crunch cuts through fatty pork Make ahead, drain before serving
White rice Easy Starchy base stretches servings and soaks up sauce Cook while pork roasts, fluff before serving
Black beans Medium Protein and fiber balance rich pork Simmer with onion and cumin, mash slightly
Fresh cilantro Easy Herbal brightness lifts heavy flavors Chop right before serving to preserve oils

Three ways to serve it:

  • Taco night: Warm tortillas, shredded pork, pickled onions, cilantro, lime wedges
  • Rice bowl: White rice base, pork on top, black beans on side, drizzle pan juices
  • Hosting platter: Arrange pork center, surround with sides, let guests build plates

Check easy white rice dinner nights for more complete meal ideas that work with slow-roasted pork.

Shortcut
Make pickled onions 2-3 days ahead - flavor improves and saves last-minute prep

Store and Reheat

Shredded pork holds up well in the fridge or freezer when stored with cooking juices. Corn brings the color this plate needs, but timing matters - this easy corn recipe adds sweet contrast without extra pans.

Method Time Best For
🍳 Stovetop 5-7 min over low heat Small portions, keeps meat moist when stirred with pan juices
📦 Microwave 2-3 min covered Single servings, fast weekday lunches
🔥 Oven 15 min at 300°F Large batches, wrap loosely in foil to retain moisture

For best results when storing:

  • Cool quickly: Spread shredded pork in shallow container, refrigerate within 2 hours of cooking
  • Add liquid: Pour ¼ cup pan juices over meat before sealing - prevents drying during storage
  • Portion for freezing: Divide into meal-sized portions with juices, freeze flat in zip-top bags
  • Label and date: Mark containers with cook date, use fridge portions within 3-4 days
  • Reheat gently: Add splash of water or broth when reheating to restore moisture and prevent toughening

Frequently Asked Questions

How long to cook cochinita pibil at 325°F?

Cook 3-4 hours until internal temperature reaches 195-205°F. Check at 3 hours with a meat thermometer - if not fork-tender, continue in 30-minute increments.

Can I make cochinita pibil ahead and freeze it?

Yes, freeze shredded pork with pan juices in zip-top bags for up to 3 months. Thaw overnight in fridge and reheat gently on stovetop with added liquid.

What are good side dishes for cochinita pibil?

Serve with corn tortillas, pickled red onions, white rice, black beans, and fresh cilantro. The acidity and crunch from pickled onions cuts through the rich pork.

How do I know when cochinita pibil is done and tender?

Meat is done when it reaches 195-205°F internally and shreds easily with a fork. If it resists shredding, continue cooking - underdone pork stays tough.

Can I use pork loin instead of shoulder for cochinita pibil?

Pork loin works for faster cooking but dries out during long roasting. Stick with pork shoulder or butt for traditional fork-tender, shredded texture.

Mexican Cochinita Pibil served on a plate

Mexican Cochinita Pibil

No ratings yet
Mexican Cochinita Pibil is a slow-roasted pork shoulder marinated in achiote paste and bitter orange juice, wrapped in banana leaves to lock in moisture. This method yields tender, citrus-soaked pork with deep earthy flavors and a striking red-orange hue.
Print Recipe Pin Recipe
Prep Time 20 minutes mins
Cook Time 4 hours hrs
Total Time 4 hours hrs 20 minutes mins
Servings: 8 servings
Course: Main Dish
Cuisine: Mexican
Ingredients Method Notes

Ingredients
  

  • 4 lbs pork shoulder with fat cap, visible fat marbling
  • 4 oz achiote paste authentic brand with annatto seeds, garlic, cumin, oregano
  • 1 cup bitter orange juice or substitute 3 parts orange juice to 1 part lime juice
  • 6 cloves garlic fresh cloves blended into marinade
  • 2 teaspoon cumin ground or toasted seeds
  • 2 teaspoon oregano
  • 1 whole white onion sliced into thick rounds
  • 2 teaspoon salt for marinade
  • 5 leaves banana leaves thawed, wiped clean, or use foil as substitute

Method
 

  1. Blend achiote paste, bitter orange juice, garlic cloves, cumin, oregano, and salt until smooth. Score pork shoulder in a 1-inch crosshatch pattern and rub marinade onto all surfaces. Marinate in refrigerator for 1 to 24 hours.
    4 oz achiote paste, 1 cup bitter orange juice, 6 cloves garlic, 2 tsp cumin, 2 tsp oregano, 2 tsp salt, 4 lbs pork shoulder
  2. Preheat oven to 325°F (163°C). Pass banana leaves over open flame for 10 seconds to soften and release aroma. Layer softened banana leaves inside a Dutch oven, overlapping edges. Spread sliced white onion over the leaves.
    5 leaves banana leaves, 1 whole white onion
  3. Place marinated pork shoulder over the bed of onions. Fold banana leaves over pork to completely seal it. Cover the Dutch oven with its lid or seal tightly with heavy-duty foil.
    4 lbs pork shoulder, 5 leaves banana leaves, 1 whole white onion
  4. Roast in preheated oven for 3 to 4 hours until internal temperature reaches 195-205°F (90-96°C) and pork shreds easily with a fork. Begin checking for doneness at 3 hours; if not tender, continue roasting in 30-minute increments.
    4 lbs pork shoulder
  5. Remove pork from oven and keep wrapped. Let rest for 15 minutes to redistribute juices. Carefully unwrap to avoid steam burns and transfer pork to cutting board. Shred pork into medium-fine pieces with two forks and mix with pan juices before serving.
    4 lbs pork shoulder

Notes

  • Use a pork shoulder with plenty of fat for moist, tender meat.
  • Marinate for at least 1 hour; 4 to 24 hours deepens flavor and color.
  • Pass banana leaves over flame briefly to soften and enhance aroma before wrapping.

Tried this recipe?

Let us know how it was!

What Is Ponzu Sauce? [Taste, Uses & More]

April 1, 2026

Dipping a slice of seared beef tataki into a small dish of ponzu for the first time is a sharp, clarifying moment - the brightness of yuzu or sudachi cuts clean through the richness of the meat. That contrast is exactly what ponzu is built for.

What Is Ponzu Sauce

Unlike heavier soy-based sauces thickened with sugar or starch, ponzu stays thin and acidic, relying on citrus and a careful balance of salt and subtle sweetness. It's one of those condiments that quietly does a lot of work without announcing itself, and once you start reaching for it, you find uses everywhere.

QUICK SUMMARY

Ponzu sauce is a thin, citrus-forward Japanese condiment combining soy sauce, citrus juice, and mirin or rice vinegar. It delivers bright tang and savory umami in one bottle, working as a dip, dressing, marinade, or finishing sauce across a wide range of dishes.

🍋Flavor: Bright citrus tang, salty umami, faint smokiness from bonito
🫙Texture: Thin and watery; lightly viscous in artisanal or reduced versions
🍣Best Uses: Dipping sauce, salad dressing, quick marinade, finishing sauce
📅Shelf Life: Unopened up to 12 months; refrigerate after opening, use within 2-3 months
⚠️Watch For: May contain gluten (soy) or fish (bonito) - check labels if you have dietary restrictions

What Is Ponzu Sauce?

Ponzu is a citrus-based soy condiment originating in Japan, with deep roots in the Kansai and Tokyo regions. The name combines the Dutch word pons (citrus punch) with the Japanese su (vinegar), which tells you something about its dual identity as both acidic and savory.

A traditional bottle contains citrus juice - most often yuzu or sudachi, though lemon appears in many commercial versions - alongside soy sauce, rice vinegar or mirin, and sometimes dashi or bonito flakes steeped into the liquid.

The result is called ponzu shoyu when soy is included, which is nearly always the case in what's sold in Western markets.

Several varieties exist, each with a different character:

  • Yuzu ponzu - the most prized; yuzu delivers a floral, distinctly Japanese citrus note that lemon can't replicate
  • Sudachi ponzu - sharper and greener in flavor, common in Tokushima-style cooking
  • Lemon or citrus blend ponzu - more common in mass-market bottles; accessible but less complex
  • Vegetarian/vegan ponzu - made without bonito, using kombu dashi instead for the savory backbone

What Does Ponzu Sauce Taste Like?

Ponzu tastes closest to a salty vinaigrette crossed with soy sauce, but that framing undersells it. The citrus hits first - bright and slightly tart - then the soy's umami rounds it out into something more complete.

Sensory SnapshotModerate Intensity
👅 Flavor
bright citrussalty umamimild sweetnessfaint smoke
✋ Texture
thinwatery
👃 Aroma
fresh citruslight sea-spray

Mirin or sugar softens the edge, keeping the sauce from tasting harsh or one-dimensional. When ponzu is made with katsuobushi, there's a subtle savory smokiness in the background - present but not dominant.

Watch Out
Heat destroys ponzu's citrus brightness fast. Add it off-heat as a finishing sauce, or use it cold - don't cook it down for more than 60-90 seconds or the fresh tang is gone.

Ponzu doesn't taste particularly fishy even when made with bonito. The steeping process mellows any assertive fishiness into a clean, savory depth.

How to Use Ponzu Sauce

Ponzu works best in roles where citrus acidity and soy umami together do the lifting.

Raw and cold applications are where it genuinely shines - as a dipping sauce for sashimi, a dressing for seaweed salad, or tossed with chilled soba noodles alongside ginger and sesame oil.

How Ponzu Sauce Is Used
MethodBest ForTip
🥗 Dip/RawSashimi, tataki, gyoza, tempuraServe chilled; add grated daikon or scallion directly to the dish
🥗 DressingCucumber salad, seaweed salad, cold tofuWhisk with sesame oil for a richer dressing; don't overdress
🍳 MarinadeTofu, chicken thighs, thinly sliced beefKeep marinating time under 1 hour - longer dulls the citrus and over-salts proteins
🍳 Finishing SauceGrilled fish, salmon, mackerelSpoon over immediately after plating; the residual heat blooms the aroma without cooking it
🍜 Sauce BlendPonzu mayo, dipping sauce for noodlesMix with kewpie mayo 2:1 for a quick sandwich or tempura dip

Ponzu bridges Japanese and modern fusion cooking cleanly. It pairs with soy-adjacent dishes naturally, however it also works well anywhere a vinaigrette-style balance is needed - think grilled salmon, cold noodle bowls, or even a quick ponzu sauce substitute in a citrus-heavy braise.

Shortcut
Mix ponzu with kewpie mayo at a 1:2 ratio for an instant dipping sauce that works with tempura, crab cakes, or grilled chicken skewers.

Avoid using ponzu in long, high-heat braises. The citrus brightness - the thing that makes it useful - evaporates early, leaving only salt and soy behind.

For braising, straight soy sauce handles that job better.

Try It In
🥢Japanese Steakhouse Yum Yum SauceSwap in a splash of ponzu for extra citrus tang→🍅Roasted Garlic Marinara SauceSee how a citrus-acid balance works in a different sauce tradition→🧄Roasted Garlic Béarnaise SauceCompare how acid functions as a finishing element here→

How to Buy and Store Ponzu Sauce

Look for bottles that name a specific citrus - yuzu ponzu or sudachi ponzu - rather than generic "citrus." These are more expensive, however the flavor difference over a lemon-based blend is significant.

The aji mirin vs rice vinegar balance varies by brand, so it's worth reading the ingredient list if brightness matters to you.

Best Pick
Yuzu ponzu in a dark glass bottle is the clearest signal of quality. Glass protects the citrus aroma better than plastic over time, especially once opened.

Storage is straightforward:

  • Unopened - cool pantry shelf; stays good for 6-12 months before the citrus notes soften
  • After opening - refrigerate immediately with the cap sealed tight to hold the aroma
  • Opened shelf life - use within 2-3 months for best flavor; see our full guide on ponzu sauce freshness guide for signs of spoilage
  • Allergy note - standard ponzu contains soy (gluten risk) and bonito (fish); choose tamari-based or vegan-labeled versions if either is a concern

Start With a Dipping Bowl

Ponzu is most convincing in its simplest job first. Buy one bottle and use it as a dipping sauce for seared fish, gyoza, or cold tofu with shiso and daikon.

That single use will tell you immediately whether this is a condiment your kitchen needs on rotation. From there, moving into marinades and dressings is a short step - and if you need to build something from scratch, a soy sauce substitute base with fresh lemon and mirin gets you most of the way there.

Frequently Asked Questions

Is ponzu sauce vegetarian?

Not always. Many commercial ponzu sauces are made with katsuobushi (bonito flakes), which is fish. Look for bottles labeled vegan or kombu-dashi ponzu - those use seaweed instead and are fully plant-based.

Does ponzu sauce have fish in it?

Traditional ponzu is steeped with bonito flakes, so yes - most authentic versions contain fish. Commercial bottles vary; always check the ingredient list if fish allergies are a concern.

Can you use lemon instead of yuzu in ponzu?

Yes, and many store-bought versions already do. Lemon gives clean acidity but misses yuzu's floral, slightly bitter edge. A mix of lemon and a little grapefruit zest gets closer to that character.

How do you make ponzu at home without bonito?

Steep a piece of kombu in equal parts soy sauce and fresh citrus juice overnight, then strain and add a small amount of mirin. The kombu provides glutamate-driven umami without any fish.

What can you use instead of ponzu sauce?

A quick mix of soy sauce, fresh lemon juice, and a few drops of rice vinegar covers most use cases. Adding a pinch of sugar brings it closer to the sweetness that mirin provides in the real thing.

Spanish Romesco Sauce

April 1, 2026

You need 40 minutes and a handful of roasted ingredients. No marinating, no precooking, just peppers, nuts, and a blender.

Spanish Romesco Sauce served on a plate

The oven does most of the work. Char the peppers until the skin blisters, toast the almonds until golden, then blend everything into a smoky, nutty sauce.

This is what we make when grilled chicken or steamed vegetables need more than salt and pepper. Works for weeknight meals or when you're hosting and want something that looks intentional.

QUICK SUMMARY

Spanish romesco sauce starts with charred peppers and toasted almonds blended into a smoky, creamy dip. The trick is roasting peppers until the skin blisters and adding olive oil slowly so the sauce emulsifies instead of separating. Make this when you need a versatile sauce that works for dipping, drizzling, or spreading.

⏱️Time: 40 minutes total, 15 minutes active prep
🔥Key Move: Toast nuts and bread separately to prevent burning
⚠️Watch Out: Add oil too fast and the sauce breaks-drizzle slowly while blending

Why This Recipe Works

Rich mains need something to cut through, and this dip does exactly that. For a version that comes together quickly, tangy sauce recipe keeps the prep simple.

Quick Reference
⏱️
Prep Time
15 min
🔥
Cook Time
25 min
⏰
Total Time
40 min
🍽️
Servings
6 servings
📊
Difficulty
Medium
🏷️
Category
Appetizer
💡
Quick Tip
Toast nuts and bread for best texture
🎯
Best For
Weeknight | Entertaining | Meal prep

What makes it work:

  • Charring the peppers under the broiler develops smokiness without needing an open flame-8-10 minutes at high heat blisters the skin and softens the flesh
  • Toasting almonds separately prevents burning and brings out the nutty oils that thicken the sauce and add texture
  • Soaking bread in vinegar creates body without making the sauce gummy-squeeze out excess liquid before blending
  • Adding olive oil slowly while the blender runs emulsifies the fats into a creamy, cohesive sauce instead of a separated, oily mess
  • Blending in stages lets you control texture-nuts and bread first, then roasted vegetables, oil last
Golden Rule
Always char peppers until the skin blisters and blackens in spots-this is what creates the smoky backbone of the sauce

What You'll Need

Ingredients for Spanish Romesco Sauce

Most people skip something simple like oil, but it balances the meal. Stock your pantry with roasted peppers, almonds, and sherry vinegar for a sauce that works all week.

🫑
Base Vegetables
  • 2 large red bell peppers (roasted)
  • 1 medium tomato (roasted or canned)
🌰
Nuts & Bread
  • ½ cup toasted almonds
  • 1 slice crusty bread (soaked)
🧄
Aromatics
  • 3 garlic cloves
  • 2 tablespoons sherry vinegar
  • 1 teaspoon smoked paprika
🫒
Fats & Seasonings
  • ⅓ cup olive oil
  • Salt to taste
  • Optional: pinch of nutmeg

Ingredient Details

  • Roasted red bell peppers
    Char under broiler 8-10 minutes, turning every 3 minutes-skin should blister and blacken in spots for maximum smokiness
  • Toasted almonds
    Toast in dry skillet over medium heat 5-7 minutes, stirring constantly-almonds should smell nutty and turn golden, not dark brown
  • Garlic cloves
    Use fresh garlic only-crush and let sit 5 minutes before adding to mellow the bite and prevent harsh raw flavor
  • Sherry vinegar
    Adds authentic Spanish acidity-start with 2 tablespoons, then adjust by the teaspoon until sauce tastes balanced
  • Crusty bread
    Soak in water or vinegar 5 minutes, squeeze gently to remove excess liquid-too wet and the sauce gets gummy
  • Olive oil
    Use good quality extra virgin-add slowly in a thin stream while blending to emulsify into a creamy texture
  • Smoked paprika
    Essential for authentic smoky depth-don't skip it or substitute sweet paprika unless you want a milder flavor

Ingredient Swaps

A good this dip can make or break the plate. The oil works best when it hits the table at the same time as the main.

Four swaps that work:

  • Almonds → hazelnuts or walnuts: Changes the nutty profile slightly-hazelnuts add earthiness, walnuts bring softer texture and milder flavor (budget)
  • Bread → gluten-free bread or omit entirely: Affects thickness-sauce may be thinner without bread, so add extra nuts to compensate (gluten-free)
  • Sherry vinegar → red wine vinegar: Less authentic Spanish flavor but maintains necessary acidity-use same amount, adjust to taste (budget)
  • Fresh tomato → sun-dried tomatoes (rehydrated): Deeper, concentrated flavor and thicker sauce-soak in warm water 10 minutes before blending (budget)

Almonds

Works for: Traditional texture, creamy thickness, authentic nutty flavor

Skip if: Nut allergies or want to try hazelnuts for earthier taste

Hazelnuts

Works for: Deeper earthy flavor, still creamy, common in Catalan versions

Skip if: You prefer milder nutty taste or can't find toasted hazelnuts

Peanut Butter (natural, unsweetened)

Works for: Budget option, no toasting required, quick shortcut

Skip if: You want authentic flavor-peanut butter changes the profile significantly

Instructions

Roast the peppers until the skin blisters, then blend everything in stages. Lobster adds the contrast this plate needs, but timing matters-a flaky lobster side works when you need something fast.

  1. Roast the peppers and tomato: Place bell peppers and tomato under broiler on a baking sheet. Broil 8-10 minutes, turning peppers every 3 minutes until skin blisters and blackens in spots. Tomato should soften and char slightly. Transfer peppers to a bowl, cover with plastic wrap, and let steam 5 minutes. Peel skins off peppers and tomato, remove seeds from peppers.

  2. Toast the almonds and bread: Heat a dry skillet over medium heat. Add almonds and toast 5-7 minutes, stirring constantly, until golden and fragrant. Remove almonds. Tear bread into pieces, add to skillet, and toast 2-3 minutes until crisp and lightly browned. Soak toasted bread in water or vinegar 5 minutes, then squeeze gently to remove excess liquid.

  3. Blend nuts and bread first: Add toasted almonds and soaked bread to blender or food processor. Pulse until coarsely ground with small nutty bits remaining-don't over-blend into powder.

  4. Add roasted vegetables and seasonings: Add roasted peppers, tomato, crushed garlic, sherry vinegar, smoked paprika, and salt to blender. Blend until mixture is smooth but retains slight texture-about 30 seconds.

  5. Emulsify with olive oil: With blender running on low speed, slowly drizzle olive oil in a thin stream through the top opening. Blend until sauce is creamy and emulsified, about 1 minute. Taste and adjust seasoning-add more vinegar for acidity, salt for balance, or paprika for smokiness. Sauce should be thick enough to coat a spoon but pourable.

Shortcut
Use jarred roasted red peppers to skip the broiler step-drain well and pat dry before blending to avoid watery sauce

What to Serve With It

When you need a hands-off dinner that works for meal prep or a last-minute weeknight, planning matters. For more ideas, try weeknight steak and chips meal ideas that pair well with smoky sauces.

Side Dish Prep Why It Works How to Serve
Grilled chicken Easy Smoky nutty sauce complements charred chicken without overwhelming Drizzle over sliced chicken breast or thighs
Steamed green beans Easy Fresh crunch contrasts creamy richness, adds color to the plate Toss warm beans with romesco or serve on the side for dipping
Roasted potatoes Easy Starchy base soaks up sauce, adds hearty substance to the meal Serve potatoes in a bowl with romesco spooned over top
Crusty bread Easy Classic dipping option, soaks up every bit of sauce Slice thick, toast lightly, serve in a basket alongside sauce
Grilled vegetables Medium Charred veg echoes smoky flavors in sauce, adds textural variety Arrange grilled zucchini, eggplant, and peppers with romesco drizzled over

Three ways to serve it:

  • As a dip for charcuterie boards: Pair with cured meats, olives, and marinated artichokes-the nutty acidity cuts through rich, salty flavors
  • Drizzled over grilled prawns: Seafood and romesco are a classic match-the smokiness complements briny sweetness without masking it
  • Spread on sandwiches or wraps: Use as a condiment instead of mayo-adds depth and keeps sandwiches from tasting flat
Best Pick
Romesco works best on grilled or roasted dishes where the smoky flavors reinforce each other-skip it for delicate fish or mild vegetables

Store and Reheat

Roast adds the contrast this plate needs, but timing matters. For a version that comes together quickly, tender homemade roast recipe keeps the prep simple without sacrificing flavor.

Method Time Best For
🍳 Stovetop 3-5 min low heat Gently warming small portions without breaking emulsion
📦 Microwave 1 min in short bursts Quick single servings-stir between intervals to prevent separation
🔥 Oven 10 min at 300°F Warming larger quantities in covered dish for serving

For best results when storing:

  • Cool completely before refrigerating: Hot sauce creates condensation in the container, which waters down flavor and speeds spoilage-let sit at room temperature 20-30 minutes
  • Use shallow glass or plastic containers: Wide, shallow storage prevents oil separation better than tall, narrow jars-easier to stir before serving too
  • Press plastic wrap directly on surface: Contact wrap prevents oxidation and keeps top layer from darkening or developing off flavors
  • Freeze in small portions: Divide into ice cube trays or small containers so you can thaw only what you need-frozen romesco lasts 3 months
  • Stir before serving cold or reheated sauce: Oil naturally separates during storage-whisk or blend briefly to re-emulsify before using

Frequently Asked Questions

Can I make romesco sauce ahead of time and store it?

Yes-romesco keeps in the fridge 3-4 days in an airtight container. Stir well before serving since the oil separates naturally during storage.

How do I know when the roasted peppers are done?

The skin should blister and blacken in spots, and the flesh should feel soft when pressed. If the skin hasn't charred after 10 minutes, move the pan closer to the broiler.

Can I use a food processor instead of a blender?

Yes-a food processor works fine and gives you more control over texture. Pulse in stages to keep some nutty bits instead of over-blending into a paste.

What do I do if my romesco sauce is too thick or too thin?

For thick sauce, thin with water, vinegar, or olive oil one tablespoon at a time while blending. For thin sauce, add toasted bread crumbs or more nuts and blend until thickened.

How long can I keep romesco sauce in the fridge and can I freeze it?

Fridge: 3-4 days in an airtight container. Freezer: up to 3 months in small portions-thaw overnight in the fridge and stir well before using.

Spanish Romesco Sauce served on a plate

Spanish Romesco Sauce

No ratings yet
Spanish Romesco Sauce is a smoky, nutty dip made by charring peppers and toasting almonds before blending them into a creamy sauce. This versatile sauce works perfectly for dipping, drizzling, or spreading on a variety of dishes.
Print Recipe Pin Recipe
Prep Time 15 minutes mins
Cook Time 25 minutes mins
Total Time 40 minutes mins
Servings: 6 servings
Course: Appetizer
Cuisine: Spanish
Ingredients Equipment Method Notes

Ingredients
  

  • 2 large red bell peppers roasted under broiler until skin blisters
  • 1 medium tomato roasted or canned
  • 0.5 cup almonds toasted in dry skillet
  • 1 slice crusty bread soaked in water or vinegar for 5 minutes and squeezed dry
  • 3 cloves garlic crushed and rested 5 minutes
  • 2 tablespoons sherry vinegar
  • 1 teaspoon smoked paprika
  • 0.33 cup olive oil extra virgin, added slowly to emulsify
  • salt to taste
  • pinch nutmeg optional

Equipment

  • Broiler For charring peppers and roasting tomato
  • Dry skillet For toasting almonds and bread
  • Blender or food processor To blend ingredients into sauce

Method
 

  1. Place red bell peppers and tomato on a baking sheet under the broiler. Broil for 8-10 minutes, turning peppers every 3 minutes until the skins blister and blacken in spots and tomato softens and chars slightly. Transfer peppers to a bowl, cover with plastic wrap, and let steam for 5 minutes. Peel skins off the peppers and tomato, and remove seeds from peppers.
    2 large red bell peppers, 1 medium tomato
  2. Heat a dry skillet over medium heat. Add almonds and toast for 5-7 minutes, stirring constantly until golden and fragrant. Remove almonds from the skillet. Tear bread into pieces and toast in the skillet for 2-3 minutes until crisp and lightly browned. Soak toasted bread in water or vinegar for 5 minutes, then squeeze gently to remove excess liquid.
    0.5 cup almonds, 1 slice crusty bread
  3. Add toasted almonds and soaked bread to a blender or food processor. Pulse until coarsely ground with small nutty bits remaining; do not over-blend into powder.
    0.5 cup almonds, 1 slice crusty bread
  4. Add roasted red peppers, tomato, crushed garlic, sherry vinegar, smoked paprika, and salt to the blender. Blend until smooth but still slightly textured, about 30 seconds.
    2 large red bell peppers, 1 medium tomato, 3 cloves garlic, 2 tablespoons sherry vinegar, 1 teaspoon smoked paprika, salt
  5. With the blender running on low speed, slowly drizzle olive oil in a thin stream through the top opening. Blend until the sauce is creamy and emulsified, about 1 minute. Taste and adjust seasoning, adding more vinegar, salt, or paprika as desired. The sauce should be thick enough to coat a spoon but still pourable.
    0.33 cup olive oil, 2 tablespoons sherry vinegar, 1 teaspoon smoked paprika, salt

Notes

  • Char peppers until the skin blisters and blackens in spots for maximum smoky flavor.
  • Toast almonds and bread separately to avoid burning and ensure best texture.
  • Add olive oil very slowly while blending to emulsify and prevent the sauce from breaking.

Tried this recipe?

Let us know how it was!

How Long Does Pomegranate Last? [Storage Guide]

April 1, 2026

Pulling a pomegranate from the fruit bowl and noticing soft spots or a fermented smell is a frustrating way to lose a fruit that can cost several dollars.

Can You Freeze Pomegranate

The good news is that whole pomegranates store remarkably well compared to most fresh fruit - but once you break the rind and expose the arils, the clock moves much faster.

Knowing exactly what to expect from each storage stage means fewer wasted fruits and better-tasting results.

QUICK SUMMARY

A whole pomegranate lasts 3-6 weeks in the fridge or about a week at room temperature. Once opened, arils keep 5-7 days refrigerated in an airtight container. Frozen arils hold for up to 12 months but lose their crisp texture after thawing.

🏠Counter (whole): 5-7 days in a cool, dry spot away from direct sun
🧊Fridge (arils): 5-7 days in a sealed container with a paper towel on top
❄️Freezer (arils): 8-12 months; flash-freeze first to keep arils separate and loose

How Long Does Pomegranate Last?

Understanding what makes pomegranate distinct helps explain why the whole fruit outlasts almost every other fresh option at room temperature. That thick, leathery rind acts as a natural barrier, slowing moisture loss and microbial entry for weeks.

Once you crack it open, that protection disappears entirely. Exposed arils are vulnerable to oxidation, excess juice, and bacteria - which is why the fridge timeline drops to just under a week.

Pomegranate Shelf Life
MethodStateDurationNotes
🏠 CounterWhole5-7 daysCool, dry spot; avoid direct sun to prevent splitting
🧊 FridgeWhole3-6 weeksCrisper drawer; away from ethylene producers like apples
🧊 FridgeArils (opened)5-7 daysAirtight container; drain excess juice to reduce sogginess
❄️ FreezerArils8-12 monthsFlash-freeze on a tray first; transfer to a labeled freezer bag
❄️ FreezerJuice6-12 monthsPortion into ice cube trays or freezer-safe containers

The wide 3-6 week fridge range depends on ripeness. Slightly underripe but heavy fruit holds longer; very ripe fruit softens and splits sooner.

How to Store Pomegranate

The right method depends entirely on whether the fruit is whole or already opened. Each state has a different priority.

Counter: Keep whole, unwashed pomegranates in a cool, dry spot with good air circulation. Direct sunlight or heat accelerates splitting, so skip the sunny windowsill.

Fridge (whole): Place unwashed whole fruit in the crisper drawer, ideally in a perforated produce bag. Keep it away from ethylene-producing fruits like apples and pears, which speed up softening.

Fridge (arils): Transfer pomegranate arils to a shallow airtight container - glass or plastic both work. Press a folded paper towel directly on top of the arils before sealing; it absorbs excess juice and slows sogginess significantly. Wash arils just before eating, not before storing.

Golden Rule
Store the whole fruit unwashed. Moisture on the rind encourages mold before you're ready to open it.

A few habits that extend fridge life for opened fruit:

  • 🧻 Paper towel layer - absorbs juice pooling at the bottom of the container
  • 🫙 Shallow container - reduces compression and bruising on lower arils
  • 🚫 Skip the wet arils - rinsing before storing shortens shelf life noticeably

Can You Freeze Pomegranate?

Freezing works well for both arils and juice, with one important caveat: thawed arils lose their signature crisp pop. They soften noticeably, which makes them poorly suited for fresh garnishing after freezing.

For smoothies, sauces, oatmeal, and cooked dishes, they perform fine.

Watch Out
Don't freeze arils without flash-freezing first. Skipping that step produces a solid, unusable clump in the bag.
  1. Remove the arils - Separate all arils from the rind and membrane; work over a bowl of water so pith floats and arils sink for easy separation.
  2. Pat dry - Spread arils on a clean towel and blot off surface moisture before freezing.
  3. Flash-freeze - Arrange arils in a single layer on a baking sheet and freeze for 1-2 hours until solid.
  4. Transfer and seal - Move frozen arils into a labeled freezer bag, press out all air, and return to the freezer.
  5. Freeze the juice - Pour pomegranate juice into ice cube trays, leaving ½-inch headspace, then transfer frozen cubes to a sealed bag.

Thaw arils in the fridge for 2-4 hours for salad use, or 10-15 minutes at room temperature when time is short.

The same portioning approach works for other ingredients too - freezing herbs in ice cube trays follows an identical logic for reducing waste and keeping portions ready.

Signs Pomegranate Has Gone Bad

Whole fruit and cut arils show spoilage differently, so it's worth checking both before use.

Signs It's Gone Bad
👀
VisualDark, mushy arils leaking deep red staining · Wrinkled or cracked rind · Brown soft patches on the skin · White or gray mold on the rind or arils
👃
SmellSour or fermented aroma from arils or juice · Any yeasty, wine-like smell
✋
TextureSlimy or excessively mushy arils · Whole fruit collapsing under light pressure

A few wrinkles on the rind don't automatically mean the fruit is lost.

Gently squeeze the fruit - if it still feels dense and heavy, the arils inside are likely fine. Discard immediately if you find mold, sliminess, or a fermented smell, as these indicate bacterial or yeast growth that isn't safe to eat around.

Getting the Most From Every Pomegranate

Pomegranate rewards a bit of forward planning, especially when you buy in bulk during peak season. If you need a substitute mid-recipe, replacements for pomegranate can fill the gap when your stored supply runs out.

Four habits that make a real difference:

  • 🏠 Buy for timing - choose slightly underripe fruit if you won't open it for a couple of weeks
  • 🧊 Crisper over shelf - the fridge extends whole fruit life from days to weeks with minimal effort
  • ❄️ Batch-freeze arils - flash-freeze a full season's worth in one session to avoid repeated work
  • 🧊 Cube the juice - frozen juice cubes drop directly into sauces, cocktails, and dressings without measuring
Shortcut
Seed the whole pomegranate at once and freeze what you don't use immediately. One prep session covers weeks of cooking.

Frequently Asked Questions

Can you freeze pomegranate arils?

Yes. Flash-freeze them in a single layer first, then transfer to a sealed freezer bag - they keep for 8-12 months. Texture softens after thawing, so use them in cooked dishes, smoothies, or sauces rather than as fresh garnish.

How long do pomegranates last in the fridge?

Whole pomegranates last 3-6 weeks in the crisper drawer. Once opened, arils stored in an airtight container last 5-7 days - shorter if left wet or loosely covered.

Do pomegranate seeds go bad?

They do. Arils turn slimy, develop a sour or fermented smell, and leak dark red juice when spoiled. Discard any batch that shows these signs - do not taste-test to confirm.

Can you freeze pomegranate juice?

Yes - pour it into ice cube trays or freezer-safe containers with ½-inch headspace. Frozen juice lasts 6-12 months and thaws overnight in the fridge or faster under cold running water.

Will freezing pomegranate damage nutrients?

Minimal nutrient loss occurs during freezing. Antioxidant levels in pomegranate arils remain largely stable in the freezer; the main trade-off is texture, not nutritional value.

Italian Olive and Capers Salsa Verde

April 1, 2026

Bright herbs chopped fine with briny olives and capers, all held together with fruity olive oil. That's Italian salsa verde-a fresh condiment that turns plain proteins into something worth making again.

Italian Olive and Capers Salsa Verde served on a plate

The knife does most of the work. You chop everything by hand so the texture stays chunky instead of turning into paste.

This works for weeknights when you need a condiment that makes grilled chicken or fish taste intentional. Also works for entertaining when you want something on the table that looks like effort but takes 10 minutes.

QUICK SUMMARY

Italian olive and capers salsa verde is a fresh, herbaceous condiment made by hand-chopping parsley, green olives, capers, and garlic, then mixing with olive oil and lemon juice. The texture stays slightly chunky instead of pureed, and the flavors need 10-15 minutes to meld before serving. Use it as a bright, briny topping for grilled meats, fish, or roasted vegetables.

⏱️Time Reality: 10 minutes active, plus 10-15 minutes resting time for flavors to develop
🔪Critical First Move: Chop parsley to 3-4mm pieces-fine enough to release oils, coarse enough to keep texture
⚠️Watch Out: Over-salting from olives and capers-taste as you add salty ingredients and rinse capers first

Table of Contents

Toggle
  • Why This Recipe Works
  • What You'll Need
    • Ingredient Details
  • Ingredient Swaps
  • What to Serve With It
  • Store and Reheat
  • Frequently Asked Questions
  • Italian Olive and Capers Salsa Verde
    • Method 
    • Tried this recipe?

Why This Recipe Works

Salsa verde works because you balance three elements: fresh herbs, briny ingredients, and fat. The oil carries flavors across your tongue while the acid from lemon juice keeps it from tasting heavy. For a version that comes together quickly, simple homemade sauce uses similar bright, tangy flavors with capers and lemon.

Quick Reference
⏱️
Prep Time
10 min
🔥
Cook Time
0 min
⏰
Total Time
10 min
🍽️
Servings
6 servings
📊
Difficulty
Easy
🏷️
Category
Appetizer
💡
Quick Tip
Chop herbs fine for fresh texture
🎯
Best For
Weeknight | Entertaining | Meal prep

What makes this work:

  • Hand-chopping keeps texture - mincing by knife creates rough edges that hold onto oil better than a food processor, which turns herbs into mush
  • Resting melds flavors - letting the mixture sit for 10-15 minutes at room temperature gives garlic time to soften and all ingredients time to marry
  • Acid cuts through richness - lemon juice balances the oily, briny elements and keeps the sauce from coating your mouth too heavily
  • Green olives add body - their firm texture and salty bite give the sauce substance instead of making it feel like an oil slick with herbs floating in it
  • Whisking oil slowly emulsifies - adding olive oil gradually while whisking creates a slightly thicker consistency that clings to food instead of running off
Golden Rule
Taste after mixing and before serving-salsa verde should taste bright and balanced, not flat or overwhelmingly salty

What You'll Need

Ingredients for Italian Olive and Capers Salsa Verde

Stock your pantry with fresh parsley, quality olive oil, and jarred briny ingredients. The rest comes together with basic aromatics you probably have. We keep a batch ready for nights like this - a similar deli recipe also relies on pantry staples for quick flavor.

🥬
Fresh Herbs
  • Flat-leaf parsley
  • Fresh thyme (optional)
🫙
Briny Ingredients
  • Green olives
  • Capers
  • Anchovies (optional)
🧄
Aromatics
  • Garlic
  • Red pepper flakes (optional)
  • Black pepper
🍋
Acid & Fat
  • Lemon juice
  • Extra-virgin olive oil

Ingredient Details

  • Flat-leaf parsley
    Use only the leaves-stems taste bitter and turn the sauce murky instead of bright green
  • Green olives
    Castelvetrano or other buttery varieties work best-avoid canned black olives which taste flat and mushy
  • Capers
    Rinse under cold water for 10 seconds to remove excess brine-otherwise the sauce tastes one-note salty
  • Extra-virgin olive oil
    Use something you'd drizzle on bread-the oil flavor comes through clearly in the finished sauce
  • Lemon juice
    Fresh-squeezed only-bottled juice tastes artificial and throws off the balance of the sauce
  • Garlic
    Mince to 2mm pieces so you don't bite into harsh chunks-larger pieces taste raw and overwhelming
  • Anchovies
    Oil-packed work better than salt-packed-they dissolve into the sauce and add umami without fishiness

Ingredient Swaps

Most swaps change the flavor profile but keep the method intact. The core technique stays the same-chop, mix, rest. A dollop of verde takes each bite somewhere more interesting. For a version that comes together quickly, something creamy like verde uses roasted tomatillos for a different kind of tangy brightness.

Four swaps that work:

  • Black olives for green olives - use the same amount but expect milder, less briny flavor and softer texture (works for budget cooking)
  • White wine vinegar for lemon juice - swap 1:1 ratio but the acid tastes sharper and less fruity (changes the brightness slightly)
  • Cilantro or basil for parsley - equal amounts but the herbaceous profile shifts dramatically-cilantro adds citrusy notes, basil adds sweetness
  • Worcestershire sauce for anchovies - use 1 teaspoon Worcestershire per 2 anchovy fillets for similar umami depth without fish (keeps it dairy-free)

Green Olives

Works for: traditional Italian flavor, firm texture, pronounced briny bite

Skip if: you want milder saltiness or softer texture

Black Olives

Works for: budget cooking, softer texture, less assertive brine flavor

Skip if: you want authentic salsa verde with clear briny punch

Instructions

You need 10 minutes for chopping and mixing, then another 10-15 for the flavors to come together. The resting time matters more than most recipes admit. Rich mains need something to cut through, and guanciale does exactly that. For a version that comes together quickly, homemade guanciale recipe also benefits from bright, herbaceous toppings like this salsa verde.

  1. Chop the parsley leaves finely - pile leaves on a cutting board and run your knife through them until pieces are 3-4mm, about the size of a grain of rice, then transfer to a mixing bowl
  2. Prep the briny ingredients - rinse capers under cold water for 10 seconds, then roughly chop green olives into 5mm chunks and mince garlic to 2mm pieces, adding all to the bowl with parsley
  3. Combine aromatics and acid - add optional anchovy fillets (minced), red pepper flakes, black pepper, and lemon juice to the bowl, then stir everything together with a fork for 30 seconds
  4. Whisk in olive oil slowly - pour extra-virgin olive oil in a thin stream while whisking constantly for about 1 minute until the sauce looks glossy and slightly thickened instead of separated
  5. Rest before serving - let the salsa sit at room temperature for 10-15 minutes so the garlic mellows and all flavors meld, then taste and adjust with more lemon juice or salt if needed
Shortcut
If you're short on time, use pre-minced garlic from a jar and pre-chopped olives from the deli counter-you'll lose some texture but save 3-4 minutes

What to Serve With It

Italian salsa verde fills the gap on plates that need brightness and acidity. It works on rich proteins, roasted vegetables, or as a dipping sauce for crusty bread. Most people skip chicken, but it balances the meal. We keep a batch ready for nights like this - classic chicken dish gets a fresh lift when you spoon salsa verde over the top before serving.

Side Dish Prep Why It Works How to Serve
Grilled chicken breast Easy Salsa adds herby brightness that cuts through plain grilled meat Spoon 2 tablespoons over each chicken breast right before serving
Roasted potatoes Easy Briny salsa complements starchy comfort without weighing it down Toss warm potatoes with salsa or serve salsa on the side for dipping
Steamed green beans Easy Simple vegetables let the salsa's fresh herbs and olives shine Drizzle 3 tablespoons over hot green beans and toss gently
Crusty bread Easy Bread soaks up the oil and provides neutral base for bold flavors Serve salsa in a small bowl for dipping toasted bread slices
Grilled branzino Medium Light fish pairs well with herbaceous, briny sauce without overpowering delicate flavor Spoon salsa over whole grilled fish or individual fillets at the table

Three ways to serve it:

  • As a marinade base - mix equal parts salsa verde and additional olive oil, then use it to marinate chicken thighs or pork chops for 2-4 hours before grilling
  • Thinned into vinaigrette - whisk 2 tablespoons salsa with 1 tablespoon red wine vinegar and drizzle over mixed greens or roasted vegetable salads
  • Dolloped on charcuterie - spoon small amounts onto a board alongside cured meats, cheeses, and pickled vegetables for contrasting brightness
Best Pick
Pair with simply grilled or roasted proteins that need a flavor boost-the salsa does the heavy lifting so the main dish can stay straightforward

Store and Reheat

Salsa verde keeps for 3-4 days in the fridge but tastes best within 2 days when the herbs still taste fresh. The oil can separate as it sits, so stir before using. The guanciale works best when it hits the table at the same time as the main. We keep a batch ready for nights like this - a rich beef on the side benefits from a bright, acidic condiment like salsa verde to cut through its richness.

Method Time Best For
🥄 Stir at room temp 1-2 min Reviving consistency after refrigeration-mix thoroughly to re-emulsify oil
📦 Microwave (low power) 15 seconds Warming small portions cautiously-heat destroys fresh herb flavor quickly
❄️ Serve cold 0 min Best method-salsa verde tastes brightest when served cold or room temperature

For best results when storing:

  • Use shallow containers - store in a shallow glass or plastic container so you can stir easily without digging through layers of separated oil
  • Press plastic wrap directly on surface - lay plastic wrap touching the salsa before sealing the container lid to prevent oxidation and browning
  • Store no more than 4 days - after that the parsley loses brightness and the garlic flavor turns sharper and more raw-tasting
  • Freeze in ice cube trays - portion salsa into ice cube trays, freeze solid, then transfer cubes to a freezer bag for up to 1 month (texture changes but flavor holds)
  • Add fresh lemon juice before serving leftovers - stir in 1 teaspoon fresh lemon juice to brighten flavors that dulled in the fridge

Frequently Asked Questions

Can I make Italian olive and capers salsa verde ahead?

Yes, make it up to 2 days ahead for best flavor-store in an airtight container in the fridge and stir before serving. After 2 days the parsley loses brightness and the garlic flavor intensifies.

How long does salsa verde keep refrigerated?

It keeps for 3-4 days in a sealed container, but the fresh herb flavor dulls after day 2. Press plastic wrap directly on the surface before refrigerating to prevent browning.

How finely should I chop the herbs and olives?

Chop parsley to 3-4mm pieces (grain of rice size) and olives to 5mm chunks-fine enough to release flavors but coarse enough to maintain texture. Avoid pureeing in a food processor which turns the mixture into paste.

What do I do if my salsa tastes too salty?

Stir in more lemon juice and olive oil incrementally-start with 1 teaspoon of each, taste, and repeat until balanced. You can also add a pinch of sugar to counteract saltiness without making it sweet.

What dishes are best served with olive and capers salsa verde?

Serve it with grilled chicken, roasted fish, steamed vegetables, or crusty bread-it works best on simple proteins that need brightness and acidity. The herby, briny flavors complement rich mains without overpowering them.

Italian Olive and Capers Salsa Verde served on a plate

Italian Olive and Capers Salsa Verde

No ratings yet
Italian olive and capers salsa verde is a fresh, herbaceous condiment made by hand-chopping parsley, green olives, capers, and garlic, then mixing with olive oil and lemon juice. The slightly chunky texture is achieved by hand chopping, and the flavors meld after resting 10-15 minutes. It brightens grilled meats, fish, and roasted vegetables with a balanced briny and acidic profile.
Print Recipe Pin Recipe
Prep Time 10 minutes mins
Cook Time 1 minute min
Total Time 11 minutes mins
Servings: 6 servings
Course: Appetizer
Cuisine: Italian
Ingredients Method Notes

Ingredients
  

  • 1 cup flat-leaf parsley leaves only, chopped to 3-4mm pieces
  • ½ cup green olives roughly chopped into 5mm chunks
  • 2 tablespoons capers rinsed under cold water for 10 seconds
  • 1 clove garlic minced to 2mm pieces
  • 1 teaspoon anchovy fillets minced, optional
  • ¼ teaspoon red pepper flakes optional
  • ¼ teaspoon black pepper freshly ground
  • 1 tablespoon lemon juice fresh-squeezed
  • ⅓ cup extra-virgin olive oil added slowly while whisking

Method
 

  1. Pile flat-leaf parsley leaves on a cutting board and chop finely until pieces measure about 3-4mm, roughly the size of a grain of rice. Transfer to a mixing bowl.
    1 cup flat-leaf parsley
  2. Rinse capers under cold water for 10 seconds to remove excess brine. Roughly chop green olives into 5mm chunks and mince garlic into 2mm pieces. Add all to the bowl with parsley.
    ½ cup green olives, 2 tablespoons capers, 1 clove garlic
  3. If using, mince anchovy fillets and add them along with red pepper flakes, black pepper, and fresh lemon juice. Stir everything together thoroughly with a fork for 30 seconds.
    1 teaspoon anchovy fillets, ¼ teaspoon red pepper flakes, ¼ teaspoon black pepper, 1 tablespoon lemon juice
  4. Pour extra-virgin olive oil in a thin, steady stream while whisking constantly for about 1 minute until the sauce looks glossy and slightly thickened instead of separated.
    ⅓ cup extra-virgin olive oil
  5. Let the salsa sit at room temperature for 10-15 minutes so the garlic mellows and all flavors meld. Taste and adjust seasoning with more lemon juice or salt if needed before serving.

Notes

  • Use only parsley leaves; stems can make the sauce bitter and murky.
  • Hand-chopping keeps a fresh, chunky texture that holds oil better than pureeing.
  • Rinse capers before adding to avoid overly salty flavor.

Tried this recipe?

Let us know how it was!

How Long Does Pastrami Last? [Storage Guide]

April 1, 2026

Plenty of people store sliced deli pastrami wrapped in nothing but the thin paper it came in - that's the mistake that turns a fresh stack of cured, smoked beef into a dry, bacteria-friendly mess within days.

Can You Freeze Pastrami

Pastrami's shelf life varies widely depending on whether you're working with a vacuum-packed whole piece, freshly sliced deli meat, or cooked leftovers from a pastrami sandwich night.

Knowing the difference matters, just as storing brisket correctly does, since pastrami is typically made from beef brisket and carries similar storage logic - with the added complexity of curing and smoking.

The good news is that with the right container and temperature, this meat holds up well.

QUICK SUMMARY

Unopened vacuum-packed pastrami lasts 2-3 weeks in the fridge. Once opened, use sliced deli pastrami within 3-5 days. Freeze for longer storage - slices hold best quality for 2-3 months, whole pieces up to 6 months.

🧊Fridge (opened): 3-5 days in an airtight container at 32-40°F
❄️Freezer (sliced): Best quality up to 2-3 months; wrap tightly with parchment between slices
⚠️Key rule: Never leave pastrami at room temperature for more than 2 hours - refrigerate promptly

How Long Does Pastrami Last?

Shelf life depends on three variables: packaging, whether it's been opened, and whether it's been cooked. Vacuum-packed commercial pastrami is the longest-lasting form - the sealed environment slows oxidation and bacterial growth significantly.

Once you break that seal, the clock accelerates fast.

Sliced deli pastrami exposed to air dries out and becomes a surface for bacterial growth within days, which is why proper wrapping is non-negotiable.

If you're curious about the taste of pastrami and whether a whole piece or pre-sliced deli version suits your needs, that choice also affects how long your purchase will stay at its best.

Pastrami Shelf Life
MethodStateDurationNotes
🧊 FridgeUnopened (vacuum-packed)2-3 weeksKeep at ≤40°F; check 'use by' date on pack
🧊 FridgeOpened / deli-sliced3-5 daysAirtight container or tightly wrapped; parchment between slices
🧊 FridgeCooked / reheated leftovers3-4 daysCool within 2 hours before refrigerating
❄️ FreezerSliced2-3 monthsVacuum or tightly wrapped; safe longer but quality drops
❄️ FreezerWhole piece3-6 monthsRetains flavor longer than pre-sliced; still loses moisture over time
🏠 CounterAny2 hours max1 hour if ambient temperature exceeds 90°F

How to Store Pastrami

Temperature is the first line of defense. Keep pastrami in the coldest part of the fridge - typically toward the back - and hold it at 32-40°F consistently.

Fridge: For unopened vacuum-packed pastrami, leave the seal intact until you're ready to use it. Once opened, transfer slices to an airtight container or a heavy-duty zip-top bag with the air pressed out, and place a sheet of parchment between slice layers to prevent sticking. Counter: Don't leave it out - cured and smoked meat still falls under the 2-hour rule, and pastrami is not shelf-stable despite its curing process.

Golden Rule
Slice only what you need. Whole, uncut pastrami keeps significantly longer than pre-sliced deli meat because less surface area is exposed to air and bacteria.

Deli paper - the thin wax-or-plastic-coated wrap from the counter - is intended for transport, not storage. Rewrap immediately at home.

Cured meats like pastrami and, similarly, keeping bacon fresh both rely on minimizing air exposure to hit their maximum fridge life.

Can You Freeze Pastrami?

Yes - pastrami freezes well, particularly whole pieces or portioned slices that are wrapped correctly before freezing. The key difference between a good freeze and a ruined one comes down to prep.

Watch Out
Don't refreeze thawed pastrami. Repeated freeze-thaw cycles accelerate moisture loss and cause texture breakdown that reheating cannot fix.

Texture does change after freezing - slices can lose moisture and turn drier or slightly crumbly. Reheating with steam, or warming wrapped in foil in the oven, largely restores tenderness.

Much like about salmon freezer burn, the damage from a poorly sealed freeze is irreversible once it sets in, so packaging quality matters before the food ever enters the freezer.

  1. Portion first - divide into meal-sized stacks so you thaw only what you need.
  2. Layer with parchment - place parchment paper between slices to prevent them from fusing together.
  3. Wrap tightly - cover in plastic wrap first, then add a layer of aluminum foil or vacuum-seal the portion.
  4. Label and freeze flat - mark the date clearly; freeze flat so stacks don't compress and stick.
  5. Thaw overnight in fridge - keep the package sealed while thawing; for faster thawing, submerge the sealed bag in cold water, then finish in the fridge before reheating.

If you bought vacuum-packed pastrami and won't use it within 10-14 days of purchase, freeze it while the seal is still intact - it goes straight into the freezer without any extra prep.

Signs Pastrami Has Gone Bad

Fresh pastrami has a deep mahogany color, a firm and elastic texture, and a smoky, slightly tangy smell. Deviation from any of those three signals is worth paying attention to.

Similar cured deli meats follow comparable spoilage patterns - turkey spoilage signs share some overlap, though pastrami's smoking process gives it a different smell baseline to gauge against.

Don't taste-test to decide: discard any pastrami you suspect has turned, since cured and smoked meat can still harbor pathogens even when visually borderline.

Signs It's Gone Bad
👀
VisualSlimy glossy film on slice surfaces · Greenish or gray patches · Color shift from deep mahogany to dull gray · Chalky dried edges (quality issue)
👃
SmellSharp sour or putrid odor · Ammonia-like smell from protein breakdown
✋
TextureSticky or tacky surface · Mushy flesh instead of firm elastic slices

Storing Pastrami the Right Way

A few habits make the difference between pastrami that hits its full fridge or freezer window and meat that gets wasted in three days.

  • 🧊 Airtight always - ditch the deli paper and move pastrami to a sealed container or pressed-out zip bag immediately when you get home.
  • 📅 Label everything frozen - write the freeze date on each package and rotate oldest portions to the front so nothing gets buried past its quality window.
  • ♨️ Reheat to 165°F - steam or foil-wrap in the oven restores moisture; always bring leftover pastrami to 165°F before serving.
  • 🥩 Buy whole when possible - a whole piece of smoked pastrami outperforms pre-sliced deli meat on both fridge and freezer life.

If you're running low and considering swapping out pastrami for another cured meat, storage timelines vary by substitute - check the specifics before assuming the same rules apply.

For serving ideas with the closely related corned beef, pairing ideas for corned beef can give you direction on using up leftovers before they hit that 3-4 day cooked limit.

And keeping vacuum sealed salmon fresh follows a similar logic - sealed packaging extends life dramatically, but once open, you're working against the clock.

Shortcut
Bought vacuum-packed pastrami and won't use it for a while? Freeze the pack unopened - no extra prep needed, and it goes straight from freezer to fridge to thaw when you're ready.

Frequently Asked Questions

Can you freeze deli pastrami?

Yes. Layer slices with parchment, wrap tightly in plastic then foil, and freeze for up to 2-3 months at best quality. Thaw overnight in the fridge and reheat with steam to restore moisture.

How long is pastrami good after the expiration date?

Unopened vacuum-packed pastrami may be safe 1-2 days past a 'sell by' date if stored correctly, but a 'use by' date should be treated as a hard cutoff. Check for spoilage signs before eating anything past its date.

Does pastrami go bad faster than roast beef?

Generally, no. Pastrami's curing and smoking process gives it a slight edge in fridge life compared to plain roast beef. However, once sliced, both should be used within 3-5 days.

Can I refreeze thawed pastrami?

Not recommended. Each freeze-thaw cycle pulls more moisture out of the meat, leaving slices dry and crumbly. Portion before the first freeze so you only thaw what you need.

Is vacuum-packed pastrami shelf stable?

No. Standard refrigerated vacuum-packed pastrami still requires cold storage - it is not shelf stable like canned meat. Keep it at 32-40°F and observe the use-by date.

« Previous Page
Next Page »

Primary Sidebar

ForkliftKitchen recipe developer

Welcome!

Recipe Developer · 12+ Yr Kitchen Veteran

I'm the recipe developer behind this site, focused on practical, well-tested dishes and smart ingredient swaps. Every recipe is written to be clear, reliable, and easy to make at home.

650+ Recipes
12+ Yrs Exp.
3x Tested
Our Story →

As Featured In

Allrecipes

TASTE OF HOME

Food52

HUFFPOST

Yahoo! Life

Our Editorial Standards

  • ✓ Every recipe tested at least 3 times before publishing
  • ✓ Substitutes verified by real kitchen trials, not guesswork
  • ✓ Reviewed for accuracy by our editorial team
  • ✓ Updated regularly with seasonal info and reader feedback

Most Popular

  • Creamy Lemon Shrimp Linguine
    Creamy Lemon Shrimp Linguine
  • Creamy Garlic Mushroom Chicken
    Creamy Garlic Mushroom Chicken
  • Sesame Ginger Chicken Noodle Bowls
    Sesame Ginger Chicken Noodle Bowls
  • Baked Lemon Herb Fish Fillets
    Baked Lemon Herb Fish Fillets
  • Veggie Loaded Fried Rice
    Veggie Loaded Fried Rice
  • Spicy Garlic Shrimp Stir Fry
    Spicy Garlic Shrimp Stir Fry

Join 8,000+ Home Cooks

Weekly Kitchen Tips

Easy recipes, smart substitutes, and real cooking shortcuts — every Thursday.

Subscribe Free →


Side Dishes

  • What to Serve With Asian Salmon? 15 Best Side Dishes
    What to Serve With Asian Salmon? 15 Best Side Dishes
  • Side Dishes for Strawberry Spinach Salad
    15 Best Side Dishes for Strawberry Spinach Salad
  • Sides for Grilled Cauliflower Steaks to Complete the Meal
    15 Sides for Grilled Cauliflower Steaks to Complete the Meal
  • 15 Sides To Serve With Calabacitas
    15 Best Sides for Calabacitas – Mexican-Inspired Favorites


Substitutes

  • 7 Best Substitutes for Hot Sauce in Marinades & Stir-Fries
    7 Best Substitutes for Hot Sauce in Marinades & Stir-Fries
  • 9 Best Substitutes for Butter in Baking and Cooking
  • 7 Best Substitutes for Tagliatelle for Italian Pasta Dishes
    7 Best Substitutes for Tagliatelle for Italian Pasta Dishes
  • 7 Best Substitutes for Udon Noodles in Asian Stir-Fries
    7 Best Substitutes for Udon Noodles in Asian Stir-Fries


Browse by Topic

  • Side Dishes320
  • Substitutes785
  • Dinner163
  • Air Fryer77
  • Taste Profiles484
  • Food Storage123


Reader Reviews

★★★★★

"Finally a food blog that tells you exactly why a substitute works instead of just listing options."

— Sarah M., via email

★★★★★

"The side dish recommendations are so specific — saved my dinner party twice this month."

— James R., Pinterest comment

★★★★★

"I trust this site more than most because they actually test everything. You can tell."

— Priya K., blog comment

Footer

↑ Back to Top

Forklift Kitchen

We do the heavy lifting so you can enjoy the cooking. Tested recipes, smart substitutes, and perfect pairings—built for real home cooks.

Content

  • Recipes
  • Substitutes
  • What to Serve With
  • Blog

Company

  • About Us
  • Contact
  • Subscribe

Legal

  • Privacy Policy
  • Terms of Service

As an Amazon Associate I earn from qualifying purchases.

© 2026 Forklift Kitchen.

Rate This Recipe

Your vote:


A rating is required
A name is required
An email is required