• Skip to primary navigation
  • Skip to main content
  • Skip to primary sidebar
  • Recipe Index
    • Air Fryer
  • Side Dishes
  • Substitutes
  • About
  • Contact
  • Subscribe

ForkLiftKitchen

menu icon
go to homepage
  • Recipe Index
    • Air Fryer
  • Side Dishes
  • Substitutes
  • About
  • Contact
  • Subscribe
subscribe
search icon
Homepage link
  • Recipe Index
    • Air Fryer
  • Side Dishes
  • Substitutes
  • About
  • Contact
  • Subscribe
×

Blog

French Sauce Gribiche

April 1, 2026

Whisking mashed egg yolks with Dijon mustard and oil creates a thick, chunky sauce with visible herbs and pickles. The emulsion forms in under 5 minutes if you add the oil slowly and keep whisking.

French Sauce Gribiche served on a plate

Hard-boiled eggs are the base, not mayo. The yolks stabilize the sauce while chopped whites add texture.

This works for weeknight dinners when you need something tangy to dress up cold chicken or steamed vegetables.

QUICK SUMMARY

French Sauce Gribiche is a chunky, tangy emulsion made from hard-boiled egg yolks, mustard, and oil, with chopped herbs and pickles folded in. The key is mashing the yolks smooth before whisking in oil dropwise to build a stable sauce that coats the back of a spoon. Use it cold on fish, vegetables, or cold meats for a briny, herby contrast.

⏱️Time reality: 15 minutes active, 10 minutes to boil eggs
🥄Critical first move: Mash yolks with mustard until smooth before adding any oil
⚠️Watch out: Adding oil too fast breaks the emulsion - drizzle it in the first 2 minutes

Why This Recipe Works

The technique hinges on creating an emulsion using egg yolks as the stabilizer instead of raw eggs. For a version that comes together quickly, try this creamy sauce for a smoother roux-based option.

Quick Reference
⏱️
Prep Time
15 min
🔥
Cook Time
10 min
⏰
Total Time
25 min
🍽️
Servings
6 servings
📊
Difficulty
Easy
🏷️
Category
Appetizer | Condiment
💡
Quick Tip
Use firm yolks for thick, chunky sauce
🎯
Best For
Weeknight | Entertaining | Meal prep
  • Boil eggs 10-12 minutes for firm yolks that mash smooth without turning grey or rubbery
  • Cool eggs in ice bath 5 minutes to stop cooking and make peeling easier without tearing whites
  • Add oil dropwise the first 2 minutes while whisking vigorously to prevent sauce from splitting
  • Chop cornichons and capers finely to 2-3mm pieces so they distribute evenly without overpowering bites
  • Season after emulsifying so salt and acid don't mask flavors or thin the sauce too early
Quick Tip
Pat dry pickles and capers before adding to avoid watering down the emulsion

What You'll Need

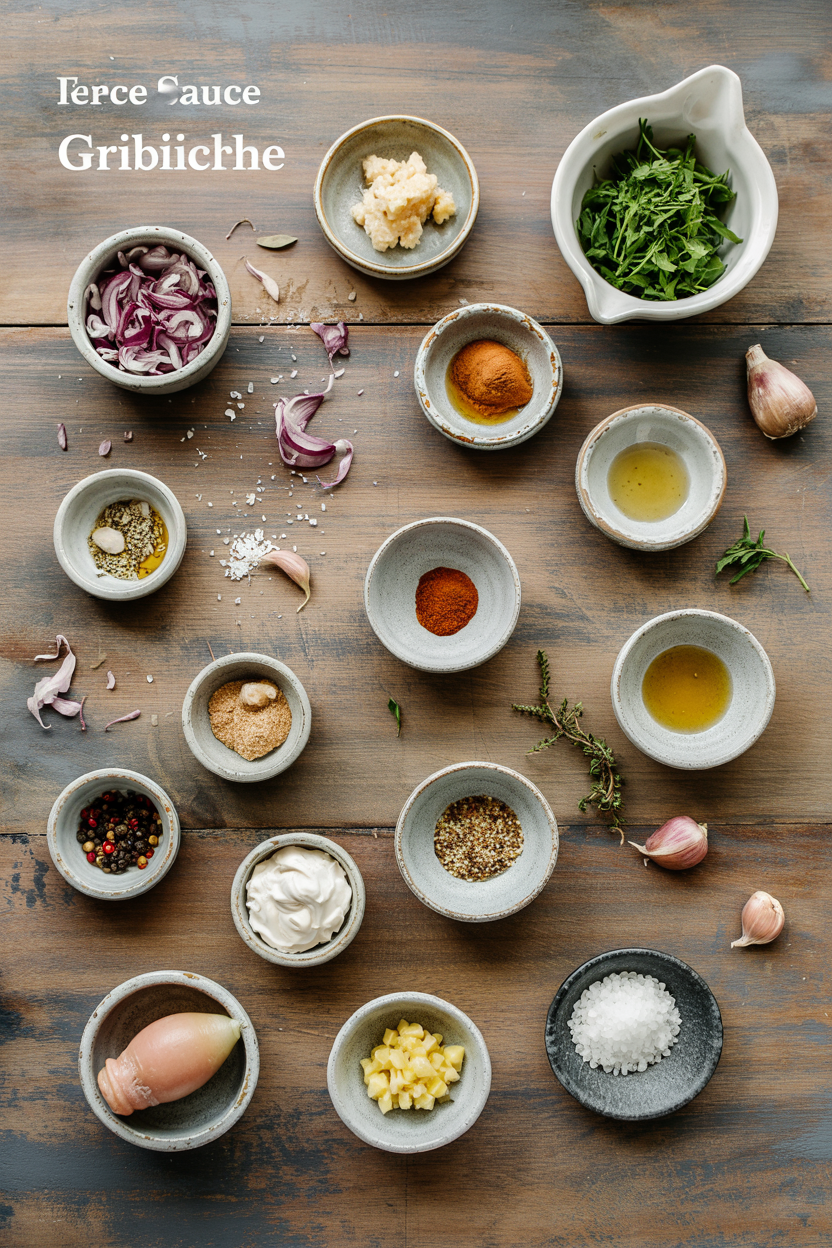
Ingredients for French Sauce Gribiche

Shopping for this sauce means grabbing eggs, mustard, and a handful of pantry staples. Rich mains need something to cut through, and fresh salad side dish does exactly that if you want another egg-based option.

🥚
Base
  • 4 hard-boiled eggs
  • 1-2 teaspoon Dijon mustard
  • ½ cup neutral oil (vegetable or grapeseed)
🥢
Acid + Brine
  • 1 tablespoon white wine vinegar
  • 2 tablespoon cornichons, finely chopped
  • 1 tablespoon capers, drained and chopped
🧄
Aromatics + Herbs
  • 1 shallot, minced
  • 2 tablespoon fresh tarragon, chopped
  • 2 tablespoon fresh parsley, chopped
  • 1 tablespoon fresh chives, chopped
🌶️
Seasoning
  • Salt to taste
  • Black pepper to taste

Ingredient Details

  • Hard-boiled eggs
    Use medium or large eggs; fresher eggs peel harder but taste the same
  • Dijon mustard
    Stabilizes emulsion and adds tang; yellow mustard works but tastes milder
  • Neutral oil
    Vegetable or grapeseed preferred; light olive oil adds fruitiness
  • White wine vinegar
    Champagne or apple cider vinegar swap fine; adjust for acidity level
  • Cornichons
    Tiny French pickles; dill pickles work but lack the same tangy crunch
  • Fresh herbs
    Tarragon, parsley, chives brighten sauce; dried herbs at half amount work in a pinch
  • Shallots
    Mild onion flavor; green onions swap fine with slightly different texture

Ingredient Swaps

A dollop of this dip takes each bite somewhere more interesting. For a version that comes together quickly, a similar deli recipe offers another egg-based approach with Southern flavors.

  • Swap light olive oil for neutral oil - adds slight fruitiness and may thicken the sauce a bit more
  • Use yellow mustard instead of Dijon - milder flavor with less spice and tang for picky eaters
  • Replace cornichons with dill pickles - softer crunch and less acidic bite, budget-friendly option
  • Swap dried herbs for fresh (use half amount) - less bright flavor but works when fresh isn't available

Fresh Herbs

Works for: entertaining, meal prep, weeknight dinners when you want bright flavor

Skip if: dried herbs are all you have; use half the amount and expect muted flavor

Dried Herbs

Works for: budget cooking, pantry staples, when fresh herbs aren't available

Skip if: you want the brightest, freshest flavor for entertaining or special meals

Instructions

The sauce comes together in about 15 minutes once the eggs are boiled and cooled. Beef adds the contrast this plate needs, but timing matters - try rich homemade beef recipe for a hearty main that benefits from tangy sauce.

  1. Boil the eggs: Place eggs in a pot, cover with cold water by 1 inch, bring to a boil over high heat, then cover, remove from heat, and let sit 10-12 minutes for firm yolks.
  2. Cool and peel: Transfer eggs to an ice bath for 5 minutes, then peel under running water to remove shells cleanly without tearing whites.
  3. Mash yolks with mustard: Separate yolks from whites, mash yolks smooth in a mixing bowl, add Dijon mustard, and whisk until combined into a thick paste.
  4. Emulsify with oil: Add oil dropwise while whisking vigorously for the first 2 minutes, then increase to a thin stream once the emulsion thickens and becomes glossy.
  5. Fold in mix-ins: Chop egg whites finely, drain and pat dry cornichons and capers, chop herbs to 2-3mm pieces, then fold everything into the sauce with shallots, vinegar, salt, and pepper.
Watch Out
Adding oil too fast breaks the emulsion - start with drops, then a thin stream once it thickens

What to Serve With It

Most people skip a tangy condiment, but it balances the meal when you're serving cold proteins or vegetables. If you're planning healthy veggie main dishes, this sauce adds brightness without heavy cream.

Side Dish Prep Why It Works How to Serve
Steamed asparagus Easy Bright contrast with creamy sauce and crisp texture Drizzle sauce over warm spears, serve immediately
Boiled new potatoes Easy Classic pairing, starchy texture soaks up tangy sauce Halve potatoes, spoon sauce over while warm
Cold chicken slices Easy Adds richness and moisture without heavy mayo Layer sauce between chicken slices or serve on side
Green beans almondine Medium Crunchy beans balance creamy sauce, nutty contrast Toss beans with sauce just before serving
Simple green salad Easy Refreshing balance, cuts through richness Use gribiche as a dressing or dollop on greens

Three ways to serve it:

  • Spoon over chilled smoked fish for a briny, tangy contrast that highlights the fish's richness
  • Dollop on artichoke hearts as a dipping sauce for a mild vegetable that complements the herbs
  • Spread on crusty French bread for scraping up every bit of sauce at the end of the meal
Best Pick
Serve with boiled new potatoes and steamed asparagus for a classic French vegetarian plate

Store and Reheat

The sauce keeps chilled for 3-4 days but loses brightness after that. The bake works best when it hits the table at the same time as the main - try simple homemade bake for a breakfast option that benefits from tangy sauce.

Method Time Best For
🥶 Serve Cold N/A Classic gribiche served chilled on cold proteins and vegetables
🌡️ Room Temp 15 min Serving with warm dishes without changing texture or consistency
📦 Microwave 10 sec low power Removing chill only, not heating fully to avoid curdling sauce

For best results when storing:

  • Store in shallow airtight container in fridge up to 3-4 days max to prevent flavors from fading
  • Don't freeze gribiche - emulsion breaks down and texture turns watery when thawed
  • Stir before serving if oil separates on top after chilling overnight
  • Add fresh herbs before serving if sauce tastes muted after a day or two in the fridge
  • Serve cold or at room temperature - heating changes texture and can curdle the emulsion

Frequently Asked Questions

How long to cook hard-boiled eggs for gribiche?

Boil eggs 10-12 minutes for firm yolks that mash smooth without a grey ring. Undercooked yolks make the sauce runny.

Can I make sauce gribiche ahead and store?

Yes, store in an airtight container in the fridge for 3-4 days. Stir before serving and add fresh herbs if flavor fades.

What goes well served with sauce gribiche?

Cold chicken, steamed asparagus, boiled new potatoes, smoked fish, or artichoke hearts. It pairs best with mild proteins and vegetables.

How do I know when sauce gribiche emulsion is done?

The sauce is done when it coats the back of a spoon and holds its shape without running. It should be glossy and thick enough to cling to vegetables.

Can I substitute mayonnaise for eggs in gribiche?

Yes, but the texture changes - you lose the chunky egg pieces that define gribiche. Use ½ cup mayo, skip the oil, and fold in chopped hard-boiled egg whites for texture.

French Sauce Gribiche served on a plate

French Sauce Gribiche

No ratings yet
French Sauce Gribiche is a thick, chunky emulsion made by whisking mashed hard-boiled egg yolks with Dijon mustard and neutral oil, folded with chopped herbs and pickles. This tangy sauce enhances cold chicken, steamed vegetables, or fish with its briny, herby flavor. The key to success is slowly adding oil dropwise while whisking to form a stable emulsion.
Print Recipe Pin Recipe
Prep Time 15 minutes mins
Cook Time 10 minutes mins
Total Time 25 minutes mins
Servings: 6 servings
Course: Appetizer, Condiment
Cuisine: French
Ingredients Method Notes

Ingredients
  

  • 4 whole hard-boiled eggs Use medium or large eggs; peel after cooling
  • 1.5 teaspoons Dijon mustard Stabilizes the emulsion
  • 0.5 cup neutral oil Vegetable or grapeseed oil preferred
  • 1 tablespoon white wine vinegar Champagne or apple cider vinegar can be used
  • 2 tablespoons cornichons Finely chopped to 2-3mm pieces
  • 1 tablespoon capers Drained and finely chopped
  • 1 whole shallot Minced
  • 2 tablespoons fresh tarragon Chopped to 2-3mm
  • 2 tablespoons fresh parsley Chopped to 2-3mm
  • 1 tablespoon fresh chives Chopped to 2-3mm
  • salt To taste, added after emulsifying
  • black pepper To taste, added after emulsifying

Method
 

  1. Place eggs in a pot and cover with cold water by 1 inch. Bring to a boil over high heat. Once boiling, cover pot, remove from heat, and let sit for 10-12 minutes to make firm yolks.
    4 whole hard-boiled eggs
  2. Transfer eggs to an ice bath for 5 minutes to stop cooking. Peel eggs under running water to remove shells cleanly without tearing the whites.
    4 whole hard-boiled eggs
  3. Separate yolks from whites. Mash yolks smooth in a mixing bowl, then add Dijon mustard and whisk until combined into a thick paste.
    4 whole hard-boiled eggs, 1.5 teaspoons Dijon mustard
  4. Add oil dropwise while whisking vigorously for the first 2 minutes to form the emulsion. Then increase to a thin stream once the sauce thickens and becomes glossy.
    0.5 cup neutral oil
  5. Chop egg whites finely. Pat dry and finely chop cornichons and capers. Chop fresh herbs to 2-3mm pieces. Fold the egg whites, pickles, capers, shallots, vinegar, salt, and pepper into the sauce evenly.
    4 whole hard-boiled eggs, 2 tablespoons cornichons, 1 tablespoon capers, 1 whole shallot, 1 tablespoon white wine vinegar, 2 tablespoons fresh tarragon, 2 tablespoons fresh parsley, 1 tablespoon fresh chives, salt, black pepper

Notes

  • Use firm yolks for a thick, chunky sauce without grey rings.
  • Add oil slowly during emulsification to prevent breaking the sauce.
  • Store in an airtight container in the fridge and stir before serving to recombine any separated oil.

Tried this recipe?

Let us know how it was!

What Is Peach Schnapps? [Taste, Uses & More]

April 1, 2026

Peach schnapps does one job in a glass - it pulls bright, candied stone-fruit sweetness into any drink it touches, doing what brandy swaps that work and vodka swaps that work cannot quite replicate on their own.

What Is Peach Schnapps

It's the reason a Fuzzy Navel tastes like a ripe summer peach rather than just orange juice with a kick. Few liqueurs carry that immediate, recognizable fruit hit as cleanly - and that specificity is exactly what makes it worth understanding.

QUICK SUMMARY

Peach schnapps is a sweet, peach-flavored liqueur made from neutral spirit infused with peach extract or natural flavors. It tastes like candied peach syrup with a soft alcoholic edge, runs moderate intensity, and works best in fruity cocktails, glazes, and quick fruit macerations.

🍑Flavor: Sweet candied peach, stone-fruit syrup, faint almond undercurrent
🍹Best Uses: Cocktails, glazes, fruit macerations, dessert sauces
🏷️ABV: Typically 15-20%; lower than spirits, higher than wine
📦Shelf Life: Unopened: several years; opened: best within 1-2 years
🛒Buy It: Look for "natural flavors" or real peach distillate on the label for cleaner fruit notes

What Is Peach Schnapps?

Peach schnapps is a fruit-flavored liqueur that originated in the schnapps tradition of Central Europe - specifically Germany and Switzerland - where distillers made dry, spirit-forward fruit brandies.

The American and modern commercial version took a different turn, becoming much sweeter and more candy-like than its European forebears.

Most bottles you'll find today are made by infusing a neutral grain spirit with peach extract or natural peach flavoring, then sweetening the blend with added sugar.

A smaller number of premium products use actual distilled peach mash as the base, which delivers a more genuine stone-fruit character.

It also goes by the names peach liqueur and sometimes simply "peach schnapps liqueur," with the spelling alternating between schnapps and schnaps depending on the brand's origin.

ABV typically sits between 15% and 20%, which puts it below most spirits but well above wine. That moderate alcohol level matters - it's strong enough to carry cocktails but mild enough that a splash doesn't overpower a drink.

  • 🍑 American-style schnapps - sweetened, extract-based, syrupy; the dominant commercial category
  • 🌿 European-style schnapps - drier, distilled from fermented fruit, lower sugar content
  • ✨ Premium peach liqueur - uses real peach distillate, labeled as "peach brandy" or "crème de pêche" in some markets

What Does Peach Schnapps Taste Like?

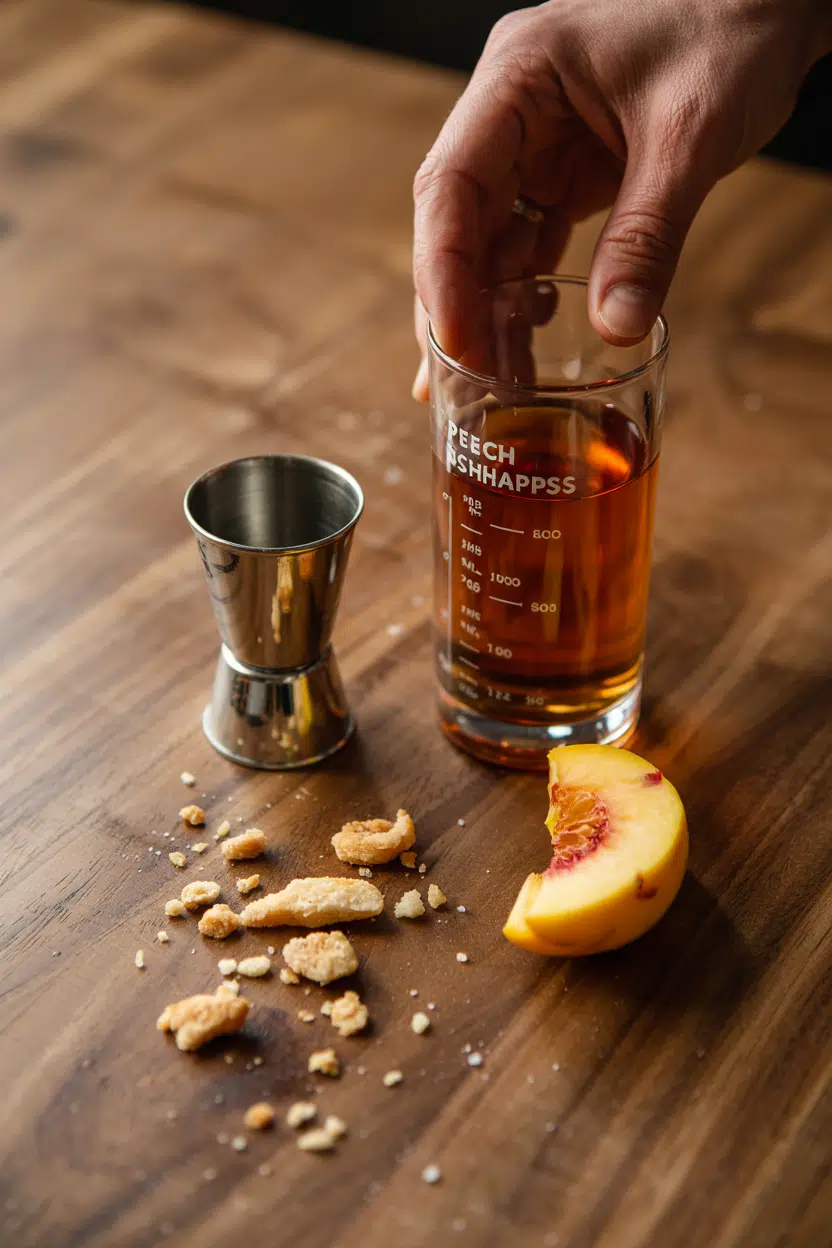
peach schnapps - What Is Peach Schnapps

The clearest way to understand the flavor is to picture peach nectar mixed with simple syrup, then add a soft alcoholic warmth at the back of the throat.

The sweetness hits first - unmistakably candy-like, closer to canned peach syrup than a fresh-picked fruit.

Some brands carry a faint almond or marzipan note, which comes from trace compounds in the peach pit.

That subtle bitterness keeps the sweetness from feeling flat.

Heat softens the alcoholic edge and lets the fruit character come forward, which is why a warm peach glaze on grilled fruit smells more genuinely peachy than the liqueur does straight from the bottle.

Sensory SnapshotModerate Intensity
👅 Flavor
candied peachstone-fruit syrupfaint almond
✋ Texture
syrupyslightly oily
👃 Aroma
peach candyfloralsugary

On the palate, the body is smooth and slightly oily - syrupy without being thick. Chilling it in a cold cocktail sharpens the fruit note and reduces the sweetness perception just enough to make it more drinkable.

How to Use Peach Schnapps

Cocktail work is the primary role.

Peach schnapps mixes cleanly with orange juice and citrus - the brightness of the citrus cuts through the sweetness and creates contrast.

The Fuzzy Navel is the textbook example.

For something more layered, try making bellini prosecco peach at home, where a small pour floated into sparkling wine creates a lightly peachy aperitif without overwhelming the bubbles.

It also pairs well with vodka and light rums, which provide a neutral mixing base - the replacements for rum in a fruity cocktail often shift the flavor profile enough that you'll notice the peach schnapps working harder.

Ginger beer adds spicy balance when you want complexity beyond sweetness.

Outside the bar, peach schnapps earns a place in the kitchen.

A quick pour over cut fruit macerates it in minutes, drawing out natural juices with a candy-peach boost.

Brushed onto grilled peaches or nectarines during the final minutes of cooking, it builds a light glaze that caramelizes at the edges.

Use it sparingly in dessert applications - poached fruit, ice cream sauces - because the sugar content climbs fast.

Watch Out
Don't use peach schnapps in long slow braises or extended reductions - the added sugar concentration will cause harsh caramelization and can turn bitter before the other flavors develop.
How Peach Schnapps Is Used
MethodBest ForTip
🍹 MixingCocktails, shooters, sparkling wine additionsStart with 1 oz; adjust for sweetness preference
🔥 GlazingGrilled peaches, nectarines, fruit skewersBrush on in the last 2-3 minutes to avoid burning
🍑 MacerationFresh stone fruit, berry mixes, fruit salads15-30 minutes is enough; longer dulls fresh fruit flavor
🍨 SauceIce cream topping, poached fruit finishingReduce gently with butter to temper sweetness
Try It In
🍹Sex on the BeachThe classic fruity cocktail where peach schnapps does the heavy lifting→

How to Buy and Store Peach Schnapps

Read the label before you buy.

A bottle listing real peach distillate or natural flavors will taste noticeably cleaner than one built purely on artificial extract.

Color is also a signal - some peach schnapps is clear, while others are amber-tinted from added coloring or an aged base spirit.

Neither is automatically better, however, so match your choice to the application: clear bottles tend to look cleaner in layered drinks.

Golden Rule
Store peach schnapps upright in a cool, dark place - heat and direct sunlight degrade the fruit compounds faster than time will.

Once opened, keep the cap tight and use it within 1-2 years for peak aroma. Unopened bottles hold well for several years without meaningful flavor loss.

If you're wondering about freezing peach schnapps, the sugar and alcohol content keeps it from freezing solid at standard freezer temperatures, which some bartenders use as a chilling trick.

Start with a Cocktail, Then Branch Out

If peach schnapps is new to your shelf, a Fuzzy Navel or Sex on the Beach is the right entry point - simple ratios, immediate payoff.

From there, try it as a glaze on grilled peaches where the sugar concentration becomes an asset rather than a challenge.

When swapping out peach schnapps isn't an option and you need to understand how the sweetness compares to other liquids, checking out the differences between agave vs simple syrup can help you calibrate balance in a recipe.

Keep one bottle on hand for summer - it earns its place.

Frequently Asked Questions

Is peach schnapps alcoholic?

Yes. Most commercial peach schnapps runs between 15% and 20% ABV. That's lower than spirits like vodka or rum but still well above wine or beer.

What is the difference between peach schnapps and peach liqueur?

In practice, the terms are used interchangeably in most markets. Technically, "peach liqueur" covers a broader category including premium products like crème de pêche, while "schnapps" often signals the sweeter, extract-based American style.

Can you cook with peach schnapps?

Yes, in short applications. Glazing grilled fruit and macerating fresh stone fruit work well. Avoid long cooking times - the high sugar content burns before the alcohol cooks off properly.

How do you substitute peach schnapps in a recipe?

Peach nectar with a small amount of simple syrup works in non-alcoholic applications. For cocktails, peach juice plus a neutral spirit covers most of the flavor without an exact match. Some bartenders use [apricot swaps that work](https://forkliftkitchen.com/apricot-substitutes/) when peach schnapps isn't available.

Does peach schnapps need to be refrigerated after opening?

Refrigeration isn't required - the alcohol content preserves it at room temperature. A cool, dark cabinet works fine; just keep the cap tight to prevent the aroma from fading.

What Is Ranch Dressing? [Taste, Uses & More]

April 1, 2026

Ranch dressing does something no vinaigrette can: it cools, binds, and coats all at once, making it as useful on a chicken wing as on a crisp wedge salad.

What Is Ranch Dressing

Built on buttermilk and mayonnaise, it sits in a category of its own - creamy enough to double as a dip, tangy enough to cut through fatty or fried foods.

If you rely on blue cheese for that creamy-tangy role, knowing replacements for blue cheese gives you a useful comparison point, and ranch often lands on that shortlist.

Keeping the herbs fresh matters too - keeping chives fresh directly affects the quality of any homemade batch.

QUICK SUMMARY

Ranch dressing is a creamy, tangy condiment made from buttermilk, mayonnaise, and dried herbs. It works as a salad dressing, dip, and cold finishing sauce. Moderate intensity, broadly paired with American comfort food, and best stored refrigerated after opening.

🧄Flavor: Tangy, savory, herbaceous with garlic-onion backbone
🥗Best Uses: Salad dressing, dip, cold sauce, sandwich spread
🧊Storage: Refrigerate after opening; use within 2-3 weeks
🥛Base: Buttermilk and mayonnaise (or sour cream)
⚠️Dietary Note: Contains dairy and eggs; check label for dairy-free versions

What Is Ranch Dressing?

Ranch dressing is a seasoned dairy-based condiment originating in the Midwestern United States, built from a base of buttermilk and mayonnaise or sour cream.

It belongs to the broader category of creamy salad dressings, though its use extends well beyond salads into dipping and finishing roles.

The flavor profile comes from a reliable combination of aromatics: garlic powder, onion powder, dried dill, chives, and parsley. You'll also hear it called buttermilk ranch or simply ranch, and it sometimes appears mislabeled as "ranching dressing" in informal contexts.

Commercial versions vary more than most people expect. Some lean heavily on sour cream for tang, others use oil-based emulsions with added buttermilk flavor, and a growing range of dairy-free versions swaps the base entirely.

Understanding alternatives to garlic powder and alternatives to onion powder helps when making ranch from scratch and you're short on pantry staples.

  • 🧴 Classic ranch - buttermilk and mayo base, dried herbs, pourable consistency
  • 🥣 Ranch dip - thicker version using sour cream instead of buttermilk, made for crudités
  • 🌶️ Flavored ranch - chipotle, jalapeño, or sriracha mixed in for heat
  • 🌱 Dairy-free ranch - plant-based mayo and oat or cashew milk substitutes

What Does Ranch Dressing Taste Like?

ranch dressing - What Is Ranch Dressing

Ranch sits at a mid-point between a plain sour cream dip and a full herb vinaigrette - tangy without sharpness, savory without being salty. The buttermilk provides a lactic acid tang that reads as fresh rather than acidic.

Sensory SnapshotModerate Intensity
👅 Flavor
tangysavoryherbaceousmildly salty
✋ Texture
creamysmoothslightly viscous
👃 Aroma
garlickyfresh herb

Garlic and onion give it a savory backbone, while dill and chives push it toward garden-fresh territory. Unlike the taste of italian dressing, which leads with vinegar and oregano, ranch keeps its acid quieter and its fat forward.

Homemade versions made with fresh herbs taste noticeably brighter than shelf-stable commercial bottles. The creaminess also mutes intensity slightly - this isn't a bold condiment, it's a moderate one that complements rather than dominates.

How to Use Ranch Dressing

Ranch works entirely at room temperature or cold. No cooking required, no reduction needed - the no-heat approach is part of what makes it practical for quick assembly dishes.

How Ranch Dressing Is Used
MethodBest ForTip
🥗 Salad DressingMixed greens, wedge salads, coleslawToss just before serving to prevent wilting
🍗 DipChicken wings, raw vegetables, friesUse a thicker sour cream base for better cling
🥙 SpreadSandwiches, wraps, burgersApply thin - it's rich and a little goes far
🥣 Cold BinderPasta salads, potato saladStir in after cooling to preserve herb flavor
🌮 Finishing SauceGrain bowls, roasted vegetables, baked potatoesDrizzle just before serving, not during cooking

Ranch fits American casual cooking by design - barbecue spreads, game-day platters, and Tex-Mex tables all use it regularly. It acts as a cooling counterweight to spicy wings or smoky brisket.

Pairing works best with ingredients that have a clear textural contrast: crisp iceberg, raw carrots and celery, roasted chicken, or crispy potatoes. Bacon and cheddar both amplify the savory side without fighting the tang.

Avoid pairing ranch with dishes built on sharp citrus or assertive vinegars - the buttermilk tang and the acid will compete rather than complement.

Watch Out
Don't heat ranch dressing. The dairy base breaks when warmed, causing the emulsion to split into greasy and watery layers.

If you want a different flavor profile in the same creamy-dip role, the guide to alternatives to ranch dressing covers what holds up in similar situations.

Try It In
🥛Homemade Buttermilk Ranch DressingThe from-scratch version with real buttermilk tang→🌶️Smoky Chipotle Ranch DressingFor when you want heat alongside the creaminess→

How to Buy and Store Ranch Dressing

At the store, look for refrigerated bottles labeled "buttermilk ranch" if classic tang is what you're after - these use real buttermilk and typically taste closer to homemade.

Shelf-stable versions are made for pantry convenience but often rely on flavoring rather than actual cultured dairy.

Best Pick
Refrigerated tubs labeled "contains buttermilk" give you the clearest tang and closest-to-homemade flavor of the commercial options.

Check the color before buying: pale off-white with visible herb specks is the right sign. Bright white or uniformly smooth dressing usually signals a heavily processed formula.

A thin oil ring at the top of a fresh tub is normal - just shake or stir before serving.

Storage is straightforward:

  • Unopened shelf-stable bottles - store in the pantry until the best-by date
  • Opened or refrigerated tubs - keep sealed in the fridge, use within 2-3 weeks
  • Homemade ranch - refrigerate in a sealed jar, use within 5-7 days

The herbs degrade fastest. If your ranch smells flat or the dill scent is gone, check dill's shelf life to understand why dried herb quality matters.

For a full breakdown of signs of spoilage and date guidelines, the article on how long ranch dressing keeps covers the detail.

Start With What You Need It to Do

Ranch divides cleanly by use case. If you're dressing a salad, buy a pourable buttermilk-based bottle.

Need a dip with more body? A sour cream-based ranch tub or homemade version with less liquid holds to crudités better.

Golden Rule
Match the base to the job: pourable buttermilk ranch for salads and drizzles, thick sour cream ranch for dipping.

Homemade gives you control over herb freshness and tang level, but it lasts under a week. Commercial is the practical call for anything beyond immediate use.

Either way, ranch earns its place fast.

Frequently Asked Questions

What is ranch dressing made of?

Buttermilk, mayonnaise or sour cream, garlic powder, onion powder, dried dill, chives, and parsley. Commercial versions sometimes add stabilizers and flavor concentrates to extend shelf life and standardize the taste.

Is ranch dressing dairy?

Yes, most ranch dressings contain dairy through buttermilk or sour cream. Dairy-free versions exist using plant-based mayo and non-dairy milk, but check the label - some reduced-fat versions still contain dairy derivatives.

Does ranch dressing have buttermilk?

Classic ranch does, and buttermilk is the source of its signature tang. However, many shelf-stable commercial versions use powdered buttermilk or artificial flavoring instead of fresh cultured buttermilk.

How long does ranch dressing last in the fridge?

Opened commercial ranch lasts about 2-3 weeks refrigerated; homemade lasts 5-7 days. The clearest spoilage sign is a sour or off smell, not just a change in color.

Can you use ranch dressing as a marinade?

Yes, but only for cold marinating before cooking - not as a sauce during heat. The dairy base tenderizes chicken effectively when used as an overnight marinade in the fridge, then discarded before grilling.

Spanish Arroz Negro

April 1, 2026

Rice soaking in briny squid ink until every grain turns deep black. That's what happens when you simmer Bomba rice in hot seafood broth with fresh squid ink sachets.

Spanish Arroz Negro served on a plate

The wide pan does the heavy lifting. You get tender grains with a slight crust on the bottom if you leave it uncovered those final 10 minutes.

This works for weeknight dinners when you want something that looks dramatic but follows a straightforward simmer-and-rest method.

QUICK SUMMARY

Spanish Arroz Negro is short-grain rice simmered in squid ink and seafood broth until it turns jet black. The key is keeping broth hot and never stirring after rice goes in. Success depends on the right liquid ratio - too much makes mush, too little leaves crunchy centers.

⏱️Time Reality: 45-55 minutes total, 20 minutes hands-off while rice simmers
🔑First Move: Heat broth to 180-190°F before adding to maintain steady simmer temperature
⚠️Watch Out: Stirring rice during cooking breaks grains and creates mush - leave it alone after adding liquid

Table of Contents

Toggle
  • Why This Recipe Works
  • What You'll Need
    • Ingredient Details
  • Ingredient Swaps
  • What to Serve With It
  • Store and Reheat
  • Frequently Asked Questions
  • Spanish Arroz Negro
    • Method 
    • Tried this recipe?

Why This Recipe Works

Squid ink mixed into hot broth colors every grain evenly while the rice absorbs all that briny seafood flavor. Rich mains need something to cut through, and buttermilk does exactly that. For a version that comes together quickly, easy buttermilk side adds a creamy contrast that balances the strong ink flavor.

Quick Reference
⏱️
Prep Time
15 min
🔥
Cook Time
30-40 min
⏰
Total Time
45-55 min
🍽️
Servings
4 servings
📊
Difficulty
Medium
🏷️
Category
Main Dish
💡
Quick Tip
Do not stir rice after simmering starts
🎯
Best For
Weeknight | Entertaining

What makes this work:

  • Bomba rice holds liquid without turning mushy - short grains absorb up to three times their volume while staying separate
  • Mixing squid ink into broth first distributes color evenly - adding it directly to rice creates dark patches and pale spots
  • Hot broth maintains steady simmer temperature - cold liquid drops the pan temp and extends cooking time by 10-15 minutes
  • Adding squid in the final 5 minutes prevents rubbery texture - longer cooking toughens the meat and makes it chewy
  • Resting covered for 5 minutes after cooking finishes absorbing liquid - skipping this leaves wet rice with a soupy bottom
Quick Tip
Keep broth hot in a separate pot throughout cooking - cold additions interrupt the simmer and create uneven texture

What You'll Need

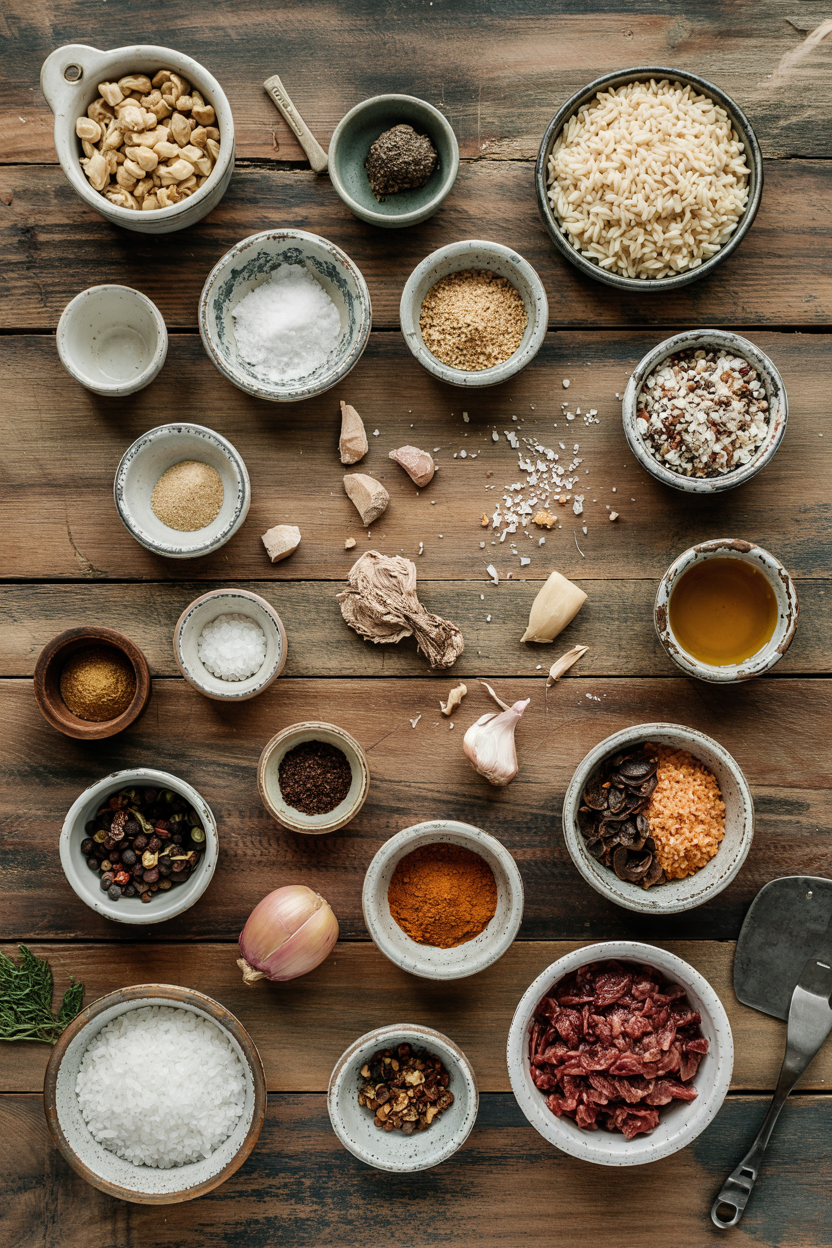
Ingredients for Spanish Arroz Negro

Stock up on Calasparra or Bomba rice and fresh squid ink sachets. A good skillet can make or break the plate. For a version that comes together quickly, easy skillet side works when you need something simple alongside the black rice.

🍚
Rice
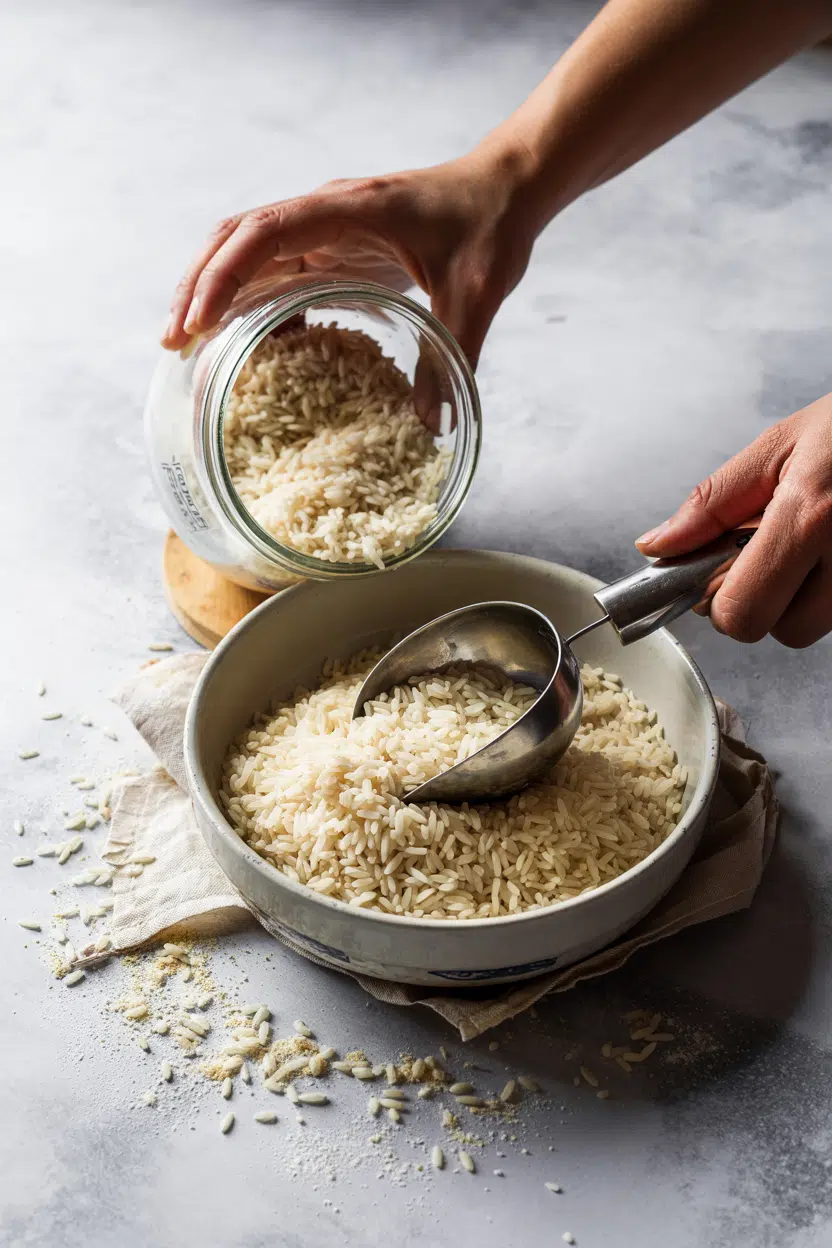
  • 1½ cups Calasparra or Bomba rice
🦐
Seafood
  • 12 oz squid or cuttlefish, cleaned and sliced
  • 4 squid ink sachets (about 4g each)
🥣
Broth & Liquid
  • 4 cups fish or seafood stock
  • ½ cup white wine
🧄
Aromatics
  • 4 cloves garlic, minced
  • 1 medium onion, finely diced
  • 1 medium tomato, grated or finely chopped
  • 3 tablespoons olive oil
  • Fresh parsley for garnish

Ingredient Details

  • Calasparra or Bomba rice
    Spanish short-grain rice absorbs three times its volume without breaking - regular long-grain turns mushy at that ratio
  • Squid ink sachets
    Use 4g packets from Spanish or Italian grocers - bottled ink works but check freshness date for best color
  • Fresh squid
    Cleaned bodies slice into rings easily - frozen works if thawed completely and patted dry before cooking
  • Fish or seafood stock
    Homemade or quality store-bought adds depth - weak broth makes bland rice that needs heavy seasoning
  • Olive oil
    Extra virgin adds fruity notes during sautéing - regular olive oil works for a milder base flavor
  • White wine
    Dry white wine deglazes the pan and adds acidity - skip it if you prefer, but add 1 tablespoon lemon juice for balance
  • Grated tomato
    Run a halved tomato over a box grater for quick pulp - adds natural sweetness and helps distribute squid ink color

Ingredient Swaps

Calasparra rice isn't always stocked, and squid can run expensive depending on season. When you need alternatives, these swaps keep the dish close to the original without requiring specialty store trips.

  • Squid ink → Cuttlefish ink or black garlic paste - Cuttlefish ink tastes similar with slightly less brine, black garlic changes flavor to earthy-sweet but maintains dark color
  • Calasparra rice → Arborio rice - Creates creamier texture similar to risotto instead of distinct grains, still absorbs liquid well
  • Fresh squid → Cuttlefish or firm white fish chunks - Cuttlefish has richer flavor and similar chew, white fish turns flaky and mild
  • Fish broth → Chicken broth with 1 sheet kombu seaweed - Adds umami depth without seafood flavor,kombu provides subtle ocean taste

Arborio Rice

Works for: Budget-friendly option when Spanish rice isn't available

Skip if: You want traditional separated grains instead of creamy texture

Black Garlic Paste

Works for: Creating dark color when squid ink is unavailable

Skip if: You want authentic briny seafood flavor - this tastes earthy and sweet

Chicken Broth + Kombu

Works for: Non-seafood eaters who still want umami depth

Skip if: You're making this for seafood lovers - the ocean flavor matters here

Instructions

The entire dish takes 45-55 minutes with most of that time spent watching rice simmer. A good potato wedges can make or break the plate. For a version that comes together quickly, this easy potato wedges recipe roasts while the rice cooks and adds a crispy side.

  1. Heat 3 tablespoons olive oil in a wide skillet or paella pan over medium heat, then sauté 1 diced onion and 4 minced garlic cloves for 3-4 minutes until translucent but not browned. Stir in 1 grated tomato and cook 2 minutes until liquid reduces slightly.

  2. Pour in ½ cup white wine and simmer 1 minute to deglaze, scraping up any browned bits. Mix 4 squid ink sachets into 4 cups hot fish stock in a separate pot until completely dissolved and black.

  3. Add 1½ cups Bomba rice to the skillet, stir once to coat with aromatics, then pour in the hot squid ink broth. Shake the pan gently to distribute rice evenly but do not stir after this point.

  4. Simmer uncovered over medium-low heat for 20 minutes, then nestle 12 oz sliced squid into the rice and cook 5 more minutes until squid turns opaque and rice is tender. Check one grain - it should be soft with no hard center.

  5. Remove from heat, cover with foil or a lid, and rest 5 minutes to finish absorbing any remaining liquid. Garnish with fresh parsley and serve with lemon wedges on the side.

Watch Out
Rice releases starch as it cooks - stirring breaks grains and creates a gummy texture instead of separate pieces

What to Serve With It

Black rice sits heavy on the plate without something bright or crisp next to it. The salad works best when it hits the table at the same time as the main. For a version that comes together quickly, something fresh like salad cuts through the rich seafood and adds crunch. If you're planning easy a tagine dinner nights, similar pairing strategies apply for Mediterranean mains.

Side Dish Prep Why It Works How to Serve
Simple Green Salad Easy Fresh acidity cuts through briny squid ink and balances rich seafood Toss mixed greens with olive oil, lemon juice, and sea salt right before serving
Crusty Bread Easy Scoops up rice and soaks up any remaining broth at the bottom of the pan Slice thick and toast lightly, serve warm alongside the rice
Steamed Green Beans Easy Light crunch and mild flavor don't compete with strong squid ink taste Steam 5-6 minutes until tender-crisp, toss with olive oil and garlic
Roasted Vegetables Medium Adds warm texture contrast and caramelized sweetness Roast bell peppers, zucchini, and eggplant at 425°F for 25 minutes
Garlic Aioli Easy Creamy richness balances briny rice and adds smooth texture Dollop on the side or drizzle over rice just before serving

Three ways to serve it:

  • For weeknight meals: Pair with a simple green salad and crusty bread - both take under 10 minutes and add brightness without extra cooking
  • For entertaining: Serve with roasted vegetables, Spanish olives, and Manchego cheese as appetizers, then finish with garlic aioli on the side
  • For meal prep: Pack rice with steamed green beans in containers - both reheat well and the beans stay crisp if you store them separately
Best Pick
Lemon wedges are non-negotiable - the acidity lifts the heavy ink flavor and brightens every bite

Store and Reheat

Arroz Negro holds up well in the fridge for 3-4 days and freezes for a month. Rich mains need something to cut through, and french fries does exactly that. For a version that comes together quickly, quick french fries dish adds a crispy contrast when reheating the rice for a second meal.

Method Time Best For
🍳 Stovetop 5-7 min Even heat with added broth loosens grains without drying them out
🔥 Oven 15 min at 350°F Retains texture and moisture when covered with foil - good for larger portions
📦 Microwave 2-3 min Quick reheating for single servings - add 1-2 tablespoons water or broth first

For best results when storing:

  • Cool rice completely before refrigerating - hot rice in a sealed container creates condensation that makes grains soggy
  • Store in shallow airtight containers - wide surface area lets rice cool faster and prevents bacterial growth in thick layers
  • Add 2-3 tablespoons broth when reheating - rice dries out in the fridge and needs extra moisture to return to original texture
  • Freeze in portion-sized bags - flat bags stack easily and thaw faster than deep containers
  • Reheat squid separately if possible - squid toughens when reheated too long, so warm it gently for 1-2 minutes max

Frequently Asked Questions

How long to cook Arroz Negro at simmer?

Simmer uncovered for 20 minutes at medium-low heat, then add squid and cook 5 more minutes. Check rice after 25 minutes total - grains should be tender with no hard centers, and most liquid should be absorbed.

Can I make Arroz Negro ahead and reheat?

Yes, cook the rice fully, cool completely, and refrigerate up to 3 days. Reheat on the stovetop with 2-3 tablespoons added broth to loosen grains - microwave works for single portions but stovetop gives better texture.

What is the best rice for Arroz Negro?

Calasparra or Bomba rice from Spain absorbs three times its volume without breaking or turning mushy. Arborio works as a substitute but creates a creamier, risotto-like texture instead of distinct separated grains.

How do I prevent squid from getting rubbery?

Add squid during the last 5 minutes of cooking and remove from heat as soon as it turns opaque. Longer cooking toughens the meat - if it's already rubbery, you overcooked it and there's no fix.

What sides pair well with Spanish Arroz Negro?

Simple green salad with lemon vinaigrette, crusty bread for scooping, and garlic aioli for richness all balance the briny squid ink. Steamed green beans or roasted vegetables add texture without competing with the strong seafood flavor.

Spanish Arroz Negro served on a plate

Spanish Arroz Negro

No ratings yet
Spanish Arroz Negro features short-grain Bomba rice simmered in squid ink and seafood broth until jet black with a tender texture and slight crust. The key is maintaining hot broth temperature, never stirring after adding rice, and adding squid late to prevent toughness.
Print Recipe Pin Recipe
Prep Time 15 minutes mins
Cook Time 30 minutes mins
Total Time 45 minutes mins
Servings: 4 servings
Course: Main Dish
Cuisine: Spanish
Ingredients Equipment Method Notes

Ingredients
  

  • 1.5 cups Bomba rice short-grain rice, Calasparra or Bomba preferred
  • 12 oz squid cleaned and sliced
  • 4 sachets squid ink about 4g each sachet
  • 4 cups fish or seafood stock
  • 0.5 cups white wine dry, for deglazing pan
  • 4 cloves garlic minced
  • 1 medium onion finely diced
  • 1 medium tomato grated or finely chopped
  • 3 tablespoons olive oil extra virgin preferred
  • to taste fresh parsley for garnish
  • to serve lemon wedges for serving

Equipment

  • wide skillet or paella pan Used for sautéing aromatics and simmering rice
  • Separate pot For heating and dissolving squid ink in seafood stock

Method
 

  1. Heat 3 tablespoons olive oil in a wide skillet or paella pan over medium heat. Sauté diced onion and minced garlic for 3-4 minutes until translucent but not browned. Stir in grated tomato and cook 2 minutes until liquid reduces slightly.
    4 cloves garlic, 1 medium onion, 1 medium tomato, 3 tablespoons olive oil
  2. Pour in ½ cup white wine and simmer 1 minute to deglaze, scraping browned bits from pan. In a separate pot, mix 4 squid ink sachets into 4 cups hot fish stock until dissolved and black.
    4 sachets squid ink, 4 cups fish or seafood stock, 0.5 cups white wine
  3. Add 1½ cups Bomba rice to the skillet, stir once to coat with aromatics, then pour in the hot squid ink broth. Shake the pan gently to distribute rice evenly but do not stir after this point.
    1.5 cups Bomba rice, 4 sachets squid ink, 4 cups fish or seafood stock
  4. Simmer uncovered over medium-low heat for 20 minutes. Then nestle sliced squid into the rice and cook 5 more minutes until squid turns opaque and rice is tender. Check one grain to ensure it is soft with no hard center.
    12 oz squid
  5. Remove from heat, cover with foil or a lid, and let rest 5 minutes to absorb remaining liquid. Garnish with fresh parsley and serve with lemon wedges on the side.
    to taste fresh parsley, to serve lemon wedges

Notes

  • Do not stir rice after simmering starts to prevent mushy texture.
  • Keep broth hot to maintain steady simmer temperature and even cooking.
  • Add squid in the last 5 minutes to avoid rubbery texture and overcooking.

Tried this recipe?

Let us know how it was!

What Is Poblano Pepper? [Taste, Uses & More]

April 1, 2026

Most people reach for poblano peppers knowing they want heat - then wonder why the dish tastes smokier and more complex than anything a jalapeño could deliver.

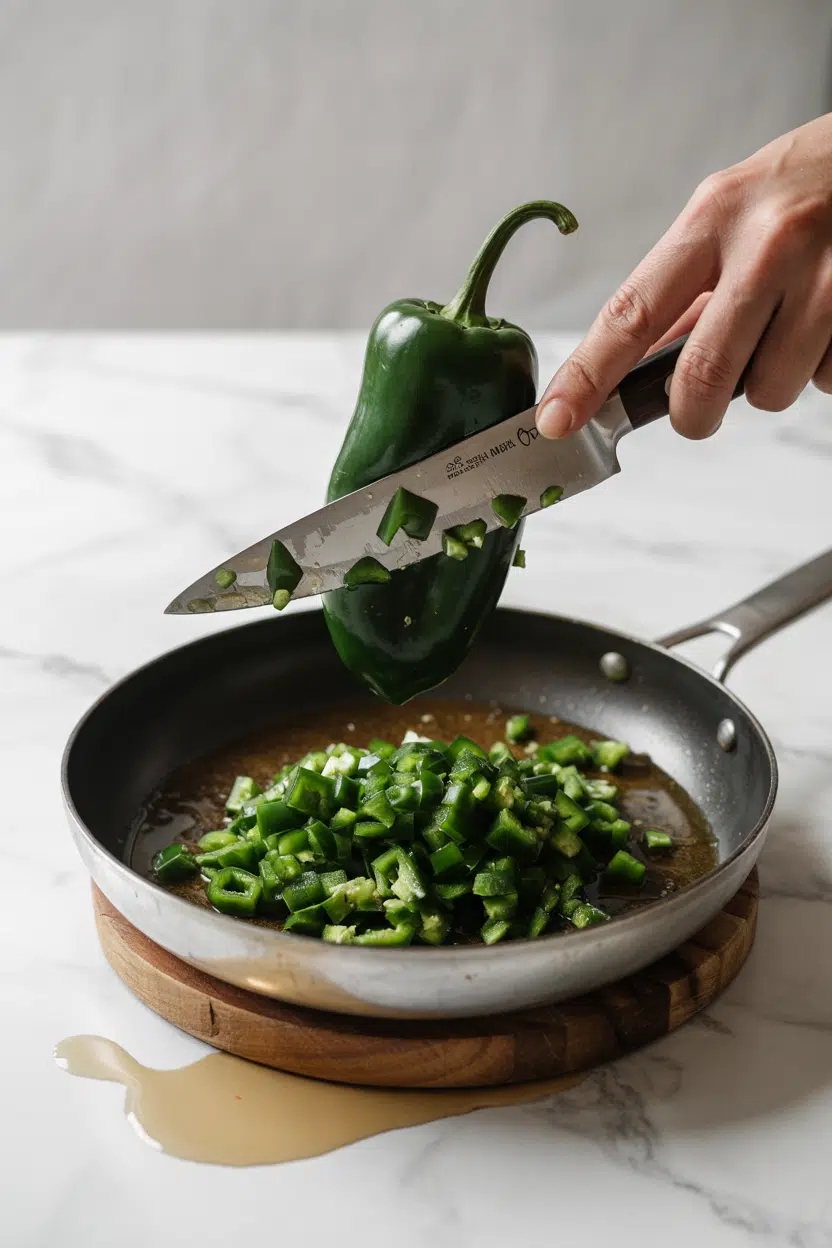
What Is Poblano Pepper

That's the misread: poblanos aren't just mild chiles standing in for hotter options, and seasoning with poblano pepper works differently than most cooks expect.

Fresh, they bring green earthiness with a restrained kick.

Roasted, they shift into something darker and richer - closer to a guajillo pepper in spice blends than a simple vegetable.

QUICK SUMMARY

The poblano pepper is a thick-walled, mild Mexican chile with earthy green flavor raw and rich smokiness when roasted. It anchors dishes like chile rellenos and mole-based sauces, and dries into ancho chile - a completely different but deeply related pantry staple.

🌶️Flavor: Mild earthy heat, green peppery, smoky and dark after roasting
🔥Heat Level: 1,000-1,500 Scoville units - mild, suits most palates
🍳Best Uses: Chile rellenos, rajas con crema, mole sauces, stuffed or roasted
❄️Shelf Life: 1-2 weeks raw; 6 months frozen roasted; months as dried ancho
🛒Buy It: Firm, glossy, heavy for size - large flat peppers are best for roasting

What Is poblano pepper?

The poblano originates from Puebla, a state in central Mexico, where it has been cultivated for centuries as a cooking chile rather than a hot one.

It belongs to Capsicum annuum - the same broad species as bell peppers and jalapeños - and sits at the mild end of the Scoville scale, typically between 1,000 and 1,500 units when fresh.

You'll recognize it by its heart-shaped silhouette, deep dark green skin, and thick walls.

Mature peppers turn reddish-brown before drying, which is when they become ancho chiles - a name that refers specifically to the dried form, not a separate variety.

The confusion between the two is common: if it's fresh and green, it's a poblano; if it's dried and wrinkled, it's an ancho.

Other names float around depending on region. "Chile poblano" is the standard Spanish form. Some markets label dried ones as pasilla poblano, though strict Mexican culinary usage reserves "pasilla" for a different chile entirely.

Knowing the distinction helps when shopping or cooking from a regional recipe.

  • 🌶️ Fresh poblano - dark green, thick-walled, mild heat
  • 🟤 Ancho chile - dried ripe poblano, wrinkled, concentrated fruity notes
  • 📍 Origin - Puebla region, central Mexico
  • 🔬 Species - Capsicum annuum, same as bell and jalapeño peppers

What Does poblano pepper Taste Like?

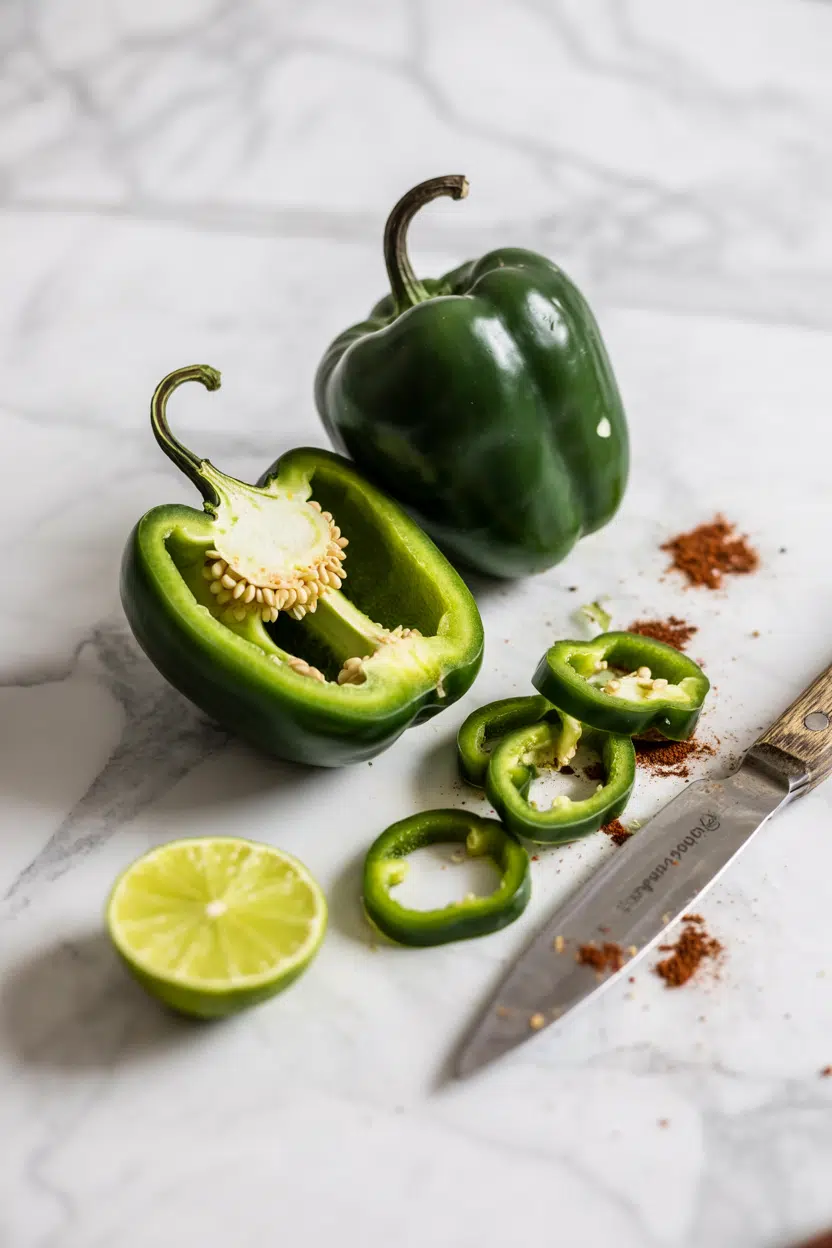
poblano pepper - What Is Poblano Pepper

Raw poblano tastes like a bell pepper that grew up with more ambition - green, slightly grassy, and vegetal with a mild back-of-throat warmth that lingers without burning. The fruity undertone is subtle but present, especially in larger, flatter specimens.

Sensory SnapshotMild Intensity
👅 Flavor
earthygreen pepperymildly smokyfaintly fruity
✋ Texture
thick and firm rawcreamy when roasted
👃 Aroma
grassy and vegetaltoasty when charred

Roasting changes everything. Direct flame contact chars the skin, loosens it for peeling, and drives a Maillard-driven shift from vegetal to toasty, lightly sweet, and smoky.

That's the flavor most associated with poblanos in cooked dishes - it's what makes chile rellenos taste the way they do.

Dried into ancho, the profile shifts again. Fruity-molasses notes dominate, and the heat barely registers.

Ancho tastes almost nothing like fresh poblano, which is why the two aren't interchangeable in a recipe without adjusting quantities and expected flavor.

Golden Rule
Never substitute raw poblano for ancho in a sauce - the flavor gap is too wide. Roast first if you want depth closer to the dried version.

How to Use poblano pepper

Roasting over an open flame is the starting point for most Mexican preparations. You char the skin directly on a gas burner or under a broiler, steam the pepper in a covered bowl for ten minutes, then peel. What remains is silky, smoky, and ready for nearly anything.

How Poblano Pepper Is Used
MethodBest ForTip
🥗 RawDiced into salsas, sliced into quesadillasRemove seeds and ribs to reduce heat further
🔥 Roasted/CharredChile rellenos, rajas con crema, creamy soupsSteam after charring for easier skin removal
🍲 Stewed/BraisedMole-style sauces, enchilada basesAdd early for deeper integration into the sauce
🥘 SautéedTaco fillings, rice dishes, egg scramblesDice small and cook in oil before adding aromatics
🌿 Dried (Ancho)Marinades, rubs, mole negro, chili blendsToast briefly in a dry pan before rehydrating

Rajas con crema is one of the simplest and most rewarding uses: roasted strips of poblano cooked down with onion, corn, and cream or crema - try making mexican rajas con crema at home if you haven't yet. For stuffing, large flat poblanos hold cheese or picadillo filling without tearing during cooking.

Pairings that work consistently include fresh corn and masa, queso fresco, roasted garlic, pork, and chicken. Lime and cilantro brighten the smokiness without competing.

Crema or sour cream cool the mild heat and carry the flavor across a dish.

For cooks who need a bell pepper swaps that work in a pinch, a raw poblano can step in - it adds mild heat and earthiness where bell pepper would only add sweetness.

The reverse works too, though you'll lose the complexity.

Try It In
🍗Air Fryer Lemon Pepper Chicken TendersBright citrus cuts through smoky poblano pairings well→🥦Air Fryer Lemon Pepper CauliflowerA vegetable-forward dish where roasted poblano adds earthy depth→🍖Air Fryer Lemon Pepper MeatballsPoblano diced into the mix adds mild heat and body→

How to Buy and Store poblano pepper

Pick peppers that are firm, glossy, and heavy for their size. Smooth skin without wrinkles, cuts, or soft patches is the right signal.

For stuffing or roasting whole, choose large, flat specimens - they have more flesh and hold their shape better under heat.

Watch Out
Brown patches or soft spots near the stem indicate decay, not ripeness. A darkening pepper that's still firm is likely transitioning to ancho-red - that's fine for drying, not ideal for fresh cooking.

Store unwashed poblanos in a perforated plastic bag in the produce drawer, keeping the stem intact to slow moisture loss.

Raw peppers last 1-2 weeks refrigerated this way.

Roasted, peeled, and packed into an airtight container, they keep 3-4 days in the fridge.

Frozen roasted poblanos extend that to six months - check poblano pepper spoilage signs before using anything that's been sitting a while.

  • 🛒 Buy firm and glossy - heavy for size, no soft spots or cuts
  • 🧊 Freeze roasted - peel first, store flat, use within 6 months
  • 🌿 Dry into ancho - best option for long-term pantry storage

Start With One Dish

If you've never cooked a poblano, chile rellenos are the entry point that shows you everything at once: roasting technique, texture transformation, and how the pepper carries a filling without becoming secondary to it.

Once roasting feels routine, move to rajas - simpler, faster, and flexible enough to go on eggs, tacos, or rice.

From there, drying your own ancho is a reasonable next step for cooks who want to work with deeper, concentrated flavor.

Shortcut
No open flame? A broiler at high heat works. Position peppers 3-4 inches from the element and rotate every 3-4 minutes until blistered on all sides.

The poblano rewards incremental familiarity. Start roasted, then stuffed, then dried - that progression covers most of what Mexican cooking asks of this chile.

Frequently Asked Questions

Are poblanos spicy?

Mildly. Fresh poblanos register 1,000-1,500 Scoville units - noticeable warmth but far below jalapeño heat. Removing the seeds and inner ribs reduces that further.

What is the difference between poblano and ancho?

Same pepper, different form. Ancho is a poblano that has ripened to red and been dried. The flavor shifts from green and earthy to dark, fruity, and slightly sweet - they're not interchangeable in recipes.

How do you roast and peel a poblano pepper?

Char directly over a gas flame or under a broiler, turning until the skin blisters all over. Transfer to a covered bowl for 10 minutes, then peel - the skin slips off easily once steamed.

Can you freeze roasted poblano peppers?

Yes. Peel and seed them first, then freeze flat on a tray before transferring to a bag. They keep up to 6 months and thaw quickly for sauces, soups, or rajas.

What are poblanos used for in Mexican food?

They anchor chile rellenos, rajas con crema, and mole-style sauces. Dried as ancho, they form the backbone of mole negro and many regional spice blends across central and southern Mexico.

Air Fryer Seafood Stuffed Peppers

April 1, 2026

You need 35 minutes and one air fryer basket. No oven preheating, no stovetop juggling, no sheet pan rotation.

Air Fryer Seafood Stuffed Peppers served on a plate

The air fryer crisps the pepper edges and sets the stuffing while you clean up the kitchen. Seafood cooks fast at 350°F, so timing matters more than technique.

This works for weeknight dinners when you want something substantial that looks like you put in effort. The stuffing comes together in one bowl and holds its shape without spilling out.

QUICK SUMMARY

Air Fryer Seafood Stuffed Peppers combine shrimp and crab meat with cream cheese and garlic in halved bell peppers, air-fried at 350°F for 12-15 minutes. The breadcrumb topping crisps while the stuffing stays creamy and the peppers soften without turning mushy.

⏱️Timing: 20 min prep, 12-15 min cook, no marinating or advance work required
🔑Key Move: Dry seafood with paper towels 5 min before mixing to prevent soggy stuffing
⚠️Watch Out: Don't overcrowd the basket - leave 1 inch between peppers or they steam instead of crisp

Table of Contents

Toggle
  • Why This Recipe Works
  • What You'll Need
    • Ingredient Details
  • Ingredient Swaps
  • What to Serve With It
  • Store and Reheat
  • Frequently Asked Questions
  • Air Fryer Seafood Stuffed Peppers
    • Method 
    • Tried this recipe?

Why This Recipe Works

The air fryer circulates heat around each pepper, crisping the edges and cooking the seafood without drying out the stuffing. For a version that comes together quickly, easy shrimp side uses the same air fryer method with a different coating approach.

Quick Reference
⏱️
Prep Time
20 min
🔥
Cook Time
12-15 min
⏰
Total Time
35 min
🍽️
Servings
4 servings
📊
Difficulty
Medium
🏷️
Category
Main Dish | Appetizer
💡
Quick Tip
Do not overcrowd air fryer basket
🎯
Best For
Weeknight | Entertaining | Meal prep
  • High heat without drying: 350°F cooks shrimp through in 12-15 minutes while cream cheese keeps the stuffing moist and prevents rubbery texture
  • Visual doneness cues: Shrimp turn opaque and pink, peppers soften at the edges but hold their shape, breadcrumb topping turns golden brown
  • No flipping required: Air circulation cooks both sides evenly when peppers sit cut-side up with at least 1 inch space between each one
  • Texture contrast: Creamy seafood stuffing with tender shrimp and crab pairs with slightly crisp pepper edges and crunchy parmesan breadcrumb topping
  • Flavor balance: Garlic and lemon juice cut through the richness of cream cheese while parsley adds fresh herby notes that complement seafood
Quick Tip
Pat shrimp and crab dry with paper towels for 5 min before mixing - excess moisture makes the stuffing watery and prevents the breadcrumb topping from crisping properly

What You'll Need

Ingredients for Air Fryer Seafood Stuffed Peppers

Medium-sized bell peppers (4-5 inches tall) hold the right amount of stuffing without falling over in the basket. Fresh shrimp and crab meat cost more than canned but deliver better texture and cleaner flavor without the metallic notes.

🦐
Seafood
  • Shrimp (1 lb, peeled and deveined)
  • Crab meat (8 oz, fresh or canned)
🥬
Vegetables
  • Bell peppers (4 medium, halved and seeded)
  • Onion (½ cup, finely diced)
  • Garlic (3 cloves, minced)
🧀
Dairy
  • Cream cheese (8 oz, softened)
  • Parmesan cheese (¼ cup, grated)
🫙
Pantry
  • Breadcrumbs (½ cup, plain or panko)
  • Lemon juice (1 tbsp, fresh)
  • Parsley (2 tbsp, chopped fresh)

Ingredient Details

  • Bell peppers
    Choose peppers that sit flat when halved - wobbly ones tip over in the air fryer basket and spill stuffing
  • Shrimp
    Buy peeled and deveined 31-40 count size - they chop easily and cook through in the same time as the peppers soften
  • Crab meat
    Lump crab meat has better texture than claw meat, but canned works if you drain and press out excess liquid with paper towels
  • Cream cheese
    Let cream cheese sit at room temp 30 min before mixing - cold chunks won't blend smoothly and create lumpy stuffing
  • Breadcrumbs
    Panko stays crunchier than regular breadcrumbs but either works - mix with parmesan before sprinkling on top for better browning
  • Garlic
    Mince garlic fine so it distributes evenly - big chunks taste raw and harsh after only 15 minutes of cooking
  • Lemon juice
    Add lemon juice after mixing seafood and cream cheese - acid brightens the rich stuffing and prevents the creamy mixture from tasting flat

Ingredient Swaps

Canned crab meat costs less than fresh and works fine if you drain it thoroughly and pick out any shell fragments. The texture softens slightly but the flavor holds up in the creamy stuffing mixture.

  • Cream cheese → mashed avocado: Adds creaminess with lighter flavor, but the stuffing won't bind as firmly and may slide out when cutting peppers (dairy-free option)
  • Breadcrumbs → crushed gluten-free crackers: Maintains crisp topping texture while avoiding gluten - use the same measurement and mix with parmesan
  • Shrimp → chopped scallops or firm white fish: Different texture but cooks in the same time - cut into ½-inch pieces so they cook through evenly
  • Bell peppers → poblano or banana peppers: Adds mild heat and different flavor profile - check doneness at 10 minutes since thinner walls soften faster

Fresh Crab Meat

Works for: clean sweet flavor, tender flaky texture, special dinners or entertaining

Skip if: budget-conscious, can't find fresh seafood locally, using for meal prep where texture matters less

Canned Crab Meat

Works for: weeknight meals, budget dinners, meal prep batches, when fresh seafood isn't available

Skip if: serving guests, want optimal texture, dislike metallic aftertaste from canned seafood

Instructions

Total active time runs about 35 minutes from start to table. The stuffing mixes in one bowl while peppers sit in the air fryer basket, making cleanup faster than traditional oven-baked versions.

  1. Prep seafood and peppers: Chop shrimp into ½-inch pieces and pat dry with paper towels. Halve bell peppers lengthwise, remove seeds and membranes, then arrange cut-side up in air fryer basket with 1 inch space between each half.

  2. Mix stuffing: Combine softened cream cheese, chopped shrimp, drained crab meat, minced garlic, diced onion, lemon juice, and chopped parsley in a mixing bowl. Stir until evenly mixed but don't overmix - you want visible chunks of seafood, not a paste.

  3. Stuff peppers: Spoon stuffing mixture into each pepper half, filling to just below the rim. Pack gently with the back of a spoon so stuffing holds together but don't compress it flat or it turns dense.

  4. Add topping and air fry: Mix breadcrumbs with grated parmesan and sprinkle 1 tablespoon over each stuffed pepper. Set air fryer to 350°F and cook 12-15 minutes until shrimp turns opaque, peppers soften at edges, and breadcrumb topping turns golden brown.

  5. Rest and serve: Let stuffed peppers sit in the basket 5 minutes after cooking so stuffing sets and doesn't spill when you plate them. Transfer to plates with a spatula and serve immediately while topping stays crisp.

Watch Out
Don't overfill peppers past the rim - excess stuffing falls into the air fryer basket, burns on the heating element, and creates smoke. Fill to just below the edge and the stuffing expands slightly as it cooks without spilling over.

What to Serve With It

Most people skip sides but seafood stuffed peppers need something to soak up the creamy stuffing that pools on the plate. A good side dish can make or break the plate. For a version that comes together quickly, complete salt baked fish meal ideas covers similar seafood pairing strategies that work here.

Side Dish Prep Why It Works How to Serve
Mixed green salad Easy Light crisp greens cut through rich creamy stuffing without competing for attention Toss with lemon vinaigrette and serve alongside peppers while still cold
Steamed rice Easy Absorbs seafood flavors and provides filling carb base that makes meal more substantial Spoon rice onto plates first, then top with stuffed pepper so juices soak in
Garlic bread Easy Crispy bread soaks up creamy stuffing that escapes pepper and adds buttery garlic notes Toast in oven last 5 min of cook time, serve warm alongside peppers
Roasted asparagus Medium Fresh vegetable adds different texture and earthy flavor that balances seafood richness Roast at 400°F for 12 min, season with salt and lemon, plate next to peppers
Lemon herb quinoa Medium Light elegant grain complements seafood without heaviness of rice, adds fresh herb notes Fluff quinoa with fork, mix in chopped parsley and lemon zest, serve under peppers

Three ways to serve it:

  • Weeknight plate: Serve one stuffed pepper half with steamed rice and a crunchy coleslaw side dish for crisp contrast against creamy seafood
  • Entertaining spread: Plate two pepper halves per person with lemon herb quinoa, roasted asparagus, and something fresh and light on the side
  • Appetizer style: Cut stuffed peppers into thirds after cooking, arrange on platter with a tangy dipping sauce and simple homemade fries for casual gathering
Best Pick
Garlic bread hits the right balance - it's simple enough for weeknights but substantial enough to make the meal feel complete. Toast slices in the oven during the last 5 minutes of air frying so everything lands on the table at the same time.

Store and Reheat

Seafood stuffed peppers keep for 3-4 days in the fridge but the breadcrumb topping loses its crunch after day one. Store in a shallow airtight container so peppers don't stack and crush the stuffing.

Method Time Best For
🔥 Air Fryer 5-7 min at 350°F Restoring crisp topping and heating evenly without drying out stuffing
🔥 Oven 10-12 min at 350°F Larger batches, maintains texture better than microwave but takes longer
📦 Microwave 1-2 min Quick reheating when texture doesn't matter, but topping turns soggy

For best results when storing:

  • Cool stuffed peppers completely before refrigerating - hot stuffing creates condensation that makes breadcrumb topping soggy and peppers watery
  • Place parchment paper between stacked peppers if using multiple layers - prevents stuffing from sticking to container lid or crushing under weight
  • Freeze stuffed peppers up to 2 months in freezer-safe container - thaw overnight in fridge before reheating, but topping won't crisp as well as fresh
  • Add fresh breadcrumb-parmesan topping before reheating - removes old soggy layer with spoon, sprinkles new mixture on top for restored crunch
  • Reheat from fridge, not room temp - seafood sits in the danger zone too long at room temperature and risks bacterial growth after 2 hours

Frequently Asked Questions

How long to cook air fryer seafood stuffed peppers at 350°F?

Cook stuffed peppers 12-15 minutes at 350°F until shrimp turns opaque and pink, peppers soften at edges but hold shape, and breadcrumb topping turns golden brown. Check at 12 minutes - if shrimp still looks translucent or topping isn't golden, add 2-3 more minutes.

Can I make seafood stuffed peppers ahead and refrigerate?

Stuff peppers up to 24 hours ahead, cover with plastic wrap, and refrigerate until ready to cook. Add 2-3 minutes to cook time since cold stuffing takes longer to heat through, and don't add breadcrumb topping until right before air frying or it gets soggy.

What goes with seafood stuffed peppers for a weeknight meal?

Serve with steamed rice to soak up creamy stuffing, mixed green salad for crisp contrast, or garlic bread to mop up juices. Keep sides simple - stuffed peppers are the star and don't need complicated accompaniments.

How do I know when seafood stuffed peppers are done in the air fryer?

Shrimp turns opaque and bright pink, stuffing feels firm when you press the center with a spoon, peppers soften at edges but don't collapse, and breadcrumb topping turns golden brown. If stuffing still jiggles or shrimp looks translucent, cook 2-3 more minutes.

Can I use canned crab meat instead of fresh?

Canned crab works fine - drain thoroughly, press out excess liquid with paper towels, and pick through for shell fragments before mixing into stuffing. Texture softens slightly and flavor isn't as sweet as fresh, but it saves money and works for weeknight meals.

Air Fryer Seafood Stuffed Peppers served on a plate

Air Fryer Seafood Stuffed Peppers

No ratings yet
Air Fryer Seafood Stuffed Peppers combine shrimp and crab meat with cream cheese and garlic inside halved bell peppers, cooked at 350°F for 12-15 minutes. The breadcrumb topping crisps while the stuffing remains creamy and the peppers soften without becoming mushy. This recipe is perfect for a weeknight dinner that looks impressive with minimal effort.
Print Recipe Pin Recipe
Prep Time 20 minutes mins
Cook Time 15 minutes mins
Total Time 35 minutes mins
Servings: 4 servings
Course: Appetizer, Main Dish
Cuisine: American
Ingredients Equipment Method Notes

Ingredients
  

  • 1 lb shrimp peeled, deveined, chopped into ½-inch pieces and patted dry
  • 8 oz crab meat fresh or canned, drained and patted dry
  • 4 medium bell peppers halved lengthwise, seeded, arranged cut-side up
  • 0.5 cup onion finely diced
  • 3 cloves garlic minced finely
  • 8 oz cream cheese softened to room temperature
  • 0.25 cup parmesan cheese grated
  • 0.5 cup breadcrumbs plain or panko
  • 1 tablespoon lemon juice fresh
  • 2 tablespoon parsley fresh, chopped

Equipment

  • Air fryer basket Used to cook the stuffed peppers evenly with crisp edges
  • Mixing bowl To combine stuffing ingredients
  • Spoon For stuffing the peppers and packing the filling gently

Method
 

  1. Chop shrimp into ½-inch pieces and pat dry with paper towels. Halve bell peppers lengthwise, remove seeds and membranes, then arrange cut-side up in air fryer basket with 1 inch space between each half.
    1 lb shrimp, 4 medium bell peppers
  2. Combine softened cream cheese, chopped shrimp, drained crab meat, minced garlic, diced onion, lemon juice, and chopped parsley in a mixing bowl. Stir until evenly mixed but do not overmix; visible chunks of seafood should remain.
    8 oz crab meat, 0.5 cup onion, 3 cloves garlic, 8 oz cream cheese, 1 tbsp lemon juice, 2 tbsp parsley
  3. Spoon stuffing mixture into each pepper half, filling to just below the rim. Pack gently with the back of a spoon so stuffing holds together but avoid compressing flat or dense.
  4. Mix breadcrumbs with grated parmesan and sprinkle one tablespoon over each stuffed pepper. Set air fryer to 350°F and cook for 12-15 minutes until shrimp turns opaque, peppers soften at edges, and breadcrumb topping turns golden brown.
    0.25 cup parmesan cheese, 0.5 cup breadcrumbs
  5. Let stuffed peppers sit in the basket for 5 minutes after cooking to allow stuffing to set and prevent spilling when plating. Transfer to plates with a spatula and serve immediately while topping stays crisp.

Notes

  • Pat shrimp and crab dry with paper towels before mixing to prevent watery stuffing and soggy breadcrumb topping.
  • Do not overcrowd the air fryer basket; leave at least 1 inch between pepper halves for even cooking and crisping.
  • Fill peppers just below the rim to avoid stuffing spilling during cooking and causing smoke.

Tried this recipe?

Let us know how it was!

What Is Parmesan Cheese? [Taste, Uses & More]

April 1, 2026

You spot a wedge of Parmigiano-Reggiano at the cheese counter, rind stamped with its signature pinprick lettering, and it's immediately clear this isn't the stuff in the green shaker.

What Is Parmesan Cheese

Knowing how long risotto keeps or watching for cacio e pepe spoilage signs only matters if you're working with cheese worth cooking with - and parmesan, done right, is exactly that.

QUICK SUMMARY

**Parmesan** is a hard, aged Italian cow's milk cheese with a granular texture, crunchy tyrosine crystals, and deep umami-forward flavor. Aged 12-36+ months, it grates, shaves, and melts into dishes. Best used fresh off the wedge rather than pre-grated.

🧀Type: Hard aged cow's milk cheese, PDO-protected from Emilia-Romagna
👅Flavor: Sharp, salty, nutty, and deeply savory with buttery sweet notes
🍝Best Uses: Grated over pasta, stirred into risotto, shaved onto salads
❄️Storage: Wrapped wedge keeps 2-4 weeks refrigerated; grated lasts days
⚠️Note: Contains animal rennet; low lactose after long aging

What Is parmesan cheese?

Parmigiano-Reggiano is a PDO-protected cheese produced exclusively in Emilia-Romagna, Italy - specifically in the provinces of Parma, Reggio Emilia, Modena, and parts of Bologna and Mantua. It's made from raw, partially skimmed cow's milk, shaped into large wheels, and aged for a minimum of 12 months, though 24- and 36-month wheels are common.

The aging process is what defines it. As moisture leaves the wheel, proteins and fats concentrate, forming the granular, crystalline texture that makes parmesan distinct from younger pressed cheeses.

Those crunchy bits aren't salt - they're tyrosine crystals, amino acid clusters that develop as proteins break down during extended aging. Longer-aged wheels produce more of them.

Outside Italy, "parmesan" is used as a generic name for similar hard grating cheeses. For authentic PDO flavor, look for the stamped rind.

Similar cheeses worth knowing include Pecorino Romano and - if you're researching dairy alternatives - questions like about is goat cheese lactose free come up often in the same conversation.

  • 🇮🇹 Parmigiano-Reggiano - PDO-certified, Italy only, stamped rind
  • Grana Padano - similar style, wider production zone, milder flavor
  • Domestic parmesan - generic name used outside Italy, variable quality
  • Stravecchio - refers to extra-aged wheels (36+ months), intensified flavor

What Does parmesan cheese Taste Like?

parmesan cheese - What Is Parmesan Cheese

Parmesan leads with salt and umami, but the flavor doesn't stop there.

There's a roasted nuttiness - think toasted almonds - underneath the savory edge, and younger wheels carry a faint milky sweetness that longer-aged versions trade for deeper, almost dashi-like intensity.

Sensory SnapshotStrong Intensity
👅 Flavor
sharp-saltynuttyumamibuttery-sweet
✋ Texture
granularcrumblycrystalline
👃 Aroma
nuttyfruity-milkyaged cellar

Compared to Pecorino Romano, parmesan is less tangy and more nutty - both are salty, however parmesan's salt registers as integrated rather than sharp.

Heat mellows the edge slightly and draws out the buttery notes, which is why a finished risotto tastes richer than the cheese does eaten cold off the wedge.

Golden Rule
Age matters: a 12-month wheel is mild enough for everyday grating; a 36-month wheel is crystalline and intense - better served in chunks with honey than dissolved into sauce.

How to Use parmesan cheese

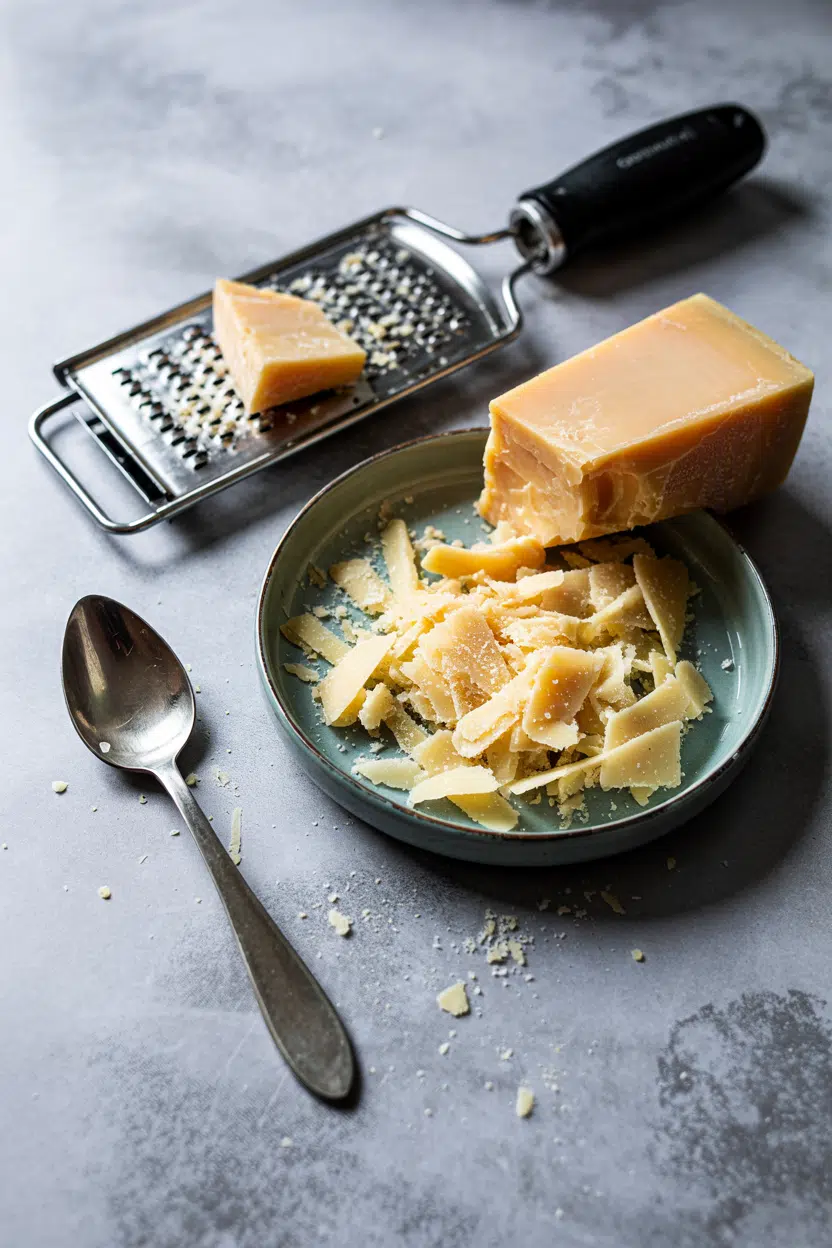
Parmesan's most common role is freshly grated over finished pasta dishes - carbonara, cacio e pepe, and simple aglio e olio all rely on it. Grating fine and adding off-heat prevents clumping and keeps the texture smooth.

If you ever need a stand-in, options like replacements for parmesan cheese can cover most applications.

Stirred into risotto at the mantecatura stage - the final off-heat emulsification - parmesan adds creaminess alongside umami without requiring cream.

It also shaves cleanly onto cold dishes: beef carpaccio, arugula salads, and roasted beet plates all benefit from thin shards rather than grated powder.

Don't discard the rind. Simmering it in soups, broth, or tomato sauce for 20-30 minutes extracts concentrated savory depth without adding visible cheese.

Rinds also work tucked into braises and bean stews.

How Parmesan Is Used
MethodBest ForTip
🧀 GratedPasta, risotto, soups, compound butterGrate fresh; pre-grated loses moisture and crystal texture fast
🔪 ShavedSalads, carpaccio, cheese boardsUse a vegetable peeler on a cold wedge for clean shards
🍲 Rind simmeredStocks, soups, braises, tomato sauceAdd whole rind early; remove before serving
🔥 Melted/bakedGratins, crusts on proteins, baked pastaCombine with breadcrumbs to prevent oily separation

Parmesan pairs naturally with olive oil, aged balsamic, black pepper, and truffles in Italian-rooted cooking. On a cheese board, serve chunks alongside honey, dried figs, or pears with a glass of Chianti or Barolo.

Avoid pairing it with very sweet desserts - the salt and umami clash rather than complement.

Try It In
🧀Crispy Parmesan Cheese CrispsShows how parmesan bakes into a lacey, crunchy wafer with no binders needed→

How to Buy and Store parmesan cheese

At the counter, reach for a wedge with a dry, stamped rind - those pinprick letters spell out Parmigiano-Reggiano and confirm PDO status. Avoid pale, powdery pre-grated containers; anti-caking additives coat the particles and prevent proper melting.

For budget shopping, a whole wedge beats pre-shredded every time.

Shortcut
Buy a larger wedge, portion it yourself, and freeze extra chunks in vacuum-sealed bags - texture holds better than freezing grated cheese.

Wrap cut wedges in parchment or cheese paper first, then loosely in plastic or place in an airtight container.

Store in the coldest part of the fridge, away from strong-smelling foods.

A well-wrapped wedge stays at peak quality for 2-4 weeks; grated parmesan degrades within days.

A full guide to storing parmesan cheese correctly covers edge cases like mold spots and freezing.

For context on how dairy behaves more broadly, the same principles around milk in dairy recipes apply - cold, airtight, and away from odors.

Start with the Wedge

Buy a 200g wedge of stamped Parmigiano-Reggiano before anything else - grate it fresh over pasta one night, simmer the rind in soup another, and serve the last chunk on a board with honey. That single wedge demonstrates every register this cheese works in.

Once you've cooked with the real thing, the pre-grated alternative won't feel like a shortcut anymore.

Frequently Asked Questions

Is parmesan the same as Parmigiano-Reggiano?

No. Parmigiano-Reggiano is a PDO-protected cheese made only in specific Italian provinces under strict rules. "Parmesan" is a generic term used globally for similar-style hard grating cheeses, with no required origin or production standard.

Why does parmesan have crunchy crystals?

Those crystals are tyrosine, an amino acid that forms as proteins break down during long aging. They're not salt. More crystals generally indicate longer aging and more concentrated flavor.

Can lactose-intolerant people eat parmesan?

Often yes. Extended aging breaks down nearly all the lactose, making Parmigiano-Reggiano one of the lowest-lactose cheeses available. Most lactose-intolerant people tolerate it well in normal portions.

How long does opened parmesan last in the fridge?

A cut wedge wrapped in parchment and stored in the coldest part of the fridge stays best for 2-4 weeks. Freshly grated parmesan degrades much faster - use it within a week at most.

How do you use a parmesan rind?

Drop it into simmering soups, stocks, or tomato sauce and cook for 20-30 minutes. The rind releases concentrated umami and a mild dairy richness. Remove it before serving - it softens but doesn't fully dissolve.

What Is Quark Cheese? [Taste, Uses & More]

April 1, 2026

Quark does something no other fresh cheese quite manages: it adds body and a clean lactic tang without pushing its own flavor to the front. It thickens sauces, fills cheesecakes, and spreads across rye bread while staying mild enough to let every other ingredient speak.

What Is Quark Cheese

If you've leaned on cream cheese swaps or kept ricotta on hand for the same reasons, quark is worth knowing properly.

QUICK SUMMARY

Quark is a fresh, acid-set soft cheese from Central and Eastern Europe with a mild lactic tang and smooth texture. It works cold as a spread, baked into cheesecake, or stirred into sauces - available from near fat-free Magerquark to rich Sahnequark.

🧀Type: Fresh acid-set dairy, no animal rennet
👅Flavor: Mild, milky tang - less sour than Greek yogurt
🍽️Best Uses: Cheesecake, spreads, sauces, fruit bowls
❄️Shelf Life: 2-3 weeks sealed; 5-7 days once opened
🛒Buy It: Refrigerated dairy case; check for smooth white curd, no watery whey pockets

What Is quark cheese?

Quark is a fresh acid-set cheese, meaning it forms when sour milk cultures acidify the milk until the proteins coagulate - no animal rennet required. That makes it vegetarian-friendly by default and gives the curd a cleaner, less aged flavor than rennet-set cheeses.

It originates in Central and Eastern Europe, where it has been a staple of home cooking for centuries. Germany and Austria are its best-known producers, though nearly every country in the region has its own name and tradition for it.

The cheese goes by several names depending on where you find it:

  • Topfen - the Austrian term, used in recipes from Vienna's pastry tradition
  • Tvaroh / Tvorog - the Czech and Russian/Eastern European names for the same product
  • Magerquark - low-fat quark with a drier, slightly grainy curd, preferred in baking
  • Sahnequark - cream-enriched quark, much richer and fully spreadable

Fat level changes everything about how quark performs. Full-fat and Sahnequark stay silky at room temperature, while Magerquark behaves more like a pressed curd - useful when a recipe needs less moisture.

Best Pick
For first-time buyers, full-fat quark gives the most forgiving texture across both sweet and savory uses. Save Magerquark for recipes that specifically call for a drier curd.

What Does quark cheese Taste Like?

quark cheese - What Is Quark Cheese

Quark's flavor is mild and clean - a soft lactic tang with a background of milky sweetness. It lacks the saltiness of cream cheese and the sharp fermented bite of sour cream.

The closest comparisons are a less sour Greek yogurt or a finer-textured ricotta. Low-fat Magerquark tips slightly more acidic as the fat no longer rounds out the tang.

Sensory SnapshotMild Intensity
👅 Flavor
lactic tangmilky sweetnesslight acidity
✋ Texture
smooth & spreadabledense (low-fat)
👃 Aroma
fresh dairylight tang

Heat mutes quark's tanginess slightly while thickening its texture. In a baked Käsekuchen (German cheesecake), the flavor mellows into something close to a dense, lightly tangy custard - noticeably different from a cream cheese-based filling.

How to Use quark cheese

Quark works across a wider range of applications than most fresh cheeses because its fat level and temperature response can be matched to the task. Cold, it spreads and fills.

Gently warmed, it enriches. Baked, it sets into a firm, sliceable texture.

How Quark Is Used
MethodBest ForTip
🥗 Cold / No HeatSpreads, dips, fruit bowls, cheeseboardWhisk with herbs or honey to loosen before serving
🍳 Low HeatStirred into sauces, mashed potatoes, creamy dressingsAdd off the heat or below a simmer to prevent breaking
🧁 BakedKäsekuchen, casseroles, pancake battersUse Magerquark when the recipe needs a drier, firmer set
🫙 FillingBlintzes, crepe fillings, stuffed pastriesMix with sugar and vanilla; drain Magerquark if too wet

Savory pairings are some of quark's strongest applications. It takes well to chives, dill, parsley, smoked salmon, black pepper, and potatoes with nutmeg. Spread thickly on rye or sourdough, it functions as a satisfying alternative to butter or cream cheese.

On the sweet side, quark folded with fresh berries, honey, and citrus zest makes a fast breakfast bowl. Mixed with sugar and vanilla, it becomes a pastry filling that sets cleanly without being heavy.

Watch Out
Don't boil quark directly in a sauce. High sustained heat causes the curd proteins to tighten and break, leaving grainy curds in your pan. Always add it last, off or just below the heat.

When you need a stand-in, quark cheese swaps can bridge the gap - though most replacements sacrifice either the texture or the clean tang that makes quark distinctive.

Try It In
🥗Blue Cheese Dressing (Homemade)Swap some mayo for quark to cut richness and add tang→🍳Egg and Cheese Breakfast SandwichUse quark as a creamy spread in place of processed cheese→

How to Buy and Store quark cheese

Look for tubs that are uniformly white and smooth with no visible pockets of watery whey sitting on the surface. Separation signals age or temperature abuse during transport.

Label reading matters more than with most dairy. "Sahnequark" means cream has been added for a richer result; "Magerquark" signals a low-fat, drier curd suited to specific baking recipes.

For cottage cheese swaps and similar fresh curd applications, full-fat quark is the closer match in texture.

Shortcut
After opening, press plastic wrap directly onto the quark surface before replacing the lid. This cuts air contact and adds a day or two to its fridge life.

Storage is straightforward: keep it in the coldest part of the fridge, not in the door. Unopened tubs hold for 2-3 weeks; once opened, use within 5-7 days.

For more detail on how fresh dairy products age, the quark cheese freshness guide guide covers the signs of spoilage to watch for.

Start Here With Quark

Quark rewards the approach of starting cold. Before baking or cooking with it, try it first as a savory spread with herbs, or stirred into mashed potatoes.

Those two uses give you an immediate read on its tang level and how the fat content you bought performs.

From there, the step to Käsekuchen or sauce enrichment is a short one. Quark doesn't need much to show its range - it just needs the right starting point.

Frequently Asked Questions

Is quark cheese the same as cottage cheese?

No. Cottage cheese has distinct, visible curds sitting in liquid whey, while quark is smooth and uniform with no curds. Quark is also tangier and lower in sodium than most cottage cheese varieties.

Can I substitute quark for cream cheese?

Yes, in most cold applications and baked cheesecakes. Quark is lower in fat and less thick, so the result will be lighter and slightly more tangy. For dips and spreads, full-fat Sahnequark is the closest match.

What is Magerquark?

Magerquark is the low-fat version of quark, typically less than 0.5% fat. Its curd is drier and slightly grainier than full-fat quark, making it the preferred choice in German baking recipes where excess moisture would affect the set.

Can you make quark at home from milk?

Yes. Warm whole milk to around 86°F (30°C), stir in a live-culture buttermilk or yogurt starter, and let it sit 12-24 hours until thickened. Strain through a cheesecloth to reach your preferred consistency.

Is quark lower in lactose than regular milk?

Yes. The culturing process converts much of the lactose into lactic acid, reducing the final lactose content significantly. Many people who are mildly lactose-sensitive tolerate quark better than fresh milk.

Air Fryer Pork Bao Filling

April 1, 2026

You need 25 minutes and one air fryer basket. No skillet, no splattering grease, no babysitting meat that sticks to the pan.

Air Fryer Pork Bao Filling served on a plate

The air fryer crisps the edges while keeping the filling juicy. Ground pork cooks through in 10-12 minutes at 375°F with minimal stirring.

This is what you make when you want bao filling without the stovetop mess or when meal-prepping protein for the week ahead.

QUICK SUMMARY

Air fryer pork bao filling delivers juicy, lightly caramelized ground pork in under 15 minutes of active work. The key is not overcrowding the basket - spacing pieces 1 inch apart ensures even browning without steaming. Mix gently and check internal temp at 160°F for tender, flavorful filling ready for bao buns or meal prep.

⏱️Time Reality: 15 min prep, 10-12 min cook; preheat air fryer 3 minutes before starting
🔥First Critical Move: Mix ingredients just until combined (30 seconds max) to prevent dense filling
⚠️Watch Out: Overcrowding basket causes soggy filling; leave 1-inch gaps or cook in batches

Table of Contents

Toggle
  • Why This Recipe Works
  • What You'll Need
    • Ingredient Details
  • Ingredient Swaps
  • What to Serve With It
  • Store and Reheat
  • Frequently Asked Questions
  • Air Fryer Pork Bao Filling
    • Method 
    • Tried this recipe?

Why This Recipe Works

The air fryer circulates hot air around small pieces of seasoned ground pork, creating caramelized edges without flipping. For a version that comes together quickly, this related pork recipe uses similar timing with bone-in cuts.

Quick Reference
⏱️
Prep Time
15 min
🔥
Cook Time
10-12 min
⏰
Total Time
25-30 min
🍽️
Servings
4 servings
📊
Difficulty
Medium
🏷️
Category
Appetizer
💡
Quick Tip
Don't overcrowd basket; crisp edges develop
🎯
Best For
Weeknight | Meal prep | Entertaining

Why it works:

  • Cornstarch binds moisture - 1 teaspoon per 8 ounces ground pork prevents crumbly filling and locks in juices during cooking
  • 375°F prevents burning - high enough to caramelize natural sugars in hoisin and soy sauce without charring edges
  • Shaking basket mid-cook - ensures uniform browning on all sides without manually flipping small pieces
  • Resting 5 minutes post-cook - allows juices to redistribute through meat instead of pooling in the basket
  • Fresh ground pork delivers best texture - day-old meat dries out faster and develops off-flavors under high air fryer heat
Quick Tip
Preheat the air fryer for 3 minutes at 375°F before adding pork - this jump-starts browning and prevents sticking to the basket.

What You'll Need

Ingredients for Air Fryer Pork Bao Filling

Shop for fresh ground pork at 80/20 fat ratio - leaner grinds dry out in the air fryer. We keep a batch ready for nights like this - more chicken ideas use the same seasoning approach with poultry.

🍗
Protein
  • 1 lb ground pork (80/20 fat ratio)
🥢
Sauce & Seasoning
  • 2 tablespoon soy sauce
  • 1 tablespoon hoisin sauce
  • 1 tablespoon rice wine
  • 1 teaspoon sesame oil
  • 1 teaspoon sugar
  • 1 teaspoon cornstarch
🧄
Aromatics
  • 2 cloves garlic (minced)
  • 1 tablespoon fresh ginger (grated)
  • 2 green onions (chopped)

Ingredient Details

  • Ground pork (80/20)
    Use fresh, not previously frozen - ice crystals create steam pockets that prevent browning in the air fryer
  • Soy sauce
    Regular or low-sodium works; low-sodium gives you more control over final saltiness when adding hoisin
  • Cornstarch
    Don't skip - this binds filling and prevents dry, crumbly texture even at high air fryer temps
  • Fresh ginger
    Grate on microplane or finest grater - large chunks don't distribute evenly and create bitter bites
  • Sesame oil
    Use toasted sesame oil (dark amber color) - light sesame oil lacks the nutty aroma that defines bao filling
  • Hoisin sauce
    Optional but adds sweet-salty depth; if omitting, increase sugar to 1½ teaspoons for balance
  • Green onions
    Chop white and green parts separately - whites go in filling, greens garnish after cooking for fresh bite

Ingredient Swaps

Most swaps work if you're out of an ingredient or adjusting for diet. A good pork can make or break the plate. For a version that comes together quickly, light refreshing greens balance the richness without competing flavors.

Four swaps that work:

  • Ground pork → ground chicken or turkey - Cook 8-10 minutes instead of 10-12; leaner meat dries faster at 375°F
  • Soy sauce → tamari or coconut aminos - Same 2 tablespoon measure; tamari is gluten-free with identical saltiness
  • Hoisin sauce → oyster sauce - Use 2 teaspoons oyster sauce instead of 1 tablespoon hoisin; more savory, less sweet
  • Cornstarch → potato starch or arrowroot - Same 1 teaspoon measure; both bind moisture equally well in air fryer heat

Ground Chicken/Turkey

Works for: Leaner protein, lower fat content, shorter cook time

Skip if: You want juicy filling with rich flavor - poultry dries out faster than pork in air fryer

Stovetop Skillet Method

Works for: No air fryer available, larger batches, direct heat control

Skip if: You want hands-off cooking with even browning - stovetop requires constant stirring and monitoring

Instructions

Total cooking takes 25-30 minutes including mixing and resting. Rich mains need something to cut through, and fries does exactly that. For a version that comes together quickly, golden fries recipe air fries alongside pork without flavor transfer.

  1. Mix filling ingredients. Combine ground pork, soy sauce, hoisin sauce, rice wine, sesame oil, sugar, cornstarch, minced garlic, grated ginger, and chopped green onion whites in mixing bowl. Stir with spatula 30 seconds until just combined - overmixing creates dense filling.

  2. Preheat air fryer. Set air fryer to 375°F and preheat 3 minutes. Form pork mixture into 1-inch meatball-sized pieces or break into small clumps - uniform size ensures even cooking.

  3. Air fry first batch. Place pork pieces in air fryer basket in single layer with 1-inch gaps between each. Cook 6 minutes at 375°F without opening basket.

  4. Shake and finish cooking. Shake basket vigorously to flip all pieces. Cook 4-6 minutes more until internal temp reaches 160°F (71°C) on instant-read thermometer and edges show light caramelization.

  5. Rest and serve. Transfer cooked filling to plate and rest 5 minutes uncovered. Garnish with reserved green onion tops before stuffing into steamed bao buns or serving over rice.

Watch Out
Don't pack pork tightly into balls - loose clumps cook faster and develop more browned surface area than compact meatballs.

What to Serve With It

Bao filling needs sides that add texture contrast or cut through richness. Most people skip this dip, but it balances the meal. For weeknight planning, weeknight ham sandwiches meal ideas offer similar protein-forward pairing strategies.

Side Dish Prep Why It Works How to Serve
Steamed bao buns Easy Soft, pillowy texture contrasts juicy filling; traditional pairing Steam 8-10 minutes, stuff warm with filling, garnish with pickled vegetables
Pickled cucumber salad Easy Bright acidity cuts through rich pork; crunchy texture adds contrast Thinly slice cucumbers, toss with rice vinegar and sugar, chill 15 minutes
Edamame pods Easy Protein-rich, mild flavor doesn't compete; quick prep Boil 5 minutes, drain, sprinkle with coarse salt
Asian slaw with sesame Medium Colorful, crunchy vegetables balance soft filling; sesame ties flavors together Shred cabbage and carrots, toss with sesame-ginger dressing, serve chilled
Cold sesame noodles Medium Cool temperature contrasts warm filling; adds carb base for fuller meal Cook noodles, rinse cold, toss with sesame sauce, top with cucumber ribbons

Three ways to serve it:

  • Classic bao style: Stuff warm filling into steamed buns with pickled vegetables, cilantro, and sriracha mayo
  • Rice bowl: Serve over jasmine rice with sautéed bok choy and soft-boiled egg
  • Lettuce wraps: Spoon filling into butter lettuce cups with shredded carrots and hoisin drizzle
Shortcut
Buy frozen steamed bao buns and microwave 30 seconds each - they taste just as good as fresh for weeknight meals.

Store and Reheat

Cooked filling keeps 3-4 days refrigerated in shallow airtight container. This dip adds the contrast this plate needs, but timing matters. For a version that comes together quickly, a creamy dip side stores identically and reheats in seconds.

Method Time Best For
🍳 Stovetop 5 min on medium heat Small portions, maintaining texture, quick weeknight reheats
📦 Microwave 1-2 min on medium power Single servings, fastest option, covering prevents drying
🔥 Oven 10 min at 350°F Multiple servings, even reheating, restoring crisp edges

For best results when storing:

  • Cool completely before refrigerating - sealing warm filling creates condensation that makes texture soggy
  • Use shallow containers - filling cools faster in thin layer, reducing bacterial growth risk
  • Freeze in portion sizes - divide into 1-cup portions in freezer bags, freeze flat for faster thawing
  • Thaw overnight in fridge - prevents texture breakdown from rapid microwave defrosting
  • Add splash of broth when reheating - 1 tablespoon chicken or vegetable broth per cup filling prevents dryness

Frequently Asked Questions

How long to cook pork bao filling in air fryer at 375°F?

Cook 10-12 minutes total - 6 minutes, shake basket, then 4-6 minutes more. Check internal temp reaches 160°F with instant-read thermometer before removing from basket.

Can I make air fryer pork bao filling ahead and freeze it?

Yes, freeze cooked filling up to 3 months in portion-sized freezer bags. Thaw overnight in fridge and reheat on stovetop 5 minutes with splash of broth to restore moisture.

How do I know when pork filling is fully cooked inside?

Insert instant-read thermometer into thickest piece - it should read 160°F (71°C). Visually, filling should have no pink color and juices run clear when pressed with spatula.

What to do if air fryer pork filling turns out dry?

Toss dry filling with 2-3 tablespoons chicken broth or soy sauce while still warm. Next batch, reduce cook time by 2 minutes and check temp early - overcooking is the usual culprit.

Can I use ground chicken instead of pork for bao filling?

Yes, but reduce cook time to 8-10 minutes at 375°F - chicken's lower fat content means it dries faster. Add extra tablespoon sesame oil to mixture for moisture and flavor.

Air Fryer Pork Bao Filling served on a plate

Air Fryer Pork Bao Filling

No ratings yet
Air fryer pork bao filling delivers juicy, lightly caramelized ground pork with minimal fuss using just one air fryer basket. The key is spacing the pork pieces to ensure even browning without steaming, creating tender, flavorful filling perfect for bao buns or meal prep.
Print Recipe Pin Recipe
Prep Time 15 minutes mins
Cook Time 12 minutes mins
Total Time 27 minutes mins
Servings: 4 servings
Course: Appetizer
Cuisine: Asian-Inspired
Ingredients Equipment Method Notes

Ingredients
  

  • 1 lb ground pork 80/20 fat ratio, fresh not frozen
  • 2 tablespoon soy sauce regular or low-sodium
  • 1 tablespoon hoisin sauce adds sweet-salty depth; optional
  • 1 tablespoon rice wine
  • 1 teaspoon sesame oil toasted sesame oil preferred
  • 1 teaspoon sugar
  • 1 teaspoon cornstarch binds moisture and prevents crumbly texture
  • 2 cloves garlic minced
  • 1 tablespoon fresh ginger grated
  • 2 green onions white parts chopped for filling, green tops reserved for garnish

Equipment

  • Air fryer Used to cook the ground pork filling without splattering or skillet
  • Mixing bowl To combine ground pork and seasonings
  • Instant-read thermometer To check internal temperature of cooked pork at 160°F

Method
 

  1. Combine ground pork, soy sauce, hoisin sauce, rice wine, sesame oil, sugar, cornstarch, minced garlic, grated ginger, and chopped green onion whites in a mixing bowl. Stir with a spatula for 30 seconds until just combined to avoid dense filling.
    1 lb ground pork, 2 tbsp soy sauce, 1 tbsp hoisin sauce, 1 tbsp rice wine, 1 tsp sesame oil, 1 tsp sugar, 1 tsp cornstarch, 2 cloves garlic, 1 tbsp fresh ginger, 2 green onions
  2. Set your air fryer to 375°F and preheat for 3 minutes before adding pork mixture.
  3. Shape the pork mixture into 1-inch meatball-sized pieces or break into small clumps. Place them in a single layer in the air fryer basket leaving 1-inch gaps between pieces.
    1 lb ground pork
  4. Cook pork pieces 6 minutes at 375°F without opening the basket.
  5. Shake the basket vigorously to flip all pieces. Cook 4-6 minutes more until internal temperature reaches 160°F and edges are lightly caramelized.
  6. Transfer cooked filling to a plate and let rest uncovered for 5 minutes to allow juices to redistribute. Garnish with reserved green onion tops before stuffing into steamed bao buns or serving over rice.
    2 green onions

Notes

  • Do not overcrowd the air fryer basket; leave 1-inch gaps between pork pieces to prevent soggy filling.
  • Mix ingredients just until combined to avoid dense texture in the filling.
  • Use fresh ground pork (80/20 fat) for best texture and juiciness.

Tried this recipe?

Let us know how it was!

What Is Ouzo? [Taste, Uses & More]

April 1, 2026

Most people assume ouzo is just a novelty shot - something you knock back at a Greek restaurant and forget.

What Is Ouzo

That framing misses almost everything interesting about it, including why a single splash of water turns a clear spirit instantly white and why that same bottle belongs in your seafood pan as much as your glass.

QUICK SUMMARY

Ouzo is a Greek anise-flavored spirit, 37.5-50% ABV, with a dry licorice character and faint herbal undertones. Sip it with water alongside meze, or use a small splash to deglaze seafood pans and add sharp anise lift.

🫧Flavor: Dry anise, licorice, subtle herbs, occasional mineral edge
🍽️Best Uses: Aperitif, seafood deglazing, marinades, flambé
🇬🇷Origin: Greece - Aegean islands and mainland distilleries
🕐Shelf Life: Indefinite unopened; best within 6-12 months opened
⚠️Watch Out: Strong anise overpowers delicate dairy sauces - use sparingly

What Is Ouzo?

Ouzo is a distilled Greek spirit made from a neutral base - typically grape pomace - redistilled with anise and a blend of botanicals that often includes coriander, cloves, and occasionally fennel.

It holds Protected Geographical Indication status, meaning only spirits produced in Greece can legally carry the name ouzo. That distinction matters at the shelf.

Most bottles fall between 37.5% and 50% ABV. Production is concentrated in the Aegean islands - Lesbos is perhaps the most cited source - and across mainland Greek distilleries, each with a slightly different botanical signature.

Island-distilled versions sometimes carry a faint mineral or saline quality that mainland bottlings lack.

The compound responsible for ouzo's defining character is anethole, the aromatic oil in anise. When water or ice is added, anethole emulsifies and scatters light, turning the liquid opaque white - a reaction called the louche.

If you want to understand anise and its flavor at a chemical level, that same compound shows up across every anise-flavored spirit.

  • 🌿 Base spirit - grape pomace (typically), redistilled with botanicals
  • 🔬 Key compound - anethole, the anise oil that triggers the louche
  • 📍 Legal protection - PGI status restricts the name to Greek-produced bottles
  • 🏝️ Regional variation - Lesbos and Aegean island bottlings trend drier and more mineral

What Does Ouzo Taste Like?

ouzo - What Is Ouzo

Ouzo leads with dry, assertive anise - closer to black licorice than candy. Unlike sambuca, which leans sweet and syrupy, ouzo keeps its sugar restrained, letting the botanical dryness dominate.

Understanding the role sambuca plays in cocktails helps clarify exactly where ouzo diverges: same anise base, very different finish.

Sensory SnapshotStrong Intensity
👅 Flavor
dry aniselicoriceherbalmineral
✋ Texture
lightly viscoussilky when diluted
👃 Aroma
intense anisefloralherbal

Dilution genuinely changes the experience. Neat, ouzo feels thick and punchy on the palate.

Add chilled water and the mouthfeel turns silky, the anise softens, and secondary notes - oregano, thyme, faint florals from the Greek botanical mix - become easier to read.

The comparison to replacements for absinthe often includes ouzo, and the flavor logic holds: both are anise-dominant and herbal, however ouzo skips the wormwood bitterness that defines absinthe.

How to Use Ouzo

The classic approach is also the most instructive. Serve ouzo neat or with a small jug of chilled water on the side - add water slowly and watch the louche develop.

Greek tradition pairs it with meze: grilled octopus, olives, cubes of feta, and lemon wedges.

The saline and acidic elements of those dishes pull the anise into focus rather than fighting it.

Golden Rule
Add ouzo to a hot pan off direct heat first, then return to the flame for flambé. Pouring alcohol directly over a live burner is a fire risk.

In the kitchen, deglazing with ouzo is its most useful role. After searing shrimp or squid, deglaze the pan with a small measure - the alcohol cooks off quickly, leaving a sharp anise note that bridges the shellfish and any acidic tomato base.

Marinating prawns in ouzo for 20-30 minutes before grilling adds the same lift without dominating the protein.

How Ouzo Is Used in Cooking
MethodBest ForTip
🥃 AperitifMeze pairings, pre-dinner ritualAdd chilled water slowly to control louche and dilution
🍳 DeglazingShrimp, squid, tomato-seafood saucesAdd near end of sauce development; alcohol evaporates fast
🧂 MarinatingPrawns, squid before grillingKeep contact brief - 20-30 minutes maximum
🔥 FlambéShellfish, tavern-style finishesMeasure carefully; high ABV catches quickly
🍮 InfusingAnise-scented creams, syrupsUse sparingly - a teaspoon goes a long way in custard

Ouzo also suits Eastern Mediterranean cooking more broadly, where pastis swaps that work in a recipe often come down to this spirit. Both bring anise character, however ouzo is drier and slightly more assertive.

For desserts, a small amount infused into warm cream or baklava syrup adds an anise note without making the dish taste like a cocktail.

Try It In
🍤Air Fryer Lemon Pepper ShrimpA quick ouzo marinade works here before the shrimp hits the air fryer→🐟Slow Cooker Fish and ChipsAdd a splash to the cooking liquid for a subtle anise backbone→

How to Buy and Store Ouzo

Look for bottles that display Greek distillery names and carry the Protected Geographical Indication marker - this confirms legal provenance, not just marketing.

Clear glass lets you check for a faint pale straw tint, which is normal.

Avoid bottles with any cloudiness at room temperature before water has been added; that suggests contamination or poor storage.

If you can smell the bottle at a reputable retailer, expect sharp, clean anise - any musty or solvent-like notes are a rejection signal.

Watch Out
Sunlight degrades the anethole compounds in ouzo faster than almost anything else. Even a few weeks on a sunlit shelf dulls the aroma noticeably.

Store bottles upright, cap tight, in a cool and dark location. For detail on how long ouzo keeps after opening and whether it loses potency, the shelf life picture is straightforward: unopened bottles keep indefinitely, while opened bottles hold their best aroma for 6-12 months.

Where to Start with Ouzo

If you've never bought a bottle, start with a well-known Lesbos distillery like Barbayanni or Ouzo Mini - both are widely available and show the dry, mineral style clearly.

Drink it with ice and a splash of water alongside salty food first; that context makes the anise approachable rather than overwhelming.

For cooks already comfortable with anise in the kitchen, replacements for ouzo and pastis's flavor and uses help map where each spirit sits - useful when a recipe calls for one and you only have the other.

Also worth knowing: replacements for sambuca covers ouzo as a viable swap, since the two overlap in anise character but diverge in sweetness.

Frequently Asked Questions

What is ouzo made from?

Ouzo is made from grape pomace - the skins and seeds left after winemaking - redistilled with anise and other botanicals like coriander and cloves. The anethole compound in anise gives it the characteristic licorice flavor.

Why does ouzo turn milky when you add water?

The white cloudiness is called the louche. Anethole, the aromatic oil from anise, is soluble in alcohol but not in water - dilution causes it to form tiny droplets that scatter light and turn the liquid opaque.

Is ouzo the same as sambuca?

No. Both are anise-based, however sambuca is Italian, significantly sweeter, and thicker. Ouzo is drier, Greek by legal definition, and typically served diluted rather than neat or over coffee beans.

Can you cook with ouzo if you don't drink alcohol?

Most of the alcohol burns off during deglazing or flambéing, leaving the anise flavor behind. However, trace ethanol remains, so it is not suitable for those avoiding alcohol entirely - anise extract is a closer non-alcoholic substitute.

How do you drink ouzo correctly?

Add a small amount of chilled water - roughly equal parts or slightly more water - and sip slowly alongside food. Drinking ouzo as a shot ignores the louche ritual and overwhelms the botanical complexity.

How Long Does Pumpkin Last? [Storage Guide]

April 1, 2026

Leftover pumpkin from last night's soup - or a whole one sitting on your counter since autumn - raises the same question: how much longer does it actually last?

Can You Freeze Pumpkin

The answer depends entirely on whether you're working with a whole uncut pumpkin, freshly cut flesh, cooked chunks, or pumpkin puree, because each form has a completely different clock.

Much like keeping squash fresh in general, pumpkin storage rewards a little planning and punishes neglect fast.

QUICK SUMMARY

A whole pumpkin keeps 2-3 months in a cool pantry. Cut or cooked pumpkin lasts 3-5 days in the fridge. Frozen puree holds quality for 6-12 months. Keep it dry, sealed, and labeled - and never refrigerate whole pumpkins.

🥧Whole (pantry): 2-3 months in a cool, dry, ventilated spot
🧊Cut/cooked (fridge): 3-5 days in an airtight container
❄️Frozen puree: 6-12 months; best quality used within 6 months

How Long Does Pumpkin Last?

Shelf life shifts dramatically based on form. A whole, uncut sugar pumpkin or pie pumpkin with an intact stem and unblemished rind can sit in a cool pantry for months - its hard shell acts as a natural barrier.

Once you cut it, that protection disappears and the clock resets to days, not months.

Pumpkin Shelf Life
MethodStateDurationNotes
🏠 PantryWhole, uncut2-3 monthsCool (50-60°F), dry, ventilated; carving pumpkins may last less
🧊 FridgeCut / raw3-5 daysSeeds removed, flesh wrapped airtight; crispness drops toward day 5
🧊 FridgeCooked / puree3-5 daysShallow airtight containers; cool to room temp before refrigerating
❄️ FreezerCooked / puree6-12 monthsBest quality within 6 months; portion before freezing
❄️ FreezerRaw / cubed10-12 monthsBlanch or roast first; raw unblanched cubes degrade faster

Large carving pumpkins generally don't hold as long as denser pie varieties, even when stored identically. Their flesh has higher water content, which accelerates softening once temperatures fluctuate.

How to Store Pumpkin

Storage method matters more here than with most produce. Getting it wrong on a whole pumpkin can mean losing two months of shelf life in two weeks.

Pantry (whole): Set whole pumpkins in a single layer on a wooden board or cardboard - never directly on concrete, which draws moisture. Aim for 50-60°F with good airflow and keep them out of sunlight. Don't stack them; pressure bruising starts rot fast.

Fridge (cut or cooked): Remove seeds and pat the flesh dry before wrapping cut pieces tightly in plastic wrap or sealing in an airtight container. Cooked pumpkin and fresh pumpkin puree should cool to room temperature first, then go into shallow containers so they chill evenly. For pumpkin used in pumpkin in cooking, prepping and storing cut portions ahead works well across soups, roasts, and baked goods.

Watch Out
Don't refrigerate whole, uncut pumpkins. A cold, damp fridge accelerates breakdown in hard-shell pumpkins - they store significantly longer at cool room temperature.

Freezer (puree or cubes): Portion puree into 1-2 cup amounts for easier use later. Cubes should be blanched or roasted before freezing to protect texture. Storage principles here parallel keeping butternut squash fresh, where pre-treatment before freezing makes a real difference to post-thaw quality.

Can You Freeze Pumpkin?

Yes - and it's one of the better vegetables for freezing, provided you handle it correctly. Raw, unblanched cubes are the one exception: skip the prep and you'll get a waterlogged, grainy result after thawing.

Puree and pre-cooked cubes both freeze well.

  1. Cook the pumpkin - roast or simmer until fully soft, then scoop flesh away from skin.
  2. Puree until smooth - use a blender or food processor, then cool completely to room temperature.
  3. Portion and seal - measure into 1-2 cup portions in airtight containers or freezer bags; remove excess air and flatten bags for faster thawing.
  4. For cubes - peel, seed, and cube raw pumpkin, then blanch 2-3 minutes (or roast until just tender), cool fully, freeze on a tray first, then transfer to bags.
  5. Label everything - note the date and state (puree vs. cubes) in YYYY-MM-DD format to rotate stock easily.

Thaw frozen pumpkin puree overnight in the fridge for best results. For faster use, submerge the sealed bag in cold water.

Expect softened texture after thawing - cubes work best in soups, stews, and breads rather than preparations where firmness matters. If you run out and need a stand-in, pumpkin swaps that work covers the closest options by dish type.

Golden Rule
Roast before freezing. Roasting concentrates the flesh and reduces the mealy, waterlogged texture that comes from freezing boiled or raw pumpkin.

Signs Pumpkin Has Gone Bad

Pumpkin gives clear signals when it's past safe use. Act on any one of these - don't wait for all three.

Signs It's Gone Bad
👀
VisualGray-green or white fuzzy mold at cuts or stem · Dark sunken spots on rind · Blackened or slimy cut surfaces
👃
SmellSour or fermented odor from flesh · Sharp acidic smell from puree
✋
TextureSlimy surface on cut pieces · Mushy, water-soaked flesh · Puree with separated liquid and off consistency

Discard any pumpkin showing mold, a strong sour smell, or sliminess - do not taste-test it. Spoilage identification works similarly to other fresh produce: when multiple senses flag a problem at once, the decision is straightforward.

The same logic applies when assessing butter spoilage signs - one clear indicator is enough to act.

Getting the Most from Your Pumpkin

A few focused habits will keep pumpkin usable far longer than casual storage allows.

  • 🥧 Choose the right variety - sugar and pie pumpkins have denser flesh and freeze to a smoother puree than large carving types.
  • 🌿 Acidulate stored puree - stir in 1-2 teaspoons of lemon juice per quart to slightly lower pH and slow early spoilage in the fridge.
  • 🌰 Reserve the seeds - scoop and store pumpkin seeds separately in a dry airtight jar; they keep 1-2 weeks in the pantry or longer in the freezer.
  • 🏷️ Label with state and date - marking containers "puree" or "cubes" alongside the freeze date in YYYY-MM-DD format makes rotation automatic.

Don't confuse canned pumpkin with canned pumpkin pie filling - the filling already contains sugar and spices, which changes how it behaves in storage and freezing. Keep them separate in your pantry notes and in your freezer labels.

Shortcut
Freeze puree in ice cube trays first, then transfer the frozen cubes to a bag. Each cube is roughly 2 tablespoons - perfect for adding small amounts to soups or sauces without thawing a full portion.

Frequently Asked Questions

Can you freeze pumpkin puree?

Yes. Cool it fully, portion into 1-2 cup airtight containers or freezer bags, and freeze for up to 6-12 months. Quality is best within 6 months.

How long does cut pumpkin last in the fridge?

Cut raw pumpkin lasts 3-5 days refrigerated in an airtight container with seeds removed. Use it closer to day 3 if you want firm texture for roasting.

Can you freeze raw pumpkin cubes?

Technically yes, but blanch or roast them first. Raw unblanched cubes suffer significant cellular damage when frozen, thawing out grainy and waterlogged.

How do you thaw frozen pumpkin puree?

Overnight in the fridge is the best method - texture holds better with a slow thaw. For same-day use, submerge the sealed bag in cold water for 30-60 minutes.

Can you freeze pumpkin pie?

Yes, for up to 1-2 months. Wrap slices individually in plastic wrap then foil; thaw overnight in the fridge. The custard filling can weep slightly but remains safe to eat.

What Is Pinto Bean? [Taste, Uses & More]

April 1, 2026

Refried beans on a taco platter, pot beans ladled into a bowl with nothing but broth and onion - the pinto bean shows up in both without apology.

What Is Pinto Bean

It shares the mild, starchy baseline of the navy bean and its flavor or the kidney bean and its flavor, yet it carves its own lane with a distinctly earthy, slightly buttery character that makes it the workhorse of Mexican and Southwestern kitchens.

Few legumes mash as smoothly or hold up as well in long braises.

QUICK SUMMARY

The pinto bean is a medium-sized, speckled legume with an earthy, mildly nutty flavor and a creamy texture when cooked. It anchors refried beans, pot beans, chili, and burritos across Mexican and Southwestern cooking. Available dried or canned, it's one of the most consumed beans in North America.

🌿Flavor: Earthy, nutty, lightly sweet with mild bean umami
🫘Texture: Creamy and mashable when cooked, mealy when whole
🍽️Best Uses: Refried beans, frijoles de la olla, chili, burritos
🛒Forms: Dried whole beans or canned in brine or water
📦Shelf Life: Dried up to 2 years; canned up to 5 years; cooked 3-5 days refrigerated

What Is Pinto Bean?

Pinto beans (Phaseolus vulgaris) originated in Mesoamerica, where they've been cultivated for thousands of years. Northern Mexico and the Southwestern United States became their stronghold, and they remain among the most widely consumed dry legumes in North America today.

The name comes from the Spanish word for "painted" - a reference to the reddish-brown speckles on the beige background of a dried pinto bean. Those markings disappear once the beans are cooked, leaving a uniform light tan color.

They fall under the dry legume and pulse category alongside lentils, though understanding what makes lentil distinct helps illustrate how differently each pulse behaves in cooking.

Pinto beans are also called frijol pinto in Mexican Spanish or simply "speckled beans" in some regions.

  • 🫘 Scientific name - Phaseolus vulgaris, the same species as black, navy, and kidney beans
  • Alternate names - frijol pinto, speckled bean
  • Key subtypes - no major culinary subdivisions; "pinto" refers to the standard speckled variety
  • Form - sold dried in bags, or canned (whole or refried)

What Does Pinto Bean Taste Like?

pinto bean - What Is Pinto Bean

Raw dried pinto beans have no meaningful flavor - cooking is what activates them.

Simmered low and slow, they develop an earthy, nutty baseline with a mild natural sweetness and a subtle umami depth that gets richer the longer they cook in a seasoned broth.

Sensory SnapshotModerate Intensity
👅 Flavor
earthynuttylightly sweetmild umami
✋ Texture
creamy when mashedmealy when whole
👃 Aroma
warm earthytoasty when fried

Compared to black beans, pintos are noticeably less mineral and less dense - earthier and more buttery overall. They sit closer to cannellini in creaminess, though with more body and a warmer flavor note.

When mashed and pan-fried in lard or oil, a faint toasty, almost roasted aroma emerges that distinguishes refried pinto beans from any other preparation.

Golden Rule
The longer pinto beans simmer in a seasoned pot, the more their earthy umami deepens. Don't rush the cook - flavor builds in the broth, not just the bean itself.

How to Use Pinto Bean

Pinto beans anchor more dishes than any other single legume in Mexican and Tex-Mex cooking. Their high starch content makes them ideal for mashing; their mild flavor makes them a blank canvas for bold seasonings like cumin and chili powder.

If cumin is unavailable, knowing replacements for cumin keeps those recipes on track.

How Pinto Bean Is Used
MethodBest ForTip
🍲 SimmeredFrijoles de la olla, soups, stews, chiliAdd salt only after beans are tender - early salt toughens skins
🍳 Pan-fried mashedRefried beans for tacos, burritos, enchiladasUse lard or bacon fat for the toasty aroma; mash while still hot
⚡ Pressure-cookedSpeed cooking without overnight soakInstant Pot cuts cook time to 25-30 minutes from dry
🥗 Cooled and dressedBean salads, grain bowlsRinse canned beans and dress while still slightly warm for better absorption
🥓 Slow-bakedCowboy beans with molasses and baconLow oven (300°F/150°C) for 2-3 hours builds a thick, smoky sauce

Smoked pork, bacon, and chorizo are the classic meat pairings - the fat and smoke cut through the bean's earthiness without drowning it. For a deeper look at how chorizo in cooking interacts with legumes, the pairing logic applies directly here.

On the vegetable side, onion, garlic, tomato, and green chiles all complement the earthy base well.

Pinto beans also work alongside the role black bean plays in Latin cooking - the two are frequently interchangeable in chili and burritos, though pintos produce a creamier, milder result.

For more options, a rundown of pinto bean swaps that work covers the most reliable substitutes by dish type.

Try It In
🍚Gallo Pinto Costa Rican Rice BeansA rice-and-bean classic where pinto beans deliver their earthy, creamy character→

How to Buy and Store Pinto Bean

Dried pinto beans offer the best value and flavor control. Look for bags with uniformly speckled, intact beans - no shriveled pieces, broken skins, or visible grit. Avoid bags that look dusty or have an off smell, which suggests old stock.

Watch Out
Canned pinto beans packed in salted brine can throw off your seasoning. Rinse them under cold water before cooking to remove excess sodium, especially in recipes where you're building your own spice blend.

For canned pinto beans, check for dents or bulges and choose low-sodium versions when you plan to season from scratch. Once opened, transfer leftover beans and their liquid into a sealed container and refrigerate immediately.

  • Dried storage - airtight container in a cool, dark pantry; best quality within 1-2 years
  • Canned, unopened - pantry shelf stable for 2-5 years
  • Cooked or opened canned - refrigerate and use within 3-5 days

A full breakdown of pinto bean's shelf life covers edge cases like freezing cooked beans and identifying spoilage in older dried stock.

Start With Refried, Then Go From There

If you've never cooked pinto beans from scratch, refried beans are the entry point.

Simmer dried pintos with onion and garlic until fully tender, then mash them hot in a pan with a little fat - no recipe required, just ratio and timing.

Once you're comfortable there, frijoles de la olla is the next move: whole pot beans simmered simply, served in their broth, eaten as a side or a base.

These two preparations cover the majority of what pinto beans do in everyday cooking.

Shortcut
No time to soak? Use canned pinto beans for refried beans - drain, mash, and fry in under 10 minutes. The texture won't be identical to dried, but it's close enough for weeknight use.

Frequently Asked Questions

Are pinto beans the same as pink beans?

No. Pink beans are smaller, rounder, and pinkish-tan without the speckled pattern of pinto beans. They're milder and slightly softer when cooked. The two are sometimes used interchangeably in Caribbean cooking, but they're distinct varieties.

How long do pinto beans take to cook?

Soaked and simmered on the stovetop, pinto beans take 1 to 1.5 hours. Unsoaked beans need up to 2 hours. In a pressure cooker or Instant Pot, soaked beans are tender in about 20-25 minutes from dry.

Can you substitute pinto beans for black beans?

Yes, in most recipes. Pintos are creamier and milder, so the swap works well in chili, burritos, and soups. The color difference is visible, but the flavor profile is close enough for everyday use.

Why are my pinto beans gritty after cooking?

Gritty texture usually means the beans were undercooked, or they're very old dried beans with compromised starch. Adding salt or acidic ingredients too early also hardens the skins and leaves an unpleasant mealy bite.

Are pinto beans healthy?

Yes. They provide plant protein, soluble and insoluble fiber, folate, and iron in meaningful amounts. They're naturally low in fat. Soaking and rinsing dried pinto beans reduces the fermentable starches that cause digestive gas.

Russian Beef Pelmeni

April 1, 2026

For nights when you want handmade comfort without the takeout menu, pelmeni delivers. Thin dough pockets filled with seasoned beef and boiled until tender-that's the entire pitch.

Russian Beef Pelmeni served on a plate

This works for meal prep since you can freeze dozens at once. Pull them straight from the freezer into boiling water and dinner's ready in seven minutes.

Perfect for budget cooking when you need to stretch ground beef across multiple meals or feed a crowd without spending hours at the stove.

QUICK SUMMARY

Russian beef pelmeni are thin-dough dumplings filled with seasoned ground beef, boiled until they float, then served with sour cream. The key is rolling dough to 1mm thickness so wrappers stay tender, not chewy. Make this when you want authentic Eastern European comfort that freezes well for quick future dinners.

⏱️Time Reality: 45 minutes of active work, mostly shaping dumplings
🔑Critical Move: Rest dough 30 minutes before rolling for elasticity
⚠️Watch Out: Undersalted filling tastes bland-season generously before sealing

Table of Contents

Toggle
  • Why This Recipe Works
  • What You'll Need
    • Ingredient Details
  • Ingredient Swaps
  • What to Serve With It
  • Store and Reheat
  • Frequently Asked Questions
  • Russian Beef Pelmeni
    • Method 
    • Tried this recipe?

Why This Recipe Works

Thin-rolled dough and properly seasoned beef create the texture contrast that makes pelmeni worth the effort. We keep a batch ready for nights like this-a hearty beef recipe stores well and reheats without losing its integrity.

Quick Reference
⏱️
Prep Time
45 min
🔥
Cook Time
5-7 min
⏰
Total Time
52 min
🍽️
Servings
4 servings (about 40 pelmeni)
📊
Difficulty
Medium
🏷️
Category
Main Dish
💡
Quick Tip
Seal edges tightly for no leaks when boiling
🎯
Best For
Weeknight | Meal prep | Entertaining

What makes this work:

  • Dough rests 30 minutes so gluten relaxes and rolling becomes easier without tearing
  • 1mm thickness on dough rounds creates tender wrappers that cook through in 5-7 minutes
  • Finely grated onion in filling adds moisture so beef stays juicy instead of dry after boiling
  • Pelmeni float when done and dough turns translucent-clear visual doneness cues
  • Salt added to both dough and filling prevents bland-tasting dumplings after cooking
Quick Tip
Press dough edges with your finger first, then pinch firmly to seal-double-sealing prevents leaks during boiling

What You'll Need

Ingredients for Russian Beef Pelmeni

The ingredient list splits between dough components and filling-shop for medium-fat ground beef and all-purpose flour as your base. For a version that comes together quickly, a fresh homemade salad recipe works as a simple side while you shape dumplings.

🍗
Filling
  • Ground beef (medium-fat)
  • Onion (finely grated)
  • Garlic (minced)
  • Salt
  • Black pepper
🍜
Dough
  • All-purpose flour
  • Eggs
  • Water
  • Salt
🧀
Serving
  • Butter
  • Sour cream

Ingredient Details

  • Ground beef
    Use 80/20 fat ratio for juicy filling-leaner meat dries out during cooking
  • All-purpose flour
    Regular flour creates elastic dough that rolls thin without tearing
  • Onion
    Grate finely so it distributes moisture evenly through filling
  • Eggs
    Binds dough and creates structure for rolling and sealing
  • Water
    Add gradually to control dough hydration-too wet tears, too dry cracks
  • Butter
    Melted butter tossed with boiled pelmeni adds richness before serving
  • Sour cream
    Traditional topping that adds tangy contrast to seasoned beef

Ingredient Swaps

Dough and filling both tolerate substitutions if you adjust technique to match. We keep a batch ready for nights like this-a quick slaw dish brings crunch when rich dumplings need textural contrast on the plate.

Four swaps that work:

  • Ground turkey for beef - Leaner meat means less juice, so add 1-2 tablespoons of broth or melted butter to filling before sealing
  • Gluten-free flour mix for all-purpose - Dough will be less elastic and more fragile, so handle gently and roll slightly thicker than 1mm
  • Plain yogurt for sour cream - Similar tangy finish with less fat, works for serving or mixing into garlic sauce
  • Flax egg or extra water for eggs - Reduces dough binding, so dough may tear more easily during rolling and sealing

Ground Turkey Filling

Works for: Budget cooking, leaner protein preference

Skip if: You want traditional juicy beef texture

Gluten-Free Flour

Works for: Gluten-free diets, celiac needs

Skip if: You're new to pelmeni-regular dough is easier to handle

Instructions

Expect 45 minutes of active work spread between dough resting and dumpling assembly. Rich mains need something to cut through, and a homemade sauce recipe adds dipping options when plain sour cream feels too simple.

  1. Mix dough and rest. Combine flour, eggs, water, and salt until dough forms. Knead 5 minutes until smooth, then cover and rest 30 minutes at room temperature.

  2. Prepare filling. Mix ground beef, finely grated onion, minced garlic, salt, and black pepper until combined. Season generously-filling tastes bland after boiling if undersalted.

  3. Roll and cut dough. Roll dough to 1mm thickness on floured surface. Cut 3-inch circles with round cutter, gathering scraps to re-roll once.

  4. Fill and seal. Place 1 teaspoon filling in center of each circle. Fold dough in half to form crescent, press edges with finger, then pinch firmly to seal. Remove any air pockets.

  5. Boil until done. Bring large pot of salted water to boil. Add pelmeni in batches without crowding. Cook 5-7 minutes until they float and dough looks translucent. Drain and toss with melted butter.

Golden Rule
Seal edges twice-press first, then pinch hard-to prevent filling from leaking during boiling

What to Serve With It

The dumplings need sides that cut richness or add crunch since pelmeni are soft and buttery. For more meal planning ideas, check this rich beef dish planning guide for pairing strategies across different beef-based dinners.

Side Dish Prep Why It Works How to Serve
Simple green salad Easy Adds freshness and balances richness Dress lightly with vinegar and oil, serve cold
Boiled potatoes Easy Starchy accompaniment, traditional pairing Toss with butter and dill, serve hot
Steamed vegetables Easy Light, healthy complement Season with salt only, serve alongside
Pickled cucumbers Easy Tangy contrast to rich filling Serve chilled as condiment
Beet salad (Vinegret) Medium Classic Russian side that brightens flavors Dress with oil and vinegar, serve cold

Three ways to serve it:

  • Traditional - Toss boiled pelmeni with melted butter and top with dollop of sour cream mixed with minced garlic
  • Pan-fried - Boil first, then fry in butter 3-5 minutes until golden and crispy on edges
  • In broth - Serve pelmeni in hot beef or chicken broth with fresh dill and black pepper
Best Pick
Pan-fry boiled pelmeni in butter for crispy golden edges-adds textural contrast to tender filling

Store and Reheat

Cooked pelmeni keep 3-4 days refrigerated or freeze raw ones for up to three months. The salad works best when it hits the table at the same time as the main, so pair with a warm rolls side if you need something that reheats well alongside frozen dumplings.

Method Time Best For
🍳 Stovetop 5 min simmer Reheat frozen or refrigerated pelmeni evenly
📦 Microwave 1-2 min Quick reheating, may lose crisp texture
🔥 Oven 10 min at 350°F Pan-fried pelmeni to restore crispness

For best results when storing:

  • Freeze raw pelmeni in single layer on parchment-lined sheet for 30 minutes before transferring to freezer bag to prevent clumping
  • Cook frozen pelmeni directly from freezer without thawing-add 2-3 minutes to boiling time
  • Store cooked pelmeni in shallow airtight container with light coating of butter to prevent sticking
  • Reheat in simmering water instead of microwave to maintain tender dough texture
  • Pan-fry day-old pelmeni in butter to refresh texture and add crispy edges

Frequently Asked Questions

Can I use ground turkey instead of beef in pelmeni?

Yes, but ground turkey is leaner and dries out faster. Add 1-2 tablespoons of broth or melted butter to the filling before sealing to keep it juicy.

How should I store leftover pelmeni and how long do they last?

Refrigerate cooked pelmeni in an airtight container for 3-4 days. Freeze raw pelmeni in a single layer for 30 minutes, then transfer to a freezer bag for up to 3 months.

How do I know when pelmeni are fully cooked after boiling?

Pelmeni float to the surface and the dough turns slightly translucent after 5-7 minutes. Cut one open to check-filling should be hot throughout with no pink meat.

Why do my pelmeni fall apart or leak during cooking?

Edges aren't sealed tightly enough or dough has thin spots that burst. Press edges with your finger first, then pinch firmly to seal, and roll dough evenly to 1mm thickness.

Can I double or halve this pelmeni recipe easily?

Yes, scale all ingredients proportionally. Dough and filling both freeze well, so doubling the batch makes sense for meal prep.

How long to cook Russian beef pelmeni at boiling water?

Cook pelmeni in boiling salted water for 5-7 minutes. They're done when they float and dough looks translucent.

Can pelmeni be pan-fried after boiling?

Yes, boil pelmeni first until cooked, then pan-fry in butter for 3-5 minutes to create crispy golden edges. This adds textural contrast to the tender filling.

Russian Beef Pelmeni served on a plate

Russian Beef Pelmeni

No ratings yet
Russian beef pelmeni are thin dough dumplings filled with seasoned ground beef, boiled until tender and served with sour cream. The dough rests for 30 minutes before rolling to 1mm thickness to ensure tender wrappers. This hearty Eastern European dish freezes well for meal prep and cooks quickly in boiling water.
Print Recipe Pin Recipe
Prep Time 45 minutes mins
Cook Time 7 minutes mins
Total Time 52 minutes mins
Servings: 4 servings
Course: Main Dish
Cuisine: Eastern European, Russian
Ingredients Method Notes

Ingredients
  

  • 2 cups all-purpose flour for dough
  • 1 large egg for dough binding
  • ⅓ cup water add gradually for dough hydration
  • ½ teaspoon salt for dough
  • 1 pound ground beef medium-fat (80/20) for juicy filling
  • ½ cup onion finely grated for moisture
  • 2 cloves garlic minced
  • 1 teaspoon salt for filling, season generously
  • ½ teaspoon black pepper for filling
  • 2 tablespoons butter melted, for tossing boiled pelmeni
  • ½ cup sour cream for serving

Method
 

  1. Combine flour, egg, water, and salt until a dough forms. Knead for 5 minutes until smooth, then cover and rest at room temperature for 30 minutes to relax gluten.
    2 cups all-purpose flour, 1 large egg, ⅓ cup water, ½ teaspoon salt
  2. Mix ground beef, finely grated onion, minced garlic, salt, and black pepper until thoroughly combined. Season generously to prevent blandness after cooking.
    1 pound ground beef, ½ cup onion, 2 cloves garlic, 1 teaspoon salt, ½ teaspoon black pepper
  3. Roll out the rested dough on a floured surface to approximately 1mm thickness. Use a 3-inch round cutter to cut circles. Gather scraps and re-roll once if needed.
    2 cups all-purpose flour
  4. Place 1 teaspoon of filling in the center of each dough circle. Fold dough in half to form a crescent, press edges with your finger, then pinch firmly to seal tightly. Remove all air pockets to prevent leakage.
    1 pound ground beef
  5. Bring a large pot of salted water to a boil. Add pelmeni in batches without crowding. Cook for 5-7 minutes until pelmeni float and the dough becomes translucent. Drain well.
  6. Toss boiled pelmeni with melted butter and serve topped with sour cream. Optionally, pan-fry boiled pelmeni in butter for 3-5 minutes until edges are golden and crispy for texture contrast.
    2 tablespoons butter, ½ cup sour cream

Notes

  • Rest dough for at least 30 minutes before rolling to make thin rolling easier and prevent tearing.
  • Seal dumpling edges twice: press with finger, then pinch firmly to prevent leaks during boiling.
  • Use medium-fat ground beef (80/20) to keep filling juicy and flavorful after cooking.

Tried this recipe?

Let us know how it was!

What Is Preserved Lemon? [Taste, Uses & More]

April 1, 2026

Preserved lemon does something no squeeze of fresh juice can - it pulls back the sharp brightness of raw citrus and replaces it with a deep, briny, almost savory complexity that holds its shape through hours of slow cooking.

What Is Preserved Lemon

Moroccan cooks have built entire pantry philosophies around a single jar of it, pairing it with couscous swaps that work or stirring the rind into sauces that rely on replacements for olive oil as a base.

It's concentrated, it's salty, and once you understand what it does, you'll reach for it constantly.

QUICK SUMMARY

Preserved lemon is whole lemon cured in coarse salt and its own juices, producing a softened rind with deeply briny, tangy, umami-adjacent flavor. Use the rind as a concentrated condiment in tagines, dressings, and sauces - not as a fresh citrus substitute.

🍋What It Is: Salt-cured whole lemon, rind used as a savory condiment
👅Flavor: Briny, tangy, mellow - saltier and less sharp than fresh lemon
🍳Best Uses: Tagines, vinaigrettes, yogurt sauces, couscous, roasted chicken
📦Shelf Life: Up to 24 months sealed; 6-12 months opened and refrigerated in brine
⚠️Watch Out: Very high sodium - rinse before use and adjust salt in the dish

What Is Preserved Lemon?

Preserved lemon is a salt-preserved citrus condiment made by packing whole lemons - or lemon quarters - into coarse salt and sealing them in their own juice, sometimes with added water, olive oil, or spices like cinnamon and bay.

The cure takes anywhere from three weeks to several months, during which the rind softens completely and the sharp citrus oils mellow into something rounded and complex.

It originates in North Africa, where it's been a pantry staple in Moroccan cooking for centuries, and appears across Mediterranean and Middle Eastern cuisines under various names - salt-preserved lemon, Moroccan preserved lemon, or occasionally (and incorrectly) pickled lemon.

That last label causes confusion, because preserved lemon is not vinegar-pickled.

There are two broad types worth knowing:

  • 🍋 Whole preserved lemons - the traditional Moroccan style, cured with just salt and lemon juice, sometimes with spices
  • 🫙 Commercial quick-cure jars - packed in a saltier brine, sometimes with citric acid added, and processed for a faster, more uniform result

We use only the rind in most recipes. The pulp is edible but intensely salty - it's occasionally blended into sauces or discarded entirely.

What Does Preserved Lemon Taste Like?

preserved lemon - What Is Preserved Lemon

The flavor sits closest to lemon zest crossed with a brined olive - citrus-forward but salty, mellow rather than sharp, with a quiet umami-adjacent bitterness from the aged peel. Fresh lemon hits you immediately and fades.

Preserved lemon lingers.

Sensory SnapshotStrong Intensity
👅 Flavor
saline-brinyconcentrated tangyaged bitterumami-savory
✋ Texture
supple rindsilky when minced
👃 Aroma
preserved citrus oilfermented salt

Heat changes it further.

Added early to a slow braise, the rind dissolves into the sauce and contributes mostly salinity and a low background citrus note.

Added near the end as a garnish, it retains its bright preserved oil aroma and a more distinct lemony bite.

That difference in timing is one of the key decisions in cooking with it well.

Golden Rule
Always taste the dish before adding any extra salt - preserved lemon rind is already heavily cured and can oversalt a recipe fast.

How to Use Preserved Lemon

Rinse the rind first. A quick rinse under cold water removes excess surface salt without stripping the flavor. Then scrape or discard the pulp - unless you're blending the whole thing into a sauce - and finely chop, mince, or slice the rind depending on the application.

How Preserved Lemon Is Used
MethodBest ForTip
🫕 Braised wholeTagines, lamb stews, slow chicken braisesAdd early - rind softens fully and melds into sauce
🥗 Finely minced rawVinaigrettes, yogurt sauces, couscous, rice pilafChop as fine as possible so it distributes evenly
🍽️ Thin strips as garnishGrilled fish, roasted chicken, braised greensAdd at the end - preserves the citrus oil aroma
🧈 Blended into spreadsCompound butter, preserved lemon aioli, labneh dipBlend pulp and rind together for a smoother result

In Moroccan cooking, preserved lemon and olives appear together in the same braise so often they function almost as a unit - the brine of each reinforcing the other.

Outside that tradition, the rind works wherever you'd want concentrated citrus salt: whisked into a vinaigrette for grilled vegetables, folded into couscous with cumin and coriander, or stirred into yogurt alongside labneh.

Pairing it with cumin, coriander, and earthy root vegetables brings out its savory side. Pairing it with chicken fat, butter, or olive oil brings out the citrus oils.

Both directions work; they just produce different results.

If a recipe calls for it and you're out, there are a few preserved lemon swaps that work - though none replicate the fermented depth exactly.

Try It In
🍗Air Fryer Lemon Pepper Chicken TendersSwap lemon pepper seasoning for minced preserved rind for a saltier, more complex crust→🥦Air Fryer Lemon Pepper CauliflowerPreserved rind gives roasted cauliflower a briny punch without extra seasoning→🥩Air Fryer Lemon Pepper MeatballsFold finely chopped rind into the meat mixture for embedded citrus-salt flavor→

How to Buy and Store Preserved Lemon

At the store, look for jars where the rinds appear glossy, pale yellow, and plump - not shriveled or discolored. A cloudy brine is fine and normal.

A filmy, off-smelling brine is not; that's a sign of spoilage.

Watch Out
A white film on top of the brine is usually harmless salt crystallization - but if the brine smells rancid or the rind feels slimy, discard the jar entirely.

Storage is straightforward once you know the rules:

  • Unopened jars - store in a cool, dark pantry for up to 24 months
  • Opened jars - refrigerate with rinds fully submerged in brine; lasts 6-12 months
  • After removing pieces - press remaining rinds back under the brine and reseal tightly

Knowing the preserved lemon spoilage signs is worth a quick read before you work through an older jar - the indicators are specific and easy to check.

Where to Start With Preserved Lemon

New to it? Start with the rind in a vinaigrette. Mince a small strip finely, whisk it into olive oil and a little lemon juice, and taste the result before using it on anything - that's the fastest way to understand its flavor range.

From there, try it in a slow-cooked dish. A chicken tagine with apricots recipe puts the preserved lemon in the context it was designed for, where braise time and sweet fruit balance the salt.

Use less than you think you need. One-quarter of a preserved lemon, properly rinsed and minced, is enough to season a dish for four.

Frequently Asked Questions

Are preserved lemons fermented?

Not exactly. The curing process is lacto-fermentation driven by salt, not active yeast cultures. Some microbial activity does occur, which contributes to the mellow, rounded depth - but preserved lemons are more accurately described as salt-cured than fermented.

Can you eat preserved lemon rind?

Yes - the rind is the part most recipes call for. Rinse it briefly under cold water, scrape away the pulp if desired, and chop or slice as needed. The pulp is edible too but intensely salty, so it's usually blended into sauces rather than eaten directly.

How long do preserved lemons last once opened?

Six to twelve months, refrigerated with rinds kept submerged in brine. The brine acts as a preservative, so the key is keeping the jar sealed and the rinds fully covered after each use.

What is the best preserved lemon substitute?

A combination of lemon zest, a small amount of lemon juice, and a pinch of salt gets closest in a pinch. No single substitute replicates the fermented depth, but this combination covers the citrus-salt balance well enough for most cooked dishes.

Do you need to rinse preserved lemon before using it?

A quick rinse is recommended to remove excess surface salt, especially in dishes where you control seasoning carefully. It won't wash away the core flavor - the brine has already penetrated the rind fully during curing.

What Is Pepperoncini? [Taste, Uses & More]

April 1, 2026

Tucked into an Italian sub alongside provolone and salami - or scattered across a Greek salad with feta and olives - pepperoncini show up wherever a dish needs brightness without serious heat.

What Is Pepperoncini

These small, pale-green to yellow pickled peppers carry a tangy punch that's unmistakably their own, and understanding what they do in a dish helps you use them well.

They pair easily with provolone cheese stand-ins when building a charcuterie spread, and they belong just as naturally on an antipasti board - the differences between antipasti vs antipasto matter less than knowing which peppers to reach for.

QUICK SUMMARY

Pepperoncini are small pickled chili peppers from the Mediterranean with a mild, tangy, slightly brassy flavor. Sold almost exclusively jarred in the U.S., they're used as a condiment, salad topper, or sandwich ingredient. Low in calories, high in sodium, and easy to use straight from the jar.

🌶️Flavor: Tangy pickled acidity, mild heat, slight sweetness, brassy salt
🫙Form: Almost always sold pickled in brine; fresh sold as friggitelli
🥗Best Uses: Subs, Greek salads, antipasti boards, pasta salads, pizza
🧂Watch: High sodium from brine - rinse if on a low-sodium diet
📅Shelf Life: Unopened: years; opened refrigerated in brine: 1-3 months

What Is pepperoncini?

Pepperoncini originated in Italy and Greece, where the fresh version - called friggitello - is thin-walled, mild, and often pan-fried or roasted whole.

In the U.S., the name almost always refers to the jarred pickled version: small, wrinkled peppers measuring roughly 2-3 inches, pale green to yellow in color, and submerged in a vinegar-forward brine.

They belong to the Capsicum annuum species, the same broad family as bell peppers and jalapeños, though they sit at the mild end of the heat spectrum.

On the Scoville scale, pepperoncini typically register 100-500 SHU - far below jalapeños and even below many banana peppers.

The name is sometimes misspelled "pepperoni-chi" or confused with the cured meat pepperoni, which is unrelated.

You may also see them labeled sweet pepperoncini on jar labels, signaling that the focus is on the tangy brine character rather than any significant spice.

  • 🇮🇹 Italian name - friggitello refers to the fresh, pan-fry-ready pepper
  • 🇬🇷 Greek use - whole pickled pepperoncini are a standard meze and salad component
  • 🏷️ U.S. market - sold jarred by brands like Mezzetta and Vlasic, whole or sliced

What Does pepperoncini Taste Like?

pepperoncini - What Is Pepperoncini

Briny acidity is the first thing you notice - the pickling brine leads, sharp and vinegary. Behind it sits a mild, green-pepper sweetness and a gentle warmth that builds slowly rather than hitting up front.

Sensory SnapshotMild Intensity
👅 Flavor
tangymildly hotslightly sweetbrassy-salty
✋ Texture
crisp but yieldingslightly chewy skin
👃 Aroma
vinegarygreen peppery

Compared to banana peppers, pepperoncini taste brighter and less sweet - banana peppers lean sugary and soft, while pepperoncini hold more tang and a firmer bite.

If you're sourcing alternatives for either, knowing alternatives to banana pepper helps clarify where each one fits in a recipe.

The flavor shifts with preparation. Straight from the jar, the vinegar is pronounced.

Sautéed briefly, the acidity softens and the pepper's natural sweetness comes forward. Roasted, they turn mellow and slightly caramelized - barely recognizable as the same ingredient.

Golden Rule
Don't discard the brine. A splash of pepperoncini brine sharpens vinaigrettes, marinades, and even Bloody Mary mixes without adding bulk.

How to Use pepperoncini

Pepperoncini are most at home in Italian-American and Greek cooking, where they function as both a condiment and an ingredient.

They require zero prep straight from the jar, which makes them one of the most practical pantry items for building flavor fast.

How Pepperoncini Are Used
MethodBest ForTip
🥗 Straight from jarSubs, antipasti boards, Greek salads, pizza toppingDrain briefly; add after cooking to keep crunch
🍳 SautéedPasta sauces, grain bowls, egg dishesCook 2-3 minutes only - longer dulls the tang
🔥 RoastedSheet pan vegetables, roasted chickenRemove tops; high heat caramelizes the flesh
🥘 BraisedSlow-cooked meats, tomato-based saucesAdd whole; they dissolve into gentle background heat

Their classic pairings run through salty, fatty, or acidic companions: feta and olives, provolone and salami, roasted red peppers, cucumber and tomato, olive oil and oregano.

They cut through the richness of mayonnaise in a sandwich and sharpen a simple olive oil dressing without overwhelming it.

For dishes where pepperoncini are central, you may find alternatives to pepperoncini useful when the jar runs out mid-recipe. Chopped pepperoncini also work well folded into giardiniera-style relishes or stirred through a pasta salad alongside artichoke hearts and sun-dried tomatoes.

Avoid pairing them with sweet custards or fruit compotes - the vinegar fights the sweetness and neither wins.

Try It In
🍋Air Fryer Lemon Pepper Chicken TendersServe sliced pepperoncini alongside for a tangy contrast→🥗Greek Vinaigrette Dressing (Homemade)Use pepperoncini brine in place of some vinegar→🍗Sheet Pan Roast ChickenAdd whole pepperoncini to the pan for roasted depth→

How to Buy and Store pepperoncini

Look for jars where the brine is pale and mostly clear - slight cloudiness is normal, but murky or heavily clouded liquid can signal age or poor storage.

The peppers themselves should be pale green to yellow, pliable but not soft, with no signs of mush at the stem end.

Watch Out
If opened pepperoncini smell off or the brine has turned visibly dark and murky, discard them. The acidity of brine preserves well, but it isn't foolproof once the jar is open and exposed to contaminants.

For fresh friggitelli, choose firm, glossy, thin-walled peppers with few blemishes - use them within 5-7 days refrigerated.

Storage details for the jarred version matter more in practice: unopened jars keep for years in a cool pantry; once opened, keep them submerged in brine with a tight lid and refrigerate.

For a full breakdown of timelines and signs of spoilage, keeping pepperoncini fresh covers the specifics.

A common pairing on antipasti boards is pepperoncini alongside feta - and if you're planning ahead, knowing how long feta keeps helps you time both components.

Start Here

If you're new to pepperoncini, open the jar and taste one whole - that's the fastest way to understand what they bring to a dish.

From there, try them in a sub or a simple Greek salad before experimenting with cooking methods.

  • 🥪 First use - tuck whole or sliced into a sandwich with provolone and salami
  • 🥗 Second use - scatter over a salad with feta, olives, and cucumber
  • 🍳 Next step - sauté briefly and fold into scrambled eggs or a grain bowl
  • 🥄 Don't waste the brine - use it as a vinaigrette base or marinade acid

One jar goes a long way. They're low-commitment, high-return.

Frequently Asked Questions

Are pepperoncini spicy?

Mildly. They register 100-500 SHU on the Scoville scale, which puts them at the very low end of chili heat. Most people notice a gentle warmth rather than any burning sensation.

What is the difference between pepperoncini and banana peppers?

Banana peppers are sweeter and milder with a smoother skin; pepperoncini are tangier, slightly more wrinkled, and carry a brighter vinegar note when pickled. They're interchangeable in many recipes, but pepperoncini bring more acidity.

Can you eat pepperoncini seeds?

Yes, they're safe to eat. The seeds carry a small amount of additional heat, so removing them gives a slightly milder result - though for most people the difference is negligible.

How do you use pepperoncini in salads?

Add them whole or sliced directly to the salad just before serving. In a Greek salad, two or three whole peppers per serving is standard alongside feta and olives.

Is pepperoncini brine safe to drink or cook with?

Completely safe, and useful. The brine works as a vinegar substitute in dressings, marinades, or cocktails. Its sodium content is high, so account for that when seasoning the rest of the dish.

What Is Rice? [Taste, Uses & More]

April 1, 2026

Warm, faintly sweet, and almost impossibly neutral - cooked rice has a sensory quietness that few grains can match. That restraint is exactly what makes it the most-consumed grain on earth, a blank canvas that absorbs soy, spice, fat, and acid without competing.

What Is Rice

Whether you're spooning it under a lamb curry or pressing it into a sushi roll, rice does its job by staying out of the way - and doing it beautifully.

QUICK SUMMARY

Rice is a mild, starchy grain with flavor ranging from neutral to faintly nutty or floral depending on variety. Long-grain types cook fluffy and separate; short-grain types turn sticky and creamy. It works across savory dishes, desserts, porridges, and anywhere a neutral starch base is needed.

🌾Type: Staple cereal grain, available in white or whole-grain brown forms
👅Flavor: Mild, starchy, faintly sweet or nutty depending on variety
🍳Best Uses: Steamed rice bowls, risotto, sushi, congee, grain bowls
📦Shelf Life: White rice up to 2 years; brown rice 6-12 months refrigerated
🌍Cuisines: East Asian, Southeast Asian, South Asian, Latin American, Mediterranean

What Is Rice?

Rice is the edible seed of plants in the Oryza genus, cultivated in flooded paddies across Asia, Latin America, and beyond. Domesticated in East and South Asia thousands of years ago, it remains the primary calorie source for more than half the world's population.

Brown rice is the whole-grain form - hull removed, bran and germ intact. White rice is milled further, stripping the bran layer to leave a polished, starchy kernel that cooks faster and stores longer.

The broadest split within rice is between long-grain and short-grain types, driven by starch chemistry:

  • Long-grain (indica) - High in amylose starch; grains stay separate and fluffy after cooking. Basmati and jasmine are the most recognized examples.
  • Short-grain (japonica) - High in amylopectin starch; grains cling together and turn creamy. Sushi rice and arborio fall here.
  • Medium-grain - A middle ground, used in Spanish paella and some Korean dishes.
  • Glutinous (sweet) rice - Extremely high amylopectin content; used for mochi and sticky-rice desserts.

For everyday cooking, basmati and jasmine are the most common aromatic long-grain options, while arborio is the go-to short-grain choice for risotto.

What Does Rice Taste Like?

rice - What Is Rice

Think of cooked pasta without the egg or wheat flavor - that neutral, starchy warmth is the baseline for most white rice. It's a quiet flavor, not a bold one.

Sensory SnapshotMild Intensity
👅 Flavor
mildstarchyfaintly sweetnutty (brown)
✋ Texture
fluffy & separatesticky & creamy
👃 Aroma
neutralfloral (jasmine)popcorn-like (basmati)

Short-grain rice cooked warm has a noticeable sweetness - mild, but there. That's the amylopectin releasing as the grains soften and cling.

Brown rice adds a layer of nuttiness from the intact bran. It's chewier and earthier, closer to farro in mouthfeel than its milled counterpart. Aromatic varieties change the equation completely: jasmine opens up floral and slightly buttery, while basmati carries a toasted, almost popcorn-like warmth you can smell before the pot even opens.

Golden Rule
The fresher the bag, the more pronounced the aroma - especially in jasmine and basmati. Old rice smells flat. Buy aromatic varieties in small quantities and use them within a year.

How to Use Rice

Rice shifts character depending on variety and method. Long-grain white rice steamed or cooked by the absorption method produces distinct, fluffy grains - the right platform for a Thai green curry or a congee rice porridge simmered low and slow until silky.

Short-grain arborio, stirred continuously with hot stock, releases its starch gradually to build the thick, creamy base that defines risotto.

How Rice Is Used
MethodBest ForTip
♨️ Steaming / AbsorptionEveryday rice bowls, curries, stir-friesUse a 1:1.5 rice-to-water ratio for long-grain; rest covered 5 min off heat
🥘 Pilaf (sauté then simmer)Grain bowls, side dishes, pilafsToast grains in butter or oil first for deeper flavor before adding liquid
🍲 Risotto (stir with stock)Creamy risotto, arancini baseAdd stock in small ladles; constant stirring coaxes starch from arborio
🫕 Slow simmer (congee)Savory or sweet porridge, recovery mealsUse a high water ratio (1:10) and cook low for at least 45 minutes
🔥 Pressure cookingFast weeknight cooking, brown riceCuts brown rice cook time from 45 min down to around 22 min

For Southeast Asian meals, jasmine rice is the standard pairing alongside grilled meats, fish sauce-based sauces, and fresh herbs. In South Asian cooking, basmati is the base for biryanis and pilafs, often finished with ghee and whole spices.

Rice vinegar plays a supporting role in Japanese kitchens, used to season cooked short-grain rice for sushi and onigiri. Glutinous rice steps into dessert territory - mochi, Southeast Asian sticky sweets, and some Latin American tamale preparations all rely on its high amylopectin content to hold shape.

If rice isn't available, grain-based substitutes like quinoa or farro work in bowl dishes, though the starch behavior differs. For a protein-forward swap, quinoa is worth knowing well.

Try It In
🥛Cinnamon Rice HorchataUses blended white rice as the creamy, starchy base→🌽Coconut Rice with CornShows how jasmine rice absorbs rich, sweet coconut milk→🌶️Dirty Rice with CornLong-grain rice absorbs bold spices and fat without clumping→

How to Buy and Store Rice

White rice is straightforward to shop for - look for uniform, unbroken grains and no musty smell through the bag. For aromatic types, sniff if you can: jasmine should smell faintly floral, basmati faintly nutty. Brown rice should have a slight oily sheen and a fresh, grain-forward smell; avoid anything that smells stale or off.

Watch Out
Brown rice contains natural oils in its bran layer that go rancid at room temperature. Store it in an airtight container in the refrigerator or freezer - not the pantry.

Storage by type:

  • White rice - Pantry, airtight container, away from light; stays good up to 2 years unopened.
  • Brown rice - Refrigerator or freezer; use within 6-12 months for best flavor.
  • Cooked rice - Refrigerator, covered; safe for 3-5 days. For a full breakdown, see how long rice lasts.
Shortcut
Cook a large batch of long-grain white rice and freeze it in portioned bags. It reheats from frozen in minutes with a splash of water in a covered pan.

Start Here

New to cooking rice regularly? Long-grain white rice by the absorption method is the entry point - low effort, consistent results, works with almost every cuisine. Once you have that down, try a jasmine or basmati for aromatic dishes, then move to short-grain for sushi or risotto.

Need to replace it in a dish? Our rice flour replacements guide covers baking swaps specifically.

Brown rice is worth adding when you want more chew and fiber, though it takes twice as long and behaves differently.

Frequently Asked Questions

Does rice need to be rinsed before cooking?

For most long-grain white rice, yes - rinsing removes excess surface starch that causes gummy, clumped grains. Skip rinsing when making risotto or congee, where released starch is exactly what you want.

Why is my rice sticky?

Stickiness usually means too much surface starch (skipped rinse), too much water, or stirring during cooking. Using a short-grain or glutinous variety instead of long-grain will also produce sticky results regardless of technique.

What rice is best for sushi?

Short-grain japonica rice - sold labeled "sushi rice" - is standard. Its high amylopectin content makes grains stick together when pressed, which long-grain types won't do even with seasoning.

What is the difference between white and brown rice?

Milling. Brown rice keeps its bran and germ layers, giving it more fiber, a nuttier flavor, and a chewier texture. White rice is milled to the starchy endosperm, making it milder, softer, and faster to cook.

Is rice gluten-free?

Yes, all plain rice is naturally gluten-free. It's one of the most widely used staple carbohydrates in gluten-free cooking, including as a base for [rice flour](https://forkliftkitchen.com/rice-flour-substitutes/) in baking.

Greek Stifado Beef Stew

April 1, 2026

Beef stew often ends up watery or bland because the sauce never gets time to concentrate. The fix is cooking beef chuck low and slow with pearl onions, cinnamon, and red wine until everything caramelizes into a thick, spiced gravy.

Greek Stifado Beef Stew served on a plate

A Dutch oven does the heavy lifting. Brown the meat hard, caramelize the onions separately, then let everything simmer for 2.5 hours while the flavors build.

This is what you make when you want comfort food that tastes like you spent all day cooking but only requires occasional stirring.

QUICK SUMMARY

Greek Stifado is a slow-simmered beef stew with pearl onions, cinnamon, and red wine that cooks down into a thick, tangy sauce. The key is browning the beef hard and caramelizing the onions separately before combining everything for a long, gentle simmer. You get fork-tender meat and sweet, spiced onions without any babysitting.

⏱️Time Reality: 2 hours 50 minutes total, 2.5 hours of that is hands-off simmering.
🔥Critical First Step: Sear beef cubes 3 minutes per side on high heat until deeply browned.
⚠️Watch Out: Hard boil toughens the meat and breaks the sauce - keep it at a gentle simmer.

Why This Recipe Works

The long simmer breaks down tough beef chuck while the wine and vinegar concentrate into a tangy, spiced glaze. For a version that comes together quickly, a similar dinner recipe uses a slow cooker for even more hands-off cooking.

Quick Reference
⏱️
Prep Time
20 min
🔥
Cook Time
2 hrs 30 min
⏰
Total Time
2 hrs 50 min
🍽️
Servings
6 servings
📊
Difficulty
Medium
🏷️
Category
Main Dish
💡
Quick Tip
Brown beef and caramelize onions separately
🎯
Best For
Weeknight | Meal prep | Family dinner

Here's what makes it work:

  • High heat searing: Brown beef cubes on all sides to create fond (those caramelized bits) that flavors the entire stew
  • Separate onion caramelization: Cooking pearl onions in olive oil for 15 minutes keeps them intact and sweet instead of mushy
  • Gentle simmer temperature: Maintaining 180-200°F prevents the beef from toughening and keeps the sauce from separating
  • Wine deglazing: Red wine scrapes up browned bits from the pan and adds acidity that balances the sweetness
  • Late vinegar addition: Adding vinegar halfway through cooking preserves its tang without making the stew sharp
Quick Tip
Use a heavy Dutch oven with a tight lid to maintain even heat and prevent moisture loss during the long simmer.

What You'll Need

Ingredients for Greek Stifado Beef Stew

Stock your pantry with beef chuck, pearl onions, and whole spices for the most authentic flavor. Most people skip beef stew variations, but they balance weeknight meal prep perfectly - we keep a batch ready for nights like this.

🥩
Beef
  • 2 lbs beef chuck or stew meat, cut into 2-inch cubes
🧅
Onions & Aromatics
  • 1 lb pearl onions or shallots, peeled
  • 4 cloves garlic, minced
🍷
Liquids & Acid
  • 1 cup red wine
  • 3 tablespoon red wine or balsamic vinegar
  • 3 tablespoon tomato paste
  • 1 cup beef broth or water
🌶️
Spices
  • 2 cinnamon sticks
  • 4-5 whole cloves
  • 2 bay leaves
  • 3 tablespoon olive oil

Ingredient Details

  • Beef chuck or stew meat
    Use well-marbled cuts - the fat breaks down during cooking and keeps the meat tender instead of dry.
  • Pearl onions or shallots
    Small onions hold their shape better during the long simmer and add signature sweetness to the sauce.
  • Red wine
    Choose a dry red you'd drink - avoid cooking wines with added salt that can make the stew taste harsh.
  • Cinnamon sticks
    Whole sticks release flavor slowly without overpowering - ground cinnamon makes the stew taste like dessert.
  • Tomato paste
    Cook the paste for 2-3 minutes before adding liquid to remove the raw, metallic taste.
  • Vinegar (red wine or balsamic)
    Add halfway through cooking to preserve acidity - adding it too early makes the stew taste flat.
  • Bay leaves
    Two leaves add subtle earthiness without competing with the cinnamon and cloves - remove before serving.

Ingredient Swaps

You can adjust the onions, meat cut, or cooking method without losing the core flavor profile. The protein holds the plate together, and timing matters - we keep a batch ready for nights like this.

Four swaps that work:

  • Pearl onions → small shallots or sliced regular onions: Regular onions soften more and won't hold their shape as well, but they still deliver sweetness (budget-friendly)
  • Beef chuck → beef brisket or short ribs: Similar fat content means similar cooking time, though short ribs add richer flavor (method swap)
  • Red wine → beef broth with 1 tablespoon vinegar: You lose wine depth but the vinegar adds necessary acidity (alcohol-free)
  • Stove simmer → slow cooker low setting 6-8 hours: Longer cook time but more tender beef - sauce won't concentrate as much (method swap)

Shallots Instead of Pearl Onions

Works for: When pearl onions aren't available or you want easier peeling

Skip if: You want the traditional texture and presentation of whole small onions

Slow Cooker Method

Works for: Hands-off cooking when you're out all day

Skip if: You want a thicker, more concentrated sauce - stovetop reduction works better

Instructions

Brown the beef first, then caramelize the onions separately before combining everything for the long simmer. Rich mains need something to cut through, and this dip does exactly that - for a version that comes together quickly, simple sauce recipe pairs perfectly with hearty stews.

  1. Sear the beef: Heat 2 tablespoons olive oil in a heavy Dutch oven over high heat until shimmering. Add beef cubes in a single layer (work in batches if needed) and sear 3 minutes per side until deeply browned. Transfer to a plate.

  2. Caramelize the onions: Lower heat to medium, add remaining 1 tablespoon olive oil and pearl onions. Cook 15 minutes, stirring every 3-4 minutes, until golden and slightly softened. Remove and set aside with the beef.

  3. Build the sauce: Add tomato paste to the pot and cook 2-3 minutes, stirring constantly. Pour in red wine, scraping up all browned bits from the bottom. Add cinnamon sticks, cloves, bay leaves, and beef broth. Bring to a boil.

  4. Simmer the stew: Return beef to the pot (leave onions out for now). Reduce heat to low, cover, and simmer gently for 2 hours. Add caramelized onions and vinegar, then continue simmering uncovered for 30 more minutes until beef is fork-tender and sauce coats the back of a spoon.

  5. Rest and serve: Remove from heat and let rest 15 minutes. Pull out cinnamon sticks, cloves, and bay leaves before serving. The sauce will thicken slightly as it cools.

Golden Rule
Keep the simmer gentle - you should see small bubbles breaking the surface every few seconds, not a rolling boil.

What to Serve With It

A thick, spiced beef stew needs something to soak up the sauce and cut through the richness. The light refreshing greens works best when it hits the table at the same time as the main - for more complete beef tenderloin meal planning ideas, pair hearty proteins with bright sides.

Side Dish Prep Why It Works How to Serve
Roasted Potatoes Easy Absorbs rich sauce while adding crispy texture contrast Roast at 425°F for 30 min, toss with olive oil and oregano
Crusty Bread Easy Perfect for dipping and soaking up every drop of sauce Slice thick, toast lightly, serve warm in a basket
Rice Pilaf Easy Neutral starch that soaks up spiced sauce without competing flavors Cook with butter and onions, fluff before serving
Crumbled Feta Salad Easy Fresh tang cuts through richness and adds bright contrast Toss greens with feta, tomatoes, cucumbers, lemon dressing
Steamed Green Beans Easy Light vegetable that balances heavy stew without adding bulk Steam 5 min until crisp-tender, toss with olive oil and lemon

Three ways to serve it:

  • Over vermicelli pasta: Toss cooked pasta with a ladle of stew sauce, then top with beef and onions for an elegant presentation
  • With Greek lemon potatoes: Roast potato wedges with lemon juice, olive oil, and oregano until crispy - classic pairing that enhances acidity
  • Alongside tzatziki: Serve yogurt-cucumber sauce on the side to add cooling contrast against the warm spices
Shortcut
Make rice while the stew simmers - it's ready when the beef is done and needs zero extra effort.

Store and Reheat

Stifado tastes better the next day once the spices have time to meld into the sauce. The fries works best when it hits the table at the same time as the main, but timing matters - for a version that comes together quickly, quick fries dish reheats just as well as the stew.

Method Time Best For
🍳 Stovetop 10-15 min on low heat Preserving texture and flavor without drying out the beef
🔥 Oven 20 min at 325°F covered Even gentle reheating for larger portions or full batches
📦 Microwave 3-5 min, stirring halfway Quick reheating of single servings when you're in a hurry

For best results when storing:

  • Let stew cool completely before transferring to shallow airtight containers - this prevents condensation and watery sauce
  • Store in fridge up to 3-4 days, or freeze in portions for up to 3 months in freezer-safe containers
  • Add a splash of beef broth or water when reheating if the sauce has thickened too much overnight
  • Reheat only what you'll eat - repeated heating breaks down the beef texture and dilutes the spice flavor
  • Pull out cinnamon sticks and bay leaves before storing to prevent the spices from becoming overpowering

Frequently Asked Questions

Can I substitute regular onions for pearl onions in Stifado?

Yes - slice regular yellow onions into thick wedges or quarters so they hold their shape during the long simmer. They'll soften more than pearl onions but still deliver the sweet, caramelized flavor that defines Stifado.

How should I store and reheat leftover Greek Stifado?

Store in airtight containers in the fridge for 3-4 days or freeze for up to 3 months. Reheat on the stovetop over low heat for 10-15 minutes, adding a splash of broth if the sauce has thickened too much.

How do I know when the beef in Stifado is cooked properly?

The beef is done when it's fork-tender and shreds easily with gentle pressure - this usually takes 2 to 2.5 hours at a gentle simmer. If the meat still feels tough, continue cooking in 15-minute intervals until it reaches the right texture.

What if my Stifado sauce is too thin or bland?

For thin sauce, simmer uncovered for 20-30 minutes to reduce and concentrate the flavors. If it tastes bland, add more tomato paste, a splash of vinegar, or extra salt - the sauce should taste rich, tangy, and slightly sweet.

Can I use a slow cooker instead of stovetop for Greek Stifado?

Yes - brown the beef and caramelize the onions on the stovetop first, then transfer everything to a slow cooker on low for 6-8 hours. The beef will be more tender, but the sauce won't reduce as much, so you may need to thicken it at the end on the stovetop.

Greek Stifado Beef Stew served on a plate

Greek Stifado Beef Stew

No ratings yet
Greek Stifado is a slow-simmered beef stew featuring pearl onions, cinnamon, and red wine that reduces into a thick, tangy sauce. The key steps include searing the beef to build rich flavor and separately caramelizing the onions before a long, gentle simmer for tender meat and sweet, spiced onions.
Print Recipe Pin Recipe
Prep Time 20 minutes mins
Cook Time 2 hours hrs 30 minutes mins
Total Time 2 hours hrs 50 minutes mins
Servings: 6 servings
Course: Main Dish
Cuisine: Greek
Ingredients Equipment Method Notes

Ingredients
  

  • 2 lbs beef chuck cut into 2-inch cubes
  • 1 lb pearl onions peeled
  • 4 cloves garlic minced
  • 1 cup red wine choose a dry variety
  • 3 tablespoon red wine vinegar (or balsamic vinegar)
  • 3 tablespoon tomato paste
  • 1 cup beef broth or water
  • 2 sticks cinnamon sticks whole
  • 5 whole cloves
  • 2 leaves bay leaves remove before serving
  • 3 tablespoon olive oil

Equipment

  • Dutch oven Used for searing beef, caramelizing onions, and slow simmering the stew.

Method
 

  1. Heat 2 tablespoons olive oil in a heavy Dutch oven over high heat until shimmering. Add beef cubes in a single layer, working in batches if needed, and sear for 3 minutes per side until deeply browned. Transfer to a plate and set aside.
    2 lbs beef chuck, 3 tbsp olive oil
  2. Lower heat to medium and add remaining 1 tablespoon olive oil. Add pearl onions and cook for 15 minutes, stirring every 3-4 minutes, until golden and slightly softened. Remove and set aside with the beef.
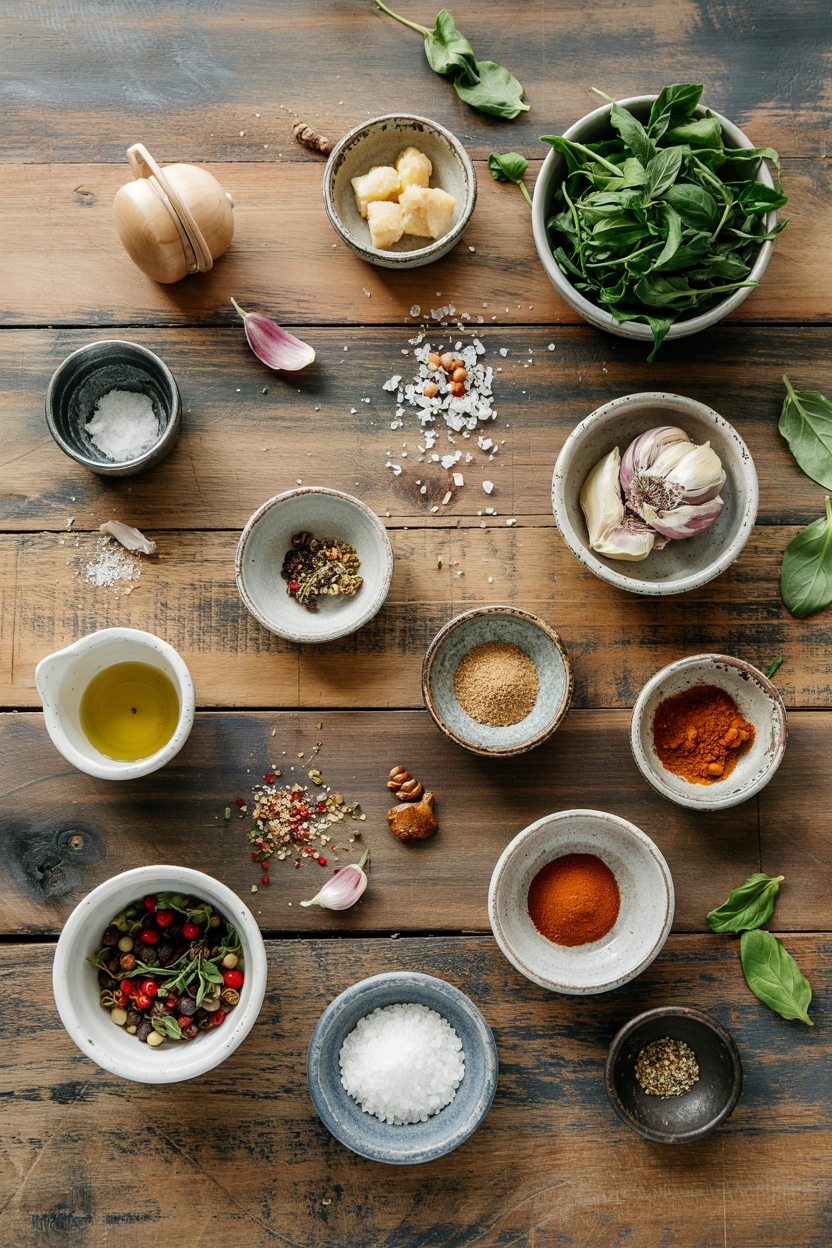
    1 lb pearl onions, 3 tbsp olive oil
  3. Add tomato paste to the Dutch oven and cook for 2 to 3 minutes, stirring constantly to remove raw taste. Pour in red wine, scraping up all browned bits from the bottom. Add cinnamon sticks, whole cloves, bay leaves, and beef broth. Bring the mixture to a boil.
    3 tbsp tomato paste, 1 cup red wine, 2 sticks cinnamon sticks, 5 whole cloves, 2 leaves bay leaves, 1 cup beef broth
  4. Return the seared beef to the pot (leave onions out for now). Reduce heat to low, cover, and simmer gently for 2 hours. Add the caramelized onions and vinegar, then continue simmering uncovered for 30 more minutes until the beef is fork-tender and the sauce coats the back of a spoon.
    2 lbs beef chuck, 1 lb pearl onions, 3 tbsp red wine vinegar
  5. Remove from heat and let rest for 15 minutes. Pull out cinnamon sticks, cloves, and bay leaves before serving. The sauce will thicken slightly as it cools.
    2 sticks cinnamon sticks, 5 whole cloves, 2 leaves bay leaves

Notes

  • Sear beef cubes on all sides to create fond that flavors the stew deeply.
  • Caramelize pearl onions separately to keep them intact and sweet instead of mushy.
  • Maintain a gentle simmer at 180-200°F to avoid toughening meat or breaking the sauce.

Tried this recipe?

Let us know how it was!

What Is Poppy Seed? [Taste, Uses & More]

April 1, 2026

Most cooks treat poppy seed as a garnish - something you sprinkle on a bagel and forget about.

What Is Poppy Seed

That assumption undersells a seed used for centuries in Central European pastry traditions, Indian curries, and spice-cured fish alike. Poppy seed brings a mild nuttiness, a faint bitter edge, and a satisfying crunch that deepens significantly once heat enters the picture.

Understanding how it actually behaves in cooking changes what you reach for it to do.

QUICK SUMMARY

Tiny kidney-shaped oilseeds with a mild nutty flavor and subtle bitterness. Used whole on baked goods or ground into sweet paste fillings. A staple in Eastern European and Indian cooking. Store refrigerated once opened to prevent rancidity.

🌿Origin: Mediterranean to Central Asia, now grown across Europe and India
👅Flavor: Mildly nutty, faintly bitter, toasty when heated
🍞Best Uses: Bagels, rolls, strudel fillings, salad dressings, spice rubs
📦Shelf Life: Several months at room temp; 6-12 months refrigerated
⚠️Note: High consumption can trigger false-positive opiate drug screenings

What Is Poppy Seed?

Poppy seed comes from Papaver somniferum, the opium poppy, harvested from dried seed capsules once the plant has flowered and died back.

The seeds themselves contain only trace opiate compounds - far below any psychoactive threshold - and have been eaten safely across cultures for thousands of years.

They are classified as an oilseed, meaning a significant portion of their weight is fat, which is why ground seeds turn paste-like so readily and why whole seeds can go rancid.

Depending on origin and variety, the seeds appear blue-grey or black (European varieties) or creamy white (Indian and Middle Eastern types, sold as khus khus).

In Bengali cooking they're called posto, and whole dishes are built around them as a primary ingredient rather than a garnish.

The European tradition treats them differently - pressed into poppy seed oil for dressings, or ground with milk and sugar into the dark filling at the heart of Polish makowiec and Czech kolaches.

  • 🌍 Blue-grey/black seeds - standard in Eastern European baking; stronger flavor
  • 🌿 White seeds (khus khus) - milder, preferred in Indian curries and gravies as a thickener
  • 🫙 Poppy seed oil - cold-pressed from European seeds, used in dressings and finishing

What Does Poppy Seed Taste Like?

poppy seed - What Is Poppy Seed

Raw, poppy seed tastes close to sesame - mildly nutty and slightly oily - but milder and with a faint bitter undertone that sesame doesn't carry.

That bitterness is subtle enough not to read as unpleasant; it functions more as a counterweight that keeps the nuttiness from feeling flat.

Sensory SnapshotModerate Intensity
👅 Flavor
mildly nuttyfaintly bittersubtle floral
✋ Texture
crunchy wholepaste-like ground
👃 Aroma
toastylightly oily

Heat changes things noticeably. Toasting in a dry pan pushes the floral undertone forward and deepens the nuttiness into something closer to roasted sesame, though still more restrained.

Ground and cooked into a paste with milk and honey, the bitterness nearly disappears, leaving a rich, earthy sweetness that explains why it anchors so many Central European desserts.

Golden Rule
Always taste your seeds before using. Old poppy seed smells faintly of paint or turned oil - that rancid note will carry into your finished dish.

How to Use Poppy Seed

The most common use in Western kitchens is whole seeds scattered on dough before baking - bagels, Kaiser rolls, and rye loaves all rely on this application.

The seeds toast lightly in the oven, which is why baked goods carry more flavor than raw seeds suggest.

Ground poppy seed filling is the ingredient's most labor-intensive form and its most rewarding. Grinding the seeds fine and cooking them with sugar, butter, and milk or cream produces the dense, dark paste used in makowiec, strudel, and hamantaschen. It takes volume - typically half a cup or more per pastry - to register properly.

How Poppy Seed Is Used
MethodBest ForTip
🥗 Raw/WholeSalad dressings, vinaigrettes, yogurt toppingsAdd just before serving to preserve crunch
🍞 BakedBagels, rolls, muffins, crackersPress lightly into dough so seeds adhere after baking
🍳 Ground into pasteStrudel, kolaches, makowiec, hamantaschenCook paste with milk and sugar until thick before filling
🔥 ToastedSpice rubs for pork and fish, pickling blendsToast until fragrant - 2 minutes max in a dry pan over medium heat

Pairing logic is straightforward. Lemon cuts the oiliness and brightens the nuttiness. Honey and butter amplify richness without drowning the seed's character.

Caraway is a natural partner - both share an earthy, slightly anise-adjacent note that works well in rye bread and deli preparations.

In Indian cooking, white poppy seeds (khus khus) are soaked and blended into curry gravies as a thickener and fat source rather than a topping.

This is a different application entirely from the European tradition, and it's worth noting when recipes reference "poppy seed" without specifying type.

If you rely heavily on this ingredient and ever need a workaround, understanding swapping out poppy seed is useful - the right stand-in depends entirely on whether you're using it whole, ground, or as a thickener.

Try It In
🥗Poppy Seed Dressing (Homemade)Whole seeds add crunch and visual contrast to a creamy vinaigrette→

How to Buy and Store Poppy Seed

Fresh poppy seed smells faintly nutty and oily - not sharp, not flat. Avoid bags with visible oil stains on the packaging or seeds clumped together, both signs of moisture exposure or age.

For ground poppy filling sold in cans (common in Eastern European grocery stores), check that the aroma is clean and not sour.

Watch Out
Poppy seeds have a high oil content and turn rancid faster than most dried spices. Don't buy in bulk unless you bake with them regularly.

Store whole seeds in an airtight container away from heat and light. Once opened, refrigeration slows rancidity considerably.

Ground paste must stay refrigerated in a sealed jar and should be used within a few weeks. For a full breakdown of timelines, knowing how long poppy seed keeps under different conditions will help you avoid wasting a batch.

  • Room temp (unopened) - several months if stored away from light and heat
  • Refrigerated (opened) - 6-12 months for whole seeds; 1-3 months for ground paste
  • Freezer - whole seeds freeze well in a sealed bag for up to a year

Starting Points Worth Knowing

New to poppy seed? Begin with the simplest application: toast a tablespoon in a dry pan, then stir it into plain yogurt with honey and lemon zest.

That single step shows you what heat and acid do to the seed's character before you commit to a full pastry project.

Shortcut
Canned poppy seed filling (look for it near Eastern European ingredients) skips the grinding step entirely and works well in kolaches or rugelach with no extra prep.

If the flavor appeals but you're baking something that calls for sesame, the two seeds are closer than most guides admit - reading up on swapping out sesame seed shows where that substitution holds and where it breaks down.

Frequently Asked Questions

Do poppy seeds show up on drug tests?

Yes, in significant quantities. Poppy seeds carry trace morphine and codeine from the plant and can trigger a false-positive opiate result on urine screenings. A single bagel is unlikely to cause a problem, but consuming a large poppy seed pastry before a test carries real risk.

Are poppy seeds opiates?

No. The seeds contain only trace residues of opiate alkaloids from the seed capsule - not enough to produce any drug effect. Food-grade poppy seeds are washed and processed, which removes most surface residue before sale.

What is the difference between black and white poppy seeds?

Black (blue-grey) seeds are the European variety - stronger flavored, used in baking and fillings. White seeds (khus khus) are the Indian type, milder in taste and used primarily as a curry thickener rather than a topping or filling.

Can you eat poppy seeds raw?

Yes, raw poppy seeds are safe to eat. Their flavor is milder untoasted - a light nuttiness without much depth. Toasting or baking unlocks noticeably more aroma and intensifies the nutty character.

How do poppy seeds affect baking texture?

Whole seeds add a fine, consistent crunch throughout muffins and cakes without altering structure. Ground into paste and used as a filling, they contribute density and moisture - which is why poppy seed pastries tend to feel heavier than plain dough versions.

Argentine Chimichurri Sauce

April 1, 2026

Article Output

Bottled sauce never has the punch of fresh herbs and garlic chopped by hand. The bright, garlicky flavor you get from fresh parsley and raw garlic beats anything you can buy.

Argentine Chimichurri Sauce served on a plate

This takes 10 minutes to make and an hour to rest. That hour lets the vinegar mellow and the garlic spread into the oil without turning harsh.

Make this when you're grilling meat and need something that cuts through fat without extra cooking.

QUICK SUMMARY

Fresh parsley, garlic, red wine vinegar, and olive oil chopped and mixed to a coarse texture. Rest it for at least an hour so the raw garlic mellows and the flavors blend. Chop by hand instead of blending to keep the chunky, herbaceous texture that makes chimichurri work.

⏱️Time reality: 10 minutes active, plus 1 hour rest minimum for flavor meld
🔪Critical first move: Chop parsley to 2-3 mm pieces by hand - food processor makes it mushy
⚠️Watch out: Too much garlic or skipping the rest creates harsh, raw bites - mince fine and let it sit

Why This Recipe Works

Chopping parsley by hand instead of using a blender keeps the texture coarse and fresh instead of turning it into a paste. The oil carries the garlic and vinegar without drowning the herbs. For a version that comes together quickly, a simple homemade spread sits on the table with minimal effort and keeps for days in the fridge.

Quick Reference
⏱️
Prep Time
10-15 min
🔥
Cook Time
0 min
⏰
Total Time
10-15 min plus resting
🍽️
Servings
6-8 servings
📊
Difficulty
Easy
🏷️
Category
Sauce | Condiment
💡
Quick Tip
Rest 1 hour for best flavor meld
🎯
Best For
Weeknight | Meal prep | Entertaining

Why it works:

  • Resting for 1-3 hours at room temperature lets the raw garlic mellow and the vinegar soften without losing brightness
  • Fresh parsley chopped to 2-3 mm pieces stays bright green and herbaceous instead of turning brown or mushy
  • Red wine vinegar balances the oil and keeps the sauce from tasting heavy or greasy
  • Mincing garlic to 1-2 mm pieces spreads the flavor evenly without harsh bites in any single forkful
  • Measuring olive oil precisely at ½ cup prevents the sauce from separating or becoming an oily slurry
Golden Rule
Use fresh parsley leaves only - dried herbs lose the bright flavor and color that makes chimichurri work

What You'll Need

Ingredients for Argentine Chimichurri Sauce

Fresh parsley forms the base, so buy a full bunch and use only the leaves. Most people skip ranch dressing, but it balances the meal. We keep a batch ready for nights like this - a homemade ranch dressing recipe uses similar measuring and mixing with a creamy finish instead of herbaceous.

🧄
Aromatics
  • Fresh parsley (1 cup packed leaves)
  • Garlic (3-4 cloves)
🥢
Liquid Base
  • Red wine vinegar (2-3 tbsp)
  • Olive oil (½ cup)
🌶️
Seasonings
  • Dried oregano (1 tsp)
  • Red pepper flakes (½ tsp)
  • Salt (½ tsp)
  • Black pepper (¼ tsp)
🫙
Optional
  • Fresh oregano (1 tablespoon chopped)
  • Lemon juice (1 tbsp)

Ingredient Details

  • Fresh parsley
    Use flat-leaf Italian parsley for stronger flavor and easier chopping; curly parsley works but tastes milder
  • Garlic
    Mince to 1-2 mm pieces with a sharp knife so it distributes evenly without harsh bites
  • Red wine vinegar
    Start with 2 tablespoons and add more to taste - too much vinegar makes the sauce thin and sour
  • Olive oil
    Use extra virgin olive oil for best flavor; measure exactly ½ cup to prevent oil separation
  • Dried oregano
    Crush between your fingers before adding to release oils and intensify flavor
  • Red pepper flakes
    Add ¼ teaspoon first if you prefer mild heat - you can always add more but can't take it out
  • Salt
    Kosher salt works best for even seasoning; add gradually and taste after resting to adjust

Ingredient Swaps

Fresh parsley and garlic drive the flavor, but the acid and heat adjust to what you have. Rich mains need something to cut through, and pork does exactly that. For a version that comes together quickly, a tender pork on the side hits the table hot while chimichurri stays at room temperature.

Four swaps that work:

  • Use cilantro instead of parsley for a milder, citrusy profile that changes the classic Argentine flavor but still pairs with grilled meats
  • Swap red wine vinegar for lemon juice to get brighter acidity with fresher notes but less depth and earthiness
  • Replace dried oregano with 1 tablespoon fresh oregano for more aromatic, softer flavor - you'll need more quantity since fresh herbs are milder
  • Use avocado oil instead of olive oil for similar mouthfeel with lighter flavor and no bitterness if your olive oil tends to taste harsh

Fresh parsley vs Cilantro

Works for: milder flavor, Mexican-style dishes, when parsley isn't available

Skip if: you want traditional Argentine flavor or dislike cilantro's soapy taste

Red wine vinegar vs Lemon juice

Works for: brighter acidity, fresher notes, when you're out of vinegar

Skip if: you want deeper, earthier flavor or the sauce needs to sit for more than 2 days

Dried oregano vs Fresh oregano

Works for: more aromatic flavor, softer herbal notes, when you have fresh herbs on hand

Skip if: you prefer stronger oregano punch or don't want to adjust quantities

Instructions

Chop everything by hand to control texture - a food processor turns parsley into mush. A good beans can make or break the plate. We keep a batch ready for nights like this - a classic beans dish uses similar timing with more hands-on stirring for even cooking.

  1. Chop parsley finely. Strip leaves from stems, pile on cutting board, and chop to 2-3 mm pieces using sharp chef's knife in rocking motion. Gather and chop again if pieces are uneven.

  2. Mince garlic. Peel cloves, slice thinly, then mince to 1-2 mm pieces. Press knife flat against garlic and scrape to form paste if you want softer garlic flavor.

  3. Mix base ingredients. Transfer chopped parsley and minced garlic to mixing bowl. Add 2 tablespoons red wine vinegar, 1 teaspoon dried oregano, ½ teaspoon red pepper flakes, ½ teaspoon salt, and ¼ teaspoon black pepper. Stir with spoon to combine.

  4. Add olive oil gradually. Pour ½ cup olive oil over herb mixture while stirring. Mix until oil coats herbs evenly and sauce looks slightly glossy but not pooling with excess oil.
  5. Rest before serving. Cover bowl with plastic wrap or transfer to airtight container. Let sit at room temperature for 1-3 hours to meld flavors. Stir gently before serving and adjust salt or vinegar to taste.

Shortcut
Make chimichurri up to 3 days ahead and store in fridge - bring to room temperature 15 minutes before serving for best flavor brightness

What to Serve With It

Chimichurri needs grilled or roasted meat to balance its garlicky punch and bright acidity. For complete meal planning with similar bold flavors, planning your bunless burgers dinner pairs chimichurri with charred beef and fresh vegetables for a low-carb plate.

Side Dish Prep Why It Works How to Serve
Grilled flank steak Easy Classic pairing - fatty meat needs bright acid to cut richness Spoon chimichurri over sliced steak immediately after resting
Roasted potatoes Easy Starchy sides soak up sauce well and balance garlicky flavors Toss warm potatoes with chimichurri or serve on the side
Steamed vegetables Easy Fresh produce complements herbaceous sauce without competing Drizzle over broccoli, carrots, or green beans while hot
Crusty bread Easy Bread mops up extra sauce and adds texture to the plate Serve sliced baguette or ciabatta for dipping
Grilled chicken thighs Medium Juicy dark meat contrasts with vibrant, punchy sauce Brush chimichurri on chicken during last 2 minutes of grilling

Three ways to serve it:

  • Spoon over grilled meats immediately after they come off the heat so the sauce soaks into the charred surface
  • Use as a marinade for chicken or pork 2-4 hours before cooking - reserve half to serve fresh at the table
  • Toss with roasted vegetables or potatoes while they're still hot so the oil coats evenly and the herbs stay bright
Best Pick
Serve chimichurri at room temperature alongside grilled flank steak - the contrast between hot meat and cool sauce makes each bite more interesting

Store and Reheat

Chimichurri keeps for 3-5 days in the fridge in a shallow airtight container. Chicken adds the contrast this plate needs, but timing matters. The chicken works best when it hits the table at the same time as the main - an easy chicken side roasts in one pan while you prep chimichurri for fresh serving.

Method Time Best For
🍳 Room Temperature 15 min Serving fresh - brings out flavor brightness and herbaceous notes

For best results when storing:

  • Transfer chimichurri to shallow glass jar with tight-fitting lid to keep herbs fresh and prevent odor transfer in fridge
  • Pour thin layer of olive oil over top before sealing to prevent parsley from browning or oxidizing
  • Stir gently before each use since oil and vinegar separate naturally during storage
  • Bring sauce to room temperature 15 minutes before serving for brightest flavor and best texture
  • Freeze in ice cube trays for up to 1 month if making large batches - thaw individual cubes as needed but texture may soften slightly

Frequently Asked Questions

Can I make Argentine chimichurri sauce ahead of time?

Make chimichurri up to 3 days ahead and store in the fridge in an airtight container. Bring it to room temperature 15 minutes before serving so the flavors brighten and the oil loosens.

How should I store chimichurri and how long does it last?

Store in a shallow glass jar in the fridge for 3-5 days. Pour a thin layer of olive oil over the top before sealing to prevent browning and keep the parsley fresh.

How finely should I chop the herbs and garlic?

Chop parsley to 2-3 mm pieces and mince garlic to 1-2 mm pieces using a sharp knife. Coarser pieces keep the texture chunky while fine garlic distributes flavor evenly without harsh bites.

What can I do if my chimichurri tastes bitter or bland?

Add more salt and red wine vinegar gradually to fix bland flavor - rest the sauce again for 30 minutes after adjusting. If it tastes bitter, check that you used fresh parsley leaves only without stems, and add more olive oil to balance.

What foods pair best with Argentine chimichurri sauce?

Serve chimichurri with grilled flank steak, roasted chicken thighs, grilled sausages, or roasted potatoes. The garlicky, bright sauce cuts through fatty meats and adds punch to starchy sides.

Argentine Chimichurri Sauce served on a plate

Argentine Chimichurri Sauce

No ratings yet
Argentine Chimichurri Sauce is a fresh, vibrant condiment made with hand-chopped parsley, garlic, red wine vinegar, and olive oil. Resting the sauce for at least an hour mellows the garlic and blends the flavors perfectly. This herbaceous sauce pairs perfectly with grilled meats and roasted vegetables.
Print Recipe Pin Recipe
Prep Time 15 minutes mins
Cook Time 1 minute min
Total Time 16 minutes mins
Servings: 6 servings
Course: Condiment, Sauce
Cuisine: Argentine
Ingredients Method Notes

Ingredients
  

  • 1 cup parsley fresh, packed leaves, flat-leaf Italian recommended
  • 4 cloves garlic minced finely to 1-2 mm pieces
  • 2 tablespoons red wine vinegar start with 2 tablespoons, can add up to 3 to taste
  • 0.5 cup olive oil extra virgin, measure exactly
  • 1 teaspoon dried oregano crushed between fingers before adding
  • 0.5 teaspoon red pepper flakes
  • 0.5 teaspoon salt kosher salt recommended
  • 0.25 teaspoon black pepper
  • 1 tablespoon fresh oregano optional, chopped
  • 1 tablespoon lemon juice optional

Method
 

  1. Strip leaves from stems and chop parsley to 2-3 mm pieces using a sharp chef's knife with a rocking motion. Gather and chop again if pieces are uneven.
    1 cup parsley
  2. Peel garlic cloves, slice thinly, then mince to 1-2 mm pieces. Optionally press knife flat against garlic and scrape to form paste for softer flavor.
    4 cloves garlic
  3. Transfer chopped parsley and minced garlic to a mixing bowl. Add red wine vinegar, dried oregano, red pepper flakes, salt, and black pepper. Stir to combine.
    1 cup parsley, 4 cloves garlic, 2 tablespoons red wine vinegar, 1 teaspoon dried oregano, 0.5 teaspoon red pepper flakes, 0.5 teaspoon salt, 0.25 teaspoon black pepper
  4. Pour olive oil over herb mixture while stirring. Mix until oil coats herbs evenly and sauce appears glossy but not oily.
    0.5 cup olive oil
  5. Cover the bowl with plastic wrap or transfer to an airtight container. Let sit at room temperature for 1-3 hours to meld flavors. Stir gently before serving and adjust salt or vinegar to taste.

Notes

  • Chop parsley by hand to maintain coarse texture and bright color.
  • Rest sauce for at least 1 hour to mellow garlic and blend flavors.
  • Use extra virgin olive oil measured precisely to prevent separation.

Tried this recipe?

Let us know how it was!

What Is Pastry Flour? [Taste, Uses & More]

April 1, 2026

You spot it on the shelf between all purpose flour in cooking and bread flour in cooking, and it's easy to pass over.

What Is Pastry Flour

Pastry flour occupies a specific lane - low-protein, finely milled, built for tenderness - and if you've ever wondered why your pie crust came out tough or your biscuits dense, this flour is likely the missing piece.

QUICK SUMMARY

Pastry flour is a soft wheat flour with roughly 8-9% protein. It produces tender, crumbly baked goods by limiting gluten development. Use it for pie crusts, biscuits, scones, and muffins - anywhere a delicate crumb matters more than chew.

🌾Type: Low-protein refined wheat flour, milled from soft wheat
👅Flavor: Mild, neutral, faintly wheaty with slight grainy sweetness
🥧Best For: Pie crusts, biscuits, scones, muffins, shortcrust pastry
📦Shelf Life: 6-8 months pantry; up to 1 year refrigerated or frozen
⚠️Avoid: Bread recipes and vigorous kneading - low protein can't hold the structure

What Is Pastry Flour?

Pastry flour is a refined wheat flour milled from soft wheat varieties, yielding a protein content of around 8-9%.

That low protein count is the defining feature - it's what separates this flour from swapping out all purpose flour territory and from the higher-protein swapping out bread flour range entirely.

You'll sometimes see it labeled soft wheat flour or baker's pastry flour. It occasionally gets mislabeled as "pastry AP," which causes real confusion at the shelf.

It's distinct from cake flour too - pastry flour sits between cake and all-purpose in terms of protein, making it more structured than cake flour but far softer than AP.

The texture of the raw flour itself is fine and powdery, similar to cake flour, but with slightly more body.

No significant varieties or subtypes exist at the consumer level - what you find in most stores is a single bleached or unbleached version.

  • 🌾 Protein content - approximately 8-9%, lower than AP (10-12%) but higher than cake flour (6-8%)
  • 🏷️ Alternate names - soft wheat flour, baker's pastry flour; avoid anything labeled "pastry AP"
  • 🌍 Origin - temperate soft wheat-growing regions across North America and Europe
  • 🆚 Not the same as cake flour - cake flour is more delicate; pastry flour has slightly more substance

What Does Pastry Flour Taste Like?

pastry flour - What Is Pastry Flour

On its own, pastry flour is mild and nearly neutral. There's a faint grainy sweetness and a soft wheaty note when you smell it fresh from the bag - nothing sharp, nothing bitter.

Sensory SnapshotMild Intensity
👅 Flavor
neutralfaint grainy sweetnesslightly wheaty
✋ Texture
fine and powdery rawtender crumb baked
👃 Aroma
soft wheatysubtle starchy

Baked, the flour steps back and lets other ingredients lead. Butter, vanilla, and sugar read clearly because the flour itself contributes almost no competing flavor.

Compared to cake flour, pastry flour adds just a touch more substance - you notice it mostly as a slightly more grounded crumb rather than any distinct taste.

Golden Rule
If your baked good should taste of butter, fruit, or spice - not flour - pastry flour is the right choice. Its neutrality keeps the supporting ingredients in front.

How to Use Pastry Flour

Pastry flour earns its place in recipes where gluten development is the enemy. The goal is always tenderness, and that means handling the flour as little as possible.

In pie crusts and shortcrust pastry, cold butter or lard gets cut into the flour before any liquid touches it.

This coats the protein strands early, limiting gluten formation.

The result is a flaky, fragile crust that shatters cleanly.

For biscuits and scones, the method is similar - minimal mixing after liquid is added keeps the crumb soft rather than rubbery.

How Pastry Flour Is Used
MethodBest ForTip
🥧 Cold-fat cuttingPie crusts, shortcrust, galette doughsKeep butter cold; work fast to avoid warming the fat
🥐 Light mixingBiscuits, scones, muffinsStop mixing the moment dry streaks disappear
🥞 Whisking/thin battersDutch baby pancakes, cream puff blendsCombine with a higher-protein flour for structure in choux
🍪 CreamingTender cookies that shouldn't turn crispReduce mix time after adding flour - don't overwork

Pastry flour pairs especially well with buttermilk or sour cream, which add mild tang while keeping the crumb open.

Cinnamon, nutmeg, and vanilla all work cleanly against its neutral base.

American biscuit and pie traditions, French galettes, and British scone recipes all lean on soft wheat flours for this reason.

If you don't have it on hand, there are practical pastry flour stand-ins that can work in a pinch.

Try It In
🥞Besan Flour PancakesSee how low-protein flours shape a soft, delicate pancake→

How to Buy and Store Pastry Flour

At the store, check the label first - the bag should say "pastry flour" explicitly, not pastry blend or pastry AP.

If you're uncertain, flip it over and read the nutrition panel; protein per serving should land around 2-3g per 30g serving, which confirms the 8-9% range.

Watch Out
Avoid any bag with clumping, a damp feel, or swollen packaging. Moisture contamination before you open it means the flour has already started to degrade.

All flour has a finite window, and understanding flour's shelf life helps you decide how much to stock at once. Pastry flour lasts 6-8 months in the pantry when unopened; once open, use it within 3-6 months.

For storing pastry flour correctly beyond that window, refrigeration extends it to 9-12 months and freezing takes it up to a year.

  • 📦 Airtight container - transfer from the bag immediately to block moisture and pests
  • ❄️ Refrigerate or freeze long-term - soft wheat oils in low-protein flour go stale faster than in AP or bread flour
  • 🗓️ Label with the date - opened flour looks identical whether it's fresh or two years old

The question of whether your stored flour is still good is similar to about can i use expired cake flour - smell and texture tell you more than the date alone.

Where to Start With Pastry Flour

Skip the elaborate laminated doughs on your first use.

A simple biscuit or single-crust pie is the clearest way to feel what low-protein flour actually does - the dough handles differently from AP almost immediately, and the baked result makes the difference obvious.

Shortcut
Mix pastry flour with cold butter and buttermilk for a quick drop biscuit. No rolling, no shaping - just mix until barely combined and bake. The crumb alone will tell you everything about how this flour performs.

Once you've baked a biscuit or pie crust with it, the rationale clicks fast. Reach for it any time a recipe calls for a crumbly, tender result - and leave it on the shelf when a recipe calls for chew.

Frequently Asked Questions

Is pastry flour the same as cake flour?

No. Cake flour has a lower protein content of around 6-8%, making it more delicate. Pastry flour sits slightly higher at 8-9%, giving baked goods a little more structure while still producing a tender crumb.

What protein percentage is pastry flour?

Pastry flour typically runs 8-9% protein. Check the nutrition label: 2-3g of protein per 30g serving confirms you're in the right range.

Can I use all-purpose flour instead of pastry flour?

You can, but results will be tougher. All-purpose flour's higher protein (10-12%) builds more gluten, which tightens crusts and biscuits. Mixing 50% AP with 50% cake flour is a closer approximation.

Does pastry flour make pie crusts flakier?

Yes, compared to all-purpose flour. Lower protein means less gluten forms when liquid is added, so fat layers stay more distinct during baking. Flakiness also depends on cold fat and gentle handling.

Can pastry flour be used for bread?

Not effectively. Bread needs a strong gluten network to trap gas and hold its rise, which requires at least 10-12% protein. Pastry flour's weak protein structure tears under vigorous kneading.

« Previous Page
Next Page »

Primary Sidebar

ForkliftKitchen recipe developer

Welcome!

Recipe Developer · 12+ Yr Kitchen Veteran

I'm the recipe developer behind this site, focused on practical, well-tested dishes and smart ingredient swaps. Every recipe is written to be clear, reliable, and easy to make at home.

650+ Recipes
12+ Yrs Exp.
3x Tested
Our Story →

As Featured In

Allrecipes

TASTE OF HOME

Food52

HUFFPOST

Yahoo! Life

Our Editorial Standards

  • ✓ Every recipe tested at least 3 times before publishing
  • ✓ Substitutes verified by real kitchen trials, not guesswork
  • ✓ Reviewed for accuracy by our editorial team
  • ✓ Updated regularly with seasonal info and reader feedback

Most Popular

  • Creamy Lemon Shrimp Linguine
    Creamy Lemon Shrimp Linguine
  • Creamy Garlic Mushroom Chicken
    Creamy Garlic Mushroom Chicken
  • Sesame Ginger Chicken Noodle Bowls
    Sesame Ginger Chicken Noodle Bowls
  • Baked Lemon Herb Fish Fillets
    Baked Lemon Herb Fish Fillets
  • Veggie Loaded Fried Rice
    Veggie Loaded Fried Rice
  • Spicy Garlic Shrimp Stir Fry
    Spicy Garlic Shrimp Stir Fry

Join 8,000+ Home Cooks

Weekly Kitchen Tips

Easy recipes, smart substitutes, and real cooking shortcuts — every Thursday.

Subscribe Free →


Side Dishes

  • What to Serve With Asian Salmon? 15 Best Side Dishes
    What to Serve With Asian Salmon? 15 Best Side Dishes
  • Side Dishes for Strawberry Spinach Salad
    15 Best Side Dishes for Strawberry Spinach Salad
  • Sides for Grilled Cauliflower Steaks to Complete the Meal
    15 Sides for Grilled Cauliflower Steaks to Complete the Meal
  • 15 Sides To Serve With Calabacitas
    15 Best Sides for Calabacitas – Mexican-Inspired Favorites


Substitutes

  • 7 Best Substitutes for Hot Sauce in Marinades & Stir-Fries
    7 Best Substitutes for Hot Sauce in Marinades & Stir-Fries
  • 9 Best Substitutes for Butter in Baking and Cooking
  • 7 Best Substitutes for Tagliatelle for Italian Pasta Dishes
    7 Best Substitutes for Tagliatelle for Italian Pasta Dishes
  • 7 Best Substitutes for Udon Noodles in Asian Stir-Fries
    7 Best Substitutes for Udon Noodles in Asian Stir-Fries


Browse by Topic

  • Side Dishes320
  • Substitutes785
  • Dinner163
  • Air Fryer77
  • Taste Profiles484
  • Food Storage123


Reader Reviews

★★★★★

"Finally a food blog that tells you exactly why a substitute works instead of just listing options."

— Sarah M., via email

★★★★★

"The side dish recommendations are so specific — saved my dinner party twice this month."

— James R., Pinterest comment

★★★★★

"I trust this site more than most because they actually test everything. You can tell."

— Priya K., blog comment

Footer

↑ Back to Top

Forklift Kitchen

We do the heavy lifting so you can enjoy the cooking. Tested recipes, smart substitutes, and perfect pairings—built for real home cooks.

Content

  • Recipes
  • Substitutes
  • What to Serve With
  • Blog

Company

  • About Us
  • Contact
  • Subscribe

Legal

  • Privacy Policy
  • Terms of Service

As an Amazon Associate I earn from qualifying purchases.

© 2026 Forklift Kitchen.

Rate This Recipe

Your vote:


A rating is required
A name is required
An email is required