
You need 45 minutes and one pot to cook farro. No fancy grains, no marinating, no babysitting the stove while it simmers.

Toss warm farro with fresh tomatoes and basil while both are at room temperature. The heat wilts the herbs slightly and the dressing coats every grain without pooling at the bottom.
This works for meal prep when you need something that tastes better the next day or weeknight lunches that don't require reheating.
Italian Farro and Tomato Salad combines chewy farro, juicy cherry tomatoes, and fresh basil with a bright lemon dressing. Cook the farro until tender but not mushy, drain it well, and toss with tomatoes while still warm so the flavors meld without making the salad soggy.
Why This Recipe Works
High heat and salted water cook farro evenly in 25-30 minutes without turning mushy. Draining and spreading the grains on a sheet pan stops carryover cooking and prevents clumping. For a version that comes together quickly, a classic pasta dish offers the same comfort with less planning ahead.
Prep Time
15 min
Cook Time
30 min
Total Time
45 min
Servings
4-6 servings
Difficulty
Easy
Category
Side
Quick Tip
Cook farro al dente, toss with fresh tomatoes
Best For
Weeknight | Meal prep | Entertaining
- Boiling farro in salted water seasons the grain from the inside out
- Cherry tomatoes release juice that mixes with olive oil to create a natural dressing
- Fresh basil added at the end stays bright green instead of turning dark
- Chilling the salad for 30 minutes lets the acid balance out and the onion mellow
- Soaking red onion in ice water removes the sharp bite without losing crunch
What You'll Need
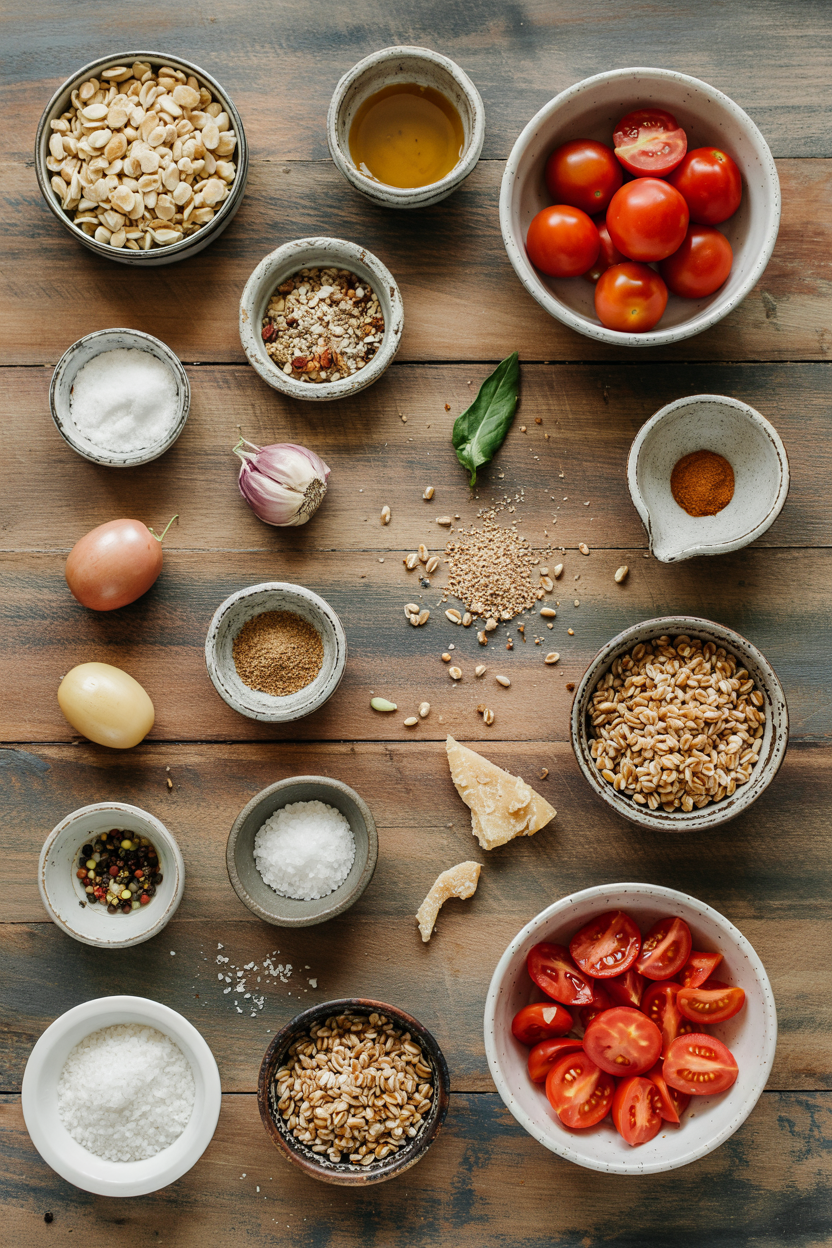
The salad works best when you hit the produce section for ripe cherry tomatoes and fresh basil. A good salad can make or break the plate, and simple homemade salad options give you more control over texture and seasoning.
- 1½ cups farro
- 6 cups water
- 1 teaspoon salt (for boiling)
- 2 cups cherry or grape tomatoes, halved
- ½ red onion, thinly sliced
- 1 cup fresh basil leaves
- 2 cloves garlic, minced
- ¼ cup extra virgin olive oil
- 2 tablespoon lemon juice or red wine vinegar
- ½ teaspoon salt
- ¼ teaspoon black pepper
Ingredient Details
- Farro
Look for pearled or semi-pearled farro; whole farro takes 50+ minutes to cook - Cherry or Grape Tomatoes
Use ripe tomatoes at room temperature for the best juice and sweetness - Extra Virgin Olive Oil
High-quality olive oil makes a difference here since it's not cooked - Fresh Basil
Tear leaves by hand instead of chopping to prevent bruising and darkening - Red Onion
Soak sliced onion in ice water for 10 minutes to reduce sharpness - Lemon Juice or Red Wine Vinegar
Lemon juice is brighter; red wine vinegar is rounder and mellower - Garlic
Fresh garlic adds pungency; roasted garlic is milder and sweeter
Ingredient Swaps
Most people skip variations when they already have the grain cooked. Salad cuts through all that richness, and a fresh salad on the side gives you a template for using what's already in your fridge.
- Farro → brown rice or barley: Changes chew and cooking times slightly; brown rice cooks in 40-45 minutes, barley in 25-30
- Cherry tomatoes → grape tomatoes or diced Roma tomatoes: Grape tomatoes are sweeter; Roma tomatoes need seeding or the salad gets watery
- Lemon juice or red wine vinegar → balsamic vinegar: Adds sweetness and darkens the salad; use 1½ tablespoons instead of 2
- Fresh basil → fresh parsley or oregano: Parsley is cleaner and less herbal; oregano is stronger and more pungent
Brown Rice
Works for: gluten-free diets, softer texture
Skip if: you want the nutty chew of farro
Balsamic Vinegar
Works for: sweeter dressing, deeper color
Skip if: you want a bright, acidic finish
Instructions
Cooking farro takes 30 minutes; chopping and mixing takes 15. Most people undercook the grain or add the dressing too early, which makes the salad either crunchy or soggy. For a version that comes together quickly, flaky homemade sauce recipe timelines work the same way.
Boil the farro. Bring 6 cups water and 1 teaspoon salt to a boil in a medium pot. Add farro, reduce heat to medium-low, and simmer 25-30 minutes until tender but chewy. Drain through a colander and spread on a sheet pan to cool and dry for 5 minutes.
Prep the vegetables. Halve cherry tomatoes and place in a large mixing bowl. Thinly slice red onion and soak in ice water for 10 minutes to mellow the sharpness, then drain and pat dry. Mince garlic. Tear basil leaves by hand.
Combine ingredients. Add cooled farro, drained onion, and garlic to the bowl with tomatoes. Toss gently to mix without crushing the tomatoes.
Dress the salad. Drizzle olive oil over the salad and toss. Add lemon juice or red wine vinegar, salt, and black pepper. Toss again until every grain is coated.
Chill and serve. Add torn basil leaves and toss once more. Cover and refrigerate for 30 minutes to let flavors meld. Taste and adjust salt or acid before serving.
What to Serve With It
Farro salad fills the gap between starch and vegetable on weeknight plates. Most people need a protein to make it a full meal. For planning your plate, weeknight shrimp louie salad meal ideas show how to balance grain salads with lighter mains.
| Side Dish | Prep | Why It Works | How to Serve |
|---|---|---|---|
| Grilled chicken breast | Easy | Lean protein balances the grain | Slice and serve over salad |
| Steamed green beans | Easy | Crisp texture contrasts chewy farro | Toss with olive oil and salt |
| Roasted bell peppers | Medium | Sweetness complements tomato acidity | Serve on the side or mix in |
| Garlic bread | Easy | Classic Italian pairing for texture | Toast and serve alongside |
| Caprese skewers | Easy | Light, visually appealing pairing | Arrange on platter |
Three ways to serve it:
- As a side: Pair with grilled chicken or fish for a complete weeknight plate
- As a main: Add chickpeas or white beans and double the vegetables for a vegetarian lunch
- For entertaining: Serve on a platter with balsamic glaze drizzled on top
Store and Reheat
Farro salad keeps for 3-4 days in the fridge but the tomatoes soften and the basil darkens. Store dressing separately if you're meal prepping for the week. A good chicken can make or break the plate, and simple homemade chicken reheats better than most grains for next-day lunches.
| Method | Time | Best For | |
|---|---|---|---|
| 🍳 Stovetop | 3-5 min | Warming farro before mixing with cold ingredients | |
| 📦 Microwave | 1-2 min | Quick reheat of farro only, not full salad | |
| 🥗 Serve cold | N/A | Maintaining fresh texture and flavor |

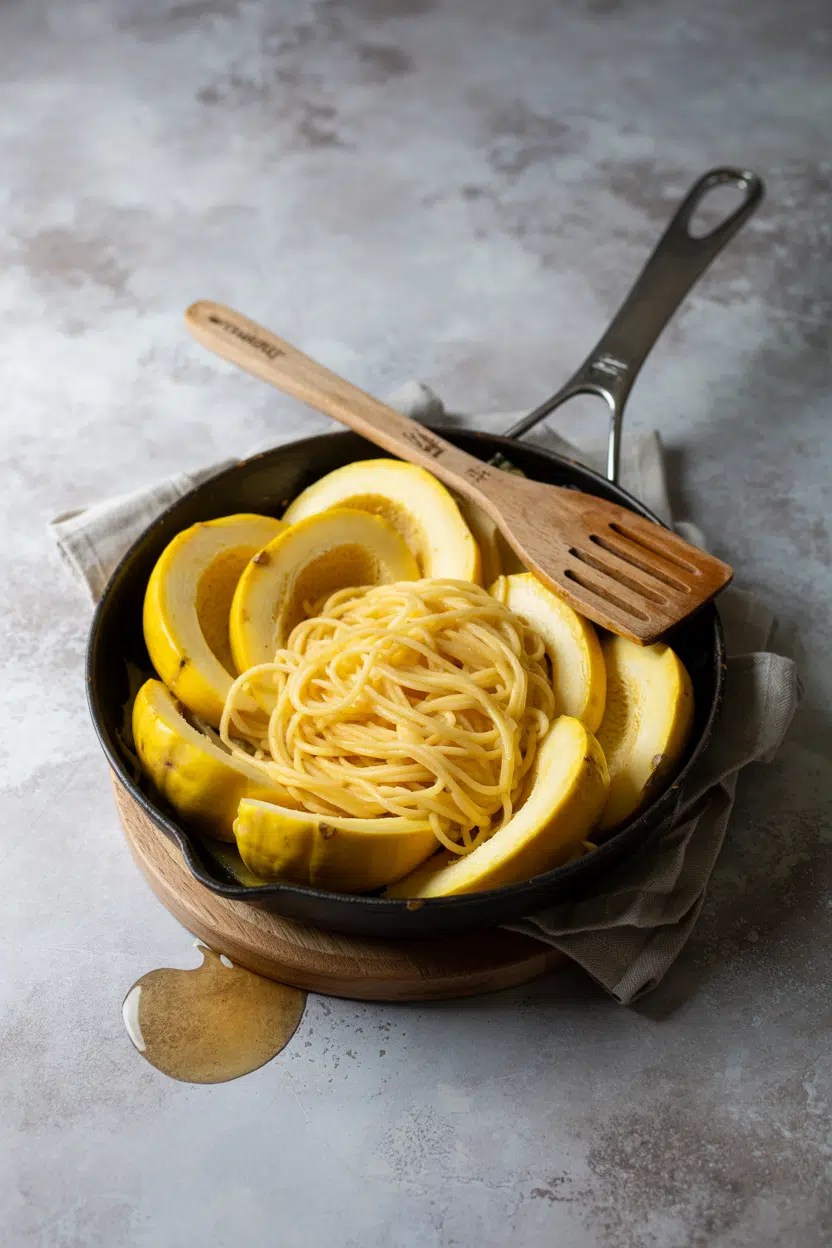
| Method | Best For | Tip |
|---|---|---|
| 🫕 Baked whole | Easier splitting, maximum moisture retention | Pierce rind several times; bake at 375°F until skin yields to pressure |
| 🔥 Roasted halved | Best strand definition and caramelized flavor | Cut side down at 400°F; 35-45 minutes depending on size |
| ⚡ Microwaved | Weeknight speed, softer strands | Pierce and microwave whole 10-12 minutes; rest 5 minutes before cutting |
| 🥘 Sautéed strands | Finishing with garlic, butter, lemon, and herbs | Keep heat medium-high and toss briefly - 2-3 minutes max to avoid mushiness |
| 🫙 Stuffed shell | One-dish meals with meat, cheese, and vegetables | Roast first, scrape half the strands out, fill, then return to oven |
The squash pairs naturally with tomato-based sauces, garlic and olive oil, and aged hard cheeses like Parmesan or pecorino.
Mediterranean-leaning preparations - lemon zest, fresh thyme, toasted pine nuts - highlight the mild sweetness without masking it.
American home cooking leans toward butter, sage, and Parmesan as a simple roasted side, and the combination works well.
For inspiration on building a full plate around it, see our guide to sides for spaghetti squash.
Avoid heavy cream sauces that bury the squash's subtle flavor entirely. Long braises are also a problem - extended heat dissolves the strands into soft mush rather than keeping them distinct.
If you need a squash that holds up to longer cooking, consider swapping out spaghetti squash for something sturdier like butternut.
How to Buy and Store Spaghetti Squash
A good spaghetti squash feels heavy for its size and has no soft spots, cracks, or shriveled skin. The rind should be firm and matte - a slightly waxy sheen is fine, but glossy or damp patches can signal early decay.
Tap it: a hollow sound means the interior may be dry and past its prime.
For storage, whole squash keeps well - proper handling around keeping squash fresh applies here too.
Store whole at cool room temperature, away from direct sunlight, for 2-3 weeks.
Refrigerating whole squash pushes that to around a month.
Once cut, wrap tightly and refrigerate; use within 4-5 days.
For a full breakdown of timing, the guide on how long spaghetti squash keeps covers edge cases like cooked strands stored separately.
- 🛒 Rind color - Pale yellow to golden-orange; avoid greenish tinge, which signals underripeness
- ⚖️ Weight - Dense and heavy; light squash for its size often has underdeveloped flesh
- 👆 Surface - No give when pressed; soft spots mean decay has started
- ❄️ Cut storage - Wrap tightly in plastic or beeswax wrap; don't leave cut sides exposed
Start with Roasting
Roast it halved, cut side down at 400°F, and you'll understand the squash in one attempt. The strand texture, the mild caramelized sweetness, the way it takes a simple garlic-and-olive-oil finish - it all becomes clear immediately.
From there, the stuffed shell approach is the logical next step for a full weeknight meal.
Scrape half the strands, fill the cavity, and bake it again.
No extra dishes, no complicated technique.
If you need a quick workaround on a night you don't have it, swapping out butter or other finishing fats won't change the method - the squash itself is the star.
Frequently Asked Questions
Yes. It's low in calories and carbohydrates compared with pasta and provides vitamin C, fiber, and beta-carotene. It's limited in protein, so pair it with eggs, meat, legumes, or cheese for a complete meal.
It won't replicate pasta exactly - the flavor is milder and the strands are softer. Using a bold, well-seasoned sauce and salting the strands lightly after scraping closes the gap considerably.
Technically yes, but the hard rind and starchy, dense flesh make it unpleasant and difficult to eat without cooking. Raw flesh has almost no flavor and the strands don't form until heat breaks down the cell structure.
Look for a fully yellow or golden rind with no green patches, which signal underripeness. The squash should feel dense, resist all pressure when squeezed, and have a dry, corky stem end.
No. The rind acts as a natural cooking vessel - you roast or bake the squash in its shell, then scrape out the cooked strands. Peeling the raw rind is difficult and unnecessary.
Japanese Agedashi Tofu
Coating silken tofu in potato starch and frying it at 350°F creates a golden, shatteringly crisp shell around a custard-soft center. The hot dashi broth soaks into the crust just enough to soften it without turning it soggy.

You don't need special equipment or hard-to-find ingredients. The contrast between crispy exterior and silky interior happens in one quick fry.
This works for weeknight appetizers when you want something that feels restaurant-quality but takes 30 minutes start to finish.
Japanese agedashi tofu delivers crispy fried tofu cubes in warm savory dashi broth. Drain the tofu well, dust lightly with starch, and fry at 320-350°F for golden edges. Serve immediately with broth, grated daikon, and green onions for the best texture contrast.
Why This Recipe Works
Frying tofu at the right temperature creates steam pockets inside the starch coating that puff and crisp. For a meal that pairs well with Japanese flavors, try this creamy potato alongside for textural variety.
Prep Time
20 min
Cook Time
10 min
Total Time
30 min
Servings
4 servings
Difficulty
Medium
Category
Appetizer
Quick Tip
Drain tofu well for crispy results
Best For
Weeknight | Entertaining
What makes this work:
- Soft or silken tofu holds more moisture than firm, which creates steam during frying that puffs the starch coating into a crisp shell while keeping the interior custardy
- Potato starch forms a lighter, crunchier crust than all-purpose flour because it gelatinizes at higher temperatures and creates more air pockets when fried
- Frying at 320-350°F cooks the exterior fast enough to set the crust before the tofu releases too much water, preventing sogginess
- Fresh dashi broth with soy sauce and mirin balances umami and sweetness without overpowering the delicate tofu flavor
- Serving immediately preserves the crisp-to-soft contrast because the hot broth gradually softens the crust from the outside in
What You'll Need
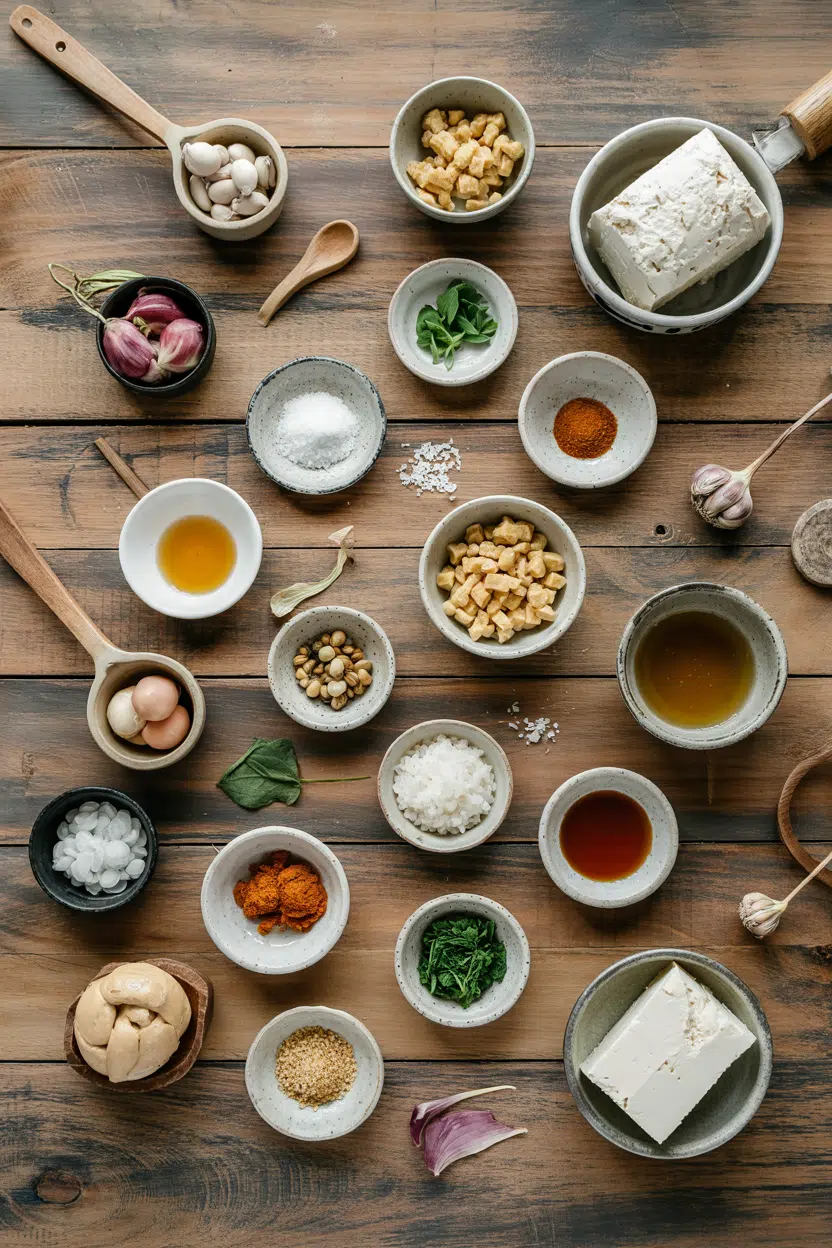
Shopping for agedashi tofu means buying silken or soft tofu, potato starch, and dashi ingredients. Most people skip a simple masala on the side, but it balances the meal nicely if you want more protein on the plate.
- Silken or soft tofu (14-16 oz block)
- Potato starch or cornstarch for coating
- Dashi stock (kombu or instant)
- Soy sauce
- Mirin
- Grated daikon radish
- Green onions, sliced thin
- Neutral oil (vegetable, canola, or grapeseed)
Ingredient Details
- Silken or Soft Tofu
Use soft tofu if silken is unavailable-it's slightly firmer but still custardy inside. Drain by pressing gently under a weight for 30 minutes. - Potato Starch
Creates the crispiest, lightest coating. Cornstarch works but produces a slightly denser crust with less crunch. - Dashi Stock
Use kombu-based dashi for vegetarian versions or instant dashi granules for speed. Simmer kombu for 10 minutes, strain before adding soy and mirin. - Soy Sauce
Use regular or low-sodium soy sauce depending on preference. Tamari works for gluten-free diets. - Mirin
Adds subtle sweetness that balances the salty soy. Substitute dry sherry or sake with a pinch of sugar if needed. - Grated Daikon
Optional but traditional-adds mild spice and freshness. Skip or use finely grated radish if daikon isn't available. - Neutral Oil
Use vegetable, canola, or grapeseed oil with high smoke points. You'll need 2-3 inches for deep frying or 1 inch for shallow frying.
Ingredient Swaps
Agedashi tofu is flexible once you understand the texture rules. Rich mains need something to cut through, and a creamy sauce side dish does exactly that-serve warm broth alongside for dipping.
Four swaps that work:
- Soft tofu instead of silken - Slightly firmer texture but still soft inside; easier to handle during frying without falling apart
- Cornstarch instead of potato starch - Less crispy crust with slightly denser texture; still golden and edible, just not as light
- Tamari instead of soy sauce - Gluten-free option with same salty umami depth; no flavor difference in broth
- Vegetable broth with kombu instead of dashi stock - Less complex umami but still savory; add a pinch of mushroom powder for depth
Deep Frying
Works for: Even golden crust, less hands-on flipping, crispest results
Skip if: You want to use less oil or don't have a deep pan
Shallow Frying
Works for: Budget-friendly, uses half the oil, still crispy if done carefully
Skip if: You want perfectly even browning without rotating cubes mid-fry
Instructions
You'll spend 10 minutes frying and 20 minutes draining tofu beforehand. For a version that comes together quickly, try a tender katsu side dish with similar crispy coating techniques that work in less time.
Here's how to make it:
Drain the tofu: Cut tofu into 1-1.5 inch cubes and place on paper towels. Cover with more paper towels, set a light weight on top, and let sit 30 minutes to remove excess water. Pat completely dry before coating.
Make the dashi broth: Simmer dashi stock (or kombu in water) for 10 minutes, strain, then stir in soy sauce and mirin. Keep warm on low heat while you fry the tofu.
Coat the tofu: Pour potato starch into a shallow bowl. Working with a few cubes at a time, roll tofu gently in starch until lightly coated on all sides. Shake off excess starch-you want a thin, even layer.
Fry the tofu: Heat 2-3 inches of oil in a deep pan or pot to 320-350°F. Fry 3-4 cubes at once for 2-3 minutes, flipping once, until golden and crispy. Remove with a slotted spoon and drain on paper towels. Repeat with remaining tofu.
Serve immediately: Divide fried tofu among serving bowls, ladle warm dashi broth over each portion, and top with grated daikon and sliced green onions. Serve while the crust is still crisp.
What to Serve With It
Most agedashi tofu plates need something starchy or fresh to complete the meal. For a version that comes together quickly, check out these savory chicken dish ideas that pair with Japanese-style appetizers for a full spread.
| Side Dish | Prep | Why It Works | How to Serve |
|---|---|---|---|
| Steamed White Rice | Easy | Neutral base absorbs dashi broth and balances savory tofu | Serve warm in small bowls alongside tofu |
| Cucumber Salad | Easy | Light, refreshing crunch contrasts warm fried texture | Toss with rice vinegar, sesame oil, and salt |
| Miso Soup | Easy | Complements Japanese flavors and warms the meal | Serve in small bowls before or alongside tofu |
| Steamed Spinach | Easy | Mild bitterness and leafy texture balance rich fried coating | Dress with soy sauce and sesame seeds |
| Edamame | Easy | Easy finger food that invites sharing at the table | Sprinkle with flaky salt while warm |
Three ways to serve it:
- As an appetizer - Portion tofu into small individual bowls with broth and garnishes, serve before the main course
- Light lunch plate - Pair with rice, miso soup, and cucumber salad for a complete vegetarian meal
- Entertaining platter - Arrange tofu cubes on a serving dish, pour broth tableside, and let guests add their own toppings
Store and Reheat
Agedashi tofu loses crispness quickly once the broth touches the coating. A good fry can make or break the plate, and we keep crispy golden french fries ready for nights when reheating needs a crunchy contrast on the side.
| Method | Time | Best For |
|---|---|---|
| 🔥 Oven | 5-7 min at 350°F | Restoring tofu crispness after refrigeration |
| 🍳 Stovetop | 3-4 min | Reheating broth and gently warming tofu |
| 📦 Microwave | 1-2 min | Quick heating but softens tofu crust |
For best results when storing:
- Store tofu and broth separately in airtight containers in the fridge for 3-4 days to prevent the crust from becoming completely soggy
- Reheat tofu in a 350°F oven for 5-7 minutes to re-crisp the coating before adding warm broth
- Warm broth gently on the stovetop over low heat until steaming, then pour over reheated tofu just before serving
- Skip freezing agedashi tofu-the texture turns rubbery and the coating doesn't recover its crispness after thawing
- Add fresh garnishes after reheating rather than storing them with the tofu, so daikon and green onions stay bright and crunchy
Frequently Asked Questions
Firm tofu works but loses the signature custardy interior that makes agedashi special. If you use firm tofu, cut larger cubes and fry slightly longer to ensure the inside warms through without overcooking the crust.
Store fried tofu and broth in separate airtight containers in the fridge for 3-4 days. Reheat tofu in a 350°F oven to re-crisp before warming broth on the stovetop and pouring it over just before serving.
Maintain oil temperature between 320-350°F using a thermometer. Lower temps make the tofu greasy and soggy, while higher temps burn the crust before the inside warms.
Soggy tofu happens when the oil temperature is too low or the tofu wasn't dried properly before coating. Pat tofu completely dry, shake off excess starch, and keep oil at 320-350°F for crisp results.
You can fry tofu 1-2 hours ahead and reheat in a 350°F oven for 5 minutes to restore crispness. Store broth separately and pour it over just before serving to maintain the best texture contrast.
Japanese Agedashi Tofu
Ingredients
Method
- Cut silken tofu into 1-1.5 inch cubes. Place cubes on paper towels, cover with more paper towels, and set a light weight on top. Let sit for 30 minutes to drain excess water. Pat dry completely before coating.14 oz silken tofu
- Simmer dashi stock for 10 minutes (if using kombu, simmer and strain). Stir in soy sauce and mirin. Keep warm on low heat while frying tofu.2 cups dashi stock, 2 tbsp soy sauce, 1 tbsp mirin
- Pour potato starch into a shallow bowl. Working with a few tofu cubes at a time, roll them gently in starch until lightly coated on all sides. Shake off excess starch for a thin, even layer.0.5 cup potato starch, 14 oz silken tofu
- Heat 2-3 inches of neutral oil in a deep pan or pot to 320-350°F. Fry 3-4 coated tofu cubes at once for 2-3 minutes, flipping once, until golden and crispy. Remove with a slotted spoon and drain on paper towels. Repeat with remaining tofu.0.25 cup neutral oil
- Divide fried tofu among serving bowls. Ladle warm dashi broth over the tofu. Top with grated daikon and sliced green onions. Serve while the crust is still crisp.2 tbsp grated daikon radish, 2 tbsp green onions, 2 cups dashi stock
Notes
- Pat tofu completely dry to avoid soggy coating.
- Maintain oil temperature between 320-350°F for crisp tofu.
- Serve immediately after frying to preserve crisp-to-soft texture contrast.
Tried this recipe?
Let us know how it was!How Long Does Scallion Last? [Storage Guide]
Buying a bunch of scallions for one recipe and then watching half of them go limp in the back of your fridge is one of the most common kitchen frustrations - understanding the role scallion plays as both a raw garnish and a cooked aromatic makes it clear why storage method matters so much here.

Whole scallions kept correctly in the fridge last 1-2 weeks; sliced ones drop to just 3-5 days.
The same flash-freeze approach used for doing flash freeze meatballs properly applies here - spread sliced scallions on a tray, freeze until solid, then bag them for months of use.
Whole scallions last 1-2 weeks in the fridge when wrapped in a damp paper towel and stored in a perforated bag. Sliced scallions keep 3-5 days in an airtight container. Frozen sliced scallions hold for 3-6 months but work only in cooked dishes.
How Long Does Scallion Last?
Shelf life for scallions varies significantly depending on whether they're whole or sliced - and where you store them. Cutting through the cell walls speeds moisture loss, which is why sliced scallions spoil so much faster than whole ones.
| Method | State | Duration | Notes |
|---|---|---|---|
| 🏠 Counter | Whole | 1-2 days | Stand upright in a glass with an inch of water; use quickly |
| 🧊 Fridge | Raw whole | 1-2 weeks | Wrap in damp paper towel; store in perforated bag in crisper |
| 🧊 Fridge | Raw sliced | 3-5 days | Airtight container with a paper towel to absorb moisture |
| ❄️ Freezer | Sliced | 3-6 months | Flash-freeze first; texture softens after thawing |
| ❄️ Freezer | Whole blanched | 3-4 months | Blanching preserves color; use in cooked recipes only |
The counter option is really a short-term hold, not a storage strategy.
Moisture from the cut ends also matters - the green tops degrade faster than the white bulb, so even well-stored scallions may lose their bright color before the bases go bad.
How to Store Scallion
Keeping scallions whole for as long as possible is the single biggest factor in extending freshness. Once sliced, the clock moves fast.
Fridge (whole): Trim any wilted tops and the very base of the root ends, pat the scallions dry, then wrap them loosely in a damp paper towel. Tuck that bundle into a perforated bag or breathable produce bag and place it in the crisper drawer.
Fridge (sliced): Transfer cut scallions to an airtight container lined with a dry paper towel. Swap the towel every couple of days if moisture builds up.
Counter: Stand whole scallions upright in a jar with about an inch of water, then drape a loose plastic bag over the green tops. This method extends life to 5-7 days and works well if you use scallions regularly.
A few storage habits that make a real difference:
- 🚫 Avoid ethylene producers - keep scallions away from apples and pears, which accelerate yellowing of the green tops.
- 📦 Keep whole when possible - cutting scallions before you need them shortens shelf life significantly.
- 🧻 Replace the paper towel - if it becomes soggy, swap it out rather than letting moisture sit against the stems.
The same logic behind keeping parsley fresh applies here - both are leafy-topped alliums that need moisture control, not moisture elimination.
Can You Freeze Scallion?
Yes, scallions freeze well - with one important caveat. Frozen scallions lose their raw crunch entirely, so they're only worth freezing if you plan to cook with them in soups, stir-fries, or omelets.
- Wash and dry Rinse scallions under cold water and dry them thoroughly - excess moisture causes ice crystals and clumping.
- Trim and slice Remove roots and any tough or damaged tops, then slice to your preferred size.
- Optional blanch For the white and light-green parts, blanch in boiling water for 10-15 seconds, then shock in ice water. This preserves color and helps them hold more structure.
- Flash-freeze Spread sliced scallions in a single layer on a lined tray and freeze for 30-60 minutes until solid.
- Bag and label Transfer to airtight freezer bags, press out as much air as possible, label with the date, and freeze for up to 3-6 months.
To use, add frozen sliced scallions directly to a hot pan or soup - no thawing required.
If you do thaw, transfer the needed amount to the fridge for 30-60 minutes.
Note that, unlike freezing kale without blanching, skipping the blanch step on scallions doesn't ruin them - it just means the green tops will be slightly more watery after thawing.
Signs Scallion Has Gone Bad
Fresh scallions have a sharp, clean onion-like smell and firm, upright green tops. Spoilage shows up clearly across all three senses.
Light yellowing on the very tips of green tops isn't a safety issue - trim and use the rest. Sliminess or a sour odor means discard the whole bunch.
Don't try to salvage scallions with mushy bases; bacterial growth starts there first.
Getting the Most From Your Scallions
A few focused habits will stretch scallion freshness well past what most people manage. These apply whether you bought one bunch or six.
- Use the water-jar method - standing whole scallions in water on the counter with a bag over the tops adds 5-7 days of life, and they'll even regrow slightly.
- Freeze in small portions - frozen scallions clump if bagged loose; flash-freezing first means you can grab exactly what a recipe needs.
- Trim before storing, not before cooking - remove only damaged material on day one, then cut to size right before use.
- Have a backup plan - if your scallions are past their best, knowing your [replacements for scallion](https://forkliftkitchen.com/scallion-substitutes/) keeps a recipe on track without a grocery run.
The same crisper-drawer discipline that helps with keeping green bean fresh works here too - consistent cold, controlled humidity, and no sealed-in moisture.
Frequently Asked Questions
Yes. Sliced scallions freeze fine without blanching and last 3-6 months. Skipping the blanch step means the green tops turn slightly more watery after thawing, but the whites hold up well enough for cooked dishes.
Whole green onions last 1-2 weeks stored in a damp paper towel inside a perforated bag in the crisper. Once sliced, that window drops to 3-5 days in an airtight container.
Yes, if the browning is limited to the very tips and the rest of the scallion smells fresh and feels firm. Trim the affected tops and use the rest immediately rather than returning them to storage.
Not exactly. Scallions have thin, straight white bases with no bulb formation, while spring onions develop a small rounded bulb at the base. Both store the same way, but spring onions have a slightly stronger flavor.
Trapped moisture is usually the cause - sealing wet scallions in a non-breathable bag creates the humid conditions bacteria need. Patting them dry before storing and using a perforated or breathable bag prevents this.
What Is Tangerine? [Taste, Uses & More]
Peel back the loose skin of a tangerine over a bowl of bitter winter greens, and you immediately understand what it brings to a dish - sweetness with a bright edge, floral peel oils that lift into the air, and segments that hold their shape without any fuss.
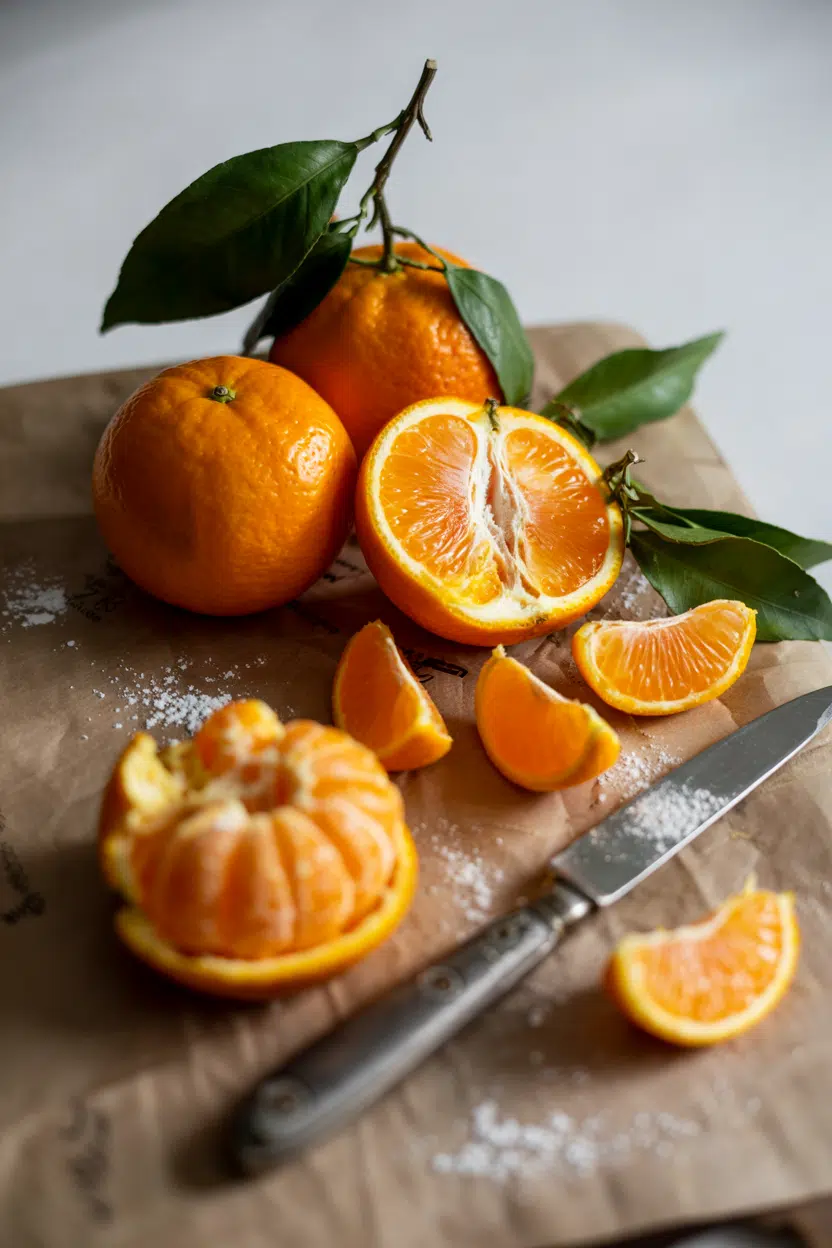
Understanding the differences between orange vs tangerine helps clarify why these two fruits aren't interchangeable in recipes. Tangerines sit in a category of their own: sweeter, softer, and far easier to eat on the spot than most citrus you'll reach for.
If you've ever wondered whether zest from a tangerine can stand in for other citrus, the answer matters as much as knowing when swapping out lime zest makes sense in a recipe.
The tangerine is a small mandarin-type citrus with a thin, loose peel and juicy segmented flesh. It's sweeter and less acidic than a navel orange, with a mild floral tang. Eat it fresh, zest it into dressings, juice it into glazes, or candy the peel for baking.
What Is Tangerine?
Tangerines belong to the mandarin subgroup of citrus, a category that includes Clementines, Satsumas, and several other loosely peeled varieties.
They originated in Southeast Asia and were domesticated across China before spreading westward through trade routes into North Africa and eventually Europe and the Americas.
The name "tangerine" comes from Tangier, Morocco - the port through which the fruit was historically shipped into Europe. Today it's used interchangeably with "mandarin" in many markets, though they're technically subtypes of the same species.
Several named varieties fall under this umbrella:
- 🍊 Clementine - nearly seedless, smooth skin, very sweet, most common in grocery stores from November through January
- Satsuma - the loosest peel of any variety, extremely low acidity, favored in Japan and East Asian markets
- Dancy tangerine - the classic American variety, slightly more tart, recognizable red-orange skin
- Honey tangerine (Murcott) - rich, sweet flavor with a higher sugar content than most
Understanding the differences between clementine vs satsuma matters if you're substituting one for another in a recipe where seed count or acidity is a factor.
What Does Tangerine Taste Like?
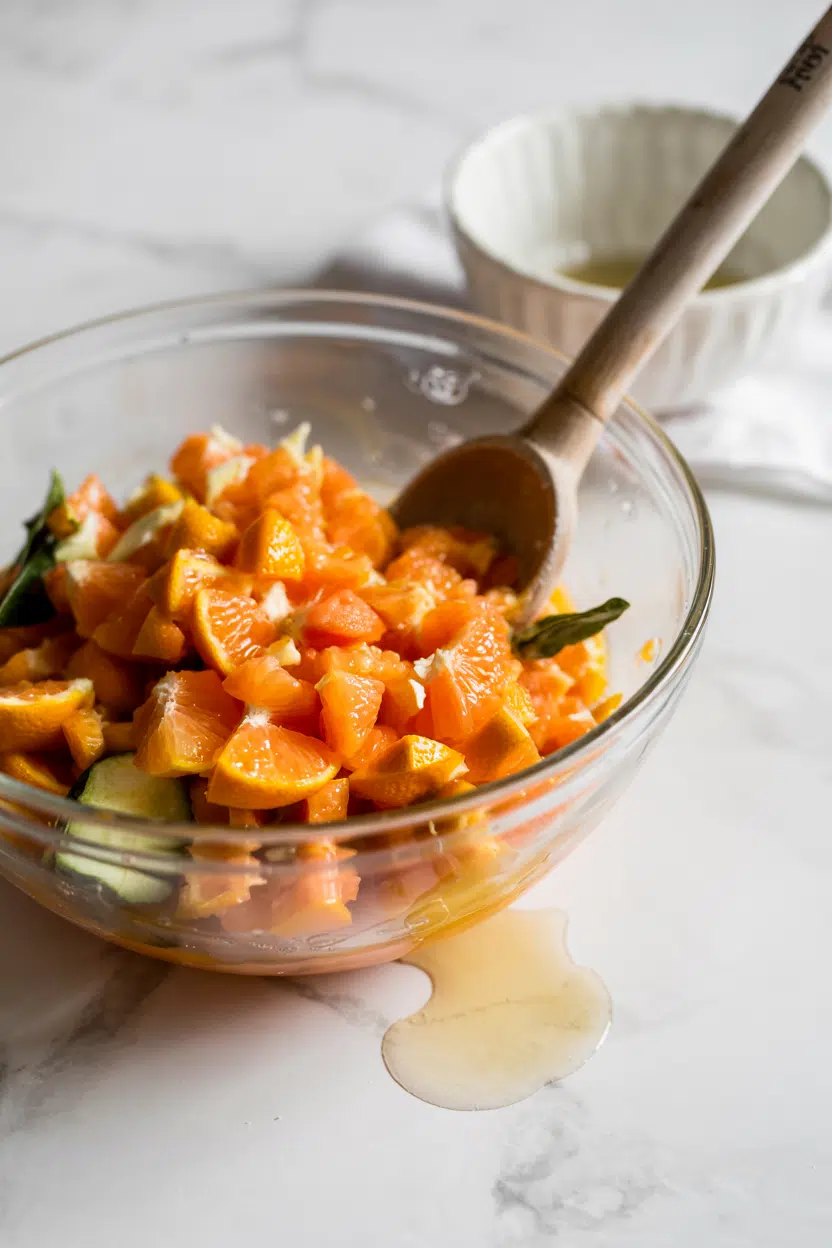
Tangerines are sweeter than most oranges and noticeably less acidic - the balance tips toward sugar with just enough tartness to keep the fruit lively.
That mild tang comes mostly from the outer membrane of the segments, not the juice itself.
The peel oils carry most of the floral complexity - that honeyed, almost perfumed note you notice when you first break the skin.
Once cooked or reduced, that floral edge mellows and the fruit's natural sweetness becomes more pronounced, which is why tangerine juice reduces beautifully into glazes.
Raw tangerine is considerably brighter than cooked. Heat softens the tartness and deepens the sweetness, moving it toward something closer to orange marmalade in character.
How to Use Tangerine
Fresh tangerines work best when their floral brightness stays intact.
Raw segmentation for salads is the most common application - peel, pull segments apart, and toss with bitter greens like arugula or radicchio in small amounts (too much radicchio drowns out the fruit's delicacy).
Tangerine segments pair especially well with fennel, shaved almonds, and goat cheese, and tangerine zest can lift a vinaigrette the way lemon does, though with a softer, sweeter note.
For salad dressings where citrus plays a supporting role, tangerine zest works well alongside olive oil and honey - the same role it fills in recipes like a balsamic vinaigrette dressing (homemade) or a Greek vinaigrette dressing (homemade).
Juiced, tangerine becomes the base for marinades and glazes for pork and duck. Reduced with honey and ginger, it thickens into a lacquer-style glaze that holds on roasted poultry. It also works as a liquid component in cocktails, where its sweetness reduces the need for added sugar.
Candied peel is one of the more rewarding preparations. The peel is blanched, simmered in sugar syrup, then dried - the result is intensely fragrant and less bitter than candied orange peel. Reduced tangerine juice can also become a curd or a tangerine marmalade, which works well anywhere you'd reach for alternatives to lime marmalade in baking and preserves.
| Method | Best For | Tip |
|---|---|---|
| 🥗 Raw | Salads, snacking, breakfast bowls with yogurt or ricotta | Supreme the segments to remove membrane for cleaner texture |
| 🍳 Reduced | Glazes for duck and pork, syrups, curd, marmalade | Reduce juice by half before adding sweetener - less correction needed |
| 🍋 Zested | Vinaigrettes, dressings, baked goods, compound butters | Zest before peeling - loose skin slides off fast and zesting gets harder |
| 🍬 Candied | Confectionery, cake decoration, chocolate bark | Blanch peel three times to cut bitterness before the sugar syrup step |
How to Buy and Store Tangerine
Firm skin with an even orange tone is the first thing to check. A slight glossy sheen indicates the peel oils are still intact - a dull, dry skin means the fruit has been sitting too long. Avoid soft spots or large brown patches, which signal internal breakdown.
Tangerines that feel heavy for their size have the most juice. The peel should give slightly under gentle pressure without collapsing.
For storage, storing tangerine correctly makes a real difference in how long you can hold a batch:
- Room temperature - 2-4 days, fine for fruit you'll eat immediately; keep away from direct sunlight
- Refrigerator crisper drawer - up to 1-2 weeks in a breathable mesh or paper bag; avoid sealed plastic, which traps moisture
- Sliced or juiced - use within 24-48 hours; juice oxidizes and loses its floral brightness quickly
Start With the Fruit, Then Push Further
If you're new to cooking with tangerines, eat one raw first - the flavor tells you exactly what you're working with before you apply any heat or sweetener. Once you've tasted it, the applications become obvious.
For fruit that's past its prime fresh window, don't discard it.
Juice it immediately and reduce that juice into a glaze, or fold it into yogurt.
If you need a swap for any reason, a guide to alternatives to tangerine covers the closest citrus options by use case - juice, zest, and segments each have different best replacements.
Clementine is the most reliable swap in most applications, since alternatives to clementine overlap heavily with tangerine when you're working with either one.
Frequently Asked Questions
Tangerines are a subtype of mandarin, not a separate species. The name "tangerine" is used loosely in North American markets and often refers to any small, loose-peeled mandarin - including Clementines and Satsumas depending on the retailer.
Tangerines are smaller, sweeter, and less acidic than navel or Valencia oranges. Their peel is thin and loose - it pulls away by hand - while orange peel is thicker and needs more effort to remove.
Peak season runs from November through April in the Northern Hemisphere. Clementines arrive first in November, with Satsumas and other varieties following through late winter.
Yes, with adjustments. Tangerine zest is sweeter and more floral than lemon - it works well in baked goods and dressings but won't add the same sharp acidity. Use it where brightness matters more than tartness.
Up to two weeks in the crisper drawer stored in a breathable bag. Sealed plastic traps moisture and accelerates mold, so avoid airtight containers for whole unpeeled fruit.
What Is Sole Fish? [Taste, Uses & More]
You spot a row of pale, oval fillets at the fish counter - some labeled Dover sole, others simply "sole" - and wonder whether the mild-looking fish is worth the premium price tag.

If you've enjoyed flounder in cooking or explored alternatives to haddock, sole sits in familiar territory but occupies a lane of its own.
Few white fish match its combination of fine texture, subtle sweetness, and quick kitchen turnaround.
Sole is a delicate flatfish with mildly sweet, clean white flesh and very low fishiness. It cooks fast - typically under five minutes - and suits French, British, and Scandinavian preparations equally well. Fresh fillets last just 1-2 days in the fridge, so plan to cook soon after buying.
What Is sole fish?
Sole is a small-to-medium flatfish native to the Northeast Atlantic and North Pacific coasts. Like all flatfish, it has a compressed oval body with both eyes positioned on one side - an adaptation for life on the seafloor.
The fish travels under several names at market. Dover sole (Solea solea) is the prized European species, caught mainly in the North Sea and English Channel.
Lemon sole and rock sole are related but distinct species, generally softer in flesh and less expensive.
Sole belongs to the broader white fish category, meaning lean, pale-fleshed, and mild.
It is thinner and finer-textured than Atlantic cod, and most markets carry it as skinned fillets rather than whole fish.
Understanding fish in cooking helps put sole's position in perspective - it sits at the delicate end of the white fish spectrum, a step finer than most everyday options.
What Does sole fish Taste Like?
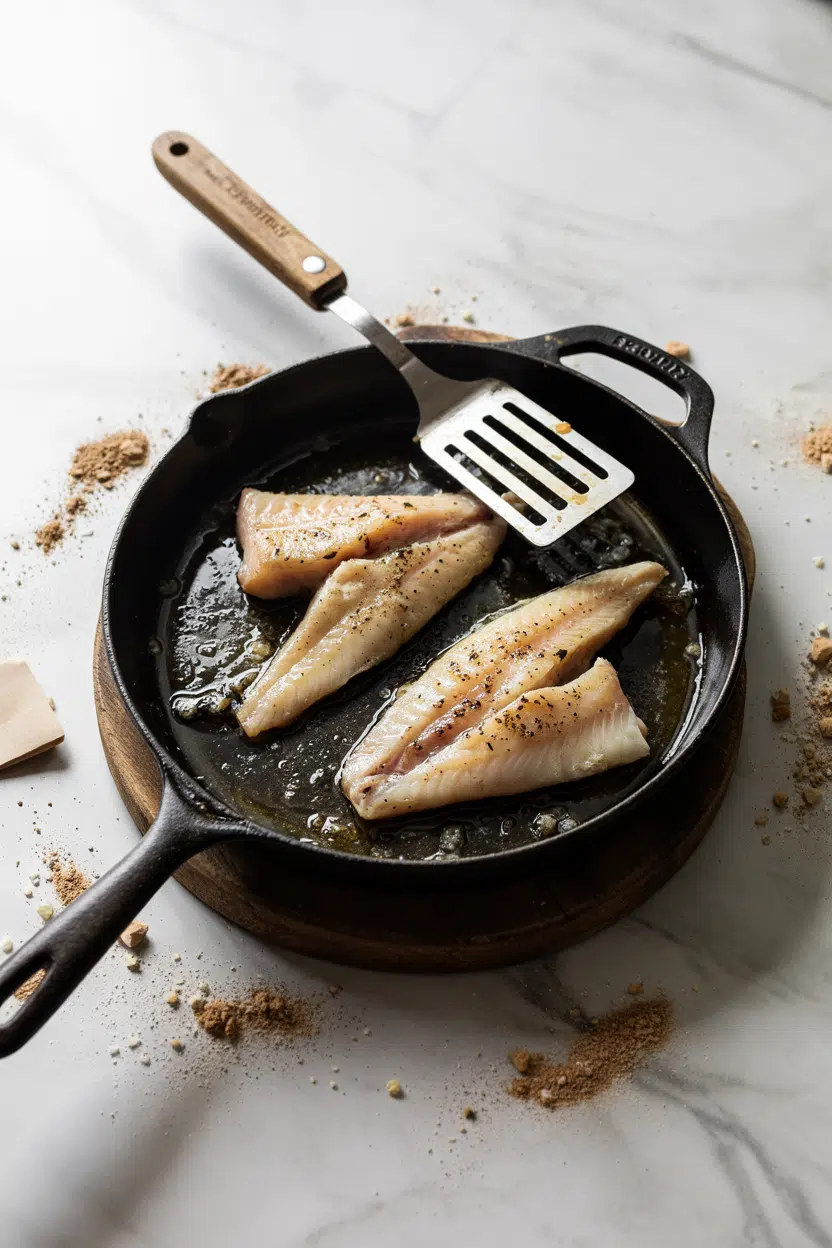
Sole has a mildly sweet, clean flavor with a faint background of brine and the faintest hint of butter - even before any fat hits the pan.
Fishiness is minimal, which makes it one of the most approachable white fish available.
Raw sole smells faintly of the sea - nothing sharp. Cooked, the flesh turns from translucent to opaque white, and the fine flakes stay tender but hold together if handled carefully.
Overcooking tightens the texture quickly, so watch the clock.
Compared to cod, sole is noticeably milder and finer-grained. Against tilapia, it tastes cleaner and slightly sweeter, without tilapia's occasional muddy note.
It is closest in character to flounder, though Dover sole carries a more pronounced sweetness when both are cooked side by side.
How to Use sole fish
Sole is a fish that rewards restraint in the kitchen. Its mild sweetness pairs with brown butter, lemon, fresh parsley, chives, and dill - ingredients that accent rather than compete.
Heavy spice rubs or gelatinous cream sauces overwhelm it fast.
French cuisine leans hardest on sole. Sole meunière - the classic of lightly floured fillets pan-seared in brown butter with lemon and parsley - remains the benchmark preparation.
British kitchens favor simple pan-fried Dover sole served whole or as fillets.
Scandinavian cooks tend toward gentle poaching in court-bouillon or light stews, while Japanese preparations use steaming with ginger and scallions to let the natural sweetness lead.
| Method | Best For | Tip |
|---|---|---|
| 🍳 Pan-sear | Sole meunière, brown butter fillets | Use medium-high heat and cook 90 seconds per side max |
| ♨️ Steam | Whole sole or fillets with aromatics | Line the steamer with scallions to prevent sticking |
| 🫙 Poach | Rolled stuffed fillets, delicate stews | Keep liquid at a bare simmer - a rolling boil breaks the fillet |
| 🫕 En papillote | Baked sole with lemon, herbs, wine | Seal tightly so steam builds and the fillet stays moist |
| 🍟 Light fry | Battered strips, tempura sole | Use a thin, light batter - heavy coatings mask the flavor |
When you need a swap, knowing your options for swapping out sole fish keeps you from stalling mid-recipe. For sides, baby carrots, new potatoes, and light olive oil with garlic all pair cleanly without fighting the fish.
How to Buy and Store sole fish
At the counter, look for fillets with glossy, translucent flesh and clean edges. Brown edges, a sour or ammonia smell, or fillets that fall apart when touched are all signs to skip.
Whole sole should have clear, bright eyes and firm belly flesh.
Checking for dover sole spoilage signs before cooking takes seconds and saves a wasted meal.
Once home, store sole on ice in the coldest part of your fridge and cook within 1-2 days.
For longer storage, freeze promptly in vacuum-sealed bags or wrapped tightly in plastic and foil - a full breakdown of sole fish's shelf life covers what to expect from frozen fish across several months.
- ❄️ Fridge storage - Place on ice or in the coldest zone; use within 1-2 days.
- 🧊 Freezer storage - Vacuum-seal or double-wrap tightly; quality holds 3-6 months.
- 🚫 Avoid refreezing - Thawed sole that has been out for hours should not go back in the freezer.
Start Here if You're New to Sole
Buy Dover sole when you can find it - the flavor difference over generic supermarket fillets is noticeable. Cook it the first time in brown butter with lemon and parsley: minimal technique, maximum payoff.
Note that brown butter pairs with more than just fish - if you end up with leftover browned butter, the same technique behind making brown butter blondies at home puts it to good use.
Once you have a feel for sole's pace in the pan, baking en papillote and gentle poaching follow naturally.
Frequently Asked Questions
No. Sole is a small, short-lived flatfish and generally sits in the low-mercury category. Regional advisories vary, so it's worth checking local guidelines for Pacific species specifically.
Handle fillets as little as possible and use a wide spatula for turning. A very brief sear - around 90 seconds per side - keeps the fillet intact before the flakes have a chance to separate.
Dover sole is noticeably sweeter and cleaner, with finer flakes. Tilapia can carry a faint muddy or flat note that Dover sole lacks entirely.
Yes, flounder is the closest practical substitute. It has a similar mild profile but slightly softer flesh, so reduce cook time by about 20 percent to avoid over-softening.
Properly vacuum-sealed sole holds quality for 3-6 months frozen. Beyond that, the flesh stays safe but turns drier and loses its fine texture when cooked.
Indian Gulab Jamun
When you need a show-stopping dessert for Diwali, Eid, or weekend entertaining, these golden syrup-soaked balls deliver. One bite gives you soft, spongy texture with cardamom-scented sweetness that melts on your tongue.

The key is controlling frying temperature and syrup consistency. Most failures happen when oil runs too hot or syrup cools before the balls soak properly.
This works for festivals when you want authentic Indian sweets without specialty equipment or all-day prep.
Gulab Jamun are milk-solid balls fried until golden, then soaked in cardamom-rose syrup. Success depends on keeping frying oil at 320°F and using warm (not hot) syrup for soaking. The balls turn soft and spongy after 2-3 hours of resting in syrup.
Why This Recipe Works
The combination of khoya and minimal flour creates balls that absorb syrup without falling apart. For a version that comes together quickly, this quick pudding dish uses similar spicing with less hands-on time.
Prep Time
20 min
Cook Time
30 min
Total Time
50 min
Servings
6-8 servings
Difficulty
Medium
Category
Dessert
Quick Tip
Keep frying oil 320°F for even cooking
Best For
Festivals | Entertaining
What makes these work:
- Khoya base: Milk solids give authentic soft texture that absorbs syrup without turning mushy
- Medium-low frying: 320°F oil cooks centers through while browning outsides evenly in 7-8 minutes
- Warm syrup soak: 100°F syrup penetrates balls during 2-3 hour rest without making them sticky
- Lemon juice in syrup: One teaspoon per two cups prevents crystallization during cooling
- Small batch frying: Four to five balls at a time keeps oil temperature stable and prevents greasiness
What You'll Need
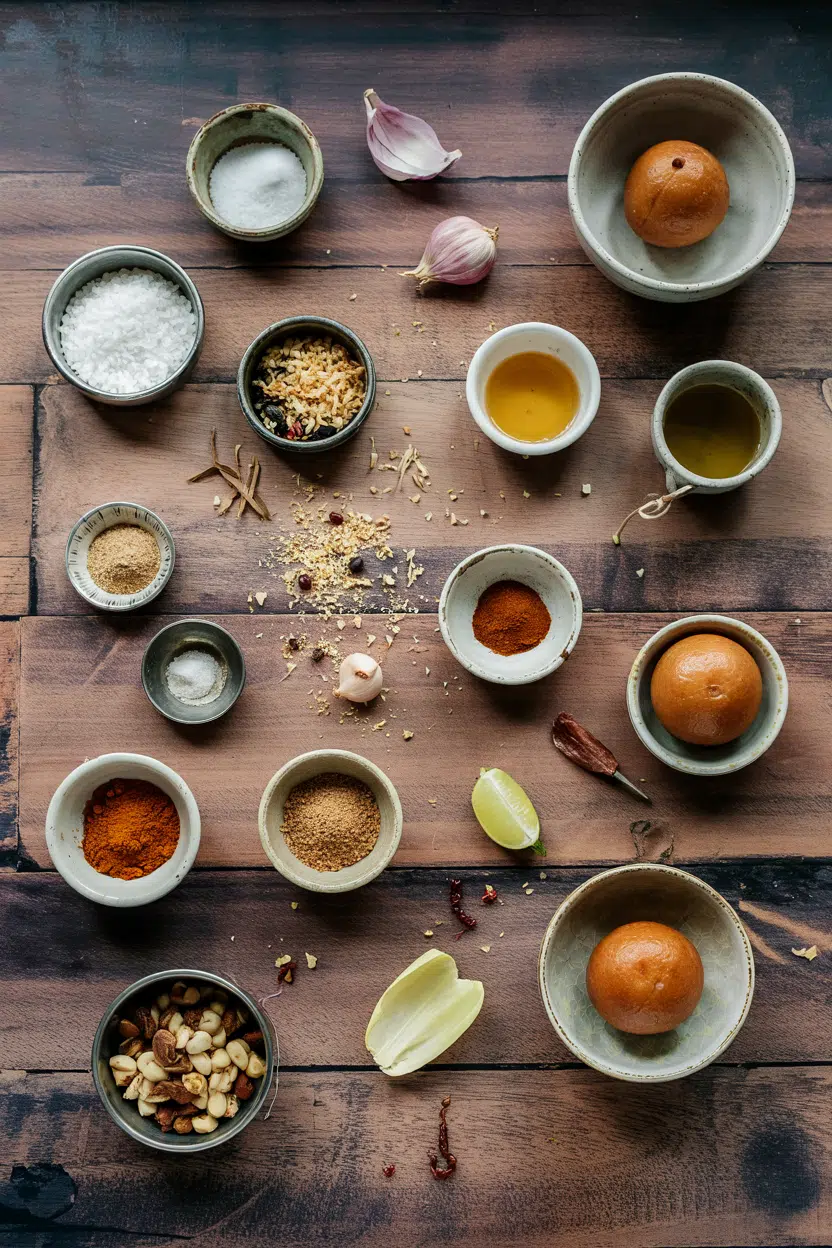
Shopping takes ten minutes at any Indian grocery or well-stocked supermarket. A good homemade pancakes recipe uses similar pantry staples if you want to try another sweet option.
- 1 cup khoya (milk solids)
- 3 tablespoons all-purpose flour
- ½ teaspoon baking powder
- 1-2 tablespoons milk (if needed)
- 3-4 cups ghee or neutral oil
- 2 cups sugar
- 2 cups water
- 4-5 cardamom pods
- 1 teaspoon lemon juice
- 1 teaspoon rose water or pinch saffron (optional)
Ingredient Details
- Khoya (milk solids)
Look for fresh khoya at Indian groceries; crumbly texture works best for shaping smooth balls - All-purpose flour
Three tablespoons binds dough without making it dense; more flour creates tough, chewy texture - Baking powder
Half teaspoon lightens balls and prevents hardness after cooling - Ghee or neutral oil
Ghee adds traditional flavor; vegetable or canola oil works for budget-friendly frying - Cardamom pods
Crush pods slightly before adding to syrup for stronger aromatic flavor - Lemon juice
One teaspoon per two cups syrup stops sugar from crystallizing as it cools - Rose water or saffron
Optional aromatics add depth; start with less-both flavors intensify during soaking
Ingredient Swaps
Most swaps change texture slightly but still deliver soft, sweet results. Rich mains need something to cut through, and a simple eggplant side does exactly that.
Common substitutions:
- Milk powder for khoya: Mix ¾ cup milk powder with ¼ cup cream and knead into dough-balls turn softer and lighter than traditional versions
- Gluten-free flour for all-purpose: Use gluten-free blend in same amount but expect slightly denser texture and less structural hold
- Vegetable oil for ghee: Saves money and works fine for frying-you lose some aromatic depth but balls still cook evenly
- Maple syrup for sugar syrup: Warm pure maple syrup works as soaking liquid but changes sweetness profile away from traditional cardamom-rose flavor
Khoya (Traditional)
Works for: Authentic soft texture, best syrup absorption, holds shape perfectly
Skip if: You can't find fresh khoya or want faster prep with pantry staples
Milk Powder Mix
Works for: Quick assembly, lighter texture, easier to find ingredients
Skip if: You want traditional dense texture or authentic festival dessert
Instructions
Total time runs fifty minutes active, then balls need two to three hours soaking for full syrup absorption. We keep a batch ready for nights like this - this easy chicken recipe pairs well with these as part of a larger Indian meal spread.
Making Gulab Jamun:
Mix the dough: Crumble khoya in a bowl, add flour and baking powder, then knead gently for 1-2 minutes until smooth. Add milk one teaspoon at a time only if dough feels too dry to shape-overworking makes hard balls.
Make the syrup: Combine sugar, water, crushed cardamom pods, and lemon juice in a pan. Boil until syrup reaches 215°F or one-string consistency (syrup forms single thread between fingers), about 8-10 minutes. Keep warm while frying.
Shape balls: Roll dough into smooth, crack-free balls about 1 inch diameter. Make sure surfaces are completely smooth-any cracks will split open during frying.
Fry at 320°F: Heat oil in deep pan to 320°F. Add 4-5 balls, stir gently with slotted spoon to brown evenly. Fry 7-8 minutes until deep golden brown. Balls should float and turn easily when done.
Soak in syrup: Transfer hot fried balls directly into warm (100°F) syrup. Let soak 2-3 hours at room temperature, turning once halfway through. Balls will double in size and turn spongy.
What to Serve With It
These work best as dessert finale after spiced Indian mains or as sweet contrast to savory snacks. Chicken adds the contrast this plate needs, but timing matters.
| Side Dish | Prep | Why It Works | How to Serve |
|---|---|---|---|
| Chai tea | Easy | Warm spiced tea cuts sweetness and complements cardamom | Serve hot in small cups alongside warm gulab jamun |
| Vanilla ice cream | Easy | Cold cream contrasts warm syrupy balls and balances richness | Scoop over or beside warm gulab jamun, drizzle with syrup |
| Fresh sliced mango | Easy | Bright fruit flavor cuts through heavy sweetness | Arrange slices on plate beside gulab jamun |
| Kesar pista kulfi | Medium | Traditional Indian ice cream shares flavor profile elegantly | Serve one slice kulfi with 2-3 warm gulab jamun |
| Chopped pistachios and almonds | Easy | Adds crunch and visual appeal for entertaining | Sprinkle toasted nuts over plated gulab jamun before serving |
Three ways to serve it:
- Festival platter: Arrange warm gulab jamun on decorative plate, garnish with rose petals and chopped pistachios, serve with small forks
- Casual dessert: Plate 2-3 balls per person with scoop of vanilla ice cream and drizzle of extra cardamom syrup
- Tea time snack: Serve one warm gulab jamun per person in small bowls with hot masala chai for dipping
Store and Reheat
Gulab jamun keeps well refrigerated and actually improves after first day as syrup penetrates deeper. The beef works best when it hits the table at the same time as the main.
| Method | Time | Best For |
|---|---|---|
| 🍳 Stovetop | 5-7 min | Gently warming thawed balls that need syrup refresh |
| 📦 Microwave | 30-45 sec | Quick warm-up for 1-2 servings from fridge |
| 🔥 Oven | 8-10 min at 300°F | Warming multiple servings without drying out balls |
For best results when storing:
- Refrigerate in syrup: Store balls completely submerged in syrup in airtight container for 3-4 days-they soften more over time
- Use shallow container: Spread balls in single layer so syrup covers evenly without stacking and crushing
- Freeze carefully: Freeze up to one month in syrup but expect slight texture change after thawing-balls may turn slightly grainy
- Bring to room temp: Let refrigerated gulab jamun sit 15 minutes before serving or warm gently for better texture
- Refresh dried syrup: If syrup thickens too much in fridge, warm with tablespoon of water before reheating balls
Frequently Asked Questions
Yes, they improve after one day as syrup penetrates deeper. Store in airtight container with syrup for up to four days refrigerated or one month frozen.
320°F works best-higher heat burns outsides while centers stay raw, lower heat makes greasy balls. Use thermometer and adjust heat to maintain temperature throughout frying.
They turn deep golden brown and float easily after 7-8 minutes at 320°F. Break one open after cooling-center should be cooked through with no raw doughy texture or white core.
Hard balls come from overmixing dough or frying too hot. Falling apart means dough was too wet or balls weren't shaped tightly enough-add less milk next time and roll smoother.
Yes, mix three-quarters cup milk powder with quarter cup cream and knead into dough. Texture turns softer and lighter than traditional khoya version but still absorbs syrup well.
Indian Gulab Jamun
Ingredients
Equipment
Method
- Crumble khoya into a bowl, add flour and baking powder, then knead gently for 1-2 minutes until smooth. Add milk one teaspoon at a time only if dough feels too dry to shape-avoid overmixing to prevent hard balls.1 cup khoya, 3 tablespoons all-purpose flour, 0.5 teaspoon baking powder, 1-2 tablespoons milk
- Combine sugar, water, crushed cardamom pods, and lemon juice in a pan. Boil until syrup reaches 215°F (one-string consistency), about 8-10 minutes. Keep syrup warm for soaking.2 cups sugar, 2 cups water, 4-5 pods cardamom, 1 teaspoon lemon juice
- Roll dough into smooth, crack-free balls about 1 inch diameter. Ensure surfaces are completely smooth to prevent splitting during frying.1 cup khoya, 3 tablespoons all-purpose flour, 0.5 teaspoon baking powder, 1-2 tablespoons milk
- Heat oil or ghee in a deep pan to 320°F. Fry 4-5 balls at a time, stirring gently with a slotted spoon. Fry for 7-8 minutes until they turn deep golden brown and float easily.3-4 cups ghee or neutral oil
- Transfer hot fried balls directly into warm syrup (about 100°F). Let soak at room temperature for 2-3 hours, turning once halfway. Balls will double in size and become soft and spongy.2 cups sugar, 2 cups water, 4-5 pods cardamom, 1 teaspoon lemon juice, 1 teaspoon rose water or saffron
Notes
- Maintain frying oil temperature at exactly 320°F for even cooking and soft centers.
- Use a thermometer to monitor both oil and syrup temperatures accurately.
- Store gulab jamun submerged in syrup refrigerated for 3-4 days to enhance softness and flavor.
Tried this recipe?
Let us know how it was!How Long Does Sage Last? [Complete Storage Guide]
Leftover sage from a stuffing recipe tends to sit in the fridge until it's forgotten - and fresh sage can go from perfect to slimy faster than most herbs.

Just as storing butter correctly affects how well it holds in brown-butter applications, how you handle sage from the moment you get home determines whether it lasts a week or barely makes it to the weekend.
The good news is that sage stores exceptionally well across all three methods - fridge, freezer, and pantry - as long as you match the method to your timeline.
Fresh sage lasts 7-14 days in the fridge when wrapped in a damp paper towel. Frozen sage keeps 6-12 months. Dried sage stays potent for up to 1 year and safe up to 3 years. The fastest path to waste is leaving fresh sprigs unwrapped in the crisper drawer.
How Long Does Sage Last?
Fresh sage has a reasonable fridge life compared to delicate herbs - sage and its flavor comes from volatile oils, mainly thujone and rosmarinic acid, and the rate at which those oils degrade determines usable shelf life.
Whole sprigs kept intact last noticeably longer than pre-plucked loose leaves, which lose moisture quickly.
| Method | State | Duration | Notes |
|---|---|---|---|
| 🧊 Fridge | Fresh (whole sprigs) | 7-14 days | Wrapped in damp paper towel or in an herb keeper |
| 🧊 Fridge | Cooked dishes | 3-4 days | Stuffing, sauces - airtight container required |
| 🏠 Counter | Stems in water | 3-7 days | Wilts faster than refrigerated; suitable for short-term use only |
| ❄️ Freezer | Raw (flash-frozen or oil cubes) | 6-12 months | Up to 18 months vacuum sealed; flavor holds well |
| 🫙 Pantry | Dried (whole or ground) | 1-3 years | Peak aroma up to 12 months; potency declines but remains safe longer |
Dried sage outlasts fresh by a wide margin, though "safe to eat" and "worth using" are different questions.
Much like parsley's shelf life depends heavily on moisture control, sage's longevity in every form comes down to limiting its exposure to air and humidity.
How to Store Sage
Fresh sage needs moisture - but not too much. Trim the stems by about half an inch, wrap the sprigs loosely in a damp (not dripping) paper towel, and slide them into a perforated resealable bag or an herb keeper with a slightly loose lid to allow minimal airflow.
Avoid sealing fresh sage in an airtight bag; trapped moisture encourages the fuzzy leaf surface to go slimy.
For dried sage, the method is straightforward:
- **Opaque, airtight jar** - clear glass lets light degrade thujone compounds faster than a sealed opaque container
- **Away from the stove** - heat from cooking accelerates oil loss in dried herbs more than any other factor
- **Label with date** - dried sage past 12 months won't harm you, but run the aroma test before using it in any dish where sage is the lead flavor
- **Revive faded ground sage** - a quick dry-toast in a pan before adding to recipes wakes up remaining oils noticeably
Counter storage in a jar of water works in a pinch for a few days, though the fridge always extends life further.
Can You Freeze Sage?
Freezing works well for sage - better, arguably, than for most soft herbs. The catch is that frozen sage becomes limp and darkens slightly, so it's a cooking ingredient afterward, not a garnish.
Use frozen leaves directly in hot pans or sauces without thawing; dropping a frozen leaf into brown butter crisps it while releasing concentrated aroma.
- Flash-freeze whole leaves Spread dry, single leaves on a parchment-lined tray and freeze for 1 hour until solid.
- Transfer to freezer bag Move frozen leaves into a labeled vacuum or freezer bag immediately; squeeze out excess air before sealing.
- Make oil or butter cubes Chop leaves finely, mix with olive oil or melted butter, spoon into an ice cube tray, and freeze solid before bagging.
- Label clearly Note the date and prep method - "oil cubes" and "flash-frozen leaves" behave differently in recipes and degrade at different rates.
Oil or butter cubes are worth the extra step. Suspending sage in fat protects the rosmarinic acid and thujone compounds from oxidation better than air-exposed frozen leaves.
If you're making butter cubes, check our notes on storing butter correctly so the base fat doesn't go rancid before the sage does.
Never refreeze thawed sage leaves. If you need whole leaves briefly thawed, a few minutes at room temperature is enough - don't use warm water or a microwave.
Signs Sage Has Gone Bad
Sage's fuzzy, velvety leaf surface makes spoilage identification slightly less obvious than with smooth-leafed herbs. Natural leaf fuzz is soft and uniform; mold on sage looks different.
Mold spores on sage spread quickly across the fuzzy surface. Discard the entire bunch if mold appears - don't attempt to salvage partially affected sprigs by trimming.
Practical Tips for Getting More From Fresh Sage
Consistent handling habits make a bigger difference with sage than with most pantry herbs. These are the practices worth building into your routine:
- 🌿 Buy whole bunches, not loose leaves - stems slow moisture loss from the cut end, preserving leaf quality by several extra days
- 🧊 Prioritize oil-cube freezing for surplus - the fat barrier protects thujone-based aroma far better than bare frozen leaves
- 🍳 Use frozen leaves straight into hot fat - brown butter applications don't require thawing, and direct-from-frozen produces crispier results
- 🏷️ Date your dried sage jar - once past 12 months, do a quick sniff-and-toast test before committing it to a dish
When your fresh sage runs low before a recipe, sage swaps that work can fill in without much flavor loss - just as alternatives to rosemary come in handy when that herb runs short.
Thujone, the compound responsible for sage's distinctive sharpness, is also found in wormwood - if you're curious about its other appearances, the absinthe with highest thujone content guide puts it in an unexpected context.
Frequently Asked Questions
Yes. Flash-freeze whole dry leaves on a tray for one hour, then transfer to a labeled freezer bag. Oil or butter cubes are a better long-term option - fat protects aroma compounds from oxidizing during storage.
Up to 14 days when stored as whole sprigs wrapped in a damp paper towel inside a perforated bag. Loose pre-plucked leaves wilt much faster - usually within 4-5 days.
It won't become unsafe, but potency drops noticeably after 12 months. Smell it before use - if the camphor-like sharpness is gone, toasting it briefly in a dry pan can help.
Yes, and it's one of the best ways to preserve sage for cooking. Spoon chopped sage mixed with softened butter into an ice cube tray, freeze solid, then bag the cubes. They keep up to 3 months before butter flavor degrades.
Mild yellowing at leaf edges is usually age, not spoilage - check for sliminess and smell before discarding. If it smells clean and feels firm, it's safe to cook with, though flavor will be weaker.
How Long Does Sweet Potato Last? [Storage Guide]
Freezing sweet potatoes is one of the most common storage questions we get, and the answer depends entirely on what state they're in. Raw whole roots should not go into the freezer - the cell walls rupture and the result is a grainy, mealy texture that no recipe can fix.

Cook them first, and sweet potatoes freeze beautifully for up to a year.
Much like preparing beet properly requires knowing which prep steps matter, understanding how sweet potato storage works saves you from wasted roots and disappointing meals.
Whole sweet potatoes last 1-2 weeks on the counter or 2-4 weeks in a cool pantry. Cooked leftovers keep 3-5 days in the fridge. For long-term storage, freeze cooked or blanched sweet potato for up to 12 months. Never freeze raw whole roots.
How Long Does Sweet Potato Last?
Sweet potato shelf life varies more than most root vegetables because storage method and whether the root is raw or cooked change everything.
A whole, unwashed root in good pantry conditions can last weeks; a cooked portion left uncovered shortens to days.
| Method | State | Duration | Notes |
|---|---|---|---|
| 🏪 Pantry | Whole, raw | 2-4 weeks | Cool, dark, well-ventilated; avoid plastic bags |
| 🏠 Counter | Whole, raw | 1-2 weeks | Typical kitchen warmth shortens life significantly |
| 🧊 Fridge | Raw (not recommended) | Avoid | Starch converts; hard center and off-flavor develop |
| 🧊 Fridge | Cooked | 3-5 days | Airtight container only; moisture loss accelerates spoilage |
| ❄️ Freezer | Cooked or blanched | 6-12 months | Mashed and roasted preparations hold texture best |
| ❄️ Freezer | Raw whole | Not recommended | Cell walls rupture; grainy texture on thaw |
The pantry window stretches to four weeks only when temperatures sit at 55-60°F (13-16°C). A warm kitchen counter cuts that estimate in half, and humidity does the same damage faster.
For guidance on preparing sweet potato properly before cooking, technique also matters for how well leftovers store.
How to Store Sweet Potato
Where you store a sweet potato matters as much as how you wrap it. Raw whole roots and cooked leftovers need completely different approaches.
Pantry: Keep whole, unwashed roots in a cool (55-60°F), dark spot with good airflow - a loosely woven basket or paper bag works well. Store them away from apples and onions; ethylene gas from apples accelerates sprouting, and onions release compounds that soften nearby roots. Storing squash by similar logic applies here too, and our guide to storing squash correctly covers the airflow principle in detail.
Counter: Fine for short-term use within one to two weeks. Keep roots out of direct sunlight and away from heat sources like the stove.
Fridge (cooked only): Place cooled mashed or roasted sweet potato in an airtight glass or BPA-free container and refrigerate immediately. Raw whole roots do not belong in the fridge - cold temperatures convert the starches, causing a hard, unpleasant center and dulled flavor.
- 🥔 Buy firm roots - smooth skin and small rootlets indicate freshness; cuts in the skin invite early rot.
- Keep them dry - any moisture on the skin during storage accelerates mold growth significantly.
- Single bad tuber? - cut out the soft spot immediately and use the rest within a day.
Can You Freeze Sweet Potato?
Yes - with one firm condition. Only cooked or blanched sweet potato freezes well. Raw whole roots lose their structure entirely when frozen, because the water inside the cells expands, ruptures the cell walls, and leaves a grainy mush on thawing.
Much like salmon freezer burn explained covers how ice crystal damage degrades texture, the same physics apply here.
Mashed and pureed sweet potato hold up best after freezing. Roasted pieces do reasonably well.
Blanched slices (2-3 minutes in boiling water) are the better choice if you want whole pieces for later recipes.
- Cook fully - bake, roast, or boil until tender, OR blanch slices for 2-3 minutes and shock in ice water.
- Cool quickly - spread on a tray and cool to room temperature before packaging; warm food creates condensation that causes freezer burn.
- Portion smartly - spoon mashed sweet potato into airtight containers or freezer bags, leaving 1 inch of headspace for expansion.
- Flash-freeze slices - freeze pieces in a single layer on a lined tray for 1-2 hours before transferring to labeled freezer bags.
- Remove air and seal - press out as much air as possible, label with the date, and freeze flat for efficient stacking.
To thaw, move containers to the fridge overnight. Roasted pieces reheat well from frozen directly in the oven at 375°F. Do not refreeze after thawing - texture degrades further and bacterial risk increases.
Signs Sweet Potato Has Gone Bad
Whole raw roots give clear warning signs before they become unsafe. Cooked leftovers spoil faster and with less obvious visual cues, so smell is your best checkpoint there.
Small, surface-level soft spots can be cut away if the flesh below looks and smells clean. Large rotten areas, persistent off-odors, or any extensive mold mean the whole root goes in the bin.
Similar spoilage logic applies to other root vegetables - our pumpkin spoilage signs guide covers comparable indicators for that family.
Note that sprouting alone doesn't mean the root is bad. Short sprouts under 2 cm are safe to remove; cut them off and use the potato promptly.
Getting the Most From Your Sweet Potatoes
Good storage habits extend shelf life significantly without much effort. A few adjustments at purchase and during storage prevent most common losses.
- 🌡️ Aim for 55-60°F storage - a basement or cool cupboard consistently beats a warm kitchen counter.
- Separate from ethylene sources - keep sweet potatoes away from apples, pears, and bananas to slow sprouting.
- Label frozen portions - mashed and roasted look identical once frozen; date and label every bag before it goes in.
- Freeze what you can't use - if a batch of roasted sweet potato won't be eaten within five days, freeze it rather than wait and waste it.
If your recipe falls through and you end up with too many roots on hand, knowing your replacements for sweet potato means the surplus doesn't go to waste either.
Blanching is worth the extra step for freezing slices - unlike some vegetables where skipping it is fine, kale without blanching cooking methods shows just how differently vegetables respond to that pre-freeze step.
Frequently Asked Questions
No. Freezing raw whole sweet potatoes ruptures the cell walls and produces a grainy, mealy texture after thawing. Always cook or blanch first - even a quick 2-3 minute blanch makes a significant difference.
Raw whole roots should not be refrigerated. Cold temperatures convert the starches and cause a hard center with dulled flavor. Only cooked sweet potato belongs in the fridge, stored in an airtight container.
Thaw in the fridge overnight for the gentlest result. Mashed portions can go straight into the microwave from frozen; roasted pieces reheat better from frozen in the oven than after thawing.
Cooked sweet potato lasts 3-5 days in the fridge in an airtight container. Raw whole roots stored in the fridge develop texture and flavor problems within days, so the pantry is always the better option.
For months-long storage, cook fully then freeze in airtight containers or freezer bags for up to 12 months. For shorter-term storage without freezing, a cool (55-60°F), dark, well-ventilated pantry keeps whole roots fresh for 2-4 weeks.
What Is Shiso? Taste Profile, Uses, & More
Most people reach for mint or basil when they want fresh, herbal lift in a dish - and shiso is the herb they're unknowingly missing.
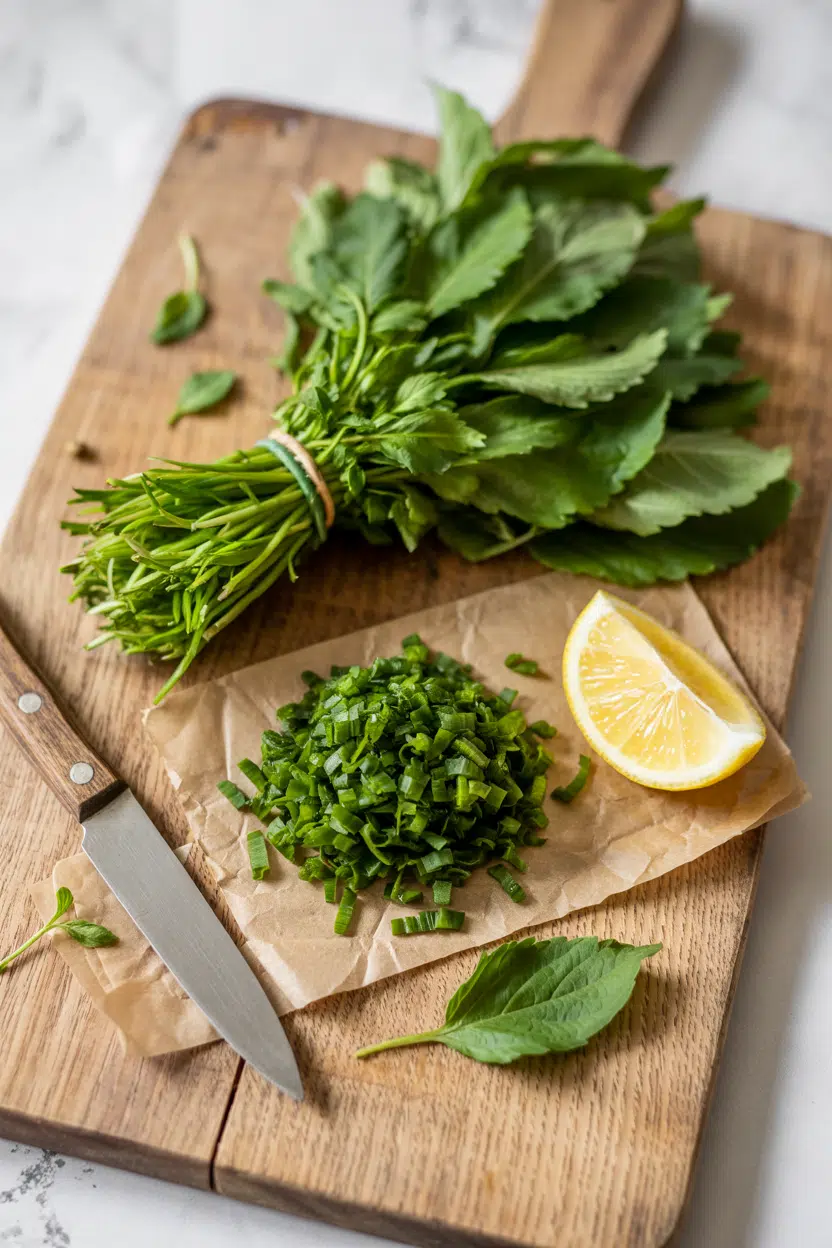
If you're looking for alternatives to mint that bring sharper, more complex character, shiso delivers something neither herb can fully replicate.
It wraps sashimi, stains pickles deep red, and fries into paper-thin tempura - often within the same meal.
Understanding what makes it distinct helps you use it intentionally, not just decoratively.
Shiso is a Japanese aromatic herb with a flavor profile crossing mint, basil, and mild anise. The green variety (ao-shiso) is used raw and cooked; the red variety (aka-shiso) colors pickles and brines. Fresh leaves last 3-7 days and work across raw, fried, and pickled applications.
What Is shiso?
Shiso (Perilla frutescens var. crispa) is a leafy aromatic herb native to East Asia, used most prominently in Japanese, Korean, and Vietnamese kitchens.
It belongs to the mint family and grows serrated, oval leaves that range from bright green to deep burgundy depending on variety.
The two main types are ao-shiso (green shiso) and aka-shiso (red shiso), and they serve different purposes.
Ao-shiso is the variety you'll see wrapped around sashimi or folded into a onigiri rice balls recipe; aka-shiso is most famous for coloring umeboshi plums and pickling brines that vibrant red-purple.
You'll also find it sold under several other names - perilla, oba, Japanese basil, or simply shiso leaf. Calling it "Japanese basil" isn't wrong, but it undersells how different it tastes.
Its compound perillaldehyde is responsible for that signature minty-anise aroma and doesn't appear in basil at all.
- 🌿 Ao-shiso (green) - bright flavor, used raw as wrap or chiffonade, plus tempura
- 🔴 Aka-shiso (red) - earthier and more tannic, primary role in pickling and coloring
- 🌏 Other names - perilla, oba, Japanese basil, shiso leaf, perilla frutescens var. crispa
What Does shiso Taste Like?
Shiso tastes like what you'd get if mint, basil, and a mild anise seed crossed paths. The mint element is real but restrained - it's fresh and cool without the sharp menthol edge you get from peppermint.
The anise undertone is subtle and slightly sweet, and citrus-like brightness lifts the whole profile without any actual sourness. A faint pepperiness lingers at the back of the palate, especially in younger green leaves.
Heat changes things noticeably.
A raw shiso leaf in sashimi delivers its full herbaceous punch; the same leaf wilted in a warm sauce loses its brightness quickly and turns slightly grassy. Aka-shiso reads earthier and more tannic than green - less mint, more iron-like depth - which is why it's used for flavor in brines rather than eaten fresh.
How to Use shiso
Raw shiso is where the herb shows best.
Whole ao-shiso leaves work as a natural wrapper for sashimi, adding herbal contrast to fatty fish without overwhelming it.
Thin julienne - chiffonade-cut into fine ribbons - works scattered over cold soba, rice bowls, or salads, and it's one area where swapping out shiso is genuinely difficult because nothing else delivers that exact flavor combination.
For cooked applications, tempura-battered shiso is a classic: the whole leaf is dipped and fried for roughly 60-90 seconds, producing a crisp, translucent shell that preserves much of the aroma.
If you're experimenting with batter options, checking replacements for tempura flour gives you workable alternatives.
Shiso also infuses well - steep leaves in rice vinegar or light oil for 24 hours for a dressing base with genuine herbaceous depth.
Aka-shiso earns its place in pickling. It gives umeboshi their red color and contributes a distinctly tannic, mineral note to the brine. The same approach scales to cucumber or ginger pickles where color and savory depth both matter.
Shiso pairs naturally with soy sauce, ponzu, yuzu, sesame oil, and raw fish - and swapping out ponzu sauce in those pairings shows how central its citrus-acid element really is.
For grilled applications, shiso blended with sesame oil and soy makes a quick, no-cook sauce for chicken or pork.
| Method | Best For | Tip |
|---|---|---|
| 🥗 Raw (whole) | Sashimi wrap, onigiri, garnish | Use within hours of slicing for full aroma |
| 🥗 Raw (chiffonade) | Cold noodles, rice bowls, salads | Cut just before serving to prevent blackening |
| 🍳 Tempura | Appetizers, bento, side dishes | Fry 60-90 seconds max; drain immediately |
| 🫙 Infused/Pickled | Dressings, umeboshi brine, vinegar | Red shiso for color; green for milder infusions |
How to Buy and Store shiso
At the market, reach for leaves that stand upright and show no yellowing or sliminess. Ao-shiso should be a clear, saturated green; aka-shiso should show deep burgundy with no brown edges. Snap a stem - it should break cleanly, not bend.
When you can, smell the leaf; fresh shiso gives an immediate minty-citrus signal.
At home, wrap leaves loosely in a damp paper towel, slip them into a perforated bag or loosely sealed container, and refrigerate.
Fresh shiso's shelf life sits around 3-7 days - notably shorter than something like basil's shelf life under the same conditions.
For a full breakdown of what affects freshness and when to discard, see the details on shiso's shelf life.
Pickled or dried shiso keeps far longer and is a practical option when fresh supply is inconsistent.
Start Here if You're New to Shiso
Buy green shiso first. It's more widely available, easier to use raw, and shows the herb's flavor most clearly.
Lay a whole leaf under sashimi or slice a few ribbons over rice - both approaches let you understand what the herb actually contributes before getting into pickling or infusions.
Red shiso is a second step. It's less about eating fresh and more about building color and depth into brines.
Once you've tasted what it does to umeboshi or a simple cucumber pickle, its role makes immediate sense.
Both varieties reward what pairs with sashimi thinking - the herb is almost always part of a composed pairing, not a solo act.
Frequently Asked Questions
Shiso is a variety of perilla - specifically Perilla frutescens var. crispa. Broader "perilla" covers several related plants used across Asian cuisines, some with flatter leaves and milder flavor than Japanese shiso.
Yes - raw is actually the preferred preparation for green shiso. Its flavor is brightest uncooked, which is why it's used as a wrap for sashimi and scattered over cold noodles without any heat applied.
Green shiso (ao-shiso) is brighter, mintier, and eaten raw or fried. Red shiso (aka-shiso) is earthier and more tannic, used mainly to color umeboshi and pickling brines rather than as a fresh eating herb.
It adds a clean, herbal contrast to fatty fish - the mint-anise note cuts through richness without the sharpness of wasabi. Most people notice it as a fresh, slightly cooling layer that lifts the overall bite.
The most reliable method is salting or pickling - layering leaves with salt or submerging in rice vinegar keeps them usable for weeks. Drying is also an option, though it dulls the minty-citrus notes considerably.
Moroccan Orange and Olive Salad
Complete Article Output
Most salads sit in the bowl looking pretty but tasting flat. The trick is building contrast - sweet oranges, briny olives, and warm spices that actually meld instead of sitting on top of each other.

High-quality olives and fresh-segmented oranges make the difference. Marinating lets the cumin and cinnamon sink into the citrus instead of dusting the surface.
This works for weeknight sides when you need something bright next to heavy mains, or for entertaining when you want a dish that looks intentional without much effort.
A Moroccan-style orange and olive salad with segmented citrus, green olives, and warm spices that marinate together for 30-60 minutes. The key is paper-thin onion slices and proper marinating time so the flavors blend instead of competing. Make this when you need a bright, no-cook side that pairs with rich mains.
Why This Recipe Works
Most people skip chicken, but it balances the meal. For a version that comes together quickly, this tender chicken recipe keeps the same Moroccan spice profile and pairs perfectly with bright citrus.
Prep Time
15 min
Cook Time
0 min
Total Time
15 min + 30-60 min marinating
Servings
4 servings
Difficulty
Easy
Category
Side | Appetizer
Quick Tip
Use fresh oranges and good quality olives
Best For
Weeknight | Entertaining | Summer meals
Why the method works:
- Segmenting oranges over a bowl catches juice that becomes part of the dressing instead of going down the drain
- Cumin and cinnamon bloom in the olive oil during marinating, coating every piece instead of clumping on the surface
- Paper-thin onion slices soften in the citrus acid without adding harsh bite
- Green olives add salt and brine that balance the sweet oranges without needing extra seasoning
- Marinating 30-60 minutes lets the textures meld - oranges stay juicy but the flavors soak through
What You'll Need
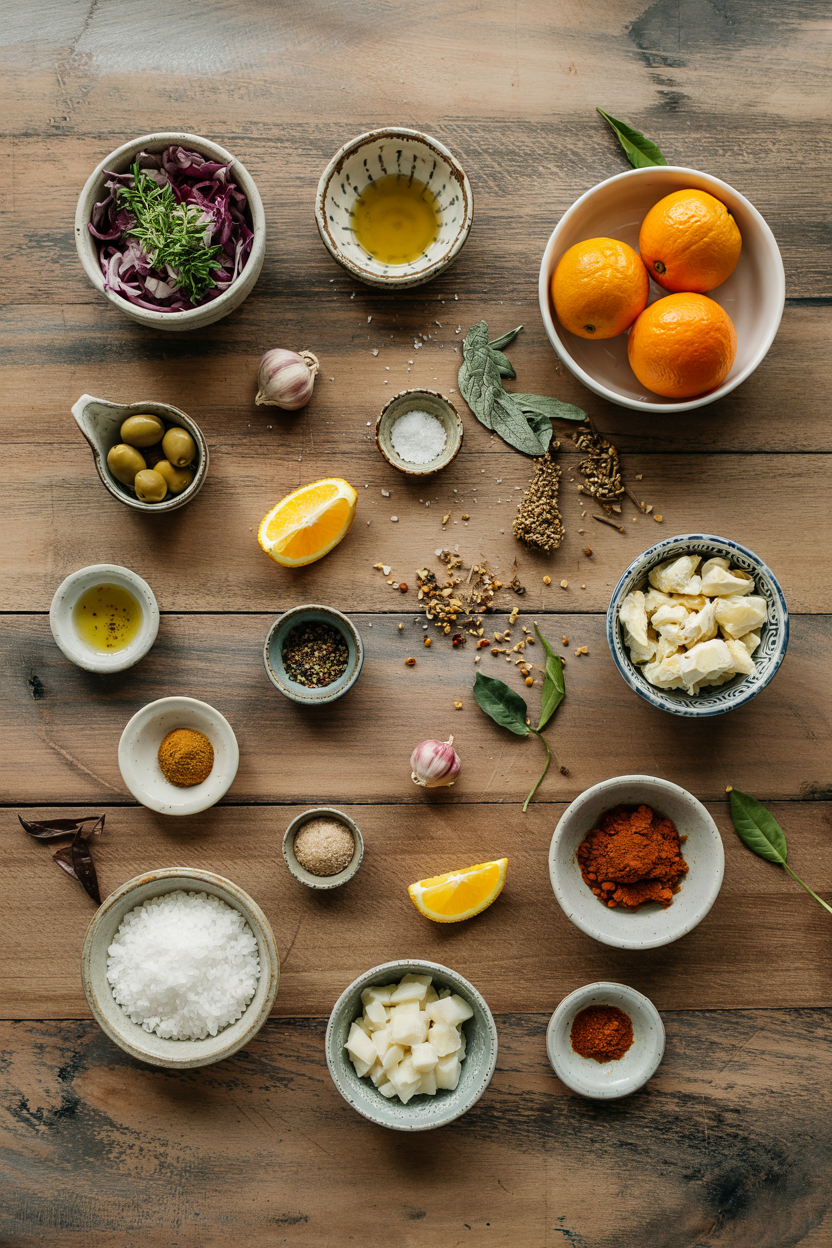
Rich mains need something to cut through, and salad does exactly that. For a version that comes together quickly, try a fresh salad on the side that uses similar Moroccan spices with a different vegetable base.
- 4 large oranges (seedless preferred)
- 2 tablespoon lemon juice
- 1 cup green olives (pitted, halved)
- ½ medium red onion (paper-thin slices)
- 1 teaspoon ground cumin
- ½ teaspoon ground cinnamon
- ½ teaspoon black pepper
- ½ teaspoon salt
- ¼ cup fresh cilantro (chopped)
- 3 tablespoon extra virgin olive oil
Ingredient Details
- Oranges
Use navel or Cara Cara oranges. Segment over a bowl to catch juice for the dressing. - Green olives
Castelvetrano or Manzanilla work best. Rinse under cold water for 30 seconds to reduce salt. - Red onion
Slice paper-thin with a sharp knife or mandoline. Soak in cold water 5 minutes to mellow the bite. - Cumin
Ground cumin blooms in the oil during marinating. Toast whole cumin seeds first for deeper flavor. - Olive oil
Extra virgin carries the spices and coats the citrus. Use a fruity or peppery oil for more character. - Fresh cilantro
Chop coarsely and add right before serving. Stems are tender enough to include. - Cinnamon
A small amount adds subtle warmth without making the salad taste like dessert.
Ingredient Swaps
The beef works best when it hits the table at the same time as the main. For a version that comes together quickly, this homemade beef recipe gives you a rich pairing option that handles similar spice profiles.
Four common swaps:
- Green olives → black olives or Kalamata: Less briny, milder flavor that changes the traditional North African profile but still works
- Fresh cilantro → fresh parsley or mint: Different herbal note - parsley is milder, mint adds cooling brightness instead of citrusy punch
- Cumin → ground coriander or smoked paprika: Alters the warm spice backbone - coriander is sweeter, paprika adds smokiness
- Orange → grapefruit or blood orange: More bitterness from grapefruit or deeper color from blood orange but similar acidity and texture
Black Olives
Works for: Milder salads, when you want less salt, pairing with delicate mains
Skip if: You want authentic Moroccan flavor, need stronger brine to balance sweet oranges
Fresh Parsley
Works for: Cilantro-haters, when you want milder herb presence, pairing with fish
Skip if: You want bright citrusy herb notes, authentic Moroccan profile
Grapefruit
Works for: Adding bitter contrast, winter citrus season, pairing with fatty meats
Skip if: You want balanced sweet-tart flavor, serving to kids, pairing with delicate proteins
Instructions
A good stew can make or break the plate. For a version that comes together quickly, this easy stew recipe works as a warm main that pairs perfectly with this bright citrus side.
Segment the oranges: Cut off both ends with a sharp knife, stand the orange upright, and slice down to remove peel and white pith. Cut between membranes to release segments over a mixing bowl, catching all the juice. Squeeze the leftover membranes to extract extra juice.
Prep the vegetables and olives: Slice the red onion paper-thin - use a mandoline if you have one. Soak slices in cold water for 5 minutes, then drain. Rinse the pitted green olives under cold water for 30 seconds and halve them lengthwise.
Mix the dressing: In the bowl with the orange juice, whisk together olive oil, lemon juice, cumin, cinnamon, salt, and black pepper until the spices are evenly distributed and the oil emulsifies slightly.
Combine and marinate: Add orange segments, olives, and drained onion slices to the bowl. Toss gently to coat everything in the dressing. Cover and refrigerate for 30-60 minutes minimum - the flavors need time to meld and the onions to soften.
Finish and serve: Right before serving, chop the fresh cilantro and toss it through the salad. Taste and add more lemon juice or salt if needed. Serve chilled or at cool room temperature on a shallow platter.
What to Serve With It
Most sides fail because they compete instead of complement. When planning easy pork dish planning, think about texture and temperature contrast - warm mains need cool, bright sides like this.
| Side Dish | Prep | Why It Works | How to Serve |
|---|---|---|---|
| Grilled Chicken | Easy | Protein that doesn't compete with bright citrus flavors | Slice warm chicken, serve alongside chilled salad |
| Couscous | Easy | Absorbs the dressing, adds starch without heaviness | Fluff warm couscous, top with cold salad |
| Warm Pita Bread | Easy | Texture contrast, soaks up juice from the salad | Toast pita, tear into pieces, serve on the side |
| Roasted Lamb | Involved | Rich, fatty meat needs citrus acidity to cut through | Slice lamb, let rest, serve salad as bright contrast |
| Spiced Chickpeas | Easy | Adds protein, shares Moroccan spice profile | Roast chickpeas with cumin, serve warm over cold salad |
Three ways to serve it:
- As an appetizer with warm flatbread and hummus before a heavy main course
- Alongside grilled proteins as a bright, no-cook side that balances rich meats
- Over couscous or quinoa for a light vegetarian lunch with added texture
Store and Reheat
The chicken works best when it hits the table at the same time as the main. We keep a batch ready for nights like this - a tender pork side dish that needs the same bright contrast this salad provides.
| Method | Time | Best For |
|---|---|---|
| ❄️ Serve Chilled | 0 min | Best texture, brightest flavor, ideal presentation |
| 🌡️ Room Temp | 10 min out of fridge | When you want softer onions, mellower flavor |
| 📦 Microwave | 10-15 sec low power | Only if slightly warming dressing - not preferred |
For best results when storing:
- Transfer to a shallow airtight container to avoid juice pooling at the bottom
- Store in the fridge for 3-4 days maximum - texture degrades after that
- Drain excess liquid before serving leftovers to prevent soggy segments
- Add fresh cilantro right before serving second-day salad for brightness
- Bring to cool room temperature 10 minutes before serving for best flavor - too cold mutes the spices
Frequently Asked Questions
Yes, make it 2-4 hours ahead and refrigerate. The flavors meld better with time, but add fresh cilantro right before serving to keep it bright.
Minimum 30 minutes, ideal 45-60 minutes. Less than 30 minutes and the onions stay too sharp; more than 2 hours and the oranges start breaking down.
Grilled or roasted lamb, chicken tagine, couscous, or warm pita bread. The citrus cuts through rich, fatty meats and pairs with North African spice profiles.
The onion slices soften and turn slightly translucent, the orange segments absorb some spice color, and the dressing tastes cohesive instead of separated. Taste after 30 minutes.
Yes, but they're milder and less briny. Kalamata olives work better than canned black olives - they have more flavor and firmer texture that stands up to marinating.
Moroccan Orange and Olive Salad
Ingredients
Method
- Cut off both ends with a sharp knife, stand the orange upright, and slice down to remove peel and white pith. Cut between membranes to release segments over a mixing bowl, catching all the juice. Squeeze leftover membranes to extract extra juice.4 large orange
- Slice the red onion paper-thin using a mandoline or sharp knife. Soak the slices in cold water for 5 minutes, then drain. Rinse the pitted green olives under cold water for 30 seconds and halve them lengthwise.1 cup green olives, 0.5 medium red onion
- In the bowl with the orange juice, whisk together olive oil, lemon juice, ground cumin, ground cinnamon, salt, and black pepper until the spices are evenly distributed and the oil emulsifies slightly.2 tbsp lemon juice, 1 tsp ground cumin, 0.5 tsp ground cinnamon, 0.5 tsp black pepper, 0.5 tsp salt, 3 tbsp extra virgin olive oil
- Add orange segments, halved olives, and drained onion slices to the bowl. Toss gently to coat everything in the dressing. Cover and refrigerate for 30 to 60 minutes to allow flavors to meld and onions to soften.4 large orange, 1 cup green olives, 0.5 medium red onion, 1 tsp ground cumin, 0.5 tsp ground cinnamon, 0.5 tsp black pepper, 0.5 tsp salt, 3 tbsp extra virgin olive oil
- Right before serving, chop fresh cilantro and toss it through the salad. Taste and adjust lemon juice or salt if needed. Serve chilled or at cool room temperature on a shallow platter.0.25 cup fresh cilantro
Notes
- Slice onions paper-thin to prevent overpowering the salad; soaking in cold water helps mellow the bite.
- Marinate at least 30 minutes for flavors to meld; longer than 2 hours may break down the oranges.
- Use extra virgin olive oil to carry warm spices and coat the citrus for best flavor integration.
Tried this recipe?
Let us know how it was!What Is Rosemary? [Taste, Uses & More]
That first whiff when you strip a rosemary sprig - sharp pine, a thread of resin, something almost medicinal - tells you exactly what you're dealing with. Rosemary is one of the few herbs that announces itself before it even hits the pan, and that confidence is precisely why cooks have leaned on it for centuries.
If you've been reaching for alternatives to bay leaf or browsing focaccia swaps that work, knowing rosemary's full character helps you decide when it belongs and when something else serves better.
Rosemary is a woody Mediterranean herb with piney, resinous flavor and strong aroma. Used fresh or dried, it suits roasted meats, breads, and infused oils. Fresh sprigs last 1-2 weeks refrigerated; dried rosemary keeps 6-12 months in a sealed container.
What Is Rosemary?
Rosemary (Rosmarinus officinalis) is an evergreen shrub native to the Mediterranean basin, where it grows wild on rocky hillsides from Spain to Lebanon.
Its leaves are stiff, needle-like, and coated in resinous oils that give the herb its characteristic punch - those oils don't fade easily, which is why rosemary holds up under heat better than most fresh herbs.
The plant belongs to the mint family, though you'd be forgiven for missing the family resemblance. Most home cooks encounter two main forms: fresh sprigs with their waxy needles still attached, and dried rosemary, which is more concentrated and easier to crush.
Serious growers also seek out named varieties.
- 🌱 Tuscan Blue - tall, upright variety with broad needles and intense flavor, popular in Italian cooking
- 🌱 Arp rosemary - cold-hardy cultivar with slightly lighter flavor, good for northern gardens
- 🌱 Prostrate rosemary - low-growing, ornamental form; milder in flavor, less common in cooking
For the kitchen, Tuscan Blue is the standard reference point. It's also sold simply as "garden rosemary" at most markets.
What Does Rosemary Taste Like?
Rosemary tastes closest to pine and eucalyptus - that same sharp, resinous quality - with a savory lift that recalls thyme.
Underneath the pine note sits a herbaceous bitterness and a faint camphor quality that gives the herb a slightly medicinal edge.
Heat softens the camphor edge and draws out more of the sweet, woody character. Long, slow cooking - a braise, a simmered tomato sauce - mutes rosemary's sharper top notes and leaves something gentler behind.
For a direct side-by-side on how it differs from a close relative, comparing sage vs rosemary options breaks down where each one fits.
How to Use Rosemary
Rosemary earns its place across Italian, Provençal, and broader Mediterranean cooking, showing up in everything from a Tuscan arista pork roast to a Provençal lamb shoulder rubbed down with garlic and herb. Lamb is the single most natural pairing - the herb's resin cuts through the meat's fat in a way few other herbs manage.
Olive oil, garlic, roasted potatoes, and lemon all complement it well, and pork takes rosemary just as readily as lamb does.
The method matters as much as the pairing.
| Method | Best For | Tip |
|---|---|---|
| 🥗 Herb Rub | Leg of lamb, pork shoulder, chicken | Chop finely with garlic and salt; press into scored fat before roasting |
| 🔥 Whole Sprig in Pan | Cast-iron steaks, pan sauces, roast potatoes | Add to hot oil and baste over meat; remove before serving |
| 🍞 Dough Seasoning | Focaccia, flatbreads, crackers | Press needles into dough surface; they crisp up and mellow in the oven |
| 🫙 Oil Infusion | Vinaigrettes, dipping oil, finishing oil | Steep sprigs in warm olive oil for 30 minutes; strain before use |
| 🍲 Slow Simmer | Tomato sauces, braises, soups | Add whole sprig early; remove before serving or needles become tough |
Rosemary also goes into savory custards and cream-based soups when steeped in warm cream.
If a recipe calls for a neutral herb oil and you need a different fat base, knowing about replacements for olive oil keeps the infusion technique intact.
How to Buy and Store Rosemary
Fresh rosemary should have bright green, pliable needles with a strong resinous smell when you pinch them. Avoid stems with brown or brittle needles, and skip any bunches showing fuzzy white spots, which signal mold. For dried rosemary, shake the jar - if the aroma is faint and dusty, the herb has already lost most of its carnosic acid content and won't deliver much flavor.
Dried rosemary keeps best in an airtight dark container away from the stove's heat. A full breakdown of timing and signs of degradation is covered in rosemary's shelf life.
And if you're mid-recipe without any on hand, there are several rosemary swaps that work depending on what the dish actually needs.
Start Here With Rosemary
Rosemary rewards confident use, not timid use. Start with a leg of lamb or roast potatoes - high-heat applications that showcase its pine character without risk of over-extraction.
Once you know how it behaves at high heat, work backward to slower methods like braised sauces and oil infusions. If a dish already has strong acidic or delicate herb elements, hold off - rosemary doesn't share the stage gracefully.
Frequently Asked Questions
Yes, rosemary needles are edible. Raw, they're quite tough and intensely piney, so most cooks chop them finely before eating them uncooked. In slow-cooked dishes, the needles soften slightly but remain chewy - whole sprigs are usually removed before serving.
Dried rosemary is more concentrated by weight - use roughly half the amount a recipe calls for if substituting dried for fresh. Fresh sprigs, however, release flavor more gradually and leave a brighter, less dusty impression in the finished dish.
They share a savory, herbaceous quality but rosemary is considerably more assertive. Thyme is earthy and subtle; rosemary brings a resinous pine note and camphor edge that thyme lacks entirely.
Rosemary's volatile oils begin releasing within the first 10-15 minutes of cooking, and the flavor peaks early in a braise or sauce. Extended cooking past 2 hours gradually strips the herb's brightness, leaving only the deeper, woodier base notes.
Thyme, oregano, and sage hold up alongside rosemary without being overwhelmed. Avoid pairing it with delicate herbs like tarragon, chervil, or fresh basil - rosemary's intensity drowns them out.
What Is Stewed Tomatoes? [Taste, Uses & More]
Stewed tomatoes do something no other canned tomato product quite replicates: they bring pre-built savory depth to a dish without any extra work.

The tomatoes are already cooked down with onion, celery, and sometimes bell pepper, so the foundational layer of flavor is done before the can ever opens.
If you're comparing pantry staples, knowing the alternatives to tomato paste helps clarify why stewed tomatoes occupy their own distinct lane - they're saucy and seasoned, not concentrated and dense.
The aromatics built into the base also mean that celery flakes stand-ins matter more when you're making a homemade version than when cracking open a can.
Stewed tomatoes are pre-cooked canned tomatoes simmered with onion, celery, and bell pepper. They're mildly sweet, tangy, and savory - less concentrated than tomato sauce, with soft tomato pieces intact. Use them in soups, braises, casseroles, and quick weeknight pasta.
What Is Stewed Tomatoes?
Stewed tomatoes are a cooked canned tomato product made from whole or chopped ripe tomatoes simmered with mild aromatics - typically onion, celery, and bell pepper - before being sealed in cans or jars.
They sit in a distinct category from plain canned options like crushed or diced tomatoes, which are raw-packed without seasoning.
The product has roots in North American home-canning tradition, where cooks preserved summer tomatoes with whatever aromatics were on hand. Many European tomato varieties contributed to the base ingredient over generations of adaptation.
Some labels add a touch of sugar or vinegar to balance acidity. Brand names vary widely, and you'll see them sold as canned stewed tomatoes, stewed diced tomatoes, or simply stewed tomatoes with onions.
- 🍅 Plain diced tomatoes - raw-packed, no seasonings, firmer texture
- 🍅 Crushed tomatoes - raw, broken down, no aromatics, more acidic
- 🍅 Stewed tomatoes - pre-cooked with onion, celery, bell pepper; saucy and seasoned
When a recipe calls for swapping out bell pepper in a homemade batch, the flavor shift is noticeable - bell pepper gives stewed tomatoes a mild sweetness that onion alone won't replicate.
What Does Stewed Tomatoes Taste Like?
Stewed tomatoes taste like slow-simmered tomato sauce - but less concentrated and with visible, softened tomato pieces that still hold their shape. The cooked tomato base delivers mild sweetness alongside a background acidity that stays gentle rather than sharp.
The onion and celery notes are understated - they round out the tomato rather than competing with it.
Extended cooking deepens the subtle umami from the tomato concentrate, which is why stewed tomatoes add more background richness than diced tomatoes in the same dish.
How to Use Stewed Tomatoes
Stewed tomatoes are a workhorse base ingredient across American comfort cooking, Southern U.S. home kitchens, and Mexican-American weeknight meals. They work equally well in Italian-American dishes where a quick, pre-seasoned tomato base saves time.
| Method | Best For | Tip |
|---|---|---|
| 🍲 Simmering | Weeknight pasta, chili base, rice and beans | Reduce by a third to concentrate flavor |
| 🫙 Baking | Casseroles like goulash or tamale pie | Add corn or masa to absorb extra liquid |
| 🍗 Braising | Chicken, pork, root vegetables | Keep lid on to retain brothy liquid |
| 🥚 Poaching | Shakshuka-style egg dishes | Bring to a full simmer before adding eggs |
Strong pairings include garlic and onion, ground beef or pork, basil or oregano, and cheddar or Monterey Jack.
Corn and masa absorb the liquid well in baked casseroles, and smoked paprika or hot sauce amplifies the savory notes without overpowering the tomato base.
Avoid pairing stewed tomatoes with delicate raw herbs like fresh basil added at the start of cooking - the long heat kills brightness.
For dishes where you need a richer tomato foundation, knowing tomato sauce swaps that work clarifies when stewed tomatoes can step in and when they fall short.
How to Buy and Store Stewed Tomatoes
At the store, check cans for no bulges, dents near the seams, or rust - any of those signal a compromised seal.
Look for labels marked "stewed tomatoes with onions" and scan the ingredient list if added sugar or vinegar is something you monitor.
Unopened cans keep for months to years at the best-by date in a cool, dark pantry. Opened and refrigerated, use within 3-5 days.
For longer storage, freezing stewed tomatoes extends their life up to six months with minimal texture loss, since they're already cooked and soft.
When to Reach for Stewed Tomatoes
Stewed tomatoes earn their place when you need savory tomato flavor with zero prep. Start here if your dish is a braise, a one-pot casserole, or a weeknight pasta that needs a tomato base built quickly.
If a recipe leans on raw tomato brightness or a very smooth sauce, stewed tomatoes stand-ins or plain diced tomatoes may serve better. Otherwise, the can does the work of chopping, sautéing aromatics, and simmering - all before you turn on the stove.
Knowing when that shortcut fits your dish is the whole decision.
Frequently Asked Questions
Diced tomatoes are raw-packed with no added seasonings. Stewed tomatoes are pre-cooked with onion, celery, and bell pepper, giving them a softer texture and built-in savory flavor that diced tomatoes lack.
Yes. They work well in quick weeknight sauces where you want pre-built savory depth. Simmer to reduce the extra liquid or the sauce will be thinner than a tomato-sauce-based version.
Not for fresh salsa. The pre-cooked texture is too soft and the onion flavor is already cooked in, which muddies the bright, raw notes salsa needs. Cooked salsa or ranchero sauce is a better fit.
Often yes. The added aromatics and sometimes seasoning in stewed tomatoes mean sodium levels can run higher than plain diced tomatoes. Check the label and compare - low-sodium versions of both exist.
No. Tomato sauce is smooth, fully broken down, and more concentrated. Stewed tomatoes are looser and brothy with visible soft tomato pieces, making them less dense and more textured than sauce.
What Is Piquillo Pepper? [Taste, Uses & More]
Cracking open a jar of piquillo peppers releases a smell that signals something already done right - smoky, faintly sweet, and edged with the char of an open flame.
These small Spanish peppers arrive fully roasted and hand-peeled, ready to use in everything from tapas spreads to stuffed appetizers, and making spanish romesco sauce at home becomes noticeably easier with them on hand.
If you cook with smoked ingredients regularly, knowing your smoked paprika stand-ins is useful context for understanding what piquillos bring to a dish on their own.
The piquillo pepper is a small, heart-shaped Spanish pepper that is char-roasted, hand-peeled, and sold jarred or canned. It tastes sweet and mildly smoky with a bright acidic finish. Use it stuffed, blended, or served cold in tapas. Unopened jars last up to a year.
What Is Piquillo Pepper?
Pimiento del piquillo is a variety of sweet pepper native to northern Spain, cultivated primarily in Navarra and La Rioja. The name translates roughly to "little beak," a reference to the pepper's narrow, pointed tip. Unlike standard bell peppers, piquillos are small - typically 3 to 4 inches long - and heart-shaped, with a thin wall that crisps and blackens easily over a wood flame.
Every commercial piquillo you'll find has been char-roasted and peeled by hand, a process that defines both its texture and flavor profile. They're packed in their own juices or olive oil, sometimes with a light brine.
The most prized designation is piquillo de Lodosa, a protected geographical indication (PGI) label tied to peppers grown in Lodosa, Navarra.
You won't often find them fresh outside Spain. Jarred piquillos - sometimes labeled pimiento piquillo - are the standard form, and they're sold at Spanish specialty shops, well-stocked grocery stores, and online.
- 🌍 Origin - Navarra and La Rioja, northern Spain
- 📐 Shape - Small, pointed, heart-shaped; 3-4 inches long
- 🏷️ Top designation - Piquillo de Lodosa carries a protected geographical indication
- 🫙 Standard form - Jarred or canned, already roasted and peeled
What Does Piquillo Pepper Taste Like?
Piquillos taste closer to a roasted red bell pepper than anything else, but the comparison only goes so far. Sweeter and more complex, they carry a brightness - a mild acidic tang - that bell peppers don't develop even after roasting.
The smokiness is subtle, not aggressive. It's the kind of background note that keeps the flavor from reading as purely sweet, and it lingers briefly after each bite.
There's also a whisper of roasted caramel that emerges from the high-heat char, which gives piquillos a slight depth that jarred roasted bells rarely match.
Texture matters here too. Jarred piquillos are silky and yielding - meaty enough to hold a stuffing, but delicate enough to melt into a sauce.
Heat doesn't dramatically change the flavor, however it does soften them further and pulls the smokiness forward.
How to Use Piquillo Pepper
Spanish cooks in Navarre and the Basque region have built entire dishes around the piquillo. The most iconic is pimientos rellenos de bacalao - peppers stuffed with a creamy salt cod filling and baked until just set.
The pepper's thin wall holds the filling without overwhelming it.
Blending is equally common. Piquillos puree smoothly into sauces, spreads, and aioli, contributing color and a rounded sweetness. They work well paired with olive oil, garlic, and anchovy in tapas; layered cold on crostini with goat cheese; or folded into eggs.
| Method | Best For | Tip |
|---|---|---|
| 🥗 Cold / Jarred | Tapas, salads, crostini toppings | Drain well and pat dry before layering |
| 🍳 Pan-seared | Warming for side dishes or garnish | High heat, 60-90 seconds only - they color fast |
| 🫙 Stuffed and baked | Pimientos rellenos, appetizer plates | Fill loosely; overstuffing splits the skin |
| 🌀 Blended | Romesco-style sauces, aioli, dips | No need to peel further - they blend completely smooth |
Avoid pairing piquillos with strong anise or licorice-forward ingredients - those flavors overpower the pepper's gentle smokiness.
When you need a different pepper profile, there are piquillo pepper swaps that work if jarred piquillos aren't available.
For a broader look at substitution decisions, the guide on swapping out bell pepper helps clarify when a roasted sweet pepper can and can't do the same job.
How to Buy and Store Piquillo Pepper
Look for jars or tins labeled "piquillo" or, ideally, "piquillo de Lodosa" for the protected designation. The peppers should appear deep red and plump - avoid anything with cloudy packing liquid or shriveled flesh.
Fresh piquillos are rare outside Spain, however specialty markets occasionally stock them in late summer.
Unopened jars hold well in a cool, dark pantry.
For a full breakdown of timelines and signs of spoilage, check the guide on piquillo pepper's shelf life.
Jarred piquillos are gluten-free and low in calories, though sodium levels vary - worth checking if you're monitoring salt intake.
The oil used in packing adds fat content, and olive oil swaps that work can matter if you're transferring peppers to a fresh container.
Start With the Jar
If piquillos are new to you, the jar is the best entry point - no roasting, no peeling, no prep.
Drain a few, lay them over toast with goat cheese and a pinch of salt, and you'll understand immediately why Spanish cooks treat them as a pantry staple rather than a specialty item.
From there, try blending them into a quick sauce or using a seasoning with roasted red pepper hummus dip as a template for how piquillo puree behaves in dips. Their flavor earns the shelf space -
once you've used them, a pantry without a backup jar starts to feel like a gap.
Frequently Asked Questions
No. Piquillos are a sweet pepper variety with no significant heat. Occasionally a jar will contain one slightly hotter pepper due to natural variation, but as a category they register no detectable spice.
Piquillos are sweeter, smaller, and have a more pronounced smoky-tangy finish. Bell peppers have thicker walls and a milder, more watery flavor even after roasting.
Yes, with some trade-off. Jarred roasted red peppers work in most recipes but lack piquillo's smokiness and concentrated sweetness. The texture is also slightly softer and less meaty.
Kept submerged in oil in an airtight container, they last 5-7 days. Peppers stored in brine degrade faster - use those within 3-4 days and check for off smells before using.
It's a protected geographical indication (PGI) label for piquillos grown in Lodosa, Navarra. These peppers must meet strict standards for variety, cultivation, and hand-peeling - making them the most regulated and often highest-quality form available.
Turkish Iskender Kebab
You need 25 minutes and one skillet. No marinating, no grilling rotisserie meat from scratch, no multi-step assembly until the very end.

Thinly sliced lamb or beef warms in minutes while you toast bread and brown butter. The tomato sauce simmers just long enough to concentrate, and the yogurt stays cold until serving.
This is the kind of recipe you make when you want a restaurant-style Turkish dinner on a weeknight without the fuss. Layer crispy bread, tender meat, hot tomato-butter sauce, and cool yogurt in under half an hour.
Turkish Iskender Kebab layers thinly sliced lamb or beef over toasted flatbread, topped with rich tomato-butter sauce and cool yogurt. The crispy bread base soaks up the sauce without getting soggy when you toast it right before assembly. Brown the butter gently and add the sauce hot at the last second to keep every layer intact.
Why This Recipe Works
High heat on the bread and gentle warming for the meat create the texture contrast that makes this dish work. The tomato sauce simmers down to concentrate flavor while the butter browns separately so you control both elements. For another layered dinner with bold flavors, try this simple skillet recipe that builds complexity in one pan.
Prep Time
15 min
Cook Time
10 min
Total Time
25 min
Servings
4 servings
Difficulty
Medium
Category
Main Dish
Quick Tip
Use fresh bread, warm butter sauce last
Best For
Weeknight | Entertaining
What makes this work:
- Thinly sliced meat (⅛ inch) reheats in 1-2 minutes without drying out or turning chewy
- Toasted flatbread stays crispy under the sauce for 3-4 minutes before it starts to soften
- Browned butter adds nutty richness that plain melted butter can't match
- Simmered tomato sauce concentrates flavor and thickens enough to coat the meat without running off
- Cold yogurt balances the hot, rich sauce and keeps the dish from feeling heavy
What You'll Need
You're shopping for thinly sliced doner meat, flatbread that can handle toasting, and full-fat yogurt that won't split. Most Turkish or Middle Eastern markets carry lamb or beef doner already sliced, but you can slice leftover roasted meat thin at home. If you're looking for more ways to build flavor-packed weeknight dinners, check out this simple skillet recipe for another easy layered meal.
- 1 lb (450g) thinly sliced lamb or beef doner meat
- 4 pieces Turkish flatbread or pita
- 1 cup (240ml) tomato sauce
- 4 tablespoon (60g) butter
- 2 cloves garlic, minced (optional)
- 1 tablespoon (15ml) olive oil
- 1 cup (240g) full-fat plain yogurt
- 2 green peppers, sliced (optional)
- 2 tomatoes, sliced (for garnish)
- 1 teaspoon sumac (optional)
Ingredient Details
- Lamb or beef doner meat
Use pre-sliced doner from a Turkish market or slice leftover roasted meat ⅛ inch thick - thicker slices dry out when reheated - Turkish flatbread or pita
Fresh bread toasts better than day-old - if using pita, split it open to maximize crispiness - Butter
Brown butter at medium-low heat for 3-4 minutes until light brown and nutty - high heat burns it quickly - Tomato sauce
Use thick sauce or simmer thin canned tomatoes for 10 minutes to reduce - watery sauce makes the bread soggy - Yogurt
Full-fat yogurt stays creamy when folded into warm sauce - low-fat splits and turns watery - Garlic
Mince garlic fine and cook in the tomato sauce for 2 minutes to mellow the bite - Sumac
Sprinkle just before serving for citrusy aroma and bright red color - it loses potency if added too early
Ingredient Swaps
You can swap the protein or make this dairy-free without losing the layered structure. The bread base matters most - crispy flatbread holds up better than soft pita, but you can make either work if you toast it right. For more Turkish-inspired sides that balance rich mains, try this fresh salad side dish that adds brightness and crunch.
Four swaps that work:
- Lamb or beef doner → chicken slices or seared ground lamb - lighter flavor, slightly drier texture, works for budget-conscious dinners
- Turkish flatbread → gluten-free pita or lettuce leaves - gluten-free option alters texture but keeps the layered structure intact
- Butter → olive oil or vegan butter - dairy-free swap reduces richness but still creates a sauce base
- Yogurt → dairy-free yogurt or omit entirely - loses the creamy contrast but keeps the dish together
Chicken Slices
Works for: Quick dinners, lighter meals, budget cooking
Skip if: You want the traditional rich, meaty flavor
Gluten-Free Pita
Works for: Gluten-free diets, same layered structure
Skip if: You want the chewy texture of fresh Turkish flatbread
Dairy-Free Yogurt
Works for: Dairy-free meals, still adds creamy contrast
Skip if: You want the tangy richness of full-fat yogurt
Instructions
The whole dish comes together in 25 minutes if you toast the bread while the sauce simmers. Warm the meat in batches so each slice heats evenly without steaming. If you're pairing this with something crispy on the side, consider golden roasted potatoes that cook while you prep the kebab.
- Toast the flatbread. Preheat oven to 400°F (200°C). Place flatbread or split pita on a baking sheet and toast 3-5 minutes until edges turn golden and crisp. Watch closely after 3 minutes - it goes from golden to burnt quickly.
- Simmer the tomato sauce. Heat olive oil in a small saucepan over medium heat. Add minced garlic if using and cook 1 minute until fragrant. Pour in tomato sauce, stir, and simmer 10 minutes until thickened. The sauce should coat the back of a spoon, not run off.
- Brown the butter. In a separate small pan, melt butter over medium-low heat. Let it cook 3-4 minutes, swirling occasionally, until it turns light brown and smells nutty. Remove from heat immediately - it burns fast.
- Warm the meat. Heat a skillet over medium heat. Add meat slices in a single layer (work in batches if needed) and warm 1-2 minutes per side until heated through and edges brown slightly. Don't overcrowd the pan or the meat steams instead of crisping.
- Assemble and serve. Place toasted bread on serving plates. Layer warm meat slices on top. Pour hot tomato sauce over the meat, then drizzle browned butter over everything. Dollop cold yogurt on the side or gently fold into the sauce off heat. Garnish with sliced tomatoes, green peppers, and sumac if using. Serve immediately while bread is still crisp.
What to Serve With It
This dish needs something light to cut the richness and something with acidity to balance the butter. Most people skip the sides, but the contrast makes the meal feel complete instead of heavy. For more ways to round out bold, meaty dinners, check out these savory chicken dish ideas for practical side pairings.
| Side Dish | Prep | Why It Works | How to Serve |
|---|---|---|---|
| Cucumber salad | Easy | Crisp, refreshing crunch balances rich meat and butter sauce | Toss sliced cucumbers with lemon juice, olive oil, salt |
| Rice pilaf | Easy | Neutral starch soaks up extra sauce without competing for flavor | Cook rice with butter and stock, fluff before serving |
| Grilled vegetables | Medium | Smoky char adds another layer, fiber balances heavy meat | Grill peppers, zucchini, eggplant until charred, drizzle olive oil |
| Pickled peppers | Easy | Sharp acidity cuts through butter richness, bright contrast | Serve store-bought or quick-pickle peppers in vinegar |
| Stuffed grape leaves | Involved | Traditional appetizer complements main, adds herby freshness | Serve cold or room temp, drizzle lemon juice |
Three ways to serve it:
- Weeknight casual: Serve with cucumber salad and rice pilaf - both come together in under 15 minutes
- Entertaining: Add a mezze platter with hummus, olives, and stuffed grape leaves for a full spread
- Quick lunch: Skip the sides and serve with extra yogurt and a squeeze of lemon
Store and Reheat
Store components separately so the bread doesn't get soggy and the yogurt doesn't split. The meat and tomato sauce keep for 3-4 days in the fridge, but the bread is best fresh or re-toasted right before serving. For a light side that travels well to work lunches, pair leftovers with fresh salad side dish for added crunch and brightness.
| Method | Time | Best For |
|---|---|---|
| 🍳 Stovetop | 3-4 min over medium-low | Reheating meat and sauce gently without drying out |
| 🔥 Oven | 10 min at 350°F (175°C) | Warming whole assembled portions, keeps bread crisp |
| 📦 Microwave | 1-2 min at 50% power | Quick single servings, watch for soggy bread |
For best results when storing:
- Separate components: Store meat, sauce, bread, and yogurt in separate airtight containers - bread gets soggy if stored assembled
- Shallow layers: Spread meat in a shallow container so it cools quickly and reheats evenly
- Toast bread fresh: Reheat assembled portions without bread, then add freshly toasted flatbread right before serving
- Keep yogurt cold: Store yogurt in the fridge and add it cold to reheated portions - heating yogurt makes it watery
- Reheat gently: Warm meat and sauce in a skillet over medium-low heat, stirring occasionally, to prevent drying out
Frequently Asked Questions
Warm the meat 1-2 minutes per side over medium heat until heated through and edges brown slightly. Simmer the tomato sauce 10 minutes over medium heat until thickened, and brown the butter 3-4 minutes over medium-low heat until light brown and nutty.
Store the meat and tomato sauce in separate containers for up to 3-4 days. Toast the bread fresh right before serving and add cold yogurt at the end - reheating assembled portions makes the bread soggy and the yogurt watery.
Serve with cucumber salad for refreshing crunch, rice pilaf to soak up the sauce, grilled vegetables for smoky contrast, or pickled peppers for sharp acidity. Lighter, brighter sides balance the rich butter and meat without adding more heaviness.
The meat is ready when it's heated through and the edges start to brown slightly, about 1-2 minutes per side. If the slices are too thick or the pan is overcrowded, the meat steams instead of crisping - work in batches for even warming.
Yes, use thinly sliced cooked chicken breast or thigh meat as a lighter, budget-friendly swap. Chicken has less fat than lamb or beef, so it dries out faster - warm it for just 1 minute per side and add extra butter sauce to keep it moist.
Turkish Iskender Kebab
Ingredients
Equipment
Method
- Preheat oven to 400°F (200°C). Place flatbread or split pita on a baking sheet and toast for 3-5 minutes until edges turn golden and crisp. Watch closely after 3 minutes to avoid burning.4 pieces Turkish flatbread or pita
- Heat olive oil in a small saucepan over medium heat. Add minced garlic if using and cook 1 minute until fragrant. Pour in tomato sauce, stir, and simmer for 10 minutes until thickened and coating the back of a spoon.1 cup tomato sauce, 2 cloves garlic, 1 tbsp olive oil
- In a separate small pan, melt butter over medium-low heat. Cook 3-4 minutes, swirling occasionally, until it turns light brown and smells nutty. Remove from heat immediately to prevent burning.4 tbsp butter
- Heat a skillet over medium heat. Add meat slices in a single layer and warm for 1-2 minutes per side until heated through and edges brown slightly. Work in batches to avoid overcrowding.1 lb lamb or beef doner meat
- Place toasted bread on serving plates. Layer warm meat slices on top. Pour hot tomato sauce over the meat, then drizzle browned butter over everything. Dollop cold yogurt on the side or gently fold into the sauce off heat. Garnish with sliced tomatoes, green peppers, and sumac if using. Serve immediately while bread is still crisp.1 lb lamb or beef doner meat, 4 pieces Turkish flatbread or pita, 1 cup tomato sauce, 4 tbsp butter, 1 cup full-fat plain yogurt, 2 green peppers, 2 tomatoes, 1 tsp sumac
Notes
- Slice doner meat ⅛ inch thick to prevent dryness and chewiness when reheating.
- Toast bread just before assembly to keep it crispy and avoid sogginess.
- Add yogurt cold and serve on the side or fold gently off heat to avoid splitting.
Tried this recipe?
Let us know how it was!What Is Pretzel? Taste, Texture, Uses & More
Bite into a fresh soft pretzel and the crust gives first - a thin, crackly shell with a faint alkaline tang - before yielding to a dense, chewy interior that smells of warm bread and toasted wheat.

That contrast is engineered, not accidental.
The lye wash (or its home-kitchen stand-in, baking soda) that coats the dough before baking drives the Maillard reaction hard and fast, producing the glossy brown crust and distinctive flavor that no plain dinner roll can replicate.
Just as alternatives to graham cracker often miss that specific toasty-sweet note, pretzel substitutes rarely nail the full package.
A pretzel is a Central European yeasted baked good distinguished by its alkaline-washed crust and coarse salt topping. Soft pretzels are chewy and best eaten fresh; hard pretzels snap clean and keep for months. Both styles carry a mildly sweet dough flavor with a salty, toasty exterior.
What Is Pretzel?
The pretzel is a knot-shaped leavened bread with roots in Central Europe, most closely associated with Bavaria and the broader German-speaking region. The German name Laugenbrezel translates roughly to "lye pretzel," naming the alkaline bath that defines the product.
Two distinct styles exist. Soft pretzels are thick, doughy rolls - sold warm from street carts, bakeries, and stadium concessions.
Hard pretzels are thin, twice-dried snacks that snap under pressure, common in American pantries and bar snack bowls.
What unites both styles is the alkaline pre-bake treatment. Dough is dipped in a lye solution (sodium hydroxide) or a strong baking soda bath before it goes into the oven.
That step raises the surface pH, accelerating browning and creating the shiny, deep-amber crust that sets pretzels apart from every other bread category.
- 🥨 Soft pretzel (Laugenbrezel) - thick, chewy, best eaten same-day; common in Bavarian bakeries and American ballparks
- 🥨 Hard pretzel - thin, dry-baked, shelf-stable snack with a clean snap
- 🥨 Pretzel rod - elongated hard pretzel variant, often served at bars
- 🥨 Mini pretzel nuggets - bite-sized, popular for snack mixes and dipping
What Does Pretzel Taste Like?

The flavor splits cleanly between crust and crumb. The exterior delivers salt up front, followed by a caramelized, slightly bitter edge from the alkaline browning - not harsh, but unmistakably different from a plain bun.
The interior dough is mild and faintly sweet, similar to a soft dinner roll without any of the crust's character.
Hard pretzels concentrate that crust flavor across the whole piece. Each bite is nuttier and more uniformly toasty, closer to a well-browned artisan cracker than to a bread product.
Heat amplifies both the salt perception and the toasty notes, which is why a warm soft pretzel from the oven tastes more complex than one left to cool on the counter for an hour.
How to Use Pretzel
Pretzels do the most work as a snack or starter, and pairing them correctly matters.
Bavarian sweet mustard is the traditional match - its mild sweetness offsets the salt without competing with the alkaline crust.
Dijon works well if you prefer more sharpness.
Understanding what makes bratwurst distinct as a sausage helps explain why a split soft pretzel makes such a natural roll for it - the dense crumb holds up to the fat and smoke where a standard bun collapses.
Beer cheese dip is the American-style counterpart, and knowing beer cheese dip's shelf life matters if you're prepping for a party rather than serving immediately.
| Method | Best For | Tip |
|---|---|---|
| 🥗 Snack/Dip | Bar food, starters, Oktoberfest spreads | Serve warm; cold pretzels lose crust texture fast |
| 🥖 Sandwich Roll | Bratwurst, deli meats, breakfast sandwiches | Split horizontally - don't hollow out or the base gets soggy |
| 🍲 Crumb Coating | Breading fried chicken, pork, or shrimp | Pulse hard pretzels in a food processor for even crumb size |
| 🍮 Baked Dessert | Bread pudding, cinnamon-sugar glazed pretzel | Balance salt by reducing added sugar slightly in the recipe |
| 🥄 Topping/Mix-in | Salad croutons, mac and cheese crust, snack mix | Add right before serving to keep crunch intact |
When baking at home, the alkaline bath is non-negotiable for authentic results.
Home bakers who can't source food-grade lye use a baking soda bath - boiling water with baking soda dissolved in - which delivers most of the crust character.
If you need to swap out the lye wash altogether, knowing replacements for baking soda helps you find the right pH-raising alternative.
For dessert applications, coarse pretzels coated with cinnamon sugar work surprisingly well, though delicate floral desserts and citrus-only sauces tend to clash with the salty crust.
If the recipe calls for a different base and you want that same sweet-salty crunch, swapping out pretzel gives you a practical shortlist of what actually holds up.
How to Buy and Store Pretzel
A good soft pretzel announces itself visually. Look for an even, deep-brown glossy crust with visible coarse salt crystals still adhered - pale or matte surfaces indicate an under-treated dough or a pretzel that's been sitting too long.
Avoid any that feel soft and deflated through the bag; the crust should have some resistance when pressed.
For packaged hard pretzels, check that the bag is fully sealed and the sticks are unbroken - broken pieces usually mean moisture has gotten in.
A stale smell through the bag seal is a reliable rejection signal.
The full picture of how long pretzel keeps across both styles is worth reviewing before stocking up in bulk.
Hard pretzels keep 4-6 months in a sealed container - closer in durability to bagel's shelf life once frozen, though pretzels don't need the freezer to get there.
Store soft pretzels loosely wrapped in paper or cloth at room temperature. Hard pretzels need an airtight container - not a resealable bag left partially open.
Start Here With Pretzel
New to pretzels beyond the ballpark? Start with a soft Laugenbrezel and Bavarian sweet mustard - that pairing shows the full flavor range in one bite.
From there, try using crushed hard pretzels as a breading the next time you fry chicken or shrimp.
If you're baking from scratch, go with the baking soda bath method before moving to food-grade lye - it's more forgiving and still produces a proper crust. Once you've nailed the basic dip-and-bake, the rest of the applications follow naturally.
Frequently Asked Questions
The shine comes from the alkaline wash applied before baking. Lye or strong baking soda raises the dough's surface pH, accelerating Maillard browning and producing the glossy, deep-amber crust that no egg wash or plain water can replicate.
Soft pretzels are thick, chewy, and baked once - eaten fresh the same day. Hard pretzels are thin and baked twice (or dried low-and-slow) to remove all moisture, producing the shelf-stable snap-cracker texture common in snack bags.
Laugenbrezel is the German name for a lye pretzel - the classic Bavarian style. "Lauge" means lye, and the name distinguishes it from lesser pretzel-shaped breads that skip the alkaline bath and lack the characteristic crust.
Yes - soft pretzels freeze well for up to one month, wrapped individually. Reheat directly from frozen in a 375°F oven for 8-10 minutes. Hard pretzels don't need freezing since they keep 4-6 months at room temperature in a sealed container.
Standard pretzels are not - they're made from wheat flour and contain gluten. Gluten-free versions exist using rice flour or cassava blends, but they rarely achieve the same chew or crust character as wheat-based pretzels.
How Long Does Pepperoni Last? [Storage Guide]
Pulling pepperoni from the fridge and noticing a slimy sheen or off-color edges is never a good sign - and with a cured meat that lives in so many fridges for weeks at a time, knowing exactly when to trust it matters.

Pepperoni's nitrate/nitrite cure and low moisture content give it a longer natural shelf life than most deli meats, but it isn't invincible.
Improper storage, a compromised package, or simply forgetting when you opened it can push it past safe limits faster than you'd expect - the same way meat spoilage signs can sneak up on other cured proteins or how bacon spoilage signs often appear before you notice an odor.
Unopened pepperoni lasts 2-3 months refrigerated and up to 6 months frozen. Once opened, sliced pepperoni keeps 3-6 weeks in the fridge when tightly wrapped. Freeze in portioned stacks for longest life. Never leave opened pepperoni at room temperature longer than 2 hours.
How Long Does Pepperoni Last?
Shelf life depends on two variables: whether the package has been opened and how it's stored. A vacuum-sealed whole pepperoni stick holds up far longer than a loosely wrapped handful of deli slices.
Once you open a package, oxygen and moisture accelerate fat oxidation, shortening the window considerably. Deli-sliced pepperoni from a counter - rather than a factory-sealed bag - sits closer to the 3-week end of the opened fridge range.
| Method | State | Duration | Notes |
|---|---|---|---|
| 🏠 Pantry | Unopened | 2-4 weeks | Cool, dark spot only; heat or humidity shortens this fast |
| 🏠 Pantry | Opened | 3-7 days max | Slices oxidize and go oily quickly; refrigerate after opening |
| 🧊 Fridge | Unopened | 2-3 months | Check sell-by date; inspect for slime or film before use |
| 🧊 Fridge | Opened | 3-6 weeks | Wrap tightly; deli-sliced trends toward 3 weeks |
| ❄️ Freezer | Opened | 1-2 months | Best quality window; whole sticks can stretch to 3 months |
| ❄️ Freezer | Unopened | 3-6 months | Vacuum-sealed commercial packs hold quality longest |
For comparison, storing salami correctly follows a similar logic - the cure buys time, but packaging integrity is what keeps it safe.
How to Store Pepperoni
Storage method changes dramatically depending on whether your pepperoni stick is still sealed or has been cut open. Getting this right determines whether you're working with 3 weeks or 3 months.
Pantry: Unopened, vacuum-sealed whole sticks can sit in a cool, dark cupboard away from heat sources for 2-4 weeks. Avoid humid spots like under the sink - moisture works against the cure.
Fridge: Once opened, wrap slices tightly in plastic wrap or aluminum foil, or transfer them to an airtight container with the air pressed out. Whole sticks should stay in their original vacuum pack or a sealed bag. A vacuum sealer extends opened whole-stick life significantly, pushing it toward the longer end of the fridge range.
Counter: Two hours is the hard limit for opened pepperoni at room temperature. Beyond that, fat oxidation and bacterial activity accelerate - move it to the fridge promptly.
Understanding pepperoni in cooking also helps here - high-fat, finely ground cured meat behaves differently from a whole salami, and its storage needs reflect that.
Can You Freeze Pepperoni?
Yes - and it's one of the better cured meats to freeze. The main trade-off is texture: fat softens and redistributes on thaw, leaving slices slightly less firm and sometimes oilier than fresh.
For pizza use, that trade-off nearly disappears. Frozen slices applied directly to an unbaked pizza cook perfectly fine - the oven heat manages the fat without any noticeable difference in the final result.
- Portion into small stacks - separate slices with parchment paper and group them by use (e.g., one pizza's worth per stack).
- Wrap each portion tightly in plastic wrap, pressing out as much air as possible.
- Bag and seal - place wrapped portions into a freezer bag, remove excess air, and seal.
- Label with the freeze date - use a first-in, first-out rotation to avoid wasting older stock.
- Thaw in the fridge overnight in its sealed bag for best texture; use frozen directly on pizza without thawing.
For whole pepperoni sticks, wrap in plastic then add a layer of foil or vacuum-seal before freezing.
This extra barrier prevents freezer burn - the same issue that affects other high-fat foods, as explained in our guide to salmon freezer burn explained.
Signs Pepperoni Has Gone Bad
Most spoilage in pepperoni is visible before it's dangerous - which makes a quick visual check worth doing every time you open the container.
Don't confuse white fat bloom (small white flecks from fat crystallization) with mold; one is harmless, the other isn't.
When in doubt, discard it. Slimy texture, chemical odors, or any fuzzy growth beyond flat white fat specks means the pepperoni is past safe use.
Practical Tips for Getting the Most Out of Pepperoni
Good habits at purchase extend your window before spoilage becomes a concern. These four practices make a real difference:
- 🧊 Portion before freezing - stack slices in single-use amounts separated by parchment so you never thaw more than you need.
- 🔒 Vacuum-seal opened whole sticks - dramatically extends fridge life compared to plastic wrap alone.
- 📅 Label every package - date the bag when you freeze, and rotate older stock to the front.
- 🍕 Use frozen slices directly on pizza - no thawing needed, and the result is indistinguishable from fresh.
If a recipe calls for more pepperoni than you have on hand, our roundup of replacements for pepperoni covers the closest options.
And if you've got leftover pizza to store alongside your pepperoni, the guide to storing pizza correctly applies directly.
Frequently Asked Questions
Unopened vacuum-sealed pepperoni lasts 2-3 months refrigerated. Once opened, keep it tightly wrapped and use within 3-6 weeks - deli-sliced pepperoni from a counter tends to drop closer to 3 weeks.
Yes, and you don't even need to thaw it first. Lay frozen slices directly onto raw pizza dough before baking - the oven heat renders the fat normally with no noticeable texture difference.
A sell-by date isn't an automatic discard signal - smell and texture matter more. If the pepperoni smells normal and shows no slime or fuzzy mold, it's generally fine a few days past the printed date.
Flat white flecks are fat bloom - crystallized fat migrating to the surface during temperature changes. It's harmless. Fuzzy or raised white growth is mold and means you should discard the pepperoni.
Commercial vacuum-sealed whole pepperoni sticks are shelf-stable before opening and can be stored in a cool, dark pantry for 2-4 weeks. Once opened, refrigeration is required regardless of the original storage method.
What Is Rice Noodle? Taste, Uses & More Explained
Pad see ew shows up on almost every Thai restaurant table, its wide, charred ribbons soaking up sweet soy until barely anything else matters - and those ribbons are rice and its flavor distilled into noodle form.

Rice noodles show up across Vietnam, China, Malaysia, and Thailand in forms ranging from hair-thin vermicelli to broad, silky sheets, yet they share one defining trait: a mild, clean base that lets the surrounding broth or sauce do the talking.
Understanding what they are, how they behave in the pan, and which format to reach for first saves a lot of guesswork at the market.
Rice noodles are starch-based noodles made from rice flour and water, available dried or fresh in multiple widths. They have a mild, neutral flavor, absorb sauces readily, and are naturally gluten-free. Use them in soups, stir-fries, cold salads, and steamed rolls.
What Is Rice Noodle?
Rice noodles are a category of starch-based noodle made by combining rice flour - and sometimes a small amount of tapioca starch - with water to form a dough or batter that gets extruded, cut, or steamed into shape.
Unlike wheat noodles, which rely on gluten for structure, rice noodles hold together through starch gelatinization, giving them that characteristic translucent, slightly glassy look after cooking.
The category covers a wide range of formats. Vermicelli (known as rice vermicelli, sen mi, or meehoon) are the thinnest, about the width of angel hair pasta. Rice sticks or bánh phở are flat and range from 3mm to 10mm wide - the wider cut is what fills a bowl of pho. Wide flat noodles like ho fun run up to 2cm across and are the standard for pad see ew and beef chow fun.
Finally, cheung fun are steamed sheets rolled around fillings or cut into tubes, common in Cantonese dim sum.
Fresh rice noodles are sold ready to use, while dried versions need rehydrating. Both forms appear across Vietnamese, Thai, Chinese, Malaysian, and Laotian kitchens under different local names, but the core ingredient stays the same.
What Does Rice Noodle Taste Like?
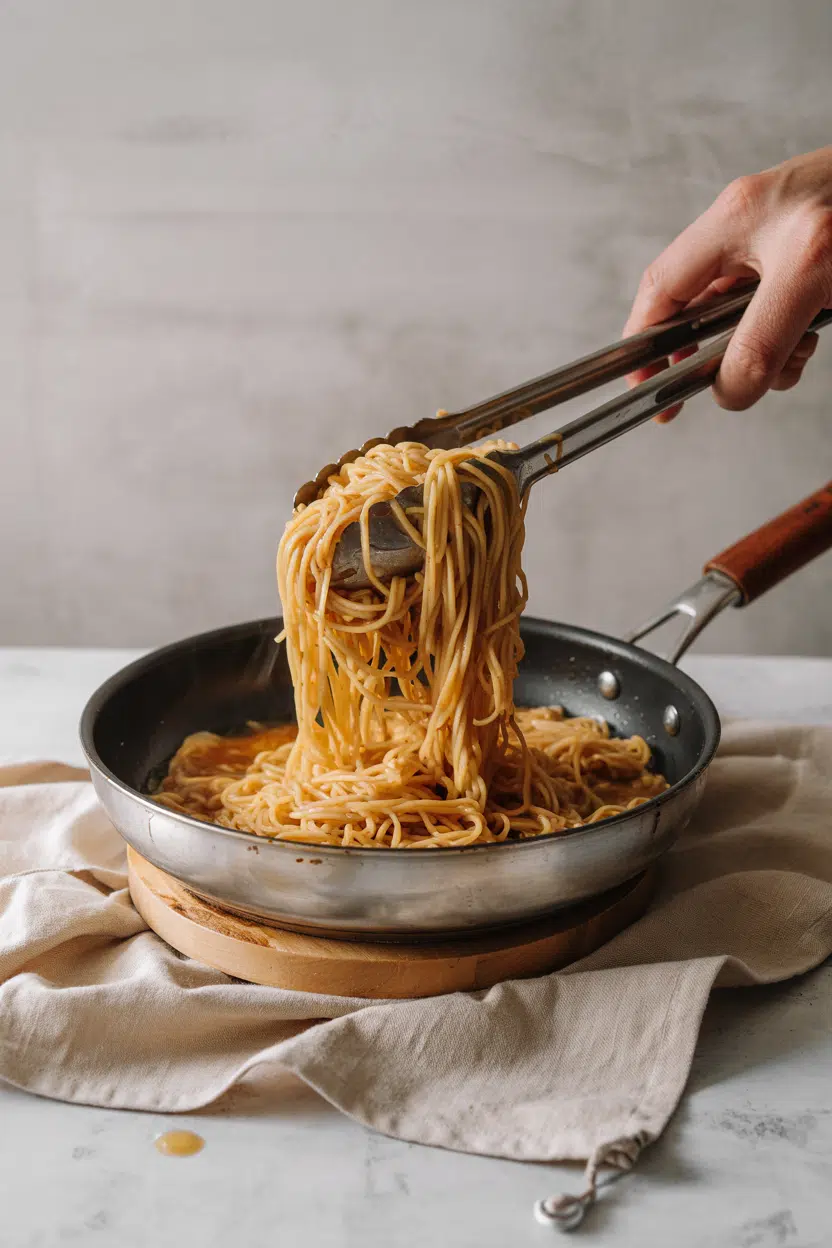
Rice noodles taste close to a bowl of plain steamed rice - a mild starchy sweetness with a subtle grainy background note.
They're noticeably more neutral than wheat noodles like udon or soba, which carry their own earthy or nutty flavors into a dish.
That neutrality is the point. Pho broth has hours of bone and spice behind it, and the noodle simply carries it without competing.
In a stir-fry, fish sauce, soy, and oyster sauce all penetrate the noodle's surface quickly because the starch is so open to absorption.
Texture shifts with format and heat.
Thin vermicelli stays delicate and almost melts into whatever it's dressed with.
Thicker flat noodles develop a pleasant chew, and in a screaming-hot wok, the edges pick up a faint toasty note from contact with the surface.
That wok char - called "wok hei" in Cantonese - introduces the only real flavor complexity rice noodles develop on their own.
How to Use Rice Noodle
Rice noodles handle five distinct cooking methods, each suited to a different format and dish.
| Method | Best For | Tip |
|---|---|---|
| ♨️ Hot Soak | Pho, vermicelli bowls, salads | Soak dried noodles in hot (not boiling) water 8-10 min; drain before adding to broth |
| 🍳 Stir-Fry | Pad see ew, pad kee mao, beef chow fun | Use fresh or just-soaked noodles; toss in a dry, very hot wok to prevent sticking |
| 🍲 Simmer in Broth | Pho, hu tieu, noodle soups | Add soaked noodles to the bowl and pour hot broth over; don't boil long or they break down |
| 🫧 Steam | Cheung fun (rice noodle rolls) | Pour thin rice-flour batter onto a greased tray; steam 3-4 min and roll while warm |
| 🔥 Deep-Fry | Crispy noodle nests, garnishes | Drop dry vermicelli straight into hot oil; they puff in seconds - no soaking needed |
For pairing, rice noodles work best with clear broths (beef or chicken), soy sauce, fish sauce, and oyster sauce.
Lime, fresh chilies, Thai basil, and cilantro brighten vermicelli bowls.
Shrimp, thinly sliced pork or beef, and tofu all pair well; so do bean sprouts, scallions, and fried shallots for crunch.
If you're working with alternatives to soy sauce in a stir-fry, coconut aminos hold up well against the noodle's mild base.
Avoid pairing rice noodles with heavy dairy-forward sauces - cream or butter masks the texture and makes the dish muddy. Long, slow braises are also a problem; the noodles disintegrate before the other ingredients finish cooking.
For protein pairings, getting the protein right matters as much as the noodle - cooking fish perfectly ensures it doesn't fall apart when tossed with delicate vermicelli.
How to Buy and Store Rice Noodle
Good dried rice noodles look uniformly translucent and sit in tight, unbroken bundles. Avoid packages with heavily powdered or shattered strands - that breakage signals moisture damage or rough handling and the noodles will dissolve unevenly in hot water.
For fresh noodles, look for smooth, moist sheets or folds with no gray discoloration and no sour smell.
Storage is straightforward:
- 🌾 Dried, unopened - keep in a cool, dry pantry away from humidity; lasts months to a full year
- ❄️ Fresh noodles - refrigerate in an airtight container; use within 2-4 days
- 🍜 Cooked noodles - refrigerate and eat within 2-3 days; toss with a little oil to prevent clumping
Full details on rice noodle's shelf life are worth checking if you're buying in bulk or storing fresh sheets for the week.
Start With Flat or Vermicelli
New to rice noodles? Pick one format and stick with it for the first few dishes. Flat rice noodles (medium width, 5-8mm) handle the most situations - broth, stir-fry, salads - without demanding precision timing.
Once that width feels familiar, thin vermicelli opens up cold bowls and quick-soak applications.
If you've already got both and want a quick win, a shrimp stir-fry using shrimp pad thai in grain dishes shows exactly how rice noodles behave under wok heat.
And if rice noodles aren't available, a quick look at rice noodle stand-ins will confirm what actually works as a swap.
Frequently Asked Questions
Yes, when made from 100% rice flour and water. Some brands add wheat starch as a binder, so always check the ingredient list. Look for a certified gluten-free label if cross-contamination is a concern.
Drain and rinse immediately after soaking or boiling, then toss with a small amount of neutral oil. For stir-frying, add noodles to a hot, lightly oiled wok and move them constantly.
Rice vermicelli is one specific type within the broader rice noodle category - the thinnest form, often sold in tight bundles. "Rice noodles" covers all widths, from vermicelli up to wide flat sheets.
In most stir-fries and broth soups, yes. Expect a softer, more delicate texture and shorter cooking time. Dishes with very thick, starchy sauces may need minor adjustment since rice noodles absorb liquid faster than wheat.
Fresh rice noodles keep for 2-4 days refrigerated in an airtight container. Beyond that, texture degrades and they may develop an off smell. Buy only what you'll use within that window.
Italian Osso Buco Milanese
You need 2.5 hours and one heavy pot. No marinating overnight, no complicated techniques, no babysitting a finicky braise.

Veal shanks braise low and slow while you prep sides or make a simple brodo on the side. The bone marrow melts into the sauce while the meat falls off the bone.
This is what you make when you want something special on a Tuesday but don't want to stand over the stove for hours.
Italian Osso Buco Milanese braises veal shanks in white wine and stock until fork-tender. Brown the meat deeply before adding liquid - those caramelized bits become the sauce base. Keep the simmer gentle at 180-190°F for 2 hours so the meat stays tender instead of turning tough.
Why This Recipe Works
Braising veal shanks at a gentle simmer breaks down collagen into gelatin while keeping the meat moist. The bone marrow melts into the sauce, adding richness you can't get from boneless cuts. For texture contrast that cuts through the richness, serve it with something fresh like salad.
Prep Time
20 min
Cook Time
120 min
Total Time
140 min
Servings
4 servings
Difficulty
Medium
Category
Main Dish
Quick Tip
Brown meat well for deep flavor
Best For
Weeknight | Entertaining
What makes this work:
- Searing creates a caramelized crust - those browned bits dissolve into the braising liquid and become the sauce base
- Low simmer at 180-190°F tenderizes without drying - boiling tightens proteins and turns meat stringy
- Wine deglazes the fond - scraping up those stuck-on bits adds layers of flavor you can't get from stock alone
- Bone marrow enriches the sauce - as it melts during braising, it adds silky body and deep savory notes
- Gremolata cuts richness - fresh lemon zest and parsley balance the heavy sauce right before serving
What You'll Need
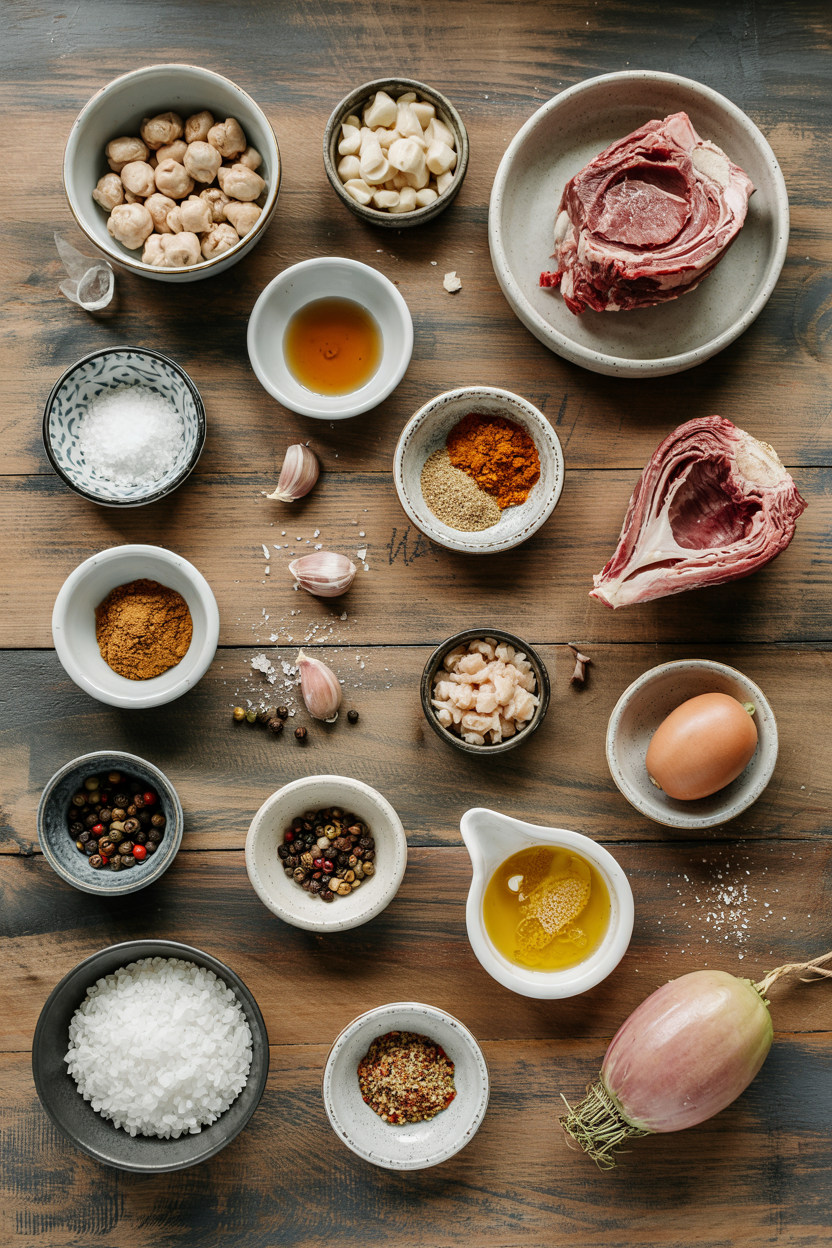
Shop for veal shanks with visible marrow in the center bone. The aromatics - carrots, celery, onion - form the classic soffritto base that builds flavor as they cook down in the braising liquid.
- 4 veal shanks (bone-in, about 1.5 inches thick)
- 2 carrots (diced)
- 2 celery stalks (diced)
- 1 onion (diced)
- 4 garlic cloves (minced)
- 1 cup dry white wine
- 2 cups beef or veal stock
- 2 tablespoon tomato paste
- Zest of 1 lemon
- ¼ cup fresh parsley (chopped)
- 2 garlic cloves (minced)
Ingredient Details
- Veal shanks
Look for cuts 1.5 inches thick with visible marrow - thinner shanks dry out, thicker ones take longer to tenderize - Dry white wine
Use something you'd drink - Pinot Grigio or Sauvignon Blanc work well, avoid sweet wines that caramelize oddly - Beef or veal stock
Low-sodium lets you control salt as sauce reduces - full-sodium stock concentrates and can turn too salty - Tomato paste
Adds color and balances acidity - skip it if you want a lighter, wine-forward sauce - Carrots and celery
Dice small so they break down into the sauce - large chunks stay firm and distract from the meat - Lemon zest
Use only the yellow outer layer, no white pith - pith tastes bitter and ruins gremolata - Fresh parsley
Flat-leaf parsley has better flavor than curly - dried parsley won't work here, it lacks the fresh brightness
Ingredient Swaps
Beef shanks cost less than veal and work fine if you extend the braise by 30 minutes. The flavor shifts from delicate to beefy, but the method stays the same.
Common swaps that work:
- Beef shanks instead of veal - slightly chewier texture, deeper flavor, needs 30 min longer braising time
- Dry vermouth instead of white wine - similar acidity and flavor profile, slightly herbal notes
- Vegetable stock instead of beef stock - lighter body but still works, loses some richness
- Fresh diced tomatoes instead of tomato paste - more liquid in sauce, less concentrated color, simmer uncovered longer to reduce
Beef Shanks
Works for: Budget meals, deeper beef flavor, slightly longer braise
Skip if: You want traditional Milanese flavor or quicker cook time
Cornstarch for Thickening
Works for: Gluten-free diets, lighter coating on meat before searing
Skip if: You prefer traditional flour dredging or want deeper browning
Instructions
The shanks braise for 2 hours with minimal attention once they're in the pot. Check every 30 minutes to make sure the liquid stays at a gentle simmer - bubbles should barely break the surface. Pair this with easy potato wedges side to soak up extra sauce.
Brown the shanks: Heat 2 tablespoon olive oil in a Dutch oven over medium-high heat. Pat shanks dry, season with salt and pepper. Sear each shank 4-5 min per side until deep golden brown. Remove and set aside.
Cook the aromatics: Reduce heat to medium. Add diced carrots, celery, and onion to the same pot. Cook 5-7 min, stirring often, until vegetables soften and edges brown. Stir in minced garlic and tomato paste, cook 1 min.
Deglaze and braise: Pour in white wine, scrape up browned bits from the bottom with a wooden spoon. Simmer 2-3 min until wine reduces by half. Add stock, return shanks to pot (liquid should come halfway up the sides). Bring to a simmer, cover, reduce heat to low.
Simmer low and slow: Braise covered 1.5-2 hours, checking every 30 min to maintain gentle simmer at 180-190°F. Meat is done when it pulls apart easily with a fork. If sauce looks thin, remove lid last 15 min to reduce and thicken.
Make gremolata and serve: Mix lemon zest, chopped parsley, and minced garlic in a small bowl. Let shanks rest 10 min off heat. Serve each shank with sauce spooned over top, sprinkle gremolata right before plating.
What to Serve With It
Rich braised meat needs something to balance the plate - either a starchy side to soak up sauce or a bright element to cut through richness. For meal planning when serving hearty mains, check out these weeknight chicken dinner ideas that follow the same approach.
| Side Dish | Prep | Why It Works | How to Serve |
|---|---|---|---|
| Creamy polenta | Easy | Soaks up sauce, mild flavor balances richness | Spoon polenta on plate, nestle shank on top, drizzle sauce over both |
| Simple risotto | Medium | Classic Milanese pairing, starchy texture holds sauce | Serve risotto alongside, use to mop up braising liquid |
| Steamed green beans | Easy | Adds crunch and freshness, cuts through heavy sauce | Toss beans with lemon juice, pile next to shank |
| Buttered mashed potatoes | Easy | Neutral base absorbs sauce without competing flavors | Spread potatoes on plate, place shank on top with extra sauce |
| Garlic bread | Easy | Crispy texture contrasts tender meat, perfect for sopping | Serve warm slices on the side for dipping in sauce |
Three ways to serve it:
- Traditional Milanese plate: Saffron risotto as base, shank on top, gremolata sprinkled over everything
- Weeknight version: Serve over buttered egg noodles or mashed potatoes with steamed vegetables on the side
- Entertaining presentation: Place shank on creamy polenta, spoon sauce around (not over) to show the golden crust, garnish with fresh gremolata
Store and Reheat
Osso Buco reheats well because the braising liquid keeps the meat moist. Store shanks and sauce together so the meat doesn't dry out in the fridge. Add a crispy potato on the side when reheating for texture contrast.
| Method | Time | Best For |
|---|---|---|
| 🍳 Stovetop | 10-15 min on low heat | Best texture retention, easiest to control moisture |
| 🔥 Oven | 20 min at 325°F covered | Even reheating for multiple servings without drying meat |
| 📦 Microwave | 3-4 min medium power | Single servings when you need speed over texture |
For best results when storing:
- Refrigerate shanks submerged in braising liquid in shallow airtight container - exposed meat dries out within a day
- Let dish cool to room temp before refrigerating to prevent condensation that waters down sauce
- Freeze in portions with sauce poured over meat - freeze up to 3 months, thaw overnight in fridge before reheating
- Skim solidified fat from surface before reheating - chill sauce, fat hardens on top and lifts off easily
- Add splash of stock when reheating if sauce thickened too much - start with 2 tablespoon and add more as needed
Frequently Asked Questions
Braise covered at a gentle simmer (180-190°F) for 1.5-2 hours. The meat is done when it pulls apart easily with a fork and the marrow has melted into the sauce.
Yes, it reheats well and flavor improves overnight. Store shanks submerged in sauce, refrigerate up to 4 days. Reheat gently on stovetop or in 325°F oven until warmed through, make gremolata fresh right before serving.
Serve with creamy polenta, saffron risotto, or buttered mashed potatoes to soak up sauce. Add steamed green beans or a simple salad for brightness that cuts through the richness.
The meat should pull apart easily with a fork without resistance. If it still feels firm or requires sawing with a knife, continue braising and check every 15 minutes until tender.
Yes, beef shanks work but need 30 minutes longer braising time and have a deeper, beefier flavor. The texture is slightly chewier than veal but still tender when cooked properly.
Italian Osso Buco Milanese
Ingredients
Equipment
Method
- Heat 2 tablespoon olive oil in a Dutch oven over medium-high heat. Pat veal shanks dry, season with salt and pepper. Sear each shank 4-5 minutes per side until deep golden brown. Remove and set aside.4 veal shanks
- Reduce heat to medium. Add diced carrots, celery, and onion to the same pot. Cook 5-7 minutes, stirring often, until vegetables soften and edges brown. Stir in minced garlic and tomato paste, cook 1 minute.2 carrots, 2 stalks celery, 1 onion, 4 cloves garlic, 2 tbsp tomato paste
- Pour in white wine and scrape up browned bits from the bottom with a wooden spoon. Simmer 2-3 minutes until wine reduces by half. Add beef or veal stock and return shanks to the pot so liquid comes halfway up the sides. Bring to a simmer, cover, then reduce heat to low.1 cup dry white wine, 2 cups beef or veal stock, 4 veal shanks
- Braise covered 1.5-2 hours, checking every 30 minutes to maintain a gentle simmer at 180-190°F. The meat is done when it pulls apart easily with a fork. Remove the lid during the last 15 minutes if sauce needs thickening.4 veal shanks
- Mix lemon zest, chopped parsley, and remaining minced garlic in a small bowl. Let shanks rest 10 minutes off heat. Serve each shank with sauce spooned over top and sprinkle gremolata just before plating.1 unit lemon zest, 0.25 cup fresh parsley, 4 cloves garlic
Notes
- Brown the meat well to develop deep flavor base for sauce.
- Keep the heat low enough to maintain a gentle simmer; boiling toughens the meat.
- Trim visible fat from shanks before browning to prevent greasy sauce-marrow provides enough richness.
Tried this recipe?
Let us know how it was!What Is Porcini Mushroom? [Taste, Uses & More]
Most people treat porcini mushrooms like a fancy button mushroom - slice them, cook them, move on.

That's the mistake. Porcini carry a depth of flavor that closer resembles reduced beef stock than anything else in the produce aisle, and handling them without that knowledge means leaving most of their value on the cutting board.
If you're after a different wild mushroom with a lighter profile, alternatives to chanterelle mushroom are worth a look, but porcini operate in a richer, more concentrated league of their own.
The porcini mushroom is a wild bolete prized for its intense umami, nutty earthiness, and meaty texture. Available fresh, dried, or powdered, it anchors Italian risotto, pasta, and sauces and delivers a flavor punch no cultivated mushroom quite matches.
What Is Porcini Mushroom?
Porcini grow wild in temperate forests across Europe, North America, and Asia, forming mycorrhizal relationships with the roots of conifers and deciduous trees - which is why they can't be commercially farmed at scale. The scientific name is Boletus edulis, though you'll see them sold under several regional labels: cep in France, porcino in Italy, king bolete in North America, and penny bun in Britain.
Unlike common button or cremini mushrooms, porcini belong to the bolete family, identifiable by a spongy pore surface on the underside of the cap rather than gills.
The caps range from pale tan to a deep chestnut brown and can grow impressively large - some specimens reach the size of a side plate.
The stem is thick and pale, often with a fine net-like pattern etched into it.
You'll find porcini in three main forms in the market:
- 🍄 Fresh porcini - seasonal, firm, and aromatic; available in late summer through autumn in most regions
- 🟤 Dried porcini - the most accessible form year-round; flavor is concentrated and intense
- 🧂 Porcini powder - ground dried slices; used as a seasoning directly on meats, vegetables, or popcorn
What Does Porcini Mushroom Taste Like?
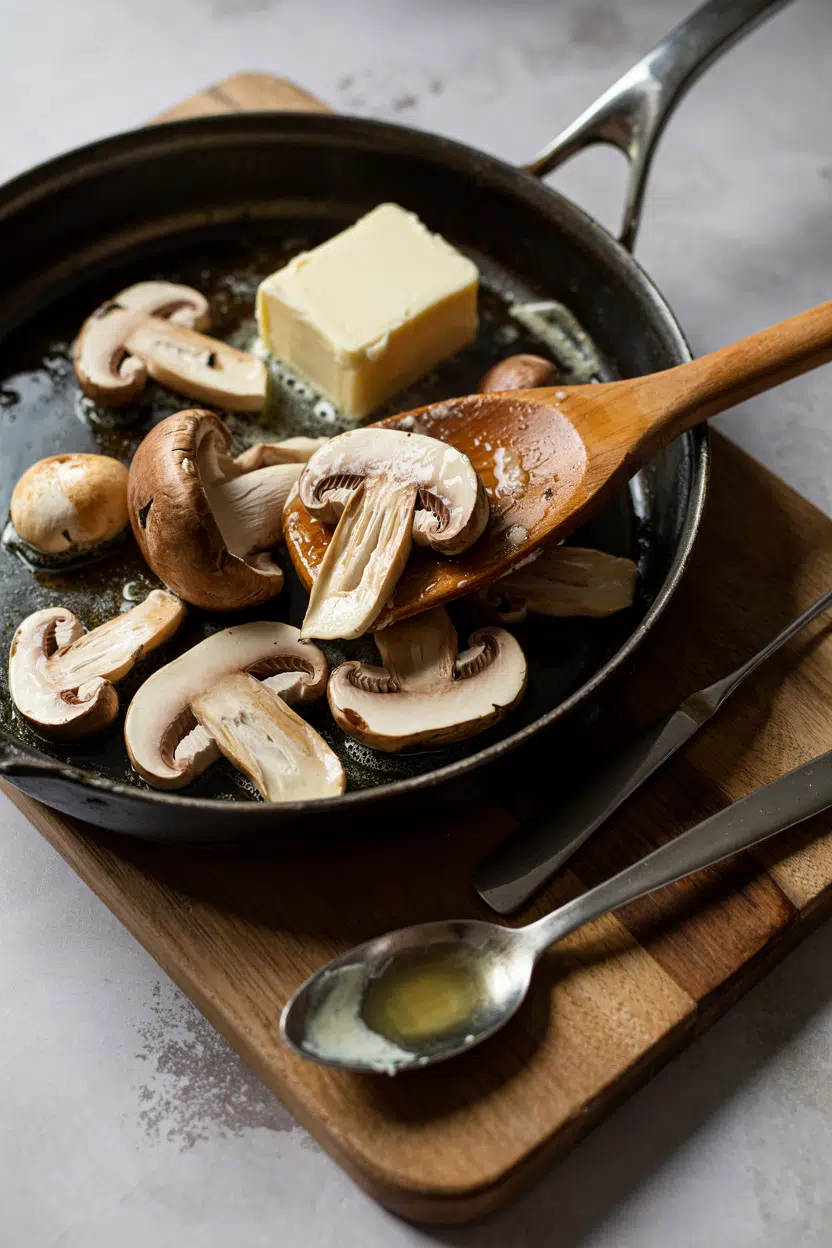
Fresh porcini taste like a more complex, meatier version of shiitake. The flavor is deep savory umami with a distinct nuttiness and a faint sweetness that suggests roasted hazelnuts.
There's none of the mild blandness you'd expect from a button mushroom - even raw, porcini announce themselves.
Drying concentrates everything: the nutty notes sharpen, the umami intensifies, and the aroma shifts from fresh forest floor to something close to toasted grain. Rehydrated dried porcini deliver a softer, velvety texture - noticeably different from the firm bite of a fresh sautéed slice.
Heat amplifies sweetness and pushes the flavor toward roasted meat territory, which is exactly why porcini stock built from the soaking liquid is so effective in sauces.
How to Use Porcini Mushroom
Porcini reward straightforward cooking. Fresh slices need only a dry-sauté in a hot pan to release moisture before finishing in butter or olive oil with garlic and thyme.
That method builds a crust on the cut surface and concentrates flavor rather than steaming it away.
| Method | Best For | Tip |
|---|---|---|
| 🍳 Dry-sauté | Steak toppers, pasta, side dishes | Start in a dry pan; add butter only after moisture evaporates |
| 🫕 Rehydrate | Risotto, ragù, sauces, soups | Soak in warm water 20-30 min; reserve and strain the liquid |
| 🍲 Simmer | Porcini broth, stews, French-style fonds | Low heat preserves volatile aromas lost at a rolling boil |
| 🥄 Powder | Seasoning roasted veg, popcorn, compound butters | Add at the end of cooking to prevent the powder from burning |
| 🥘 Pan-fry | Stuffed pasta fillings, polenta topping | Cut thick to maintain structure; thin slices dissolve into dishes |
In northern Italian cooking, porcini are foundational - risotto alla porcini, ravioli packed with ricotta and porcini, polenta finished with grated Parmesan and a pile of sautéed caps.
French kitchens use the dried and powdered form to deepen sauces and braising liquids.
Central and Eastern European cooks fold rehydrated porcini into stews and dumplings, where the soaking broth doubles as the base liquid.
Strong pairings include Parmesan and aged cheeses, garlic and shallot, thyme, rosemary, red wine, and cream.
Beef, game, and poultry all benefit from porcini alongside them.
When swapping out porcini mushroom is necessary, the replacements tend to be milder, so compensate by adding a splash of the soaking liquid or a pinch of porcini powder to restore depth.
Note that porcini can easily overpower delicate greens and citrus-forward dressings - keep those pairings separate.
How to Buy and Store Porcini Mushroom
Fresh porcini should feel firm and heavy for their size, with dry, unblemished caps ranging from pale tan to dark chestnut. Avoid anything slimy, soft at the stem base, or showing heavy bruising - those signs indicate age.
The pore surface beneath the cap should be pale and fine-grained, not yellowed or wet.
For dried porcini, buy whole or large-broken slices rather than crumbled fragments. Strong nutty aroma at the bag is a reliable quality signal; minimal dust means better handling.
- 🧺 Fresh storage - Paper bag in the refrigerator crisper; paper absorbs moisture and allows airflow, unlike plastic
- 📦 Dried storage - Airtight container in a cool, dark spot away from humidity; a glass jar works well
- ⏱️ Shelf life - Fresh porcini last 3-7 days; dried hold 6-12 months sealed; tips on [keeping porcini mushroom fresh](https://forkliftkitchen.com/porcini-mushroom-shelf-life/) cover edge cases like partial prep and freezing
Risotto made with porcini keeps well when handled correctly, and storing risotto correctly prevents the texture from turning gluey on reheating.
Where to Start With Porcini
New to porcini? Start dried, not fresh. Dried porcini are cheaper, available year-round, and the soaking liquid teaches you immediately what this mushroom contributes to a dish - before you've spent a cent on a seasonal fresh specimen.
Once you understand that soaking liquid, fresh porcini make sense: sauté them hard in a dry pan, add butter last, and pile them onto something that can carry the weight of that flavor.
If the depth of shiitake appeals to you but feels thin by comparison, shiitake mushroom swaps that work can bridge the gap until porcini are in season.
Start with risotto or a simple pasta - both are forgiving formats that let porcini do the heavy lifting.
Frequently Asked Questions
Yes. Cep is the French name for Boletus edulis; porcini is the Italian plural. Both terms refer to the same species - king bolete and penny bun are two more regional names for the same mushroom.
Young, very fresh porcini can be eaten raw and thinly sliced in Italian carpaccio-style preparations. However, cooking significantly improves digestibility and intensifies flavor, so raw use is the exception rather than the rule.
Submerge dried slices in warm (not boiling) water for 20-30 minutes until soft. Always strain the soaking liquid through a fine cloth or coffee filter before using it - grit settles at the bottom of the bowl.
Shiitake works as a structural substitute but delivers less umami depth and none of the nutty sweetness. Adding a pinch of porcini powder alongside shiitake brings the flavor profile much closer to the original.
Peak season runs late summer through autumn - roughly August to November in the Northern Hemisphere, depending on rainfall and altitude. A second, smaller flush sometimes appears in spring in warmer regions of southern Europe.