• Skip to primary navigation
  • Skip to main content
  • Skip to primary sidebar
  • Recipe Index
    • Air Fryer
  • Side Dishes
  • Substitutes
  • About
  • Contact
  • Subscribe

ForkLiftKitchen

menu icon
go to homepage
  • Recipe Index
    • Air Fryer
  • Side Dishes
  • Substitutes
  • About
  • Contact
  • Subscribe
subscribe
search icon
Homepage link
  • Recipe Index
    • Air Fryer
  • Side Dishes
  • Substitutes
  • About
  • Contact
  • Subscribe
×

Blog

What Is Serrano Pepper? [Taste, Uses & More]

April 2, 2026

Pico de gallo without a serrano pepper is just tomato salad.

What Is Serrano Pepper

That single pepper - small, glossy, tapered - is what makes the difference between something mild and something with real bite.

Cooks across Mexico have relied on it for centuries, reaching for it when a jalapeño would be too soft, too slow, or simply not sharp enough.

It shares shelf space with peppers like alternatives to poblano pepper and replacements for habanero pepper, but the serrano occupies its own lane - hotter than the former, more restrained than the latter.

QUICK SUMMARY

The serrano pepper is a small, thin-skinned Mexican chili with sharp, clean heat and grassy vegetal flavor. Hotter than a jalapeño, it's used fresh in salsas, raw in ceviche, roasted into sauces, or pickled for tacos. Green serranos are common; red ones are riper and slightly fruitier.

🌶️Flavor: Bright, grassy heat with clean vegetal notes and slight fruity finish when ripe
🔥Heat Level: Strong - noticeably hotter and sharper than a jalapeño
🍳Best Uses: Pico de gallo, salsa verde, ceviche, escabeche, guacamole
🛒Buy: Firm, glossy, bright green or red; avoid wrinkling or soft spots
📅Shelf Life: 1-2 weeks whole in the fridge; 3-5 days once sliced or cooked

What Is Serrano Pepper?

The serrano pepper (Capsicum annuum) originates from the Sierra Madre mountain range in central Mexico, where it has been cultivated for centuries as a staple fresh chili. Its name comes directly from the Spanish word for "from the mountains."

Physically, it's easy to identify: cylindrical and tapered, usually 1-4 inches long, with a smooth, glossy skin that's thinner than a jalapeño's.

Most serranos are harvested green, though left on the plant they ripen to red, orange, or yellow - each stage bringing slight flavor shifts.

It goes by several names depending on region:

  • 🌶️ Chile serrano - standard Spanish-language name
  • Serrano chile - common U.S. grocery label
  • Serrano chile pepper - full descriptor used in recipe writing

Unlike jalapeños, serranos are rarely sold dried or smoked. Their thin skin also means they don't need peeling after roasting - a practical advantage that makes them faster to work with.

If you need a stand-in, a guide to serrano pepper swaps that work covers the closest options by heat and texture.

What Does Serrano Pepper Taste Like?
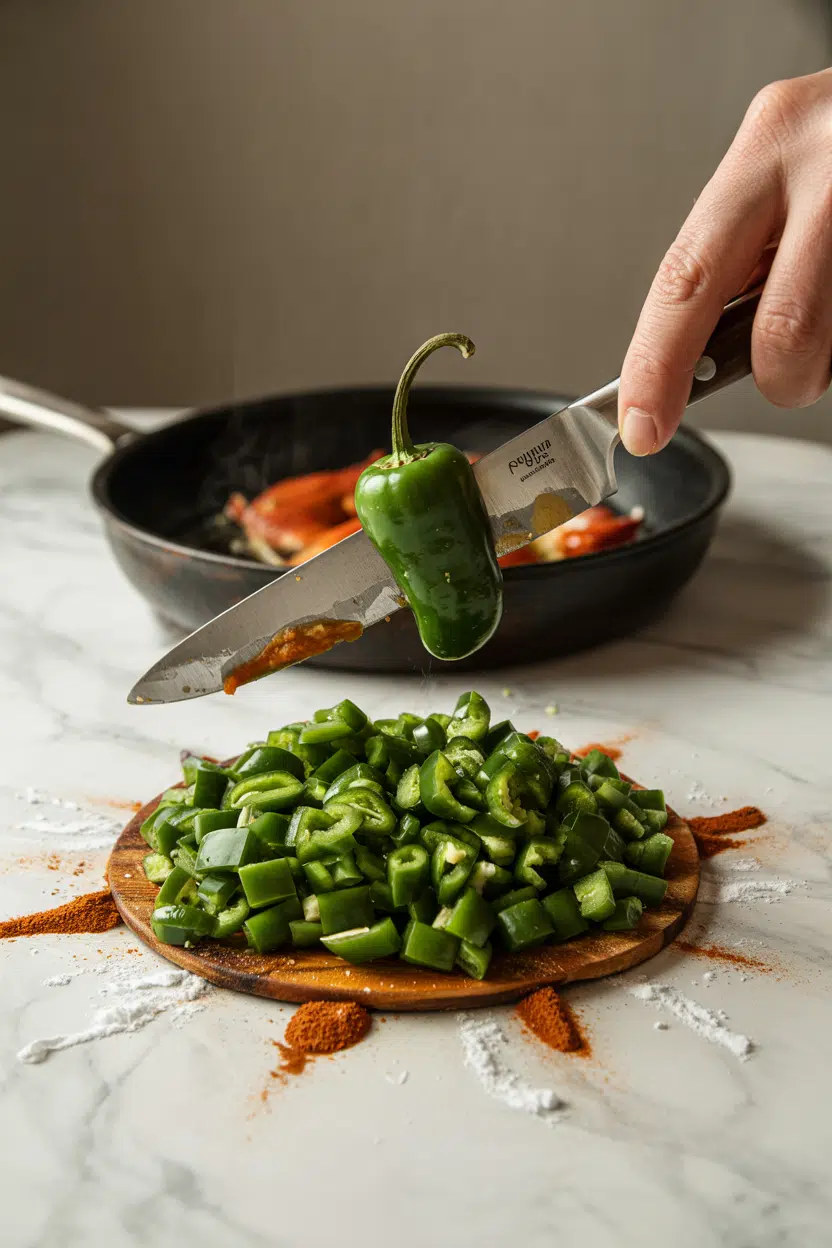
serrano pepper - What Is Serrano Pepper
Sensory SnapshotStrong Intensity
👅 Flavor
bright green heatgrassyslightly fruity when ripe
✋ Texture
crisp rawholds shape when cooked
👃 Aroma
freshgrassyslight pungency when cut

A raw serrano tastes similar to a jalapeño but sharper and more immediate.

The heat hits faster, with less of the slow build you get from a jalapeño, and there's a clean, grassy quality behind the spice that keeps it from tasting one-dimensional.

Green serranos carry the most pronounced vegetal character. Red serranos, ripened fully on the plant, develop a subtle fruitiness that softens the edge slightly without reducing the heat significantly.

Capsaicin concentration is higher in serranos than in jalapeños - typically 10,000-23,000 Scoville Heat Units versus a jalapeño's 2,500-8,000. That gap is noticeable on the palate. If you've been working with hotter peppers, comparing how scotch bonnet pepper in spice blends behaves can give useful reference points for building heat layers.

How to Use Serrano Pepper

Serranos perform across a wide range of preparations, from raw to roasted. Their thin skin and firm flesh make them one of the most adaptable fresh chilies in Mexican and Southwestern cooking.

How Serrano Pepper Is Used
MethodBest ForTip
🥗 RawPico de gallo, ceviche, guacamoleRemove seeds for less heat; keep them for full bite
🔥 RoastedSalsa verde, blended chile saucesNo need to peel - thin skin chars and blends smoothly
🍳 SautéedStir-fries, seared meats, vegetablesAdd early for deeper heat, late for brighter punch
🫙 PickledTacos, tortas, sandwichesSlice thin for escabeche; brine softens heat noticeably
🫒 InfusedChili oils, spiced vinegarsHalve before infusing to release heat faster

In Mexican cooking, the serrano is the go-to pepper for fresh salsas and escabeche.

It's finely minced into pico de gallo alongside tomato, onion, cilantro, and lime - and if you want to understand the full structure of that dish, a closer look at pico de gallo in spice blends is worth the read.

Roasted and blended with tomatillos, it anchors a sharper, more assertive salsa verde than you'd get from a jalapeño.

Raw serrano pairs well with cilantro, lime, tomato, avocado, garlic, and onion. Fresh cheeses like queso fresco balance its heat without competing.

Avoid pairing it with delicate cream-based sauces where the sharpness will dominate without adding complexity.

One note: serranos don't need to replace jalapeños cup-for-cup. They're hotter, so use about half the amount if swapping - a guide to replacements for jalapeno pepper covers this substitution in more detail.

Try It In
🍗Air Fryer Lemon Pepper Chicken TendersAdd minced serrano for a sharp heat contrast against the citrus crust→🥦Air Fryer Lemon Pepper CauliflowerToss in sliced serrano before air frying for a spicy, crisp vegetable side→🍖Air Fryer Lemon Pepper MeatballsMix finely chopped serrano into the meat blend for built-in heat throughout→

How to Buy and Store Serrano Pepper

Best Pick
Choose firm, glossy serranos with taut skin and bright color - green or fully red. A little give in the flesh means it's past its peak.

At the market, skip any pepper with wrinkled skin, soft spots, or dark blotches. Those are signs of age or physical damage, and the heat and flavor degrade along with the texture.

At home, storage is straightforward:

  • Whole, unwashed - place in a perforated plastic bag in the crisper drawer; lasts 1-2 weeks
  • Sliced or chopped - store in an airtight container in the fridge; use within 3-5 days
  • Cooked - refrigerate and use within 3-5 days; flavors intensify slightly as they sit
  • Frozen - freeze whole or sliced on a sheet pan, then transfer to a bag; texture softens but heat holds

Wash them only immediately before use. Moisture on the skin accelerates breakdown in the fridge.

For more on timing, seasoning with serrano pepper covers how shelf life affects flavor and when to cut your losses.

Start Fresh, Add Heat Gradually

New to serranos? Start with one pepper, seeds removed, in whatever you're making.

Golden Rule
You can always add more serrano. You can't take heat back once it's in the dish. Taste as you go.

If the heat is right but you want more pepper flavor without extra spice, add a second serrano with seeds discarded.

For cooks already comfortable with jalapeños but curious about stepping up, using making air fryer jalapeño poppers at home as a baseline recipe gives you a direct comparison point for how serrano's sharper heat performs in a cooked application.


Frequently Asked Questions

How hot is a serrano pepper on the Scoville scale?

Serranos range from 10,000 to 23,000 Scoville Heat Units. That places them firmly above jalapeños and well below habaneros. Heat also varies by individual pepper - smaller serranos tend to run hotter.

Are serrano peppers spicier than jalapeños?

Yes - consistently. Serranos average three to five times the heat of a jalapeño, and the heat arrives faster and sharper on the palate. Substituting one for the other at equal amounts will noticeably change the dish.

Can you eat serrano pepper seeds?

Yes, the seeds are edible. They carry concentrated capsaicin and add significant heat, so removing them is the simplest way to reduce spice level without changing the pepper's flavor profile.

How do you reduce heat from serrano peppers?

Remove the seeds and inner white membrane - that's where most capsaicin concentrates. Pickling in a vinegar brine also softens the heat substantially while preserving the pepper's texture and flavor.

Do red serrano peppers taste different from green ones?

Red serranos are fully ripe versions of the same pepper. They develop a slight fruitiness that green ones lack, though heat levels remain similar. Most grocery stores stock only green serranos since they're harvested before full ripeness.

Korean Cucumber Salad (Oi Muchim)

April 2, 2026

Crunchy cucumber slices tossed in a garlicky, spicy-tangy dressing that stays crisp for hours. That happens when you salt the cucumbers first to pull out moisture, then coat them in gochugaru and sesame oil.

Korean Cucumber Salad (Oi Muchim) served on a plate

The salting step does the heavy lifting. You get snappy texture without any cooking or wilting.

Make this for weeknight dinners when you need a side that takes 15 minutes but tastes like you planned ahead. It works for meal prep, potlucks, or any time you want something cold and crunchy next to rice.

QUICK SUMMARY

Korean cucumber salad (Oi Muchim) delivers crisp, spicy-tangy crunch in 15 minutes. Salt the cucumbers for 15-20 minutes to remove excess water, then squeeze them dry and toss with gochugaru, garlic, sesame oil, and rice vinegar. Skip the salting step and you'll end up with a watery, limp salad instead of the snappy texture that makes this dish work.

⏱️Time Reality: 15 minutes active plus 20 minutes salting time.
🔪Key Move: Salt sliced cucumbers first, then squeeze out moisture before dressing.
⚠️Watch Out: Over-salting turns cucumbers soft - stick to 20 minutes max, then drain thoroughly.

Why This Recipe Works

The salting technique pulls water out of the cucumbers before you dress them, so the sauce sticks instead of sliding off into a puddle at the bottom of the bowl. Most people skip salad, but it balances the meal. For a version that comes together quickly, quick vegetables dish uses similar timing and keeps the table interesting.

Quick Reference
⏱️
Prep Time
15 min
🔥
Cook Time
0 min
⏰
Total Time
15 min (plus 20 min salting)
🍽️
Servings
4 servings
📊
Difficulty
Easy
🏷️
Category
Side
💡
Quick Tip
Salt and squeeze cucumbers for crisp crunch
🎯
Best For
Weeknight | Meal prep | Entertaining

What makes it work:

  • Salting time removes water without cooking - 15-20 minutes pulls out moisture so cucumbers stay crunchy instead of turning soggy when dressed
  • Gochugaru adds mild heat and smoky sweetness - Korean red chili flakes give authentic flavor without the sharp burn of regular crushed red pepper
  • Sesame oil provides nutty richness - a small amount coats each slice and balances the acidity from rice vinegar
  • Squeezing cucumbers after salting is non-negotiable - pressing them in a clean towel for one minute removes the liquid salt can't eliminate on its own
  • Mixing the sauce first ensures even coating - combine gochugaru, garlic, soy sauce, sugar, vinegar, and sesame oil before tossing with cucumbers so every slice gets dressed
Quick Tip
Slice cucumbers about ¼ inch thick for uniform texture - thicker slices won't soften enough, thinner ones turn limp.

What You'll Need

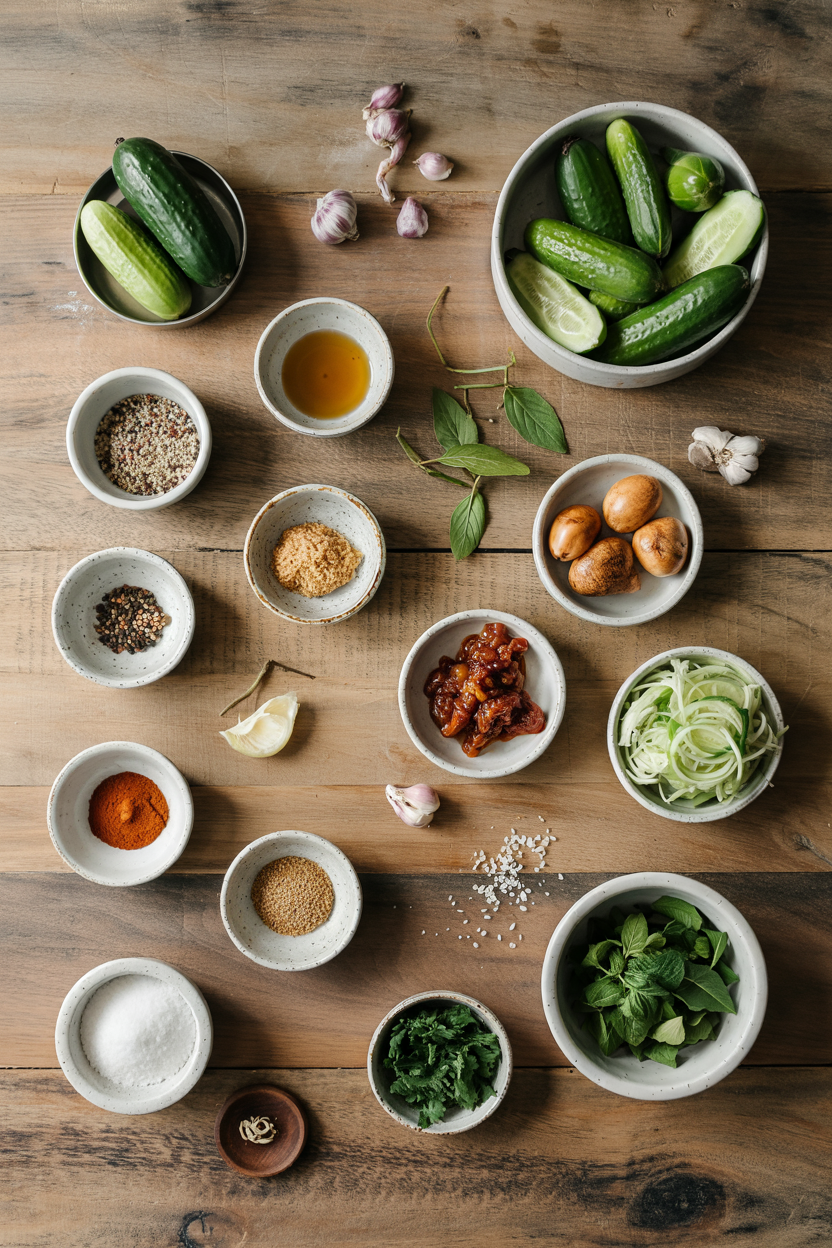
Ingredients for Korean Cucumber Salad (Oi Muchim)

Korean cucumbers (or kirby cucumbers) give you the thin skin and firm crunch that makes this salad work, but you can use English cucumbers if you peel them and scrape out the seeds. A good vegetables can make or break the plate. For a version that comes together quickly, a fresh salad variation keeps the same crisp texture and spicy-tangy balance.

🥒
Vegetables
  • Korean cucumber (or kirby cucumber)
  • Green onions
🧄
Aromatics
  • Garlic
🌶️
Spices & Seasonings
  • Gochugaru (Korean red chili flakes)
  • Sesame seeds
  • Salt
🥢
Sauce & Flavor
  • Sesame oil
  • Soy sauce
  • Rice vinegar
  • Sugar

Ingredient Details

  • Korean cucumber
    Thin-skinned and crunchy with fewer seeds - the texture stays firm after salting instead of turning mushy like regular cucumbers
  • Gochugaru
    Korean red chili flakes provide mild heat and smoky-sweet flavor that regular crushed red pepper can't match - find it in Asian markets or online
  • Sesame oil
    Use toasted sesame oil for nutty aroma - a little goes a long way, so measure carefully or the flavor overpowers the other ingredients
  • Rice vinegar
    Mild acidity balances the heat and richness without turning the salad sharp or sour like white vinegar would
  • Garlic
    Fresh garlic minced fine adds sharp pungency that mellows slightly as it sits in the dressing - jarred garlic tastes flat in comparison
  • Soy sauce
    Adds saltiness and umami depth - use regular soy sauce or tamari for gluten-free, but skip low-sodium versions or the salad tastes bland
  • Green onions
    Optional but adds mild onion flavor and bright green color - slice thin on the diagonal for visual appeal

Ingredient Swaps

You can swap most ingredients based on what you have, but the texture changes if you use regular cucumbers instead of Korean or kirby varieties. Salad adds the contrast this plate needs, but timing matters. For a version that comes together quickly, this quick broccoli dish uses similar prep time and adds protein to the plate.

Common swaps:

  • Kirby cucumber or English cucumber for Korean cucumber - peel English cucumbers and scrape out seeds to reduce water content, but expect slightly less crunch
  • Crushed red pepper flakes for gochugaru - use half the amount since regular chili flakes are hotter and lack the smoky sweetness of Korean chili
  • Tamari for soy sauce - gluten-free option with nearly identical flavor, use the same amount as regular soy sauce
  • Honey or maple syrup for sugar - adds subtle different sweetness and helps the dressing cling to cucumbers, use slightly less than granulated sugar

Korean Cucumber

Works for: Authentic texture, stays crisp after salting, thin skin needs no peeling

Skip if: Can't find them - kirby cucumbers substitute well and English cucumbers work if peeled

Regular Cucumber

Works for: Budget option, widely available, mild flavor

Skip if: You want maximum crunch - peel and deseed first or it turns bitter and watery

Instructions

The whole process takes 35 minutes but only 15 minutes of that involves active work - the rest is waiting for salt to do its job. Rich mains need something to cut through, and garlic shrimp does exactly that. For a version that comes together quickly, simple garlic shrimp recipe pairs with this salad when you need dinner fast.

  1. Slice cucumbers into ¼-inch rounds or half-moons, toss with 1 teaspoon salt in a colander, and let sit for 15-20 minutes until water pools at the bottom.

  2. Press salted cucumbers firmly in a clean kitchen towel or cheesecloth for 1 minute to squeeze out excess moisture - you should see liquid drip out.

  3. Mix gochugaru, minced garlic, soy sauce, rice vinegar, sugar, and sesame oil in a mixing bowl until sugar dissolves and sauce looks combined.

  4. Add squeezed cucumbers and sliced green onions to the bowl, toss thoroughly for 1-2 minutes until every piece is coated with dressing.

  5. Chill in the fridge for 10-15 minutes before serving to let flavors meld, or serve immediately if you're short on time - texture stays crisp for 3-4 hours.

Golden Rule
Don't skip squeezing the cucumbers after salting - that extra step removes moisture salt can't pull out and prevents watery dressing at the bottom of your bowl.

What to Serve With It

This salad needs a protein or grain to complete the plate since it's all vegetables and sauce. The chicken works best when it hits the table at the same time as the main. For a version that comes together quickly, juicy homemade chicken recipe keeps the meal balanced when you're building the plate.

Side Dish Prep Why It Works How to Serve
Steamed rice Easy Neutral base balances spicy salad Serve warm rice in bowls with cucumber salad on the side
Grilled chicken Medium Adds protein and complements cooling salad Slice chicken and serve alongside salad with rice
Korean BBQ beef Medium Flavor contrast with spicy, tangy cucumber Arrange beef and salad on platter for sharing
Bibimbap Involved Adds crunchy fresh contrast to warm bowl Place cucumber salad as one of the vegetable toppings
Soft tofu Easy Mild texture contrasts cucumber crunch Serve cold silken tofu with cucumber salad and soy sauce

Three ways to serve it:

  • As a banchan spread - put small portions in individual dishes alongside other Korean sides like kimchi and seasoned spinach for a traditional meal
  • With noodle dishes - serve cold cucumber salad next to japchae or spicy noodles to cool down the heat and add textural contrast
  • At potlucks or picnics - transport in an airtight container and serve chilled since it holds up well at room temperature for 2-3 hours
Best Pick
Pair this with Korean BBQ beef and steamed rice for a complete weeknight dinner that feels restaurant-quality but takes less than 45 minutes start to finish.

Store and Reheat

The salad stays crisp in the fridge for 3-4 days if stored properly, but texture softens slightly each day as the dressing continues to draw out moisture. Pork adds the contrast this plate needs, but timing matters. For a version that comes together quickly, this quick pork dish comes together in similar time and works for meal prep like this salad.

Method Time Best For
🥶 Serve cold N/A Maintaining crisp texture and fresh flavor
🌡️ Room temperature 15-20 min out of fridge Softer but flavorful salad when you forgot to chill it

For best results when storing:

  • Use airtight shallow containers - spread salad in a thin layer instead of piling it deep so cucumbers don't get crushed and release more water
  • Drain excess liquid before storing - if dressing pools at the bottom after mixing, pour it off to prevent cucumbers from sitting in liquid
  • Store up to 3-4 days maximum - texture stays acceptably crisp for the first two days, then softens gradually but remains edible
  • Don't freeze this salad - cucumbers turn mushy and watery when thawed, losing all the crunch that makes the dish worth eating
  • Refresh before serving leftovers - toss with a small drizzle of sesame oil and a pinch of fresh gochugaru to brighten flavors that dull in the fridge

Frequently Asked Questions

Can I use regular cucumbers instead of Korean cucumbers?

Yes, but peel them completely and scrape out the seeds with a spoon first. Regular cucumbers have thicker, bitter skin and watery seed pockets that turn the salad soggy and bitter if left in.

How long does Korean cucumber salad keep in the fridge?

3-4 days in an airtight container. The cucumbers stay acceptably crisp for the first two days, then gradually soften as the dressing continues to draw out moisture, but the salad remains safe to eat.

How long should I salt cucumbers when making Oi Muchim?

15-20 minutes is the sweet spot. Less than 15 minutes doesn't pull out enough water and the salad turns watery, but more than 20 minutes makes cucumbers too soft and limp.

Why is my cucumber salad soggy and how can I fix it?

You either didn't salt long enough or skipped squeezing out the moisture. Rinse the cucumbers, pat them dry with paper towels, then toss with fresh dressing - some crunch will return but not all of it.

Can I make Oi Muchim ahead for meal prep?

Yes, but make it no more than 1-2 days ahead for best texture. Store the dressed salad in an airtight container and drain any pooled liquid before serving to refresh the crunch.

Korean Cucumber Salad (Oi Muchim) served on a plate

Korean Cucumber Salad (Oi Muchim)

No ratings yet
Korean Cucumber Salad (Oi Muchim) delivers a crunchy, spicy-tangy side with a garlicky dressing that stays crisp for hours. Salting the cucumbers first removes excess moisture, ensuring a snappy texture that complements any meal. This no-cook salad is perfect for quick weeknight dinners or meal prep.
Print Recipe Pin Recipe
Prep Time 15 minutes mins
Cook Time 1 minute min
Total Time 16 minutes mins
Servings: 4 servings
Course: Side Dish
Cuisine: Korean
Ingredients Method Notes

Ingredients
  

  • 2 cups cucumber Korean cucumber or kirby cucumber, sliced ¼-inch rounds or half-moons
  • 1 teaspoon salt for salting cucumbers
  • 1 tablespoon gochugaru Korean red chili flakes
  • 1 clove garlic minced finely
  • 1 tablespoon soy sauce
  • 1 tablespoon rice vinegar
  • 1 teaspoon sugar granulated
  • 1 teaspoon sesame oil toasted
  • 2 tablespoons green onions sliced thin on the diagonal
  • 1 teaspoon sesame seeds optional, for garnish

Method
 

  1. Slice cucumbers into ¼-inch rounds or half-moons. Toss with 1 teaspoon salt in a colander and let sit for 15-20 minutes until water pools at the bottom.
    2 cups cucumber, 1 teaspoon salt
  2. Press salted cucumbers firmly in a clean kitchen towel or cheesecloth for 1 minute to squeeze out excess moisture, allowing liquid to drip out.
    2 cups cucumber
  3. Mix gochugaru, minced garlic, soy sauce, rice vinegar, sugar, and sesame oil in a mixing bowl until the sugar dissolves and the sauce looks combined.
    1 tablespoon gochugaru, 1 clove garlic, 1 tablespoon soy sauce, 1 tablespoon rice vinegar, 1 teaspoon sugar, 1 teaspoon sesame oil
  4. Add squeezed cucumbers and sliced green onions to the bowl. Toss thoroughly for 1-2 minutes until every piece is coated with dressing.
    2 cups cucumber, 2 tablespoons green onions
  5. Chill in the fridge for 10-15 minutes before serving to let flavors meld, or serve immediately if short on time. The salad stays crisp for 3-4 hours.

Notes

  • Salt cucumbers for no more than 20 minutes to prevent them becoming too soft or limp.
  • Always squeeze out moisture after salting to avoid watery dressing.
  • Use toasted sesame oil for best nutty flavor without overpowering the dressing.

Tried this recipe?

Let us know how it was!

How Long Does Spam Last? [Storage Guide]

April 2, 2026

Opening a can of Spam and finding a slimy, grayish loaf is jarring - especially when you can't remember when you opened it.

How Long Does Spam Last In The Fridge

Spam is a shelf-stable, canned luncheon meat made from pork and ham, and understanding spam and its flavor helps explain why storage missteps show up so clearly in texture and taste.

The rules for how long meat keeps vary widely by type, and Spam's canned format gives it a longer runway than most - but only when handled correctly after opening.

QUICK SUMMARY

Unopened Spam lasts 12-18 months in the pantry. Once opened, refrigerate it in an airtight container and use within 7-10 days. Freeze portioned slices for 1-2 months of extended storage, though expect some texture change.

🥫Pantry (unopened): 12-18 months; check Best By date on can
🧊Fridge (opened): 7-10 days in airtight container, labeled with date
❄️Freezer: 1-2 months best quality; slice and wrap before freezing

How Long Does Spam Last?

Spam's shelf life depends almost entirely on whether the can has been opened. An unopened can sits comfortably in the pantry for 12-18 months - the commercially sealed environment blocks oxygen and bacterial growth.

Spam Shelf Life
MethodStateDurationNotes
🥫 PantryUnopened12-18 monthsIntact can only; verify Best By date
🧊 FridgeOpened7-10 daysAirtight container; label with date opened
🧊 FridgeCooked3-4 daysFried or baked Spam degrades faster than raw opened
❄️ FreezerOpened or sliced1-2 monthsSafe longer but expect dryness and crumbling

The cooked window is notably shorter - fried or baked Spam loses moisture faster than a sealed, uncooked portion.

Similar to keeping tuna fresh, once the protein's protective packaging is broken, the clock moves quickly.

The Best By date on the can is a quality marker, not a hard safety cutoff, though a can nearing that date deserves a close inspection before use.

How to Store Spam

How you store Spam after opening determines whether you get seven days of quality or a metallic, dried-out disappointment after three.

The single biggest mistake is leaving opened Spam in its metal can - the interior oxidizes and transfers off-flavors into the meat.

Golden Rule
Always transfer opened Spam out of the can immediately. The can interior oxidizes after opening and will give the meat a metallic taste within days.

Storage by method, in practice:

Pantry: Keep unopened cans at stable room temperature, away from direct sunlight and humidity. Don't stack cans near a stove or in a damp cabinet.

Fridge: Remove Spam from the can and wrap tightly in plastic wrap, or transfer to an airtight glass or BPA-free container. Label the container with the date opened. Slice only what you'll use immediately - thin slices dry out faster than a whole portion left intact.

Counter: Don't leave opened Spam at room temperature. Like chicken and its flavor suggests for poultry, emulsified meats enter the danger zone fast above 40°F.

Can You Freeze Spam?

Yes - Spam freezes, though the emulsified fat-and-pork matrix doesn't love the process.

Expect a grainier, drier texture after thawing, particularly with extended freezing beyond two months.

That said, frozen Spam works well in cooked dishes like fried rice or musubi, where texture change is masked by heat and seasoning.

If you need spam swaps that work because your frozen supply has degraded too far, those alternatives hold up similarly in cooked applications.

Watch Out
Never freeze an unopened Spam can. Expanding liquid can compromise the seal or warp the can. Portion first, then freeze.
  1. Slice or portion Spam into meal-size pieces before freezing - whole loaves freeze unevenly.
  2. Wrap tightly in plastic wrap or vacuum-seal individual portions to minimize air exposure.
  3. Flash-freeze on a tray for 1-2 hours so slices don't stick together in the bag.
  4. Bag and label - place wrapped portions in a freezer bag, press out all air, and mark the date.
  5. Thaw in the fridge for 12-24 hours; use within 24 hours of thawing, or reheat directly from frozen in a skillet.

Signs Spam Has Gone Bad

Most spoilage in Spam is detectable before you take a bite. Start with the can itself - a bulging, rusted, or leaking can signals bacterial gas production and should go straight in the bin without opening.

Signs It's Gone Bad
👀
VisualBulging or rusted can · green, blue, or brown mold spots · grayish discoloration through the loaf
👃
SmellSharp sour or rotten odor · metallic or ammonia-like smell
✋
TextureSlimy or tacky surface · soft mushy spots inside the loaf

Don't taste-test questionable Spam to decide.

If smell, color, or texture are off, discard it - unlike shelf-stable pantry staples such as sugar (see the shelf life of sugar guide for contrast), animal protein carries real bacterial risk when it turns.

Getting the Most Out of Every Can

A few habits separate a well-managed can from a wasted one.

Good storage discipline also applies to the sides you'd pair with it - much like planning dishes alongside corned beef, Spam works best when the whole meal comes together efficiently.

  • 🏷️ Label opened containers - write the date so the 7-10 day window is never guesswork.
  • 🔪 Slice to order - keep the remaining loaf intact in the fridge; thin pre-cut slices dry faster.
  • ❄️ Use thawed Spam in cooked applications - fried rice, musubi, or hash mask any texture changes from freezing.
  • 🥫 Inspect the can before opening - any denting along the seam, rust, or swelling means discard without tasting.
Shortcut
Reheating frozen Spam directly in a skillet - no thawing required - produces better texture than microwaving from frozen.

Frequently Asked Questions

How long is Spam good after opening?

Opened Spam keeps for 7-10 days in the fridge when stored in an airtight container. Cooked Spam - fried or baked - has a shorter window of 3-4 days.

Can you eat Spam after the Best By date?

Often yes, if the can is intact and undamaged. The Best By date marks peak quality, not safety - inspect for bulging, rust, and off-smell before use.

Does Spam need to be refrigerated after opening?

Yes. Once the can is opened, Spam must be refrigerated immediately. Room temperature accelerates bacterial growth and degrades the emulsified texture quickly.

Can you freeze Spam in the can?

No - freezing an unopened can risks seal damage and uneven freezing. Always remove Spam from the can, portion it, and wrap before freezing.

Why does Spam taste metallic after a few days in the fridge?

That metallic taste comes from leaving Spam stored inside the opened tin. The exposed metal interior oxidizes and transfers flavor into the meat - always transfer to a glass or plastic container immediately after opening.

Mexican Rajas con Crema

April 2, 2026

When you need a vegetable side that works for weeknight tacos or a weekend Mexican feast, rajas con crema delivers. Charred poblano strips melt into smoky, creamy sauce in under 30 minutes with one skillet.

Mexican Rajas con Crema served on a plate

The peppers do most of the flavor work. Roast them until blistered, slice them into strips, and the rest is just stirring cream into caramelized onions.

Perfect for busy weeks when you want something better than canned beans or plain rice.

QUICK SUMMARY

Roasted poblano peppers sautéed with onions and finished with Mexican crema. The trick is charring the peppers until the skin blackens, then steaming them in a covered bowl for easy peeling. Takes 30 minutes start to finish with one pan for cooking.

⏱️Timeline: 15 minutes roasting peppers, 15 minutes sautéing and finishing
🔥Key Move: Roast poblanos directly on flame or under broiler until skin blisters black
⚠️Watch Out: Add crema off heat to prevent curdling and greasiness

Why This Recipe Works

Poblano peppers bring mild heat and smoky depth when their skins char completely. For a version that comes together quickly, this this quick verde dish adds tangy contrast and takes 10 minutes to mix.

High heat transforms the peppers from vegetal to sweet and smoky. The blackened skin peels away easily after steaming in a covered bowl, leaving tender flesh that soaks up cream.

Quick Reference
⏱️
Prep Time
15 min
🔥
Cook Time
15-20 min
⏰
Total Time
30-35 min
🍽️
Servings
4 servings
📊
Difficulty
Easy
🏷️
Category
Side Dish
💡
Quick Tip
Roast peppers till blistered for best flavor
🎯
Best For
Weeknight
  • Roast poblanos 8-10 minutes on medium-high heat until skin blackens and blisters evenly across surface
  • Steam peppers in covered bowl 10 minutes to loosen skins for easy peeling without scraping
  • Sauté onions 5-7 minutes until translucent before adding peppers to develop sweetness
  • Remove pan from heat before stirring in crema to prevent curdling and maintain smooth texture
  • Season with salt after cream is mixed to avoid drawing moisture that makes peppers soggy
Golden Rule
The skin must blacken completely for easy peeling and smoky flavor - pale spots mean bitter, tough skin that won't come off

What You'll Need

Ingredients for Mexican Rajas con Crema

Shopping for this takes one trip to the produce section and dairy aisle. Rich mains need something to cut through, and vegetarian does exactly that - for a version that comes together quickly, this simple vegetarian side dish builds on similar technique with different vegetables.

🌶️
Peppers
  • 4 poblano peppers
  • 1 jalapeño (optional)
🧅
Aromatics
  • 1 medium onion
  • 2 cloves garlic (optional)
🥛
Dairy
  • ½ cup Mexican crema
  • 2 oz queso fresco (optional)
🫙
Pantry
  • 2 tablespoon vegetable oil
  • 1 teaspoon salt
  • 1 teaspoon epazote (optional)

Ingredient Details

  • Poblano peppers
    Choose firm peppers with smooth, glossy skin and no soft spots - wrinkled skin means they're past peak
  • Mexican crema
    Look for crema mexicana in the dairy aisle near sour cream - it's thinner and less tangy than sour cream
  • Onion
    White or yellow onion works best - red onion adds color but can taste sharper after cooking
  • Vegetable oil
    Neutral oil with high smoke point lets peppers char without burning - avoid olive oil which smokes at lower heat
  • Epazote
    Fresh Mexican herb with earthy, slightly minty flavor - found in Latin markets or substitute with cilantro
  • Queso fresco
    Mild, crumbly Mexican cheese adds salt and texture - crumble it over finished dish just before serving
  • Salt
    Add after cream is mixed to prevent drawing moisture from peppers that causes sogginess

Ingredient Swaps

Most swaps work if you adjust for heat level or dairy tang. The peppers matter most - pick mild or spicy based on what you can handle.

  • Mexican crema → sour cream or Greek yogurt - sour cream adds more tang, Greek yogurt thickens more when heated (use full-fat to prevent curdling)
  • poblano peppers → Anaheim peppers or jalapeños - Anaheim milder and sweeter, jalapeños bring twice the heat and less smoky flavor
  • vegetable oil → olive oil - adds fruity flavor but lower smoke point means watch for burning during roasting
  • queso fresco → feta or cotija - feta saltier and tangier, cotija drier with aged flavor (both work crumbled on top)

Sour Cream Instead of Crema

Works for: Budget-friendly cooking, when crema isn't available, adds extra tang

Skip if: You want authentic flavor, you dislike sour tang, you're heating above medium

Jalapeños Instead of Poblanos

Works for: Heat lovers, when poblanos aren't available, smaller batch cooking

Skip if: You want mild heat, you dislike spicy food, you need smoky flavor

Instructions

The whole process takes 30 minutes with most of that time roasting and resting peppers. Potato adds the contrast this plate needs, but timing matters - for a version that comes together quickly, this creamy buttery potato side uses similar technique with different vegetables.

  1. Roast poblano peppers on baking sheet under broiler or directly on gas flame 8-10 minutes, turning every 2-3 minutes until skin blackens and blisters across entire surface. Transfer to bowl, cover with plastic wrap or plate, and let steam 10 minutes to loosen skins.
  2. Peel charred skins off peppers under running water or with damp cloth, then slice off stems and remove seeds. Cut peppers into ½-inch strips lengthwise - uniform strips cook evenly and look better on the plate.
  3. Heat 2 tablespoons vegetable oil in skillet over medium heat, add sliced onion, and cook 5-7 minutes stirring occasionally until translucent and edges start to brown. Add garlic if using and cook 30 seconds until fragrant.
  4. Add pepper strips to skillet with onions and cook 3-4 minutes, stirring gently, until peppers soften slightly and onions caramelize. The pan should sizzle but not smoke - reduce heat if edges darken too fast.
  5. Remove pan from heat, stir in Mexican crema and salt, mixing until peppers coat evenly with cream. Add epazote if using, taste for salt, and serve warm with crumbled queso fresco on top.
Shortcut
Skip the roasting step and use jarred roasted poblanos or Hatch chiles - drain well, slice, and start at step 3 for 15-minute cook time

What to Serve With It

Rajas work as a taco filling, side dish, or topping for rice and beans. The rice works best when it hits the table at the same time as the main - we keep a batch ready for nights like this, and for complete stuffed shells meal ideas that need vegetable sides, this technique adapts to other peppers and cream bases.

Side Dish Prep Why It Works How to Serve
Warm corn tortillas Easy Traditional base for scooping rajas, adds mild corn sweetness Heat in dry skillet 30 seconds per side, stack in towel
Mexican rice Medium Absorbs creamy sauce, adds bulk to make rajas a full meal Serve rice in bowl, spoon rajas over top with extra crema
Refried beans Easy Adds protein and earthy flavor that balances smoky peppers Warm beans in small pot, serve alongside rajas in separate dish
Simple green salad Easy Crisp lettuce cuts through rich cream, adds freshness Toss greens with lime juice and olive oil, serve on side
Guacamole and chips Easy Creamy-on-creamy pairing works for parties, adds avocado richness Serve in bowls as appetizer before rajas or alongside

Three ways to serve it:

  • Taco filling: Spoon rajas into warm tortillas with queso fresco, cilantro, and lime wedges for squeezing
  • Side dish: Serve alongside grilled chicken or steak with rice and beans for complete Mexican dinner
  • Appetizer: Pile rajas on tostadas or thick tortilla chips, top with crema and cheese for party bites
Best Pick
Rajas work best as taco filling when peppers are sliced thin and cream is thick enough to cling without dripping - reduce cream slightly if it seems too runny

Store and Reheat

Rajas keep for several days if cooled quickly and stored properly. Rich mains need something to cut through, and tea does exactly that - for a version that comes together quickly, this easy tea side brews in 15 minutes and complements creamy dishes perfectly.

Method Time Best For
🍳 Stovetop 5-7 minutes Quick reheating, preserves texture, best for single servings
🔥 Oven 10-12 minutes at 350°F Larger batches, even heating, no stirring needed
📦 Microwave 1-2 minutes Small portions when you're in a hurry, add splash of water

For best results when storing:

  • Cool to room temperature within 2 hours to prevent bacterial growth and maintain food safety
  • Store in shallow airtight container in fridge for 3-4 days - shallow container cools faster and prevents moisture buildup
  • Freeze in portion-sized containers up to 1 month - cream texture changes slightly but flavor holds
  • Add splash of water or extra crema when reheating to restore creamy consistency if sauce thickens
  • Reheat only once after initial cooking - multiple reheating cycles break down cream and make peppers mushy

Frequently Asked Questions

Can I make rajas con crema ahead and reheat later?

Yes - cook rajas completely, cool to room temperature, and store in airtight container up to 3 days. Reheat gently on stovetop with splash of water or cream to restore texture.

How long do I roast poblanos for rajas con crema?

Roast poblanos 8-10 minutes under broiler or on open flame, turning every 2-3 minutes until skin blackens and blisters completely. Pale spots mean the skin won't peel easily.

What is the best way to peel poblano peppers easily?

Steam roasted peppers in covered bowl for 10 minutes after roasting - the steam loosens skins so they rub off easily under running water or with damp cloth.

How do I prevent the crema from curdling?

Remove pan from heat before stirring in crema - adding dairy to hot pan or boiling mixture causes curdling. Stir gently and keep heat off until cream fully incorporates.

Can I use sour cream instead of Mexican crema?

Yes - sour cream works but adds more tang and slightly thicker texture. Use full-fat sour cream and remove pan from heat before stirring in to prevent curdling.

Mexican Rajas con Crema served on a plate

Mexican Rajas con Crema

No ratings yet
Mexican Rajas con Crema features charred poblano pepper strips simmered with onions and finished in a smooth, smoky crema sauce. This versatile vegetable side is quick to prepare with one skillet and perfect for tacos or a rich Mexican feast.
Print Recipe Pin Recipe
Prep Time 15 minutes mins
Cook Time 20 minutes mins
Total Time 35 minutes mins
Servings: 4 servings
Course: Side Dish
Cuisine: Mexican
Ingredients Equipment Method Notes

Ingredients
  

  • 4 whole poblano peppers roasted and peeled
  • 1 whole jalapeño optional, remove seeds for less heat
  • 1 medium onion sliced
  • 2 cloves garlic optional, minced
  • 0.5 cup Mexican crema
  • 2 oz queso fresco optional, crumbled for garnish
  • 2 tablespoon vegetable oil neutral oil with high smoke point
  • 1 teaspoon salt add after crema is mixed
  • 1 teaspoon epazote optional, fresh or dried

Equipment

  • Skillet Used to sauté onions and cook peppers
  • Baking sheet For roasting poblano peppers
  • Covered bowl Used to steam peppers and loosen skins

Method
 

  1. Roast poblano peppers on baking sheet under broiler or directly on gas flame for 8 to 10 minutes, turning every 2 to 3 minutes until skin blackens and blisters evenly. Transfer to a bowl, cover with plastic wrap or plate, and let steam for 10 minutes to loosen skins.
    4 whole poblano peppers
  2. Peel charred skins off peppers under running water or with a damp cloth. Remove stems and seeds, then slice peppers into ½-inch wide strips lengthwise.
    4 whole poblano peppers
  3. Heat 2 tablespoons vegetable oil in a skillet over medium heat. Add sliced onion and cook 5 to 7 minutes until translucent and lightly browned at edges. Add minced garlic if using and cook for 30 seconds until fragrant.
    1 medium onion, 2 cloves garlic, 2 tbsp vegetable oil
  4. Add pepper strips to the skillet with onions and cook 3 to 4 minutes, stirring gently until peppers soften slightly and onions caramelize. Adjust heat to avoid burning.
    4 whole poblano peppers, 1 medium onion
  5. Remove the skillet from heat. Stir in Mexican crema and salt, mixing gently to coat peppers evenly. Add epazote if using. Taste and adjust seasoning. Serve warm topped with crumbled queso fresco if desired.
    0.5 cup Mexican crema, 1 tsp salt, 1 tsp epazote, 2 oz queso fresco

Notes

  • Ensure the peppers' skin blackens completely for easy peeling and best flavor.
  • Add the crema off the heat to prevent curdling and maintain a smooth texture.
  • Add salt after mixing in the cream to avoid drawing moisture from the peppers.

Tried this recipe?

Let us know how it was!

What Is Schmaltz? [Taste, Uses & More]

April 2, 2026

You spot a small tub of schmaltz at a Jewish deli counter, nestled between jars of pickled herring and rye bread - pale, waxy, and almost unassuming.

What Is Schmaltz

It's the kind of fat that once did the job of swapping out butter or swapping out beef tallow in Ashkenazi kitchens across Eastern Europe, and it's worth understanding why cooks are still reaching for it today.

QUICK SUMMARY

Schmaltz is rendered chicken or goose fat with a moderate, savory flavor and a silky texture when melted. It's a foundational fat in Ashkenazi cooking, best used for sautéing, frying, and enriching soups. Refrigerated shelf life is 3-4 weeks; frozen, up to a year.

🍗What It Is: Clarified poultry fat rendered slowly from chicken or goose skin
👅Flavor: Savory, mildly sweet, with a roasted-chicken note
🍳Best Uses: Sautéing onions, frying latkes, enriching soups and matzo balls
❄️Shelf Life: 3-4 weeks refrigerated; 6-12 months frozen
⚠️Watch Out: Not suitable for vegetarians, vegans, or low-fat diets

What Is Schmaltz?

Schmaltz is rendered poultry fat, produced by slowly melting down the fatty skin of chicken or, less commonly, goose over low heat until the fat separates and clarifies.

The term comes from Yiddish, rooted in the German word Schmalz, meaning melted fat or lard.

It's been a staple of Ashkenazi Jewish cooking since at least the medieval period in Eastern Europe, where butter couldn't be used in meat-based kosher meals and lard was off the table entirely.

Chicken schmaltz is the most widely available variety today. Goose schmaltz carries a slightly richer, gamier character, though it's harder to source outside specialty markets.

A notable byproduct of rendering is gribenes - the crispy, golden chicken skin crackling left behind after the fat is strained. Think of it as the poultry world's answer to pork crackling.

  • 🐔 Chicken schmaltz - the standard, mild and widely available
  • 🪿 Goose schmaltz - richer and slightly gamier, used in traditional Eastern European recipes
  • ✨ Gribenes - crispy rendered skin crackling, a valued byproduct of the process

Because it's pure rendered fat, schmaltz shares a category with goose fat and duck fat, though its flavor profile is distinctly more approachable.

For context on latkes's shelf life and how schmaltz plays into that dish's texture, the two are closely linked.

What Does Schmaltz Taste Like?

schmaltz - What Is Schmaltz

Schmaltz has a moderate, rounded savoriness - not sharp or aggressive, but deeply savory in a way that reads as background warmth rather than front-of-palate punch.

The closest comparison is light bacon fat or unsalted clarified butter, but with a clearer roasted-chicken note underneath.

Sensory SnapshotModerate Intensity
👅 Flavor
savoryroasted-chickenmildly sweetumami
✋ Texture
solid when coldsilky when melted
👃 Aroma
poultry-scentedtoasty

At room temperature, schmaltz is pale and waxy - solid but soft enough to spread.

Once melted, it turns completely clear and silky, coating pans evenly.

Heat intensifies its toasty aroma noticeably.

Used raw or at low heat, it contributes a gentle, savory richness; at higher temperatures, it develops a fuller roasted quality that does a lot of work in a dish like chopped liver.

Golden Rule
Fresh schmaltz should smell like mild roasted chicken - never sour, rancid, or metallic. Off aromas mean it's past its prime.

How to Use Schmaltz

Schmaltz performs best as a cooking fat and a quiet flavor base, not as a loud seasoning. Its moderate intensity means it enriches without overpowering, which is why it works across a wider range of dishes than people expect.

In Ashkenazi cooking, the entry point is almost always sautéed onions.

Cooking onions low and slow in schmaltz is the foundation of chopped liver and a dozen other preparations.

The fat pulls sweetness from the onion while adding its own savory depth.

From there, it moves naturally into soups - stirring a spoonful into matzo ball broth or chicken stock off the heat adds body and a glossy finish without muddying the flavor.

How Schmaltz Is Used
MethodBest ForTip
🍳 SautéingOnions, vegetables, chopped liver baseUse medium-low heat to avoid burning the fat
🔥 Pan-fryingLatkes, potatoes, pan-fried dumplingsSchmaltz's smoke point handles frying well; watch for steam
🥣 FinishingSoups, stocks, cooked grainsStir in off-heat to preserve aroma and avoid breakdown
🍞 SpreadingRye bread, matzo, as a butter alternativeUse softened at room temperature, seasoned with salt
🍗 BastingRoasted poultry, root vegetables before roastingBrush on before the oven for sheen and a golden crust

Schmaltz pairs naturally with onions, scallions, potatoes, cabbage, and root vegetables - ingredients that share its Eastern European roots. Fresh herbs like parsley and dill cut through the fat cleanly.

Egg-based dishes, particularly those in the matzo and dumpling family, benefit from schmaltz mixed directly into the binding mixture.

Avoid using schmaltz with delicate floral seafood - its poultry character competes rather than complements.

Strongly spiced Southeast Asian curries are similarly a mismatch.

If you need a neutral swap, the guide on alternatives to schmaltz covers the main options across cooking contexts.

Duck fat is a close substitute in non-kosher kitchens, though understanding swapping out duck fat helps clarify where the two diverge.

Try It In
🥣Loaded Baked Potato SoupSchmaltz replaces butter as the fat base for a richer, savory finish→🍠Roasted Sweet Potato and Black Bean SaladToss sweet potatoes in melted schmaltz before roasting for a golden crust→🥔Garlic Butter Roasted Baby PotatoesSwap the butter for schmaltz to push the savory poultry note forward→

How to Buy and Store Schmaltz

Good schmaltz should look pale and opaque when cold - nearly white to light gold. A faint roasted poultry aroma is correct; anything sour, sharp, or metallic signals oxidation or spoilage.

Buy from reputable delis or specialty stores, or render it at home from fatty chicken skin trimmings saved over several weeks.

Watch Out
When sourcing chicken skin to render at home, check for discoloration before using - our guide on black spots on raw chicken skin explains what's safe to use and what to discard.

Storage is straightforward, but fat absorbs odors easily, so an airtight container is non-negotiable. The full breakdown on storing schmaltz correctly covers fridge versus freezer timelines in detail.

  • 🧊 Refrigerator - keeps 3-4 weeks in a sealed container away from strong-smelling foods
  • 🧊 Freezer - portion into ice-cube trays first; frozen schmaltz holds 6-12 months when well-wrapped
  • 🚫 Counter storage - not recommended; rendered fat spoils faster at room temperature

Start Here If You're New to Schmaltz

If you've never cooked with schmaltz before, sautéed onions are the lowest-stakes entry point. Melt a tablespoon in a pan over medium-low heat, add sliced onions, and cook slowly - the result makes the case better than any description can.

From there, frying potatoes is the natural second step. Schmaltz gives latkes and roasted potatoes a crust and depth that neutral oils don't match.

Once you're comfortable with those two uses, the rest of its applications follow naturally.

Shortcut
No deli nearby? Render your own from chicken skin scraps saved in the freezer - it takes about 45 minutes on low heat and yields a jar that lasts a month in the fridge.

Frequently Asked Questions

Is schmaltz the same as lard?

No. Lard is rendered pork fat; schmaltz is rendered chicken or goose fat. Both are clarified animal fats used similarly as cooking fats, however their flavors are distinct - schmaltz has a roasted-chicken note while lard is more neutral and slightly pork-forward.

How do you make schmaltz at home?

Cut chicken skin and fat into small pieces, then cook over low heat with a splash of water until the fat renders out and the skin crisps into gribenes. Strain through a fine sieve, cool, and refrigerate - the whole process takes 30-45 minutes.

What substitutes for schmaltz in recipes?

Duck fat or goose fat are the closest matches in flavor and fat composition. For kosher-neutral swaps, refined coconut oil or a neutral vegetable oil with a few drops of sesame oil can approximate the richness, though not the poultry note.

Is schmaltz kosher?

Chicken schmaltz can be kosher, provided the source chicken was slaughtered and processed according to kosher law and the fat was rendered under kosher supervision. Always check for a kosher certification on packaged schmaltz if that matters for your kitchen.

Does schmaltz go bad?

Yes. Refrigerated schmaltz lasts 3-4 weeks; beyond that, it can turn rancid. A sour or metallic smell is the clearest sign it's gone off - discard it rather than cooking with it.

How Long Does Spaghetti Squash Last? [Storage Guide]

April 2, 2026

Leftover spaghetti squash sitting in your fridge is one of those things you either use within a few days or forget about entirely - and how long squash keeps depends heavily on whether it's whole, halved, or already cooked.

Can You Freeze Spaghetti Squash

A whole, uncut squash can last months under the right conditions, while cooked strands have a much shorter window.

Knowing the difference keeps you from opening a container to find a sour, watery mess - or worse, tossing a perfectly good squash before it's even close to done.

QUICK SUMMARY

A whole spaghetti squash lasts up to 3 months in a cool pantry. Cooked strands keep 3-5 days in the fridge and up to 12 months frozen. Always cook before freezing - raw strands turn watery and unusable.

🥶Fridge (cooked): 3-5 days in a sealed airtight container
❄️Freezer (cooked): 8-12 months; cook and dry before freezing
🧺Pantry (whole): 2-3 months in a cool, dry, dark spot

How Long Does Spaghetti Squash Last?

Shelf life for spaghetti squash varies more than most vegetables because its hard rind acts as a natural barrier when left whole. A mature, unbruised squash stored properly can outlast many fresh produce items by several weeks.

Spaghetti Squash Shelf Life
MethodStateDurationNotes
🧺 PantryWhole2-3 monthsCool, dry, dark spot; keep away from ethylene producers like apples
🏠 CounterWhole1-2 weeksWarm room temp accelerates aging; use quickly
🧊 FridgeWhole4-8 weeksKeep in crisper, away from coldest vents to avoid chill damage
🧊 FridgeCooked3-5 daysAirtight container; cool completely before storing
❄️ FreezerCooked8-12 monthsCook and dry strands before freezing to limit ice crystals

The pantry range of 2-3 months assumes a fully mature squash - one with a hard, dull rind and a dry, intact stem. An immature squash or one with existing soft spots degrades far faster.

If you're curious about the taste of spaghetti squash and how maturity affects strand quality, that context is worth understanding before you cook.

How to Store Spaghetti Squash

Storage method makes a significant difference for both whole squash and cooked strands. Each form needs a different approach.

Pantry: Keep whole, unwashed squash in a single layer on a rack or shelf at 50-60°F. Rotate occasionally to prevent pressure bruising, and keep the stem intact - a broken stem accelerates moisture loss from the seed cavity end. Storing whole squash correctly shares the same logic as storing acorn squash correctly, since both are winter squash with similar rind structure.

Counter: Fine for short-term use, but warm kitchens shorten the window fast. Don't store in plastic bags, which trap moisture and invite mold.

Fridge (whole or halved): Place whole squash in the crisper drawer away from coldest vents. Halved, uncooked squash should be wrapped tightly or placed cut-side down in a container - exposed cut surfaces dry out or pick up off-flavors within a couple of days.

Fridge (cooked): Cool strands completely at room temperature first. Then transfer to a shallow airtight container, pressing out excess air before sealing.

Watch Out
Never store a whole spaghetti squash in a sealed plastic bag. Trapped moisture softens the rind and creates conditions for surface mold to spread quickly into the flesh.

Can You Freeze Spaghetti Squash?

Yes - with one firm rule: always cook before freezing. Raw scraped strands break down badly in the freezer, turning soft and weepy after thawing.

Cooked strands hold up well enough for soups, gratins, and sauced dishes.

Golden Rule
Cook and fully dry the strands before they go anywhere near the freezer. Excess moisture is what causes ice crystal damage and watery texture after thawing.
  1. Cook the squash - roast, steam, or microwave until strands separate easily from the shell.
  2. Cool completely - let sit at room temperature; don't rush this step.
  3. Scrape the strands - use a fork to pull them away from the shell in long pulls.
  4. Drain and dry - spread strands on a paper towel and press gently to remove excess moisture.
  5. Portion and pack - divide into airtight freezer bags or rigid containers, pressing flat to remove air.
  6. Label and freeze - note the date and portion size; flat bags thaw faster and stack efficiently.

Thaw overnight in the fridge for planned use in casseroles or gratins. For soups, add frozen strands directly to a simmering pot - no thawing needed.

Texture after freezing is noticeably softer, so dishes where texture matters less, like baked gratins, work better than serving strands as a standalone side.

Signs Spaghetti Squash Has Gone Bad

Whole squash gives clear external warnings before the interior is compromised. Cooked strands show spoilage differently - watch for both.

Signs It's Gone Bad
👀
VisualDark, sunken soft spots on rind · mold near stem or cracks · discolored or blackened flesh after cutting
👃
SmellSour or fermented odor · musty smell from cavity or cut surface
✋
TextureSlimy or excessively mushy strands · dry, desiccated interior that won't form moist strands

A small blemish on the rind doesn't automatically mean the whole squash is lost - cut it open and check the flesh. If the interior looks bright and pale yellow with no wateriness or off-smell, it's fine.

Any mold, sour smell, or slimy strands means discard it entirely - don't taste-test to confirm.

Getting the Most Out of Your Squash

A few practical habits extend useful life and reduce waste across the whole storage cycle.

  • 🧺 Buy mature squash - a hard, dull rind and dry stem signal full development; soft or shiny rinds indicate the squash was picked early and won't store as long.
  • ❄️ Roast before freezing - roasting reduces moisture content compared to steaming or microwaving, which means less wateriness after thawing.
  • 📦 Freeze flat - bags frozen flat stack easily and thaw in under an hour in cold water versus 3-4 hours for a thick brick.
  • 🔄 Move to fridge before use - if pantry space is what you have, shift the squash to the fridge 2-3 weeks before you plan to cook it to slow any late-stage aging.

If strands aren't right for your recipe and you need an alternative, checking replacements for spaghetti squash can help you pivot without a wasted trip to the store.

Thinking ahead about what pairs with spaghetti squash also helps you plan portions before freezing so nothing gets stored in awkward sizes.

Shortcut
Roast two squash at once, use one now, and freeze the second batch flat. You halve the prep effort and get a ready-to-go freezer portion for a weeknight meal.

Frequently Asked Questions

Can you freeze cooked spaghetti squash?

Yes, cooked strands freeze well for up to 12 months. Drain and dry them thoroughly before packing to reduce ice crystals. Thawed strands are softer, so use them in sauced or baked dishes rather than as a standalone side.

How long does spaghetti squash last in the refrigerator?

A whole squash keeps 4-8 weeks in the crisper drawer. Cooked strands last 3-5 days sealed in an airtight container. Halved, uncooked squash should be used within 2-3 days.

Can you freeze raw spaghetti squash strands?

No - raw strands break down in the freezer and thaw into a mushy, watery mass. Cook the squash first, drain and dry the strands, then freeze. Skipping the cooking step is the most common freezing mistake.

What's the best way to store a whole spaghetti squash?

A cool (50-60°F), dry, dark pantry shelf gives the longest life - up to 3 months. Keep it unwashed, stem intact, and away from ethylene-producing fruit. The fridge works too but offers little advantage over a proper pantry setup.

Does spaghetti squash go bad faster after cutting?

Yes, significantly. Once cut, the exposed flesh dries out and can develop mold within 2-3 days even in the fridge. Wrap cut halves tightly or store cut-side down in a covered container and use them quickly.

Thai Green Papaya Vegetarian Curry

April 2, 2026

You need 35 minutes and one wok. No marinating, no complex prep, no hunting for rare ingredients beyond the curry paste and papaya.

Thai Green Papaya Vegetarian Curry served on a plate

Green papaya simmers in coconut milk while tofu crisps in a separate pan. The curry paste blooms in oil first so the flavors open up before the liquid hits.

This is what we make when we want Thai flavors without the takeout markup or the MSG hangover. Works for meal prep Sunday or Tuesday night when the fridge holds vegetables but no plan.

QUICK SUMMARY

Thai Green Papaya Vegetarian Curry brings tender green papaya and crispy tofu together in a creamy coconut curry sauce. The key is cooking the curry paste until fragrant before adding coconut milk gradually to control thickness. Make this when you want authentic Thai flavors that come together in under 40 minutes.

⏱️Time reality: 15 minutes prep, 20 minutes cooking, no marinating or waiting
🔥Critical move: Cook curry paste 2-3 minutes in oil before adding any liquid
⚠️Watch out: Green papaya turns mushy after 7 minutes - simmer gently and check texture

Why This Recipe Works

The curry paste blooms in hot oil before the coconut milk goes in, which means the flavors develop instead of just mixing. Most people skip slaw, but it balances the meal. For a version that comes together quickly, try something crunchy like slaw alongside.

Quick Reference
⏱️
Prep Time
15 min
🔥
Cook Time
20 min
⏰
Total Time
35 min
🍽️
Servings
4 servings
📊
Difficulty
Medium
🏷️
Category
Main Dish
💡
Quick Tip
Cook green papaya until slightly tender, not mushy
🎯
Best For
Weeknight | Meal prep | Casual entertaining

What makes it work:

  • Pressing tofu for 20 minutes removes water so it crisps instead of steaming when it hits the pan
  • Green papaya stays firm through simmering while ripe papaya would disintegrate and sweeten the curry
  • Adding coconut milk gradually controls sauce thickness instead of dumping it all in and hoping for the right consistency
  • Lime leaves and Thai basil go in during the last 2 minutes which keeps their aroma sharp instead of cooking it off
  • Sautéing the curry paste before liquid hits releases the oils and deepens the flavor base for everything that follows
Quick Tip
Taste and adjust salt, sugar, and lime juice midway through cooking - Thai curry balances spicy, salty, sweet, and sour at once.

What You'll Need

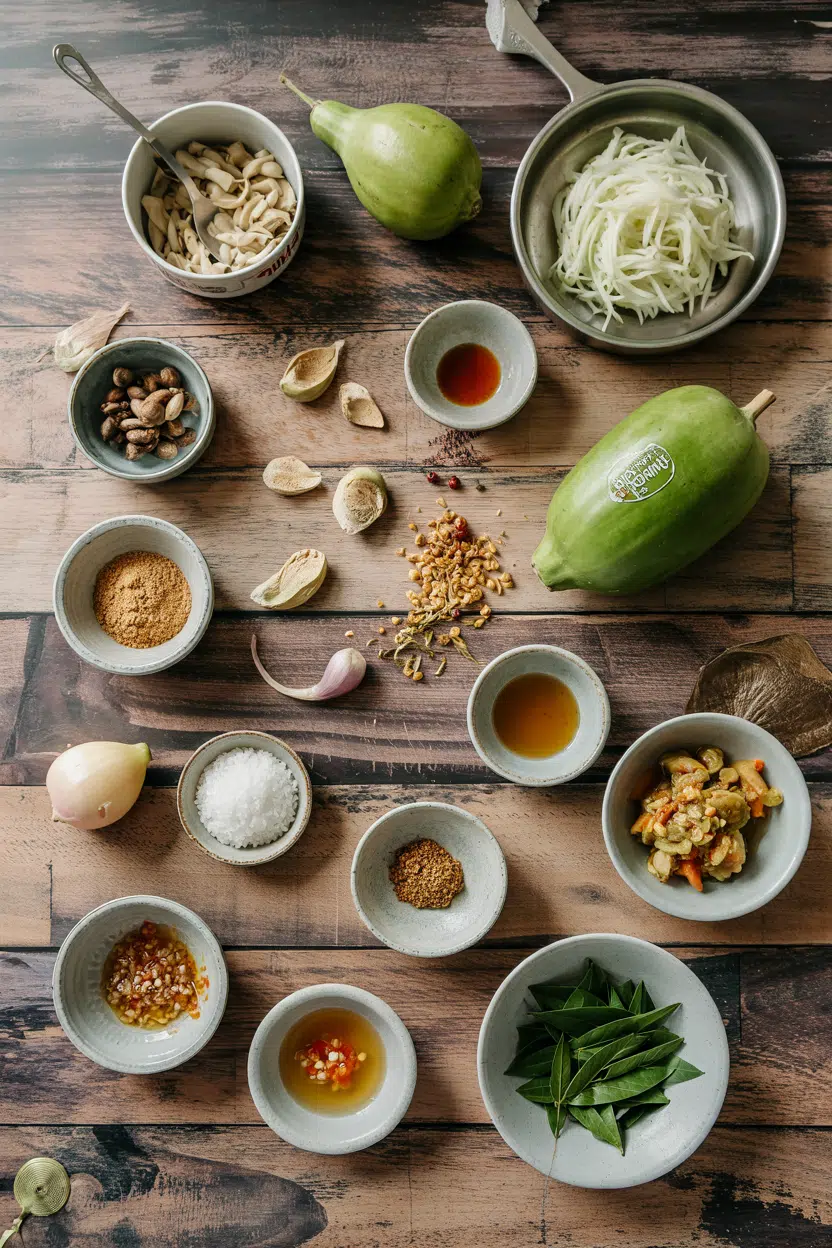
Ingredients for Thai Green Papaya Vegetarian Curry

The shopping list stays short if you have curry paste and can find green papaya. Rich mains need something to cut through, and curry does exactly that. For a version that comes together quickly, check out this related curry recipe that uses a slow cooker instead.

🧊
Protein
  • Firm tofu (14 oz block)
🥬
Vegetables
  • Green papaya (1 medium, about 2 cups julienned)
  • Bamboo shoots (1 cup, sliced)
🥢
Sauce & Base
  • Thai green curry paste (2-3 tbsp)
  • Coconut milk (1 can, 13.5 oz)
  • Vegetable oil (2 tbsp)
🧄
Aromatics & Herbs
  • Garlic (3 cloves, minced)
  • Thai basil (½ cup fresh leaves)
  • Lime leaves (4-5 leaves)
  • Chilies (1-2, sliced, optional)

Ingredient Details

  • Green papaya
    Use unripe papaya with pale green flesh and white seeds - ripe papaya turns the curry sweet and mushy
  • Firm tofu
    Press under weight for 20 minutes to remove moisture before pan-frying for crispy edges
  • Thai green curry paste
    Start with 2 tablespoons and taste - brands vary wildly in heat level and salt content
  • Coconut milk
    Shake the can before opening to mix the cream and liquid, or use half thick cream for richer sauce
  • Thai basil
    Adds anise-like flavor that sweet basil can't replicate - add in the last 2 minutes to preserve aroma
  • Lime leaves
    Tear or slice before adding to release citrus oils - dried leaves work but fresh ones deliver more punch
  • Bamboo shoots
    Rinse canned shoots to remove tinny flavor - they add crunch without competing with papaya's texture

Ingredient Swaps

Green papaya holds up better than zucchini but both work if you adjust cooking time. The curry stays vegetarian with protein swaps like tempeh or chickpeas instead of tofu.

Four swaps that work:

  • Green papaya → zucchini or cucumber: Softer texture and less fibrous, cook for 3-4 minutes instead of 5-7 to avoid mush
  • Tofu → tempeh or chickpeas: Tempeh gives firmer bite and nutty flavor, chickpeas add softer texture with earthy notes
  • Thai green curry paste → homemade paste: Grind lemongrass, galangal, chilies, shallots, garlic with shrimp paste for authentic flavor but more work
  • Coconut milk → cashew cream: Blend soaked cashews with water for nutty, creamy sauce that's thinner than coconut milk

Zucchini Instead of Green Papaya

Works for: Budget cooking when green papaya costs too much or isn't available

Skip if: You want authentic texture and mild flavor - zucchini releases more water and softens faster

Tempeh Instead of Tofu

Works for: Extra protein and firmer texture that holds up through reheating

Skip if: You dislike nutty, fermented flavors - tempeh tastes stronger than tofu

Instructions

The curry builds in layers starting with the paste, then liquid, then vegetables. A good curry can make or break the plate. For a version that comes together quickly, classic rolls dish works as a side without stealing the spotlight.

  1. Press and pan-fry the tofu: Drain firm tofu and press under a heavy plate for 20 minutes. Cut into 1-inch cubes. Heat 1 tablespoon vegetable oil in a wok over medium-high heat. Add tofu cubes and cook 3-4 minutes per side until golden and crispy. Remove and set aside.

  2. Bloom the curry paste: Add remaining 1 tablespoon oil to the same wok over medium heat. Add minced garlic and cook 30 seconds until fragrant. Add 2-3 tablespoons Thai green curry paste and stir constantly for 2-3 minutes until the paste darkens and smells aromatic.

  3. Build the sauce: Pour in half the coconut milk (about ¾ cup) and stir to combine with the paste. Simmer 2 minutes until the sauce thickens slightly. Add remaining coconut milk gradually while stirring to reach your desired consistency.

  4. Add vegetables and simmer: Stir in julienned green papaya and bamboo shoots. Bring to a gentle simmer and cook 5-7 minutes until papaya softens but still has slight crunch. Add torn lime leaves. Taste and adjust with soy sauce, sugar, or lime juice as needed.

  5. Finish and serve: Return tofu to the wok and stir gently to coat. Add Thai basil leaves and fresh chili slices if using. Cook 1-2 minutes until basil wilts. Serve immediately over steamed jasmine rice.

Watch Out
Green papaya turns from tender to mushy in under 2 minutes - check texture at the 5-minute mark and pull it off heat when it still has bite.

What to Serve With It

Thai curry needs something neutral to soak up the sauce and something fresh to cut the richness. The gaps: starch to absorb liquid, crunch to contrast creamy sauce, herbs to brighten each bite. For planning weeknight meals with other proteins, weeknight liver and onions meal ideas shows how to build complete plates.

Side Dish Prep Why It Works How to Serve
Steamed Jasmine Rice Easy Neutral base absorbs curry sauce without competing with flavors Serve 1 cup rice per person, spoon curry over top
Cucumber Salad Easy Cool crunch balances spicy, creamy curry Slice cucumbers thin, dress with rice vinegar and sugar
Roasted Peanuts Easy Salty crunch adds texture contrast to soft curry Sprinkle 2 tablespoons over each bowl before serving
Steamed Bok Choy Easy Mild greens add vegetables without clashing with curry Steam 3-4 minutes until tender, drizzle with soy sauce
Fresh Herb Platter Easy Cilantro, mint, and Thai basil let guests customize brightness Arrange washed herbs on a plate, serve family-style

Three ways to serve it:

  • Weeknight bowl: Spoon curry over jasmine rice with cucumber salad on the side and roasted peanuts sprinkled on top
  • Meal prep version: Pack curry separate from rice in containers, reheat curry on stovetop and rice in microwave
  • Casual entertaining spread: Serve curry family-style with sticky rice, herb platter, and pickled vegetables for guests to build their own bowls
Shortcut
Make rice in a rice cooker while the curry simmers - both finish at the same time for zero waiting.

Store and Reheat

Thai curry holds texture better than most dishes but the papaya softens more each time you reheat. Store curry and rice separately so the rice doesn't absorb all the sauce. A dollop of buttermilk takes each bite somewhere more interesting. For a version that comes together quickly, try a creamy buttermilk side dish alongside.

Method Time Best For
🍳 Stovetop 5-7 min Even reheating that maintains texture - add splash of water if sauce thickened
📦 Microwave 2-3 min Quick single servings - cover bowl to retain moisture, stir halfway through
🔥 Oven 10-12 min at 350°F Larger portions or when reheating multiple containers at once

For best results when storing:

  • Cool completely before refrigerating - hot curry in a sealed container creates condensation that dilutes the sauce
  • Store in shallow containers for faster cooling - deep containers keep the center warm too long and risk bacterial growth
  • Keep curry and rice separate - rice soaks up sauce and turns mushy when stored together
  • Freeze in single portions - freezer bags laid flat save space and thaw faster than containers
  • Add fresh herbs after reheating - Thai basil loses aroma when frozen or microwaved, so garnish with fresh leaves

Frequently Asked Questions

Can I substitute zucchini for green papaya in this curry?

Yes, zucchini works but cooks faster and releases more water. Cut zucchini into matchsticks and simmer for only 3-4 minutes instead of 5-7 to avoid mush.

How long can I store leftover Thai green papaya curry?

Store curry in an airtight container in the fridge for 3-4 days. Freeze in portions for up to 1 month, but the papaya softens more after freezing.

How do I know when the green papaya is cooked properly?

Green papaya should bend slightly when you press it with a spoon but still have a bit of crunch. If it falls apart easily or turns translucent, it's overcooked.

What should I do if my curry tastes too bland or too spicy?

For bland curry, stir in more curry paste, lime juice, or soy sauce off heat. For too much spice, add more coconut milk or a teaspoon of sugar to balance the heat.

Is it possible to make this curry ahead and reheat?

Yes, make the curry up to 2 days ahead and store in the fridge. Reheat gently on the stovetop over low heat, adding a splash of water if the sauce thickened.

Thai Green Papaya Vegetarian Curry served on a plate

Thai Green Papaya Vegetarian Curry

No ratings yet
Thai Green Papaya Vegetarian Curry features tender green papaya and crispy tofu simmered in a creamy coconut curry sauce. Cooking the curry paste in oil before adding coconut milk releases deep flavors, making this dish a quick and authentic Thai meal perfect for weeknights or meal prep.
Print Recipe Pin Recipe
Prep Time 15 minutes mins
Cook Time 20 minutes mins
Total Time 35 minutes mins
Servings: 4 servings
Course: Main Dish
Cuisine: Thai
Ingredients Equipment Method Notes

Ingredients
  

  • 14 oz firm tofu press under weight for 20 minutes, cut into 1-inch cubes
  • 2 cups green papaya julienned, use unripe papaya with pale green flesh
  • 1 cup bamboo shoots sliced, rinse canned to remove flavor
  • 2-3 tablespoon Thai green curry paste start with 2 tablespoons and adjust to taste
  • 13.5 oz coconut milk shake can before opening
  • 2 tablespoon vegetable oil divided for tofu and curry paste
  • 3 cloves garlic minced
  • 0.5 cup Thai basil leaves fresh, added at the end
  • 4-5 leaves lime leaves torn or sliced before adding
  • 1-2 chilies sliced, optional

Equipment

  • Wok Used for cooking tofu and building the curry sauce

Method
 

  1. Drain and press firm tofu under a heavy plate for 20 minutes. Cut into 1-inch cubes. Heat 1 tablespoon vegetable oil in a wok over medium-high heat. Add tofu cubes and cook 3-4 minutes per side until golden and crispy. Remove and set aside.
    14 oz firm tofu, 2 tbsp vegetable oil
  2. Add remaining 1 tablespoon vegetable oil to the wok over medium heat. Add minced garlic and cook 30 seconds until fragrant. Add 2-3 tablespoons Thai green curry paste and stir constantly for 2-3 minutes until the paste darkens and is aromatic.
    2-3 tbsp Thai green curry paste, 2 tbsp vegetable oil, 3 cloves garlic
  3. Pour in half the coconut milk (about ¾ cup) and stir to combine with the curry paste. Simmer for 2 minutes until the sauce thickens slightly. Gradually add the remaining coconut milk while stirring to reach desired consistency.
    13.5 oz coconut milk, 2-3 tbsp Thai green curry paste
  4. Stir in julienned green papaya and bamboo shoots. Bring to a gentle simmer and cook 5-7 minutes until papaya softens but retains slight crunch. Add torn lime leaves. Taste and adjust seasoning with soy sauce, sugar, or lime juice as needed.
    2 cups green papaya, 1 cup bamboo shoots, 4-5 leaves lime leaves
  5. Return crispy tofu to the wok and stir gently to coat in the curry sauce. Add Thai basil leaves and sliced chilies if using. Cook 1-2 minutes until basil wilts. Serve immediately over steamed jasmine rice.
    14 oz firm tofu, 0.5 cup Thai basil leaves, 1-2 chilies

Notes

  • Press tofu for 20 minutes before cooking to achieve crispy edges.
  • Simmer green papaya gently and check for tenderness at 5 minutes to avoid mushiness.
  • Cook curry paste 2-3 minutes in oil before adding liquid to deepen flavor.

Tried this recipe?

Let us know how it was!

What Is Scamorza Cheese? [Taste, Uses & More]

April 2, 2026

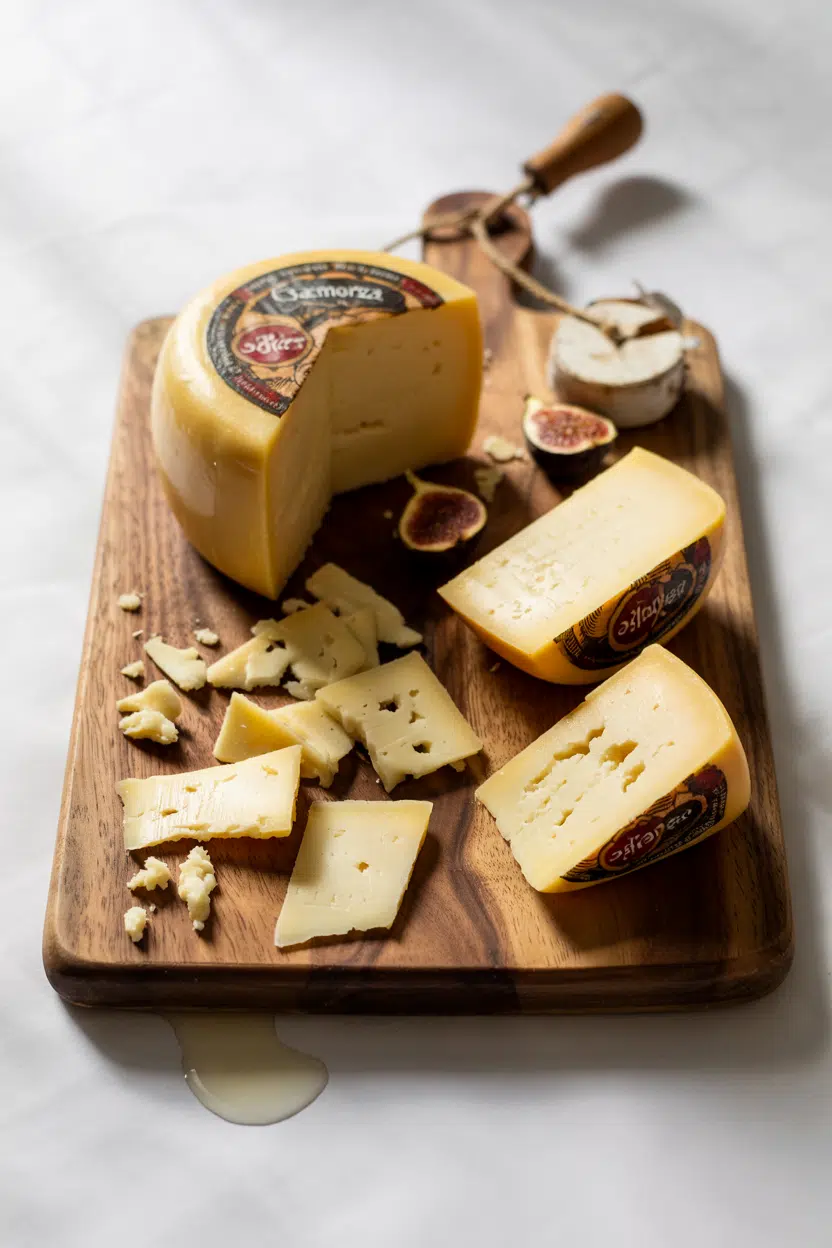
Slice into a whole scamorza and the interior springs back slightly under the knife - dense, supple, and faintly glossy, like a drier version of fresh mozzarella with real structural backbone.

What Is Scamorza Cheese

Heat it in a skillet and the exterior browns and blisters while the inside pulls into long, creamy strings.

That contrast between firm skin and molten core is what makes scamorza worth knowing, and it's why Southern Italian cooks reach for it where a softer cheese would simply collapse.

If you already know caciocavallo cheese swaps that work, scamorza sits in a similar stretched-curd tradition and is worth comparing directly.

QUICK SUMMARY

Scamorza is a semi-soft pasta filata cheese from Southern Italy, shaped like a small pear and sold plain or smoked. It has a mild milky sweetness and a firm, springy texture that melts cleanly into strings - well-suited to grilling, pizza, and baked pasta.

🧀Type: Stretched-curd cow's-milk cheese, semi-soft
👅Flavor: Mild milky, lactic tang, smoky in affumicata
🔥Best For: Grilling, pizza, panini, baked pasta dishes
📍Origin: Apulia and Campania, Southern Italy
❄️Shelf Life: Whole: 2-3 weeks; cut: use within 5-7 days
⚠️Note: Contains lactose; not suitable for vegan diets

What Is Scamorza Cheese?

Scamorza is a pasta filata - a pulled or stretched curd - cow's-milk cheese made in the Southern Italian regions of Apulia and Campania.

Like mozzarella and provolone, it's formed by kneading hot curds into a smooth mass, then shaping them by hand into a distinctive pear form with a narrow neck where a cord is looped for hanging during aging.

Two main varieties exist. Scamorza bianca is the plain, unsmoked version with a pale ivory rind. Scamorza affumicata is cold-smoked over wood - typically straw or chestnut - giving the rind a light tan color and the interior a subtle aromatic depth.

Compared to fresh mozzarella, scamorza is pressed and dried for longer, removing more moisture and producing a firmer, more concentrated cheese. It's sometimes confused with provolone, but provolone cheese swaps that work show how the two differ in aging time and fat content.

Scamorza is younger, milder, and more pliable.

What Does Scamorza Cheese Taste Like?

scamorza cheese - What Is Scamorza Cheese
Sensory SnapshotModerate Intensity
👅 Flavor
milky-sweetlactic tangwood-smoke (affumicata)
✋ Texture
firm springy rinddense supple interior
👃 Aroma
fresh milkywood-smoke (if smoked)

Scamorza bianca tastes closest to low-moisture mozzarella, but with a rounder, more developed milkiness and a slightly firmer bite. The lactic tang is gentle - present enough to give the cheese character, not sharp enough to dominate.

Heat changes it noticeably. Cold from the fridge, scamorza is firm and sliceable.

Warm it and the interior softens into long, creamy pulls, while the outer skin firms and caramelizes slightly. Scamorza affumicata adds a clean wood-smoke note that sharpens the otherwise mild profile without overpowering it - closer in spirit to a young smoked provolone.

How to Use Scamorza Cheese

Scamorza's low moisture and firm pasta filata structure make it one of the more adaptable cheeses in the Italian repertoire.

It doesn't weep water onto a pizza base the way fresh mozzarella can, and it doesn't seize into a rubbery mass under high heat.

How Scamorza Is Used
MethodBest ForTip
🔥 GrillingScamorza alla griglia; antipasti boardsSlice 1 cm thick; sear dry pan on high heat until blistered
🫕 BakingPasta al forno; stuffed vegetables; flatbreadsCube it - don't shred - for distinct molten pockets
🥗 Cold slicedAntipasti platters; salads; charcuterie boardsPair with sun-dried tomatoes and prosciutto for balance
🍕 Pizza toppingNeapolitan-style pizza; focacciaShred over the base for a milkier, cleaner melt than provolone

For scamorza alla griglia, no oil is needed - the rind firms up fast in a dry cast-iron pan, sealing in the molten interior. On pizza, shredded scamorza gives a milkier result than provolone and holds together better than fresh mozzarella at high temperatures.

Cubed into pasta al forno, it creates pockets of molten cheese without the dish becoming watery.

Scamorza affumicata pairs especially well with bold partners: sun-dried tomatoes, roasted red peppers, prosciutto, and rustic sourdough or focaccia. For wine, a Primitivo from Puglia matches the smoked version's weight.

If you're building a melt-focused sandwich, the cheese behaves similarly to using scamorza cheese for creaminess in other applications - the stretched-curd structure is the constant.

Golden Rule
Never slice scamorza paper-thin for grilling. At least 1 cm thickness lets the rind blister before the interior fully collapses - that contrast is the point.
Try It In
🧀Cheddar Cheese StrawsSwap in smoked scamorza for a milkier, softer pull→🍳Egg and Cheese Breakfast SandwichScamorza melts cleanly without watering out the bread→🥗Blue Cheese Dressing (Homemade)Serve alongside a scamorza antipasto board as contrast→

How to Buy and Store Scamorza Cheese

A good scamorza loaf feels firm but not rigid and has a smooth, slightly tacky rind with a pale straw color.

For scamorza affumicata, expect a uniform light tan exterior - avoid anything with a slimy surface, a strong ammonia smell, or rind that's visibly cracking and dried out.

Watch Out
Scamorza picks up fridge odors quickly through its rind. Always wrap it in parchment first, then in plastic, or seal it in an airtight container.

Storage is straightforward, though worth doing properly.

Whole, uncut scamorza keeps about 2-3 weeks refrigerated.

Once cut, use it within 5-7 days before the exposed interior dries and loses its melt quality.

For a comparison point, how long mozzarella keeps is a useful frame - scamorza outlasts fresh mozzarella by a significant margin due to its lower moisture.

Full guidance on keeping scamorza cheese fresh covers freezing and portioning if you're buying in bulk.

Start With the Smoked Version

If scamorza is new to you, scamorza affumicata is the better entry point. The smoke note anchors the mild base flavor, making it more immediately distinctive on a plate or panino.

  • 🍕 First cook - grill thick slices in a dry pan and serve with roasted peppers and bread
  • 🧀 First buy - look for it at Italian delis or specialty grocers; vacuum-packed imports are widely available
  • 🔁 Already cook with mozzarella? - swap scamorza anywhere you want less moisture and more structure in the melt

Scamorza bianca works better where you want a neutral backdrop - in pasta al forno or on a pizza where other toppings carry the flavor.

Both versions reward high heat, so don't treat them like a fresh cheese that needs gentle handling.

Frequently Asked Questions

Is scamorza the same as mozzarella?

No - both are pasta filata cheeses, however scamorza is pressed and dried longer, making it firmer and lower in moisture. Fresh mozzarella releases water when heated; scamorza melts cleanly into strings without pooling.

Can you melt scamorza on pizza?

Yes, and it performs better than fresh mozzarella in most home ovens because it doesn't release excess moisture. Shred it over the base and it melts into a smooth, creamy layer without making the crust soggy.

What is smoked scamorza?

Scamorza affumicata is the same cheese cold-smoked over wood - typically straw or chestnut - after shaping. The smoke tans the rind and adds a clean aromatic note to the interior without significantly changing the melt behavior.

How do you grill scamorza cheese?

Cut it into slices at least 1 cm thick and place them in a dry, very hot cast-iron or non-stick pan. Cook 2-3 minutes per side until the exterior is browned and blistered; serve immediately while the interior is still molten.

Is scamorza lactose-free?

No. Scamorza is made from cow's milk and retains lactose. It contains less lactose than fresh mozzarella due to its lower moisture, however people with lactose intolerance should treat it the same as other semi-soft cheeses.

How Long Does Thai Basil Last? [Storage Guide]

April 2, 2026

You just brought home a bunch of thai basil - purple stems, pointed leaves, that sharp anise kick - and now you're wondering how long it'll actually last before it turns to mush.

Can You Freeze Thai Basil

Unlike heartier herbs such as storing parsley correctly or even kale without blanching's shelf life, Thai basil is especially sensitive to moisture and cold damage, which means storage method matters more than most people expect.

Done right, fresh stems hold up 5-10 days in the fridge; done wrong, you're looking at wilted leaves in 48 hours.

QUICK SUMMARY

Thai basil lasts 5-10 days in the fridge when stems stand upright in water with a loose bag over the leaves. Frozen in oil cubes, it keeps 3-6 months. Never store washed leaves loose - excess moisture is the fastest route to sliminess.

🧊Fridge: 5-10 days in a jar of water with a loose plastic bag
❄️Freezer: 3-6 months; best frozen in oil cubes for cooked dishes
⚠️Key Rule: Don't wash leaves before storing - moisture speeds decay and kills aroma

How Long Does Thai Basil Last?

Thai basil's shelf life swings widely depending on how it's handled from the moment you get home.

Understanding what makes thai basil distinct - specifically its volatile anise oils and thin, bruise-prone leaves - explains why it drops off faster than sweet basil under the same conditions.

Thai Basil Shelf Life
MethodStateDurationNotes
🏠 CounterRaw (on stem)1-2 daysAway from direct sun; wilts fast in warm kitchens
🧊 FridgeRaw (in water)5-10 daysWhole stems in a jar with a loose bag last toward the upper end
🧊 FridgeCooked3-4 daysBright anise notes fade after a few days in sauces or stir-fries
❄️ FreezerRaw (frozen in oil)3-6 monthsPlain frozen leaves brown but keep aroma for cooked use

Chopped or bruised leaves decline much faster than whole stems - cutting accelerates oxidation in Thai basil more than in most soft herbs.

If you're comparing notes with how long basil keeps, Thai basil runs a few days shorter overall, especially once leaves are separated from their stems.

How to Store Thai Basil

The jar method is the single most effective technique for keeping Thai basil fresh in the fridge, and it's closer to storing cut flowers than storing produce.

Fridge: Trim about half an inch off the stem ends, stand the bunch upright in a glass jar or tumbler with 1-2 inches of fresh water, then loosely drape a plastic or reusable produce bag over the leaves. Change the water every two days to prevent bacterial buildup. Counter: If you plan to use the bunch within a day or two, a shaded counter spot at room temperature works, but warm kitchens will push wilting faster.

Golden Rule
Don't wash Thai basil until you're ready to cook. Water on the leaves accelerates decay and dulls the licorice-like aroma that makes this herb worth using.

A few habits that extend fridge life noticeably:

  • 🪴 Keep stems in water - treats the bunch like cut flowers and preserves the volatile oils longer
  • Skip the airtight container - stems suffocate without airflow; loose coverage is better
  • Use whole leaves as garnish - torn or chopped leaves oxidize faster, so save cutting for the last moment
  • 🛒 Buy bunches with purple-tinged stems - these tend to be fresher and hold up better through a full storage week

Can You Freeze Thai Basil?

Yes - with one important caveat. Frozen Thai basil won't work for raw applications like salads or fresh garnishes; the leaves turn limp and darker once thawed.

For cooked dishes - stir-fries, curries, sauces - frozen Thai basil delivers nearly full aroma and flavor.

Three methods work, and your choice should match how you plan to use it. The oil-cube method is the most practical for regular cooking.

Note that the flash freeze meatballs technique uses the same flat-tray principle that works well for Option B below.

  1. Option A - Oil cubes (best for cooking): Chop leaves, pack into an ice cube tray, cover each well with neutral oil (vegetable or light olive), then freeze solid. Transfer the cubes to a labeled freezer bag.
  2. Option B - Blanch and freeze: Blanch whole stems in boiling water for 5-10 seconds, shock immediately in ice water, pat dry, then layer between parchment sheets and freeze flat before bagging.
  3. Option C - Flash freeze whole: Spread individual leaves on a tray and freeze uncovered until solid, then transfer to a bag. Quickest method but lowest quality over time.
Watch Out
Don't expect frozen Thai basil to stand in for fresh in raw dishes. The crisp texture and sharp anise edge are gone after freezing - it's a cooked-dish ingredient from this point forward.

To use frozen oil cubes, drop them directly into a hot pan or sauce. Blanched leaves thaw in 30-60 minutes in the fridge, or go straight into soups and stir-fries from frozen.

Signs Thai Basil Has Gone Bad

Thai basil gives clear signals when it's past its prime, and the signs are specific enough to distinguish "slightly faded" from "actually unsafe."

Signs It's Gone Bad
👀
VisualDark brown or black spots at leaf edges · Yellowing and translucent leaves near the stem base · Slimy sheen on stems or leaves
👃
SmellSour or fermented odor that masks the usual sweet anise scent
✋
TextureLeaves feel wet or slimy · Stems collapse rather than snapping

The dark-edge spotting is especially characteristic of Thai basil, caused by rapid oxidation of its leaf oils.

Discard the whole bunch if you notice sliminess, a fermented smell, or widespread dark spotting - partial salvage isn't worth it at that stage.

Getting the Most from Thai Basil

Knowing the storage windows is only half the equation - buying and handling well from the start makes the difference.

Shortcut
Freeze chopped Thai basil in oil cubes the day you buy it if you won't use the whole bunch that week. It takes five minutes and locks in full aroma for months.

If a recipe calls for this herb and you've run out, checking alternatives to thai basil will give you workable stand-ins - though none fully replicate the anise-forward profile.

That same profile is why the herb is related in character to anise's shelf life concerns - the volatile oils that give it flavor are the same compounds that degrade fastest with heat, moisture, and air.

  • Store unwashed, always - moisture is the enemy before it reaches the pan
  • Use the jar method immediately - don't leave the bunch in the bag it came in
  • Freeze what you won't use in 5 days - don't wait until it's declining
  • Buy with purpose - bunches with firm purple stems and unbruised leaves start stronger and last longer

Frequently Asked Questions

Should you wash Thai basil before storing?

No - wash only when you're ready to cook. Surface moisture accelerates bacterial decay and degrades the leaf oils responsible for Thai basil's anise scent faster than almost any other factor.

Can you freeze Thai basil for pesto?

Yes, with reservations. Frozen Thai basil loses the bright, sharp anise edge that makes it stand out in a fresh pesto. It works better blended into cooked sauces than used raw in uncooked preparations.

Does freezing change Thai basil flavor?

Slightly. The core anise-clove aroma survives freezing well, especially in oil-preserved cubes. However, the sharper top notes that come through raw do fade, making frozen Thai basil better suited to cooked dishes.

Can you use frozen Thai basil fresh?

Not effectively. Frozen leaves turn limp and darker once thawed, losing the texture needed for garnishes or salads. Reserve frozen Thai basil strictly for soups, curries, and stir-fries where texture isn't critical.

Is Thai basil the same as holy basil?

No - they're distinct species. Holy basil has a more peppery, clove-forward flavor and slightly serrated leaves, while Thai basil carries a sweeter anise note with smooth, purple-stemmed leaves. They're not interchangeable in most recipes.

What Is Sorghum Flour? [Taste, Uses & More]

April 2, 2026

Sorghum flour gets a reputation as a direct wheat swap, and that misconception leads to dense muffins and flat breads that put people off it permanently.

What Is Sorghum Flour

It shares some grain sweetness with the taste of millet, though it's lighter and less earthy.

Like most whole-grain flours, understanding flour's shelf life matters here because sorghum's natural oils turn rancid faster than refined white flour.

Once you understand what it actually does - and what it can't do alone - it becomes a reliable base for gluten-free baking.

QUICK SUMMARY

Sorghum flour is a mild, slightly sweet cereal flour milled from whole sorghum grain. Naturally gluten-free, it works best blended into GF flour mixes for breads, pancakes, flatbreads, and gravies. White varieties are milder; red sorghum tastes more robust and bitter.

👅Flavor: Mildly sweet, nutty, faintly grainy - like mild cornmeal
🌾Category: Gluten-free cereal flour, whole grain
🍳Best Uses: GF quick breads, pancakes, flatbreads, stew thickener
🌍Origin: Sub-Saharan Africa and Indian subcontinent
📦Shelf Life: 3-6 months pantry; up to 1 year frozen
⚠️Key Limit: No gluten structure - must be blended for most baked goods

What Is sorghum flour?

Sorghum flour is ground from the whole grain of sorghum, a small round cereal grass domesticated in Sub-Saharan Africa and later cultivated widely across the Indian subcontinent.

The grain itself has been a staple for thousands of years, and knowing how long rice keeps gives useful context - sorghum grain stores similarly well in dry conditions, though the milled flour is far less stable.

You'll find it sold under several names. Jowar flour is the most common Indian market label; milo flour appears in some American regional products; sorghum meal is a coarser grind used more for porridges than baking.

The two main types are:

  • 🌾 White sorghum flour - pale tan, finely milled, mild and slightly sweet. The standard choice for GF baking blends.
  • 🟤 Red (whole-grain) sorghum flour - darker, more robust, higher in tannins and polyphenols. Adds bitterness that some recipes benefit from and others don't.

Both are naturally gluten-free and contain no wheat proteins, making them suitable for celiac and gluten-intolerant diets without any processing changes.

What Does sorghum flour Taste Like?

sorghum flour - What Is Sorghum Flour

Sorghum flour tastes closest to a cross between mild whole-grain cornmeal and light whole-wheat - but sweeter than both and without the wheaty aftertaste. White sorghum keeps that sweetness clean and forward, which is why it dominates commercial GF flour blends.

Sensory SnapshotMild Intensity
👅 Flavor
mildly sweetnuttygrainy-cornlikefaint bitter (red)
✋ Texture
fine-powderyslightly sandy
👃 Aroma
warm toasted cerealsubtle grassy

Heat changes it noticeably.

Toasting sorghum flour dry in a skillet before use deepens the nutty character and pulls the grassy note back, leaving something closer to a warm, caramel-grain smell. Red sorghum varieties amplify that bitterness when baked, which works in savory flatbreads but can fight against sweet muffin recipes.

Raw in a blend, the flavor is easy to miss - mild enough that other ingredients lead. That mildness is an asset, not a flaw.

How to Use sorghum flour

Sorghum flour rarely works solo in baked goods because it has no gluten network to trap gas or provide stretch. Blend it with starches and binders, and it performs well across a wide range of applications.

How Sorghum Flour Is Used
MethodBest ForTip
🧁 BakingQuick breads, muffins, GF pizza crust, cookiesBlend 60-70% sorghum with tapioca or potato starch; add xanthan gum for lift
🥞 Pan-fryingPancakes, crepes, jowar rotis100% sorghum works in thin batters; rest the batter 5 minutes before cooking
🍲 ThickeningGravies, stews, chiliWhisk into cold liquid first to prevent lumps; no roux needed
🍗 CrumbingFried chicken coating, vegetable frittersMix with cornstarch or potato starch for crispness

For GF flour blends, a common ratio is two parts sorghum flour to one part starch - tapioca starch adds chew while cooking potato starch perfectly teaches you how to handle the other common starch option without gumminess.

Buttermilk or yogurt pair naturally here, adding tenderness and tang that complements sorghum's grain sweetness.

Warm spices - cinnamon, cardamom, ginger - amplify the natural nuttiness well.

In West African home cooking it appears in porridges and fermented flatbreads.

Across the Indian subcontinent, jowar rotis use it straight, rolled thin and cooked on a dry tawa.

If you're unsure whether this flour fits your needs, checking replacements for sorghum flour maps out when other options cover the gap better.

For comparison, replacements for teff flour shows how similarly structured alternatives cross over in GF baking.

Try It In
🥞Besan Flour PancakesSwap half the besan for sorghum to soften the flavor→
Golden Rule
Never use sorghum flour alone in a yeast bread. Without starch and a binder like xanthan gum or eggs, the loaf won't hold its rise.

How to Buy and Store sorghum flour

Choose bags labeled pale tan or cream-colored for the mildest flavor - this indicates white sorghum. A red-brown color signals whole-grain or red sorghum, which suits savory applications.

Check the packaging date; stone-ground versions are worth seeking for texture, though they carry more oil and go stale faster.

Watch Out
Sorghum flour smells faintly sour or musty when rancid. If it's been in a warm pantry for months, smell it before baking - rancid flour ruins the whole batch.

Storage is straightforward once the bag is open:

  • Pantry (unopened) - Up to 3-6 months in a cool, dark spot away from heat sources.
  • Refrigerator (opened) - Airtight container, 6-12 months. Bring to room temp before measuring.
  • Freezer (opened or bulk) - Up to 1 year. Double-bag to block odor transfer.

For a full breakdown of timing and signs of spoilage, the guide on cooking sorghum flour perfectly covers what to watch for at each storage stage.

The choice of starch partner also affects batch planning - cooking tapioca starch vs xantham gum perfectly is worth reading before you commit to a GF blend formula.

Start With the Blend

If you're new to sorghum flour, don't open with a solo recipe.

Pick a quick bread or pancake where sorghum takes up 60-70% of the flour weight and a neutral starch fills the rest.

That ratio shows you what the flour actually contributes - mild sweetness, a light crumb, and a clean grain flavor - before you adjust for more complex bakes.

Frequently Asked Questions

Is sorghum flour gluten free?

Yes, sorghum is naturally gluten-free. However, cross-contamination at the mill is a real risk - look for bags explicitly labeled "certified gluten-free" if you have celiac disease.

Can you substitute sorghum flour for wheat flour?

Not at a 1:1 ratio. Sorghum lacks gluten, so direct substitution collapses structure in most baked goods. Blend it with a starch and a binder like xanthan gum or eggs for workable results.

Does sorghum flour taste like corn?

It's close but sweeter and less bold than cornmeal. The grainy, slightly nutty flavor is the shared note - sorghum just carries it at a lower intensity with no corn-specific sharpness.

What is the difference between white and red sorghum flour?

White sorghum flour is milder, sweeter, and better for most baking. Red sorghum is darker, more bitter, and higher in tannins and polyphenols - useful in savory flatbreads but noticeable in sweet recipes.

How do you use sorghum flour in pancakes?

Sorghum flour works well in pancake batter at 100% or blended with tapioca starch. Rest the batter for 5 minutes before cooking - the flour hydrates fully and the pancakes hold together better on the griddle.

Japanese Matcha Roll Cake

April 2, 2026

When you want an elegant dessert for afternoon tea or a weeknight treat that feels special, this matcha roll cake delivers with minimal effort. The light sponge bakes in 12 minutes and rolls up with sweet cream while still warm.

Japanese Matcha Roll Cake served on a plate

Rolling the cake while it's warm prevents cracks. The high heat creates a tender crumb that stays flexible enough to shape without breaking.

Perfect for entertaining guests or making ahead for birthday celebrations when you need something that looks impressive but doesn't require advanced baking skills.

QUICK SUMMARY

This Japanese matcha roll cake combines a light, airy sponge with earthy green tea flavor and smooth whipped cream filling. Whisking eggs to ribbon stage creates the fluffy texture, while rolling the cake warm with a towel prevents cracks. Bakes in 12 minutes at 325°F and serves 8.

⏱️Time Reality: 15 minutes prep, 12 minutes baking, plus cooling and assembly
🎯Key Move: Beat eggs and sugar 5-7 minutes until thick and pale before adding anything else
⚠️Watch Out: Letting the sponge cool completely before rolling causes cracks-roll it warm with the towel immediately

Why This Recipe Works

Whisking eggs with sugar until they reach ribbon stage traps air that expands during baking, creating the signature light texture. Cake flour contains less protein than all-purpose, so the sponge stays tender instead of chewy. Rolling the warm cake with a kitchen towel trains it to hold its shape without splitting.

For a version that comes together quickly, this quick rice dish uses similar Japanese techniques for soft texture.

Quick Reference
⏱️
Prep Time
15 min
🔥
Cook Time
12 min
⏰
Total Time
30 min
🍽️
Servings
8 servings
📊
Difficulty
Medium
🏷️
Category
Dessert
💡
Quick Tip
Roll cake warm with towel to prevent cracking
🎯
Best For
Weeknight | Entertaining

Key success factors:

  • Egg volume: Whisking eggs and sugar for 5-7 minutes until thick and pale creates enough trapped air to make the sponge rise properly without baking powder
  • Gentle folding: Using cutting motions in 10-15 strokes when adding dry ingredients maintains the airiness instead of deflating the batter
  • Moderate heat: Baking at 325°F for 10-12 minutes sets the structure without drying out the edges or creating a tough crust
  • Immediate rolling: Wrapping the warm sponge in a kitchen towel right out of the oven trains it to hold a spiral shape and prevents surface cracks
  • Cold cream: Chilling the bowl and whisk before whipping heavy cream at medium speed produces stable soft peaks that won't weep or separate inside the roll
Golden Rule
The sponge should spring back when touched lightly-if your finger leaves an indent, bake 1-2 minutes longer

What You'll Need

Ingredients for Japanese Matcha Roll Cake

A good rice can make or break the plate. Most grocery stores stock cake flour near the baking aisle, and culinary-grade matcha powder works better than ceremonial grade for cooking.

🥚
Eggs & Dairy
  • 4 large eggs
  • ½ cup heavy cream
  • 2 tablespoons milk
🍚
Dry Ingredients
  • ½ cup cake flour
  • ⅓ cup granulated sugar
  • 1-2 tablespoons matcha powder
  • ¼ cup powdered sugar
🫗
Fats & Flavorings
  • 2 tablespoons vegetable oil
  • ½ teaspoon vanilla extract

Ingredient Details

  • Cake flour
    Lower protein content than all-purpose creates a tender, delicate crumb-sift before measuring to remove lumps
  • Matcha powder
    Culinary-grade works fine for baking and costs less than ceremonial-sift with flour to prevent bitter clumps
  • Eggs
    Room temperature eggs whip faster and hold more air than cold ones-set them out 30 minutes before starting
  • Heavy cream
    Must contain at least 36% fat to whip properly-chill the bowl and whisk for best results
  • Granulated sugar
    Dissolves into eggs during whisking to stabilize the foam-don't reduce the amount or the structure weakens
  • Vegetable oil
    Neutral flavor keeps the focus on matcha-measure after the milk so it slides out of the spoon easily
  • Powdered sugar
    The cornstarch in powdered sugar helps stabilize whipped cream and adds subtle sweetness without graininess

Ingredient Swaps

Rich mains need something to cut through, and glaze does exactly that. Swapping ingredients changes texture more than flavor, so test one substitution at a time before combining multiple changes.

Common swaps that work:

  • All-purpose flour + cornstarch for cake flour: Mix ⅞ cup all-purpose with 2 tablespoons cornstarch per cup needed-slightly denser but still tender (gluten-free option if using GF flour)
  • Coconut cream for heavy cream: Creates dairy-free filling with mild coconut flavor-chill the can overnight and scoop only the thick cream from the top
  • Plant milk for dairy milk: Almond or soy milk work equally well in the batter with no noticeable flavor change-use unsweetened versions
  • Hojicha powder for matcha: Roasted green tea powder gives a nutty, caramel-like flavor instead of grassy matcha notes-same amount, different profile

Melted Butter Instead of Oil

Works for: richer flavor and slightly firmer texture that holds shape better

Skip if: you want the lightest possible sponge or need dairy-free

Coconut Sugar Instead of Granulated

Works for: lower glycemic option with caramel undertones

Skip if: you want pure matcha flavor-coconut sugar competes with the green tea

Aquafaba Instead of Eggs

Works for: vegan version-use ¾ cup aquafaba whisked to stiff peaks

Skip if: you're new to this recipe-it requires longer whisking and produces less stable structure

Instructions

The sponge bakes quickly at moderate heat, so prep all ingredients before turning on the oven. For a version that comes together quickly, something sweet like glaze uses similar whisking techniques for airy texture.

  1. Whisk eggs and sugar until ribbon stage: Beat 4 eggs with ⅓ cup granulated sugar using an electric mixer on medium-high for 5-7 minutes until thick, pale yellow, and the mixture falls in ribbons that hold their shape on the surface for 3 seconds before dissolving-this traps enough air to make the sponge rise.

  2. Fold in dry ingredients gently: Sift together ½ cup cake flour and 1-2 tablespoons matcha powder, then fold into the egg mixture in two additions using a spatula with cutting motions, turning the bowl and folding 10-15 times total until just combined-stop when you see the last streak of flour disappear.

  3. Add liquid ingredients carefully: Combine 2 tablespoons each of milk and vegetable oil in a small bowl, then drizzle around the edge of the batter and fold 5-6 times until incorporated-adding liquids last prevents deflating the eggs.

  4. Bake until springy: Pour batter into a parchment-lined 10x15-inch jelly roll pan, spread evenly to the corners, and bake at 325°F for 10-12 minutes until the surface springs back when touched lightly and the edges just start to pull away-overbaking by even 2 minutes dries out the cake.

  5. Roll immediately with towel: Flip the hot cake onto a clean kitchen towel dusted with powdered sugar, peel off the parchment, and roll the cake up with the towel starting from a short end-let it cool completely rolled up (30 minutes), then unroll, spread with whipped cream (½ cup heavy cream whipped with ¼ cup powdered sugar and ½ teaspoon vanilla), and re-roll without the towel.

Shortcut
Skip the electric mixer if you have strong arms-whisk by hand in a metal bowl set over simmering water for faster ribbon stage

What to Serve With It

Most people skip a pairing for cake, but it balances the sweetness. We keep a batch ready for nights like this - planning your cornbread dinner shows similar strategies for matching textures.

Side Dish Prep Why It Works How to Serve
Hot green tea Easy Bitter tea cuts through sweet cream and echoes the matcha flavor Brew sencha or genmaicha and serve in small cups alongside slices
Fresh strawberries Easy Tart berries balance earthy matcha and add moisture Hull and halve berries, scatter on the plate or macerate with sugar
Black coffee Easy Strong espresso provides sharp contrast to soft, sweet cake Pull a double shot or brew dark roast-serve hot in espresso cups
Sweet red bean paste Easy Traditional Japanese pairing adds smooth, slightly grainy sweetness Spread a thin layer on the plate or dollop on each slice
Yuzu sorbet Medium Citrus cleanses the palate between bites and adds brightness Scoop small portions and serve immediately beside warm cake

Three ways to serve it:

  • Afternoon tea setup: Slice the roll into ¾-inch pieces, arrange on a platter with fresh berries, and serve hot green tea in small cups
  • Birthday dessert: Dust the top with extra matcha powder through a fine sieve, add fresh flowers or mint leaves, and slice at the table
  • Make-ahead snack: Cut into individual portions, wrap each in plastic, and pull from the fridge for grab-and-go treats throughout the week
Best Pick
White chocolate drizzle melts into the matcha flavor without overpowering it-microwave 2 ounces chopped white chocolate with 1 teaspoon oil for 30 seconds and drizzle before serving

Store and Reheat

The cream filling stays stable in the fridge for 3-4 days but loses moisture in the freezer. Bread exists to mop up what is left on the plate. Wrap the whole roll tightly in plastic wrap or slice first and store pieces in an airtight container-either way, keep it cold.

Method Time Best For
🧊 Room Temperature 20 minutes Restoring cream softness and sponge moisture before serving-best texture option
📦 Microwave 10-15 seconds at 50% power Warming small slices quickly without melting the cream-watch closely

For best results when storing:

  • Wrap immediately after cooling: Plastic wrap prevents the sponge from drying out in the fridge-press it directly against the cut ends
  • Slice before freezing: Pre-portioned pieces thaw faster and more evenly than a whole roll-wrap each slice individually in plastic, then stack in a freezer bag
  • Thaw in the fridge overnight: Slow thawing preserves texture better than countertop or microwave methods-plan 8 hours for full defrost
  • Avoid freezing cream-filled rolls long-term: The filling can separate and weep after 1 month-freeze the sponge alone and add fresh cream after thawing if storing longer
  • Refresh dried edges: Brush the cut ends lightly with simple syrup (equal parts sugar and water, heated) before serving to restore moisture

Frequently Asked Questions

Can I use all-purpose flour instead of cake flour?

Yes-mix ⅞ cup all-purpose flour with 2 tablespoons cornstarch per cup of cake flour needed. The sponge will be slightly denser but still tender enough to roll without cracking.

How should I store leftover matcha roll cake?

Wrap tightly in plastic wrap and refrigerate for 3-4 days. You can freeze slices for up to 1 month, but the cream may separate slightly after thawing-let it come to room temperature for 20 minutes before serving.

How do I know when the matcha roll cake sponge is done baking?

Touch the center lightly with your finger-if it springs back without leaving an indent, it's done. The edges should just start pulling away from the pan and show light golden color after 10-12 minutes at 325°F.

My roll cake cracks when rolling; how can I fix this?

Roll the cake while it's still warm-waiting until it cools makes it brittle. If it already cracked, brush the surface lightly with water or simple syrup, let it sit 5 minutes to soften, then gently re-roll.

Can I make matcha roll cake ahead of time and freeze it?

Yes-freeze the unfilled sponge (rolled in the towel) for up to 1 month, then thaw overnight in the fridge and add fresh whipped cream before serving. Freezing the filled cake works but the cream may weep slightly.

Japanese Matcha Roll Cake served on a plate

Japanese Matcha Roll Cake

No ratings yet
This Japanese Matcha Roll Cake features a light, airy sponge infused with earthy matcha green tea flavor and a smooth whipped cream filling. The cake is baked quickly at moderate heat and rolled while still warm to ensure a tender, crack-free texture perfect for elegant desserts or special occasions.
Print Recipe Pin Recipe
Prep Time 15 minutes mins
Cook Time 12 minutes mins
Total Time 27 minutes mins
Servings: 8 servings
Course: Dessert
Cuisine: Japanese
Ingredients Method Notes

Ingredients
  

  • 4 large eggs room temperature
  • 0.5 cup heavy cream for whipped cream filling, chilled
  • 2 tablespoons milk
  • 0.5 cup cake flour sifted with matcha powder
  • 0.33 cup granulated sugar
  • 1.5 tablespoons matcha powder culinary grade, sifted
  • 0.25 cup powdered sugar for whipped cream and dusting towel
  • 2 tablespoons vegetable oil
  • 0.5 teaspoon vanilla extract for whipped cream

Method
 

  1. Beat 4 eggs and ⅓ cup granulated sugar with an electric mixer on medium-high speed for 5-7 minutes until thick, pale yellow, and the mixture forms ribbons that hold their shape for 3 seconds on the surface before dissolving.
    4 large eggs, 0.33 cup granulated sugar
  2. Sift together ½ cup cake flour and 1-2 tablespoons matcha powder. Fold dry ingredients gently into the egg mixture in two additions using a spatula with cutting motions, turning the bowl and folding 10-15 times total until just combined, stopping when the last streak of flour disappears.
    0.5 cup cake flour, 1.5 tablespoons matcha powder
  3. Combine 2 tablespoons milk and 2 tablespoons vegetable oil in a small bowl, then drizzle around the edge of the batter and fold 5-6 times until incorporated without deflating the eggs.
    2 tablespoons milk, 2 tablespoons vegetable oil
  4. Pour batter into a parchment-lined 10x15-inch jelly roll pan, spreading evenly to the corners. Bake at 325°F (163°C) for 10-12 minutes until the surface springs back when lightly touched and edges just start to pull away from the pan.
  5. Flip the hot cake onto a clean kitchen towel dusted with powdered sugar, peel off the parchment, and roll the cake up with the towel starting from a short end. Let cool completely rolled up for 30 minutes.
    0.25 cup powdered sugar
  6. Whip ½ cup chilled heavy cream with ¼ cup powdered sugar and ½ teaspoon vanilla extract at medium speed until soft peaks form.
    0.5 cup heavy cream, 0.25 cup powdered sugar, 0.5 teaspoon vanilla extract
  7. Unroll the cooled sponge, spread the whipped cream filling evenly, and re-roll without the towel. Chill or serve immediately.
    0.5 cup heavy cream, 0.25 cup powdered sugar, 0.5 teaspoon vanilla extract

Notes

  • Roll the cake while it is still warm to prevent cracks.
  • Use room temperature eggs for better volume and air trapping.
  • Chill the bowl and whisk before whipping cream to obtain stable peaks.

Tried this recipe?

Let us know how it was!

What Is Salad Supreme Seasoning? [Taste, Uses & More]

April 2, 2026

Salad Supreme seasoning does one thing that no single pantry item replicates cleanly: it drops cheese, crunch, and seasoning onto a salad in a single shake.

What Is Salad Supreme Seasoning

The blend combines replacements for parmesan cheese and replacements for sesame seed into a unified product that eliminates the need to reach for three separate jars.

McCormick's version is the standard, and it's been stocked in American spice aisles for decades.

Knowing what's inside the bottle - and how to apply it - makes the difference between using it well and using it constantly on the wrong things.

QUICK SUMMARY

Salad Supreme seasoning is a dry commercial blend of Romano and cheddar powder, sesame and poppy seeds, paprika, garlic, and salt. It reads savory, nutty, and mildly tangy - think dry Caesar with a ranch backbone - and works as a finishing sprinkle, a dressing mix-in, or a pasta salad staple.

🧀Flavor: Savory, nutty, mildly garlicky with a cheesy backbone
🌿Best Uses: Green salads, pasta salad, deviled eggs, roasted vegetables
🧂Intensity: Moderate - noticeable but not overpowering on most dishes
⏳Shelf Life: 18-24 months unopened; 6-12 months after opening
⚠️Dietary Note: Contains dairy and sesame - check labels if managing allergies or sodium

What Is Salad Supreme Seasoning?

Salad Supreme is a pre-mixed dry seasoning blend sold primarily by McCormick, though private-label versions exist in some grocery chains.

It belongs to the category of salad toppers - products designed to add seasoning and texture in a single application, without requiring fresh cheese, separate seeds, or a vinaigrette.

The blend's core components are Romano and cheddar cheese powders, sesame seeds, poppy seeds, paprika, garlic powder, and salt. That combination gives it more structural complexity than most table shakers.

If you've ever needed replacements for poppy seed or replacements for paprika in a salad context, this blend answers both questions at once.

It's also sometimes called simply "Salad Supreme" or "Salad Supreme spice blend" on recipe sites and potluck cards. No meaningful subtypes exist beyond the McCormick original - the private-label versions vary mainly in salt content and milk solid ratios.

  • 🧀 Cheese component - Romano powder drives the umami; cheddar softens it slightly
  • 🌱 Seed component - sesame and poppy seeds add crunch and mild nuttiness
  • 🌶️ Spice component - paprika, garlic powder, and black pepper round out the savory base
  • 🧂 Salt backbone - present throughout; worth noting for low-sodium eaters

What Does Salad Supreme Seasoning Taste Like?

salad supreme seasoning - What Is Salad Supreme Seasoning

The dominant impression is savory and cheesy, close to what you'd get from grating Romano over a salad and adding a pinch of garlic and paprika. It's not sharp like raw Romano on its own - the powdered form mellows quickly and blends into whatever it lands on.

Underneath the cheese note, sesame seeds add a warm, toasted nuttiness that reads almost buttery at room temperature. Poppy seeds contribute texture more than flavor, though they add a faint earthy note when chewed.

Sensory SnapshotModerate Intensity
👅 Flavor
savoryumamimildly garlickyfaintly tangy
✋ Texture
dry granularoccasional seed crunch
👃 Aroma
cheesywarm toasted seeds

Heat doesn't improve it. Roasting with it on vegetables works - the seeds toast lightly - however, prolonged oven time dulls the cheese aroma and can make the garlic note bitter.

How to Use Salad Supreme Seasoning

Sprinkle it directly over a finished salad and you're done - that's the intended use. On romaine or mixed baby greens with a simple olive oil and lemon dressing, it replaces grated cheese and a full spice rack in one motion.

The blend also folds into creamy dressings and spreads. Stir it into mayonnaise or Greek yogurt and you get a quick dressing with layered savory notes without building from scratch.

The same approach works on cream cheese for party spreads - rim the outside of a log or block with the seasoning for an immediate visual and textural effect.

Golden Rule
Add Salad Supreme after cooking, not before - heat kills the cheese aroma and flattens the seed crunch that makes the blend worth using.

Pasta salad is where church-potluck versions shine. Toss cooked pasta with Italian dressing, then shake Salad Supreme over the top before chilling.

The blend absorbs into the dressing and seasons every bite. Cold potato salad and egg salad respond similarly - it adds body and umami where plain salt falls short.

How Salad Supreme Seasoning Is Used
MethodBest ForTip
🥗 Finishing SprinkleGreen salads, roasted veg, grilled chickenAdd at the end so seeds stay crunchy
🥣 Stirred Into DressingCreamy mayo or yogurt dressings, spreadsLet it sit 5 minutes to hydrate before serving
🍝 Mixed Into Cold SaladsPasta salad, potato salad, egg saladToss with dressing first, then add seasoning
🔥 Pre-Roast SprinkleBroccoli, carrots, salmon filletsUse light hand - seeds can scorch at high heat

Avoid pairing it with sweet fruit-forward dressings. The cheese and seed profile clashes with raspberry vinaigrette or honey-citrus bases.

Delicate fresh dill and floral herbs also disappear under its weight. If you're building a recipe around those flavors, look at salad supreme seasoning swaps that work instead.

Try It In
🍿Popcorn Seasoning BlendsThe cheesy-savory profile works as well on popcorn as it does on salads→

How to Buy and Store Salad Supreme Seasoning

Look for sealed bottles with intact sifter lids and no visible moisture clumping inside. McCormick's version clearly lists Romano cheese powder and visible sesame and poppy seeds - that's your quality signal.

Private-label alternatives sometimes list higher sodium and more milk solids, so compare ingredient lists when sodium matters to you.

Watch Out
Moisture is the main enemy. A bottle stored near the stove will clump fast and lose its seed crunch within weeks - move it to a cool, dry shelf.

Store in a cool, dry pantry with the original lid sealed tight after each use. Opened bottles hold peak quality - meaning full cheese aroma and crunchy seeds - for 6 to 12 months.

Unopened, you can expect 18 to 24 months. For a full breakdown of timelines and signs of decline, see salad supreme seasoning's shelf life.

The cheese powder in the blend, which draws from alternatives to romano cheese flavor profiles, is the first component to go flat. When the aroma disappears, the blend isn't ruined - it's just duller than it should be.

Start Here If You're New to It

Don't overthink the first use. Shake it over a simple green salad with olive oil and a squeeze of lemon - that's where it performs best and most clearly shows you what it adds.

Once you know the flavor, folding it into pasta salad or a cream cheese spread makes more sense as a next step.

If the sodium is a concern, start with half the suggested amount. The blend is assertive enough that a lighter hand still registers.

Shortcut
Mix one teaspoon into two tablespoons of mayo with a squeeze of lemon - instant creamy dressing that takes thirty seconds and no measuring beyond that.

Frequently Asked Questions

What is Salad Supreme seasoning made of?

The primary ingredients in McCormick's version are Romano cheese powder, sesame seeds, poppy seeds, paprika, garlic powder, salt, and cheddar cheese powder. Milk solids are also present as part of the dairy base.

Does Salad Supreme contain dairy?

Yes. Romano cheese powder, cheddar powder, and powdered milk solids are all listed ingredients. Anyone with a milk allergy or lactose sensitivity should avoid it.

How do you use Salad Supreme on pasta salad?

Toss cooked, cooled pasta with Italian dressing first, then shake Salad Supreme over the top and stir to coat. About one to two teaspoons per pound of pasta is a practical starting point - adjust after tasting.

Is Salad Supreme high in sodium?

Sodium levels are moderate to high per serving, depending on how generously you apply it. Private-label versions often run higher than McCormick's - always compare labels when managing sodium intake.

Can I make Salad Supreme at home?

Yes. Combine grated Romano, sesame seeds, poppy seeds, paprika, garlic powder, and salt to approximate the blend. The texture won't match exactly - powdered cheese behaves differently than freshly grated - however, the flavor profile lands close.

How Long Does Sweetened Condensed Milk Last? [Storage Guide]

April 2, 2026

Buying a can of sweetened condensed milk for one recipe often means you're left with the rest of it open in the fridge - and that's where most storage questions start.

How Long Does Sweetened Condensed Milk Last In The Fridge

Like storing heavy cream correctly, the rules shift the moment the seal breaks. Opened condensed milk lasts 10-14 days refrigerated, while an intact can sits shelf-stable for up to 18 months.

Understanding using milk for creaminess in baked goods helps explain just how much rides on keeping this ingredient fresh.

QUICK SUMMARY

Unopened sweetened condensed milk lasts 12-18 months in the pantry. Once opened, use it within 10-14 days from a sealed airtight container in the fridge. Freezing is possible but causes graininess - best reserved for cooked or blended recipes.

🥫Pantry (unopened): 12-18 months; keep cool, dark, and away from humidity
🧊Fridge (opened): 10-14 days in an airtight container, not the original can
❄️Freezer (opened): 2-3 months; expect grainy texture - use in cooking, not direct applications

How Long Does Sweetened Condensed Milk Last?

Sweetened condensed milk is shelf-stable in its sealed can because the combination of heat processing and high sugar content creates a hostile environment for most microbes.

Once you break that seal, however, the clock starts immediately.

Understanding the role sweetened condensed milk plays in desserts like dulce de leche and key lime pie also explains why texture and freshness matter - off flavor carries straight through to the finished dish.

Sweetened Condensed Milk Shelf Life
MethodStateDurationNotes
🏠 PantryUnopened12-18 monthsFollow best-by date; discard dented or rusted cans
🧊 FridgeOpened10-14 daysTransfer to airtight container immediately after opening
❄️ FreezerOpened2-3 monthsTexture becomes grainy; use in cooked or blended recipes only
🏠 PantryUnopened (freezer)Not recommendedMetal cans can swell or rupture as contents expand

Sugar slows microbial growth significantly, but it does not prevent spoilage once the milk solids are exposed to air.

Much like milk spoilage signs in regular dairy, opened condensed milk can still develop mold and bacterial growth given enough time and temperature.

How to Store Sweetened Condensed Milk

Proper storage for an unopened can requires almost nothing. Pantry: Keep the can in a cool, dark spot - a kitchen cupboard away from the stove or any heat source works well.

Avoid areas with humidity fluctuation, and check that the can shows no rust, bulging, or dents before using.

Golden Rule
Never store opened condensed milk in the original metal can. Transfer immediately to a glass jar or BPA-free container - the cut metal edge promotes corrosion and can add metallic off-flavors within days.

Once opened, the handling matters more than the container choice. Fridge: Pour the remainder into a clean glass jar with a tight lid or a food-safe plastic container, seal it firmly, and label it with today's date.

That date label is how you track the 10-14 day window without guessing.

  • 🏷️ Label every container - write the opening date, not the use-by date, so you always know the actual elapsed time.
  • Press plastic wrap directly onto the surface before sealing to limit air contact and slow oxidation.
  • Store at the back of the fridge, where temperature is most stable, rather than in the door where warmth fluctuates.

Can You Freeze Sweetened Condensed Milk?

Yes, you can freeze opened sweetened condensed milk, though the result won't look exactly as it did before.

Sugar crystallization and changes to the milk proteins cause the texture to turn grainy and slightly separated after thawing.

That's a problem for no-bake cheesecake or coffee drinks where smoothness matters - but it's a non-issue for baked goods, cooked sauces, or blended applications like milkshakes.

If you're making something like freezing key lime pie or similar desserts, frozen-then-thawed condensed milk incorporated into a batter behaves just fine.

  1. Portion first. Spoon condensed milk into recipe-sized amounts - 14 oz (one full can) or smaller increments - so you thaw only what a recipe calls for.
  2. Choose the right container. Use a shallow airtight container or a heavy-duty freezer bag. Leave headspace for expansion; flatten bags for faster, more even freezing.
  3. Seal and label. Write the date and the volume on the container. Use within 2-3 months for best quality.
  4. Thaw in the fridge. Allow 12-24 hours in the refrigerator. Never thaw at room temperature - the sugar content won't protect it from the danger zone.
  5. Recombine before using. Whisk vigorously after thawing. If graininess persists, warm gently over a double boiler and whisk again - avoid boiling, which can scorch and caramelize the sugars.
Watch Out
Do not freeze sweetened condensed milk in the original sealed metal can. The contents expand as they freeze, and the can can swell or burst in the freezer.

Signs Sweetened Condensed Milk Has Gone Bad

Fresh condensed milk has a pale ivory to light caramel color and a clean, sweet aroma. Spoiled product signals its condition clearly - you rarely need to guess.

For comparison, coconut milk in dairy recipes shows similar visual separation when it's past its prime, though the indicators for condensed milk are sharper.

Signs It's Gone Bad
👀
VisualBrown spots or darkened patches on the surface · Visible mold or fuzzy growth · Watery layer with curd-like solids that won't re-mix
👃
SmellSharp sour or rancid dairy odor · Yeasty or fermented smell distinct from normal caramel sweetness
✋
TextureGrainy or curdled consistency that won't smooth with stirring · Slimy surface or excessively thin watery separation

Discard without tasting if you spot mold, detect sourness, or see curdling that won't stir out. High sugar content can mask early spoilage aromas, so visual cues matter here.

Getting the Most From Every Can

Most of the waste from condensed milk comes from small handling errors, not actual spoilage events. These four steps prevent the most common problems.

  • Ditch the original can - always transfer opened condensed milk into glass within an hour of opening to avoid metallic contamination.
  • Freeze in portions - measure out recipe-specific quantities before freezing so nothing goes to waste on thaw day.
  • Know your use case - reserve frozen-thawed product for cooked applications; fresh opened product works for [sweetened condensed milk in dairy recipes](https://forkliftkitchen.com/sweetened-condensed-milk-substitutes/) that call for smooth texture.
  • Check for [sugar spoilage signs](https://forkliftkitchen.com/sugar-shelf-life/) alongside dairy indicators - crystallization in the container can sometimes mimic spoilage, but true spoilage also comes with off-odors.
Shortcut
If you regularly use partial cans, freeze in ice cube trays first, then transfer the frozen cubes to a freezer bag. Each cube is roughly 2 tablespoons - easy to grab exactly what a recipe needs.

Frequently Asked Questions

How long is unopened sweetened condensed milk good for?

An unopened can lasts 12-18 months stored in a cool, dark pantry. Always follow the printed best-by date and discard any can showing rust, dents, or bulging, which can indicate compromised seals.

Can condensed milk go bad if left out overnight?

Yes. Opened condensed milk left at room temperature for more than 2 hours enters the bacterial danger zone. High sugar slows spoilage but doesn't stop it - discard any opened product left out overnight.

What happens if you freeze sweetened condensed milk?

The texture turns grainy and slightly separated due to sugar crystallization and milk-protein changes. Whisking after thawing helps, but use it in cooked or blended recipes rather than smooth no-bake applications.

How long does homemade sweetened condensed milk last?

Homemade versions lack commercial heat processing, so they last only 5-7 days refrigerated in a sealed glass jar. They also cannot be safely stored at room temperature - refrigerate immediately after cooling.

Can I use condensed milk past its best-by date?

An intact, undamaged can is often still usable a few months past the date if stored correctly. Check for any off-color, sour smell, or textural changes before using - the best-by date reflects peak quality, not a hard safety cutoff.

What Is Short Rib? Taste, Uses & Cooking Tips

April 2, 2026

Tear into a properly braised short rib and the first thing you notice isn't tenderness - it's the weight of the flavor. Fat that's spent hours rendering into silk, collagen collapsing into gelatin, Maillard-roasted beef crust giving way to something almost sweet and nutty underneath.

What Is Short Rib

This cut earns its reputation the hard way: slowly, with heat and time. If you've cooked low-and-slow dishes like beef shank caldereta before, short rib will feel familiar - richer, fattier, and even more rewarding.

QUICK SUMMARY

Short rib is a bone-in beef cut from the plate or forequarter, loaded with intermuscular fat and collagen. Slow-cooked, it becomes silky, gelatinous, and deeply savory. Sold as English cut (thick slabs) or flanken cut (thin crosswise slices), it suits braising, grilling, or smoking.

🥩Category: Bone-in beef, plate or forequarter section
💪Flavor: Rich beefy umami, rendered fat sweetness, nutty caramel
🍳Best For: Braising, Korean galbi, ragu, BBQ smoking
🌡️Intensity: Strong - needs long cook times to tame collagen
📅Shelf Life: Raw: 3-5 days refrigerated; frozen up to 12 months

What Is Short Rib?

Short rib comes from the beef plate and forequarter, specifically the lower rib section where muscles do significant work. That labor leaves behind dense muscle fiber, thick intermuscular fat, and a high concentration of collagen - all of which behave beautifully under prolonged heat.

Two cuts dominate the market. English cut short ribs are thick slabs, typically 2-3 inches, sliced parallel to the bone. Flanken cut short ribs are thin cross-sections sliced through multiple bones - the format most associated with Korean galbi jjim and grilled preparations.

You'll see this cut sold under several names:

  • 🥩 Beef short ribs - the generic market name across most US butchers
  • English cut short rib - one bone per slab, cut parallel, ideal for braising
  • Flanken cut - thin strip through 3-4 bones, preferred for grilling and marinating
  • Plate short rib - a thicker, meatier version from the plate primal, often seen at BBQ joints

The connective tissue that makes short rib tough when undercooked is the same reason it becomes extraordinary when slow-cooked - collagen converts to gelatin, creating that signature glossy, lip-coating texture.

What Does Short Rib Taste Like?

short rib - What Is Short Rib

Short rib tastes closer to brisket than to any steak - deeply savory, fatty, and rich with layered umami. However, the flavor is more concentrated than brisket due to the intermuscular fat running through the muscle rather than sitting on top.

Sensory SnapshotStrong Intensity
👅 Flavor
Rich UmamiDeep SavoryRendered-Fat SweetNutty Caramel
✋ Texture
SilkyFall-ApartGelatinous
👃 Aroma
Maillard-Roasted BeefBraise-SweetCaramelized Collagen

Raw short rib smells and looks like any beef cut. The transformation happens in the pan.

Searing triggers the Maillard reaction - that dark, roasted crust develops a nutty, almost caramel note. Hours of braising then coax out a braise-sweet scent from the caramelizing collagen and fat.

Undercooked short rib is chewy and greasy, with none of this complexity. Time is non-negotiable.

How to Use Short Rib

Short rib rewards patience more than technique. The fat renders, the collagen gels, and what you get out of a braising pan or Dutch oven is fundamentally different from what went in raw.

How Short Rib Is Used
MethodBest ForTip
🍲 BraisingRed wine braise, ragu, slider fillingSear hard first; deglaze with wine or stock before covering
🔥 Smoking + BraiseBBQ short rib plates, smoked raguSmoke to bark, then finish in liquid at 275°F until probe-tender
⚡ Pressure CookingWeeknight braises, quick ragu45-60 minutes at high pressure replicates a 4-hour braise
🔥 Grilling (Flanken)Korean galbi, Latin-style asadoMarinate flanken-cut for at least 4 hours; grill fast over high heat

French bistro-style red wine braises - Cabernet or Malbec, thyme, garlic, and root vegetables - are the classic Western preparation. English-cut short ribs braise for 3-4 hours until the bone slides free.

Italian cooks shred braised short rib into a pappardelle ragu, where the gelatin from the bones enriches the sauce without any added thickener. The fat content here is an asset, not a problem.

Korean galbi uses flanken cut thin-sliced through the bone, marinated in soy, brown sugar, garlic, and sesame, then grilled quickly. It's one of the few preparations where short rib doesn't need hours of cooking.

American BBQ plates lean toward plate short ribs - massive, thick slabs smoked over oak until the fat nearly liquefies into the meat.

Golden Rule
Always sear short ribs on all meaty sides before braising. Skipping this step costs you the Maillard-developed flavor that carries the entire braise.
Try It In
🍲Slow Cooker Short RibsSet-and-forget braise that delivers fall-apart results→🇰🇷Slow Cooker Korean Beef Short RibsSoy-sesame braise with flanken-style depth→🔥Korean Galbi Short RibsGrilled flanken cut with classic marinade→

How to Buy and Store Short Rib

At the butcher counter, look for deep pink-to-red meat with visible white intermuscular marbling - not just surface fat. Bones should be cream-to-white and firmly attached.

Avoid any slab with grayish edges, dried-out surfaces, or a sour smell.

Watch Out
Flanken cut short ribs are sometimes mislabeled or confused with chuck short ribs - thinner, less meaty slabs. Ask your butcher to confirm the primal source if BBQ-style plate ribs are what you need.

For English cut, confirm thickness runs at least 2 inches - thinner slabs dry out before collagen fully converts. For flanken, you want clean cross-cuts through the bone, not jagged saw marks.

Storage is straightforward:

  • 🧊 Refrigerator (raw) - 3-5 days at 32-40°F in butcher paper or vacuum seal
  • ❄️ Freezer (raw) - up to 12 months; vacuum-sealed preferred to prevent freezer burn
  • 🍲 Cooked and braised - 3-4 days refrigerated; reheat gently in braising liquid

Full detail on short rib freshness guide is worth reading if you're buying in bulk or freezing braised portions. The braising liquid itself - loaded with gelatin from the bones - keeps best when stored with the meat rather than separately.

Where to Start with Short Rib

Short rib has a steep learning curve only if you fight it. Work with the cut's nature and the process is simple.

  • 🍷 First-timer - Start with an English cut red wine braise; it's forgiving and scales easily
  • 🔥 Grill-first cook - Buy flanken cut and follow a [Korean galbi](https://forkliftkitchen.com/korean-galbi-short-ribs/) marinade; no special equipment needed
  • ⚡ Weeknight cook - Pressure cooker short ribs get you there in under 90 minutes total
  • 🔄 Can't find it - Check the [short rib substitutes](https://forkliftkitchen.com/short-rib-substitutes/) guide; chuck short ribs or brisket cover most preparations

Don't undercook it. That's the only real mistake here.

Frequently Asked Questions

Are short ribs fatty?

Yes, noticeably so. Short rib has thick intermuscular fat woven through the muscle, not just a surface cap. Most of that fat renders out during a proper braise, but the cut is not suitable for low-fat diets.

What is flanken cut short rib?

Flanken cut short rib is sliced thin and crosswise through multiple rib bones, producing a flat strip with bone cross-sections. This cut is standard in Korean galbi and cooks quickly on a grill rather than requiring hours of braising.

How does short rib differ from brisket?

Both are collagen-rich and need long cooking, but short rib is fattier and more concentrated in flavor. Brisket has more uniform lean muscle and produces a firmer, sliceable result; short rib shreds and turns gelatinous. See the [brisket shelf life](https://forkliftkitchen.com/brisket-shelf-life/) page for post-cook storage differences.

How long do you braise short ribs?

English cut short ribs need 3-4 hours at 325°F in a covered Dutch oven. The meat is done when a knife slides through with no resistance and the bone pulls free cleanly. Pressure cooking cuts this to 45-60 minutes.

Can you grill short ribs?

Yes, but only flanken cut. The thin cross-sections cook through quickly over high heat without needing collagen breakdown. English cut short ribs are too thick and fatty for direct grilling - the exterior burns long before the interior softens.

Sicilian Fennel and Orange Salad

April 2, 2026

Fresh fennel often tastes too sharp or goes limp after sitting. The fix is thin slicing and letting it marinate just long enough to soften without turning soggy.

Sicilian Fennel and Orange Salad served on a plate

High-acid citrus and olive oil mellow the anise bite. The fennel stays crisp but loses that raw edge after 30 minutes in the dressing.

Make this when you need a bright side that holds up next to grilled meats or heavy pasta dishes without wilting immediately.

QUICK SUMMARY

This Sicilian Fennel and Orange Salad combines thin-sliced fennel with segmented oranges, mint, and a simple vinaigrette. Marinate 30-60 minutes to soften the fennel without losing crunch. Use fresh, firm fennel bulbs and segment oranges carefully to avoid bitter pith.

⏱️Time: 15 minutes prep, 30-60 minutes marinating before serving
🔪Method: Slice fennel thin (⅛ inch), segment oranges, toss with dressing
⚠️Watch Out: Over-marinating turns fennel soggy - drain excess liquid before serving

Why This Recipe Works

Thin slicing breaks down fennel's fibrous texture while marinating in acid softens the raw bite. For a version that comes together quickly, fresh homemade salad recipe uses similar bright, crisp vegetables with minimal prep.

Quick Reference
⏱️
Prep Time
15 min
🔥
Cook Time
0 min
⏰
Total Time
45-75 min
🍽️
Servings
4
📊
Difficulty
Easy
🏷️
Category
Side
💡
Quick Tip
Marinate at least 30 minutes for flavor meld
🎯
Best For
Weeknight | Entertaining | Summer

What makes it work:

  • Mandoline slicing creates uniform ⅛-inch fennel pieces that marinate evenly without turning mushy
  • Segmenting oranges between membranes removes bitter pith and releases clean citrus flavor into the dressing
  • 30-60 minute marination window softens fennel's raw edge while keeping the crunch intact
  • Cold-pressed olive oil coats vegetables and carries mint and citrus oils throughout every bite
  • Fresh mint added last preserves bright green color and prevents browning from acid exposure
Quick Tip
Use a paring knife to cut away all white pith from oranges - even a thin layer adds bitterness that overpowers the sweet citrus

What You'll Need

Ingredients for Sicilian Fennel and Orange Salad

Shop for firm fennel bulbs with no brown spots and bright green fronds still attached. Rich mains need something to cut through, and salad does exactly that - for a version that comes together quickly, another great salad recipe pairs creamy avocado with crunchy vegetables and protein.

🥬
Vegetables
  • 2 medium fennel bulbs
  • 1 small red onion (optional)
🍋
Citrus
  • 3 navel oranges
🥢
Dressing
  • 3 tablespoon extra virgin olive oil
  • 1 tablespoon red or white wine vinegar
  • Salt and black pepper
🌶️
Herbs & Extras
  • ¼ cup fresh mint leaves
  • ¼ cup black olives (optional)
  • Fennel fronds for garnish

Ingredient Details

  • Fennel bulbs
    Look for heavy bulbs with tight layers and no browning - old fennel turns woody and bitter
  • Navel oranges
    Choose firm fruit with smooth skin - juice-heavy oranges make the salad watery
  • Extra virgin olive oil
    Use cold-pressed for fruity flavor that complements anise and citrus notes
  • Fresh mint
    Add torn leaves right before serving to prevent browning from acid contact
  • Red wine vinegar
    White wine vinegar works too - both add sharp acidity without overpowering citrus
  • Red onion
    Slice thin and rinse under cold water to mellow the sharpness before adding
  • Black olives
    Use Kalamata or Castelvetrano for briny depth - omit if serving to olive-averse guests

Ingredient Swaps

Swap citrus or vinegar types based on what's in your fridge without changing technique. The shrimp works best when it hits the table at the same time as the main - for a version that comes together quickly, flaky shrimp side dish pairs garlic butter with tender shrimp in under 15 minutes.

Four swaps that work:

  • Blood oranges or grapefruit instead of navel oranges - adds tartness and deeper color without changing texture
  • Shallots or green onion instead of red onion - milder bite that won't overpower the fennel's anise flavor
  • Lemon juice or sherry vinegar instead of wine vinegar - shifts acidity profile slightly but maintains brightness
  • Fresh basil or parsley instead of mint - changes herbal note while keeping fresh green contrast

Blood Oranges

Works for: Deeper berry-like sweetness and dramatic red color

Skip if: You want classic bright orange appearance

Lemon Juice

Works for: Sharper acid that highlights fennel's crispness

Skip if: Salad already tastes too tart from citrus segments

Shallots

Works for: Mild onion flavor that blends into dressing

Skip if: You want visible onion pieces for texture contrast

Instructions

Total time runs 45-75 minutes including marination - most of that is hands-off waiting. Most people skip chicken, but it balances the meal - for a version that comes together quickly, simple chicken recipe delivers crispy edges and tender filling in one sheet pan.

  1. Slice fennel thin: Cut fennel bulbs in half lengthwise, remove the tough core, and slice crosswise into ⅛-inch pieces using a mandoline or sharp knife. Place in a large mixing bowl.

  2. Segment oranges: Cut away peel and pith completely with a paring knife, then cut between membranes to release clean citrus segments. Add segments to the bowl with fennel and squeeze juice from membranes over top.

  3. Add aromatics: Toss in thinly sliced red onion (rinsed if desired), torn mint leaves, and black olives. Drizzle with olive oil and vinegar, then season with salt and pepper.

  4. Marinate: Toss everything together until evenly coated, then cover and refrigerate for 30-60 minutes. Stir once halfway through to redistribute dressing.

  5. Serve chilled: Drain any excess liquid that has pooled at the bottom of the bowl. Taste and adjust salt or vinegar if needed, then garnish with fennel fronds and serve immediately.

Watch Out
Don't marinate longer than 60 minutes - fennel releases water and turns limp, making the salad watery and dull

What to Serve With It

This salad needs a protein-forward main to create a complete plate. Beef adds the contrast this plate needs, but timing matters - for a version that comes together quickly, a rich beef on the side adds hearty warmth that offsets the salad's bright acidity.

Side Dish Prep Why It Works How to Serve
Grilled chicken breast Easy Light protein complements crisp salad without overwhelming citrus notes Slice grilled chicken and arrange over salad or serve alongside
Crusty bread Easy Soaks up olive oil dressing and adds texture contrast to crisp vegetables Toast slices and serve warm on the side for dipping
Roasted potatoes Medium Warm starch balances cold salad and creates temperature contrast Roast until golden and serve hot next to chilled salad
Prosciutto platter Easy Salty cured meat pairs with sweet oranges and cuts through olive oil richness Drape thin slices over salad or serve on separate plate
Focaccia bread Medium Soft herb-flecked bread complements Mediterranean flavors and adds substance Slice thick and serve warm for mopping up dressing

Three ways to serve it:

  • As an appetizer: Divide salad among small plates and top with shaved Parmesan for a light first course
  • Next to grilled fish: Pair with seared salmon or tuna to let citrus and herbs enhance seafood flavor
  • With pasta: Serve alongside simple olive oil pasta to add bright, crunchy contrast to rich noodles
Best Pick
For entertaining, pair this salad with roasted lamb or pork - the sweet citrus and anise cut through rich, fatty meat perfectly

Store and Reheat

Dressed salad lasts 3-4 days in the fridge but loses crispness each day. Rich mains need something to cut through, and pork does exactly that - for a version that comes together quickly, tender pork side dish delivers smoky flavor that contrasts with bright citrus and herbs.

Method Time Best For
📦 Serve Cold Direct from fridge Best texture and flavor - do not reheat
🥗 Refresh 5 minutes Add fresh fennel slices and herbs to revive day-old salad
🧊 Chill 15 minutes Return to cold temp after sitting at room temperature

For best results when storing:

  • Keep dressing separate: Store fennel, oranges, and dressing in separate containers to prevent soggy vegetables
  • Drain before serving: Pour off excess liquid that accumulates at the bottom before plating leftovers
  • Add fresh herbs: Toss in new mint or basil leaves to brighten flavor and appearance of day-old salad
  • Use shallow containers: Spread salad in wide, shallow containers to prevent crushing delicate orange segments
  • Don't freeze: Citrus and fennel turn mushy and watery after freezing - make only what you'll eat within 4 days

Frequently Asked Questions

Can I make Sicilian fennel and orange salad ahead?

Yes, but store components separately. Slice fennel and segment oranges up to 1 day ahead, then toss with dressing 30-60 minutes before serving to maintain crispness.

How long should I marinate the salad for best flavor?

Marinate 30-60 minutes in the refrigerator. Less than 30 minutes leaves fennel too sharp, more than 60 minutes turns it soggy and watery.

How do I prevent the fennel from becoming soggy?

Slice fennel no thinner than ⅛ inch and marinate for 60 minutes maximum. Drain excess liquid before serving and add fresh fennel slices to revive day-old salad.

Can I substitute lemon for oranges in this salad?

No, lemon is too tart and lacks the sweet juice that balances fennel's anise flavor. Use blood oranges or grapefruit instead for similar texture with slightly different sweetness.

How to store Sicilian fennel and orange salad?

Store in an airtight container in the refrigerator for 3-4 days. Drain excess liquid before serving and add fresh mint or fennel slices to restore crispness and color.

Sicilian Fennel and Orange Salad served on a plate

Sicilian Fennel and Orange Salad

No ratings yet
This Sicilian Fennel and Orange Salad features thinly sliced fennel and segmented oranges tossed in a citrusy vinaigrette with fresh mint. Marinating for 30-60 minutes softens the fennel's raw sharpness while keeping it crisp. The bright, refreshing salad pairs beautifully with grilled meats or pasta without wilting.
Print Recipe Pin Recipe
Prep Time 15 minutes mins
Cook Time 1 minute min
Total Time 46 minutes mins
Servings: 4 servings
Course: Side Dish
Cuisine: Italian
Ingredients Equipment Method Notes

Ingredients
  

  • 2 medium fennel bulbs remove tough core, thin sliced ⅛ inch
  • 1 small red onion optional, thinly sliced and rinsed if desired
  • 3 navel oranges peeled and segmented, seeds and pith removed
  • 3 tablespoon extra virgin olive oil
  • 1 tablespoon red or white wine vinegar
  • salt to taste
  • black pepper to taste
  • 0.25 cup fresh mint leaves torn, added last
  • 0.25 cup black olives optional, sliced
  • fennel fronds for garnish

Equipment

  • Mandoline or sharp knife For thinly slicing fennel
  • Paring knife To segment oranges
  • Large mixing bowl For tossing salad ingredients

Method
 

  1. Cut fennel bulbs in half lengthwise, remove the tough core, and slice crosswise into ⅛-inch pieces using a mandoline or sharp knife. Place sliced fennel in a large mixing bowl.
    2 medium fennel bulbs
  2. Using a paring knife, cut away the peel and all white pith from the oranges. Cut between membranes to release clean orange segments. Add the segments to the bowl with the fennel and squeeze any juice from membranes over top.
    3 navel oranges
  3. Toss in thinly sliced red onion (if using, rinsed), torn fresh mint leaves, and sliced black olives (if using). Drizzle with extra virgin olive oil and wine vinegar. Season with salt and black pepper to taste.
    1 small red onion, 0.25 cup fresh mint leaves, 0.25 cup black olives, 3 tbsp extra virgin olive oil, 1 tbsp red or white wine vinegar, salt, black pepper
  4. Toss everything until evenly coated. Cover and refrigerate for 30 to 60 minutes to allow fennel to soften while remaining crisp. Stir once halfway through marination to redistribute dressing.
  5. Before serving, drain any excess liquid pooled at the bottom of the bowl. Taste and adjust salt or vinegar if needed. Garnish with fresh fennel fronds and serve immediately chilled.
    fennel fronds

Notes

  • Use a mandoline or sharp knife to slice fennel uniformly about ⅛ inch thick for best texture.
  • Marinate salad between 30-60 min to soften fennel without sogginess; drain excess liquid before serving.
  • Add fresh mint last to preserve bright green color and prevent browning in acidic dressing.

Tried this recipe?

Let us know how it was!

How Long Does Rosemary Last? [Storage Guide]

April 2, 2026

Leaving fresh rosemary in a sealed plastic bag without drying it first is one of the most common storage errors - moisture trapped against the needles accelerates mold before the week is out. Fresh rosemary sprigs can last anywhere from one to two weeks in the fridge with the right setup, while dried rosemary stays usable for up to a year when stored correctly.

Can You Freeze Rosemary

If you've ever wondered whether the oil-cube method is worth the effort, keeping herbs in ice cube trays fresh shows exactly how long that approach holds up.

QUICK SUMMARY

Fresh rosemary lasts 7-14 days in the fridge when wrapped in a damp paper towel. Frozen sprigs stay usable for up to 12 months. Dried rosemary holds flavor for 6-12 months in an airtight jar away from heat and light.

🧊Fridge: Fresh sprigs last 7-14 days wrapped in a damp paper towel
❄️Freezer: Best quality at 6 months; acceptable up to 12 months
🫙Dried: Airtight jar, away from light and heat, keeps flavor 6-12 months

How Long Does Rosemary Last?

Fresh rosemary's shelf life depends on how it was handled before it reached your kitchen.

A bunch bought at peak freshness and stored well can last closer to two weeks; a bunch that sat in a warm car for an hour might show signs of decline by day five.

Rosemary Shelf Life
MethodStateDurationNotes
🧊 FridgeFresh sprigs7-14 daysWrapped in damp paper towel inside a breathable bag
🧊 FridgeCooked (dishes)3-4 daysStandard cooked-herb fridge timeline
❄️ FreezerRaw (whole or chopped)6-12 monthsBest aroma within 6 months; oil cubes preserve volatiles well
🏠 PantryDried (opened)6-12 monthsAirtight jar, away from direct heat and light

Dried rosemary degrades more slowly than most fresh herbs, but it doesn't last indefinitely.

If the piney, resinous scent has faded to almost nothing, the herb has lost most of its value - and understanding rosemary's flavor and uses helps clarify why that aroma is the whole point.

How to Store Rosemary

The storage method depends on whether you're working with fresh sprigs or dried rosemary - the two require completely different conditions.

Fridge (fresh sprigs): Trim the stem ends, wrap the sprigs loosely in a damp paper towel, and place them in a perforated plastic bag or a produce container with vents. Check the towel every two to three days - replace it if it has dried out or turned slimy. For even longer fridge life, stand the sprigs upright in a jar with about an inch of water, loosely cover the top, and swap the water every one to two days.

Pantry (dried rosemary): Transfer dried rosemary to an airtight glass jar and keep it somewhere dark and cool - a cabinet away from the stove is ideal. Store whole needles rather than grinding them in advance, since the volatile oils that carry rosemary's signature scent escape quickly once the herb is powdered.

Watch Out
Never seal wet rosemary in a non-vented bag. Trapped moisture turns into mold within a couple of days, faster than almost any other common herb.

Counter: Fresh rosemary should not sit at room temperature for more than a few hours. Heat and airflow strip moisture from the needles quickly, accelerating wilting and loss of aroma.

Can You Freeze Rosemary?

Freezing works well for rosemary, with one important caveat: the needle texture collapses after thawing. Frozen rosemary is not suited for garnishing or fresh use - it's a cooked-dish ingredient from the moment it hits the freezer.

Three methods work, and each serves a slightly different purpose:

  1. Wash and dry thoroughly - shake off water and pat with a clean towel; any remaining moisture forms ice crystals that damage the needles.
  2. Tray-freeze whole sprigs (Option A) - spread sprigs on a lined tray, freeze for 1-2 hours, then transfer to a labeled freezer bag. Use directly from frozen or let sit 5-10 minutes before use.
  3. Make chopped oil cubes (Option B) - chop the needles, pack into an ice-cube tray, cover with a neutral oil, and freeze solid before transferring to a bag. These drop straight into soups, braises, and roasting pans.
  4. Puree and portion (Option C) - blend rosemary with oil into a smooth paste and freeze in small sealed containers. Good for marinades and compound butters.
  5. Label everything - note the date and method on each bag. Use whole sprigs and oil cubes within 6 months for the strongest aroma, though they remain safe up to 12 months.

Do not refreeze thawed rosemary. Once it reaches temperature, use the whole portion.

Golden Rule
Use frozen rosemary only in cooked applications. The aromatic compounds hold up when heated, but the texture won't recover for fresh use.

Signs Rosemary Has Gone Bad

Fresh rosemary gives clear signals when it's no longer usable. Dried rosemary declines more subtly - it rarely "goes bad" in a food-safety sense, but it does become pointless once the aroma is gone.

Signs It's Gone Bad
👀
VisualNeedles turning brown or yellow across stems · White or green fuzzy mold on stems or packaging · Slimy, translucent appearance on needles
👃
SmellMusty, fermented, or sour odor replacing the piney, resinous scent
✋
TextureNeedles feel slimy or detach easily from stem when touched

Discard fresh rosemary immediately if you see mold or detect any off-odor. For dried rosemary, the test is simpler: rub a pinch between your fingers and smell it.

No scent means no value - at that point, consider alternatives to rosemary rather than cooking with a spent herb.

Habits That Keep Rosemary Usable Longer

Consistent handling matters more than any single storage trick. These practices make a real difference across fridge, freezer, and pantry storage.

  • 🧊 Dry before storing - pat fresh sprigs completely dry before wrapping; residual moisture is the fastest route to mold.
  • 🫙 Grind dried rosemary only as needed - whole needles hold volatile oils far longer than pre-ground; a small mortar or spice grinder takes seconds.
  • ❄️ Prioritize oil cubes for cooked use - oil-filled ice-cube trays protect rosemary's aromatic compounds better than plain freezing, especially for soups and braises.
  • 🏷️ Label freezer packages by method - whole sprigs, chopped, and oil cubes degrade at slightly different rates; use the highest-quality format first.

Rosemary behaves similarly to other woody herbs in some respects - storing parsley correctly follows a comparable upright-jar method - though parsley's softer stems need less airflow management than rosemary's woody ones.

The same logic applies when comparing to basil's shelf life, where temperature sensitivity is the dominant variable rather than moisture control.

Shortcut
Batch-freeze oil cubes on the day you buy fresh rosemary. It takes ten minutes and eliminates waste when a recipe only calls for a sprig or two.

Frequently Asked Questions

Can you freeze rosemary whole or chopped?

Both work. Whole sprigs tray-freeze well and can be used directly from frozen in roasting pans or stock. Chopped rosemary packs better into oil cubes, which preserve aroma more effectively for long freezer storage.

Can you freeze rosemary in oil?

Yes, and it's the preferred method for cooked applications. Oil surrounds the needles and shields the volatile compounds from freezer air. Use a neutral oil like sunflower or light olive oil; avoid extra virgin, which can turn bitter when frozen and reheated.

Does dried rosemary lose flavor over time?

Yes, gradually. The piney, camphor-like oils that define rosemary's scent evaporate through the jar over months. After 12 months, most dried rosemary is technically safe but functionally weak - rub and smell before using.

How do I store fresh rosemary long term?

Freezing is the only practical long-term option for fresh rosemary. Fridge storage tops out at two weeks even under ideal conditions. Oil-cube freezing gives you usable rosemary for up to six months with minimal quality loss.

Is rosemary still good if the needles turn slightly yellow?

A few yellowed needles on an otherwise firm, fragrant sprig are acceptable - strip those sections and use the rest. Widespread yellowing across multiple stems, combined with any off-odor, means the bunch should be discarded.

What Is Stilton Cheese? [Taste, Uses & More]

April 2, 2026

Most people assume Stilton is just "strong blue cheese" and stop there - which means they're either using too much or pairing it badly.

What Is Stilton Cheese

Stilton has a sharper, more complex character than that flat description suggests, and it rewards anyone who spends a few minutes understanding what they're actually working with.

Whether you're crumbling it over bitter greens or stirring it into a sauce, port wine in dairy recipes pairs with it in ways that make both ingredients taste more complete.

QUICK SUMMARY

Stilton is a Protected Designation of Origin English blue cheese made from cow's milk, known for its crumbly paste, blue-green veins, and a bold, tangy-salty flavor with buttery undertones. Use it crumbled, melted, or stirred into sauces and soups.

🧀Category: Blue cow's-milk cheese, PDO-protected, English origin
👅Flavor: Tangy, sharp, salty with buttery-sweet and nutty finish
🍽️Best Uses: Cheese boards, cream sauces, salads, soups, mashed potatoes
🛒Buying Tip: Look for cream-yellow paste with clear blue-green veins and dry rind
📅Shelf Life: Wrapped in the fridge: 2-3 weeks opened; 3-4 weeks unopened

What Is Stilton Cheese?

Stilton is a Protected Designation of Origin (PDO) blue cheese produced exclusively in three English counties: Derbyshire, Leicestershire, and Nottinghamshire. Only dairies operating within those counties and following strict production guidelines can legally call their product Stilton.

It's made from full-fat cow's milk and inoculated with Penicillium roqueforti spores, which are responsible for the distinctive blue-green veins that run through the paste.

Cheesemakers pierce the formed wheels with metal needles to let oxygen in, encouraging those mold channels to develop.

The wheels are cylindrical, sold upright, and develop a natural wrinkled rind as they age - typically for nine to twelve weeks minimum.

Inside, the paste runs from cream to pale yellow and has a crumbly yet slightly dense structure that softens noticeably as it warms toward room temperature.

Two main varieties exist:

  • 🔵 Blue Stilton - the standard, with full blue-green veining and a sharp, developed flavor
  • ⚪ White Stilton - younger, unpierce, milder, and often sold with added fruit flavors like mango or apricot

Blue Stilton is what most people mean when they say Stilton. White Stilton is a different product with its own PDO status and barely resembles its blue counterpart in flavor.

What Does Stilton Cheese Taste Like?

stilton cheese - What Is Stilton Cheese

Stilton delivers a sharp, tangy-salty punch upfront, followed by buttery-sweet undertones that soften the initial bite. The finish is distinctly nutty, which sets it apart from more aggressively acidic blues like Roquefort.

Sensory SnapshotStrong Intensity
👅 Flavor
tangy-saltybuttery-sweetnutty finishpiquant
✋ Texture
crumblycreamy when warm
👃 Aroma
earthy blue-moldyeastydairy-rich

Compared to Shropshire Blue, which is a close English relative, Stilton is milder and more dairy-forward - less assertively bitter on the finish. Heat changes things considerably.

Melted Stilton becomes noticeably creamier and the saltiness concentrates, so dishes built around cooked Stilton need less of it than raw applications.

Golden Rule
Always bring Stilton to room temperature before serving on a board. Cold cheese mutes the buttery-sweet notes and makes the saltiness feel harsher than it actually is.

How to Use Stilton Cheese

Stilton works across a wider range of applications than most strong blues because its buttery undertone cushions the sharpness in cooked dishes. Raw uses let the full flavor complexity come through; cooked uses blend it into a background richness.

How Stilton Cheese Is Used
MethodBest ForTip
🥗 Raw / CrumbledCheese boards, salads with pear and walnuts, celery plattersCrumble by hand - a knife compresses the paste and kills the texture
🍳 Melted into SauceCream sauces for steak, mushroom ragù, pastaAdd off-heat or over very low heat - boiling breaks the emulsion
🫙 BakedToast, individual gratin dishes, stuffed mushroomsUse sparingly; heat amplifies saltiness significantly
🥣 Stirred InMashed potatoes, butternut squash soup, dipsAdd at the end of cooking to keep flavor bright and clean

In British cooking, Stilton is traditional on the Christmas cheese board alongside celery and fig jam, and it finds its way into hearty winter soups.

Modern European bistro cooking borrows it for blue-cheese cream sauces on steak.

American steakhouse menus use it in blue cheese dressing - you can build a solid version at home with a creamy garlic mashed potatoes recipe as a base inspiration for getting that rich, tangy texture right.

Strong pairings for Stilton include:

  • 🍐 Pear and apple - fresh fruit sweetness cuts the salt cleanly
  • 🍷 Port or tawny port - the classic British pairing; sweetness balances the sharpness
  • 🌰 Walnuts and toasted hazelnuts - echo the cheese's own nutty finish
  • 🍯 Honey or fig jam - bridges the gap between Stilton and milder board elements
  • 🍫 Dark chocolate - a small amount works surprisingly well with the earthiness

Stirring Stilton into using butternut squash soup for creaminess adds a tangy depth that the soup's natural sweetness keeps from tipping into overwhelming. Avoid pairing Stilton with delicate floral teas or heavy citrus - both clash with the mold-forward earthiness.

Try It In
🥗Blue Cheese Dressing (Homemade)Stilton's buttery notes make this dressing richer than gorgonzola versions→🧀Cheddar Cheese StrawsSwap in crumbled Stilton for a sharper, more pungent result→🍳Egg and Cheese Breakfast SandwichA small Stilton crumble adds sharpness where mild cheese falls flat→

How to Buy and Store Stilton Cheese

At the counter, look for a wedge with firm, cream-to-pale-yellow paste threaded with clear blue-green veins. The natural rind should be dry and slightly flaky - not sticky, not darkly brown, and not carrying an ammonia smell through the packaging.

Watch Out
A strong ammonia smell from a sealed wedge signals over-aging or poor storage. Don't buy it. For a full breakdown of what to look for, check these stilton cheese spoilage signs before deciding.

Once home, wrap Stilton in cheese paper or wax paper - never cling film, which traps moisture and causes the rind to sweat. Keep it in the crisper drawer where temperature is stable.

  • 📦 Unopened refrigerated wedge - about 3-4 weeks
  • 🧻 Opened and wrapped in cheese paper - 2-3 weeks; rewrap after each use
  • 🥣 Crumbled into dishes - use within 2-3 days; the exposed surface degrades fast

Freezing is possible but not recommended - it breaks the crumbly texture and makes the paste grainy when thawed.

Start with a Wedge, Then Scale

If Stilton is new to you, buy a small wedge first and serve it simply: room temperature, with a few oatcakes, a slice of pear, and a drizzle of honey.

That combination shows you everything the cheese can do without cooking getting in the way.

Once you're comfortable with the intensity, move into sauces and soups - that's where Stilton earns its keep on a weeknight.

If a specific dish calls for a blue cheese and you don't have Stilton, look at stilton cheese stand-ins or the broader range of blue cheese swaps that work for guidance on what holds up in cooked applications.

The gap between Stilton and, say, roquefort cheese in dairy recipes is real - Roquefort runs sharper and saltier, so substitutions aren't always one-for-one.

Frequently Asked Questions

Is Stilton a blue cheese?

Yes. Blue Stilton is a blue-veined cheese made with Penicillium roqueforti cultures, which produce the characteristic blue-green mold channels. White Stilton exists but contains no veining and has a completely different flavor profile.

How strong does Stilton taste?

Strong, but not the most aggressive blue available. It's sharper and saltier than mild blues like Gorgonzola Dolce, however milder and more dairy-forward than Roquefort. Age affects it - older wedges push sharper.

Can Stilton be melted?

Yes, and it melts well into cream-based sauces. Add it off-heat or over very low heat - boiling causes the fat to split and the sauce to turn grainy. A little goes a long way once melted.

Is Stilton pasteurized?

Most commercially sold Stilton in supermarkets uses pasteurized cow's milk. However, some artisan producers still make it from thermized milk. Check the label if pasteurization matters for dietary or medical reasons.

Where is Stilton made?

PDO rules restrict production to three English counties: Derbyshire, Leicestershire, and Nottinghamshire. Any cheese called Stilton must be made there - no exceptions. The town of Stilton in Cambridgeshire, despite the name, is not in the protected zone.

What Is Serrano Ham? [Taste, Uses & More]

April 2, 2026

You spot it at the deli counter - a whole serrano ham leg, deep rose and glistening, or a vacuum-sealed pack of paper-thin slices fanned out like playing cards.

What Is Serrano Ham

Knowing what you're actually buying matters, because the taste of prosciutto and jamón serrano overlap enough to cause confusion, yet the two are meaningfully different cured products.

Serrano is leaner, saltier, and firmer - qualities that make it behave differently on a plate.

If you're also reaching for Marcona almonds to build a board, understanding almonds in cooking rounds out why that pairing keeps showing up in Spanish kitchens.

QUICK SUMMARY

Jamón serrano is a dry-cured Spanish ham made from white pork breeds, aged from a few months to over two years. It has a savory, nutty, moderately salty flavor and slices paper-thin. Serve it raw, crisp it in a pan, or use it to finish cooked dishes.

🐷Origin: Spain, primarily Sierra Nevada mountain regions
🧂Flavor: Savory umami, clean salt, nutty cured notes, faint sweet fat
🍽️Best Uses: Charcuterie boards, tapas, sandwiches, finishing garnish
❄️Shelf Life: Opened slices: 3-5 days; vacuum-sealed: 2-3 weeks in fridge
⚠️Watch Out: High sodium - not suited for low-sodium diets or delicate sweet pairings

What Is Serrano Ham?

Jamón serrano - literally "mountain ham" - is a whole dry-cured ham made from white pork breeds such as Duroc, Landrace, and Large White. Spain produces it primarily in the Sierra Nevada and other highland regions where cool, dry mountain air has shaped the curing tradition for centuries.

The process is straightforward but slow. Whole legs are salted, rinsed, and then hung to cure and air-dry for anywhere from seven months to over two years depending on the grade.

Three commercial grades exist: Bodega (aged around seven months), Reserva (nine to twelve months), and Gran Reserva (twelve months and beyond). Each tier deepens the flavor and firms the texture.

Serrano is sometimes confused with jamón ibérico, which comes from a different breed - the black Iberian pig - and carries a distinct nutty richness from acorn feeding.

Serrano is the more affordable, widely available option, and when shopping you'll find it sold either as a whole bone-in leg, a boneless piece, or pre-sliced in vacuum packs.

Best Pick
Gran Reserva serrano - aged 12+ months - delivers the deepest flavor. For everyday use, Reserva hits a solid balance between price and taste.

What Does Serrano Ham Taste Like?

serrano ham - What Is Serrano Ham

Savory and clean - that's the short answer. Serrano opens with a pronounced umami hit, followed by a bright, direct salty finish that doesn't linger as heavily as, say, heavily brined deli meats.

Beneath the salt, there's a nutty cured note that intensifies with longer aging, and the fat carries a subtle sweetness that rounds the whole thing out. Slice it paper-thin, and that fat practically dissolves on the tongue.

Sensory SnapshotModerate Intensity
👅 Flavor
savory umamiclean saltnuttysweet pork fat
✋ Texture
silky thin-slicedslightly chewy edgesfat melts
👃 Aroma
dry-curedwoodymildly nutty

Compared to prosciutto, serrano is leaner with a firmer bite and a sharper salt profile.

Heat changes things: a brief warm brings out the fat's sweetness, while full crisping in a dry pan pushes the flavor toward concentrated, almost bacon-adjacent territory.

How to Use Serrano Ham

Serrano is built for restraint. Most of what it does best happens with minimal heat or none at all.

On a charcuterie board, drape thin slices alongside Manchego - if you're out of it, a look at manchego cheese stand-ins can save the spread - and a handful of Marcona almonds.

The contrast of fat, salt, and crunch is the whole point.

For tapas, wrap slices around melon or ripe figs.

The sweetness cuts the salt without smothering it.

Pairing serrano with a glass of fino sherry is traditional; if you're out of sherry, exploring replacements for sherry can keep the pairing logic intact.

Similarly, cantaloupe stands in well, but replacements for melon liqueur covers that angle if you're building a cocktail to match.

Golden Rule
Add serrano ham off the heat. Folding it into hot pasta or risotto at the last moment preserves its texture and prevents it from turning tough and overly salty.
How Serrano Ham Is Used
MethodBest ForTip
🥗 Raw SlicedCharcuterie boards, tapas, bocadillosSlice as thin as possible; bring to room temp before serving
🍳 Pan-CrispedSoup garnish, egg dishes, salad toppingDry pan, medium heat - 1-2 minutes per side until edges curl
✨ Finishing GarnishPizza, pasta, risottoAdd after cooking so the fat softens but ham stays tender
🍲 Stew FlavoringBean stews, vegetable braisesAdd near the end - early addition turns it stringy and very salty

Torn into a Spanish spinach salad, serrano adds a salty umami backbone that anchors bitter greens.

For a fuller picture of what works alongside it, the range of dishes alongside serrano ham is worth a look when you're planning a spread.

Try It In
🫑Roasted Red Pepper MuhammaraDrape thin slices on top for a salt contrast with the smoky dip→🥪Ham and Cheese Breakfast SlidersSwap in serrano for sharper salt and a cured depth→🥚Ham and Spinach Egg BakeFold in slices off the heat to keep texture intact→

How to Buy and Store Serrano Ham

At the counter, look for pale pink to deep rose meat with creamy, evenly distributed fat. Avoid anything with grey edges, a slimy surface, or slices so dry they've started to crack at the edges.

  • 🛒 Pre-sliced packs - Choose vacuum-sealed with visible marbling and a clear sell-by date; avoid packs with pooled liquid inside.
  • 🦴 Whole bone-in leg - Hang in a cool, dry space; wrap the cut face with its own fat cap or a breathable cloth between uses.
  • 🔪 Boneless piece - Wrap in parchment then plastic, refrigerate, and slice as needed rather than pre-slicing the whole piece.

Opened slices dry out quickly - use them within 3-5 days. For everything on wrapping, packaging, and extending life past that window, the full guide on keeping serrano ham fresh covers it in detail.

Watch Out
Never freeze pre-sliced serrano ham. Freezing ruptures the thin fat layers and leaves the slices dry and crumbly once thawed.

Where to Start With Serrano Ham

Don't overthink the first purchase. Grab a vacuum-sealed pack of Gran Reserva slices, set them out at room temperature for fifteen minutes, and serve with good bread, olive oil, and a wedge of Manchego.

That's the baseline.

Once you know the flavor, you'll recognize where it fits - finishing a risotto, crisping up for a fried egg, or folding into a bocadillo with tomato.

If prosciutto is your usual go-to and serrano feels like a stretch, the list of serrano ham swaps that work maps out the differences clearly so you can move between them with confidence.

Frequently Asked Questions

What is serrano ham made from?

White pork breeds - mainly Duroc, Landrace, and Large White. The whole hind leg is salted, rinsed, and air-dried for months. No smoking or cooking is involved; curing and airflow do all the work.

Is serrano ham the same as prosciutto?

No. Both are dry-cured hams, but serrano is leaner, firmer, and saltier. Prosciutto - particularly di Parma - is fattier and sweeter. The pork breeds, regional climates, and curing methods differ between Italy and Spain.

How long is serrano ham aged?

Bodega grade is aged around seven months; Reserva runs nine to twelve months; Gran Reserva goes twelve months or longer. Longer aging produces deeper, nuttier flavor and a drier, firmer texture.

How do you store serrano ham after opening?

Wrap slices in parchment then seal in plastic or an airtight container. Use within 3-5 days. For a cut whole leg, cover the exposed face with its fat cap or a clean breathable cloth - not plastic wrap directly on the meat.

What wine pairs with serrano ham?

Fino or manzanilla sherry is the classic match - the dry, saline notes mirror the ham without fighting the salt. A crisp Albariño or light Garnacha also works well if you prefer still wine.

Persian Shirazi Salad

April 2, 2026

Dicing cucumbers, tomatoes, and red onion into uniform cubes creates a crisp Persian salad with balanced texture in every bite. The dried mint and fresh lemon juice bind the vegetables without turning them soggy.

Persian Shirazi Salad served on a plate

Marinating for 30 minutes lets the raw onion mellow and the flavors blend. You skip the skillet entirely-just a knife, a bowl, and time in the fridge.

This is what we make for meal prep when the week ahead looks busy but we still want fresh vegetables on hand.

QUICK SUMMARY

Persian Shirazi Salad relies on uniform ¼-inch dice for consistent texture and 30 minutes of chilling to mellow the onion sharpness. Use firm cucumbers to prevent excess liquid from diluting the dressing.

⏱️Time Reality: 15 minutes active, plus 30 minutes chilling for best flavor
🔪Critical First Move: Dice all vegetables to the same size before mixing
⚠️Watch Out: Watery cucumbers turn the salad soggy-press diced cubes lightly in paper towel

Why This Recipe Works

Uniform dicing creates texture balance so each forkful delivers cucumber crunch, tomato juice, and onion bite together. For a version that comes together quickly, simple homemade salad uses similar prep but different vegetables.

Quick Reference
⏱️
Prep Time
15 min
🔥
Cook Time
0 min
⏰
Total Time
15 min
🍽️
Servings
4 servings
📊
Difficulty
Easy
🏷️
Category
Side
💡
Quick Tip
Chill 30 min for flavors to meld
🎯
Best For
Weeknight | Meal prep | Entertaining

Why the technique delivers:

  • Dried mint adds concentrated flavor without the moisture that fresh herbs release into the dressing
  • Lemon juice and olive oil coat vegetables evenly when you dice them small enough to hold the dressing
  • Chilling for 30 minutes softens the raw onion while keeping the cucumber and tomato crisp
  • Firm cucumbers prevent watery buildup that would turn the salad limp after an hour in the fridge
  • Sumac (optional) boosts tartness without adding more liquid to the mix
Quick Tip
Rinse diced red onion under cold water for 5 minutes to remove sharpness, then drain completely before mixing with other vegetables.

What You'll Need

Ingredients for Persian Shirazi Salad

Most produce aisles stock everything for this salad year-round, but firm cucumbers matter more than variety. A good salad can make or break the plate when you need something fresh-this quick soup dish uses a similar hands-off approach but with warming spices instead.

🥬
Vegetables
  • Cucumber (firm, no soft spots)
  • Tomato (ripe but not mushy)
  • Red onion
🧄
Herbs & Aromatics
  • Fresh parsley or mint
  • Dried mint
🥢
Dressing
  • Lemon juice (fresh)
  • Olive oil
  • Salt
  • Black pepper
  • Sumac (optional)

Ingredient Details

  • Cucumber
    Select firm cucumbers without soft spots-English or Persian varieties work best because they hold less water and stay crisp longer after dicing.
  • Red Onion
    Soak diced onion in cold water for 5 minutes to reduce sharpness, then drain well-this step prevents overpowering raw onion flavor from dominating the salad.
  • Lemon Juice
    Use fresh lemon juice instead of bottled for bright acidity-bottled juice tastes flat and won't balance the vegetables as well.
  • Dried Mint
    Dried mint delivers concentrated herbal flavor without adding moisture-crush it between your fingers before adding to release more aroma.
  • Tomato
    Choose ripe but firm tomatoes-overripe ones release too much juice and dilute the dressing within the first hour.
  • Olive Oil
    Extra virgin olive oil adds fruity notes that balance the lemon's tartness-measure it carefully to avoid greasy coating on vegetables.
  • Sumac (Optional)
    Sumac adds tangy depth without extra liquid-skip it if you can't find it, but it's worth hunting down at Middle Eastern markets.

Ingredient Swaps

Red onion provides the traditional sharpness, but green onion or shallots work when you want milder bite. Most people skip beef, but it balances the meal when you need something hearty-homemade beef recipe keeps a batch ready for nights like this.

Four swaps that work:

  • Green onion or shallots instead of red onion - Milder flavor with less sharpness; skip the cold water soak since they're already mellow
  • Lime juice instead of lemon juice - Slightly different citrus note but similar acidity; use the same amount as lemon
  • Fresh mint instead of dried mint - Fresher aroma but less concentrated flavor; use triple the amount and add right before serving
  • Zucchini (peeled) instead of cucumber - Less juicy with milder taste; peel completely and press diced pieces in paper towel to remove moisture

Fresh Mint vs Dried Mint

Works for: Fresh mint delivers bright herbal notes and looks vibrant mixed into the salad just before serving.

Skip if: You're making this ahead-fresh mint wilts and darkens after an hour in the acidic dressing.

Lemon Juice vs Lime Juice

Works for: Lime juice brings similar tartness with a slightly more floral note that complements the dried mint.

Skip if: You prefer the classic bright citrus flavor-lemon is more traditional in Persian Shirazi Salad.

Instructions

Dicing takes most of the 15 minutes, but the chilling time does the real work by mellowing the onion. The chicken works best when it hits the table at the same time as the main, so we keep a batch ready for nights like this-this juicy chicken uses similar timing.

  1. Dice the vegetables: Cut cucumber, tomato, and red onion into uniform ¼-inch cubes. Soak the diced onion in cold water for 5 minutes, then drain completely.
  2. Mix the dressing: Whisk together fresh lemon juice, olive oil, dried mint, salt, and black pepper in a large mixing bowl until the oil and lemon emulsify slightly.
  3. Combine everything: Add the diced cucumber, tomato, and drained onion to the dressing. Toss gently with a large spoon until all vegetables are coated evenly.
  4. Chill to meld flavors: Cover the bowl and refrigerate for 30 minutes. The resting time softens the raw onion sharpness and lets the dried mint rehydrate into the dressing.
  5. Finish and serve: Add fresh parsley or mint right before serving if using. Sprinkle with sumac if desired. Taste and adjust salt or lemon juice if needed.
Golden Rule
Press diced cucumber lightly in paper towel before mixing if it feels very wet-this prevents excess liquid from pooling at the bottom of the bowl after chilling.

What to Serve With It

Shirazi Salad fills the fresh vegetable gap on plates that need crisp texture against rich mains. For more ideas on building balanced plates around salads, check out meatless meal ideas that work with similar fresh components.

Side Dish Prep Why It Works How to Serve
Grilled chicken kebabs Easy Light protein complements the fresh, acidic salad without overwhelming the crisp vegetables Place kebabs on plate, spoon salad alongside, serve warm pita on the side
Basmati rice Easy Neutral base absorbs the tangy dressing and balances the salad's bright acidity Mound rice on plate, top with salad, let juices soak into grains
Warm pita bread Easy Soft bread scoops salad and adds filling texture against the vegetables Cut pita into wedges, serve warm in basket next to salad bowl
Roasted eggplant Medium Soft, smoky eggplant contrasts with the crisp, juicy vegetables in the salad Arrange roasted eggplant slices on plate, spoon salad over top
Lamb koobideh kebabs Medium Traditional pairing enhances Persian theme with rich, spiced meat against fresh vegetables Serve kebabs hot off grill, pile salad on the side to cool each bite

Three ways to serve it:

  • Weeknight plate: Pair with grilled chicken kebabs and warm pita bread for a balanced dinner that takes 30 minutes total
  • Meal prep bowl: Scoop over basmati rice in containers, pack dressing separately, mix before eating to keep vegetables crisp
  • Entertaining spread: Serve alongside lamb koobideh kebabs, hummus, and stuffed grape leaves for a full Persian table
Best Pick
For picnics or potlucks, transport the salad in a sealed container with the dressing mixed in-the vegetables stay crisp for 3-4 hours without refrigeration.

Store and Reheat

Shirazi Salad keeps best in the fridge for 3-4 days when stored properly in an airtight container. Pork adds the contrast this plate needs, but timing matters when prepping ahead-smoky pork recipe uses similar cold storage strategy.

Method Time Best For
🍳 Room Temperature 10 min Letting chilled salad warm slightly before serving if it's too cold from fridge
❄️ Keep Cold N/A Serving straight from fridge for maximum crispness and freshness

For best results when storing:

  • Use airtight containers to prevent the salad from absorbing fridge odors and keep vegetables from drying out
  • Store for 3-4 days maximum since cucumber and tomato start releasing water after that, making the salad watery
  • Drain excess liquid before serving if the salad sits more than 2 days-tip the container and pour off pooled dressing
  • Add fresh herbs right before eating if you stored the salad with herbs mixed in-they'll be wilted but still flavorful
  • Don't freeze Shirazi Salad since the vegetables turn mushy and lose their crisp texture when thawed

Frequently Asked Questions

Can I make Shirazi Salad ahead and how long does it keep?

Make it up to 4 hours ahead and refrigerate until serving-the vegetables stay crisp and the flavors continue melding. After 4 hours, cucumber and tomato start releasing water that dilutes the dressing.

What can I substitute for red onion in Shirazi Salad?

Use green onion or shallots for milder flavor without the sharp bite of red onion. Skip the cold water soak since these alternatives are already mellow enough to eat raw.

How do I know when Shirazi Salad is ready to serve?

After 30 minutes of chilling, taste a bite-the raw onion sharpness should be mellowed and the vegetables should be well-coated with dressing. If the onion still tastes harsh, chill for another 15 minutes.

Why does my Shirazi Salad become watery and how to fix it?

Watery cucumbers or overripe tomatoes release excess liquid into the salad. Press diced cucumber in paper towel before mixing, and choose firm tomatoes-drain any pooled liquid from the bowl before serving.

What dishes pair well with Shirazi Salad for a meal?

Serve with grilled kebabs, basmati rice, or warm pita bread for a complete meal. The salad's crisp texture and bright acidity balance rich, spiced mains like lamb koobideh or roasted eggplant.

Persian Shirazi Salad served on a plate

Persian Shirazi Salad

No ratings yet
Persian Shirazi Salad features crisp cucumbers, ripe tomatoes, and red onion diced uniformly and coated in a lemon-olive oil dressing with dried mint. Chilling for 30 minutes mellows the onion's sharpness while keeping the vegetables fresh and crunchy.
Print Recipe Pin Recipe
Prep Time 15 minutes mins
Cook Time 1 minute min
Total Time 16 minutes mins
Servings: 4 servings
Course: Side Dish
Cuisine: Persian
Ingredients Method Notes

Ingredients
  

  • 1 medium cucumber firm, no soft spots, diced ¼-inch
  • 2 medium tomato ripe but firm, diced ¼-inch
  • ½ medium red onion diced ¼-inch, soaked in cold water 5 minutes then drained
  • 2 tablespoons lemon juice fresh
  • 2 tablespoons olive oil extra virgin
  • 1 teaspoon dried mint crushed between fingers
  • ½ teaspoon salt
  • ¼ teaspoon black pepper freshly ground
  • ¼ teaspoon sumac optional, for garnish
  • 2 tablespoons fresh parsley or mint chopped, add before serving if using

Method
 

  1. Dice cucumber, tomato, and red onion into uniform ¼-inch cubes. Soak the diced onion in cold water for 5 minutes to mellow sharpness, then drain completely.
    1 medium cucumber, 2 medium tomato, ½ medium red onion
  2. Whisk fresh lemon juice, olive oil, dried mint, salt, and black pepper together in a large mixing bowl until the oil and lemon juice emulsify slightly.
    2 tablespoons lemon juice, 2 tablespoons olive oil, 1 teaspoon dried mint, ½ teaspoon salt, ¼ teaspoon black pepper
  3. Add the diced cucumber, tomato, and drained onion to the dressing. Toss gently with a large spoon until all vegetables are coated evenly.
    1 medium cucumber, 2 medium tomato, ½ medium red onion, 2 tablespoons lemon juice, 2 tablespoons olive oil, 1 teaspoon dried mint, ½ teaspoon salt, ¼ teaspoon black pepper
  4. Cover the bowl and refrigerate for 30 minutes to allow flavors to meld and onion sharpness to soften.
  5. Before serving, add fresh parsley or mint if using, sprinkle sumac if desired, and taste to adjust salt or lemon juice.
    ¼ teaspoon sumac, 2 tablespoons fresh parsley or mint, ½ teaspoon salt, 2 tablespoons lemon juice

Notes

  • Press diced cucumber lightly in paper towel before mixing to prevent watery salad.
  • Use firm cucumbers and ripe but not overripe tomatoes to avoid excess liquid.
  • Chilling for at least 30 minutes mellows the onion and blends the flavors well.

Tried this recipe?

Let us know how it was!

What Is Semolina Flour? [Taste, Uses & More]

April 2, 2026

Semolina flour has a smell that tells you something before you've cooked a single thing - a warm, wheaty note that sharpens the moment it hits a hot pan.

What Is Semolina Flour

It's coarser than almost any flour you'll handle, pale yellow, and slightly gritty between your fingers.

Durum wheat, the grain behind it, is built differently from common wheat varieties, and that difference shows up in every dish where semolina appears.

Like wheat's shelf life, semolina's longevity depends on how well you protect it from heat and moisture - but its flavor at its best is worth the effort.

QUICK SUMMARY

Semolina flour is a coarse, pale-yellow durum wheat flour with a mild nutty, sweet-cereal flavor. It builds firm pasta, adds crunch to baked bases, and sets into creamy puddings. High in protein, it's a key flour across Italian, North African, and Middle Eastern kitchens.

🌾Type: Coarsely milled durum wheat endosperm, higher protein than all-purpose
👅Flavor: Mildly nutty, sweet-cereal, toasty when browned in a pan
🍝Best Uses: Pasta dough, pizza dusting, semolina cake, couscous, puddings
📦Shelf Life: 6-12 months pantry; up to 18 months refrigerated or frozen
⚠️Note: Contains gluten - not suitable for celiac or gluten-sensitive diets

What Is semolina flour?

Semolina flour is the coarsely milled endosperm of durum wheat, a hard, amber-colored grain grown widely across the Mediterranean and North Africa.

Unlike softer wheat flours, durum is exceptionally high in protein and produces granules rather than a fine powder when milled at coarse settings.

You'll find it sold under several names: durum semolina, semolina wheat, and semoule in French markets.

In the United States, some packages are labeled "farina" - which can cause confusion, since farina typically refers to a finer-milled cereal made from softer wheat, not durum.

Two main forms exist in most markets:

  • 🌾 Coarse semolina - the standard grade; gritty, pale yellow, used for pasta dough, couscous, and dusting
  • 🌾 Fine semolina (semolina flour) - finer ground, closer to bread flour in feel, better suited to cakes and puddings

Durum semolina has a naturally higher gluten-forming protein content than all-purpose flour, which is why pasta made with it holds its shape and bite.

If you're ever working without it, knowing your replacements for semolina flour helps you choose the closest structural match for each dish.

What Does semolina flour Taste Like?

semolina flour - What Is Semolina Flour

Raw semolina flour tastes mildly sweet with a clean wheat character - slightly grainy on the tongue, almost like coarse cornmeal but with a lighter, less earthy note. There's a subtle corn-like sweetness, though it's distinctly wheaty rather than maize-forward.

Heat changes it. Toasting semolina in a dry pan before adding it to halva or puddings draws out a warm, almost nutty aroma that deepens the flavor considerably.

Sensory SnapshotModerate Intensity
👅 Flavor
mildly nuttysweet-cerealtoastycorn-like note
✋ Texture
coarse and grainy rawfirm and chewy cookedcrisps when pan-toasted
👃 Aroma
warm wheattoasty when browned

Once cooked into pasta or boiled as a porridge, the graininess softens into a firm, slightly chewy texture with residual sweetness. Compared to all-purpose flour, semolina has far more character - it contributes flavor, not just structure.

How to Use semolina flour

Pasta dough is semolina's most recognized role. A dough made with durum semolina and water produces the firm, springy bite of dried Italian pasta - distinct from softer egg-pasta made with 00 flour. The high protein content resists overcooking and holds sauce without going mushy.

Golden Rule
For fresh pasta with clean bite, use 100% coarse semolina with water. For silkier, more tender pasta sheets, blend semolina with 00 flour at a 1:1 ratio.

Beyond pasta, semolina's coarse grains make it a practical dusting flour - scatter it under pizza dough or bread before baking and it acts like ball bearings, preventing sticking and adding a slightly crunchy bottom.

Semolina plays a similar role in pizza in grain dishes, where that textured crust base is part of the appeal.

Cooked long and slow with milk or water, fine semolina becomes a porridge with a naturally creamy set - closer to a smooth polenta than a gruel.

If you're curious how semolina fits alongside corn-based options, the guide to alternatives to polenta covers the comparison in detail.

How Semolina Flour Is Used
MethodBest ForTip
🥗 DustingPizza bases, bread loaves, pasta boardsUse coarse semolina only - fine semolina absorbs too quickly
🍳 BoilingPorridge, gnocchi alla romana, puddingsWhisk constantly at first to prevent lumps forming
🥖 BakingSemolina cake, rustic hearth breadsBlend with all-purpose or bread flour for lighter crumb
🍳 Coating/SearingBreading fish, crusting vegetablesIts coarse grind holds fat and crisps faster than fine flour
🥘 ToastingHalva, spiced puddings, warm grain bowlsToast in a dry pan over medium heat until golden and fragrant

For sweets, semolina is central to a halva middle eastern sweet recipe - toasted in butter or ghee until golden, then pulled off heat before adding syrup.

It pairs naturally with warm spices, butter or ghee, and sugar-syrup bases across Middle Eastern, North African, and Indian kitchens. Semolina also suits eggs (for pasta), olive oil, pecorino, ricotta, and roasted vegetables.

Try It In
🥞Besan Flour PancakesSee how a high-protein flour behaves in a simple batter format→

How to Buy and Store semolina flour

At the store, look for packages labeled "semolina" or "durum semolina" with pale-yellow, coarse granules.

Avoid anything gray, powdery fine, or labeled simply "farina" without a durum wheat specification - that's likely a different product with softer wheat and less protein.

Watch Out
Fine-milled "semolina flour" and coarse semolina are not interchangeable in pasta dough. Check the grind on the label before buying - the difference in texture and hydration is significant.

Check the best-by or production date. Fresh semolina has a noticeably brighter yellow color and warmer aroma than older stock.

For storage at home, a sealed airtight container in a cool, dark pantry covers most cooks for up to a year. Detailed guidance on how long semolina flour keeps covers fridge and freezer timelines if you buy in bulk.

Semolina contains natural wheat oils that go rancid over time, so refrigerating or freezing extends life to 12-18 months without flavor loss.

Anyone managing multiple grain flours should also read up on about is rye bread gluten free to understand how gluten-containing grains differ in handling needs.

Where Semolina Flour Earns Its Place

Semolina isn't a flour you reach for on instinct - it's one you choose deliberately. Start with dusting your next pizza or bread loaf if you're new to it: minimal commitment, immediate payoff in texture.

From there, pasta dough is the logical next step.

Coarse semolina with water, kneaded firm, rested, and rolled - it's the structure behind every good dried pasta shape.

If you want to compare it directly with softer flours before committing, a look at cooking all purpose flour perfectly shows exactly where each flour excels.

Semolina's place is wherever structure, bite, and a clean wheat flavor matter most.

Frequently Asked Questions

Is semolina flour the same as all-purpose flour?

No. Semolina comes from durum wheat and mills to a coarser, higher-protein grain than all-purpose flour. The two behave very differently in doughs - semolina builds firmer, chewier structure, while all-purpose produces softer, more tender results.

Can you make pasta with semolina only?

Yes - coarse semolina and water is the traditional formula for dried pasta shapes like orecchiette and busiate. The dough is stiffer and less elastic than egg pasta, so it needs longer kneading and a rest period before rolling.

How does semolina taste compared to cornmeal?

Both are coarse-ground with a mild sweetness, but semolina tastes cleaner and more neutral - distinctly wheat rather than corn. Cornmeal carries a more pronounced earthy, vegetal sweetness; semolina's flavor is subtler and nuttier when toasted.

Is semolina high in protein?

Yes, relative to most wheat flours. Durum semolina typically contains around 12-13% protein by weight, compared to 10-11% in standard all-purpose flour. That extra protein is what gives semolina pasta its firm bite and resistance to overcooking.

Can semolina be used in cakes?

Fine semolina works well in dense, syrup-soaked cakes like basbousa or semolina orange cake, where its grainy texture is part of the structure. For light sponge cakes, it's too heavy on its own - blend with all-purpose flour at no more than 50%.

« Previous Page
Next Page »

Primary Sidebar

ForkliftKitchen recipe developer

Welcome!

Recipe Developer · 12+ Yr Kitchen Veteran

I'm the recipe developer behind this site, focused on practical, well-tested dishes and smart ingredient swaps. Every recipe is written to be clear, reliable, and easy to make at home.

650+ Recipes
12+ Yrs Exp.
3x Tested
Our Story →

As Featured In

Allrecipes

TASTE OF HOME

Food52

HUFFPOST

Yahoo! Life

Our Editorial Standards

  • ✓ Every recipe tested at least 3 times before publishing
  • ✓ Substitutes verified by real kitchen trials, not guesswork
  • ✓ Reviewed for accuracy by our editorial team
  • ✓ Updated regularly with seasonal info and reader feedback

Most Popular

  • Creamy Lemon Shrimp Linguine
    Creamy Lemon Shrimp Linguine
  • Creamy Garlic Mushroom Chicken
    Creamy Garlic Mushroom Chicken
  • Sesame Ginger Chicken Noodle Bowls
    Sesame Ginger Chicken Noodle Bowls
  • Baked Lemon Herb Fish Fillets
    Baked Lemon Herb Fish Fillets
  • Veggie Loaded Fried Rice
    Veggie Loaded Fried Rice
  • Spicy Garlic Shrimp Stir Fry
    Spicy Garlic Shrimp Stir Fry

Join 8,000+ Home Cooks

Weekly Kitchen Tips

Easy recipes, smart substitutes, and real cooking shortcuts — every Thursday.

Subscribe Free →


Side Dishes

  • What to Serve With Asian Salmon? 15 Best Side Dishes
    What to Serve With Asian Salmon? 15 Best Side Dishes
  • Side Dishes for Strawberry Spinach Salad
    15 Best Side Dishes for Strawberry Spinach Salad
  • Sides for Grilled Cauliflower Steaks to Complete the Meal
    15 Sides for Grilled Cauliflower Steaks to Complete the Meal
  • 15 Sides To Serve With Calabacitas
    15 Best Sides for Calabacitas – Mexican-Inspired Favorites


Substitutes

  • 7 Best Substitutes for Hot Sauce in Marinades & Stir-Fries
    7 Best Substitutes for Hot Sauce in Marinades & Stir-Fries
  • 9 Best Substitutes for Butter in Baking and Cooking
  • 7 Best Substitutes for Tagliatelle for Italian Pasta Dishes
    7 Best Substitutes for Tagliatelle for Italian Pasta Dishes
  • 7 Best Substitutes for Udon Noodles in Asian Stir-Fries
    7 Best Substitutes for Udon Noodles in Asian Stir-Fries


Browse by Topic

  • Side Dishes320
  • Substitutes785
  • Dinner163
  • Air Fryer77
  • Taste Profiles484
  • Food Storage123


Reader Reviews

★★★★★

"Finally a food blog that tells you exactly why a substitute works instead of just listing options."

— Sarah M., via email

★★★★★

"The side dish recommendations are so specific — saved my dinner party twice this month."

— James R., Pinterest comment

★★★★★

"I trust this site more than most because they actually test everything. You can tell."

— Priya K., blog comment

Footer

↑ Back to Top

Forklift Kitchen

We do the heavy lifting so you can enjoy the cooking. Tested recipes, smart substitutes, and perfect pairings—built for real home cooks.

Content

  • Recipes
  • Substitutes
  • What to Serve With
  • Blog

Company

  • About Us
  • Contact
  • Subscribe

Legal

  • Privacy Policy
  • Terms of Service

As an Amazon Associate I earn from qualifying purchases.

© 2026 Forklift Kitchen.

Rate This Recipe

Your vote:


A rating is required
A name is required
An email is required