• Skip to primary navigation
  • Skip to main content
  • Skip to primary sidebar
  • Recipe Index
    • Air Fryer
  • Side Dishes
  • Substitutes
  • About
  • Contact
  • Subscribe

ForkLiftKitchen

menu icon
go to homepage
  • Recipe Index
    • Air Fryer
  • Side Dishes
  • Substitutes
  • About
  • Contact
  • Subscribe
subscribe
search icon
Homepage link
  • Recipe Index
    • Air Fryer
  • Side Dishes
  • Substitutes
  • About
  • Contact
  • Subscribe
×

Blog

What Is Rutabaga? [Taste, Uses & More]

April 2, 2026

Rutabaga earns its place in the pot by doing something few root vegetables manage: it adds sweetness and body simultaneously, without the sharpness of a turnip or the starchiness of a plain potato. It thickens stews, holds its shape under high roasting heat, and collapses into a creamy mash when you want it to - making it one of the more reliable workhorses in cold-weather cooking.

What Is Rutabaga

If you're already comfortable with kohlrabi or similar brassica roots, rutabaga will feel like familiar territory.

QUICK SUMMARY

Rutabaga is a large brassica root vegetable with dense yellow flesh and a mild, sweet-earthy flavor. It roasts well, mashes smoothly, and adds body to stews. Smaller bulbs are sweeter. Whole roots store for weeks in a cold, humid spot.

🌱Origin: Northern Europe and Scandinavia, bred from turnip and cabbage crosses
👅Flavor: Mildly sweet, earthy, and slightly peppery with a nutty finish
🍳Best Uses: Roasting, mashing, stews, soups, and raw slaws
🛒Buy It: Heavy for size, firm skin, no soft spots; smaller bulbs are sweeter
📦Storage: Crisper drawer or root cellar, whole; lasts 3-12 weeks
🥗Pairs With: Pork, bacon, potato, apple, thyme, mustard, butter, carrot

What Is Rutabaga?

Rutabaga (Brassica napobrassica) is a cool-season root vegetable believed to be a natural cross between a turnip and a wild cabbage, originating in Scandinavia or Northern Europe sometime in the 17th century.

Outside North America, it's almost universally called swede - short for Swedish turnip - while in Scotland it goes by "neep," as in the traditional Burns Night side dish.

The bulb grows large, often reaching the size of a grapefruit or bigger, with distinctively two-toned skin: purplish-brown on the upper half and creamy yellow below the soil line. Cut it open and you'll find dense, bright yellow flesh that's firmer than a turnip and noticeably heavier in the hand.

That density is one of its defining traits - it doesn't cook down into mush the way some roots do.

A few things worth knowing about varieties and size:

  • Small to medium bulbs (roughly tennis-ball to softball size) - sweeter, less woody, better for mashing and roasting
  • Large bulbs - more fibrous, better suited to long braises or soups where texture softens over time
  • Waxed rutabagas - common in supermarkets; the wax coating extends shelf life and should be peeled away before cooking

What Does Rutabaga Taste Like?
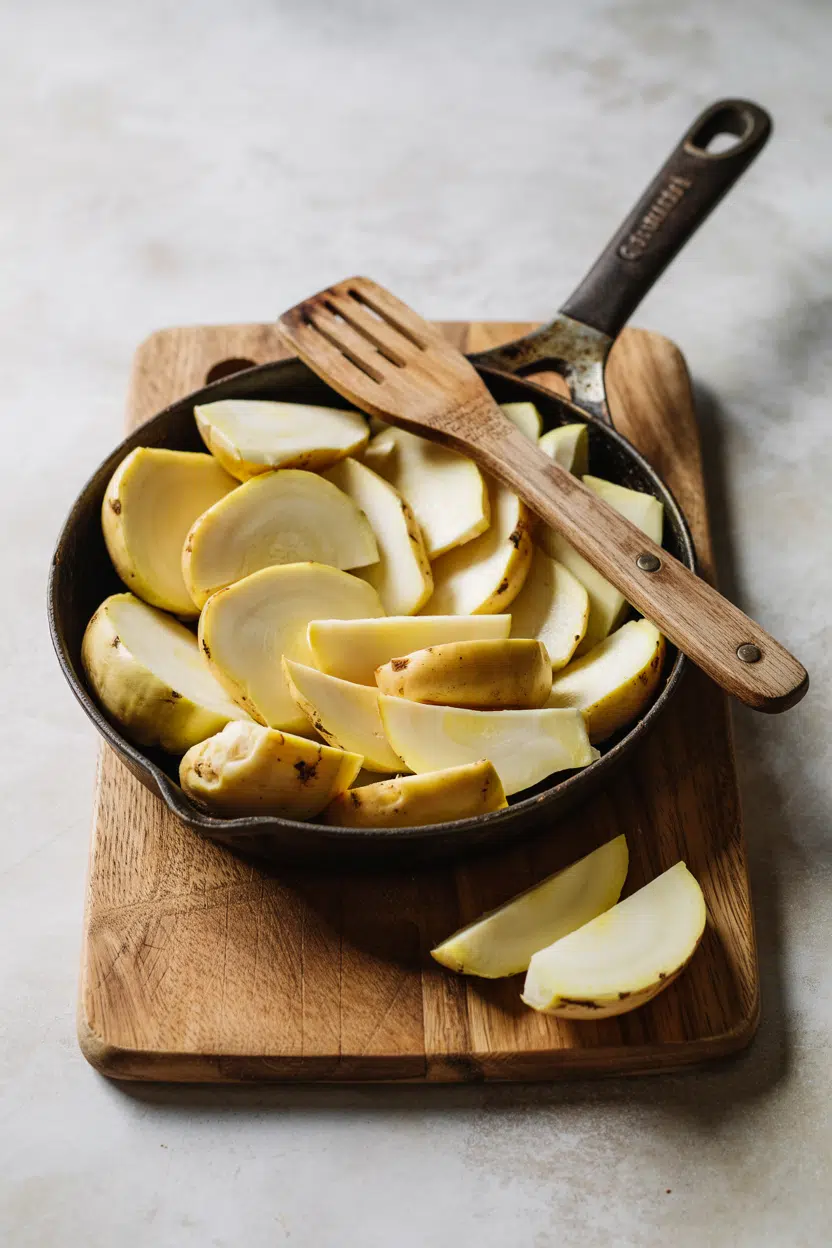
rutabaga - What Is Rutabaga
Sensory SnapshotModerate Intensity
👅 Flavor
sweetearthypepperynutty
✋ Texture
very firm rawcreamy when mashed
👃 Aroma
rootymild cabbage

Raw rutabaga tastes like a turnip that's been dialed back - less sharp, more sweet, with a faint peppery bite at the finish. The earthy sweetness is the dominant note, which is why it pairs so naturally with butter, thyme, and pork.

Heat changes it noticeably. Roasting concentrates the sugars and brings out a nutty, caramelized depth that raw rutabaga doesn't hint at.

Boiling and mashing softens everything - the pepper fades, the sweetness stays, and the result leans closer to a mild, creamy root puree than anything sharp or brassica-forward.

Golden Rule
If rutabaga tastes bitter to you, it's likely oversize or old. Stick to smaller, fresher bulbs and the sharpness stays well in check.

The closest kohlrabi swaps in flavor profile include rutabaga itself - that shared nuttiness when cooked is not a coincidence, given their common brassica lineage.

How to Use Rutabaga

Rutabaga handles high heat without falling apart, which makes roasting the most forgiving starting point.

Cut it into 1-inch cubes, toss with oil and thyme, and roast at 425°F until the edges caramelize - a method that works as well for rutabaga as it does for honey-roasted carrots with thyme.

How Rutabaga Is Used
MethodBest ForTip
🥗 RawSlaws, salads, cruditésShred or julienne thin; pairs well with mustard vinaigrette
🔥 RoastedSide dishes, sheet pan mealsCut evenly; high heat (400-425°F) for good caramelization
🥣 Boiled/MashedMash blends, purees, soupsMix with butter and cream; combine with potato for lighter texture
🍲 BraisedStews, braises with lamb or beefAdd in the last 45 minutes so it holds shape
🫙 PickledScandinavian-style condimentsSlice thin; a light brine with vinegar and dill works well

In British and Scottish cooking, mashed rutabaga - sometimes blended with potato in a dish called "clapshot" - appears alongside haggis or roasted meats. Scandinavian kitchens use it in long-simmered root vegetable stews and pickled as a table condiment.

New England American cooking folds it into holiday mashes, often as a partial swap for potato flakes or fresh potato.

It holds its own in soups too. Pureed rutabaga creates a thick, slightly sweet base that carries cream, stock, and bacon well.

For gratin, layer thin slices with potato and aged cheddar - the rutabaga adds density and a mild earthiness the potato alone won't deliver.

Shortcut
Skip peeling struggles by microwaving the whole rutabaga for 2-3 minutes first. The skin softens enough to cut and peel cleanly without a fight.

Avoid pairing rutabaga with delicate white fish or very acidic dressings - both overwhelm its subtler sweet notes or get buried under its earthiness.

Try It In
🌶️Air Fryer Buffalo Potato WedgesSame wedge method works great swapping in rutabaga→🧄Air Fryer Garlic Parmesan Potato WedgesTry half rutabaga, half potato for a nuttier result→🍖Air Fryer BBQ Potato WedgesBBQ seasoning complements rutabaga's earthy sweetness well→

How to Buy and Store Rutabaga

Pick rutabagas that feel heavy and dense for their size, with smooth, firm skin and no soft spots, cracks, or shriveled stem ends. That two-tone coloring - purple on top, pale yellow below - should look clean and even.

Smaller to medium bulbs are the better buy; very large ones tend toward woodiness.

Watch Out
Most supermarket rutabagas are coated in food-grade wax to extend shelf life. Always peel deeply - past the wax and the thin fibrous layer beneath - before cooking.

Store whole, unwashed rutabagas in the crisper drawer or a root cellar at 32-40°F with moderate humidity. A perforated bag helps limit moisture loss without trapping condensation.

For full details on how long rutabagas last under different storage conditions, see our rutabaga storage life guide - whole roots can keep anywhere from 3 weeks in a standard fridge to 12 weeks in a proper root cellar. Once cut, wrap tightly and use within a few days.

Start Here If You're New to Rutabaga

Roast it first. High heat brings out the sweetness, neutralizes any bitterness, and gives you an immediate sense of what rutabaga does well - without committing to a whole stew or mash project.

If roasting wins you over, the next step is a simple mashed rutabaga with butter and a splash of cream. From there, try it alongside turnip in a winter stew, where the two roots balance each other's sharpness and sweetness.

Cooks looking for a direct swap in existing recipes should also check rutabaga replacements and turnip alternatives for side-by-side comparisons.

Frequently Asked Questions

Is rutabaga the same as a turnip?

No. Rutabaga is larger, denser, and sweeter than a turnip, with yellow flesh versus a turnip's white interior. They're related brassicas but distinct species - rutabaga is thought to be a hybrid of turnip and wild cabbage.

Can you eat rutabaga raw?

Yes. Raw rutabaga is firm and mildly peppery - it works well shredded into slaws or cut into sticks for dipping. The flavor is sharper raw than cooked, so thin cuts and a bold dressing help balance it.

How do you cook rutabaga so it isn't bitter?

Choose smaller, fresher bulbs - bitterness in rutabaga usually signals age or oversized, woody roots. Roasting at high heat or boiling in lightly salted water both reduce any bitterness effectively.

How long does rutabaga last in the fridge?

Whole rutabagas keep 3-4 weeks in the crisper drawer at standard fridge temperatures. A root cellar at 32-40°F can extend that to 12 weeks. Cut rutabaga should be used within 3-4 days.

Does rutabaga need to be peeled before cooking?

Always peel rutabaga - the skin is thick, fibrous, and often coated in food-grade wax in stores. Use a sturdy vegetable peeler or a knife and remove a generous layer, not just the outer surface.
What Is Stracciatella Cheese? [Taste, Uses & More]

April 2, 2026

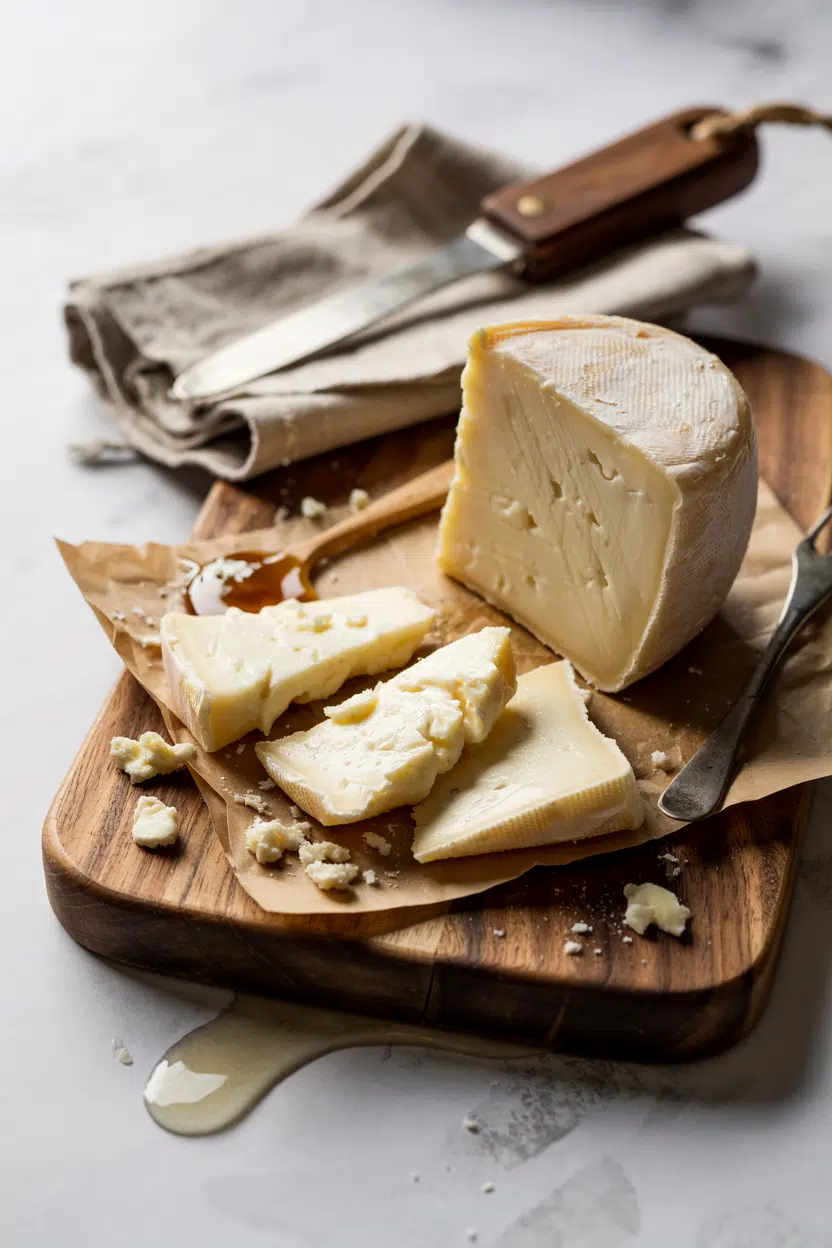
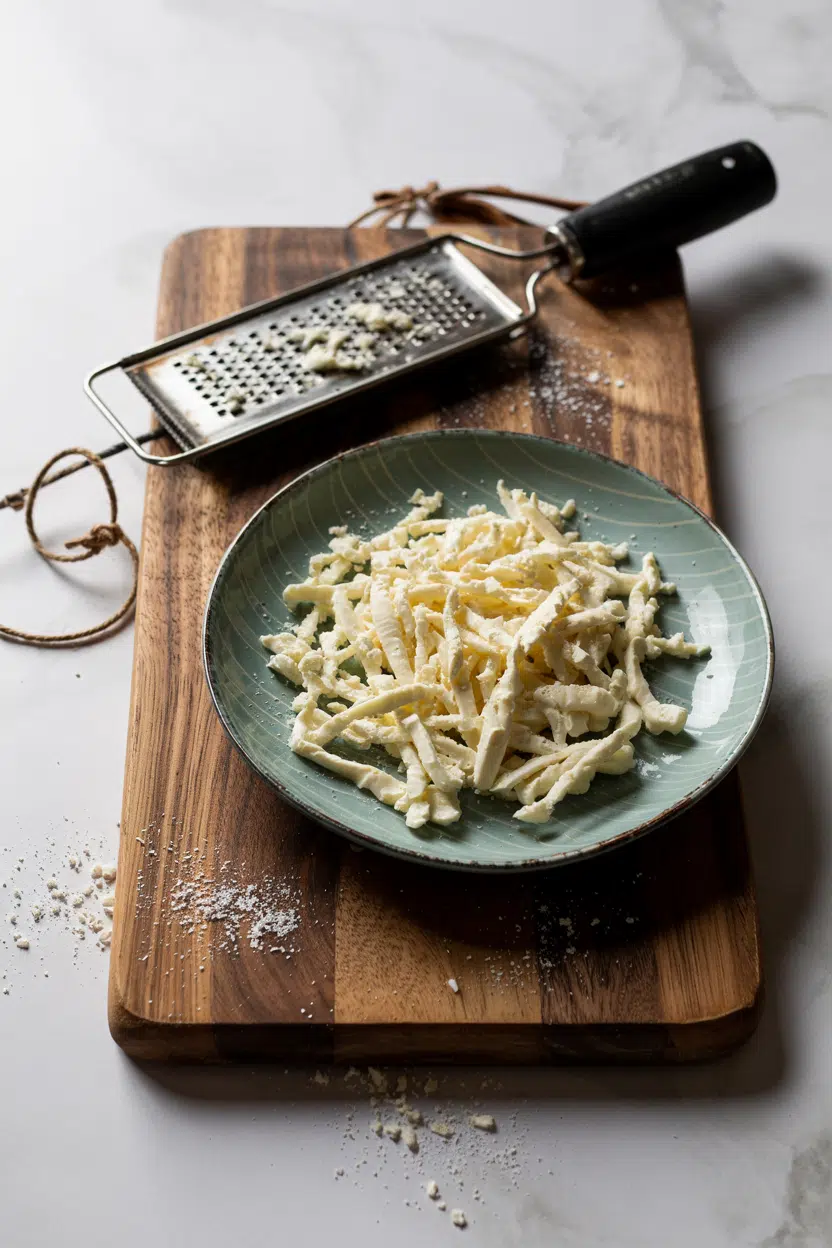
Spoon stracciatella over a just-pulled pizza and watch it collapse into creamy, irregular ribbons - that moment is exactly what this cheese is built for.

What Is Stracciatella Cheese

Unlike how long fresh mozzarella keeps or storing mozzarella correctly concerns fresh stretched curd at its simplest, stracciatella is a step further: shredded mozzarella curds stirred into cream, producing something richer, looser, and more perishable than either.

QUICK SUMMARY

Stracciatella is shredded mozzarella curds mixed with cream - the loose, silky filling inside burrata. Mild and milky with a buttery finish, it's best used raw as a finishing cheese, spooned over hot dishes off the heat. Use within 3-5 days.

🧀What It Is: Shredded mozzarella curds suspended in fresh cream
👅Flavor: Milky, slightly tangy, clean buttery sweetness
🍽️Best Use: Spooned over pizza, pasta, tomatoes, or grilled vegetables
❄️Shelf Life: 3-5 days from production; use quickly once opened
📍Origin: Puglia, southern Italy - also the filling inside burrata

What Is stracciatella cheese?

Stracciatella originates from Puglia, the heel of Italy's boot, where cheesemakers in the mid-20th century began pulling fresh mozzarella curd into thin shreds and mixing them with cream.

The name comes from stracciare - Italian for "to shred" or "to tear." Understanding how is fresh cheese made explained helps clarify why this process matters: the stretching and tearing opens the curd structure, allowing cream to coat every strand.

It belongs to the stretched-curd fresh dairy category, related to mozzarella but distinct in form and fat content. Most people encounter stracciatella as the interior of burrata - that soft outer shell holds stracciatella inside.

However, it's also sold on its own as loose, cream-soaked ribbons ready to spoon directly onto food.

You may see it labeled stracciatella di bufala, which indicates buffalo milk curds rather than cow's milk, yielding slightly richer fat and a fuller dairy note. Other common labels include stracciatella di burrata and stracciatella mozzarella.

Worth noting: this bears no relation to stracciatella gelato or stracciatella soup - the name simply means "shredded" in both cases.

  • 🐃 Stracciatella di bufala - made from buffalo-milk curds; richer, higher in fat and calcium
  • 🐄 Cow's-milk stracciatella - milder and more widely available; the standard commercial form
  • 🧀 Burrata filling - the same product contained inside a mozzarella shell; sold separately in tubs

What Does stracciatella cheese Taste Like?

stracciatella cheese - What Is Stracciatella Cheese

Stracciatella's flavor is quiet but distinctive. The dominant note is clean, fresh milk - not sharp, not aged, not funky. Behind it sits a gentle lactic tang, similar to fresh mozzarella but softened by the cream mixed through the curds.

That cream addition is what separates stracciatella from plain shredded mozzarella. It gives the finish a buttery roundness that coats the palate without heaviness.

Buffalo-milk versions push this further, adding a faintly grassy, more complex backdrop.

Sensory SnapshotMild Intensity
👅 Flavor
milkybutterylactic tangclean sweetness
✋ Texture
silkyloose ribbonssoft stringy curds
👃 Aroma
fresh dairyvery mild

Heat changes it fast. Add stracciatella to a warm dish and the cream loosens further, creating pools of rich dairy rather than a distinct curd texture.

That's useful - but it also means high, sustained heat strips out what makes it special. Keep applications gentle.

Watch Out
Don't add stracciatella mid-cook. High, sustained heat causes the curds to fully separate from the cream, leaving a grainy, broken texture instead of silky ribbons.

How to Use stracciatella cheese

Stracciatella works as a finishing ingredient, not a cooking one.

The goal in almost every application is to let residual heat - from a hot pizza, a bowl of just-drained pasta, a plate of roasted vegetables - do the work without direct flame.

A classic move: spoon it over a freshly baked pizza straight out of the oven, letting the heat below turn it molten at the edges while the center stays cool and creamy.

With pasta, toss short shapes like rigatoni or orecchiette while still hot, pulling the cheese through right before serving. It melts into the sauce rather than replacing it.

Beyond pasta and pizza, stracciatella plays well with a wide range of simple preparations.

Because keeping extra virgin olive oil fresh matters as much here as the cheese itself - stale oil will dull the whole plate - always finish with a good pour.

When you can't source stracciatella, stracciatella cheese stand-ins cover the gap reasonably well using fresh mozzarella and heavy cream.

How Stracciatella Is Used
MethodBest ForTip
🥗 Raw / FinishingPizza, tomato plates, crostini, grilled vegetablesSpoon over just before serving; do not stir in early
🍝 Off-Heat PastaShort shapes - rigatoni, orecchiette, penneAdd after draining; toss for 30 seconds maximum
🍲 Swirled Into SoupsTomato soup, warm broth-based soupsSwirl in at table, not on the stove - heat breaks it
🌽 Stirred Into PolentaCreamy polenta just off heatFold in at the very end for dairy richness without added cream

Pairings lean into contrast: ripe heirloom tomatoes and fresh basil balance its fat with acidity, while prosciutto or cured ham adds salt and savoriness. Grilled figs or peaches bring sweetness that works well against the lactic tang.

For drinks, acidic whites - Verdicchio, Sauvignon Blanc - cut through without overpowering.

Try It In
🧀Cheddar Cheese StrawsSee how fresh dairy cheeses work in baked formats→🍳Egg and Cheese Breakfast SandwichA template for adding creamy cheese to a morning build→🥗Blue Cheese Dressing (Homemade)Contrast in technique — aged vs. fresh dairy bases→

How to Buy and Store stracciatella cheese

Look for stracciatella sold in glossy, cream-soaked ribbons - loose and moist, not compressed or dry. Fresh product smells faintly milky, not sour or sharp. At a cheese counter, ask when it was made; anything beyond four or five days old is past its window.

Commercially packed tubs carry a longer date but still move fast once opened.

Golden Rule
Buy stracciatella the day you plan to use it. No other storage strategy compensates for purchasing it too early.

At home, keep it submerged in its cream or brine in an airtight container and refrigerate immediately.

Don't let it sit exposed - the curds dry out and the texture turns grainy.

Full guidance on keeping stracciatella cheese fresh covers edge cases like opened vs. sealed tubs in detail.

For comparison, how long burrata keeps follows a similar short window given the shared cream-curd structure.

  • Fridge temp - Store between 35-38°F (2-3°C); warmer fridge zones shorten the window fast
  • Shelf life - Best within 3-5 days from production; opened tubs: use same day or next
  • Freezing - Not recommended; the cream separates and curds turn watery on thaw

Start Here With Stracciatella

First time with stracciatella? Tomatoes, olive oil, and flaky salt. Slice ripe tomatoes, spoon the cheese over them, finish with a drizzle and a crack of pepper. Nothing else needed.

That one plate answers every question about what the cheese does and why it works.

Once you've nailed that, move to pizza or short pasta - both show you how residual heat changes its texture in useful ways. After that, the rest of the applications follow naturally.

Shortcut
No stracciatella at your store? Tear fresh mozzarella into small pieces and stir in a tablespoon of heavy cream. The texture won't be identical, but the flavor profile holds up well enough for most uses.

Frequently Asked Questions

What is the difference between stracciatella and burrata?

Stracciatella is the filling; burrata is the whole package. A burrata ball is a thin mozzarella shell wrapped around stracciatella. Buy stracciatella when you want just the creamy interior without the outer shell.

Can you cook with stracciatella?

Only off-heat. Stracciatella melts into loose, creamy ribbons when added to hot food after plating, but direct sustained heat breaks the curds and cream, leaving a grainy, separated texture.

How long does stracciatella last in the fridge?

Best within 3-5 days from production. Once opened, use it the same day or the next - exposed curds dry out quickly and the cream can sour fast.

Is stracciatella cheese the same as stracciatella gelato?

No - they share only the name. Stracciatella gelato is vanilla ice cream with chocolate shavings. The cheese is shredded mozzarella curds in cream. The Italian word "stracciare" (to shred or tear) links both names, nothing else.

What wine pairs with stracciatella?

Acidic whites work best - Verdicchio, Sauvignon Blanc, or Greco di Tufo cut through the cream without overpowering the mild dairy notes. Avoid heavy oaked whites or tannic reds, which clash with the delicate lactic flavor.

What Is Shaoxing Wine? [Taste, Uses & More]

April 2, 2026

Most home cooks reach for shaoxing wine without fully knowing what they're adding to the pot - and that gap matters.

What Is Shaoxing Wine

Unlike comparing aji mirin vs rice vinegar options, which splits into two distinct categories, shaoxing wine occupies a lane of its own: fermented, aged, and unmistakably savory.

It's not just a liquid seasoning - it's the backbone of some of the most recognized dishes in Chinese cooking, and using it well starts with understanding what it actually is.

QUICK SUMMARY

Shaoxing wine is an amber fermented rice wine from Zhejiang province, China. It delivers nutty, umami-rich depth to braises, stir-fries, and marinades. Moderately alcoholic, shelf-stable when sealed, and a direct upgrade over generic cooking wine.

🍶Category: Fermented rice cooking wine, aged in clay jars
👅Flavor: Nutty, caramel-sweet, savory umami, mild acidity
🔥Best For: Braises, stir-fries, marinades, dumpling fillings
📦Shelf Life: Unopened: years; opened: 6-12 months refrigerated
🛒Buy It: Look for "Shaoxing" or "Huang Jiu" on the label, amber color, intact seal

What Is Shaoxing Wine?

Shaoxing wine - also called huang jiu or Shaoxing yellow wine - is a fermented rice wine produced in Shaoxing, a city in Zhejiang province on China's eastern coast. It's been made there for over two thousand years, brewed from glutinous rice, wheat-based starter, and local water, then aged in sealed clay jars or wooden casks until it develops its characteristic amber color and layered aroma.

The name huang jiu simply means "yellow wine," and it distinguishes this style from clear grain spirits or lighter rice wines.

Alcohol content typically sits between 14% and 20%, placing it closer to fortified wine than beer.

While many brands sell it specifically as a cooking wine, higher-grade Shaoxing expressions are also consumed as a table wine in China, sipped warm from small ceramic cups.

Understanding the role rice vinegar plays in balancing a dish helps clarify why shaoxing wine handles a different job entirely - acidity versus depth. The two are not interchangeable.

  • 🍶 Shaoxing huang jiu - the broad category; includes cooking and drinking grades
  • Hua Diao - a premium sub-style, longer-aged, sold in decorated ceramic jars
  • Salted cooking wine - a supermarket version with added salt, not suitable for drinking

What Does Shaoxing Wine Taste Like?

shaoxing wine - What Is Shaoxing Wine

Shaoxing wine tastes closer to a dry sherry than anything else in the Western pantry - but the comparison only goes so far.

Sherry leans on oxidative, nutty notes from solera aging, while shaoxing wine brings a distinctly rice-derived umami alongside warm caramel and dried-fruit undertones.

The acidity is mild and background-level, never sharp. On the palate, the texture feels slightly viscous and silky, coating rather than cutting.

Aroma-wise, expect toasty fermented rice, faint soy-like warmth, and a caramel note that softens the savory edge.

Sensory SnapshotModerate Intensity
👅 Flavor
nuttycaramel-sweetsavory umamimild acidity
✋ Texture
silkyslightly viscous
👃 Aroma
toasty ricewarm carameldried fruit

In stir-fries, alcohol cooks off quickly under high wok heat, and what remains is a round, savory warmth that fills the background.

In long braises, the wine deepens over time, contributing to the complex glaze that makes hong shao rou (red-braised pork) so distinctive.

How to Use Shaoxing Wine

Shaoxing wine shows up across a wide range of Chinese cooking methods, and each one asks something slightly different from it.

The most important distinction: high heat drives off alcohol fast, while slow braises let the wine's sugars and amino acids integrate gradually into the sauce.

How Shaoxing Wine Is Used
MethodBest ForTip
🥩 MarinadePork, chicken, tofu - masks gaminess, tenderizesCombine with light soy sauce and ginger; 30 min minimum
🔥 Stir-FryDeglazing the wok to lift fond and add aromaAdd along the edge of the hot wok, not the center
🍲 BraiseSoy-braised beef, hong shao rou, clay pot dishesAdd early so alcohol fully cooks off during simmering
🥟 Filling/SauceDumpling and wonton fillings, mapo-style saucesA small splash rounds acidity without overpowering spice
🐟 Steamed FishFinishing splash just before or during steamingUse sparingly - heat volatilizes the alcohol, aroma stays

In Chinese regional cooking, shaoxing wine anchors Jiangsu and Shanghai-style braises and appears constantly in Cantonese home kitchens.

It pairs tightly with light soy sauce, fresh ginger, scallions, star anise, and shiitake mushrooms - the core aromatics of many classic preparations.

Golden Rule
Never substitute shaoxing wine with regular white wine or rice vinegar - the flavor profiles are structurally different. If you're out, dry sherry is the closest swap, and [alternatives to shaoxing wine](https://forkliftkitchen.com/shaoxing-wine-substitutes/) covers every realistic option.

Pork and chicken absorb its umami best, but firm tofu in a braise also benefits noticeably. Avoid pairing it with delicate fruit-forward preparations - the savory depth clashes rather than complements.

Try It In
🍷Fruity Red Wine SangriaSee how wine-based depth translates into a cold punch format→☕Warm Spiced Mulled WineCompare how spiced wine aromatics behave under gentle heat→🍐Red Wine Poached PearsA slow simmer that shows wine's reduction behavior→

How to Buy and Store Shaoxing Wine

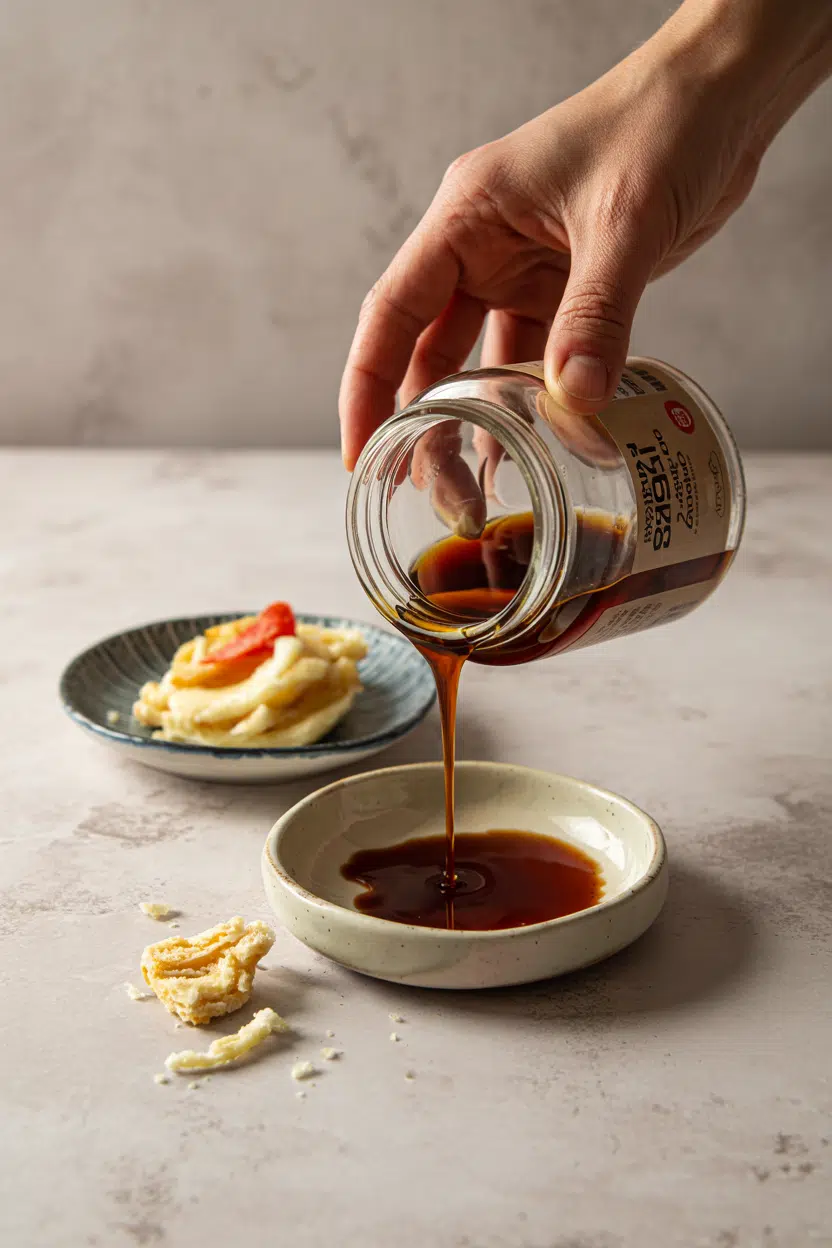
Look for bottles labeled "Shaoxing" or "Huang Jiu" with a clearly stated Zhejiang origin.

The color should be amber and clear - cloudy sediment in an unlabeled bottle is a quality warning, unless it's explicitly sold as an aged unfiltered variety.

If a bottle is labeled simply "Chinese cooking wine" without a regional name, it's likely a lower-grade product with added salt and fewer aromatic compounds.

Watch Out
Salted cooking wine versions have sodium added - they can throw off a recipe's seasoning if you're also using soy sauce. Check the ingredient list before buying.

Storage is straightforward.

Keep an unopened bottle in a cool, dark cupboard - it holds well for years.

Once opened, cap it tightly and refrigerate.

For specifics on how long shaoxing wine keeps under different conditions, the guide on how long shaoxing wine keeps covers refrigerated versus pantry timelines in detail.

General guidance: best aroma within 6-12 months of opening, still usable for cooking beyond that.

Where to Start With Shaoxing Wine

If you cook Chinese food more than twice a month, a bottle belongs in your kitchen permanently. Start with a marinade - combine it with light soy sauce, ginger, and a pinch of sugar, then use it on pork shoulder before braising.

That single application shows exactly what the wine contributes.

From there, try deglazing a hot wok mid-stir-fry. The aroma hits immediately.

If you can't find shaoxing wine locally, dry sherry is the most reliable swap - and sherry swaps that work lists fallback options when sherry itself isn't available. Skip generic "rice wine" labels that don't specify Shaoxing - they won't deliver the same depth.

Frequently Asked Questions

Is shaoxing wine the same as rice wine?

No. Shaoxing wine is a specific style of fermented rice wine from Zhejiang province, aged and amber-colored. Generic "rice wine" is a broader category that includes lighter, less complex products that won't replicate shaoxing wine's umami depth.

Can you substitute shaoxing wine with dry sherry?

Yes, dry sherry is the closest Western substitute - similar alcohol level and nutty profile. It lacks shaoxing wine's rice-derived umami, so the result is slightly less savory but still functional in braises and stir-fries.

Does shaoxing wine contain alcohol?

Yes. Alcohol content ranges from 14% to 20% ABV depending on grade and producer. Cooking burns off most of the alcohol, however a small residual amount may remain in quickly cooked dishes.

What does shaoxing wine taste like in stir-fries?

In a hot wok, alcohol volatilizes within seconds, leaving behind savory warmth and a faint caramel note. It rounds out the flavor of the dish without tasting "winey" - you notice its absence more than its presence.

Can shaoxing wine replace soy sauce in a recipe?

No - they serve different functions. Soy sauce provides salt and concentrated umami; shaoxing wine adds aromatic depth and mild sweetness. If you're short on soy, check [replacements for soy sauce](https://forkliftkitchen.com/soy-sauce-substitutes/) for workable swaps instead.

Filipino Ensaladang Talong

April 2, 2026

Smoky grilled eggplant often turns mushy or bland when the timing's off. The trick is charring the skin until it blackens completely while the flesh stays firm enough to hold its shape.

Filipino Ensaladang Talong served on a plate

High heat creates the smoky flavor while keeping the interior from turning to mush. You peel the skin when it's still warm, then toss with vinegar and fresh vegetables.

This works for weeknight sides when you want something that tastes intentional but doesn't require babysitting a stove.

QUICK SUMMARY

Filipino Ensaladang Talong uses grilled eggplant charred until the skin blisters and the flesh softens. The smoky flavor comes from direct heat, and the tangy dressing balances the richness. Make this when you need a side that works for meal prep or weeknight dinners.

⏱️Time Reality: 15 minutes grilling, 15 minutes prep-no marinating required
🔥Critical Move: Grill eggplants over medium-high heat, turning every 3-4 minutes for even charring
⚠️Watch Out: Undercooked eggplant won't peel easily-char until skin blackens and flesh gives when pressed

Table of Contents

Toggle
  • Why This Recipe Works
  • What You'll Need
    • Ingredient Details
  • Ingredient Swaps
  • What to Serve With It
  • Store and Reheat
  • Frequently Asked Questions
  • Filipino Ensaladang Talong
    • Method 
    • Tried this recipe?

Why This Recipe Works

Grilling eggplant at medium-high heat chars the skin while softening the flesh without turning it watery. For a version that comes together quickly, a simple salad side works when you need contrast on the plate.

Quick Reference
⏱️
Prep Time
15 min
🔥
Cook Time
15 min
⏰
Total Time
30 min
🍽️
Servings
4 servings
📊
Difficulty
Easy
🏷️
Category
Side
💡
Quick Tip
Grill eggplants till skin chars and flesh softens
🎯
Best For
Weeknight | Meal prep | Entertaining
  • Charring develops smoky depth - blackened skin creates the signature flavor that makes this salad work with grilled mains
  • Vinegar cuts through richness - the tangy dressing balances the soft eggplant without making it soggy when measured correctly
  • Fresh vegetables add texture - diced tomatoes and red onions stay crisp against the tender eggplant if you cut them just before mixing
  • Brief marinating blends flavors - 10-15 minutes lets the dressing soak in without turning the vegetables watery
  • Peeling while warm works faster - the skin slides off easily when the eggplant is still slightly hot from the grill
Quick Tip
Pat grilled eggplant flesh dry with paper towels before mixing to prevent excess moisture from diluting the dressing

What You'll Need

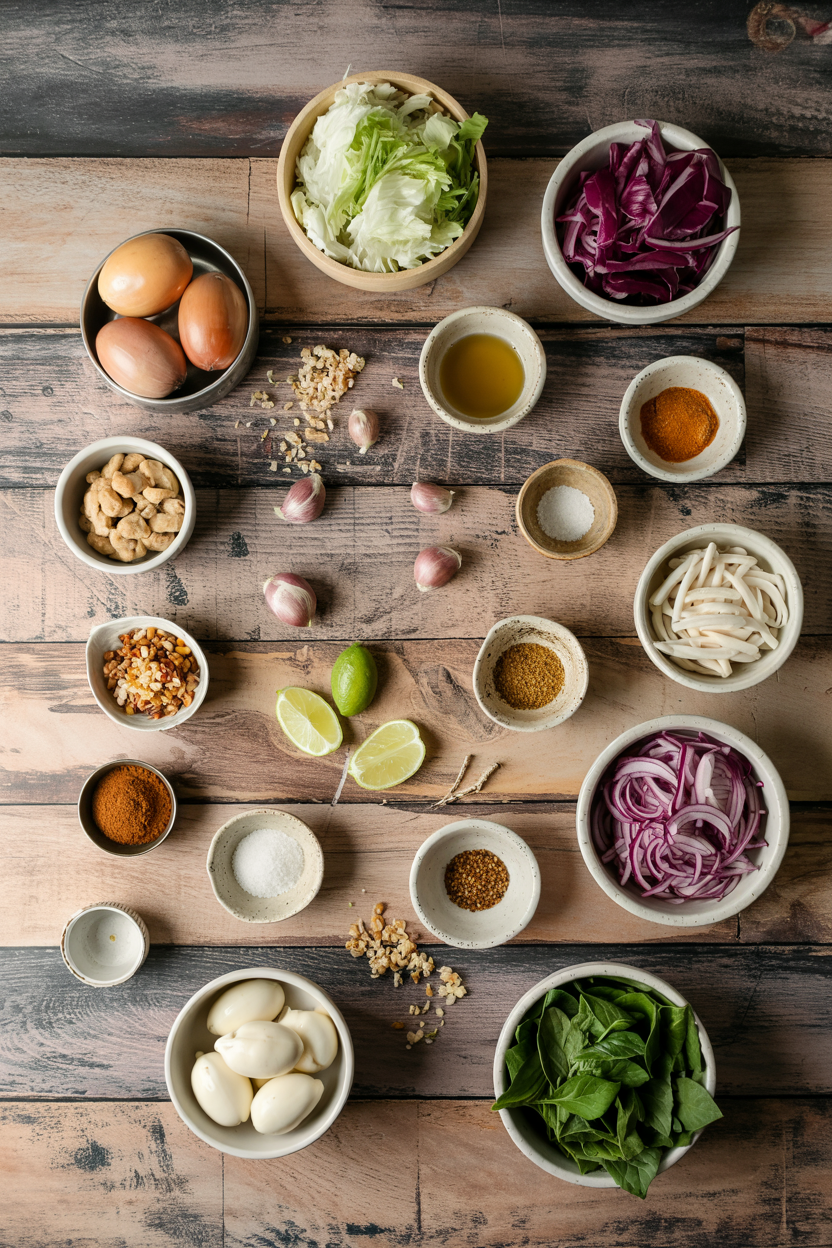
Ingredients for Filipino Ensaladang Talong

Buy firm eggplants with tight skin and no soft spots. Most people skip salad, but it balances the meal, so check out this quick salad dish for another option that works with smoky vegetables.

🍆
Base
  • Eggplants (long purple variety)
  • Tomatoes
  • Red onions
🥢
Dressing
  • Vinegar (cane or white)
  • Salt
  • Black pepper
  • Sugar
🫙
Optional
  • Bagoong (fermented shrimp paste)

Ingredient Details

  • Eggplants
    Use medium-size firm eggplants with no soft spots-they hold shape better after grilling
  • Vinegar
    Cane vinegar has the most traditional flavor, but white vinegar works if you add it in 1-tablespoon increments
  • Tomatoes
    Dice tomatoes just before mixing to keep them from releasing too much juice
  • Red Onions
    Soak sliced onions in cold water for 5 minutes to reduce sharpness without losing crunch
  • Sugar
    Balance vinegar with sugar by tasting after each addition-start with 1 teaspoon and adjust
  • Bagoong
    Optional fermented shrimp paste adds umami-omit for vegetarian or substitute diluted miso paste
  • Black Pepper
    Freshly ground black pepper adds more flavor than pre-ground-use white pepper for milder heat

Ingredient Swaps

Grilling creates the smoky flavor, but oven roasting works when outdoor grilling isn't an option. Rich mains need something to cut through, and salad does exactly that, so try another great salad recipe if you want a different fresh side.

  • Grilled eggplant → oven-roasted eggplant at 425°F for 20-25 minutes - slightly less smoky but similar tender texture
  • Cane or white vinegar → apple cider vinegar or rice vinegar - milder acidity with fruity or neutral flavor profile
  • Bagoong → soy sauce or diluted miso paste - less pungent umami that changes the flavor direction
  • Red onions → shallots or white onions - milder sweetness or sharper bite with same crunch

Oven Roasting

Works for: indoor cooking without grill access-set oven to 425°F and roast 20-25 minutes

Skip if: you want maximum smoky flavor-grilling over direct heat creates deeper char

Apple Cider Vinegar

Works for: milder tangy flavor-use same amount as cane vinegar and adjust sugar to balance

Skip if: you prefer traditional sharp acidity-cane vinegar has more pronounced bite

Instructions

Grill eggplants until the skin blackens and blisters, then peel while warm for easiest removal. The salad works best when it hits the table at the same time as the main, so check out simple homemade beef if you need a protein that pairs with smoky vegetables.

  1. Grill eggplants over medium-high heat - place whole eggplants directly on grill grates, turning every 3-4 minutes until skin blackens and flesh softens when pressed, about 12-15 minutes total

  2. Peel charred skin - remove eggplants from grill and let cool 2-3 minutes until you can handle them, then peel off blackened skin with your fingers or a knife, discarding skin and keeping tender flesh

  3. Dice vegetables - chop peeled eggplant into bite-size pieces, dice tomatoes into small cubes, and slice red onions thinly, soaking onions in cold water for 5 minutes if desired to reduce sharpness

  4. Mix dressing - combine vinegar, salt, black pepper, and sugar in a small bowl, tasting and adjusting until the balance between tangy and sweet feels right, adding bagoong if using

  5. Toss and marinate - place eggplant, tomatoes, and drained onions in a mixing bowl, pour dressing over vegetables, toss gently to coat, and let sit 10-15 minutes at room temperature before serving

Golden Rule
Season after peeling eggplant to prevent dilution-salt and vinegar stick better to dry flesh than wet surfaces

What to Serve With It

This salad needs a protein or starch to round out the plate. For a version that comes together quickly, complete brussels sprouts meal ideas work when you're planning weeknight dinners around smoky sides.

Side Dish Prep Why It Works How to Serve
Steamed white rice Easy Neutral base absorbs tangy dressing without competing with smoky eggplant Serve warm rice in shallow bowls with salad spooned on top
Grilled chicken Medium Adds protein while matching the char from the eggplant Slice grilled chicken and arrange next to salad on the same plate
Fried fish Medium Traditional pairing where crispy texture contrasts with tender eggplant Place fried fish fillet beside salad with extra vinegar for drizzling
Pandesal rolls Easy Soft bread soaks up dressing and offers mild flavor contrast Serve warm rolls on the side for scooping salad
Garlic fried rice Medium Savory garlic flavor balances tangy vinegar without overpowering it Mound rice on plate and top with generous portion of salad

Three ways to serve it:

  • For weeknight meals - pair with steamed rice and grilled chicken or pork for a complete plate that takes 30 minutes total
  • For entertaining - serve with fried fish and pandesal rolls, setting out extra bagoong and calamansi wedges for guests to customize
  • For meal prep - make a double batch and store in shallow containers, pairing with different proteins throughout the week
Best Pick
Fried fish is the traditional pairing-the crispy coating contrasts with tender smoky eggplant better than most other proteins

Store and Reheat

This salad holds up for 3-4 days when stored properly in the fridge. We keep a batch ready for nights like this, so check out classic pork dish if you need a protein that works with make-ahead sides.

Method Time Best For
🌡️ Room Temperature 10-15 min Restoring flavor and texture before serving-best method for this salad
📦 Microwave 30 sec low power Quick warming if serving warm-use sparingly to avoid sogginess
🍳 Stovetop 1-2 min low heat Small portions that need gentle warming without drying out

For best results when storing:

  • Store in shallow containers - spread salad in a single layer for quick cooling in the fridge, which prevents vegetables from getting watery
  • Keep dressing separate - if making ahead for meal prep, store eggplant and vegetables in one container and dressing in another, mixing just before serving
  • Drain excess liquid - if the salad releases too much moisture after storing, pour off liquid and add a splash of fresh vinegar to brighten flavor
  • Don't freeze - freezing ruins the texture of both the eggplant and fresh vegetables, making them mushy when thawed
  • Bring to room temperature - let refrigerated salad sit out 10-15 minutes before serving to restore the best flavor and texture

Frequently Asked Questions

How long to grill Ensaladang Talong for perfect tenderness?

Grill whole eggplants over medium-high heat for 12-15 minutes total, turning every 3-4 minutes. The skin should blacken completely and the flesh should give when pressed-this ensures easy peeling and tender texture without mushiness.

Can I make Ensaladang Talong ahead and store it?

Store the salad in an airtight container in the fridge for 3-4 days. For best results, keep the dressing separate and mix just before serving, or drain any excess liquid that accumulates and add a splash of fresh vinegar.

What goes well as sides with Filipino Ensaladang Talong?

Serve with steamed white rice, grilled chicken, fried fish, pandesal rolls, or garlic fried rice. The tangy smoky salad needs a protein or neutral starch to balance the vinegar and create a complete meal.

How do I know when grilled eggplant is done for Ensaladang Talong?

The eggplant is done when the skin blackens and blisters all over and the flesh feels soft when you press it with tongs. If the skin won't peel easily after cooling slightly, it needs more time on the grill.

Can I use roasted eggplant instead of grilled for this salad?

Roast whole eggplants at 425°F for 20-25 minutes, turning halfway through. The texture will be similar but you'll get less smoky flavor than grilling over direct heat-increase the char by running them under the broiler for the last 2-3 minutes.

Filipino Ensaladang Talong served on a plate

Filipino Ensaladang Talong

No ratings yet
Filipino Ensaladang Talong is a smoky grilled eggplant salad featuring eggplants charred until the skin blisters and the flesh softens but holds shape. The tangy vinegar dressing balances the richness, while fresh tomatoes and red onions add crisp texture, perfect for easy weeknight sides or meal prep.
Print Recipe Pin Recipe
Prep Time 15 minutes mins
Cook Time 15 minutes mins
Total Time 30 minutes mins
Servings: 4 servings
Course: Side Dish
Cuisine: Filipino
Ingredients Method Notes

Ingredients
  

  • 4 eggplants medium-size, long purple variety, firm with no soft spots
  • 2 cups tomatoes diced just before mixing to avoid excess juice
  • 1 medium red onions thinly sliced, soaked in cold water 5 minutes to reduce sharpness
  • ¼ cup vinegar cane or white vinegar; adjust with 1 tablespoon increments if using white
  • ½ teaspoon salt to taste
  • ¼ teaspoon black pepper freshly ground preferred
  • 1 teaspoon sugar to taste, add gradually
  • 1 tablespoon bagoong optional, fermented shrimp paste

Method
 

  1. Place whole eggplants directly on grill grates over medium-high heat, turning every 3-4 minutes until skin blackens completely and flesh softens when pressed, about 12-15 minutes total.
    4 eggplants
  2. Remove eggplants from grill and let cool 2-3 minutes until manageable. Peel off blackened skin with fingers or a knife, discarding the skin and keeping the tender flesh.
    4 eggplants
  3. Chop peeled eggplant into bite-size pieces. Dice tomatoes into small cubes. Thinly slice red onions and soak them in cold water for 5 minutes, then drain.
    4 eggplants, 2 cups tomatoes, 1 medium red onions
  4. In a small bowl, combine vinegar, salt, black pepper, and sugar. Taste and adjust balance of tangy and sweet. Add bagoong if using and mix well.
    ¼ cup vinegar, ½ tsp salt, ¼ tsp black pepper, 1 tsp sugar, 1 tbsp bagoong
  5. Place eggplant, tomatoes, and drained onions in a mixing bowl. Pour dressing over vegetables and toss gently to coat. Let sit at room temperature for 10-15 minutes before serving.
    4 eggplants, 2 cups tomatoes, 1 medium red onions, ¼ cup vinegar, ½ tsp salt, ¼ tsp black pepper, 1 tsp sugar, 1 tbsp bagoong

Notes

  • Grill eggplants until skin fully blackens and flesh gives to ensure easy peeling and tender texture.
  • Peel the eggplant while still warm for quickest and easiest skin removal.
  • Pat grilled eggplant flesh dry with paper towels before mixing to prevent excess moisture from diluting the dressing.

Tried this recipe?

Let us know how it was!

What Is Speck? [Taste, Uses & More]

April 2, 2026

Smoked wood, juniper, and a faint black pepper warmth - that's the first thing you notice when you unseal a pack of speck. The fat has a creamy, almost silky quality, and the deep-rose meat carries a savory depth that sits somewhere between a mountain cured ham and a lightly smoked charcuterie board anchor.

What Is Speck

If you've cooked with prosciutto or pancetta, speck will feel familiar - yet distinct enough to justify keeping both on hand.

QUICK SUMMARY

Speck is a dry-cured, cold-smoked pork leg from South Tyrol with mild smoke, herbal notes, and savory depth. It slices thin like prosciutto, crisps like pancetta, and adds a smoky, umami backbone to everything from antipasto boards to bean stews.

🍖Category: Dry-cured, cold-smoked pork hind leg from Alpine Italy
👅Flavor: Mild smoke, salty, savory umami with herbal and nutty notes
🍳Best Uses: Antipasto boards, pasta, soups, wrapped and roasted
❄️Storage: Fridge; use opened packs within 2-3 weeks
⚠️Watch Out: High in sodium - a little goes a long way for seasoning

What Is Speck?

Speck Alto Adige comes from South Tyrol, the German-speaking Alpine province in northern Italy that borders Austria.

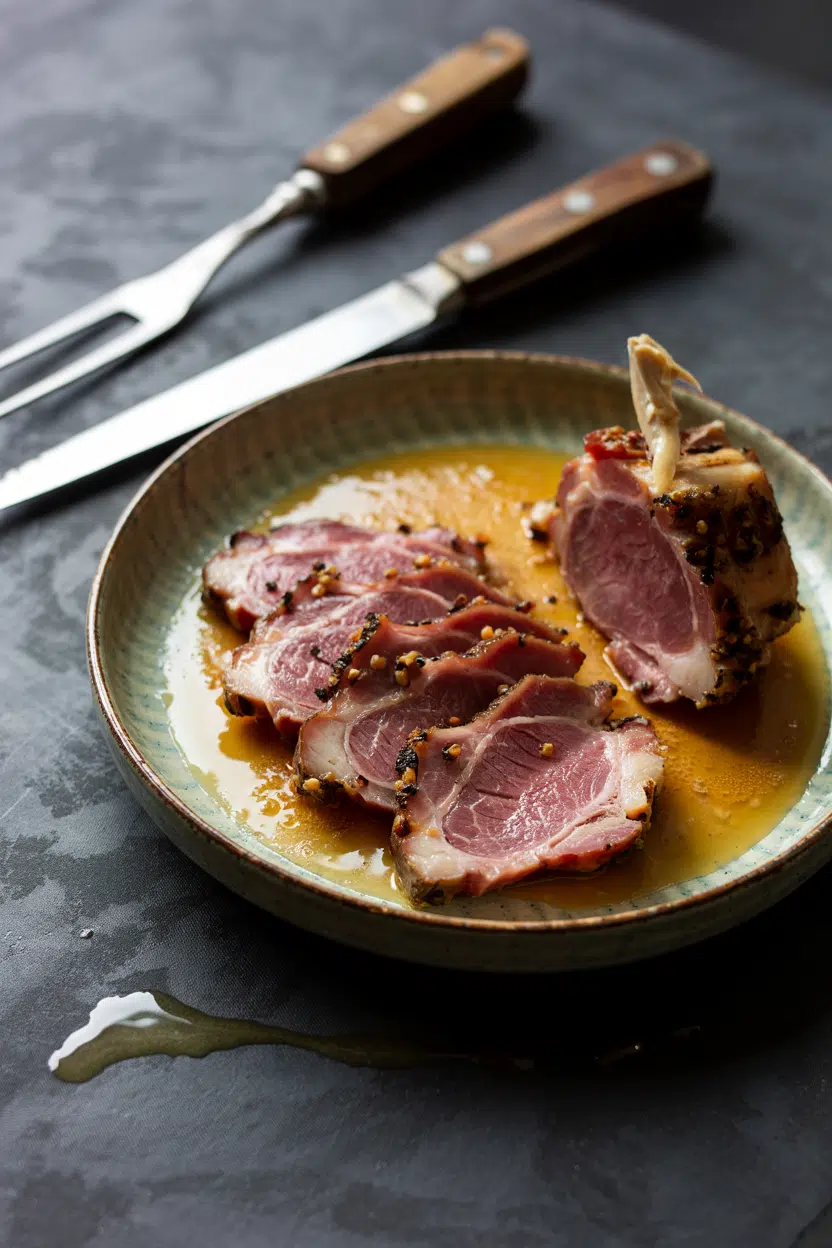
It's a pork hind leg, cured with a dry rub of salt, juniper berries, black pepper, bay leaf, and rosemary, then cold-smoked over beech or mountain pine wood before an extended air-curing period of at least 22 weeks.

The result sits in a category of its own. Unlike raw prosciutto swaps that skip the smoke, speck gets a brief but decisive cold-smoking step that sets its character early.

Unlike heavily smoked products, the smoke here is restrained.

You'll also see it labeled Tyrolean speck or speck Alto Adige, the latter being a protected designation of origin (IGP) since 1996. Two broad styles exist:

  • Boneless sliced packs - the most common retail form; pre-sliced thin for immediate use
  • Whole or half legs - sold by specialty shops and worth seeking if you want to slice to order for better texture and flavor retention
Best Pick
Whole legs or vacuum-sealed slices with an IGP stamp on the packaging are the most reliable indicators of authentic speck Alto Adige.

What Does Speck Taste Like?

speck - What Is Speck

Speck lands at moderate intensity - more assertive than prosciutto, less aggressive than a heavily smoked salami. The smoke is the first thing you register, but it's wood-forward rather than campfire-sharp, with juniper providing a clean, slightly piney lift underneath.

Sensory SnapshotModerate Intensity
👅 Flavor
mild smokesavory umamisaltyherbalnutty sweetness
✋ Texture
firm but pliablecreamy fat ribbon
👃 Aroma
wood smokejuniperblack pepper

The fat band that runs along the edge is where much of the nutty sweetness lives. When heat hits speck - even briefly in a pan - the smoke mellows and the fat renders into something richer, closer to what you'd get from pancetta swaps used as a flavor base.

Served cold and thin, it's unmistakably a cured ham; cooked low and slow in a stew, it recedes into the background as a savory building block.

How to Use Speck

Speck works across two registers: raw and thin for charcuterie-style service, or cooked as a flavor foundation. Neither approach is wrong - they just produce very different results.

How Speck Is Used
MethodBest ForTip
🥗 Raw, thinly slicedAntipasto boards, sandwiches, wrapped around vegetablesSlice as thin as possible; fat should be nearly translucent
🍳 Sautéed or crispedRendered fat for greens, pasta, or eggsMedium-low heat prevents bitterness from the smoke
🥘 Braised or stewedBean soups, lentils, braised cabbageAdd early so smoke softens and integrates fully
🔥 Wrapped and roastedAsparagus, scallops, stuffed canederliHigh heat, short time - keep roasting under 10 minutes

For antipasto boards, pair speck with aged grana-style cheeses like Parmigiano or Piave, cornichons, and rye or country bread. The salt and smoke need something acidic - pickled vegetables and a whole-grain mustard smear are the easiest fixes.

In cooked applications, rendered speck fat replaces olive oil or butter as a starting point for sautéed greens, frittatas, or pasta. Chopped and added to a bean stew early, it dissolves into the broth and gives a smoky umami baseline that builds the whole dish.

Golden Rule
Don't slice speck thick for raw service - the texture turns rubbery. Thin enough to see light through it is the target.

Wrapping speck around asparagus or scallops before a quick roast follows the same logic as bacon wrapped scallops - the fat bastes the protein as it renders.

Try It In
🍤Bacon Wrapped ScallopsSwap bacon for speck for a smokier, more herbal result→🫘Black Bean SaladCrisp speck pieces add smoky depth without overpowering→🥣Loaded Baked Potato SoupUse speck instead of bacon for a cleaner, less sharp smoke→

How to Buy and Store Speck

At the deli counter or specialty shop, look for firm, pale-pink meat with a consistent white fat band and no grey edges. Pre-sliced vacuum packs should have no pooled liquid inside - excess moisture signals the curing was uneven or the product has been sitting.

Watch Out
Avoid pre-sliced packs that smell aggressively sour or show grey-brown discoloration on the meat edges - those are signs of age, not character.

Once opened, wrap speck in butcher paper or breathable parchment and store it loosely inside a plastic bag. Sealed plastic alone traps moisture and softens the surface.
Unopened vacuum packs hold well for several weeks in the coldest part of the fridge. For full shelf life guidance, the details on speck storage life and comparable notes on prosciutto storage guide are worth checking before buying in bulk.

  • Opened packs - use within 2-3 weeks for best flavor and texture
  • Whole legs - wrap tightly, refrigerate, and slice as needed; they hold longer than pre-sliced

Where to Start With Speck

Speck rewards cooks who already work with cured meats and want a smokier option that still behaves like prosciutto when sliced thin. If you're comparing options, the breakdown at speck vs prosciutto clarifies where each one earns its place.

And if speck isn't available locally, the speck alternatives guide covers the closest alternatives by use case.

Start with a simple antipasto application - thin slices, aged cheese, pickles - before cooking with it. That first taste sets the baseline so every cooked use makes sense.

Frequently Asked Questions

Is speck the same as prosciutto?

No. Both use the pork hind leg and a dry cure, however speck adds cold smoking and a juniper-pepper rub that prosciutto skips entirely. The result is firmer, slightly drier, and noticeably smoky compared to prosciutto's clean, sweet-savory profile.

How smoky is speck?

Mild to moderate. The cold-smoking step is brief, so the smoke reads as a background note rather than the dominant flavor. It's nowhere near as assertive as smoked sausage or lardo affumicato.

Can you cook with speck?

Yes - it performs well as a cooked ingredient. Render it low and slow for fat to sauté with, add it early to soups for a smoky base, or wrap it around proteins for a quick roast. Heat mellows the smoke and deepens the savory notes.

How long does speck last in the fridge?

Unopened vacuum-sealed packs keep for several weeks refrigerated. Once opened, use within 2-3 weeks and store in breathable parchment rather than sealed plastic to prevent surface moisture buildup.

Is speck healthy?

It's high in sodium and saturated fat, so large portions aren't suitable for low-sodium diets. Small amounts - two or three thin slices - deliver concentrated protein and flavor without significant bulk calories.

Korean Bibimbap (Vegetarian)

April 2, 2026

Colorful vegetables layered over warm rice with spicy-sweet gochujang drizzled on top. That's what happens when you cook each vegetable separately and season them individually before building the bowl.

Korean Bibimbap (Vegetarian) served on a plate

The method prevents soggy vegetables. Blanching spinach for 30 seconds keeps it bright green. Sautéing carrots and mushrooms in separate batches preserves their distinct textures.

This works for meal prep when you need something that holds up in the fridge and reheats without turning mushy. Layer the components, pack the sauce separately, and you have lunch ready for the week.

QUICK SUMMARY

Korean bibimbap layers sautéed and blanched vegetables over short-grain rice with gochujang sauce. Cook each vegetable separately to retain individual texture and prevent sogginess. Season components individually with soy sauce and sesame oil before assembling bowls.

⏱️Time Reality: 50 minutes total - 20 min prep, 30 min cooking rice and vegetables
🔥Critical Move: Blanch spinach 30 seconds, shock in ice water to stop cooking
⚠️Watch Out: Overcooking vegetables turns them mushy - sauté 2-3 minutes max per batch

Table of Contents

Toggle
  • Why This Recipe Works
  • What You'll Need
    • Ingredient Details
  • Ingredient Swaps
  • What to Serve With It
  • Store and Reheat
  • Frequently Asked Questions
  • Korean Bibimbap (Vegetarian)
    • Method 
    • Tried this recipe?

Why This Recipe Works

Cooking each vegetable separately maintains distinct textures instead of turning everything into a steamed mush. Short-grain rice provides the sticky base that holds the bowl together. For another Korean weeknight option that uses similar techniques, simple homemade vegetarian dishes layer flavors without requiring specialty equipment.

Quick Reference
⏱️
Prep Time
20 min
🔥
Cook Time
30 min
⏰
Total Time
50 min
🍽️
Servings
4 servings
📊
Difficulty
Medium
🏷️
Category
Main Dish
💡
Quick Tip
Cook vegetables separately for ideal texture
🎯
Best For
Weeknight | Meal prep

What makes this work:

  • Rice water ratio of 1:1.25 creates sticky texture that clumps without turning gummy
  • Individual seasoning per vegetable builds layered flavor instead of one-note bland bowls
  • Medium-high heat for sautéing caramelizes vegetables while maintaining crunch
  • Ice water shock after blanching stops cooking and locks in bright green color
  • Sesame oil added last preserves nutty aroma that cooking would destroy
Quick Tip
Toast sesame seeds dry for 2 minutes until fragrant before sprinkling on finished bowls

What You'll Need

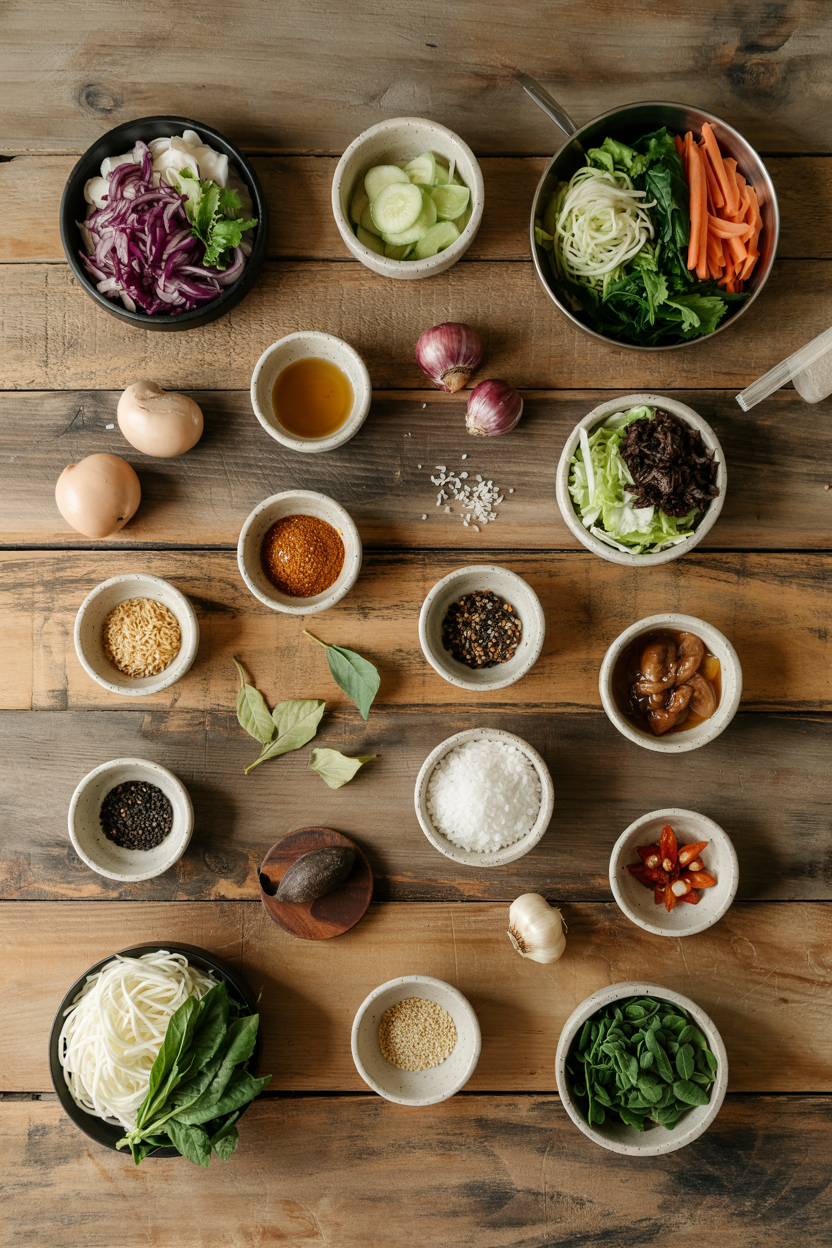
Ingredients for Korean Bibimbap (Vegetarian)

Short-grain rice is non-negotiable for texture. Long-grain varieties won't clump properly and the bowl falls apart when you mix it. Stock up on gochujang and sesame oil for authentic Korean flavor without hunting down specialty ingredients every time.

🍜
Rice Base
  • 2 cups short-grain rice
  • 2½ cups water
🥬
Vegetables
  • 8 oz spinach
  • 2 medium carrots, julienned
  • 6 oz shiitake mushrooms, sliced
  • 1 cup bean sprouts
  • 1 medium zucchini, julienned
🥢
Seasonings
  • 3 tablespoon gochujang
  • 2 tablespoon sesame oil
  • 3 tablespoon soy sauce
  • 1 tablespoon rice vinegar
  • 1 teaspoon sugar
🫙
Finishing
  • 4 eggs (optional)
  • 1 tablespoon toasted sesame seeds
  • 2 cloves garlic, minced
  • Neutral oil for cooking

Ingredient Details

  • Short-grain rice
    Rinse 3 times until water runs clear to remove excess starch
  • Gochujang
    Korean fermented chili paste - check Asian grocery stores or buy online
  • Shiitake mushrooms
    Remove tough stems before slicing - save for stock
  • Sesame oil
    Toasted sesame oil has stronger flavor than plain - use sparingly
  • Bean sprouts
    Fresh sprouts from produce section - canned versions turn mushy
  • Eggs
    Fry sunny-side up for runny yolk that mixes into rice
  • Carrots
    Julienne into matchsticks for quick cooking and uniform texture

Ingredient Swaps

Tamari swaps directly for soy sauce when you need gluten-free. Quinoa works for higher protein but loses the sticky texture that makes bibimbap work.

Four swaps that hold up:

  • Soy sauce → tamari - Gluten-free option with slightly less salty punch but same umami depth
  • Gochujang → sriracha plus miso paste - Mix 2 tablespoon sriracha with 1 tablespoon white miso for similar heat and fermented funk
  • Shiitake mushrooms → cremini mushrooms - Milder flavor but same meaty texture when sautéed
  • Bean sprouts → julienned cucumber - Adds crunch without the grassy bean flavor

Short-Grain Rice

Works for: Traditional texture, sticky clumping, authentic bibimbap

Skip if: Need gluten-free grains or want higher protein base

Quinoa

Works for: Gluten-free, higher protein, faster cooking time

Skip if: Want authentic sticky texture or traditional presentation

Fried Egg

Works for: Ovo-vegetarian, adds creamy yolk richness, traditional topping

Skip if: Vegan or prefer plant-based protein like tofu

Instructions

Rice cooks while you prep and sauté vegetables. Time the components so everything stays warm for assembly - cold vegetables make the bowl feel like leftovers even when freshly made.

  1. Cook rice: Rinse 2 cups short-grain rice until water runs clear. Add rice and 2½ cups water to pot, bring to boil, reduce to low, cover, steam 18-20 minutes until tender and water absorbed.

  2. Blanch spinach and bean sprouts: Boil water in medium pot. Add 8 oz spinach, blanch 30 seconds, transfer to ice water. Blanch 1 cup bean sprouts 45 seconds, shock in ice water. Drain both, squeeze excess water, season each with ½ teaspoon soy sauce and ¼ teaspoon sesame oil.

  3. Sauté carrots: Heat 1 teaspoon neutral oil in skillet over medium-high heat. Add julienned carrots, cook 2-3 minutes until softened but still crisp. Season with ½ teaspoon soy sauce, transfer to bowl.

  4. Cook mushrooms and zucchini: Add 1 teaspoon oil to same skillet. Sauté sliced shiitake mushrooms 3-4 minutes until browned and moisture released. Season with ½ teaspoon soy sauce and minced garlic. Repeat with julienned zucchini, cooking 2 minutes until tender-crisp.

  5. Assemble bowls: Divide warm rice among 4 bowls. Arrange vegetables in sections on top. Mix 3 tablespoon gochujang, 1 tablespoon sesame oil, 1 tablespoon soy sauce, 1 tablespoon rice vinegar, 1 teaspoon sugar for sauce. Drizzle over bowls. Top with fried egg if using, sprinkle toasted sesame seeds.

Shortcut
Skip individual vegetable seasoning and toss everything with gochujang sauce after plating - saves 5 minutes

What to Serve With It

Bibimbap covers vegetables and carbs but needs acidic or crunchy sides to balance the rich bowl. Korean cucumber salad cuts through sesame oil richness while kimchi adds fermented punch. For more weeknight falafel balls meal ideas that pair vegetarian mains with complementary sides, look for dishes that add textural contrast without competing flavors.

Side Dish Prep Why It Works How to Serve
Korean Cucumber Salad Easy Crisp, tangy crunch contrasts soft vegetables Serve in small dish alongside bowl
Miso Soup Easy Warm broth adds liquid element to dry bowl Sip between bites for palate cleansing
Steamed Edamame Easy Simple protein boosts meal without heavy feel Sprinkle with sea salt, serve warm
Kimchi Easy Fermented spice cuts richness, adds probiotic punch Spoon onto rice or eat between bites
Pickled Radish Easy Bright acidity balances gochujang heat Chop and scatter over bowl or serve separately

Three ways to serve it:

  • Meal prep bowls - Pack rice and vegetables in separate containers, sauce on side, reheat rice before assembling
  • Family-style platter - Arrange all vegetables on large plate around rice bowl, let diners build their own
  • Dolsot-style - Heat stone bowl, add thin oil layer, pack rice and press down, cook 5 minutes over medium heat for crispy bottom
Best Pick
Serve bibimbap immediately while rice is warm - cold rice hardens and loses the soft texture that makes mixing work

Store and Reheat

Store rice and vegetables in separate containers to prevent soggy textures. The egg and gochujang sauce go bad faster than other components - pack those separately if meal prepping. Rice hardens when cold but steams back to tender in 2 minutes.

Method Time Best For
🍳 Stovetop 5-7 min Reheating rice with minimal texture loss - add splash of water, cover, steam over low
📦 Microwave 1-2 min Quick reheating single portions - cover bowl, microwave 1 minute, stir, repeat 30 seconds
🔥 Oven 10-12 min at 350°F Larger portions needing even heating - cover with foil, bake until steaming

For best results when storing:

  • Refrigerate assembled bowls up to 3 days - Store in airtight containers, keep sauce separate to prevent soggy rice
  • Freeze rice and cooked vegetables separately up to 1 month - Thaw overnight in fridge before reheating
  • Skip freezing fresh vegetables - Blanched spinach and bean sprouts turn watery when frozen and thawed
  • Store gochujang sauce separately - Mix fresh batch for each serving or keep in small container up to 1 week
  • Reheat rice with moisture - Add 1-2 tablespoon water before microwaving to restore soft texture

Frequently Asked Questions

How long to cook bibimbap rice for best texture?

Cook short-grain rice for 18-20 minutes after bringing to boil, then reduce to low and cover. Use 1 cup rice to 1¼ cups water ratio for sticky texture that clumps without turning mushy.

Can I make vegetarian bibimbap ahead and reheat?

Yes, store rice and vegetables separately in airtight containers for up to 3 days. Reheat rice with splash of water in microwave for 1-2 minutes, warm vegetables in skillet for 2-3 minutes, then assemble fresh.

What goes well side dish-wise with bibimbap?

Korean cucumber salad adds crisp, tangy crunch while kimchi provides fermented spice. Miso soup works as palate cleanser between bites, and steamed edamame boosts protein without heavy feel.

How do I know when bibimbap vegetables are cooked properly?

Carrots should soften but maintain crunch after 2-3 minutes of sautéing. Spinach turns bright green after 30 seconds of blanching, mushrooms release moisture and brown after 3-4 minutes, and zucchini becomes tender-crisp in 2 minutes.

Can I use quinoa or other grains instead of rice?

Quinoa works for higher protein and gluten-free option but loses the sticky texture that makes traditional bibimbap work. Cook quinoa in 1:2 ratio with water for 15 minutes, but expect looser bowl structure when mixing.

Korean Bibimbap (Vegetarian) served on a plate

Korean Bibimbap (Vegetarian)

No ratings yet
Korean Bibimbap layers individually cooked vegetables over warm short-grain rice, topped with a spicy-sweet gochujang sauce. Cooking each vegetable separately preserves its unique texture and flavor, making this dish perfect for meal prep. The sticky rice base combined with carefully seasoned components delivers a balanced and authentic dish.
Print Recipe Pin Recipe
Prep Time 20 minutes mins
Cook Time 30 minutes mins
Total Time 50 minutes mins
Servings: 4 servings
Course: Main Dish
Cuisine: Korean
Ingredients Method Notes

Ingredients
  

  • 2 cups short-grain rice rinse 3 times until water runs clear to remove excess starch
  • 2.5 cups water
  • 8 oz spinach blanch 30 seconds, shock in ice water
  • 2 medium carrots julienned into matchsticks
  • 6 oz shiitake mushrooms remove tough stems, sliced
  • 1 cup bean sprouts fresh from produce section
  • 1 medium zucchini julienned
  • 3 tablespoon gochujang Korean fermented chili paste
  • 2 tablespoon sesame oil added last to preserve aroma
  • 3 tablespoon soy sauce
  • 1 tablespoon rice vinegar
  • 1 teaspoon sugar
  • 4 eggs eggs optional, fry sunny-side up
  • 1 tablespoon toasted sesame seeds toast dry 2 minutes until fragrant
  • 2 cloves garlic minced
  • 1 teaspoon neutral oil for cooking vegetables

Method
 

  1. Rinse 2 cups short-grain rice until water runs clear. Add rice and 2½ cups water to pot, bring to boil, reduce to low, cover, and steam for 18-20 minutes until tender and all water is absorbed.
    2 cups short-grain rice, 2.5 cups water
  2. Bring water to boil in a medium pot. Blanch 8 oz spinach for 30 seconds and transfer immediately to ice water. Blanch 1 cup bean sprouts for 45 seconds, then shock in ice water. Drain both well, squeeze out excess water, and season each with ½ teaspoon soy sauce and ¼ teaspoon sesame oil.
    8 oz spinach, 1 cup bean sprouts, 3 tbsp soy sauce, 2 tbsp sesame oil
  3. Heat 1 teaspoon neutral oil in a skillet over medium-high heat. Add julienned carrots and cook 2-3 minutes until softened but still crisp. Season with ½ teaspoon soy sauce and transfer to a bowl.
    2 medium carrots, 1 tsp neutral oil, 3 tbsp soy sauce
  4. Add 1 teaspoon neutral oil to the same skillet. Sauté sliced shiitake mushrooms for 3-4 minutes until browned and moisture is released. Season with ½ teaspoon soy sauce and minced garlic.
    6 oz shiitake mushrooms, 1 tsp neutral oil, 3 tbsp soy sauce, 2 cloves garlic
  5. Using the same skillet, sauté julienned zucchini for 2 minutes until tender-crisp. Transfer to a bowl.
    1 medium zucchini, 1 tsp neutral oil
  6. Divide warm rice among 4 bowls. Arrange each cooked vegetable in sections on top of rice. Mix 3 tablespoon gochujang, 1 tablespoon sesame oil, 1 tablespoon soy sauce, 1 tablespoon rice vinegar, and 1 teaspoon sugar to make the sauce. Drizzle sauce over bowls. Top with fried egg if using, and sprinkle toasted sesame seeds.
    2 cups short-grain rice, 8 oz spinach, 2 medium carrots, 6 oz shiitake mushrooms, 1 cup bean sprouts, 1 medium zucchini, 3 tbsp gochujang, 2 tbsp sesame oil, 3 tbsp soy sauce, 1 tbsp rice vinegar, 1 tsp sugar, 4 eggs eggs, 1 tbsp toasted sesame seeds

Notes

  • Cook each vegetable separately to preserve texture and flavor.
  • Blanch spinach briefly and shock in ice water to keep bright green color.
  • Store rice and vegetables separately if meal prepping to avoid sogginess.

Tried this recipe?

Let us know how it was!

What Is Scotch Bonnet Pepper? [Taste, Uses & More]

April 2, 2026

Few Caribbean dishes hit the way they do without a scotch bonnet somewhere in the pot.

What Is Scotch Bonnet Pepper

This squat, lantern-shaped chili is the heat engine behind jerk marinades, oxtail stews, and the kind of hot sauce that cooks keep on the table rather than in the cupboard - and if you've ever reached for alternatives to hot sauce or even alternatives to jalapeno pepper mid-recipe, you already know how hard this pepper is to replicate. Scotch bonnet doesn't just add heat - it brings a sweet, tropical brightness that changes the whole character of a dish.

QUICK SUMMARY

The scotch bonnet pepper is a thick-walled Caribbean chili with intense heat, fruity tropical flavor, and a floral aroma. Use it in jerk seasoning, hot sauces, and stews. Refrigerate whole for up to 2 weeks, or freeze purée for up to 6 months.

🌶️Flavor: Fruity, sweet tropical notes with bright citrus heat
🔥Heat Level: Strong - 100,000-350,000 Scoville heat units
🍽️Best For: Jerk marinades, Caribbean stews, hot sauces, salsas
🛒Buy: Firm, glossy, unblemished skin in orange, red, yellow, or green
📦Shelf Life: 1-2 weeks refrigerated; frozen purée lasts up to 6 months

What Is Scotch Bonnet Pepper?

Scotch bonnet is a hot chili pepper native to the Caribbean, most closely associated with Jamaican and Trinidadian cooking.

Its name comes from its resemblance to the traditional Scottish tam o'shanter bonnet - a squat, round shape with a slightly flattened top.

The pepper sits in the same species as the habanero (Capsicum chinense), which explains a lot about its heat. It registers between 100,000 and 350,000 Scoville heat units, putting it roughly 12-25 times hotter than a jalapeño.

You'll also see it labeled as bonnet pepper, Caribbean scotch bonnet, scotch bonnet chilli, or scotch-bonnet. Color signals ripeness rather than variety - green is unripe, while orange, red, and yellow indicate full maturity.

Thick, rigid walls and a waxy, glossy skin are characteristic of the pepper at any stage.

Best Pick
Orange and red scotch bonnets are fully ripe and carry the most developed fruit flavor. Green ones still have heat but a sharper, more vegetal edge - useful if you want less sweetness in a sauce.

What Does Scotch Bonnet Pepper Taste Like?

scotch bonnet pepper - What Is Scotch Bonnet Pepper

Heat is the headline, but it's not the whole story. The first impression is actually fruity - tropical notes of guava and mango hit before the capsaicin does, layered over a citrusy sharpness and a faint vegetal green-pepper tang underneath.

That's what separates scotch bonnet from most other hot chilies. The heat itself is sustained and deep, not a sharp spike - it builds and lingers.

When you cook it briefly in oil or sweat it into a base, the sweetness intensifies while some of the raw brightness softens.

Sensory SnapshotStrong Intensity
👅 Flavor
fruitytropicalcitrusysweet heat
✋ Texture
crisp rawmeaty cooked
👃 Aroma
tropical fruitslightly floral

Compared to a habanero, scotch bonnet is rounder and sweeter - the role habanero pepper plays in Mexican and Yucatecan cooking is similar in heat level, but the flavor profile leans more floral and less fruity than scotch bonnet's distinctly tropical character.

How to Use Scotch Bonnet Pepper

Scotch bonnet drives the flavor in Caribbean cooking more than almost any other single ingredient.

Jamaican jerk seasoning relies on it alongside allspice (pimento) and thyme - a combination worth knowing well, and if you're adapting any jerk-adjacent recipe, check which alternatives to allspice hold up alongside the pepper's heat.

Trinidadian and Barbadian cooks use it in pepper sauces, curry bases, and braises.

The pepper works in several distinct ways depending on prep method:

How Scotch Bonnet Pepper Is Used
MethodBest ForTip
🥗 RawRelishes, condiments, salsasMince finely; wear gloves - oils transfer fast
🍳 Sweated/SautéedSofrito bases, stews, rice and peasAdd early so heat infuses the whole dish
🌀 PuréedJerk marinades, hot sauces, mango salsasBlend with vinegar or citrus to balance intensity
🔥 Roasted/CharredSimmered sauces, smoked preparationsCharring mellows brightness and adds depth

Whole peppers can be studded into jerk chicken or whole-roasted fish to infuse heat without blowing out a dish. Blending scotch bonnet with mango or pineapple tames the raw edge while keeping the tropical synergy intact - what pairs with mango salsa chicken gives a useful picture of how those fruit-heat combinations land on the plate. Coconut milk, sweet potato, lime, garlic, and scallion are the natural companions in the pot.

Try It In
🍗Air Fryer Lemon Pepper Chicken TendersSwap lemon pepper for scotch bonnet to test heat against crispy chicken→🥦Air Fryer Lemon Pepper CauliflowerA base where scotch bonnet's citrus heat works surprisingly well→🍖Air Fryer Lemon Pepper MeatballsAdd minced scotch bonnet to the mix for Caribbean-leaning heat→

How to Buy and Store Scotch Bonnet Pepper

At the market, look for firm, glossy peppers with tight, unblemished skin. Color tells you ripeness - orange, red, and yellow are fully ripe; green is usable but sharper.

A thick, rigid stem is a sign of a fresher harvest; soft spots or dull wrinkling mean the pepper is past its window.

Watch Out
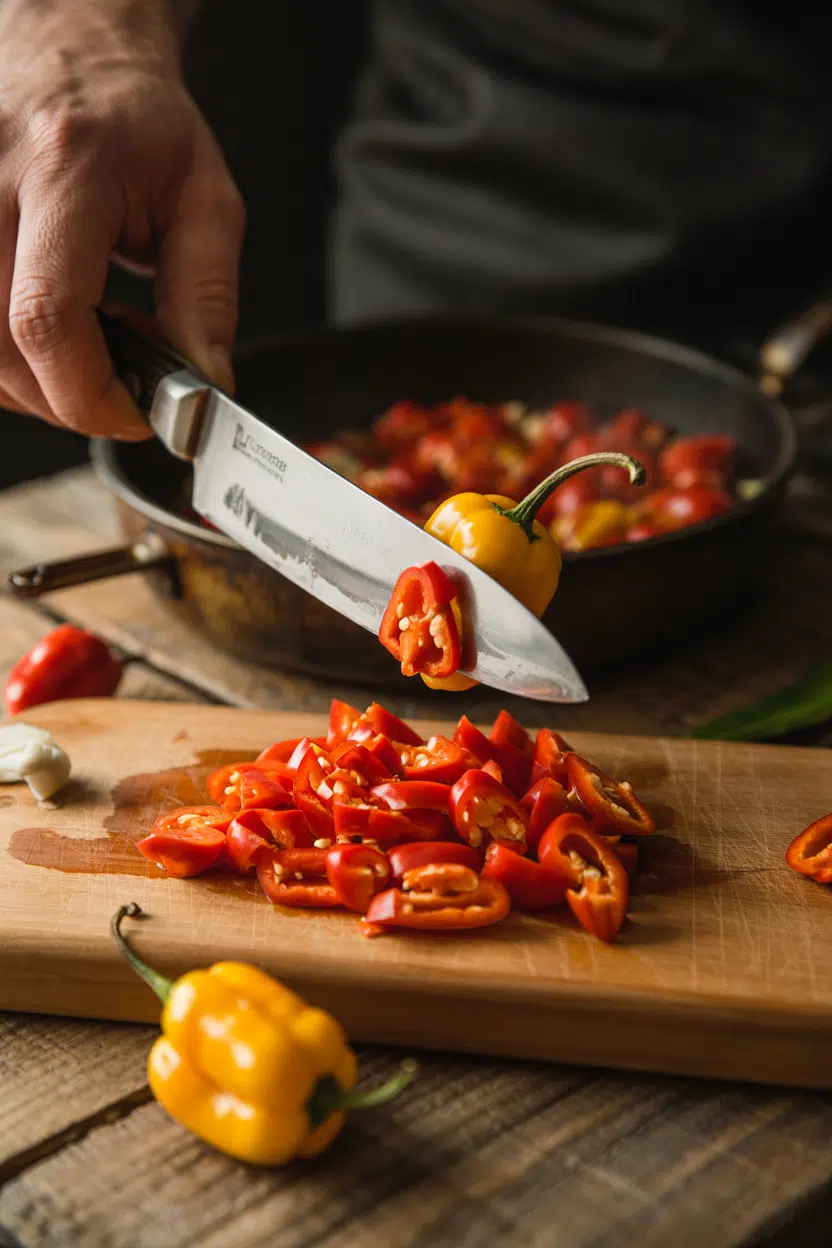
Scotch bonnet oils are potent enough to burn eyes and skin. Always handle with gloves, and never touch your face mid-prep. Wash hands and cutting boards thoroughly with soap immediately after.

For storage:

  • 🌶️ Whole in the fridge - wrap in paper towel inside a container or perforated bag; keeps 1-2 weeks
  • ❄️ Frozen purée - blend with oil or vinegar before freezing; lasts up to 6 months
  • 🧴 Pickled or dried - significantly extends shelf life; dried flakes keep up to a year in an airtight jar

Proper seasoning with scotch bonnet pepper depends partly on how long your supply has been stored - older peppers lose some top-note brightness even before they visibly deteriorate.

Where to Start With Scotch Bonnet

If you're cooking with scotch bonnet for the first time, start with a puréed jerk marinade. You control how much goes in, and the allspice and citrus in the mix give the heat somewhere to land.

  • 🟢 Start here - one pepper puréed into a jerk marinade for chicken; taste before adding more
  • 🔁 Next step - sweat half a minced pepper into a stew base to understand how heat infuses over time
  • 🔄 Need a swap? - [alternatives to scotch bonnet pepper](https://forkliftkitchen.com/scotch-bonnet-pepper-substitutes/) cover the closest heat-and-flavor matches; [habanero pepper swaps that work](https://forkliftkitchen.com/habanero-pepper-substitutes/) are worth checking if habanero is what you have on hand

Scotch bonnet rewards restraint at first. One pepper goes further than most cooks expect.

Frequently Asked Questions

How hot is a scotch bonnet compared to a jalapeño?

Significantly hotter. Scotch bonnet registers 100,000-350,000 Scoville heat units; a jalapeño tops out around 8,000. That makes scotch bonnet roughly 12-25 times more intense, with a heat that builds and lingers rather than fading quickly.

Can I substitute habanero for scotch bonnet?

Yes - it's the closest widely available substitute. Habanero matches the heat range, but the flavor is more floral and slightly less sweet than scotch bonnet's tropical profile. Use a 1:1 ratio and expect a minor flavor shift.

What color indicates ripeness for scotch bonnet?

Orange, red, and yellow scotch bonnets are fully ripe and carry the most developed fruit sweetness. Green peppers are unripe - still usable, but sharper and more vegetal with less of the tropical character ripe ones deliver.

How do you remove heat from a dish with scotch bonnet?

Add coconut milk, starchy vegetables like sweet potato, or extra acid from lime juice - all dilute capsaicin intensity. Dairy fats also help, but avoid raw cream in high-acid dishes since it can split.

Is scotch bonnet safe to eat if you have digestive sensitivity?

Use with caution. Capsaicin at high concentrations can aggravate reflux and IBS symptoms. Cooking the pepper into a stew base rather than using it raw reduces direct irritation without fully eliminating the effect.

How Long Does Tomato Paste Last? [Storage Guide]

April 2, 2026

You just cracked open a can of tomato paste, used a tablespoon, and now you're staring at the leftovers wondering how long they'll actually keep. Opened tomato paste spoils faster than most pantry staples - mold can appear within days if you store it carelessly.

How Long Does Tomato Paste Last In The Fridge

The same portion-and-freeze strategy that works for keeping herbs in ice cube trays fresh applies here too, and it saves you from throwing out half a can every time you cook.

Understanding tomato paste's flavor and uses also helps you plan how much to keep on hand.

QUICK SUMMARY

Unopened tomato paste keeps 12-18 months in the pantry. Once opened, it lasts 5-7 days in the fridge in an airtight container with an oil seal, or up to 3-4 months in the freezer when portioned into cubes. Never leave opened paste at room temperature.

🥫Pantry (unopened): 12-18 months; check best by date before use
🧊Fridge (opened): 5-7 days in an airtight container with oil seal
❄️Freezer (opened): 3-4 months; portion into cubes for easy use

How Long Does Tomato Paste Last?

Shelf life depends almost entirely on whether the can or tube is open. Unopened canned tomato paste sits comfortably in the pantry for 12-18 months, protected by its sealed environment. Once you break that seal, the clock moves fast.

Tomato Paste Shelf Life
MethodStateDurationNotes
🏠 PantryUnopened12-18 monthsCool, dark location; check best by date
🧊 FridgeOpened5-7 daysAirtight container; oil seal extends freshness
❄️ FreezerOpened3-4 monthsPortion into cubes; flavor fades beyond 4 months
🏠 PantryOpenedNot recommendedMold and off flavors develop rapidly

The tomato paste tube format behaves differently from cans - the nozzle limits air exposure each time, so a refrigerated tube can outlast an opened can by a few extra days.

That said, the 5-7 day window is still the safe guideline regardless of format.

How to Store Tomato Paste

The single biggest mistake people make is leaving leftover paste in the original can. Metal can corrosion causes off flavors and discoloration quickly, so always transfer the paste before refrigerating.

Watch Out
Never refrigerate opened tomato paste in the metal can. The exposed metal reacts with the acidic paste and causes off flavors within 24 hours. Transfer to glass or plastic every time.

Here's how to store it properly by method:

  • Fridge - Move paste into a small airtight glass jar or a sealed ramekin; smooth a thin layer of olive oil over the surface to block air contact and slow mold.
  • Pantry (unopened) - Keep cans and tubes in a cool, dark spot away from the stove or any heat source; humidity accelerates rust on cans.
  • Tube format - Seal the cap tightly after each use and refrigerate; the tube's design minimizes air exposure far better than a half-empty can.
  • Portioning trick - Spoon paste into tablespoon-sized portions before storing so you only open and expose what you actually need next time.

Always use a clean spoon each time you scoop. Introducing contaminants from a used utensil speeds up spoilage noticeably.

Can You Freeze Tomato Paste?

Yes, and for most home cooks it's the most practical option. Freezing tomato paste in small portions means you never need to use an entire can in one sitting - a frozen cube drops straight into a simmering sauce with no thawing required.

  1. Portion it out - Spoon paste into an ice-cube tray in tablespoon-sized amounts, or drop mounds onto a parchment-lined baking sheet.
  2. Freeze solid - Leave in the freezer for 2-3 hours until each portion is completely firm.
  3. Transfer to a bag - Move the frozen cubes into a labeled **freezer bag**, pressing out as much air as possible before sealing.
  4. Label clearly - Write the date and portion size on the bag; cubes look identical after a few weeks.
  5. Thaw as needed - Drop a cube directly into a hot pan or sauce, or thaw overnight in the fridge if you need a larger amount.

Texture does soften slightly after freezing - thawed paste becomes a touch grainier. Heat fixes this completely, so it's a non-issue in cooked dishes.

If you run out and need a substitute while your frozen stash is locked up, there are solid replacements for tomato paste worth knowing.

Golden Rule
Never freeze tomato paste as a single large block. Thawing more than you need forces refreezing or waste. Cubes solve both problems.

Signs Tomato Paste Has Gone Bad

Tomato paste gives clear warnings before it becomes dangerous. Visible mold is the most obvious - white, gray, or green patches on the surface mean the entire container goes in the bin, not just the top layer.

Signs It's Gone Bad
👀
VisualWhite, gray, or green mold on surface · Dark brown or black streaks · Slimy film despite oil seal · Heavy separation with cloudy liquid
👃
SmellSour or fermented odor · Rotten smell instead of bright tomato tang
✋
TextureMucusy or slimy surface · Extreme watery separation with gritty solids

A small amount of liquid separation at the top is normal - just stir it back in. Cloudy, discolored liquid alongside any off smell is a different story entirely.

Heat won't save moldy paste. Cooking does not neutralize mold toxins, so if you spot mold or catch a sour smell, discard the whole container.

Getting the Most From Every Can

Small habits make a real difference with tomato paste. None of these require extra equipment - just a bit of intention the first time you open a can.

  • 🫙 Oil seal every time - After each use, smooth a fresh layer of olive oil over the surface before closing the lid; this is your primary mold barrier.
  • 🧊 Switch to tubes for small batches - A tomato paste tube stays fresher between uses than a can because air exposure is minimal each time.
  • 🏷️ Label freezer bags immediately - Date and portion size written at the moment of freezing saves guesswork later.
  • 🥄 Dedicated clean spoon only - Cross-contamination from a used utensil is one of the fastest ways to shorten fridge life.

If your recipe calls for more tomato base than you have on hand, swapping out canned tomato or swapping out tomato puree are both practical paths depending on the dish.

When the olive oil seal becomes part of your routine, consider how olive oil cooking methods vary so you're always choosing the right oil for the right job.

Frequently Asked Questions

Can you freeze tomato paste in ice cube trays?

Yes - it's the most efficient method. Spoon tablespoon-sized amounts into the tray, freeze solid, then transfer cubes to a labeled freezer bag. Each cube goes straight into a hot pan without thawing.

How long is tomato paste good after opening?

Five to seven days in the fridge in an airtight container. An olive oil seal over the surface extends freshness toward the upper end of that window.

Is brown tomato paste bad?

Light browning at the edges from oxidation is normal and not a safety issue. Dark brown or black streaks throughout the paste, especially alongside an off smell, indicate spoilage - discard it.

Can you store tomato paste in oil?

A thin layer of oil on top acts as an air barrier and slows mold, but it doesn't replace refrigeration. Keep the container sealed and cold regardless of the oil layer.

Does tomato paste in a tube last longer than in a can?

Generally yes. The sealed nozzle limits air contact each time, so the paste stays fresh longer than a repeatedly opened can. Both still require refrigeration after first use.

Thai Nam Jim Seafood Sauce

April 2, 2026

Most Thai sauces come loaded with prep steps and specialty pastes you don't have. Nam Jim Seafood Sauce skips all that-five minutes, seven ingredients, no cooking required.

Thai Nam Jim Seafood Sauce served on a plate

The balance of salty fish sauce, sour lime juice, sweet palm sugar, and fiery chilies creates a sauce that cuts through rich seafood without overpowering it. You adjust as you go, tasting until the flavors snap into place.

Make this when grilled shrimp or steamed fish needs something sharper than plain soy sauce. It works for weeknight dinners and backyard seafood boils where you want authentic Thai heat without marinating overnight.

QUICK SUMMARY

Thai Nam Jim Seafood Sauce balances salty fish sauce, fresh lime juice, palm sugar, and Thai bird's eye chilies into a bright condiment for grilled or steamed seafood. No cooking required-just dissolve the sugar, pound the aromatics, and taste until the sweet-sour-salty-spicy balance hits. Ready in 10 minutes with ingredients you can find at any Asian market.

⏱️Time Reality: 10 minutes total, no marinating or waiting
🔑Success Move: Dissolve palm sugar completely before adding other ingredients
⚠️Watch Out: Too much chili overpowers-add gradually and taste between additions

Why This Recipe Works

The trick is balancing four distinct flavors instead of cooking anything. Most people skip this for weeknight meals because they assume it requires hard-to-find ingredients, but for quick butter recipe fans who want something sharper, this delivers.

Quick Reference
⏱️
Prep Time
10 min
🔥
Cook Time
0 min
⏰
Total Time
10 min
🍽️
Servings
8 servings
📊
Difficulty
Easy
🏷️
Category
Condiment
💡
Quick Tip
Balance salty, sour, sweet, and spicy precisely
🎯
Best For
Weeknight | Entertaining

Five reasons this sauce works:

  • Fresh lime juice creates the bright acidity that cuts through fatty grilled shrimp or rich steamed fish without tasting bottled or flat
  • Palm sugar dissolves into mild caramel sweetness that rounds out harsh edges from fish sauce and balances sharp lime without turning syrupy
  • Pounding garlic and chilies in a mortar releases oils and creates texture-crushed bits suspended in liquid instead of pureed smoothness
  • Fish sauce delivers umami depth that makes the sauce taste complex instead of one-note sour or sweet
  • Adjusting ratios by tasting every 30 seconds teaches you what balanced Southeast Asian flavors feel like on your tongue
Quick Tip
Remove chili seeds and membranes for milder heat that still delivers authentic Thai flavor without making your eyes water.

What You'll Need

Ingredients for Thai Nam Jim Seafood Sauce

You need fresh ingredients more than specialty equipment. The this more dip ideas approach works here too-simple pantry items mixed right before serving.

🥢
Base Liquid
  • 3 tablespoons fish sauce
  • 3 tablespoons fresh lime juice
  • 2 tablespoons water
🌶️
Heat & Aromatics
  • 3-5 fresh red Thai bird's eye chilies
  • 3 garlic cloves
  • 1 shallot
🫙
Sweetener & Herb
  • 1 tablespoon palm sugar
  • 2 tablespoons chopped cilantro

Ingredient Details

  • Fish sauce
    Provides essential umami and salty base-measure carefully as brands vary in intensity
  • Fresh lime juice
    Gives bright, fresh acidity that defines the sauce-bottled juice tastes flat and throws off balance
  • Palm sugar
    Adds mild caramel sweetness that balances sour and salt-must dissolve completely to avoid grainy texture
  • Red Thai bird's eye chilies
    Delivers authentic heat and flavor-start with 3 chilies and add more after tasting
  • Garlic cloves
    Adds pungent depth when pounded-use fresh garlic and avoid over-crushing to prevent bitterness
  • Cilantro
    Fresh herbaceous notes balance the sauce-chop finely just before mixing for maximum flavor
  • Shallots
    Optional for mild sharpness-can omit if you prefer a simpler flavor profile

Ingredient Swaps

Most swaps work but change the flavor profile slightly. The this simple homemade beef logic applies-you can adjust heat, sweetness, or umami without destroying the sauce.

Four swaps that work:

  • Brown sugar or white sugar for palm sugar - Changes caramel notes and may taste less complex, but still balances sour and salty elements
  • Serrano or jalapeño for Thai bird's eye chilies - Lowers heat and shifts flavor away from authentic Thai profile, but keeps the sauce spicy enough
  • Soy sauce or tamari for fish sauce - Less umami depth and slightly altered salt profile, works for vegetarian or gluten-free versions
  • Fresh parsley for cilantro - Changes fresh herb note and removes citrusy quality, but still adds green brightness

Palm Sugar

Works for: Authentic caramel sweetness that balances without tasting like table sugar

Skip if: You can't find it-brown sugar works in a pinch and most people won't notice

Thai Bird's Eye Chilies

Works for: High heat level and authentic Thai flavor that defines Nam Jim

Skip if: You want milder sauce-use serrano and remove seeds for less burn

Fresh Lime Juice

Works for: Bright acidity that tastes fresh-squeezed and balances fish sauce perfectly

Skip if: You're truly desperate-bottled lime juice works but tastes noticeably flat

Instructions

The sauce comes together in one bowl with no cooking required. Rich mains need something to cut through, and this rich homemade rice recipe timing principle applies-mix just before serving for brightest flavor.

Five steps to balanced Nam Jim:

  1. Dissolve palm sugar in warm water and lime juice (2-3 minutes). Stir until liquid is clear with no grainy bits-undissolved sugar causes uneven sweetness and gritty texture that coats your tongue wrong.

  2. Pound garlic and chilies in mortar and pestle until crushed but not pureed. You want small chunks suspended in sauce, not smooth paste-over-pounding creates bitterness and loses texture contrast.

  3. Mix pounded garlic-chili mixture with dissolved sugar liquid and fish sauce. Stir vigorously for 30 seconds until everything combines into clear amber liquid with green-red flecks.

  4. Add chopped cilantro and shallots if using. Chop herbs finely just before mixing so they stay bright green and fragrant instead of turning dark or wilted.

  5. Taste and adjust balance of salty, sour, sweet, and spicy. Add small amounts of missing element-more fish sauce for salt, lime for sour, sugar for sweet, chili for heat-and taste after each addition until flavors snap into place.

Golden Rule
Taste every 30 seconds while adjusting-the difference between balanced and overpowering is one extra teaspoon of fish sauce or lime juice.

What to Serve With It

The sauce works best with mild seafood that needs acid and heat. The this this quick soup dish works best when it hits the table at the same time as the main, and for complete mexican street corn meal ideas, this sauce adds Thai brightness to grilled proteins.

Side Dish Prep Why It Works How to Serve
Steamed jasmine rice Easy Neutral base absorbs sauce and balances heat Spoon sauce over rice or serve in small bowl for dipping
Grilled shrimp Easy Classic pairing with fresh sauce cuts through rich shellfish Drizzle sauce over hot shrimp or serve as dipping condiment
Light cucumber salad Easy Cool and crisp offsets spicy sauce without competing Toss cucumber slices in separate bowl, serve sauce on side
Steamed vegetables Easy Healthy mild pairing softens strong sauce notes Pour sauce over steamed broccoli, green beans, or bok choy
Rice noodle salad Medium Absorbs sauce and showcases bright flavors with herbs Toss cold rice noodles with sauce and fresh herbs just before serving

Three ways to serve it:

  • As a dipping sauce for fresh seafood platter - Set out small bowls with grilled shrimp, steamed mussels, and crab claws for entertaining
  • Drizzled over grilled chicken skewers - Adds spicy-sour zing to mild meat without overpowering the charred flavor
  • Mixed into Thai fresh spring rolls - Complements fresh herbs and mild rice paper with bright heat and umami
Shortcut
Make sauce up to 4 hours ahead and refrigerate-bring to room temperature before serving so flavors bloom fully.

Store and Reheat

The sauce keeps for 3-4 days but tastes brightest when fresh. The this something juicy like sauce approach works-refrigerate in glass and stir before serving at room temperature.

Method Time Best For
🌡️ Room temperature 5-10 min Best flavor-pull from fridge and let sit while you cook
🍳 Stovetop 1-2 min low heat Warming before serving with hot seafood-stir gently
📦 Microwave 30 sec low power Quick warm up when rushed-stir after heating

For best results when storing:

  • Transfer to airtight glass container immediately - Plastic absorbs fish sauce smell and discolors from lime acid
  • Refrigerate within 30 minutes of mixing - Room temperature fish sauce and lime juice can develop off flavors quickly
  • Stir before serving - Ingredients settle and separate, need mixing to redistribute garlic and chili bits
  • Add fresh cilantro after reheating - Old herbs turn dark and bitter, chop new ones just before serving
  • Don't freeze - Thawed sauce tastes watery and loses bright acidity that defines Nam Jim

Frequently Asked Questions

Can I substitute lime juice with lemon juice in Nam Jim Seafood Sauce?

Lemon juice works in a pinch but tastes sharper and less floral than lime. Use the same amount but expect the sauce to taste more citrusy-tart than bright-tangy.

How long can I store Thai Nam Jim Seafood Sauce in the refrigerator?

Store in airtight glass container for 3-4 days. The sauce stays safe longer but loses bright lime flavor and fresh herb notes after day four.

What are signs that Thai Nam Jim Seafood Sauce flavor is balanced?

Balanced sauce hits salty, sour, sweet, and spicy notes equally-no single flavor overpowers. You should taste fish sauce umami, lime brightness, sugar roundness, and chili heat in one cohesive bite.

Why does my Nam Jim Seafood Sauce taste bitter and how to fix it?

Bitterness comes from over-pounded garlic or old spices releasing harsh compounds. Add small amounts of sugar or lime juice to balance, or make fresh batch with gentler pounding.

What dishes pair best with Thai Nam Jim Seafood Sauce for entertaining?

Fresh seafood platter with grilled shrimp, steamed mussels, and crab works best. Thai fresh spring rolls and grilled chicken skewers also pair well for variety.

Thai Nam Jim Seafood Sauce served on a plate

Thai Nam Jim Seafood Sauce

No ratings yet
Thai Nam Jim Seafood Sauce combines salty fish sauce, fresh lime juice, palm sugar, and fiery chilies into a bright, no-cook condiment perfect for grilled or steamed seafood. This quick sauce balances savory, sour, sweet, and spicy flavors in just 10 minutes for authentic Thai heat without complicated prep.
Print Recipe Pin Recipe
Prep Time 10 minutes mins
Cook Time 1 minute min
Total Time 11 minutes mins
Servings: 8 servings
Course: Condiment
Cuisine: Thai
Ingredients Equipment Method Notes

Ingredients
  

  • 3 tablespoons fish sauce essential umami and salty base
  • 3 tablespoons lime juice freshly squeezed for bright acidity
  • 2 tablespoons water warm for dissolving palm sugar
  • 3-5 count red Thai bird's eye chilies adjust quantity to desired heat
  • 3 cloves garlic pounded but not pureed
  • 1 count shallot optional, finely chopped
  • 1 tablespoon palm sugar dissolved completely
  • 2 tablespoons cilantro fresh, chopped

Equipment

  • Mortar and Pestle For pounding garlic and chilies

Method
 

  1. Dissolve palm sugar in warm water and lime juice, stirring for 2-3 minutes until no grainy bits remain.
    1 tablespoon palm sugar, 2 tablespoons water, 3 tablespoons lime juice
  2. Pound garlic cloves and red Thai bird's eye chilies in a mortar and pestle until crushed but not pureed.
    3 cloves garlic, 3-5 count red Thai bird's eye chilies
  3. Mix the pounded garlic-chili mixture with the dissolved sugar liquid and fish sauce, stirring vigorously for 30 seconds until combined.
    3 tablespoons fish sauce, 3 tablespoons lime juice, 1 tablespoon palm sugar, 3-5 count red Thai bird's eye chilies, 3 cloves garlic
  4. Add chopped cilantro and shallot if using, mixing gently to combine.
    2 tablespoons cilantro, 1 count shallot
  5. Taste and adjust flavors by adding small amounts of fish sauce, lime juice, sugar, or chili until the sweet-sour-salty-spicy balance is perfect.
    3 tablespoons fish sauce, 3 tablespoons lime juice, 1 tablespoon palm sugar, 3-5 count red Thai bird's eye chilies

Notes

  • Dissolve palm sugar completely for smooth sweetness and to avoid grainy texture.
  • Add chilies gradually and taste frequently to control heat without overpowering.
  • Use fresh lime juice and fish sauce for authentic, balanced flavors.

Tried this recipe?

Let us know how it was!

What Is Sourdough Bread? [Taste, Uses & More]

April 2, 2026

Most people assume sourdough is just bread with a sour flavor added in.

What Does Sourdough Bread Taste Like

What's actually happening is far more interesting - a live culture of wild yeast and lactobacilli slowly ferments the dough over hours or even days, building acidity, structure, and a crust unlike anything commercial yeast produces.

If you're working with a new loaf or baking your own, knowing alternatives to bread flour can help you understand why flour choice shapes the final result.

That fermentation process is also what makes sourdough behave differently from other loaves when it comes to cooking bread perfectly.

QUICK SUMMARY

Sourdough bread is a naturally leavened loaf fermented by wild yeast and bacteria. It has a mild lactic tang, chewy open crumb, and a thick blistered crust. Best within 2-4 days, it suits toast, sandwiches, croutons, and rustic open-faced preparations.

🍞Type: Fermented leavened bread using wild yeast and lactobacilli
👅Flavor: Mild tang, nutty caramelized crust, subtle fruity acidity
✋Texture: Chewy open crumb, crisp blistered crust, moist interior
🔥Best Uses: Toast, grilled sandwiches, croutons, French toast, bread bowls
📅Shelf Life: 2-4 days room temp; frozen slices last 1-3 months
🛒Buy It: Look for dark-golden blistered crust and audible crack when tapped

What Is Sourdough Bread?

Sourdough is one of the oldest forms of leavened bread, with roots traced back to ancient Egypt and the Levant.

Unlike modern yeasted breads, it relies on a sourdough starter - a live culture of wild yeast and lactic acid bacteria maintained by regular flour and water feedings.

That starter drives fermentation, which produces carbon dioxide for lift and organic acids for flavor. The result is a loaf in a category of its own: often called levain bread, natural-leavened bread, or starter bread depending on region and tradition.

San Francisco sourdough is the most recognized regional style, defined by its pronounced tang from Lactobacillus sanfranciscensis. European styles, especially French and Nordic, tend toward a milder lactic character.

Flour choice also shapes the loaf significantly. Many bakers use bread flour as the base, though swapping out whole wheat flour in partial amounts is a common approach to add earthiness without losing structure.

Varieties range from high-hydration open-crumb loaves to denser, more acidic whole-grain versions built with rye flour.

What Does Sourdough Bread Taste Like?

sourdough bread - What Does Sourdough Bread Taste Like

Sourdough's flavor doesn't land in one place. The crumb carries a mild lactic tang - closer to plain yogurt than vinegar - while the caramelized crust adds nutty, toasty, almost malt-like notes that balance the acidity.

Sensory SnapshotModerate Intensity
👅 Flavor
Lactic tangNutty crustFruity acidityToasty malt
✋ Texture
Chewy open crumbCrisp blistered crust
👃 Aroma
Yeasty sournessToasted grain

Heat changes the profile noticeably. Toasting deepens crust caramelization and amplifies those malt and nutty notes while pulling some acidity back.

A cold slice straight from the fridge reads mild and slightly dense - not the same bread at all.

Golden Rule
Always bring refrigerated sourdough to room temperature before eating it plain - cold suppresses the lactic tang and makes the crumb feel gummy.

Fermentation length also drives sourness. Longer cold retardation during bulk fermentation increases acetic acid production, pushing the flavor toward a sharper tang.

Shorter, warmer ferments produce more lactic acid, which reads milder and creamier.

How to Use Sourdough Bread

Sourdough's open crumb and thick crust make it well-suited for preparations that need structural integrity and flavor contrast. The irregular holes absorb fat and liquid without collapsing, and the crust holds up to heat better than softer sandwich loaves.

How Sourdough Bread Is Used
MethodBest ForTip
🍞 Sliced/ToastedButter, jam, soft cheeses, avocadoToast until crust re-crisps for best texture
🥪 Grilled/PressedPanini, grilled cheese, open-faced sandwichesBrush with olive oil - crumb absorbs it evenly
🍳 Pan-FriedRustic French toast, buttered pan slicesSour notes cut sweetness; use day-old slices
🥣 Baked/CubedCroutons, stuffing, strata, bread puddingDry cubes overnight before baking for cleaner texture
🥗 Torn/StaledPanzanella, bread bowls, breadcrumbsDay-two or day-three loaves work better than fresh

Pairing works best with ingredients that either echo or contrast the tang. Unsalted butter, sharp cheddar, cured salmon, and pickled vegetables all hold their own against the acidity.

Tomato, basil, and mozzarella on grilled sourdough is a straightforward Mediterranean combination that highlights the bread rather than burying it.

European and American artisan traditions both use sourdough as a platform for sourdough bread in grain dishes and hearty pairings that would overwhelm a softer loaf.

Skip very delicate floral honeys or bitter greens - both clash with the fermented tang rather than complementing it.

Shortcut
Stale sourdough from day three is better for croutons and panzanella than a fresh loaf - drier crumb toasts more evenly and absorbs dressings without going soggy.
Try It In
🍞Classic Sourdough Bread RecipeThe baseline — starter-driven, open crumb, blistered crust→🌾Healthy Sourdough Bread RecipeWhole grain variation with deeper earthiness and lower GI→🥪Gluten Free Sourdough Sandwich Bread RecipeFor those avoiding gluten but wanting fermented bread flavor→

How to Buy and Store Sourdough Bread

A quality loaf announces itself immediately. Tap the bottom - a hollow sound means the crust has dried and set properly during baking. The surface should show a dark-golden blister pattern, not a pale, matte finish.

  • ✅ Dark-golden blistered crust - indicates high oven temperature and proper fermentation
  • ✅ Audible crust crack - tap the base; hollow sound confirms correct bake
  • ✅ Open, irregular crumb - varied hole sizes signal good hydration and fermentation
  • ❌ Pale or soggy crust - often under-baked or low-starter loaves with commercial yeast added
  • ❌ Uniform small holes - typical of commercial "sourdough-flavored" bread, not true fermented loaves

Store whole loaves in a paper bag or linen bread bag at room temperature - never sealed in plastic for more than a day, which softens the crust and traps moisture.

For details on exactly how long each storage method holds up, sourdough bread's shelf life breaks it down day by day.

Watch Out
Airtight plastic bags ruin sourdough crust within hours. If you need to keep it more than two days, slice and freeze - don't refrigerate, which stales bread faster than room temperature storage.

Slice and freeze what you won't use within 2-4 days. Frozen slices toast directly from frozen with no defrosting required.

If you're maintaining a starter at home, freezing sourdough starter is also worth understanding for long-term backup.

Where to Start With Sourdough

Start with a bakery loaf before committing to home baking. Once you know the flavor profile - that lactic tang, the resistance of the crumb, the crust's crack - you'll have a reference point for every decision after.

If a classic white sourdough reads too sharp for your preference, try a loaf made with a mix of bread flour and whole wheat.

Richer, earthier, and slightly less acidic - if you're exploring home baking, rye flour stand-ins can help you dial back intensity further.

For cooking, start with toast and grilled cheese. Both show exactly what sourdough does that no other bread can replicate.

Frequently Asked Questions

Is sourdough bread healthier than regular bread?

Fermentation reduces phytates, which may improve mineral absorption from the bread. Some studies show a lower glycemic response compared to standard yeasted loaves, though results vary by recipe and flour type. Sourdough still contains gluten and is not safe for celiac disease.

Why does sourdough taste sour?

Lactobacilli in the starter produce lactic and acetic acids during fermentation. Lactic acid gives a mild, creamy tang; acetic acid produces sharper sourness. The balance between the two depends on fermentation temperature and duration.

How long should sourdough ferment for best flavor?

Most bakers use a bulk fermentation of 4-6 hours at room temperature, followed by an overnight cold retard of 8-16 hours. The cold retard builds acetic acid and complexity without over-proofing the dough.

What makes sourdough crust so crispy?

High oven temperatures - typically 230-260°C (450-500°F) - and steam during the first phase of baking create the blistered, crackling crust. Steam keeps the surface flexible for oven spring, then dry heat sets it hard.

How do you reduce sourness in sourdough?

Use a warmer, shorter fermentation to favor lactic acid over acetic acid production. Skipping or shortening the cold retard significantly mellows the tang. A higher-hydration dough also tends to produce a milder flavor.

What Is Tomato Paste? [Taste, Uses & More]

April 2, 2026

You spot it on the shelf - a small can or a slender tube, easy to overlook next to the larger jars of swapping out tomato puree or crushed tomatoes.

What Is Tomato Paste

Tomato paste is the most concentrated form of tomato you can buy, and a single tablespoon does work that a cup of fresh tomatoes cannot.

Most home cooks underuse it or reach for it only as an afterthought, which is exactly where this guide comes in.

QUICK SUMMARY

Tomato paste is cooked-down, strained tomatoes sold in cans, tubes, or jars. It delivers deep umami, balanced acidity, and subtle sweetness in small amounts. Use it to build sauce bases, enrich braises, and glaze roasted meats.

🍅What It Is: Concentrated tomato product, cooked down and strained smooth
👅Flavor: Deep umami, tangy-acidic, faintly sweet and caramelized
🍳Best Uses: Sauce bases, braises, glazes, chili, pan sauces
📦Shelf Life: Unopened up to 24 months; opened, refrigerate and use within 3 weeks
🛒Buy: Look for deep brick-red color; tubes waste less than cans once opened

What Is Tomato Paste?

Tomato paste is a concentrated tomato product made by cooking fresh tomatoes for several hours, then straining out seeds and skins, and cooking the pulp again until thick.

The result is dense, smooth, and far more potent than anything labeled tomato sauce or tomato purée.

It has roots in Mediterranean cooking, particularly Italian and Spanish kitchens where preserving summer tomatoes in concentrated form was both practical and necessary.

You'll also see it labeled as tomato concentrate or double-concentrated tomato paste - the latter contains about twice the solids of standard paste.

Three main formats exist on the market today:

  • 🥫 Cans (small, 6 oz) - widely available and inexpensive, but require prompt use after opening
  • 🧴 Tubes - resealable and fridge-ready; far less waste for recipes needing only a tablespoon or two
  • 🫙 Jars - common in Middle Eastern and specialty stores, sometimes oil-packed for extended shelf stability

What Does Tomato Paste Taste Like?

tomato paste - What Is Tomato Paste

Raw from the tube, tomato paste hits hard - intensely savory, acidic, and slightly metallic in a way that signals it's not meant to be eaten straight. That rawness disappears quickly with heat.

Once sautéed in oil for even 60 seconds, the flavor shifts toward something roasted and caramelized. The sharpness softens, and the natural sweetness of the tomato becomes more pronounced.

Think of it as concentrated tomato sauce reduced to its boldest essence, with an umami depth closer to a long-simmered ragù than anything fresh.

Sensory SnapshotStrong Intensity
👅 Flavor
Umami-richTangyCaramelized
✋ Texture
DenseSmooth
👃 Aroma
Roasted tomatoCaramel

How to Use Tomato Paste

Tomato paste earns its place early in cooking, not late. Frying it briefly in olive oil - a technique sometimes called "blooming" - strips out the raw, sharp edge and builds a caramelized base before any liquid enters the pan.

It's the foundation step in a proper Bolognese, and it's also what separates a flat tomato sauce from one with genuine depth.

Beyond pasta, the uses branch out considerably.

Italian ragù and Mediterranean braises both rely on paste for color and body.

American chili and sloppy joes use it to concentrate tomato flavor without adding liquid.

Mixed with honey or vinegar for balance, it makes a quick glaze for roasted lamb or pork.

Whisked into pan drippings with a splash of stock, it becomes an instant umami-forward sauce.

If you find yourself without any on hand, exploring alternatives to tomato paste is a useful detour - though most substitutes need more volume to match the intensity.

Golden Rule
Always cook tomato paste in fat for at least 60 seconds before adding liquid. This single step removes rawness and doubles its depth of flavor.

Pairings that consistently work well with tomato paste include onion and garlic, red wine or stock, basil and oregano, and any combination of beef, lamb, or pork.

The paste's natural acidity responds well to a pinch of sugar or a drizzle of honey, especially in long-cooked dishes.

Understanding red wine cooking methods helps when you're deglazing after browning the paste, since the wine lifts the fond and integrates with the tomato in a way plain stock doesn't.

How Tomato Paste Is Used
MethodBest ForTip
🍳 Sauté in fatSauce bases, ragù, BologneseCook on medium heat, stirring constantly - 60-90 seconds max
🥘 Braise liquidStews, short ribs, lamb shanksStir into liquid before adding to pot; it dissolves evenly
🍯 Glaze baseRoasted meats, ribs, chicken thighsBalance with honey or vinegar; brush on in the last 15 minutes
🥄 Stir-inChili, bean dishes, meatloafAdd directly to wet mixtures - no pre-cooking needed here
Try It In
🥐Portuguese Pastéis de NataClassic Portuguese tart worth having in your repertoire→🌶️Korean Ssamjang PasteSee how concentrated paste builds bold flavor in sauce form→🍮Pastel de Nata Portuguese TartAnother take on the custard tart if you want to compare methods→

How to Buy and Store Tomato Paste

Good tomato paste is deep brick-red, glossy, and uniform throughout the can or tube.

Avoid anything pale, brownish, or separated into an oily top and a chalky, dry base - those are signs of age or poor storage before it reached the shelf.

For buying format, tubes are the smarter choice for most home cooks.

A can forces you to use or store the remainder within days, while a tube seals after each use and keeps refrigerated for weeks.

When checking tomato paste's shelf life more closely, unopened cans stay shelf-stable for 12-24 months.

Once opened, transfer any leftover canned paste to an airtight container and refrigerate.

Shortcut
Freeze leftover canned tomato paste in tablespoon-sized portions on a lined tray, then transfer to a bag. Each portion is ready to grab straight from freezer to pan - no thawing needed.

If you're out of paste and the recipe calls for olive oil as the cooking fat, knowing your olive oil swaps that work keeps the base intact while you improvise.

Frozen paste lasts up to six months with no meaningful flavor loss.

Start Here If You're New to It

New to cooking with tomato paste? Start with a simple pasta sauce - sauté one tablespoon in olive oil with minced garlic and onion, then build your sauce from there.

That single step will show you more about what this ingredient does than any recipe description can.

Once you're comfortable with the bloom technique, try working it into a braise or chili. Those dishes benefit from its color and depth even when it's playing a supporting role, not the lead.

Watch Out
More is not better here. Two tablespoons in a small sauce can tip it from savory into bitter and harsh. Start with less than you think you need.

Frequently Asked Questions

Is tomato paste the same as tomato sauce?

No. Tomato sauce is thin, lightly seasoned, and ready to use as-is. Tomato paste is cooked down much further - roughly three times the solids - making it far more concentrated in flavor and texture.

Does tomato paste need to be cooked before eating?

It's safe raw but tastes sharp and metallic straight from the can. Cooking it in fat for at least 60 seconds removes that rawness and unlocks its sweeter, roasted qualities.

How much tomato paste replaces fresh tomatoes?

One tablespoon of tomato paste approximates the flavor of about three medium fresh tomatoes, though it contributes no liquid. Add water or stock alongside it to compensate for the missing moisture.

What is tomato paste mainly used for?

Primarily as a flavor base - sautéed early to build depth in sauces, stews, and braises. It also works as a glaze binder for meats and as a quick umami boost stirred into gravies or chili.

Can you use tomato paste instead of tomato purée?

Yes, with adjustment. Use about one-third the amount of paste and add water to reach the right consistency. The flavor will be more intense, so taste and correct seasoning before finishing the dish.

Indian Mint Cilantro Chutney

April 2, 2026

When you need a condiment that works for meal prep or a last-minute entertaining spread, mint cilantro chutney delivers. Five minutes of blending and you have a bright, herbaceous sauce that makes plain rice bowls and grilled proteins taste intentional.

Indian Mint Cilantro Chutney served on a plate

Roast the cumin first and the chutney develops warm, earthy depth instead of tasting flat. The high-speed blender does the work while you measure out the other ingredients.

Perfect for weeknight dinners when you want fresh flavor without the fuss.

QUICK SUMMARY

This Indian mint cilantro chutney blends fresh herbs with lemon juice and roasted cumin into a smooth, herbaceous condiment in 15 minutes. Toast the cumin briefly to unlock aroma, then blend everything with just enough water to keep it thick. Balance salt and acid at the end so the chutney tastes bright, not harsh.

⏱️Time Reality: 15 minutes total, 5 for toasting spices, 10 for blending and adjusting
🔪First Move: Dry-roast cumin seeds in a pan until fragrant, 2-3 minutes on medium heat
⚠️Watch Out: Add water gradually or chutney turns watery and loses flavor punch

Table of Contents

Toggle
  • Why This Recipe Works
  • What You'll Need
    • Ingredient Details
  • Ingredient Swaps
  • What to Serve With It
  • Store and Reheat
  • Frequently Asked Questions
  • Indian Mint Cilantro Chutney
    • Method 
    • Tried this recipe?

Why This Recipe Works

Blending fresh herbs with roasted cumin and lemon juice creates a condiment that stays vibrant for days. Toast the cumin before grinding and you unlock nutty, earthy notes that dried powder alone can't match. For a version that comes together quickly, more recipe ideas work when you need something cooling on the side.

Quick Reference
⏱️
Prep Time
10 min
🔥
Cook Time
5 min (spice roasting)
⏰
Total Time
15 min
🍽️
Servings
6 servings
📊
Difficulty
Easy
🏷️
Category
Side | Appetizer | Condiment
💡
Quick Tip
Balance heat, acidity, and herbs evenly
🎯
Best For
Weeknight | Meal prep | Entertaining

Five reasons it works:

  • Fresh herbs stay vibrant - Blending in 20-second pulses prevents heat buildup that browns cilantro and mint
  • Roasted cumin adds depth - Toasting whole seeds for 2-3 minutes releases aromatic oils that ground powder lacks
  • Lemon juice preserves color - Adding acid early slows oxidation that turns chutney from green to brown
  • Gradual water addition controls texture - Starting thick and thinning with water prevents watery, diluted flavor
  • Balanced seasoning prevents harshness - Tasting and adjusting salt, acid, and sugar creates a chutney that complements rather than overwhelms
Quick Tip
Remove chili seeds before blending to control heat level - you can always add more spice, but you can't take it out once it's in.

What You'll Need

Ingredients for Indian Mint Cilantro Chutney

Shopping for this means buying fresh herbs in bunches and grabbing a lemon or two. Most people skip this quick sauce dish, but it balances the meal. Stock your spice cabinet with cumin seeds and you're set for toasting.

🥬
Fresh Herbs
  • 1 cup fresh mint leaves, packed
  • 1 cup fresh cilantro leaves, packed
🌶️
Heat & Spice
  • 1-2 green chili peppers, seeds removed
  • 1 teaspoon roasted cumin powder (or cumin seeds to toast)
  • 1-inch piece fresh ginger, peeled
🍋
Acid & Balance
  • 2 tablespoon lemon juice (about 1 lemon)
  • 1 teaspoon sugar (optional, for balance)
🫙
Base
  • ¾ teaspoon salt
  • 2-3 tablespoon cold water (adjust for texture)
  • 2 tablespoon plain yogurt (optional, for creaminess)

Ingredient Details

  • Fresh mint leaves
    Use packed leaves only, no thick stems - stems taste bitter and don't blend smooth
  • Fresh cilantro leaves
    Rinse and dry completely before measuring - wet herbs dilute flavor and make chutney watery
  • Green chili peppers
    Serrano or Thai chilies work best - jalapeños are milder, use 2-3 if substituting
  • Roasted cumin powder
    Toast whole cumin seeds in a dry pan for 2-3 minutes, then grind - pre-ground cumin loses aroma quickly
  • Lemon juice
    Fresh-squeezed only - bottled lemon juice tastes flat and metallic, ruins chutney brightness
  • Cold water
    Start with 2 tablespoons, add more gradually - chutney should coat a spoon, not run off like soup
  • Plain yogurt (optional)
    Full-fat yogurt adds richness without thinning - Greek yogurt makes chutney too thick, use regular

Ingredient Swaps

Most swaps work if you keep the herb-to-acid ratio consistent. For a version that comes together quickly, quick sauce dish brings similar brightness to the plate.

Four swaps that work:

  • Green chili peppers → jalapeño or serrano - Jalapeños are milder, use 2-3 for comparable heat; serranos match green chili spice level
  • Lemon juice → lime juice - Lime tastes slightly sweeter and less sharp, but acidity level stays the same
  • Fresh cilantro → baby spinach - Spinach makes a milder, less citrusy chutney; add extra lemon juice to compensate for lost brightness
  • Yogurt → coconut yogurt or omit entirely - Coconut yogurt keeps it dairy-free with similar creaminess; omitting makes a thinner, sharper chutney

Jalapeños Instead of Green Chilies

Works for: Milder heat preference, easier to find in most stores

Skip if: You want authentic spice level and bright chili flavor

Baby Spinach Instead of Cilantro

Works for: Cilantro-haters, milder herbal flavor, budget stretch

Skip if: You want classic chutney flavor with citrusy, herbaceous notes

Instructions

Fifteen minutes from start to finish, with most of that time spent blending and tasting. The beef works best when it hits the table at the same time as the main. We keep a batch ready for nights like this - this quick beef dish balances rich curries and grilled proteins without extra work.

  1. Toast cumin seeds in a dry pan over medium heat for 2-3 minutes, stirring constantly, until fragrant and slightly darkened. Watch closely - cumin burns fast and tastes bitter once it turns black. Let cool, then grind into powder using a spice grinder or mortar and pestle.

  2. Add mint, cilantro, green chilies, ginger, lemon juice, salt, and roasted cumin powder to a blender or food processor. Start with chilies seeds removed for moderate heat. Pulse 5-6 times to break down large pieces before blending continuously.

  3. Blend on high for 20 seconds, scrape down sides with a spatula, then blend again for another 20 seconds. Add 2 tablespoons cold water if mixture won't blend smoothly. The chutney should be thick enough to coat a spoon but not paste-like.

  4. Taste and adjust seasoning - add more salt for depth, lemon juice for brightness, or sugar to balance heat. Blend 10 more seconds after each adjustment to incorporate evenly. If adding yogurt for creaminess, stir it in now rather than blending to preserve texture.

  5. Transfer to an airtight container and refrigerate for at least 10 minutes before serving. Chutney thickens slightly as it chills and flavors meld. Stir before serving if water separates on top.

Golden Rule
Add water in 1-tablespoon increments only - easier to thin chutney than to fix a watery batch that's lost its punch.

What to Serve With It

This chutney fills the gap when you need something bright to cut through rich curries or grilled meats. Rich mains need something to cut through, and soup does exactly that. For a version that comes together quickly, quick soup dish works when you want complementary flavors without heavy prep.

Side Dish Prep Why It Works How to Serve
Plain yogurt Easy Cooling creaminess balances chutney's heat and acidity Serve in small bowls alongside chutney for dipping
Rice and dal Easy Simple staples let chutney's fresh flavor shine Drizzle chutney over rice, stir into dal for brightness
Grilled chicken Medium Smoky charred protein needs herbal zing to wake it up Spoon chutney over sliced chicken or serve on the side
Vegetable pakoras Medium Crispy fried snacks need fresh, acidic contrast Use as dipping sauce, serve at room temperature
Naan bread Easy Soft, chewy bread picks up chutney without overpowering it Tear naan into pieces, dip into chutney or spread on top

Three ways to serve it:

  • As a sandwich spread - Slather on flatbreads or wraps with grilled vegetables and paneer for a quick lunch
  • Stirred into yogurt - Mix 2 tablespoons chutney into ½ cup plain yogurt for a quick raita that cools spicy mains
  • Drizzled over bowls - Top rice bowls, grain salads, or roasted vegetables with a spoonful for instant brightness
Best Pick
Pair with samosas or tandoori kebabs when entertaining - chutney balances smoky, savory appetizers without competing for attention. For more ideas, check out our fresh vegetable dinner ideas for complete meal pairings.

Store and Reheat

Chutney keeps for 3-4 days in the fridge when stored properly, though color dulls after day two. This seafood adds the contrast this plate needs, but timing matters. For a version that comes together quickly, more seafood ideas work when you need similar brightness and acidity.

Method Time Best For
🏠 Room temperature 5-10 min Best flavor and texture, takes chill off before serving
📦 Microwave 10-15 sec Quick warm-up if serving with hot mains, but usually served cold

For best results when storing:

  • Store in an airtight container - Glass jars or plastic containers with tight lids prevent air exposure that browns chutney and dulls flavor
  • Press plastic wrap directly on chutney surface - Creates a barrier that minimizes oxidation and keeps color bright for an extra day
  • Use within 3-4 days for peak freshness - Herbs lose brightness and chutney develops an off, stale taste after that window
  • Freeze in ice cube trays for longer storage - Pop out frozen cubes into freezer bags, thaw individual portions as needed for up to 1 month
  • Stir before serving if liquid separates - Water naturally rises to the top during storage; a quick stir reincorporates it evenly

Frequently Asked Questions

Can I make Indian mint cilantro chutney ahead and store it? How long does it last?

Make chutney up to 3-4 days ahead and store in an airtight container in the fridge. Color fades after day two but flavor stays bright if you press plastic wrap directly on the surface to minimize air exposure.

How do I know when the chutney is blended enough?

The chutney is ready when it's smooth with no large herb pieces visible and thick enough to coat a spoon without running off. If you see chunks or it looks grainy, blend another 10-20 seconds until texture evens out.

Can I substitute spinach or parsley for cilantro or mint?

Baby spinach works as a cilantro substitute but makes a milder, less citrusy chutney - add extra lemon juice to compensate. Parsley tastes too grassy and lacks the brightness mint brings, so skip it unless you want a completely different flavor profile.

Why does my chutney turn brown after blending?

Herbs oxidize when exposed to air during and after blending, turning from green to brown. Add lemon juice before blending to slow oxidation, blend in short pulses to avoid heating the herbs, and press plastic wrap directly on the chutney surface during storage to minimize air contact.

What dishes pair best with Indian mint cilantro chutney?

Serve with samosas, pakoras, grilled kebabs, tandoori chicken, rice and dal, naan bread, or as a sandwich spread. The fresh, herbaceous flavor cuts through rich, spicy, or fried foods and adds brightness to simple grains and proteins.

Indian Mint Cilantro Chutney served on a plate

Indian Mint Cilantro Chutney

No ratings yet
Indian mint cilantro chutney is a bright, herbaceous condiment blending fresh herbs, roasted cumin, and lemon juice. Toasting cumin seeds unlocks warm, earthy flavors, while gradual water addition controls texture for a vibrant, smooth chutney perfect for enhancing rice bowls and grilled proteins.
Print Recipe Pin Recipe
Prep Time 10 minutes mins
Cook Time 5 minutes mins
Total Time 15 minutes mins
Servings: 6 servings
Course: Appetizer, Condiment, Side Dish
Cuisine: Indian
Ingredients Equipment Method Notes

Ingredients
  

  • 1 cup fresh mint leaves packed, no thick stems
  • 1 cup fresh cilantro leaves packed, rinsed and dried completely
  • 1-2 green chili peppers seeds removed for moderate heat
  • 1 teaspoon roasted cumin powder or cumin seeds to toast and grind
  • 1 inch fresh ginger peeled
  • 2 tablespoon lemon juice fresh-squeezed
  • 1 teaspoon sugar optional, for balance
  • 0.75 teaspoon salt
  • 2-3 tablespoon cold water adjust for texture
  • 2 tablespoon plain yogurt optional, for creaminess

Equipment

  • Dry pan To toast cumin seeds
  • spice grinder or mortar and pestle To grind toasted cumin seeds
  • Blender or food processor To blend chutney ingredients
  • Spatula To scrape down sides during blending

Method
 

  1. Toast cumin seeds in a dry pan over medium heat for 2-3 minutes, stirring constantly, until fragrant and slightly darkened. Watch closely to avoid burning. Let cool, then grind into powder using a spice grinder or mortar and pestle.
    1 tsp roasted cumin powder
  2. Add mint leaves, cilantro leaves, green chilies with seeds removed, peeled ginger, lemon juice, salt, and roasted cumin powder to a blender or food processor. Pulse 5-6 times to break down large pieces.
    1 cup fresh mint leaves, 1 cup fresh cilantro leaves, 1-2 green chili peppers, 1 inch fresh ginger, 2 tbsp lemon juice, 0.75 tsp salt, 1 tsp roasted cumin powder
  3. Blend on high for 20 seconds, scrape down sides with a spatula, then blend again for another 20 seconds. Add 2 tablespoons cold water if mixture won't blend smoothly. The chutney should be thick enough to coat a spoon but not paste-like.
    2-3 tbsp cold water
  4. Taste and adjust seasoning by adding more salt, lemon juice, or sugar as needed. Blend for 10 more seconds after each adjustment. If using yogurt for creaminess, stir it in now rather than blending.
    1 tsp sugar, 2 tbsp lemon juice, 0.75 tsp salt, 2 tbsp plain yogurt
  5. Transfer chutney to an airtight container and refrigerate for at least 10 minutes before serving. Stir before serving if water separates on top.

Notes

  • Toast cumin seeds just until fragrant to avoid bitterness.
  • Add water gradually in small increments to prevent watery chutney.
  • Remove chili seeds for controlled heat; add more later if desired.

Tried this recipe?

Let us know how it was!

What Is Sour Mix? [Taste, Uses & More]

April 2, 2026

Sour mix hits the tongue with a jolt of lemon-lime brightness, followed immediately by a clean syrupy sweetness that rounds out the sharp edge.

What Is Sour Mix

That balance - acid forward, sweet in reserve - is exactly what makes it useful in high-volume cocktail service, and occasionally frustrating in situations where fresh juice would do a better job.

Just as knowing the right replacements for grenadine helps you build a more flexible bar, understanding sour mix on its own terms helps you use it well and avoid the moments when it falls short.

QUICK SUMMARY

Sour mix is a pre-made blend of citrus juice and simple syrup, designed to add consistent acidity and sweetness to cocktails. It tastes like sweetened lemon-limeade - bright but less complex than fresh juice. Best for high-volume bar use.

🍋Flavor: Tangy citrus front, clean sweet mid-palate, mild puckering finish
🍹Best Uses: Whiskey sours, margaritas, frozen drinks, mocktails
🧪Also Known As: Sweet-and-sour mix, bar mix, sours mix, lemon-lime mix
❄️Storage: Refrigerate after opening; use within 2-4 weeks for fresh-style mixes
⚠️Watch For: High-fructose corn syrup and artificial flavoring in budget commercial bottles

What Is Sour Mix?

Sour mix is a cocktail mixer combining citrus juice - typically lemon, lime, or both - with simple syrup in a ratio designed to balance acidity and sweetness in one ready-to-pour liquid.

American bars developed it during the mid-20th century as a speed tool: one ingredient instead of two, pre-measured, consistent across every shift.

It goes by several names depending on context. Sweet-and-sour mix, bar mix, sours mix, and lemon-lime mix all refer to the same basic product, though formulas vary between brands.

Commercial versions split into two categories worth knowing:

  • 🏪 Shelf-stable commercial mixes - typically made with citric acid, artificial flavoring, or concentrate rather than real juice; long shelf life but flatter flavor
  • 🍋 Refrigerated fresh-style mixes - made with actual lemon and lime juice; shorter shelf life but noticeably brighter citrus character
  • 🏠 House-made bar mix - equal parts fresh citrus juice and simple syrup; the standard in cocktail-forward programs and easy to replicate at home

Some commercial bottles replace cane sugar with high-fructose corn syrup - if that matters to you, check the ingredient list before buying, or consider corn syrup swaps that work when making your own version from scratch.

What Does Sour Mix Taste Like?

sour mix - What Is Sour Mix
Sensory SnapshotModerate Intensity
👅 Flavor
bright citrusclean sweetmild tart
✋ Texture
thin syrupyslick
👃 Aroma
zesty lemon-limelight sugar

Think sweetened lemon-limeade - that's the closest everyday reference point. The citrus acidity hits first, fading quickly into a syrupy sweetness that never fully disappears, leaving a faint pucker at the back of the palate.

Fresh-squeezed lemon and lime juice mixed with simple syrup will read more complex, with subtle bitterness from the pith and volatile aromatics that fade fast once the fruit is cut. Sour mix trades that complexity for consistency. The flavor curve is flatter, more predictable, and noticeably sweeter than straight fresh juice would produce at the same acidity level.

Commercial bottles relying on citric acid rather than real juice taste sharper and more one-dimensional.

The lemon-lime character reads artificial at higher concentrations - which is why dilution into a shaken cocktail matters more with those products than with fresh-style versions.

Golden Rule
Taste your sour mix before building any drink. Sweet-heavy batches need a squeeze of fresh lemon to restore balance; acid-heavy ones need a small pull of simple syrup to correct.

How to Use Sour Mix

Sour mix is a shaker-ready acid-sweet base, meaning it steps in wherever a recipe needs both citrus and sugar without measuring each separately. The whiskey sour is the canonical example: spirit, sour mix, shake, done.

How Sour Mix Is Used
MethodBest ForTip
🥂 ShakeWhiskey sour, daiquiri, amaretto sourShake hard with ice to dilute and aerate - improves texture significantly
🌀 BlendFrozen margaritas, frozen daiquiris, party slushiesAdd sour mix after the ice to control consistency
🥄 StirMocktails, punch bowls, highball-style drinksStir gently to preserve carbonation when mixing with soda
🔥 ReduceCitrus glazes for shrimp, chicken, or fishReduce over medium-low heat only - high heat kills the citrus brightness

In cocktail work, sour mix pairs cleanly with whiskey, tequila, and rum - spirits with enough body to hold their own against the acidity.

Triple sec or another orange liqueur is the standard third component in a margarita build; for options when that bottle runs out, triple sec in cooking covers the flavor role it plays and what substitutes behave similarly.

Fresh mint, berry purées, and club soda all extend sour mix into longer, lower-alcohol formats.

Beyond cocktails, a gentle reduction turns sour mix into a usable citrus glaze. It works over grilled shrimp or pan-seared chicken when you want tang without the effort of reducing fresh juice.

Don't push the heat - the citrus brightness drops off quickly.

Sour mix doesn't perform well alongside delicate floral liqueurs, which it tends to overwhelm. Skip it when a recipe calls for oil-based acids for emulsification purposes.

Try It In
🥜Homemade Trail MixA base recipe to customize with sweet-tart elements→🍯Honey Roasted Chickpea Snack MixSweet-tangy glaze technique translates to sour mix reductions→🧀Cheddar Ranch Snack MixContrast with sour-forward flavors in mixed party spreads→

How to Buy and Store Sour Mix

Start in the refrigerated mixer section for the freshest product. Refrigerated fresh-style mixes carry a bottling date - look for the most recent one, and check the bottle for cloudiness or visible sediment, which signals degradation.

Watch Out
Sediment and cloudiness in a refrigerated sour mix usually mean it's past its best. A shelf-stable mix that looks cloudy straight off the grocery shelf likely contains concentrate rather than real juice - not a defect, but worth knowing.

For shelf-stable commercial bottles, scan the ingredient list for real juice versus citric acid, and note whether cane sugar or high-fructose corn syrup is the sweetener. The difference shows up clearly in flavor once mixed into a drink.

Storage is straightforward:

  • Unopened shelf-stable - cool pantry, good for several months to a year
  • Fresh-style refrigerated, unopened - follow the best-by date; typically a few weeks
  • After opening - refrigerate immediately; fresh-style mixes hold 2-4 weeks, commercial preservative-heavy bottles several months

A full breakdown of keeping sour mix fresh covers spoilage signs and when to discard. Similarly, if you're questioning an older batch of margarita pre-mix, margaritas spoilage signs gives specific indicators to check.

Where to Start With Sour Mix

If you're new to it, buy one refrigerated fresh-style bottle and shake it into a whiskey sour at the standard 2:1:1 ratio (spirit, sour mix, nothing else).

That single drink tells you more about the product's balance than any label claim.

Shortcut
No bottle on hand? Combine 1 oz fresh lemon juice, ½ oz fresh lime juice, and ¾ oz simple syrup. That's a single-serving house sour mix that outperforms most commercial versions.

From there, the replacements for sour mix guide helps when the bottle runs out mid-recipe, and making classic whiskey sour cocktail at home walks the full build with fresh and bottled options.

If the commercial versions disappoint, make your own - it takes five minutes and the difference is immediate.

Frequently Asked Questions

Is sour mix the same as sweet and sour mix?

Yes, they're the same product under different names. "Sweet and sour mix" is more common in retail packaging; "sour mix" or "bar mix" is what most bartenders call it. The formula - citrus juice plus simple syrup - doesn't change.

Can I use sour mix in margaritas?

Yes. Combine tequila, triple sec, and sour mix in a 2:1:1 ratio, shake with ice, and strain. It won't match a fresh-lime margarita in complexity, however it's significantly faster for large batches.

How long does sour mix last after opening?

Fresh-style refrigerated mixes hold 2-4 weeks after opening. Commercial bottles with preservatives can last several months refrigerated. Flat citrus smell and dull flavor are the clearest signs it's declined.

How do you make sour mix from fresh lemons?

Juice equal parts lemon and lime, then combine with an equal volume of simple syrup (1:1 sugar to water, dissolved). A standard batch: 1 cup citrus juice to 1 cup syrup. Refrigerate and use within one week.

Does sour mix contain alcohol?

No. Sour mix is non-alcoholic - it's citrus juice and sugar, nothing more. That makes it usable in mocktails and nonalcoholic punch without modification.

Spanish Tarta de Santiago

April 2, 2026

You need 50 minutes and one springform pan. No special decorating skills, no fancy ingredients, just almond flour and eggs that turn into a moist, dense cake with golden edges.

Spanish Tarta de Santiago served on a plate

The oven does most of the work. Whisk eggs and sugar until pale, fold in the almond flour, bake at 350°F until the center barely jiggles.

This is the kind of cake you make for weekend baking when you want something gluten-free that still feels special, or when you need a gift that travels well and looks intentional with just a dusting of powdered sugar.

QUICK SUMMARY

Spanish Tarta de Santiago is a traditional Galician almond cake with a moist, dense crumb and bright citrus notes from lemon zest. High-quality almond flour and proper whisking create the signature tender texture. Bake until edges are golden and the center has only a slight jiggle.

⏱️Time Reality: 15 minutes prep, 35-40 minutes baking, 30 minutes cooling before unmolding
🥄Critical Move: Whisk eggs and sugar for 5 minutes until pale ribbons form, then fold almond flour gently in 10 strokes
⚠️Watch Out: Overbaking dries the crumb - remove when center is set with slight jiggle, not firm

Table of Contents

Toggle
  • Why This Recipe Works
  • What You'll Need
    • Ingredient Details
  • Ingredient Swaps
  • What to Serve With It
  • Store and Reheat
  • Frequently Asked Questions
  • Spanish Tarta de Santiago
    • Method 
    • Tried this recipe?

Why This Recipe Works

Finely ground almond flour creates a moist crumb that stays tender without gluten, while whisking eggs and sugar to ribbon stage aerates the batter for a light texture despite the dense nuts. For something equally simple with chocolate and fruit, try an easy cookies side that uses similar pantry staples.

Quick Reference
⏱️
Prep Time
15 min
🔥
Cook Time
35-40 min
⏰
Total Time
50-55 min
🍽️
Servings
8 servings
📊
Difficulty
Medium
🏷️
Category
Dessert
💡
Quick Tip
Use fresh lemon zest for aromatic flavor
🎯
Best For
Holiday | Entertaining | Weekend baking

Five things that make this work:

  • Room temperature eggs whisk faster - they incorporate more air when whisking with sugar, creating a lighter batter that bakes into a tender crumb instead of a heavy brick
  • Folding prevents deflation - stirring aggressively knocks out the air you just whisked in; 10 gentle folds keep the batter aerated for a soft interior
  • Lemon zest adds brightness - the citrus oil cuts through the rich almond flavor and balances the sweetness without adding liquid that would make the cake soggy
  • 350°F prevents burning - lower heat sets the batter slowly so the edges don't char before the center cooks through; high heat creates a hard crust and raw middle
  • Cooling in the pan firms the structure - the cake is fragile when hot; 20-30 minutes in the pan lets it set so it doesn't crack or fall apart when you unmold it
Quick Tip
Grease the springform pan thoroughly and line the bottom with parchment - the cake sticks if you skip this step, and you'll lose half the surface when unmolding

What You'll Need

Ingredients for Spanish Tarta de Santiago

Shop for finely ground almond flour, not coarse almond meal, and grab fresh lemons for zesting. The ingredient list is short, but each one matters for texture and flavor.

🥜
Base
  • 2½ cups almond flour
  • 4 large eggs
  • 1 cup granulated sugar
🌶️
Aromatics
  • Zest of 1 lemon
  • 1 teaspoon cinnamon
  • 1 teaspoon vanilla extract
  • ½ teaspoon almond extract (optional)
🧈
Fat + Finish
  • 2 tablespoon melted butter
  • ¼ teaspoon salt
  • Powdered sugar for dusting

Ingredient Details

  • Almond flour
    Use finely ground, not coarse meal - coarse creates a gritty texture instead of tender crumb; blanched almond flour works best for smooth color
  • Eggs
    Bring to room temperature 30 minutes before baking - cold eggs don't whisk to ribbon stage and create a denser batter with less rise
  • Granulated sugar
    White sugar dissolves cleanly; brown sugar adds moisture but darkens the color and changes the traditional flavor profile
  • Lemon zest
    Zest only the yellow part with a microplane - the white pith underneath tastes bitter and ruins the bright citrus note
  • Cinnamon
    Use fresh ground if possible; stale cinnamon tastes woody instead of warm and aromatic
  • Butter
    Melt and cool slightly before adding - hot butter can cook the eggs and create lumps in the batter
  • Powdered sugar
    Sift before dusting to avoid clumps; use a stencil of the Cross of Saint James for traditional decoration

Ingredient Swaps

Almond flour is non-negotiable for the authentic texture, but you can adjust the other ingredients for dietary needs or flavor variations. The swaps below keep the moist crumb intact.

Four swaps that work:

  • Almond meal instead of almond flour - Use 1:1 ratio; the coarser grind creates a slightly rougher crumb and more rustic appearance, but the flavor stays nutty and rich (budget option)
  • Neutral oil instead of butter - Swap 2 tablespoon melted butter for 2 tablespoon canola or avocado oil; you lose some richness but the moisture content stays the same (dairy-free)
  • Orange zest instead of lemon zest - Use zest of 1 orange; the flavor is milder and slightly sweeter, less sharp than lemon but still aromatic (flavor variation)
  • Coconut sugar instead of granulated sugar - Use 1:1 ratio; the cake turns darker brown with mild caramel notes, but sweetness level matches white sugar (alternative sweetener)

Flax Eggs for Vegan Version

Works for: Egg-free diets; mix 8 tablespoon ground flax with 24 tablespoon water, let sit 5 minutes until gelatinous

Skip if: You want traditional rise and tender crumb - flax creates denser texture with less airiness and slightly gummy interior

Regular Pie Pan Instead of Springform

Works for: When you don't own a springform; bake in greased 9-inch pie pan at same temp and time

Skip if: You want clean edges - unmolding is harder, and you risk breaking the cake or losing the decorative powdered sugar pattern

Instructions

The batter comes together in one bowl with minimal mixing. Bake at 350°F for 35-40 minutes until the edges are golden and the center barely jiggles when you shake the pan.

  1. Whisk eggs and sugar. Beat 4 eggs and 1 cup sugar with an electric mixer on medium-high for 5 minutes until pale yellow and thick ribbons form when you lift the whisk. The mixture should triple in volume and hold peaks for 2-3 seconds before dissolving back into the bowl.

  2. Fold in dry ingredients. Sift 2½ cups almond flour, 1 teaspoon cinnamon, and ¼ teaspoon salt over the egg mixture. Add lemon zest from 1 lemon, 1 teaspoon vanilla, and optional ½ teaspoon almond extract. Fold gently with a spatula using 10 slow strokes - stop when no dry streaks remain.

  3. Add melted butter. Drizzle 2 tablespoon melted (but not hot) butter over the batter and fold 3-4 times until just incorporated. Overmixing deflates the air you whisked in and creates a dense, heavy cake instead of tender crumb.

  4. Bake until set. Pour batter into greased, parchment-lined 9-inch springform pan. Bake at 350°F for 35-40 minutes until edges are golden brown and center has only a slight jiggle when you shake the pan - a toothpick inserted 2 inches from the edge should come out with a few moist crumbs.

  5. Cool and unmold. Let cake cool in the pan on a wire rack for 20-30 minutes. Run a thin knife around the edge, release the springform, and transfer to a serving plate. Dust with sifted powdered sugar once completely cool - use a paper stencil of the Cross of Saint James for traditional decoration.

Watch Out
Remove the cake as soon as the center is set with a slight jiggle - overbaking dries the crumb and turns it crumbly instead of moist; the cake continues cooking slightly as it cools in the pan

What to Serve With It

This almond cake needs something to cut the sweetness and add texture contrast. Strong coffee or tangy yogurt balance the rich, dense crumb better than more sweet sides.

Side Dish Prep Why It Works How to Serve
Strong coffee or espresso Easy Bitterness offsets sweet almond flavor; hot liquid contrasts dense cake texture Serve in small cups alongside slices; sip between bites to cleanse palate
Fresh berries Easy Tartness cuts through rich crumb; bright color adds visual contrast to golden cake Pile raspberries or strawberries on the plate; their juice soaks into the cake
Whipped cream Easy Light, airy texture contrasts dense almond crumb; adds richness without heaviness Dollop on each slice or pipe rosettes around the edge for entertaining
Plain yogurt Easy Tangy acidity balances sweetness; creamy texture softens dry edges Spoon Greek yogurt alongside slices; let it melt slightly into warm cake
Vanilla bean ice cream Easy Cold creaminess enhances warm cake; vanilla echoes the almond flavor without competing Serve cake slightly warm with a scoop on top; let ice cream melt into the crumb

Three ways to serve it:

  • Afternoon tea: Slice thin wedges, dust with extra powdered sugar, serve with strong black tea and lemon wedges for a traditional Galician presentation
  • Holiday dessert: Top with candied orange peel and drizzle with lemon glaze; serve at room temperature so the citrus flavors come through clearly
  • Casual snack: Cut into squares, wrap individually in parchment, store in an airtight container for grab-and-go breakfast or lunchbox treats that stay moist for days
Best Pick
Serve with armagnac or sweet sherry for entertaining - the nutty, caramel notes in the spirits echo the almond and cinnamon in the cake, and the alcohol cuts through the dense texture

Store and Reheat

Store loosely covered at room temperature for up to 2 days - the cake stays moist because almond flour holds moisture better than wheat flour. Refrigerating dries the crumb and mutes the citrus aroma.

Method Time Best For
🔥 Oven 10 min at 300°F Whole cake or multiple slices; restores slight warmth and softens crumb without drying edges
📦 Microwave 20-30 seconds Single slices when you want fast results; works but creates short serving window before cake cools and firms up again
🏠 Room Temperature 30 min Best texture if cake was refrigerated; let it sit out so almond flour softens and flavors brighten

For best results when storing:

  • Wrap loosely, not airtight - Plastic wrap traps moisture and makes the surface sticky; use a cake dome or drape a clean kitchen towel over the top instead
  • Skip the fridge unless hot weather - Room temperature keeps the crumb tender; refrigerate only if your kitchen is above 75°F or the cake will go stale faster
  • Freeze for longer storage - Wrap individual slices in plastic, then foil, and freeze up to 2 months; thaw at room temp for 1 hour before serving
  • Dust with powdered sugar after reheating - The original dusting melts or absorbs into the cake; add a fresh layer right before serving for clean appearance
  • Store away from strong odors - Almond flour absorbs smells; keep the cake away from onions, garlic, or spices or it picks up off-flavors

Frequently Asked Questions

Can I substitute almond flour with almond meal in Tarta de Santiago?

Yes, use almond meal 1:1, but expect a coarser, grainier texture. The cake won't be as smooth or tender as the traditional version, but the nutty flavor stays rich.

How should I store leftover Tarta de Santiago and for how long?

Store loosely covered at room temperature for up to 2 days or in the fridge for 4-5 days. The crumb stays moister at room temp; refrigerating dries it out but extends shelf life.

How do I tell when Tarta de Santiago is fully baked?

The edges turn golden brown and pull slightly from the pan, and the center has only a slight jiggle when you shake the pan. A toothpick inserted 2 inches from the edge should come out with a few moist crumbs, not wet batter.

What causes Tarta de Santiago to crack on top and how to fix it?

Oven temp too high or overmixing the batter causes cracks. Bake at 350°F and fold gently to avoid deflating the air; if it cracks anyway, cover with a thick layer of powdered sugar to hide the surface.

Can I scale Tarta de Santiago recipe for smaller cakes?

Yes, halve the recipe and bake in a 6-inch pan for 25-30 minutes at 350°F. Check doneness at 20 minutes - smaller cakes bake faster and overbake easily.

Spanish Tarta de Santiago served on a plate

Spanish Tarta de Santiago

No ratings yet
Spanish Tarta de Santiago is a traditional Galician almond cake with a moist, dense crumb and bright citrus notes from lemon zest. High-quality almond flour and proper whisking create the signature tender texture. Bake until edges are golden and the center has a slight jiggle for perfect doneness.
Print Recipe Pin Recipe
Prep Time 15 minutes mins
Cook Time 40 minutes mins
Total Time 55 minutes mins
Servings: 8 servings
Course: Dessert
Cuisine: Spanish
Ingredients Equipment Method Notes

Ingredients
  

  • 2.5 cups almond flour finely ground, not coarse meal
  • 4 large eggs room temperature
  • 1 cup granulated sugar
  • 1 lemon zest zest of 1 lemon, yellow part only
  • 1 teaspoon cinnamon freshly ground if possible
  • 1 teaspoon vanilla extract
  • 0.5 teaspoon almond extract optional
  • 2 tablespoon butter melted and cooled
  • 0.25 teaspoon salt
  • powdered sugar for dusting after baking

Equipment

  • Springform pan Used to bake and unmold the cake
  • Electric mixer Whisk eggs and sugar to ribbon stage
  • Parchment paper Line bottom of pan to prevent sticking
  • Spatula For gentle folding of ingredients

Method
 

  1. Beat 4 room temperature eggs and 1 cup granulated sugar with an electric mixer on medium-high speed for 5 minutes until pale yellow and thick ribbons form when you lift the whisk. The mixture should triple in volume and hold peaks for 2-3 seconds before dissolving.
    4 large eggs, 1 cup granulated sugar
  2. Sift 2½ cups almond flour, 1 teaspoon cinnamon, and ¼ teaspoon salt over the egg mixture. Add lemon zest from 1 lemon, 1 teaspoon vanilla extract, and optional ½ teaspoon almond extract. Fold gently with a spatula using 10 slow strokes until no dry streaks remain.
    2.5 cups almond flour, 1 lemon zest, 1 tsp cinnamon, 1 tsp vanilla extract, 0.5 tsp almond extract, 0.25 tsp salt
  3. Drizzle 2 tablespoon melted and cooled butter over the batter and fold 3-4 times until just incorporated. Avoid overmixing to preserve the airiness of the batter.
    2 tbsp butter
  4. Pour the batter into a greased and parchment-lined 9-inch springform pan. Bake at 350°F for 35-40 minutes until the edges are golden brown and the center has a slight jiggle when shaking the pan. A toothpick inserted 2 inches from the edge should come out with a few moist crumbs.
  5. Let the cake cool in the pan on a wire rack for 20-30 minutes to firm up. Run a thin knife around the edge, release the springform, and transfer to a serving plate. Once completely cool, dust with sifted powdered sugar using a stencil if desired.
    powdered sugar

Notes

  • Remove the cake from the oven as soon as the center has a slight jiggle to avoid drying the crumb.
  • Use finely ground almond flour and room temperature eggs for a tender and light texture.
  • Grease the springform pan thoroughly and line with parchment paper to prevent sticking and preserve the cake surface.
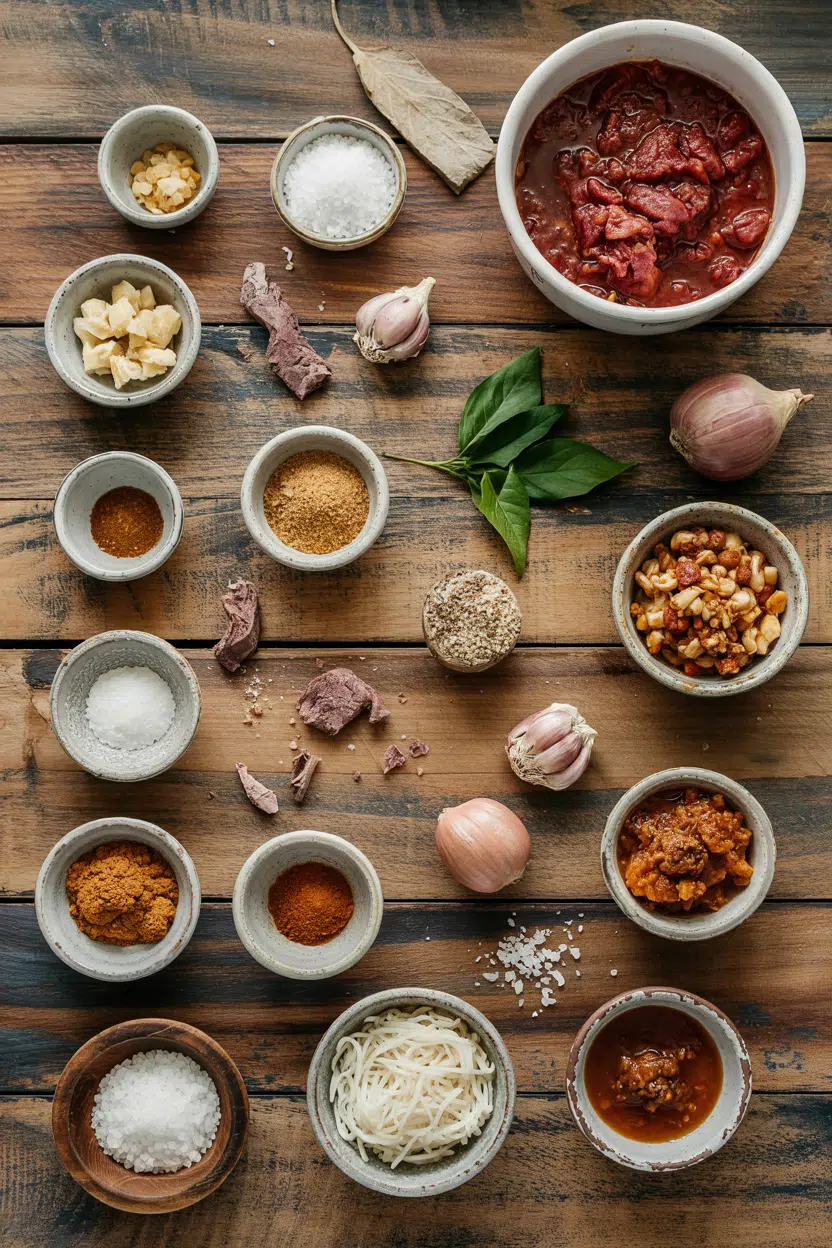
Tried this recipe?

Let us know how it was!

What Is Salmon? Taste, Texture, Culinary Uses & More

April 2, 2026

Salmon does something in a hot pan that almost no other fish can replicate - fat renders from the flesh itself, basting the fillet from the inside out while the skin crisps into something close to crackling. That self-basting quality is what makes it forgiving to cook and extraordinary when left alone with minimal seasoning.

What Does Salmon Taste Like

Whether you're working with a wild-caught sockeye or a farmed Atlantic fillet, understanding what salmon actually is - and how its fat and flavor behave - is the difference between a meal that lands and one that doesn't. It sits in the same oily-fish family as trout, but richer, meatier, and far more adaptable across techniques.

QUICK SUMMARY

Salmon is a rich, oil-forward cold-water fish with buttery umami flavor and firm, silky flesh. It works raw, cured, smoked, pan-seared, or roasted. Wild varieties run leaner and more intense; farmed runs milder and fattier. Refrigerate raw salmon and use within 1-2 days.

🐟Category: Oily cold-water fish, wild-caught or farmed
👅Flavor: Buttery, mildly briny, rich umami, slightly sweet
🔥Best Methods: Pan-searing, roasting, curing, smoking, raw sashimi
🛒Buy It: Firm, glossy flesh; no ammonia smell; moist surface
⏱️Shelf Life: Raw: 1-2 days refrigerated; frozen up to 6 months

What Is Salmon?

Salmon belongs to the family Salmonidae and spends its life migrating between freshwater and saltwater - a journey that shapes the dense, oil-rich muscle tissue it's prized for.

The two main commercial categories are Atlantic salmon (Salmo salar), which is almost entirely farmed today, and Pacific salmon, which includes several distinct species.

Each Pacific species has its own character:

  • Chinook (King) - the largest and fattiest Pacific species; deep orange flesh with a pronounced buttery richness
  • Sockeye - vivid red flesh, leaner than chinook, with a more assertive flavor and firm texture
  • Coho - milder than sockeye, medium fat content, lighter pink color; a good middle-ground option
  • Pink - the most abundant and lightest in flavor; commonly used in canned products
  • Chum (Keta) - pale flesh, lower fat, often smoked or used in roe production

Atlantic salmon from aquaculture dominates retail markets worldwide. It's consistently fatty, mild, and thick-cut - which is why it's the default choice for restaurant portions and home cooking alike.

What Does Salmon Taste Like?

salmon - What Does Salmon Taste Like

Salmon's defining flavor is buttery umami - a rich, savoury depth that comes from its high fat content rather than from any sharp or pungent note. It reads as mildly briny and slightly sweet, with no aggressive fishiness when fresh.

Sensory SnapshotModerate Intensity
👅 Flavor
butteryumamimildly brinyslightly sweet
✋ Texture
firm flakessilkyoily mouthfeel
👃 Aroma
clean oceanictoasty when cooked

Raw sashimi-grade salmon closely resembles fatty tuna in mouthfeel - cool, smooth, and almost melting. Heat firms the protein and opens up a toasty, nutty top note while the fat remains present on the palate.

Smoked and cured preparations shift the profile entirely. Cold-smoked salmon becomes silky and concentrated, salty with a wood-smoke edge.

Gravlax, cured with salt, sugar, and dill, reads sweeter and more herbal. Compared to mackerel, salmon is noticeably less aggressive - it's one reason it converts people who claim not to like oily fish.

Golden Rule
If salmon smells strongly of ammonia or fish market at purchase, don't cook it. Fresh salmon smells like clean ocean water, nothing more.

How to Use Salmon

Salmon's fat content makes it one of the most forgiving proteins across heat applications. It holds moisture under high heat, stays tender when poached gently, and takes on smoke and cure exceptionally well.

Few proteins span as many techniques without losing their character.

How Salmon Is Used
MethodBest ForTip
🥗 RawSashimi, tartare, nigiriUse sushi-grade only; slice against the grain for clean cuts
🧂 CuringGravlax, lox, salt-cured sidesEqual-weight salt and sugar cure; 24-48 hours in the fridge
🔥 Pan-SearingSkin-on fillets, weeknight dinnersStart skin-side down in a cold pan; render slowly then flip once
🫙 RoastingWhole sides, sheet-pan mealsPull at 125°F internal for a still-silky center
🍲 PoachingDelicate flakes for salads, fish cakesCourt-bouillon with white wine and aromatics keeps flavor clean
🔥 GrillingSteaks, thick fillets with charOil the fish, not the grate; grill skin-side down first

Japanese preparations - sashimi, nigiri, and salmon roe - showcase the raw fish. Nordic cuisines rely on gravlax cured salmon and smoked sides.

Pacific Northwest cooking pairs salmon with cedar planks or open fire. French technique reaches for poaching and butter sauces.

American coastal cooking stacks hot-smoked salmon onto bagels with lox or folds it into chowders.

Strong pairings lean into contrast and richness-cutting: lemon or yuzu, fresh dill or chives, capers, sour cream or crème fraîche, soy sauce and wasabi, or whole-grain mustard. Avocado echoes the fat and softens the brine.

Roasted root vegetables add earthiness without competing. Avoid heavy sweet glazes - they bury the natural umami - and steer clear of intensely bitter greens that fight the fat rather than balance it.

If you need a swap, salmon replacements in the oily-fish category work well for most cooked applications, though nothing matches its fat-to-flavor ratio exactly.

Try It In
🌶️Air Fryer Buffalo Salmon BitesHigh heat, crispy exterior, bold sauce — great for introducing salmon to skeptics→🍖Air Fryer BBQ Salmon BitesSmoky-sweet glaze that complements rather than smothers the fish→🍯Air Fryer Honey Garlic Salmon BitesHoney and garlic hit the sweet-savory balance salmon handles well→

How to Buy and Store Salmon

Fresh fillets should look moist and translucent, not dull or dried at the edges. Color ranges from pale pink in farmed Atlantic to deep crimson in sockeye - neither is a quality signal on its own. The reliable test is smell: clean and oceanic, nothing more.

Watch Out
For raw preparations like sashimi or tartare, look for "sushi-grade" or "frozen-to-kill-parasites" labeling. Standard fresh fillets haven't undergone the required freeze cycle.

At home, keep raw salmon in the coldest part of the fridge - ideally at 32-38°F - wrapped airtight or set on a plate over ice. Use it within 1-2 days.
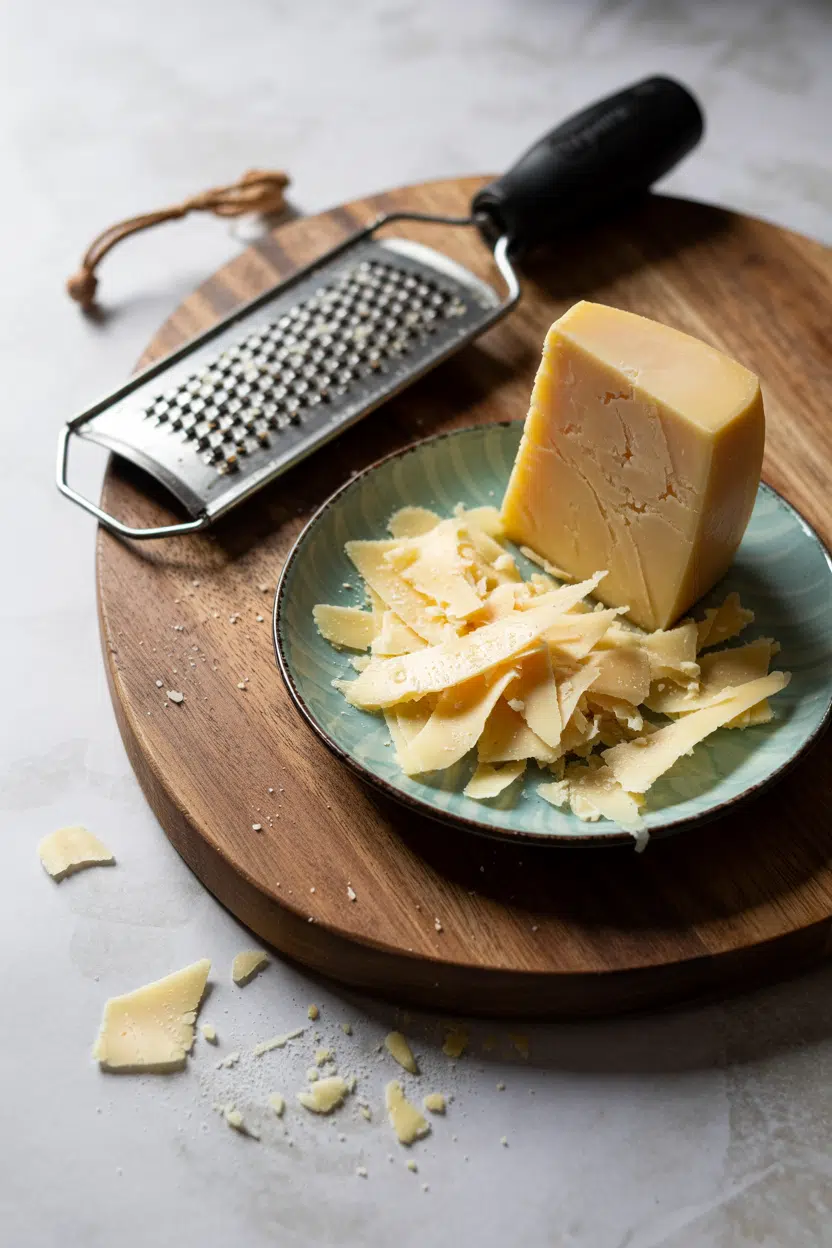
For longer storage, freeze immediately after purchase; properly wrapped, it holds well for 2-6 months. Cooked salmon keeps for 3-4 days refrigerated.

Full detail on timelines is covered in our salmon storage guide guide.

Where to Start With Salmon

New to cooking it? Start with a skin-on Atlantic fillet, pan-seared.

The thick, fatty cut is forgiving, the skin protects the flesh, and the result lands reliably without special equipment.

  • For raw preparations - buy sushi-grade and start with sashimi; serve alongside sashimi accompaniments to build a complete plate
  • For cured fish - gravlax is a weekend project that rewards patience; 36 hours in the fridge transforms a raw side into something entirely different
  • For smoky flavor - hot-smoked salmon needs no further cooking; flake it cold over greens or fold it into scrambled eggs
  • Exploring other oily fish? - check tuna replacements if you want to branch further into the fatty-fish category

Once you've worked through those entry points, the rest of the techniques follow naturally.

Frequently Asked Questions

Is salmon fishy tasting?

Not when it's fresh. Salmon tastes buttery and mildly briny - the "fishy" edge only appears when the fish is aging or poorly stored. It reads as far less aggressive than mackerel or sardines.

How does wild salmon taste compared to farmed?

Wild salmon is leaner, firmer, and more intensely flavored. Farmed Atlantic salmon is milder, fattier, and more forgiving to cook because the higher fat content buffers overcooking.

What is the difference between sockeye and king salmon taste?

King (chinook) is fattier, buttery, and milder. Sockeye is leaner with a deeper red flesh and a more pronounced, assertive flavor - it holds up better to strong seasonings and high heat.

Can you eat raw salmon safely?

Yes, with the right fish. Use only sushi-grade salmon that has been commercially frozen to kill parasites. Pregnant individuals and immunocompromised people should avoid raw fish entirely per standard food safety guidance.

Does frozen salmon taste different than fresh?

Flash-frozen salmon thawed properly tastes nearly identical to fresh. The difference shows up only with slow freezing or freezer burn, which damages the cell structure and causes mushy texture after cooking.

What Is Swiss Chard? Taste, Uses & Cooking Tips

April 2, 2026

You spot it at the farmers market - a wide, leafy bundle with ribs the color of traffic lights, ranging from bone white to deep crimson. Swiss chard is one of those greens that rewards a closer look.

What Is Swiss Chard

It handles heat better than spinach swaps and brings more character than standard salad greens, making it a genuinely useful addition to a weeknight kitchen. If you tend to reach for kale or collard greens but haven't tried chard, this profile covers everything you need.

QUICK SUMMARY

Swiss chard is a leafy green with broad, tender leaves and crunchy colored ribs. Raw, it tastes mildly bitter and earthy. Cooked, it softens into something slightly sweet and silky. Best used sautéed, braised, or stirred into soups. Use within 3-7 days of purchase.

🌿Category: Leafy green, botanically related to beets
👅Flavor: Mildly bitter raw, earthy and slightly sweet when cooked
🍳Best Uses: Sautéed with garlic, braised into grains, stirred into soups
❄️Shelf Life: 3-7 days refrigerated; stems last slightly longer than leaves
⚠️Note: High vitamin K content - consult a provider if on blood thinners

What Is Swiss Chard?

Swiss chard (Beta vulgaris subsp. cicla) is a leafy green in the same botanical family as beetroot - not brassicas like kale or cabbage, despite looking the part. It was domesticated in the Mediterranean and has been a staple of Southern European cooking for centuries.

The plant is grown for its leaves and stems, not its roots. Chard ribs can be white, yellow, orange, or red depending on the variety. The collective term rainbow chard refers to bundles that mix several rib colors together rather than a single cultivar.

It goes by several names depending on where you are:

  • Silverbeet - the standard name in Australia and New Zealand
  • Chard - common shorthand in North American kitchens
  • Swiss chard - the name most widely used in the United States, despite Switzerland having no particular claim to it
  • Beta vulgaris subsp. cicla - the botanical classification shared with spinach beet and perpetual spinach

White-stem chard tends to have a milder flavor, while red-stem varieties carry a slightly more pronounced beet-like mineral note. Both cook the same way.

What Does Swiss Chard Taste Like?

swiss chard - What Is Swiss Chard

Raw swiss chard lands somewhere between spinach and beet greens - mildly bitter, earthy, and with a faint mineral quality that the leaves inherit from their botanical relatives. The bitterness is noticeable but not sharp.

Heat changes everything. Sautéed or braised chard loses most of its bitterness and develops a subtle sweetness, while the leaves go from chewy to silky within minutes. The stems hold their crunch longer and carry that mineral note more prominently than the leaves.

Sensory SnapshotModerate Intensity
👅 Flavor
mildly bitterearthyslightly sweet (cooked)mineral
✋ Texture
silky leaf (cooked)crunchy ribs
👃 Aroma
greenmineralbeet-like (raw)

Acid - lemon juice or a splash of vinegar - brightens the flavor and softens any remaining bitterness. It's a reliable finish when chard tastes flat or slightly muddy after cooking.

How to Use Swiss Chard

Treat the stems and leaves as two separate ingredients. Stems need more time than leaves, so add them to the pan first and give them a few minutes of heat before the leaves go in.

The most common approach - and the fastest - is a quick sauté. Start stems in olive oil with garlic, add leaves once the stems soften, then finish with lemon juice.

This is the foundation for dozens of Italian-style preparations, and it works on a weeknight in under fifteen minutes.

How Swiss Chard Is Used
MethodBest ForTip
🍳 SautéQuick side dish, pasta additions, grain bowlsStems first, leaves last - about 3 min apart
🥘 BraiseFolding into polenta, farro, or bean dishesUse stock and aromatics; low heat for 15-20 min
🥗 Raw (sliced)Slaws, grain salads, massaged saladsSlice leaves thin and massage with salt and acid first
🍲 SoupMinestrone, lentil soups, bean brothsAdd in final 5 minutes to avoid mushiness
🥚 BakedFrittatas, quiches, stuffed leavesSqueeze out moisture after blanching before adding to eggs
🫙 PickledStems as a crunchy condiment or relishQuick-pickle stems in white wine vinegar and a pinch of sugar

Chard pairs naturally with garlic, lemon, olive oil, and pancetta. For something richer, fold braised leaves into ricotta for a pasta filling or layered grain dish.

Middle Eastern preparations often use stuffed chard leaves in place of grape leaves - the wider leaf surface makes it easier to roll. Check pairings for swiss chard for complete pairing ideas.

Golden Rule
Always separate stems from leaves before cooking. The stems take twice as long - if you add everything at once, the leaves will be overcooked before the stems have any texture.
Try It In
🍳Sautéed Swiss Chard with GarlicThe fastest way to see how heat changes chard's flavor→

How to Buy and Store Swiss Chard

Look for glossy, crisp leaves with no large holes or yellowing. The ribs should feel firm and snap when bent - a limp rib is a sign the bunch has been sitting too long. For rainbow chard, vivid color along the stems is a quality indicator; avoid bunches with brown spotting along the veins.

Watch Out
Avoid bunches where the ribs feel pithy or hollow when you squeeze them. That texture doesn't improve with cooking - the stem turns mealy rather than tender-crisp.

Store chard unwashed, wrapped in a slightly damp paper towel and placed in a perforated plastic bag. Keep it in the crisper drawer.

The leaves are more delicate than the stems, so check the leaves first when assessing freshness.

  • Leaves: Best within 3-5 days; deteriorate faster than stems
  • Stems: Firm and usable for up to 7 days if kept cold and dry
  • Do not wash until ready to use - moisture accelerates decay

For a full breakdown of how long chard holds in different conditions, see our guide on swiss chard storage guide.

Where to Start with Swiss Chard

New to chard? Sauté it first. Stems in, leaves in two minutes later, garlic, olive oil, a squeeze of lemon at the end. That single method shows you what the green does at its best - and takes less time than most pasta cooks.

If you're already comfortable with it, the stems deserve more attention. Quick-pickle them, roast them separately, or fold them into a frittata with eggs and feta.

They're the most underused part of an already underused green.

Can't find chard at your market? Our swiss chard swaps guide covers the closest options by use case.

Frequently Asked Questions

Can you eat swiss chard raw?

Yes, but the texture and bitterness are stronger raw. Slicing the leaves thin and massaging them with salt and acid first makes a significant difference. Stems can be eaten raw too - they're crunchy and slightly earthy, similar to raw beet stems.

How do you reduce bitterness in swiss chard?

Cook it. Heat breaks down the bitter compounds quickly, especially with braising. Finishing with lemon juice or a splash of vinegar also brightens the flavor and masks any residual bitterness.

How long does swiss chard last in the fridge?

3-7 days, depending on freshness at purchase. Store unwashed in a damp towel in the crisper drawer. Leaves go first - check them after 3 days even if the stems still look firm.

What is the difference between chard and beet greens?

They're closely related - both are subspecies of Beta vulgaris. Beet greens have a stronger earthy-sweet flavor and thinner stems, while chard has wider leaves and meatier ribs bred specifically for eating.

Is swiss chard healthy?

It's nutrient-dense and low in calories, with meaningful amounts of vitamin K, vitamin A, and magnesium. The high vitamin K content is worth noting if you take blood-thinning medication - consistent intake matters more than occasional use.

What Is Shoyu? Taste, Uses & How It Tastes

April 2, 2026

Shoyu turns up in the dipping sauce beside your gyoza, in the glaze coating yakitori skewers, and in the broth of a bowl of ramen that tastes like it took all day to build. It's one of the most-used condiments in Japanese cooking, yet most people outside Japan treat it as interchangeable with any soy sauce on the shelf.

What Is Shoyu

That's worth reconsidering.

QUICK SUMMARY

Shoyu is a fermented Japanese soy sauce brewed from soybeans and wheat using koji. It delivers umami-rich, mildly sweet, rounded flavor - lighter in harshness than many alternatives - and works as a seasoning, dipping sauce, marinade, and finishing condiment across Japanese and pan-Asian cooking.

🍶Type: Fermented soy condiment brewed with soybeans, wheat, and koji
👅Flavor: Umami-rich, mildly sweet, salty with a lightly bitter finish
🔥Best Uses: Dipping, marinating, braising, finishing, and teriyaki glazes
📦Shelf Life: Up to 24 months unopened; 6-12 months refrigerated after opening
⚠️Note: Contains wheat - not gluten-free unless labeled as such; high in sodium

What Is Shoyu?

Shoyu (醤油) is Japan's native soy sauce, brewed by fermenting a mixture of soybeans and wheat with koji mold, then pressing the aged liquid from the solids.

The wheat is what separates it from Chinese-style soy sauces and from tamari, which uses little to no wheat and tastes noticeably sharper as a result.

Most shoyu sold outside Japan is koikuchi, the dark, general-purpose style that accounts for roughly 80% of domestic Japanese production. A few other types are worth knowing:

  • Koikuchi - The standard. Dark amber, balanced umami, mildly sweet. Works in almost any application.
  • Usukuchi - Lighter in color but actually saltier than koikuchi. Used in Kyoto-style cooking to keep dishes pale.
  • Nama shoyu - Unpasteurized, with a fresher, more complex aroma. Refrigerate from day one and use quickly.
  • Tamari - Technically a separate category, wheat-free or nearly so, with a thicker body and deeper soy flavor.

For most home cooks, a bottle of koikuchi is the right starting point. Specialty styles serve specific regional dishes and are worth exploring once you have the basics down.

What Does Shoyu Taste Like?

shoyu - What Is Shoyu

Umami is the dominant note - a savory depth that coats the palate without tasting sharp or metallic. The wheat in the brew adds a mild sweetness that rounds out the salt, making shoyu noticeably less aggressive than some Chinese soy sauces and softer than tamari.

Sensory SnapshotModerate Intensity
👅 Flavor
umamimildly sweetsaltysavory-bitter finish
✋ Texture
thinsatin finish
👃 Aroma
toasty-soybready

Heat changes the equation. Added early in cooking, shoyu mellows and deepens, contributing color and background savoriness.

A splash added at the end of cooking preserves the toasty, bready aroma that makes it worth reaching for as a finishing sauce.

The texture is thin and fluid - a small pour goes a long way before the saltiness becomes noticeable. That's the signal to stop.

Golden Rule
Add shoyu at two points for maximum impact: a measured amount during cooking for depth, and a small finishing splash just before serving for aroma.

How to Use Shoyu

Shoyu is a workhorse condiment. It pulls equal weight as a dipping sauce, a braise base, and a one-ingredient finishing drizzle.

The key is matching the application to the style: light touch for delicate dishes, more assertive use in long-cooked preparations.

How Shoyu Is Used
MethodBest ForTip
🥗 DippingGyoza, sashimi, dumplingsCombine with citrus or rice vinegar to cut the salt
🍳 Stir-fryingVegetables, fried rice, noodlesAdd near the end so the aroma doesn't cook off
🥩 MarinatingChicken yakitori, grilled fish, tofuShort marinades work - over 2 hours can over-salt proteins
🍲 BraisingNikujaga, simmered root vegetablesPair with [mirin](https://forkliftkitchen.com/aji-mirin-vs-rice-vinegar/) and [sake](https://forkliftkitchen.com/sake-substitutes/) for a balanced braise liquid
✨ FinishingSteamed greens, silken tofu, soupsA few drops only - you're adding aroma, not seasoning

Dashi and shoyu are the backbone of most Japanese clear soups and noodle broths. Together they create the layered savory base that makes shoyu ramen taste like more than the sum of its parts. Ginger, garlic, scallions, and sesame oil all pair naturally for marinades and finishing.

For a teriyaki glaze, reduce shoyu with sugar and mirin until it thickens and turns glossy. Mushrooms and tofu both benefit from direct seasoning with shoyu, because their high water content absorbs it evenly.

Try It In
🍜Japanese Shoyu RamenShoyu forms the seasoning base of this classic broth→

How to Buy and Store Shoyu

Read the label before you buy. Look for shoyu listed by type - koikuchi is the default choice for general cooking. Check the ingredient list for wheat if gluten is a concern; most standard shoyu contains it. The bottle should be clear amber without cloudiness unless it's labeled nama (unpasteurized).

Watch Out
An off or metallic smell when you first open the bottle means the shoyu has oxidized or was stored poorly. Don't use it - the flavor will be flat and harsh in your food.

Once opened, refrigerate it. Room-temperature storage accelerates darkening and gradually strips the aroma.

An opened bottle stored in the fridge holds its best flavor for 6-12 months. For full details on how long shoyu actually lasts, see our guide to shoyu freshness guide.

Unopened bottles keep 12-24 months in a cool, dark pantry.

Start With Koikuchi

If you're new to shoyu, one bottle of koikuchi covers most of what you'll cook. It works in marinades, broths, dipping sauces, and stir-fries without adjustment.

From there, consider branching into specialty types. Nama shoyu adds fragrance to cold dishes and finishing applications.

Usukuchi suits pale broths and Kansai-style cooking.

If gluten is a factor, tamari is the closest substitute - it's made with minimal or no wheat and delivers a similar umami depth. For a broader comparison of alternatives, the shoyu replacements guide covers the full range.

Frequently Asked Questions

Is shoyu the same as soy sauce?

Shoyu is a type of soy sauce - specifically the Japanese style, brewed with both soybeans and wheat. Chinese soy sauces and other regional varieties are made with different ratios and fermentation methods, producing noticeably different flavor profiles.

Does shoyu contain wheat?

Yes, standard shoyu is brewed with wheat - typically a 50/50 ratio with soybeans. Gluten-free versions exist and are labeled as such; tamari is the most common wheat-free alternative.

Which shoyu is best for sushi?

Koikuchi is the standard choice for sushi dipping. Some sushi chefs prefer tamari for its thicker body and cleaner soy flavor, especially with raw fish.

What is nama shoyu?

Nama shoyu is unpasteurized soy sauce, bottled without heat treatment to preserve live enzymes and a fresher, more aromatic flavor. It requires refrigeration from purchase and has a shorter shelf life than standard shoyu.

How salty is shoyu compared to regular soy sauce?

Koikuchi shoyu and many Chinese soy sauces have similar sodium levels, but shoyu tastes less sharp because the wheat adds sweetness that softens the salt perception. Usukuchi shoyu is actually saltier by sodium content despite its lighter color.

Slow Cooker Mexican Birria

April 2, 2026

You need 8 hours and basic dried chiles. No marinating overnight, no precooking, no complicated blending multiple times.

Slow Cooker Mexican Birria served on a plate

Chuck roast breaks down in the slow cooker while you work or sleep. The chile sauce becomes the cooking liquid, so everything happens in one pot.

Make this when you want real birria without standing over the stove all day or spending money on restaurant takeout.

QUICK SUMMARY

Slow Cooker Mexican Birria combines beef chuck roast with toasted guajillo and ancho chiles for fork-tender meat that shreds easily after 8 hours on low. The key is searing the beef first and blending the toasted chiles into a smooth sauce. Set it in the morning and come home to dinner ready.

⏱️Time: 25 min prep, 8 hours slow cooking, hands-off after setup
🔥First Move: Toast dried chiles 2-3 minutes per side until fragrant before soaking
⚠️Watch Out: Bland sauce comes from skipping the chile toasting step-it's non-negotiable

Table of Contents

Toggle
  • Why This Recipe Works
  • What You'll Need
    • Ingredient Details
  • Ingredient Swaps
  • What to Serve With It
  • Store and Reheat
  • Frequently Asked Questions
  • Slow Cooker Mexican Birria
    • Method 
    • Tried this recipe?

Why This Recipe Works

Searing beef chuck before slow cooking locks in flavor and creates texture you can't get otherwise. For a version that comes together quickly, simple crema recipe adds cooling contrast when the heat builds.

Quick Reference
⏱️
Prep Time
25 min
🔥
Cook Time
8 hours
⏰
Total Time
8 hours 25 min
🍽️
Servings
6-8 servings
📊
Difficulty
Medium
🏷️
Category
Main Dish
💡
Quick Tip
Sear beef before slow cooking for best texture
🎯
Best For
Weeknight | Meal prep | Entertaining

Why it works:

  • Dried chiles toasted before soaking develop smoky depth - skipping this step leaves the sauce flat and one-dimensional
  • Chuck roast has enough fat to stay juicy through 8 hours of low heat without drying out like leaner cuts
  • Blending the softened chiles creates a smooth sauce that coats the meat instead of leaving gritty bits throughout
  • Searing the beef first builds a crust that adds texture contrast to the final shredded meat
  • Low and slow breaks down tough connective tissue into gelatin, making the meat fall apart with fork pressure
Quick Tip
Check the meat at 7 hours-if it doesn't shred easily with a fork, give it another hour on low.

What You'll Need

Ingredients for Slow Cooker Mexican Birria

Dried chiles require a quick toast and soak, but they're shelf-stable and cost less than jarred sauces. We keep a batch ready for nights like this - classic corn dish rounds out the plate when you need something mild alongside the rich broth.

🥩
Protein
  • 3-4 lb beef chuck roast
🌶️
Chiles & Spices
  • 6-8 dried guajillo chiles
  • 3-4 dried ancho chiles
  • 2 teaspoon cumin
  • 1 cinnamon stick
  • 2 bay leaves
🧄
Aromatics
  • 1 white onion, quartered
  • 6 garlic cloves
🥢
Liquid Base
  • 3 cups beef broth
  • 2 tablespoon vinegar (apple cider or white)

Ingredient Details

  • Beef chuck roast
    Look for marbling throughout-fat keeps the meat juicy during the long cook time
  • Dried guajillo chiles
    Toast until fragrant but not blackened-burnt chiles taste bitter and ruin the sauce
  • Dried ancho chiles
    Remove stems and seeds before toasting to control heat level and ensure smooth blending
  • White onion
    Quarter it instead of dicing-larger pieces break down into the sauce without disappearing
  • Garlic cloves
    No need to peel-they'll blend into the sauce and add mellow garlic flavor
  • Beef broth
    Use enough to cover the meat halfway-too little dries it out, too much dilutes the sauce
  • Vinegar
    Apple cider vinegar adds tang without overwhelming the chile flavor

Ingredient Swaps

Budget cuts and equipment changes work here without sacrificing the final texture. Most people skip slaw, but it balances the meal - this simple slaw cuts through the rich broth when you need something crisp.

Four swaps that work:

  • Pork shoulder instead of beef chuck - Fattier texture, milder flavor, breaks down just as tender in the same cook time
  • Pasilla chiles instead of guajillo - Similar heat level with slightly different smoky notes, toast and soak the same way
  • Vegetable broth instead of beef broth - Lighter base that keeps it dairy-free, adds about 1 teaspoon extra salt to compensate
  • Instant Pot instead of slow cooker - 60-70 minutes on high pressure cuts the time to under 2 hours total

Slow Cooker (8 Hours Low)

Works for: Set-it-and-forget-it convenience, deep flavor development, no monitoring needed

Skip if: You need dinner in under 2 hours or don't have counter space

Instant Pot (70 Min Pressure)

Works for: Fast weeknights, smaller batches, quicker turnaround for meal prep

Skip if: You prefer hands-off cooking or want maximum tenderness from long braising

Oven Braise (300°F, 4-5 Hours)

Works for: When you don't own a slow cooker, similar results with covered Dutch oven

Skip if: You want fully hands-off cooking-oven requires occasional checking

Instructions

The first 20 minutes involves toasting, blending, and searing. Grapefruit adds the contrast this plate needs, but timing matters - simple grapefruit recipe keeps things balanced when the spice builds.

  1. Toast the chiles: Heat a dry skillet over medium heat. Add guajillo and ancho chiles, pressing with tongs. Toast 2-3 minutes per side until fragrant and slightly darkened but not blackened. Remove stems and seeds, then soak in hot water for 20 minutes until softened.

  2. Blend the sauce: Drain the soaked chiles and add to a blender with garlic, onion, cumin, vinegar, and 1 cup beef broth. Blend on high 60-90 seconds until completely smooth with no chile skin chunks remaining.

  3. Sear the beef: Pat the chuck roast dry with paper towels and season with salt and pepper. Heat 1 tablespoon oil in a large skillet over high heat. Sear beef 3-4 minutes per side until a dark brown crust forms. Transfer to the slow cooker.

  4. Add liquids and cook: Pour the blended chile sauce over the beef. Add remaining 2 cups beef broth, cinnamon stick, and bay leaves. Cover and cook on low for 8 hours. Check at 7 hours-meat should shred easily with a fork. If not, cook another hour.

  5. Shred and serve: Remove beef from slow cooker and rest 10 minutes. Shred with two forks, discarding any large fat pieces. Skim fat from the surface of the sauce. Return shredded meat to the pot, stir to coat, and serve in corn tortillas with consommé for dipping.

Golden Rule
Don't skip resting the meat before shredding-it reabsorbs juices and stays moister when you pull it apart.

What to Serve With It

Rich broth and tender beef need something crisp, mild, or acidic to break up the intensity. For a version that comes together quickly, white rice meal planning ideas gives you options when the main is already sorted.

Side Dish Prep Why It Works How to Serve
Corn tortillas Easy Traditional base for birria tacos, soaks up consommé without falling apart Warm in dry skillet 30 seconds per side, serve stacked
Mexican rice Easy Mild grain absorbs the rich broth and balances the chile heat Cook with tomato and cumin, serve in bowls alongside
Pico de gallo Easy Fresh tomato and lime cut through fatty, rich meat with acidic contrast Dice tomatoes, onion, cilantro, lime juice, salt-serve cold
Sliced radishes Easy Crisp, peppery bite adds textural contrast to tender shredded beef Slice thin, serve raw on the side with lime wedges
Queso fresco Easy Creamy, mild cheese cools down spice and adds richness without overwhelming Crumble over tacos or serve on the side for sprinkling

Three ways to serve it:

  • Birria tacos: Dip tortillas in consommé, fill with shredded beef, fold, and crisp in a skillet until edges are golden
  • Birria quesadillas: Layer cheese and beef between two tortillas, pan-fry until crispy, serve with consommé for dipping
  • Birria bowls: Serve shredded beef over rice with beans, pico, radishes, and a ladle of hot consommé on the side
Best Pick
Crisp the tortillas in the leftover beef fat before assembling tacos-adds flavor and prevents sogginess.

Store and Reheat

Birria tastes better the next day after the flavors meld overnight in the fridge. A good bread can make or break the plate - homemade bread recipe works when you need something to soak up extra consommé.

Method Time Best For
🍳 Stovetop 10-15 min Reheating shredded meat with broth for tacos or bowls
🔥 Oven 20 min at 325°F (160°C) Larger portions in covered dish, keeps meat moist
📦 Microwave 2-4 min Single servings, stir halfway through to heat evenly

For best results when storing:

  • Cool completely before refrigerating - hot meat in a sealed container creates condensation that dilutes the sauce
  • Store meat and consommé together - keeps the beef moist and prevents it from drying out in the fridge
  • Use shallow containers for faster cooling - gets the temperature down quickly and reduces bacterial growth risk
  • Freeze in portion-sized bags - thaw only what you need instead of reheating the entire batch multiple times
  • Skim solidified fat before reheating - the fat rises to the top when cold and removes easily with a spoon

Frequently Asked Questions

Can I substitute chicken for beef in birria?

Yes, use bone-in chicken thighs and reduce cook time to 4-5 hours on low. The meat will shred easily but won't have the same rich, gelatinous texture that beef chuck develops.

How should I store leftover birria and for how long?

Store in an airtight container with the consommé for 3-4 days in the fridge or up to 3 months in the freezer. Reheat on the stovetop with a splash of broth to loosen.

How can I tell when the meat is fully cooked and tender?

Insert a fork into the thickest part-if it slides in easily and the meat pulls apart without resistance, it's done. Check at 7 hours and give it another hour if it still feels firm.

Why is my birria sauce grainy and how do I fix it?

The chiles weren't blended long enough. Blend for 60-90 seconds on high until completely smooth, or strain the sauce through a fine-mesh sieve before adding to the slow cooker.

What are good side dishes to serve with birria tacos?

Mexican rice, pico de gallo, sliced radishes, and pickled jalapeños all work. Add queso fresco or guacamole for richness, and serve extra consommé on the side for dipping.

Slow Cooker Mexican Birria served on a plate

Slow Cooker Mexican Birria

No ratings yet
Slow Cooker Mexican Birria features tender beef chuck roast cooked low and slow in a smoky, smooth chile sauce made from toasted guajillo and ancho chiles. This straightforward recipe requires no overnight marinating and delivers authentic flavors with minimal hands-on time.
Print Recipe Pin Recipe
Prep Time 25 minutes mins
Cook Time 8 hours hrs
Total Time 8 hours hrs 25 minutes mins
Servings: 7 servings
Course: Main Dish
Cuisine: Mexican
Ingredients Equipment Method Notes

Ingredients
  

  • 3 lb beef chuck roast Choose marbled cut for juiciness
  • 6 pieces dried guajillo chiles Toast until fragrant, remove stems and seeds
  • 3 pieces dried ancho chiles Toast after removing stems and seeds
  • 2 teaspoon cumin
  • 1 stick cinnamon stick
  • 2 pieces bay leaves
  • 1 white onion quartered
  • 6 cloves garlic unpeeled
  • 3 cups beef broth divided, 1 cup for blending, 2 cups for slow cooker
  • 2 tablespoon vinegar apple cider or white vinegar
  • 1 tablespoon oil for searing beef
  • salt to taste
  • black pepper to taste

Equipment

  • Slow cooker For slow cooking the beef and sauce
  • Skillet To toast dried chiles and sear beef
  • Blender To blend soaked chiles and aromatics into sauce

Method
 

  1. Heat a dry skillet over medium heat. Add guajillo and ancho chiles, pressing with tongs. Toast each side 2-3 minutes until fragrant and slightly darkened but not blackened. Remove stems and seeds, then soak chiles in hot water for 20 minutes until softened.
    6 pieces dried guajillo chiles, 3 pieces dried ancho chiles
  2. Drain soaked chiles and add to a blender with garlic cloves, quartered onion, cumin, vinegar, and 1 cup beef broth. Blend on high for 60-90 seconds until completely smooth with no chile skin chunks.
    6 pieces dried guajillo chiles, 3 pieces dried ancho chiles, 1 white onion, 6 cloves garlic, 2 tsp cumin, 2 tbsp vinegar, 3 cups beef broth
  3. Pat the chuck roast dry and season with salt and black pepper. Heat 1 tablespoon oil in a large skillet over high heat. Sear beef 3-4 minutes per side until a dark brown crust forms. Transfer seared beef to the slow cooker.
    3 lb beef chuck roast, 1 tbsp oil, salt, black pepper
  4. Pour the blended chile sauce over the beef in the slow cooker. Add remaining 2 cups beef broth, cinnamon stick, and bay leaves. Cover and cook on low for 8 hours. Check at 7 hours and continue if meat isn't shredding easily.
    3 cups beef broth, 1 stick cinnamon stick, 2 pieces bay leaves
  5. Remove beef from slow cooker and rest 10 minutes. Shred with two forks, discarding large fat pieces. Skim fat from the surface of the sauce. Return shredded meat to the sauce, stir to coat, and serve in warmed corn tortillas with consommé for dipping.
    3 lb beef chuck roast

Notes

  • Always toast dried chiles before soaking to develop smoky depth and avoid bitterness.
  • Rest meat before shredding to reabsorb juices and maintain moist texture.
  • Check meat at 7 hours; if it doesn't shred easily, cook for an additional hour.

Tried this recipe?

Let us know how it was!

What Is Rotel? Taste, Uses & What It Tastes Like

April 2, 2026

You spot it on the shelf between plain canned tomatoes and salsa - a small, unassuming can with a simple label. Rotel has been a U.S. pantry staple for decades, and if you've never grabbed one, you've likely eaten something made with it.

What Is Rotel

It sits in a middle ground that no other canned product quite fills: more seasoned than plain diced tomatoes, less chunky than salsa, and reliably useful for everything from weeknight queso to chili.

QUICK SUMMARY

Rotel is a canned mix of diced tomatoes and green chiles with a tangy, mildly spicy profile. It's ready straight from the can, holds moderate heat, and works across dips, soups, and baked dishes. Typically vegan and gluten-free, though sodium content runs high.

🌶️Flavor: Bright tangy tomato with mild green-chile heat and a salty edge
🥫Best Uses: Queso dip, chili, taco meat, enchilada bakes, soups
📦Shelf Life: Unopened for many months; opened, 5-7 days refrigerated
⚠️Watch: High sodium - check labels if you need a low-sodium option
🛒Buy: Look for dent-free cans with visible green chile pieces and a current best-by date

What Is Rotel?

Rotel is a branded canned tomato-chile product made by ConAgra, sold almost exclusively in the United States. The original formula combines diced tomatoes with diced green chiles - typically a mild variety with jalapeño-level heat - packed together in tomato liquid with salt added.

The brand traces its roots to Tex-Mex cooking traditions and has been on U.S. shelves since the 1940s. It's also called Rotel tomatoes or simply "diced tomatoes with green chiles," and you'll see that generic phrase on store-brand versions too.

Several varieties exist across the product line:

  • Original - the standard mild-heat version most recipes call for
  • Mild - reduced chile intensity, good for heat-sensitive eaters
  • Hot - extra chiles for more pronounced spice
  • Fire Roasted - tomatoes charred before canning, deeper flavor
  • Chunky - larger dice pieces for a more textured result
  • No Salt Added - same formula without the sodium hit

Most recipes that call for Rotel mean the Original variety unless stated otherwise.

What Does Rotel Taste Like?

rotel - What Is Rotel

Opening a can of Rotel delivers a sharp, bright tomato smell with a green pepper note underneath. The flavor hits as tangy first, with a recognizable canned-tomato sweetness that quickly gives way to mild chile warmth.

Sensory SnapshotModerate Intensity
👅 Flavor
tangymildly spicysaltyslightly sweet
✋ Texture
chunkysaucy
👃 Aroma
fresh tomatogreen chile

The heat is moderate - closer to a green salsa than a hot sauce. Compared to plain canned diced tomatoes, Rotel tastes saltier and more aggressively seasoned straight from the can.

Heat builds slightly when simmered, though long cooking mellows the chile bite considerably.

Watch Out
Rotel's sodium level is notably high for a canned tomato product. Taste before adding extra salt to any dish - it almost never needs more.

How to Use Rotel

Rotel goes into dishes with almost no prep required. Drain it for drier applications; use it with all the liquid for soups, chili, or any dish that needs sauce volume.

The most well-known use is queso dip - block processed cheese melted with one can of Rotel stirred in. It's a formula so reliable it appears on the Velveeta packaging.

For Tex-Mex eggs like migas, a spoonful of Rotel stirred into the pan adds both tomato body and a mild chile lift without extra chopping.

How Rotel Is Used
MethodBest ForTip
🥫 Straight from canQueso dip, nacho topping, dip baseDrain lightly if you want a thicker dip
🍳 SimmeredTaco meat, chili, skillet saucesAdd early and let the liquid reduce for deeper flavor
🫙 BakedEnchilada casseroles, layered rice bakesNo need to pre-cook - the oven does the work
🥣 Stirred inSoups, stews, bean dishesUse the full can liquid; it adds flavor to the broth

Rotel pairs well with shredded cheddar, Monterey Jack, or any melting cheese, plus ground beef, chorizo, black beans, and corn. Garlic and onion round out the base when you're building a longer-simmered dish.

If you need more heat in a recipe, add fresh jalapeño alongside the can rather than swapping varieties - it gives you control without changing the tomato-to-chile ratio.

Try It In
🍗Air Fryer Chili-Lime Chicken WingsUse Rotel as a quick skillet sauce base alongside the wings→🍗Air Fryer Garlic Parmesan Chicken TendersStir drained Rotel into a dipping sauce for a Tex-Mex twist→🍗Air Fryer Honey Garlic Chicken TendersBalance the sweetness with a spoonful of Rotel in the glaze→

How to Buy and Store Rotel

At the store, check the can seams first. Dented seams or bulging lids are reason to skip a can regardless of the best-by date. A current date and a dent-free body are the two things worth checking.

Best Pick
For batch cooking - big pots of chili or enchilada bakes - buy the standard 10-oz can. Single-serve sizes exist but cost more per ounce.

Once opened, transfer leftovers to a glass or plastic container and refrigerate. Metal cans react with acidic tomato contents over time, which affects both flavor and safety.

Opened Rotel keeps for 5-7 days in the fridge - for a longer look at storage timelines, see our rotel storage guide.

Unopened cans store well in a cool, dry pantry. Heat and humidity degrade canned goods faster, so avoid storing above the stove or near a dishwasher vent.

Where to Start With Rotel

Rotel earns its pantry space fastest when you're cooking for a crowd or building a quick weeknight meal with minimal prep. Start with the Original variety if you're new to it - it's what virtually every recipe is calibrated for.

If you find yourself without a can, rotel replacements break down the closest combinations using plain canned tomatoes and salsa verde or canned chiles. Stock two or three cans and you'll reach for them more often than you expect.

Golden Rule
Drain Rotel when you need body, use the full can when you need liquid. That single decision controls how much a dish thickens.

Frequently Asked Questions

Is Rotel just tomatoes and green chiles?

Mostly, yes. The Original formula contains diced tomatoes, diced green chiles, salt, and calcium chloride as a firming agent. No additional spices are listed - the chile variety itself provides the heat.

Can I use diced tomatoes instead of Rotel?

Yes, but the result will taste milder and less seasoned. Add a small can of diced green chiles and a pinch of extra salt to get closer to Rotel's flavor profile.

How spicy is Rotel?

The Original variety is mildly spicy - comparable to a mild green salsa or a mild fresh jalapeño. The Hot variety noticeably increases the chile presence without reaching hot-sauce territory.

How long does opened Rotel last in the fridge?

Five to seven days in a sealed, nonreactive container. Transfer it out of the metal can immediately - acidic tomatoes react with the metal and degrade flavor faster.

Does Rotel work as a queso dip on its own?

Not alone - it needs melted cheese to become queso. The standard ratio is one 10-oz can of Rotel to one pound of processed cheese, melted together until smooth.

What Is Stracchino Cheese? [Taste, Uses & More]

April 2, 2026

Soft, milky, and almost cloud-like on the tongue, stracchino lands somewhere between a gentle crème fraîche and a young robiola cheese for creaminess - lactic, lightly tangy, with a buttery finish that doesn't overwhelm.

What Is Stracchino Cheese

It's a northern Italian fresh cheese built for immediacy: spread it cold, melt it warm, or let it collapse into hot pasta just off the heat.

Alongside a few slices of prosciutto's flavor and uses, it anchors an antipasto board with very little effort.

QUICK SUMMARY

Stracchino is a soft, spreadable fresh cow's-milk cheese from northern Italy with a mild lactic tang and buttery finish. Use it cold on bread, melted into focaccia, or folded into pasta. It's best within a week of opening and suits cured meats, bitter greens, and light wines.

🧀Origin: Lombardy and Emilia-Romagna, northern Italy
👅Flavor: Mild lactic tang, buttery sweet, lightly creamy finish
🍽️Best Uses: Spread, melted into focaccia, folded into pasta or polenta
🛒Buy: Look for uniform pale-ivory paste, no watery pooling or cracks
❄️Storage: Fridge, tightly wrapped; use within 5-7 days of opening
⏱️Shelf Life: Unopened 2-3 weeks refrigerated; opened best within one week

What Is stracchino cheese?

Stracchino is a fresh cow's-milk cheese originating in Lombardy and Emilia-Romagna, where it has been made for centuries using the milk of cows returning from alpine summer pasture -

the word derives from stracco, Italian for "tired." That tradition has since industrialized, and today most stracchino arrives in tubs or small wrapped wedges.

It belongs to the family of high-moisture Italian fresh cheeses, sitting close to crescenza - a name often used interchangeably, though some producers and regions treat them as distinct products.

Crescenza tends to be slightly firmer and more structured; stracchino is typically softer and more uniformly spreadable.

The paste is pale ivory, smooth, and almost pudding-soft when it's at peak freshness. You may also see it labelled stracchino d'Italia in Italian delis, or occasionally misspelled as stracino on packaging.

  • 🌍 Region - Lombardy and Emilia-Romagna, northern Italy
  • 🐄 Milk type - Pasteurized whole cow's milk
  • 🧾 Also known as - Crescenza (linked but distinct), stracchino d'Italia
  • 📦 Formats - Tubs, wrapped wedges, or small whole wheels

What Does stracchino cheese Taste Like?

stracchino cheese - What Is Stracchino Cheese

Stracchino is mild and lactic - the kind of cheese that tastes more like very good fresh dairy than anything aged or sharp. A slight tang registers at the back of the palate, followed by a clean buttery sweetness.

Sensory SnapshotMild Intensity
👅 Flavor
lactic tangbuttery sweetlightly acidic
✋ Texture
very softspreadablesilky when warmed
👃 Aroma
fresh milklactic

Warmed gently, the tang softens and the buttery note comes forward - it's why stracchino works so well folded into hot pasta just off the heat rather than cooked directly over flame.

Comparing it to mozzarella or ricotta misses the mark; young robiola is a closer relative, and a mild crème fraîche lands in the same sensory neighbourhood.

Golden Rule
Stracchino's tang sharpens as it ages toward the end of its shelf life - use it early in the week for the sweetest, creamiest result.

How to Use stracchino cheese

Cold, stracchino behaves like a premium spreadable cheese: drag it across toasted rustic bread, pile it onto crostini with a few drops of olive oil and cracked pepper, or layer it into a panino against cured meats. Arugula in dairy recipes pairs particularly well here -

the bitterness cuts stracchino's milky richness without overwhelming it.

Warm applications are where this cheese becomes genuinely useful.

Folding stracchino into pasta off the heat creates a glossy, creamy sauce with no cream at all.

Dolloped onto hot using polenta for creaminess just before serving, it melts into a soft, silky pool.

Its most celebrated use is inside focaccia al formaggio, the Ligurian flatbread where two thin doughs sandwich a thick layer of cheese before baking.

Watch Out
Stracchino doesn't hold up to sustained high heat. Direct grilling or prolonged oven time dries it out and kills its creaminess - add it at the very end.
How Stracchino Is Used
MethodBest ForTip
🥗 Cold/SpreadCrostini, panini, antipasto boardsServe at room temperature for best spreadability
🍝 Folded Off HeatPasta sauces, polenta toppingAdd after removing from heat to preserve silky texture
🫓 Baked InFocaccia al formaggio, pizza bianca, vegetable gratinsSandwich between dough layers to prevent direct heat contact

For pairings, lean on ingredients that complement its lactic mildness: prosciutto and other cured hams, fresh figs or pear, roasted mushrooms, and bitter greens all work.

Light reds like Pinot Noir suit it better than heavily tannic wines, which can clash with the cheese's delicate acidity.

If you can't source stracchino locally, knowing your stracchino cheese stand-ins keeps most of these dishes within reach.

Try It In
🧀Cheddar Cheese StrawsSwap in stracchino for a softer, milder cheese pastry→🍳Egg and Cheese Breakfast SandwichStracchino melts into eggs without any sharpness→🥗Blue Cheese Dressing (Homemade)Use stracchino as a creamy mild base instead→

How to Buy and Store stracchino cheese

At the counter or deli case, look for a uniform pale-ivory paste - no sun-dried cracking at the edges, no dark spots, and no excess watery whey pooled inside the tub. For whole wheels, press gently: the interior should feel smooth and give evenly.

A thin, slightly tacky rind on a wheel is normal and desirable.

Shortcut
Can't find stracchino at a local deli? Specialty grocery stores with Italian imports or online cheese retailers are your most reliable source.

Once open, wrap it tightly in wax paper then plastic, or transfer to an airtight container and keep it in the coldest part of your fridge.

Proper handling for **stracchino cheese in dairy recipes](https://forkliftkitchen.com/stracchino-cheese-shelf-life/) covers shelf life in detail, but the short version is: use it within five to seven days of opening for peak creaminess.

  • 🗓️ Unopened - Refrigerated tubs keep 2-3 weeks
  • 📅 Opened - Best within 5-7 days; texture degrades quickly
  • ❄️ Freezing - Not recommended; high moisture causes grainy texture on thaw
  • 🌡️ Serving - Pull from the fridge 15-20 minutes before serving cold

Where to Start With stracchino

New to this cheese? Buy a small tub, toast a thick slice of bread, and spread it cold with olive oil and a pinch of salt.

That single preparation tells you everything about its character.

From there, the next step is focaccia al formaggio or a simple pasta: both show what gentle heat does to stracchino's texture.

For anyone exploring similar soft Italian cheeses, using creme fraiche for creaminess or young robiola in the same recipes builds a useful point of comparison.

Stracchino is forgiving, quick to use, and requires almost no technique - just good timing.

Frequently Asked Questions

Is stracchino the same as crescenza?

They're related but not identical. Crescenza tends to be slightly firmer and more structured; stracchino is typically softer and more spreadable. Some Italian producers and regions use the names interchangeably, which adds to the confusion.

Can you melt stracchino?

Yes - it melts very well under gentle heat. Fold it into hot pasta off the burner or layer it inside focaccia before baking. Sustained direct high heat dries it out, so add it late in cooking.

What substitutes for stracchino exist?

Young robiola and fresh crescenza are the closest matches. Mild cream cheese thinned with a little crème fraîche works in a pinch for cold applications, though the lactic tang won't be identical.

How long does stracchino last in the fridge?

Unopened tubs keep 2-3 weeks refrigerated. Once opened, use it within 5-7 days - the texture becomes watery and the tang sharpens noticeably past that point.

Where can you buy stracchino cheese?

Italian delis and specialty grocery stores with imported cheese sections carry it most reliably. Online Italian food retailers are a consistent source if you can't find it locally.

« Previous Page
Next Page »

Primary Sidebar

ForkliftKitchen recipe developer

Welcome!

Recipe Developer · 12+ Yr Kitchen Veteran

I'm the recipe developer behind this site, focused on practical, well-tested dishes and smart ingredient swaps. Every recipe is written to be clear, reliable, and easy to make at home.

650+ Recipes
12+ Yrs Exp.
3x Tested
Our Story →

As Featured In

Allrecipes

TASTE OF HOME

Food52

HUFFPOST

Yahoo! Life

Our Editorial Standards

  • ✓ Every recipe tested at least 3 times before publishing
  • ✓ Substitutes verified by real kitchen trials, not guesswork
  • ✓ Reviewed for accuracy by our editorial team
  • ✓ Updated regularly with seasonal info and reader feedback

Most Popular

  • Creamy Lemon Shrimp Linguine
    Creamy Lemon Shrimp Linguine
  • Creamy Garlic Mushroom Chicken
    Creamy Garlic Mushroom Chicken
  • Sesame Ginger Chicken Noodle Bowls
    Sesame Ginger Chicken Noodle Bowls
  • Baked Lemon Herb Fish Fillets
    Baked Lemon Herb Fish Fillets
  • Veggie Loaded Fried Rice
    Veggie Loaded Fried Rice
  • Spicy Garlic Shrimp Stir Fry
    Spicy Garlic Shrimp Stir Fry

Join 8,000+ Home Cooks

Weekly Kitchen Tips

Easy recipes, smart substitutes, and real cooking shortcuts — every Thursday.

Subscribe Free →


Side Dishes

  • What to Serve With Asian Salmon? 15 Best Side Dishes
    What to Serve With Asian Salmon? 15 Best Side Dishes
  • Side Dishes for Strawberry Spinach Salad
    15 Best Side Dishes for Strawberry Spinach Salad
  • Sides for Grilled Cauliflower Steaks to Complete the Meal
    15 Sides for Grilled Cauliflower Steaks to Complete the Meal
  • 15 Sides To Serve With Calabacitas
    15 Best Sides for Calabacitas – Mexican-Inspired Favorites


Substitutes

  • 7 Best Substitutes for Hot Sauce in Marinades & Stir-Fries
    7 Best Substitutes for Hot Sauce in Marinades & Stir-Fries
  • 9 Best Substitutes for Butter in Baking and Cooking
  • 7 Best Substitutes for Tagliatelle for Italian Pasta Dishes
    7 Best Substitutes for Tagliatelle for Italian Pasta Dishes
  • 7 Best Substitutes for Udon Noodles in Asian Stir-Fries
    7 Best Substitutes for Udon Noodles in Asian Stir-Fries


Browse by Topic

  • Side Dishes320
  • Substitutes785
  • Dinner163
  • Air Fryer77
  • Taste Profiles484
  • Food Storage123


Reader Reviews

★★★★★

"Finally a food blog that tells you exactly why a substitute works instead of just listing options."

— Sarah M., via email

★★★★★

"The side dish recommendations are so specific — saved my dinner party twice this month."

— James R., Pinterest comment

★★★★★

"I trust this site more than most because they actually test everything. You can tell."

— Priya K., blog comment

Footer

↑ Back to Top

Forklift Kitchen

We do the heavy lifting so you can enjoy the cooking. Tested recipes, smart substitutes, and perfect pairings—built for real home cooks.

Content

  • Recipes
  • Substitutes
  • What to Serve With
  • Blog

Company

  • About Us
  • Contact
  • Subscribe

Legal

  • Privacy Policy
  • Terms of Service

As an Amazon Associate I earn from qualifying purchases.

© 2026 Forklift Kitchen.

Rate This Recipe

Your vote:


A rating is required
A name is required
An email is required