• Skip to primary navigation
  • Skip to main content
  • Skip to primary sidebar
  • Recipe Index
    • Air Fryer
  • Side Dishes
  • Substitutes
  • About
  • Contact
  • Subscribe

ForkLiftKitchen

menu icon
go to homepage
  • Recipe Index
    • Air Fryer
  • Side Dishes
  • Substitutes
  • About
  • Contact
  • Subscribe
subscribe
search icon
Homepage link
  • Recipe Index
    • Air Fryer
  • Side Dishes
  • Substitutes
  • About
  • Contact
  • Subscribe
×

Blog

What Is Skim Milk? [Taste, Uses & More]

April 2, 2026

Skim milk earns its place in the kitchen not through richness but through restraint. Remove nearly all the fat from whole milk and you get a thin, clean liquid that adds milky character without the calorie load - useful in smoothies, low-fat sauces, cereal, and anywhere you want dairy presence without density.

What Is Skim Milk

If you're already weighing milk alternatives against each other, understanding what skim actually contributes - and where it falls short - makes the comparison clearer.

QUICK SUMMARY

Skim milk is fat-free cow's milk with a mild, faintly sweet flavor and watery texture. It works best where dairy flavor is needed without added fat - cereal, smoothies, low-fat custards, and light batters - but struggles anywhere mouthfeel or richness matters.

🥛Category: Fat-reduced fluid dairy, processed by centrifugal separation
👅Flavor: Mildly sweet, clean, faint dairy tang, noticeably thin
🍳Best Uses: Cereal, smoothies, light batters, low-fat custards with stabilizer
⏱️Shelf Life: 5-7 days refrigerated after opening; UHT unopened lasts months
⚠️Avoid: High-heat reductions and fat-dependent recipes like ganache or rich cream sauces

What Is Skim Milk?

Skim milk is cow's milk that has had nearly all its milk fat removed, typically through centrifugal separation, leaving a fat content of 0.1-0.5%.

It goes by several names - nonfat milk, fat-free milk, and skimmed milk in the UK - but they all refer to the same product.

Standard pasteurized skim milk is what you'll find in refrigerated dairy cases. Ultra-pasteurized (UHT) skim milk undergoes higher-heat processing, extending its shelf life to months when kept sealed and unrefrigerated.

Both types are commonly fortified with vitamin D, since the fat removal strips fat-soluble vitamins naturally present in whole milk.

Two subgroups are worth knowing:

  • Pasteurized skim - Standard refrigerated carton; requires cold storage from day one; shortest shelf life of the two.
  • UHT skim milk - Shelf-stable until opened; useful for pantry storage, though flavor is slightly more cooked after ultra-pasteurization.

Skim milk contains roughly 3-3.4 g of protein per 100 mL, with casein and whey proteins intact despite fat removal. It is not inherently lactose-free, so people who are lactose-intolerant still need lactase-treated versions - similar to what applies to lactose-free milk options.

What Does Skim Milk Taste Like?

Skim milk tastes clean and faintly milky, with a mild sweetness that comes from lactose rather than fat. The dairy tang is present but subdued - noticeably thinner than whole milk or even reduced-fat milk.

The absence of fat changes more than richness. Fat carries flavor compounds, so removing it strips some of the depth that whole milk has.

What you're left with is closer to diluted milk than a full dairy product.

Sensory SnapshotMild Intensity
👅 Flavor
Faintly sweetClean dairyThin tang
✋ Texture
WateryNo creaminess
👃 Aroma
Faint dairyNearly neutral

Heat affects skim milk differently than whole milk. Because there's no fat to buffer it, high-heat cooking amplifies the proteins' tendency to tighten, which is why skim milk scorches faster and can develop a slightly chalky note in overcooked applications.

How to Use Skim Milk

Skim milk works where dairy flavor is the goal but fat is not.

Its thin body makes it a natural fit for cold applications - poured over cereal or granola, stirred into instant coffee, or blended into smoothies where fruit, banana, or yogurt provide the creaminess it can't.

In cooking, the rules shift. Pair skim milk with a stabilizer - cornstarch, eggs, or gelatin - and it can hold its own in custards and puddings.

Without one, the lack of fat means thin, loose results. For light pancake batter, skim milk reduces richness while still activating leavening, which works in recipes where a slightly less tender crumb is acceptable.

Golden Rule
Always pair skim milk with a starch or egg stabilizer in any heated sauce or custard. Without fat to build body, the texture will be thin unless something else provides structure.

Where skim milk genuinely struggles is in fat-dependent recipes - butter-rich ganache, cream-forward sauces, or anything reduced down to concentrate flavor. Reducing skim milk drives off water and leaves the proteins increasingly exposed, which leads to scorching and off-flavors long before you achieve the thickness you'd get from heavy cream.

In those cases, checking your skim milk alternatives makes more practical sense than forcing it.

How Skim Milk Is Used
MethodBest ForTip
🥛 ColdCereal, coffee, drinking straightServe well chilled - thin texture is less noticeable at cold temps
🍳 Gentle heatLow-fat mashed potatoes, thin soups, light saucesAlways add stabilizer; keep heat medium or below
🌀 BlendingSmoothies, pancake batter, drink mixesLet other ingredients (fruit, starch) carry the mouthfeel
🥚 TemperingCustards, puddings with eggs or cornstarchAdd warm skim milk slowly to eggs to prevent curdling

American low-fat home cooking and institutional kitchens are where skim milk appears most consistently. It also shows up in diet-focused European preparations and weight-management recipes globally.

For drinks, it pairs well with coffee, tea, and almond milk alternatives when mixing dairy and plant-based options.

Try It In
🥞Fluffy Buttermilk PancakesSwap in skim milk with acid to mimic buttermilk's lift without the fat→☕Iced Brown Sugar Oat Milk LatteSee how dairy-free milk compares in a cold coffee drink→🍵Iced Matcha Oat Milk LatteShows how skim milk competes against plant-based options in cold drinks→

How to Buy and Store Skim Milk

Choose pasteurized skim milk with the most recent sell-by date on the carton. When you open it, check for any off-odor - fresh skim milk smells nearly neutral.

A sour or sharp smell means it's turned, regardless of the date printed.

Watch Out
Don't rely solely on the sell-by date. Skim milk can sour before that date if the carton was handled improperly or left warm during shopping. Always smell it when opening.

Storage is straightforward:

  • Refrigerated skim - Keep at or below 40°F (4°C); once opened, use within 5-7 days.
  • UHT skim - Store unopened at room temperature until the printed date; refrigerate after opening and treat like standard skim.
  • Original carton - Keep it sealed when not in use; skim milk absorbs surrounding refrigerator odors quickly.

For a full breakdown of timelines and signs of spoilage, the skim milk freshness guide guide covers edge cases like partially opened cartons and freezing.

Start Here If You're Unsure

If a recipe calls for whole milk and you want to substitute skim, ask first whether fat is structural in that dish. Soup, cereal, smoothies, light batters - yes, skim works.

Cream sauce, ganache, or anything relying on fat for texture - don't force it.

Skim milk's value is specific: clean dairy flavor, zero fat, lower calories. Use it where those three things align with what the dish actually needs.

Frequently Asked Questions

Why does skim milk taste watery?

Fat carries many of milk's flavor compounds, and removing it strips both mouthfeel and depth. What remains is mostly water, lactose, and protein - which tastes clean but noticeably thin compared to whole milk.

Can you substitute skim milk for whole milk in recipes?

In cold or lightly cooked applications - soups, batters, smoothies - yes. In fat-dependent recipes like cream sauces or ganache, the swap fails because skim milk can't replicate the texture fat provides.

Does skim milk curdle when heated?

It can, especially near boiling or in acidic environments. The proteins - casein and whey - are more exposed without fat to buffer them, so they coagulate faster than in whole milk. Keep heat moderate and add acid carefully.

What is the difference between skim and nonfat milk?

Nothing meaningful - they're the same product under different labeling conventions. The FDA allows both terms for milk with 0.5% fat or less, so brands use them interchangeably.

How long does skim milk last after opening?

Typically 5-7 days when kept sealed at or below 40°F. UHT skim follows the same window once opened, even though the unopened carton lasts much longer at room temperature.

Slow Cooker Korean Ox Bone Soup

April 2, 2026

When you need a hands-off dinner that doubles as meal prep and soothes on cold nights, ox bone soup delivers. One slow cooker, minimal hands-on work, and a milky white broth that tastes like you spent all day at the stove.

Slow Cooker Korean Ox Bone Soup served on a plate

The slow cooker extracts gelatin from the bones while you do nothing. Blanch first, add aromatics, and let it run for 8-12 hours.

Perfect for weeks when you want real food without standing over the stove.

QUICK SUMMARY

Slow Cooker Korean Ox Bone Soup simmers ox bones with garlic, ginger, and green onions for 8-12 hours to create a velvety, milky broth. Blanch the bones first for clarity, then let the slow cooker do the work. The broth should turn opaque pale white with tender marrow bones.

⏱️Time: Soak bones 2-4 hours, blanch 10 minutes, cook 8-12 hours on low
🔑Key Move: Blanch bones in boiling water 10 minutes before slow cooking
⚠️Watch Out: Don't boil the broth - cloudy soup comes from high heat and skipped blanching

Table of Contents

Toggle
  • Why This Recipe Works
  • What You'll Need
    • Ingredient Details
  • Ingredient Swaps
  • What to Serve With It
  • Store and Reheat
  • Frequently Asked Questions
  • Slow Cooker Korean Ox Bone Soup
    • Method 
    • Tried this recipe?

Why This Recipe Works

Long, slow extraction pulls gelatin from ox bones without any babysitting. Blanching first removes impurities that make the broth bitter. For a version that comes together quickly, a warm homemade stew recipe uses similar aromatics with faster-cooking ingredients.

Quick Reference
⏱️
Prep Time
20 min
🔥
Cook Time
6-12 hours
⏰
Total Time
6h 20min - 12h 20min
🍽️
Servings
6 servings
📊
Difficulty
Medium
🏷️
Category
Main Dish
💡
Quick Tip
Blanch bones first for clearer broth
🎯
Best For
Weeknight | Meal prep | Cold weather

What makes this work:

  • Soaking bones in cold water 2-4 hours pulls out blood without setting impurities
  • Blanching for 10 minutes removes scum that causes bitter, cloudy broth
  • Low heat for 8-12 hours extracts gelatin without breaking down proteins into cloudiness
  • Skimming foam every 30 minutes during the first 2 hours keeps broth clean
  • Adding salt at the end prevents proteins from toughening and clouding the liquid
Quick Tip
Use leg or knuckle bones - they have more marrow and gelatin than other cuts

What You'll Need

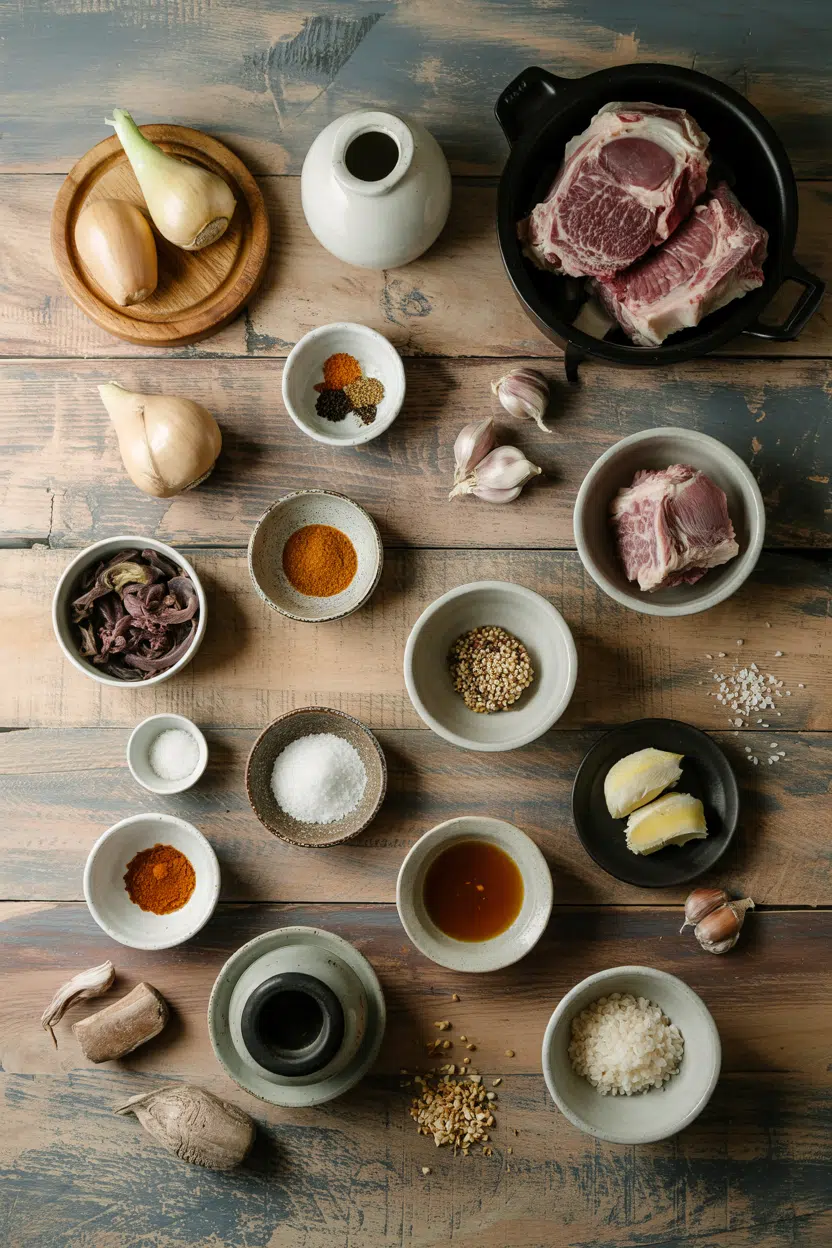
Ingredients for Slow Cooker Korean Ox Bone Soup

Shop for ox bones at Asian markets or butcher shops where they're fresher and cheaper. Stock up on garlic and ginger while you're there since they store for weeks.

🦴
Bones
  • 3-4 lbs ox bones (leg or knuckle)
🧄
Aromatics
  • 6 cloves garlic, smashed
  • 2-inch piece ginger, sliced
  • 4 green onions, cut into 2-inch pieces
🥬
Vegetables
  • 1 lb daikon radish, peeled and cut into chunks (optional)
  • 2 pieces Korean dried kelp/dashima (optional)
🫙
Seasoning & Base
  • 8 cups water
  • 2 tablespoon soy sauce
  • Salt to taste
  • Black pepper, freshly ground

Ingredient Details

  • Ox bones
    Look for leg or knuckle bones with visible marrow - they create the richest, most gelatinous broth
  • Garlic
    Smash cloves with the side of a knife to release oils without mincing them into bits
  • Ginger
    Slice against the grain into coins - it reduces gaminess and adds warmth without overpowering
  • Green onions
    Cut into 2-inch pieces so they stay intact and are easy to remove before serving
  • Daikon radish
    Peel and cut into 1-inch chunks - it adds mild sweetness but can turn mushy if added too early
  • Water
    Use filtered or spring water if your tap water is heavily mineralized - it makes a cleaner-tasting broth
  • Soy sauce
    Add at the end so you can taste and adjust - early salting toughens proteins and clouds the broth

Ingredient Swaps

Beef marrow bones work when ox bones are hard to find. They create slightly less gelatin but the flavor stays close enough for weeknight cooking.

Four swaps that work:

  • Use beef marrow or knuckle bones instead of ox bones for a slightly less gelatinous but still rich broth
  • Swap soy sauce for tamari if you need gluten-free - same savory depth, no gluten
  • Replace fresh garlic with 1 teaspoon garlic powder when you're out - milder but functional
  • Use ground ginger (½ tsp) instead of fresh when the store's out - less sharp but still reduces gaminess

Fresh Ginger

Works for: Traditional flavor, bright aromatic punch, reduces gaminess effectively

Skip if: You only have ground ginger - use ½ teaspoon instead of 2-inch piece

Ground Ginger

Works for: Budget cooking, pantry staples, milder warmth without fresh bite

Skip if: You want authentic Korean flavor - fresh ginger makes a noticeable difference

Instructions

The blanching step takes 10 minutes but saves the whole batch from bitterness. Once the slow cooker's running, you don't touch it for 8 hours. A dollop of this easy dip recipe takes each bite somewhere more interesting.

  1. Soak ox bones in cold water for 2-4 hours, changing water once halfway through. Drain and rinse bones under cold running water.

  2. Bring a large stockpot of water to a rolling boil. Add bones and boil for 10 minutes. Dump water, rinse bones thoroughly, and rinse the pot to remove scum.

  3. Place blanched bones in slow cooker. Add smashed garlic, sliced ginger, green onion pieces, dried kelp if using, and 8 cups water. Set slow cooker to low and cook for 8-12 hours without opening the lid.

  4. After 4-6 hours, add daikon radish chunks if using. Skim any foam or fat from the surface with a large spoon. Continue cooking until broth turns milky white and bones are very soft.

  5. Remove and discard bones, aromatics, and kelp. Strain broth through a fine mesh strainer or cheesecloth. Stir in soy sauce and salt to taste. Finish with freshly ground black pepper before serving.

Golden Rule
Never salt until the last 15 minutes - early salt toughens proteins and clouds the broth

What to Serve With It

Ox bone soup sits rich and savory on the plate, so it needs something neutral or acidic to balance each spoonful. For a version that comes together quickly, weeknight tortellini soup meal ideas offer similar comfort with different textures.

Side Dish Prep Why It Works How to Serve
Steamed white rice Easy Neutral starch soaks up broth without competing Serve in a separate bowl, spoon broth over each bite
Kimchi Easy Acidic crunch cuts through rich, fatty broth Place small dish on the side, eat between spoonfuls
Quick pickled cucumbers Easy Refreshing palate cleanser resets each bite Toss sliced cucumbers with rice vinegar and salt, chill 15 minutes
Blanched spinach with sesame oil Easy Adds mild earthiness and soft texture contrast Blanch 2 minutes, drain, toss with sesame oil and garlic
Korean-style pancakes (Pajeon) Medium Hearty, shareable side with crispy edges Slice into wedges, serve hot with soy dipping sauce

Three ways to serve it:

  • Spoon broth over steamed rice in a deep bowl, top with sliced green onions and kimchi on the side
  • Serve alongside japchae (stir-fried glass noodles) for textural contrast and extra vegetables
  • Offer gochujang dipping sauce or soy-vinegar-chili mix for those who want heat
Best Pick
Steamed white rice is the most reliable side - it soaks up broth and doesn't fight the mild, savory flavor

Store and Reheat

Cool the broth in a shallow container within an hour, then refrigerate uncovered until cold. A layer of fat will solidify on top - scrape it off before reheating. The potato works best when it hits the table at the same time as the main. We keep a batch ready for nights like this - creamy homemade potato recipe uses similar aromatics and stores just as well.

Method Time Best For
🍳 Stovetop 10-15 min on medium-low Best flavor and texture restoration - broth heats evenly
📦 Microwave 3-5 min, stir midway Single servings when you're in a rush
🔥 Oven 15-20 min at 325°F Large batches in an oven-safe pot with lid

For best results when storing:

  • Cool broth in shallow containers within 1 hour to prevent bacterial growth
  • Refrigerate up to 3-4 days in airtight containers - fat layer on top acts as a seal
  • Freeze up to 3 months in freezer-safe containers, leaving 1 inch headspace for expansion
  • Skim solidified fat before reheating for cleaner flavor and less grease
  • Reheat gently on stovetop at medium-low - high heat makes the broth cloudy again

Frequently Asked Questions

How long to cook Korean ox bone soup in slow cooker?

Cook on low for 8-12 hours until the broth turns milky white and bones are very soft. Six hours is the minimum, but 10-12 hours extracts more gelatin and creates a richer, more velvety texture.

Can I make slow cooker Korean ox bone soup ahead?

Yes - refrigerate up to 4 days or freeze up to 3 months. The broth actually improves after a day as flavors meld. Skim the fat layer before reheating.

What goes with Korean ox bone soup?

Serve with steamed white rice, kimchi, quick pickled cucumbers, or blanched spinach with sesame oil. The soup is rich, so it needs neutral or acidic sides to balance each bite.

How do I know when Korean ox bone soup is done?

The broth turns opaque pale white (milky), bones are very soft, and marrow is tender enough to scoop out easily. If the broth is still clear after 8 hours, keep cooking - gelatin extraction takes time.

Can I use beef marrow bones instead of ox bones?

Yes - beef marrow or knuckle bones work but create a slightly less gelatinous broth. The flavor stays close enough for weeknight cooking, and they're often easier to find at regular grocery stores.

Slow Cooker Korean Ox Bone Soup served on a plate

Slow Cooker Korean Ox Bone Soup

No ratings yet
Slow Cooker Korean Ox Bone Soup uses long, gentle heat to extract gelatin and flavor for a velvety, milky broth. Blanching the bones first ensures a clear, rich soup with tender marrow bones. This recipe requires minimal hands-on time and is ideal for meal prep and cold weather comfort.
Print Recipe Pin Recipe
Prep Time 20 minutes mins
Cook Time 12 hours hrs
Total Time 12 hours hrs 20 minutes mins
Servings: 6 servings
Course: Main Dish
Cuisine: Korean
Ingredients Equipment Method Notes

Ingredients
  

  • 3-4 lbs ox bones leg or knuckle bones with visible marrow
  • 6 cloves garlic smashed
  • 2 inch ginger sliced into coins
  • 4 pieces green onions cut into 2-inch pieces
  • 1 lbs daikon radish peeled and cut into chunks, optional
  • 2 pieces Korean dried kelp dashima, optional
  • 8 cups water
  • 2 tablespoon soy sauce added at the end for seasoning
  • salt to taste, added last
  • black pepper freshly ground, added before serving

Equipment

  • Slow cooker Used for long slow cooking of bones and broth
  • Large stockpot For blanching bones to remove impurities
  • Fine-mesh strainer For straining broth before seasoning

Method
 

  1. Soak ox bones in cold water for 2 to 4 hours, changing the water once halfway through. Drain and rinse bones under cold running water.
    3-4 lbs ox bones
  2. Bring a large stockpot of water to a rolling boil. Add bones and boil for 10 minutes to remove impurities. Dump water, rinse bones thoroughly, and rinse the pot to remove scum.
    3-4 lbs ox bones
  3. Place the blanched bones in the slow cooker. Add smashed garlic, sliced ginger, green onion pieces, dried kelp if using, and 8 cups of water. Set slow cooker to low and cook for 8 to 12 hours without opening the lid.
    3-4 lbs ox bones, 6 cloves garlic, 2 inch ginger, 4 pieces green onions, 2 pieces Korean dried kelp, 8 cups water
  4. After 4 to 6 hours, add daikon radish chunks if using. Skim any foam or fat from the surface every 30 minutes for the first 2 hours to keep the broth clear. Continue cooking until the broth turns milky white and bones are very soft.
    1 lbs daikon radish
  5. Remove and discard bones, aromatics, and kelp. Strain broth through a fine mesh strainer or cheesecloth. Stir in soy sauce and salt to taste. Finish with freshly ground black pepper before serving.
    2 tbsp soy sauce, salt, black pepper

Notes

  • Blanch bones before slow cooking for a clear, non-bitter broth.
  • Do not salt the broth until the last 15 minutes to prevent cloudiness.
  • Skim foam and fat regularly during early cooking to keep broth clean and milky.

Tried this recipe?

Let us know how it was!

What Is Rye Bread? [Taste, Uses & More]

April 2, 2026

You spot a dense, dark loaf at the bakery counter and pause - it looks nothing like the sandwich bread at home. Rye bread earns that second glance.

What Is Rye Bread

Made with a high proportion of rye flour rather than wheat, it carries a depth of flavor that makes it the backbone of some of Northern and Eastern Europe's most iconic food traditions. If your loaf goes uneaten for a few days, it's worth knowing how different breads hold up before you buy.

QUICK SUMMARY

Rye bread is a dense, earthy loaf made with rye flour. It ranges from light mixed-rye to dark pumpernickel, with a tangy, slightly bitter flavor - especially in sourdough-fermented versions. Best for hearty sandwiches, smoked fish toasts, and stew-dipping. Contains gluten.

🌾Category: Dense yeast-leavened bread, Northern and Eastern European origin
👅Flavor: Earthy, tangy, malty - stronger and less sweet than wheat bread
🥪Best For: Reuben sandwiches, smoked salmon toast, open-faced pâté slices
📅Shelf Life: 2-4 days at room temp; up to 7 days refrigerated; 3 months frozen
⚠️Note: Contains gluten - not suitable for celiac disease or gluten intolerance

What Is Rye Bread?

Rye bread is a loaf made with rye flour as the dominant or sole grain, originating in Northern and Eastern Europe where rye thrived in cold, wet climates that defeated wheat crops.

It falls under the broad category of dense, yeast-leavened breads - though many authentic versions use a sourdough starter rather than commercial yeast to achieve their characteristic tang.

The spectrum of styles is wide. At one end sits light rye, a softer loaf with a modest rye percentage blended with wheat flour.

At the other end is pumpernickel, a dense German-style dark rye slow-baked for up to 24 hours, turning malty and almost chocolate-dark through the Maillard reaction. In between, you'll find Danish rugbrød - a tightly crumbed, whole-grain staple - and Jewish Ashkenazi-style deli ryes that often feature caraway seeds for a herbaceous, anise-adjacent bite.

  • Light rye - blended with wheat flour, softer crumb, milder flavor
  • Dark rye / sourdough rye - high rye percentage, tangier, denser texture
  • Pumpernickel - whole rye, long-baked, malty and nearly sweet
  • Rugbrød - Scandinavian whole-grain style, very dense, often seed-studded
  • Caraway rye - any style with caraway seeds added for an herbal note

What Does Rye Bread Taste Like?

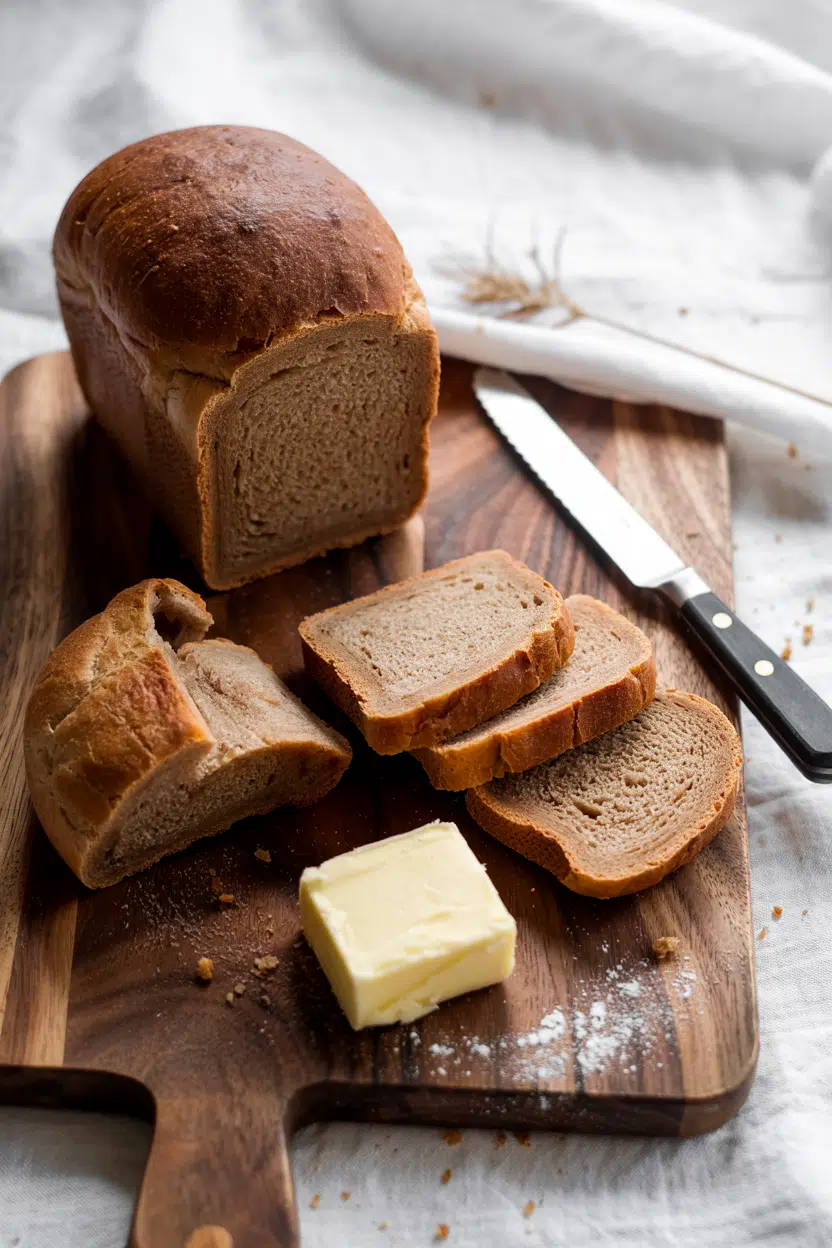
rye bread - What Is Rye Bread

Rye bread tastes earthier and less sweet than whole-wheat bread, with a noticeable bitterness at the finish - particularly in darker, high-rye loaves.

The closest reference point is whole-wheat sourdough, but rye pushes that baseline further: more mineral, more sour, with a grainy depth that wheat doesn't quite reach.

Fermentation has an outsized impact. A sourdough bread made with rye flour develops pronounced lactic tang, while a commercial-yeast rye stays more neutral and mild.

Toasting sharpens the crust, drives off some sourness, and brings out a nutty, toasty note in the crumb.

Sensory SnapshotStrong Intensity
👅 Flavor
EarthyTangyMaltySlightly Bitter
✋ Texture
DenseMoist CrumbTight Crumb
👃 Aroma
GrainySlightly SourToasty

Caraway-forward versions add a distinct herbal warmth that can read as licorice-adjacent on first bite. Pumpernickel, by contrast, rounds out that bitterness into something closer to malt - almost sweet at the finish despite having no added sugar.

How to Use Rye Bread

Rye bread does its best work where bold flavors can meet it head-on. Its structural density means it holds up under wet toppings without collapsing - a quality that makes it the right call for heavy, saucy, or briny builds.

How Rye Bread Is Used
MethodBest ForTip
🥗 UntoastedReuben sandwiches, open-faced smørrebrød, charcuterie boardsSlice thin - dense crumb is filling, so thinner cuts balance a heavy topping
🔥 ToastedSmoked salmon and cream cheese toast, pâté slices, butter and jamToast on medium - high heat scorches the surface before the center warms
🥘 Stew-dippedBorscht, beef stew, bean soupsRye keeps structure longer than white bread when dipped; leave it whole
🍞 Diced and toastedCroutons for hearty soups, breadcrumbs for meatballs and stuffingsRye croutons add earthiness - pair with cabbage soup or lentil dishes

Cuisines across Scandinavia, Germany, and Eastern Europe rely on rye as a daily staple. Jewish Ashkenazi cooking built the deli Reuben around it - corned beef, sauerkraut, and strong mustard demand a bread that won't fade into the background.

Options for pairings for corned beef almost always include rye for exactly this reason.

For pairings, lean into contrast and intensity. Smoked salmon and dill on toasted rye is a classic for good reason - the fat and smoke need the bread's tang to feel complete. smoked salmon freshness guide is short once opened, so assembling that toast same-day matters.

Sharp cheddar, horseradish, pastrami, pickled vegetables, and caraway-forward condiments all land well.

Avoid pairing rye with delicate raw fish served without strong condiments, or with subtle, sweet dessert preparations - the bread's earthiness will overpower both.

Try It In
🍞Air Fryer Savory Bread PuddingRye's dense crumb soaks broth without turning to mush→🧄Air Fryer Garlic BreadTry a dark rye slice for an earthier garlic toast→

How to Buy and Store Rye Bread

Best Pick
Look for "100% rye" or a high-percentage rye on the label. Loaves labeled "rye bread" with wheat flour listed first are mostly wheat - the flavor difference is significant.

At the bakery or store, choose loaves with a firm, slightly springy crust and a tight, moist crumb. Sourdough or "ryv-style" labels signal authentic fermentation, which brings fuller flavor.

Reject any loaf that smells metallic or stale through the bag.

Storage is straightforward. Wrap a whole loaf in paper, then place it loosely inside a plastic bag - this keeps the crust from softening without trapping moisture.

Sliced loaves dry out faster; refrigerate them if you won't finish within two to three days. For longer holds, the rye bread storage guide extends considerably in the freezer - slice before freezing so you can pull individual pieces as needed.

  • Room temperature - 2-4 days, whole loaf wrapped in paper
  • Refrigerated - up to 7 days for sliced loaves
  • Frozen - 2-3 months; toast directly from frozen

If you've run out and need a swap, a guide to rye bread swaps can help you find the closest match for a given recipe.

Start with a Dark Loaf

New to rye bread? Skip light rye and go straight for a sourdough dark rye - the flavor is more distinctive, and it immediately shows you why this bread built centuries of cuisine around it.

Toast it, add butter and a sharp cheese, and you'll understand the appeal in one sitting.

If whole-grain rye feels too intense, a caraway rye or a mixed-flour loaf bridges the gap. Check the rye flour replacements guide if you're baking your own and need to adjust the grain ratio.

Either way, start with something assertive - rye rewards eaters who meet it on its own terms.

Frequently Asked Questions

What is the difference between pumpernickel and rye?

Both are rye-based, but pumpernickel uses coarsely ground whole rye and bakes at low heat for up to 24 hours. That long bake creates the deep, malty, almost-sweet flavor and near-black color that standard rye bread doesn't develop.

Does rye bread contain gluten?

Yes. Rye contains secalin, a gluten protein, making it unsuitable for anyone with celiac disease or a wheat-gluten intolerance. No rye-based bread is safe for a gluten-free diet.

Is rye bread healthier than white bread?

Whole-grain rye bread generally has more dietary fiber, B vitamins, and a lower glycemic response than white bread. That said, many commercial "rye" loaves are mostly wheat flour - check the label before assuming the fiber benefit.

Can you freeze rye bread?

Yes - slice it first, then freeze in an airtight bag for up to three months. Toast slices directly from frozen; thawing at room temperature can make the crumb gummy.

How can you tell if rye bread has gone stale?

Stale rye bread feels hard or crumbly rather than firm-moist, and the sour aroma flattens out. Visible mold - typically white or green - means discard the whole loaf, not just the affected slice.

What Is Sucanat? Taste, Uses & More Explained

April 2, 2026

Most people assume sucanat is just a fancy name for brown sugar, but the two are made by entirely different processes.

What Is Sucanat

Brown sugar is refined white sugar with molasses added back; sucanat is cane juice that was never refined in the first place, which means the molasses was never removed.

That distinction drives everything - flavor, texture, and how it behaves in the kitchen.

QUICK SUMMARY

Sucanat is unrefined evaporated cane juice that retains its natural molasses. It has coarse amber granules, a deep molasses-caramel flavor, and works wherever brown sugar is called for but you want more depth. Shelf life reaches about a year when stored dry.

🍬Type: Whole cane sugar, unrefined, molasses fully intact
👅Flavor: Deep molasses, brown-sugar caramel, mild toffee bitterness
🍽️Best For: Spice cakes, glazes, dark cookie doughs, hot drinks
📦Shelf Life: Up to one year in an airtight container, away from moisture
🔄Closest Swap: Muscovado sugar for flavor; dark brown sugar in a pinch

What Is Sucanat?

Sucanat stands for SUgar CAne NATural - the name is an acronym, not a brand category. It originated as a product of Latin American cane-growing tradition and was formalized as a commercial product in the 1970s.

The process is straightforward: fresh cane juice is extracted, heated to evaporate moisture, and then dried and granulated. No centrifuge separates the molasses, so the final granules contain every mineral and flavor compound the cane juice started with.

Visually, sucanat looks like coarse, moist amber-brown sand. It clumps easily and the granules feel slightly sticky compared to white sugar.

  • 🍃 Also called - evaporated cane juice, whole cane sugar, or raw cane sugar with molasses
  • Related but different from panela - panela is pressed into blocks and is common across Latin America and the Caribbean; sucanat comes granulated
  • Not demerara - demerara is partially refined with large dry crystals; if you want a comparison, the article on [comparing demerara vs turbinado sugar options](https://forkliftkitchen.com/demerara-vs-turbinado-sugar/) breaks down where those two sit relative to each other
  • Closest relative - muscovado, which also retains molasses, though muscovado is typically finer and more intensely moist

What Does Sucanat Taste Like?

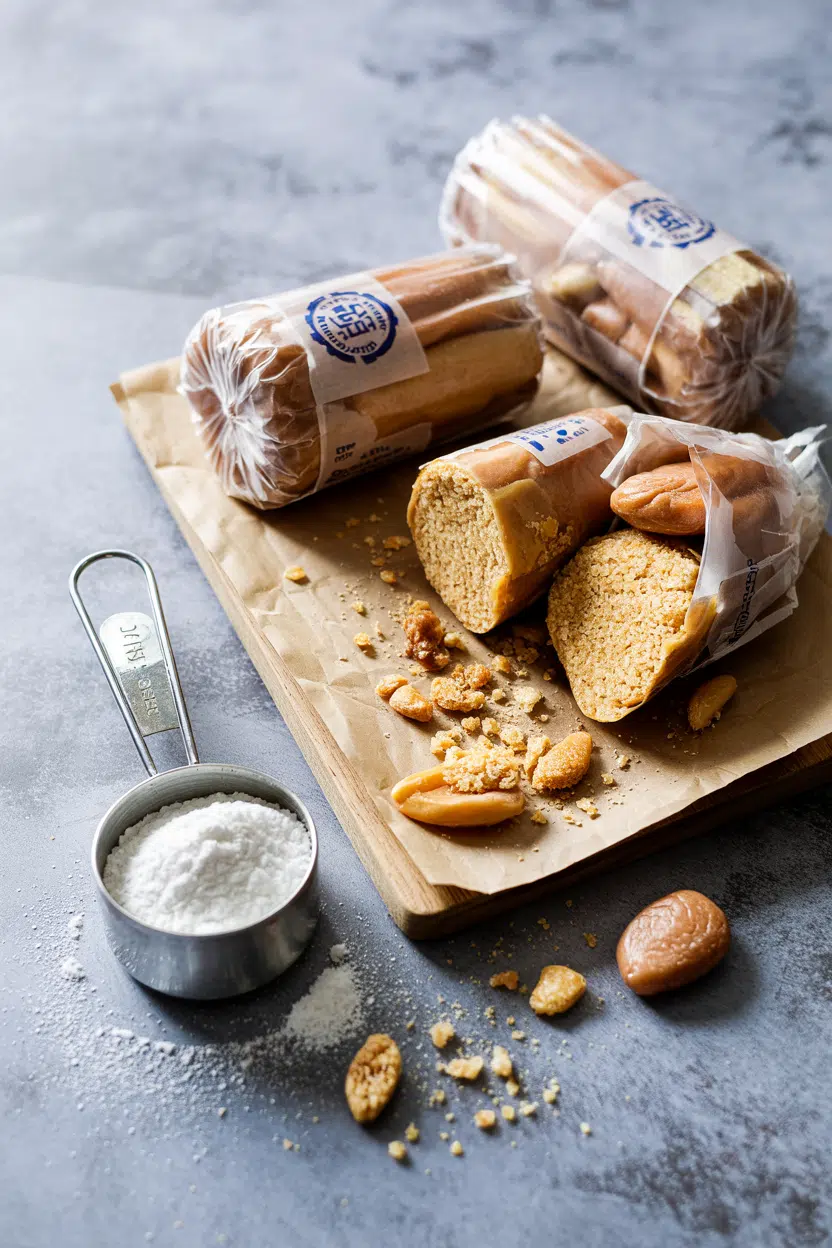
sucanat - What Is Sucanat

Sucanat tastes like concentrated brown sugar with a prominent molasses thread running through it. The first note is dark caramel, followed quickly by a mild toffee bitterness that keeps it from reading as pure sweetness.

There's also a faint grassy, green-cane quality - subtle, but noticeable in uncooked applications like stirring into coffee or oatmeal. Heat softens that raw edge and amplifies the caramel.

Sensory SnapshotStrong Intensity
👅 Flavor
Deep MolassesBrown-Sugar CaramelToffee BitterGrassy Cane
✋ Texture
CoarseSlightly StickySandy When Dry
👃 Aroma
Rich MolassesFresh-Cut Cane

Compared to muscovado, sucanat is milder and less intensely damp. Against straight jaggery - where jaggery swaps that work shows just how bold jaggery can get - sucanat reads considerably more restrained.

Golden Rule
Don't substitute sucanat in recipes expecting neutral sweetness. Its molasses character will always come through, especially in delicate batters and light sponge cakes.

How to Use Sucanat

Sucanat earns its place in recipes where brown sugar's molasses note is the point, not just a byproduct.

Gingerbread, dark spice cakes, and molasses-glazed roasted ham are natural fits - the existing molasses character in the recipe aligns with what sucanat brings.

In cookie doughs, it boosts chew and adds color, since residual molasses increases hygroscopicity. Barbecue glazes and sticky stovetop sauces also benefit because the molasses helps the glaze set and tack to meat or roasted root vegetables.

How Sucanat Is Used
MethodBest ForTip
🥄 Stirred InHot cereals, atoles, black coffeeStir vigorously - coarse granules dissolve slower than white sugar
🍞 BakedGingerbread, spice cakes, molasses cookiesSift or pulse in a blender if the recipe calls for fine-grain sugar
🍖 Glazed/CaramelizedHam glazes, BBQ sauces, root vegetable roastingResidual molasses lowers the caramelization point - watch heat
🍬 ConfectionsNut brittles, toffee, dark caramel saucesExpect a darker color and more complex bitter note than white-sugar versions

Sucanat pairs well with ginger, cinnamon, dark rum, butter, coffee, and citrus zest. Avoid it in delicate floral teas or light sponge cakes where its presence will overpower the intended flavor.

In terms of swaps, replacements for brown sugar covers the full range of options if you're mid-recipe and short on sucanat. For a closer flavor match, swapping out demerara sugar also addresses some of the same molasses-forward territory.

Try It In
☕Ginger Cold Brew CoffeeSucanat's molasses depth pairs naturally with cold brew's bitterness and fresh ginger→

How to Buy and Store Sucanat

Look for bags with visibly moist, evenly colored amber crystals and minimal hard black specks. A few dark flecks are normal; a bag that's clumped into one solid mass often signals moisture contamination during storage or shipping.

Watch Out
Sucanat readily absorbs surrounding odors. Store it away from spices, coffee, or anything strongly aromatic - the granules will pick up those smells and carry them into your baking.

Check the label for the phrases "evaporated cane juice" or "whole cane sugar" rather than simply "raw sugar," which is a looser term that can describe partially refined products.

Sealed retail packaging is preferable to bulk bins, which expose the sugar to air and humidity.

For storage, an airtight container in a cool, dry pantry keeps sucanat in good shape for up to a year.

Pressing out excess air before sealing slows clumping.

General guidance on keeping sugar fresh applies here - moisture is the main enemy.

If you spot off-smells, unusual discoloration, or signs of pests, the article on sucanat spoilage signs walks through what to look for.

Start Here if You're New to Sucanat

If you already bake with brown sugar, swap sucanat in at a 1:1 ratio in gingerbread, spice cookies, or a dark glaze and taste the difference side by side.

That single test will tell you immediately whether the stronger molasses note is something you want in your regular rotation.

Shortcut
New to sucanat? Start with a gingerbread recipe. The existing molasses in the formula is forgiving, and the flavor difference versus brown sugar is immediately obvious without tasting off.

If the flavor is too assertive for a specific recipe, alternatives to sucanat maps out where muscovado, panela, and turbinado each land by intensity. Pick the depth you need and work from there.

Frequently Asked Questions

What is sucanat made of?

Sucanat is made from fresh sugarcane juice that is heated to evaporate moisture and then granulated. Unlike white or brown sugar, it skips centrifugation entirely, so the natural molasses stays bound in the granule rather than being separated out.

How does sucanat taste compared to brown sugar?

Sucanat reads deeper and less uniform than commercial brown sugar. Brown sugar's molasses coating is thinner and more even; sucanat's molasses is integral to the crystal, so the flavor is more pronounced and slightly bitter at the finish.

Can you substitute sucanat for brown sugar 1:1?

Yes, by weight or volume the swap is direct. Expect a darker result and a stronger molasses flavor. In recipes where brown sugar plays a subtle background role, the difference will be noticeable.

Does sucanat dissolve in cold drinks?

Slowly. The coarse granules dissolve much faster in hot liquids than cold ones. For iced drinks, dissolve sucanat in a small amount of hot water first to make a simple syrup, then stir that into the cold drink.

Is sucanat healthier than white sugar?

Marginally, at best. Sucanat retains trace minerals - iron, calcium, potassium - from the molasses, but the amounts are too small to be nutritionally significant. It remains predominantly sucrose and is not suitable for low-sugar or diabetic diets.

What Is Sherry? Taste, Varieties & Uses Explained

April 2, 2026

A splash of sherry in a pan of sautéed mushrooms does something no stock or wine quite replicates - a nutty, oxidative depth that settles into the dish rather than announcing itself. It's one of those ingredients that quietly separates a competent cook from a confident one.

What Is Sherry

Sherry spans a wider range of styles than most fortified wines, from the bone-dry and saline to the syrup-thick and sweet, and that range is exactly what makes it worth understanding. If you've only ever reached for port or madeira, sherry deserves a closer look.

QUICK SUMMARY

Sherry is a fortified wine from Jerez, Spain, aged under the solera system in styles ranging from bone-dry fino to syrupy Pedro Ximénez. It adds nutty, oxidative depth to pan sauces, soups, braises, and desserts. Style determines flavor - and choosing the right one matters.

🍷Category: Fortified wine, Jerez region, Andalusia, Spain
👅Flavor: Dry and saline (fino) to rich, nutty, or molasses-sweet (PX)
🍳Best Uses: Deglazing, pan sauces, braises, soups, dessert drizzles
🧊Storage: Refrigerate dry styles after opening; sweet styles keep sealed in a cool spot
⏱️Shelf Life: Opened dry sherry keeps a few weeks refrigerated; sweet PX lasts months sealed

What Is Sherry?

Sherry is a fortified wine produced exclusively in the Jerez region of Andalusia, southern Spain - a protected designation that means no other wine can legally carry the name. It's made primarily from the palomino grape, with sweeter styles using Pedro Ximénez or Moscatel grapes.

What makes sherry distinct is how it's aged. The solera system blends wines across multiple years by fractionally drawing from older barrels and topping them with younger wine, creating consistent house styles rather than vintage variation.

Some barrels age under a living yeast layer called flor, which shields the wine from oxygen and produces fino and manzanilla. Others oxidize fully, producing oloroso.

The main styles break down like this:

  • Fino - bone-dry, pale, and aged under flor; the lightest style
  • Manzanilla - a fino-style aged specifically in Sanlúcar de Barrameda, with a notable saline edge
  • Amontillado - starts as fino, then oxidizes; amber, dry, and nutty
  • Oloroso - fully oxidized, dark, dry, and full-bodied with walnut and dried fruit notes
  • Pedro Ximénez (PX) - made from sun-dried grapes; intensely sweet and viscous

What Does Sherry Taste Like?

sherry - What Is Sherry

Sherry's flavor shifts dramatically depending on style, and that's not an overstatement. Fino and manzanilla read as dry white wine but with a mineral, almost sea-spray character - crisp, lean, and faintly yeasty from extended flor aging.

Sensory SnapshotModerate Intensity
👅 Flavor
salinetoasted nutsdried fruitmolassesbrown sugar
✋ Texture
light and crisp (fino)viscous (PX)
👃 Aroma
nutty sherry casksea sprayoxidative warmth

Amontillado sits in the middle - amber in color, dry but with a hazelnut richness and a faint caramel edge. Oloroso goes further into walnut and dark dried-fruit territory, with a full body and no sweetness.

Pedro Ximénez is in a category of its own: thick, raisin-dark, and as close to a syrup as a wine gets - think aged balsamic crossed with fig molasses.

Golden Rule
Match the style to the dish. Fino in a cream sauce, PX over dessert. Using the wrong sherry doesn't just miss the mark - it can overpower everything else in the pan.

How to Use Sherry

Dry sherries do the heavy lifting in savory cooking. Fino or manzanilla works well for deglazing a hot pan after searing chicken or shrimp - the saline lift brightens the fond without adding obvious wine flavor.

Amontillado brings more body to bisques and veloutés, and a small pour into a mushroom pan before reducing adds a nuttiness that stock alone won't provide.

Oloroso suits richer applications: braised short ribs, pork shoulder, or a reduction-based glaze for roasted root vegetables. Its oxidative character holds up to long cooking times without going flat. A few tablespoons stirred into a beef stew in the last 30 minutes rounds out the braise.

On the sweet end, Pedro Ximénez functions more like a condiment than a cooking wine. Drizzle it over vanilla ice cream, roasted pears, or strong blue cheese without reducing it further - the syrup is already concentrated enough to use straight from the bottle.

How Sherry Is Used in Cooking
MethodBest ForTip
🥂 DeglazingChicken, pork, shrimp, mushroomsUse fino or amontillado; add off the heat to control flare-up
🍲 Braising liquidShort ribs, pork shoulder, lambOloroso holds up to long cooking; add early with stock
🥣 Finishing saucesCream sauces, bisques, veloutésStir in dry sherry just before serving to preserve aroma
🧴 Reduction/glazeRoot vegetables, duck, pork bellyReduce PX by half for a glossy, dessert-sweet glaze
🍨 DrizzleIce cream, blue cheese, roasted fruitUse PX straight - no reduction needed

Sherry pairs readily with jamón ibérico, anchovies, Manchego, aged Gouda, roasted nuts, and shellfish. For a quick marinade, manzanilla with olive oil and garlic gives seafood a briny lift in under 30 minutes.

When substituting in a recipe, dry sherry alternatives vary significantly by style, so matching dryness level matters.

Try It In
🧀Blue Cheese Dressing (Homemade)A splash of dry sherry adds oxidative depth to the base→🥩Roasted Garlic Béarnaise SauceAmontillado can replace white wine in the reduction for nuttier complexity→

How to Buy and Store Sherry

Buy by style name, not by the word "sherry" alone. Bottles labeled simply "cooking sherry" are often salted and low-quality - avoid them. Look for Denominación de Origen Jerez labels and choose your style based on use: fino or manzanilla for light savory work, amontillado or oloroso for richer dishes, and Pedro Ximénez for dessert applications.

Watch Out
Cooking sherry sold in supermarket baking aisles contains added salt and preservatives. It won't ruin a dish, but it limits your control over seasoning - and the flavor is noticeably duller than proper table sherry.

Storage is style-dependent. Dry sherries (fino, manzanilla, amontillado) oxidize quickly once opened - refrigerate them and use within two to three weeks. Oloroso keeps a bit longer, around a month.

Sweet PX is more forgiving and stays good for several months if sealed and kept cool. For a full breakdown of how long each style holds, check the guide on sherry freshness guide by style.

Store all unopened bottles upright in a cool, dark place. Unlike still wine, sherry doesn't need to be on its side.

Start With One Style

Don't buy a bottle of each. Pick amontillado as your first all-rounder - it handles deglazing, pan sauces, and braises without overwhelming, and it's forgiving in a way that fino isn't.

Once you've used half a bottle and seen what it does to a pan sauce, branch out toward oloroso for heavier dishes or fino for seafood applications.

Sherry rewards specificity. The cook who knows which style to reach for gets more from a single bottle than one who treats them all the same.

Frequently Asked Questions

Is sherry the same as port?

No. Both are fortified wines, but port comes from the Douro Valley in Portugal and is almost always sweet. Sherry comes from Jerez, Spain, and ranges from bone-dry to very sweet depending on the style.

What does fino sherry taste like?

Fino is bone-dry, pale, and light-bodied with a mineral, slightly saline character from aging under flor yeast. It tastes closer to a very dry white wine than to what most people expect from a fortified wine.

How long does opened sherry last?

Dry styles like fino and manzanilla keep about two to three weeks refrigerated. Oloroso holds up to a month. Pedro Ximénez lasts several months sealed, because its high residual sugar acts as a preservative.

What food pairs with Pedro Ximénez?

Strong blue cheeses, vanilla ice cream, roasted stone fruit, and dark chocolate are the best matches. PX's raisin-molasses sweetness needs bold flavors - it gets lost alongside mild or delicate foods.

Can you use sherry instead of white wine in cooking?

Yes, but the swap adds oxidative and nutty notes that white wine won't. Fino works best as the closest substitute in light sauces and risotto. Use less than the recipe calls for and taste as you go.

French Carrot Salad (Carottes Râpées)

April 2, 2026

You need 10 minutes and one bowl. No cooking, no chopping blocks full of scraps, no oven to preheat.

French Carrot Salad (Carottes Râpées) served on a plate

Grate carrots finely and toss with a lemony mustard dressing. The acid softens the carrots just enough while keeping them crisp.

This is the kind of salad you make when you want something fresh but don't want to stand at the stove.

QUICK SUMMARY

French carrot salad uses finely grated carrots tossed in a bright lemon-Dijon dressing. The key is grating the carrots small so the dressing coats every strand evenly. Marinate 15-30 minutes before serving so the flavors meld without turning the carrots soggy.

⏱️Time: 10 minutes active + 15-30 minutes marinating
🥕Method: Grate carrots finely, whisk dressing, toss and chill
⚠️Watch out: Too much dressing makes the salad watery - start with less and add more if needed

Why This Recipe Works

Fine grating creates more surface area for the dressing to cling to. Most people skip salad, but it balances the meal. For a version that comes together quickly, a fluffy salad on the side works just as well when you want something hearty.

The lemon juice breaks down the carrot's rigid texture slightly while keeping the crunch.

Quick Reference
⏱️
Prep Time
10 min
🔥
Cook Time
0 min
⏰
Total Time
10 min + 15-30 min marinating
🍽️
Servings
4 servings
📊
Difficulty
Easy
🏷️
Category
Side
💡
Quick Tip
Grate carrots finely for even flavor distribution
🎯
Best For
Weeknight | Meal prep | Entertaining
  • Finely grated carrots create more surface area so every strand gets coated with dressing instead of clumping
  • Emulsifying the dressing first with mustard keeps the oil and lemon juice from separating on the plate
  • Marinating 15-30 minutes softens the carrots slightly while keeping them crisp and fresh-tasting
  • Using neutral oil lets the carrot sweetness and lemon brightness come through without competing flavors
  • Adding fresh parsley right before serving preserves its bright green color and fresh herb bite
Quick Tip
Use the smallest holes on your box grater or the fine grating disk on a food processor - it takes 3-4 minutes per 4 carrots but creates the right texture

What You'll Need

Ingredients for French Carrot Salad (Carottes Râpées)

Fresh carrots work best here. A good carrot can make or break the plate. We keep a batch ready for nights like this - this tender croissant pairs well when you want something more substantial on the side.

Use firm carrots without soft spots or wrinkled skin.

🥕
Vegetables
  • 4 medium carrots
🥢
Dressing
  • 2 tablespoon neutral oil (vegetable or sunflower)
  • Juice of 1 lemon (about 2-3 Tbsp)
  • 1 teaspoon Dijon mustard
🌶️
Seasonings
  • ½ teaspoon salt
  • ¼ teaspoon black pepper
  • 2 tablespoon fresh parsley, chopped

Ingredient Details

  • Carrots
    Pick firm, smooth carrots without cracks - older carrots turn woody and lose their natural sweetness
  • Lemon juice
    Fresh lemon juice tastes brighter than bottled and helps soften the carrot texture during marinating
  • Neutral oil
    Vegetable or sunflower oil lets the carrot and lemon flavors shine without adding competing taste
  • Dijon mustard
    Acts as an emulsifier to bind the oil and lemon juice while adding a mild tangy kick
  • Salt
    Enhances the carrot's natural sweetness and balances the lemon's acidity
  • Black pepper
    Adds subtle heat without overpowering the delicate carrot flavor
  • Fresh parsley
    Optional but adds bright green color and fresh herb notes - add right before serving to keep it from wilting

Ingredient Swaps

You can change the acid or oil without losing the salad's structure. Most people skip salad, but it balances the meal. For a version that comes together quickly, easy caesar salad side works when you want something heartier with more texture.

Start with these four swaps if you're missing ingredients:

  • Swap lemon juice for apple cider vinegar - slightly milder acidity that changes the brightness but still softens the carrots
  • Use extra virgin olive oil instead of neutral oil - adds grassy, fruity notes that can overpower delicate carrot sweetness
  • Replace Dijon mustard with yellow mustard - less sharp with a subtler mustard flavor that blends into the background
  • Switch fresh parsley for dill or chives - changes the herb profile without affecting texture or crunch

Apple Cider Vinegar

Works for: Milder acidity, slightly fruity taste, same softening effect on carrots

Skip if: You want bright, citrusy sharpness that lemon juice delivers

Extra Virgin Olive Oil

Works for: Adding fruity, peppery notes if you like stronger flavors in salads

Skip if: You want the carrot and lemon to be the main flavors without competition

Fresh Dill or Chives

Works for: Changing the herb profile while keeping the fresh, bright finish

Skip if: You prefer classic French bistro flavor with mild parsley notes

Instructions

The whole process takes 10 minutes of active work. A good chicken can make or break the plate. We keep a batch ready for nights like this - juicy chicken side dish pairs well when you want protein alongside the salad.

Grating the carrots finely is the most important step.

  1. Peel 4 medium carrots and grate them using the smallest holes on a box grater or the fine disk on a food processor until you have about 3 cups of thin carrot strands - this takes 3-4 minutes and creates even texture throughout.

  2. Whisk together 2 tablespoon lemon juice, 1 teaspoon Dijon mustard, ½ teaspoon salt, and ¼ teaspoon black pepper in a small bowl until the mustard dissolves - this takes about 30 seconds and creates the emulsified base.

  3. Add 2 tablespoon neutral oil in a slow stream while whisking constantly until the dressing thickens slightly and turns pale yellow - this takes about 1 minute and prevents separation.

  4. Pour the dressing over the grated carrots and toss with your hands or a fork until every strand is coated evenly - work the dressing through for 1-2 minutes so no dry spots remain.

  5. Cover the bowl and refrigerate for 15-30 minutes so the acid softens the carrots slightly while they stay crisp - right before serving, chop 2 tablespoon fresh parsley and fold it in gently.

Shortcut
Use a food processor with the grating disk to shred all 4 carrots in under 1 minute - it saves time and creates uniform texture

What to Serve With It

You need something with more heft to balance the light, crisp salad. The shrimp works best when it hits the table at the same time as the main. For a version that comes together quickly, homemade shrimp recipe adds protein without overwhelming the fresh carrot flavor.

Pair with warm, rich mains or crusty bread.

Side Dish Prep Why It Works How to Serve
Grilled chicken breast Easy Light protein balances fresh salad without competing flavors Slice warm chicken, serve on same plate with salad on the side
Crusty baguette Easy Adds texture contrast and soaks up any extra dressing on the plate Slice thick pieces, toast lightly, serve warm alongside salad
Steamed green beans Easy Simple vegetable complements brightness without adding more acid Cook until tender-crisp, season with salt, serve warm or room temp
Oven-roasted potatoes Medium Adds hearty, warm contrast to cold, crisp salad Roast until golden, season with herbs, serve hot next to chilled salad
French country pâté Easy Classic pairing for traditional French bistro feel Slice thin, serve room temp with salad and cornichons

Three ways to serve it:

  • Pack as a lunch side with grilled chicken and crusty bread for a light, fresh midday meal
  • Serve chilled alongside roasted meat or fish for a bright contrast to rich, warm proteins
  • Bring to picnics or potlucks in a sealed container - it travels well and stays crisp for hours
Best Pick
Serve with warm goat cheese tart for entertaining - the rich, creamy cheese balances the tangy, crisp carrots

Store and Reheat

The salad stays crisp for 3-4 days if you store it properly. The shrimp works best when it hits the table at the same time as the main. For a version that comes together quickly, this rich beef makes a hearty main when you want something more substantial for dinner.

This salad is served chilled or at room temperature - no reheating needed.

Method Time Best For
❄️ Serve Chilled Straight from fridge Maximum crunch and bright flavor
🌡️ Room Temp Sit 10-15 min When you want flavors to open up slightly

For best results when storing:

  • Transfer salad to an airtight container with a shallow base so carrots sit in a thin layer instead of piling deep
  • Press plastic wrap directly onto the salad surface before sealing the lid to minimize air exposure and prevent drying
  • Store in the coldest part of your fridge (usually the back of the bottom shelf) at 40°F (4°C) or below
  • Drain any excess liquid that accumulates at the bottom of the container before serving leftovers
  • Add a handful of freshly grated carrots to refresh texture if the salad turns slightly soft after 2-3 days

Frequently Asked Questions

Can I make French carrot salad ahead and store it?

Yes, make it up to 1 day ahead and store in an airtight container in the fridge. The texture stays crisp for 3-4 days if stored properly.

How long should the carrot salad marinate for best flavor?

Marinate 15-30 minutes minimum before serving. Longer than 30 minutes and the carrots start to soften too much and release water.

Can I substitute apple cider vinegar for lemon juice?

Yes, use the same amount of apple cider vinegar for a milder, slightly fruity acidity. The salad won't have the bright citrus punch but still tastes balanced.

What causes the carrot salad dressing to separate?

Adding oil too quickly or skipping the mustard emulsifier causes separation. Whisk mustard with lemon juice first, then add oil in a slow stream while whisking constantly.

What vegetables go well served alongside French carrot salad?

Steamed green beans, roasted potatoes, or grilled zucchini work well. They add texture and warmth without competing with the carrot's bright, tangy flavor.

French Carrot Salad (Carottes Râpées) served on a plate

French Carrot Salad (Carottes Râpées)

No ratings yet
French carrot salad features finely grated carrots tossed in a bright lemon-Dijon dressing that softens the carrots slightly while keeping them crisp. This easy no-cook salad is perfect for a fresh side with minimal prep.
Print Recipe Pin Recipe
Prep Time 10 minutes mins
Cook Time 1 minute min
Total Time 25 minutes mins
Servings: 4 servings
Course: Side Dish
Cuisine: French
Ingredients Equipment Method Notes

Ingredients
  

  • 4 medium carrot peeled, finely grated
  • 2 tablespoon neutral oil vegetable or sunflower oil
  • 2-3 tablespoon lemon juice freshly squeezed, about juice of 1 lemon
  • 1 teaspoon Dijon mustard
  • 0.5 teaspoon salt
  • 0.25 teaspoon black pepper
  • 2 tablespoon fresh parsley chopped, added right before serving

Equipment

  • Box Grater Use smallest holes for fine grating
  • Small bowl For whisking dressing
  • Whisk To emulsify dressing

Method
 

  1. Peel 4 medium carrots and grate them using the smallest holes on a box grater or the fine disk on a food processor until you have about 3 cups of thin carrot strands, taking 3-4 minutes for even texture.
    4 medium carrot
  2. Whisk together 2 tablespoons lemon juice, 1 teaspoon Dijon mustard, ½ teaspoon salt, and ¼ teaspoon black pepper in a small bowl until the mustard dissolves, about 30 seconds.
    2-3 Tbsp lemon juice, 1 tsp Dijon mustard, 0.5 tsp salt, 0.25 tsp black pepper
  3. Add 2 tablespoons neutral oil in a slow stream while whisking constantly until the dressing thickens slightly and turns pale yellow, about 1 minute.
    2 Tbsp neutral oil
  4. Pour the dressing over the grated carrots and toss with your hands or a fork until every strand is coated evenly, working the dressing through for 1-2 minutes.
    4 medium carrot, 2 Tbsp neutral oil, 2-3 Tbsp lemon juice, 1 tsp Dijon mustard, 0.5 tsp salt, 0.25 tsp black pepper
  5. Cover the bowl and refrigerate for 15-30 minutes so the acid softens the carrots slightly while keeping them crisp.
    4 medium carrot, 2 Tbsp neutral oil, 2-3 Tbsp lemon juice, 1 tsp Dijon mustard, 0.5 tsp salt, 0.25 tsp black pepper
  6. Right before serving, chop 2 tablespoons fresh parsley and fold it gently into the salad.
    2 Tbsp fresh parsley

Notes

  • Grate carrots finely for even dressing coverage and texture.
  • Whisk mustard and lemon juice before adding oil to prevent dressing separation.
  • Marinate 15-30 minutes for best flavor without sogginess.

Tried this recipe?

Let us know how it was!

What Is Sport Peppers? [Taste, Uses & More]

April 2, 2026

Most people reach for sport peppers without thinking twice, then struggle to explain what exactly they're grabbing.

What Is Sport Peppers

They're not fresh chiles, not standard hot sauce, and not quite the same as the taste of cherry pepper you'd find in a produce aisle.

Sport peppers are small, pickled hot cherry peppers sold in jars - a condiment with a sharp vinegar edge and a quick, clean heat that cuts through rich food fast.

If you've ever swapped in something milder and wondered why it didn't land, understanding cherry pepper swaps that work starts with knowing what you're replacing.

QUICK SUMMARY

Sport peppers are small pickled cherry peppers with a bright vinegar tang, mild-to-moderate heat, and a crisp bite. They're a regional condiment from Buffalo, New York, used most on sandwiches, pizza, and antipasto - anywhere you need acid and heat together.

🌶️Flavor: Vinegar-forward tang, light sweetness, sharp capsaicin heat
🫙Form: Sold whole in jars; always pickled, never fresh
🥪Best For: Beef on Weck, Buffalo pizza, subs, antipasto salads
📍Origin: Buffalo, New York regional deli and pizzeria tradition
📅Shelf Life: Up to a year unopened; 2-3 months refrigerated after opening

What Is Sport Peppers?

Sport peppers are small pickled cherry peppers preserved in a vinegar-based brine, typically sold whole in glass jars.

They belong to the pickled hot pepper category alongside giardiniera and pepperoncini, though they're distinctly associated with Western New York's deli and pizzeria culture.

The pepper itself is a cherry pepper variety - round, thin-walled, and small enough to eat in one or two bites. Pickling is the only form you'll find them in commercially; there's no fresh-market equivalent sold under this name.

They go by several names depending on who's selling them:

  • 🫙 Buffalo sport peppers - the regional name used by Western New York brands
  • Pickled cherry peppers - the generic descriptor used elsewhere in the country
  • Sport chiles - less common, sometimes used in specialty food catalogs
  • Sportpeppers or sport pepper - frequent misspellings that still pull up the same product

Buffalo-area delis and pizzerias typically stock jars behind the counter or on condiment tables. Outside the region, they appear in Italian-American grocery sections or specialty food stores.

The brine they're packed in - sharp, salty, vinegar-heavy - is itself a useful ingredient, worth saving after the peppers are gone.

What Does Sport Peppers Taste Like?

sport peppers - What Is Sport Peppers

Sport peppers lead with bright, punchy vinegar - more acidic upfront than most pickled cherry peppers you'd find under a generic label. The cherry pepper flesh underneath is slightly sweet, which keeps the flavor from tipping into pure sourness.

Heat is present but not overwhelming. Capsaicin kicks in quickly and fades at the same pace, leaving a clean finish rather than a lingering burn.

That quick-heat profile is part of why they work so well as a topping rather than a cooking ingredient.

Sensory SnapshotModerate Intensity
👅 Flavor
vinegar-brightlightly sweetsaltysharp heat
✋ Texture
crisp skinsoftened fleshcrunchy seeds
👃 Aroma
sharp vinegarearthy green pepper

Compared to pepperoncini, sport peppers are noticeably more vinegar-forward and run slightly hotter. Pepperoncini tend to be milder and slightly fruitier - understanding the role pepperoncini plays in Italian-American cooking helps clarify why the two aren't always interchangeable.

Sport peppers hit harder on both acid and heat.

How to Use Sport Peppers

Sport peppers function as a condiment, not a cooking ingredient. Most of the time, they go straight from the jar to the plate.

That's how Buffalo delis use them - placed whole alongside Beef on Weck sandwiches so each bite gets a sharp, briny contrast to the slow-roasted beef and horseradish.

On Buffalo-style pizza, they're dropped whole onto slices just before serving, adding acid that cuts through cheese and tomato sauce without softening the crust.

Both applications rely on the vinegar staying sharp, which is why you add them after heat rather than during cooking.

Golden Rule
Add sport peppers after cooking, not during. Heat drives off the vinegar brightness that makes them work.

Beyond their home region, sport peppers fit anywhere you'd use pickled peppers for contrast:

  • Antipasto and cold salads - chop and toss into pasta salads or antipasto spreads alongside cured meats and olives
  • Subs and hot sandwiches - layer whole or sliced to cut the fat in pork, sausage, or meatball sandwiches
  • Vinaigrettes - chop finely and whisk into olive oil with a splash of the brine for instant tang
  • Charcuterie boards - serve alongside mozzarella, salami, and prosciutto as an acidic counterpoint
  • Bloody Marys and savory cocktails - use as a garnish or drop one in for slow-building heat

For sport peppers swaps that work when you run out, pickled cherry peppers or a mix of pepperoncini and extra brine get close - though the vinegar punch won't be identical.

Similarly, if you find yourself without pepperoncini, our guide to replacements for pepperoncini covers options with a comparable acidic profile.

Try It In
🌶️Buffalo Chicken Stuffed Mini PeppersSport peppers' heat pairs cleanly with Buffalo-spiced chicken filling→🍳Sausage and Peppers Italian-StyleAdd whole from the jar after cooking to keep vinegar bright→🍗Air Fryer Chicken Sausage and PeppersA fast weeknight dish where pickled pepper acidity cuts the fat→

How to Buy and Store Sport Peppers

Good jars are easy to read at a glance. Clear, unclouded brine is the first sign of a quality pack - cloudiness can indicate age or fermentation drift.

Peppers should be uniformly colored (bright red or green depending on variety) and hold their shape without collapsed or wrinkled skins.

Best Pick
Look for jars labeled "Buffalo sport peppers" or "pickled cherry peppers" from Western New York brands for the most authentic vinegar profile.

For storage, keep sealed jars in a cool, dark pantry. Once opened, refrigerate in the original brine and press the peppers down so liquid covers them entirely - exposure to air softens the flesh faster and dulls the brine.

Unopened jars hold well for many months to a year. After opening, use within 2-3 months for the best texture.

A full breakdown of keeping sport peppers fresh covers edge cases like partially submerged peppers and brine replacement.

Where Sport Peppers Fit

Sport peppers aren't an everyday pantry staple for most cooks - they're a precision condiment for specific jobs. Start here:

If you're making Beef on Weck or any roast beef sandwich with horseradish, put them on the plate whole. Don't skip that step.

The vinegar tension against the beef fat is the point.

If you're building a charcuterie board or antipasto and want heat without hot sauce, reach for these instead of fresh chiles.

They bring acid and heat in one ingredient.

And if the brine-forward flavor of sport peppers is new to you, note that the same principle - using pickled pepper acidity as a condiment - is central to the role pepperoncini plays across Italian-American cooking.

Frequently Asked Questions

Are sport peppers spicy?

Mild to moderate. The heat comes on quickly and fades fast, without the slow build of hotter pickled peppers. Most people who handle jalapeños comfortably will find sport peppers manageable.

What is the difference between sport peppers and pepperoncini?

Sport peppers are noticeably more vinegar-forward and slightly hotter than pepperoncini. Pepperoncini have a milder, fruitier taste and softer flesh; sport peppers hold their shape better and hit harder on acid.

Where can you buy sport peppers?

Buffalo-area delis, Italian-American grocery stores, and specialty food retailers carry them. Outside the region, search online for Buffalo-brand jars or substitute with pickled cherry peppers from a standard grocery store.

How do you store sport peppers after opening?

Refrigerate in the original brine with peppers fully submerged. Use within 2-3 months for best texture; peppers left partly exposed to air soften faster and lose their crisp snap.

Can you make sport peppers at home?

Yes - pack fresh small cherry peppers into sterilized jars with a white vinegar and salt brine, then refrigerate for at least a week. The result won't be identical to commercial jars but gets close in flavor profile.

French Vegetable Tian

April 2, 2026

Most vegetable bakes turn soggy or bland from crowding and under-seasoning. The fix is slicing thin, layering loosely, and building flavor between every row.

French Vegetable Tian served on a plate

Roasting at 375°F uncovered lets moisture evaporate while edges caramelize. The olive oil and herbs de Provence soak into each layer instead of pooling at the bottom.

This works for weeknight dinners when you want something that looks impressive but only needs 20 minutes of knife work.

QUICK SUMMARY

French vegetable tian layers thinly sliced eggplant, zucchini, and tomatoes vertically in a baking dish with olive oil and herbs de Provence. High heat roasting uncovered caramelizes edges while keeping vegetables tender. Success depends on uniform ⅛-inch slices and spacing layers loosely so steam escapes.

⏱️Time Reality: 20 minutes slicing, 45 minutes hands-off roasting, 10 minutes resting before serving
🔪First Move: Slice all vegetables to ⅛-inch thickness using mandoline or sharp knife for even cooking
⚠️Watch Out: Crowding traps steam and creates soggy vegetables - layer loosely with space between slices

Why This Recipe Works

Thin slicing ensures every vegetable piece cooks at the same rate. For a version that comes together quickly, tender homemade te recipe uses a similar layering approach with less prep time.

Quick Reference
⏱️
Prep Time
20 min
🔥
Cook Time
45 min
⏰
Total Time
65 min
🍽️
Servings
6 servings
📊
Difficulty
Easy
🏷️
Category
Side
💡
Quick Tip
Slice vegetables thinly for even cooking
🎯
Best For
Weeknight | Meal prep | Entertaining

Five reasons this method delivers:

  • Mandoline slicing creates uniform ⅛-inch slices that roast evenly without mushy or raw spots
  • Vertical layering maximizes surface area for caramelization while allowing moisture to escape
  • Uncovered roasting at 375°F concentrates flavors and browns edges without steaming vegetables
  • Oil between layers prevents sticking and carries herb flavor into every bite
  • 10-minute rest lets juices redistribute so vegetables hold their shape when sliced
Quick Tip
Rotate the dish halfway through roasting to brown all edges evenly - ovens have hot spots that can char one side while leaving another pale

What You'll Need

Ingredients for French Vegetable Tian

Shop for firm vegetables with no soft spots or wrinkles. A good a similar dish recipe uses the same technique with different vegetables if eggplant isn't available.

🥬
Vegetables
  • 1 medium eggplant (sliced ⅛ inch thick)
  • 2 medium zucchini (sliced ⅛ inch thick)
  • 4 medium tomatoes (sliced ⅛ inch thick)
  • 1 large onion (sliced thin)
🧄
Aromatics
  • 4 cloves garlic (minced)
🥢
Seasonings
  • ¼ cup olive oil
  • 2 teaspoon herbs de Provence
  • 1 teaspoon salt
  • ½ teaspoon black pepper
🧀
Optional
  • ¼ cup grated Parmesan or Gruyère

Ingredient Details

  • Eggplant
    Look for firm, glossy skin with no soft spots - older eggplant turns bitter and mushy
  • Zucchini
    Small to medium zucchini have fewer seeds and less water than large ones
  • Tomatoes
    Roma or plum tomatoes hold their shape better than beefsteak varieties which release too much liquid
  • Olive Oil
    Use regular olive oil, not extra virgin - high heat dulls delicate flavors and wastes premium oil
  • Herbs de Provence
    Contains thyme, rosemary, oregano, and lavender - skip lavender if making your own blend
  • Garlic
    Fresh cloves give sharper flavor than jarred minced garlic which tastes flat after roasting
  • Cheese (Optional)
    Add during last 10 minutes of roasting so it melts without burning

Ingredient Swaps

Substitutions work best when they match the original texture and moisture level. Most people skip a similar dish recipe because they think it requires exact ingredients, but swaps are straightforward.

Four swaps that work:

  • Extra zucchini or yellow squash for eggplant - softer texture and less earthy flavor, but cooks at same rate
  • Avocado oil or vegetable oil for olive oil - neutral flavor that works when you want vegetables to taste cleaner
  • Dried thyme, rosemary, and oregano mix for herbs de Provence - similar Mediterranean flavor without tracking down specialty blend
  • Nutritional yeast for Parmesan - adds umami and makes dish dairy-free without compromising texture

Fresh Tomatoes

Works for: bright acidity, firm texture, clean presentation

Skip if: only large beefsteak available (too watery) or winter tomatoes taste flat

Canned Diced Tomatoes (Drained)

Works for: budget cooking, off-season reliability, consistent flavor

Skip if: you want visual appeal - canned breaks down and looks messy in layers

Instructions

The entire dish roasts hands-off once you finish layering. Rich mains need something to cut through, and this quick chicken dish pairs well with the herby Mediterranean flavors here.

  1. Preheat oven to 375°F and grease a 9x13-inch baking dish with 1 tablespoon olive oil, coating bottom and sides. Set aside while you slice vegetables.

  2. Slice eggplant, zucchini, and tomatoes into ⅛-inch rounds using mandoline or sharp knife. Pat tomato slices dry with paper towel to remove excess moisture. Slice onion into thin half-moons and mince garlic.

  3. Spread onion slices and minced garlic evenly across bottom of dish to create aromatic base layer. Drizzle with 1 tablespoon olive oil and sprinkle with pinch of salt.

  4. Layer vegetable slices vertically in alternating pattern - eggplant, zucchini, tomato - standing them upright and leaning slightly. Leave small gaps between slices for steam to escape. Drizzle remaining olive oil over vegetables, then sprinkle with herbs de Provence, salt, and black pepper.

  5. Roast uncovered 40-45 minutes until vegetables are tender when pierced with fork and edges turn golden brown. If adding cheese, sprinkle over top during last 10 minutes. Let rest 10 minutes before serving.

Golden Rule
Never cover the dish with foil - trapped steam makes vegetables soggy instead of caramelized

What to Serve With It

This side needs a protein or grain to make a complete meal. For easy watermelon salad dinner nights, this tian works as the vegetable component alongside fresh greens.

Side Dish Prep Why It Works How to Serve
Simple Green Salad Easy Crisp lettuce cuts richness of roasted vegetables Toss with vinaigrette, serve cold alongside warm tian
Crusty Bread Easy Soaks up olive oil and vegetable juices from bottom of dish Slice thick, toast lightly, serve warm for dipping
Roasted Chicken Breast Medium Adds lean protein without competing with herb flavors Season simply with salt and pepper, roast alongside tian
Herbed Quinoa Easy Light grain balances acidity and adds substance to plate Cook quinoa, toss with fresh herbs, serve at room temperature
Garlic Mashed Potatoes Medium Creamy texture contrasts with roasted vegetables Make ahead, reheat before serving, keep warm covered

Three ways to serve it:

  • As vegetarian main: Pair with crusty bread and salad for complete meal that serves 4
  • As side dish: Serve alongside roasted chicken, beef, or lamb for 6-8 people
  • For entertaining: Make ahead, reheat before guests arrive, garnish with fresh basil
Best Pick
Serve with this warm stew when you want an all-vegetable French dinner - the rich sauce complements roasted vegetables without overwhelming them

Store and Reheat

Tian keeps well but loses some texture after reheating. The this quick beef dish works better for meal prep if you need something that reheats perfectly, but tian is still solid for 3-4 days.

Method Time Best For
🔥 Oven 15-20 min at 350°F Best texture, restores caramelization, worth the wait
📦 Microwave 2-3 min on medium Quick single portions, softer texture but still edible
🍳 Stovetop 5-7 min covered on low Small portions, prevents drying, requires monitoring

For best results when storing:

  • Cool completely before refrigerating - hot vegetables release steam in container and turn mushy
  • Store in shallow glass container so you can reheat directly in oven without transferring
  • Keep up to 4 days refrigerated - vegetables soften further after that and lose structure
  • Freeze up to 1 month but texture suffers significantly - best eaten fresh or within 4 days
  • Reheat uncovered in oven to restore some crispness to edges instead of steaming vegetables further

Frequently Asked Questions

How long to cook French vegetable tian at 375°F?

Roast uncovered 40-45 minutes until vegetables are tender when pierced with fork and edges turn golden. Check at 40 minutes - if edges aren't browning, broil for 2-3 minutes to finish.

Can I make French vegetable tian ahead and refrigerate?

Yes - assemble up to 4 hours ahead, cover with plastic wrap, and refrigerate. Remove from fridge 30 minutes before roasting so it comes to room temperature, then bake as directed.

What goes well as a side with French vegetable tian?

Crusty bread soaks up olive oil and juices, roasted chicken adds lean protein, and herbed quinoa makes it a complete vegetarian meal. For special occasions, try tender homemade roast recipe which pairs well with the Mediterranean flavors.

How do I know when French vegetable tian is done cooking?

Vegetables should be tender when pierced with fork but still hold their shape, with golden-brown edges. If vegetables slide apart when you cut into them, they're overcooked.

Can I use zucchini instead of eggplant in French vegetable tian?

Yes - double the zucchini or use yellow squash for similar texture. The dish will be slightly softer and less earthy without eggplant but still works well.

French Vegetable Tian served on a plate

French Vegetable Tian

No ratings yet
French Vegetable Tian layers thinly sliced eggplant, zucchini, tomatoes, and onion vertically for even roasting and caramelized edges. Roasting uncovered at 375°F lets moisture evaporate, intensifying flavors while keeping vegetables tender. The method involves a 20-minute prep and 45-minute roast with a 10-minute rest before serving.
Print Recipe Pin Recipe
Prep Time 20 minutes mins
Cook Time 45 minutes mins
Total Time 1 hour hr 5 minutes mins
Servings: 6 servings
Course: Side Dish
Cuisine: French
Ingredients Equipment Method Notes

Ingredients
  

  • 1 medium eggplant sliced ⅛ inch thick
  • 2 medium zucchini sliced ⅛ inch thick
  • 4 medium tomatoes sliced ⅛ inch thick, pat dry
  • 1 large onion sliced thin into half-moons
  • 4 cloves garlic minced
  • ¼ cup olive oil regular olive oil, not extra virgin
  • 2 teaspoon herbs de Provence
  • 1 teaspoon salt
  • ½ teaspoon black pepper
  • ¼ cup Parmesan or Gruyère cheese optional, add during last 10 minutes of roasting

Equipment

  • 9x13 inch baking dish Used for roasting the layered vegetables
  • Mandoline or sharp knife For slicing vegetables evenly to ⅛ inch thickness
  • Paper towels To pat tomato slices dry for removing excess moisture

Method
 

  1. Preheat oven to 375°F and grease a 9x13-inch baking dish with 1 tablespoon of olive oil, coating the bottom and sides. Set aside while you prepare vegetables.
    ¼ cup olive oil
  2. Slice eggplant, zucchini, and tomatoes into ⅛-inch rounds using a mandoline or a sharp knife. Pat tomato slices dry with paper towels to remove excess moisture. Slice onion into thin half-moons and mince garlic.
    1 medium eggplant, 2 medium zucchini, 4 medium tomatoes, 1 large onion, 4 cloves garlic
  3. Spread the onion slices and minced garlic evenly across the bottom of the prepared baking dish to create an aromatic base layer. Drizzle with 1 tablespoon olive oil and sprinkle with a pinch of salt.
    1 large onion, 4 cloves garlic, ¼ cup olive oil, 1 tsp salt
  4. Layer the vegetable slices vertically in an alternating pattern of eggplant, zucchini, and tomato, standing them upright and leaning slightly. Leave small gaps between slices to allow steam to escape. Drizzle the remaining olive oil over the vegetables, then sprinkle evenly with herbs de Provence, salt, and black pepper.
    1 medium eggplant, 2 medium zucchini, 4 medium tomatoes, ¼ cup olive oil, 2 tsp herbs de Provence, 1 tsp salt, ½ tsp black pepper
  5. Roast uncovered in the preheated oven for 40 to 45 minutes until vegetables are tender when pierced with a fork and edges turn golden brown. If using cheese, sprinkle it over the top during the last 10 minutes of roasting. Remove from oven and let rest for 10 minutes before serving.
    ¼ cup Parmesan or Gruyère cheese

Notes

  • Slicing vegetables evenly to ⅛ inch ensures even roasting and caramelization.
  • Layer vegetables loosely to allow moisture to escape and prevent sogginess.
  • Rotate the dish halfway through roasting to brown all edges evenly.

Tried this recipe?

Let us know how it was!

What Is Sea Bass? Taste, Texture, Uses & More

April 2, 2026

You spot a fillet labeled "sea bass" at the fish counter and pause - because the tag next to it says "branzino," and another case over reads "Chilean sea bass." These are not the same fish, and knowing which one you're buying changes how you'll cook it.

What Is Sea Bass

Sea bass is a broad market name covering several species, from the lean European branzino to the richer Patagonian toothfish, and each brings its own character to the plate.

Cooks who reach for cod swaps that work or replacements for halibut often land here - sea bass sits in that same mild, white-fish lane but with a slightly meatier bite.

QUICK SUMMARY

Sea bass is a mild, clean-tasting white fish with firm, moist flakes and a subtle briny sweetness. The name covers multiple species - most notably branzino and Chilean sea bass. It suits pan-searing, roasting whole, and steaming equally well. Use within 1-2 days of purchase.

🐟Type: Marine white-fleshed fish; multiple species sold under one name
👅Flavor: Mildly briny, slightly sweet, clean with subtle umami
🍳Best Uses: Whole roasting, pan-searing skin-on, steaming, en papillote
⏱️Shelf Life: 1-2 days refrigerated; up to 3 months frozen
⚠️Watch Out: "Chilean sea bass" is actually Patagonian toothfish - richer and fattier than true sea bass

What Is Sea Bass?

Sea bass is a market term, not a single species - and that distinction matters at the fish counter.

True sea bass typically refers to European seabass (Dicentrarchus labrax), sold widely under its Italian name branzino, a slender, silver-skinned fish from Atlantic and Mediterranean coastal waters.

Chilean sea bass is a different story entirely. It's actually Patagonian toothfish, a deep-water fish from the Southern Ocean with considerably more fat than its namesake.

The two share a name for commercial reasons, not biological ones.

Other varieties show up depending on the region and season. Striped bass is commonly confused with sea bass, though it belongs to a separate family.

All fall under the category of marine white-fleshed fish - firm, mild, and suited to a wide range of preparations.

  • 🌊 European seabass / branzino - lean, fine-flaked, mild; the "classic" sea bass of Mediterranean cooking
  • 🧊 Chilean sea bass (Patagonian toothfish) - much fattier and richer; a distinctly different eating experience
  • 🎣 Striped bass - often mislabeled or confused; firmer texture, slightly stronger flavor

What Does Sea Bass Taste Like?

sea bass - What Is Sea Bass

Sea bass has a clean, mildly briny flavor with a subtle sweetness and a low-level umami note that sits in the background rather than announcing itself.

It's closer to cod or halibut than it is to salmon or mackerel - no assertiveness, no oiliness on the palate.

Sensory SnapshotMild Intensity
👅 Flavor
brinyslightly sweetsubtle umami
✋ Texture
firm flakesmoist
👃 Aroma
cleanoceanic

Heat changes the texture more than the flavor. A pan-seared fillet develops a golden crust while keeping the interior moist and gently flaking.

Steamed or poached, it stays tender but loses that slight richness you get from fat contact with a hot pan.

Chilean sea bass is the outlier. Its higher fat content gives it a buttery, almost luxurious mouthfeel - significantly richer than branzino and closer to sablefish territory.

Don't expect the same result from both in the same recipe.

How to Use Sea Bass

Sea bass rewards simple preparation. Its mild flavor is an asset - it takes on the character of whatever surrounds it without disappearing.

Heavy cream sauces work against it; Mediterranean and East Asian flavor profiles work with it.

For full pairing ideas for sea bass, the range is wider than most cooks expect, from roasted vegetables to clean grain sides. If the fish isn't available, knowing your options for swapping out sea bass keeps dinner plans intact.

How Sea Bass Is Used
MethodBest ForTip
🍳 Pan-searingSkin-on fillets; weeknight cookingDry the skin thoroughly before it hits the pan - moisture prevents crisping
🔥 Roasting wholeBranzino; Mediterranean presentationsStuff the cavity with lemon slices, garlic, and fresh herbs before roasting
♨️ SteamingAsian-style preparations; delicate textureSteam over aromatics - ginger, scallions, rice wine - for clean, direct flavor
🌿 En papilloteBaked fillets with citrus and fennelSeal tightly; the steam inside the packet keeps the fish from drying out
🍋 CevicheThinly sliced, very fresh specimens onlyUse the freshest fish you can source - acidity does not kill spoilage bacteria
Watch Out
Avoid pairing sea bass with strongly smoked ingredients or heavy cream sauces. Both overwhelm its mild, clean character and you lose what makes the fish worth buying in the first place.
Try It In
🧄Roasted Garlic AioliA clean, garlicky dip that complements pan-seared fillets→🍅Roasted Garlic Marinara SauceWorks as a light base for baked sea bass in Italian-style preparations→🥄Roasted Garlic Béarnaise SauceA richer pairing for Chilean sea bass or thicker pan-seared fillets→

How to Buy and Store Sea Bass

Fresh sea bass announces itself clearly - or rather, it doesn't announce itself at all. No fishy smell is the first test. A strong odor at the counter means it's past its window.

For whole fish, look for clear, bright eyes and shiny skin. For fillets, the flesh should appear moist and translucent, not dull or browning at the edges.

Golden Rule
Always ask the fishmonger for the species name and catch region. "Sea bass" on a label tells you almost nothing - branzino and Patagonian toothfish are entirely different fish requiring different cooking approaches.

Always ask the fishmonger to confirm the species. The same spoilage signs that flag bad salmon - sliminess, ammonia notes, discoloration - apply here; checking salmon spoilage signs gives you a useful reference framework for white fish too.

Understanding sea bass's shelf life in more detail helps if you're buying in larger quantities or planning ahead.

  • Refrigerator - wrap fillets tightly and store in the coldest part; use within 1-2 days
  • Freezer - freeze in an airtight bag with air pressed out; quality holds up to 3 months
  • Olive oil note - marinating in olive oil before freezing helps preserve moisture, though knowing your [swapping out olive oil](https://forkliftkitchen.com/olive-oil-substitutes/) options keeps you covered if needed

Start With the Right Species

If you're new to sea bass, branzino is the entry point. It's widely available, easy to whole-roast or pan-sear, and forgiving enough for a first attempt.

Its mild flavor responds well to lemon, olive oil, and fresh herbs - a short ingredient list that lets the fish carry the dish.

Chilean sea bass suits cooks who want something richer and don't mind a higher price. It's closer to swapping out tilapia in the opposite direction - more fat, more presence, more tolerance for bold sauces.

Pick the species first. Then cook accordingly.

Frequently Asked Questions

Is sea bass the same as branzino?

Not exactly. Branzino is European seabass (*Dicentrarchus labrax*) - a specific species. "Sea bass" is a broader commercial label that can also cover Patagonian toothfish (sold as Chilean sea bass) and other species entirely.

Is sea bass healthy to eat?

Yes, for most people. It's a lean protein with omega-3 fatty acids, vitamin B12, and selenium. Pregnant people and young children should limit frequency due to potential trace mercury, particularly with Chilean sea bass.

How do you tell if sea bass is fresh?

Fresh sea bass has no strong odor - just a clean, faint oceanic scent. Fillets should look moist and translucent; whole fish should have clear eyes and firm, shiny skin. Avoid any fillet with browning edges or a slimy surface.

Is Chilean sea bass overfished?

It has been historically. Patagonian toothfish stocks were severely depleted in the 1990s and early 2000s. Today, MSC-certified sources exist, so checking for sustainability certification at the point of purchase is worth the extra second.

Can you eat sea bass skin?

Yes - and it's worth keeping on during pan-searing. Scored or pressed flat against a hot dry pan, sea bass skin crisps up well and adds texture. Remove it only if the fish was not descaled properly.

What Is Tomato Sauce? [Taste, Uses & More]

April 2, 2026

You spot it on the shelf in three dozen variations - smooth passata, chunky marinara, herb-laced jarred sugo - and the choice can feel genuinely confusing.

What Is Tomato Sauce

Tomato sauce is one of those pantry staples that most cooks use weekly without stopping to think about what separates a flat, thin version from one with real depth.

A sauce built on long-simmered tomatoes behaves very differently in a lasagna than a quick pour-and-heat shortcut, and understanding those differences matters.

Good tomato sauce anchors some of the most familiar dishes in Mediterranean and American-Italian cooking, from spaghetti to shakshuka, and knowing what to look for changes what lands on the plate - pairing it with comparing dried oregano vs ground oregano options or even preparing chili garlic sauce properly can shift the whole flavor register.

QUICK SUMMARY

Tomato sauce is a cooked, reduced tomato preparation seasoned with garlic, onion, and herbs. It delivers bright acidity, cooked sweetness, and deep umami. Use it as a base for pasta, pizza, braises, and egg dishes. Opened jars keep 5-7 days refrigerated or up to 4 months frozen.

🍅What It Is: Cooked, strained or crushed tomatoes reduced into a cohesive sauce
👅Flavor: Bright tang, cooked sweetness, savory umami, herbal background
🍳Best Uses: Pasta, pizza base, lasagna, braised meats, shakshuka
🧄Pairs With: Garlic, basil, parmesan, olive oil, ground pork or beef
📦Shelf Life: Unopened: months to years; opened fridge: 5-7 days; frozen: 3-4 months
✅Dietary: Naturally vegan and gluten-free; check labels for added sugar and sodium

What Is Tomato Sauce?

Tomato sauce is a cooked tomato condiment made by simmering crushed or puréed tomatoes - often with garlic, onion, olive oil, and herbs - until the liquid reduces and the flavors concentrate.

It sits in a different category from raw tomato products like fresh salsa or uncooked passata, because heat fundamentally changes the tomatoes' chemistry: acidity mellows, natural sugars develop, and glutamates increase, building umami that a raw tomato simply can't deliver.

The sauce traces its roots to southern Italy, where it became the backbone of regional cooking from Naples outward.

You'll see it called sugo in Italian households, passata-based sauce when the base is strained, and marinara when it's kept simple - just tomatoes, garlic, and oil.

Once Italian immigrants brought these traditions to the United States, American-Italian versions evolved with added sugar and more herbs, creating the jarred pasta sauce style now standard in grocery stores.

Varieties range from smooth and pourable to thick and chunky, depending on whether the tomatoes are passed through a strainer or left with texture.

Onion choice matters too - cipollini onion cooking methods show how different alliums shift a sauce's sweetness at the base level.

What Does Tomato Sauce Taste Like?

tomato sauce - What Is Tomato Sauce

Tomato sauce lands somewhere between sharp passata and concentrated canned tomatoes, but with added savory seasoning pulling it toward full sauce territory.

The raw vegetal edge you get from crushed tomatoes softens considerably during cooking - what remains is a rounded, cooked-tomato sweetness layered under bright acidity.

Sensory SnapshotModerate Intensity
👅 Flavor
bright acidiccooked-sweetumami-richherbal
✋ Texture
smooth to slightly chunkycohesive
👃 Aroma
warm cooked tomatogarlicky-herby

Longer reduction deepens the sweetness and pushes the sauce toward richer, almost wine-like complexity.

Compared to tomato paste, the flavor is less concentrated and less bitter - paste reads as intense and almost caramelized, while sauce stays brighter and more fluid on the palate.

Golden Rule
A pinch of sugar corrects acidity in underripe-tomato sauces, but a proper long simmer does the same job with more depth. Use sugar as a fix, not a default.

How to Use Tomato Sauce

Tomato sauce functions as both a standalone coating and a building block. In its simplest role, it gets tossed with spaghetti or penne and finished with grated parmesan or pecorino.

Beyond pasta, it layers into lasagna, spreads under pizza toppings, and braises short ribs or meatballs low and slow until the meat absorbs its acidity.

Shakshuka - eggs poached directly in seasoned tomato sauce - shows how well the sauce works as a cooking medium, not just a condiment. Stirring it into vegetable ragùs adds acidity and body. Blending it into a bisque with a splash of cream produces tomato soup with real savory backbone.

When the sauce runs short, knowing your tomato sauce stand-ins keeps a recipe on track without losing the acidic structure.

A sauce built on olive oil benefits from using the right fat as a carrier - the breakdown on alternatives to olive oil helps when the pantry is low.

How Tomato Sauce Is Used
MethodBest ForTip
🍝 SimmeredPasta coatings, braised meats, ragùReduce until sauce clings to a spoon - no pooling
🫙 Layered & BakedLasagna, baked ziti, stuffed peppersUse a slightly thinner sauce; it thickens in the oven
🍕 Spread (uncooked application)Pizza base, flatbreadsKeep it cold and thick so it doesn't steam the crust
🍳 Poaching mediumShakshuka, poached fish, eggsBring to a gentle simmer before adding proteins
Try It In
🍝Slow Cooker Meatballs in Tomato SauceLong, slow cooking lets the sauce absorb into every meatball→🥚Baked Eggs in Tomato Sauce (Shakshuka-Style)Uses sauce as the cooking medium, not just a topping→🍳Shakshuka Eggs in Tomato SauceA breakfast-friendly take on poached eggs in spiced sauce→

How to Buy and Store Tomato Sauce

At the store, color is the first signal.

Look for a deep, even red on the label photograph or through glass - watery, pale orange tones suggest a diluted or low-tomato product.

Flip the can or jar and check the ingredient list: tomatoes should appear first, well ahead of water, starch, or sugar.

A clean, slightly sweet aroma on opening is right; any metallic or sour-fermented smell means skip it.

Watch Out
Large oil separation and a thin, watery layer on top of jarred sauce aren't always deal-breakers, but excessive separation after stirring suggests a low-tomato-solids product that will run thin in cooking.

Storage is straightforward once you know the windows:

  • 🧊 Unopened pantry - Cool, dark shelf; commercially canned sauces keep months to years before the best-by date.
  • ❄️ Opened refrigerated - Transfer to a sealed container and use within 5-7 days; watch for [tomato sauce spoilage signs](https://forkliftkitchen.com/tomato-sauce-shelf-life/) like mold or off-smell before using.
  • 🧊 Frozen - Portion into freezer bags or containers; quality holds for 3-4 months.
  • 🌿 Fresh herb additions - If you stir in fresh basil before storing, note that [basil's shelf life](https://forkliftkitchen.com/basil-shelf-life/) is short - it fades and darkens within days in the fridge.

Where to Start With Tomato Sauce

New to making it from scratch? Start with a simple sauté of garlic and onion in olive oil, add a can of crushed tomatoes, and simmer for 25 minutes. That baseline teaches you how the sauce thickens and what reduction actually smells like. From there, preparing tomato paste properly can show you how to add concentrated depth when the sauce needs more backbone.

Shortcut
A good jarred sauce sautéed with fresh garlic and a splash of red wine for five minutes tastes significantly better than straight from the jar - small effort, clear payoff.

If scratch cooking isn't the goal, buy jarred and upgrade it in the pan. Either way, tomato sauce rewards attention to heat and time more than any special ingredient.

Frequently Asked Questions

What is the difference between tomato sauce and marinara?

Marinara is a specific, minimal tomato sauce - tomatoes, garlic, olive oil, sometimes oregano - cooked briefly to keep it bright. Tomato sauce is broader: it typically includes onion, longer cooking, and sometimes wine or meat, producing a richer, deeper result.

Is tomato sauce the same as pasta sauce?

Not exactly. Pasta sauce is a marketing term covering tomato sauce, marinara, arrabbiata, and others. Plain tomato sauce is one type within that broader category - usually simpler and less seasoned than jarred American-style pasta sauces.

What does tomato sauce taste like compared to tomato paste?

Tomato paste is far more concentrated - intensely savory, slightly bitter, and thick enough to hold a spoon upright. Tomato sauce is lighter, brighter, and more acidic, functioning as a liquid component rather than a concentrated flavoring agent.

How long does opened tomato sauce last in the fridge?

Five to seven days in a sealed container is the safe window. Glass or BPA-free containers preserve flavor better than the original can, which can impart a metallic taste after opening.

Can you freeze tomato sauce and how?

Yes. Portion it into freezer-safe bags or containers, leave a small headspace for expansion, and freeze for up to 3-4 months. Thaw overnight in the fridge and stir well before reheating - texture holds well after freezing.

Korean Ssamjang Paste

April 2, 2026

Most condiments take longer to make than they do to use up. Ssamjang is the opposite-10 minutes of stirring, then weeks of dipping grilled meat and lettuce wraps into thick, salty-sweet paste.

Korean Ssamjang Paste served on a plate

The trick is balancing the fermented doenjang with sweet honey before the sesame oil goes in. Mix the base pastes first, then adjust for heat and sweetness.

Make this when you're tired of bottled sauces that taste flat or too sweet.

QUICK SUMMARY

Ssamjang paste combines fermented doenjang and spicy gochujang with garlic, sesame oil, and honey for a thick, umami-rich condiment. Mix the two base pastes thoroughly before adding aromatics and oil to prevent grainy texture. Rest the finished paste 30 minutes so flavors meld into a balanced, spreadable dip.

⏱️Time Reality: 10 minutes active, 30 minutes resting for flavor integration
🥄First Critical Move: Combine doenjang and gochujang completely before adding other ingredients
⚠️Watch Out: Too much doenjang makes it too salty-balance with extra honey or a splash of water

Why This Recipe Works

Mixing two fermented pastes with fresh aromatics creates depth without cooking. Most people skip chicken, but it balances the meal-for a version that comes together quickly, this homemade chicken recipe pairs with ssamjang's salty punch.

Quick Reference
⏱️
Prep Time
10 min
🔥
Cook Time
0 min
⏰
Total Time
10 min
🍽️
Servings
8 servings
📊
Difficulty
Easy
🏷️
Category
Condiment
💡
Quick Tip
Balance salty, sweet, spicy, then rest flavors
🎯
Best For
Weeknight | Meal prep | Entertaining

Five things that make this work:

  • Doenjang and gochujang mixed first - combining the two fermented bases before adding aromatics prevents lumps and creates even umami throughout
  • Freshly minced garlic - letting chopped garlic sit 5 minutes before mixing develops sharper flavor that cuts through the thick paste
  • Toasted sesame seeds - heating seeds in a dry pan 2 minutes releases nutty oils that stale seeds can't match
  • Honey added gradually - starting with 1 tablespoon and tasting before adding more prevents overly sweet paste
  • 30-minute rest - refrigerating the finished paste lets garlic, sesame oil, and chili flavors meld into a cohesive dip
Best Pick
Use Korean fermented doenjang for authentic depth-Japanese miso works but tastes milder and less funky.

What You'll Need

Ingredients for Korean Ssamjang Paste

Shopping for ssamjang means hitting the Asian grocery store or ordering online. The cream works best when it hits the table at the same time as the main-for a version that comes together quickly, another great cream recipe uses similar dairy richness.

🥢
Base Pastes
  • 3 tablespoon doenjang (fermented soybean paste)
  • 2 tablespoon gochujang (Korean red chili paste)
🧄
Aromatics
  • 2 garlic cloves, minced
  • 2 green onions, finely chopped
  • ½ small onion, grated (optional)
🫙
Flavor Builders
  • 1 tablespoon honey or sugar
  • 1 tablespoon sesame oil
  • 1 tablespoon toasted sesame seeds
  • ½ teaspoon chili flakes (optional)

Ingredient Details

  • Doenjang
    Fermented soybean paste provides foundational umami-look for brands with visible texture, not smooth like miso
  • Gochujang
    Korean red chili paste adds moderate heat and fermented depth-check the spice level label before buying
  • Garlic
    Fresh cloves minced finely provide sharp bite that mellows after resting-garlic powder works but tastes flat
  • Sesame oil
    Toasted sesame oil adds nutty richness-use sparingly since it overpowers if you pour too much
  • Green onion
    Chop white and green parts small for mild sharpness and color-scallions work the same way
  • Honey
    Balances salty doenjang with subtle sweetness-sugar or rice syrup work but honey adds floral notes
  • Sesame seeds
    Toast in a dry pan until golden for nutty crunch-stale seeds taste dusty and dull

Ingredient Swaps

Swapping ingredients changes the fermented funk or heat level but keeps the thick paste texture. Rich mains need something to cut through, and salad does exactly that-for a version that comes together quickly, a juicy salad on the side uses similar creamy dressing balance.

Four swaps that work:

  • Doenjang → Miso paste (1:1 ratio) - Japanese miso tastes milder and less funky than doenjang but keeps the salty base intact
  • Gochujang → Sriracha + chili powder (2 tablespoon sriracha + ½ teaspoon chili powder) - loses fermented depth but adds similar heat and color
  • Honey → Sugar or maple syrup (1:1 ratio) - white sugar dissolves fast, maple adds woodsy sweetness, both balance salt equally
  • Sesame oil → Neutral oil + extra toasted sesame seeds (1 tablespoon oil + 1 teaspoon seeds) - loses intense nuttiness but preserves smooth texture

Using Miso Instead of Doenjang

Works for: Milder umami taste, easier to find in regular grocery stores, less pungent aroma

Skip if: You want authentic Korean fermented funk, need deep salty punch, prefer traditional ssamjang flavor

Using Sugar Instead of Honey

Works for: Vegan diets, faster dissolving, cleaner sweetness without floral notes

Skip if: You want complex sweetness, prefer honey's viscosity, like subtle floral flavor

Instructions

The whole thing takes 10 minutes of mixing and mincing before you rest it. Garlic shrimp adds the contrast this plate needs, but timing matters-for a version that comes together quickly, this flaky homemade garlic shrimp recipe cooks while the paste sits.

  1. Toast sesame seeds in dry pan over medium heat 2 minutes - shake pan frequently until seeds turn golden and smell nutty, then cool on a plate before adding to paste.
  2. Combine 3 tablespoon doenjang and 2 tablespoon gochujang in mixing bowl - stir vigorously with spoon until completely blended with no streaks, about 1 minute of mixing.
  3. Add minced garlic, chopped green onion, and 1 tablespoon honey - stir ingredients into paste base until evenly distributed, then taste and add more honey if too salty.
  4. Drizzle 1 tablespoon sesame oil over mixture and stir until smooth - add oil slowly while mixing to prevent separation, paste should look glossy and cohesive.
  5. Fold in toasted sesame seeds and optional chili flakes - mix gently to preserve seed texture, then cover and refrigerate 30 minutes before serving.
Shortcut
Skip the rest period if serving immediately-flavors won't be as melded but the paste still works for dipping.

What to Serve With It

Ssamjang works best with grilled meats wrapped in lettuce or as a dip for steamed vegetables. A good soup can make or break the plate-for a version that comes together quickly, something warm like soup balances the thick paste's intensity.

Side Dish Prep Why It Works How to Serve
Lettuce Wraps (Ssam) Easy Crisp lettuce balances thick paste with fresh crunch and neutral base Wash romaine or butter lettuce leaves, pat dry, serve whole for wrapping grilled meat and ssamjang
Steamed Rice Easy Neutral grain absorbs salty paste without competing for flavor attention Cook short-grain white rice until fluffy, serve warm in small bowls alongside paste
Grilled Pork Belly Medium Rich fatty meat pairs with fermented umami for classic Korean BBQ combination Slice pork belly ½-inch thick, grill over high heat until crispy, serve with ssamjang for dipping
Korean Pickled Radish Easy Acidic crunch cuts through creamy paste and cleanses palate between bites Slice daikon radish thin, quick-pickle in vinegar-sugar brine 30 minutes, serve cold
Steamed Vegetables Easy Healthy base complements intense ssamjang without adding extra fat or salt Steam broccoli, carrots, or zucchini until tender-crisp, serve with ssamjang as dipping sauce

Three ways to serve it:

  • Korean BBQ night - grill beef short ribs, pork belly, or chicken thighs, serve ssamjang in small bowls for dipping wrapped meat
  • Bibimbap topping - dollop ssamjang over mixed rice bowl with vegetables and fried egg for extra umami punch
  • Vegetable dip - pair with raw cucumber sticks, carrot batons, and bell pepper strips for crunchy appetizer
Quick Tip
Spread ssamjang on grilled cheese sandwiches or burgers for fermented umami boost that replaces ketchup or mustard.

Store and Reheat

Ssamjang lasts weeks in the fridge because the fermented base acts as a preservative. For ideas on building complete meals around condiments like this, check out healthy veggie main dishes that benefit from bold dipping sauces.

Method Time Best For
🍳 Room Temp 0 min Serving as dip or spread-paste tastes best at room temperature with full flavor intensity
🔥 Gentle Warming 1-2 min low heat Loosening thick cold paste-warm briefly in small pan to soften for easier scooping

For best results when storing:

  • Transfer to airtight glass jar - prevents odor absorption and keeps paste fresh up to 4 weeks refrigerated
  • Press plastic wrap directly onto surface - eliminates air pockets that cause oxidation and browning on top layer
  • Label with date - track freshness since fermented pastes darken over time but stay safe to eat
  • Keep refrigerated always - room temperature storage causes separation and weakens garlic flavor within days
  • Freeze in small portions - divide into ice cube trays or small containers for up to 3 months, thaw overnight in fridge

Frequently Asked Questions

Can I make ssamjang paste ahead and store it?

Yes, ssamjang tastes better after resting overnight in the fridge. The garlic mellows and flavors meld into a cohesive paste within 12-24 hours.

How long does ssamjang paste last in the refrigerator?

Properly stored in an airtight container, ssamjang lasts 3-4 weeks refrigerated. The fermented base preserves the paste, though garlic flavor fades after 2 weeks.

What is the best ratio of doenjang to gochujang for ssamjang?

Use 3 parts doenjang to 2 parts gochujang for balanced umami and moderate heat. Adjust by adding more gochujang for spicier paste or more doenjang for saltier flavor.

What causes ssamjang to be too salty and how to fix it?

Too much doenjang or soy sauce makes ssamjang overly salty. Fix by stirring in extra honey (1 teaspoon at a time) or adding a splash of water to dilute the salt concentration.

Can I scale ssamjang paste recipe up or down easily?

Yes, ssamjang scales perfectly by maintaining the 3:2 doenjang-to-gochujang ratio. Double or halve all ingredients while keeping proportions intact for consistent flavor.

Korean Ssamjang Paste served on a plate

Korean Ssamjang Paste

No ratings yet
Korean Ssamjang paste blends fermented doenjang and spicy gochujang into a thick, umami-rich condiment perfect for dipping grilled meats and lettuce wraps. Mixing the pastes thoroughly before adding garlic, honey, and sesame oil ensures a balanced and smooth texture. Resting the paste for 30 minutes melds the flavors into a cohesive dip.
Print Recipe Pin Recipe
Prep Time 10 minutes mins
Cook Time 2 minutes mins
Total Time 12 minutes mins
Servings: 8 servings
Course: Condiment
Cuisine: Korean
Ingredients Equipment Method Notes

Ingredients
  

  • 3 tablespoon doenjang fermented soybean paste, foundational umami
  • 2 tablespoon gochujang Korean red chili paste, adds moderate heat
  • 2 cloves garlic minced finely
  • 2 green onions finely chopped
  • 0.5 small onion grated, optional
  • 1 tablespoon honey balances salty flavor, can substitute sugar
  • 1 tablespoon sesame oil toasted, adds nutty richness
  • 1 tablespoon sesame seeds toasted
  • 0.5 teaspoon chili flakes optional

Equipment

  • Mixing bowl Used to combine pastes and ingredients
  • Dry pan Used for toasting sesame seeds
  • Spoon For stirring paste and ingredients

Method
 

  1. Toast sesame seeds in a dry pan over medium heat for 2 minutes, shaking pan frequently until seeds turn golden and smell nutty. Remove and cool on a plate.
    1 tbsp sesame seeds
  2. Combine 3 tablespoons doenjang and 2 tablespoons gochujang in a mixing bowl. Stir vigorously with a spoon for about 1 minute until fully blended with no streaks.
    3 tbsp doenjang, 2 tbsp gochujang
  3. Add minced garlic, chopped green onion, and 1 tablespoon honey to the paste base. Stir until evenly distributed. Taste and add more honey if the paste is too salty.
    2 cloves garlic, 2 green onions, 1 tbsp honey
  4. Drizzle 1 tablespoon toasted sesame oil over the mixture slowly while stirring to prevent separation. Mix until the paste looks glossy and smooth.
    1 tbsp sesame oil
  5. Fold in the toasted sesame seeds and optional chili flakes gently to preserve seed texture. Cover and refrigerate for 30 minutes before serving to meld flavors.
    1 tbsp sesame seeds, 0.5 tsp chili flakes

Notes

  • Mix doenjang and gochujang first to avoid lumps and ensure even umami.
  • Let minced garlic sit 5 minutes before mixing for sharper flavor.
  • Toast sesame seeds just until golden for the best nutty aroma.
  • Rest paste 30 minutes refrigerated to meld flavors and improve texture.

Tried this recipe?

Let us know how it was!

What Is Soy Sauce? [Taste, Uses & More]

April 2, 2026

Most people treat soy sauce like a one-note salt delivery system, splashing it on fried rice and calling it done.

What Is Soy Sauce

That misses what makes it genuinely hard to replace - the fermented depth that behaves differently from table salt, from the taste of fish-forward sauces, from oyster sauce swaps that work in stir-fry contexts. Soy sauce contributes umami, not just salinity, and understanding that distinction changes how you cook with it.

QUICK SUMMARY

Soy sauce is a fermented liquid seasoning made from soybeans, wheat, salt, and koji cultures. It delivers strong umami, salt, and faint sweetness in one ingredient. Use it raw as a finisher, in marinades, or reduced into glazes. High in sodium.

🍶Category: Fermented liquid seasoning, East Asian origin
🧂Flavor: Salty, umami-rich, slightly sweet, savory roasted
🔥Intensity: Strong - a little goes further than you expect
🥘Best Uses: Marinades, stir-fries, ramen, glazes, dressings
⏳Shelf Life: Unopened: years; opened: months to a few years refrigerated
⚠️Watch Out: Very high sodium; most types contain wheat - check labels

What Is Soy Sauce?

Soy sauce is a fermented liquid condiment produced from soybeans, roasted grain (usually wheat), water, and salt, inoculated with koji - a mold culture that drives the enzymatic breakdown of proteins and starches.

The result is a dark, slightly viscous liquid loaded with free amino acids, which is exactly why it tastes more complex than plain salt.

It originates from China, where early versions date back over two millennia, later spreading through Japan and Korea into distinct regional styles.

The Japanese term shoyu covers the broad category; koikuchi (dark soy sauce) is the everyday standard most bottles sold in Western markets contain.

Tamari, a wheat-reduced or wheat-free variant, has its own distinct character - for a closer look, tamari's flavor and uses explains where it diverges from standard shoyu.

  • 🇯🇵 Koikuchi shoyu - the most common dark variety, balanced salt and umami
  • 🇯🇵 Usukuchi - lighter in color but actually saltier, used in delicate Japanese dishes
  • 🇨🇳 Dark Chinese soy sauce - thicker, slightly sweeter, used in braises and color
  • Tamari - little to no wheat, richer body, often gluten-free
  • Sweet soy sauce (kecap manis) - a Southeast Asian variant, heavily sweetened with palm sugar

What Does Soy Sauce Taste Like?

soy sauce - What Is Soy Sauce

Soy sauce tastes like a concentrated savory broth with toasted grain underneath. The salt hits first, followed by a deep umami wave - that glutamate richness that coats the palate and lingers.

There's a faint sweetness from the grain fermentation, and a subtle roasted note from the wheat, which some describe as close to a very mild soy-forward miso.

Sensory SnapshotStrong Intensity
👅 Flavor
saltyumamislightly sweetsavory roasted
✋ Texture
thin liquidslightly viscous when reduced
👃 Aroma
fermented savorytoasty grain

Heat intensifies the salt and caramelizes the sugars, which is why a splash into a hot pan smells darker and more complex than soy sauce straight from the bottle. Raw and reduced, it behaves like two different ingredients.

If you're out and need a quick swap, soy sauce swaps that work covers what holds up and what doesn't.

Golden Rule
Add soy sauce before the heat drops to let it caramelize, or after to preserve its raw fermented aroma. Doing both - layering - is standard in professional wok cooking.

How to Use Soy Sauce

Soy sauce works across a wider range of techniques than most people use it for. Marinades are the obvious entry point - mixing soy sauce with mirin and sugar for a teriyaki base is a three-ingredient formula that works on chicken, salmon, or tofu.

Beyond that, the ingredient earns its place in every cooking stage.

How Soy Sauce Is Used
MethodBest ForTip
🥗 Raw / FinishingSushi dipping, dressing noodles, seasoning ramenUse light shoyu raw - koikuchi can overpower delicate fish
🍳 Stir-frySeasoning vegetables, proteins during high-heat tossAdd with oyster sauce near the end; don't let it scorch
🧂 MarinadeChicken, beef, tofu - overnight infusionBalance salt with mirin or citrus to avoid over-curing
🔥 Glaze / ReductionRoasted vegetables, grilled meatsReduce over medium heat - high heat burns sugars fast
🥣 DressingVinaigrettes, grain bowls, slawsSmall amounts only - it dominates light dressings quickly

Soy sauce pairs well with ginger, garlic, sesame oil, and mirin - these four together form the backbone of most Japanese and Chinese sauces.

Mushrooms and tofu absorb it particularly well because of their neutral, porous character.

A small amount also works in vinaigrettes alongside rice vinegar and a drop of sesame oil, bringing savory depth to salads without announcing itself.

Note that soy sauce clashes with delicate dairy sauces and can curdle cream-based preparations, so keep it away from those contexts.

The connection between soy sauce and fermented relatives like miso is worth knowing - if a recipe calls for miso and you're out, swapping out miso paste covers your options without losing that fermented backbone.

Try It In
🍗Chicken and Vegetable Stir Fry with Soy Ginger SauceA high-heat stir-fry that shows how soy sauce layers with ginger at every stage→

How to Buy and Store Soy Sauce

Look for bottles labeled naturally brewed or traditionally fermented - these have more amino acid complexity than chemically produced versions, which are made faster via acid hydrolysis and taste sharper and flatter.

Check the ingredient list: a good soy sauce needs only soybeans, wheat, salt, and water.

If wheat allergies are a concern, look for tamari specifically labeled gluten-free, since standard wheat used in soy sauce production behaves differently from what you'd find checking wheat spoilage signs in raw grain storage.

Quick Tip
Once opened, move the bottle to the fridge. Aroma degrades faster than flavor at room temperature, and refrigeration keeps both intact for months longer.

Store unopened bottles in a cool, dark pantry. After opening, a tight cap and refrigeration are non-negotiable for preserving the fermented character.

Full guidance on keeping soy sauce fresh covers both opened and unopened timelines in detail.

Start Here

Soy sauce rewards anyone who moves past the "just add more" approach. Start with naturally brewed koikuchi if you cook Japanese or Chinese food regularly - it handles everything from raw dipping to hot pan sauces.

Switch to tamari if gluten is a concern or you want a richer, slightly thicker result.

For Southeast Asian cooking, kecap manis is its own category and shouldn't be substituted directly.

Use less than you think you need. Season, taste, adjust - soy sauce is strong enough that a teaspoon often does what a tablespoon seems to promise.

Frequently Asked Questions

Is soy sauce fermented or brewed?

Both terms describe the same process. Naturally brewed soy sauce ferments soybeans and wheat with koji cultures over months. "Brewed" is simply the commercial label for traditionally fermented soy sauce, distinguishing it from chemically produced versions.

What is the difference between light and dark soy sauce?

Light soy sauce is thinner and saltier, used for seasoning without coloring a dish. Dark soy sauce is thicker, slightly sweeter, and adds deep color to braises and noodles - but it's lower in sodium than the light version.

Is tamari soy sauce gluten-free?

Not automatically. Traditional tamari uses little or no wheat, but only bottles explicitly labeled gluten-free are certified safe. Check labels carefully - some tamari products still include small amounts of wheat, and [about what happens to gluten during fermentation](https://forkliftkitchen.com/what-happens-to-gluten-during-fermentation/) explains why trace amounts can persist.

Can you substitute soy sauce for fish sauce?

Yes, with caveats. Soy sauce replaces fish sauce's salt and umami but lacks its briny, fermented seafood character. In cooked dishes the gap is small; in raw dipping sauces or Thai applications, the flavor difference is more noticeable.

How salty is soy sauce compared to table salt?

By weight, table salt is far saltier - roughly 40% sodium versus about 6-8% in soy sauce. However, soy sauce's umami amplifies the perception of saltiness, so food seasoned with it tastes saltier than the sodium numbers alone suggest.

Middle Eastern Mujadara Lentils and Rice

April 2, 2026

Simmering lentils with rice in one pot creates a hearty dish where both cook evenly and the flavors blend. The trick is partially cooking the lentils first so they finish at the same time as the rice.

Middle Eastern Mujadara Lentils and Rice served on a plate

Caramelizing the onions low and slow adds sweetness that balances the earthy lentils. Skip that step and the dish tastes flat.

Make this for meal prep nights when you need something filling that reheats well all week.

QUICK SUMMARY

Mujadara combines brown lentils and white rice simmered together until tender, topped with crispy caramelized onions. The lentils cook partially before the rice goes in so both finish at the same time. One pot, 55 minutes, and it holds in the fridge for days.

⏱️Timing: Simmer lentils 10-15 minutes before adding rice for even texture
🧅Method: Caramelize onions separately on low heat for 25-30 minutes
⚠️Watch out: Too much stirring makes the rice gummy-fluff gently after resting

Why This Recipe Works

Cooking lentils and rice together means they absorb the same seasoned liquid and blend into one cohesive dish. The rice works best when it hits the table at the same time as the main. For a version that comes together quickly, this easy homemade salad recipe pairs well on busy nights.

Quick Reference
⏱️
Prep Time
15 min
🔥
Cook Time
40 min
⏰
Total Time
55 min
🍽️
Servings
4 servings
📊
Difficulty
Easy
🏷️
Category
Main Dish
💡
Quick Tip
Caramelize onions low and slow for best flavor
🎯
Best For
Weeknight | Meal prep | Budget

Here's what makes it work:

  • Partial lentil cooking - Simmering lentils 10-15 minutes before adding rice gives them a head start so both finish tender at the same time
  • Rinsed rice - Washing the rice three or four times removes excess starch so the grains stay separate instead of clumping
  • Caramelized onions - Low heat and 25-30 minutes turn the onions sweet and crispy without burning
  • Covered simmering - A tight-fitting lid keeps the steam in so the rice cooks evenly without drying out
  • Resting time - Letting the pot sit off the heat for 10 minutes before fluffing helps the rice finish cooking and prevents a gummy texture
Quick Tip
Add 1 teaspoon salt per 2 cups water for balanced flavor throughout the dish

What You'll Need

Ingredients for Middle Eastern Mujadara Lentils and Rice

Most people skip checking the lentil type, but green or brown holds its shape better than red. A good this quick rice recipe uses similar staples if you're stocking up.

🫘
Base
  • 1 cup brown or green lentils
  • 1 cup long-grain white or basmati rice
  • 3 cups water or vegetable broth
🧅
Aromatics
  • 2 large yellow onions, thinly sliced
  • 3 tablespoon olive oil
🌶️
Seasonings
  • 1 teaspoon ground cumin
  • 1 teaspoon salt
  • ½ teaspoon black pepper

Ingredient Details

  • Brown or green lentils
    Hold their shape during cooking-red lentils turn mushy and break down
  • Long-grain white or basmati rice
    Separates well when cooked-rinse 3-4 times until water runs clear
  • Yellow onions
    Slice thin and even so they caramelize at the same rate
  • Olive oil
    Use at least 3 tablespoons for the onions to reach that rich caramel color
  • Cumin
    Toast with the onions for 30 seconds to wake up the warm, earthy flavor
  • Vegetable broth
    Swaps for water with no method change-adds savory depth
  • Salt
    Season the cooking liquid, not just the finished dish, for even flavor

Ingredient Swaps

Some swaps change cooking time while others just shift the flavor profile. Rich mains need something to cut through, and something creamy like dip does exactly that. We keep a batch ready for nights like this-it takes 10 minutes.

Four swaps that work:

  • Brown rice instead of white - Adds chewier texture and nuttier flavor but needs 10-15 more minutes cooking time
  • Red lentils instead of brown - Cooks faster but breaks down into a softer, porridge-like texture instead of staying intact
  • Vegetable oil instead of olive oil - Neutral flavor with the same cooking properties-good for budget cooking
  • Ground coriander instead of cumin - Citrusy and floral instead of warm and earthy-changes the spice profile

Brown Lentils

Works for: Holding shape, defined texture, traditional Mujadara

Skip if: You want faster cooking or softer texture

Red Lentils

Works for: Quick cooking, creamy texture, budget meals

Skip if: You want intact grains or traditional appearance

Instructions

You need about 40 minutes of simmering, with most of that hands-off. Most people skip rolls, but it balances the meal. For a version that comes together quickly, this quick rolls dish works when timing matters.

  1. Rinse the rice - Place rice in a fine-mesh sieve and rinse under cold water 3-4 times until the water runs clear, about 2 minutes total.
  2. Start the lentils - Add lentils, 3 cups water or broth, and 1 teaspoon salt to a medium saucepan, bring to a boil, then reduce to a simmer and cook uncovered for 10-15 minutes until lentils are just tender but still hold their shape.
  3. Add the rice - Stir in the rinsed rice and cumin, cover with a tight-fitting lid, and simmer on low heat for 20 minutes without lifting the lid.
  4. Caramelize the onions - While lentils and rice cook, heat 3 tablespoons olive oil in a large skillet over medium-low heat, add sliced onions, and cook 25-30 minutes, stirring every 5 minutes, until golden brown and crispy.
  5. Rest and serve - Remove pot from heat and let sit covered for 10 minutes, then fluff gently with a fork and top with caramelized onions before serving.
Golden Rule
Never lift the lid during the 20-minute simmer-steam escapes and the rice won't cook evenly

What to Serve With It

A good a cold drink side can make or break the plate. Rich mains need something to cut through, and drink does exactly that.

Side Dish Prep Why It Works How to Serve
Greek Cucumber Salad Easy Crisp, refreshing contrast to the warm lentils and rice Toss chopped cucumbers, tomatoes, red onion with lemon and olive oil
Plain Yogurt with Mint Easy Cool creaminess cuts through the earthy spices Stir fresh mint into Greek yogurt, drizzle with olive oil
Roasted Eggplant Medium Smoky, rich flavor complements the lentils Roast at 425°F for 25 minutes until golden and tender
Pita Bread Easy Easy to scoop the lentils and rice Warm in oven or on stovetop for 2 minutes
Tabbouleh Salad Medium Bright, herbaceous balance to the savory dish Chop parsley, tomatoes, bulgur with lemon dressing

Three ways to serve it:

  • Weeknight bowl - Top with a fried egg and serve with pita bread for scooping
  • Meal prep lunch - Pack in containers with yogurt sauce and pickled vegetables on the side
  • Casual dinner - Serve family-style with roasted eggplant and tabbouleh salad
Best Pick
Tahini sauce adds nutty creaminess-drizzle 2 tablespoons over each serving

Store and Reheat

Mujadara holds in the fridge for 3-4 days in an airtight container. The lentils and rice stay tender, but the onions soften when stored-add fresh caramelized onions when reheating if you want that crispy texture back.

Method Time Best For
🍳 Stovetop 5-7 minutes Reheating larger batches gently-add 2 tablespoons water, cover, stir halfway through
📦 Microwave 1-2 minutes Quick single servings-cover with damp paper towel to keep moisture
🔥 Oven 10-15 minutes at 350°F Even warming with slight crisping-cover with foil, uncover last 3 minutes

For best results when storing:

  • Cool completely before storing - Spread on a baking sheet for 15 minutes so condensation doesn't make it soggy
  • Use shallow containers - Helps it cool faster and reheat more evenly
  • Store onions separately - Keep caramelized onions in a small container so they stay crispy
  • Freeze in portions - Lasts up to 2 months-thaw overnight in the fridge before reheating
  • Add fresh toppings - Brighten leftovers with a squeeze of lemon juice or sprinkle of sumac

Frequently Asked Questions

Can I make Mujadara ahead of time and how to store it?

Yes, Mujadara holds in the fridge for 3-4 days in an airtight container. Store caramelized onions separately so they stay crispy, then add them when you reheat.

How long should I cook the lentils and rice together?

Simmer lentils alone for 10-15 minutes first, then add rice and cook covered for 20 minutes. Let it rest off heat for 10 minutes before fluffing.

What is the best way to caramelize onions for Mujadara?

Cook sliced onions in 3 tablespoons olive oil over medium-low heat for 25-30 minutes, stirring every 5 minutes. Rushing with high heat causes bitter, burnt onions.

Why is my Mujadara soggy or mushy and how to fix it?

Too much water or overcooking makes it soggy-use 3 cups liquid for 1 cup lentils and 1 cup rice, and simmer exactly 20 minutes covered. If it's already mushy, spread on a baking sheet to dry out excess moisture.

What can I serve alongside Mujadara for a complete meal?

Serve with Greek cucumber salad for crunch, plain yogurt with mint for cooling contrast, or roasted eggplant for smoky richness. Pita bread works for scooping.

Can I use red lentils instead of green or brown?

Red lentils cook faster but break down into a softer, porridge-like texture instead of staying intact. Use them if you want creamy consistency, but the dish won't look traditional.

How do I know when Mujadara is done?

The rice should be tender with no raw grains, lentils soft but holding their shape, and all liquid absorbed. Let it rest covered for 10 minutes, then fluff gently-if it's still wet, cook uncovered for 2-3 more minutes.

Is Mujadara gluten-free?

Yes, Mujadara made with lentils, rice, onions, and olive oil is naturally gluten-free. Just check that your broth is certified gluten-free if using instead of water.

Middle Eastern Mujadara Lentils and Rice served on a plate

Middle Eastern Mujadara Lentils and Rice

No ratings yet
Mujadara is a hearty Middle Eastern dish combining brown lentils and rice simmered together until tender and topped with sweet, crispy caramelized onions. Partially cooking the lentils before adding rice ensures both finish perfectly at the same time in one pot.
Print Recipe Pin Recipe
Prep Time 15 minutes mins
Cook Time 40 minutes mins
Total Time 55 minutes mins
Servings: 4 servings
Course: Main Dish
Cuisine: Middle Eastern
Ingredients Equipment Method Notes

Ingredients
  

  • 1 cup brown lentils can substitute with green lentils
  • 1 cup long-grain white rice or basmati rice; rinse 3-4 times until water runs clear
  • 3 cups water or vegetable broth adds savory depth if using broth
  • 1 teaspoon salt add to cooking liquid
  • 2 yellow onions large, thinly sliced
  • 3 tablespoons olive oil for caramelizing onions
  • 1 teaspoon ground cumin toast with onions
  • 0.5 teaspoon black pepper

Equipment

  • Medium saucepan For simmering lentils and rice
  • Large skillet For caramelizing onions
  • Fine-mesh sieve For rinsing rice
  • Fork For fluffing rice

Method
 

  1. Place rice in a fine-mesh sieve and rinse under cold water 3-4 times until the water runs clear, about 2 minutes total.
    1 cup long-grain white rice
  2. Add lentils, 3 cups water or broth, and 1 teaspoon salt to a medium saucepan, bring to a boil, then reduce to a simmer and cook uncovered for 10-15 minutes until lentils are just tender but still hold their shape.
    1 cup brown lentils, 3 cups water or vegetable broth, 1 teaspoon salt
  3. Stir in the rinsed rice and ground cumin, cover with a tight-fitting lid, and simmer on low heat for 20 minutes without lifting the lid.
    1 cup long-grain white rice, 1 teaspoon ground cumin
  4. While lentils and rice cook, heat 3 tablespoons olive oil in a large skillet over medium-low heat, add sliced onions, and cook 25-30 minutes, stirring every 5 minutes, until golden brown and crispy.
    2 yellow onions, 3 tablespoons olive oil
  5. Remove pot from heat and let sit covered for 10 minutes, then fluff gently with a fork and top the dish with caramelized onions before serving.

Notes

  • Partially cooking lentils before adding rice helps both cook evenly.
  • Rinse rice thoroughly to prevent clumping and gummy texture.
  • Caramelize onions slowly over low heat for best sweetness and crispiness.

Tried this recipe?

Let us know how it was!

What Is Sardine? [Taste, Uses & More]

April 2, 2026

Sardines are the ingredient that holds a dish together without announcing itself - the source of deep savory backbone in a pasta, the reason a simple toast feels satisfying enough to serve guests.

What Is Sardine

Understanding what makes anchovy distinct helps put sardines in context: both are oily, briny, and umami-forward, but sardines have milder, fleshier character that lets them function as a main protein, not just a seasoning.

If you've explored mackerel swaps that work, you already know the oily-fish category has more range than most cooks expect.

QUICK SUMMARY

Sardines are small, oily ocean fish with briny, umami-rich flavor and tender flesh. Available fresh, canned, or smoked, they're used in everything from pasta and toast to grilled whole as a main dish. Canned sardines are pantry-stable for years; fresh ones must be used within 48 hours.

🐟What It Is: Small oily pelagic fish, sold fresh, canned in oil or water, or smoked
👅Flavor: Briny, savory, umami-rich with a slightly oily, metallic finish
🍳Best Uses: Grilled whole, broken into pasta, pressed on toast, layered into sauces
🌍Key Cuisines: Portuguese, Spanish, Italian, Japanese regional cooking
🛒Buy: Firm flesh, bright eyes (fresh) or labeled oil/water tins in good condition
⏱️Shelf Life: Fresh: 1-2 days refrigerated; canned unopened: months to years; opened: 1-2 days

What Is Sardine?

Sardines are small, schooling pelagic fish belonging primarily to the species Sardina pilchardus, found along the Northeast Atlantic and Mediterranean coasts, with related species along Pacific shores.

The name pilchard refers to the same or closely related fish, typically applied to larger, adult specimens - "sardine" usually describes younger, smaller ones, though the terms overlap by region and market.

Fresh sardines run roughly 15-25 cm long, with distinctive shiny silver skin, a slender body, and a single dorsal fin.

Their high fat content - distributed through the flesh rather than stored in a liver - is what defines their flavor, cooking behavior, and nutritional profile.

Understanding fish and its flavor broadly helps explain why oilier species like sardines taste richer and more assertive than lean white fish.

Three main market forms exist:

  • 🐟 Fresh sardines - whole fish, typically grilled or pan-fried same-day
  • 🥫 Canned sardines - packed in olive oil, sunflower oil, tomato, or water; bones included and edible
  • 🌫️ Smoked sardines - hot-smoked and packed in tins or jars, with deeper, more resinous flavor

Brislings, a closely related Norwegian species, appear under the same sardine label in many markets.

What Does Sardine Taste Like?

sardine - What Is Sardine

Sardines hit several flavor registers at once. The dominant note is briny and savory - a clean, direct sea salt character - followed immediately by a deep, glutamate-driven umami that coats the palate.

There's noticeable oiliness, not heavy but persistent, and a faint metallic edge on the finish.

Sensory SnapshotStrong Intensity
👅 Flavor
brinyumami-richoilymetallic finish
✋ Texture
tenderflakysoft bones
👃 Aroma
marinesmoky (smoked)

Compared with anchovies, sardines deliver similar saltiness and umami but with milder, fleshier character - less concentrated and more forgiving in a dish.

Much like the taste of canned tuna shifts depending on packing liquid, sardines taste markedly different from tin to tin: olive oil-packed ones are richer and rounder, water-packed are leaner and sharper, and smoked sardines add a resinous depth that shifts their role entirely.

Heat softens the metallic edge and deepens the savory notes. Cold, straight from the can, the oiliness is more pronounced.

How to Use Sardine

Sardines work across more contexts than most people expect - from quick pantry meals to slow-cooked sauces. Fresh sardines take best to high, direct heat: grilling whole over charcoal is the classic Portuguese approach (sardinhas assadas), where the skin chars and crisps while the flesh stays moist.

Pan-frying fillets in olive oil works equally well indoors.

Golden Rule
Always add an acid - lemon juice, vinegar, or tomato - when cooking sardines. It cuts the oiliness and keeps the flavor clean rather than heavy.

Canned sardines are the workhorse form. Break them into cooked pasta with garlic, chili, and toasted breadcrumbs for a fast weeknight meal; the oil in the tin counts as part of the cooking fat. Pressed onto toast with sliced tomato and olive oil, they make a solid open-faced snack that needs nothing else.

How Sardine Is Used
MethodBest ForTip
🥫 Straight from TinToast, salads, sandwiches, crackersUse the packing oil as a dressing component
🔥 Grilled/BroiledWhole fresh sardines as a main dishScore skin before grilling to prevent curling
🍳 Pan-FriedFillets in pasta, grain bowls, stewsMedium-high heat - flip once, no more
🫙 BakedHerb or tomato crust preparationsAdd breadcrumbs on top to absorb excess oil
🥗 Blended/SpreadPâtés, dips with cream cheese or yogurtSmoked sardines give deeper flavor for spreads

Sardines pair reliably with garlic, chili flakes, capers, olives, parsley, and oregano. Starchy bases - pasta, potatoes, bread - absorb the oil and balance the intensity.

If you're thinking about swapping out sardine in a recipe, the best alternatives depend heavily on whether the dish needs the whole flaky texture or just the savory depth.

Try It In
🥗Sardine and Tomato SaladTomato's acidity balances the oily richness well→🍽️Venetian Sarde in Saor Sweet SardinesA classic sweet-sour escabeche-style preparation→

How to Buy and Store Sardine

Fresh sardines should look alive on the counter. Bright, clear eyes and shiny silver skin signal freshness; sunken eyes, dull skin, or any ammonia smell mean pass.

Buy them the day you plan to cook them - their high oil content means they deteriorate faster than leaner fish.

Watch Out
Dented, bulging, or rusted cans are a safety risk. Always check can integrity before buying, and discard any can that hisses or shows swelling when opened.

For canned sardines, read the label: olive oil-packed sardines offer the richest result; water-packed are leaner; tomato-packed work well when going straight into sauces. Smoked tins should smell cleanly smoky, not sour or fermented.

  • Fresh: Store on ice or in the coldest fridge zone; use within 24-48 hours
  • Canned (unopened): Cool, dry pantry; shelf-stable for months to years per can date
  • Canned (opened): Transfer to a sealed container; refrigerate and use within 1-2 days

Full guidance on storing sardine correctly covers the edge cases - including what to do with leftover smoked sardines from a jar.

If you rely on olive oil as a cooking fat here and run short, knowing olive oil swaps that work keeps the process moving.

Start With the Can

Canned sardines are where most cooks should begin. A tin of olive oil-packed sardines on toast with sliced tomato and good salt costs almost nothing and takes two minutes - it's the clearest way to understand what the ingredient actually tastes like before building from there.

Once you're comfortable with the flavor, move to fresh for grilling season or try breaking them into a simple pasta.

The anchovy-adjacent recipes you already know - puttanesca, pasta con le sarde - are natural next steps, and anchovy swaps that work can help you navigate where sardines fit in those dishes when anchovies aren't available.

Frequently Asked Questions

Are sardines healthy to eat?

Yes. Sardines are high in omega-3 fatty acids (EPA and DHA), vitamin D, and protein. The edible bones in canned sardines also provide calcium - an unusual benefit for a fish product.

How do sardines differ from anchovies?

Anchovies are smaller, more intensely salted, and cured - they dissolve into dishes and season rather than add texture. Sardines are larger, milder, and fleshier, functioning as a standalone protein rather than a background flavoring.

Can you eat sardine bones?

Yes - in canned sardines, the bones are fully softened during processing and are safe to eat. They're the main source of calcium in the fish and add no unpleasant texture.

What do canned sardines taste like?

Briny, oily, and savory with a mild metallic edge. Olive oil-packed sardines taste rounder and richer; water-packed are leaner and sharper. Smoked varieties add a resinous depth that makes them taste distinct from unsmoked tins.

How long do canned sardines last after opening?

Transfer them to a sealed container and refrigerate immediately - they keep for 1-2 days. Don't store opened sardines in the tin itself, as the exposed metal can affect flavor.

What Is Tabasco Sauce? [Taste, Uses & More]

April 2, 2026

That first drop lands on the tongue as pure vinegar brightness, then the heat rises - clean, fast, and gone almost as quickly as it arrived.

What Is Tabasco Sauce

Tabasco sauce doesn't build slowly the way chili pastes do; it hits and retreats, leaving a faint fermented tang behind.

If you've been reaching for it on eggs or in a Bloody Mary without fully understanding what you're working with, that's worth changing.

For cooks who also work with cayenne pepper swaps that work or experiment with making honey sriracha snack mix at home, Tabasco occupies its own lane - thinner, more acidic, and built on a fermentation process most hot sauces skip entirely.

QUICK SUMMARY

A vinegar-based hot sauce made from aged Tabasco peppers, distilled vinegar, and salt. Delivers sharp, fast heat with a fermented tang. Best as a finishing sauce, cocktail seasoning, or condiment on eggs and shellfish. Shelf life of 2-3 years after opening.

🌶️Flavor: Sharp vinegar tang, clean chili heat, fermented pepper notes
🍳Best Uses: Eggs, Bloody Marys, oysters, gumbo, marinades
🏭Origin: Avery Island, Louisiana - McIlhenny Company since 1868
🧴Texture: Very thin, pourable liquid with low-viscosity mouthfeel
📦Shelf Life: Unopened for years; peak flavor 2-3 years after opening
✅Dietary: Vegan, gluten-free, low-calorie - watch sodium on sensitive diets

What Is Tabasco Sauce?

Tabasco sauce is a vinegar-based hot sauce produced by the McIlhenny Company on Avery Island, Louisiana - a salt dome off the Gulf Coast where the peppers were first cultivated after the Civil War.

The original recipe uses only three ingredients: mashed Tabasco peppers, distilled vinegar, and salt.

What separates it from most grocery-shelf hot sauces is the aging process - the pepper mash sits in white oak barrels for up to three years before vinegar is blended in.

Understanding what makes hot sauce distinct as a category helps clarify where Tabasco fits - it's one of the oldest continuously produced American hot sauces, first bottled commercially in 1868.

The McIlhenny Company still uses Avery Island salt in production, and the iconic diamond-label bottle with its narrow neck and dropper-style opening hasn't changed much in over a century.

Tabasco also produces several sauce variants, including a thicker chipotle version, a milder green jalapeño sauce, and a habanero sauce rated much higher on the Scoville scale. When people say "Tabasco" without qualification, they mean the original red pepper sauce.

What Does Tabasco Sauce Taste Like?

tabasco sauce - What Is Tabasco Sauce
Sensory SnapshotStrong Intensity
👅 Flavor
bright vinegarclean heatfermented tangfruity pepper
✋ Texture
very thinslick
👃 Aroma
pungent vinegarfresh crushed pepper

The dominant note is distilled vinegar - present immediately and upfront. Behind it comes the chili heat, which registers between 2,500 and 5,000 Scoville Heat Units (moderate by hot sauce standards) and fades quickly rather than lingering.

The fermentation from barrel aging adds a subtle depth that straight vinegar-and-pepper blends lack.

Compared to sriracha, Tabasco is far thinner, sharper, and less sweet. Against thicker Louisiana-style sauces like Crystal or Frank's RedHot, it's more pungent and more vinegar-forward.

A bottle that's been open for two years will taste noticeably flatter - the pepper brightness dulls before the heat does.

Golden Rule
Use Tabasco as a finishing sauce, not a cooking base. The vinegar brightness that defines its flavor cooks off fast - add it late or at the table.

How to Use Tabasco Sauce

Tabasco's low viscosity makes it a drizzle-and-stir sauce rather than a spread. A few drops go a long way, and the delivery mechanism - that narrow-neck bottle - is intentional.

Most applications use two to five drops, not a heavy pour.

How Tabasco Sauce Is Used
MethodBest ForTip
🥗 Raw / FinishingEggs, raw oysters, shrimp, grilled fishAdd at the table to keep the vinegar sharp and heat intact
🍹 Stirred InBloody Marys, vinaigrettes, aioli, marinadesBalance acidity with other ingredients before tasting - it compounds fast
🍲 Late-Stage CookingGumbo, jambalaya, bean stews, braisesAdd in the final five minutes to preserve pepper flavor
🧈 BlendedCompound butters, dips, sandwich spreadsMix into softened butter or mayo - fat carries heat without diluting it

In Louisiana Creole and Cajun cooking, Tabasco appears at the table as often as in the pot - gumbo and red beans get a personal dose rather than a cook's measure.

Southern seafood preparations lean on it as a finish over oysters or clams, where the vinegar cuts through brine.

Mexican-American fusion applications use it in citrus-forward dishes like ceviche-style preparations, where its acidity reinforces the lime cure.

Pairing choices matter more than people expect. Tabasco works cleanly with eggs, raw shellfish, tomato-based dishes, aged cheddar, pickled foods, and butter-based spreads. It clashes in delicate dairy desserts and milk-based custards - the acid destabilizes the protein and the heat has nowhere to balance against sweetness.

If you find yourself without a bottle, guides on swapping out tabasco sauce or finding replacements for hot sauce more broadly can point you to workable alternatives.

Try It In
🍶Japanese Steakhouse Yum Yum SauceA dash of Tabasco sharpens the creamy base without overpowering it→🍅Roasted Garlic Marinara SauceA few drops late in cooking add heat without extra thickness→🧈Roasted Garlic Béarnaise SauceTabasco's vinegar brightness lifts the buttery richness of béarnaise→

How to Buy and Store Tabasco Sauce

Buy in clear glass bottles - the translucent packaging lets you check the color before purchasing. A fresh bottle shows bright, translucent red.

Pass on anything with a dark brown tint or visible cloudiness, both signs of age or improper storage.

  • ✅ Sealed bottle - check for an unbroken seal and the McIlhenny diamond label on paper (not a sticker)
  • 🔴 Color check - bright red means fresh pepper mash; brownish red means flavor has faded
  • 👃 First-open sniff - should smell sharp and peppery; a dull or purely sour smell indicates age
  • 📦 Before opening - store upright in a cool, dark pantry; no refrigeration needed
  • ❄️ After opening - pantry is fine with the cap tight; refrigerator extends color and brightness

An opened bottle stays at peak flavor for around two to three years - storing tabasco sauce correctly extends that window noticeably.

If your Bloody Mary mix calls for celery salt and you're out, knowing replacements for celery salt rounds out the prep without a store run.

Watch Out
Sodium adds up fast with Tabasco. A single teaspoon contains roughly 35mg - small per drop, but significant if you're shaking it freely over every meal.

Start Here If You're New to Tabasco

Two drops on eggs is the right entry point. It shows you the vinegar-heat balance without overwhelming the dish.

From there, a splash in a Bloody Mary and a drizzle over raw oysters will cover the full range of what this sauce does well.

Shortcut
Already have a bottle? Stir two drops into softened butter and spread it on grilled corn or shrimp. It's the fastest way to see what Tabasco adds to fat-based applications.

Avoid using it as a cooking base - the vinegar burns off too quickly under heat, leaving thin heat with none of the flavor complexity. Keep it finishing-side, and it punches well above its simple three-ingredient formula.

Frequently Asked Questions

Is Tabasco sauce fermented?

Yes - the Tabasco pepper mash is aged in white oak barrels for up to three years before vinegar is added. That barrel time creates the subtle fermented tang that distinguishes it from unaged hot sauces. The fermentation happens in the mash stage, not after bottling.

How spicy is Tabasco sauce on the Scoville scale?

The original red sauce rates between 2,500 and 5,000 Scoville Heat Units - moderate heat, similar to a jalapeño. The habanero variant jumps to around 7,000 SHU, while the green jalapeño sauce sits closer to 600 SHU.

Can Tabasco sauce go bad?

It won't spoil in a way that makes it unsafe - the vinegar and salt content prevent bacterial growth. However, an opened bottle past two to three years will taste noticeably flat and dull, with faded pepper character.

What is the difference between Tabasco and other hot sauces?

Tabasco uses only three ingredients and relies on barrel fermentation, giving it a cleaner, sharper profile than sauces with added garlic, sugar, or thickeners. Frank's RedHot is milder and less acidic; sriracha is thicker, sweeter, and garlic-forward.

How do you use Tabasco in cocktails?

Two to four drops in a Bloody Mary is standard - stir it in with the tomato juice before adding vodka so the heat distributes evenly. Its thin consistency blends without affecting texture, making it better suited to cocktails than thicker chili sauces.

Indian Chana Masala

April 2, 2026

You need 55 minutes and a heavy-bottomed pan. No overnight soaking required if you use canned chickpeas, no pre-made curry pastes, just straightforward spice layering.

Indian Chana Masala served on a plate

Chickpeas simmer in tomato-spice sauce while you prep rice or flatbread. The onions caramelize slowly to build sweetness that balances the heat from chili powder and garam masala.

This is what you make when you want budget-friendly vegetarian meals that taste like you spent the day cooking. Works for meal prep, weeknight dinners, or when you need something that reheats without losing flavor.

QUICK SUMMARY

Chana masala combines tender chickpeas with a thick, spiced tomato sauce that develops depth through proper onion caramelization and careful spice toasting. The key is simmering long enough to let flavors meld while keeping chickpeas intact, then adding acid last to avoid toughness.

⏱️Time Reality: 40 minutes active cooking, mostly hands-off simmering
🔥Critical First Step: Golden-brown onions take 10-12 minutes-don't rush this
⚠️Watch Out: Add lemon juice or amchur in final 5 minutes only, earlier makes chickpeas tough

Table of Contents

Toggle
  • Why This Recipe Works
  • What You'll Need
    • Ingredient Details
  • Ingredient Swaps
  • What to Serve With It
  • Store and Reheat
  • Frequently Asked Questions
  • Indian Chana Masala
    • Method 
    • Tried this recipe?

Why This Recipe Works

Rich mains need something to cut through, and bright seasonal vegetables do exactly that. We keep a batch ready for nights like this-quick assembly once you have the base spices toasted.

Quick Reference
⏱️
Prep Time
15 min
🔥
Cook Time
40 min
⏰
Total Time
55 min
🍽️
Servings
4 servings
📊
Difficulty
Medium
🏷️
Category
Main Dish
💡
Quick Tip
Cook chickpeas till tender, spice properly
🎯
Best For
Weeknight | Meal prep | Budget

Five things that make this work:

  • Golden onions build the base: Sautéing onions 10-12 minutes on medium heat until golden brown creates natural sweetness that balances the heat from chili powder and garam masala
  • Toasted spices release aroma: Toast cumin and coriander seeds 1-2 minutes on low heat before grinding or using ground versions-prevents bitterness and brings out essential oils
  • Low simmer keeps chickpeas intact: Simmer chickpeas 20-25 minutes at gentle heat so they soften without bursting or turning mushy, maintaining texture through sauce
  • Heavy pan prevents burning: Cook in heavy-bottomed pan to distribute heat evenly and avoid scorching the tomato-spice base during long simmering
  • Acid added last preserves tenderness: Stir in lemon juice or amchur powder in final 5 minutes only-earlier addition toughens chickpeas and prevents proper cooking
Golden Rule
Let cooked chana masala sit 5-10 minutes off heat before serving-flavors meld and sauce thickens slightly as it rests

What You'll Need

Ingredients for Indian Chana Masala

Shopping for this recipe takes one trip to any grocery store with a decent spice section. For something simple like gai, you need fresh herbs and citrus, but chana masala relies on dried spices you probably already have.

🫘
Chickpeas
  • 2 cans (15 oz each) chickpeas, drained and rinsed
  • or 1½ cups dried chickpeas, soaked overnight
🧅
Aromatics
  • 2 medium onions, finely diced
  • 3 medium tomatoes, pureed or diced
  • 1 tablespoon ginger, grated
  • 4 garlic cloves, minced
🌶️
Spices
  • 1 teaspoon cumin seeds or ground cumin
  • 1 tablespoon coriander powder
  • 1 teaspoon chili powder
  • 1 tablespoon garam masala
  • 1 teaspoon amchur powder or 2 tablespoon lemon juice
  • Salt to taste
🫙
Base
  • 3 tablespoon oil or ghee
  • 1 cup water

Ingredient Details

  • Chickpeas
    Canned chickpeas work for quick cooking but drain and rinse them first to remove excess sodium-dried chickpeas give firmer texture if you have time to soak overnight
  • Onions
    Dice onions finely so they break down into the sauce during caramelization-larger chunks won't melt properly and create uneven texture
  • Tomatoes
    Puree tomatoes in blender for smooth sauce or dice them for chunkier texture-fresh tomatoes add brightness but canned works in winter
  • Garam Masala
    Add garam masala in two stages: half during cooking for depth, half at end for aromatic punch-store-bought works but fresh-ground is more fragrant
  • Amchur Powder
    Dry mango powder adds tangy sourness without liquid-if using lemon juice instead, start with 1 tablespoon and add more to taste at the very end
  • Oil
    Use neutral oil for standard version or ghee for richer, more authentic flavor-ghee adds nutty depth but isn't essential
  • Cumin Seeds
    Toast whole cumin seeds briefly before grinding or use pre-ground cumin if you're short on time-toasted seeds have stronger aroma but ground is easier

Ingredient Swaps

Spice cabinets vary wildly, so flexibility here matters. Rich mains need something to cut through, and a simple homemade salad does exactly that-we keep a batch ready for nights like this when you want fresh contrast without extra cooking.

Four swaps that work:

  • Amchur powder → lemon juice: Use 2 tablespoons fresh lemon juice for tangy brightness-adds moisture instead of dry fruit flavor but tastes nearly identical (budget swap)
  • Dried chickpeas → canned chickpeas: Drain and rinse two 15-ounce cans to skip soaking overnight-softer texture but cuts 8+ hours of prep time (method swap)
  • Garam masala → curry powder: Substitute equal amount for milder, less complex spice profile-different flavor but still aromatic and Indian-inspired (budget swap)
  • Oil → ghee or coconut oil: Swap 1:1 for richer aroma and deeper flavor-ghee adds dairy notes, coconut oil keeps it vegan with slight sweetness (dietary swap)

Canned Chickpeas

Works for: Quick weeknight cooking, last-minute meals, when you forgot to soak beans overnight

Skip if: You want firmer texture, prefer less sodium, have time for overnight soaking and pressure cooking

Dried Chickpeas

Works for: Meal prep, firmer bite, controlling sodium levels, making large batches for freezing

Skip if: You need dinner in under an hour, don't have pressure cooker or time for long simmering

Ground Spices Only

Works for: Faster cooking, no spice grinding equipment needed, simpler ingredient list

Skip if: You want maximum aroma, have whole spices on hand, prefer traditional toasted flavor

Toasted Whole Spices

Works for: Deeper flavor, traditional method, aromatic intensity, special occasions

Skip if: You're short on time, don't have grinder or mortar-pestle, prefer convenience

Instructions

Total time breaks down to 15 minutes prep and 40 minutes mostly hands-off cooking. The this dip works best when it hits the table at the same time as the main-for a version that comes together quickly, try something creamy to dunk.

  1. Sauté onions until golden: Heat 3 tablespoons oil or ghee in heavy-bottomed pan over medium heat, add diced onions, cook 10-12 minutes stirring occasionally until golden brown and edges start caramelizing-this builds sweetness that balances spices
  2. Toast spices and add aromatics: Add cumin seeds (or ground cumin), coriander powder, and chili powder to pan, stir 1-2 minutes until fragrant, then add minced garlic and grated ginger, cook 1 minute more until raw smell disappears
  3. Build tomato base: Stir in pureed or diced tomatoes, cook 8-10 minutes on medium-low heat until tomatoes break down and oil separates from mixture-sauce should thicken and deepen to orange-brown color
  4. Simmer chickpeas in sauce: Add drained chickpeas, 1 cup water, salt, and half the garam masala, bring to gentle simmer, cover partially, cook 20-25 minutes on low heat until chickpeas are tender with slight bite and sauce coats back of spoon
  5. Finish with acid and rest: Stir in remaining garam masala and amchur powder (or lemon juice), cook 2-3 minutes uncovered, turn off heat, let sit 5-10 minutes-mash about ¼ of chickpeas lightly with spoon if you want thicker sauce
Watch Out
Don't add lemon juice or amchur before the final 5 minutes-acid added too early prevents chickpeas from softening properly and creates tough texture

What to Serve With It

Fry adds the contrast this plate needs, but timing matters. For a version that comes together quickly, easy fry side hits the table at the same time as chana masala-planning your plate around complete coney dogs meal ideas helps when you need the full dinner sorted.

Side Dish Prep Why It Works How to Serve
Basmati Rice Easy Neutral grain soaks up spicy sauce without competing for flavor Cook rice while chickpeas simmer, serve hot in shallow bowls with chana masala ladled over top
Plain Naan Easy Soft flatbread for scooping sauce and chickpeas directly from plate Warm naan in dry skillet 30 seconds per side, tear into pieces, stack on side of plate
Cucumber Raita Easy Cool yogurt contrast cuts heat and adds creamy texture balance Mix grated cucumber with plain yogurt, salt, cumin powder, serve chilled in small bowl
Jeera Rice Medium Cumin-scented rice adds aromatic layer without overwhelming spices Toast cumin seeds in ghee, add rice and water, cook covered until fluffy, fluff with fork before serving
Roasted Vegetables Medium Adds heartiness and textural variety to vegetarian meal Toss cauliflower or carrots with oil, roast at 425°F for 25 minutes, season with salt and serve hot

Three ways to serve it:

  • For weeknight meals: Serve over basmati rice with plain naan on the side for scooping-add simple green salad dressed with lemon juice and olive oil for fresh crunch
  • For meal prep: Pack chana masala in containers with separate compartment of rice-reheat both together, top with fresh cilantro and squeeze of lemon before eating
  • For hosting: Plate jeera rice first, ladle chana masala over top, garnish with cilantro and serve garlic naan and mango chutney in small bowls on the side
Shortcut
Store-bought naan works perfectly-warm it in a dry skillet for 30 seconds per side right before serving instead of making flatbread from scratch

Store and Reheat

Chana masala tastes better the next day after flavors meld overnight in the fridge. Store in airtight container up to 4 days or freeze individual portions up to 3 months-the sauce thickens as it cools so add splash of water when reheating.

Method Time Best For
🍳 Stovetop 5-7 min Even reheating that preserves texture-add 2-3 tablespoons water, heat on medium-low until warmed through
📦 Microwave 2-3 min Quick reheating single portions-cover with damp paper towel, stir halfway through, heat in 1-minute intervals
🔥 Oven 10-12 min at 350°F Reheating larger portions for meal prep or hosting-cover with foil, add splash of water before heating

For best results when storing:

  • Cool chana masala completely at room temperature before transferring to storage containers-hot food creates condensation that dilutes sauce
  • Store rice separately from chana masala so rice doesn't absorb too much liquid and turn soggy overnight
  • Freeze in single-serving portions using freezer-safe containers or bags-thaw in fridge overnight before reheating for best texture
  • Add fresh lemon juice or cilantro after reheating instead of before storing-citrus and herbs lose brightness during storage
  • Reheat only the amount you plan to eat-repeated heating and cooling breaks down chickpeas and makes them mushy

Frequently Asked Questions

Can I use canned chickpeas instead of dried for chana masala?

Yes, canned chickpeas cut cooking time significantly-drain and rinse two 15-ounce cans before adding to sauce. They'll be slightly softer than dried chickpeas but still work well, just reduce simmering time to 15-20 minutes instead of 25 minutes.

How should I store and reheat leftover chana masala?

Store in airtight container in fridge up to 4 days or freeze up to 3 months. Reheat on stovetop over medium-low heat with 2-3 tablespoons water added to loosen sauce-microwave works for single portions but stovetop gives more even heating.

What is the best way to know when chickpeas are fully cooked in chana masala?

Press a chickpea between your fingers-it should smash easily but still hold shape without turning to mush. The texture should be tender with slight bite, not crunchy or falling apart completely.

Why does my chana masala taste bitter and how can I fix it?

Burnt spices or overtoasted cumin create bitterness-if this happens, add pinch of sugar and extra lemon juice to balance. For prevention, toast spices on medium-low heat for only 1-2 minutes and watch them closely.

How can I scale chana masala recipe for larger groups?

Double or triple all ingredients proportionally but cook in larger pot or Dutch oven to maintain proper heat distribution. Simmering time stays roughly the same-just check chickpeas for tenderness at 20-minute mark regardless of batch size.

Indian Chana Masala served on a plate

Indian Chana Masala

No ratings yet
Indian Chana Masala features tender chickpeas simmered in a thick, spiced tomato sauce enriched by golden caramelized onions and toasted spices. Slow simmering melds flavors while acid is added last to preserve chickpea tenderness, making it a flavorful and budget-friendly vegetarian main.
Print Recipe Pin Recipe
Prep Time 15 minutes mins
Cook Time 40 minutes mins
Total Time 55 minutes mins
Servings: 4 servings
Course: Main Dish
Cuisine: Indian
Ingredients Equipment Method Notes

Ingredients
  

  • 2 cans chickpeas 15 oz each, drained and rinsed
  • 2 medium onions finely diced
  • 3 medium tomatoes pureed or diced
  • 1 tablespoon ginger grated
  • 4 cloves garlic minced
  • 1 teaspoon cumin seeds or ground cumin
  • 1 tablespoon coriander powder
  • 1 teaspoon chili powder
  • 1 tablespoon garam masala use half during cooking and half at the end
  • 1 teaspoon amchur powder or use 2 tablespoon lemon juice added at the end
  • 3 tablespoon oil or ghee
  • 1 cup water

Equipment

  • Heavy-bottomed pan Used for even heat distribution and to prevent burning during simmering

Method
 

  1. Heat 3 tablespoons oil or ghee in a heavy-bottomed pan over medium heat. Add diced onions and cook for 10-12 minutes, stirring occasionally, until golden brown and edges start to caramelize. This develops natural sweetness that balances spices.
    2 medium onions, 3 tbsp oil
  2. Add cumin seeds (or ground cumin), coriander powder, and chili powder to the pan. Stir for 1-2 minutes until fragrant. Then add minced garlic and grated ginger, cooking 1 minute more until raw smell disappears.
    1 tsp cumin seeds, 1 tbsp coriander powder, 1 tsp chili powder, 1 tbsp ginger, 4 cloves garlic
  3. Stir in pureed or diced tomatoes and cook on medium-low heat for 8-10 minutes until tomatoes break down and oil separates from the mixture, forming a thick, orange-brown sauce.
    3 medium tomatoes
  4. Add drained chickpeas, 1 cup water, salt to taste, and half the garam masala. Bring to a gentle simmer, cover partially, and cook on low heat for 20-25 minutes until chickpeas are tender with slight bite and sauce coats the back of a spoon.
    2 cans chickpeas, 1 cup water, 1 tbsp garam masala
  5. Stir in the remaining garam masala and amchur powder or lemon juice. Cook uncovered for 2-3 minutes, then turn off heat and let sit 5-10 minutes. Lightly mash about one-quarter of the chickpeas with a spoon if you want a thicker sauce.
    1 tbsp garam masala, 1 tsp amchur powder

Notes

  • Caramelize onions slowly to build natural sweetness balancing spicy heat.
  • Toast whole cumin seeds briefly to release aroma but avoid burning to prevent bitterness.
  • Add acid (lemon juice or amchur) only in the last 5 minutes to keep chickpeas tender.

Tried this recipe?

Let us know how it was!

What Is Salsa? [Taste, Uses & More]

April 2, 2026

Bright acidity hits first - the citrus-sharp edge of lime cutting through ripe tomato, with cilantro's green freshness right behind it.

What Is Salsa

That's the opening note of a well-made salsa, and whether it's making pico de gallo at home or a blended, fire-roasted sauce, the sensory range is wider than most people expect.

Salsa isn't one thing; it's a whole family of condiments, and knowing the differences changes how you cook with them.

For anyone used to reaching for hot sauce swaps that work in a pinch, fresh salsa opens a different lane entirely.

QUICK SUMMARY

Salsa is a fresh or cooked Mexican condiment built on tomatoes, chilies, onion, cilantro, and lime. Flavor ranges from bright and tangy in raw pico de gallo to smoky and complex in roasted or blended versions. Use it as a dip, topping, or cooking base.

🌶️Flavor: Tangy, citrusy, herbaceous, with spicy heat that varies by chili
🍅Texture: Chunky and crisp fresh, smooth and saucy when blended or cooked
🫙Shelf Life: Fresh: 3-7 days; opened jar: 2-3 weeks; sealed: months
🌮Best Uses: Chip dip, taco topping, braising base, grain bowls, eggs
🛒Buy It: Look for bright color, visible herb flecks, and a clean tomato scent

What Is Salsa?

Salsa is a condiment from Mexico and Mesoamerica built on a core of tomatoes, chilies, onion, cilantro, and lime. The word simply means "sauce" in Spanish, and the category covers everything from uncooked relishes to long-simmered red cooking sauces.

Pico de gallo - also called salsa fresca or salsa cruda - is the chunky, raw version: hand-chopped ingredients, no heat applied. Salsa roja is the cooked or blended red-tomato version, while salsa verde swaps tomatoes for tomatillos and brings a sharper, slightly more tart profile. Each style has its own texture and intensity.

The chilies used shift the whole character of the sauce.

Jalapeños give moderate, grassy heat; serranos push hotter; habaneros tip into serious fire. Chili's shelf life also affects when to use fresh versus dried, since dried and roasted chilies carry deeper, earthier notes into the salsa.

The onion base matters too - white onion is standard in Mexican versions, though swapping out cipollini onion can soften the sharpness when milder flavor is the goal.

What Does Salsa Taste Like?

salsa - What Is Salsa

Raw salsa lands bright and sharp. The tomato gives a sweet-acid backbone, lime juice pushes the acidity forward, and cilantro adds an unmistakable green, slightly soapy freshness that anchors the whole thing.

Roasted and cooked versions read differently. Charring the tomatoes and chilies before blending introduces a mild smokiness that echoes low-heat barbecue - fuller and rounder than the raw version, with less citrus snap and more depth.

Think of it as the difference between a fresh tomato and a slow-roasted one.

Sensory SnapshotModerate Intensity
👅 Flavor
tangycitrusyherbaceousspicy heat
✋ Texture
chunky-crisp (raw)smooth (blended)
👃 Aroma
fresh citrus-limesmoky (roasted)

Heat level shifts as salsa sits. Fresh jalapeño loses some sharpness after a day in the fridge, so a newly made pico de gallo will sting more than the same batch 24 hours later.

How to Use Salsa

Salsa covers more ground than most people use it for. The obvious moves - chip dip and taco topping - are just the starting point.

How Salsa Is Used
MethodBest ForTip
🥗 Raw (Pico de Gallo)Chip dip, taco topping, fish and shrimp, grain bowlsUse within 2 days for maximum crunch and acidity
🔥 Blended & CookedBraised meats, huevos rancheros, rice basesSimmer briefly after blending to concentrate and mellow the flavor
🌑 Roasted / CharredSmoky sauces, enchilada bases, grilled meat companionChar tomatoes and chilies under a broiler or dry skillet before blending

Stirred into scrambled eggs or spooned over huevos rancheros, salsa adds acidity where dairy might otherwise flatten everything. Grilled fish - tilapia or mahi-mahi especially - pairs well with the raw version because the lime and cilantro echo typical fish marinades without competing.

For braised meats, a cooked salsa roja works as the braising liquid itself, giving the dish its structure and heat.

The role guacamole plays alongside salsa is worth noting - the fat and creaminess of avocado balances salsa's acidity, which is why the two appear together so consistently.

Black beans, queso fresco, and corn tortillas round out the classic pairings.

When you're missing an ingredient entirely, knowing the salsa swaps that work keeps a recipe on track without a special trip to the store.

Golden Rule
Match the salsa to the cooking method: raw pico de gallo for fresh-served dishes, cooked or roasted salsa for anything going into heat.
Try It In
🫙Roasted Tomatillo Salsa VerdeThe tart, fire-roasted tomatillo version — sharper and greener than salsa roja→🫒Italian Olive and Capers Salsa VerdeA briny, herb-forward riff on salsa verde — not Mexican, but shows the concept's range→🌶️Mexican Salsa RojaClassic blended red salsa, cooked down for depth and a smooth pour→

How to Buy and Store Salsa

Fresh salsa from a deli case should smell clean and bright - if the tomato scent is muted or the herbs look grey, pass on it. Pico de gallo is best bought within a day or two of preparation; it deteriorates faster than blended or jarred versions.

Watch Out
Avoid jarred salsa with swollen lids, off odors, or visible separation beyond normal settling - these are signs of spoilage, not just age.

For jarred and canned salsa, check the expiration date and inspect the lid for any bulging. Sodium levels in store-bought versions can be high - something worth scanning on the label if that matters to you.

  • 🫙 Unopened jar or can - store in a cool pantry; lasts several months up to the printed date
  • ❄️ Opened jarred salsa - refrigerate immediately in an airtight container; good for 2-3 weeks
  • 🍅 Fresh or homemade salsa - refrigerate and use within 3-7 days; acidity fades noticeably after day four

Watch for salsa spoilage signs like off-smell, liquid separation, or color changes before you assume it's still good. If you need to stretch ingredients further, knowing the replacements for canned tomato also helps when building a cooked salsa from scratch.

Start With Pico, Then Branch Out

If salsa is new territory, raw pico de gallo is the clearest entry point - fewest ingredients, most transparent flavors, and no cooking required. From there, a blended salsa roja shows how heat changes the profile entirely.

Best Pick
For first-time homemade salsa, a simple salsa roja - roasted tomatoes, one jalapeño, half an onion, blended and briefly simmered - gives the clearest sense of what cooked salsa can do.

Anyone comfortable with both styles can start using salsa verde as a cooking sauce rather than just a condiment. That's where the real range opens up.

Frequently Asked Questions

What is salsa made of?

Most salsas start with tomatoes, chilies, onion, cilantro, and lime juice. The exact ingredients shift by style - salsa verde replaces tomatoes with tomatillos, while some regional versions add roasted garlic or dried chilies for depth.

How long does homemade salsa last?

Refrigerated in an airtight container, homemade salsa lasts 3-7 days. Cooked versions tend to hold closer to the 7-day end; raw pico de gallo is best within 3-4 days before texture and brightness fade.

Can you freeze salsa?

Yes, cooked and blended salsas freeze well for up to 3 months. Raw pico de gallo doesn't freeze well - the tomato and onion turn watery and soft when thawed, losing their crunch entirely.

What is the difference between salsa and salsa verde?

Standard salsa roja is tomato-based and ranges from mild to hot. Salsa verde uses tomatillos instead, giving it a tarter, slightly more herbal flavor and a distinctly green color even after cooking.

Is salsa healthy?

Fresh salsa is low in calories and provides vitamin C, vitamin A, and potassium from tomatoes and lime. Store-bought versions can be high in sodium, so checking the label matters if you're watching intake.

How Long Does Swiss Chard Last? [Storage Guide]

April 2, 2026

Most cooks wash swiss chard the moment they get home, wrap it soaking wet, and wonder why it turns slimy within two days.

Can You Freeze Swiss Chard

That single habit cuts shelf life nearly in half - and it's easy to fix once you know what chard actually needs to stay crisp.

Understanding the role swiss chard plays in everything from braised sides to grain bowls makes proper storage worth the small effort.

Unlike replacements for collard green or swapping out beet greens, chard has a dual structure - tender leaves and dense, crunchy stems - and each part ages at a different pace.

QUICK SUMMARY

Raw swiss chard keeps 3-7 days in the fridge, unwashed, in a perforated bag with a lightly damp paper towel. Blanched and frozen, it lasts 10-12 months. Store away from ethylene-producing fruit and never wash before refrigerating.

🧊Fridge (raw): 3-7 days unwashed in a perforated bag at 34-38°F
🍳Fridge (cooked): 3-5 days in an airtight container; cool quickly first
❄️Freezer (blanched): 10-12 months; blanch stems and leaves separately before freezing

How Long Does Swiss Chard Last?

Raw swiss chard is more perishable than most cooks expect. Whole bunches stored correctly at 34-38°F last 3-7 days, but the tender leaves start wilting well before the thick ribs show any decline.

Swiss Chard Shelf Life
MethodStateDurationNotes
🧊 FridgeRaw3-7 daysWhole bunch in perforated bag at 34-38°F; leaves wilt first, ribs last
🧊 FridgeCooked3-5 daysAirtight container; cool quickly before refrigerating
❄️ FreezerBlanched, chopped10-12 monthsStems and leaves blanched separately; freeze flat in labeled bags
🏠 CounterRaw1 day maxCool, shaded spot only; warm pantry rapidly degrades both leaves and ribs

The wide fridge range - three days versus seven - comes down almost entirely to how the bunch was handled at purchase. Damaged outer leaves, excess moisture, and proximity to ethylene-producing fruit all push chard toward the shorter end of that window.

Cooked chard compresses and loses surface area, so it actually holds up reasonably in the fridge if cooled fast. The risk there is pooled liquid at the bottom of the container accelerating breakdown overnight.

How to Store Swiss Chard

Don't wash it first. That step alone is the most common reason raw chard slimes out before the week is up - surface moisture trapped in a bag creates the exact conditions bacteria need.

Golden Rule
Wash swiss chard only right before you cook or eat it. Storing it wet - even slightly damp - dramatically shortens shelf life and invites slime.

Here's how to handle each storage scenario correctly:

  • 🌿 Fridge (raw bunch) - Trim any damaged outer leaves at home, leave stems intact. Wrap loosely in a lightly damp paper towel, then slip into a perforated produce bag or breathable container. Keep in the crisper drawer at 34-38°F.
  • 🧅 Fridge (prepped stems and leaves separately) - Separate thick stems from leaves if you plan to use them on different days. Stems keep longer and can go into their own bag; wrap leaves more carefully since they're more fragile.
  • 🍲 Fridge (cooked) - Cool the chard quickly before sealing in an airtight container. Squeeze out excess liquid first to slow breakdown.
  • 🚫 Away from ethylene sources - Keep swiss chard away from apples, pears, bananas, and tomatoes. Those fruits emit ethylene gas, which hastens wilting regardless of temperature.
Counter storage is only viable for one day in a cool, shaded spot - and that's for display, not practical storage.

Can You Freeze Swiss Chard?

Yes, and it holds exceptionally well for up to 10-12 months when blanched properly. Freezing raw without blanching is a real mistake here - it causes enzyme activity to continue in the freezer, which leads to poor texture, color loss, and diminished nutrients.

The kale spoilage signs to watch for before freezing apply to chard too: discard any leaves that are already slimy or blackened before they go into the freezer.

Watch Out
Never skip blanching before freezing. Raw frozen chard turns gray-green and mushy, and no amount of cooking rescues the texture.
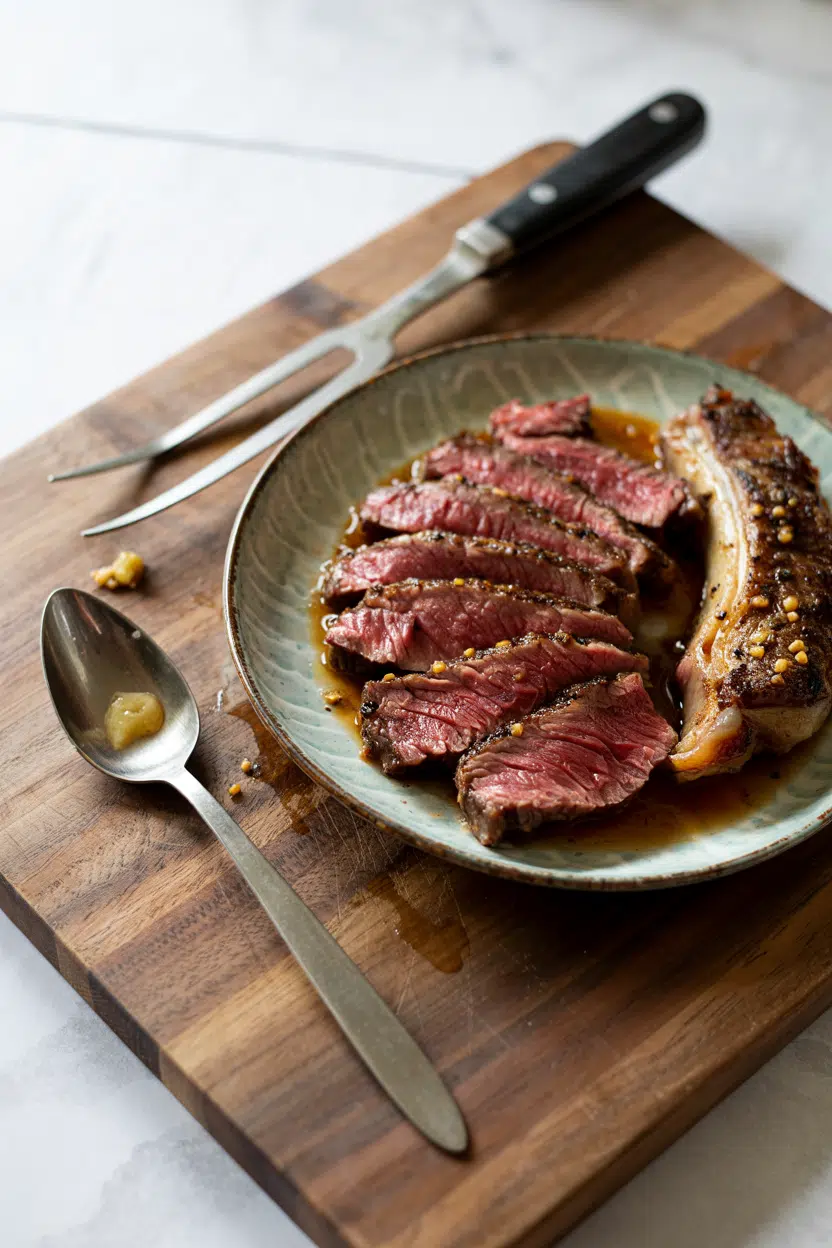
  1. Trim and separate Cut stems away from leaves and chop each into manageable pieces.
  2. Blanch separately Boil leaves for 1-2 minutes and stems for 2-3 minutes - stems need the extra time.
  3. Ice bath Shock both immediately in ice water for the same duration to stop cooking.
  4. Drain and dry Drain well, then squeeze out as much water as possible and pat dry.
  5. Pre-freeze flat Spread on a baking tray and freeze until solid before bagging.
  6. Bag and label Transfer to labeled freezer bags, remove excess air, and seal.

Frozen chard thaws well in the refrigerator over several hours, or you can add it directly to soups, stews, and sautés from frozen.

Expect leaves to become soft and limp after thawing - this isn't suitable for raw salads, but works well in any cooked application.

Signs Swiss Chard Has Gone Bad

Chard gives clear signals before it becomes a food safety issue. Catching them early means you can sometimes salvage the stems even when the leaves have turned.

Signs It's Gone Bad
👀
VisualSlimy or translucent patches on leaf surfaces · Dark brown or blackened ribs and veins · Yellowing or desiccated crispy leaf edges
👃
SmellSour or fermented odor · Earthy rot smell concentrated near the stems
✋
TextureMushy, waterlogged stems · Leaves that collapse to a gelatinous feel when touched

Slime, blackening, or a sour smell are all discard signals - no cooking step makes spoiled chard safe. Yellowed, crispy edges on otherwise firm chard are purely a quality issue, not a safety one, and that chard is still usable if the rest checks out.

Keeping Swiss Chard Fresh Longer

A few targeted habits make a meaningful difference in how long a bunch holds up.

If you run out before the week ends and need a backup, browsing swiss chard swaps that work gives you solid leafy green options that store similarly.

  • Pull damaged leaves at purchase - Removing outer leaves with brown spots or slime immediately stops decay from spreading inward.
  • Use damp, not wet - A lightly damp paper towel maintains the humidity chard needs without creating the pooled moisture that causes slime.
  • Pre-separate stems from leaves - If you know you'll use them on different days, split them at home so each part gets the handling it needs.
  • Plan your cook - Chard fits naturally into pasta, egg dishes, and grain bowls; checking [pairing ideas for swiss chard](https://forkliftkitchen.com/what-to-serve-with-swiss-chard/) before shopping helps you plan a week that actually uses the full bunch.
Shortcut
Blanch a whole bunch on the weekend, freeze in portion-sized bags, and skip the weekly freshness race entirely. Frozen chard is ready for weeknight cooking in minutes.

Frequently Asked Questions

Can you freeze swiss chard without blanching?

Technically yes, but the results are poor. Enzymes remain active in raw frozen chard, causing gray discoloration, mushy texture, and nutrient loss. Blanching takes under five minutes and makes a significant difference in quality.

Do swiss chard stems last longer than leaves?

Yes. The thick, dense ribs hold moisture and structure longer than the thin leaf tissue. Storing stems and leaves separately in the fridge lets you use each part at its peak.

What temperature should swiss chard be stored at?

Store swiss chard at 34-38°F - the coldest section of a standard refrigerator crisper drawer. Temperatures above 40°F accelerate wilting and bacterial growth significantly.

Can you eat swiss chard that's a little slimy?

No. Slime on leaves or stems indicates bacterial breakdown - cooking does not make it safe. Discard any portion showing slime and inspect the rest carefully before using.

How do you revive wilted swiss chard?

Submerge wilted chard in a bowl of ice water for 15-30 minutes. The leaves often recover enough crispness for cooking, though heavily wilted chard won't return to salad quality.

What Is Sirloin Steak? Taste, Uses & Cooking Tips

April 2, 2026

You spot it at the butcher counter somewhere between the ribeye and the rump - a thick, deep-red steak with a thin band of fat along one edge and almost no marbling running through the muscle.

What Is Sirloin Steak

That's sirloin steak, and it's one of the most straightforward beef purchases you'll make, provided you know which end of the loin you're buying from.

If you already know the taste of flank steak, sirloin lands in familiar territory - lean, beefy, and built for high heat.

QUICK SUMMARY

Sirloin steak is a lean, moderately tender beef cut from the rear back of the cow. Top sirloin is the go-to for pan-searing and grilling; bottom sirloin suits stir-fries and kebabs. Beefy, savory flavor with a clean sear. Best cooked to medium-rare over high heat.

🥩Flavor: Bold beefy umami, light nuttiness from sear, mild savory sweetness
🔥Best Method: High-heat pan-sear or direct grill, finished to medium-rare
🛒Buying Tip: Even thickness, fine-grain muscle, small marbling specks, no gray color
❄️Shelf Life: Raw 3-5 days refrigerated; frozen up to 12 months in airtight wrap
🍽️Pairs With: Chimichurri, garlic herb butter, charred peppers and onions, mashed potatoes

What Is Sirloin Steak?

Sirloin steak comes from the rear back portion of the cow, sitting just ahead of the rump and behind the short loin. It's divided into two subprimal cuts - top sirloin and bottom sirloin - that behave quite differently at the butcher and in the pan.

Top sirloin is the leaner, more tender of the two. It has fine-grain muscle tissue, minimal connective tissue, and a narrow fat cap that crisps up well under heat.

Bottom sirloin is broader and works harder in the animal, making it chewier and better suited to thin slicing or cubing.

The sirloin tip - sometimes grouped here - is technically part of the round but sold alongside sirloin cuts at many counters.

You may also see this cut labeled simply as "sirloin steak" in American and British supermarkets, where standardization varies.

Compared with cuts like NY strip or ribeye, sirloin has less intramuscular fat - which means the flavor profile leans clean and savory rather than rich and fatty.

For a closer look at how sirloin stacks up against another lean cut, comparing tri tip steak vs sirloin options covers the key differences in structure and cooking behavior.

What Does Sirloin Steak Taste Like?

sirloin steak - What Is Sirloin Steak

Sirloin delivers a direct, beefy flavor - straightforward umami without the buttery richness that ribeye brings. The lean muscle reads as clean and savory, with a mild background sweetness that comes through most clearly when the steak is cooked to medium-rare.

Searing activates a light, nutty note across the crust that contrasts well with the interior's softer beef flavor. That crust matters: without it, sirloin can taste flat.

Sensory SnapshotModerate Intensity
👅 Flavor
beefy umamilean savorymild sweetnesslight nuttiness
✋ Texture
firmyielding when sliced across grain
👃 Aroma
toasty searclean beef

Texture changes sharply with doneness. Cook past medium and the lean muscle tightens fast, leaving the steak noticeably chewy - more so than a fattier cut that has marbling to compensate.

Slicing against the grain at serving fixes most remaining chew.

Golden Rule
Always slice sirloin against the grain. The muscle fibers run long - cutting with them leaves the steak tough regardless of how well you cooked it.

How to Use Sirloin Steak

Top sirloin handles most jobs you'd ask of a steak. It holds up to a hard sear, grills cleanly over direct heat, and slices well for plated meals or cold applications like steak salads. Bottom sirloin, being chewier, does better when cut thin for stir-fries or fajitas, or cubed for kebabs where smaller pieces benefit from marinade penetration.

For side dish ideas, sides for sirloin steak runs through pairings that balance the cut's lean profile, from roasted potatoes to bright slaw.

For a different angle, the same logic that works for sides for skirt steak applies here - bold, acidic accompaniments offset the savory beef cleanly.

How Sirloin Steak Is Used
MethodBest ForTip
🔥 Pan-Sear + OvenThick top sirloin steaks, steak platesSear 2-3 min per side, finish at 400°F to internal temp of 130-135°F
🌡️ Direct GrillWhole sirloin steaks, asado-styleSeason with coarse salt only; grill over high heat, rest 5 minutes
🥢 Thin-Slice Stir-FryBottom sirloin, fajitas, Asian stir-friesFreeze 20 min before slicing for cleaner, thinner cuts
🧄 Marinate + BroilCarne asada variants, leaner skirt-style prepAcid-based marinades (citrus or wine) for 2-4 hours max; longer softens texture
🍢 Cube for KebabsLeaner beef kebabs, stewsCut into 1.5-inch cubes; don't overcrowd the skewer

Chimichurri is the pairing that earns its place here more than any sauce. Its acidity and herb sharpness cut through the savory fat on the crust and brighten the lean interior. Garlic herb compound butter works differently - it melts into the sear and adds richness the cut lacks on its own.

American barbecues and British pub steak dinners both treat sirloin as a weeknight workhorse. In Mexican cooking, carne asada sometimes uses top sirloin when skirt or flank isn't available, marinated in citrus and grilled fast over wood or charcoal.

Try It In
🥣Japanese Steakhouse Yum Yum SauceA creamy, tangy dipping sauce that pairs cleanly with pan-seared sirloin→🧄Air Fryer Garlic Butter Steak TipsUses cubed sirloin-style beef with a garlic butter finish — fast and reliable→🥗Grilled Steak and Blue Cheese SaladSliced grilled sirloin works perfectly here — lean enough not to overwhelm the greens→

How to Buy and Store Sirloin Steak

Look for even thickness -

ideally at least one inch - so the steak cooks at a consistent rate. Top sirloin should show fine-grain muscle with small specks of marbling distributed across the surface; avoid cuts with large white sinew bands or any grayish discoloration, which signals age or poor handling.

Watch Out
Gray or brown edges on raw sirloin mean oxidation has set in. A small surface patch is harmless, but widespread discoloration or an off smell means skip it.

Buy vacuum-sealed or butcher-cut within 2-3 days of the sell-by date.

At home, keep it refrigerated at 32-36°F and use within 3-5 days.

For longer storage, wrap tightly in plastic and then foil before freezing - the full guide on keeping sirloin steak fresh breaks down fridge and freezer timelines in detail.

Cooked sirloin holds 3-4 days in the fridge and reheats well sliced cold into salads or sandwiches.

Start Here With Sirloin

Top sirloin, pan-seared to medium-rare, is the clearest entry point. Season with coarse salt and cracked pepper, get the pan very hot, and slice against the grain before serving. That single method shows you what this cut does well.

Once you're confident there, thin-sliced bottom sirloin for fajitas or stir-fries opens up fast, weeknight territory. Understanding the role meat plays in broader cooking decisions can also help you decide when sirloin is the right pick versus a fattier or more tender alternative.

If the cut isn't available, replacements for sirloin steak lists the closest options by cooking method.

Frequently Asked Questions

Is sirloin steak tough?

Top sirloin is moderately tender when cooked to medium-rare and sliced against the grain. It toughens noticeably past medium because the lean muscle has little marbling to compensate. Bottom sirloin is chewier by nature and suits thin-sliced or cubed preparations.

Top sirloin vs ribeye - which is better?

Ribeye has more marbling, a richer flavor, and a softer texture. Top sirloin is leaner, cheaper, and has a cleaner beefy taste - better if you want less fat or are stretching the steak across a dish like a salad or stir-fry.

How long to cook sirloin to medium-rare?

For a 1-inch top sirloin in a hot cast iron pan, sear 2-3 minutes per side then pull at an internal temp of 130-135°F. Rest 5 minutes before slicing - carryover heat brings it to 135°F.

Can you grill bottom sirloin?

Yes, but it works best when marinated first and grilled fast over high heat, then sliced thin. Grilling it as a thick whole steak without prep tends to produce a chewy result that top sirloin handles more forgivingly.

Is sirloin healthy?

Top sirloin is relatively lean with high-quality protein, heme iron, zinc, and B12. It has less saturated fat than ribeye or NY strip, making it a reasonable choice for high-protein diets where total fat intake matters.

Crockpot Filipino Chicken Adobo

April 2, 2026

Slow-cooked chicken thighs in soy sauce and vinegar develop deep, tangy flavor without constant attention. The crockpot does the work while you handle other tasks.

Crockpot Filipino Chicken Adobo served on a plate

Bone-in thighs stay tender even after hours of cooking. The sauce reduces naturally and coats the meat without extra steps.

This is what we make for weeknight dinners when meal prep matters more than active cooking time.

QUICK SUMMARY

Crockpot Filipino Chicken Adobo cooks bone-in chicken thighs in soy sauce, vinegar, garlic, and bay leaves for 4-6 hours on low. The key is balancing the vinegar-to-soy ratio and browning the chicken first for better texture. Works for meal prep or weeknight dinners when you need hands-off cooking.
⏱️Timing: 15 min prep, 4-6 hours cook time, mostly unattended
🔥First move: Sear chicken 3-4 min per side before slow cooking
⚠️Watch out: Too much vinegar makes it sour - taste before serving, add sugar if needed

Table of Contents

Toggle
  • Why This Recipe Works
  • What You'll Need
    • Ingredient Details
  • Ingredient Swaps
  • What to Serve With It
  • Store and Reheat
  • Frequently Asked Questions
  • Crockpot Filipino Chicken Adobo
    • Method 
    • Tried this recipe?

Why This Recipe Works

Slow cooking breaks down the chicken without drying it out because bone-in thighs release collagen into the sauce. For a similar approach with different flavors, try this quick chicken dish that uses chocolate and spices instead of vinegar.

Quick Reference
⏱️
Prep Time
15 min
🔥
Cook Time
4-6 hours
⏰
Total Time
4 hrs 15 min to 6 hrs 15 min
🍽️
Servings
4-6 servings
📊
Difficulty
Easy
🏷️
Category
Main Dish
💡
Quick Tip
Brown chicken before slow cooking for better flavor
🎯
Best For
Weeknight | Meal prep

Five things that make this work:

  • Bone-in chicken thighs stay moist through long cooking because the bones conduct heat slowly and the dark meat has more fat
  • Searing before slow cooking creates caramelized spots that add depth the sauce can't provide alone
  • Bay leaves and black peppercorns infuse gradually over hours, building layers without overwhelming the vinegar tang
  • Low heat prevents the proteins from seizing up, which is what makes chicken stringy and dry
  • The vinegar-soy ratio balances acidity with salt - measuring both prevents one-note sauce
Quick Tip
Marinate chicken 30 minutes to 1 hour before cooking for deeper flavor penetration - the acid in vinegar starts breaking down surface proteins early

What You'll Need

Ingredients for Crockpot Filipino Chicken Adobo

Buy bone-in chicken thighs even if boneless costs less - the bones add body to the sauce. Stock your pantry with soy sauce and vinegar, then grab garlic and bay leaves from the produce aisle.

🍗
Protein
  • 2 lbs bone-in chicken thighs
🥢
Sauce Base
  • ½ cup soy sauce
  • ½ cup white or cane vinegar
  • ½ cup water or chicken broth
  • 2 tablespoon brown sugar (optional)
🧄
Aromatics
  • 8-10 garlic cloves, smashed
  • 1 medium onion, sliced
  • 2-3 bay leaves
  • 1 teaspoon black peppercorns

Ingredient Details

  • Bone-in chicken thighs
    Provides moisture and flavor - boneless dries out during long cooking
  • Soy sauce
    Use regular or low-sodium - low-sodium gives you more control over final saltiness
  • Vinegar
    White or cane vinegar are traditional - apple cider works but changes the flavor profile slightly
  • Garlic
    Smash cloves with the side of a knife instead of mincing - they soften and sweeten without burning
  • Bay leaves
    Use whole dried bay leaves, remove before serving - they add subtle earthy notes
  • Black peppercorns
    Whole peppercorns add mild heat without overpowering - ground pepper works but tastes sharper
  • Brown sugar
    Optional but balances acidity - start with 1 tablespoon, add more at the end if too sour

Ingredient Swaps

Most swaps work if you adjust the cook time or liquid ratio. Boneless chicken cooks faster, so check at 3 hours instead of 4.

Four swaps that work:

  • Use tamari or coconut aminos instead of soy sauce - tamari tastes nearly identical and is gluten-free, coconut aminos are sweeter and less salty
  • Swap white vinegar for apple cider vinegar - slightly fruity and less sharp, still balances the soy sauce
  • Replace bone-in thighs with boneless thighs or breasts - reduce cook time to 3-4 hours, check internal temp at 165°F
  • Use garlic powder instead of fresh garlic - 1 teaspoon powder per 3-4 cloves, but you lose the soft roasted texture

Bone-In Thighs

Works for: Long cooking, rich sauce, meal prep

Skip if: You need faster cook time or want less fat

Boneless Thighs

Works for: Quick cooking, easier eating, less mess

Skip if: You want richer flavor or more tender texture

Chicken Breasts

Works for: Leaner meal, white meat preference

Skip if: You want juicy, fall-off-bone texture - breasts dry out faster

Instructions

Total hands-on time is 15 minutes, then the crockpot runs 4-6 hours on low. Rich mains need something to cut through, and slaw does exactly that - crisp refreshing coleslaw resets your palate between bites.

  1. Brown the chicken. Heat a skillet over medium-high, add chicken thighs skin-side down, cook 3-4 minutes per side until golden brown. Transfer to crockpot - no need to cook through, just sear the outside for flavor.
  2. Build the sauce. In the same skillet, add garlic and onion, cook 1-2 minutes until fragrant. Pour in soy sauce, vinegar, water or broth, and brown sugar if using. Stir to combine, scraping up browned bits from the pan.
  3. Add aromatics and cook. Pour sauce over chicken in crockpot, add bay leaves and black peppercorns. Cover, cook on low 4-6 hours until chicken reaches 165°F internal temp and meat pulls away from bone easily.
  4. Reduce the sauce (optional). Remove lid during last 30 minutes of cooking to thicken sauce, or transfer finished chicken to a plate and simmer sauce in a pan on the stove for 5-7 minutes until syrupy.
  5. Adjust seasoning and serve. Taste sauce - add more vinegar if too mild, more sugar if too sour, more soy if too bland. Remove bay leaves, stir gently to coat chicken, serve over rice.
Golden Rule
Use an internal thermometer to check chicken reaches 165°F - visual cues can mislead with dark meat, temp confirms food safety

What to Serve With It

Filipino adobo needs starch to soak up the tangy sauce and something fresh to balance the richness. Most people skip salad, but it balances the meal - for complete chicken and biscuits meal ideas that follow similar pairing logic, we recommend building around contrast.

Side Dish Prep Why It Works How to Serve
Steamed jasmine rice Easy Absorbs the tangy sauce and balances saltiness Serve 1 cup rice per person, spoon adobo and sauce over top
Garlic fried rice Easy Adds savory garlic notes that enhance adobo flavor Use day-old rice, fry with garlic until crispy edges form
Sautéed bok choy Easy Provides fresh green crunch and cuts through richness Stir-fry 4-5 minutes with garlic, serve alongside
Pickled vegetables (atchara) Medium Adds bright acidity and crunch to reset palate Make ahead, serve cold as condiment on the side
Lumpia (spring rolls) Medium Crispy appetizer that complements tender chicken Fry until golden, serve with sweet chili dipping sauce

Three ways to serve it:

  • Over jasmine rice with sautéed bok choy - the classic pairing that soaks up sauce and adds fresh greens
  • With garlic fried rice and pickled vegetables - doubles down on savory notes while adding acidic crunch
  • Alongside pancit noodles and lumpia - turns it into a full Filipino feast for casual entertaining
Best Pick
Steamed jasmine rice is the most reliable side - it absorbs the sauce without competing for attention and takes 20 minutes start to finish

Store and Reheat

Chicken adobo tastes better the next day after the sauce has time to penetrate the meat. A good rolls can make or break the plate, and a warm rolls side exists to mop up what is left on the plate. Store in shallow containers so it cools quickly and reheats evenly.

Method Time Best For
🍳 Stovetop 5-7 min Best flavor retention - gently reheat in pan with splash of water
🔥 Oven 15 min at 350°F Large portions - reheat covered to prevent drying out
📦 Microwave 2-3 min Single servings - stir halfway through, add water if sauce thickened

For best results when storing:

  • Cool chicken to room temp within 2 hours, then refrigerate in airtight containers - prevents bacteria growth
  • Store chicken and sauce together so meat stays moist - sauce acts as protective layer
  • Freeze in portion-sized containers for up to 3 months - thaw overnight in fridge before reheating
  • Skim fat from surface before reheating if you want less richness - cold fat solidifies and lifts off easily
  • Add splash of water or broth when reheating if sauce thickened too much - restores original consistency without diluting flavor

Frequently Asked Questions

How long to cook crockpot chicken adobo?

Cook on low for 4-6 hours until chicken reaches 165°F internal temp and meat pulls away from the bone easily. Check at 4 hours for boneless cuts, 5-6 hours for bone-in thighs.

Can I make crockpot chicken adobo ahead?

Yes - adobo tastes better after sitting overnight as flavors meld. Cook fully, cool to room temp, refrigerate up to 4 days, or freeze up to 3 months.

What goes with Filipino chicken adobo?

Serve with steamed jasmine rice or garlic fried rice to soak up the sauce. Add sautéed bok choy or pickled vegetables for contrast.

How do I know when chicken adobo is done?

Check internal temp reaches 165°F with a thermometer, and meat should pull away from the bone easily with a fork. Sauce should coat the chicken without being watery.

Can I use chicken breasts instead of thighs?

Yes, but reduce cook time to 3-4 hours on low and check temp at 165°F. Breasts dry out faster than thighs, so watch closely and don't overcook.

Crockpot Filipino Chicken Adobo served on a plate

Crockpot Filipino Chicken Adobo

No ratings yet
Slow-cooked Filipino Chicken Adobo features bone-in chicken thighs simmered in a balanced mixture of soy sauce, vinegar, garlic, and aromatics. Browning the chicken before slow cooking enhances the sauce's depth while the crockpot ensures tender, moist meat with minimal hands-on time.
Print Recipe Pin Recipe
Prep Time 15 minutes mins
Cook Time 5 hours hrs
Total Time 5 hours hrs 15 minutes mins
Servings: 5 servings
Course: Dinner, Main Dish
Cuisine: Filipino
Ingredients Equipment Method Notes

Ingredients
  

  • 2 lbs chicken thighs bone-in, skin-on
  • 0.5 cup soy sauce regular or low sodium
  • 0.5 cup vinegar white or cane vinegar
  • 0.5 cup water or chicken broth
  • 2 tablespoon brown sugar optional, to balance acidity
  • 8 cloves garlic smashed
  • 1 medium onion sliced
  • 3 leaves bay leaves whole dried
  • 1 teaspoon black peppercorns whole

Equipment

  • Skillet For browning chicken and sautéing aromatics
  • Crockpot Slow cook chicken for 4-6 hours
  • Meat thermometer To check internal temperature of chicken

Method
 

  1. Heat a skillet over medium-high heat. Add chicken thighs skin-side down and cook for 3-4 minutes per side until golden brown. Transfer the chicken to the crockpot. The chicken does not need to be fully cooked at this stage.
    2 lbs chicken thighs
  2. In the same skillet, add smashed garlic and sliced onion. Cook for 1-2 minutes until fragrant. Pour in soy sauce, vinegar, water or broth, and brown sugar if using. Stir well, scraping up browned bits from the pan.
    0.5 cup soy sauce, 0.5 cup vinegar, 0.5 cup water, 2 tbsp brown sugar, 8 cloves garlic, 1 medium onion
  3. Pour the sauce over the chicken in the crockpot. Add bay leaves and black peppercorns. Cover and cook on low for 4 to 6 hours, until chicken reaches an internal temperature of 165°F and the meat pulls away from the bone easily.
    3 leaves bay leaves, 1 tsp black peppercorns
  4. During the last 30 minutes of cooking, remove the crockpot lid to thicken the sauce, or transfer the chicken to a plate and simmer the sauce on the stove for 5-7 minutes until syrupy.
  5. Remove bay leaves and taste the sauce. Adjust by adding more vinegar if too mild, more sugar if too sour, or more soy if too bland. Stir gently to coat the chicken and serve over rice.
    0.5 cup soy sauce, 0.5 cup vinegar, 2 tbsp brown sugar

Notes

  • Browning chicken before slow cooking enhances flavor and adds texture.
  • Check chicken internal temperature with a meat thermometer to ensure it reaches 165°F.
  • Marinate chicken for 30-60 minutes before cooking for deeper flavor penetration.

Tried this recipe?

Let us know how it was!
« Previous Page
Next Page »

Primary Sidebar

ForkliftKitchen recipe developer

Welcome!

Recipe Developer · 12+ Yr Kitchen Veteran

I'm the recipe developer behind this site, focused on practical, well-tested dishes and smart ingredient swaps. Every recipe is written to be clear, reliable, and easy to make at home.

650+ Recipes
12+ Yrs Exp.
3x Tested
Our Story →

As Featured In

Allrecipes

TASTE OF HOME

Food52

HUFFPOST

Yahoo! Life

Our Editorial Standards

  • ✓ Every recipe tested at least 3 times before publishing
  • ✓ Substitutes verified by real kitchen trials, not guesswork
  • ✓ Reviewed for accuracy by our editorial team
  • ✓ Updated regularly with seasonal info and reader feedback

Most Popular

  • Creamy Lemon Shrimp Linguine
    Creamy Lemon Shrimp Linguine
  • Creamy Garlic Mushroom Chicken
    Creamy Garlic Mushroom Chicken
  • Sesame Ginger Chicken Noodle Bowls
    Sesame Ginger Chicken Noodle Bowls
  • Baked Lemon Herb Fish Fillets
    Baked Lemon Herb Fish Fillets
  • Veggie Loaded Fried Rice
    Veggie Loaded Fried Rice
  • Spicy Garlic Shrimp Stir Fry
    Spicy Garlic Shrimp Stir Fry

Join 8,000+ Home Cooks

Weekly Kitchen Tips

Easy recipes, smart substitutes, and real cooking shortcuts — every Thursday.

Subscribe Free →


Side Dishes

  • What to Serve With Asian Salmon? 15 Best Side Dishes
    What to Serve With Asian Salmon? 15 Best Side Dishes
  • Side Dishes for Strawberry Spinach Salad
    15 Best Side Dishes for Strawberry Spinach Salad
  • Sides for Grilled Cauliflower Steaks to Complete the Meal
    15 Sides for Grilled Cauliflower Steaks to Complete the Meal
  • 15 Sides To Serve With Calabacitas
    15 Best Sides for Calabacitas – Mexican-Inspired Favorites


Substitutes

  • 7 Best Substitutes for Hot Sauce in Marinades & Stir-Fries
    7 Best Substitutes for Hot Sauce in Marinades & Stir-Fries
  • 9 Best Substitutes for Butter in Baking and Cooking
  • 7 Best Substitutes for Tagliatelle for Italian Pasta Dishes
    7 Best Substitutes for Tagliatelle for Italian Pasta Dishes
  • 7 Best Substitutes for Udon Noodles in Asian Stir-Fries
    7 Best Substitutes for Udon Noodles in Asian Stir-Fries


Browse by Topic

  • Side Dishes320
  • Substitutes785
  • Dinner163
  • Air Fryer77
  • Taste Profiles484
  • Food Storage123


Reader Reviews

★★★★★

"Finally a food blog that tells you exactly why a substitute works instead of just listing options."

— Sarah M., via email

★★★★★

"The side dish recommendations are so specific — saved my dinner party twice this month."

— James R., Pinterest comment

★★★★★

"I trust this site more than most because they actually test everything. You can tell."

— Priya K., blog comment

Footer

↑ Back to Top

Forklift Kitchen

We do the heavy lifting so you can enjoy the cooking. Tested recipes, smart substitutes, and perfect pairings—built for real home cooks.

Content

  • Recipes
  • Substitutes
  • What to Serve With
  • Blog

Company

  • About Us
  • Contact
  • Subscribe

Legal

  • Privacy Policy
  • Terms of Service

As an Amazon Associate I earn from qualifying purchases.

© 2026 Forklift Kitchen.

Rate This Recipe

Your vote:


A rating is required
A name is required
An email is required