• Skip to primary navigation
  • Skip to main content
  • Skip to primary sidebar
  • Recipe Index
    • Air Fryer
  • Side Dishes
  • Substitutes
  • About
  • Contact
  • Subscribe

ForkLiftKitchen

menu icon
go to homepage
  • Recipe Index
    • Air Fryer
  • Side Dishes
  • Substitutes
  • About
  • Contact
  • Subscribe
subscribe
search icon
Homepage link
  • Recipe Index
    • Air Fryer
  • Side Dishes
  • Substitutes
  • About
  • Contact
  • Subscribe
×

Blog

What Is Soba Noodles? Taste, Uses & More Explained

April 2, 2026

You spot a bundle of soba noodles at a Japanese grocery, their dark gray-brown strands thinner than spaghetti and rougher to the touch, and you wonder what to actually do with them.

What Is Soba Noodles

Unlike wheat-based pastas where the noodle is mostly background, soba brings its own toasted, earthy character to every dish - whether it ends up cold on a bamboo tray or submerged in a clear dashi broth.

If you already know what pairs with ramen noodles, soba will feel familiar but distinct; the buckwheat base adds a nuttiness that wheat noodles simply don't have.

Getting familiar with soy sauce swaps that work is also worth doing early, since soy is the backbone of nearly every soba dipping broth.

QUICK SUMMARY

Soba noodles are thin Japanese buckwheat noodles with a nutty, earthy flavor and a firm bite. Served hot in broth or cold with a soy-dashi dipping sauce, they're a staple of Japanese cooking and adapt easily to salads and stir-fries. Dried soba keeps for months; fresh soba must be used within days.

🍜What It Is: Thin buckwheat-based noodles, gray-brown, firm, and slightly coarse
🌰Flavor: Nutty, earthy, mildly sweet with toasted buckwheat notes
🍽️Best Uses: Zaru soba, hot broth soups, cold sesame salads, stir-fries
📦Shelf Life: Dried: up to 1 year; fresh: 3-5 days refrigerated
⚠️Watch: Many commercial blends contain wheat - check labels if you need gluten-free

What Is Soba Noodles?

Soba (蕎麦) is a Japanese noodle made from buckwheat flour, sometimes blended with wheat flour to improve texture and handling.

Despite the name, buckwheat is not related to wheat - it's a seed crop more closely related to rhubarb, which gives soba its characteristic color and flavor profile.

The two main commercial types are juwari soba, made from 100% buckwheat, and ni-hachi soba, which blends roughly 80% buckwheat with 20% wheat flour.

Juwari is darker, coarser, and more intensely flavored; ni-hachi is smoother and a little easier to cook without breaking.

A third variety, cha soba, incorporates green tea powder for a subtle herbal note and pale green color.

Soba originates broadly across Japan but is especially tied to Nagano prefecture, where the cold mountain climate historically suited buckwheat cultivation.

In contrast to what makes udon noodles distinct - their thick, chewy wheat-flour construction - soba is thin, somewhat fragile, and built around a completely different grain base.

  • 🌾 Juwari soba - 100% buckwheat, gluten-free, dark and coarse
  • 🍜 Ni-hachi soba - 80/20 buckwheat-wheat blend, most widely available
  • 🍵 Cha soba - buckwheat noodles with matcha added, pale green and mildly herbal

What Does Soba Noodles Taste Like?
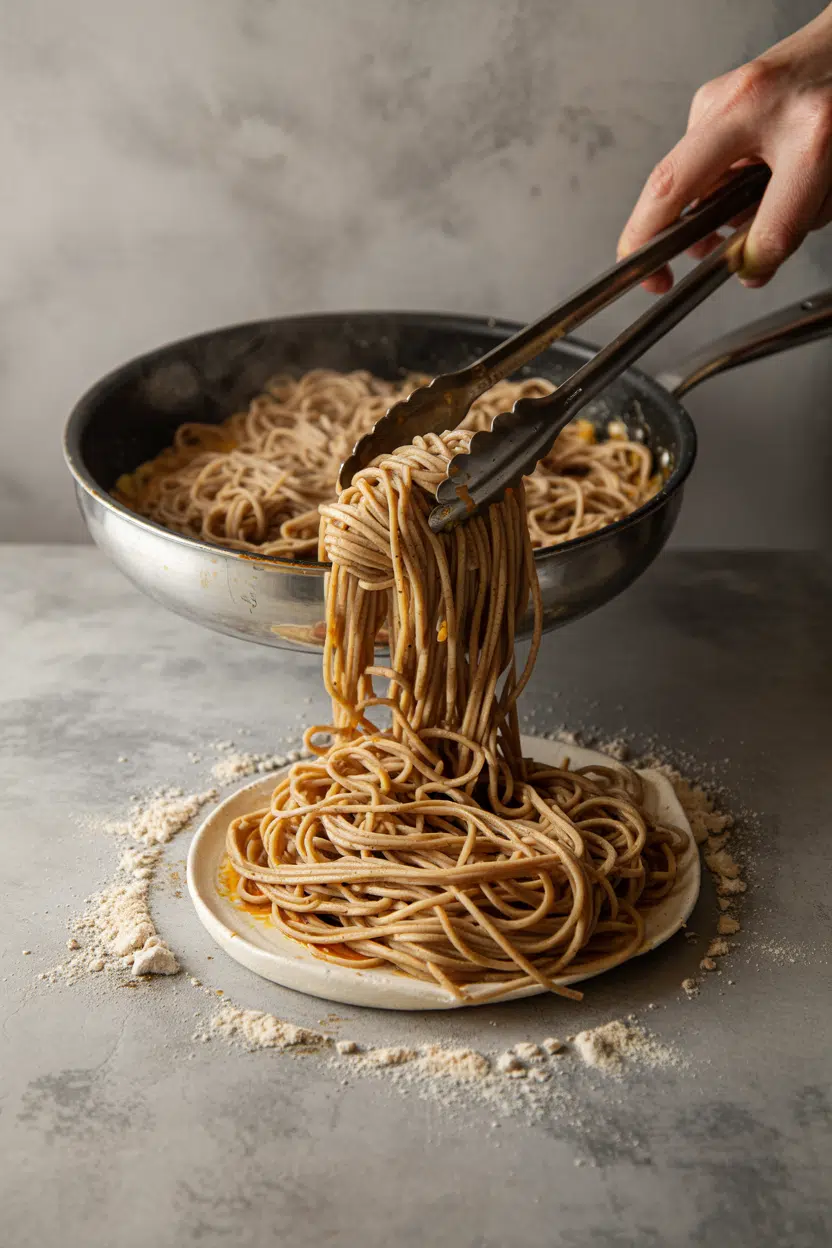
soba noodles - What Is Soba Noodles

Soba has a moderate, clearly defined flavor - it doesn't fade into the background the way white wheat pasta does.

The dominant note is toasted buckwheat nuttiness, similar in character to lightly roasted oats or whole-grain rye bread, layered over a mild earthiness.

There's a faint natural sweetness that comes through particularly in cold preparations, where the noodle isn't competing with a hot broth.

Heat softens the earthiness slightly and makes the aroma more pronounced - you'll catch a bready, grainy smell when the noodles hit boiling water.

Sensory SnapshotModerate Intensity
👅 Flavor
nuttyearthymildly sweet
✋ Texture
firmspringy when coldslippery when hot
👃 Aroma
toastedbreadymildly grainy

Texture changes significantly depending on temperature. Hot soba has a slippery, tender surface that yields quickly; cold soba firms up and turns springy, which is why zaru soba - the chilled preparation - has such a satisfying bite.

How to Use Soba Noodles

Soba splits cleanly into two service styles: hot and cold. Both are worth knowing, because the noodle behaves differently in each and calls for different pairings.

For cold preparations, boil the soba just until tender (typically 4-6 minutes), then shock it immediately in ice water to stop cooking and firm up the texture.

Zaru soba is the classic result - chilled noodles on a bamboo tray, served alongside a soy-dashi dipping broth, grated daikon, scallion, and a small amount of wasabi.

The scallion is traditional here; if you're out, swapping out scallion is worth planning for before the dish suffers. Nori adds a briny backdrop that works well with the earthy buckwheat; understanding what makes nori distinct explains why the pairing is so consistent across Japanese preparations.

Golden Rule
Always shock cold-service soba in ice water immediately after boiling. Skipping this step makes the noodles clump and turns the surface starchy.

For hot service, kake soba - noodles in a clear soy-dashi broth - is the foundational preparation.

Tempura soba adds crispy fried shrimp or vegetables alongside the broth, keeping the crunch separate from the liquid.

Soba also works in stir-fries: parboil the noodles, then toss them briefly over high heat with sesame oil, soy, and vegetables.

Avoid heavy cream sauces - they overpower the buckwheat's nuttiness entirely.

How Soba Noodles Are Used
MethodBest ForTip
❄️ Cold/ChilledZaru soba, sesame salads, daikon-scallion bowlsIce-shock immediately after boiling for the best springy texture
🍲 Hot BrothKake soba, tempura soba, nabemonoDon't boil in the broth - add pre-cooked noodles at the end
🥢 Stir-FriedYakisoba-style dishes, quick weeknight bowlsParboil first, then finish in a very hot pan with minimal liquid
🥗 Dressed/SaladCold sesame-soy noodle salads, grain bowlsToss with sesame paste or tahini dressing while noodles are still cold
Try It In
🍜Soba Noodles with Dipping SauceClassic soy-dashi broth alongside cold buckwheat noodles→🎋Zaru Soba Cold NoodlesThe benchmark cold preparation — bamboo tray, chilled noodles, sharp dipping sauce→🥢Japanese Vegetable Yakisoba NoodlesStir-fried soba with vegetables and umami-forward sauce→

How to Buy and Store Soba Noodles

At the grocery, check the ingredient label first. 100% buckwheat (juwari) soba will be dark gray-brown, with a coarse, textured surface. Ni-hachi blends look smoother and lighter - that's fine for most cooking, but not for gluten-free needs.

For fresh soba, look for pliability and a faint toasted smell; dry, cracked fresh noodles are past their window.

Watch Out
Most supermarket soba contains wheat flour even if marketed as "soba" or "buckwheat noodles." Only labels reading "100% buckwheat" or "juwari" are reliably gluten-free.

Store dried soba in a cool, dry pantry in its original sealed packaging or an airtight container - it will keep for months to a year.

Fresh soba goes in the refrigerator and should be used within 3-5 days.

Cooked soba stays good for 2-3 days refrigerated, though it will clump; rinse with cold water before using again.

For signs that stored noodles have turned, the guide on soba noodles spoilage signs covers what to look for.

The dipping broth matters almost as much as the noodle itself. If your pantry is missing dashi, the roundup on alternatives to dashi powder is a useful reference before you start.

Where to Start With Soba

New to soba?

Begin with zaru soba - it's the simplest preparation and shows the noodle's flavor without interference.

Boil, shock in ice water, and serve cold with a store-bought mentsuyu or a simple soy-dashi dip.

Once the cold version makes sense, move to kake soba in a hot broth.

If soba isn't available, swapping out soba noodles outlines the closest alternatives worth trying.

The buckwheat character is genuinely hard to replicate, however - when you can find it, use it.

Frequently Asked Questions

Is soba the same as buckwheat noodles?

Mostly, yes - soba is a Japanese noodle made primarily from buckwheat flour. However, many commercial soba blends include wheat flour, so not every soba is 100% buckwheat. Only juwari soba is purely buckwheat with no wheat added.

Are soba noodles gluten-free?

Only 100% buckwheat (juwari) soba is gluten-free. Most packaged soba contains wheat flour and is not safe for celiac or gluten-sensitive diets. Always read the full ingredient list, not just the front label.

How long do you boil soba noodles?

Most dried soba cooks in 4-6 minutes in boiling unsalted water. Start checking at 4 minutes - soba overcooks quickly and turns mushy. For cold service, drain and transfer immediately to ice water.

How do you eat soba noodles?

Cold soba is dipped strand by strand into a small cup of soy-dashi tsuyu, often with wasabi stirred in. Hot soba is eaten directly from the broth bowl with chopsticks and a spoon for the soup.

Can you eat soba noodles cold the next day?

Yes, cooked soba keeps for 2-3 days refrigerated. The noodles will clump together, so rinse them under cold water and toss briefly before using. Texture is best on day one.

Middle Eastern Basbousa Semolina Cake

April 2, 2026

Baking basbousa at 350°F with a yogurt-semolina batter creates a moist, grainy cake with golden edges. The syrup goes on after baking so it soaks in without turning the base soggy.

Middle Eastern Basbousa Semolina Cake served on a plate

You score the cake before it goes in the oven. This prevents cracking and makes slicing clean.

Use coarse semolina for the signature texture. Fine flour turns this into regular cake instead of the slightly grainy crumb that makes basbousa work.

QUICK SUMMARY

Basbousa is a Middle Eastern semolina cake soaked in floral sugar syrup after baking. The coarse semolina creates a moist, grainy texture that's different from typical cakes. Bake it at 350°F until golden, then pour warm syrup over the top.

⏱️Time: 60 minutes total including 20 minutes for syrup absorption
🔑Key Move: Score the cake into squares before baking to prevent cracking
⚠️Watch Out: Add syrup only after baking - too early makes the base soggy

Table of Contents

Toggle
  • Why This Recipe Works
  • What You'll Need
    • Ingredient Details
  • Ingredient Swaps
  • What to Serve With It
  • Store and Reheat
  • Frequently Asked Questions
  • Middle Eastern Basbousa Semolina Cake
    • Method 
    • Tried this recipe?

Why This Recipe Works

The semolina gives basbousa its characteristic grainy texture that stays moist without turning gummy. Most people skip cake, but it balances the meal. For a version that comes together quickly, this related cake recipe keeps things simple with different milk soaking methods.

Quick Reference
⏱️
Prep Time
15 min
🔥
Cook Time
30-40 min
⏰
Total Time
60 min including syrup soaking
🍽️
Servings
9-12 servings
📊
Difficulty
Medium
🏷️
Category
Dessert
💡
Quick Tip
Soak cake while warm for best moisture
🎯
Best For
Entertaining | Weeknight | Holidays

What makes this work:

  • Yogurt adds moisture and a slight tang that keeps the cake from tasting one-note sweet
  • Baking powder lightens the dense semolina batter so you get tender crumb instead of a brick
  • Rose water or orange blossom water in the syrup adds floral aroma that's signature to Middle Eastern desserts
  • Scoring before baking prevents the top from cracking as it rises
  • Cooling the syrup slightly before pouring keeps the cake from dissolving into mush
Quick Tip
Press almonds or pine nuts gently into the batter before baking for crunch and decoration

What You'll Need

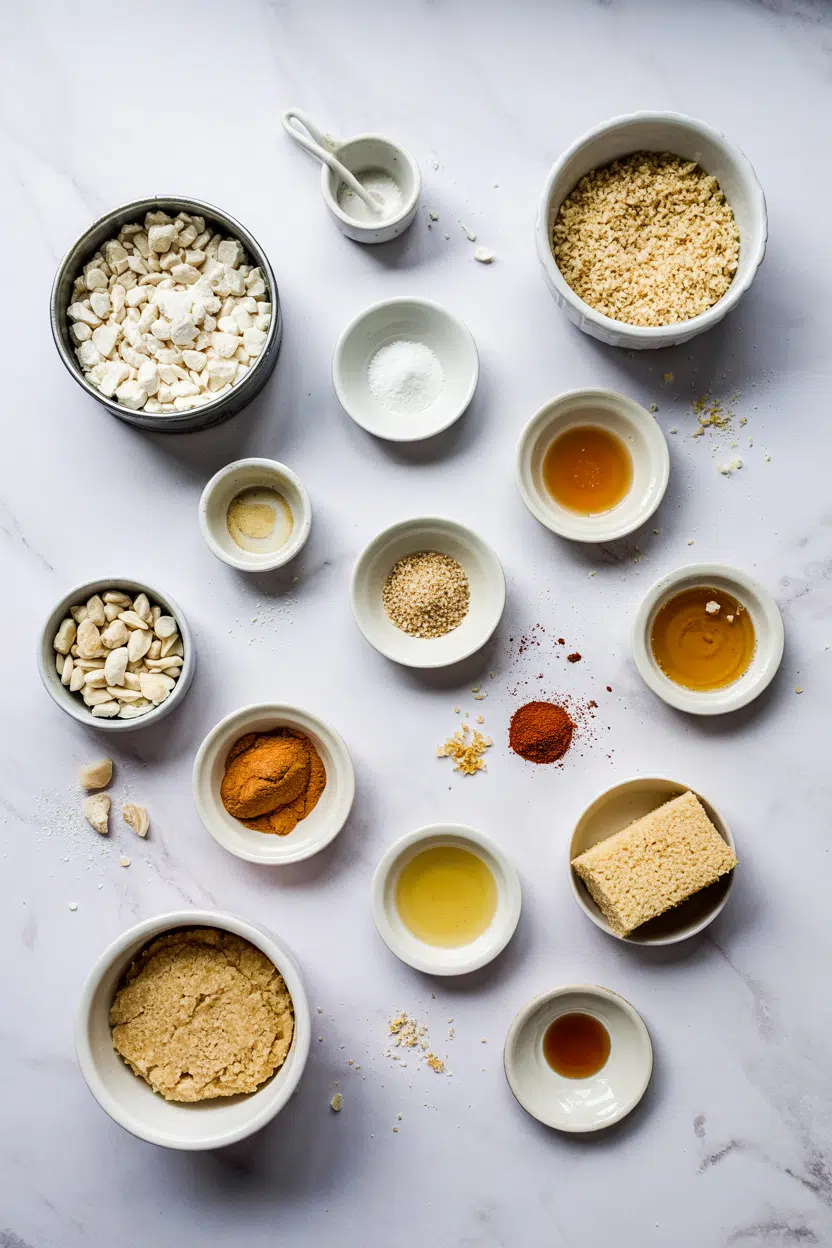
Ingredients for Middle Eastern Basbousa Semolina Cake

Shop for coarse semolina in the baking aisle or Middle Eastern markets. Pastry adds the contrast this plate needs, but timing matters. For a version that comes together quickly, simple homemade pastry recipe works with shredded phyllo instead of semolina.

🍜
Base
  • 2 cups coarse semolina
  • 1 cup sugar
  • 1 cup plain yogurt
  • ½ cup melted butter or ghee
  • 2 teaspoon baking powder
🫙
Optional Add-Ins
  • ½ cup coconut flakes
  • ¼ cup whole milk
🥢
Syrup
  • 1 ½ cups sugar
  • 1 cup water
  • 1 tablespoon lemon juice
  • 1 tablespoon rose water or orange blossom water
🫙
Topping
  • ⅓ cup whole almonds or pine nuts

Ingredient Details

  • Coarse Semolina
    Use coarse grind only - fine semolina or regular flour makes the texture too cake-like and loses the grainy crumb
  • Yogurt
    Use thick plain yogurt - Greek yogurt works but may need a splash of milk to thin the batter slightly
  • Butter or Ghee
    Melt completely but cool slightly before mixing to avoid cooking the yogurt
  • Rose Water
    Add to the syrup after it cools - adding during boiling evaporates the floral aroma
  • Simple Syrup
    Let syrup cool to warm (not hot) before pouring - too hot makes the cake dissolve, too cold doesn't soak in
  • Almonds or Pine Nuts
    Press whole nuts gently into batter before baking so they stick and toast slightly
  • Coconut Flakes
    Optional but traditional - adds texture and subtle sweetness without changing the base flavor

Ingredient Swaps

You can adjust ingredients based on what's in the pantry or dietary needs. Rich mains need something to cut through, and chicken does exactly that. For a version that comes together quickly, something juicy like chicken works alongside syrup-soaked desserts.

Four swaps that work:

  • Coconut oil for butter - Adds subtle coconut flavor, keeps it dairy-free, may slightly soften the texture
  • Plant-based yogurt for dairy yogurt - Maintains moisture and acidity, tanginess may vary slightly depending on brand
  • Gluten-free semolina or fine polenta for regular semolina - Texture gets slightly coarser, flavor less nutty, but suitable for gluten-free diets
  • Honey syrup for simple syrup - Stronger flavor, less floral, stickier texture but still soaks in well

Coconut Oil

Works for: Dairy-free needs, adds subtle coconut aroma, liquid fat blends easily

Skip if: You want traditional butter richness or don't like coconut flavor

Orange Blossom Water

Works for: Different floral note, still Middle Eastern traditional, equally potent

Skip if: You prefer rose water's specific aroma or can't find it locally

Gluten-Free Semolina

Works for: Celiac diets, maintains similar texture, absorbs syrup well

Skip if: You want the classic nutty semolina flavor or don't need gluten-free

Instructions

The full bake takes 30-40 minutes at 350°F, then 20 minutes for the syrup to soak in. The chicken works best when it hits the table at the same time as the main. We keep a batch ready for nights like this - this quick chicken dish keeps prep under 15 minutes with simple pantry ingredients.

  1. Preheat oven to 350°F and mix the batter. Combine semolina, sugar, yogurt, melted butter, and baking powder in a bowl until smooth. Fold in coconut flakes if using. The batter should be thick but pourable - add a splash of milk if too stiff.

  2. Score the cake before baking. Pour batter into a greased 9x9-inch pan and smooth the top. Use a sharp knife to score diagonal lines creating diamond or square shapes. Press one almond or pine nut into the center of each piece.

  3. Bake until golden and pulling from edges. Bake on the center rack for 30-40 minutes. The top should be golden brown and edges pulling slightly away from the pan. A toothpick inserted should come out clean.

  4. Make the syrup while the cake bakes. Combine sugar, water, and lemon juice in a small saucepan. Bring to a boil, then simmer for 8-10 minutes until slightly thickened. Remove from heat and stir in rose water or orange blossom water. Let cool to warm.

  5. Pour syrup over warm cake and rest. Remove cake from oven and immediately pour the warm syrup evenly over the surface. The cake will sizzle and absorb the liquid. Let sit for 20-30 minutes before serving so the syrup fully soaks in and the texture sets.

Golden Rule
Score the cake before baking, not after - cutting a baked cake causes crumbling and uneven syrup absorption

What to Serve With It

Basbousa pairs with hot tea, coffee, or light sides that balance the sweetness. A good chicken can make or break the plate. We keep a batch ready for nights like this - this easy chicken recipe goes with syrup-soaked cakes without competing for attention.

Side Dish Prep Why It Works How to Serve
Black Tea Easy Complements sweet floral flavor, traditional pairing, cuts through richness Brew strong, serve hot alongside cake slices
Plain Yogurt Easy Balances sweetness, adds creamy tang, refreshes palate between bites Dollop on the side or spread thin layer on top
Fresh Fruit Slices Easy Adds freshness and acidity, contrasts sticky syrup texture Serve oranges, berries, or figs on the side
Strong Arabic Coffee Easy Traditional pairing, bitter coffee balances sweet cake, palate cleanser Serve in small cups, sip between bites
Mint Tea Easy Refreshing palate cleanser, adds herbal brightness, cools spice if present Brew hot or iced, serve alongside dessert

Three ways to serve it:

  • Top with a dollop of rose water whipped cream and crushed pistachios for entertaining
  • Serve warm with vanilla ice cream melting over the syrup-soaked squares
  • Pair with cardamom-spiced syrup drizzled over individual slices for extra aroma
Best Pick
Strong Arabic coffee or black tea cuts through the sweetness and is the traditional Middle Eastern pairing

Store and Reheat

Basbousa keeps for 3-4 days in the fridge and actually gets better as the syrup soaks deeper. Rich mains need something to cut through, and beef does exactly that. For a version that comes together quickly, this quick beef dish works with syrup-soaked desserts without overwhelming the plate.

Method Time Best For
🔥 Oven 10-12 min at 325°F Restores crisp edges and warms syrup evenly
📦 Microwave 30-45 seconds Quick warmups, but edges may soften

For best results when storing:

  • Keep in an airtight container in the fridge - the syrup stays moist without making the cake soggy
  • Store in a shallow container so pieces don't stack and stick together
  • Brush extra warm syrup over slices before serving if the cake dries out after a few days
  • Freeze individual pieces wrapped tightly for up to 2 months - thaw in the fridge overnight
  • Avoid leaving at room temperature more than 4 hours - the dairy in yogurt spoils and the syrup can ferment

Frequently Asked Questions

Can I use almond flour instead of semolina?

No - almond flour creates a completely different texture, more like cake than the grainy crumb that defines basbousa. Use gluten-free semolina or fine polenta if you need a gluten-free option.

How should I store leftover basbousa and for how long?

Store in an airtight container in the fridge for 3-4 days. The syrup keeps the cake moist, and it actually improves after a day as flavors meld.

How do I know when basbousa is fully baked?

The top should be golden brown and edges pulling slightly from the pan. A toothpick inserted in the center comes out clean, and the surface springs back lightly when pressed.

What to do if basbousa turns out dry or too dense?

Dry cake means not enough syrup or overbaking - brush extra warm syrup over slices before serving. Dense texture usually comes from too much semolina or no baking powder, which can't be fixed after baking.

Can I double or halve the basbousa recipe easily?

Yes - the recipe scales easily. For half, use an 8x8-inch pan and check doneness around 25 minutes. For double, use a 9x13-inch pan and bake 40-45 minutes.

Middle Eastern Basbousa Semolina Cake served on a plate

Middle Eastern Basbousa Semolina Cake

No ratings yet
Basbousa is a traditional Middle Eastern semolina cake with a moist, grainy texture created by coarse semolina and yogurt. It is baked at 350°F and soaked in a floral sugar syrup after baking to maintain its signature texture without becoming soggy. Scoring the cake before baking prevents cracking and ensures clean slices.
Print Recipe Pin Recipe
Prep Time 15 minutes mins
Cook Time 40 minutes mins
Total Time 1 hour hr
Servings: 12 servings
Course: Dessert
Cuisine: Middle Eastern
Ingredients Method Notes

Ingredients
  

  • 2 cups semolina coarse grind only
  • 1 cup sugar
  • 1 cup yogurt plain, thick
  • 0.5 cup butter melted and slightly cooled (or ghee)
  • 2 teaspoon baking powder
  • 0.5 cup coconut flakes optional
  • 0.25 cup whole milk optional splash to thin batter
  • 1.5 cups sugar for syrup
  • 1 cup water for syrup
  • 1 tablespoon lemon juice for syrup
  • 1 tablespoon rose water or orange blossom water added to syrup after cooking
  • 0.33 cup almonds or pine nuts whole, for pressing into batter

Method
 

  1. Preheat oven to 350°F. In a bowl, combine coarse semolina, sugar, plain yogurt, melted butter, and baking powder until smooth. Fold in coconut flakes if using. If the batter is too stiff, add a splash of milk to achieve a thick but pourable consistency.
  2. Grease a 9x9-inch pan and pour the batter in. Smooth the top. Use a sharp knife to score diagonal lines forming diamond or square shapes. Press one whole almond or pine nut into the center of each piece.
  3. Bake on the center rack for 30-40 minutes until the top is golden brown and edges slightly pull away from the pan. A toothpick inserted should come out clean.
  4. While the cake bakes, prepare the syrup: Combine sugar, water, and lemon juice in a small saucepan and bring to a boil. Simmer for 8-10 minutes until slightly thickened. Remove from heat and stir in rose water or orange blossom water. Let syrup cool to warm temperature.
  5. Remove the baked cake from the oven and immediately pour the warm syrup evenly over the surface. The cake should sizzle and soak in the syrup. Let rest for 20-30 minutes to fully absorb the syrup and set the texture before serving.

Notes

  • Always score the cake before baking to prevent cracking and ensure even syrup absorption.
  • Use only coarse semolina for the authentic grainy texture of basbousa; fine semolina or flour will produce a regular cake texture.
  • Let the syrup cool to warm before pouring to avoid making the cake soggy or preventing proper absorption.

Tried this recipe?

Let us know how it was!

What Is Sage? [Taste, Uses & More]

April 2, 2026

Saltimbocca puts sage front and center - a single fresh leaf pressed between veal and prosciutto, fried in butter until the herb turns crisp and its resinous oils release into the fat. That one technique reveals everything about how sage works: it doesn't blend into the background.

What Is Sage

It announces itself. Whether you're reaching for a bundle of fresh leaves or a jar of dried flakes, understanding sage's intensity is the difference between a well-seasoned dish and one that tastes like potpourri.

QUICK SUMMARY

Sage is a woody Mediterranean herb with leathery gray-green leaves and a strong, resinous flavor. Use it sparingly - with butter, pork, beans, and squash - either fried whole for crisp texture or dried for slow-cooked depth. Fresh leaves last about a week in the fridge.

👅Flavor: Resinous, earthy, slightly bitter, savory with faint citrus
🌿Best Uses: Brown butter, stuffing, bean soups, pork and poultry
🗓️Shelf Life: Fresh 5-10 days refrigerated; dried 6-12 months airtight

What Is Sage?

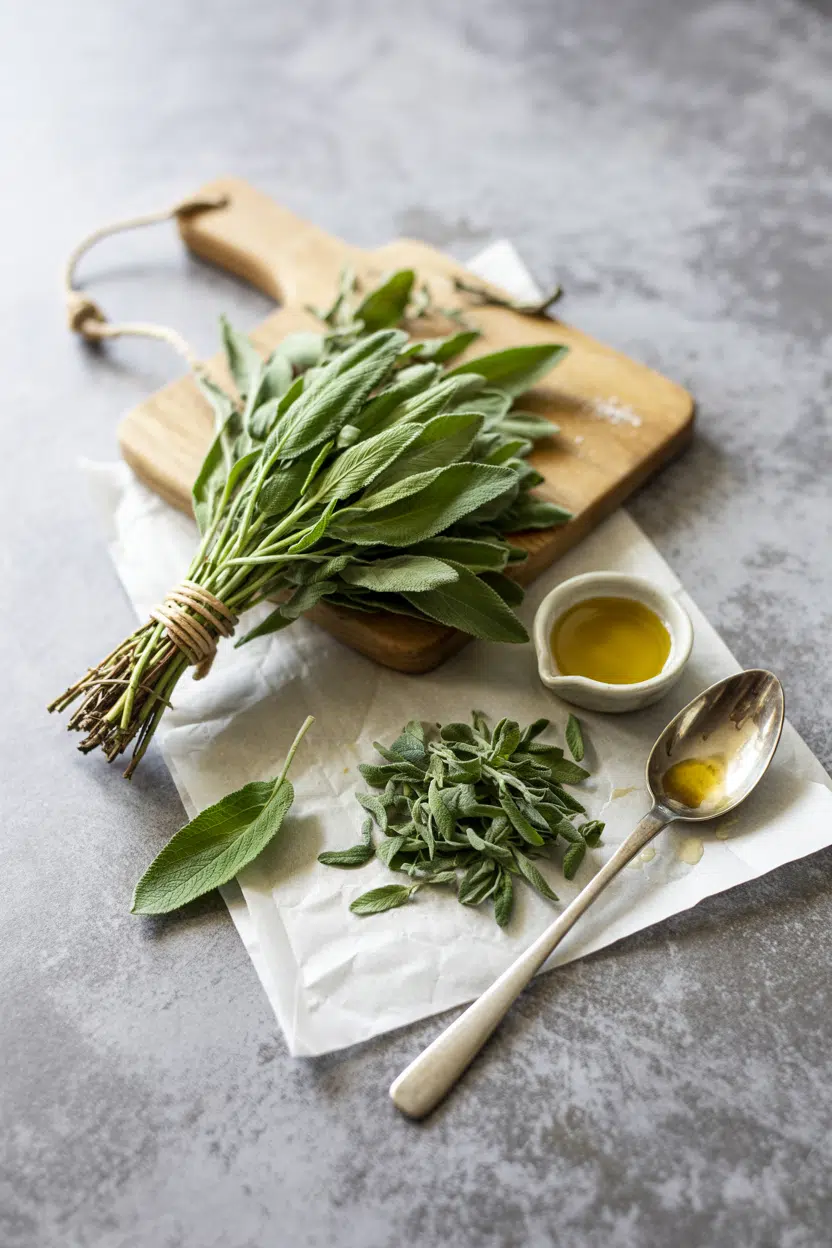
Sage (Salvia officinalis) is a perennial shrub native to the Mediterranean, grown for its oblong, gray-green leaves covered in soft, velvety fuzz.

That fuzz isn't decoration - the fine hairs trap the herb's volatile oils, which is why rubbing a fresh leaf between your fingers releases such an immediate, concentrated scent.

It belongs to the mint family, though it shares little in common with its relatives flavor-wise. Most markets sell common culinary sage, but you'll occasionally encounter purple sage, which has a milder profile, and pineapple sage, which is mainly ornamental.

Clary sage is a related species sometimes mislabeled in stores - it's coarser and less suited to cooking.

Dried sage has a longer history in British and American kitchens, especially in poultry stuffing and pork roast seasoning blends. Fresh sage arrived later in broader home cooking, largely through Italian influences.

Both forms are useful - they just behave differently in the pan.

What Does Sage Taste Like?

Think of a milder rosemary with more bitter, tea-like back notes. Sage is resinous and earthy, but where rosemary skews sharp and piney, sage has a broader, almost medicinal warmth with a faint citrus edge underneath.

Sensory SnapshotStrong Intensity
👅 Flavor
resinousearthybittersavory
✋ Texture
leathery (fresh)brittle (fried/dried)
👃 Aroma
piney-resinousmenthol-like

Heat changes sage significantly. Raw, the bitterness is sharp and can be abrasive. Fried or toasted, the volatile compounds mellow and sweeten, and the leaf itself becomes crisp enough to eat whole.

Long braising softens it further into the background - useful in beans and stews, where you want warmth without the edge.

Watch Out
Don't add dried sage directly to a cold dish expecting the same result as fresh. Dried sage needs heat and fat to fully release its oils - stir it into butter or oil for 30-60 seconds before adding other ingredients.

How to Use Sage

Sage works best when paired with fat. Butter is the classic vehicle - brown it with whole leaves until the leaves crisp and the butter smells nutty, then spoon the whole thing over gnocchi, ravioli, or roasted squash.

The fat absorbs the herb's oils and carries them through the dish evenly.

Italian and British cooking use it most heavily. Roman cuisine built the saltimbocca around it.

British stuffing relies almost entirely on sage and onion to season bread-based mixtures for poultry. Eastern European cooks work it into bean soups and braised pork.

Across all of these, sage pairs naturally with pork and sausage, cannellini beans, roasted squash, garlic, lemon, and pecorino.

How Sage Is Used
MethodBest ForTip
🍳 FriedCrisp garnish for pasta, gnocchi, risottoUse medium heat; leaves burn fast in butter
🫕 BraisedBean soups, slow-cooked pork, greensAdd early - long cooking tames the bitterness
🥩 RubbedFatty roasts - lamb, pork shoulder, duckCombine with garlic and oil for a dry paste
🧈 InfusedBrown butter, cream sauces, compound butterSteep over low heat; strain before serving

Two things sage doesn't suit: delicate white fish and light leafy salads. Its resinous intensity overwhelms subtle flavors.

If you need something less aggressive, sage alternatives include marjoram and thyme, which share savory warmth without the same bite.

Try It In
🥘Sheet Pan Sausage and VegetablesSage and sausage fat work together as the vegetables roast→🍝Creamy Garlic Sausage GnocchiA natural fit for a sage brown butter finish→

How to Buy and Store Sage

Good sage stems are compact with many intact leaves - gray-green color, velvety texture, no black spots. Yellowing or limp leaves signal age.

A sour smell means the batch has started to turn; skip it.

Quick Tip
Buy fresh sage in small quantities unless you cook with it daily. A 5-10 day refrigerated shelf life means a large bunch will often go soft before you finish it - dried sage stores far longer and works well in slow-cooked applications.

Store fresh sprigs unwashed, wrapped in a slightly damp paper towel inside a perforated plastic bag in the crisper drawer. For dried sage, keep it in an airtight container away from light and heat - it holds well for up to a year before the oils fade noticeably.

A full guide on sage storage life covers signs of spoilage in detail.

Starting Points With Sage

Sage rewards cooks who treat it as a main flavor rather than a background note.

  • New to sage? - Start with brown butter. Fry four or five whole leaves in butter over medium heat for 90 seconds, then pour over pasta or roasted vegetables immediately.
  • Using dried sage - Stir it into fat at the beginning of a braise or soup, not at the end. Heat unlocks the oils that raw dried sage won't release.
  • Going bold - Rub a mixture of minced sage, garlic, and olive oil under the skin of a chicken or onto a pork shoulder before roasting. The fat bastes the herb into the meat as it cooks.
Golden Rule
Sage and fat are inseparable. Without butter, oil, or rendered meat fat to carry its oils, sage tastes raw and bitter regardless of how long it cooks. Always start in fat.

Frequently Asked Questions

Is sage the same as rosemary?

No. Both are Mediterranean herbs with resinous, piney qualities, but rosemary is sharper and more needle-like in flavor. Sage is broader and earthier, with more bitter back notes. They can work as [substitutes for each other](https://forkliftkitchen.com/rosemary-substitutes/) in some recipes, but the result tastes noticeably different.

Can I substitute thyme for sage?

Yes, in most savory applications. Thyme is less resinous and bitter, so the swap produces a milder result. Use slightly more thyme than the sage quantity called for, and expect to lose some of the characteristic earthy depth.

How long does fresh sage last in the fridge?

About 5-10 days when stored correctly - unwashed, wrapped in a damp paper towel, in the crisper drawer. Leaves that turn black or smell sour should be discarded.

Can you eat raw sage leaves?

Technically yes, but the raw flavor is sharp and quite bitter. Most people find it unpleasant without some form of heat or fat to mellow it. Thin-sliced raw sage works occasionally in compound butters, where it softens as the butter melts.

Does sage work in sweet recipes?

Rarely, but it can. Sage infused into a simple syrup or steeped in cream adds herbal warmth to caramel, honey desserts, or custards. The key is using it very lightly - it's easy to cross the line from interesting to medicinal.

What Is Sweet Potato? [Taste, Uses & More]

April 2, 2026

Most people assume sweet potato is just a sweeter, more colorful stand-in for white potato. That assumption leads to undercooked centers, bland mashes, and roasted cubes that steam instead of caramelize.

What Is Sweet Potato

Sweet potato rewards specific handling - higher sugar content means it behaves differently under heat than any other root vegetable. Get that right, and it becomes one of the most useful ingredients in a savory kitchen.

QUICK SUMMARY

Sweet potato is a starchy root tuber with naturally high sugar content that deepens to caramel and earthiness under heat. It excels roasted, mashed, or pureed. Raw tubers store 2-4 weeks in a cool pantry.

🍠Flavor: Sweet, earthy, nutty with caramel notes when roasted
🌡️Intensity: Moderate - sweetness amplifies significantly with cooking
🍽️Best Uses: Roasting, mashing, pureeing into soups, fries
🛒Buy: Firm, smooth skin, no soft spots or sprouts
📦Storage: Cool, dark pantry 2-4 weeks; never refrigerate raw whole tubers

What Is Sweet Potato?

Sweet potato (Ipomoea batatas) is a starchy root tuber domesticated thousands of years ago in Central and South America. It belongs to the morning glory family - no botanical relation to white potato whatsoever.

In North American grocery stores, it's frequently mislabeled as a yam, which is an entirely different plant genus (Dioscorea) native to Africa and Asia. True yams are drier, starchier, and rarely sold outside specialty markets.

Flesh color and texture vary widely across varieties:

  • 🟠 Orange-fleshed - the most common type in US stores; moist, high-sugar, and deeply caramel when roasted
  • ⬜ White or yellow-fleshed (boniato) - firmer, drier, less sweet; used across Caribbean and Latin American kitchens
  • 🟣 Purple-fleshed - dense and mildly sweet with an earthy, almost wine-like undertone; popular in Japanese cooking as satsumaimo

The orange variety is what most recipes mean by default. When a recipe specifies boniato or purple sweet potato, technique and timing shift noticeably.

What Does Sweet Potato Taste Like?

sweet potato - What Is Sweet Potato

Raw sweet potato is mild and faintly sweet - almost understated. Heat changes everything.

As it cooks, natural starches convert to sugars, which is why a roasted sweet potato tastes dramatically sweeter than a raw one. The effect is most pronounced above 300°F (149°C), where those sugars start to caramelize at the surface.

Sensory SnapshotModerate Intensity
👅 Flavor
sweetearthynuttycaramel
✋ Texture
moistsilkycreamy when mashed
👃 Aroma
warm starchslightly floral

The closest comparison is roasted carrot or pumpkin - that same vegetal sweetness - but with more starchy body and a deeper caramel finish. It's sweeter and moister than white potato, and far less neutral.

Purple and white varieties are noticeably less sweet and firmer in texture. They read more savory and hold their shape better under long cooking.

How to Use Sweet Potato

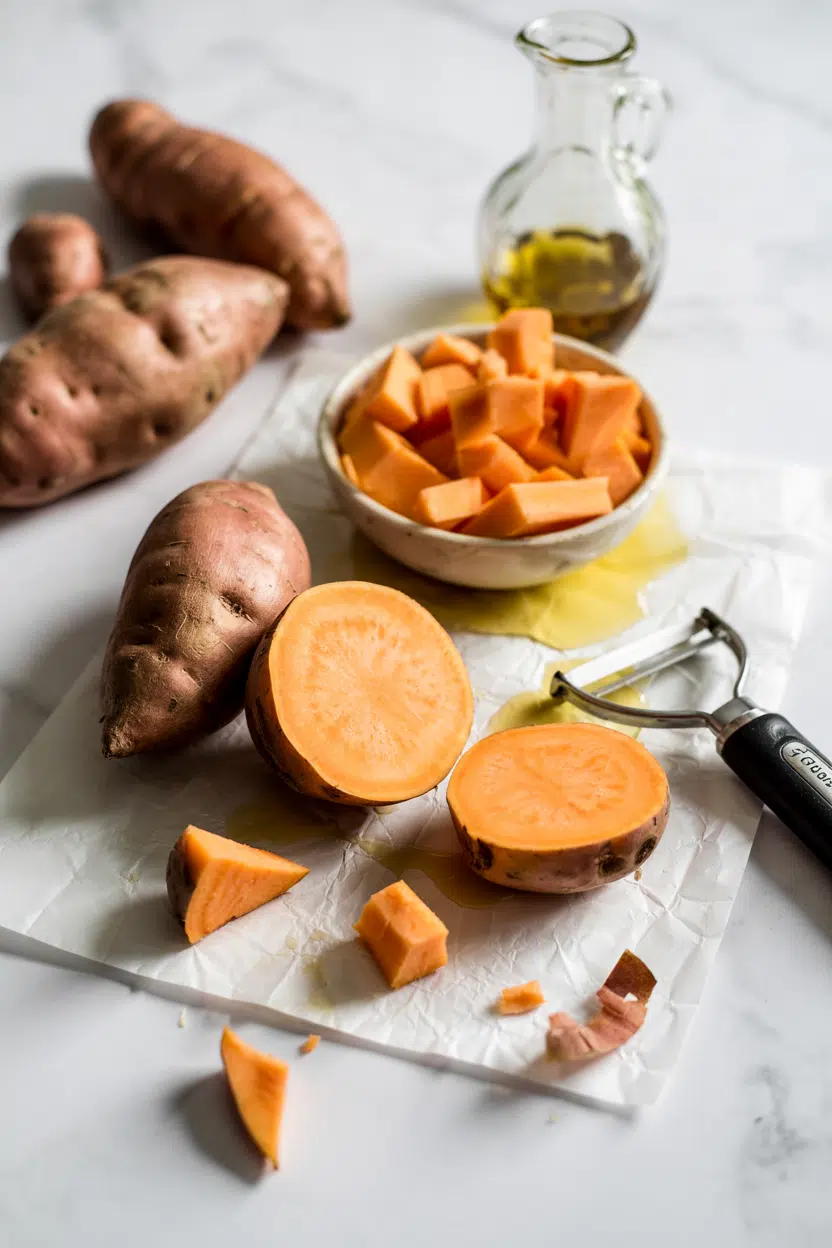
Sweet potato handles a wider range of heat than most roots. Roasting is where its character really comes through: cut into cubes, tossed in oil, and cooked at high heat until the edges caramelize and pull slightly from the flesh.

Golden Rule
Don't crowd the pan. Sweet potato releases moisture as it cooks - give each piece space or it steams instead of caramelizes.

Whole baked sweet potato works similarly to a baked white potato but cooks faster and collapses more at the center. Mashed sweet potato is richer and naturally creamier, needing less butter than white mash to achieve a smooth texture.

Coconut milk works especially well in place of dairy.

Pureeing into soups or bisques requires no thickener - the starch does that naturally. For savory contrast in curries or West African stews, the natural sweetness balances heat and acid without added sugar.

How Sweet Potato Is Used
MethodBest ForTip
🔥 RoastingCaramelized sides, salads, grain bowlsUse 425°F (220°C) minimum; flip once halfway
🍠 Baking wholeSimple sides, stuffed mealsPierce skin and bake on foil to catch syrup
🥣 Boiling + mashingSmooth mash, pie filling, frittersDrain thoroughly - excess water makes mash gluey
🍟 Frying or air-fryingSweet potato fries, chipsSoak cut pieces in cold water first to reduce sugar sticking
🍲 StewingCurries, soups, West African stewsAdd in the last 20 minutes - it softens quickly

Flavor pairings that reliably work: warm spices (cinnamon, ginger, nutmeg), rosemary and thyme for savory applications, and a splash of citrus or vinegar to cut the inherent sweetness.

When a recipe calls for it and you're out, reviewing your sweet potato stand-ins helps narrow down which substitute actually fits the dish.

Try It In
🥣Sweet Potato MashWhere the silky texture really shows→🍟Crispy Sweet Potato FriesTechnique-driven for actual crunch→🥗Roasted Sweet Potato and Black Bean SaladCaramel edges meet acidic dressing→

How to Buy and Store Sweet Potato

Choose tubers that feel solid and heavy for their size. The skin should be smooth and taut with intact tapered ends - no soft spots, wet blemishes, or visible sprouts.

Watch Out
Never refrigerate raw whole sweet potatoes. Temperatures below 50°F (10°C) cause a hard, starchy core that won't soften properly, even after cooking.

Flesh color signals how the tuber will cook. Orange-fleshed varieties (often labeled Beauregard or Garnet) yield moist, sweet results. White and purple types stay firmer and dryer - useful when you want texture to hold through long braising.

For a clear comparison of white-fleshed varieties, the guide on preparing boniato vs batata properly covers the handling differences in detail.

Store whole raw tubers in a cool, dark, ventilated space at 55-60°F (13-16°C). They last 2-4 weeks this way.

Cut or cooked sweet potato goes into the fridge and keeps for 3-5 days. Knowing the sweet potato spoilage signs saves you from cooking one that's already past its window.

Start with Roasting

If you're new to cooking sweet potato, roast it first. Cut into 1-inch cubes, coat in oil, and give it space at high heat.

That's where the caramel flavor develops, and it tells you exactly what this ingredient can do. From there, mashing and pureeing follow the same logic - high heat, enough time, and no excess moisture.

Frequently Asked Questions

Why are sweet potatoes sweeter after cooking?

Heat activates amylase enzymes in the flesh, which break down starches into maltose - a simple sugar. This conversion peaks around 135-170°F (57-77°C) during slow cooking, which is why a long-baked sweet potato tastes far sweeter than a boiled one cooked quickly.

What is the difference between yams and sweet potatoes?

They're entirely different plants. Sweet potatoes are Ipomoea batatas; true yams are Dioscorea species native to Africa and Asia, with dry, starchy flesh and bark-like skin. Most "yams" sold in US supermarkets are actually orange-fleshed sweet potatoes.

Is sweet potato a vegetable or a starch?

Both, depending on context. Botanically it's a root vegetable, but nutritionally it's categorized as a starchy food alongside potatoes and corn. Dietitians typically count it toward starch intake rather than non-starchy vegetable servings.

How do you tell if a sweet potato is bad?

Discard it if the skin shows wet, sunken soft spots, mold, or the flesh has turned dark brown or black inside. Small fibrous sprouts alone don't mean it's inedible - cut them away and check that the flesh is still firm throughout.

Are sweet potatoes healthier than regular potatoes?

Not categorically. Sweet potatoes have more beta-carotene and slightly more fiber, while white potatoes have more potassium and a lower calorie count per gram. The better choice depends on what your diet is already missing.

What Is Shishito Pepper? [Taste, Uses & More]

April 2, 2026

Blistered shishito peppers hit the table at a Japanese izakaya and disappear within minutes - whole pods, charred and salted, eaten stem to tip.

What Is Shishito Pepper

That rapid service from skillet to plate isn't laziness; it's the entire point of this small, thin-skinned pepper that needs almost nothing to shine.

If you've been reaching for alternatives to poblano pepper or hunting down a mild heat option for weeknight cooking, shishito is worth a serious look, and seasoning with jalapeno pepper will feel overcomplicated by comparison.

QUICK SUMMARY

The shishito pepper is a small Japanese variety with mild smoky sweetness and a thin skin that blisters fast. About one in ten pods packs unexpected heat. Best used whole in a screaming-hot pan with sea salt - done in under five minutes.

🌶️Flavor: Mild smoky-sweet with a bright grassy note and rare heat
🍳Best Use: Pan-blistered whole in cast iron, served immediately with sea salt
🛒Buy: Glossy, firm, bright green pods - avoid any with soft spots or limp skin
❄️Shelf Life: Raw 5-10 days refrigerated; cooked 3-4 days in an airtight container
🌍Cuisines: Japanese, modern American, Korean-fusion, pan-Asian grills

What Is shishito pepper?

Shishito pepper is a thin-walled capsicum annuum variety originating in Japan, where it has been cultivated for centuries as a snacking and drinking-food staple.

The name comes from the Japanese word shishi (lion) - a nod to the pepper's slightly crinkled, lion-head tip.

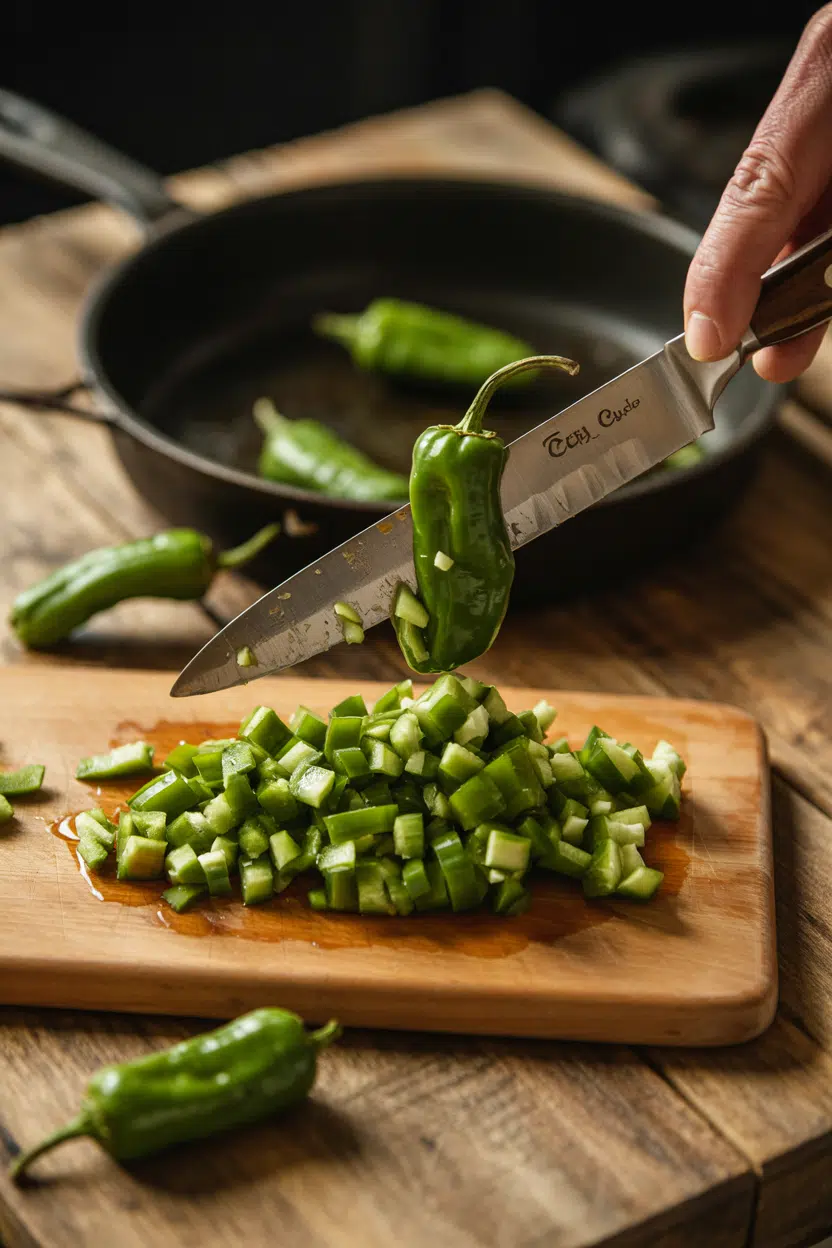
Each pod runs 2-4 inches long with a tapered, wrinkled shape and a stem that doubles as a natural handle.

Most pods stay firmly mild, but roughly one in ten carries a sharp jalapeño-level bite - a randomness that makes eating them a minor game.

Shishito sits in the same mild pepper family as the Spanish padron pepper in cooking, and the two are often confused. The key difference: padrón tends to run hotter and has a slightly thicker wall.

  • 🌶️ Species - Capsicum annuum, same family as bell and poblano peppers
  • 📍 Origin - Japan, now widely grown in the U.S. for restaurant and home markets
  • 📏 Size - 2-4 inches, wrinkled and tapered with a thin, blisterable skin
  • 🎲 Heat factor - Most pods are mild (100-1,000 Scoville); roughly 10% spike unexpectedly

What Does shishito pepper Taste Like?

shishito pepper - What Is Shishito Pepper

Raw shishito has a bright grassy sweetness - mild, clean, and slightly vegetal, not unlike a young green bell pepper but with more character. The thin skin adds a faint bitterness at the edges.

Heat changes everything. Once blistered, the pepper softens and turns smoky-sweet, with caramelized char notes that mellow the grassiness considerably.

Think mild poblano crossed with a charred green bell, occasionally interrupted by one hot pod that tastes closer to a fresh jalapeño.

Sensory SnapshotMild Intensity
👅 Flavor
smoky-sweetgrassymildly bitteroccasional heat
✋ Texture
tender-firm rawsoft and charred blistered
👃 Aroma
green and vegetallightly smoky when roasted

How to Use shishito pepper

Pan-blistering is the standard move. Get a cast-iron skillet or heavy pan screaming hot, add a small amount of oil, and drop in whole dry pods - no cutting needed. They blister and char in three to four minutes. A note on your equipment choice: comparing comal vs cast iron skillet options is worthwhile here, since both surfaces handle high-heat blistering well.

Finish with sea salt or smoked salt and eat immediately. That's it.

That's the recipe most chefs go back to.

Beyond the skillet, shishito works across several preparations worth knowing:

How Shishito Pepper Is Used
MethodBest ForTip
🥗 RawSalads, bento slicing, mild pepper note in grain bowlsSlice thin - thick cuts are chewy and bitter raw
🍳 Pan-BlisteredIzakaya-style snack, appetizer, side dishDry pods completely - water causes splattering
🔥 Grilled WholeSkewer appetizer, summer cookoutsLeave stem on as a handle; char over direct heat 2-3 min
🥒 Quick PickledBento boxes, condiment, grain bowl toppingRice vinegar, pinch of sugar, 30 min minimum
🥘 SautéedStir-fries, omelets, frittatasAdd near the end - long heat destroys the thin skin

Shishito belongs to Japanese and modern American kitchens equally.

It pairs naturally with soy sauce, sesame oil, and yuzu - the classic Japanese trio - but also handles gochujang well for a Korean-fusion contrast.

If sesame oil isn't available, replacements for sesame oil can keep a similar nutty undertone in the dish.

Avoid long braises or heavy dairy sauces - both bury the pepper's bright green character.

Try It In
🍋Air Fryer Lemon Pepper Chicken TendersCitrus heat pairing that works alongside blistered shishito→🥦Air Fryer Lemon Pepper CauliflowerMild vegetable base that shares shishito's green character→🍖Air Fryer Lemon Pepper MeatballsServe with pickled shishito as a tangy counterpoint→

How to Buy and Store shishito pepper

At the market, reach for pods that are glossy, bright green, and firm with no give under your fingers. A slightly reddish pod just means it has ripened further - still fine, slightly sweeter.

Skip anything with shriveled stems, dark blemishes, or skin that feels papery.

Watch Out
Don't wash shishito pods before storing - moisture speeds up decay fast. Rinse only right before cooking.

Store unwashed pods in a perforated plastic bag or open produce container in the crisper drawer. For a full breakdown of timelines and conditions, keeping shishito pepper fresh covers the specifics in detail.

  • 🗓️ Raw, refrigerated - 5-10 days in the crisper drawer
  • 🍳 Cooked/blistered - 3-4 days in an airtight container
  • 🚫 Freezing - Not recommended for whole pods; texture collapses completely after thawing

Start With the Blister

If you've never cooked shishito before, skip the complicated preparations and start with a hot cast iron and sea salt. That one technique shows you exactly what this pepper does.

Understanding the role poblano pepper plays in mild-pepper cooking helps frame where shishito fits - it's less earthy, faster to cook, and lower commitment for a weeknight side.

Once you've nailed the blister, the soy-sesame finish and quick-pickle variations follow naturally.

Golden Rule
Dry your pods before they hit the pan. Wet shishito steams instead of blistering, and you lose the char entirely.

Frequently Asked Questions

Are shishito peppers spicy?

Most are not. About nine out of ten pods rate between 100-1,000 Scoville units - milder than a banana pepper. Roughly one in ten delivers a jalapeño-level bite with no visual warning.

What do shishito peppers taste like raw?

Raw shishito tastes grassy, mildly sweet, and slightly bitter at the skin - similar to a young green bell pepper with more edge. The flavor mellows and turns smoky once heat is applied.

What is the difference between shishito and padrón?

Both are small blistering peppers with a similar roulette-heat pattern, but padrón originates in Spain and has a thicker wall and earthier flavor. Shishito is thinner-skinned, sweeter, and blisters faster.

Can you freeze shishito peppers?

Not successfully for whole pods. The thin skin turns mushy after freezing and thawing, making blistering impossible. Freeze only if you plan to blend or purée them later.

How do you know when shishito peppers are done cooking?

Look for dark char spots on at least two sides and a visibly softened, slightly collapsed skin. The whole process takes three to five minutes in a properly preheated pan over high heat.

What Is Safflower Oil? [Taste, Uses & More]

April 2, 2026

Crack open a bottle of refined safflower oil and you'll notice almost nothing - a pale, barely-there color, a faint seed-like smell, and a thin, silky pour that vanishes into the pan.

What Is Safflower Oil

That near-invisibility is the whole point.

Like sunflower oil stand-ins or replacements for canola oil, safflower oil earns its place in the kitchen by stepping back and letting every other ingredient carry the flavor.

QUICK SUMMARY

Safflower oil is a pale, neutral seed oil pressed from Carthamus tinctorius seeds. Its very mild flavor, near-zero aroma, and high smoke point make it a reliable all-purpose oil for frying, baking, and cold dressings.

👅Flavor: Very mild, faintly nutty, slightly sweet - nearly neutral
🔥Smoke Point: Refined: up to 510°F (266°C); cold-pressed: around 225°F (107°C)
🍳Best Uses: High-heat frying, neutral vinaigrettes, baking, emulsions
🫙Shelf Life: Refined unopened: 12-18 months; opened cold-pressed: 4-6 months
🛒Buy It: Choose refined in a dark bottle for frying; cold-pressed for raw applications

What Is Safflower Oil?

Safflower oil is pressed from the seeds of Carthamus tinctorius, a thistle-like flowering plant native to the Mediterranean and parts of Asia.

Commercially, it ranks as one of the most widely used seed oils in food manufacturing and home kitchens across Western markets.

Two distinct types exist, and they behave differently. Refined safflower oil is heat-processed to remove color, odor, and impurities -

the result is a clear, light oil with a smoke point reaching around 510°F, built for high-heat work. Cold-pressed safflower oil skips that processing, retaining slightly more flavor and nutrients, though its smoke point drops considerably.

You'll also encounter high-oleic safflower oil, a variety bred for a higher monounsaturated fat content, which improves stability under heat.

On labels, the oil appears under names like Carthamus oil, safflower seed oil, and safflower cooking oil.

Nutritionally, standard varieties are rich in linoleic acid (an omega-6 fatty acid) and vitamin E, with very low saturated fat - a profile that suits vegan cooking and low-saturated-fat diets well.

What Does Safflower Oil Taste Like?

safflower oil - What Is Safflower Oil

Safflower oil is about as close to flavorless as a cooking oil gets. The taste is very mild - a faint nuttiness and a whisper of sweetness, nothing assertive.

Sensory SnapshotMild Intensity
👅 Flavor
faintly nuttyslightly sweetneutral
✋ Texture
very lightsilky
👃 Aroma
nearly odorlesssubtle seed-like

In a direct comparison, safflower oil tastes closest to refined sunflower oil or light grapeseed oil - all three read as neutral, though safflower has a marginally sweeter edge.

Cold-pressed versions carry slightly more character, closer to a mild walnut oil but without the bitterness.

Heat doesn't dramatically change safflower oil's flavor the way it would with extra-virgin olive oil.

It stays clean and transparent in taste even after frying, which is why it's the preferred carrier when dishes need the cooking fat to disappear.

If a recipe calls for swapping out olive oil in a context where fruitiness would interfere, safflower is a sound option.

How to Use Safflower Oil

Safflower oil's high smoke point makes refined varieties a reliable choice for any high-heat application. It handles deep frying and pan-searing without breaking down or imparting off-flavors, which matters when you're building a dish around delicate proteins.

How Safflower Oil Is Used
MethodBest ForTip
🍟 Deep FryingChicken, fish, doughnutsUse refined only - cold-pressed will smoke and degrade
🍳 Pan-SearingWhite fish, chicken breast, sous-vide finishing searsPreheat pan before adding oil for best crust
🥗 Cold EmulsionsVinaigrettes, homemade mayoCold-pressed gives a slightly richer body in dressings
🧁 BakingCakes, muffins, quick breadsSwap 1:1 for vegetable oil; won't affect taste or crumb
🌿 InfusingHerb or chile finishing oilsUse cold-pressed as the base for better flavor absorption

For cold applications, its silky, thin body works well in vinaigrettes alongside lemon juice and bright acids, or blended into mayonnaise where a light mouthfeel is the goal.

It pairs cleanly with fresh herbs like parsley and cilantro, garlic, shallots, and mild proteins - chicken, white fish - without competing.

Baked goods that call for neutral fat, from cakes to muffins, accept safflower oil without detectable change in flavor or texture.

Watch Out
Don't use safflower oil where a distinct fat flavor is the point - toasted sesame dishes, peanut-heavy stir-fries, or olive-oil-forward raw salads where fruitiness matters. It will do the job, but the dish will taste flat.

Because safflower and grapeseed behave so similarly in cold preparations, readers researching replacements for grapeseed oil will find safflower near the top of most swap lists.

Try It In
🎂Olive Oil CakeSwap in safflower for a lighter, more neutral crumb→🍋Ricotta with Lemon and Olive OilUse cold-pressed safflower when you want less fruitiness→🫙Labneh with Olive Oil and Za'atarA neutral drizzle lets the za'atar flavor lead→

How to Buy and Store Safflower Oil

Start with the bottle itself. Dark glass or opaque packaging protects the oil from light degradation - avoid clear plastic containers unless you plan to transfer the contents immediately.

Best Pick
For frying and high-heat cooking, choose refined safflower oil in a dark bottle. For dressings and finishing, cold-pressed gives marginally better flavor. Don't buy one and expect it to do both jobs well.

Check for a clear, pale yellow color when buying.

Cloudiness or visible sediment signals age or possible contamination - skip it.

On shelf life: unopened refined safflower oil holds around 12-18 months; once opened, aim to use it within 6-12 months. Cold-pressed safflower oil is more fragile - opened bottles should be used within 4-6 months, and refrigeration helps.

For questions about long-term storage, knowing the rules around freezing safflower oil is worth a look before stocking up in bulk.

Start With the Right Type

Reach for refined safflower oil first if high-heat frying or neutral baking is your primary use. It handles heat, stays clean in flavor, and costs less per use than specialty oils.

Switch to cold-pressed when raw applications - dressings, finishing drizzles, infused oils - are the goal.

If you're already holding a bottle and wondering whether it still works across your recipes, the guide on swapping out safflower oil walks through when other oils cover the same ground.

Frequently Asked Questions

What is the smoke point of safflower oil?

Refined safflower oil reaches around 510°F (266°C), one of the highest smoke points among common cooking oils. Cold-pressed safflower oil sits much lower, around 225°F (107°C), and shouldn't be used for high-heat frying.

Is safflower oil healthy?

It's low in saturated fat and high in vitamin E. Standard varieties are rich in linoleic acid (omega-6); if you want more monounsaturated fat, choose high-oleic safflower oil, which has a fatty acid profile closer to olive oil.

What is the difference between safflower and sunflower oil?

Both are neutral seed oils with comparable smoke points and flavor profiles. Sunflower oil is more widely available and often cheaper; safflower oil tends to have a slightly higher smoke point in its refined form and a marginally thinner body.

Can you use safflower oil for frying?

Yes - refined safflower oil is well-suited to deep frying and pan-searing. Use only the refined type; cold-pressed has too low a smoke point and will degrade quickly under frying temperatures.

Is safflower oil good for salads?

Cold-pressed safflower oil works well in vinaigrettes and light dressings where a neutral, silky base is needed. It won't add fruitiness or bitterness, so it suits salads where the acid or herbs should carry the flavor.

What Is Suet? Taste, Texture, Uses & Storage

April 2, 2026

Suet does one thing in cooking that refined oils and soft fats struggle to replicate: it creates structure while adding richness. In steamed puddings, it keeps the crumb open and moist without turning greasy.

What Is Suet

In pastry, it produces a short, crumbly crust that holds up under heavy fillings. If you've worked with lard alternatives or schmaltz replacements and found them lacking that firm, clean bite, suet is worth understanding on its own terms.

QUICK SUMMARY

Suet is the firm kidney fat from beef or mutton, used raw in doughs and rendered into tallow for frying. It has a mild, clean animal flavor that disappears into dishes, making it useful for savory pies, steamed puddings, and dumplings.

🐄What It Is: Hard kidney fat from beef or mutton, also called kidney fat
👅Flavor: Mild, clean, faintly meaty - neutral once rendered into tallow
🥧Best Uses: Steamed puddings, suet crust pastry, dumplings, rendered tallow
🌡️Intensity: Mild - flavor recedes into background during cooking
🛒Buy From: Butcher counter; ask for kidney or loin fat trimmed from beef
❄️Shelf Life: 1-2 weeks refrigerated; 6-12 months frozen when well wrapped

What Is Suet?

Beef suet is the dense, white fat that surrounds the kidneys and loins of cattle or sheep. Unlike softer body fat, it has a high melting point - around 45-50°C (113-122°F) - which is what makes it behave differently from butter or lard in recipes.

It belongs to the category of renderable animal fats, alongside lard and tallow. Mutton suet behaves similarly to beef suet but is slightly softer and carries a faint lanolin note that disappears when cooked.

You'll find it sold under several names at the butcher:

  • 🥩 Beef suet - the most common form; clean white fat from cattle kidneys
  • Mutton suet - from sheep; slightly softer, traditional in British puddings
  • Kidney fat - the same product, named by its anatomical source
  • Atora - a UK brand of pre-shredded, shelf-stable suet used widely in home baking
  • Tallow - the rendered, clarified form; what suet becomes after slow melting and straining

Raw suet has a firm, waxy texture and crumbles when pressed. It is not the same as dripping, which is collected from roasting pan juices, or shortening alternatives derived from vegetable sources.

Its British and northern European roots go back centuries, anchoring dishes from beef puddings to mincemeat.

What Does Suet Taste Like?

suet - What Is Suet

Raw suet has a mild, clean animal fat flavor - faintly meaty, low in sweetness, with no strong aftertaste. It tastes closer to fresh beef fat than to cured bacon fat, and noticeably less rich than rendered lard.

Heat changes it. Rendered suet (tallow) becomes almost neutral in aroma and flavor, which is why it works in both savory and sweet dishes without dominating either. The slight beefy note present in raw form largely burns off during cooking.

Sensory SnapshotMild Intensity
👅 Flavor
clean animal fatmildly savorylow sweetness
✋ Texture
firm and crumbly rawsilky when rendered
👃 Aroma
faint meatyneutral once rendered

One practical note: suet in a steamed pudding doesn't taste "fatty." The high melting point means it releases slowly during steaming, coating the crumb without pooling. That's the structural role no neutral oil can replicate.

How to Use Suet

Suet shows up in two forms in the kitchen - raw and shredded, or rendered into tallow - and each has distinct applications.

British and Irish cooking rely on it most heavily, though Central and Eastern European recipes also call for rendered suet fat in traditional preparations.

Golden Rule
Always grate or shred cold suet. Warm suet smears and clumps rather than distributing evenly through dough.

Raw, shredded suet goes directly into doughs and batters. In a classic steak and kidney pudding, it's folded into flour and water to create a suet crust - dense, short, and steam-resistant. The same approach applies to boiled dumplings, where suet produces a fluffier texture than butter. For sweet preparations, shredded suet appears in spotted dick and traditional Christmas mincemeat, paired with stone fruits, raisins, black pepper, and nutmeg.

How Suet Is Used
MethodBest ForTip
🧀 Raw / ShreddedSuet crust pastry, dumpling dough, steamed puddings, mincemeatKeep refrigerator-cold; grate on a coarse box grater
🔥 Rendered (Tallow)Deep frying, roasting potatoes, searing meatStrain through cheesecloth while hot to remove solids
♨️ SteamedSavory puddings, sweet sponge puddingsUse a well-greased basin and a tight foil seal
🍳 Pan FriedFrying eggs, browning sausages, sautéed onionsA small cube of raw suet renders quickly in a hot pan

Rendered tallow from suet has a high smoke point, making it a reliable fat for deep frying and roasting. Potatoes roasted in tallow develop a harder, crispier crust than those done in vegetable oil. When a recipe needs something other than tallow, check these beef tallow alternatives for comparable options. Beyond cooking, suet mixed with oats and seeds sets into bird suet cakes - a cold-weather use that requires no cooking at all.

Try It In
🍞Warm Bread Pudding with Vanilla SauceA steamed, fat-enriched pudding that shows suet's moisture-locking role→

How to Buy and Store Suet

Skip the supermarket. A butcher is the right source for fresh suet - ask specifically for kidney fat or loin fat trimmed from beef or mutton.

Fresh suet should be snowy white with a firm, dry texture. Avoid any pieces showing yellow tones, brown patches, or a sour metallic smell.

Watch Out
Yellowing suet has begun to oxidize. It will taste rancid in finished dishes - don't use it.

For storage, wrap tightly in butcher paper or vacuum seal before refrigerating. Suet keeps for 1-2 weeks in the fridge and 6-12 months in the freezer when portioned before freezing.

Freeze in usable amounts - a 200g block works well for a single pudding or pastry batch.

If you want full details on storage timelines and signs of spoilage, see this guide on suet freshness guide. For dumpling-specific storage questions after cooking, the same logic applies as for dumplings freshness guide more broadly.

Pre-shredded shelf-stable suet (like Atora) is a practical alternative. It has a longer pantry life, though the flavor is slightly more processed than fresh.

Where to Start With Suet

New to suet? Start with dumplings.

They're forgiving, fast, and the suet flavor is barely detectable in the finished dish - a low-stakes way to see how the fat behaves in dough. From there, a basic suet crust for a savory pie is the natural next step.

If your first priority is rendering rather than baking, start with a small batch of tallow. It stores well and gives you a working fat for everyday frying before you commit to full pudding-making.

Need a stand-in for a specific dish? These suet alternatives cover the most practical swaps by recipe type.

Frequently Asked Questions

Is suet the same as tallow?

No. Suet is the raw, solid kidney fat; tallow is what you get after rendering suet slowly and straining out the connective tissue. Tallow is shelf-stable, pourable when warm, and has a higher smoke point than raw suet.

Can you eat suet raw?

Technically yes, but it's not eaten raw on its own. Raw suet is used uncooked in pastry doughs and mincemeat, where it melts during baking or steaming rather than being consumed in its raw state.

What is suet made of?

It's the hard fat that surrounds the kidneys and loins of cattle or sheep. Structurally it's mostly saturated and monounsaturated fat, with a higher melting point than most other animal fats due to its dense fatty acid composition.

How do you render suet at home?

Chop or grate the raw suet, then melt it in a heavy pan over the lowest heat possible, stirring occasionally. Once fully liquid, strain through cheesecloth into a clean jar - the result is clear, golden tallow.

Can vegetarians use suet in traditional recipes?

Not with animal suet. Vegetable suet products exist - typically hydrogenated palm or vegetable fat blended with rice flour - and they work in suet pastry and puddings, though the flavor is noticeably more neutral.

What Is Shiitake Mushroom? [Taste, Uses & More]

April 2, 2026

You spot them at the farmers market - dark brown caps, dense and slightly damp, with gills running clean underneath.

What Is Shiitake Mushroom

Shiitake mushrooms look humble next to flashier produce, yet they quietly anchor some of the most umami-forward cooking across East Asia.

If you're also weighing other strong-flavored fungi, comparing shiitake vs porcini options clarifies where each one wins, and oyster mushroom swaps that work covers the lighter end of the spectrum.

QUICK SUMMARY

Shiitake is a firm, meaty mushroom with deep umami flavor, sold fresh or dried. Dried shiitake concentrates that savoriness and doubles as a stock base. Use it in stir-fries, braises, ramen, and vegetarian mains. Fresh keeps up to a week; dried lasts nearly a year.

🍄Flavor: Umami-rich, meaty, slightly smoky when dried, mildly nutty
🌏Origin: East Asia - primarily China and Japan
🔥Best Methods: Sauté, braise, grill, rehydrate for stock
🛒Buy: Firm, dry caps with intact gills; whole dried caps with smoky aroma
📅Shelf Life: Fresh 5-7 days refrigerated; dried several months to one year

What Is Shiitake Mushroom?

Shiitake (Lentinula edodes) is an edible fungus native to East Asia, cultivated in China and Japan for over a millennium.

It grows naturally on hardwood logs - oak, chestnut, and chinquapin - and takes its name from the Japanese words for the shii tree (椎) and mushroom (茸).

The cap is dark brown, umbrella-shaped, and ranges from 5 to 12 centimeters across.

Underneath, pale cream gills run to a short, fibrous stem that is typically discarded or reserved for stocks.

You'll find shiitake sold two ways: fresh, with soft-firm caps ready to cook; and dried, which is darker, shriveled, and far more intensely flavored.

Outside Japan, they're also called oak mushrooms, and the dried form sometimes appears labeled as Chinese black mushrooms in Cantonese cooking.

  • 🍄 Fresh shiitake - mild, immediate umami; best for stir-fries and grilling
  • 🌑 Dried shiitake - concentrated savory depth; essential for ramen stocks and braising liquids
  • 🪵 Log-grown vs. sawdust-grown - log cultivation takes longer and produces thicker, more aromatic caps

What Does Shiitake Mushroom Taste Like?

shiitake mushroom - What Is Shiitake Mushroom

Shiitake delivers umami first - a deep, savory richness that lingers longer than most vegetables. Raw, the flavor is mild and faintly grassy, which is also why raw consumption is not recommended beyond very thin slices in salads.

Heat changes everything. Sautéing concentrates the savoriness and introduces a meatiness that earns frequent comparisons to portobello, while replacements for portobello mushroom show just how much overlap the two share.

Dried shiitake pushes further into smoky, almost beefy territory - the soaking liquid itself tastes like a light, savory broth.

Sensory SnapshotStrong Intensity
👅 Flavor
umami-richmeatysmoky (dried)mildly nutty
✋ Texture
firmchewyspongy (rehydrated)
👃 Aroma
woodsyearthymushroomy depth

How to Use Shiitake Mushroom

Shiitake is one of the few fungi that performs well across every cooking method -

high-heat browning, slow braises, and long stock simmers all produce different but worthwhile results. Sauté caps in a dry pan first to drive off moisture, then add fat; this gets you proper browning rather than steaming.

Pairing with soy sauce or tamari is standard across Japanese, Chinese, and Korean preparations, and replacements for soy sauce covers what to reach for when you're out.

Mirin adds a gentle sweetness that balances shiitake's savory weight - for more on that condiment, comparing aji mirin vs rice vinegar options is useful context.

Classic pairings also include garlic, ginger, scallions, sesame oil, tofu, dark leafy greens, and miso with kombu for stock.

How Shiitake Mushroom Is Used
MethodBest ForTip
🍳 SautéStir-fries, rice bowls, vegetarian mainsDry-pan first, then add sesame oil or butter
🍲 BraiseSoy-mirin braises, bento componentsSimmer in soy, mirin, and ginger until deeply glazed
🔥 Grill/RoastWhole caps, side dishes, miso glazesBrush with sesame oil; grill gill-side up first
💧 RehydrateRamen stock, miso soup, dashi-style basesUse cold water, 20-30 min minimum; save the soaking liquid
🥗 Raw (thin slices)Salads only - and cook thoroughly if sensitiveSlice paper-thin; dress immediately to soften

Beyond East Asian cooking, shiitake works in Western vegetarian dishes: diced into a mushroom ragout over polenta, torn into dumpling filling, or tempura-battered and served with tentsuyu.

If shiitake isn't available, shiitake mushroom stand-ins maps out which alternatives hold up in each context.

Try It In
🍝One-Pot Creamy Mushroom OrzoShiitake's meaty texture holds up well in this creamy one-pot format→🍄Air Fryer Stuffed MushroomsLarge shiitake caps are ideal for stuffing without falling apart→🧀Cheesy Spinach Stuffed MushroomsPairs the earthy depth of shiitake with spinach and melted cheese→

How to Buy and Store Shiitake Mushroom

Fresh shiitake should have firm, dry caps with no sliminess, no darkly stained stems, and gills that are pale and intact. Avoid any with wrinkled or sunken caps - that's age showing.

For dried shiitake, whole caps with a strong, smoky aroma outperform broken pieces; the latter has usually lost aromatic compounds during rough handling.

Watch Out
Never store fresh shiitake in a sealed plastic bag. Trapped moisture accelerates sliminess fast - use a paper bag in the crisper instead.

Store dried shiitake in an airtight container in a cool, dark pantry - not the fridge, where humidity can degrade them. The guide on storing shiitake mushroom correctly goes deeper on both forms.

When your stock needs that soaking liquid but you're short on dashi components, replacements for dashi powder covers what bridges the gap.

  • Fresh shiitake - 5 to 7 days, paper bag, refrigerator crisper
  • Dried shiitake - several months to a year, airtight container, cool pantry
  • Rehydrated shiitake - use within 3 days; refrigerate submerged in soaking liquid

Start With the Dried Version

If you're new to shiitake, buy dried caps first. They're shelf-stable, affordable, and the soaking process teaches you immediately how much flavor this mushroom carries - one cup of rehydrating liquid tastes like a full bowl of broth.

Golden Rule
Always save the shiitake soaking liquid. Strain it through a fine mesh and use it as the base of any stock, soup, or braising sauce.

From there, move to fresh caps for stir-fries and grilling. Once you've cooked both forms, the choice becomes intuitive: dried for depth, fresh for texture.

Frequently Asked Questions

What does shiitake mushroom taste like raw?

Raw shiitake tastes mild and faintly grassy, with much less umami than cooked. The savory depth only develops fully with heat. Raw consumption also carries a risk of shiitake dermatitis in sensitive individuals, so cooking is strongly recommended.

Do shiitake mushrooms taste like meat?

Not exactly, but the comparison is understandable. Cooked shiitake has the same dense, chewy bite and savory depth as beef broth, which is why it works as a meat substitute in vegetarian cooking.

How do you rehydrate dried shiitake mushrooms?

Submerge dried caps in cold water for at least 20-30 minutes, or up to several hours for thicker caps. Cold water draws out more flavor compounds than hot water, producing a richer soaking liquid you can use as stock.

Are shiitake mushrooms healthy?

Yes. Shiitake contains B vitamins, selenium, potassium, and beta-glucans - a dietary fiber linked to immune support. They also contain ergosterol, which converts to vitamin D when the mushroom is exposed to UV light.

Can vegetarians eat shiitake as a protein source?

Shiitake is low in protein compared to legumes or tofu, so it shouldn't be a primary protein source. Its real value in vegetarian cooking is umami - it replaces the savory depth that meat would otherwise provide.

Austrian Potato Salad

April 2, 2026

You need 35 minutes and one pot for this. No mayo, no precooking onions, no complicated steps that turn potato salad into a weekend project.

Austrian Potato Salad served on a plate

The warm dressing soaks into the potato slices while they're still tender from the pot. That's the trick that makes this taste like something from a Central European family kitchen instead of a last-minute side dish.

Make this when you need something that works for weeknight meals, picnics, or holiday dinners without the usual potato salad heaviness.

QUICK SUMMARY

Austrian potato salad uses warm vinaigrette instead of mayo, creating a tangy side dish that soaks up flavor as it cools. You boil waxy potatoes whole, slice them thin while warm, and toss with a hot dressing made from broth, vinegar, and mustard. The salad needs 30 minutes to rest before serving so flavors can meld.

⏱️Time Reality: 15 minutes prep, 20 minutes boiling, 30 minutes resting before it's ready
🔥First Move: Boil potatoes whole with skins on until fork-tender, then peel while warm
⚠️Watch Out: Dressing cold potatoes makes them bland-toss them warm within 5 minutes of slicing

Table of Contents

Toggle
  • Why This Recipe Works
  • What You'll Need
    • Ingredient Details
  • Ingredient Swaps
  • What to Serve With It
  • Store and Reheat
  • Frequently Asked Questions
  • Austrian Potato Salad
    • Method 
    • Tried this recipe?

Why This Recipe Works

The key is dressing the potatoes while they're warm so they absorb the tangy vinaigrette. For a version that comes together quickly, something fresh like salad takes even less time and still delivers that bright, acidic contrast.

Quick Reference
⏱️
Prep Time
15 min
🔥
Cook Time
20 min
⏰
Total Time
35 min
🍽️
Servings
4-6 servings
📊
Difficulty
Easy
🏷️
Category
Side
💡
Quick Tip
Dress potatoes warm for best flavor absorption
🎯
Best For
Weeknight | Picnic | Family meals

What makes it work:

  • Waxy potatoes hold their shape - Yukon Gold or red potatoes stay firm when sliced, unlike starchy russets that turn mushy
  • Boiling whole with skins on - keeps the flesh intact and makes peeling easier when they're warm
  • Hot dressing at 120°F - the warm potatoes absorb the vinaigrette faster and more evenly than cold ones
  • 30-minute rest - lets the onion bite mellow and the vinegar balance out with the starch
  • Slicing to ¼ inch - creates enough surface area for dressing without breaking down into mash
Quick Tip
Peel the potatoes as soon as they're cool enough to handle-the skins slip off cleanly without tearing the flesh underneath.

What You'll Need

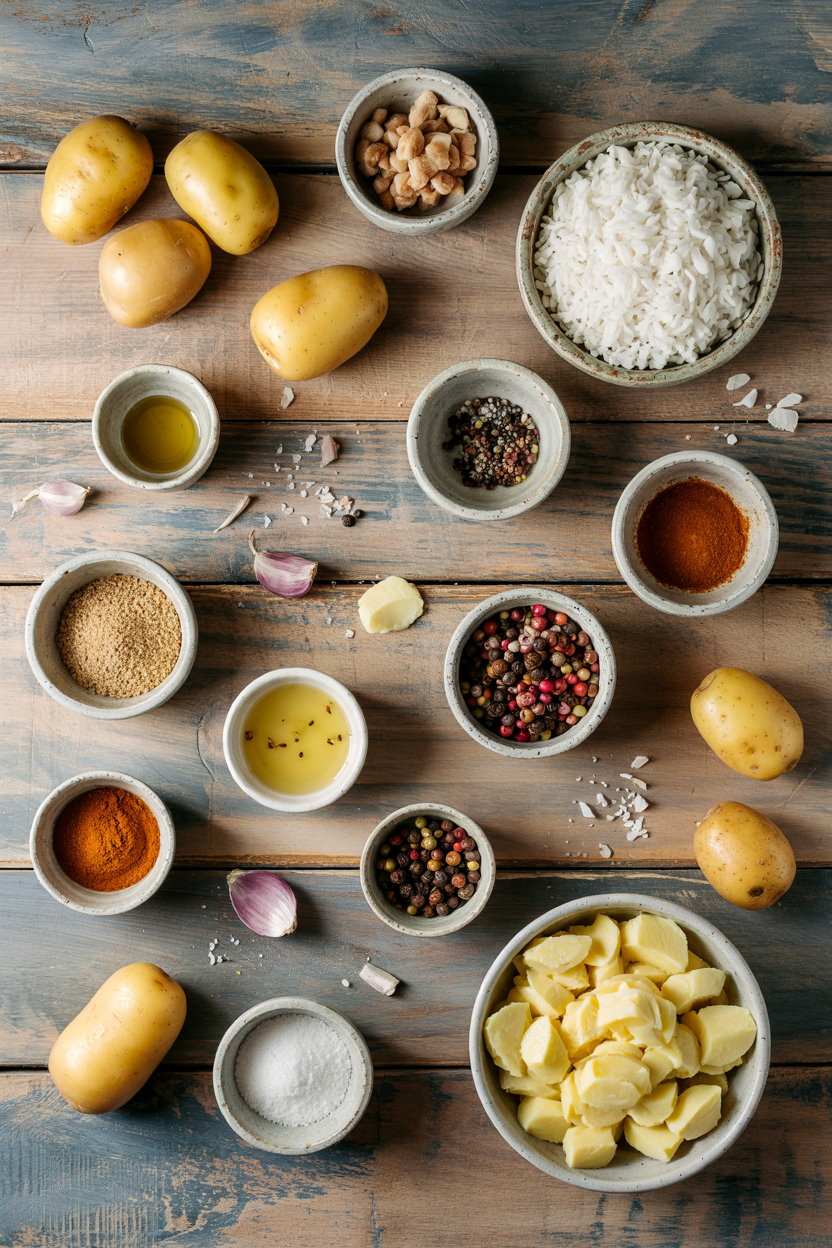
Ingredients for Austrian Potato Salad

You're shopping for potatoes and pantry staples, nothing that requires a specialty store run. Rich mains need something to cut through, and salad does exactly that. For a version that comes together quickly, a warm soup on the side balances heavier plates without adding prep time.

🥔
Potatoes
  • 2 lbs waxy potatoes (Yukon Gold or red)
🧅
Aromatics
  • 1 medium yellow or white onion, thinly sliced
  • Fresh parsley for garnish
🥢
Dressing
  • ¾ cup vegetable broth
  • ¼ cup apple cider vinegar
  • 3 tablespoon sunflower or neutral oil
  • 1 tablespoon mustard (Dijon or mild)
  • 1 teaspoon sugar
🌶️
Seasoning
  • Salt and black pepper to taste

Ingredient Details

  • Waxy potatoes
    Use Yukon Gold or red potatoes-they hold their shape when sliced and don't turn gluey like russets.
  • Apple cider vinegar
    Provides the signature tang-white wine vinegar works if that's what you have, but the flavor is sharper.
  • Vegetable broth
    Adds depth and keeps the dressing from being too acidic-water works in a pinch but tastes flat.
  • Mustard
    Emulsifies the dressing and adds pungency-Dijon is traditional but yellow mustard works for milder flavor.
  • Sunflower oil
    Neutral flavor that doesn't overpower the vinegar-canola works too, but skip olive oil unless it's very mild.
  • Yellow onion
    Sliced thin and added raw for bite-soak in cold water for 5 minutes if you want to tone down the harshness.
  • Sugar
    Balances the vinegar's acidity-honey works but changes the flavor slightly.

Ingredient Swaps

Most swaps work as long as you keep the waxy potatoes and warm dressing method. The beef works best when it hits the table at the same time as the main. For a version that comes together quickly, this rich beef pairs well with the tangy salad without competing for attention.

Four swaps that work:

  • White wine vinegar instead of apple cider vinegar - slightly sharper tang, same acidity level
  • Canola oil instead of sunflower oil - neutral flavor, no texture change
  • Shallots instead of yellow onion - milder bite, softer texture when mixed in
  • Chicken broth instead of vegetable broth - adds savory depth but makes it non-vegetarian

Red Potatoes vs Yukon Gold

Works for: Both hold shape well when boiled and sliced thin

Skip if: You want the creamiest texture-Yukon Gold has slightly more starch and tastes richer

Water vs Vegetable Broth

Works for: Budget-friendly option that still makes a functional dressing

Skip if: You want depth-broth adds flavor that water can't replicate

Instructions

The whole process takes 35 minutes from pot to table, with 30 minutes of hands-off resting time at the end. Chicken adds the contrast this plate needs, but timing matters. For a version that comes together quickly, this quick chicken dish roasts while the salad rests so everything finishes at once.

  1. Boil the potatoes whole with skins on in salted water for 15-20 minutes. Check doneness by piercing with a fork-it should slide in with slight resistance, not mush straight through. Drain and let them cool just enough to handle.
  2. Peel the warm potatoes and slice them ¼ inch thick into a mixing bowl. The warmth makes the skins slip off easily. Slice while they're still hot so they absorb the dressing better.
  3. Heat the broth, vinegar, mustard, sugar, oil, salt, and pepper in a small pot over medium heat until it reaches 120°F. Whisk to dissolve the sugar and emulsify the mustard. The dressing should be warm but not boiling.
  4. Pour the hot dressing over the sliced potatoes and add the thinly sliced onion. Toss gently with a spatula to coat every slice without breaking them apart. The potatoes will absorb most of the liquid as they sit.
  5. Let the salad rest at room temperature for 30 minutes before serving. This gives the onion time to mellow and the vinegar to balance with the starch. Garnish with fresh parsley and adjust salt and pepper before serving.
Golden Rule
Never dress cold potatoes-they won't absorb the vinaigrette and you'll end up with bland slices sitting in a puddle of dressing.

What to Serve With It

This salad fills the gap on plates that need something tangy to cut through rich mains. Most people skip style, but it balances the meal. For a version that comes together quickly, simple homemade style works when you need texture contrast without adding cook time.

Side Dish Prep Why It Works How to Serve
Grilled sausages Easy Savory meat complements the tangy potatoes without competing Slice on the bias and serve warm alongside
Simple green salad Easy Adds freshness and crunch to balance the soft potatoes Toss with vinaigrette and serve immediately
Roasted vegetables Medium Earthy flavors balance the salad's acidity Roast at 425°F for 25 minutes, serve hot
Cold meats platter Easy Classic Austrian pairing for picnics and casual meals Arrange sliced meats on platter with pickles
Crusty bread Easy Helps soak up the dressing and juices on the plate Slice thick and serve warm or toasted

Three ways to serve it:

  • For weeknight dinners: Pair with grilled sausages and a quick green salad for a complete plate in under 45 minutes
  • For picnics: Serve at room temperature with cold meats, pickles, and hard-boiled eggs for traditional Austrian flavor
  • For holiday meals: Double the batch and serve alongside roasted vegetables and crusty rye bread

If you're looking for more ideas on building out a full meal, try easy chicken meal planning for pairing strategies that work across different mains.

Best Pick
This salad works warm, at room temperature, or chilled-but most Austrians prefer it slightly warm or at room temp for maximum flavor.

Store and Reheat

The salad keeps for 3-4 days in the fridge but tastes best within the first 48 hours. A good salad can make or break the plate. For a version that comes together quickly, a warm soup on the side reheats better if you're meal prepping for the week.

Method Time Best For
🍳 Stovetop 3-5 min low heat Warming the salad gently without drying it out
📦 Microwave 1-2 min medium power Quick reheating of individual portions
🔥 Oven 5-7 min at 300°F Warming larger quantities without losing texture

For best results when storing:

  • Store in a shallow, airtight container - keeps the potatoes from getting soggy on the bottom
  • Don't freeze it - the texture turns mushy and watery when thawed
  • Add extra oil or broth when reheating - the potatoes absorb liquid as they sit, so drizzle a tablespoon of warm broth or oil to moisten before serving
  • Bring to room temperature before serving - cold from the fridge tastes flat, so let it sit out for 15 minutes
  • Adjust seasoning after storing - the vinegar mellows overnight, so taste and add a splash more vinegar or salt before serving

Frequently Asked Questions

Can I use red potatoes instead of Yukon Gold?

Yes, red potatoes work fine-they hold their shape well and have a slightly firmer texture. Yukon Gold tastes creamier and richer, but red potatoes are easier to find and cost less.

How should I store leftover Austrian potato salad?

Store it in a shallow, airtight container in the fridge for 3-4 days. Add a tablespoon of warm broth or oil before reheating to replace the moisture the potatoes absorbed.

Is Austrian potato salad served warm or cold?

Traditionally, it's served warm or at room temperature-that's when the flavors are brightest. You can serve it cold, but the vinegar tastes sharper and the potatoes lose some of their creaminess.

What do I do if the salad tastes too acidic?

Add more oil or an extra potato to dilute the acidity. You can also stir in a pinch of sugar to balance the vinegar.

Can I add bacon or other meats to Austrian potato salad?

Yes, crispy bacon bits or diced ham are common additions that add savoriness. Toss them in with the warm dressing so they absorb some of the vinaigrette.

Austrian Potato Salad served on a plate

Austrian Potato Salad

No ratings yet
Austrian Potato Salad features waxy potatoes dressed warm with a tangy vinaigrette made from broth, vinegar, and mustard. The warm dressing soaks into the tender potato slices, creating a flavorful side dish that works for weeknight meals, picnics, or holiday dinners.
Print Recipe Pin Recipe
Prep Time 15 minutes mins
Cook Time 20 minutes mins
Total Time 35 minutes mins
Servings: 6 servings
Course: Side Dish
Cuisine: Austrian
Ingredients Method Notes

Ingredients
  

  • 2 lbs waxy potatoes Yukon Gold or red potatoes
  • 1 medium yellow or white onion thinly sliced
  • ¾ cup vegetable broth
  • ¼ cup apple cider vinegar
  • 3 tablespoon sunflower oil or neutral oil
  • 1 tablespoon mustard Dijon or mild
  • 1 teaspoon sugar
  • salt to taste
  • black pepper to taste
  • fresh parsley for garnish

Method
 

  1. Boil the potatoes whole with skins on in salted water for 15 to 20 minutes until fork-tender but still firm. Drain and let them cool just enough to handle.
    2 lbs waxy potatoes, salt
  2. Peel the warm potatoes and slice them ¼ inch thick into a mixing bowl. Keep them warm to help absorb the dressing better.
    2 lbs waxy potatoes
  3. Heat vegetable broth, apple cider vinegar, mustard, sugar, sunflower oil, salt, and black pepper in a small pot over medium heat until it reaches about 120°F. Whisk to dissolve sugar and emulsify mustard. The dressing should be warm but not boiling.
    ¾ cup vegetable broth, ¼ cup apple cider vinegar, 3 tbsp sunflower oil, 1 tbsp mustard, 1 tsp sugar, salt, black pepper
  4. Pour the hot dressing over the sliced potatoes and add the thinly sliced onion. Toss gently with a spatula to coat all slices without breaking them apart.
    1 medium yellow or white onion
  5. Let the salad rest at room temperature for 30 minutes before serving to allow flavors to meld and the onion bite to mellow. Garnish with fresh parsley and adjust seasoning before serving.
    fresh parsley, salt, black pepper

Notes

  • Use waxy potatoes like Yukon Gold or red for best texture and flavor.
  • Dress the potatoes while still warm for optimal absorption of the vinaigrette.
  • Let the salad rest 30 minutes to mellow flavors and balance acidity before serving.

Tried this recipe?

Let us know how it was!

What Is Romano Cheese? Taste, Uses & Quick Guide

April 2, 2026

Most cooks reach for romano cheese as a simple pasta topper and never think twice about what's in the bag.

What Is Romano Cheese

That's the mistake - because the difference between pre-grated cow's-milk Romano and a wedge of genuine Pecorino Romano is roughly the difference between background noise and a sharp, pungent punch that restructures an entire dish.

Much like the differences between parmesan vs parmigiano reggiano reveal how label wording hides real quality gaps, romano cheese carries the same risk of confusion at the counter.

QUICK SUMMARY

Romano cheese is a hard, aged grating cheese with a granular texture and sharp, salty flavor. Authentic Pecorino Romano is made from sheep's milk in Sardinia and Lazio; American Romano uses cow's milk and tastes milder. Both are used grated over pasta and stirred into sauces.

🐑Origin: Sardinia and Lazio, Italy; cow's-milk versions made in the U.S.
🧂Flavor: Salty, sharp, and umami-rich - noticeably stronger than Parmesan
🍝Best Uses: Grated over pasta, stirred into sauces, mixed into breadcrumbs
❄️Shelf Life: Opened wedge keeps 3-6 weeks wrapped correctly in the fridge
🏷️Buy Smart: Look for DOP labeling for authentic sheep's-milk Pecorino Romano

What Is Romano Cheese?

Romano cheese is a hard, aged grating cheese originating from central and southern Italy, specifically the regions of Lazio and Sardinia.

The authentic version, Pecorino Romano, carries DOP (Protected Designation of Origin) status and must be produced from sheep's milk following traditional methods - the name "pecorino" itself comes from pecora, Italian for sheep.

American-made Romano takes a different path. U.S. manufacturers typically use cow's milk, producing a cheese that looks similar but delivers a milder, less pungent result.

Labeling matters here: "Romano" on a U.S. package does not guarantee sheep's milk, while "Pecorino Romano" with DOP certification does.

Both versions share some traits worth knowing:

  • 🧀 Texture - Firm and granular when young, increasingly crumbly as it ages further
  • 🏺 Aging - Minimum eight months for DOP Pecorino Romano; flavor sharpens with time
  • 🌍 Also called - Pecorino Romano, pecorino, romano (U.S.), or simply "romano cheese"
  • 🐄 Cow's-milk analog - Milder, less barny, lower sodium than sheep's-milk versions

What Does Romano Cheese Taste Like?

romano cheese - What Is Romano Cheese

Pecorino Romano hits hard. It's sharper and saltier than Parmesan, with a tangy edge and a distinct umami depth that lingers after swallowing.

Where Parmigiano-Reggiano reads as nutty and buttery, romano reads as bracing and aggressive - it announces itself.

Sensory SnapshotStrong Intensity
👅 Flavor
saltysharpumami-richtangy
✋ Texture
firmgranularcrumbly
👃 Aroma
pungentbarnysheepy

Heat changes the experience slightly.

When grated into hot pasta water or stirred off-heat into a sauce, the sharpness softens and the saltiness integrates - which is exactly why using romano cheese for creaminess in pasta emulsions works so well.

Cow's-milk Romano is noticeably tamer: less barny on the nose, less aggressive on the palate, closer to a sharp provolone in character.

Watch Out
Romano's sodium level is significantly higher than Parmesan's. Taste your dish before adding salt when romano is already in the mix - oversalting is easy.

How to Use Romano Cheese

Romano's strongest role is as a finishing cheese. Grated finely over hot pasta, it melts into the surface and seasons every bite simultaneously.

Its sharpness is designed for dishes that can carry it - not subtle cream sauces, but bold Roman preparations.

Cacio e pepe is the purest test. The dish relies entirely on Pecorino Romano and black pepper, with pasta water forming the sauce; understanding cacio e pepe's shelf life also helps if you're planning ahead with a batch. Aglio e olio is another natural pairing, where the salty cheese cuts through the garlic-heavy oil - and storing aglio e olio correctly matters if you make extra.

How Romano Cheese Is Used
MethodBest ForTip
🥗 Shaved RawBitter green salads with arugula or radicchioUse a vegetable peeler for thin, irregular shards
🍝 Grated FinishPasta dishes, soups, minestroneGrate finely - coarse shreds won't incorporate smoothly
🍅 Stirred InTomato sauces, bean soups, braised dishesAdd off-heat to prevent clumping and preserve sharpness
🍞 Mixed InBreadcrumbs, meatball mixes, baked fillingsReduce or skip added salt - romano handles it

Cured pork like guanciale or pancetta pairs naturally with romano's salt and funk. Sturdy red wines - Montepulciano, Aglianico - balance its intensity without being overwhelmed.

Delicate floral herbs and sweet fruit pairings don't work; romano steamrolls them.

Try It In
🧀Cheddar Cheese StrawsSwap in romano for a sharper, saltier bite→🍳Egg and Cheese Breakfast SandwichA small amount of grated romano adds serious depth→🥗Blue Cheese Dressing (Homemade)See how strong aged cheeses work in dressings→

How to Buy and Store Romano Cheese

At the counter, look for a whole wedge with pale straw to ivory color and a hard, dry rind.

For authentic sheep's-milk cheese, DOP labeling is your clearest signal - the words "Pecorino Romano" with DOP certification mean the product meets Italian origin and production standards. Avoid any wedge with wet or sticky surfaces, which indicates improper storage.

Best Pick
A DOP-labeled wedge of Pecorino Romano delivers the sharpest, most authentic flavor. Pre-grated Romano is convenient but loses pungency faster - buy the block when flavor matters.

In the U.S., check the label carefully to distinguish cow's-milk Romano from sheep's-milk Pecorino.

They're sold side by side and priced similarly, but the flavor difference is significant.

Once opened, wrap the cut face in wax paper, then loosely in plastic or a sealed container.

An opened wedge keeps three to six weeks this way; know the romano cheese spoilage signs - blue-gray mold beyond the rind, slimy texture, or an ammonia smell - before using a wedge that's been sitting.

Pre-grated Romano runs out of quality in one to two weeks.

Start with the Wedge

If romano cheese has only appeared in your kitchen as a green cardboard cylinder, buy a wedge of DOP Pecorino Romano next time and grate it fresh.

The flavor difference is immediate and unambiguous.

For cooks who find the sheep's-milk version too sharp at first, cow's-milk Romano makes a reasonable starting point - and alternatives to parmesan cheese can help you map out the whole family of hard Italian grating cheeses before committing to one.

Frequently Asked Questions

Is Romano cheese the same as Parmesan?

No. Both are hard Italian grating cheeses, but romano is saltier, sharper, and made from sheep's milk in its authentic form. Parmesan is milder and nuttier, made from cow's milk with a longer typical aging period.

What is the difference between Pecorino Romano and Romano?

Pecorino Romano is DOP-certified, sheep's-milk cheese from Sardinia or Lazio. American "Romano" typically uses cow's milk and is milder, less pungent, and lower in sodium - a noticeably different product despite the shared name.

Can you melt Romano cheese?

It melts, but not smoothly at high heat - it tends to clump or turn grainy if added directly to a boiling sauce. Stir it in off-heat with a splash of pasta water to get a cohesive, creamy result.

Which is better for cacio e pepe: Romano or Parmesan?

Pecorino Romano is traditional and correct for cacio e pepe. Many cooks use a half-and-half blend with Parmesan to soften the intensity - purely Parmesan produces a milder dish that lacks the dish's characteristic sharp edge.

How salty is Romano cheese?

Very. Pecorino Romano contains roughly 1,200-1,400 mg of sodium per 100g - among the highest of common grating cheeses. Traditional production involves heavy dry-salting of the curds, which drives both preservation and flavor.

What Is Squirrel? [Taste, Uses & More]

April 2, 2026

Squirrel meat has a smell that tells you exactly what the animal spent its life eating - woodland, bark, foraged nuts, open air.

What Does Squirrel Taste Like

That earthy, almost woody aroma is the first signal you're working with small-game, and it sets expectations correctly before the meat ever hits a pan.

Much like the role chicken plays as a reference point for lean white protein, squirrel invites comparison but quickly moves past it into territory that's richer, gamier, and more structurally demanding.

The cooks who handle it best treat it like rabbit - something in the neighborhood of dishes alongside rabbit can orient a whole meal built around small game.

QUICK SUMMARY

Squirrel meat is lean small-game with a mildly gamey, nutty flavor and firm texture that rewards low-and-slow cooking. Best in braises, stews, and Southern pan-fry preparations, it stores up to 3 days refrigerated or 12 months frozen.

🌰Flavor: Lean, mildly gamey, nutty with a slightly sweet note
🍖Best Use: Braise, stew, or pan-fry in a seasoned flour crust
❄️Shelf Life: 2-3 days refrigerated; up to 12 months frozen
🌿Pairs With: Bacon, thyme, root vegetables, black pepper, red wine
⚠️Watch: Requires proper field dressing; risk of lead contamination from bullet fragments

What Is Squirrel?

Squirrel meat comes from wild tree squirrels harvested across temperate North America and, historically, rural parts of the British Isles. The gray squirrel (Sciurus carolinensis) is the most common source in the U.S., though the larger fox squirrel yields noticeably more meat per animal.

The carcass breaks down into distinct sections: hind quarters, front quarters, and the backstrap - a slender muscle running along the spine that cooks differently from the leg meat.

Dark and light muscle sections exist in the same animal, much like poultry.

In Appalachian and Southern U.S. cooking, squirrel has fed families for generations and sits comfortably within a broader tradition of small-game preparation. French rustic game cuisine also has precedents for cooking it, though it appears there less frequently today.

  • 🐿️ Gray squirrel - Most hunted North American species; moderate size, widely available in season
  • 🐿️ Fox squirrel - Larger body, more meat per animal, slightly richer flavor
  • 🌿 Field-dressed squirrel - Cleaned shortly after harvest; the only form worth buying or using
  • 🧊 Frozen whole or quartered - Common from specialty suppliers; check vacuum seal integrity before purchase

What Does Squirrel Taste Like?

squirrel - What Does Squirrel Taste Like

Squirrel lands somewhere between dark chicken meat and rabbit, with a game note that neither of those animals carries.

The flavor is lean but not bland - a nutty undercurrent comes through clearly, especially in animals that fed on acorns and hickory nuts.

Sensory SnapshotModerate Intensity
👅 Flavor
mildly gameynuttyslightly sweet
✋ Texture
firmstringy if rushed
👃 Aroma
woodyearthy musk

Heat amplifies the game note if you cook fast and dry. Slow, moist methods - braising especially - mellow that quality into something more savory and accessible.

Older animals skew slightly sweeter in the muscle fiber, which sounds counterintuitive but shows up consistently. Young squirrels cooked over high heat retain more of the clean, mild character that makes the rabbit comparison most accurate.

Golden Rule
Match the animal's age to the method. Young squirrels suit quick-sear or roasted backstraps; older ones need a braise or long stew to tenderize properly.

How to Use Squirrel

Appalachian cooking built its squirrel tradition around two methods: stewed in peppery gravy with root vegetables, and pan-fried in seasoned flour. Both approaches are still the most reliable entry points for cooks unfamiliar with small game.

Braising is the method with the widest margin for error. The meat breaks down into tender, shreddable pieces that work well in a meat pie filling, cornbread stuffing, or poured over a bowl of grits.

Bacon or pork fat is nearly always involved - the extra fat compensates for squirrel's leanness and keeps the braise from drying out.

For cooks who want a longer-preservation option, squirrel confit - cooked slowly in rendered fat until silky - stores well and brings the dish into the territory of French rustic game cooking, not far removed from thinking about dishes alongside duck confit where richness and acid need balancing.

How Squirrel Is Used
MethodBest ForTip
🍳 Pan-FrySouthern fried squirrel, quick weeknight prepUse seasoned flour, fry in lard or pork fat for best crust
🍲 BraiseMeat pie filling, shredded ragù, bean soupLow heat, 2+ hours; add apple or tart fruit to balance game note
🥘 StewPeppery gravy over grits, root vegetable stewBrown pieces first for deeper fond before adding stock
🫙 ConfitLong storage, rich flavor developmentCook in seasoned rendered fat at low temp; press and chill before serving
🔪 Poach + ShredBean soups, chowders, cornbread stuffingPoach gently in seasoned stock; shred while warm for easiest texture

Pairings that work consistently: thyme, bay leaf, black pepper, garlic, onion, and robust red wine or a dark beer as the braising liquid. Avoid overly sweet glazes - they push against the game note rather than rounding it.

Try It In
🧄Roasted Garlic AioliUse as a dipping sauce for pan-fried squirrel pieces→🍅Roasted Garlic Marinara SauceBraised squirrel shreds into this sauce for a rustic game ragù→🧈Roasted Garlic Béarnaise SaucePairs with quickly seared backstraps from young squirrels→

How to Buy and Store Squirrel

Buy from a hunter or specialist supplier you trust, and insist on animals that were field-dressed soon after harvest. Look for firm, evenly colored meat - pinkish-gray is normal.

A sour or ammonia smell means the carcass sat too long; walk away.

Watch Out
Avoid carcasses with greenish discoloration behind the ribs or any sign of bloating. These indicate spoilage that no amount of cooking corrects. The same warning signs apply to other small game - understanding rabbit spoilage signs gives useful crossover knowledge here.

Once home, keep raw squirrel at 32-38°F in an airtight container and cook within 2-3 days.

For longer storage, vacuum-seal portions and freeze immediately - well-packaged squirrel holds quality for 6-12 months.

Freezer burn sets in quickly with poor packaging, which is why vacuum sealing matters more here than with fattier meats.

Signs of freezer damage and off-odors on thawed game mirror what you'd find reviewing venison spoilage signs - the same principles apply across lean wild meats.

Where to Start With Squirrel

New to small game? Start with a braise. It's the method that forgives the most - tougher cuts, older animals, a slightly stronger game note all get managed by low heat and a good braising liquid.

  • Braise first - If you're uncertain about gamey flavor, a long braise with bacon, onion, thyme, and red wine is the most forgiving entry point
  • Pan-fry for crunch - Season well, use pork fat, and treat it like Southern fried chicken once you're comfortable with the meat
  • Backstraps for experienced cooks - Quick-sear or skewer over high heat, but only with young animals; older backstraps turn tough fast
  • Confit for long storage - Commit an afternoon, yield a week of rich, ready-to-use meat

Squirrel rewards patience. Rushed cooking reveals every structural limitation; slow cooking reveals everything that makes it worth eating.

Frequently Asked Questions

Is squirrel meat safe to eat?

Yes, when properly handled and cooked to an internal temperature of 165°F. The primary risks are lead contamination from bullet fragments in the carcass and zoonotic pathogens if field dressing is done carelessly - both are avoidable with correct technique.

What does squirrel taste like compared to chicken?

Closer to dark chicken meat than white, but with a distinct nutty and mildly gamey note that chicken doesn't have. The texture is firmer and benefits from longer cooking than most chicken cuts require.

How do you clean and dress a squirrel?

Field dress immediately after harvest by removing the entrails and hide, then rinse the carcass in cold water. Quarter into hind legs, front legs, and backstrap before cooking or chilling.

Does squirrel taste gamey?

Mildly, yes - less so than venison or wild boar. Animals that fed on nuts tend to have a cleaner flavor. Poor field dressing or delayed chilling amplifies the gamey quality significantly.

Can you eat squirrel raw?

No. Raw squirrel carries risk of Salmonella, tularemia, and other pathogens common in wild rodents. Always cook to a minimum internal temperature of 165°F throughout.

What Is Seitan? Taste, Texture, Uses & More

April 2, 2026

Pulled seitan in smoky barbecue sauce, piled onto a toasted roll, looks convincingly like the real thing - and for good reason. This dense, chewy wheat protein has been feeding people across East Asia for centuries, long before plant-based eating became a mainstream conversation.

Unlike jackfruit or tempeh replacements, seitan delivers a genuinely meat-like bite that holds up to high heat, bold sauces, and aggressive seasoning. Here's exactly what it is, how it tastes, and how to cook it well.

QUICK SUMMARY

Seitan is a high-protein wheat gluten product with a dense, chewy texture and mild savory flavor. It absorbs broths and sauces readily, making it one of the most convincing meat substitutes available. Best stored refrigerated in liquid and used within a week of opening.

🌾What It Is: Concentrated wheat gluten, simmered or steamed into a dense protein block
👅Flavor: Mild, savory, umami-absorbing with a faint bready background note
✋Texture: Chewy, dense, and fibrous when shredded - closer to meat than most plant proteins
🍳Best Uses: Pan-fried cutlets, braised pulled "pork," stir-fries, roasts, vegan schnitzel
🧊Shelf Life: Unopened: 2-3 weeks refrigerated. Opened: 4-7 days in liquid. Frozen: up to 3 months

What Is Seitan?

Seitan is a wheat gluten protein product made by washing the starch out of wheat flour dough until only the elastic gluten network remains. The result - a dense, springy mass - is then simmered or steamed in seasoned broth to develop both texture and flavor.

Using vital wheat gluten (pre-extracted gluten flour) speeds up the process considerably, which is why most commercial producers and home cooks favor it.

The name comes from Japanese, coined in the 1960s by the macrobiotic food movement, though the product itself is far older. China has produced a similar ingredient called fu for well over a thousand years, using it in Buddhist temple cooking as a meat-free protein source.

Across East Asia, it appears in braised dishes, soups, and cold appetizers under various names including wheat gluten and mock meat.

Seitan comes in a few forms worth knowing:

  • Block or loaf - the most common commercial format; dense and easy to slice or cube
  • Pre-seasoned strips - vacuum-sealed, ready to pan-fry or heat and serve
  • Homemade - made from vital wheat gluten flour, typically shaped and poached in broth
  • Fu (Japanese style) - dried or toasted, with a lighter, more porous texture than standard seitan

What Does Seitan Taste Like?

seitan - What Is Seitan

On its own, seitan is mildly savory with a faint bready background - not quite neutral like plain tofu, but close. The more useful way to think about its flavor is what it does under heat and seasoning: it absorbs aggressively.

Simmer it in a rich soy sauce and ginger broth and it takes on that flavor completely.

Sensory SnapshotMild Intensity
👅 Flavor
mild savoryumami-absorbingfaint bready
✋ Texture
densechewyfibrous when shredded
👃 Aroma
neutral to faintly wheatybroth-scented after cooking

Compared to firm tofu, seitan has a noticeably meatier chew - less silken, more fibrous. Seasoned and seared, thin slices can read as cooked chicken or pork in both bite and aroma.

The texture is where it earns its reputation, not the raw flavor.

Watch Out
Seitan cooked in plain water or unseasoned broth tastes flat and slightly wheaty. Always season the cooking liquid - broth, soy sauce, aromatics - from the start.

How to Use Seitan

Seitan's dense structure makes it suitable for almost every cooking method you'd apply to meat. It browns well in a hot pan, holds its shape on a grill, and shreds cleanly after braising.

The key is committing to bold seasoning at every stage.

How Seitan Is Used
MethodBest ForTip
🍳 Pan-FryingCutlets, sandwich slices, gyro stripsPat dry before searing - moisture kills the crust
🥘 BraisingPulled "pork," mock duck, roastsLow and slow in rich broth or barbecue sauce deepens flavor
🥢 Stir-FryingCubed seitan with vegetables, soy-based saucesCut small - larger pieces stay rubbery in high-heat stir-fries
🔥 Baking/RoastingSeitan roasts, vegan schnitzel, katsuMarinate first; baking without liquid dries it fast
♨️ SteamingSetting texture in homemade seitan, dumplingsWrap tightly in foil or cheesecloth to control shape

Seitan fits naturally into East Asian cooking - Chinese braised wheat gluten dishes, Japanese fu in dashi broth - and crosses into Western formats with ease. Ground or minced seitan folds into vegan meatballs or sausages the same way ground meat would.

It also works sliced thin over cold salads after marinating in sesame oil and rice vinegar. For a similar protein with a different texture profile, seitan alternatives like tempeh or textured soy protein are worth comparing.

It pairs best with soy sauce, miso, smoked paprika, garlic, ginger, and sesame oil. Nut-based sauces - peanut, tahini - cling well to its surface.

Avoid light, watery dressings; they simply don't give seitan enough to work with.

Try It In
🧄Air Fryer Garlic Parmesan MeatballsSwap in minced seitan for a plant-based version that holds together well→🍯Air Fryer Honey Garlic MeatballsThe bold glaze is exactly the kind of sauce seitan absorbs best→🍋Air Fryer Lemon Pepper MeatballsAcidic seasoning cuts through seitan's density for a cleaner finish→

How to Buy and Store Seitan

Good seitan should feel firm and elastic, not slimy. Look for pale tan blocks or strips in vacuum-sealed packs or refrigerated tubs.

Avoid anything with a sour smell, visible discoloration, or a wet, slippery surface - those are signs of spoilage regardless of the date on the pack.

Shortcut
After opening, submerge leftover seitan in fresh water or broth in an airtight container and change the liquid every 2-3 days. It stays in good shape for up to a week.

For full details on how long it keeps under different conditions, the seitan storage life guide covers opened, unopened, and frozen storage in depth.

Seitan also freezes reliably for up to three months - freeze it in the chicken broth or vegetable broth you cooked it in for best results after thawing.

  • Unopened, refrigerated - 2-3 weeks depending on the brand's packaging
  • Opened, stored in liquid - 4-7 days; change the liquid every few days
  • Frozen - up to 3 months; texture may soften slightly after thawing

Start Here If You're New to Seitan

If you've never cooked it before, pan-fried cutlets are the lowest-risk entry point. Slice the block thin, press it dry with a paper towel, season heavily, and sear in a hot oiled pan until the edges brown.

From there, braising opens up - pulled seitan in smoky sauce, slow-cooked mock duck, seitan roasts seasoned like a Sunday joint. Those dishes reward patience and bold broth.

Seitan also works as a direct protein swap anywhere you'd reach for tofu alternatives or similar plant proteins, though its chew is distinctly more assertive.

Golden Rule
Seitan is only as good as the liquid it's cooked in. Season every stage - the simmer, the marinade, the finishing sauce - and it delivers. Skip seasoning and it falls flat every time.

Frequently Asked Questions

Is seitan a meat?

No - seitan is made entirely from wheat gluten with no animal products. Its dense, chewy texture mimics meat closely enough that it's used as a direct substitute in dishes like mock duck and pulled "pork."

Is seitan gluten-free?

No. Seitan is pure wheat gluten - it's completely off-limits for anyone with celiac disease or gluten sensitivity. There's no gluten-free version; the gluten is the product.

How is seitan made?

Traditional seitan is made by kneading wheat flour dough and rinsing it repeatedly until the starch washes away, leaving only the gluten. Most home cooks now use vital wheat gluten flour mixed directly with water and seasoning, which skips the rinsing entirely.

How do you cook seitan so it's not rubbery?

Overcooking seitan at high heat without moisture causes rubberiness. Braise it low and slow in seasoned liquid, or press it dry and sear quickly over high heat - the middle ground (long dry heat) is where it goes wrong.

Does seitan have complete protein?

Not on its own. Seitan is low in lysine, an essential amino acid, so it doesn't qualify as a complete protein. Pairing it with legumes - lentils, edamame, beans - rounds out the amino acid profile at the same meal.

How Long Does Tomato Sauce Last? [Storage Guide]

April 2, 2026

Freezing tomato sauce is one of the smartest things you can do with a big batch - but only if you store it right from the start.

How Long Does Tomato Sauce Last In The Fridge

Whether you're working with a half-used jar of store-bought marinara or a pot of homemade passata, the role tomato sauce plays in weeknight cooking makes proper storage worth getting right.

Spoilage here isn't always obvious - understanding what happens to gluten during fermentation explained gives you a useful frame for why opened sauce ferments faster than most people expect.

QUICK SUMMARY

Unopened commercial tomato sauce lasts 12-18 months in the pantry. Once opened, use it within 5-7 days (store-bought) or 3-4 days (homemade) in the fridge. Freeze in portioned containers for up to 3-4 months. Never leave opened sauce at room temperature beyond 2 hours.

🥫Pantry (unopened): 12-18 months in a cool, dark place
🧊Fridge (opened): 5-7 days store-bought; 3-4 days homemade
❄️Freezer: 3-4 months in airtight, portioned containers
⚠️Key rule: Transfer opened sauce to a sealed container immediately; label with date

How Long Does Tomato Sauce Last?

Shelf life varies significantly depending on whether the sauce is commercial or homemade, and whether it's been opened. An unopened jar or can sits comfortably in the pantry for over a year.

Once air hits the sauce, the clock moves fast.

Homemade sauce - including slow-cooked marinara or passata - has no preservatives, so it moves through the fridge window faster than store-bought. Opened canned tomato sauce should always be transferred out of the can before refrigerating, since metal can affect flavor and speed deterioration.

Tomato Sauce Shelf Life
MethodStateDurationNotes
🥫 PantryUnopened (commercial)12-18 monthsCool, dark place; check 'best by' date
🧊 FridgeOpened (store-bought)5-7 daysAirtight container; label with date opened
🧊 FridgeCooked (homemade)3-4 daysCool to room temp first; shallow airtight container
❄️ FreezerCooked or opened3-4 monthsPortion into meal-sized amounts; quality drops after 4 months
🏠 CounterOpened jar left out2 hours maxPerishable; fermentation risk beyond this point

The 'best by' date on an unopened commercial jar signals peak quality, not a safety cutoff. That said, any jar showing rust, bulging, or a broken seal should be discarded immediately.

How to Store Tomato Sauce

Pantry: Keep unopened jars and cans away from heat sources - above the stove or near the oven will shorten their life considerably. A cool, dark cabinet is all they need.

Fridge: Once opened, move the sauce into a glass or BPA-free airtight container rather than leaving it in the original jar. Scrape the inner lid and rim clean before sealing; residue left there is where mold takes hold first.

For homemade sauce, let it cool to room temperature before sealing - trapping steam creates condensation inside the container, which accelerates spoilage. A shallow container helps it cool and chill faster.

Golden Rule
Press a layer of plastic wrap directly onto the surface of homemade sauce before sealing the lid. This limits air contact and slows oxidation between uses.

Counter: An opened jar left at room temperature is a spoilage risk after two hours. Heat and air together accelerate fermentation rapidly - this is one of the most common mistakes people make without realizing it.

Always write the open date or freeze date on the container. It's the only reliable way to track the 3-7 day fridge window without guessing.

Can You Freeze Tomato Sauce?

Yes - tomato sauce freezes well, and doing it in portions makes weeknight cooking significantly faster. Both store-bought marinara and homemade sauce are good candidates, provided you follow a few steps to protect texture.

Watch Out
Don't refreeze sauce that has already been thawed. Each freeze-thaw cycle degrades texture further and increases the risk of bacterial growth.
  1. Cool completely - bring sauce to room temperature before freezing; never freeze warm sauce.
  2. Portion by meal - divide into 1-2 cup increments so you only thaw what you need at a time.
  3. Choose the right container - use freezer-safe airtight containers or heavy-duty freezer bags; leave headspace for expansion.
  4. Remove excess air - press out air from bags or use containers filled close to capacity to reduce freezer burn.
  5. Label clearly - mark the date and portion size; use within 3-4 months for best quality.

Thaw overnight in the fridge, or submerge a sealed bag in cold water for faster results. After thawing, tomato sauce may separate or turn slightly grainy - a brief simmer with a whisk will re-emulsify it.

Quality holds well within the 4-month window; beyond that, the sauce stays safe if continuously frozen but the texture suffers.

Signs Tomato Sauce Has Gone Bad

Tomato sauce gives clear signals when it's past its point, though some signs are easier to miss than others.

Understanding mold in yogurt offers useful context for how surface mold behaves in acidic foods - tomato sauce follows a similar pattern.

Signs It's Gone Bad
👀
VisualGreen, white, or fuzzy mold on surface or rim · Dull brown or black discoloration · Large dark spots in sauce
👃
SmellSharp sour odor · Alcoholic smell indicating active fermentation
✋
TextureExcessive watery separation · Slimy film on surface

Discard the entire container if you see mold - don't scoop around it. Mold roots run deeper than the visible surface in soft, high-moisture foods like tomato sauce.

Slight separation after refrigeration is normal and not a spoilage sign on its own. Reheat and whisk; if any off-odors appear during reheating, throw it out.

Getting the Most From Every Jar

These habits make a real difference across the shelf life of tomato sauce, whether store-bought or homemade.

  • 🧴 Portion before freezing - 1-2 cup increments mean less waste and faster thaw times.
  • 🏷️ Label everything - open date in the fridge, freeze date in the freezer; guessing is how sauce gets wasted.
  • 🫙 Clean the jar rim - wiping residue from lid and rim before resealing slows mold growth at the contact point.
  • 🔄 Reheat before judging - sauce that looks separated after refrigeration often recovers with a brief simmer and whisk.

If you're running low and need a workaround, checking out replacements for tomato sauce can keep dinner on track without a store run.

For dishes where tomato sauce is simmered into a braise or stew - like the method used in slow-simmered beef stew with potatoes cooking methods - sauce that's approaching the end of its fridge window works fine when it's going straight into a hot pot.

Shortcut
Use sauce that's 3-4 days old in a cooked dish rather than as a fresh topping - heat kills early-stage bacteria and extends your options without waste.

Frequently Asked Questions

Can you freeze opened tomato sauce?

Yes. Cool it completely, portion into freezer-safe containers or heavy-duty bags, and freeze for up to 3-4 months. Leave headspace in containers - tomato sauce expands as it freezes.

How long does homemade tomato sauce last in the fridge?

Three to four days, stored in a shallow airtight container. Homemade sauce has no preservatives, so it moves through the fridge window faster than commercial jarred sauce.

How long does jarred pasta sauce last after opening?

Up to 5-7 days in the fridge in a sealed airtight container. Leaving it in the original jar is fine if the lid seals tightly, but wiping the rim clean before resealing slows mold.

Does tomato sauce go bad if it smells okay?

Not necessarily, but smell alone isn't a reliable safety check. Visible mold - even a small spot on the rim - is a discard signal regardless of how the sauce smells.

Can you refreeze thawed tomato sauce?

It's not recommended. Refreezing degrades texture significantly and increases bacterial risk. Portioning before the first freeze is the best way to avoid this situation entirely.

Indonesian Sambal Oelek

April 2, 2026

When you need a condiment that works for meal prep or a last-minute weeknight dinner, sambal oelek delivers. Fresh red chilies ground with vinegar and garlic create bright heat that makes plain rice or grilled chicken taste intentional.

Indonesian Sambal Oelek served on a plate

Pulse the chilies instead of fully blending and the texture stays coarse. The chunky bits hold up better than smooth chili paste when stirred into stir-fries or used as a dipping sauce.

Perfect for busy weeks when store-bought hot sauce feels one-note and you want something that actually tastes like chilies.

QUICK SUMMARY

Fresh red chilies pulsed with vinegar, garlic, and salt create coarse, bright sambal oelek in 10 minutes. The key is stopping before it turns into paste-small chili pieces give you texture that holds up in cooking. Store it in the fridge for up to three weeks and use it on everything from fried eggs to satay.

⏱️Timeline: 10 minutes start to finish, no cooking required
🔪First move: Pulse chilies 5-7 times in blender, stop before smooth
⚠️Watch out: Over-blending creates paste instead of coarse texture-pulse carefully

Table of Contents

Toggle
  • Why This Recipe Works
  • What You'll Need
    • Ingredient Details
  • Ingredient Swaps
  • What to Serve With It
  • Store and Reheat
  • Frequently Asked Questions
  • Indonesian Sambal Oelek
    • Method 
    • Tried this recipe?

Why This Recipe Works

Grinding chilies with vinegar and salt preserves the bright, raw heat instead of cooking it out. For a version that comes together quickly, try this flaky homemade salad recipe-the tanginess works with mild proteins the same way sambal cuts through rich stir-fries.

Quick Reference
⏱️
Prep Time
10 min
🔥
Cook Time
0 min
⏰
Total Time
10 min
🍽️
Servings
8 servings
📊
Difficulty
Easy
🏷️
Category
Condiment
💡
Quick Tip
Grind chilies evenly, avoid overheating blender
🎯
Best For
Weeknight | Meal prep | Entertaining
  • Pulse blending keeps texture coarse-5-7 pulses break chili skins without turning them into liquid
  • Vinegar preserves color and heat-acid stops chilies from oxidizing and going dull
  • Salt acts as both seasoning and preservative-layering half before grinding, half after balances flavor
  • Fresh chilies deliver brighter heat than dried-you get vegetal notes instead of just generic spice
  • Resting for 15 minutes melds flavors-garlic mellows slightly and vinegar distributes evenly
Quick Tip
Toast whole chilies in a dry pan for 1-2 minutes at medium-low heat before grinding to add smoky depth without bitterness.

What You'll Need

Ingredients for Indonesian Sambal Oelek

Use firm, bright red chilies without wrinkles or soft spots-older chilies lose heat and turn bitter. Most people skip homemade, but it balances the meal-for another take on tangy condiments, check out this classic homemade dish that uses similar acid-forward technique.

🌶️
Chilies & Heat
  • Red chili peppers (fresh, firm)
  • Garlic cloves
🫙
Acid & Seasoning
  • Vinegar (white or rice)
  • Salt
  • Sugar (optional)
🧄
Aromatics
  • Shallots (optional)
  • Lime juice (optional swap for vinegar)
💧
Liquid
  • Water (for texture adjustment)

Ingredient Details

  • Red chili peppers
    Select firm chilies with smooth skins-wrinkled or soft spots mean less heat and muddy flavor
  • Vinegar
    White vinegar gives sharp acidity, rice vinegar adds mild sweetness-both preserve color and heat
  • Salt
    Add half before grinding to draw moisture, half after to control final seasoning level
  • Garlic
    Fresh cloves add pungent depth that powder can't match-use 2-3 cloves per cup of chilies
  • Water
    Add 1 tablespoon at a time to reach slightly moist consistency-too much creates watery paste
  • Sugar
    Optional pinch balances acidity without making sambal sweet-skip if you want pure heat
  • Shallots
    Add mild sweetness and aroma-mince finely and grind with chilies for integrated flavor

Ingredient Swaps

Fresno or serrano chilies work when you can't find standard red Thai chilies-heat level stays similar. Salad adds the contrast this plate needs, but timing matters-we keep a batch ready for nights like this, and flaky homemade salad recipe uses the same quick-prep approach.

  • Fresno or serrano chilies instead of red Thai chilies-slightly different heat profile but similar texture, budget-friendly
  • Lime juice instead of vinegar-brighter citrus note with less sharpness, method swap that changes flavor
  • Gluten-free tamari instead of salt-adds umami depth, modifies flavor, works for gluten-free needs
  • Garlic powder instead of fresh garlic-less pungent and more convenient, budget option when fresh isn't available

Lime Juice for Vinegar

Works for: Brighter citrus flavor, less sharp acidity

Skip if: You want traditional tangy heat and longer shelf life

Dried Chili Flakes Soaked

Works for: No fresh chilies available, adds smoky depth

Skip if: You want coarse texture with visible seeds and skin

Rice Wine Vinegar

Works for: Milder acidity, slightly sweet finish

Skip if: You want sharp, clean heat that cuts through rich food

Instructions

Pulse instead of blending continuously so you control texture at every stage. Fried chicken adds the contrast this plate needs, but timing matters-for a version that comes together quickly, try this quick fried chicken dish that uses high-heat searing to get crispy skin in under 30 minutes.

  1. Stem and roughly chop chilies - Cut stems off red chilies and slice into 1-inch pieces, keep half the seeds for heat and texture
  2. Add chilies, garlic, half the salt, and vinegar to food processor - Combine chopped chilies, 2-3 garlic cloves, half your measured salt, and 2 tablespoons vinegar in processor bowl
  3. Pulse 5-7 times until coarse - Hit pulse button in short bursts, stopping when chili skins break but small pieces remain visible, not smooth paste
  4. Add water 1 tablespoon at a time - Drizzle water while pulsing once or twice between additions until mixture looks slightly moist but not runny
  5. Stir in remaining salt, taste, and rest 15 minutes - Mix in reserved salt by hand, adjust vinegar if needed, let sit at room temperature so flavors meld before jarring
Golden Rule
Stop pulsing when you still see individual chili pieces with seeds-over-processing creates paste that loses texture and turns bitter from friction heat.

What to Serve With It

Sambal works on anything that needs bright heat-fried eggs, grilled meats, plain rice, noodles. Most people skip noodles, but it balances the meal-for simple homemade noodles that absorb sambal without competing, use wide rice noodles tossed with a touch of oil.

Side Dish Prep Why It Works How to Serve
Steamed white rice Easy Neutral base absorbs spicy sambal, balances heat Spoon sambal over rice, mix into each bite
Fried eggs Easy Rich yolk cuts chili heat, runny texture spreads sambal Dollop sambal on fried eggs, break yolk to mix
Grilled chicken Medium Smoky char pairs with bright sambal heat Brush sambal on chicken last 2 minutes of grilling
Sautéed greens Easy Mild bitterness balances sharp chili, refreshing contrast Toss greens with sambal while still hot in pan
Cucumber salad Easy Cool crunch offsets chili heat, cleanses palate Mix sambal into dressing or serve on the side

Three ways to serve it:

  • As a condiment-set jar on table with spoon so everyone controls their own heat level
  • Mixed into stir-fries-add 1-2 tablespoons at the end of cooking for bright heat that doesn't cook out
  • With satay skewers-classic pairing where sambal cuts through rich peanut sauce
Shortcut
Stir sambal into mayo or sour cream for instant spicy dipping sauce-1 tablespoon sambal per ½ cup dairy creates balanced heat.

Store and Reheat

Sambal keeps longer than you'd think because vinegar and salt act as preservatives. The stew works best when it hits the table at the same time as the main-we keep a batch ready for nights like this, and something warm like stew uses similar make-ahead technique that holds up in the fridge.

Method Time Best For
📦 Room Temperature 0 min Direct serving as condiment, cold applications
🍳 Stovetop 1-2 min on low Warming before mixing into hot dishes
📦 Microwave 20-30 sec Small portions, careful not to overheat

For best results when storing:

  • Use sterilized glass jars-boil jars and lids 5 minutes before filling to extend fridge life
  • Press plastic wrap directly on surface-eliminates air contact that fades color and dulls heat
  • Store in fridge up to 3 weeks-vinegar and salt preserve fresh chili flavor longer than expected
  • Freeze in ice cube trays for 3 months-pop out portions as needed for stir-fries and marinades
  • Stir before each use-oil and solids separate naturally, quick mix redistributes flavor

Frequently Asked Questions

Can I use dried chili flakes instead of fresh chilies?

Yes, soak 1 cup dried chili flakes in warm water for 15 minutes until softened, then drain and grind with vinegar and garlic. Texture will be smoother with less chili skin visible, and you'll lose some bright vegetal notes that fresh chilies provide.

How long does sambal oelek keep in the refrigerator?

Store in an airtight glass jar in the fridge for 2-3 weeks. Vinegar and salt preserve the chilies, but color will fade slightly after two weeks-heat level stays strong throughout storage.

Should I remove chili seeds for better flavor?

Remove half the seeds if you want milder heat while keeping coarse texture. Seeds and membranes carry most of the capsaicin, so leaving some in gives you authentic spice level and visual texture that makes sambal look homemade.

What can I do if sambal oelek tastes too sour?

Stir in a pinch of sugar or honey to balance acidity without making it sweet. Start with ¼ teaspoon, mix thoroughly, and taste-you're correcting sharpness, not adding dessert-level sweetness.

How do I scale the recipe for larger batches?

Double or triple all ingredients proportionally and process in batches if your food processor is small. Don't overfill the bowl past halfway-chilies need room to move around for even grinding without turning into paste.

Indonesian Sambal Oelek served on a plate

Indonesian Sambal Oelek

No ratings yet
Indonesian Sambal Oelek is a bright, coarse chili condiment made by pulsing fresh red chilies with vinegar, garlic, and salt. This quick no-cook recipe preserves vibrant heat and texture, perfect for spicing up rice, grilled chicken, or eggs.
Print Recipe Pin Recipe
Prep Time 10 minutes mins
Cook Time 1 minute min
Total Time 11 minutes mins
Servings: 8 servings
Course: Condiment
Cuisine: Indonesian
Ingredients Equipment Method Notes

Ingredients
  

  • 1 cup red chili peppers fresh, firm, roughly chopped with half the seeds retained
  • 3 cloves garlic fresh cloves
  • 1 tablespoon white vinegar
  • 1 teaspoon salt divided, half added before grinding and half after
  • 2 tablespoons water added gradually to adjust texture
  • 0.25 teaspoon sugar optional, balances acidity
  • shallots optional, minced finely and ground with chilies

Equipment

  • Food processor Used to pulse chilies and ingredients to coarse texture

Method
 

  1. Cut stems off red chilies and roughly chop into 1-inch pieces, keeping half the seeds for heat and texture.
    1 cup red chili peppers
  2. Add the chopped chilies, garlic cloves, half the salt, and vinegar to the food processor bowl.
    1 cup red chili peppers, 3 cloves garlic, 1 tablespoon white vinegar, 1 teaspoon salt
  3. Pulse 5-7 times in short bursts until the chili skins break but small pieces remain visible, avoiding a smooth paste.
    1 cup red chili peppers, 3 cloves garlic, 1 tablespoon white vinegar, 1 teaspoon salt
  4. Add water 1 tablespoon at a time while pulsing once or twice between additions until the mixture looks slightly moist but not runny.
    2 tablespoons water
  5. Stir in the remaining salt by hand, taste and adjust vinegar if needed, then let sit at room temperature for 15 minutes to meld flavors before transferring to a jar.
    1 teaspoon salt, 1 tablespoon white vinegar

Notes

  • Pulse chilies briefly to keep coarse texture and avoid bitter paste.
  • Use sterilized jars and press plastic wrap on surface for longer shelf life.
  • Store in fridge up to 3 weeks; stir before each use to redistribute flavor.

Tried this recipe?

Let us know how it was!

How Long Does Soy Sauce Last? [Storage Guide]

April 2, 2026

That half-used bottle of soy sauce sitting in your pantry from three months ago - still good, or quietly past its prime?

How Long Does Soy Sauce Last In The Fridge

The answer depends mostly on whether it's been opened and where you've been keeping it.

High salt content and fermentation byproducts give soy sauce and its flavor remarkable staying power, but oxidation will chip away at aroma and depth over time.

Understanding alternatives to worcestershire sauce or hoisin sauce stand-ins won't help if the bottle you're reaching for has already turned flat and stale.

QUICK SUMMARY

An unopened bottle lasts 1-3 years in the pantry. Once opened, refrigeration extends shelf life to 2-3 years versus 6-12 months at room temperature. Soy sauce rarely spoils outright - the real risk is flavor loss, not food safety.

🏠Pantry (opened): 6-12 months before noticeable flavor and aroma loss
🧊Fridge (opened): 2-3 years with cap tightened between every use
❄️Freezer: Indefinitely safe; best quality within 12-24 months after freezing

How Long Does Soy Sauce Last?

Soy sauce outlasts most condiments by a significant margin. Its high sodium content and natural fermentation acids create an environment where harmful bacteria struggle to survive, which is why shelf life is measured in years rather than weeks.

Unopened bottles benefit from a sealed, oxygen-free environment. Once you break that seal, oxidation begins gradually dulling the umami depth and aromatic complexity - especially in naturally brewed soy sauce, which tends to darken faster than chemically produced versions.

Soy Sauce Shelf Life
MethodStateDurationNotes
🏠 PantryUnopened12-36 monthsCommercially sealed; quality slowly declines after best-by date
🏠 PantryOpened6-12 monthsSafe but loses peak flavor and aromatic notes within months
🧊 FridgeOpened2-3 yearsSlows oxidation; some darkening and sediment still occur
❄️ FreezerOpenedIndefinite (quality up to 2 years)Safe long-term; texture and clarity may change after thawing

Light and dark soy sauce follow roughly the same timeline. The best-by date on the label reflects peak flavor, not a safety cutoff - soy sauce used past that date is almost always still safe.

How to Store Soy Sauce

Where you keep it matters, but how you seal it matters just as much. Every time the bottle sits open on the counter, oxygen contacts the liquid and begins degrading amino acids responsible for that layered umami character.

Golden Rule
Tighten the cap completely after every single pour. Oxygen is the main enemy - not heat alone.

Pantry: Keep bottles upright in a cool, dark spot away from stoves or sunny windows. Unopened soy sauce is perfectly at home here. Opened bottles can stay in the pantry short-term, but expect noticeable flavor drop-off within six months.

Fridge: This is the right move for any opened bottle you want to last. Transfer to a clean glass jar if the original bottle is nearly empty - less headspace means less trapped oxygen. Both tamari and standard soy sauce store well in the fridge using the same method.

Container: Never transfer soy sauce to a metal container. Metal can react with the acidic, salty liquid and introduce off-flavors. Stick with the original bottle or food-safe glass.

  • 🧹 Clean the pour spout - wipe it dry after each use to prevent localized mold at the cap
  • 🛒 Buy smaller bottles - less headspace accumulates if you only use soy sauce occasionally
  • 🏷️ Check the label - "naturally brewed" soy may darken faster, so fridge storage matters more

Can You Freeze Soy Sauce?

Freezing is rarely necessary, but it's a smart move for premium or artisanal bottles you won't use for months. Much like understanding how long fish keeps, the goal with freezing is preserving quality, not just safety.

Soy sauce won't freeze solid the way water does - its high salt concentration drops the freezing point considerably. You'll see a thick, slushy consistency rather than a hard block.

Shortcut
Freeze soy sauce in an ice cube tray first, then bag the cubes. Each cube is roughly one tablespoon - perfect for single-use portions.
  1. Choose your container - use a freezer-safe, airtight container or silicone ice cube tray; leave 1 inch headspace in any bottle or jar to allow for expansion.
  2. Portion if needed - pour into an ice cube tray for small-batch freezing, especially useful for aged or artisanal **dark soy sauce** you don't want to waste.
  3. Seal and label - transfer frozen cubes to a sealed freezer bag and write the date; aim to use within 12-24 months for best aroma.
  4. Thaw correctly - move to the fridge overnight or leave at room temperature for a few hours; shake or stir before using to recombine any separated components.

Salt crystals can form after freezing. This is a quality issue, not a safety red flag - warm the container slightly and shake to dissolve them before using.

Signs Soy Sauce Has Gone Bad

True spoilage in soy sauce is uncommon. The salt concentration does most of the protective work, which is part of what happens to gluten during fermentation explained in the broader chemistry of brewed condiments.

That said, contamination can happen - usually from a dirty pour spout or repeated exposure to moisture.

Signs It's Gone Bad
👀
VisualThick gelatinous film at surface · Fuzzy mold at cap or inside bottle · Heavy sediment increasing over time beyond normal soy particulates
👃
SmellSour or putrid odor · Off-fermentation smell distinct from normal tangy umami
✋
TextureExtreme sliminess · Heavy gelatinized layer that won't mix back in after shaking

Some cloudiness in naturally brewed soy sauce is normal - don't discard it on appearance alone. Check smell and texture first.

Watch Out
If you spot mold, detect a sour or rotten smell, or find an abnormal gelatinous film - discard the bottle. Don't taste to test.

Getting the Most From Every Bottle

Three habits will keep your soy sauce performing at its best from first pour to last. If you cook with soy sauce infrequently, consider soy sauce swaps that work - some alternatives stay shelf-stable longer in small quantities.

  • 🧊 Refrigerate after opening - move it to the fridge once opened, regardless of the label's suggestion
  • 🧴 Downsize the bottle - a smaller bottle used up quickly beats a large one sitting open for a year
  • 🧊 Cube premium bottles - freeze aged or artisanal soy in portioned cubes to protect a bottle you won't finish quickly
  • 🔍 Trust your nose - flat aroma means flavor loss; a sour or rotten smell means discard

Frequently Asked Questions

Does soy sauce go bad in the refrigerator?

Not really. Refrigerated soy sauce stays safe for 2-3 years after opening. Flavor gradually dulls over time, but harmful spoilage is rare given the high salt content.

How long is opened soy sauce good for?

In the pantry, opened soy sauce holds peak flavor for 6-12 months. Refrigerated, it stays at good quality for up to 3 years - the difference is mainly oxidation rate.

Does light or dark soy sauce last longer?

Both follow the same general shelf life. Light soy sauce may show flavor loss slightly faster since its more delicate aroma is quicker to oxidize than the robust profile of dark soy sauce.

Can you freeze soy sauce to extend shelf life?

Yes, and it works well for premium bottles. Soy sauce won't freeze solid due to its salt content - expect a thick, slushy texture. Shake after thawing to recombine any separated components.

Is cloudy soy sauce safe to use?

Usually yes. Naturally brewed soy sauce often develops sediment or mild cloudiness from amino acid particles - this is normal. Discard only if cloudiness is paired with a sour smell or slimy texture.

Italian Ribollita Soup

April 2, 2026

Simmering vegetables with cannellini beans and stale Tuscan bread creates a thick, rustic ribollita that thickens as it cools. The low heat melds garlic and tomato into the broth while the bread soaks up flavor without turning to mush.

Italian Ribollita Soup served on a plate

You don't need to babysit the pot. Simmer uncovered for an hour and the soup builds depth on its own.

This is what we make when the weather turns cold and we want something that tastes better the next day. The reboiling step - which gives ribollita its name - deepens every flavor.

QUICK SUMMARY

Italian ribollita soup layers sautéed vegetables, cannellini beans, and cavolo nero with stale bread that soaks into the broth. Simmer uncovered for 1 hour to meld flavors and thicken the texture. Use dry bread to prevent the soup from turning watery.

⏱️Time Reality: 1 hour 35 minutes total - 20 minutes prep, 1 hour 15 minutes simmer time
🔑First Critical Move: Sauté onion, carrot, celery 7-10 minutes till soft before adding liquid
⚠️Watch Out: Fresh bread makes soggy soup - use stale cubed bread soaked 15 minutes first

Table of Contents

Toggle
  • Why This Recipe Works
  • What You'll Need
    • Ingredient Details
  • Ingredient Swaps
  • What to Serve With It
  • Store and Reheat
  • Frequently Asked Questions
  • Italian Ribollita Soup
    • Method 
    • Tried this recipe?

Why This Recipe Works

The slow simmer breaks down vegetables and thickens the broth while the bread absorbs liquid without disintegrating. For a version that comes together quickly, this easy sauce recipe adds richness alongside the soup.

Quick Reference
⏱️
Prep Time
20 min
🔥
Cook Time
1 hr 15 min
⏰
Total Time
1 hr 35 min
🍽️
Servings
6 servings
📊
Difficulty
Medium
🏷️
Category
Main Dish
💡
Quick Tip
Use stale bread soaked to thicken soup
🎯
Best For
Weeknight, Meal prep, Cold weather

Five things that make ribollita work:

  • Stale bread soaks without dissolving - Fresh bread turns mushy in hot broth, but day-old cubes hold their shape while thickening the soup
  • Beans mashed partially create creaminess - Crushing some of the cannellini beans against the pot side releases starch that gives body to the broth
  • Layered seasoning builds depth - Salting at the start and again after 45 minutes develops savory richness instead of flat flavor
  • Low simmer preserves vegetable texture - High heat turns carrots and celery to mush, but gentle bubbling keeps them tender with bite
  • Cavolo nero added last stays vibrant - Kale wilts in 10-15 minutes, keeping its dark green color and slight bitterness intact
Quick Tip
Soak dried cannellini beans 8-12 hours before cooking to ensure they soften completely and cook evenly with the vegetables.

What You'll Need

Ingredients for Italian Ribollita Soup

Tuscan ribollita relies on pantry staples and sturdy vegetables that hold up to long simmering. We keep a batch ready for nights like this - bright seasonal vegetables round out the hearty bowl.

🫘
Beans & Bread
  • 2 cups dried cannellini beans (or 3 cans, drained)
  • 2 cups stale Tuscan bread, cubed
🥬
Vegetables
  • 1 bunch cavolo nero or kale, stems removed
  • 1 large onion, diced
  • 2 carrots, diced
  • 2 celery stalks, diced
🧄
Aromatics & Base
  • 4 garlic cloves, minced
  • 2 tablespoons tomato paste
  • 6 cups vegetable broth
  • ¼ cup olive oil

Ingredient Details

  • Cannellini beans
    Dried beans need overnight soaking - canned beans work if you're short on time but rinse them first to remove excess salt
  • Stale Tuscan bread
    Day-old bread works best - leave fresh bread out overnight uncovered to dry or toast cubes lightly in the oven for 10 minutes
  • Cavolo nero
    Also called Tuscan kale or dinosaur kale - remove thick stems before chopping leaves into ribbons
  • Vegetable broth
    Low-sodium broth gives you control over salt levels - add more as needed after the soup simmers
  • Olive oil
    Extra virgin adds fruity richness - save the expensive bottle for drizzling at the end, use regular for sautéing
  • Tomato paste
    Cook the paste in the pot for 2 minutes to deepen its flavor before adding liquid
  • Garlic
    Add garlic after the other vegetables soften - it burns easily and turns bitter if cooked too long

Ingredient Swaps

The base vegetables stay constant, but the greens and beans have flexible options. For a version that comes together quickly, quick chili dish uses similar layered simmering technique with beans.

Four swaps that work:

  • Cavolo nero → kale or Swiss chard - Regular kale adds slightly more bitterness, Swiss chard brings earthy sweetness (use the same amount, stems removed)
  • Cannellini beans → great Northern beans - Similar creamy texture when mashed, slightly smaller size (same cooking time applies)
  • Stale Tuscan bread → gluten-free bread - Less chewy but still soaks up broth (dry it out first to prevent mushiness)
  • Vegetable broth → chicken broth - Richer flavor profile, no longer vegetarian (use same quantity)

Kale

Works for: Budget cooking, year-round availability, similar texture to cavolo nero

Skip if: You want authentic Tuscan flavor or prefer milder greens

Swiss Chard

Works for: Sweeter flavor preference, colorful presentation, tender texture

Skip if: You want traditional bitter edge or need sturdy greens that hold up

Instructions

Sauté the vegetables first to build a flavor base, then let the soup simmer while you do other things. For a version that comes together quickly, this easy fries recipe crisps up in 20 minutes alongside the soup.

  1. Sauté the base vegetables. Heat ¼ cup olive oil in a large Dutch oven over medium heat. Add diced onion, carrots, and celery. Cook 7-10 minutes, stirring occasionally, until vegetables soften but don't brown. Add minced garlic and tomato paste, cook 2 minutes more until paste darkens.

  2. Add beans and broth. Pour in 6 cups vegetable broth and drained cannellini beans. Bring to a boil, then reduce heat to low. Simmer uncovered 45 minutes, stirring every 15 minutes. Use a wooden spoon to mash some beans against the pot side to thicken the broth.

  3. Prepare and add bread. While soup simmers, place 2 cups cubed stale bread in a bowl. Ladle 1 cup hot broth over bread, let soak 15 minutes. Add soaked bread to pot, stir gently to combine. The bread will break apart slightly and thicken the soup.

  4. Add greens and finish simmering. Chop cavolo nero into ribbons, removing tough stems. Stir greens into soup. Simmer 15 minutes more until greens wilt and darken. Taste and adjust salt - the soup should taste deeply savory with layered vegetable flavor.

  5. Rest and reboil. Remove from heat, let soup sit 10 minutes. Reheat over low heat for 5-10 minutes before serving - this reboiling step gives ribollita its name and deepens the flavor. The soup will thicken as it cools.

Golden Rule
Simmer uncovered for the full hour - covered pots trap too much liquid and prevent the soup from thickening properly.

What to Serve With It

Ribollita fills the bowl completely but benefits from something crisp or fresh alongside. Salad cuts through all that richness. For weeknight meal planning, comforting soup meal planning offers pairing strategies for hearty soups.

Side Dish Prep Why It Works How to Serve
Simple green salad Easy Adds freshness and crunch contrast to thick soup Dress lightly with lemon and olive oil
Garlic crostini Easy Provides crisp texture for dipping and scooping Rub toasted bread with garlic clove, drizzle oil
Grated Parmesan Easy Adds savory richness and salty punch Pass bowl at table for sprinkling on top
Roasted vegetables Medium Complements earthy bean flavors with caramelization Roast while soup simmers, serve warm
Crusty bread Easy Mops up broth and adds satisfying chew Slice thick, warm in oven briefly

Three ways to serve it:

  • Weeknight bowl - Ladle soup into wide bowls, top with grated Parmesan and red pepper flakes, serve with crusty bread for dipping
  • Meal prep containers - Store soup and extra bread separately in airtight containers, reheat soup on stovetop and add fresh bread when ready
  • Cold weather dinner - Serve in deep bowls with garlic crostini on the side, drizzle extra virgin olive oil over each portion, pass Pecorino at table
Best Pick
We keep a batch ready for nights like this - bright salad recipe cuts through the richness and adds crunch the soup lacks.

Store and Reheat

Ribollita tastes better the next day after flavors meld overnight in the fridge. Store the soup and any extra bread separately to prevent the bread from absorbing too much liquid and turning mushy. The soup thickens significantly when cold.

Method Time Best For
🍳 Stovetop 10-15 min on low heat Even heating and preserving texture
📦 Microwave 3-5 min with stirring halfway Quick single servings
🔥 Oven 20 min at 350°F (175°C) Gentle reheating for parties

For best results when storing:

  • Fridge storage: Transfer cooled soup to shallow airtight containers within 2 hours of cooking - lasts 3-4 days in the fridge
  • Freezer storage: Freeze soup without bread for up to 2 months in freezer-safe containers - leave 1 inch headspace for expansion
  • Reheating thickened soup: Add ¼-½ cup vegetable broth or water when reheating to loosen consistency, stir frequently over low heat
  • Bread texture fix: Add fresh cubed bread to reheated soup 5 minutes before serving to restore texture without mushiness
  • Flavor boost: Drizzle extra virgin olive oil and sprinkle fresh grated Parmesan over each reheated bowl to brighten the taste

Frequently Asked Questions

Can I make ribollita ahead and reheat?

Yes - ribollita tastes better the next day after flavors meld overnight. Store in the fridge for 3-4 days and reheat gently on the stovetop, adding a splash of broth to loosen the thickened soup.

How should I store ribollita to keep bread from getting soggy?

Store soup and extra bread in separate airtight containers. The bread in the soup will soften completely, but storing unused bread separately prevents oversaturation.

How do I know when ribollita soup is done cooking?

The soup is done when vegetables are tender, beans mash easily against the spoon, and the broth has thickened to a hearty consistency. Greens should be wilted and dark green, usually after 1 hour 15 minutes total simmering.

Can I use kale instead of cavolo nero?

Yes - regular kale or curly kale works as a direct swap for cavolo nero. Remove thick stems and chop leaves, using the same amount and cooking time.

How can I scale ribollita recipe for more servings?

Double all ingredients for 12 servings, using a larger pot. Keep the simmer time the same but stir more frequently to prevent sticking on the bottom.

Italian Ribollita Soup served on a plate

Italian Ribollita Soup

No ratings yet
Italian ribollita soup layers sautéed vegetables, cannellini beans, and stale Tuscan bread to create a thick, rustic dish that deepens in flavor with slow simmering. The bread soaks up the broth without dissolving, and the soup is simmered uncovered for an hour to build depth and richness.
Print Recipe Pin Recipe
Prep Time 20 minutes mins
Cook Time 1 hour hr 15 minutes mins
Total Time 1 hour hr 35 minutes mins
Servings: 6 servings
Course: Main Dish
Cuisine: Italian
Ingredients Equipment Method Notes

Ingredients
  

  • 2 cups dried cannellini beans soaked 8-12 hours overnight; substitute canned, drained and rinsed if short on time
  • 2 cups stale Tuscan bread cubed, soaked 15 minutes in hot broth before adding
  • 1 bunch cavolo nero stems removed, chopped into ribbons
  • 1 large onion diced
  • 2 carrots diced
  • 2 stalks celery diced
  • 4 cloves garlic minced
  • 2 tablespoons tomato paste
  • 6 cups vegetable broth low sodium
  • 0.25 cup olive oil regular olive oil for sautéing

Equipment

  • Large Dutch oven Used for sautéing and simmering the soup
  • Wooden spoon For mashing some beans against the pot side
  • Bowl For soaking stale bread in hot broth

Method
 

  1. Heat ¼ cup olive oil in a large Dutch oven over medium heat. Add diced onion, carrots, and celery. Cook for 7 to 10 minutes, stirring occasionally, until vegetables soften but do not brown. Add minced garlic and tomato paste; cook 2 more minutes until the paste darkens.
    1 large onion, 2 carrots, 2 stalks celery, 4 cloves garlic, 2 tablespoons tomato paste, 0.25 cup olive oil
  2. Add 6 cups vegetable broth and drained soaked cannellini beans to the pot. Bring to a boil, then reduce heat to low. Simmer uncovered for 45 minutes, stirring every 15 minutes. Use a wooden spoon to mash some beans against the pot side to thicken the broth.
    2 cups dried cannellini beans, 6 cups vegetable broth
  3. While soup simmers, place 2 cups cubed stale Tuscan bread in a bowl. Ladle 1 cup hot broth over the bread and let soak for 15 minutes. Add soaked bread to the pot and stir gently to combine. The bread will break apart slightly and thicken the soup.
    2 cups stale Tuscan bread
  4. Chop cavolo nero leaves into ribbons, discarding tough stems. Stir the greens into the soup. Simmer 15 more minutes until the greens have wilted and darkened. Taste and adjust salt as needed.
    1 bunch cavolo nero
  5. Remove the soup from heat and let it rest for 10 minutes. Reheat over low heat for 5 to 10 minutes before serving. This reboiling step deepens the flavor and thickens the soup as it cools.

Notes

  • Use stale bread soaked before adding to prevent sogginess and maintain soup texture.
  • Mash some beans during simmering to release starches and thicken broth naturally.
  • Simmer uncovered for the entire hour to enable thickening and flavor development.

Tried this recipe?

Let us know how it was!

What Is Sauvignon Blanc? [Taste, Uses & More]

April 2, 2026

Most people assume sauvignon blanc is just a summer patio wine-something cold and green-tasting you pour without thinking much about.

What Is Sauvignon Blanc

That assumption undersells it considerably, and it also explains why so many pairings fall flat.

Understanding what this grape actually does, and why a Marlborough bottle behaves so differently from a Sancerre, makes it far more useful in both your glass and your kitchen.

If you're ever caught without a bottle, knowing white wine stand-ins that approximate its acidity can save a sauce.

QUICK SUMMARY

Sauvignon blanc is a dry white wine with high acidity, grassy aromas, and citrus-forward flavor. Loire Valley expressions lean lean and mineral; New Zealand styles run riper and more tropical. It's a natural match for shellfish, goat cheese, and herb-driven dishes.

🍋Flavor: Zesty citrus, green herbs, tropical fruit in warmer-climate bottles
🍾Style: Dry, crisp, light-to-medium body with sharp, clean acidity
🧀Best With: Goat cheese, oysters, grilled white fish, green vegetables
📅Shelf Life: Unopened 1-4 years; opened 3-5 days refrigerated with stopper
🌍Key Regions: Loire Valley (Sancerre, Pouilly-Fumé) and Marlborough, New Zealand

What Is Sauvignon Blanc?

Sauvignon blanc is a white wine grape originating in the Loire Valley of France, where it produces the celebrated appellations of Sancerre and Pouilly-Fumé.

The name likely derives from the French sauvage (wild), referencing how vigorously the vine grows in the field.

It's classified as a dry white wine, though the flavor profile shifts noticeably depending on where the grapes are grown. Cooler climates, particularly the Loire, yield wines with lean, mineral character and sharp green-herb notes driven by aromatic compounds called pyrazines.

Warm-climate regions - especially Marlborough in New Zealand - push the grape toward riper passionfruit and pineapple expressions.

You'll also see it abbreviated as Sauv. blanc on wine lists or simply called "Sauvignon" in casual French usage. A few key style markers to know:

  • 🇫🇷 Loire / Sancerre - Lean, stony, high-acid; distinct wet-stone minerality
  • 🇳🇿 Marlborough - Ripe tropical fruit, intense grassy aromatics, bold finish
  • 🇺🇸 California / Fumé Blanc - Sometimes lightly oaked, rounder texture than Loire
  • 🇿🇦 South Africa - Mid-point between Loire and NZ; often fig and citrus notes

What Does Sauvignon Blanc Taste Like?

sauvignon blanc - What Is Sauvignon Blanc
Sensory SnapshotModerate Intensity
👅 Flavor
limegrapefruitgreen bell pepperpassionfruit
✋ Texture
crisplean mouthfeel
👃 Aroma
cut grasswet stoneherbs

Think of sauvignon blanc as landing somewhere between an unoaked chardonnay and a dry riesling - comparable acidity to riesling, but far more herbaceous and citrus-driven than either.

The pyrazines responsible for that green-pepper and grassy quality are the grape's chemical signature; cooler vintages and cooler climates amplify them sharply.

On the palate, the texture is lean rather than creamy. There's no residual sugar softening the edges - the high acidity hits quickly and lingers.

Warm-climate bottles swap some of that green intensity for ripe tropical fruit, which makes them taste broader and less angular, though the acid backbone stays intact.

Golden Rule
If a bottle smells like freshly cut lawn and lime zest, pyrazines are doing their job. If it smells like passionfruit and white peach, you're holding a warm-climate expression - and those two styles cook differently.

How to Use Sauvignon Blanc

Sauvignon blanc earns its place at the stove as much as on the table. Its high acidity does specific work: it brightens broth, cuts fat in pan sauces, and adds a sharp backbone to vinaigrettes without muddying their flavor.

How Sauvignon Blanc Is Used in Cooking
MethodBest ForTip
🥗 RawVinaigrettes, marinades, cold saucesUse in place of white wine vinegar; start with less and adjust
🍳 DeglazingPan sauces for chicken, white fish, shallot butter saucesUse a Loire-style bottle; tropical fruit notes can read flat when reduced
🍲 PoachingFish, shellfish, light chicken breastAdd a splash late to keep citrus notes bright in the poaching liquid
🍚 RisottoSeafood risotto, herb-forward vegetable risottoAdd near the end of cooking so acidity stays lively rather than cooking out

Pairings follow the herb-and-acid logic. Goat cheese - especially chèvre crostini or a classic Loire salad - is the benchmark pairing because the wine's acidity cuts the fat of the cheese cleanly.

Oysters and raw shellfish work for the same reason. Asparagus, parsley, and tarragon all mirror the wine's green herbaceous notes rather than clashing with them.

In French cooking, it's the backbone of classic beurre blanc sauce: shallots and white wine reduced hard, then finished with cold butter. Mediterranean applications lean toward grilled white fish with lemon and olive oil.

California-style cooking uses it alongside grilled vegetables and citrus-heavy dressings.

Heavy cream sauces and sweet desserts are where it stumbles. Against rich dairy fat, the lean body reads thin; against sugar, the acidity turns sharp in an unpleasant way.

If you're substituting in a recipe, replacements for sauvignon blanc that match on acidity include dry vermouth and certain styles of pinot grigio - pinot grigio in cooking covers where that grape holds up and where sauvignon blanc would be the stronger call.

Try It In
🌰Mont Blanc Chestnut DessertA classic French dessert where a crisp glass of sauvignon blanc cuts the richness of chestnut cream→

How to Buy and Store Sauvignon Blanc

Region and producer tell you more than price does when buying sauvignon blanc. A Sancerre or Pouilly-Fumé label signals the lean, mineral Loire style; a Marlborough label signals the riper, bolder New Zealand expression. Vintage year matters for herb intensity - cooler years bring more pyrazine-driven green character.

Shortcut
Screwcap closures are common on New Zealand sauvignon blanc and are a good sign the producer is protecting fresh-fruit character. Don't avoid screwcaps - they're standard quality practice for young-drinking whites.

For bottles you plan to drink within the year, screwcap beats cork at preserving citrus brightness. Most sauvignon blancs are built to drink young - within 1-4 years of vintage.

High-quality single-vineyard Loire wines can age longer, but the herbaceous freshness that defines the grape fades over time.

Once opened, guidance on storing sauvignon blanc correctly consistently points to the same approach: vacuum stopper plus refrigeration, and drink within 3-5 days. Beyond that, the citrus notes flatten and the acidity starts to feel harsh rather than bright.

Where to Start With Sauvignon Blanc

New to the grape? Start with a Marlborough bottle - the ripe tropical-fruit expression is immediately accessible and shows the grape's range clearly.

Once that baseline is set, try a Sancerre to understand how dramatically terroir shifts the flavor.

If you're cooking rather than sipping, a mid-range Loire-style bottle is the better kitchen workhorse. Its sharper acidity reduces cleanly into sauces without the tropical notes complicating the flavor.

For cheese boards, the classic goat-cheese pairing holds - though alternatives to goat cheese like fresh ricotta or cream cheese with herbs pair nearly as well against sauvignon blanc's acid.

Frequently Asked Questions

Is sauvignon blanc sweet or dry?

Dry. Virtually all sauvignon blanc produced commercially is fermented to dryness with no residual sugar. Ripe tropical-fruit aromas in Marlborough styles can read as sweetness, but the actual sugar level is very low.

What food goes with sauvignon blanc?

Shellfish, goat cheese, grilled white fish, asparagus, and herb-forward salads. The wine's acidity and green-herb notes work best with ingredients that share or contrast that character - avoid pairing with very rich or sweet dishes.

How do you store an opened bottle of sauvignon blanc?

Reseal with a vacuum stopper and refrigerate immediately. Drink within 3-5 days; after that, citrus freshness fades noticeably and the acidity loses its bright edge.

What is the difference between Sancerre and Pouilly-Fumé?

Both are Loire Valley sauvignon blancs, but they come from opposite banks of the Loire River. Sancerre tends toward floral and mineral notes; Pouilly-Fumé often shows a distinct smoky, gunflint character from its flinty soils.

Can you cook with any sauvignon blanc, or does quality matter?

Avoid anything labeled "cooking wine" - added salt distorts the sauce. A decent mid-range bottle works well; you don't need a Sancerre, but the wine should be something you'd drink.

What Is Tagliatelle? [Taste, Uses & More]

April 2, 2026

Tagliatelle is the pasta that holds sauce rather than letting it slide off - those long, flat egg-enriched ribbons have a slightly rough, porous surface that clings to every drop of ragù alla bolognese or browned butter.

What Is Tagliatelle

Understanding what makes this pasta work is tied to understanding its partners: the differences between parmesan vs parmigiano reggiano matter when you're building a finished dish, and knowing when swapping out porcini mushroom is sensible will save a weeknight meal.

This is a pasta with a specific job, and it does that job better than most.

QUICK SUMMARY

Tagliatelle is a long, flat egg pasta ribbon from Emilia-Romagna with an eggy-rich, wheaty flavor and a silky-toothsome bite. It grips thick sauces exceptionally well. Fresh cooks in 2-5 minutes; dried takes longer. Not suitable for gluten-free or vegan diets.

🍝Type: Fresh egg ribbon pasta, 6-8 mm wide, from Emilia-Romagna
👅Flavor: Eggy-rich, mildly wheaty, slightly sweet - moderate intensity
🍳Best With: Ragù alla bolognese, porcini cream, browned butter and sage
🕐Cook Time: 2-5 minutes fresh; varies for dried egg pasta ribbons
📦Shelf Life: Fresh: 2-3 days refrigerated, 1-2 months frozen; Dried: 1-2 years

What Is Tagliatelle?

Tagliatelle is a ribbon pasta from Emilia-Romagna, the northern Italian region that also gave us mortadella and Parmigiano-Reggiano.

Each strand is traditionally hand-rolled from a dough of durum or soft wheat flour and whole eggs, then cut to roughly 6-8 mm wide - a width that, according to Bologna's Chamber of Commerce, should equal one-twelfth the height of the Asinelli Tower.

You'll also hear it called tagliatelle al uovo or fresh egg tagliatelle. It's commonly mistaken for fettuccine, though fettuccine originates in Rome, tends to be slightly wider, and uses a denser dough; tagliatelle is typically the more delicate of the two.

A thinner cousin, tagliolini, shares the same egg-rich base but is cut far narrower.

Both fresh and dried versions exist. Fresh tagliatelle is sold refrigerated or made at home; dried comes in nests or flat bundles labeled all-uovo (with egg).

The fresh variety has a more pronounced egg flavor and softer texture, while dried holds up better in longer-cooked preparations.

What Does Tagliatelle Taste Like?

tagliatelle - What Is Tagliatelle

Tagliatelle has a mild, eggy richness that sets it apart from plain durum pasta. The wheat provides a gentle, slightly sweet backbone, while the eggs add depth without heaviness - closer to fresh pasta dough than to a neutral noodle.

Sensory SnapshotModerate Intensity
👅 Flavor
Eggy-richWheatyMildly sweet
✋ Texture
SilkyToothsome
👃 Aroma
Warm baked-wheatSubtle egg

Heat changes the experience slightly. Boiled to al dente, fresh tagliatelle has a silk-like surface with a firm inner bite; overcooked, it turns limp and loses that grip on sauce entirely.

Dried versions have a chewier, more neutral profile - still eggy, however the egg note is less forward than in fresh.

The pasta itself is a delivery vehicle with flavor of its own. That's what makes it a better match for ragù than a thin broth.

How to Use Tagliatelle

Ragù alla bolognese is the definitive use - this is not tradition for tradition's sake. The sauce's fat and meat particles lodge in the ribbon's porous surface and every forkful carries both pasta and sauce together. The technique of finishing pasta in the pan with its sauce, called mantecatura, works especially well here because the ribbons absorb the final emulsification.

Golden Rule
Always finish tagliatelle in the pan with your sauce for 60-90 seconds. This step binds fat and starch into a cohesive coating - skipping it leaves sauce pooling at the bottom of the bowl.

Beyond bolognese, the egg flavor pairs cleanly with sautéed porcini and light cream, browned butter and sage, or pancetta and Parmigiano-Reggiano.

Knowing what makes pancetta distinct from other cured pork helps here - its clean, fatty salt cuts through the egg richness without overpowering it.

A spring variation with peas, pancetta, and Parmigiano-Reggiano is one of the most effective uses of the ribbon format.

Avoid pairing tagliatelle with very thin broths or strongly spiced Asian sauces. The egg-wheat notes get lost in both cases, and the wide ribbons overwhelm a delicate soup base.

How Tagliatelle Is Used
MethodBest ForTip
🍲 Boiled + TossedRagù, cream sauces, butter-based finishesCook 2-5 min fresh; finish in pan with sauce (mantecatura)
🥗 Boiled + DressedLight oil, garlic, anchovy as a primer dishUse minimal fat so egg flavor stays forward
🫕 BakedLayered Emilian casseroles, pasta al fornoSlightly undercook before baking; residual heat finishes it

If you need a substitute for this pasta format, there are solid replacements for tagliatelle depending on whether you're after a similar width or a similar egg-rich profile.

Try It In
🧄Roasted Garlic AioliA rich, egg-based sauce that complements tagliatelle's eggy depth→🍅Roasted Garlic Marinara SauceA lighter tomato base that lets the ribbon pasta carry flavor→🧈Roasted Garlic Béarnaise SauceButter-forward and herby — works well with the pasta's wheat sweetness→

How to Buy and Store Tagliatelle

Fresh tagliatelle should show pale yellow strands with even thickness and a surface that's slightly tacky - the ribbons should pull apart without tearing. Avoid anything clumped solid, discolored, or bone-dry at the edges.

For dried, look for ribbons labeled all-uovo with no visible breaks and an even golden color throughout.

Watch Out
Don't store fresh tagliatelle loosely in the fridge. Exposed ribbons dry and crack within hours. An airtight container or tightly wrapped portion keeps the surface pliable for the full 2-3 day window.

Freeze fresh pasta the right way: spread portions on a tray first, then bag once solid.

This stops the ribbons from fusing into a block.

For how long tagliatelle keeps across fresh, frozen, and dried formats in detail, that guide covers each scenario.

Dried tagliatelle is less sensitive - it survives 1-2 years in a cool pantry, though storing wheat correctly applies to the flour in homemade dough as well.

Start With the Right Sauce

Bolognese first. If you're new to tagliatelle, cook it with ragù alla bolognese before anything else - that combination exists for structural reasons, not just convention. The ribbon width and egg-rich surface were built for exactly that sauce.

Once you're comfortable with the format, move toward mushroom-cream or browned butter preparations. Those dishes expose the egg-wheat flavor directly rather than burying it under meat sauce.

Fans of similar pasta dishes in the wider fettuccine family will find a creamy fettuccine alfredo recipe a useful reference point for sauce consistency and pan technique.

Frequently Asked Questions

Is tagliatelle the same as fettuccine?

No. Tagliatelle comes from Emilia-Romagna and is typically 6-8 mm wide with a more delicate texture; fettuccine is Roman, slightly wider, and denser. Both use egg dough, however the regional traditions and sauce pairings differ.

What is tagliatelle made of?

Traditionally, durum or soft wheat flour and whole eggs - no water, no oil. The egg-to-flour ratio gives the pasta its golden color and characteristic richness. Dried versions sometimes include semolina for extra firmness.

How long does tagliatelle take to cook?

Fresh tagliatelle cooks in 2-5 minutes in boiling salted water. Dried egg pasta takes longer - check the packet, but 7-10 minutes is typical. Pull it 1 minute early if finishing in the pan with sauce.

Can you freeze fresh tagliatelle?

Yes. Spread portions on a tray, freeze until solid, then transfer to a sealed bag. Frozen tagliatelle keeps for 1-2 months and cooks from frozen - just add an extra minute to the boiling time.

What sauce goes best with tagliatelle?

Ragù alla bolognese is the classic match - the ribbon's porous surface grips the meat sauce better than smooth pasta shapes. Porcini cream and browned butter with sage are strong alternatives that highlight the egg-wheat flavor.

How Long Does Smoked Salmon Last? [Storage Guide]

April 2, 2026

Leftover smoked salmon from Sunday brunch is one of the more time-sensitive items in your fridge, and knowing how long it actually lasts changes how confidently you can plan a second meal around it.

Can You Freeze Smoked Salmon

Unlike shelf-stable pantry staples - the about shelf life of sugar question has a far more forgiving answer - smoked salmon operates on a tight clock once the pack is open.

Cold-smoked varieties like lox are cured but not fully cooked, which makes them especially perishable.

If you're handling leftover smoked trout instead, the rules shift slightly; see our guide on cooking trout right for that ingredient.

QUICK SUMMARY

Unopened smoked salmon keeps 7-10 days in the fridge and up to 3 months frozen. Once opened, use within 3-5 days. Keep it sealed, cold, and airtight - exposure to air is the fastest route to spoilage.

🧊Fridge (unopened): Up to 7-10 days sealed at or below 38°F
📦Fridge (opened): 3-5 days in airtight container, use quickly
❄️Freezer: 2-3 months unopened; 1-2 months after opening

How Long Does Smoked Salmon Last?

Shelf life depends on two things: whether the pack has been opened, and which style of smoked salmon you have. Cold-smoked salmon (including lox) is cured at low temperatures and never reaches full cooking heat, so it carries a shorter fridge window than hot-smoked fillets, which are cooked through during smoking.

Smoked Salmon Shelf Life
MethodStateDurationNotes
🧊 FridgeUnopened7-10 daysVacuum- or sealed-pack at ≤38°F; check pack date
🧊 FridgeOpened3-5 daysAirtight container; use quickly once exposed to air
🧊 FridgeCooked dishes3-4 daysPasta, quiche, etc. - store in sealed container
❄️ FreezerUnopened2-3 monthsVacuum-pack maintains oily texture and mouthfeel best
❄️ FreezerOpened1-2 monthsWrap tightly; remove all air to limit freezer burn

Pack dates matter here. Use-by dates on vacuum-sealed packs are calibrated to the specific preservation environment inside that seal - once you break it, those dates no longer apply.

How to Store Smoked Salmon

The goal is simple: keep the fish cold, sealed, and away from air. How you do that shifts depending on whether the pack is still intact.

Fridge (unopened): Leave the vacuum pack untouched until you're ready to eat. Store it on the coldest shelf, typically toward the back, at or below 38°F.

Fridge (opened): Press plastic film directly against the surface of the fish, or transfer slices to an airtight container lined with parchment and with minimal headspace. Don't leave it loosely wrapped - air exposure accelerates oxidation and pulls moisture from the flesh.

Counter: No. Smoked salmon should never sit at room temperature beyond two hours.

Golden Rule
Always trust the pack date on an unopened vacuum-sealed fillet over any general grocery store timeline. Once opened, your clock resets to 3-5 days regardless of the original use-by date.
  • 🐟 Parchment separation - Layer slices between parchment sheets to prevent sticking and preserve texture.
  • 📦 Minimal headspace - A tightly packed container limits the air that degrades flavor and moisture.
  • 🌡️ Consistent temperature - Avoid storing in the fridge door, where temperature fluctuates most.

Can You Freeze Smoked Salmon?

Yes - freezing works well, provided you handle it correctly before it goes in. Hot-smoked fillets tolerate freezing better than cold-smoked slices; the firmer, flakier structure holds up more reliably.

Cold-smoked lox can become slightly crumbly or lose its silky sheen after thawing, though it's still perfectly usable in cooked dishes like pasta or scrambled eggs.

  1. Pat dry - Remove excess moisture with a paper towel before wrapping; surface water accelerates freezer burn.
  2. Portion first - Divide into single-use amounts so you only thaw what you need each time.
  3. Wrap tightly - Encase each portion in plastic wrap, then add a layer of parchment between slices.
  4. Seal out air - Vacuum-seal if possible, or press all air from a heavy-duty freezer bag before sealing.
  5. Label and freeze flat - Note the date and lay the bag flat so portions don't fuse together.

For thawing, move the sealed bag to the fridge and allow 12-24 hours for a slow, texture-preserving thaw. If time is short, submerge the sealed bag in cold water for 30-60 minutes.

Use immediately after thawing - do not refreeze once thawed.

Watch Out
Freezing in a loosely sealed bag is the single biggest mistake. Air contact causes freezer burn and leaves slices dry and crumbly - exactly what you don't want for a cold plate or bagel spread.

Curious how salmon freezer burn explained differs from general dryness? The short answer is that freezer burn is irreversible, while mild dryness from overfreezing can sometimes be masked by pairing with cream cheese or a sauce.

Signs Smoked Salmon Has Gone Bad

Smoked salmon gives clear warnings before it becomes a food safety problem. Similar salmon spoilage signs apply to fresh fillets, though the curing in smoked salmon means some surface changes are easier to miss.

Signs It's Gone Bad
👀
VisualDull grey or greenish edges · White or fuzzy patches on surface · Discoloration between slices
👃
SmellSharp sour or fermented odor · Ammonia or aggressively 'fishy' scent
✋
TextureSticky or slimy surface film · Unnaturally crumbly, dry flakes

Don't taste-test to check. Discard immediately if you see mold, smell ammonia, or feel any surface slime - none of these are fixable with rinsing or cooking.

Getting the Most from Every Pack

A few habits make a real difference with smoked salmon, and none of them are complicated.

  • ❄️ Freeze in portions - Single-use portions mean you thaw only what you need and waste nothing.
  • 🐟 Thaw cold, not fast - Fridge thawing retains delicate texture for [pairing ideas for smoked salmon](https://forkliftkitchen.com/what-to-serve-with-smoked-salmon/) on cold plates and bagels; firmer thawed fillets are fine for cooked recipes.
  • 📅 Respect the pack date - An unopened vacuum fillet that's past its use-by date should go, regardless of how it looks.
  • 🚫 No refreezing - Once thawed, commit to using it within 24 hours.

Unlike fish that benefits from extended marinating - cooking tuna right covers why fresh tuna has a similarly narrow window - smoked salmon's curing gives it slightly more fridge resilience, but not much. Treat every opened pack like a two-to-five day countdown and you won't go wrong.

Shortcut
Buy vacuum-packed fillets and freeze half the day you get home - before you've even opened the pack. You'll always have a portion ready without racing the clock.

Frequently Asked Questions

How long does lox last in the fridge after opening?

3-5 days in an airtight container at or below 38°F. Once the vacuum seal is broken, the original use-by date no longer applies - air exposure starts the clock immediately.

Can you freeze smoked salmon and still eat it raw after thawing?

Yes, but texture changes make cold-smoked slices slightly crumbly or less silky. For raw preparations like bagels or charcuterie boards, thaw slowly in the fridge and use immediately.

Does freezing smoked salmon change the taste?

Flavor is largely preserved, however texture takes the bigger hit. Cold-smoked varieties lose some silkiness; hot-smoked holds up better because its firmer structure survives freezing more intact.

Can you refreeze smoked salmon after thawing?

No. Refreezing degrades texture further and raises spoilage risk as the fish passes through the temperature danger zone twice. Portion before freezing so you only thaw what you need.

Is cold-smoked salmon treated the same as raw fish for storage purposes?

Treat it similarly - it's cured but not cooked to food-safe internal temperatures. Its fridge window is actually shorter than hot-smoked salmon, which reaches full cooking heat during processing.

Crockpot Italian Beef Sandwich Filling

April 2, 2026

Tender beef that shreds apart with a fork after 8 hours in the crockpot. That's what slow cooking does to a tough chuck roast with Italian seasonings and pepperoncini peppers.

Crockpot Italian Beef Sandwich Filling served on a plate

The liquid turns into a tangy au jus for dipping. You get restaurant-style sandwich filling without standing over a stove.

This works for meal prep Sundays or game day when you need to feed a crowd without stress. Set it in the morning and dinner assembles itself.

QUICK SUMMARY

Slow-cooked chuck roast breaks down into shreddable Italian beef sandwich filling after 8 hours on low heat with pepperoncini peppers and Italian seasonings. The peppers add moisture and tang while the beef turns fork-tender. Reduce the cooking liquid on the stovetop to create a concentrated au jus for dipping sandwiches.

⏱️Timing: 15 minutes prep, then the crockpot does 8 hours of work unattended.
🔥Key Move: Sear the roast first for caramelized flavor or skip it to save 10 minutes.
⚠️Watch Out: Too much liquid makes watery meat-use just enough broth to barely cover the roast.

Table of Contents

Toggle
  • Why This Recipe Works
  • What You'll Need
    • Ingredient Details
  • Ingredient Swaps
  • What to Serve With It
  • Store and Reheat
  • Frequently Asked Questions
  • Crockpot Italian Beef Sandwich Filling
    • Method 
    • Tried this recipe?

Why This Recipe Works

Tough cuts like chuck roast have collagen that melts into gelatin during long, low-heat cooking. The crockpot holds steady at 200°F, breaking down fibers without drying out the meat. For a version that comes together quickly, this related beef recipe follows similar slow-cooking principles with different seasonings.

Quick Reference
⏱️
Prep Time
15 min
🔥
Cook Time
8 hours (low) or 4-5 hours (high)
⏰
Total Time
8-8.5 hours
🍽️
Servings
6-8 servings
📊
Difficulty
Easy
🏷️
Category
Main Dish
💡
Quick Tip
Use pepperoncini for juicy, tangy beef.
🎯
Best For
Weeknight | Meal prep | Entertaining

What makes this method reliable:

  • Low heat for 8 hours breaks down collagen in chuck roast into tender, shreddable texture without drying out
  • Pepperoncini peppers and juice add moisture, tang, and signature Italian beef flavor without extra prep
  • Minimal liquid prevents watery, diluted meat-just enough broth to keep beef moist while cooking
  • Shredding hot catches meat at peak tenderness when fibers pull apart easily with two forks
  • Reduced cooking liquid concentrates beef drippings and pepper juice into a thick au jus for dipping
Quick Tip
Sear the roast 3-4 minutes per side in a hot skillet before adding to the crockpot-the caramelized crust adds depth to the final flavor.

What You'll Need

Ingredients for Crockpot Italian Beef Sandwich Filling

Chuck roast stays tender during long cooking because of its marbled fat and connective tissue. Leaner cuts like sirloin dry out even with moisture present. We keep a batch ready for nights like this - simple homemade dip balances the richness without competing for attention.

🥩
Protein
  • 3-4 lb beef chuck roast (or sirloin tip)
🧄
Aromatics
  • 1 medium onion (yellow or white)
  • 4-5 garlic cloves
🥢
Seasonings & Liquid
  • 2 tablespoon Italian seasoning
  • 1 tablespoon dried oregano
  • 2 cups beef broth
  • 1 cup pepperoncini peppers with juice
  • Salt and black pepper
🥖
For Serving
  • 6-8 Italian sandwich rolls

Ingredient Details

  • Chuck roast
    Look for marbling and connective tissue-that fat melts during cooking and keeps meat moist instead of stringy.
  • Italian seasoning
    Store-bought blends work fine, but check the label-some include salt, which affects how much you add later.
  • Pepperoncini peppers
    Mild peppers in a jar labeled "Greek golden peppers" or "Tuscan peppers"-include some of the brine for authentic tang.
  • Beef broth
    Low-sodium gives you control over final saltiness-the peppers and reduced liquid add plenty of salt on their own.
  • Garlic cloves
    Smash them with the flat side of a knife before adding-releases oils without mincing or creating bitter burnt bits.
  • Italian sandwich rolls
    Crusty rolls with a soft interior hold up to dipping-avoid soft hot dog buns that turn soggy immediately.
  • Onion
    Slice into thick wedges instead of dicing-they hold their shape during long cooking and add sweet, caramelized flavor.

Ingredient Swaps

The beef and peppers create the base flavor profile, but the broth and seasonings adjust without changing the method. Most people skip salad, but it balances the meal. For a version that comes together quickly, quick coleslaw dish adds crunch without heating up the kitchen.

Four swaps that work:

  • Chuck roast → pork shoulder: Slightly sweeter flavor and different texture, but cooks in the same timeframe and shreds just as easily-good budget move when pork costs less per pound.
  • Beef broth → vegetable broth: Lighter, less beefy depth but still provides moisture for cooking-keeps the dish dairy-free without losing the tangy pepper punch.
  • Pepperoncini → banana peppers: Milder tang with less complexity, but still adds moisture and a hint of heat-use the same amount including some brine.
  • Italian seasoning → oregano and basil blend: Mix 1 tablespoon dried oregano with 1 teaspoon dried basil for similar herb flavor at lower cost-adds up when cooking for a crowd.

Searing Before Slow Cooking

Works for: Adding caramelized crust flavor and darker color to the final meat

Skip if: You're short on time or prefer a cleaner, lighter beef flavor

High Heat Setting (4-5 Hours)

Works for: Same-day meals when you can't wait 8 hours but still want tender beef

Skip if: You want the most tender, fall-apart texture-low heat breaks down fibers better

Instructions

The roast goes into the crockpot with seasonings, then cooks unattended until it reaches 190-205°F internally. Rich mains need something to cut through, and brussels does exactly that. For a version that comes together quickly, a tender brussels side roasts while the beef finishes its final hour.

  1. Season the roast: Pat the beef dry with paper towels, then rub with Italian seasoning, dried oregano, salt, and black pepper on all sides. Heat a skillet over medium-high heat and sear the roast 3-4 minutes per side until browned (or skip this step to save time).

  2. Build the crockpot layers: Place sliced onion wedges and smashed garlic cloves in the bottom of the crockpot. Set the seasoned roast on top, then pour beef broth around the sides-liquid should come halfway up the roast, not cover it completely. Add pepperoncini peppers and 3-4 tablespoons of the pepper brine over the top.

  3. Cook low and slow: Cover and cook on low for 8 hours or high for 4-5 hours. Check doneness by inserting a fork into the thickest part-meat should slide apart easily with no resistance and internal temperature should read 190-205°F.

  4. Shred and strain: Transfer the roast to a cutting board and let rest 5 minutes. Use two forks to pull beef into shreds, discarding any large chunks of fat. Strain the cooking liquid through a fine-mesh sieve into a saucepan, pressing on the solids to extract all the juice.

  5. Reduce the au jus: Simmer the strained liquid over medium heat for 10-15 minutes until it reduces by half and thickens slightly. Taste and adjust seasoning with salt and black pepper. Return shredded beef to the crockpot or a serving bowl, then pour some of the reduced liquid over the meat to keep it moist. Serve on toasted Italian rolls with extra au jus on the side for dipping.

Golden Rule
Resist lifting the lid during cooking-every peek releases heat and adds 15-20 minutes to the total cook time. Trust the process and only check at the 7.5-hour mark.

What to Serve With It

Slow-cooked beef needs crunch and acid to balance the richness. Salad adds the contrast this plate needs, but timing matters. For a version that comes together quickly, easy salad side works because you can toss it together while the beef finishes its last 30 minutes-and for more complete planning around similar dishes, savory steak meal ideas shows how sides like these round out beef-forward dinners.

Side Dish Prep Why It Works How to Serve
Coleslaw Easy Crunchy, tangy contrast cuts through rich beef and adds freshness Pile directly on sandwich or serve on the side for scooping
Potato chips Easy Salty crunch and no cooking required-classic sandwich pairing Serve alongside for easy handheld eating
Pickle spears Easy Bright acid balances heavy meat and adds palate-cleansing bite Arrange on the plate or add to sandwich for extra tang
Roasted potatoes Medium Hearty starch soaks up au jus and fills out the meal Roast at 425°F for 30-35 minutes while beef rests and shreds
Garlic Parmesan fries Medium Crispy, garlicky fries match Italian flavors and work for dipping Bake frozen fries, then toss with garlic powder and Parmesan

Three ways to serve it:

  • On toasted rolls with giardiniera: Toast Italian sandwich rolls until crusty, pile beef high, top with spicy pickled vegetables, and serve au jus in a small bowl for dunking between bites.
  • Over creamy polenta: Skip the bread and serve shredded beef over soft polenta with reduced cooking liquid drizzled on top-turns it into a hearty dinner bowl instead of a sandwich.
  • As lettuce wraps with mustard: Use crisp romaine leaves instead of rolls for a low-carb option, add a smear of spicy brown mustard, and serve with the au jus on the side.
Best Pick
Toast the rolls cut-side down in a dry skillet or under the broiler for 2-3 minutes before assembling-the crunchy surface resists sogginess even when dipped multiple times in au jus.

Store and Reheat

The beef and au jus keep separately in the fridge for up to 4 days or freeze for 3 months. The coleslaw works best when it hits the table at the same time as the main. We keep a batch ready for nights like this - simple coleslaw recipe takes 5 minutes to mix and stays crisp in the fridge while you reheat the beef.

Method Time Best For
🍳 Stovetop 5-7 minutes low heat Even reheating that preserves texture without drying out the beef
📦 Microwave 2-3 minutes medium power Quick single servings when you need lunch assembled fast
🔥 Oven 15-20 minutes at 325°F Larger portions or when reheating multiple sandwiches at once

For best results when storing:

  • Cool beef and liquid separately: Spread shredded beef in a shallow container and refrigerate uncovered for 30 minutes before sealing-prevents steam from making the meat mushy.
  • Portion before freezing: Divide into 2-cup portions in freezer bags, press out air, and lay flat-stacks neatly and thaws faster when you need just enough for sandwiches.
  • Reheat with moisture: Add 2-3 tablespoons of au jus or broth when reheating to prevent drying-the liquid steams the meat instead of toughening it.
  • Don't freeze assembled sandwiches: Bread turns soggy and loses texture-freeze only the beef and au jus, then assemble fresh rolls when serving.
  • Use within 3 months: Frozen beef stays safe longer but starts losing flavor and developing freezer burn after 12 weeks-label containers with the date.

Frequently Asked Questions

Can I make Crockpot Italian Beef Sandwich Filling ahead?

Yes-cook the beef fully, shred it, and store with some of the cooking liquid in the fridge for up to 3 days. Reheat on the stovetop with a splash of broth before assembling sandwiches so the meat stays moist and doesn't dry out.

How long to cook Crockpot Italian Beef Sandwich Filling on low?

Cook on low for 8 hours until the internal temperature reaches 190-205°F and the beef shreds easily with a fork. If you need faster results, cook on high for 4-5 hours, but low heat produces more tender, fall-apart texture.

How do I know when Crockpot Italian Beef is done?

Insert a fork into the thickest part of the roast-if it slides in with no resistance and the meat pulls apart easily, it's done. An instant-read thermometer should register 190-205°F for optimal shredding texture.

Can I use sirloin instead of chuck roast for Italian beef?

You can, but sirloin is leaner and dries out more easily during long cooking. If you use sirloin, add extra broth and check for doneness at 7 hours instead of 8-it cooks faster without the fat and connective tissue.

What are good bread options for Italian Beef Sandwich?

Use crusty Italian sandwich rolls or hoagie rolls with a sturdy crust and soft interior-they hold up to dipping in au jus without falling apart. Toast them cut-side down before assembling to add extra protection against sogginess.

Crockpot Italian Beef Sandwich Filling served on a plate

Crockpot Italian Beef Sandwich Filling

No ratings yet
Slow-cooked chuck roast becomes tender, shreddable Italian beef sandwich filling after 8 hours on low heat with pepperoncini peppers and Italian seasonings. The reduced cooking liquid turns into a tangy au jus perfect for dipping. This set-it-and-forget-it recipe is ideal for meal prep or game day.
Print Recipe Pin Recipe
Prep Time 15 minutes mins
Cook Time 8 hours hrs
Total Time 8 hours hrs 15 minutes mins
Servings: 8 servings
Course: Main Dish
Cuisine: Italian-American
Ingredients Equipment Method Notes

Ingredients
  

  • 3.5 pounds beef chuck roast look for marbling and connective tissue
  • 1 medium onion yellow or white, sliced into thick wedges
  • 5 cloves garlic smashed with flat side of knife
  • 2 tablespoons Italian seasoning check label for salt content
  • 1 tablespoon dried oregano
  • 2 cups beef broth preferably low sodium
  • 1 cup pepperoncini peppers with juice include 3-4 tablespoons of pepper brine
  • salt to taste
  • black pepper to taste
  • 8 pieces Italian sandwich rolls for serving, crusty with soft interior

Equipment

  • Skillet To sear the roast for caramelized crust
  • Crockpot For slow cooking the beef
  • Fine-mesh sieve To strain the cooking liquid
  • Saucepan To reduce the au jus

Method
 

  1. Pat the beef dry with paper towels. Rub all sides with Italian seasoning, dried oregano, salt, and black pepper. Optionally, heat a skillet over medium-high heat and sear the roast 3-4 minutes per side until browned to add caramelized flavor. Skip searing to save time.
    3.5 pounds beef chuck roast, 2 tablespoons Italian seasoning, 1 tablespoon dried oregano, salt, black pepper
  2. Place sliced onion wedges and smashed garlic cloves in the bottom of the crockpot. Set the seasoned roast on top. Pour beef broth around the sides so it comes halfway up the roast but does not cover it completely. Add the pepperoncini peppers and 3-4 tablespoons of their brine over the top.
    1 medium onion, 5 cloves garlic, 2 cups beef broth, 1 cup pepperoncini peppers with juice
  3. Cover and cook on low for 8 hours or on high for 4-5 hours. Check doneness by inserting a fork into the thickest part. The meat should shred easily with no resistance and reach an internal temperature of 190-205°F.
  4. Transfer the roast to a cutting board and let rest 5 minutes. Use two forks to pull meat into shreds, discarding large fat pieces. Strain the cooking liquid through a fine-mesh sieve into a saucepan, pressing the solids to extract all juice.
  5. Simmer the strained liquid over medium heat for 10-15 minutes until reduced by half and slightly thickened. Taste and adjust seasoning with salt and black pepper. Return shredded beef to the crockpot or serving bowl and pour some of the reduced liquid over to keep moist.
    salt, black pepper
  6. Serve the shredded beef on toasted Italian sandwich rolls with extra au jus on the side for dipping.
    8 pieces Italian sandwich rolls

Notes

  • Sear the roast before slow cooking to add depth of flavor and color but it is optional.
  • Use just enough broth to come halfway up the roast to avoid watery meat.
  • Reduce the cooking liquid on the stove to create a concentrated au jus perfect for dipping sandwiches.

Tried this recipe?

Let us know how it was!
« Previous Page
Next Page »

Primary Sidebar

ForkliftKitchen recipe developer

Welcome!

Recipe Developer · 12+ Yr Kitchen Veteran

I'm the recipe developer behind this site, focused on practical, well-tested dishes and smart ingredient swaps. Every recipe is written to be clear, reliable, and easy to make at home.

650+ Recipes
12+ Yrs Exp.
3x Tested
Our Story →

As Featured In

Allrecipes

TASTE OF HOME

Food52

HUFFPOST

Yahoo! Life

Our Editorial Standards

  • ✓ Every recipe tested at least 3 times before publishing
  • ✓ Substitutes verified by real kitchen trials, not guesswork
  • ✓ Reviewed for accuracy by our editorial team
  • ✓ Updated regularly with seasonal info and reader feedback

Most Popular

  • Creamy Lemon Shrimp Linguine
    Creamy Lemon Shrimp Linguine
  • Creamy Garlic Mushroom Chicken
    Creamy Garlic Mushroom Chicken
  • Sesame Ginger Chicken Noodle Bowls
    Sesame Ginger Chicken Noodle Bowls
  • Baked Lemon Herb Fish Fillets
    Baked Lemon Herb Fish Fillets
  • Veggie Loaded Fried Rice
    Veggie Loaded Fried Rice
  • Spicy Garlic Shrimp Stir Fry
    Spicy Garlic Shrimp Stir Fry

Join 8,000+ Home Cooks

Weekly Kitchen Tips

Easy recipes, smart substitutes, and real cooking shortcuts — every Thursday.

Subscribe Free →


Side Dishes

  • What to Serve With Asian Salmon? 15 Best Side Dishes
    What to Serve With Asian Salmon? 15 Best Side Dishes
  • Side Dishes for Strawberry Spinach Salad
    15 Best Side Dishes for Strawberry Spinach Salad
  • Sides for Grilled Cauliflower Steaks to Complete the Meal
    15 Sides for Grilled Cauliflower Steaks to Complete the Meal
  • 15 Sides To Serve With Calabacitas
    15 Best Sides for Calabacitas – Mexican-Inspired Favorites


Substitutes

  • 7 Best Substitutes for Hot Sauce in Marinades & Stir-Fries
    7 Best Substitutes for Hot Sauce in Marinades & Stir-Fries
  • 9 Best Substitutes for Butter in Baking and Cooking
  • 7 Best Substitutes for Tagliatelle for Italian Pasta Dishes
    7 Best Substitutes for Tagliatelle for Italian Pasta Dishes
  • 7 Best Substitutes for Udon Noodles in Asian Stir-Fries
    7 Best Substitutes for Udon Noodles in Asian Stir-Fries


Browse by Topic

  • Side Dishes320
  • Substitutes785
  • Dinner163
  • Air Fryer77
  • Taste Profiles484
  • Food Storage123


Reader Reviews

★★★★★

"Finally a food blog that tells you exactly why a substitute works instead of just listing options."

— Sarah M., via email

★★★★★

"The side dish recommendations are so specific — saved my dinner party twice this month."

— James R., Pinterest comment

★★★★★

"I trust this site more than most because they actually test everything. You can tell."

— Priya K., blog comment

Footer

↑ Back to Top

Forklift Kitchen

We do the heavy lifting so you can enjoy the cooking. Tested recipes, smart substitutes, and perfect pairings—built for real home cooks.

Content

  • Recipes
  • Substitutes
  • What to Serve With
  • Blog

Company

  • About Us
  • Contact
  • Subscribe

Legal

  • Privacy Policy
  • Terms of Service

As an Amazon Associate I earn from qualifying purchases.

© 2026 Forklift Kitchen.

Rate This Recipe

Your vote:


A rating is required
A name is required
An email is required