• Skip to primary navigation
  • Skip to main content
  • Skip to primary sidebar
  • Recipe Index
    • Air Fryer
  • Side Dishes
  • Substitutes
  • About
  • Contact
  • Subscribe

ForkLiftKitchen

menu icon
go to homepage
  • Recipe Index
    • Air Fryer
  • Side Dishes
  • Substitutes
  • About
  • Contact
  • Subscribe
subscribe
search icon
Homepage link
  • Recipe Index
    • Air Fryer
  • Side Dishes
  • Substitutes
  • About
  • Contact
  • Subscribe
×

Blog

What Is Truffle Oil? Taste, Uses & More Explained

April 3, 2026

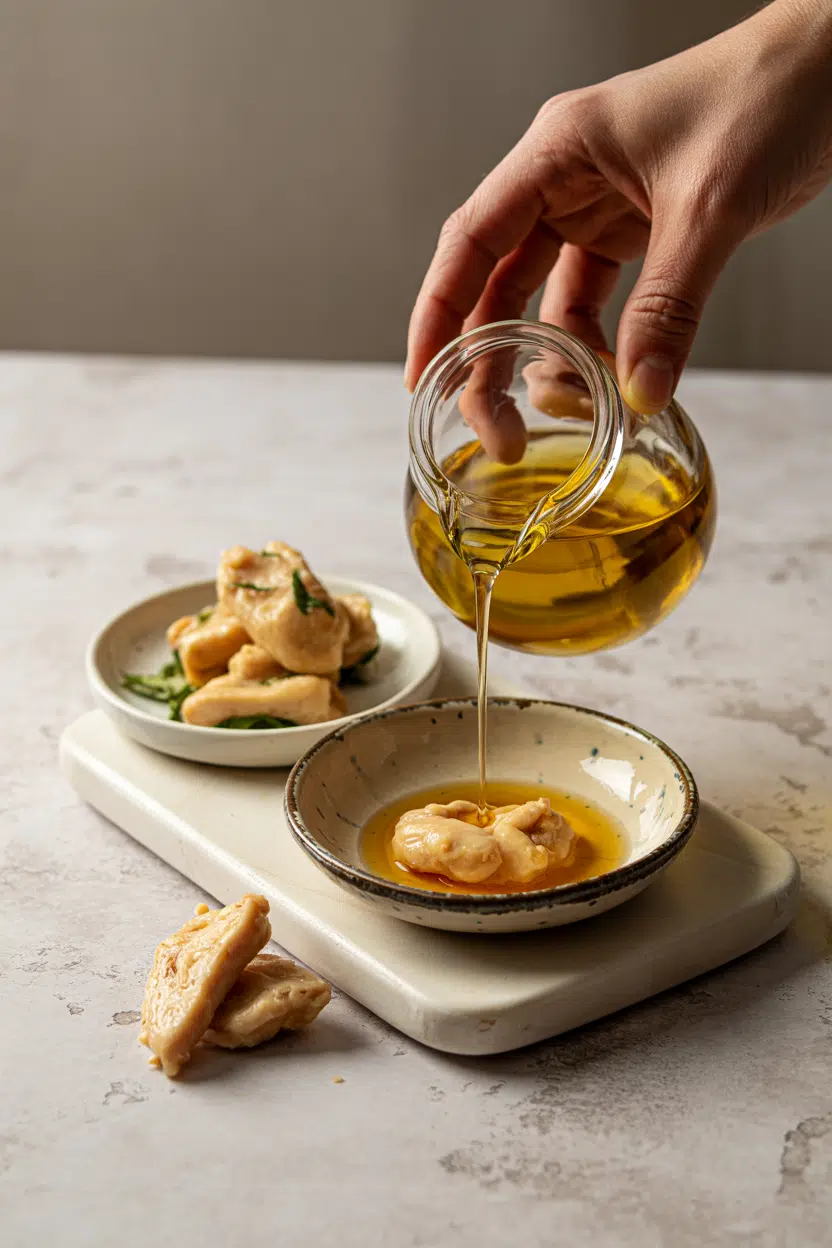
Drizzle a small spoon of truffle oil over a bowl of mushroom risotto just before serving, and the steam carries that dense, musky perfume straight up - the kind of aroma that makes people pause mid-conversation.
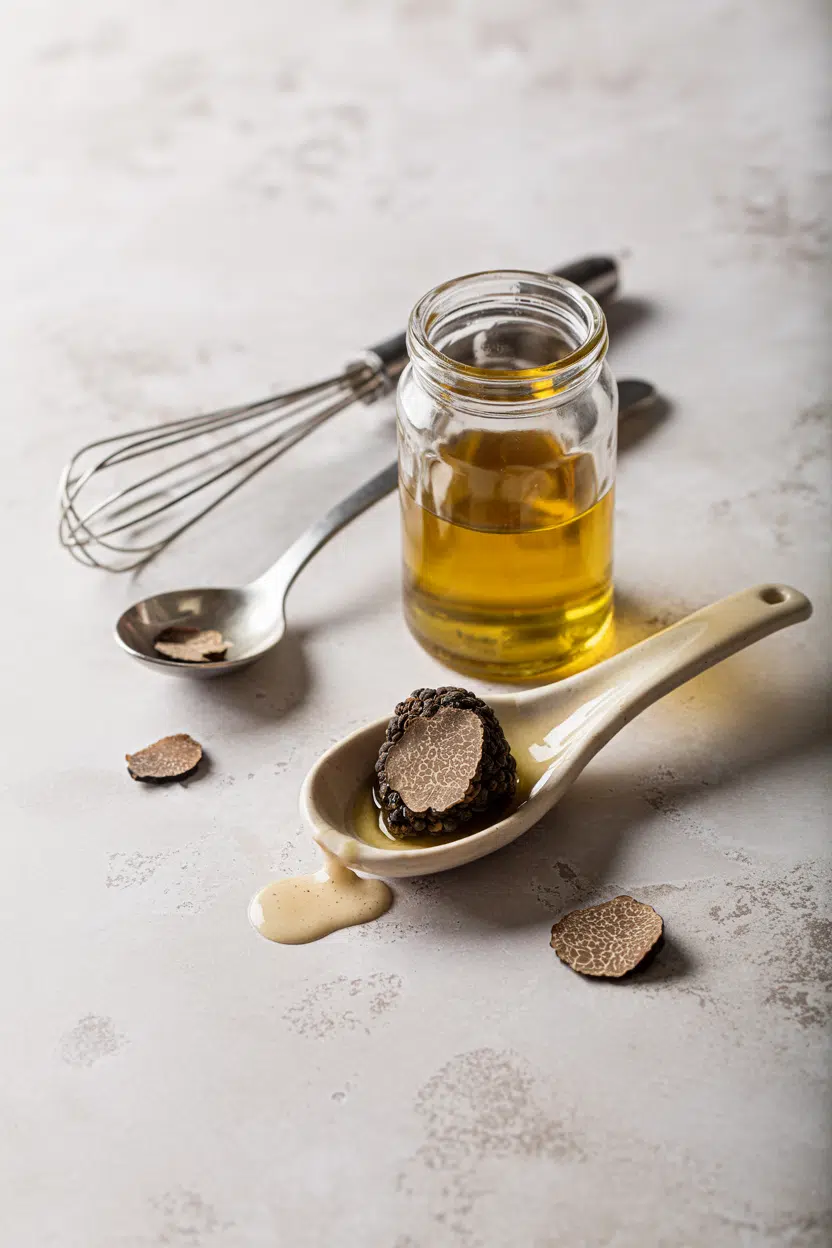
What Is Truffle Oil

Like keeping extra virgin olive oil fresh, getting the most from truffle oil comes down to how well you understand what you're actually working with.

This oil occupies a specific lane in the kitchen: not an everyday cooking fat, not a sauce, but a finishing ingredient built to deliver one thing - concentrated truffle character at the last second.

QUICK SUMMARY

Truffle oil is a neutral or olive oil infused with truffle compounds - most often a synthetic molecule called 2,4-dithiapentane. It delivers an earthy, garlicky, musky hit as a finishing drizzle. Use it cold or off heat. Opened bottles last 3-6 months at their best.

👅Flavor: Earthy, musky, sulfurous with a slightly bitter finish
🍳Best Use: Drizzled over risotto, eggs, mashed potatoes after cooking
🛒Buying Tip: Dark glass bottle, recent date, read the label carefully
⏱️Shelf Life: Unopened 9-18 months; opened 3-6 months for peak aroma
🌿Diet: Vegan-friendly; high in calories; not a meaningful truffle nutrient source

What Is Truffle Oil?

Truffle oil is a finishing oil - an olive oil or neutral oil base (often grapeseed oil or extra-virgin olive oil) that has been flavored with truffle compounds to carry the aroma of real truffles.

Most commercial versions use a synthetic aromatic compound called 2,4-dithiapentane, which replicates the sulfurous, musky edge of fresh truffles without requiring actual fungus in the bottle.

The product sits under a few names: truffle-infused oil, truffle-flavored oil, black truffle oil, and white truffle oil are the most common. Black truffle oil leans earthier and more robust; white truffle oil is sharper, more garlicky, and often more intense on the nose.

A smaller category of premium products contains real truffle pieces or natural truffle extract, though these cost significantly more and don't necessarily outperform quality synthetic versions in aroma.

  • 🫙 Base oil choices - Extra-virgin olive oil adds its own fruity notes; grapeseed stays neutral and lets the truffle lead.
  • 🖤 Black truffle oil - Earthier, rounder, more forgiving in bold dishes like pasta or steak.
  • 🤍 White truffle oil - Sharper and more pungent; use even less than you think you need.
  • 🔬 Synthetic vs. natural - Most bottles labeled "truffle-flavored" use 2,4-dithiapentane; "contains real truffle" is a different product entirely.

What Does Truffle Oil Taste Like?
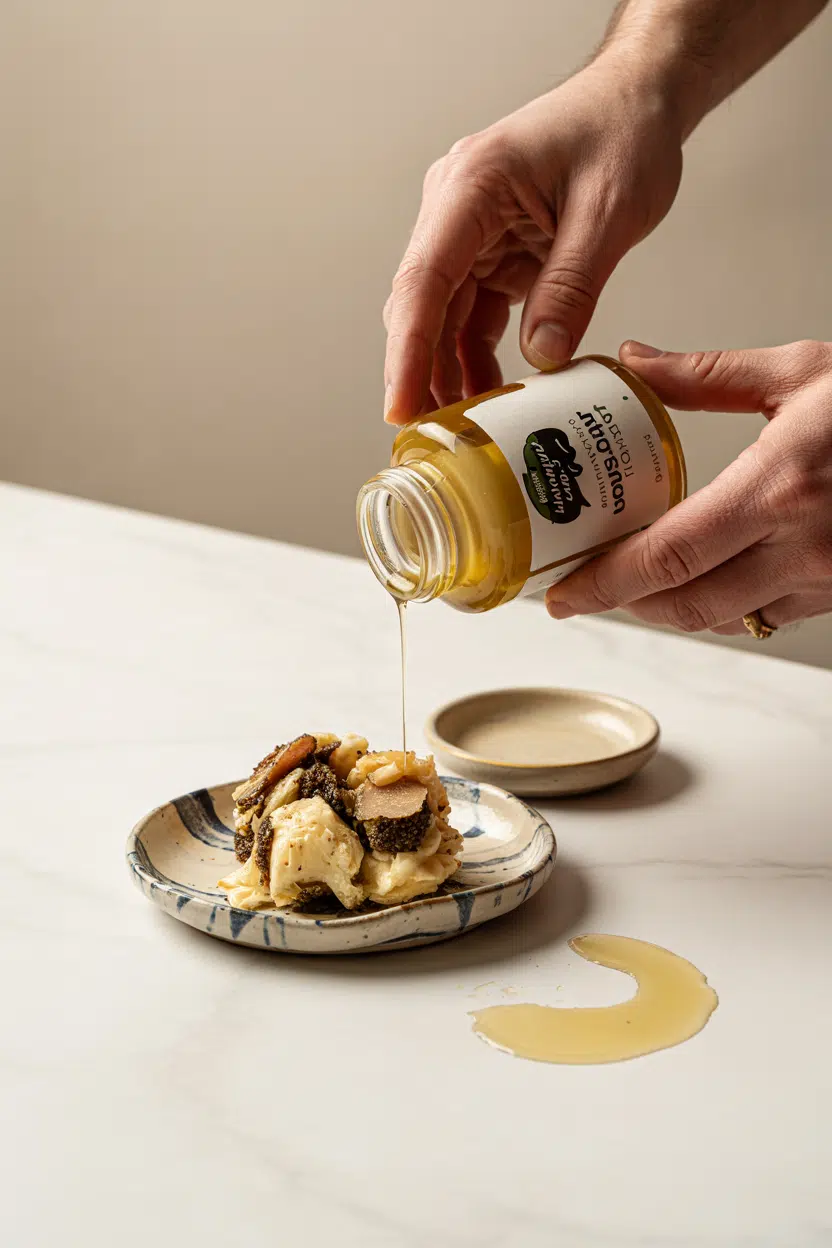
truffle oil - What Is Truffle Oil

Truffle oil tastes like concentrated mushroom stock with a garlicky sulfur edge - deeper and more one-note than fresh truffle, with a lingering finish that can tip bitter if overused.

The aroma does most of the work here; the flavor itself is relatively thin on the palate compared with butter-based truffle products.

Sensory SnapshotPungent Intensity
👅 Flavor
earthymuskysulfurousslightly bitter
✋ Texture
slicklight mouthcoat
👃 Aroma
perfume-likesynthetic muskpungent

Heat kills the aroma fast. A truffle oil added at the start of cooking leaves almost no trace by the time the dish reaches the table.

Applied cold or swirled in at the last moment, the compound stays volatile and the nose catches it fully. That difference - hot vs. off-heat - is where most first-time users go wrong.

Golden Rule
Always add truffle oil off heat, just before serving. Even gentle sustained warmth drives off the aromatic compounds within minutes.

How to Use Truffle Oil

Truffle oil belongs at the end of cooking, never the beginning. It works best on simple, starchy, or egg-based dishes where the base flavor is mild enough that truffle can read clearly - risotto, mashed potatoes, scrambled eggs, plain pasta.

For dishes with bold competing sauces or strong spices, the truffle note disappears or clashes.

Pairing the oil with Parmesan or Pecorino amplifies the effect; the glutamates in aged cheese lock onto the musky aroma and make both taste stronger.

A few drops on a creamy garlic mashed potatoes recipe - added after pulling the pot from heat - is one of the most reliable uses in a home kitchen.

Similarly, stirring it into aioli or mayonnaise off heat gives you a spread that punches above its weight on sandwiches or as a dipping sauce.

How Truffle Oil Is Used
MethodBest ForTip
🫗 Finishing DrizzleRisotto, eggs, mashed potatoes, grilled steak after restAdd last; 1-2 teaspoons maximum per serving
🥗 Dressings & VinaigrettesRoasted beet salad, arugula, grain bowlsEmulsify off heat; balance with citrus or vinegar
🧈 Compound ButterSteak butter, corn, dinner rollsFold in cold; melt at table, not in the pan
🥄 Folded into SaucesTruffle mayo, light cream finishesStir in after removing from heat source

Avoid truffle oil on delicate raw fish - the synthetic musk overpowers rather than complements.

High-heat frying destroys the aroma entirely, so don't use it as a cooking oil.

When swapping out truffle oil isn't an option and the recipe calls for something mushroom-forward, swapping out mushroom stock as a base layer first can help bridge the gap before a finishing drizzle.

Try It In
🍰Olive Oil CakeSee how a quality oil base carries flavor through baking→🍋Ricotta with Lemon and Olive OilA finishing-oil dish that shows restraint and timing→🫙Labneh with Olive Oil and Za'atarAnother cold-drizzle technique worth borrowing→

How to Buy and Store Truffle Oil

Read the label before you buy. "Truffle-flavored oil" means synthetic compound; "contains real truffle" means the bottle includes actual truffle extract or pieces - a meaningful difference in price and sometimes in complexity.

Look for dark glass bottles with a recent production date, and check the base oil: extra-virgin olive oil adds character, while grapeseed stays neutral.

If the label says only "artificial flavor" and nothing else, set it back on the shelf.

Watch Out
Olive oil-based truffle oil may cloud or solidify in the fridge - that's harmless, but bring it to room temperature before use so the aroma compounds flow freely.

Store sealed bottles in a cool, dark cupboard away from the stove.

Once opened, refrigeration extends the life of the base oil, though the truffle aroma still fades with time.

For a full breakdown of timing by bottle type and base oil, truffle oil's shelf life covers the specifics.

If the base is grapeseed, knowing grapeseed oil swaps that work also helps if you run out mid-recipe.

  • 🏷️ Unopened shelf life - 9-18 months depending on base oil and whether preservatives are used.
  • ⏳ After opening - 3-6 months for peak aroma; the truffle note degrades faster than the oil itself goes rancid.
  • 🔍 Quality check - If the truffle smell is gone but the oil smells clean, it's safe but functionally flat.

Where to Start With Truffle Oil

Start with black truffle oil on risotto or mashed potatoes - those two dishes give you the clearest read on the oil's quality and intensity.

If the aroma smells more like cheap perfume than earth and mushrooms, the bottle isn't worth repeating.

A good bottle rewards restraint: one teaspoon over a serving does more than a tablespoon.

For anyone still curious about parmesan cheese stand-ins in those same dishes, pairing choices matter as much as the oil itself.

Shortcut
Mix 1 teaspoon of truffle oil into store-bought mayo, chill for 20 minutes, and use as a dip. It's the fastest way to judge a new bottle before committing it to a full recipe.

Frequently Asked Questions

Is truffle oil made from real truffles?

Most commercial truffle oil uses 2,4-dithiapentane, a synthetic compound that mimics truffle aroma - no actual truffle required. Bottles labeled "contains real truffle" or "truffle extract" are a different, pricier product and should state it clearly on the label.

Can you cook with truffle oil?

Not effectively. Heat destroys the aromatic compounds within minutes, leaving you with plain oil and no truffle character. Always add it off heat, right before the dish is served.

How much truffle oil should I use?

Start with half a teaspoon per serving and add more only after tasting. Truffle oil is pungent - overuse turns the dish perfume-like rather than earthy, and that's hard to correct once it's in.

How long does truffle oil last after opening?

Opened truffle oil holds its aroma well for 3-6 months. The truffle character fades before the base oil goes rancid, so a bottle that smells flat is functionally spent even if the oil itself is still safe.

Does white truffle oil taste different from black truffle oil?

Yes, noticeably. White truffle oil is sharper and more garlicky with a stronger synthetic edge; black truffle oil is earthier and rounder. Black is more forgiving for beginners - white truffle oil is easier to overdo.

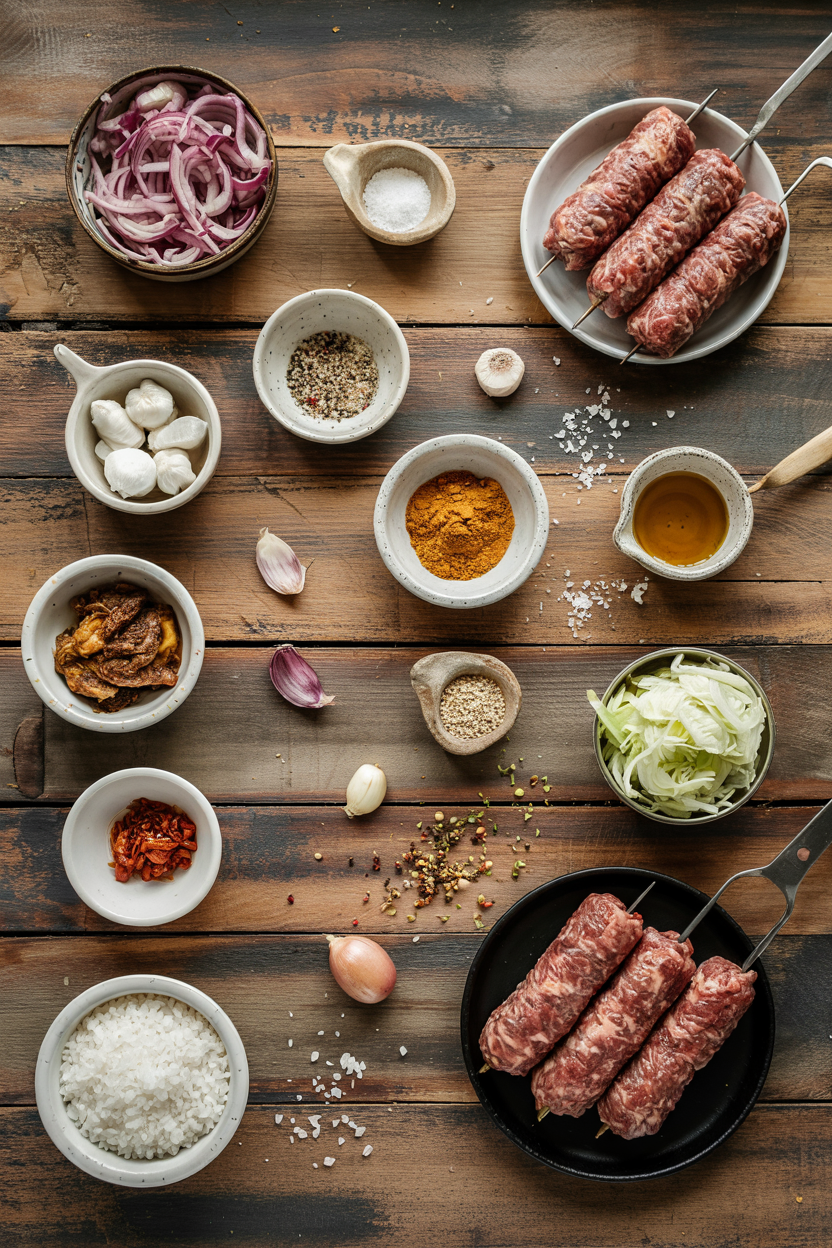
Lamb Kofta Kebabs

April 3, 2026

You need 25 minutes and a mixing bowl. No marinating overnight, no complicated prep, no special equipment beyond skewers.

Lamb Kofta Kebabs served on a plate

Ground lamb mixed with warm spices grills into juicy kebabs with charred edges. The meat mixture firms up in the fridge so it holds together on the grill without falling apart.

This is what you make when you want something that tastes like you ordered it but still feels achievable on a Tuesday.

QUICK SUMMARY

Mix ground lamb with onion, garlic, cumin, and fresh parsley, then shape onto skewers and grill until charred. Chilling the mixture for 30 minutes keeps the meat from falling apart. Use 80/20 ground lamb for moisture and cook to 160°F internal temperature.

⏱️Time Reality: 15 min prep, 30 min chill time, 10-12 min cooking
🔥Critical First Move: Chill meat mixture before shaping to prevent crumbling
⚠️Watch Out: Overmixing toughens texture - mix just until combined, max 1 minute

Table of Contents

Toggle
  • Why This Recipe Works
  • What You'll Need
    • Ingredient Details
  • Ingredient Swaps
  • What to Serve With It
  • Store and Reheat
  • Frequently Asked Questions
  • Lamb Kofta Kebabs
    • Method 
    • Tried this recipe?

Why This Recipe Works

Ground lamb with 20% fat stays moist through high-heat grilling while lean meat dries out. For a refreshing contrast that cuts through the richness, try a simple homemade salad on the side.

Quick Reference
⏱️
Prep Time
15 min
🔥
Cook Time
10-12 min
⏰
Total Time
25-30 min
🍽️
Servings
4 servings
📊
Difficulty
Medium
🏷️
Category
Main Dish | Appetizer
💡
Quick Tip
Chill mix 30 min for firmer kebabs
🎯
Best For
Weeknight | Entertaining | Meal prep

Why this method delivers:

  • Chilling firms the mixture - cold meat holds its shape on skewers and resists falling apart during flipping
  • 80/20 fat ratio prevents dryness - enough fat to stay juicy without greasy drips that cause flare-ups
  • Fresh parsley adds moisture - herbs release water during cooking, keeping the interior tender
  • Medium-high heat creates char - 400°F sears the outside before the inside overcooks past 160°F
  • Resting redistributes juices - 5 minutes off heat lets the meat reabsorb moisture instead of bleeding onto the plate
Quick Tip
Use an instant-read thermometer to hit 160°F exactly - guessing leads to dry or undercooked meat

What You'll Need

Ingredients for Lamb Kofta Kebabs

Stock your pantry with ground lamb, onion, and cumin for weeknight kebabs that come together faster than takeout. If you're working with similar spiced meat dishes, check out a similar dinner recipe that uses the same flavor base.

🍗
Protein Base
  • 1½ lbs ground lamb (80/20)
🧄
Aromatics
  • 1 small onion, grated
  • 3 garlic cloves, minced
  • ½ cup fresh parsley, chopped
🌶️
Spices
  • 2 teaspoon ground cumin
  • 1 teaspoon ground coriander
  • ½ teaspoon ground cinnamon
  • 1½ teaspoon salt
  • ½ teaspoon black pepper
🫙
Extras
  • 2 tablespoon olive oil
  • Metal or wooden skewers

Ingredient Details

  • Ground lamb (80/20)
    Higher fat content keeps kebabs moist during grilling - lean lamb dries out and crumbles
  • Grated onion
    Squeeze out excess liquid before adding to prevent soggy mixture that won't hold shape
  • Fresh parsley
    Chop fine for even distribution - large pieces create weak spots that break apart
  • Ground cumin
    Toast whole cumin seeds and grind fresh for stronger flavor, or use pre-ground for convenience
  • Wooden skewers
    Soak in water 30 minutes before use to prevent burning on the grill
  • Olive oil
    Brush on kebabs before grilling to prevent sticking and add golden color
  • Salt
    Mix in thoroughly to help proteins bind - undersalted meat falls apart more easily

Ingredient Swaps

Lamb can be pricey or hard to find, and ground beef or turkey work as direct substitutes with minor adjustments. For a different starch option that pairs well with grilled meat, try this easy potato wedges recipe instead of rice.

Four swaps that work:

  • Ground beef for ground lamb - choose 80/20 for similar fat content, flavor will be milder and less gamey
  • Ground turkey for ground lamb - add 2 tablespoon olive oil to compensate for lean meat, otherwise mixture dries out
  • Fresh cilantro or mint for parsley - changes the herbal profile but keeps moisture and freshness intact
  • Garlic powder for fresh garlic - use 1 teaspoon powder per 3 cloves, mix evenly to avoid concentrated bitter spots

Ground Beef

Works for: Budget cooking, milder flavor preference, easier to find in stores

Skip if: You want authentic Middle Eastern flavor or richer taste

Ground Turkey

Works for: Leaner protein option, lighter texture, lower calorie count

Skip if: You don't add extra fat - turkey alone turns dry and crumbly

Fresh Mint

Works for: Bright herbal notes, traditional in some regions, adds cooling contrast

Skip if: You prefer earthy parsley flavor or find mint too strong

Instructions

Shape uniform kebabs about 1 inch thick and 4 inches long so they cook evenly in 10-12 minutes. For a creamy contrast that balances the warm spices, serve with creamy homemade sauce recipe on the side.

  1. Mix the meat mixture. Combine ground lamb, grated onion (squeeze out excess liquid first), minced garlic, chopped parsley, cumin, coriander, cinnamon, salt, and black pepper in a mixing bowl. Mix gently with your hands just until combined, about 30 seconds - overmixing develops protein strands that toughen the texture.

  2. Chill the mixture. Cover the bowl with plastic wrap and refrigerate for 30 minutes. The cold firms up the fat and makes shaping easier without the meat sticking to your hands or falling apart on skewers.

  3. Shape onto skewers. Divide mixture into 8 equal portions (about 3 oz each). Wet your hands with cold water, then mold each portion around a skewer into a 4-inch log about 1 inch thick. Press firmly enough to stick but don't compact too hard or the texture turns dense.

  4. Grill the kebabs. Preheat grill or grill pan to medium-high (400°F). Brush kebabs lightly with olive oil. Place on grill and cook 10-12 minutes total, turning every 2-3 minutes to char all sides evenly. Check internal temperature - pull at 160°F for juicy meat with no pink center.

  5. Rest before serving. Transfer cooked kebabs to a plate and tent loosely with foil. Let rest 5 minutes so juices redistribute instead of running out when you bite in.

Watch Out
Don't press down on kebabs while grilling - squeezing forces moisture out and creates dry, tough meat

What to Serve With It

Kofta needs something fresh and something starchy to round out the plate. For more ways to build complete meals around grilled meat, check out complete lamb shanks meal ideas that work with any kebab dish.

Side Dish Prep Why It Works How to Serve
Cucumber yogurt salad Easy Cool and tangy contrast cuts through warm spices and rich lamb fat Mix diced cucumber, Greek yogurt, lemon juice, salt; serve cold in small bowls
Basmati rice Easy Neutral base soaks up meat juices and balances bold flavors without competing Cook rice with pinch of salt, fluff with fork, mound on plate under kebabs
Roasted vegetables Medium Caramelized edges add texture contrast and color to an otherwise brown plate Toss bell peppers, zucchini, red onion with olive oil; roast at 425°F for 20 min
Warm pita bread Easy Wrap kebabs for handheld eating or tear pieces to scoop up rice and sauce Warm pitas on grill 30 seconds per side; stack wrapped in towel to keep soft
Tabbouleh salad Medium Bright parsley and lemon wake up your palate between rich bites of meat Chop parsley, tomato, cucumber; toss with bulgur, lemon juice, olive oil

Three ways to serve it:

  • Weeknight plate: Basmati rice, cucumber yogurt salad, warm pita bread for scooping
  • Entertaining spread: Tabbouleh, hummus platter, roasted vegetables, tzatziki for dipping
  • Meal prep bowls: Rice base, chopped kofta, roasted veggies, drizzle of tahini sauce
Best Pick
Serve tzatziki on the side - cool garlicky yogurt balances warm spices better than any other sauce

Store and Reheat

Cooked kofta keeps 3-4 days in the fridge and reheats without drying out if you add moisture. You can also freeze raw shaped kebabs for up to 3 months - thaw in the fridge overnight before grilling.

Method Time Best For
🍳 Stovetop 4-5 min over medium heat Quick reheating with moisture retention - add splash of water to pan
📦 Microwave 1-2 min at 50% power Fast reheating but softens exterior char - cover with damp paper towel
🔥 Oven 10-12 min at 350°F Even reheating without drying - wrap in foil with tablespoon of broth

For best results when storing:

  • Store in shallow containers - stacking kebabs causes bottom ones to steam and get soggy
  • Separate raw and cooked - raw meat lasts 1-2 days in fridge, cooked lasts 3-4 days
  • Freeze shaped raw kebabs - place on parchment-lined tray to freeze solid, then transfer to freezer bag
  • Thaw overnight in fridge - don't thaw at room temperature or bacteria grows in the danger zone
  • Add moisture when reheating - drizzle with broth or water to prevent drying out in oven or microwave

Frequently Asked Questions

How long to cook lamb kofta kebabs at medium-high heat?

Cook 10-12 minutes total, turning every 2-3 minutes to char all sides evenly. Pull when internal temperature hits 160°F - undercooking leaves pink centers, overcooking dries out the meat.

Can I make lamb kofta kebabs ahead and freeze?

Yes, freeze raw shaped kebabs up to 3 months. Place on parchment-lined tray to freeze solid, then transfer to freezer bag. Thaw overnight in fridge before grilling.

What goes with lamb kofta kebabs for sides?

Serve with basmati rice, cucumber yogurt salad, warm pita bread, roasted vegetables, or tabbouleh. You need something fresh to cut richness and something starchy to soak up juices.

How do I know when lamb kofta kebabs are done?

Use an instant-read thermometer to check internal temperature - pull at 160°F for fully cooked meat with no pink. Visual cue: juices run clear when you press the center, and exterior has golden-brown char marks.

Can I use beef instead of lamb in kofta kebabs?

Yes, substitute 80/20 ground beef for similar fat content and moisture. Flavor will be milder and less gamey than lamb, but the texture and cooking method stay the same.

Lamb Kofta Kebabs served on a plate

Lamb Kofta Kebabs

No ratings yet
Lamb Kofta Kebabs are juicy grilled skewers made from ground lamb mixed with warm spices and fresh parsley. Chilling the meat mixture before shaping helps the kebabs hold together and develop charred edges while staying tender inside.
Print Recipe Pin Recipe
Prep Time 15 minutes mins
Cook Time 12 minutes mins
Total Time 27 minutes mins
Servings: 4 servings
Course: Appetizer, Main Dish
Cuisine: Middle Eastern
Ingredients Equipment Method Notes

Ingredients
  

  • 1.5 lbs ground lamb 80/20 fat ratio
  • 1 small onion grated, excess liquid squeezed out
  • 3 cloves garlic minced
  • 0.5 cup fresh parsley chopped finely
  • 2 teaspoon ground cumin
  • 1 teaspoon ground coriander
  • 0.5 teaspoon ground cinnamon
  • 1.5 teaspoon salt to help bind mixture
  • 0.5 teaspoon black pepper
  • 2 tablespoon olive oil for brushing kebabs before grilling

Equipment

  • Mixing bowl For combining ingredients
  • skewers Metal or wooden, wooden should be soaked to prevent burning
  • Grill or Grill Pan Preheated to medium-high heat (around 400°F)

Method
 

  1. Combine ground lamb, grated onion (with excess liquid squeezed out), minced garlic, chopped parsley, cumin, coriander, cinnamon, salt, and black pepper in a mixing bowl. Mix gently with your hands just until combined, about 30 seconds, to avoid toughening the texture.
    1.5 lbs ground lamb, 1 small onion, 3 cloves garlic, 0.5 cup fresh parsley, 2 tsp ground cumin, 1 tsp ground coriander, 0.5 tsp ground cinnamon, 1.5 tsp salt, 0.5 tsp black pepper
  2. Cover the bowl with plastic wrap and refrigerate the mixture for 30 minutes to firm up the fat and make shaping easier without sticking or falling apart.
  3. Divide the mixture into 8 equal portions. Wet your hands with cold water and mold each portion around a skewer into a 4-inch long log about 1 inch thick. Press firmly but do not compact too hard.
  4. Preheat grill or grill pan to medium-high heat (400°F). Brush kebabs lightly with olive oil. Place on grill and cook for 10-12 minutes total, turning every 2-3 minutes to char all sides evenly. Use an instant-read thermometer to check internal temperature and pull when it reaches 160°F.
    2 tbsp olive oil
  5. Transfer the cooked kebabs to a plate and tent loosely with foil. Let rest for 5 minutes to allow juices to redistribute before serving.

Notes

  • Chill the meat mixture for 30 minutes to help the kebabs hold their shape on the grill.
  • Use an instant-read thermometer to ensure kebabs reach 160°F internal temperature for juiciness and safety.
  • Mix gently to avoid toughening the texture from overworking the meat.

Tried this recipe?

Let us know how it was!

What Is Whipped Cream? Taste, Uses & More Explained

April 3, 2026

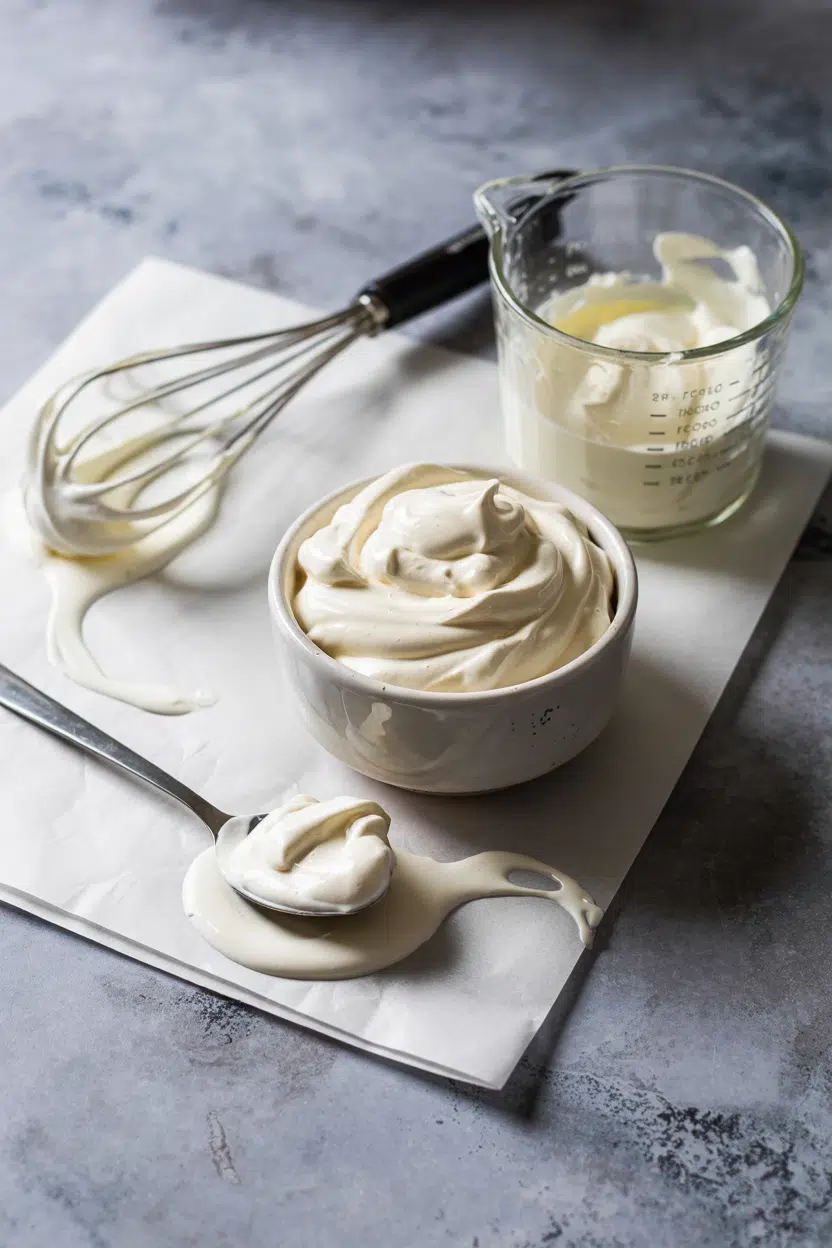
That first spoonful of whipped cream - cold, barely sweet, dissolving almost before you register it - is one of the most satisfying contrasts in a dessert kitchen. Cream in dairy recipes plays many roles, and whipped cream sits at the lightest, most fleeting end of that spectrum.

What Is Whipped Cream

It exists where air and fat meet, which is exactly what makes it so useful and so easy to get wrong.

If you've ever reached for a storebought tub and wondered whether it compares to the real thing, the alternatives to whipped topping question matters more than most people expect.

QUICK SUMMARY

Whipped cream is aerated heavy cream - light, mildly sweet, and built on dairy fat. It's used cold as a topping or folded into desserts. Stabilized versions hold their shape for piping. Plain whipped cream deflates within hours without stabilizers.

🥛What It Is: Heavy cream whipped to soft or firm peaks with trapped air
👅Flavor: Mildly sweet, rich dairy fat, neutral creaminess when unsweetened
🍓Best Uses: Pie topping, mousse base, piped rosettes, hot drink garnish
❄️Shelf Life: Whipped: 2-3 days refrigerated; heavy cream unwhipped: 1-3 weeks
⚠️Watch Out: Deflates fast without stabilizers; separates under heat or long acid exposure

What Is Whipped Cream?

Whipped cream is heavy cream that has been beaten - by hand whisk, electric mixer, or aerosol canister - until air is trapped in the fat network, producing a light, voluminous foam. It traces its formal identity to French and Italian pastry traditions, where chantilly cream (crème chantilly) referred specifically to sweetened, vanilla-scented whipped cream served with desserts.

The base is always high-fat cream - typically heavy cream or whipping cream with 30-36% milkfat, which is the minimum needed to hold stable peaks. Lower-fat creams don't whip reliably.

You'll also encounter aerosol whipped cream in canisters, which uses pressurized nitrous oxide to aerate the cream on the spot.

The terminology gets messy fast.

  • 🥛 Heavy cream - 36%+ fat; most stable, best for piping and holding shape
  • 🥛 Whipping cream - 30-35% fat; lighter results, less structure
  • 🍦 Chantilly cream - sweetened and vanilla-flavored; a French subcategory
  • 🧴 Aerosol whipped cream - pre-made, convenient, deflates within minutes
  • 🚫 Whipped topping - a non-dairy product; does not behave the same way

If you're curious about swapping out mascarpone in recipes that call for a rich cream component, whipped cream often appears as a lightening agent in that same context.

What Does Whipped Cream Taste Like?

whipped cream - What Is Whipped Cream

Whipped cream is mild by design. The dominant note is clean, rich dairy fat - not sharp, not sweet unless sugar has been added.

Unsweetened, it reads as neutral creaminess with a faint milky tang. Sweeten it with powdered sugar, and a soft, round sweetness emerges without becoming candy-like.

The closest comparison is a very lightly sweetened mascarpone that's been spread thin, or a spoonful of light custard with no egg weight behind it.

Cultured cream or crème fraîche bases add a subtle tang that standard heavy cream won't give you.

Sensory SnapshotMild Intensity
👅 Flavor
mildly sweetrich dairyneutralfaint tang
✋ Texture
light and airysoft peakssilky
👃 Aroma
clean milkylightly sweet

Texture is where whipped cream earns its place. It melts almost immediately on the tongue, adding richness without weight - which is why it pairs so naturally with dense items like spiced pies or chocolate.

How to Use Whipped Cream

Whipped cream does two distinct jobs: cold topping and structural component. As a topping, it's dolloped or piped right before serving - on pumpkin pie, fresh berries, hot cocoa, or a shot of espresso for an affogato-adjacent finish.

As a structural component, it's folded into chocolate mousse to lighten the texture, or layered through trifles and parfaits.

French patisserie uses chantilly cream extensively as a filling for cream puffs and éclairs, where it must be stabilized to survive time in the fridge. American pie and dessert culture defaults to a generous spoonful at the table.

Golden Rule
Whipped cream and heat don't work together. Never use it as a sauce over hot food - it separates and pools within seconds.
How Whipped Cream Is Used
MethodBest ForTip
🥗 DollopedPies, fruit, hot drinksAdd at the last moment - don't pre-plate
🍳 FoldedMousse, parfaits, triflesUse firm peaks and fold gently to keep air
🧁 PipedCupcakes, layer cakes, éclairsStabilize with gelatin or cornstarch first
💨 AerosolQuick topping on drinks, casual dessertsUse immediately - deflates within minutes

Pairings skew toward fruits with brightness and sweets with depth. Fresh strawberries, raspberries, and peaches cut through the fat.

Chocolate, espresso, and vanilla curds give the cream something to rest against. Angel food cake and sponge cake are natural matches because neither competes in richness.

When you need a dairy-free swap, there are solid replacements for whipped cream that work in most cold applications, though the mouthfeel differs noticeably.

Try It In
🥣Creamy Overnight OatsA dollop of whipped cream adds richness to cold oats at serving time→🍝Creamy Beef StroganoffShows how heavy cream functions as the base before whipping changes everything→🦞Creamy Lobster RavioliDemonstrates heavy cream's role in building sauce body before aeration→

How to Buy and Store Whipped Cream

At the store, reach for heavy cream with at least 36% milkfat for the most reliable results.

Whipping cream at 30-35% fat works but produces softer, less stable peaks.

Both should be kept cold - using heavy cream for creaminess starts with buying a carton that hasn't been heat-damaged in transit.

Ultrapasteurized cream has a longer shelf life, however it can be stubbornly slow to whip compared to standard pasteurized cream.

Quick Tip
Chill your metal bowl and beaters in the freezer for 10-15 minutes before whipping. Cold equipment keeps the fat stable and doubles your volume faster.

Skip any carton labeled "whipped topping" if real dairy is what you need. Once whipped, keep it covered in the coldest part of the fridge.

For the full breakdown on storing whipped cream correctly, timing matters more than most people think - especially for stabilized versions made with gelatin's flavor and uses as a structural aid.

  • ❄️ Unwhipped heavy cream - stays fresh 1-3 weeks refrigerated, unopened
  • 🍦 Freshly whipped cream - best within 2 hours; holds 2-3 days stabilized
  • 💨 Aerosol cans - months unopened; use within days once opened

Powdered sugar dissolves faster than granulated when sweetening, and keeping sugar fresh ensures it incorporates smoothly without graininess.

Start Here

New to whipping cream at home? Start with plain heavy cream, a chilled bowl, and an electric hand mixer. Whip to soft peaks for topping, firm peaks for piping. Don't sweeten until you know the texture you want.

Best Pick
Heavy cream at 36%+ fat, standard pasteurized (not ultra), chilled from the fridge - this gives the fastest whip time and most stable foam.

If you're folding it into a mousse or filling pastry shells, stabilize with a small amount of cornstarch or gelatin so it doesn't weep. Aerosol cream is fine for a quick coffee topping.

For anything that needs to hold longer than 20 minutes on a plate, whip it fresh.

Frequently Asked Questions

What is whipped cream made of?

Heavy cream and air - that's it in its simplest form. Sugar and vanilla are added for chantilly cream. The fat content (minimum 30%) is what allows the cream to trap air bubbles and hold a foam structure.

How does whipped cream differ from whipped topping?

Whipped topping is a non-dairy product made with hydrogenated oils, stabilizers, and sweeteners. It holds its shape longer than real whipped cream but lacks the dairy fat flavor and melts differently on the tongue.

Why won't my cream whip?

Most failures trace to warm cream, warm equipment, or too-low fat content. Ultrapasteurized cream is also notoriously slow. Chill the bowl, beaters, and cream before you start.

How long does whipped cream last in the fridge?

Unstabilized whipped cream deflates within 2-4 hours. Stabilized versions - made with gelatin or cornstarch - hold for up to 3 days covered in the fridge. Aerosol cream collapses almost immediately after dispensing.

Can you freeze whipped cream?

Yes, in dollops. Pipe or spoon individual portions onto a lined tray, freeze until solid, then transfer to a bag. They thaw in about 15 minutes and hold their shape better than refrigerated leftovers.

Pan-Seared Salmon with Dill Sauce

April 3, 2026

When you need dinner fast and want something that feels like real cooking, pan-seared salmon delivers. One skillet, ten minutes of active time, and a creamy dill sauce you whisk together while the fish rests.

Pan-Seared Salmon with Dill Sauce served on a plate

The high heat does all the work. You get crispy, golden skin on the bottom and tender, flaky flesh on top without flipping multiple times or hovering over the stove.

Perfect for weeknight meals when you're tired but still want to eat well, or for easy entertaining when you need something impressive that doesn't stress you out.

QUICK SUMMARY

Pan-seared salmon with dill sauce is a one-skillet dinner where you cook skin-on fillets at medium-high heat for 4-5 minutes per side, then top with a tangy Greek yogurt and fresh dill sauce. The key is drying the skin thoroughly and not moving the fish - that's what creates the crispy, golden crust while keeping the interior tender.

⏱️Time Reality: 18-20 minutes total, 10 active
🔥Method Shortcut: Preheat pan 3 minutes, cook skin side first without flipping
⚠️Watch Out: Soggy skin means pan wasn't hot enough or fish was too wet - pat dry for 2 minutes before cooking

Table of Contents

Toggle
  • Why This Recipe Works
  • What You'll Need
    • Ingredient Details
  • Ingredient Swaps
  • What to Serve With It
  • Store and Reheat
  • Frequently Asked Questions
  • Pan-Seared Salmon with Dill Sauce
    • Method 
    • Tried this recipe?

Why This Recipe Works

Pan-searing at medium-high heat creates a caramelized crust on skin-on salmon while the flesh stays moist. For a similar approach with this flaky shrimp, the technique works because you're building flavor through direct contact with hot metal.

Quick Reference
⏱️
Prep Time
10 min
🔥
Cook Time
8-10 min
⏰
Total Time
18-20 min
🍽️
Servings
4 servings
📊
Difficulty
Easy
🏷️
Category
Main Dish
💡
Quick Tip
Dry skin well, use hot pan for crispiness
🎯
Best For
Weeknight | Meal prep | Entertaining
  • Pat salmon skin dry with paper towels for 2 minutes - moisture is the enemy of crispy skin and causes sticking
  • Preheat pan over medium-high for 3 minutes before adding oil - the pan needs to be hot enough to sear on contact
  • Cook skin side 4-5 minutes without moving - this develops the golden crust and lets the fish release naturally from the pan
  • Check doneness at 140-145°F with an instant-read thermometer - salmon continues cooking as it rests, so pull it slightly under
  • Let fish rest 3 minutes off heat - this redistributes juices and firms up the flesh so it doesn't flake apart when you plate it
Quick Tip
Use a spatula with a thin edge to slide under the fish when flipping - thick spatulas tear the delicate flesh and break the crust.

What You'll Need

Ingredients for Pan-Seared Salmon with Dill Sauce

Shopping for this takes one trip down the seafood counter and a quick stop in produce. If you're already making a creamy homemade potato recipe, you probably have most of the pantry items on hand.

🦐
Protein
  • 4 salmon fillets (6 oz each, skin-on)
🧄
Aromatics
  • 3 tablespoon fresh dill (chopped)
  • 2 cloves garlic (minced)
  • 2 tablespoon lemon juice
🧀
Sauce Base
  • ½ cup Greek yogurt or sour cream
  • 1 tablespoon butter (optional)
🫙
Pantry
  • 2 tablespoon olive oil
  • 1 teaspoon salt
  • ½ teaspoon black pepper
  • 1 teaspoon Dijon mustard (optional)

Ingredient Details

  • Salmon fillets (skin-on)
    Skin protects the flesh from overcooking and crisps up like bacon when seared properly - skinless fillets cook faster but lack that textural contrast.
  • Fresh dill
    Provides the bright, herbaceous flavor that defines the sauce - dried dill works but use 1½ tablespoons since it's less potent.
  • Olive oil
    High smoke point fat that can handle medium-high heat without burning - swap for avocado oil if you prefer a more neutral flavor.
  • Greek yogurt or sour cream
    Creates the creamy base for the dill sauce - Greek yogurt is tangier and higher in protein, sour cream is richer and smoother.
  • Lemon juice
    Adds acidity to balance the richness of both the salmon and the sauce - lime juice works but has a slightly different citrus profile.
  • Butter
    Optional richness that adds depth to the pan drippings - skip it if you want to keep the dish dairy-free or lighter.
  • Black pepper
    Adds subtle heat and depth - white pepper works if you want a milder flavor without visible specks.

Ingredient Swaps

Most swaps here are about preference or what's already in your fridge. Skinless fillets work, but you lose the crispy skin that makes this dish feel special.

  • Greek yogurt → dairy-free coconut yogurt - Different flavor, slightly less creamy, keeps it dairy-free
  • Fresh dill → dried dill weed - Weaker flavor, use 1½ tablespoons instead of 3 tablespoons, less fresh taste
  • Butter → olive oil - Less richness, higher smoke point, keeps it dairy-free
  • Lemon juice → lime juice - Slightly different citrus flavor, equal acidity

Skin-On Salmon

Works for: Crispy texture, protects flesh from overcooking, adds visual appeal

Skip if: You prefer tender skin or want faster cooking

Skinless Salmon

Works for: Faster cook time, more delicate texture, easier to eat

Skip if: You want that crispy, golden crust

Instructions

You're looking at 8-10 minutes of actual cooking once the pan is hot. The dill sauce comes together while the salmon rests, so everything hits the table at the same time.

  1. Pat salmon dry and season. Use paper towels to dry the skin for 2 minutes - press firmly to pull out surface moisture. Season both sides with salt and black pepper just before cooking.
  2. Preheat pan and add oil. Heat a nonstick or cast iron skillet over medium-high for 3 minutes. Add olive oil and swirl to coat - the oil should shimmer but not smoke.
  3. Sear skin side first. Place salmon skin-side down and press gently with a spatula for 10 seconds to ensure contact. Cook 4-5 minutes without moving - you'll see the flesh turn opaque about halfway up the sides.
  4. Flip and finish cooking. Slide a thin spatula under the fish and flip in one motion. Add butter to the pan if using. Cook 3-4 minutes more until the internal temperature reaches 140-145°F.
  5. Make dill sauce and rest fish. Remove salmon to a plate and let rest 3 minutes. Whisk Greek yogurt, fresh dill, lemon juice, minced garlic, and Dijon mustard in a bowl. Season with salt and pepper to taste.
Golden Rule
Don't move the fish during the first sear - it needs uninterrupted contact with the hot pan to develop that golden crust and release naturally.

What to Serve With It

Rich salmon needs something to cut through the fattiness. Salad adds the contrast this plate needs, but timing matters. If you're planning your bang bang shrimp dinner, the same sides work here - bright vegetables and starches that don't compete with the fish.

Side Dish Prep Why It Works How to Serve
Steamed green beans Easy Quick, fresh, light vegetable that doesn't overpower the dill sauce Toss with lemon zest and olive oil, serve alongside salmon
Quinoa salad Easy Protein-rich grain that balances the richness of the salmon and sauce Mix with cherry tomatoes and cucumber, drizzle with vinaigrette
Roasted baby potatoes Medium Crispy texture pairs well with tender salmon, soaks up extra sauce Roast with olive oil and herbs, serve hot
Mixed green salad Easy Adds acidity to cut through the creamy dill sauce Dress with lemon vinaigrette, serve immediately
Sautéed spinach Easy Mild, quick-cooking leafy green that adds nutrition without competing flavors Sauté with garlic, serve under or beside salmon

Three ways to serve it:

  • Plate salmon over lemony herb risotto with asparagus and toasted almonds for elegant dinner parties
  • Serve with garlic butter roasted carrots and herbed couscous for a lighter weeknight meal
  • Layer over mixed greens with something fresh and light and use the dill sauce as dressing for meal prep bowls
Shortcut
Make the dill sauce 30 minutes before cooking - the flavors meld and develop while you prep the fish, and it's one less thing to do when dinner hits the table.

Store and Reheat

Cooked salmon keeps for 3-4 days in the fridge but loses crispiness as it sits. The dill sauce holds up better and actually tastes brighter the next day. For another protein that reheats well, try tender roasted vegetable side alongside leftover salmon.

Method Time Best For
🍳 Stovetop 3-4 min on medium-low Preserves some crispiness, gentle reheating
📦 Microwave 30-60 seconds low power Quick reheating when you don't care about texture
🔥 Oven 8-10 min at 275°F Even reheating without drying out the fish

For best results when storing:

  • Transfer salmon and sauce to separate airtight containers within 2 hours of cooking
  • Store sauce in a shallow container so it cools quickly and maintains freshness
  • Reheat salmon gently at low temperatures to prevent overcooking and drying out the flesh
  • Bring dill sauce to room temperature before serving rather than microwaving it
  • Freeze cooked salmon in individual portions wrapped tightly in plastic wrap, then foil - use within 2 months and thaw overnight in the fridge

Frequently Asked Questions

How long to cook pan-seared salmon at medium heat?

Cook skin-side down for 4-5 minutes, then flip and cook 3-4 minutes more until the internal temperature reaches 140-145°F. Medium heat takes longer than medium-high, so add 1-2 minutes per side if your pan isn't as hot.

Can I make pan-seared salmon with dill sauce ahead?

Make the dill sauce up to 2 days ahead and store it in the fridge - the flavors actually improve as they meld. Cook the salmon right before serving, since it loses texture and moisture when reheated.

What goes with pan-seared salmon with dill sauce?

Serve with steamed green beans, quinoa salad, roasted baby potatoes, or sautéed spinach. The salmon is rich and fatty, so pair it with bright, acidic sides like mixed greens with lemon vinaigrette or try [something creamy to dunk](https://forkliftkitchen.com/roasted-garlic-garlic-aioli/) on the side.

How do I know when pan-seared salmon is done?

Use an instant-read thermometer and pull the salmon at 140-145°F - it continues cooking as it rests. The flesh should be opaque and flake easily with a fork but still look slightly translucent in the very center.

Can I use dried dill instead of fresh in the sauce?

Yes, but use 1½ tablespoons of dried dill instead of 3 tablespoons fresh - dried herbs are more concentrated but lack the bright, fresh flavor of the original. The sauce will still work, just with less vibrancy.

Pan-Seared Salmon with Dill Sauce served on a plate

Pan-Seared Salmon with Dill Sauce

No ratings yet
Pan-seared salmon with dill sauce is a quick and flavorful dinner featuring crispy skin salmon cooked in one skillet. The tangy Greek yogurt and fresh dill sauce is whisked together while the fish rests, making it perfect for fast, impressive meals.
Print Recipe Pin Recipe
Prep Time 10 minutes mins
Cook Time 10 minutes mins
Total Time 20 minutes mins
Servings: 4 servings
Course: Dinner, Main Dish
Cuisine: American
Ingredients Equipment Method Notes

Ingredients
  

  • 4 fillets salmon 6 oz each, skin-on
  • 3 tablespoon fresh dill chopped
  • 2 cloves garlic minced
  • 2 tablespoon lemon juice
  • 0.5 cup Greek yogurt or sour cream
  • 1 tablespoon butter optional
  • 2 tablespoon olive oil
  • 1 teaspoon salt
  • 0.5 teaspoon black pepper
  • 1 teaspoon Dijon mustard optional

Equipment

  • Nonstick or cast iron skillet Used for searing salmon
  • Paper towels To pat salmon skin dry
  • Spatula with thin edge To flip salmon without breaking crust
  • Instant-read thermometer To check salmon doneness
  • Mixing bowl For whisking dill sauce

Method
 

  1. Pat salmon skin dry with paper towels for 2 minutes to remove surface moisture. Season both sides with salt and black pepper just before cooking.
    4 fillets salmon, 1 tsp salt, 0.5 tsp black pepper
  2. Heat a nonstick or cast iron skillet over medium-high heat for 3 minutes. Add olive oil and swirl to coat the pan; the oil should shimmer but not smoke.
    2 tbsp olive oil
  3. Place salmon fillets skin-side down and press gently with a spatula for 10 seconds to ensure contact. Cook without moving for 4-5 minutes until the flesh turns opaque halfway up the sides.
    4 fillets salmon
  4. Slide a thin spatula under each fillet and flip in one motion. Add butter to the pan if using. Cook 3-4 minutes more until the salmon reaches an internal temperature of 140-145°F.
    4 fillets salmon, 1 tbsp butter
  5. Remove salmon to a plate and let rest for 3 minutes. Whisk together Greek yogurt, fresh dill, lemon juice, minced garlic, and Dijon mustard in a bowl. Season with salt and pepper to taste and serve alongside the salmon.
    3 tbsp fresh dill, 2 cloves garlic, 2 tbsp lemon juice, 0.5 cup Greek yogurt, 0.5 tsp black pepper, 1 tsp Dijon mustard

Notes

  • Dry the salmon skin thoroughly to achieve a crispy crust.
  • Preheat the pan properly before adding fish to prevent sticking and sogginess.
  • Use a thin-edged spatula to flip the salmon gently without breaking the crust.

Tried this recipe?

Let us know how it was!

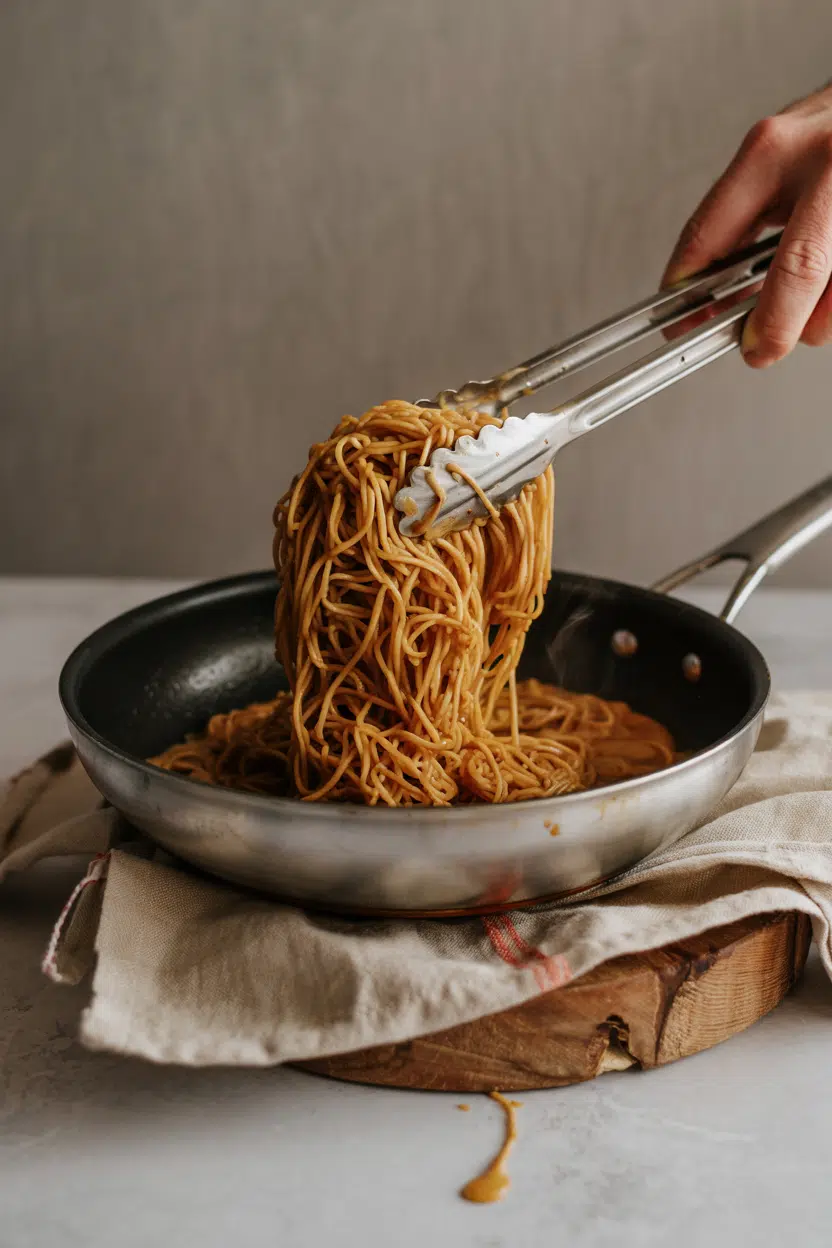
What Is Vermicelli? [Taste, Uses & More]

April 3, 2026

Bún bowls in Vietnamese kitchens always start the same way: a nest of softened white strands hit the bottom of the bowl first, before the herbs, the sliced pork, or the fish sauce dressing arrive. That noodle is vermicelli, and its role is rarely decorative.

What Is Vermicelli

It provides the neutral, slippery base that carries bold surrounding flavors without competing with them - a job that rice and wheat both handle, just differently.

QUICK SUMMARY

Vermicelli is a very thin noodle available in wheat, rice, and mung-bean forms. Flavor is mild to neutral depending on type. Used across Vietnamese, Indian, and Southeast Asian cooking, it soaks or boils quickly and pairs best with light sauces and broths.

🍜Type: Thin pasta or noodle - wheat, rice, or glass varieties
👅Flavor: Mild and neutral; slight wheat or subtle sweetness by type
🔥Best Uses: Cold salads, soups, stir-fries, puddings, spring rolls
📦Shelf Life: Many months dry; cooked keeps 3-5 days refrigerated
🌾Diet Note: Rice and glass types are gluten-free; wheat vermicelli contains gluten

What Is Vermicelli?

Vermicelli originated in the Mediterranean pasta tradition - its name comes from Italian, meaning "little worms," a reference to its threadlike shape.

From there, similar thin-noodle formats developed independently across South and Southeast Asia, giving us several distinct products that share a name but not a grain.

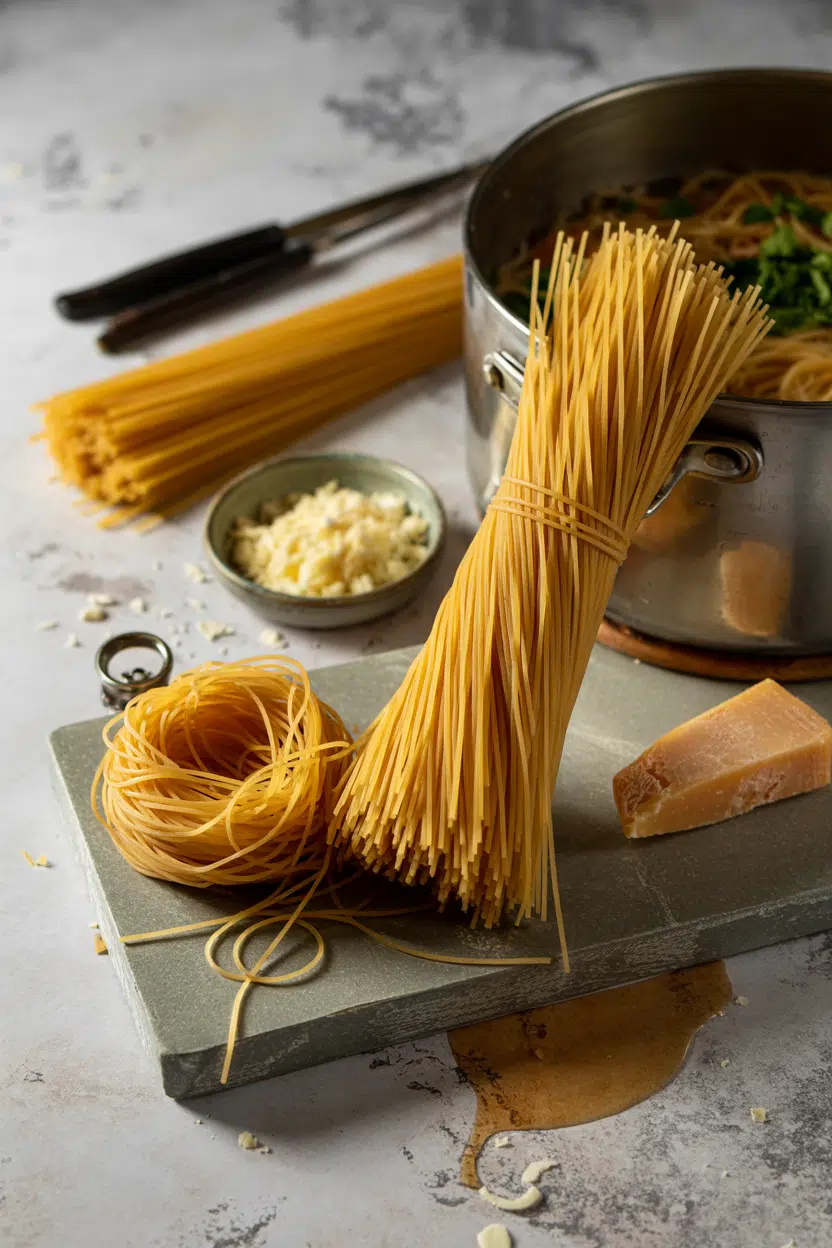
Wheat vermicelli is the closest relative of thin spaghetti, made from durum semolina and sold dry in straight or bundled form. Rice vermicelli - called bee hoon in Singapore and Malaysia - is extruded from rice flour, dries into brittle, glass-like white strands, and turns soft and translucent once hydrated. A third type, made from mung-bean starch, produces what many cooks call glass noodles or miến in Vietnamese; these are often labeled vermicelli despite being a distinct product. On the Indian subcontinent, thin wheat strands are sold as seviyan, typically pre-toasted to a golden color before they reach the pan.

  • Wheat vermicelli - pale, durum-based, cooks al dente like pasta
  • Rice vermicelli - brittle white strands, goes translucent when soaked
  • Glass/mung-bean vermicelli - clear, slippery, often sold in tight coils
  • Seviyan - pre-toasted Indian variant, used in sweet and savory dishes

What Does Vermicelli Taste Like?

vermicelli - What Is Vermicelli

Wheat vermicelli tastes close to a very thin spaghetti - mild, faintly wheaty, with a delicate bite when cooked al dente. The flavor is understated enough that it disappears into whatever sauce or broth surrounds it.

Rice vermicelli reads as nearly neutral, with a subtle background sweetness from the rice flour. It doesn't carry the same wheaty note, which makes it a cleaner canvas for assertive dressings like fish sauce or chili garlic.

Sensory SnapshotMild Intensity
👅 Flavor
mild wheatyneutrallightly sweetfaintly nutty (toasted)
✋ Texture
silkyslipperytender with bite (wheat)
👃 Aroma
subtle grainyfaint toasted note

Toasted or pan-roasted variants - especially seviyan - develop a noticeably nutty aroma before liquid is added. That roasted quality fades once moisture enters, leaving a warm, slightly caramel background in dishes like kheer.

How to Use Vermicelli

Vermicelli is fast-cooking by design, and its preparation method depends entirely on which type you're working with. Getting this right matters because even 30 extra seconds in boiling water can push rice vermicelli from tender to mushy.

How Vermicelli Is Used
MethodBest ForTip
🥗 Soak (hot water)Rice vermicelli in cold salads, spring rollsPour boiling water over strands; drain after 3-5 minutes
🍲 Brief boilWheat vermicelli in soups, braised dishesCook 2-4 minutes; test early - it cooks faster than pasta
🍳 Stir-fry (after soak)Singapore bee hoon, quick noodle dishesShake off excess water before hitting the wok
🍯 Pan-toast drySeviyan puddings, pilaf-style dishesStir constantly over medium heat until golden, then add liquid

Vietnamese bún bowls use soaked rice vermicelli as the cold base under grilled proteins, fresh herbs, and a fish sauce dressing. Singapore-style bee hoon calls for quick stir-frying after soaking, with soy sauce, chili, and shrimp or egg. In Indian cooking, seviyan gets dry-toasted in ghee first, then simmered in sweetened milk for a pudding-like dessert. Vermicelli also works well in clear broths - a Vietnamese-style pho variation swaps thick noodles for rice vermicelli when a lighter bowl is the goal.

Avoid pairing vermicelli with heavy, chunky ragùs. The strands are too thin to hold up against dense, slow-cooked sauces - they tangle, clump, and lose structure fast.

When you need a sturdier wheat noodle, check what egg noodle swaps might work instead.

Vermicelli pairs cleanly with: light broths, fish sauce, soy sauce, scallions, cilantro, shrimp, tofu, toasted sesame oil, and chili garlic.

Try It In
🍤Air Fryer Garlic Parmesan ShrimpServe over soaked rice vermicelli for a fast weeknight bowl→🍯Air Fryer Honey Garlic ShrimpThe sweet-soy glaze clings well to thin rice vermicelli strands→🌶️Air Fryer Chili-Lime ShrimpPairs with cold bún-style bowls using soaked vermicelli and herbs→

How to Buy and Store Vermicelli

Read the label carefully. "Rice vermicelli" and plain "vermicelli" are not interchangeable at the store - one is rice-based and gluten-free, the other is wheat pasta.

Watch Out
Glass noodles (mung-bean starch) are sometimes labeled "vermicelli" in Asian grocery stores. They cook and behave differently from rice vermicelli - check the ingredient list for rice flour vs. mung bean or potato starch before buying.

When buying dry rice vermicelli, look for brittle, uniformly white strands with no yellowing or off-smell. Wheat vermicelli should be pale and consistent in thickness - discoloration or a musty odor signals age or moisture damage.

  • Unopened - store in a cool, dry pantry in the original sealed packaging
  • Opened - transfer to an airtight container, away from heat and moisture
  • Cooked - refrigerate and use within 3-5 days; toss with a little oil to prevent clumping

Dry vermicelli keeps for many months when stored properly. For a detailed breakdown by type, see our vermicelli storage life guide.

Where to Start With Vermicelli

New to it? Begin with rice vermicelli - soak it in hot water, drain, and build a cold bowl with whatever herbs and protein you have.

Golden Rule
Match the noodle to the dish: rice vermicelli for soaking and cold applications, wheat vermicelli for boiling and brothy soups, seviyan for toasting and sweet puddings.

If a recipe calls for a different thin noodle entirely, the vermicelli replacements guide covers the closest swaps by type and texture. Start simple, get the soak or boil time right, and the rest follows.

Frequently Asked Questions

Is vermicelli the same as rice noodles?

Not exactly. Rice vermicelli is one type of rice noodle - specifically the very thin variety. Other rice noodles like flat pho noodles or wide rice ribbons are distinct products with different textures and cooking times.

How long does vermicelli take to cook?

Rice vermicelli softens in 3-5 minutes when soaked in just-boiled water - no stovetop needed. Wheat vermicelli boils in 2-4 minutes; start testing at 2 minutes because it overcooks quickly.

Is vermicelli gluten-free?

Rice and glass (mung-bean) vermicelli are naturally gluten-free. Wheat vermicelli contains gluten. Always check the label, since products from shared facilities may carry cross-contamination warnings.

How do you tell rice vermicelli from glass noodles?

Dry rice vermicelli is opaque white; glass noodles are semi-transparent or grayish before cooking. After hydration, glass noodles turn completely clear and feel more slippery, while rice vermicelli stays white and slightly firmer.

Can vermicelli be used in soup?

Yes, and it works well in clear or light broths where thin strands won't compete with the liquid. Add it near the end of cooking - vermicelli softens fast and will turn mushy if left in hot broth too long.

Pulled Pork Sandwiches

April 3, 2026

When meal prep means cooking once and eating all week, pulled pork sandwiches deliver. One pork shoulder roasts low and slow while you do other things, then shreds into eight servings that freeze well and reheat without drying out.

Pulled Pork Sandwiches served on a plate

The slow roast breaks down collagen into gelatin. That's what makes the meat pull apart instead of slicing. Fat renders into the shreds, keeping them moist even when reheated days later.

Make this when you need dinners sorted for the week or feeding a group without standing over the stove.

QUICK SUMMARY

Pork shoulder roasts at low heat for 6-8 hours until it shreds with a fork. The long cook time breaks down tough connective tissue into tender, juicy meat. Cook to 195-205°F internal temperature for proper texture, then rest 20 minutes before pulling.

⏱️Time Reality: 6-8 hours mostly unattended cooking, plan around your schedule
🔥First Critical Move: Set oven to 225-250°F, higher heat dries meat
⚠️Watch Out: Shredding too early releases juices, rest meat 20-30 minutes first

Table of Contents

Toggle
  • Why This Recipe Works
  • What You'll Need
    • Ingredient Details
  • Ingredient Swaps
  • What to Serve With It
  • Store and Reheat
  • Frequently Asked Questions
  • Pulled Pork Sandwiches
    • Method 
    • Tried this recipe?

Why This Recipe Works

Pork shoulder has enough fat marbling to stay moist through hours of cooking. Most people skip coleslaw, but it balances the meal. For a version that comes together quickly, this bright salad recipe adds crunch without extra cookware.

Quick Reference
⏱️
Prep Time
15 min
🔥
Cook Time
6-8 hours
⏰
Total Time
6 hrs 15 min
🍽️
Servings
8 servings
📊
Difficulty
Medium
🏷️
Category
Main Dish
💡
Quick Tip
Cook low and slow for tender, juicy pork
🎯
Best For
Weeknight | Meal prep | Entertaining

What makes this work:

  • Set probe thermometer alarm at 195°F - monitors doneness without opening oven and losing heat
  • Maintain oven temperature between 225-250°F for 6-8 hours - low heat breaks down collagen without drying meat
  • Rest meat uncovered 20 minutes - keeps bark crisp while juices redistribute
  • Use two forks pulling in opposite directions - creates uniform shreds instead of chunks
  • Toast buns at 350°F for 3-4 minutes - adds structure so they hold up to sauce
Golden Rule
Never shred pork straight from the oven - the 20-minute rest keeps juices in the meat instead of pooling on your cutting board.

What You'll Need

Ingredients for Pulled Pork Sandwiches

Pork shoulder is sold as Boston butt at most grocers. Aioli adds the contrast this plate needs, but timing matters. For a version that comes together quickly, this something tender like pork uses fewer spices but similar technique.

🍗
Protein
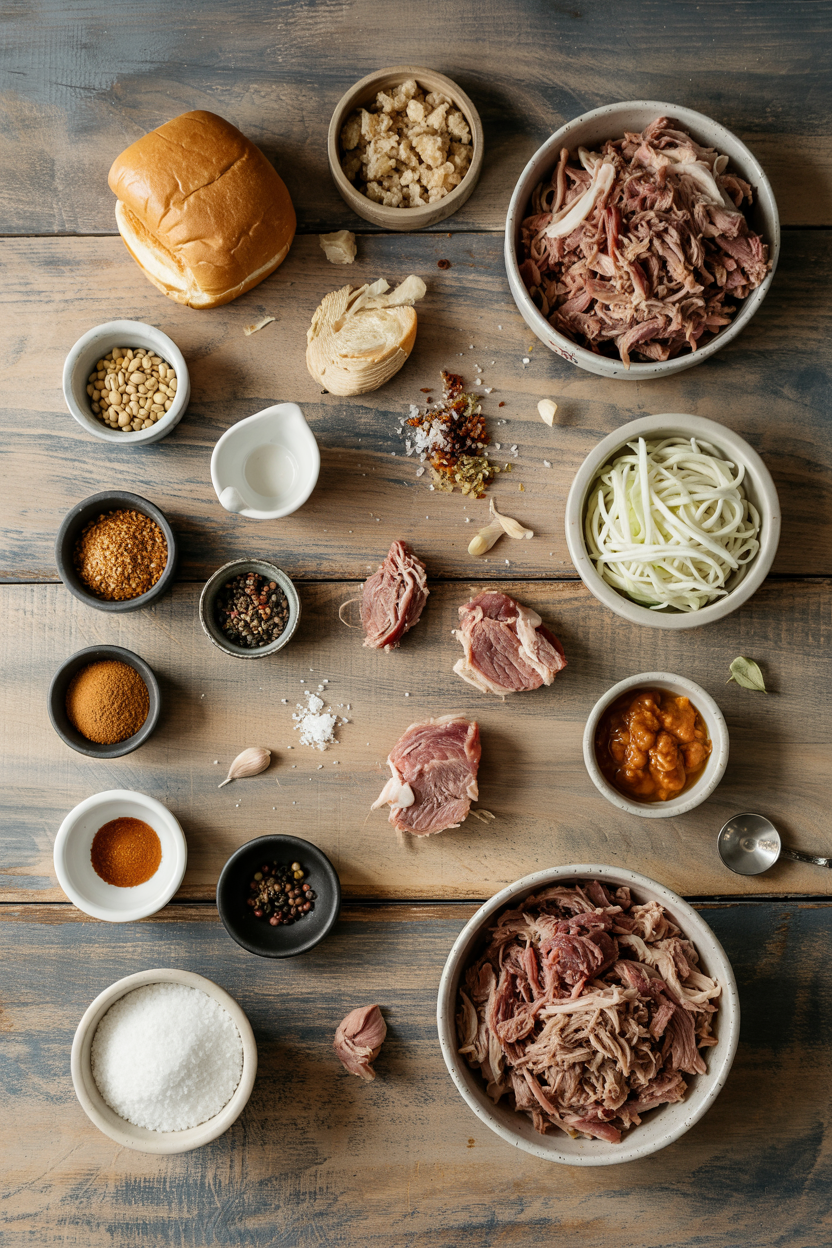
  • 4-5 lb pork shoulder (Boston butt)
🥢
Sauce & Seasoning
  • 1½ cups barbecue sauce
  • ¼ cup apple cider vinegar
  • 2 tablespoon yellow mustard
  • 2 tablespoon brown sugar
  • 1 tablespoon smoked paprika
  • 2 teaspoon salt
🧄
Aromatics
  • 1 large onion, sliced
  • 4 cloves garlic, minced
🍜
Bread
  • 8 hamburger buns

Ingredient Details

  • Pork shoulder (Boston butt)
    Look for well-marbled meat with visible fat streaks - this fat renders during cooking and keeps shreds moist
  • Barbecue sauce
    Use your preferred style (sweet, vinegar-based, or spicy) and add gradually to control moisture level
  • Brown sugar
    Creates caramelized bark on the meat surface during roasting
  • Smoked paprika
    Adds smoky flavor without needing a smoker - use regular paprika if you prefer mild seasoning
  • Apple cider vinegar
    Cuts through fat and adds tang - mix into sauce or drizzle on finished pork
  • Hamburger buns
    Toast lightly to prevent sogginess when sauce hits the bread
  • Salt
    Season meat generously before cooking - pork shoulder needs more salt than smaller cuts

Ingredient Swaps

Different cuts and cooking methods change texture and timing. Most people skip pork, but it balances the meal. We keep a batch ready for nights like this - homemade aioli recipe adds richness without extra steps.

Four swaps that work:

  • Swap pork shoulder for pork butt or pork picnic roast - picnic roast has more connective tissue so add 30-60 minutes to cook time
  • Swap traditional barbecue sauce for vinegar-based Carolina sauce - lighter, tangier flavor that lets pork shine through
  • Swap hamburger buns for gluten-free buns or lettuce wraps - lettuce adds crunch and keeps carbs lower
  • Swap brown sugar for maple syrup or honey - use 3 tablespoons liquid sweetener for every ¼ cup brown sugar

Slow Cooker Method

Works for: hands-off cooking, consistent moisture, no oven space needed

Skip if: you want crispy bark or caramelized edges on the meat

Pressure Cooker Method

Works for: fast cooking (90 minutes total), similar texture to slow roasting

Skip if: you prefer traditional bark formation or cooking larger roasts over 5 pounds

Oven Roasting Method

Works for: best bark, control over browning, classic Southern BBQ texture

Skip if: you're out all day or need set-and-forget cooking

Instructions

Plan 6-8 hours for roasting plus 30 minutes for resting and assembly. A good coleslaw can make or break the plate. For a version that comes together quickly, this crunchy homemade coleslaw recipe uses pantry ingredients you already have.

  1. Season the pork shoulder: Mix brown sugar, smoked paprika, salt, and any other dry spices in a bowl. Rub mixture all over the pork shoulder, covering every surface. Let sit at room temperature 30 minutes while oven preheats to 225°F.

  2. Set up the roasting pan: Layer sliced onions and minced garlic in the bottom of a large roasting pan. Place seasoned pork shoulder fat-side up on top of vegetables. Insert meat thermometer into thickest part of meat, avoiding bone if present.

  3. Roast low and slow: Cover pan tightly with aluminum foil and place in preheated oven. Roast 6-8 hours until internal temperature reaches 195-205°F. Check temperature at 5 hours, then every 30 minutes after that.

  4. Rest before shredding: Remove pan from oven when pork reaches target temperature. Tent loosely with foil (don't wrap tightly) and rest 20-30 minutes on counter. Meat will continue cooking slightly and juices will redistribute.

  5. Shred and sauce: Use two forks to pull pork into shreds, discarding any large fat pieces. Mix shredded pork with barbecue sauce gradually, adding just enough to coat without making it soupy. Toast buns lightly, pile pork on bottom bun, and serve immediately.

Shortcut
Skip the rub step and season pork with just salt and pepper if you're short on time - the long cook and sauce still deliver plenty of flavor.

What to Serve With It

The sandwich needs something crunchy and something acidic to balance the rich pork. Fries adds the contrast this plate needs, but timing matters. If you're looking for something different, check out these pork vindaloo meal planning ideas for more pairing options.

Side Dish Prep Why It Works How to Serve
Coleslaw Easy Crunchy, fresh contrast cuts through rich pork Pile directly on sandwich or serve alongside
Potato Chips Easy Crispy texture complements tender meat Open bag and serve in bowl
Pickles Easy Vinegar sharpness balances sweet BBQ sauce Slice thick and layer on sandwich
Baked Beans Easy Sweet and smoky flavors match pork Warm in pot and serve in small bowls
Cornbread Medium Classic Southern pairing adds sweetness Bake while pork rests, serve warm with butter

Three ways to serve it:

  • Classic sandwich plate: Pulled pork on toasted bun with coleslaw piled on top, potato chips and pickles on the side
  • Bowl style: Pulled pork over rice or greens with pickled vegetables and drizzle of extra sauce
  • Taco night: Stuff pork into flour tortillas with shredded cabbage, lime wedges, and hot sauce
Best Pick
Toast your buns - a 3-minute step that prevents soggy sandwiches and adds texture contrast to every bite.

Store and Reheat

Pulled pork improves after a day in the fridge as flavors meld together. For a version that comes together quickly, we keep a batch ready for nights like this - crispy golden french fries reheat alongside pork for a complete meal.

Method Time Best For
🍳 Stovetop 5-7 minutes over medium heat Small portions, adds moisture with splash of broth
📦 Microwave 2-3 minutes, stir halfway Single servings, quickest method but can dry edges
🔥 Oven 15-20 minutes at 300°F Large amounts, preserves texture best

For best results when storing:

  • Store pork in shallow airtight containers - cools faster and maintains food safety, keeps 3-4 days refrigerated
  • Freeze in portion-sized bags - remove air, label with date, keeps up to 3 months without freezer burn
  • Add extra sauce before reheating - pork absorbs liquid as it sits, splash of sauce or broth prevents dryness
  • Reheat only what you'll eat - repeated heating and cooling degrades texture and increases bacteria risk
  • Separate pork from buns when storing - store components separately so bread doesn't get soggy

Frequently Asked Questions

How long to cook pulled pork sandwiches at 225°F?

Cook 6-8 hours at 225°F until internal temperature reaches 195-205°F. Check temperature starting at 5 hours, then every 30 minutes.

Can I make pulled pork sandwiches ahead for meal prep?

Yes, shred pork and store in airtight containers up to 4 days refrigerated or 3 months frozen. Reheat with splash of sauce or broth to restore moisture.

What buns and sides pair best with pulled pork sandwiches?

Use potato buns or brioche for soft texture that holds up to sauce. Serve with coleslaw, pickles, and chips for crunch and acidity that balances rich pork.

How do I know when pulled pork is perfectly cooked and ready?

Pork is done when it reaches 195-205°F internal temperature and bone pulls out clean. Meat should shred easily with two forks without resistance.

Can I substitute pork loin for pulled pork sandwiches?

No, pork loin is too lean and dries out with long cooking. Stick with pork shoulder or Boston butt - the fat marbling breaks down into tender, shreddable meat.

Pulled Pork Sandwiches served on a plate

Pulled Pork Sandwiches

No ratings yet
Pulled pork sandwiches rely on slow-roasting pork shoulder at low heat to break down collagen, producing tender, juicy meat that shreds easily. The recipe includes a flavorful rub and barbecue sauce, with toasted buns providing structure to hold the sauced pork without sogginess.
Print Recipe Pin Recipe
Prep Time 15 minutes mins
Cook Time 6 hours hrs
Total Time 6 hours hrs 15 minutes mins
Servings: 8 servings
Course: Main Dish
Cuisine: American
Ingredients Equipment Method Notes

Ingredients
  

  • 4-5 lb pork shoulder Boston butt, well-marbled
  • 1.5 cups barbecue sauce your preferred style
  • 0.25 cup apple cider vinegar
  • 2 tablespoon yellow mustard
  • 2 tablespoon brown sugar
  • 1 tablespoon smoked paprika
  • 2 teaspoon salt season generously
  • 1 large onion sliced
  • 4 cloves garlic minced
  • 8 pieces hamburger buns

Equipment

  • Oven Roast pork shoulder low and slow
  • Roasting pan Used to hold pork, onions, and garlic for roasting
  • Meat thermometer Monitor internal temperature of pork shoulder
  • Forks Shred the pork
  • Aluminum foil Cover pork during roasting and tent during resting
  • Oven or toaster Toast hamburger buns

Method
 

  1. Mix brown sugar, smoked paprika, salt, and any additional dry spices in a bowl. Rub the mixture evenly all over the pork shoulder. Let the pork sit at room temperature for 30 minutes while you preheat the oven to 225°F.
    2 tbsp brown sugar, 1 tbsp smoked paprika, 2 tsp salt, 4-5 lb pork shoulder
  2. Layer sliced onions and minced garlic in the bottom of a large roasting pan. Place the seasoned pork shoulder fat-side up on top of the vegetables. Insert a meat thermometer into the thickest part of the pork, avoiding any bone.
    1 large onion, 4 cloves garlic, 4-5 lb pork shoulder
  3. Cover the pan tightly with aluminum foil. Place it in the preheated oven and roast for 6 to 8 hours until the internal temperature reaches 195-205°F. Check temperature at 5 hours, then every 30 minutes thereafter.
    4-5 lb pork shoulder
  4. Remove the pan from the oven once the pork reaches target temperature. Tent the pork loosely with foil and let it rest uncovered on the counter for 20 to 30 minutes to allow juices to redistribute.
    4-5 lb pork shoulder
  5. Use two forks to shred the pork, discarding any large fat pieces. Gradually mix in barbecue sauce to coat the pork without making it too wet.
    4-5 lb pork shoulder, 1.5 cups barbecue sauce
  6. Toast hamburger buns at 350°F for 3-4 minutes until lightly browned. Pile shredded pork onto the bottom buns, top with desired sides, and serve immediately.
    8 pieces hamburger buns

Notes

  • Maintain oven temperature between 225-250°F for best results.
  • Rest pork uncovered for 20-30 minutes before shredding to retain juices.
  • Toast buns before assembling to prevent sogginess from the sauce.

Tried this recipe?

Let us know how it was!

What Is Tzatziki Sauce? [Taste, Uses & More]

April 3, 2026

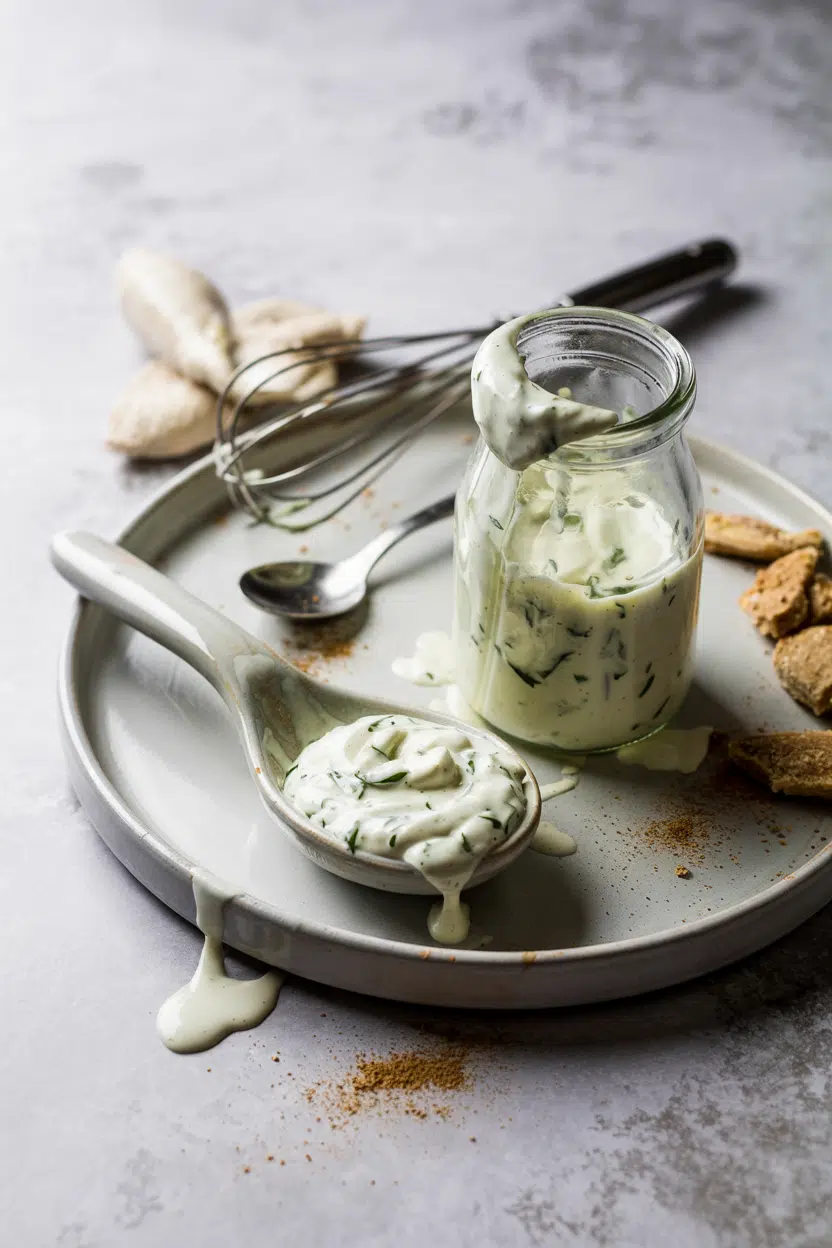
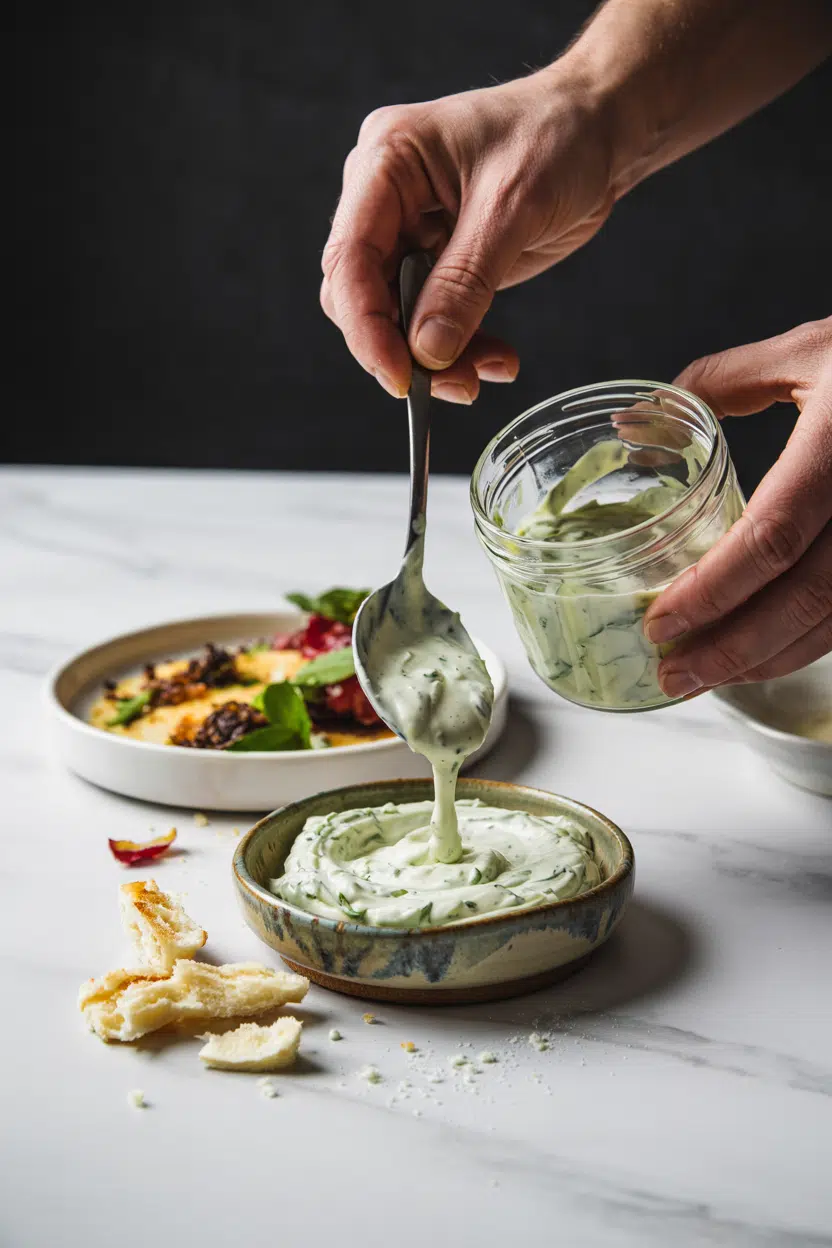
Most people think tzatziki is just a dip - something to drag a pita through before the real food arrives. It's actually a sauce built on technique: straining yogurt, salting cucumber, and giving garlic enough time to mellow into something cohesive rather than sharp.

What Is Tzatziki Sauce
QUICK SUMMARY

Tzatziki is a chilled Greek yogurt sauce made with grated cucumber, garlic, olive oil, and fresh herbs. Tangy, creamy, and herby, it works as a dip, spread, or condiment across Greek and Eastern Mediterranean dishes. Moderately intense flavor with a cooling finish.

🧄Flavor: Tangy yogurt, garlicky, herby dill or mint, mild cucumber freshness
🥣Texture: Thick and creamy when yogurt is properly strained
🍽️Best Uses: Gyros, kebabs, mezze platters, grilled vegetables, grain bowls
❄️Shelf Life: Opened homemade: 3-4 days; commercial unopened: 2-3 weeks
🌿Origin: Eastern Mediterranean, central to Greek cuisine and regional Balkan traditions

What Is tzatziki sauce?

Tzatziki is a yogurt-based sauce and condiment originating in Eastern Mediterranean cooking, with Greece as its most recognized home.

It's made by combining strained yogurt with grated or finely diced cucumber, raw garlic, olive oil, and fresh herbs - most often dill, mint, or both - finished with lemon juice or a small splash of white vinegar.

The sauce travels under different names across the region. Turks call it cacık, which is often thinner and served as a side salad.

In the Balkans, a similar preparation called tarator sometimes incorporates walnuts or vinegar in place of lemon. All three share the same foundation: cultured dairy, raw cucumber, and allium.

Two main styles exist in practice:

  • Thick tzatziki - made with full-fat strained Greek yogurt, grated cucumber pressed dry, and a longer rest time. Standard in Greek restaurants.
  • Thin cacık - made with regular yogurt thinned with water or ice, common in Turkish mezze service where it functions closer to a cold soup.

The word "tzatziki" comes from Turkish cacık, which itself likely derives from a Persian root. Common misspellings include tzadziki and tzaziki.

What Does tzatziki sauce Taste Like?

tzatziki sauce - What Is Tzatziki Sauce

The dominant note is tangy cultured yogurt - bright, slightly acidic, and clean on the palate. Garlic provides a savory edge that softens over time as the sauce rests; fresh-made tzatziki tastes sharper than a batch that's sat overnight.

Cucumber contributes mild, watery freshness rather than any strong flavor of its own. Dill leans grassy and slightly anise-adjacent.

Mint, when used instead, pushes the sauce toward something cooler and more aromatic. A squeeze of lemon sharpens everything without adding sweetness.

Sensory SnapshotModerate Intensity
👅 Flavor
tangygarlickyherbybright
✋ Texture
thickcreamy
👃 Aroma
fresh herbraw garlic

Think of it as a thicker, garlicky cousin of ranch dressing - same creamy base, same herby lift, but with yogurt's fermented tang in place of buttermilk and none of the sweetness.

How to Use tzatziki sauce

Tzatziki starts cold and stays cold. Unlike most sauces, it's never cooked - heat breaks down the yogurt's structure and kills any probiotic benefit.

Its job is to contrast: cutting through rich, fatty, or charred proteins with cool acidity.

The most direct use is inside a pita for chicken souvlaki or gyros, where the sauce acts as both moisture and flavor anchor. It pairs just as naturally with lamb kebabs, grilled eggplant, and zucchini - anything with char benefits from its cooling effect.

How Tzatziki Is Used
MethodBest ForTip
🥗 DipPita chips, raw vegetables, grilled flatbreads, mezze plattersServe in a shallow bowl with a drizzle of olive oil on top
🌯 SpreadGyros, souvlaki wraps, sandwiches, burgersLayer generously - it compresses under fillings
🍖 SauceGrilled lamb, chicken kebabs, roasted salmon, grilled vegetablesSpoon alongside, not over, hot proteins so it stays cold
🥗 DressingPotato salad, grain bowls, chilled pasta saladThin slightly with lemon juice if using as a pour-over dressing

Beyond Greek cuisine, tzatziki crosses into Levantine-influenced fusion cooking - swirled into chilled grain bowls, spooned over roasted potatoes with za'atar, or served alongside dolmades as part of a cold mezze spread.

Avoid pairing it with very spicy dishes; the dairy amplifies heat rather than neutralizing it.

Golden Rule
Rest tzatziki in the fridge for at least one hour before serving. Garlic and herbs need time to absorb into the yogurt - fresh-mixed sauce tastes raw and sharp by comparison.
Try It In
🥣Greek Yogurt Tzatziki SauceClassic strained yogurt version with dill and fresh lemon→🥒Greek Cucumber Tzatziki SauceCucumber-forward build with a longer rest for mellow garlic→

How to Buy and Store tzatziki sauce

At the store, look for refrigerated tubs with visible cucumber pieces and green herb flecks - those are signs of real ingredients rather than flavored paste. A short ingredient list matters: strained yogurt, cucumber, garlic, oil, herbs, salt.

Anything with stabilizers, modified starch, or artificial preservatives suggests a product built for shelf life rather than flavor.

Watch Out
Watery separation in the container before you've even opened it means the cucumber wasn't drained properly. That batch will taste diluted - choose a different tub.

Store tzatziki at or below 40°F. Once opened, press plastic wrap directly onto the sauce surface to limit oxidation and herb browning.

Homemade tzatziki and its shelf life depend on how well the cucumber was dried before mixing - poorly drained cucumber shortens freshness to two days. Commercial unopened tubs last 2-3 weeks refrigerated; opened homemade versions hold for 3-4 days.

Don't freeze tzatziki. The yogurt separates on thawing and the cucumber turns waterlogged - the texture doesn't recover.

Where to Start With Tzatziki

If you're new to it, buy a quality refrigerated tub and taste it alongside pita bread or grilled chicken before committing to homemade. The store version shows you what the sauce should taste like.

Once you're ready to make your own, drain the cucumber aggressively - that single step separates good tzatziki from a watery one. If the flavor feels flat, it needs more garlic or lemon, not more salt.

And if it tastes sharp and disjointed straight after mixing, give it an hour. It comes together with time, not effort.

If you want a dairy-free alternative or need to swap it out for a dish, check the available tzatziki substitutes before improvising.

Frequently Asked Questions

How do you prevent tzatziki from becoming watery?

Salt the grated cucumber and let it sit for 10 minutes, then squeeze it in a clean towel until almost dry. This removes most of the excess liquid before it ever reaches the yogurt.

What herbs go in tzatziki?

Dill is the most common choice in Greek-style tzatziki, giving it a grassy, slightly anise note. Mint is equally traditional and produces a cooler, more aromatic result - some recipes use both.

Can you freeze tzatziki?

No. Freezing causes yogurt to separate and cucumber to release water on thawing, leaving a grainy, diluted mess. Make smaller batches and refrigerate instead.

Is tzatziki healthy?

Made with full-fat strained Greek yogurt, it's high in protein, calcium, and - if live-culture yogurt is used - probiotics. It's naturally gluten-free and low in carbohydrates.

Is tzatziki the same as cacık?

They share the same core ingredients but differ in consistency. Turkish cacık is typically thinned with water or ice and served as a cold side dish, while Greek tzatziki is thick enough to use as a dip or spread.

Polish Pączki Doughnuts

April 3, 2026

Toggle

Most fried doughnuts turn out greasy or dense because the dough isn't properly proofed or the oil temperature swings wildly. The fix is a patient two-hour rise and holding the oil steady at 350°F with a thermometer.

Polish Pączki Doughnuts served on a plate

The yeast does most of the heavy lifting. You mix, rest, shape, then fry when the dough has doubled and feels pillowy.

This works for Fat Thursday celebrations or weekend baking when you want something that actually tastes like it came from a Polish bakery instead of a grocery store box.

QUICK SUMMARY

Polish pączki are yeast-raised doughnuts fried until golden and filled with fruit preserves. Success depends on proofing the dough fully and maintaining oil at 350°F so the exterior crisps without absorbing grease. Make these for festive gatherings when you want light, airy doughnuts with a traditional rose or plum jam center.

⏱️Time Reality: 1.5 hours total with 90 minutes rising time
🔥First Critical Move: Proof yeast in 100-110°F milk for 10 minutes until foamy
⚠️Watch Out: Cold oil makes greasy doughnuts - use a thermometer and hold at 350°F

Why This Recipe Works

High-protein all-purpose flour builds enough gluten for structure while whole milk and butter keep the crumb tender. Most people skip the thermometer and end up with oil-logged doughnuts, but holding the frying temperature between 350-360°F means the exterior sets fast and blocks grease absorption. For a version that comes together quickly, this quick cheesecake dish skips the proofing but trades texture for speed.

Quick Reference
⏱️
Prep Time
40 min
🔥
Cook Time
5-7 min per batch
⏰
Total Time
1 hour 30 min
🍽️
Servings
12 pączki
📊
Difficulty
Involved
🏷️
Category
Dessert
💡
Quick Tip
Fry at 350°F for fluffy, golden doughnuts
🎯
Best For
Holiday | Festive gatherings

Five things that make this work:

  • Warm milk activates yeast properly - 100-110°F liquid wakes up the yeast without killing it; hotter temps destroy fermentation
  • Room temperature eggs blend smoothly - cold eggs clump and create uneven hydration throughout the dough
  • Two-stage rising develops flavor - first rise builds structure, second rise after shaping creates the pillowy texture
  • Softened butter integrates fully - cold butter forms lumps that leave greasy pockets in the finished doughnuts
  • Candy thermometer prevents oil swings - maintaining 350°F means even browning and minimal grease absorption
Quick Tip
Use a kitchen scale and add less than 10% extra flour to prevent dry, dense doughnuts that won't puff during frying.

What You'll Need

Ingredients for Polish Pączki Doughnuts

Shop for active dry yeast, whole milk, and fruit preserves in the baking aisle. Most people skip cheesecake, but it balances the meal - something simple like cheesecake adds contrast without extra work.

🌾
Dry Ingredients
  • all-purpose flour
  • granulated sugar
  • active dry yeast
🥛
Dairy
  • whole milk
  • unsalted butter
  • eggs
🫙
Frying & Finishing
  • vegetable oil
  • vanilla extract
  • powdered sugar
  • fruit preserves or rose petal jam

Ingredient Details

  • All-Purpose Flour
    Builds gluten structure for chewy, elastic dough - bread flour makes them too dense, cake flour too fragile
  • Active Dry Yeast
    Proof in warm milk for 10 minutes until foamy to confirm it's alive before mixing into dough
  • Whole Milk
    Fat content adds richness and tender crumb - skim milk makes drier doughnuts
  • Unsalted Butter
    Soften to room temp so it blends evenly without leaving greasy streaks in the dough
  • Vegetable Oil
    Neutral flavor and 400°F smoke point handle high-heat frying without burning or off-flavors
  • Fruit Preserves
    Rose petal jam is traditional, but plum, raspberry, or apricot work - avoid runny jams that leak during frying
  • Powdered Sugar
    Dust while doughnuts are still slightly warm so sugar sticks without melting into a glaze

Ingredient Swaps

Whole milk can shift to almond or oat milk for dairy-free versions, though browning may lighten slightly. Rich mains need something to cut through, and rich beef side dish does exactly that without adding hours to your cook time.

Four swaps that work:

  • Whole milk → almond milk or oat milk - slightly less rich with lighter browning; works for dairy-free diets but may need 1-2 extra minutes of frying time
  • All-purpose flour → gluten-free flour blend - texture less elastic and requires xanthan gum to bind; expect denser crumb and shorter shelf life
  • Unsalted butter → vegetable shortening or coconut oil - flavor shifts away from buttery richness; may yield drier dough that needs extra milk
  • Active dry yeast → instant yeast - faster rise by 20-30 minutes; skip proofing step and mix directly into dry ingredients

Almond Milk

Works for: dairy-free diets, mild nutty flavor, similar liquid ratio

Skip if: you want maximum richness or traditional flavor profile

Gluten-Free Flour

Works for: celiac-safe baking, still fries well with xanthan gum added

Skip if: you want light, airy texture - these turn out denser and chewier

Instant Yeast

Works for: faster prep, skip proofing, reliable rise in 60 minutes

Skip if: you prefer traditional method and have time for full proofing

Instructions

Budget 90 minutes for rising time before you start frying batches. A good chicken can make or break the plate, and a juicy chicken side brings savory contrast to sweet desserts when you're building a full spread.


  1. Proof the yeast. Warm whole milk to 100-110°F, stir in active dry yeast and 1 teaspoon sugar, then let sit 10 minutes until foamy on top. Cold milk won't activate yeast; hotter liquid kills it.


  2. Mix and knead the dough. Combine flour, remaining sugar, and salt in a large bowl, add proofed yeast mixture, eggs, softened butter, and vanilla extract, then knead by hand or with a stand mixer for 8-10 minutes until smooth and elastic. Dough should pull away from the bowl and feel slightly tacky but not sticky.


  3. First rise. Place dough in a greased bowl, cover with a damp towel, and let rise at 75°F for 60-90 minutes until doubled in size. Underproofed dough makes dense, heavy doughnuts that won't puff when fried.


  4. Shape and second rise. Punch down dough gently, roll out to ½-inch thickness on a lightly floured surface, cut into 3-inch rounds, place on a parchment-lined baking sheet, cover, and let rise 30 minutes until puffy. Don't skip the second rise - it creates the airy crumb.


  5. Fry until golden. Heat vegetable oil in a deep pan to 350°F, fry 3-4 doughnuts at a time for 2-3 minutes per side until deep golden brown, then drain on a cooling rack. Oil temperature drops when doughnuts go in, so wait 30 seconds between batches to let it recover.


Golden Rule
Never crowd the fryer - fry maximum 4 pączki at once so oil temperature stays steady and doughnuts cook evenly without turning greasy.

What to Serve With It

Pączki need something to cut through the richness, and acidic fresh fruit or tangy yogurt does that without adding work. The chicken works best when it hits the table at the same time as the main - for a version that comes together quickly, a juicy chicken side keeps things balanced without extra prep.

Side Dish Prep Why It Works How to Serve
Fresh Fruit Easy Natural acidity cuts sweetness and adds bright, clean contrast Slice strawberries, oranges, or kiwi and arrange on the side
Hot Tea Easy Traditional Polish pairing - warmth complements fried doughnuts Brew black tea or herbal tea and serve in cups alongside
Plain Yogurt Easy Tangy creaminess balances sweet jam filling and fried dough Spoon into small bowls for dipping or dolloping
Vanilla Custard Medium Rich sauce amplifies dessert feel for special occasions Drizzle warm custard over pączki or serve in a small pitcher
Whipped Cream Easy Light texture adds sweetness without competing with filling Whip heavy cream with sugar and pipe or spoon on top

Three ways to serve it:

  • Traditional Polish style - dust with powdered sugar and serve warm with black tea on Fat Thursday
  • Indulgent dessert plate - drizzle with lemon glaze or chocolate and add a scoop of vanilla ice cream
  • Brunch spread - arrange on a platter with fresh fruit, yogurt, and hot coffee for weekend gatherings
Best Pick
Serve pączki within 2 hours of frying for maximum crispness - reheating revives texture, but nothing beats fresh-from-the-fryer warmth.

Store and Reheat

Store pączki at room temperature in an airtight container for 3-4 days or loosely covered in the fridge if your kitchen runs warm. The this side works best when it hits the table at the same time as the main, but something simple like sauce works as a dip for day-old doughnuts when you reheat them in the oven.

Method Time Best For
🔥 Oven 5-7 min at 350°F Restoring crisp exterior after refrigeration
📦 Microwave 15-20 seconds Quick reheating when you don't care about crispness
🍳 Stovetop 1-2 min per side Reviving crispness gently in a non-stick pan

For best results when storing:

  • Cool completely before storing - trapping steam in the container makes pączki soggy and encourages mold growth
  • Skip paper towels for storage - they wick moisture and dry out the doughnuts faster than airtight containers
  • Freeze unfilled doughnuts - fry, cool, freeze for up to 3 months, then thaw and fill just before serving for best texture
  • Revive stale pączki in the oven - 5 minutes at 350°F brings back crispness and warms the filling
  • Don't refrigerate unless necessary - room temp storage keeps texture better for 3-4 days in cool kitchens

Frequently Asked Questions

Can I use bread flour instead of all-purpose flour?

Skip bread flour - the higher protein content builds too much gluten and makes pączki dense and chewy instead of light and airy.

How should I store leftover Polish pączki and for how long?

Store at room temperature in an airtight container for 3-4 days or freeze unfilled doughnuts for up to 3 months. Reheat in a 350°F oven for 5-7 minutes to restore crispness.

How do I know when pączki are fully cooked inside?

Fry until deep golden brown on both sides - the exterior color matches the interior doneness at 350°F. If you're unsure, cut one open to check for raw dough in the center.

Why are my pączki greasy or oily after frying?

Oil temperature too low causes dough to absorb grease instead of crisping. Hold the oil at 350°F with a candy thermometer and drain pączki on a cooling rack, not paper towels.

Can I double or halve the pączki recipe easily?

Yes - double or halve all ingredients proportionally, but rising times stay the same. Larger batches may need an extra 10-15 minutes on the first rise if your bowl is crowded.

 
Polish Pączki Doughnuts served on a plate

Polish Pączki Doughnuts

No ratings yet
Polish pączki are yeast-raised doughnuts fried until golden and filled with fruit preserves. Success depends on proofing the dough fully and maintaining oil at 350°F so the exterior crisps without absorbing grease. Make these for festive gatherings when you want light, airy doughnuts with a traditional rose or plum jam center.
Print Recipe Pin Recipe
Prep Time 40 minutes mins
Cook Time 50 minutes mins
Total Time 1 hour hr 30 minutes mins
Servings: 12 pączki
Course: Dessert
Cuisine: Polish
Ingredients Equipment Method Notes

Ingredients
  

  • 4 cups all-purpose flour use high-protein all-purpose flour
  • 2 teaspoons granulated sugar plus 1 teaspoon for yeast proofing
  • 2 teaspoons active dry yeast proofed in warm milk
  • 1 ¼ cups whole milk warmed to 100-110°F for yeast proofing
  • 3 eggs at room temperature
  • ¼ cup unsalted butter softened to room temperature
  • 1 teaspoon vanilla extract
  • for frying vegetable oil neutral flavor with 400°F smoke point
  • ½ cup fruit preserves rose petal jam or other thick jam
  • to dust powdered sugar dust while doughnuts are slightly warm

Equipment

  • Candy thermometer To monitor and maintain oil temperature at 350°F during frying
  • Stand mixer or bowl For mixing and kneading dough
  • Deep frying pan For frying doughnuts in vegetable oil
  • Cooling rack To drain doughnuts after frying to reduce greasiness
  • Parchment paper For lining baking sheet during second rise

Method
 

  1. Warm whole milk to 100-110°F, stir in active dry yeast and 1 teaspoon sugar, then let sit 10 minutes until foamy on top. Avoid milk temperatures colder or hotter than recommended.
    2 teaspoons active dry yeast, 1 ¼ cups whole milk, 2 teaspoons granulated sugar
  2. Combine flour, remaining sugar, and salt in a large bowl. Add proofed yeast mixture, eggs, softened butter, and vanilla extract. Knead by hand or with a stand mixer for 8-10 minutes until smooth, elastic, and slightly tacky.
    4 cups all-purpose flour, 2 teaspoons granulated sugar, 3 eggs, ¼ cup unsalted butter, 1 teaspoon vanilla extract
  3. Place dough in a greased bowl, cover with a damp towel, and let rise at 75°F for 60-90 minutes until doubled in size.
  4. Punch down dough gently, roll out to ½-inch thickness on a lightly floured surface, cut into 3-inch rounds, place on parchment-lined baking sheet, cover, and let rise 30 minutes until puffy.
    4 cups all-purpose flour
  5. Heat vegetable oil in a deep pan to 350°F. Fry 3-4 doughnuts at a time for 2-3 minutes per side until deep golden brown. Drain on a cooling rack and wait 30 seconds before frying the next batch to maintain oil temperature.
    for frying vegetable oil
  6. Inject each fried doughnut with fruit preserves using a pastry bag or spoon if desired. Dust doughnuts with powdered sugar while still slightly warm.
    ½ cup fruit preserves, to dust powdered sugar

Notes

  • Maintain oil temperature at 350°F with a candy thermometer to prevent greasy doughnuts.
  • Allow two rises totaling 90 minutes for a light and airy texture.
  • Use room temperature eggs and softened butter for even dough hydration and richness.

Tried this recipe?

Let us know how it was!

What Is Wondra Flour? [Taste, Uses & More]

April 3, 2026

You spot it on the grocery shelf - a squat blue can labeled Wondra, wedged between all-purpose and bread flour - and wonder if it's worth buying.

What Is Wondra Flour

Unlike cooking cornstarch perfectly or reaching for a standard roux, Wondra handles two completely different kitchen jobs: instant lump-free thickening and a dry coating that crisps without heavy batter.

It's a specialist, not a general-purpose flour, and knowing what it actually does changes how you cook gravies and pan sauces for good.

If flour freshness matters to you, the same principle applies here as with about can i use expired cake flour - condition and storage determine whether it performs.

QUICK SUMMARY

Wondra is an ultra-fine, pre-gelatinized wheat flour that dissolves instantly into hot or cold liquids. It thickens gravies and sauces without lumps, and its fine particle size creates a crisp, light coating on fried proteins. Flavor is mild and neutral.

🌾What It Is: Pre-gelatinized, ultra-fine milled wheat flour sold as Wondra
👅Flavor: Very mild, neutral starch - far less raw-flour taste than all-purpose
🍳Best Uses: Instant gravies, pan sauce thickening, light fry coating
📦Shelf Life: Unopened: up to 1 year; opened airtight: 6-12 months
⚠️Watch Out: Contains wheat gluten - not safe for celiac or gluten-free diets

What Is Wondra Flour?

Wondra is a commercially developed instant flour - a specialty product from the United States, produced by Gold Medal and sold in that recognizable blue canister.

Its defining characteristic is that it has been pre-gelatinized: the starch granules are partially cooked and dried during milling, which allows them to hydrate and dissolve in liquid far faster than conventional flour.

The particle size is dramatically finer than all-purpose flour, which is why it pours almost like a powder and never clumps when stirred into a warm liquid.

You may also see it labeled as instant-mix flour or referred to generically as pre-gelatinized flour in professional recipe writing.

Unlike bread flour stand-ins designed for gluten development, Wondra is low-protein and not meant for yeasted baking.

It is a single-brand product - there is no generic "wondra" on shelves - though a few other instant flour products exist under different names.

  • 🌾 Category - specialty milled wheat flour, not all-purpose or pastry flour
  • 🏭 Origin - American commercial development, Gold Medal brand
  • 🔬 Process - partially pre-cooked (gelatinized) then re-dried for instant dispersal
  • 📋 Also called - instant flour, pre-gelatinized flour, instant-mix flour

What Does Wondra Flour Taste Like?

wondra flour - What Is Wondra Flour

Wondra flour has an almost aggressively neutral flavor. Raw, it carries a faint fresh-milled wheat note - barely detectable, nothing like the raw-dough taste you notice when dusting a board with all-purpose flour.

Once stirred into a hot sauce or gravy, any residual starchy taste cooks out almost immediately. That rapid cook-out is a direct result of pre-gelatinization - the starch has already been partially cooked before it reaches your pan.

Sensory SnapshotMild Intensity
👅 Flavor
neutral starchmild wheatslightly bland raw
✋ Texture
ultra-fine powdersilky when cookedglossy finish
👃 Aroma
faint fresh wheatvirtually odorless cooked

The glossy, silky texture it imparts to a finished pan sauce is Wondra's most distinctive quality - noticeably smoother than a standard roux-thickened sauce.

For comparison, cooking all purpose flour perfectly requires longer cooking to eliminate that pasty undertone; Wondra skips most of that work.

How to Use Wondra Flour

Wondra earns its place through speed and precision - it closes the gap between a thin liquid and a finished sauce in under a minute.

Most home cooks discover it through gravy, but restaurant kitchens reach for it specifically for coating proteins before a quick pan-sear.

Golden Rule
Never dump Wondra directly into a boiling liquid without whisking. Even with instant flour, adding it fast to a rolling boil creates surface gelling before full dispersion. Sprinkle in gradually while whisking off peak heat.
How Wondra Flour Is Used
MethodBest ForTip
🥘 Hot WhiskInstant gravy from pan drippings and stockSprinkle and whisk off direct heat first, then return to heat
❄️ Cold SlurryFinishing warm sauces without pre-cooking flourStir into cold liquid first, then stream into the warm sauce
🍳 Dry DredgeLight crisp coating on fish, chicken cutlets, vegetablesPat protein dry, dust lightly, shake off excess before frying
✨ Sauce FinishGlossy body in butter-based pan saucesPinch stirred in at the end gives body without starch opacity

American comfort cooking drives most Wondra use - beef gravies, roast chicken pan sauces, Southern-style fried fish - but it appears in any professional kitchen that values a quick, clean thickening agent.

It pairs exceptionally well with pan drippings and veal or beef stock, butter, roasted poultry, and cream-based white sauces.

Understanding comparing beurre manie vs roux options shows why Wondra is neither of those things - it replaces both for fast weeknight cooking, though it doesn't build the same depth of flavor a properly toasted roux does.

For dishes like wondra flour in grain dishes, its neutral starch profile keeps it from competing with other flavors.

Try It In
🥞Besan Flour Pancakes RecipeSee how fine-milled flour changes pancake texture and crispness→

How to Buy and Store Wondra Flour

Buy Wondra in its sealed blue canister - the packaging matters because the fine powder absorbs moisture faster than standard flour. The powder should look uniformly pale and free-flowing; any visible clumping or a stale, musty smell indicates moisture damage.

Watch Out
Wondra is sold at major grocery chains and large retailers, but not every store stocks it. If your store doesn't carry it, check the baking aisle online - the canister ships well and the shelf life makes it worth buying ahead.

Store it in a cool, dry pantry, resealing the original can tightly after each use or transferring to an airtight container in humid climates. Opened, it stays reliable for 6-12 months; unopened canisters can last up to a year.

For extended storage, freezing wondra flour is a practical option if you live somewhere with high ambient humidity.

  • 🛒 Where to find it - grocery baking aisle, large retailers, online; not in every store
  • 📦 What to check - uniform pale color, free-flowing powder, no clumps or mustiness
  • 🌡️ Storage - airtight container, cool dry pantry; avoid humidity at all costs

When Wondra Is the Right Call

Wondra isn't a workhorse flour - it's a targeted tool.

Reach for it when you need a smooth, quick sauce from pan drippings with no time to toast flour, or when you want a fried coating that stays light and crisp without egg wash and breadcrumbs.

Skip it for anything requiring gluten structure. Bread, pizza dough, and thick stews are not its territory - for long-simmered dishes, the taste of cornstarch thickening or a simple reduction gives a clearer, cleaner result.

If you have a jar of drippings and five minutes, Wondra is the fastest route to a finished sauce on the table.

Frequently Asked Questions

Can Wondra replace cornstarch as a thickener?

Yes, with a ratio adjustment. Wondra thickens similarly but produces a slightly cloudier, more opaque result than cornstarch. Use about 1½ tablespoons of Wondra for every 1 tablespoon of cornstarch a recipe calls for.

How much Wondra flour does it take to thicken gravy?

Start with 1 tablespoon per cup of liquid and whisk in gradually. Wondra thickens faster than all-purpose flour, so adding too much at once leads to over-thickening that's difficult to correct.

Is Wondra flour gluten-free?

No. Wondra is made from wheat and contains gluten. It is not safe for people with celiac disease or a wheat allergy, and no gluten-free version of this product currently exists.

What does Wondra flour taste like in a finished sauce?

Essentially nothing - that's the point. Because its starch is pre-gelatinized, the raw-flour taste cooks out almost immediately, leaving a glossy, neutral-bodied sauce with no starchy undertone.

Can you use Wondra flour in baking?

For yeasted breads, no - its low protein content won't support gluten development. Some bakers use it in small quantities for tender cakes or crisp crepe batters, where minimal gluten is actually desirable.

Classic Pot Roast with Vegetables

April 3, 2026

Tender beef that pulls apart with a fork, sitting in rich gravy with carrots and potatoes that soak up every bit of flavor. That's what happens when you brown a chuck roast, then let it braise low and slow in the oven for three hours.

Classic Pot Roast with Vegetables served on a plate

The Dutch oven does the work while you do other things. You get fall-apart meat without standing over the stove or checking every twenty minutes.

This works for family dinners when you want something comforting that fills the house with the smell of real cooking. Make it on a Sunday and you'll have leftovers for Tuesday.

QUICK SUMMARY

Chuck roast braised with carrots, potatoes, and onions in beef broth until fork-tender. The key is searing the meat first to lock in juices, then cooking low at 325°F for 3-4 hours. Add vegetables in the last hour so they stay intact instead of turning to mush.

⏱️Time Reality: Takes 4 hours total, but only 20 minutes is active work
🔥Critical Move: Sear the roast 3-4 minutes per side before braising
⚠️Watch Out: Add vegetables too early and they turn to mush - wait until the last hour

Why This Recipe Works

The marbled fat in chuck roast melts during the long braise, keeping the meat moist while the collagen breaks down into gelatin for a silky sauce. A good pot roast needs something to cut through, and a sweet lamb side dish does exactly that - we keep a batch ready for nights like this.

Quick Reference
⏱️
Prep Time
20 min
🔥
Cook Time
3 hr 30 min
⏰
Total Time
3 hr 50 min
🍽️
Servings
6 servings
📊
Difficulty
Medium
🏷️
Category
Main Dish
💡
Quick Tip
Sear meat to lock juices before slow cooking
🎯
Best For
Weeknight | Meal prep | Family dinner

Five things that make this work:

  • High heat sear creates a caramelized crust - browning develops deep flavor through the Maillard reaction and locks in juices before the long braise
  • Low oven temperature breaks down collagen - 325°F allows tough connective tissue to transform into gelatin without drying out the meat
  • Vegetables added late stay intact - holding carrots and potatoes until the last hour prevents them from disintegrating into the sauce
  • Braising liquid becomes the sauce - deglazing captures fond from searing, then reduces into rich gravy as the roast cooks
  • Resting redistributes moisture - letting the roast sit 15 minutes covered after cooking ensures every slice stays juicy instead of leaking onto the board
Golden Rule
Use a meat thermometer to check for 190-200°F internal temp - that's when collagen breaks down and meat falls apart with a fork

What You'll Need

Ingredients for Classic Pot Roast with Vegetables

Buy a chuck roast with visible marbling - the white streaks of fat are what keep this tender during the long cook. Most people skip this related corn recipe, but it balances the meal - for a version that comes together quickly, use frozen corn instead of fresh.

🥩
Protein
  • 3-4 lb chuck roast
🥬
Vegetables
  • 4 large carrots, cut into chunks
  • 1 lb baby potatoes, halved
  • 2 onions, quartered
  • 3 celery stalks, chopped
🧄
Aromatics
  • 6 garlic cloves, smashed
  • 3 sprigs fresh thyme
  • 2 bay leaves
🥢
Braising Liquid
  • 3 cups beef broth
  • 2 tablespoon tomato paste
  • Salt and black pepper

Ingredient Details

  • Chuck roast
    Look for a roast with good marbling throughout - the fat melts during cooking and keeps the meat moist instead of dry
  • Carrots
    Use whole carrots cut into 2-inch chunks - baby carrots work but cook faster and can turn mushy
  • Potatoes
    Baby potatoes hold their shape better than russets - if using large potatoes, cut into 1.5-inch pieces
  • Beef broth
    Low-sodium broth gives you control over salt - the sauce reduces during cooking and can get too salty with regular broth
  • Tomato paste
    Cook the paste in the pot for 1-2 minutes before adding liquid - this removes the raw taste and adds depth
  • Fresh thyme
    Tie the sprigs together with kitchen twine so you can pull them out easily before serving
  • Garlic
    Smash the cloves with the flat side of a knife - they release more flavor than sliced garlic during the long braise

Ingredient Swaps

You can use brisket or bottom round instead of chuck, but they need an extra 30-45 minutes to reach the same tenderness. Four swaps that work:

  • Brisket for chuck roast - leaner cut needs more time to break down, budget-friendly but requires patience
  • Turnips or parsnips for potatoes - reduces carbs and adds earthy sweetness, good for low-carb meals
  • Extra beef broth for red wine - skips alcohol but loses some acidity and complexity in the sauce
  • Garlic powder for fresh garlic - use 1 teaspoon per 3 cloves, less pungent but works in a pinch

Chuck Roast

Works for: classic pot roast texture, reliable tenderness, most forgiving cut

Skip if: watching budget closely, brisket costs less per pound

Brisket

Works for: budget meals, slightly leaner option, feeds more people

Skip if: short on time, needs 30-45 minutes longer to get tender

Bottom Round

Works for: lowest cost option, easy to find at any store

Skip if: you want guaranteed tenderness, less marbling means drier results

Instructions

The roast goes into a 325°F oven for 3 hours before you add vegetables, then cooks another hour until everything is tender. Start by searing the meat - heat oil in a Dutch oven over high heat and brown the roast 3-4 minutes per side until a dark crust forms.

  1. Sear the roast: Pat the chuck roast dry with paper towels, season all sides with salt and pepper, then sear in hot oil 3-4 minutes per side until deeply browned - this locks in juices and builds flavor through caramelization.

  2. Build the braising base: Remove the roast, reduce heat to medium, add onions and celery to the pot and cook 5 minutes, then stir in tomato paste and cook 2 minutes until it darkens - this removes the raw taste and adds richness to the sauce.

  3. Braise in the oven: Return the roast to the pot, add garlic, thyme, bay leaves, and beef broth until liquid comes halfway up the meat, bring to a simmer, then cover tightly and transfer to a 325°F oven for 3 hours - the low heat breaks down collagen without drying out the beef.

  4. Add vegetables: After 3 hours, remove the pot from the oven, nestle carrots and potatoes around the roast, return to the oven uncovered for 1 hour until vegetables are fork-tender and meat reaches 190-200°F internal temperature - adding them late keeps them intact instead of mushy.

  5. Rest and serve: Transfer the roast to a cutting board, tent with foil and let rest 15 minutes, then slice against the grain and serve with vegetables and braising liquid spooned over the top - resting redistributes juices so they don't run out when you cut.

Shortcut
Deglaze the pot with ½ cup broth or wine after searing - scrape up the brown bits stuck to the bottom for deeper sauce flavor

What to Serve With It

A good pot roast needs something fresh to balance the richness - this plate runs heavy without a bright contrast. For corn chowder meal planning ideas, pair with crisp vegetables or a tangy side - we keep a batch ready for nights like this.

Side Dish Prep Why It Works How to Serve
Mashed potatoes Easy Soaks up gravy, adds creamy texture Serve hot with butter melted on top
Steamed green beans Easy Adds freshness and crunch Toss with garlic and lemon juice
Crusty bread Easy Mops up sauce, no extra cooking Warm in oven 5 minutes before serving
Simple garden salad Easy Light contrast to rich meat Dress with vinaigrette right before serving
Roasted Brussels sprouts Medium Adds texture and deep flavor Roast at 425°F for 20-25 minutes

Three ways to serve it:

  • Weeknight plate: Slice the roast thin, serve over mashed potatoes with gravy, add steamed green beans on the side
  • Sunday dinner: Present the whole roast on a platter surrounded by vegetables, let everyone serve themselves family-style
  • Meal prep bowls: Shred leftover meat, pack with vegetables and gravy in containers, reheat portions throughout the week
Best Pick
Serve with horseradish cream sauce on the side - the sharp tang cuts through the richness and adds contrast to every bite

Store and Reheat

Pot roast holds in the fridge 3-4 days and freezes well up to 3 months without losing texture. Store meat and vegetables in shallow containers with enough braising liquid to keep everything moist - if there's something fresh and light on the side like salad, store that separately so it doesn't wilt.

Method Time Best For
🍳 Stovetop 10-15 min Even heating, preserves moisture best
🔥 Oven 20 min at 300°F Large portions, retains texture
📦 Microwave 3-5 min Quick single servings, cover to prevent drying

For best results when storing:

  • Cool completely before refrigerating - putting hot meat in the fridge raises the temperature and creates condensation that makes everything soggy
  • Slice only what you need - whole roast stays moister than sliced meat, cut portions as you reheat them
  • Save the braising liquid - freeze extra sauce in ice cube trays, pop out cubes to add moisture when reheating dry leftovers
  • Layer meat and vegetables separately - vegetables get mushy if they sit in liquid too long, store in different containers if possible
  • Reheat with a splash of broth - add 2-3 tablespoons liquid per serving to restore moisture lost during storage

Frequently Asked Questions

How long to cook pot roast at 325°F?

Cook for 3-4 hours until the internal temperature reaches 190-200°F and the meat falls apart with a fork. Exact time depends on the size of your roast - a 3-pound chuck needs closer to 3 hours, while a 4-pound roast may take the full 4 hours.

Can I make pot roast ahead and reheat?

Yes, pot roast actually tastes better the next day after the flavors meld. Cook it completely, let it cool, then refrigerate in the braising liquid for up to 3 days or freeze for 3 months - reheat gently on the stovetop or in a 300°F oven.

How do I know when pot roast is done?

The roast is done when a fork slides in easily and the meat pulls apart without resistance - check the internal temperature with a meat thermometer, it should read 190-200°F. If the meat feels tough or springy, it needs more time.

What should I do if my pot roast is dry?

Slice the roast thin and reheat it in the braising liquid or extra beef broth - simmer gently for 10-15 minutes to reabsorb moisture. Next time, make sure the liquid comes halfway up the meat during cooking and use a well-marbled chuck roast instead of a lean cut.

What vegetables go well with classic pot roast?

Carrots, potatoes, onions, and celery are the classic choices because they hold up well during long cooking. Add parsnips, turnips, or mushrooms for variety - always add vegetables in the last hour so they stay intact and don't turn to mush.

Classic Pot Roast with Vegetables served on a plate

Classic Pot Roast with Vegetables

No ratings yet
This classic pot roast features tender chuck roast braised low and slow with carrots, potatoes, and onions in a rich beef broth. Searing the meat first locks in juices while cooking at 325°F for several hours breaks down connective tissue for melt-in-your-mouth tenderness.
Print Recipe Pin Recipe
Prep Time 20 minutes mins
Cook Time 3 hours hrs 30 minutes mins
Total Time 3 hours hrs 50 minutes mins
Servings: 6 servings
Course: Dinner, Main Dish
Cuisine: American
Ingredients Equipment Method Notes

Ingredients
  

  • 3.5 lb chuck roast with good marbling
  • 4 large carrots cut into 2-inch chunks
  • 1 lb baby potatoes halved
  • 2 onions quartered
  • 3 stalks celery chopped
  • 6 cloves garlic smashed
  • 3 sprigs fresh thyme tied with kitchen twine
  • 2 leaves bay leaves
  • 3 cups beef broth low-sodium
  • 2 tablespoon tomato paste cooked in pot before adding broth
  • salt to season roast
  • black pepper to season roast
  • 2 tablespoon oil for searing

Equipment

  • Dutch oven Used for searing and braising the roast in the oven
  • Meat thermometer Check internal temperature of roast for doneness

Method
 

  1. Pat the chuck roast dry with paper towels, season all sides generously with salt and black pepper. Heat oil in a Dutch oven over high heat and sear the roast 3-4 minutes per side until deeply browned and caramelized to lock in juices.
    3.5 lb chuck roast, salt, black pepper, 2 tbsp oil
  2. Remove the roast from the pot. Reduce heat to medium and add onions and celery. Cook for 5 minutes until softened, then stir in tomato paste and cook an additional 2 minutes until darkened to remove raw flavor and add richness.
    2 onions, 3 stalks celery, 2 tbsp tomato paste
  3. Return the roast to the pot. Add garlic, thyme sprigs tied with kitchen twine, bay leaves, and beef broth so the liquid covers halfway up the meat. Bring to a simmer on the stovetop, then cover tightly and transfer to a 325°F oven. Braise for 3 hours to break down collagen and tenderize meat.
    3.5 lb chuck roast, 6 cloves garlic, 3 sprigs fresh thyme, 2 leaves bay leaves, 3 cups beef broth
  4. After 3 hours, remove the pot from the oven and nestle in the carrots and baby potatoes around the roast. Return to the oven uncovered and cook an additional 1 hour until vegetables are fork-tender and meat reaches an internal temperature of 190-200°F.
    4 large carrots, 1 lb baby potatoes
  5. Transfer the roast to a cutting board and tent with foil. Let rest for 15 minutes to redistribute juices. Slice against the grain and serve with the vegetables and braising liquid spooned over the top.

Notes

  • Sear the roast well to develop deep flavor and lock in moisture before braising.
  • Add vegetables after the initial braise to keep them from turning mushy.
  • Let the roast rest covered to retain juices for moist, tender slices.

Tried this recipe?

Let us know how it was!

Japanese Sunomono Cucumber Salad

April 2, 2026

Thin cucumber slices soaking in sweet-sour rice vinegar with a tangle of dark seaweed. That's what happens when you salt cucumbers first to draw out water, then marinate them in a tangy dressing.

Japanese Sunomono Cucumber Salad served on a plate

The salting step does most of the work. You get crisp texture without sogginess or bland flavor.

This works for weeknight dinners when you need a side that feels intentional but takes 15 minutes. Also perfect for meal prep since it holds in the fridge for days.

QUICK SUMMARY

Salt cucumber slices for 15 minutes to draw moisture, then rinse and marinate in rice vinegar, sugar, and soy sauce. The salting step prevents sogginess while the vinegar balances sweetness and acidity. Marinate at least 10 minutes for flavor to develop.

⏱️Active Time: 15 minutes prep, 10-15 minutes marinating minimum
🔪Key Move: Salt cucumbers first, rinse after 15 minutes, drain well
⚠️Watch Out: Skip the salting step and cucumbers turn watery and bland - always rinse and drain

Table of Contents

Toggle
  • Why This Recipe Works
  • What You'll Need
    • Ingredient Details
  • Ingredient Swaps
  • What to Serve With It
  • Store and Reheat
  • Frequently Asked Questions
  • Japanese Sunomono Cucumber Salad
    • Method 
    • Tried this recipe?

Why This Recipe Works

Rice vinegar mixed with sugar creates a balanced sweet-sour base that coats cucumbers without overwhelming them. Most people skip salmon, but it balances the meal. For a version that comes together quickly, simple homemade salmon hits the table while the cucumbers marinate.

Quick Reference
⏱️
Prep Time
15 min
🔥
Cook Time
0 min
⏰
Total Time
15 min (plus optional marinating up to 2 hours)
🍽️
Servings
4 servings
📊
Difficulty
Easy
🏷️
Category
Side | Appetizer
💡
Quick Tip
Salt cucumbers then rinse for crispness
🎯
Best For
Weeknight | Meal prep | Entertaining

What makes this work:

  • Salting draws moisture - cucumbers release water before marinating, staying crisp instead of turning mushy
  • Balanced sweet-sour ratio - rice vinegar and sugar create tangy brightness without overwhelming saltiness
  • Thin slices absorb flavor - ⅛-inch slices soak up dressing faster than thick chunks
  • Wakame adds umami - seaweed soaked 5-7 minutes brings savory depth without fishiness
  • Minimal marinating time - 10-15 minutes is enough for flavor to penetrate without softening texture
Quick Tip
Warm 2 tablespoons rice vinegar with 1 tablespoon sugar until sugar dissolves fully - prevents cloudy dressing and uneven sweetness.

What You'll Need

Ingredients for Japanese Sunomono Cucumber Salad

Japanese cucumbers have thin skin and fewer seeds than standard varieties, which means less bitterness and better crunch. A good salad can make or break the plate. For a version that comes together quickly, this related salad recipe uses similar bright flavors with different textures.

🥒
Vegetables
  • 2 Japanese cucumbers (or 1 English cucumber)
🥢
Dressing
  • 3 tablespoon rice vinegar
  • 1 tablespoon sugar
  • 1 teaspoon soy sauce
  • ½ teaspoon salt (for salting cucumbers)
🌿
Add-Ins
  • 2 tablespoon dried wakame seaweed
  • 1 teaspoon sesame seeds
  • 1 teaspoon mirin (optional)
  • ½ teaspoon grated ginger (optional)

Ingredient Details

  • Japanese cucumber
    Thin skin, fewer seeds, crisper texture - slice ⅛ inch thick with sharp knife or mandoline
  • Rice vinegar
    Milder acidity than white vinegar - warm with sugar to dissolve fully before mixing
  • Sugar
    White granulated works best - balances vinegar without altering color
  • Wakame seaweed
    Soak dried seaweed 5-7 minutes in cold water, drain well before adding to salad
  • Soy sauce
    Adds savory depth - use tamari for gluten-free version
  • Sesame seeds
    Toast 1 teaspoon over medium heat for 2 minutes for nutty aroma
  • Mirin
    Optional sweetener - adds mild alcohol aroma and extra sweetness to dressing

Ingredient Swaps

English cucumbers have more water than Japanese varieties but work fine if you salt them longer. Rich mains need something to cut through, and salad does exactly that. We keep a batch ready for nights like this - a fresh salad side uses similar vinegar-based dressing with different vegetables.

Four swaps that work:

  • Japanese cucumber → English cucumber - slice thin, salt 15-20 minutes instead of 15, rinse well to remove excess water
  • Rice vinegar → white vinegar with pinch of sugar - sharper acidity, less nuanced flavor, use 2 tablespoons white vinegar plus ¼ teaspoon extra sugar
  • Soy sauce → tamari - gluten-free with similar savory flavor, use same amount
  • Sugar → honey or maple syrup - different sweetness profile, use 2 teaspoons honey or maple syrup instead of 1 tablespoon sugar

Japanese Cucumber

Works for: Traditional texture, less water, thinner skin, crisper bite after salting

Skip if: Unavailable in local stores, budget tight, English cucumber already on hand

English Cucumber

Works for: Budget-friendly, widely available, works with longer salting time

Skip if: Want traditional crisp texture, less watery result, authentic Japanese flavor

Instructions

Total time from start to serving is 25-30 minutes including marinating, but active prep only takes 15 minutes. The chicken works best when it hits the table at the same time as the main. For a version that comes together quickly, simple chicken recipe pairs well with this tangy side.

  1. Slice and salt cucumbers - Cut cucumbers into ⅛-inch thin slices using sharp knife or mandoline. Sprinkle ½ teaspoon salt over slices in mixing bowl, toss to coat, let sit exactly 15 minutes to draw moisture.

  2. Prepare dressing - Warm 2 tablespoons rice vinegar with 1 tablespoon sugar in small saucepan over low heat for 1-2 minutes until sugar dissolves fully. Remove from heat, stir in 1 teaspoon soy sauce and 1 tablespoon rice vinegar. Let cool while cucumbers salt.

  3. Soak seaweed - Place 2 tablespoons dried wakame seaweed in bowl, cover with cold water, soak 5-7 minutes until soft. Drain well, squeeze out excess water with hands, chop into bite-sized pieces if needed.

  4. Rinse and drain cucumbers - After 15 minutes, rinse salted cucumber slices under cold water for 30 seconds to remove excess salt. Drain in colander or strainer for 5 minutes, pressing gently to remove water without crushing slices.

  5. Combine and marinate - Add drained cucumbers and seaweed to large bowl, pour dressing over, toss to coat evenly. Marinate at least 10 minutes at room temperature or refrigerate up to 2 hours. Sprinkle 1 teaspoon toasted sesame seeds before serving.

Golden Rule
Never skip the salting and rinsing steps - cucumbers turn watery and bland without drawing moisture first, and excess salt makes the dressing too salty.

What to Serve With It

Sunomono works best alongside rich or fried Japanese dishes that need acidity to cut through heaviness. Most people skip pork, but it balances the meal. For a version that comes together quickly, a tender pork side benefits from the tangy crunch of this salad.

Side Dish Prep Why It Works How to Serve
Grilled teriyaki chicken Easy Adds protein, balances freshness of salad with savory glaze Serve salad in small bowl next to chicken, pour extra dressing over rice
Steamed white rice Easy Neutral base complements acidity without competing flavors Place salad on top of rice or serve in separate small dish
Miso soup Easy Warm umami contrasts cold salad, traditional Japanese pairing Serve soup first, salad alongside main dish
Edamame beans Easy Simple snack, adds texture and protein without heaviness Serve edamame and salad as shared appetizers before main
Assorted sushi platter Medium Traditional pairing, light and elegant for entertaining Arrange salad in small bowls next to sushi plates

Three ways to serve it:

  • As appetizer - divide into small bowls, garnish with extra sesame seeds, serve before main course
  • With rice bowls - spoon salad over steamed rice, add grilled protein, drizzle ponzu sauce
  • Meal prep - portion into containers with teriyaki chicken or salmon, pack rice separately, combine before eating

Need more pairing ideas for chicken dishes? For easy chicken wings dinner nights, this salad adds refreshing crunch that cuts through rich, sticky sauces.

Best Pick
Serve salad chilled between 40-45°F for best refreshment - cold temperature enhances crisp texture and bright acidity.

Store and Reheat

Sunomono holds in the fridge for 3-4 days but cucumbers soften slightly after the first day. Rich mains need something to cut through, and salad does exactly that. We keep a batch ready for nights like this - easy soup side pairs well when you want warm and cold contrast on the plate.

Method Time Best For
🍳 Stovetop N/A Not applicable - serve cold to maintain texture and flavor
📦 Microwave N/A Not applicable - heating destroys crisp texture and bright acidity
🔥 Oven N/A Not applicable - cucumbers wilt and seaweed turns slimy when heated

For best results when storing:

  • Use airtight container - prevents cucumbers from absorbing fridge odors and dressing from evaporating
  • Store in shallow dish - cucumbers stay submerged in dressing without excess liquid pooling at bottom
  • Drain before serving - pour off excess liquid that accumulates after first day for better texture
  • Add fresh cucumbers - mix in newly salted and rinsed cucumbers to refresh texture after 2-3 days
  • Keep seaweed separate - if meal prepping, store wakame separately and add just before eating to prevent sliminess

Frequently Asked Questions

Can I use regular cucumbers instead of Japanese cucumbers?

Yes, English cucumbers work but have more water and thicker skin. Salt slices for 15-20 minutes instead of 15, rinse well, and drain thoroughly to remove excess moisture.

How long can I store sunomono cucumber salad in the fridge?

3-4 days in an airtight container. Cucumbers soften slightly after the first day but stay crisp enough to eat. Drain excess liquid before serving.

How do I know when cucumbers are ready after salting?

After exactly 15 minutes, cucumbers release visible water in the bowl and feel slightly flexible but still crisp. Rinse under cold water for 30 seconds, then drain 5 minutes before marinating.

Why does my sunomono salad get soggy?

Skipping the salting step or marinating too long causes sogginess. Always salt cucumbers 15 minutes, rinse well, drain thoroughly, and marinate maximum 2 hours for best texture.

Can I double or halve this sunomono recipe easily?

Yes, multiply or divide all ingredients by the same amount. Keep salting time at 15 minutes regardless of batch size, and maintain ⅛-inch slice thickness for consistent texture.

Japanese Sunomono Cucumber Salad served on a plate

Japanese Sunomono Cucumber Salad

No ratings yet
This Japanese Sunomono Cucumber Salad features thinly sliced cucumbers salted to draw out moisture and marinated in a tangy sweet-sour rice vinegar dressing. A tangle of soaked wakame seaweed and toasted sesame seeds add umami and texture, making it a crisp and refreshing side dish.
Print Recipe Pin Recipe
Prep Time 15 minutes mins
Cook Time 1 minute min
Total Time 16 minutes mins
Servings: 4 servings
Course: Appetizer, Side Dish
Cuisine: Japanese
Ingredients Equipment Method Notes

Ingredients
  

  • 2 whole Japanese cucumber or 1 English cucumber, sliced ⅛ inch thin
  • 3 tablespoon rice vinegar use 2 tablespoon warmed with sugar and 1 tablespoon added after warming
  • 1 tablespoon sugar white granulated
  • 1 teaspoon soy sauce tamari can be used for gluten-free version
  • 0.5 teaspoon salt for salting cucumbers
  • 2 tablespoon dried wakame seaweed soak 5-7 minutes in cold water before draining
  • 1 teaspoon sesame seeds toasted
  • 1 teaspoon mirin optional
  • 0.5 teaspoon grated ginger optional

Equipment

  • Mixing bowl For salting cucumbers and combining ingredients
  • Small saucepan To warm rice vinegar and dissolve sugar
  • Colander To drain cucumbers and seaweed

Method
 

  1. Cut cucumbers into ⅛-inch thin slices using a sharp knife or mandoline. Sprinkle ½ teaspoon salt over slices in a mixing bowl, toss to coat, and let sit exactly 15 minutes to draw out moisture.
    2 whole Japanese cucumber, 0.5 tsp salt
  2. Warm 2 tablespoons rice vinegar and 1 tablespoon sugar in a small saucepan over low heat for 1-2 minutes until sugar dissolves fully. Remove from heat, stir in 1 teaspoon soy sauce and 1 tablespoon additional rice vinegar. Let cool while cucumbers salt.
    3 tbsp rice vinegar, 1 tbsp sugar, 1 tsp soy sauce
  3. Place 2 tablespoons dried wakame seaweed in a bowl, cover with cold water, and soak for 5-7 minutes until soft. Drain well and squeeze out excess water. Chop into bite-sized pieces if desired.
    2 tbsp dried wakame seaweed
  4. After 15 minutes, rinse salted cucumber slices under cold water for 30 seconds to remove excess salt. Drain in a colander for 5 minutes, pressing gently to remove water without crushing slices.
    2 whole Japanese cucumber, 0.5 tsp salt
  5. Add drained cucumbers and seaweed to a large bowl. Pour dressing over and toss to coat evenly. Marinate at least 10 minutes at room temperature or refrigerate up to 2 hours. Sprinkle 1 teaspoon toasted sesame seeds before serving. Optionally stir in mirin and grated ginger.
    2 whole Japanese cucumber, 2 tbsp dried wakame seaweed, 3 tbsp rice vinegar, 1 tsp soy sauce, 1 tsp sesame seeds, 1 tsp mirin, 0.5 tsp grated ginger

Notes

  • Never skip the salting and rinsing steps to prevent watery, bland cucumbers.
  • Warm rice vinegar with sugar to fully dissolve sugar and avoid cloudy dressing.
  • Marinate no longer than 2 hours to maintain cucumber crispness.

Tried this recipe?

Let us know how it was!

What Is Roquefort Cheese? [Taste, Uses & More]

April 2, 2026

That first crumble of Roquefort carries an immediate punch - a cold, salty sharpness followed by something deeper, almost earthy, that lingers.

What Is Roquefort Cheese

Few cheeses announce themselves so directly, and that intensity is the whole point.

Made from raw Lacaune sheep milk and aged in natural caves in southern France, Roquefort holds a flavor profile unlike anything produced from cow's milk.

If Roquefort turns out to be too strong for a recipe, knowing your replacements for blue cheese will save the dish.

QUICK SUMMARY

Roquefort is a PDO-protected French blue cheese made from raw sheep milk, aged in the Combalou caves. It delivers a sharp, salty, tangy bite with mushroomy depth. Use it crumbled cold or melted gently into sauces and dressings. Keeps 2-3 weeks once opened.

🧀Type: Mold-ripened blue sheep's milk cheese, AOC/PDO protected
👅Flavor: Salty, tangy, sharp, with earthy mushroom and barnyard umami
🔥Best Uses: Salads, steak sauces, tartines, pasta, savory tarts
❄️Storage: Wrapped in cheese paper, refrigerated up to 3 weeks opened
📍Origin: Roquefort-sur-Soulzon, Aveyron, France - aged exclusively in Combalou caves

What Is Roquefort Cheese?

Roquefort is a mold-ripened blue cheese produced exclusively from the raw milk of Lacaune ewes, a breed native to the Aveyron region of southern France.

Its protected designation - both AOC and PDO - means no other cheese can legally carry the Roquefort name.

The cheese is inoculated with Penicillium roqueforti, a mold that creates the blue-green veining and drives much of its sharp, funky character.

Wheels are aged in the Combalou caves near Roquefort-sur-Soulzon, where naturally occurring cold air currents and high humidity shape the final result.

Roquefort has been produced for centuries and is considered one of the oldest named cheeses in the world.

The Combalou caves maintain a consistent temperature near 9°C year-round, and producers use metal rods to introduce air channels, allowing the mold to develop evenly through the paste.

  • 🐑 Milk source - Raw Lacaune sheep milk, never pasteurized for PDO-certified wheels
  • 🏔️ Aging location - Exclusively the Combalou caves in Roquefort-sur-Soulzon
  • 🔵 Veining agent - Penicillium roqueforti, introduced during production and activated by air channels
  • 📜 Legal protection - AOC since 1925, PDO under European law; one of the first cheeses to receive this status

What Does Roquefort Cheese Taste Like?

roquefort cheese - What Is Roquefort Cheese

Roquefort hits salt first - more aggressively than most blues - followed quickly by a sharp, tangy brightness tied to butyric acid compounds in the sheep milk. The finish is earthy and savory, somewhere between mushroom and damp stone.

Compared to Stilton, which reads as creamy and relatively mild, Roquefort is considerably more assertive. Against Cabrales, another sheep-milk blue from Spain, it tends to be saltier and more tang-forward rather than barnyard-heavy.

The sheep milk base gives Roquefort a distinct richness that cow-milk blues don't replicate.

Sensory SnapshotPungent Intensity
👅 Flavor
saltytangysharpumami
✋ Texture
crumblycreamy center
👃 Aroma
cave funkearthy mushroom

Heat softens the sharpness somewhat but reduces the tang noticeably. Cold Roquefort straight from the fridge is at peak intensity; bringing it to room temperature for 20 minutes opens up the aromatic depth without blunting the salt.

How to Use Roquefort Cheese

Cold applications let Roquefort perform at full strength. Crumbled over a Salade Roquefort - the classic Aveyron dish with frisée, walnuts, and vinaigrette - it needs no heat to work.

A thin spread on country bread with a drizzle of honey or a smear of fig jam is one of the most direct ways to use it.

Golden Rule
Add Roquefort at the very end of any hot dish. High, sustained heat destroys the blue character and turns the fat greasy.

In warm applications, the key is low heat and a short window. Stir crumbled Roquefort into a steak sauce just before serving, or fold it into mashed potatoes off the heat.

It also works stirred into cream-based pasta sauces at the finish, where it melts into the liquid rather than frying in a pan.

How Roquefort Cheese Is Used
MethodBest ForTip
🥗 Cold/CrumbledSalads, cheese boards, tartinesServe at room temp for fuller aroma
🍳 Melted into SauceSteak sauces, pasta, gratinAdd off heat or at very low simmer
🥧 Baked in Tart/QuicheSavory tarts, quiche fillingsUse sparingly - salt intensifies in the oven
✨ Finishing GarnishRoasted beets, pear slices, grilled lambDot on just before serving, never stir in while plating

Pairings lean toward contrast.

Sweet Sauternes or off-dry Riesling cuts the salt cleanly; fresh pear or apple does similar work on a board.

Walnuts and toasted hazelnuts add texture without competing on flavor.

When choosing a swap for a recipe, roquefort cheese swaps that work can guide you toward the right intensity and texture match.

For a creamier, milder route, using stilton cheese for creaminess covers the cases where you need less punch.

Try It In
🥣Blue Cheese Dressing (Homemade)Roquefort's tang makes this sharper than dressings built on cow-milk blues→🥨Cheddar Cheese StrawsSwap a portion of cheddar for Roquefort for a sharper, funkier straw→

How to Buy and Store Roquefort Cheese

Look for wedges with visible blue-green veining and a pale ivory to slightly yellow paste that appears moist, not dried out. The rind should be thin and natural-looking.

A strong ammonia smell signals the wheel is past its prime - set it aside.

Watch Out
Avoid wheels with dry, browning paste or no visible veining - minimal mold development means the cheese was handled poorly or stored too long before cutting.

Always buy from a source that sells it labeled AOC/PDO Roquefort; imported French product under that designation is the real article.

For storage, wrap the cut face in cheese paper or breathable wax paper, then place it in a loosely sealed container in the fridge.

This protects the cheese from absorbing other odors while allowing slight air exchange.

Know the roquefort cheese spoilage signs before assuming any surface change is normal mold versus a sign the cheese has turned.

Opened Roquefort lasts about 2-3 weeks refrigerated. An intact sealed wedge can hold up to 6 weeks depending on handling and the sell-by date.

Where to Start With Roquefort

Roquefort rewards a direct introduction. Eat it cold on bread with honey before ever cooking with it - the flavor profile makes more sense experienced straight than buried in a sauce.

Best Pick
For a first use in cooking, stir Roquefort into warm mashed potatoes off the heat. Low risk, clear payoff, and the starch tempers the salt.

Once you're comfortable with the intensity, a steak pan sauce is the natural next step.

Melt a small knob into reduced cream and black pepper, add it at the very end, and you have a classic bistro finish.

Cooks who enjoy stilton cheese in dairy recipes will find Roquefort pushes further in every direction - more salt, more tang, more funk.

Frequently Asked Questions

Is Roquefort the same as blue cheese?

No. Roquefort is a specific PDO-protected blue cheese made from raw Lacaune sheep milk in a single French region. All Roquefort is blue cheese, but blue cheese is a broad category that includes Stilton, Gorgonzola, and many others made from cow's milk.

How strong does Roquefort taste?

Very strong by most standards - pungent, salty, and sharp. It's considerably more assertive than Stilton and tends to be saltier than Gorgonzola. First-time eaters often find a little goes a long way.

Can you cook with Roquefort?

Yes, but add it off heat or at the very end of cooking. Sustained high heat destroys the blue mold character and makes the fat separate unpleasantly. Sauces, pasta, and potato dishes all work well with a final stir-in.

Is Roquefort safe during pregnancy?

Most health guidelines advise against it. PDO Roquefort is made from unpasteurized raw sheep milk, which carries a listeria risk. Cooking it until fully hot throughout significantly reduces that risk, but cold consumption is generally not recommended during pregnancy.

How is Roquefort aged?

Wheels are aged in the Combalou caves near Roquefort-sur-Soulzon, where natural air currents maintain a near-constant temperature of around 9°C. Producers pierce each wheel with metal rods to create air channels, allowing Penicillium roqueforti to develop evenly through the paste.

What Is St Germain Liqueur? [Taste, Uses & More]

April 2, 2026

Crack open a bottle of St. Germain and the first thing that reaches you is the aroma - a heady rush of fresh-cut blossoms, lemon peel, and something soft and fruity underneath.

What Is St Germain Liqueur

It's intensely floral in a way that few spirits manage without tipping into artificial territory. That fragrance alone tells you exactly what kind of work this elderflower liqueur does best.

QUICK SUMMARY

St. Germain is a French elderflower liqueur with a syrupy texture and a fragrant, honeyed flavor. It adds floral sweetness to cocktails, spritzes, and chilled desserts. Best used in small amounts - it's concentrated and sweet.

🌸Flavor: Floral elderflower, honeyed, bright pear and citrus top notes
🍾Best Use: Stirred into gin, Champagne, or vodka cocktails
🧴Texture: Lightly syrupy, with a coating mouthfeel
🕐Shelf Life: Unopened: several years; opened: 12-24 months
🛒Buy It: Look for clear liquid, sealed cap, ~20% ABV on the label

What Is St. Germain Liqueur?

St. Germain is a French elderflower liqueur produced from hand-harvested elderflower blossoms gathered each spring in the Alps.

The brand's origin story traces to the Haute-Savoie region, where foragers collect the blossoms over a narrow seasonal window - just a few weeks per year. That timing matters: elderflower is highly perishable, which is why the liqueur carries such a vivid, fresh floral quality.

It sits at roughly 20% ABV, making it lighter than most spirits but stronger than a cordial. You'll also see it referred to as simply "elderflower liqueur" or occasionally misspelled as Sainte-Germain.

Unlike plain simple syrup, it brings both sweetness and a complex floral character to whatever it touches.

  • Category - Floral liqueur, sub-category of fruit and botanical liqueurs
  • ABV - ~20%; sweeter and lower-proof than gin or vodka
  • Key ingredient - Elderflower blossom, macerated and concentrated
  • Appearance - Translucent, pale gold liquid with a slightly viscous pour

What Does St. Germain Liqueur Taste Like?

st germain liqueur - What Is St Germain Liqueur

The flavor lands closest to a concentrated elderflower cordial with an alcoholic backbone. Floral is the dominant note - think jasmine-adjacent, but rounder and less perfumed.

Underneath that, bright pear and citrus surface immediately, followed by softer undertones of lychee and stone fruit.

Sensory SnapshotModerate Intensity
👅 Flavor
ElderflowerHoneyedPearLychee
✋ Texture
SyrupyLightly Viscous
👃 Aroma
Fresh BlossomsLemon Peel

Sweetness is real but not cloying in moderate doses. Used warm or at room temperature, the floral notes become more forward; over ice, the pear and citrus notes sharpen.

It's genuinely unlike anything you'd get from asian pear or elderflower cordial alone - the alcohol carries the aroma differently.

Golden Rule
Treat St. Germain like a flavored sweetener, not a base spirit. Half an ounce is usually enough - more and the floral sweetness can dominate the drink.

How to Use St. Germain Liqueur

St. Germain shines most in cold applications - cocktails, spritzes, and chilled desserts.

It functions as both a sweetener and a flavoring agent, which means it often replaces simple syrup entirely in a recipe.

How St. Germain Is Used
MethodBest ForTip
🍸 StirredGin and tonics, vodka-citrus cocktails, French 75 riffsAdd after your base spirit; taste before adding more
🥂 SpritzesChampagne, prosecco, and sparkling water combinationsUse ½ oz per flute - it builds quickly in a sparkling format
🍑 Finishing DrizzleFresh fruit salad, panna cotta, zabaglioneA few drops only; heat dulls the floral notes significantly
🍮 Folded InChilled creams, mousse, no-bake dessertsFold in cold; do not cook or bake with it

Gin is its most natural partner - the botanicals in gin and the elderflower aroma are a genuine match. A splash in a gin and tonic in place of simple syrup changes the drink's entire register. Champagne spritzes are equally straightforward: St. Germain, a squeeze of lemon, and sparkling wine is the core of a Hugo cocktail.

Pear and apple cocktails benefit from it too, since the liqueur's existing pear note deepens rather than competes. Ginger-forward drinks - think a Moscow Mule variation - take on pleasant complexity with ½ oz stirred in.

Avoid pairing it with heavily smoky mezcal or amaro-dominant builds, where the floral sweetness sits uncomfortably against bitter or smoky profiles.

If you're working without St. Germain, check what works as a [St.

Germain substitute](https://forkliftkitchen.com/st-germain-liqueur-substitutes/) before substituting a different liqueur - the floral character is harder to replicate than the sweetness.

Try It In
🥃Irish Cream Liqueur HomemadeSee how liqueur layering works before building St. Germain cocktails→

How to Buy and Store St. Germain Liqueur

Buy sealed bottles with completely clear, pale-gold liquid - any cloudiness or sediment suggests mishandling or age. Check the label for elderflower extract and an ABV around 20%. Bottles from smaller producers can vary in sweetness and color, so stick to recognizable retailers when buying for the first time.

Watch Out
Avoid bottles stored near heat sources or in direct sunlight at the shop - floral aromatics in elderflower liqueur degrade faster than most spirits when exposed to warmth.

Store upright in a cool, dark place with the cap tightly closed after every use. You don't need to refrigerate it, however cold storage does slow aroma loss once opened.

For full detail on how long it keeps, see our guide to St. Germain shelf life.

  • Unopened - Stable for several years if stored correctly
  • Opened - Best within 12-24 months; floral aroma fades noticeably after that
  • Signs it's past peak - Muted scent, flatter sweetness, slight color change

Where to Start With St. Germain

Start with a gin spritz. One ounce of gin, half an ounce of St.

Germain, a squeeze of lemon, and sparkling water over ice - that drink shows you everything the liqueur does clearly and quickly. From there, try it in a Champagne-based spritz or stirred into a pear cocktail.

If you need an alcohol-free option for a mocktail build, non-alcoholic gin paired with elderflower cordial gets you closer than most alternatives. St.

Germain rewards restraint - use less than you think you need, and adjust upward from there.

Frequently Asked Questions

Is St. Germain sweet or floral?

Both, with floral leading. The elderflower aroma is the dominant impression; sweetness sits underneath it rather than in front. In larger pours, the sugar becomes more noticeable.

What can I substitute for St. Germain?

Elderflower cordial is the closest non-alcoholic option - use about half the amount since it's sweeter. Other floral liqueurs like Lillet Blanc work structurally but won't replicate the elderflower note.

How long does St. Germain last after opening?

Peak quality holds for 12-24 months after opening. The liquid stays safe to drink beyond that, however the floral aroma fades and the flavor flattens noticeably.

Can you drink St. Germain straight?

Yes, though it's rarely served that way. It's very sweet and concentrated at full strength - most people find a small pour over ice more approachable than a neat shot.

Does St. Germain need to be refrigerated?

No, but refrigeration after opening slows aroma loss. Room-temperature storage in a cool, dark spot is sufficient if you use the bottle within a year.

What Is Self Rising Flour? [Taste, Uses & More]

April 2, 2026

You spot a bag of self-rising flour at the grocery store and wonder if it's worth grabbing over your usual all-purpose flour. It is - provided you know what's already inside it and which recipes it's built for.

What Is Self Rising Flour

Self-rising flour has baking powder and salt pre-measured into the mix, which means one less step when you're making biscuits or pancakes. Understanding that built-in chemistry is the difference between fluffy Southern biscuits and a flat, salty disappointment.

QUICK SUMMARY

Self-rising flour is all-purpose wheat flour pre-blended with baking powder and salt. It produces a tender, cakey crumb with minimal prep. Best for biscuits, quick breads, and pancakes - not for yeast-leavened recipes.

👅Flavor: Mild wheaty base with faint salt and a subtle baking powder tang
🍞Best For: Southern biscuits, pancakes, scones, drop biscuits, quick breads
📦Shelf Life: Unopened up to 12 months; opened, use within 6 months
⚠️Avoid: Yeast breads and recipes needing adjustable leavening
🌾Also Known As: Self-raising flour (UK and Australian usage); contains gluten and added sodium

What Is Self-Rising Flour?

Self-rising flour is a pre-leavened wheat flour - all-purpose flour with a fixed ratio of baking powder and salt already blended in. Standard formulas combine roughly one teaspoon of baking powder and a quarter teaspoon of salt per cup of flour.

It originated as a convenience product for American home bakers, and it became a cornerstone of Southern US baking traditions, particularly for buttermilk biscuits.

In the UK and Australia, the same product goes by "self-raising flour," though the leavening ratios can differ slightly between regional brands.

Unlike plain flour, you can't control how much lift or salt goes into a recipe - the ratio is fixed. That's ideal for simple quick breads and biscuits but limiting for complex bakes.

  • 🌾 Base ingredient - milled all-purpose wheat flour, typically enriched with iron and B vitamins
  • 🧂 Salt content - already present; omit or reduce added salt in any recipe using it
  • 🫧 Leavening agent - baking powder (not baking soda) provides the chemical rise
  • ⏱️ Shelf sensitivity - the baking powder degrades over time, which is why [wheat shelf life](https://forkliftkitchen.com/wheat-shelf-life/) matters even for processed flour products

What Does Self-Rising Flour Taste Like?

On its own, self-rising flour tastes close to standard all-purpose flour - mild, lightly wheaty, and neutral. The salt adds a faint savory edge you won't find in plain flour, and the baking powder contributes a barely detectable metallic or alkaline tang.

That tang is subtle in a well-made biscuit. Overbaking or using old flour amplifies it, pushing the background note toward something closer to chalk.

Sensory SnapshotModerate Intensity
👅 Flavor
mild wheatyfaintly saltysubtle alkaline tang
✋ Texture
fine and powderypromotes tender crumb
👃 Aroma
neutral wheatyfaint chemical note

Heat changes things. Baked goods made with self-rising flour develop a toasty wheat character that masks most of the raw alkaline note.

The salt becomes more integrated and rounds out sweetness in pancakes or shortcakes rather than standing out as a separate flavor.

Watch Out
If your finished biscuits or pancakes taste noticeably bitter or chemical, the baking powder in your flour has likely degraded. Check the best-by date and replace the bag.

How to Use Self-Rising Flour

Self-rising flour works best in quick-mix recipes where you want a tender, cakey crumb without a long mixing process. The built-in leavening activates once liquid hits the dough, so work quickly and avoid overworking the mix - excess gluten development toughens the result.

Southern-style buttermilk biscuits are the flagship use. The combination of self-rising flour, cold butter, and buttermilk produces a layered, fluffy biscuit without any additional baking powder. Pancakes and griddle cakes also come together fast - combine with milk, an egg, and melted butter, and the flour does the rest.

How Self-Rising Flour Is Used
MethodBest ForTip
🥐 BakingBiscuits, scones, shortcakes, quick breadsUse cold fat and fold minimally for flaky layers
🥞 Mix & FoldPancakes, drop biscuits, savory cheese biscuitsStop mixing once dry streaks disappear - lumps are fine
🍲 Shallow Fry / SimmerSkillet dumplings dropped into stew, basic frittersKeep dough thick; thin batters spread and lose structure

In savory applications, grated cheddar and herbs fold cleanly into a self-rising dough for drop biscuits - no proofing, no kneading. For sweet recipes, pair with buttermilk and sugar for pancakes or with sliced strawberries for classic shortcakes.

Avoid using it in yeast-leavened recipes. The pre-measured salt can interfere with yeast activity, and the baking powder becomes redundant alongside fermentation.

Recipes requiring adjustable leavening - certain layer cakes, soufflés - are also better suited to baking powder swaps and plain flour.

Try It In
🥞Besan Flour PancakesSee how a different flour base compares for quick griddle cakes→

How to Buy and Store Self-Rising Flour

Buy by the date. Self-rising flour has a shorter effective life than plain flour because baking powder degrades - always check the manufacturing or best-by date on the bag. Avoid packages with visible clumps, damp spots, or a sharp chemical smell, all of which signal moisture damage or spent leavening.

Best Pick
Choose bags from brands that print a clear best-by date rather than a manufacturing code you'd need to decode. Freshness is non-negotiable for reliable rise.

Once open, transfer the flour to an airtight container in a cool, dry pantry. Reseal the original bag inside the container to preserve the milling date for reference.

For a full breakdown of how flour ages, see our guide to flour freshness guide.

  • Unopened: Up to 12 months in a sealed bag at room temperature
  • Opened: Use within 6 months for reliable leavening power
  • Signs it's past its prime: clumps that don't break apart easily, or baked goods that come out flat despite correct technique

Start Here for Fast Bakes

If your goal is Southern-style biscuits or quick pancakes, self-rising flour is the most direct route - no measuring baking powder separately, no guessing on salt.

Grab it when a recipe specifically calls for it, or when you want to cut steps in a quick bread or griddle-cake routine.

It's less useful for adventurous baking where leavening control matters. In those cases, plain all-purpose flour with measured baking powder gives you more flexibility.

Golden Rule
Never add extra baking powder or salt when a recipe is written specifically for self-rising flour - you'll over-leaven and over-salt in a single move.

Frequently Asked Questions

Can you substitute self-rising flour for all-purpose flour?

Yes, but only if you remove the baking powder and salt the recipe calls for. Swap 1:1 by weight, then subtract roughly 1½ teaspoons of baking powder and ¼ teaspoon of salt per cup used.

How much baking powder is in self-rising flour?

Most US brands include about 1 to 1½ teaspoons of baking powder per cup of flour. Some brands vary slightly, so check the label if precision matters for your recipe.

What is the difference between UK self-raising flour and US self-rising flour?

They're the same concept, but UK self-raising flour often contains slightly less leavening - around 1 teaspoon per cup versus up to 1½ in US versions. Results may differ when swapping across recipes from different regions.

Can you use self-rising flour for yeast bread?

No - the pre-measured salt can inhibit yeast activity, and the chemical leavening conflicts with long fermentation. Use plain bread flour or all-purpose flour for any yeast-based dough.

Does self-rising flour work for gluten-free baking?

No. It's wheat-based and contains gluten - it's not suitable for anyone with celiac disease or a wheat allergy. Dedicated gluten-free flour blends with added leavening are the correct alternative; see our notes on [gluten in wheat-based products](https://forkliftkitchen.com/is-rye-bread-gluten-free/).

What Is Triple Sec? [Taste, Uses & More]

April 2, 2026

That first sip carries a sharp, candied brightness - dried orange peel meeting sweet syrup, with just enough bitter pith underneath to keep it honest. Triple sec sits behind some of the most recognizable cocktails on any menu, and understanding what it actually tastes like changes how you use it.

What Is Triple Sec

If you've wondered how it compares to other orange bitters replacements or grand marnier swaps, this profile covers everything from flavor to shelf life.

QUICK SUMMARY

Triple sec is a clear orange liqueur made from dried orange peels, used primarily as a citrus-sweet component in cocktails and some sauces. It tastes sweeter and softer than Cointreau, with a candied orange profile and mild bitter finish.

🍊Flavor: Candied orange peel, sweet citrus, mild bitter pith underneath
🍹Best Use: Margaritas, Sidecars, Cosmopolitans, pan sauces, dessert glazes
📦Shelf Life: Unopened, several years; opened, best within 12-24 months
🌡️Storage: Upright, cool and dark, cap tightly sealed to preserve aroma

What Is Triple Sec?

Triple sec is a clear orange liqueur made by macerating and distilling the dried peels of both bitter and sweet oranges, then blending the distillate with sugar and neutral spirit. It originated in 19th-century France, with Maison Combier widely credited as an early commercial producer.

The name likely refers to a triple distillation process, though the exact etymology is debated.

ABV ranges widely - from around 15% in budget bottles up to 40% in premium expressions. That range matters in cocktails, since a low-ABV version adds sweetness without much alcohol punch, while a stronger bottle contributes both.

Triple sec is often grouped with curaçao-style liqueurs, which also use dried orange peel. Here's how the main types compare:

  • Standard triple sec - Widely available, clear, 15-25% ABV, noticeably sweet, budget to mid-range price
  • Cointreau - A premium triple sec at 40% ABV, drier, more spirit-forward, sharper orange finish
  • Curaçao - Can be clear or colored (blue, orange), sourced from laraha peel, slightly more complex bitter note
  • Grand Marnier - Cognac-based orange liqueur, amber, richer and oakier than standard triple sec

What Does Triple Sec Taste Like?

Triple sec leads with bright, candied orange peel - the kind of sweetness you associate with orange hard candy rather than fresh juice.

A clean citrus backbone runs underneath, and there's a brief flutter of bitter pith at the finish that prevents it from tasting flat or one-dimensional.

Sensory SnapshotModerate Intensity
👅 Flavor
candied orange peelsweet citrusmild bitter pith
✋ Texture
lightly syrupyquick-drying finish
👃 Aroma
zesty orange oilfaint citrus blossom

Compared to Cointreau, standard triple sec tastes noticeably sweeter and less boozy - the spirit doesn't cut through as sharply.

In cooking, heat softens the bitter note further and amplifies the syrupy orange character, which works well for reductions but can turn cloying if you overdo it.

Golden Rule
Start with less than you think you need. Triple sec's sweetness compounds quickly in reductions and batched cocktails - you can always add more, but you can't pull it back.

How to Use Triple Sec

Triple sec earns its place primarily in classic cocktails. It bridges the tart and the sweet - in a Margarita it softens lime acidity while keeping the tequila front and center, and in a Sidecar it balances cognac's weight with just enough citrus lift.

The Cosmopolitan uses it for orange depth alongside cranberry. If you need to rework a recipe, there are solid triple sec alternatives worth considering.

Beyond cocktails, triple sec moves into the kitchen more easily than most people expect. French-influenced cooking uses it in pan sauces for duck and pork - deglaze after searing, reduce briefly, and the liqueur's sugar and citrus tighten into a gloss.

Contemporary dessert work folds it into custards, whipped creams, or cake glazes where a straight orange extract would smell artificial.

How Triple Sec Is Used
MethodBest ForTip
🍹 CocktailsMargarita, Cosmopolitan, Sidecar, daiquiri variationsUse a higher-ABV triple sec so the spirit isn't lost in the mix
🍳 DeglazingPan sauces for duck, pork, chickenAdd off-heat first, then return to flame to avoid flare-up
🎂 Glazes & reductionsCake soaking syrup, fruit glazes, tart fillingsReduce with equal sugar over medium heat until slightly thickened
🔥 FlambéingCrêpes Suzette-style desserts, plated fruitWarm gently before igniting - cold liqueur won't catch easily
🥗 MarinadesStone fruit, citrus-forward vinaigrettesPair with lime zest and a neutral oil to keep orange flavor bright

Avoid pairing triple sec with strongly tannic red wines - the bitter orange oils clash rather than complement. It also overwhelms delicate green teas.

Stone fruit (peaches, apricots) and dark chocolate are natural fits, as is ginger in both cocktail and savory applications.

Try It In
🍰Classic Baked CheesecakeA splash in the batter adds quiet orange depth without overpowering→🍫No-Bake Oreo Cheesecake CupsDark chocolate and orange peel pair naturally in the filling→🍓Strawberry Cheesecake Yogurt BowlsUse a small pour over fresh strawberries for a clean citrus lift→

How to Buy and Store Triple Sec

ABV is your first checkpoint. A bottle labeled 15% works fine for desserts and low-proof applications, however anything going into a spirit-forward cocktail should sit at 30-40% ABV. Check for a clean, pronounced orange-peel aroma when you can - bottles that smell medicinal or solvent-like signal lower-quality oils.

Watch Out
Price doesn't always predict quality in triple sec. Some mid-range bottles outperform premium-labeled ones on aroma and balance - smell before you buy when possible.

When comparing triple sec to drier premium options, reviewing cointreau replacements can help you land on the right ABV and sweetness level for your recipe.

  • Unopened - Stores well for several years in a cool, dark location
  • Opened - Best quality within 12-24 months; the triple sec storage life extends further, though aroma fades
  • Storage position - Upright, away from heat sources, cap sealed tightly to prevent alcohol evaporation

Where to Start with Triple Sec

A classic Margarita is the fastest way to understand what triple sec actually contributes - lime, tequila, and triple sec with no distractions.

From there, try it in a pan sauce reduction, where the sugar and agave vs simple syrup question becomes relevant if you're adjusting sweetness levels.

If the sweetness feels like too much, step up to Cointreau or try a drier curaçao-style bottle. Standard triple sec suits high-volume batching and dessert glazes particularly well - it's where the sweetness is an asset rather than a problem.

Frequently Asked Questions

Is triple sec the same as Cointreau?

No. Cointreau is a specific brand of triple sec made at 40% ABV with a drier, more spirit-forward profile. Standard triple sec is sweeter, lower in alcohol, and less complex - it's a category, not a single product.

How strong is triple sec?

ABV ranges from about 15% in budget bottles up to 40% in premium expressions like Cointreau. Most widely available grocery-store bottles sit between 20-25% ABV.

Can you substitute triple sec in a Margarita?

Yes. Cointreau, curaçao, or a mix of fresh orange juice and simple syrup all work. Each changes the sweetness and alcohol balance slightly, so adjust lime juice accordingly.

Does triple sec go bad?

It won't spoil in a way that makes it unsafe, but aroma and flavor fade after opening. An opened bottle held past 24 months often smells flat - the citrus oils degrade before the alcohol does.

What cocktails use triple sec?

The Margarita, Cosmopolitan, Sidecar, and Long Island Iced Tea all call for it. It also appears in the White Lady and various tiki-style drinks where orange sweetness balances rum or gin.

Burmese Tea Leaf Salad (Lahpet Thoke)

April 2, 2026

You need 35 minutes and a mixing bowl. No cooking beyond toasting nuts, no complicated prep, just crisp assembly.

Burmese Tea Leaf Salad (Lahpet Thoke) served on a plate

The tea leaves bring earthy bitterness while fried chickpeas add crunch you can't get any other way. The garlic oil pulls everything together without turning it into a dressed salad.

This is what you make for potlucks when you want something that looks impressive but doesn't require hovering over a stove. Everything can be prepped ahead and tossed right before serving.

QUICK SUMMARY

Burmese Tea Leaf Salad layers fermented tea leaves with toasted nuts, fried chickpeas, and fresh cabbage for a crispy, bitter-sweet mix. The garlic oil infusion ties together bold flavors without making anything soggy. Toast nuts separately so each ingredient keeps its texture.

⏱️Time: Toast nuts 3-4 minutes, fry chickpeas 4-5 minutes, mix just before serving
🔪Start Here: Rinse fermented tea leaves under cold water for 30 seconds to cut excess salt
⚠️Watch Out: Add lime juice and oil last to prevent soggy textures - wet ingredients kill the crunch

Table of Contents

Toggle
  • Why This Recipe Works
  • What You'll Need
    • Ingredient Details
  • Ingredient Swaps
  • What to Serve With It
  • Store and Reheat
  • Frequently Asked Questions
  • Burmese Tea Leaf Salad (Lahpet Thoke)
    • Method 
    • Tried this recipe?

Why This Recipe Works

The salad works best when it hits the table at the same time as the main. For a version that comes together quickly, this related salad recipe keeps prep minimal while delivering crunch.

Quick Reference
⏱️
Prep Time
20 min
🔥
Cook Time
15 min
⏰
Total Time
35 min
🍽️
Servings
4 servings
📊
Difficulty
Medium
🏷️
Category
Appetizer
💡
Quick Tip
Toast nuts until golden, not burnt.
🎯
Best For
Weeknight | Entertaining | Potluck

What makes this work:

  • Toasting sesame seeds over medium heat for 3-4 minutes brings out nutty aroma without burning - constant stirring prevents hot spots
  • Frying chickpeas at 325°F in shallow oil creates crisp shells that hold texture even after mixing with wet ingredients
  • Infusing garlic in oil over low heat for 5 minutes pulls out savory pungency without browning or turning bitter
  • Rinsing fermented tea leaves under cold water removes excess salt while keeping the earthy bitterness that defines the dish
  • Adding lime juice and garlic oil at the very end preserves the crunch of cabbage and nuts instead of turning everything limp
Quick Tip
Crush peanuts lightly with the back of a spoon - you want chunks, not powder, so they add texture instead of dissolving into the mix.

What You'll Need

Ingredients for Burmese Tea Leaf Salad (Lahpet Thoke)

Most people skip salad, but it balances the meal. For a version that comes together quickly, this easy salad recipe layers textures without fussing over individual components.

🥬
Fresh Vegetables
  • fresh cabbage
  • tomatoes
🧄
Flavor Base
  • fermented tea leaves
  • garlic oil
  • lime juice
🫙
Crispy Toppings
  • fried chickpeas
  • toasted sesame seeds
  • crushed peanuts
  • dried shrimp

Ingredient Details

  • Fermented tea leaves
    Rinse lightly under cold water for 30 seconds before using to cut down salt and bitterness - the earthy flavor should still come through
  • Fried chickpeas
    Fry in ¼ inch oil at 325°F for 4-5 minutes until golden and crisp - overcrowding the pan makes them soggy instead of crunchy
  • Toasted sesame seeds
    Toast over medium heat, stirring constantly, until light golden (3-4 minutes) - they burn fast once they start to color
  • Crushed peanuts
    Use the back of a spoon to break into chunks - powdered peanuts dissolve into the dressing instead of adding crunch
  • Garlic oil
    Simmer crushed garlic in neutral oil over low heat for 5 minutes, then strain out solids - burnt garlic turns bitter and ruins the balance
  • Fresh cabbage
    Shred thinly and keep crisp - thick slices won't absorb any flavor and thin shreds wilt too fast
  • Dried shrimp
    Optional for umami depth - omit for vegetarian or swap with mushroom flakes for similar savory punch

Ingredient Swaps

Rich mains need something to cut through, and salad does exactly that. For a version that comes together quickly, tender rice recipe adds contrast without competing for attention.

Four swaps that work:

  • Black tea leaves soaked briefly instead of fermented tea leaves - less bitterness, milder earthy flavor, acceptable when you can't find the real thing
  • Fried soy nuts or roasted peanuts instead of fried chickpeas - similar crunch with slightly different flavor, saves frying time
  • Umami mushroom flakes instead of dried shrimp - vegetarian-friendly option that still brings savory depth without seafood funk
  • Shredded iceberg lettuce instead of fresh cabbage - crisper texture but less earthy sweetness, works when cabbage isn't available

Fermented Tea Leaves vs. Black Tea

Works for: When fermented leaves aren't available - black tea soaked in warm water gives mild earthy flavor

Skip if: You want authentic bitterness - black tea lacks the funky depth that defines the dish

Fried Chickpeas vs. Roasted Peanuts

Works for: Saving frying time - roasted peanuts deliver crunch without heating oil

Skip if: You want traditional texture - chickpeas have lighter crunch and absorb garlic oil differently

Instructions

Salad adds the contrast this plate needs, but timing matters. We keep a batch ready for nights like this - simple salmon recipe pairs with bold, crunchy sides without stealing focus.

  1. Toast sesame seeds over medium heat in a dry skillet for 3-4 minutes, stirring constantly, until light golden and fragrant. Pull off heat immediately.
  2. Fry chickpeas in ¼ inch neutral oil at 325°F for 4-5 minutes until crisp and golden. Drain on paper towels and season lightly with salt.
  3. Infuse garlic oil by simmering crushed garlic in neutral oil over low heat for 5 minutes, then strain out solids. Let cool to room temperature.
  4. Rinse fermented tea leaves under cold water for 30 seconds, drain well, and pat dry. Crush peanuts lightly with the back of a spoon into chunks.
  5. Toss cabbage, tomatoes, tea leaves, chickpeas, sesame seeds, peanuts, and dried shrimp in a large mixing bowl. Add lime juice and garlic oil last, toss gently, and serve immediately.
Golden Rule
Add wet ingredients last - lime juice and garlic oil go in right before serving to keep everything crisp instead of soggy.

What to Serve With It

The pork works best when it hits the table at the same time as the main. For a version that comes together quickly, this easy pork recipe balances bold sides without overpowering them.

Side Dish Prep Why It Works How to Serve
Steamed jasmine rice Easy Neutral base that soaks up garlic oil and balances bitter tea leaves Serve warm alongside salad for scooping
Grilled chicken skewers Easy Simple protein that complements vibrant salad without competing Slice skewers over salad or serve on the side
Light cucumber salad Easy Cool freshness cuts through rich garlic oil and intense tea flavor Plate next to lahpet thoke for contrast
Plain yogurt dip Easy Soothes palate from bitterness and spice, adds creamy texture Serve in small bowl for dipping or drizzling
Rice noodles tossed in sesame Medium Mild, textural counterpoint that absorbs bold salad flavors Toss noodles with a bit of garlic oil, serve under salad

Three ways to serve it:

  • As an appetizer - portion into small bowls and serve before the main course hits the table, keeps flavors bold and focused
  • Family-style on a large platter - pile high with all toppings visible, let people scoop their own portions for potlucks or casual dinners
  • Over jasmine rice as a light meal - spoon salad over warm rice so the garlic oil soaks in, add grilled protein on the side for substance

For more chinese chicken salad meal planning ideas, check side dishes that balance bold, crunchy mains without doubling up on textures.

Shortcut
Toast nuts and fry chickpeas up to 2 days ahead - store in airtight containers at room temperature and toss into salad right before serving.

Store and Reheat

Beef adds the contrast this plate needs, but timing matters. For a version that comes together quickly, a rich beef side holds up next to bold, crunchy dishes without fading into the background.

Method Time Best For
🚫 No reheating N/A Serve chilled or at room temperature only - heat wilts cabbage and makes nuts soggy
🌡️ Rest at room temp 10-15 min Take chill off before serving to bring out garlic oil aroma and soften tea leaves slightly
🥗 Re-toss with fresh greens 2 min Refresh texture of leftover salad by adding crisp cabbage and extra toasted nuts

For best results when storing:

  • Fridge: Store assembled salad in airtight container for 2-3 days - cabbage softens but nuts stay crunchy if you drain excess liquid before storing
  • Store components separately if making ahead - keep toasted nuts, fried chickpeas, and wet ingredients apart, then toss right before serving
  • Drain excess liquid before refrigerating leftover salad - tomatoes and lime juice pool at the bottom and make everything soggy
  • Refresh with fresh cabbage when reusing leftovers - toss in extra shredded cabbage and a handful of toasted nuts to revive crunch
  • Do not freeze - tea leaves turn mushy and cabbage breaks down completely, texture becomes unrecognizable

Frequently Asked Questions

Can I use fresh tea leaves instead of fermented tea leaves?

No - fresh tea leaves lack the earthy bitterness and funky depth that define lahpet thoke. Soak black tea leaves briefly in warm water if you can't find fermented leaves, but the flavor will be milder and less authentic.

How do I store leftover Burmese Tea Leaf Salad?

Store in an airtight container in the fridge for 2-3 days. Drain excess liquid before refrigerating to prevent soggy textures, and refresh with fresh cabbage and toasted nuts before serving leftovers.

How do I know when the nuts and seeds are properly toasted?

They turn light golden and smell nutty after 3-4 minutes over medium heat with constant stirring. Pull off heat immediately - they go from golden to burnt in seconds once they start to color.

What is the best way to avoid soggy salad textures?

Add lime juice and garlic oil last, right before serving. Use firm tomatoes sparingly and drain excess liquid if preparing ahead - wet ingredients kill the crunch if they sit too long.

Can I scale the recipe easily for larger gatherings?

Yes - double or triple all ingredients and toast nuts in batches to avoid overcrowding the pan. Mix in a large bowl and add wet ingredients just before serving to keep everything crisp.

Burmese Tea Leaf Salad (Lahpet Thoke) served on a plate

Burmese Tea Leaf Salad (Lahpet Thoke)

No ratings yet
Burmese Tea Leaf Salad (Lahpet Thoke) combines fermented tea leaves with toasted nuts, fried chickpeas, and fresh cabbage for a unique crispy and bitter-sweet flavor. The garlic oil infusion unites these bold ingredients without making the salad soggy, creating an impressive yet easy-to-assemble dish.
Print Recipe Pin Recipe
Prep Time 20 minutes mins
Cook Time 15 minutes mins
Total Time 35 minutes mins
Servings: 4 servings
Course: Appetizer
Cuisine: Burmese
Ingredients Equipment Method Notes

Ingredients
  

  • fermented tea leaves Rinse lightly under cold water for 30 seconds to reduce saltiness
  • fried chickpeas Fry in ¼ inch neutral oil at 325°F until golden and crisp
  • toasted sesame seeds Toast over medium heat until light golden, stirring constantly
  • crushed peanuts Crush lightly into chunks with the back of a spoon for texture
  • dried shrimp Optional for umami depth; can be omitted or swapped with mushroom flakes
  • fresh cabbage Shred thinly and keep crisp
  • tomatoes Use sparingly to avoid excess liquid
  • garlic oil Infuse crushed garlic in neutral oil over low heat for 5 minutes, then strain
  • lime juice Add last to maintain crunch

Equipment

  • Mixing bowl Used to toss and combine salad ingredients
  • Dry skillet To toast sesame seeds
  • Frying pan For frying chickpeas in neutral oil

Method
 

  1. Toast sesame seeds over medium heat in a dry skillet for 3-4 minutes, stirring constantly until light golden and fragrant. Remove immediately from heat to prevent burning.
    toasted sesame seeds
  2. Fry chickpeas in ¼ inch neutral oil heated to 325°F for 4-5 minutes until crisp and golden. Drain on paper towels and season lightly with salt.
    fried chickpeas
  3. Simmer crushed garlic in neutral oil over low heat for 5 minutes to infuse flavor, then strain out solids. Let the oil cool to room temperature.
    garlic oil
  4. Rinse fermented tea leaves under cold water for 30 seconds to reduce excess salt. Drain well and pat dry. Lightly crush peanuts with the back of a spoon into chunks.
    fermented tea leaves, crushed peanuts
  5. In a large mixing bowl, toss shredded cabbage, tomatoes, fermented tea leaves, fried chickpeas, toasted sesame seeds, crushed peanuts, and dried shrimp. Add lime juice and garlic oil last, tossing gently to combine and serve immediately.
    fresh cabbage, tomatoes, fermented tea leaves, fried chickpeas, toasted sesame seeds, crushed peanuts, dried shrimp, lime juice, garlic oil

Notes

  • Add lime juice and garlic oil last to keep salad ingredients crisp and prevent sogginess.
  • Toast nuts until light golden, stirring constantly to avoid burning.
  • Fry chickpeas in small batches to maintain crunch and avoid soggy texture.

Tried this recipe?

Let us know how it was!

What Is Soybean Oil? [Taste, Uses & More]

April 2, 2026

Crack open a bottle of refined soybean oil and there's almost nothing to smell - a faint breath of something clean and neutral, maybe the ghost of a legume if you try hard enough.

What Is Soybean Oil

That near-invisibility is exactly the point: soybean oil is one of the most widely used cooking oils on the planet precisely because it doesn't get in the way.

Cooks reaching for a neutral high-heat oil often rotate through options like sunflower oil stand-ins or consider swapping out peanut oil, but soybean oil holds its own place in that conversation.

QUICK SUMMARY

A clear, pale-yellow vegetable oil pressed from soybeans, soybean oil has a nearly neutral flavor with a faint nutty or beany note in unrefined versions. It handles high heat well, blends into emulsions cleanly, and appears in everything from deep-frying to mayonnaise to baked goods.

👅Flavor: Mild, neutral, faint nuttiness - beany/grassy if unrefined
🍳Best Uses: Deep-frying, stir-frying, emulsified dressings, baking
🌡️Heat Tolerance: High - refined versions handle temperatures above 450°F
🧴Texture: Light, fluid, slick mouthfeel - no heaviness
📦Shelf Life: Refined: 12-18 months unopened; 6-12 months after opening
🌱Also Known As: Soy oil, soya oil, Glycine max oil, soybean seed oil

What Is soybean oil?

Soybean oil is a vegetable oil extracted from the seeds of Glycine max, the soybean plant first domesticated in China thousands of years ago.

Today it is one of the highest-volume edible oils produced globally, used across commercial food processing and home kitchens alike.

Three main forms reach the market. Refined soybean oil is solvent-extracted and then bleached and deodorized, producing the clear, pale-gold oil sold in most supermarkets. Cold-pressed or expeller-pressed versions skip chemical solvents, leaving a slightly more pronounced aroma and a slightly darker color. Hydrogenated soybean oil - the most processed form - is the solid or semi-solid fat used in margarine and shortening; always check labels, since partially hydrogenated versions contain trans fats.

You may also see it labeled as soy oil, soya oil, or Glycine max oil, depending on the country.

Just as keeping avocado oil fresh depends on understanding how processing affects oxidation, the same logic applies to choosing between refined and cold-pressed soy versions.

Golden Rule
Refined soybean oil = neutral flavor and long shelf life. Cold-pressed = more character, shorter window. Hydrogenated = check for trans fats before buying.

What Does soybean oil Taste Like?

soybean oil - What Is Soybean Oil

Refined soybean oil is about as close to flavorless as cooking fat gets. There's a faint nuttiness and a very mild sweetness, but it won't announce itself in a finished dish.

That neutrality is why it ends up in so many commercial products - it carries other flavors without competing.

Sensory SnapshotMild Intensity
👅 Flavor
neutralfaint nuttymild beanlightly sweet
✋ Texture
lightfluidslick
👃 Aroma
barely perceptiblemild legumefaint green

Unrefined cold-pressed soybean oil shifts the profile noticeably - a grassy, slightly beany note emerges that resembles the raw soybean itself.

It's not sharp, however, it's distinct enough that some people notice it in delicately seasoned dishes.

Side by side, refined soybean oil tastes very close to canola oil and light sunflower oil; all three occupy the "stays out of the way" end of the oil spectrum.

Where it differs from olive oil swaps that work is that soybean oil brings none of olive oil's fruity or peppery character - it's a background player by design.

How to Use soybean oil

High-heat frying is where refined soybean oil earns its place. Its smoke point sits above 450°F, making it reliable for deep-frying, stir-frying, and commercial cooking lines where oil stays hot for hours. Chinese kitchens lean on it for high-heat wok cooking; Korean home cooks use it for pan-frying banchan; some Japanese tempura shops use it in their fry blends.

How Soybean Oil Is Used
MethodBest ForTip
🍟 Deep-FryingChicken, tofu, donuts, extruded snacksRefined only - cold-pressed can smoke unevenly at high heat
🥘 Stir-FryingVegetables, tofu, meat in wok cookingPre-heat the wok before adding oil for best sear
🥗 Cold EmulsificationMayonnaise, vinaigrettes, creamy dressingsAdd oil slowly for stable emulsification with vinegar or mustard
🍰 BakingCakes, muffins, quick breads needing a neutral fatSwap 1:1 for other neutral oils; reduces saturated fat vs. butter

Its emulsification properties make it a natural base for mayonnaise and salad dressings - it's the oil in most store-bought mayo.

Pairing it with rice vinegar and soy sauce, or with garlic and ginger in a stir-fry sauce, works well because the oil amplifies without interfering.

Citrus-based vinaigrettes, mustard dressings, and ginger-sesame sauces all behave cleanly with it.

If you're after more character in a dish, note that alternatives to canola oil or soybean oil stand-ins can bring more flavor when that's the goal.

Try It In
🍰Olive Oil CakeSwap in soybean oil for a lighter, more neutral crumb→🍋Ricotta with Lemon and Olive OilUse soybean oil to let the ricotta and citrus take center stage→🌿Labneh with Olive Oil and Za'atarA neutral drizzle keeps the za'atar and labneh front and center→

How to Buy and Store soybean oil

Look for refined soybean oil in a clean, clear bottle with a pale-gold color and no cloudiness. A tight cap and an intact seal matter - oil oxidizes quickly once air gets in.

Cold-pressed versions will look slightly darker; avoid any bottle with a sticky rim, which signals previous leakage and exposure.

  • 🏪 Buy refined - for neutral flavor, high heat, and the longest shelf life
  • 🌿 Buy cold-pressed - only if you want that mild bean/grassy note, and plan to use it within a few months
  • ⚠️ Read hydrogenated labels carefully - avoid "partially hydrogenated" to steer clear of trans fats
  • 🕶️ Store away from light and heat - a dark pantry shelf beats a cabinet next to the stove

For a full breakdown of what affects how long this oil holds up, soybean oil's shelf life depends heavily on whether the bottle has been opened and how it's stored.

Unrefined versions turn rancid faster than refined - expect 3-6 months after opening versus 6-12 months for refined.

Margarine made from soybean oil follows different rules; see margarine swaps that work if you're using it as a fat component in baking.

Watch Out
Unrefined cold-pressed soybean oil goes rancid faster than refined. Smell it before each use - a crayon-like or paint-like odor means it's past its window.

Start With the Right Bottle

Soybean oil isn't a single product - it ranges from flavorless refined oil built for high-heat frying to cold-pressed versions with detectable beany character.

If you're new to it, start with refined: it performs across frying, baking, and emulsification without demanding any adjustment in your recipes.

Cold-pressed suits cooks who want a mild background note in uncooked dressings or simple pan applications. Either way, avoid hydrogenated versions unless your recipe specifically calls for a solid fat.

Once you know which type fits your kitchen, this oil earns its shelf space reliably.

Shortcut
Not sure which to grab? Refined soybean oil in a dark bottle from a brand with a clear harvest date is the safest default for any kitchen task.

Frequently Asked Questions

Does soybean oil taste like soy sauce?

No. Soy sauce gets its salty, fermented flavor from brewed soybeans, not from the oil. Refined soybean oil is nearly tasteless - the two share a source ingredient but have nothing in common on the palate.

Can you use soybean oil for deep frying?

Yes - refined soybean oil handles deep-frying well. Its smoke point exceeds 450°F, it stays stable under extended heat, and its neutral flavor won't compete with the food being fried.

Is soybean oil the same as soya oil?

Yes, they're the same product under different regional names. "Soya oil" is common in the UK and parts of Asia; "soybean oil" is used in North America. Both come from Glycine max seeds.

Is soybean oil healthy?

It provides polyunsaturated fats, including linoleic acid, and vitamin E tocopherols. The main concern is its high omega-6 to omega-3 ratio - balance it with oils higher in omega-3s like flaxseed or walnut oil.

Does soybean oil go rancid quickly?

Refined versions hold up well - 6 to 12 months after opening if stored correctly. Cold-pressed soybean oil oxidizes faster, typically within 3 to 6 months. Heat, light, and an open cap all accelerate rancidity.

Ethiopian Misir Wat

April 2, 2026

Simmering red lentils with berbere spice blend and niter kibbeh creates a thick, creamy stew with layers of heat and aromatic depth. The slow-cooked onions dissolve into the sauce while the lentils break down just enough to thicken without turning to mush.

Ethiopian Misir Wat served on a plate

You don't need special equipment or hard-to-find techniques. The pot does most of the work while you stir every few minutes.

This is what we make for weeknight vegetarian dinners when plain rice needs something substantial or for meal prep that holds up for days in the fridge.

QUICK SUMMARY

Ethiopian Misir Wat is a spiced red lentil stew cooked with berbere spice and niter kibbeh until thick and creamy. The key is slow-cooking the onions until golden, then simmering the lentils gently for 25-30 minutes with frequent stirring. Make this when you need a vegetarian protein dish that works for weeknight dinners or meal prep.

⏱️Time Reality: 55 minutes total - 15 min prep, 40 min hands-on cooking
🔥First Critical Move: Cook onions on medium-low for 15-20 min until golden and soft
⚠️Watch Out: Lentils stick and burn easily - stir every 3-5 min during the simmer

Table of Contents

Toggle

  • Why This Recipe Works
  • What You'll Need
    • Ingredient Details
  • Ingredient Swaps
  • What to Serve With It
  • Store and Reheat
  • Frequently Asked Questions
  • Ethiopian Misir Wat
    • Method 
    • Tried this recipe?

Why This Recipe Works

The high starch content in red split lentils breaks down during simmering to naturally thicken the sauce without extra work. For meals that need similar depth but different flavors, try a similar dish recipe that uses legumes as the base.

Quick Reference
⏱️
Prep Time
15 min
🔥
Cook Time
40 min
⏰
Total Time
55 min
🍽️
Servings
4 servings
📊
Difficulty
Medium
🏷️
Category
Main Dish | Side
💡
Quick Tip
Simmer lentils gently; stir often to avoid lumps
🎯
Best For
Weeknight | Meal prep | Budget

Five reasons this works:

  • Slow caramelizing the onions on medium-low heat develops natural sweetness that balances the berbere's heat and prevents bitterness in the final stew
  • Toasting berbere spice after the onions soften releases essential oils and intensifies the complex flavors without burning the spice blend
  • Using red split lentils instead of whole or green varieties creates a creamy texture as they cook down and naturally thicken the sauce in 25-30 minutes
  • Simmering at low heat with frequent stirring prevents scorching on the pot bottom while ensuring even cooking and tender lentils without mushiness
  • Adding niter kibbeh (spiced clarified butter) at the start infuses every layer with aromatic depth that oil or plain butter can't replicate
Golden Rule
Cook the onions until they're soft and golden before adding any spices - this builds the flavor foundation that makes the stew taste like it simmered for hours instead of 40 minutes

What You'll Need

Ingredients for Ethiopian Misir Wat

Red lentils cook faster than other legumes and break down into the creamy consistency this Ethiopian stew requires. Stock your pantry with these ingredients and you can make this any night without a special shopping trip.

🥬
Base Vegetables
  • 2 large onions, finely diced
  • 4 cloves garlic, minced
  • 1 tablespoon fresh ginger, grated
🍜
Lentils
  • 1½ cups red split lentils
🌶️
Spices & Aromatics
  • 2-3 tablespoons berbere spice blend
  • 3 tablespoons niter kibbeh
  • 2 tablespoons tomato paste
  • Salt to taste
🥢
Liquid
  • 2½ cups vegetable or chicken broth

Ingredient Details

  • Red split lentils
    Use split red lentils, not whole - they cook faster and break down to create the creamy texture essential for Misir Wat
  • Berbere spice blend
    This Ethiopian spice mix contains chili, fenugreek, coriander, and other aromatics - start with 2 tablespoons and add more after tasting if you want extra heat
  • Niter kibbeh
    Ethiopian spiced clarified butter adds depth regular butter can't match - find it at specialty stores or substitute with ghee plus a pinch of cardamom and turmeric
  • Onions
    Yellow onions work best - dice them finely so they dissolve into the sauce during the long caramelization
  • Tomato paste
    Adds acidity and deepens the reddish-brown color - optional but recommended for balanced flavor
  • Vegetable or chicken broth
    Use low-sodium broth so you control the salt level - add broth gradually to avoid making the stew too thin
  • Fresh ginger
    Grate on a microplane for fine texture that melts into the sauce - don't substitute with ground ginger unless necessary

Ingredient Swaps

Most Ethiopian recipes call for niter kibbeh, but you can adjust based on what's in your pantry or dietary needs. These swaps maintain the stew's rich texture while accommodating different cooking situations.

Four proven swaps:

  • Niter kibbeh → olive oil or coconut oil: Use 3 tablespoons oil instead of niter kibbeh for a dairy-free version - you'll lose some aromatic depth but the berbere spice still delivers strong flavor
  • Red lentils → yellow lentils or split peas: Cook yellow lentils or split peas for 5-10 minutes longer to achieve tender texture - expect a slightly firmer bite and less creamy consistency
  • Vegetable broth → water: Substitute water if you don't have broth on hand - add an extra ½ teaspoon salt and expect lighter overall flavor
  • Berbere spice → chili powder + smoked paprika + coriander: Mix 1 tablespoon chili powder, 1 tablespoon smoked paprika, and 1 teaspoon ground coriander for an approximate substitute - the flavor won't be as complex but it works in a pinch

Niter Kibbeh

Works for: Traditional flavor, richness, aromatic depth from spiced butter

Skip if: You need dairy-free or can't find it - substitute ghee with spices or use oil

Olive Oil

Works for: Vegan cooking, budget-friendly swaps, lighter texture

Skip if: You want authentic Ethiopian flavor - it lacks the aromatic spice notes

Red Split Lentils

Works for: Quick cooking (25-30 min), creamy texture, traditional method

Skip if: You only have yellow or green lentils - adjust cook time accordingly

Instructions

The entire cook happens in one pot over 40 minutes with regular stirring to prevent scorching. For sides that pair well with lentil stews, this quick rolls dish adds texture contrast without extra pans.

  1. Cook the onions: Heat 3 tablespoons niter kibbeh in a medium saucepan over medium-low heat, add finely diced onions, and cook 15-20 minutes, stirring every 2-3 minutes, until golden and translucent with no raw crunch remaining.
  2. Add aromatics and spices: Stir in minced garlic and grated ginger, cook 1 minute until fragrant, then add 2-3 tablespoons berbere spice and 2 tablespoons tomato paste, stirring constantly for 1-2 minutes to toast the spices and release their oils.
  3. Simmer the lentils: Add 1½ cups rinsed red split lentils and 2½ cups vegetable or chicken broth, bring to a boil, then reduce heat to low and simmer 25-30 minutes, stirring every 3-5 minutes, until lentils are tender and sauce thickens to coat a spoon.
  4. Adjust seasoning: Taste the stew and add salt (start with ½ teaspoon) and more berbere if you want extra heat - the flavor deepens as it sits, so season conservatively at first.
  5. Rest before serving: Remove from heat and let the stew rest 10 minutes off the burner to allow flavors to meld and sauce to thicken further before serving with injera bread or steamed rice.
Shortcut
Rinse lentils in a fine-mesh strainer before cooking to remove excess starch and prevent foam buildup during the simmer - this keeps the sauce cleaner and reduces stirring frequency

What to Serve With It

Ethiopian meals traditionally include multiple dishes served together on injera bread for scooping. The stew's thick texture means you need sides that either soak up sauce or add crisp contrast.

Side Dish Prep Why It Works How to Serve
Injera bread Easy Traditional Ethiopian flatbread with tangy flavor soaks up sauce perfectly Tear pieces and use as edible utensils for scooping stew
Steamed white or brown rice Easy Neutral base lets the berbere spice shine without competing flavors Serve in bowls with stew spooned over top
Sautéed collard greens Medium Traditional African vegetable side adds bitter greens to balance rich lentils Cook with garlic and serve alongside stew on the same plate
Roasted root vegetables Medium Sweet carrots and parsnips contrast with spicy lentils Roast until caramelized and serve on separate plate or mixed into stew
Simple green salad Easy Fresh greens and lemon dressing cut through the stew's richness Dress lightly and serve on the side to refresh palate between bites

Three ways to serve it:

  • Ethiopian platter style: Spread injera bread flat on a large plate, spoon Misir Wat in the center, and add 2-3 other Ethiopian dishes like gomen (collard greens) and tikil gomen (cabbage and potatoes) around the edges for a traditional shared meal
  • Grain bowl format: Layer steamed rice or quinoa in bowls, top with a generous scoop of lentil stew, add sautéed spinach or kale on the side, and drizzle with extra niter kibbeh or tahini sauce for a quick weeknight dinner
  • Meal prep containers: Portion stew into containers with cooked rice and roasted vegetables on the side - the lentils reheat well and the flavors deepen after a day in the fridge
Best Pick
Injera bread is the traditional choice, but if you can't find it, use naan or pita bread - the key is having something to scoop with instead of using utensils

Store and Reheat

Misir Wat holds up better than most lentil dishes because the thick sauce doesn't separate or turn watery in storage. The stew actually tastes better the next day after the spices have time to bloom.

Method Time Best For
🍳 Stovetop 5-7 min over medium-low Preserves texture and prevents drying - best method overall
📦 Microwave 2-3 min, stir halfway Quick reheating of single portions - add 1-2 tablespoons water if dry
🔥 Oven 15 min at 325°F (165°C) Larger portions or multiple servings - cover with foil to prevent drying

For best results when storing:

  • Cool completely before transferring: Let stew sit at room temperature 30-45 minutes after cooking - hot stew creates condensation in containers that dilutes flavor and affects texture
  • Use shallow airtight containers: Store in containers no deeper than 2 inches so the stew cools quickly in the fridge and reheats evenly later
  • Add liquid when reheating: Lentils absorb liquid as they sit - stir in 2-3 tablespoons broth or water per cup of stew when reheating to restore original consistency
  • Freeze in portions: Divide into single-serving containers before freezing - thaw overnight in the fridge or reheat from frozen in the microwave for 5-6 minutes
  • Refresh with fresh aromatics: Top reheated stew with minced fresh garlic, grated ginger, or a drizzle of niter kibbeh to revive the aromatic flavors that fade slightly during storage

Frequently Asked Questions

Can I make Ethiopian Misir Wat ahead of time and store it?

Yes, Misir Wat stores well for 3-4 days in the fridge and up to 3 months in the freezer. The flavors actually deepen after a day, so making it ahead improves the taste - just add a splash of broth when reheating to restore the creamy texture.

How long should I cook Misir Wat to get tender lentils without mush?

Simmer red split lentils for 25-30 minutes at low heat, stirring every 3-5 minutes. The lentils are done when they're soft enough to mash easily against the side of the pot but still hold some shape - if they turn completely to mush, you've cooked them too long.

What side dishes traditionally pair well with Misir Wat?

Injera bread is the traditional pairing for scooping the stew, but steamed rice, sautéed collard greens, or roasted root vegetables also work well. Serve multiple sides Ethiopian-style on one large platter for family-style eating.

How do I adjust spice levels if I'm sensitive to heat?

Start with 1-2 tablespoons berbere spice instead of 3, taste after 20 minutes of cooking, then add more gradually if needed. You can also stir in 1-2 tablespoons tomato paste or a dollop of yogurt to mellow the heat without losing the complex spice flavors.

Can I substitute yellow lentils or split peas for red lentils in Misir Wat?

Yellow lentils or split peas work as substitutes but require 5-10 minutes longer cooking time and produce a firmer texture. Red split lentils break down more easily to create the traditional creamy consistency - if you use yellow lentils, expect a slightly different texture but similar flavor.

Ethiopian Misir Wat served on a plate

Ethiopian Misir Wat

No ratings yet
Ethiopian Misir Wat is a spiced red lentil stew cooked with berbere spice and niter kibbeh until thick and creamy. Slow-cooked onions develop sweetness while gentle simmering softens lentils without turning mushy. This hearty vegetarian dish makes a flavorful weeknight dinner or meal prep option.
Print Recipe Pin Recipe
Prep Time 15 minutes mins
Cook Time 40 minutes mins
Total Time 55 minutes mins
Servings: 4 servings
Course: Main Dish, Side
Cuisine: Ethiopian
Ingredients Equipment Method Notes

Ingredients
  

  • 2 large onions finely diced
  • 4 cloves garlic minced
  • 1 tablespoon fresh ginger grated
  • 1.5 cups red split lentils rinsed
  • 2-3 tablespoons berbere spice blend
  • 3 tablespoons niter kibbeh
  • 2 tablespoons tomato paste
  • 2.5 cups vegetable or chicken broth low sodium recommended
  • salt to taste

Equipment

  • Medium saucepan Used for cooking stew
  • Fine-mesh strainer Used to rinse lentils before cooking

Method
 

  1. Heat 3 tablespoons niter kibbeh in a medium saucepan over medium-low heat. Add finely diced onions and cook for 15-20 minutes, stirring every 2-3 minutes, until golden and translucent with no raw crunch remaining.
    2 large onions, 3 tablespoons niter kibbeh
  2. Stir in minced garlic and grated ginger; cook 1 minute until fragrant. Then add 2-3 tablespoons berbere spice and 2 tablespoons tomato paste, stirring constantly for 1-2 minutes to toast spices and release oils.
    4 cloves garlic, 1 tablespoon fresh ginger, 2-3 tablespoons berbere spice blend, 2 tablespoons tomato paste
  3. Add rinsed red split lentils and 2.5 cups broth. Bring to a boil, then reduce heat to low and simmer 25-30 minutes, stirring every 3-5 minutes, until lentils are tender and sauce thickens to coat a spoon.
    1.5 cups red split lentils, 2.5 cups vegetable or chicken broth
  4. Taste and add salt starting with ½ teaspoon and more berbere if desired. The flavor deepens after resting, so season conservatively at first.
    salt, 2-3 tablespoons berbere spice blend
  5. Remove from heat and let stew rest 10 minutes off the burner to allow flavors to meld and sauce to thicken further. Serve with injera bread or steamed rice.

Notes

  • Simmer lentils gently and stir often to prevent sticking and burning.
  • Cook onions slowly on medium-low heat for maximum sweetness and flavor depth.
  • Rinse lentils before cooking to reduce foam and keep sauce clean.

Tried this recipe?

Let us know how it was!

What Is Scallion? [Taste, Uses & More]

April 2, 2026

Most cooks treat scallions as a garnish and move on. That's a miss.

What Is Scallion

The white base and the green stalk behave differently in heat, and understanding both parts unlocks a lot more than a sprinkle of green rings on top of ramen. If you need a swap in a pinch, our green onion alternatives and leek alternatives guides cover the closest options - but scallions earn their own place on the cutting board.

QUICK SUMMARY

Scallions are mild, crisp alliums with a two-part structure - a white base that carries more punch and green tops that are bright and grassy. Use them raw for freshness, briefly cooked for a softened onion note, or grilled whole for char and sweetness.

🌿Flavor: Mild oniony, slightly sweet, with a sharp green bite
🔪Best Uses: Garnish, stir-fries, dips, grilled whole, egg dishes
🌍Key Cuisines: Chinese, Korean, Japanese, Mexican, Mediterranean
❄️Shelf Life: 7-10 days whole in fridge; 3-5 days once cut
✅Pairs With: Soy sauce, sesame oil, ginger, eggs, lime, cream cheese, grilled meats

What Is Scallion?

Scallions are immature onions from the species Allium fistulosum, harvested before any significant bulb forms. They originated in East Asia, with China credited as the center of widespread cultivation, and they remain a staple across Chinese, Korean, and Japanese kitchens today.

The plant has two distinct parts: a short white-to-pale base and long, hollow green tubular leaves. Both are edible, though the white end is sharper and the green tops are more delicate.

You'll see them labeled as green onions or spring onions depending on where you shop - these names are largely interchangeable, though some regions use "spring onion" to describe a slightly more developed bulb.

Scallions are closely related to chives but are notably larger, with a fuller onion flavor that chives don't quite reach. They're also distinct from shallots and mature onions, which develop dense, papery-skinned bulbs.

Best Pick
For the mildest flavor, choose the thinnest scallions on the shelf. Thicker ones have had more time to develop and carry a sharper, more assertive bite.

What Does Scallion Taste Like?

Raw scallions land somewhere between a mild raw onion and a fresh chive - recognizably allium, but without the eye-watering bite of a yellow or white onion. The white base is sharpest, carrying a clean, slightly pungent onion note.

The green tops are grassy and bright, closer to a herb than a vegetable.

Sensory SnapshotMild Intensity
👅 Flavor
mild onionslightly sweetsharp green bite
✋ Texture
crisp rawtender cooked
👃 Aroma
brightgrassy

Heat changes the character significantly. A quick sauté softens the sharp edge and pulls out a gentle sweetness, while grilling whole scallions until lightly charred adds a smoky depth that raw scallions don't have.

Either way, they lose volume fast - add them late if you want any texture left.

How to Use Scallion

Scallions split naturally into two cooking modes: raw and briefly heated. Raw, they add crunch and a fresh onion note without overpowering other ingredients.

Heated, they mellow into a soft aromatic that blends into a dish rather than standing apart.

How Scallion Is Used
MethodBest ForTip
🥗 Raw SlicedGarnish on ramen, pho, salsas, dips, potato saladSlice on a bias for more surface area and better presentation
🍳 Sauté/Stir-fryEggs, fried rice, noodles, stir-fried vegetablesAdd in the final 60 seconds to keep some bite and color
🔥 Grilled WholeSide dish, kebab base, charred garnishBrush with oil and grill over high heat until blackened in spots
🧈 Softened in ButterCompound butters, omelettes, frittatas, cream saucesUse white parts first; fold green tops in at the end
🥣 Blended/MixedCold dips, vinaigrettes, herb spreads, pico de galloUse green tops only for a cleaner, less sharp flavor

Scallions pair well with soy sauce, sesame oil, and ginger across East Asian dishes - the combination appears in everything from scallion oil noodles to dumpling dipping sauces. In Mexican cooking, they're used raw in pico de gallo and as a grilled side alongside meats. Fried shallots often share the garnish role in Southeast Asian dishes, but scallions deliver fresher, greener flavor without frying.

Avoid pairing them with delicate floral herbs - any onion presence will cancel the subtlety.

Try It In
🥞Crispy Scallion PancakesWhere scallions are the star, not the garnish→🍚Shrimp Fried Rice with ScallionsShows how late-added scallions keep color and bite→

How to Buy and Store Scallion

At the market, look for firm white bases with no soft spots and bright green tops that stand upright rather than droop. Yellowing or slimy leaves are a sign of age.

If you can smell the base, fresh scallions have a faint onion scent - not a sour or fermented one.

Quick Tip
Store scallions upright in a jar with an inch of water, loosely covered with a plastic bag. They'll stay crisp for up to a week and may even sprout new green tops.

Keeping them in the fridge wrapped in a slightly damp paper towel inside a perforated bag also works well, especially if you have a lot. Once cut, store in an airtight container and use within 3-5 days.

For a full breakdown of freshness timelines, see our scallion storage life guide.

  • Whole, unwashed - 7-10 days in the fridge
  • Cut or trimmed - 3-5 days in an airtight container
  • Upright in water - up to 7 days at room temperature, away from direct sun

Where to Start with Scallion

Scallions are a low-risk, high-return ingredient if you treat them as two separate tools.

  • Start with the green tops - scatter thinly sliced rings over eggs, soups, or noodles to see how much fresh flavor they add at zero effort.
  • Then try the white base - sauté the white parts in butter or oil before scrambling eggs or building a stir-fry sauce.
  • Go whole last - grill entire scallions brushed with oil for a completely different result than either raw or sautéed.

If you need a replacement in a recipe, scallion replacements and chive replacements are your closest routes depending on whether the recipe needs bulk or just flavor.

Golden Rule
Add green tops last. Heat destroys their color and grassy brightness faster than almost any other allium green.

Frequently Asked Questions

Are scallions the same as green onions?

Yes, in most contexts. Both names refer to the same immature allium harvested before the bulb forms. Some recipes use "spring onion" for a slightly more developed bulb with a rounder base, but at the grocery store, scallion and green onion are the same thing.

Can you eat the green part of scallion?

Absolutely - the green tops are the most commonly eaten part. They're milder and more herb-like than the white base, making them ideal for raw garnish or last-minute additions to cooked dishes.

How do scallions differ from spring onions?

Spring onions have a more developed, rounded white bulb and a slightly stronger flavor. Scallions are harvested earlier with a straight, undeveloped base. The difference is minor in most recipes, and either can substitute for the other.

How long do scallions last in the fridge?

Whole scallions kept dry and cool last about 7-10 days. Once cut, use them within 3-5 days stored in an airtight container. Standing them upright in a jar of water can extend freshness at room temperature.

Do scallions need to be cooked?

No - raw scallions are safe and commonly used uncooked in garnishes, salsas, dips, and salads. Cooking softens their texture and mellows the sharp edge, but raw delivers better color and a fresher bite.

What Is Taleggio Cheese? Taste, Uses & More

April 2, 2026

Most people assume a stinky rind means a punishing flavor inside.

What Is Taleggio Cheese

With taleggio, that assumption costs them one of northern Italy's most approachable cheeses - the kind that melts smoothly, adds tang without aggression, and pairs as naturally with polenta as it does with a ripe pear.

Italian cheesemakers have leaned on it for centuries, yet outside Lombardy it still gets passed over for bolder options like alternatives to gorgonzola cheese or softer spreads like robiola cheese in dairy recipes.

That's a miss worth correcting.

QUICK SUMMARY

Taleggio is a soft, washed-rind cow's milk cheese from Lombardy with an orange rind, creamy interior, and a tangy, mildly umami flavor that melts cleanly into hot dishes. Protected under DOP status, it suits everything from risotto to a simple cheese board.

🧀Category: Washed-rind cow's milk cheese, DOP protected
👅Flavor: Tangy, mildly meaty, slightly fruity with buttery finish
🍳Best Uses: Melting over polenta, stirred into risotto, cheese boards
❄️Shelf Life: Opened wedge lasts 1-2 weeks refrigerated in cheese paper
🛒Buy It: Look for an intact orange rind, tacky surface, no ammonia smell

What Is taleggio cheese?

Taleggio is a washed-rind cheese made from whole cow's milk in the Lombardy region of northern Italy, with a history stretching back to at least the tenth century.

It holds DOP (Denominazione di Origine Protetta) status, meaning authentic Taleggio DOP must be produced and aged in designated Italian provinces - Val Taleggio being the namesake valley where the tradition originated.

Each square wheel weighs roughly 2 kg and is distinguished by its thin orange-to-russet rind, which develops through repeated washing with brine during aging.

The interior, called the paste, runs from pale ivory to light gold.

Younger wheels are firmer and milder; older wheels soften toward the edges and develop a more assertive aroma.

You'll sometimes see it labeled Taleggio Val Taleggio or, more casually, just Taleggio DOP on specialty deli counters.

It belongs to the same broad family as alternatives to achiote paste - just kidding. Taleggio sits alongside other washed-rind Italian cheeses, though its square shape and DOP rules set it apart from looser regional imitations.

Best Pick
For the creamiest melt, choose a younger wheel with a pale, gold-tinged paste and a rind that gives slightly under pressure - avoid anything with deep cracks or an ammonia edge.

What Does taleggio cheese Taste Like?

taleggio cheese - What Is Taleggio Cheese

Taleggio's aroma outpaces its flavor by a wide margin - that earthy, barnyard smell signals intensity that the paste simply doesn't deliver.

The actual taste is moderate: tangy and lactic up front, followed by a mild meatiness that reads as umami rather than sharpness.

Sensory SnapshotModerate Intensity
👅 Flavor
tangymildly meatyslightly fruitybuttery finish
✋ Texture
soft pastecreamyspringy near rind
👃 Aroma
earthybarnyardmildly pungent

A faint fruitiness appears mid-palate - subtle, closer to pear skin than anything fermented.

Heat smooths the tang and amplifies the buttery finish, which is why melted taleggio tastes noticeably rounder than a cold slice.

Think of it as a milder entry point to washed-rind cheeses, sitting between young Epoisses and aged fontina cheese in dairy recipes in terms of intensity.

How to Use taleggio cheese

Taleggio earns its place in northern Italian cooking because it melts without breaking. Low, steady heat keeps the paste fluid and glossy rather than greasy and clumped - a detail that matters most with risotto or polenta.

How Taleggio Is Used
MethodBest ForTip
🍲 MeltingRisotto, polenta, pasta bakesAdd off heat or at lowest simmer; stir gently
🍕 BakingFlatbreads, pizza, lasagna layersSlice thin; add in final 5-8 minutes to avoid over-browning
🧀 Cold boardCheese plates, charcuterie, toastServe at room temperature for 20 minutes to open aroma
🥪 Sandwich meltGrilled cheese, pressed sandwichesPair with prosciutto or roasted mushrooms to balance tang

Lombardy and Piedmont are its natural home cuisines, though modern European bistro cooking has adopted it for its reliable melt and mild funk.

On a cheese board, thin slices alongside fresh pears, walnuts, and honey handle the pairing work without much effort.

A glass of Barbera - with its own acidity - stands up to the cheese rather than clashing with it.

Avoid pairing taleggio with delicate white fish or citrus-forward sauces.

The cheese's buttery richness overwhelms mild proteins, and high-acid citrus creates an unpleasant metallic edge with the rind's brine character. Using polenta for creaminess alongside taleggio is one of the more reliable pairings in Lombard cooking - the starch absorbs the melted cheese evenly.

Try It In
🧀Cheddar Cheese StrawsSwap cheddar for taleggio for a tangy, soft-pull variation→🍳Egg and Cheese Breakfast SandwichTaleggio melts cleanly and adds tang to a morning sandwich→🥗Blue Cheese Dressing (Homemade)For a milder dressing, taleggio blended with cream works well→

How to Buy and Store taleggio cheese

Buy from a counter where staff can cut a fresh wedge. Pre-wrapped supermarket pieces often sit too long and develop the ammonia sharpness you want to avoid.

A good wedge has an orange-tan rind that's slightly tacky - not slimy, not dried out.

Watch Out
A strong ammonia smell means the cheese is over-ripe. Mild funk is normal; nose-stinging sharpness is a sign to pass on that piece.

At home, knowing the taleggio cheese spoilage signs helps you judge when a wedge has crossed from ripe to gone. Storage is straightforward:

  • 🧻 Wrap in cheese paper or waxed paper - plastic traps ammonia and accelerates rind degradation.
  • 📦 Place in a breathable container - a loosely closed box or cheese drawer works; airtight seals don't.
  • ❄️ Refrigerate at 35-40°F (2-4°C) - the coldest section of your fridge, not the door.
  • 📅 Use opened wedges within 1-2 weeks - an unopened piece stays good for 3-4 weeks.

Where to Start with Taleggio

Skip the online searches if you have a local Italian deli or specialty cheese shop nearby. That's where you'll find properly stored wedges cut to order.

If you're buying taleggio for the first time, start with a younger wheel and melt it over polenta - that single preparation shows exactly what the cheese does well.

For cooks who want a similar melt with less aroma, exploring alternatives to taleggio cheese is a reasonable next step before committing to a full wedge.

Frequently Asked Questions

Is taleggio cheese strong?

The aroma is stronger than the flavor. Inside, the paste is tangy and mildly umami - moderate in intensity, not sharp or aggressive. Older wheels develop more punch near the rind.

Can you eat taleggio rind?

Yes, the rind is edible. It's firmer and more pungent than the paste, so some people trim it for cold eating but leave it on when melting, where it softens into the dish.

How do you melt taleggio?

Use low, steady heat - high heat splits the fat and turns the paste greasy. Slice or cube it first, then stir into hot grains off the heat, or add to a baked dish in the final few minutes.

Is taleggio pasteurized?

It depends on the producer. Some Taleggio DOP wheels use raw milk; others use pasteurized. Check the label - pregnant or immunocompromised individuals should confirm before eating.

Where can you buy taleggio cheese?

Italian delis, specialty cheese shops, and well-stocked supermarket cheese counters carry it. Online retailers like Murray's or igourmet ship it temperature-controlled if local options are limited.

« Previous Page
Next Page »

Primary Sidebar

ForkliftKitchen recipe developer

Welcome!

Recipe Developer · 12+ Yr Kitchen Veteran

I'm the recipe developer behind this site, focused on practical, well-tested dishes and smart ingredient swaps. Every recipe is written to be clear, reliable, and easy to make at home.

650+ Recipes
12+ Yrs Exp.
3x Tested
Our Story →

As Featured In

Allrecipes

TASTE OF HOME

Food52

HUFFPOST

Yahoo! Life

Our Editorial Standards

  • ✓ Every recipe tested at least 3 times before publishing
  • ✓ Substitutes verified by real kitchen trials, not guesswork
  • ✓ Reviewed for accuracy by our editorial team
  • ✓ Updated regularly with seasonal info and reader feedback

Most Popular

  • Creamy Lemon Shrimp Linguine
    Creamy Lemon Shrimp Linguine
  • Creamy Garlic Mushroom Chicken
    Creamy Garlic Mushroom Chicken
  • Sesame Ginger Chicken Noodle Bowls
    Sesame Ginger Chicken Noodle Bowls
  • Baked Lemon Herb Fish Fillets
    Baked Lemon Herb Fish Fillets
  • Veggie Loaded Fried Rice
    Veggie Loaded Fried Rice
  • Spicy Garlic Shrimp Stir Fry
    Spicy Garlic Shrimp Stir Fry

Join 8,000+ Home Cooks

Weekly Kitchen Tips

Easy recipes, smart substitutes, and real cooking shortcuts — every Thursday.

Subscribe Free →


Side Dishes

  • What to Serve With Asian Salmon? 15 Best Side Dishes
    What to Serve With Asian Salmon? 15 Best Side Dishes
  • Side Dishes for Strawberry Spinach Salad
    15 Best Side Dishes for Strawberry Spinach Salad
  • Sides for Grilled Cauliflower Steaks to Complete the Meal
    15 Sides for Grilled Cauliflower Steaks to Complete the Meal
  • 15 Sides To Serve With Calabacitas
    15 Best Sides for Calabacitas – Mexican-Inspired Favorites


Substitutes

  • 7 Best Substitutes for Hot Sauce in Marinades & Stir-Fries
    7 Best Substitutes for Hot Sauce in Marinades & Stir-Fries
  • 9 Best Substitutes for Butter in Baking and Cooking
  • 7 Best Substitutes for Tagliatelle for Italian Pasta Dishes
    7 Best Substitutes for Tagliatelle for Italian Pasta Dishes
  • 7 Best Substitutes for Udon Noodles in Asian Stir-Fries
    7 Best Substitutes for Udon Noodles in Asian Stir-Fries


Browse by Topic

  • Side Dishes320
  • Substitutes785
  • Dinner163
  • Air Fryer77
  • Taste Profiles484
  • Food Storage123


Reader Reviews

★★★★★

"Finally a food blog that tells you exactly why a substitute works instead of just listing options."

— Sarah M., via email

★★★★★

"The side dish recommendations are so specific — saved my dinner party twice this month."

— James R., Pinterest comment

★★★★★

"I trust this site more than most because they actually test everything. You can tell."

— Priya K., blog comment

Footer

↑ Back to Top

Forklift Kitchen

We do the heavy lifting so you can enjoy the cooking. Tested recipes, smart substitutes, and perfect pairings—built for real home cooks.

Content

  • Recipes
  • Substitutes
  • What to Serve With
  • Blog

Company

  • About Us
  • Contact
  • Subscribe

Legal

  • Privacy Policy
  • Terms of Service

As an Amazon Associate I earn from qualifying purchases.

© 2026 Forklift Kitchen.

Rate This Recipe

Your vote:


A rating is required
A name is required
An email is required