• Skip to primary navigation
  • Skip to main content
  • Skip to primary sidebar
  • Recipe Index
    • Air Fryer
  • Side Dishes
  • Substitutes
  • About
  • Contact
  • Subscribe

ForkLiftKitchen

menu icon
go to homepage
  • Recipe Index
    • Air Fryer
  • Side Dishes
  • Substitutes
  • About
  • Contact
  • Subscribe
subscribe
search icon
Homepage link
  • Recipe Index
    • Air Fryer
  • Side Dishes
  • Substitutes
  • About
  • Contact
  • Subscribe
×

Blog

What Is Wasabi? Taste, Uses & More for Sushi

April 3, 2026

Wasabi does one thing no other condiment can replicate: it delivers a sharp, sinus-clearing heat that rises fast, peaks instantly, and then vanishes - leaving the flavor of the food beneath it completely intact. Unlike brown mustard or ginger, which linger and layer, real wasabi clears the palate rather than coating it.
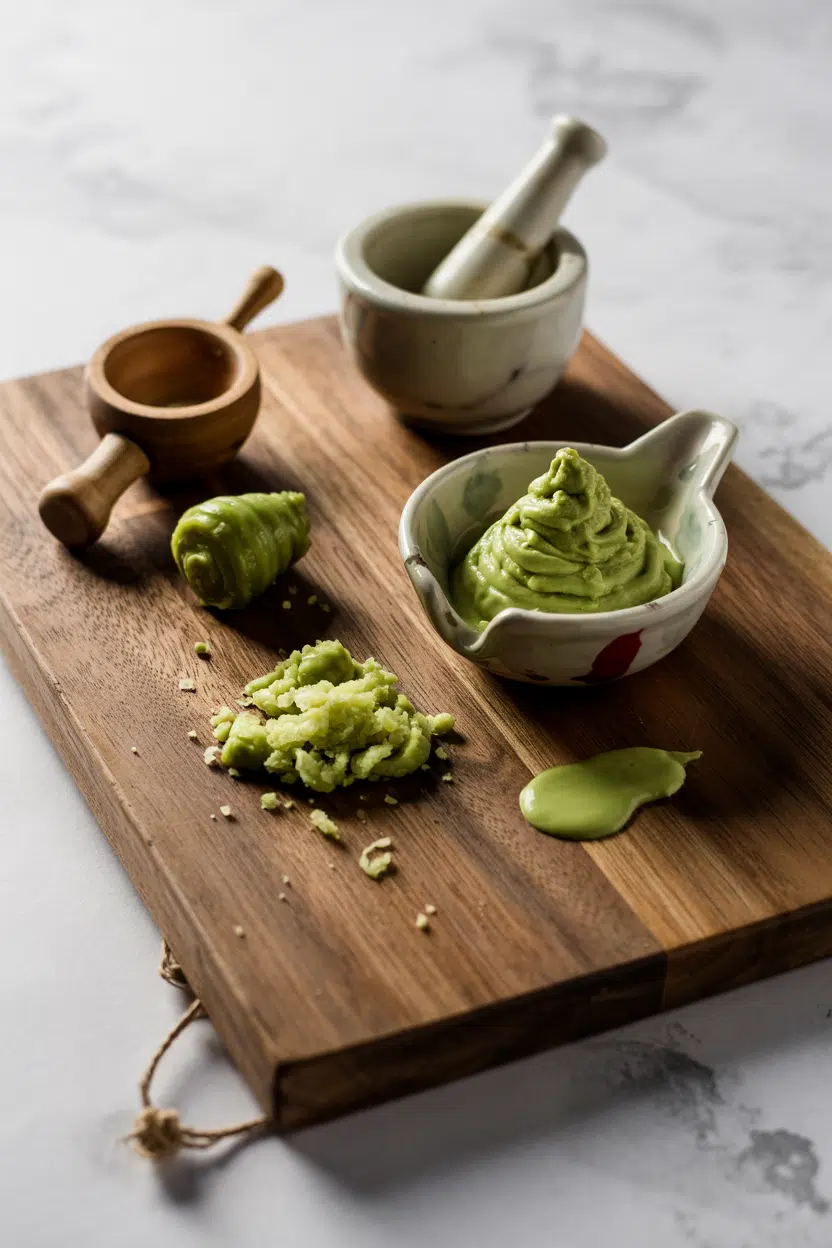
What Is Wasabi

That role - precise heat with zero residue - is exactly why sushi chefs still reach for the rhizome first.

QUICK SUMMARY

Wasabi is a pungent Japanese rhizome prized for its sharp nasal heat and clean green finish. Most products sold as wasabi are horseradish-based. Freshly grated hon-wasabi loses peak heat within minutes and pairs best with raw fish, soy sauce, and cold noodles.

🌿Flavor: Sharp nasal heat, clean green sweetness, mild bitter finish
🍣Best Uses: Sashimi, nigiri, cold noodle dipping sauce, wasabi mayo
⏱️Shelf Life: Fresh rhizome 1-2 weeks; grated heat fades in 10-30 minutes
🛒Buy It: Check labels - most commercial pastes contain no real wasabi at all
🌡️Intensity: Pungent - nasal heat spikes fast, then dissipates cleanly without lingering burn

What Is Wasabi?

Wasabi (Wasabia japonica, also classified as Eutrema japonicum) is a semi-aquatic rhizome native to mountain stream regions of Japan, particularly on Honshu and Shikoku. It has been cultivated in Japan for over a thousand years and remains one of the most labor-intensive crops in food production.

The plant requires cold, clean running water, filtered light, and precise temperature control - conditions that make commercial farming outside Japan rare and expensive.

The part used in cooking is the swollen stem, or rhizome, not the root itself. When grated, cells in the tissue break open and release allyl isothiocyanate, the volatile compound responsible for wasabi's distinctive nasal burn.

You'll encounter wasabi in several forms:

  • Hon-wasabi (real wasabi) - the whole fresh rhizome, grated to order; the gold standard
  • Wasabi paste (tube or tub) - often a blend of horseradish, mustard, and green dye with little or no actual wasabi
  • Wasabi powder - dried and ground, reconstituted with water; flavor is sharper and less nuanced than fresh
  • Wasabi leaves and stems - edible and mildly pungent; sometimes pickled or used in salads

The term "Japanese horseradish" is technically inaccurate - wasabi and horseradish are different species, though both belong to the Brassicaceae family.

What Does Wasabi Taste Like?

Wasabi's heat is fundamentally different from chili heat. It travels upward into the sinuses rather than spreading across the tongue, which is why the sensation feels like a sharp clearing rather than a burn.

The intensity peaks within two or three seconds and then drops away almost completely.

Sensory SnapshotPungent Intensity
👅 Flavor
nasal heatsharp pepperyclean green sweetnessmild bitter finish
✋ Texture
fine moist pastegrainy if coarsely grated
👃 Aroma
pungentsinus-clearinglightly floral

Beneath that heat sits a clean green sweetness - faintly grassy and mildly floral - that horseradish and hot mustard don't have. That's the quality that makes real wasabi worth seeking out.

The finish is slightly bitter, which helps reset the palate between bites.

Freshly grated wasabi tastes noticeably rounder and more complex than tube paste. Powder-based preparations lean sharper and more one-dimensional, closer to strong mustard.

How to Use Wasabi

Fresh hon-wasabi should be grated using an oroshigane - traditionally a sharkskin grater - in small circular motions to produce the finest paste possible. Grate only what you'll use immediately. The volatile compounds that create its heat begin breaking down within 10 to 30 minutes of grating, so timing matters.

Golden Rule
Grate wasabi just before serving. Once the volatile heat compounds are released, they dissipate fast - waiting even 20 minutes means noticeably weaker flavor.

Heat destroys allyl isothiocyanate, so wasabi belongs in cold or room-temperature applications. It works best raw or folded gently into sauces just before serving.

The ingredient pairs most naturally with raw fish - tuna, salmon, yellowtail - and is a cornerstone of pairings for sashimi.

How Wasabi Is Used
MethodBest ForTip
🥗 Fresh GratedNigiri, sashimi, tofu with soyUse immediately; circular motion on oroshigane produces finest paste
🥄 Folded into SaucePonzu vinaigrettes, cold noodle dips, soy dipping sauceAdd just before serving to preserve heat; avoid prolonged stirring
🧈 Blended into FatWasabi mayo, compound butter for seared beef or seafoodUse sparingly - fat amplifies the sharpness noticeably
💧 Reconstituted PowderEveryday cooking when fresh is unavailableMix with cold water, rest 5 minutes before using for best flavor

Wasabi mayo works particularly well on fried seafood and sandwiches - the richness of the mayonnaise tempers the nasal hit without erasing it. A thin smear between seared beef and sauce cuts through fat cleanly. Ponzu with a small amount of whisked wasabi makes a sharp, citrusy dressing for cold soba or udon.

Outside Japanese cuisine, wasabi shows up in modern fusion cooking - Japanese-European crossovers especially - where it contrasts with butter-rich sauces and fatty proteins.

Try It In
🌿Crispy Tempura VegetablesServe with a wasabi dipping sauce for sharp contrast→🥗Sesame Ginger Dressing (Homemade)Add a small amount of wasabi for a pungent kick→

How to Buy and Store Wasabi

Fresh rhizomes are the hardest to source outside Japan but worth finding. Select firm, knobby specimens with pale green flesh and no soft spots.

Leaves still attached indicate a recent harvest - a reliable freshness signal. For prepared products, read the ingredient list carefully.

Most commercial tubes and packets contain horseradish, mustard powder, and green food coloring with no wasabi whatsoever; genuine products list Wasabia japonica and tend to cost significantly more.

Watch Out
Labels reading "wasabi paste" or "wasabi sauce" are almost always horseradish-based. Only the ingredient list tells the truth - look for Wasabia japonica or hon-wasabi.

Storage is straightforward but time-sensitive:

  • Whole rhizome - wrap in a damp paper towel, seal in an airtight container, refrigerate; use within 1-2 weeks
  • Grated wasabi - use within 10-30 minutes or heat and aroma are largely gone
  • Tube paste - refrigerate after opening and use within the manufacturer's window (weeks to months, depending on preservatives)
  • Wasabi powder - store in a cool, dry place; reconstitute only what you need

For a full breakdown of how long each form keeps, see our wasabi freshness guide guide. And if fresh rhizomes aren't available, our wasabi swaps guide covers the closest alternatives.

A good grater matters more than most people expect - the finer the grate, the more heat compounds release.

Start Here

Real wasabi is unforgiving in one direction: timing. If you have a fresh rhizome, grate it in the last minute before serving and use every bit of it.

If you're working with powder or tube paste, read the label and adjust portion size down - commercial preparations tend to run sharper and less nuanced than fresh. Start with half a teaspoon in any sauce or dressing; you can always add more, and you cannot take it back.

Shortcut
No fresh rhizome? Mix wasabi powder with cold water and let it sit for five minutes before using. It won't match fresh, however it's a reliable everyday option.

Frequently Asked Questions

Is store-bought wasabi real wasabi?

Almost never. Most commercial tubes and packets are made from horseradish, mustard powder, and green dye. Only products that list Wasabia japonica or hon-wasabi in the ingredients contain genuine wasabi.

How long does freshly grated wasabi keep its heat?

Peak heat lasts roughly 10-30 minutes after grating. The volatile allyl isothiocyanate compounds disperse quickly at room temperature, so grate directly before serving.

What is the difference between wasabi and horseradish?

Both belong to the Brassicaceae family and share similar heat compounds, however wasabi has a cleaner, greener flavor and shorter-lived heat. Horseradish is more widely grown and significantly cheaper to produce.

Can you grow wasabi at home?

Yes, though it's difficult. Wasabi needs cold running water or consistently moist soil, filtered light, and temperatures between 8-20°C (46-68°F). Container growing near a cool, shaded water source is the most manageable home approach.

Does cooking with wasabi destroy the heat?

Yes. High heat breaks down allyl isothiocyanate rapidly, leaving little to no pungency. Wasabi should always be added to cold or room-temperature dishes, or stirred into sauces just before serving.

Cioppino Seafood Stew

April 3, 2026

You need 50 minutes and one large pot. No special skills, no complicated timing-just fresh seafood added at the right moment so it stays tender.

Cioppino Seafood Stew served on a plate

Cioppino delivers rich tomato-wine broth with shellfish that opens perfectly and fish that flakes. The trick is simmering the base gently, then adding seafood in stages so nothing overcooks.

Make this when you want restaurant-quality seafood without the restaurant price tag. Works for weeknight dinners or when friends show up unexpectedly.

QUICK SUMMARY

Cioppino is a tomato-wine seafood stew with clams, mussels, shrimp, and fish simmered in aromatic broth. Success depends on adding seafood last and cooking each type just until done-shellfish opens in 3-5 minutes, fish turns opaque and flaky. Perfect for weeknight entertaining when you want something impressive that mostly takes care of itself.

⏱️Time Reality: 20 minutes prep, 30 minutes simmer-most time is hands-off
🔑Critical First Step: Sauté garlic and onion low and slow to build sweet aromatic base
⚠️Watch Out: Tough rubbery seafood means you cooked it too long-add it last, remove pan immediately when done

Table of Contents

Toggle
  • Why This Recipe Works
  • What You'll Need
    • Ingredient Details
  • Ingredient Swaps
  • What to Serve With It
  • Store and Reheat
  • Frequently Asked Questions
  • Cioppino Seafood Stew
    • Method 
    • Tried this recipe?

Why This Recipe Works

White wine deglazes the pan after sautéing aromatics, pulling up browned bits that add depth to the broth. For a version that comes together quickly, something flaky like lobster works when you want to stretch your seafood budget without losing richness.

Quick Reference
⏱️
Prep Time
20 min
🔥
Cook Time
30 min
⏰
Total Time
50 min
🍽️
Servings
6 servings
📊
Difficulty
Medium
🏷️
Category
Main Dish
💡
Quick Tip
Simmer seafood gently to avoid toughness
🎯
Best For
Weeknight | Entertaining

What makes this work:

  • Crushed tomatoes create the base - they break down into thick broth that clings to seafood without tasting acidic
  • Fish stock amplifies seafood flavor - clam juice or fish stock adds umami depth that plain water can't match
  • Garlic and onion build aromatic foundation - sautéed slowly over medium-low heat, they turn sweet and mellow instead of sharp
  • Shellfish steams open in the broth - clams and mussels release their own briny liquid as they cook, seasoning the stew naturally
  • Fresh herbs finish without wilting - parsley or basil stirred in off heat stays bright green and aromatic
Quick Tip
Add shellfish last and cook only 3-5 minutes until shells open-overcooked clams and mussels turn rubbery and chewy

What You'll Need

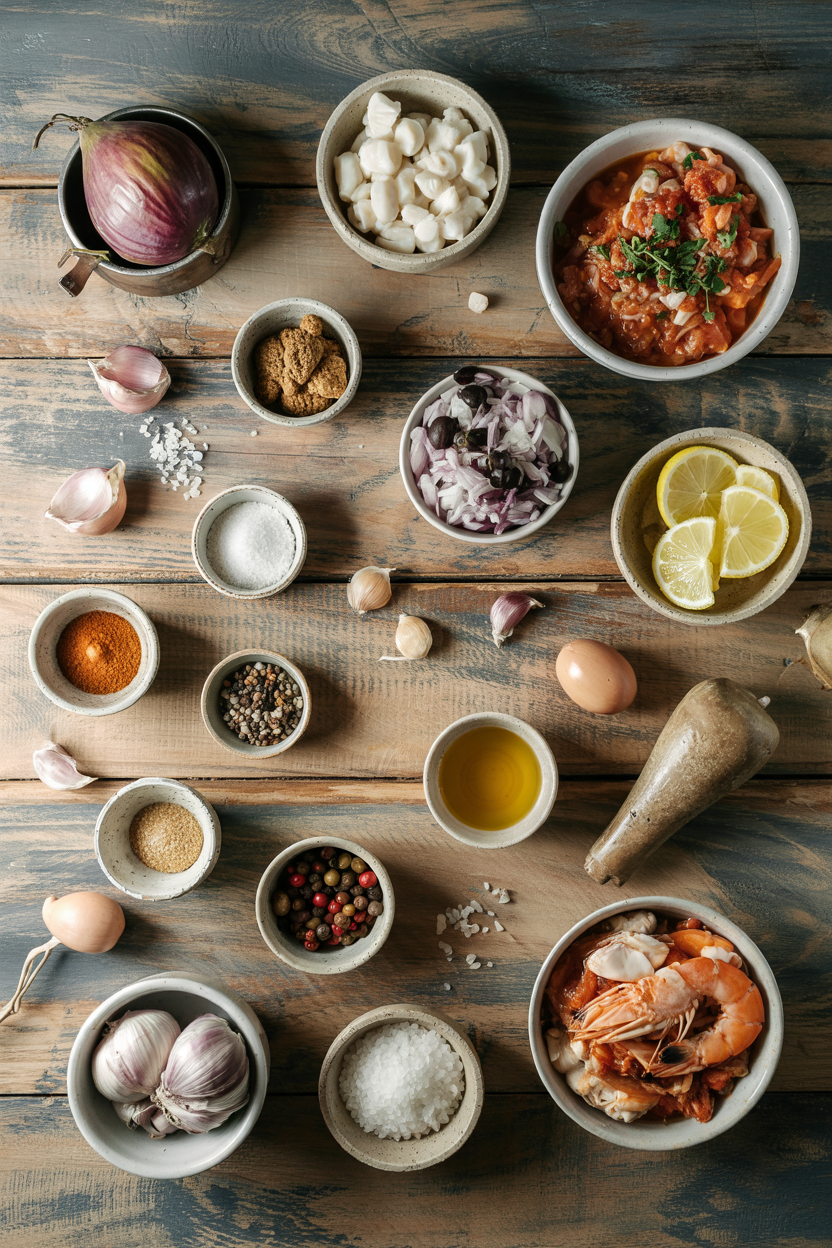
Ingredients for Cioppino Seafood Stew

Shop for the freshest seafood you can find-frozen works in a pinch but fresh shellfish opens cleaner. We keep a batch ready for nights like this - this easy potatoes recipe soaks up every drop of tomato broth left in the bowl.

🦐
Mixed Seafood
  • 1 lb clams (littleneck or Manila)
  • 1 lb mussels
  • 1 lb large shrimp (peeled, deveined)
  • 1 lb firm white fish (halibut, cod, or snapper), cut into chunks
🥬
Aromatics & Vegetables
  • 1 large onion, diced
  • 6 garlic cloves, minced
  • 1 fennel bulb, sliced (optional)
  • 2 celery stalks, diced (optional)
🥢
Base & Liquids
  • 1 (28-oz) can crushed tomatoes
  • 1 cup dry white wine
  • 2 cups fish stock or clam juice
  • ¼ cup olive oil
🌶️
Seasonings & Herbs
  • ½ teaspoon red pepper flakes
  • 1 bay leaf
  • ½ cup fresh parsley, chopped
  • ¼ cup fresh basil, torn
  • Salt and black pepper to taste

Ingredient Details

  • Clams and mussels
    Tap each shellfish before cooking-if it doesn't close, toss it out; discard any that don't open after cooking
  • White wine
    Use dry varieties like Sauvignon Blanc or Pinot Grigio-sweet wines make the broth cloying and unbalanced
  • Fish stock or clam juice
    Bottled clam juice works fine if you can't find fish stock-skip the seafood base cubes that taste artificial
  • Crushed tomatoes
    San Marzano tomatoes create the richest broth, but any canned crushed tomatoes work-avoid tomato sauce or paste which are too thick
  • Firm white fish
    Halibut, cod, or snapper hold up best-flaky fish like tilapia falls apart into mush
  • Fresh herbs
    Parsley and basil stay bright when added off heat at the end-dried herbs taste dusty and flat in this stew
  • Olive oil
    Extra virgin adds fruity depth but regular olive oil works if that's what you have-vegetable oil tastes neutral and bland

Ingredient Swaps

Swap shellfish types based on what's fresh at the market-scallops or crab work just as well. Rich mains need something to cut through, and homemade coleslaw recipe does exactly that with its tangy crunch against rich tomato broth.

Common swaps that work:

  • White wine → dry vermouth or extra fish stock - vermouth adds herbal notes; more stock keeps it alcohol-free but less complex
  • Shellfish → extra firm tofu or king oyster mushrooms - changes the dish completely but works for seafood allergies; loses briny ocean flavor
  • Fish stock → vegetable broth with seaweed - lighter and less seafood-forward; add kombu or nori for umami depth
  • Crushed tomatoes → diced tomatoes or tomato puree - diced creates chunkier texture; puree makes thicker smoother broth

Fresh Seafood

Works for: cleanest flavor, shellfish opens easily, best texture

Skip if: you're on a tight budget or can't access a good fishmonger

Frozen Seafood

Works for: budget-friendly option, convenient storage, still tasty

Skip if: you want the cleanest ocean flavor-frozen releases more water into broth

Instructions

The entire stew cooks in one pot with seafood added in stages so nothing overcooks. A dollop of homemade aioli takes each bite somewhere more interesting-dunk bread or drizzle it over the top.

  1. Sauté aromatics low and slow. Heat olive oil in a large Dutch oven over medium-low heat. Add diced onion, minced garlic, and sliced fennel if using. Cook 5-7 minutes, stirring occasionally, until onion turns translucent and garlic smells sweet-don't let garlic brown or it turns bitter.

  2. Deglaze with wine and build the base. Pour in white wine, scraping up any browned bits from the bottom of the pot. Simmer 3 minutes until wine reduces by half and smells less alcoholic. Add crushed tomatoes, fish stock, bay leaf, and red pepper flakes. Bring to a gentle simmer.

  3. Simmer broth uncovered to concentrate flavors. Reduce heat to medium-low and simmer uncovered 15-20 minutes, stirring occasionally. The broth should thicken slightly and turn a deep reddish color. Taste and adjust salt-clam juice is salty, so go light at first.

  4. Add seafood in stages based on cook time. Add fish chunks first, nestling them into the broth. After 2 minutes, add shrimp. After another minute, add clams and mussels. Cover pot with lid and cook 3-5 minutes until shellfish opens and shrimp turns pink and opaque. Discard any shellfish that stays closed.

  5. Finish with fresh herbs off heat. Remove pot from heat immediately when seafood is done-carryover cooking continues even off the burner. Stir in chopped parsley and torn basil. Let sit 2 minutes to infuse herbs into broth. Serve immediately in wide bowls with crusty bread.

Watch Out
Overcooked seafood turns rubbery and tough-remove pot from heat as soon as shellfish opens and fish flakes easily with a fork

What to Serve With It

The salad works best when it hits the table at the same time as the main. For a version that comes together quickly, this fresh salad adds crisp cucumber and tomato that balance the rich stew perfectly.

Side Dish Prep Why It Works How to Serve
Crusty sourdough bread Easy Soaks up tomato-wine broth without getting soggy Slice thick, toast lightly, rub with garlic
Simple green salad Easy Cuts richness with crisp lettuce and tangy vinaigrette Toss greens with lemon juice and olive oil
Steamed white rice Easy Neutral base that stretches the stew into more servings Spoon stew over rice in wide bowls
Garlic herb roasted potatoes Medium Adds heartiness and soaks up extra broth Roast until crispy, serve alongside stew
Lemon-garlic butter green beans Easy Bright citrus cuts through rich tomato broth Sauté beans with garlic, finish with lemon zest

Three ways to serve it:

  • Weeknight dinner - ladle stew over steamed rice with crusty bread on the side for soaking up broth
  • Casual entertaining - serve in wide shallow bowls with garlic bread and a simple arugula salad dressed with lemon
  • Meal prep - portion stew into containers without bread, reheat gently and add fresh herbs before serving
Best Pick
Crusty sourdough is the move here-it stays firm enough to soak up broth without dissolving into mush

Store and Reheat

Seafood stew stores well for 3 days but freezing changes the texture of shellfish. For a version that comes together quickly, this easy potatoes recipe reheats alongside leftover stew when you need a complete meal fast.

Method Time Best For
🍳 Stovetop 5-7 min low heat Even warming without overcooking seafood-stir gently, add splash of stock if needed
🔥 Oven 15 min at 325°F Larger portions in oven-safe dish-cover with foil, check at 10 minutes
📦 Microwave 2-3 min medium power Single serving in microwave-safe bowl-stir halfway through, add fresh herbs after heating

For best results when storing:

  • Cool quickly after cooking - transfer stew to shallow containers within 2 hours to prevent bacterial growth
  • Store broth and seafood together - keeping them combined prevents seafood from drying out in the fridge
  • Reheat gently over low heat - high heat toughens seafood that's already cooked; warm just until steaming
  • Add fresh herbs after reheating - parsley and basil turn brown and slimy when reheated; stir in fresh at serving
  • Freeze broth separately if meal prepping - freeze tomato base without seafood, add fresh seafood when reheating for better texture

Frequently Asked Questions

Can I use frozen mixed seafood for Cioppino?

Yes, frozen seafood works but thaw it completely first and pat dry before adding to the stew. Frozen releases more water than fresh, so simmer broth uncovered an extra 5 minutes to thicken.

How should I store and reheat leftover Cioppino?

Store in airtight containers in the fridge for up to 3 days. Reheat gently on the stovetop over low heat for 5-7 minutes, stirring occasionally-high heat makes seafood rubbery.

How do I know when shellfish and fish are perfectly cooked?

Clams and mussels are done when shells open fully-discard any that stay closed after 5 minutes. Fish should be opaque and flake easily with a fork, and shrimp turn pink and firm.

What should I do if my stew tastes too watery or bland?

Simmer uncovered for 10 more minutes to reduce liquid and concentrate flavors. Add salt gradually, tasting as you go-clam juice is salty, so go light at first.

What are good side dishes to serve with Cioppino?

Crusty sourdough bread soaks up the tomato broth best. A simple green salad with lemon vinaigrette cuts the richness, or serve over steamed rice to stretch servings.

Cioppino Seafood Stew served on a plate

Cioppino Seafood Stew

No ratings yet
Cioppino is a tomato-wine seafood stew that combines clams, mussels, shrimp, and firm white fish simmered in a rich aromatic broth. The recipe works by sautéing aromatics slowly, building a flavorful base with wine and tomatoes, then adding seafood in stages to ensure perfect tenderness.
Print Recipe Pin Recipe
Prep Time 20 minutes mins
Cook Time 30 minutes mins
Total Time 50 minutes mins
Servings: 6 servings
Course: Main Dish
Cuisine: Italian
Ingredients Equipment Method Notes

Ingredients
  

  • 1 lb clams littleneck or Manila
  • 1 lb mussels
  • 1 lb large shrimp peeled and deveined
  • 1 lb firm white fish halibut, cod, or snapper, cut into chunks
  • 1 large onion diced
  • 6 cloves garlic minced
  • 1 bulb fennel sliced, optional
  • 2 stalks celery diced, optional
  • 28 oz crushed tomatoes canned
  • 1 cup dry white wine such as Sauvignon Blanc or Pinot Grigio
  • 2 cups fish stock or clam juice
  • 0.25 cup olive oil
  • 0.5 teaspoon red pepper flakes
  • 1 leaf bay leaf
  • 0.5 cup fresh parsley chopped
  • 0.25 cup fresh basil torn

Equipment

  • large Dutch oven or pot Used for cooking the entire stew

Method
 

  1. Heat olive oil in a large Dutch oven over medium-low heat. Add diced onion, minced garlic, and sliced fennel if using. Cook 5-7 minutes, stirring occasionally, until onion is translucent and garlic is fragrant but not browned.
    1 large onion, 6 cloves garlic, 1 bulb fennel, 0.25 cup olive oil
  2. Pour in white wine and scrape up browned bits from the bottom of the pot. Simmer 3 minutes until wine reduces by half. Add crushed tomatoes, fish stock, bay leaf, and red pepper flakes. Bring to a gentle simmer.
    28 oz crushed tomatoes, 1 cup dry white wine, 2 cups fish stock or clam juice, 0.5 tsp red pepper flakes, 1 leaf bay leaf
  3. Reduce heat to medium-low and simmer uncovered for 15-20 minutes, stirring occasionally, until broth thickens slightly and deepens in color. Taste and adjust salt carefully due to clam juice saltiness.
  4. Add fish chunks first, nestling into the broth. After 2 minutes, add shrimp. After another minute, add clams and mussels. Cover pot and cook 3-5 minutes until shellfish open and shrimp turn opaque. Discard any shellfish that remain closed.
    1 lb clams, 1 lb mussels, 1 lb large shrimp, 1 lb firm white fish
  5. Remove pot from heat immediately when seafood is done. Stir in chopped parsley and torn basil. Let sit 2 minutes to infuse herbs into broth. Serve immediately with crusty bread.
    0.5 cup fresh parsley, 0.25 cup fresh basil

Notes

  • Simmer seafood gently and remove promptly to avoid rubbery texture.
  • Tap shellfish before use; discard any that don't close or open after cooking.
  • Add fresh herbs off heat at the end to keep them bright and aromatic.

Tried this recipe?

Let us know how it was!

How Long Does Vodka Last? [Storage Guide]

April 3, 2026

Buying a bottle of vodka and wondering how long it'll actually hold up is a fair question - and the answer depends more on whether it's been opened, and what's in it, than on some strict expiration date. Plain 40% ABV vodka is one of the most shelf-stable spirits you can own: sealed bottles last indefinitely, and opened ones stay good for years. Flavored vodkas follow a shorter timeline because added sugars and extracts degrade faster.

Can You Freeze Vodka

Understanding the role vodka plays in your bar or kitchen makes storing it correctly worth the small effort.

QUICK SUMMARY

Sealed vodka lasts indefinitely in the pantry. Opened plain vodka holds quality for 2-5 years at room temperature, longer in the fridge. Flavored vodka degrades faster due to sugars and extracts - aim to finish within 1-3 years of opening.

🏠Pantry (sealed): Indefinite - quality preserved for many years unopened
🧊Fridge (opened): Indefinite safety; best quality maintained for 1-3 years
❄️Freezer: Safe indefinitely; standard 40% ABV won't freeze solid at home temps

How Long Does Vodka Last?

Vodka's shelf life is driven almost entirely by alcohol content and oxidation rate - not bacterial spoilage. High-ethanol spirits don't support microbial growth, so safety isn't the concern here; flavor and aroma are.

Sealed bottles at 40% ABV can sit on a shelf for decades without meaningful change.

Once opened, oxygen enters the bottle and slowly strips away volatile aromatics, making the spirit taste flatter over time.

Plain vodka changes slowly enough that most drinkers won't notice for years. Flavored vodkas move faster - extracts and added sugars break down within one to three years of opening.

Vodka Shelf Life
MethodStateDurationNotes
🏠 PantrySealedIndefiniteUpright, away from heat and light; quality holds for many years
🏠 PantryOpened2-5 yearsGradual aroma loss from oxidation; tightly capped slows this
🧊 FridgeOpened1-3 years (best quality)Cold slows volatile loss; flavored variants degrade faster
❄️ FreezerOpenedIndefiniteStandard 40% ABV won't freeze solid; flavor maintained for years

Unlike spirits such as whiskey in cooking, where aging and barrel contact matter, vodka's neutral base means oxidation is the only real enemy over time.

How to Store Vodka

Storage is straightforward, and the biggest gains come from consistent habits rather than special equipment.

Pantry: Keep sealed bottles upright in a cool, dark spot - a cabinet away from the stove or any window works well. Upright storage protects the cap's integrity and avoids cork-derived off-notes in boutique bottles with natural stoppers.

Fridge: Opened bottles belong upright, tightly capped, and in their original glass bottles. Decanting into a decorative vessel without an airtight seal speeds aroma loss noticeably.

Counter: Avoid it for opened bottles. Room-temperature oxidation is faster than in the fridge, and heat spikes near cooking areas accelerate flavor loss.

Golden Rule
Keep vodka away from pungent foods. Neutral ethanol absorbs volatile aromas through imperfect caps over time, especially in crowded pantry or fridge shelves.

A few habits that make a real difference:

  • 📅 Label opened bottles - note the date so you can track flavored vodkas separately from plain ones
  • Original bottle always - original glass with a screw cap outperforms decorative decanters for long-term storage
  • Flavored vodka first - use these within a year or two; their sugar-based ingredients don't hold as long

Can You Freeze Vodka?

Standard 40% ABV vodka will not freeze solid in a typical household freezer running at around -18°C (0°F).

The ethanol concentration keeps it liquid, though it becomes noticeably more viscous and cold-smooth - which is exactly why many people store it there for shots or martinis.

Watch Out
Very high-proof vodka (above 50% ABV) can form alcohol crystals at standard freezer temps. Flavored or low-proof vodkas may haze or precipitate extracts when frozen - this doesn't mean they're spoiled, but it needs attention.

If you do freeze vodka, the process is simple:

  1. Check the bottle - standard vodka comes in glass rated for cold; confirm before freezing.
  2. Tighten the cap - a loose seal will let freezer odors in over time.
  3. Place upright at the back - the coldest zone of your freezer maintains the most consistent temperature.
  4. Mind the headspace - if decanting to another container, leave 1-2 cm for expansion.

If cloudiness or slush appears after freezing a flavored vodka, move it to the fridge or counter to warm slowly.

Swirl gently to reincorporate any precipitate, then smell and taste. Don't apply heat to speed thawing - slow, ambient warming is enough.

Signs Vodka Has Gone Bad

Plain unflavored vodka rarely goes "bad" in a food-safety sense, but it can degrade noticeably in quality. Flavored vodkas are more prone to actual spoilage indicators because of their added ingredients.

Signs It's Gone Bad
👀
VisualPersistent cloudiness in clear unflavored vodka · Oily film or separation in flavored bottles · Yellowing or discolored tint
👃
SmellSharp solvent or chemical off-odors · Rancid or moldy notes in flavored bottles
✋
TextureSticky residue at bottle neck · Syrupy pour indicating sugar breakdown in flavored vodka

A clear, unflavored vodka should smell like clean neutral ethanol - no chemical sharpness, no off-notes. Any deviation from that baseline is reason to discard.

If the bottle has been stored badly (direct sunlight, heat exposure), yellowing is a red flag even in a sealed bottle.

Practical Tips for Keeping Vodka at Its Best

Following a few consistent rules makes the difference between vodka that tastes fresh years later and one that falls flat well before its time.

  • 🧊 Freeze plain vodka for serving - 40% ABV stays liquid and pours smoother straight from the freezer
  • Prioritize flavored bottles - drink these within 1-2 years of opening and don't assume they last as long as unflavored
  • Cap tightly every time - even a few hours open accelerates aroma loss in a half-empty bottle
  • Skip the decanter - porous stoppers and decorative vessels without airtight seals shorten quality life

If you ever need to swap it out in a recipe, a guide to replacements for vodka covers which spirits and pantry options hold up best in different applications.

Shortcut
Two bottles, two rules: plain vodka lives in the freezer indefinitely; flavored vodka belongs in the fridge and should be finished within a year or two of opening.

Frequently Asked Questions

Can vodka freeze in my freezer?

Standard 40% ABV vodka won't freeze solid at typical home freezer temperatures of -18°C (0°F). Ultra-high-proof bottles may form alcohol crystals, and low-proof flavored vodkas can haze or precipitate extracts when frozen.

Does vodka go bad if left open?

It won't become unsafe, but quality declines. Oxidation gradually strips volatile aromatics, leaving plain vodka tasting flat - flavored variants deteriorate faster because sugars and extracts break down sooner.

Do flavored vodkas spoil faster than plain vodka?

Yes, noticeably. Added sugars, fruit extracts, and natural flavors degrade within one to three years of opening. Plain 40% ABV vodka can hold good quality for five or more years when tightly sealed.

Is it okay to store vodka in a glass decanter long-term?

Only if the decanter has a fully airtight seal. Porous stoppers or loose-fitting lids accelerate oxidation and allow surrounding kitchen aromas to absorb into the neutral spirit over weeks or months.

Why has my clear vodka turned slightly yellow?

Yellowing in a clear vodka typically indicates prolonged exposure to heat or direct light, which can cause chemical changes in the spirit. Discard any bottle showing this discoloration regardless of whether it was sealed.

Braised Pork Belly

April 3, 2026

Searing pork belly until golden, then simmering it low with soy sauce, sugar, and aromatics creates tender, umami-rich meat. The slow braise renders fat gradually while the braising liquid reduces to a caramelized coating.

Braised Pork Belly served on a plate

You don't need special skills or equipment. A heavy pot and two hours at a gentle simmer does the work.

This is what we make when meal prep needs to look intentional but can't demand constant attention.

QUICK SUMMARY

Braised pork belly cooks low and slow in soy sauce, brown sugar, and aromatics until fork-tender. The key is maintaining a gentle simmer so fat renders without the meat drying out. Plan for 2+ hours of mostly hands-off cooking with periodic fat skimming.

⏰Time Reality: 15 min prep, then 2+ hours simmering-mostly unattended
🔥First Move: Sear pork belly pieces 3-4 min per side before adding liquid
⚠️Watch Out: Don't let it boil-high heat toughens meat; keep at 190°F-210°F simmer

Table of Contents

Toggle
  • Why This Recipe Works
  • What You'll Need
    • Ingredient Details
  • Ingredient Swaps
  • What to Serve With It
  • Store and Reheat
  • Frequently Asked Questions
  • Braised Pork Belly
    • Method 
    • Tried this recipe?

Why This Recipe Works

Braising combines dry and wet heat to break down tough proteins and render fat slowly. Most people skip another great pork recipe, but it balances the meal with a similar technique that builds flavor through time rather than temperature.

Quick Reference
⏱️
Prep Time
15 min
🔥
Cook Time
2 to 2.5 hours
⏰
Total Time
2 hours 15 min to 2 hours 45 min
🍽️
Servings
4-6 servings
📊
Difficulty
Medium
🏷️
Category
Main Dish
💡
Quick Tip
Sear, then simmer low for tender pork belly.
🎯
Best For
Weeknight | Meal prep | Entertaining

Five reasons this method delivers:

  • Searing first locks in texture - browning the meat before braising creates caramelized edges that hold up through long cooking
  • Low heat prevents dry meat - a gentle 190°F-210°F simmer breaks down collagen without squeezing out moisture
  • Star anise adds complexity - one or two pods infuse subtle licorice notes that balance the sweet-salty braising liquid
  • Skimming fat keeps sauce clean - removing rendered fat every 20-30 minutes prevents greasy coating and concentrates flavor
  • Uncovered finish thickens sauce - removing the lid during the last 30 minutes reduces liquid to a sticky glaze
Quick Tip
Cut pork belly into 1.5-inch cubes so each piece cooks evenly and absorbs braising liquid at the same rate.

What You'll Need

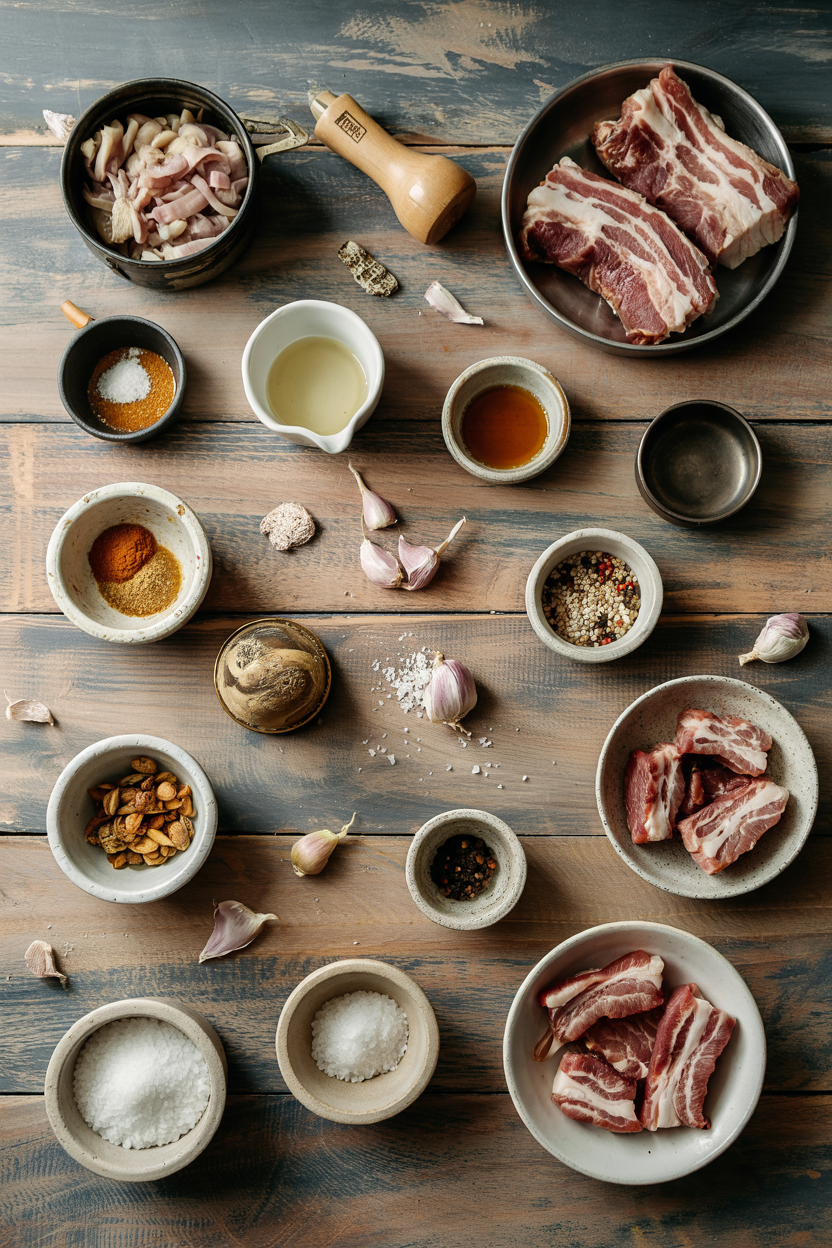
Ingredients for Braised Pork Belly

Most grocery stores stock pork belly in the meat section, often near bacon or specialty cuts. For a version that comes together quickly, a homemade caesar salad recipe on the side adds brightness without extra cooking time.

🍗
Protein
  • 2 lbs pork belly, cut into 1.5-inch cubes
🧄
Aromatics
  • 6 garlic cloves, smashed
  • 2-inch piece fresh ginger, sliced
  • 3 scallions, cut into 2-inch pieces
  • 2 star anise pods
  • 1-2 dried chili peppers (optional)
🥢
Braising Liquid
  • ½ cup soy sauce
  • 2 cups water or chicken broth
  • ¼ cup brown sugar
  • 2 tablespoon rice wine vinegar or Shaoxing wine

Ingredient Details

  • Pork belly
    Look for pieces with even fat-to-meat ratio; too much fat makes it greasy, too little makes it dry
  • Soy sauce
    Use regular or low-sodium depending on salt preference; the liquid reduces and concentrates saltiness
  • Brown sugar
    Adds molasses depth and caramelizes during the final reduction; white sugar works but lacks complexity
  • Fresh ginger
    Slice thick so pieces don't disintegrate; remove before serving or leave in for stronger flavor
  • Star anise
    Two pods maximum-more than that overpowers the dish with licorice flavor
  • Water vs broth
    Broth adds richness but isn't necessary; the pork renders enough fat to build flavor on its own
  • Rice wine vinegar
    A splash of acidity brightens the braising liquid; skip it if you don't have it on hand

Ingredient Swaps

The base recipe adapts depending on what's in your pantry or dietary needs. A dollop of creamy homemade homemade recipe takes each bite somewhere more interesting when you want contrast against the rich pork.

Four swaps that work:

  • Tamari for soy sauce - Same umami depth, gluten-free option; use 1:1 ratio and check sodium level
  • Pork shoulder for pork belly - Leaner cut needs 30-60 minutes longer cooking time to reach fork-tender texture
  • Honey for brown sugar - Sweeter and thinner consistency; start with 3 tablespoon and adjust to taste after first hour
  • Chicken broth for water - Adds savory depth without changing cooking method; reduces sodium in soy sauce slightly

Pork Belly

Works for: Rich, tender texture with natural fat that renders slowly

Skip if: You prefer leaner meat or want to reduce fat content

Pork Shoulder

Works for: Budget-friendly option that still braises well with less fat

Skip if: You want the traditional layered texture and don't mind longer cooking

Instructions

Plan for 2.5 hours start to finish, with most of that time spent simmering on the stove. The brussels works best when it hits the table at the same time as the main, so for a version that comes together quickly, a homemade brussels recipe can roast while the pork finishes braising.

  1. Sear the pork belly - Heat a heavy-bottom pot or Dutch oven over medium-high heat with no oil; add pork belly cubes and sear 3-4 minutes per side until golden brown, then remove and set aside
  2. Build the braising liquid - Lower heat to medium, add garlic, ginger, scallions, star anise, and chili to the pot; cook 1-2 minutes until aromatic but not burnt, then return pork to pot
  3. Simmer covered - Pour in soy sauce, water or broth, brown sugar, and rice wine vinegar; bring to a boil, then reduce to a gentle simmer at 190°F-210°F; cover with tight-fitting lid and cook 90-120 minutes, skimming fat every 20-30 minutes
  4. Thicken the sauce - Remove lid during the last 30 minutes of cooking; let liquid reduce by half until it coats the back of a spoon and turns glossy
  5. Rest and serve - Remove pot from heat and let pork rest 10 minutes before slicing; the meat should separate easily with a fork and hold its shape when plated
Golden Rule
Never let the liquid boil hard-bubbles should barely break the surface to keep meat tender and prevent fat from emulsifying into the sauce.

What to Serve With It

Rich pork belly needs something to balance the plate and soak up the braising liquid. Potato adds the contrast this plate needs, but timing matters, so for a version that comes together quickly, a simple potato recipe works alongside the long braise.

Side Dish Prep Why It Works How to Serve
Steamed White Rice Easy Neutral base absorbs rich braising sauce without competing Spoon pork and sauce directly over hot rice
Blanched Bok Choy Easy Slightly bitter greens cut through fatty richness Blanch 2-3 min, drain, drizzle with sesame oil
Pickled Cucumbers Easy Acid and crunch reset palate between bites Quick-pickle thin slices in rice vinegar and sugar
Scallion Pancakes Medium Crispy, chewy texture contrasts with tender pork Serve warm, tear into pieces for wrapping pork
Stir-Fried Green Beans Easy Snappy texture and garlicky flavor balance richness Stir-fry with garlic until blistered, 4-5 min

Three ways to serve it:

  • Over rice with greens - Plate a scoop of rice, top with pork belly pieces, spoon sauce over, add blanched bok choy on the side
  • In steamed buns - Slice pork thin, tuck into warm bao with pickled cucumbers and a drizzle of hoisin sauce
  • As part of a meal prep bowl - Divide rice, pork, and stir-fried vegetables into containers; reheat individual portions throughout the week
Best Pick
For tender pork dinner ideas that round out the meal without extra pots, check what pairs well with similar braised dishes.

Store and Reheat

Braised pork belly holds up well in the fridge and freezes without losing texture. The braising liquid solidifies when cold, making it easy to scrape off excess fat before reheating if needed.

Method Time Best For
🍳 Stovetop 8-10 min over low heat Even heating, preserves tender texture without drying out
🔥 Oven 15-20 min at 325°F (163°C) Large portions, maintains caramelized edges if finished uncovered
📦 Microwave 1-2 min on medium power Quick single servings, cover with damp paper towel to prevent drying

For best results when storing:

  • Refrigerate in shallow containers - Store pork and sauce together in airtight containers; use within 3-4 days for best texture
  • Freeze in single-serve portions - Divide into meal-sized portions before freezing; thaw overnight in fridge before reheating
  • Skim solidified fat before reheating - Cold braising liquid separates; scrape off top layer of fat for lighter sauce
  • Add liquid if sauce thickens - Reheat with a splash of water or broth if sauce becomes too thick after chilling
  • Finish under broiler for crisp edges - After reheating, broil 2-3 minutes to restore caramelized surface if desired

Frequently Asked Questions

How long to cook braised pork belly at low heat?

Simmer covered for 90-120 minutes at 190°F-210°F, then uncover for the last 30 minutes to thicken sauce. Total cooking time is 2 to 2.5 hours from start to finish.

Can I make braised pork belly ahead and reheat?

Yes-braise fully, cool completely, then refrigerate up to 4 days. Reheat gently on the stovetop with a splash of water, or portion and freeze for up to 3 months.

What goes well with braised pork belly?

Steamed white rice, blanched bok choy, pickled cucumbers, or scallion pancakes balance the rich, sweet-savory pork. Add a side with acid or crunch to cut through the fat.

How do I know when braised pork belly is fully tender?

The pork should separate easily when pressed with a fork but still hold its shape when plated. If it resists or feels tough, cover and simmer another 15-30 minutes.

Can I use pork shoulder instead of pork belly?

Yes-pork shoulder works but has less fat, so it needs 30-60 minutes longer to reach fork-tender texture. The braising method stays the same, just add extra time.

Braised Pork Belly served on a plate

Braised Pork Belly

No ratings yet
Braised pork belly cooks slowly in a soy sauce and brown sugar mixture with aromatics until fork-tender and richly flavored. Maintaining a gentle simmer ensures the meat stays moist while fat renders to create a caramelized coating. This straightforward method requires minimal hands-on time for a deeply satisfying main dish.
Print Recipe Pin Recipe
Prep Time 15 minutes mins
Cook Time 2 hours hrs 15 minutes mins
Total Time 2 hours hrs 30 minutes mins
Servings: 5 servings
Course: Main Dish
Cuisine: Asian-Inspired
Ingredients Equipment Method Notes

Ingredients
  

  • 2 lbs pork belly cut into 1.5-inch cubes
  • 6 cloves garlic smashed
  • 2 inch fresh ginger sliced
  • 3 stalks scallions cut into 2-inch pieces
  • 2 pods star anise
  • 1-2 pieces dried chili peppers optional
  • 0.5 cup soy sauce
  • 2 cups water or chicken broth
  • 0.25 cup brown sugar
  • 2 tablespoon rice wine vinegar or Shaoxing wine

Equipment

  • Heavy-bottom pot or Dutch oven Used for searing and simmering the pork belly

Method
 

  1. Heat a heavy-bottom pot or Dutch oven over medium-high heat with no oil. Add pork belly cubes and sear for 3-4 minutes per side until golden brown. Remove pork and set aside.
    2 lbs pork belly
  2. Lower heat to medium. Add garlic, ginger, scallions, star anise, and chili peppers (if using) to the pot. Cook for 1-2 minutes until aromatic but not burnt. Return the pork to the pot.
    6 cloves garlic, 2 inch fresh ginger, 3 stalks scallions, 2 pods star anise, 1-2 pieces dried chili peppers, 2 lbs pork belly
  3. Pour in soy sauce, water or broth, brown sugar, and rice wine vinegar. Bring to a boil, then reduce heat to maintain a gentle simmer at 190°F-210°F. Cover with a tight-fitting lid and cook for 90-120 minutes, skimming fat every 20-30 minutes.
    0.5 cup soy sauce, 2 cups water or chicken broth, 0.25 cup brown sugar, 2 tbsp rice wine vinegar
  4. Remove the lid during the last 30 minutes of cooking. Let the liquid reduce by half until it coats the back of a spoon and turns glossy.
  5. Remove the pot from heat and let the pork rest for 10 minutes before slicing. The meat should separate easily with a fork and hold its shape when plated.

Notes

  • Maintain a gentle simmer between 190°F and 210°F to keep meat tender and prevent boiling.
  • Skim rendered fat every 20-30 minutes to avoid greasy sauce and concentrate flavor.
  • Cut pork belly into even 1.5-inch cubes for consistent cooking and absorption of the braising liquid.

Tried this recipe?

Let us know how it was!

What Is Udon Noodles? Taste, Uses & More

April 3, 2026

Udon noodles do one thing better than almost any other noodle: they hold their ground.

What Is Udon Noodles

Where the role soba noodles plays in Japanese cooking leans earthy and assertive, udon steps back and lets the bowl speak - a thick, springy wheat noodle that absorbs broths, clings to stir-fry sauces, and delivers a dense chew that lighter noodles simply can't match.

QUICK SUMMARY

Udon are thick Japanese wheat noodles with a mild, slightly sweet flavor and a dense, springy chew. They suit hot broths, stir-fries, and cold dipping preparations equally well. Fresh udon lasts 4-7 days refrigerated; dried udon keeps for many months in the pantry.

🍜Flavor: Mild, subtly wheaty, slightly sweet - a neutral base for bold sauces
✋Texture: Thick, chewy, springy - slippery when well-cooked
🔥Best Uses: Hot soup, stir-fry, cold dipping, hot pot, curry
🛒Buy: Fresh refrigerated for best texture; dried for pantry convenience
📅Shelf Life: Fresh 4-7 days; dried many months; cooked 2-3 days refrigerated

What Is Udon Noodles?

Udon is a thick Japanese wheat noodle made from just three ingredients: wheat flour, water, and salt. The result is a pale white, smooth-surfaced strand that is noticeably denser and wider than most other noodles in the East Asian pantry.

The noodle's roots run deep in Japanese food culture, with origins traced to the Sanuki region (now Kagawa Prefecture) on Shikoku Island - where sanuki udon remains the benchmark for firm, elastic noodles.

Regional styles vary: Sanuki udon is taut and chewy, Osaka-style leans softer, and Inaniwa udon from Akita is thinner and more delicate.

Udon comes in several market forms:

  • 🧊 Fresh refrigerated udon - pale, slightly translucent strands; tenderest texture; ready in minutes
  • 📦 Dried udon - shelf-stable; requires longer boiling; slightly firmer after cooking
  • 🥡 Pre-cooked vacuum-packed udon - the most convenient form; just rinse and heat
  • ❄️ Frozen udon - retains fresh-like texture well; recommended if fresh isn't available

Udon goes by several names: thick udon, うどん, and occasionally the misspelling "udonnoodles" in online searches. It is not the same as ramen, soba, or somen - each noodle differs in flour type, thickness, and flavor.

What Does Udon Noodles Taste Like?

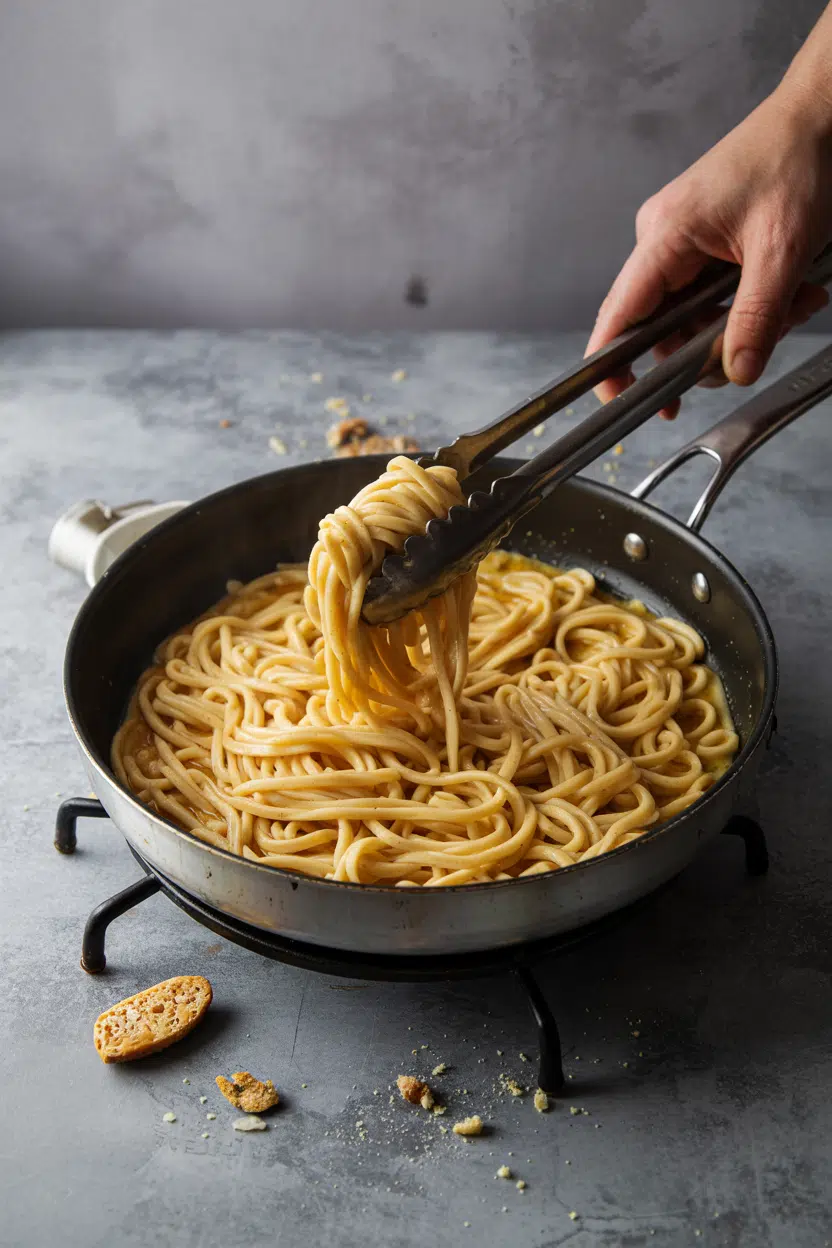
udon noodles - What Is Udon Noodles

Udon's flavor is deliberately understated. The mild, wheaty base carries a faint natural sweetness and a barely-there savory note - nothing that competes with whatever sauce or broth surrounds it.

Sensory SnapshotMild Intensity
👅 Flavor
mild wheatslightly sweetsubtle savory
✋ Texture
chewyspringyslippery
👃 Aroma
neutral wheatlight yeast (fresh)

The closest Western comparison is a thick pasta like pici or perciatelli - but udon is milder and considerably chewier. That chew is the defining quality.

A well-cooked udon strand has real resistance before it gives way, a springiness that holds through long-simmered broths without going mushy.

Fresh udon has a faint yeasty note that dried and pre-cooked forms don't carry. Heat doesn't intensify the flavor much - udon stays neutral, which is exactly the point.

Golden Rule
Udon's mild flavor isn't a weakness - it's the design. The noodle is a vehicle. Build flavor in the broth or sauce, not the noodle itself.

How to Use Udon Noodles

Udon's dense structure and neutral flavor make it functional across a wide range of cooking methods. The noodle doesn't just sit in a bowl - it actively performs differently depending on how it's prepared.

How Udon Noodles Are Used
MethodBest ForTip
🍲 Hot SoupKake udon, curry udon, tempura udonAdd noodles last; residual broth heat finishes them
🥢 Stir-FriedYaki udon with soy, mirin, and vegetablesParboil first, then stir-fry on high heat to sear
❄️ Cold/ChilledZaru udon, summer salads with tangy dressingRinse under cold running water immediately after cooking
🫕 Hot PotNabemono - added at the end to absorb brothUse pre-cooked vacuum-packed for easy hot pot finish

In soup, kake udon is the baseline: noodles in a clear dashi broth seasoned with soy and mirin, topped with green onion.

Tempura udon layers in rich fried batter, while curry udon wraps the noodle in a viscous, warming sauce that clings to every strand.

For stir-fries, a yaki udon stir fried noodles recipe shows how thinly sliced pork, cabbage, and a soy-mirin glaze coat the thick noodle in a way that simply doesn't work with thinner pasta.

Those looking for a similar vegetable-forward approach might also draw inspiration from a japanese vegetable yakisoba noodles recipe, which uses comparable high-heat technique.

Udon pairs confidently with dashi broth (kombu and katsuobushi), soy sauce, mirin, shichimi togarashi, soft-boiled egg, and thinly sliced beef or pork. Avoid delicate emulsified sauces - the noodle's bulk overwhelms anything too subtle.

Shortcut
Pre-cooked vacuum-packed udon needs no boiling. Rinse under hot water for 30 seconds, drain, and drop straight into your broth or wok.
Try It In
🥩Crockpot Beef and NoodlesUdon's chew stands up to slow-cooked beef and rich braising liquid→🌶️Thai Drunken Noodles Pad Kee MaoSwap in udon for a thicker, chewier take on the stir-fry classic→

How to Buy and Store Udon Noodles

Fresh refrigerated udon is the first choice for texture: look for pale, slightly translucent strands with no discoloration or sour smell. For pantry stock, choose dried udon that is uniform in thickness with no visible cracks along the strand.

Best Pick
Packages labeled "sanuki udon" signal a firmer, chewier noodle - the regional style most associated with authentic udon texture.

Storage is straightforward:

  • Fresh (unopened) - refrigerate in original sealed package; use within 4-7 days
  • Fresh (opened) - transfer to an airtight container and refrigerate; use within 1-2 days
  • Dried (unopened) - cool, dry pantry; keeps for many months
  • Cooked udon - refrigerate in an airtight container; use within 2-3 days

For a full breakdown, udon noodles's shelf life covers every format in detail, including frozen storage. Much like keeping rice fresh, the core rule is simple: sealed, cool, and away from moisture.

Where to Start With Udon

New to udon? Start with kake udon - noodles in dashi broth with green onion. It's the format that puts the noodle's chew front and center with nothing masking it.

From there, move to yaki udon if you want stir-fry, or zaru udon if you want to serve it cold.

If udon isn't available, alternatives to udon noodles maps out which noodles come closest by texture and cooking method. And if you're building a Japanese noodle bowl from scratch, the sides for ramen noodles guide translates well to udon accompaniments.

One bowl is enough to understand why this noodle has stayed central to Japanese cooking for centuries.

Frequently Asked Questions

Is udon the same as ramen?

No. Ramen noodles are thinner, made with alkaline water (giving them a yellow tint and firm bite), and carry more flavor of their own. Udon is thicker, made with just flour, water, and salt, and tastes milder.

What is sanuki udon?

Sanuki udon comes from Kagawa Prefecture (formerly Sanuki Province) and is known for being firmer and chewier than other regional styles. It's the most replicated style outside Japan and is often what "premium udon" labels reference.

How long should you boil udon noodles?

Dried udon typically needs 8-12 minutes in boiling water; fresh udon cooks in 2-3 minutes. Pre-cooked vacuum-packed udon needs only a 30-second hot water rinse - no boiling required.

Can udon be frozen?

Yes. Fresh and cooked udon both freeze well for up to one month. Freeze in portion-sized bundles, and reheat directly from frozen in boiling water or hot broth for 1-2 minutes.

Is udon gluten-free?

No. Udon is made from wheat flour and contains gluten, making it unsuitable for anyone with celiac disease or a wheat allergy. Rice noodles or certified gluten-free pasta are the closest structural alternatives.

What Is Zaatar? [Taste, Uses & More]

April 3, 2026

You spot a small jar of zaatar at a Middle Eastern grocery, and the label doesn't tell you much beyond the name. Open it and you get a hint: a bright, lemony-herb smell that cuts through immediately.

What Is Zaatar

This Levantine spice blend sits somewhere between a finishing sprinkle and a full-on condiment - closer in spirit to dukkah than to a single dried herb, but far more tart and less nutty.

QUICK SUMMARY

Zaatar is a Levantine herb-and-spice blend of dried thyme, ground sumac, and toasted sesame seeds. It's tangy, herbal, and mildly savory - used as a finishing sprinkle, a wet paste with olive oil, or a dry rub for meat and bread.

🌿Flavor: Tangy citrus-herb with a toasty sesame backbone and mild salt
🍞Best Use: Brushed on flatbread with olive oil or sprinkled over labneh
📦Shelf Life: Best within 6-12 months unopened; 3-6 months once opened

What Is Zaatar?

Zaatar is a dried herb-and-spice blend from the Levant - Lebanon, Syria, Palestine, and Jordan all have their own versions. At its core, it combines dried wild thyme (sometimes oregano or hyssop), ground sumac, toasted sesame seeds, and salt.

The name "zaatar" actually refers to both the blend and the wild herb at its base - a source of real confusion on spice shop labels. You'll also see it spelled za'atar, zahatar, or zahter depending on transliteration from Arabic.

Regional recipes vary significantly: Palestinian blends tend to be more sumac-forward and sour, while Lebanese versions often lean heavier on sesame.

Most commercial blends sold in Western grocery stores are mild-to-moderate in sourness and herb intensity, which makes them accessible for first-time buyers. However, the best jars come from specialty Middle Eastern shops, where turnover keeps the sumac fresh and fragrant.

Best Pick
Buy zaatar from a Middle Eastern specialty shop with high turnover - the sumac stays brighter and the thyme retains more aroma than supermarket versions sitting on a shelf for months.

What Does Zaatar Taste Like?

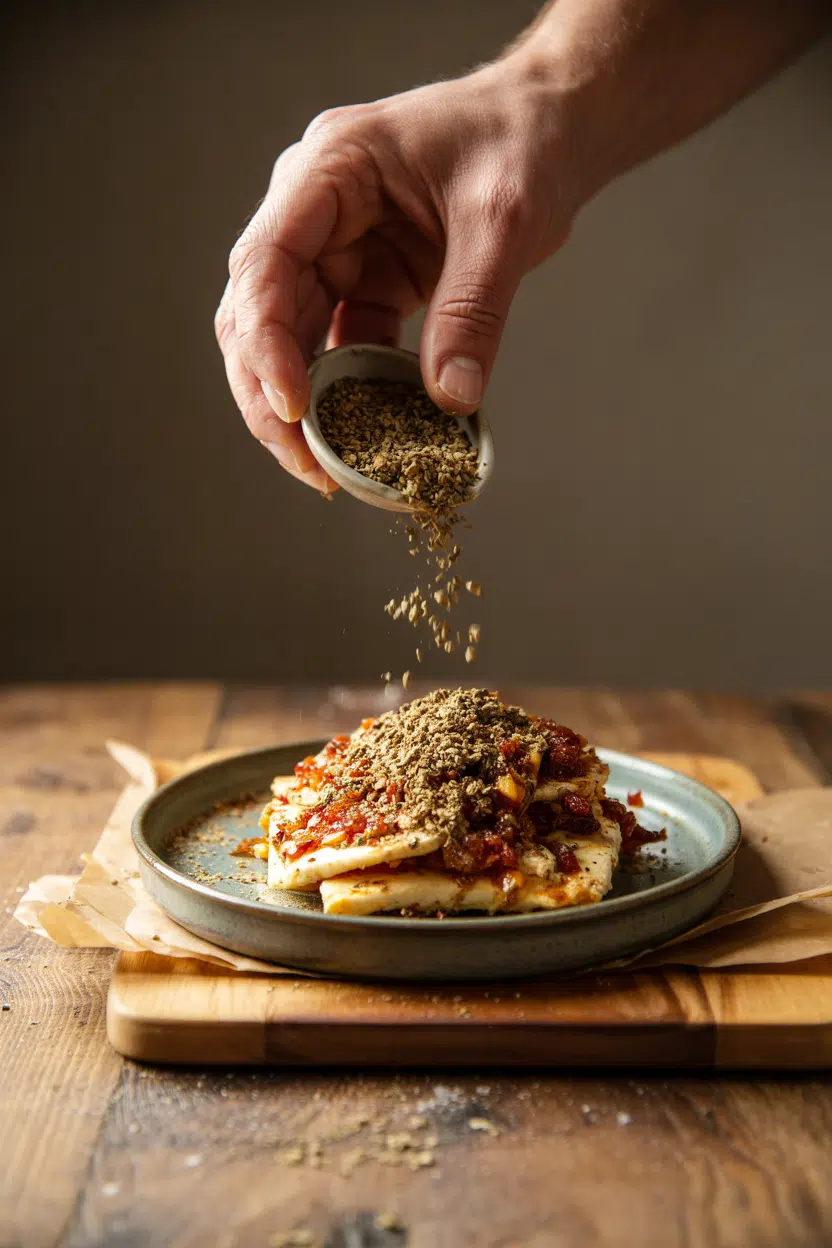
zaatar - What Is Zaatar

Sumac drives the first impression: a sharp, citrus-like sourness that's closer to lemon zest than vinegar. Underneath that, the dried thyme or oregano adds a resinous, slightly piney earthiness. Then the toasted sesame seeds round everything out with a quiet, nutty warmth.

Sensory SnapshotModerate Intensity
👅 Flavor
tangyherbalnuttysavory
✋ Texture
dryslightly grittytoasty crunch
👃 Aroma
lemonypineyearthy

Heat changes the profile. Used as a finishing sprinkle, you get the full sour-herb brightness.

Baked or roasted into a dish, the sumac mellows and the thyme turns warmer and more savory. If you've had dried oregano in a Mediterranean marinade, you already know half the flavor - zaatar adds the citrus kick and sesame depth that oregano alone can't provide.

How to Use Zaatar

Zaatar pulls double duty: it works dry as a finishing sprinkle or wet as a paste mixed with olive oil. The wet version is where it shines most.

Stir a tablespoon of zaatar into two tablespoons of good olive oil, then brush it over flatbread dough before baking - that's manakish, one of the most common Levantine breakfasts.

How Zaatar Is Used
MethodBest ForTip
🥗 Finishing SprinkleLabneh, hummus, warm rice, roasted vegetablesAdd after plating - heat kills the bright sumac note
🍞 Olive Oil PasteFlatbreads (manakish), brushed on pita before toastingUse a 1:2 ratio of zaatar to oil for even spread
🍗 Dry RubChicken thighs, fish fillets, lamb chops before grillingPress firmly into the protein; let it sit 15 minutes minimum
🥗 Stirred Into DressingsVinaigrettes, yogurt-based sauces, marinadesWhisk with lemon juice and olive oil for an instant salad dressing

Zaatar fits naturally into Lebanese and Palestinian cooking, though it works in any context calling for a lemony-herb hit. Classic pairings include labneh or plain yogurt, roasted eggplant, cauliflower, and cucumber-tomato salads.

Chicken and lamb take it well as a dry rub. For something less expected, try a thin spread of zaatar-oil on toast with a drizzle of honey - the savory-sweet contrast works.

Avoid pairing it with delicate floral teas or very sweet desserts without a savory anchor - the tartness fights rather than complements.

Try It In
🫙Labneh with Olive Oil and Za'atarThe simplest way to taste zaatar's full profile in one bowl→🧆Labneh Balls with Za'atarRolled and coated — shows how zaatar works as a crust→

How to Buy and Store Zaatar

A good jar shows visible sesame seeds and coarse reddish-brown sumac flecks. If the blend looks uniformly gray or powdery with no seeds, it likely lacks sufficient sumac or fresh thyme - skip it.

Smell before buying when possible; a flat, dusty scent means the sumac has oxidized and the thyme has faded.

Watch Out
Commercial blends often contain added salt. If you're monitoring sodium intake, check the label before using zaatar as a finishing sprinkle - some brands salt heavily.

Store zaatar in an airtight, opaque container away from heat and direct light. The sesame seeds are the first to go stale, so use your nose as the guide.

Full zaatar storage life details break down the storage window by form and conditions - but in practical terms, opened zaatar stays bright for about three to six months. Blends made with olive oil already mixed in should be refrigerated and used within a week.

Where to Start with Zaatar

If you're new to it, start with the labneh-and-olive-oil dip - it requires nothing but a bowl and five minutes. That single combination shows you everything: the tang from sumac, the herb backbone, and the sesame texture.

From there, consider a dry rub on chicken thighs before roasting. If you want to experiment with the individual components, sumac swaps and zaatar swaps can help you understand what each element brings to the blend.

  • 🫙 First use - Mix with olive oil and spoon over labneh or thick yogurt
  • 🍗 Second use - Press onto chicken thighs and roast at high heat
  • 🫓 Third use - Brush on pita or flatbread dough before baking
Shortcut
No labneh? Mix zaatar and olive oil, then spread it on toasted bread with a thin layer of cream cheese. It's not traditional, but it captures the core flavor combination in under two minutes.

Frequently Asked Questions

Is zaatar a spice or an herb?

It's both, depending on context. As a blend, zaatar is a spice mix combining dried herbs and ground sumac. The word also names the specific wild herb - a type of thyme or hyssop - used as its base ingredient.

Can you eat zaatar raw?

Yes, and raw is often best. Sprinkling it directly over labneh, yogurt, or eggs without cooking preserves the bright sumac tang and herbal aroma. Heat mellows those notes significantly.

What is zaatar made of?

The core trio is dried thyme (or oregano/hyssop), ground sumac, and toasted sesame seeds. Most blends also include salt, and some regional versions add cumin, fennel seeds, or dried marjoram.

How spicy is zaatar?

Not spicy at all in the chili-heat sense. The intensity comes from tartness and herb pungency, not capsaicin. Children and heat-sensitive eaters generally tolerate it without any issue.

Does zaatar go bad?

It won't become unsafe, but the flavor degrades. Stale zaatar loses its sumac tang first, then the thyme aroma flattens. If the blend smells like dusty paper rather than herbs, replace it.

Cube Steak with Onion Gravy

April 3, 2026

Cube steak often dries out or turns chewy when pan-fried. The fix is searing it quickly in a hot pan, then simmering in onion gravy instead of overcooking it.

Cube Steak with Onion Gravy served on a plate

The gravy does double duty-it keeps the meat tender while adding flavor. You caramelize onions low and slow, build a flour-based roux, then let the steak finish in the sauce.

Make this for budget weeknight dinners when you need something hearty that tastes like you tried.

QUICK SUMMARY

Pan-seared cube steak finished in silky onion gravy. Sear the meat first for a light crust, then simmer it in the gravy so it stays tender instead of tough. The onions cook low and slow to develop sweetness that balances the beef.

⏱️Time Reality: 35 minutes start to finish, 10 minutes active prep
🔥Critical First Step: Pat steak completely dry before seasoning or it steams instead of sears
⚠️Watch Out: Cook onions on medium-low heat or they burn instead of caramelize

Table of Contents

Toggle
  • Why This Recipe Works
  • What You'll Need
    • Ingredient Details
  • Ingredient Swaps
  • What to Serve With It
  • Store and Reheat
  • Frequently Asked Questions
  • Cube Steak with Onion Gravy
    • Method 
    • Tried this recipe?

Why This Recipe Works

The technique matters more than the cut here. Rich mains need something to cut through, and a simple gravy side does exactly that-it keeps the meat from drying out while adding layers of flavor.

Quick Reference
⏱️
Prep Time
10 min
🔥
Cook Time
25 min
⏰
Total Time
35 min
🍽️
Servings
4 servings
📊
Difficulty
Easy
🏷️
Category
Main Dish
💡
Quick Tip
Pat steak dry for a better crust
🎯
Best For
Weeknight | Budget
  • High-heat sear creates texture: A hot cast iron skillet crisps the outside in 3-4 minutes per side without overcooking the thin meat
  • Slow-cooked onions add sweetness: Caramelizing onions on medium-low for 10-12 minutes develops natural sugars that balance the beef
  • Flour roux thickens without lumps: Cooking flour in fat for 2 minutes before adding liquid prevents clumping and raw flour taste
  • Simmering finishes the steak: The meat stays in the gravy for 5-7 minutes, which tenderizes it instead of drying it out
  • Resting redistributes juices: Tenting the steak for 5 minutes after cooking keeps the interior moist when you slice it
Quick Tip
Leave 1 inch between steaks in the pan-overcrowding traps steam and you lose the crust.

What You'll Need

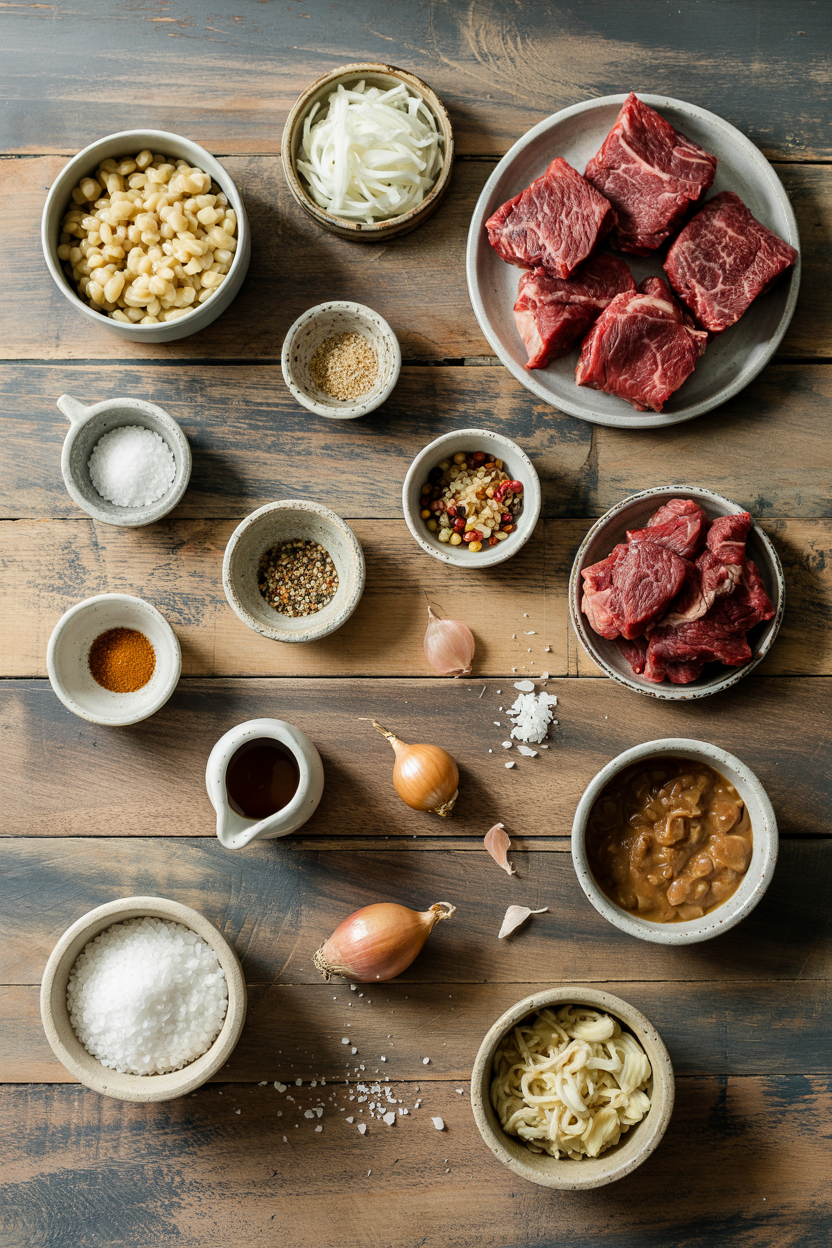
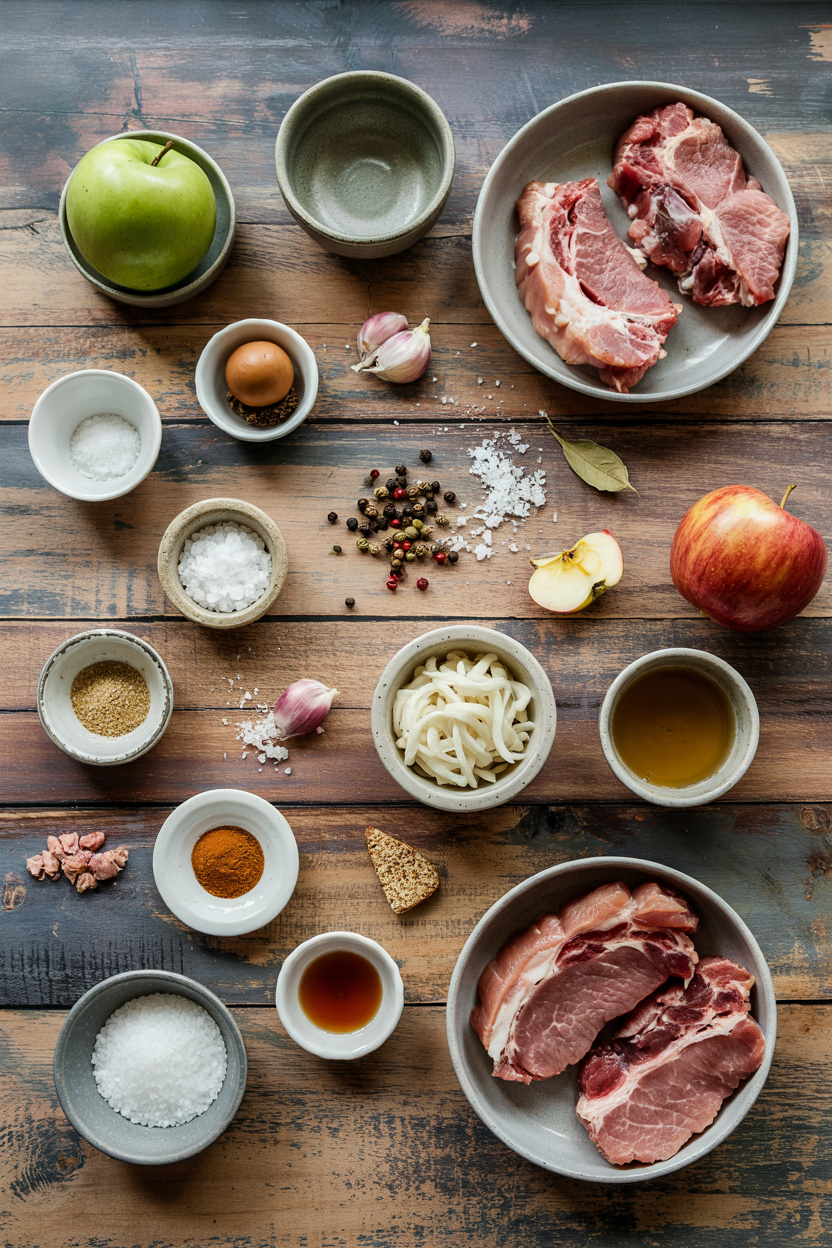
Ingredients for Cube Steak with Onion Gravy

Most of this comes from pantry staples you already have. A good chicken can make or break the plate, but for a version that takes a different direction, this related chicken recipe uses similar techniques with a creamier sauce.

🥩
Protein
  • Cube steak (4 pieces, about 1½ lbs)
🧅
Aromatics
  • Yellow onions (2 large, sliced thin)
  • Garlic (2 cloves, optional)
🥣
Gravy Base
  • All-purpose flour (¼ cup)
  • Beef broth (2 cups)
  • Butter (2 tablespoons)
  • Vegetable oil (2 tablespoons)
🧂
Seasonings
  • Salt (1 teaspoon)
  • Black pepper (½ teaspoon)
  • Thyme (½ teaspoon, optional)

Ingredient Details

  • Cube steak
    Look for pieces with visible tenderizing marks-avoid thick cuts over ½ inch or they won't cook evenly
  • Yellow onions
    Slice them ¼ inch thick so they break down into the gravy without turning mushy
  • All-purpose flour
    Measure level, not heaping-too much makes the gravy paste-like instead of silky
  • Beef broth
    Use low-sodium if you're watching salt-you can always add more but can't take it out
  • Butter
    Let it melt completely before adding flour or the roux won't cook evenly
  • Vegetable oil
    High smoke point keeps the pan from smoking when you sear the meat
  • Black pepper
    Freshly ground adds more bite than pre-ground-use less if you're sensitive to heat

Ingredient Swaps

The core ingredients stay the same, but the gravy base adapts. The this dip works best when it hits the table at the same time as the main, so for a version that comes together quickly, tangy sauce recipe shows how to build flavor with minimal ingredients.

  • Gluten-free flour blend for all-purpose flour: Use a 1:1 blend-the gravy thickens slightly slower but gets there in the same time
  • Olive oil or dairy-free margarine for butter: Swap equal amounts-you lose some richness but keep the gravy smooth
  • Thin-cut round steak for cube steak: Pound it with a meat mallet before cooking-adds 2-3 minutes to the sear time
  • Cornstarch for flour (use half the amount): Mix with cold water first, then stir into the gravy-it thickens faster and creates a clearer sauce

All-Purpose Flour Roux

Works for: Classic texture, longer simmer time without breaking

Skip if: You need gluten-free or want a clearer sauce

Cornstarch Slurry

Works for: Faster thickening, gluten-free, glossy finish

Skip if: You're simmering longer than 10 minutes-it can thin out

Instructions

The timing is forgiving once you nail the sear. Most people skip salad, but it balances the meal-for a version that comes together quickly, a fresh salad side adds crunch without extra cooking.

  1. Pat steak dry and season both sides. Use paper towels to remove all moisture-wet meat steams instead of searing. Season with salt and pepper right before cooking.

  2. Sear steak in hot oil 3-4 minutes per side. Heat vegetable oil in a cast iron skillet over medium-high until it shimmers. Don't move the meat once it hits the pan-let it develop a golden crust. Remove to a plate and tent with foil.

  3. Cook onions in the same pan 10-12 minutes. Lower heat to medium-low and add butter. Stir onions every 2 minutes until they turn golden and soft. Add garlic in the last minute if using.

  4. Whisk in flour and cook 2 minutes. Sprinkle flour over onions and stir constantly-it should smell nutty, not raw. Gradually pour in beef broth while whisking to prevent lumps.

  5. Simmer gravy 5-7 minutes, then return steak. Let the gravy bubble gently until it coats the back of a spoon. Nestle steak into the sauce and cook 3-4 minutes until heated through and internal temp hits 145°F.

Watch Out
Don't rush the onions-high heat burns them instead of caramelizing, and burnt onions make the whole gravy bitter.

What to Serve With It

The gravy needs something to soak into, so you want starch on the plate. Rich mains need something to cut through, and slaw does exactly that-for a version that comes together quickly, crisp refreshing coleslaw balances the richness without competing for attention. If you're planning the whole meal, check out these weeknight grilled ham steak meal ideas for more pairing options.

Side Dish Prep Why It Works How to Serve
Mashed potatoes Easy Creamy texture soaks up gravy without competing for flavor Spoon potatoes on plate, nestle steak on top, pour gravy over both
Buttered egg noodles Easy Neutral base lets the onion gravy be the star Toss noodles with butter, serve steak on top with gravy pooled around
Steamed green beans Easy Crisp snap cuts through richness, adds color to the plate Pile beans on the side, season with salt and lemon juice
Roasted carrots Medium Natural sweetness echoes the caramelized onions Roast at 425°F for 20 minutes, serve alongside steak
Garlic mashed potatoes Medium Bold garlic flavor complements beef without overpowering Make potatoes creamy, spoon gravy generously over top

Three ways to serve it:

  • Over mashed potatoes: Make a well in the center, nestle the steak, pour gravy into the well so it pools around the meat
  • With egg noodles: Toss noodles with butter and parsley, lay steak on top, spoon gravy over everything
  • Alongside roasted vegetables: Serve steak with carrots and green beans on the side, drizzle gravy over the steak only
Best Pick
Mashed potatoes soak up the most gravy and turn a simple dinner into comfort food that tastes like it took effort.

Store and Reheat

The gravy thickens in the fridge, so you'll need to thin it when reheating. Salad adds the contrast this plate needs, but timing matters-for a version that comes together quickly, quick rolls dish reheats well alongside the steak.

Method Time Best For
🍳 Stovetop 5-7 min Keeping gravy smooth and steak tender
🔥 Oven 15 min at 325°F Reheating multiple portions without drying out
📦 Microwave 2-3 min Single servings when speed matters

For best results when storing:

  • Cool completely before refrigerating: Let steak and gravy reach room temp within 2 hours-hot food raises fridge temperature and creates condensation
  • Store in shallow containers: Spread steak and gravy in a single layer so it cools faster and reheats evenly
  • Add broth when reheating: Stir in 2-3 tablespoons of beef broth or water to thin the gravy back to original consistency
  • Reheat gently on stovetop: Use medium-low heat and stir often-high heat breaks the gravy and toughens the meat
  • Freeze in portions: Wrap individual steaks with gravy in foil, then place in freezer bags-thaw overnight in the fridge before reheating

Frequently Asked Questions

How long to cook cube steak at medium heat?

Cook cube steak 3-4 minutes per side over medium-high heat in a hot pan. The meat is thin, so it cooks fast-pull it when the internal temp hits 145°F or no pink shows in the center.

Can I make cube steak with onion gravy ahead?

Yes-cook the steak and gravy completely, cool within 2 hours, then refrigerate up to 3 days. Reheat gently on the stovetop with a splash of broth to thin the gravy.

What goes with cube steak with onion gravy?

Serve it over mashed potatoes, buttered egg noodles, or alongside steamed green beans and roasted carrots. You need something that soaks up the gravy and balances the richness.

How do I know when cube steak with onion gravy is done?

The steak is done when an instant-read thermometer reads 145°F in the thickest part. If you don't have a thermometer, cut into the center-no pink means it's cooked through.

Can I use other cuts of steak for cube steak with onion gravy?

Yes-use thin-cut round steak or minute steak, but pound them with a meat mallet first. They'll take 2-3 minutes longer to cook and won't be quite as tender as pre-tenderized cube steak.

Cube Steak with Onion Gravy

No ratings yet
This Cube Steak with Onion Gravy recipe features pan-seared cube steak finished in a rich, flavorful onion gravy that keeps the meat tender. Caramelized onions create a sweet base while the gravy simmers the steak gently to avoid drying.
Print Recipe Pin Recipe
Prep Time 10 minutes mins
Cook Time 25 minutes mins
Total Time 35 minutes mins
Servings: 4 servings
Course: Main Dish
Cuisine: American
Ingredients Equipment Method Notes

Ingredients
  

  • 4 pieces cube steak about 1½ lbs, tenderized with visible marks
  • 2 large yellow onions sliced thin, about ¼ inch thick
  • 2 cloves garlic optional, minced
  • 0.25 cup all-purpose flour level measure
  • 2 cups beef broth low sodium recommended
  • 2 tablespoons butter let melt completely before adding flour
  • 2 tablespoons vegetable oil high smoke point for searing
  • 1 teaspoon salt
  • 0.5 teaspoon black pepper preferably freshly ground
  • 0.5 teaspoon thyme optional

Equipment

  • Cast iron skillet Used to sear steak and cook onion gravy
  • Paper towels To pat steak dry before searing
  • Whisk To mix flour and broth without lumps
  • Tongs For flipping steak during searing
  • Instant-read thermometer To check steak internal temperature
  • Foil To tent steak while resting

Method
 

  1. Use paper towels to pat the cube steak dry completely to prevent steaming and promote searing. Season both sides with salt and black pepper right before cooking.
    4 pieces cube steak, 1 teaspoon salt, 0.5 teaspoon black pepper
  2. Heat vegetable oil in a cast iron skillet over medium-high heat until shimmering. Add steak pieces, leaving 1 inch between each. Sear for 3-4 minutes per side without moving the meat to develop a golden crust. Remove steak to a plate and tent with foil.
    4 pieces cube steak, 2 tablespoons vegetable oil
  3. Reduce heat to medium-low and add butter to the same skillet. Add the sliced onions and cook, stirring every 2 minutes, for 10-12 minutes until golden and soft. Add minced garlic during the last minute if using.
    2 large yellow onions, 2 cloves garlic, 2 tablespoons butter
  4. Sprinkle all-purpose flour over the cooked onions and stir constantly for 2 minutes until the roux smells nutty and there is no raw flour taste. Gradually whisk in beef broth to prevent lumps.
    0.25 cup all-purpose flour, 2 cups beef broth, 2 large yellow onions
  5. Let the gravy simmer gently for 5-7 minutes until it coats the back of a spoon. Nestle the seared steaks into the gravy and cook for 3-4 more minutes, or until the internal temperature reaches 145°F. Remove from heat and tent with foil to rest for 5 minutes before serving.
    4 pieces cube steak, 2 cups beef broth, 0.5 teaspoon thyme

Notes

  • Pat steak completely dry before seasoning to ensure a good sear and prevent steaming.
  • Cook onions on medium-low heat to caramelize slowly without burning, which would cause bitterness.
  • Leave space between steaks in the pan; overcrowding traps steam and prevents browning.

Tried this recipe?

Let us know how it was!

What Is Tuna? Taste, Texture, Culinary Uses & More

April 3, 2026

Crack open a tin of good albacore packed in olive oil and the smell alone tells you what you're dealing with - clean, marine, and faintly mineral. Tuna sits in a category of its own among everyday fish: dense enough to eat like a steak, fatty enough to melt at the belly, and mild enough to anchor anything from a poke bowl to a Niçoise.

What Is Tuna

If you've only eaten it canned, the fresh version will genuinely reframe how you think about the fish.

Pelagic oily fish like mackerel swaps that work and sardines share some of tuna's marine character, though none match its meatiness - just as keeping sardines fresh follows different rules than handling a fresh tuna loin.

QUICK SUMMARY

Tuna is a large, migratory saltwater fish with firm, meaty flesh and a moderate, umami-rich flavor. Sold fresh, frozen, or canned, it spans everything from buttery bluefin toro used raw in sushi to shelf-stable albacore for everyday cooking.

🐟Category: Oily pelagic fish, multiple species
👅Flavor: Umami-rich, briny, slightly mineral, buttery in fatty cuts
🍽️Best Uses: Sashimi, seared steak, poke bowls, Niçoise, canned salads
🛒Buy It: Bright red-pink, firm, glossy; avoid brown edges or sour smell
⏱️Shelf Life: Fresh 1-2 days fridge; frozen 2-3 months; canned 2-5 years
⚠️Note: Larger species carry higher mercury; follow guidelines if pregnant

What Is Tuna?

Tuna belongs to the family Scombridae and comprises several distinct species, each with different culinary profiles. Bluefin (Thunnus thynnus) is the most prized - a massive, high-fat fish whose fatty belly section, called toro, commands extraordinary prices at sushi counters.

Yellowfin and bigeye are leaner, sold fresh as "ahi" in Hawaiian cuisine and Japanese sashimi bars alike.

Albacore (Thunnus alalunga) has the palest flesh of the group, mild in flavor, and is the species most commonly labeled "white tuna" in North American cans. Skipjack is the workhorse of global canning - smaller, darker, and more assertive in flavor.

All tuna are pelagic, meaning they roam open ocean rather than hugging the seafloor. That constant movement builds dense, deeply vascularized muscle, which explains the red-to-deep-pink color of most cuts and the iron notes you detect on the palate.

  • 🐠 Bluefin - richest fat content; toro belly is the benchmark for sashimi
  • 🐠 Yellowfin / Bigeye (Ahi) - lean, firm, mild; the go-to for poke and seared steaks
  • 🐠 Albacore - pale, mild, low in fat; premium canned and slow-poach candidate
  • 🐠 Skipjack - small, dark, assertive; dominant species in most canned tuna worldwide

What Does Tuna Taste Like?

tuna - What Is Tuna

Raw tuna reads as umami-forward and gently briny, with iron notes that vary by cut. Lean loin sections taste clean and subtly oceanic.

Fatty toro from the belly is closer to rich salmon belly - unctuous, almost sweet, with the fat carrying flavor forward.

Heat changes everything. Seared rare over high heat, a yellowfin steak develops a savory crust that genuinely resembles lean beef - firm bite, mineral depth, no fishiness.

Sensory SnapshotModerate Intensity
👅 Flavor
umami-richbrinylightly metallicbuttery (fatty cuts)
✋ Texture
steak-like rawflaky when cooked
👃 Aroma
clean marinemildly fishy if older

Overcooked tuna loses its moisture rapidly and turns chalky, which is why most cooking advice skews toward rare or medium-rare centers. The metallic note intensifies when the fish ages - fresh tuna should smell clean, not sharp.

Golden Rule
Pull seared tuna off the heat with a raw, cool center still visible. Residual heat continues cooking it on the plate - finishing at medium-rare rather than gray and dry.

How to Use Tuna

Raw preparations are where high-grade tuna shines hardest. Sliced thin as sashimi or draped over sushi rice as nigiri, bluefin and yellowfin need almost nothing - maybe soy sauce, wasabi, and a curl of pickled ginger. Poke bowls layer cubed ahi with soy, sesame oil, scallion, and cucumber over rice; note that poke spoilage signs appear quickly once the fish is dressed, so serve it promptly.

For cooked applications, a thick yellowfin or bigeye steak seared in a hot cast iron pan with a cracked pepper crust hits the table in under four minutes.

Mediterranean preparations go longer and lower - tuna grilled over charcoal and finished with olive oil and lemon, or slow-poached in olive oil until just set, which produces an exceptionally tender result for pasta or salads.

Canned tuna operates in a separate register entirely. Albacore packed in oil works beautifully in a Niçoise with green beans and hard-boiled eggs, while skipjack in water handles sandwiches and quick pasta sauces equally well. If you're considering swapping out tuna in a recipe, the preparation method matters more than the species.

How Tuna Is Used
MethodBest ForTip
🥗 Raw / SashimiSashimi, nigiri, poke bowlsUse sushi-grade bluefin or yellowfin; keep ice-cold until serving
🔥 Hot SearTuna steak, pepper-crusted loin2 min per side max; rare center is the goal
🍳 Slow PoachSalad, pasta, sandwichesSubmerge in olive oil at 140°F; albacore holds up best
🔥 GrilledKebabs, Mediterranean steaksMarinate briefly in lemon-oil; avoid drying with long cook times
🥫 Canned / FlakedNiçoise, tuna salad, stewsOil-packed albacore has richer flavor; water-packed is leaner

Good sides for raw tuna preparations extend the whole plate - resources on sides for sashimi show how daikon, shiso, and pickled vegetables balance the fish without competing.

Try It In
🥗Classic Niçoise Salad with TunaOil-packed tuna at its most composed→🥪Old-Fashioned Tuna SaladThe canned albacore benchmark, done properly→🌿Tuna Salad with Celery and DillBrighter, herb-forward take on the classic→

How to Buy and Store Tuna

Fresh tuna should look glossy and firm, with color ranging from bright cherry-red in lean cuts to deep burgundy in bluefin. Dull brown edges or any sour, ammonia-like odor are rejection signals - no exceptions.

For freezing tuna steak at home, vacuum-seal the portions before freezing to prevent freezer burn and oxidation of the fat.

Watch Out
Some retailers treat fresh tuna with carbon monoxide to preserve its red color artificially. The flesh looks vibrant even when it's past its prime - always rely on smell and texture, not color alone.

Refrigerate fresh tuna tightly wrapped at 32-38°F and use it within 1-2 days.

Frozen tuna holds quality for 2-3 months.

For the full breakdown of how long tuna keeps across fresh, frozen, and canned forms, the rules differ more than most people expect - similar to how salmon spoilage signs track differently from other fish.

Canned tuna stays shelf-stable 2-5 years unopened; once opened, transfer to a covered container and refrigerate for up to 3 days.

Shortcut
Buy a 150-200g fresh tuna block rather than a pre-cut steak. You control the thickness, waste less trim, and can slice sashimi from one end while searing the other.

Start with the Can, Then Go Fresh

New to tuna? Begin with oil-packed albacore in a Niçoise or simple pasta - it's forgiving, widely available, and genuinely shows the fish's flavor range.

Once that feels familiar, step up to a thick yellowfin steak seared hard and fast in cast iron. That's the jump that converts most canned-tuna skeptics.

Frequently Asked Questions

Is tuna a red meat or white meat fish?

Technically neither by culinary classification, but tuna flesh is red-to-pink due to high myoglobin content from its constant swimming. Albacore is the exception - its pale flesh earns it the "white tuna" label on cans.

Why does tuna taste metallic?

The metallic note comes from iron-rich myoglobin in the dark muscle tissue. It's most pronounced in skipjack and the bloodline of any species - trimming the dark strip before cooking reduces it noticeably.

Can you eat raw tuna safely?

Yes, with the right sourcing. Buy fish labeled sushi-grade or sashimi-grade from a trusted fishmonger, which indicates it was frozen to parasite-killing temperatures. Immunocompromised individuals and pregnant people should avoid raw fish regardless.

What is the healthiest type of tuna to eat?

Skipjack and canned light tuna have the lowest mercury levels among common species, making them the safer choice for frequent consumption. Bluefin and bigeye carry the highest mercury and are best eaten occasionally.

How do you tell if fresh tuna has gone bad?

Sour or ammonia-like odor is the clearest sign, followed by a tacky or slimy surface and brown discoloration throughout the cut. Good fresh tuna smells clean and oceanic, not sharp.

Greek Lamb Gyros

April 3, 2026

Tender lamb with crispy, caramelized edges wrapped in warm pita with cool yogurt sauce and fresh veggies. That's what happens when you marinate lamb shoulder overnight and roast it at high heat.

Greek Lamb Gyros served on a plate

The marinade does most of the flavor work. Garlic, oregano, and lemon juice tenderize the meat while you sleep.

This works for meal prep when you want homemade gyros without standing over a vertical rotisserie. Slice the lamb thin after it rests and you get that same texture as the diner version.

QUICK SUMMARY

Greek lamb gyros use marinated lamb shoulder roasted until tender with crispy edges, then sliced thin and served in warm pita with tzatziki, tomatoes, and onions. Marinate the meat at least 4 hours (overnight is better) and cook to 145°F internal temp for juicy, flavorful results.

⏰Time Reality: 15 min prep, 4-24 hr marinating, 45 min roasting
🔪Critical First Step: Marinate lamb with garlic, oregano, lemon juice in fridge
⚠️Watch Out: Don't skip resting meat 10 min or juices run out when slicing

Table of Contents

Toggle
  • Why This Recipe Works
  • What You'll Need
    • Ingredient Details
  • Ingredient Swaps
  • What to Serve With It
  • Store and Reheat
  • Frequently Asked Questions
  • Greek Lamb Gyros
    • Method 
    • Tried this recipe?

Why This Recipe Works

Roasting lamb shoulder at 375°F renders the fat slowly while keeping the meat tender, unlike lean cuts that dry out. High heat at the end crisps the edges without overcooking the center. For more lamb ideas that work with bold flavors, this quick shanks dish uses similar braising techniques for fall-apart meat.

Quick Reference
⏱️
Prep Time
15 min + 4-24 hr marinating
🔥
Cook Time
45 min
⏰
Total Time
1 hr (plus marinate time)
🍽️
Servings
4-6 servings
📊
Difficulty
Medium
🏷️
Category
Main Dish
💡
Quick Tip
Marinate lamb 4+ hours for best flavor
🎯
Best For
Weeknight | Meal prep | Casual entertaining

Five reasons this recipe delivers:

  • Fatty lamb shoulder stays juicy at 145°F while lean cuts turn dry and tough
  • Overnight marinating breaks down muscle fibers with lemon acid and salt, making meat tender
  • Resting 10 minutes after roasting keeps juices inside instead of running out when you slice
  • Slicing thin creates the signature gyro texture and makes chewy spots disappear
  • Tzatziki sauce adds cool, creamy contrast that balances rich lamb fat
Quick Tip
Use a meat thermometer to hit 145°F exactly - lamb continues cooking 5 degrees while resting

What You'll Need

Ingredients for Greek Lamb Gyros

Lamb shoulder costs less than leg and has more fat marbling, which means it stays moist during roasting. Most grocery stores carry it bone-in or boneless - boneless works better here since you'll slice it thin.

🍖
Protein
  • 2 lbs lamb shoulder or leg, boneless
🧄
Aromatics
  • 4 garlic cloves, minced
  • 1 small onion, sliced
🌶️
Seasonings
  • 2 tablespoon dried oregano
  • 1 teaspoon salt
  • ½ teaspoon black pepper
🥢
Marinade & Sauce
  • ¼ cup lemon juice (fresh)
  • 3 tablespoon olive oil
  • 1 cup Greek yogurt
🥬
Fresh Vegetables
  • 1 cucumber, grated and drained
  • 2 tomatoes, sliced
🍜
Bread
  • 4-6 pita breads

Ingredient Details

  • Lamb shoulder
    Look for pieces with visible fat streaks - that marbling keeps meat moist during roasting
  • Fresh lemon juice
    Bottled juice lacks the acid strength to tenderize meat properly - squeeze 2-3 lemons
  • Greek yogurt
    Full-fat yogurt makes thicker tzatziki that doesn't slide off the meat
  • Dried oregano
    Use Mediterranean oregano, not Mexican - the flavor profile is sharper and more authentic
  • Cucumber for tzatziki
    Grate it, then squeeze in a kitchen towel for 10 minutes to remove water that makes sauce runny
  • Pita bread
    Warm pitas in a 350°F oven for 1-2 minutes so they fold without cracking
  • Garlic
    Mince it fine so it distributes evenly in the marinade - big chunks burn during roasting

Ingredient Swaps

Ground lamb cooks faster but loses the sliced texture that defines a gyro. If you swap it in, shape the meat into a loaf and slice after cooking for a closer match.

Four swaps that work:

  • Greek yogurt → dairy-free coconut yogurt - loses traditional tang but keeps sauce creamy (dairy-free)
  • Pita bread → gluten-free flatbread - different texture but holds fillings just as well (gluten-free)
  • Fresh lemon juice → bottled lemon juice - less bright flavor and weaker tenderizing (budget-friendly)
  • Lamb shoulder → ground lamb - faster cooking, softer texture, shape into loaf and slice thin (method swap)

Lamb Shoulder

Works for: authentic sliced texture, holds up to overnight marinating, visible fat keeps it juicy

Skip if: you need dinner in under 2 hours or prefer leaner meat

Ground Lamb

Works for: quick weeknight version, cooks in 15 minutes, easier to find at most stores

Skip if: you want traditional sliced gyro texture or plan to meal prep for the week

Instructions

Marinating overnight makes the biggest flavor difference, but 4 hours minimum gets you tender meat. The lamb roasts hands-off while you prep the tzatziki and toppings.

  1. Mix marinade and coat lamb: Whisk garlic, oregano, lemon juice, olive oil, salt, and pepper in a bowl. Place lamb in a shallow dish, pour marinade over it, turn to coat all sides. Cover and refrigerate 4-24 hours.

  2. Roast the lamb: Preheat oven to 375°F. Transfer lamb to a roasting pan or sheet pan, pour marinade over top. Roast 40-45 minutes until internal temp hits 145°F on a meat thermometer. Increase heat to 425°F for final 5 minutes to crisp edges.

  3. Rest and slice: Remove lamb from oven, tent with foil, rest 10 minutes. Slice meat into thin strips about ⅛ inch thick using a sharp knife.

  4. Make tzatziki: Grate cucumber, squeeze in a kitchen towel to remove excess water. Mix drained cucumber with Greek yogurt, 1 minced garlic clove, 1 tablespoon lemon juice, salt. Chill until serving.

  5. Assemble gyros: Warm pitas in oven at 350°F for 1-2 minutes. Layer sliced lamb, tomatoes, onions, and tzatziki inside each pita. Fold and serve immediately.

Golden Rule
Never skip resting the lamb - cutting it immediately releases all the juices onto the cutting board instead of keeping them in the meat

What to Serve With It

Most gyro plates feel incomplete without something starchy and something fresh to balance the richness. A good side dish soaks up extra tzatziki and adds textural contrast.

Side Dish Prep Why It Works How to Serve
Greek salad Easy Fresh cucumbers, tomatoes, feta add cool crunch against warm lamb Toss right before serving to keep veggies crisp
Roasted potatoes Easy Starchy base soaks up tzatziki and balances rich meat Cut into wedges, roast at 400°F for 30 min
Cucumber slices Easy Fresh crunch and hydration between bites of lamb Slice thin, sprinkle with salt and lemon juice
Pickled onions Easy Acidity cuts through lamb fat, adds sharp bite Quick-pickle in vinegar, sugar, salt for 20 min
Dolmas (stuffed grape leaves) Medium Authentic Mediterranean pairing, herby and tangy Serve cold or room temp as appetizer

Three ways to serve it:

  • Weeknight plate: Serve lamb over rice with a classic salad dish on the side - no pita needed, just pile everything in a bowl
  • Meal prep version: Pack sliced lamb, tzatziki, and chopped veggies separately in containers - assemble gyros fresh each day so pitas don't get soggy
  • Entertaining spread: Set out warm pitas, lamb, three sauces (tzatziki, hummus, harissa), and bowls of toppings so guests build their own gyros
Best Pick
Roasted potatoes are the most reliable side - they reheat well, soak up sauce, and fill out the plate without competing with the lamb

Store and Reheat

Lamb stays tender in the fridge for 3-4 days if you store it in shallow containers so it cools quickly. Freezing works but the texture gets slightly softer after thawing - still good for gyros, just not as snappy.

Method Time Best For
🍳 Stovetop 3-5 min medium heat Quick reheat with crispy edges restored
🔥 Oven 10 min at 350°F Large portions, even heating without drying out
📦 Microwave 1-2 min medium power Small portions, fastest method but edges won't crisp

For best results when storing:

  • Cool lamb completely before refrigerating - hot meat in a sealed container creates steam that makes it soggy
  • Store tzatziki separately from lamb and veggies - yogurt sauce breaks down when mixed with warm meat
  • Freeze lamb up to 2 months in freezer bags with air pressed out - thaw overnight in fridge before reheating
  • Reheat only what you'll eat - lamb dries out if you reheat it multiple times
  • Warm pitas fresh each time - storing them with moist fillings makes them gummy and tears them when you fold

Frequently Asked Questions

How long to cook Greek lamb gyros at 375°F?

Roast lamb at 375°F for 40-45 minutes until internal temp hits 145°F. Increase heat to 425°F for the final 5 minutes to crisp the edges.

Can I make lamb gyro meat ahead and store?

Yes, roast the lamb up to 3 days ahead, let it cool completely, then refrigerate in airtight containers. Reheat on the stovetop for 3-5 minutes to restore crispy edges.

What goes with Greek lamb gyros for sides?

Roasted potatoes, Greek salad, cucumber slices, and pickled onions all balance the rich lamb. Starchy sides like potatoes soak up tzatziki sauce, while fresh veggies add crunch.

How do I know when lamb gyros meat is done?

Use a meat thermometer to check for 145°F internal temp in the thickest part. The meat should be pink in the center but firm to touch - it continues cooking 5 degrees while resting.

Can I use ground lamb instead of sliced lamb?

Yes, shape ground lamb into a loaf, roast at 375°F for 25-30 minutes to 160°F, then slice thin. The texture will be softer than traditional gyro meat but it works for a quick weeknight version.

Greek Lamb Gyros served on a plate

Greek Lamb Gyros

No ratings yet
Greek Lamb Gyros feature tender, marinated lamb shoulder roasted to juicy perfection with crispy edges, sliced thin, and wrapped in warm pita bread with creamy tzatziki and fresh vegetables. Marinating the lamb overnight with garlic, oregano, and lemon juice enhances the flavor and tenderness. This recipe offers a hands-off roasting method for classic gyros without a rotisserie.
Print Recipe Pin Recipe
Prep Time 15 minutes mins
Cook Time 45 minutes mins
Total Time 1 hour hr
Servings: 6 servings
Course: Dinner, Main Dish
Cuisine: Greek, Mediterranean
Ingredients Method Notes

Ingredients
  

  • 2 lbs lamb shoulder boneless
  • 4 cloves garlic minced
  • 1 small onion sliced
  • 2 tablespoon dried oregano
  • 1 teaspoon salt
  • 0.5 teaspoon black pepper
  • 0.25 cup lemon juice freshly squeezed
  • 3 tablespoon olive oil
  • 1 cup Greek yogurt full-fat
  • 1 whole cucumber grated and drained
  • 2 whole tomatoes sliced
  • 4-6 pita breads pita bread warm before serving
  • 1 clove garlic minced, for tzatziki
  • 1 tablespoon lemon juice for tzatziki
  • to taste salt for tzatziki

Method
 

  1. Whisk together minced garlic, oregano, lemon juice, olive oil, salt, and pepper to make the marinade. Place boneless lamb shoulder in a shallow dish and pour marinade over, turning to coat all sides evenly. Cover and refrigerate for 4 to 24 hours, preferably overnight.
    4 cloves garlic, 2 tbsp dried oregano, 0.25 cup lemon juice, 3 tbsp olive oil, 1 tsp salt, 0.5 tsp black pepper, 2 lbs lamb shoulder
  2. Preheat oven to 375°F (190°C). Transfer lamb and marinade to a roasting pan or sheet pan. Roast for 40 to 45 minutes, or until a meat thermometer inserted into the thickest part reads 145°F (63°C). Increase oven temperature to 425°F for the last 5 minutes to crisp the edges.
    2 lbs lamb shoulder
  3. Remove lamb from oven and tent loosely with foil. Let it rest for 10 minutes to allow juices to redistribute. Then slice the lamb thinly into strips about ⅛ inch thick using a sharp knife.
    2 lbs lamb shoulder
  4. Grate the cucumber and squeeze excess water out using a kitchen towel. In a bowl, mix drained cucumber with Greek yogurt, 1 minced garlic clove, 1 tablespoon lemon juice, and salt to taste. Chill until ready to serve.
    1 whole cucumber, 1 cup Greek yogurt, 1 clove garlic, 1 tbsp lemon juice, to taste salt
  5. Warm pita breads in a 350°F oven for 1 to 2 minutes until pliable. Fill each pita with sliced lamb, tomato slices, onion slices, and a generous spoonful of tzatziki sauce. Fold and serve immediately.
    4-6 pita breads pita bread, 2 lbs lamb shoulder, 2 whole tomatoes, 1 small onion, 1 cup Greek yogurt

Notes

  • Marinate the lamb shoulder for at least 4 hours or overnight for best flavor and tenderness.
  • Use a meat thermometer to reach 145°F internal temperature; meat will continue to cook while resting.
  • Rest lamb 10 minutes after roasting to keep juices inside and prevent dryness when slicing.

Tried this recipe?

Let us know how it was!

What Is Whiskey? Taste, Uses & Aging Notes Explained

April 3, 2026

Warm alcohol heat reaches the back of your throat before the flavor even registers - that signature barrel-driven warmth is what separates whiskey from every other spirit on the shelf. The first smell gives you toasted oak and vanilla; the first sip layers in caramel, spice, or smoke depending on where the whiskey was made and how long it sat in wood.

What Is Whiskey

If you've been reaching for brandy swaps or lighter spirits in your cooking, whiskey brings a depth that's harder to replicate.

QUICK SUMMARY

Whiskey is a distilled grain spirit aged in charred oak barrels. Its flavor ranges from sweet caramel and vanilla in bourbon to peaty smoke in Islay Scotch. It works in pan sauces, desserts, marinades, and cocktails.

🥃Flavor: Oak-driven caramel and vanilla with spice or smoke by style
🍳Best Uses: Pan sauces, glazes, dessert soaks, marinades, cocktails
🛒Buying Tip: Check style, cask finish, and proof before you buy
📦Storage: Upright, cool, dark - indefinite unopened, months to years opened
⚠️Avoid With: Delicate seafood and fresh salads where oak and smoke overpower

What Is Whiskey?

Whiskey is a distilled spirit made from a fermented cereal grain mash - most often corn, barley, rye, wheat, or a blend - and aged in charred oak barrels. That aging step is what gives it color and most of its flavor.

Without barrel contact, the spirit runs clear and relatively neutral.

The spelling varies by origin. Scotland, Canada, and Japan use "whisky"; the United States and Ireland use "whiskey." Beyond spelling, the styles diverge significantly.

  • Scotch single malt - made from malted barley at a single distillery; often smoky or fruity depending on region
  • Bourbon - American style requiring at least 51% corn in the mash bill and new charred oak barrels; notably sweet
  • Rye whiskey - U.S. or Canadian style with rye-forward spice and drier finish
  • Irish whiskey - typically triple-distilled, lighter-bodied, and approachable
  • Blended whiskey - a mix of malt and grain whiskeys; consistent and often more affordable

The age statement on a bottle marks the youngest whiskey in the blend. No age statement doesn't mean young - it means the producer chose not to specify.

What Does Whiskey Taste Like?

whiskey - What Is Whiskey

Whiskey's core flavor comes from barrel maturation. Charred oak releases vanillin, lactones, and tannins into the spirit over time, producing the vanilla, caramel, and toffee notes most drinkers recognize first.

The grain bill adds a second layer: corn brings sweetness, rye adds pepper and spice, and malted barley contributes biscuit and dried fruit.

Sensory SnapshotModerate Intensity
👅 Flavor
caramelvanillabaking spicepeat smoke
✋ Texture
silkywarming
👃 Aroma
toasted oakvanillasmoky peat

Islay Scotch introduces phenolic peat smoke - a distinctly medicinal, campfire-like quality that has no equivalent in bourbon. Cask finishes shift things further: a sherry cask adds dried fruit and dark sugar, while a port cask finish nudges the profile toward berry and plum.

Whiskey tastes broadly similar to aged dark rum in its oak-and-caramel register, or closer to brandy when dried fruit and richness dominate.

Golden Rule
Heat drives off alcohol first and concentrates the sugars. When cooking with whiskey, the smoke and caramel notes intensify - the raw ethanol bite disappears.

How to Use Whiskey

In the kitchen, whiskey functions as a flavor amplifier for anything already rich, smoky, or sweet. It deglazes a hot pan after searing steak or pork chops, lifting the fond and building a quick sauce as the alcohol cooks off.

A few tablespoons stirred into a bourbon replacements-style barbecue sauce adds caramelized depth without overpowering the meat.

Dessert applications are where whiskey earns its most consistent use. A splash in chocolate ganache sharpens the cocoa.

Soaking dried cherries or currants in whiskey before folding them into bread pudding or fruitcake distributes flavor throughout the bake. Flambéing bananas foster with whiskey produces brûléed sugar and warm oak aroma at the table.

How Whiskey Is Used in Cooking
MethodBest ForTip
🥩 DeglazePan sauces for steak, pork, duckUse 2-3 tbsp; scrape fond before reducing
🔥 FlambéBananas foster, flamed fruit dessertsWarm the whiskey first so it ignites easily
🥣 MarinadeBeef, game, pork shoulderCombine with brown sugar and acid; 2-4 hours max
🍰 Soak/SteepDried fruit, ganache, caramel saucesSoak fruit overnight for maximum infusion
🍹 Cocktail finishWhiskey sour, hot toddy, old fashionedMatch style to drink - use Islay Scotch sparingly

Whiskey pairs especially well with dark chocolate, pecans, maple syrup, orange zest, and smoked meats. It works across American barbecue, British pub sauces, and French-style reductions in restaurant cooking.

Skip it on delicate white fish or fresh green salads - oak and peat have no business there.

Try It In
☕Warm Whiskey Hot ToddyWhere whiskey's warmth and spice take center stage→🍋Classic Whiskey Sour CocktailCitrus and oak in a simple, well-balanced drink→

How to Buy and Store Whiskey

Start with the label. Style and origin tell you more than price: "Scotch single malt" versus "Kentucky straight bourbon" versus "blended Irish whiskey" signals entirely different flavor profiles before you open the bottle. For peated character, look specifically for Islay Scotch.

For sweetness, check for ex-bourbon cask or sherry cask finish on the label.

Best Pick
For all-purpose cooking use, a mid-range bourbon works in most recipes - sweet, oaky, and affordable enough to add generously to a sauce or marinade.

Proof matters for cooking. Higher-proof bottles carry more aromatic oils, which means more flavor survives heat.

For sipping, proof is a personal preference.

  • Unopened bottles - store upright, away from sunlight and temperature swings; quality holds indefinitely
  • Opened bottles - reseal tightly after each use; flavor slowly shifts via oxidation over months to years
  • Avoid storing on their side long-term; unlike wine, whiskey doesn't need cork moisture and the spirit can degrade the cork seal

Where to Start With Whiskey

New to cooking with whiskey? Reach for a mid-shelf bourbon first. Its sweetness and caramel notes are the most forgiving in food applications and work without overwhelming other ingredients.

Once comfortable, swap in a rye for spicier pan sauces or a smoky Islay Scotch for grilled meat glazes where peat smoke is an asset.

If you're avoiding alcohol entirely, non-alcoholic gin substitutes are one option for cocktails, though nothing fully replicates the aged barrel character whiskey provides.

Shortcut
A 50ml miniature bottle costs almost nothing and gives you just enough whiskey to test a sauce or soak without committing to a full bottle.

Frequently Asked Questions

How is whiskey different from bourbon?

All bourbon is whiskey, but not all whiskey is bourbon. Bourbon must be made in the U.S., contain at least 51% corn, and aged in new charred oak barrels. Those rules produce the sweeter, fuller-bodied profile bourbon is known for.

Why does whiskey taste smoky?

Smoke comes from peat used to dry malted barley during production. Peat is decomposed organic matter; burning it releases phenolic compounds that absorb into the grain. Islay Scotch distilleries use heavy peat, which creates an intensely smoky, medicinal profile.

What does single malt mean?

Single malt means the whisky was made entirely from malted barley at one distillery. It says nothing about age or being from a single barrel. The term most commonly refers to Scotch but also applies to Japanese and Irish single malts.

Is whiskey gluten-free?

Most distilled whiskey is considered gluten-free because distillation removes gluten proteins. However, those with severe celiac disease should check with individual producers, as some add flavorings or use shared equipment that may introduce cross-contact.

What is cask strength whiskey?

Cask strength whiskey is bottled directly from the barrel without water dilution, typically ranging from 55% to 65% ABV. The higher alcohol preserves more aromatic oils and flavor intensity. A small amount goes a long way in cooking.

How Long Does Whipped Cream Last? [Storage Guide]

April 3, 2026

Storing whipped cream incorrectly is one of the easiest kitchen mistakes to make - most people assume a bowl of freshly whipped cream will hold for days, then find a watery puddle within hours. Whipped cream has a much shorter window than most refrigerated dairy, and that window shrinks fast outside the fridge.

Can You Freeze Whipped Cream

Unlike how long sour cream keeps (up to two weeks sealed), whipped cream starts losing structure almost immediately.

If you've been reaching for whipped topping swaps that work to avoid waste, knowing the actual shelf life may change your approach entirely.

QUICK SUMMARY

Freshly whipped cream lasts just 1-2 days in the fridge and 2 hours at room temp. Stabilized or aerosol whipped cream holds 3-7 days refrigerated. Flash-frozen dollops keep 1-2 months. Always store covered and cold - it collapses and turns watery fast.

🧊Fridge (fresh): 1-2 days; best used same day before it weeps
🥫Aerosol/Stabilized: 3-7 days refrigerated with cap on, stored upright
❄️Freezer (dollops): 1-2 months flash-frozen; texture changes on thaw

How Long Does Whipped Cream Last?

Shelf life depends entirely on what type you're working with. Freshly whipped cream - made at home from heavy cream - starts collapsing within hours and becomes visibly watery after 24-48 hours even when chilled properly.

Stabilized whipped cream and aerosol cans last significantly longer because of added stabilizers or pressurized propellant. Understanding whipped cream's flavor and uses helps clarify why the fat structure behaves so differently across types. For broader context on whipping cream uk in dairy recipes, the fat percentage also plays a direct role in how long peaks hold.

Whipped Cream Shelf Life
MethodStateDurationNotes
🧊 FridgeFreshly whipped (opened)1-2 daysBest used same day; loses volume and turns watery after 24-48 hours
🧊 FridgeAerosol or stabilized (opened)3-7 daysCheck manufacturer date; stabilized brands hold texture longer
❄️ FreezerFlash-frozen dollops1-2 monthsKeeps shape for decorating; texture changes on thaw
🏠 CounterFreshly whipped (in-use)2 hours maxWarmer rooms shorten this window significantly

Warm kitchens are the silent enemy. On a summer day above 75°F, that two-hour counter limit can shrink to under one hour.

How to Store Whipped Cream

Speed matters here. Chill whipped cream immediately after whipping - every minute at room temperature accelerates collapse.

Fridge: Transfer freshly whipped cream to a shallow airtight container or cover a bowl tightly with plastic wrap. Keep it away from strong-smelling foods; dairy absorbs odors quickly. For aerosol cans, store upright with the cap on. Counter: During serving, keep whipped cream out no longer than two hours - less in a warm room. Freezer: The process deserves its own section below, but never place an aerosol can in the freezer; it can damage the can and alter the propellant.

Golden Rule
Stabilize before you store. Fold in 1 teaspoon bloomed unflavored gelatin or 1-2 tablespoon powdered sugar per cup of cream before whipping - this single step extends fridge life and dramatically reduces weeping.

For anyone routinely working with dairy, storing cream correctly covers the full range of cream types and their specific fridge windows.

Can You Freeze Whipped Cream?

Yes - with a clear caveat. Freshly whipped cream freezes best when flash-frozen as individual dollops, not stored as a bulk mass. Texture will change on thaw, so plan how you'll use it before you freeze.

Watch Out
Never freeze whipped cream in a loose container without flash-freezing first. Skipping this step produces a flat, watery result after thawing - the structure collapses completely.
  1. Pipe or spoon dollops onto a parchment-lined baking tray, spacing them apart.
  2. Flash-freeze uncovered for 1-2 hours until each dollop is completely solid.
  3. Transfer to an airtight container or freezer bag, press out air, and label with date and portion size.
  4. Thaw in the fridge for 4-6 hours or overnight; for hot desserts, place frozen dollops directly on top without thawing.
  5. Re-whip if needed - briefly whip chilled, partially thawed cream to help restore soft peaks.

Expect a slightly grainy or weepy texture after thawing. Frozen dollops work well on pie, hot chocolate, or baked desserts where texture is less critical than fresh applications.

Signs Whipped Cream Has Gone Bad

Bad whipped cream usually announces itself clearly. Don't taste cream that looks or smells wrong - the spoilage signs are reliable enough to trust on sight alone.

Signs It's Gone Bad
👀
Visualliquid separation with curd-like lumps · grayish tint · visible mold spots on peaks
👃
Smellsharp sour or tangy dairy odor · fermented smell stronger than fresh cream
✋
Texturesliminess or granular curds · excessive wateriness with no ability to hold peaks

A faint sweet-off smell isn't always a red flag - that can happen when powdered sugar oxidizes slightly. A sharp, sour, or fermented odor is the real warning sign.

For comparison, heavy cream spoilage signs follow a similar pattern since whipped cream's base fat behaves the same way when it turns. When in doubt, discard without tasting.

Practical Tips for Less Waste

The goal is using whipped cream before it deteriorates, not rescuing it after. A few small habits make a real difference.

  • 🧊 Freeze decorator dollops immediately - pipe shapes onto a tray, freeze solid, then bag them for later use on desserts straight from frozen.
  • 🥄 Fix over-whipped cream before it's too far gone - add a tablespoon of cold heavy cream and gently fold or re-whip to pull back soft peaks.
  • 🏷️ Label every container - include freeze date and approximate portion count to prevent repeated partial thawing.
  • 🔄 Consider alternatives when shelf life is a concern - [alternatives to whipped cream](https://forkliftkitchen.com/whipped-cream-substitutes/) include stabilized options that hold longer under refrigeration.

The heavy cream in dairy recipes resource is also worth checking if you're working through leftover cream before it expires.

Shortcut
Whip a full batch, freeze most of it as dollops, and keep only a day's worth in the fridge. You get fresh texture when you need it without watching a bowl slowly collapse over three days.

Frequently Asked Questions

Can you freeze whipped cream and still re-whip it?

Yes, with limitations. Thaw frozen whipped cream in the fridge until partially softened, then briefly re-whip with a cold bowl. It won't fully recover its original airiness, but soft peaks are achievable if it wasn't over-frozen.

Does store-bought whipped cream last longer than homemade?

Yes. Aerosol and stabilized store-bought whipped cream lasts 3-7 days refrigerated after opening. Homemade freshly whipped cream lasts just 1-2 days and starts weeping noticeably after the first day.

How do you stabilize whipped cream for freezing?

Fold in 1 teaspoon bloomed unflavored gelatin per cup of heavy cream before whipping. Powdered sugar also helps. Stabilized cream holds its shape better through freezing and thaws with less weeping than plain whipped cream.

Can overwhipped cream be fixed?

Often yes, if caught early. Add one tablespoon of cold heavy cream and gently fold or re-whip at low speed. Once it turns grainy and butter-like, the fat structure has broken - it cannot be reversed at that stage.

Is it safe to leave whipped cream out overnight?

No. Whipped cream left at room temperature beyond two hours enters the bacterial danger zone. Overnight exposure makes it unsafe to eat regardless of how it looks or smells.

Baked Cod with Lemon Butter

April 3, 2026

Baking cod at 400°F with lemon butter creates flaky, moist fish without guesswork. The high heat sets the butter glaze while the fish stays tender, and you skip the flipping or babysitting.

Baked Cod with Lemon Butter served on a plate

The oven does the work in 12-15 minutes. Pat the fillets dry, brush with melted butter, and bake until the flesh turns opaque white.

This is what we make for weeknight dinners when the fridge is bare but you still want something that feels intentional.

QUICK SUMMARY

Baked cod with lemon butter delivers tender, flaky fish in under 25 minutes. High heat at 400°F crisps the edges while butter keeps the flesh moist. Pat fillets dry before baking so the butter and seasoning stick instead of steaming off.

⏱️Timeline: 10 minutes prep, 12-15 minutes baking, no marinating required
🔑Key Move: Brush melted butter on fillets before baking to lock in moisture
⚠️Watch Out: Overbaking dries out cod-check at 12 minutes for opaque flesh

Table of Contents

Toggle
  • Why This Recipe Works
  • What You'll Need
    • Ingredient Details
  • Ingredient Swaps
  • What to Serve With It
  • Store and Reheat
  • Frequently Asked Questions
  • Baked Cod with Lemon Butter
    • Method 
    • Tried this recipe?

Why This Recipe Works

Cod bakes fast because the fillets are thin and the flesh is delicate. High heat at 400°F sets the butter glaze before the fish dries out. Most people skip fish, but it balances the meal. For a version that comes together quickly, try this quick fish recipe that uses similar timing principles.

Quick Reference
⏱️
Prep Time
10 min
🔥
Cook Time
12-15 min
⏰
Total Time
22-25 min
🍽️
Servings
4 servings
📊
Difficulty
Easy
🏷️
Category
Main Dish
💡
Quick Tip
Pat fish dry before baking for better texture
🎯
Best For
Weeknight | Meal prep | Easy entertaining

Five reasons this works:

  • Patting fish dry removes surface moisture so butter and seasoning stick instead of sliding off or steaming the flesh
  • Butter adds fat that keeps cod moist during high-heat baking and creates a glossy coating that browns at the edges
  • Lemon juice brightens mild fish and cuts through the richness of butter without overpowering delicate cod flavor
  • Garlic adds savory depth that makes plain white fish taste intentional instead of bland or boring
  • Resting for 3 minutes after baking lets juices redistribute so the first bite doesn't leak moisture onto the plate
Quick Tip
Use an oven thermometer to confirm 400°F-off temps cause dry or undercooked fish

What You'll Need

Ingredients for Baked Cod with Lemon Butter

Shop for fresh cod with firm flesh and no fishy smell. The coleslaw works best when it hits the table at the same time as the main. For a version that comes together quickly, pair with something crunchy and fresh that balances the buttery richness.

🦐
Fish
  • 4 cod fillets (6 oz each)
🧀
Butter & Fat
  • 4 tablespoons butter, melted
  • 1 tablespoon olive oil
🧄
Seasonings
  • 2 tablespoons lemon juice
  • 3 cloves garlic, minced
  • 2 tablespoons fresh parsley, chopped
  • 1 teaspoon salt
  • ½ teaspoon black pepper
  • ½ teaspoon paprika

Ingredient Details

  • Cod fillets
    Pick even-thickness fillets (1 inch) so they cook at the same rate-thicker edges dry out while thin parts finish
  • Butter
    Melted butter coats better than cold-microwave 30 seconds and stir until smooth before brushing on fish
  • Lemon juice
    Fresh lemon juice tastes brighter than bottled-squeeze right before mixing so citrus oils stay potent
  • Garlic
    Mince garlic fine so it distributes evenly and doesn't burn in spots during high-heat baking
  • Fresh parsley
    Add parsley after baking, not before-heat wilts herbs and turns them brown instead of bright green
  • Paprika
    Paprika adds color and mild smoky flavor without heat-use smoked paprika for deeper taste
  • Olive oil
    Grease the baking dish with olive oil so fillets release cleanly without shredding when you plate them

Ingredient Swaps

Cod swaps easily with other white fish that have similar thickness and baking times. Most swaps work if you match the original's texture and adjust cook time. Fish adds the contrast this plate needs, but timing matters. For a version that comes together quickly, use quick fish recipe techniques for similar proteins.

Four swaps that work:

  • Butter → olive oil: Use 4 tablespoons olive oil for lighter texture and dairy-free option-brush on fish same way, expect less richness
  • Cod fillets → tilapia or haddock: Swap 1:1 with similar baking time (12-15 minutes)-tilapia is milder, haddock slightly firmer
  • Fresh parsley → dried parsley or dill: Use 1 tablespoon dried herbs instead of 2 tablespoons fresh-add after baking for best color
  • Lemon juice → lime juice: Swap 1:1 for different citrus note-lime tastes sharper and slightly more tropical than lemon

Olive Oil Instead of Butter

Works for: dairy-free diets, lighter texture, when you want less richness on the plate

Skip if: you want traditional buttery flavor, need richness to balance acidic sides

Tilapia Instead of Cod

Works for: budget meals, milder fish flavor, when cod isn't available fresh

Skip if: you want firmer texture, prefer less delicate fish that holds up to reheating

Instructions

Total time runs 22-25 minutes from start to plating. Preheat the oven fully before the fish goes in so temperature stays consistent. A good tartar sauce can make or break the plate. For a version that comes together quickly, keep this easy tartar sauce recipe ready for dipping alongside the fish.

  1. Preheat oven to 400°F (205°C) and grease a baking dish with 1 tablespoon olive oil, spreading it evenly across the bottom so fillets don't stick.
  2. Pat cod fillets dry with paper towels for 1-2 minutes, removing all surface moisture so butter and seasoning adhere instead of sliding off during baking.
  3. Mix melted butter, lemon juice, minced garlic, salt, black pepper, and paprika in a small bowl, stirring until garlic distributes evenly through the butter mixture.
  4. Brush butter mixture over both sides of each fillet, coating thoroughly, then place fillets in the greased baking dish spaced 1 inch apart so heat circulates evenly.
  5. Bake 12-15 minutes until fish turns opaque white and flakes easily at the thickest point when tested with a fork-thicker fillets need 2-3 extra minutes, rest 3 minutes before serving, sprinkle with fresh parsley.
Golden Rule
Check doneness at 12 minutes-overcooked cod turns dry and rubbery fast, so pull it early if edges start to brown

What to Serve With It

Baked cod needs sides that add texture contrast or cut through the butter. The best sides balance richness with crunch or acidity. Salad adds the contrast this plate needs, but timing matters. If you're planning ahead, check easy chicken meal planning strategies that work for fish nights too.

Side Dish Prep Why It Works How to Serve
Steamed green beans Easy Light, fresh contrast to rich butter sauce Steam 5-7 minutes, toss with salt and serve alongside fish
Garlic mashed potatoes Medium Comforting, creamy side soaks up lemon butter Mash potatoes with butter and garlic, plate under fish
Roasted asparagus Easy Crisp texture and earthy flavor balance delicate fish Roast at 425°F for 12-15 minutes with olive oil
Mixed greens salad Easy Refreshing acidity cuts through butter richness Dress greens lightly with vinaigrette, serve on the side
Quinoa pilaf Medium Nutty grain adds protein and absorbs lemon butter Cook quinoa with broth, fluff and serve under fish

Three ways to serve it:

  • Weeknight plate: Pair with steamed green beans and garlic mashed potatoes for a comforting meal that uses one pot and one sheet pan
  • Light dinner: Serve over mixed greens salad with lemon vinaigrette for a fresh, low-carb option that skips heavy starches
  • Make-ahead bowl: Layer quinoa pilaf, roasted asparagus, and sliced cod in meal-prep containers for lunches that reheat well
Best Pick
Roasted asparagus cooks in the same oven at the same temp-start asparagus 3 minutes before fish so both finish together

Store and Reheat

Cooked cod keeps 3-4 days in the fridge but texture degrades after day two. Store in shallow containers so fish cools fast and doesn't steam itself. The fries works best when it hits the table at the same time as the main. For a version that comes together quickly, pair reheated cod with a fresh homemade fries recipe to add back the crisp contrast.

Method Time Best For
🍳 Stovetop 3-5 min over low heat Gentle reheating that preserves moisture without drying edges
📦 Microwave 1-2 min at 50% power Quick reheating if monitored closely-check every 30 seconds to prevent rubbery texture
🔥 Oven 8-10 min at 300°F Even reheating without drying when you're warming multiple servings at once

For best results when storing:

  • Cool fish completely before sealing in airtight containers-warm fish creates condensation that makes the texture soggy when reheated
  • Layer parchment between fillets if stacking in containers so they don't stick together or shred when you pull them apart
  • Reheat with 1 teaspoon water or butter drizzled over fish to add back moisture lost during storage and prevent dry, chalky texture
  • Freeze only if you plan to use within 1 month and wrap fillets individually in plastic wrap, then foil-thaw overnight in fridge before reheating
  • Skip microwave reheating for best texture unless you're in a rush-stovetop or oven keeps fish tender instead of rubbery or tough

Frequently Asked Questions

How long to cook baked cod at 400°F?

Bake cod at 400°F for 12-15 minutes until the flesh turns opaque white and flakes easily at the thickest point. Thicker fillets (over 1 inch) need 2-3 extra minutes-check at 12 minutes to avoid overbaking.

Can I make baked cod with lemon butter ahead?

Prep the butter mixture and season fillets up to 4 hours ahead, but bake right before serving for best texture. Cooked fish doesn't reheat as well-it dries out and loses the tender flake.

What goes with baked cod with lemon butter?

Serve with roasted asparagus, garlic mashed potatoes, steamed green beans, or a light mixed greens salad. Pick sides that add crunch or acidity to balance the buttery richness of the fish.

How do I know when baked cod with lemon butter is done?

Cod is done when the flesh turns opaque white throughout and flakes easily when you insert a fork at the thickest part. The internal temp should hit 145°F-overcooked fish looks dry and feels rubbery.

Can I use frozen cod for baked cod with lemon butter?

Thaw frozen cod overnight in the fridge, then pat completely dry before seasoning and baking. Don't bake from frozen-it adds 10-15 minutes cook time and creates watery, steamed texture instead of tender flakes.

Baked Cod with Lemon Butter served on a plate

Baked Cod with Lemon Butter

No ratings yet
Baked cod with lemon butter delivers tender, flaky fish in under 25 minutes. Baking at 400°F crisps the edges while butter keeps the flesh moist and flavorful. Patting the fillets dry ensures the butter glaze sticks, avoiding a steamed texture.
Print Recipe Pin Recipe
Prep Time 10 minutes mins
Cook Time 15 minutes mins
Total Time 25 minutes mins
Servings: 4 servings
Course: Main Dish
Cuisine: American
Ingredients Method Notes

Ingredients
  

  • 4 fillets cod 6 oz each, pat dry before baking
  • 4 tablespoons butter melted
  • 1 tablespoon olive oil to grease baking dish
  • 2 tablespoons lemon juice freshly squeezed
  • 3 cloves garlic minced finely
  • 2 tablespoons fresh parsley chopped, added after baking
  • 1 teaspoon salt
  • 0.5 teaspoon black pepper
  • 0.5 teaspoon paprika

Method
 

  1. Preheat oven to 400°F (205°C) and grease a baking dish with 1 tablespoon olive oil, spreading evenly to prevent fillets from sticking.
    1 tablespoon olive oil
  2. Pat cod fillets dry with paper towels for 1-2 minutes, removing all surface moisture so butter and seasonings adhere well during baking.
    4 fillets cod
  3. In a small bowl, mix melted butter, lemon juice, minced garlic, salt, black pepper, and paprika until garlic is evenly distributed.
    4 tablespoons butter, 2 tablespoons lemon juice, 3 cloves garlic, 1 teaspoon salt, 0.5 teaspoon black pepper, 0.5 teaspoon paprika
  4. Brush the butter mixture over both sides of each cod fillet thoroughly, then place the fillets in the greased dish spaced 1 inch apart for even cooking.
    4 tablespoons butter, 2 tablespoons lemon juice, 3 cloves garlic, 1 teaspoon salt, 0.5 teaspoon black pepper, 0.5 teaspoon paprika
  5. Bake the cod for 12-15 minutes until the flesh turns opaque white and flakes easily at the thickest point when tested with a fork. Check at 12 minutes to avoid overbaking.
    4 fillets cod
  6. Let the fish rest for 3 minutes after baking, then sprinkle fresh chopped parsley on top before serving.
    2 tablespoons fresh parsley

Notes

  • Pat fish dry before baking for better butter adhesion and texture.
  • Check fish at 12 minutes to prevent overcooking, which causes dryness.
  • Add fresh parsley after baking to keep herbs bright and green.

Tried this recipe?

Let us know how it was!

What Is Vodka? Taste, Uses & More — Guide

April 3, 2026

Penne alla vodka is the most convincing argument for keeping vodka in the kitchen. That splash of spirit does something neither the tomato nor the cream can do alone - it coaxes fat-soluble aroma compounds out of the tomato and holds the sauce together in a way water simply won't.

What Is Vodka

Unlike whiskey or rum, vodka brings almost no flavor of its own, which is exactly the point. Neutral by design, it works behind the scenes - in cocktails, sauces, frozen desserts, and even homemade extracts.

QUICK SUMMARY

Vodka is a clear distilled spirit made from fermented grains or potatoes, filtered to near-neutrality. Its clean ethanol backbone makes it the default cocktail base and a useful cooking ingredient - especially where alcohol is needed without added flavor.

🌾Base: Grains (wheat, corn, rye) or potatoes, distilled to high ABV
👅Flavor: Neutral, faint cereal sweetness, subtle pepper or earth
🍹Best Uses: Cocktails, pasta sauces, marinades, frozen desserts, extracts
📦Storage: Cool, dark place; stable for years once opened
⏳Shelf Life: Indefinite unopened; subtle aroma fades slowly after opening

What Is Vodka?

Vodka is a distilled spirit originating from Eastern Europe, with Russia and Poland both claiming its earliest recorded production.

It is made by fermenting a starch- or sugar-rich base - typically wheat, corn, rye, or potatoes - then distilling the liquid to a high ABV and filtering it, often through charcoal, to strip away congeners and impurities.

The result is a spirit that sits close to neutral grain alcohol, typically bottled at 40% ABV (80 proof) in most markets. Some craft producers deliberately preserve trace character from the base material, which is why potato vodka can taste slightly creamier and rye vodka can carry a faint spice.

Flavored vodka is a separate category entirely, infused with fruit, herbs, or spices after distillation.

Here's what sets vodka apart from other clear spirits:

  • Base material - Grain, potato, grape, or even sugarcane; each leaves faint traces despite heavy filtration
  • Distillation target - Typically distilled above 95% ABV before dilution, higher than most spirits
  • Filtration - Charcoal or quartz filtration removes oils and esters that carry flavor
  • ABV at bottling - Standard is 40%, though some reach 50% or higher for sipping

What Does Vodka Taste Like?

vodka - What Is Vodka

Vodka's reputation as tasteless is only half-true. A well-made neutral vodka reads as clean alcohol heat with the faintest grain or potato sweetness underneath.

Think of it as a very high-proof version of plain grain alcohol - present but not assertive.

Sensory SnapshotModerate Intensity
👅 Flavor
neutral ethanolfaint cereal sweetnesssubtle pepper
✋ Texture
watery to slightly oilywarm finish
👃 Aroma
mild grainclean alcohol heat

Craft and artisan vodkas often retain a faint oiliness on the palate - a mouth-coating quality that mass-market versions filter out. The closest comparison is light gin stripped of all botanicals: same base spirit, none of the herbal interference.

That clean slate is what makes vodka useful in both a Moscow mule and a tomato cream sauce without pulling focus.

Golden Rule
The base material matters more than the price tag. A rye or potato vodka brings faint spice or creaminess; a wheat or corn base reads cleaner. Choose by base, not by bottle aesthetics.

How to Use Vodka

Vodka earns its place in the kitchen mostly because of what it doesn't do. Its near-neutral flavor won't compete with other ingredients, and its ethanol content does real chemical work.

It emulsifies, tenderizes, lowers freeze points, and extracts fat-soluble aromatics from tomatoes and herbs.

How Vodka Is Used
MethodBest ForTip
🍳 SaucePenne alla vodka, tomato-cream basesAdd before cream; simmer briefly to cook off harsh alcohol
🥗 MarinadeSeafood, poultry; tenderizing and heat deliveryKeep ratios low - 1-2 tablespoon per cup of marinade
🧊 FrozenSorbet, granita; lower freeze point for softer texture1-2 tablespoon per quart prevents an icy, hard freeze
🫙 ExtractionVanilla extract, herb macerationsUse 40% ABV minimum for clean, efficient extraction
🍹 Cocktail baseMartini, vodka tonic, [Paloma-style builds](https://forkliftkitchen.com/paloma-tequila-grapefruit/)Chill the bottle; dilution matters more than the brand

Penne alla vodka is the canonical cooking example. The vodka goes in after the tomatoes and before the cream, and it's simmered down until the alcohol cooks off - what stays is an emulsification bridge between the acidic tomato and the fat-heavy cream. Without it, the sauce tends to break. Deglazing with vodka works similarly: it lifts browned fond cleanly without adding wine's acidity or beer's bitterness.

For frozen desserts, a small pour of vodka into a sorbet base prevents it from freezing rock-solid. Homemade vanilla extract uses the same maceration logic - vodka's neutral base lets the vanilla bean's compounds extract clearly over several weeks.

Watch Out
Don't add vodka to long, low-simmer reductions. Alcohol volatility at sustained low heat means it lingers longer than expected and can leave a raw spirit note in the finished dish.

Vodka pairs well with tomato, heavy cream, citrus, dill, smoked salmon, olive brine, and vanilla - ingredients that benefit from a neutral carrier.

If you need a non-alcoholic swap, vodka swaps include water plus a splash of white vinegar for sauces, or plain sparkling water in frozen applications.

Try It In
🍋Air Fryer Lemon Pepper Chicken TendersA vodka-spiked marinade tenderizes the chicken before it hits the fryer→🥦Air Fryer Lemon Pepper CauliflowerVodka in the basting liquid lifts citrus and pepper without adding flavor→🍖Air Fryer Lemon Pepper MeatballsSplash of vodka in the sauce keeps it loose and emulsified→

How to Buy and Store Vodka

Mid-shelf is usually enough. For cooking - sauces, marinades, extracts - a standard 40% ABV grain vodka does the job without wasting money on craft distillation. For cocktails or sipping, the base material becomes worth evaluating.

  • Potato vodka - Slightly creamy, mildly earthy; good for martinis and spirit-forward sips
  • Rye vodka - Faint spice and dryness; classic Eastern European character
  • Wheat or corn vodka - Cleaner, sweeter baseline; mixes invisibly in most cocktails
  • Flavored vodka - Infused after distillation; avoid for cooking unless the recipe calls specifically for it
Shortcut
Keep two bottles: a 750ml mid-shelf neutral for cooking and marinades, and a smaller bottle of potato or rye if you sip neat. No need to cook with expensive craft vodka.

Storage is straightforward. Keep the bottle upright in a cool, dark place - a cabinet away from the stove works fine.

Refrigerating or freezing is optional and mostly a preference for cocktail chilling. For a full breakdown of how long vodka holds up after opening, see our guide on vodka storage life.

Start Here If You're New to Cooking With Vodka

One recipe will tell you everything. Make penne alla vodka once with the vodka and once without - the difference in sauce cohesion is immediate and noticeable.

That single test explains why neutral ethanol earns a spot in the kitchen even for people who don't drink.

From there, try a simple vanilla extract: split two vanilla beans, drop them in a jar with 40% ABV vodka, and wait four weeks. Both applications show the same principle - vodka working behind the scenes, carrying flavor without competing with it.

Frequently Asked Questions

Is vodka tasteless?

Not entirely. Quality vodka has faint traces of its base material - cereal sweetness, mild pepper, or slight creaminess. Mass-market versions filter these out more aggressively, which is why they read closer to neutral.

What is vodka made from?

Most commercial vodka uses wheat, corn, rye, or potatoes as the fermentation base. Some producers use grapes or sugarcane. The base determines trace flavor even after distillation and filtration.

Why add vodka to sauce?

Ethanol releases fat-soluble aroma compounds in tomatoes that water and fat alone can't access. It also acts as an emulsifier, helping tomato and cream bind without breaking.

How many calories are in vodka?

A standard 1.5 fl oz (44 ml) pour at 40% ABV has roughly 97 calories, all from ethanol. There are no carbohydrates, fat, or protein in a properly distilled neutral vodka.

Does vodka go bad?

Unopened vodka keeps indefinitely. Once opened, it remains safe and stable for years, though subtle aroma notes can soften if the bottle sits mostly empty for a long time.

Pork Tenderloin with Apple Glaze

April 3, 2026

Searing pork tenderloin at high heat creates a golden crust that locks in moisture. The apple glaze reduces in the same pan, picking up all the caramelized bits from the sear.

Pork Tenderloin with Apple Glaze served on a plate

An oven-safe skillet does both jobs without extra dishes. You get tender meat with a sticky-sweet coating that doesn't taste fussy.

This works for weeknight dinners when you want something that feels special but doesn't require fancy techniques. Perfect for meal prep or when you're feeding guests who expect more than plain protein.

QUICK SUMMARY

Pork tenderloin gets seared in a hot pan, then roasted at 400°F until it hits 145°F internal temp. The apple cider glaze reduces in the same pan while the meat rests. Use a meat thermometer and rest the meat 3-5 minutes to keep it juicy.

⏱️Active Time: 10 minutes prep, 5 minutes searing, 15-20 minutes roasting
🔥Critical Step: Sear all sides 2-3 minutes each before roasting for crust
⚠️Watch Out: Overcooking past 150°F dries out the meat - pull at 145°F

Table of Contents

Toggle
  • Why This Recipe Works
  • What You'll Need
    • Ingredient Details
  • Ingredient Swaps
  • What to Serve With It
  • Store and Reheat
  • Frequently Asked Questions
  • Pork Tenderloin with Apple Glaze
    • Method 
    • Tried this recipe?

Why This Recipe Works

The sear creates a crust that brown sugar and apple cider can actually stick to. For a version that comes together quickly, a tender pork side dish uses similar roasting times so you can cook both at once.

Quick Reference
⏱️
Prep Time
10 min
🔥
Cook Time
20-25 min
⏰
Total Time
35 min
🍽️
Servings
4
📊
Difficulty
Medium
🏷️
Category
Main Dish
💡
Quick Tip
Sear first for crust, finish roasting for juiciness
🎯
Best For
Weeknight, Entertaining, Meal prep

Why these steps matter:

  • Preheating the pan for 3 minutes creates enough surface heat to sear without sticking
  • Deglazing with apple cider picks up the caramelized bits and builds the glaze base
  • Pulling meat at 145°F accounts for carryover cooking during the 3-5 minute rest
  • Reducing glaze uncovered concentrates the sweetness and thickens to a syrupy consistency
  • Slicing against the grain cuts through muscle fibers so each bite stays tender
Quick Tip
Brush pork with olive oil before seasoning - it helps salt and pepper stick and promotes even browning in the pan.

What You'll Need

Ingredients for Pork Tenderloin with Apple Glaze

Fresh pork tenderloin sears better than frozen because surface moisture cooks off faster. Rich mains need something to cut through, and salad does exactly that - we keep a batch ready for nights like this with a crisp green salad that takes 5 minutes to toss together.

🍖
Protein
  • 1 pork tenderloin (1-1.5 lb)
🥢
Glaze Base
  • ¾ cup apple cider or apple juice
  • 3 tablespoon brown sugar
  • 1 tablespoon apple cider vinegar
  • 2 tablespoon butter
🧄
Aromatics & Seasoning
  • 3 garlic cloves, minced
  • 2 teaspoon fresh thyme or rosemary
  • 1 teaspoon salt
  • ½ teaspoon black pepper
  • 1 tablespoon olive oil

Ingredient Details

  • Pork tenderloin
    Look for a piece that's even in thickness so it cooks at the same rate - trim off the silver skin before seasoning
  • Apple cider
    Use unfiltered cider for more apple flavor or regular juice if that's what you have - both reduce to the same syrupy texture
  • Brown sugar
    Light or dark brown sugar both work - dark has a slight molasses edge that pairs well with pork
  • Fresh thyme
    Strip the leaves from the stems before adding to the glaze - woody stems don't soften and taste bitter
  • Garlic
    Mince garlic finely so it distributes evenly in the glaze and doesn't burn during the sear
  • Butter
    Add butter at the end of reducing the glaze for a glossy finish - it emulsifies better off heat
  • Olive oil
    Brush the pork with oil instead of adding oil to the pan - it coats evenly and prevents sticking

Ingredient Swaps

Apple juice works when you don't have cider, but it's sweeter and needs a bit more vinegar to balance. A good fries can make or break the plate - for a version that comes together quickly, a crispy fries side cooks in the air fryer while the pork roasts.

Four swaps that work:

  • Apple cider → apple juice: Slightly sweeter and less tangy, add an extra teaspoon of vinegar to balance (budget)
  • Brown sugar → honey or maple syrup: More liquid consistency so simmer glaze 2-3 minutes longer to thicken (budget)
  • Fresh thyme → dried thyme: Use 1 teaspoon dried instead of 2 teaspoons fresh - dried herbs taste more concentrated (budget)
  • Butter → olive oil: Less creamy finish but still glossy, swap 1:1 and stir in at the end (dairy-free)

Apple Cider

Works for: deeper apple flavor with natural tartness, better for entertaining

Skip if: you only have juice on hand - juice is sweeter but still reduces well

Apple Juice

Works for: budget-friendly option, kids prefer the milder sweetness

Skip if: you want more complexity - add a splash of vinegar to balance the sugar

Instructions

The sear takes 8-10 minutes total for all sides, then the oven finishes the job in 15-20 minutes. Most people skip fries, but it balances the meal - we keep a batch ready for nights like this with creamy homemade potato recipe that reheats perfectly.

  1. Prep the pork: Pat the tenderloin dry with paper towels and brush with olive oil. Season all sides evenly with salt and black pepper. Let it sit at room temperature for 10 minutes while you preheat the oven to 400°F.

  2. Sear the meat: Heat an oven-safe skillet over medium-high for 3 minutes. Add the pork and sear each side for 2-3 minutes until golden brown - don't move it around or you'll lose the crust. Use tongs to rotate and sear all four sides.

  3. Roast until done: Transfer the skillet to the oven and roast for 15-20 minutes, checking internal temp at 15 minutes. Pull the pork when it hits 145°F - it will rise to 150°F as it rests. Move the meat to a cutting board and tent with foil.

  4. Make the glaze: Return the skillet to the stovetop over medium heat. Add garlic and cook 30 seconds until fragrant. Pour in apple cider, brown sugar, vinegar, and thyme. Scrape up the brown bits from the pan with a spatula. Simmer uncovered for 5-8 minutes until the glaze reduces by half and coats the back of a spoon. Stir in butter off heat.

  5. Slice and serve: Slice the pork against the grain at a 45-degree angle into ½-inch medallions. Arrange on a platter and spoon the warm glaze over the top. Serve immediately while the glaze is still glossy.

Golden Rule
Use an instant-read thermometer and check temp after 15 minutes - pork tenderloin goes from juicy to dry in 5 degrees.

What to Serve With It

Glazed pork needs something to cut the sweetness or soak up the extra sauce. Rich mains need something to cut through, and salad does exactly that - for savory meal planning, savory pork meal ideas breaks down timing and texture balance for complete dinners.

Side Dish Prep Why It Works How to Serve
Roasted sweet potatoes Easy Natural sweetness echoes glaze, crispy edges add texture contrast Cube and roast at 425°F for 25 min, toss with olive oil and salt
Steamed green beans Easy Crisp-tender bite cuts through rich glaze, bright green color pops Steam 4-5 min, toss with butter and garlic or serve plain
Mashed cauliflower Easy Creamy low-carb base soaks up extra glaze without heaviness Steam florets 10 min, mash with butter, salt, and cream
Wild rice pilaf Medium Nutty texture and earthy flavor balance sweet-tart glaze Cook rice with broth, stir in toasted pecans and dried cranberries
Roasted Brussels sprouts Easy Charred edges and slight bitterness contrast sweet glaze perfectly Halve, toss with oil, roast at 400°F for 20 min with bacon bits

Three ways to serve it:

  • Weeknight plate: Slice pork over mashed cauliflower, drizzle glaze, add steamed green beans on the side
  • Meal prep bowls: Divide sliced pork, wild rice, roasted sweet potatoes into containers, pack glaze separately
  • Holiday platter: Arrange sliced pork on a bed of Brussels sprouts, garnish with fresh thyme, serve glaze in a small pitcher
Shortcut
Make the glaze ahead and store it in the fridge for up to 3 days - reheat gently on the stovetop before serving.

Store and Reheat

Slice the pork before storing so it reheats evenly and you can grab single portions. Salad cuts through all that richness - for a version that comes together quickly, quick dressing dish takes 5 minutes to whisk and keeps for a week.

Method Time Best For
🍳 Stovetop 3-5 min over low heat with glaze Quick reheating that keeps the glaze glossy and the meat tender
📦 Microwave 1-2 min at 50% power, covered Single portions when you need speed - add a splash of water to prevent drying
🔥 Oven 10-15 min at 300°F, covered Reheating multiple servings evenly without drying out the edges

For best results when storing:

  • Let pork cool completely before slicing and storing - hot meat releases moisture in the container and turns soggy
  • Store sliced pork and glaze separately in airtight containers so you can reheat each at different rates
  • Refrigerate up to 3-4 days in shallow containers for even chilling and quick reheating
  • Freeze sliced pork in a single layer on a baking sheet first, then transfer to a freezer bag for up to 3 months
  • Reheat from frozen in the oven at 300°F for 20-25 minutes covered, then add glaze in the last 5 minutes

Frequently Asked Questions

Can I use pork loin instead of pork tenderloin for this recipe?

Yes, but pork loin is thicker and takes 10-15 minutes longer to roast. Check internal temp at 25 minutes and pull when it hits 145°F to avoid dryness.

How should I store leftovers of pork tenderloin with apple glaze?

Store sliced pork and glaze separately in airtight containers in the fridge for 3-4 days. Reheat gently on the stovetop or in the oven to keep the meat tender.

What is the best way to tell when pork tenderloin is perfectly cooked?

Use an instant-read thermometer and pull the pork at 145°F internal temp. The meat should feel firm but spring back when pressed, and juices should run clear.

Why did my glaze turn out burnt and how can I avoid this?

Too much sugar or too high heat causes burning. Reduce oven temp to 375°F and add the glaze halfway through roasting instead of before baking.

Can I prepare the apple glaze ahead of time and reheat before serving?

Yes, make the glaze up to 3 days ahead and refrigerate in an airtight container. Reheat gently on the stovetop over low heat, stirring until it loosens and becomes pourable again.

Pork Tenderloin with Apple Glaze served on a plate

Pork Tenderloin with Apple Glaze

No ratings yet
This pork tenderloin features a golden seared crust and a sticky-sweet apple cider glaze made in the same pan for maximum flavor. The recipe balances quick searing and roasting to ensure juicy, tender pork with a flavorful glaze that enhances every bite.
Print Recipe Pin Recipe
Prep Time 10 minutes mins
Cook Time 25 minutes mins
Total Time 35 minutes mins
Servings: 4 servings
Course: Main Dish
Cuisine: American
Ingredients Equipment Method Notes

Ingredients
  

  • 1 pound pork tenderloin trim silver skin and pat dry
  • 0.75 cup apple cider unfiltered preferred, or apple juice
  • 3 tablespoons brown sugar
  • 1 tablespoon apple cider vinegar
  • 2 tablespoons butter added off heat for glossy finish
  • 3 cloves garlic minced finely
  • 2 teaspoons fresh thyme leaves stripped from woody stems
  • 1 teaspoon salt for seasoning pork
  • 0.5 teaspoon black pepper for seasoning pork
  • 1 tablespoon olive oil to brush pork before seasoning

Equipment

  • Oven-safe skillet Used for searing the pork and roasting in the oven
  • Meat thermometer For checking internal temperature to pull pork at 145°F
  • Tongs To rotate pork while searing
  • Spatula To scrape up caramelized bits during glaze making

Method
 

  1. Pat the tenderloin dry with paper towels and brush with olive oil. Season all sides evenly with salt and black pepper. Let it sit at room temperature for 10 minutes while you preheat the oven to 400°F.
    1 pound pork tenderloin, 1 teaspoon salt, 0.5 teaspoon black pepper, 1 tablespoon olive oil
  2. Heat an oven-safe skillet over medium-high for 3 minutes. Add the pork and sear each side for 2-3 minutes until golden brown without moving it around. Use tongs to rotate and sear all four sides for a total of 8-10 minutes.
    1 pound pork tenderloin
  3. Transfer the skillet to the oven and roast for 15-20 minutes, checking internal temperature at 15 minutes. Pull the pork when it reaches 145°F as it will rise to 150°F while resting. Move to a cutting board and tent with foil.
    1 pound pork tenderloin
  4. Return the skillet to stovetop over medium heat. Add minced garlic and cook 30 seconds until fragrant. Pour in apple cider, brown sugar, vinegar, and thyme. Scrape caramelized bits and simmer uncovered for 5-8 minutes until glaze reduces by half and coats the spoon. Stir in butter off heat.
    0.75 cup apple cider, 3 tablespoons brown sugar, 1 tablespoon apple cider vinegar, 3 cloves garlic, 2 teaspoons fresh thyme, 2 tablespoons butter
  5. Slice the pork against the grain at a 45-degree angle into ½-inch medallions. Arrange on a platter and spoon warm glaze over the top. Serve immediately while the glaze is glossy.
    1 pound pork tenderloin

Notes

  • Use an instant-read thermometer to pull pork at 145°F to avoid dryness.
  • Brush pork with olive oil before seasoning for better crust and even browning.
  • Reduce glaze uncovered to achieve a syrupy consistency that coats the pork beautifully.

Tried this recipe?

Let us know how it was!

How Long Does Tzatziki Sauce Last? [Storage Guide]

April 3, 2026

Freezing tzatziki seems like a smart move when you've made a large batch or caught a good sale on store-bought jars - but the results depend entirely on what's inside and how you handle it.

Can You Freeze Tzatziki Sauce

Made from Greek yogurt, cucumber, garlic, and often dill or lemon, tzatziki is a dairy-based condiment that behaves differently from most sauces in both the fridge and freezer.

If yogurt's shelf life already feels uncertain to you, tzatziki adds another layer of variables: the cucumber shortens fridge life, and the dairy complicates freezing.

This guide covers exactly how long it lasts, the right way to store it, and what to watch for before you serve it.

QUICK SUMMARY

Homemade tzatziki lasts 2-3 days in the fridge; store-bought lasts up to 5-7 days after opening. Freeze for 1-2 months, but remove the cucumber first. Never leave it out past 2 hours.

🧊Fridge (opened): 2-3 days homemade; up to 7 days store-bought
❄️Freezer: 1-2 months; remove cucumber before freezing
⚠️Counter limit: 2 hours max - discard after that, no exceptions

How Long Does Tzatziki Sauce Last?

Shelf life for tzatziki splits along two lines: whether it's homemade or commercial, and whether the container has been opened.

Homemade versions made with fresh grated cucumber are the most perishable, because the cucumber continues releasing water into the yogurt base over time.

Store-bought tzatziki has a stronger advantage unopened - commercial pasteurization extends refrigerated shelf life significantly. Once opened, however, it narrows closer to homemade territory, and the sell-by date becomes a ceiling, not a guarantee.

Learning tzatziki sauce in cooking helps clarify why this condiment is so fresh-forward - and why its short fridge window is by design, not a flaw.

Tzatziki Sauce Shelf Life
MethodStateDurationNotes
🧊 FridgeOpened - homemade2-3 daysFresh cucumber accelerates spoilage
🧊 FridgeOpened - store-bought5-7 daysKeep cold immediately after each use
🧊 FridgeUnopened - commercial2-3 weeksUse by sell-by date; keep refrigerated
❄️ FreezerOpened or homemade1-2 monthsBest without cucumber; texture changes
🏠 CounterAny2 hours max1 hour if ambient temp exceeds 90°F

How to Store Tzatziki Sauce

Proper storage comes down to two principles: limit air contact and keep temperature steady. Both are easy to get wrong.

Fridge: Transfer tzatziki to a glass jar or airtight plastic container with a tight-fitting lid. Press a piece of plastic wrap directly onto the surface before sealing - this reduces condensation and slows whey separation. Avoid shallow wide bowls; they expose too much surface area.

Counter: Don't leave it out. Dairy and raw garlic together create real bacterial risk past the two-hour mark.

Fridge door: Never store it there. Temperature swings from repeated opening accelerate separation and shorten shelf life faster than almost anything else.

Golden Rule
Always return tzatziki to the coldest part of the fridge - back of a middle shelf - immediately after serving. Every minute at room temperature counts.

Like keeping hummus fresh, tzatziki responds well to a sealed surface and consistent cold - the methods are nearly identical for good reason.

Can You Freeze Tzatziki Sauce?

Yes, with conditions. Freezing works for the yogurt-garlic-dill base, but grated cucumber does not survive the freeze-thaw cycle intact - it turns watery and limp, pulling the whole sauce apart.

The solution is to freeze the base without cucumber, then fold in freshly grated, salted, and drained cucumber at serving time.

If your tzatziki already has cucumber mixed in, expect noticeable texture changes after thawing.

Skipping alternatives to lemon juice in the frozen batch is also smart - acid can alter dairy texture during freezing, so add it fresh at the end.

Watch Out
Freezing complete tzatziki with raw grated cucumber already mixed in is the single biggest freezing mistake. The cucumber turns mushy and forces the sauce to separate beyond recovery.
  1. Remove the cucumber. If homemade, set aside any grated cucumber before freezing - add it fresh after thawing.
  2. Portion into containers. Use airtight, freezer-safe jars or heavy-duty freezer bags with ½ inch headspace to allow for expansion.
  3. Label with date and cucumber status. Note whether the batch includes cucumber so you know what to expect after thawing.
  4. Freeze flat if using bags. Lays flatter, thaws faster, and takes up less space.
  5. Thaw in the fridge for 24 hours. Drain any pooled water, then whisk or briefly blitz to re-emulsify. Fold in 1-2 tablespoon fresh Greek yogurt for a creamier result. Do not refreeze.

Signs Tzatziki Sauce Has Gone Bad

Normal tzatziki has some whey separation - a thin, slightly opaque liquid pooling at the surface is expected and harmless. What you're looking for are signs that go beyond that.

Signs It's Gone Bad
👀
VisualMold spots (green, black, or white) · slimy surface film · large pools of cloudy, off-colored liquid
👃
SmellSharp acrid sourness beyond normal tang · sulfurous or rotten garlic odor
✋
TextureSlimy surface or cucumber pieces · extreme separation that won't re-emulsify with stirring

Don't taste-test if anything looks or smells off. Spoiled dairy condiments can carry bacterial loads that aren't detectable by flavor alone - discard immediately.

Make It Last Longer

A few targeted habits add days to your tzatziki and keep the texture where it should be.

  • 🥒 Salt and drain the cucumber - let grated cucumber sit in a sieve with salt for 10-20 minutes before folding in; less excess water means better texture and longer fridge life.
  • 🥛 Start with thick strained yogurt - full-fat Greek yogurt or labneh releases less whey during storage and holds up better after freezing; understanding [swapping out labneh cheese](https://forkliftkitchen.com/labneh-cheese-substitutes/) can help if Greek yogurt isn't available.
  • 🍋 Hold the lemon until serving - skip lemon juice in any batch you plan to freeze and brighten the flavor when you serve it.
  • 📅 Label everything - note the date and whether cucumber is already mixed in, so nothing sits forgotten at the back of the fridge.

If you're planning a spread with multiple dips, the same logic applies to similar condiments - alternatives to tzatziki sauce can fill in when your batch runs out or texture suffers after thawing.

Shortcut
Make the yogurt-garlic-dill base in bulk and freeze it plain. Grate and salt fresh cucumber at serving time. You get a freezer-ready staple with no texture trade-offs.

Frequently Asked Questions

How long does homemade tzatziki last in the fridge?

Homemade tzatziki lasts 2-3 days refrigerated. Batches made without grated cucumber stay fresher longer, since cucumber releases water that speeds up spoilage.

Does tzatziki separate when frozen?

Yes - the yogurt base releases whey and can turn grainy. Whisking after thawing and folding in a tablespoon of fresh Greek yogurt usually recovers the texture.

Is store-bought tzatziki safe after the sell-by date?

Not reliably. The sell-by date is a quality ceiling for refrigerated tzatziki, not a rough guideline. Once opened, use it within 5-7 days regardless of the printed date.

How do you re-emulsify tzatziki after thawing?

Drain pooled water first, then whisk vigorously or pulse briefly in a blender. Folding in 1-2 tablespoons of fresh strained Greek yogurt restores creaminess more effectively than stirring alone.

Can you store tzatziki in the freezer door?

No - store it at the back of a middle shelf instead. The freezer door experiences temperature fluctuations every time it opens, which degrades dairy-based sauces faster.

Chicken Marsala with Mushrooms

April 3, 2026

When you need a restaurant-quality dinner that doesn't take all night, pan-seared chicken with a wine-mushroom sauce delivers. This works for weeknight meals when you want something impressive, date nights at home, or meal prep that reheats without turning rubbery.

Chicken Marsala with Mushrooms served on a plate

The skillet does most of the work. Pound the chicken thin, sear it until golden, then build a silky Marsala sauce in the same pan using the browned bits.

Perfect for family dinners when you need protein and vegetables in one dish, or casual entertaining when you want to look like you know what you're doing without spending hours in the kitchen.

QUICK SUMMARY

Chicken Marsala with Mushrooms delivers crispy-edged chicken and a silky wine sauce in 35 minutes. The key is pounding chicken thin for even cooking and adding wine off heat to prevent bitterness. Make this when you need a reliable dinner that tastes like you tried.

⏱️Time Reality: 15 minutes prep, 20 minutes cook - no marinating or advance work needed
🔥First Critical Move: Pound chicken to ½ inch thickness before flouring so it cooks evenly
⚠️Watch Out: Add wine off heat or you'll get bitter sauce - remove pan, pour, then return to burner

Table of Contents

Toggle
  • Why This Recipe Works
  • What You'll Need
    • Ingredient Details
  • Ingredient Swaps
  • What to Serve With It
  • Store and Reheat
  • Frequently Asked Questions
  • Chicken Marsala with Mushrooms
    • Method 
    • Tried this recipe?

Why This Recipe Works

The technique separates good chicken from rubbery disappointment. Pounding breasts thin ensures they cook through before the outside overcooks, and the flour coating crisps in the hot pan while thickening the sauce later. For similar weeknight techniques, try another great chicken recipe that uses pan-searing to build flavor fast.

Quick Reference
⏱️
Prep Time
15 min
🔥
Cook Time
20 min
⏰
Total Time
35 min
🍽️
Servings
4 servings
📊
Difficulty
Medium
🏷️
Category
Main Dish
💡
Quick Tip
Pound chicken thin for even cooking
🎯
Best For
Weeknight | Date night | Meal prep

Key success factors:

  • Pound chicken to uniform thickness - ½ inch ensures the center cooks through while the edges stay tender, not dry
  • Dry chicken and shake off excess flour - wet surfaces steam instead of sear, creating soggy coating instead of golden crust
  • Heat pan 3-4 minutes before adding chicken - medium-high heat sets the crust immediately and prevents sticking
  • Remove pan from heat when adding wine - direct flame burns off delicate flavors and turns the sauce bitter
  • Simmer sauce 5-7 minutes to reduce - the liquid needs to thicken enough to coat the back of a spoon and cling to chicken
Golden Rule
If your chicken pieces are uneven thickness, they won't finish cooking at the same time - pound them all to ½ inch or pull thinner pieces out early

What You'll Need

Ingredients for Chicken Marsala with Mushrooms

Shopping is straightforward if you know what actually matters. Marsala wine (the sweet kind, not dry) defines the sauce, and cremini mushrooms hold up better than white buttons when sautéed. A quick salad dish adds the brightness this rich plate needs without extra cooking time.

🍗
Protein
  • 4 boneless skinless chicken breasts (1½ to 2 lbs total)
🥬
Vegetables
  • 8 oz cremini or white mushrooms, sliced
  • 2 cloves garlic, minced
🫙
Pantry
  • ½ cup all-purpose flour
  • ¾ cup sweet Marsala wine
  • ¾ cup chicken broth
  • 2 tablespoon olive oil
  • 3 tablespoon butter
  • Salt and black pepper
  • Fresh parsley for garnish

Ingredient Details

  • Chicken breasts
    Pat completely dry with paper towels before pounding - moisture prevents the flour from adhering and creates steam instead of a sear
  • All-purpose flour
    Shake off excess after dredging - clumps of flour turn gummy in the sauce instead of creating a smooth coating
  • Marsala wine
    Use sweet Marsala (not dry) - the label should say "dolce" or "sweet," and you'll find it near cooking wines or in the liquor section
  • Cremini mushrooms
    Slice ¼ inch thick and cook in a single layer - overcrowding steams them instead of browning, which loses the caramelized flavor
  • Butter
    Add at the end to finish the sauce - it creates gloss and rounds out the wine's sharpness without making the dish heavy
  • Chicken broth
    Use low-sodium so you can control the salt - the sauce reduces and concentrates, and regular broth can turn too salty
  • Garlic
    Mince finely and add after mushrooms brown - raw garlic burns quickly and turns bitter in the hot pan

Ingredient Swaps

Most swaps work if you understand what changes. Chicken thighs stay moister than breasts but need 2-3 extra minutes per side, and gluten-free flour blends thicken the sauce just as well as all-purpose. If you're looking for more flexibility with pan-seared chicken, this easy sauce recipe works with different proteins and cooking methods.

Four swaps that work:

  • Swap chicken breasts for thighs - use bone-in or boneless, cook 7-8 minutes per side instead of 4-5, check for 165°F internal temp
  • Swap all-purpose flour for gluten-free blend - use 1:1 ratio, Cup4Cup or King Arthur work best, sauce thickens the same way
  • Swap Marsala for dry sherry plus 1 teaspoon sugar - adds sweetness back, or use ¾ cup white grape juice with 2 tablespoon balsamic vinegar for non-alcoholic version
  • Swap butter for olive oil - use 3 tablespoon total, sauce won't be as glossy but stays dairy-free and lighter

Cremini vs White Mushrooms

Works for: Cremini have deeper flavor and firmer texture when sautéed

Skip if: White buttons are fine if that's what you have - they just release more water

Fresh vs Dried Parsley

Works for: Fresh adds color and brightness as garnish

Skip if: Dried works in the sauce (use 1 tsp) but skip as garnish - it looks dusty

Instructions

Cook time matters more than most recipes admit. The chicken needs 4-5 minutes per side at medium-high heat to hit 165°F without drying out, and the sauce needs a full 5-7 minute simmer to thicken properly. For timing strategies that work with skillet meals, classic potato wedges dish cooks in the oven while you handle the stovetop.

  1. Pound and flour the chicken. Place breasts between plastic wrap or parchment and pound to ½ inch thickness with a meat mallet or rolling pin. Pat completely dry with paper towels, season both sides with salt and pepper, then dredge in flour and shake off excess - you want a light coating, not clumps.

  2. Sear the chicken. Heat 2 tablespoon olive oil in a large heavy skillet over medium-high heat for 3-4 minutes until shimmering. Add chicken breasts without crowding (work in batches if needed) and cook 4-5 minutes per side until golden brown and internal temp reads 165°F. Transfer to a plate and tent with foil.

  3. Sauté the mushrooms. Add 1 tablespoon butter to the same pan, still over medium-high heat. Add sliced mushrooms in a single layer and cook without stirring for 4-5 minutes until golden brown on one side, then stir and cook 2 more minutes. Add minced garlic and cook 30 seconds until fragrant.

  4. Deglaze and build the sauce. Remove pan from heat and pour in Marsala wine, scraping up browned bits from the bottom with a wooden spoon. Return to medium heat, add chicken broth, and simmer 5-7 minutes until sauce reduces by about half and coats the back of a spoon. Stir in remaining 2 tablespoon butter until melted and glossy.

  5. Finish and serve. Return chicken to the pan, spoon sauce over the top, and simmer 1-2 minutes to reheat. Taste sauce and adjust salt if needed. Garnish with fresh parsley and serve immediately.

Shortcut
If you're short on time, buy thin-sliced chicken cutlets instead of pounding breasts yourself - they're already the right thickness and cook in 3-4 minutes per side

What to Serve With It

The plate needs something to soak up the sauce and cut the richness. Starchy sides work best - mashed potatoes, buttered egg noodles, or rice catch every drop of Marsala glaze without competing for attention. For more weeknight chicken dinner ideas that pair with similar sides, check options that balance rich sauces with lighter vegetables.

Side Dish Prep Why It Works How to Serve
Mashed potatoes Easy Creamy base soaks up Marsala sauce without getting soggy Spread on plate, place chicken on top, spoon sauce over both
Buttered egg noodles Easy Classic Italian pairing, catches sauce in every fold Toss noodles with butter and parsley, nest chicken on top
Steamed green beans Easy Light crunch contrasts rich sauce, adds color to plate Steam until bright green and tender-crisp, season with salt
Arugula salad Easy Peppery greens cut through butter and wine richness Dress with lemon and olive oil, serve alongside chicken
Roasted asparagus Medium Caramelized flavor matches mushrooms, adds elegance Roast at 425°F for 12-15 minutes, finish with lemon zest

Three ways to serve it:

  • Weeknight style: Serve over buttered egg noodles with steamed green beans on the side - the noodles cook while chicken rests, and beans steam in 5 minutes
  • Date night plating: Spoon creamy mashed potatoes in center of plate, place chicken on top, drizzle extra sauce around edges, and add roasted asparagus alongside
  • Meal prep bowls: Pack chicken and sauce with rice or quinoa and roasted vegetables - reheat the protein and grains together, vegetables stay on the side
Best Pick
Mashed potatoes or egg noodles are the move here - you need something that actually absorbs the sauce instead of letting it pool on the plate

Store and Reheat

Leftovers hold up well if you store them right. Keep chicken and sauce together in a shallow airtight container for 3-4 days in the fridge - separating them dries out the meat. For protein dishes that reheat without turning rubbery, crunchy potato fries make solid meal prep sides that stay crisp when stored properly.

Method Time Best For
🍳 Stovetop 5-7 min Best texture - add 2 tablespoon broth or water, cover, simmer on medium-low until heated through
📦 Microwave 2-3 min Quickest option - cover with damp paper towel, heat 50% power in 1-minute intervals, stir sauce between
🔥 Oven 15 min at 325°F Even heating - place in covered baking dish with splash of broth, good for reheating multiple servings

For best results when storing:

  • Refrigerate within 2 hours - bacteria grows fast in room-temp chicken and wine-based sauces, store in shallow containers so they cool quickly
  • Add extra sauce - the chicken absorbs liquid as it sits, so save extra Marsala sauce separately or add a splash of broth when reheating
  • Freeze for up to 2 months - sauce texture stays silky, but chicken can get slightly rubbery, so reheat gently and don't overheat
  • Reheat to 165°F internal - use a thermometer to check the thickest part of the chicken, especially after freezing
  • Don't refreeze thawed chicken - texture breaks down further and bacteria risk increases, so only thaw what you'll eat

Frequently Asked Questions

Can I use chicken thighs instead of breasts in chicken Marsala?

Yes - boneless thighs work great and stay moister, but they need 7-8 minutes per side instead of 4-5. Check that internal temp hits 165°F before removing from the pan.

How long can I store leftover chicken Marsala in the fridge?

Store in an airtight container for 3-4 days. Keep the chicken and sauce together so the meat doesn't dry out, and reheat gently on the stovetop with a splash of broth.

How do I know when chicken Marsala is fully cooked?

Use an instant-read thermometer in the thickest part - it should read 165°F. The chicken should feel firm when pressed and juices should run clear, not pink.

Why is my Marsala sauce bitter and how can I fix it?

Bitterness comes from adding wine on high heat - always remove the pan from the burner before pouring in Marsala. If it's already bitter, stir in a pinch of sugar or an extra splash of broth to balance it out.

What side dishes pair well with chicken Marsala for dinner?

Mashed potatoes, buttered egg noodles, or rice soak up the sauce best. Add steamed green beans or roasted asparagus for a vegetable that cuts the richness without competing with the wine-mushroom flavors.

Chicken Marsala with Mushrooms served on a plate

Chicken Marsala with Mushrooms

No ratings yet
Chicken Marsala with Mushrooms features pan-seared chicken breasts coated in flour and topped with a silky sweet Marsala wine sauce and caramelized mushrooms. This method ensures juicy, evenly cooked chicken with a rich, flavorful sauce perfect for weeknights or date nights.
Print Recipe Pin Recipe
Prep Time 15 minutes mins
Cook Time 20 minutes mins
Total Time 35 minutes mins
Servings: 4 servings
Course: Dinner, Main Dish
Cuisine: Italian
Ingredients Equipment Method Notes

Ingredients
  

  • 4 pieces chicken breast boneless, skinless, patted dry
  • 0.5 cup all-purpose flour shake off excess after dredging
  • 0.75 cup sweet Marsala wine use sweet/dolce, not dry
  • 0.75 cup chicken broth low-sodium recommended
  • 2 tablespoons olive oil
  • 3 tablespoons butter divided: 1 tablespoon for mushrooms, 2 tablespoon for finishing sauce
  • 8 ounces cremini mushrooms sliced about ¼ inch thick
  • 2 cloves garlic minced
  • to taste salt and black pepper
  • for garnish fresh parsley chopped

Equipment

  • large heavy skillet Used for searing chicken and making sauce
  • Meat mallet or rolling pin Used to pound chicken breasts to ½ inch thickness
  • Wooden spoon Used to scrape browned bits when deglazing the pan

Method
 

  1. Place chicken breasts between plastic wrap or parchment paper and pound to ½ inch thickness using a meat mallet or rolling pin. Pat completely dry with paper towels. Season both sides with salt and pepper. Dredge in all-purpose flour, shaking off excess flour to ensure a light coating.
    4 pieces chicken breast, 0.5 cup all-purpose flour, to taste salt and black pepper
  2. Heat olive oil in a large heavy skillet over medium-high heat for 3-4 minutes until shimmering. Add chicken breasts without crowding the pan and cook 4-5 minutes per side until golden brown and internal temperature reaches 165°F. Transfer cooked chicken to a plate and tent with foil.
    4 pieces chicken breast, 2 tablespoons olive oil
  3. Add 1 tablespoon butter to the same skillet over medium-high heat. Add sliced mushrooms in a single layer and cook without stirring for 4-5 minutes until golden brown on one side. Stir and cook for an additional 2 minutes. Add minced garlic and cook for 30 seconds until fragrant.
    3 tablespoons butter, 8 ounces cremini mushrooms, 2 cloves garlic
  4. Remove the skillet from heat and pour in the sweet Marsala wine, scraping up browned bits from the bottom with a wooden spoon. Return pan to medium heat, add chicken broth, and simmer for 5-7 minutes until sauce is reduced by about half and coats the back of a spoon. Stir in remaining 2 tablespoons butter until melted and glossy.
    0.75 cup sweet Marsala wine, 0.75 cup chicken broth, 3 tablespoons butter
  5. Return the chicken breasts to the skillet and spoon sauce over the top. Simmer for 1-2 minutes to reheat the chicken. Taste and adjust salt if needed. Garnish with fresh chopped parsley and serve immediately.
    4 pieces chicken breast, for garnish fresh parsley, to taste salt and black pepper

Notes

  • Pound chicken breasts evenly to ½ inch thickness for uniform cooking.
  • Remove pan from heat before adding Marsala wine to avoid bitter sauce.
  • Simmer sauce until thick enough to coat the back of a spoon for best texture.

Tried this recipe?

Let us know how it was!

What Is Yuca? [Taste, Uses & More]

April 3, 2026

You spot yuca at the market - a thick, waxy root with what looks like bark for skin, sitting alongside other tubers you probably recognize. It's easy to walk past it if you don't know what it can do, especially when familiar options like sweet potato or potato flakes are nearby.

What Is Yuca

Yuca earns a place in your cart, and this guide explains exactly why.

QUICK SUMMARY

Yuca (also called cassava or manioc) is a dense starchy root from South America, now grown across the tropics. It tastes like a denser, drier potato with mild sweetness. Boil it, fry it, or mill it into cassava flour. Always cook it - raw yuca contains compounds that require heat to neutralize.

👅Flavor: Mildly sweet with a nutty, earthy undertone
🌍Origin: Amazon basin; now grown across Latin America, Africa, and Asia
🍽️Best Uses: Boiled, fried as yuca fries, or milled into cassava flour
⚠️Key Note: Must be peeled and fully cooked before eating
📦Shelf Life: About 1 week at room temp; up to 3 weeks refrigerated and wrapped

What Is Yuca?

Yuca is a starchy tuber native to the Amazon basin and one of the most widely eaten roots on the planet. Outside the US, it goes by cassava or manioc - the same root, just different regional names.

The outer skin is thick, dark brown, and genuinely bark-like. Underneath sits white to cream-colored flesh that's dense and smooth before cooking.

Two main types exist: sweet cassava (the variety sold in most US grocery stores and markets) and bitter cassava. Bitter cassava contains higher concentrations of cyanogenic glycosides - naturally occurring compounds that require thorough peeling, soaking, and cooking to break down.

Sweet cassava has far lower levels, but both types should always be cooked.

Cassava is also the source of tapioca, made from the extracted and processed starch, and cassava flour, which is the dried, milled root used in gluten-free baking. Garri, a fermented, dried cassava product common across West Africa, comes from the same root.

Think of yuca as the raw material behind several pantry staples you may already use - including a number of arrowroot powder swaps that rely on cassava starch.

What Does Yuca Taste Like?

yuca - What Is Yuca

Raw yuca doesn't offer much - it smells neutral and the starch is tight and dry. Heat changes everything.

After boiling, the flesh turns creamy and slightly fibrous, with a mild sweetness that sits closer to taro than a standard potato. It's denser than a russet and drier than a Yukon Gold, with less inherent moisture in every bite.

If you've tried taro before, you'll recognize that same earthy, starchy base - yuca just skews a little sweeter and less purple.

Frying or roasting pulls out a toasty aroma and a faint nuttiness that doesn't show up when you boil it. The outer layer crisps while the interior stays soft.

Sensory SnapshotMild Intensity
👅 Flavor
mildly sweetnuttyearthy
✋ Texture
creamy when boiledcrisp when fried
👃 Aroma
neutral rawtoasty when fried

How to Use Yuca

Yuca handles heat in several distinct ways, and each method produces a noticeably different result. Boiling with salted water until fork-tender is the most common starting point - from there, you can mash, cube, or fry it.

How Yuca Is Used
MethodBest ForTip
🫕 BoiledMashed sides, stews, soupsSalt the water well; boil until a knife meets no resistance
🍟 FriedYuca fries, chipsBoil first, then fry for a creamy interior and crisp shell
🔥 Roasted/BakedWedges as a side dishToss in olive oil; high heat (425°F+) builds the best crust
🫓 Grated & PressedCasabe flatbreads, garriPress out excess moisture before cooking on a dry griddle
🧁 Milled (flour/starch)Gluten-free baking, thickeningCassava flour and tapioca starch behave differently - check ratios

Yuca fries are one of the best-known applications in Latin American and Caribbean cooking - boil the pieces first, then fry them in hot oil until golden. The double-cook method gives you a creamy interior and a crisp outer layer that fried plantains fans will appreciate for the same satisfying contrast.

Across cuisines, pairings lean on contrast. Garlic, cilantro, and lime cut through the dense starch in Colombian and Puerto Rican dishes.

Coconut milk enriches yuca in Caribbean stews. Pork and beef hold up well against its body.

In West African cooking, cassava gets fermented and dried into garri, used as a porridge or side with soups and stews.

Cassava flour works in place of wheat flour in gluten-free baking, and it's a frequent entry among tapioca flour alternatives when starch-based thickening is the goal.

Try It In
🍟Yuca Frita Fried CassavaThe double-cook method in action — boiled first, then fried→🥩Yucatan Cochinita Pibil PorkRich slow-cooked pork that pairs with starchy sides→🌮Yucatan Papadzules Egg TacosShowcases the broader Yucatecan pantry yuca belongs to→

How to Buy and Store Yuca

Good yuca is firm throughout, with intact brown skin that shows no cracks, soft spots, or deep splits. Heavier roots for their size signal higher starch content - that's what you want.

A sour smell means spoilage; skip those entirely.

Watch Out
Any pink or grey discoloration in the cut flesh indicates oxidation or rot. Don't cook it - the texture and safety both suffer.

Whole, unpeeled yuca keeps about one week at room temperature in a cool, dry spot. Refrigerate it wrapped in paper and it can last 2-3 weeks.

Once peeled and cut, submerge the pieces in water and refrigerate - they're good for up to 48 hours. For longer storage, check our full guide on yuca freshness guide for freezing options.

Where to Start With Yuca

New to yuca? Boil it first. Salt your water generously, cook until a knife slides through cleanly, then serve with garlic oil and lime. That single preparation covers most of what this root does well.

Golden Rule
Always boil yuca before frying or roasting. Skipping this step gives you a woody, undercooked center no matter how long it sits in the oven.

If you want a swap in a recipe that calls for a dense starchy tuber, the yuca alternatives page covers which roots hold up under the same conditions. Once you've worked with the boiled version a few times, frying and flour applications follow naturally.

Frequently Asked Questions

Is yuca the same as cassava?

Yes - same root, different names. "Yuca" is standard in the US and Latin America; "cassava" or "manioc" is used across Africa, Asia, and international food contexts. Neither name indicates a different variety.

Can you eat yuca raw?

No. Raw yuca contains cyanogenic glycosides, which break down into hydrogen cyanide if not neutralized by heat. Always peel thoroughly and cook until fully soft - boiling is the most reliable method.

How do you cook yuca so it isn't woody?

Remove the fibrous central cord that runs through the root - it stays tough regardless of cooking time. After pulling that out, boil the pieces in well-salted water until a knife meets no resistance, typically 20-30 minutes.

What is the difference between sweet and bitter cassava?

Bitter cassava has much higher cyanogenic glycoside content and requires soaking, fermenting, or prolonged cooking to be safe. Sweet cassava - sold in most markets - has lower levels but still must be cooked. Bitter varieties are mainly processed industrially into flour or garri.

Is cassava flour the same as tapioca starch?

No. Cassava flour is the whole dried and milled root; tapioca starch is extracted from the root's liquid and contains almost no fiber or protein. They don't swap 1:1 - cassava flour adds body while tapioca starch acts primarily as a thickener.

Beef Goulash with Paprika

April 3, 2026

Article Output

When you need a hearty dinner that warms you from the inside out, beef goulash delivers on every level. One pot, rich paprika-laced sauce, and tender beef that falls apart with a fork.

Beef Goulash with Paprika served on a plate

The slow simmer does all the work. You brown the beef, layer the paprika and onions, then let low heat turn tough chuck into something you can eat with a spoon.

Perfect for cold nights when you want comfort food that tastes like you spent all day cooking but actually only needs about two hours of mostly hands-off time.

QUICK SUMMARY

Beef goulash with paprika starts with seared beef chuck simmered low and slow in a paprika-rich sauce until fork-tender. The gentle 180-190°F simmer breaks down tough meat without drying it out. Takes 1 hour 50 minutes total with 20 minutes of active prep, then the pot does the rest.

⏱️Active Time: 20 minutes prep, 10 minutes browning, rest is hands-off simmering
🔥Key Move: Brown beef in batches without crowding-builds flavor base for entire stew
⚠️Watch Out: Add paprika to soft onions off heat-direct heat burns paprika and tastes bitter

Why This Recipe Works

Tough beef chuck breaks down into tender chunks when you simmer it low and slow in a paprika-rich broth. For a version that comes together quickly, this rich beef uses a similar gentle simmer method to tenderize the meat without drying it out.

Quick Reference
⏱️
Prep Time
20 min
🔥
Cook Time
1 hr 30 min
⏰
Total Time
1 hr 50 min
🍽️
Servings
4-6 servings
📊
Difficulty
Medium
🏷️
Category
Main Dish
💡
Quick Tip
Use sweet paprika for authentic color and flavor
🎯
Best For
Weeknight | Meal prep | Cold weather

Five things that make this work:

  • High heat sear locks in flavor - browning beef in a hot Dutch oven creates caramelized bits that dissolve into the sauce during simmering
  • Fresh paprika defines the dish - old paprika tastes flat and dusty; fresh Hungarian paprika brings sweet smokiness and deep red color
  • Uniform 1-1.5 inch cubes cook evenly - larger chunks stay raw inside, smaller ones fall apart into mush
  • 180-190°F simmer tenderizes without drying - rolling boil toughens beef; gentle bubbles break down collagen into silky texture
  • 10-15 minute rest off heat - sauce thickens as it cools slightly and flavors meld together
Quick Tip
Test beef tenderness at the 1-hour mark by piercing with a fork-it should slide off easily when ready

What You'll Need

Ingredients for Beef Goulash with Paprika

Stock your pantry with Hungarian paprika and grab beef chuck from the meat counter. We keep a batch ready for nights like this - easy dare side rounds out the plate when you want something creamy alongside the rich stew.

🍗
Protein
  • 2 lbs beef chuck, cut into 1-1.5 inch cubes
🥬
Vegetables
  • 2 large onions, diced
  • 2 bell peppers, chopped
  • 4 cloves garlic, minced
🌶️
Seasonings
  • 3 tablespoon Hungarian sweet paprika
  • 1 teaspoon smoked paprika (optional)
  • 1 teaspoon caraway seeds
  • Salt and black pepper
🥢
Sauce Base
  • 2 tablespoon tomato paste
  • 3 cups beef broth
  • 1 tablespoon flour or cornstarch (optional thickener)

Ingredient Details

  • Beef chuck
    Choose well-marbled stew meat or chuck roast cut into uniform cubes-fat and connective tissue break down during long simmer into tender, flavorful bites
  • Hungarian sweet paprika
    Look for bright red powder with no clumps-stale paprika loses sweet smokiness and turns bitter when heated
  • Onions
    Yellow or white onions work best-they soften into the sauce base and add natural sweetness that balances paprika's earthiness
  • Beef broth
    Low-sodium gives you control over salt levels-add gradually to adjust sauce consistency as beef releases its own liquid
  • Tomato paste
    Use double-concentrated paste for depth without making sauce too acidic-adds body and helps paprika cling to beef
  • Bell peppers
    Red or yellow peppers add mild sweetness-green peppers work but taste slightly bitter and less traditional
  • Caraway seeds
    Optional but traditional-adds subtle anise-like warmth that complements paprika without overpowering

Ingredient Swaps

Beef chuck is traditional but not your only option. Rich mains need something to cut through, and this easy rolls recipe brings that contrast with crispy texture and lighter flavor.

Four swaps that work:

  • Beef chuck → beef brisket - similar marbling and texture, may need 15-20 minutes longer simmer for full tenderness
  • Beef broth → vegetable broth - lighter umami but works for less meaty flavor profile
  • Tomato paste → crushed tomatoes - thinner sauce with brighter acidity, add extra simmer time to reduce
  • Bell peppers → jarred roasted red peppers - adds smokiness and softer texture, skip the sautéing step

Fresh paprika vs. old paprika

Works for: Bright red color, sweet smokiness, no bitterness when heated

Skip if: Powder is brownish, clumpy, or smells flat-old paprika ruins the dish

Beef chuck vs. pork shoulder

Works for: Similar texture when braised, budget-friendly swap, slightly sweeter flavor

Skip if: You want traditional Hungarian goulash-pork changes the dish entirely

Instructions

You need 20 minutes of active work, then 90 minutes of gentle simmering. The beef works best when it hits the table at the same time as the main, so time your sides accordingly or keep things simple with this easy salad recipe that comes together while the stew simmers.

  1. Brown the beef in batches: Heat 2 tablespoon oil in a Dutch oven over medium-high heat. Pat beef cubes dry, season with salt and pepper, then sear 3-4 minutes per side until deep brown crust forms. Don't crowd the pan-work in 2-3 batches. Remove beef and set aside.

  2. Cook the aromatics: Lower heat to medium, add diced onions and bell peppers to the same pot. Cook 5-7 minutes, stirring occasionally, until onions turn translucent and peppers soften. Add minced garlic and caraway seeds, cook 1 minute until fragrant.

  3. Add paprika off heat: Remove pot from burner. Stir in 3 tablespoon sweet paprika and 1 teaspoon smoked paprika (if using), coating vegetables evenly. Let sit 30-60 seconds to bloom-this prevents burning while releasing paprika oils.

  4. Build the stew: Return pot to medium heat. Stir in tomato paste, cook 2 minutes. Add browned beef back with any accumulated juices. Pour in 3 cups beef broth, scraping bottom to release browned bits. Bring to a boil, then reduce to low simmer (180-190°F)-you should see gentle bubbles breaking the surface every few seconds.

  5. Simmer until tender: Cover and simmer 1.5 hours, stirring every 20-30 minutes. Check beef at 1 hour by piercing with a fork-it should slide off easily. If sauce is too thin, whisk 1 tablespoon flour or cornstarch with 2 tablespoon cold water, stir into stew, and simmer uncovered 10 minutes. Remove from heat, rest covered 10-15 minutes before serving.
Golden Rule
Maintain a gentle simmer, not a rolling boil-high heat toughens beef instead of tenderizing it

What to Serve With It

Goulash needs something to soak up the paprika-rich sauce. Cool and crunchy, slaw resets your palate between bites, and classic slaw dish brings that crisp texture and tangy contrast to balance the rich stew.

Side Dish Prep Why It Works How to Serve
Egg noodles Easy Wide ribbons catch thick sauce, cook while goulash rests Boil 8-10 min, toss with butter, nest goulash on top
Buttered potatoes Easy Neutral starchy base absorbs sauce without competing flavors Boil small potatoes 15 min, toss with butter and parsley
Crusty bread Easy Soaks up every drop of sauce, zero cooking required Slice thick, toast lightly if desired, serve in basket
Steamed rice Easy Light neutral grain stretches servings without heaviness Cook white rice, fluff with fork, ladle goulash over top
Green salad Easy Crisp fresh greens cut richness, adds bright contrast Toss mixed greens with vinaigrette, serve on side

Three ways to serve it:

  • Traditional Hungarian style: Ladle over wide egg noodles or spaetzle, dollop sour cream on top, sprinkle fresh parsley
  • Meal prep bowls: Portion goulash over cooked rice, store sides separately, reheat in microwave
  • Bread bowl: Hollow out small round boules, fill with hot goulash, serve with torn bread for dipping

For more pairing ideas that work with rich beef stews, see our guide on planning your beef bourguignon dinner-many of the same principles apply to goulash.

Shortcut
Skip homemade sides-buy pre-cooked egg noodles or microwave rice, add butter and herbs, serve in 5 minutes

Store and Reheat

Goulash tastes better the next day as flavors meld overnight in the fridge. Beef adds the contrast this plate needs, but timing matters when you're planning leftovers or meal prep portions.

Method Time Best For
🍳 Stovetop 10-15 min over low heat Small batches, retains texture and prevents beef from drying out
📦 Microwave 2-4 min, stir halfway Single servings, quick reheating when you're short on time
🔥 Oven 20 min at 325°F covered Large portions, even reheating for family-style serving

For best results when storing:

  • Cool completely before refrigerating - transfer to shallow containers within 2 hours to prevent bacterial growth
  • Store in airtight containers - keeps 3-4 days in fridge; sauce thickens as it sits, add splash of broth when reheating
  • Freeze in portion sizes - use freezer-safe containers or bags, freeze up to 3 months, thaw overnight in fridge
  • Add liquid when reheating - frozen goulash loses moisture, stir in ¼ cup broth or water while warming
  • Reheat gently on stovetop - low heat prevents beef from toughening, stir occasionally, bring to 165°F internal temp

Frequently Asked Questions

How long to cook beef goulash at simmer?

Simmer beef goulash for 1.5 hours at 180-190°F (gentle bubbles breaking surface every few seconds). Test beef at the 1-hour mark by piercing with a fork-it should slide off easily when fully tender.

Can I make beef goulash ahead and refrigerate?

Yes, goulash tastes better the next day as flavors meld. Store in airtight containers for 3-4 days in the fridge, reheat on stovetop over low heat with a splash of broth to loosen sauce.

What are the best side dishes for beef goulash?

Serve goulash with egg noodles, buttered potatoes, crusty bread, or steamed rice to soak up the paprika-rich sauce. Add a green salad or pickled vegetables on the side to cut the richness.

How do I know when beef goulash is done and tender?

Test beef by piercing with a fork after 1 hour of simmering-it should slide off easily without resistance. If beef still feels firm or chewy, continue simmering in 15-minute intervals until fork-tender.

Can I use pork instead of beef in goulash?

Yes, pork shoulder works as a substitute with similar braising texture, though it changes the traditional Hungarian flavor profile. Use the same cooking method and simmer time as beef chuck for tender results.

Beef Goulash with Paprika served on a plate

Beef Goulash with Paprika

No ratings yet
Beef goulash with paprika features tender beef chuck simmered low and slow in a rich paprika-laced sauce. This hearty one-pot stew delivers deep flavor with minimal active cooking time, perfect for cold nights and comforting dinners.
Print Recipe Pin Recipe
Prep Time 20 minutes mins
Cook Time 1 hour hr 30 minutes mins
Total Time 1 hour hr 50 minutes mins
Servings: 5 servings
Course: Dinner, Main Dish
Cuisine: Central European, Hungarian
Ingredients Equipment Method Notes

Ingredients
  

  • 2 lbs beef chuck cut into 1-1.5 inch cubes
  • 2 large onions diced
  • 2 bell peppers chopped
  • 4 cloves garlic minced
  • 3 tablespoon Hungarian sweet paprika
  • 1 teaspoon smoked paprika optional
  • 1 teaspoon caraway seeds
  • 2 tablespoon tomato paste
  • 3 cups beef broth low sodium recommended
  • 1 tablespoon flour or cornstarch, optional thickener
  • 2 tablespoon oil for browning beef
  • to taste salt
  • to taste black pepper

Equipment

  • Dutch oven Used for browning beef and simmering the stew

Method
 

  1. Heat 2 tablespoons oil in a Dutch oven over medium-high heat. Pat beef cubes dry, season with salt and pepper, then sear for 3-4 minutes per side until a deep brown crust forms. Avoid crowding the pan by working in 2-3 batches. Remove browned beef and set aside.
    2 lbs beef chuck, 2 tbsp oil, to taste salt, to taste black pepper
  2. Lower heat to medium and add diced onions and chopped bell peppers to the same pot. Cook for 5-7 minutes, stirring occasionally, until onions turn translucent and peppers soften. Add minced garlic and caraway seeds, cooking for another 1 minute until fragrant.
    2 large onions, 2 bell peppers, 4 cloves garlic, 1 tsp caraway seeds
  3. Remove the pot from heat. Stir in 3 tablespoons sweet paprika and 1 teaspoon smoked paprika (if using), coating the vegetables evenly. Let the mixture sit for 30-60 seconds to bloom, preventing paprika from burning and releasing its oils.
    3 tbsp Hungarian sweet paprika, 1 tsp smoked paprika
  4. Return the pot to medium heat. Stir in tomato paste and cook for 2 minutes. Add the browned beef along with any accumulated juices. Pour in 3 cups of beef broth, scraping the bottom to release browned bits. Bring to a boil, then reduce to a low simmer (180-190°F) with gentle bubbles.
    2 tbsp tomato paste, 2 lbs beef chuck, 3 cups beef broth
  5. Cover and simmer for 1.5 hours, stirring every 20-30 minutes. Check tenderness at 1 hour by piercing beef with a fork-it should slide off easily. If the sauce is too thin, whisk 1 tablespoon of flour or cornstarch with 2 tablespoons cold water, stir into stew, and simmer uncovered for 10 minutes. Remove from heat and let rest covered for 10-15 minutes before serving.
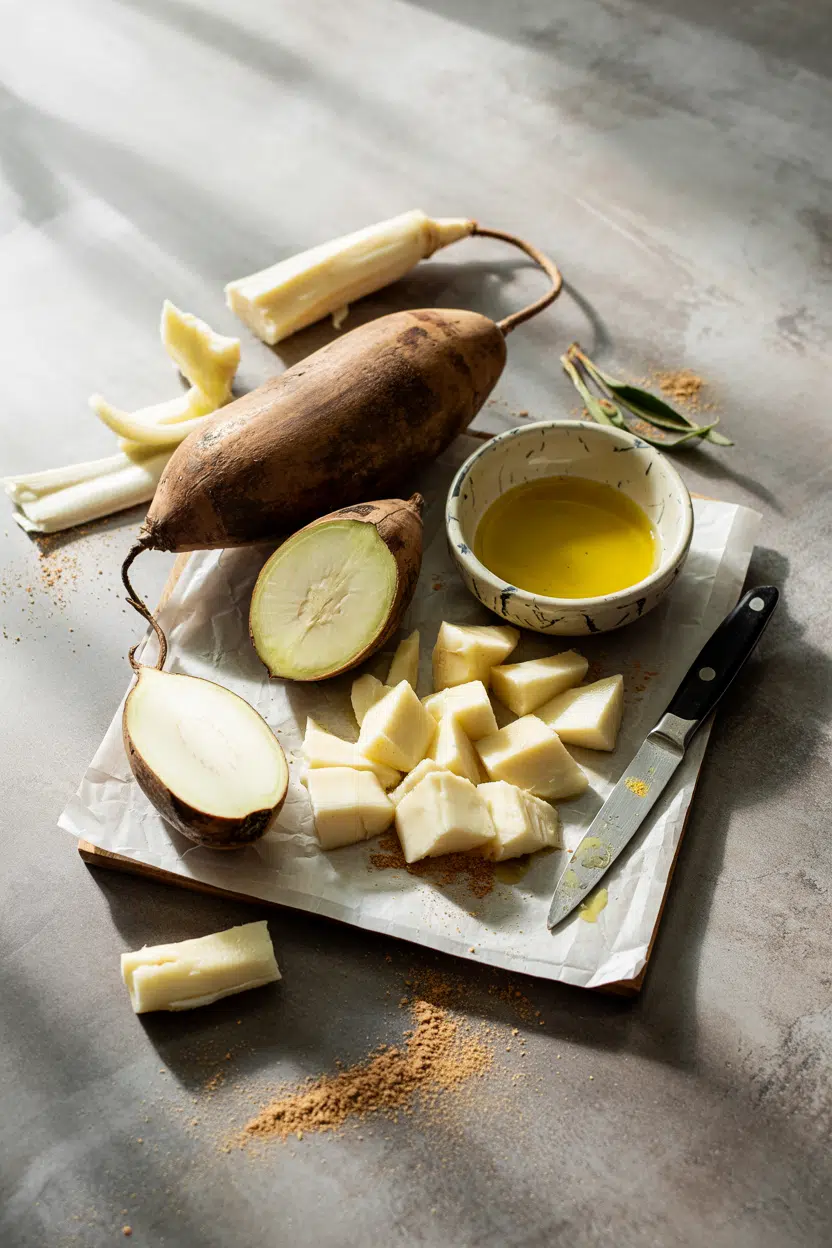
    1 tbsp flour

Notes

  • Brown beef in batches to build a deep flavor base.
  • Add paprika off heat to prevent burning and bitterness.
  • Test beef tenderness at 1 hour, continue simmering if needed.

Tried this recipe?

Let us know how it was!

What Is Tuaca? [Taste, Uses & More]

April 3, 2026

Tuaca earns its place in a drink or dessert not through subtlety but through specificity - it delivers vanilla, citrus, and brandy warmth in one pour where three separate ingredients would otherwise be needed.

What Is Tuaca

A small bottle on the shelf handles replacements for brandy in sweet applications without sacrificing the aromatic lift that makes a sauce or cocktail feel finished.

Most people encounter it first in a coffee drink and immediately start asking what else it can do.

The answer is more than expected.

QUICK SUMMARY

Tuaca is a brandy-based Italian liqueur flavored with vanilla and citrus peel. Sweet, amber, and moderately strong at ~35% ABV, it works in cocktails, hot coffee drinks, and desserts. An opened bottle holds quality for 1-2 years when stored cool.

🍊Flavor: Sweet vanilla, bright citrus, warm brandy backbone, soft caramel
🥃Best Uses: Hot coffee drinks, cocktails, tiramisu, glazed fruit, chocolate sauce
🏪Where to Buy: Licensed spirits retailer; 375 ml bottles work for occasional use
📦Storage: Cool, dark place upright; no refrigeration needed after opening
⏳Shelf Life: Indefinite unopened; 1-2 years open before noticeable flavor decline

What Is Tuaca?

Tuaca is a sweet, amber-hued Italian liqueur built on a brandy base and flavored with vanilla extract and citrus oils - primarily mandarin and orange peel.

The brand claims Tuscan origins, with stories linking it to Renaissance-era Florence, though those historical claims are more legend than verified record.

It sits in the category of sweet citrus-vanilla liqueurs, somewhere between a spiced brandy and an orange curaçao.

You may also see it labeled Tuaca Toscana or Tuaca Vanilla-Citrus Brandy; Tuacca (double-c) is a common misspelling but refers to the same product.

Unlike most fruit liqueurs, Tuaca doesn't taste like a single citrus fruit. The orange peel and mandarin oils merge with vanilla to produce a rounded sweetness that doesn't tip into candy territory.

  • 🍂 Base spirit - brandy, which gives it more body and warmth than vodka-based liqueurs
  • 🍋 Citrus character - mandarin and orange peel oils, not fresh juice
  • 🌿 Sweetness level - noticeably sweet but not cloying; closer to amaretto than triple sec
  • 📍 ABV - approximately 35%, similar to most mid-strength liqueurs

What Does Tuaca Taste Like?

tuaca - What Is Tuaca

Tuaca tastes like a vanilla-forward orange curaçao crossed with a mellow brandy - sweet up front, citrusy through the mid-palate, and warm at the finish.

The brandy backbone adds depth that most orange liqueurs lack, giving it a slightly roasted, almost caramel quality that lingers.

Sensory SnapshotModerate Intensity
👅 Flavor
sweet vanillabright citrussoft caramelwarm brandy
✋ Texture
silkylightly syrupy
👃 Aroma
vanilla-forwardsweet orange peel

When added to heat - stirred into espresso or reduced in a sauce - the alcohol softens and the vanilla note sharpens. Cold, in a shaken cocktail, the citrus reads brighter and the brandy recedes.

Neither version is aggressive; moderate intensity means it layers well without overpowering other ingredients.

Golden Rule
Taste Tuaca at room temperature before cooking with it. Cold dulls the brandy backbone, which is the flavor most likely to carry through heat.

How to Use Tuaca

Tuaca's most natural home is hot coffee and espresso drinks. A 30 ml pour stirred into a short espresso adds vanilla and citrus without needing simple syrup or dairy.

It also works well alongside dishes alongside gelato where a small drizzle over the top acts as a finishing syrup, especially with vanilla or fior di latte scoops.

In Italian-inspired desserts, Tuaca adds sweet citrus-vanilla depth to tiramisu custard and panna cotta.

If you're already planning your sides for tiramisu, a Tuaca-laced cream layer can tie the whole plate together without any additional flavoring.

For stone fruits - peaches, figs, apricots - brush a tablespoon over halves before broiling; the sugars caramelize and the citrus oils concentrate into the flesh.

Shortcut
No cocktail shaker? Stir Tuaca over ice in a rocks glass with whiskey and a dash of bitters - same flavors, zero equipment.
How Tuaca Is Used
MethodBest ForTip
🥃 Stirred ColdWhiskey sours, spirit-forward cocktailsUse as the sweetener - reduce or skip simple syrup
☕ Hot LiquidEspresso drinks, hot chocolateAdd after brewing; heat volatilizes alcohol faster
🍑 Brush + BroilPeaches, figs, apricotsThin coat only - too much and it burns before caramelizing
🍮 Fold Into CustardTiramisu, panna cotta, pastry creamAdd off-heat to preserve citrus aromatics

In cocktails, Tuaca functions as both spirit and sweetener. A vanilla-orange sour - Tuaca, lemon juice, egg white, shaken - needs no added sugar.

It also pairs directly with whiskey and aged rum, where the shared caramel notes amplify rather than compete.

Try It In
🍑Peach Cold Brew CoffeeTuaca's citrus-vanilla profile pairs cleanly with cold brew and ripe peach→🌿Passion Fruit Cold Brew CoffeeTropical acidity plays off Tuaca's brandy warmth in a cold drink→🍫Passion Fruit Hot ChocolateA small pour of Tuaca adds vanilla depth to this citrus-chocolate drink→

How to Buy and Store Tuaca

At the bottle shop, look for clear amber color and no visible sediment. A quick smell at the cap should give you vanilla and sweet orange peel - if it smells flat or sharp, the bottle has been stored poorly.

Smaller 375 ml bottles are a sensible purchase if cocktails or baking are your only use cases.

Watch Out
Don't buy Tuaca from a shelf in direct sunlight or near a heat source. UV and warmth degrade the citrus oils faster than anything else in the bottle.

Store upright in a cool, dark cabinet - no refrigeration needed. An opened bottle holds well for 1-2 years before flavor decline becomes noticeable; check for tuaca spoilage signs if your bottle has been open longer than that.

Unopened, stored cool, it keeps indefinitely.

Where to Start with Tuaca

If you've never used Tuaca before, the espresso drink is the entry point. One pour into a hot espresso shows all three of its core flavors - vanilla, citrus, brandy - with nothing else in the way.

From there, move into desserts.

When you're confident with quantities, cocktails follow naturally.

Need a stand-in for a different dish?

These tuaca swaps that work cover both cocktail and kitchen scenarios.

And if citrus liqueurs generally interest you, the guide on swapping out limoncello shows where these categories overlap.

Tuaca isn't a niche ingredient - it just needs the right introduction.

Frequently Asked Questions

Is Tuaca vodka or brandy?

Brandy. Tuaca is built on a brandy base, which gives it more body and warmth than vodka-based liqueurs. That brandy backbone is what produces the soft caramel note in the finish.

How strong is Tuaca?

Tuaca is approximately 35% ABV - similar to amaretto or most mid-strength liqueurs. It's strong enough to function as the spirit in a cocktail, not just a mixer.

Is Tuaca the same as curaçao?

No. Curaçao is an orange liqueur with a neutral or brandy base but no vanilla flavor. Tuaca adds vanilla and has a heavier, warmer profile than most curaçao expressions.

Can you cook with Tuaca?

Yes - fold it into custards, brush it over fruit before broiling, or stir it into chocolate sauces off the heat. Add it late in cooking to preserve the citrus aromatics, which fade quickly under prolonged heat.

Does Tuaca work with coffee flavoring substitutes in baking?

It can, though it adds citrus-vanilla rather than straight coffee depth. If a recipe calls for espresso powder, reviewing [replacements for espresso powder](https://forkliftkitchen.com/espresso-powder-substitutes/) will clarify when Tuaca is a viable swap versus when it shifts the flavor profile too far.

Moroccan Lamb Tagine

April 3, 2026

When you need something slow-cooked that fills the house with warm spices and makes dinner feel intentional, Moroccan lamb tagine delivers. One heavy pot, lamb shoulder that falls apart with a fork, and dried apricots that sweeten the broth just enough.

Moroccan Lamb Tagine served on a plate

The low simmer does all the work. You brown the meat, add spices and liquid, then walk away for two hours while the tagine cooks itself.

Perfect for meal prep Sundays or weeknights when you want real food without constant stirring.

QUICK SUMMARY

Moroccan lamb tagine is a slow-simmered stew with lamb shoulder, warm spices, and dried apricots that cooks low and slow until the meat falls apart. The key is browning the lamb well before adding liquid, then simmering at the lowest heat for 2+ hours. Works best for meal prep or entertaining when you want something hands-off that tastes complex.

⏱️Time Reality: 20 minutes prep, then 2.5 hours of mostly unattended simmering
🔥Critical First Step: Brown lamb chunks 3-4 minutes per side over medium-high heat before adding any liquid
⚠️Common Mistake: Adding dried fruit too early makes it dissolve into mush - wait until the last 30-40 minutes

Why This Recipe Works

The low simmer breaks down the fatty lamb shoulder into tender pieces while the warm spices bloom in the broth. Browning the meat first creates a caramelized base that deepens the flavor before you add any liquid.

Quick Reference
⏱️
Prep Time
20 min
🔥
Cook Time
2 hr 30 min
⏰
Total Time
2 hr 50 min
🍽️
Servings
6 servings
📊
Difficulty
Medium
🏷️
Category
Main Dish
💡
Quick Tip
Brown lamb well before simmering
🎯
Best For
Weeknight | Meal prep | Entertaining

What makes this work:

  • Lamb shoulder has enough fat to stay moist during the long simmer without drying out
  • Toasting spices for 2 minutes before adding liquid releases their essential oils and intensifies the flavor
  • The conical shape of a tagine pot (or a heavy Dutch oven) traps steam and keeps the meat tender
  • Dried apricots added in the last 30-40 minutes hold their shape and add sweetness without dissolving into mush
  • Internal temp of 190°F means the lamb pulls apart easily with a fork and the collagen has fully broken down
Quick Tip
Check seasoning 1 hour into simmering and adjust salt gradually - the flavors concentrate as the liquid reduces

What You'll Need

Ingredients for Moroccan Lamb Tagine

Shopping for a tagine is straightforward - you need fatty lamb, warm spices, and something sweet to balance the earthiness. For a twist that adds brightness without the specialty store trip, try this simple dare recipe to drizzle over couscous.

🍗
Protein
  • 2 lbs lamb shoulder, cut into 2-inch chunks
🧄
Aromatics
  • 2 large onions, diced
  • 4 garlic cloves, minced
  • 2-inch piece fresh ginger, grated
🌶️
Spices
  • 1 cinnamon stick
  • 2 teaspoon ground cumin
  • 2 teaspoon ground coriander
  • 1 teaspoon paprika
  • ½ teaspoon chili flakes (optional)
🫙
Pantry
  • 1 cup dried apricots
  • 1 can (15 oz) chickpeas, drained
  • 2 cups chicken or vegetable broth
  • 1 preserved lemon, chopped (or zest + juice of 1 lemon)
  • Fresh cilantro for garnish

Ingredient Details

  • Lamb shoulder
    Fatty cut that stays moist during slow cooking - lean cuts dry out and turn stringy
  • Cinnamon stick
    Whole stick adds subtle warmth without overpowering - ground cinnamon turns muddy and bitter
  • Dried apricots
    Add sweetness and hold their shape when added in the last 30-40 minutes of cooking
  • Ground cumin
    Toast in a dry pan for 2 minutes to release earthy, nutty notes before adding liquid
  • Preserved lemon
    Adds tangy brightness - chop thinly and add near the end to keep the citrus notes fresh
  • Chickpeas
    Optional but adds protein and texture - drain canned chickpeas and add in the last hour
  • Fresh ginger
    Grate finely so it melts into the sauce - large chunks turn woody and bitter

Ingredient Swaps

Most tagine variations work if you keep the core structure - fatty meat, warm spices, and something sweet. For another slow-cooked option that uses similar braising techniques, try this simple sandwich side dish when you need comfort food with layers.

Four swaps that work:

  • Beef chuck for lamb shoulder: Longer cooking time (3+ hours) but similar texture - slightly less gamey flavor makes it more budget-friendly
  • Fresh lemon zest + juice for preserved lemon: Less intense tang and fresher citrus notes - add in the last 15 minutes to prevent bitterness
  • Prunes or raisins for dried apricots: Different sweetness profile (prunes are darker, raisins more subtle) but same textural contrast
  • White beans for chickpeas: Softer texture and milder flavor - add in the last 30 minutes so they don't fall apart

Traditional Tagine Pot

Works for: Even heat distribution, authentic conical steam circulation, keeps meat extra tender

Skip if: Don't have one - a heavy Dutch oven with a tight lid works just as well

Heavy Dutch Oven

Works for: Most home kitchens, retains heat well, easier to find and clean

Skip if: Using a thin pot - it scorches the bottom and cooks unevenly

Instructions

The first 20 minutes sets up the rest - brown the lamb well, toast the spices, then let it simmer low and slow. For a side that comes together while the tagine cooks, try this easy rolls recipe to soak up the sauce.

  1. Brown the lamb: Heat 2 tablespoon oil in a heavy-bottomed pot or Dutch oven over medium-high heat. Brown lamb chunks 3-4 minutes per side until deep golden - don't crowd the pan or the meat steams instead of searing. Remove and set aside.

  2. Sauté aromatics and toast spices: Lower heat to medium. Add onions and cook 5 minutes until softened. Stir in garlic, ginger, cumin, coriander, paprika, and cinnamon stick. Toast 2 minutes until fragrant and the spices darken slightly.

  3. Add liquid and simmer: Return lamb to pot. Pour in broth and stir to scrape up any browned bits. Bring to a boil, then reduce to the lowest simmer. Cover and cook 2 hours, stirring every 30 minutes - the lamb should be fork-tender and the internal temp should hit 190°F.

  4. Add fruit and finish: Stir in dried apricots, chickpeas, and preserved lemon. Simmer uncovered 30-40 minutes until the sauce thickens slightly and the fruit is plump but still holds its shape. Taste and adjust salt.

  5. Rest and serve: Turn off heat and let the tagine sit 10 minutes off the burner. The flavors meld and the sauce settles. Garnish with fresh cilantro and serve over couscous or with warm flatbread.

Golden Rule
Stir occasionally during the long simmer to prevent sticking - if the bottom starts to scorch, add a splash of hot water and lower the heat immediately

What to Serve With It

Rich stews need something to soak up the sauce and cut through the heaviness. A good side makes the difference between a satisfying meal and one that feels incomplete - for more complete meal ideas, check out these fresh vegetable dinner ideas.

Side Dish Prep Why It Works How to Serve
Couscous Easy Light, fluffy texture soaks up tagine sauce without overpowering it Fluff with fork, serve in shallow bowl with tagine spooned over top
Steamed green beans Easy Adds vibrant color and fresh crunch to balance the rich stew Steam 4-5 minutes until tender-crisp, toss with lemon zest
Warm flatbread Easy Ideal for scooping tagine and wiping up sauce - no utensils needed Warm in oven 2-3 minutes, serve whole or torn into pieces
Simple cucumber salad Easy Refreshing contrast cuts through the warm spices and rich sauce Slice thin, toss with lemon juice, olive oil, mint
Saffron couscous with toasted almonds Medium Elevated texture and nutty flavor for entertaining or special meals Steep saffron in warm broth before adding to couscous, top with almonds

Three ways to serve it:

  • Family-style weeknight: Spoon tagine over a large platter of couscous, let everyone serve themselves with flatbread on the side
  • Meal prep bowls: Divide couscous into containers, top with tagine, store green beans separately to keep them crisp
  • Hosting dinner: Serve tagine in the tagine pot at the table, pass saffron couscous and harissa roasted vegetables separately
Best Pick
For a brighter pairing, serve with a [classic salad dish](https://forkliftkitchen.com/mediterranean-chickpea-salad-with-feta/) that adds freshness without competing with the warm spices

Store and Reheat

Tagine tastes better the next day after the flavors meld overnight in the fridge. The sauce thickens as it cools, and the meat stays tender when reheated gently - for a finishing touch that cuts through the richness, add something cold like traditional to balance the meal.

Method Time Best For
🍳 Stovetop 8-10 min over low heat Even reheating, retains texture, easy to adjust sauce thickness
🔥 Oven 20 min at 325°F covered Larger portions, maintains moisture, hands-off reheating
📦 Microwave 3-4 min in 1-min intervals Quick reheating for individual servings - stir between intervals

For best results when storing:

  • Cool tagine to room temp within 2 hours, then transfer to shallow airtight containers - the sauce solidifies slightly but melts when reheated
  • Store in the fridge 3-4 days or freeze up to 3 months in freezer-safe containers - leave 1 inch headspace for expansion
  • Reheat on the stovetop over low heat, adding a splash of broth or water if the sauce is too thick
  • Freeze tagine without the couscous or bread - starchy sides turn mushy when frozen and reheated
  • Add fresh cilantro and preserved lemon after reheating to brighten the flavors - they lose their punch when stored

Frequently Asked Questions

Can I make Moroccan lamb tagine ahead and reheat?

Yes - tagine tastes better the next day after the flavors meld overnight. Store in the fridge up to 4 days or freeze up to 3 months, then reheat gently on the stovetop with a splash of broth to loosen the sauce.

How long should lamb be cooked in a tagine for tenderness?

Simmer lamb shoulder at the lowest heat for 2 to 2.5 hours until the internal temp hits 190°F and the meat pulls apart easily with a fork. Check every 30 minutes and add liquid if the sauce reduces too much.

What are good side dishes to serve with lamb tagine?

Serve tagine over couscous or with warm flatbread to soak up the sauce. Add steamed green beans or a simple cucumber salad for freshness, or try saffron couscous with toasted almonds for entertaining.

Can I use beef or chicken instead of lamb in a tagine?

Yes - beef chuck works well but needs 3+ hours of simmering to match the tenderness. Chicken thighs cook faster (45-60 minutes) but lack the rich flavor of lamb, so adjust spices to compensate.

How do I prevent my tagine from burning or sticking?

Use the lowest simmer setting and stir every 30 minutes to prevent sticking. If the bottom starts to scorch, add a splash of hot water immediately and lower the heat - a heavy Dutch oven or tagine pot distributes heat more evenly than thin pots.

Moroccan Lamb Tagine served on a plate

Moroccan Lamb Tagine

No ratings yet
Moroccan lamb tagine is a slow-simmered stew featuring tender lamb shoulder, warm spices, and sweet dried apricots. The lamb is browned first to develop depth of flavor, then simmered gently for hours until fork-tender, making it perfect for meal prep or entertaining.
Print Recipe Pin Recipe
Prep Time 20 minutes mins
Cook Time 2 hours hrs 30 minutes mins
Total Time 2 hours hrs 50 minutes mins
Servings: 6 servings
Course: Dinner, Main Dish
Cuisine: Moroccan, North African
Ingredients Equipment Method Notes

Ingredients
  

  • 2 lbs lamb shoulder cut into 2-inch chunks
  • 2 onions large, diced
  • 4 cloves garlic minced
  • 2 inch fresh ginger grated
  • 1 stick cinnamon stick whole
  • 2 teaspoon ground cumin
  • 2 teaspoon ground coriander
  • 1 teaspoon paprika
  • 0.5 teaspoon chili flakes optional
  • 1 cup dried apricots added in last 30-40 minutes
  • 15 oz chickpeas canned, drained
  • 2 cups chicken or vegetable broth
  • 1 preserved lemon chopped (or zest and juice of 1 lemon)
  • fresh cilantro for garnish
  • 2 tablespoon oil

Equipment

  • Heavy-bottomed pot or Dutch oven Used for browning lamb and slow simmering the tagine

Method
 

  1. Heat 2 tablespoons oil in a heavy-bottomed pot or Dutch oven over medium-high heat. Brown lamb chunks 3-4 minutes per side until deep golden. Do not crowd the pan to avoid steaming. Remove lamb and set aside.
    2 lbs lamb shoulder, 2 tbsp oil
  2. Lower heat to medium. Add diced onions and cook 5 minutes until softened. Stir in minced garlic, grated ginger, ground cumin, ground coriander, paprika, chili flakes, and cinnamon stick. Toast spices for 2 minutes until fragrant and slightly darkened.
    2 onions, 4 cloves garlic, 2 inch fresh ginger, 1 stick cinnamon stick, 2 tsp ground cumin, 2 tsp ground coriander, 1 tsp paprika, 0.5 tsp chili flakes
  3. Return browned lamb to pot. Pour in broth and stir to scrape up browned bits. Bring to a boil, then reduce to lowest simmer. Cover and cook for 2 hours, stirring every 30 minutes. Lamb should be fork-tender and internal temperature should reach 190°F.
    2 lbs lamb shoulder, 2 cups chicken or vegetable broth
  4. Stir in dried apricots, drained chickpeas, and chopped preserved lemon. Simmer uncovered for 30-40 minutes until sauce thickens slightly and fruit is plump but intact. Taste and adjust salt as needed.
    1 cup dried apricots, 15 oz chickpeas, 1 preserved lemon
  5. Turn off heat and let the tagine rest 10 minutes off the burner. Garnish with fresh cilantro and serve over couscous or with warm flatbread.
    fresh cilantro

Notes

  • Brown lamb well before simmering to deepen flavor and prevent stewing.
  • Add dried apricots in the last 30-40 minutes to keep them from dissolving.
  • Stir every 30 minutes during simmering to prevent sticking and burning; add hot water if needed.

Tried this recipe?

Let us know how it was!
« Previous Page
Next Page »

Primary Sidebar

ForkliftKitchen recipe developer

Welcome!

Recipe Developer · 12+ Yr Kitchen Veteran

I'm the recipe developer behind this site, focused on practical, well-tested dishes and smart ingredient swaps. Every recipe is written to be clear, reliable, and easy to make at home.

650+ Recipes
12+ Yrs Exp.
3x Tested
Our Story →

As Featured In

Allrecipes

TASTE OF HOME

Food52

HUFFPOST

Yahoo! Life

Our Editorial Standards

  • ✓ Every recipe tested at least 3 times before publishing
  • ✓ Substitutes verified by real kitchen trials, not guesswork
  • ✓ Reviewed for accuracy by our editorial team
  • ✓ Updated regularly with seasonal info and reader feedback

Most Popular

  • Creamy Lemon Shrimp Linguine
    Creamy Lemon Shrimp Linguine
  • Creamy Garlic Mushroom Chicken
    Creamy Garlic Mushroom Chicken
  • Sesame Ginger Chicken Noodle Bowls
    Sesame Ginger Chicken Noodle Bowls
  • Baked Lemon Herb Fish Fillets
    Baked Lemon Herb Fish Fillets
  • Veggie Loaded Fried Rice
    Veggie Loaded Fried Rice
  • Spicy Garlic Shrimp Stir Fry
    Spicy Garlic Shrimp Stir Fry

Join 8,000+ Home Cooks

Weekly Kitchen Tips

Easy recipes, smart substitutes, and real cooking shortcuts — every Thursday.

Subscribe Free →


Side Dishes

  • What to Serve With Asian Salmon? 15 Best Side Dishes
    What to Serve With Asian Salmon? 15 Best Side Dishes
  • Side Dishes for Strawberry Spinach Salad
    15 Best Side Dishes for Strawberry Spinach Salad
  • Sides for Grilled Cauliflower Steaks to Complete the Meal
    15 Sides for Grilled Cauliflower Steaks to Complete the Meal
  • 15 Sides To Serve With Calabacitas
    15 Best Sides for Calabacitas – Mexican-Inspired Favorites


Substitutes

  • 7 Best Substitutes for Hot Sauce in Marinades & Stir-Fries
    7 Best Substitutes for Hot Sauce in Marinades & Stir-Fries
  • 9 Best Substitutes for Butter in Baking and Cooking
  • 7 Best Substitutes for Tagliatelle for Italian Pasta Dishes
    7 Best Substitutes for Tagliatelle for Italian Pasta Dishes
  • 7 Best Substitutes for Udon Noodles in Asian Stir-Fries
    7 Best Substitutes for Udon Noodles in Asian Stir-Fries


Browse by Topic

  • Side Dishes320
  • Substitutes785
  • Dinner163
  • Air Fryer77
  • Taste Profiles484
  • Food Storage123


Reader Reviews

★★★★★

"Finally a food blog that tells you exactly why a substitute works instead of just listing options."

— Sarah M., via email

★★★★★

"The side dish recommendations are so specific — saved my dinner party twice this month."

— James R., Pinterest comment

★★★★★

"I trust this site more than most because they actually test everything. You can tell."

— Priya K., blog comment

Footer

↑ Back to Top

Forklift Kitchen

We do the heavy lifting so you can enjoy the cooking. Tested recipes, smart substitutes, and perfect pairings—built for real home cooks.

Content

  • Recipes
  • Substitutes
  • What to Serve With
  • Blog

Company

  • About Us
  • Contact
  • Subscribe

Legal

  • Privacy Policy
  • Terms of Service

As an Amazon Associate I earn from qualifying purchases.

© 2026 Forklift Kitchen.

Rate This Recipe

Your vote:


A rating is required
A name is required
An email is required