• Skip to primary navigation
  • Skip to main content
  • Skip to primary sidebar
  • Recipe Index
    • Air Fryer
  • Side Dishes
  • Substitutes
  • About
  • Contact
  • Subscribe

ForkLiftKitchen

menu icon
go to homepage
  • Recipe Index
    • Air Fryer
  • Side Dishes
  • Substitutes
  • About
  • Contact
  • Subscribe
subscribe
search icon
Homepage link
  • Recipe Index
    • Air Fryer
  • Side Dishes
  • Substitutes
  • About
  • Contact
  • Subscribe
×

Blog

What Is Watermelon Radish? [Taste, Uses & More]

April 3, 2026

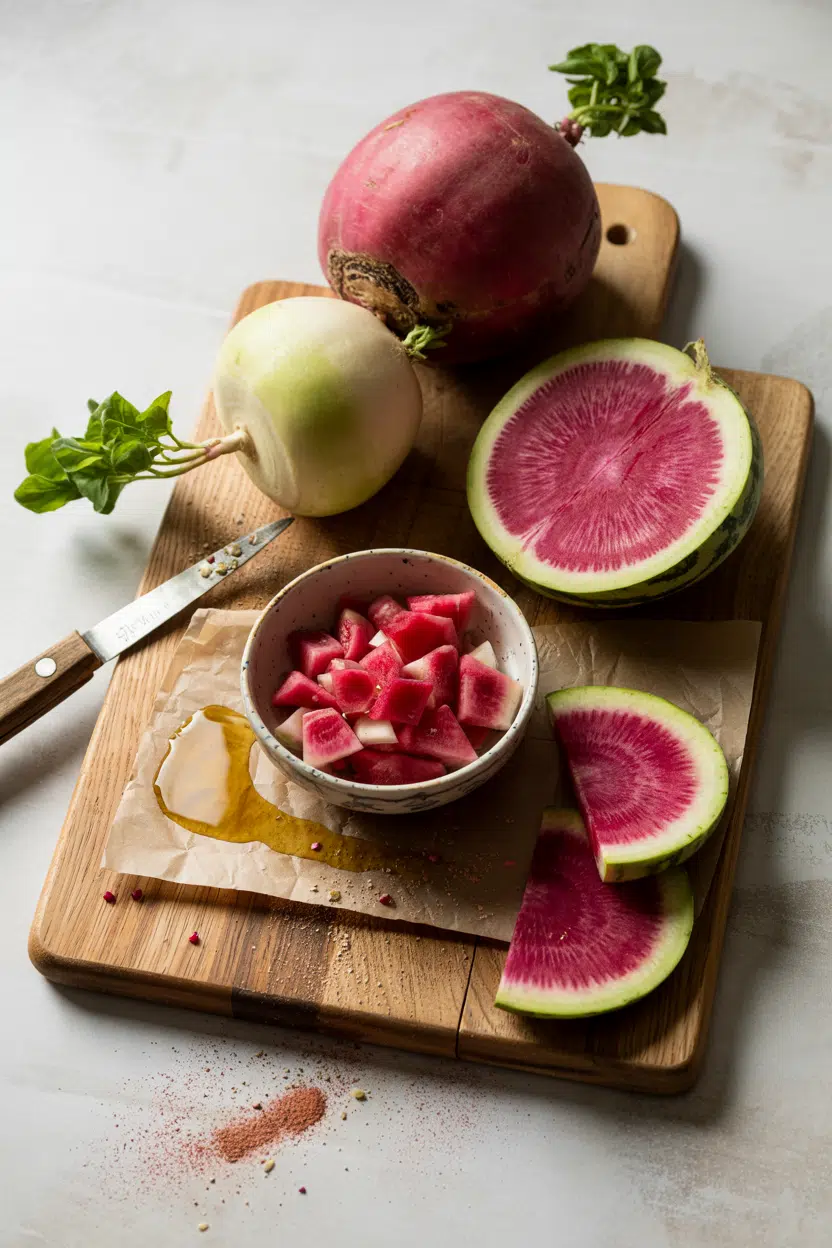
You spot it at the farmers market or tucked into a specialty produce bin - a squat, pale green root that gives no hint of what's inside.
What Is Watermelon Radish

Slice one open and you get a jolt of deep magenta, vivid enough to stop you mid-prep.

If you've been curious about radish in cooking but want something with more visual impact, this is it.

The watermelon radish earns its name entirely from that interior reveal, and understanding how to use it well makes all the difference.

QUICK SUMMARY

The watermelon radish is a winter root with a dull green exterior and a striking magenta interior. Mildly peppery with a sweet undercurrent, it shines raw in salads, quick-pickled, or briefly roasted - though long cooking fades its color fast.

🌱Also Known As: Crimson heart radish, Shinrimei, red meat radish
👅Flavor: Mildly peppery, lightly sweet, subtle mustard warmth
✋Texture: Very crisp raw; tender but fibrous when cooked
🍽️Best Uses: Raw slicing, quick pickling, high-heat roasting
📅Shelf Life: Whole: 2-3 weeks refrigerated; sliced or pickled: 1-2 weeks

What Is Watermelon Radish?

Watermelon radish is a winter radish in the Brassicaceae family, the same broad group that includes turnips, mustard greens, and daikon. It originated in China and later spread through European cultivation before landing in specialty markets worldwide.

The root goes by several names - crimson heart radish, red meat radish, and Shinrimei among them. "Watermelon daikon" is sometimes used, though that's technically inaccurate since it belongs to a distinct cultivar group separate from standard daikon.

Visually, it presents as a round to slightly flattened bulb, roughly 2-4 inches across, with a pale green-to-white outer skin. Cut it and the interior is the whole point: a dense, bright magenta core that deepens toward the center.

Like alternatives to beet, it's often sought specifically for that bold interior color in raw preparations.

  • 🌿 Family - Brassicaceae, closely related to daikon and common red radishes
  • 📍 Origin - East Asia (China), distributed through European market cultivation
  • 📏 Best size - 2-3 inches diameter; larger bulbs risk woody texture
  • 🎨 Color driver - Interior pigments are betacyanin-like compounds, intensifying toward the core

What Does Watermelon Radish Taste Like?
watermelon radish - What Is Watermelon Radish

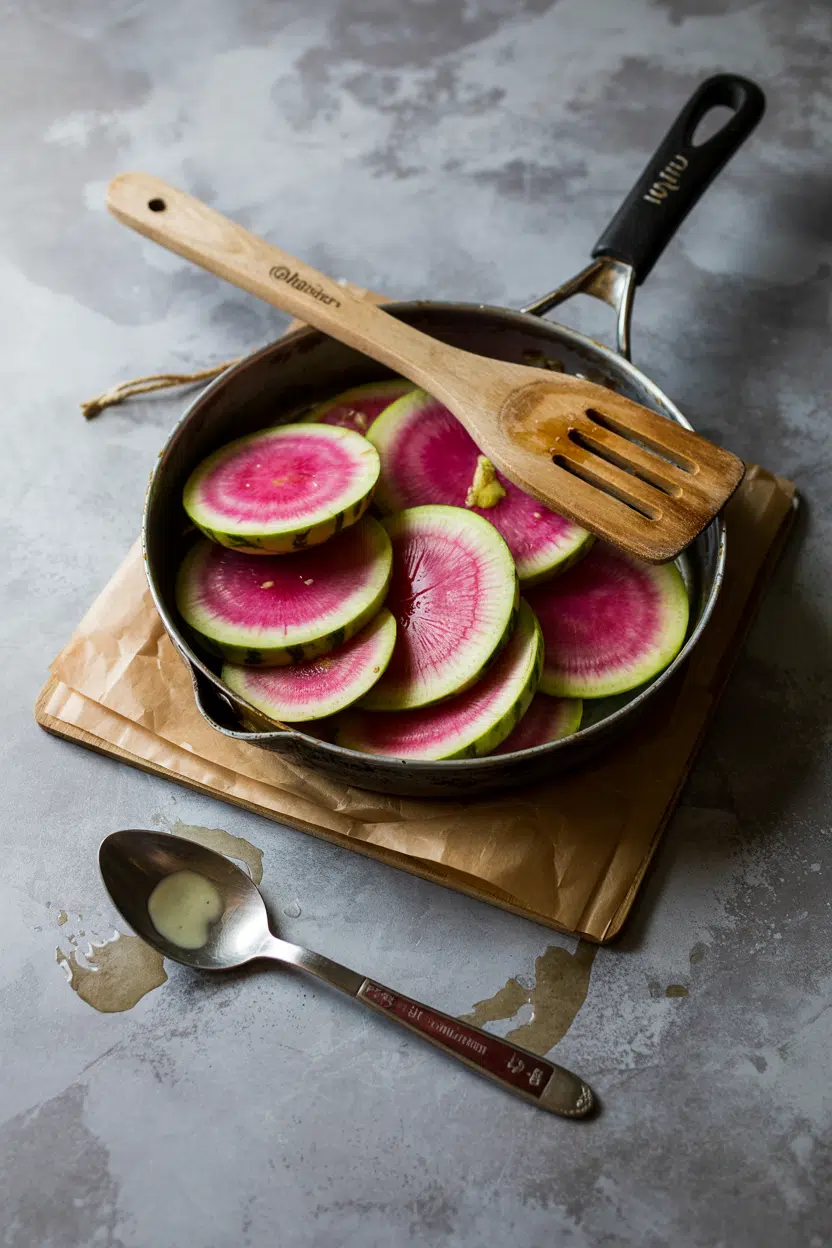
Raw watermelon radish is mildly peppery, with a clean brightness and a subtle sweetness that most spring red radishes don't carry.

The heat is real but restrained - closer to a gentle mustard warmth than the sharp bite you'd get from a black radish.

Comparing it against its relatives helps. The taste of daikon radish is the closest reference point: watermelon radish shares that mild, slightly starchy base but adds a touch more pepper and noticeably more sweetness.

It's less aggressive than a standard red radish and far less pungent than a black radish.

Sensory SnapshotModerate Intensity
👅 Flavor
mildly pepperylightly sweetmustard warmth
✋ Texture
very crisp rawtender when cooked
👃 Aroma
cleanslightly greenlow pungency

Heat changes the flavor profile noticeably. Roasting or pan-searing mellows the pepper and draws out the sweetness, while the color shifts from vivid magenta toward a duller rose - still present, just quieter.

How to Use Watermelon Radish

The raw approach is where this radish does its best work. Thin-sliced or shaved, it holds its crunch and delivers that full magenta cross-section - exactly what you want on crudo, ceviche, or a composed salad.

Golden Rule
The thinner you slice it raw, the more vivid the color reads on the plate. A mandoline or sharp knife keeps the magenta edge clean and bold.

Quick pickling is the other high-return method.

A short brine of rice vinegar, water, salt, and a pinch of sugar preserves both the crunch and the color far longer than leaving it raw.

Korean banchan tradition uses fast-pickled radishes in exactly this way - the watermelon radish fits that role well, similar to how swapping out daikon radish for it in quick pickles works cleanly with minimal adjustment.

How Watermelon Radish Is Used
MethodBest ForTip
🥗 RawSalads, crudo, slaws, garnishMandoline for even, vivid slices
🥒 PickledBanchan, tacos, grain bowlsRice vinegar brine holds color best
🔥 Roasted/SearedSide dishes, warm saladsHigh heat, short time - color fades fast
🍲 BraisedBroths and Asian-style stewsColor will mute; lean on texture instead

Pairings that work: citrus (lemon, yuzu), toasted sesame, ginger, goat cheese, soy sauce, smoked fish, fresh mint, and avocado for creamy contrast. Avoid heavy sweet reductions - they swamp the radish's restrained pepper entirely.

If you can't find one locally, a guide to alternatives to watermelon radish covers the closest options for both color and flavor.

Turnip lovers switching to this radish may also find value in reviewing replacements for turnip to understand where the two overlap in cooked applications.

Try It In
🥗Musaengchae Korean Radish SaladA fast, bright side where thin-sliced radish is the star→🥒Quick Pickled Daikon RadishSame brine technique applies directly to watermelon radish→

How to Buy and Store Watermelon Radish

Firmness is the only metric that matters at the market. Press the root - it should feel dense and heavy for its size, with smooth, crack-free skin and no soft patches. Medium-sized bulbs around 2-3 inches in diameter give the best balance of vivid color and mild heat; oversized ones tend toward woody texture.

Watch Out
Very large watermelon radishes (4+ inches) often have a pale, washed-out interior with less magenta. Size up only if texture - not color - is your priority.

Store unwashed roots in the refrigerator, wrapped in a damp paper towel or in a perforated plastic bag to hold humidity without trapping excess moisture. Trim any greens before storing - they pull moisture from the root quickly.

For a full breakdown, a guide to keeping watermelon radish fresh covers all the edge cases.

  • Whole, uncut - Up to 2-3 weeks refrigerated
  • Sliced or shaved - Use within 1-2 weeks, stored in an airtight container
  • Cooked - 3-5 days in the fridge; texture softens further over time

Where to Start With Watermelon Radish

Raw is the right entry point. A mandoline, a sharp knife, and a simple citrus-and-sesame dressing will show you everything this radish does well - the crunch, the mild heat, the color.

Move to quick pickling once you're comfortable. A basic rice vinegar brine takes under ten minutes and extends shelf life to two weeks.

For anyone who needs a fast replacements for radish swap in a dish, this root handles most raw and pickled applications cleanly.

Save braising for last - the color fades, and you're cooking it mostly for body and mild sweetness at that point.

Frequently Asked Questions

Is watermelon radish a type of daikon?

No. Both are winter radishes in the Raphanus sativus species, but watermelon radish is a distinct cultivar group - Shinrimei - separate from daikon. The term "watermelon daikon" is common but inaccurate; flavor and color profiles differ significantly.

How spicy is watermelon radish compared to red radish?

Noticeably milder. Spring red radishes carry a sharp, biting heat, while watermelon radish delivers a gentler mustard warmth with a sweet undercurrent. The peppery kick is real but rarely overpowering even for heat-sensitive eaters.

Why is the inside of my watermelon radish not pink?

Age and size are the most common causes. Older roots lose pigment intensity, and very large bulbs often have pale, washed-out centers. Choose medium-sized, firm roots harvested in late fall or winter for the deepest magenta color.

How do you preserve the magenta color when cooking?

Keep cooking time short and heat high. A quick sear or roast at high temperature preserves more color than slow braising. Adding an acid - rice vinegar or lemon juice - to the cooking liquid also helps stabilize the pigments.

Can you eat watermelon radish raw?

Yes - raw is actually the preferred method for most cooks. The crunch and color are at their peak uncooked, and the mild heat works well in salads, slaws, and garnishes without any prep beyond slicing.

Italian Sausage and Peppers

April 3, 2026

Sausage and peppers often turn out dry or mushy because most recipes skip the sear or overcrowd the pan. The trick is browning the sausages first over medium heat, then cooking the vegetables separately so they caramelize instead of steam.

Italian Sausage and Peppers served on a plate

High heat on Italian sausage links creates a crisp, golden crust while the inside stays juicy. Slice the peppers thin and leave space in the pan so they get tender edges instead of turning soggy.

This works for weeknight dinners when you need something fast that doesn't taste like you took shortcuts. The pan does most of the work while you boil pasta or toast bread.

QUICK SUMMARY

Italian sausage and peppers delivers crispy-skinned sausage and caramelized vegetables in 35 minutes. Searing the sausages first locks in juices while browning creates a crust. Cook the peppers and onions in batches to avoid steaming - that's how you get tender-crisp texture with charred edges.

⏱️Time: Sear sausages 8-10 min, cook peppers 12-15 min - no marinating needed
🔥First Move: Sear whole sausage links over medium heat before slicing - keeps them juicy
⚠️Watch Out: Overcrowding steams vegetables instead of browning - use a large skillet or cook in batches

Table of Contents

Toggle
  • Why This Recipe Works
  • What You'll Need
    • Ingredient Details
  • Ingredient Swaps
  • What to Serve With It
  • Store and Reheat
  • Frequently Asked Questions
  • Italian Sausage and Peppers
    • Method 
    • Tried this recipe?

Why This Recipe Works

Searing Italian sausage links before cooking the vegetables gives you crispy edges without drying out the meat. Most people skip risotto, but it balances the meal - try something simple like risotto for a different take on Italian comfort food.

Quick Reference
⏱️
Prep Time
10 min
🔥
Cook Time
25 min
⏰
Total Time
35 min
🍽️
Servings
4 servings
📊
Difficulty
Easy
🏷️
Category
Main Dish
💡
Quick Tip
Sear sausage first for crisp edges
🎯
Best For
Weeknight | Meal prep | Casual entertaining

Here's what makes it work:

  • Searing whole links prevents drying - cooking sausages intact keeps the juices inside while the casings crisp up
  • Medium heat renders fat slowly - too high burns the outside before the inside reaches 160°F
  • Thin-sliced peppers cook evenly - quarter-inch strips caramelize in 12-15 minutes without turning mushy
  • Adding garlic last prevents burning - wait until the peppers soften, then toss garlic in for the final 1-2 minutes
  • Deglazing lifts browned bits - a splash of water or wine after removing sausages creates instant sauce
Quick Tip
Leave 1-inch gaps between sausages and vegetables for proper browning - overcrowding creates steam instead of crisp edges

What You'll Need

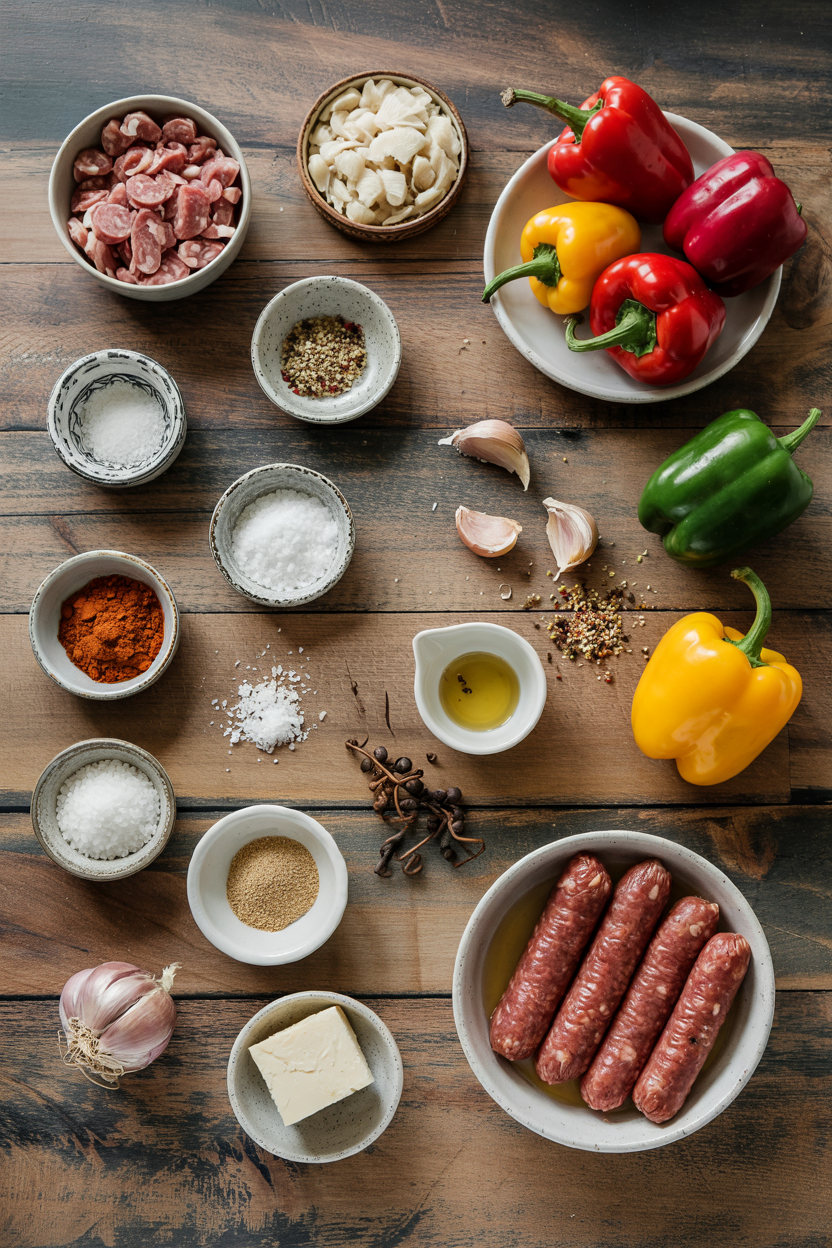
Ingredients for Italian Sausage and Peppers

The sausage defines the dish, so buy links with visible fat marbling. A good potato can make or break the plate - for a version that comes together quickly, something crispy like potato adds texture without competing for pan space.

🍗
Protein
  • Italian sausage links (1½ lbs)
🥬
Vegetables
  • Bell peppers - red, yellow, green (3 large)
  • Yellow or white onions (2 medium)
🧄
Aromatics
  • Garlic cloves (4-5)
  • Olive oil (2 tbsp)
🌶️
Seasonings
  • Salt
  • Black pepper
  • Dried oregano or Italian seasoning
  • Red pepper flakes (optional)

Ingredient Details

  • Italian sausage links
    Buy links with casings intact - they crisp better than crumbled sausage and hold juices during cooking
  • Bell peppers
    Mix red, yellow, and green for color contrast - red and yellow taste sweeter while green adds slight bitterness
  • Onions
    Slice into half-moons for faster cooking and better caramelization than diced pieces
  • Garlic
    Mince fresh cloves instead of using jarred - add in the final 1-2 minutes to prevent burning
  • Olive oil
    Use regular olive oil, not extra virgin - it handles medium-high heat better without smoking
  • Crushed tomatoes
    Optional for saucier version - add after vegetables soften and simmer 10 minutes to thicken
  • Red pepper flakes
    Start with ¼ teaspoon if using - you can always add more heat at the table

Ingredient Swaps

Chicken or turkey sausage works when you want less fat, but you'll need to watch timing more closely since leaner meat dries out faster. The homemade works best when it hits the table at the same time as the main - for a version that comes together quickly, creamy homemade homemade recipe adds tangy contrast without extra cooking.

Four swaps that work:

  • Chicken or turkey sausage instead of pork - leaner meat means shorter cooking time (12-15 min total) and less fat for browning the vegetables
  • Poblano or banana peppers instead of bell peppers - adds different heat levels and less sweetness; slice the same way
  • Tomato paste thinned with water instead of crushed tomatoes - makes a thicker sauce but requires more stirring to prevent sticking
  • Fresh basil or parsley instead of dried Italian seasoning - tear leaves and add at the end for brighter, fresher flavor

Pork Italian Sausage

Works for: Traditional flavor, crispy browning, enough fat to cook vegetables

Skip if: Watching fat intake or cooking for dietary restrictions

Chicken or Turkey Sausage

Works for: Lower fat option, quicker cooking, lighter meal

Skip if: You want rich flavor and crispy edges - leaner meat browns less

Bell Peppers (Red, Yellow, Green)

Works for: Sweet flavor, color variety, classic texture

Skip if: You want more heat - try poblanos or banana peppers instead

Tomato-Based Sauce

Works for: Saucier version for serving over pasta or in hoagie rolls

Skip if: You prefer drier texture - leave it out for concentrated vegetable flavor

Instructions

Searing the sausages takes about 10 minutes, then the vegetables cook in the rendered fat while the meat rests. Salad cuts through all that richness - we keep a batch ready for nights like this, a fresh salad on the side keeps the meal balanced without extra pans.

  1. Sear the sausages. Heat 1 tablespoon olive oil in a large skillet or cast iron pan over medium heat. Add sausage links with 1-inch gaps between them. Cook 4-5 minutes per side until golden brown and the internal temperature reaches 160°F on an instant-read thermometer. Transfer to a plate and tent with foil.

  2. Cook the vegetables. Add remaining 1 tablespoon oil to the same pan. Toss in sliced peppers and onions. Sauté 12-15 minutes, stirring every 2-3 minutes, until peppers soften and edges char. Season with salt, black pepper, and dried oregano.

  3. Add garlic. Push vegetables to the sides of the pan. Add minced garlic to the center and cook 1-2 minutes until fragrant, stirring constantly to prevent burning. Mix garlic into vegetables.

  4. Deglaze and combine. Pour ¼ cup water or white wine into the pan, scraping up browned bits with a wooden spoon. Slice rested sausages into 1-inch pieces and return to pan. Toss everything together for 2-3 minutes until heated through.

  5. Rest and serve. Turn off heat and let the pan sit 2-3 minutes so flavors meld. Taste and adjust salt and pepper. Serve immediately with crusty bread, over pasta, or in hoagie rolls.

Watch Out
If peppers release too much liquid, increase heat to medium-high and cook uncovered for 3-4 minutes to evaporate excess moisture - otherwise vegetables turn mushy instead of caramelized

What to Serve With It

Sausage and peppers needs something to soak up the juices and balance the richness. The potato works best when it hits the table at the same time as the main - for ideas on easy club sandwich dinner nights, check how different sides work with hearty proteins.

Side Dish Prep Why It Works How to Serve
Polenta Easy Creamy base soaks up sausage fat and vegetable juices Spoon polenta on plate, top with sausage and peppers
Crusty Bread Easy Absorbs sauce and adds crunch contrast to soft vegetables Toast slices, serve alongside or build into sandwiches
Simple Green Salad Easy Fresh greens cut through rich sausage and balance the plate Dress lightly with lemon vinaigrette, serve on the side
Roasted Potatoes Medium Complements hearty sausage texture without competing flavors Roast with olive oil and herbs, serve hot alongside
Steamed White Rice Easy Neutral starch absorbs sauce in tomato-based versions Spoon rice into bowls, top with sausage and peppers

Three ways to serve it:

  • Over pasta - toss penne or rigatoni with the sausage, peppers, and any pan juices for a complete meal
  • In hoagie rolls - pile the mixture into toasted rolls and top with provolone for Italian sausage sandwiches
  • With garlic bread - serve the sausage and peppers family-style on a platter with toasted garlic bread on the side
Shortcut
For meal prep, cook the sausage and vegetables Sunday night and reheat portions throughout the week - the flavors improve after a day in the fridge

Store and Reheat

Italian sausage and peppers keeps 3-4 days in the fridge if you store it in a shallow airtight container. The potato works best when it hits the table at the same time as the main - we keep a batch ready for nights like this, creamy buttery potato side reheats alongside the main without extra fuss.

Method Time Best For
🍳 Stovetop 5-7 min over medium-low heat Even reheating that preserves texture - add splash of water if dry
📦 Microwave 2-3 min with cover, stir halfway Quick single portions - vegetables soften more than other methods
🔥 Oven 10-15 min at 325°F Larger portions or maintaining crispy edges on sausage

For best results when storing:

  • Cool sausage and peppers to room temperature before refrigerating to prevent condensation that makes vegetables soggy
  • Store in shallow containers (2 inches deep max) so the mixture cools evenly and reheats faster
  • Keep sliced sausage and vegetables together - the fat from the meat prevents peppers from drying out
  • Freeze portions in freezer bags for up to 2 months, pressing out air before sealing
  • Reheat frozen portions in a covered skillet over medium-low heat for 12-15 minutes, stirring occasionally

Frequently Asked Questions

How long to cook Italian sausage and peppers at medium heat?

Sausages take 8-10 minutes total (4-5 minutes per side) over medium heat to reach 160°F internal temperature. Peppers and onions need 12-15 minutes, stirring every 2-3 minutes, to soften and caramelize without burning.

Can I make Italian sausage and peppers ahead?

Yes, cook the full recipe and refrigerate in an airtight container for up to 4 days. The flavors improve after a day in the fridge. Reheat on the stovetop over medium-low heat for 5-7 minutes, adding a splash of water if the mixture looks dry.

What goes well with Italian sausage and peppers?

Serve with crusty bread, polenta, pasta, roasted potatoes, or steamed rice. A simple green salad with lemon vinaigrette cuts through the richness. For sandwiches, pile the mixture into toasted hoagie rolls and add provolone cheese.

How do I know when Italian sausage and peppers is done?

Sausages are done when an instant-read thermometer reads 160°F in the center and the casings are golden brown. Peppers should be tender with charred edges but not mushy - they'll bend when you lift them with tongs but still hold their shape.

Can I use chicken sausage instead of Italian sausage?

Yes, chicken or turkey sausage works but requires shorter cooking time (12-15 minutes total) since leaner meat dries out faster. You'll also get less fat for browning the vegetables, so add an extra tablespoon of olive oil to the pan.

Italian Sausage and Peppers served on a plate

Italian Sausage and Peppers

No ratings yet
Italian sausage and peppers features crispy-skinned sausage with caramelized, tender-crisp peppers and onions. Searing the sausages first locks in juices and creates a flavorful crust while cooking vegetables in batches avoids steaming for perfect texture.
Print Recipe Pin Recipe
Prep Time 10 minutes mins
Cook Time 25 minutes mins
Total Time 35 minutes mins
Servings: 4 servings
Course: Main Dish
Cuisine: Italian
Ingredients Equipment Method Notes

Ingredients
  

  • 1.5 lbs Italian sausage links casings intact
  • 3 large bell peppers mixed red, yellow, and green, thinly sliced
  • 2 medium onions yellow or white, sliced into half-moons
  • 4 cloves garlic minced
  • 2 tablespoon olive oil regular olive oil, not extra virgin
  • salt to taste
  • black pepper to taste
  • dried oregano or Italian seasoning
  • 0.25 teaspoon red pepper flakes optional
  • 0.25 cup water or white wine for deglazing

Equipment

  • Large skillet or cast iron pan Used for searing sausages and cooking vegetables
  • Instant-read thermometer To check sausage internal temperature
  • Wooden spoon For deglazing and stirring

Method
 

  1. Heat 1 tablespoon olive oil in a large skillet or cast iron pan over medium heat. Add Italian sausage links spaced 1-inch apart. Cook for 4-5 minutes per side until golden brown and internal temperature reaches 160°F. Transfer sausages to a plate and tent with foil.
    1.5 lbs Italian sausage links, 2 tbsp olive oil
  2. Add remaining 1 tablespoon olive oil to the same pan. Add sliced bell peppers and onions. Sauté for 12-15 minutes, stirring every 2-3 minutes, until peppers soften and edges char. Season with salt, black pepper, dried oregano, and red pepper flakes if using.
    3 large bell peppers, 2 medium onions, salt, black pepper, dried oregano or Italian seasoning, 0.25 tsp red pepper flakes, 2 tbsp olive oil
  3. Push vegetables to sides of the pan. Add minced garlic to the center and cook for 1-2 minutes until fragrant, stirring constantly to prevent burning. Then mix garlic into vegetables.
    4 cloves garlic
  4. Pour ¼ cup water or white wine into the pan and scrape browned bits from the bottom with a wooden spoon. Slice rested sausages into 1-inch pieces and return to pan. Toss everything together and cook for 2-3 minutes until heated through.
    0.25 cup water or white wine, 1.5 lbs Italian sausage links
  5. Turn off heat and let the pan sit for 2-3 minutes so flavors meld. Taste and adjust seasonings with salt and pepper. Serve immediately with crusty bread, over pasta, or in hoagie rolls.

Notes

  • Sear sausages whole to keep juices inside and create crispy casings.
  • Cook peppers and onions in batches or with space to avoid steaming and achieve caramelization.
  • Add garlic at the end to prevent burning and maximize flavor.

Tried this recipe?

Let us know how it was!

What Is Velveeta Cheese? [Taste, Uses & More]

April 3, 2026

You spot it at the store - that pale yellow brick wrapped in plastic, shelved alongside sliced deli cheeses.

What Is Velveeta Cheese

Velveeta doesn't look like much, and that's kind of the point.

For using mac and cheese for creaminess or building a queso that stays glossy through an entire party, few products match it.

Unlike queso fresco in dairy recipes, Velveeta doesn't crumble, curdle, or separate - it melts into a smooth, even sauce every single time.

QUICK SUMMARY

Velveeta is a pasteurized prepared cheese product - not natural cheese - engineered for ultra-smooth, stable melting. It tastes mild, salty, and lightly tangy, and it holds a glossy, uniform sauce without breaking. Best for queso, stovetop mac, and creamy casseroles.

🧀Category: Processed cheese product, not classified as natural cheese
👅Flavor: Mild dairy, salty, slightly tangy, clean processed umami
🍳Best Uses: Queso dip, stovetop mac and cheese, creamy casseroles
❄️Shelf Life: Opened: 3-4 weeks refrigerated; unopened: 1-3 months
⚠️Watch: High sodium and saturated fat; not suitable for milk-allergic individuals

What Is Velveeta Cheese?

Velveeta started as an American invention designed to use cheese trimmings more efficiently.

Developed in the early 20th century and eventually acquired by Kraft, it's classified by the FDA as a "pasteurized prepared cheese product" - a label that signals it doesn't meet the composition standards for natural cheese.

The product comes as a dense, pale-yellow brick with a smooth, almost rubbery texture at room temperature.

Its structure relies on emulsifying salts - typically sodium citrate or sodium phosphate - which bind fat and water together and prevent the separation that causes natural cheeses to turn greasy when heated.

Velveeta isn't the same thing as American cheese, though both are processed products. American cheese is closer in composition to natural cheese, while Velveeta contains a higher proportion of added ingredients for stability and shelf life.

  • 🧀 Full name on packaging - "Pasteurized Prepared Cheese Product" per FDA classification
  • Kraft ownership - acquired and standardized into the product sold widely today
  • Shelf-stable variant - some versions are sold unrefrigerated until opened, unlike block cheeses
  • Available formats - standard brick, smaller snack-size blocks, and flavored varieties with jalapeño or salsa

What Does Velveeta Cheese Taste Like?

velveeta cheese - What Is Velveeta Cheese

Velveeta's flavor is mild and clean - think of a young, mild cheddar melted down into a cream sauce, then dialed back slightly. The dairy base is present but not sharp or complex.

There's a light saltiness that comes through immediately, followed by a faint tangy note that keeps it from tasting flat.

Sensory SnapshotMild Intensity
👅 Flavor
mild dairysaltylightly tangyprocessed umami
✋ Texture
ultra-smoothelastic when meltedspreadable cold
👃 Aroma
mild dairyfaint cooked note when heated

Heat changes the experience noticeably. Melted Velveeta develops a faint caramelized, cooked-dairy aroma and its texture shifts to a pourable, glossy sauce.

That neutral base is also what makes it useful in heavily seasoned applications - it carries chiles, beer, or spiced ground beef without fighting them.

Golden Rule
Velveeta's mild flavor is intentional. It's a backdrop, not a feature - use bold co-ingredients and let Velveeta handle the texture.

How to Use Velveeta Cheese

Velveeta earns its place in the kitchen through one specific skill: staying smooth under heat. Natural block cheeses like cheddar can break into greasy, grainy pools if overheated; Velveeta's emulsifiers prevent that entirely.

How Velveeta Is Used
MethodBest ForTip
🍳 Stovetop meltMac and cheese, queso dip, fondue-style saucesAdd milk in small pours and stir continuously over medium-low heat
🌡️ MicrowaveQuick queso, single-serve saucesHeat in 30-second intervals; stir between each to prevent hot spots
🫙 BakedCasseroles, potato toppings, layered dipsCube before layering so it melts evenly without pooling
🥪 Pan-friedGrilled cheese sandwichesSlice thin - it melts faster than natural cheese and needs less time
🍺 Simmered with liquidBeer cheese dip, chowders, creamy soupsAdd Velveeta last to avoid scorching; keep heat low once incorporated

In Tex-Mex cooking, the classic move is cubing Velveeta and melting it with a can of diced tomatoes and chiles - that's queso, ready in under ten minutes.

American comfort cooking leans on it for stovetop mac, baked potato toppings, and casseroles that need a binding, creamy element.

It pairs naturally with pasta, tortilla chips, pickled jalapeños, ground beef, and onions. For occasions where you need a backup plan, knowing your velveeta cheese swaps that work is worth a few minutes.

Shortcut
For a two-ingredient queso, combine 1 lb cubed Velveeta with one 10-oz can of Ro-Tel. Microwave in intervals, stir, done.
Try It In
🧀Cheddar Cheese StrawsSee how processed cheese behaves in a baked snack format→🍳Egg and Cheese Breakfast SandwichA melting cheese that holds without separating works well here→🥗Blue Cheese Dressing (Homemade)Compare this bold, aged-cheese flavor profile against Velveeta's mild base→

How to Buy and Store Velveeta Cheese

At the store, look for sealed bricks with no bulging or punctured packaging and a consistent pale-yellow color throughout. Check the best-by date stamped on the plastic - newer dates give the longest refrigerated life after opening.

The label wording matters: "pasteurized prepared cheese product" is standard Velveeta; anything labeled just "cheese" is a different product.

Watch Out
Some Velveeta varieties are shelf-stable until opened, but once the seal breaks, refrigeration is required. Don't assume it's safe at room temperature just because it was sold that way.

Once opened, wrap tightly in the original film or transfer to an airtight container to prevent drying and odor absorption.

Proper storage is straightforward, though the specifics of using velveeta cheese for creaminess depend on keeping it within the right date window.

  • Unopened refrigerated brick - lasts 1-3 months from purchase date
  • Opened and rewrapped - use within 3-4 weeks refrigerated
  • Shelf-stable unopened - can last months at room temperature; refrigerate after opening
  • Signs it's gone off - discoloration, dry cracked surface, or off-smell; see [queso dip spoilage signs](https://forkliftkitchen.com/queso-dip-shelf-life/) for what to watch for in prepared dips

Start Here for Smooth Cheese Sauce

Velveeta is the right call when texture matters more than cheese character.

If you're making queso, a creamy mac sauce, or a layered casserole and you need it to stay smooth without babysitting the temperature, this is the product built for that job.

If you need something with sharper flavor or a different profile entirely, white american cheese swaps that work covers the closest processed-cheese alternatives. For straightforward sauce work, though, start with Velveeta and adjust seasonings around it.

Frequently Asked Questions

Is Velveeta real cheese?

Not by FDA standards. It's classified as a "pasteurized prepared cheese product," meaning it contains cheese along with emulsifiers, whey, and other additives that push it outside the definition of natural cheese.

What is Velveeta made of?

The main ingredients are milk, whey, milkfat, and cheese culture, stabilized with emulsifying salts like sodium citrate. Those salts are what give it smooth, non-greasy melt behavior that natural cheese can't reliably replicate.

How does Velveeta melt so smoothly?

Emulsifying salts bind the fat and water in the cheese together, preventing separation when heat is applied. Natural cheeses lack this structure, so they can break into greasy or grainy pools at high temperatures.

Can you substitute Velveeta for cheddar?

In sauce and dip applications, yes - with the understanding that Velveeta is milder and won't deliver cheddar's sharpness. In recipes where crumbly texture or aged flavor matters, it's a poor swap.

Does Velveeta need refrigeration before opening?

Some versions are shelf-stable and can be stored at room temperature before opening. Check the packaging - if it was sold refrigerated, keep it cold. Once opened, all Velveeta requires refrigeration.

What Is Vegemite? Taste, Uses & Flavor Profile

April 3, 2026

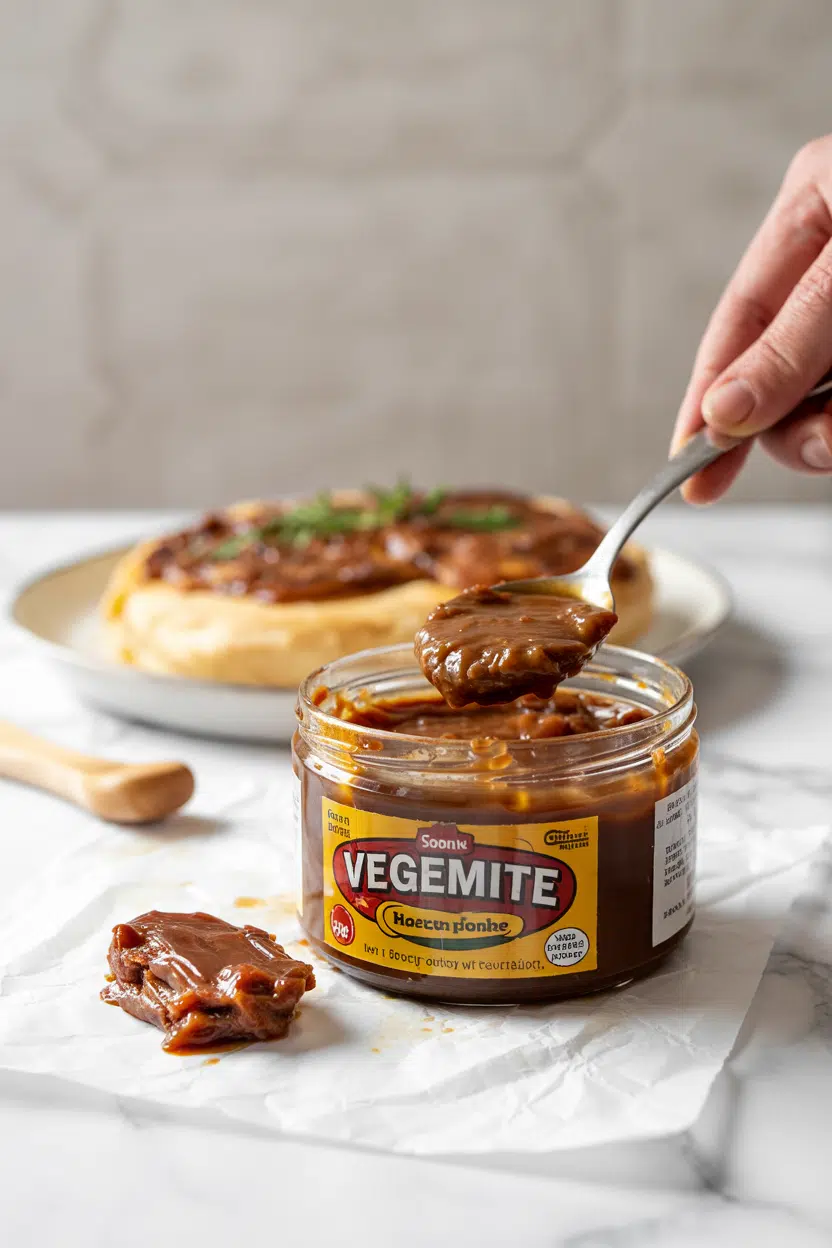
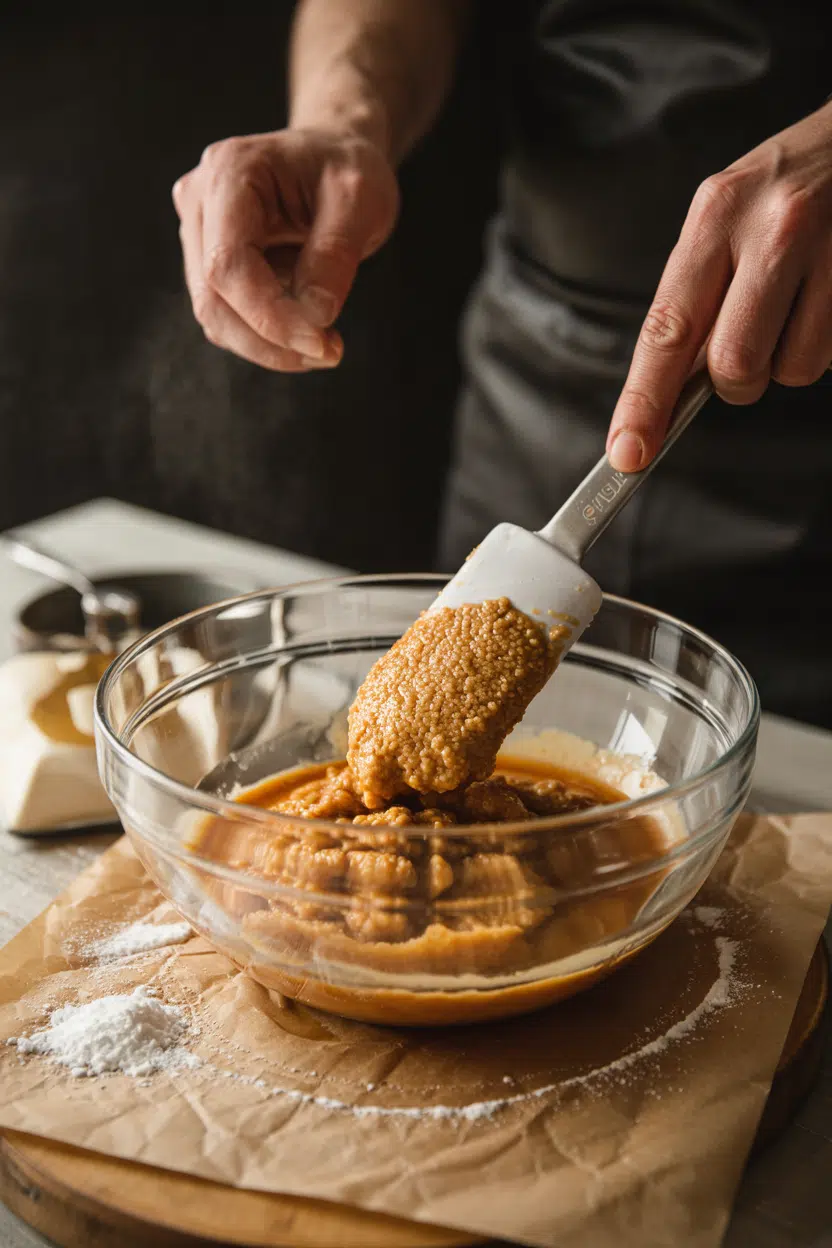
You spot it on the shelf at an international grocery - a squat yellow jar with bold red lettering, contents invisible through the opaque packaging. Vegemite doesn't advertise itself the way most spreads do.

It's famously polarizing, yet Australians have been reaching for it at breakfast for over a century, and cooks worldwide are quietly folding it into broths and gravies as an umami boost hiding in plain sight.

QUICK SUMMARY

Vegemite is a dark brown yeast extract paste from Australia with an intensely salty, umami-forward flavor. Spread thin on buttered toast, it's a breakfast staple. Used in small quantities, it deepens soups, stews, and gravies. Very high sodium - a little goes a long way.

🫙Category: Yeast extract spread, made from brewer's yeast
🧂Flavor: Intensely salty, umami-rich, slightly bitter with malty notes
🍞Best Use: Spread thin on buttered toast or stirred into broths
⏳Shelf Life: Opened jar keeps 6-12 months pantry; longer refrigerated
⚠️Watch: Very high sodium - use sparingly, especially in cooked applications

What Is Vegemite?

Vegemite is an Australian yeast extract spread produced by Bega Cheese (formerly Kraft Foods) since 1922.

It's made from the byproduct of beer brewing - spent brewer's yeast - which is processed, concentrated, and blended with salt, malt extract, and B vitamins to create a thick, dark-brown paste.

The product sits firmly in a category alongside Marmite, the British yeast spread it's most often compared to, and the milder Australian competitor Promite. Vegemite is not a Marmite copy - the formulation differs, producing a noticeably saltier, less sweet result with more pronounced bitterness.

It's sold exclusively in jars and is sometimes called simply "yeast spread" outside Australia. No meaningful varieties exist beyond a reduced-salt version and a cream cheese blend ("Cheesymite"), though the original formula remains dominant.

Golden Rule
Vegemite is not Marmite. Marmite is sweeter and less bitter; using them interchangeably in recipes will produce noticeably different results.

What Does Vegemite Taste Like?

vegemite - What Is Vegemite

Nothing about Vegemite is subtle. The first hit is sharp saltiness, followed almost immediately by deep umami - the kind you associate with concentrated beef bouillon or a long-reduced soy braise, but without any meatiness.

Underneath the salt and savory weight sits a pronounced brewer's-yeast bitterness with faint roasted, malty undertones. That bitterness is the note that catches first-timers off guard.

Heat softens it slightly when Vegemite is dissolved into a hot liquid, but it doesn't disappear.

Sensory SnapshotStrong Intensity
👅 Flavor
saltyumamibittermalty
✋ Texture
densepastytacky
👃 Aroma
savory yeasttoasted bread

Spread cold on buttered toast, the paste stays sharp and assertive. Butter is not optional - it acts as a fat buffer that rounds the bitterness and distributes the intensity more evenly across the bread.

How to Use Vegemite

Most people encounter Vegemite one way: scraped thin on buttered toast. That's the correct starting point.

The ratio matters enormously - a scraping, not a spread. New users who apply it like peanut butter tend not to return for a second try.

Beyond toast, Vegemite earns its keep as a covert umami booster in cooked applications. A half-teaspoon dissolved into soup stock, gravy, or a braising liquid adds the kind of savory depth that usually requires a long simmer.

It also works stirred into mashed potatoes, folded into a savory butter, or dotted into scrambled eggs before the pan gets hot.

Shortcut
Add ½ teaspoon of Vegemite to store-bought gravy or broth. It adds roasted, savory depth in under 30 seconds - no reduction required.

Classic pairings include cheddar or melted cheese on toast, fresh tomato, and eggs in any form. Australian home cooking uses it casually alongside butter or margarine; modern fusion recipes treat it the way chefs use miso or soy sauce - as a background flavor multiplier.

How Vegemite Is Used
MethodBest ForTip
🍞 SpreadToast, crackers, sandwichesApply very thin layer over cold butter; don't skip the butter
🍲 DissolvedSoups, gravies, broths, stewsStart with ¼-½ tsp; taste before adding more
🥣 FoldedMashed potatoes, savory dips, compound butterMix with a fat base to distribute evenly
🥩 Glaze/MarinadeRoasted meats, vegetablesDilute with oil or broth - full strength will over-salt

Avoid Vegemite in anything sweet or delicate. Light seafood dishes will be overwhelmed by its salt content, and it has no place near desserts.

Try It In
🍠Sweet Potato MashA small amount deepens the savory base without losing the sweetness→🥣Loaded Baked Potato SoupDissolve ½ teaspoon into the broth for an instant umami layer→

How to Buy and Store Vegemite

Choose a jar with a firm, sealed lid and no sign of bulging or leakage. The paste inside should be uniformly dark brown; a metallic off-smell on opening or visible liquid separation signals a compromised jar.

Most supermarkets in Australia stock it in the spreads aisle, and international grocers or online retailers carry it elsewhere.

  • Unopened jars - store in a cool pantry; shelf life runs many months to several years
  • Opened jars - reseal tightly and keep in the pantry or fridge; pantry storage works for 6-12 months, refrigeration extends that further
  • Surface drying - a thin film can form if the jar isn't sealed well; scrape it off, the paste beneath is fine

For a detailed breakdown of timelines and signs of spoilage, see vegemite storage life. If you ever run out, a handful of vegemite swaps can fill the umami gap in cooked applications.

Watch Out
Vegemite is extremely high in sodium. A single teaspoon can contain over 300mg. Account for it before adding any other salt to a dish.

Where to Start With Vegemite

Start with buttered toast and a scraping. That's the format the flavor was built for, and it's the version that converts skeptics.

Once you're comfortable with the intensity, move to cooked applications - a small amount in a broth or gravy is low-risk and immediately useful.

If the saltiness is a concern, butter substitutes with higher fat content can help buffer the intensity on toast. Keep the jar in the pantry, use it in small quantities, and it will last you a long time.


Frequently Asked Questions

Is Vegemite the same as Marmite?

No. Both are yeast extract spreads, however Marmite is sweeter and less bitter than Vegemite. Vegemite has a saltier, more aggressively savory profile that makes direct substitution noticeable in both raw and cooked applications.

How do you eat Vegemite for the first time?

Spread it very thin over cold butter on toast - less than you think you need. Applying too much is the most common mistake first-timers make, and the resulting intensity puts most people off permanently.

Does Vegemite contain alcohol?

No detectable alcohol. It's made from brewer's yeast extract, not from fermented liquid, so the brewing byproduct is the yeast itself - not the beer. The finished product contains no measurable alcohol content.

Is Vegemite healthy?

It supplies B vitamins including B1, B2, B3, and folate, and some fortified versions carry B12. The sodium content is very high for its volume, so people managing blood pressure should use it sparingly.

Can you use Vegemite instead of soy sauce in a recipe?

Only in small amounts and only for umami depth - not as a direct swap. Vegemite is far thicker and more bitter, so use roughly ¼ the volume and dissolve it in warm liquid before adding it to a dish.

What Is Zucchini? [Taste, Uses & More]

April 3, 2026

Sliced thin on a hot grill or shredded into a quick bread batter, zucchini shows up in more places than most cooks expect.

What Is Zucchini

It's one of summer's most prolific vegetables - and one of the least understood in terms of flavor.

Raw, it's closer in character to cucumber than to any cooked squash, which explains why people who consider cucumber cooking methods often find zucchini a useful crossover.

Cooked, it softens into something mild and yielding, not unlike eggplant in the way it absorbs surrounding flavors - a parallel that also makes sense if you've ever tried swapping out eggplant in a layered dish.

QUICK SUMMARY

Zucchini is a mild, tender summer squash with thin edible skin and soft seeds. Raw, it tastes faintly sweet and grassy; cooked, it turns creamy and absorbs flavors well. Best used grilled, sautéed, roasted, or shredded into baked goods. Store in the fridge and use within 1-2 weeks.

🌿Flavor: Mild, slightly sweet, lightly vegetal - subtle in both raw and cooked forms
🍳Best Uses: Grilling, sautéing, roasting, shredding into fritters or quick bread
🧊Shelf Life: 1-2 weeks refrigerated, unwashed, in a perforated bag in the crisper

What Is Zucchini?

Zucchini is a summer squash - harvested young and eaten immature, unlike winter squash varieties that cure and harden on the vine.

It belongs to the species Cucurbita pepo, which also includes pumpkin and delicata, though preparing pumpkin properly requires a very different approach given the denser, starchier flesh.

Domesticated originally in Central America, zucchini was refined into its current elongated form in Italy, which is why both names hold: zucchini (Italian plural of zucchino) and courgette (the French and British term). South Africans call it baby marrow.

It's all the same vegetable.

Most zucchini sold in markets is dark or medium green with pale green streaks, though yellow zucchini is common and behaves identically in cooking.

Understanding how squash cooking methods differ across the family helps place zucchini in context - it's the quickest-cooking and most water-dense of the group.

  • 🟢 Standard green zucchini - the most widely available form, 4-8 inches at peak
  • 🟡 Yellow zucchini - same flavor and texture, slightly milder skin bitterness
  • ⚪ Round zucchini (Ronde de Nice) - compact, ideal for stuffing whole
  • 🌸 Zucchini blossoms - the edible flowers, often stuffed and fried

What Does Zucchini Taste Like?

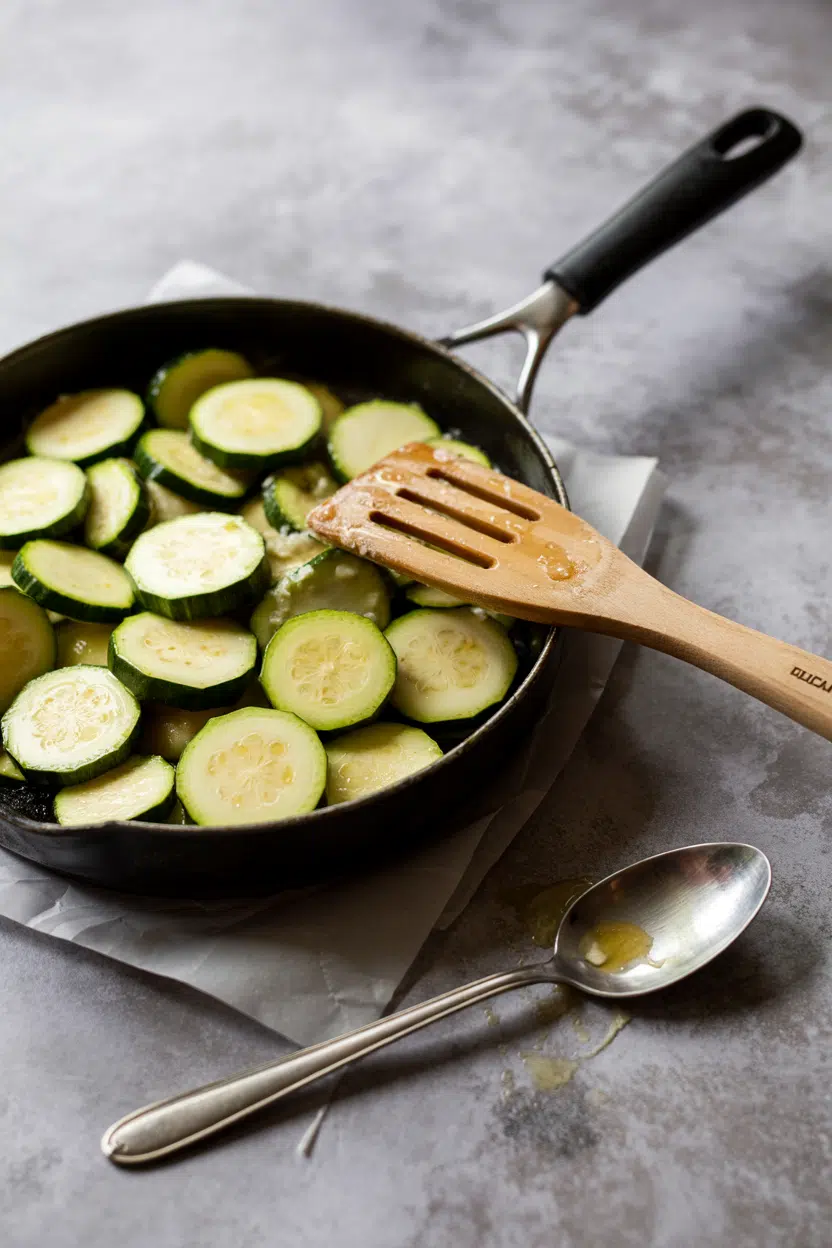
zucchini - What Is Zucchini

Raw zucchini has a mild, clean flavor - slightly sweet, faintly grassy, with a crisp texture and high water content that places it close to cucumber on the palate.

There's no bitterness in young specimens, and the thin skin adds just a hint of vegetal edge.

Heat changes the picture significantly. Sautéed or roasted zucchini becomes tender and creamy, with a subtle sweetness that deepens as surface moisture evaporates.

At that point, it behaves more like mild eggplant - absorbing garlic, olive oil, or tomato rather than asserting its own flavor.

Sensory SnapshotMild Intensity
👅 Flavor
Mildly sweetLightly vegetalClean green
✋ Texture
Crisp rawCreamy when cooked
👃 Aroma
FreshLightly grassy

Overcooking is the main risk. Past a certain point, zucchini turns watery and loses whatever texture it had - the goal in most cooking is tender but not collapsed.

How to Use Zucchini

Zucchini handles heat in multiple ways, and each method produces a noticeably different result. For a full breakdown of zucchini cooking methods and what works as a stand-in when you're out, that resource covers the options clearly.

How Zucchini Is Used
MethodBest ForTip
🥗 RawSalads, ribbons, quick picklesSlice thin or ribbon with a peeler; salt briefly to soften
🍳 SautéedSkillet sides, pasta additions, frittersHigh heat, don't crowd - lets moisture escape before it steams
🔥 GrilledSide dishes, kebabs, antipastoCut ½-inch planks lengthwise; brush with olive oil before grilling
🫙 RoastedSheet pan meals, casseroles, lasagna layers425°F (220°C) concentrates flavor; avoid overlapping
🍞 Shredded & BakedZucchini bread, muffins, fritter pattiesSqueeze out excess moisture before mixing into batter

Italian cooking gets the most out of zucchini - think simple sautés with garlic and olive oil, layered pasta bakes, and ratatouille-style vegetable stews. Mediterranean and Middle Eastern kitchens stuff halved zucchini with spiced grains or meat.

North American home baking leans on shredded zucchini in quick breads and muffins, where its moisture adds structure without adding strong flavor.

For pairings, zucchini works best alongside parmesan or feta, lemon, tomato, and fresh herbs - particularly basil, mint, and dill. Eggs round it out in fritters.

A range of good sides for zucchini can help if you're building a plate around it.

Watch Out
Avoid dressing raw zucchini in high-acid vinaigrettes more than 10 minutes before serving - the acid draws out water fast and turns slices limp.
Try It In
🌶️Air Fryer Buffalo Zucchini FriesBig heat and bold sauce on tender zucchini strips→🧄Air Fryer Garlic Parmesan Zucchini FriesClassic pairing — garlic, parmesan, crisp edges→🧀Crispy Parmesan Zucchini ChipsThin-sliced and oven-crisped with a parmesan crust→

How to Buy and Store Zucchini

Smaller zucchini are almost always better. Aim for 4-7 inch fruits with firm, glossy, unblemished skin and a fresh-cut stem end.

Avoid anything with soft spots, wrinkled skin, or a dull surface - those are signs of age and water loss.

Golden Rule
Don't wash zucchini before storing. Moisture on the skin accelerates softening - rinse only when you're ready to cook.

Once home, store zucchini unwashed in a perforated plastic bag in the refrigerator crisper, away from ethylene-producing fruit like apples or bananas, which speed up softening.

Full advice on keeping zucchini fresh covers the specifics if you've got a glut from the garden.

Expect 1-2 weeks of usable life refrigerated. Larger, overgrown zucchini degrade faster due to fibrous seeds and looser flesh - use those first, or shred them for baking.

If you're rotating through alternatives to olive oil in a sauté, zucchini holds up fine regardless of the fat you choose.

Where to Start With Zucchini

Zucchini rewards simplicity. If you haven't cooked it much, start with a hot skillet sauté - sliced rounds, olive oil, garlic, and salt.

That single method shows you exactly what it can do and why it earns its place on so many plates.

From there, branch into grilling for char and texture, or shredding for zucchini bread when the garden gets ahead of you. Both directions take less effort than most people expect.

Shortcut
A mandoline or box grater handles most zucchini prep faster than a knife - thin slices for layering, coarse shreds for baking.

Frequently Asked Questions

Is zucchini a fruit or vegetable?

Botanically, it's a fruit - it develops from a flower and contains seeds. In culinary use, however, it's treated as a vegetable in savory cooking. The distinction rarely matters in the kitchen.

Can you eat zucchini raw?

Yes. Raw zucchini is safe and has a mild, crisp texture similar to cucumber. Slice thin or ribbon it with a peeler for salads - younger, smaller zucchini taste best raw.

How do you know when zucchini is ripe?

Garden zucchini is ready at 4-7 inches - firm skin, no soft spots, and a fresh stem. Waiting longer produces large, seedy specimens with tougher flesh and weaker flavor.

What can you make with too much zucchini?

Shred and freeze it in measured portions for zucchini bread or muffins year-round. Overgrown zucchini works especially well shredded since size and seed content matter less once grated.

Does zucchini need to be peeled before cooking?

No. The skin on young zucchini is thin, tender, and completely edible. Peeling is only worth considering on very large, older specimens where the skin has toughened.

Garlic Butter Steak Bites

April 3, 2026

You need 20 minutes and one cast iron skillet. No marinating, no multi-step prep, no precooking required.

Garlic Butter Steak Bites served on a plate

Sirloin cubes sear in 2-3 minutes per side while you chop garlic. The butter goes in at the end so it coats instead of burns.

This is what we make on weeknights when the meal needs to feel intentional but the energy isn't there for a whole steak dinner.

QUICK SUMMARY

Garlic Butter Steak Bites deliver golden brown crust with juicy interiors in under 20 minutes. High heat and room temperature meat create even searing while late-added garlic prevents burning. Perfect for weeknight dinners or quick meal prep when you want steakhouse flavor without the wait.

⏱️Time Reality: 10 min prep, 8-10 min cook, serve immediately for best texture
🔥Method Shortcut: Preheat cast iron 5 minutes, sear steak in single layer batches
⚠️Watch Out: Wet steak steams instead of sears - pat dry 2 minutes before cooking

Table of Contents

Toggle
  • Why This Recipe Works
  • What You'll Need
    • Ingredient Details
  • Ingredient Swaps
  • What to Serve With It
  • Store and Reheat
  • Frequently Asked Questions
  • Garlic Butter Steak Bites
    • Method 
    • Tried this recipe?

Why This Recipe Works

High heat crisps the exterior while keeping the center tender. Room temperature steak and a preheated skillet create even browning without overcooking the middle.

For a version that comes together quickly, easy steak side uses similar timing so both dishes finish together.

Quick Reference
⏱️
Prep Time
10 min
🔥
Cook Time
8-10 min
⏰
Total Time
18-20 min
🍽️
Servings
3-4 servings
📊
Difficulty
Easy
🏷️
Category
Main Dish | Appetizer
💡
Quick Tip
Use room temp steak for even cooking
🎯
Best For
Weeknight | Entertaining | Meal prep
  • Cast iron retains heat better than stainless, maintaining temperature when cold steak hits the pan
  • Olive oil raises the smoke point so butter can coat without burning during the initial sear
  • Adding garlic in the last 90 seconds prevents bitter, burnt flavor while infusing the butter
  • Resting 5 minutes after cooking redistributes juices so they don't flood the plate when you bite in
  • Uniform 1-inch cubes ensure every piece reaches 130-135°F at the same time
Quick Tip
Preheat your cast iron skillet for 5 full minutes over medium-high heat before adding oil - the surface should shimmer when ready.

What You'll Need

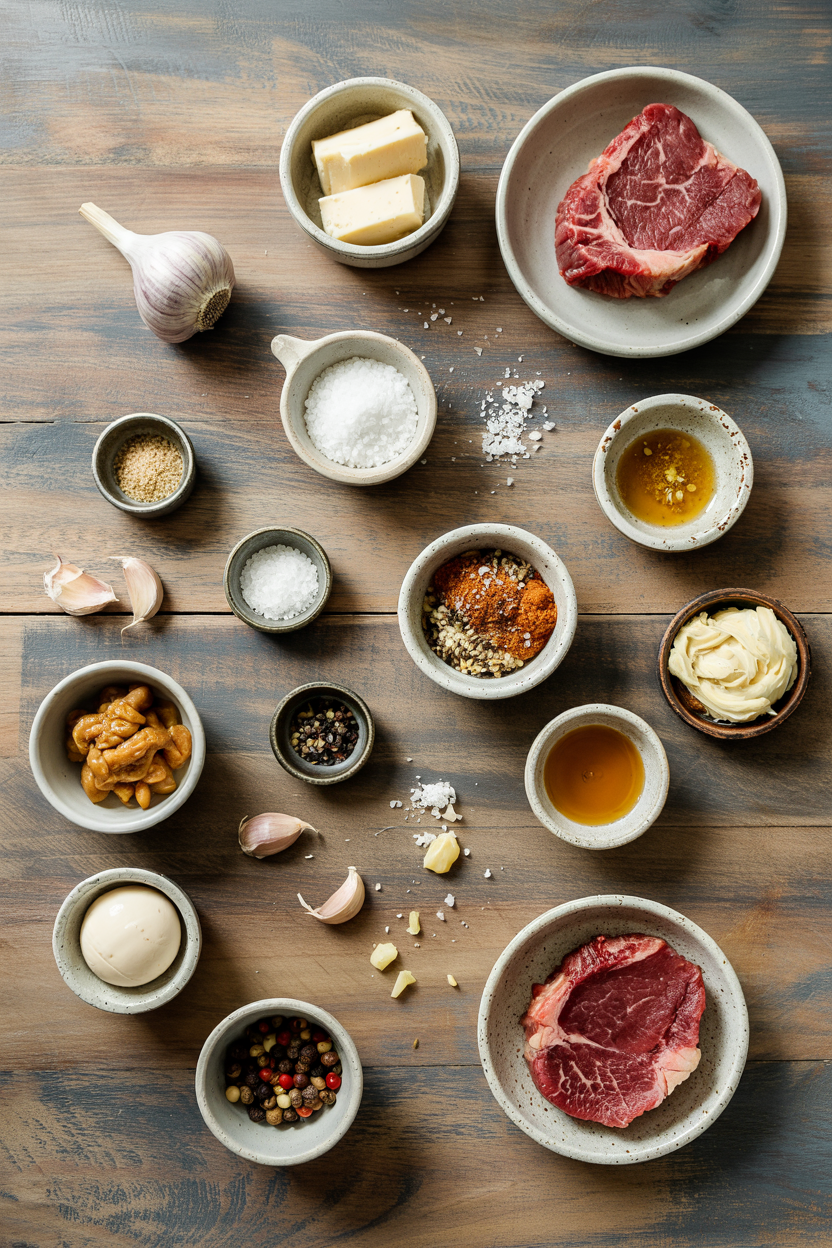
Ingredients for Garlic Butter Steak Bites

Most of this lives in your fridge already. Bring the steak to room temp 30 minutes before you start cooking.

A good this easy fish recipe uses similar pantry staples if you're planning a second protein for meal prep.

🥩
Protein
  • 1.5 lb sirloin steak, cut into 1-inch cubes
🧈
Butter & Oil
  • 3 tablespoon unsalted butter
  • 2 tablespoon olive oil
🧄
Aromatics
  • 4 cloves garlic, minced
  • 2 tablespoon fresh parsley, chopped
  • 1 teaspoon fresh thyme (optional)
🌶️
Seasoning
  • 1 teaspoon salt
  • ½ teaspoon black pepper
  • ¼ teaspoon red pepper flakes (optional)
  • 1 tablespoon lemon juice (optional)

Ingredient Details

  • Sirloin steak
    Choose cuts 1-1.5 inches thick for uniform cubes - thinner steaks dry out before browning
  • Unsalted butter
    Salted butter makes it harder to control seasoning and burns faster than unsalted
  • Garlic cloves
    Mince fresh garlic just before cooking - pre-minced loses potency and can taste metallic
  • Olive oil
    Use regular olive oil, not extra virgin - EVOO smokes at lower temps and wastes money in high-heat cooking
  • Fresh parsley
    Add parsley after cooking, not during - heat kills its bright flavor and turns it brown
  • Black pepper
    Freshly cracked pepper adds more punch than pre-ground - crack it coarse for visible texture
  • Red pepper flakes
    Start with ⅛ teaspoon if heat-sensitive - you can always add more at the table

Ingredient Swaps

The steak cut and butter are the two places where swaps change the outcome most. Everything else flexes without major impact.

Ribeye instead of sirloin

Works for: richer flavor and more marbling, stays juicy longer

Skip if: you're watching fat content or prefer leaner cuts

Flank steak instead of sirloin

Works for: tighter budget, chewier texture some prefer

Skip if: you want tender bites - flank needs marinating to avoid toughness

Ghee instead of butter

Works for: higher smoke point, dairy-free option, nuttier flavor

Skip if: you want traditional butter richness and coating

Garlic powder instead of fresh

Works for: convenience, won't burn as easily

Skip if: you want bold garlic punch - powder delivers milder flavor

  • Sirloin steak → ribeye or flank steak: Ribeye adds fat and flavor; flank is less tender and needs marinating first
  • Unsalted butter → ghee or coconut oil: Ghee resists burning; coconut oil adds a different aroma
  • Fresh parsley → dried parsley or omit: Dried loses fresh brightness but still works in a pinch
  • Lemon juice → lime juice or white wine vinegar: Either adds acidity with slightly different flavor profiles

Instructions

Total cook time is 8-10 minutes once the pan is hot. Sear in batches so pieces don't touch.

For a version that comes together quickly, simple homemade potato wedges cook in the oven while you handle the stovetop.

  1. Cut and dry the steak. Slice sirloin into 1-inch cubes, then pat completely dry with paper towels for 2 minutes. Season all sides with salt and black pepper.

  2. Preheat the skillet. Heat cast iron skillet over medium-high for 5 minutes until a drop of water sizzles instantly. Add olive oil and swirl to coat.

  3. Sear the steak bites. Arrange steak cubes 1 inch apart in a single layer - work in 2 batches if needed. Sear 2-3 minutes per side until golden brown crust forms. Transfer to a plate.

  4. Add garlic and butter. Lower heat to medium, add minced garlic to the empty pan, and cook 30 seconds until fragrant. Add butter and stir until melted.

  5. Finish and rest. Return steak bites to the pan and toss in garlic butter for 1 minute, spooning sauce over the top continuously. Remove from heat, cover loosely with foil, and rest 5 minutes before serving.

Golden Rule
Never skip the rest - cutting into steak immediately after cooking releases all the juices onto the plate instead of keeping them inside the meat.

What to Serve With It

Steak bites need something to balance the richness and soak up the garlic butter. Most people skip salad, but it balances the meal.

When planning your steak bites dinner, pair with sides that can handle butter dripple without getting soggy.

Side Dish Prep Why It Works How to Serve
Garlic mashed potatoes Easy Soaks up butter sauce, adds creamy contrast to seared crust Spoon steak bites and pan sauce directly over warm mash
Steamed green beans Easy Light, fresh crunch cuts through buttery richness Toss beans with lemon juice, serve alongside steak
Simple arugula salad Easy Peppery greens add brightness, dressed lightly to balance fat Plate salad first, top with warm steak bites
Crispy roasted potatoes Medium Crunchy edges mimic steak crust, neutral flavor lets garlic shine Roast at 425°F while steak rests, serve hot
Grilled asparagus Easy Charred flavor complements seared steak, visually appealing for guests Grill 5 minutes, drizzle with steak pan drippings

Three ways to serve it:

  • As an appetizer: Serve with toothpicks and classic dip dish for dipping - keeps hands clean and feels party-ready
  • Over rice or pasta: Spoon steak and butter sauce over rice pilaf or egg noodles to catch every drop
  • On a platter: Arrange steak bites over crispy fries side dish with chimichurri or horseradish cream on the side
Best Pick
For weeknight meals, pair with this quick salad dish - it takes 5 minutes to toss together while the steak rests.

Store and Reheat

Steak bites keep 3-4 days in the fridge but lose some crust when reheated. The stovetop method works best for retaining texture.

A dollop of this classic dip dish takes each bite somewhere more interesting. We keep a batch ready for nights like this - it reheats well and complements leftover steak.

Method Time Best For
🍳 Stovetop 3-4 min in skillet over medium heat Retains crust, avoids dryness, best overall texture
🔥 Oven 8-10 min at 300°F (150°C) Even warming for larger batches, prevents overcooking
📦 Microwave 30-45 sec at 50% power Quick reheating when texture isn't critical

For best results when storing:

  • Cool completely before storing - hot steak creates condensation that makes leftovers soggy
  • Use shallow airtight containers to prevent moisture buildup and keep steak from steaming itself
  • Store garlic butter separately if meal prepping - reheat steak first, then toss with warmed butter
  • Add fresh garlic when reheating to revive the flavor that fades during storage
  • Freeze in single-layer portions up to 2 months - thaw in fridge overnight, reheat gently on stovetop

Frequently Asked Questions

Can I use other steak cuts for garlic butter steak bites?

Yes - ribeye, tenderloin, or strip steak work well. Flank steak needs marinating first or it turns chewy.

How should I store leftover garlic butter steak bites?

Store in an airtight container in the fridge for 3-4 days. Reheat on the stovetop over medium heat for 3-4 minutes to retain crust.

How do I know when the steak bites are cooked to medium rare?

Use an instant-read thermometer - medium-rare registers 130-135°F (54-57°C) in the center. The steak will continue cooking 5 degrees during rest.

What should I do if my steak bites turn out dry or tough?

You overcooked them or used meat that was too cold. Next time, bring steak to room temp before cooking and pull it at 130-135°F instead of waiting for visual cues.

Can I scale this recipe for larger gatherings?

Yes - double or triple the ingredients but still cook in batches. Overcrowding the pan drops the temperature and steams the steak instead of searing it.

Garlic Butter Steak Bites served on a plate

Garlic Butter Steak Bites

No ratings yet
Garlic Butter Steak Bites offer a golden brown crust with juicy interiors in under 20 minutes. High heat and room temperature sirloin cubes ensure even searing, while late-added garlic prevents burning and infuses rich flavor. Perfect for quick weeknight dinners or meal prep when you want steakhouse quality without the wait.
Print Recipe Pin Recipe
Prep Time 10 minutes mins
Cook Time 10 minutes mins
Total Time 20 minutes mins
Servings: 4 servings
Course: Appetizer, Main Dish
Cuisine: American
Ingredients Equipment Method Notes

Ingredients
  

  • 1.5 lb sirloin steak cut into 1-inch cubes, bring to room temperature 30 minutes before cooking
  • 3 tablespoon unsalted butter added at end to coat steak without burning
  • 2 tablespoon olive oil use regular olive oil, not extra virgin
  • 4 cloves garlic minced fresh, added last 90 seconds to avoid burning
  • 2 tablespoon fresh parsley chopped, added after cooking to preserve bright flavor
  • 1 teaspoon salt to season steak cubes evenly
  • 0.5 teaspoon black pepper freshly cracked for best flavor
  • 0.25 teaspoon red pepper flakes optional, add to taste
  • 1 tablespoon lemon juice optional, for finishing

Equipment

  • Cast iron skillet Preheat skillet before cooking to retain heat for searing

Method
 

  1. Slice sirloin into 1-inch cubes, then pat completely dry with paper towels for 2 minutes. Season all sides evenly with salt and black pepper.
    1.5 lb sirloin steak, 1 tsp salt, 0.5 tsp black pepper
  2. Heat cast iron skillet over medium-high heat for 5 minutes until a drop of water sizzles instantly. Add olive oil and swirl to coat the surface.
    2 tbsp olive oil
  3. Arrange steak cubes in a single layer, at least 1 inch apart. Cook in 2 batches if needed to avoid overcrowding. Sear 2-3 minutes per side until a golden brown crust forms. Transfer seared steak to a plate.
    1.5 lb sirloin steak
  4. Lower heat to medium. Add minced garlic to the empty pan and cook for 30 seconds until fragrant. Add unsalted butter and stir until melted.
    3 tbsp unsalted butter, 4 cloves garlic
  5. Return steak bites to the pan and toss in the garlic butter for 1 minute, spooning the sauce continuously over the top. Remove from heat, cover loosely with foil, and rest for 5 minutes before serving. Add fresh parsley and optional red pepper flakes and lemon juice before plating.
    1.5 lb sirloin steak, 3 tbsp unsalted butter, 4 cloves garlic, 2 tbsp fresh parsley, 0.25 tsp red pepper flakes, 1 tbsp lemon juice

Notes

  • Preheat your cast iron skillet for 5 full minutes over medium-high to maintain heat when adding steak.
  • Pat steak dry before cooking to avoid steaming and ensure a good sear.
  • Rest steak bites for 5 minutes after cooking to redistribute juices and keep meat tender.

Tried this recipe?

Let us know how it was!

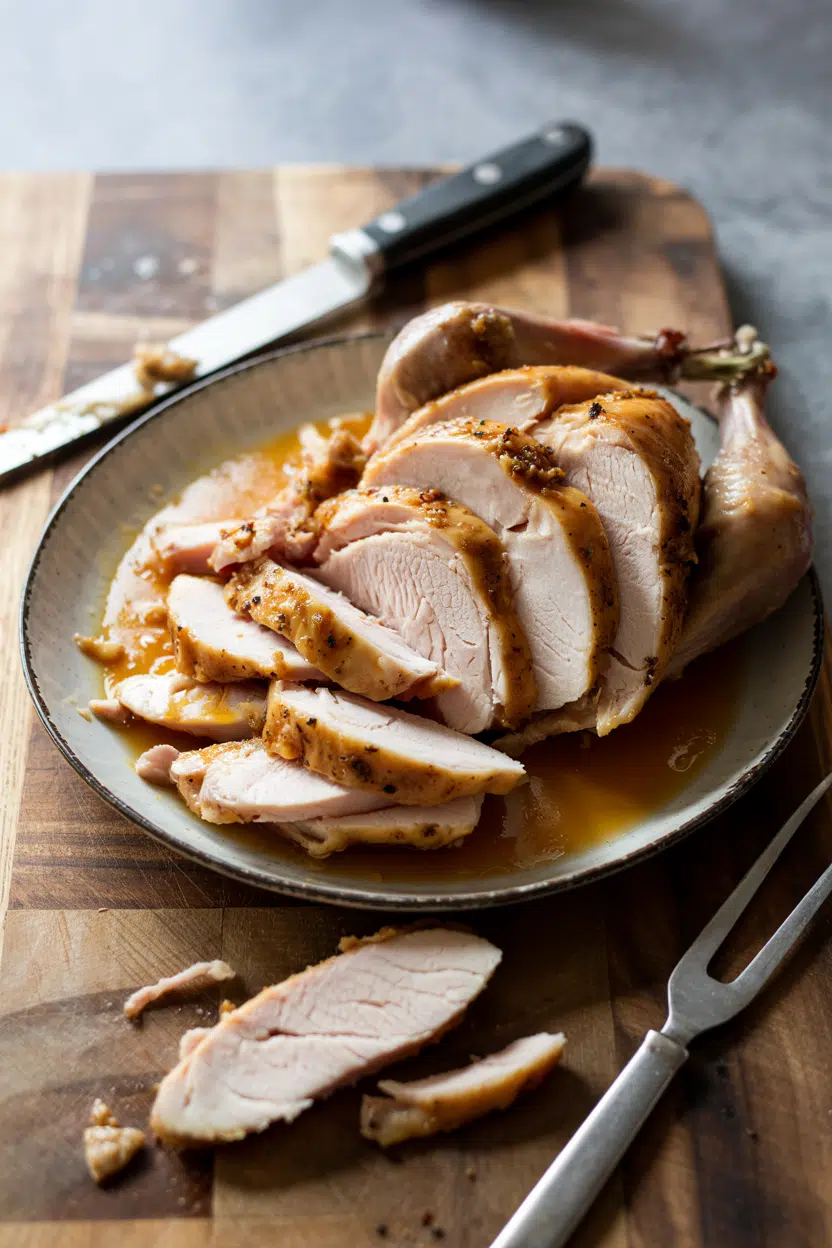
What Is Turkey? Taste, Texture, Culinary Uses & More

April 3, 2026

Roast turkey at the center of a holiday table is one of the most iconic images in American cooking, yet the bird itself often goes underappreciated until it's sliced and plated.

What Is Turkey

Many cooks treat it like an oversized chicken, reaching for the same techniques they'd use on a weeknight bird - and that's where things go wrong.

Getting turkey right means understanding how its white and dark meat behave differently, how brining changes everything, and why a properly cooked thigh tastes nothing like a dried-out breast.

If you're already thinking about what to pair with poultry, the sides for chicken drumsticks guide offers a useful reference frame, and cooking smoked turkey breast right is worth reading before you fire up a smoker.

QUICK SUMMARY

Turkey is a large domesticated bird with mild, savory white meat and richer, iron-forward dark meat. It roasts whole as a holiday centerpiece, breaks down into parts for everyday cooking, and suits smoking, brining, and slow-cooking equally well. Raw parts keep 1-2 days refrigerated; cooked turkey lasts 3-4 days.

🦃Category: Poultry - large domesticated bird, white and dark meat
👅Flavor: Mild savory, subtle sweetness; dark meat richer and iron-forward
🔥Best Methods: Roasting whole, smoking low-and-slow, brining before any dry heat
🌿Pairs With: Sage, thyme, cranberry, butter, root vegetables, stock-based gravy
🛒Buy: Plump flesh, no sour smell, intact skin, USDA inspection stamp
❄️Shelf Life: Raw parts 1-2 days fridge; cooked 3-4 days; frozen whole up to 1 year

What Is Turkey?

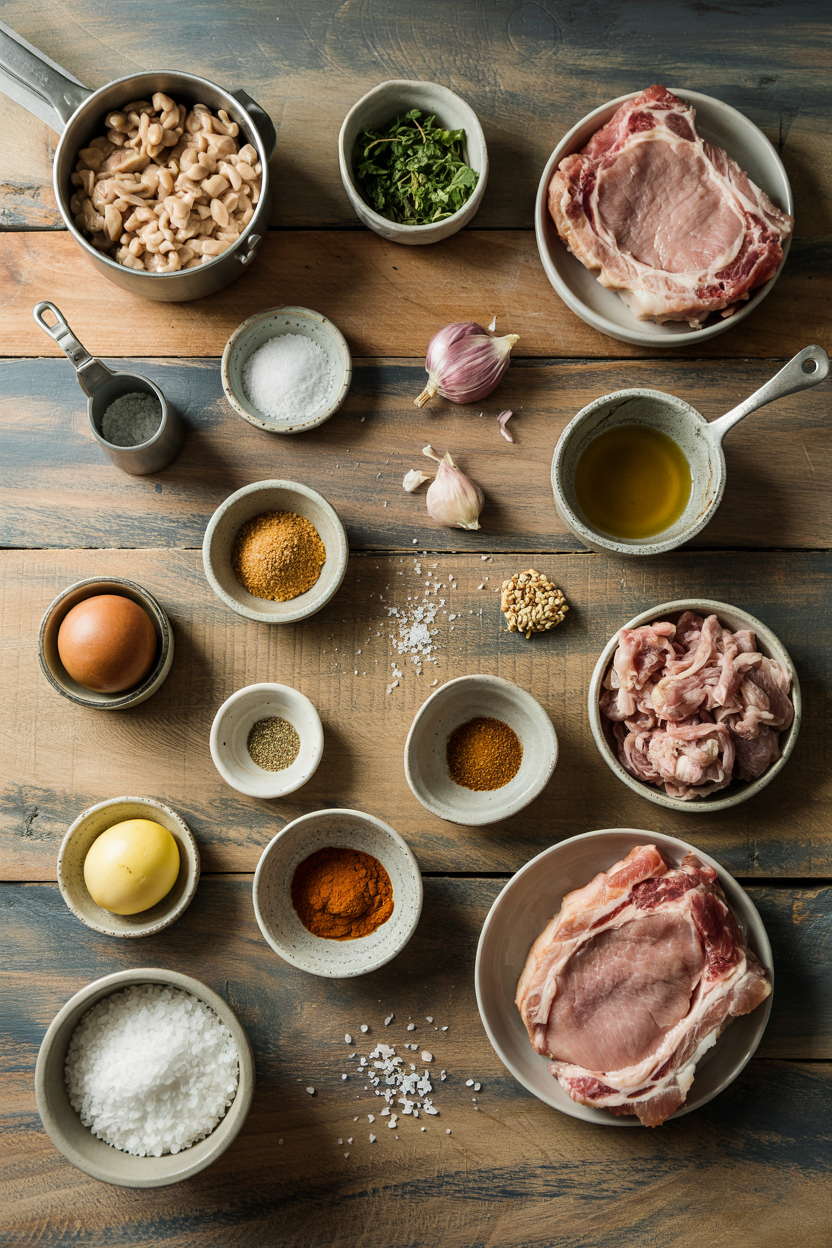
Turkey (Meleagris gallopavo) is a large North American bird domesticated from wild stock and raised specifically for meat. It belongs to the poultry category alongside chicken and duck, though it's considerably larger than either.

The bird is sold in several forms: whole for roasting, broken down into breasts, thighs, drumsticks, and wings, or ground for everyday cooking. Each cut carries different fat content, texture, and flavor character.

White meat - primarily the breast - is lean, dense, and mild. Dark meat from the thighs and drumsticks contains more fat and myoglobin, which gives it deeper flavor and a juicier finish.

Wild turkey is also eaten, though it's less common in retail. Expect darker, firmer flesh and a slightly gamey edge compared to the domestic bird most people cook at home.

  • 🦃 Whole bird - sold fresh or frozen, typically 10-24 lbs for domestic breeds
  • Breast - sold bone-in or boneless; the leanest, mildest cut
  • Thighs and drumsticks - dark meat cuts, higher fat, more forgiving to cook
  • Ground turkey - made from mixed light and dark meat or breast only
  • Wild turkey - leaner and gamier; requires different timing and seasoning

What Does Turkey Taste Like?

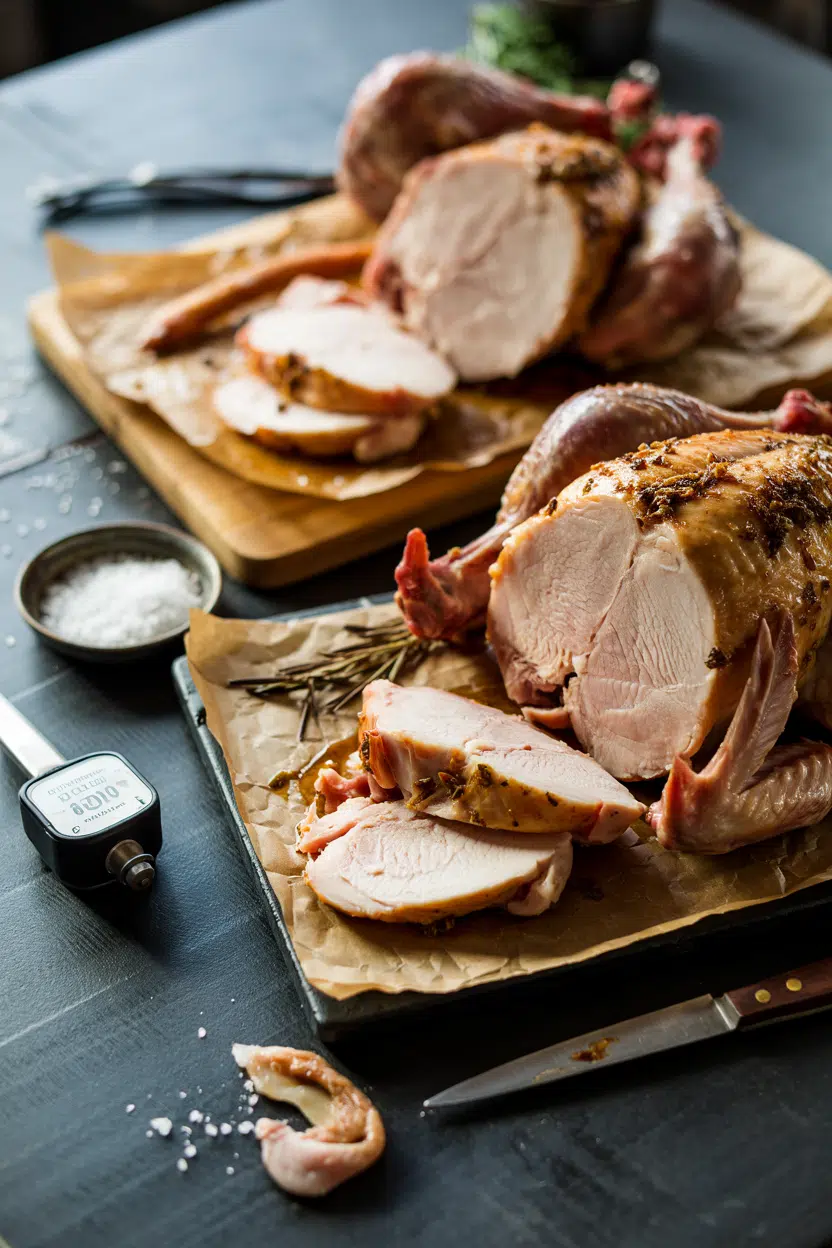
turkey - What Is Turkey

Turkey's flavor is mild and savory with a faint sweetness - closer to chicken than to duck, though not identical.

If you already know chicken's flavor and uses, turkey reads as a slightly firmer, less fatty version of that same profile.

White meat delivers lean umami with a clean, almost neutral finish. Dark meat has noticeably more richness, an iron-forward depth, and a juicy texture that stays moist even with aggressive cooking.

Sensory SnapshotModerate Intensity
👅 Flavor
mild savorysubtle sweetnesslean umamiiron-forward (dark)
✋ Texture
firm and fibrousjuicy when properly cooked
👃 Aroma
roasted poultryfaintly nuttyherb and gravy notes

Heat changes turkey noticeably. Breast meat tightens quickly past 165°F, turning chalky and dry - a few degrees of overcooking makes a real difference.

Dark meat, by contrast, actually improves slightly with longer cook times, breaking down connective tissue into gelatin.

Golden Rule
White meat and dark meat don't cook at the same rate. Roasting them together without adjusting for that gap is the single biggest reason turkey disappoints at the table.

How to Use Turkey

Turkey's range goes well beyond the holiday roast. The whole bird, brined overnight in salt water with aromatics and roasted low-then-high, remains the classic treatment - but individual cuts give you more control on any weeknight.

How Turkey Is Used
MethodBest ForTip
🔥 Oven RoastWhole bird, bone-in breastBrine first; tent with foil for first hour to slow surface browning
🍖 Low-and-Slow SmokeLegs, wings, whole birdApple or cherry wood keeps smoke flavor mild; pull legs at 175°F internal
🥘 Braise / Slow CookThighs, drumsticksWorks in stock, wine, or mole base; shreds cleanly for tacos and enchiladas
🌡️ Sous Vide + SearBoneless breastCook at 145°F for two hours, then sear skin-side down for crust
🧆 GroundBurgers, meatballs, skillet mealsAdd fat (olive oil or egg yolk) when using breast-only ground turkey
🍲 Stock / ConfitCarcass stock, dark meat confitRoast carcass before simmering for deeper stock color and flavor

In American Southern cooking, smoked turkey legs appear in gumbo and bean pots as a flavoring base. Mexican-American kitchens slow-cook thighs for turkey tacos or simmer the whole bird in mole.

For pairing ideas beyond the basics, pairing ideas for smoked turkey breast covers the full range of sides and sauces that work well.

Turkey pairs naturally with sage, thyme, and rosemary. Cranberry provides a bright, acidic contrast to the mild meat, while butter-basted pan sauces and root vegetables round out a classic roast.

Avoid overly sweet glazes - they flatten the bird's natural savor rather than complementing it.

Try It In
🍝Turkey Meatball Marinara SkilletA one-pan weeknight use for ground turkey→🌮Turkey and Black Bean Taco SkilletShows how well braised turkey handles bold seasoning→🥒Turkey Taco Stuffed Zucchini BoatsA lighter format for seasoned ground turkey→

How to Buy and Store Turkey

Fresh turkey should look plump and even-colored, with no sour or ammonia smell.

For whole birds, check that the skin is intact and the cavity is properly closed. Packaged cuts should carry a USDA inspection stamp and a clear packing date - prioritize the freshest date you can find.

Watch Out
Self-basting and pre-seasoned turkeys contain added sodium. If you plan to brine, these birds will end up over-salted - buy unseasoned and season it yourself.

Store raw turkey on a tray in its original packaging, at or below 40°F, in the coldest part of your fridge. Use raw parts within 1-2 days.

Our full guide to keeping turkey fresh covers fridge, freezer, and thawing timelines in detail.

  • Raw whole bird - 1-2 days refrigerated; up to 1 year frozen
  • Raw parts - 1-2 days refrigerated; 9 months frozen for best quality
  • Cooked turkey - refrigerate within 2 hours; use within 3-4 days

Start With Dark Meat

If turkey has let you down before, dark meat is the honest place to start. Thighs braised in stock or rubbed and slow-roasted are far more forgiving than breast, and they showcase the bird's best flavor without the risk of drying out.

Once you're comfortable there, move to a brined breast or a spatchcocked whole bird - both reward the extra prep time.

If you'd rather skip the bird entirely this season, the alternatives to turkey guide lays out the most practical swaps by cut and occasion.

Shortcut
Bone-in turkey thighs roasted at 375°F for 45-50 minutes give you the full flavor of a holiday bird with a fraction of the effort and none of the timing anxiety.

Frequently Asked Questions

What does turkey taste like compared to chicken?

Turkey is milder and slightly firmer than chicken. White meat is leaner with a cleaner finish, while dark meat has more iron-forward depth than chicken thighs - closer to duck in richness.

Why is turkey dark meat juicier than white meat?

Dark meat contains more intramuscular fat and connective tissue, which render during cooking and keep the meat moist. White meat has almost no fat buffer, so it dries out quickly if internal temperature climbs past 165°F.

How long does turkey keep in the fridge?

Raw turkey parts last 1-2 days; a whole raw bird also keeps 1-2 days. Cooked turkey is safe for 3-4 days if refrigerated within two hours of cooking.

How do you keep turkey breast from drying out?

Brining adds moisture that the meat retains during roasting - even a simple overnight salt brine makes a noticeable difference. Sous vide at 145°F followed by a quick sear is the most reliable method for boneless breast.

Is ground turkey the same as ground chicken in cooking?

They're close but not identical. Ground turkey is slightly firmer and has a mildly earthier flavor. Breast-only ground turkey is very lean and needs added fat in burgers or meatballs to stay moist.

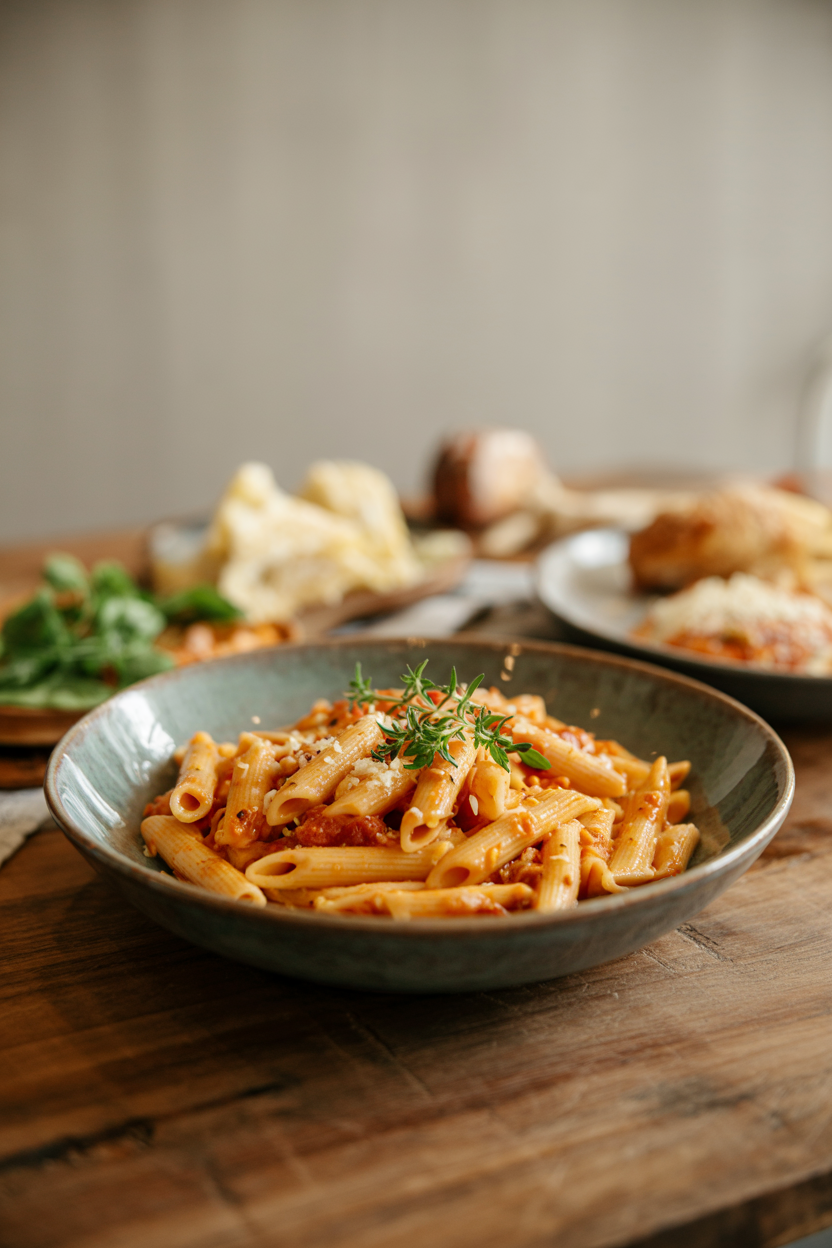
Penne alla Vodka

April 3, 2026

Cooking pasta until it's al dente and pairing it with vodka sauce gives you creamy tomato flavor without the heaviness. The vodka opens up flavor compounds in the tomatoes that don't come through otherwise, and the cream smooths out the acidity.

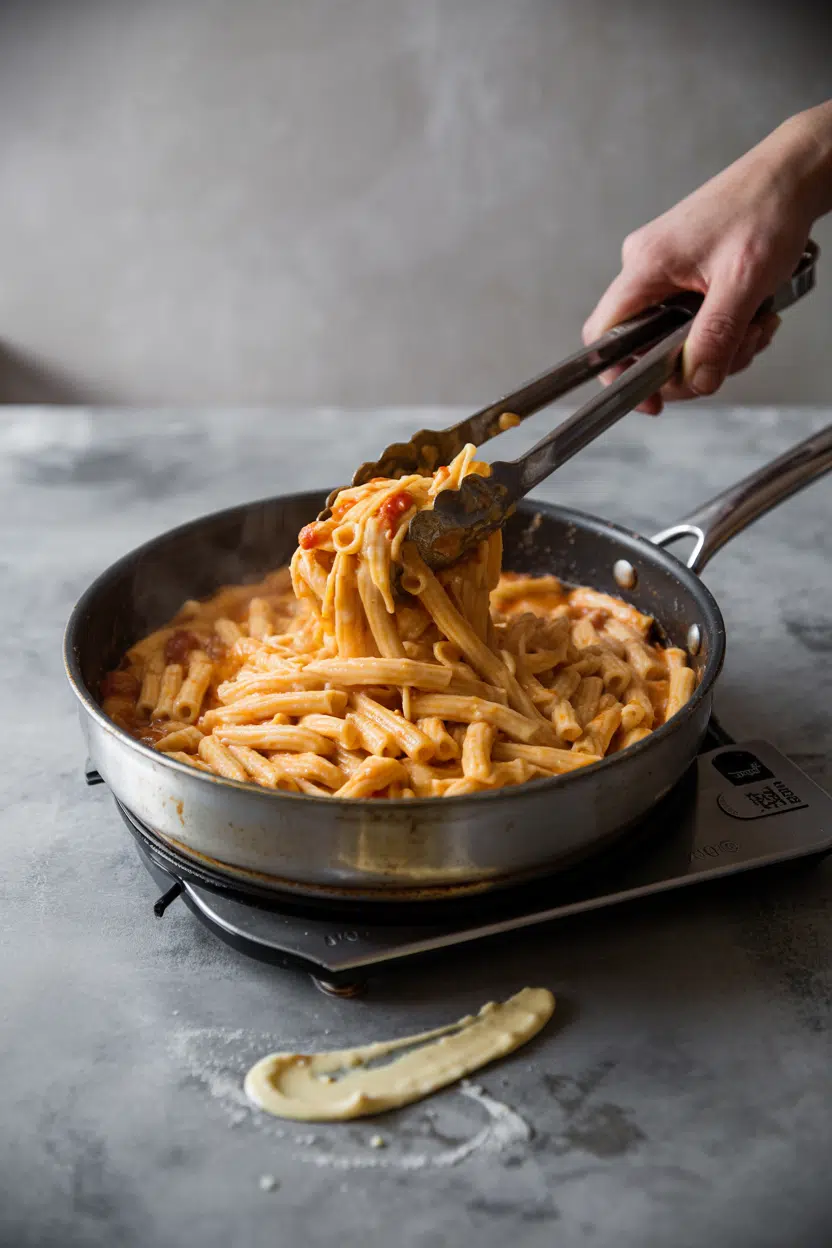
Penne alla Vodka served on a plate

Simmering the vodka for 3-5 minutes burns off the alcohol completely. Skip that step and you'll taste raw liquor instead of a balanced sauce.

This works for weeknight dinners when you want something that feels intentional but doesn't require multiple pots or fancy ingredients.

QUICK SUMMARY

Penne alla vodka delivers creamy tomato sauce with a subtle warmth from vodka that activates flavor compounds in the tomatoes. The vodka must simmer 3-5 minutes to evaporate the alcohol fully, and adding cream off heat prevents curdling. Works for casual weeknight meals or date nights when you need something that looks more complicated than it is.

⏱️Timing: 30 minutes total-10 for prep, 20 for cooking pasta and sauce together
🔑Key Move: Add cream after removing pan from heat to avoid separation and curdling
⚠️Watch Out: Overcooking pasta or skipping the vodka simmer leaves you with mushy noodles or harsh alcohol taste-cook pasta 1 minute less than package directions and let vodka bubble for the full time

Table of Contents

Toggle
  • Why This Recipe Works
  • What You'll Need
    • Ingredient Details
  • Ingredient Swaps
  • What to Serve With It
  • Store and Reheat
  • Frequently Asked Questions
  • Penne alla Vodka
    • Method 
    • Tried this recipe?

Why This Recipe Works

Sautéing onions and garlic in olive oil before adding tomatoes builds a sweet, aromatic base that makes the sauce taste richer than it actually is. The vodka helps tomato flavors bloom by pulling out compounds that aren't water-soluble or fat-soluble, which is why this quick brodo dish also relies on alcohol for depth. Simmering the sauce uncovered for 10-15 minutes thickens it to the right consistency so it coats the penne without pooling at the bottom of the bowl.

Quick Reference
⏱️
Prep Time
10 min
🔥
Cook Time
20 min
⏰
Total Time
30 min
🍽️
Servings
4 servings
📊
Difficulty
Medium
🏷️
Category
Main Dish
💡
Quick Tip
Simmer vodka to burn off alcohol fully
🎯
Best For
Weeknight | Entertaining

What makes this work:

  • Cook pasta 1 minute less than package directions - Al dente texture means the pasta has bite and won't turn mushy when tossed with hot sauce
  • Reserve ½ cup pasta water before draining - Starchy water adjusts sauce consistency if it thickens too much or looks separated
  • Simmer vodka on medium heat for 3-5 minutes - Alcohol evaporates completely and leaves behind a mellow warmth instead of harsh liquor taste
  • Remove pan from heat before adding cream - High heat causes cream to curdle and separate into grainy clumps instead of staying smooth
  • Add grated parmesan off heat - Cheese melts evenly without clumping when the pan isn't actively cooking
Quick Tip
Use medium heat when sautéing onions and garlic-too high and they'll brown and turn bitter instead of softening and sweetening the sauce.

What You'll Need

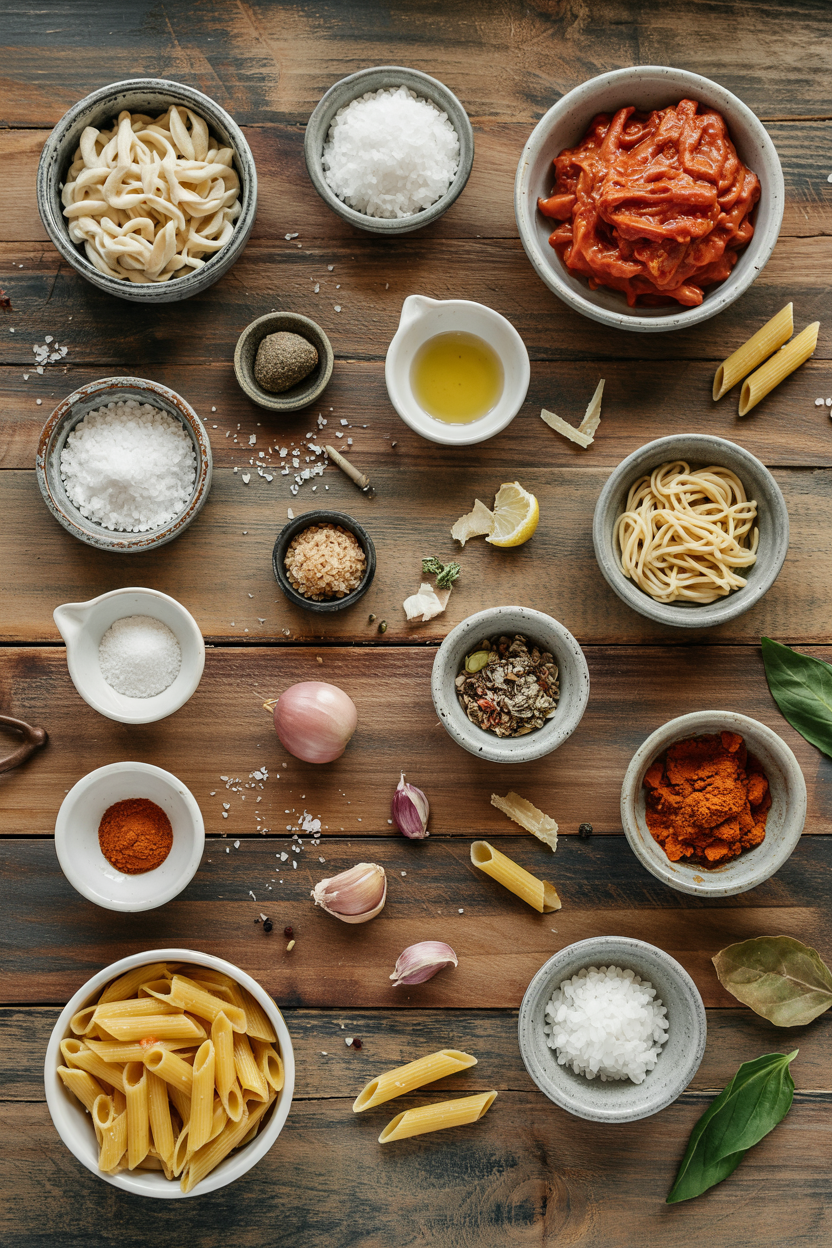
Ingredients for Penne alla Vodka

Shopping for this takes one trip to the pasta aisle and the dairy section. Most kitchens already have olive oil, garlic, and onions, so you're buying penne, vodka, heavy cream, and canned tomatoes. For a similar approach to building flavor with simple pantry staples, simple homemade homemade also relies on everyday ingredients that turn into something better than store-bought.

🍜
Pasta
  • 1 lb penne pasta
🫙
Base
  • ¼ cup vodka
  • 28 oz tomato puree or crushed tomatoes
  • 1 cup heavy cream
🧄
Aromatics
  • 1 medium onion, diced
  • 3 cloves garlic, minced
  • 2 tablespoons olive oil
🧀
Finishing
  • ½ cup grated parmesan cheese
  • ½ teaspoon red pepper flakes (optional)
  • Salt and pepper to taste

Ingredient Details

  • Penne pasta
    Tubular shape with ridges holds sauce better than smooth pasta-rigatoni or ziti work the same way
  • Vodka
    Use any mid-shelf vodka; expensive brands don't change the sauce and cheap ones work fine once the alcohol cooks off
  • Heavy cream
    Full-fat cream creates a silky texture-half-and-half makes a thinner sauce that separates more easily
  • Tomato puree
    Smooth puree gives a consistent pink sauce; crushed tomatoes add texture but take longer to break down
  • Onion
    Yellow or white onions work best for sweetness-red onions stay sharper even after sautéing
  • Garlic
    Fresh cloves add pungency that pre-minced garlic can't match-mince just before cooking for strongest flavor
  • Parmesan cheese
    Grate from a block instead of buying pre-grated-fresher flavor and melts smoother without anti-caking agents

Ingredient Swaps

Half-and-half makes a lighter sauce if heavy cream feels too rich, but the texture won't be as velvety and it's more likely to separate when reheating. For dairy-free versions, coconut cream or cashew cream work without curdling, though coconut adds a faint sweetness that changes the flavor profile.

Swaps that work:

  • Substitute gluten-free penne for regular pasta - Brands like Barilla and Banza hold up during cooking; rinse after draining to remove excess starch
  • Use white wine instead of vodka - Adds acidity and brightness but skips the flavor-opening effect vodka provides; simmer the same amount of time
  • Replace heavy cream with cashew cream for dairy-free - Blend soaked raw cashews with water for a creamy base that doesn't curdle; adds mild nuttiness
  • Swap crushed tomatoes for tomato puree - Creates a chunkier sauce with more texture; simmer 5 minutes longer to break down tomato pieces

Heavy Cream

Works for: Silky texture, rich mouthfeel, stays emulsified when reheated properly

Skip if: You want a lighter sauce or need dairy-free-coconut cream or cashew cream work instead

Half-and-Half

Works for: Lower fat content, thinner sauce, budget-friendly substitute

Skip if: You want a thick, restaurant-style sauce-half-and-half separates more easily and doesn't coat pasta as well

Vodka

Works for: Opening up tomato flavors that aren't water or fat-soluble, adding subtle warmth without harshness

Skip if: You're avoiding alcohol entirely-white wine or extra tomato puree can substitute but the sauce tastes different

Instructions

The sauce builds in layers: sauté aromatics, simmer vodka until the alcohol smell fades, add tomatoes, reduce to thicken, then fold in cream off heat. Pasta cooks separately in salted water and gets tossed with sauce at the end. For techniques that rely on reducing liquids to concentrate flavor, creamy homemade potato wedges recipe uses a similar approach to building depth without extra ingredients.

  1. Boil pasta in salted water. Bring 4 quarts water to a rolling boil with 1 tablespoon salt. Add penne and cook 1 minute less than package directions-usually 9-10 minutes for al dente. Drain and reserve ½ cup pasta water.
  2. Sauté onions and garlic. Heat 2 tablespoons olive oil in a large skillet over medium heat. Add diced onion and cook 4-5 minutes until soft and translucent. Stir in minced garlic and cook 1 minute until fragrant but not browned.
  3. Simmer vodka to burn off alcohol. Pour in ¼ cup vodka and let it bubble on medium heat for 3-5 minutes. You'll smell the alcohol evaporate-sauce should smell mellow and slightly sweet, not sharp.
  4. Add tomatoes and reduce. Stir in 28 oz tomato puree, ½ teaspoon red pepper flakes if using, and season with salt and pepper. Simmer uncovered 10-15 minutes, stirring occasionally, until sauce thickens enough to coat the back of a spoon.
  5. Fold in cream and toss with pasta. Remove skillet from heat and stir in 1 cup heavy cream until smooth and pink. Add drained penne and toss to coat. If sauce is too thick, add reserved pasta water 2 tablespoons at a time. Stir in grated parmesan off heat.
Watch Out
Don't add cream while the pan is still on the burner-residual heat is enough to warm it through, and direct heat causes the cream to separate into grainy clumps instead of staying smooth and silky.

What to Serve With It

Penne alla vodka is rich and creamy, so the plate needs something crisp or acidic to cut through the heaviness. A simple green salad with vinaigrette balances the meal without adding more starch or dairy. For more ways to round out pasta dinners, complete caponata meal ideas covers similar pairing strategies for Italian-style mains.

Side Dish Prep Why It Works How to Serve
Simple green salad Easy Crisp lettuce and tangy vinaigrette cut through creamy sauce Toss mixed greens with lemon juice and olive oil just before serving
Garlic bread Easy Crunchy texture and buttery flavor complement soft pasta Toast sliced baguette with garlic butter until golden and crisp
Steamed broccoli Easy Adds fiber and a vegetal contrast to rich tomato cream Steam florets 4-5 minutes until bright green and tender-crisp
Roasted cherry tomatoes Medium Intensifies tomato flavor and adds caramelized sweetness Roast at 400°F for 15 minutes with olive oil and salt
Caesar salad Medium Creamy dressing matches pasta richness; romaine adds crunch Serve with fresh-shaved parmesan and croutons on the side

Three ways to serve it:

  • With crusty bread and salad - Tear bread for dipping in leftover sauce; dress greens with lemon and olive oil for brightness
  • Over zucchini noodles for lighter meal - Spiralize raw zucchini and toss with warm sauce; skip the penne entirely for lower-carb option
  • With grilled chicken or shrimp - Sear protein separately and slice over finished pasta; adds protein without changing the sauce
Best Pick
A simple arugula salad with lemon vinaigrette cuts through the cream and adds peppery bite-dress it right before serving so the greens stay crisp and don't wilt under the acidic dressing.

Store and Reheat

Penne alla vodka keeps in the fridge for 3-4 days in an airtight container, but the pasta absorbs sauce as it sits and can dry out. Reheat with a splash of water or cream to loosen the sauce back to its original consistency. For similar storage strategies with cream-based dishes, easy potato side also benefits from adding moisture when reheating to prevent drying out.

Method Time Best For
🍳 Stovetop 5-7 min low heat Reheating leftovers without drying out-add 2 tablespoons water or cream and stir frequently
📦 Microwave 1-2 min medium power Quick single servings-stir halfway through and add liquid if sauce looks separated
🔥 Oven 10-12 min at 300°F Reheating large portions evenly-cover with foil to trap steam and prevent drying

For best results when storing:

  • Transfer to shallow airtight container within 2 hours - Cooling quickly prevents bacterial growth and keeps sauce from separating
  • Add extra sauce or cream when reheating - Pasta absorbs liquid overnight; stir in 2-3 tablespoons cream or reserved pasta water to restore creaminess
  • Freeze sauce separately from pasta - Cooked pasta turns mushy after freezing; freeze sauce up to 1 month and cook fresh pasta when ready to serve
  • Reheat on low heat to prevent cream from breaking - High heat causes cream to curdle and separate; warm gently and stir constantly
  • Use within 3-4 days for best texture - Sauce stays safe longer but pasta gets softer and loses its al dente bite after the fourth day

Frequently Asked Questions

Can I substitute vodka with another alcohol in penne alla vodka?

White wine works as a substitute but changes the flavor-it adds acidity and brightness instead of vodka's neutral warmth. Simmer wine the same 3-5 minutes to cook off the alcohol, but the sauce will taste more wine-forward and less balanced.

How do I store and reheat leftover penne alla vodka?

Store in an airtight container in the fridge for 3-4 days. Reheat on the stovetop over low heat with 2-3 tablespoons of water or cream to loosen the sauce-microwave works for single servings but stir halfway through to prevent uneven heating.

What are the signs that the vodka sauce is cooked correctly?

The sauce should coat the back of a spoon without running off immediately, and it should smell mellow and slightly sweet instead of sharp or alcoholic. If you taste raw liquor, simmer another 2-3 minutes until the harshness disappears.

Why does my cream sauce sometimes curdle and how can I fix it?

Cream curdles when added to a pan that's too hot or reheated at high heat. Always remove the pan from the burner before stirring in cream, and reheat leftovers on low. If it curdles, whisk vigorously off heat and add a tablespoon of cold water to re-emulsify.

How can I scale penne alla vodka recipe for larger groups?

Double all ingredients and use a larger pot for the pasta and a wide skillet for the sauce-cooking times stay the same. Make the sauce in batches if your skillet isn't big enough, or the liquid won't reduce properly and the sauce will stay thin.

Penne alla Vodka served on a plate

Penne alla Vodka

No ratings yet
Penne alla Vodka features creamy tomato sauce enhanced by vodka, which unlocks unique flavor compounds in the tomatoes. Simmering the vodka for 3-5 minutes eliminates alcohol taste, while folding in cream off the heat creates a smooth, velvety sauce perfect for weeknight dinners.
Print Recipe Pin Recipe
Prep Time 10 minutes mins
Cook Time 20 minutes mins
Total Time 30 minutes mins
Servings: 4 servings
Course: Dinner, Main Dish
Cuisine: Italian
Ingredients Method Notes

Ingredients
  

  • 1 lb penne pasta cook 1 minute less than package directions, reserve ½ cup pasta water
  • 0.25 cup vodka simmer 3-5 minutes to burn off alcohol
  • 28 oz tomato puree can substitute crushed tomatoes
  • 1 cup heavy cream add off heat to avoid curdling
  • 1 medium onion diced
  • 3 cloves garlic minced
  • 2 tablespoons olive oil
  • 0.5 cup parmesan cheese grated, add off heat
  • 0.5 teaspoon red pepper flakes optional

Method
 

  1. Bring 4 quarts of salted water to a rolling boil with 1 tablespoon salt. Add penne and cook for 1 minute less than package directions, usually 9-10 minutes for al dente. Drain the pasta and reserve ½ cup of the pasta water.
    1 lb penne pasta
  2. Heat 2 tablespoons olive oil in a large skillet over medium heat. Add diced onion and cook 4-5 minutes until soft and translucent. Stir in minced garlic and cook 1 minute until fragrant, avoiding browning.
    1 medium onion, 3 cloves garlic, 2 tablespoons olive oil
  3. Pour in ¼ cup vodka and let it simmer on medium heat for 3-5 minutes until the alcohol smell fades and the sauce smells mellow and slightly sweet.
    0.25 cup vodka
  4. Stir in 28 oz tomato puree, ½ teaspoon red pepper flakes if using, and season with salt and pepper. Simmer uncovered for 10-15 minutes, stirring occasionally, until sauce thickens and coats the back of a spoon.
    28 oz tomato puree, 0.5 teaspoon red pepper flakes
  5. Remove the skillet from heat and stir in 1 cup heavy cream until smooth and pink. Add drained penne and toss to coat. Adjust thickness by adding reserved pasta water 2 tablespoons at a time if necessary. Stir in grated parmesan off heat until melted.
    1 lb penne pasta, 1 cup heavy cream, 0.5 cup parmesan cheese

Notes

  • Cook pasta 1 minute less than package directions for perfect al dente texture.
  • Always simmer vodka 3-5 minutes to fully evaporate alcohol and avoid harsh taste.
  • Add cream and parmesan off the heat to prevent curdling and clumping.

Tried this recipe?

Let us know how it was!

What Is White Chocolate? [Taste, Uses & More]

April 3, 2026

Most people assume white chocolate is just a milder, creamier stand-in for the real thing - a consolation prize for those who find dark chocolate too bitter.

What Is White Chocolate

That assumption undersells it badly. White chocolate has its own distinct character built on cocoa butter, milk solids, and sugar, and understanding what it actually is (and isn't) makes you a sharper baker and a more deliberate shopper.

QUICK SUMMARY

White chocolate is a cocoa butter-based confection with no cocoa solids. It tastes sweet and creamy - like sweetened condensed milk with added butterfat - and works best where you want richness without chocolate color or bitterness. Buy bars labeled "couverture" for best results.

🍫What It Is: Cocoa butter, sugar, and milk solids - no cocoa solids at all
🌿Flavor: Sweet, buttery, creamy with a mild vanilla finish
🍰Best Uses: Ganache, mousse, blondies, truffle coatings, cheesecake swirls
🛒Buy This: Look for "cocoa butter" on the label; avoid compound coatings
📅Shelf Life: Unopened up to 12 months; opened 4-6 months airtight and cool

What Is White Chocolate?

White chocolate sits in a category of its own within the chocolate family.

It contains cocoa butter - the fat extracted from cacao beans - but no cocoa solids, which means none of the dark brown color or bitter flavor associated with milk or dark chocolate.

The product was industrialized in Europe in the 20th century, though its exact origins are disputed.

You'll see it sold under several names: white couverture (higher cocoa butter content, preferred by pastry professionals), white chocolate chips, and candy coating or compound coating (which swaps cocoa butter for cheaper vegetable fats - a significant quality downgrade).

Real white chocolate must contain a minimum cocoa butter content to qualify legally in many countries. Color is a reliable tell: genuine white chocolate is ivory to pale yellow, not stark white.

Stark white almost always signals a compound coating made with palm or coconut oil rather than cocoa butter.

What Does White Chocolate Taste Like?

Sensory SnapshotMild Intensity
👅 Flavor
SweetButteryCreamyVanilla finish
✋ Texture
SmoothFast-melting
👃 Aroma
Vanilla-scentedButtery

Think of sweetened condensed milk with extra butterfat and a whisper of vanilla - that's the closest comparison. The dominant notes are sugar-forward sweetness and dairy creaminess, with the cocoa butter contributing a clean, neutral richness rather than any chocolate bitterness.

Vanilla or vanillin (the synthetic version) is almost always added, which is why people often describe white chocolate as tasting "like vanilla." That finish is real, however the vanilla note is an addition, not something inherent to cocoa butter itself. Low-quality products push the sweetness too far and can taste synthetic or one-dimensional; cheap compound coatings often have a waxy, almost medicinal aftertaste.

Good couverture melts cleanly at body temperature and coats the palate with no chalky or greasy residue.

How to Use White Chocolate

White chocolate earns its place in recipes where you need richness and sweetness without dark color or bitter cocoa flavor.

It melts at a lower temperature than dark or milk chocolate, so low, gentle heat is non-negotiable - always use a double boiler or short bursts in a microwave at 50% power.

Watch Out
White chocolate scorches faster than dark chocolate. Even a few seconds of direct heat or steam from a double boiler can cause it to seize into a grainy, unworkable mass. Keep the bowl dry and the heat low.

Here's where it performs best:

  • 🍮 Ganache and frosting - Melted with heavy cream, it makes a pale, ivory ganache for tarts, layer cakes, and truffle centers. If you're working without cream, check out heavy cream in ganache replacements that still emulsify well.
  • 🍪 Blondies and cookies - White chocolate chips fold into blondie batter or oatmeal cookies where cocoa flavor would clash with brown butter or macadamia nuts.
  • 🍰 Cheesecake swirls and mousse - Melted and folded into mascarpone or whipped cream, it adds sweetness and body without weighing down a light texture.
  • 🍓 Fruit sauces - Whisked into warm raspberry or passion fruit coulis, it balances tartness with creamy richness.
  • 🍫 Truffle and bonbon coatings - **Tempered white chocolate** gives a glossy, snappy shell on handmade confections when you want a pale finish.

It works across European patisserie, American baking, and modern dessert kitchens. Tart pairings are where white chocolate shines most: raspberry, cranberry, lemon zest, and yuzu all cut through its sweetness cleanly.

Toasted macadamia nuts, sea salt, and espresso are equally strong partners.

Try It In
🫕Rich Chocolate FondueWhite chocolate melts into an exceptionally smooth fondue base→🍋Lemon Mint Hot ChocolateCitrus and white chocolate is a natural pairing worth trying→🌺Passion Fruit Hot ChocolateTart fruit against creamy white chocolate — the contrast works→

How to Buy and Store White Chocolate

Start with the ingredient list. "Cocoa butter" must appear - if you see only "vegetable fat" or "palm oil," you're buying compound coating, not white chocolate. Color confirms it: ivory or pale yellow means real cocoa butter; bright white is a red flag.

Best Pick
White couverture bars (35%+ cocoa butter) from brands like Valrhona, Callebaut, or Guittard give the cleanest melt and most balanced flavor. They cost more, however the texture difference in ganache and mousse is immediate.

For storage, keep white chocolate away from strong odors - it absorbs them readily through its fat content. Aim for 15-18°C (59-64°F) in an airtight container or the original sealed packaging.

Avoid the refrigerator unless your kitchen runs very warm; condensation causes fat bloom, the whitish surface streaking that affects texture without making it unsafe to eat.

For a full breakdown of how long it keeps under different conditions, see our guide to white chocolate storage life. Opened bars last 4-6 months if stored correctly; unopened, up to 12 months.

Start Here If You're New to White Chocolate

If you've never cooked with it before, buy a couverture bar and melt it into whipped cream for a simple mousse. That single step shows you everything: how it behaves with heat, how fast it sets, and how its flavor changes when diluted with dairy.

From there, white chocolate alternatives are worth knowing for the moments when cocoa butter content actually matters to your recipe's outcome.

Skip compound coatings entirely at first. Get one good bar, use it once, and the quality difference will make every future buying decision obvious.

Frequently Asked Questions

Is white chocolate real chocolate?

Technically, it depends on the standard. It contains cocoa butter - a direct cacao derivative - however it has no cocoa solids, which many definitions require. Most food regulators classify it as a chocolate product, not chocolate itself.

Why does white chocolate taste like vanilla?

Vanilla or vanillin is almost universally added during manufacturing. Cocoa butter itself is neutral and buttery - the vanilla note is deliberate flavoring, not something inherent to the fat.

How do you melt white chocolate without seizing?

Use a dry bowl over barely simmering water, or a microwave at 50% power in 20-second bursts, stirring between each. Even a drop of water can cause it to seize; fat - like a small amount of neutral oil - can sometimes recover a seized batch.

Does white chocolate contain caffeine?

Essentially none. Caffeine in chocolate comes from cocoa solids, which white chocolate doesn't contain. Trace amounts are theoretically possible from cocoa butter processing, however not in any meaningful quantity.

Can you use white chocolate chips instead of a bar for melting?

You can, however most chips contain stabilizers that help them hold their shape in baking - which means they melt less smoothly than a couverture bar. For ganache or dipping, a quality bar gives better results.

Grilled Swordfish Steaks

April 3, 2026

High heat and a simple marinade turn swordfish steaks into firm, flaky dinners in under 10 minutes. The dense texture holds up to grilling without falling apart or drying out.

Grilled Swordfish Steaks served on a plate

You don't need to flip more than once. Oil the grill grates and the fish, then let the heat do the work while you prep a side.

This works for weeknight dinners when you want something that feels intentional but doesn't require standing over the stove. The char adds flavor without needing heavy sauces.

QUICK SUMMARY

Swordfish steaks grill in 6-10 minutes at medium-high heat with a citrus-herb marinade. The thick, meaty texture stays moist when you pull it at 130-135°F internal temperature. Pat the fish dry before grilling so it browns instead of steaming.

⏱️Time Reality: 15 minutes to marinate, 6-10 minutes on the grill, 5 minutes to rest
🔥Key Move: Preheat grill to 400°F and oil both grates and fish to prevent sticking
⚠️Watch Out: Marinating longer than 30 minutes breaks down the fish texture - brief marinating works best

Table of Contents

Toggle
  • Why This Recipe Works
  • What You'll Need
    • Ingredient Details
  • Ingredient Swaps
  • What to Serve With It
  • Store and Reheat
  • Frequently Asked Questions
  • Grilled Swordfish Steaks
    • Method 
    • Tried this recipe?

Why This Recipe Works

The dense texture of swordfish handles direct heat without falling apart like flakier fish. For a lighter complement to rich grilled fish, a simple tortellini on the side adds contrast without competing for attention.

Quick Reference
⏱️
Prep Time
15 min
🔥
Cook Time
6-10 min
⏰
Total Time
25 min
🍽️
Servings
4 servings
📊
Difficulty
Easy
🏷️
Category
Main Dish
💡
Quick Tip
Oil grill and fish to prevent sticking
🎯
Best For
Weeknight | Entertaining

Five reasons this method delivers consistent results:

  • High heat creates grill marks without overcooking - 400°F gives you char on the outside while the center stays at 130-135°F
  • Brief marinating preserves texture - 15-30 minutes with lemon juice tenderizes without turning the fish mushy
  • Thick steaks resist drying out - 1-inch cuts stay moist even if you slightly overshoot on time
  • Single flip minimizes handling - flipping once after 3-5 minutes keeps the fish intact instead of breaking apart
  • Resting evens out the cook - 5 minutes off heat lets internal temperature stabilize and juices redistribute
Quick Tip
Use an instant-read thermometer at the thickest part - pull the fish at 130°F and it will coast to 135°F while resting

What You'll Need

Ingredients for Grilled Swordfish Steaks

Choose steaks that look moist with a slight sheen, not dry or grayish. Most people skip planning for sides, but it balances the meal - check this quick potato salad dish if you need something that works alongside grilled fish.

🦐
Fish
  • Swordfish steaks (4, about 1 inch thick)
🥢
Marinade
  • Olive oil (¼ cup)
  • Lemon juice (2 tablespoons)
  • Garlic (3 cloves, minced)
🌶️
Seasonings
  • Fresh herbs (parsley, thyme, or oregano, 2 tablespoons chopped)
  • Salt (1 teaspoon)
  • Black pepper (½ teaspoon)
  • Chili flakes (optional, ¼ teaspoon)
🫙
Optional
  • Butter (2 tablespoons, for finishing)

Ingredient Details

  • Swordfish steaks
    Look for steaks cut to 1 inch thick so they cook evenly - thinner cuts overcook before getting good grill marks
  • Olive oil
    Use regular olive oil instead of extra-virgin since high heat can make EVOO taste bitter
  • Lemon juice
    Fresh lemon juice has brighter flavor than bottled, but bottled works in a pinch
  • Garlic
    Mince garlic fine so it distributes evenly in the marinade instead of clumping
  • Fresh herbs
    Any combination of parsley, thyme, or oregano works - dried herbs need half the quantity
  • Salt
    Kosher salt works best for even seasoning - table salt is finer so use less
  • Black pepper
    Freshly cracked pepper tastes sharper than pre-ground but both work fine

Ingredient Swaps

Tuna steaks work almost identically if swordfish prices spike or availability drops. If you're working with what's already in the pantry, simple potato wedges recipe uses similar aromatics and pairs well with grilled fish.

Four swaps that maintain the texture and flavor:

  • Avocado oil instead of olive oil - same smoke point and neutral flavor, works for high-heat grilling
  • Tuna steaks instead of swordfish - similar firm texture, reduce cooking time by 1-2 minutes since tuna overcooks faster
  • Dried herbs instead of fresh - use 1 tablespoon dried instead of 2 tablespoons fresh, less aromatic but still effective
  • Lime juice instead of lemon juice - slightly sweeter citrus note, same acidity level for tenderizing

Outdoor Grill

Works for: Smoky char flavor, authentic grill marks, larger batches

Skip if: No outdoor space, weather prevents grilling, prefer less cleanup

Grill Pan

Works for: Indoor cooking, year-round option, controlled heat

Skip if: Want smokier flavor, cooking for more than 2-3 people

Instructions

You'll need about 25 minutes start to finish, but only 6-10 minutes require active attention at the grill. Potato wedges soaks up every drop of sauce on the plate - for a version that comes together quickly, simple potato wedges recipe cooks while the fish rests.

Five steps from marinade to plated:

  1. Mix marinade and coat fish - Whisk olive oil, lemon juice, minced garlic, chopped herbs, salt, and pepper in a bowl, then pour over swordfish steaks in a shallow dish or zip-top bag. Marinate 15-30 minutes at room temperature, flipping once halfway through.

  2. Preheat and oil grill - Heat outdoor grill or grill pan to medium-high (about 400°F). Brush grill grates with oil using a paper towel soaked in olive oil and held with tongs. Pat fish dry with paper towels to remove excess marinade.

  3. Grill first side - Place swordfish steaks on hot, oiled grill grates. Cook 3-5 minutes without moving until grill marks form and fish releases easily from grates when you lift an edge with a spatula.

  4. Flip and finish cooking - Use a wide spatula to flip steaks gently in one smooth motion. Grill second side 3-5 minutes until internal temperature reaches 130-135°F at the thickest part when checked with an instant-read thermometer.

  5. Rest before serving - Transfer grilled swordfish to a clean plate and tent loosely with foil. Let rest 5 minutes so juices redistribute and temperature evens out before slicing or serving whole.

Watch Out
Don't press down on the fish while grilling - it squeezes out moisture and makes the texture dry instead of tender

What to Serve With It

Grilled fish needs something to round out the plate, whether that's a quick vegetable side or a starch that soaks up any leftover marinade. The homemade works best when it hits the table at the same time as the main - for a version that comes together quickly, simple homemade recipe adds tangy richness without extra cook time.

Side DishPrepWhy It WorksHow to Serve
Grilled asparagusEasyCooks in same time as fish, smoky char complements grilled flavorToss with olive oil, season with salt, grill alongside swordfish
Mixed greens saladEasyRefreshing contrast to rich fish, adds brightness and crunchDress lightly with lemon vinaigrette, serve immediately
Garlic roasted potatoesMediumHearty starch balances lighter fish, absorbs flavors wellRoast at 425°F for 30 minutes while fish marinates, serve hot
Quinoa pilafEasyNutty flavor pairs with herbs in marinade, gluten-free optionCook quinoa in broth, fluff before serving alongside fish
Charred lemon wedgesEasyAdds fresh zing and visual appeal, intensifies citrus flavorHalve lemons, grill cut-side down 2-3 minutes, serve for squeezing

Three ways to serve it:

  • Mediterranean style: Serve over couscous with cucumber-tomato salad and a drizzle of garlic-caper butter
  • Low-carb plate: Pair with grilled vegetables and a side of lemon herb vinaigrette for dipping
  • Casual dinner: Slice grilled swordfish and serve on toasted bread with arugula and chimichurri

For more complete meal ideas that work with grilled fish, check savory scones meal planning ideas for side dish combinations.

Shortcut
Double the marinade recipe and save half for drizzling over the finished fish - the fresh herbs and lemon brighten every bite

Store and Reheat

Grilled swordfish keeps 3-4 days in the fridge but tastes best eaten within two days while the texture stays firm. Reheating at low temperatures prevents the fish from drying out further - we keep a batch ready for nights like this to turn into quick grain bowls or salads.

MethodTimeBest For
🍳 Stovetop3-4 minutes low heatQuick warming without drying, small portions
🔥 Oven10 min at 275°F (135°C)Even reheating maintaining moisture, larger portions
📦 Microwave1-2 minutes low powerSingle servings, watch closely to avoid toughening

For best results when storing:

  • Cool completely before refrigerating - hot fish creates condensation that makes the texture soggy instead of firm
  • Store in shallow airtight containers - limits air exposure and prevents fish from absorbing fridge odors
  • Separate leftover marinade - store extra marinade in a small jar for drizzling over reheated fish
  • Freeze up to 2 months - wrap individual portions tightly in plastic wrap, then foil before freezing
  • Add moisture when reheating - brush with olive oil or butter before warming to restore some of the original texture

Frequently Asked Questions

How long to cook grilled swordfish steaks at medium-high heat?

Cook swordfish steaks 3-5 minutes per side at 400°F for a total of 6-10 minutes. The exact time depends on steak thickness - check internal temperature at the thickest part and pull at 130-135°F.

Can I make grilled swordfish steaks ahead of time?

You can marinate swordfish up to 30 minutes ahead, but grill just before serving for best texture. Leftover grilled swordfish stores 3-4 days in the fridge and reheats well for grain bowls or salads.

What goes well with grilled swordfish steaks?

Serve grilled swordfish with grilled asparagus, garlic roasted potatoes, quinoa pilaf, or a simple mixed greens salad. Charred lemon wedges add brightness, and garlic-caper butter or chimichurri work as finishing sauces.

How do I know when grilled swordfish steaks are done?

Swordfish is done when it reaches 130-135°F internal temperature at the thickest part. The flesh should be opaque throughout and flake easily when tested with a fork but still feel moist, not dry.

Can I use frozen swordfish steaks for grilling?

Thaw frozen swordfish steaks completely in the fridge overnight before grilling. Pat them very dry with paper towels since frozen fish releases more moisture - excess water prevents proper browning and grill marks.

Grilled Swordfish Steaks served on a plate

Grilled Swordfish Steaks

No ratings yet
Grilled swordfish steaks are prepared quickly with a citrus-herb marinade that keeps the fish moist and flavorful. The dense texture holds up well to high heat grilling, delivering firm, flaky results in under 10 minutes of cook time.
Print Recipe Pin Recipe
Prep Time 15 minutes mins
Cook Time 10 minutes mins
Total Time 25 minutes mins
Servings: 4 servings
Course: Main Dish
Cuisine: American
Ingredients Method Notes

Ingredients
  

  • 4 swordfish steaks about 1 inch thick
  • 0.25 cup olive oil use regular olive oil for grilling
  • 2 tablespoons lemon juice fresh or bottled
  • 3 cloves garlic minced finely
  • 2 tablespoons fresh herbs parsley, thyme, or oregano, chopped
  • 1 teaspoon salt kosher salt preferred
  • 0.5 teaspoon black pepper freshly cracked preferred
  • 0.25 teaspoon chili flakes optional
  • 2 tablespoons butter optional, for finishing

Method
 

  1. Mix olive oil, lemon juice, minced garlic, chopped fresh herbs, salt, black pepper, and optional chili flakes in a bowl. Pour marinade over swordfish steaks in a shallow dish or zip-top bag. Marinate at room temperature for 15-30 minutes, flipping once halfway through.
    0.25 cup olive oil, 2 tablespoons lemon juice, 3 cloves garlic, 2 tablespoons fresh herbs, 1 teaspoon salt, 0.5 teaspoon black pepper, 0.25 teaspoon chili flakes, 4 swordfish steaks
  2. Preheat grill or grill pan to medium-high heat (about 400°F). Oil grill grates with a paper towel soaked in olive oil held by tongs. Pat swordfish steaks dry with paper towels to remove excess marinade.
    0.25 cup olive oil, 4 swordfish steaks
  3. Place swordfish steaks on the hot, oiled grill grates. Cook for 3-5 minutes without moving until grill marks form and the fish easily releases from the grates when lifted with a spatula.
    4 swordfish steaks
  4. Flip steaks gently using a wide spatula in one smooth motion. Grill the second side for another 3-5 minutes until the internal temperature reaches 130-135°F at the thickest part using an instant-read thermometer.
    4 swordfish steaks
  5. Transfer grilled swordfish to a clean plate and tent loosely with foil. Let rest for 5 minutes to allow juices to redistribute and temperature to even out before serving.
    4 swordfish steaks

Notes

  • Pat the fish dry before grilling to ensure proper browning instead of steaming.
  • Do not press down on the fish while grilling to retain moisture and avoid drying out the texture.
  • Use an instant-read thermometer to pull fish at 130°F so it reaches 135°F while resting.

Tried this recipe?

Let us know how it was!

What Is Watercress? [Taste, Uses & More]

April 3, 2026

Watercress does something in a dish that mild salad greens simply can't: it pushes back. That sharp, peppery bite cuts through rich dressings, holds its own against smoked fish, and adds a fresh, water-forward edge that makes everything around it taste more awake.

What Is Watercress

It's one of the few leafy greens that functions equally well as a main salad base, a blending herb, or a last-minute soup addition - each role relying on the same assertive character.

QUICK SUMMARY

Watercress is an aquatic brassica with a strong peppery, slightly bitter flavor. It works raw in salads, wilted into soups, or blended into sauces. Use it fresh - it softens fast and loses its sharp edge within minutes of heat. Shelf life is short: 3-7 days refrigerated.

🌿Type: Aquatic leafy green, Brassicaceae family, grown in flowing water
👅Flavor: Peppery, sharp, bright, with a mild bitter finish
🍽️Best Uses: Raw salads, watercress soup, herb sauces, sandwich layering
🛒Buy It: Look for bright green, crisp bunches with no yellowing or sliminess
📅Shelf Life: 3-7 days refrigerated; use quickly for best peppery flavor

What Is Watercress?

Watercress (Nasturtium officinale) is a semiaquatic brassica native to Europe and Western Asia, where it grows naturally in slow-moving streams and spring-fed beds.

Today it's cultivated in irrigated channels across the UK, the US, and parts of Asia, arriving at markets as loose, delicate bunches with small round leaves and thin hollow stems.

It belongs to the same family as mustard greens and broccoli, which explains its sharp bite. Unlike most leafy greens, watercress requires flowing, oxygenated water to thrive - a growing condition that also concentrates its peppery compounds and distinctive freshness.

You may see it labeled Nasturtium officinale at specialty markets, though it's unrelated to the garden nasturtium flower. "Garden cress" is a common mislabel; those are two distinct plants with different flavors and growing habits.

  • 🌱 Wild form - grows in streams; slightly more intense and bitter than farmed
  • 🌱 Cultivated bunches - the standard market form; milder, with uniform leaf size
  • 🌱 Micro watercress - young shoots used as a garnish; sharp flavor in a small package

What Does Watercress Taste Like?

watercress - What Is Watercress

Watercress hits with a sharp, peppery front note that lands somewhere between arugula and mustard greens - but with a cleaner, more water-forward sharpness than either. There's a brightness to it that feels almost mineral, followed by a mild bitter finish that lingers briefly.

Sensory SnapshotStrong Intensity
👅 Flavor
pepperysharpbrightlightly bitter
✋ Texture
crisp stemtender leaf
👃 Aroma
green-pepperyfresh aquatic

Heat changes everything. A quick sauté of 30-60 seconds softens the pepper and brings out a gentler, slightly sweet green note. Prolonged heat kills it - overcook watercress and you're left with a muddy, flat bitterness and limp texture worth avoiding.

Raw is where the full character shows. The stems have a satisfying snap; the leaves give way instantly.

Golden Rule
Add watercress to hot soups off the heat. Residual warmth wilts it just enough without destroying its peppery sharpness.

How to Use Watercress

Raw applications are the most straightforward entry point. Toss the leaves into green salads where you want pepper without the dryness of arugula, or pile them onto open-faced sandwiches with smoked salmon and a squeeze of lemon. The combination of watercress and smoked fish is a classic British pairing for good reason - the bright bite cuts through the fat cleanly.

For cooked uses, watercress and potato soup is the benchmark dish. Blend cooked potato with briefly wilted watercress for a soup that holds its green color and pepper.

A quick sauté with garlic and butter makes a simple warm side - keep it under a minute and pull it immediately.

Blended applications work well too. Watercress can replace or supplement basil in a herb sauce; if you're interested in other ways to rethink pesto sauce, the peppery depth of watercress is worth experimenting with.

How Watercress Is Used
MethodBest ForTip
🥗 RawSalads, sandwiches, grain bowlsUse leaves and thin stems; discard thick base stems
🍳 Quick SautéWarm side dish with garlic, butter30-60 seconds max; high heat, then off
🥣 Blended/SoupWatercress and potato soup, vinaigrettesAdd at end of cooking; blend immediately
🌿 Herb SauceChimichurri-style sauces, watercress pestoBalance with lemon juice and olive oil to soften bitterness

Watercress pairs tightly with lemon, goat cheese, poached eggs, walnuts, and new potatoes. It also holds up in arugula salad formats - substitute half the arugula for watercress to add a wetter, brighter pepper note.

Avoid pairing it with heavy cream sauces or large amounts of sweet ripe fruit, both of which flatten its character.

Try It In
🍋Air Fryer Lemon Pepper Chicken TendersServe over a bed of raw watercress — the heat wilts it lightly against the crisp chicken→🥔Air Fryer Garlic Parmesan Potato WedgesPair alongside a watercress salad — potato and watercress is a classic combination→🍯Air Fryer Honey Garlic Potato WedgesThe sweet-savory glaze contrasts well with watercress's peppery sharpness→

How to Buy and Store Watercress

At the market, bright green and crisp are the two signals that matter most. The round leaves should be unblemished, and the hollow stems should snap rather than bend.

Smell the bunch before buying - fresh watercress is distinctly peppery and green; a sour or fermented smell means it's past its window.

Watch Out
Yellowing leaves or a slimy base - even on just one stem - spread fast. Remove affected stems immediately and use the rest that day.

Storage is straightforward. Keep the bunch unwashed in a perforated bag or wrapped loosely in a damp paper towel, then place it in the crisper drawer.

Washing early introduces moisture that accelerates decay. For a detailed breakdown of how long it lasts under different conditions, see our guide to watercress storage guide.

  • Refrigerator shelf life - 3-7 days; use toward the shorter end if bought from a warm display
  • Freezer - not recommended for raw leaves; texture collapses completely on thaw
  • Trimming - cut only dirty root ends; unnecessary trimming exposes stems to moisture loss

Starting With Watercress

If you've cooked with spinach alternatives or mild salad greens and want more assertiveness, watercress is the next step. Start raw - a handful tossed into your next grain bowl or sandwich costs nothing and immediately shows you what the flavor does.

From there, try the potato soup. It's the format that shows watercress at its most controlled: the starch softens the pepper, the blending locks in color, and the result is a bowl that demonstrates exactly why this green has a place in serious cooking.

Anyone looking for a watercress substitute should know that arugula comes closest raw, but nothing fully replicates the aquatic sharpness.

Frequently Asked Questions

Is watercress a cruciferous vegetable?

Yes. Watercress belongs to the Brassicaceae family, which includes broccoli, cabbage, and mustard greens. Its peppery sharpness comes from the same glucosinolate compounds found across cruciferous vegetables.

Can you eat watercress raw?

Yes - raw is actually the best format for full flavor. The peppery sharpness and crisp texture are most pronounced uncooked. Rinse thoroughly, especially if using wild-harvested stems.

What is the difference between garden cress and watercress?

They're separate plants. Garden cress (*Lepidium sativum*) grows in soil and has a finer, more delicate texture. Watercress (*Nasturtium officinale*) is aquatic, has rounder leaves, and carries a more pronounced peppery bite.

How do you store watercress so it lasts longer?

Keep it unwashed, wrapped in a damp paper towel, in the crisper drawer. Don't seal it airtight - watercress needs slight airflow. Used within 3-4 days, it stays crisp and sharp.

Does watercress have health benefits?

It's notably high in vitamin K, vitamin C, and beta-carotene relative to its calorie count. However, the high vitamin K content can interact with anticoagulant medications - check with a healthcare provider if that applies to you.

Char Siu Chinese BBQ Pork

April 3, 2026

Sticky, caramelized pork with a glossy red glaze that clings to every slice. That's what happens when you marinate pork shoulder overnight and roast it at high heat with hoisin and honey.

Char Siu Chinese BBQ Pork served on a plate

The marinade does the heavy lifting. Chinese five-spice and soy sauce penetrate deep into the meat while you sleep, so you're just monitoring the oven and basting a few times.

This works for weeknight dinners when you want something that feels special without last-minute stress. The pork reheats beautifully, so it doubles as meal prep for fried rice or noodle bowls later in the week.

QUICK SUMMARY

Char Siu is Chinese BBQ pork with a sticky sweet-savory glaze and deep mahogany color. The key is marinating pork shoulder overnight so the five-spice and hoisin flavors soak through, then roasting at 375°F while basting every 10 minutes. You get tender meat with caramelized edges - no grill required.

⏰Time Reality: 15 minutes active work, but you need 8-12 hours marinating time overnight
🔥First Move: Mix the marinade and coat pork pieces completely before refrigerating
⚠️Watch Out: Glaze burns above 400°F - apply honey in the last 10 minutes only

Table of Contents

Toggle
  • Why This Recipe Works
  • What You'll Need
    • Ingredient Details
  • Ingredient Swaps
  • What to Serve With It
  • Store and Reheat
  • Frequently Asked Questions
  • Char Siu Chinese BBQ Pork
    • Method 
    • Tried this recipe?

Why This Recipe Works

The high sugar content in the marinade caramelizes during roasting, creating that signature glossy finish. For a different take on roasted pork with bold seasonings, a tender pork side dish uses citrus and garlic instead of five-spice for a tangy contrast.

Quick Reference
⏱️
Prep Time
15 min active + 8-12 h marinating
🔥
Cook Time
40-50 min
⏰
Total Time
9-12 hours (mostly inactive)
🍽️
Servings
4-6 servings
📊
Difficulty
Medium
🏷️
Category
Main Dish
💡
Quick Tip
Marinate overnight for best flavor and tenderness
🎯
Best For
Weeknight | Meal prep | Entertaining

Five things that make this work:

  • Pork shoulder stays juicy - The fat marbling melts during roasting, keeping the meat tender even at 145°F internal temp
  • Overnight marinating tenderizes - Soy sauce and rice wine break down proteins while five-spice infuses every fiber
  • Basting builds the glaze - Brushing marinade every 10 minutes creates multiple caramelized layers instead of one burnt coating
  • High heat sets the crust - Roasting at 375°F renders fat and caramelizes sugars without steaming the meat
  • Resting redistributes juices - Ten minutes off heat lets the pork reabsorb moisture so it doesn't run out when you slice
Quick Tip
Leave 1-2 inches between pork pieces on the rack so air circulates and edges crisp instead of steam

What You'll Need

Ingredients for Char Siu Chinese BBQ Pork

The marinade ingredients are shelf-stable, so you can keep them stocked for spontaneous marinating. If you want crunch alongside the pork, a classic rolls dish adds texture without competing for oven space.

🍗
Protein
  • 2 lbs pork shoulder or pork butt, cut into 2-inch strips
🥢
Marinade Base
  • 3 tablespoons hoisin sauce
  • 2 tablespoons soy sauce
  • 2 tablespoons honey or maltose
  • 2 tablespoons rice wine or Shaoxing wine
🧄
Aromatics
  • 3 cloves garlic, minced
  • 1 tablespoon fresh ginger, grated
🌶️
Seasonings
  • 1½ teaspoons Chinese five-spice powder
  • 1 tablespoon sugar
  • 1 tablespoon red fermented tofu or ½ teaspoon red food coloring

Ingredient Details

  • Pork shoulder or butt
    Fat content keeps meat tender during high-heat roasting - don't trim it
  • Hoisin sauce
    Provides sweet-savory base and helps glaze stick to meat surface
  • Chinese five-spice powder
    Star anise, cloves, cinnamon, Sichuan pepper, fennel - the signature Char Siu aroma
  • Honey or maltose
    Maltose creates a shinier glaze but honey caramelizes faster and works fine
  • Red fermented tofu
    Adds umami depth and natural red color - food coloring is purely cosmetic
  • Rice wine or Shaoxing wine
    Alcohol tenderizes meat and balances sweetness in the marinade
  • Garlic and ginger
    Fresh versions have more punch than powdered, but both work in a pinch

Ingredient Swaps

The marinade is flexible, but swapping the pork cut changes cook time and texture. When you're ready to build the full plate, quick slaw dish adds crunch and acidity to cut through the glaze's sweetness.

Four swaps that work:

  • Soy sauce → tamari - Same umami and salt, gluten-free, no timing changes
  • Honey → brown sugar or maple syrup - Slightly thinner glaze but caramelizes the same way
  • Pork shoulder → pork loin - Leaner cut cooks 10-15 minutes faster but dries out more easily
  • Red fermented tofu → paprika or red food coloring - Loses the funky umami depth but keeps the red color

Pork Shoulder

Works for: Long marinating, forgiving timing, meal prep batches

Skip if: You need dinner in under 2 hours total

Pork Loin

Works for: Faster cook time, leaner option, easier slicing

Skip if: You want fall-apart tender texture or maximum glaze adhesion

Red Fermented Tofu

Works for: Traditional flavor, natural color, extra umami depth

Skip if: You can't find it at Asian markets or prefer simpler ingredient lists

Instructions

Plan for 45 minutes in the oven plus basting breaks every 10 minutes. If you're craving something fresh to balance the richness, a fresh salad side dish provides brightness without heavy prep.

  1. Mix the marinade. Whisk hoisin sauce, soy sauce, honey, rice wine, garlic, ginger, five-spice powder, sugar, and red fermented tofu in a bowl until smooth. Coat pork strips completely and refrigerate 8-12 hours, flipping once halfway through.

  2. Set up for roasting. Preheat oven to 375°F. Place a wire rack on a foil-lined baking sheet. Arrange marinated pork strips on the rack with 1-2 inches between pieces so air circulates. Reserve leftover marinade for basting.

  3. Roast and baste. Roast 20 minutes, then brush pork with reserved marinade. Flip pieces and baste again. Continue roasting another 20-30 minutes, basting every 10 minutes, until internal temp hits 145°F on a meat thermometer.

  4. Apply honey glaze and broil. Brush pork with extra honey during the last 5 minutes of roasting. Turn broiler to high and broil 2 minutes, watching closely, until edges char and glaze bubbles. Rotate pan if needed for even caramelization.

  5. Rest and slice. Remove pork from oven and rest 10 minutes on the rack. Slice thinly across the grain for maximum tenderness. Serve warm with any pan drippings spooned over the top.

Watch Out
Sugar burns fast under the broiler - stay at the oven and pull the pan the moment you see dark spots forming

What to Serve With It

Char Siu needs sides that cut through the glaze's sweetness and add textural contrast. For more structured planning around this style of roasted pork, cuban mojo pork meal planning ideas offers a framework for balancing rich mains with refreshing sides.

Side Dish Prep Why It Works How to Serve
Steamed Jasmine Rice Easy Neutral base soaks up glaze and balances sweetness Serve hot in bowls with sliced pork on top
Stir-Fried Bok Choy Easy Leafy greens add crunch and slight bitterness Toss with garlic and soy sauce, serve alongside
Quick Cucumber Salad Easy Refreshing acidity cuts through rich glaze Dress with rice vinegar and sesame oil
Egg Fried Rice Medium Adds protein and creates a complete one-bowl meal Mix diced Char Siu into fried rice at the end
Chinese Broccoli (Gai Lan) Medium Slightly bitter greens balance sweet pork Blanch and drizzle with oyster sauce

Three ways to serve it:

  • Char Siu bao buns - Stuff sliced pork into steamed buns with pickled vegetables and cilantro for handheld portions
  • Rice bowls - Layer jasmine rice, sliced pork, stir-fried greens, and a drizzle of sweet chili sauce
  • Noodle topping - Toss sliced Char Siu with sesame noodles and cucumber ribbons for a cold noodle salad
Best Pick
Jasmine rice is the safest side - it never competes with the glaze and always soaks up the drippings

Store and Reheat

Char Siu reheats better than most roasted meats because the glaze protects the surface from drying out. If you need a quick finishing touch before serving leftovers, an easy homemade side like tangy dressing perks up day-old pork without additional cooking.

Method Time Best For
🍳 Stovetop 3-5 min over medium heat Single servings, quick reheating, preserving glaze shine
🔥 Oven 10-15 min at 325°F Larger portions, retaining juiciness, meal prep batches
📦 Microwave 1-2 min on medium power Fastest option, lunch at work, single portions

For best results when storing:

  • Refrigerate in shallow containers - Spread slices in a single layer so they cool fast and stay moist
  • Store glaze separately - Keep leftover marinade in a jar to brush on during reheating
  • Freeze in portions - Wrap 4-6 slices per bag so you can thaw only what you need
  • Reheat gently - Low heat prevents the glaze from burning and the meat from toughening
  • Add moisture when microwaving - Drape a damp paper towel over the pork to steam it slightly and prevent drying

Frequently Asked Questions

How long to cook Char Siu pork at 375°F?

Roast for 40-50 minutes total, flipping and basting every 10 minutes. Use a meat thermometer to confirm it hits 145°F internal temp before pulling it from the oven.

Can I make Char Siu pork ahead and store it?

Yes - refrigerate cooked pork up to 4 days or freeze up to 3 months. Reheat gently in the oven or stovetop to preserve the glaze and texture.

What internal temperature indicates Char Siu is done?

Pull it at 145°F for juicy, safe pork. Let it rest 10 minutes so the temp climbs to 150°F while juices redistribute.

How to fix Char Siu pork that is dry or bland?

Slice thin and serve with extra hoisin or sweet chili sauce to add moisture. For bland flavor, brush with soy sauce mixed with honey and broil 1-2 minutes to caramelize.

What are good sides to serve with Char Siu pork?

Steamed jasmine rice, stir-fried bok choy, quick cucumber salad, or egg fried rice all balance the sweet glaze. Chinese broccoli with oyster sauce adds a traditional bitter contrast.

Char Siu Chinese BBQ Pork served on a plate

Char Siu Chinese BBQ Pork

No ratings yet
Char Siu is a sticky, caramelized Chinese BBQ pork with a glossy red glaze achieved by marinating pork shoulder overnight in a flavorful five-spice and hoisin marinade. Roasting at 375°F while basting every 10 minutes creates tender meat with caramelized edges, perfect for weeknight dinners or meal prep.
Print Recipe Pin Recipe
Prep Time 15 minutes mins
Cook Time 45 minutes mins
Total Time 1 hour hr
Servings: 6 servings
Course: Dinner, Main Dish
Cuisine: Chinese
Ingredients Equipment Method Notes

Ingredients
  

  • 2 lbs pork shoulder cut into 2-inch strips
  • 3 tablespoons hoisin sauce
  • 2 tablespoons soy sauce
  • 2 tablespoons honey plus extra for glaze at end
  • 2 tablespoons rice wine or Shaoxing wine
  • 3 cloves garlic minced
  • 1 tablespoon fresh ginger grated
  • 1.5 teaspoons Chinese five-spice powder
  • 1 tablespoon sugar
  • 1 tablespoon red fermented tofu or 0.5 teaspoon red food coloring

Equipment

  • Wire rack Used for roasting pork to allow air circulation
  • Baking sheet lined with foil Placed under wire rack to catch drippings
  • Meat thermometer To check pork internal temperature reaches 145°F

Method
 

  1. Whisk hoisin sauce, soy sauce, honey, rice wine, garlic, ginger, five-spice powder, sugar, and red fermented tofu in a bowl until smooth. Coat pork strips completely with marinade. Refrigerate covered for 8-12 hours, flipping once halfway through.
    3 tablespoons hoisin sauce, 2 tablespoons soy sauce, 2 tablespoons honey, 2 tablespoons rice wine, 3 cloves garlic, 1 tablespoon fresh ginger, 1.5 teaspoons Chinese five-spice powder, 1 tablespoon sugar, 1 tablespoon red fermented tofu, 2 lbs pork shoulder
  2. Preheat oven to 375°F. Place a wire rack on a foil-lined baking sheet. Arrange marinated pork strips on the rack with 1-2 inches between pieces to allow air circulation. Reserve leftover marinade for basting.
    2 lbs pork shoulder
  3. Roast pork for 20 minutes. Brush pork with reserved marinade, then flip pieces and baste again. Continue roasting an additional 20-30 minutes, basting every 10 minutes, until internal temperature reaches 145°F.
    2 lbs pork shoulder
  4. Brush pork with extra honey during the last 5 minutes of roasting. Then turn broiler to high and broil for 2 minutes, watching closely to avoid burning. Rotate pan if needed for even caramelization and a glossy charred glaze.
    2 tablespoons honey
  5. Remove pork from oven and let rest on the rack for 10 minutes. Slice thinly across the grain for maximum tenderness. Serve warm with pan drippings spooned over the top.
    2 lbs pork shoulder

Notes

  • Marinate pork overnight for best flavor and tenderness.
  • Leave 1-2 inches between pork pieces on the rack to prevent steaming and promote crisp edges.
  • Watch closely when broiling as sugar burns quickly; remove immediately when dark spots form.

Tried this recipe?

Let us know how it was!

Cuban Mojo Pork

April 3, 2026

Tender pork shoulder with garlic, citrus, and oregano that shreds apart with a fork. That's what happens when you marinate the meat for four hours and roast it low and slow at 325°F.

Cuban Mojo Pork served on a plate

The oven does most of the work. You score the surface, coat it with mojo marinade, and let time handle the rest.

This works for meal prep when you need protein that lasts all week or casual entertaining when you want something that looks impressive without constant attention.

QUICK SUMMARY

Cuban mojo pork uses citrus-garlic marinade on pork shoulder that roasts at 325°F for three hours until fork-tender. The low temperature and marbling keep the meat juicy while developing caramelized edges. Perfect for weeknight dinners, meal prep, or casual gatherings when you need hands-off protein.

⏱️Timeline: Marinate 4 hours minimum, roast 3 hours at moderate heat
🔪Method shortcut: Score pork surface before marinating for faster flavor penetration
⚠️Watch out: High heat dries pork and burns garlic-keep oven at 325°F

Why This Recipe Works

Slow roasting at 325°F breaks down collagen in pork shoulder while preserving moisture from fat marbling. For a different take on tender slow-cooked pork, simple homemade pork uses a similar low-and-slow approach with Hawaiian seasonings.

Quick Reference
⏱️
Prep Time
15 min plus 4 hours marinating
🔥
Cook Time
3 hours
⏰
Total Time
3 hours 15 min (plus marinating time)
🍽️
Servings
6-8 servings
📊
Difficulty
Medium
🏷️
Category
Main Dish
💡
Quick Tip
Marinate 4 hours for best flavor penetration
🎯
Best For
Weeknight | Meal prep | Casual entertaining

What makes this work:

  • Fat marbling in pork shoulder stays juicy - Dark meat with intramuscular fat doesn't dry out during long roasting like leaner cuts would
  • Fresh citrus marinade penetrates scored meat - Sour orange juice acids tenderize surface proteins while garlic and oregano infuse deep flavor
  • Moderate oven temperature caramelizes without burning - 325°F renders fat slowly and browns exterior without scorching garlic or spices
  • Internal temperature of 195°F creates shreddable texture - Collagen breaks down completely at this temperature, making meat fork-tender
  • Resting 15 minutes redistributes moisture - Juices settle back into meat fibers instead of running out when you slice or shred
Quick Tip
Crush garlic cloves with the flat side of your knife before mincing-it releases more oils and distributes flavor evenly throughout the marinade.

What You'll Need

Ingredients for Cuban Mojo Pork

Pork shoulder from the meat counter works better than pre-packaged because you can see the fat marbling. A good easy dip side can make or break the plate, and we keep a batch ready for nights like this-it adds contrast without extra cooking time.

🍗
Protein
  • 3-4 lb pork shoulder (pork butt)
🧄
Aromatics
  • 8 cloves fresh garlic
  • 1 medium onion
  • 2 bay leaves
🥢
Marinade
  • ¾ cup fresh sour orange juice
  • ⅓ cup olive oil
  • 2 tablespoon fresh oregano
  • 1 tablespoon cumin
🌶️
Seasoning
  • 2 teaspoon salt
  • 1 teaspoon black pepper

Ingredient Details

  • Pork shoulder
    Look for pieces with visible white fat marbling throughout-this keeps meat moist during long roasting and creates better texture when shredded.
  • Fresh sour orange juice
    Find sour oranges at Latin markets or substitute with half regular orange juice and half lime juice-the acidity tenderizes meat and brightens flavor.
  • Fresh garlic
    Use fresh cloves instead of jarred or powdered-fresh releases more oils and creates the signature pungent mojo flavor that defines this dish.
  • Fresh oregano
    Fresh oregano has brighter flavor than dried, but if using dried, use 1 teaspoon for every tablespoon of fresh called for in the recipe.
  • Olive oil
    Oil helps marinade cling to meat surface and promotes browning during roasting-don't skip it even though the pork has plenty of its own fat.
  • Cumin
    Whole cumin seeds toasted and ground give better flavor than pre-ground, but either works-cumin adds essential earthy warmth to balance citrus acidity.
  • Bay leaves
    Add subtle herbal complexity but won't ruin the dish if you skip them-tuck them into marinade and remove before shredding the finished pork.

Ingredient Swaps

No sour oranges at your store means mixing regular orange juice with lime juice in equal parts. The result tastes slightly sweeter but still works-the lime provides needed acidity and the orange adds citrus brightness.

Four swaps that work:

  • No sour orange juice - Mix ½ cup orange juice with ¼ cup lime juice for similar tangy citrus flavor with slightly sweeter notes
  • Fresh oregano unavailable - Use 1 teaspoon dried oregano for every tablespoon fresh, adding it at the same time to the marinade
  • Olive oil alternative - Substitute avocado oil for neutral flavor and high heat tolerance without changing the marinade's texture or function
  • Pork shoulder sold out - Use pork butt instead, which has similar fat content and marbling but slightly different shape that roasts the same way

Chicken Thighs Instead

Works for: Faster cooking (90 minutes at 375°F), similar dark meat texture, absorbs marinade well

Skip if: You want authentic Cuban flavor, need meal prep protein that lasts all week, prefer shreddable texture

Garlic Powder Swap

Works for: Convenience, consistent flavor distribution, longer shelf life than fresh cloves

Skip if: You want authentic mojo flavor, need the pungent garlic punch, prefer texture from minced fresh garlic

Instructions

You need three hours of roasting time but only 15 minutes of active work. Rich mains need something to cut through, and simple salad recipe does exactly that, and we keep a batch ready for nights like this-it adds freshness without stealing attention from the pork.

  1. Score and marinate the pork. Cut ¼-inch deep slashes across the pork shoulder in a crosshatch pattern, spacing cuts about 1 inch apart. Mix sour orange juice, olive oil, minced garlic, oregano, cumin, salt, and pepper in a bowl. Pour marinade over scored pork in a zip-top bag or covered dish and refrigerate 4 hours or overnight, flipping halfway through.

  2. Prep for roasting. Remove pork from fridge 30 minutes before cooking to bring to room temperature. Pat surface dry with paper towels-excess moisture prevents browning. Place pork fat-side up in a roasting pan with sliced onion and bay leaves underneath.

  3. Roast low and slow. Set oven to 325°F and roast uncovered for 2.5-3 hours until internal temperature reaches 195°F when tested with a meat thermometer in the thickest part. Baste with pan juices every 45 minutes to keep surface moist and build flavor.

  4. Check for doneness. Pork is ready when a fork slides in easily and meat pulls apart without resistance. If exterior browns too quickly before reaching temperature, tent loosely with foil and continue roasting until internal temp hits 195°F.

  5. Rest and shred. Transfer pork to a cutting board and tent with foil for 15 minutes-this redistributes juices throughout the meat. Shred with two forks or chop into chunks, discarding excess fat. Toss shredded pork with reserved pan juices or extra mojo sauce before serving.

Shortcut
Skip the 4-hour marinate if you're short on time-rub the marinade on scored pork and roast immediately, then finish with extra sauce spooned over shredded meat at serving.

What to Serve With It

Cuban mojo pork needs sides that soak up the citrus-garlic pan juices without competing with the pork's bold flavor. For more ideas on building a complete plate, pork wellington meal planning ideas covers similar concepts for matching rich proteins with balanced accompaniments.

Side Dish Prep Why It Works How to Serve
White rice Easy Neutral base absorbs mojo sauce and pan juices without adding competing flavors Spoon rice onto plate, pile pork on top, drizzle extra sauce over everything
Black beans Easy Classic Cuban pairing adds earthy protein and creamy texture that balances citrus acidity Serve beans alongside rice or mixed together with chopped onion and cilantro on top
Fried plantains Medium Sweet caramelized exterior and soft interior contrast with tangy pork and garlic Slice ripe plantains diagonally, fry until golden, sprinkle with salt before plating
Simple green salad Easy Light, fresh greens cut through rich pork fat and provide crisp texture contrast Toss romaine or mixed greens with lime vinaigrette and serve on the side
Yuca con mojo Medium Traditional Cuban starch with similar mojo flavors reinforces citrus-garlic theme Boil yuca until tender, toss with extra mojo sauce, serve hot alongside pork

Three ways to serve it:

  • Build Cuban bowls - Layer rice, black beans, shredded pork, fried plantains, and chopped onion in wide bowls with extra mojo sauce drizzled on top
  • Make loaded sandwiches - Pile pork on Cuban bread with pickles, Swiss cheese, and mustard, then press in a hot skillet until bread crisps and cheese melts
  • Serve family-style - Put whole pork shoulder on a platter surrounded by rice, beans, and plantains so everyone builds their own plate
Best Pick
White rice and black beans make the most practical weeknight pairing-both cook while the pork roasts and need zero attention once you start them.

Store and Reheat

Shredded mojo pork holds up better than sliced because the smaller pieces absorb more sauce and stay moist during storage. Classic adds the contrast this plate needs, but timing matters, and simple homemade classic complements rich pork without requiring precise coordination between dishes.

Method Time Best For
🍳 Stovetop 5-7 minutes over medium-low heat Quick weeknight reheats when you want to add fresh sauce or crisp the edges slightly
📦 Microwave 2-3 minutes on medium power Single portions for lunch or when speed matters more than texture
🔥 Oven 15-20 minutes at 325°F Larger batches for meal prep or when reheating straight from fridge without drying out

For best results when storing:

  • Cool quickly in shallow containers - Spread hot pork in a single layer in wide, shallow containers so it cools to fridge temperature within 2 hours and prevents bacterial growth
  • Store with extra sauce - Reserve ½ cup pan juices or extra mojo sauce to toss with pork before refrigerating-this keeps meat moist and prevents drying
  • Reheat with added liquid - Add 2-3 tablespoons water, broth, or mojo sauce when reheating to restore moisture lost during storage
  • Freeze in portion sizes - Divide pork into 2-cup portions in freezer bags, press out air, freeze flat for faster thawing and easier storage
  • Thaw overnight in fridge - Move frozen pork to refrigerator 24 hours before needed for safest, most even thawing that maintains texture

Frequently Asked Questions

How long to cook Cuban mojo pork at 325°F?

Roast 3 pounds of pork shoulder for 2.5 to 3 hours at 325°F until internal temperature reaches 195°F in the thickest part. Larger 4-5 pound pieces need closer to 3.5 hours-use a meat thermometer instead of timing alone for accuracy.

Can I make Cuban mojo pork ahead and store it?

Yes, roast the pork up to 3 days ahead, shred it, and store in an airtight container with pan juices in the refrigerator. Reheat portions on the stovetop with a splash of extra sauce or in the oven at 325°F for 15-20 minutes until warmed through.

What goes well as side dishes with Cuban mojo pork?

White rice and black beans make the most traditional pairing and soak up the mojo sauce perfectly. Fried plantains, yuca con mojo, or a simple green salad with lime vinaigrette add texture contrast and cut through the rich pork fat.

How do I know when Cuban mojo pork is fully cooked and tender?

Insert a meat thermometer into the thickest part-it should read 195°F for shreddable texture. The pork is done when a fork slides in easily and meat pulls apart without resistance, even if it reaches temperature sooner than expected.

Can I use chicken or other meats instead of pork shoulder?

Chicken thighs work with the same marinade but need only 90 minutes at 375°F instead of 3 hours. The flavor won't be as authentic and the texture is different, but it's a faster option when you're short on time or prefer poultry.

Cuban Mojo Pork served on a plate

Cuban Mojo Pork

No ratings yet
Cuban Mojo Pork is a tender, slow-roasted pork shoulder marinated in a bright citrus-garlic sauce that infuses deep flavor and stays juicy thanks to fat marbling. Roasted at 325°F for three hours until fork-tender, this dish is perfect for meal prep, weeknight dinners, or casual entertaining.
Print Recipe Pin Recipe
Prep Time 15 minutes mins
Cook Time 3 hours hrs
Total Time 3 hours hrs 15 minutes mins
Servings: 6 servings
Course: Dinner, Main Dish
Cuisine: Cuban
Ingredients Method Notes

Ingredients
  

  • 3 lb pork shoulder with visible fat marbling
  • 8 cloves garlic minced
  • 1 medium onion sliced for roasting pan
  • 2 bay leaves tucked under pork for roasting
  • 0.75 cup sour orange juice fresh, or half orange juice and half lime juice
  • 0.33 cup olive oil
  • 2 tablespoon oregano fresh, minced
  • 1 tablespoon cumin
  • 2 teaspoon salt
  • 1 teaspoon black pepper

Method
 

  1. Cut ¼-inch deep slashes across the pork shoulder in a crosshatch pattern, spacing cuts about 1 inch apart. Mix sour orange juice, olive oil, minced garlic, oregano, cumin, salt, and pepper in a bowl. Pour marinade over scored pork in a zip-top bag or covered dish and refrigerate for at least 4 hours or overnight, flipping halfway through.
    3 lb pork shoulder, 8 cloves garlic, 0.75 cup sour orange juice, 0.33 cup olive oil, 2 tbsp oregano, 1 tbsp cumin, 2 tsp salt, 1 tsp black pepper
  2. Remove pork from the refrigerator 30 minutes before cooking to bring to room temperature. Pat surface dry with paper towels to prevent excess moisture and aid browning. Place pork fat-side up in a roasting pan with sliced onion and bay leaves underneath.
    3 lb pork shoulder, 1 medium onion, 2 bay leaves
  3. Preheat oven to 325°F. Roast pork uncovered for 2.5 to 3 hours until internal temperature reaches 195°F, basting with pan juices every 45 minutes to keep surface moist and build flavor.
    3 lb pork shoulder
  4. Pork is done when a fork slides in easily and meat pulls apart without resistance. If the exterior browns too quickly before reaching temperature, tent loosely with foil and continue roasting until internal temperature hits 195°F.
  5. Transfer pork to a cutting board, tent with foil, and let rest for 15 minutes to redistribute juices. Shred with two forks or chop into chunks, discarding excess fat. Toss shredded pork with reserved pan juices or extra mojo sauce before serving.
    3 lb pork shoulder

Notes

  • Marinate pork for at least 4 hours for best flavor penetration.
  • Keep oven temperature moderate at 325°F to avoid drying out pork or burning garlic.
  • Resting the meat for 15 minutes after roasting helps redistribute juices for moist, tender pork.

Tried this recipe?

Let us know how it was!

How Long Does Unsalted Butter Last? [Storage Guide]

April 3, 2026

Picking up a few sticks of unsalted butter for dairy recipes is routine, but knowing how long those sticks stay good is where most home cooks go wrong.

How Long Does Unsalted Butter Last In The Fridge

Unopened in the fridge, unsalted butter lasts 1-3 months; once opened, that window tightens to 2-4 weeks.

Without salt acting as a natural preservative, this butter oxidizes and picks up odors faster than its salted counterpart - and poor storage makes that happen even sooner.

QUICK SUMMARY

Unsalted butter lasts 2-4 weeks opened in the fridge, up to 3 months unopened, and up to 12 months frozen. Without salt's protective effect, it absorbs odors and turns rancid faster - airtight wrapping at every stage is non-negotiable.

🧊Fridge (opened): 2-4 weeks, tightly wrapped in airtight container
❄️Freezer: Up to 12 months with double-wrap and labeled bag
⚠️Key Rule: Keep away from onion, fish, or any strong-smelling fridge neighbors

How Long Does Unsalted Butter Last?

Shelf life depends on three factors: whether the package is open, where it's stored, and how well it's wrapped. Understanding how long butter keeps in different conditions helps you decide how much to buy at once without waste.

Unsalted Butter Shelf Life
MethodStateDurationNotes
🏠 PantryUnopened3-7 daysCool, dark spot only; no salt means faster spoilage at room temp
🧊 FridgeUnopened1-3 monthsBest quality within the first month; keep in original wrapper
🧊 FridgeOpened2-4 weeksOxidizes quickly once cut; wrap tightly and use airtight container
❄️ FreezerOpened6-12 monthsDouble-wrap to prevent freezer burn and odor pickup

The gap between salted and unsalted butter is real. Salt suppresses oxidation and microbial growth, so unsalted butter's pantry and fridge tolerance is genuinely shorter.

Just like heavy cream's shelf life drops sharply once opened, unsalted butter's clock accelerates the moment air hits the cut surface.

Golden Rule
Quality peaks in the first month of fridge storage, even if the butter remains technically safe for three. Use oldest sticks first and rotate stock when you restock.

How to Store Unsalted Butter

Where you store butter matters, but how you wrap it matters just as much. Unsalted butter has no salt barrier against odors - it will absorb whatever is nearby, from leftover fish to raw onion.

Fridge: Keep the stick in its original foil or wax wrapper, then place it inside a rigid airtight container or a resealable bag with the air pressed out. Avoid storing it in the fridge door, where warm cycles from opening and closing accelerate spoilage. Pantry: Only leave sealed, unopened sticks at cool room temperature for up to a week - and only for spreadability purposes, away from heat sources and direct sunlight. Counter: An open stick left out for more than a few hours in a warm kitchen is a spoilage risk; a butter bell filled with cold water is a safer option if you want soft butter on hand daily.

Reserve one stick in the fridge for everyday use and keep backup sticks wrapped in foil in the coldest part - typically the back of a middle shelf.

A note on odor neighbors: strong-smelling foods like garlic, onions, and cured fish are genuinely problematic for unsalted butter in ways they aren't for salted.

  • 📦 Original wrapper first - never remove foil before placing in a container; layered protection slows oxidation
  • 🌡️ Consistent cold - steady refrigerator temperature (below 40°F) matters more than any container upgrade
  • 🕐 One stick out at a time - limits how often backup sticks are exposed to air and warmth

Can You Freeze Unsalted Butter?

Freezing is the single best move for anyone who buys butter in bulk. Unsalted butter freezes well, retaining its quality for up to 12 months when properly wrapped - and the process is straightforward.

You can read more about butter in cooking to understand why fat structure matters when freezing dairy.

Watch Out
Freezing butter in just the original wrapper is a common mistake. Without an extra airtight layer, freezer burn and odor transfer will degrade flavor within weeks.
  1. Wrap tightly - keep the original wrapper on, then add a layer of parchment followed by a layer of foil
  2. Bag and seal - place wrapped portions in a labeled resealable freezer bag and press out all remaining air
  3. Flatten and stack - lay bags flat so they stack efficiently and freeze evenly throughout
  4. Label with date - cut into 1-2 tablespoon portions before freezing so you can thaw only what a recipe needs
  5. Thaw correctly - move to the fridge for 24 hours; for faster results, place a sealed bag in cold water for 30-60 minutes

Thawed butter may show slight graininess or watery separation - that's separated butterfat, not spoilage. Let it sit at room temperature for 15-30 minutes, then stir gently with a spatula to reincorporate.

It performs reliably in baking after this step.

Signs Unsalted Butter Has Gone Bad

Rancidity is the main threat, not mold. Oxidation affects the cut surfaces first, so always check there before assuming the whole block is fine.

Signs It's Gone Bad
👀
VisualDull yellow-to-brown patches on cut surfaces · Grayish streaks · Mold at wrapper edges
👃
SmellRancid or sharp sour odor · Metallic note · Loss of clean dairy scent
✋
TextureSlippery or slimy surface film · Excessive watery separation at cut face

If color, smell, or texture seems off, discard the butter - don't taste-test it. Rancid butter won't make you seriously ill, however it will ruin whatever you cook with it and the off-flavor doesn't bake out.

Practical Tips for Getting the Most From Unsalted Butter

Good storage habits extend from how you buy butter to how you use it.

If you run low and need a swap, unsalted butter stand-ins can cover most baking recipes, and a broader list of replacements for butter addresses cooking applications too.

  • 🧂 Skip buying salted for storage - if a recipe needs salt, add a pinch to softened unsalted butter rather than switching products
  • 📅 Rotate stock - move older sticks to the front of the fridge or freezer every time you add new ones
  • 🔪 Pre-portion before freezing - tablespoon-sized cuts thaw faster and reduce waste when a recipe calls for small amounts
  • 🥄 Stir thawed butter - gentle spatula work after thawing restores consistency for reliable baking results
Shortcut
Keep one fridge stick and freeze the rest in labeled portions. You'll always have fresh-tasting butter without committing a full block to daily wear and odor exposure.

Frequently Asked Questions

How long does unsalted butter last in the fridge once opened?

Opened unsalted butter lasts 2-4 weeks in the fridge. Wrap it tightly in its original foil and store it in an airtight container to slow oxidation and odor absorption.

Does unsalted butter go bad faster than salted butter?

Yes. Salt acts as a preservative, slowing oxidation and microbial growth. Unsalted butter has a shorter pantry window (3-7 days vs. up to 2 weeks) and a tighter fridge window once opened.

Can you bake with thawed frozen unsalted butter?

Yes, with one step: stir gently after thawing to reincorporate any separated butterfat. Well-wrapped frozen butter performs the same as fresh in most baking recipes once it's restored to even consistency.

How do I tell if unsalted butter is rancid?

Smell is the clearest indicator - rancid butter has a sharp, sour, or metallic odor instead of a clean dairy scent. Brownish patches on cut surfaces or a slimy film confirm it should be discarded.

Is it safe to leave unsalted butter on the counter overnight?

In a cool kitchen (below 70°F), a covered stick is generally fine for one night. However, without salt's protection, unsalted butter left uncovered or in a warm room degrades faster and should be refrigerated promptly.

What Is Ziti Pasta? Taste, Uses & Best Recipes

April 3, 2026

Ziti's real strength is structural - those smooth, hollow tubes hold chunky sauces, trap pockets of ricotta, and emerge from the oven with browned edges that no flat pasta can replicate.

What Is Ziti Pasta

While you might reach for a similar shape when making spicy sausage rigatoni skillet at home, ziti has a slightly softer profile that makes it the default choice for baked dishes.

Knowing how the shape works - and what it won't do - helps you use it well every time.

If you're working with dairy components, understanding cooking ricotta perfectly is just as important as picking the right pasta.

QUICK SUMMARY

Ziti are smooth, straight tube pasta made from durum wheat semolina. They have a mild, wheaty flavor and a firm al dente bite that holds up in baked casseroles and chunky sauces. Best known for baked ziti, they suit Italian-American comfort cooking.

🌾Flavor: Mild, wheaty, slightly nutty - neutral enough for bold sauces
🍝Best Use: Baked casseroles, chunky ragù, vodka sauce dishes
🛒Buy: Look for 100% durum wheat semolina, pale yellow, no cracks
📦Shelf Life: Dry: 1-2 years; fresh: 2-3 days refrigerated
⚠️Avoid: Light broths and delicate seafood sauces - tubes don't absorb thin liquids

What Is Ziti Pasta?

Ziti are medium-length, straight pasta tubes from the dried semolina family, originating in Southern Italy - particularly Campania and Sicily. Each piece runs about 2-3 cm long with smooth outer walls and open blunt ends on both sides.

That open-ended, hollow structure is the defining feature: sauce, cheese, and fat travel inside the tube during baking.

The name comes from the Italian word zito, meaning "bridegroom." Ziti were traditionally served at weddings in Southern Italian cooking, which is why the plural zite still appears on some Italian packaging.

In the United States, the shape became a cornerstone of Italian-American cooking, particularly in baked casseroles.

  • 🌾 Dried ziti - the standard form, made from durum wheat semolina, sold in most supermarkets
  • Ziti rigati - ridged ziti that grip sauce more aggressively on the exterior
  • Whole-wheat ziti - nuttier, denser, with more fiber than standard semolina versions
  • Fresh ziti - softer dough, shorter shelf life, less common outside specialty stores

Compared to other tube shapes, ziti sits between the smaller penne and the wider rigatoni in terms of diameter. The smooth walls set it apart from ridged alternatives and give baked dishes a cleaner, less textured surface.

What Does Ziti Pasta Taste Like?

ziti pasta - What Is Ziti Pasta

Ziti has a mild, wheaty flavor with a faint nuttiness from the durum wheat semolina. On its own, it's a neutral carrier - designed to let the sauce do the talking rather than compete with it.

That neutrality is a feature, not a flaw.

Sensory SnapshotMild Intensity
👅 Flavor
wheatyslightly nuttyneutral
✋ Texture
firm al dentechewy interior
👃 Aroma
subtle wheatneutral dried

Cooked to al dente, ziti has a firm bite and a slightly chewy interior that stays intact under heavy sauces and oven heat. Overcooked, it softens quickly and loses that resistance.

In baked dishes, the exterior develops a lightly glossy surface from rendered cheese and sauce, and the edges that touch the pan can caramelize slightly.

Compared to penne, ziti is milder and less assertive - penne's angled cuts and ridges catch more sauce on the surface.

Ziti's smooth walls and blunt ends mean the flavor exchange happens primarily inside the tube, which makes the eating experience slightly different even when both shapes use the same sauce.

How to Use Ziti Pasta

Ziti performs best when the dish involves heat, fat, and time.

Quick weeknight pasta with light olive oil or broth won't showcase the shape - it's built for dishes that cook in the oven or simmer in a thick sauce.

Roasted or baked dishes also benefit from the way mozzarella in grain dishes melts into hollow tubes, creating pockets of cheese throughout the bake.

How Ziti Is Used
MethodBest ForTip
🍳 Boil + BakeClassic baked ziti, layered casserolesParboil 2 minutes under al dente - oven finishes cooking
🥘 Boil + TossChunky ragù, vodka sauce, sausage saucesReserve pasta water to loosen thick sauces
🍳 Skillet FinishAdding crust and texture before bakingSear boiled ziti in a dry or lightly oiled skillet first
🥗 Chilled SaladCold pasta salads with vinaigrette or mayoUndercook by 1-2 minutes, rinse under cold water immediately

Ziti pairs naturally with tomato-based ragù, ricotta and mozzarella, Italian sausage, ground beef, roasted eggplant, and cream or vodka sauces.

It also works well with parmesan or pecorino stirred in after cooking.

For a change of pace, the approach used in penne alla vodka in grain dishes translates almost directly to ziti - the tube shape handles the creamy tomato sauce just as well.

Watch Out
Ziti won't absorb light broths or delicate seafood sauces - the tube stays hollow rather than soaking up thin liquids. Stick to sauces thick enough to coat the back of a spoon.

If you can't find ziti, a guide to replacements for ziti pasta covers the closest alternatives by shape and wall texture.

Try It In
🧀Cheesy Baked Ziti PastaThe benchmark recipe — layered sauce, ricotta, and mozzarella baked until browned→

How to Buy and Store Ziti Pasta

Look for dry ziti with a uniform pale yellow color and no visible cracks or broken tubes through the packaging. The ingredient label should read 100% durum wheat semolina - this signals the firm texture that holds up in baked dishes.

Avoid bags with excess breakage, which affects both cooking consistency and appearance in the finished dish.

Best Pick
100% durum wheat semolina ziti, pale yellow, no cracked tubes visible through the bag. Enriched varieties add iron and B vitamins with no textural trade-off.

Dry ziti stores easily. Keep unopened bags in a cool, dry pantry - original packaging works fine, or transfer to an airtight container once opened.

Fresh ziti needs refrigeration and should be used within 2-3 days. For long-term planning, the same principles behind how long wheat keeps apply here: moisture and heat are the main enemies.

  • Dry, unopened - up to 2 years in a cool pantry
  • Dry, opened - 1-2 years in an airtight container away from humidity
  • Fresh ziti - 2-3 days refrigerated, tightly wrapped

For cooked ziti, freezing ziti pasta extends its life significantly - baked dishes freeze especially well because the sauce protects the tubes during the freeze-thaw cycle.

Start With Baked Ziti

If you're new to this shape, baked ziti is the entry point - it shows exactly what smooth tubes do that other shapes don't. Parboil, layer with ricotta and tomato sauce, top with mozzarella, and bake until the edges brown.

From there, try a chunky ragù or a skillet finish for texture contrast. The shape rewards patience and heat.

Frequently Asked Questions

Is ziti the same as penne?

No. Both are tube pasta, however ziti has smooth walls, blunt ends, and a milder flavor, while penne has angled cuts and ridged walls that grip sauce on the exterior. They can substitute for each other, but the texture and sauce distribution differ.

How long do you cook ziti for al dente?

Most dry ziti reaches al dente in 8-10 minutes in well-salted boiling water. For baked dishes, pull it 2 minutes early - the oven finishes the cooking and prevents mushy results.

What sauce goes best with ziti?

Thick tomato-based sauces, chunky meat ragù, and vodka sauce work best. The tube structure holds these sauces inside each piece. Thin broths and delicate seafood sauces are poor matches - they don't cling or penetrate the hollow center.

Can you substitute ziti for penne in recipes?

Yes, in most recipes the swap is straightforward. Ziti's smooth walls mean slightly less sauce grip on the outside, however the hollow tube compensates by trapping sauce inside. Baked dishes and casseroles work especially well with either shape.

Does whole-wheat ziti cook differently than regular ziti?

It cooks slightly faster and softens more quickly past al dente. Whole-wheat ziti also has a nuttier, more assertive flavor that shows through mild sauces - pair it with robust tomato or meat sauces rather than cream-based ones.

Smothered Pork Chops

April 3, 2026

When you need a dinner that feels special but doesn't require much effort, bone-in pork chops with onion gravy deliver. One skillet does all the work from sear to simmer.

Smothered Pork Chops served on a plate

The gravy forms while the chops cook. You get caramelized onions and rich pan sauce without any multi-step prep or complicated technique.

This is what we make for weeknight meals when plain chicken feels tired but time is short. Works for family dinners or meal prep since it reheats better than most pork dishes.

QUICK SUMMARY

Smothered pork chops means bone-in chops seared then simmered in onion gravy until tender. The key is starting with bone-in chops and building the gravy in the same pan after searing. Make this when you want comfort food that reheats well for meal prep or weeknight dinners.

⏱️Time Reality: 35-40 minutes total with minimal active work
🔥Critical First Step: Pat chops dry before searing to get crispy golden crust
⚠️Watch Out: Cook to 145°F only or meat dries out-bone-in chops stay juicier than boneless

Why This Recipe Works

The bone keeps the meat juicy while the high-heat sear locks in flavor before the chops finish in gravy. Building the onion gravy in the same pan captures all the browned bits from searing, which is where most of the savory depth comes from. Most people skip pork, but it balances the meal. For a version that comes together quickly, this related pork recipe adds mushrooms and uses a similar technique.

Quick Reference
⏱️
Prep Time
10 min
🔥
Cook Time
25-30 min
⏰
Total Time
35-40 min
🍽️
Servings
4 servings
📊
Difficulty
Medium
🏷️
Category
Main Dish
💡
Quick Tip
Sear chops before simmering in gravy
🎯
Best For
Weeknight | Meal prep | Family dinner

What makes this work:

  • Pat chops dry with paper towel - removes surface moisture so you get a proper sear instead of steamed, gray meat
  • Sear on medium-high for 3-4 minutes per side - creates deep golden crust and prevents sticking when you flip
  • Caramelize onions slowly for 8-10 minutes - builds sweetness and creates the flavor base for the gravy
  • Deglaze pan after searing - scraping up browned bits adds depth to the sauce that plain broth can't match
  • Simmer covered to 145°F internal - finishing in gravy keeps chops tender while the sauce thickens around them
Quick Tip
Leave 1-inch gaps between chops in the pan. Crowding causes steaming instead of searing, and you lose the crispy crust.

What You'll Need

Ingredients for Smothered Pork Chops

Shopping for this means hitting the meat counter for bone-in chops and grabbing onions, flour, and broth. Pork adds the contrast this plate needs, but timing matters. For a version that comes together quickly, a similar dinner recipe swaps in mushrooms for added depth.

🍗
Meat
  • 4 bone-in pork chops (1-inch thick)
🧄
Aromatics
  • 2 medium onions (sliced)
  • 3 cloves garlic (minced)
🫙
Pantry
  • ⅓ cup all-purpose flour
  • 2 cups chicken broth
  • ½ cup milk or cream
  • 3 tablespoons butter
  • 2 tablespoons oil (vegetable or canola)
🌶️
Seasonings
  • Salt
  • Black pepper

Ingredient Details

  • Bone-in pork chops
    Choose chops at least 1-inch thick. Thinner cuts overcook before the gravy forms. The bone keeps the meat moist during braising.
  • Onions
    Yellow onions work best for sweetness. Slice them thin so they melt into the gravy instead of staying chunky.
  • Flour
    Use just enough to coat the chops lightly. Too much flour makes gummy gravy that tastes pasty instead of silky.
  • Chicken broth
    Low-sodium broth gives you control over salt levels. The gravy reduces as it cooks, concentrating the salt.
  • Butter
    Butter adds richness to the gravy and helps with browning. Use unsalted if your broth is already salted.
  • Milk or cream
    Heavy cream makes richer gravy. Whole milk works fine if you want lighter sauce. Stir it in at the end so it doesn't curdle.
  • Oil for searing
    Vegetable or canola oil handles high heat better than butter alone. The mix prevents burning while you get a good sear.

Ingredient Swaps

Four swaps that work:

  • All-purpose flour → gluten-free flour blend - maintains thickness but may need slightly more to reach same consistency
  • Butter → canola or vegetable oil - loses some richness but handles higher heat better for dairy-free cooking
  • Milk or cream → coconut milk or almond milk - creates thinner gravy with mild flavor shift, works for dairy-free diets
  • Bone-in pork chops → boneless pork chops - cooks faster but dries out easier, watch temp closely and reduce simmer time

Bone-In Chops

Works for: staying juicy, traditional texture, meal prep

Skip if: you need faster cooking or easier eating

Boneless Chops

Works for: quick weeknight cooking, feeding kids

Skip if: you want foolproof juicy results or richer gravy

Instructions

The full cook takes 35-40 minutes with about 10 minutes of hands-on work. Rich mains need something to cut through, and coleslaw does exactly that. For a version that comes together quickly, a bright tangy slaw pairs perfectly with the gravy.

  1. Pat the pork chops completely dry with paper towels. Season both sides with salt and black pepper, then coat lightly in flour and shake off excess. Heat oil in a cast iron skillet over medium-high heat until it shimmers.

  2. Sear chops for 3-4 minutes per side without moving them. You want a deep golden crust that releases easily from the pan. Remove chops to a plate when both sides are browned.

  3. Lower heat to medium-low and add butter to the same pan. Toss in sliced onions and cook for 8-10 minutes, stirring often, until they turn golden and soft. Add minced garlic and cook 1 minute more until it smells sharp.

  4. Pour in chicken broth and scrape up all the browned bits with a wooden spoon. Bring to a simmer, then nestle the seared chops back into the pan. Cover and simmer for 10-12 minutes until the internal temperature hits 145°F.

  5. Remove chops to a serving platter and tent with foil. Stir milk or cream into the gravy and simmer uncovered for 3-5 minutes until it thickens enough to coat the back of a spoon. Taste and adjust salt. Pour gravy over chops.

Golden Rule
Check internal temp with a meat thermometer instead of guessing. Pork is safe at 145°F with a slight pink center, and it stays juicier than overcooked gray meat.

What to Serve With It

You need sides that soak up gravy or cut through the richness. Coleslaw adds the contrast this plate needs, but timing matters. We keep a batch ready for nights like this - creamy homemade dressing recipe works as a dip or drizzle over greens.

Side Dish Prep Why It Works How to Serve
Mashed potatoes Easy Soaks up gravy, adds creamy contrast Make a well in the center, ladle gravy into it
Steamed green beans Easy Light crunch balances rich pork Toss with butter and garlic, serve alongside
Rice pilaf Easy Neutral base absorbs sauce Spoon gravy over rice on the plate
Buttered corn Easy Sweetness complements savory onions Serve warm in a separate bowl
Garden salad Easy Refreshing contrast to heavy main Dress lightly, serve on the side

Three ways to serve it:

  • For weeknight comfort: Pair with mashed potatoes and steamed green beans for a classic Southern-style plate
  • For lighter meals: Serve over rice pilaf with a crisp garden salad to balance the richness
  • For entertaining: Add garlic roasted potatoes, glazed carrots, and buttermilk biscuits for soaking up extra gravy

For more ideas on pairing pork mains with sides that work, check out pork and sauerkraut meal planning ideas for weeknight combinations.

Best Pick
Mashed potatoes win for gravy-soaking power. Make them while the chops simmer so everything finishes at the same time.

Store and Reheat

Store chops and gravy together in a shallow airtight container in the fridge for 3-4 days. The gravy keeps the meat moist during storage and reheating. Most people skip potato wedges, but it balances the meal. For a version that comes together quickly, simple potato wedges recipe pairs well with leftover pork.

Method Time Best For
🍳 Stovetop 5-7 min over low heat Even reheating of chops and gravy together
📦 Microwave 2-3 min, stirring gravy halfway Quick single servings but softens crust
🔥 Oven 15-20 min at 325°F covered Maintaining texture for multiple servings

For best results when storing:

  • Cool chops and gravy separately before combining - prevents condensation that makes the crust soggy
  • Store in shallow containers - helps everything cool faster and reheat more evenly
  • Freeze gravy and chops separately if meal prepping - thaw gravy first, then reheat chops in it
  • Add a splash of broth when reheating - thins gravy that thickened in the fridge
  • Cover tightly during oven reheating - prevents the edges from drying out while the center warms

Frequently Asked Questions

Can boneless pork chops be used for smothered pork chops?

Yes, but reduce simmer time to 6-8 minutes and watch the temp closely. Boneless chops cook faster and dry out easier than bone-in cuts, so pull them at exactly 145°F.

How should I store and reheat leftover smothered pork chops?

Store chops and gravy together in an airtight container in the fridge for 3-4 days. Reheat on the stovetop over low heat for 5-7 minutes, adding a splash of broth if the gravy thickened too much.

What internal temperature indicates pork chops are done?

Pull them at 145°F internal temperature. A slight pink center is safe and keeps the meat juicy instead of dry and gray.

How do I fix gravy that is too thin or lumpy?

For thin gravy, simmer uncovered for 3-5 minutes or whisk in a slurry of 1 tablespoon flour mixed with 2 tablespoons cold water. For lumps, strain the gravy through a fine-mesh sieve or whisk vigorously while reheating.

What side dishes pair best with smothered pork chops?

Mashed potatoes soak up the gravy best. Steamed green beans, rice pilaf, or a crisp garden salad balance the richness without competing with the main dish.

Smothered Pork Chops served on a plate

Smothered Pork Chops

No ratings yet
Smothered pork chops feature bone-in chops seared and simmered in a rich onion gravy for tender, juicy meat. This one-skillet recipe delivers comfort food with minimal effort, perfect for weeknight dinners or meal prep.
Print Recipe Pin Recipe
Prep Time 10 minutes mins
Cook Time 30 minutes mins
Total Time 40 minutes mins
Servings: 4 servings
Course: Dinner, Main Dish
Cuisine: American, Southern
Ingredients Equipment Method Notes

Ingredients
  

  • 4 pieces bone-in pork chops 1-inch thick
  • 2 medium onions sliced
  • 3 cloves garlic minced
  • 0.33 cup all-purpose flour for coating chops
  • 2 cups chicken broth low-sodium recommended
  • 0.5 cup milk or cream stirred in at end
  • 3 tablespoons butter unsalted preferred
  • 2 tablespoons oil vegetable or canola oil
  • salt to taste
  • black pepper to taste

Equipment

  • Cast iron skillet Used for searing chops and cooking onion gravy
  • Meat thermometer To check pork internal temperature
  • Wooden spoon For scraping browned bits and stirring gravy

Method
 

  1. Pat the pork chops completely dry with paper towels. Season both sides with salt and black pepper, then coat lightly in flour and shake off excess. Heat oil in a cast iron skillet over medium-high heat until it shimmers.
    4 pieces bone-in pork chops, 0.33 cup all-purpose flour, 2 tablespoons oil, salt, black pepper
  2. Sear chops for 3-4 minutes per side without moving them to create a deep golden crust that releases easily from the pan. Remove chops to a plate when both sides are browned.
    4 pieces bone-in pork chops
  3. Lower heat to medium-low and add butter to the same pan. Toss in sliced onions and cook for 8-10 minutes, stirring often, until they turn golden and soft. Add minced garlic and cook 1 minute more until fragrant.
    2 medium onions, 3 cloves garlic, 3 tablespoons butter
  4. Pour in chicken broth and scrape up all the browned bits with a wooden spoon. Bring to a simmer, then nestle the seared chops back into the pan. Cover and simmer for 10-12 minutes until the internal temperature reaches 145°F.
    4 pieces bone-in pork chops, 2 cups chicken broth
  5. Remove chops to a serving platter and tent with foil. Stir milk or cream into the gravy and simmer uncovered for 3-5 minutes until it thickens enough to coat the back of a spoon. Adjust salt to taste. Pour gravy over the chops and serve.
    4 pieces bone-in pork chops, 0.5 cup milk or cream, salt

Notes

  • Pat chops dry to ensure a crispy golden crust.
  • Sear chops without moving for 3-4 minutes per side to develop flavor.
  • Use a meat thermometer to reach 145°F internal temperature for juicy, tender pork.

Tried this recipe?

Let us know how it was!

What Is Turbinado Sugar? [Taste, Uses & More]

April 3, 2026

Sprinkle turbinado sugar over a pan of scones before they go in the oven, and something specific happens: those large amber crystals hold their shape through the heat, cracking under a fork into a satisfying crunch that brown sugar or white sugar simply won't deliver.

That textural job - plus a mild, toasty sweetness - is exactly why cooks keep a bag of it around alongside their other sugar freshness guide staples.

QUICK SUMMARY

Turbinado sugar is a partially refined raw cane sugar with large, amber crystals and a light molasses coating. It tastes like a milder version of light brown sugar - clean, toasty, and slightly caramel-forward - and works best where crystal texture matters.

🍬Flavor: Mild caramel, light molasses, clean sucrose sweetness
✋Texture: Coarse, crunchy crystals with a slightly tacky surface
🍽️Best Uses: Topping baked goods, coffee, glazes, simple syrups
📦Storage: Airtight container, cool dry pantry; lasts indefinitely when dry
🔄Substitute: Demerara sugar is the closest swap; light brown sugar works in a pinch

What Is Turbinado Sugar?

Turbinado sugar is a raw cane sugar produced by spinning partially refined sugarcane juice in a turbine - that spinning process is where the name comes from. The crystals retain a thin film of natural molasses, which gives them their characteristic amber color and faint caramel note.

It's sometimes labeled "Sugar in the Raw," a trademarked brand name that many people use generically. You'll also see it misidentified as demerara sugar, though the two are technically different products made by different refining processes.

Both come from sugarcane grown in Caribbean and tropical regions, and both fall into the broader category of raw cane sugar. Understanding the distinction matters if you're looking for demerara sugar swaps or trying to match a specific recipe texture.

  • Crystal size - Large and irregular, significantly coarser than granulated white sugar
  • Color - Uniform light amber; avoid bags with dark clumps, which signal moisture damage
  • Molasses content - Very thin coating; far less molasses than dark brown sugar or molasses replacements would suggest
  • Refinement level - Partially refined, meaning more cane character than white sugar but less than true raw sugar

What Does Turbinado Sugar Taste Like?

turbinado sugar - What Is Turbinado Sugar

Turbinado tastes like sucrose with edges. The baseline is clean sweetness, but a mild caramel warmth and faint molasses note layer over it - enough to notice, not enough to dominate.

It reads closer to light brown sugar than to dark brown sugar, without the moisture and intensity that makes dark brown sugar assertive in baked goods.

White sugar tastes flat by comparison; turbinado has a toasty, almost nutty quality that registers especially well in hot liquids like coffee or tea.

Sensory SnapshotModerate Intensity
👅 Flavor
mild caramellight molassesbrown-sugar warmthclean sweet
✋ Texture
coarsecrunchyslightly tacky
👃 Aroma
toasty canefaint brown sugar

With heat, the crystals caramelize quickly and develop a deeper, nuttier sweetness. That behavior makes turbinado a reliable finishing sugar - a spoonful dissolved into warm oatmeal or stirred into a hot cocktail syrup expresses its character better than it does in a cold application.

How to Use Turbinado Sugar

Texture is turbinado's primary argument. Its large crystals don't dissolve on contact, which makes it the right choice any time a crunch is part of the plan.

The most common application is as a pre-bake topping: scatter it over muffin batter, scone dough, or quick bread loaves and the crystals bake into a glassy, crunchy crust.

It works the same way pressed into pork tenderloin or chicken skin before roasting - the crystals caramelize into a lacquered glaze without turning sticky.

Golden Rule
Use turbinado as a finishing sugar first. Swap it into batter only when you want visible crystal pockets and a slightly less sweet result than white sugar provides.

For beverages, turbinado dissolves cleanly in hot liquids. It pairs particularly well with rum and bourbon-based cocktail syrups, where its light molasses note adds a complementary depth.

Stir it into café drinks, granola mixes, or fruit crisps where its warmth echoes cinnamon, oats, and dark fruit like figs or plums.

How Turbinado Sugar Is Used
MethodBest ForTip
✨ FinishingMuffin tops, scones, crème brûlée, fruit crispsApply just before baking; crystals hold shape in oven heat
🍳 GlazingPork or poultry skin, roasted vegetablesPat onto surface before high-heat roasting for caramelization
🥄 DissolvingSimple syrups, coffee, oatmeal, porridgeUse warm or hot liquid; turbinado dissolves slower than white sugar
🍪 Baking InCookies, granola, quick breadsExpect slightly less spread and visible crystal pockets in finished bake

One pairing to avoid: delicate meringues. The coarse crystals can disrupt the smooth foam structure before they dissolve, leaving a grainy result.

In that situation, reach for brown sugar alternatives that dissolve more reliably.

Try It In
🌰Cinnamon Sugar Roasted NutsCrystal crunch and caramel warmth shine in a roasted coating→☕Iced Brown Sugar Oat Milk LatteTurbinado dissolves into the syrup for a toasty, molasses-edged sweetness→🧁Cinnamon Sugar Donut MuffinsSprinkled on top before baking for that signature crunchy crown→

How to Buy and Store Turbinado Sugar

Look for a sealed bag with uniform amber crystals - glossy, dry to slightly tacky, with no dark clumps. Clumping or a heavy, stale molasses smell signals age or moisture damage; pass on that bag.

Watch Out
Turbinado absorbs odors easily. Store it away from spices, coffee, and onions - a loose lid will let neighboring pantry smells into the crystals within days.

Transfer to an airtight container once opened and keep it in a cool, dry pantry away from sunlight. Humidity is the main enemy: it fuses crystals into hard chunks and dulls their texture.

On shelf life, turbinado lasts indefinitely when stored dry, but crystal quality peaks within two to three years. For a deeper look at how different sugar types compare over time, the turbinado sugar storage guide guide covers the specifics.

Start With the Topping

If turbinado is new to you, start on the outside of something baked. Scatter it over muffin batter or a quick bread before it goes in the oven, and you'll immediately understand why it earns a separate spot in the pantry from white or brown sugar.

Once that click happens, dissolving it into a cocktail syrup or pressing it onto a pork loin feels like a natural next step. For situations where you need to swap it out, turbinado sugar replacements and the closely related demerara sugar are worth knowing.

Frequently Asked Questions

Is turbinado sugar the same as demerara?

No. Both are raw cane sugars with amber crystals, but demerara crystals are slightly harder and drier, while turbinado crystals are a touch stickier with a thinner molasses film. They're close enough to swap in most recipes.

Can turbinado sugar be used in baking instead of white sugar?

Yes, with caveats. It dissolves more slowly and adds a faint molasses flavor, so expect subtle color and taste differences. Recipes relying on precise crystal dissolution - like meringues or certain custards - may not work as well.

How do you dissolve turbinado sugar quickly?

Use hot liquid and stir actively. For simple syrups, combine it with equal parts boiling water over low heat; the coarse crystals dissolve fully in about three to four minutes.

Is turbinado sugar healthier than white sugar?

Not meaningfully. It contains trace minerals like calcium and potassium from the cane, but amounts are nutritionally negligible. Calorie count and glycemic impact are essentially identical to white granulated sugar.

Does turbinado sugar go bad?

It doesn't spoil in the traditional sense, but moisture exposure causes the crystals to clump and lose their crunch. Stored airtight in a dry pantry, it remains usable indefinitely - though peak texture holds best within two to three years.

Braised Lamb Shanks

April 3, 2026

When you need a show-stopping dinner that works for meal prep or a cozy weekend at home, braised lamb shanks deliver. One pot, slow-roasted heat, and enough rich sauce to make polenta or mashed potatoes taste like they came from a restaurant.

Braised Lamb Shanks served on a plate

The Dutch oven does all the heavy lifting. Sear the meat, build the braising liquid, then let the oven work for three hours while you handle other tasks.

Perfect for entertaining or Sunday batch cooking when you want something that looks impressive but doesn't chain you to the stove.

QUICK SUMMARY

Braised lamb shanks use slow oven heat and red wine to turn tough cuts fork-tender. Searing builds flavor, then 2.5-3 hours at 325°F breaks down connective tissue without drying the meat. The braising liquid becomes the sauce, so maintaining liquid level matters more than constant checking.

⏱️Time Reality: 3 hours total, but only 20 minutes active work
🔥Critical First Step: Sear shanks 4-5 minutes per side before braising
⚠️Watch Out: Skipping the sear makes bland meat-brown crust = flavor base

Table of Contents

Toggle
  • Why This Recipe Works
  • What You'll Need
    • Ingredient Details
  • Ingredient Swaps
  • What to Serve With It
  • Store and Reheat
  • Frequently Asked Questions
  • Braised Lamb Shanks
    • Method 
    • Tried this recipe?

Why This Recipe Works

Rich mains need something to cut through, and spinach does exactly that. For a version that comes together quickly, this quick spinach dish adds the bitter element you need without overpowering the lamb.

Quick Reference
⏱️
Prep Time
20 min
🔥
Cook Time
2.5-3 hrs
⏰
Total Time
3 hrs
🍽️
Servings
4 servings
📊
Difficulty
Medium
🏷️
Category
Main Dish
💡
Quick Tip
Brown shanks before slow braise
🎯
Best For
Weeknight, Meal prep, Entertaining

What makes this method work:

  • Searing on all sides creates a caramelized crust that adds depth the braising liquid can't replicate on its own
  • Red wine and beef broth together provide acidity and body that tenderizes connective tissue while building sauce flavor
  • Braising at 325°F keeps the simmer gentle so meat stays moist instead of seizing up from high heat
  • Fresh rosemary and thyme release oils slowly during the long cook without turning bitter like dried herbs can
  • Resting the finished shanks for 10 minutes lets juices redistribute so the first cut doesn't leak moisture onto the plate
Quick Tip
Keep braising liquid halfway up the shanks throughout cooking-add broth if it drops below that line

What You'll Need

Ingredients for Braised Lamb Shanks

A good garlic bread can make or break the plate. We keep a batch ready for nights like this - soft garlic bread recipe soaks up every bit of that rich braising liquid without turning soggy.

🍖
Lamb
  • 4 lamb shanks (meaty, uniform size)
🧄
Aromatics
  • 1 large onion (chopped)
  • 4 cloves garlic (minced)
  • 2 carrots (1-inch chunks)
  • 2 celery stalks (1-inch chunks)
🥢
Braising Liquid
  • 1½ cups red wine
  • 2 cups beef or chicken broth
  • 2 tablespoons tomato paste
🌿
Herbs & Oil
  • 3 sprigs fresh rosemary
  • 4 sprigs fresh thyme
  • 2 tablespoons olive oil
  • Salt and black pepper

Ingredient Details

  • Lamb shanks
    Pick shanks with even thickness so they cook at the same rate-mismatched sizes mean some dry out while others stay tough
  • Red wine
    Full-bodied reds like Cabernet or Merlot add tannins that tenderize meat-avoid sweet wines that make sauce syrupy
  • Beef or chicken broth
    Low-sodium broth lets you control salt levels since the liquid reduces and concentrates during braising
  • Fresh herbs (rosemary, thyme)
    Fresh holds up better than dried during long cooking-dried herbs turn bitter after 90 minutes of heat
  • Tomato paste
    Sauté the paste for 1 minute before adding liquid to remove raw taste and deepen the color
  • Olive oil
    Use regular olive oil, not extra-virgin-high heat for searing burns delicate EVOO and wastes money
  • Vegetables (onion, carrots, celery)
    Cut into 1-inch chunks so they hold shape after 3 hours-smaller pieces disintegrate into mush

Ingredient Swaps

Most people skip salad, but it balances the meal. For a version that comes together quickly, light refreshing greens cut through the richness without competing for plate space.

Four swaps that work:

  • Red wine → grape juice + 2 tablespoons vinegar - Less depth, more sweetness, but maintains acidity for tenderizing (budget-friendly)
  • Beef broth → vegetable broth - Lighter flavor, still provides braising liquid (dairy-free, gluten-free option)
  • Fresh herbs → 1 tablespoon dried herbs total - Use one-third the amount, less aromatic but functional (pantry swap)
  • Tomato paste → ½ cup crushed tomatoes - Thinner sauce, less concentrated flavor but still adds body (method swap)

Lamb Shanks

Works for: Even cooking, classic presentation, individual portions

Skip if: You can't find uniform sizes or prefer boneless cuts

Bone-In Leg of Lamb

Works for: Feeding larger groups, budget-friendly alternative

Skip if: You don't want to add 30-45 minutes to cook time

Beef Shanks

Works for: Similar texture, easier to find in some regions

Skip if: You want lamb's distinct flavor or shorter cook time

Instructions

The coleslaw works best when it hits the table at the same time as the main. We keep a batch ready for nights like this - something crunchy and fresh adds the contrast you need without extra pots on the stove.

Step-by-step:

  1. Sear the shanks: Heat 2 tablespoons olive oil in a Dutch oven over medium-high heat until shimmering. Pat shanks dry, season with salt and pepper, then sear 4-5 minutes per side until deep brown. Remove and set aside.
  2. Build the base: Lower heat to medium, add onion, carrots, celery to the same pot. Cook 5 minutes, stirring occasionally, until softened. Add garlic and tomato paste, stir constantly for 1 minute until paste darkens.
  3. Deglaze and braise: Pour in red wine, scrape up browned bits with a wooden spoon. Add broth, rosemary, thyme, then return shanks to pot. Liquid should reach halfway up the meat-add more broth if needed.
  4. Oven braise: Cover pot with lid, transfer to 325°F oven. Braise 2.5-3 hours, checking liquid level at 90 minutes. Shanks are done when meat pulls away from bone with a fork and internal temp hits 190°F.
  5. Rest and serve: Remove pot from oven, let shanks rest covered for 10 minutes. Skim fat from surface if desired, then serve shanks with sauce spooned over top.
Golden Rule
Don't skip the rest-cutting into shanks immediately releases juices that should stay in the meat

What to Serve With It

Salad adds the contrast this plate needs, but timing matters. For more ideas on building the full plate, savory chicken dish ideas walks through sides that work without competing with rich mains.

Side Dish Prep Why It Works How to Serve
Mashed Potatoes Easy Creamy base soaks up rich braising liquid without competing for flavor Mound potatoes on plate, nestle shank on top, spoon sauce over both
Polenta Easy Smooth texture balances tender meat, slight sweetness cuts richness Spread polenta on plate, place shank beside it, drizzle sauce across both
Roasted Root Vegetables Medium Caramelized edges add texture contrast, natural sweetness complements savory lamb Arrange vegetables around shank, use sauce as connecting element
Braised Greens Easy Bitter element balances fat and sauce, wilted texture matches tender meat Pile greens on side of plate, let braising liquid mingle with lamb sauce
Crusty Bread Easy Soaks up every bit of sauce, adds textural contrast to soft meat Serve warm slices on the side for dipping and mopping

Three ways to serve it:

  • Mediterranean style: Pair with polenta, braised greens, and lemon wedges for brightness
  • French bistro: Serve with mashed potatoes, glazed carrots, and crusty bread for soaking
  • Moroccan variation: Add cumin and coriander to braising liquid, serve over couscous with mint chimichurri
Best Pick
Mashed potatoes or polenta make the best base-they catch sauce without turning soggy like rice can

Store and Reheat

Braised dishes improve overnight as flavors meld and deepen. Lamb shanks store well because the sauce protects the meat from drying out, making them ideal for meal prep or entertaining ahead.

Method Time Best For
🍳 Stovetop 10-15 min Even reheating with sauce, retains tender texture without drying
🔥 Oven 20 min at 300°F Larger portions, preserves moisture when covered with foil
📦 Microwave 3-5 min at 50% power Single servings only-use low power to prevent tough, rubbery meat

For best results when storing:

  • Cool shanks completely before refrigerating to prevent condensation that dilutes sauce and creates ice crystals in freezer
  • Store in shallow airtight containers with enough sauce to cover meat-exposed surfaces dry out and toughen
  • Refrigerate up to 4 days or freeze up to 3 months for meal prep batches
  • Reheat gently with added liquid if sauce has thickened too much-a splash of broth restores consistency
  • Add fresh herbs after reheating for brightness that fades during storage

Frequently Asked Questions

Can I make braised lamb shanks ahead and reheat?

Yes-braise up to 2 days ahead, cool completely, then refrigerate in braising liquid. Reheat gently on stovetop or in 300°F oven until warmed through, about 20 minutes.

How long should lamb shanks braise at 325°F?

Braise 2.5-3 hours at 325°F until fork-tender and internal temp hits 190°F. Check liquid level at 90 minutes and add broth if it drops below halfway up the shanks.

What are effective signs lamb shanks are done?

Meat pulls away from bone easily with a fork, no resistance when pierced, and internal temp reaches 190°F. The shank should look glossy with caramelized exterior intact.

How do I fix meat that's still tough after cooking?

Return shanks to pot with braising liquid, cover, and continue braising at 325°F for another 30-45 minutes. Check every 15 minutes until fork-tender-collagen needs more time to break down.

What are good side dishes for braised lamb shanks?

Mashed potatoes, polenta, or crusty bread soak up sauce best. Add roasted root vegetables or braised greens for contrast without competing flavors.

Braised Lamb Shanks served on a plate

Braised Lamb Shanks

No ratings yet
Braised lamb shanks are seared to create a caramelized crust then slow-roasted in red wine and broth until tender, with a rich sauce perfect for pairing with polenta or mashed potatoes. The Dutch oven method keeps the meat moist and flavorful while you handle other tasks. Resting the shanks before serving locks in the juices for a restaurant-quality dinner.
Print Recipe Pin Recipe
Prep Time 20 minutes mins
Cook Time 3 hours hrs
Total Time 3 hours hrs 20 minutes mins
Servings: 4 servings
Course: Dinner, Main Dish
Cuisine: Mediterranean
Ingredients Equipment Method Notes

Ingredients
  

  • 4 pieces lamb shanks meaty, uniform size
  • 1 large onion chopped
  • 4 cloves garlic minced
  • 2 pieces carrots 1-inch chunks
  • 2 stalks celery 1-inch chunks
  • 1.5 cups red wine full-bodied like Cabernet or Merlot
  • 2 cups beef broth or chicken broth, low sodium recommended
  • 2 tablespoons tomato paste sautéed 1 minute before adding liquid
  • 3 sprigs fresh rosemary
  • 4 sprigs fresh thyme
  • 2 tablespoons olive oil regular olive oil for searing
  • salt to season lamb shanks
  • black pepper to season lamb shanks

Equipment

  • Dutch oven Used for searing and braising lamb shanks in the oven
  • Wooden spoon For scraping browned bits and stirring

Method
 

  1. Heat 2 tablespoons olive oil in a Dutch oven over medium-high heat until shimmering. Pat lamb shanks dry, season with salt and black pepper, then sear for 4-5 minutes per side until deeply browned. Remove shanks and set aside.
    2 tablespoons olive oil, 4 pieces lamb shanks, salt, black pepper
  2. Reduce heat to medium. Add chopped onion, carrots, and celery to the same pot. Cook for 5 minutes, stirring occasionally, until softened. Add minced garlic and tomato paste; stir constantly for 1 minute until paste darkens and raw flavor cooks out.
    1 large onion, 2 pieces carrots, 2 stalks celery, 4 cloves garlic, 2 tablespoons tomato paste
  3. Pour in red wine and scrape up the browned bits from the bottom with a wooden spoon. Add broth, fresh rosemary, and thyme, then return shanks to the pot. Ensure liquid reaches halfway up the meat; add more broth if necessary.
    1.5 cups red wine, 2 cups beef broth, 3 sprigs fresh rosemary, 4 sprigs fresh thyme, 4 pieces lamb shanks
  4. Cover the Dutch oven with the lid and transfer to a preheated oven at 325°F. Braise for 2.5 to 3 hours, checking liquid level at 90 minutes and adding broth if it drops below halfway. Shanks are done when meat pulls away from bone easily and internal temperature reaches 190°F.
    4 pieces lamb shanks
  5. Remove the pot from the oven and let the shanks rest, covered, for 10 minutes to redistribute juices. Skim excess fat from the surface if desired. Serve the shanks with sauce spooned over the top.

Notes

  • Always sear lamb shanks thoroughly to build a flavorful crust that enhances the sauce.
  • Maintain liquid level halfway up the shanks during braising to keep meat moist.
  • Let shanks rest before serving to retain their juices and tenderness.

Tried this recipe?

Let us know how it was!

What Is White American Cheese? [Taste, Uses & More]

April 3, 2026

Pulling a warm slice of white American cheese off a cheeseburger reveals everything you need to know about it - the way it stretches in one glossy, unbroken sheet, clinging evenly to the beef without greasing the bun.

What Is White American Cheese

That clean, faintly buttery melt is the result of careful engineering, and it's why this cheese holds its ground against bolder alternatives to cheddar cheese in applications where texture matters as much as flavor.

No other cheese melts quite the same way. The emulsifiers built into processed American cheese keep the fat and protein from separating, giving you that uniform, silky coverage every time.

QUICK SUMMARY

White American cheese is a mild, emulsified processed cheese with a buttery, lightly salty flavor and an exceptionally smooth melt. It's the go-to slice for cheeseburgers, grilled cheese, and creamy sauces where consistent texture is non-negotiable.

🧀Type: Processed American-style melting cheese, pale and uniform
👅Flavor: Mild lactic tang, buttery, slightly salty, clean dairy sweetness
🍔Best Uses: Cheeseburgers, grilled cheese, mac and cheese, cheese sauces
❄️Storage: Refrigerate tightly wrapped; opened slices last 2-3 weeks
🏷️Also Known As: American cheese (white), white American, white American processed cheese

What Is White American Cheese?

White American cheese is a processed cheese product made by blending natural cheeses - typically cheddar and Colby-style varieties - with emulsifying salts and pasteurized milk.

The result is a pale, smooth, uniform block or slice with no rind and no aging required.

Its origins sit squarely in the American processed cheese tradition, which took off in the early twentieth century as a shelf-stable, consistent alternative to natural cheese wheels.

Unlike aged cheddar or Colby, white American skips the maturation process entirely, which is precisely what keeps the flavor mild and the texture predictable.

You'll find it sold as individual pre-wrapped slices, deli-counter blocks cut to order, or in resealable packages.

The "white" designation simply means no annatto dye was added - the composition is otherwise identical to yellow American.

If you're already familiar with using colby jack cheese for creaminess in cooked dishes, white American delivers a similar result with an even softer, more uniform finish.

  • 🏷️ Other names - white American, American cheese slice, white American processed cheese
  • 🧪 Key ingredients - cheddar/Colby blend, emulsifying salts, pasteurized milk
  • 🎨 Color note - pale ivory; no annatto coloring used
  • 📦 Forms available - pre-wrapped slices, deli block, resealable pack

What Does White American Cheese Taste Like?

white american cheese - What Is White American Cheese

The flavor is quiet, which is the point. Mild lactic tang anchors the profile, supported by a gentle butteriness and a low-level saltiness that doesn't overpower anything around it.

Cold from the fridge, you get a clean dairy sweetness that sits closer to Colby than sharp cheddar - soft and non-acidic. Heat changes the experience considerably.

Melted, the cheese becomes richer and creamier, and the buttery note amplifies without turning greasy. There's a barely-there nutty background aroma that disappears entirely once it hits a hot pan.

Sensory SnapshotMild Intensity
👅 Flavor
butterylactic tangslightly saltydairy sweet
✋ Texture
smooth coldsilky melted
👃 Aroma
mild dairyfaint nuttiness

What it doesn't do: develop sharpness, bite, or complexity. That's a feature, not a flaw - mild flavor means it layers under other ingredients without competing.

How to Use White American Cheese

White American cheese earns its place through one reliable capability: even, glossy, non-oily melting. The emulsifiers hold fat and protein together under heat, so you never get a greasy puddle or a broken sauce.

For diner-style cheeseburgers, lay a slice directly on the patty during the last minute of cooking and tent a lid over the pan. The steam finishes the melt in seconds.

A solid starting point for that technique is making air fryer grilled cheese at home - the same two-slice method applies to a burger build with minor adjustments.

Golden Rule
Always melt white American over low-to-medium heat. High heat doesn't make it melt faster - it makes it rubbery.

Macaroni and cheese is where this cheese quietly outperforms natural options.

Stir slices or cubed block into a warm cream base off the heat, and the sauce stays smooth without any starch slurry.

The same logic applies to nacho cheese dip and pub-style queso.

For a weeknight application that shows off that smooth sauce behavior, a dish like skillet cheeseburger pasta uses the melt to bind the whole dish together.

Breakfast sandwiches are another natural home. White American doesn't weep oil onto the egg the way sharper cheeses sometimes do, and its mild flavor stays in the background while the egg and meat lead.

How White American Cheese Is Used
MethodBest ForTip
🥗 Cold/SlicedSandwiches, cold-cut boards, wrapsLet slices come to room temp for easier peel separation
🍳 Pan MeltGrilled cheese, cheeseburgers, omeletsAdd slice in the final 60 seconds; cover pan to trap steam
🥣 Sauce MeltMac and cheese, nacho dip, quesoAdd off direct heat into warm liquid; stir gently
🔥 Oven/CasseroleBaked pasta, layered casserolesLow oven (325-350°F) keeps the melt even, not oily

It pairs cleanly with burger beef, soft white bread, pickles, caramelized onions, and sharp mustard. Light lagers and cola both cut the mild fat without overwhelming the cheese.

Avoid pairing it with very spicy chiles if you want the pepper heat front-and-center - white American's creaminess will blunt the burn.

Try It In
🧀Cheddar Cheese StrawsWhite American's smooth melt keeps the texture crisp without separation→🍳Egg and Cheese Breakfast SandwichThe go-to slice for a clean, non-oily melt on a hot egg→

How to Buy and Store White American Cheese

At the deli counter, ask for white American by name - some counters stock both yellow and white, and they aren't always labeled identically.

Look for a pale ivory color with no dry or chalky edges, and a surface that looks uniform rather than sweaty or wet.

Watch Out
Excess liquid pooling in a pre-packaged bag signals moisture loss from temperature fluctuation - avoid those packs.

Vacuum-sealed deli packs offer the longest refrigerator life. Once opened, wrap slices tightly in wax paper or parchment and keep them in an airtight container - loose exposure dries edges fast and causes odor pickup from other fridge contents.

Catching spoilage early is similar to reading milk spoilage signs: off smell, slick surface, and discoloration are the clear tells.

Unopened, the cheese keeps for several weeks to months depending on packaging. Opened, plan to use it within 2-3 weeks.

For longer storage, read up on freezing white american cheese - it's possible, though texture softens slightly after thawing.

Where White American Cheese Fits Best

Start here if you need a melt that won't break, separate, or overpower.

White American handles the jobs where texture is the job - cheeseburgers, grilled cheese, smooth cream sauces - without requiring any technique adjustments.

If the flavor profile feels too neutral for a recipe, consider swapping out white american cheese for something with more edge.

However, for reliable, no-fuss melting in everyday cooking, nothing in its category is more consistent.

Frequently Asked Questions

Is white American cheese real cheese?

Technically, it's a processed cheese product, not a natural cheese. It starts with real cheddar and Colby-type cheeses, then adds emulsifying salts and pasteurized milk during processing. The FDA classifies it as "pasteurized process American cheese."

Does white American cheese melt better than cheddar?

Yes, for most melting applications. Emulsifying salts prevent fat separation, so it melts smoothly without breaking or turning greasy. Sharp cheddar can split under direct heat, especially in sauces without added starch.

What is the difference between white and yellow American cheese?

Color only - yellow American gets its hue from annatto, a natural plant-based dye. The base cheese blend, emulsifiers, flavor, and melt behavior are identical between the two.

Can you freeze American cheese?

Yes, though texture becomes slightly softer after thawing. Freeze slices separated by parchment paper in a sealed bag for up to two months. Use thawed slices in cooked applications rather than cold sandwiches.

Is white American cheese healthier than yellow?

No meaningful nutritional difference exists between them. Both are higher in sodium than most natural cheeses due to added emulsifying salts, and both supply calcium and protein in similar amounts per slice.

Mussels in White Wine Sauce

April 3, 2026

Recipe Article: Mussels in White Wine Sauce

Plump mussels steaming open in a garlicky white wine sauce, each shell filled with tender meat and glossy broth. That's what happens when you cook fresh shellfish fast over high heat.

Mussels in White Wine Sauce served on a plate

The pot does most of the work. You sauté aromatics, add wine, dump in the mussels, and cover for six minutes.

This works for weeknight dinners when you want something that feels special without the fuss. Also perfect for casual entertaining when you need to look effortless.

QUICK SUMMARY

Mussels in White Wine Sauce steams fresh shellfish in a bright garlic-butter broth in under 10 minutes. The key is buying live mussels and not overcooking them-shells open in 5-7 minutes, and rubbery texture means you went too long. Serve immediately with crusty bread for soaking up the sauce.

⏱️Timing: 25 minutes start to finish, 15 for cleaning mussels
🔑Key Move: Steam in large pot with lid, don't overcrowd or mussels cook unevenly
⚠️Watch Out: Discard any mussels that don't open after cooking-they're unsafe to eat

Why This Recipe Works

High heat and a wide pot create the ideal steaming environment for tender mussels that open evenly. For a version that comes together quickly, this easy sauce recipe uses similar technique with different protein.

Quick Reference
⏱️
Prep Time
15 min
🔥
Cook Time
10 min
⏰
Total Time
25 min
🍽️
Servings
4 servings
📊
Difficulty
Easy
🏷️
Category
Appetizer
💡
Quick Tip
Use fresh mussels, discard open or cracked
🎯
Best For
Weeknight | Entertaining

Here's what makes it work:

  • Soaking in cold salted water for 20 minutes - Mussels expel sand and grit, preventing grainy texture in finished dish
  • Debearding right before cooking - Pulling the fibrous beard toward the hinge removes it cleanly without damaging the shell
  • Sautéing aromatics until fragrant - Garlic and shallots release their oils before wine hits the pan, building flavor base
  • Steaming 5-7 minutes with lid on - Shells open at different rates; check at 5 minutes and remove opened ones immediately
  • Finishing with cold butter off heat - Creates silky, emulsified sauce without breaking or turning grainy
Quick Tip
Use a large wide pot or Dutch oven so mussels sit in one layer-stacking them causes uneven cooking and some won't open.

What You'll Need

Ingredients for Mussels in White Wine Sauce

Fresh mussels from a fishmonger or grocery seafood counter work best-avoid pre-packaged shellfish sitting in ice for days. For a version that comes together quickly, quick brodo recipe uses similar aromatics with different base.

🦐
Protein
  • 2 lbs fresh mussels
🧄
Aromatics
  • 4 cloves garlic, minced
  • 2 shallots, finely chopped
🥢
Liquids
  • 1 cup dry white wine
  • 2 tablespoon olive oil
  • 3 tablespoon butter
🫙
Finishing
  • ¼ cup fresh parsley, chopped
  • 1 lemon, halved
  • Salt and black pepper

Ingredient Details

  • Fresh mussels
    Check shells are closed or close when tapped-open shells before cooking mean dead mussels that spoil quickly
  • Dry white wine
    Use Sauvignon Blanc or Pinot Grigio for bright acidity-avoid sweet wines that make sauce cloying
  • Garlic
    Mince finely so it disperses evenly in sauce without burning during the sauté
  • Shallots
    Finely chop for milder onion flavor that doesn't overpower delicate shellfish
  • Butter
    Add off heat and swirl to create glossy emulsified sauce-boiling breaks the emulsion
  • Fresh parsley
    Chop right before serving to retain bright green color and herbaceous flavor
  • Lemon
    Squeeze over finished mussels for brightness that cuts through rich butter sauce

Ingredient Swaps

Most swaps keep the core technique intact while adjusting for what's available or dietary needs. A dollop of this dip takes each bite somewhere more interesting.

Four swaps that work:

  • Butter → Olive oil - Slightly lighter sauce, keeps it dairy-free without losing richness
  • Dry white wine → White grape juice with lemon juice - Less acidity and sweeter flavor, but works for alcohol-free version
  • Shallots → Yellow onion - Stronger flavor and coarser texture, still builds aromatic base
  • Fresh parsley → Dried parsley or cilantro - Less fresh brightness, but cilantro adds different herb note

Butter Finish

Works for: Classic French-style sauce with silky texture and rich flavor

Skip if: Making dairy-free or want lighter Mediterranean version

Olive Oil Finish

Works for: Dairy-free meals, lighter Mediterranean style, pescatarian diets

Skip if: You want traditional French richness and velvety mouthfeel

Clams Instead

Works for: Similar steaming method, slightly sweeter brininess, same cooking time

Skip if: You prefer tender texture of mussels or want stronger ocean flavor

Instructions

The entire cooking process takes 10 minutes once mussels are cleaned and prepped. Rich mains need something to cut through, and a fresh salad side does exactly that.

  1. Soak and clean mussels: Place mussels in large bowl with cold salted water for 20 minutes. Scrub shells with stiff brush, pull beards firmly toward hinge to remove, discard any with cracked shells or that stay open when tapped.

  2. Sauté aromatics: Heat olive oil in large wide pot or Dutch oven over medium-high heat. Add shallots and garlic, cook 2 minutes until fragrant and softened but not browned.

  3. Deglaze and add mussels: Pour in white wine, bring to simmer. Add cleaned mussels, season with salt and black pepper, stir once to coat.

  4. Steam with lid on: Cover pot tightly, cook 5-7 minutes. Check at 5 minutes-remove opened mussels with tongs to serving bowl, continue cooking unopened ones another 1-2 minutes. Discard any that don't open.

  5. Finish sauce and serve: Remove pot from heat, swirl in cold butter until melted and sauce looks glossy. Pour sauce over mussels, sprinkle with fresh parsley, squeeze lemon halves over top. Serve immediately.

Watch Out
Do not reheat mussels more than once-they turn rubbery and lose their tender texture with repeated heating.

What to Serve With It

The garlic-wine sauce needs something to soak it up, and bread is the obvious answer. For spinach artichoke dip meal planning ideas that follow similar logic, the same principle applies-build around the sauce.

Side Dish Prep Why It Works How to Serve
Crusty bread Easy Soaks up every drop of garlicky sauce without competing flavors Slice thick, toast lightly, serve warm in basket
Simple green salad Easy Light freshness balances rich butter sauce, adds crunch Dress with lemon vinaigrette, serve alongside
Steamed rice Easy Neutral base absorbs sauce, makes it more filling meal Spoon mussels and sauce over rice in shallow bowls
Roasted potatoes Medium Adds hearty texture, golden roasted flavor complements shellfish Roast with olive oil and herbs, serve on same platter
French fries Easy Casual texture pairs surprisingly well, fun for informal dinners Serve hot and crispy on side, dunk in sauce

Three ways to serve it:

  • As appetizer for 4-6 people - Serve in large shallow bowl with small forks, pass bread for soaking
  • As main course for 2 - Double the portion, add golden roasted potatoes and classic cauliflower dish on the side
  • For entertaining - Present in individual bowls with lemon wedges, garnish with extra parsley
Best Pick
Garlic butter bread elevates the meal-toast thick slices, brush with melted butter and minced garlic, broil until golden.

Store and Reheat

Mussels taste best eaten immediately, but leftovers keep if stored properly within 2 hours of cooking. Cauliflower brings the color this plate needs.

Method Time Best For
🍳 Stovetop 3-4 min on low Gently warming sauce and mussels without toughening meat
📦 Microwave 1-2 min on medium Quick warming but may toughen texture slightly
🔥 Oven 5 min at 300°F Even reheating without drying, best for larger portions

For best results when storing:

  • Transfer cooled mussels and sauce to airtight shallow container within 2 hours
  • Store in fridge for 3-4 days maximum-shellfish spoils quickly after that
  • Reheat only once on low heat, adding splash of wine or water if sauce thickened
  • Freeze up to 1 month in freezer-safe container, but texture suffers slightly when thawed
  • Serve reheated mussels over fresh pasta or rice to stretch leftovers into new meal

Frequently Asked Questions

How long to cook mussels in white wine sauce?

Steam mussels for 5-7 minutes with the lid on. Check at 5 minutes and remove any that have opened-continuing to cook opened mussels makes them rubbery.

Can I make mussels in white wine sauce ahead?

No-mussels are best eaten immediately after cooking. They turn rubbery when reheated and lose their tender texture within hours of steaming.

What goes with mussels in white wine sauce?

Crusty bread is essential for soaking up the garlic-wine sauce. Simple green salad or roasted potatoes balance the richness without competing with delicate shellfish flavor.

How do I know when mussels in white wine sauce is done?

Mussels are done when shells open fully, typically 5-7 minutes after steaming begins. Discard any that remain closed after 7 minutes-they're unsafe to eat.

Can I use red wine instead of white wine?

White wine works best for its bright acidity and lighter flavor that complements shellfish. Red wine creates a darker, heavier sauce that overpowers delicate mussel taste.

Mussels in White Wine Sauce

No ratings yet
Mussels in White Wine Sauce steams fresh shellfish in a bright garlic-butter broth in under 10 minutes. The key is buying live mussels and not overcooking them to avoid rubbery texture. Serve immediately with crusty bread to soak up the flavorful sauce.
Print Recipe Pin Recipe
Prep Time 15 minutes mins
Cook Time 10 minutes mins
Total Time 25 minutes mins
Servings: 4 servings
Course: Appetizer
Cuisine: French
Ingredients Equipment Method Notes

Ingredients
  

  • 2 lbs fresh mussels cleaned, debearded, discard open or cracked shells
  • 4 cloves garlic minced
  • 2 shallots finely chopped
  • 1 cup dry white wine such as Sauvignon Blanc or Pinot Grigio
  • 2 tablespoon olive oil
  • 3 tablespoon butter cold, added off heat to finish sauce
  • ¼ cup fresh parsley chopped, for garnish
  • 1 lemon halved, to squeeze over finished dish
  • salt to season
  • black pepper to season

Equipment

  • large wide pot or Dutch oven Used for sautéing aromatics and steaming mussels
  • stiff brush For scrubbing mussel shells
  • Tongs To remove opened mussels during steaming

Method
 

  1. Place mussels in a large bowl with cold salted water and soak for 20 minutes to expel sand and grit. Scrub shells with a stiff brush and pull beards firmly toward the hinge to remove. Discard any mussels with cracked shells or that remain open when tapped.
    2 lbs fresh mussels
  2. Heat olive oil in a large wide pot or Dutch oven over medium-high heat. Add finely chopped shallots and minced garlic. Cook for about 2 minutes until fragrant and softened but not browned.
    4 cloves garlic, 2 shallots, 2 tbsp olive oil
  3. Pour in the dry white wine and bring to a simmer. Add cleaned mussels, season with salt and black pepper, then stir once to coat.
    2 lbs fresh mussels, 1 cup dry white wine, salt, black pepper
  4. Cover the pot tightly with lid and cook for 5 to 7 minutes. Check at 5 minutes and remove all opened mussels to a serving bowl with tongs. Continue cooking the remaining unopened mussels for 1 to 2 more minutes. Discard any mussels that do not open.
    2 lbs fresh mussels
  5. Remove pot from heat and swirl in cold butter until melted and the sauce becomes glossy. Pour the sauce over the mussels, sprinkle with chopped fresh parsley, and squeeze lemon halves over the top. Serve immediately.
    3 tbsp butter, ¼ cup fresh parsley, 1 lemon

Notes

  • Use a large wide pot so mussels cook evenly in one layer.
  • Discard any mussels that do not open after cooking-they are unsafe to eat.
  • Add cold butter off heat to finish the sauce for a glossy, emulsified texture.

Tried this recipe?

Let us know how it was!
« Previous Page
Next Page »

Primary Sidebar

ForkliftKitchen recipe developer

Welcome!

Recipe Developer · 12+ Yr Kitchen Veteran

I'm the recipe developer behind this site, focused on practical, well-tested dishes and smart ingredient swaps. Every recipe is written to be clear, reliable, and easy to make at home.

650+ Recipes
12+ Yrs Exp.
3x Tested
Our Story →

As Featured In

Allrecipes

TASTE OF HOME

Food52

HUFFPOST

Yahoo! Life

Our Editorial Standards

  • ✓ Every recipe tested at least 3 times before publishing
  • ✓ Substitutes verified by real kitchen trials, not guesswork
  • ✓ Reviewed for accuracy by our editorial team
  • ✓ Updated regularly with seasonal info and reader feedback

Most Popular

  • Creamy Lemon Shrimp Linguine
    Creamy Lemon Shrimp Linguine
  • Creamy Garlic Mushroom Chicken
    Creamy Garlic Mushroom Chicken
  • Sesame Ginger Chicken Noodle Bowls
    Sesame Ginger Chicken Noodle Bowls
  • Baked Lemon Herb Fish Fillets
    Baked Lemon Herb Fish Fillets
  • Veggie Loaded Fried Rice
    Veggie Loaded Fried Rice
  • Spicy Garlic Shrimp Stir Fry
    Spicy Garlic Shrimp Stir Fry

Join 8,000+ Home Cooks

Weekly Kitchen Tips

Easy recipes, smart substitutes, and real cooking shortcuts — every Thursday.

Subscribe Free →


Side Dishes

  • What to Serve With Asian Salmon? 15 Best Side Dishes
    What to Serve With Asian Salmon? 15 Best Side Dishes
  • Side Dishes for Strawberry Spinach Salad
    15 Best Side Dishes for Strawberry Spinach Salad
  • Sides for Grilled Cauliflower Steaks to Complete the Meal
    15 Sides for Grilled Cauliflower Steaks to Complete the Meal
  • 15 Sides To Serve With Calabacitas
    15 Best Sides for Calabacitas – Mexican-Inspired Favorites


Substitutes

  • 7 Best Substitutes for Hot Sauce in Marinades & Stir-Fries
    7 Best Substitutes for Hot Sauce in Marinades & Stir-Fries
  • 9 Best Substitutes for Butter in Baking and Cooking
  • 7 Best Substitutes for Tagliatelle for Italian Pasta Dishes
    7 Best Substitutes for Tagliatelle for Italian Pasta Dishes
  • 7 Best Substitutes for Udon Noodles in Asian Stir-Fries
    7 Best Substitutes for Udon Noodles in Asian Stir-Fries


Browse by Topic

  • Side Dishes320
  • Substitutes785
  • Dinner163
  • Air Fryer77
  • Taste Profiles484
  • Food Storage123


Reader Reviews

★★★★★

"Finally a food blog that tells you exactly why a substitute works instead of just listing options."

— Sarah M., via email

★★★★★

"The side dish recommendations are so specific — saved my dinner party twice this month."

— James R., Pinterest comment

★★★★★

"I trust this site more than most because they actually test everything. You can tell."

— Priya K., blog comment

Footer

↑ Back to Top

Forklift Kitchen

We do the heavy lifting so you can enjoy the cooking. Tested recipes, smart substitutes, and perfect pairings—built for real home cooks.

Content

  • Recipes
  • Substitutes
  • What to Serve With
  • Blog

Company

  • About Us
  • Contact
  • Subscribe

Legal

  • Privacy Policy
  • Terms of Service

As an Amazon Associate I earn from qualifying purchases.

© 2026 Forklift Kitchen.

Rate This Recipe

Your vote:


A rating is required
A name is required
An email is required