• Skip to primary navigation
  • Skip to main content
  • Skip to primary sidebar
  • Recipe Index
    • Air Fryer
  • Side Dishes
  • Substitutes
  • About
  • Contact
  • Subscribe

ForkLiftKitchen

menu icon
go to homepage
  • Recipe Index
    • Air Fryer
  • Side Dishes
  • Substitutes
  • About
  • Contact
  • Subscribe
subscribe
search icon
Homepage link
  • Recipe Index
    • Air Fryer
  • Side Dishes
  • Substitutes
  • About
  • Contact
  • Subscribe
×

Blog

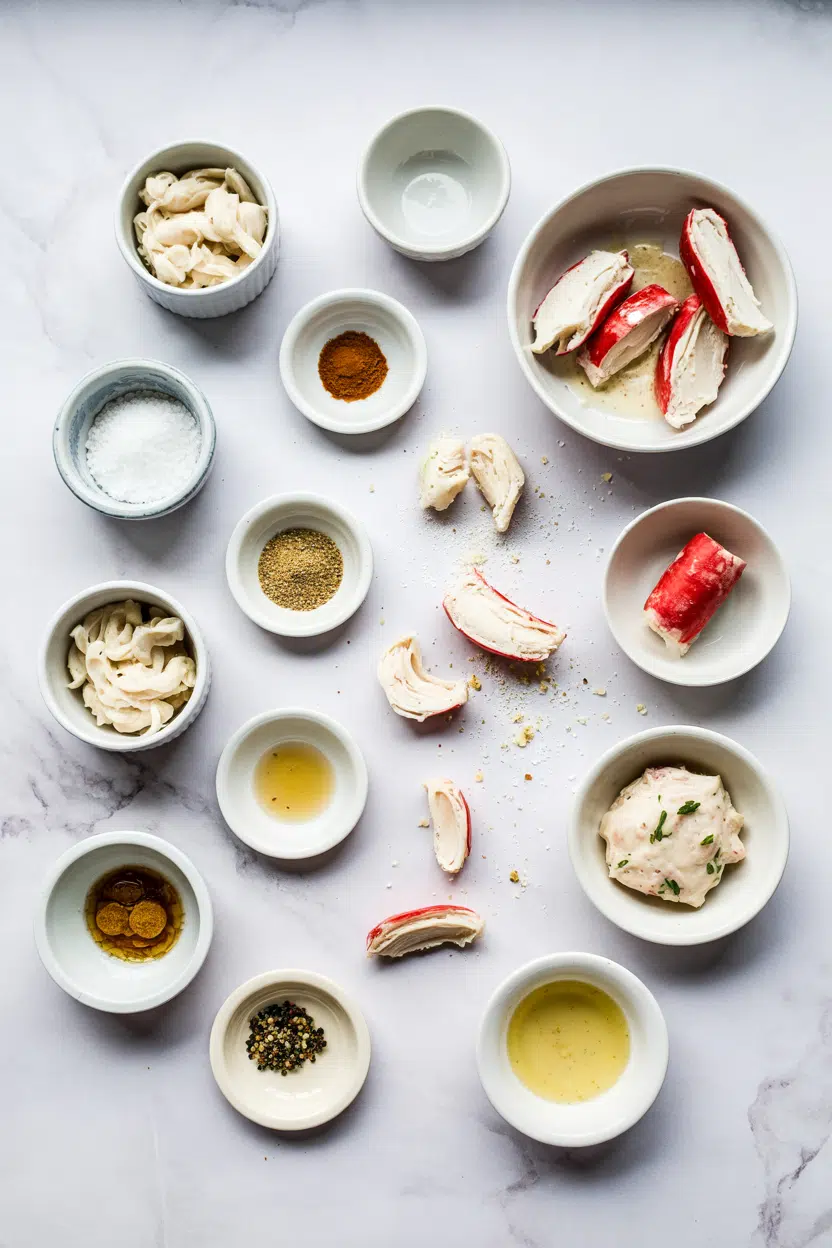
Crab Cakes with Remoulade

April 4, 2026

When you need a hands-off appetizer that works for entertaining or casual weeknight dinners, crab cakes deliver. One mixing bowl, a hot skillet, and a simple remoulade sauce are all it takes to pull off restaurant-quality results at home.

Crab Cakes with Remoulade served on a plate

Pan-searing at medium heat crisps the exterior while keeping the crab moist and flaky inside. The trick is chilling the patties before cooking so they hold their shape and develop that golden crust.

Perfect for holiday brunches, meal prep lunches, or any time you want something that feels special without spending hours in the kitchen.

QUICK SUMMARY

Pan-seared crab cakes with crispy golden edges and tender, flaky centers. The key is folding the crab mixture gently to keep the lumps intact, then chilling the patties for 30 minutes before cooking. Serve with tangy remoulade sauce for a balanced, bright finish.

⏱️Time Reality: 35 min total - 20 min hands-on, 10-12 min cooking, chill time matters
🔥Critical Move: Heat pan to medium (325-350°F) before adding cakes - prevents burning
⚠️Watch Out: Overmixing breaks crab lumps and creates dense cakes - fold 10-12 times only

Table of Contents

Toggle
  • Why This Recipe Works
  • What You'll Need
    • Ingredient Details
  • Ingredient Swaps
  • What to Serve With It
  • Store and Reheat
  • Frequently Asked Questions
  • Crab Cakes with Remoulade
    • Method 
    • Tried this recipe?

Why This Recipe Works

Lump crab meat stays sweet and tender when you fold it gently with just enough binder to hold the patties together. For a version that comes together quickly, simple homemade shrimp uses the same pan-searing technique with equally crispy results.

Quick Reference
⏱️
Prep Time
20 min
🔥
Cook Time
10-12 min
⏰
Total Time
35 min
🍽️
Servings
4 servings
📊
Difficulty
Medium
🏷️
Category
Appetizer
💡
Quick Tip
Chill patties for firmer, crispier cakes
🎯
Best For
Weeknight | Entertaining

What makes this work:

  • Lump crab meat provides texture and sweetness - claw meat is too fine and turns the cakes dense
  • Mayonnaise adds moisture without heaviness - keeps the interior tender while the breadcrumbs crisp up
  • Chilling the patties for 30 minutes firms them up - prevents falling apart when you flip them in the pan
  • Medium heat (325-350°F) crisps the exterior slowly - high heat burns the coating before the inside cooks through
  • Old Bay seasoning delivers that classic coastal flavor - the spice blend is signature to Southern-style crab cakes
Golden Rule
Fold the crab mixture gently 10-12 times to keep the lumps intact - overmixing turns the cakes dense and breaks up the delicate pieces.

What You'll Need

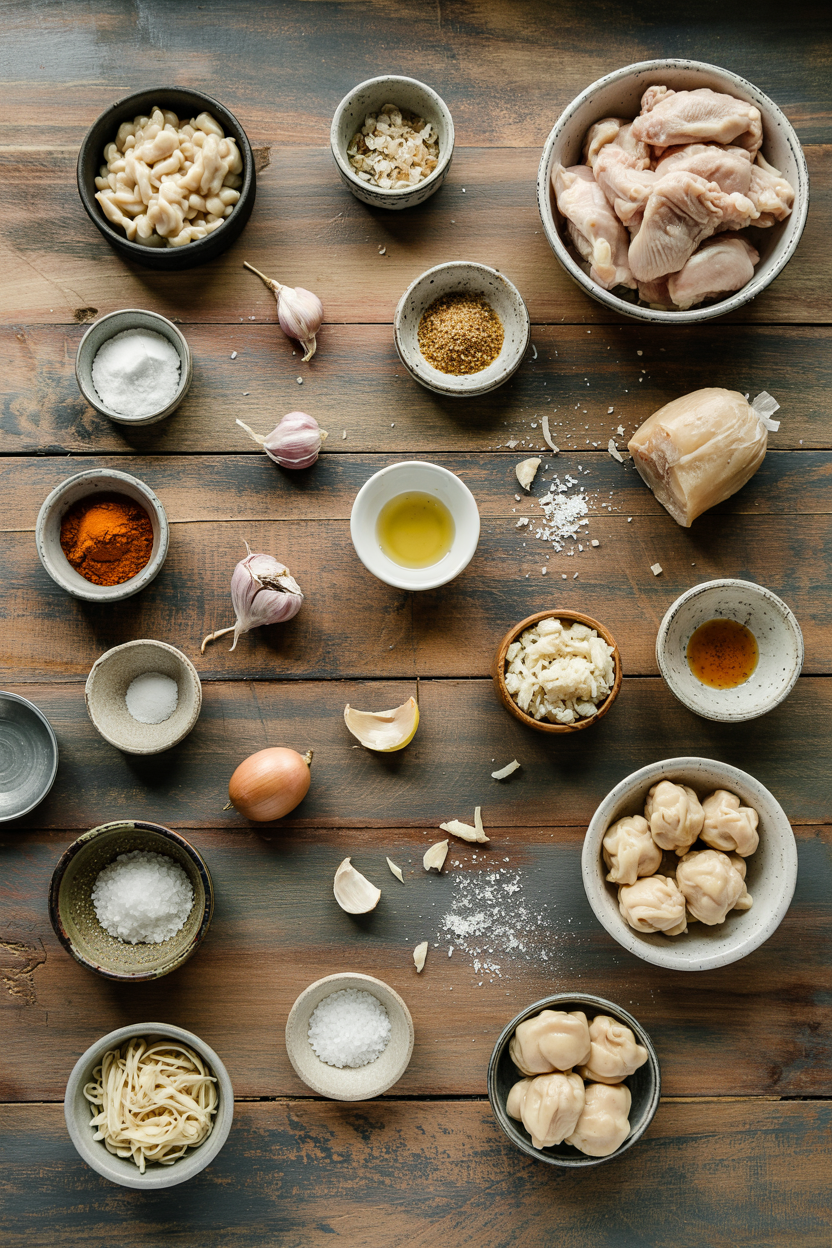
Ingredients for Crab Cakes with Remoulade

Rich mains need something to cut through, and potato salad does exactly that. For a version that comes together quickly, a fresh potato salad side balances the richness without competing with the crab.

🦐
Protein
  • Lump crab meat (1 lb)
  • Eggs (2 large)
🫙
Binders
  • Mayonnaise (⅓ cup)
  • Breadcrumbs (½ cup)
🌶️
Seasonings
  • Old Bay seasoning (1 tbsp)
  • Dijon mustard (1 tbsp)
  • Worcestershire sauce (1 tsp)
🧄
Fresh Aromatics
  • Lemon juice (1-2 tsp)
  • Parsley (2 tbsp, chopped)
  • Green onions (2, sliced)

Ingredient Details

  • Lump crab meat
    Use fresh lump crab for the best texture - canned works but yields a softer, less sweet result
  • Mayonnaise
    Provides moisture and binding without making the cakes heavy - measure carefully to avoid sogginess
  • Breadcrumbs
    Panko creates extra crispiness, but regular breadcrumbs work fine for a denser crust
  • Old Bay seasoning
    The signature spice blend for coastal crab cakes - Cajun seasoning works as a spicier swap
  • Eggs
    Binds the mixture so the patties hold their shape during searing - flax eggs work for a vegan version
  • Dijon mustard
    Adds acidity and tang - yellow mustard works but tastes milder and slightly sweeter
  • Lemon juice
    Fresh lemon brightens the seafood flavor - skip for a milder taste or use lime juice instead

Ingredient Swaps

The shrimp works best when it hits the table at the same time as the main. We keep a batch ready for nights like this - simple homemade homemade pairs well with seafood and takes minutes to mix.

Common substitutions that work:

  • Swap breadcrumbs for gluten-free breadcrumbs or crushed cornflakes - different crispiness level but keeps the cakes gluten-free
  • Use dairy-free mayo or Greek yogurt instead of regular mayo - dairy-free mayo tastes close to the original, yogurt adds tang
  • Replace eggs with flax eggs (1 tablespoon flaxseed + 3 tablespoon water per egg) - slightly less binding strength but works for vegan versions
  • Substitute Old Bay with Cajun seasoning or a homemade spice mix - changes the flavor profile but keeps the cakes well-seasoned

Pan-Searing

Works for: Crispy golden crust, fast cooking, better texture control

Skip if: You're cooking more than 4 cakes at once or want hands-off cooking

Baking at 400°F

Works for: Cooking larger batches, gentler method, less oil needed

Skip if: You want maximum crispiness - edges won't be as golden or crunchy

Instructions

The whole process takes 35 minutes from start to finish. A good potato can make or break the plate - crispy potato side dish adds crunch and contrast without overwhelming the delicate crab.

  1. Mix the binder ingredients. Whisk together mayonnaise, eggs, Dijon mustard, Worcestershire sauce, Old Bay, lemon juice, parsley, and green onions in a large mixing bowl until smooth and well combined.

  2. Fold in the crab meat gently. Add lump crab meat to the bowl and fold 10-12 times with a spatula until just combined - stop when you can still see visible crab lumps. Add breadcrumbs and fold 3-4 more times until the mixture holds together when pressed.

  3. Form and chill the patties. Divide the mixture into 8 equal portions and shape into patties about ¾-inch thick. Place on a plate, cover with plastic wrap, and refrigerate for 30 minutes to firm up.

  4. Pan-sear the crab cakes. Heat 2 tablespoons of oil in a nonstick skillet or cast iron pan over medium heat (about 325-350°F). Add 4 patties, leaving 1 inch of space between each. Cook for 3-4 minutes per side until golden brown and crispy - internal temp should reach 145°F (63°C).

  5. Rest and serve with remoulade. Transfer cooked cakes to a paper towel-lined plate to drain excess oil. Let rest for 2-3 minutes before serving with remoulade sauce on the side.

Best Pick
Leave 1 inch of space between cakes in the pan - overcrowding steams them instead of searing, which means no crispy crust.

What to Serve With It

Most people skip planning sides, but it balances the meal. For complete whole lobster meal ideas, the same principles apply - pair rich seafood with something tangy or crunchy to cut through the richness.

Side Dish Prep Why It Works How to Serve
Simple green salad Easy Light and fresh, balances crab richness Toss greens with lemon vinaigrette and serve chilled
Cole slaw Easy Tangy crunch complements creamy crab Make ahead and chill for 30 min before serving
Crispy fries Medium Classic pairing with crunchy texture Serve hot alongside cakes for dipping in remoulade
Roasted vegetables Easy Adds warmth and depth to the meal Roast at 425°F until tender and slightly charred
Corn on the cob Easy Seasonal, easy, complements Southern style Boil or grill and brush with butter and Old Bay

Three ways to serve it:

  • As an appetizer: Serve 2 cakes per person with remoulade and lemon wedges for squeezing
  • As a main dish: Pair with a green salad and crispy fries for a complete plate
  • For meal prep: Store cooked cakes in airtight containers and reheat in a skillet for quick lunches
Shortcut
Make remoulade ahead and chill for 30 minutes - flavors blend better and the sauce thickens slightly for easier dipping.

Store and Reheat

Cooked crab cakes keep for 3-4 days in the fridge when stored in a shallow airtight container to avoid crushing. Rich mains need something to cut through, and potato wedges does exactly that - this easy potato wedges recipe reheats just as well as the cakes.

Method Time Best For
🍳 Stovetop 4-5 min low heat Retaining crisp texture when reheating
📦 Microwave 1-2 min medium power Quick reheating but may soften crust
🔥 Oven 8-10 min at 375°F (190°C) Reheating multiple cakes evenly

For best results when storing:

  • Drain excess oil on paper towels before storing - prevents sogginess and keeps the crust crisp
  • Layer parchment paper between cakes if stacking - stops them from sticking together in the container
  • Freeze uncooked patties for up to 2 months - shape, freeze on a baking sheet, then transfer to a freezer bag
  • Thaw frozen cakes overnight in the fridge - cook from thawed for even searing and proper browning
  • Refrigerate remoulade separately for up to 1 week - keeps longer than the cakes and stays fresh for future meals

Frequently Asked Questions

Can I make crab cakes ahead and freeze them?

Yes - shape the patties, freeze them on a baking sheet until solid, then transfer to a freezer bag for up to 2 months. Thaw overnight in the fridge before cooking for even searing.

What is the best way to reheat crab cakes without losing crispiness?

Reheat in a skillet over low heat for 4-5 minutes, flipping once - this keeps the crust crispy. The oven works too (8-10 min at 375°F), but the stovetop gives better texture control.

How do I know when crab cakes are fully cooked?

The exterior should be golden brown and the internal temperature should reach 145°F (63°C). They'll feel firm when you press the center gently with a spatula.

Why do my crab cakes fall apart and how can I fix it?

This happens when there's not enough binder or the patties weren't chilled before cooking. Add an extra tablespoon of mayo or an egg, reform the cakes, and chill for 30 minutes before searing.

What are some good side dishes to serve with crab cakes?

Cole slaw, crispy fries, roasted vegetables, corn on the cob, or a simple green salad all work. Pick something tangy or crunchy to balance the richness of the crab.

Crab Cakes with Remoulade served on a plate

Crab Cakes with Remoulade

No ratings yet
These pan-seared crab cakes feature crispy golden edges and tender, flaky centers thanks to gentle folding and chilling before cooking. Served with a tangy remoulade sauce, they make an easy yet special appetizer or weeknight dinner.
Print Recipe Pin Recipe
Prep Time 20 minutes mins
Cook Time 12 minutes mins
Total Time 32 minutes mins
Servings: 4 servings
Course: Appetizer
Cuisine: American, Southern
Ingredients Equipment Method Notes

Ingredients
  

  • 1 lb lump crab meat fresh or canned
  • 2 large eggs for binding
  • ⅓ cup mayonnaise adds moisture without heaviness
  • ½ cup breadcrumbs panko or regular
  • 1 tablespoon Old Bay seasoning signature coastal spice blend
  • 1 tablespoon Dijon mustard adds acidity and tang
  • 1 teaspoon Worcestershire sauce
  • 1-2 teaspoon lemon juice freshly squeezed
  • 2 tablespoon parsley chopped fresh
  • 2 whole green onions sliced
  • 2 tablespoon oil for pan-searing

Equipment

  • Nonstick skillet or cast iron pan Used for pan-searing the crab cakes
  • Mixing bowl For mixing crab cake ingredients

Method
 

  1. In a large mixing bowl, whisk together mayonnaise, eggs, Dijon mustard, Worcestershire sauce, Old Bay seasoning, lemon juice, parsley, and green onions until smooth and well combined.
    2 large eggs, ⅓ cup mayonnaise, 1 tbsp Dijon mustard, 1 tsp Worcestershire sauce, 1 tbsp Old Bay seasoning, 1-2 tsp lemon juice, 2 tbsp parsley, 2 whole green onions
  2. Add lump crab meat to the bowl and gently fold 10-12 times with a spatula until just combined, preserving visible crab lumps. Add breadcrumbs and fold 3-4 more times until the mixture holds when pressed.
    1 lb lump crab meat, ½ cup breadcrumbs
  3. Divide mixture into 8 equal portions and shape into patties about ¾-inch thick. Place on a plate, cover with plastic wrap, and refrigerate for 30 minutes to firm up.
  4. Heat 2 tablespoons of oil in a nonstick or cast iron skillet over medium heat (325-350°F). Add 4 patties spaced 1 inch apart. Cook 3-4 minutes per side until golden brown and crispy; internal temperature should reach 145°F (63°C).
    2 tbsp oil
  5. Transfer cooked crab cakes to a paper towel-lined plate to drain excess oil. Let rest 2-3 minutes before serving with remoulade sauce on the side.

Notes

  • Chill patties for at least 30 minutes before cooking to help them hold their shape and develop a crispy crust.
  • Fold crab mixture gently 10-12 times to keep lumps intact and avoid dense cakes.
  • Heat the pan to medium (325-350°F) before adding patties to prevent burning and ensure even cooking.

Tried this recipe?

Let us know how it was!

Japanese Tamagoyaki Rolled Omelet

April 4, 2026

You need 20 minutes and a nonstick pan. No complex technique, no flipping multiple times, no wondering if you've layered it right.

Japanese Tamagoyaki Rolled Omelet served on a plate

The pan does the work if you keep the heat low and pour thin layers. Each addition sets quickly, rolls into the previous layer, and builds a soft spiral without browning.

This is the kind of recipe you make when you want protein-packed breakfast meal prep or a quick bento box addition that travels well.

QUICK SUMMARY

Japanese tamagoyaki is a rolled omelet made by cooking thin egg layers with dashi, soy sauce, and mirin, then rolling each layer into the previous one. Low heat and careful rolling produce soft, moist layers without browning. Works for breakfast, bento boxes, or meal prep when you need something that holds shape and reheats well.

⏱️Time reality: 20 minutes start to finish, 10 minutes active cooking with 5-7 thin layers
🔑First critical action: Whisk eggs with dashi and seasonings until uniform but not frothy
⚠️Watch out: High heat causes browning and tough texture - keep heat medium-low and oil pan between layers

Table of Contents

Toggle
  • Why This Recipe Works
  • What You'll Need
    • Ingredient Details
  • Ingredient Swaps
  • What to Serve With It
  • Store and Reheat
  • Frequently Asked Questions
  • Japanese Tamagoyaki Rolled Omelet
    • Method 
    • Tried this recipe?

Why This Recipe Works

Thin layers cook fast and roll without tearing when you maintain consistent low heat. Each new pour bonds to the previous layer while still slightly wet, creating a cohesive roll instead of separate sheets.

Quick Reference
⏱️
Prep Time
10 min
🔥
Cook Time
10 min
⏰
Total Time
20 min
🍽️
Servings
3-4 servings
📊
Difficulty
Medium
🏷️
Category
Side
💡
Quick Tip
Low heat, thin layers, roll tightly
🎯
Best For
Weeknight | Meal prep

Five things that make this work:

  • Dashi stock adds umami and moisture - prevents dry texture and gives traditional savory depth that plain water can't match
  • Sugar and mirin balance soy sauce - creates sweet-savory flavor without overwhelming saltiness or flat taste
  • Low-medium heat prevents browning - maintains soft yellow color and tender texture instead of crusty edges
  • Thin layers (⅛ cup each) cook evenly - set quickly without raw spots and roll without breaking
  • Rolling while slightly wet bonds layers - creates cohesive spiral instead of separate sheets that fall apart
Quick Tip
Use a folded paper towel dipped in oil to grease the pan before each layer - keeps surface nonstick without excess oil pooling

What You'll Need

Ingredients for Japanese Tamagoyaki Rolled Omelet

Fresh eggs and dashi stock are non-negotiable for texture and flavor. Most people skip dashi, but it balances the meal with classic dough dish for a complete Japanese breakfast spread.

🥚
Base
  • 4-5 large eggs
  • 3 tablespoons dashi stock
🥢
Seasonings
  • 1 tablespoon soy sauce
  • 1 tablespoon mirin
  • 1 teaspoon sugar
  • Pinch of salt
🫙
Cooking
  • 1-2 teaspoons vegetable oil
🌿
Optional Add-Ins
  • Chopped green onions
  • Grated daikon (for serving)

Ingredient Details

  • Eggs
    Fresh eggs produce smooth layers without breakage - old eggs cause tearing and uneven texture
  • Dashi stock
    Gives umami depth and moisture that water alone can't provide - use instant dashi powder if needed
  • Soy sauce
    Provides saltiness and savory depth - use tamari for gluten-free version without flavor loss
  • Mirin
    Adds traditional sweetness and balances soy sauce - substitute with sweet white wine or sugar plus water
  • Sugar
    Essential for authentic sweet-savory balance - honey or maple syrup work but brown faster
  • Vegetable oil
    Light oil prevents sticking without adding flavor - light sesame oil adds subtle nutty aroma if preferred
  • Green onions
    Optional fresh flavor boost - chop finely and fold into egg mixture before cooking

Ingredient Swaps

You can adjust ingredients based on what's in your pantry or dietary needs. Balance seasoning carefully - too salty or sweet disrupts traditional flavor that pairs well with steamed rice or this easy salad recipe.

Four swaps that work:

  • Dashi stock → water with pinch of instant dashi powder - slightly less umami but maintains moisture and savory depth without specialty stock
  • Soy sauce → tamari - gluten-free option with nearly identical salty flavor and no texture change
  • Sugar → honey or maple syrup - different sweetness profile that browns faster, reduce heat slightly to prevent burning
  • Vegetable oil → light sesame oil - adds subtle nutty aroma and stronger flavor without changing cooking method

Water substitute for dashi

Works for: Budget cooking when dashi unavailable, still produces soft texture

Skip if: You want authentic umami depth and traditional flavor balance

Egg whites only

Works for: Lower fat version, lighter texture with similar rolling technique

Skip if: You want rich traditional flavor and golden color

Coconut aminos instead of soy sauce

Works for: Lower sodium needs, gluten-free, slightly sweeter profile

Skip if: You prefer traditional salty depth and authentic Japanese flavor

Instructions

The entire process takes 20 minutes from whisking to slicing. Medium-low heat and thin layers prevent browning and create soft texture that holds shape when you roll tightly with a silicone spatula after each addition sets.

  1. Whisk eggs with seasonings: In a bowl, whisk together 4-5 eggs, 3 tablespoons dashi stock, 1 tablespoon soy sauce, 1 tablespoon mirin, 1 teaspoon sugar, and pinch of salt until uniform but not frothy. Strain mixture through fine-mesh sieve if you want extra-smooth texture.

  2. Heat pan and oil surface: Heat rectangular tamagoyaki pan or small 8-inch nonstick skillet over medium-low heat (about 275°F/135°C). Dip folded paper towel in vegetable oil and wipe pan surface to create thin coating.

  3. Cook first thin layer: Pour about ⅛ cup (30 ml) egg mixture into pan, tilting to spread into thin even layer. Cook 1-2 minutes until surface is just set but still slightly wet on top - edges should lift easily with silicone spatula.

  4. Roll tightly and repeat layers: Using spatula, roll cooked layer tightly from one end to the other, pushing roll to far end of pan. Oil pan again with paper towel, pour another ⅛ cup egg mixture, lifting rolled portion so egg flows underneath. Cook until set, then roll entire portion over itself. Repeat until all egg mixture is used, oiling pan between each layer.

  5. Rest and slice: Remove rolled omelet to cutting board and let rest 2-3 minutes to set shape and firm texture. Slice crosswise into ½-inch (1.3 cm) pieces with sharp knife, wiping blade between cuts for clean edges.

Golden Rule
Maintain medium-low heat throughout - high heat causes browning and tough texture that ruins the soft layered effect

What to Serve With It

A good side can make or break the plate. The latte works best when it hits the table at the same time as the main, and for a simple complementary side that balances the savory egg flavors, we keep a batch ready for nights like this.

Side Dish Prep Why It Works How to Serve
Steamed rice Easy Neutral base absorbs tamagoyaki flavors and balances sweet-savory profile Serve warm in bowl alongside sliced omelet for traditional Japanese breakfast
Miso soup Easy Hot broth complements soft egg texture and adds umami depth Serve in small bowl with tofu and wakame seaweed
Pickled vegetables Easy Acidity cuts richness and adds crunchy contrast to tender eggs Use cucumber, daikon, or mixed tsukemono in small side dish
Fresh green salad Easy Crisp lettuce and light dressing balance soft egg texture Toss with sesame-ginger dressing and serve alongside omelet
Edamame beans Easy Adds plant protein and snappy texture to complete meal Steam and sprinkle with sea salt, serve warm or room temperature

Three ways to serve it:

  • Bento box style: Pack sliced tamagoyaki with steamed rice, pickled vegetables, and small portion of fruit for portable lunch
  • Japanese breakfast plate: Arrange tamagoyaki slices with miso soup, steamed rice, and nori sheets for traditional morning meal
  • Appetizer presentation: Serve at room temperature with grated daikon, soy sauce, and shiso leaves for entertaining
Best Pick
Serve with grated daikon (daikon oroshi) and soy sauce - the mild radish cuts richness and adds refreshing bite that balances sweet eggs

Store and Reheat

Tamagoyaki keeps 3-4 days in the fridge and reheats better than most egg dishes because the dashi adds moisture. Store in shallow airtight container to prevent drying, and slice just before serving for cleanest presentation that works for meal prep or creamy dip side dish pairings.

Method Time Best For
🍳 Stovetop 2-3 minutes on low heat Preserving soft texture without moisture loss - flip halfway through
📦 Microwave 30-45 seconds on medium power Quick reheating for meal prep - cover with damp paper towel to prevent drying
🔥 Oven 5-7 minutes at 300°F (150°C) Even warming for multiple portions without drying - wrap loosely in foil

For best results when storing:

  • Cool completely before refrigerating - prevents condensation that makes surface soggy and texture mushy
  • Wrap tightly in plastic wrap - keeps moisture in and prevents absorption of other fridge odors
  • Store whole roll unsliced - maintains moisture better than pre-sliced pieces that dry out faster
  • Bring to room temperature before serving - cold eggs taste less flavorful than room-temp portions
  • Freeze wrapped portions up to 1 month - thaw overnight in fridge and reheat gently on stovetop for best texture

Frequently Asked Questions

Can I make tamagoyaki ahead and store it overnight?

Yes - cook completely, cool to room temperature, wrap tightly in plastic wrap, and refrigerate up to 3-4 days. Slice just before serving for cleanest presentation and reheat gently if preferred warm.

How do I reheat tamagoyaki without drying it out?

Use stovetop on low heat for 2-3 minutes, flipping halfway, or microwave 30-45 seconds on medium power covered with damp paper towel. Avoid high heat that causes tough texture and moisture loss.

What are signs that tamagoyaki is fully cooked but still tender?

Surface should be just set with no raw wet spots, edges lift easily from pan, and center feels firm but not stiff when pressed gently. Color stays pale yellow without browning - golden edges mean heat is too high.

Why does my tamagoyaki tear or fall apart while rolling?

Egg layer is too thick or not fully set before rolling. Pour thinner layers (⅛ cup each) and wait until surface is just set with slight tackiness before rolling - use silicone spatula to guide gently without forcing.

Can I triple the recipe for a larger batch?

Yes - scale ingredients proportionally and cook in batches using same technique. Each batch takes about 10 minutes, and finished rolls store well refrigerated up to 4 days for easy meal prep.

Japanese Tamagoyaki Rolled Omelet served on a plate

Japanese Tamagoyaki Rolled Omelet

No ratings yet
Japanese tamagoyaki is a rolled omelet made by cooking thin layers of eggs seasoned with dashi, soy sauce, and mirin. Cooking on low heat and rolling while slightly wet creates soft, moist layers without browning. This dish works well for protein-packed breakfasts, bento boxes, or meal prep.
Print Recipe Pin Recipe
Prep Time 10 minutes mins
Cook Time 10 minutes mins
Total Time 20 minutes mins
Servings: 4 servings
Course: Breakfast, Side Dish
Cuisine: Japanese
Ingredients Equipment Method Notes

Ingredients
  

  • 4 large eggs fresh eggs produce smooth layers without breakage
  • 3 tablespoons dashi stock adds umami and moisture, can use instant dashi powder
  • 1 tablespoon soy sauce provides saltiness and savory depth
  • 1 tablespoon mirin adds traditional sweetness and balances soy sauce
  • 1 teaspoon sugar balances sweet-savory flavor without overwhelming saltiness
  • pinch salt seasoning
  • 1.5 teaspoons vegetable oil used to grease pan between layers
  • green onions optional, finely chopped and folded into egg mixture
  • daikon optional, grated for serving

Equipment

  • Nonstick skillet 8-inch nonstick pan for cooking tamagoyaki layers
  • Silicone spatula Used for rolling the omelet layers
  • Paper towel Folded and dipped in oil to grease pan
  • Whisk For mixing eggs and seasonings

Method
 

  1. In a bowl, whisk together 4-5 large eggs, 3 tablespoons dashi stock, 1 tablespoon soy sauce, 1 tablespoon mirin, 1 teaspoon sugar, and a pinch of salt until uniform but not frothy. For an extra smooth texture, strain mixture through a fine-mesh sieve.
    4 large eggs, 3 tablespoons dashi stock, 1 tablespoon soy sauce, 1 tablespoon mirin, 1 teaspoon sugar, pinch salt
  2. Heat an 8-inch nonstick skillet over medium-low heat (about 275°F/135°C). Dip a folded paper towel in vegetable oil and wipe the pan surface to create a thin, even coating.
    1.5 teaspoons vegetable oil
  3. Pour about ⅛ cup (30 ml) of egg mixture into the pan, tilting to spread it evenly into a thin layer. Cook for 1-2 minutes until the surface is just set but still slightly wet and the edges lift easily with a silicone spatula.
    4 large eggs, 3 tablespoons dashi stock, 1 tablespoon soy sauce, 1 tablespoon mirin, 1 teaspoon sugar, pinch salt
  4. Using the silicone spatula, roll the cooked layer tightly from one end to the other and push the roll to the far end of the pan. Oil the pan again with the paper towel, pour another ⅛ cup egg mixture, lifting the rolled portion so the egg flows underneath. Cook until set, then roll the entire portion over itself. Repeat until all egg mixture is used, oiling the pan between each layer.
    1.5 teaspoons vegetable oil
  5. Remove the rolled omelet to a cutting board and let rest for 2-3 minutes to set shape and firm texture. Slice crosswise into ½-inch (1.3 cm) pieces using a sharp knife, wiping the blade between cuts for clean edges.

Notes

  • Maintain medium-low heat to prevent browning and tough texture.
  • Use folded paper towel dipped in oil for light pan greasing between layers.
  • Pour thin layers (about ⅛ cup each) for even cooking and easy rolling.

Tried this recipe?

Let us know how it was!

Savory Bread Pudding with Eggs and Cheese

April 4, 2026

Baking savory bread pudding at 350°F with a whisked custard base creates a set interior and golden edges. The stale bread absorbs the egg mixture without turning mushy, and the cheese melts into pockets of richness instead of pooling at the bottom.

Savory Bread Pudding with Eggs and Cheese served on a plate

You don't need a water bath or constant checking. The oven does the work while you prep a simple salad.

This is what we make for weekend brunch when scrambled eggs feel lazy but a full spread feels like too much effort.

QUICK SUMMARY

Savory bread pudding with eggs and cheese bakes into a custardy interior with crispy edges when you use day-old bread and whisk the egg mixture thoroughly. The bread soaks up the custard without collapsing, and the cheese creates savory pockets throughout instead of sinking to the bottom.

⏱️Time Reality: 60-70 minutes total with 15 minutes hands-on prep before the oven takes over
🔑Critical First Move: Use stale or day-old bread cut into 1-inch cubes for even soaking
⚠️Watch Out: Too much liquid makes soggy pudding - measure milk to 2 cups per 6 eggs and press bread down

Table of Contents

Toggle
  • Why This Recipe Works
  • What You'll Need
    • Ingredient Details
  • Ingredient Swaps
  • What to Serve With It
  • Store and Reheat
  • Frequently Asked Questions
  • Savory Bread Pudding with Eggs and Cheese
    • Method 
    • Tried this recipe?

Why This Recipe Works

High heat sets the custard while the bread edges crisp and the cheese melts without burning. For a version that comes together quickly, this easy rice recipe works when you need breakfast without the oven time.

Quick Reference
⏱️
Prep Time
15-20 min
🔥
Cook Time
40-50 min
⏰
Total Time
60-70 min
🍽️
Servings
6-8 servings
📊
Difficulty
Medium
🏷️
Category
Breakfast | Brunch
💡
Quick Tip
Use stale bread for best texture
🎯
Best For
Weeknight | Meal prep

Five reasons this works:

  • Day-old bread absorbs custard without falling apart - Fresh bread gets waterlogged and mushy instead of tender
  • Whisked egg mixture sets evenly - Lumpy custard creates rubbery pockets and uneven texture throughout
  • Sautéed aromatics add depth without raw bite - Onions or leeks need 5-7 minutes to soften and sweeten before mixing
  • Middle oven rack prevents burnt tops - Direct top heat scorches the cheese before the center sets
  • 10-minute rest after baking firms the custard - Cutting too early makes the pudding collapse and leak liquid
Quick Tip
Press bread firmly into the custard mixture and let it sit for 10 minutes before baking so every cube soaks evenly

What You'll Need

Ingredients for Savory Bread Pudding with Eggs and Cheese

Most ingredients live in your fridge or pantry already. A good breakfast can make or break the plate. For a version that comes together quickly, easy breakfast side fills the gap when you want protein without the custard work.

🍞
Bread Base
  • 6 cups day-old bread (French or sourdough), cut into 1-inch cubes
🥚
Custard
  • 6 large eggs
  • 2 cups whole milk or cream
  • ¾ teaspoon salt
  • ½ teaspoon black pepper
🧀
Cheese & Fat
  • 1½ cups shredded cheddar or gruyere
  • 2 tablespoon butter (for greasing pan)
🧅
Aromatics
  • 1 medium onion or leek, diced
  • 2 tablespoon fresh thyme or parsley, chopped
  • Optional: ½ cup cooked bacon or mushrooms

Ingredient Details

  • Day-old bread
    French or sourdough works best - avoid soft sandwich bread that turns gummy when soaked
  • Eggs
    Use large eggs and whisk thoroughly to break up yolks completely for smooth custard
  • Milk or cream
    Whole milk creates tender texture - cream makes it richer but heavier
  • Cheese
    Sharp cheddar or gruyere melt smoothly - pre-shredded cheese has anti-caking agents that make it grainy
  • Salt
    Add ¾ teaspoon to custard base even with salty cheese - undercutting makes the dish taste flat
  • Onions or leeks
    Sauté until translucent (5-7 minutes) - raw aromatics stay crunchy and sharp instead of sweet
  • Fresh herbs
    Add thyme or parsley at the end - delicate herbs burn under high heat and turn bitter

Ingredient Swaps

Dairy-free and gluten-free versions work if you adjust liquid ratios and baking time. Rich mains need something to cut through, and rice does exactly that. For a version that comes together quickly, a warm rice variation balances the plate when bread feels too heavy.

Four swaps that work:

  • Whole milk → Almond or oat milk - Use unsweetened versions and expect slightly less richness and thinner custard texture
  • Regular bread → Gluten-free bread - Toast cubes lightly first so they hold structure and don't dissolve into mush
  • Cheddar cheese → Nutritional yeast (3 tbsp) - Adds savory flavor but skips the gooey melt and stretchy texture
  • Eggs → Chia or flax eggs (6 tablespoon meal + 18 tablespoon water) - Binds ingredients but custard stays looser and less silky

Almond Milk

Works for: Dairy-free diets, lighter texture, subtle nutty flavor

Skip if: You want rich custard or creamy mouthfeel

Gluten-Free Bread

Works for: Celiac or gluten sensitivity, similar texture when toasted

Skip if: You're on a budget - GF bread costs 2-3x more

Nutritional Yeast

Works for: Vegan diets, adds savory umami depth, shelf-stable

Skip if: You want melted cheese pockets or gooey texture

Instructions

The custard needs 10 minutes to soak into the bread before baking starts. Most people skip this dip, but it balances the meal. For a version that comes together quickly, a creamy sauce side adds richness without extra oven time.

  1. Preheat oven to 350°F and grease an 8x8-inch baking dish with butter. Cut day-old bread into 1-inch cubes and spread them in the dish.
  2. Whisk 6 eggs, 2 cups milk, ¾ teaspoon salt, and ½ teaspoon pepper in a large bowl until smooth. Pour custard over bread cubes and press down firmly so every piece soaks. Let sit 10 minutes.
  3. Sauté diced onion in a skillet over medium heat for 5-7 minutes until translucent. Stir onions and 1 cup shredded cheese into soaked bread mixture. Sprinkle remaining ½ cup cheese on top.
  4. Bake on middle rack for 40-45 minutes until center is set and edges are golden. Custard should jiggle slightly in the middle but not look wet or liquidy.
  5. Rest pudding for 10 minutes before cutting into squares. Optional: Broil for 2-3 minutes to crisp the top without burning the cheese.
Golden Rule
Pull the pudding when the center still jiggles slightly - it will firm up during the 10-minute rest

What to Serve With It

The custard richness needs something fresh or crunchy to balance the plate. Salad adds the contrast this plate needs, but timing matters. For weeknight chicken dinner ideas that pair with bread pudding, we keep sides that work for brunch or dinner.

Side Dish Prep Why It Works How to Serve
Simple green salad Easy Fresh greens cut through rich custard and heavy cheese Toss with lemon vinaigrette and serve cold
Roasted vegetables Easy Caramelized edges add sweetness and texture variety Roast at 400°F for 25-30 minutes until charred
Steamed asparagus Easy Light, slightly crunchy contrast to soft custard texture Steam 4-5 minutes, finish with butter and salt
Tomato cucumber salad Easy Bright acidity balances savory richness and heavy cheese Dice, toss with olive oil and vinegar, chill
Fruit compote Medium Sweetness cuts through savory notes without overpowering Simmer berries with sugar for 10 minutes, serve warm

Three ways to serve it:

  • For brunch gatherings: Serve with charcuterie board and pickled vegetables for varied textures and bright acidity
  • For weeknight meals: Pair with simple green salad and roasted potatoes for filling, balanced plate
  • For meal prep: Pack with steamed asparagus and tomato salad in separate containers for easy reheating
Shortcut
Make the pudding the night before, refrigerate unbaked, then bake fresh in the morning - add 5-10 minutes to baking time

Store and Reheat

Leftover pudding lasts 3-4 days in the fridge and reheats without turning rubbery. The coleslaw works best when it hits the table at the same time as the main. For a version that comes together quickly, something crunchy and fresh balances the richness when you're serving leftovers for lunch.

Method Time Best For
🔥 Oven 15-20 min at 350°F Restores crispy edges and even heating throughout
📦 Microwave 2-3 min on medium Quick reheating but softens crust and makes edges rubbery
🍳 Stovetop 5-7 min covered on low Gentle reheating for individual portions without drying out

For best results when storing:

  • Cool completely before refrigerating - Warm pudding creates condensation that makes the top soggy
  • Store in shallow airtight container - Deep containers trap moisture and turn the custard watery
  • Refrigerate within 2 hours of baking - Eggs and dairy spoil quickly at room temperature
  • Freeze individual portions up to 2 months - Wrap tightly in plastic wrap, then foil to prevent freezer burn
  • Reheat covered with foil in oven - Prevents top from drying out while center warms through

Frequently Asked Questions

How long to cook savory bread pudding at 350°F?

Bake for 40-45 minutes until the center is set and edges are golden brown. The middle should jiggle slightly when you shake the pan but shouldn't look wet or liquidy.

Can I make savory bread pudding ahead of time?

Assemble the unbaked pudding the night before, cover tightly, and refrigerate. Bake directly from the fridge the next morning and add 5-10 minutes to the baking time.

What goes well as a side for savory bread pudding?

Simple green salad with lemon vinaigrette cuts through the richness. Roasted vegetables or steamed asparagus add texture contrast without competing with the custard.

How do I know when savory bread pudding is fully cooked?

The center should be firm but jiggle slightly when you shake the pan. A knife inserted in the middle comes out mostly clean with a few moist crumbs, not wet custard.

Can I use gluten-free bread in this recipe?

Toast gluten-free bread cubes lightly before soaking so they hold structure and don't dissolve. GF bread absorbs less liquid, so check the custard level after 5 minutes and add 2-3 tablespoon more milk if needed.

Savory Bread Pudding with Eggs and Cheese served on a plate

Savory Bread Pudding with Eggs and Cheese

No ratings yet
Savory bread pudding with eggs and cheese bakes to a custardy interior with crispy golden edges. Day-old bread soaks up the whisked egg custard without falling apart, while melted cheese creates rich pockets throughout the dish.
Print Recipe Pin Recipe
Prep Time 15 minutes mins
Cook Time 45 minutes mins
Total Time 1 hour hr
Servings: 6 servings
Course: Breakfast, Brunch
Cuisine: American
Ingredients Method Notes

Ingredients
  

  • 6 cups bread day-old, French or sourdough, cut into 1-inch cubes
  • 6 large eggs whisk thoroughly
  • 2 cups whole milk or cream
  • 0.75 teaspoon salt
  • 0.5 teaspoon black pepper
  • 1.5 cups shredded cheddar cheese or gruyere
  • 2 tablespoon butter for greasing pan
  • 1 medium onion or leek, diced
  • 2 tablespoon fresh thyme or parsley, chopped
  • 0.5 cups bacon or mushrooms optional, cooked

Method
 

  1. Preheat oven to 350°F and grease an 8x8-inch baking dish with butter. Cut day-old bread into 1-inch cubes and spread evenly in the prepared dish.
    6 cups bread, 2 tbsp butter
  2. Whisk together eggs, milk, salt, and black pepper in a large bowl until smooth. Pour the custard over the bread cubes and press down firmly to ensure even soaking. Let stand for 10 minutes.
    6 large eggs, 2 cups whole milk, 0.75 tsp salt, 0.5 tsp black pepper
  3. Sauté diced onion in a skillet over medium heat for 5-7 minutes until translucent and softened. Stir the cooked onions and 1 cup of shredded cheese into the soaked bread mixture. Sprinkle the remaining ½ cup of cheese evenly on top.
    1.5 cups shredded cheddar cheese, 1 medium onion
  4. Bake on the middle rack for 40-45 minutes until the center is set and the edges are golden brown. The custard should jiggle slightly in the center but not appear wet.
  5. Let the pudding rest for 10 minutes before cutting into squares. Optional: Broil for 2-3 minutes to crisp the top without burning the cheese.

Notes

  • Use day-old bread cut into 1-inch cubes to prevent sogginess.
  • Press the bread firmly into the custard and let it soak for 10 minutes before baking.
  • Rest the pudding after baking to allow the custard to fully set and avoid collapse.

Tried this recipe?

Let us know how it was!

Jamaican Brown Stew Chicken

April 4, 2026

Dark meat sizzling in its own rendered fat, edges turning mahogany while brown sugar melts into a glossy glaze. That's what happens when you sear bone-in chicken pieces before simmering them in soy sauce and thyme.

Jamaican Brown Stew Chicken served on a plate

The pan builds flavor in layers. You get caramelized skin first, then deglaze with liquid to create a thick sauce that coats every piece.

This works for weeknight dinners when you want something that tastes slow-cooked but comes together in an hour. Makes enough for meal prep too.

QUICK SUMMARY

Jamaican Brown Stew Chicken starts with a quick marinade, then sears in its own fat before simmering in a savory-sweet sauce made from soy sauce, brown sugar, and thyme. The bone-in pieces stay moist while the sauce reduces into a thick glaze. Takes 60 minutes total with hands-off simmering time for the flavors to develop.

⏱️Time Reality: 15 minutes prep, 45 minutes mostly unattended cooking
🔥First Move: Sear chicken skin-side down 4-5 minutes before adding any liquid
⚠️Watch Out: Crowding the pan steams instead of sears - leave 1-2 inches between pieces

Table of Contents

Toggle
  • Why This Recipe Works
  • What You'll Need
    • Ingredient Details
  • Ingredient Swaps
  • What to Serve With It
  • Store and Reheat
  • Frequently Asked Questions
  • Jamaican Brown Stew Chicken
    • Method 
    • Tried this recipe?

Why This Recipe Works

The marinade tenderizes the meat while the searing step locks in moisture before the simmer. For nights when you want more ginger-forward flavor, a juicy homemade chicken recipe uses similar braising techniques with Filipino aromatics.

Quick Reference
⏱️
Prep Time
15 min
🔥
Cook Time
45 min
⏰
Total Time
60 min
🍽️
Servings
4 servings
📊
Difficulty
Medium
🏷️
Category
Main Dish
💡
Quick Tip
Sear chicken before simmering to deepen flavor
🎯
Best For
Weeknight | Meal prep | Casual entertaining

Why it works:

  • Bone-in chicken pieces retain moisture during the 45-minute simmer while boneless cuts dry out
  • Brown sugar caramelizes during searing to create the signature mahogany color and glossy finish
  • Soy sauce adds umami depth and acts as a browning agent for darker, richer color
  • Simmering uncovered for 20-25 minutes concentrates the sauce into a thick glaze that clings to the meat
  • Adding bell peppers in the last 10 minutes keeps them slightly crisp instead of mushy
Quick Tip
Use an instant-read thermometer to check doneness - chicken should hit 165°F (74°C) at the thickest part, not just look cooked on the outside

What You'll Need

Ingredients for Jamaican Brown Stew Chicken

Shop for bone-in chicken pieces and fresh thyme if you can find it - dried works but fresh gives brighter flavor. Most people skip aioli, but it balances the meal - for a version that comes together quickly, try smooth creamy dip that takes 5 minutes to whisk together.

🍗
Protein
  • 3 lbs bone-in chicken pieces (thighs and drumsticks)
🥢
Marinade & Sauce
  • 3 tablespoon soy sauce
  • 2 tablespoon brown sugar
  • 2 tablespoon tomato paste
  • 1 cup chicken stock or water
🧄
Aromatics
  • 1 large onion, sliced
  • 4 cloves garlic, minced
  • 1 tablespoon fresh ginger, grated
  • 4 sprigs fresh thyme (or 1 teaspoon dried)
  • 3 scallions, chopped
🥬
Vegetables
  • 1 bell pepper, sliced (any color)
  • 1 scotch bonnet or habanero pepper (optional)

Ingredient Details

  • Bone-in chicken pieces
    Dark meat (thighs and drumsticks) stays moist during long simmering - breasts dry out faster and need shorter cook times
  • Soy sauce
    Low-sodium works best so you can control salt levels - regular soy sauce can make the final dish too salty after reduction
  • Brown sugar
    Light or dark brown sugar both work - dark gives deeper molasses flavor and darker color
  • Fresh thyme
    Strip leaves from stems before adding - stems turn woody and bitter during cooking
  • Tomato paste
    Adds body to the sauce and balances sweetness with acidity - skip it if you prefer a thinner, sweeter sauce
  • Bell pepper
    Red or yellow peppers add more sweetness than green - add in the last 10 minutes to keep some crunch
  • Scotch bonnet pepper
    Pierce it whole and remove before serving for mild heat, or mince it for serious spice - habanero works as a substitute

Ingredient Swaps

You can adjust this recipe based on what you have or dietary needs. The core technique stays the same - marinate, sear, simmer - but these swaps change flavor or cooking time slightly.

Four practical swaps:

  • Soy sauce → tamari or coconut aminos: Use 1:1 ratio for gluten-free, coconut aminos tastes slightly sweeter so reduce brown sugar by 1 tsp
  • Brown sugar → maple syrup or honey: Use 2 tablespoon liquid sweetener, add it after searing since it burns faster than granulated sugar
  • Bone-in chicken → boneless thighs: Reduce simmer time to 25-30 minutes and check temp at 25 minutes to avoid drying out
  • Fresh thyme → dried thyme or oregano: Use 1 teaspoon dried for every 4 sprigs fresh, add it with the marinade instead of during simmering

Tamari (Gluten-Free Soy Sauce)

Works for: Gluten-free diets, tastes nearly identical to regular soy sauce

Skip if: You want the deepest umami punch - regular soy sauce has slightly more depth

Coconut Aminos

Works for: Soy-free diets, adds subtle sweetness that complements brown sugar

Skip if: You want traditional Jamaican flavor - it tastes noticeably different from soy sauce

Boneless Chicken Thighs

Works for: Faster cooking (saves 15 minutes), easier to eat without dealing with bones

Skip if: You want the richest sauce - bones add flavor and gelatin that thickens the liquid

Instructions

Total active time is about 20 minutes with 40 minutes of hands-off simmering. A good salad can make or break the plate - we keep a batch ready for nights like this, and something fresh like salad adds the brightness this rich dish needs.

  1. Marinate the chicken: Mix soy sauce, brown sugar, half the garlic, half the ginger, and thyme in a large bowl. Add chicken pieces and coat completely. Cover and refrigerate 30 minutes minimum, up to 4 hours for deeper flavor.

  2. Sear the chicken: Heat a large skillet or Dutch oven over medium-high heat. Remove chicken from marinade (save the liquid) and place skin-side down in the pan with 1-2 inches between pieces. Sear undisturbed 4-5 minutes until mahogany brown, then flip and sear other side 3-4 minutes. Remove chicken and set aside.

  3. Build the sauce: Reduce heat to medium. Add onion, remaining garlic, and remaining ginger to the pan. Cook 2-3 minutes until onion softens, scraping up browned bits from the bottom. Add tomato paste and cook 1 minute, stirring constantly.

  4. Simmer the chicken: Return chicken to pan. Pour in reserved marinade and chicken stock. Add whole scotch bonnet if using. Bring to a boil, then reduce to a gentle simmer. Cook uncovered 35-40 minutes, turning chicken halfway through, until meat reaches 165°F (74°C) and sauce reduces by half.

  5. Finish and rest: Add bell pepper and scallions in the last 10 minutes of cooking. Remove scotch bonnet before serving. Let chicken rest 5 minutes so juices redistribute, then serve with sauce spooned over top.

Golden Rule
Never cover the pan during simmering - the sauce needs to reduce and concentrate, and a lid traps steam that thins it out and prevents caramelization

What to Serve With It

Rich, savory chicken needs something to balance the plate - either neutral starch to soak up sauce or bright sides to cut through the richness. For more ways to round out weeknight chicken dinner ideas, that guide covers what works best with bold, saucy poultry dishes.

Side Dish Prep Why It Works How to Serve
Steamed white rice Easy Neutral base soaks up thick brown sauce without competing with bold flavors Mound rice on plate, spoon chicken and sauce over top, let it soak in
Red kidney beans Easy Traditional Jamaican pairing adds protein and creamy texture that balances spice Serve warm beans alongside or mixed into rice, drizzle with pan sauce
Fried plantains Medium Sweet, caramelized edges contrast with savory chicken and add soft texture Slice ripe plantains, pan-fry until golden, serve on side for dipping in sauce
Simple green salad Easy Fresh greens and tangy vinaigrette cut through rich, sweet sauce Toss lettuce with lime juice and olive oil, serve on separate plate to stay crisp
Festival (fried dough) Involved Traditional sweet, crispy Jamaican side adds textural contrast and soaks up sauce Serve hot alongside chicken, tear pieces for dipping in pan sauce

Three ways to serve it:

  • Weeknight bowl: Spoon chicken and sauce over rice with kidney beans mixed in, top with sliced scallions and lime wedge
  • Meal prep: Pack chicken, rice, and beans in separate containers, reheat and combine when ready to eat
  • Weekend plate: Serve with fried plantains and festival on the side, drizzle extra sauce over everything
Best Pick
Rice and peas (kidney beans cooked with coconut milk and thyme) is the most authentic pairing - the creamy beans and fragrant rice mirror the same Caribbean flavors in the chicken

Store and Reheat

Chicken keeps well because the sauce protects the meat from drying out. Rolls adds the contrast this plate needs, but timing matters - for a version that comes together quickly, this quick rolls dish takes 15 minutes start to finish.

Method Time Best For
🍳 Stovetop 8-10 min low heat Best texture retention, add splash of water if sauce thickened in fridge
🔥 Oven 15-20 min at 325°F (163°C) Larger portions, cover with foil to prevent drying, uncover last 5 minutes for crispy edges
📦 Microwave 2-3 min medium power Quickest option, stir halfway through, skin won't crisp but meat stays moist

For best results when storing:

  • Let chicken cool to room temperature within 30 minutes, then transfer to shallow airtight containers to chill quickly
  • Store sauce and chicken together so meat stays moist - sauce forms a protective layer that prevents drying
  • Refrigerate up to 3-4 days, freeze up to 3 months in freezer-safe containers or bags with air pressed out
  • Label containers with date and reheat instructions - frozen chicken needs thawing in fridge overnight before reheating
  • Add fresh scallions and bell pepper after reheating if you want brighter color and crunch - original vegetables soften more during storage

Frequently Asked Questions

Can I use boneless chicken for Jamaican Brown Stew Chicken?

Yes, use boneless skinless thighs and reduce simmer time to 25-30 minutes. Check temp at 25 minutes since boneless cuts cook faster and dry out easier than bone-in pieces.

How should I store and reheat leftover Brown Stew Chicken?

Store in airtight containers in the fridge up to 4 days or freeze up to 3 months. Reheat on stovetop over low heat for 8-10 minutes with a splash of water, or microwave 2-3 minutes at medium power.

What is the ideal internal temperature and texture for doneness?

Chicken should reach 165°F (74°C) at the thickest part of the meat. The texture should be tender enough to pull from the bone easily but not falling apart, with a glossy brown sauce coating each piece.

Why is my sauce too thin or too bitter?

Thin sauce means you added too much liquid or didn't simmer long enough - increase heat slightly and cook uncovered until reduced by half. Bitter sauce comes from burning the sugar during searing - use medium-high heat, not high, and watch the pan closely when caramelizing.

What are easy sides to serve with Jamaican Brown Stew Chicken?

Steamed white rice works best for soaking up sauce, with kidney beans or fried plantains on the side. For lighter options, serve with a simple green salad dressed with lime juice to cut through the rich flavors.

Can I make Jamaican Brown Stew Chicken ahead?

Yes, the flavor actually improves after sitting overnight in the fridge. Make it up to 2 days ahead, store in an airtight container, and reheat gently before serving.

Is Brown Stew Chicken gluten-free?

Not with regular soy sauce, which contains wheat. Swap in tamari or coconut aminos using a 1:1 ratio to make it gluten-free without changing the recipe.

What is the difference between Brown Stew Chicken and Jerk Chicken?

Brown Stew Chicken simmers in a sweet-savory sauce with soy sauce and brown sugar, while Jerk Chicken uses a dry spice rub with allspice, scotch bonnet, and thyme, then grills or roasts at high heat. Stew is saucy and braised, jerk is dry and charred.

Jamaican Brown Stew Chicken served on a plate

Jamaican Brown Stew Chicken

No ratings yet
Jamaican Brown Stew Chicken features bone-in pieces marinated and seared to develop a rich mahogany glaze. The savory-sweet sauce made with soy sauce, brown sugar, and thyme simmers to coat the chicken in thick, glossy flavor. Ideal for weeknight dinners and meal prep with just 60 minutes total time.
Print Recipe Pin Recipe
Prep Time 15 minutes mins
Cook Time 45 minutes mins
Total Time 1 hour hr
Servings: 4 servings
Course: Main Dish
Cuisine: Caribbean, Jamaican
Ingredients Equipment Method Notes

Ingredients
  

  • 3 lbs chicken pieces bone-in thighs and drumsticks
  • 3 tablespoon soy sauce low sodium preferred
  • 2 tablespoon brown sugar
  • 2 tablespoon tomato paste
  • 1 cup chicken stock or water
  • 1 large onion sliced
  • 4 cloves garlic minced, divided
  • 1 tablespoon fresh ginger grated, divided
  • 4 sprigs fresh thyme or 1 teaspoon dried
  • 3 count scallions chopped
  • 1 count bell pepper sliced, any color
  • 1 count scotch bonnet pepper optional, whole

Equipment

  • large skillet or Dutch oven Used for searing chicken and simmering the sauce

Method
 

  1. Mix soy sauce, brown sugar, half the garlic, half the ginger, and thyme in a large bowl. Add chicken pieces and coat completely. Cover and refrigerate for at least 30 minutes, up to 4 hours for deeper flavor.
    3 tbsp soy sauce, 2 tbsp brown sugar, 4 cloves garlic, 1 tbsp fresh ginger, 4 sprigs fresh thyme, 3 lbs chicken pieces
  2. Heat a large skillet or Dutch oven over medium-high heat. Remove chicken from marinade (reserve liquid) and place skin-side down in pan with 1-2 inches between pieces. Sear undisturbed 4-5 minutes until mahogany brown, flip and sear other side 3-4 minutes. Remove chicken and set aside.
    3 lbs chicken pieces
  3. Reduce heat to medium. Add onion, remaining garlic and ginger to pan. Cook 2-3 minutes until onion softens, scraping browned bits. Add tomato paste and cook 1 minute, stirring constantly.
    1 large onion, 4 cloves garlic, 1 tbsp fresh ginger, 2 tbsp tomato paste
  4. Return chicken to pan. Pour in reserved marinade and chicken stock. Add whole scotch bonnet if using. Bring to boil, then reduce to gentle simmer. Cook uncovered 35-40 minutes, turning chicken halfway, until internal temp reaches 165°F (74°C) and sauce reduces by half.
    3 lbs chicken pieces, 1 cup chicken stock, 1 count scotch bonnet pepper
  5. Add bell pepper and scallions in last 10 minutes of cooking. Remove scotch bonnet before serving. Let chicken rest 5 minutes for juices to redistribute, then serve with sauce spooned over top.
    1 count bell pepper, 3 count scallions, 1 count scotch bonnet pepper, 3 lbs chicken pieces

Notes

  • Use bone-in chicken pieces for moist meat and richer sauce.
  • Do not cover pan while simmering; sauce needs to reduce and thicken uncovered.
  • Check chicken doneness with an instant-read thermometer; target 165°F (74°C) internal temperature.

Tried this recipe?

Let us know how it was!

Ham and Cheese Egg Strata

April 4, 2026

When you need something reliable for weekend brunch or meal prep that doesn't require morning-of cooking, egg strata works. One dish bakes while you shower or set the table, and the custard stays creamy even when reheated days later.

Ham and Cheese Egg Strata served on a plate

The bread soaks up the egg mixture and turns into soft, custardy layers. You get pockets of melted cheese and salty ham without flipping or stirring.

Make this for holiday breakfast when you want to feed a crowd without standing over the stove, or prep it Sunday night for grab-and-go weekday mornings.

QUICK SUMMARY

Ham and Cheese Egg Strata layers day-old bread with eggs, milk, ham, and cheese, then bakes into a creamy custard with slightly crispy edges. The bread must be stale so it absorbs the custard without turning mushy. Soak 10-15 minutes before baking for the best texture.

⏰Time Reality: 20 minutes hands-on, 45 minutes baking, plus 10-minute soak time
🔑Success Move: Use stale bread cut into 1-inch cubes so custard penetrates evenly
⚠️Watch Out: Fresh bread turns soggy - leave bread out overnight or toast lightly first

Table of Contents

Toggle
  • Why This Recipe Works
  • What You'll Need
    • Ingredient Details
  • Ingredient Swaps
  • What to Serve With It
  • Store and Reheat
  • Frequently Asked Questions
  • Ham and Cheese Egg Strata
    • Method 
    • Tried this recipe?

Why This Recipe Works

The egg-milk custard soaks into every bread cube and sets into a firm but tender texture that holds its shape when sliced. Baking at 350°F cooks the eggs through without drying them out or curdling the dairy, and the cheese melts into pockets throughout. For a version that comes together quickly, homemade frittata recipe skips the soak time and bakes faster.

Quick Reference
⏱️
Prep Time
20 min
🔥
Cook Time
45 min
⏰
Total Time
1 hr 5 min
🍽️
Servings
6-8 servings
📊
Difficulty
Easy
🏷️
Category
Main Dish
💡
Quick Tip
Soak bread well for creamy custard texture
🎯
Best For
Weeknight | Meal prep | Entertaining

Five things that make this work:

  • Stale bread absorbs custard without falling apart - fresh bread turns to mush and ruins the texture
  • The 10-15 minute soak distributes custard evenly - skip it and you get dry patches and raw egg pools
  • Baking at 350°F sets eggs gently - higher temps curdle the custard and dry out the edges
  • Resting 10 minutes after baking firms up the structure - slice too soon and it falls apart on the spatula
  • Ham and cheese add enough salt on their own - season the custard lightly or the final dish tastes too salty
Golden Rule
Insert a knife in the center after 45 minutes - it should come out clean with no liquid egg clinging to it

What You'll Need

Ingredients for Ham and Cheese Egg Strata

Day-old bread and cooked ham eliminate most of the prep work, and the rest goes into one bowl. The sandwiches works best when it hits the table at the same time as the main. For a version that comes together quickly, simple homemade sandwiches takes fewer steps and bakes faster on a sheet pan.

🥚
Base
  • 8 large eggs
  • 2 cups milk or half-and-half
  • ½ teaspoon salt
  • ¼ teaspoon black pepper
🍞
Bread
  • 6 cups day-old bread cubes (1-inch pieces)
  • French, sourdough, or brioche work best
🍖
Protein & Cheese
  • 2 cups diced cooked ham
  • 2 cups shredded cheese (cheddar or Swiss)
🧈
Extras
  • 1 tablespoon butter for greasing dish
  • Optional: 2 tablespoons chopped chives or parsley

Ingredient Details

  • Day-old bread
    Leave bread out overnight uncovered or toast fresh bread lightly to dry it out - fresh bread turns soggy and can't hold the custard
  • Milk or half-and-half
    Half-and-half makes a richer custard; whole milk works fine and saves cost - avoid skim milk which thins the texture
  • Cooked ham
    Deli ham, leftover baked ham, or ham steak all work - cut into ½-inch cubes so pieces distribute evenly
  • Cheese choice
    Sharp cheddar adds tangy punch, Swiss melts smooth and mild - shred from a block for better melting than pre-shredded
  • Eggs
    Whisk just until yolks and whites combine - overmixing adds air that dries out the custard during baking
  • Salt timing
    Use only ½ teaspoon in the custard since ham and cheese add plenty of salt - taste after baking and adjust then
  • Butter for dish
    Grease the entire 9x13 inch baking dish including corners to prevent sticking - use your fingers to spread it evenly

Ingredient Swaps

Most swaps work if you match the moisture level and protein content. Rich mains need something to cut through, and coleslaw does exactly that. For a version that comes together quickly, something crunchy like coleslaw balances the creamy custard and adds freshness to the plate.

Four swaps that work:

  • Swap ham for cooked turkey or chicken - milder flavor and leaner protein, cut into same-size cubes for even distribution
  • Swap cheddar for mozzarella or fontina - milder cheese that melts smooth, use same amount but expect less sharpness
  • Swap milk for unsweetened almond milk - thinner custard with slightly less richness, add 1 extra egg to compensate
  • Swap white bread for gluten-free bread - denser texture and less custardy result, soak an extra 5 minutes before baking

Fresh Bread

Works for: Last-minute baking when you forgot to stale bread - toast lightly first to dry it out

Skip if: You want the best texture - fresh bread absorbs unevenly and turns mushy in spots

Stale Bread

Works for: Proper custard absorption and even texture throughout the strata

Skip if: You're baking today and have no time to dry bread - toast fresh bread instead as backup

Instructions

Mix the custard, layer everything in a greased dish, soak 10-15 minutes, then bake at 350°F for 45 minutes. A good dressing can make or break the plate. We keep a batch ready for nights like this - a creamy dressing side adds herby brightness that cuts through the richness.

  1. Grease a 9x13 inch baking dish with butter. Spread it with your fingers into every corner so nothing sticks after baking.

  2. Whisk 8 eggs, 2 cups milk, ½ teaspoon salt, and ¼ teaspoon black pepper in a large bowl for 30 seconds. Stop when everything combines - overmixing adds air bubbles that dry out the custard.

  3. Layer 6 cups stale bread cubes, 2 cups diced ham, and 2 cups shredded cheese in the greased dish. Distribute evenly so every serving gets protein and cheese.

  4. Pour egg mixture over the layered ingredients and press bread down gently with a spatula so it soaks up custard. Let sit 10-15 minutes at room temperature before baking.

  5. Bake at 350°F for 40-50 minutes until a knife inserted in the center comes out clean. The top should look golden with visible cheese pockets, and the center should barely wobble when you shake the pan. Rest 10 minutes before slicing.

Shortcut
Prep the entire strata the night before, cover with foil, refrigerate, then bake straight from the fridge in the morning - add 10 extra minutes to bake time

What to Serve With It

Strata fills the plate, so sides should add crunch or brightness instead of more richness. Salad adds the contrast this plate needs, but timing matters. For a version that comes together quickly, this easy salad recipe takes 10 minutes and pairs with any easy pork dish planning when you want ideas beyond the usual.

Side Dish Prep Why It Works How to Serve
Mixed green salad Easy Crisp greens cut through custard richness Toss with vinaigrette and serve alongside warm strata slices
Roasted potatoes Medium Crispy texture contrasts with soft custard Roast at 425°F while strata bakes at 350°F, finish at same time
Fresh fruit salad Easy Sweet and refreshing against salty ham Cut fruit into bite-size pieces, chill until serving
Steamed asparagus Easy Mild vegetable that doesn't compete with flavors Steam 3-4 minutes until bright green, drizzle with lemon juice
Crispy bacon strips Easy Adds smoky crunch for texture variety Bake on sheet pan at 400°F for 15 minutes, serve on the side

Three ways to serve it:

  • For brunch hosting: Set out honey mustard and maple syrup in small bowls for drizzling, plus mimosas and buttered dinner rolls
  • For weekday meal prep: Slice into individual portions, store in containers with fresh fruit salad and roasted potatoes on the side
  • For holiday breakfast: Serve with crispy bacon strips, steamed asparagus, and fresh tomato salsa for a full spread
Best Pick
Potatoes adds the contrast this plate needs, but timing matters. We keep a batch ready for nights like this - this creamy potatoes crisps up while the strata rests and adds the crunch every bite needs

Store and Reheat

Strata holds moisture well and tastes almost as good reheated as fresh from the oven. Store in shallow containers so it cools fast and reheats evenly. Leftovers work for grab-and-go breakfast through the week.

Method Time Best For
🔥 Oven 15-20 min at 325°F Full portions or multiple slices - keeps texture intact
📦 Microwave 1-2 min per slice Single servings when you need speed - edges soften but center heats through
🍳 Stovetop 5-7 min low heat, covered Restoring crispy edges on single slices - use nonstick skillet with lid

For best results when storing:

  • Cool to room temperature before refrigerating - cover loosely with foil for the first 30 minutes so condensation doesn't make it soggy
  • Slice into portions before storing - reheat only what you need instead of warming the whole pan multiple times
  • Wrap tightly in plastic or foil for freezing - freeze up to 1 month, thaw overnight in fridge before reheating
  • Add moisture when reheating - drizzle 1 tablespoon water over oven portions or cover microwave slices with damp paper towel
  • Skip stovetop for full portions - oven reheating works better for large pieces that need even heating throughout

Frequently Asked Questions

How long to cook ham and cheese egg strata at 350°F?

Bake for 40-50 minutes until a knife inserted in the center comes out clean with no liquid egg. The top should look golden and the center should barely wobble when you shake the pan.

Can I make ham and cheese egg strata ahead?

Yes, assemble the entire strata the night before, cover tightly with foil, and refrigerate up to 24 hours. Bake straight from the fridge in the morning, adding 10 extra minutes to the bake time since it starts cold.

What goes with ham and cheese egg strata?

Serve with mixed green salad, roasted potatoes, fresh fruit salad, or steamed asparagus. Add crispy bacon strips or fresh tomato salsa for extra flavor, and set out honey mustard or maple syrup for drizzling.

How do I know when ham and cheese egg strata is done?

Insert a knife in the center after 45 minutes - it should come out clean with no liquid egg clinging to the blade. The top should look golden with visible cheese pockets, and the center should barely wobble when you gently shake the pan.

Can I use turkey instead of ham in egg strata?

Yes, cooked turkey or chicken works as a direct swap for ham using the same amount. The flavor will be milder and leaner, so consider using a sharper cheese like aged cheddar to add more punch to each bite.

Ham and Cheese Egg Strata served on a plate

Ham and Cheese Egg Strata

No ratings yet
Ham and Cheese Egg Strata uses stale bread soaked in an egg and milk custard layered with ham and cheese, then baked to creamy perfection with crispy edges. The 10-15 minute soak ensures even custard absorption, creating tender, sliceable layers full of melted cheese and savory ham. It's ideal for weekend brunch, holiday breakfasts, or easy meal prep that holds well reheated.
Print Recipe Pin Recipe
Prep Time 20 minutes mins
Cook Time 45 minutes mins
Total Time 1 hour hr 5 minutes mins
Servings: 6 servings
Course: Breakfast, Brunch, Main Dish
Cuisine: American
Ingredients Equipment Method Notes

Ingredients
  

  • 8 large eggs whisk until just combined
  • 2 cups milk or half-and-half for richer custard
  • 0.5 teaspoon salt season lightly due to salty ham and cheese
  • 0.25 teaspoon black pepper
  • 6 cups bread day-old cubes, 1-inch pieces; stale bread required
  • 2 cups ham cooked, diced into ½-inch cubes
  • 2 cups cheese shredded cheddar or Swiss
  • 1 tablespoon butter for greasing baking dish
  • 2 tablespoons chives or parsley optional, chopped

Equipment

  • 9x13 inch baking dish Greased with butter to prevent sticking
  • Whisk Used to combine eggs and milk
  • Spatula To press bread down and distribute custard

Method
 

  1. Grease a 9x13 inch baking dish thoroughly with butter, spreading it into every corner to prevent sticking.
    1 tablespoon butter
  2. In a large bowl, whisk together 8 eggs, 2 cups milk, ½ teaspoon salt, and ¼ teaspoon black pepper for about 30 seconds until just combined. Avoid overmixing.
    8 large eggs, 2 cups milk, 0.5 teaspoon salt, 0.25 teaspoon black pepper
  3. Layer 6 cups of stale bread cubes evenly in the greased dish. Sprinkle 2 cups diced cooked ham over the bread, followed by 2 cups shredded cheese.
    6 cups bread, 2 cups ham, 2 cups cheese
  4. Pour the egg mixture evenly over the layered ingredients. Use a spatula to gently press the bread down, ensuring it soaks up the custard. Let the strata sit at room temperature for 10-15 minutes before baking.
    8 large eggs, 2 cups milk, 0.5 teaspoon salt, 0.25 teaspoon black pepper, 6 cups bread, 2 cups ham, 2 cups cheese
  5. Preheat the oven to 350°F (177°C). Bake the strata for 40-50 minutes until a knife inserted in the center comes out clean and the top is golden with visible cheese pockets. The center should barely wobble when you gently shake the pan.
  6. Remove the strata from the oven and let it rest for 10 minutes to firm up before slicing and serving. Optionally, sprinkle chopped chives or parsley on top for garnish.
    2 tablespoons chives or parsley

Notes

  • Use stale bread to prevent sogginess; fresh bread should be toasted or dried overnight before use.
  • Soak the strata 10-15 minutes before baking to ensure even custard absorption and avoid dry spots.
  • Resting after baking sets the strata's structure, making it easier to slice without falling apart.

Tried this recipe?

Let us know how it was!

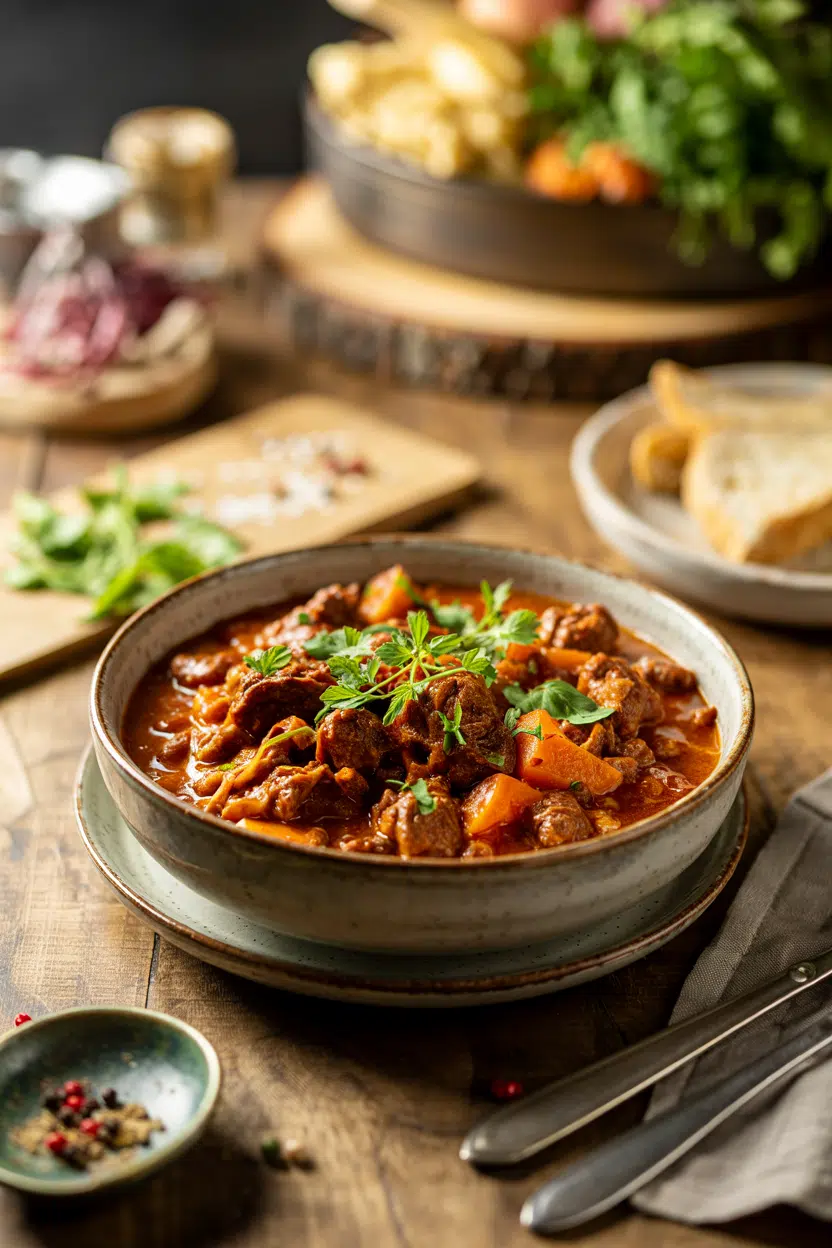
Beef Goulash Hungarian-Style

April 3, 2026

Slow-cooked beef chuck in a paprika-rich broth creates tender meat with deep, earthy flavor. The key is browning the beef well before simmering it low and slow with Hungarian sweet paprika and caraway seeds.

Beef Goulash Hungarian-Style served on a plate

A heavy-bottomed pot holds steady heat for the 2+ hour simmer. You don't need to stir constantly or check every ten minutes.

This is what we make for meal prep Sundays or weeknight dinners when we want something that tastes like it took more effort than it actually did.

QUICK SUMMARY

Beef chuck simmers in paprika-spiced broth until fork-tender. Success depends on searing the meat properly and maintaining a gentle simmer. The paprika must go in off-heat to avoid bitterness.

⏱️Time Reality: 15 min prep, then 2.5 hours mostly unattended on the stove
🔥Critical First Move: Brown beef in batches-crowding steams the meat instead of searing it
⚠️Watch Out: Add paprika after removing pot from heat or it burns and turns bitter

Table of Contents

Toggle
  • Why This Recipe Works
  • What You'll Need
    • Ingredient Details
  • Ingredient Swaps
  • What to Serve With It
  • Store and Reheat
  • Frequently Asked Questions
  • Beef Goulash Hungarian-Style
    • Method 
    • Tried this recipe?

Why This Recipe Works

Beef chuck breaks down into tender chunks during the long simmer while the paprika blooms into the sauce. For a version that comes together quickly, this rich beef uses similar braising techniques with different aromatics.

Quick Reference
⏱️
Prep Time
15 min
🔥
Cook Time
2 hours 30 min
⏰
Total Time
2 hours 45 min
🍽️
Servings
6 servings
📊
Difficulty
Medium
🏷️
Category
Main Dish
💡
Quick Tip
Sear beef well for maximum flavor
🎯
Best For
Weeknight, Meal prep

Five reasons this recipe delivers:

  • Batch searing creates crust - Brown 1-inch cubes in two batches, 3-4 minutes per side, without crowding the pot
  • Paprika blooms off-heat - Stir in Hungarian sweet paprika after removing the pot from direct flame to prevent burning
  • Gentle simmer tenderizes - Maintain 185°F-205°F for the full 2+ hours so the beef breaks down without drying out
  • Vegetables hold shape - Add bell peppers and potatoes in the last 30 minutes so they soften but don't turn to mush
  • Resting thickens sauce - Let the stew sit 10 minutes off heat before serving so the liquid reduces slightly and flavors settle
Quick Tip
Deglaze the pot with broth after searing to lift all the browned bits-that's where half the flavor lives.

What You'll Need

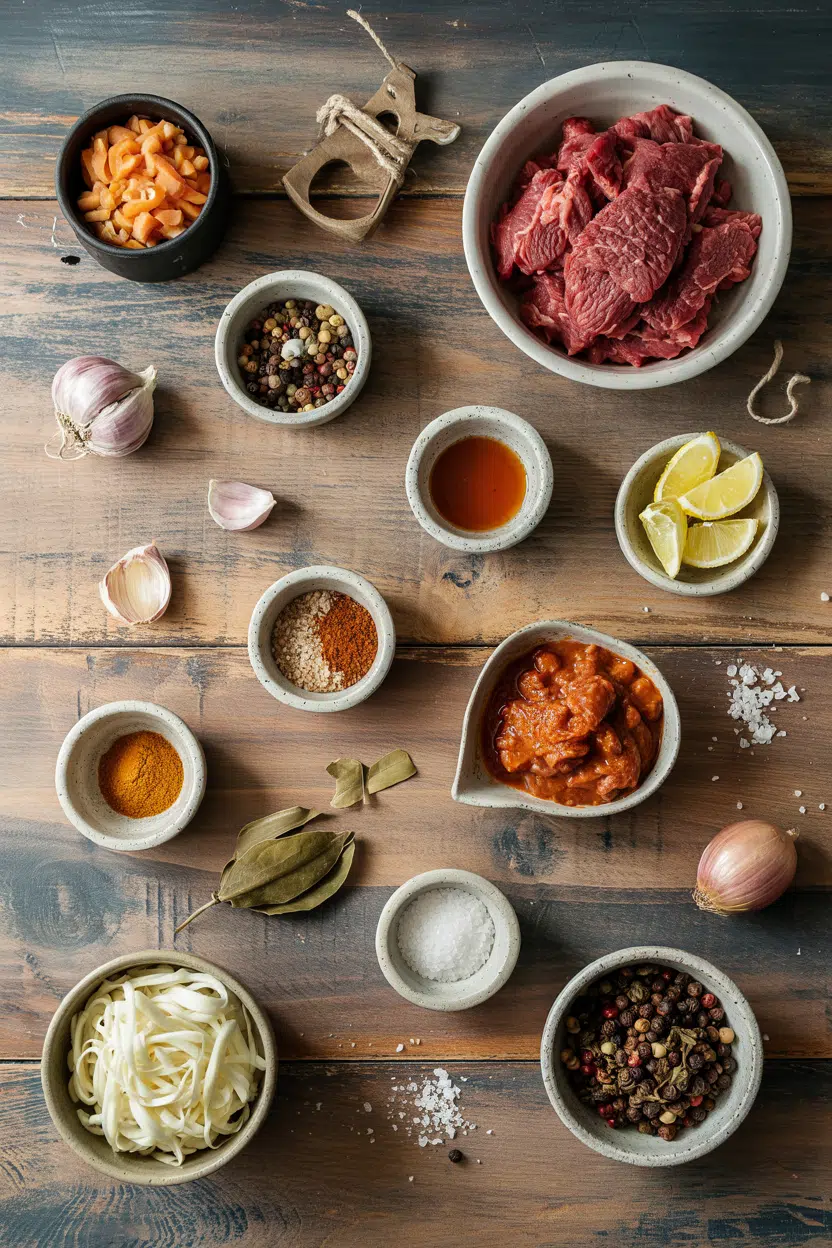
Ingredients for Beef Goulash Hungarian-Style

Shop for fresh paprika if yours has been sitting in the cupboard for more than six months. We keep a batch ready for nights like this - this creamy dip uses similar pantry spices and stores just as well.

🥩
Beef
  • 2 lbs beef chuck, cut into 1-inch cubes
  • Salt and pepper for seasoning
🧄
Aromatics
  • 2 large onions, diced
  • 4 cloves garlic, minced
  • 1 teaspoon caraway seeds
🌶️
Vegetables
  • 2 bell peppers, chopped
  • 2 medium potatoes, cubed (optional)
🥫
Sauce Base
  • 3 tablespoon Hungarian sweet paprika
  • 2 tablespoon tomato paste
  • 3 cups beef broth

Ingredient Details

  • Beef chuck
    Tough cuts with marbling break down into tender, flavorful chunks during the long simmer-skip lean cuts like sirloin
  • Hungarian sweet paprika
    This is the signature spice-regular paprika works but lacks the vibrant color and sweet depth of the Hungarian version
  • Onion
    Sweating diced onions until soft and golden builds the sweet base layer for the entire stew
  • Caraway seeds
    These add earthy, anise-like undertones that balance the paprika's sweetness-don't skip them
  • Beef broth
    Use low-sodium broth so you can control the salt level as the liquid reduces during cooking
  • Tomato paste
    A small amount adds umami depth and helps thicken the sauce without making it taste tomato-forward
  • Bell peppers
    Add these in the last 30 minutes so they soften but keep some texture-any color works

Ingredient Swaps

Most swaps work if you maintain the cooking time and paprika base. The beef works best when it hits the table at the same time as the main - simple rolls recipe soaks up the sauce without competing for attention.

Four swaps that hold up:

  • Beef chuck → beef brisket - Similar tenderness with slightly different texture; same cooking time applies
  • Hungarian sweet paprika → regular paprika - Slightly less vibrant color and authentic flavor, but still delivers the signature taste
  • Bell peppers → zucchini - Less sweetness and softer texture; add in the last 20 minutes instead of 30
  • Potatoes → skip them entirely - Lower starch content makes a lighter, brothier stew that works for low-carb meals

Beef Brisket

Works for: Budget cooking, similar tenderness, holds up to long simmer

Skip if: You want the most traditional texture-chuck is fattier and more forgiving

Pork Shoulder

Works for: Different flavor profile, cooks in similar time, stays moist

Skip if: You want authentic Hungarian goulash-pork changes the dish entirely

Regular Paprika

Works for: Budget-friendly, widely available, still delivers paprika flavor

Skip if: You care about vibrant color and authentic sweet depth-Hungarian is worth finding

Instructions

Plan for 15 minutes of active prep, then mostly hands-off simmering. Cool and crunchy, slaw resets your palate between bites - homemade slaw recipe cuts through the richness without extra cooking.

Five steps to tender beef:

  1. Sear the beef - Pat 2 lbs beef chuck cubes dry, season with salt and pepper, then brown in 2 batches over medium-high heat, 3-4 minutes per side. Don't crowd the pot or the meat steams instead of searing. Remove beef and set aside.

  2. Sweat the onions - In the same pot, cook 2 diced onions over medium heat until soft and golden, about 8 minutes. Stir in 4 minced garlic cloves and 1 teaspoon caraway seeds, cook 1 minute until fragrant.

  3. Add paprika off-heat - Remove pot from burner, then stir in 3 tablespoon Hungarian sweet paprika and 2 tablespoon tomato paste. This prevents the paprika from burning and turning bitter. Return pot to heat, add beef back in, pour in 3 cups beef broth, bring to a boil.

  4. Simmer low and slow - Reduce heat to low, cover, and simmer gently for 2 hours, stirring occasionally. The beef should pull apart easily with a fork. Add 2 chopped bell peppers and 2 cubed potatoes (if using) in the last 30 minutes.

  5. Rest and adjust - Turn off heat, let stew sit covered for 10 minutes. Taste and adjust salt, add a splash of vinegar or lemon juice if it needs brightness. The sauce should coat the back of a spoon.

Golden Rule
Maintain a gentle simmer at 185°F-205°F-boiling hard dries out the beef and makes it stringy instead of tender.

What to Serve With It

A good salad can make or break the plate. For a version that comes together quickly, something fresh and light balances the richness without extra fuss.

Side Dish Prep Why It Works How to Serve
Egg noodles Easy Absorbs sauce, quick to prepare, classic pairing Boil 8 min, toss with butter, spoon goulash on top
Buttered potatoes Easy Traditional side, balances rich stew, simple prep Boil small potatoes 15 min, toss with butter and parsley
Crusty white bread Easy Perfect for dipping sauce, no cooking required Slice thick, serve warm on the side for soaking up broth
Steamed rice Easy Neutral base, soaks up sauce, stretches servings Cook rice, serve goulash ladled over the top
Pickled cucumber salad Easy Cuts richness with acidity, refreshing contrast Slice cucumbers thin, toss with vinegar and dill, chill 10 min

Three ways to serve it:

  • Weeknight plate: Spoon goulash over egg noodles, serve with a simple green salad and crusty bread for dipping
  • Meal prep bowl: Portion goulash into containers with steamed rice, top with sour cream before reheating
  • Hosting dinner: Serve family-style with spaetzle, roasted root vegetables, and pickled cucumber salad on the side

For more hearty beef dinner ideas, check the full pairing guide.

Best Pick
Top each bowl with a dollop of sour cream or crème fraîche-it balances the paprika heat and adds creamy richness.

Store and Reheat

Goulash tastes better the next day after the flavors have time to meld. Store in shallow airtight containers so it cools quickly and reheats evenly without hot spots.

Method Time Best For
🍳 Stovetop 8-10 min over medium heat, stir occasionally Best flavor and texture retention, add splash of broth if needed
🔥 Oven 20 min at 325°F covered Large portions, even heating, good for meal prep containers
📦 Microwave 3-4 min, stir halfway Quick single servings, less ideal texture but convenient

For best results when storing:

  • Fridge storage: Keep in airtight containers up to 3-4 days-the paprika flavor deepens over time
  • Freeze smart: Portion into freezer-safe containers, leave 1-inch headspace for expansion, freeze up to 3 months
  • Thaw safely: Move frozen goulash to the fridge 24 hours before reheating for even warming
  • Add moisture: Stir in a splash of beef broth when reheating if the sauce has thickened too much
  • Skip the microwave for potatoes: If your goulash has potatoes, stovetop or oven reheating prevents them from turning gummy

Frequently Asked Questions

Can I substitute pork for beef in Hungarian goulash?

Yes-use pork shoulder and cook it the same way for similar tenderness. The flavor profile changes completely, so it's more of a pork stew than authentic goulash, but it works if that's what you have.

How should I store leftover goulash and for how long?

Store in airtight containers in the fridge for 3-4 days or freeze for up to 3 months. The paprika flavor actually improves after a day or two in the fridge.

How do I know when the beef is tender and goulash is done?

The beef should pull apart easily with a fork and no longer feel chewy. If it's still tough after 2 hours, keep simmering-some cuts need closer to 2.5 or 3 hours to fully break down.

What to do if the goulash tastes too bitter?

The paprika likely burned-add a pinch of sugar or a splash of vinegar to balance it. Next time, remove the pot from heat completely before stirring in the paprika.

What are some good sides to serve with beef goulash?

Egg noodles, buttered potatoes, steamed rice, or crusty bread all work-they soak up the sauce and keep prep simple. Add a pickled cucumber salad or simple green salad to cut the richness.

Beef Goulash Hungarian-Style served on a plate

Beef Goulash Hungarian-Style

No ratings yet
Slow-cooked beef chuck simmers in a paprika-spiced broth until tender and flavorful. Key steps include searing the beef well and adding Hungarian sweet paprika off-heat to avoid bitterness, resulting in a rich, earthy stew perfect for meal prep or weeknight dinners.
Print Recipe Pin Recipe
Prep Time 15 minutes mins
Cook Time 2 hours hrs 30 minutes mins
Total Time 2 hours hrs 45 minutes mins
Servings: 6 servings
Course: Main Dish
Cuisine: Hungarian
Ingredients Equipment Method Notes

Ingredients
  

  • 2 lbs beef chuck cut into 1-inch cubes
  • salt for seasoning beef
  • black pepper for seasoning beef
  • 2 large onions diced
  • 4 cloves garlic minced
  • 1 teaspoon caraway seeds
  • 2 bell peppers chopped
  • 2 medium potatoes cubed, optional
  • 3 tablespoon Hungarian sweet paprika added off-heat to prevent burning
  • 2 tablespoon tomato paste
  • 3 cups beef broth preferably low sodium

Equipment

  • Heavy-bottomed pot Used for steady heat during simmering

Method
 

  1. Pat beef chuck cubes dry and season with salt and pepper. Brown in two batches over medium-high heat, 3-4 minutes per side, without crowding the pot. Remove beef and set aside.
    2 lbs beef chuck, salt, black pepper
  2. In the same pot, cook diced onions over medium heat until soft and golden, about 8 minutes. Stir in minced garlic and caraway seeds, cook for 1 more minute until fragrant.
    2 large onions, 4 cloves garlic, 1 tsp caraway seeds
  3. Remove the pot from the burner and stir in Hungarian sweet paprika and tomato paste to prevent burning. Return to heat, add the beef back in, pour in beef broth, and bring to a boil.
    3 tbsp Hungarian sweet paprika, 2 tbsp tomato paste, 3 cups beef broth, 2 lbs beef chuck
  4. Reduce heat to low, cover, and simmer gently for 2 hours, stirring occasionally. Add chopped bell peppers and cubed potatoes (if using) in the last 30 minutes of cooking.
    2 bell peppers, 2 medium potatoes
  5. Turn off heat and let the stew sit covered for 10 minutes. Taste and adjust salt. Add a splash of vinegar or lemon juice if needed for brightness. The sauce should coat the back of a spoon.

Notes

  • Sear beef in batches without crowding for optimal browning and flavor.
  • Add paprika only off-heat to avoid bitterness and burning.
  • Maintain a gentle simmer (185°F-205°F) for tender beef and prevent drying.

Tried this recipe?

Let us know how it was!

What Is Whole Milk? [Taste, Uses & More]

April 3, 2026

Whole milk shows up in the most relied-upon recipes - crème anglaise, béchamel, tres leches cake - and most of the time it's not interchangeable with the reduced-fat versions.

What Is Whole Milk

Knowing how milk's flavor and uses shift with fat content changes how you cook with it, and knowing what can go wrong helps you avoid curdled sauces and off-tasting custards, whether you're watching for milk spoilage signs or tracking how close your carton is to the wire.

QUICK SUMMARY

Whole milk is fresh pasteurized cow's milk with its natural fat intact - roughly 3.25% milk fat in the U.S. It has a mild, creamy, lightly sweet flavor and a silky mouthfeel that makes it the preferred liquid in custards, sauces, and steamed coffee drinks.

🥛Flavor: Mild dairy-sweet, creamy, faint lactose sweetness
🍳Best Uses: Custards, béchamel, lattes, pancakes, ice cream
❄️Shelf Life: Opened 5-7 days; unopened up to 3 weeks refrigerated
🌡️Storage: Refrigerate below 40°F, away from the door
⚠️Watch Out: Can curdle in high-acid sauces; scorches without stabilizer at high heat

What Is Whole Milk?

Whole milk is pasteurized cow's milk sold with its natural fat content intact - standardized at a minimum of 3.25% milk fat in the United States.

In the UK and Commonwealth countries, it goes by full-cream milk; you'll also see it labeled as full-fat milk or whole cow's milk depending on the region.

Nearly all commercial whole milk is homogenized, meaning the fat globules are broken down so cream no longer separates and rises to the top.

It also undergoes pasteurization - heat treatment that eliminates pathogens - which differs from ultra-pasteurization (UHT), a higher-heat process that extends shelf life for months at room temperature but alters flavor slightly.

Whole milk sits above 2%, 1%, and skim milk on the fat scale, and that fat is not cosmetic. Milk fat carries fat-soluble vitamins A and D and aids their absorption, while also giving whole milk its characteristic body and coating feel.

A few common varieties worth knowing:

  • 🐄 Standard pasteurized - most common in U.S. supermarkets, 1-3 week shelf life
  • 🌿 Grass-fed or pasture-raised - slightly more complex aroma, sometimes a faint grassy note
  • 📦 UHT (ultra-pasteurized) - shelf-stable unopened, mildly cooked flavor, used widely in Europe
  • 🧪 Organic whole milk - produced without synthetic hormones or pesticide-treated feed

What Does Whole Milk Taste Like?

whole milk - What Is Whole Milk

Whole milk has a mild, dairy-sweet flavor with a clean finish. The sweetness comes from lactose, not added sugar, and it's subtle - closer to a whisper than a note you'd name in a blind tasting.

Sensory SnapshotMild Intensity
👅 Flavor
dairy-sweetcreamylightly fatty
✋ Texture
silkyslightly viscous
👃 Aroma
fresh milkfaint creamgrass (pasture-fed)

The closest comparison is light cream significantly diluted with water, or the base liquid in a milk-rich café latte.

It coats the palate in a way skim milk does not, because milk fat clings to taste receptors and extends perceived richness.

Heat changes the picture. Gently scalded whole milk develops a deeper, almost cooked-cream note that's part of what makes custard and béchamel smell so good.

At high heat without attention, however, the milk proteins casein and whey can denature and scorch, flattening that pleasant sweetness into something flat and faintly burnt.

How to Use Whole Milk

Whole milk earns its place across a wide range of dishes, and the fat content is the reason it performs where lower-fat milks fall short.

In custards and crème anglaise, the fat slows protein coagulation, giving you a wider window before the eggs scramble.

In béchamel, the fat helps hold the emulsion between butter and starch, producing a sauce with a smooth, glossy finish.

For anyone swapping dairy in a recipe, using skim milk for creaminess requires different technique - typically adding fat back separately - because the stripped-down version behaves differently under heat.

On the sweet side, whole milk is the standard liquid in pancake batters and crêpes, where its fat contributes to a tender crumb.

Golden Rule
Scald whole milk before adding it to eggs. Warming to just below a simmer (about 180°F) prevents curdling and shortens cook time in custards.
How Whole Milk Is Used
MethodBest ForTip
🍳 ScaldedCustards, crème anglaise, flan, béchamelHeat to 180°F, then temper slowly into eggs
☕ Steamed/FrothedLattes, cappuccinos, café au laitWhole milk fat creates stable, dense microfoam
🥗 Raw/ColdDrinking, cereal, drinking chocolateServe well chilled; flavor dulls at room temperature
🧁 In BatterPancakes, crêpes, quick breadsDon't overmix once milk is added - gluten tightens fast
🍦 Ice Cream BaseChurned ice cream, semifreddoCombine with cream for balanced fat and body

French pastry and sauce-making rely on whole milk as a base fat, while American comfort cooking uses it across everything from gravies to cornbread. Latin American desserts like tres leches and flan depend on its fat structure to set properly. Understanding whole milk in dairy recipes makes substituting easier when you're out mid-recipe.

Try It In
🥞Fluffy Buttermilk PancakesWhole milk builds the batter body without heaviness→🧋Iced Brown Sugar Oat Milk LatteCompare milk fat against an oat-based alternative→🍵Iced Matcha Oat Milk LatteSee how whole milk frothing compares to plant-based options→

How to Buy and Store Whole Milk

At the store, check the sell-by or use-by date first and choose the furthest date available. Avoid containers with swollen sides, leaking seams, or a watery-looking fill line through translucent jugs.

For the best flavor, look for grass-fed or pasture-raised labeling - these often carry a slightly more complex, grassy aroma that registers in custards and hot drinks.

Watch Out
Don't store whole milk in the fridge door. Temperature swings from opening and closing accelerate spoilage - keep it on a middle or back shelf instead.

Store it at or below 40°F, tightly sealed. Once opened, consume within 5-7 days for best quality, though you can monitor whole milk's shelf life by checking smell and appearance rather than relying on dates alone.

UHT whole milk stays shelf-stable for months before opening, making it useful for stocking up - however, its flavor differs slightly from standard pasteurized, and it should still be refrigerated and used within 7-10 days after opening.

Start With the Custard

If you're new to cooking with whole milk, start with a simple custard or béchamel - both are low-risk, make the fat content's role obvious, and reveal how the milk behaves under heat.

The silkiness you get won't come from skim or 2%, and that difference is immediate.

Once you've worked with milk in dairy recipes and have a feel for how whole milk emulsifies and sets, branching into ice cream bases or stovetop puddings is straightforward.

The fat is the constant - learn to work with it, not around it.

Frequently Asked Questions

How much fat is in whole milk?

U.S. whole milk contains a minimum of 3.25% milk fat by weight. A standard 8-oz glass has roughly 8 grams of total fat, about 5 of which are saturated.

Why does whole milk taste different from 2%?

The difference is milk fat. Fat carries flavor compounds and coats the palate, making whole milk taste richer and creamier. At 2%, roughly half that fat has been removed, and the thinner mouthfeel is noticeable side by side.

Can you use whole milk in baking instead of skim?

Yes, and the result is typically better. Whole milk adds fat and moisture that skim lacks, producing a more tender crumb in cakes and quick breads. Substitute 1:1 without adjusting other ingredients.

Does whole milk curdle when heated?

It can if exposed to high heat or a strong acid. Boiling whole milk causes proteins to denature and clump; adding acid like lemon juice at high temperatures has the same effect. Keep heat gentle and avoid combining with acidic ingredients until off the heat.

How long does opened whole milk last in the fridge?

Opened whole milk lasts 5-7 days in the fridge when stored properly below 40°F. UHT whole milk opened the same day should be used within 7-10 days, even though the unopened carton was shelf-stable.

Stuffed Cabbage Rolls

April 3, 2026

When you need a hands-off dinner that works for meal prep or family gatherings, stuffed cabbage rolls deliver. One pot, tender cabbage wrapping savory beef and rice, all simmering in tangy tomato sauce.

Stuffed Cabbage Rolls served on a plate

The blanching step takes five minutes and saves you from torn leaves. High heat softens the cabbage just enough to roll without splitting.

Perfect for weeknight dinners when you want real comfort food without babysitting the stove.

QUICK SUMMARY

Stuffed cabbage rolls combine ground beef, cooked rice, and aromatics wrapped in softened cabbage leaves, then simmered in tomato sauce. Blanching the cabbage for 3-4 minutes makes leaves pliable without tearing. The rolls need 50-60 minutes of covered simmering at low heat to cook the filling through and tenderize the leaves.

⏱️Time Reality: 30 minutes hands-on, 60 minutes simmering, plan for 90 minutes total
🔪First Critical Move: Blanch cabbage leaves in boiling water until flexible before attempting to roll
⚠️Watch Out: Overfilling causes tearing and uneven cooking - use 3-4 tablespoons filling per leaf

Table of Contents

Toggle
  • Why This Recipe Works
  • What You'll Need
    • Ingredient Details
  • Ingredient Swaps
  • What to Serve With It
  • Store and Reheat
  • Frequently Asked Questions
  • Stuffed Cabbage Rolls
    • Method 
    • Tried this recipe?

Why This Recipe Works

The combination of blanched cabbage, beef-rice filling, and slow simmering creates tender rolls with moist filling. For a version that comes together quickly, this quick bread dish works as an alternative comfort meal.

Quick Reference
⏱️
Prep Time
30 min
🔥
Cook Time
60 min
⏰
Total Time
90 min
🍽️
Servings
6 servings
📊
Difficulty
Medium
🏷️
Category
Main Dish
💡
Quick Tip
Blanch cabbage leaves to soften for easy rolling
🎯
Best For
Weeknight | Meal prep | Family dinner

What makes this work:

  • Blanching cabbage for 3-4 minutes softens leaves enough to roll without tearing while maintaining structure during cooking
  • Using cooked rice instead of raw keeps the filling moist and prevents hard, undercooked grains that raw rice produces
  • Simmering covered at 180°F for 50-60 minutes cooks the meat through while keeping cabbage tender without falling apart
  • Rolling with seams facing down prevents unraveling during the long simmer and keeps filling contained
  • Checking internal temperature reaches 160°F ensures food safety and confirms the beef is fully cooked through
Quick Tip
Mix filling and rest 10 minutes before rolling to let flavors meld and make the mixture easier to handle

What You'll Need

Ingredients for Stuffed Cabbage Rolls

Shopping for this takes one trip to the produce and meat sections. Most people skip bread, but it balances the meal - more bread ideas help round out the plate.

🥬
Base
  • Green cabbage (1 large head)
  • Onion (1 medium)
  • Garlic (3 cloves)
🍗
Filling
  • Ground beef (1½ lbs)
  • Cooked white rice (1½ cups)
  • Egg (1 large)
🥢
Sauce & Seasoning
  • Tomato sauce (24 oz)
  • Salt (1 tsp)
  • Black pepper (½ tsp)

Ingredient Details

  • Green cabbage
    Choose a head with tight, unblemished leaves; outer leaves work best for rolling
  • Ground beef
    Use 80/20 blend for moisture; leaner meat dries out during the long simmer
  • Cooked rice
    Day-old rice works perfectly; raw rice will not cook through and stays hard
  • Tomato sauce
    Plain sauce works best; avoid pre-seasoned varieties that can overpower the filling
  • Egg
    Acts as binder to hold filling together during rolling and cooking
  • Onion
    Mince finely so it distributes evenly and doesn't create lumps in the filling
  • Garlic
    Fresh garlic adds aromatic depth; skip garlic powder for this recipe

Ingredient Swaps

Rich mains need something to cut through, and shrimp does exactly that. For a version that comes together quickly, easy shrimp side offers a lighter protein option.

Four swaps that work:

  • Ground turkey or chicken for ground beef - Lighter texture but dries faster; reduce cook time by 10 minutes and monitor closely
  • Cauliflower rice for white rice - Lower carb option with softer texture; drains more liquid so reduce sauce by ¼ cup
  • Crushed tomatoes for tomato sauce - Creates chunkier sauce with similar acidity; strain if you prefer smooth consistency
  • Flax egg for regular egg - Mix 1 tablespoon ground flax with 3 tablespoons water; vegan binder but slightly alters taste

Ground Beef (Traditional)

Works for: Classic flavor, stays moist during long cooking, familiar texture

Skip if: You want lighter option or prefer poultry-based filling

Ground Turkey

Works for: Lower fat content, lighter texture, budget-friendly alternative

Skip if: You want richer flavor or worry about dry filling with lean meat

Lentils (Vegetarian)

Works for: Plant-based protein, holds shape well, absorbs sauce flavors

Skip if: You want traditional texture or need higher protein content

Instructions

The rolls take 90 minutes from start to finish with minimal active work. A good this dip can make or break the plate - creamy homemade dip recipe adds tangy contrast to the savory rolls.

  1. Blanch the cabbage leaves. Bring large pot of water to boil, core the cabbage, and submerge in water for 3-4 minutes until outer leaves soften and peel away easily. Remove leaves with tongs and pat dry.

  2. Mix the filling. Combine ground beef, cooked rice, minced onion, minced garlic, egg, salt, and pepper in large bowl. Mix until just combined and let rest 10 minutes.

  3. Roll the cabbage. Place 3-4 tablespoons filling near the stem end of each leaf, fold in sides, and roll tightly toward the leaf tip. Place seam-side down in baking dish.

  4. Add sauce and simmer. Pour tomato sauce over rolled cabbage, cover dish tightly with foil, and bake at 350°F for 50-60 minutes or simmer on stovetop over low heat until filling reaches 160°F internal temperature.

  5. Rest before serving. Remove from heat and let rolls rest uncovered for 10 minutes to thicken sauce and settle filling before plating.

Golden Rule
Roll tightly with seams facing down to prevent unraveling during the hour-long simmer

What to Serve With It

Salad adds the contrast this plate needs, but timing matters. For weeknight focaccia bread meal ideas, the same principles of balancing rich mains with fresh sides apply here.

Side Dish Prep Why It Works How to Serve
Mashed potatoes Easy Creamy texture soaks up extra tomato sauce Serve warm with pat of butter on top
Steamed green beans Easy Fresh crunch cuts through rich beef filling Toss with garlic and lemon juice
Crusty bread Easy Perfect for sopping up tangy sauce Slice thick and serve warm
Roasted root vegetables Medium Caramelized sweetness balances savory rolls Roast at 425°F for 30 minutes until golden
Garden salad Easy Bright acidity offsets heavy tomato sauce Dress lightly with vinaigrette

Three ways to serve it:

  • Plate rolls over mashed potatoes with extra sauce drizzled on top and tender roasted vegetable side for color
  • Serve family-style in the baking dish with crusty bread and light refreshing greens on the side
  • Pack individual portions with easy potato wedges side for meal prep lunches
Best Pick
Dollop sour cream on top just before serving for classic tangy complement

Store and Reheat

Stuffed cabbage rolls keep well in the fridge and freeze perfectly for future meals. Rich mains need something to cut through, and broccoli does exactly that - more seafood ideas round out your weekly rotation.

Method Time Best For
🍳 Stovetop 10-15 min covered on low Retaining moisture and even heating for multiple servings
📦 Microwave 3-4 min on medium power Quick single portions when you're short on time
🔥 Oven 25 min at 350°F covered Reheating batch quantities without drying out

For best results when storing:

  • Cool rolls completely before transferring to airtight containers in single layers to prevent crushing
  • Store in fridge for 3-4 days with extra sauce spooned over top to keep cabbage from drying
  • Freeze for up to 3 months in freezer-safe containers with parchment between layers
  • Add 2 tablespoons water or broth before reheating to restore moisture lost during storage
  • Reheat from frozen by adding 10 minutes to oven time or thaw overnight in fridge first

Frequently Asked Questions

How long to cook stuffed cabbage rolls at 350°F?

Bake covered for 50-60 minutes until filling reaches 160°F internal temperature. Check at 45 minutes and add 10-15 minutes if rolls aren't fully cooked through.

Can I make stuffed cabbage rolls ahead and freeze them?

Yes, assemble rolls and freeze uncooked in single layers for up to 3 months. Bake from frozen by adding 20 minutes to cook time and checking internal temp hits 160°F.

What goes well as side dishes with stuffed cabbage rolls?

Mashed potatoes, steamed green beans, crusty bread, roasted root vegetables, and garden salad all work. Choose sides that balance the rich tomato sauce and provide textural contrast.

How do I know when stuffed cabbage rolls are fully cooked?

Check internal temperature reaches 160°F with instant-read thermometer inserted into center of roll. Filling should be firm with no pink remaining and cabbage tender but not mushy.

Can I use cauliflower rice instead of white rice in the filling?

Yes, but reduce sauce by ¼ cup since cauliflower releases more moisture. The texture will be softer and the binding slightly looser than traditional rice filling.

Stuffed Cabbage Rolls served on a plate

Stuffed Cabbage Rolls

No ratings yet
Stuffed cabbage rolls combine tender blanched cabbage leaves with a savory beef and cooked rice filling, all simmered in tangy tomato sauce. The key is blanching the cabbage for 3-4 minutes to soften leaves without tearing and simmering covered until the filling is fully cooked and tender.
Print Recipe Pin Recipe
Prep Time 30 minutes mins
Cook Time 1 hour hr
Total Time 1 hour hr 30 minutes mins
Servings: 6 servings
Course: Main Dish
Cuisine: American, Comfort Food
Ingredients Equipment Method Notes

Ingredients
  

  • 1 large green cabbage choose head with tight, unblemished outer leaves
  • 1 medium onion minced finely
  • 3 cloves garlic minced fresh
  • 1.5 lbs ground beef 80/20 blend for moisture
  • 1.5 cups cooked white rice day-old rice preferred
  • 1 large egg acts as binder
  • 24 oz tomato sauce plain, avoid pre-seasoned
  • 1 teaspoon salt
  • 0.5 teaspoon black pepper

Equipment

  • Large pot For blanching cabbage leaves
  • Mixing bowl For combining filling ingredients
  • Baking dish For arranging and simmering rolled cabbage
  • Tongs To remove cabbage leaves from boiling water
  • Instant-read thermometer To check internal temperature of filling

Method
 

  1. Bring a large pot of water to boil. Core the cabbage and submerge the whole head or leaves in boiling water for 3-4 minutes until outer leaves soften and peel away easily. Remove leaves with tongs and pat dry.
    1 large green cabbage
  2. In a large bowl, combine ground beef, cooked rice, minced onion, minced garlic, egg, salt, and black pepper. Mix until just combined and let rest for 10 minutes to meld flavors and ease handling.
    1 medium onion, 3 cloves garlic, 1.5 lbs ground beef, 1.5 cups cooked white rice, 1 large egg, 1 tsp salt, 0.5 tsp black pepper
  3. Place 3-4 tablespoons of filling near the stem end of each cabbage leaf. Fold in sides and roll tightly toward the leaf tip. Arrange rolls seam-side down in a baking dish.
  4. Pour tomato sauce over the rolled cabbage. Cover the dish tightly with foil and bake at 350°F for 50-60 minutes or simmer on the stovetop over low heat until the filling reaches an internal temperature of 160°F.
    24 oz tomato sauce
  5. Remove rolls from heat and let rest uncovered for 10 minutes to thicken the sauce and settle the filling before plating.

Notes

  • Blanch cabbage leaves for 3-4 minutes to soften without tearing for easy rolling.
  • Use cooked rice to keep the filling moist and avoid undercooked grains.
  • Simmer rolls covered at low heat until filling reaches 160°F internal temperature to ensure safety and tenderness.

Tried this recipe?

Let us know how it was!

Lamb Chops with Mint Sauce

April 3, 2026

Complete Article Output

A golden sear on tender lamb chops with bright mint sauce cutting through the richness. That's what happens when you crank the heat and time it right.

Lamb Chops with Mint Sauce served on a plate

The pan does most of the work. You get a crispy crust without constant flipping or fussing.

This works for weeknight dinners when you need something fast that looks intentional. Pair it with something crunchy and fresh and you've got a complete plate.

QUICK SUMMARY

Pan-seared lamb chops with homemade mint sauce deliver a crispy browned crust and juicy interior in under 20 minutes. High heat creates the sear while resting keeps the meat tender. Fresh mint and vinegar balance the rich lamb fat without overpowering the plate.

⏱️Timing: 10 min prep, 8-12 min cook, 5 min rest before serving
🔥Key Move: Preheat pan 3 minutes, pat chops dry, sear without moving
⚠️Watch Out: Pull at 140°F to avoid dry meat - it climbs during rest

Why This Recipe Works

High heat creates a caramelized crust while the interior stays juicy because lamb chops cook fast. Resting the meat for 5 minutes lets the juices redistribute instead of pooling on the cutting board, and this creamy sauce adds richness without making another pot.

Quick Reference
⏱️
Prep Time
10 min
🔥
Cook Time
8-12 min
⏰
Total Time
20 min
🍽️
Servings
4 servings
📊
Difficulty
Medium
🏷️
Category
Main Dish
💡
Quick Tip
Sear hot, rest 5 minutes, serve with cold sauce
🎯
Best For
Weeknight | Entertaining

What makes this work:

  • Cast iron or heavy-bottom pan holds heat - prevents temperature drop when meat hits the surface
  • Room temperature chops cook evenly - cold meat stays raw in the center while edges overcook
  • Fresh mint stays bright and aromatic - dried mint turns bitter and loses the sharp contrast you need
  • Vinegar balances lamb's natural fat - cuts through richness without adding heaviness
  • Resting under foil keeps juices inside - slicing too soon releases moisture onto the plate
Quick Tip
Use a meat thermometer and pull chops at 140°F for medium-rare - they'll climb to 145°F during rest

What You'll Need

Ingredients for Lamb Chops with Mint Sauce

Shop for lamb chops with even thickness so they cook at the same rate. A dollop of this dip takes each bite somewhere more interesting, and for a version that comes together quickly, a similar dinner recipe delivers similar results with different protein.

🍗
Protein
  • Lamb chops (1 to 1.5 inches thick)
🧄
Aromatics
  • Garlic (optional)
  • Fresh mint leaves
🥢
Sauce Base
  • White or malt vinegar
  • Sugar
  • Water
  • Lemon juice (optional)
🫙
Seasonings
  • Olive oil
  • Salt
  • Black pepper

Ingredient Details

  • Lamb chops
    Choose 1 to 1.5 inch thick cuts for even cooking - thinner chops overcook before getting a good sear
  • Fresh mint
    Use bright green leaves without brown spots - wilted mint turns the sauce murky
  • Vinegar
    White vinegar is sharper, malt vinegar is mellower - both work but malt is more traditional for British-style sauce
  • Olive oil
    Use regular olive oil, not extra virgin - EVOO smokes at high heat and turns bitter
  • Sugar
    Granulated dissolves fastest - stir until fully dissolved or the sauce stays gritty
  • Garlic
    Optional but adds sharp depth - mince finely so it blends into the sauce
  • Black pepper
    Freshly cracked adds more punch than pre-ground - use coarse grind for texture

Ingredient Swaps

Most swaps work if you adjust the ratios to match acidity and sweetness. Topping adds the contrast this plate needs, but timing matters, and for a version that comes together quickly, a simple topping variation keeps the plate interesting without extra steps.

Four swaps that work:

  • Fresh mint → dried mint (use ⅓ amount) - Less vibrant, slightly bitter, but budget-friendly when fresh isn't available
  • White vinegar → lemon juice - Lighter acidity with fruity notes instead of sharp tang
  • Olive oil → avocado oil - Neutral flavor, higher smoke point, good for dietary restrictions
  • Lamb chops → pork chops - Different flavor profile but similar cooking method and texture

Fresh Mint

Works for: Bright green color, aromatic sauce, entertaining guests

Skip if: Budget-tight or can't find fresh - use ⅓ dried mint instead

Dried Mint

Works for: Shelf-stable convenience, budget meals, last-minute cooking

Skip if: You want vibrant color and fresh aroma - dried turns dull

White Vinegar

Works for: Sharp acidity, clean flavor, easy to find

Skip if: You prefer milder tang - use malt vinegar or lemon juice

Lemon Juice

Works for: Fruity brightness, milder acidity, fresh citrus note

Skip if: You want traditional British mint sauce - use vinegar instead

Instructions

Total active time is under 15 minutes if you let the pan preheat while you prep the sauce. Most people skip pie, but it balances the meal, and for a version that comes together quickly, simple pie recipe adds variety without doubling your workload.

  1. Make the mint sauce: Whisk vinegar, sugar, and water in a small bowl until sugar dissolves completely (about 2 minutes). Finely chop fresh mint leaves and stir into the vinegar mixture. Add minced garlic if using. Let sit at room temperature while you cook the chops.

  2. Prep the lamb chops: Pat chops completely dry with paper towels - moisture blocks browning. Season both sides generously with salt and black pepper. Let sit at room temperature for 10 minutes while the pan heats.

  3. Preheat the pan: Heat a cast iron skillet or heavy-bottom pan over medium-high heat for 3 minutes. Add 1 tablespoon olive oil and swirl to coat. The oil should shimmer but not smoke.

  4. Sear the chops: Place chops in the pan with 2 cm space between each piece - cook in batches if needed. Sear without moving for 3-4 minutes until a golden crust forms. Flip and cook 3-4 minutes more for medium-rare (140°F internal temperature). Use a meat thermometer to check doneness.

  5. Rest and serve: Transfer chops to a plate and tent loosely with foil. Rest 5 minutes to let juices redistribute. Serve with cold mint sauce spooned over the top or on the side.

Golden Rule
Never skip the rest - slicing hot meat releases all the moisture onto the plate instead of keeping it inside

What to Serve With It

Rich mains need something to cut through, and coleslaw does exactly that. The aioli works best when it hits the table at the same time as the main, and we keep a batch ready for nights like this - savory chicken dish ideas show how to build a complete plate without repeating textures.

Side Dish Prep Why It Works How to Serve
Roasted root vegetables Medium Earthy sweetness balances gamey lamb richness Roast at 425°F with olive oil and rosemary for 25 minutes
Garlic mashed potatoes Easy Creamy texture soaks up mint sauce and pan juices Mash with butter and roasted garlic while chops rest
Mixed greens salad Easy Fresh crunch cuts through fatty meat and heavy sides Toss with lemon vinaigrette right before serving
Couscous with lemon zest Easy Light grain absorbs mint sauce without adding weight Fluff couscous with fork and stir in fresh lemon zest
Steamed green beans Easy Bright vegetable note keeps plate from feeling too rich Steam 4 minutes, toss with butter and sea salt

Three ways to serve it:

  • Weeknight plate: Garlic mashed potatoes, steamed green beans, and lamb chops drizzled with mint sauce
  • Entertaining spread: Herb roasted asparagus, gratin dauphinois, crusty bread for soaking up sauce
  • Light summer meal: Mixed greens salad, couscous with lemon zest, cold mint sauce on the side
Best Pick
Garlic mashed potatoes - the creamy texture catches every drop of mint sauce and balances the crispy lamb

Store and Reheat

Lamb chops keep for 3-4 days in the fridge but lose crispness when reheated. Store mint sauce separately in an airtight container so it stays bright and doesn't make the meat soggy, and salad cuts through all that richness when you're reheating leftovers for a quick second meal.

Method Time Best For
🍳 Stovetop 4-5 min Quick reheating with some sear recovery - add splash of oil to pan
🔥 Oven 10 min at 300°F Even gentle heat that doesn't dry out meat - cover with foil
📦 Microwave 1-2 min low power Fast weekday lunch but crust goes soft - unavoidable trade-off

For best results when storing:

  • Cool completely before refrigerating - hot meat creates condensation that turns the crust soggy
  • Store mint sauce separately - it keeps the meat dry and sauce stays vibrant for up to 5 days
  • Wrap chops individually in foil - makes reheating faster and prevents them from sticking together
  • Freeze for up to 2 months - thaw overnight in fridge before reheating to preserve texture
  • Add fresh mint sauce when serving leftovers - the original sauce loses brightness after a day or two

Frequently Asked Questions

How long to cook lamb chops at medium-high heat?

Cook lamb chops 3-4 minutes per side at medium-high heat for medium-rare (140°F internal temperature). Thicker chops (1.5 inches) may need an extra minute per side.

Can I make lamb chops with mint sauce ahead?

Make mint sauce up to 2 days ahead and store in the fridge - the flavors actually improve overnight. Cook chops fresh for best texture since reheated lamb loses the crispy sear.

What goes with lamb chops with mint sauce?

Serve with garlic mashed potatoes, roasted root vegetables, or couscous to soak up the mint sauce. Add a fresh green salad or steamed green beans to cut through the richness.

How do I know when lamb chops are done?

Use a meat thermometer and pull chops at 140°F for medium-rare or 145°F for medium. The meat should feel firm but still give slightly when pressed with tongs.

Can I use dried mint instead of fresh?

Use ⅓ the amount of dried mint if fresh isn't available - about 1 tablespoon dried for 3 tablespoons fresh. The sauce will be less bright and slightly bitter but still works.

Lamb Chops with Mint Sauce served on a plate

Lamb Chops with Mint Sauce

No ratings yet
This recipe delivers pan-seared lamb chops with a crispy browned crust and juicy interior in under 20 minutes. The bright and fresh mint sauce balances the richness of the lamb fat, making it perfect for quick weeknight dinners or entertaining guests.
Print Recipe Pin Recipe
Prep Time 10 minutes mins
Cook Time 12 minutes mins
Total Time 22 minutes mins
Servings: 4 servings
Course: Main Dish
Cuisine: British
Ingredients Equipment Method Notes

Ingredients
  

  • 8 pieces lamb chops 1 to 1.5 inch thick
  • ¼ cup fresh mint leaves finely chopped
  • ¼ cup white vinegar
  • 2 tablespoon sugar
  • ¼ cup water
  • 1 tablespoon olive oil regular olive oil, not extra virgin
  • to taste salt for seasoning lamb chops
  • to taste black pepper freshly cracked
  • optional garlic minced, optional in sauce

Equipment

  • Cast iron skillet Used for searing the lamb chops

Method
 

  1. Whisk vinegar, sugar, and water in a small bowl until sugar dissolves completely (about 2 minutes). Finely chop fresh mint leaves and stir into the vinegar mixture. Add minced garlic if using. Let sit at room temperature while you cook the chops.
    ¼ cup white vinegar, 2 tbsp sugar, ¼ cup water, ¼ cup fresh mint leaves, optional garlic
  2. Pat chops completely dry with paper towels to ensure browning. Season both sides generously with salt and black pepper. Let sit at room temperature for 10 minutes while the pan heats.
    8 pieces lamb chops, to taste salt, to taste black pepper
  3. Heat a cast iron skillet or heavy-bottom pan over medium-high heat for 3 minutes. Add 1 tablespoon olive oil and swirl to coat. The oil should shimmer but not smoke.
    1 tbsp olive oil
  4. Place chops in the pan with 2 cm space between each piece-cook in batches if needed. Sear without moving for 3-4 minutes until a golden crust forms. Flip and cook 3-4 minutes more for medium-rare (140°F internal temperature). Use a meat thermometer to check doneness.
    8 pieces lamb chops
  5. Transfer chops to a plate and tent loosely with foil. Rest 5 minutes to let juices redistribute. Serve with cold mint sauce spooned over the top or on the side.
    8 pieces lamb chops, ¼ cup fresh mint leaves, ¼ cup white vinegar, 2 tbsp sugar, ¼ cup water, optional garlic

Notes

  • Use a meat thermometer and pull chops at 140°F for medium-rare to avoid dryness.
  • Pat lamb chops dry before seasoning to ensure a crispy crust.
  • Store mint sauce separately for up to 5 days to maintain brightness and prevent sogginess.

Tried this recipe?

Let us know how it was!

What Is Wheat Berries? [Taste, Uses & More]

April 3, 2026

Most cooks treat wheat berries as a specialty item - something obscure, slow to cook, and probably not worth the bother.

What Is Wheat Berries

That assumption is wrong, and it costs them one of the most satisfying whole grains in a pantry. Wheat berries are simply the complete, unprocessed kernel of wheat, and storing wheat correctly is far easier than most people expect - they sit comfortably on a shelf for months.

If you've been reaching for alternatives to barley in hearty salads and soups, wheat berries are worth a close look.

QUICK SUMMARY

Wheat berries are the whole, intact kernel of wheat - bran, germ, and endosperm included. They taste nutty and slightly sweet, cook to a firm, chewy texture, and work well in pilafs, salads, soups, and porridges. Not gluten-free.

🌾Flavor: Nutty, toasty, mildly sweet with a grassy undertone
✋Texture: Firm, chewy, toothsome with a satisfying bran pop
🍳Best Uses: Pilafs, grain salads, soups, porridge, risotto-style dishes
⏱️Cook Time: 45-60 min simmered; 25-30 min pressure cooked
📦Shelf Life: Pantry 6-12 months; freezer up to 2 years
⚠️Dietary Note: Contains gluten - not suitable for gluten-free diets

What Is Wheat Berries?

Wheat berries are the whole kernel of wheat before any milling or processing has taken place. Every layer remains intact: the fibrous bran on the outside, the nutrient-dense germ at the core, and the starchy endosperm in between.

They originate from wheat cultivation in the Fertile Crescent and are now grown across temperate regions worldwide. You'll also see them labeled as whole wheat kernels or hard wheat berries, depending on the variety.

Two main types show up in most stores:

  • 🌾 Hard red wheat berries - the most common variety, with a robust, nutty flavor and a very firm, chewy bite after cooking
  • 🌾 Hard white wheat berries - slightly milder in flavor, lighter in color, still chewy but marginally softer
  • Soft wheat berries - lower protein, less chew; better suited to porridge than salads or pilafs

It's worth separating wheat berries from related products. Bulgur is made from wheat berries that have been parboiled and cracked - it cooks in minutes. Cracked wheat is raw and split but not precooked.

Wheat berries, by contrast, are fully whole and raw, which is precisely what gives them their long cook time and superior chew.

If you're curious how a tabbouleh with parsley and bulgur recipe compares in texture, the bulgur version is noticeably softer and quicker to prepare.

What Does Wheat Berries Taste Like?

wheat berries - What Is Wheat Berries

Wheat berries have a clean, honest grain flavor - nutty and toasty at the front, with a mild sweetness that comes through clearly once they've been simmered. There's also a faint grassy undertone, most noticeable in the first few bites.

Sensory SnapshotModerate Intensity
👅 Flavor
nuttytoastymildly sweetgrassy
✋ Texture
firmchewytoothsome
👃 Aroma
warm toasted grainmild grassy

Heat deepens the toasty quality noticeably. Dry-toasting kernels in a skillet for a few minutes before simmering pulls out oils from the bran and germ, adding a roasted, almost nutty depth that raw-simmered wheat berries lack.

Compared to similar grains, wheat berries sit close to farro in grain dishes and barley in grain dishes in overall character, but with a cleaner, more distinctly wheat-forward note. Farro reads as slightly earthier; barley leans creamier.

Wheat berries are the most assertively chewy of the three.

How to Use Wheat Berries

Long simmering is the standard method - 45 to 60 minutes in well-salted water or stock, optionally after a short dry-toast or an overnight soak. A pressure cooker cuts that to around 25-30 minutes without sacrificing texture.

How Wheat Berries Are Used
MethodBest ForTip
🍲 SimmeredPilafs, soups, grain saladsToast kernels first for added depth
♨️ Pressure CookedWeeknight meals, meal prepNo soaking required; check at 25 min
💧 Soaked then SimmeredPorridge, stuffed vegetablesOvernight soak reduces cook time by 20 min
🫙 SproutedSalads, sandwiches, grain bowlsRinse twice daily; sprouts appear in 2-3 days
⚙️ GroundCoarse whole wheat flour, rustic breadsUse a stone mill or high-powered grain grinder

Wheat berries fit naturally into Middle Eastern pilafs and Eastern European grain salads. Mediterranean preparations favor them dressed with lemon and olive oil, often alongside feta and strong greens like arugula or kale.

American farmhouse cooking uses them in slow-simmered porridges with honey, dried apricot, and walnut.

They pair well with roasted root vegetables - beets and carrots in particular - and hold their own against bold flavors like mushrooms and thyme or hard cheeses such as Parmesan and Pecorino.

Avoid pairing them with very watery broths; the chew becomes lost without enough body in the surrounding dish.

If wheat berries aren't available, our guide to wheat berries stand-ins covers the closest options by texture and cook time.

Try It In
🥣Quinoa Breakfast Bowl with BerriesSwap quinoa for wheat berries for a chewier, more filling bowl→

How to Buy and Store Wheat Berries

Look for plump, intact kernels with a glossy, dry surface when buying. Avoid bags showing broken pieces, visible dust, or any musty smell - that last point indicates moisture damage or old stock.

Best Pick
Hard red or hard white wheat berries give the best chewy texture for salads and pilafs. Soft wheat berries are worth choosing only if you're making porridge.

Storage is straightforward once you understand what degrades first. The oil in the germ goes rancid over time, so heat, light, and air are the main enemies.

  • Short-term pantry - airtight container in a cool, dark spot; good for 6-12 months
  • Fridge - extends shelf life and protects germ oils in warm climates
  • Freezer - best for bulk buying; stays fresh for 1-2 years
  • Cooked berries - refrigerate in a sealed container and use within 4-6 days

Full guidance on keeping wheat berries fresh covers signs of spoilage and whether freezer storage changes the texture after cooking.

Where to Start With Wheat Berries

Wheat berries reward a little patience.

If you have 45 minutes and want to understand what these kernels can do, start with a simple warm pilaf - toast, simmer in salted stock, toss with roasted carrots and a splash of olive oil.

Golden Rule
Always cook wheat berries in well-salted liquid. Seasoning the water or stock is the single biggest factor in whether they taste flat or full.

Already comfortable with grains like alternatives to farro? Wheat berries work in most of those same dishes - just plan for longer cooking and a chewier result.

Frequently Asked Questions

How long do wheat berries take to cook?

Stovetop simmering takes 45-60 minutes in well-salted water. An overnight soak cuts that to around 35-40 minutes. A pressure cooker brings it down to 25-30 minutes without soaking.

Are wheat berries the same as bulgur?

No. Bulgur is made from wheat berries that have been parboiled, dried, and cracked - it rehydrates in minutes. Wheat berries are the raw, whole kernel and require proper cooking from scratch.

Can you grind wheat berries into flour?

Yes, and the result is true whole wheat flour with all three kernel layers intact. A stone grain mill or a high-powered grain grinder attachment works best; standard blenders produce uneven, coarse meal rather than fine flour.

How do you sprout wheat berries?

Soak raw wheat berries in water for 8-12 hours, then drain and rinse twice daily in a jar or sprouting tray. Sprouts appear in 2-3 days at room temperature and are ready when the tail is about the same length as the kernel.

Do wheat berries have more fiber than whole wheat bread?

Yes, typically more per serving. The intact bran in wheat berries provides insoluble fiber in its original, undisrupted form. Whole wheat bread uses milled flour, which breaks down that structure even before digestion begins.

Kielbasa and Sauerkraut

April 3, 2026

You need a simple dinner that works for meal prep or a last-minute weeknight when cooking feels like a chore. One skillet, 30 minutes, and smoky kielbasa with tangy sauerkraut that actually tastes like comfort food.

Kielbasa and Sauerkraut served on a plate

Brown the sausage first and the edges crisp while the sauerkraut softens. The pan does the work while you make mashed potatoes or slice rye bread.

Perfect for busy weeks when you want something that feels intentional without the effort.

QUICK SUMMARY

Brown pre-cooked kielbasa in a skillet, then simmer with drained sauerkraut, onions, and apple for a smoky, tangy dinner in 30 minutes. The key is draining the sauerkraut well and searing the sausage over medium heat for crisp edges without splitting.

⏱️Timeline: 10 minutes prep, 20 minutes cooking, no marinating or resting needed
🔥First Move: Brown sliced kielbasa 4-5 minutes before adding anything else to the pan
⚠️Watch Out: Soggy sauerkraut from skipping the drain step - press it in a colander for 2-3 minutes

Why This Recipe Works

Pre-cooked kielbasa needs heat to brown the edges, not to cook through. For a version that comes together quickly, a similar dinner recipe uses the same skillet method with different sausages.

Quick Reference
⏱️
Prep Time
10 min
🔥
Cook Time
20 min
⏰
Total Time
30 min
🍽️
Servings
4 servings
📊
Difficulty
Easy
🏷️
Category
Main Dish
💡
Quick Tip
Brown kielbasa before adding sauerkraut
🎯
Best For
Weeknight | Meal prep | Casual entertaining

Success comes from three moves:

  • Drain sauerkraut thoroughly - Press it in a colander for 2-3 minutes to remove excess liquid that makes the dish watery instead of sautéed
  • Brown kielbasa over medium heat - Sear sliced pieces 4-5 minutes until edges crisp and turn golden without splitting the casings
  • Sauté onions until translucent - Cook onions in butter 5 minutes until soft and see-through so they add sweetness instead of crunch
  • Add apple last - Stir in diced apples during the final 2-3 minutes to preserve their shape and subtle sweetness
  • Simmer gently with lid partially off - Cook combined sauerkraut and kielbasa 8-10 minutes on low so flavors meld without overcooking
Quick Tip
Use pan liquid to deglaze - Add ¼ cup broth or water to lift brown bits and add flavor to the dish

What You'll Need

Ingredients for Kielbasa and Sauerkraut

Stock up on kielbasa, sauerkraut, and an onion. We keep a batch ready for nights like this - simple homemade homemade uses similar pantry staples when you need something cooling on the side.

🍗
Protein
  • kielbasa sausage (pre-cooked, 1 lb)
🥬
Vegetables
  • sauerkraut (1 jar or 2 cups, drained)
  • onion (1 medium, sliced)
🍋
Fruit
  • apple (1 medium, diced)
🧄
Aromatics & Seasonings
  • butter or oil (2 tbsp)
  • garlic (2 cloves, minced)
  • caraway seeds (1 tsp, optional)
  • black pepper (½ tsp)

Ingredient Details

  • kielbasa sausage
    Use pre-cooked kielbasa - raw sausage requires longer cooking and different timing for proper browning
  • sauerkraut
    Drain sauerkraut well - excess liquid causes sogginess instead of the sautéed texture you want
  • onion
    Slice onions uniformly - even pieces cook at the same rate and turn translucent together
  • apple
    Cut apples into uniform dice - consistent size prevents some pieces from turning mushy while others stay firm
  • butter
    Butter adds richness - swap for olive oil if you need dairy-free with slightly less flavor depth
  • caraway seeds
    Caraway is traditional but optional - skip it if you don't like the licorice-like flavor it brings
  • garlic
    Fresh garlic adds aromatic flavor - garlic powder works in a pinch but loses the fresh bite

Ingredient Swaps

Different sausages change the flavor but the method stays the same. Most people skip cheese, but it balances the meal - this quick cheese dish works as a side when you want something richer on the plate.

Four swaps that work:

  • Polish smoked sausage instead of kielbasa - Similar smoky flavor with slightly different texture; cook times stay nearly the same
  • Olive oil instead of butter - Dairy-free option with less richness but same browning capability for the sausage
  • Chicken broth instead of white wine - Milder flavor without the acidity wine brings; water works too if you're out of broth
  • Fennel seeds instead of caraway - Different flavor profile that's slightly sweeter and less licorice-like

Polish Smoked Sausage

Works for: Similar smoky flavor and texture with slightly different spice blend

Skip if: You want the specific garlic-forward taste that kielbasa brings to the dish

Fresh Cabbage

Works for: Budget meals when sauerkraut isn't available; add vinegar for tang

Skip if: You don't have time for longer cooking - fresh cabbage needs 15-20 minutes to soften

Instructions

Brown the kielbasa first, then add everything else. Rich mains need something to cut through, and potato salad does exactly that - classic potato salad dish takes 15 minutes and pairs with the smoky sausage.

  1. Slice kielbasa into ½-inch rounds - Cut pre-cooked sausage into even pieces so they brown uniformly in the pan
  2. Brown kielbasa in skillet over medium heat 4-5 minutes - Sear sliced pieces until edges turn golden and slightly crisp, flipping once halfway through
  3. Remove kielbasa, add butter and onions to pan - Sauté sliced onions in the same skillet 5 minutes until translucent and soft
  4. Add drained sauerkraut, garlic, caraway, and kielbasa back to pan - Stir everything together, then add ¼ cup broth or water to deglaze brown bits
  5. Simmer 8-10 minutes with lid partially off, add apple last 2-3 minutes - Cook on low heat until sauerkraut softens and flavors meld; stir in diced apple at the end so it keeps its shape
Golden Rule
Season at multiple stages - Add salt and pepper during onion sauté and again before serving for layered flavor depth

What to Serve With It

A good potato salad can make or break the plate. For a version that comes together quickly, easy pav bhaji dinner nights shows how to build complete meals around smoky mains like this.

Side Dish Prep Why It Works How to Serve
Mashed Potatoes Easy Creamy texture soaks up sauerkraut juices and balances the tangy bite Spoon kielbasa and sauerkraut over warm mashed potatoes on the plate
Rye Bread Easy Hearty texture and caraway flavor complement the Eastern European profile Toast thick slices and serve alongside for soaking up pan liquid
Steamed Green Beans Easy Fresh, crisp contrast cuts through the richness of sausage and butter Season simply with salt and pepper, serve on the side
Roasted Potatoes Medium Crispy edges and fluffy centers add textural variety to the plate Toss with olive oil and caraway seeds, roast at 425°F for 25 minutes
Carrot Salad Easy Refreshing crunch and sweetness balance the salty, smoky main dish Shred carrots, toss with lemon juice and dill, serve cold

Three ways to serve it:

  • For weeknight meals - Spoon over mashed potatoes with a side of steamed green beans and rye bread for soaking up pan juices
  • For meal prep - Portion with roasted potatoes and carrot salad in containers; reheat the main and serve the salad cold
  • For casual entertaining - Serve family-style in a large skillet with a platter of rye bread, grain mustard, and pickled cucumbers on the side
Shortcut
Bread adds the contrast this plate needs, but timing matters - classic bread dish bakes while you cook the kielbasa

Store and Reheat

Store in shallow containers so it cools fast and reheats evenly. A good bread can make or break the plate - creamy buttery potato side reheats in the oven alongside leftovers for a complete second meal.

Method Time Best For
🍳 Stovetop 5-7 minutes over medium-low heat Retaining texture and flavor; stir occasionally to prevent sticking
🔥 Oven 10-12 minutes at 350°F (175°C) Reheating larger portions evenly; cover with foil to prevent drying
📦 Microwave 2-3 minutes, stirring halfway Quick reheating in small portions; add a splash of water if dry

For best results when storing:

  • Cool completely before storing - Let dish sit at room temperature 15-20 minutes so condensation doesn't make sauerkraut soggy
  • Use shallow airtight containers - Spread leftovers in a layer no more than 2 inches deep so they cool and reheat evenly
  • Store up to 4 days in the fridge - Keep in airtight container; flavors deepen overnight but texture stays good through day 4
  • Freeze up to 2 months - Portion into freezer-safe containers; thaw overnight in fridge before reheating
  • Add moisture when reheating - Splash in a tablespoon of broth or water if the sauerkraut looks dry after storing

Frequently Asked Questions

How long to cook Kielbasa and Sauerkraut on stove?

Total stovetop time is 20 minutes: 4-5 minutes to brown the kielbasa, 5 minutes to sauté onions, and 8-10 minutes to simmer everything together. The kielbasa is pre-cooked so you're only heating through and building flavor.

Can I make Kielbasa and Sauerkraut ahead?

Yes - make it up to 2 days ahead and store covered in the fridge. Reheat on the stovetop over medium-low heat for 5-7 minutes, adding a splash of broth if it looks dry.

What goes with Kielbasa and Sauerkraut?

Mashed potatoes, rye bread, steamed green beans, or roasted potatoes all work. Pick something that soaks up the pan juices or adds a fresh, crisp contrast to the rich, tangy main dish.

How do I know when Kielbasa and Sauerkraut is done?

The kielbasa should reach 160°F internally and show golden brown, crisp edges. The sauerkraut should be tender and heated through, and the onions should look translucent and soft.

Can I use Polish sausage instead of kielbasa?

Yes - Polish smoked sausage works with the same cooking method and timing. The flavor profile is slightly different but still smoky and pairs well with sauerkraut.

Kielbasa and Sauerkraut served on a plate

Kielbasa and Sauerkraut

No ratings yet
Enjoy a smoky kielbasa with tangy sauerkraut cooked in one skillet in just 30 minutes. The recipe focuses on browning the pre-cooked sausage properly and simmering sauerkraut with onions and apple for a comforting weeknight meal.
Print Recipe Pin Recipe
Prep Time 10 minutes mins
Cook Time 20 minutes mins
Total Time 30 minutes mins
Servings: 4 servings
Course: Main Dish
Cuisine: Eastern European
Ingredients Method Notes

Ingredients
  

  • 1 lb kielbasa sausage pre-cooked
  • 2 cups sauerkraut drained thoroughly
  • 1 medium onion sliced
  • 1 medium apple diced
  • 2 tablespoon butter or oil as dairy-free substitute
  • 2 cloves garlic minced
  • 1 teaspoon caraway seeds optional
  • 0.5 teaspoon black pepper
  • 0.25 cup broth or water for deglazing

Method
 

  1. Slice pre-cooked kielbasa into ½-inch rounds for even browning.
    1 lb kielbasa sausage
  2. In a skillet over medium heat, brown sliced kielbasa for 4-5 minutes until edges are golden and slightly crisp, flipping halfway through.
    1 lb kielbasa sausage
  3. Remove kielbasa from skillet. Add butter and sliced onions to the pan and sauté for 5 minutes until translucent and soft.
    1 medium onion, 2 tbsp butter
  4. Add drained sauerkraut, minced garlic, caraway seeds (if using), black pepper, and browned kielbasa back to the pan. Stir to combine.
    2 cups sauerkraut, 2 cloves garlic, 1 tsp caraway seeds, 0.5 tsp black pepper, 1 lb kielbasa sausage
  5. Pour ¼ cup broth or water into the pan to deglaze, scraping up browned bits. Simmer everything together with the lid partially off over low heat for 8-10 minutes until sauerkraut softens.
    0.25 cup broth
  6. Stir in diced apple during the last 2-3 minutes of simmering to preserve its shape and add subtle sweetness.
    1 medium apple

Notes

  • Press sauerkraut in a colander 2-3 minutes to remove excess liquid for better sautéing.
  • Brown kielbasa carefully over medium heat to develop crisp edges without splitting casings.
  • Season at multiple stages, especially when sautéing onions and before serving, for deep layered flavors.

Tried this recipe?

Let us know how it was!

How Long Does Velveeta Cheese Last? [Storage Guide]

April 3, 2026

Storing Velveeta the wrong way is one of the most common mistakes home cooks make - leaving an opened block on the counter while a pot of mac and cheese bubbles away, then wrapping the remainder loosely before sliding it into the fridge. Velveeta, a pasteurized process cheese product, holds up well under proper conditions, but it's more vulnerable to mold, odor absorption, and texture loss than many people expect.

Can You Freeze Velveeta Cheese

Whether you're stretching a block over several uses or planning to freeze what's left, a few specific habits protect both safety and meltability.

QUICK SUMMARY

An unopened Velveeta block keeps 6-8 weeks in the fridge. Once opened, use it within 3-4 weeks in an airtight container. Freezing is possible but causes graininess - thawed Velveeta works best in cooked dishes like queso or casseroles.

🧊Fridge (opened): 3-4 weeks in an airtight container or sealed wrap
❄️Freezer: Up to 2 months; expect texture changes after thawing
⚠️Counter limit: 2 hours max before bacterial risk increases significantly

How Long Does Velveeta Cheese Last?

Velveeta's shelf life depends heavily on whether the package has been opened and how it's stored after that point. Unopened blocks benefit from commercial sealing and typically hold their quality for 6-8 weeks refrigerated - though the printed "use by" date overrides that range if it falls earlier.

Once the wrapper is broken, the clock moves faster. Exposure to air invites mold, and Velveeta's moisture content means it dries or picks up off-flavors more readily than a harder aged cheese would.

Velveeta Cheese Shelf Life
MethodStateDurationNotes
🧊 FridgeUnopened6-8 weeksFollow printed "use by" if earlier than 8 weeks
🧊 FridgeOpened3-4 weeksWrap tightly or use airtight container to limit mold
❄️ FreezerOpened block2 monthsTexture degrades; best in cooked applications after thawing
❄️ FreezerCooked (dip/casserole)2-3 monthsThaw in fridge before reheating; stir while melting
🏠 CounterOpened2 hours maxProcessed cheese softens fast; bacterial risk rises quickly

Cooked Velveeta dishes - cheese dips, casseroles, baked mac - actually freeze better than raw blocks do, since the cooking process has already altered the texture structure.

How to Store Velveeta Cheese

The original packaging works well short-term, but once opened, it won't protect the block adequately on its own. Airtight storage is non-negotiable for keeping mold and odors out.

Fridge: Transfer the opened block to an airtight plastic container or a vacuum-seal bag with the air pressed out. For longer fridge storage, wrap the block first in wax paper - which prevents sticking - then in foil to block light and air before sealing it in a bag. Counter: Avoid leaving cut portions out beyond two hours; Velveeta softens quickly and enters the temperature danger zone faster than most people realize.

Golden Rule
Keep Velveeta away from strong-smelling foods in the fridge - it absorbs odors readily, and even well-wrapped blocks can pick up flavors from fish, onions, or aged cheese stored nearby.

A detail worth knowing: using velveeta cheese for creaminess in sauces works best when the block is fresh, so don't bury a new package behind older ones. Rotate stock, and label any stored portions with the date you opened them.

Can You Freeze Velveeta Cheese?

Yes - Velveeta can be frozen, but expect a real texture change. Thawed blocks turn crumbly or grainy and won't melt as smoothly as fresh.

That's fine for queso, mac and cheese, or any cooked sauce where you're stirring the cheese through heat anyway.

Watch Out
Don't freeze the whole unopened box at once. A large block takes longer to thaw and suffers more texture loss - portion first, freeze in meal-sized pieces.

Here's the process that minimizes quality loss:

  1. Portion the block - cut into meal-sized cubes or slices before freezing so you thaw only what you need.
  2. Wrap tightly - layer plastic wrap directly against the cut surface, then wrap again in foil or slide into a zip-top freezer bag with air removed.
  3. Label and freeze flat - mark the date and freeze flat for even freezing; use within 2 months for best quality.
  4. Thaw in the fridge - move to the refrigerator 24-48 hours before you need it, depending on portion size.
  5. Handle the whey separation - drain any pooled liquid before using, then stir constantly while melting to help the cheese recombine; if you've ever dealt with [whey brine for feta](https://forkliftkitchen.com/whey-brine-for-feta/), the separation looks similar but doesn't behave the same way.

Comparable dairy products behave differently in the freezer - cream cheese's shelf life follows a similar fridge window but suffers even more texture loss when frozen than Velveeta does.

Signs Velveeta Cheese Has Gone Bad

Velveeta is a processed product, which means it resists spoilage longer than natural cheese - but it absolutely can go bad. Don't rely on smell alone; visual checks matter just as much here.

Signs It's Gone Bad
👀
VisualFuzzy mold (green, blue, or white) on block surface · Darkened or brownish-gray patches at edges · Yellowish liquid pooling with a slimy surface
👃
SmellSour or tangy off-odor · Sharp ammonia-like scent not present in fresh blocks
✋
TextureSlimy surface · Excessively dry and cracked · Large grainy curds that won't recombine after thawing

Mold on Velveeta is not salvageable the way it might be on a hard aged block. The soft, moist structure means mold threads penetrate further than they appear to on the surface. Discard the entire block.

Getting the Most Out of Every Block

Good Velveeta storage comes down to four habits that prevent waste before it starts.

  • **Label everything** - write the open date on the wrapper or bag so you always know where you stand on the 3-4 week fridge window.
  • **Portion before freezing** - meal-sized pieces thaw faster and with less quality loss than a full block.
  • **Use thawed Velveeta in cooked dishes** - queso, casseroles, and baked dips [sides for pimento cheese dip](https://forkliftkitchen.com/what-to-serve-with-pimento-cheese-dip/) pair well with are all formats where graininess disappears once the cheese is stirred over heat.
  • **Have a backup plan** - if a block has sat too long, knowing your [velveeta cheese stand-ins](https://forkliftkitchen.com/velveeta-cheese-substitutes/) keeps a recipe on track without a last-minute grocery run.
Shortcut
Freeze Velveeta in 4-oz portions - roughly the amount a standard queso or mac recipe calls for - so every package goes straight from freezer to pot without measuring.

Frequently Asked Questions

Can you freeze Velveeta cheese and still melt it?

Yes, but it won't melt as smoothly as fresh. Freezing makes Velveeta grainy and crumbly when thawed, so it works best stirred into cooked sauces, queso, or mac and cheese rather than used on its own.

How long does Velveeta last once opened in the fridge?

An opened block lasts 3-4 weeks refrigerated when wrapped tightly or stored in an airtight container. After that window, check for mold, off-odors, or sliminess before using.

Is Velveeta shelf-stable if unopened?

Standard Velveeta blocks are refrigerated products and should stay in the fridge even when unopened. Only certain processed cheese snack formats are shelf-stable - check the package label to confirm which type you have.

Does Velveeta go bad if it gets mold?

Discard it entirely. Unlike hard cheeses where you can cut away surface mold, Velveeta's soft and moist structure allows mold to penetrate deeper than it appears. Cutting around the spot is not safe.

How do you thaw Velveeta without making it grainy?

Thaw slowly in the fridge over 24-48 hours rather than at room temperature. Drain any separated liquid, then stir constantly over low heat - gradual warming helps the cheese recombine better than high heat does.

Chicken and Dumplings

April 3, 2026

Simmering bone-in chicken with dumplings creates a thick, rich broth with tender meat and fluffy dough pillows. The chicken cooks gently in broth while the dumplings steam on top, absorbing flavor without turning mushy.

Chicken and Dumplings served on a plate

The pot does all the work. You drop spoonfuls of dough into simmering liquid and walk away for 15 minutes.

This works for cold weather dinners when you want something that fills bowls and stretches across multiple meals. Make it when the fridge is stocked with basics and you need comfort without fuss.

QUICK SUMMARY

Chicken and dumplings simmers bone-in chicken in broth until tender, then steams drop dumplings on top for 15-20 minutes. Keep the simmer gentle - boiling breaks dumplings apart. Use bone-in, skin-on chicken for rich broth that thickens naturally.

⏱️Time Reality: 60 minutes total - 20 min prep, 40 min hands-off simmering
🥄Critical First Step: Brown chicken with skin on, then simmer in broth 30-40 minutes
⚠️Watch Out: Overmixing dumpling dough makes them dense - stir just until combined, lumps are fine

Table of Contents

Toggle
  • Why This Recipe Works
  • What You'll Need
    • Ingredient Details
  • Ingredient Swaps
  • What to Serve With It
  • Store and Reheat
  • Frequently Asked Questions
  • Chicken and Dumplings
    • Method 
    • Tried this recipe?

Why This Recipe Works

Bone-in, skin-on chicken releases gelatin and fat that thickens broth naturally while dumplings steam on top. Dropping dough onto simmering liquid instead of boiling keeps dumplings intact. Most people skip chicken, but it balances the meal. For a version that comes together quickly, try this juicy homemade chicken recipe with a different flavor profile.

Quick Reference
⏱️
Prep Time
20 min
🔥
Cook Time
40 min
⏰
Total Time
60 min
🍽️
Servings
6 servings
📊
Difficulty
Medium
🏷️
Category
Main Dish
💡
Quick Tip
Simmer gently; don't over-stir dumplings
🎯
Best For
Weeknight | Meal prep | Family meal

Success markers you can see:

  • Broth stays at 180-190°F with small bubbles breaking the surface, never a rolling boil
  • Dumplings puff up and float after 15 minutes, with dry tops and soft interiors
  • Chicken shreds easily with two forks and reaches 165°F internal temperature
  • Broth thickens to coat the back of a spoon from dumpling starch
  • Vegetables soften but hold their shape, not mushy or falling apart
Quick Tip
Drop 1-inch dough dollops with space between each - they expand by half as they cook

What You'll Need

Ingredients for Chicken and Dumplings

Shopping for chicken and dumplings means buying bone-in pieces and pantry staples. Skip boneless breasts - the bones and skin create the rich base that makes this work.

🍗
Chicken
  • 2 lbs bone-in, skin-on chicken thighs or breasts
🍜
Dumpling Base
  • 2 cups all-purpose flour
  • 1 tablespoon baking powder
  • 1 teaspoon salt
  • ¾ cup milk
  • 3 tablespoons butter, melted
🥬
Vegetables
  • 1 medium onion, diced
  • 2 celery stalks, chopped
  • 2 large carrots, sliced
🥢
Broth
  • 6 cups chicken broth
  • 1 bay leaf
  • ½ teaspoon black pepper

Ingredient Details

  • Bone-in, skin-on chicken
    Thighs stay tender longer than breasts - skin adds fat that enriches broth while bones release gelatin for thickness
  • All-purpose flour
    Creates structure in dumplings and thickens broth as dough cooks - measure by spooning into cup and leveling, not scooping
  • Baking powder
    Lightens dumplings with air bubbles - check expiration date, old powder won't rise properly
  • Milk
    Whole milk adds richness but 2% works - warm to room temperature for easier mixing into dough
  • Chicken broth
    Low-sodium lets you control salt level - homemade or store-bought both work, avoid anything labeled "condensed"
  • Celery and carrots
    Cut into ½-inch pieces so they cook through in 30 minutes without turning mushy
  • Butter
    Melt and cool slightly before adding to dough - too hot scrambles the mixture, too cold creates lumps

Ingredient Swaps

Swapping ingredients works when you match texture and moisture level. Gluten-free flour and dairy alternatives change dumpling texture slightly but still deliver soft, fluffy results.

Four swaps that work:

  • Gluten-free flour blend for all-purpose - Use 1:1 baking blend with xanthan gum already added; dumplings may be slightly crumbly but hold together
  • Unsweetened almond milk for dairy milk - Match volume exactly; dough may be thinner so add flour 1 tablespoon at a time until it holds shape on a spoon
  • Boneless skinless thighs for bone-in chicken - Cook 20-25 minutes instead of 40, add 2 tablespoons butter to broth for richness
  • Self-rising flour for all-purpose plus baking powder - Use 2 cups self-rising, skip the baking powder, reduce salt to ½ teaspoon

Vegetable Broth Instead of Chicken Broth

Works for: Lighter flavor profile, vegetarian adaptation with tofu or beans instead of chicken

Skip if: You want rich, hearty broth - vegetable base lacks the gelatin and fat that thickens liquid naturally

Oil or Margarine Instead of Butter

Works for: Dairy-free cooking, same moisture level in dough

Skip if: You want the richness butter brings - oil makes flatter-tasting dumplings

Instructions

This takes 60 minutes with most time spent simmering while you do other things. The stove does the work - you just drop dumplings and wait.

  1. Brown the chicken: Heat 1 tablespoon oil in a large pot over medium-high heat. Add chicken skin-side down and cook 4-5 minutes until golden. Flip and brown the other side 3-4 minutes. Remove chicken and set aside.
  2. Build the broth: Add onion, celery, and carrots to the pot. Cook 3-4 minutes until onion softens. Pour in chicken broth, add bay leaf and pepper. Return chicken to pot, bring to a boil, then reduce to a gentle simmer (180-190°F). Cover and cook 30-40 minutes until chicken reaches 165°F.
  3. Make dumpling dough: While chicken simmers, whisk flour, baking powder, and salt in a bowl. Pour in milk and melted butter. Stir gently with a fork just until combined - batter should be thick and slightly lumpy, not smooth.
  4. Cook the dumplings: Remove chicken from pot and shred with two forks, discarding skin and bones. Return shredded chicken to pot. Drop dough by heaping tablespoons onto simmering broth, spacing them apart. Cover and simmer 15-20 minutes without lifting the lid - dumplings steam and puff up.
  5. Finish and serve: Check dumplings by pressing the center - they should spring back and feel dry on top. Stir gently once to distribute dumplings. Taste broth and add salt if needed. Serve immediately in bowls.
Golden Rule
Never stir dumplings while they cook - lifting the lid releases steam and prevents them from puffing properly

What to Serve With It

Chicken and dumplings fills the bowl but benefits from something crunchy or bright on the side. Rich mains need something to cut through, and salad does exactly that. For chicken dumplings meal planning ideas that work across different occasions, we keep several options ready.

Side Dish Prep Why It Works How to Serve
Mixed green salad Easy Crisp greens cut through rich broth Toss with vinaigrette, serve on the side
Cornbread Easy Absorbs extra broth, adds sweetness Serve warm with butter on top
Steamed green beans Easy Light, fresh contrast to heavy stew Season with salt and lemon juice
Roasted root vegetables Medium Adds caramelized flavor depth Roast at 425°F for 25 minutes
Coleslaw Easy Crunchy, tangy balance to rich dish Make ahead, serve chilled

Three ways to serve it:

  • Weeknight bowl: Ladle over mashed potatoes with this quick asparagus dish on the side for a complete plate
  • Family style: Serve in a large pot at the table with a bright tangy slaw and crusty bread for dipping
  • Meal prep portions: Divide into containers with cornbread squares and a crisp green salad packed separately
Best Pick
Cornbread soaks up broth without getting soggy - bake it while the chicken simmers so both finish at the same time

Store and Reheat

Chicken and dumplings keeps 3-4 days in the fridge but dumplings soften as they sit in liquid. The salad works best when it hits the table at the same time as the main. For a version that comes together quickly, make a creamy sauce side that doubles as a leftover topper.

Method Time Best For
🍳 Stovetop 5-7 min on medium-low Even reheating, maintains dumpling texture
📦 Microwave 2-3 min, stir halfway Single servings, quick lunch
🔥 Oven 15 min at 325°F covered Large portions, preserves texture best

For best results when storing:

  • Cool chicken and dumplings to room temperature within 30 minutes, then transfer to shallow airtight containers
  • Store dumplings and broth together - separating them dries out dumplings faster
  • Reheat only what you'll eat - repeated heating breaks down dumplings into mush
  • Add a splash of broth or water when reheating to thin liquid that thickens overnight
  • Freeze chicken and broth for up to 3 months but skip freezing dumplings - they turn gummy and dense when thawed

Frequently Asked Questions

Can I make chicken and dumplings ahead and reheat?

Make the chicken and broth up to 2 days ahead, store in the fridge, then reheat and add fresh dumplings when ready to serve. Cooked dumplings get soggy when stored in liquid overnight.

How do I know when the dumplings are fully cooked?

Press the center of a dumpling with your finger - it should spring back and feel dry on top, not sticky or doughy. They'll puff up and float after 15-20 minutes at a gentle simmer.

Can I use biscuit dough instead of homemade dumplings?

Refrigerated biscuit dough works - tear each biscuit into 3-4 pieces and drop into simmering broth. Cook 12-15 minutes until puffed and cooked through.

What is the best way to store leftover chicken and dumplings?

Store in an airtight container in the fridge for 3-4 days. Dumplings will soften as they sit in broth but still taste fine when reheated gently on the stovetop.

Can I make chicken and dumplings gluten-free and dairy-free?

Use a 1:1 gluten-free flour blend with xanthan gum for dumplings and swap milk for unsweetened almond or oat milk. Replace butter with oil or dairy-free margarine in the dough.

Chicken and Dumplings served on a plate

Chicken and Dumplings

No ratings yet
This chicken and dumplings recipe simmers bone-in, skin-on chicken in broth until tender, then steams fluffy dumplings on top while absorbing rich flavors. The gentle simmer and dumpling dough dropped by spoonfuls create a comforting, hearty meal.
Print Recipe Pin Recipe
Prep Time 20 minutes mins
Cook Time 40 minutes mins
Total Time 1 hour hr
Servings: 6 servings
Course: Main Dish
Cuisine: American
Ingredients Method Notes

Ingredients
  

  • 2 lbs chicken bone-in, skin-on thighs or breasts
  • 2 cups all-purpose flour
  • 1 tablespoon baking powder
  • 1 teaspoon salt
  • 0.75 cup milk room temperature
  • 3 tablespoons butter melted and slightly cooled
  • 1 medium onion diced
  • 2 stalks celery chopped
  • 2 large carrots sliced
  • 6 cups chicken broth
  • 1 leaf bay leaf
  • 0.5 teaspoon black pepper
  • 1 tablespoon oil for browning chicken

Method
 

  1. Heat 1 tablespoon oil in a large pot over medium-high heat. Add chicken skin-side down and cook 4-5 minutes until golden. Flip and brown the other side 3-4 minutes. Remove chicken and set aside.
    2 lbs chicken, 1 tablespoon oil
  2. Add diced onion, chopped celery, and sliced carrots to the pot. Cook 3-4 minutes until onion softens. Pour in chicken broth, add bay leaf and black pepper. Return chicken to pot, bring to a boil, then reduce to a gentle simmer (180-190°F). Cover and cook 30-40 minutes until chicken reaches 165°F internal temperature.
    1 medium onion, 2 stalks celery, 2 large carrots, 6 cups chicken broth, 1 leaf bay leaf, 0.5 teaspoon black pepper, 2 lbs chicken
  3. While the chicken simmers, whisk flour, baking powder, and salt in a bowl. Pour in milk and melted butter. Stir gently with a fork just until combined - batter should be thick and slightly lumpy, not smooth.
    2 cups all-purpose flour, 1 tablespoon baking powder, 1 teaspoon salt, 0.75 cup milk, 3 tablespoons butter
  4. Remove chicken from pot and shred with two forks, discarding skin and bones. Return shredded chicken to pot. Drop dough by heaping tablespoons onto simmering broth, spacing them apart. Cover and simmer 15-20 minutes without lifting the lid - dumplings steam and puff up.
    2 lbs chicken, 2 cups all-purpose flour, 1 tablespoon baking powder, 1 teaspoon salt, 0.75 cup milk, 3 tablespoons butter
  5. Check dumplings by pressing the center - they should spring back and feel dry on top. Stir gently once to distribute dumplings. Taste broth and add salt if needed. Serve immediately in bowls.
    1 teaspoon salt

Notes

  • Keep the simmer gentle to prevent dumplings from breaking apart.
  • Stir dumpling dough just until combined to avoid dense dumplings; lumps are fine.
  • Drop dumplings spaced apart as they will expand by half as they cook.

Tried this recipe?

Let us know how it was!

How Long Do Turnips Last in Storage? [Guide]

April 3, 2026

Finding a soft, wrinkled turnip in the back of your crisper is a familiar disappointment - especially when you're not sure if it's still safe to eat or just past its prime.

Can You Freeze Turnip

Much like swapping out beet in a root vegetable dish, understanding storage first saves you a wasted trip to the store. Turnips keep well when handled correctly, but they're sensitive to one key mistake: leaving the greens attached too long.

The turnip greens's shelf life is far shorter than the root, and the two compete for moisture when stored together.

QUICK SUMMARY

Whole turnips last 2-3 weeks in the fridge after trimming the greens. Blanched cubes freeze for 8-12 months. The single biggest mistake is storing the root with greens attached - they pull moisture and cut shelf life significantly.

🧊Fridge (whole): 2-3 weeks in crisper, greens removed first
❄️Freezer (blanched): 8-12 months in airtight bags
⚠️Key rule: Trim greens within 12 hours of purchase to protect the root

How Long Does Turnip Last?

Shelf life depends heavily on two things: whether the greens are still attached and how the root is stored. A whole purple-top turnip in a cool, dark pantry holds for 1-2 weeks - longer if it's small and firm.

Move it to the fridge and that extends to 2-3 weeks.

Once you slice into a turnip, the clock moves faster. Cut pieces left in an airtight container with a paper towel absorb excess moisture and last 3-5 days.

Cooked turnip - mashed, roasted, or pureed - also holds 3-5 days refrigerated, similar to other cooked root vegetables.

Turnip Shelf Life
MethodStateDurationNotes
🏠 CounterWhole1-3 daysSoftens quickly; greens wilt fast at room temp
🗄️ PantryWhole1-2 weeksCool, dark spot; greens removed; check for soft spots daily
🧊 FridgeWhole2-3 weeksCrisper drawer; larger roots may store shorter
🧊 FridgeSliced3-5 daysAirtight container with paper towel to absorb moisture
🧊 FridgeCooked3-5 daysMash or roasted pieces; seal tightly
❄️ FreezerBlanched & frozen8-12 monthsBest texture; use within a year for quality
❄️ FreezerRaw frozen1-3 monthsGrainy texture after thaw; soups only
❄️ FreezerCooked & frozen6-12 monthsCool fully before wrapping; mash freezes well

Smaller turnips consistently outlast larger ones in the fridge. Mature, oversized roots develop woody flesh faster, which accelerates deterioration even under ideal conditions.

How to Store Turnip

The method that protects a turnip most comes down to one decision made within hours of buying it. Trim the greens within 12 hours - they actively draw moisture from the root, shrinking its fridge life from weeks to days.

Golden Rule
Never rinse turnips before storing. Moisture on the skin invites mold. Rinse only immediately before you use them.

Pantry: Remove tops and lay whole turnips in a single layer in a cool, dark spot. Check daily for soft patches - one softening root can affect others nearby. Fridge: Place trimmed roots in a perforated plastic bag or a reusable crisper bag with a paper towel, then set in the crisper drawer with some airflow. Counter: Fine for 1-3 days max, but not a reliable option in a warm kitchen.

One environmental factor most people miss: ethylene gas. Store turnips away from apples and pears, which emit ethylene and accelerate softening and bitterness in the root.

This is one of the same principles that applies to turnip in cooking - the root's mild sulfur compounds react quickly to neighboring produce.

Can You Freeze Turnip?

Yes - with conditions. Raw, unblanched turnip frozen whole or in cubes will turn grainy and watery after thawing.

The high water content in the root expands during freezing and collapses cell walls. Blanching first is the fix.

Watch Out
Freezing raw turnip cubes and expecting usable texture after thaw is a common mistake. Raw-frozen turnip is only suitable for long-cooked soups or stews - never for roasting or mashing.
  1. Cut trimmed turnip into 2-3 cm cubes, uniform in size for even blanching.
  2. Blanch the cubes in boiling water for 2-3 minutes - no longer, or they soften too much.
  3. Ice bath immediately for 2 minutes to stop cooking, then drain thoroughly.
  4. Dry the cubes with a clean towel - surface moisture causes [salmon freezer burn explained](https://forkliftkitchen.com/salmon-freezer-burn/) -style ice crystal damage on vegetables too.
  5. Flash-freeze spread out on a tray for 1-2 hours until solid.
  6. Transfer to airtight freezer bags, press out all air, label with the date, and freeze.

For cooked turnip, cool it fully before sealing. Mashed turnip freezes particularly well - portion it into smaller containers so you thaw only what you need.

Thaw blanched or cooked turnip overnight in the fridge; add raw-frozen cubes directly to soups without thawing.

Signs Turnip Has Gone Bad

A turnip won't always look obviously ruined.

Some spoilage starts internally, which is why slicing before use matters. Small soft spots can be cut away if the surrounding flesh stays firm and the root smells clean - use it immediately after trimming.

Signs It's Gone Bad
👀
VisualSoft or collapsing areas at the taproot · Dark brown or black internal streaks when sliced · Yellowed, slimy, or heavily wilted attached greens
👃
SmellSour or fermented odor from cut surface · Musty smell from the skin
✋
TextureSlimy surface on greens · Grainy, spongy, or mushy root flesh throughout

Discard any turnip with an off smell, sticky or slimy skin, or large soft areas. Don't taste-test a turnip you're uncertain about - the smell and texture alone give you the answer.

Storage Habits Worth Keeping

Good turnip storage is mostly about three habits done consistently. Understanding the alternatives to rutabaga is also useful here - rutabagas have denser flesh and store longer, so don't assume the same timelines apply if you've mixed up the two roots.

Similarly, replacements for parsnip follow different fridge rules than turnip does.

  • 🟢 Trim greens immediately - within 24 hours of purchase, separate and store them independently.
  • 🟢 Choose small roots - smaller turnips stay firm longer and are less likely to go woody.
  • 🟢 Blanch before freezing - this single step is the difference between usable frozen turnip and grainy waste. For similar leafy comparisons, [kale without blanching's shelf life](https://forkliftkitchen.com/kale-without-blanching-shelf-life/) shows what skipping that step costs you.
  • 🟢 Keep away from ethylene producers - apples and pears nearby will shorten turnip life noticeably.

If you run low and need a substitute, turnip swaps that work covers the closest options by texture and cooking method.

Frequently Asked Questions

Can you freeze turnip raw?

Yes, but texture suffers significantly. Raw-frozen turnip becomes grainy and watery after thawing, making it only suitable for soups or long-cooked stews. Blanch first if you want usable texture in any other dish.

Can you eat turnips after they soften?

Mild softening without off smells or slimy skin is usually fine - cook it promptly rather than eating it raw. If the flesh is mushy throughout or smells sour, discard it.

How do you store turnip greens separately?

Wrap unwashed greens in a damp paper towel and store in a sealed bag in the fridge. They last 3-5 days at most and wilt quickly, so use them before the root.

Is turnip the same as rutabaga for storage purposes?

No. Rutabaga has denser, waxier flesh and stores longer - often 4-6 weeks in the fridge versus 2-3 weeks for turnip. Don't apply turnip timelines to rutabaga or you may discard perfectly good roots.

Do turnips go bad faster after cutting?

Yes. Cut turnip exposed to air oxidizes and loses moisture rapidly. Store sliced pieces in an airtight container with a paper towel and use within 3-5 days.

Baked Chicken Thighs with Herbs

April 3, 2026

You need 45 minutes and one sheet pan. No marinating, no flipping, no precooking.

Baked Chicken Thighs with Herbs served on a plate

Bone-in chicken thighs roast while you prep rice or chop vegetables. The herbs crisp into the skin while the meat stays tender underneath.

This is what we make on weeknights when the fridge is half-empty but we still want real food. Pat the skin dry, season generously, and let the oven handle the rest.

QUICK SUMMARY

Bone-in, skin-on chicken thighs roasted at 400°F with fresh herbs, garlic, and olive oil. High heat crisps the skin while keeping the meat juicy. The pan does all the work-no flipping required.

⏱️Time Reality: 45-55 minutes total, 10 minutes hands-on
🔑Key Move: Pat skin completely dry before seasoning
⚠️Watch Out: Crowded pan = soggy skin; space thighs 1 inch apart

Table of Contents

Toggle
  • Why This Recipe Works
  • What You'll Need
    • Ingredient Details
  • Ingredient Swaps
  • What to Serve With It
  • Store and Reheat
  • Frequently Asked Questions
  • Baked Chicken Thighs with Herbs
    • Method 
    • Tried this recipe?

Why This Recipe Works

Bone-in thighs retain moisture that boneless pieces lose, and the skin crisps without constant attention. For a version that comes together quickly, something juicy like chicken offers a different flavor direction but similar hands-off cooking.

Quick Reference
⏱️
Prep Time
10 min
🔥
Cook Time
35-45 min
⏰
Total Time
45-55 min
🍽️
Servings
4 servings
📊
Difficulty
Easy
🏷️
Category
Main Dish
💡
Quick Tip
Pat dry for crispy skin
🎯
Best For
Weeknight, Meal prep, Casual entertaining

What makes this reliable:

  • Bone-in thighs stay juicy at 165°F internal temperature while boneless pieces dry out
  • Fresh thyme and rosemary release oils that coat the skin and crisp during roasting
  • Pat-dry skin sheds moisture that would otherwise steam the chicken and prevent browning
  • Spacing thighs 1 inch apart allows hot air to circulate and crisp all sides evenly
  • Resting for 5-10 minutes after baking redistributes juices throughout the meat
Quick Tip
Preheat your oven fully to 400°F before adding the chicken-partial preheat extends cook time and softens the skin

What You'll Need

Ingredients for Baked Chicken Thighs with Herbs

Stock bone-in, skin-on thighs and fresh herbs. For a version that comes together quickly, light refreshing greens work as a bright side without adding cook time.

🍗
Protein
  • 4 bone-in, skin-on chicken thighs (6-8 oz each)
🧄
Aromatics
  • 4 garlic cloves, minced
  • 2 tablespoons fresh thyme
  • 2 tablespoons fresh rosemary
  • 2 tablespoons fresh parsley
🫙
Pantry
  • 3 tablespoons olive oil
  • 1 teaspoon salt
  • ½ teaspoon black pepper
  • 1 lemon (zest and juice)
  • Optional: ½ teaspoon paprika

Ingredient Details

  • Bone-in, skin-on chicken thighs
    Look for thighs with intact skin and visible fat-this renders during cooking and keeps meat moist
  • Fresh thyme and rosemary
    Strip leaves from stems before chopping; woody stems won't soften and taste bitter
  • Olive oil
    Use regular olive oil, not extra virgin-high heat burns delicate EVOO and creates bitter flavors
  • Garlic
    Mince garlic fresh right before cooking; pre-minced jarred garlic tastes metallic and burns faster
  • Lemon
    Zest before juicing and avoid the white pith-it's bitter and overwhelms the bright citrus notes
  • Salt
    Season generously on both sides; undersalted chicken tastes flat even with herbs and garlic
  • Paprika (optional)
    Adds color and subtle sweetness without changing the herb profile; smoked paprika adds deeper flavor

Ingredient Swaps

Dried herbs work when fresh ones aren't available, but cut the quantity in half. We keep a batch ready for nights like this-a bright tangy slaw uses pantry staples and comes together while the chicken roasts.

Common swaps that work:

  • Avocado oil instead of olive oil: Neutral flavor with similar smoke point, works for dairy-free or mild herb flavor
  • Dried herbs instead of fresh: Reduce quantity by half since dried herbs concentrate flavor; add halfway through cooking to prevent burning
  • Boneless thighs instead of bone-in: Cut cook time to 25-30 minutes and check internal temp early; less forgiving and dries out faster
  • White wine vinegar instead of lemon juice: Sharper acidity with less brightness; use 1 tablespoon instead of 2 tablespoons lemon juice

Fresh Herbs

Works for: Bright aroma, visible green flecks, better texture against crispy skin

Skip if: Not in season, budget is tight, or only cooking for one

Dried Herbs

Works for: Pantry cooking, longer shelf life, concentrated flavor in small amounts

Skip if: You want fresh herbal aroma or visual appeal for hosting

Instructions

The chicken roasts for 35-45 minutes depending on size. For a version that comes together quickly, something warm like rolls can go in after the chicken comes out.

  1. Pat chicken thighs dry with paper towels for 2-3 minutes. Press firmly to absorb all surface moisture-wet skin steams instead of crisps. Preheat oven to 400°F.

  2. Mix olive oil, minced garlic, chopped herbs, lemon zest, salt, pepper, and paprika in a bowl. Rub mixture all over chicken, coating skin and underside. Let sit 5 minutes while oven preheats.

  3. Place thighs skin-side up on a baking sheet or wire rack, spacing them 1 inch apart. Crowding creates steam pockets that soften skin. Pour any remaining herb mixture over the top.

  4. Roast for 35-45 minutes until skin turns golden brown and internal temp hits 165°F. Check thickest part with a meat thermometer-undercooked chicken stays rubbery and unsafe. For extra crispness, broil for 2-3 minutes at the end.

  5. Rest chicken covered with foil for 5-10 minutes before serving. Cutting immediately releases juices onto the cutting board instead of staying in the meat. Squeeze fresh lemon juice over the top before plating.

Golden Rule
Use a wire rack on your baking sheet so hot air circulates underneath-thighs crisp on all sides without flipping

What to Serve With It

Rich roasted chicken needs something bright or starchy to balance the plate. We keep a batch ready for nights like this-weeknight lemon chicken meal ideas cover the gaps when you're staring at leftovers.

Side Dish Prep Why It Works How to Serve
Roasted vegetables Easy Caramelized edges mirror chicken's crispy skin Toss carrots, broccoli, or Brussels sprouts with olive oil; roast on separate pan at 400°F for 25 minutes
Mashed potatoes Medium Creamy texture soaks up herb-infused pan juices Boil Yukon golds 15 minutes, mash with butter and milk; serve with chicken juices spooned over
Green salad Easy Fresh greens cut through rich, fatty chicken Toss mixed greens with lemon vinaigrette; plate alongside chicken while it rests
Rice pilaf Easy Absorbs chicken drippings and herb flavors Cook rice with chicken broth and butter; fluff and serve under or beside thighs
Garlic herb roasted potatoes Medium Matches herb profile and adds textural contrast Toss cubed potatoes with garlic and thyme; roast on lower oven rack while chicken cooks above

Three ways to serve it:

  • Family-style weeknight: Plate thighs over rice pilaf with roasted vegetables on the side and drizzle pan juices over everything
  • Meal prep: Divide thighs into containers with mashed potatoes and steamed broccoli; reheat in oven for crispy skin
  • Casual entertaining: Serve thighs on a platter with garlic roasted potatoes, grilled asparagus, and crusty bread for mopping up juices
Shortcut
Make rice in a rice cooker while chicken roasts-it finishes at the same time and stays warm without drying out

Store and Reheat

Chicken thighs hold up better than breasts in the fridge because dark meat stays moist. For a version that comes together quickly, simple dressing recipe revives day-old chicken with tangy richness.

Method Time Best For
🔥 Oven 10-15 min at 350°F Preserves crispy skin and reheats evenly without drying out meat
🍳 Stovetop 5-7 min covered, medium-low Quick reheating when you need one portion; skin softens but meat stays tender
📦 Microwave 1-2 min, medium power Speed when you don't care about crispy skin; cover with damp paper towel to prevent drying

For best results when storing:

  • Cool chicken to room temperature within 30 minutes before refrigerating to prevent bacterial growth
  • Store in shallow airtight containers instead of deep bowls-shallow containers cool faster and prevent condensation
  • Keep skin-side up in containers so it doesn't stick to the bottom and tear when reheating
  • Freeze individual thighs wrapped in foil, then placed in freezer bags-pull out single servings without thawing the whole batch
  • Reheat from frozen by adding 5-7 minutes to oven time; check internal temp reaches 165°F before serving

Frequently Asked Questions

How long to cook baked chicken thighs at 400°F?

Bake for 35-45 minutes depending on thigh size. Check the thickest part with a meat thermometer-it should read 165°F when done.

Can I make baked chicken thighs ahead?

Yes. Season thighs and refrigerate up to 24 hours before baking, or bake fully and reheat in a 350°F oven for 10-15 minutes to restore crispy skin.

What goes with baked chicken thighs?

Roasted vegetables, mashed potatoes, rice pilaf, or green salad balance the richness. Pair with crusty bread to soak up herb-infused pan juices.

How do I know when baked chicken thighs are done?

Insert a meat thermometer into the thickest part without touching bone-it should read 165°F. Juices run clear when fully cooked, not pink.

Can I use boneless chicken thighs instead?

Yes, but reduce cook time to 25-30 minutes and check internal temp early. Boneless thighs dry out faster and won't stay as juicy as bone-in.

Baked Chicken Thighs with Herbs served on a plate

Baked Chicken Thighs with Herbs

No ratings yet
Bone-in, skin-on chicken thighs roasted at high heat with fresh herbs, garlic, and olive oil deliver juicy meat and crispy skin with minimal hands-on time. This simple sheet pan recipe requires no flipping and is perfect for quick weeknight meals.
Print Recipe Pin Recipe
Prep Time 10 minutes mins
Cook Time 40 minutes mins
Total Time 50 minutes mins
Servings: 4 servings
Course: Dinner, Main Dish
Cuisine: American
Ingredients Equipment Method Notes

Ingredients
  

  • 4 chicken thighs bone-in, skin-on, 6-8 oz each
  • 4 cloves garlic minced fresh
  • 2 tablespoons thyme fresh, leaves stripped and chopped
  • 2 tablespoons rosemary fresh, leaves stripped and chopped
  • 2 tablespoons parsley fresh, chopped
  • 3 tablespoons olive oil regular (not extra virgin)
  • 1 teaspoon salt season generously on both sides
  • 0.5 teaspoon black pepper
  • 1 whole lemon zest and juice, avoid white pith
  • 0.5 teaspoon paprika optional, for color and subtle sweetness

Equipment

  • Sheet pan To roast chicken thighs in the oven
  • Wire rack Optional, placed on sheet pan to allow air circulation under chicken
  • Meat thermometer For checking internal temperature of chicken

Method
 

  1. Pat chicken thighs dry with paper towels for 2-3 minutes, pressing firmly to absorb all surface moisture. Wet skin will steam instead of crisp.
    4 chicken thighs
  2. Preheat oven to 400°F (204°C) fully before roasting chicken to ensure crispy skin and proper cook time.
  3. Mix olive oil, minced garlic, fresh chopped thyme, rosemary, parsley, lemon zest, salt, black pepper, and optional paprika in a bowl.
    4 cloves garlic, 2 tablespoons thyme, 2 tablespoons rosemary, 2 tablespoons parsley, 3 tablespoons olive oil, 1 teaspoon salt, 0.5 teaspoon black pepper, 1 whole lemon, 0.5 teaspoon paprika
  4. Rub the herb mixture all over chicken thighs, coating skin and underside evenly. Let sit 5 minutes while the oven finishes preheating.
    4 chicken thighs, 4 cloves garlic, 2 tablespoons thyme, 2 tablespoons rosemary, 2 tablespoons parsley, 3 tablespoons olive oil, 1 teaspoon salt, 0.5 teaspoon black pepper, 1 whole lemon, 0.5 teaspoon paprika
  5. Place chicken thighs skin-side up on a baking sheet or wire rack, spacing them 1 inch apart to allow air circulation and prevent soggy skin. Pour any remaining herb mixture over the top.
    4 chicken thighs
  6. Roast for 35-45 minutes until skin is golden brown and internal temperature reaches 165°F (74°C). Use a meat thermometer to check the thickest part without touching bone. For extra crispness, broil for 2-3 minutes at the end of roasting.
    4 chicken thighs
  7. Rest the chicken covered loosely with foil for 5-10 minutes before serving to allow juices to redistribute. Squeeze fresh lemon juice over the top before plating.
    4 chicken thighs, 1 whole lemon

Notes

  • Pat chicken skin completely dry to ensure it crisps rather than steams during roasting.
  • Space thighs at least 1 inch apart on the pan to allow hot air circulation and prevent soggy skin.
  • Use a meat thermometer to check for doneness-internal temperature should reach 165°F.

Tried this recipe?

Let us know how it was!

What Is Turnip? [Taste, Uses & More]

April 3, 2026

Raw turnip has a presence. That first bite - crisp, clean, and a little sharp - sits somewhere between a radish and a mild horseradish, peppery without the heat.

What Does Turnip Taste Like

It's the kind of root that surprises people who expect a bland starchy vegetable and get something with actual character. Cooked low and slow, though, the whole personality shifts: the sharpness mellows, a quiet sweetness opens up, and the texture goes from snappy to silky.

Whether you're new to it or just haven't used it confidently, understanding what turnip greens and roots each bring to the table makes the difference.

QUICK SUMMARY

The turnip is a brassica root with white flesh and a peppery, earthy bite when raw that softens into a mildly sweet, creamy flavor when cooked. Small bulbs are best for flavor; greens are edible and worth using separately.

🌱Category: Root vegetable, brassica family (Brassica rapa)
👅Flavor: Peppery and earthy raw; mildly sweet and tender when cooked
🍳Best Uses: Roasting, mashing with potato, braising, raw in slaws
🛒Buy: Firm, smooth, heavy for size - choose small to medium bulbs
⏱️Shelf Life: Roots keep 1-3 weeks refrigerated; greens use within 2-4 days

What Is Turnip?

Turnip is a brassica root vegetable - the same family as cabbage, mustard, and kale - grown for both its bulbous root and its leafy greens.

Botanically it's Brassica rapa subsp. rapa, domesticated across Eurasia and cultivated in Europe and Western Asia for thousands of years.

The root is typically round and squat, with white flesh and a two-toned skin: white at the base, shading into purple or red at the top where sunlight hits. You'll see it sold as white turnip in most markets, and in Scotland it goes by neep.

Rutabaga is a common source of confusion - it's a separate species, larger, yellow-fleshed, and sweeter, though both belong to the broader brassica genus. For a detailed look at how the two compare, the rutabaga profile covers the distinctions clearly.

Size matters here more than with most roots:

  • Small bulbs (golf ball to fist-sized) - sweeter, tender, milder pepper notes
  • Medium bulbs - the standard; balance of bite and sweetness
  • Large, knobby bulbs - often woody and bitter; worth avoiding unless braising long and slow

The greens are fully edible and handled separately from the root - they're closer to mustard greens in character.

What Does Turnip Taste Like?

turnip - What Does Turnip Taste Like

Raw turnip lands somewhere between a radish and a very mild horseradish. The bite is clean and peppery, with an earthy undertone and a faint bitterness that becomes more pronounced in larger roots.

It's not aggressive, however - more of a confident vegetable flavor than a sharp shock.

Sensory SnapshotModerate Intensity
👅 Flavor
pepperyearthymildly sweetslightly bitter
✋ Texture
crisp and firm rawtender and creamy when cooked
👃 Aroma
green and slightly pungent rawtoasty and warm when cooked

Heat changes turnip significantly. Roasting drives off the sharp compounds - glucosinolates, the same brassica chemicals responsible for mustard's heat - and what remains is a nutty, gently sweet root with some caramelized depth.

Boiled or mashed, it's closest to a mild potato with a background pepper note. Think less "sharp" and more "earthy and round."

How to Use Turnip

Turnip performs differently depending on how you treat it, which is part of its appeal. Raw, it adds peppery crunch to slaws and grain bowls; cooked, it absorbs savory broths and fats like a sponge.

The greens deserve their own moment too - sautéed with garlic, they cook down like mustard greens with a slightly more bitter edge.

How Turnip Is Used
MethodBest ForTip
🥗 RawSlaws, salads, quick picklesSlice thin or grate; salt briefly to soften the pepperiness
🔥 RoastingCaramelized sides, sheet-pan dishesCut into wedges, high heat (200°C+), don't crowd the pan
🥣 Boiling/MashingTurnip-potato purée, creamy sidesMix with potato for creamier texture; turnip alone can go watery
🍲 BraisingStews, jjigae, slow-cooked meatsAdd early - it holds shape but absorbs surrounding flavors well
🫙 PicklingCondiments, Korean kimchi variantsA beet slice in the brine turns pickled turnips that signature pink

British cooking uses turnip roasted or mashed alongside pork and bacon - fatty meats cut the pepperiness cleanly. Japanese tsukemono pickles lean on turnip's firm texture and neutral base, while Korean cooks use it raw and fermented in kimchi variants or simmered in jjigae.

Eastern European braises often treat it like a secondary root, added to stews alongside potato and carrot.

Strong pairings worth knowing: butter and cream soften the raw sharpness in mashes; thyme and rosemary hold up to its earthy weight in the oven; apple or pear adds brightness that balances the bitter notes in larger roots. If you've run out of turnips and need a substitute, the turnip swaps guide covers the closest options.

For mashed applications, the notes on potato flake substitutes can also be useful when blending mashes.

Golden Rule
Never skip salting raw turnip before adding it to a slaw or salad. A 10-minute salt rest draws out moisture and takes the edge off the raw peppery bite.
Try It In
🧄Air Fryer Garlic Parmesan Potato WedgesSwap half the potato for turnip wedges — same method, peppery contrast→🍯Air Fryer Honey Garlic Potato WedgesHoney glaze balances turnip's earthiness; works especially well on small roots→

How to Buy and Store Turnip

Good turnip selection comes down to weight and firmness. Pick roots that feel heavy for their size with smooth, taut skin and no soft spots, cracks, or wrinkled patches.

Smaller bulbs - roughly golf ball to fist-sized - are almost always sweeter and less woody than large ones.

Watch Out
Large turnips with knobby shapes often have a pithy, woody interior and stronger bitterness. Size up slowly - if you need more volume, buy several small bulbs instead of one large one.

At home, remove the greens at the stem before storing - they draw moisture from the root and shorten shelf life. Keep the unwashed root in a perforated bag in the fridge crisper drawer.

Greens need separate storage, wrapped loosely in a damp paper towel; they deteriorate fast.

  • Root shelf life - 1-3 weeks refrigerated; check the full guide on turnip storage guide for tips on longer storage
  • Greens shelf life - 2-4 days; use them first, before the root

Where to Start With Turnip

Turnip rewards a low-stakes first attempt. Roast small cubes at high heat with olive oil, salt, and thyme - that's the method that shows its best side fastest.

From there, try it mashed half-and-half with potato for a creamy side with more depth than potato alone. Raw slaws and radish alternatives are worth exploring once you have a feel for how peppery the raw root tastes.

If you want a milder, sweeter entry point, check what sets rutabaga swaps apart - the two roots are close enough to be interchangeable in many dishes.

Frequently Asked Questions

What is the difference between turnip and rutabaga?

Rutabaga is larger, yellow-fleshed, and noticeably sweeter than turnip. Turnip is white-fleshed, sharper, and peppery. Rutabaga is actually a hybrid of turnip and wild cabbage - a separate species entirely.

How do you cook a turnip to remove bitterness?

Roasting at high heat or slow braising both reduce bitterness significantly. The glucosinolate compounds responsible for the sharp, bitter edge break down with prolonged heat. Starting with small bulbs also helps - they're naturally less bitter.

Are turnip greens edible?

Yes - and they're worth using. Turnip greens taste similar to mustard greens, slightly bitter and bold, and they're best sautéed with garlic or added to braises. Store them separately from the root and use within 2-4 days.

Are turnips healthy?

Turnips are low in calories and carbohydrates compared to starchy roots like potato. They provide vitamin C, potassium, fiber, and glucosinolates - brassica compounds associated with anti-inflammatory properties in research contexts.

How long do turnips last in the fridge?

Properly stored roots last 1-3 weeks in the refrigerator. Remove the greens before storing - they draw moisture from the root and accelerate spoilage. Keep the root unwashed in a perforated bag in the crisper drawer.

Orecchiette with Sausage and Broccoli Rabe

April 3, 2026

Complete Article Output

Pasta dishes can turn bland when the greens taste too bitter or the sausage dries out. The trick is blanching broccoli rabe first and browning the sausage until it gets crispy edges.

Orecchiette with Sausage and Broccoli Rabe served on a plate

The pasta water does half the work. Reserve a cup before draining - it helps the ingredients stick together and creates a light sauce without adding cream.

This is what you make when you want something hearty that still feels fresh. Works for weeknight dinners or meal prep because it reheats well.

QUICK SUMMARY

Orecchiette with Sausage and Broccoli Rabe combines cup-shaped pasta with browned Italian sausage and blanched bitter greens. Blanching the broccoli rabe first removes excess bitterness while keeping it tender. The pasta water creates a silky coating that ties everything together without heavy cream.

⏱️Time Reality: 35 minutes total - 15 minutes prep, 20 minutes cooking with no downtime between steps
🔥Critical Move: Brown sausage completely before adding pasta so the meat gets crispy edges and deeper flavor
⚠️Watch Out: Under-salted pasta water yields bland results - use 1 tablespoon salt per 4 quarts water

Why This Recipe Works

High heat and proper timing make the difference between greasy pasta and a balanced dish. Most people skip chicken, but it balances the meal. For a version that comes together quickly, this simple chicken recipe uses similar timing strategies with different proteins.

Quick Reference
⏱️
Prep Time
15 min
🔥
Cook Time
20 min
⏰
Total Time
35 min
🍽️
Servings
4 servings
📊
Difficulty
Medium
🏷️
Category
Main Dish
💡
Quick Tip
Blanch broccoli rabe to reduce bitterness.
🎯
Best For
Weeknight | Meal prep | Casual entertaining

Five reasons this works:

  • Blanching cuts bitterness: Boiling broccoli rabe for 1-2 minutes in salted water before sautéing removes the harsh edge while keeping the greens firm
  • Orecchiette shape traps sauce: Cup-shaped pasta catches bits of sausage and garlic oil in every bite instead of letting ingredients slide off
  • Browning sausage creates texture: Breaking sausage into pieces and cooking until crispy edges form adds meaty contrast to tender pasta
  • Reserved pasta water binds everything: Starchy cooking liquid creates a silky coating without cream when tossed with hot ingredients
  • Garlic timing prevents burning: Adding minced garlic after browning sausage and cooking for only 30-60 seconds keeps it fragrant instead of bitter
Quick Tip
Salt the pasta water like the ocean - at least 1 tablespoon per 4 quarts ensures the pasta tastes seasoned from the inside out.

What You'll Need

Ingredients for Orecchiette with Sausage and Broccoli Rabe

Shopping takes 10 minutes if you hit the Italian section first for sausage and grab fresh broccoli rabe from produce. The vegetables works best when it hits the table at the same time as the main. For a version that comes together quickly, a tender vegetables side uses the same approach with different greens and proteins.

🍜
Pasta
  • 1 lb orecchiette pasta
  • Salt for pasta water
🍗
Protein
  • 1 lb Italian sausage (pork, mild or spicy)
🥬
Vegetables
  • 1 bunch broccoli rabe (about 1 lb)
  • 4 cloves garlic, minced
🫙
Seasonings & Finishing
  • 3 tablespoon olive oil
  • ½ teaspoon red pepper flakes
  • ¼ cup Parmesan cheese (optional)
  • 1 teaspoon lemon zest (optional)
  • Black pepper to taste

Ingredient Details

  • Orecchiette pasta
    Cup-shaped design catches sauce and sausage pieces better than spaghetti or penne - look for dried pasta in the Italian aisle, cook to al dente for best texture
  • Italian sausage
    Buy links and remove casings yourself for fresher flavor, or use bulk sausage to save time - mild works for families, spicy adds heat
  • Broccoli rabe
    Choose bunches with firm stems and dark green leaves - trim woody ends before blanching, expect some bitterness even after cooking
  • Garlic
    Fresh cloves minced right before cooking deliver pungent aroma - jarred garlic works but tastes milder and slightly metallic
  • Olive oil
    Extra virgin adds fruity flavor, but regular olive oil works if you're browning sausage at higher heat
  • Red pepper flakes
    Start with ½ teaspoon and add more at the table - heat level varies by brand and age of spices
  • Parmesan cheese
    Grate fresh from a wedge for nutty flavor and smooth melting - pre-grated works but contains anti-caking agents that affect texture

Ingredient Swaps

Substitutions change texture and flavor but keep the meal doable when you're missing ingredients or need dietary adjustments. Four swaps that work:

  • Italian sausage → ground turkey or chicken sausage: Leaner meat means less fat in the pan - add an extra tablespoon of olive oil when browning to prevent sticking and dry texture
  • Broccoli rabe → kale or broccoli florets: Kale tastes milder and needs only 30 seconds blanching time, broccoli florets work raw if you sauté them longer with garlic
  • Orecchiette → gluten-free pasta: Use rice-based shells or penne, check package directions because gluten-free pasta cooks faster and can turn mushy if overcooked
  • Parmesan cheese → nutritional yeast: Use 2 tablespoons nutritional yeast for umami without dairy - texture stays dry instead of melty, so add it at the very end

Mild Italian Sausage

Works for: families with kids, anyone who skips spicy food, letting the broccoli rabe bitterness shine

Skip if: you want heat in every bite, the rest of the dish feels too plain without added spice

Spicy Italian Sausage

Works for: balancing bitter greens with heat, adding depth without extra ingredients, spice lovers

Skip if: kids are eating, you're sensitive to heat, the red pepper flakes already add enough kick

Instructions

The entire process runs 20 minutes once water boils - blanch greens first, then cook pasta and sausage at the same time. Rich mains need something to cut through, and corn on the cob does exactly that. For a version that comes together quickly, this homemade corn on the cob recipe pairs well with Italian sausage and keeps the timing simple.

  1. Blanch broccoli rabe: Bring 4 quarts salted water to a rolling boil, add trimmed broccoli rabe, cook 1-2 minutes until stems turn bright green and tender. Drain and shock in ice water to stop cooking, then chop into 2-inch pieces.

  2. Cook pasta: In the same pot with fresh salted water (1 tablespoon salt per 4 quarts), boil orecchiette 9-11 minutes until al dente with a slight chew. Reserve 1 cup pasta water before draining.

  3. Brown sausage: While pasta cooks, heat 2 tablespoons olive oil in a large skillet over medium heat. Remove sausage from casings, break into bite-size pieces, cook 6-8 minutes until browned and crispy edges form, stirring occasionally.

  4. Sauté aromatics and greens: Push sausage to the side of the pan, add remaining 1 tablespoon olive oil, minced garlic, and red pepper flakes. Cook 30-60 seconds until fragrant, then add chopped broccoli rabe and toss with sausage for 2 minutes.

  5. Combine and finish: Add drained pasta to the skillet with ½ cup reserved pasta water. Toss everything together over low heat for 1-2 minutes, adding more pasta water if it looks dry. Remove from heat, stir in Parmesan and lemon zest if using, season with black pepper.

Watch Out
Garlic burns in under 90 seconds on medium heat - add it after browning sausage and watch closely for the first whiff of fragrance before adding broccoli rabe.

What to Serve With It

A hearty pasta dish needs sides that add crunch or freshness without competing for attention. A good coleslaw can make or break the plate. For a version that comes together quickly, something crunchy like coleslaw cuts through the richness and takes 5 minutes to assemble. If you're planning a complete meal, check out these weeknight creamed corn meal ideas that use similar sides.

Side Dish Prep Why It Works How to Serve
Simple green salad Easy Light greens with lemon vinaigrette cut through rich sausage and pasta Dress at the last minute so leaves stay crisp
Garlic bread Easy Toasted bread soaks up garlic oil and adds crunch to soft pasta Toast under broiler for 3-4 minutes until golden
Roasted cherry tomatoes Medium Sweet acidity balances bitter broccoli rabe without adding heaviness Roast at 400°F for 15 minutes, toss with olive oil and salt
Steamed green beans Easy Mild vegetable doesn't fight with bold sausage and garlic flavors Steam 5-7 minutes until tender-crisp, finish with butter
Antipasto platter Easy Olives, pickled peppers, and salami add variety without cooking Arrange on a board with marinated artichokes and mozzarella

Three ways to serve it:

  • Weeknight bowl: Toss pasta with extra Parmesan and serve with garlic bread for dipping in leftover oil at the bottom of the bowl
  • Meal prep lunch: Pack in containers with roasted cherry tomatoes on the side, reheat pasta separately and add tomatoes cold for texture contrast
  • Casual dinner: Plate pasta family-style on a large platter, drizzle with extra olive oil, scatter lemon zest and red pepper flakes on top for guests to customize heat level
Best Pick
Simple green salad with lemon vinaigrette - the bright acid and crisp lettuce balance the dish without adding more cooking steps or competing flavors.

Store and Reheat

Leftovers hold texture better than most pasta dishes because orecchiette stays firm and sausage doesn't dry out as fast as chicken. Store in shallow airtight containers within 2 hours of cooking to prevent bacterial growth. Potato cuts through all that richness. For a version that comes together quickly, we keep a batch ready for nights like this - this simple homemade potato reheats alongside pasta for complete meals.

Method Time Best For
🍳 Stovetop 5-7 minutes Single servings, adding a splash of water or olive oil to restore moisture while stirring over medium heat
📦 Microwave 1-2 minutes Quick lunches, covering with damp paper towel to prevent drying, stirring halfway through
🔥 Oven 10-15 minutes at 350°F Larger portions, covering with foil to trap steam, removing foil last 3 minutes for slightly crispy edges

For best results when storing:

  • Fridge storage: Keep in shallow containers for 3-4 days - pasta absorbs liquid over time, so add a tablespoon of water or olive oil when reheating
  • Freezer prep: Freeze up to 2 months in portion-size containers, but broccoli rabe texture softens and cheese separates slightly after thawing
  • Thawing method: Move frozen pasta to the fridge overnight, then reheat on stovetop with added olive oil to restore moisture
  • Avoid dryness: Store sauce and pasta together instead of separately - the oil coating prevents pasta from sticking and drying out
  • Refresh flavor: Add fresh Parmesan, a squeeze of lemon, or extra red pepper flakes after reheating to brighten flavors that dull in storage

Frequently Asked Questions

How long should I cook orecchiette with sausage and broccoli rabe?

Total cooking time runs 20 minutes once water boils - blanch broccoli rabe for 1-2 minutes, cook pasta 9-11 minutes, brown sausage 6-8 minutes, then toss everything together for 1-2 minutes. Prep adds another 15 minutes for trimming greens and mincing garlic.

Can I make orecchiette with sausage and broccoli rabe ahead of time?

Cook the full recipe and store in the fridge for 3-4 days, reheating portions as needed. The pasta absorbs liquid over time, so add a tablespoon of water or olive oil when reheating on the stovetop or in the microwave to restore moisture and prevent drying.

What side dishes pair well with orecchiette with sausage and broccoli rabe?

Simple green salad with lemon vinaigrette, garlic bread, or roasted cherry tomatoes work best because they add freshness or crunch without competing with the bold sausage and garlic flavors. Skip heavy cream-based sides that make the plate feel too rich.

How do I know when the sausage and broccoli rabe are properly cooked?

Sausage is done when it reaches 160°F internal temperature and develops crispy brown edges after 6-8 minutes of cooking. Broccoli rabe turns bright green and tender after 1-2 minutes of blanching - stems should bend without snapping but still have some bite.

Can I substitute kale or turkey sausage in this recipe?

Kale works as a milder swap - blanch for only 30 seconds since it's less bitter than broccoli rabe. Turkey sausage is leaner, so add an extra tablespoon of olive oil when browning to prevent drying and sticking in the pan.

Orecchiette with Sausage and Broccoli Rabe served on a plate

Orecchiette with Sausage and Broccoli Rabe

No ratings yet
Orecchiette with Sausage and Broccoli Rabe is a hearty Italian pasta dish combining cup-shaped pasta with browned Italian sausage and blanched bitter greens. Blanching the broccoli rabe removes excess bitterness while reserved pasta water creates a silky sauce without cream, making this dish fresh and satisfying.
Print Recipe Pin Recipe
Prep Time 15 minutes mins
Cook Time 20 minutes mins
Total Time 35 minutes mins
Servings: 4 servings
Course: Main Dish
Cuisine: Italian
Ingredients Method Notes

Ingredients
  

  • 1 lb orecchiette pasta cook to al dente
  • 1 lb Italian sausage pork, mild or spicy, casing removed
  • 1 bunch broccoli rabe trim woody ends before blanching
  • 4 cloves garlic minced
  • 3 tablespoon olive oil divided
  • 0.5 teaspoon red pepper flakes
  • 0.25 cup Parmesan cheese optional, grated
  • 1 teaspoon lemon zest optional
  • black pepper to taste
  • salt for pasta water, 1 tablespoon per 4 quarts water

Method
 

  1. Bring 4 quarts of salted water to a rolling boil. Add trimmed broccoli rabe and cook for 1-2 minutes until stems turn bright green and become tender. Drain and immediately shock in ice water to stop cooking. Chop into 2-inch pieces.
    1 bunch broccoli rabe, salt
  2. In a separate large pot, bring fresh salted water to boil (1 tablespoon salt per 4 quarts). Boil orecchiette pasta for 9-11 minutes until al dente with a slight chew. Reserve 1 cup pasta water before draining.
    1 lb orecchiette pasta, salt
  3. While pasta cooks, heat 2 tablespoons olive oil in a large skillet over medium heat. Remove sausage from casings and break into bite-sized pieces. Cook for 6-8 minutes until browned and crispy edges form, stirring occasionally.
    1 lb Italian sausage, 3 tbsp olive oil
  4. Push sausage to the side of the pan, add remaining 1 tablespoon olive oil, minced garlic, and red pepper flakes. Cook 30-60 seconds until fragrant, then add chopped broccoli rabe and toss with sausage for 2 minutes.
    1 bunch broccoli rabe, 4 cloves garlic, 3 tbsp olive oil, 0.5 tsp red pepper flakes, 1 lb Italian sausage
  5. Add drained pasta to the skillet with ½ cup reserved pasta water. Toss everything together over low heat for 1-2 minutes, adding more pasta water if needed. Remove from heat, stir in Parmesan cheese and lemon zest if using, and season with black pepper to taste.
    1 lb orecchiette pasta, 0.25 cup Parmesan cheese, 1 tsp lemon zest, black pepper

Notes

  • Blanch broccoli rabe briefly to reduce bitterness and keep it tender.
  • Reserve pasta water to create a silky sauce without extra cream.
  • Brown sausage fully before adding garlic to develop crispy texture and avoid greasy results.

Tried this recipe?

Let us know how it was!

How Long Does White Wine Last? [Storage Guide]

April 3, 2026

Leftover white wine sitting in the fridge after dinner is a question most of us face more often than we'd like.

How Long Does White Wine Last In The Fridge

Opened bottles don't last long - oxygen starts degrading the wine the moment you pull the cork - and even an unopened bottle stored carelessly can lose quality before you open it.

Understanding the timelines for each scenario, whether pantry, fridge, or freezer, helps you avoid pouring a glass that's gone flat, sour, or worse.

The style of white wine matters too, since what makes white wine distinct - its acidity, oak treatment, and residual sugar - directly affects how long it keeps.

QUICK SUMMARY

Opened white wine lasts 3-7 days in the fridge when recorked immediately. Unopened bottles keep 6 months to 2 years refrigerated, or up to several years in a cool pantry. Freeze only for cooking use - expect flavor and texture loss.

🧊Fridge (opened): 3-7 days, recorked upright at 34-40°F
🏠Pantry (unopened): 12 months to several years in cool, dark storage
❄️Freezer: 1-3 months for cooking quality; use freezer-safe containers only

How Long Does White Wine Last?

White wine shelf life shifts significantly depending on whether the bottle is opened, how it's stored, and what style you're dealing with.

A lean, high-acid Sauvignon Blanc holds up better after opening than a soft, oaked Chardonnay - oxidation hits the richer style faster and more noticeably.

White Wine Shelf Life
MethodStateDurationNotes
🏠 PantryUnopened12 months-several yearsCool, dark, stable temperature; aromatic whites best consumed sooner
🧊 FridgeUnopened6 months-2 yearsBest within 1 year for most styles; avoid freezer compartment temps
🧊 FridgeOpened3-7 daysRecorked or sealed; high-acid unoaked whites last toward the longer end
❄️ FreezerOpened1-3 monthsCooking use only; flavor and aroma loss expected
❄️ FreezerUnopenedIndefinite (safety)Quality degrades over months; bottle may crack without headspace

Pantry storage suits bottles you plan to drink within a year or two - beyond that, most everyday whites lose their freshness rather than improve.

Cork-sealed bottles stored upright also risk slow oxidation over time, since upright storage doesn't keep the cork moist the way horizontal wine rack storage does for long-term cellaring.

Golden Rule
Not all whites age the same. High-acid, unoaked styles like Riesling and Pinot Grigio fade faster after opening than richer oaked whites - drink them within 3-5 days of uncorking.

How to Store White Wine

How you seal and position an opened bottle makes more difference than most people expect. Oxygen is the enemy once the cork is out, so reducing surface exposure is the first priority.

Fridge (opened): Recork immediately or use a vacuum wine stopper or inert-gas preserver to displace oxygen before sealing. Store the bottle upright - this minimizes the wine's contact surface with any remaining air in the bottle. A screw-cap bottle transfers cleanly to a smaller sealed container if more than half the wine is gone.

Pantry (unopened): Keep bottles in a cool, dark spot at 50-59°F (10-15°C), away from heat sources, direct light, and vibrations. Temperature swings accelerate aging - a consistent environment matters more than the exact number.

Fridge (unopened): Refrigeration slows chemical change and is a solid option for bottles you plan to open within weeks. Screw-cap bottles do especially well here since the cap limits oxygen transfer better than older natural corks.

The same principles apply to red wine - keeping red wine fresh after opening follows similar oxygen-reduction logic, though reds are typically stored at slightly higher fridge temperatures.

  • 🚫 Don't leave an opened bottle at room temperature overnight - oxidation accelerates sharply above fridge temperature.
  • Use smaller containers - decanting leftovers into a half-bottle with minimal headspace slows oxidation more than a vacuum stopper alone.
  • Label the date - a simple piece of tape on the bottle prevents the guessing game after a few days.

Can You Freeze White Wine?

Yes, white wine can be frozen - with a clear trade-off. Freezing preserves it safely for months, but the volatile aromatics that give wine its character dissipate, and the mouthfeel becomes noticeably thinner after thawing.

Frozen white wine works well in sauces and risotto; it won't perform as a drinking wine.

Watch Out
Never freeze a full glass wine bottle with no headspace. The liquid expands as it freezes and can crack the bottle or force seepage through the cork.
  1. Portion first - pour wine into an ice cube tray (roughly 2 tablespoons per cube) for pre-measured cooking portions, or use a freezer-safe container with 1-2 inches of headspace for larger amounts.
  2. Seal tightly - cover the tray with plastic wrap or transfer frozen cubes to a zip-lock freezer bag; seal the container lid firmly if using a jar or container.
  3. Label with the date - quality is best within 1-3 months, so dating the bag or container removes any guesswork.
  4. Thaw correctly - for cooking, add frozen cubes directly to the pan or sauce; for larger portions, thaw overnight in the fridge before use.

For everyday cooking needs, a lighter style like Pinot Grigio freezes just as effectively as a fuller Chardonnay - how long sauvignon blanc keeps in the fridge versus the freezer follows the same general timeline.

Signs White Wine Has Gone Bad

Identifying a spoiled white wine is usually straightforward once you know which signals to check. Cork taint and oxidation are the two most common culprits, and they each leave distinct markers.

Signs It's Gone Bad
👀
VisualDeep yellowing or browning · Cloudiness in a normally clear filtered white · Unusual sediment
👃
SmellSharp vinegar or nail-polish remover · Musty damp cardboard (cork taint / TCA)
✋
TextureUnexpected fizz in a still wine · Slimy film or increased viscosity in opened leftovers

Browning is the most reliable visual cue for white wine specifically - it signals oxidation in the same way browning affects a cut apple. If the aroma is sharply vinegary or solvent-like, acetic acid has formed and the bottle should be discarded.

Unexpected fizz in a still white indicates secondary fermentation, which is a microbial issue, not a harmless quirk.

Make Your Bottles Last

Good habits at the point of opening make a bigger difference than any fancy storage gadget. A few consistent steps protect both the drinking bottles and your cooking supply.

  • Use inert gas or a vacuum pump - a quality wine preserver extends opened bottle life toward the full 7-day window rather than the 3-day end.
  • Match storage to style - lighter aromatics like Sauvignon Blanc and Riesling need colder storage and faster consumption than richer oaked whites.
  • Freeze for cooking in measured cubes - pre-portioned half-cup freezer cubes mean you never thaw more than a recipe needs.
  • Keep screw-cap bottles upright in the fridge - they transfer oxygen more slowly than old natural corks and reward cold, upright storage.

If a recipe calls for white wine and you're out of stock, alternatives to white wine can step in for most cooking applications without compromising the dish.

Frequently Asked Questions

How long does opened white wine last in the fridge?

3-7 days, depending on the style and how well it's sealed. High-acid unoaked whites like Sauvignon Blanc hold up toward 7 days; softer oaked styles decline faster. A vacuum stopper or inert-gas preserver makes a noticeable difference.

Does white wine go bad after opening?

Yes. Oxygen exposure starts degrading the wine immediately, flattening aroma and flavor within days. It won't become unsafe to drink quickly, but the quality drops noticeably after a week.

Can you drink white wine that smells like vinegar?

It won't harm you, but it's not worth drinking. A sharp vinegar smell means acetic acid has formed through acetification. The wine is essentially on its way to wine vinegar - discard it or use it as an actual cooking acid.

How long does boxed white wine last after opening?

Up to 4-6 weeks refrigerated. The bag-in-box design collapses as wine is dispensed, limiting oxygen contact far better than an open bottle. Keep the tap sealed and store it in the fridge after first use.

Is it safe to store white wine in the fridge long-term before opening?

Safe, yes - quality is the concern. Most whites stay good for 6 months to a year refrigerated and unopened. Beyond that, cold storage can dull aromatics, especially in delicate styles like Pinot Grigio.

Swedish Meatballs with Egg Noodles

April 3, 2026

When you need a hands-off comfort meal that works for weeknight family dinners or Sunday meal prep, Swedish meatballs deliver. Tender ground beef and pork shaped into bite-sized rounds, browned in butter, then simmered in a velvety cream sauce over egg noodles.

Swedish Meatballs with Egg Noodles served on a plate

The skillet does most of the work after you brown the meatballs. The sauce thickens while the meat finishes cooking, so you're not standing over the stove babysitting multiple steps.

Perfect for busy weeks when you want something that feels intentional without requiring culinary school skills or an hour of active cooking time.

QUICK SUMMARY

Swedish meatballs combine ground beef and pork with breadcrumbs and egg, browned in batches, then simmered in a rich cream sauce. The beef-pork blend keeps them juicy while high heat creates crisp edges. Serve over egg noodles for a complete dinner that reheats well for meal prep.

⏱️Time Reality: 45 minutes total - 20 to shape and brown, 25 to simmer in sauce
🔥First Critical Move: Brown meatballs in batches with 1 inch spacing for even crust
⚠️Watch Out: Overmixing makes tough meatballs - combine with 20 gentle strokes, no more

Table of Contents

Toggle
  • Why This Recipe Works
  • What You'll Need
    • Ingredient Details
  • Ingredient Swaps
  • What to Serve With It
  • Store and Reheat
  • Frequently Asked Questions
  • Swedish Meatballs with Egg Noodles
    • Method 
    • Tried this recipe?

Why This Recipe Works

Rich mains need something to cut through, and a crunchy slaw side dish does exactly that. The beef-pork blend creates tender meatballs that stay juicy even after browning and simmering in sauce.

Quick Reference
⏱️
Prep Time
20 min
🔥
Cook Time
25 min
⏰
Total Time
45 min
🍽️
Servings
4 servings
📊
Difficulty
Medium
🏷️
Category
Main Dish
💡
Quick Tip
Brown meatballs in batches for crisp edges
🎯
Best For
Weeknight | Meal prep | Family dinner

What makes this work:

  • Leave 1 inch space between meatballs when browning - crowding steams instead of sears, 5 minutes per side gets golden edges
  • Internal temp at 160°F ensures safe doneness without dryness when checked with an instant-read thermometer
  • Fresh breadcrumbs absorb moisture better than dried, keeping the interior tender while the exterior crisps
  • Simmer sauce 5-7 minutes after adding cream - this thickens it to coat-the-spoon consistency without breaking
  • Medium heat prevents burning the outside before the inside cooks through, especially important for uniform-sized meatballs
Quick Tip
Form meatballs 24 hours ahead and refrigerate tightly - the flavors deepen and they hold their shape better when you brown them.

What You'll Need

Ingredients for Swedish Meatballs with Egg Noodles

The salad works best when it hits the table at the same time as the main. Ground beef and pork form the base, with breadcrumbs and egg binding everything together while heavy cream creates the signature sauce.

🍖
Meat
  • Ground beef (80/20 blend)
  • Ground pork
🥖
Binders
  • Fresh breadcrumbs
  • Egg (1 large)
🧅
Aromatics
  • Yellow onion (finely diced)
  • Ground allspice
🧈
Sauce
  • Heavy cream
  • Beef broth
  • Butter
🍜
Pasta
  • Egg noodles

Ingredient Details

  • Ground beef (80/20)
    The fat content keeps meatballs moist - leaner beef dries out during cooking
  • Ground pork
    Adds moisture and tenderness that beef alone can't achieve, creates softer texture
  • Fresh breadcrumbs
    Absorb and retain moisture better than dried - pulse stale bread in food processor
  • Heavy cream
    Creates classic velvety sauce - milk makes thinner, less rich result
  • Beef broth
    Builds savory base for sauce and deglazes pan for extra flavor
  • Allspice
    Traditional Swedish spice that adds warm, slightly sweet depth - don't skip it
  • Egg noodles
    Wide, flat shape catches cream sauce better than spaghetti or penne

Ingredient Swaps

Slaw adds the contrast this plate needs, but timing matters. For a version that comes together quickly, try simple salmon recipe when you want a different protein with similar comfort appeal.

Four swaps that work:

  • Ground turkey or chicken for pork - leaner meat creates drier texture, reduce cook time by 2-3 minutes and check temp at 165°F instead of 160°F
  • Gluten-free breadcrumbs for regular - maintains binding with slight texture variation, use same amount as regular breadcrumbs
  • Coconut cream for heavy cream - dairy-free option with slight coconut flavor, sauce may be thinner so simmer 2 minutes longer
  • Mashed potatoes for egg noodles - changes texture completely but still absorbs sauce well, lower carb option uses spiralized zucchini

Ground Turkey/Chicken

Works for: Leaner meal, reduces fat by 30%, cooks 2-3 minutes faster

Skip if: You want traditional texture and moisture, leaner meat dries faster

Coconut Cream

Works for: Dairy-free diets, adds slight sweetness that complements allspice

Skip if: You want authentic Swedish flavor, coconut taste comes through

Mashed Potatoes Base

Works for: Extra hearty meal, soaks up sauce like noodles, budget-friendly

Skip if: You prefer traditional presentation, potatoes make it heavier

Instructions

Most people skip this side, but it balances the meal. We keep a batch ready for nights like this - the simple homemade sauce adds tang that cuts through the cream.

  1. Mix the meat gently. Combine ground beef, ground pork, breadcrumbs, egg, diced onion, and allspice in a large bowl with 20 gentle strokes using your hands. Stop when ingredients just come together - overmixing creates tough meatballs. Shape into 1.5-inch rounds.

  2. Brown in batches. Heat butter in a large skillet over medium heat until foaming. Add meatballs with 1 inch space between each. Brown 5 minutes per side until golden crust forms. Remove to plate, don't cook through yet.

  3. Build the sauce. Add beef broth to the same skillet, scraping up browned bits with a wooden spoon. Cook onions 3-4 minutes until translucent. Stir in heavy cream and bring to a simmer.

  4. Finish the meatballs. Return browned meatballs to the sauce. Reduce heat to low, cover, and simmer 12-15 minutes. Check internal temp reaches 160°F with an instant-read thermometer. The sauce will thicken as it reduces.

  5. Cook noodles and serve. While meatballs simmer, boil egg noodles according to package directions. Drain and toss with butter. Serve meatballs and sauce over noodles immediately.

Golden Rule
Use medium heat for browning - prevents burning the outside while leaving the inside raw, especially critical for even cooking.
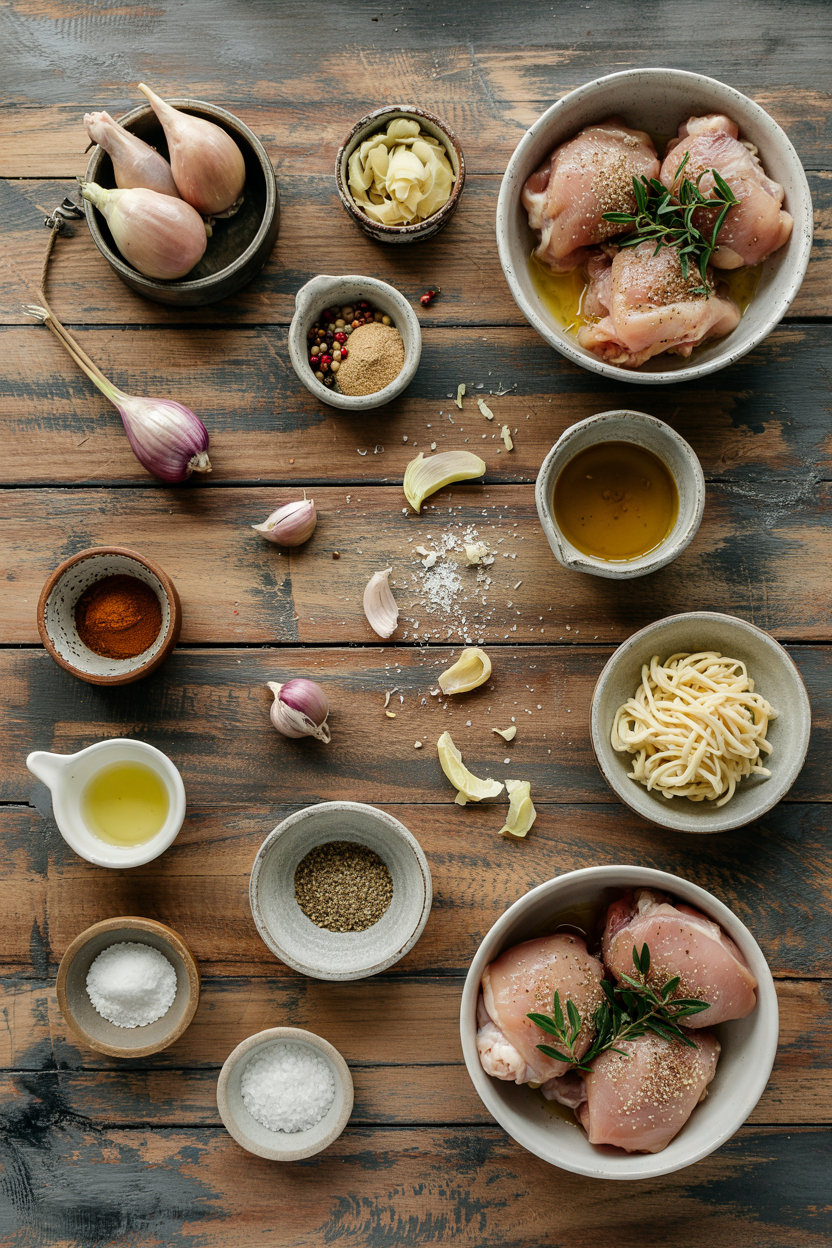
What to Serve With It

A good side can make or break the plate. Rich mains need something to cut through, and this helps balance the cream sauce with complete meatballs meal ideas that work for weeknight or hosting scenarios.

Side Dish Prep Why It Works How to Serve
Steamed Green Beans Easy Bright, fresh contrast cuts through cream sauce richness Steam 5 min, toss with butter and garlic
Cucumber Salad Easy Refreshing crunch and vinegar balance fatty sauce Slice thin, dress with vinegar 10 min before serving
Roasted Carrots Easy Sweetness contrasts savory meatballs, adds texture Roast at 425°F for 20 min with olive oil
Pickled Lingonberries Easy Traditional Swedish tart-sweet cuts richness instantly Serve cold in small bowl on the side
Roasted Brussels Sprouts Medium Earthy bitterness balances cream, adds crispy texture Roast at 400°F for 25 min until charred edges form

Three ways to serve it:

  • Weeknight plate: Buttered egg noodles, steamed green beans, cucumber salad for quick contrast
  • Comfort meal: Creamy mashed potatoes instead of noodles, roasted carrots, lingonberry jam on the side
  • Hosting dinner: Egg noodles, roasted Brussels sprouts with balsamic, fresh bread for soaking up sauce
Best Pick
Serve over buttered egg noodles with lingonberry jam on the side - the sweet-tart jam cuts through cream sauce and adds authentic Swedish flavor.

Store and Reheat

Store meatballs and sauce together in a shallow airtight container for 3-4 days in the fridge. They freeze well for up to 3 months - portion into meal-sized containers before freezing.

Method Time Best For
🍳 Stovetop 8-10 min on low heat Even warming, retains moisture and texture best
🔥 Oven 15 min at 325°F Larger batches, keeps meatballs tender without drying
📦 Microwave 2-3 min on medium power Quick single servings, cover to prevent drying

For best results when storing:

  • Cool completely before refrigerating - prevents condensation that makes sauce watery, takes 30 minutes at room temp
  • Store meatballs submerged in sauce - keeps them moist and prevents surface from drying out
  • Freeze in shallow containers - speeds thawing and reheating, 1-inch depth works best
  • Thaw overnight in fridge - maintains texture better than countertop thawing or microwave defrost
  • Add splash of broth when reheating - restores sauce consistency if it thickened too much in storage

Frequently Asked Questions

Can I make Swedish meatballs ahead and freeze them?

Yes, freeze cooked meatballs in sauce for up to 3 months in airtight containers. Thaw overnight in the fridge and reheat on the stovetop over low heat for 10 minutes.

How do I store and reheat Swedish meatballs without drying out?

Store meatballs submerged in sauce in shallow containers for 3-4 days. Reheat gently on low stovetop heat for 8-10 minutes, adding a splash of broth if the sauce thickened.

What internal temperature ensures Swedish meatballs are fully cooked?

Meatballs reach safe doneness at 160°F internal temperature when checked with an instant-read thermometer. This ensures they're cooked through without drying out.

Why is my sauce lumpy and how can I fix it?

Lumps form when cream hits too-hot liquid or flour doesn't cook fully. Whisk vigorously to break up lumps, or strain the sauce through a fine-mesh sieve.

What sides pair well with Swedish meatballs for a complete meal?

Steamed green beans, cucumber salad, or roasted carrots add fresh contrast to the cream sauce. Lingonberry jam on the side cuts richness with traditional Swedish tang.

Swedish Meatballs with Egg Noodles served on a plate

Swedish Meatballs with Egg Noodles

No ratings yet
Swedish meatballs combine ground beef and pork with fresh breadcrumbs and egg, browned to create crisp edges and finished in a rich cream sauce. Served over buttered egg noodles, this comforting dish delivers tender, juicy meatballs with velvety sauce perfect for weeknight dinners or meal prep.
Print Recipe Pin Recipe
Prep Time 20 minutes mins
Cook Time 25 minutes mins
Total Time 45 minutes mins
Servings: 4 servings
Course: Dinner, Main Dish
Cuisine: Swedish
Ingredients Equipment Method Notes

Ingredients
  

  • 8 oz ground beef 80/20 blend for moisture
  • 8 oz ground pork adds tenderness and moisture
  • 1 cup fresh breadcrumbs pulse stale bread in food processor if needed
  • 1 large egg binds meatballs
  • ½ cup yellow onion finely diced
  • ½ teaspoon ground allspice traditional Swedish spice
  • ¾ cup heavy cream creates creamy velvety sauce
  • ½ cup beef broth deglazes pan and builds sauce base
  • 2 tablespoon butter for browning meatballs and tossing noodles
  • 8 oz egg noodles wide flat shape holds sauce well

Equipment

  • Large skillet Used for browning meatballs and simmering sauce
  • Wooden spoon For scraping browned bits and stirring sauce
  • Instant-read thermometer Checks internal meatball temperature
  • Pot For boiling egg noodles
  • Colander For draining noodles

Method
 

  1. Combine ground beef, ground pork, fresh breadcrumbs, egg, diced onion, and allspice in a large bowl. Mix gently with about 20 strokes using your hands until just combined. Shape mixture into 1.5-inch rounds.
    8 oz ground beef, 8 oz ground pork, 1 cup fresh breadcrumbs, 1 large egg, ½ cup yellow onion, ½ tsp ground allspice
  2. Heat butter in a large skillet over medium heat until foaming. Add meatballs with 1 inch spacing to avoid crowding. Brown for 5 minutes per side until golden crust forms. Remove meatballs to a plate; they will finish cooking later.
    2 tbsp butter
  3. Add beef broth to the same skillet, scraping up browned bits with a wooden spoon. Cook the diced onions in broth for 3-4 minutes until translucent. Stir in heavy cream and bring to a simmer.
    ½ cup beef broth, ½ cup yellow onion, ¾ cup heavy cream
  4. Return browned meatballs to the skillet with the sauce. Reduce heat to low, cover, and simmer for 12-15 minutes until meatballs reach an internal temperature of 160°F and sauce thickens.
  5. While meatballs simmer, boil egg noodles according to package instructions in salted water. Drain noodles and toss with butter. Serve meatballs and cream sauce over the buttered noodles immediately.
    8 oz egg noodles, 2 tbsp butter

Notes

  • Leave 1 inch space between meatballs when browning for crisp edges.
  • Check meatball internal temperature with an instant-read thermometer to avoid dryness.
  • Simmer sauce gently to thicken without breaking the cream.

Tried this recipe?

Let us know how it was!

Cajun Blackened Catfish

April 3, 2026

Most catfish turns out bland or overcooked. The fix is high heat and a spice-packed crust that locks in moisture while creating a dark, caramelized exterior.

Cajun Blackened Catfish served on a plate

A cast iron skillet does the heavy lifting. You get a crispy, smoky crust without flipping multiple times or constant monitoring.

This works for weeknight dinners when you need protein on the table fast or casual entertaining that looks more complicated than it is.

QUICK SUMMARY

Cajun blackened catfish delivers a crispy, smoky crust with moist, flaky flesh inside. High heat and a dry spice rub create the signature dark exterior without burning. Pat the fish dry before seasoning for maximum crust adhesion.

⏱️Time Reality: 16 minutes total - 10 minutes prep, 4-6 minutes cooking
🔥Critical First Move: Preheat your cast iron skillet on medium-high for 3-5 minutes before adding fish
⚠️Watch Out: Butter burns fast at high heat - mix it with oil or use oil alone for better control

Why This Recipe Works

A properly blackened catfish crust forms when dry spices hit screaming-hot cast iron. Rich mains need something to cut through, and butter does exactly that. For a version that comes together quickly, try our classic butter dish with lemon brightening the richness.

Quick Reference
⏱️
Prep Time
10 min
🔥
Cook Time
4-6 min
⏰
Total Time
16 min
🍽️
Servings
4 servings
📊
Difficulty
Medium
🏷️
Category
Main Dish
💡
Quick Tip
High heat, quick sear, dry fish surface
🎯
Best For
Weeknight

Why it works:

  • Paprika and cayenne create the blackened look - the spices caramelize into a dark crust without actual charring
  • Thyme and oregano add herbal depth - they balance the heat and prevent the rub from tasting one-note
  • Pressing the rub firmly into dry fish - moisture blocks adhesion, so patting fillets dry lets spices stick during the sear
  • Medium-high heat in a preheated skillet - the pan needs time to reach the right temperature for instant crust formation
  • Four to six minutes total cooking time - catfish cooks fast, and pulling it at 145°F keeps the inside moist while the outside crisps
Golden Rule
Never skip drying the fish - three passes with paper towels removes surface moisture that prevents crust formation

What You'll Need

Ingredients for Cajun Blackened Catfish

Blackened catfish requires a handful of pantry spices and fresh fillets. A good butter can make or break the plate. For a version that comes together quickly, we keep a batch ready for nights like this - our simple homemade butter stays in rotation.

🐟
Fish
  • 4 catfish fillets (6 oz each)
🌶️
Cajun Spice Rub
  • 2 tablespoon paprika
  • 1 teaspoon cayenne pepper
  • 1 teaspoon onion powder
  • 1 teaspoon garlic powder
  • 1 teaspoon dried thyme
  • 1 teaspoon dried oregano
  • 1 teaspoon salt
  • ½ teaspoon black pepper
🧈
Fat for Searing
  • 2 tablespoon unsalted butter
  • 2 tablespoon vegetable or avocado oil

Ingredient Details

  • Catfish fillets
    Look for fillets ¾ to 1 inch thick - thinner pieces overcook before the crust forms, thicker ones stay raw inside
  • Paprika
    Use regular paprika for mild color and flavor, or smoked paprika for deeper smokiness - both work
  • Cayenne pepper
    Start with ½ teaspoon if you're sensitive to heat - you can always add more at the table
  • Thyme and oregano
    Dried herbs hold up better to high heat than fresh, which burn and turn bitter
  • Unsalted butter
    Unsalted lets you control seasoning - salted butter can make the rub too salty
  • Oil
    Avocado oil handles higher heat than vegetable oil, but both work mixed with butter to prevent burning
  • Salt
    Fine sea salt distributes more evenly through the rub than coarse kosher salt

Ingredient Swaps

Catfish isn't always available, and dietary needs shift. Salad adds the contrast this plate needs, but timing matters. For a version that comes together quickly, check out a fresh salad side that balances spice.

Four swaps that work:

  • Cod or tilapia for catfish - use thicker fillets since these fish are leaner and cook faster than catfish
  • Avocado or vegetable oil for butter - skip butter entirely for dairy-free cooking and use 4 tablespoons oil instead
  • Smoked paprika for regular paprika - adds deeper smoke flavor without changing the cooking method
  • Chili powder for cayenne pepper - cuts the heat while adding complexity from additional spices in the blend

Butter + Oil Mix

Works for: Traditional flavor, rich crust, golden browning

Skip if: Dairy-free diet, worried about butter burning, need higher smoke point

Oil Only

Works for: Dairy-free, higher heat tolerance, cleaner crust without butter solids

Skip if: You want richer flavor, prefer traditional blackening taste

Instructions

The cooking window is tight - four to six minutes total from pan to plate. A dollop of bread takes each bite somewhere more interesting. For a version that comes together quickly, try simple homemade bread on the side.

  1. Mix the spice rub. Combine paprika, cayenne, onion powder, garlic powder, thyme, oregano, salt, and black pepper in a small bowl. Stir until evenly blended with no clumps.
  2. Prep the fish. Pat catfish fillets completely dry with paper towels - press down for 10 seconds per side to remove all surface moisture. Press spice rub onto both sides of each fillet using your fingertips. Let sit 5 minutes while the skillet heats.
  3. Preheat the skillet. Set a cast iron skillet over medium-high heat for 3-5 minutes until a drop of water sizzles instantly. Add butter and oil, swirl to coat the pan, and heat until the butter stops foaming.
  4. Sear the fish. Place fillets in the hot skillet, leaving 1 inch between each piece. Cook without moving for 2.5-3 minutes until the bottom develops a dark brown crust. Flip once and cook 2-3 minutes more until the fish reaches 145°F internally and flakes easily.
  5. Rest and serve. Transfer fillets to a plate and let rest 3 minutes. The carryover heat finishes cooking the center while the crust stays crisp.
Watch Out
If you see smoke before adding the fish, pull the pan off heat for 30 seconds - the spices will burn instead of blacken

What to Serve With It

Blackened catfish needs something to balance the heat and richness. Most people skip fries, but it balances the meal. We keep a batch ready for nights like this - something crispy like fries works perfectly.

Side Dish Prep Why It Works How to Serve
Steamed white rice Easy Neutral base soaks up spices and cools the palate Scoop rice onto plates first, top with fish, let juices run into rice
Sautéed green beans Easy Mild crunch and freshness cut through rich fish Toss with garlic and lemon, pile alongside fish
Cornbread muffins Medium Southern classic with slight sweetness balances spice Serve warm with butter, use to soak up sauce
Simple garden salad Easy Crisp, cool greens refresh between bites Dress lightly with vinaigrette, serve on separate plates
Cajun dirty rice Medium Doubles down on Cajun flavors for a hearty meal Mound rice on plate, lean fish against it

Three ways to serve it:

  • With remoulade sauce - mix mayo, mustard, capers, and hot sauce for a creamy, tangy dip that cools the heat
  • Over Cajun dirty rice - the rice soaks up fish drippings and creates a one-plate meal with layered spice
  • Alongside pickled okra - the tart crunch cuts through richness and refreshes your palate between bites
Best Pick
Steamed rice with sautéed green beans - the rice absorbs spices while green beans add freshness without competing flavors

Store and Reheat

Blackened catfish holds up better than most fish in the fridge. Potato wedges soaks up every drop of sauce on the plate. The potato wedges works best when it hits the table at the same time as the main - try our buttery potato wedges recipe as a side.

Store cooked fillets in a shallow airtight container for 3-4 days in the fridge. Stack with parchment between layers to prevent sticking.

Method Time Best For
🍳 Stovetop 3-4 min on medium heat Restoring crust crispness quickly with a drizzle of oil
🔥 Oven 8-10 min at 350°F Even reheating without drying, especially for multiple servings
📦 Microwave 1-2 min on medium power Fast reheating when texture isn't critical - crust softens

For best results when storing:

  • Cool fish to room temperature before refrigerating - hot fish creates condensation that softens the crust
  • Reheat in a dry skillet with a teaspoon of oil - this revives the crispy exterior better than any other method
  • Freeze for up to 1 month in freezer bags - press out air, label with the date, thaw overnight in the fridge
  • Add a squeeze of lemon after reheating - fresh citrus brightens flavors that dull during storage
  • Skip the microwave if you want crispy crust - use stovetop or oven for better texture results

Frequently Asked Questions

How long to cook Cajun blackened catfish at medium-high heat?

Cook catfish for 2.5-3 minutes per side at medium-high heat, totaling 4-6 minutes. The fish is done when it reaches 145°F internally and flakes easily with a fork.

Can I make Cajun blackened catfish ahead and reheat it?

Yes, cook the fish fully, cool to room temperature, and refrigerate for up to 4 days. Reheat in a dry skillet over medium heat for 3-4 minutes to restore the crispy crust.

What goes well with Cajun blackened catfish for sides?

Steamed white rice, sautéed green beans, cornbread muffins, and simple garden salad all work. The neutral or fresh flavors balance the spicy, rich fish without competing.

How do I know when Cajun blackened catfish is fully cooked?

The fish is done at 145°F internal temperature. Visually, the flesh turns opaque and flakes easily when pressed with a fork.

Can I use cod or tilapia instead of catfish for blackening?

Yes, both cod and tilapia work for blackening. Choose thicker fillets since these fish are leaner and cook faster than catfish - adjust cook time to 2-3 minutes per side.

Cajun Blackened Catfish served on a plate

Cajun Blackened Catfish

No ratings yet
Cajun blackened catfish features a crispy, smoky crust with moist, flaky flesh inside. High heat and a dry spice rub create a dark caramelized exterior without burning. Patting the fish dry before seasoning ensures maximum crust adhesion.
Print Recipe Pin Recipe
Prep Time 10 minutes mins
Cook Time 6 minutes mins
Total Time 16 minutes mins
Servings: 4 servings
Course: Main Dish
Cuisine: Cajun
Ingredients Equipment Method Notes

Ingredients
  

  • 4 fillets catfish 6 oz each, ¾ to 1 inch thick
  • 2 tablespoon paprika regular or smoked paprika
  • 1 teaspoon cayenne pepper reduce to ½ teaspoon if sensitive to heat
  • 1 teaspoon onion powder
  • 1 teaspoon garlic powder
  • 1 teaspoon dried thyme
  • 1 teaspoon dried oregano
  • 1 teaspoon salt fine sea salt preferred
  • 0.5 teaspoon black pepper
  • 2 tablespoon unsalted butter mix with oil to prevent burning
  • 2 tablespoon vegetable oil or avocado oil for higher heat tolerance

Equipment

  • Cast iron skillet Used for high heat searing to create blackened crust.

Method
 

  1. Combine paprika, cayenne, onion powder, garlic powder, thyme, oregano, salt, and black pepper in a small bowl. Stir until evenly blended with no clumps.
    2 tbsp paprika, 1 tsp cayenne pepper, 1 tsp onion powder, 1 tsp garlic powder, 1 tsp dried thyme, 1 tsp dried oregano, 1 tsp salt, 0.5 tsp black pepper
  2. Pat catfish fillets completely dry with paper towels, pressing down for 10 seconds per side to remove surface moisture. Press spice rub onto both sides of each fillet using your fingertips. Let sit 5 minutes while skillet heats.
    4 fillets catfish
  3. Set a cast iron skillet over medium-high heat for 3-5 minutes until a drop of water sizzles instantly. Add butter and oil, swirl to coat the pan, and heat until the butter stops foaming.
    2 tbsp unsalted butter, 2 tbsp vegetable oil
  4. Place fillets in the hot skillet, leaving 1 inch between each piece. Cook without moving for 2.5-3 minutes until the bottom develops a dark brown crust. Flip once and cook 2-3 minutes more until fish reaches 145°F internally and flakes easily.
    4 fillets catfish
  5. Transfer fillets to a plate and let rest 3 minutes. The carryover heat finishes cooking the center while the crust stays crisp.
    4 fillets catfish

Notes

  • Pat fish dry thoroughly for best spice crust adhesion.
  • Mix butter with oil to prevent burning at high heat.
  • Cook fish until it reaches 145°F internally to keep moist while crisp.

Tried this recipe?

Let us know how it was!
« Previous Page
Next Page »

Primary Sidebar

ForkliftKitchen recipe developer

Welcome!

Recipe Developer · 12+ Yr Kitchen Veteran

I'm the recipe developer behind this site, focused on practical, well-tested dishes and smart ingredient swaps. Every recipe is written to be clear, reliable, and easy to make at home.

650+ Recipes
12+ Yrs Exp.
3x Tested
Our Story →

As Featured In

Allrecipes

TASTE OF HOME

Food52

HUFFPOST

Yahoo! Life

Our Editorial Standards

  • ✓ Every recipe tested at least 3 times before publishing
  • ✓ Substitutes verified by real kitchen trials, not guesswork
  • ✓ Reviewed for accuracy by our editorial team
  • ✓ Updated regularly with seasonal info and reader feedback

Most Popular

  • Creamy Lemon Shrimp Linguine
    Creamy Lemon Shrimp Linguine
  • Creamy Garlic Mushroom Chicken
    Creamy Garlic Mushroom Chicken
  • Sesame Ginger Chicken Noodle Bowls
    Sesame Ginger Chicken Noodle Bowls
  • Baked Lemon Herb Fish Fillets
    Baked Lemon Herb Fish Fillets
  • Veggie Loaded Fried Rice
    Veggie Loaded Fried Rice
  • Spicy Garlic Shrimp Stir Fry
    Spicy Garlic Shrimp Stir Fry

Join 8,000+ Home Cooks

Weekly Kitchen Tips

Easy recipes, smart substitutes, and real cooking shortcuts — every Thursday.

Subscribe Free →


Side Dishes

  • What to Serve With Asian Salmon? 15 Best Side Dishes
    What to Serve With Asian Salmon? 15 Best Side Dishes
  • Side Dishes for Strawberry Spinach Salad
    15 Best Side Dishes for Strawberry Spinach Salad
  • Sides for Grilled Cauliflower Steaks to Complete the Meal
    15 Sides for Grilled Cauliflower Steaks to Complete the Meal
  • 15 Sides To Serve With Calabacitas
    15 Best Sides for Calabacitas – Mexican-Inspired Favorites


Substitutes

  • 7 Best Substitutes for Hot Sauce in Marinades & Stir-Fries
    7 Best Substitutes for Hot Sauce in Marinades & Stir-Fries
  • 9 Best Substitutes for Butter in Baking and Cooking
  • 7 Best Substitutes for Tagliatelle for Italian Pasta Dishes
    7 Best Substitutes for Tagliatelle for Italian Pasta Dishes
  • 7 Best Substitutes for Udon Noodles in Asian Stir-Fries
    7 Best Substitutes for Udon Noodles in Asian Stir-Fries


Browse by Topic

  • Side Dishes320
  • Substitutes785
  • Dinner163
  • Air Fryer77
  • Taste Profiles484
  • Food Storage123


Reader Reviews

★★★★★

"Finally a food blog that tells you exactly why a substitute works instead of just listing options."

— Sarah M., via email

★★★★★

"The side dish recommendations are so specific — saved my dinner party twice this month."

— James R., Pinterest comment

★★★★★

"I trust this site more than most because they actually test everything. You can tell."

— Priya K., blog comment

Footer

↑ Back to Top

Forklift Kitchen

We do the heavy lifting so you can enjoy the cooking. Tested recipes, smart substitutes, and perfect pairings—built for real home cooks.

Content

  • Recipes
  • Substitutes
  • What to Serve With
  • Blog

Company

  • About Us
  • Contact
  • Subscribe

Legal

  • Privacy Policy
  • Terms of Service

As an Amazon Associate I earn from qualifying purchases.

© 2026 Forklift Kitchen.

Rate This Recipe

Your vote:


A rating is required
A name is required
An email is required