• Skip to primary navigation
  • Skip to main content
  • Skip to primary sidebar
  • Recipe Index
    • Air Fryer
  • Side Dishes
  • Substitutes
  • About
  • Contact
  • Subscribe

ForkLiftKitchen

menu icon
go to homepage
  • Recipe Index
    • Air Fryer
  • Side Dishes
  • Substitutes
  • About
  • Contact
  • Subscribe
subscribe
search icon
Homepage link
  • Recipe Index
    • Air Fryer
  • Side Dishes
  • Substitutes
  • About
  • Contact
  • Subscribe
×

Blog

Air Fryer Honey Mustard Pork Chops [Weeknight Dinner]

May 11, 2026

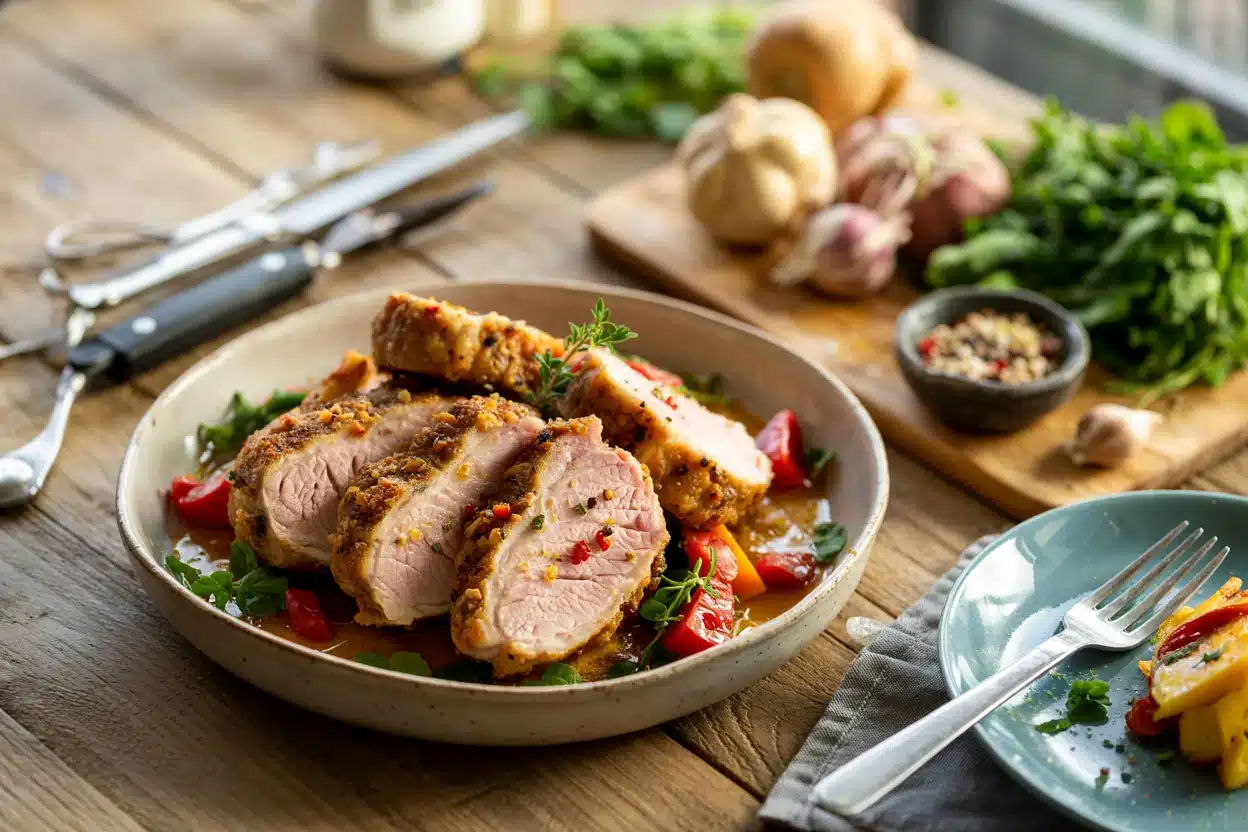
Tangy, sticky, and golden at the edges - these air fryer honey mustard pork chops hit the table in 22 minutes flat. The glaze caramelizes into a shiny, peppery-sweet crust that keeps the pork moist instead of drying it out.
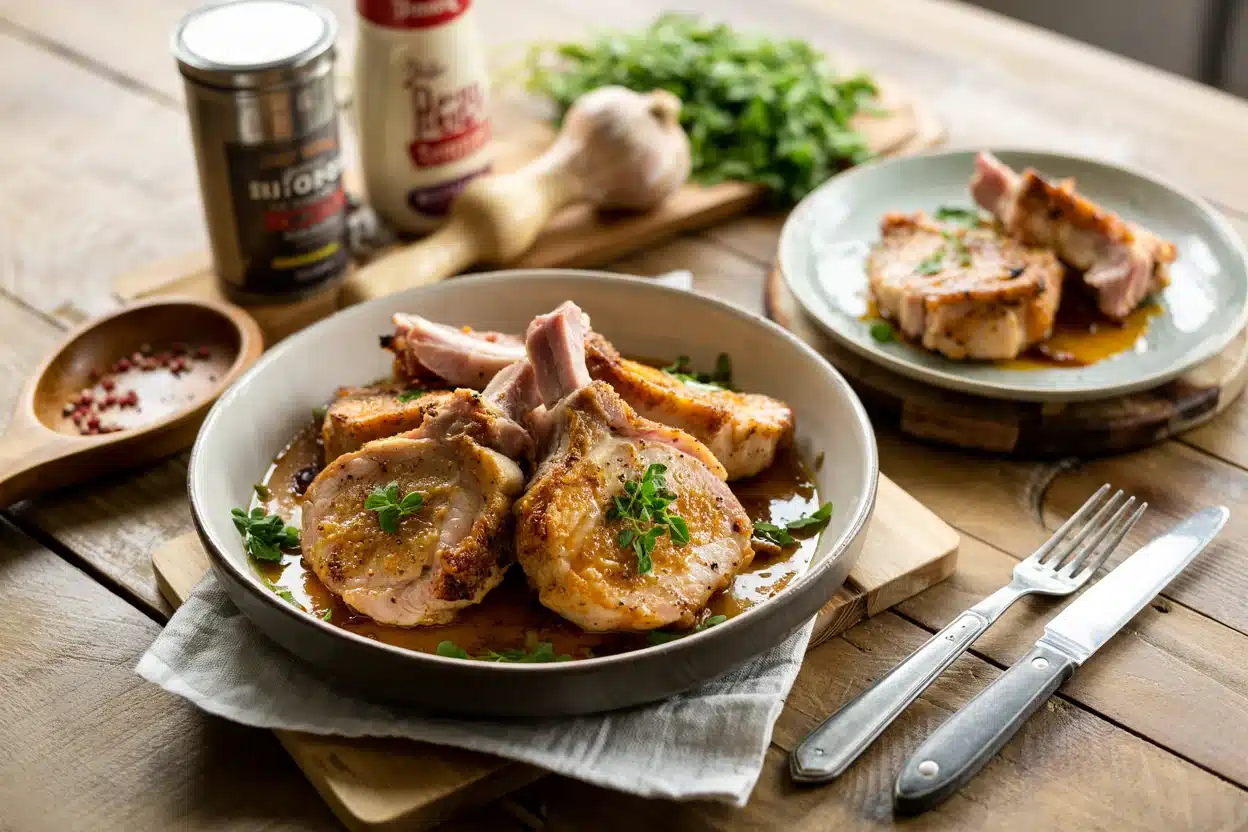
Air Fryer Honey Mustard Pork Chops

Four ingredients do the heavy lifting here. Dijon mustard and honey form a tight, velvety glaze that clings to the pork under the air fryer's circulating heat.

Weeknight dinners don't get faster than this.

If you've got whole grain mustard swaps that work on hand, you've already got a shortcut variation ready to go - brush it on in place of Dijon for a slightly milder, seedier finish.

QUICK SUMMARY

These air fryer honey mustard pork chops cook in 12 minutes at 400°F and come out with a caramelized, tangy-sweet glaze and a juicy center. The key move is brushing most of the glaze on in the last 2-3 minutes to avoid burning the honey. Use 1" thick chops and a thermometer for reliable results every time.

⏱️Time Reality: 22 minutes total - 10 prep, 12 cook
🍯Method Shortcut: Add most of the glaze in the final 2-3 minutes only
⚠️Watch Out: Honey burns fast - never glaze at the start of the cook cycle

Why This Recipe Works

Cooking pork chops in an air fryer means fast, dry, circulating heat - exactly the conditions that can dry out thin or uneven cuts.

One-inch thick chops solve that problem by giving you a window of 10-12 minutes where the outside browns before the interior overcooks.

Patting the chops completely dry before cooking is non-negotiable. Moisture on the surface steams the meat instead of browning it, and a wet surface also stops the glaze from sticking cleanly.

The late-glaze method is what separates a shiny, caramelized finish from a burnt, bitter one. You air-fry the chops plain first, then brush on the honey-mustard in the final 2-3 minutes so the natural sugars caramelize without scorching.

Quick Reference
⏱️
Prep Time
10 minutes
🔥
Cook Time
12 minutes
⏰
Total Time
22 minutes
🍽️
Servings
4
📊
Difficulty
Easy
🏷️
Category
Main Dish
💡
Quick Tip
Pat chops dry and glaze late for a shiny finish
🎯
Best For
Weeknight dinner
  • 🌡️ Pull chops at exactly 145°F internal - carry-over heat does the rest during the 3-minute rest
  • Cook in a single layer with space between each chop so hot air circulates evenly on all sides
  • Reserve a small portion of the glaze before it touches raw pork to serve on the side
  • Let chops rest at room temperature for 15 minutes before cooking for even doneness edge to edge
  • Flip halfway through the cook time to ensure both sides develop golden, even color
Golden Rule
Glaze goes on at the 9-minute mark, not before. That 2-3 minute window at 400°F is enough to caramelize honey without burning it.

What You'll Need

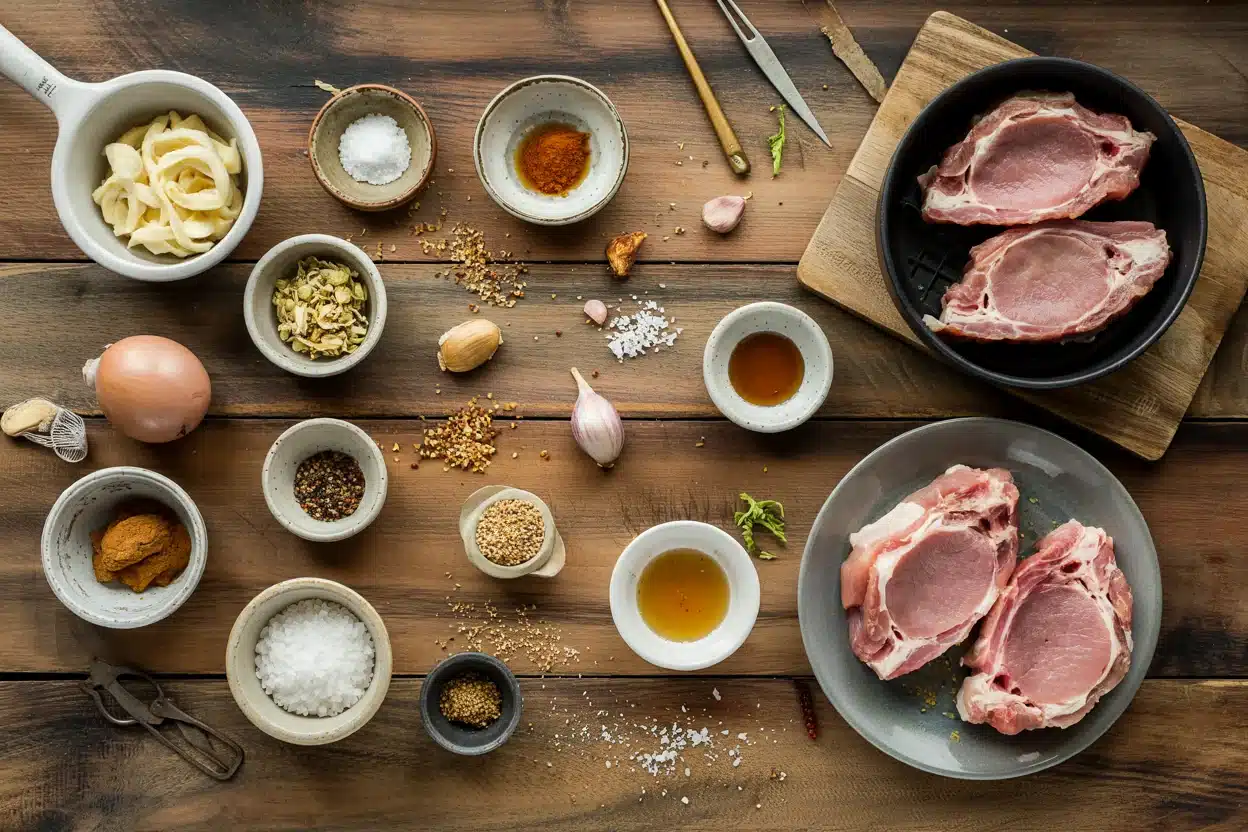
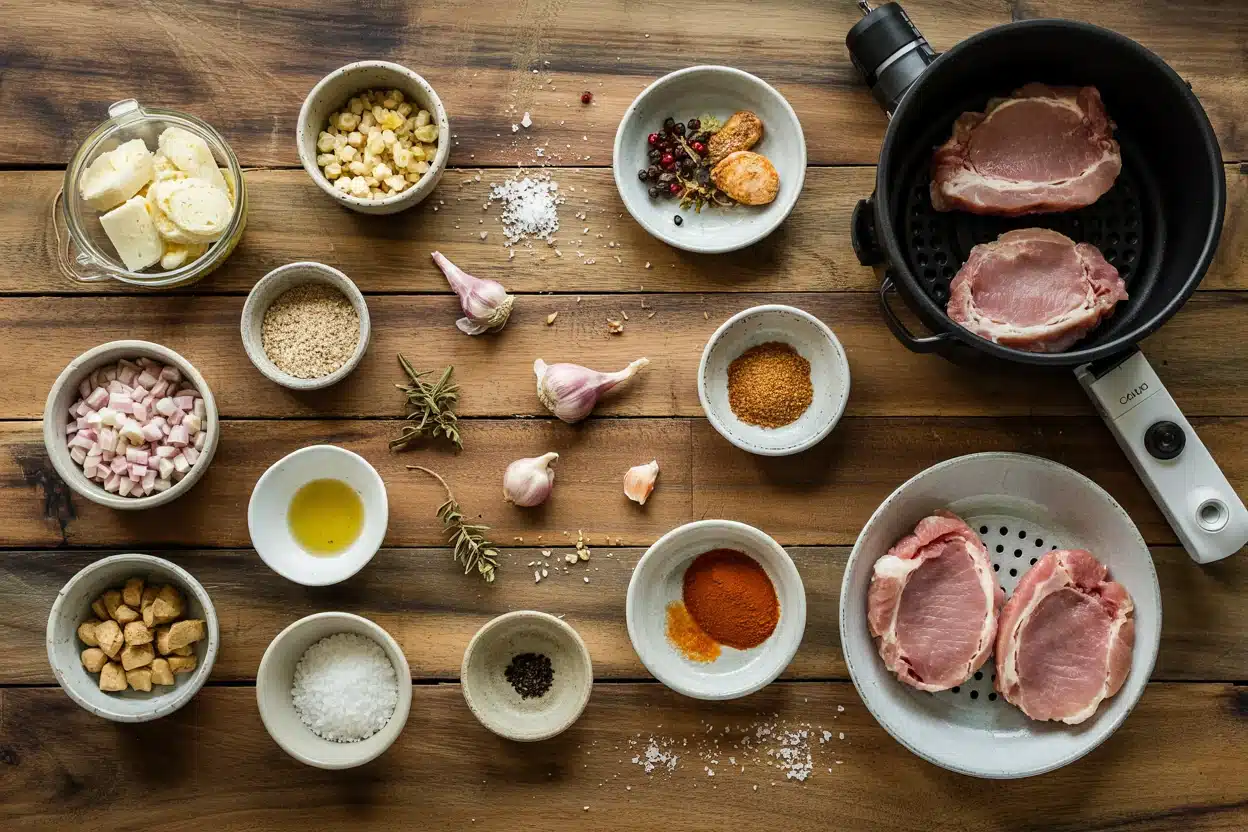
Air Fryer Honey Mustard Pork Chops - Air Fryer Honey Mustard Pork Chops

Bone-in or boneless pork chops both work here - the critical factor is thickness, not cut.

If you need a reference for a air fryer garlic bread recipe to round out the meal, that same air fryer does double duty and cooks alongside this in under 8 minutes.

Four core ingredients make up the glaze, and everything else is pantry-standard seasoning.

🍗
Protein
  • 4 pork chops, 1" thick (bone-in or boneless)
🥢
Glaze
  • 3 tablespoon Dijon mustard
  • 2 tablespoon honey
  • 1 teaspoon olive oil
🧄
Aromatics & Spices
  • 2 cloves garlic, minced
  • ½ teaspoon garlic powder
  • Salt and black pepper to taste

Ingredient Details

  • Pork Chops (1" thick)
    Thinner than 1" overcooks in the 10-12 minute window; thicker than 1" may need an extra 3-4 minutes. Measure at the thickest point.
  • Dijon Mustard
    The sharp, tangy base that emulsifies with honey into a glaze. Smooth Dijon adheres more evenly than grainy varieties.
  • Honey
    Raw or regular both work. Thicker honeys (like clover) cling better and caramelize with less drip than thin runny varieties.
  • Olive Oil
    Helps the glaze spread and adds a slight richness. Use just a teaspoon - too much oil and the glaze slides off under heat.
  • Fresh Garlic
    Minced fresh garlic adds bright, pungent notes to the glaze. Add it with the late brush-on, not the initial seasoning, to prevent it burning.
  • Salt and Black Pepper
    Season both sides of the dry chops before any glaze goes on. This is the base layer that amplifies the honey-mustard on top.

Ingredient Swaps

Dijon is the standard here, but the recipe holds up well with a handful of smart swaps.

For smoked paprika stand-ins you can stir into the dry rub, chipotle powder gives a smokier, spicier base that contrasts nicely with the sweet glaze.

Four reliable substitutions that each shift the result slightly without breaking the recipe:

  • Whole-grain mustard for Dijon - adds visible seeds and a milder, nuttier tang to the glaze
  • Maple syrup for honey - thinner consistency, deeper caramel notes, slightly less floral sweetness
  • Boneless pork loin medallions for bone-in chops - cook 1-2 minutes faster; check temp earlier
  • Canola or sunflower oil for olive oil - neutral flavor, same browning result

Whole-Grain Mustard

Works for: Guests who want texture in the glaze and a milder tang

Skip if: You want a smooth, even-coating glaze with no seed texture

Maple Syrup

Works for: Deeper, less-sweet glaze with richer caramel color

Skip if: You want that bright, honey-forward sweetness in the finish

Instructions

Getting the steps right comes down to timing - specifically when the glaze goes on.

For guidance on swapping out pork chop cuts if you're working with a different protein, thickness and fat content will change your cook time, so adjust in 1-minute increments.

Follow these five steps for a glossy, properly cooked result:

  1. Prep the chops: Remove pork chops from the fridge 15 minutes before cooking.

Pat completely dry on both sides with paper towels, then season with salt, black pepper, and garlic powder on both sides. 2. Make the glaze: Combine Dijon mustard, honey, olive oil, and minced garlic in a small bowl.

Stir until smooth.

Set aside - reserve 2 tablespoons in a separate dish for serving. 3. First air-fry: Preheat air fryer to 400°F for 3 minutes.

Arrange chops in a single layer with space between each.

Air-fry for 8-9 minutes, flipping halfway at the 4-minute mark. 4. Apply the glaze: Open the air fryer and brush the honey-mustard glaze generously over both sides of each chop.

Return to the air fryer and cook for a final 2-3 minutes until glaze is glossy and caramelized at the edges. 5. Check doneness and rest: Insert a meat thermometer into the thickest part.

Pull the chops at 145°F and transfer to a plate.

Rest for 3 minutes before slicing or serving.

Watch Out
Don't skip the 3-minute rest. Slicing immediately pushes juices out of the meat and leaves the glaze runny instead of set.

What to Serve With It

Sides that mirror or contrast the tangy-sweet glaze work best here. For more ideas on proteins with similar flavor profiles, the guide on what pairs with chicken thighs covers bright, acidic sides that cross over well to glazed pork.

Side DishPrepWhy It WorksHow to Serve
Pan-roasted green beans with lemon zestEasyBright acidity cuts the sweetness of the glazeToss in olive oil, roast 8 min, finish with zest
Yukon gold mashed potatoesEasyCreamy starch soaks up extra honey-mustard sauceSpoon chops over a bed of mash for weeknight plating
Cabbage slaw with appleEasyCrunchy, tart apple balances the sweet glazeServe cold alongside the chops as a contrast
Roasted Brussels sprouts with baconMediumSavory, smoky notes pair with the tangy porkRoast at 400°F alongside the air fryer cycle
Herb rice pilafEasyNeutral base that lets the glaze take center stagePlate rice first, lay chop on top, spoon extra glaze over

Three ways to serve it:

  • 🍽️ Slice thinly against the grain and fan over mashed potatoes with extra glaze drizzled on top
  • 🥗 Serve whole alongside cold slaw and let the temperature contrast work for you
  • 🥪 Slice leftovers thin for a next-day sandwich with whole-grain mustard aioli
Shortcut
The reserved glaze from step 2 doubles as a table sauce. Warm it for 20 seconds in the microwave and serve in a small dish on the side.

Store and Reheat

Cooked pork chops keep well for 3 days in the fridge in a shallow airtight container.

For swapping out olive oil in the glaze before storage, canola holds up equally well and won't solidify in the fridge the way some finishing oils can.

Freezer-friendly: Wrap individually and freeze for up to 2 months. Thaw overnight in the fridge before reheating.

MethodTimeBest For
🍳 Air Fryer3-5 min at 350°FRetains exterior crispness and revives the glaze
🔥 Oven10 min at 300°F coveredEven reheating without drying; good for multiple chops
📦 Microwave + Sear45-60 sec then 60 sec in skilletQuick option that restores some glaze shine

For best results when storing:

  • Cool chops completely before sealing - trapping steam softens the glaze and makes it sticky
  • Store any reserved dipping sauce separately so it doesn't over-saturate the meat
  • Use a shallow container rather than a deep one to avoid stacking and crushing the glaze layer
  • Label and date frozen portions - texture starts to decline noticeably past 2 months
  • Reheat to an internal temperature of 145°F to maintain food safety, especially for thicker chops

Frequently Asked Questions

Can we use frozen pork chops in the air fryer for this recipe?

Thaw completely before cooking. Frozen chops release water as they cook, which steams the surface and prevents the glaze from adhering or caramelizing properly.

What internal temperature should pork reach for safe eating?

The USDA-recommended safe internal temperature for pork is 145°F, followed by a 3-minute rest. At that temperature the center will be faintly pink, which is safe and indicates a juicy result.

Can we make the honey-mustard glaze ahead?

Yes - mix the glaze up to 3 days ahead and store covered in the fridge. Stir before using, as the honey and mustard can separate slightly when chilled.

Are bone-in chops better than boneless for air frying?

Bone-in chops retain slightly more moisture during the cook due to the bone insulating the surrounding meat. Boneless works fine but cook 1-2 minutes faster, so check the temperature early.

How do we prevent the honey from burning while cooking?

Apply the glaze only in the last 2-3 minutes of the cook cycle at 400°F. Brushing it on at the start exposes the honey to prolonged high heat, which turns it bitter and dark rather than caramelized and glossy.

Air Fryer Honey Mustard Pork Chops

Air Fryer Honey Mustard Pork Chops

No ratings yet
We make juicy 1" pork chops in the air fryer with a bright honey-Dijon glaze. The glaze is added near the end so it caramelizes without burning, giving a glossy, tangy-sweet finish.
Print Recipe Pin Recipe
Prep Time 10 minutes mins
Cook Time 12 minutes mins
Total Time 22 minutes mins
Servings: 4 servings
Course: Dinner
Cuisine: American
Ingredients Equipment Method Notes

Ingredients
  

  • 1.5 lb pork chops bone-in or boneless, 4 chops, 1" thick
  • 2 tablespoon Dijon mustard
  • 2 tablespoon honey runny
  • 1 tablespoon whole-grain mustard optional; adds texture (use instead of or with Dijon)
  • 1 tablespoon olive oil
  • 1 teaspoon apple cider vinegar adds brightness
  • 2 clove garlic minced
  • 1 teaspoon smoked paprika or regular paprika
  • 1 teaspoon kosher salt
  • 0.5 teaspoon black pepper freshly ground

Equipment

  • Air fryer Basket-style or drawer-style, 3–5 quart capacity
  • Instant-read thermometer Digital probe for accurate doneness reading
  • Small bowl For mixing glaze
  • Tongs For flipping chops

Method
 

  1. Preheat the air fryer to 400°F for 5 minutes with the basket inside.
  2. Pat pork chops completely dry and rub both sides with olive oil, kosher salt, pepper, and smoked paprika.
  3. Mix Dijon, honey, apple cider vinegar, minced garlic, and whole-grain mustard in a small bowl until smooth.
  4. Place chops in a single layer in the basket; air-fry at 400°F for 5 minutes.
  5. Flip chops and air-fry for another 4–6 minutes until the thickest part reads 135–140°F.
  6. Brush both sides with most of the glaze, air-fry 1–2 more minutes at 400°F until glaze is glossy and thermometer reads 145°F.
  7. Transfer to a plate and rest 3 minutes before serving so juices redistribute and glaze sets.

Notes

  • Use 1" thick chops and an instant-read thermometer to avoid overcooking.
  • Apply glaze only in the last 1–2 minutes to prevent the honey from burning.
Tried this recipe?

Let us know how it was!

Air Fryer Crispy Tofu Bites [Weeknight Snack]

May 11, 2026

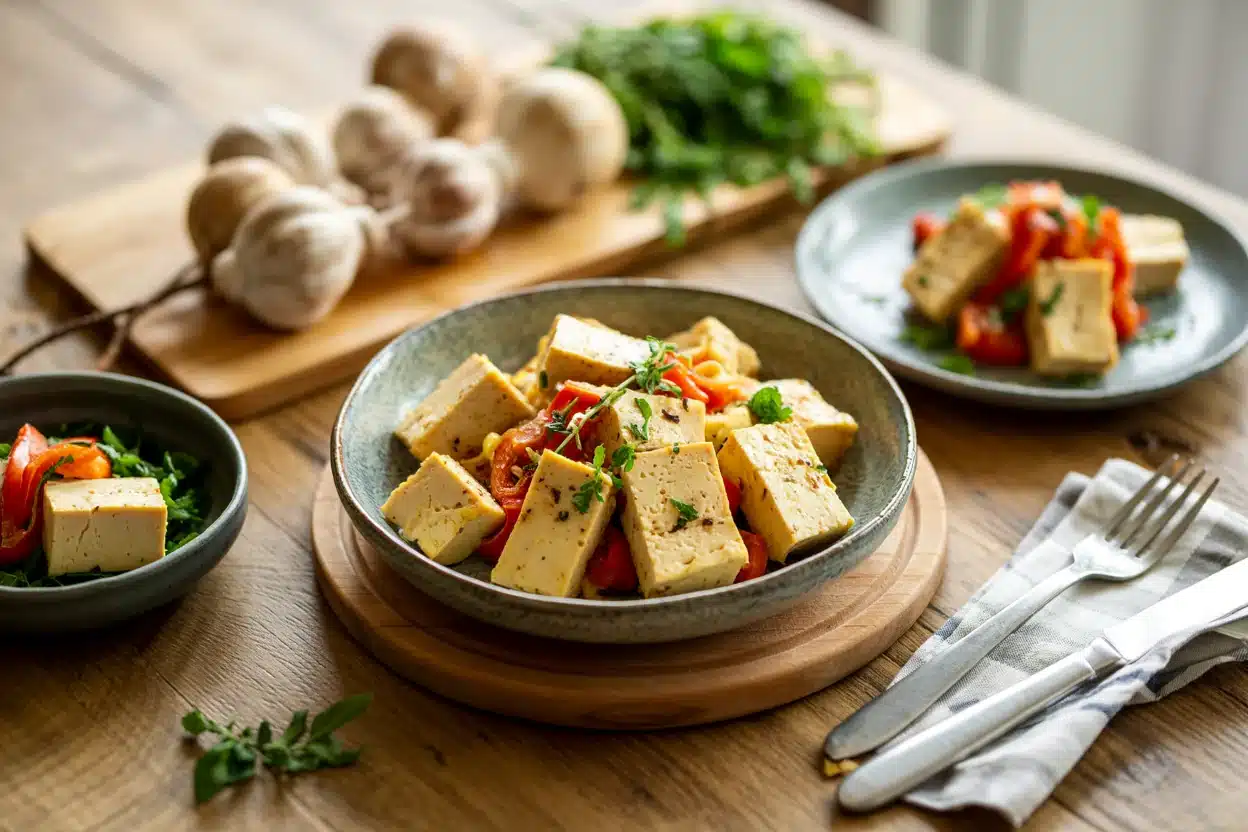
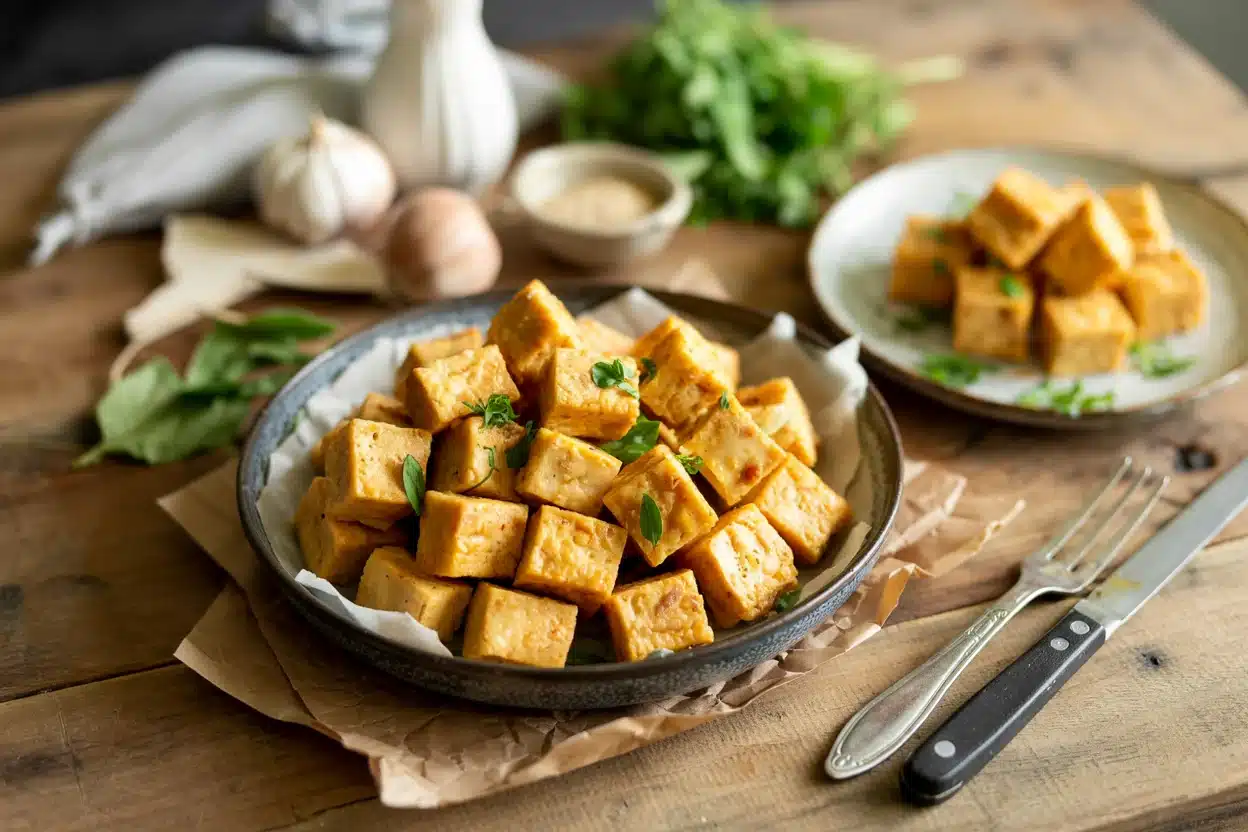
Extra-firm tofu, pressed dry, tossed in cornstarch, and blasted at 400°F - that's the whole method. The air fryer circulates heat so aggressively that each cube develops a shattering crust in under 15 minutes, with zero deep-frying required.

Air Fryer Crispy Tofu Bites

Understanding tofu's flavor and uses helps here - this is a naturally neutral ingredient that takes on whatever seasoning you apply.

Ready in 27 minutes from start to finish.

QUICK SUMMARY

Air fryer crispy tofu bites deliver a crackly cornstarch crust with a tender center in just 27 minutes. Press the tofu thoroughly, coat lightly, and cook in a single layer. These work as a weeknight snack, party appetizer, or meal-prep protein.

⏱️Time Reality: 27 min total - most of it is hands-off pressing time
🥢Method Shortcut: Toss cornstarch-coated cubes in a zip-top bag for even coverage fast
⚠️Watch Out: Overcrowding the basket kills crispness - cook in batches if needed

Why This Recipe Works

Pressing tofu removes the trapped water that would otherwise steam the cubes from the inside out. That single step is why this recipe produces crisp, golden bites instead of rubbery, pale ones.

Cornstarch is the coating that makes this version work. Unlike flour or breadcrumbs, it forms a thin, dry shell that shatters - and the air fryer's circulating heat sets it in minutes.

Getting tofu preparation tips right before you cook makes the difference between a crust that holds and one that peels away.

Quick Reference
⏱️
Prep Time
15 minutes
🔥
Cook Time
12 minutes
⏰
Total Time
27 minutes
🍽️
Servings
4
📊
Difficulty
Easy
🏷️
Category
Appetizer
💡
Quick Tip
Press tofu and dust with cornstarch for best crunch
🎯
Best For
Weeknight snack, meal prep, party appetizer
  • 🌡️ Air-fry at 375°F for 10 minutes, then crank to 400°F for the final 2 minutes to shatter the crust
  • Shake or flip the basket at the 6-minute mark for uniform browning on all sides
  • Cubes are done when edges are deep golden-brown and spring back lightly when pressed
  • A thin, cracked surface with no pale or wet spots means the crust has fully set
  • Single-layer cooking is non-negotiable - gaps between cubes are what allow air circulation to do its job
Golden Rule
Press 20-30 minutes minimum. Skipping or rushing this step is the single biggest cause of soggy tofu bites.

What You'll Need

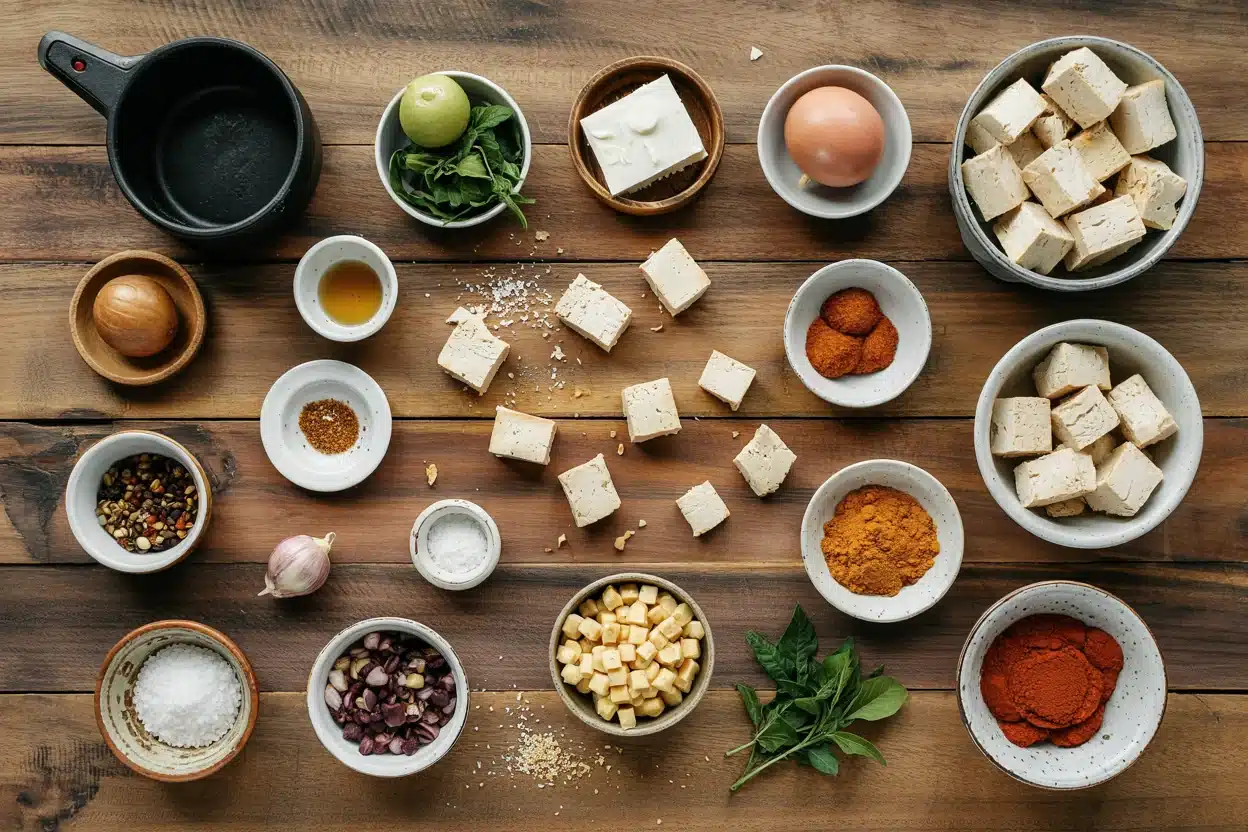
Air Fryer Crispy Tofu Bites - Air Fryer Crispy Tofu Bites

Five ingredients do all the work here. Choosing cooking tofu right starts with the block itself - only extra-firm tofu has the density to hold cube shape and take on a proper crust without collapsing.

🍗
Protein
  • Extra-firm tofu (14 oz block)
🌶️
Coating
  • Cornstarch (2 tbsp)
  • Neutral oil (1 tablespoon - avocado or vegetable)
🥢
Seasoning
  • Soy sauce (1 tbsp)
  • Sesame oil (1 tsp)

Ingredient Details

  • Extra-Firm Tofu (14 oz)
    High density holds shape when cubed. Press 20-30 minutes under a 2-4 lb weight wrapped in towels.
  • Cornstarch (2 tbsp)
    The crust agent. Apply dry, after wet seasoning - this is what creates the shattering exterior.
  • Neutral Oil (1 tbsp)
    Avocado oil's high smoke point suits air-fryer temps well. Vegetable oil works equally.
  • Soy Sauce (1 tbsp)
    Seasons the interior and helps the cornstarch adhere. Keep the quantity small - excess liquid ruins the crust.
  • Sesame Oil (1 tsp)
    For aroma only. A little goes a long way; omit entirely if you want a neutral flavor base.

Ingredient Swaps

All four swaps here are direct and workable. Knowing replacements for soy sauce is especially useful if you're cooking gluten-free or low-sodium.

Tamari is the cleanest one-for-one swap with no recipe changes needed.

  • 🔄 Firm tofu instead of extra-firm - press longer (up to 45 minutes) to compensate for higher water content
  • 🔄 Potato starch instead of cornstarch - equally crisp with a slightly glossier finish
  • 🔄 Tamari instead of soy sauce - gluten-free, same savory profile, same quantity
  • 🔄 Light olive oil instead of neutral oil - milder browning and a slight fruitiness to the crust

Cornstarch vs. Potato Starch

Works for: direct swap, equally crisp crust, available at most grocers

Skip if: you want the driest, most matte finish - cornstarch wins there

Extra-Firm vs. Firm Tofu

Works for: firm tofu works fine with extended pressing time

Skip if: you're short on time - firm tofu needs significantly longer pressing

Instructions

Heat your air fryer to 375°F before you add anything. Getting that chamber hot first means the cornstarch crust starts setting immediately on contact.

If you're building a full meal around these bites, check alternatives to sesame oil for the dipping sauce step - several neutral options round out the same flavor.

  1. Press the tofu. Wrap the block in two layers of paper towels.

Place on a plate and set a heavy skillet or 2-4 lb weight on top.

Press for 20-30 minutes, then unwrap and pat completely dry. 2. Cut and season. Slice tofu into uniform 1-inch cubes.

Toss gently with soy sauce and sesame oil until lightly coated.

Let sit 2 minutes. 3. Coat with cornstarch. Add cornstarch to a zip-top bag, drop in the tofu, seal, and shake until every cube is evenly dusted.

No wet spots should remain. 4. Air-fry. Arrange cubes in a single layer with ¼-½ inch gaps.

Cook at 375°F for 10 minutes, shaking the basket at the 6-minute mark for even color. 5. Finish hot. Increase temperature to 400°F and cook a final 2 minutes.

Cubes are done when edges are deep golden-brown and surfaces show a thin, cracked crust.

Watch Out
Don't skip the final 2-minute blast at 400°F - that temperature spike is what shatters the crust from soft to snappy.

What to Serve With It

These bites are a strong standalone snack with a dipping sauce, and they drop into a full plate easily.

A tangy soy-sesame dip - soy sauce, rice vinegar, sesame oil, chili flakes, a pinch of sugar - pulls the whole thing together in under two minutes.

Side DishPrepWhy It WorksHow to Serve
Steamed brown riceEasyNeutral base that soaks up dipping saucesSpoon bites over rice, drizzle with sauce
Quick cucumber saladEasyBright and acidic against the crisp crustServe alongside as a cool contrast
Stir-fried greensEasyAdds color and rounds out the platePlate greens first, bites on top
Gochujang mayo dipEasySpicy-creamy dip for party servingSmall bowl with toothpick skewers
Sweet chili sauceEasySalty-sweet contrast to the soy-seasoned crustDip straight or drizzle over plated bites

Three ways to serve it:

  • Weeknight bowl - rice base, stir-fried greens, bites on top, soy-sesame drizzle
  • Party platter - toothpick skewers, scallion garnish, two dipping sauces on the side
  • Meal prep - store bites plain, reheat in air fryer, sauce only when serving
Shortcut
Store-bought sweet chili sauce is a zero-effort dip that works straight from the bottle - no mixing needed.

Store and Reheat

Store cooled bites in a shallow airtight container lined with a paper towel. That lining absorbs any moisture that releases as they cool, which keeps the crust from going soft overnight.

Knowing swapping out rice vinegar in dipping sauces is useful here too - if you're meal-prepping, store the sauce separately.

MethodTimeBest For
🍳 Air Fryer3-5 min at 375°FRestoring the crisp exterior - best method for leftover bites
🔥 Oven8-10 min at 400°FLarger batches; reheat on a wire rack over a sheet pan
📦 MicrowaveNot recommendedTurns crust soft and rubbery - avoid

For best results when storing:

  • 🧊 Refrigerate within 2 hours of cooking in a paper-towel-lined container
  • Keeps up to 3 days in the fridge; texture is best on day 1 or 2
  • Freeze in a single layer on a sheet pan first, then transfer to a freezer bag - lasts up to 2 months
  • Always reheat from frozen directly in the air fryer or oven - no thawing needed
  • Store dipping sauces separately - never pour sauce over bites you plan to store

Frequently Asked Questions

Can you use silken or soft tofu for this recipe?

No. Silken and soft tofu have too much water content and will fall apart when cubed and tossed. Extra-firm tofu is the minimum density needed to hold shape and form a crust in the air fryer.

Do you need to marinate the tofu before coating?

A full marinade isn't needed and can actually work against you - excess liquid on the surface prevents the cornstarch from forming a dry, even crust. A brief 2-minute toss with soy sauce and sesame oil is enough to season and help adhesion.

How do you make the tofu gluten-free?

Swap soy sauce for tamari in the same quantity. Every other ingredient in this recipe is already gluten-free, including cornstarch and neutral oil.

Can you make these ahead for a party?

Yes - cook the bites up to a day ahead, refrigerate plain, and reheat in the air fryer at 375°F for 3-5 minutes just before serving. The crust revives well and guests won't notice the difference.

Why did my tofu stick to the air fryer basket?

Sticking usually happens when the basket isn't preheated or the tofu cubes have too little oil coating. Lightly spray the basket with oil before adding the cubes, and make sure each piece has a thin oil film before going in.

Air Fryer Crispy Tofu Bites

Air Fryer Crispy Tofu Bites

No ratings yet
We crisp extra-firm tofu in the air fryer by pressing, lightly seasoning, dusting with cornstarch, and air-frying until golden. The method yields crunchy, bite-sized cubes perfect for snacks, salads, or bowls.
Print Recipe Pin Recipe
Prep Time 15 minutes mins
Cook Time 12 minutes mins
Total Time 27 minutes mins
Servings: 4 servings
Course: Appetizer
Cuisine: Asian-Inspired
Ingredients Equipment Method Notes

Ingredients
  

  • 14 oz extra-firm tofu one standard block, well-pressed
  • 2 tablespoon soy sauce or tamari for gluten-free
  • 1 teaspoon sesame oil toasted
  • 1 teaspoon rice vinegar
  • 1 teaspoon maple syrup or honey
  • 1 clove garlic minced
  • 1 teaspoon ground ginger or 1 teaspoon fresh grated
  • 3 tablespoon cornstarch for dusting (potato starch ok)
  • 2 tablespoon neutral oil avocado or vegetable, divided
  • 0.5 teaspoon kosher salt divide between seasoning and finishing
  • 0.25 teaspoon black pepper freshly ground
  • scallions thinly sliced, for garnish (optional)

Equipment

  • Air fryer Basket-style or drawer-style; 3–5 qt capacity works for 1 block.
  • Tofu press or heavy weight Alternative: several stacked cans and clean towels.
  • Mixing bowl Medium size for tossing
  • Zip-top bag Optional for dusting with cornstarch

Method
 

  1. Preheat the air fryer to 375°F while you press and prep the tofu.
  2. Press tofu 20–30 minutes to remove excess water, then cut into 1-inch cubes and pat dry with paper towels.
  3. Whisk soy sauce, sesame oil, rice vinegar, maple syrup, garlic, and ginger in a bowl; toss tofu gently with 1 tablespoon oil and 1 tablespoon of the sauce for 1 minute.
  4. Place cornstarch in a zip-top bag, add tofu cubes, seal, and shake until each cube has a light, even dusting; discard excess cornstarch.
  5. Arrange cubes in a single layer in the air fryer basket, brush or spray with remaining 1 tablespoon oil, and cook at 375°F for 6 minutes; shake basket or flip cubes.
  6. Increase heat to 400°F and air-fry 4–6 more minutes until golden-brown and edges are crackled; season with remaining ¼ teaspoon salt and serve with scallions.

Notes

  • Press tofu 20–30 minutes for best texture; more water equals steaming not crisping.
  • Dusting in a bag yields a thin, even crust; remove excess cornstarch to avoid gummy spots.

Tried this recipe?

Let us know how it was!

Air Fryer Veggie Egg Rolls [Crispy & Quick]

May 11, 2026

Game night, a casual weeknight dinner, or a party appetizer spread -

Air Fryer Veggie Egg Rolls

air fryer veggie egg rolls fit all of it. They come out golden and crisp on the outside with a tender, savory filling, and the air fryer gets them there without a pot of hot oil on the stove.

Skip the takeout order. These are faster than delivery and use ingredients you can find at any grocery store.

QUICK SUMMARY

These air fryer veggie egg rolls deliver a crunchy golden shell packed with a stir-fried cabbage and vegetable filling. They cook in under 15 minutes at 375°F and require no deep-frying. A light brush of oil is all it takes to get that satisfying crisp exterior.

⏱️Time Reality: 30 min total - 15 prep, 12 cook
🔑Method Shortcut: Squeeze filling dry before rolling - prevents soggy wrappers
⚠️Watch Out: Overfilling causes bursting; use 2-3 tablespoons max per roll

Why This Recipe Works

The filling is stir-fried and cooled before it goes into the wrappers, which keeps moisture from softening the shell during air frying.

That extra step - squeezing the cabbage dry with a clean towel - is what separates crisp rolls from soggy ones.

Air frying circulates hot, dry air around each roll at high speed, which mimics the effect of deep frying without the oil. A light spray or brush of oil on the outside is enough to get that deep golden color and audible crunch.

Quick Reference
⏱️
Prep Time
15 min
🔥
Cook Time
12 min
⏰
Total Time
27 min
🍽️
Servings
4 servings (8 rolls)
📊
Difficulty
Medium
🏷️
Category
Main Dish / Appetizer
💡
Quick Tip
Cool filling fully before rolling
🎯
Best For
Weeknight dinner, party apps

Key reasons this method works:

  • Stir-frying the filling first removes excess water from vegetables
  • Cooling the filling before rolling stops the wrapper from steaming and tearing
  • Rolling tightly (no air pockets) prevents the shell from cracking open
  • Seam-side down placement at the start holds the roll together during cooking
  • Flipping halfway through ensures even browning on all sides
Golden Rule
Never skip cooling the filling. Hot filling creates steam inside the wrapper, which turns your crisp shell soft before it even hits the air fryer.

What You'll Need

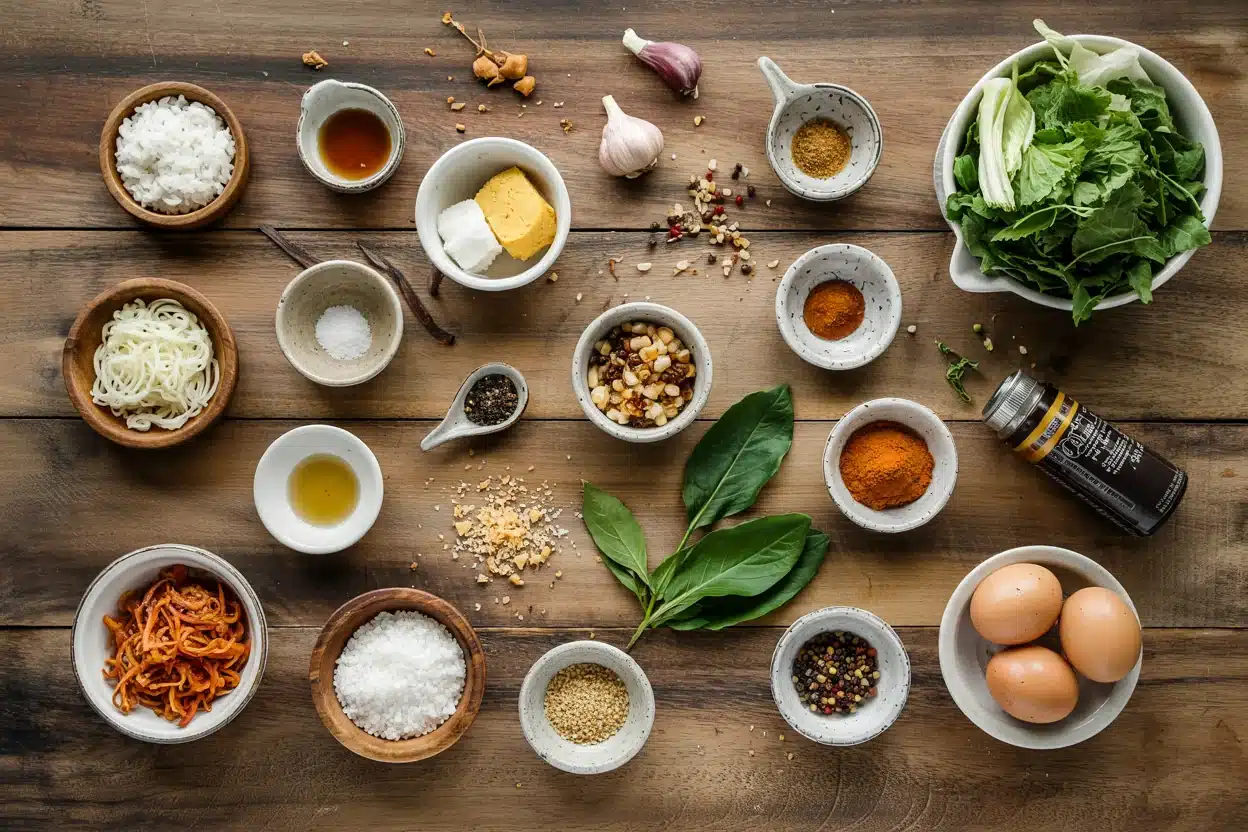
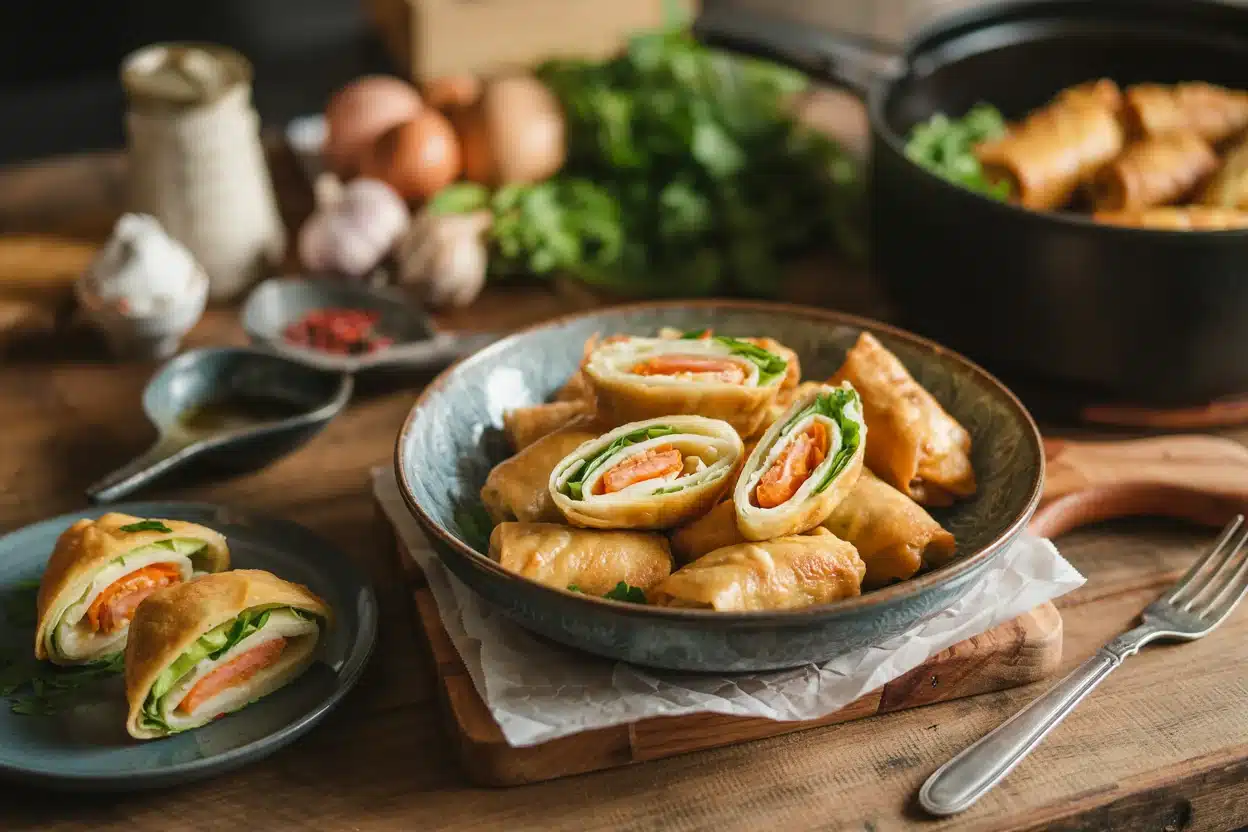
Air Fryer Veggie Egg Rolls - Air Fryer Veggie Egg Rolls

Good egg rolls depend on a few key components - fresh cabbage, aromatics, and egg roll wrappers (not spring roll wrappers), which are thicker and hold up better to air frying.

The sesame oil swaps that work if you're out, though the toasty, nutty finish it adds to the filling is worth having on hand.

🥬
Vegetables
  • 2 cups shredded green cabbage
  • 1 cup shredded carrots
  • 1 cup bean sprouts
  • 3 scallions, sliced thin
🧄
Aromatics
  • 3 cloves garlic, minced
  • 1 teaspoon fresh ginger, grated
🥢
Sauce & Binder
  • 2 tablespoon soy sauce
  • 1 teaspoon sesame oil
  • 1 teaspoon cornstarch
  • 1 tablespoon water
🫙
Wrappers & Finish
  • 8 egg roll wrappers
  • Neutral oil spray or brush
  • Dipping sauce of choice

Ingredient Details

  • Green Cabbage
    Shred thin and squeeze out moisture with a towel before cooking. Pre-bagged coleslaw mix also works well here.
  • Egg Roll Wrappers
    Find these in the refrigerated produce section near tofu. They're thicker than spring roll wrappers and won't crack under the air fryer's heat.
  • Sesame Oil
    Add it at the end of stir-frying, not at the start - high heat destroys its nutty aroma. A little goes a long way.
  • Cornstarch + Water
    This slurry thickens the filling and prevents liquid from pooling inside the wrapper during cooking.
  • Scallions
    Stir in right at the end of cooking so they stay bright and slightly crisp rather than going limp.
  • Soy Sauce
    Use low-sodium if you want more control over saltiness. Two tablespoons is enough for a savory but not overwhelming filling.

Ingredient Swaps

Most of the vegetables here are flexible. If you're working with what's in the fridge, you can swap freely as long as you keep the total volume roughly the same and always cook out the moisture first.

For anyone thinking about replacements for cornstarch, arrowroot powder works at a 1:1 ratio and behaves nearly the same in this filling.

Common swaps that hold up well:

  • 🥦 Cabbage → thinly sliced napa cabbage or shredded bok choy (squeeze both dry)
  • 🥕 Carrots → thinly sliced bell pepper or zucchini (pat zucchini very dry)
  • 🌱 Bean sprouts → shredded edamame or thinly sliced snow peas
  • 🧅 Scallions → finely diced yellow onion, sautéed until soft

Soy Sauce → Tamari or Coconut Aminos

Works for: gluten-free diets; tamari is nearly identical in flavor, coconut aminos is slightly sweeter

Skip if: you need an exact flavor match - coconut aminos can make the filling taste slightly different

Egg Roll Wrappers → Wonton Wrappers

Works for: smaller portions or bite-sized appetizers

Skip if: you want standard-sized rolls - wonton wrappers are smaller and will tear if overfilled

Instructions

Rolling technique matters as much as the filling itself - a loose roll will open during cooking and a wet seal won't hold.

Keep a small bowl of water nearby to seal the edges, and work with one wrapper at a time to prevent them from drying out.

If you enjoy this format, a air fryer vegetable spring rolls recipe uses a similar method with rice paper wrappers and a lighter texture.

  1. Stir-fry the filling: Heat 1 tablespoon of neutral oil in a wok or large skillet over high heat.

Add garlic and ginger, cook 30 seconds.

Add cabbage, carrots, and bean sprouts.

Stir-fry 3-4 minutes until just softened.

Add soy sauce, then stir in the cornstarch slurry.

Cook 1 more minute until the filling tightens up.

Remove from heat, stir in sesame oil and scallions, then spread on a plate to cool completely.

  1. Preheat the air fryer to 375°F for 3-5 minutes.
  1. Roll the egg rolls: Place one wrapper diamond-side down. Add 2-3 tablespoons of filling near the bottom third.

Fold the bottom corner up over the filling, fold in the sides, then roll forward firmly. Dab the top corner with water and press to seal.

  1. Oil and load: Lightly brush or spray all sides of each roll with neutral oil. Place seam-side down in the air fryer basket in a single layer with space between them.
  1. Air fry: Cook at 375°F for 10-12 minutes, flipping at the 6-minute mark. Pull them when the shells are deep golden and feel hard when tapped with a finger.
Watch Out
Don't stack or overlap rolls in the basket. Air circulation is what creates the crisp - crowded rolls steam each other and turn soft.

What to Serve With It

These rolls are filling on their own but a dipping sauce and a simple side turn them into a proper meal.

A garlicky soy-ginger dipping sauce is the classic move, though sweet chili sauce and hoisin both work well here.

You can also look at scallion swaps that work if you want to build a garnish or quick dipping sauce from what you already have.

Side DishPrepWhy It WorksHow to Serve
Steamed jasmine riceEasyNeutral base that balances the salty, savory rollsServe alongside with extra dipping sauce
Miso soupEasyWarm broth rounds out a lighter mealServe in a small bowl as a starter
Cucumber saladEasyCool and tangy contrast to the crisp, hot rollsDress with rice vinegar and sesame seeds
Fried riceMediumHeartier pairing for a full dinner plateUse day-old rice for best texture
Edamame with sea saltEasySimple protein addition that keeps the meal lightServe warm, still in the pods

Three ways to serve it:

  • Appetizer spread: Cut rolls diagonally and arrange on a board with three dipping sauces
  • Weeknight plate: Pair two rolls with steamed rice and cucumber salad for a complete dinner
  • Packed lunch: Rolls hold up well at room temperature for 2-3 hours - pack sauce separately
Shortcut
Use a bag of pre-shredded coleslaw mix in place of shredding cabbage and carrots separately. It cuts prep time almost in half.

Store and Reheat

Cooked egg rolls keep well in the fridge for 3-4 days in an airtight container. Avoid wrapping them in paper towels or plastic wrap while still warm - trapped steam will soften the shell overnight.

Rules around storing dumplings correctly apply here too, since the wrapper structure behaves the same way.

MethodTimeBest For
🔥 Air Fryer (375°F)4-5 minBest overall - restores the crisp shell fully
🍳 Stovetop (dry skillet)3-4 min per sideGood crunch, works without reheating equipment
📦 Microwave60-90 secQuick but softens the shell; use only if needed

For best results when storing:

  • Let rolls cool completely before refrigerating - minimum 20 minutes out of the air fryer
  • Store in a single layer if possible, or use parchment between layers to prevent sticking
  • Freeze raw, uncooked rolls for up to 2 months - flash-freeze on a tray first, then bag
  • Cook frozen rolls directly from frozen at 375°F for 14-16 minutes, no thawing needed
  • Do not refrigerate uncooked rolled egg rolls for more than 4 hours - wrappers get soggy

Frequently Asked Questions

How long do you air fry egg rolls at 375°F?

Cook at 375°F for 10-12 minutes, flipping once at the 6-minute mark. Pull them when the shell is deep golden and feels hard when tapped - pale shells will be soft inside even if the timer says done.

Can you freeze raw egg rolls before air frying?

Yes. Flash-freeze them on a parchment-lined tray for 1-2 hours first, then transfer to a freezer bag. Cook straight from frozen at 375°F for 14-16 minutes - no thawing required.

Does the filling need to be cooked before rolling?

Yes - always cook the filling first. Raw vegetables release water inside the wrapper during air frying, which turns the shell soft and can cause it to burst. Pre-cooking also concentrates flavor in the filling.

How do you keep egg rolls from bursting in the air fryer?

Two things matter most: don't overfill (2-3 tablespoons per roll), and seal the edge with water and press firmly before placing seam-side down. A loose or overfilled roll will almost always open up during cooking.

What wrappers are best for air frying egg rolls?

Standard egg roll wrappers (the thick square ones in the refrigerated section) are the right choice. Spring roll wrappers and wonton wrappers are thinner and can crack or turn papery under the air fryer's dry heat.

Air Fryer Veggie Egg Rolls

No ratings yet
Print Recipe Pin Recipe

Tried this recipe?

Let us know how it was!

Air Fryer Cauliflower Tacos [Weeknight Dinner]

May 11, 2026

Cauliflower tacos are a go-to for busy weeknights when you want something with real crunch and bold seasoning without spending an hour in the kitchen. Air frying cuts the cook time down to 16 minutes and delivers charred edges that a sheet pan often struggles to match.

Air Fryer Cauliflower Tacos

For a fresh herb element on the side, try building a spread around a indian mint cilantro chutney recipe to round out your taco night.

A good slaw finishes the plate - and if you're rethinking what goes in it, check out these ideas for swapping out green cabbage before you shop.

QUICK SUMMARY

These air fryer cauliflower tacos come together in just over 30 minutes. A smoky spice blend - chili powder, smoked paprika, and cumin - coats crispy florets that go straight onto warm corn tortillas with tangy crema and quick-pickled onion. Simple enough for a weeknight, bold enough for a taco spread.

⏱️Time Reality: 31 minutes total - pickled onion ideally starts 30 min ahead
🔥Method Shortcut: Shake basket at 8 minutes - no need to flip each piece individually
⚠️Watch Out: Wet or crowded florets will steam, not crisp - pat dry and cook in a single layer

Why This Recipe Works

Cauliflower has a naturally dense, porous surface that grabs spice blends and holds them under high heat without falling apart. Air frying at 400°F forces hot air around every exposed edge, producing the light char you'd expect from a much longer roasting process.

The spice trio here does specific work: smoked paprika adds depth without added heat, cumin ties in earthiness, and chili powder pulls both together.

For a citrusy twist in the sauce, kaffir lime leaf swaps that work can shift the crema in an interesting direction.

Quick Reference
⏱️
Prep Time
15 minutes
🔥
Cook Time
16 minutes
⏰
Total Time
31 minutes
🍽️
Servings
4
📊
Difficulty
Easy
🏷️
Category
Main Dish
💡
Quick Tip
Pat florets dry and use light oil for maximum crisp
🎯
Best For
Weeknight dinner
  • Uniform 1-inch florets cook evenly - no burnt small pieces or raw large ones
  • A single layer in the basket keeps hot air circulating around each piece
  • Shaking at the 8-minute mark browns all sides without manual flipping
  • Corn tortillas get a 30-45 second finish in the air fryer for snappy charred edges
  • Quick-pickled onion adds bright acid that cuts the richness of the crema
Golden Rule
Pat florets completely dry before seasoning. Any surface moisture turns to steam and prevents browning, no matter how good your air fryer runs.
What You'll Need

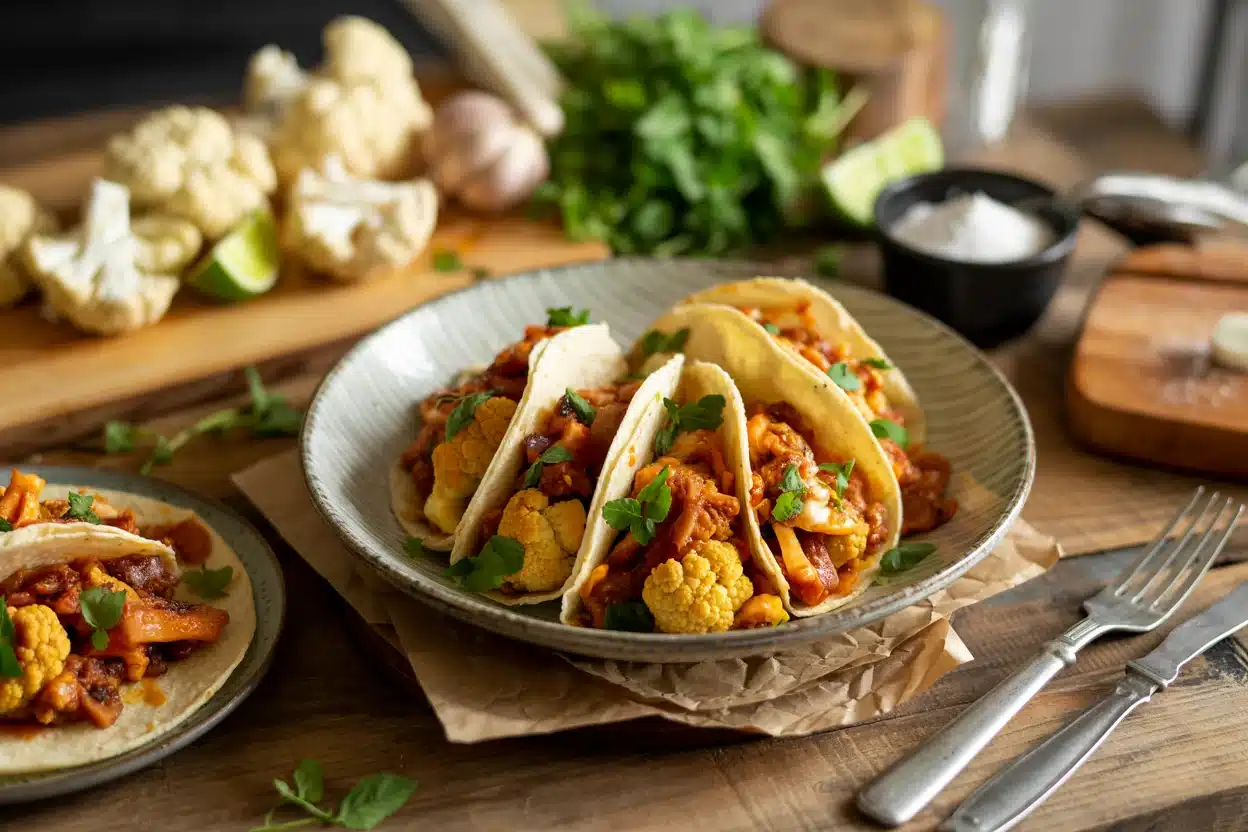
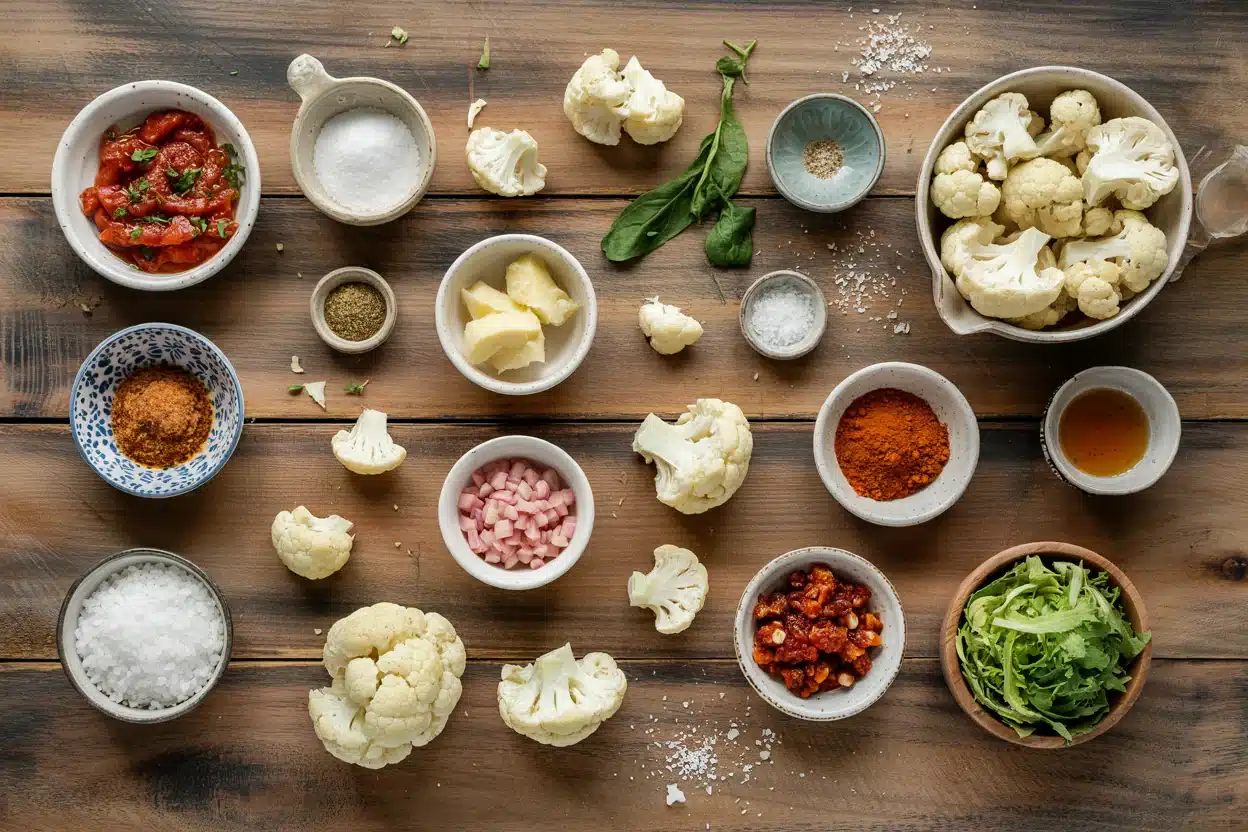
Air Fryer Cauliflower Tacos - Air Fryer Cauliflower Tacos

Cauliflower is the star here, and a medium head yields roughly 12-14 ounces of florets once trimmed - enough for four tacos with a little extra.

Using oil measured by tablespoon rather than by feel keeps the coating light enough to crisp rather than fry.

Corn tortillas are worth buying fresh if your store stocks them - they flex better when warm and char cleanly. If you want to cut prep time by using a different oil, olive oil stand-ins cover several good options.

🥬
Produce
  • 1 medium cauliflower head (≈12 oz florets)
  • ½ red onion, thinly sliced
🍜
Base
  • 8 corn tortillas
🌶️
Spice Blend
  • 1 teaspoon chili powder
  • 1 teaspoon smoked paprika
  • ½ teaspoon cumin
  • ½ teaspoon salt
🧀
Sauce & Topping
  • ½ cup Greek yogurt or crema
  • 1 tablespoon lime juice
  • 2 tablespoon white vinegar (for pickling)
  • 1 teaspoon sugar

Ingredient Details

  • Cauliflower florets
    Cut to uniform 1-inch pieces - larger pieces stay raw in the center while the outside browns
  • Smoked paprika
    Use smoked, not sweet - sweet paprika lacks the depth that defines these tacos
  • Corn tortillas
    Warm just before serving - cold corn tortillas crack and break when folded
  • Greek yogurt crema
    Mix with lime juice and a pinch of salt; full-fat yogurt gives a creamier result
  • Red onion (pickled)
    Combine with vinegar, sugar, and a pinch of salt at least 30 minutes ahead for the best color and tang
  • Oil
    Use 1-2 tablespoon for 12 oz florets - more than that traps moisture and prevents crisping

Ingredient Swaps

Most swaps here are straightforward, though each one shifts the final result in a specific direction. Knowing what changes helps you decide what trade-offs are worth it.

If you're working around a tofu preference, note that pressed and cubed firm tofu takes the spice blend well but loses the dense, slightly nutty bite cauliflower provides.

For the crema, any vegan or dairy-free swap should have enough body to coat a spoon. A full breakdown of replacements for greek yogurt covers ratios and flavor differences worth reading before you substitute.

  • 🔄 Cauliflower → firm tofu (pressed, ¾-inch cubes) - crisps similarly but has a softer interior and less structural bite
  • 🌮 Corn tortillas → flour tortillas - stays softer, won't char at the edges, and folds more easily
  • 🥛 Greek yogurt crema → vegan cashew crema - retains creaminess but the tanginess drops noticeably
  • 🌶️ Smoked paprika → chipotle powder - use half the quantity; it runs significantly hotter and smokier

Cauliflower vs. Firm Tofu

Works for: Those avoiding cauliflower or wanting a protein-forward taco

Skip if: You want the firmer, charred-edge texture cauliflower delivers

Smoked Paprika vs. Chipotle Powder

Works for: Heat lovers who want a deeper smoky burn

Skip if: You're cooking for anyone sensitive to spice - chipotle is substantially hotter

Instructions

Getting the florets into the basket correctly matters more than any other step -

a crowded basket produces soft, steamed cauliflower no matter how long you run the air fryer. Work in two batches if your basket is smaller than 5 quarts. For ideas on what to build alongside these, a roasted vegetables spoilage signs guide is also a useful read if you're prepping extra veg ahead.

  1. Quick-pickle the onion. Combine sliced red onion, 2 tablespoon white vinegar, 1 teaspoon sugar, and a pinch of salt in a small bowl.

Set aside for at least 30 minutes. 2. Season the florets. Toss dry, 1-inch cauliflower pieces with 1-2 tablespoon oil, chili powder, smoked paprika, cumin, and salt until evenly coated. 3. Air fry at 400°F. Arrange florets in a single layer.

Cook for 8 minutes, shake the basket, then cook another 7-8 minutes until edges are golden and charred. 4. Warm the tortillas. Place corn tortillas in the air fryer basket for 30-45 seconds after the cauliflower is done - look for lightly charred spots and flexibility. 5. Assemble the tacos. Spread crema on each tortilla, add cauliflower, top with pickled onion, and serve immediately.

Watch Out
Don't assemble tacos ahead of time. The crema softens the tortilla quickly - keep all components separate until you're ready to serve.

What to Serve With It

These tacos don't need much to become a full meal - a simple side with acid or crunch does most of the work. Mexican street corn salad and black beans with lime rice are both quick enough to prep while the air fryer runs.

For the slaw side, swapping out red onion in your cabbage base gives you some flexibility depending on what's in the fridge.

Side DishPrepWhy It WorksHow to Serve
Mexican street corn saladEasyCreamy, acidic contrast to charred cauliflowerServe cold or at room temp alongside tacos
Black beans and lime riceEasyAdds bulk and a complementary earthy textureSpoon into a side bowl or serve as a taco base layer
Simple cabbage slawEasyCrunchy and bright against the smoky floretsPile on top of tacos or serve separately
Citrus-marinated jicama saladMediumRefreshes the palate between bites of rich cremaServe chilled in a small bowl on the side
Salsa verdeEasyBright herb and acid that contrasts smoky spiceDrizzle over assembled tacos or serve for dipping

Three ways to serve it:

  • Build-your-own taco platter - Keep components in separate bowls so tortillas stay crisp until each person assembles
  • Taco bowls - Skip tortillas and serve cauliflower over lime rice with all toppings for a gluten-free option
  • Loaded platter - Lay tortillas flat, top with cauliflower, crema, pickled onion, and slaw for a shareable spread
Shortcut
Pre-mix a double batch of the spice blend and store it in a small jar. You can coat another round of florets in under a minute next time.

Store and Reheat

Store cauliflower separately from tortillas and toppings - combined storage makes everything soggy within hours. Keep florets in a shallow airtight container with a paper towel underneath to absorb residual moisture, and they'll hold in the fridge for up to 3 days.

Freezing cooked florets doesn't work well here; they turn watery on thaw and lose all their texture. For guidance on how long similar roasted veg lasts, storing buffalo cauliflower correctly applies directly to this recipe's leftovers.

MethodTimeBest For
🌀 Air Fryer6-8 min at 375°FRestoring crunch - best option for small portions
🔥 Oven8-10 min at 400°F on baking sheetLarger batches where basket space is limited
📦 MicrowaveNot recommendedSteams the florets and makes them soft - avoid

For best results when storing:

  • 🧊 Keep florets in a shallow container - deep stacking traps steam and softens the texture
  • 📄 Add a paper towel layer on the bottom to pull moisture away from the cauliflower
  • 🌮 Store tortillas separately in a zip bag at room temperature, not refrigerated
  • 🧄 Keep crema and pickled onion in their own sealed containers in the fridge
  • 🔁 Re-crisp in the air fryer - don't add extra oil before reheating, the residual coating is enough

Frequently Asked Questions

Can I bake these instead of air frying?

Yes - roast at 425°F on a parchment-lined baking sheet for 22-25 minutes, flipping halfway through. Spread florets widely so they roast rather than steam; a crowded sheet pan will produce the same soft result as an overcrowded air fryer basket.

How do I make these gluten-free and vegan?

Corn tortillas are naturally gluten-free, so the base is already covered. Swap Greek yogurt crema for vegan cashew crema or a thick coconut yogurt to make the full recipe plant-based.

Can I use frozen cauliflower?

You can, but thaw it completely first and press out as much water as possible with a clean towel. Add 4-5 extra minutes of cook time and expect slightly less crisp edges compared to fresh florets.

How do I keep corn tortillas from getting soggy?

Don't assemble tacos until you're ready to eat, and warm tortillas just before serving - cold or pre-built tacos let the crema soak through quickly. Stacking warm tortillas in a folded towel while you plate everything keeps them pliable without absorbing moisture.

What spice ratio gives the best smoky flavor without too much heat?

Use 1 teaspoon smoked paprika, 1 teaspoon chili powder, and ½ teaspoon cumin - this ratio delivers deep smokiness from the paprika with moderate warmth from the chili powder. If you want zero heat, replace chili powder with an equal amount of sweet paprika and increase smoked paprika to 1½ tsp.

Air Fryer Cauliflower Tacos

Air Fryer Cauliflower Tacos

No ratings yet
Air fryer cauliflower tacos crisp florets with a smoky spice blend and crema for a quick vegetarian weeknight dinner. The air fryer produces browned edges and tender centers in about 16 minutes.
Print Recipe Pin Recipe
Prep Time 15 minutes mins
Cook Time 16 minutes mins
Total Time 31 minutes mins
Servings: 4 servings
Course: Dinner
Cuisine: Mexican-Inspired
Ingredients Equipment Method Notes

Ingredients
  

  • 1 lb cauliflower trimmed into 1-inch florets (about 12 oz after trimming)
  • 1.5 tablespoon olive oil
  • 1 teaspoon chili powder
  • 1 teaspoon smoked paprika
  • 0.5 teaspoon ground cumin
  • 0.5 teaspoon garlic powder
  • 0.5 teaspoon kosher salt
  • 0.25 teaspoon black pepper freshly ground
  • 8 corn tortillas 6-inch, warmed
  • 0.5 cup plain Greek yogurt or vegan yogurt
  • 1 tablespoon lime juice fresh
  • 1 teaspoon honey or agave for vegan
  • 1 cup red cabbage thinly sliced
  • 0.5 cup pickled red onion quick-pickle: 2 tablespoon vinegar + 1 teaspoon sugar + 4 tablespoon water
  • 0.25 cup cilantro chopped
  • 0.5 cup lime wedges

Equipment

  • Air fryer Basket-style or drawer; 3–5 quart capacity
  • Mixing bowl Large enough to toss florets
  • Sheet pan For warming tortillas or oven alternative

Method
 

  1. Preheat air fryer to 400°F for 3 minutes while you prepare cauliflower.
  2. Toss cauliflower florets with olive oil, chili powder, smoked paprika, cumin, garlic powder, salt, and pepper in a large bowl until evenly coated.
  3. Arrange florets in a single layer in the air fryer basket without overcrowding; cook at 400°F for 8 minutes.
  4. Shake the basket or flip florets and continue cooking for 6–8 minutes until edges are golden brown and a fork slides into the center with slight resistance.
  5. Warm corn tortillas in the air fryer 30–45 seconds at 375°F until slightly charred at the edges; keep wrapped in a clean towel.
  6. Mix Greek yogurt, lime juice, and honey in a small bowl to make crema; adjust lime or honey to taste.
  7. Assemble tacos with 2–3 florets per tortilla, top with cabbage, pickled red onion, cilantro, a drizzle of crema, and a lime wedge.

Notes

  • Cut florets to uniform 1-inch pieces for even browning.
  • Do not overcrowd the air fryer basket; work in batches for best crisp.

Tried this recipe?

Let us know how it was!

Air Fryer Apple Fritters

May 11, 2026

When you want something warm and sweet without turning on the oven, air fryer apple fritters deliver. Crisp edges and soft apple chunks in under 30 minutes with minimal cleanup.

Air Fryer Apple Fritters

The air fryer crisps the outside while keeping the inside moist. No deep frying, no splattering oil, no waiting for batches to drain on paper towels.

This works for weekend breakfast when you want something that feels special but doesn't require an hour of prep. Also good as a quick dessert when friends show up unannounced.

QUICK SUMMARY

Air fryer apple fritters give you golden crisp outsides with tender apple-studded insides in 25 minutes. The key is using firm apples like Granny Smith, dicing them small, and not overmixing the batter. Glaze while warm for a sticky-sweet finish.

⏱️Time Reality: 15 minutes prep, 10-12 minutes cooking, minimal hands-on work
🔑First Move: Dice apples into ¼-inch pieces and dry them thoroughly before mixing
⚠️Watch Out: Overmixing the batter creates dense fritters-stir only until just combined

Why This Recipe Works

High heat in a small space creates steam that puffs the fritters while crisping the outside. For a version that comes together quickly, homemade bread recipe uses similar timing with different flavors.

Quick Reference
⏱️
Prep Time
15 min
🔥
Cook Time
10-12 min
⏰
Total Time
25-27 min
🍽️
Servings
6-8 fritters
📊
Difficulty
Easy
🏷️
Category
Dessert
💡
Quick Tip
Dry apples to avoid soggy batter
🎯
Best For
Weeknight | Weekend brunch | Quick snack

What makes these work:

  • Small apple pieces cook through while the batter sets, preventing raw chunks in finished fritters
  • Preheating the air fryer basket creates immediate contact heat that starts crisping before steam builds
  • Light oil spray on both basket and fritters promotes browning without the greasy feel of deep frying
  • Baking powder creates lift in the confined space, giving you tender interiors instead of dense dough
  • Applying glaze to warm fritters lets it soak in slightly while still setting into a thin candy shell
Quick Tip
Pat diced apples with paper towels before mixing-excess moisture makes batter spread too thin and results in flat, soggy fritters instead of puffy rounds.

What You'll Need

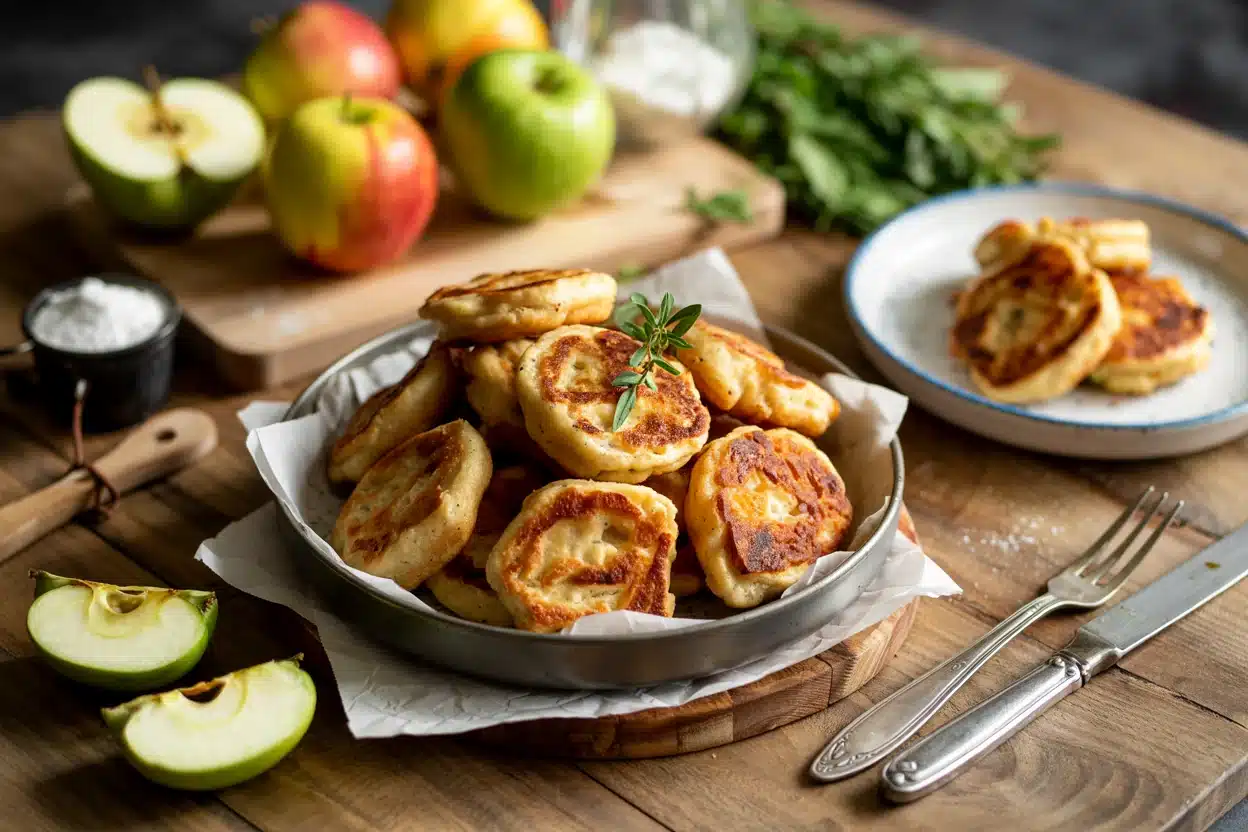
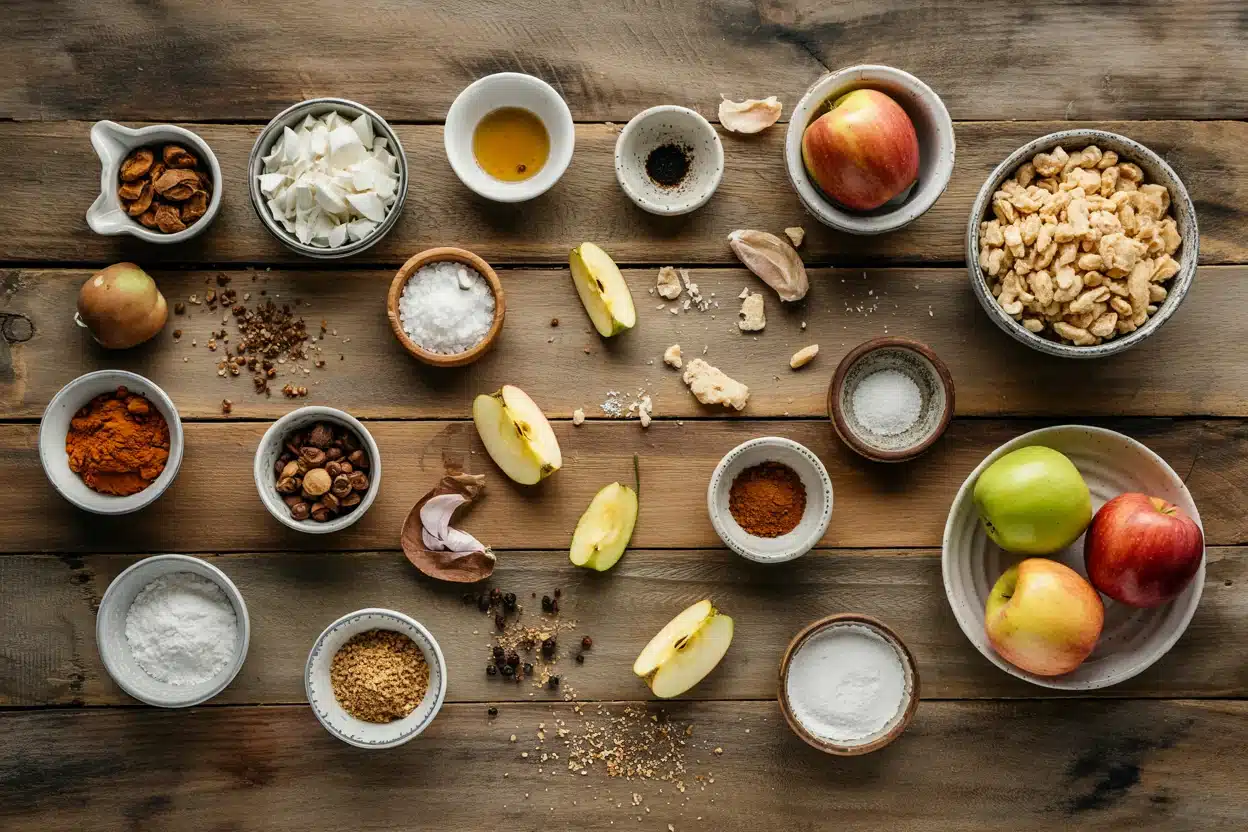
Air Fryer Apple Fritters - Air Fryer Apple Fritters

Firm apples hold their shape and provide tart contrast to the sweet batter. We keep a batch ready for nights like this-a simple meatballs side uses the air fryer with similar timing if you want variety.

🍎
Fruit
  • 2 medium apples (Granny Smith or Honeycrisp), diced ¼-inch
🫙
Dry Ingredients
  • 1½ cups all-purpose flour
  • ⅓ cup granulated sugar
  • 2 teaspoon baking powder
  • 1 teaspoon ground cinnamon
🥛
Wet Ingredients
  • ½ cup milk (dairy or oat milk)
  • 1 large egg
  • 1 teaspoon vanilla extract
🍯
Glaze
  • 1 cup powdered sugar
  • 2-3 tablespoon milk
  • Oil spray

Ingredient Details

  • Apples
    Granny Smith stays firm and adds tartness; Honeycrisp gives sweetness. Avoid Red Delicious-too soft and mushy after cooking.
  • All-Purpose Flour
    Creates structure without toughness. Gluten-free 1:1 flour works but may brown faster-check at 8 minutes.
  • Baking Powder
    Must be fresh (check expiration date). Old baking powder results in dense, flat fritters that don't rise.
  • Milk
    Whole milk gives richest flavor. Almond or oat milk work fine-no adjustment needed.
  • Egg
    Binds ingredients and adds structure. Flax egg (1 tablespoon flax + 3 tablespoon water, sit 5 minutes) works but produces slightly softer fritters.
  • Cinnamon
    Use ground, not sticks. Fresh cinnamon has stronger flavor-reduce to ¾ teaspoon if yours is less than 6 months old.
  • Oil Spray
    Prevents sticking and promotes browning. Melted butter works too but browns faster-reduce cook time by 1-2 minutes.

Ingredient Swaps

Pantry staples cover most variations without special shopping. Most people skip meatballs, but it balances the meal-this easy meatballs recipe comes together while these cook if you want a savory option later.

Four practical swaps:

  • All-purpose flour → Gluten-free 1:1 baking flour: Use same amount, watch closely after 8 minutes as it browns faster, texture slightly denser but still crisp
  • Granulated sugar → Maple syrup or honey: Use ¼ cup liquid sweetener, reduce milk to ⅓ cup, sweeter flavor with caramel notes
  • Milk → Almond or oat milk: Direct 1:1 swap, no recipe changes needed, slight nutty flavor with almond milk
  • Egg → Flax egg: Mix 1 tablespoon ground flax with 3 tablespoon water, let sit 5 minutes, binds slightly less so fritters are softer but still work

Fresh Diced Apples

Works for: firm texture, even moisture distribution, best crisp-tender contrast

Skip if: short on time or no fresh apples available

Frozen Thawed Apples

Works for: convenience, budget-friendly, readily available year-round

Skip if: want best texture-releases extra moisture, makes batter thinner, requires draining and extra flour (add 2 tbsp)

Instructions

Mixing takes 5 minutes, then the air fryer does the work. Rich mains need something to cut through, and roast does exactly that-for a version that comes together quickly, quick roast dish pairs well if you're making these for brunch.

  1. Preheat air fryer to 350°F for 3-5 minutes. Spray basket lightly with oil. Dice apples into ¼-inch pieces and pat completely dry with paper towels.

  2. Mix dry ingredients in medium bowl: flour, sugar, baking powder, cinnamon. Whisk wet ingredients separately: milk, egg, vanilla. Pour wet into dry and stir with fork until just combined-some lumps are fine, overmixing creates dense fritters.

  3. Fold in diced apples gently until coated with batter. Scoop ¼ cup portions of batter onto parchment circles or directly into greased basket, leaving 1 inch between each. Flatten slightly to ½-inch thick rounds. Spray tops lightly with oil.

  4. Air fry 10-12 minutes until golden brown on edges and firm to touch in center. Check at 8 minutes-if browning too fast, reduce temp to 325°F. Let cool on wire rack 5 minutes before glazing.

  5. Make glaze while fritters cool: whisk powdered sugar with 2 tablespoon milk until smooth and pourable. Add more milk by the teaspoon if too thick. Drizzle or dip warm fritters in glaze, let set 2-3 minutes before serving.

Golden Rule
Don't skip the cooling step before glazing-hot fritters cause glaze to melt off instead of setting into a sticky coating. Five minutes on a wire rack is enough.

What to Serve With It

These need something to balance the sweetness or add substance if you're serving them for breakfast. The chicken works best when it hits the table at the same time as the main-we keep a batch ready for nights like this, and homemade chicken recipe works if you want a savory follow-up.

Side Dish Prep Why It Works How to Serve
Scrambled Eggs Easy Protein balances sweet fritters, adds savory contrast for complete breakfast Soft scramble, season with salt and pepper, serve alongside fritters
Greek Yogurt Easy Tangy creaminess cuts sweetness, adds protein and makes fritters feel lighter Use plain full-fat yogurt, add drizzle of honey if desired
Fresh Fruit Salad Easy Light and fresh contrast to fried texture, adds vitamins and color to plate Mix berries, melon, grapes-serve chilled in separate bowl
Hot Coffee or Chai Easy Warm beverage enhances cinnamon spice notes and balances sweetness Brew strong coffee or chai tea, serve hot alongside fritters
Vanilla Ice Cream Easy Cold-hot contrast turns fritters into proper dessert, adds creamy richness Scoop onto warm fritters, let melt slightly before eating

Three ways to serve it:

  • Weekend brunch: Serve with scrambled eggs and fresh fruit salad for balanced sweet-savory breakfast spread
  • Quick dessert: Warm fritters topped with vanilla ice cream and caramel drizzle for 5-minute dessert
  • Afternoon snack: Plain with hot coffee or chai tea for simple cinnamon-spiced treat
Best Pick
For breakfast, pair with Greek yogurt and fresh berries-the tangy yogurt cuts the sweetness while protein keeps you full until lunch.

Store and Reheat

These lose crispness as they sit but reheating in the air fryer brings back most of the texture. The beef works best when it hits the table at the same time as the main-for a version that comes together quickly, something rich like beef is another option if you're making these ahead for a larger meal.

Method Time Best For
🔥 Air Fryer 3-5 min at 320°F Restoring crisp texture quickly
🔥 Oven 8-10 min at 350°F Reheating multiple fritters evenly
📦 Microwave 30-40 seconds When texture matters less than speed

For best results when storing:

  • Fridge storage: Keep in airtight container with paper towel on bottom to absorb moisture, lasts 3-4 days, store unglazed if possible
  • Freeze individually: Wrap each fritter in plastic wrap then foil, freeze up to 1 month, thaw overnight in fridge before reheating
  • Glaze after reheating: If storing for later, skip glaze until after reheating-fresh glaze tastes better and sets properly on warm fritters
  • Don't stack warm fritters: Let cool completely on wire rack before stacking in container-traps steam and makes them soggy
  • Reheat from frozen: Add 2-3 minutes to air fryer or oven time, no need to thaw first for quick heating

Frequently Asked Questions

Can I use frozen apples for air fryer apple fritters?

Yes, but thaw completely and drain excess liquid first. Frozen apples release more moisture, making batter thinner and fritters denser-pat dry thoroughly and add 2 tablespoons extra flour to compensate.

How should I store leftover air fryer apple fritters?

Store in airtight container in fridge for 3-4 days, with paper towel on bottom to absorb moisture. For longer storage, wrap individually in plastic wrap and foil, freeze up to 1 month-reheat in air fryer at 320°F for 3-5 minutes.

What are clear signs that apple fritters are fully cooked?

Golden brown edges, firm center when touched lightly, and slight puffing indicate doneness. If center feels soft or batter looks wet, cook 2-3 more minutes-internal temp should reach 190-200°F if using thermometer.

Why are my apple fritters soggy and how do I fix it?

Excess moisture from undried apples or overmixed batter causes sogginess. Fix by patting apples completely dry before mixing and stirring batter only until just combined-if already cooked, return to air fryer for 2-3 minutes uncovered at 350°F to crisp.

Can I double this recipe for a larger batch in the air fryer?

Double the ingredients but cook in batches-overcrowding prevents proper air circulation and results in uneven cooking. Each batch takes 10-12 minutes, keep finished fritters warm in 200°F oven while cooking remaining batches.

Air Fryer Apple Fritters

Air Fryer Apple Fritters

No ratings yet
Air Fryer Apple Fritters deliver warm, sweet fritters with crisp outsides and tender apple-studded insides in under 30 minutes. The air fryer crisps without deep frying, while the glaze adds a sticky-sweet finish.
Print Recipe Pin Recipe
Prep Time 15 minutes mins
Cook Time 12 minutes mins
Total Time 27 minutes mins
Servings: 7 fritters
Course: Breakfast, Dessert, Snack
Cuisine: American
Ingredients Equipment Method Notes

Ingredients
  

  • 2 medium apple diced ¼-inch, Granny Smith or Honeycrisp
  • 1.5 cups all-purpose flour
  • 0.33 cup granulated sugar
  • 2 teaspoon baking powder
  • 1 teaspoon ground cinnamon
  • 0.5 cup milk dairy or oat milk
  • 1 large egg
  • 1 teaspoon vanilla extract
  • 1 cup powdered sugar for glaze
  • 2-3 tablespoon milk for glaze, add gradually for desired thickness
  • oil spray to grease air fryer basket and spray fritters

Equipment

  • Air fryer Used to cook fritters quickly with crisp texture
  • Mixing bowls For combining dry and wet ingredients separately
  • Whisk To whisk wet ingredients
  • Fork To gently stir batter
  • Paper towels To thoroughly dry diced apples before mixing
  • Wire rack To cool fritters before glazing

Method
 

  1. Preheat air fryer to 350°F for 3 to 5 minutes. Lightly spray the air fryer basket with oil. Dice apples into ¼-inch pieces and pat completely dry with paper towels.
    2 medium apple, oil spray
  2. In a medium bowl, mix all-purpose flour, granulated sugar, baking powder, and ground cinnamon together.
    1.5 cups all-purpose flour, 0.33 cup granulated sugar, 2 tsp baking powder, 1 tsp ground cinnamon
  3. In a separate bowl, whisk together milk, egg, and vanilla extract until combined.
    0.5 cup milk, 1 large egg, 1 tsp vanilla extract
  4. Pour wet ingredients into dry ingredients and stir gently with a fork until just combined. Some lumps are fine; avoid overmixing to prevent dense fritters.
  5. Fold in diced apples gently until coated. Scoop ¼ cup portions of batter onto parchment circles or directly into the greased air fryer basket, leaving 1 inch between each. Flatten slightly to about ½-inch thick rounds. Spray tops lightly with oil.
    2 medium apple, oil spray
  6. Air fry for 10 to 12 minutes until edges are golden brown and center feels firm to touch. Check at 8 minutes; if browning too fast, reduce temperature to 325°F. Remove and let cool on wire rack for 5 minutes before glazing.
  7. While fritters cool, whisk powdered sugar with 2 tablespoons milk until smooth and pourable. Add more milk teaspoon by teaspoon if needed. Drizzle or dip warm fritters in glaze. Let set 2 to 3 minutes before serving.
    1 cup powdered sugar, 2-3 tbsp milk

Notes

  • Pat diced apples completely dry to prevent soggy batter.
  • Stir batter only until just combined to avoid dense fritters.
  • Let fritters cool on a wire rack before glazing to ensure glaze sets properly.

Tried this recipe?

Let us know how it was!

Air Fryer Egg Rolls

May 11, 2026

Crispy egg rolls with golden-brown wrappers and a savory filling that doesn't leak or turn soggy. The air fryer crisps the wrapper evenly without deep frying, and the filling stays juicy without excess grease.

Air Fryer Egg Rolls

The method works because you control the moisture before wrapping. Cook the filling until most liquid evaporates, wrap tightly, and spray oil on all sides for even browning.

This is what you make for quick appetizers, meal prep, or weeknight snacks when you want something that tastes fried but skips the cleanup.

QUICK SUMMARY

Air fryer egg rolls crisp up in 10-12 minutes at 400°F with no deep frying. Cook the filling until dry, wrap tightly to prevent leaks, and spray oil on all sides for golden, crunchy wrappers. The filling stays moist while the wrapper crisps evenly.

⏱️Time: 25 minutes total - 15 min prep, 10-12 min air frying
🔧First move: Sauté filling 5-7 min until moisture evaporates before wrapping
⚠️Watch out: Excess moisture causes soggy wrappers - drain filling and pat dry before rolling

Why This Recipe Works

High heat in the air fryer crisps the wrapper without submerging it in oil. The filling gets fully cooked before wrapping, so the air fryer only needs to brown the outside. For a protein-packed main that pairs well with this, try this juicy chicken that works on busy nights when you need something ready fast.

Quick Reference
⏱️
Prep Time
15 min
🔥
Cook Time
10-12 min
⏰
Total Time
25-27 min
🍽️
Servings
6-8 egg rolls
📊
Difficulty
Easy
🏷️
Category
Appetizer
💡
Quick Tip
Spray egg rolls lightly for even crispiness
🎯
Best For
Weeknight | Meal prep | Entertaining

Five things that make this work:

  • Dry filling prevents soggy wrappers - cook meat and vegetables 5-7 minutes until most moisture evaporates before wrapping
  • Oil spray creates even browning - spray each egg roll twice before air frying for crisp, golden shells without grease
  • Tight wrapping stops leaks - roll wrappers snugly with proper folding technique to keep filling inside during cooking
  • Flipping halfway ensures uniform color - turn egg rolls at 5-6 minutes so both sides crisp evenly
  • Space between rolls allows airflow - place egg rolls 1 inch apart in basket for hot air circulation and consistent crisping
Quick Tip
Cover unused wrappers with a damp towel during assembly to prevent drying and cracking.

What You'll Need

Air Fryer Egg Rolls - Air Fryer Egg Rolls

Stock your pantry with egg roll wrappers, ground pork or chicken, shredded cabbage, soy sauce, and oil spray. Most grocery stores carry egg roll wrappers in the refrigerated or freezer section near produce. If you want variety in your appetizer spread, simple homemade rolls work well alongside this recipe for different textures and flavors.

🍗
Protein
  • 1 lb ground pork or chicken
🥬
Vegetables
  • 2 cups shredded cabbage
  • 1 carrot, shredded
  • 2 green onions, chopped
🧄
Aromatics
  • 2 cloves garlic, minced
  • 1 teaspoon fresh ginger, grated
🫙
Wrappers & Oil
  • 8 egg roll wrappers
  • 2 tablespoon soy sauce
  • Oil spray

Ingredient Details

  • Egg roll wrappers
    Thicker than wonton wrappers; use the square variety (6-7 inches) for best results
  • Ground pork or chicken
    Pork adds traditional flavor and fat; chicken is leaner but still juicy when cooked properly
  • Cabbage
    Green or napa cabbage work; shred finely and squeeze out excess moisture before mixing
  • Soy sauce
    Low-sodium soy sauce prevents over-salting; tamari works for gluten-free needs
  • Oil spray
    Vegetable or olive oil spray both work; apply light, even coats for crispness without grease
  • Fresh ginger
    Grate on a microplane for smooth texture; use ¼ teaspoon ground ginger if fresh unavailable
  • Carrot
    Adds color and slight sweetness; shred on the large holes of a box grater

Ingredient Swaps

You can adjust protein, wrappers, and seasonings based on what's in your fridge or dietary needs. Most swaps work as long as you control moisture in the filling. For another air fryer option with different textures, a roasted pakoras recipe delivers crispy exteriors with vegetable filling and works on the same timeline.

Four swaps that work:

  • Egg roll wrappers → wonton wrappers - smaller size, thinner texture, cooks 2 minutes faster but tears easier during wrapping
  • Ground pork → ground turkey or finely chopped mushrooms - turkey is leaner and milder; mushrooms create vegetarian option with less moisture
  • Soy sauce → tamari or coconut aminos - tamari keeps similar saltiness for gluten-free needs; coconut aminos add slight sweetness
  • Fresh ginger → ¼ teaspoon ground ginger - less pungent but still adds warmth; use sparingly to avoid powdery texture

Wonton Wrappers

Works for: Smaller portions, faster cooking, lighter texture

Skip if: You want traditional size or worry about tearing during assembly

Ground Turkey

Works for: Leaner option, mild flavor that takes seasonings well

Skip if: You prefer richer, fattier filling with traditional pork taste

Mushrooms (vegetarian)

Works for: Meatless version, lower fat, umami-rich flavor

Skip if: You need higher protein or prefer meat-based filling

Instructions

The filling cooks first in a skillet, then you wrap and air fry. Fully cooking the filling before wrapping means the air fryer only needs to crisp the wrapper. Most people skip something flaky like salmon when planning appetizer spreads, but it adds contrast and works well for parties that need variety.

  1. Cook the filling: Heat a skillet over medium-high, add ground pork or chicken, and sauté 5-7 minutes until browned and moisture evaporates. Stir in garlic, ginger, cabbage, carrot, green onions, and soy sauce. Cook 3-4 minutes until vegetables soften and liquid cooks off. Let cool 5 minutes.

  2. Wrap the egg rolls: Place one wrapper on a clean surface with a corner pointing toward you. Spoon 2-3 tablespoons filling onto the center. Fold the bottom corner over filling, tuck sides in, and roll tightly toward the top corner. Seal the edge with a dab of water. Repeat with remaining wrappers.

  3. Prep for air frying: Spray each egg roll lightly with oil on all sides. Place egg rolls seam-side down in air fryer basket, spaced 1 inch apart. Don't overcrowd or they won't crisp evenly.

  4. Air fry: Set air fryer to 400°F and cook 10-12 minutes. Flip egg rolls at 5-6 minutes for even browning. Check at 10 minutes - wrappers should be golden-brown with no pale dough areas.

  5. Cool and serve: Remove egg rolls from basket and let rest 2-3 minutes before serving. The filling will be very hot. Serve with sweet chili sauce, soy sauce, or hoisin for dipping.

Watch Out
Don't overfill the wrappers - excess filling causes bursting during cooking and uneven crisping. Stick to 2-3 tablespoons per wrapper.

What to Serve With It

Egg rolls work as appetizers or part of a larger meal spread. They need something fresh or acidic to balance the richness. For more steak bites meal planning ideas that work with finger foods like this, pair them with lighter sides that add color and texture contrast.

Side Dish Prep Why It Works How to Serve
Steamed White Rice Easy Neutral base soaks up dipping sauce and balances savory filling Serve warm in a bowl alongside egg rolls
Cucumber Salad Easy Crisp, cool, acidic - cuts through richness and refreshes palate Chill before serving; toss with rice vinegar
Stir-Fried Green Beans Easy Quick vegetable side with garlic adds texture and color Serve hot; toss with soy sauce and sesame oil
Asian Slaw Medium Crunchy, tangy, colorful - adds variety for entertaining Make ahead and chill; toss before serving
Edamame Pods Easy Finger-friendly protein side that's light and easy to prep Sprinkle with sea salt; serve warm or chilled

Three ways to serve it:

  • Appetizer spread: Arrange egg rolls on a platter with cucumber salad, edamame, and small bowls of sweet chili sauce and soy sauce for dipping
  • Weeknight meal: Serve 2-3 egg rolls per person with steamed rice and stir-fried green beans for a quick dinner
  • Party finger food: Cut egg rolls in half diagonally, arrange on a tray, and serve with multiple dipping sauces for variety
Best Pick
Sweet chili sauce adds the right balance of sweet and spicy without overpowering the filling. Keep it on the side so guests control how much they want.

Store and Reheat

Air fryer egg rolls keep 3-4 days in the fridge and reheat well without turning soggy. Store them in a single layer in an airtight container to prevent sticking. For another appetizer that reheats just as easily, simple homemade pork works as a make-ahead option when you need something ready to grab and heat.

Method Time Best For
🔥 Air Fryer 5-7 min at 375°F Restoring crispness without drying out
🔥 Oven 10 min at 350°F Reheating large batches at once
📦 Microwave 30-40 sec Quick warming when crispness doesn't matter

For best results when storing:

  • Cool completely before storing - hot egg rolls create condensation in containers, which makes wrappers soggy
  • Single layer prevents sticking - place parchment paper between layers if stacking in containers
  • Freeze uncooked for make-ahead - wrap tightly and freeze up to 1 month; air fry directly from frozen, adding 3-4 minutes to cook time
  • Reheat in air fryer for crispness - skip the microwave if you want the wrapper to stay crunchy
  • Store filling separately if meal prepping - cook filling, chill, and wrap fresh wrappers later for best texture

Frequently Asked Questions

Can I make air fryer egg rolls ahead and freeze them?

Yes - wrap egg rolls tightly, freeze in a single layer on a baking sheet for 1 hour, then transfer to a freezer bag for up to 1 month. Air fry directly from frozen at 400°F for 13-15 minutes, flipping halfway.

How do I reheat air fryer egg rolls without losing crispiness?

Use the air fryer at 375°F for 5-7 minutes, flipping once. The hot circulating air restores the crisp wrapper without drying out the filling.

What temperature and time for cooking air fryer egg rolls?

Set the air fryer to 400°F and cook for 10-12 minutes, flipping at 5-6 minutes. Check for golden-brown wrappers with no pale dough areas.

Why are my egg rolls soggy after air frying?

Excess moisture in the filling or insufficient oil spray causes sogginess. Cook the filling until most liquid evaporates, pat dry before wrapping, and spray oil evenly on all sides before air frying.

How can I scale this recipe for larger batches?

Cook filling in larger quantities, wrap all egg rolls at once, and freeze extras before cooking. Air fry in batches without overcrowding - 4-6 egg rolls per batch depending on basket size.

Air Fryer Egg Rolls

Air Fryer Egg Rolls

No ratings yet
Crispy air fryer egg rolls feature golden, evenly browned wrappers and a savory filling cooked until dry to prevent sogginess. This method enables a fried taste without deep frying, making it a quick appetizer or snack option that stays juicy inside and crunchy outside.
Print Recipe Pin Recipe
Prep Time 15 minutes mins
Cook Time 12 minutes mins
Total Time 27 minutes mins
Servings: 8 egg rolls
Course: Appetizer
Cuisine: Asian-Inspired
Ingredients Method Notes

Ingredients
  

  • 1 lb ground pork or chicken
  • 2 cups cabbage shredded, green or napa
  • 1 carrot shredded
  • 2 green onions chopped
  • 2 cloves garlic minced
  • 1 teaspoon fresh ginger grated
  • 8 egg roll wrappers thicker, square 6-7 inch size
  • 2 tablespoon soy sauce low-sodium recommended
  • oil spray vegetable or olive oil spray

Method
 

  1. Heat a skillet over medium-high heat. Add ground pork or chicken and sauté 5-7 minutes until browned and most moisture evaporates. Stir in garlic, ginger, cabbage, carrot, green onions, and soy sauce. Cook an additional 3-4 minutes until vegetables soften and liquid cooks off. Remove from heat and let cool for 5 minutes.
    1 lb ground pork, 2 cloves garlic, 1 tsp fresh ginger, 2 cups cabbage, 1 carrot, 2 green onions, 2 tbsp soy sauce
  2. Place one egg roll wrapper on a clean surface with a corner pointing toward you. Spoon 2-3 tablespoons of filling onto the center. Fold the bottom corner over the filling, tuck in the sides, and roll tightly toward the top corner. Seal the edge with a dab of water. Repeat with remaining wrappers.
    8 egg roll wrappers
  3. Spray each egg roll lightly with oil on all sides. Place the egg rolls seam-side down in the air fryer basket, spaced about 1 inch apart to allow airflow. Do not overcrowd the basket to ensure even crisping.
    oil spray
  4. Set air fryer to 400°F and cook the egg rolls for 10-12 minutes. Flip the egg rolls at 5-6 minutes to ensure even browning. Check for golden-brown wrappers with no pale dough spots before removing.
  5. Remove egg rolls from the basket and let them rest for 2-3 minutes before serving. The filling will be hot. Serve with sweet chili sauce, soy sauce, or hoisin sauce for dipping.

Notes

  • Cook the filling until most liquid evaporates to prevent soggy wrappers.
  • Spray oil evenly on all sides of the egg rolls before air frying for crispy, golden wrappers.
  • Wrap egg rolls tightly and seal edges well to avoid leaking during cooking.

Tried this recipe?

Let us know how it was!

Air Fryer Tofu

May 11, 2026

When you need a high-protein side that works for meal prep or a quick weeknight dinner, air fryer tofu delivers. Crispy edges, tender centers, and enough versatility to pair with rice bowls, stir-fries, or salads.

Air Fryer Tofu

Press the tofu well and the air fryer handles the rest. No flipping multiple times or babysitting a skillet full of oil.

Perfect for busy weeks when you want something that feels intentional but doesn't require constant attention.

QUICK SUMMARY

Air fryer tofu uses firm tofu, cornstarch coating, and high heat to create crispy edges without deep frying. Press the tofu for 15 minutes to remove moisture - that's what separates soggy cubes from crispy ones. The air fryer crisps all sides in 15-20 minutes with one halfway toss.

⏱️Time Reality: 30 minutes start to finish, including 15-minute press time
🔑Key Move: Coat tofu evenly with cornstarch after pressing for uniform crispiness
⚠️Watch Out: Overcrowding the basket creates steam - leave 1-inch space between pieces

Why This Recipe Works

Pressing tofu removes excess water so the cornstarch coating can crisp instead of turning gummy. High heat at 375°F sets the exterior fast while keeping the interior tender. For a version that comes together quickly, this easy chicken recipe uses the same air fryer method with minimal hands-on time.

Quick Reference
⏱️
Prep Time
15 min
🔥
Cook Time
15-20 min
⏰
Total Time
30-35 min
🍽️
Servings
4 servings
📊
Difficulty
Easy
🏷️
Category
Main Dish | Side | Snack
💡
Quick Tip
Press tofu well for maximum crispiness
🎯
Best For
Weeknight | Meal prep | Entertaining

Why it works:

  • Firm or extra-firm tofu holds its shape at high heat and develops a crispy crust
  • Cornstarch creates a light coating that crisps without the greasiness of deep frying
  • Pressing removes moisture that would otherwise steam the tofu and prevent browning
  • 375°F is hot enough to crisp the exterior without drying out the interior
  • Tossing halfway through ensures even browning on all sides
Quick Tip
Cut tofu into 1-inch cubes - smaller pieces overcook, larger pieces stay pale in the center.

What You'll Need

Shop for firm or extra-firm tofu in the refrigerated section near produce. The cornstarch coating works better than flour for crispiness. For a classic pies dish that uses similar prep timing, the method stays the same.

🥡
Protein Base
  • 14-16 oz firm or extra-firm tofu
🌾
Coating
  • 1-2 tablespoon cornstarch or arrowroot
  • 1 tablespoon neutral oil (canola, avocado)
🥢
Marinade
  • 2 tablespoon soy sauce or tamari
  • 1 teaspoon sesame oil (optional)
  • 1 teaspoon garlic powder
  • ½ teaspoon ginger powder (optional)
🧄
Finishing
  • Green onions for garnish
  • Sriracha or chili flakes (optional)
  • Lemon or lime juice (optional)

Ingredient Details

  • Firm or Extra-Firm Tofu
    Look for blocks with minimal liquid in the package - less moisture means less pressing time.
  • Cornstarch
    Creates a lighter, crispier coating than flour - arrowroot works the same way if you're out.
  • Neutral Oil
    Use avocado, canola, or sunflower oil - anything with a high smoke point that won't burn at 375°F.
  • Soy Sauce or Tamari
    Tamari keeps it gluten-free - use low-sodium versions if you're watching salt intake.
  • Garlic Powder
    Fresh minced garlic burns easily in the air fryer - stick with powder for even flavor.
  • Sesame Oil
    Drizzle after cooking for nutty flavor - adding it before frying makes it smoke.
  • Green Onions
    Slice thin and add after cooking - they wilt fast and add fresh crunch.

Ingredient Swaps

Four swaps that work:

  • Firm tofu → extra-firm tofu: Slightly firmer texture, same cook time - press it the same way
  • Cornstarch → arrowroot powder: Same crispiness, possibly lighter coating - use 1:1 ratio
  • Soy sauce → tamari: Gluten-free with identical umami flavor - swap directly
  • Neutral oil → avocado or sunflower oil: Similar smoke point, no flavor change - use same amount

Most people skip variations, but swapping the marinade changes the meal. For a simple meatballs side that uses similar flavor-building timing, the approach stays consistent.

Instead OfUseRatio
Wet marinade (soy sauce + oil)Dry rub (garlic powder + paprika + salt)2 tablespoon dry rub per 14 oz tofu
Garlic powderMinced fresh garlic1 teaspoon powder = 2 cloves minced (watch for burning)
Sesame oil drizzleOlive oil drizzle1:1 — different flavor but still rich
Lemon juiceRice vinegar1:1 — similar tang, slightly sweeter

Instructions

Total cook time runs 15-20 minutes with one halfway toss. The air fryer crisps faster than oven roasting and uses less oil than pan-frying. For juicy chicken side dish timing that works on the same schedule, the method overlaps.

  1. Press the tofu: Wrap tofu block in clean kitchen towel or paper towels, place on plate, set 5-lb weight (cast iron skillet, heavy pot, cans) on top. Press 15-20 minutes to remove moisture. Pat dry after pressing.

  2. Cut and marinate: Slice pressed tofu into 1-inch cubes. Toss in bowl with soy sauce, garlic powder, ginger powder, and sesame oil. Let sit 15 minutes for flavor absorption. Drain excess marinade before coating.

  3. Coat with cornstarch: Add cornstarch to tofu cubes in bowl. Toss until evenly coated with no clumps. Shake off excess starch - too much creates gummy spots.

  4. Air fry: Preheat air fryer to 375°F for 3 minutes. Arrange tofu cubes in single layer with 1-inch space between pieces. Lightly spray with neutral oil. Air fry 10 minutes, shake basket or flip pieces, then cook 5-10 minutes more until golden brown with crispy edges.

  5. Finish and serve: Remove tofu when edges are golden and surface feels firm. Drizzle with sesame oil if using. Garnish with sliced green onions and chili flakes. Serve immediately for maximum crispiness or cool for meal prep.

Golden Rule
Don't skip the press - wet tofu steams instead of crisps, no matter how hot the air fryer runs.

What to Serve With It

Air fryer tofu works as a protein add-in for rice bowls, salads, or grain dishes that need substance without heaviness. The crispy texture balances soft starches like jasmine rice or quinoa. For rich beef dish planning that requires similar side-dish timing, the approach stays flexible.

Side DishPrepWhy It WorksHow to Serve
Steamed jasmine riceEasyNeutral base soaks up any leftover marinadeServe tofu over rice with drizzle of soy sauce
Stir-fried mixed vegetablesEasyAdds crunch and color contrastToss tofu with hot vegetables in same bowl
Simple green saladEasyLight, fresh contrast with fried textureServe warm tofu on top of cold greens
Sautéed bok choyEasyMild bitterness balances savory tofuPlate tofu alongside wilted greens
Asian slaw with sesame dressingMediumCrunchy, tangy contrast to crispy tofuServe tofu on bed of slaw for texture layers

Three ways to serve it:

  • Rice bowl: Layer tofu over jasmine rice with sautéed vegetables, drizzle with soy-ginger sauce
  • Salad topper: Serve warm tofu on mixed greens with cucumber, shredded carrots, sesame dressing
  • Snack plate: Arrange tofu cubes with sweet chili sauce or peanut dipping sauce for appetizer
Best Pick
Steamed jasmine rice soaks up any leftover marinade and balances the crispy texture without competing.

Store and Reheat

Air fryer tofu keeps 3-4 days in the fridge but loses crispiness after the first day. Reheat in the air fryer instead of the microwave to restore the crust. Store in shallow airtight container to prevent sogginess from condensation. For homemade pork recipe leftovers that use similar reheating timing, the method stays the same.

MethodTimeBest For
🔥 Air Fryer5-7 min at 350°FRestoring crispy texture - best option
🍳 Oven10 min at 350°FLarger portions, even reheating
📦 Microwave1-2 min on highQuick reheating when texture doesn't matter

For best results when storing:

  • Cool tofu completely before refrigerating to prevent condensation
  • Store in shallow container with paper towel underneath to absorb moisture
  • Keep sauce or garnishes separate until serving to maintain crispiness
  • Freeze cooked tofu up to 1 month - texture turns slightly chewier after thawing
  • Reheat from frozen by adding 3-5 minutes to air fryer time

Frequently Asked Questions

Can I use silken tofu instead of firm for air fryer tofu?

No - silken tofu falls apart at high heat and won't crisp. Stick with firm or extra-firm tofu for air frying.

How do I store and reheat leftover air fryer tofu?

Store in airtight container in fridge for 3-4 days. Reheat in air fryer at 350°F for 5-7 minutes to restore crispiness - microwave makes it soggy.

What is the best way to tell when air fryer tofu is done?

Look for golden-brown edges and firm surface texture. The tofu should feel crispy when you touch it and pull away from the basket easily.

Why does my air fryer tofu turn out soggy and how to fix it?

Soggy tofu means you didn't press it long enough or the basket was overcrowded. Press for full 15 minutes and leave 1-inch space between pieces - return to air fryer for 3-5 minutes if it's already cooked but soft.

How can I scale this recipe for larger batches?

Work in batches - don't overcrowd the basket or tofu steams instead of crisps. Cook one layer at a time and keep finished batches warm in 200°F oven while you finish the rest.

Air Fryer Tofu

Air Fryer Tofu

No ratings yet
Air fryer tofu delivers crispy edges and tender centers with minimal hands-on time. Pressing the tofu removes moisture for a perfect cornstarch coating that crisps in the air fryer at high heat. Ideal for quick meals, meal prep, or adding protein to bowls and salads.
Print Recipe Pin Recipe
Prep Time 30 minutes mins
Cook Time 20 minutes mins
Total Time 50 minutes mins
Servings: 4 servings
Course: Main Dish, Side, Snack
Cuisine: Asian-Inspired, Vegan
Ingredients Equipment Method Notes

Ingredients
  

  • 14 oz firm or extra-firm tofu pressed and cut into 1-inch cubes
  • 1-2 tablespoon cornstarch or arrowroot powder
  • 1 tablespoon neutral oil canola or avocado oil, for spraying and coating
  • 2 tablespoon soy sauce or tamari for gluten-free
  • 1 teaspoon sesame oil optional, added after cooking
  • 1 teaspoon garlic powder
  • 0.5 teaspoon ginger powder optional
  • green onions thinly sliced for garnish
  • sriracha or chili flakes optional for garnish
  • lemon or lime juice optional for finishing

Equipment

  • Air fryer Used to crisp tofu with minimal oil
  • Kitchen towel or paper towels For pressing tofu to remove moisture
  • Mixing bowl For marinating and coating tofu

Method
 

  1. Wrap the tofu block in a clean kitchen towel or paper towels and place on a plate. Set a 5-lb weight on top (like a heavy skillet or cans) and press for 15-20 minutes to remove moisture. Pat dry after pressing.
    14 oz firm or extra-firm tofu
  2. Slice the pressed tofu into 1-inch cubes. Toss in a bowl with soy sauce, garlic powder, ginger powder, and sesame oil if using. Let sit for 15 minutes to absorb flavor. Drain excess marinade before coating.
    14 oz firm or extra-firm tofu, 2 tbsp soy sauce, 1 tsp sesame oil, 1 tsp garlic powder, 0.5 tsp ginger powder
  3. Add cornstarch to the tofu cubes in the bowl. Toss until evenly coated and no clumps remain. Shake off excess starch to avoid gummy spots.
    1-2 tbsp cornstarch
  4. Preheat the air fryer to 375°F (190°C) for 3 minutes.
  5. Arrange tofu cubes in a single layer in the air fryer basket with at least 1-inch space between pieces. Lightly spray with neutral oil. Air fry for 10 minutes, then shake basket or flip pieces. Cook another 5-10 minutes until golden brown with crispy edges.
    1 tbsp neutral oil, 14 oz firm or extra-firm tofu
  6. Remove tofu once edges are golden and surface feels firm. Drizzle with sesame oil if desired. Garnish with sliced green onions and chili flakes. Serve immediately for best crispiness or cool for meal prep.
    1 tsp sesame oil, green onions, sriracha or chili flakes, lemon or lime juice

Notes

  • Press tofu well to remove moisture for crispiness.
  • Leave 1-inch space between tofu pieces to avoid steaming.
  • Reheat leftovers in air fryer to restore crisp texture.

Tried this recipe?

Let us know how it was!

Air Fryer Tater Tots

May 11, 2026

Frozen tater tots cooked at 400°F in an air fryer get golden and crispy in 15 minutes. The circulating heat crisps every side without flipping halfway through.

Air Fryer Tater Tots

You need one layer in the basket and a light oil spray. Skip the overcrowding and they'll cook evenly.

This works for quick weeknight sides when you want something crunchy that doesn't require babysitting.

QUICK SUMMARY

Air fryer tater tots cook at 400°F for 15-20 minutes until golden brown and crispy. Shake the basket halfway through for even browning. Light oil coating prevents sticking without making them greasy.

⏱️Time Reality: 20 minutes total, shake basket at 10-minute mark
🔥Key Move: Preheat air fryer 3 minutes before adding tots
⚠️Watch Out: Overcrowding makes them soggy - cook 6 cups max per batch

Why This Recipe Works

High heat and constant air circulation crisp the outside while keeping the inside tender. Most people skip chicken, but it balances the meal. For a version that comes together quickly, this easy chicken recipe uses similar air fryer timing.

Quick Reference
⏱️
Prep Time
2 min
🔥
Cook Time
15-20 min
⏰
Total Time
20-25 min
🍽️
Servings
4 servings
📊
Difficulty
Easy
🏷️
Category
Side | Appetizer
💡
Quick Tip
Preheat air fryer for crispiness
🎯
Best For
Weeknight | Meal prep | Entertaining

Here's what makes them crispy:

  • Preheating the air fryer creates instant heat that starts crisping the exterior before the inside overcooks
  • Light oil coating helps browning and prevents sticking to the basket without adding grease
  • Shaking at 10 minutes exposes all sides to direct heat for uniform golden edges
  • Single-layer spacing lets hot air circulate around each tot instead of trapping steam
  • Seasoning after cooking keeps salt and spices from sliding off or burning during air frying
Best Pick
Toss tots with 1 teaspoon oil per 2 cups before cooking - enough to crisp without smoking

What You'll Need

Air Fryer Tater Tots - Air Fryer Tater Tots

Buy frozen tater tots and keep vegetable oil on hand. The shrimp works best when it hits the table at the same time as the main. For a version that comes together quickly, flaky homemade shrimp recipe takes the same 20 minutes start to finish.

🥔
Frozen Base
  • Frozen tater tots (6 cups)
🫙
Cooking Fat
  • Vegetable or canola oil (1 teaspoon per 2 cups)
  • Cooking spray (optional swap)
🌶️
Seasonings
  • Salt (½ tsp)
  • Black pepper (¼ tsp)
  • Paprika (¼ tsp)
  • Garlic powder (¼ tsp, optional)
🧀
Optional Topping
  • Parmesan cheese (2 tbsp, grated)

Ingredient Details

  • Frozen tater tots
    Use straight from freezer - thawing makes them soggy and uneven
  • Vegetable oil
    Light coating prevents sticking; excess oil causes smoke and greasiness
  • Salt
    Add after cooking while tots are hot so it sticks to the surface
  • Paprika
    Adds color and mild smoky flavor without overpowering the tots
  • Garlic powder
    Optional boost; swap with onion powder for different savory depth
  • Parmesan cheese
    Sprinkle immediately after cooking for best adhesion and melting
  • Cooking spray
    Lower-fat alternative but may reduce final crispiness slightly

Ingredient Swaps

Frozen tots work best but sweet potato versions add different flavor. Breast adds the contrast this plate needs, but timing matters. For a version that comes together quickly, simple breast side dish cooks at the same temperature with similar texture.

Common swaps that work:

  • Olive oil instead of vegetable oil: Use light olive oil for higher smoke point - adds mild flavor but may smoke if basket gets too hot
  • Sweet potato tots instead of regular: Cook 2-3 minutes less at 400°F - sweeter flavor, softer texture when done
  • Smoked paprika instead of regular paprika: Same amount - deeper smoky flavor without extra heat
  • Nutritional yeast instead of parmesan: Use 3 tablespoons - savory umami flavor, dairy-free, less texture on top

Light Olive Oil

Works for: Higher smoke point than regular olive oil, mild flavor addition

Skip if: You want neutral taste or cooking above 425°F

Cooking Spray

Works for: Lower fat content, convenient application, no measuring

Skip if: You want maximum crispiness or richer flavor

Sweet Potato Tots

Works for: Sweeter flavor profile, more nutrients, different color

Skip if: You want traditional texture or consistent cook times

Instructions

Start to finish takes 20 minutes with one shake halfway through. A good chicken can make or break the plate. For a version that comes together quickly, this simple chicken uses the same air fryer method with similar timing.

  1. Preheat air fryer to 400°F for 3 minutes while you prep the tots. This creates immediate heat contact for faster crisping.

  2. Toss frozen tots with 1 teaspoon oil per 2 cups in a bowl until lightly coated. Skip the thawing step - frozen tots cook more evenly.

  3. Arrange in single layer in air fryer basket without overlapping. Cook 6 cups maximum per batch to avoid steam buildup that makes them soggy.

  4. Cook 10 minutes, then shake basket vigorously to flip tots. Continue cooking 5-10 minutes until golden brown and crispy on edges.

  5. Season immediately after removing from basket while hot. Toss with salt, pepper, paprika, and optional garlic powder or parmesan.

Golden Rule
Check at 15 minutes - tots should be golden brown and firm to touch, not pale or soft

What to Serve With It

Tater tots fill the crispy gap when your main dish is soft or saucy. Rich mains need something to cut through, and chicken does exactly that. If you're making healthy veggie main dishes, add tater tots for texture contrast and kid-friendly appeal.

Side Dish Prep Why It Works How to Serve
Grilled burgers Easy Classic pairing - crispy tots balance juicy burgers Serve tots hot alongside with ketchup
Coleslaw Easy Fresh crunch contrasts fried texture Pile coleslaw on plate, tots on side
Buffalo wings Medium Finger food combo for game day Serve together on large platter with dips
Simple salad Easy Light balance to fried side Dress salad lightly, serve tots separately
Roasted vegetables Medium Healthy complement with varied textures Mix warm veggies and tots on same plate

Three ways to serve it:

  • As appetizer: Arrange on platter with small bowls of ketchup, ranch, and spicy mayo for dipping at parties
  • Weeknight side: Pair with protein and quick salad for balanced 20-minute dinner that feels complete
  • Snack plate: Serve warm with assorted dips and vegetable sticks for casual game day grazing
Shortcut
Make tots while protein rests - they stay hot longer than most sides and reheat well

Store and Reheat

Cool tots completely on a rack before storing to prevent soggy bottoms from trapped steam. Rich mains need something to cut through, and pork does exactly that. For a version that comes together quickly, simple pork recipe reheats alongside tots for easy meal prep.

Method Time Best For
🔥 Air Fryer 5 min at 375°F Restoring original crispiness quickly
🔥 Oven 10 min at 400°F Reheating large batches evenly
📦 Microwave 30-45 seconds Fast reheating when texture isn't critical

For best results when storing:

  • Cool tots on wire rack 5 minutes before refrigerating to prevent condensation that makes them soggy
  • Store in shallow airtight container lined with paper towel to absorb moisture - lasts 3-4 days refrigerated
  • Freeze cooled tots in single layer on sheet pan, then transfer to freezer bag - keeps up to 1 month
  • Reheat directly from frozen in air fryer at 375°F for 7-8 minutes without thawing first
  • Skip microwave for stored tots unless speed matters more than texture - they turn soft and lose crispiness

Frequently Asked Questions

Can I cook air fryer tater tots at 375°F instead of 400°F?

Yes, but add 5-7 minutes to cook time. Lower temperature takes longer to crisp the outside while cooking the inside evenly.

How do I store and reheat leftover air fryer tater tots?

Cool completely, store in airtight container up to 4 days. Reheat in air fryer at 375°F for 5 minutes to restore crispiness.

What visual cues show air fryer tater tots are done?

Look for golden brown edges and firm texture when touched with tongs. Pale or soft tots need 2-3 more minutes.

Why are my air fryer tater tots soggy and how to fix?

Overcrowding or excess oil causes sogginess. Cook maximum 6 cups per batch, use only 1 teaspoon oil per 2 cups, and shake halfway through.

Can I double the air fryer tater tots recipe for a party?

Cook in batches instead of doubling - overcrowding makes them steam rather than crisp. Keep finished batches warm in 200°F oven while cooking remaining tots.

Air Fryer Tater Tots

Air Fryer Tater Tots

No ratings yet
Air Fryer Tater Tots cook frozen tater tots to golden, crispy perfection quickly and evenly. The method uses high heat, light oil, and a mid-cook shake to achieve a crunchy exterior without flipping.
Print Recipe Pin Recipe
Prep Time 2 minutes mins
Cook Time 15 minutes mins
Total Time 17 minutes mins
Servings: 4 servings
Course: Appetizer, Side Dish
Cuisine: American
Ingredients Equipment Method Notes

Ingredients
  

  • 6 cups frozen tater tots use straight from freezer; thawing causes sogginess
  • 3 teaspoons vegetable oil 1 teaspoon per 2 cups; light coating prevents sticking
  • 0.5 teaspoon salt add immediately after cooking while tots are hot
  • 0.25 teaspoon black pepper season after cooking
  • 0.25 teaspoon paprika adds color and mild smoky flavor
  • 0.25 teaspoon garlic powder optional; adds savory depth
  • 2 tablespoons parmesan cheese optional; sprinkle immediately after cooking

Equipment

  • Air fryer Used for cooking the tater tots
  • Mixing bowl To toss tater tots with oil

Method
 

  1. Preheat the air fryer to 400°F for 3 minutes to create immediate heat for faster crisping.
  2. In a mixing bowl, toss the frozen tater tots with 1 teaspoon vegetable oil per 2 cups until lightly coated. Do not thaw the tots.
    6 cups frozen tater tots, 3 teaspoons vegetable oil
  3. Arrange the tots in a single layer in the air fryer basket without overlapping. Cook a maximum of 6 cups per batch to prevent sogginess.
    6 cups frozen tater tots
  4. Cook for 10 minutes, then shake the basket vigorously to flip the tots. Continue cooking for an additional 5 minutes until golden brown and crispy on edges.
    6 cups frozen tater tots
  5. Immediately after removing from the basket, season the hot tots with salt, black pepper, paprika, and optional garlic powder and parmesan cheese. Toss gently to coat and serve.
    0.5 teaspoon salt, 0.25 teaspoon black pepper, 0.25 teaspoon paprika, 0.25 teaspoon garlic powder, 2 tablespoons parmesan cheese

Notes

  • Preheat the air fryer to ensure instant crisping at the start.
  • Do not overcrowd the basket; cook a maximum of 6 cups per batch for best results.
  • Shake the basket halfway through cooking to ensure even browning on all sides.

Tried this recipe?

Let us know how it was!

Air Fryer Bone-In Ribeye

May 11, 2026

Air frying a bone-in ribeye at 400°F creates a caramelized crust while keeping the meat tender. The high heat renders fat quickly and browns the surface in 12-15 minutes without flipping constantly.

Air Fryer Bone-In Ribeye

The air fryer basket does the work. Hot air circulates around the steak so both sides brown without babysitting.

This is what we make when a skillet feels too fussy but we still want a proper steakhouse crust. Works for weeknight dinners or date nights when you need something fast that looks intentional.

QUICK SUMMARY

Air fryer bone-in ribeye delivers a crusty exterior and tender interior in under 20 minutes. High heat at 400°F caramelizes the surface while the bone adds moisture and flavor. Pat the steak dry before seasoning to ensure proper crust formation.

⏱️Time Reality: 5 minutes prep, 12-15 minutes cooking, 5 minutes resting
🔥Critical First Move: Preheat air fryer to 400°F for 5 minutes before adding steak
⚠️Watch Out: Overcrowding blocks airflow and creates uneven crust-leave 1 inch gap between steaks

Why This Recipe Works

High heat renders the fat cap while circulating air browns both sides evenly. For a version that comes together quickly, this classic chicken dish uses the same circulating heat method for crispy skin.

Quick Reference
⏱️
Prep Time
5 min
🔥
Cook Time
12-15 min
⏰
Total Time
20 min
🍽️
Servings
1-2 servings
📊
Difficulty
Medium
🏷️
Category
Main Dish
💡
Quick Tip
Pat dry steak for crisp crust
🎯
Best For
Weeknight | Entertaining

What makes this work:

  • Bone adds moisture: The bone conducts heat slower than meat, keeping the interior juicy while the exterior browns
  • Dry surface = crisp crust: Patting the steak dry removes surface moisture that blocks caramelization and creates steam instead of sear
  • Coarse salt enhances texture: Kosher salt draws out just enough moisture to form a concentrated savory crust without over-salting the meat
  • Flipping halfway ensures even browning: Turning at 6-7 minutes exposes both sides to direct heat for uniform caramelization
  • Resting redistributes juices: Letting the steak sit for 5-7 minutes after cooking allows muscle fibers to relax and reabsorb liquid that would otherwise run onto the plate
Quick Tip
Use an instant-read thermometer to check doneness-130°F for medium rare, 140°F for medium, 150°F for medium well

What You'll Need

Air Fryer Bone-In Ribeye - Air Fryer Bone-In Ribeye

Pick a steak with good marbling and even thickness. We keep a batch ready for nights like this - simple potato wedges recipe pairs well when you need something on the side.

🥩
Protein
  • Bone-in ribeye steak (1-1.5 inches thick)
🌶️
Seasonings
  • Kosher salt
  • Black pepper
  • Garlic powder
🫙
Fats & Extras
  • Olive oil
  • Butter (optional)
  • Fresh herbs: rosemary, thyme (optional)

Ingredient Details

  • Bone-in ribeye steak
    Choose 1-1.5 inch thickness for even cooking-thinner steaks overcook quickly, thicker cuts need longer time and may brown unevenly
  • Kosher salt
    Coarse grains stick better than fine salt and create concentrated pockets of seasoning that enhance crust without over-salting the meat
  • Black pepper
    Freshly cracked pepper adds sharp bite-pre-ground pepper loses volatile oils and tastes flat after air frying at high heat
  • Olive oil
    Coat steak lightly to prevent sticking and help seasonings adhere-too much oil causes smoking and greasy texture
  • Garlic powder
    Adds aromatic depth without burning like fresh garlic does under high heat-use granulated, not garlic salt which over-seasons
  • Butter (optional)
    Place on top during resting for steakhouse finish-butter melts into meat and adds richness, skip for dairy-free version
  • Fresh herbs (optional)
    Rosemary and thyme add aromatic flavor when placed on steak during resting-dried herbs work but use half the amount

Ingredient Swaps

Flexibility depends on what you're changing. Rich mains need something to cut through, and corn does exactly that. For a version that comes together quickly, something simple like corn uses similar cooking methods.

Common swaps:

  • Avocado oil for olive oil: Higher smoke point handles 400°F heat without smoking-same amount, slightly more neutral flavor
  • Sea salt for kosher salt: Similar coarse texture and flavor-reduce by about 25% since sea salt grains pack tighter
  • Boneless ribeye for bone-in: Cooks 2-3 minutes faster and slightly less flavorful-check internal temp at 10 minutes instead of 12
  • Onion powder for garlic powder: Milder aromatic note with less sharpness-use same amount for balanced seasoning

Boneless Ribeye

Works for: Faster cooking, easier slicing, more affordable per pound

Skip if: You want maximum flavor from bone, prefer traditional steakhouse presentation

Bone-In Ribeye

Works for: Richer flavor, juicier texture, impressive presentation for entertaining

Skip if: Short on time, prefer easier handling, working with small air fryer basket

Instructions

Total active time: 20 minutes. The shrimp works best when it hits the table at the same time as the main. For a version that comes together quickly, a flaky shrimp side cooks in similar time.

  1. Pat steak completely dry with paper towels for 2-3 minutes until surface feels tacky-moisture blocks crust formation and creates steam instead of sear
  2. Rub steak with olive oil then season both sides liberally with kosher salt, black pepper, and garlic powder-let rest 5 minutes so salt penetrates surface
  3. Preheat air fryer to 400°F for 5 minutes to ensure basket is hot when steak hits-cold basket extends cooking time and reduces crust
  4. Place steak in basket with 1 inch space around edges, air fry 6-7 minutes, flip once, then cook another 6-8 minutes until internal temp reaches 130°F for medium rare
  5. Rest steak on plate tented with foil for 5-7 minutes-top with butter and fresh herbs if using, then slice against the grain before serving
Watch Out
Don't skip resting-cutting immediately causes juices to spill onto the plate instead of staying in the meat, leaving you with dry slices

What to Serve With It

Most plates need a starchy side and something crisp. We keep a batch ready for nights like this - weeknight turkey burgers meal ideas shows how to build complete beef dinners.

Side Dish Prep Why It Works How to Serve
Roasted Garlic Mashed Potatoes Easy Creamy texture balances rich steak, soaks up meat juices Scoop potatoes beside steak, spoon pan drippings over top
Steamed Broccoli Easy Light vegetable adds freshness, quick 5-minute cook time Toss with butter and lemon, place on opposite side of plate
Air Fryer Asparagus Easy Crisp texture contrasts tender meat, cooks in same appliance Season with salt and olive oil, serve alongside steak
Creamed Spinach Medium Classic steakhouse pairing, rich and smooth texture Spoon onto plate first, rest steak on top for presentation
Truffle Fries Easy Elevated potato side for special occasions, crispy and aromatic Pile fries beside steak, drizzle with truffle oil before serving

Three ways to serve it:

  • Weeknight plate: Pair with mashed potatoes and steamed broccoli for balanced meal that comes together in 30 minutes
  • Date night: Serve with creamed spinach and Caesar salad, top steak with garlic herb butter for steakhouse finish
  • Casual dinner: Add truffle fries and grilled mushrooms, finish with peppercorn sauce for rich, satisfying combination
Best Pick
Garlic herb butter melts into the steak during resting and adds richness without extra steps-mix softened butter with minced garlic, thyme, and parsley

Store and Reheat

Cooked steak keeps in the fridge for 3-4 days but loses moisture with each reheat. Slice leftovers thin and warm gently to avoid drying out further.

Method Time Best For
🍳 Stovetop 3-5 min Quick reheating with some crust restoration, heat skillet with butter over medium
📦 Microwave 1-2 min Fastest option but softens crust, use 50% power to prevent rubbery texture
🔥 Oven 10 min at 275°F Gentle reheating without drying, wrap in foil to trap moisture

For best results when storing:

  • Refrigerate in airtight container within 2 hours of cooking-place paper towel underneath to absorb condensation that softens crust
  • Slice before storing if meal prepping-thinner slices reheat faster and more evenly than whole steaks
  • Freeze for up to 2 months wrapped tightly in plastic then foil-thaw overnight in fridge before reheating
  • Add moisture when reheating with splash of beef broth or pat of butter-dry heat pulls remaining moisture from leftover steak
  • Reheat to 130°F max to avoid overcooking past original doneness-use instant-read thermometer to check temperature

Frequently Asked Questions

How long to cook air fryer bone-in ribeye at 400°F?

Cook for 12-15 minutes total, flipping halfway at 6-7 minutes. Check internal temperature at 12 minutes-130°F for medium rare, 140°F for medium.

Can I make air fryer bone-in ribeye ahead?

Season the steak up to 24 hours ahead and refrigerate uncovered-this dries the surface for better crust. Cook right before serving since reheated steak loses texture.

What goes with air fryer bone-in ribeye?

Serve with mashed potatoes, roasted vegetables, or Caesar salad. Garlic herb butter, peppercorn sauce, or chimichurri add extra flavor without much effort.

How do I know when air fryer bone-in ribeye is done?

Use an instant-read thermometer inserted into the thickest part away from the bone. Target 130°F for medium rare, 140°F for medium, or 150°F for medium well.

Can I use boneless ribeye instead of bone-in in air fryer?

Yes, boneless ribeye works but cooks 2-3 minutes faster. Check internal temperature at 10 minutes instead of 12 since there's no bone to slow heat transfer.

Air Fryer Bone-In Ribeye

Air Fryer Bone-In Ribeye

No ratings yet
This air fryer bone-in ribeye creates a crusty exterior and tender interior in under 20 minutes. High heat at 400°F caramelizes the surface while the bone adds moisture and flavor. Patting the steak dry before seasoning ensures a perfect crust formation.
Print Recipe Pin Recipe
Prep Time 5 minutes mins
Cook Time 15 minutes mins
Total Time 20 minutes mins
Servings: 2 servings
Course: Main Dish
Cuisine: American
Ingredients Equipment Method Notes

Ingredients
  

  • 1 steak bone-in ribeye steak 1-1.5 inches thick
  • 1 tablespoon olive oil light coating to help seasonings adhere
  • 1 teaspoon kosher salt coarse salt for crust formation
  • 0.5 teaspoon black pepper freshly cracked
  • 0.5 teaspoon garlic powder granulated, not garlic salt
  • 1 tablespoon butter optional, to add on top during resting
  • 1 sprig rosemary optional, fresh herb for resting
  • 1 sprig thyme optional, fresh herb for resting

Equipment

  • Air fryer Used to cook the ribeye steak at high heat with circulating hot air
  • Instant-read thermometer To check the internal temperature of the steak for desired doneness
  • Paper towels To pat the steak dry before seasoning

Method
 

  1. Pat steak completely dry with paper towels for 2-3 minutes until surface feels tacky to ensure proper crust formation.
    1 steak bone-in ribeye steak
  2. Rub steak with olive oil then season both sides liberally with kosher salt, black pepper, and garlic powder. Let rest for 5 minutes so salt penetrates surface.
    1 tbsp olive oil, 1 tsp kosher salt, 0.5 tsp black pepper, 0.5 tsp garlic powder
  3. Preheat air fryer to 400°F for 5 minutes to ensure basket is hot when steak is added.
  4. Place steak in air fryer basket with at least 1 inch space around edges. Air fry 6-7 minutes, flip once, then cook another 6-8 minutes until internal temperature reaches 130°F for medium rare.
    1 steak bone-in ribeye steak
  5. Rest steak on a plate tented with foil for 5-7 minutes. Top with butter and fresh herbs if using, then slice against the grain before serving.
    1 tbsp butter, 1 sprig rosemary, 1 sprig thyme

Notes

  • Pat the steak dry before seasoning to achieve a crisp crust.
  • Do not overcrowd the air fryer basket; leave at least 1 inch gap around steak for even browning.
  • Use an instant-read thermometer to check doneness: 130°F for medium rare, 140°F for medium.

Tried this recipe?

Let us know how it was!

Air Fryer Pork Cutlets

May 11, 2026

Golden breading on pork cutlets usually means standing over a hot skillet with oil splattering everywhere. Air frying skips the mess and still delivers that crunchy crust with juicy meat underneath.

Air Fryer Pork Cutlets

The breading sticks without deep frying. You coat the cutlets in flour, egg, and breadcrumbs, then the circulating hot air crisps everything in 12 minutes.

This works for weeknight dinners when you want something that feels intentional but doesn't require babysitting a pan.

QUICK SUMMARY

Breaded pork cutlets air fry to a crispy golden crust in 12 minutes at 400°F. The three-step breading process creates layers that stick without deep frying. Spray both sides with oil before cooking for even browning.

⏱️Time Reality: 25 minutes total-10 for breading, 12 for cooking, 3 for resting.
🔪Critical First Move: Pound cutlets to ½ inch thickness so they cook evenly.
⚠️Watch Out: Crowding the basket traps steam-leave 1 inch between pieces or the crust goes soggy.

Why This Recipe Works

Air frying circulates hot air around the cutlets instead of submerging them in oil, so the breading crisps without grease. Rich mains need something to cut through, and pork does exactly that. For a version that comes together quickly, this quick pork dish uses a similar method with a tangy glaze.

Quick Reference
⏱️
Prep Time
10-15 min
🔥
Cook Time
10-12 min
⏰
Total Time
20-27 min
🍽️
Servings
4 servings
📊
Difficulty
Easy
🏷️
Category
Main Dish
💡
Quick Tip
Spray cutlets for extra crispiness
🎯
Best For
Weeknight | Meal prep

What makes it work:

  • Even thickness: Pounding cutlets to ½ inch ensures they cook through at the same rate without dry edges
  • Three-layer breading: Flour creates a sticky base, egg acts as glue, breadcrumbs form the crispy shell
  • Oil spray: A light coating promotes browning without the heaviness of deep frying
  • High heat: 400°F circulates air fast enough to crisp the exterior before the interior overcooks
  • Resting period: Five minutes after cooking lets juices redistribute so the first cut doesn't release a flood
Quick Tip
Pat cutlets completely dry before breading-any moisture prevents the flour from sticking and leads to bare spots.

What You'll Need

Air Fryer Pork Cutlets - Air Fryer Pork Cutlets

Most people skip chicken, but it balances the meal. We keep a batch ready for nights like this-this related chicken recipe uses the same breading technique with a citrus twist.

🍗
Protein
  • 4 boneless pork cutlets (½ inch thick)
🫙
Breading Station
  • ½ cup all-purpose flour
  • 2 large eggs (beaten)
  • 1 cup breadcrumbs (panko or regular)
🌶️
Seasonings
  • 1 teaspoon salt
  • ½ teaspoon black pepper
  • ½ teaspoon garlic powder (optional)
  • ½ teaspoon paprika (optional)
🫙
For Cooking
  • Cooking oil spray
  • 2 tablespoon grated parmesan (optional)

Ingredient Details

  • Boneless pork cutlets
    Look for cutlets ½ inch thick or pound thicker ones to even thickness-uneven pieces cook at different rates.
  • Breadcrumbs
    Panko creates a lighter, crispier crust than regular breadcrumbs-stale breadcrumbs turn dull and grainy.
  • Eggs
    Beat eggs thoroughly so they coat evenly-lumps of yolk create bare spots where breading won't stick.
  • Flour
    All-purpose works best for the initial coating-it absorbs moisture and gives the egg something to grip.
  • Salt
    Season the flour and breadcrumbs separately so every layer carries flavor-salting only the meat isn't enough.
  • Cooking oil spray
    Use a neutral oil spray like avocado or canola-olive oil burns at high heat and leaves bitter spots.
  • Parmesan cheese
    Mix into breadcrumbs for extra umami-skip it if you want a plain, kid-friendly version.

Ingredient Swaps

Panko breadcrumbs create the crispiest crust, but crushed cornflakes work when you're out. Most people skip chicken, but it balances the meal. For a version that comes together quickly, this related chicken recipe shows how breading adapts across proteins.

Four swaps that work:

  • All-purpose flour → gluten-free flour blend: Maintains breading adhesion with slight texture change-use 1:1 ratio
  • Breadcrumbs → crushed pork rinds: Keeps crispiness with zero carbs-grind finely or large pieces fall off
  • Eggs → buttermilk: Changes binding slightly but works for egg allergies-use ¼ cup per egg
  • Paprika → smoked chili powder: Adds spicier smoky flavor-start with half the amount and taste

Panko Breadcrumbs

Works for: Lightest, crispiest crust with airy texture

Skip if: You prefer a denser, traditional breaded coating

Regular Breadcrumbs

Works for: Classic texture, sticks better, easier to find

Skip if: You want maximum crunch without any sogginess

Crushed Cornflakes

Works for: Gluten-free with extra crunch, pantry-friendly

Skip if: You're avoiding processed cereals or want neutral flavor

Ground Pork Rinds

Works for: Zero carb, keto-friendly, stays crispy

Skip if: You don't eat pork or dislike the strong porky flavor

Instructions

The breading takes 10 minutes to set up, then the air fryer handles the rest. Fries adds the contrast this plate needs, but timing matters. For a version that comes together quickly, crispy homemade fries recipe cooks in the same temperature window.

  1. Pound and dry the cutlets. Use a meat mallet or rolling pin to pound cutlets to ½ inch thickness. Pat both sides completely dry with paper towels-any moisture prevents breading from sticking.

  2. Set up breading station. Place flour mixed with salt and pepper in one shallow bowl, beaten eggs in a second bowl, and breadcrumbs mixed with garlic powder and paprika in a third. Line them up in order: flour, egg, breadcrumbs.

  3. Bread the cutlets. Dredge each cutlet in flour, shake off excess, dip in egg to coat completely, then press into breadcrumbs on both sides. Press firmly so breadcrumbs adhere-loose coating falls off during cooking.

  4. Spray and air fry. Spray both sides of breaded cutlets with cooking oil. Place in air fryer basket in single layer with 1 inch between pieces. Cook at 400°F for 10-12 minutes, flipping halfway through, until internal temperature reaches 145°F and crust is golden brown.

  5. Rest before serving. Let cutlets rest on a wire rack for 5 minutes after cooking. This redistributes juices so the meat stays tender when you slice it.

Golden Rule
Never skip the resting step-cutting into hot pork immediately releases all the moisture and leaves dry, stringy meat on the plate.

What to Serve With It

Breaded pork needs something to cut through the richness without competing with the crispy coating. For more complete meal ideas, planning your serrano ham dinner offers side pairings that work across pork dishes.

Side Dish Prep Why It Works How to Serve
Steamed Green Beans Easy Light, quick veggie adds freshness without heaviness Toss with butter and lemon zest, serve hot alongside cutlets
Mashed Potatoes Easy Creamy texture contrasts crunchy breading, soaks up juices Make ahead and reheat, top with gravy or keep plain
Simple Green Salad Easy Crisp greens and tangy vinaigrette cut through fried richness Dress lightly with lemon vinaigrette, serve cold
Roasted Sweet Potatoes Medium Natural sweetness balances salty pork, adds hearty bulk Cube and roast at 425°F for 25 minutes with olive oil
Caesar Salad Easy Classic pairing with breaded proteins, creamy and tangy Use store-bought or homemade dressing, add croutons

Three ways to serve it:

  • With honey mustard: Whisk equal parts honey and Dijon mustard for a sweet-tangy dipping sauce that balances the crispy breading
  • Over Caesar salad: Slice cutlets and arrange over romaine with dressing-the warm pork wilts the greens slightly for a hearty dinner salad
  • In a sandwich: Layer cutlet on a toasted bun with lettuce, tomato, and spicy aioli for a quick weeknight meal
Best Pick
Mashed potatoes soak up any juices from the cutlets and provide the creamy contrast the crispy coating needs-make them while the pork cooks.

Store and Reheat

Breaded cutlets lose some crispiness in the fridge but reheat better than most fried foods. The potatoes works best when it hits the table at the same time as the main. We keep a batch ready for nights like this-golden roasted potatoes store just as well and reheat quickly.

Method Time Best For
🔥 Oven 8-10 min at 375°F Maintaining crisp crust without drying out the meat
🍳 Air Fryer 4-5 min at 350°F Quick re-crisping for single servings or leftovers
📦 Microwave 30-45 sec Fast reheating when texture doesn't matter-crust softens

For best results when storing:

  • Cool completely: Let cutlets cool to room temperature on a wire rack before refrigerating-sealing hot food creates condensation that turns breading soggy
  • Stack with parchment: Layer parchment paper between cutlets in an airtight container so breading doesn't stick together or peel off
  • Refrigerate up to 4 days: Store in shallow airtight container in coldest part of fridge-breading loses crispness after day three but meat stays safe
  • Freeze for 2 months: Wrap individually in plastic wrap, then place in freezer bag-thaw overnight in fridge before reheating
  • Reheat from frozen: Add 2-3 minutes to air fryer time if reheating from frozen-don't thaw or breading absorbs moisture and goes mushy

Frequently Asked Questions

How long to cook air fryer pork cutlets at 400°F?

Cook for 10-12 minutes at 400°F, flipping halfway through. Check internal temperature with an instant-read thermometer-it should read 145°F for safe, juicy pork.

Can I make air fryer pork cutlets ahead and reheat?

Yes, bread and cook cutlets up to 4 days ahead. Reheat in air fryer at 350°F for 4-5 minutes to restore crispness-microwave works but softens the coating.

What goes well with air fryer pork cutlets as sides?

Mashed potatoes, steamed green beans, Caesar salad, or roasted sweet potatoes balance the crispy breading. Pick something creamy or fresh to contrast the crunchy coating.

How do I know when air fryer pork cutlets are fully cooked?

Internal temperature should reach 145°F on an instant-read thermometer. Juices run clear when you cut into the thickest part, and the meat looks white with no pink center.

Can I use almond flour or gluten-free breadcrumbs instead?

Yes, use gluten-free flour blend for dredging and gluten-free breadcrumbs or crushed pork rinds for coating. Almond flour alone doesn't crisp well-mix it with breadcrumbs for better texture.

Air Fryer Pork Cutlets

Air Fryer Pork Cutlets

No ratings yet
Air fryer pork cutlets deliver a crispy golden crust without the mess of deep frying. The three-step breading process ensures the coating sticks well, while a high heat of 400°F crisps the exterior in about 12 minutes for juicy, tender pork.
Print Recipe Pin Recipe
Prep Time 10 minutes mins
Cook Time 12 minutes mins
Total Time 22 minutes mins
Servings: 4 servings
Course: Main Dish
Cuisine: American
Ingredients Equipment Method Notes

Ingredients
  

  • 4 boneless pork cutlets pounded to ½ inch thickness
  • 0.5 cup all-purpose flour mixed with salt and pepper
  • 2 large eggs beaten
  • 1 cup breadcrumbs panko or regular, mixed with garlic powder and paprika
  • 1 teaspoon salt for seasoning flour and breadcrumbs
  • 0.5 teaspoon black pepper for seasoning flour
  • 0.5 teaspoon garlic powder optional, mixed in breadcrumbs
  • 0.5 teaspoon paprika optional, mixed in breadcrumbs
  • cooking oil spray neutral oil like avocado or canola
  • 2 tablespoon grated parmesan optional, mixed into breadcrumbs

Equipment

  • Air fryer To cook the breaded pork cutlets with circulating hot air
  • Meat mallet or rolling pin To pound pork cutlets to even thickness
  • Paper towels To pat cutlets dry before breading
  • Three shallow bowls For flour, egg, and breadcrumb breading stations

Method
 

  1. Pound each pork cutlet to ½ inch thickness using a meat mallet or rolling pin. Pat both sides completely dry with paper towels to ensure breading sticks.
    4 boneless pork cutlets
  2. Set up three shallow bowls: mix flour with salt and pepper in the first, beat the eggs in the second, and combine breadcrumbs with garlic powder, paprika, and optional parmesan in the third.
    0.5 cup all-purpose flour, 2 large eggs, 1 cup breadcrumbs, 1 tsp salt, 0.5 tsp black pepper, 0.5 tsp garlic powder, 0.5 tsp paprika, 2 tbsp grated parmesan
  3. Dredge each cutlet in the seasoned flour, shaking off excess. Dip completely into beaten eggs, then press firmly into breadcrumb mixture on both sides to coat evenly.
    4 boneless pork cutlets, 0.5 cup all-purpose flour, 2 large eggs, 1 cup breadcrumbs
  4. Spray both sides of each breaded cutlet lightly with cooking oil spray. Arrange in the air fryer basket in a single layer with at least 1 inch between pieces.
    cooking oil spray
  5. Air fry at 400°F for 10-12 minutes, flipping halfway through, until the crust is golden and the internal temperature reaches 145°F.
  6. Remove cutlets and let rest on a wire rack for 5 minutes to allow juices to redistribute before serving.

Notes

  • Pound cutlets evenly to ensure uniform cooking without dry edges.
  • Pat dry meat thoroughly before breading for better adhesion.
  • Leave space between cutlets in the air fryer to prevent soggy crust.

Tried this recipe?

Let us know how it was!

Air Fryer Filet Mignon

May 11, 2026

Filet mignon often dries out or cooks unevenly in a pan. The air fryer fixes both problems by circulating dry heat that crisps the outside while keeping the inside tender.

Air Fryer Filet Mignon

The high heat locks in juices without constant flipping. You get a golden crust in under 15 minutes with no babysitting.

Make this for date nights or quick weeknight dinners when you want steak that tastes intentional without the hassle.

QUICK SUMMARY

Air fryer filet mignon cooks in 9-12 minutes at 400°F. Pat the steaks dry and bring them to room temperature for even cooking and a crispy crust. Rest 5 minutes after cooking for juice retention.

⏱️Timing: Remove steaks from fridge 20 minutes early, preheat air fryer 5 minutes
🔥First Move: Pat steaks completely dry, brush with olive oil, season generously
⚠️Watch Out: Overcooking dries out the steak - pull at 130°F for medium-rare carryover

Why This Recipe Works

The air fryer creates a crispy crust without drying out the center because dry heat circulates around the steak instead of cooking it in oil. For a different protein approach, try this easy chicken recipe that uses the same circulating heat method.

Quick Reference
⏱️
Prep Time
5 min
🔥
Cook Time
9-12 min
⏰
Total Time
15 min
🍽️
Servings
2 servings
📊
Difficulty
Easy
🏷️
Category
Main Dish
💡
Quick Tip
Rest 5 min after air frying for juice retention
🎯
Best For
Weeknight | Entertaining
  • Room temperature steak cooks evenly - cold steak gets a burnt crust with a raw center because the outside overcooks before heat reaches the middle
  • Patting dry removes surface moisture - wet steak steams instead of searing, which prevents the golden crust
  • Flipping halfway creates uniform browning - air circulates better when both sides face the heating element
  • Internal temp at 135°F ensures medium-rare - carryover cooking raises temp 5 degrees during rest
  • Resting redistributes juices - cutting immediately loses moisture that pools on the cutting board
Quick Tip
Use an instant-read thermometer inserted into the thickest part at the 8-minute mark to avoid overcooking

What You'll Need

Air Fryer Filet Mignon - Air Fryer Filet Mignon

Most of these ingredients sit in your pantry already, so shopping takes under 10 minutes. If you want to explore more air fryer options, another great boats recipe uses similar seasoning techniques with vegetables.

🥩
Protein
  • 2 filet mignon steaks (6-8 oz each, 1.5 inches thick)
🧄
Aromatics & Seasonings
  • 1 tablespoon olive oil
  • 1 teaspoon salt
  • ½ teaspoon black pepper
  • ½ teaspoon garlic powder
🧈
Finishing Touches
  • 2 tablespoon butter
  • 1 teaspoon fresh thyme
  • 1 teaspoon fresh rosemary
  • Optional: balsamic glaze

Ingredient Details

  • Filet mignon steaks
    Look for even thickness (1.5 inches) so both steaks cook at the same rate - uneven cuts mean one overcooked and one undercooked
  • Olive oil
    Brush lightly instead of drizzling - too much oil drips and smokes in the air fryer basket
  • Salt
    Use coarse kosher salt for better control - fine table salt concentrates too quickly and can oversalt the crust
  • Black pepper
    Freshly cracked pepper adds more aromatic heat than pre-ground, which tastes flat and dusty
  • Butter
    Add herb butter after resting, not during cooking - butter burns at high heat and creates bitter smoke
  • Fresh herbs
    Strip thyme and rosemary leaves from stems before mixing with butter - woody stems don't melt and leave chewy bits
  • Garlic powder
    Skip fresh garlic before air frying - minced garlic burns and turns bitter at 400°F

Ingredient Swaps

These swaps work when you're missing an ingredient or want to adjust flavor. If you need more variety, a simple pasties recipe uses similar air fryer timing with different fillings.

  • Swap olive oil for avocado oil - same smoke point and neutral flavor, works for high-heat cooking without dairy
  • Replace butter with ghee - dairy-free richness without milk solids that burn, adds nutty depth to finishing
  • Use ribeye instead of filet mignon - more marbling means fattier and less tender, but still cooks well in air fryer
  • Substitute dried herbs for fresh - less vibrant flavor, add ½ teaspoon dried to butter mixture instead of 1 teaspoon fresh

Fresh Herbs

Works for: Date nights, special occasions - bright aromatic finish that looks impressive

Skip if: You only have dried herbs - they work but taste less vibrant in butter

Dried Herbs

Works for: Quick weeknight meals - pantry-stable and blend well into butter

Skip if: You want restaurant-level presentation - dried herbs look dull on top

Instructions

The entire cook takes under 15 minutes once steaks hit room temperature. Most people skip pork, but it balances the meal - for a version that comes together quickly, this quick pork dish uses the same dry seasoning method.

  1. Prep the steaks. Remove steaks from fridge 20 minutes before cooking. Pat completely dry with paper towels. Brush both sides lightly with olive oil. Season generously with salt, black pepper, and garlic powder.
  2. Preheat the air fryer. Set air fryer to 400°F (200°C) and preheat for 5 minutes. This step creates the initial sear when steaks hit the basket.
  3. Air fry the steaks. Place steaks in the basket with space between them. Cook 5 minutes, then flip with tongs. Cook another 4-7 minutes depending on doneness (4 min for rare, 5-6 min for medium-rare, 7 min for medium). Check internal temp with an instant-read thermometer at 8 minutes - pull at 130°F for medium-rare (temp rises to 135°F during rest).
  4. Rest the steaks. Transfer steaks to a cutting board and tent loosely with foil. Rest 5 minutes - juices redistribute and temp climbs 5 degrees.
  5. Finish and serve. Mix softened butter with chopped thyme and rosemary. Place a dollop of herb butter on each steak. Optional: drizzle with balsamic glaze.
Watch Out
Don't skip the flip at the 5-minute mark - one side gets overcooked while the other stays pale without it

What to Serve With It

Rich mains need something to cut through, and shrimp does exactly that - for a version that comes together quickly, tender shrimp recipe balances the richness of steak with bright citrus notes.

Side Dish Prep Why It Works How to Serve
Garlic mashed potatoes Easy Creamy texture absorbs steak juices and herb butter Scoop onto plate, place steak on top
Steamed asparagus Easy Fresh snap balances rich meat without competing Arrange alongside steak, drizzle with lemon
Caesar salad Medium Tangy dressing and crispy romaine cut through fat Serve on separate plate to keep crisp
Roasted baby carrots Easy Natural sweetness pairs with savory crust Toss with thyme, pile next to steak
Truffle mac and cheese Involved Luxurious comfort side for entertaining Spoon into small ramekin, serve on side

Three ways to serve it:

  • For date night: Plate steak with truffle mac and cheese and grilled mushrooms, finish with balsamic drizzle
  • Quick weeknight: Pair with garlic mashed potatoes and steamed asparagus for a 20-minute meal
  • Hosting: Serve with Caesar salad and red wine reduction for a restaurant-style presentation
Best Pick
Garlic mashed potatoes soak up every drop of herb butter and steak juice without adding prep time

Store and Reheat

Leftover steak keeps 3-4 days in the fridge but tastes best reheated gently to avoid drying out. Store in an airtight shallow container immediately after cooling to preserve texture.

Method Time Best For
🔥 Oven 8-10 min at 300°F Gentle reheat that keeps steak moist - tent with foil
🍳 Stovetop 3-4 min medium-low heat Quick warm with butter in pan - flip once
📦 Microwave 30-45 sec low power Fast but risks drying - add butter and cover loosely

For best results when storing:

  • Slice leftover steak thin - reheats faster and more evenly than thick cuts
  • Add butter before reheating - extra fat keeps meat moist during warming
  • Store in shallow container - prevents steaks from stacking and steaming each other
  • Freeze up to 3 months - wrap individually in plastic, then foil to prevent freezer burn
  • Thaw overnight in fridge - quick thawing in water dilutes flavor and creates mushy texture

Frequently Asked Questions

How long to cook filet mignon in air fryer at 400°F?

Cook 9-12 minutes total at 400°F, flipping at 5 minutes. Pull at 130°F internal temp for medium-rare (temp rises to 135°F during 5-minute rest).

Can I make air fryer filet mignon ahead and reheat?

Yes, but steak tastes best fresh. Store cooked steak in fridge up to 4 days. Reheat gently in oven at 300°F for 8-10 minutes to avoid drying out.

What temperature indicates medium rare in filet mignon?

Pull steak at 130°F internal temp - carryover cooking raises temp to 135°F during the 5-minute rest. Insert thermometer into thickest part for accuracy.

Why is my air fryer filet mignon dry and how to fix?

Dry steak means overcooking or skipping the rest. Pull at 130°F and rest 5 minutes tented with foil. Fix dry steak by slicing thin and serving with sauce or herb butter.

Can I use frozen filet mignon steaks directly in air fryer?

No, frozen steaks cook unevenly - burnt crust with raw center. Thaw overnight in fridge, then bring to room temp 20 minutes before cooking.

Air Fryer Filet Mignon

Air Fryer Filet Mignon

No ratings yet
This air fryer filet mignon recipe delivers a tender, juicy steak with a crisp, golden crust in under 15 minutes. The air fryer circulates dry heat evenly, preventing uneven cooking and drying out, making it perfect for quick weeknight dinners or special date nights.
Print Recipe Pin Recipe
Prep Time 5 minutes mins
Cook Time 12 minutes mins
Total Time 17 minutes mins
Servings: 2 servings
Course: Main Dish
Cuisine: American
Ingredients Equipment Method Notes

Ingredients
  

  • 2 pieces filet mignon steaks 6-8 oz each, 1.5 inches thick, room temperature
  • 1 tablespoon olive oil brush lightly on both sides
  • 1 teaspoon salt preferably coarse kosher salt
  • 0.5 teaspoon black pepper freshly cracked
  • 0.5 teaspoon garlic powder
  • 2 tablespoon butter softened, for finishing
  • 1 teaspoon fresh thyme stripped from stems and chopped, mixed in butter
  • 1 teaspoon fresh rosemary stripped from stems and chopped, mixed in butter
  • balsamic glaze optional, for drizzling

Equipment

  • Air fryer Used to cook the filet mignon evenly with circulating dry heat.
  • Instant-read thermometer To check internal temperature of steak for doneness.
  • Tongs Used to flip the steaks halfway through cooking.

Method
 

  1. Remove steaks from fridge 20 minutes before cooking. Pat completely dry with paper towels. Brush both sides lightly with olive oil. Season generously with salt, black pepper, and garlic powder.
    2 pieces filet mignon steaks, 1 tbsp olive oil, 1 tsp salt, 0.5 tsp black pepper, 0.5 tsp garlic powder
  2. Set air fryer to 400°F (200°C) and preheat for 5 minutes to create the initial sear.
  3. Place steaks in the basket with space between them. Cook for 5 minutes, then flip with tongs. Cook an additional 4-7 minutes depending on preferred doneness (4 min rare, 5-6 min medium-rare, 7 min medium). Check internal temperature at the 8-minute mark and pull steaks at 130°F for medium-rare (the temperature will rise to 135°F while resting).
    2 pieces filet mignon steaks
  4. Transfer steaks to a cutting board and tent loosely with foil. Rest for 5 minutes to allow juices to redistribute and temperature to climb.
  5. Mix softened butter with chopped thyme and rosemary. Place a dollop of herb butter on each steak. Optionally drizzle with balsamic glaze before serving.
    2 tbsp butter, 1 tsp fresh thyme, 1 tsp fresh rosemary, balsamic glaze

Notes

  • Pat steaks dry and bring to room temperature before cooking for even searing.
  • Flip steaks halfway through cooking to ensure uniform browning.
  • Rest steaks for 5 minutes after cooking to retain juices and enhance tenderness.

Tried this recipe?

Let us know how it was!

Cheddar and Chive Biscuits [Easy Biscuit Recipe]

May 11, 2026

Cheddar and chive biscuits earn a spot at any brunch table without much argument.

They come together in 30 minutes, hit the oven cold, and come out with rough, golden tops streaked with sharp cheddar and bright flecks of chive.

Cheddar and Chive Biscuits

If you want something that doubles as a breakfast sandwich base or a holiday side, this is it.

Keep your ingredients cold right up until mixing - that single rule separates flaky layers from a dense, bread-like crumb. Good biscuits are about cold butter, a light hand, and knowing when to stop working the dough.

Those signs of keeping biscuits fresh start with how you bake them first.

QUICK SUMMARY

These cheddar and chive biscuits are buttery, tender, and ready in 30 minutes. Cold butter and minimal mixing are the two moves that create flaky layers and a golden, slightly crisp top. Expect a tangy buttermilk crumb with sharp cheddar pockets and a clean, herby finish from fresh chives.

⏱️Time Reality: 30 minutes start to finish - 15 minutes mixing, 12-15 minutes baking
🧈Method Shortcut: Fold dough over itself 2-3 times instead of kneading for layers without toughness
⚠️Watch Out: Grated cheese that's warm or cut too coarse will ooze out and pool on the baking sheet

Why This Recipe Works

Cold butter is the engine here.

As it hits the oven, solid fat turns to steam and pushes the dough layers apart - warm butter just melts in and collapses. Sharp cheddar (not mild) carries enough punch to stay present through the fat of the buttermilk and butter, while the acid in buttermilk reacts with the baking powder for a reliable lift.

Folding the dough rather than kneading it keeps gluten development low and layers intact. You'll see the rough, split tops and ragged edges - those are features, not flaws.

They mean the butter stayed cold long enough to steam correctly.

Quick Reference
⏱️
Prep Time
15 minutes
🔥
Cook Time
12-15 minutes
⏰
Total Time
30 minutes
🍽️
Servings
8 biscuits
📊
Difficulty
Easy
🏷️
Category
Breakfast, Side Dish
💡
Quick Tip
Chill your bowl and grated cheese 10 min before mixing
🎯
Best For
Weekends, Brunch, Holiday sides
  • Use butter straight from the fridge - or freeze it for 10 minutes and grate it directly in
  • Bake on a cold sheet pan so butter doesn't start melting before the oven does its job
  • Toss grated cheddar with 1 tablespoon flour before folding in to prevent sinking and pooling
  • Internal temp of 200°F confirms doneness when golden color alone isn't enough
  • Brush with melted butter immediately after baking for a glossy, rich finish
Golden Rule
If your kitchen runs warm, chill the mixing bowl and your grated cheese for 10 minutes before you start. One warm element can undo the entire fat structure.

What You'll Need

Cheddar and Chive Biscuits - Cheddar and Chive Biscuits

Six ingredients carry this recipe. The flour, butter, and buttermilk are structural - skip or swap any of them carelessly and the texture changes.

Fresh chives give the most defined, grassy bite; dried chives deliver much less and should be avoided if you can help it.

Understanding the role each ingredient plays helps with comparing milk wash vs egg wash options when you want a specific finish on the tops.

🍜
Dry Base
  • 2 cups all-purpose flour
  • 1 tablespoon baking powder
  • ½ teaspoon baking soda
  • 1 teaspoon salt
🧀
Fat & Dairy
  • 6 tablespoon cold unsalted butter, cubed
  • ¾ cup cold buttermilk
  • 1 cup sharp cheddar, grated
🥬
Fresh Add-Ins
  • 3 tablespoon fresh chives, thinly sliced

Ingredient Details

  • All-Purpose Flour
    Spoon flour into the measuring cup and level off - packing it in adds 10-20% more flour and tightens the crumb.
  • Cold Unsalted Butter
    Cut into ½-inch cubes and refrigerate until the moment you need it. Grating frozen butter is a fast alternative.
  • Sharp Cheddar
    Grate it medium or fine on a box grater. Pre-shredded cheese has anti-caking coatings that prevent clean melting.
  • Buttermilk
    Must be cold. The acid reacts with baking powder for lift; warm buttermilk activates leavening too early.
  • Fresh Chives
    Slice thin with a sharp knife. Bruised or roughly chopped chives release moisture and can make dough sticky.
  • Baking Powder
    Check the date - expired baking powder is the most common cause of flat biscuits in an otherwise correct recipe.

Ingredient Swaps

Most swaps here shift either flavor or texture rather than breaking the recipe entirely. Knowing what you'll lose helps you decide whether it's worth it.

When swapping out baking powder or adjusting fat, the result is still edible - just different in height or crumb.

  • Replace up to 50% of all-purpose flour with whole wheat pastry flour for a nuttier crumb - reduce buttermilk by 1-2 tbsp
  • No buttermilk? Add 1 tablespoon white vinegar or lemon juice to 1 cup whole milk and let it sit 5 minutes
  • Swap sharp cheddar for aged Gruyère for a nuttier, slightly milder result that still melts cleanly
  • Replace butter with cold shortening for a taller, more tender biscuit - buttery flavor decreases noticeably

Butter vs. Shortening

Works for: Maximum height and a very tender, soft interior

Skip if: Butter flavor matters - shortening produces a blander result

Sharp Cheddar vs. Gruyère

Works for: Nuttier, upscale flavor profile that melts evenly

Skip if: You want the classic sharp, tangy bite cheddar delivers

Instructions

Biscuits move fast once the dough comes together - have your sheet pan ready and your oven preheated before you start. Replacements for shortening apply here if you're adjusting the fat, but keep whatever you use cold right up until mixing.

  1. Preheat oven to 425°F. Line a cold baking sheet with parchment. Whisk flour, baking powder, baking soda, and salt in a large chilled bowl.
  2. Cut in the butter. Add cold butter cubes and press between fingertips until the mixture resembles coarse crumbs with some pea-sized butter pieces remaining.
  3. Add cheese and chives. Fold in cheddar (tossed with 1 tablespoon flour) and sliced chives with a spatula - two or three turns is enough.
  4. Add buttermilk. Pour in cold buttermilk and fold just until the dough comes together in shaggy clumps. Fold dough over itself 2-3 times on a lightly floured surface - do not knead.
  5. 5. Pat and cut. Pat dough to about 1-inch thickness.

Cut into 8 rounds or squares and place on the prepared sheet.

Bake 12-15 minutes until deep golden on top and edges are set.

Internal temp should read 200°F.

Watch Out
Resist the urge to re-roll scraps more than once. Every additional roll develops more gluten and produces a tougher biscuit from that cut onward.

What to Serve With It

These biscuits are rich and savory on their own, so sides that cut through the fat work best. Acidic, bright, or salty pairings give the most contrast without competing with the cheddar.

For a wider list, sides for biscuits covers the full range by occasion.

Side Dish Prep Why It Works How to Serve
Scrambled eggs Easy Soft, mild eggs let the cheddar and chive flavor lead Split biscuit, pile eggs inside, serve open-faced
Ham slices Easy Salty cured meat amplifies the sharpness of the cheddar Layer inside biscuit as a sandwich
Simple green salad Easy Vinaigrette acidity cuts through buttermilk richness Serve alongside, not plated under the biscuit
Smoked salmon platter Medium Briny fish contrasts the buttery, tangy crumb Break biscuit into halves, top with salmon and cream cheese
Hot honey Easy Sweet heat balances sharp cheddar without masking it Drizzle directly over a warm split biscuit

Three ways to serve it:

  • 🍳 Split and fill with scrambled eggs and ham for a brunch sandwich that holds together
  • 🧈 Spread with herbed compound butter (chive, lemon zest) for a hosting-ready side
  • 🍯 Drizzle with hot honey and serve warm alongside a cheese board as a starter
Shortcut
Herbed butter takes 3 minutes - mix softened butter with chopped chives and a pinch of lemon zest, roll in parchment, and chill while the biscuits bake.

Store and Reheat

Biscuits are best within a few hours of baking, but they hold well for three days if stored correctly.

Keep them in a rigid container with a paper towel underneath to pull moisture away from the bottoms.

For a full guide on keeping biscuits fresh beyond the short term, the shelf life breakdown covers fridge, counter, and freezer timing in detail.

Method Time Best For
🔥 Oven 8-10 min at 350°F Reviving crisp top and flaky interior
📦 Microwave then oven 15-20 sec + 3-4 min at 375°F Quick reheating without a soggy result
🍳 Air fryer 3-4 min at 350°F Fast reheat with a crisped exterior

For best results when storing:

  • Cool biscuits completely before sealing - trapped steam softens the crust inside the container
  • Layer paper towels between biscuits if stacking to absorb residual moisture
  • Freeze unbaked cut biscuits on a sheet until solid, then transfer to a bag - bake from frozen at 425°F, adding 3-5 minutes to bake time
  • Avoid refrigerating in plastic wrap alone - it traps moisture and turns the exterior gummy
  • Reheat only what you'll eat; repeated heating dries the crumb significantly

Frequently Asked Questions

Can I make these biscuits vegan or dairy-free?

Yes, with some trade-offs. Use cold vegan butter (stick-style, not spread), unsweetened oat milk with 1 tablespoon lemon juice as the buttermilk substitute, and a dairy-free cheddar-style shred. The layers will be slightly less defined and the flavor milder, but the structure holds.

Why do my biscuits spread instead of rising?

Spread almost always comes from warm butter or overworked dough. Make sure butter goes in cold, the oven is fully preheated to 425°F before the sheet goes in, and the dough is handled with folds rather than rolling or pressing repeatedly.

Can I make the dough ahead and bake later?

Cut the biscuits and refrigerate on the sheet pan, covered, for up to 12 hours before baking. They go straight from fridge to hot oven - the cold rest actually keeps the butter solid and can improve the rise slightly.

How do I keep the cheese from making biscuits greasy?

Two steps prevent it: grate the cheese fine or medium (not coarse), and toss it with 1 tablespoon of flour before folding it in. Both steps keep the cheese distributed rather than pooling and leaking out during baking.

Can I freeze unbaked biscuits and bake them from frozen?

Freeze cut biscuits in a single layer until solid, then bag them for up to one month. Bake directly from frozen at 425°F - add 3-5 minutes to the standard bake time and check for a 200°F internal temp before pulling them out.

Cheddar and Chive Biscuits

Cheddar and Chive Biscuits

No ratings yet
Quick buttermilk cheddar-and-chive biscuits with cold butter for flaky layers and sharp cheddar pockets. The recipe uses chilled ingredients and a gentle fold technique to produce tall, layered biscuits with bright chive flecks.
Print Recipe Pin Recipe
Prep Time 15 minutes mins
Cook Time 15 minutes mins
Total Time 30 minutes mins
Servings: 8 biscuits
Course: Breakfast, Side Dish
Cuisine: American, Southern
Ingredients Equipment Method Notes

Ingredients
  

  • 2 cup all-purpose flour scoop-and-level
  • 1 tablespoon baking powder
  • 0.5 teaspoon baking soda
  • 1 teaspoon salt adjust if using salted butter or cheese
  • 0.5 teaspoon black pepper freshly ground
  • 0.25 cup unsalted butter cold, cubed (plus 2 tablespoon melted for brushing)
  • 0.25 cup vegetable shortening cold, cubed (optional: use all butter instead)
  • 1 cup sharp cheddar cheese grated and chilled
  • 3 tablespoon fresh chives finely chopped
  • 1 cup buttermilk cold
  • 1 large egg for brushing (optional)

Equipment

  • Baking sheet rimmed, lined with parchment
  • Mixing bowl large
  • Box Grater for cheddar
  • Pastry cutter or two forks or food processor
  • Measuring cups and spoons

Method
 

  1. Preheat oven to 425°F and place a rack in the center; line a rimmed baking sheet with parchment.
  2. Whisk flour, baking powder, baking soda, salt, and pepper in a large bowl until combined.
  3. Cut cold butter and shortening into flour with a pastry cutter or two forks until pea-size crumbs remain and mixture looks sandy with visible butter bits.
  4. Toss chilled grated cheddar with 1 tablespoon flour, then stir into dry mix with chopped chives.
  5. Pour cold buttermilk into dry ingredients and gently fold with a spatula until dough comes together but still shaggy; do not overmix.
  6. Turn dough onto a lightly floured surface, fold over itself 2 times to create layers, pat to 1-inch thickness, and cut into eight rounds with a 2.5-inch cutter; place on prepared sheet with sides touching.
  7. Brush tops with beaten egg or 2 tablespoons melted butter and bake at 425°F for 12-15 minutes until tops are golden brown and edges set.
  8. Transfer to a wire rack and brush with remaining melted butter; serve warm.

Notes

  • Chill grated cheddar and toss with flour to reduce greasiness and sinking.
  • Fold dough gently 2 times for flaky layers; avoid kneading.
  • Bake at high heat (425°F) for quick oven spring and golden tops.

Tried this recipe?

Let us know how it was!

Baked Buffalo Cauliflower Bites [Weeknight Appetizer]

May 11, 2026

Baked buffalo cauliflower bites are the appetizer you pull out when the crowd includes both meat-eaters and vegetarians and you don't want to make two separate dishes.

They deliver the same tangy, spicy coating you expect from classic wings - just with a crisp battered floret at the center instead.

Baked Buffalo Cauliflower Bites

Ranch dressing is almost non-negotiable at a buffalo spread, so understanding the role ranch dressing plays in balancing vinegary heat will save you a last-minute trip to the store. Keep a batch ready before guests arrive.

This recipe uses a high-heat bake, a light flour batter, and a double-bake method to get genuine crunch without a fryer.

QUICK SUMMARY

These baked buffalo cauliflower bites use a light batter, a 425°F oven, and a two-stage bake to build a crisp, glossy crust around tender florets. Coat with a butter-hot sauce emulsion after the first bake, then return to the oven to set the glaze. Ready in 45 minutes, easy enough for a weeknight, and crowd-ready for any gathering.

⏱️Time Reality: 45 min total - first bake takes 20 min, second just 5-8 min
🔑Method Shortcut: Bake on a wire rack so heat circulates without flipping
⚠️Watch Out: Don't crowd the pan - it's the single biggest cause of soggy batter

Why This Recipe Works

Cauliflower's dense, porous florets do something most vegetables can't: they hold a battered crust. The flour batter clings to the rough surface, then sets into a shell during the first bake before any sauce touches it.

The double-bake is the technique that separates crisp from soggy.

Bake first to set the crust, toss in sauce, then return to the oven for 5-8 minutes so the glaze caramelizes and dries slightly rather than sitting wet on the surface.

Blue cheese is a natural pairing here, and knowing the best replacements for blue cheese opens the dip options for guests with strong opinions. Serve at least two dipping options on the side.

Quick Reference
⏱️
Prep Time
15 minutes
🔥
Cook Time
30 minutes
⏰
Total Time
45 minutes
🍽️
Servings
4
📊
Difficulty
Easy
🏷️
Category
Appetizer
💡
Quick Tip
Light batter + high oven temp = crispiest result
🎯
Best For
Entertaining

Why this version works:

  • 425°F heat creates edge browning before the interior softens too much
  • Wire rack placement lets hot air reach the bottom of each floret
  • Batter consistency - thick enough to coat a spoon - prevents runoff and clumping
  • Patting florets dry before battering gives the coating a surface to grip
  • Off-heat butter emulsion makes sauce glossy rather than greasy
Golden Rule
Never sauce unbaked florets. The crust must be fully set and dry before it meets any liquid.

What You'll Need

Baked Buffalo Cauliflower Bites - Baked Buffalo Cauliflower Bites

A single medium head of cauliflower gives you enough florets for four servings. Cut everything to a uniform 1-1.5 inch size - this is the one prep step that most directly controls even baking.

Fresh cauliflower holds batter better than frozen, which releases moisture during baking. If you're curious about branching out, making air fryer cauliflower at home uses many of the same principles with a faster cook time.

🥬
Produce
  • 1 medium head cauliflower, cut into 1-1.5" florets
🍜
Batter
  • ¾ cup all-purpose flour
  • ¾ cup water or milk
  • ½ teaspoon garlic powder
  • ½ teaspoon smoked paprika
  • Salt and pepper to taste
🥢
Buffalo Sauce
  • ½ cup Frank's RedHot (or similar)
  • 2 tablespoon butter or vegan butter
🫙
Optional
  • ¼ cup panko breadcrumbs (added to batter for extra crunch)

Ingredient Details

  • Cauliflower
    Pat dry with a paper towel after washing - surface moisture prevents batter from adhering.
  • All-Purpose Flour
    Whisk with liquid until smooth. Batter should coat the back of a spoon but not drip off in sheets.
  • Frank's RedHot
    The high vinegar content and thin consistency are what define classic buffalo flavor. Generic hot sauces vary widely.
  • Butter
    Melt into hot sauce off-heat. This creates an emulsion that clings and glosses rather than pooling at the bottom of the bowl.
  • Garlic Powder + Smoked Paprika
    Season the batter directly - don't rely solely on the sauce for flavor in the crust itself.
  • Panko
    Optional but effective. Stir into batter for a coarser, crunchier crust. Omit for a gluten-free or smoother finish.

Ingredient Swaps

Most swaps here are genuinely workable, not compromise moves. Chickpea flour produces a noticeably firmer, nuttier crust - some people prefer it over all-purpose. The swap that actually changes the dish most is the hot sauce.

Sriracha shifts the flavor toward garlic and sweetness and loses the vinegary tang that defines buffalo. For anyone navigating chickpea swaps that work for batter or other uses, the gram flour option here is one of the cleaner applications.

  • All-purpose flour → chickpea (gram) flour at a 1:1 ratio for a firmer, nuttier crust that stays vegan
  • Butter → vegan buttery spread at 1:1 to preserve sauce richness and keep the plate dairy-free
  • Frank's-style hot sauce → sriracha for chile-forward heat (note: loses classic tang) or cayenne + white vinegar to rebuild it
  • Oven bake → air fryer at 380°F for 18-22 minutes total; check at 15 minutes since batches vary

Chickpea Flour Batter

Works for: Vegan builds, anyone wanting a denser, snappier crust with nutty undertones

Skip if: You want a neutral crust that lets the buffalo sauce carry all the flavor

Air Fryer Method

Works for: Smaller batches, faster cook time, and when oven space is limited

Skip if: You're cooking for a crowd - batching slows you down significantly

Instructions

Getting the batter right before anything hits the oven is the moment most batches go wrong. Aim for a consistency thicker than pancake batter but thinner than bread dough - it should coat each floret in a thin, even shell with no drips pooling at the bottom.

For a side-by-side look at how different coatings hold up, comparing panko vs tempura options shows exactly what changes with each approach. Panko added to this batter pushes the texture decisively toward crunchy.

  1. Preheat oven to 425°F.Set a wire rack over a rimmed baking sheet and lightly spray with oil.
  2. Make the batter. Whisk flour, water (or milk), garlic powder, smoked paprika, salt, and pepper until smooth. Fold in panko if using.
  3. Coat the florets. Working in batches, dip each dry floret into batter, let excess drip off, and place on the wire rack without touching. Space matters here - crowding creates steam, not crust.
  4. First bake. Bake 20 minutes until batter is set and edges begin to brown. Don't rush this stage.
  5. Sauce and second bake. Whisk butter into hot sauce off-heat. Toss baked florets in sauce, return to the rack, and bake 8-10 more minutes until glaze is glossy and edges darken.
Watch Out
If florets look pale and soft after 20 minutes, give them 5 more minutes before saucing. Saucing underbaked crust guarantees sogginess you can't recover from.

What to Serve With It

Buffalo cauliflower bites need something creamy and something crunchy nearby. The spicy, acidic coating calls for a cooling dip and a textural contrast - celery and carrot sticks aren't a cliché here, they're genuinely the right call.

For a complete party spread, knowing how long freezing ranch dressing keeps it usable helps you prep dips days ahead. Make ranch and blue cheese both; guests will split down the middle.

Side Dish Prep Why It Works How to Serve
Ranch or blue cheese dip Easy Creamy, cooling contrast to vinegary heat Serve in small bowls alongside the platter
Celery and carrot sticks Easy Traditional buffalo accompaniment; snappy texture Bundle in a cup or lay flat on the board
Shredded romaine salad Easy Bright, crunchy counterpoint to rich coating Lightly dressed - keep it simple
Buffalo cauliflower sliders Medium Turns the bites into a finger-food main Pile into small buns with coleslaw
Pickles and pickled onions Easy Briny acidity cuts through the butter in the sauce Scatter around the platter for color and bite

Three ways to serve it:

  • 🍽️ Platter-style with dips, pickles, and raw vegetables for entertaining
  • 🥖 Slider format on small buns with slaw for a casual main course
  • 🥗 Chopped over romaine with blue cheese crumbles as a warm salad
Shortcut
Prep the dips and cut the vegetables the night before. Everything keeps well chilled, and it cuts 15 minutes off party-day prep.

Store and Reheat

These keep well for 3 days in the fridge in a shallow airtight container. Layer a paper towel under the florets to absorb moisture and prevent the bottom layer from going soft overnight.

Freezing works too - up to 1 month - though the crust softens slightly after thawing. Full guidance on freezing buffalo cauliflower covers what to expect from frozen batches and how to restore texture on reheat.

Method Time Best For
🔥 Oven 8-12 min at 400°F Restoring crisp exterior on larger batches
🍳 Air Fryer 4-6 min at 380°F Small batches, fastest route back to crunchy
📦 Microwave Not recommended Steam softens the batter - use as last resort only

For best results when storing:

  • Cool completely before sealing - steam trapped in the container softens the crust
  • Store in a single layer if possible, or separate layers with parchment
  • Reheat on a wire rack, not a flat sheet, so air circulates underneath
  • If freezing, freeze before saucing for the crispest reheat outcome
  • Re-sauce lightly after reheating if the glaze looks dry or dull

Frequently Asked Questions

Can we make these gluten-free?

Yes. Swap all-purpose flour for chickpea (gram) flour at a 1:1 ratio and skip the panko. The crust will be slightly denser but holds up well through the double-bake process.

How do we keep them crispy after saucing?

The second bake is key - after tossing in sauce, return the florets to the wire rack and bake 8-10 minutes at 425°F. This sets the glaze and dries the surface so it clings rather than drips.

Can we air-fry instead of baking?

Yes - cook at 380°F for 18-22 minutes total, pausing at the halfway point to toss in sauce, then finish. Work in small batches to avoid crowding, which causes steam buildup.

How spicy will these be for kids?

Frank's RedHot is medium-heat by most standards - noticeable but not aggressive. To reduce heat, cut the hot sauce by half and replace with melted butter or a mild tomato-based sauce.

How long to bake buffalo cauliflower at 425°F?

Bake 20 minutes for the first stage until the batter sets and edges brown, then 8-10 minutes after saucing for a total of roughly 28-30 minutes in the oven. Florets should be fork-tender with a glossy, set glaze.

Baked Buffalo Cauliflower Bites

Baked Buffalo Cauliflower Bites

No ratings yet
We bake cauliflower florets in a light seasoned batter, toss them in a butter-forward hot sauce, and finish with a short return to the oven so the sauce glazes and the crust crisps. The method delivers a bright, vinegary buffalo flavor with a crisp exterior and tender interior.
Print Recipe Pin Recipe
Prep Time 15 minutes mins
Cook Time 30 minutes mins
Total Time 45 minutes mins
Servings: 4 servings
Course: Appetizer
Cuisine: American
Ingredients Equipment Method Notes

Ingredients
  

  • 1 head cauliflower about 1.5 lb, cut into 1-1.5 inch florets
  • 1 cup all-purpose flour substitute chickpea flour for gluten-free
  • 1 cup water room temperature; adjust to make batter coat-fluently
  • 1 teaspoon garlic powder
  • 0.5 teaspoon paprika smoked or sweet
  • 0.5 teaspoon salt
  • 0.25 teaspoon black pepper freshly ground
  • 1 cup panko optional for extra crunch
  • 0.25 cup hot sauce Frank's-style preferred
  • 2 tablespoon butter melted; use vegan butter to make dairy-free
  • 1 tablespoon brown sugar optional, balances vinegar
  • celery sticks for serving
  • ranch or blue cheese dressing for serving

Equipment

  • Sheet pan Half-sheet or similar
  • Wire cooling rack Fits inside the sheet pan for air circulation
  • Mixing bowls One for batter, one for sauce
  • Whisk

Method
 

  1. Preheat oven to 425°F and place a wire rack on a rimmed sheet pan; spray the rack lightly with oil.
  2. Whisk flour, water, garlic powder, paprika, salt, and pepper until a smooth batter coats the back of a spoon; fold in panko if using.
  3. Toss cauliflower florets in the batter until evenly coated, shake off excess, and arrange in a single layer on the wire rack.
  4. Bake for 20-25 minutes until the batter is set and edges are golden brown and slightly blistered; florets should be fork-tender when pierced.
  5. Mix hot sauce, melted butter, and brown sugar in a bowl off heat until glossy; quickly toss baked florets in the sauce to coat.
  6. Return sauced florets to the rack and bake 5-8 minutes at 425°F until the sauce glazes and edges firm; serve immediately with celery and dressing.

Notes

  • Trim florets to uniform 1-1.5 inch pieces so they cook evenly.
  • Use a wire rack over a sheet pan to allow hot air to crisp all sides.

Tried this recipe?

Let us know how it was!

Cinnamon Sugar Roasted Nuts [Snack & Gift]

May 11, 2026

Warm, crunchy, and coated in a glassy cinnamon-sugar shell cinnamon sugar roasted nuts deliver that satisfying crackle in every handful.

Cinnamon Sugar Roasted Nuts

They're the kind of snack that disappears from the bowl before you've even set out napkins. Whether you're filling a charcuterie board, wrapping jars as gifts, or just want something better than a bag of trail mix, this recipe covers it.

A single sheet pan and 40 minutes is all it takes. The result looks and tastes like something from a market stall.

QUICK SUMMARY

Cinnamon sugar roasted nuts come together in 40 minutes with one bowl and a sheet pan. An egg white binder creates that signature crackled sugar shell, while a low oven temperature keeps the nuts from burning before the coating sets. Watch for the glossy, slightly crackled shell as your doneness cue.

⏱️Time Reality: 10 min prep, 30 min bake - stir once at the 15-minute mark
🥚Method Shortcut: Foamy (not stiff) egg white coats every nut evenly without clumping
⚠️Watch Out: Sticky, wet clumps after cooling mean the sugar didn't fully dry - return to oven 5-10 minutes at 300°F

Why This Recipe Works

Most candied nut recipes go wrong at two points: the coating stays wet, or the nuts scorch before the sugar sets.

This version fixes both by keeping the oven at 300-325°F and using a foamy egg white - not beaten stiff, not watery - as the binder that locks cinnamon and sugar to every surface.

You can read about pecans in cooking to understand why nuts with natural oils and skins hold coatings better than drier varieties. Cashews, almonds, pecans, and walnuts all work here for exactly that reason.

Quick Reference
⏱️
Prep Time
10 minutes
🔥
Cook Time
30 minutes
⏰
Total Time
40 minutes
🍽️
Servings
6
📊
Difficulty
Easy
🏷️
Category
Snack
💡
Quick Tip
Use egg white for even, crackled sugar coating
🎯
Best For
Entertaining

Five things that make this recipe reliable:

  • 🌡️ Low oven temp (300-325°F) lets the sugar dry slowly without smoking or burning
  • Foamy egg white distributes evenly - stiff peaks create lumps, watery whites don't bind
  • Single layer on parchment means hot air circulates around each nut
  • One mid-bake stir at 15 minutes prevents any nut from sitting in pooled sugar
  • Separating the nuts while still warm stops them from fusing into hard clumps as they cool
Golden Rule
Pull the nuts when the sugar looks glossy and slightly crackled at the edges - not wet, not dark brown. That's the window.

What You'll Need

Cinnamon Sugar Roasted Nuts - Cinnamon Sugar Roasted Nuts

Raw, unsalted nuts are non-negotiable here. Pre-salted nuts throw off the final seasoning and prevent the sugar mixture from adhering cleanly.

If you're curious about alternatives to cashews or other nuts in the mix, that's worth a look before you shop. Stick to nuts with skins - almonds, pecans, walnuts - for the best coating grip.

🥜
Nuts
  • 3 cups mixed raw, unsalted nuts (almonds, pecans, cashews, walnuts)
🫙
Coating
  • 1 egg white (or 3 tablespoon aquafaba)
  • ½ cup granulated sugar
  • 1½ teaspoon ground cinnamon
  • ¼ teaspoon fine kosher salt
✨
Optional Finish
  • Flaky sea salt for topping
  • Pinch of cayenne for heat

Ingredient Details

  • Mixed raw nuts
    Use nuts with skins for better coating adhesion. Avoid roasted or salted varieties - they don't absorb the sugar mixture properly.
  • Granulated sugar
    Spoon-and-level into the measuring cup. Too much sugar leaves wet clumps; too little won't form a full crust.
  • Ground cinnamon
    Fresh cinnamon makes a real difference here - older spice loses its bite and blends into the background.
  • Egg white
    Whisk until foamy but not stiff. This is the binder that holds the sugar-cinnamon crust to each nut.
  • Salt
    Fine kosher salt goes into the coating. Flaky sea salt, added after baking, gives pockets of salty contrast.
  • Cayenne (optional)
    A small pinch - ⅛ teaspoon - adds a warm back-heat without turning the batch spicy.

Ingredient Swaps

The base recipe is forgiving, but each swap changes the result in a specific way. Knowing what shifts helps you decide which version fits your situation.

Understanding swapping out turbinado sugar is useful if you want a coarser, more rustic shell - the texture will be crunchier, though the coating won't be as smooth.

Choose based on whether you want a candy-shop finish or a market-stall crunch.

  • 🥜 Single nut (almonds or pecans): Direct swap, same ratio - flavor focuses on that nut; pecans brown slightly faster, so check at 20 minutes
  • 🌱 Aquafaba for egg white: Use 3 tablespoon - keeps it vegan; coating is slightly less brittle and a touch less glossy
  • 🍬 Turbinado or demerara sugar: Same volume - adds brown-sugar depth and extra crunch; won't melt into a smooth shell
  • 🫚 Pumpkin pie spice or cardamom for cinnamon: Use half the amount - flavor shifts are significant, so go sparingly the first time

Aquafaba vs. Egg White

Works for: Vegan diets, same method, similar binding

Skip if: You need the hardest, glassiest shell - egg white wins for texture

Turbinado vs. Granulated Sugar

Works for: Extra crunch, rustic appearance, brown-sugar flavor

Skip if: You want a smooth, glossy candy coating

Instructions

Get your sheet pan lined with parchment before anything else - sugar-coated nuts weld to unlined pans, and you don't want to deal with that cleanup.

Read about swapping out almonds if you're working with a single-nut batch, since timing shifts slightly by variety.

Here's how to make them:

  1. Preheat oven to 300°F. Line a large rimmed baking sheet with parchment paper.
  2. Whisk the egg white in a large bowl until foamy - about 30 seconds.

Add sugar, cinnamon, and salt, then whisk to combine.
3. Add the nuts and toss until every nut is fully coated in the cinnamon-sugar mixture.

No dry patches.
4. Spread in a single layer on the prepared pan.

No overlapping.

Bake for 15 minutes, then stir once and spread flat again.
5. Bake another 12-15 minutes until the sugar looks glossy and slightly crackled.

Pull immediately.

Separate any touching nuts with a spatula while warm.

Watch Out
Don't skip separating the nuts while warm. Once the sugar sets cold, clumped nuts won't come apart without breaking the coating.

What to Serve With It

Cinnamon sugar roasted nuts sit comfortably across multiple occasions - from a weekend brunch topping to a cocktail hour bowl. They add crunchy, salty-sweet contrast wherever you place them, so the pairing options are wide.

Keep a small bowl next to a cheese board at your next gathering. The nuts work alongside mild, creamy cheeses the same way a honeycomb does - sweet counterpoint to something savory and rich.

Side Dish Prep Why It Works How to Serve
Green salad with goat cheese and apple Easy Nuts add crunchy contrast to tangy cheese and crisp fruit Scatter on top just before serving
Charcuterie or cheese board Easy Sweet-salty nuts complement cured meats and mild cheeses Fill a small bowl on the board
Yogurt or oatmeal bowl Easy Warm cinnamon spice ties into breakfast flavors Add 2-3 tablespoon as a topping
Dark chocolate drizzle plate Medium Rich, bitter chocolate cuts the sweetness Drizzle 2 oz melted chocolate over cooled nuts
Gift jar with ribbon Easy Travels well and keeps for weeks Pack in airtight jars once fully cooled

Three ways to serve it:

  • Cocktail hour: pour into small bowls with rosemary sprigs for a simple, polished presentation
  • Breakfast: crush lightly and stir into Greek yogurt with a drizzle of honey
  • Dessert topping: scatter over vanilla ice cream for instant crunch
Shortcut
For gifting, cool completely before jarring - any residual warmth traps steam and softens the coating.

Store and Reheat

These nuts keep well and are worth making in a double batch.

Store them in an airtight metal tin or glass jar with a tight lid in a cool, dark spot - they hold their crunch for up to 3 weeks at room temperature, or up to 3 months in the freezer.

Knowing how long pecans keep gives useful context, since oily nuts like pecans and walnuts go rancid faster than almonds - factor that in when choosing your mix.

If the batch softens slightly, the oven method below brings them back fully.

Method Time Best For
🔥 Oven 5-7 min at 300°F Restoring crispness to a full batch or clumped nuts
🍳 Stovetop (skillet) 2-3 min over low heat Quickly refreshing a small handful

For best results when storing:

  • Cool completely on the pan before transferring - at least 20 minutes
  • Add a small piece of parchment to the tin to absorb any humidity
  • Don't mix with fresh nuts - they introduce moisture that softens the coating
  • Freeze in a zip-lock bag with air pressed out; thaw at room temperature uncovered
  • 🚫 Avoid airtight plastic containers at room temperature - they trap moisture more than tins or glass

Frequently Asked Questions

Can we use pre-roasted salted nuts?

It's not recommended. Pre-salted nuts make the final saltiness unpredictable, and the surface oils from prior roasting prevent the egg white mixture from adhering properly - leading to patchy, uneven coating.

How do we make this vegan?

Replace the egg white with 3 tablespoons of aquafaba (the liquid from a can of chickpeas). The coating will be slightly less brittle and a touch less glossy, but it sets fully and holds well.

Why did my sugar not set?

The oven temperature was likely too low, or the baking time was too short - the sugar needs sustained heat to dry fully. Return the nuts to the oven at 300°F for 5-10 extra minutes, spread flat, and watch for the crackled, glossy appearance.

Can I make these with only almonds?

Yes - almonds are one of the best single-nut options since their firm texture holds the coating well. Check them at 20-22 minutes, as almonds can brown faster without the fat buffer that pecans or cashews provide.

How long do they keep crunchy?

Up to 3 weeks at room temperature in an airtight tin or glass jar, and up to 3 months in the freezer. Humidity is the main enemy - store away from the stove or any steam source.

Cinnamon Sugar Roasted Nuts

Cinnamon Sugar Roasted Nuts

No ratings yet
Cinnamon Sugar Roasted Nuts: a simple oven method that coats mixed raw nuts in an egg-white-spiced sugar shell, then bakes at moderate heat until the sugar crackles and the nuts are toasted. The result is a crunchy sweet-salty snack ideal for gifting or salads.
Print Recipe Pin Recipe
Prep Time 10 minutes mins
Cook Time 30 minutes mins
Total Time 40 minutes mins
Servings: 6 servings
Course: Snack
Cuisine: American
Ingredients Equipment Method Notes

Ingredients
  

  • 4 cup mixed raw nuts almonds, pecans, cashews, and walnuts; roughly 16 oz total
  • 1 egg white from one large egg
  • 1 tablespoon water to loosen egg white
  • 3 tablespoon unsalted butter melted; optional for richer flavor
  • 3 tablespoon granulated sugar use caster for smoother coating
  • 0.75 cup granulated sugar additional coating sugar (see instructions)
  • 2 teaspoon ground cinnamon
  • 1 teaspoon fine sea salt plus flaky sea salt for finishing
  • 1 teaspoon vanilla extract optional, adds depth

Equipment

  • Sheet pan half-sheet or rimmed baking sheet
  • Parchment paper or silicone baking mat
  • Large mixing bowl for coating nuts
  • Whisk or fork to beat egg white
  • Spatula heatproof for spreading and separating nuts

Method
 

  1. Preheat oven to 325°F. Line a rimmed baking sheet with parchment paper.
  2. Whisk egg white and 1 tablespoon water in a large bowl until foamy; stir in melted butter and vanilla if using.
  3. Add 4 cups mixed raw nuts to bowl and toss until evenly coated with the egg-white mixture.
  4. Mix 3 tablespoons sugar, 2 teaspoons cinnamon, and 1 teaspoon fine sea salt in a small bowl; sprinkle over nuts and toss until sugar evenly clings.
  5. Spread nuts in a single layer on prepared sheet. Bake 20 minutes, then stir and spread again; bake another 8-10 minutes until sugar is dry, slightly crackled, and nuts are fragrant and lightly browned at edges.
  6. Immediately sprinkle flaky sea salt if desired and separate any clumps with a spatula; cool completely on the sheet until sugar is crisp (about 30 minutes).

Notes

  • Use raw, unsalted nuts for controlled seasoning and even coating.
  • Cool fully on the baking sheet; packing warm nuts causes steam and soggy sugar.

Tried this recipe?

Let us know how it was!

Chocolate Covered Strawberries [Easy Valentine's Recipe]

May 11, 2026

Dip, swirl, set - that's the entire technique for chocolate-covered strawberries.

The method centers on dry berries, correctly tempered chocolate, and a cold surface to set a clean, glossy shell. No baking, no special molds, no pastry skills required.

Chocolate Covered Strawberries

This recipe takes 15 minutes of active work and another 30 to chill. You get a firm, snappy shell over a bright, tangy strawberry center.

QUICK SUMMARY

Chocolate-covered strawberries come together with just a few ingredients and a reliable technique. Dry berries and gently melted semi-sweet chocolate are the two non-negotiables. Dip, drizzle with white chocolate if you like, then chill for 15-20 minutes until set and snappy.

⏱️Time Reality: 15 min active, 30 min chill - plan around the rest time
💡Method Shortcut: Microwave at 50% power in 30-second bursts - slower than stovetop but cleaner
⚠️Watch Out: Any water on the berry or in the bowl will seize the chocolate instantly

Why This Recipe Works

Chocolate-covered strawberries fail in one of two ways: seized chocolate or a dull, streaky shell. This recipe avoids both by controlling moisture at every step and keeping the chocolate below 120°F throughout melting.

Good-quality semi-sweet chocolate with a higher cocoa butter content flows thinly over the berry and sets to a firm, glossy shell at room temperature - no tempering machine needed.

If you've made a brazilian brigadeiros chocolate truffles recipe, you already understand how chocolate behaves under gentle heat.

Quick Reference
⏱️
Prep Time
15 minutes
🔥
Cook Time
15 minutes
⏰
Total Time
45 minutes
🍽️
Servings
12
📊
Difficulty
Easy
🏷️
Category
Dessert
💡
Quick Tip
Room-temp, bone-dry berries only
🎯
Best For
Entertaining
  • Firm, ripe strawberries give the cleanest snap against the chocolate shell
  • Melting chocolate at 50% microwave power prevents scorched cocoa solids
  • A single-layer parchment setup lets air circulate and the shell set evenly
  • Dipping one test berry first lets you catch texture or sheen issues before the whole batch
  • White chocolate drizzled while the dark shell is still tacky bonds rather than flaking off
Golden Rule
Dry is everything. Pat each berry with paper towels, then rest on a rack for 10 minutes before dipping. A single water droplet will turn smooth chocolate grainy and unusable.

What You'll Need

Chocolate Covered Strawberries - Chocolate Covered Strawberries

Twelve large strawberries with stems intact are your starting point - choose ones that are firm and fully ripe but without soft spots.

Skip any replacements for banana style fruit swaps here; strawberries are what makes this recipe work structurally and in flavor.

🍓
Fruit
  • 12 large fresh strawberries, stems on
🍫
Chocolate
  • 8 oz semi-sweet baking chocolate, chopped
  • 2 oz white chocolate, chopped
🫙
Optional
  • 1 tablespoon coconut or neutral vegetable oil
  • Flaky sea salt, for finishing

Ingredient Details

  • Fresh strawberries
    Firm and ripe, not soft. Leave ¾-1 inch of green stem for dipping and presentation.
  • Semi-sweet baking chocolate (8 oz)
    Couverture or high-quality baking bars preferred. Higher cocoa butter content = thinner, glossier shell.
  • White chocolate (2 oz)
    For decorative drizzle. Melt separately and apply while dark shell is still tacky for best adhesion.
  • Coconut or vegetable oil (1 tbsp, optional)
    Thins the melted chocolate for a smoother coating. Add in ½ teaspoon increments - too much dulls the shell.
  • Flaky sea salt
    Apply immediately after dipping, before chocolate sets. Cuts sweetness and adds visual contrast.

Ingredient Swaps

Most swaps here shift either sweetness or shell firmness, not the technique. If you're exploring other chocolate-based recipes, the same swap logic applies when you want the differences between double boiler vs steamer for melting methods across different chocolate types.

  • 🍫 Milk chocolate (8 oz) - Sweeter and softer shell; store finished berries chilled or the shell won't hold
  • 🍫 Dark chocolate 70% (8 oz) - Firmer, more intense shell; pairs best with very ripe, sweet berries
  • 🎨 Candy melts (colored) - Easier to pipe for decoration but waxier on the palate and less glossy
  • 🫙 Vegetable oil for coconut oil - Identical thinning effect; coconut oil adds a faint aroma some find noticeable

Milk Chocolate Shell

Works for: sweeter palates, kids' parties, casual presentation

Skip if: serving at room temperature for more than 30 minutes - shell softens

Dark Chocolate 70% Shell

Works for: adult entertaining, pairing with dry sparkling wine

Skip if: your berries are underripe - bitterness compounds without sweet fruit to balance

Instructions

Getting the chocolate to the right consistency before the first dip determines everything that follows.

Line a baking sheet with parchment - and if you're out, check replacements for parchment paper before you start, because the surface matters for release and finish.

  1. Prep berries: Wash strawberries, then pat each one completely dry with paper towels.

Rest on a wire rack for 10 minutes at room temperature.
2. Melt dark chocolate: Place chopped semi-sweet chocolate in a dry, microwave-safe bowl.

Microwave at 50% power in 30-second bursts, stirring between each, until fully smooth - about 3-4 bursts total.

Stir in oil now if using.
3. Test one berry: Dip a single strawberry, let excess drip off, and set on parchment.

Check sheen after 2 minutes.

If dull, the chocolate is too hot - let it cool slightly.
4. Dip the batch: Hold each berry by the stem, dip to ¾ depth, let excess chocolate drip for 3-4 seconds, then set on parchment.

Space them without touching.
5. Drizzle and finish: Melt white chocolate separately in 20-second bursts.

Drizzle over the still-tacky dark shells using a spoon or piping bag.

Add flaky sea salt immediately.

Chill for 15-20 minutes until set.

Watch Out
If your chocolate seizes mid-batch and turns thick and grainy, water got in. Stir in 1-2 teaspoon warm neutral oil to recover minor seizing. For severe seizing, start fresh - there's no fixing broken chocolate for dipping.

What to Serve With It

Chocolate-covered strawberries hold their own as a standalone dessert, however they pair well with a few well-chosen accompaniments that don't compete with the chocolate shell.

Side Dish Prep Why It Works How to Serve
Champagne or dry sparkling wine Easy Bubbles cut sweetness and highlight bright strawberry notes Serve chilled alongside on a small tray
Simple shortbread cookies Easy Buttery crunch contrasts the firm chocolate shell Arrange on the same board for guests to alternate
Assorted nuts (almonds, pistachios) Easy Salty crunch pairs with the smooth shell Scatter in small bowls near the berry platter
Warm raspberry coulis Medium Amplifies fruit acidity and deepens the berry flavor Serve in a small ramekin for dipping
Vanilla yogurt dip Easy Tangy and cool - balances sweetness for lighter servings Spoon into a small bowl alongside the strawberry platter

Three ways to serve it:

  • On a chilled marble board with shortbread and nuts for a hosting spread
  • In a small gift box lined with parchment - single layer, stems facing up
  • Alongside champagne with a ramekin of raspberry coulis for a formal dessert course
Shortcut
Pull strawberries from the fridge 20 minutes before serving. Cold chocolate shells can taste flat and muted - room temperature brings the cocoa and berry flavors forward.

Store and Reheat

Chocolate-covered strawberries have a short window - 24 to 48 hours in the fridge is the realistic limit before berries start to weep under the shell.

Store them in a single layer on a parchment-lined shallow container with a loose lid, never sealed airtight, which traps moisture and causes condensation bloom.

Method Time Best For
🌡️ Room temperature rest 20 minutes Restoring full flavor after refrigeration
📦 Microwave Do not use Melts shell and causes strawberries to weep
❄️ Freezer Not recommended Ice crystals form inside berry, shell weeps on thaw

For best results when storing:

  • 🧊 Single layer only - stacking smudges shells and causes uneven condensation
  • 📄 Parchment between berry and container surface prevents sticking and shell cracking
  • 🌬️ Loose lid or uncovered for the first 30 minutes after chilling lets residual moisture escape
  • 🍓 Discard any berries showing juice pooling under the shell - they won't firm back up
  • ⏰ Make same-day or 1 day ahead for best appearance; beyond 48 hours, texture declines sharply

Frequently Asked Questions

Can we make chocolate-covered strawberries ahead of time?

Yes - up to 24 hours ahead works well. Make them the morning of your event, chill in a single layer, and pull them out 20 minutes before serving so the chocolate shell reaches full flavor at room temperature.

How do we prevent chocolate from seizing when dipping?

Two causes: wet berries and water in the melting bowl. Pat berries completely dry and rest them on a rack before dipping, and make sure your bowl and spatula are dry. Even a single water droplet will turn smooth chocolate thick and grainy.

Can we freeze chocolate-covered strawberries for later?

Freezing isn't recommended. Ice crystals form inside the berry and when they thaw, the fruit weeps liquid under the shell, leaving a soggy, separated result. Make these fresh within 48 hours of serving.

What is the best chocolate to use for a shiny finish?

High-quality semi-sweet couverture or baking bars with a high cocoa butter content give the thinnest, glossiest shell. Chocolate chips contain stabilizers that reduce flow and sheen - avoid them for dipping.

Why did the chocolate bloom or turn white after setting?

Bloom happens from temperature shock or condensation - usually from refrigerating warm, freshly dipped berries too quickly. Let the chocolate cool to barely warm before chilling, and always dry the berries thoroughly beforehand. The bloom is safe to eat but affects appearance and texture.

Chocolate Covered Strawberries

Chocolate Covered Strawberries

No ratings yet
A straightforward recipe for glossy chocolate-covered strawberries using 8 ounces of semi-sweet chocolate and an optional white chocolate drizzle. We use room-temperature, dry berries and gentle melting to produce a firm, snappy shell that sets in 10-15 minutes.
Print Recipe Pin Recipe
Prep Time 15 minutes mins
Cook Time 15 minutes mins
Total Time 45 minutes mins
Servings: 12 servings
Course: Dessert
Cuisine: American
Ingredients Equipment Method Notes

Ingredients
  

  • 12 strawberries medium, firm-ripe with stems intact
  • 8 oz semi-sweet chocolate finely chopped or chocolate chips
  • 2 oz white chocolate for drizzle, finely chopped
  • 1 tablespoon neutral oil vegetable or coconut; optional to thin melted chocolate
  • flaky sea salt optional finishing sprinkle
  • 1 tablespoon unsalted butter optional-do not use salted; small knob can smooth dark chocolate (alternative to oil)

Equipment

  • Mixing bowl heatproof for double boiler or microwave melting
  • Saucepan for double boiler if using
  • Baking sheet lined with parchment paper
  • fork or dipping tool for shaking off excess chocolate
  • small piping bag or zip-top bag for white chocolate drizzle

Method
 

  1. Wash strawberries and pat completely dry with paper towels; rest on a rack at room temperature for 10 minutes to remove any residual moisture.
  2. Place chopped semi-sweet chocolate in a dry heatproof bowl and melt over simmering water (double boiler) stirring until smooth, or microwave in 20-30 second bursts at 50% power, stirring between bursts; remove from heat at 100-105°F and stir until glossy.
  3. Stir in up to 1 tablespoon neutral oil or 1 tablespoon unsalted butter if needed to loosen chocolate for dipping; test with one strawberry for coating consistency.
  4. Hold a strawberry by the stem, dip two-thirds into the melted chocolate, lift and allow excess to drip off, then place on a parchment-lined baking sheet; repeat with remaining berries, spacing them in a single layer.
  5. Melt white chocolate similarly, transfer to a small piping bag, and drizzle over the dark-coated berries while shells are tacky; optionally sprinkle flaky sea salt immediately after drizzling.
  6. Chill the sheet pan uncovered in the refrigerator for 10-15 minutes until the chocolate is firm to the touch, then transfer to a shallow container with parchment layers in between if storing; serve within 24-48 hours.

Notes

  • Ensure berries are completely dry and at room temperature to prevent chocolate seizing.
  • Set berries single-layer on parchment to avoid smudges and condensation.

Tried this recipe?

Let us know how it was!

Veggie Snack Platter [Easy Entertaining Guide]

May 11, 2026

Some evenings call for a spread that looks thoughtful but takes almost no actual cooking.

Veggie Snack Platter

A veggie snack platter is the right move for those moments - a board loaded with crisp raw vegetables, at least one briny accent, and two or three dips that give every guest something to reach for.

Twenty minutes of slicing and arranging is all it takes. The result handles everything from casual weeknight grazing to a full hosting spread without a single pan on the stove.

Color and texture do most of the work here. Carrots, bell peppers, and cucumbers form the backbone, and small bowls of dip anchor the layout so the whole board feels intentional rather than scattered. Knowing your cucumber swaps that work ahead of time also means you can build this platter with whatever the store actually has.

QUICK SUMMARY

A veggie snack platter comes together in 20 minutes with no cooking required. Arrange crisp raw vegetables around a central trio of dips, include at least one briny or roasted item for contrast, and keep everything chilled until guests arrive. Color variety and consistent cutting shapes make the biggest visual difference.

⏱️Time Reality: 20 minutes prep, zero cook time - most of that is slicing
🥣Method Shortcut: Use store-bought hummus and pre-washed baby carrots to cut setup in half
⚠️Watch Out: Wet vegetables sitting on the board too early will pool and soften everything around them - pat dry and assemble close to serving

Why This Recipe Works

This platter succeeds because it treats texture as a design decision, not an afterthought.

Crisp carrots and peppers contrast with creamy hummus and briny olives, so every bite lands somewhere different on the palate.

Pairing one earthy dip with one tangy option - like hummus alongside tzatziki - covers most guest preferences without overcrowding the board.

Understanding hummus's flavor and uses helps you pick the right style, whether that's a smoky roasted red pepper version or a classic plain.

Quick Reference
⏱️
Prep Time
20 minutes
🔥
Cook Time
0 minutes
⏰
Total Time
20 minutes
🍽️
Servings
6
📊
Difficulty
Easy
🏷️
Category
Appetizer
💡
Quick Tip
Choose a mix of colors, textures, and at least two dips
🎯
Best For
Entertaining
  • 🥕 Carrots add firm, sweet crunch and hold their texture for hours without softening
  • Three textures minimum - crisp, creamy, and briny - prevents the platter from feeling one-dimensional
  • Consistent cutting shapes (spears, rounds, matchsticks) make the board look arranged rather than dumped
  • A roasted or marinated element, like marinated olives or smoky roasted chickpeas, adds depth without any cooking on the day
  • Placing dips in small bowls rather than spooning them directly onto the board keeps edges clean and makes refills easy
Golden Rule
Arrange dips in a triangle at the center first, then radiate vegetable sections outward - this locks in the layout before you start filling gaps.

What You'll Need

Veggie Snack Platter - Veggie Snack Platter

The ingredient list here is intentionally flexible, though four items are non-negotiable: carrots, bell peppers, cucumbers, and hummus. Those four cover the sweet, crisp, and creamy bases that make a platter feel complete.

If you plan to add cheese cubes, check our guide on keeping feta fresh so nothing goes soft before guests arrive.

🥬
Raw Vegetables
  • 3 medium carrots, peeled and cut into sticks
  • 2 bell peppers (mixed colors), sliced into strips
  • 1 English cucumber, sliced into rounds or spears
  • 1 cup cherry tomatoes
  • 6-8 radishes, halved
🥢
Dips
  • 1 cup hummus (plain or smoked paprika)
  • ¾ cup tzatziki
  • ½ cup green goddess or harissa yogurt (optional third dip)
🫙
Briny & Extras
  • ½ cup marinated olives
  • ¼ cup pickles or cornichons
  • ½ cup roasted chickpeas
🧀
Optional Additions
  • 100g cheese cubes (cheddar or feta)
  • Pita triangles or crackers
  • Fresh herbs (dill, parsley) for garnish

Ingredient Details

  • Carrots
    Choose firm, thick carrots for sticks - thin baby carrots bend too easily and look flimsy on a board.
  • Bell Peppers
    Red, yellow, and orange are sweeter than green; use at least two colors for contrast.
  • English Cucumber
    Thinner skin and fewer seeds than standard cucumbers - no peeling needed and less wateriness on the board.
  • Hummus
    Store-bought works well; smooth out the surface with the back of a spoon and drizzle with olive oil before serving.
  • Marinated Olives
    Drain most of the oil before placing them on the board to avoid pooling around nearby vegetables.
  • Roasted Chickpeas
    Buy pre-roasted or roast your own up to 24 hours ahead - they stay crunchy at room temperature.
  • Cherry Tomatoes
    Add these last - they release juice if punctured early and can make adjacent items soggy.

Ingredient Swaps

Most of the vegetables on this platter swap easily without changing the overall structure.

The dips are slightly more involved - switching hummus to tzatziki shifts the board from earthy and rich to tangy and cool, which changes how it pairs with bold items like olives.

Those swapping out individual vegetables should also read up on replacements for carrot and swapping out bell pepper for options that match the same crunch and color contribution.

  • 🥕 Carrot sticks → jicama sticks - same crisp bite, slightly milder flavor, works cup-for-cup
  • 🥣 Hummus → tzatziki - tangier, cooler profile; pair it with heartier veg like celery and cucumber
  • 🫑 Bell peppers → celery ribs - milder, stringier crunch; use more pieces to fill the same visual space
  • 🧀 Cheese cubes → roasted chickpeas - keeps the platter fully dairy-free while adding a nutty crunch

Hummus vs. Tzatziki as the Base Dip

Works for: Hummus anchors most flavor profiles; tzatziki suits light spring platters and fish-forward spreads

Skip if: Avoiding sesame (hummus contains tahini) or dairy (tzatziki is yogurt-based)

Cheese Cubes vs. Roasted Chickpeas

Works for: Cheese adds richness for adult platters; chickpeas keep things vegan and add crunch

Skip if: Guests have nut or legume allergies (check chickpea tolerance) or avoiding dairy

Instructions

Assembly order matters more than most people expect - starting with dip bowls locks in the layout before any vegetables go down.

Work outward in sections by color and shape so the board fills evenly without crowding.

For a light meal pairing, swapping out smoked paprika in your hummus recipe can shift the dip's heat level up or down depending on your guests.

  1. Set dip bowls first. Place three small bowls in a loose triangle across the board.

Fill each with hummus, tzatziki, and your optional third dip.
2. Add the longest vegetables. Arrange carrot sticks and bell pepper strips in fanned sections radiating outward from the bowls, alternating colors as you go.
3. Fill in with rounds and halves. Tuck cucumber rounds, radish halves, and cherry tomatoes into gaps between the longer sections.
4. Place briny items. Spoon marinated olives and pickles into any remaining open sections.

Drain excess oil first.
5. Finish with dry items. Scatter roasted chickpeas and cheese cubes last.

Add pita triangles or crackers along one edge, then garnish with fresh dill or parsley.

Shortcut
Pre-cut all vegetables up to 4 hours ahead and store in a paper-towel-lined airtight container in the fridge. Assemble the board in under 5 minutes when guests arrive.

What to Serve With It

A veggie platter works as a standalone starter, but a few additions turn it into a proper spread.

Pita triangles and crackers are the most immediate upgrades - they give the dips a vehicle and keep guests satisfied longer.

Pairing the platter alongside a charcuterie board spoilage signs reference helps when you're planning how long the full spread can sit out safely.

Side Dish Prep Why It Works How to Serve
Pita triangles Easy Adds bulk and gives dips a sturdy scooping vehicle Warm briefly in oven, cut into triangles, fan along board edge
Rotisserie chicken Easy Zero-cook protein that rounds out a light dinner spread Pull into pieces, place on a side plate next to the platter
Quinoa salad Medium Grain base adds texture variety and makes the meal more filling Serve chilled in a separate bowl alongside the board
Charcuterie additions Easy Cured meats and aged cheese shift the platter toward adult entertaining Layer on a separate board adjacent to the veggie spread
Mini crostini Easy Offers a crisp base for layered bites with dip and vegetable toppings Arrange along the outer edge of the board or in a side basket

Three ways to serve it:

  • 🥗 For weeknight dinners, pair with rotisserie chicken and a simple grain salad to make a full no-cook meal
  • 🧆 For hosting, run a second board with charcuterie and crostini so guests can mix and build their own bites
  • 🌿 For a fully plant-based spread, skip the cheese and anchor the board with three dips - hummus, green goddess, and harissa yogurt
Quick Tip
Keep a small bowl of extra roasted chickpeas nearby - they make the fastest gap-filler if the board starts looking sparse mid-party.

Store and Reheat

An assembled platter holds well for up to 24 hours in the fridge if you cover it tightly with plastic wrap.

Whole uncut vegetables stay fresh for 3-5 days in a shallow airtight container lined with a paper towel, which absorbs the moisture that makes produce go limp.

Dips should go into sealed jars rather than staying in the serving bowls - exposure to air dries out the surface quickly.

Checking charcuterie board spoilage signs is useful if your platter includes cheese or cured meats alongside the vegetables.

Method Time Best For
🔥 Oven 8-10 min at 350°F Reheating roasted chickpeas or any roasted vegetable additions
📦 Microwave 30-45 sec on medium Warming small batches of roasted items; not for raw vegetables

For best results when storing:

  • Pat all cut vegetables completely dry before storing - surface moisture is the main cause of sogginess
  • Store dips in sealed jars with a thin layer of olive oil on top to prevent a dry crust from forming
  • Keep cherry tomatoes separate from other vegetables until just before serving
  • Revive limp raw vegetables by soaking in ice water for 10 minutes, then drain and chill before re-plating
  • Do not freeze any component - raw vegetables turn mushy and dips separate when thawed

Frequently Asked Questions

How far ahead can we assemble the platter?

Up to 24 hours ahead if kept tightly covered in the fridge. For best appearance, add cherry tomatoes, roasted chickpeas, and fresh herbs in the final 30 minutes before serving.

Which vegetables hold up longest on a buffet?

Carrots, bell peppers, celery, and radishes are the most durable - they hold their crunch for 2-3 hours at room temperature. Cucumbers and cherry tomatoes soften faster and should be replenished if the spread sits out longer than 90 minutes.

How much do we need per person?

Plan for roughly 1 cup of cut vegetables and 3-4 tablespoons of dip per person as an appetizer. If the platter is the main snack for a longer event, scale up to 1½ cups of vegetables per person.

Can this platter be made gluten-free and vegan?

Yes - all the raw vegetables, hummus, marinated olives, and roasted chickpeas are naturally gluten-free and vegan. Skip the cheese cubes and tzatziki, and replace pita with gluten-free crackers if needed.

How do we keep hummus from drying out on the platter?

Keep hummus in a small bowl rather than spreading it directly on the board, and drizzle a thin layer of olive oil over the surface before serving. Replenish from a covered backup container every hour if the platter is out for an extended event.

Veggie Snack Platter

Veggie Snack Platter

No ratings yet
A composed veggie snack platter with three dips and a mix of raw, roasted, and briny components for six people. The recipe focuses on prep order, exact amounts, and visual assembly rules for a reliable entertaining platter.
Print Recipe Pin Recipe
Prep Time 20 minutes mins
Cook Time 1 minute min
Total Time 20 minutes mins
Servings: 6 people
Course: Appetizer
Cuisine: Mediterranean
Ingredients Equipment Method Notes

Ingredients
  

  • 1 lb carrots peeled and cut into 3-inch sticks
  • 2 red bell peppers seeded and cut into 3-inch sticks
  • 2 yellow bell peppers seeded and cut into 3-inch sticks
  • 1 lb mini cucumbers halved lengthwise
  • 1 pt cherry tomatoes optional - leave whole
  • 6 oz sugar snap peas trimmed
  • 6 radishes halved or quartered depending on size
  • 8 oz hummus store-bought or homemade
  • 8 oz tzatziki plain yogurt-based dip
  • 8 oz marinated olives or pickles pitted olives or cornichons
  • 4 oz feta cheese cubed (optional)
  • 0.25 cup extra virgin olive oil for drizzling roasted item
  • 0.5 teaspoon smoked paprika for hummus garnish
  • 0.25 cup roasted red peppers jarred, sliced - optional warm/roasted component
  • 0.5 cup roasted chickpeas store-bought or oven-roasted for crunch

Equipment

  • large serving board or sheet pan 18x12-inch or similar
  • Small bowls 3 for dips
  • Sharp chef's knife for consistent cuts
  • Cutting board

Method
 

  1. Prepare three small bowls and spoon hummus, tzatziki, and olives/pickles into separate bowls; drizzle hummus with 1 teaspoon olive oil and sprinkle smoked paprika.
  2. Wash and dry all vegetables thoroughly; trim ends and cut carrots and peppers into uniform 3-inch sticks, halve mini cucumbers lengthwise.
  3. If using roasted chickpeas or roasted red peppers, warm them in a 350°F oven for 8-10 minutes until edges brown and crisp; transfer to a small bowl.
  4. Arrange dips in a triangle near the center of the board or sheet pan; place vegetables in grouped sections radiating outward by color and shape.
  5. Tuck smaller items (cherry tomatoes, radishes, olives) into gaps to fill space; scatter roasted chickpeas for texture contrast and sprinkle feta cubes in an accessible cluster.
  6. Chill the assembled platter on ice for up to 30 minutes before serving for buffet service; keep remaining cut vegetables refrigerated in a shallow airtight container lined with paper towel.

Notes

  • Cut vegetables within 4 hours of serving for best crunch; store cut items over paper towel in a shallow container.
  • Warm roasted components separately and add to the platter just before service to keep contrast between warm and cool items.

Tried this recipe?

Let us know how it was!

Fruit & Cheese Snack Box [Entertaining Guide]

May 11, 2026

Twenty minutes - that's all this fruit and cheese snack box takes, start to finish.

Fruit & Cheese Snack Box

No cooking, no complicated prep, just smart portioning of cheeses, ripe fruit, and crackers into a box that works for a backyard gathering or a packed lunch equally well.

Three cheeses, grouped fruit, a single spread. That framework is what separates a thoughtful box from a random pile of snacks.

QUICK SUMMARY

This fruit and cheese snack box comes together in 20 minutes with no cooking required. Use one soft, one semi-firm, and one hard cheese for texture contrast, pair with firm sliced fruit and whole berries, and keep crackers in their own compartment to stay crisp. A single jarred spread - honey, jam, or mustard - rounds it out without making things soggy.

⏱️Time Reality: 20 minutes total - slicing and portioning only, no heat involved
📦Method Shortcut: Pre-slice cheeses and fruit up to 1 hour ahead; pack crackers separately until serving
⚠️Watch Out: Crackers touching juicy fruit go soggy fast - always give them their own compartment

Why This Recipe Works

Snack boxes fail when everything is the same texture or the same flavor register.

This one avoids that by anchoring each box with three distinct cheeses - creamy brie, sliceable cheddar, and the firm, salty bite of aged manchego - so every mouthful offers something different.

If you're curious about using manchego cheese for creaminess in other contexts, that guide covers how its fat content behaves differently from softer styles.

Quick Reference
⏱️
Prep Time
20 minutes
🔥
Cook Time
0 minutes
⏰
Total Time
20 minutes
🍽️
Servings
4 boxes
📊
Difficulty
Easy
🏷️
Category
Appetizer
💡
Quick Tip
One soft, one semi-firm, one hard cheese - always
🎯
Best For
Entertaining and grab-and-go snacks

The visual result matters here too. Color contrast - pale brie against deep red grapes, ivory cheddar beside bright green apple slices - signals a well-assembled box before anyone takes a bite. Five markers tell you it's ready to go:

  • 🧀 Three cheeses sliced or portioned, each in its own zone
  • 🍇 Fruit grouped by type, ripe but still firm to the touch
  • 🍬 One spread portioned into a sealed 2 oz jar
  • 🫙 Crackers in a dry compartment, unbroken and not touching fruit
  • 🌿 Optional nuts or a garnish placed last for visual brightness
Golden Rule
Soft cheese goes nearest the ice pack for transport - it's the most temperature-sensitive of the three.

What You'll Need

Fruit & Cheese Snack Box - Fruit & Cheese Snack Box

The box only works when the components contrast each other. Firm fruit like apples holds shape for slicing; small whole fruit like grapes and berries stay intact without browning.

If you're planning ahead, check out tips for keeping blueberries fresh before assembling your boxes the morning of an event.

🧀
Cheeses
  • 2 oz brie (soft)
  • 2 oz sharp cheddar (semi-firm)
  • 2 oz aged manchego (hard)
🍋
Fresh Fruit
  • 1 apple, thinly sliced
  • ½ cup halved grapes
  • ½ cup mixed berries
🍜
Crackers
  • 1½ oz assorted crackers or baguette slices per box
🫙
Accents
  • 2 oz honey, fig jam, or grainy mustard
  • ¼ cup roasted almonds or walnuts (optional)

Ingredient Details

  • Brie
    Remove rind or leave intact - both work. Slice into wedges just before packing.
  • Sharp cheddar
    Cut into small cubes or thin slices. Aged cheddar holds its edge better than mild.
  • Aged manchego
    Slice thin with a sharp knife or break into rustic shards for visual texture.
  • Apple
    Slice within 30 minutes of packing and toss with 1 teaspoon lemon juice to slow browning.
  • Grapes
    Halve for easier eating. Red and green together add color contrast.
  • Honey or jam
    Portion into a 2 oz sealed jar per box. Loose honey will soak crackers and fruit.
  • Nuts
    Roasted and salted work best - raw nuts lack the fat-forward contrast the box needs.

Ingredient Swaps

Most swaps here shift flavor intensity rather than break the recipe. If you're swapping the hard cheese for something sharper, expect a stronger overall flavor profile across the whole box.

For a crunchy cracker alternative, making taralli italian ring crackers at home gives you a sturdier, less breakable base that holds up well in packed boxes.

  • 🧀 Brie → camembert for similar creaminess with a slightly earthier, mushroomy edge
  • 🧀 Manchego → aged parmesan or asiago for sharper umami and a crumblier texture
  • 🍎 Apple → firm pear for a sweeter, juicier result - slice last and lemon-juice immediately
  • 🍞 Crackers → toasted baguette slices for a more robust base, though they stale faster once boxed

Brie vs. Camembert

Works for: Direct 1:1 swap in any box where creaminess and spreadability are the priority

Skip if: You're serving guests who find strong aromas off-putting at room temperature

Crackers vs. Baguette Slices

Works for: Gatherings where boxes are opened and eaten immediately on arrival

Skip if: Boxes will sit more than 1 hour before serving - baguette slices go stale quickly

Instructions

Sequence matters even when nothing is cooked. Slice the most delicate items last so they spend the least time in the box before the lid goes on.

If you're pairing this box with a spicy element, the honey sriracha snack mix in dairy recipes works as a bold counterpoint to the creamy cheese.

  1. Portion and slice cheeses. Cut brie into wedges, cheddar into cubes or thin slices, and manchego into thin shards. Set each in a separate section of your container.
  2. Prep firm fruit. Slice apples thinly and toss immediately with 1 teaspoon lemon juice per apple. Halve grapes. Leave berries whole. Add fruit in grouped clusters beside the cheese.
  3. Pack condiments. Spoon honey, fig jam, or mustard into a 2 oz sealed jar. Place the closed jar in one corner of the box.
  4. Add crackers last. Place crackers or baguette slices in a dry compartment - furthest from any juicy fruit or the sealed jar. Keep them in a single layer if possible.
  5. Finish and seal. Add nuts and any garnish. Seal the box and refrigerate until 15 minutes before serving - soft cheese is best slightly below room temperature.
Watch Out
Don't assemble more than 2 hours ahead if the box won't stay refrigerated - soft cheese and cut fruit both degrade quickly above 40°F.

What to Serve With It

The box is self-contained, however it pairs well with a few light additions when you're hosting.

Cured meats are the most natural companion - they add protein and a salty, savory layer that the fruit and cheese don't fully cover on their own.

Side Dish Prep Why It Works How to Serve
Mixed greens with vinaigrette Easy Light acidity cuts through cheese richness Serve alongside in a separate bowl
Sliced cured meats Easy Adds protein and savory depth to each bite Fold and tuck beside cheeses in the box
Raw vegetable sticks Easy Crunchy, low-moisture contrast to soft cheese Pack in a separate compartment or on the side
Small pickled vegetable tray Medium Bright, tangy palate cleanser between bites Serve in a small ramekin beside the open box
Extra crackers on a communal board Easy Lets guests refill without touching each other's boxes Arrange in a basket or on a board at the table center

Three ways to serve it:

  • Individual sealed boxes for grab-and-go lunches or outdoor events where guests need their own portion
  • Open boxes arranged as a spread on a table, lids removed, for casual grazing at home
  • Deconstructed onto one large communal board for parties where guests build their own combinations
Shortcut
Use a compartmentalized bento box or a divided meal prep container - they already separate crackers, fruit, and cheese without needing dividers.

Store and Reheat

Assembled boxes keep for up to 24 hours in the fridge, though crackers will soften if they're touching any moisture. Pack them separately and add at serving time to extend cracker life.

For context on how long individual components like cheeses hold up on their own, the guide on freezing charcuterie board covers cheese-specific timelines worth knowing.

Method Time Best For
🍳 Room Temperature Rest 15 minutes Soft cheeses - brings brie to spreadable texture before serving
📦 Refrigerate (assembled) Up to 24 hours Full boxes with crackers stored separately and condiments sealed
🔥 Oven (brie only) 10 minutes at 350°F Serving brie warm at a gathering - not suitable for transport boxes

For best results when storing:

  • Keep crackers in a sealed zip bag or separate container - not inside the box until serving
  • Store soft cheeses near the back of the fridge where temperature is most consistent
  • Use wax-paper dividers between components to prevent flavors from bleeding across sections
  • Toss cut apples with lemon juice before storing - they'll still brown slightly after 4-6 hours
  • Do not freeze assembled boxes - fruit texture collapses and cheese weeps moisture on thawing

Frequently Asked Questions

How long can I assemble the boxes before serving?

Up to 24 hours if kept refrigerated, with crackers stored separately. If the boxes will sit at room temperature, assemble no more than 2 hours before serving and keep them in an insulated bag with an ice pack.

Which cheeses keep best for transport?

Semi-firm and hard cheeses like cheddar and manchego hold up best - they don't sweat or lose shape. Soft cheeses like brie need to stay cold and should be placed closest to the ice pack in an insulated container.

Can I make these boxes vegan or dairy-free?

Yes - use firm dairy-free cheeses based on cashew or almond for the soft and semi-firm slots, and a coconut-based hard style for texture variety. The fruit, crackers, and jam components need no changes.

How do I prevent fruit from browning in the box?

Toss cut apples or pears with 1 teaspoon lemon juice per apple immediately after slicing - this slows oxidation for 2-4 hours. Berries and grapes don't brown; slice them only if needed and keep them whole when possible.

Is it safe to pack meat with cheese at room temperature?

Only for up to 2 hours total - both cured meats and soft cheeses fall into the food safety danger zone above 40°F after that point. For longer events, keep boxes in an insulated container with an ice pack and replenish ice as needed.

Fruit & Cheese Snack Box

Fruit & Cheese Snack Box

No ratings yet
A grab-and-go fruit and cheese snack box built for contrast: one soft, one semi-firm, and one hard cheese with firm and bite-size fruits, crackers, nuts, and a sealed sweet accent. The arrangement and exact portions ensure balanced texture and flavor for 4 boxes.
Print Recipe Pin Recipe
Prep Time 20 minutes mins
Cook Time 1 minute min
Total Time 20 minutes mins
Servings: 4 boxes
Course: Appetizer
Cuisine: American, Mediterranean
Ingredients Equipment Method Notes

Ingredients
  

  • 4 brie 2 oz wedge per box, soft
  • 8 oz mild cheddar 2 oz per box, semi-firm, sliced
  • 4 oz aged manchego 1 oz per box, broken into shards
  • 2 cup red seedless grapes about ½ cup (handful) per box, halved if large
  • 2 apple 1 medium apple, cored and sliced into 8 slices per box total (slice just before packing)
  • 2 cup mixed berries about ½ cup per box (strawberries halved if large)
  • 8 oz assorted crackers 2 oz per box; keep in separate compartment
  • 4 tablespoon honey 1 tablespoon per box in sealed 2 oz jar
  • 4 oz roasted almonds 1 oz (about 12-14) per box
  • 4 sprig fresh rosemary 1 small sprig per box for garnish and aroma
  • 1 tablespoon lemon juice use 1 teaspoon per apple half tossed to prevent browning (total 1 tbsp)
  • 4 small paper napkin for each box

Equipment

  • insulated lunch box or cooler large enough for 4 compartment boxes and an ice pack
  • 4 compartment meal boxes each approx 9x6 inches with removable dividers
  • small 2 oz jam jars for spreads; screw-top to prevent leaks
  • Cheese knife for cutting soft and hard cheeses cleanly

Method
 

  1. Gather equipment and chill an insulated lunch box with an ice pack for 10 minutes while prepping ingredients.
  2. Slice cheeses: cut brie into four 2 oz wedges, slice cheddar into 4 equal 2 oz portions, and break manchego into 4 small shards.
  3. Prep fruit: halve grapes if large, core and slice apples into 8 wedges per apple and toss apple slices with 1 teaspoon lemon juice immediately to slow browning.
  4. Portion items into 4 compartment boxes: place cheeses in the largest section (soft nearest the ice pack side), fruit in two separate sections (berries and grapes/apples), and crackers in a sealed compartment to avoid moisture contact.
  5. Add 1 tablespoon honey into each small sealed jar and place jar in its own compartment; add 1 oz roasted almonds and a rosemary sprig to each box as garnish.
  6. Close boxes, place in chilled insulated lunch box with ice pack separated by cloth, and transport within 2 hours for optimal texture; refrigerate if not served within that time.

Notes

  • Toss apple slices with lemon juice right before packing to minimize browning.
  • Keep crackers in a separate sealed compartment to prevent sogginess from fruit juices or spreads.

Tried this recipe?

Let us know how it was!

7 Best Substitutes for Hot Sauce in Marinades & Stir-Fries

May 11, 2026

You reach for hot sauce mid-recipe and find an empty bottle. Whether you need heat for wings, stir-fries, or marinades, these swaps keep your dish moving without a store run.

7 Best Substitutes for Hot Sauce in Marinades & Stir-Fries

Hot sauce brings acidity, heat, and tang - but not every bottle behaves the same. Sriracha adds sweetness, chili garlic brings texture, and cayenne-vinegar mixes deliver pure fire. The swap you choose depends on whether you need smooth liquid heat or chunky, garlicky punch.

The following options work best in different recipe situations.

Quick Substitute Reference
#SubstituteBest ForRatioKey Note
1 Sriracha Sauce ✨ Both 1:1 Sweeter and thicker
2 Chili Garlic Sauce 🍳 Cooking 1:1 Chunky texture
3 Cayenne Pepper + Vinegar 🍳 Cooking ½ teaspoon cayenne + 1 tablespoon vinegar Pure heat, more acidic
4 Frank's RedHot Sauce 🍳 Cooking 1:1 Vinegar-forward
5 Harissa Paste 🍳 Cooking 1:1 Smoky, cumin-heavy
6 Chipotle in Adobo 🍳 Cooking 1:1 Smoky and slightly sweet
7 Hot Paprika + Lemon Juice 🍳 Cooking 1 teaspoon paprika + 1 tablespoon lemon Mild heat, citrusy

7 Easy Hot Sauce Swaps for Cooking

These swaps range from grocery staples to specialty options. Pick based on your dish and what heat level you need.

1 - Sriracha

Sriracha sits slightly sweeter than most hot sauces, with a thicker consistency that clings to noodles, glazes, and marinades. The garlic undertone works in Asian-inspired dishes but reads less neutral than vinegar-based sauces.

Use 1 tablespoon Sriracha per 1 tablespoon hot sauce. The sweetness softens spicy mayo, stir-fry glazes, and dipping sauces.

Here's what to know:

  • Works in marinades without separating
  • Blends smoothly into mayo-based sauces
  • Adds mild garlic flavor

**Skip if:: you need a vinegar-forward tang or want heat without sweetness.

Sriracha

Works for: Asian marinades and dipping sauces

**Skip if**:: You want sharp vinegar tang

Frank's RedHot

Works for: Buffalo wings and barbecue glazes

**Skip if**:: You need complex spice layers

2 - Chili Garlic

Chili garlic sauce delivers bold garlic punch with visible chili flakes throughout. The chunky texture means it doesn't disappear into smooth sauces the way liquid hot sauce does.

Use 1 tablespoon per 1 tablespoon hot sauce. Stir-fries and meat glazes benefit from the texture.

If you're short on chili garlic too, replacements similar to Chili Garlic Sauce covers swaps for similar heat.

**Skip if:: you dislike garlic or need smooth, liquid consistency.

Watch Out
Chili garlic doesn't dissolve. Use it in stir-fries or glazes where texture belongs, not in vinaigrettes or smooth sauces.

3 - Cayenne Mix

Cayenne pepper mixed with vinegar mimics the heat and acidity of hot sauce without the thickness or garlic. You control the heat level by adjusting cayenne amounts.

Mix ½ teaspoon cayenne with 1 tablespoon vinegar for 1 tablespoon hot sauce. Start with less cayenne if you want mild heat.

Key details:

  • Pure heat without sweetness
  • More acidic than bottled hot sauce

Out of cayenne as well? Cayenne Pepper alternatives worth trying lists dried chili options.

**Skip if:: you need liquid consistency or a thicker sauce for coating.

4 - Frank's RedHot

Frank's RedHot runs thinner and more vinegary than Sriracha, making it the standard swap for Buffalo wings and barbecue sauces. The flavor stays simple: vinegar, cayenne, salt.

Use 1 tablespoon per 1 tablespoon hot sauce. It works in any recipe that calls for Louisiana-style hot sauce.

The essentials:

  • Vinegar-forward with mild cayenne heat
  • Stays thin for tossing and coating
  • Blends smoothly into butter-based sauces

If you're out of Frank's too, quick Hot Sauce replacements to try keeps you covered.

**Skip if:: you need complex spice layers beyond heat and vinegar.

UseRatioNotes
Buffalo wings1:1Frank's RedHot works best
Asian stir-fries1:1Use Sriracha or chili garlic
Dressings1:1Cayenne mix adds clean heat

5 - Harissa

Harissa paste brings smoky, cumin-forward heat that shifts the flavor profile away from vinegar tang. The texture stays thicker than liquid hot sauce, so it clings to roasted vegetables and grilled meats.

Use 1 tablespoon per 1 tablespoon hot sauce. North African and Middle Eastern dishes handle the spice blend naturally.

What to expect:

  • Smoky depth from roasted peppers
  • Cumin and coriander flavors layer in
  • Less acidic than vinegar-based sauces
  • Thick paste works best stirred into stews

Missing harissa as well? What to use for Harissa Paste covers similar spiced pastes.

**Skip if:: you want a smooth, pourable sauce without texture.

Best Pick
Harissa works best in stews, tagines, and roasted vegetable dishes where smoky spice belongs.

6 - Chipotle Adobo

Chipotle in adobo sauce delivers smoky heat with a hint of sweetness from the tomato-based adobo. The texture runs thicker than liquid hot sauce, so it works better stirred into marinades than drizzled.

Use 1 tablespoon per 1 tablespoon hot sauce. Stews, chili, and Mexican-inspired dishes take on deeper, smokier heat.

Short on chipotle adobo too? What to use for Adobo Sauce lists smoky pepper swaps.

**Skip if:: you want bright, fresh heat instead of smoky depth.

Golden Rule
Use chipotle adobo in slow-cooked dishes where smoke has time to meld. Skip it in quick sautés or fresh salsas.

7 - Paprika Lemon

Hot paprika mixed with lemon juice gives mild heat and citrus brightness without garlic or vinegar tang. The flavor stays lighter than most hot sauces, so it works in Mediterranean and seafood dishes.

Mix 1 teaspoon hot paprika with 1 tablespoon lemon juice for 1 tablespoon hot sauce. Add more paprika if you want stronger heat.

Quick specs:

  • Mild heat with smoky undertones
  • Citrus acidity replaces vinegar
  • Works in dressings and marinades
  • Thins with olive oil if needed

Missing paprika as well? Swaps when Paprika runs out covers similar dried peppers.

**Skip if:: you need strong chili flavor or thick consistency.

Shortcut
Start with ½ teaspoon paprika, taste, then add more. It's easier to add heat than pull it back.

Picking the Right Replacement

Most of these swaps work without changing the recipe. For stir-fries and marinades, sriracha or chili garlic stay closest to traditional hot sauce. For wings and barbecue, Frank's RedHot matches the vinegar-forward profile.

Start with what you have and adjust based on heat preference.

  • Closest match - Sriracha for Asian dishes
  • Easiest grab - Frank's RedHot for wings
  • Bold alternative - Harissa for smoky depth

Frequently Asked Questions

Can I use Tabasco instead of hot sauce?

Yes. Tabasco works at a 1:1 ratio. It runs thinner and more vinegary than Sriracha but matches Frank's RedHot closely.

Does hot sauce substitute work in baking?

Most hot sauces add too much liquid for baking. Use cayenne pepper or hot paprika instead to control moisture.

How do I make hot sauce milder when substituting?

Cut the amount in half and add vinegar or lemon juice to match the acidity. Taste and adjust from there.

Can I freeze leftover hot sauce substitutes?

Sriracha, chili garlic, and harissa freeze well in small portions. Frank's RedHot and cayenne-vinegar mixes stay shelf-stable, so freezing isn't necessary.

What hot sauce substitute works best for Buffalo wings?

Frank's RedHot matches the classic Buffalo profile. If you're out, mix cayenne with vinegar and melted butter for similar tang and heat.

7 Best Substitutes for Hot Sauce in Marinades & Stir-Fries

7 Best Substitutes for Hot Sauce

No ratings yet
This guide helps you pick the right hot sauce substitute for cooking or finishing. Choose based on your dish's flavor needs and desired heat and texture levels.
Print Recipe Pin Recipe
Prep Time 7 minutes mins
Cook Time 6 minutes mins
Total Time 13 minutes mins
Servings: 4 servings
Course: Substitution Guide
Cuisine: Various
Ingredients Method Notes

Ingredients
  

  • 1 tablespoon Sriracha Sauce Use 1:1 ratio; sweeter and thicker, adds mild garlic flavor; skip if you want vinegar tang or no sweetness.
  • 1 tablespoon Chili Garlic Sauce Use 1:1 ratio; chunky texture and bold garlic punch; skip if you need smooth liquid consistency.
  • 0.5 teaspoon Cayenne Pepper Mix ½ teaspoon cayenne with 1 tablespoon vinegar per tablespoon hot sauce; pure heat, more acidic; control cayenne for heat level.
  • 1 tablespoon Vinegar Mix ½ teaspoon cayenne with 1 tablespoon vinegar per tablespoon hot sauce for acidity and heat balance.
  • 1 tablespoon Frank's RedHot Sauce Use 1:1 ratio; vinegar-forward, thinner consistency for coating and tossing; skip if you need complex spice layers.
  • 1 tablespoon Harissa Paste Use 1:1 ratio; smoky, cumin-heavy, less acidic; best in stews and roasted vegetables; skip for smooth sauces.
  • 1 tablespoon Chipotle in Adobo Use 1:1 ratio; smoky and slightly sweet; works better in marinades or slow-cooked dishes; skip for fresh salsas.
  • 1 tablespoon Lemon Juice Mix 1 teaspoon hot paprika with 1 tablespoon lemon juice per tablespoon hot sauce; citrusy brightness replaces vinegar.
  • 1 teaspoon Hot Paprika Mix 1 teaspoon hot paprika with 1 tablespoon lemon juice; mild heat with smoky undertones; skip if thick consistency needed.

Method
 

  1. Choose a substitute based on your dish type and desired flavor profile, such as sweet, smoky, or vinegary.
  2. Prepare the substitute according to recommended ratios, mixing ingredients like cayenne and vinegar or paprika and lemon juice as indicated.
  3. For thick pastes like harissa or chipotle in adobo, stir into dishes or marinades where texture is appropriate; avoid use in dressings or fresh sauces.
  4. Adjust amounts gradually, starting with equal parts or specified ratios, then taste and modify heat or acidity to suit your preference.
  5. Ensure substitutions blend well into your recipe, thinning thicker sauces if needed, to maintain the dish's intended texture and balance.
  6. Taste the dish after adding the substitute and adjust seasoning or acidity as needed for optimal flavor.

Notes

Adjust Sriracha slowly and blend well to avoid a too sweet or improperly thick sauce.

Tried this recipe?

Let us know how it was!

What Is Webbing on Watermelon? [Taste, Uses & More]

May 11, 2026

Bite into a slice and you notice it immediately - pale threads running through the red flesh, slightly resistant where the rest gives way cleanly. Webbing on watermelon isn't mold, isn't damage from the outside, and it won't make you sick.

It's the fruit's own vascular tissue, visible when growth conditions push those internal fibers to the surface of perception.

Knowing what it is changes how you use the melon rather than whether you eat it.

QUICK SUMMARY

Webbing on watermelon is pale fibrous vascular tissue inside the flesh. It's safe to eat but alters texture - stringy and occasionally mealy. Flavor in webbed areas is dull and mildly starchy. Cut away heavy webbing for salads; blend or juice lightly webbed sections.

👅Flavor: Dull, mildly starchy-sweet, less juicy than healthy flesh
✋Texture: Stringy, fibrous, can turn mealy when dense
🍉Best Use: Juice or blend lightly webbed areas; cut away heavy webbing
🛒Buying Tip: Heavy for size, creamy field spot, inspect cut flesh for even color
⏱️Shelf Life: Whole melon 5-7 days at room temp; cut flesh 3-5 days refrigerated

What Is Webbing on Watermelon?

Watermelons grow a network of vascular bundles - the same structures that move water and nutrients through the fruit during development.

Under normal conditions, these bundles stay fine and inconspicuous. Webbing becomes visible when those bundles thicken, often due to water stress, uneven growth surges, or the fruit holding on the vine too long after peak ripeness.

👅
Flavor
starchy-sweet
dull melon
mildly concentrated sugar
✋
Texture
stringy
fibrous
mealy when dense
👃
Aroma
mild melon
slightly dusty when advanced
Flavor Intensity
Mild
 

You may also see it called fibrous flesh, stringy watermelon, or vascular streaking. It appears more frequently in seeded heirloom varieties than in modern seedless hybrids, though no variety is entirely immune.

The condition is not a disease and carries no alternate scientific name - it's simply a structural outcome of how the fruit developed.

What Does Webbing on Watermelon Taste Like?

The webbed strands themselves taste closest to the stringy sections of underripe honeydew or the fibrous inner ribs of an overripe cantaloupe. There's a faint starchiness where a good watermelon would deliver pure, clean juice.

Surrounding flesh often tastes slightly duller than usual, too - not sour, not fermented, just flat.

This happens because the disrupted vascular flow means sugars didn't distribute evenly during development.

Where webbing is light and scattered, you may notice only a mild textural interruption.

Dense webbing, however, signals the melon passed its peak, and the flesh there can turn genuinely mealy rather than just fibrous.

How to Use Webbing on Watermelon

Light webbing doesn't disqualify a melon. It just redirects how you use it.

How Webbing on Watermelon Is Used
Method Best For Tip
🥗 Raw (trimmed) Summer salads, fruit plates, mezze Cut away heavy webbing; use crisp surrounding flesh only
🧃 Juicing/Blending Watermelon agua fresca, smoothies Straining removes fibrous bits; blend whole including lightly webbed sections
🌶️ Chopped Salsas, relishes Dice webbed areas small - texture blends with onion and chili
🧊 Frozen Granita, sorbet Freeze only non-webbed crisp flesh for clean, smooth result
🍹 Maceration Cocktail base, gin mixer Sugar and lime acid soften fibrous texture during macerating time
🇺🇸 American summer salads
🇲🇽 Mexican agua fresca
🇬🇷 Mediterranean mezze
🌏 Southeast Asian fruit salads

Avoid using heavily webbed sections in thin clear fruit gels or refined purees - the stringiness will survive straining and ruin the texture.

For everything else, maceration with a little lime juice and sugar does a reasonable job of softening the fibers before serving.

Pairs well with
🧀 feta
🌿 mint
🍋 lime
🥒 cucumber
🌶️ chili flakes
🍸 gin

How to Buy and Store Watermelon

The best prevention happens at the market.

Pick up the fruit - it should feel heavy for its size, a sign the flesh is still dense and moist.

Look for a creamy yellow field spot on the underside, which indicates it sat on the ground long enough to ripen properly.

A white or pale green field spot often means it was picked early, which correlates with uneven vascular development and more webbing.

Best Pick
If buying a cut melon, inspect the flesh directly. Even pink color with minimal pale strands is what you want. Avoid pieces with large white streaks radiating from the center - those webbed areas won't improve once cut.

Once home, keep a whole melon at room temperature for up to seven days.

Refrigerate cut pieces in shallow airtight containers, where they'll hold for three to five days. Webbed sections deteriorate faster - they darken and soften quicker than clean flesh, so use those parts first.

Juicing produce stores differently from solid fruit; just as how long celery for juicing keeps matters when you're prepping batches, timing your watermelon juice right after cutting keeps flavor where you want it.

When to Use It and When to Skip It

If webbing is light - a few thin strands scattered through otherwise firm, deeply colored flesh - use the melon. Juice it, toss it in a salsa, or blend it into agua fresca.

The texture issue nearly disappears once the fruit is processed or diced small.

Skip the heavily webbed sections for anything where texture is the whole point: a clean fruit salad, a watermelon slice served at the table, a sorbet that needs smoothness. Cut those parts away without guilt.

The rest of the melon is still worth using.

Frequently Asked Questions

Is webbing on watermelon safe to eat?

Yes, webbing is the fruit's own vascular tissue and poses no health risk. The exception is if the webbed area is also soft, discolored, or smells fermented - that signals actual decay, which you should cut away and discard. Webbing alone is a textural issue, not a safety one.

What causes stringy watermelon flesh?

Stringiness comes from thickened vascular bundles, usually triggered by water stress during growing, uneven irrigation, or the fruit remaining on the vine past peak ripeness. Rapid growth spurts after dry periods can also cause these bundles to become more prominent. It's a development issue, not disease or mishandling after harvest.

Does webbing mean the watermelon is bad?

Not necessarily - light webbing just means the fruit had some growth irregularity. Heavy, widespread webbing combined with dull color and mealy texture does indicate the melon is past its best. In that case the flesh won't improve with storage; use it in blended or juiced applications rather than fresh.

Can you juice a watermelon with webbing?

Yes. Juicing or blending is actually the best use for lightly webbed watermelon, since straining removes the fibrous strands. Run the juice through a fine mesh strainer or cheesecloth and the result is clean. Heavily webbed and mealy sections may yield less juice and a slightly flat flavor, so taste before committing a full batch.

Which watermelon varieties have less stringiness?

Modern seedless hybrid varieties - including Crimson Sweet and Sugar Baby - tend to show less visible webbing than older seeded heirlooms because they've been bred for uniform flesh density. That said, growing conditions matter more than variety; even a seedless melon grown under water stress can develop prominent vascular strands.

What Is Molasses? Taste, Uses & Baking Tips

May 11, 2026

Gingerbread wouldn't be gingerbread without it - that dark, slightly bitter backbone that keeps spiced cookies from tasting like plain caramel.

Molasses is what gives brown sugar its color and depth in the first place, and using it straight from the bottle delivers something far more complex than any refined sweetener can replicate.

The range across its types is wide, from gently sweet light molasses to the intensely mineral punch of blackstrap.

QUICK SUMMARY

Molasses is a thick, dark syrup and byproduct of sugar refining with a deep, bitter-caramel flavor. It ranges from mild and sweet (light) to strongly mineral (blackstrap). Used in baked goods, glazes, sauces, and marinades, it adds color and a complex, slightly tangy sweetness nothing else quite matches.

🍯Flavor: Bitter caramel, tangy, mineral - intensity rises with each extraction stage
🍪Best Uses: Gingerbread, baked beans, glazes, barbecue sauces, marinades
📅Shelf Life: Opened: 6-12 months pantry; unopened: 2+ years

What Is Molasses?

Molasses is what remains after sugarcane or sugar beet juice is boiled down and sugar crystals are extracted. Each round of extraction - called a "strike" - leaves behind a darker, thicker, more bitter syrup.

Light molasses comes from the first strike and is the mildest; dark molasses follows the second and has more depth; blackstrap molasses is the third and final strike, yielding the most intense, mineral-heavy syrup of the three.

In the UK, molasses is closely related to what's sold as treacle, though the terms aren't interchangeable. Black treacle is closer to blackstrap; golden syrup is a separate product made differently and is much sweeter.

Here's how the main types compare:

  • Light molasses - Mild, sweet, least bitter; good when you want color without overpowering flavor.
  • Dark molasses - Richer, slightly bitter, the standard choice for lebkuchen, gingerbread, and baked beans.
  • Blackstrap molasses - Very bitter, mineral, almost savory; used in small quantities or for nutritional reasons.
  • Treacle (UK) - Black treacle is the closest British equivalent to blackstrap; used in classic British baking.

What Does Molasses Taste Like?

Molasses tastes like dark brown sugar that has been pushed further - more bitter, more tangy, with a wine-like, slightly acidic finish that no other sweetener produces.

The caramel notes are real, however they come with a woody, smoky undertone rather than the clean sweetness you'd get from straight cane sugar.

Sensory SnapshotStrong Intensity
 
👅 Flavor
bitter carameltangy-maltymineralslightly metallic
✋ Texture
viscousstickysyrupy
👃 Aroma
toasted caramelwoody smoke

Compared to maple syrup, molasses is far less sweet and far more assertive. Maple reads as clean and floral; molasses reads as dark, earthy, and almost savory at higher concentrations.

Blackstrap specifically tips into a slightly metallic register that some find difficult on its own - but balanced inside a gingerbread batter or a slow-simmered barbecue sauce, it adds something irreplaceable.

Golden Rule
Use light molasses where sweetness leads and dark molasses where bitterness and color are the goal. Reserve blackstrap for recipes that specifically call for it - substituting it freely will make most baked goods noticeably bitter.

How to Use Molasses

Molasses performs best in recipes where heat and other strong flavors can integrate its bitterness. Baking is its most classic context - it's foundational to gingerbread, spice cookies, and dense rye-based breads found across Scandinavian baking traditions.

How Molasses Is Used
Method Best For Tip
🥖 Baking Gingerbread, spice cookies, rye bread, quick breads Dark molasses for depth; light for milder color and less bitterness
🍖 Glazing Ham, pork ribs, roasted root vegetables Brush on during the last 15-20 minutes to prevent scorching
🍲 Simmering Baked beans, barbecue sauces, braises, stews Add early so the bitterness mellows into the sauce over time
🥣 Stirring in Oatmeal, marinades, cocktail syrups Warm slightly first - it blends far more easily at room temperature

Ginger, cinnamon, and cloves are molasses's most natural flavor partners, which is why spiced baking is where it dominates. In savory cooking, it pairs well with mustard and soy in glazes for pork and beef, or with a squeeze of orange to cut through the bitterness in marinades.

American Southern cooking leans on molasses for baked beans and molasses-glazed ham, two dishes where the slow application of heat completely transforms its raw bitterness into something rich and layered. Caribbean cooking uses it in sauces and as an ingredient in rum production.

Shortcut
No dark molasses on hand? Stir 1 tablespoon of molasses into ¾ cup of white sugar to approximate dark brown sugar - it won't be identical, however it works well in most baked recipes. See more options in our guide to [molasses substitutes](https://forkliftkitchen.com/molasses-substitutes/).
Try It In

🥣Maple Baked OatmealSwap a tablespoon of maple syrup for molasses to add dark, caramelized depth→🍅Roasted Garlic Marinara SauceA small spoonful of dark molasses balances acidity in a long-simmered tomato base→

How to Buy and Store Molasses

Read the label before buying. Light, dark, and blackstrap are distinct products, and grabbing the wrong one will change your recipe significantly. For general baking, dark molasses is the default.

Check that the bottle shows a glossy, pourable syrup - avoid any jar where the contents look crystallized, separated, or unusually pale.

Watch Out
Refrigerating molasses keeps it fresher longer, however it becomes thick and difficult to pour. If you bake with it regularly, pantry storage at room temperature is more practical - just keep the lid tightly sealed.

Store molasses in a cool, dark pantry, tightly sealed in its original jar. Opened bottles stay good for 6-12 months; unopened jars last 2 years or more.

Blackstrap holds up slightly longer than lighter grades because its higher mineral content acts as a natural preservative. For more detail on how long it lasts, see our breakdown of molasses freshness guide.

Start With Dark, Adjust From There

If you're new to cooking with molasses, dark molasses is the right entry point - bitter enough to be interesting, mild enough to work in most standard recipes without adjustment. Try it once in a spice cookie or a simple glaze before committing to blackstrap.

Those looking for brown sugar swaps will find that molasses mixed with white sugar is one of the most reliable swaps available. Start small, taste as you go, and increase only when the recipe can handle the weight.

Frequently Asked Questions

Is molasses the same as treacle?

Not exactly. Black treacle is the British equivalent of blackstrap molasses - dark, bitter, and mineral-heavy. Golden syrup, also called treacle in some UK contexts, is a separate product made from a different refining process and is much sweeter.

What does molasses taste like compared to maple syrup?

Maple syrup is clean, floral, and straightforwardly sweet. Molasses is darker, more bitter, and has a tangy, mineral edge that maple lacks. They're not interchangeable in most recipes.

How do you substitute molasses for brown sugar?

Use ¾ cup white sugar plus 1 tablespoon molasses to replace 1 cup of brown sugar. Dark molasses makes dark brown sugar; light molasses approximates light brown sugar. Adjust liquid slightly if the recipe is sensitive to moisture. More options are covered in our [brown sugar substitutes](https://forkliftkitchen.com/brown-sugar-substitutes/) guide.

Can molasses go bad?

Yes, though it takes time. An opened jar kept in the pantry stays good for 6-12 months; off-smells, mold, or extreme crystallization are signs it's past its best. Unopened bottles last over two years stored properly.

Is molasses vegan?

Generally yes - molasses is a plant-derived byproduct of sugarcane or sugar beet processing with no animal ingredients. However, some strict vegans avoid cane sugar products processed with bone char; beet-derived molasses sidesteps that concern entirely.

« Previous Page
Next Page »

Primary Sidebar

ForkliftKitchen recipe developer

Welcome!

Recipe Developer · 12+ Yr Kitchen Veteran

I'm the recipe developer behind this site, focused on practical, well-tested dishes and smart ingredient swaps. Every recipe is written to be clear, reliable, and easy to make at home.

650+ Recipes
12+ Yrs Exp.
3x Tested
Our Story →

As Featured In

Allrecipes

TASTE OF HOME

Food52

HUFFPOST

Yahoo! Life

Our Editorial Standards

  • ✓ Every recipe tested at least 3 times before publishing
  • ✓ Substitutes verified by real kitchen trials, not guesswork
  • ✓ Reviewed for accuracy by our editorial team
  • ✓ Updated regularly with seasonal info and reader feedback

Most Popular

  • Creamy Lemon Shrimp Linguine
    Creamy Lemon Shrimp Linguine
  • Creamy Garlic Mushroom Chicken
    Creamy Garlic Mushroom Chicken
  • Sesame Ginger Chicken Noodle Bowls
    Sesame Ginger Chicken Noodle Bowls
  • Baked Lemon Herb Fish Fillets
    Baked Lemon Herb Fish Fillets
  • Veggie Loaded Fried Rice
    Veggie Loaded Fried Rice
  • Spicy Garlic Shrimp Stir Fry
    Spicy Garlic Shrimp Stir Fry

Join 8,000+ Home Cooks

Weekly Kitchen Tips

Easy recipes, smart substitutes, and real cooking shortcuts — every Thursday.

Subscribe Free →


Side Dishes

  • What to Serve With Asian Salmon? 15 Best Side Dishes
    What to Serve With Asian Salmon? 15 Best Side Dishes
  • Side Dishes for Strawberry Spinach Salad
    15 Best Side Dishes for Strawberry Spinach Salad
  • Sides for Grilled Cauliflower Steaks to Complete the Meal
    15 Sides for Grilled Cauliflower Steaks to Complete the Meal
  • 15 Sides To Serve With Calabacitas
    15 Best Sides for Calabacitas – Mexican-Inspired Favorites


Substitutes

  • 7 Best Substitutes for Hot Sauce in Marinades & Stir-Fries
    7 Best Substitutes for Hot Sauce in Marinades & Stir-Fries
  • 9 Best Substitutes for Butter in Baking and Cooking
  • 7 Best Substitutes for Tagliatelle for Italian Pasta Dishes
    7 Best Substitutes for Tagliatelle for Italian Pasta Dishes
  • 7 Best Substitutes for Udon Noodles in Asian Stir-Fries
    7 Best Substitutes for Udon Noodles in Asian Stir-Fries


Browse by Topic

  • Side Dishes320
  • Substitutes785
  • Dinner163
  • Air Fryer77
  • Taste Profiles484
  • Food Storage123


Reader Reviews

★★★★★

"Finally a food blog that tells you exactly why a substitute works instead of just listing options."

— Sarah M., via email

★★★★★

"The side dish recommendations are so specific — saved my dinner party twice this month."

— James R., Pinterest comment

★★★★★

"I trust this site more than most because they actually test everything. You can tell."

— Priya K., blog comment

Footer

↑ Back to Top

Forklift Kitchen

We do the heavy lifting so you can enjoy the cooking. Tested recipes, smart substitutes, and perfect pairings—built for real home cooks.

Content

  • Recipes
  • Substitutes
  • What to Serve With
  • Blog

Company

  • About Us
  • Contact
  • Subscribe

Legal

  • Privacy Policy
  • Terms of Service

As an Amazon Associate I earn from qualifying purchases.

© 2026 Forklift Kitchen.

Rate This Recipe

Your vote:


A rating is required
A name is required
An email is required