• Skip to primary navigation
  • Skip to main content
  • Skip to primary sidebar
  • Recipe Index
    • Air Fryer
  • Side Dishes
  • Substitutes
  • About
  • Contact
  • Subscribe

ForkLiftKitchen

menu icon
go to homepage
  • Recipe Index
    • Air Fryer
  • Side Dishes
  • Substitutes
  • About
  • Contact
  • Subscribe
subscribe
search icon
Homepage link
  • Recipe Index
    • Air Fryer
  • Side Dishes
  • Substitutes
  • About
  • Contact
  • Subscribe
×

Blog

Air Fryer Cornish Hen

May 11, 2026

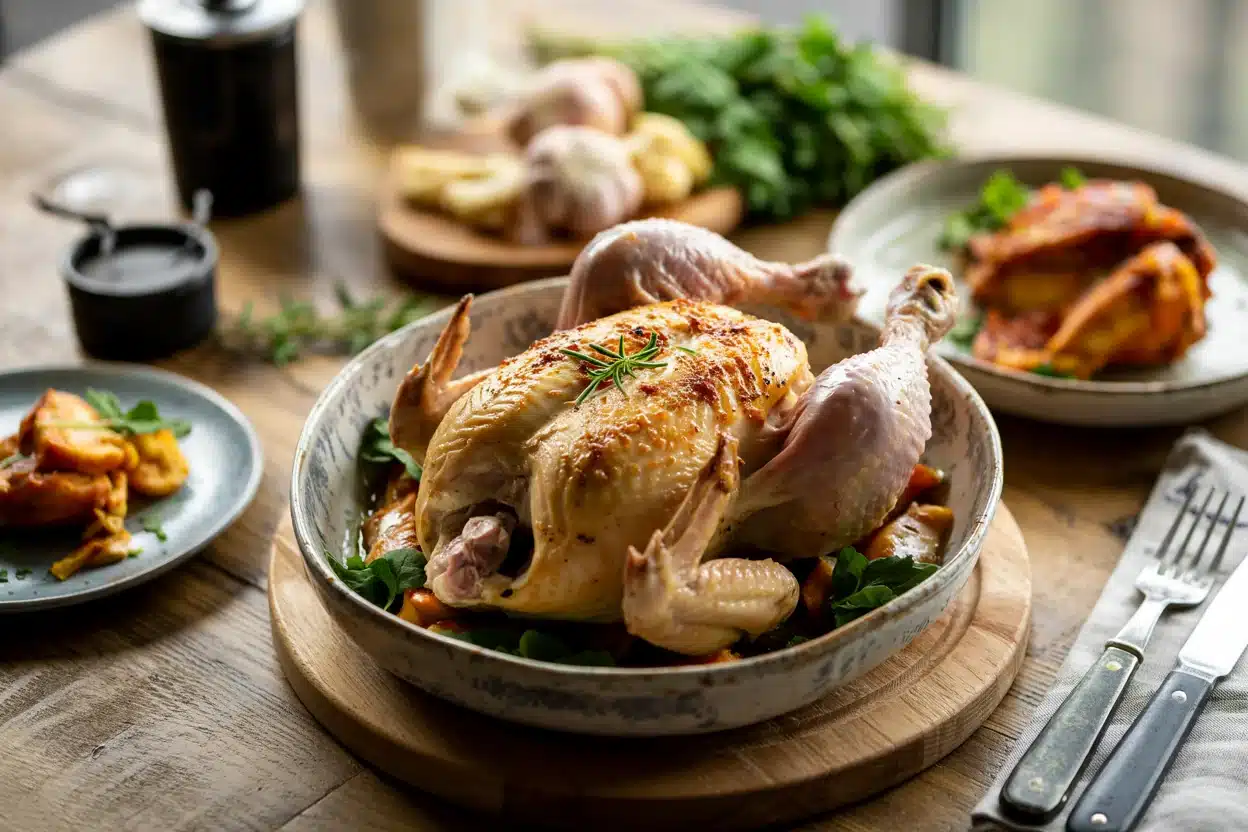
Crispy golden skin that crackles when you cut into it, and tender meat that pulls away from the bone. That's what happens when you air fry Cornish hen at 375°F for 35 minutes.
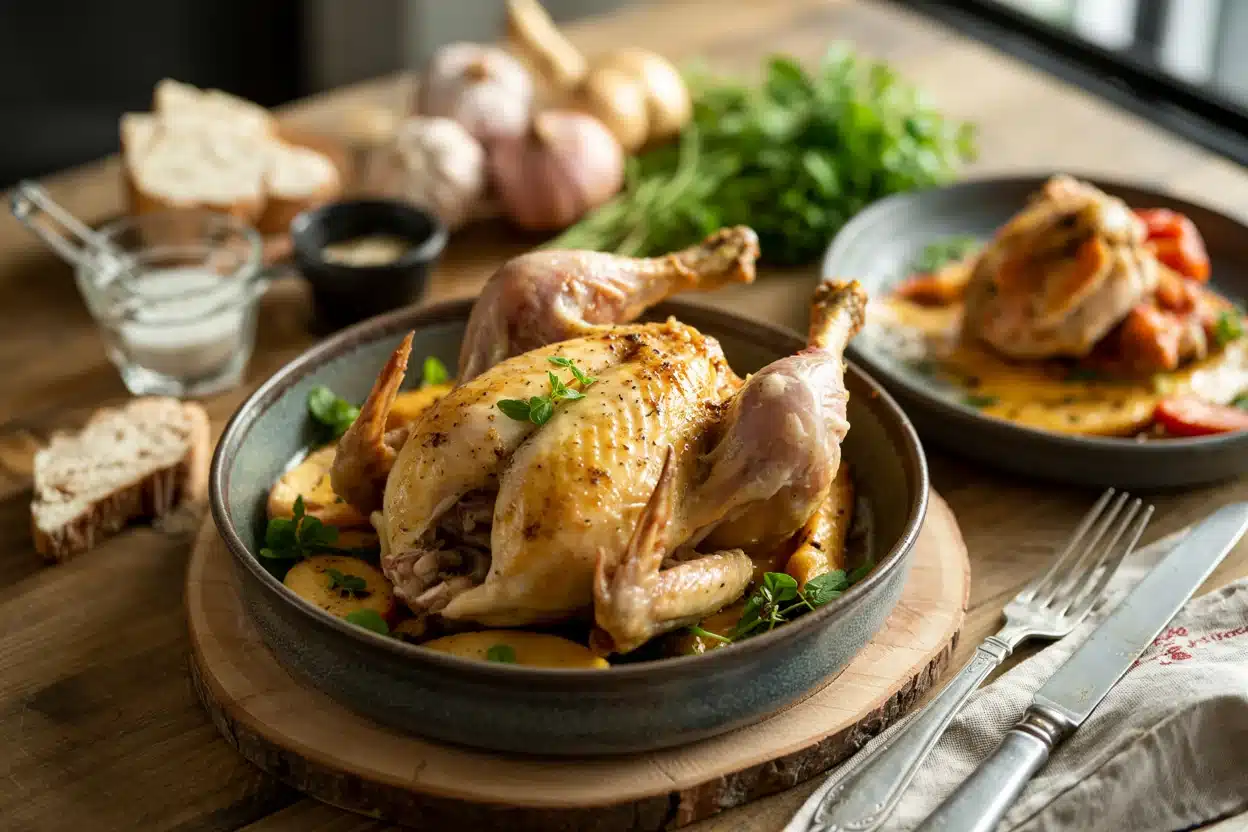
Air Fryer Cornish Hen

The air fryer does the hard work. You get restaurant-quality roast chicken without heating up the whole kitchen or babysitting a stovetop pan.

This works for weeknight dinners when you want something that looks impressive but doesn't require chef skills. Each hen cooks individually, so timing stays consistent whether you're cooking for one or four.

QUICK SUMMARY

Air Fryer Cornish Hen delivers crispy skin and juicy meat in 45 minutes total. Dry skin before seasoning is the key to crispness, and flipping halfway through ensures even browning. The compact size fits most air fryers without crowding, and each hen serves one person perfectly for dinner parties or meal prep.

⏱️Time Reality: 45 minutes start to finish - 10 minutes prep, 35 minutes hands-off cooking
🔑Critical First Step: Pat the skin completely dry with paper towels for 5 minutes before adding any oil or seasoning
⚠️Watch Out: Wet skin steams instead of crisps - skip this step and you'll get rubbery texture no matter how long you cook

Why This Recipe Works

High heat circulates around the small bird and renders the fat while crisping the skin. For a version that comes together quickly, this simple homemade meatballs recipe uses the same temperature logic with different protein.

Quick Reference
⏱️
Prep Time
10 min
🔥
Cook Time
35 min
⏰
Total Time
45 min
🍽️
Servings
1 Cornish hen per person
📊
Difficulty
Easy
🏷️
Category
Main Dish
💡
Quick Tip
Dry skin ensures crispy results
🎯
Best For
Weeknight | Entertaining

What makes this method work:

  • Pat the skin dry for 5 minutes - removes surface moisture that would steam the skin instead of crisping it
  • Brush 1 tablespoon oil evenly across all skin surfaces - promotes browning and helps seasoning stick without pooling
  • Set temperature to 375°F and cook for 35 minutes - balances crispy exterior with juicy interior without drying out dark meat
  • Flip hens at the 17-minute mark - ensures both sides brown evenly instead of one side staying pale
  • Check internal temperature reaches 165°F in the thickest part of the thigh - guarantees safe doneness while avoiding the rubbery texture of overcooked poultry
Quick Tip
Leave 1-2 inches of space between hens if cooking multiple birds - crowding blocks airflow and creates steam pockets that prevent crisping.

What You'll Need

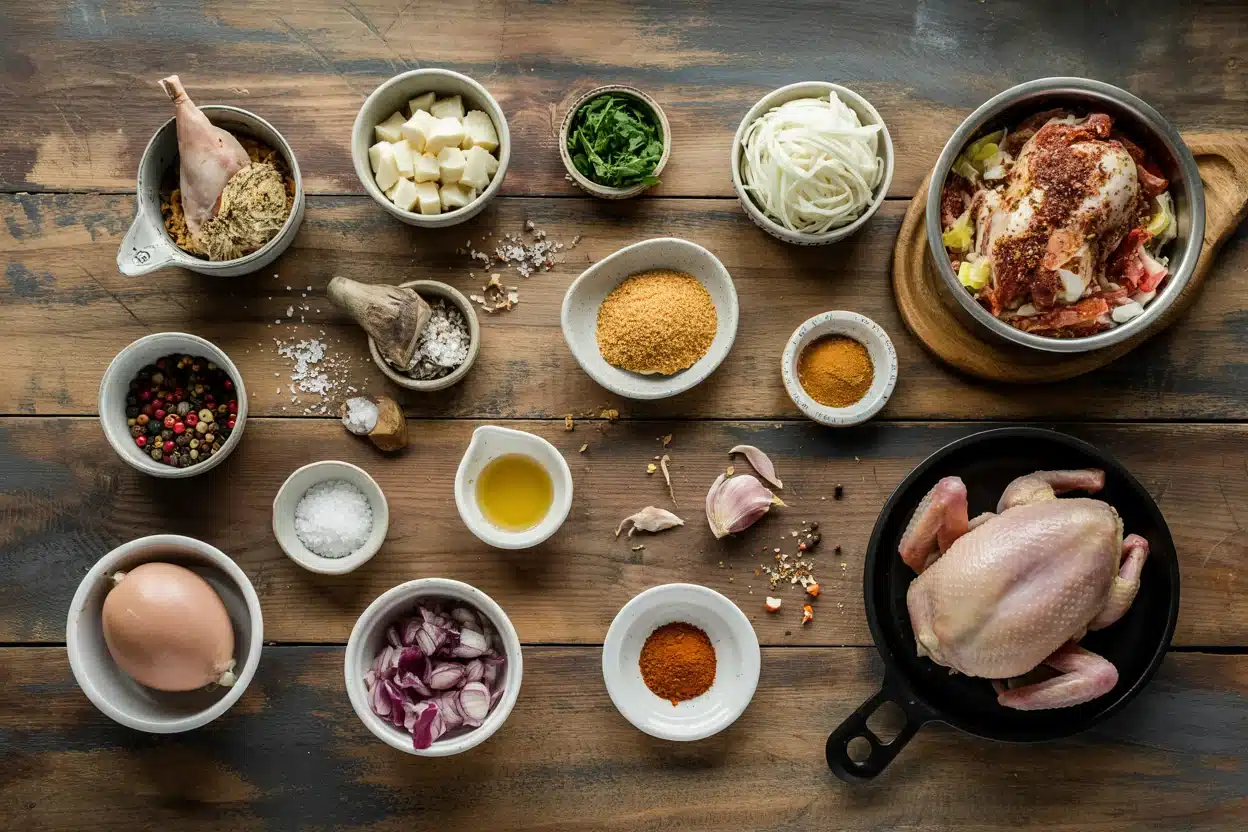
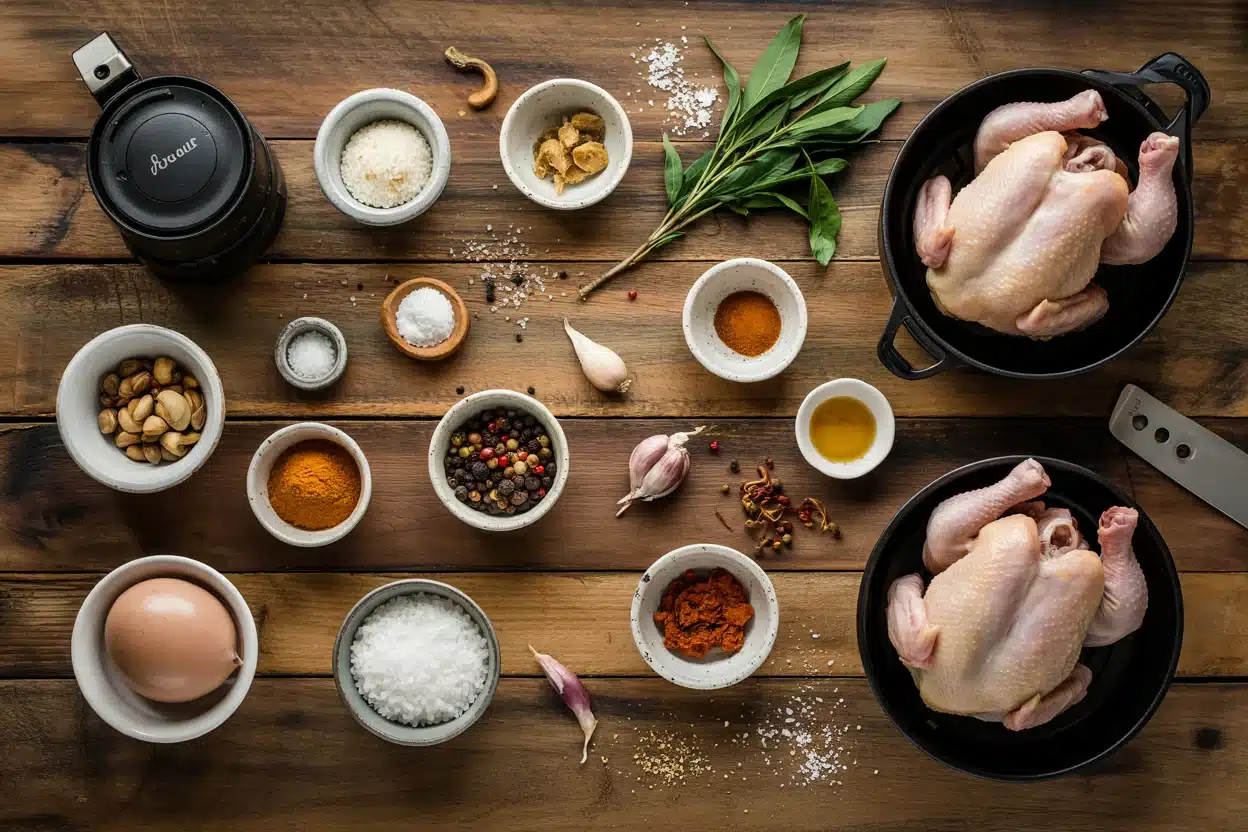
Air Fryer Cornish Hen - Air Fryer Cornish Hen

Most of these ingredients sit in your pantry already. A good hen can make or break the plate, so we keep a batch ready for nights like this - try a similar airfryer-side recipe when you want to use up what's already in the fridge.

🍗
Protein
  • Cornish hen (1 per person, 1-1.5 lb each)
🧄
Seasonings
  • Olive oil (1 tablespoon per hen)
  • Salt (1 teaspoon per hen)
  • Black pepper (½ teaspoon per hen)
  • Garlic powder (½ teaspoon per hen)
  • Paprika (½ teaspoon per hen)
🌿
Fresh Elements
  • Fresh thyme or rosemary (2-3 sprigs, optional)
  • Lemon (1 half, optional for cavity)

Ingredient Details

  • Cornish hen
    Look for hens between 1-1.5 pounds - larger birds won't fit most air fryer baskets and smaller ones dry out quickly
  • Olive oil
    Brush on after drying skin - oil applied to wet skin slides off and pools in the basket instead of crisping
  • Salt
    Kosher salt works best for even distribution - table salt clumps and creates salty spots instead of seasoning the whole bird
  • Garlic powder
    Use powder instead of fresh minced garlic - fresh burns at air fryer temperatures and turns bitter
  • Paprika
    Adds color more than flavor - smoked paprika gives deeper color and subtle smokiness if you have it
  • Fresh herbs
    Tuck sprigs inside the cavity for aroma - herbs on the outside burn and turn black in the air fryer
  • Lemon half
    Place inside cavity cut-side up to release steam and citrus oils - don't squeeze over skin or it prevents browning

Ingredient Swaps

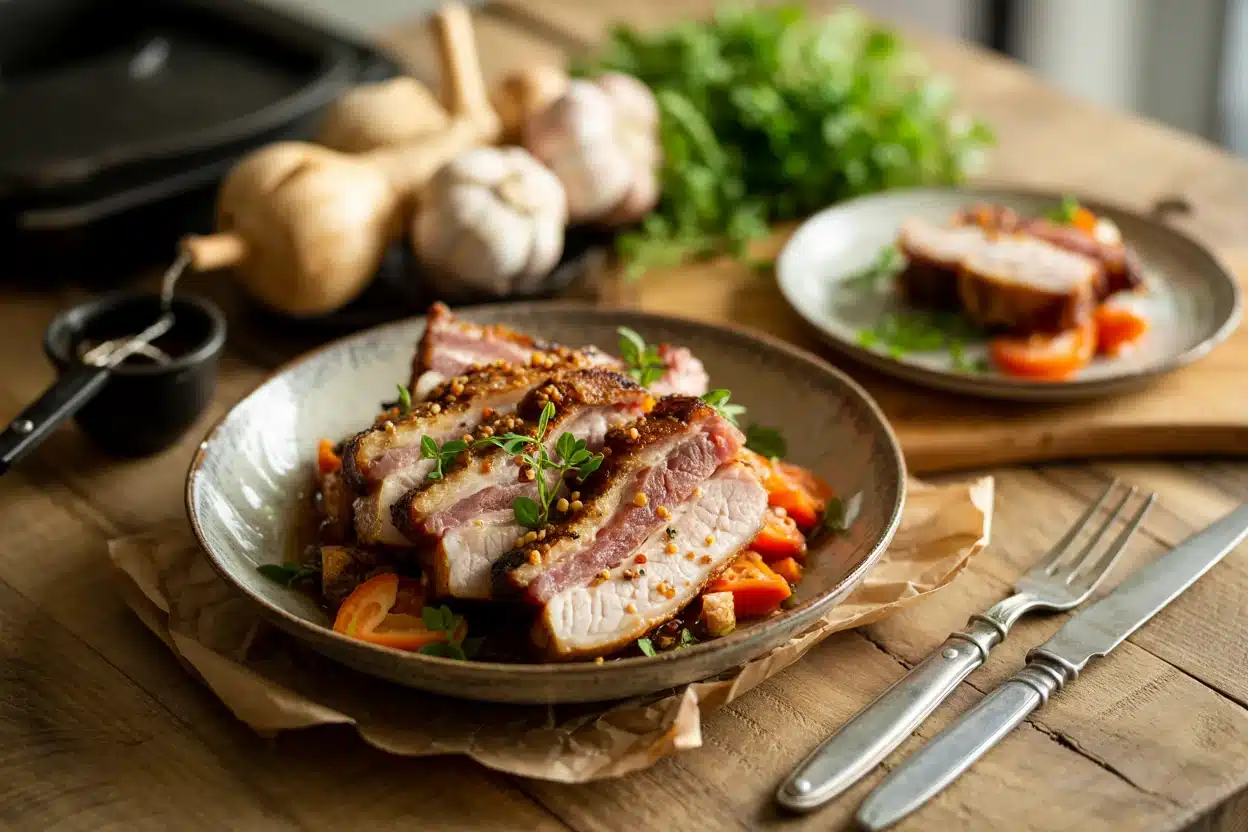
Most swaps work if you understand what each ingredient does. Rich mains need something to cut through, and pork does exactly that, so for a version that comes together quickly, this smoky pork recipe uses similar seasoning logic with different timing.

Four swaps that work:

  • Olive oil → Avocado oil - swap 1:1, higher smoke point means less chance of bitter flavors at 375°F
  • Fresh herbs → Dried herbs - use 1 teaspoon dried per 3 sprigs fresh, adds herby flavor without the fresh aroma
  • Paprika → Smoked paprika - swap 1:1, adds deeper color and subtle smoky note without changing texture
  • Cornish hen → Small whole chicken (2-3 lb) - increase cook time to 50-60 minutes and check thigh temp hits 165°F, won't crisp as evenly

Butter instead of oil

Works for: Richer flavor and golden color if you're okay with slightly less crisp skin

Skip if: You want maximum crispness - butter's milk solids brown faster and can burn before skin fully crisps

Fresh minced garlic instead of powder

Works for: Stronger garlic punch if you add it in the last 5 minutes of cooking

Skip if: You're adding it at the start - fresh garlic burns at 375°F and turns bitter

Instructions

The entire cook happens in one basket with one flip halfway through. Beef adds the contrast this plate needs, but timing matters, so we keep a batch ready for nights like this - check out this rich homemade beef recipe if you're planning tomorrow's meal now.

  1. Pat the Cornish hen completely dry with paper towels, inside and out. Spend a full minute on this - any moisture left on the skin will steam instead of crisp. Let it sit at room temperature for 10 minutes while you prep seasonings.

  2. Brush 1 tablespoon olive oil evenly over all skin surfaces. Use your hands or a pastry brush to coat the breast, thighs, wings, and back. Don't pour oil directly on the bird - it pools in the cavity and doesn't help with crisping.

  3. Mix salt, black pepper, garlic powder, and paprika in a small bowl, then rub the seasoning blend all over the oiled skin. Press gently so the spices stick to the oil. If using fresh herbs or lemon, tuck them inside the cavity now.

  4. Place the hen breast-side down in the air fryer basket and cook at 375°F for 17 minutes. Don't preheat the air fryer - starting in a cold basket helps render fat gradually. Leave 1-2 inches of space if cooking multiple hens.

  5. Flip the hen breast-side up using tongs and cook for 18 more minutes until skin is golden and crispy. Insert a meat thermometer into the thickest part of the thigh - it should read 165°F. Let rest for 5-10 minutes loosely tented with foil before carving.

Golden Rule
Never skip the flip at 17 minutes - the bottom side browns faster than the top, and flipping ensures both sides reach the same crispy texture instead of one staying pale and rubbery.

What to Serve With It

One hen per person leaves room on the plate for sides that balance richness with freshness. The rice works best when it hits the table at the same time as the main, and for complete pulled beef meal ideas that follow the same pairing logic, check that guide when planning your next dinner.

Side Dish Prep Why It Works How to Serve
Garlic roasted potatoes Easy Starchy base soaks up pan juices, mild garlic complements herby hen Roast at 400°F for 30 min, toss with chopped parsley
Simple green salad Easy Fresh crunch and acidity cut through rich crispy skin Toss mixed greens with lemon vinaigrette, serve chilled
Steamed green beans Easy Light vegetable balances heavy protein without competing Steam 5 min, toss with butter and salt
Wild rice pilaf Medium Nutty texture and elegant look match presentation of whole hen Cook with chicken broth, fold in toasted pecans
Roasted root vegetables Easy Caramelized sweetness pairs with savory seasoning on hen Roast carrots and parsnips at 400°F for 25 min

Three ways to serve it:

  • Weeknight plate: Serve hen over garlic roasted potatoes with steamed green beans on the side - the starch soaks up juices and greens add freshness
  • Dinner party presentation: Pair with wild rice pilaf and roasted root vegetables - the nutty rice and caramelized vegetables match the crispy skin
  • With sauce: Drizzle garlic lemon butter sauce or spicy honey mustard over sliced hen - both add moisture and punch up the seasoning
Shortcut
Make quick coleslaw while the hen cooks - shred cabbage, toss with mayo and vinegar, and the creamy tang cuts through richness without extra cooking time.

Store and Reheat

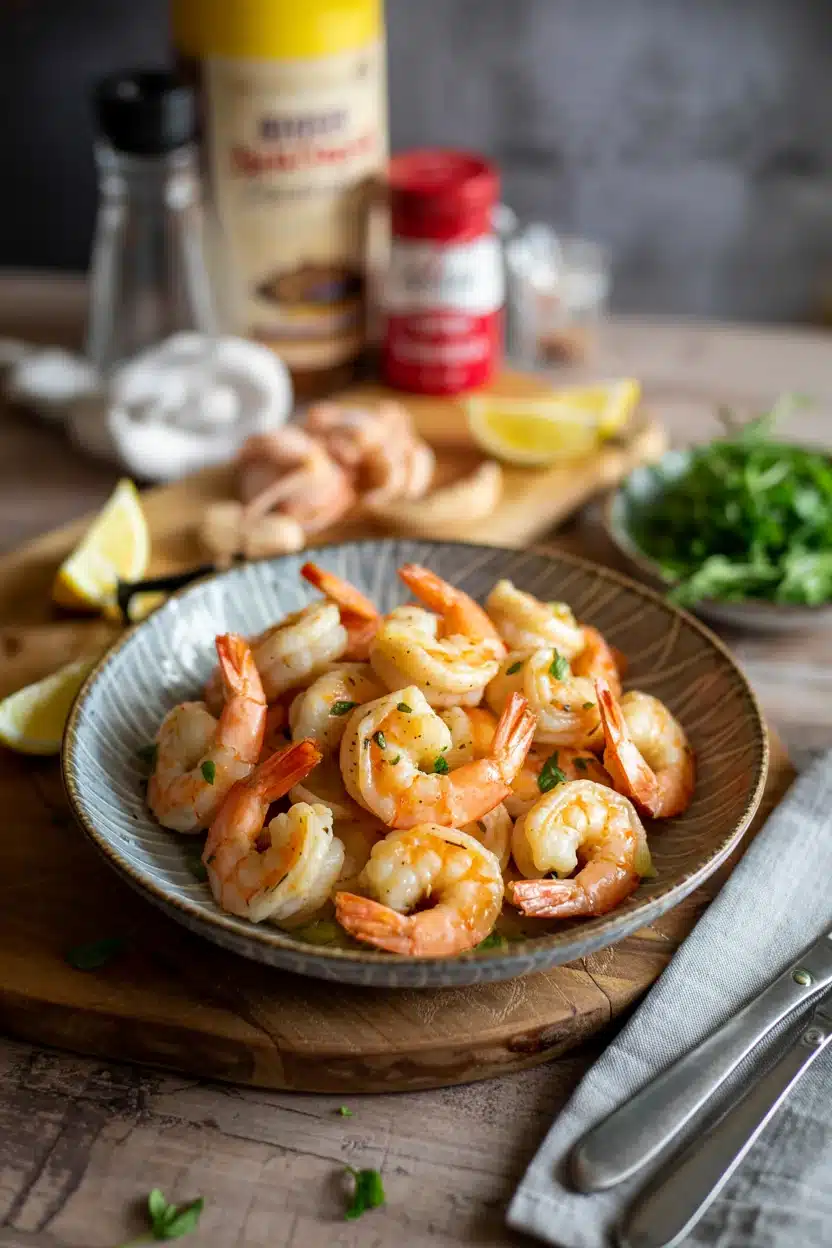
Leftover hen stays juicy for 3-4 days if you store it right. Most people skip shrimp, but it balances the meal, and for a version that comes together quickly, we keep a batch ready for nights like this - try this tender shrimp recipe when planning tomorrow's dinner.

Method Time Best For
🍳 Stovetop 5-7 minutes over medium heat Sliced portions when you want to restore crispy skin quickly
🔥 Oven 10 min at 350°F Whole or half hen when you want even reheating and skin stays crisp
📦 Microwave 1-2 minutes on medium power Small portions when speed matters more than texture - skin won't crisp

For best results when storing:

  • Cool completely before refrigerating - hot hen creates condensation in the container that makes skin soggy
  • Store in shallow airtight container - glass or plastic works, but shallow depth prevents bottom pieces from steaming
  • Separate meat from bones before freezing - whole hen takes up too much freezer space and thaws unevenly
  • Reheat skin-side up in oven or air fryer - direct heat from above re-crisps skin instead of steaming it
  • Add a tablespoon of water to the reheating container - creates steam that keeps meat moist without touching skin directly

Frequently Asked Questions

How long to cook air fryer Cornish hen at 375°F?

Cook for 35 minutes total - 17 minutes breast-side down, then flip and cook 18 minutes breast-side up. Check that internal temperature reaches 165°F in the thickest part of the thigh before serving.

Can I make air fryer Cornish hen ahead of time?

Cook it fully, let it cool, then refrigerate for up to 3 days. Reheat in the oven at 350°F for 10 minutes to restore crispy skin - microwave makes it rubbery.

What goes well as sides for air fryer Cornish hen?

Garlic roasted potatoes, wild rice pilaf, steamed green beans, or simple green salad work best. Pick starchy sides that soak up juices and fresh vegetables that cut through richness.

How do I know when air fryer Cornish hen is fully cooked?

Insert a meat thermometer into the thickest part of the thigh without touching bone - it should read 165°F. The juices should run clear, not pink, when you cut between the leg and breast.

Can I use frozen Cornish hen directly in air fryer?

No - thaw it completely in the fridge for 24 hours first. Frozen hen cooks unevenly, with burnt skin and raw interior, and won't reach safe temperature without overcooking the outside.

Air Fryer Cornish Hen

Air Fryer Cornish Hen

No ratings yet
Air Fryer Cornish Hen delivers crispy golden skin and tender, juicy meat with minimal effort. The key to success is drying the skin before seasoning and flipping the hen halfway through cooking at 375°F for even browning. This method yields a restaurant-quality roast that's perfect for weeknight dinners or entertaining.
Print Recipe Pin Recipe
Prep Time 10 minutes mins
Cook Time 35 minutes mins
Total Time 45 minutes mins
Servings: 1 hen
Course: Dinner, Main Dish
Cuisine: American
Ingredients Method Notes

Ingredients
  

  • 1 hen Cornish hen 1 to 1.5 pounds each
  • 1 tablespoon olive oil for brushing evenly over skin
  • 1 teaspoon salt kosher salt recommended
  • 0.5 teaspoon black pepper
  • 0.5 teaspoon garlic powder powder prevents burning during cooking
  • 0.5 teaspoon paprika adds color and subtle smokiness if smoked paprika
  • 2 sprigs fresh thyme or rosemary optional, tuck inside cavity
  • 0.5 lemon lemon half optional, place cut-side up inside cavity

Method
 

  1. Pat the Cornish hen completely dry with paper towels, inside and out. Spend a full minute on this to remove surface moisture that would steam the skin. Let the hen sit at room temperature for 10 minutes while you prepare seasonings.
    1 hen Cornish hen
  2. Brush 1 tablespoon olive oil evenly over all skin surfaces, including breast, thighs, wings, and back. Avoid pouring oil directly on the hen to prevent pooling in the cavity.
    1 tablespoon olive oil
  3. Mix salt, black pepper, garlic powder, and paprika in a small bowl. Rub the seasoning blend all over the oiled skin, pressing gently to help the spices stick. If using fresh herbs or lemon, tuck them inside the cavity now.
    1 teaspoon salt, 0.5 teaspoon black pepper, 0.5 teaspoon garlic powder, 0.5 teaspoon paprika, 2 sprigs fresh thyme or rosemary, 0.5 lemon lemon half
  4. Place the hen breast-side down in the air fryer basket. Cook at 375°F for 17 minutes. Do not preheat the air fryer; starting in a cold basket allows gradual fat rendering. Leave 1-2 inches of space if cooking multiple hens to avoid crowds that cause steaming.
  5. Flip the hen breast-side up using tongs and cook for an additional 18 minutes until the skin is golden and crispy. Check the internal temperature in the thickest part of the thigh; it should reach 165°F. Let rest loosely tented with foil for 5-10 minutes before carving.

Notes

  • Patting skin dry before seasoning is essential for crispy skin.
  • Flip the hen at 17 minutes for even browning on both sides.
  • Ensure internal temperature hits 165°F to guarantee safe and juicy poultry.

Tried this recipe?

Let us know how it was!

Air Fryer Duck Breast

May 11, 2026

Scoring duck skin before air frying makes all the difference. The shallow cuts let fat render out while the high heat crisps the surface without flipping or fussing.

Air Fryer Duck Breast

The air fryer basket does the work for you. You get golden, caramelized edges and tender meat in under 20 minutes.

Make this for weeknight dinners when you want something that feels special but doesn't need constant attention.

QUICK SUMMARY

Air fryer duck breast delivers crispy skin and juicy meat in 20 minutes. Score the skin, dry brine for 30 minutes, then air fry at 400°F starting skin side down. The high heat renders fat and crisps the surface while the meat stays tender.

⏱️Time Reality: 30 minutes total with 10 minutes hands-on prep and no flipping required
🔪First Move: Score skin in diamond pattern without cutting meat, then salt and rest 30+ minutes
⚠️Watch Out: Soggy skin happens when you skip dry brining - pat dry and salt ahead

Why This Recipe Works

Dry brining draws moisture from the skin while the scored cuts let fat escape during cooking. For a version that comes together quickly, this easy garlic bread recipe works as a side when you need something simple to round out the plate.

Quick Reference
⏱️
Prep Time
10 min
🔥
Cook Time
15-20 min
⏰
Total Time
30 min
🍽️
Servings
2-3 servings
📊
Difficulty
Medium
🏷️
Category
Main Dish
💡
Quick Tip
Score skin, dry brine, air fry skin side down
🎯
Best For
Weeknight | Entertaining
  • High heat at 400°F renders fat fast while crisping the skin without burning
  • Starting skin side down for 12-15 minutes lets gravity pull fat away from the meat
  • Room temperature duck cooks evenly - cold meat contracts and stays tough
  • Resting 5-10 minutes after cooking redistributes juices so they don't run out when you slice
  • A sharp knife for scoring creates clean cuts that open up during cooking instead of tearing
Quick Tip
Score the skin in a diamond pattern about 0.25 inch deep - deep enough to see fat but not so deep you hit meat.

What You'll Need

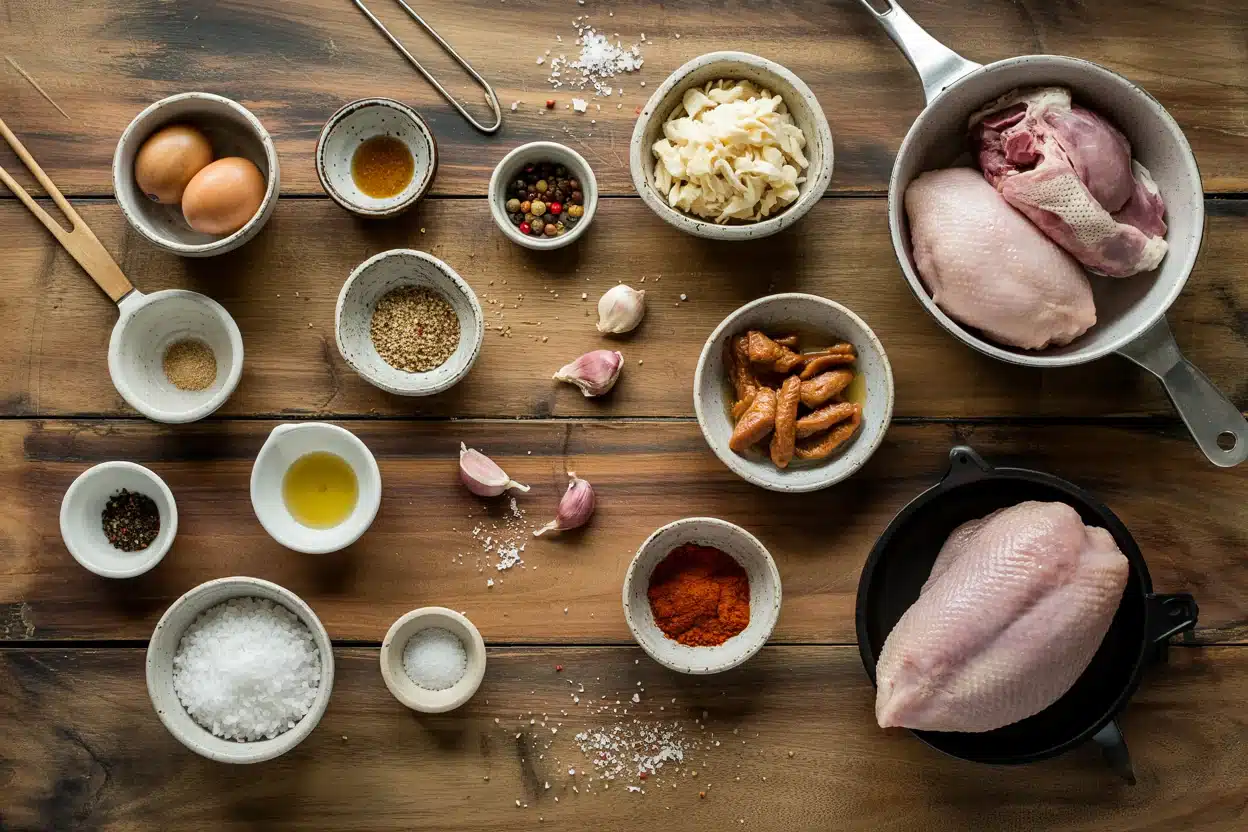
Air Fryer Duck Breast - Air Fryer Duck Breast

Duck breast, salt, and black pepper are the only non-negotiables. Rich mains need something to cut through, and salmon does exactly that - we keep a batch ready for nights like this using flaky salmon side dish methods that take the same amount of time.

🦆
Protein
  • Duck breast
🌶️
Seasonings
  • Salt
  • Black pepper
  • Five-spice powder
🧄
Aromatics
  • Garlic
  • Fresh thyme
🫙
Finishing
  • Olive oil
  • Honey
  • Soy sauce
  • Orange zest

Ingredient Details

  • Duck breast
    Look for breasts with thick, even fat layers - thin fat won't crisp properly
  • Salt
    Kosher salt works best for dry brining because the larger crystals draw moisture without over-salting
  • Five-spice powder
    Adds star anise, cinnamon, and clove notes that balance duck's richness
  • Olive oil
    Brush lightly on skin only - too much oil makes it greasy instead of crispy
  • Fresh thyme
    Strip leaves from stems before using - woody stems turn bitter when cooked
  • Soy sauce
    Use low-sodium soy sauce if you salted heavily during dry brining
  • Orange zest
    Zest before juicing and avoid the white pith which tastes bitter

Ingredient Swaps

Chicken thighs work when duck is too expensive, but you lose the rich flavor. Most people skip fritters, but it balances the meal - for a version that comes together quickly, simple homemade fritters take the same prep window and pair with the same sides.

  • Swap five-spice powder for smoked paprika plus a pinch of cinnamon - you get warmth and smoke but lose the licorice notes
  • Use tamari instead of soy sauce for gluten-free without sacrificing umami depth
  • Replace honey with maple syrup for the same sticky glaze with a slightly woody sweetness
  • Try avocado oil instead of olive oil for a higher smoke point that handles 400°F heat better

Duck Fat for Brushing

Works for: Richer flavor, crispier skin, authentic French technique

Skip if: You don't have duck fat on hand or want lighter results

Skinless Duck Breast

Works for: Lower fat content, faster cooking, leaner meal

Skip if: You want crispy texture - skinless duck dries out easily

Garlic Powder vs Fresh

Works for: Shelf-stable option, even distribution, no chopping

Skip if: You want stronger garlic punch - powder is milder

Instructions

Bring duck to room temperature 20-30 minutes before cooking so it doesn't shock in the hot air. A good chicken can make or break the plate, and we keep a batch ready for nights like this using juicy chicken side dish methods that match this timing.

  1. Score the skin in a diamond pattern. Cut 0.25 inch deep through fat without hitting meat. Space cuts about 0.5 inches apart so fat can escape during cooking.

  2. Dry brine the duck breast. Salt both sides, place skin side up on a plate, and rest uncovered in the fridge for 30 minutes minimum. Pat skin completely dry with paper towels before cooking.

  3. Preheat air fryer to 400°F. Brush duck skin lightly with olive oil and season with black pepper and five-spice powder. Place breast skin side down in the basket with at least 2 cm of space around it.

  4. Air fry 12-15 minutes skin side down, then flip. Check internal temp with a thermometer - you want 135°F for medium-rare. Flip skin side up and cook 3-5 minutes more until skin turns golden and crispy.

  5. Rest duck 5-10 minutes before slicing. Tent loosely with foil and let juices redistribute. Slice against the grain at a slight angle for tender pieces.

Golden Rule
Use a thermometer every time - duck overcooks fast and goes from tender to tough in 2-3 minutes.

What to Serve With It

Duck needs sides that cut through the richness without competing for attention. For more ideas on balancing rich proteins, check out easy chicken meal planning strategies that work across different mains.

Side DishPrepWhy It WorksHow to Serve
Roasted Brussels SproutsEasyEarthy bitterness balances duck's richnessRoast at 400°F for 20 min, toss with balsamic
Garlic Mashed PotatoesEasyCreamy texture soaks up duck fat and juicesMake ahead, reheat with butter and cream
Arugula SaladEasyPeppery greens cut through fat, add freshnessDress with lemon juice and olive oil at serving
Steamed AsparagusEasyLight vegetable adds color and textural contrastSteam 4-5 min, finish with sea salt
Wild Rice PilafMediumNutty grains absorb sauce and add chewCook rice ahead, warm with duck drippings

Three ways to serve it:

  • For weeknight meals: Slice duck over garlic mashed potatoes with steamed asparagus on the side
  • For entertaining: Serve whole breast with roasted Brussels sprouts and wild rice pilaf, drizzle with orange ginger glaze
  • For meal prep: Slice thin and pack with arugula salad and roasted root vegetables for lunch bowls
Shortcut
Save duck drippings from the air fryer basket - toss with roasted vegetables or stir into rice for extra flavor.

Store and Reheat

Duck keeps 3-4 days in the fridge when stored properly. Slice leftovers before storing so they reheat evenly without drying out the edges while the center warms up.

MethodTimeBest For
🍳 Stovetop3-5 min low heatMaintaining crispy skin - heat fat side down in a dry pan
🔥 Oven8-10 min at 350°FEven reheating multiple servings without drying meat
📦 Microwave1-2 min low powerQuick lunch reheating but expect softer skin

For best results when storing:

  • Let duck cool to room temperature before refrigerating - trapping steam makes skin soggy
  • Store sliced duck in a single layer in an airtight container with parchment between slices
  • Keep skin separate from sauces when meal prepping so it stays crispy longer
  • Freeze up to 2 months wrapped tightly in plastic then foil - thaw overnight in fridge
  • Reheat from room temperature for even warming - cold duck straight from the fridge stays cold in the center

Frequently Asked Questions

Can I cook frozen duck breast in an air fryer?

Thaw duck completely before air frying. Frozen duck cooks unevenly - the outside overcooks while the center stays raw.

How should I store leftover air fryer duck breast?

Store in an airtight container for 3-4 days. Slice before storing and keep skin separate from wet ingredients to maintain texture.

What internal temperature is ideal for air fryer duck breast?

Aim for 135°F for medium-rare or 140°F for medium. Duck stays tender at these temps - higher and it dries out fast.

Why is my duck breast skin not getting crispy?

Soggy skin happens when you skip dry brining or don't pat the skin dry. Salt the skin 30+ minutes before cooking and make sure it's completely dry before air frying.

Can I double the recipe to cook more duck breasts at once?

Cook maximum 2 breasts with at least 2 cm between them. Crowding traps steam and prevents crispy skin - cook in batches if you need more.

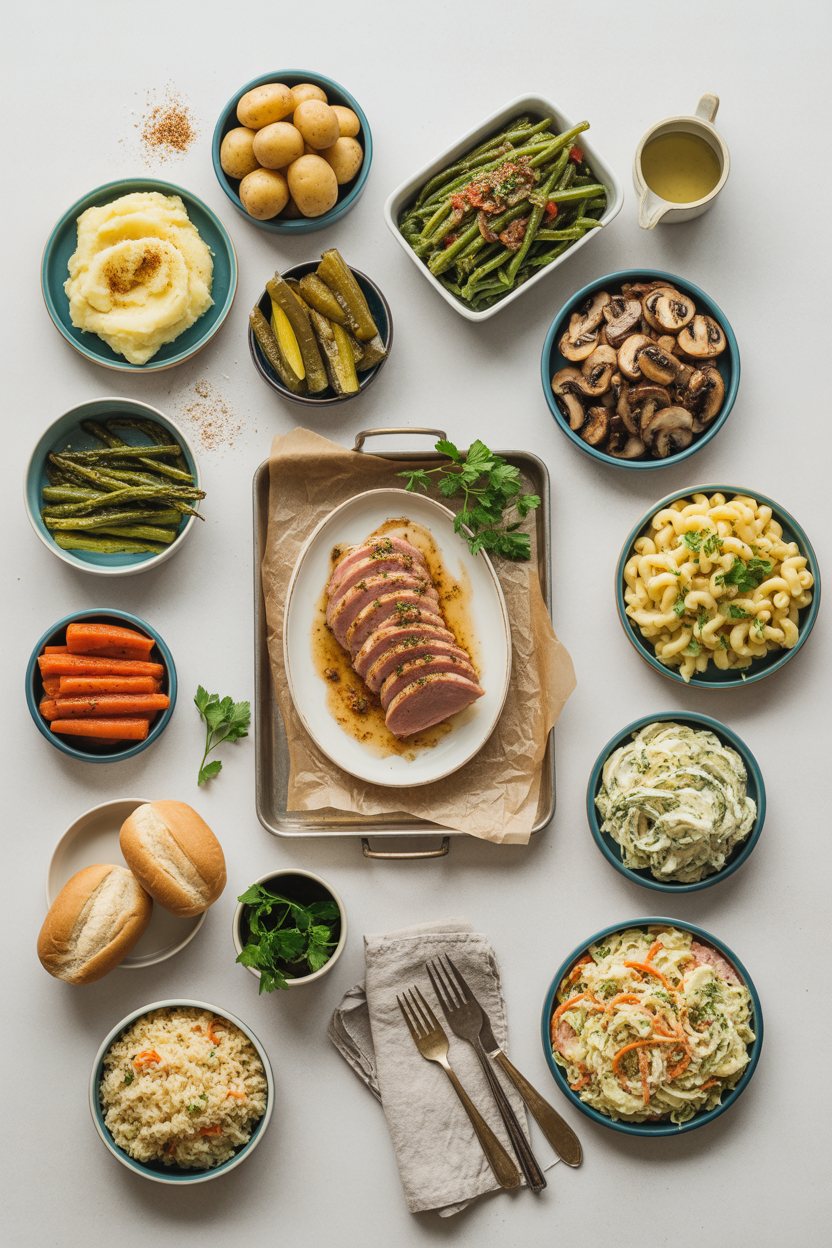
What To Serve With Duck Breast

Air Fryer Duck Breast

No ratings yet
Air fryer duck breast produces crispy skin and juicy meat in under 20 minutes. Scoring the skin and dry brining beforehand ensures rendered fat and a crisp surface, while high heat cooking requires no flipping until nearly finished.
Print Recipe Pin Recipe
Prep Time 10 minutes mins
Cook Time 20 minutes mins
Total Time 30 minutes mins
Servings: 3 servings
Course: Main Dish
Cuisine: American
Ingredients Equipment Method Notes

Ingredients
  

  • 2 pieces duck breast thick fat layer, skin on
  • 1.5 teaspoons kosher salt for dry brining both sides
  • 1 teaspoon black pepper freshly ground
  • 0.5 teaspoon five-spice powder
  • 1 teaspoon olive oil brush lightly on skin

Equipment

  • Air fryer Used to cook duck breast at 400°F for crispy skin and tender meat
  • Sharp knife For scoring duck skin in diamond pattern
  • Thermometer To check internal temperature of duck breast

Method
 

  1. Bring duck breasts to room temperature for 20-30 minutes before cooking to ensure even cooking.
  2. Score the duck skin in a diamond pattern about 0.25 inch deep without cutting into the meat. Space cuts about 0.5 inches apart to allow fat to render.
  3. Dry brine the duck breasts by seasoning both sides evenly with kosher salt. Place skin side up on a plate and rest uncovered in the fridge for at least 30 minutes. Before cooking, pat the skin dry completely with paper towels.
  4. Preheat the air fryer to 400°F. Lightly brush olive oil over the duck skin and season with black pepper and five-spice powder. Place the breasts skin side down in the air fryer basket with at least 2 cm space around each piece.
  5. Air fry the duck skin side down for 12 to 15 minutes. Flip the breasts skin side up and cook an additional 3 to 5 minutes until the skin is golden and crispy. Use a thermometer to check for an internal temperature of 135°F for medium-rare.
  6. Remove the duck breasts from the air fryer and rest under loose foil for 5 to 10 minutes to redistribute juices. Slice against the grain at a slight angle before serving.

Notes

  • Score the skin carefully to avoid cutting into the meat for even fat rendering.
  • Dry brining and patting the skin dry are essential to achieve crispy skin.
  • Use a meat thermometer to avoid overcooking; 135°F yields tender, medium-rare duck.

Tried this recipe?

Let us know how it was!

Air Fryer Empanadas

May 11, 2026

Golden empanadas with crispy edges taste like you spent all day in the kitchen, but they take 30 minutes in the air fryer. The trick is sealing the dough properly and letting hot air circulate around each one.

Air Fryer Empanadas

High heat crisps the exterior while the beef filling stays juicy. No flipping required-the air fryer basket does that work for you.

This is what we make for weeknight dinners when we want something that feels special but doesn't chain us to the stove.

QUICK SUMMARY

Air fryer empanadas cook at 370°F for 10-12 minutes with no oil needed. The key is sealing edges with a fork to prevent leaks and leaving space between each one for air to circulate. The dough turns golden when internal temp hits 160°F.

⏱️Time Reality: 20 minutes prep, 10-12 minutes cooking-store-bought dough cuts that in half
🔑Critical First Step: Drain excess liquid from filling before stuffing to avoid soggy empanadas
⚠️Watch Out: Overfilling causes leaks-use 2-3 tablespoons max and press edges firmly with a fork

Why This Recipe Works

The air fryer creates a crispy shell without submerging empanadas in oil. For a version that comes together quickly, a similar airfryer-side recipe uses the same folding method with different fillings.

Quick Reference
⏱️
Prep Time
20 min
🔥
Cook Time
10-12 min
⏰
Total Time
30-35 min
🍽️
Servings
6-8 empanadas
📊
Difficulty
Medium
🏷️
Category
Appetizer
💡
Quick Tip
Brush edges to seal and crisp outer crust
🎯
Best For
Weeknight | Meal prep | Entertaining

Five things that make this work:

  • Preheating the air fryer at 370°F for 5 minutes ensures even cooking from the first minute
  • Sealing edges firmly with fork tines creates a crimped border that locks filling inside
  • Leaving 1-2 inches between empanadas allows hot air to crisp all sides without turning
  • Draining filling before stuffing removes excess moisture that would steam the dough instead of crisping it
  • Chilling dough for 30 minutes before rolling reduces cracking when you fold and seal
Quick Tip
Brush edges with beaten egg before sealing for a golden, glossy finish that browns faster than plain dough.

What You'll Need

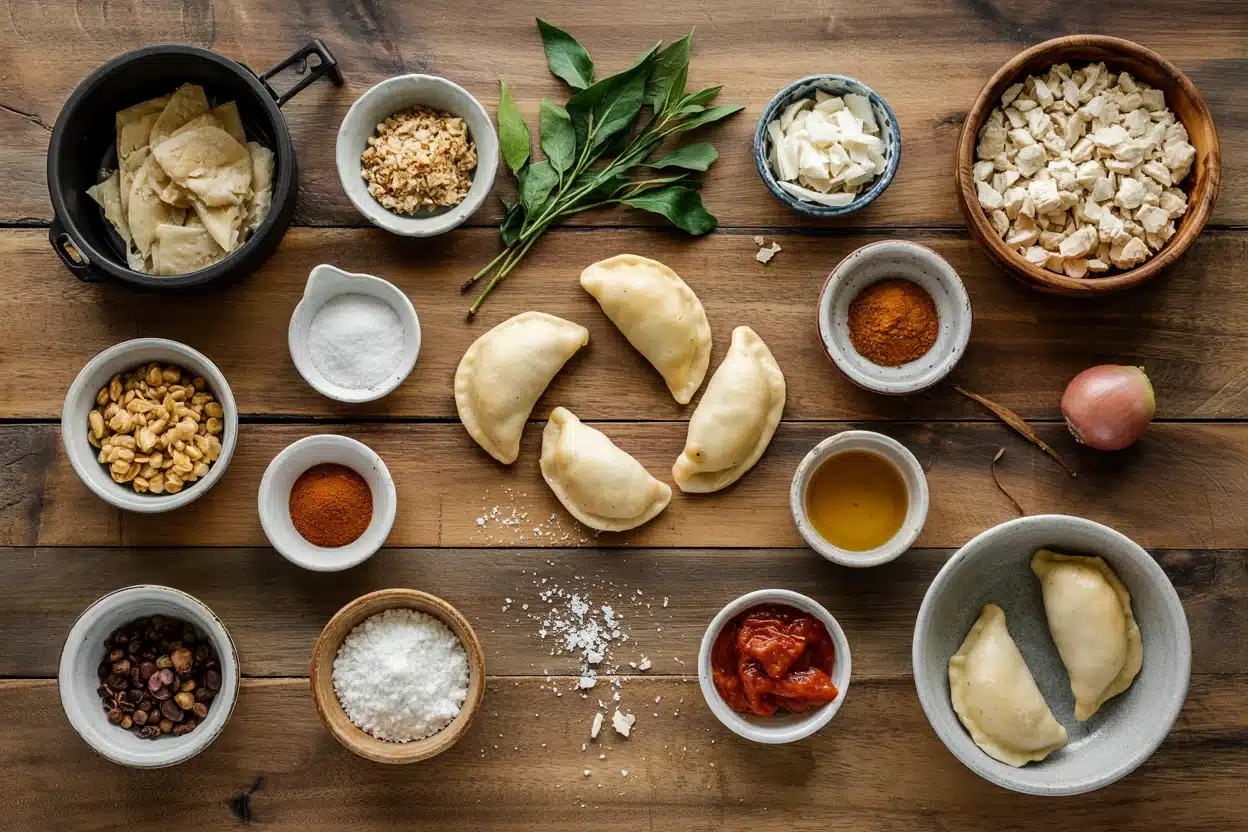
Air Fryer Empanadas - Air Fryer Empanadas

Store-bought empanada dough sits in the freezer section next to pie crusts-thaw it overnight in the fridge. We keep a batch ready for nights like this - a simple slaw variation uses similar assembly timing for back-to-back air frying.

🥩
Protein Base
  • 1 lb ground beef (80/20 blend)
🧄
Aromatics
  • 1 medium onion, diced
  • 1 green bell pepper, diced
🌶️
Seasonings
  • 1 teaspoon cumin
  • 1 teaspoon paprika
  • 1 teaspoon salt
  • ½ teaspoon black pepper
🫙
Extras
  • 12 empanada dough discs
  • 2 hard-boiled eggs, chopped (optional)
  • ¼ cup green olives, sliced (optional)
  • 1 egg, beaten (for sealing)

Ingredient Details

  • Empanada dough
    Store-bought rounds save 30 minutes-look for Goya brand in the freezer aisle; thaw overnight in fridge, not on counter
  • Ground beef
    80/20 blend provides enough fat for juicy filling without excess grease; drain well after browning to prevent soggy empanadas
  • Cumin
    Toasting cumin in a dry skillet for 30 seconds before adding to filling intensifies the earthy, warm flavor
  • Beaten egg
    Brush only the edges, not the entire surface-too much egg wash makes dough sticky and hard to seal
  • Hard-boiled eggs
    Chop into small pieces no larger than ¼ inch so they distribute evenly and don't create lumps that tear dough
  • Green olives
    Pat dry with paper towels before slicing to remove brine that would add unwanted moisture to filling
  • Paprika
    Smoked paprika adds depth; regular paprika works but lacks the charred, woodsy notes that complement beef

Ingredient Swaps

Ground turkey cooks faster than beef but dries out easily-add 1 tablespoon olive oil to the filling. Rich mains need something to cut through, and chicken does exactly that. For a version that comes together quickly, simple homemade chicken works as a protein swap with adjusted seasoning.

Four swaps that work:

  • Ground beef → ground turkey or shredded chicken - Use 1 tablespoon olive oil to prevent dryness; cook 2 minutes less to avoid rubbery texture
  • Empanada dough → gluten-free pie crust - Roll thinner than wheat dough; reduce cook time by 2 minutes and watch for browning
  • Butter in dough → olive oil or coconut oil - Dough will be slightly less flaky but still crisp; use same amount by volume
  • Air frying → oven baking at 375°F - Bake 18-20 minutes on parchment-lined sheet, flipping halfway for even browning

Store-Bought Dough

Works for: weeknight cooking, consistent size, no rolling required

Skip if: you want full control over dough thickness and flavor

Homemade Dough

Works for: meal prep, custom flavors, softer texture

Skip if: you're short on time or don't want to roll and cut circles

Instructions

The filling cooks first so it cools while you assemble-hot filling melts butter in dough and causes tears. The chicken works best when it hits the table at the same time as the main. We keep a batch ready for nights like this - classic chicken dish uses similar fold-and-seal technique for stuffed tortillas.

  1. Brown the beef: Heat a large skillet over medium-high heat. Add ground beef and cook 6-8 minutes, breaking into small crumbles with a wooden spoon, until no pink remains. Drain excess fat into a bowl, leaving 1 tablespoon in the pan. Add diced onion and bell pepper; cook 4 minutes until softened.

  2. Season the filling: Stir in cumin, paprika, salt, and pepper. Cook 1 minute until fragrant. Remove from heat and fold in chopped eggs and olives if using. Transfer to a shallow dish and chill 10 minutes-filling should be cool enough to touch comfortably.

  3. Assemble empanadas: Place one dough disc on a clean surface. Spoon 2-3 tablespoons filling onto the lower half, leaving a ½-inch border. Brush edges with beaten egg. Fold the top half over filling to form a half-moon. Press edges firmly with fork tines to seal-press hard enough to leave deep ridges.

  4. Preheat and arrange: Set air fryer to 370°F and preheat 5 minutes. Arrange empanadas in a single layer in the basket, leaving 1-2 inches between each. Brush tops lightly with remaining egg wash. Cook in batches if needed to avoid crowding.

  5. Air fry: Cook 10-12 minutes without opening basket. Dough should be golden brown with crisp edges. Check internal temperature with an instant-read thermometer-filling should reach 160°F. Let rest 5 minutes before serving so filling sets and doesn't spill out.

Golden Rule
Press fork tines into dough edges at least three times around the curve-one or two presses won't hold during cooking and filling will leak into the basket.

What to Serve With It

Empanadas work as appetizers or mains depending on what's on the plate. A good slaw can make or break the plate. For a version that comes together quickly, easy garlic butter shrimp dinner nights pair crispy handheld foods with light, fresh sides that don't compete.

Side Dish Prep Why It Works How to Serve
Simple green salad Easy Crisp lettuce cuts through rich beef filling with acidity from vinaigrette Toss mixed greens with lime juice, olive oil, salt; serve cold alongside hot empanadas
Spanish rice Easy Mild, savory base soaks up any filling that leaks; complements cumin in beef Cook rice with tomato paste and chicken stock; fluff and serve warm in shallow bowls
Black beans Easy Adds protein and fiber; creamy texture contrasts crispy dough Warm canned beans with garlic, cumin, salt; mash lightly and serve as dip or side
Quick pico de gallo Easy Fresh tomatoes and lime juice add brightness; cilantro cuts through beef fat Dice tomatoes, onion, jalapeño; toss with lime juice, cilantro, salt; serve chilled in small bowls
Guacamole Easy Rich, creamy dip balances spiced beef; cooling effect against paprika heat Mash avocados with lime juice, salt, diced onion; serve immediately with empanadas for dipping

Three ways to serve it:

  • For weeknights: Pair with Spanish rice and a simple green salad-the rice soaks up any stray filling while greens add crunch
  • For entertaining: Set out small bowls of chimichurri, spicy aioli, and tomato salsa so guests can choose their dipping sauce
  • For meal prep: Pack empanadas with black beans and pico de gallo in divided containers-reheat empanadas separately to preserve crispness
Best Pick
Chimichurri sauce works as both a dipping condiment and a drizzle over plated empanadas-the herbaceous, tangy flavor cuts through beef fat better than ketchup or plain salsa.

Store and Reheat

Cooked empanadas keep 3-4 days in the fridge but lose crispness overnight. The beef works best when it hits the table at the same time as the main. For a version that comes together quickly, tender shrimp recipe reheats using similar air fryer method for restoring texture.

Method Time Best For
🔥 Air Fryer 4-6 min at 350°F Restoring crispness without drying out filling
🍳 Oven 8-10 min at 375°F Reheating multiple empanadas at once evenly
📦 Microwave 30-45 seconds Quick reheating when you don't care about crispy texture

For best results when storing:

  • Place cooled empanadas in a single layer in an airtight container lined with paper towels to absorb condensation
  • Store uncooked, assembled empanadas on a parchment-lined tray in the freezer for up to 2 months; cook from frozen, adding 3-4 minutes to air fry time
  • Refrigerate leftover filling separately from dough for up to 4 days; assemble fresh empanadas when ready to cook
  • Reheat empanadas directly from the fridge without thawing-cold dough crisps better than room-temperature dough
  • Avoid microwaving if possible-the dough turns rubbery and filling dries out; air fryer or oven preserves texture

Frequently Asked Questions

How long to cook air fryer empanadas at 370°F?

Cook 10-12 minutes without opening the basket. Dough should be golden brown with crisp edges and internal temperature should reach 160°F for beef filling.

Can I make air fryer empanadas ahead and freeze them?

Yes-assemble uncooked empanadas and freeze on a parchment-lined tray for up to 2 months. Cook from frozen at 370°F for 13-16 minutes, adding 3-4 minutes to the standard cook time.

What goes well with air fryer empanadas?

Simple green salad, Spanish rice, black beans, pico de gallo, or guacamole. Chimichurri, spicy aioli, and tomato salsa work as dipping sauces that cut through the richness of beef filling.

How do I know when air fryer empanadas are fully cooked?

Dough turns golden brown with crispy edges and internal temperature reaches 160°F when tested with an instant-read thermometer. The empanadas should feel firm to the touch, not doughy or soft.

Can I use pre-made frozen empanada dough in the air fryer?

Yes-thaw frozen dough overnight in the fridge before assembling. Don't thaw at room temperature or in the microwave, which makes dough sticky and hard to work with.

Air Fryer Empanadas

Air Fryer Empanadas

No ratings yet
Air Fryer Empanadas deliver golden, crispy edges with juicy beef filling in just over 30 minutes. Using high heat and proper sealing techniques ensures a crisp shell without oil and no flipping needed. These empanadas are perfect for weeknight dinners that feel special but are quick to prepare.
Print Recipe Pin Recipe
Prep Time 20 minutes mins
Cook Time 12 minutes mins
Total Time 32 minutes mins
Servings: 8 empanadas
Course: Appetizer, Dinner
Cuisine: Latin American
Ingredients Method Notes

Ingredients
  

  • 1 lb ground beef 80/20 blend, drained after cooking
  • 1 medium onion diced
  • 1 medium green bell pepper diced
  • 1 teaspoon cumin toasted if possible
  • 1 teaspoon paprika smoked paprika preferred
  • 1 teaspoon salt
  • 0.5 teaspoon black pepper
  • 12 pieces empanada dough discs store-bought, thawed
  • 2 pieces hard-boiled eggs chopped into small pieces, optional
  • 0.25 cup green olives sliced and patted dry, optional
  • 1 piece egg beaten, for sealing edges

Method
 

  1. Heat a large skillet over medium-high heat. Add ground beef and cook 6-8 minutes, breaking into small crumbles until no pink remains. Drain excess fat, leaving 1 tablespoon in the pan. Add diced onion and bell pepper; cook 4 minutes until softened.
    1 lb ground beef, 1 medium onion, 1 medium green bell pepper
  2. Stir in cumin, paprika, salt, and pepper. Cook 1 minute until fragrant. Remove from heat and fold in chopped eggs and olives if using. Transfer to a shallow dish and chill 10 minutes until cool enough to handle.
    1 tsp cumin, 1 tsp paprika, 1 tsp salt, 0.5 tsp black pepper, 2 pieces hard-boiled eggs, 0.25 cup green olives
  3. Place one dough disc on a clean surface. Spoon 2-3 tablespoons filling onto the lower half, leaving a ½-inch border. Brush edges with beaten egg. Fold the top half over to form a half-moon. Press edges firmly with a fork to seal, creating deep ridges.
    12 pieces empanada dough discs, 1 piece egg
  4. Set air fryer to 370°F and preheat for 5 minutes. Arrange empanadas in a single layer with 1-2 inches between each. Brush tops lightly with remaining egg wash. Cook in batches if needed to avoid crowding.
    1 piece egg
  5. Air fry empanadas for 10-12 minutes without opening basket. Dough should be golden brown and crisp. Check internal temperature reaches 160°F. Let rest 5 minutes before serving to allow filling to set.

Notes

  • Press fork tines into dough edges at least three times around the curve to prevent leaks during cooking.
  • Drain filling thoroughly before stuffing to avoid soggy dough.
  • Brush only the edges with beaten egg wash to help sealing and achieve a golden crust without stickiness.

Tried this recipe?

Let us know how it was!

Air Fryer Falafel

May 11, 2026

Complete Air Fryer Falafel Article

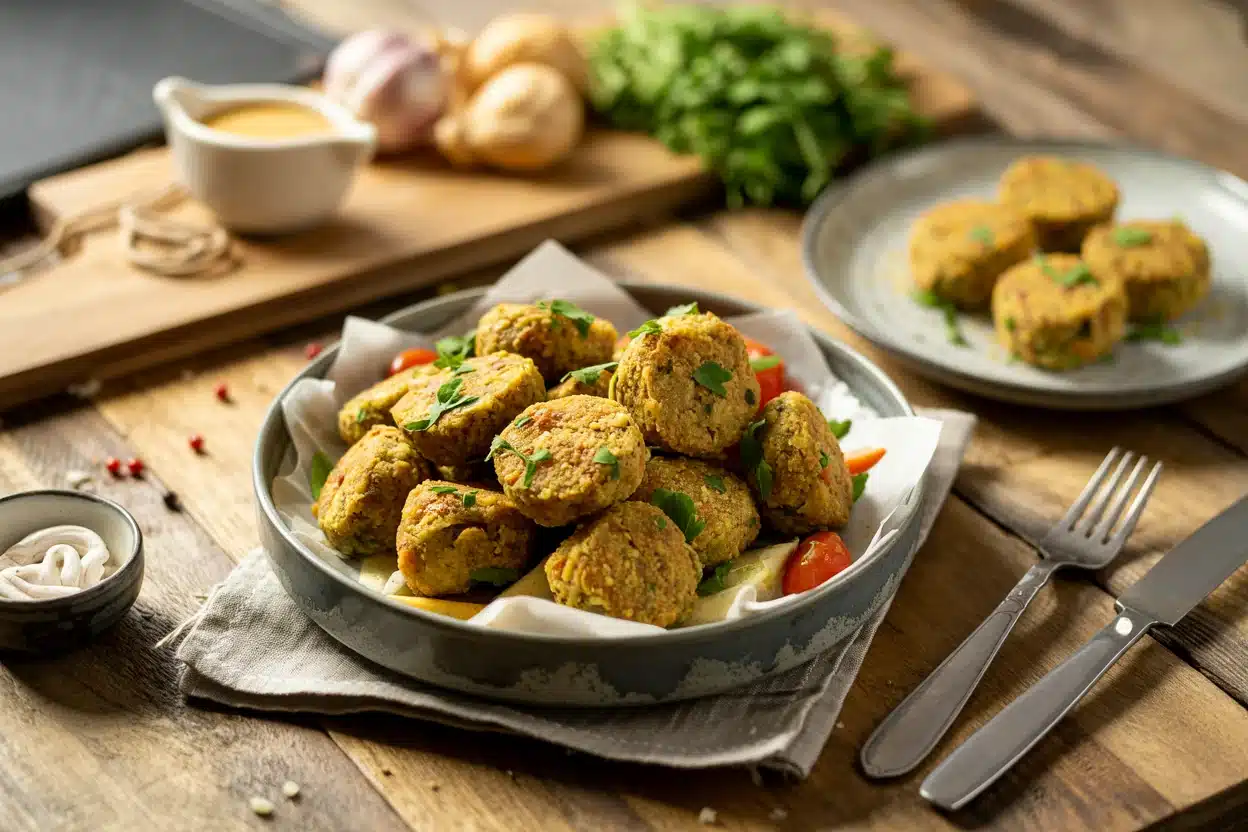
Crispy falafel with a golden crust and tender, herby center. That's what happens when you air fry soaked chickpeas with fresh parsley and garlic at 375°F.

Air Fryer Falafel

The air fryer crisps the edges without deep frying. You get restaurant texture in 15 minutes with barely any oil.

This works for weeknight dinners when you want something filling that doesn't require a vat of oil or constant babysitting.

QUICK SUMMARY

Air fryer falafel delivers crispy edges and moist centers using dried chickpeas soaked overnight, pulsed with fresh herbs and spices, then air fried at 375°F for 12-15 minutes. The key is keeping the mixture coarse-not smooth-and resting the dough 30 minutes before shaping.

⏰Time Reality: 20 minutes active work, but chickpeas need 8-12 hours soaking
🔑Critical First Move: Pulse ingredients 10-15 times in short bursts-stop when coarse
⚠️Watch Out: Canned chickpeas make soggy falafel-use dried, drained well after soaking

Why This Recipe Works

Air frying at 375°F creates a crispy crust while keeping the inside tender without submerging in oil. For a version that comes together quickly, a homemade broccoli recipe uses the same method with different timing.

Quick Reference
⏱️
Prep Time
20 min (plus 8-12 hrs soaking)
🔥
Cook Time
12-15 min
⏰
Total Time
8 hr 35 min (including soaking)
🍽️
Servings
4-6 servings
📊
Difficulty
Medium
🏷️
Category
Appetizer | Main Dish
💡
Quick Tip
Pulse ingredients until coarse, not paste
🎯
Best For
Weeknight | Meal prep | Entertaining

Five reasons this method works:

  • Dried chickpeas create the right texture - Canned chickpeas hold too much moisture and turn falafel soggy no matter how you cook them
  • Pulsing keeps the mix coarse - A food processor run in short bursts leaves small chickpea pieces that crisp up, while a smooth puree steams instead of crisps
  • Resting the dough for 30 minutes - Lets the flour and baking powder hydrate evenly so falafel hold their shape without crumbling mid-cook
  • Preheating the air fryer - Gets the basket hot enough to start browning immediately instead of steaming the falafel first
  • Light oil spray before cooking - A quick mist helps browning without the calorie load of deep frying
Quick Tip
Drain soaked chickpeas completely and pat dry with a towel-extra water makes the mix too wet to hold together.

What You'll Need

Air Fryer Falafel - Air Fryer Falafel

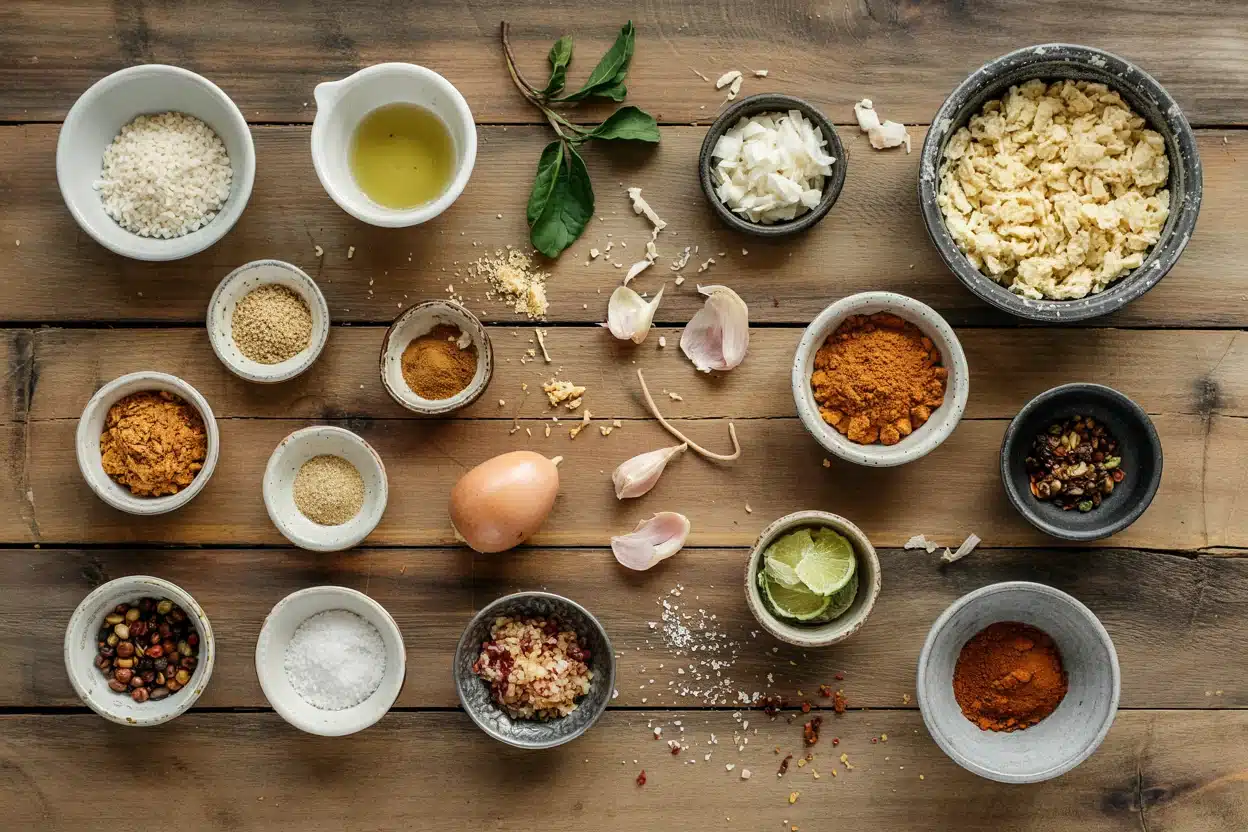
The ingredient list is short but non-negotiable-fresh herbs and dried chickpeas make the difference between crispy falafel and dense veggie pucks. For a version that comes together quickly, another great rice recipe uses similar binding techniques with rice instead.

🫘
Legumes
  • 1½ cups dried chickpeas (soaked 8-12 hours)
🧄
Aromatics
  • ½ medium onion, roughly chopped
  • 4 garlic cloves
  • 1 cup fresh parsley
  • ½ cup fresh cilantro (optional)
🌶️
Spices & Binders
  • 1½ teaspoon ground cumin
  • 1 teaspoon ground coriander
  • 1 teaspoon salt
  • 1 teaspoon baking powder
  • 3-4 tablespoon all-purpose flour or chickpea flour
🫙
For Cooking
  • Cooking spray or olive oil

Ingredient Details

  • Dried chickpeas
    Soak overnight, drain completely-canned chickpeas make the mix too wet and produce soggy falafel
  • Fresh parsley and cilantro
    Use stems and leaves, chop roughly before food processing-dried herbs lack the brightness falafel needs
  • Ground cumin
    Primary spice for authentic flavor-toast cumin seeds and grind fresh if you want deeper aroma
  • All-purpose flour
    Add 1 tablespoon at a time until mix holds shape when squeezed-too much makes dense falafel
  • Baking powder
    Creates slight puff and lighter texture-optional but worth it for fluffier interior
  • Onion
    Yellow or white work best-adds moisture and slight sweetness that balances earthy chickpeas
  • Garlic
    Fresh cloves only-garlic powder tastes flat and doesn't add the pungency falafel needs

Ingredient Swaps

Most swaps work if you understand the texture trade-offs. Rich mains need something to cut through, and rice does exactly that-a creamy pasta side uses similar binding principles with different base ingredients.

Four swaps that work:

  • Dried chickpeas → canned chickpeas drained and patted dry - Produces softer, less crispy falafel and requires extra flour to bind, but works in a pinch when you skip the overnight soak
  • All-purpose flour → chickpea flour or gluten-free flour blend - Keeps the recipe gluten-free with minimal texture change, may need slightly less flour since chickpea flour binds more
  • Fresh parsley → dried parsley or mixed dried herbs - Reduces brightness and aroma but saves a grocery trip, use half the amount since dried herbs concentrate
  • Fresh onion → onion powder - Cuts moisture from the mix, use 1 teaspoon powder per ½ onion, flavor slightly flatter but more shelf-stable

Canned Chickpeas

Works for: Last-minute cooking, skipping overnight soak, budget-friendly approach

Skip if: You want traditional crispy texture, maximum flavor, professional-level results

Dried Chickpeas (Soaked)

Works for: Authentic texture, crispy exterior, classic Middle Eastern falafel taste

Skip if: You forgot to soak overnight, need dinner in under an hour, running low on time

Instructions

The method takes 20 minutes of active work once chickpeas are soaked and drained. Chicken adds the contrast this plate needs, but timing matters-for a classic chicken dish, we keep a batch ready for nights like this.

  1. Drain soaked chickpeas and pulse in food processor - Add chickpeas, onion, garlic, parsley, cilantro, cumin, coriander, salt, and baking powder to food processor, pulse 10-15 times in short bursts until coarse and crumbly (not smooth paste), scrape down sides halfway through
  2. Add flour and test texture - Add 3 tablespoons flour, pulse 3-4 times, squeeze a handful of mix-if it holds shape without crumbling, you're set; if too wet, add 1 more tablespoon flour and pulse again
  3. Rest dough and preheat air fryer - Transfer mix to bowl, cover, refrigerate 30 minutes to let flour hydrate and flavors meld, preheat air fryer to 375°F (190°C) for 3-5 minutes
  4. Shape and oil falafel - Scoop 2 tablespoons mix, roll into balls or flatten slightly into patties about 1½ inches wide, place on parchment, spray lightly with oil on all sides for browning
  5. Air fry and flip halfway - Arrange falafel in air fryer basket 1 inch apart (work in batches if needed), cook 12-15 minutes at 375°F, flip at 7 minutes, done when golden-brown and crisp outside with firm center
Golden Rule
Don't overcrowd the basket-falafel need air circulation to crisp up instead of steaming against each other.

What to Serve With It

Falafel work as an appetizer or main depending on what you pair them with. The beef works best when it hits the table at the same time as the main-we keep a batch ready for nights like this, using rich beef dish planning strategies to build the full plate.

Side Dish Prep Why It Works How to Serve
Israeli Salad Easy Diced cucumbers and tomatoes add fresh crunch that cuts through rich falafel Toss with lemon juice and serve in pita alongside falafel for texture contrast
Hummus Easy Creamy, garlicky dip complements earthy chickpea flavor without competing Spread in pita or use as dipping sauce, drizzle with olive oil before serving
Pita Bread Easy Traditional vessel for falafel sandwiches, soaks up tahini sauce perfectly Warm pita, stuff with falafel, salad, and sauce for handheld meal
Pickled Vegetables Easy Tangy crunch from pickled turnips or cucumbers balances richness Serve on the side or tuck into pita with falafel for acidity
Tabbouleh Medium Herbaceous bulgur salad adds freshness and makes falafel feel like a full meal Pile on plate next to falafel, serve with lemon wedges for brightness

Three ways to serve it:

  • Falafel sandwich: Warm pita bread, stuff with 3-4 falafel, shredded lettuce, diced tomatoes, cucumbers, drizzle tahini sauce, wrap tightly
  • Mezze platter: Arrange falafel on large plate with hummus, baba ganoush, olives, pickled vegetables, warm pita triangles for dipping and scooping
  • Bowl meal: Layer rice or quinoa in bowl, top with falafel, Israeli salad, tahini sauce, sprinkle with sumac or za'atar
Best Pick
Garlic tahini sauce is non-negotiable-whisk tahini with lemon juice, minced garlic, and water until pourable for the classic falafel pairing.

Store and Reheat

Falafel keep their crispy texture better than most fried foods when stored properly. Most people skip salmon, but it balances the meal-for a flaky homemade salmon recipe, we keep a batch ready for nights like this.

Method Time Best For
🔥 Air Fryer 3-5 min at 375°F Restoring crispy crust and tender center without drying out
🍳 Oven 5-7 min at 375°F Reheating multiple servings at once while maintaining crispness
📦 Microwave 30-45 sec Quick reheating when texture isn't critical, produces softer falafel

For best results when storing:

  • Cool completely before refrigerating - Hot falafel create condensation in containers that turns crispy crust soggy within hours
  • Use shallow airtight containers - Stack falafel in single layer separated by parchment to prevent sticking and maintain airflow
  • Refrigerate up to 4 days - Store in fridge within 2 hours of cooking, reheat in air fryer or oven to restore crispness
  • Freeze for longer storage - Freeze cooked falafel in freezer bags for up to 2 months, reheat from frozen at 375°F for 8-10 minutes
  • Skip microwave for best texture - Microwave makes falafel rubbery and soft, use only when speed matters more than crispy exterior

Frequently Asked Questions

Can I use canned chickpeas instead of dried for air fryer falafel?

Canned chickpeas work but produce softer, less crispy falafel because they hold too much moisture. Drain and pat them completely dry, then add extra flour (1-2 tablespoons more) to compensate for the wetness.

How do I store and reheat leftover air fryer falafel?

Cool falafel completely, store in airtight container in fridge for 3-4 days or freeze for 2 months. Reheat in air fryer at 375°F for 3-5 minutes to restore crispy texture-skip the microwave unless you're okay with softer falafel.

How do I know when air fryer falafel is fully cooked and crispy?

Falafel are done when golden-brown all over with crisp edges and firm centers that hold shape when pressed. They should sound slightly hollow when tapped and break open to reveal fully cooked, not raw-looking, interior.

Why do my falafel fall apart or stay soggy in the air fryer?

Falling apart means not enough flour or the mix was over-processed into paste-add 1 tablespoon flour at a time and keep texture coarse. Soggy falafel come from canned chickpeas or overcrowding the basket-use dried chickpeas and space falafel 1 inch apart.

What are good sides or sauces to serve with air fryer falafel?

Serve falafel with tahini sauce, hummus, Israeli salad, pickled vegetables, and warm pita bread. For sauces, try garlic tahini, spicy harissa yogurt, or lemon herb yogurt dip-all add creaminess and tang that balance earthy chickpea flavor.

Air Fryer Falafel

Air Fryer Falafel

No ratings yet
Crispy air fryer falafel feature a golden crust and tender, herby interior made from dried chickpeas soaked overnight. Pulsing the mixture to a coarse texture and air frying at 375°F creates a perfect crispy texture without deep frying.
Print Recipe Pin Recipe
Prep Time 20 minutes mins
Cook Time 15 minutes mins
Total Time 35 minutes mins
Servings: 5 servings
Course: Appetizer, Main Dish
Cuisine: Middle Eastern
Ingredients Equipment Method Notes

Ingredients
  

  • 1.5 cups dried chickpeas soaked 8-12 hours and drained completely
  • 0.5 medium onion roughly chopped
  • 4 cloves garlic fresh
  • 1 cup fresh parsley roughly chopped
  • 0.5 cup fresh cilantro optional, roughly chopped
  • 1.5 teaspoon ground cumin
  • 1 teaspoon ground coriander
  • 1 teaspoon salt
  • 1 teaspoon baking powder
  • 3 tablespoon all-purpose flour add more as needed to hold shape, up to 4 tbsp
  • cooking spray or olive oil for spraying falafel before air frying

Equipment

  • Food processor Used to pulse chickpeas and mix ingredients
  • Air fryer For air frying falafel at 375°F

Method
 

  1. Drain soaked chickpeas thoroughly. Add chickpeas, onion, garlic, parsley, cilantro, cumin, coriander, salt, and baking powder to a food processor. Pulse 10-15 times in short bursts until mixture is coarse and crumbly, scraping down sides halfway.
    1.5 cups dried chickpeas, 0.5 medium onion, 4 cloves garlic, 1 cup fresh parsley, 0.5 cup fresh cilantro, 1.5 tsp ground cumin, 1 tsp ground coriander, 1 tsp salt, 1 tsp baking powder
  2. Add 3 tablespoons of flour to the mixture and pulse 3-4 times. Squeeze a handful of the mix; if it holds shape without crumbling, the texture is ready. If too wet, add an additional tablespoon of flour and pulse again.
    3 tbsp all-purpose flour
  3. Transfer the falafel mixture to a bowl, cover, and refrigerate for 30 minutes to hydrate the flour and meld flavors. Meanwhile, preheat the air fryer to 375°F (190°C) for 3-5 minutes.
  4. Scoop about 2 tablespoons of mixture and shape into balls or slightly flattened patties approximately 1½ inches wide. Place on parchment and lightly spray all sides with cooking oil for better browning.
    cooking spray or olive oil
  5. Arrange falafel in the air fryer basket with about 1-inch space between each to allow air circulation. Cook at 375°F for 12-15 minutes, flipping at 7 minutes, until golden brown and crisp outside with a firm center.

Notes

  • Use dried chickpeas soaked overnight for best texture, as canned chickpeas add too much moisture.
  • Do not puree the mixture smooth; keep it coarse for crispier falafel.
  • Do not overcrowd the air fryer basket to prevent falafel from steaming and becoming soggy.

Tried this recipe?

Let us know how it was!

Air Fryer French Fries

May 11, 2026

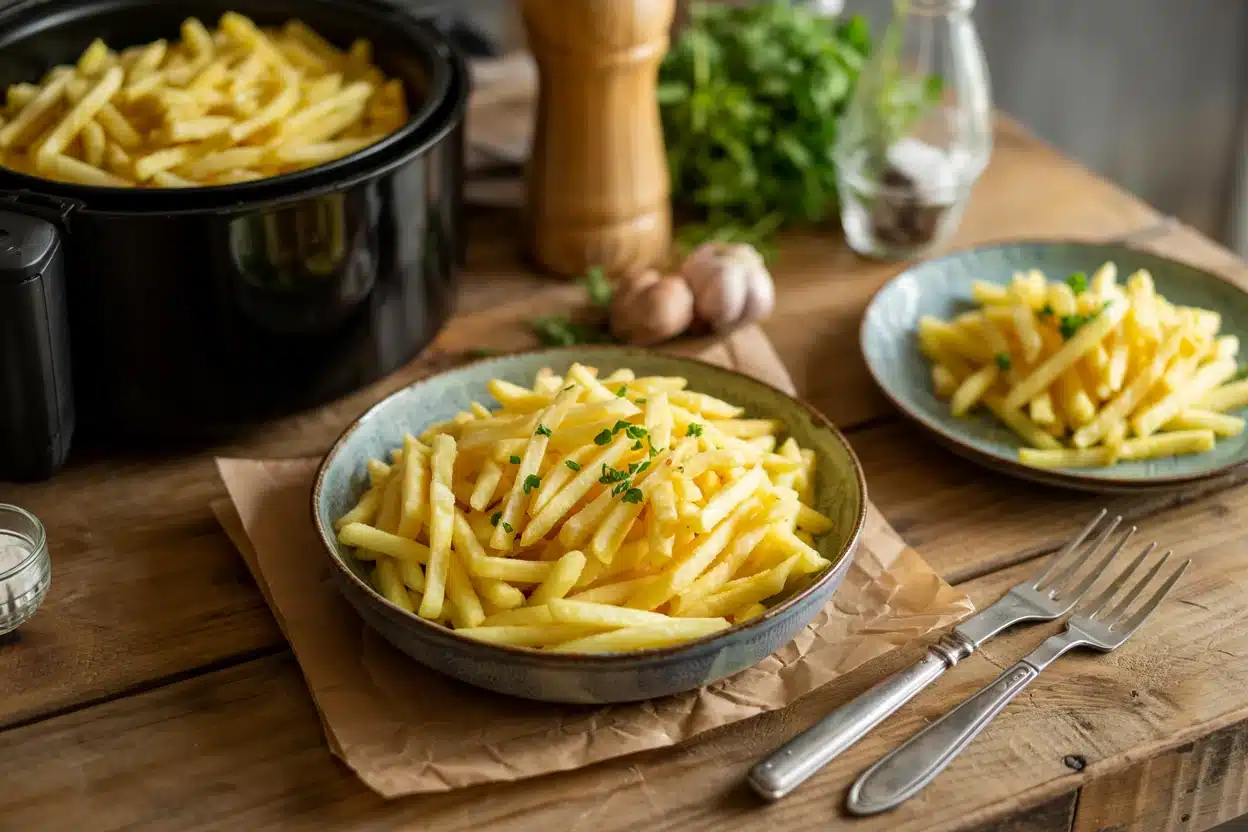
You need 30 minutes and a bag of russet potatoes. No deep fryer, no splatter guard, no oil cleanup that takes longer than the actual cooking.

Air Fryer French Fries

The air fryer crisps the outside while keeping the inside fluffy. A quick soak removes excess starch so the fries don't stick together.

This is what you make on weeknights when frozen fries feel lazy but you're not ready to commit to actual frying.

QUICK SUMMARY

Air Fryer French Fries crisp up in 15-20 minutes with minimal oil and zero mess. Soak cut potatoes in cold water to remove starch, dry completely, toss with cornstarch and oil, then air fry in a single layer. Shake the basket halfway through for even browning.

⏱️Time Reality: 15 minutes prep, 15-20 minutes cooking, no soaking required but helps
🔪First Move: Cut potatoes into uniform strips and soak in cold water for 30-60 minutes
⚠️Watch Out: Wet potatoes steam instead of crisp - dry them completely before adding oil

Why This Recipe Works

High heat and dry surfaces create the crisp you want without a deep fryer. For a protein that works alongside these, try a easy shrimp side that cooks in the same amount of time.

Quick Reference
⏱️
Prep Time
15 min
🔥
Cook Time
15-20 min
⏰
Total Time
30-35 min
🍽️
Servings
4 servings
📊
Difficulty
Easy
🏷️
Category
Side
💡
Quick Tip
Soak, dry, toss, air fry in single layer
🎯
Best For
Weeknight | Meal prep | Entertaining

What makes these fries crisp:

  • Soaking removes surface starch that causes sticking and prevents browning
  • Cornstarch creates a light coating that crisps faster than bare potato
  • Air circulation at 380-400°F renders moisture without submerging in oil
  • Shaking the basket halfway through ensures all sides hit direct heat
  • Russet potatoes have high starch content that turns fluffy inside while the exterior crisps
Quick Tip
Season fries immediately after cooking while they're hot - salt sticks better to warm surfaces

What You'll Need

Air Fryer French Fries - Air Fryer French Fries

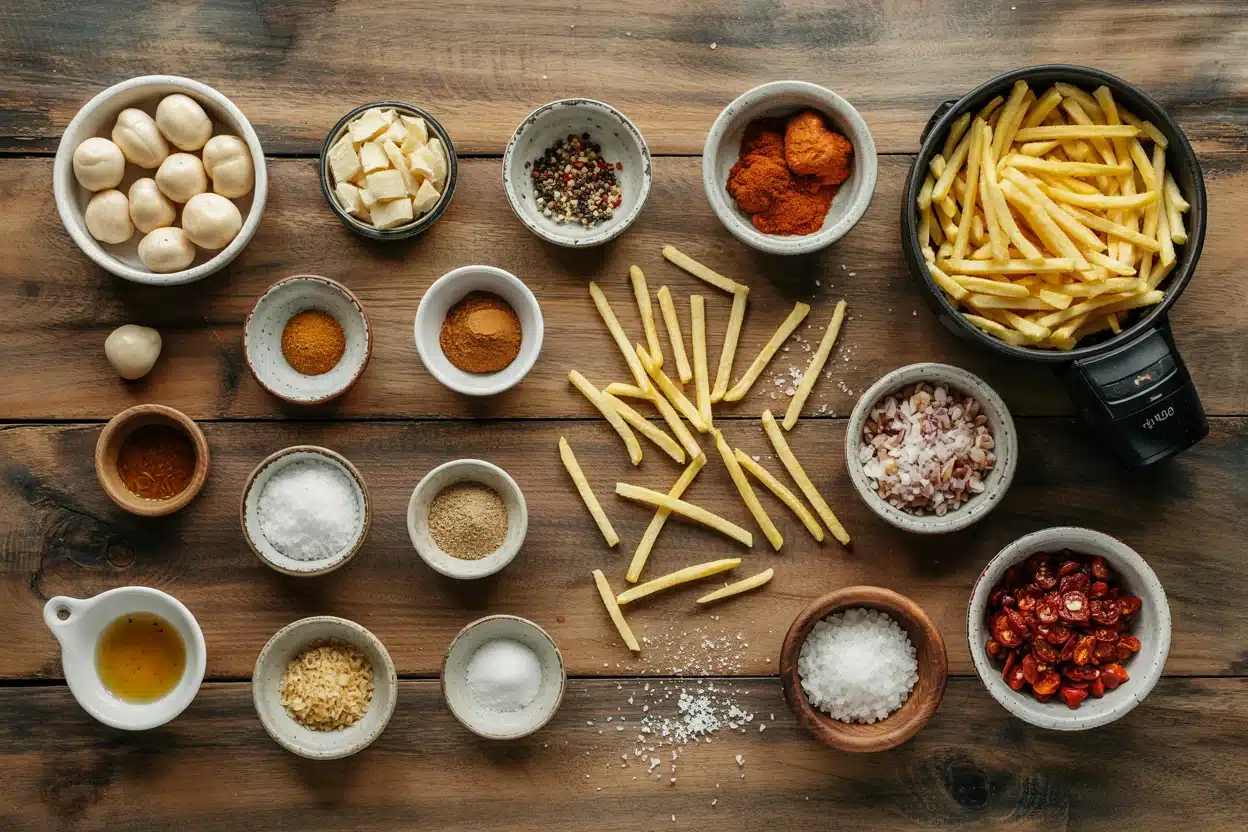
Russet potatoes are non-negotiable because waxy varieties turn mushy instead of fluffy. For another take on potatoes that uses similar technique, check out this homemade potato wedges recipe with a smoky twist.

🥔
Produce
  • Russet potatoes
  • Fresh parsley (optional)
🫙
Pantry
  • Olive oil
  • Cornstarch
  • Salt
  • Black pepper
🌶️
Seasonings
  • Garlic powder (optional)
  • Paprika (optional)
🥢
For Serving
  • Ketchup
  • Mayonnaise

Ingredient Details

  • Russet potatoes
    High starch content creates fluffy interior and crisp exterior - waxy potatoes stay dense
  • Olive oil
    Use 1-2 tablespoons for even coating without greasiness - more oil doesn't mean more crisp
  • Cornstarch
    Creates light coating that crisps faster than flour or bare potato
  • Salt
    Add immediately after cooking while fries are hot for better adhesion
  • Black pepper
    Freshly ground adds more punch than pre-ground
  • Garlic powder
    Optional but adds depth without burning like fresh garlic would
  • Fresh parsley
    Chop and sprinkle after cooking for color and fresh herb note

Ingredient Swaps

Russet potatoes work best but Yukon Golds cook faster and taste creamier. If you want something lighter than burgers, pair these with easy rolls side that uses similar air fryer timing.

Four swaps that work:

  • Russet potatoes → Yukon Gold potatoes: Creamier texture, slightly less crisp, cooks 2-3 minutes faster
  • Olive oil → avocado oil: Neutral flavor, higher smoke point, same crisping power
  • Cornstarch → arrowroot powder: Comparable crispiness with slightly lighter coating
  • Black pepper → cayenne pepper: Adds heat instead of mild spice - start with half the amount

Russet Potatoes

Works for: High starch content, fluffy inside, crispest exterior

Skip if: You want creamier texture or faster cook time

Yukon Gold Potatoes

Works for: Creamier interior, slightly faster cooking, buttery flavor

Skip if: You prioritize maximum crispiness over creamy texture

Instructions

Total time runs about 30 minutes including soaking but you can skip the soak if you're rushed. Rich mains need something to cut through, and this tender pork balances the plate without competing for oven space.

  1. Cut and soak the potatoes. Slice potatoes into uniform strips about ¼-inch thick. Soak in cold water for 30-60 minutes to remove surface starch, then drain and pat completely dry with paper towels or a clean kitchen towel.

  2. Toss with cornstarch and oil. Transfer dried potato strips to a large bowl. Add 1-2 tablespoons olive oil and 1-2 tablespoons cornstarch. Toss until every fry has a light, even coating with no dry spots or clumps.

  3. Arrange in air fryer basket. Place fries in a single layer in the air fryer basket with space between each piece. Don't pile them or they'll steam instead of crisp. Work in batches if needed.

  4. Air fry at 380-400°F for 15-20 minutes. Set temperature to 380-400°F and cook for 15-20 minutes total. At the 10-minute mark, shake the basket or use tongs to flip fries for even browning on all sides.

  5. Season immediately and serve. Remove fries when edges are golden brown and exterior feels crisp. Season with salt, black pepper, and any optional spices while still hot. Let rest 2-3 minutes before serving.

Watch Out
Wet potatoes create steam that prevents crisping - dry them thoroughly after soaking before adding oil

What to Serve With It

Fries work as a side but they need something substantial on the plate. Chicken adds the contrast this plate needs, but timing matters - plan a quick chicken dish that finishes right when the fries come out hot.

Side Dish Prep Why It Works How to Serve
Burger Easy Classic pairing adds protein and richness Serve fries alongside with ketchup and pickles
Grilled chicken Easy Lean protein balances starchy fries Plate chicken breast with fries and a simple salad
BLT sandwich Easy Smoky bacon and fresh tomato contrast crispy fries Cut sandwich in half and stack fries on the side
Fish tacos Medium Crunchy fries add texture to soft tacos Serve fries in a basket with lime wedges
Chicken wings Easy Popular combo for game day or casual meals Pile fries in center with wings around the edges

Three ways to serve it:

  • With burgers and sliders: Classic diner pairing that feels complete with ketchup and mustard
  • Alongside grilled proteins: Chicken, steak, or pork chops balance the starchy fries with lean meat
  • As a snack with dipping sauces: Garlic aioli, spicy mayo, or plain ketchup for casual entertaining
Best Pick
Pair with lean proteins like grilled chicken or fish to balance the starch without adding more richness

Store and Reheat

Fries lose crispness fast but the air fryer brings them back to life better than any other method. For complete meal planning around similar weeknight timing, check out easy rotisserie chicken dinner nights that use the same approach.

Method Time Best For
🔥 Air fryer 5-7 min at 375°F Restoring crispiness without drying out
🔥 Oven 10-12 min at 400°F Reheating larger batches evenly
📦 Microwave 1-2 min Quick reheating when texture doesn't matter

For best results when storing:

  • Fridge storage: Keep in airtight container for 3-4 days in a shallow layer to prevent sogginess
  • Freezing: Freeze cooked fries in single layer on a sheet pan, then transfer to freezer bag for up to 1 month
  • Reheat from frozen: Add 3-5 minutes to air fryer time and skip thawing
  • Avoid microwave for crisp texture: Microwave makes fries soft - use air fryer or oven instead
  • Don't stack when reheating: Arrange in single layer for even heat and restored crispness

Frequently Asked Questions

How long to cook air fryer French fries at 400°F?

Cook for 15-20 minutes at 400°F, shaking the basket halfway through at the 10-minute mark. Fries are done when edges are golden brown and the exterior feels crisp to the touch.

Can I make air fryer French fries ahead and store them?

Store cooked fries in an airtight container in the fridge for 3-4 days. Reheat in the air fryer at 375°F for 5-7 minutes to restore crispness - they won't be quite as crisp as fresh but close.

How do I know when air fryer French fries are perfectly done?

Look for golden brown edges and a crisp exterior that doesn't feel soft when you touch it with tongs. The inside should feel tender when you bite through, not hard or dry.

Why are my air fryer French fries soggy and how to fix it?

Soggy fries happen when potatoes aren't dried completely after soaking or when the basket is overcrowded. Fix it by patting fries bone-dry before oiling and cooking in a single layer with space between each piece.

Can I use frozen French fries in an air fryer instead of fresh?

Yes, cook frozen fries at 400°F for 12-15 minutes without thawing, shaking halfway through. Skip the oil and cornstarch since frozen fries are already coated.

Air Fryer French Fries

Air Fryer French Fries

No ratings yet
Air Fryer French Fries are crisp on the outside and fluffy inside with minimal oil and zero mess. Soaking cut russet potatoes removes excess starch for better browning. Tossed with cornstarch and olive oil, then air fried in a single layer for perfectly crispy fries.
Print Recipe Pin Recipe
Prep Time 15 minutes mins
Cook Time 20 minutes mins
Total Time 35 minutes mins
Servings: 4 servings
Course: Side Dish
Cuisine: American
Ingredients Equipment Method Notes

Ingredients
  

  • 4 medium russet potatoes cut into ¼-inch strips
  • 2 tablespoons olive oil for tossing fries
  • 2 tablespoons cornstarch for light coating to help crisping
  • to taste salt season immediately after cooking
  • to taste black pepper freshly ground, optional
  • garlic powder optional, for seasoning
  • paprika optional, for seasoning

Equipment

  • Air fryer Used to cook fries crisply with minimal oil
  • Large bowl To toss potatoes with cornstarch and oil
  • Paper towels or clean kitchen towel To dry potatoes thoroughly before cooking

Method
 

  1. Slice russet potatoes into uniform ¼-inch thick strips. Soak in cold water for 30 to 60 minutes to remove surface starch, then drain and pat completely dry with paper towels or a clean kitchen towel.
    4 medium russet potatoes
  2. Transfer dried potato strips to a large bowl. Add 1 to 2 tablespoons olive oil and 1 to 2 tablespoons cornstarch. Toss until every fry has a light, even coating with no dry spots or clumps.
    4 medium russet potatoes, 2 tablespoons olive oil, 2 tablespoons cornstarch
  3. Place fries in a single layer in the air fryer basket with space between each piece. Work in batches if necessary to avoid overcrowding.
    4 medium russet potatoes
  4. Air fry at 380-400°F for 15 to 20 minutes. At the 10-minute mark, shake the basket or use tongs to flip fries for even browning on all sides.
  5. Remove fries when edges are golden brown and exterior feels crisp. Season immediately with salt, black pepper, and optional spices while still hot. Let rest 2 to 3 minutes before serving.
    to taste salt, to taste black pepper, garlic powder, paprika

Notes

  • Soak potatoes to remove excess starch and prevent sticking.
  • Dry potatoes completely before tossing with oil to avoid steaming and sogginess.
  • Cook fries in a single layer and shake halfway through for even crisping.

Tried this recipe?

Let us know how it was!

Air Fryer Grilled Cheese

May 11, 2026

When you need a fast lunch that feels like comfort without the mess of a stovetop pan, air fryer grilled cheese delivers. One appliance, six minutes, and enough golden crispiness to make plain white bread feel intentional.

Air Fryer Grilled Cheese

The air fryer crisps the bread evenly on both sides while the cheese melts from circulating hot air. You don't flip unless you want to, and there's no grease splatter on the stove.

Perfect for weeknight meals when cooking feels like a chore or when you're meal prepping simple lunches for the week.

QUICK SUMMARY

Air fryer grilled cheese takes 7 minutes at 370°F to get golden crispy bread with gooey melted cheese inside. Butter the outside of both slices, stack 2-3 thin cheese slices between them, and air fry without flipping for even browning. Works for quick lunches, snacks, or easy kid-friendly dinners.

⏱️Total Time: 11-13 minutes including 5-minute prep
🔥Key Move: Preheat air fryer 3 minutes; butter outside only for crisp crust
⚠️Watch Out: Too much filling blocks heat and prevents melting-use 2-3 thin slices max

Why This Recipe Works

Air fryer grilled cheese crisps faster than stovetop because hot air circulates around all sides of the sandwich at once. For a version that comes together quickly, easy chicken side gives you a complete meal with minimal cleanup.

Quick Reference
⏱️
Prep Time
5 min
🔥
Cook Time
6-8 min
⏰
Total Time
11-13 min
🍽️
Servings
1-2 servings
📊
Difficulty
Easy
🏷️
Category
Main Dish
💡
Quick Tip
Butter outside, cheese inside, air fry 370°F 7 minutes
🎯
Best For
Weeknight

Why it works:

  • Preheating the air fryer for 3 minutes ensures the bread starts crisping immediately when you add the sandwich
  • Buttering only the outside keeps the interior from getting soggy while the exterior turns golden and crisp
  • Using 2-3 thin cheese slices melts faster and more evenly than one thick slice or shredded cheese
  • Cooking at 370°F balances crisp bread with melted cheese-higher temps burn the bread before the cheese melts
  • Monitoring after 6 minutes prevents burnt edges since air fryer models vary in heat intensity
Best Pick
American cheese melts smoothest, cheddar adds sharper flavor, mozzarella gives the longest cheese pull-use what you want

What You'll Need

Air Fryer Grilled Cheese - Air Fryer Grilled Cheese

Most people skip breast, but it balances the meal. We keep a batch ready for nights like this - this related breast recipe works with the same air fryer temperature.

🍞
Bread
  • 2 slices white, whole wheat, or sourdough bread
🧈
Fat
  • 1-2 teaspoons butter, softened
  • or 1-2 teaspoons mayonnaise
🧀
Cheese
  • 2-3 slices cheddar, American, or mozzarella
  • or ⅓ cup shredded cheese
🫙
Optional Add-Ins
  • tomato slices
  • cooked bacon
  • fresh herbs

Ingredient Details

  • Bread
    White bread crisps fastest; whole wheat adds nuttiness; sourdough needs 1-2 extra minutes for thicker slices
  • Butter
    Room temperature butter spreads evenly without tearing bread-microwave 5-10 seconds if needed
  • Cheese slices
    Pre-sliced cheese melts more evenly than block cheese you slice yourself-thickness matters for melting speed
  • Mayonnaise
    Substitute mayo for butter in equal amounts-creates golden crust with slight tang
  • Shredded cheese
    Melts faster than slices but can ooze out sides-use less than you think
  • Add-ins
    Pat tomato slices dry with paper towel to avoid sogginess; cook bacon crisp before adding
  • Air fryer basket
    Spray lightly with oil or line with parchment to prevent sticking-avoid wax paper which can burn

Ingredient Swaps

Fries adds the contrast this plate needs, but timing matters. For a version that comes together quickly, simple fries recipe pairs well with grilled cheese for a full lunch plate.

Four swaps that work:

  • Butter → olive oil: Brush 1 teaspoon olive oil per side for slightly different flavor with less saturated fat-still crisps well but changes taste profile
  • Regular bread → gluten-free bread: Use sturdy GF bread like Canyon Bakehouse; may need 1-2 fewer minutes since GF bread dries faster
  • Cheddar → vegan cheese: Violife or Daiya slices melt slower-add 1-2 minutes to cook time and check for gooey texture
  • Butter → mayonnaise: Spread thin layer of mayo on outside for crispy crust with tangy flavor-use same amount as butter

White Bread

Works for: Fastest crisping, classic texture, budget-friendly

Skip if: Want more fiber or nutty flavor

Whole Wheat Bread

Works for: More fiber, nutty flavor, holds up to add-ins

Skip if: Prefer soft white bread texture

Sourdough Bread

Works for: Tangy flavor, sturdy crust, artisan feel

Skip if: Slices are too thick-needs longer cook time

Instructions

Timing this meal means getting everything done at once without overcooking the bread. Rich mains need something to cut through, and chicken does exactly that. For a version that comes together quickly, quick pork dish finishes right when the sandwich does.

  1. Preheat air fryer to 370°F for 3 minutes. This ensures bread starts crisping immediately instead of steaming. Check that basket is clean and dry.

  2. Spread 1 teaspoon softened butter on one side of each bread slice. Use thin, even layer from edge to edge-gaps leave pale spots. Butter goes on the outside that touches the air fryer basket.

  3. Layer 2-3 thin cheese slices on unbuttered side of one bread slice. Place second slice on top, buttered side facing out. Press gently to seal-don't smash flat.

  4. Place sandwich in air fryer basket with space around all sides. Cook 7 minutes at 370°F without opening. Bread should be golden brown with cheese fully melted inside.

  5. Check at 6 minutes for doneness. Look for even golden color on top and melted cheese visible at edges. Add 1-2 minutes if needed for deeper browning. Let rest 1 minute before cutting.

Quick Tip
Flip sandwich halfway through only if your air fryer heats unevenly-most don't need flipping with circulating air

What to Serve With It

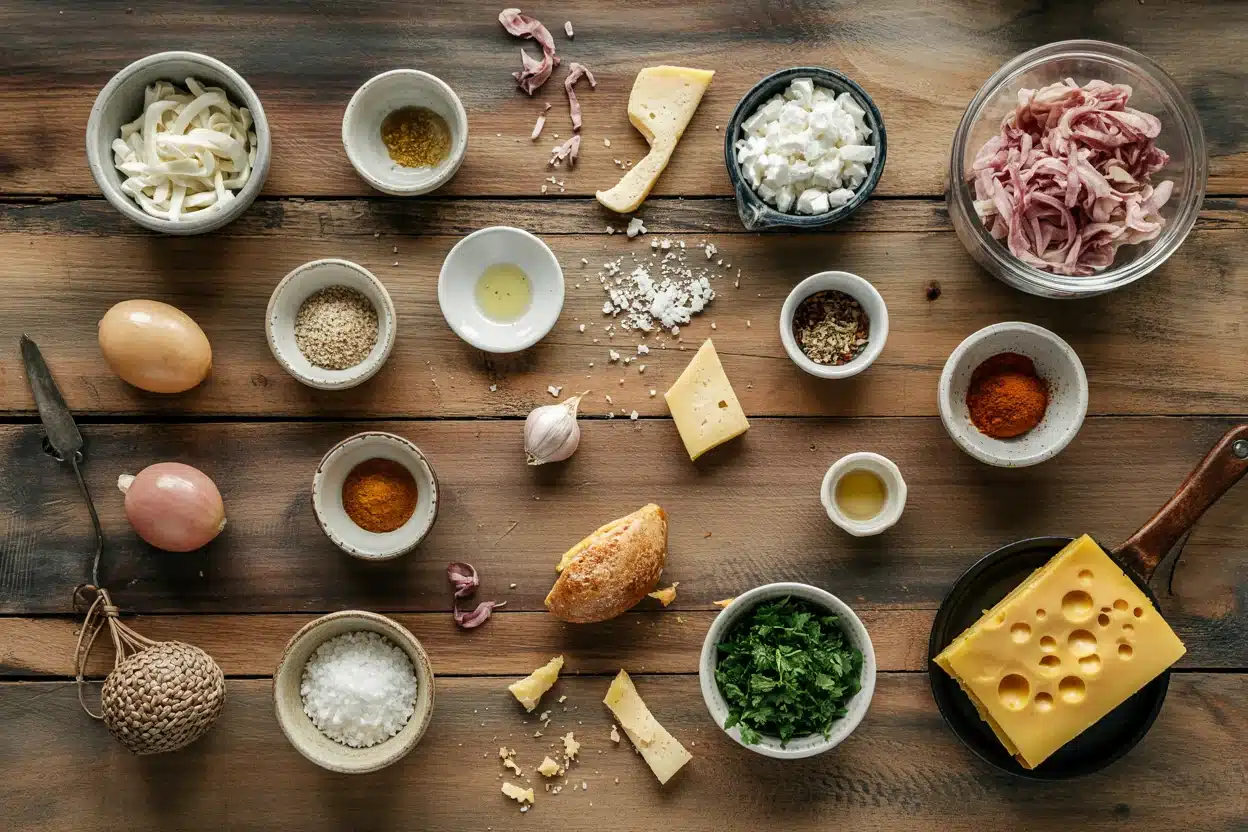
Air fryer grilled cheese needs sides that add texture and cut through the richness. The burgers works best when it hits the table at the same time as the main. We keep a batch ready for nights like this - this simple burgers makes the plate feel more complete without extra cooking time. For more meal planning ideas, check complete cauliflower cheese meal ideas for vegetarian dinner combinations.

Side Dish Prep Why It Works How to Serve
Tomato Soup Easy Classic pairing with tangy richness that complements buttery bread Serve hot in small bowls for dipping sandwich corners
Mixed Green Salad Easy Light greens with vinaigrette cut through cheese and add crunch Toss greens with lemon vinaigrette; serve on the side
Pickle Spears Easy Briny crunch balances rich cheese and adds acidity Place 2-3 spears on plate; use dill or bread-and-butter pickles
Air Fryer Potato Wedges Medium Crispy potato matches sandwich texture; fills out the plate Air fry 15 minutes at 400°F; season with salt and paprika
Fresh Fruit Easy Sweet fruit adds freshness without competing with savory sandwich Slice apples or pears; add grapes for quick side

Three ways to serve it:

  • Lunch plate: Cut sandwich diagonally, add pickle spears and handful of chips for classic diner-style lunch
  • Light dinner: Serve with tomato soup and small green salad for balanced weeknight meal
  • Snack plate: Cut into quarters, arrange with fresh fruit and nuts for easy after-school snack
Shortcut
Buy pre-cut veggies and use canned tomato soup-dinner comes together in under 15 minutes total

Store and Reheat

Grilled cheese stores up to 4 days but loses crispiness in the fridge. A good beef can make or break the plate. For a version that comes together quickly, this easy beef recipe reheats well alongside leftover sandwiches for quick lunches.

Method Time Best For
🍳 Stovetop 3-5 minutes low heat Restores crispiness without drying out bread
📦 Microwave 30-45 seconds Fastest reheat but makes bread soft and chewy
🔥 Oven 6-8 minutes at 350°F Even reheating with crispy crust; good for multiple sandwiches

For best results when storing:

  • Wrap cooled sandwich tightly in foil or plastic wrap-prevents bread from drying out in fridge
  • Store up to 3-4 days in shallow airtight container-quality drops after that with soggy bread
  • Reheat in air fryer 3-4 minutes at 350°F for best texture-flips crispy crust back without burning
  • Freeze wrapped sandwiches up to 1 month-thaw in fridge overnight before reheating
  • Add fresh tomato or lettuce after reheating-keeps produce crisp instead of wilted from stored heat

Frequently Asked Questions

Can I make air fryer grilled cheese ahead and reheat?

Yes, but texture suffers. Make sandwiches up to 4 days ahead, store wrapped in fridge, then reheat in air fryer 3-4 minutes at 350°F to restore crispiness-stovetop also works in 3-5 minutes over low heat.

What is the best temperature and time to cook grilled cheese in air fryer?

Cook at 370°F for 6-8 minutes. This balances golden crispy bread with fully melted cheese-higher temps burn the bread before cheese melts, lower temps leave bread pale and cheese partially melted.

How do I know when air fryer grilled cheese is done?

Check for golden brown bread on both sides and melted cheese visible at the edges. Bread should feel crisp when you press gently-if it's pale or soft, add 1-2 more minutes.

Why is my air fryer grilled cheese soggy and how can I fix it?

Soggy sandwich comes from butter on the inside or too much wet filling like tomato. Butter only the outside of bread and pat tomato slices dry-if already soggy, air fry 2 extra minutes to crisp it up.

What are good side dishes to serve with air fryer grilled cheese?

Tomato soup is the classic pairing. Also works with mixed green salad, pickle spears, air fryer potato wedges, or fresh fruit-choose sides that add crunch or acidity to balance the rich cheese.

Air Fryer Grilled Cheese

Air Fryer Grilled Cheese

No ratings yet
Air fryer grilled cheese delivers a quick, crispy, and melty sandwich using circulating hot air for even browning without flipping. Butter the outside of the bread, layer 2-3 thin cheese slices inside, and air fry for 7 minutes at 370°F for a perfect golden crust and gooey cheese interior.
Print Recipe Pin Recipe
Prep Time 5 minutes mins
Cook Time 7 minutes mins
Total Time 12 minutes mins
Servings: 2 servings
Course: Main Dish
Cuisine: American
Ingredients Equipment Method Notes

Ingredients
  

  • 2 slices bread white, whole wheat, or sourdough
  • 1-2 teaspoons butter softened, for spreading on outside of bread
  • 2-3 slices cheese cheddar, American, or mozzarella, thinly sliced

Equipment

  • Air fryer Used to cook the sandwich evenly without flipping

Method
 

  1. Preheat air fryer to 370°F for 3 minutes to ensure bread crisps immediately.
  2. Spread 1 teaspoon softened butter on one side of each bread slice evenly from edge to edge; buttered side will touch the air fryer basket.
    2 slices bread, 1-2 teaspoons butter
  3. Layer 2-3 thin cheese slices on the unbuttered side of one bread slice. Place the second slice on top with buttered side facing out. Press gently to seal.
    2 slices bread, 2-3 slices cheese
  4. Place sandwich in air fryer basket with space around all sides. Cook at 370°F for 7 minutes without opening. Check at 6 minutes for doneness and add 1-2 minutes if needed.
  5. Let sandwich rest for 1 minute before cutting. Serve warm.

Notes

  • Butter only the outside of the bread to keep the interior from becoming soggy.
  • Use 2-3 thin cheese slices for faster, more even melting.
  • Pat tomato slices dry before adding as an optional filling to avoid sogginess.

Tried this recipe?

Let us know how it was!

Air Fryer Lemon Pepper Cauliflower [Quick Crispy Side]

May 11, 2026

Coat the florets in cornstarch, toss them in oil and lemon pepper, and drop them in a preheated air fryer - that's the whole method. Twenty-two minutes from fridge to table, and you get golden, crisp-edged cauliflower with bright citrus tang and cracked pepper heat throughout.

Air Fryer Lemon Pepper Cauliflower

No blanching. No oven preheating for 20 minutes.

This recipe leans on three mechanical rules: dry florets, a light starch coat, and a single layer in the basket. Get those right, and the results are consistent every time.

If you want a fresh herb finish, parsley swaps that work can point you toward bright garnish options that complement the lemon notes here.

QUICK SUMMARY

Air fryer lemon pepper cauliflower is a 22-minute side dish that delivers crisp, golden florets with citrus brightness and peppery heat. Coat dry florets in cornstarch and lemon pepper seasoning, air fry at 400°F, and shake the basket at the halfway mark. Single-layer cooking is non-negotiable - crowding the basket gives you steam, not crunch.

⏱️Time Reality: 10 min prep + 12 min cook - faster than oven roasting by 15+ minutes
🌟Method Shortcut: Toss starch before oil so the coating adheres and crisps instead of clumping
⚠️Watch Out: Wet or overcrowded florets steam instead of brown - pat dry and cook in batches

Why This Recipe Works

Lemon pepper cauliflower can turn soft and bland in a regular oven if the timing or spacing is off.

The air fryer circulates heat on all sides simultaneously, so the edges char and the centers stay tender without crossing into mushy territory.

Cornstarch is the structural element here. A light dusting applied before the oil creates a thin, dry surface layer that crisps on contact with hot air. It's a different result from flour - lighter, crunchier, and without any pasty coating.

Cauliflower also holds lemon pepper better than broccoli does, because the tight floret surface gives the seasoning more grip. That means bold, even flavor in every bite rather than clumping on some florets and bare others.

Quick Reference
⏱️
Prep Time
10 minutes
🔥
Cook Time
12 minutes
⏰
Total Time
22 minutes
🍽️
Servings
4
📊
Difficulty
Easy
🏷️
Category
Side Dish
💡
Quick Tip
Use cornstarch and spray oil for maximum crispness
🎯
Best For
Weeknight dinner
  • 🌡️ Air fry at 400°F - the temperature where Maillard browning happens fast without burning the pepper coating
  • Cut florets to 1-1.5 inches so every piece finishes at the same time
  • Pat cauliflower dry after washing - surface moisture is the main reason florets steam instead of crisp
  • Shake the basket at the 6-minute mark to expose undersides and brown all surfaces evenly
  • Finish with a squeeze of fresh lemon after cooking to lift the flavor without softening the crust
Golden Rule
Starch first, oil second. Adding oil before the cornstarch turns it into a paste instead of a crust.

What You'll Need

Air Fryer Lemon Pepper Cauliflower - Air Fryer Lemon Pepper Cauliflower

Cauliflower is the star here - choose a firm white head with tight, dense florets rather than a loose or yellowing one, since firm florets hold their shape through air frying.

If you're curious about how different cruciferous vegetables behave in storage, the guide on keeping broccoli fresh covers shelf life and prep timing that applies to cauliflower too.

🥬
Produce
  • 1.5 lb cauliflower head (cut into 1-1.5-inch florets)
  • 1 lemon (zest + juice for finishing)
🌶️
Seasonings
  • 2 teaspoon lemon pepper seasoning
  • ½ teaspoon garlic powder
  • ¼ teaspoon fine salt (optional, if seasoning is low-sodium)
🫙
Coating
  • 1 tablespoon cornstarch
  • 1.5 tablespoon olive oil

Ingredient Details

  • Cauliflower head
    Buy a firm, bright-white head. Avoid any with soft spots or yellowing - those florets collapse in the air fryer instead of crisping.
  • Lemon pepper seasoning
    Store-bought blends vary widely in salt content. Taste yours before adding extra salt.
  • Cornstarch
    1 tablespoon is enough for 1.5 lbs of florets. More than that and the coating turns chalky.
  • Olive oil
    Stick to 1-1.5 tbsp. Too much oil pools in the basket and promotes uneven, greasy browning.
  • Garlic powder
    Adds savory depth that balances the sharp lemon notes. Use ½ teaspoon - it shouldn't dominate.
  • Fresh lemon
    Used only after cooking. Zesting and squeezing before air frying softens the coating.

Ingredient Swaps

Most swaps here are low-risk.

The only one that noticeably changes the dish is replacing lemon pepper seasoning with fresh zest and cracked pepper - it's brighter but less balanced without the seasoned salt component.

If your blend calls for garlic powder and you're out, the guide on swapping out garlic powder lists direct alternatives that won't throw off the seasoning balance.

  • 🔄 Pre-cut florets (1 lb): Use instead of a whole head - reduce cook time by 1-2 minutes and check at 8 minutes
  • 🌾 All-purpose flour: Replaces cornstarch with a heavier, less crisp coating - works, but noticeably different texture
  • 🫒 Avocado or canola oil: Direct swap for olive oil - higher smoke point, no flavor difference at 400°F
  • 🍋 Fresh lemon zest + cracked pepper: Brighter citrus note, however the seasoned salt balance of a pre-made blend is harder to replicate

Cornstarch vs. All-Purpose Flour

Works for: Cornstarch when you want maximum crunch and a light coating

Skip if: Using flour when you want the thinner, crispier result - flour gives a denser shell

Store-Bought Blend vs. Fresh Zest + Pepper

Works for: Fresh zest when you want sharper citrus and control over salt

Skip if: You want consistent, all-in-one seasoning with built-in salt balance

Instructions

Every step below assumes a preheated air fryer at 400°F - skipping the preheat drops the initial crisping temperature and delays browning.

If you're serving this alongside a grain dish, check how replacements for lard affect fat choice in companion recipes that share the same prep window.

  1. Preheat your air fryer to 400°F for 3-5 minutes.

Pat cauliflower florets completely dry with a clean kitchen towel. 2. Coat in starch: Add florets to a large bowl, sprinkle cornstarch over them, and toss until evenly dusty.

No clumps. 3. Season and oil: Drizzle olive oil over the florets, add lemon pepper seasoning and garlic powder, then toss again until every piece is coated. 4. Air fry: Arrange florets in a single layer in the basket - do not overlap.

Cook at 400°F for 12 minutes.

Shake the basket hard at the 6-minute mark. 5. Check doneness: Edges should be golden-brown with light char on the tips.

A fork pushed into the stem should meet slight resistance - not mushy.

Finish with lemon zest and a squeeze of fresh juice.

Watch Out
If florets look pale at 8 minutes and your air fryer runs cool, raise the temp to 410°F for the final 4 minutes rather than extending time - extra time without heat just dries them out.

What to Serve With It

Lemon pepper cauliflower works as a weeknight side or a shareable platter component. The bright, peppery profile pairs well with rich proteins and neutral grains, and it holds up well next to creamy dips.

Check the guide on replacements for onion powder if you're building a spice-rubbed protein to serve alongside and need to adjust the seasoning mix.

Side DishPrepWhy It WorksHow to Serve
Grilled chicken thighsMediumRich, savory protein offsets bright lemon notesPlate alongside with a wedge of lemon
Steamed basmati riceEasyNeutral grain absorbs peppery seasoning from the floretsServe cauliflower on top or beside
Yogurt-cucumber saladEasyCool, creamy element tempers the cracked pepper heatSpoon alongside as a cooling dip
Hummus platterEasyLemon-pepper florets complement Mediterranean dips naturallyArrange florets around the hummus bowl
Charred pita wedgesEasyShared char notes and citrus make them feel like one dishServe warm with a dipping sauce

Three ways to serve it:

  • As a stand-alone snack with a Greek yogurt lemon-dill dip for a cooling, creamy contrast
  • Alongside grilled chicken and rice for a balanced weeknight plate
  • On a sharing board with hummus, pita, and olives for a Mediterranean-style spread
Shortcut
Spicy mayo (sriracha + mayo, 1:3 ratio) takes 30 seconds to make and turns this into a shareable appetizer without any extra cooking.

Store and Reheat

Leftover florets keep for 3 days in a shallow airtight container in the fridge - glass works better than plastic because it doesn't trap steam as aggressively.

Unlike some cooked cauliflower preparations, these don't freeze well; the cornstarch coating turns gummy after thawing, which is different from freezing buffalo cauliflower where a saucier coating holds up better.

MethodTimeBest For
🍳 Air Fryer3-5 min at 375°FRestoring crisp edges on small portions
🔥 Oven6-8 min at 400°F on a wire rackLarger batches without overcrowding
📦 MicrowaveNot recommendedSoftens coating completely - avoid

For best results when storing:

  • Let florets cool completely before sealing - hot steam inside a container softens the crust overnight
  • Store in a single layer if possible, or at least keep portions shallow
  • Skip adding fresh lemon zest until reheating - it loses its brightness in cold storage
  • Reheat directly from fridge, not from frozen - do not freeze this recipe
  • Add a fresh squeeze of lemon after reheating to revive the citrus note the heat drove off

Frequently Asked Questions

Can we use pre-cut frozen cauliflower for this recipe?

Yes, but thaw and pat the florets completely dry first - frozen cauliflower releases significant water as it heats, which prevents browning. Add 2-3 minutes to the cook time and check at 10 minutes for doneness.

Do we need to blanch cauliflower before air frying?

No. Blanching introduces moisture and softens the exterior before it even hits the air fryer. Raw, dry florets cut to 1-1.5 inches cook through fully at 400°F in 12 minutes without blanching.

How do we make this oil-free?

Use a light spray of water or aquafaba instead of oil to help the cornstarch and seasoning stick. The result is less golden and the edges won't char, however the florets still cook through and the lemon pepper flavor stays intact.

Is lemon pepper spicy? Can we reduce the heat?

Most lemon pepper blends have moderate pepper heat, not chili heat. To reduce it, cut the seasoning to 1 teaspoon and add ½ teaspoon lemon zest - you keep the citrus note without the full pepper intensity.

Can we double the recipe in a large air fryer?

Only if the florets still fit in a single layer - doubling the quantity while stacking defeats the whole method. Cook in two separate batches and hold the first batch in a 200°F oven while the second finishes.

Air Fryer Lemon Pepper Cauliflower

Air Fryer Lemon Pepper Cauliflower

No ratings yet
We roast cauliflower florets in the air fryer with a light cornstarch coating, olive oil, and lemon pepper so the exterior crisps while the interior stays tender. A finishing zest and lemon squeeze keep the flavor bright and pepper-forward.
Print Recipe Pin Recipe
Prep Time 10 minutes mins
Cook Time 12 minutes mins
Total Time 22 minutes mins
Servings: 4 servings
Course: Side Dish
Cuisine: American, Mediterranean
Ingredients Equipment Method Notes

Ingredients
  

  • 1.5 lb cauliflower trimmed into 1–1.5-inch florets
  • 2 tablespoon cornstarch
  • 2 tablespoon olive oil
  • 2 teaspoon lemon pepper seasoning store-bought or homemade
  • 1 teaspoon garlic powder
  • 1 teaspoon onion powder
  • 1 teaspoon kosher salt
  • 0.5 teaspoon black pepper freshly cracked
  • 1 tablespoon lemon juice freshly squeezed
  • 1 teaspoon lemon zest finely grated, plus extra for finishing
  • 2 tablespoon flat-leaf parsley chopped, optional for garnish

Equipment

  • Air fryer basket-style or drawer; 3–5 qt recommended
  • Mixing bowl large, for tossing florets
  • Paper towels for drying florets

Method
 

  1. Preheat the air fryer to 400°F for 3 minutes while you prep the cauliflower.
  2. Dry trimmed florets thoroughly on paper towels, then transfer to a large bowl and toss with cornstarch until lightly dusted.
  3. Add olive oil, lemon pepper, garlic powder, onion powder, kosher salt, black pepper, lemon zest, and lemon juice; toss to coat evenly.
  4. Arrange florets in a single layer in the air fryer basket without crowding; work in batches if needed.
  5. Air fry at 400°F for 10–12 minutes, shaking the basket or flipping florets at 6 minutes, until edges are golden-brown and a fork meets slight resistance.
  6. Transfer to a bowl, sprinkle chopped parsley and extra lemon zest, and serve immediately with an optional squeeze of lemon.

Notes

  • Do not overcrowd the basket—cook in batches for crisp, browned edges.
  • Pat florets dry and toss in cornstarch before oil to achieve a crunchy crust.

Tried this recipe?

Let us know how it was!

Air Fryer Lemon Pepper Chicken Tenders Gu

May 11, 2026

Twenty minutes is all this takes, start to finish. Bright, zesty, peppery chicken tenders with a shatteringly crisp panko crust - built entirely in your air fryer, no oil-splattered stovetop required.

Air Fryer Lemon Pepper Chicken Tenders

This recipe leans on a few non-negotiable moves: patting the chicken dry, zesting the lemon before juicing it, and using cracked black pepper instead of finely ground. Get those three right and the rest falls into place.

If you've been curious about comparing lemon extract vs lemon zest options, this recipe is a good test case for why fresh zest wins. The volatile oils in the peel are what drive that sharp citrus punch in every bite.

QUICK SUMMARY

Air fryer lemon pepper chicken tenders come together in 20 minutes with a double-coat panko crust that stays crispy from basket to plate. Pat the chicken dry before coating, use cracked black pepper (not finely ground), and zest your lemons before juicing. Greek yogurt is the binder that holds it all together.

⏱️Time Reality: 10-minute prep, 10-minute cook - done before the oven preheats
🔑Method Shortcut: Double-coat (flour → yogurt → panko → yogurt → panko) for max crunch
⚠️Watch Out: Finely ground pepper burns fast in the air fryer and turns bitter - use cracked only

Why This Recipe Works

The air fryer runs hot and dry, which means coatings crisp faster than in a conventional oven -

but they also scorch faster if anything goes wrong. Patting the chicken dry before dredging removes surface moisture that would otherwise steam the coating from the inside, turning panko soggy before it ever has a chance to brown.

The double-coat method is the real advantage here. Two passes through yogurt and panko builds a thicker, more textured crust that grips the lemon zest and cracked pepper without letting them fall into the basket.

For an accurate internal temperature reading, read up on comparing meat thermometer vs candy thermometer options before you cook - a meat thermometer is the right tool, and 165°F is the target.

Quick Reference
⏱️
Prep Time
10 minutes
🔥
Cook Time
10 minutes
⏰
Total Time
20 minutes
🍽️
Servings
4
📊
Difficulty
Easy
🏷️
Category
Main Dish / Appetizer
💡
Quick Tip
Pat tenders dry and double-coat for extra crispness
🎯
Best For
Weeknight dinner, casual hosting, meal prep
  • 🌡️ Cook to 165°F internal - juices should run completely clear
  • ⚙️ Preheat your air fryer 3 minutes before the first batch goes in
  • 📐 Single layer only - overlapping tenders steam instead of crisping
  • 🛢️ Spritz tenders with oil spray before cooking and again at the halfway flip
  • ⏸️ Let tenders rest 5 minutes after coating before air frying to set the crust
Golden Rule
Room-temp chicken cooks more evenly. Pull tenders from the fridge 10 minutes before you start coating.

What You'll Need

Air Fryer Lemon Pepper Chicken Tenders - Air Fryer Lemon Pepper Chicken Tenders

Chicken tenderloins are the natural choice here - they're uniform in thickness, cook in under 12 minutes, and don't need to be trimmed or cut. Fresh lemon does double duty: the zest goes into the panko coating, the juice goes into the yogurt binder.

For a related approach using the same air fryer method, making air fryer chicken tenders at home covers the base technique in detail.

🍗
Protein
  • 1½ lbs chicken tenderloins
🍜
Coating
  • 1 cup panko breadcrumbs
  • ⅓ cup all-purpose flour
🧀
Binder
  • ½ cup plain Greek yogurt
  • 1 tablespoon lemon juice
🌶️
Seasoning
  • Zest of 2 lemons
  • 1½ teaspoon cracked black pepper
  • 1 teaspoon kosher salt
  • ½ teaspoon garlic powder

Ingredient Details

  • Chicken Tenderloins
    Look for uniform pieces around 1-1.5 oz each. Pat completely dry with paper towels - this is non-negotiable for crust adhesion.
  • Panko Breadcrumbs
    Japanese-style panko has larger, airier flakes than standard breadcrumbs. Don't substitute regular breadcrumbs if you want a genuinely crisp result.
  • Plain Greek Yogurt
    Full-fat or 2% both work. The thick texture clings better than buttermilk and shortens any marinating time significantly.
  • Lemon Zest
    Zest both lemons before you cut and juice them. The oils are in the outer peel - avoid zesting into the white pith beneath it.
  • Cracked Black Pepper
    Use a pepper mill or buy pre-cracked. Fine ground pepper sits flush against the coating, heats faster, and goes bitter in the air fryer.
  • Kosher Salt
    Mixed into both the flour dredge and the panko layer for even seasoning throughout the crust.
  • Garlic Powder
    Optional but recommended - adds a savory undertone that keeps the lemon from tasting one-dimensional.

Ingredient Swaps

Most swaps in this recipe are straightforward, though each one shifts something - crust texture, tang level, or cook time. If you're replacing the yogurt binder, check out these greek yogurt stand-ins before committing to one.

  • Chicken breasts (cut into 1" strips) work in place of tenderloins - add 2-4 minutes to cook time and watch for dryness
  • Crushed cornflakes swap for panko - crust comes out lighter and crunchier with a mild toasted note
  • Buttermilk replaces Greek yogurt - use equal volume; marinate 20-30 minutes since it's thinner and needs more contact time
  • Gluten-free 1:1 flour blend works in the dredge - browns slightly faster, so check at the 8-minute mark

Panko vs. Crushed Cornflakes

Works for: Extra-light crunch; gluten-free if using GF cornflakes

Skip if: You want a neutral-flavored crust without any corn taste

Greek Yogurt vs. Buttermilk

Works for: Deeper tang and tenderization with a 20-minute soak

Skip if: You're short on time - yogurt adheres without any marinating

Instructions

The steps here move fast. Have your three dredging stations set up before you touch the chicken, and keep one hand for dry and one for wet to avoid clumping.

If you want to see how this compares to a classic preparation, a air fryer chicken wings recipe uses similar spacing and temp logic.

  1. Prep the chicken. Pat tenderloins completely dry. Mix flour, ½ teaspoon salt, and ½ teaspoon pepper in a shallow dish.

In a second dish, combine yogurt and lemon juice. In a third, combine panko, lemon zest, remaining pepper, remaining salt, and garlic powder. 2. Double-coat. Dredge each tender in flour (shake off excess) → yogurt mixture → panko.

Repeat the yogurt → panko pass for a second layer. Press the panko firmly with your palm. 3. Rest. Place coated tenders on a plate and let them sit 5 minutes.

This sets the crust and prevents it peeling off in the basket. 4. Air fry. Preheat air fryer to 400°F for 3 minutes. Arrange tenders in a single layer with ½-1" gaps.

Spritz with oil spray. Cook 5 minutes, flip, spritz again, and cook another 4-5 minutes. 5. Check doneness. Internal temp should read 165°F.

Crust should be deep golden with visible lemon zest and pepper flecks. Rest 2 minutes before serving.

Watch Out
Don't skip the flip. The bottom of the tender gets direct basket heat; flipping ensures both sides go golden rather than one side browning and the other steaming.

What to Serve With It

These tenders work across multiple formats - quick weeknight plate, party platter, or meal-prep container. The peppery, tangy crust pairs best with sides that are either creamy, crunchy, or starchy to balance the brightness.

Side DishPrepWhy It WorksHow to Serve
Quick Cabbage SlawEasyCrunchy, cool contrast to peppery tendersPile alongside or under the tenders
Steamed Rice + Lemon WedgesEasyAbsorbs juices, extends the mealServe tenders on top; squeeze lemon over
Roasted Baby PotatoesMediumStarchy base softens the tangy pepper notesToss with olive oil and serve warm
Celery and Carrot SticksEasyFinger-food pairing for plattersArrange around tenders on a board
Dipping Board with Honey MustardEasyMultiple sauces for customizing heat and tangSet out with lemon-garlic aioli and honey-Sriracha

Three ways to serve it:

  • Weeknight plate - rice, slaw, lemon wedges; dinner on the table in 30 minutes total
  • Party platter - tenders on a board with celery, carrots, and three dipping sauces
  • Meal prep - slice into strips and refrigerate for wraps and grain bowls through the week
Shortcut
Lemon-garlic aioli takes 2 minutes: mix mayo, minced garlic, lemon juice, and a pinch of salt. Far better than bottled ranch alongside these tenders.

Store and Reheat

Cooked tenders keep for 3 days in the fridge in a shallow airtight container lined with a paper towel, which pulls moisture away from the crust.

For the oil spray used before cooking and reheating, olive oil stand-ins covers what to use if you're out of olive oil or prefer a neutral spray.

Freeze cooked tenders up to 2 months - layer between parchment in a zip bag and freeze flat.

MethodTimeBest For
🍳 Air Fryer4-6 min at 375°FRestores the panko crunch; best single-portion method
🔥 Oven8-10 min at 375°F on wire rackEven reheating for larger batches without overcrowding
📦 MicrowaveNot recommendedSteams the crust and turns panko soft - avoid

For best results when storing:

  • Cool tenders fully before sealing - trapping steam softens the crust overnight
  • Layer paper towels between stacked tenders in the container
  • Freeze on a flat tray first, then transfer to a bag to prevent clumping
  • Reheat from frozen at 375°F for 8-10 minutes in the air fryer, flipping once
  • Add a quick spritz of oil before reheating to refresh the crust's crunch

Frequently Asked Questions

Can we use frozen chicken tenders and how do we adjust the cook time?

Yes, but thaw them first for best results - fully frozen tenders take 18-22 minutes and the crust often overcooks before the interior hits 165°F. If cooking from frozen, skip the double-coat and use a single panko layer; reduce temp to 375°F and check temp at the 18-minute mark.

Do we need to marinate the chicken and how long is enough?

No marinade is required. The yogurt binder works as a quick wet coat rather than a soak - 5 minutes resting after coating is enough. If using buttermilk instead, a 20-30 minute soak improves flavor penetration since buttermilk is thinner and needs more contact time.

Will the crust stick to the air fryer basket and how do we prevent it?

Lightly spritz the basket itself with oil spray before placing tenders in, and spritz the tenders on top before cooking. Parchment liners cut to fit the basket also work, provided they have holes to allow hot air flow - solid liners block circulation and slow cooking.

Can we make these gluten-free and what changes are needed?

Swap the all-purpose flour for a gluten-free 1:1 blend and replace panko with gluten-free panko or crushed GF cornflakes. The GF flour dredge browns faster, so check at 8 minutes and reduce heat to 390°F if the coating is darkening too quickly before the inside is cooked through.

How do we know if the pepper has overcooked and turned bitter?

Overcooked pepper smells acrid and tastes sharp-bitter rather than warm and peppery. It typically happens with finely ground pepper at 400°F - cracked pepper sits higher on the crust surface, browns more evenly, and is far less likely to scorch. If tenders do come out bitter, a creamy dipping sauce cuts through it effectively.

Air Fryer Lemon Pepper Chicken Tenders

Air Fryer Lemon Pepper Chicken Tenders Gu

No ratings yet
Crispy air-fried chicken tenders coated in lemon, cracked black pepper, and panko. The recipe uses a yogurt binder and a double-coat technique for a golden, tangy crust and reliable 10-minute air-fryer cook time.
Print Recipe Pin Recipe
Prep Time 10 minutes mins
Cook Time 10 minutes mins
Total Time 20 minutes mins
Servings: 4 servings
Course: Main Dish / Appetizer
Cuisine: American
Ingredients Equipment Method Notes

Ingredients
  

  • 1 lb chicken tenderloins trimmed, about 12–14 tenders
  • 0.5 cup plain Greek yogurt or buttermilk
  • 1 cup panko breadcrumbs fine or regular
  • 0.5 cup all-purpose flour for dredge
  • 1 tablespoon lemon zest from 1 large lemon
  • 1 tablespoon fresh lemon juice about 1 lemon
  • 1 teaspoon coarse black pepper cracked or coarsely ground
  • 1 teaspoon kosher salt adjust to taste
  • 0.5 teaspoon garlic powder
  • 2 tablespoon olive oil or neutral oil for spritzing
  • lemon wedges for serving

Equipment

  • Air fryer basket-style or drawer; 3–5 qt works for 1–2 batches
  • Shallow bowls 3 bowls for flour, yogurt binder, and panko
  • Tongs For flipping tenders
  • Meat thermometer Instant-read for 165°F doneness
  • Wire rack Optional — for resting tenders between batches

Method
 

  1. Preheat the air fryer to 400°F for 3 minutes and arrange a wire rack nearby.
  2. Pat chicken tenderloins dry with paper towels; toss with lemon juice and ½ teaspoon kosher salt and let sit 5 minutes.
  3. Combine flour with ¼ teaspoon salt and garlic powder in one shallow bowl, whisk yogurt and lemon zest in second bowl, and mix panko with cracked black pepper in third bowl.
  4. Dredge tenders in flour, dip into yogurt mixture, press into panko, then repeat yogurt + panko for a double coat; press crumbs firmly to adhere.
  5. Arrange tenders single-layer in air fryer basket, spray lightly with olive oil, and cook at 400°F for 8–10 minutes, flipping halfway, until crust is golden and internal temp reaches 165°F.
  6. Transfer to wire rack to rest 3 minutes; serve with lemon wedges and chosen dip.

Notes

  • Pat chicken very dry and press crumbs to ensure coating stays on.
  • Cook one test tender first; adjust time for thicker or frozen tenders.

Tried this recipe?

Let us know how it was!

Air Fryer Lemon Pepper Meatballs [Weeknight Appetizer]

May 11, 2026

Zest the lemon, crack the pepper coarsely, and mix everything gently - those three moves carry almost all the flavor work here. Air fryer lemon pepper meatballs come together in under 30 minutes, with a lightly crisped shell and a tender center that holds together cleanly when you bite through.

Air Fryer Lemon Pepper Meatballs

Knowing how long meatballs keep is worth a look if you're doubling the batch. Three days in the fridge, three months frozen - this recipe scales well for prep-ahead situations.

The air fryer handles the browning without a drop of oil in the pan.

QUICK SUMMARY

These meatballs use ground pork or beef with fresh lemon zest and coarsely cracked pepper for a bright, snappy bite. Air-fried at 375°F for 10-12 minutes, they hit a crisp exterior without drying out. Chill the rolled meatballs for 10 minutes before cooking - it keeps them round and helps them brown evenly.

⏱️Time: 15 min prep, 10-12 min cook - done in 27 minutes total
🧊Shortcut: Chill rolled meatballs 10 minutes before air frying for tighter shape
⚠️Watch Out: Lean meat dries fast - use 12-20% fat ground meat and pull at 160°F

Why This Recipe Works

The air fryer creates a circulating heat environment that crisps the outside fast while keeping the interior at a safe, juicy 160°F. Fresh lemon zest is doing heavier lifting than most people expect -

the aromatic oils in the zest skin deliver a citrus punch that lemon juice alone never quite matches.

Coarsely cracked black pepper matters here too - fine-ground disperses into the mix and loses its bite, while larger pepper pieces survive the heat and create distinct peppery pockets throughout each meatball.

Read more about the taste of meat to understand why fat content affects final texture so directly.

Ground pork or beef at 12-20% fat keeps the interior moist even as the air fryer pulls surface moisture away.

Quick Reference
⏱️
Prep Time
15 minutes
🔥
Cook Time
10-12 minutes
⏰
Total Time
27 minutes
🍽️
Servings
4
📊
Difficulty
Easy
🏷️
Category
Appetizer
💡
Quick Tip
Dry mix and chill 10 min for tighter meatballs
🎯
Best For
Weeknight appetizer or quick hosting
  • 🧄 Mix until just combined - overworking the meat tightens gluten and makes dense meatballs
  • Use a 1.5-tbsp scoop to keep every meatball the same size for even cooking
  • Single layer only in the basket - crowding blocks airflow and kills the crisped shell
  • Pull at exactly 160°F internal temp and rest five minutes before serving
  • Zest a little extra lemon directly over the finished meatballs right before plating
Golden Rule
Chill your rolled meatballs 10 minutes in the fridge before air frying. Cold meatballs hold their round shape better and develop a more even golden crust.

What You'll Need

Air Fryer Lemon Pepper Meatballs - Air Fryer Lemon Pepper Meatballs

These meatballs use a short, focused ingredient list - nothing unusual to track down. If you're interested in swapping out lemon pepper components entirely, that's worth reviewing before you shop.

🍗
Protein
  • 1 lb ground pork or beef (12-20% fat)
🧄
Aromatics
  • Zest of 1 large lemon (zested fresh)
  • 1 tablespoon fresh lemon juice
  • 2 garlic cloves, minced
🌶️
Spices
  • 1.5 teaspoon coarsely cracked black pepper
  • 1 teaspoon kosher salt
🫙
Binders
  • ½ cup Panko breadcrumbs
  • 1 large egg
  • 2 tablespoon flat-leaf parsley, chopped

Ingredient Details

  • Ground Pork or Beef (12-20% fat)
    Fat keeps meatballs moist during air frying. Anything leaner risks a dry, crumbly interior - 80/20 ground beef or standard ground pork both work.
  • Fresh Lemon Zest
    Zest immediately before mixing - aromatic oils dissipate fast once exposed. One large lemon yields about 1.5 teaspoon packed zest.
  • Coarsely Cracked Black Pepper
    Buy whole peppercorns and crack them with a mortar and pestle or the flat of a knife. Pre-ground is too fine and loses its signature bite after cooking.
  • Panko Breadcrumbs
    Panko keeps the texture lighter than plain breadcrumbs. Measure ½ cup loosely packed - don't press it down.
  • Egg
    One egg is the binding agent that holds the ratio of 1 lb meat to ½ cup panko together. Skip it and meatballs fall apart in the basket.
  • Kosher Salt
    If substituting table salt, use ¾ teaspoon - table salt is denser and the same volume oversalts the mix.
  • Flat-Leaf Parsley
    Fresh parsley adds a mild herby note and visual flecks. Dried parsley is a workable backup at 1 tsp.

Ingredient Swaps

Four reliable swaps cover the most common situations - dietary needs, what's already in the fridge, or a preference for a different protein.

Note that swapping out lemon pepper components changes both the intensity and direction of the flavor, so lean toward less at first.

  • 🐔 Ground turkey or chicken in place of pork or beef - add 1 tablespoon olive oil directly into the mix to compensate for lower fat content
  • 🍘 Crushed saltines or GF breadcrumbs instead of Panko - saltines add extra saltiness, so reduce kosher salt to ½ tsp
  • 🌱 Flax egg (1 tablespoon ground flax + 3 tablespoon water, gelled) instead of egg - slightly more tender crumb, works well for dairy-free or vegan binders
  • 🍋 1.5 teaspoon lemon extract + 1 teaspoon lemon juice instead of fresh zest - noticeably more artificial flavor, so use half the amount first and adjust

Ground Turkey / Chicken

Works for: Lighter protein or dietary preference

Skip if: You want the richest, most tender result - turkey without added fat is noticeably drier

Lemon Extract Swap

Works for: No fresh lemons on hand

Skip if: You want a clean, natural lemon note - extract can taste perfumed at full measure

Instructions

Air frying at 375°F is the consistent sweet spot - high enough to brown the outside quickly, low enough to keep the interior from seizing up before it cooks through.

For a side idea to plan alongside this, check out what pairs with meatballs before you start so the timing lines up.

  1. Mix the meatball base. Combine ground meat, lemon zest, lemon juice, garlic, salt, cracked pepper, parsley, panko, and egg in a large bowl.

Mix with your hands until just combined - stop as soon as no streaks of egg or dry crumbs remain. 2. Scoop and roll. Use a 1.5-tbsp scoop to portion meatballs, then roll between your palms into smooth 1-inch spheres.

Place on a plate and refrigerate for 10 minutes. 3. Preheat and load the basket. Preheat the air fryer to 375°F for 3 minutes.

Arrange meatballs in a single layer with at least ½ inch between each - cook in batches if needed. 4. Air fry 10-12 minutes. Cook until the exterior is golden-brown and a thermometer inserted into the center reads 160°F (165°F for turkey or chicken).

Shake the basket gently once at the 7-minute mark to rotate. 5. Rest and finish. Transfer to a plate, rest 5 minutes, then zest a small amount of fresh lemon directly over the top before serving.

Watch Out
Overcrowding the air fryer basket causes steaming instead of crisping. If you see more than 16-18 meatballs fitting without gaps, split into two batches.

What to Serve With It

These meatballs work as a standalone appetizer with a dipping sauce, or as the main protein on a plate with a starch and a green.

Checking what pairs with meatballs gives a fuller rundown if you're building a complete spread for guests.

Side DishPrepWhy It WorksHow to Serve
Arugula salad with olive oil and lemonEasyPeppery greens echo the cracked pepper in the meatballsToss and plate under meatballs
Buttermilk mashed potatoesMediumCreamy starch cuts the sharp pepper biteSpoon alongside, drizzle with pan juices
Toasted pita and tzatzikiEasyCool tangy dip balances the citrus-pepper punchServe pita alongside as a wrap option
Skewered with lemon wedgesEasyKeeps hands clean at a party and highlights the citrus themeToothpick each meatball, arrange on a platter
Garlic-yogurt dipping sauceEasySilky, cool contrast to the crisp, peppery exteriorPlain yogurt, garlic, 1 teaspoon lemon juice - stir and serve

Three ways to serve it:

  • 🍽️ Plated dinner: mashed potatoes on one side, arugula on the other, meatballs centered
  • 🥙 Casual handheld: stuffed into toasted pita with tzatziki and thinly sliced cucumber
  • 🪄 Party tray: skewered, arranged over lemon slices, with yogurt sauce and honey-mustard on the side
Shortcut
Garlic-yogurt sauce takes 2 minutes: stir together ½ cup plain yogurt, 1 minced garlic clove, and 1 teaspoon lemon juice. It keeps in the fridge for 3 days.

Store and Reheat

Cool meatballs to room temperature for about 30 minutes before refrigerating - sealing them hot traps steam and softens the crust.

Store in a shallow airtight container, stacked no more than two inches deep, for up to 3 days in the fridge.

If you're freezing a batch, they hold well for 3 months - just like how long bread keeps, the texture holds best when you thaw overnight in the fridge rather than at room temperature.

MethodTimeBest For
🍳 Air Fryer4-6 min at 350°FRestoring the crisp exterior - best for small batches
📦 Microwave60-90 sec coveredSpeed when texture isn't the priority
🔥 Oven10 min at 325°F (foil-covered)Even reheating for a larger portion

For best results when storing:

  • Let meatballs cool fully before stacking - stacking hot meatballs crushes the bottom layer
  • Freeze in a single layer on a sheet pan first, then transfer to a bag once solid
  • Label freezer bags with the date - 3 months is the window before texture degrades noticeably
  • Thaw overnight in the fridge before reheating; microwave-thawing from frozen makes them rubbery
  • Add a squeeze of lemon juice after reheating to brighten the flavor back up

Frequently Asked Questions

Can we use frozen meat for this recipe?

Thaw meat completely in the fridge before mixing - frozen or partially thawed meat won't incorporate the binders evenly, and the meatballs are more likely to fall apart in the air fryer. Plan for an overnight thaw for a 1-pound block.

How do we tell when meatballs are safely cooked in an air fryer?

Use an instant-read thermometer inserted into the center of the largest meatball - 160°F for beef or pork, 165°F for turkey or chicken. Juices should run clear with no pink visible when you cut one open.

Can meatballs be made ahead and reheated in the air fryer?

Yes - cook them fully, cool, and refrigerate up to 3 days. Reheat at 350°F for 4-6 minutes in the air fryer to restore the crisp exterior without drying the interior out.

How do we make these meatballs gluten-free?

Swap the Panko for certified gluten-free breadcrumbs at a 1:1 ratio - the binding and texture stay close to the original. Check your lemon pepper seasoning label too if using a pre-blended version, as some contain wheat-based fillers.

What's the best way to keep meatballs moist with lean ground turkey?

Mix 1 tablespoon of olive oil directly into the meatball mixture before forming - this compensates for turkey's low fat content and prevents the dry, crumbly texture that air frying can accelerate with lean proteins. Pull them at 165°F and don't cook a minute longer.

Air Fryer Lemon Pepper Meatballs

Air Fryer Lemon Pepper Meatballs

No ratings yet
These air fryer lemon pepper meatballs use ground pork or beef, fresh lemon zest, and coarsely cracked black pepper for bright, punchy flavor. Quick 10–12 minute air-frying yields tender interiors and lightly crisp exteriors; we chill the rolled meatballs briefly so they hold shape.
Print Recipe Pin Recipe
Prep Time 15 minutes mins
Cook Time 12 minutes mins
Total Time 27 minutes mins
Servings: 4 servings
Course: Appetizer
Cuisine: American, Mediterranean
Ingredients Equipment Method Notes

Ingredients
  

  • 1 lb ground pork 12–20% fat; can substitute ground beef
  • 0.5 cup panko breadcrumbs packed
  • 1 egg large, beaten
  • 2 tablespoon fresh lemon zest from 1 medium lemon, finely grated
  • 1 tablespoon lemon juice fresh
  • 1 teaspoon salt kosher salt
  • 1 teaspoon cracked black pepper coarsely ground
  • 1 clove garlic minced
  • 1 tablespoon olive oil for brushing or spraying meatballs before air-frying
  • 0.25 cup finely chopped parsley optional, for freshness

Equipment

  • Air fryer basket-style or drawer; preheat to 375°F
  • Mixing bowl large
  • 1.5 tablespoon scoop or small cookie scoop for uniform meatballs
  • Instant-read thermometer to check internal temperature

Method
 

  1. Preheat the air fryer to 375°F for 3 minutes while you mix ingredients.
  2. Combine ground pork, panko, beaten egg, lemon zest, lemon juice, minced garlic, salt, cracked black pepper, and parsley in a large bowl; mix gently until just combined.
  3. Portion using a 1.5 tablespoon scoop and roll into 1-inch meatballs; place on a rimmed tray and chill in the refrigerator for 10 minutes to firm up.
  4. Brush or spray each meatball lightly with olive oil and arrange in a single layer in the air fryer basket, leaving ½-inch space between meatballs.
  5. Air fry at 375°F for 10–12 minutes, shaking the basket or turning meatballs halfway at 5–6 minutes, until exterior is golden and internal temp reads 160°F.
  6. Remove meatballs and rest 5 minutes so juices redistribute; zest a touch more lemon over them before serving.

Notes

  • Chill rolled meatballs 10 minutes — this prevents falling apart and encourages even browning.
  • Use an instant-read thermometer: 160°F for pork/beef, 165°F for poultry.
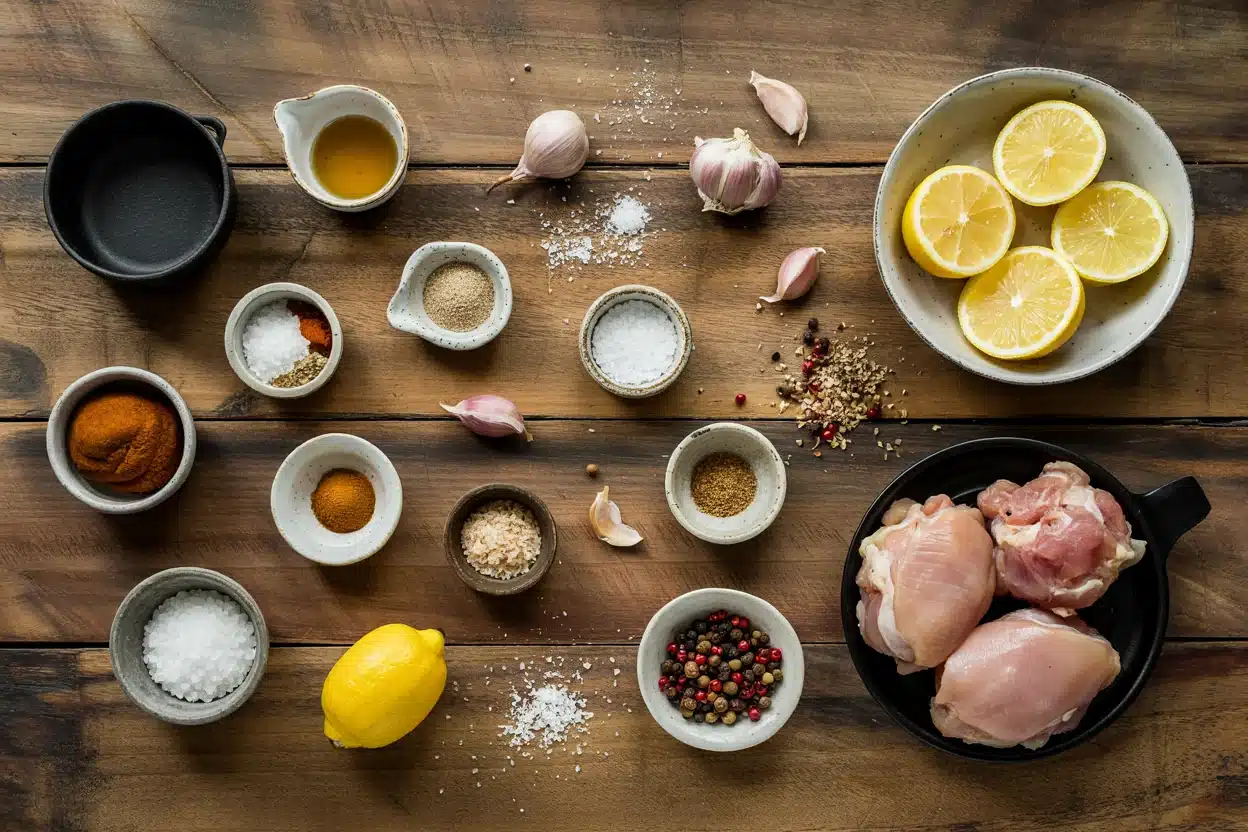
Tried this recipe?

Let us know how it was!

Air Fryer Lemon Pepper Salmon Bites [Quick & Bright]

May 11, 2026

Crisp golden edges, a tender flaky center, and that sharp citrus-pepper punch - these air fryer lemon pepper salmon bites deliver everything you want in under 20 minutes. The air fryer's circulating heat turns simple salmon cubes into something with real texture, without any deep frying or complicated prep.

Air Fryer Lemon Pepper Salmon Bites

This recipe works for weeknight dinners and party platters equally well. Cut the salmon into even pieces, season hard, and let the machine do the work.

QUICK SUMMARY

These air fryer lemon pepper salmon bites come together in under 20 minutes with minimal prep. A light cornstarch dusting creates crisp edges while the interior stays tender and flaky. Bright lemon zest and coarse black pepper do the flavor heavy lifting - and a lemon-butter finish right after cooking seals the deal.

⏱️Time Reality: 10 min prep, 8-10 min cook - start to table in under 20 minutes
🧂Method Shortcut: Pat dry, dust with cornstarch, single layer - that's the formula for crisp edges
⚠️Watch Out: Don't overcrowd the basket - steaming instead of air-frying gives you soft, pale bites

Why This Recipe Works

Getting salmon right in an air fryer comes down to two non-negotiables: dry surfaces and even sizing. Moisture on the fish creates steam, steam prevents browning, and browning is exactly what makes these bites worth eating.

Cutting the salmon into uniform 1-inch cubes solves the doneness problem that plagues thicker fillets. Every piece gets the same exposure to hot circulating air, so nothing overcooks while something else catches up.

Quick Reference
⏱️
Prep Time
10 minutes
🔥
Cook Time
8-10 minutes
⏰
Total Time
18-20 minutes
🍽️
Servings
4
📊
Difficulty
Easy
🏷️
Category
Appetizer
💡
Quick Tip
Pat dry and dust with cornstarch for crisp edges
🎯
Best For
Weeknight dinner or quick party appetizer
  • 🌡️ **Target 125-130°F internal temp** - carryover heat finishes the job at medium doneness
  • **Cornstarch coating** creates the lightly crisped crust without weighing down delicate fish
  • Lemon pepper seasoning carries both lemon rind oil and coarse pepper in a single ingredient
  • Melted butter promotes browning and pulls all that citrus-pepper seasoning into each bite
  • Finishing with a squeeze of fresh lemon right after cooking keeps the flavor bright and sharp
Quick Tip
Check bites at the 7-minute mark. Salmon goes from perfect to dry fast - pull it at 125-130°F and let carryover do the rest.

What You'll Need

Air Fryer Lemon Pepper Salmon Bites - Air Fryer Lemon Pepper Salmon Bites

Fresh salmon fillets work best here, but the fish itself isn't the whole story - replacements for parsley and other finishing herbs can round out your platter presentation if you want to go beyond the basics.

Skinless, boneless salmon cuts cleanly into 1-inch cubes and gives you maximum surface area for the coating to grip.

🦐
Protein
  • 1.5 lbs skinless salmon fillet, cut into 1-inch cubes
🌶️
Seasoning
  • 2 teaspoon lemon pepper seasoning
  • ½ teaspoon garlic powder
  • ¼ teaspoon salt
🫙
Coating
  • 1 tablespoon cornstarch
  • 1 tablespoon melted butter or oil
🍋
Finish
  • 1 tablespoon fresh lemon juice
  • Lemon wedges for serving

Ingredient Details

  • Salmon
    Atlantic or sockeye both work. Firm, fatty flesh holds up to high heat and stays moist in the short cook window.
  • Lemon Pepper Seasoning
    Pre-blended seasoning contains dried lemon rind oil and cracked pepper. Check the label - some blends run salty, so reduce added salt accordingly.
  • Cornstarch
    Just 1 tablespoon gives the exterior a light, crisp shell. Don't skip the drying step or the starch won't bond properly.
  • Melted Butter
    Carries fat-soluble flavor compounds from the seasoning into the fish. Use unsalted if your lemon pepper blend is already heavily salted.
  • Fresh Lemon Juice
    Applied after cooking, not before. Acid added pre-cook can begin to break down the fish texture and soften the crust.

Ingredient Swaps

Most swaps here work cleanly, though a couple shift the texture or flavor noticeably. If you're curious about a air fryer teriyaki salmon fillets recipe, that version handles the soy-sweet glaze side of the same fish entirely differently.

  • **Salmon → trout fillet:** Direct swap, slightly milder and flakier - reduce cook time by 1 minute
  • **Lemon pepper seasoning → fresh zest + cracked pepper:** Brighter citrus aroma, less uniform coverage across bites
  • **Cornstarch → rice flour:** Same crisp result, fully gluten-free - use at the same 1 tablespoon ratio
  • **Butter → olive oil:** Less rich finish, slightly less browning at 400°F - still works well

Butter vs. Olive Oil

Works for: Butter gives richer flavor, better browning, and a glossy finish on each bite

Skip if: You need dairy-free - olive oil produces clean, lighter results with minimal flavor change

Cornstarch vs. Rice Flour

Works for: Rice flour is the cleaner gluten-free option with nearly identical crisping power

Skip if: You have neither - the bites still cook well without any dusting agent, just with softer edges

Instructions

Temperature control is the single most important factor in this recipe - going past 140°F turns salmon dry and chalky fast.

If you want to explore comparing lemon extract vs lemon zest options for the finishing drizzle, zest wins for crust adhesion while extract works better stirred into a dipping sauce.

  1. Prep the salmon: Pat cubes completely dry with paper towels.

Toss with melted butter, then sprinkle with lemon pepper seasoning, garlic powder, and salt. 2. Dust: Add cornstarch and toss again until each piece has a thin, even coating. 3. Preheat: Heat air fryer to 400°F for 3 minutes. 4. Cook: Arrange salmon in a single layer - no overlapping.

Air fry at 400°F for 8-10 minutes, flipping once at the 5-minute mark. 5. Finish: Pull at 125-130°F internal temp.

Immediately squeeze fresh lemon juice over the bites and serve hot.

Watch Out
Don't skip the flip at 5 minutes. The bottom side browns faster against the basket - flipping gives you even golden color on all sides.

What to Serve With It

These bites are flexible enough to anchor a full bowl dinner or serve as a finger-food appetizer on a party platter.

Lean into the lemon-pepper profile when choosing sides - swapping out butter in a side sauce or dip is an easy way to keep things dairy-free without losing richness.

Side DishPrepWhy It WorksHow to Serve
Steamed jasmine riceEasySoaks up lemon-butter juices from the bitesSpoon bites directly over a bowl of rice
Quick green salad with vinaigretteEasyBright acidity complements the peppery fishServe alongside for a light weeknight plate
Roasted broccoliEasyEarthy, slightly charred veg contrasts crisp bitesToss on the same tray and roast while salmon rests
Toothpick platter with lemon wedgesEasyFinger-food format for parties and hostingArrange on a board with dipping sauces alongside
Citrus-herb yogurt dipEasyCool, creamy dip balances the peppery biteMix Greek yogurt, dill, lemon zest, and salt

Three ways to serve it:

  • Bowl dinner - rice base, salmon bites on top, drizzle of lemon-garlic aioli
  • Party platter - toothpicks, lemon wedges, two dipping sauces on the side
  • Quick salad topper - pile warm bites over dressed greens for a light main
Golden Rule
Serve within 5 minutes of cooking. Salmon bites lose their crisp edges quickly once they sit - the sooner they hit the table, the better the texture.

Store and Reheat

Leftover salmon bites keep for up to 2 days in the fridge.

Store them in a shallow airtight container with a paper towel layer on top to absorb any moisture that could soften the crust.

Knowing about storing butter correctly also matters if you're prepping a lemon-butter dipping sauce ahead of time - it stays fresh for far longer than most people assume.

MethodTimeBest For
🍳 Air Fryer2-4 minutes at 375°FRestoring crisp exterior - best option by far
🔥 Oven6-8 minutes at 350°F, covered with foilGentle reheat when texture is less critical
📦 MicrowaveNot recommendedCreates steam, softens crust, can dry out fish

For best results when storing:

  • Cool completely before refrigerating - sealing warm fish traps steam and softens the crust
  • Single layer in the container if possible, or separate layers with parchment
  • Freeze for up to 1 month in a sealed freezer bag with air pressed out
  • Thaw frozen bites overnight in the fridge before reheating in the air fryer
  • Add a fresh squeeze of lemon after reheating to restore brightness

Frequently Asked Questions

Can we use frozen salmon for this recipe?

Yes, but thaw it completely first and pat it very dry before seasoning. Frozen salmon releases a lot of water as it cooks, and excess moisture will prevent the cornstarch coating from crisping properly.

What internal temperature should salmon reach in the air fryer?

Pull the bites at 125-130°F for medium doneness - the FDA recommends 145°F for fully cooked fish, but carryover heat will bring the temperature up a few degrees while resting. At 145°F and above, salmon turns noticeably dry.

Will skin-on salmon work in the air fryer?

It works, but the skin makes cutting uniform 1-inch cubes difficult and can turn chewy rather than crisp on small pieces. Skinless fillets give cleaner results and more even seasoning coverage.

Can we make these ahead and reheat without losing the crisp?

The air fryer is the only reheating method that brings back any meaningful crispness - 2 to 4 minutes at 375°F works well. Even so, freshly cooked bites will always have better texture than reheated ones.

Is cornstarch necessary for crisping the bites?

It's optional but makes a real difference - bites without it still cook well, they just have softer edges. If you need a gluten-free swap, rice flour performs almost identically at the same 1 tablespoon quantity.

Air Fryer Lemon Pepper Salmon Bites

Air Fryer Lemon Pepper Salmon Bites

No ratings yet
We cut salmon into 1-inch bites, toss with lemon-pepper seasoning and a light cornstarch dust, then air-fry at 400°F for 8–10 minutes for crisp edges and a tender interior. A quick lemon-butter finish adds shine and bright acidity.
Print Recipe Pin Recipe
Prep Time 10 minutes mins
Cook Time 10 minutes mins
Total Time 20 minutes mins
Servings: 4 servings
Course: Appetizer
Cuisine: American
Ingredients Equipment Method Notes

Ingredients
  

  • 1 lb salmon skinless, boneless, trimmed of dark bloodline, cut into 1-inch cubes
  • 1 tablespoon cornstarch for light dusting (omit if avoiding)
  • 1.5 teaspoon lemon pepper seasoning
  • 0.5 teaspoon kosher salt Diamond Crystal; use ⅓ teaspoon if table salt
  • 1 tablespoon olive oil or melted butter
  • 1 tablespoon unsalted butter melted, for finishing (optional with oil)
  • 1 tablespoon lemon juice freshly squeezed
  • 1 teaspoon lemon zest finely grated
  • 2 tablespoon parsley fresh, chopped for garnish

Equipment

  • Air fryer Basket-style or drawer; 3–5 quart minimum
  • Mixing bowl Medium bowl for tossing salmon
  • Instant-read thermometer For checking internal temp

Method
 

  1. Preheat the air fryer to 400°F for 3 minutes while you prep a single shallow layer.
  2. Pat salmon cubes completely dry with paper towels, then place in a medium bowl and sprinkle with cornstarch, tossing until evenly coated.
  3. Add lemon pepper seasoning, kosher salt, and olive oil to the bowl and toss gently to coat; pieces should glisten but not be dripping.
  4. Arrange salmon in a single layer in the air fryer basket, leaving space between pieces; cook at 400°F for 8 minutes, then check doneness.
  5. If needed, continue cooking 1–2 minutes until an instant-read thermometer reads 125–130°F and pieces flake easily at the thickest part.
  6. Transfer to a bowl, toss with melted butter, lemon juice, and lemon zest, garnish with chopped parsley, and serve immediately.

Notes

  • Do not overcrowd the basket; cook in batches for even crisping.
  • Remove from heat at 125–130°F; residual heat raises temperature while resting.

Tried this recipe?

Let us know how it was!

Air Fryer Lemon Pepper Shrimp [Quick & Crispy]

May 11, 2026

This recipe takes about 20 minutes from start to finish, and most of that time is prep. The air fryer does the heavy lifting - circulating dry heat that crisps shrimp edges while keeping the center tender, something a skillet rarely manages without extra fat.

Air Fryer Lemon Pepper Shrimp

Knowing how quickly shrimp can go from golden to rubbery keeps most people cautious in the kitchen. Watch for the loose C-shape and opaque flesh, and you'll pull them at the right moment every time.

Fresh lemon zest is non-negotiable here. It's the difference between a sharp citrus punch and a flat, vaguely lemony dish.

QUICK SUMMARY

Air fryer lemon pepper shrimp is a 20-minute weeknight staple that delivers crisp edges and tender centers without any breading. Pat shrimp dry, toss with oil, cracked pepper, and lemon zest, then air fry at 400°F for 8-10 minutes. The key failure to avoid: crowding the basket.

⏱️Time Reality: 10 min prep, 8-10 min cook - plan for 20 min total
🍋Method Shortcut: Add lemon zest after cooking, not before, to preserve aroma
⚠️Watch Out: Wet shrimp steam instead of crisp - dry them completely before seasoning

Why This Recipe Works

Air frying shrimp at 400°F creates rapid surface browning without submerging them in oil. Coarse cracked black pepper adheres to the shrimp's surface, toasting slightly in the dry heat and developing a peppery crust that fine-ground pepper simply won't produce.

The combination of lemon zest grated on right after cooking - not before - keeps the volatile citrus oils intact. Applying zest to hot shrimp just off the fryer releases those oils immediately into steam, coating every piece evenly.

Fresh zest added during cooking burns off. Save it for the finish.

Quick Reference
⏱️
Prep Time
10 minutes
🔥
Cook Time
8-10 minutes
⏰
Total Time
18-20 minutes
🍽️
Servings
4
📊
Difficulty
Easy
🏷️
Category
Main Dish / Appetizer
💡
Quick Tip
Dry shrimp thoroughly; don't overcrowd the basket
🎯
Best For
Weeknight dinner, quick appetizer
  • 🦐 Shrimp cook in a single layer - no stacking, no touching
  • Preheating the air fryer means immediate browning from the first second
  • Neutral oil coats thinly without competing with lemon flavor
  • Large 16-20 count shrimp give a uniform cook time across the whole batch
  • Internal temp of 120-125°F signals perfectly cooked - not overdone
Golden Rule
Shrimp only need 8-10 minutes. Check at 6-7 minutes and pull as soon as they curl into a loose C-shape.

What You'll Need

Air Fryer Lemon Pepper Shrimp - Air Fryer Lemon Pepper Shrimp

Shrimp selection drives the result here more than any other variable. Go with raw, peeled, deveined shrimp in the 16-20 count range - this size cooks evenly at 400°F and produces the right curl shape that signals doneness.

If you enjoy a air fryer shrimp recipe beyond the lemon-pepper profile, this same shrimp prep works across nearly any seasoning.

🦐
Protein
  • 1 lb large shrimp (16-20/lb), raw, peeled, deveined
🍋
Citrus
  • Zest of 1 lemon
  • 1 tablespoon fresh lemon juice
🌶️
Seasoning
  • 1 teaspoon coarse cracked black pepper
  • ½ teaspoon kosher salt
  • ½ teaspoon garlic powder (optional)
🫙
Fat
  • 1 tablespoon neutral oil (canola or avocado)
  • 1 tablespoon butter, melted (optional finish)

Ingredient Details

  • Large shrimp (16-20/lb)
    Consistent size means every shrimp hits doneness at the same time. Avoid medium or small sizes - they overcook before larger ones finish.
  • Lemon zest
    Use a microplane on a room-temperature lemon for maximum yield. Reserve zest in a small bowl to add right after cooking.
  • Coarse cracked black pepper
    Pre-ground fine pepper disappears into the seasoning. Cracked pepper gives visible flakes and mouthfeel - use a pepper mill or crack whole peppercorns with a pan.
  • Neutral oil
    One tablespoon per pound is enough. More oil causes steaming rather than crisping in the enclosed basket environment.
  • Butter (optional)
    Drizzle melted butter over plated shrimp, not into the basket. It burns at air fryer temps and creates smoke.
  • Garlic powder
    Optional but adds savory depth. Avoid fresh minced garlic - it burns in the air fryer before shrimp are done.

Ingredient Swaps

Most swaps here are low-risk, but shrimp size changes the cook time enough to matter. Swapping lemon components deserves more attention - fresh zest behaves differently from bottled, and the profile shifts noticeably.

If you're modifying the herb finish, parsley swaps that work can point you toward options that complement peppery shrimp without competing with lemon.

  • Fresh lemon zest → ½ teaspoon bottled zest or 1 extra teaspoon juice (less aromatic, brighter acid)
  • Neutral oil → olive oil (mild fruity shift, fine for serving warm)
  • Large shrimp → jumbo shrimp (add 2-4 minutes; check temp at 8 minutes)
  • Butter finish → ghee or olive oil (ghee keeps richness; olive oil stays dairy-free)

Butter vs. Ghee Finish

Works for: Richness without dairy sensitivity concerns when using ghee; classic buttery finish with regular butter

Skip if: Dairy-free is required - use olive oil drizzle instead

Large vs. Jumbo Shrimp

Works for: Jumbo shrimp as a main dish centerpiece with more visual impact

Skip if: You're making appetizers - jumbo size is hard to handle as finger food

Instructions

Preheating the air fryer for 3 minutes at 400°F before the shrimp go in is the step most people skip, and it's the reason edges don't brown evenly.

Hot air from the first second of cooking creates a surface crust rather than a slow steam-then-brown process.

If you're pairing these with bread, a air fryer garlic bread recipe can run in the fryer right before the shrimp.

  1. Pat dry: Spread shrimp on a paper towel-lined tray and press firmly on all sides.

Moisture is the enemy of browning. 2. Season: Toss shrimp in a bowl with 1 tablespoon oil, cracked pepper, salt, garlic powder (if using), and lemon juice.

Do not add zest yet. 3. Arrange: Place shrimp in a single layer in the preheated basket.

No overlapping.

Cook at 400°F for 4 minutes. 4. Flip: Shake or flip shrimp and cook for another 4-6 minutes.

Pull when shrimp are opaque and curled into a loose C-shape - not a tight O. 5. Finish: Transfer immediately to a serving plate.

Drizzle with melted butter if using, then grate fresh lemon zest directly over the shrimp while hot.

Watch Out
A tight O-shape means overcooked. Pull shrimp at the first sign of a loose C and carryover heat will finish the job on the plate.

What to Serve With It

Lemon pepper shrimp works as both a main over a grain and as a standalone appetizer on toasted bread.

The peppery finish needs something neutral or green alongside it - starchy bases absorb the cooking juices well, while crisp vegetables provide contrast in texture.

Side DishPrepWhy It WorksHow to Serve
Steamed jasmine riceEasyNeutral base absorbs lemon-pepper juices without competingPile shrimp directly over rice, drizzle with any butter from the plate
Garlic butter roasted broccoliEasyCharred edges contrast the tender shrimp; green color rounds the plateServe alongside with lemon wedge between them
Quick lemon couscousEasyCitrus-forward grain echoes zest and cooks in 5 minutesSpoon shrimp over couscous and top with extra zest
Toasted baguette slicesEasyMakes shrimp into crostini-style finger food for hostingPlace 2-3 shrimp per slice, add a dab of aioli
Mixed greens with lemon vinaigretteEasyBright acidity matches lemon notes and lightens a heavier plateArrange shrimp over greens, toss lightly before serving

Three ways to serve it:

  • Over jasmine rice as a weeknight main with a lemon wedge on the side
  • On toasted baguette slices with lemon-garlic aioli as a quick appetizer
  • Over mixed greens with vinaigrette for a light lunch or starter salad
Shortcut
Sweet chili sauce on the side takes 0 prep time and adds a sweet-heat counterpoint that works especially well for appetizer portions.

Store and Reheat

Cooked shrimp keeps for 2 days in the fridge - store in a shallow glass container with a paper towel layer to absorb excess moisture. Don't stack shrimp tightly in the container; it accelerates texture breakdown and makes reheating uneven.

For the butter finish, knowing about keeping butter fresh is useful if you're prepping compound butter to serve with multiple batches.

MethodTimeBest For
🍳 Air Fryer2-3 min at 350°FBest texture recovery; retains crisp edges
🔥 Oven6-8 min at 325°FGentle reheat for multiple servings at once
📦 Microwave30-45 sec on mediumQuick only; softens texture significantly

For best results when storing:

  • 🧊 Freeze in a single layer on a sheet pan first, then transfer to a bag - prevents clumping
  • Label with the date; use within 1 month from the freezer
  • Thaw overnight in the fridge, never at room temperature
  • Don't add butter or zest before storing - finish fresh when reheating
  • Reheat from frozen in the air fryer at 350°F for 5-6 minutes without thawing

Frequently Asked Questions

Can we use frozen shrimp for this air fryer recipe?

Yes, but thaw them fully in the fridge first and pat them completely dry before seasoning. Cooking from frozen produces steam in the basket, which prevents the crisp edges this recipe depends on.

What size shrimp is best for air frying?

Large shrimp in the 16-20 count per pound range cook evenly at 400°F in 8-10 minutes. Smaller shrimp overcook before larger ones finish if you mix sizes, so uniform sizing matters.

How do we know when shrimp are fully cooked without a thermometer?

Look for opaque flesh and a loose C-shape curl - that's the visual signal for 120-125°F internal temp. A tight O-shape means they've gone past done and will be rubbery.

Can we bread the shrimp for extra crunch in the air fryer?

Panko works well for a breaded version - it crisps faster than standard breadcrumbs and stays light. Understanding the differences between panko vs tempura batter helps you decide which coating gives the crunch level you want.

Is it better to marinate shrimp before air frying?

Skip the marinade for this recipe - shrimp absorb flavors quickly, and anything over 10 minutes with salt or acid starts drawing out moisture. Season right before cooking for the best surface texture.

Air Fryer Lemon Pepper Shrimp

Air Fryer Lemon Pepper Shrimp

No ratings yet
We air-fry peeled large shrimp tossed in lemon zest, cracked black pepper, garlic, and a light oil coating for crisp edges and bright citrus flavor. Quick preheat plus a single-layer cook yields tender, just-opaque shrimp in under 10 minutes.
Print Recipe Pin Recipe
Prep Time 10 minutes mins
Cook Time 10 minutes mins
Total Time 20 minutes mins
Servings: 4 servings
Course: Main Dish / Appetizer
Cuisine: American, Seafood
Ingredients Equipment Method Notes

Ingredients
  

  • 1 lb shrimp raw, peeled and deveined, 16–20 count
  • 1 tablespoon neutral oil canola or avocado oil
  • 1 teaspoon coarse cracked black pepper freshly cracked
  • 1 teaspoon kosher salt Diamond Crystal or similar
  • 1 tablespoon lemon juice freshly squeezed
  • 1 teaspoon lemon zest finely grated (from ~1 small lemon)
  • 2 clove garlic minced (optional)
  • 1 tablespoon unsalted butter melted (optional finish)
  • chopped parsley for garnish (optional)

Equipment

  • Air fryer basket style, 3–5 qt or larger
  • Mixing bowl medium, for seasoning shrimp
  • Microplane or fine grater for lemon zest
  • Tongs for arranging shrimp in basket

Method
 

  1. Preheat the air fryer to 400°F for 3 minutes.
  2. Pat shrimp dry with paper towels and place in a medium bowl.
  3. Toss shrimp with oil, lemon juice, lemon zest, minced garlic (if using), salt, and cracked black pepper until evenly coated.
  4. Arrange shrimp in a single layer in the air fryer basket with space between pieces; work in batches if necessary.
  5. Cook at 400°F for 4 minutes, shake basket or flip shrimp, then cook an additional 3–4 minutes until shrimp are opaque and form a loose C with light browning at edges.
  6. Transfer shrimp to a bowl, toss with melted butter if using, and grate a little extra lemon zest over the top before serving.

Notes

  • Do not overcrowd the basket; cook in batches for even crisping.
  • Look for opaque flesh and a loose C-shape; overcooked shrimp tighten into an O.

Tried this recipe?

Let us know how it was!

Air Fryer Pizza

May 11, 2026

When you want homemade pizza but don't want to wait 30 minutes for the oven to heat up, the air fryer delivers. Hot circulating air crisps the crust and melts the cheese in under 10 minutes.

Air Fryer Pizza

This works for quick dinners, late-night snacks, or when you're feeding picky kids who want exactly what they want. No planning, no fuss.

Most people skip the air fryer because they assume it won't crisp right. It does - as long as you preheat and keep the sauce thin.

QUICK SUMMARY

Air fryer pizza cooks in 7-10 minutes at 375-400°F, delivering a crispy golden crust with melted cheese. The key is preheating the air fryer for 3-5 minutes and keeping the sauce layer thin to avoid sogginess. Perfect for weeknights when you need real food fast.

⏱️Time Reality: 20 minutes total - 10 min prep, 7-10 min cook, no waiting for ovens to heat.
🔥First Critical Move: Preheat air fryer to 400°F for 3-5 minutes before adding pizza for maximum crispness.
⚠️Watch Out: Too much sauce or heavy toppings make the crust soggy - use 2-3 tablespoons sauce, spread thin.

Why This Recipe Works

High heat from the air fryer crisps the crust while melting the cheese evenly in minutes. Rich mains need something to cut through, and peppers does exactly that, but if you're planning your full meal, an easy peppers side adds contrast without extra effort.

Quick Reference
⏱️
Prep Time
10-15 min
🔥
Cook Time
7-10 min
⏰
Total Time
20-25 min
🍽️
Servings
2-4 servings
📊
Difficulty
Easy
🏷️
Category
Main Dish
💡
Quick Tip
Preheat air fryer for crispier crust.
🎯
Best For
Weeknight | Quick meal | Entertaining

What makes it work:

  • Preheating the air fryer creates immediate heat contact that crisps the dough before moisture seeps in
  • Rolling dough to exactly ¼ inch thickness ensures even cooking - thicker dough stays raw in the center
  • Low-moisture mozzarella melts without releasing excess water that would turn the crust soggy
  • Thin sauce layer (2-3 tablespoons max) provides flavor without weighing down the base
  • High circulating heat at 375-400°F mimics pizza oven conditions in a fraction of the time
Quick Tip
Place cheese directly on dough before adding other toppings - it acts as a moisture barrier and helps everything stick.

What You'll Need

Air Fryer Pizza - Air Fryer Pizza

You need pizza dough, sauce, cheese, and toppings you already have. Most people skip eggs, but it balances the meal, and for a version that comes together quickly, a classic eggs dish adds protein without extra planning.

🍜
Base
  • Pizza dough (store-bought or homemade)
  • Olive oil
  • Cornmeal (optional for dusting)
🥢
Sauce & Cheese
  • Tomato sauce (or pizza sauce)
  • Mozzarella cheese (low-moisture)
🥬
Toppings
  • Pizza toppings (pepperoni, veggies, etc.)
  • Dried oregano
  • Garlic powder

Ingredient Details

  • Pizza dough
    Use room-temperature dough - cold dough shrinks back when rolled and won't hold its shape in the air fryer.
  • Tomato sauce
    Spread thin with the back of a spoon, leaving a ½-inch border - too much sauce equals soggy crust.
  • Mozzarella cheese
    Shred your own from a block instead of pre-shredded - it melts smoother without added cellulose preventing clumping.
  • Olive oil
    Brush the dough edges lightly to promote browning and prevent drying out during cooking.
  • Pizza toppings
    Pat wet toppings (like mushrooms or tomatoes) dry with paper towels to reduce moisture release.
  • Cornmeal
    Dust the air fryer basket or parchment lightly - it prevents sticking and adds a subtle crunch to the bottom crust.
  • Dried oregano
    Sprinkle over cheese before cooking, not after - heat releases the oils and intensifies the flavor.

Ingredient Swaps

Standard mozzarella works fine, but swaps let you adjust for diet or pantry gaps. Peppers adds the contrast this plate needs, but timing matters, and we keep a batch ready for nights like this - an easy peppers side fits without adding steps.

Four swaps that work:

  • Dairy-free cheese instead of mozzarella - melts less smoothly but works for lactose intolerance; add 1-2 minutes to cook time for full melt
  • Gluten-free dough instead of regular pizza dough - texture turns slightly crumblier; watch carefully as GF dough can dry out faster
  • Pesto instead of tomato sauce - changes the flavor profile completely but eliminates moisture issues; use same amount (2-3 tablespoons)
  • Flatbread or naan instead of pizza dough - cuts prep time in half and cooks in 5-6 minutes; crust stays thinner and crisper

Low-Moisture Mozzarella

Works for: Classic melty texture, minimal sogginess, quick even melt

Skip if: You're dairy-free or need sharper cheese flavor

Dairy-Free Cheese

Works for: Lactose intolerance, vegan diets, lighter texture

Skip if: You want traditional melt and stretch - it stays slightly grainy

Gluten-Free Dough

Works for: Celiac or gluten sensitivity, similar cook time

Skip if: You want chewy crust - it's drier and more crumbly

Instructions

Plan for 20 minutes start to finish - 10 minutes to prep and assemble, 7-10 minutes to cook. Most people skip shrimp, but it balances the meal, and for a version that comes together quickly, a simple shrimp recipe adds protein without extra pans.

  1. Preheat air fryer to 400°F for 3-5 minutes while you prep the pizza - this step is non-negotiable for crispy crust.
  2. Roll or stretch dough to ¼-inch thickness on a floured surface, shaping it to fit your air fryer basket with ½-inch clearance on all sides.
  3. Brush dough with olive oil, then spread 2-3 tablespoons sauce thinly, leaving a ½-inch border for crust; layer cheese directly on sauce, then add toppings.
  4. Transfer pizza to air fryer basket (use parchment with holes if needed to prevent sticking), cook at 375-400°F for 7-10 minutes, checking at 7 minutes for golden edges and melted cheese.
  5. Remove pizza when crust is golden brown and cheese is bubbling, let rest 2 minutes before slicing with a pizza cutter or sharp knife.
Watch Out
Don't skip the rest time - hot cheese slides off if you cut immediately. Two minutes lets everything set.

What to Serve With It

Pizza works solo, but adding a crisp side or simple salad turns it into a full meal. If you're looking for easy fish meal ideas that pair with lighter mains, those same concepts work here - balance rich cheese with fresh crunch.

Side Dish Prep Why It Works How to Serve
Simple green salad Easy Fresh contrast cuts through rich cheese Toss greens with olive oil and lemon juice, serve cold
Garlic breadsticks Easy Complements Italian flavors without competing Brush with garlic butter, bake or air fry until golden
Steamed broccoli Easy Adds nutrition and mild veggie balance Steam until tender-crisp, season with salt and pepper
Carrot sticks with ranch Easy Kid-friendly crunch, light and fast Slice carrots into sticks, serve with ranch dip
Antipasto platter Medium Elegant variety for entertaining, pairs well Arrange olives, cheese, cured meats, marinated veggies

Three ways to serve it:

  • Weeknight casual: Pair with a simple green salad and garlic breadsticks for a full Italian meal that takes under 30 minutes total
  • Kid-friendly dinner: Serve with carrot sticks and ranch or steamed broccoli - keeps it simple and gets veggies on the table
  • Entertaining: Set out an antipasto platter with olives, cheese, and cured meats while the pizza cooks - feels intentional without extra work
Shortcut
Use pre-washed salad greens and bottled dressing - saves 5 minutes and pairs perfectly with hot pizza.

Store and Reheat

Leftover pizza keeps in the fridge for 3-4 days in an airtight container. Rich mains need something to cut through, and chicken does exactly that, and we keep a batch ready for nights like this - something juicy like chicken turns leftovers into a full meal.

Method Time Best For
🔥 Air Fryer 3-5 min at 350°F Restores crispness quickly, closest to fresh-cooked texture
🔥 Oven 8-10 min at 375°F Large batches or multiple slices, even heating throughout
📦 Microwave 30-60 sec Speed when you don't care about crispy crust - softens quickly

For best results when storing:

  • Cool pizza completely before storing - stacking hot slices creates condensation that makes the crust soggy
  • Layer parchment between slices in the container to prevent cheese from sticking and toppings from sliding off
  • Store in shallow airtight container in the fridge for up to 3-4 days - deeper containers trap moisture
  • Freeze individual slices wrapped in plastic then foil for up to 1 month - thaw in fridge overnight before reheating
  • Reheat in air fryer at 350°F for 3-5 minutes instead of microwave - restores crispy crust and melted cheese texture

Frequently Asked Questions

Can I use frozen pizza dough for air fryer pizza?

Yes - thaw frozen dough completely in the fridge overnight, then let it sit at room temperature for 30 minutes before rolling. Cold dough shrinks back and won't hold its shape in the air fryer.

What's the best way to reheat leftover air fryer pizza?

Use the air fryer at 350°F for 3-5 minutes - it restores the crispy crust and melts the cheese without drying it out. Skip the microwave unless you're okay with soft, chewy crust.

How do I know when my air fryer pizza is fully cooked?

Check at 7 minutes - the crust should be golden brown on the edges, the cheese fully melted and bubbling, and the bottom should lift easily from the basket without sticking. If the cheese isn't bubbling, cook another 2-3 minutes.

Why is my air fryer pizza crust soggy and how do I fix it?

Too much sauce or wet toppings cause sogginess - use only 2-3 tablespoons of sauce spread thin, and pat wet toppings dry before adding them. Always preheat the air fryer for 3-5 minutes to create immediate crisping heat.

How can I make multiple servings of air fryer pizza at once?

Cook pizzas one at a time for best results - most air fryer baskets only fit one personal-sized pizza with proper airflow. Keep finished pizzas warm in a 200°F oven while you cook the rest.

Air Fryer Pizza

Air Fryer Pizza

No ratings yet
Air fryer pizza cooks quickly in under 10 minutes, delivering a crispy golden crust and melted cheese without waiting for a conventional oven. Preheating the air fryer and spreading a thin sauce layer are key to avoiding sogginess. This recipe is perfect for quick dinners, late-night snacks, or feeding picky eaters with minimal fuss.
Print Recipe Pin Recipe
Prep Time 10 minutes mins
Cook Time 10 minutes mins
Total Time 20 minutes mins
Servings: 4 servings
Course: Main Dish
Cuisine: Italian
Ingredients Method Notes

Ingredients
  

  • 1 piece pizza dough store-bought or homemade, room temperature
  • 1 tablespoon olive oil for brushing dough edges
  • 2 tablespoons tomato sauce or pizza sauce, spread thin leaving ½-inch border
  • 1 cup mozzarella cheese low-moisture, shredded from block
  • as needed pizza toppings pepperoni, veggies, pat wet toppings dry
  • ½ teaspoon dried oregano sprinkle over cheese before cooking
  • 1 teaspoon cornmeal optional, for dusting air fryer basket or parchment

Method
 

  1. Preheat the air fryer to 400°F for 3-5 minutes to ensure a crispy crust.
  2. Roll or stretch pizza dough on a floured surface to ¼-inch thickness, shaping to fit your air fryer basket with ½-inch clearance all around.
    1 piece pizza dough
  3. Brush dough edges lightly with olive oil, then spread 2-3 tablespoons of tomato sauce thinly over dough leaving a ½-inch border. Layer shredded mozzarella cheese directly on sauce, then add your chosen toppings and sprinkle dried oregano over the cheese.
    1 piece pizza dough
  4. Transfer the pizza to the air fryer basket, optionally dusted with cornmeal or lined with parchment with holes to prevent sticking. Cook at 375-400°F for 7-10 minutes, checking at 7 minutes for golden edges and bubbling cheese.
    1 piece pizza dough
  5. Remove pizza when crust is golden brown and cheese is bubbling. Let rest for 2 minutes before slicing with a pizza cutter or sharp knife to allow toppings to set.

Notes

  • Preheat the air fryer for maximum crust crispness.
  • Use a thin sauce layer and pat wet toppings dry to avoid sogginess.
  • Let pizza rest 2 minutes before cutting to prevent cheese from sliding off.

Tried this recipe?

Let us know how it was!

Air Fryer Pork Belly

May 11, 2026

You need 50 minutes and one air fryer basket. No marinating overnight, no stovetop searing, no constant flipping.

Air Fryer Pork Belly

Score the skin, dry it well, and the air fryer crisps it while the fat renders. The high heat turns pork belly into crackling skin with tender meat underneath.

This is what we make when we want restaurant-quality pork belly on a Tuesday without the mess of deep-frying or the wait of slow roasting.

QUICK SUMMARY

Air fryer pork belly delivers crispy, blistered skin with juicy, tender meat in under an hour. Score the skin shallowly, dry it completely, and cook at 400°F for 35-40 minutes with one flip halfway through. The key is starting with dry skin and leaving space between pieces so air circulates.

⏱️Time Reality: 10 minutes prep, 40 minutes hands-off cooking, plus 10 minutes rest before slicing
🔪Critical First Move: Pat skin completely dry with paper towels, then score ⅛ inch deep in a crosshatch pattern
⚠️Common Mistake: Wet skin won't crisp - refrigerate uncovered 2-12 hours if you have time, or pat aggressively with paper towels

Why This Recipe Works

Pork belly needs high heat to render fat and crisp the skin without drying out the meat. For a version that comes together quickly, quick shrimp dish works when you want seafood instead.

Quick Reference
⏱️
Prep Time
10 min
🔥
Cook Time
35-40 min
⏰
Total Time
50 min
🍽️
Servings
4 servings
📊
Difficulty
Medium
🏷️
Category
Main Dish
💡
Quick Tip
Dry skin well for crispiness
🎯
Best For
Weeknight, Meal prep, Entertaining

What makes this work:

  • High heat at 400°F renders fat quickly while the circulating air crisps the skin without needing a deep fryer or oven broiler
  • Scoring the skin in shallow crosshatch lines lets fat escape and creates more surface area for crackling without cutting into the meat
  • Flipping halfway through ensures even cooking and prevents the bottom from steaming while the top crisps
  • Resting 10 minutes after cooking redistributes juices so the meat stays tender when you slice through the crispy skin
  • Room temperature pork belly cooks evenly - cold centers stay raw while edges overcook, ruining the texture balance
Quick Tip
Preheat the air fryer for 5 minutes before adding pork belly so the skin starts crisping immediately on contact

What You'll Need

Air Fryer Pork Belly - Air Fryer Pork Belly

A good pork can make or break the plate. For a version that comes together quickly, this easy pork recipe uses the same equipment when you want a different flavor profile.

🥓
Protein
  • 1.5-2 lbs pork belly, skin-on
🌶️
Seasonings
  • 1 tablespoon salt
  • 1 teaspoon black pepper
  • 1 teaspoon garlic powder
  • 1 teaspoon five-spice powder
🥢
Optional Glaze
  • 1 tablespoon soy sauce
  • 1 tablespoon brown sugar
  • 1 teaspoon vinegar
🫙
Basics
  • 1 teaspoon neutral oil
  • Paper towels

Ingredient Details

  • Pork belly (skin-on)
    Look for even thickness, about 1.5-2 inches, with a good fat-to-meat ratio - too lean and it dries out, too fatty and it won't render properly
  • Salt
    Coarse salt works best for drawing moisture from the skin - fine salt dissolves too quickly and doesn't create the dry surface you need
  • Oil
    Use neutral oil with a high smoke point like canola or vegetable - olive oil burns at 400°F and turns bitter
  • Five-spice powder
    Classic Chinese blend of star anise, cloves, cinnamon, Sichuan pepper, and fennel - adds depth without overwhelming the pork
  • Soy sauce
    Adds salty umami to the glaze - use low-sodium if you're salt-sensitive since the skin is already heavily salted
  • Brown sugar
    Creates caramelization on the skin but burns easily - apply in the last 10 minutes or skip if you prefer just crispy without sweet
  • Vinegar
    Rice vinegar or white vinegar cuts the richness - a little goes a long way, start with 1 teaspoon

Ingredient Swaps

Most people stick to the basic seasoning, but swaps change the flavor direction completely. For a version that comes together quickly, a fresh salad side balances the richness when you're serving this for dinner.

Four swaps that work:

  • Swap soy sauce for tamari - gluten-free option with the same salty depth, use 1:1 ratio
  • Use white pepper instead of black pepper - milder heat with a slightly different aroma, better if you want less visible spice flecks on the skin
  • Replace brown sugar with maple syrup - adds liquid sweetness that caramelizes differently, brush on in the last 5 minutes and watch closely for burning
  • Substitute fresh minced garlic for garlic powder - stronger, sharper flavor but risk of burning, add it after the first flip at the 20-minute mark

Traditional Five-Spice

Works for: Classic Chinese flavor profile, pairs well with rice and pickled vegetables

Skip if: You want a simpler seasoning or don't like anise/licorice notes

Mixed Dried Herbs

Works for: Western flavor approach, good with roasted vegetables and potatoes

Skip if: You're aiming for Asian-inspired pork belly - the flavor shift is too dramatic

Instructions

The scoring and drying happen before anything else touches the pan. We keep a batch ready for nights like this - easy dip side makes the meal feel more complete without extra work.

  1. Score and dry the skin. Use a sharp knife to score the pork belly skin in a crosshatch pattern, cutting ⅛ inch deep - stop before you hit meat. Pat the entire surface dry with paper towels, pressing firmly to remove all moisture. Let it sit at room temperature for 20 minutes.

  2. Season the pork belly. Rub 1 teaspoon neutral oil over the skin, then sprinkle salt, black pepper, garlic powder, and five-spice powder evenly across the surface. Flip and season the meat side lightly with remaining spices.

  3. Preheat and arrange. Preheat the air fryer to 400°F for 5 minutes. Place pork belly pieces skin-side up in the basket, leaving at least 1 inch of space between each piece so air circulates freely.

  4. Air fry and flip. Cook for 20 minutes, then carefully flip each piece using tongs. Continue cooking for another 15-20 minutes until the skin blisters and turns golden brown with crispy, crackled edges. Check internal temperature at 35 minutes - it should reach 165-175°F.

  5. Rest and slice. Remove pork belly from the air fryer and let it rest on a cutting board for 10 minutes. Slice into ½-inch thick pieces against the grain. Serve immediately while the skin is still crispy.

Golden Rule
If the skin isn't blistering after 25 minutes, increase temperature to 425°F for the remaining time - but watch closely to prevent burning

What to Serve With It

Rich mains need something to cut through, and coleslaw does exactly that. For a version that comes together quickly, crunchy homemade coleslaw recipe adds the acid and crunch this plate needs.

Side Dish Prep Why It Works How to Serve
Steamed Rice Easy Neutral base soaks up rendered fat and balances the richness Serve hot in bowls, place sliced pork belly on top with drizzled juices
Quick Pickled Cucumber Easy Vinegar and sugar cut through fat with bright, tangy crunch Slice thin, toss with rice vinegar and sugar, let sit 10 minutes
Steamed Bok Choy Easy Light, fresh green vegetable adds texture without competing flavors Steam 4 minutes, drizzle with soy sauce and sesame oil
Sticky Rice Medium Traditional pairing, chewy texture holds up to crispy pork belly Cook in rice cooker with less water, serve warm in small portions
Spicy Kimchi Easy Fermented spice and acidity cut richness with probiotic punch Serve cold on the side, let guests add their own amount

Three ways to serve it:

  • As a rice bowl - slice pork belly thin, layer over steamed rice with pickled vegetables and a drizzle of hoisin sauce for a quick weeknight meal
  • In lettuce wraps - use butter lettuce leaves, add pork belly slices with fresh herbs, cucumber, and chili garlic sauce for a lighter option
  • With noodles - toss cold soba or rice noodles with sesame oil, top with warm pork belly and scallions for meal prep lunches
Shortcut
Buy pre-cooked jasmine rice from the grocery store - it reheats in 90 seconds and tastes almost as good as fresh

Store and Reheat

Pork belly skin loses its crisp after a few hours, but you can bring it back with the right method. For a version that comes together quickly, fresh baked bread side rounds out the meal when you're reheating leftovers.

Method Time Best For
🍳 Air Fryer 5-8 min at 350°F Restoring crispy skin without drying out the meat
🔥 Oven 10-15 min at 350°F Reheating larger portions evenly with gentle heat
📦 Microwave 1-2 min on medium power Quick reheating when you don't care about crispy skin

For best results when storing:

  • Refrigerate within 2 hours - let pork belly cool completely, then transfer to an airtight container and store for 3-4 days
  • Freeze for longer storage - wrap individual portions tightly in plastic wrap, then place in a freezer bag for up to 2 months
  • Reheat from frozen - add 3-5 minutes to air fryer time, no need to thaw first if you're using the air fryer method
  • Separate skin from meat when storing - if possible, cut the skin off and store separately so it reheats crisper
  • Avoid stacking pieces - lay pork belly flat in a single layer in the container so pieces don't steam each other and turn soggy

Frequently Asked Questions

Can I use pork shoulder instead of pork belly?

Pork shoulder has less fat and no skin, so you won't get the crispy crackling that makes this recipe work. If you want to try it anyway, cook it longer at a lower temperature (350°F for 45-50 minutes) and expect tender meat without the crisp texture.

How do I store and reheat leftover air fryer pork belly?

Store in an airtight container in the fridge for 3-4 days or freeze for up to 2 months. Reheat in the air fryer at 350°F for 5-8 minutes to restore crispy skin - microwave works in a pinch but turns the skin rubbery.

How do I know when the pork belly is properly cooked and crispy?

Check the internal temperature with a meat thermometer - it should read 165-175°F. The skin should be golden brown with visible blisters and crackled edges that sound hollow when you tap them with tongs.

Why is my pork belly skin not getting crispy? How to fix?

Wet skin won't crisp - pat it aggressively dry with paper towels or refrigerate uncovered for 2-12 hours before cooking. If it's already cooking and not crisping, increase the temperature to 425°F and add 5 more minutes, watching closely for burning.

Can I prep pork belly the night before and cook it fresh the next day?

Score and season the pork belly, then refrigerate it uncovered on a wire rack overnight - the cold air dries the skin even more and makes it easier to get crispy. Cook it straight from the fridge, adding 2-3 minutes to the initial cook time.

Air Fryer Pork Belly

Air Fryer Pork Belly

No ratings yet
Air fryer pork belly delivers crispy, blistered skin with juicy, tender meat in under an hour. Scoring the skin shallowly and drying it well before cooking at high heat ensures a perfect crackling texture. This quick method yields restaurant-quality pork belly without deep-frying or slow roasting.
Print Recipe Pin Recipe
Prep Time 10 minutes mins
Cook Time 40 minutes mins
Total Time 50 minutes mins
Servings: 4 servings
Course: Main Dish
Cuisine: Asian-Inspired
Ingredients Equipment Method Notes

Ingredients
  

  • 1.5-2 lbs pork belly skin-on, about 1.5-2 inches thick
  • 1 tablespoon salt coarse salt preferred
  • 1 teaspoon black pepper
  • 1 teaspoon garlic powder
  • 1 teaspoon five-spice powder Chinese blend of star anise, cloves, cinnamon, Sichuan pepper, and fennel
  • 1 teaspoon neutral oil such as canola or vegetable oil
  • 1 tablespoon soy sauce optional glaze; use low-sodium if desired
  • 1 tablespoon brown sugar optional glaze; apply in last 10 mins to avoid burning
  • 1 teaspoon vinegar rice vinegar or white vinegar, optional glaze

Equipment

  • Air fryer Used for cooking the pork belly at high heat to crisp skin.
  • Sharp knife For scoring pork belly skin in a crosshatch pattern.
  • Tongs To flip pork belly halfway through cooking.
  • Paper towels To dry the skin thoroughly before cooking.

Method
 

  1. Use a sharp knife to score the pork belly skin in a crosshatch pattern, cutting ⅛ inch deep without cutting into the meat. Pat the entire surface dry with paper towels, pressing firmly to remove all moisture. Let pork belly sit at room temperature for 20 minutes.
    1.5-2 lbs pork belly
  2. Rub 1 teaspoon of neutral oil evenly over the skin. Sprinkle salt, black pepper, garlic powder, and five-spice powder evenly on the skin side. Flip and lightly season the meat side with the remaining spices.
    1.5-2 lbs pork belly, 1 tbsp salt, 1 tsp black pepper, 1 tsp garlic powder, 1 tsp five-spice powder, 1 tsp neutral oil
  3. Preheat the air fryer to 400°F for 5 minutes to help start crisping the skin immediately.
  4. Place pork belly pieces skin-side up in the air fryer basket, leaving at least 1 inch of space between each piece to allow air circulation.
    1.5-2 lbs pork belly
  5. Cook pork belly at 400°F for 20 minutes. Carefully flip each piece using tongs, then continue cooking for another 15 to 20 minutes until the skin blisters and becomes golden brown and crispy. Check internal temperature at 35 minutes; it should reach 165-175°F.
    1.5-2 lbs pork belly
  6. Remove pork belly from air fryer and let rest on a cutting board for 10 minutes to redistribute juices. Slice into ½-inch thick pieces against the grain and serve immediately while skin is still crispy.
    1.5-2 lbs pork belly

Notes

  • Pat skin completely dry before cooking for best crackling results.
  • Leave space between pork belly pieces in air fryer to ensure even crisping.
  • Rest the meat after cooking to keep it juicy and tender.

Tried this recipe?

Let us know how it was!

Air Fryer Turkey Breast

May 11, 2026

Air frying turkey breast at 350°F locks in moisture while crisping the skin. The circulating heat renders fat and browns the exterior in 25-30 minutes without drying out the meat.

Air Fryer Turkey Breast

Use a meat thermometer to hit 165°F internal temp. That's the line between juicy slices and rubbery disappointment.

This works for weeknight dinners when you need protein fast or meal prep when you're cooking for the week ahead.

QUICK SUMMARY

Air fryer turkey breast cooks in 25-30 minutes at 350°F with crispy skin and juicy meat. Pat the skin dry before oiling for maximum browning. Rest 10 minutes before slicing to keep moisture locked in.

⏱️Total time: 35-40 minutes including rest time
🔥Key move: Flip breast at 15 minutes for even crisping
⚠️Watch out: Wet skin steams instead of crisps - dry thoroughly

Why This Recipe Works

High heat renders the fat under the skin while the air fryer's circulation browns every surface. For a version that comes together quickly, a simple chicken side uses the same method with faster cook time.

Quick Reference
⏱️
Prep Time
10 min
🔥
Cook Time
25-30 min
⏰
Total Time
35-40 min
🍽️
Servings
4
📊
Difficulty
Easy
🏷️
Category
Main Dish
💡
Quick Tip
Rest meat 10 min for juicy slices
🎯
Best For
Weeknight | Meal prep | Holiday

Five things that make this work:

  • Room temperature turkey cooks evenly without cold spots in the center
  • Patting skin dry before oiling prevents steaming and supports browning
  • Flipping at 15 minutes ensures both sides crisp without burning
  • 165°F internal temp means cooked through without overdoing it
  • Ten-minute rest lets juices redistribute so they don't run out when you slice
Quick Tip
Insert the thermometer horizontally into the thickest part of the breast, avoiding bone if present

What You'll Need

Air Fryer Turkey Breast - Air Fryer Turkey Breast

A good corn on the cob can make or break the plate. For a version that comes together quickly, homemade corn on the cob recipe works as a side when you need something simple.

🍗
Protein
  • Turkey breast, skin-on boneless
🥢
Seasoning & Fat
  • Olive oil
  • Salt
  • Black pepper
  • Garlic powder
  • Paprika
🧄
Aromatics & Finishing
  • Fresh thyme or rosemary
  • Lemon juice (optional)

Ingredient Details

  • Turkey breast (skin-on)
    Skin protects meat from drying out and crisps into a golden layer - boneless cooks faster and slices easier
  • Olive oil
    Brush evenly on skin to promote browning - use 1 tablespoon for a 1.5-2 pound breast
  • Salt
    Season generously on all sides including under the skin if possible - aids moisture retention
  • Garlic powder
    Adds savory depth without burning like fresh garlic would at high heat
  • Paprika
    Provides color and mild flavor - smoked paprika adds extra dimension
  • Fresh herbs
    Thyme and rosemary hold up to heat - strip leaves and rub on skin before cooking
  • Meat thermometer
    Non-negotiable for hitting 165°F without guessing - insert horizontally into thickest part

Ingredient Swaps

Most people skip falafel, but it balances the meal. For a version that comes together quickly, a simple falafel variation uses similar air fryer timing.

Four swaps that work:

  • Olive oil → Avocado oil: Same crisping power with a neutral flavor and higher smoke point
  • Garlic powder → Onion powder: Lighter, sweeter profile if you want to reduce pungency
  • Fresh herbs → Dried herbs: Use half the amount - less vibrant but gets the job done
  • Turkey breast → Chicken breast: Similar cook time but check temp at 20 minutes since chicken cooks faster

Smoked Paprika

Works for: Adding smoky depth and darker color

Skip if: You want mild, sweet paprika flavor

Butter Instead of Olive Oil

Works for: Richer flavor and golden color

Skip if: You need dairy-free or worry about burning

Instructions

Chicken adds the contrast this plate needs, but timing matters. We keep a batch ready for nights like this - juicy chicken side dish keeps well for meal prep.

  1. Prep the turkey: Pat turkey breast completely dry with paper towels. Brush 1 tablespoon olive oil evenly over skin and all sides.

  2. Season generously: Mix salt, black pepper, garlic powder, and paprika in a small bowl. Rub seasoning mix all over turkey, pressing into skin. Add fresh herb leaves if using.

  3. Preheat and cook: Preheat air fryer to 350°F for 3-5 minutes. Place turkey breast skin-side up in basket with 2cm space around it. Air fry 15 minutes.

  4. Flip and finish: Turn turkey breast over using tongs. Air fry another 10-15 minutes until internal temp hits 165°F when checked with meat thermometer inserted horizontally into thickest part.

  5. Rest and slice: Transfer turkey to cutting board and tent loosely with foil. Rest 10 minutes. Slice against the grain into ½-inch pieces.

Golden Rule
Don't skip the rest - slicing immediately releases all the moisture you worked to keep inside

What to Serve With It

Rich mains need something to cut through, and salmon does exactly that. For easy chicken meal planning, pairing suggestions help round out the plate without extra effort.

Side Dish Prep Why It Works How to Serve
Steamed green beans Easy Light, fast, complements turkey without competing Toss with butter and lemon juice
Mashed potatoes Medium Classic pairing, balances texture with creamy base Make ahead and reheat while turkey rests
Quinoa salad Easy Protein-rich, fresh contrast to rich turkey Serve cold with herbs and vinaigrette
Roasted sweet potatoes Easy Natural sweetness and fiber balance savory turkey Cube and roast at 400°F for 25 minutes
Simple garden salad Easy Freshness lightens meal, takes 5 minutes Mixed greens with olive oil and vinegar

Three ways to serve it:

  • Holiday meal: Pair with cranberry sauce, herb stuffing, and garlic roasted brussels sprouts for traditional feast
  • Weeknight dinner: Slice over quinoa salad with steamed green beans for quick balanced plate
  • Meal prep: Portion sliced turkey with roasted sweet potatoes and store in containers for grab-and-go lunches
Best Pick
Gravy or garlic herb butter adds moisture and richness - drizzle over sliced turkey just before serving

Store and Reheat

Most people skip salmon, but it balances the meal. For a version that comes together quickly, this easy salmon recipe pairs well when you want seafood instead of poultry.
Method Time Best For
🔥 Air fryer 5-7 min at 350°F Restoring crispy skin quickly
🔥 Oven 10-15 min at 325°F Retaining moisture and crisp skin
📦 Microwave 1-2 min covered Speed when texture doesn't matter

For best results when storing:

  • Wrap tightly in foil or store in airtight container to prevent drying out
  • Refrigerate within 2 hours of cooking - keeps 3-4 days
  • Freeze sliced turkey in portions for up to 3 months
  • Add a tablespoon of broth or gravy before reheating to restore moisture
  • Reheat only once - repeated heating dries out the meat

Frequently Asked Questions

How long to cook air fryer turkey breast at 350°F?

Cook 25-30 minutes total, flipping at 15 minutes. Check internal temp at 25 minutes - when it hits 165°F, it's done.

Can I make air fryer turkey breast ahead and reheat?

Yes. Cook fully, cool, then refrigerate up to 3 days. Reheat in air fryer at 350°F for 5-7 minutes to restore crispy skin.

How do I know when air fryer turkey breast is done?

Insert meat thermometer horizontally into thickest part - 165°F means done. Juices should run clear, not pink.

Why is my air fryer turkey breast dry and how to fix it?

Overcooking past 165°F dries it out. Fix by slicing thin and serving with gravy, or chop for salads where moisture matters less.

Can I use frozen turkey breast directly in air fryer?

No. Thaw completely in the fridge first - frozen turkey cooks unevenly with raw centers and overcooked edges.

Air Fryer Turkey Breast

Air Fryer Turkey Breast

No ratings yet
Air fryer turkey breast cooks quickly at 350°F, delivering crispy skin and juicy meat. Patting the skin dry before oiling and flipping halfway through ensures even browning and perfect texture. Rest the meat for 10 minutes to lock in moisture before slicing.
Print Recipe Pin Recipe
Prep Time 10 minutes mins
Cook Time 30 minutes mins
Total Time 40 minutes mins
Servings: 4 servings
Course: Main Dish
Cuisine: American
Ingredients Equipment Method Notes

Ingredients
  

  • 1.5 pounds turkey breast skin-on and boneless
  • 1 tablespoon olive oil to brush on skin and all sides
  • 1 teaspoon salt season generously
  • 0.5 teaspoon black pepper season generously
  • 0.5 teaspoon garlic powder
  • 0.5 teaspoon paprika
  • 1 tablespoon fresh thyme or rosemary leaves optional, stripped and rubbed on skin
  • 1 teaspoon lemon juice optional, for finishing

Equipment

  • Air fryer Used to cook the turkey breast evenly at 350°F
  • Meat thermometer Check internal temperature to ensure 165°F

Method
 

  1. Pat turkey breast completely dry with paper towels. Brush 1 tablespoon olive oil evenly over skin and all sides.
    1.5 pounds turkey breast, 1 tablespoon olive oil
  2. Mix salt, black pepper, garlic powder, and paprika in a small bowl. Rub seasoning mix all over turkey, pressing into skin. Add fresh herb leaves if using.
    1 teaspoon salt, 0.5 teaspoon black pepper, 0.5 teaspoon garlic powder, 0.5 teaspoon paprika, 1 tablespoon fresh thyme or rosemary leaves
  3. Preheat air fryer to 350°F for 3 to 5 minutes. Place turkey breast skin-side up in basket with 2cm space around it. Air fry for 15 minutes.
  4. Turn turkey breast over using tongs. Air fry another 10 to 15 minutes until internal temperature reaches 165°F when checked with meat thermometer inserted horizontally into the thickest part.
  5. Transfer turkey to cutting board and tent loosely with foil. Rest for 10 minutes. Slice against the grain into ½-inch pieces. Optionally drizzle with lemon juice before serving.
    1 teaspoon lemon juice

Notes

  • Pat the skin dry before oiling to prevent steaming and ensure crispy skin.
  • Flip turkey halfway through cooking to brown both sides evenly.
  • Rest meat 10 minutes before slicing to lock in juices and keep slices moist.

Tried this recipe?

Let us know how it was!

Air Fryer Whole Chicken

May 11, 2026

You need 60-75 minutes and a large air fryer. No marinating, no special prep, just a whole chicken and basic seasonings.

Air Fryer Whole Chicken

High heat crisps the skin while the dark meat stays juicy. The air fryer circulates heat around the bird so you get roasted chicken texture without heating up your kitchen.

This is what we make for meal prep Sundays or when we need leftovers that actually reheat well. Works for weeknight dinners when you want something that looks intentional but doesn't require constant attention.

QUICK SUMMARY

Air fryer whole chicken delivers crispy golden skin and juicy meat in 45-60 minutes. Pat the bird completely dry before seasoning - moisture is the enemy of crisp skin. Works best with a 3-5 pound chicken in a large capacity air fryer (5.8 quarts or bigger).

⏱️Time Reality: 15 min prep, 45-60 min cook depending on size, 10 min rest before carving
🔥Critical First Move: Dry brine overnight with salt for crispier skin and deeper seasoning
⚠️Watch Out: Overcrowding the basket traps moisture - leave 1 inch space around the chicken

Why This Recipe Works

Air frying creates convection heat that renders fat and crisps skin faster than traditional roasting. Rich mains need something to cut through, and chicken does exactly that. For a version that comes together quickly, this related chicken recipe uses similar technique with smaller portions.

Quick Reference
⏱️
Prep Time
15 min
🔥
Cook Time
45-60 min
⏰
Total Time
60-75 min
🍽️
Servings
4-6 servings
📊
Difficulty
Medium
🏷️
Category
Main Dish
💡
Quick Tip
Dry brine overnight for crispier skin
🎯
Best For
Weeknight | Meal prep | Entertaining

Why it delivers:

  • Starting breast-side down protects white meat from overcooking while dark meat renders fat and gets tender
  • Flipping halfway through exposes both sides to direct heat, creating even browning and crispy skin all over
  • Resting 10 minutes after cooking lets juices redistribute so they don't run out when you carve
  • Using an instant-read thermometer eliminates guesswork - 165°F in the thickest part of the thigh means it's done
  • Trussing the legs with kitchen twine keeps the bird compact so it cooks evenly and fits better in the basket
Quick Tip
Pat the chicken completely dry with paper towels before seasoning. Moisture on the skin creates steam, which prevents crisping and leaves you with rubbery texture.

What You'll Need

Air Fryer Whole Chicken - Air Fryer Whole Chicken

Shopping for this takes one trip to the meat counter and your spice cabinet. A good cauliflower can make or break the plate. For a version that comes together quickly, tender roasted vegetable side uses the same air fryer while the chicken rests.

🍗
Protein
  • 1 whole chicken (3-5 pounds / 1.4-2.3 kg)
🌶️
Seasonings
  • 2 tablespoon olive oil
  • 1½ teaspoon salt
  • 1 teaspoon black pepper
  • 1 teaspoon garlic powder
  • 1 teaspoon paprika
🧄
Aromatics
  • 1 lemon (halved, optional)
  • Fresh rosemary and thyme sprigs (optional)
🫙
Equipment
  • Large capacity air fryer (5.8 qt+)
  • Instant-read meat thermometer
  • Kitchen twine
  • Tongs

Ingredient Details

  • Whole chicken (3-5 pounds)
    Size matters for cook time - a 3-pound bird takes 45 minutes, a 5-pound bird needs 60 minutes. Larger chickens may not fit in standard air fryer baskets.
  • Salt
    Kosher salt is easier to control than table salt. If dry brining, use 1½ teaspoon per pound of chicken and refrigerate uncovered for 4-12 hours.
  • Olive oil
    Brush evenly over the skin to help seasonings stick and promote browning. Skip it if you dry brine - the salt will draw moisture to the surface which helps crisping.
  • Paprika
    Adds color more than flavor. Smoked paprika gives deeper color and a subtle smoky note. Regular paprika works fine if that's what you have.
  • Fresh herbs
    Rosemary and thyme add aroma when stuffed in the cavity. Dried herbs work but use 1 teaspoon total instead of fresh sprigs - they burn more easily.
  • Lemon
    Halve it and stuff inside the cavity for subtle citrus aroma. Don't squeeze it over the chicken before cooking - the acid can inhibit browning.
  • Instant-read thermometer
    Non-negotiable for doneness. Probe the thickest part of the thigh without touching bone. Pull at 165°F - carryover heat will bring it to 170°F while resting.

Ingredient Swaps

You can adjust seasonings based on what's in your pantry without changing the method. Most people skip potatoes, but it balances the meal. For a version that comes together quickly, a creamy potatoes side cooks at the same temperature while you carve.

Four swaps that work:

  • Olive oil → melted butter: Adds richer flavor and slightly crispier skin. Use the same amount (2 tbsp) brushed evenly over the surface.
  • Paprika → smoked paprika: Gives deeper mahogany color and subtle smoky flavor without changing cook time or texture.
  • Fresh herbs → dried herbs: Use 1 teaspoon total dried instead of fresh sprigs. They're more concentrated and burn faster at high heat.
  • Whole chicken → spatchcocked chicken: Cuts cook time to 35-40 minutes and creates more even browning. Remove backbone, press flat, season both sides.

Garlic Powder

Works for: Even distribution, no burning, consistent flavor throughout

Skip if: You want sharper garlic bite or prefer fresh ingredients only

Fresh Minced Garlic

Works for: Stronger garlic flavor, fresher aroma, works in herb butter basting

Skip if: High heat air frying - minced garlic burns quickly and turns bitter

Instructions

Cook time depends on chicken size - plan for 12-15 minutes per pound. The fries works best when it hits the table at the same time as the main. For a version that comes together quickly, something crispy like fries uses the same air fryer temperature and finishes faster.

  1. Pat chicken completely dry with paper towels. Moisture prevents crisping. Remove giblets from cavity if present. Let chicken sit at room temperature for 20 minutes while air fryer preheats to 360°F (180°C).
  2. Season the chicken inside and out. Mix salt, pepper, garlic powder, and paprika. Rub half the mixture inside the cavity. Brush olive oil over the skin, then rub remaining seasoning all over. Stuff cavity with lemon halves and herb sprigs if using.
  3. Truss the legs with kitchen twine. Tie the legs together tightly to keep the bird compact. This helps it cook evenly and fit better in the basket. Tuck wing tips under the body.
  4. Air fry breast-side down for 30 minutes. Place chicken in the air fryer basket with at least 1 inch clearance on all sides. After 30 minutes, carefully flip breast-side up using tongs. Cook 15-30 minutes more depending on size.
  5. Check internal temperature in the thickest part of the thigh. Pull chicken when thermometer reads 165°F (74°C) without touching bone. Tent loosely with foil and rest 10 minutes before carving.
Golden Rule
Never skip the flip. Cooking breast-side down first protects white meat from drying out, but you must flip halfway to crisp the top skin and brown the breast evenly.

What to Serve With It

Air fryer chicken pairs best with sides that balance richness or add contrasting texture. Cauliflower brings the color this plate needs. We keep a batch ready for nights like this - complete honey sriracha chicken meal ideas shows how to build full weeknight dinners.

Side Dish Prep Why It Works How to Serve
Simple Green Salad Easy Crisp lettuce and tangy vinaigrette cut through rich chicken skin Toss with lemon juice, olive oil, salt just before serving
Roasted Vegetables Easy Caramelized edges add sweet contrast to savory chicken Roast carrots, Brussels sprouts, or broccoli at 400°F for 25 min
Steamed Rice Easy Neutral base soaks up chicken drippings and pan juices Cook jasmine or basmati rice while chicken rests
Garlic Mashed Potatoes Medium Creamy texture balances crispy chicken skin, classic pairing Mash with butter, cream, roasted garlic cloves
Quinoa Salad Easy Light and nutritious, adds fresh herbs and citrus brightness Mix cooked quinoa with cucumber, tomato, lemon, parsley

Three ways to serve it:

  • Family-style weeknight: Carve chicken at the table, serve with steamed rice and roasted vegetables on the side
  • Meal prep bowls: Shred chicken and portion into containers with quinoa salad, roasted vegetables, store up to 4 days
  • Casual entertaining: Serve whole chicken on a platter with herb roasted potatoes, grilled asparagus, crusty bread for soaking up juices
Shortcut
Use the same air fryer basket to cook sides before or after the chicken. Roast vegetables at 375°F while chicken rests, or air fry frozen fries at 400°F afterward.

Store and Reheat

Leftover chicken stays good in the fridge for 3-4 days when stored properly. The buttermilk works best when it hits the table at the same time as the main. For a version that comes together quickly, something creamy like buttermilk adds richness to reheated chicken.

Method Time Best For
🍳 Stovetop 5-7 min Shredded chicken in soups, stir-fries, or grain bowls
📦 Microwave 2-3 min Quick reheating when texture doesn't matter, works for shredded or chopped pieces
🔥 Oven 15-20 min at 325°F Bone-in pieces when you want to retain crispy skin and juicy meat
💨 Air Fryer 8-10 min at 350°F Best method for restoring crispy skin on bone-in pieces

For best results when storing:

  • Carve before storing: Remove meat from bones and separate white meat from dark. Store in separate containers so you can reheat each properly.
  • Use shallow containers: Spread chicken in a single layer in airtight containers. Deep piles trap heat and create moisture, which makes skin soggy.
  • Store drippings separately: Save pan juices in a small jar. Reheat and drizzle over chicken before serving to restore moisture.
  • Freeze in portions: Wrap individual portions tightly in plastic wrap, then foil. Label with date. Thaw overnight in fridge before reheating.
  • Skip reheating skin: If skin has gone soft in storage, remove it before reheating. It won't crisp back up and just gets rubbery in the microwave.

Frequently Asked Questions

How long to cook air fryer whole chicken at 360°F?

Plan for 12-15 minutes per pound at 360°F. A 3-pound chicken takes 45 minutes, a 4-pound bird needs 50-55 minutes, and a 5-pound chicken requires 60 minutes. Always verify with a meat thermometer - pull when thickest part of thigh reads 165°F.

Can I make air fryer whole chicken ahead of time?

Cook the chicken fully, let it cool to room temperature, then refrigerate up to 3 days. Reheat in the air fryer at 350°F for 8-10 minutes to restore crispy skin. Carving before storage makes reheating faster and more even.

What goes with air fryer whole chicken?

Simple green salad, roasted vegetables, steamed rice, garlic mashed potatoes, or quinoa salad all work. Pick sides that balance richness or add contrasting texture - crisp lettuce, caramelized vegetables, or creamy starches.

How do I know when air fryer whole chicken is done?

Use an instant-read thermometer in the thickest part of the thigh without touching bone. Pull at 165°F - juices should run clear, not pink. The meat near the bone should no longer look translucent or raw.

Can I use frozen whole chicken in air fryer?

No. Frozen chicken cooks unevenly in the air fryer - the outside overcooks before the inside thaws. Thaw completely in the fridge for 24-48 hours depending on size before air frying.

Air Fryer Whole Chicken

Air Fryer Whole Chicken

No ratings yet
Air fryer whole chicken delivers crispy golden skin and juicy meat in under 75 minutes. The convection heat crisps the skin quickly while keeping the dark meat tender and juicy. This recipe requires minimal prep and works well for meal prep or weeknight dinners.
Print Recipe Pin Recipe
Prep Time 15 minutes mins
Cook Time 1 hour hr
Total Time 1 hour hr 15 minutes mins
Servings: 5 servings
Course: Main Dish
Cuisine: American
Ingredients Equipment Method Notes

Ingredients
  

  • 1 whole chicken 3-5 pounds, giblets removed
  • 2 tablespoon olive oil for brushing skin
  • 1.5 teaspoon salt kosher salt recommended
  • 1 teaspoon black pepper
  • 1 teaspoon garlic powder
  • 1 teaspoon paprika
  • 1 whole lemon halved, optional, for cavity
  • 2 sprigs rosemary optional, for cavity
  • 2 sprigs thyme optional, for cavity

Equipment

  • Large capacity air fryer Minimum 5.8 quart capacity
  • Instant-read meat thermometer For checking internal temperature
  • Kitchen twine To truss legs
  • Tongs For flipping the chicken

Method
 

  1. Pat chicken completely dry with paper towels. Remove giblets if present. Let sit at room temperature for 20 minutes while preheating air fryer to 360°F (180°C).
    1 whole chicken
  2. Mix salt, black pepper, garlic powder, and paprika. Rub half the seasoning inside the cavity. Brush olive oil evenly over skin, then rub remaining seasoning all over the chicken. Stuff lemon halves and herb sprigs inside the cavity if using.
    2 tbsp olive oil, 1.5 tsp salt, 1 tsp black pepper, 1 tsp garlic powder, 1 tsp paprika, 1 whole lemon, 2 sprigs rosemary, 2 sprigs thyme
  3. Truss the legs tightly with kitchen twine to keep the bird compact and cook evenly. Tuck wing tips under the body.
    1 whole chicken
  4. Place chicken breast-side down in air fryer basket with at least 1 inch clearance around it. Air fry for 30 minutes.
    1 whole chicken
  5. Using tongs, carefully flip chicken breast-side up. Continue cooking 15-30 minutes more depending on chicken size until an instant-read thermometer inserted in the thickest part of the thigh reads 165°F (74°C).
    1 whole chicken
  6. Remove chicken from air fryer and tent loosely with foil. Let rest for 10 minutes to allow juices to redistribute before carving.
    1 whole chicken

Notes

  • Pat the chicken dry thoroughly before seasoning for crisp skin.
  • Start cooking breast-side down to protect white meat and flip halfway to crisp the top.
  • Use an instant-read thermometer to ensure the chicken is fully cooked to 165°F in the thigh.

Tried this recipe?

Let us know how it was!

Air Fryer Lemon Pepper Chicken Thighs [Quick Weeknight]

May 11, 2026

Weeknight dinners rarely come together this fast.

Air Fryer Lemon Pepper Chicken Thighs

These air fryer lemon pepper chicken thighs land on the table in under 35 minutes - crispy-skinned, juicy at the bone, and sharp with citrusy pepper heat that wakes up the whole plate.

If you've been sleeping on chicken and its flavor possibilities beyond the usual pan-sear, the air fryer changes the math entirely.

Bone-in, skin-on thighs are the right call here. The bone keeps the meat moist during high-heat cooking, and the skin crisps into a golden shell that a boneless thigh simply can't replicate.

QUICK SUMMARY

Air fryer lemon pepper chicken thighs cook in 18-22 minutes at 380°F - no oven preheat, no oil splatter. Pat the skin fully dry before seasoning, season under and over the skin, and flip once at the halfway mark. The result is golden, snappy skin with tender, juicy meat near the bone.

⏱️Time Reality: 28-32 minutes total, including 10 minutes of prep
🔑Method Shortcut: Season under the skin for deeper flavor without extra steps
⚠️Watch Out: Overcrowding the basket causes steaming, not crisping - keep pieces spaced

Why This Recipe Works

Bone-in thighs in the air fryer succeed for one specific reason: the circulating hot air crisps the skin at the same rate the bone-retained moisture keeps the meat from drying out.

That balance doesn't work as reliably in a skillet or a sheet pan.

Double-seasoning is the key move - lift the skin slightly and rub lemon pepper directly onto the meat beneath, then season the skin surface again. You get flavor in two layers, not just a coating that slides off when the fat renders.

The internal target is 165°F at the thickest point near the bone. Probe there, not at the surface.

Quick Reference
⏱️
Prep Time
10 minutes
🔥
Cook Time
18-22 minutes
⏰
Total Time
28-32 minutes
🍽️
Servings
4
📊
Difficulty
Easy
🏷️
Category
Main Dish
💡
Quick Tip
Pat thighs dry and double-season for crisp skin
🎯
Best For
Weeknight dinner

Here's what makes this method reliable every time:

  • Air frying at 380°F gives the skin time to render fat before it chars
  • A light, even oil coat closes surface gaps and promotes uniform browning
  • Flipping once at the 10-minute mark ensures color develops on both sides
  • Resting 3-5 minutes after cooking lets juices redistribute toward the bone
  • Fresh lemon zest added to dry seasoning concentrates citrus oils without adding moisture
Golden Rule
Dry skin browns. Wet skin steams. Pat every thigh with paper towels until the surface feels tacky, not damp.

What You'll Need

Air Fryer Lemon Pepper Chicken Thighs - Air Fryer Lemon Pepper Chicken Thighs

Getting the right cut matters more than the seasoning brand here. Bone-in, skin-on thighs are non-negotiable - swap to boneless skinless and you lose both the structural moisture retention and the crisp surface that makes this worth making.

If you're already familiar with a air fryer chicken wings recipe, this uses similar prep logic, just scaled to larger pieces.

🍗
Protein
  • 4 bone-in, skin-on chicken thighs
🌶️
Seasoning
  • 2 tablespoon lemon pepper seasoning
  • Zest of 1 lemon (optional)
  • Salt to taste
🫙
Fats & Finish
  • 1 tablespoon neutral oil
  • 1 tablespoon unsalted butter (optional)
  • Fresh lemon wedges for serving

Ingredient Details

  • Bone-in, skin-on chicken thighs
    Look for thighs of similar size so they finish cooking at the same time. Larger thighs (over 6 oz) may need the full 22 minutes.
  • Lemon pepper seasoning
    Pre-blended versions vary in salt content - taste yours before adding extra salt. Some brands are very salty straight from the jar.
  • Fresh lemon zest
    Adds concentrated citrus oil to the seasoning without moisture. Bottled lemon juice is a poor substitute here - it makes the skin wet.
  • Neutral oil
    Apply with your hands or a brush in a thin, even coat. Excess oil can smoke in smaller air fryer units.
  • Unsalted butter
    Optional finish - dab a small knob on each thigh in the last 2 minutes for sheen and richness. Skip entirely for a lighter result.

Ingredient Swaps

Most swaps here are straightforward, though each one shifts something in the final texture or flavor. For the finishing fat specifically, the guide on swapping out butter covers dairy-free options that hold up to heat.

  • 🔄 Bone-in thighs → skin-on boneless thighs: cooks 4-5 minutes faster; skin still crisps but meat is slightly less juicy
  • 🌿 Lemon pepper seasoning → fresh lemon zest + coarse black pepper + 1 teaspoon salt: brighter, fresher flavor but requires measuring
  • 🫒 Neutral oil → light olive oil: mild fruity note added; smoke point is slightly lower so watch for smoke near end of cook
  • 🧈 Unsalted butter → dairy-free butter or olive oil: maintains finishing sheen; flavor is slightly less rich

Bone-In vs. Boneless Thighs

Works for: Faster weeknights, meal prep portions, or if bone-in isn't available

Skip if: You want maximum juiciness near the bone and deep golden skin

Seasoning Blend vs. Fresh Zest + Pepper

Works for: Fresh, brighter citrus punch with more control over salt levels

Skip if: You want speed - the pre-blended seasoning is one scoop, no measuring

Instructions

These thighs cook at 380°F the whole way through, with one flip at the halfway mark - no constant checking needed.

If you're adding a parsley garnish at serving and run short, the article on swapping out parsley has quick alternatives that won't change the dish.

  1. Pat dry and preheat. Use paper towels to dry each thigh thoroughly on all sides.

Preheat the air fryer to 380°F for 3 minutes. 2. Season. Rub neutral oil over each thigh.

Lift the skin slightly and work lemon pepper seasoning (and zest if using) directly onto the meat.

Season the skin surface as well. 3. Load the basket. Place thighs skin-side down in a single layer with at least half an inch of space between each piece.

Do not stack or overlap. 4. Cook and flip. Air fry at 380°F for 10 minutes, flip to skin-side up, then continue for another 8-12 minutes depending on thigh size. 5. Check and rest. Probe the thickest point near the bone - it must read 165°F.

Pull the thighs, add butter now if using, and rest 3-5 minutes before serving.

Watch Out
If skin hasn't browned by minute 18, crank to 400°F for the final 3-4 minutes. Watch closely - lemon pepper seasoning can scorch fast at higher heat.

What to Serve With It

These thighs are peppery, tangy, and rich enough that sides working in contrast - or mirroring the citrus notes - land best.

For a broader look at what works alongside this cut, the roundup of dishes alongside chicken thighs covers a range of weeknight and hosting options.

Side DishPrepWhy It WorksHow to Serve
Steamed jasmine riceEasyNeutral starch absorbs pan juices and balances the sharp seasoningSpoon juices from the air fryer basket over the rice
Roasted asparagusEasyMatches cook time; charred tips echo the pepper notesRoast at 400°F alongside and plate together
Arugula salad with lemon vinaigretteEasyPeppery greens mirror the seasoning and cut the richness of the skinDress at serving, not ahead, to keep leaves crisp
Garlic-parsley orzoMediumSmall pasta shape carries the bright chicken drippings wellStir a spoonful of cooking juices into orzo before plating
Warm lemony potato saladMediumMirrors the citrus theme; hearty enough for a full mealServe at room temperature next to the thighs

Three ways to serve it:

  • Weeknight plate: thigh over jasmine rice with a lemon wedge and arugula on the side
  • Hosting spread: sliced thighs fanned over garlic orzo with a Greek yogurt dill dip alongside
  • Quick lunch: pull meat off the bone, pile over a simple green salad, drizzle with honey-lemon glaze
Shortcut
The juices that collect at the bottom of the air fryer basket are seasoned and rich - spoon them over rice or orzo before serving.

Store and Reheat

Leftovers keep well in the fridge for 3 days.

Store in a shallow airtight container with a paper towel layer beneath the thighs to absorb moisture and slow skin softening.

For freezing, wrap individually and use within 2 months.

The guide on comparing lemon extract vs lemon zest options is worth reading if you want to boost the citrus flavor even after reheating.

MethodTimeBest For
🍳 Air Fryer6-8 min at 350°FRestores crisp skin; best single-serving method
🔥 Oven10-12 min at 375°F on wire rackEven reheating for multiple pieces at once
📦 Microwave90 sec on medium powerQuickest option; skin goes soft - acceptable for pulled meat

For best results when storing:

  • Cool completely before sealing - trapped steam is what softens the skin overnight
  • Keep thighs in a single layer in the container, not stacked
  • Reheat from fridge cold, not frozen, for the most even result
  • If reheating from frozen, thaw in the fridge overnight first
  • Add a fresh squeeze of lemon after reheating to revive the bright citrus note

Frequently Asked Questions

Can we use boneless skinless thighs for this recipe?

Yes, but reduce cook time to 14-16 minutes total at 380°F. The skin-crisp effect won't carry over - without skin, the surface browns but stays soft rather than snappy.

Do we need to flip the chicken thighs while air frying?

Flip once at the halfway mark - that's it. Starting skin-side down lets fat render out first, then flipping skin-side up for the second half gives you the final crisp and golden color.

How do we prevent the lemon pepper seasoning from burning?

Keep the temperature at 380°F rather than higher for most of the cook time. If you bump to 400°F at the end to crisp, watch closely - the last 2-3 minutes are when the pepper specks can char.

Can we make these ahead and reheat without losing the crispy skin?

The air fryer is the best reheat method - 6-8 minutes at 350°F recovers most of the crispness. The oven on a wire rack works for multiple pieces, though the skin won't be quite as snappy as fresh-cooked.

What internal temperature confirms the thighs are safe to eat?

165°F at the thickest point near the bone is the USDA-safe minimum. Probe there specifically - the meat near the surface reaches temperature faster and will read high before the deepest point is safe.

Air Fryer Lemon Pepper Chicken Thighs

Air Fryer Lemon Pepper Chicken Thighs

No ratings yet
We crisp bone-in, skin-on chicken thighs in the air fryer at 380°F then finish at 400°F for golden skin. A simple lemon-pepper rub and fresh lemon finish deliver bright, sharp flavor with reliably juicy meat.
Print Recipe Pin Recipe
Prep Time 10 minutes mins
Cook Time 22 minutes mins
Total Time 32 minutes mins
Servings: 4 servings
Course: Dinner
Cuisine: American, Modern comfort
Ingredients Equipment Method Notes

Ingredients
  

  • 1.75 lb chicken thighs bone-in, skin-on (about 6 medium thighs)
  • 1.5 tablespoon lemon pepper store-bought blend
  • 1 teaspoon kosher salt
  • 0.5 teaspoon garlic powder
  • 0.5 teaspoon onion powder
  • 1 tablespoon neutral oil canola or grapeseed
  • 1 lemon zested and halved (zest in rub, half for finishing)
  • 1 tablespoon unsalted butter optional; melted, for brushing at end
  • 2 tablespoon fresh parsley chopped, for garnish

Equipment

  • Air fryer Large basket-style or drawer-style, 3–5 qt minimum
  • Instant-read thermometer For checking 165°F internal temp
  • Tongs For flipping thighs safely

Method
 

  1. Preheat the air fryer to 380°F for 5 minutes while you prep the chicken.
  2. Pat chicken thighs completely dry with paper towels and tuck a little zest under the skin; brush skin lightly with 1 tablespoon oil.
  3. Season both sides with 1 teaspoon kosher salt, 1.5 tablespoon lemon pepper, 0.5 teaspoon garlic powder, and 0.5 teaspoon onion powder, pressing rub onto skin.
  4. Arrange thighs skin-side up in a single layer in the air fryer with space between pieces and cook at 380°F for 10 minutes.
  5. Flip thighs skin-side down, increase temp to 400°F, and cook 8–12 more minutes until skin is golden-brown and an instant-read thermometer reads 165°F near the bone.
  6. Remove to a rack, brush with melted butter if using, squeeze remaining lemon half over top, rest 5 minutes, then sprinkle parsley and serve.

Notes

  • Patting skin fully dry and adding a short high-heat finish (400°F) produces the crispiest skin.
  • Check the thickest part near the bone with a thermometer; 165°F is the safe internal temp.

Tried this recipe?

Let us know how it was!

Air Fryer Teriyaki Salmon Fillets [Weeknight Dinner]

May 11, 2026

Caramelized edges, glossy glaze, and flaky flesh that pulls apart with a fork -

Air Fryer Teriyaki Salmon Fillets

this is what a good teriyaki salmon looks like, and the air fryer gets you there in under 20 minutes. The sweet-savory glaze clings to every ridge of the fillet, finishing with that slightly sticky, golden surface you'd expect from a much longer cooking method.

Most weeknight fish recipes ask you to babysit a pan. This one doesn't.

You prep the glaze, dry the fillets, and let the air fryer do the heavy lifting while you sort out a side dish.

If you're thinking about swapping out salmon for a different fish, know that fatty, firm fillets hold up best under high heat with a sugary glaze. Lean, delicate fish can fall apart or dry out before the glaze even sets.

QUICK SUMMARY

Air fryer teriyaki salmon delivers a glazed, flaky fillet in about 20 minutes. Pat the salmon dry, air fry skin-side down, and apply most of the glaze only in the final 60-90 seconds to avoid burning. The result is a golden, caramelized surface with a tender, fully cooked interior.

⏱️Time Reality: 18-20 minutes total - glaze simmers while the air fryer preheats
🔑Method Shortcut: Reserve most glaze for the last 90 seconds; early application burns
⚠️Watch Out: Wet or unoiled skin sticks to the basket - always pat dry and lightly oil

Why This Recipe Works

Salmon's high fat content means it stays moist even at 400°F, where the air fryer's circulating heat crisps the skin without drying out the flesh.

The key move here is timing the glaze - sugar burns fast at high heat, so a light initial brush and a heavier final coat keeps the surface glossy rather than bitter.

A quick-read thermometer removes all the guesswork. Pull the fillets at 145°F internal temperature, and the center will be just opaque with a slight translucency - cooked through but not chalky.

Quick Reference
⏱️
Prep Time
10 minutes
🔥
Cook Time
8-10 minutes
⏰
Total Time
18-20 minutes
🍽️
Servings
4
📊
Difficulty
Easy
🏷️
Category
Main Dish
💡
Quick Tip
Pat salmon dry and lightly oil skin for crisp finish
🎯
Best For
Weeknight dinner
  • Skin-on fillets protect the flesh from direct heat and crisp up in the circulating air
  • Patting fillets completely dry before cooking prevents steam from forming under the skin
  • Simmering the glaze first thickens it so it coats the salmon instead of pooling in the basket
  • Starting skin-side down lets the fat render slowly before the fillet firms up
  • Letting fillets rest at room temperature for 10 minutes before cooking promotes even doneness
Golden Rule
Apply a thin brush of glaze at the start, then a heavier coat in the final 60-90 seconds. This is what creates a glossy, caramelized finish without any bitter burnt edges.

What You'll Need

Air Fryer Teriyaki Salmon Fillets - Air Fryer Teriyaki Salmon Fillets

Salmon is the one ingredient worth spending on here - skin-on fillets cut to an even 1 to 1.25-inch thickness cook uniformly and hold the glaze without falling apart.

Everything else in the glaze is pantry staple territory.
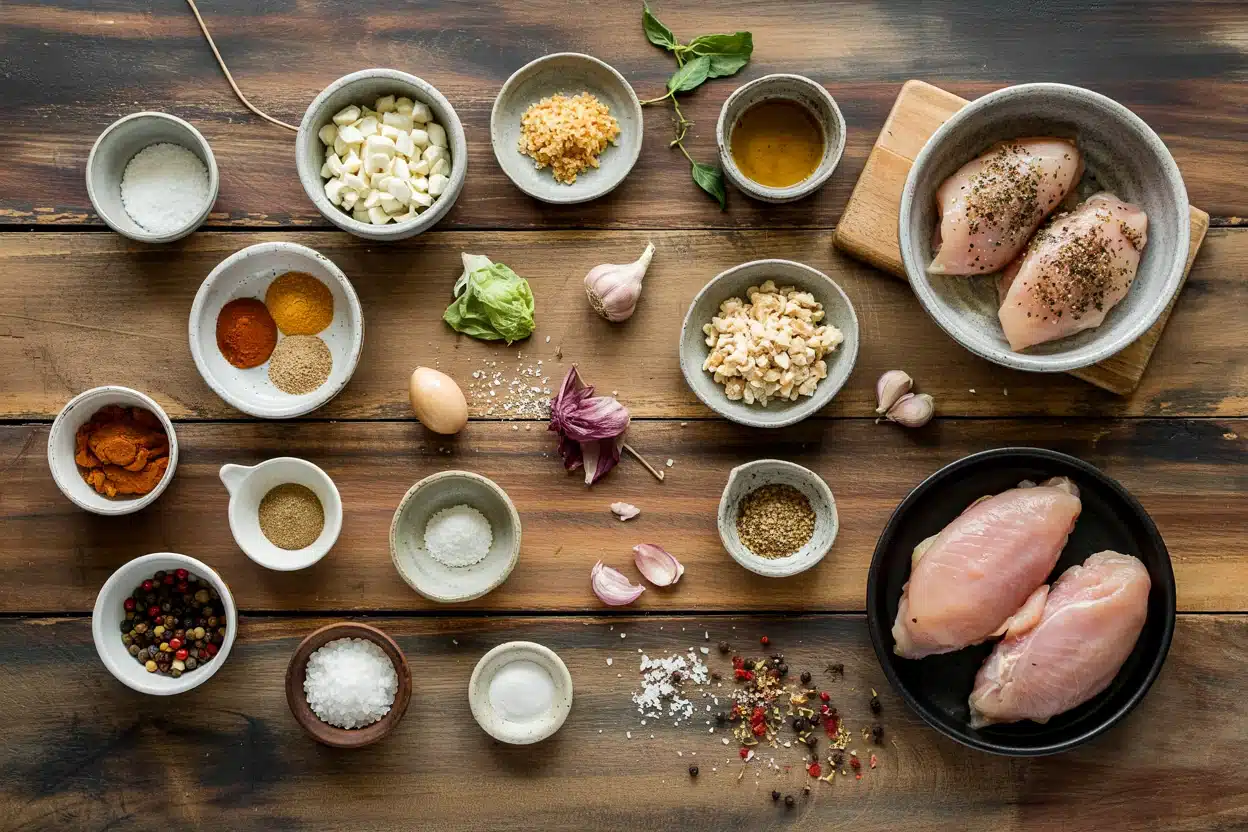
If you're curious about brown sugar swaps that work in the glaze, honey and maple syrup both land well with some small adjustments.

🦐
Protein
  • 4 salmon fillets (6 oz each, skin-on)
🥢
Teriyaki Glaze
  • 3 tablespoon soy sauce
  • 2 tablespoon brown sugar
  • 1 tablespoon mirin
  • 1 teaspoon sesame oil
  • 1 teaspoon fresh ginger, grated
  • 2 garlic cloves, minced
🫙
For Cooking
  • Neutral oil spray or brush
  • Optional: 1 teaspoon cornstarch to thicken glaze

Ingredient Details

  • Salmon Fillets
    Skin-on, evenly thick pieces around 1-1.25 inches. Uneven cuts cook at different rates - ask the counter to cut uniform portions.
  • Soy Sauce
    Regular soy sauce provides the saltiest base. Low-sodium works but you may need to reduce by one less minute or the glaze will taste flat.
  • Brown Sugar
    Dark brown sugar adds more molasses depth; light brown is milder. Either caramelizes well at air fryer temps.
  • Mirin
    Adds sweet acidity that balances the soy. Don't skip it without a substitute - the glaze will taste one-dimensional.
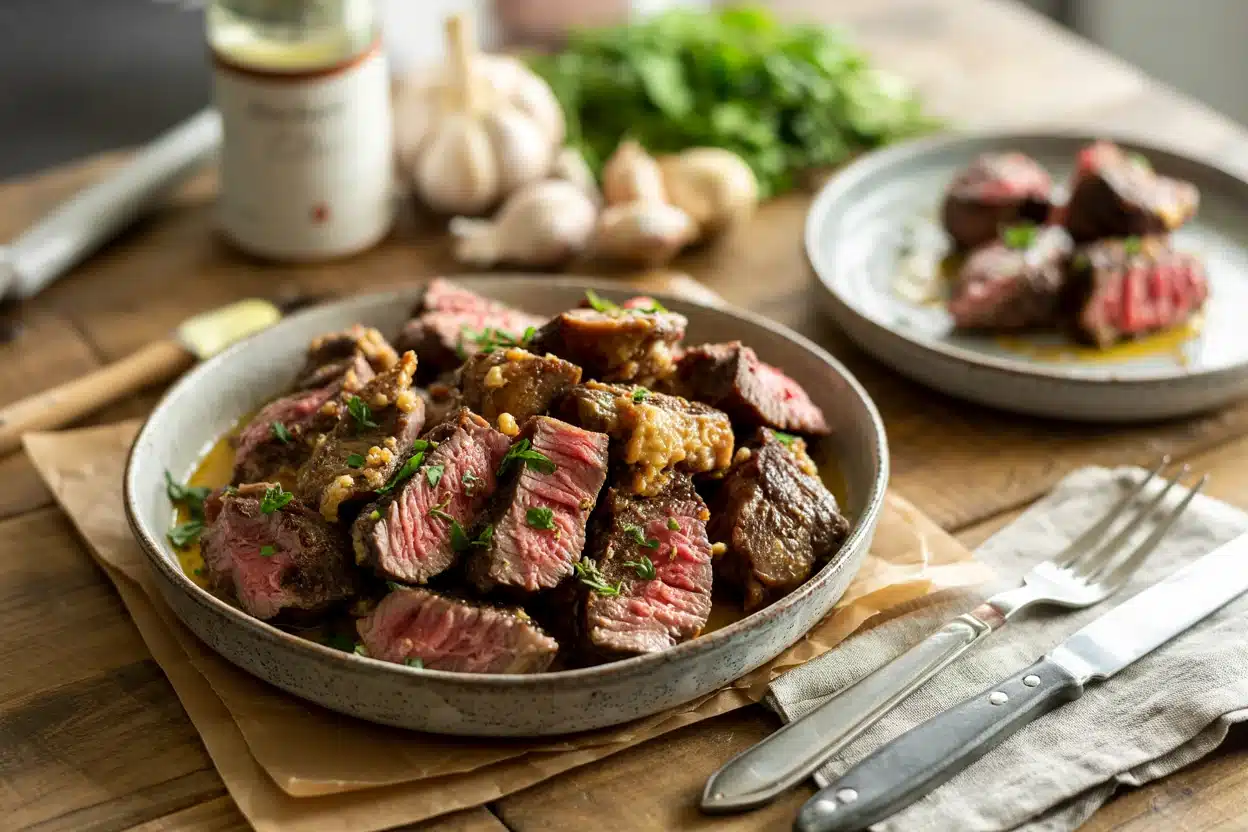
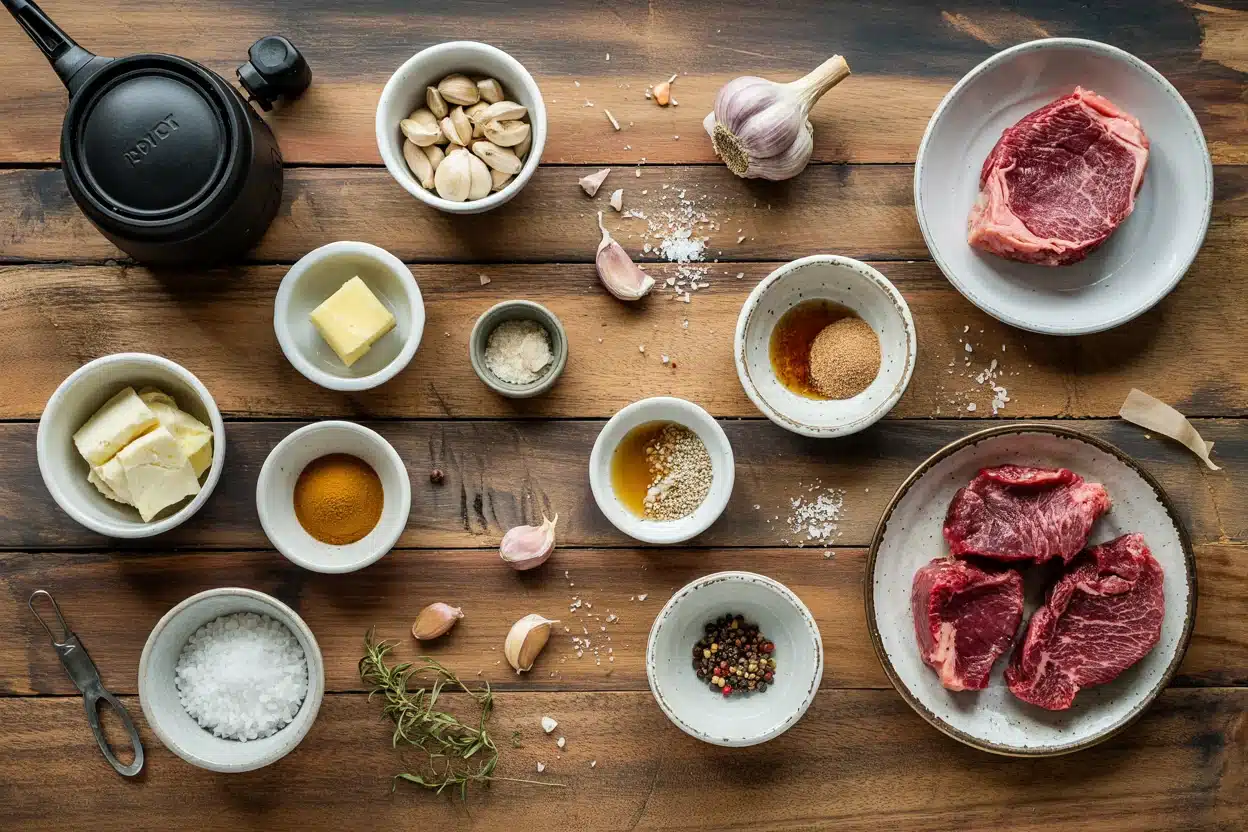
  • Fresh Ginger
    Grate on a microplane for the brightest flavor. Powdered ginger works at half the quantity but delivers noticeably less heat.
  • Sesame Oil
    Use toasted sesame oil, not raw. A little goes far - more than 1 teaspoon and it can overpower the glaze.
  • Cornstarch (optional)
    Mix ½ teaspoon with cold water and whisk in during simmering for a thicker, clingy glaze.

Ingredient Swaps

Tamari is the most seamless swap for soy sauce - the alternatives to soy sauce range from nearly identical to noticeably different, so tamari is the safest call.

Mirin has a specific sweet-acidic profile that's worth preserving; check out aji mirin vs rice vinegar preparation tips if you need to build a substitute from pantry ingredients.

  • Soy sauce → tamari at a 1:1 ratio; choose low-sodium tamari if the glaze tastes too salty
  • Brown sugar → honey at 75% of the original quantity; expect a thinner, more floral glaze
  • Mirin → dry sherry plus 1 teaspoon granulated sugar per tablespoon of mirin; less traditional but functional
  • Sesame oil → neutral vegetable oil; add toasted sesame seeds to the finished dish to recover some of that nutty aroma

Honey Instead of Brown Sugar

Works for: Those who prefer a floral, lighter sweetness and don't mind a runnier glaze

Skip if: You want a thicker, more caramelized coating - honey doesn't set quite the same way

Tamari Instead of Soy Sauce

Works for: Gluten-free needs; near-identical flavor with slightly less salt

Skip if: Your pantry only has regular tamari and you've already seasoned heavily elsewhere

Instructions

Air frying salmon is straightforward, but the glaze timing and temperature sequencing are what separate a glossy result from a scorched one.

For alternatives to sesame oil in the glaze, neutral oil works at the same volume - just add a sprinkle of toasted sesame seeds at the end to compensate.

  1. Make the glaze. Combine soy sauce, brown sugar, mirin, sesame oil, ginger, and garlic in a small saucepan.

Simmer over medium heat for 2-3 minutes until slightly thickened.

Remove from heat and set aside. 2. Prep the salmon. Pat fillets completely dry with paper towels.

Let them sit at room temperature for 10 minutes.

Lightly brush or spray the skin side with neutral oil. 3. Preheat and place. Preheat the air fryer to 400°F for 3 minutes.

Place fillets skin-side down in a single layer - don't overlap.

Brush a thin layer of glaze over the flesh side. 4. Air fry. Cook at 400°F for 7-8 minutes until the flesh turns opaque and just begins to flake at the edges.

Check internal temperature at the thickest point - target 140-145°F. 5. Final glaze. Brush a generous coat of glaze over each fillet.

Air fry for another 60-90 seconds until the surface is glossy and edges show light caramelization.

Rest for 2 minutes before serving.

Watch Out
If the glaze smells bitter or looks very dark before the final 90 seconds, wipe the fillets clean and re-apply a fresh coat. Burnt sugar doesn't improve with more heat.

What to Serve With It

Teriyaki salmon lands in a sweet-savory zone that pairs best with neutral or lightly acidic sides - plain steamed rice, crisp cucumber, and roasted vegetables are the core trio.

If you want inspiration beyond fish-focused pairings, pairing ideas for chicken thighs covers a lot of the same Asian-adjacent side dish territory.

Side DishPrepWhy It WorksHow to Serve
Steamed jasmine riceEasyNeutral base soaks up the teriyaki glazeSpoon extra glaze over rice alongside salmon
Quick cucumber saladEasyBright, tangy contrast to the sweet glazeToss with rice vinegar, sesame oil, and salt
Roasted broccoliEasyNutty char and firm texture balance the soft salmonToss with sesame seeds and a squeeze of lemon
Ginger-scallion soba noodlesMediumStays within the same flavor family; adds substanceServe warm alongside or under the salmon
Pickled daikon and carrot ribbonsMediumCuts through richness with briny acidityPile on the side as a fresh garnish

Three ways to serve it:

  • 🍚 Over steamed rice with extra warm glaze in a small pitcher on the side
  • 🥗 Flaked over a cold soba noodle salad with shredded cucumber and sesame dressing
  • 🍱 Sliced and packed into a bento box with pickled vegetables and edamame
Shortcut
Start the rice and broccoli before the salmon. Both take longer than the 8-minute air fry window, so staggering the timing means everything lands on the table at once.

Store and Reheat

Cooked salmon keeps for up to 2 days in the fridge in a shallow airtight container - use a vented lid or crack it slightly to prevent sogginess from trapped steam.

Watch for salmon spoilage signs before reheating, especially if it's been stored overnight: off smell and grayish flesh are the clearest tells.

MethodTimeBest For
🍳 Air Fryer3-4 min at 350°FRestoring crispness and reactivating the glaze
🔥 Oven6-8 min at 325°F, foil-coveredGentle reheating that keeps the flesh flaky
📦 MicrowaveNot recommendedOvercooks salmon and steams out the glaze

For best results when storing:

  • Cool fillets completely before sealing - trapping steam causes soggy skin
  • Store glaze separately in a small jar; reheat and brush on fresh before serving
  • Do not freeze - salmon texture becomes watery and the glaze separates after thawing
  • If reheating in the air fryer, add a fresh brush of glaze in the final 60 seconds
  • Eat cold leftovers flaked over salad rather than reheating if you're short on time

Frequently Asked Questions

Can we cook frozen salmon fillets in the air fryer for this recipe?

Yes, but thaw them first for best results. Frozen fillets release too much water during cooking, which prevents browning and causes the glaze to slide off rather than adhere to the surface.

How do we prevent the teriyaki glaze from burning in the air fryer?

Apply only a thin base coat of glaze at the start of cooking, then add the main coat in the final 60-90 seconds. The sugar in the glaze caramelizes quickly at 400°F, so late application is the difference between glossy and burnt.

What internal temperature indicates salmon is safe but not overcooked?

The FDA recommends 145°F, which gives fully opaque flesh. For a slightly silkier center, many cooks pull at 130-135°F - the carryover heat during resting brings it up a few more degrees.

Can we use skinless salmon fillets, and does cooking change?

Skinless fillets work but are more prone to sticking and drying out. Spray the basket well, reduce cook time by about 1 minute, and check doneness early - without skin acting as insulation, the flesh cooks faster.

Is the glaze suitable for meal prep, or should we keep it separate?

Keep the glaze separate. It stores well in a sealed jar in the fridge for up to a week, and brushing it fresh onto reheated salmon produces a much better result than glaze that has soaked in and gone sticky during storage.

Air Fryer Teriyaki Salmon Fillets

Air Fryer Teriyaki Salmon Fillets

No ratings yet
Pan-seared finish and a late-applied teriyaki glaze give salmon fillets glossy, slightly caramelized results in the air fryer. This fast method produces flaky, firm fillets in under 20 minutes and preserves the ginger-garlic brightness by adding most glaze at the end.
Print Recipe Pin Recipe
Prep Time 10 minutes mins
Cook Time 10 minutes mins
Total Time 20 minutes mins
Servings: 4 servings
Course: Dinner
Cuisine: Japanese
Ingredients Equipment Method Notes

Ingredients
  

  • 1.5 lb salmon fillets skin-on, 4 fillets about 6 oz each, evenly sized
  • 3 tablespoon soy sauce use low-sodium if preferred
  • 2 tablespoon mirin or 2 tablespoon dry sherry + 1 teaspoon sugar
  • 2 tablespoon brown sugar light or dark
  • 1 tablespoon rice vinegar
  • 1 tablespoon fresh ginger grated
  • 2 clove garlic minced
  • 1 teaspoon cornstarch mixed with 1 tablespoon cold water to make slurry
  • 0.5 teaspoon sesame oil
  • 1 tablespoon neutral oil for skin: canola or vegetable
  • scallions 2, thinly sliced for garnish
  • sesame seeds 1 tsp, toasted for garnish
  • lemon wedges optional, for serving

Equipment

  • Air fryer Basket-style or drawer; 3–5 quart minimum
  • Small saucepan For reducing teriyaki glaze
  • Instant-read thermometer Optional but recommended

Method
 

  1. Preheat air fryer to 400°F for 3 minutes while you pat salmon fillets very dry and brush skin lightly with neutral oil.
  2. Mix soy sauce, mirin, brown sugar, rice vinegar, grated ginger, and minced garlic in a small saucepan and simmer over medium heat 2–3 minutes until sugar dissolves.
  3. Stir cornstarch slurry into the glaze, simmer 30–60 seconds until slightly thickened, then remove from heat and stir in sesame oil; reserve 2 tablespoon glaze for serving.
  4. Place fillets skin-side down in a single layer in the air fryer basket and cook at 400°F for 6–7 minutes for 1-inch-thick fillets; thicker fillets may need 8–10 minutes.
  5. Brush each fillet with a thin layer of glaze, then air fry 60–90 seconds more at 400°F until glaze is glossy and edges show light caramelization; remove when internal temp reaches 145°F or flesh flakes easily.
  6. Rest fillets 2–3 minutes, garnish with sliced scallions and toasted sesame seeds, and serve with reserved warm glaze and lemon wedges.

Notes

  • Reserve most glaze and add in the final 60–90 seconds to prevent burning.
  • Use skin-on, evenly thick fillets and aim for 145°F at the thickest point.

Tried this recipe?

Let us know how it was!

Air Fryer Crispy Fish Tacos [Weeknight Dinner]

May 11, 2026

Soggy, bland fish tacos usually come down to two problems: wet fish and a weak dredge. This recipe fixes both with a simple cornstarch-flour coating, panko breadcrumbs, and a hot air fryer that locks in a golden, crunchy crust without a drop of frying oil.

Air Fryer Crispy Fish Tacos

If you've been reaching for the skillet, it's time to stop.

The air fryer runs at 400°F and has the fish done in under 15 minutes. That's weeknight speed with results that actually hold up on the plate. Keep an eye on your taco toppings too - knowing your salsa spoilage signs keeps the whole meal safe and fresh.

The real payoff here is texture contrast: crispy panko fish, creamy lime crema, and snappy shredded cabbage all folded into a warm corn tortilla.

Fans of quick air fryer seafood will find this lands in the same territory as making air fryer shrimp at home, with similarly low effort and high crunch.

QUICK SUMMARY

These air fryer crispy fish tacos use a cornstarch-flour-panko dredge on cod fillets to build a crunchy crust without deep frying. At 400°F for 10-12 minutes, the fish cooks through while the coating stays dry and golden. Assemble with lime crema, shredded cabbage, and warm corn tortillas for a fast, textured weeknight meal.

⏱️Time reality: 32 minutes total - most of that is prep and dredging, not cooking
🔑Method shortcut: Press panko onto the egg wash firmly with your palm to lock the crust in place
⚠️Watch out: Wet fish = falling breading. Pat completely dry before you touch the dredge

Why This Recipe Works

Most panko-crusted fish recipes rely on deep oil to set the crust quickly.

The air fryer replicates that effect by blasting circulating hot air around every exposed surface, which is why a single-layer arrangement and a light oil spray are non-negotiable steps here.

The dredge sequence matters just as much as the heat. Cornstarch goes on first, creating a dry, tacky surface that grips the egg wash, which then anchors the panko so it doesn't slide off mid-cook.

Quick Reference
⏱️
Prep Time
20 minutes
🔥
Cook Time
12 minutes
⏰
Total Time
32 minutes
🍽️
Servings
4
📊
Difficulty
Easy
🏷️
Category
Main Dish
💡
Quick Tip
Dry the fish and use a cornstarch-dredge before panko for extra crunch
🎯
Best For
Weeknight dinner

Success here comes down to three consistent markers:

  • 🐟 Fish reaches 145°F internally and flakes cleanly with a fork
  • Panko crust is dry and golden-brown, not pale or patchy
  • No breading has pooled or detached on the basket floor
  • Tortilla edges show a faint char from a dry skillet warm-up
  • Slaw stays crisp - dress it right before assembly, not before
Quick Tip
Cut cod into uniform 1-inch strips before dredging. Uneven thickness means thinner pieces dry out while thicker ones finish cooking.

What You'll Need

Air Fryer Crispy Fish Tacos - Air Fryer Crispy Fish Tacos

Cod is the right call here because its firm, dense flesh holds a panko crust through the air fryer's turbulent airflow without falling apart.

Corn tortillas are the other non-negotiable - their structure stays intact under the fish, while flour tortillas go soft quickly.

The sauce is a two-ingredient blend of mayo and sour cream with lime juice and hot sauce. It doubles as both a binder for toppings and the cooling contrast to the spicy, crispy fish.

🍗
Protein
  • 1 lb cod fillets, cut into 1-inch strips
🍜
Coating
  • ½ cup all-purpose flour
  • 2 tablespoon cornstarch
  • 1 egg, beaten
  • 1 cup panko breadcrumbs
🌶️
Seasoning
  • 1 teaspoon garlic powder
  • 1 teaspoon smoked paprika
  • ½ teaspoon cumin
  • Salt and black pepper
🫙
Assembly
  • 8 corn tortillas
  • 1½ cups green cabbage, shredded
  • ⅓ cup mayo
  • 2 tablespoon sour cream
  • 1 lime, juiced
  • Hot sauce to taste

Ingredient Details

  • Cod fillets
    Fresh or fully thawed. Pat aggressively dry with paper towels - even a little surface moisture breaks the dredge.
  • Panko breadcrumbs
    Don't substitute regular breadcrumbs. Panko's larger, lighter flakes are what create the dry, airy crunch in circulating air.
  • Cornstarch
    Mixed into the flour - not used alone. The ratio is roughly 4:1 flour to cornstarch for baseline adhesion plus crispness.
  • Corn tortillas
    Warm in a dry skillet 30 seconds per side. Cold tortillas crack and let the filling escape.
  • Green cabbage
    Shred thin and keep it undressed until right before serving. Dressed slaw releases water and softens fast.
  • Smoked paprika
    Adds a lightly smoky note to the coating. Regular paprika works but the depth is noticeably different.

Ingredient Swaps

Cod is the baseline, but the dredge and air fryer method work across several white fish options.

If you're already comfortable swapping out cornstarch in other recipes, the same logic applies here - arrowroot powder works at a 1:1 ratio in the dredge.

  • 🐟 Cod → pollock or tilapia: Pollock is nearly identical in texture; tilapia is thinner, so reduce cook time by 1-2 minutes
  • 🍞 Panko → crushed cornflakes: Delivers more crunch and a corn-forward flavor; browns faster, so check at 8 minutes
  • 🫓 Corn tortillas → flour tortillas: Softer wrap with less nixtamal flavor; toast slightly longer to get any edge crisp
  • 🥛 Mayo → plain Greek yogurt: Tangier and lower-fat; the sauce will be thinner, so use less lime juice to compensate

Cod vs. Tilapia

Works for: tilapia when cod isn't available and you want a milder, leaner result

Skip if: you want the thicker, flakier texture that holds up under heavy toppings

Panko vs. Crushed Cornflakes

Works for: cornflakes when you want extra crunch and a subtle corn flavor that echoes the tortilla

Skip if: you're cooking for kids or anyone who wants a neutral-tasting coating - cornflakes brown quickly and can turn bitter

Instructions

Getting the sequence right is everything - rushing the dredge or crowding the basket are the two fastest ways to end up with pale, patchy fish.

For the seasoning blend in the coating, check out these replacements for taco seasoning if you want to build more complexity or dial back the heat.

  1. Prep the fish. Pat cod strips completely dry with paper towels.

Cut into uniform 1-inch strips and season lightly with salt and pepper. 2. Set up the dredge. Mix flour, cornstarch, smoked paprika, garlic powder, and cumin in one bowl.

Beat the egg in a second bowl.

Pour panko into a third. 3. Coat the fish. Dredge each strip in the flour mix, dip into egg wash, then press firmly into panko with your palm.

Set on a plate without overlapping. 4. Air fry. Preheat the air fryer to 400°F.

Arrange coated fish in a single layer, spray both sides with oil, and cook 10-12 minutes, flipping once at the 6-minute mark, until the crust is golden-brown and fish reads 145°F. 5. Warm tortillas and assemble. Heat tortillas 30 seconds per side in a dry skillet.

Rest the fish 2 minutes, then layer fish, slaw, and crema into each tortilla.

Watch Out
Don't skip the flip at 6 minutes. The bottom side won't brown evenly from residual heat alone - circulating air only fully reaches both sides if you turn the fish.

What to Serve With It

These tacos are a full meal on their own, but the right sides push the whole plate somewhere worth sitting down for.

If you want a broader map of pairings beyond the obvious rice-and-beans, the guide on what pairs with fish sandwiches covers several crossover ideas that work just as well here.

Side DishPrepWhy It WorksHow to Serve
Mexican riceEasyNeutral starch soaks up crema that escapes the tacoServe warm alongside the tacos
Black beansEasyCreamy protein contrast to the crunchy panko crustSeason with cumin and serve in a small bowl
Quick pickled red onionEasyBright acid cuts through the fried coatingPile directly onto tacos or serve on the side
Corn and jicama saladMediumCool, crisp contrast that scales well for hostingServe chilled in a wide bowl with a lime wedge
Chipotle aioliEasySmoky heat pairs directly with the panko crunchServe in a small ramekin for dipping or drizzling

Three ways to serve it:

  • 🌮 Weeknight plate: Two tacos with rice and black beans - done in under 35 minutes total
  • 🎉 Hosting spread: Build-your-own taco station with all toppings separated so guests control heat and texture
  • 🥗 Light lunch: One taco over a bed of shredded cabbage with chipotle aioli as dressing - skip the tortilla
Best Pick
Quick pickled red onion is the side that does the most work - the sharp acid resets the palate between bites and keeps the fish tasting bright all the way through the meal.

Store and Reheat

Store the fish separately from tortillas, slaw, and crema - assembled tacos go soggy within an hour. Cooked fish keeps 3 days in an airtight container with a layer of paper towel underneath to absorb moisture.

The freezer is a real option here. Freeze cooked, cooled fish strips on a baking sheet first, then transfer to a bag for up to 1 month.

MethodTimeBest For
🍳 Air fryer3-4 minutes at 350°FRestoring crunch - best all-around method
🔥 Oven8-10 minutes at 350°F on a wire rackLarger batches; wire rack keeps the bottom crisp
📦 MicrowaveNot recommendedTurns panko soggy; use only if the other two aren't available

For best results when storing:

  • 🧊 Let fish cool completely before sealing - steam inside the container softens the crust
  • Store slaw undressed; add lime and seasoning fresh when you're ready to reassemble
  • Keep crema in a sealed jar - it holds 5 days refrigerated and doesn't separate
  • Freeze in a single layer before bagging to prevent strips from fusing together
  • Reheat from frozen at 375°F for 6-8 minutes in the air fryer - no thawing needed

Frequently Asked Questions

Can we use frozen fish fillets?

Yes, but thaw them completely first and pat very dry before dredging. Frozen fish releases water as it cooks, which will steam the breading off if there's any surface moisture remaining when it goes into the air fryer.

What air fryer temp and time make the crispiest crust?

400°F for 10-12 minutes, flipping once at the 6-minute mark, gives the best result. Lower temperatures won't set the panko fast enough, and the crust ends up pale and soft instead of golden.

How do we keep tacos from getting soggy when assembling?

Assemble right before eating and keep the slaw undressed until the last minute. Warm, dry tortillas also help - a cold or damp tortilla absorbs moisture from the fish much faster than one that's been heated in a dry skillet.

Can we make the slaw and sauce ahead?

The crema keeps up to 5 days refrigerated. Make the slaw ahead but hold the dressing - shredded cabbage stays crisp for 2 days dry in the fridge, then dress it right before you assemble.

Is this recipe good for meal prep and freezing?

It works well for batch cooking. Cook a full pound of fish, freeze the strips in a single layer, and reheat directly from frozen at 375°F for 6-8 minutes - the panko crust comes back crisper than you'd expect from a reheated meal.

Air Fryer Crispy Fish Tacos

Air Fryer Crispy Fish Tacos

No ratings yet
Crispy air-fried cod coated in a cornstarch-flour dredge and panko, topped with bright cabbage slaw and a lime crema. The air fryer gives a golden, crunchy crust with a flaky interior using minimal oil.
Print Recipe Pin Recipe
Prep Time 20 minutes mins
Cook Time 12 minutes mins
Total Time 32 minutes mins
Servings: 4 servings
Course: Dinner
Cuisine: Mexican-American
Ingredients Equipment Method Notes

Ingredients
  

  • 1.5 lb cod fillets skinless, cut into 8 strips about 1" thick
  • 0.75 cup all-purpose flour
  • 0.25 cup cornstarch
  • 2 egg large, beaten with milk
  • 0.33 cup milk whole or 2%
  • 1.5 cup panko breadcrumbs plain
  • 1 tablespoon taco seasoning store-bought or homemade
  • 1 teaspoon kosher salt
  • 0.5 teaspoon black pepper freshly ground
  • 8 corn tortillas 6-inch
  • 2 cup green cabbage finely shredded (about half small head)
  • 2 lime 1 for slaw, 1 for serving
  • 0.25 cup cilantro chopped
  • 0.5 cup mayonnaise
  • 0.25 cup sour cream
  • 1 tablespoon hot sauce such as chipotle or sriracha
  • 1 avocado ripe, sliced (optional)
  • neutral oil spray for air fryer basket and fish

Equipment

  • Air fryer Basket-style or drawer; 3–5 qt works for 4 servings
  • Shallow bowls For flour, egg wash, and panko station
  • Mixing bowl For slaw and sauce
  • Tongs For flipping fish and handling tortillas

Method
 

  1. Preheat the air fryer to 400°F for at least 5 minutes; lightly spray basket with oil.
  2. Mix flour, cornstarch, taco seasoning, salt, and pepper in a shallow bowl.
  3. Whisk eggs and milk in a second bowl; place panko in a third bowl and press cilantro into panko if desired.
  4. Pat cod strips dry, dredge each first in the flour mix, then in egg wash, then press into panko to adhere.
  5. Arrange fish in a single layer in the air fryer basket, spray tops lightly with oil, and air fry at 400°F for 8–10 minutes until crust is golden and fish flakes at 145°F.
  6. Toss shredded cabbage with juice of 1 lime and a pinch of salt; mix mayo, sour cream, hot sauce, and 1 tablespoon lime juice for crema.
  7. Warm tortillas in a dry skillet 20–30 seconds per side or in the air fryer 1 minute at 350°F; assemble tacos with fish, slaw, crema, avocado slices, and extra lime.

Notes

  • Cut fillets into uniform 1" strips so each piece cooks in 8–10 minutes at 400°F.
  • Press panko onto the egg-washed fish with your palm to build a secure crust before air frying.

Tried this recipe?

Let us know how it was!

Air Fryer Stuffed Chicken Breasts [Weeknight Dinner]

May 11, 2026

Weeknight dinners that look like you put in serious effort tend to earn their place in the rotation fast. Air fryer stuffed chicken breasts deliver exactly that - a golden, lightly crisped exterior hiding a hot, creamy spinach and cheese filling, ready in under 40 minutes.

Air Fryer Stuffed Chicken Breasts

The taste of chicken matters here, so we're working with thick, boneless breasts that can hold a real pocket. Butterfly them right, chill before cooking, and you get a clean slice every time.

QUICK SUMMARY

Air fryer stuffed chicken breasts are a weeknight main built on a cream cheese, mozzarella, and spinach filling tucked into butterflied breasts, then air-fried to 165°F in under 25 minutes. The air fryer keeps the exterior lightly browned while the filling stays hot and melty. Chill assembled breasts before cooking to lock in the filling.

⏱️Time Reality: 15 min prep + 18-22 min cook - chilling adds 10 min but prevents leaks
🔑Method Shortcut: One toothpick across the seam holds everything together - remove before serving
⚠️Watch Out: Overstuffing is the main cause of leaks - keep filling to ¾ cup total and make a narrow pocket

Why This Recipe Works

A wide, shallow pocket is the structural key here. Butterfly the breast just past the midpoint, leaving a hinge so the two halves fold back over the filling without gaps.

Chilling the assembled breasts for 10 minutes firms up the cream cheese base so it holds shape at first contact with high heat rather than rushing out. Most failures with stuffed chicken trace back to skipping that step.

Learn more about keeping stuffed peppers fresh for the same logic applied to other stuffed formats.

Quick Reference
⏱️
Prep Time
15 minutes
🔥
Cook Time
18-22 minutes
⏰
Total Time
33-37 minutes
🍽️
Servings
4
📊
Difficulty
Medium
🏷️
Category
Main Dish
💡
Quick Tip
Butterfly and chill before stuffing for neat pockets
🎯
Best For
Weeknight dinner

What makes this version reliable over others comes down to a few specific choices:

  • Breasts trimmed to 6-7 oz each cook at the same rate - no guesswork
  • Cream cheese anchors the filling so mozzarella and spinach don't separate or pool
  • Sautéed and cooled spinach is compact and dry - raw spinach releases water mid-cook
  • A single toothpick across the seam prevents the pocket from springing open
  • Pulling at exactly 165°F and resting 5 minutes keeps the breast juicy, not rubbery
Quick Tip
Insert your thermometer into the thickest part of the breast - not into the filling - for an accurate doneness reading.

What You'll Need

Air Fryer Stuffed Chicken Breasts - Air Fryer Stuffed Chicken Breasts

Six ingredients do the real work here. Fresh spinach, cream cheese, and mozzarella form the filling trio; the chicken, oil, and seasoning handle everything else.

🍗
Protein
  • 4 boneless skinless chicken breasts (6-7 oz each)
🧀
Filling - Dairy
  • 4 oz cream cheese, softened
  • ½ cup shredded mozzarella
  • 2 tablespoon grated Parmesan
🥬
Filling - Veg
  • 2 cups fresh spinach, sautéed and cooled
🌶️
Seasoning
  • 1 teaspoon Italian seasoning
  • Salt and black pepper
  • 1 tablespoon olive oil

Ingredient Details

  • Chicken Breasts
    Choose even-sized pieces around 6-7 oz. Larger breasts can be trimmed or pounded to match.
  • Cream Cheese
    Soften at room temp for 20 minutes so it blends smoothly without tearing the filling apart.
  • Mozzarella
    Pre-shredded works; fresh mozzarella holds more moisture and may cause minor leaking - pat it dry first.
  • Fresh Spinach
    Sauté in a dry pan for 2 minutes until wilted, then cool completely and press out any liquid.
  • Parmesan
    Adds sharp, salty depth to the filling. Freshly grated melts more evenly than the canned version.
  • Italian Seasoning
    Used both in the filling and on the exterior of the breast for consistent herby flavor throughout.
  • Olive Oil
    A light brush before air frying promotes browning - don't skip it or the exterior stays pale.

Ingredient Swaps

Most of the filling is flexible. Cream cheese and mozzarella are the only components that directly affect structural integrity - swap carefully and adjust for moisture.

  • 🧀 Cream cheese → ricotta: slightly grainier texture, less tang; direct swap works but filling will be looser
  • 🫕 Mozzarella → fontina: richer, more buttery melt with a stronger flavor note - works well
  • 🥬 Fresh spinach → frozen chopped spinach: use ⅔ cup, thawed and squeezed very dry; any residual moisture will make the filling runny
  • 🌾 No dredge → panko dredge: a light panko coat before air frying gives a noticeably crispier exterior - learn more about [the differences between panko vs tempura](https://forkliftkitchen.com/panko-vs-tempura/) before choosing your crust

Fresh Spinach vs. Frozen

Works for: both - fresh is lower moisture; frozen is convenient

Skip if: using frozen and skipping the squeeze step - wet filling leaks every time

Cream Cheese vs. Ricotta

Works for: both - cream cheese is firmer; ricotta is lighter

Skip if: you want a neat, compact pocket - ricotta can thin out under heat

Instructions

Getting the pocket right takes one careful knife pass. Cut horizontally into the thickest part of each breast, stopping about ½ inch from the opposite edge - go slow and keep the blade parallel to the board.

Keeping the pocket narrow is what prevents leaks. Check butter preparation tips if you're planning a pan sauce to serve alongside.

  1. Make the filling: Mix softened cream cheese, mozzarella, Parmesan, and Italian seasoning in a bowl.

Fold in cooled, pressed spinach until combined. 2. Butterfly the chicken: Cut a horizontal pocket into each breast, leaving a ½-inch hinge.

Season the outside with salt, pepper, and Italian seasoning. 3. Stuff and seal: Spoon 2-3 tablespoon filling into each pocket - don't pack tightly.

Secure the seam with one toothpick per breast. 4. Chill: Place on a plate and refrigerate for 10 minutes.

Preheat air fryer to 375°F. 5. Air fry: Brush breasts lightly with olive oil.

Cook at 375°F for 18-22 minutes, flipping once at the 10-minute mark, until internal temp hits 165°F.

Rest 5 minutes before slicing and removing toothpicks.

Watch Out
If filling starts to ooze before the 10-minute flip, press the seam closed with an extra toothpick and continue cooking - don't remove from the basket early.

What to Serve With It

A rich, creamy filling calls for sides that cut through the weight rather than add to it. Acid, crunch, and bright starches all work - lean on those for chicken thighs preparation tips and similar pairing logic.

Side DishPrepWhy It WorksHow to Serve
Garlic lemon couscousEasyBright starch absorbs filling juicesSpoon alongside sliced breast
Steamed green beans with butterEasyCrisp texture balances creamy fillingServe warm on the side
Mixed greens with vinaigretteEasyAcid cuts through cheese richnessPlate next to sliced chicken
Roasted fingerling potatoesMediumHolds up under plating, rustic matchArrange around the breast
Blistered cherry tomatoesEasyWarm acidity and color contrastSpoon over or beside chicken

Three ways to serve it:

  • Slice crosswise to show the filling, fan on the plate, and spoon a lemon herb pan sauce around the base
  • Serve whole with roasted potatoes for a plated hosting presentation
  • Spoon marinara over sliced halves for an Italian-style plate - pairs directly with the mozzarella filling
Best Pick
Garlic lemon couscous is the fastest, most complementary side - it's ready in under 10 minutes and soaks up every drop of melted filling.

Store and Reheat

Cooked stuffed breasts keep well for 3 days in the fridge. Use a shallow airtight container lined with a paper towel to absorb moisture and prevent the exterior from going soft.

Freeze them for up to 2 months - wrap each breast individually before placing in a freezer bag. Reheating low and slow is always the safer choice given how easy it is to push past 165°F the second time around.

MethodTimeBest For
🍳 Air Fryer6-8 min at 350°FRestoring crispy exterior and re-melting filling
🔥 Oven12-15 min at 325°F (foil covered)Gentle reheat; lowest risk of drying out
📦 Microwave + Broil45-60 sec + 2 min broilFast option; watch for uneven heating at center

For best results when storing:

  • Cool completely before refrigerating - hot chicken in a sealed container creates condensation
  • Separate layers with paper towel if stacking more than one breast
  • Freeze before cooking for the cleanest result - assembled, chilled, uncooked breasts freeze better than leftovers
  • Label frozen breasts with the date - texture starts declining after 6 weeks
  • Always reheat to 165°F internally, not just until warm to the touch

Frequently Asked Questions

Can we bake these in a conventional oven instead of an air fryer?

Yes - bake at 400°F for 25-30 minutes on a lightly oiled baking sheet. The exterior won't brown as evenly, so brush with oil and finish under the broiler for 2-3 minutes to get color.

How do we prevent the filling from leaking during cooking?

Keep the pocket narrow, limit filling to 2-3 tablespoon per breast, secure with a toothpick, and chill for 10 minutes before air frying. Chilling firms the cream cheese so it doesn't rush out when it hits the heat.

What size chicken breasts work best for stuffing?

Aim for 6-7 oz breasts - thick enough to hold a pocket without the back wall tearing. Anything under 5 oz is too thin to butterfly safely and tends to overcook before the filling heats through.

Can we assemble these ahead and refrigerate before cooking?

Yes - stuff and toothpick the breasts, then refrigerate uncovered for up to 8 hours before cooking. The chill actually helps; the filling firms further and the seam holds better in the air fryer.

How do we reheat without drying out the chicken?

The oven at 325°F covered with foil is the safest method - low heat and trapped steam prevent moisture loss. The air fryer at 350°F is faster and restores exterior texture, but watch the time closely and pull at 165°F.

Air Fryer Stuffed Chicken Breasts

Air Fryer Stuffed Chicken Breasts

No ratings yet
We stuff boneless chicken breasts with a creamy spinach, cream cheese, and mozzarella filling, chill briefly, then cook in the air fryer at 375°F until the internal temperature reaches 165°F. The method keeps breasts moist while giving a lightly browned exterior and melty filling.
Print Recipe Pin Recipe
Prep Time 15 minutes mins
Cook Time 22 minutes mins
Total Time 37 minutes mins
Servings: 4 servings
Course: Dinner
Cuisine: American, Italian
Ingredients Equipment Method Notes

Ingredients
  

  • 4 chicken breasts boneless skinless, about 6–7 oz each
  • 4 oz cream cheese softened
  • 1 cup mozzarella shredded
  • 2 cup fresh spinach packed; wilted and squeezed dry
  • 1 tablespoon olive oil for skillet
  • 1 tablespoon Parmesan freshly grated
  • 1 teaspoon Italian seasoning
  • 1 teaspoon garlic minced
  • 0.5 teaspoon salt
  • 0.5 teaspoon black pepper freshly ground
  • 1 tablespoon olive oil for brushing breasts before air frying
  • 1 tablespoon panko optional, for light crust

Equipment

  • Air fryer 6–8 quart basket-style or drawer model
  • Cutting board For butterflying and trimming
  • Mixing bowl Medium
  • Instant-read thermometer Digital
  • Skillet 8-inch for wilting spinach

Method
 

  1. Preheat the air fryer to 375°F for 5 minutes while you prepare the filling and chicken.
  2. Cook spinach: Heat 1 tablespoon olive oil in an 8-inch skillet over medium; add garlic and spinach and cook until wilted, 1–2 minutes, then squeeze dry and cool.
  3. Mix filling: In a bowl, combine softened cream cheese, shredded mozzarella, grated Parmesan, Italian seasoning, cooled spinach, salt, and pepper until homogenous.
  4. Prepare breasts: Butterfly each chicken breast by slicing horizontally leaving a ½-inch hinge, then gently pound to even thickness about ½-inch; season inside and out with ½ teaspoon salt and ½ teaspoon pepper total.
  5. Stuff and seal: Divide filling into four ¾-cup portions, place inside each pocket, press closed, and secure seam with one toothpick; optionally brush outside with 1 tablespoon olive oil and press 1 tablespoon panko on top for crust.
  6. Chill: Refrigerate assembled breasts on a plate for 10 minutes to set the filling and reduce leaking.
  7. Air-fry: Place breasts seam-side down in a single layer in the preheated basket; cook at 375°F for 9–11 minutes, flip and cook 9–11 more minutes until internal temp reaches 165°F and exterior is lightly browned.
  8. Rest and serve: Transfer to a cutting board, rest 5 minutes, remove toothpicks, slice to reveal filling and serve with chosen sides or sauce.

Notes

  • Trim breasts to similar weight (6–7 oz) for even cooking.
  • Chill stuffed breasts 10 minutes before air frying to prevent filling leakage.

Tried this recipe?

Let us know how it was!

Air Fryer Garlic Butter Steak Tips [Weeknight Steak]

May 11, 2026

Garlicky, buttery steak tips straight from the air fryer land on the table in twenty minutes flat -

Air Fryer Garlic Butter Steak Tips

browned on the outside, tender at the center, glossy with a finishing coat of melted butter. That combination of crisp crust and juicy interior is exactly what this recipe delivers. No grill required, no pan splatter to scrub.

This is a weeknight recipe that punches well above its effort level. Four ingredients do most of the work, and the air fryer handles the browning without babysitting.

If you've been curious about replacements for butter that still produce a rich, glossy finish, this recipe is a good place to test one. The garlic-butter toss at the end is where the real coating happens.

QUICK SUMMARY

Air fryer garlic butter steak tips cook in under 10 minutes and finish with a hot butter toss that keeps them juicy and glossy. Cut tips into uniform 1 to 1½-inch pieces, pat completely dry, and pull at 5°F below your target temp. The air fryer does the browning - the butter does the rest.

⏱️Time Reality: 20 minutes total - most of it is air fry time, not hands-on work
🧈Method Shortcut: Make garlic butter off-heat right before tossing to avoid bitter burned garlic
⚠️Watch Out: Crowding the basket kills the crust - cook in batches if needed

Why This Recipe Works

Steak tips cut to 1 to 1½ inches are the ideal size for air fryer cooking - small enough to cook through fast, large enough to hold moisture.

The air fryer's circulating heat hits every exposed surface simultaneously, which is why even browning happens without flipping repeatedly.

Patting the meat bone-dry before seasoning is the single biggest factor in getting a caramelized crust. Moisture on the surface steams the meat instead of searing it, and the air fryer can't compensate for a wet exterior.

The two-stage finish - pull early, rest briefly, then toss in hot garlic butter - solves the texture problem that plagues most quick steak recipes.

You can find closely related results with air fryer steak bites in dairy recipes if you want to compare approaches and timing.

Quick Reference
⏱️
Prep Time
10 minutes
🔥
Cook Time
10 minutes
⏰
Total Time
20 minutes
🍽️
Servings
4
📊
Difficulty
Easy
🏷️
Category
Main Dish
💡
Quick Tip
Pat steak dry and use a thermometer for consistent doneness
🎯
Best For
Weeknight dinner
  • 🌡️ Pull tips at 120°F for medium-rare - carryover brings them to 125°F during the butter toss
  • Single layer only in the basket - overlap stops browning cold
  • Mince garlic finely so it coats evenly without burning
  • Leave small fat caps on the tips - they crisp and add flavor in the short cook time
  • Use a probe thermometer inserted into the largest piece for an accurate read
Golden Rule
Dry meat browns. Wet meat steams. Pat every piece dry before it goes near seasoning.

What You'll Need

Air Fryer Garlic Butter Steak Tips - Air Fryer Garlic Butter Steak Tips

Sirloin steak tips are the right call here - they're tender enough for a fast cook and hold together as bite-sized pieces without falling apart.

Most grocery stores sell them pre-cut, though you can buy a sirloin and cube it yourself if you need to.

If you're exploring alternatives to sirloin steak that still work in the air fryer, flank or skirt steak are the closest options.

🍗
Protein
  • 1½ lbs sirloin steak tips, cut into 1-1½-inch pieces
🧀
Dairy
  • 3 tablespoon unsalted butter
🧄
Aromatics
  • 4 cloves garlic, finely minced
  • 2 tablespoon fresh parsley, chopped
🥢
Seasoning
  • 1 teaspoon Worcestershire sauce
  • 1 teaspoon kosher salt
  • ½ teaspoon black pepper
  • 1 teaspoon olive oil

Ingredient Details

  • Sirloin Steak Tips
    Look for even-colored, deep red pieces without large thick fat bands. Uniform size is more important than the exact cut.
  • Unsalted Butter
    Unsalted gives you control over final saltiness. Cold butter melts slowly into a glossier sauce than room-temp butter.
  • Garlic
    Mince finely - large chunks won't coat evenly and can scorch quickly in hot butter.
  • Worcestershire Sauce
    Just 1 teaspoon adds depth without overpowering. Omit entirely for a clean butter-garlic finish.
  • Fresh Parsley
    Add after the butter toss, not during cooking - heat wilts it fast and kills the bright color.
  • Olive Oil
    A thin coat on the meat before air frying helps the seasoning stick and encourages browning.

Ingredient Swaps

Most swaps here are low-risk and change only the finish, not the core technique. The one exception is switching steak cuts - a tougher cut needs a different slicing approach to stay tender.

If you're working with flank steak stand-ins, always slice thin across the grain after cooking rather than serving in chunks.

  • Swap sirloin tips for flank or skirt steak, sliced thin across the grain - chewier texture, same air fryer timing
  • Swap unsalted butter for ghee - higher smoke point and nuttier finish, slightly less glossy coating
  • Swap Worcestershire for soy sauce - adds umami and salt but darkens the crust noticeably
  • Swap fresh parsley for chives - brighter onion note; use the same quantity

Butter vs. Ghee

Works for: Either produces a rich finishing coat; ghee handles higher heat without burning

Skip if: You want the creamiest, most classic butter gloss - ghee is slightly less silky

Worcestershire vs. Soy Sauce

Works for: Soy sauce is a solid 1:1 swap for umami depth in a pinch

Skip if: You're watching sodium - soy sauce is significantly saltier per teaspoon

Instructions

Preheat your air fryer to 400°F for 3 minutes before the steak goes in - a cold basket produces steam, not crust.

For more on timing and temperature calibration with smaller beef cuts, the notes on replacements for worcestershire sauce include useful seasoning context for beef-forward recipes.

  1. Pat and season: Pat steak tips completely dry with paper towels.

Toss with olive oil, salt, pepper, and Worcestershire sauce until evenly coated. 2. Air fry first batch: Arrange tips in a single layer in the preheated basket - no overlapping.

Cook at 400°F for 7-8 minutes, shaking the basket once at the 4-minute mark. 3. Check temp: Insert a probe thermometer into the largest piece.

Pull at 120°F for medium-rare or 130°F for medium - the butter toss adds residual heat. 4. Make garlic butter: While tips rest, melt butter in a small pan over low heat, then remove from heat and stir in minced garlic.

Don't let the garlic sizzle - off-heat is enough to bloom the flavor. 5. Toss and rest: Add steak tips to the butter, toss to coat, and rest 3 minutes.

Scatter parsley over the top just before serving.

Watch Out
Adding garlic directly to hot butter on the burner turns it bitter in under 30 seconds. Pull the pan off heat first, then stir the garlic in.

What to Serve With It

These tips are rich and salty-sweet from the garlic butter, so sides that cut or balance that richness work best. A bright acid or a creamy starch both do the job.

Keep sides simple - the steak is the whole point here.

Side DishPrepWhy It WorksHow to Serve
Garlic mashed potatoesMediumCreamy starch soaks up the garlic butter pan juicesSpoon tips directly over the top
Arugula salad with lemonEasyPeppery bitterness cuts the richness of the butterServe alongside as a fresh contrast
Steamed green beans with lemon zestEasyLight vegetable that doesn't compete with the beefToss with lemon zest and a pinch of salt
Herb roasted fingerling potatoesMediumCan roast ahead and finish while tips restPlate alongside with extra garlic butter for dipping
Charred broccolini with chili flakesEasySlight bitterness and heat offset the buttery coatingArrange on plate with tips stacked over the top

Three ways to serve it:

  • Over mashed potatoes with extra garlic butter drizzled across everything
  • In a shallow bowl with arugula and a squeeze of fresh lemon - the butter wilts the greens slightly and acts as the dressing
  • As a shareable appetizer platter with a small ramekin of warm garlic butter and chimichurri on the side
Shortcut
Make a double batch of garlic butter and refrigerate the extra. It melts straight onto vegetables, toast, or pasta within the same week.

Store and Reheat

Steak tips keep for 3 days in a shallow airtight container in the fridge - glass with a tight lid holds in the garlic butter and prevents the meat from picking up other fridge odors.

They also freeze well for up to 2 months if you store them flat in a freezer bag with the air pressed out.

For tips on keeping fats and finishing sauces stable in storage, the guide on replacements for olive oil covers how different fats behave over time.

MethodTimeBest For
🍳 Stovetop2-3 minutes over medium with 1 teaspoon butterRestoring gloss and quick single-portion reheats
📦 Microwave60-90 seconds at 50% powerSpeed; cover with a damp paper towel to reduce drying
🔥 Air Fryer3-5 minutes at 350°FMaintaining crust texture; best for larger portions

For best results when storing:

  • Let tips cool to room temperature before sealing - trapping steam softens the crust
  • Store the garlic butter separately if possible, and add fresh during reheating
  • Freeze in a single layer first, then transfer to a bag once solid to prevent clumping
  • Thaw overnight in the fridge rather than on the counter - even cooking during reheat depends on an even starting temp
  • Add a small pat of fresh butter when reheating on the stovetop to restore the glossy finish

Frequently Asked Questions

What internal temperature should we cook steak tips to for medium-rare?

Pull the tips at 120°F in the air fryer - the butter toss and 3-minute rest bring them up to 125°F, which is medium-rare. For medium, pull at 130°F and expect a final temp of 135°F after resting.

Can we marinate steak tips overnight for this recipe?

Yes, but pat them completely dry before air frying - excess marinade on the surface steams instead of browns. A simple marinade of soy sauce, garlic, and olive oil overnight works well without changing the cook time.

Will frozen steak tips work in the air fryer?

They work, however the results are uneven - the outside overcooks before the center thaws. Thaw fully in the fridge first, pat dry, and proceed as normal for the best crust and doneness.

How do we prevent garlic from burning in the butter?

Remove the butter from heat completely before stirring in the minced garlic. Residual heat in the pan is enough to bloom the garlic's flavor without scorching it.

Can we make the garlic butter ahead and reheat?

Yes - garlic butter keeps in the fridge for up to a week in a sealed container. Warm it gently over low heat before tossing with the cooked steak tips so it coats evenly without separating.

Air Fryer Garlic Butter Steak Tips

Air Fryer Garlic Butter Steak Tips

No ratings yet
We pan-sear-style air fryer steak tips finished in a quick garlic-butter sauce for a fast, weeknight-friendly main. Precise temps and a short rest deliver tender, evenly cooked pieces with a glossy finish.
Print Recipe Pin Recipe
Prep Time 10 minutes mins
Cook Time 10 minutes mins
Total Time 20 minutes mins
Servings: 4 servings
Course: Dinner
Cuisine: American
Ingredients Equipment Method Notes

Ingredients
  

  • 1.5 lb beef steak tips sirloin or top sirloin, cut into 1–1½-inch pieces
  • 1 teaspoon kosher salt Diamond or Morton coarse
  • 0.5 teaspoon black pepper freshly ground
  • 1 tablespoon olive oil
  • 3 tablespoon unsalted butter divided; 2 tablespoon for finishing, 1 tablespoon optional for tossing
  • 4 clove garlic minced
  • 1 tablespoon Worcestershire sauce
  • 1 tablespoon fresh parsley finely chopped
  • lemon zest of 1 lemon (optional, for bright finish)

Equipment

  • Air fryer Basket-style or drawer; 3–5 quart works for 4 servings
  • Instant-read thermometer For accurate internal temperature
  • Small skillet For melting garlic butter (optional) or use microwave-safe bowl

Method
 

  1. Preheat the air fryer to 400°F for 5 minutes while you prepare the meat.
  2. Pat steak tips very dry with paper towels, then toss with olive oil, kosher salt, and black pepper until evenly coated.
  3. Place steak tips in a single layer in the air fryer basket without overcrowding; cook at 400°F for 6 minutes, shake or flip pieces, then cook 3–4 more minutes until internal temp reaches 125°F for medium-rare or 135°F for medium.
  4. While meat rests 3 minutes, melt 2 tablespoon butter in a small skillet over low heat, add minced garlic and Worcestershire sauce off-high heat and stir 30–45 seconds until fragrant but not browned.
  5. Transfer steak tips to a warm bowl, pour garlic-butter over the pieces, toss to coat, then sprinkle with chopped parsley and lemon zest if using.
  6. Serve immediately; the sauce should be glossy and meat juices slightly pink for medium-rare.

Notes

  • Patting the meat dry helps achieve browning in the air fryer.
  • Pull meat 5°F below target temperature; carryover heat raises final doneness while resting.

Tried this recipe?

Let us know how it was!
« Previous Page
Next Page »

Primary Sidebar

ForkliftKitchen recipe developer

Welcome!

Recipe Developer · 12+ Yr Kitchen Veteran

I'm the recipe developer behind this site, focused on practical, well-tested dishes and smart ingredient swaps. Every recipe is written to be clear, reliable, and easy to make at home.

650+ Recipes
12+ Yrs Exp.
3x Tested
Our Story →

As Featured In

Allrecipes

TASTE OF HOME

Food52

HUFFPOST

Yahoo! Life

Our Editorial Standards

  • ✓ Every recipe tested at least 3 times before publishing
  • ✓ Substitutes verified by real kitchen trials, not guesswork
  • ✓ Reviewed for accuracy by our editorial team
  • ✓ Updated regularly with seasonal info and reader feedback

Most Popular

  • Creamy Lemon Shrimp Linguine
    Creamy Lemon Shrimp Linguine
  • Creamy Garlic Mushroom Chicken
    Creamy Garlic Mushroom Chicken
  • Sesame Ginger Chicken Noodle Bowls
    Sesame Ginger Chicken Noodle Bowls
  • Baked Lemon Herb Fish Fillets
    Baked Lemon Herb Fish Fillets
  • Veggie Loaded Fried Rice
    Veggie Loaded Fried Rice
  • Spicy Garlic Shrimp Stir Fry
    Spicy Garlic Shrimp Stir Fry

Join 8,000+ Home Cooks

Weekly Kitchen Tips

Easy recipes, smart substitutes, and real cooking shortcuts — every Thursday.

Subscribe Free →


Side Dishes

  • What to Serve With Asian Salmon? 15 Best Side Dishes
    What to Serve With Asian Salmon? 15 Best Side Dishes
  • Side Dishes for Strawberry Spinach Salad
    15 Best Side Dishes for Strawberry Spinach Salad
  • Sides for Grilled Cauliflower Steaks to Complete the Meal
    15 Sides for Grilled Cauliflower Steaks to Complete the Meal
  • 15 Sides To Serve With Calabacitas
    15 Best Sides for Calabacitas – Mexican-Inspired Favorites


Substitutes

  • 7 Best Substitutes for Hot Sauce in Marinades & Stir-Fries
    7 Best Substitutes for Hot Sauce in Marinades & Stir-Fries
  • 9 Best Substitutes for Butter in Baking and Cooking
  • 7 Best Substitutes for Tagliatelle for Italian Pasta Dishes
    7 Best Substitutes for Tagliatelle for Italian Pasta Dishes
  • 7 Best Substitutes for Udon Noodles in Asian Stir-Fries
    7 Best Substitutes for Udon Noodles in Asian Stir-Fries


Browse by Topic

  • Side Dishes320
  • Substitutes785
  • Dinner163
  • Air Fryer77
  • Taste Profiles484
  • Food Storage123


Reader Reviews

★★★★★

"Finally a food blog that tells you exactly why a substitute works instead of just listing options."

— Sarah M., via email

★★★★★

"The side dish recommendations are so specific — saved my dinner party twice this month."

— James R., Pinterest comment

★★★★★

"I trust this site more than most because they actually test everything. You can tell."

— Priya K., blog comment

Footer

↑ Back to Top

Forklift Kitchen

We do the heavy lifting so you can enjoy the cooking. Tested recipes, smart substitutes, and perfect pairings—built for real home cooks.

Content

  • Recipes
  • Substitutes
  • What to Serve With
  • Blog

Company

  • About Us
  • Contact
  • Subscribe

Legal

  • Privacy Policy
  • Terms of Service

As an Amazon Associate I earn from qualifying purchases.

© 2026 Forklift Kitchen.

Rate This Recipe

Your vote:


A rating is required
A name is required
An email is required