• Skip to primary navigation
  • Skip to main content
  • Skip to primary sidebar
  • Recipe Index
    • Air Fryer
  • Side Dishes
  • Substitutes
  • About
  • Contact
  • Subscribe

ForkLiftKitchen

menu icon
go to homepage
  • Recipe Index
    • Air Fryer
  • Side Dishes
  • Substitutes
  • About
  • Contact
  • Subscribe
subscribe
search icon
Homepage link
  • Recipe Index
    • Air Fryer
  • Side Dishes
  • Substitutes
  • About
  • Contact
  • Subscribe
×

Blog

Broccoli Salad with Bacon

May 11, 2026

You need 25 minutes and one mixing bowl. No cooking the broccoli, no complicated prep work, just raw florets with crisp bacon and creamy dressing.

Broccoli Salad with Bacon

The bacon does all the heavy lifting. Fry it until crisp, crumble it over cold broccoli, and the smoky fat coats everything without extra steps.

This is what you make for potlucks when you need something that travels well and still tastes fresh three hours later.

QUICK SUMMARY

Broccoli Salad with Bacon uses raw broccoli florets mixed with crisp bacon, creamy mayo-based dressing, and crunchy sunflower seeds. The key is keeping the broccoli raw so it stays crisp and doesn't turn soggy. Cook the bacon until completely crisp or it gets chewy in the salad.

⏱️Time Reality: 15 minutes prep plus 10 minutes to cook bacon
🥓Critical First Move: Cook bacon crisp at medium heat for 7-10 minutes before crumbling
⚠️Watch Out: Dress the salad right before serving or broccoli wilts

Why This Recipe Works

Raw broccoli stays crunchy for hours while cooked broccoli turns mushy the moment dressing hits it. The bacon fat seasons everything without extra oil. For a version that comes together quickly, this related salad recipe uses similar crisp textures with different greens.

Quick Reference
⏱️
Prep Time
15 min
🔥
Cook Time
10 min
⏰
Total Time
25 min
🍽️
Servings
6 servings
📊
Difficulty
Easy
🏷️
Category
Side
💡
Quick Tip
Cook bacon crisp; toss broccoli raw and cold
🎯
Best For
Weeknight | Potluck | Picnic

Here's what makes it work:

  • Bacon cooked until completely crisp - renders fat evenly and crumbles without turning chewy
  • Uniform 1-inch broccoli florets - ensures consistent crunch and even dressing distribution
  • Dressing whisked for 1-2 minutes - emulsifies mayo and vinegar so it coats instead of separating
  • Nuts toasted at 350°F for 5 minutes - brings out nutty oils and adds textural contrast
  • Salad chilled 30 minutes before serving - melds sweet-tangy-smoky flavors without wilting greens
Golden Rule
Always dress the salad right before serving to prevent soggy broccoli and limp bacon

What You'll Need

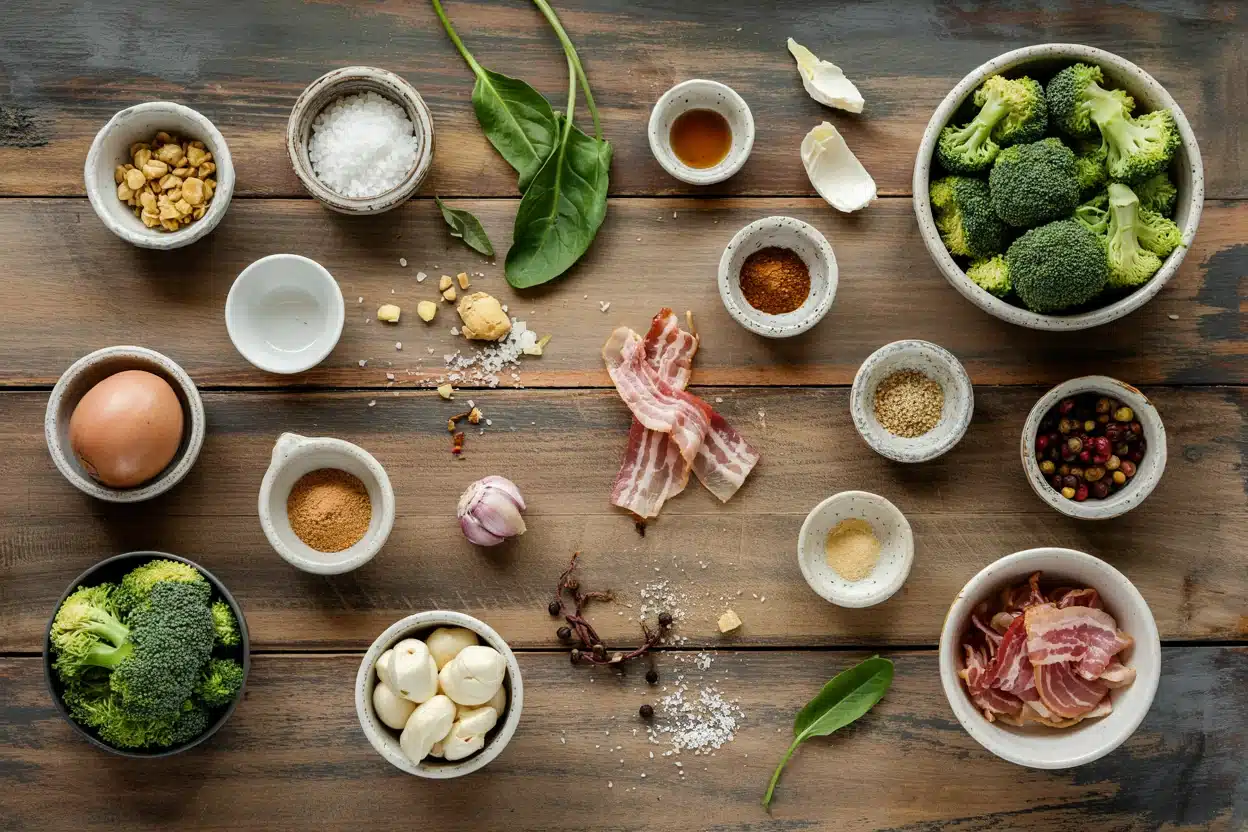
Broccoli Salad with Bacon - Broccoli Salad with Bacon

Stock your fridge with bacon, fresh broccoli, and basic pantry staples. Most people skip something fresh like salad but that's what makes the meal complete instead of heavy.

🥓
Bacon
  • 6-8 slices thick-cut bacon
🥦
Broccoli
  • 4 cups broccoli florets (about 1 large head)
  • ¼ cup red onion, finely chopped
🌰
Crunch Elements
  • ⅓ cup sunflower seeds or chopped almonds
  • ⅓ cup dried cranberries or raisins
  • ½ cup shredded cheddar cheese (optional)
🥣
Dressing
  • ¾ cup mayonnaise
  • 2 tablespoons apple cider vinegar
  • 2 tablespoons sugar

Ingredient Details

  • Broccoli florets
    Cut into uniform 1-inch pieces so every bite has the same crunch
  • Thick-cut bacon
    Holds up better in salad than thin bacon which turns chewy
  • Apple cider vinegar
    Cuts through mayo richness better than white vinegar
  • Red onion
    Soak sliced onion in cold water for 5 minutes to mellow the bite
  • Sunflower seeds
    Toast in dry skillet for 3-4 minutes until golden for deeper flavor
  • Sugar
    Balances acidity from vinegar and sharpness from onion
  • Mayonnaise
    Full-fat mayo creates creamy coating that clings to broccoli

Ingredient Swaps

Bacon adds the contrast this plate needs, but timing matters. Different proteins or dressing bases change texture and richness. For a version that comes together quickly, homemade beef recipe uses similar smoky elements with different cooking methods.

  • Pork bacon → Turkey bacon - Less fat so it crisps differently but still works if you cook it medium heat for 8-10 minutes until edges curl
  • Mayonnaise → Greek yogurt - Tangier and lighter but thins the dressing so use ½ cup yogurt plus ¼ cup mayo for body
  • Sunflower seeds → Chopped pecans or almonds - Nuttier flavor and you need to chop them fine so they mix evenly instead of sinking
  • Dried cranberries → Golden raisins or chopped dates - Dates are sweeter and stickier so use half the amount

Greek Yogurt Dressing

Works for: Lighter texture with tangy bite, fewer calories, still creamy enough to coat

Skip if: You want thick coating that clings or need make-ahead option (yogurt thins over time)

Turkey Bacon

Works for: Lower fat option that still crisps, milder smoky flavor, works for dietary restrictions

Skip if: You need deep bacon flavor or want fat to season the salad naturally

Smoked Tempeh

Works for: Plant-based version with smoky notes, firm texture that crumbles like bacon

Skip if: You need crispy texture or traditional bacon flavor (tempeh stays chewy)

Instructions

Most people skip simple chicken recipe but that's what makes weeknight dinners work without stress. Start with bacon so it has time to cool before you crumble it into the salad.

  1. Cook the bacon - Fry 6-8 slices thick-cut bacon in skillet over medium heat for 7-10 minutes, flipping halfway, until edges curl and fat renders clear (or bake at 400°F for 12-15 minutes on parchment-lined sheet). Drain on paper towels and let cool 5 minutes before crumbling into bite-sized pieces.

  2. Prep the broccoli - Cut 1 large head broccoli into uniform 1-inch florets, discarding thick stems. Chop ¼ cup red onion finely and soak in cold water for 5 minutes if you want milder bite, then drain.

  3. Mix the dressing - Whisk ¾ cup mayonnaise, 2 tablespoons apple cider vinegar, and 2 tablespoons sugar in small bowl for 1-2 minutes until smooth and slightly thickened.

  4. Combine everything - Toss broccoli florets, crumbled bacon, drained onion, ⅓ cup sunflower seeds, ⅓ cup dried cranberries, and ½ cup shredded cheddar (if using) in large mixing bowl. Pour dressing over and stir until every piece is coated.

  5. Chill before serving - Cover bowl and refrigerate 30 minutes to let flavors meld. Stir once before serving to redistribute dressing that settles to bottom.

Shortcut
Toast nuts in dry skillet for 3-4 minutes instead of oven if you're only making one batch

What to Serve With It

Rich mains need something to cut through, and salad does exactly that. Broccoli salad works as a side for grilled meats, potluck spreads, or packed lunches when you need crunch without wilting. For complete meal ideas that work with bacon-based dishes, easy pork dish planning covers more pairing options.

Side Dish Prep Why It Works How to Serve
Grilled chicken breast Easy Lean protein balances creamy salad Slice chicken and serve alongside cold salad
Baked potatoes Easy Starch soaks up dressing and adds comfort Top potatoes with salad for loaded texture
Quinoa or brown rice Easy Whole grains make salad more filling Mix grains into salad or serve underneath
Deviled eggs Medium Classic pairing for potlucks and picnics Arrange eggs around salad bowl
Crusty bread rolls Easy Scoops up dressing and adds carbs Toast rolls and serve warm on the side

Three ways to serve it:

  • For weeknight meals - Pair with grilled chicken or baked fish plus steamed rice for balanced plate
  • At potlucks - Double the batch and serve in shallow bowl so people can see colorful mix
  • For meal prep - Pack undressed salad in containers with dressing separate, toss right before eating
Best Pick
Grilled meats work best because char flavor complements smoky bacon without competing

Store and Reheat

The salad works best when it hits the table at the same time as the main. Store dressed salad up to 3 days but texture softens as broccoli absorbs dressing. For longer storage, keep components separate and toss right before serving.

Method Time Best For
🔥 Oven 5-7 min at 350°F Re-crisping bacon bits before mixing into salad
📦 Microwave 30 sec to 1 min Quickly warming single portion (texture softens slightly)
🍳 Stovetop 2-3 min medium heat Crisping bacon in skillet before adding to fresh batch

For best results when storing:

  • Undressed salad keeps 4-5 days in airtight container with paper towel on bottom to absorb moisture
  • Dressed salad lasts 3 days but broccoli softens and bacon loses crunch after day 2
  • Store dressing separately in jar and shake before pouring over salad portions
  • Add nuts and seeds right before serving to maintain crunch instead of storing mixed in
  • Refresh limp salad by tossing with handful of fresh broccoli florets and extra bacon bits

Frequently Asked Questions

Can I make broccoli salad with bacon ahead?

Yes, but store components separately. Keep undressed broccoli, bacon, and dressing in separate containers up to 2 days, then toss everything together 30 minutes before serving so flavors meld without wilting the broccoli.

How do I store broccoli salad to keep it crisp?

Store in shallow airtight container with paper towel underneath to absorb excess moisture. Dressed salad stays crisp for 1-2 days, undressed salad lasts 4-5 days if you keep dressing separate and toss right before eating.

What is the best way to cook bacon for salad?

Bake bacon at 400°F for 12-15 minutes on parchment-lined sheet pan for even crisping. This renders fat completely and eliminates chewy spots that happen with stovetop frying.

How do I prevent broccoli from becoming soggy?

Never cook the broccoli - use raw florets only. Dress the salad right before serving instead of hours ahead, and if making ahead, store dressing separately until you're ready to eat.

Can I substitute turkey bacon or a vegetarian option?

Yes, turkey bacon works if you cook it 8-10 minutes until edges curl and it crisps completely. For vegetarian version, use smoked tempeh crumbled into small pieces, though it stays chewier than bacon and won't crisp the same way.

Broccoli Salad with Bacon

Broccoli Salad with Bacon

No ratings yet
Broccoli Salad with Bacon features crisp raw broccoli florets combined with smoky, crispy bacon and a creamy mayo-based dressing for a refreshing side dish. The salad stays crunchy and flavorful by dressing it just before serving, making it perfect for potlucks and weekday meals.
Print Recipe Pin Recipe
Prep Time 15 minutes mins
Cook Time 10 minutes mins
Total Time 25 minutes mins
Servings: 6 servings
Course: Side Dish
Cuisine: American
Ingredients Equipment Method Notes

Ingredients
  

  • 6-8 slices bacon thick-cut, cooked crisp and crumbled
  • 4 cups broccoli florets cut into uniform 1-inch pieces
  • 0.25 cup red onion finely chopped and optionally soaked in cold water for 5 minutes
  • 0.33 cup sunflower seeds toasted until golden
  • 0.33 cup dried cranberries
  • 0.5 cup cheddar cheese shredded, optional
  • 0.75 cup mayonnaise full-fat
  • 2 tablespoons apple cider vinegar
  • 2 tablespoons sugar

Equipment

  • Skillet For frying bacon until crisp
  • Mixing bowl To toss salad ingredients and dressing
  • Whisk To emulsify dressing

Method
 

  1. Fry 6-8 slices thick-cut bacon in a skillet over medium heat for 7-10 minutes, turning halfway, until edges curl and fat renders clear. Drain on paper towels and let cool 5 minutes before crumbling into bite-sized pieces.
    6-8 slices bacon
  2. Cut 1 large head broccoli into uniform 1-inch florets, discarding thick stems. Chop ¼ cup red onion finely and soak in cold water for 5 minutes if you want a milder bite, then drain thoroughly.
    4 cups broccoli florets, 0.25 cup red onion
  3. Whisk ¾ cup mayonnaise, 2 tablespoons apple cider vinegar, and 2 tablespoons sugar in a small bowl for 1-2 minutes until smooth and slightly thickened.
    0.75 cup mayonnaise, 2 tablespoons apple cider vinegar, 2 tablespoons sugar
  4. In a large mixing bowl, toss broccoli florets, crumbled bacon, drained onion, ⅓ cup toasted sunflower seeds, ⅓ cup dried cranberries, and ½ cup shredded cheddar cheese (if using). Pour dressing over and stir until everything is evenly coated.
    6-8 slices bacon, 4 cups broccoli florets, 0.25 cup red onion, 0.33 cup sunflower seeds, 0.33 cup dried cranberries, 0.5 cup cheddar cheese, 0.75 cup mayonnaise, 2 tablespoons apple cider vinegar, 2 tablespoons sugar
  5. Cover the bowl and refrigerate the salad for 30 minutes to allow flavors to meld. Stir once before serving to redistribute dressing.

Notes

  • Cook bacon completely crisp to prevent chewy pieces in the salad.
  • Keep broccoli raw and dress right before serving to maintain crunch.
  • Toast sunflower seeds for deeper flavor and added crunch.
Tried this recipe?

Let us know how it was!

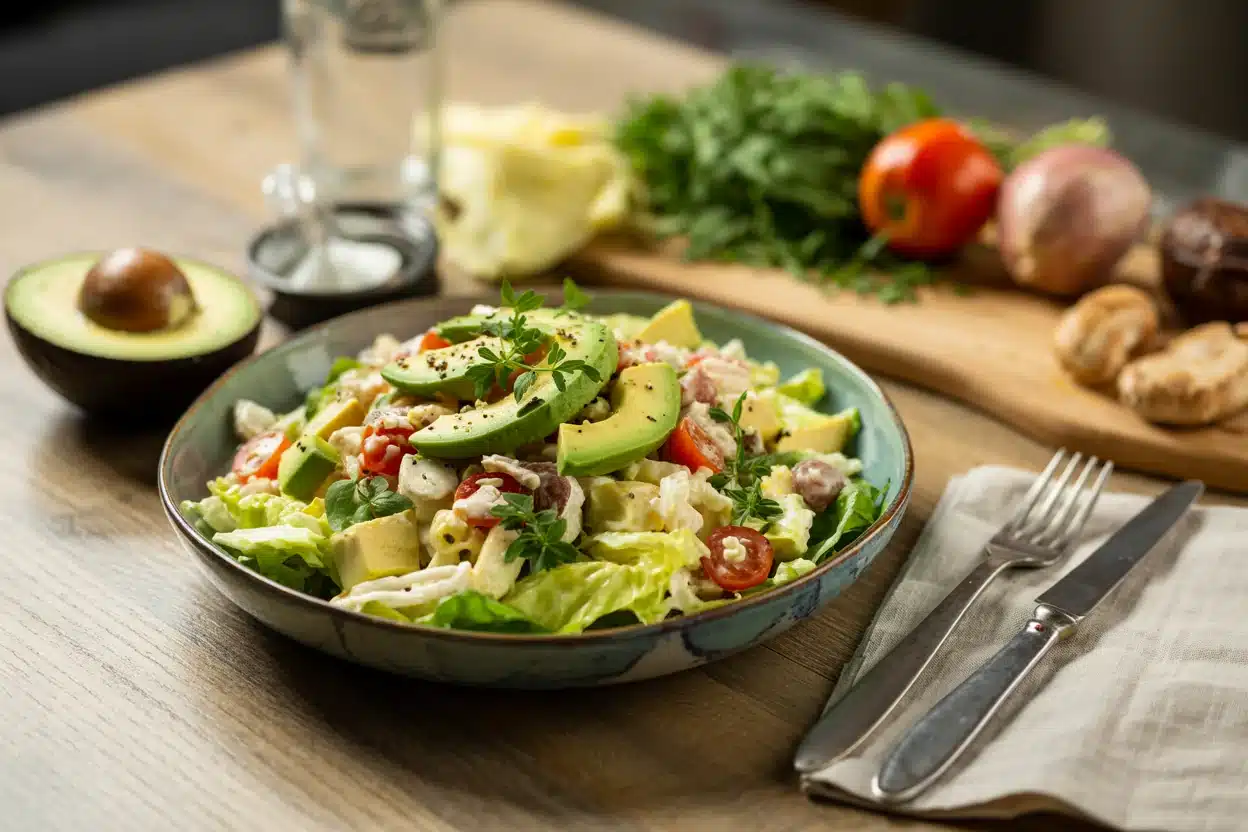
Classic Cobb Salad with Avocado

May 11, 2026

When you need a protein-packed lunch that doubles as meal prep or a light dinner for warm evenings, Cobb salad delivers. Crispy bacon, tender chicken, creamy avocado, and hard-boiled eggs over romaine-all arranged in colorful rows that make weeknight eating feel less like a chore.

Classic Cobb Salad with Avocado

High heat crisps the bacon while eggs boil, and everything else gets chopped. No stove-watching required once the components cook.

Perfect for meal prep Sundays or those nights when cooking feels exhausting but you still want real food.

QUICK SUMMARY

Classic Cobb salad layers crisp romaine with chicken, bacon, eggs, avocado, tomatoes, and blue cheese. Bacon crisps in the oven while eggs boil, then everything gets chopped and arranged in neat rows. The red wine vinaigrette goes on just before serving so the lettuce stays crunchy.

⏱️Time Reality: 35 minutes total-15 for cooking bacon and eggs, 20 for chopping and arranging
🔪Critical First Move: Start bacon in 400°F oven and eggs boiling simultaneously to save time
⚠️Watch Out: Dress salad right before serving-early dressing turns lettuce soggy and wilted

Why This Recipe Works

The oven does the heavy lifting-bacon crisps at 400°F while eggs boil on the stove, no flipping or babysitting required. For protein that comes together this fast, try this easy chicken recipe-it roasts while you prep the rest.

Quick Reference
⏱️
Prep Time
20 min
🔥
Cook Time
15 min
⏰
Total Time
35 min
🍽️
Servings
4
📊
Difficulty
Easy
🏷️
Category
Main Dish
💡
Quick Tip
Keep avocado ripe and add dressing just before serving
🎯
Best For
Weeknight | Meal prep | Entertaining
  • Egg boil timing: Boil eggs 10 minutes, then shock in ice water for tender whites-no chalky yolks or greenish rings
  • Bacon crispness: Cook bacon in oven at 400°F for 15 minutes for even crispness without standing over the stove
  • Avocado ripeness: Choose avocado that yields slightly to gentle pressure-too soft turns mushy, too firm tastes bitter
  • Lettuce drying: Dry lettuce in salad spinner for 2-3 minutes so water doesn't dilute the vinaigrette
  • Salad assembly order: Arrange lettuce base first, proteins in rows, then dressing last-keeps every bite balanced
Quick Tip
Shock boiled eggs in ice water immediately after cooking-stops the cooking process and makes peeling easier.

What You'll Need

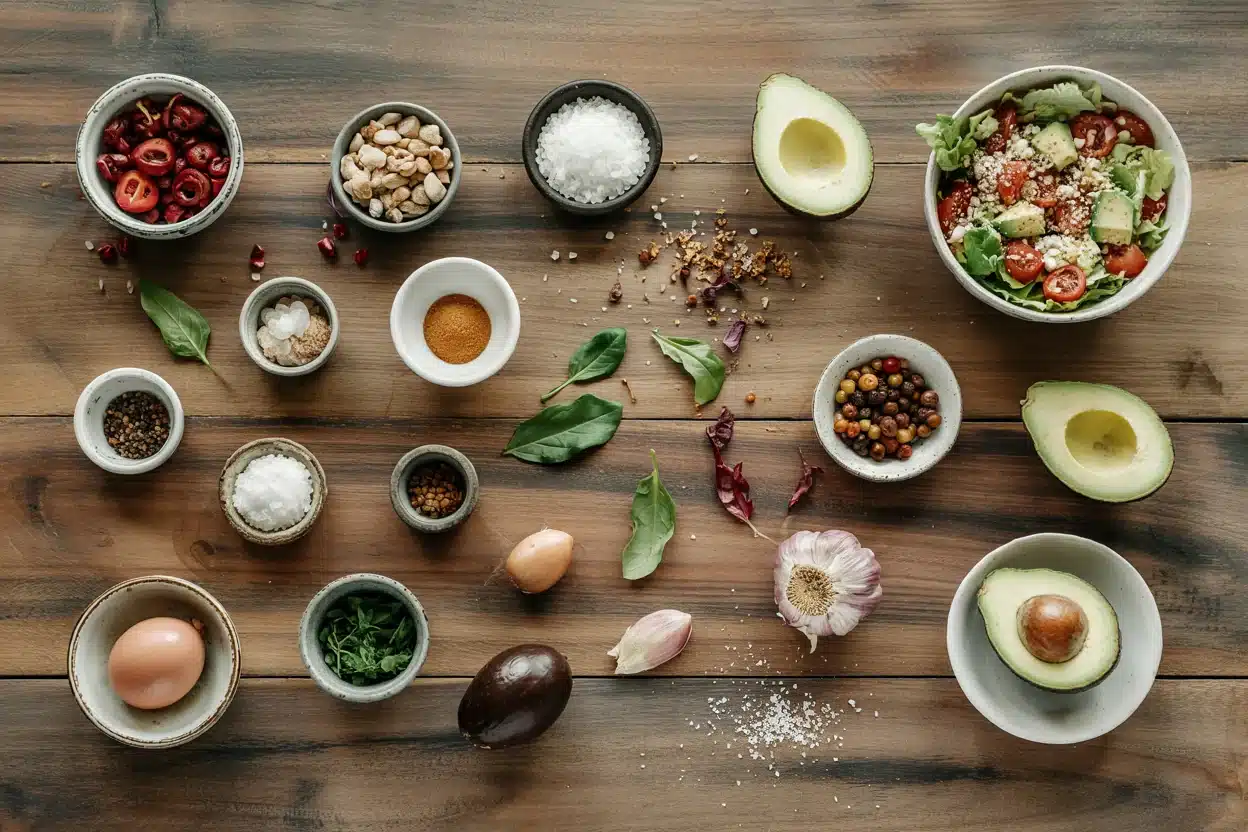
Classic Cobb Salad with Avocado - Classic Cobb Salad with Avocado

Most ingredients live in your fridge or pantry year-round-romaine, bacon, eggs, chicken. For another take on building a meal around crisp greens, this classic salad dish uses similar base ingredients with a Southwest twist.

🥬
Greens & Vegetables
  • Romaine lettuce (1 head, chopped)
  • Cherry tomatoes (1 cup, halved)
  • Avocado (2 ripe, diced)
🍗
Proteins
  • Cooked chicken breast (2 cups, diced)
  • Bacon (6 slices)
  • Hard-boiled eggs (4 large)
🧀
Cheese
  • Blue cheese (½ cup, crumbled)
🥢
Dressing
  • Red wine vinaigrette (½ cup)

Ingredient Details

  • Romaine lettuce
    Crisp base for texture-spin dry completely or water dilutes the dressing
  • Cooked chicken breast
    Rotisserie or grilled works-dice into ½-inch pieces for even bites
  • Avocado
    Firm but ripe-yields to gentle pressure without mushiness, prevents browning
  • Bacon
    Cook until crispy-rubbery bacon ruins the texture contrast you're building
  • Hard-boiled eggs
    Boil 10 minutes max-longer turns yolks chalky and develops a greenish ring
  • Tomatoes
    Halve cherry tomatoes to drain excess juice-whole tomatoes leak and make salad watery
  • Blue cheese
    Sharp tangy contrast-crumble fresh instead of pre-crumbled for better texture

Ingredient Swaps

Turkey bacon works when you want less fat, though it loses some smokiness. If you're building a lighter version, homemade salad recipe swaps bacon for sardines without sacrificing protein.

  • Bacon → Turkey bacon: Less fat, slightly less smoky flavor-cook 2-3 minutes less to prevent drying out
  • Blue cheese → Feta cheese: Milder tang, crumbly texture-use same amount but expect less sharpness
  • Romaine lettuce → Mixed greens: Varied textures, less crisp-works for variety but wilts faster once dressed
  • Red wine vinaigrette → Balsamic vinaigrette: Sweeter, less tangy dressing-adds caramelized notes instead of brightness

Grilled Chicken

Works for: Fresh-cooked flavor, charred edges add smokiness

Skip if: You're short on time-rotisserie chicken cuts 20 minutes

Grilled Tofu

Works for: Vegetarian swap, absorbs marinade well, softer texture

Skip if: You want traditional Cobb flavor-tofu lacks chicken's savoriness

Instructions

Bacon and eggs cook simultaneously while you chop vegetables-nothing waits on the stove. Building meals where components cook at once matters, like how a rich rice side bakes while you prep the rest of dinner.

  1. Cook bacon and eggs together: Lay bacon on a sheet pan and bake at 400°F for 15 minutes. At the same time, place eggs in a saucepan, cover with cold water by 1 inch, bring to a boil, then cover and remove from heat-let sit 10 minutes.
  2. Shock and prep eggs: Transfer boiled eggs to ice water immediately and let cool 5 minutes. Peel and chop into quarters.
  3. Chop all ingredients: Dice cooked chicken into ½-inch pieces, crumble cooled bacon, chop romaine into bite-sized pieces, halve cherry tomatoes, and dice avocado. Spin lettuce dry in salad spinner.
  4. Arrange salad in rows: Spread romaine on a large platter or in a wide bowl. Arrange chicken, bacon, eggs, tomatoes, avocado, and blue cheese in neat rows across the lettuce.
  5. Dress right before serving: Drizzle red wine vinaigrette over the entire salad just before eating-early dressing wilts lettuce and makes everything soggy.
Watch Out
Never dress salad more than 5 minutes before serving-lettuce absorbs liquid fast and turns limp.

What to Serve With It

Cobb salad needs sides that add crunch or warmth without competing for attention. When planning a full meal around greens, fresh vegetable dinner ideas help you build a plate that feels complete without overdoing it.

Side Dish Prep Why It Works How to Serve
Crusty bread Easy Adds hearty contrast and fullness to an otherwise light meal Slice thick, toast lightly, serve warm on the side
Fruit salad Easy Light sweetness balances savory bacon and blue cheese Toss berries and melon with lime juice, chill before serving
Roasted sweet potatoes Medium Adds warmth and complementary earthy sweetness Roast cubes at 425°F for 25 minutes, season with salt
Iced tea Easy Refreshing beverage cuts through rich salad components Brew strong, sweeten lightly, serve over ice with lemon
Cheese board Easy Pairs well with blue cheese and bacon flavors for entertaining Arrange 3-4 cheeses with crackers and nuts on a platter

Three ways to serve it:

  • For weeknight meals: Crusty bread and iced tea keep it simple-toast bread while salad assembles
  • For hosting: Add a cheese board and chilled white wine-light acidity complements the vinaigrette
  • For meal prep: Roasted sweet potatoes add substance-prep both Sunday and assemble fresh each day
Best Pick
Crusty bread soaks up leftover vinaigrette at the bottom of the bowl-waste nothing.

Store and Reheat

Store components separately for up to 3 days-assembled salad turns soggy overnight. When planning meals that need protein options, simple homemade pork keeps just as long and reheats better than chicken.

Method Time Best For
🍳 Stovetop 3-5 min low heat Reheating chicken only-keeps it tender without drying out
🔥 Oven 5-7 min at 350°F Warming chicken or bacon separately-crisps bacon back up
📦 Microwave 30-60 sec low power Quickly warming eggs or chicken pieces-use 50% power to prevent rubberiness

For best results when storing:

  • Store lettuce dry in airtight container with paper towel-absorbs moisture and prevents wilting
  • Keep dressing separate in a jar-add only to portions you're eating that day
  • Store avocado with lemon juice-citric acid slows browning for 1-2 days
  • Refrigerate bacon and chicken in shallow containers-cools faster and stays fresher
  • Assemble salad fresh each time-pre-assembled salad turns soggy within hours

Frequently Asked Questions

How long to boil eggs for Cobb salad?

Boil eggs for exactly 10 minutes, then shock in ice water immediately. Longer cooking turns yolks chalky with a greenish ring around the edge.

Can I make Cobb salad ahead of time?

Prep all components up to 3 days ahead and store separately, but assemble and dress only right before serving. Pre-dressed salad turns soggy and wilted within an hour.

What goes with Cobb salad as a side?

Crusty bread, fruit salad, or roasted sweet potatoes work best-they add texture or warmth without competing with the salad's protein-packed richness.

How do I know when avocado is ripe for Cobb salad?

Press gently near the stem-ripe avocado yields slightly without feeling mushy. If it's rock-hard, leave it on the counter for 2-3 days to ripen.

Can I use turkey bacon instead of regular bacon?

Yes, but cook turkey bacon 2-3 minutes less than regular bacon to prevent drying out. It has less fat and slightly less smoky flavor but works fine as a lighter swap.

Classic Cobb Salad with Avocado

Classic Cobb Salad with Avocado

No ratings yet
This classic Cobb salad combines crispy bacon, tender chicken, hard-boiled eggs, creamy avocado, and sharp blue cheese over crunchy romaine lettuce. The bacon crisps in the oven while eggs boil simultaneously, making it an easy, protein-packed meal perfect for lunch or a light dinner. Dress right before serving to keep the lettuce crisp and fresh.
Print Recipe Pin Recipe
Prep Time 20 minutes mins
Cook Time 15 minutes mins
Total Time 35 minutes mins
Servings: 4 servings
Course: Main Dish
Cuisine: American
Ingredients Equipment Method Notes

Ingredients
  

  • 1 head romaine lettuce chopped and spun dry
  • 1 cup cherry tomatoes halved
  • 2 avocado ripe, diced
  • 2 cups cooked chicken breast diced into ½-inch pieces
  • 6 slices bacon cooked crispy, crumbled
  • 4 large eggs hard-boiled, peeled, quartered
  • 0.5 cup blue cheese crumbled
  • 0.5 cup red wine vinaigrette for dressing, added just before serving

Equipment

  • Oven Used to crisp bacon at 400°F
  • Saucepan To boil eggs
  • Salad spinner To dry romaine lettuce
  • Sheet pan For baking bacon
  • Large platter or wide bowl For arranging salad in rows

Method
 

  1. Lay bacon slices on a sheet pan and bake at 400°F for 15 minutes until crispy. Simultaneously, place eggs in a saucepan, cover with cold water by 1 inch, bring to a boil, then cover and remove from heat. Let eggs sit for 10 minutes.
    6 slices bacon, 4 large eggs
  2. Transfer boiled eggs immediately to ice water and let cool for 5 minutes. Peel shells off and chop eggs into quarters.
    4 large eggs
  3. Dice cooked chicken into ½-inch pieces. Crumble cooled bacon. Chop romaine lettuce into bite-sized pieces and spin dry with a salad spinner. Halve cherry tomatoes and dice avocado.
    1 head romaine lettuce, 1 cup cherry tomatoes, 2 avocado, 2 cups cooked chicken breast, 6 slices bacon
  4. Spread chopped romaine evenly on a large platter or wide bowl. Arrange chicken, bacon, eggs, tomatoes, avocado, and blue cheese in neat rows across the lettuce.
    1 head romaine lettuce, 2 cups cooked chicken breast, 6 slices bacon, 4 large eggs, 1 cup cherry tomatoes, 2 avocado, 0.5 cup blue cheese
  5. Drizzle red wine vinaigrette over the salad just before serving to keep lettuce crisp and prevent sogginess.
    0.5 cup red wine vinaigrette

Notes

  • Boil eggs for exactly 10 minutes and shock in ice water immediately for tender whites without greenish yolks.
  • Cook bacon at 400°F for 15 minutes to get even crispness without stove babysitting.
  • Dry lettuce thoroughly in a salad spinner to avoid diluting the vinaigrette and soggy texture.

Tried this recipe?

Let us know how it was!

Classic Waldorf Apple Salad

May 11, 2026

Chop apples and celery into uniform pieces, toss with a creamy dressing, and chill for 30 minutes. The salad stays crisp because you coat the apples immediately with lemon juice.

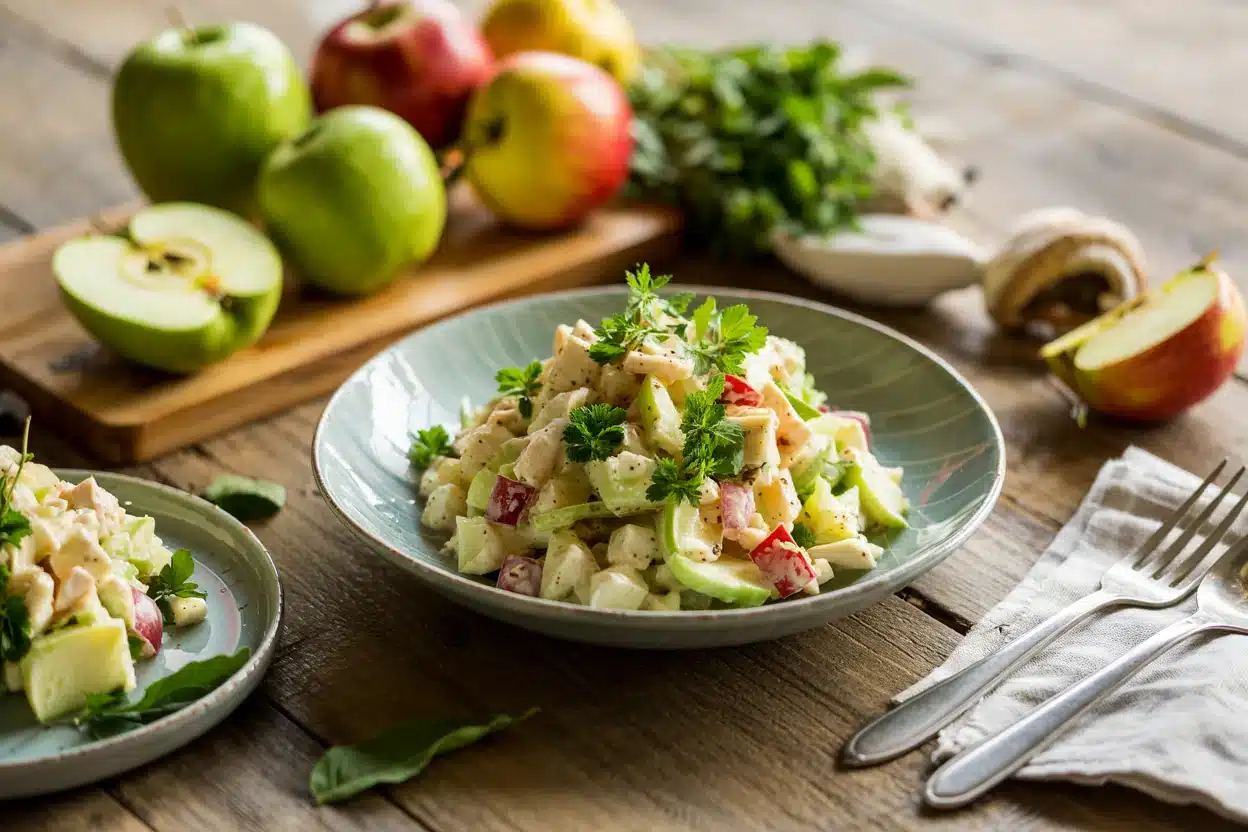
Classic Waldorf Apple Salad

That's the technique that keeps Waldorf salad from browning or going limp before it hits the table.

Perfect for picnics, potlucks, or weeknight lunches when you need something fresh that holds up in the fridge.

QUICK SUMMARY

Classic Waldorf apple salad combines crisp apples, crunchy celery, toasted walnuts, and juicy grapes in a creamy mayonnaise dressing. Toss the apples with lemon juice immediately after cutting to prevent browning. Chill for 30 minutes before serving to let flavors blend while keeping textures intact.

⏱️Time Reality: 15 minutes prep, no cooking, plus 30 minutes chilling before serving
🔪First Critical Move: Cut apples into ½-inch cubes and toss with lemon juice within 30 seconds
⚠️Watch Out: Browning apples from delayed acid contact - coat immediately and serve within 4 days

Why This Recipe Works

The crisp texture comes from chopping ingredients just before assembly and keeping everything cold. Most people skip salad, but it balances the meal - for a version that comes together quickly, this easy salad side adds protein and works for meal prep.

Quick Reference
⏱️
Prep Time
15 min
🔥
Cook Time
0 min
⏰
Total Time
15 min + chilling
🍽️
Servings
4 servings
📊
Difficulty
Easy
🏷️
Category
Side
💡
Quick Tip
Toss apples with lemon to prevent browning
🎯
Best For
Weeknight | Entertaining | Picnic

Five things that make this work:

  • Uniform chopping: Cut apples and celery into ½-inch cubes so every bite has balanced texture and dressing coverage
  • Immediate acid coating: Toss cut apples with 1 tablespoon lemon juice within 30 seconds to stop enzymatic browning
  • Firm apple varieties: Use crisp apples like Granny Smith or Honeycrisp - soft apples turn mushy and break down the salad structure
  • Toasted walnuts: Toast walnuts 5 minutes at 350°F to enhance nutty flavor and add crunch that stays crisp in dressing
  • Chill time: Refrigerate assembled salad 30 minutes before serving to blend flavors while maintaining crisp apple and celery texture
Quick Tip
Whisk mayonnaise and lemon juice until smooth before adding solids - clumpy dressing won't coat evenly and leaves dry spots.

What You'll Need

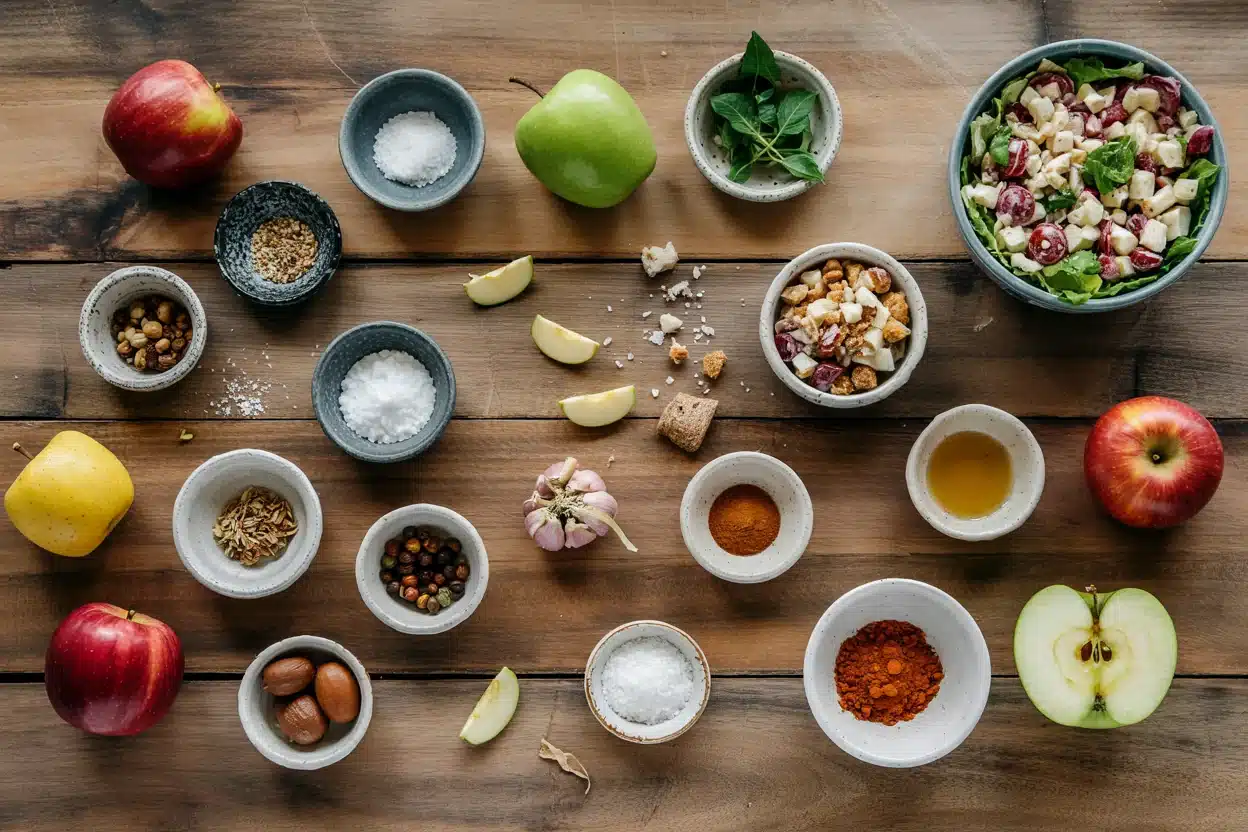
Classic Waldorf Apple Salad - Classic Waldorf Apple Salad

Shop for firm apples with no soft spots and fresh celery with tight stalks. A good salad can make or break the plate - for a version that comes together quickly, a fresh salad variation uses finely chopped vegetables and bright citrus.

🍎
Produce
  • 2 large crisp apples (Granny Smith or Honeycrisp)
  • 2 celery stalks
  • 1 cup red or green grapes
  • 1 tablespoon lemon juice
  • Optional: lettuce leaves for serving
🥜
Nuts & Dried Fruit
  • ½ cup walnuts (toasted if desired)
  • Optional: ¼ cup raisins
🥄
Dressing
  • ½ cup mayonnaise
  • ¼ teaspoon salt
  • ⅛ teaspoon black pepper

Ingredient Details

  • Apples
    Pick firm varieties like Granny Smith for tartness or Honeycrisp for sweetness - soft apples cause mushy texture and break down in dressing
  • Celery
    Use inner stalks with tight, crisp texture - outer stalks are stringy and chewy, ruining the fresh crunch
  • Walnuts
    Toast in a 350°F oven for 5 minutes to enhance nutty flavor - raw walnuts taste flat and don't add the same depth
  • Grapes
    Slice grapes in half so they distribute evenly and don't roll off the fork - whole grapes create awkward bites
  • Mayonnaise
    Full-fat mayo creates a creamy, stable dressing - low-fat versions separate and taste watery when mixed with acidic lemon juice
  • Lemon juice
    Fresh-squeezed lemon juice prevents browning better than bottled - use 1 tablespoon for 2 large apples to coat every surface
  • Salt
    Add ¼ teaspoon to the dressing before mixing - undersalted Waldorf tastes flat and lets apple sweetness dominate

Ingredient Swaps

Swap mayonnaise for Greek yogurt to cut fat or use pecans instead of walnuts for allergy concerns. Salad adds the contrast this plate needs, but timing matters - for a version that comes together quickly, simple salad recipe uses avocado and chicken for a heartier option.

Four swaps that work:

  • Mayonnaise → Greek yogurt: Use 1:1 ratio for lighter texture and tangier flavor - adds protein and lowers fat without changing method
  • Walnuts → pecans: Swap 1:1 for similar crunch with sweeter, buttery flavor - works for nut allergy if using sunflower seeds instead
  • Grapes → diced pears: Use ¾ cup diced firm pears for different sweetness and slightly grainy texture - seasonal swap when grapes cost more
  • Lettuce → spinach: Replace leaf-for-leaf for more tender greens and mild flavor - budget option that adds iron and folate

Greek Yogurt

Works for: Lighter dressing with more tang and protein, dairy-free if using plant yogurt

Skip if: You want traditional creamy richness - yogurt thins out faster and tastes sharper

Pecans

Works for: Sweeter, buttery crunch that's less bitter than walnuts, similar texture

Skip if: You prefer the earthy, slightly tannic flavor of walnuts in classic Waldorf

Sunflower Seeds

Works for: Nut-free version with crunchy texture, budget-friendly option

Skip if: You want the rich, nutty depth that only walnuts or pecans provide

Instructions

Chop everything uniformly, mix the dressing separately, then toss and chill. The salad works best when it hits the table at the same time as the main - for a version that comes together quickly, simple beans recipe pairs with this fresh side on busy weeknights.

  1. Prep the apples: Core and chop 2 large apples into ½-inch cubes, leaving skin on for texture and color. Toss immediately with 1 tablespoon lemon juice in a large mixing bowl to coat all surfaces and prevent browning.

  2. Chop the vegetables and fruit: Slice 2 celery stalks into ¼-inch pieces for snappy crunch. Halve 1 cup grapes so they distribute evenly in the salad without rolling off the fork.

  3. Mix the dressing: Whisk ½ cup mayonnaise, remaining lemon juice (if any), ¼ teaspoon salt, and ⅛ teaspoon black pepper in a small bowl until smooth and creamy with no lumps. Taste and adjust salt if needed.

  4. Combine everything: Add chopped celery, halved grapes, and ½ cup walnuts (toasted if using) to the bowl with apples. Pour dressing over the salad and toss gently with a spoon until all ingredients are evenly coated.

  5. Chill before serving: Cover the bowl with plastic wrap or transfer to an airtight container. Refrigerate for at least 30 minutes to let flavors blend and textures crisp up before serving on lettuce leaves if desired.

Golden Rule
Add salt to the dressing before mixing - undersalted Waldorf lets apple sweetness dominate and tastes one-dimensional.

What to Serve With It

Waldorf salad pairs with grilled chicken, crusty bread, or roasted vegetables for a complete meal. Rich mains need something to cut through, and pork does exactly that - for a version that comes together quickly, simple pork recipe balances the fresh crunch of this salad.

Side Dish Prep Why It Works How to Serve
Grilled chicken breast Easy Adds protein and balances the light, fruity salad with savory grilled flavor Slice warm chicken and place on top of salad or serve alongside on the same plate
Crusty bread Easy Provides textural contrast and soaks up extra dressing, adds filling carbohydrates Toast thick slices and serve warm on the side or tear into chunks for dipping
Roasted sweet potatoes Medium Warm, earthy sweetness complements crisp apple salad and adds seasonal depth Roast cubes at 400°F until caramelized and serve alongside or mixed into the salad
Steamed green beans Easy Fresh vegetable pairing with mild flavor that doesn't compete with apples or walnuts Steam until tender-crisp and toss with butter, salt, and pepper before serving
Hard boiled eggs Easy Extra protein and creamy texture contrast with crunchy apples and celery Slice or quarter eggs and arrange on top of salad just before serving

Three ways to serve it:

  • Picnic style: Pack in individual containers with lettuce cups on the side - assemble at the table so greens don't wilt or get soggy from dressing
  • Lunch bowl: Layer over mixed greens with grilled chicken and a side of whole grain crackers for a filling weekday lunch
  • Entertaining platter: Serve in a large bowl lined with crisp lettuce leaves and garnish with extra toasted walnuts for visual appeal
Shortcut
Buy pre-chopped walnuts and pre-washed salad greens to cut 5 minutes off prep time - focus your effort on chopping apples and celery evenly.

Store and Reheat

Waldorf salad keeps for 3-4 days in the fridge but tastes best served fresh. A good pork can make or break the plate - for a version that comes together quickly, simple rice recipe rounds out the meal when you need something substantial.

Method Time Best For
🍳 Stovetop N/A Not recommended - salad served chilled
📦 Microwave N/A Not recommended - salad served chilled
🔥 Oven N/A Not recommended - salad served chilled

For best results when storing:

  • Fridge storage: Transfer to an airtight, shallow container and refrigerate for up to 3-4 days - apples stay crisp but may soften slightly after day two
  • Drain excess liquid: If water pools at the bottom after a day, pour it off and stir gently before serving to redistribute dressing
  • Add fresh apples: If stored salad tastes dull or apples turn brown, toss in ½ cup freshly chopped apples with lemon juice to brighten flavors
  • Keep lettuce separate: Store salad base and lettuce greens separately - assemble just before serving to avoid soggy, wilted leaves
  • Freezer warning: Do not freeze Waldorf salad - mayonnaise separates and apples turn mushy when thawed, ruining texture completely

Frequently Asked Questions

Can I use Greek yogurt instead of mayonnaise in Waldorf Salad?

Yes, swap mayonnaise for Greek yogurt 1:1 to cut fat and add tang. The dressing will be lighter and slightly thinner, so mix just before serving to prevent the salad from getting watery.

How long does Waldorf Salad keep in the fridge?

Waldorf salad keeps for 3-4 days in an airtight container. Apples stay crisp for the first two days but may soften slightly after that - add fresh chopped apples tossed with lemon juice to refresh it.

What apples work best for crispness in Waldorf Salad?

Use Granny Smith for tart crunch or Honeycrisp for sweet crispness. Skip Red Delicious or Gala - they turn mushy in dressing and lack the firm texture that makes Waldorf salad work.

Why does my Waldorf Salad turn brown or soggy?

Apples brown when not coated immediately with lemon juice - toss cut apples within 30 seconds of chopping. Sogginess comes from wet lettuce or letting the salad sit mixed too long - dry greens thoroughly and assemble just before serving.

How do you serve Waldorf Salad for a large crowd?

Double or triple the recipe and keep the salad chilled in a large bowl until serving time. Set out lettuce leaves separately so guests can assemble their own portions and prevent the greens from wilting.

Classic Waldorf Apple Salad

Classic Waldorf Apple Salad

No ratings yet
Classic Waldorf apple salad features crisp apples, crunchy celery, toasted walnuts, and juicy grapes tossed in a creamy mayonnaise dressing. Coating the apples immediately with lemon juice prevents browning, keeping the salad fresh and crisp after chilling for 30 minutes.
Print Recipe Pin Recipe
Prep Time 15 minutes mins
Cook Time 1 minute min
Total Time 16 minutes mins
Servings: 4 servings
Course: Side Dish
Cuisine: American
Ingredients Method Notes

Ingredients
  

  • 2 large apple firm variety like Granny Smith or Honeycrisp, chopped into ½-inch cubes
  • 2 stalks celery sliced into ¼-inch pieces
  • 1 cup grapes red or green, halved
  • 1 tablespoon lemon juice fresh, for tossing apples and dressing
  • 0.5 cup walnuts toasted if desired
  • 0.5 cup mayonnaise
  • 0.25 teaspoon salt for dressing
  • 0.125 teaspoon black pepper for dressing

Method
 

  1. Core and chop 2 large apples into ½-inch cubes, leaving skin on. Immediately toss with 1 tablespoon lemon juice in a large mixing bowl to coat all surfaces and prevent browning.
    2 large apple, 1 tablespoon lemon juice
  2. Slice 2 celery stalks into ¼-inch pieces and halve 1 cup grapes for even distribution in the salad.
    2 stalks celery, 1 cup grapes
  3. Whisk ½ cup mayonnaise, remaining lemon juice if any, ¼ teaspoon salt, and ⅛ teaspoon black pepper in a small bowl until smooth and creamy with no lumps. Taste and adjust salt if needed.
    0.5 cup mayonnaise, 1 tablespoon lemon juice, 0.25 teaspoon salt, 0.125 teaspoon black pepper
  4. Add chopped celery, halved grapes, and ½ cup toasted walnuts to the bowl with apples. Pour dressing over the salad and toss gently until all ingredients are evenly coated.
    2 large apple, 2 stalks celery, 1 cup grapes, 0.5 cup walnuts, 0.5 cup mayonnaise
  5. Cover the bowl or transfer to an airtight container. Refrigerate for at least 30 minutes to let flavors blend and maintain crisp textures before serving, optionally on lettuce leaves.

Notes

  • Always toss apples with lemon juice immediately to prevent browning.
  • Toast walnuts for 5 minutes at 350°F to enhance flavor and crunch.
  • Refrigerate chilled salad for at least 30 minutes before serving to blend flavors.

Tried this recipe?

Let us know how it was!

Creamy Southern Pea Salad

May 11, 2026

When you need a no-cook side that travels well and feeds a crowd, pea salad shows up. This Southern staple combines frozen peas with a creamy dressing and crunchy bits that hold their texture through picnics and potlucks.

Creamy Southern Pea Salad

Blanch the peas just long enough to soften them, then shock them in ice water. That's how you keep them tender-crisp instead of mushy.

Make this for summer cookouts, family dinners, or holiday gatherings when you need something that sits on the table without wilting.

QUICK SUMMARY

Creamy Southern Pea Salad combines blanched frozen peas with mayo, sour cream, crispy bacon, and crunchy red onion. The key is blanching peas for exactly 90 seconds, then chilling them in ice water to lock in bright color and firm texture. Mix the dressing first, then fold in peas and crunchy vegetables to keep everything crisp.

⏱️Time Reality: 20 minutes total - 5 for blanching and bacon, 15 for mixing and chilling
🔪First Move: Boil water for peas and prep ice bath before touching anything else
⚠️Watch Out: Overcooked peas turn mushy and dull - pull them at 90 seconds and shock immediately

Why This Recipe Works

Rich mains need something to cut through, and a simple homemade potato salad does exactly that. For a version that comes together quickly, keep a batch ready for barbecue ribs or grilled chicken.

Quick Reference
⏱️
Prep Time
15 min
🔥
Cook Time
5 min
⏰
Total Time
20 min
🍽️
Servings
6 servings
📊
Difficulty
Easy
🏷️
Category
Side
💡
Quick Tip
Blanch peas briefly for crisp texture
🎯
Best For
Weeknight | Entertaining | Picnic
  • Blanching locks in texture: Frozen peas hit boiling water for 90 seconds, then shock in ice water to stop cooking and preserve snap
  • Ice bath prevents mushiness: Cold water halts carryover cooking that turns peas gray and soft
  • Mayo-sour cream combo balances richness: Half mayo, half sour cream gives you creamy coating without being heavy
  • Bacon adds smoky crunch: Crisping bacon over medium heat for 6-8 minutes creates texture contrast against creamy peas
  • Chilling time matters: One hour in the fridge lets flavors meld and firms up the dressing so it clings to peas
Quick Tip
Drain peas completely after the ice bath - excess water dilutes the dressing and makes the salad watery

What You'll Need

Creamy Southern Pea Salad - Creamy Southern Pea Salad

The salad works best when it hits the table at the same time as the main. For a version that comes together quickly, keep a juicy salad side dish ready for nights like this.

🥬
Base Vegetables
  • 2 cups frozen green peas
  • ½ cup diced red onion
  • ½ cup diced celery
🍗
Protein
  • 6 slices bacon
🧀
Creamy Components
  • ½ cup mayonnaise
  • ½ cup sour cream
  • ½ cup shredded cheddar cheese
🌶️
Seasonings
  • 1 tablespoon white vinegar
  • 1 teaspoon sugar
  • ½ teaspoon black pepper

Ingredient Details

  • Frozen green peas
    Use petite peas if you want smaller, sweeter pieces - regular frozen peas work fine but stay firmer after blanching
  • Mayonnaise
    Full-fat mayo creates the creamiest texture - light mayo works but makes the dressing thinner
  • Bacon
    Thick-cut bacon gives you bigger crunchy pieces - cook until crispy but not burnt for best texture
  • Red onion
    Soak diced onion in cold water for 10 minutes to mellow the sharp bite without losing crunch
  • Sour cream
    Full-fat sour cream adds tang and holds the dressing together - Greek yogurt makes it thinner
  • White vinegar
    White vinegar keeps the salad tangy without changing the color - apple cider vinegar works but adds slight sweetness
  • Cheddar cheese
    Sharp cheddar gives the most flavor - mild cheddar works but adds less punch

Ingredient Swaps

A good this seafood can make or break the plate. For a version that comes together quickly, keep a flaky sauce side ready for nights like this.

Four swaps that work:

  • Dairy-free mayo or mashed avocado instead of mayonnaise - keeps the creaminess, slight flavor shift, works for dairy-free diets
  • Plain Greek yogurt instead of sour cream - adds tang with less fat, makes the dressing slightly thinner
  • Smoked turkey bacon or tempeh bacon instead of pork bacon - less fat, different smoky note, works for vegetarian or budget meals
  • Fresh peas instead of frozen - cook for 1 minute instead of 90 seconds, sweeter flavor, softer texture

Dairy-Free Mayo

Works for: Egg allergies, vegan diets, lighter texture

Skip if: You want traditional creamy Southern flavor

Greek Yogurt

Works for: Lower fat content, extra protein, tangy punch

Skip if: You need thick dressing that clings to peas without sliding off

Turkey Bacon

Works for: Less grease, similar smoky flavor, budget-friendly

Skip if: You want crispy, salty pork bacon crunch

Instructions

Pork adds the contrast this plate needs, but timing matters. For a version that comes together quickly, keep a tender homemade pork recipe ready for nights like this.

  1. Blanch the peas: Bring a medium pot of water to a rolling boil. Add frozen peas and cook for 90 seconds. Drain immediately and plunge peas into a bowl of ice water for 2 minutes. Drain completely and pat dry with paper towels.
  2. Crisp the bacon: Cook bacon in a skillet over medium heat for 6-8 minutes, flipping halfway, until browned and crispy. Drain on paper towels, then chop into small pieces.
  3. Mix the dressing: In a large mixing bowl, whisk together mayonnaise, sour cream, white vinegar, sugar, and black pepper until smooth and combined.
  4. Combine everything: Add drained peas, diced red onion, diced celery, chopped bacon, and shredded cheddar cheese to the bowl. Stir gently until everything is coated with dressing.
  5. Chill before serving: Cover the bowl and refrigerate for at least 1 hour to let flavors meld and dressing firm up. Stir once before serving.
Golden Rule
Pull peas from boiling water at 90 seconds - carryover cooking continues in the ice bath, so 2 minutes total keeps them tender-crisp

What to Serve With It

Most people skip the side planning step, but it makes the meal feel complete. If you need more options for building a full plate, check out fresh vegetable dinner ideas that balance creamy salads like this one.

Side Dish Prep Why It Works How to Serve
Grilled chicken breast Easy Adds lean protein, mild flavor complements creamy peas Slice and serve alongside salad with lemon wedges
Cornbread muffins Easy Traditional Southern pairing, slightly sweet balances tang Serve warm with butter while salad is cold
Fresh watermelon slices Easy Refreshing contrast to creamy salad, no cooking needed Cube and serve chilled in separate bowl
Barbecue ribs Medium Classic Southern smoky combination, rich meat needs creamy side Plate ribs with salad on the side, add extra napkins
Baked beans Easy Sweet and savory complement, both travel well to picnics Serve warm or room temp in separate bowl

Three ways to serve it:

  • Picnic spread: Pack salad in a shallow container with ice packs, serve with fried chicken and coleslaw for full Southern meal
  • Potluck dinner: Double the recipe and bring in a large bowl with serving spoon - salad holds texture for 2-3 hours at room temp
  • Weeknight plate: Scoop salad next to grilled protein and cornbread, add sliced tomatoes for extra freshness
Best Pick
Serve this salad with anything smoky or grilled - the creamy tang cuts through charred flavors and rich meats

Store and Reheat

Pea salad keeps for 3-4 days in the fridge, which makes it worth batch-cooking. A good pork can make or break the plate, so keep a tender homemade pork recipe on hand when meal-prepping sides like this one.

Method Time Best For
🍳 Stovetop Not recommended Salad is served cold or room temp
📦 Microwave Not applicable Heating wilts peas and separates dressing
🔥 Oven Not applicable Salad should stay chilled until serving

For best results when storing:

  • Use shallow containers: Store in wide, shallow containers instead of tall bowls - salad cools evenly and faster in the fridge
  • Cover tightly: Press plastic wrap directly onto the surface before sealing with a lid to prevent drying and absorbing fridge odors
  • Stir before serving: Give the salad a quick stir after pulling from the fridge - dressing settles to the bottom as it sits
  • Add fresh bacon: If bacon gets soft in storage, crisp a fresh batch and fold in right before serving for crunch
  • Watch for watery texture: If liquid pools at the bottom, drain it off and stir in 1-2 tablespoons of mayo to refresh the dressing

Frequently Asked Questions

Can I use fresh peas instead of frozen in Southern pea salad?

Yes, but blanch them for only 1 minute instead of 90 seconds. Fresh peas cook faster and turn mushy if you leave them in boiling water too long.

How long can I store creamy Southern pea salad in the fridge?

Store in an airtight container for 3-4 days. The texture holds best on day one, but the salad stays safe to eat through day four if kept at 40°F or below.

How do I know when the peas are perfectly cooked for pea salad?

Peas are done when they're bright green and tender but still have a slight snap when you bite into one. Pull one out at 90 seconds and taste it - if it's too firm, cook 15 more seconds.

Why is my Southern pea salad soggy, and how can I fix it?

Soggy salad comes from overcooked peas or excess water. Drain peas completely after the ice bath and pat them dry with paper towels before mixing with dressing.

What are good side dishes to serve with creamy Southern pea salad?

Serve with grilled chicken, barbecue ribs, cornbread muffins, or baked beans. The creamy tang of pea salad cuts through smoky or rich mains and balances the plate.

Creamy Southern Pea Salad

Creamy Southern Pea Salad

No ratings yet
Creamy Southern Pea Salad blends tender-crisp blanched peas with a smooth mayo and sour cream dressing, crispy bacon, and crunchy veggies. The key is blanching peas for exactly 90 seconds and shocking them in ice water to preserve their bright color and firm texture. This no-cook side is perfect for picnics, cookouts, and holiday gatherings.
Print Recipe Pin Recipe
Prep Time 15 minutes mins
Cook Time 5 minutes mins
Total Time 20 minutes mins
Servings: 6 servings
Course: Side Dish
Cuisine: Southern
Ingredients Equipment Method Notes

Ingredients
  

  • 2 cups frozen green peas blanched for 90 seconds and shocked in ice water
  • 0.5 cup red onion diced, soaked in cold water for 10 minutes
  • 0.5 cup celery diced
  • 6 slices bacon thick-cut, cooked until crispy and chopped
  • 0.5 cup mayonnaise full-fat preferred for creaminess
  • 0.5 cup sour cream full-fat for tang and texture
  • 0.5 cup cheddar cheese shredded, sharp cheddar recommended
  • 1 tablespoon white vinegar
  • 1 teaspoon sugar
  • 0.5 teaspoon black pepper

Equipment

  • Medium pot to boil water for blanching peas
  • Skillet for cooking bacon
  • Mixing bowl to combine dressing and salad ingredients

Method
 

  1. Bring a medium pot of water to a rolling boil. Add frozen peas and cook for 90 seconds. Drain immediately and plunge peas into a bowl of ice water for 2 minutes. Drain completely and pat dry with paper towels.
    2 cups frozen green peas
  2. Cook bacon in a skillet over medium heat for 6 to 8 minutes, flipping halfway through, until browned and crispy. Drain on paper towels, then chop into small pieces.
    6 slices bacon
  3. In a large mixing bowl, whisk together mayonnaise, sour cream, white vinegar, sugar, and black pepper until smooth and combined.
    0.5 cup mayonnaise, 0.5 cup sour cream, 1 tablespoon white vinegar, 1 teaspoon sugar, 0.5 teaspoon black pepper
  4. Add drained peas, diced red onion, diced celery, chopped bacon, and shredded cheddar cheese to the bowl with the dressing. Stir gently until everything is coated evenly.
    2 cups frozen green peas, 0.5 cup red onion, 0.5 cup celery, 6 slices bacon, 0.5 cup cheddar cheese
  5. Cover the bowl and refrigerate the salad for at least 1 hour to let flavors meld and the dressing firm up. Stir once before serving.

Notes

  • Drain peas completely after ice bath to prevent watery salad.
  • Cook bacon until crispy but not burnt for the best texture contrast.
  • Chill salad for at least one hour for flavors to meld and dressing to thicken.

Tried this recipe?

Let us know how it was!

Ensalada Mixta Spanish Salad

May 11, 2026

Complete Article Output

You need 25 minutes and a sharp knife. No cooking beyond boiling eggs, no complicated steps, just chopping and tossing.

Ensalada Mixta Spanish Salad

The lettuce stays crisp because you dress it right before serving. The canned tuna and hard-boiled eggs make it filling enough for lunch or a light dinner.

This is what you make when you want something fresh that doesn't feel like rabbit food. Works for weeknight meals when the grill is already going or picnics when you need a dish that travels well.

QUICK SUMMARY

Ensalada Mixta is a Spanish salad with romaine lettuce, tomatoes, canned tuna, hard-boiled eggs, and olives dressed with olive oil and vinegar. The salad stays crisp because you dress it just before serving. Make this when you need a filling side that comes together in 25 minutes.

⏱️Time Reality: 15 minutes prep, 10 minutes to boil eggs, no waiting
🔪First Move: Boil eggs first so they cool while you chop vegetables
⚠️Watch Out: Dress salad within 10 minutes of serving or lettuce wilts-keep dressing separate until ready

Why This Recipe Works

Most salads taste like an afterthought, but this one balances crisp vegetables with rich protein. For something equally fresh that works as a main, try a similar salad recipe-the contrast keeps every bite interesting.

Quick Reference
⏱️
Prep Time
15 min
🔥
Cook Time
10 min
⏰
Total Time
25 min
🍽️
Servings
4 servings
📊
Difficulty
Easy
🏷️
Category
Side
💡
Quick Tip
Chop veggies uniformly for even texture
🎯
Best For
Weeknight | Entertaining

Five things that make this work:

  • Romaine lettuce holds up under dressing better than delicate greens-the thick ribs stay crunchy even after tossing with vinaigrette
  • Hard-boiled eggs cooked exactly 10 minutes have firm whites and creamy yolks with no grey ring-the ice bath stops carryover cooking
  • Draining canned tuna for 2 minutes in a colander removes excess liquid that would water down the dressing-press gently to extract more moisture
  • A 3:1 ratio of olive oil to vinegar creates balanced acidity-whisk until the mixture looks cloudy and slightly thickened
  • Dressing the salad within 10 minutes of serving keeps lettuce crisp-once dressed, the acid starts breaking down cell walls
Quick Tip
Dry washed lettuce completely with a spinner or towel-water droplets dilute the dressing and prevent it from coating properly

What You'll Need

Ensalada Mixta Spanish Salad - Ensalada Mixta Spanish Salad

The shopping list is short because the ingredients do the flavor work. Salad cuts through all that richness when you serve it alongside grilled meat or this easy stew recipe-balance matters more than complexity.

🥬
Fresh Vegetables
  • Romaine lettuce (1 head)
  • Tomatoes (2 medium)
  • Red onion (1 small)
🥚
Protein
  • Canned tuna (1 can, 5 oz)
  • Eggs (4 large)
🫙
Pantry Items
  • Olives (½ cup)
  • Olive oil (3 tablespoons)
  • Vinegar (1 tablespoon)
  • Salt and pepper

Ingredient Details

  • Romaine lettuce
    Choose heads with dark green outer leaves and pale yellow centers-the darker leaves have more flavor while the inner leaves stay crisp longer
  • Tomatoes
    Use ripe but firm tomatoes that don't squish when you press gently-overripe tomatoes release too much juice and make the salad watery
  • Canned tuna
    Look for tuna packed in olive oil rather than water-the oil-packed version has better texture and doesn't need extra moisture
  • Eggs
    Use fresh eggs less than 2 weeks old-older eggs have thinner whites that spread more when boiled and peel less cleanly
  • Red onion
    Soak sliced onions in cold water for 10 minutes to remove the sharp bite-this makes them sweet and mild instead of pungent
  • Olives
    Any variety works but Spanish green olives or black Kalamata add the most authentic flavor-pit them before adding to make eating easier
  • Vinegar
    Red wine vinegar or sherry vinegar both work-avoid balsamic which is too sweet and overpowers the other ingredients

Ingredient Swaps

Substitutions work when you keep the texture contrast between crisp vegetables and creamy protein. Most people need flexibility with what's in the fridge, and these swaps preserve what makes the salad work.

Four swaps that don't change the outcome:

  • Butter lettuce or mixed greens for romaine-softer texture with less crunch but still fresh and mild (dietary flexibility)
  • Lemon juice for vinegar-brighter acidity with citrus notes instead of wine-forward sharpness (method swap)
  • Cooked shrimp or canned salmon for tuna-different flavor profile but same protein richness and flaky texture (budget flexibility)
  • Green onions or shallots for red onion-milder bite with less sharpness, no soaking needed (flavor flexibility)

Romaine Lettuce

Works for: Crisp texture, holds dressing well, traditional Spanish salad flavor

Skip if: You want softer greens or have only iceberg on hand

Butter Lettuce

Works for: Delicate texture, sweeter flavor, less prep (no thick ribs to remove)

Skip if: You need salad to last more than 5 minutes after dressing

Mixed Greens

Works for: Variety of textures, pre-washed convenience, modern presentation

Skip if: You want authentic Spanish salad or maximum crunch

Instructions

The salad comes together in three stages: boil eggs, chop everything, dress and toss. A good easy chicken side balances this fresh plate when you need something more substantial-the timing lines up if you start the chicken first.

Five steps to crisp, balanced salad:

  1. Boil eggs in simmering water for 10 minutes, then transfer to ice bath for 5 minutes-set timer exactly at 10 minutes when water returns to simmer, the ice bath stops cooking and makes peeling easier
  2. Chop romaine into bite-size pieces, dice tomatoes into 1-inch chunks, slice red onion thin-uniform pieces ensure every forkful has balanced texture, soak onion slices in cold water for 10 minutes if you want milder flavor
  3. Drain canned tuna in colander for 2 minutes, pressing gently to remove excess liquid-too much moisture waters down the dressing and makes the salad soggy within minutes
  4. Whisk olive oil, vinegar, salt, and pepper in small bowl until mixture looks cloudy-use 3 parts oil to 1 part vinegar, the cloudiness means the dressing is emulsified and won't separate immediately
  5. Combine lettuce, tomatoes, onion, tuna, and quartered eggs in large bowl, add dressing, toss gently-dress no more than 10 minutes before serving, add half the dressing first and taste before adding more
Golden Rule
Taste the salad after adding half the dressing-you can always add more but you can't remove excess once it's too dressed

What to Serve With It

This salad needs something warm and filling to complete the plate. Most Spanish meals pair salad with grilled meat or hearty stews, and weeknight bunless burgers meal ideas work when you want a complete meal without much planning.

Side Dish Prep Why It Works How to Serve
Crusty bread Easy Adds carbs to soak up leftover dressing and makes the meal more filling Slice thick, toast lightly, serve warm alongside salad
Grilled chicken Easy Warm protein balances cold salad and adds smoky char flavor Slice grilled chicken breast over salad or serve on the side
Roasted potatoes Medium Starchy side balances fresh vegetables and adds substance Roast with olive oil and herbs, serve hot next to cold salad
Spanish rice Medium Traditional pairing with Mediterranean flavors that complement the salad Cook with tomatoes and saffron, serve as base under salad
Gazpacho soup Easy Cold starter with similar fresh vegetable flavors, both served chilled Serve in small bowls before salad as a light first course

Three ways to serve it:

  • As a light lunch-double the tuna and eggs, add sliced avocado, serve with crusty bread for a complete meal
  • With grilled protein-serve alongside grilled steak, chicken, or fish as a fresh contrast to charred meat
  • Tapas style-divide into small portions, serve on individual plates as part of a Spanish appetizer spread with olives, cheese, and cured ham
Shortcut
Buy pre-washed romaine hearts and use jarred hard-boiled eggs from the grocery store-cuts prep time to 8 minutes

Store and Reheat

Keep components separate until serving time to maintain crispness. A good rich homemade beef recipe benefits from having fresh salad on the side, and storing them separately means you can prep the salad base ahead without sacrificing texture.

Method Time Best For
🥗 Serve Cold 0 min This salad is meant to be eaten fresh and cold-reheating destroys texture

For best results when storing:

  • Store chopped vegetables and dressing separately in airtight containers up to 3 days-combine right before serving to prevent wilting and sogginess
  • Keep hard-boiled eggs unpeeled in the fridge up to 5 days-peel and quarter them just before adding to salad for best texture
  • Drain canned tuna immediately after opening and store in small container-press paper towel on top to absorb remaining moisture before sealing
  • Store washed lettuce wrapped in paper towels inside plastic bag-the towels absorb excess moisture that causes browning and slime
  • Never store dressed salad overnight-the acid in vinegar breaks down lettuce cell walls and turns everything into mush within 6 hours

Frequently Asked Questions

Can I make Ensalada Mixta ahead and store it?

Store components separately up to 3 days and dress right before serving. Once dressed, the salad wilts within 10-15 minutes as the acid breaks down the lettuce.

How do I know when the hard-boiled eggs are done?

Simmer for exactly 10 minutes then ice bath for 5 minutes-yolks should be firm but still creamy yellow with no grey ring around the edge. If you see grey, you've overcooked them.

What goes well as a side with Ensalada Mixta?

Grilled meat, crusty bread, roasted potatoes, or Spanish rice balance the cold salad. The warm components make it feel like a complete meal instead of just a side dish.

Can I use fresh tuna steak instead of canned tuna?

Yes, sear fresh tuna 2 minutes per side until rare in the center, then slice thin and add to salad. The texture is firmer and less flaky than canned but works fine.

What can I substitute if I don't have red onion?

Use green onions sliced thin or shallots diced small-both have milder flavor than red onion and don't need soaking. Yellow onion works but tastes sharper even after soaking.

Ensalada Mixta Spanish Salad

Ensalada Mixta Spanish Salad

No ratings yet
Ensalada Mixta is a fresh Spanish salad combining crisp romaine lettuce, ripe tomatoes, canned tuna, and hard-boiled eggs with olives, dressed in olive oil and vinegar. The salad stays crisp because it is dressed just before serving. Ideal for a filling side or light meal, it comes together in 25 minutes.
Print Recipe Pin Recipe
Prep Time 15 minutes mins
Cook Time 10 minutes mins
Total Time 25 minutes mins
Servings: 4 servings
Course: Side Dish
Cuisine: Spanish
Ingredients Equipment Method Notes

Ingredients
  

  • 1 head romaine lettuce washed and dried
  • 2 medium tomatoes ripe but firm, diced into 1-inch chunks
  • 1 small red onion thinly sliced, optional soak in cold water for 10 minutes to reduce sharpness
  • 1 can canned tuna 5 oz, drained and pressed to remove excess liquid
  • 4 large eggs hard boiled, peeled and quartered
  • ½ cup olives pitted
  • 3 tablespoons olive oil
  • 1 tablespoon vinegar red wine or sherry vinegar
  • salt to taste
  • black pepper to taste

Equipment

  • Sharp knife For chopping vegetables and slicing onion
  • Colander To drain canned tuna
  • Small bowl To whisk dressing
  • Large bowl To combine salad ingredients
  • Pot To boil eggs
  • Ice bath To cool eggs and stop cooking

Method
 

  1. Place eggs in simmering water and cook for 10 minutes once the water returns to simmer. Then transfer the eggs immediately to an ice bath for 5 minutes to stop cooking and make peeling easier.
    4 large eggs
  2. Chop the romaine lettuce into bite-sized pieces, dice tomatoes into 1-inch chunks, and thinly slice the red onion. Soak the onion slices in cold water for 10 minutes if you prefer milder flavor, then drain.
    1 head romaine lettuce, 2 medium tomatoes, 1 small red onion
  3. Drain canned tuna in a colander for 2 minutes, pressing gently to remove any excess liquid that could water down the dressing.
    1 can canned tuna
  4. Whisk together olive oil, vinegar, salt, and black pepper in a small bowl until the mixture looks cloudy and slightly thickened, ensuring a 3:1 ratio of oil to vinegar.
    3 tablespoons olive oil, 1 tablespoon vinegar, salt, black pepper
  5. In a large bowl, combine lettuce, tomatoes, onion, tuna, and quartered hard-boiled eggs. Add half the dressing first and toss gently. Taste and add more dressing as needed. Dress the salad no more than 10 minutes before serving to keep lettuce crisp.
    1 head romaine lettuce, 2 medium tomatoes, 1 small red onion, 1 can canned tuna, 4 large eggs, 3 tablespoons olive oil, 1 tablespoon vinegar, salt, black pepper

Notes

  • Dress the salad within 10 minutes of serving to maintain crispness; lettuce wilts quickly in the acid.
  • Drain canned tuna well to avoid watery dressing and soggy salad.
  • Use an ice bath after boiling to stop the eggs from overcooking and to make peeling easier.

Tried this recipe?

Let us know how it was!

Fresh Tomato Mozzarella Caprese Salad

May 11, 2026

You need 10 minutes and no cooking. Slice tomatoes and mozzarella, layer them with basil, then drizzle with olive oil and balsamic vinegar.

Fresh Tomato Mozzarella Caprese Salad

The salad sits for 10-15 minutes while flavors meld. No heat, no baking, no monitoring temperature.

This works for weeknight dinners when you want something fresh that feels intentional. A good salad can make or break the plate. For a version that comes together quickly, easy potato salad side works just as well on busy nights.

QUICK SUMMARY

Fresh Tomato Mozzarella Caprese Salad layers ripe tomatoes with creamy mozzarella and basil, finished with olive oil and balsamic vinegar. The salad needs 10-15 minutes to rest so the flavors blend without getting soggy. Use fully ripe tomatoes and slice everything evenly for the best result.

⏱️Time Reality: 10 minutes hands-on, rest 10-15 minutes before serving
🔪Critical First Step: Slice tomatoes and mozzarella ¼ inch thick for uniform layering
⚠️Watch Out: Underripe tomatoes cause bitterness - pick firm, red tomatoes with slight give

Why This Recipe Works

Slicing everything to the same thickness creates uniform bites where tomato, cheese, and basil hit your tongue together. Rich mains need something to cut through, and bread does exactly that. For a version that comes together quickly, homemade bread recipe pairs perfectly with this salad.

Quick Reference
⏱️
Prep Time
10 min
🔥
Cook Time
0 min
⏰
Total Time
10 min
🍽️
Servings
4 servings
📊
Difficulty
Easy
🏷️
Category
Appetizer
💡
Quick Tip
Use ripe tomatoes, slice evenly for best result
🎯
Best For
Weeknight | Entertaining
  • Ripe tomatoes provide natural sweetness and juice that mix with the olive oil to create a simple dressing without extra work
  • Fresh mozzarella stays smooth and creamy when you pat it dry before slicing - removing excess water prevents a watery plate
  • Basil leaves release their herbal aroma when torn or bruised slightly, adding more flavor than whole untouched leaves
  • Balsamic vinegar balances the creamy cheese with acidity and adds a touch of sweetness that brings all the flavors together
  • Resting the salad for 10-15 minutes lets the salt draw out tomato juices without turning everything soggy
Quick Tip
Slice tomatoes right before layering - cutting too early releases too much liquid and dilutes the dressing

What You'll Need

Fresh Tomato Mozzarella Caprese Salad - Fresh Tomato Mozzarella Caprese Salad

Shop for the ripest tomatoes you can find - they should give slightly when pressed. Salad adds the contrast this plate needs, but timing matters. For a version that comes together quickly, a creamy salad side works with similar ingredients.

🍅
Produce
  • ripe tomatoes (3-4 large)
  • fresh basil leaves (½ cup)
🧀
Dairy
  • fresh mozzarella cheese (8 oz)
🫙
Pantry
  • extra virgin olive oil (3 tbsp)
  • balsamic vinegar (1 tbsp)
  • salt (½ tsp)
  • black pepper (¼ tsp)
🌰
Optional
  • garlic (1 clove, minced)
  • pine nuts (2 tbsp, toasted)
  • arugula (1 cup)

Ingredient Details

  • Ripe tomatoes
    Pick tomatoes that are deep red with slight give when pressed - firm tomatoes won't release enough juice
  • Fresh mozzarella
    Buy mozzarella packed in water and pat dry with paper towels for 2 minutes before slicing to prevent sogginess
  • Fresh basil
    Look for bright green leaves without brown spots - wilted or dark basil adds bitterness instead of fresh aroma
  • Extra virgin olive oil
    Use high-quality olive oil since it's the main dressing component - cheap oil tastes flat and greasy
  • Balsamic vinegar
    Regular balsamic works fine - skip the aged expensive stuff since you only need 1 tablespoon for acidity
  • Salt
    Season the tomatoes lightly first, then taste before adding more - over-salting masks the fresh tomato flavor
  • Pine nuts (optional)
    Toast pine nuts in a dry skillet for 2-3 minutes until golden - raw pine nuts taste bland and waxy

Ingredient Swaps

Mozzarella balls work if you can't find sliced fresh mozzarella. Most people skip pasta, but it balances the meal. We keep a batch ready for nights like this - classic pasta dish uses the same core ingredients.

  • Fresh mozzarella → dairy-free mozzarella alternative: Firmer texture and milder taste, less creamy than regular mozzarella (dairy-free)
  • Balsamic vinegar → red wine vinegar with honey: Slightly sharper acidity with less sweetness - use 1 tablespoon vinegar plus ½ teaspoon honey (budget)
  • Ripe tomatoes → heirloom or cherry tomatoes: Different sweetness and juiciness levels - slice heirlooms same thickness, halve cherry tomatoes (flexible)
  • Pine nuts → toasted walnuts or almonds: Different crunch intensity and flavor - chop coarsely before sprinkling (budget)

Mozzarella Slices

Works for: Uniform layering, classic look, even cheese distribution

Skip if: You can't find fresh sliced - pre-sliced packaged mozzarella is too dry

Mozzarella Pearls (Bocconcini)

Works for: Quick assembly, easier handling, bite-sized portions

Skip if: You want the traditional layered look - pearls sit differently on the plate

Instructions

You'll spend 10 minutes slicing and layering, then let everything rest while you set the table. The chicken works best when it hits the table at the same time as the main. For a version that comes together quickly, simple homemade chicken pairs well with this fresh salad.

  1. Slice tomatoes and mozzarella ¼ inch thick. Use a sharp knife and cut slowly - uneven slices make layering harder and look messy on the plate.
  2. Arrange tomato and mozzarella slices on a serving platter, alternating and slightly overlapping. Leave a small gap between each set so the dressing reaches every piece.
  3. Tuck fresh basil leaves between the layers. Tear larger leaves in half so they fit better and release more aroma.
  4. Whisk olive oil and balsamic vinegar in a small bowl, then drizzle over the salad. Pour in a zigzag pattern to coat evenly without pooling in one spot.
  5. Season with salt and black pepper, then let rest 10-15 minutes before serving. The salt draws out tomato juices that mix with the dressing - don't skip this step or the flavors stay separated.
Golden Rule
Pat mozzarella dry before slicing - wet cheese releases water that dilutes the dressing and makes the salad watery

What to Serve With It

Caprese salad needs something with substance to make a complete meal. If you're hosting, check easy chicken meal planning for more appetizer and main dish combinations.

Side Dish Prep Why It Works How to Serve
Grilled chicken breast Easy Adds protein without overpowering fresh tomato flavor Slice and place alongside salad, drizzle with extra olive oil
Crusty Italian bread Easy Soaks up olive oil and tomato juices from the plate Toast slices lightly, serve warm on the side
Light pasta with olive oil Easy Keeps the meal simple and light without heavy sauces Toss pasta with garlic and olive oil, serve in separate bowl
Prosciutto slices Easy Adds savory contrast to creamy cheese and fresh tomato Drape slices over salad or serve on the side
Baby arugula salad Easy Adds peppery bite that cuts through rich mozzarella Toss arugula with lemon juice, pile next to Caprese

Three ways to serve it:

  • For entertaining: Add prosciutto slices and balsamic glaze drizzle for an elegant appetizer that looks intentional
  • For weeknight dinners: Serve with crusty bread and grilled chicken to turn it into a complete light meal
  • For summer BBQ: Pair with grilled vegetables and a light pasta to keep everything fresh and bright
Shortcut
Buy pre-sliced fresh mozzarella from the deli counter - it saves 5 minutes and the slices are already uniform thickness

Store and Reheat

Store components separately if you plan to make this ahead. The pasta works best when it hits the table at the same time as the main. We keep a batch ready for nights like this - classic paella dish uses similar fresh ingredients.

Method Time Best For
🍳 Stovetop N/A Not recommended - heat wilts basil and makes cheese rubbery
📦 Microwave N/A Not recommended - destroys fresh texture and appearance
🔥 Oven N/A Not recommended - best served cold or room temperature only

For best results when storing:

  • Keep components separate: Store tomatoes, mozzarella, and basil in separate containers until ready to serve - assembled salad gets soggy within hours
  • Refrigerate up to 3-4 days: Place in shallow airtight containers and keep in the coldest part of the fridge
  • Drain before serving: If tomatoes release liquid during storage, drain excess water and pat gently with paper towels before plating
  • Add dressing fresh: Wait to drizzle olive oil and balsamic vinegar until just before serving - pre-dressed salad turns watery fast
  • Bring to room temperature: Take salad out of the fridge 15-20 minutes before serving so flavors bloom and cheese softens slightly

Frequently Asked Questions

Can I make Caprese salad ahead of time without it getting soggy?

Store tomatoes, mozzarella, and basil separately in the fridge up to 24 hours before serving. Assemble and dress the salad no more than 15-20 minutes before eating to prevent sogginess.

How should I store leftover Caprese salad to keep it fresh?

Place in a shallow airtight container and refrigerate for up to 3-4 days. Drain any excess liquid before serving and add a fresh drizzle of olive oil to restore moisture.

Can I use mozzarella balls instead of sliced mozzarella?

Yes, mozzarella pearls (bocconcini) work well - halve them before adding to the salad for easier eating. They won't create the same layered look but taste just as good.

What is the best way to tell when tomatoes are ripe enough?

Pick tomatoes that are deep red with slight give when pressed gently. Underripe tomatoes feel rock-hard and taste bitter, while overripe ones feel mushy and release too much liquid.

What side dishes pair well with Fresh Tomato Mozzarella Caprese Salad?

Serve with grilled chicken breast for protein, crusty Italian bread to soak up juices, or light pasta with olive oil. For entertaining, add prosciutto slices and a balsamic glaze drizzle.

Fresh Tomato Mozzarella Caprese Salad

Fresh Tomato Mozzarella Caprese Salad

No ratings yet
Fresh Tomato Mozzarella Caprese Salad layers ripe tomatoes with creamy mozzarella and basil, finished with olive oil and balsamic vinegar. The salad needs 10-15 minutes to rest so the flavors blend without getting soggy. Use fully ripe tomatoes and slice everything evenly for the best result.
Print Recipe Pin Recipe
Prep Time 10 minutes mins
Cook Time 1 minute min
Total Time 11 minutes mins
Servings: 4 servings
Course: Appetizer
Cuisine: Italian
Ingredients Method Notes

Ingredients
  

  • 3-4 large ripe tomatoes slice ¼ inch thick
  • 8 oz fresh mozzarella cheese pat dry 2 minutes then slice ¼ inch thick
  • ½ cup fresh basil leaves tear large leaves to release aroma
  • 3 tablespoon extra virgin olive oil high quality, drizzle over salad
  • 1 tablespoon balsamic vinegar drizzle over salad
  • ½ teaspoon salt season tomatoes lightly
  • ¼ teaspoon black pepper
  • 1 clove garlic minced, optional
  • 2 tablespoon pine nuts toasted, optional
  • 1 cup arugula optional

Method
 

  1. Slice tomatoes and mozzarella ¼ inch thick using a sharp knife to ensure even layering.
    3-4 large ripe tomatoes, 8 oz fresh mozzarella cheese
  2. Arrange tomato and mozzarella slices on a serving platter, alternating and slightly overlapping with small gaps so the dressing reaches every piece.
    3-4 large ripe tomatoes, 8 oz fresh mozzarella cheese
  3. Tuck fresh basil leaves between the layers; tear larger leaves in half to release more aroma.
    ½ cup fresh basil leaves
  4. Whisk extra virgin olive oil and balsamic vinegar in a small bowl, then drizzle over the salad in a zigzag pattern to coat evenly.
    3 tbsp extra virgin olive oil, 1 tbsp balsamic vinegar
  5. Season with salt and black pepper, then let the salad rest for 10-15 minutes before serving to allow flavors to meld.
    ½ tsp salt, ¼ tsp black pepper

Notes

  • Pat mozzarella dry before slicing to prevent watery salad.
  • Use ripe tomatoes with slight give for best flavor and juiciness.
  • Let salad rest 10-15 minutes so salt draws out tomato juices without sogginess.

Tried this recipe?

Let us know how it was!

Gado Gado Indonesian Salad

May 11, 2026

When you need a protein-packed vegetarian main that works for weeknight dinners or casual entertaining, gado gado delivers. Fresh blanched vegetables, crispy fried tofu, and hard-boiled eggs get dressed in thick peanut sauce.

Gado Gado Indonesian Salad

The sauce does the heavy lifting. Everything else is simple prep: boil, blanch, fry, plate.

Perfect for meal prep when you want something that holds up in the fridge but still tastes fresh when you eat it.

QUICK SUMMARY

Gado gado is an Indonesian salad with blanched vegetables, fried tofu, hard-boiled eggs, and creamy peanut sauce. Success comes from crisp-tender vegetables and thick sauce that coats every ingredient without pooling at the bottom.

⏱️Timing: 35 minutes total - 20 min prep, 15 min cook, assemble just before serving
🔥First Move: Toast raw peanuts 5 minutes on medium heat for richest sauce flavor
⚠️Watch Out: Thin sauce won't coat ingredients - add peanut butter 1 tablespoon at a time until thick

Why This Recipe Works

Blanching vegetables for 2-3 minutes keeps them crisp-tender instead of mushy, and shocking them in ice water stops the cooking so they hold their color. For a hearty main that pairs well with this salad, try this creamy noodles - the rich flavors balance the fresh vegetables perfectly.

Quick Reference
⏱️
Prep Time
20 min
🔥
Cook Time
15 min
⏰
Total Time
35 min
🍽️
Servings
4 servings
📊
Difficulty
Medium
🏷️
Category
Main Dish | Side
💡
Quick Tip
Toast peanuts for richest sauce flavor
🎯
Best For
Weeknight | Meal prep | Entertaining

Five keys to getting it right:

  • Blanch vegetables al dente: Cook green beans 2-3 minutes, then shock in ice water 1 minute so they stay crisp and bright green
  • Fry tofu until golden: Pat tofu dry, heat oil to 350°F, fry 3-4 minutes per side for crispy edges that hold up under sauce
  • Make sauce thick, not runny: Add warm water 1 tablespoon at a time until sauce coats a spoon heavily without dripping off
  • Boil eggs to tender yolks: Simmer 9 minutes, then cool immediately in ice water 5 minutes to stop cooking and prevent chalky yolks
  • Cut vegetables uniformly: Slice all components to similar size so every bite has balanced texture and flavor
Golden Rule
Assemble the salad just before serving - pre-dressed vegetables turn soggy and lose their crunch within 30 minutes

What You'll Need

Gado Gado Indonesian Salad - Gado Gado Indonesian Salad

Shopping for gado gado means hitting the produce section for fresh vegetables and grabbing firm tofu from the refrigerated aisle. If you want another fresh salad side dish with similar prep-ahead appeal, Russian salad uses boiled vegetables with creamy mayo dressing.

🥬
Fresh Vegetables
  • green beans
  • potatoes
  • cucumber
  • bean sprouts
🍗
Protein
  • firm tofu
  • eggs
  • tempeh (optional)
🥢
Peanut Sauce Base
  • peanut butter or ground peanuts
  • soy sauce or tamari
  • tamarind or lime juice
  • palm sugar or brown sugar
🧄
Aromatics & Garnish
  • garlic
  • fried shallots
  • chili paste (optional)

Ingredient Details

  • Peanut butter
    Use natural, unsweetened peanut butter or toast and grind raw peanuts for deeper flavor
  • Firm tofu
    Press tofu 10 minutes between towels to remove excess water before frying - dry tofu crisps better
  • Tamarind paste
    Adds fruity sourness; swap with lime juice if unavailable but use 2 tablespoons instead of 1
  • Green beans
    Trim ends before blanching; overcooking turns them drab olive instead of bright green
  • Boiled potatoes
    Use waxy potatoes like Yukon Gold - they hold their shape better than russets after boiling
  • Fried shallots
    Buy pre-fried from Asian grocery stores or make your own by frying thinly sliced shallots until golden
  • Soy sauce
    Swap for tamari if you need gluten-free; flavor stays nearly identical

Ingredient Swaps

Most swaps work if you match texture and protein content, so tempeh replaces tofu with minimal changes to cooking time. For a richer take on Indonesian flavors, pair this with a homemade beef recipe - the spiced meat contrasts the fresh vegetables perfectly.

Four swaps that work:

  • Tofu → tempeh: Firmer texture, nuttier flavor, fry 1-2 minutes longer per side until edges crisp and darken
  • Peanut butter → almond butter: Milder taste, similar creaminess, use same amount but sauce will be less intensely nutty
  • Tamarind → lime juice: More direct acidity with less fruity complexity, use 2 tablespoons lime instead of 1 tablespoon tamarind
  • Boiled potatoes → sweet potatoes: Adds natural sweetness and softer texture, boil 12-15 minutes until fork-tender

Fried Tofu

Works for: crispy texture, traditional preparation, absorbs sauce well

Skip if: avoiding frying, want softer protein, prefer steamed texture

Steamed Tofu

Works for: lighter meal, less oil, softer bite, quicker prep

Skip if: want crispy texture, need contrast to creamy sauce, prefer golden edges

Tempeh

Works for: firmer texture, nutty flavor, higher protein, holds shape well

Skip if: prefer milder taste, want softer protein, new to fermented foods

Instructions

Total active time is about 35 minutes with most tasks happening simultaneously - boil eggs while you blanch vegetables. When you're ready for a warm main alongside this salad, try a quick stew dish - the rich peanut flavors complement each other.

  1. Boil eggs and potatoes: Place eggs in a pot, cover with cold water by 1 inch, bring to a simmer, then cook 9 minutes. At the same time, boil peeled and cubed potatoes in a separate pot for 10-12 minutes until fork-tender. Drain both, then shock eggs in ice water 5 minutes before peeling.

  2. Blanch green beans: Bring a pot of salted water to a rolling boil, add trimmed green beans, cook 2-3 minutes until bright green but still crisp. Drain and immediately plunge into ice water for 1 minute, then drain well and pat dry with towels.

  3. Fry tofu until golden: Pat tofu dry with paper towels, cut into 1-inch cubes, heat 2 tablespoons oil in a frying pan over medium-high heat to 350°F. Fry tofu 3-4 minutes per side until golden and crispy, then drain on paper towels.

  4. Make peanut sauce: Whisk together ½ cup peanut butter, 3 tablespoons soy sauce, 1 tablespoon tamarind paste, 1 tablespoon brown sugar, 2 minced garlic cloves, and ¼ cup warm water. Add more warm water 1 tablespoon at a time until sauce coats a spoon thickly without dripping off.

  5. Assemble and serve: Arrange blanched vegetables, boiled potatoes, sliced cucumber, bean sprouts, fried tofu, and halved hard-boiled eggs on a platter. Drizzle peanut sauce over everything just before serving, then top with fried shallots and a squeeze of lime.

Shortcut
Buy pre-fried tofu from Asian grocery stores to skip the frying step - just cube and add it directly to the salad

What to Serve With It

Gado gado works as a complete meal but pairs well with steamed jasmine rice or crispy prawn crackers for extra crunch. If you're planning your shrimp caesar salad dinner, similar fresh-vegetable salads work on the same plate-building principles.
Side Dish Prep Why It Works How to Serve
Steamed jasmine rice Easy Neutral base absorbs peanut sauce, adds filling carbs Serve warm in bowls alongside salad components
Crispy prawn crackers Easy Adds salty crunch, traditional Indonesian pairing Scatter on top or serve in separate bowl
Simple cucumber salad Easy Refreshing acidity cuts through rich peanut sauce Toss sliced cucumbers with rice vinegar, serve chilled
Pickled vegetables Medium Tangy brightness balances creamy sauce, adds crunch Quick-pickle carrots and daikon, drain before serving
Indonesian fried rice (nasi goreng) Medium Hearty grain base, complements peanut flavors Serve warm alongside salad for complete meal

Three ways to serve it:

  • As a main: Pile everything on a large platter, drizzle sauce generously, serve with jasmine rice on the side for scooping
  • Family-style: Arrange vegetables and proteins on individual plates, pass peanut sauce at the table so everyone controls portions
  • Meal-prep bowls: Pack components separately in containers, store sauce in small jar, assemble when ready to eat
Best Pick
Serve gado gado at room temperature rather than cold - the peanut sauce stays creamy and vegetables taste more flavorful

Store and Reheat

Gado gado stores best with components separated - vegetables stay crisp, sauce stays thick, and nothing gets soggy. For another Southeast Asian dish with similar make-ahead appeal, simple homemade chicken curry keeps just as well when stored properly.

Method Time Best For
🍳 Stovetop 3-5 min medium heat Warming peanut sauce or re-crisping fried tofu gently
📦 Microwave 30-45 sec medium power Quickly warming individual components without overheating
🔥 Oven 10 min at 350°F Re-crisping fried tofu or tempeh to restore texture

For best results when storing:

  • Store sauce separately: Keep peanut sauce in airtight jar in fridge up to 3 days; thin with warm water before using if it thickens
  • Keep vegetables dry: Pat blanched vegetables completely dry before storing to prevent soggy texture
  • Refrigerate components: Store vegetables, tofu, and eggs in separate containers up to 3-4 days; assemble just before eating
  • Freeze sauce only: Peanut sauce freezes well up to 1 month; thaw overnight in fridge and whisk before serving
  • Refresh before serving: Toss stored vegetables with squeeze of lime juice to brighten flavor and restore freshness

Frequently Asked Questions

Can I make gado gado ahead and store it?

Yes, but store components separately in airtight containers for up to 3-4 days. Assemble and add peanut sauce just before serving to keep vegetables crisp and prevent sogginess.

How long should I boil vegetables for gado gado?

Blanch green beans 2-3 minutes until bright green but still crisp, then shock in ice water immediately. Boil potatoes 10-12 minutes until fork-tender, and simmer eggs exactly 9 minutes for tender yolks.

What is the best way to fry tofu for this salad?

Pat tofu completely dry with paper towels, cut into 1-inch cubes, then fry in 350°F oil for 3-4 minutes per side until golden and crispy. Drain on paper towels before adding to salad.

Why is my peanut sauce too thin or runny?

Too much liquid creates thin sauce that won't coat ingredients. Add peanut butter 1 tablespoon at a time or reduce warm water until sauce coats a spoon thickly without dripping off.

What sides pair well with gado gado?

Steamed jasmine rice, crispy prawn crackers, simple cucumber salad, and pickled vegetables all work. Indonesian fried rice (nasi goreng) makes it a complete meal with hearty grains.

Gado Gado Indonesian Salad

Gado Gado Indonesian Salad

No ratings yet
Gado gado is a protein-packed Indonesian salad featuring crispy fried tofu, hard-boiled eggs, and fresh blanched vegetables dressed with a thick, creamy peanut sauce. The key to success is crisp-tender vegetables and a sauce thick enough to coat every ingredient without pooling.
Print Recipe Pin Recipe
Prep Time 20 minutes mins
Cook Time 15 minutes mins
Total Time 35 minutes mins
Servings: 4 servings
Course: Main Dish, Side Dish
Cuisine: Indonesian
Ingredients Equipment Method Notes

Ingredients
  

  • 4 eggs hard boiled
  • 2 cups green beans trimmed and blanched
  • 2 cups potatoes peeled, cubed, boiled until fork-tender
  • 1 cup cucumber sliced
  • 1 cup bean sprouts fresh
  • 1 block firm tofu pressed, cut into 1-inch cubes
  • 2 tablespoons oil for frying tofu
  • ½ cup peanut butter natural, unsweetened
  • 3 tablespoons soy sauce or tamari for gluten-free
  • 1 tablespoon tamarind paste or substitute 2 tablespoons lime juice
  • 1 tablespoon brown sugar
  • 2 cloves garlic minced
  • ¼ cup warm water plus more to adjust sauce consistency
  • ¼ cup fried shallots for garnish
  • 1 tablespoon lime juice for finishing squeeze
  • 1 teaspoon chili paste optional, for sauce heat

Equipment

  • Pot For boiling eggs and potatoes
  • Frying pan For frying tofu
  • Whisk For mixing peanut sauce
  • tongs or slotted spoon For blanching vegetables and frying tofu

Method
 

  1. Place eggs in a pot, cover with cold water by 1 inch, and bring to a simmer. Cook eggs for 9 minutes. Simultaneously, boil peeled, cubed potatoes in a separate pot for 10-12 minutes until fork-tender. Drain potatoes and eggs, then shock eggs in ice water for 5 minutes before peeling.
    4 eggs, 2 cups potatoes
  2. Bring a pot of salted water to a rolling boil. Add trimmed green beans and cook for 2-3 minutes until bright green and crisp-tender. Drain and immediately plunge into ice water for 1 minute to stop cooking. Drain well and pat dry with towels.
    2 cups green beans
  3. Pat tofu dry with paper towels and cut into 1-inch cubes. Heat oil in a frying pan over medium-high heat to 350°F. Fry tofu cubes 3-4 minutes per side until golden and crispy. Drain on paper towels.
    1 block firm tofu, 2 tablespoons oil
  4. Whisk together peanut butter, soy sauce, tamarind paste, brown sugar, minced garlic, and warm water. Add more warm water 1 tablespoon at a time until sauce coats a spoon thickly without dripping off. Optionally stir in chili paste for heat.
    ½ cup peanut butter, 3 tablespoons soy sauce, 1 tablespoon tamarind paste, 1 tablespoon brown sugar, 2 cloves garlic, ¼ cup warm water, 1 teaspoon chili paste
  5. Arrange blanched vegetables, boiled potatoes, sliced cucumber, bean sprouts, fried tofu, and halved hard-boiled eggs on a platter. Drizzle peanut sauce over everything just before serving, then top with fried shallots and a squeeze of lime juice.
    2 cups green beans, 2 cups potatoes, 1 cup cucumber, 1 cup bean sprouts, 1 block firm tofu, 4 eggs, ½ cup peanut butter, ¼ cup fried shallots, 1 tablespoon lime juice

Notes

  • Toast raw peanuts for 5 minutes on medium heat to deepen sauce flavor before making peanut butter or use natural peanut butter.
  • Press tofu 10 minutes between towels to remove water for crispier frying results.
  • Assemble the salad just before serving to keep vegetables crisp and prevent sogginess.

Tried this recipe?

Let us know how it was!

Gavurdagi Turkish Tomato Salad

May 11, 2026

You need 20 minutes and one mixing bowl. No cooking, no heat, no multi-step prep.

Gavurdagi Turkish Tomato Salad

Tomatoes rest with the dressing while you toast walnuts on the stovetop. The pomegranate molasses caramelizes slightly with the olive oil and coats everything without sliding off.

This is the kind of salad you make on a Tuesday when you want something fresh that actually tastes like you tried.

QUICK SUMMARY

Gavurdagi Turkish Tomato Salad combines juicy tomatoes, toasted walnuts, and tangy pomegranate molasses in one bowl. The secret is dicing tomatoes uniformly and letting the dressed salad rest 10-15 minutes so flavors meld without turning soggy. Make this for weeknight dinners or summer entertaining when you need a side that holds up.

⏱️Time Reality: 15 minutes active, 5 minutes toasting walnuts, ready in 20
🔪First Move: Dice firm tomatoes ½ inch so they stay intact when tossed
⚠️Watch Out: Overripe tomatoes or too much dressing makes the salad soggy-add dressing gradually and serve within an hour

Why This Recipe Works

Toasting walnuts on medium-low heat brings out nutty oils without bitterness. Pomegranate molasses adds fruity acidity that cuts through the richness while olive oil binds everything into a cohesive dressing. For a version that comes together quickly, fresh salad side dish works when you need contrast on a plate with grilled meats or rich stews.

Quick Reference
⏱️
Prep Time
15 min
🔥
Cook Time
5 min
⏰
Total Time
20 min
🍽️
Servings
4 servings
📊
Difficulty
Easy
🏷️
Category
Side | Appetizer
💡
Quick Tip
Toast walnuts for crunch and flavor boost
🎯
Best For
Weeknight | Entertaining | Summer

What makes this salad hold together:

  • Uniform tomato dice creates consistent texture and prevents some pieces from breaking down faster than others
  • Toasted walnuts at medium-low heat develop golden color and crunchy texture without turning bitter from scorching
  • Resting time after dressing lets onions soften slightly and flavors meld while tomatoes stay firm and juicy
  • Balanced acidity from pomegranate molasses and lemon juice cuts through olive oil richness without overwhelming fresh tomato flavor
  • Firm, ripe tomatoes hold their shape when tossed and release just enough juice to coat without pooling
Quick Tip
Soak thinly sliced onion in cold water for 10 minutes to reduce sharpness and prevent it from overpowering the tomatoes

What You'll Need

Gavurdagi Turkish Tomato Salad - Gavurdagi Turkish Tomato Salad

Shopping for this takes one trip to the produce section and a quick stop at the Middle Eastern aisle for pomegranate molasses. Most people skip beef, but it balances the meal. We keep a batch ready for nights like this - easy beef side rounds out the plate when you're serving something light.

🍅
Base Vegetables
  • 4 medium ripe tomatoes
  • ½ red onion, thinly sliced
🌰
Crunch + Texture
  • ½ cup walnuts, roughly chopped
🌿
Fresh Herbs
  • ½ cup fresh parsley, finely chopped
🥢
Dressing Components
  • 2 tablespoon pomegranate molasses
  • 3 tablespoon olive oil
  • 2 tablespoon fresh lemon juice
  • 1 teaspoon red pepper flakes
  • 1 teaspoon salt
  • ½ teaspoon sumac (optional)

Ingredient Details

  • Tomatoes
    Use firm, ripe tomatoes-overripe ones release too much juice and turn the salad watery within minutes of dressing
  • Walnuts
    Toast on medium-low heat 3-5 minutes until fragrant and golden-high heat burns the oils and makes them taste bitter
  • Pomegranate molasses
    This sticky, dark syrup provides signature sweet-tart flavor-balsamic vinegar mixed with honey works but tastes less fruity
  • Onion
    Slice thin and soak in cold water 10 minutes to mellow the bite-skip this and raw onion overpowers the tomatoes
  • Parsley
    Chop finely, about 1 tablespoon packed per serving-large pieces make the salad harder to eat and the flavor uneven
  • Olive oil
    Use good quality extra virgin-it binds the dressing and adds smooth mouthfeel that balances the acidity
  • Lemon juice
    Fresh lemon juice adds brightness-bottled juice tastes flat and doesn't balance the pomegranate molasses as well

Ingredient Swaps

Walnuts provide traditional crunch, but almonds or pistachios work when you want a different texture. The salad stays Turkish with these changes-it just shifts slightly in flavor or convenience.

Four swaps that work:

  • Walnuts → almonds or pistachios: Different crunch, less traditional nutty flavor, but still provides texture contrast against juicy tomatoes
  • Pomegranate molasses → balsamic vinegar + honey: Mix 2 tablespoons balsamic with 1 teaspoon honey for similar sweet-tart balance, though it tastes less fruity
  • Parsley → cilantro or mint: Changes the herbal profile-cilantro adds brightness, mint brings coolness that works in summer
  • Red onion → shallot or green onion: Shallot offers milder bite, green onion adds fresher, sharper flavor that doesn't need soaking

Almond Swap

Works for: budget cooking, nut allergies to walnuts, when you want milder flavor

Skip if: you want authentic Turkish flavor, prefer rich nutty taste over mild crunch

Balsamic + Honey Mix

Works for: when pomegranate molasses isn't available, pantry cooking with common ingredients

Skip if: you want fruity complexity, prefer less sharp acidity in the dressing

Instructions

The salad comes together in 20 minutes with most time spent chopping vegetables. A good salad can make or break the plate. Rich mains need something to cut through, and salad does exactly that. For a version that comes together quickly, this fresh salad works as the contrast your plate needs.

  1. Toast walnuts in a small skillet over medium-low heat 3-5 minutes, stirring frequently, until golden and fragrant. Remove from heat immediately and let cool-residual heat continues cooking, so pull them just before they look done.

  2. Dice tomatoes into ½-inch uniform pieces and place in a large mixing bowl. Slice onion thin, soak in cold water 10 minutes, drain well, and add to tomatoes along with finely chopped parsley.

  3. Whisk pomegranate molasses, olive oil, lemon juice, red pepper flakes, and salt in a small bowl until fully combined and slightly emulsified. The dressing should coat the back of a spoon without separating immediately.

  4. Pour dressing over tomato mixture and toss gently with your hands or a large spoon, making sure every piece gets coated without crushing the tomatoes. Add cooled toasted walnuts and toss once more.

  5. Let salad rest 10-15 minutes at room temperature before serving so flavors meld and onions soften slightly. Taste and adjust with more lemon juice, salt, or sumac if needed-the salad should taste bright and balanced.

Golden Rule
Add dressing gradually and taste as you go-you can always add more, but you can't fix an overdressed, soggy salad

What to Serve With It

This salad needs something rich or grilled on the plate to balance its bright acidity. For a version that comes together quickly, light seafood dish planning gives you ideas when the main is already decided.

Side Dish Prep Why It Works How to Serve
Grilled chicken Easy Adds protein, mild flavor contrasts with tangy dressing Slice grilled chicken and serve alongside salad, spoon extra dressing over both
Pita bread Easy Mild chewiness complements fresh crunch, good for scooping Warm pita in oven 2 minutes, tear into pieces, serve on the side
Rice pilaf Easy Neutral base balances acidity, soaks up extra dressing Mound rice on plate, place salad next to it, let juices mix naturally
Roasted vegetables Medium Earthy notes pair with fresh salad, different textures on one plate Roast vegetables at 425°F until caramelized, serve warm next to chilled salad
Grilled lamb kebabs Medium Rich meat pairs with tangy salad, traditional Turkish pairing Skewer lamb, grill until charred, serve kebabs over salad to let juices mingle

Three ways to serve it:

  • As a meze appetizer: Serve in a shallow bowl with warm pita triangles and garlic yogurt sauce on the side for dipping
  • With grilled protein: Pair with grilled chicken, lamb, or beef and let the salad juices dress the meat naturally
  • For meal prep: Pack salad and dressing separately in containers, toss just before eating to keep tomatoes firm and walnuts crunchy
Best Pick
Serve this salad with grilled lamb kebabs and rice pilaf for a complete Turkish-style dinner that balances rich, tangy, and neutral flavors

Store and Reheat

This salad tastes best within an hour of dressing but holds up in the fridge for short-term storage. Soup adds the contrast this plate needs, but timing matters. Most people skip soup, but it balances the meal. For a version that comes together quickly, this quick soup dish rounds out the table when you're serving multiple courses.

Method Time Best For
🥗 Serve Cold N/A Fresh flavor, ideal texture-this salad is never reheated
🌡️ Room Temp 15-20 min out Takes edge off refrigerator chill, lets flavors open up before serving

For best results when storing:

  • Keep undressed salad components separate if making more than 2 hours ahead-store chopped vegetables in one container, dressing in another, toss just before serving
  • Refrigerate dressed salad up to 2 days in an airtight container, but expect softer tomatoes and walnuts that lose some crunch
  • Add fresh walnuts and parsley right before serving leftovers to restore texture and brightness that fades in storage
  • Drain excess liquid from stored salad before serving-tomatoes release more juice over time, which dilutes the dressing
  • Never freeze this salad-tomatoes turn mushy and walnuts lose their crunch completely when thawed

Frequently Asked Questions

Can I use cherry tomatoes instead of regular tomatoes?

Yes, halve or quarter cherry tomatoes depending on size. They hold their shape better than larger tomatoes and release less juice, making the salad less likely to turn soggy.

How long can I store Gavurdagi salad in the fridge?

Up to 2 days in an airtight container, but expect softer tomatoes and walnuts that lose crunch. Add fresh toasted walnuts and extra lemon juice before serving to refresh the flavor and texture.
What is the best way to know when walnuts are toasted enough?

Watch for golden color and a strong nutty smell, usually 3-5 minutes on medium-low heat. Pull them just before they look fully done-residual heat continues toasting after you remove the pan.

Why does my Gavurdagi salad turn soggy and how to fix it?

Overripe tomatoes or too much dressing causes sogginess. Use firm, ripe tomatoes and add dressing gradually while tossing-serve within an hour of dressing for best texture.

Can I double the recipe for a large crowd?

Yes, double all ingredients and use a larger bowl for tossing. Mix gently to avoid crushing tomatoes-consider dressing half the batch at a time if your bowl isn't big enough to toss everything without spilling.

Gavurdagi Turkish Tomato Salad

Gavurdagi Turkish Tomato Salad

No ratings yet
Gavurdagi Turkish Tomato Salad features juicy tomatoes, toasted walnuts, and tangy pomegranate molasses all combined in one bowl. The secret to this fresh side dish is dicing tomatoes uniformly and letting the dressed salad rest 10-15 minutes so flavors meld without sogginess. It's perfect for weeknight dinners or summer entertaining.
Print Recipe Pin Recipe
Prep Time 15 minutes mins
Cook Time 5 minutes mins
Total Time 20 minutes mins
Servings: 4 servings
Course: Appetizer, Side Dish
Cuisine: Turkish
Ingredients Equipment Method Notes

Ingredients
  

  • 4 medium tomatoes firm, ripe, diced into ½-inch pieces
  • 0.5 cup walnuts roughly chopped and toasted
  • 0.5 cup fresh parsley finely chopped
  • 0.5 unit red onion thinly sliced and soaked in cold water 10 minutes
  • 2 tablespoon pomegranate molasses
  • 3 tablespoon olive oil extra virgin
  • 2 tablespoon fresh lemon juice
  • 1 teaspoon red pepper flakes
  • 1 teaspoon salt
  • 0.5 teaspoon sumac optional

Equipment

  • Mixing bowl Used for tossing salad ingredients
  • Small skillet For toasting walnuts
  • Whisk To mix dressing

Method
 

  1. Toast walnuts in a small skillet over medium-low heat for 3-5 minutes, stirring frequently, until golden and fragrant. Remove from heat immediately and let cool.
    0.5 cup walnuts
  2. Dice tomatoes into ½-inch uniform pieces and place in a large mixing bowl. Thinly slice red onion and soak in cold water for 10 minutes, then drain well. Add onion and finely chopped parsley to tomatoes.
    4 medium tomatoes, 0.5 unit red onion, 0.5 cup fresh parsley
  3. Whisk pomegranate molasses, olive oil, fresh lemon juice, red pepper flakes, and salt in a small bowl until fully combined and slightly emulsified.
    2 tbsp pomegranate molasses, 3 tbsp olive oil, 2 tbsp fresh lemon juice, 1 tsp red pepper flakes, 1 tsp salt
  4. Pour dressing over tomato mixture and toss gently with a spoon or your hands to coat evenly without crushing tomatoes. Add cooled toasted walnuts and toss once more.
    4 medium tomatoes, 0.5 cup walnuts, 0.5 unit red onion, 0.5 cup fresh parsley, 2 tbsp pomegranate molasses, 3 tbsp olive oil, 2 tbsp fresh lemon juice, 1 tsp red pepper flakes, 1 tsp salt
  5. Let the salad rest at room temperature for 10-15 minutes before serving so flavors meld and onions soften slightly. Taste and adjust with more lemon juice, salt, or sumac if desired.
    0.5 tsp sumac

Notes

  • Use firm, ripe tomatoes to keep the salad from turning watery.
  • Toast walnuts on medium-low heat and remove just before fully browned to avoid bitterness.
  • Add dressing gradually and serve the salad within an hour to prevent sogginess.

Tried this recipe?

Let us know how it was!

German Potato Salad

May 11, 2026

Boiling waxy potatoes until fork-tender, then tossing them warm with a tangy bacon-mustard vinaigrette creates the signature texture and flavor of German potato salad. The warm dressing absorbs into the potatoes while the bacon fat adds richness and the vinegar cuts through with sharp acidity.

German Potato Salad

You don't need mayo or refrigeration. The warm serving temperature and mustard-based dressing set this apart from American potato salad.

This works for backyard barbecues, potlucks, or weeknight dinners when you want something hearty that holds up at room temperature.

QUICK SUMMARY

German potato salad uses waxy potatoes boiled until tender but firm, then tossed warm with a bacon-mustard vinaigrette. The dressing absorbs best when both potatoes and liquid are warm, creating a tangy, savory side dish served at room temperature or slightly warm.

⏱️Time Reality: 35-40 minutes total; boil potatoes 15-20 minutes, prep dressing while they cook
🥓Critical First Step: Cook bacon until crisp on medium-low heat to render fat for dressing base
⚠️Watch Out: Overcooked potatoes turn mushy when tossed; stop when fork pierces with slight resistance

Why This Recipe Works

Waxy potatoes hold their shape during boiling and tossing, while starchy varieties fall apart. For a version that comes together quickly, this fresh salad uses canned beans and skips the boiling step entirely.

Quick Reference
⏱️
Prep Time
15 min
🔥
Cook Time
20-25 min
⏰
Total Time
35-40 min
🍽️
Servings
4-6 servings
📊
Difficulty
Easy
🏷️
Category
Side
💡
Quick Tip
Use waxy potatoes for tender, firm texture
🎯
Best For
Weeknight | Entertaining | Potluck

What makes it work:

  • Waxy potatoes stay intact through boiling and tossing, while starchy varieties break down and turn gluey
  • Warm dressing absorption happens when both potatoes and vinaigrette are combined at similar temperatures
  • Bacon fat emulsifies the vinegar and mustard into a glossy coating instead of a separated puddle
  • Vinegar and sugar balance creates tangy-sweet flavor that cuts through rich mains like bratwurst or pork
  • Gentle folding technique keeps potato slices whole instead of mashed chunks
Quick Tip
Boil potatoes 15-20 minutes until fork pierces with slight resistance - they firm up as they cool

What You'll Need

German Potato Salad - German Potato Salad

A good salad can make or break the plate. For a version that comes together quickly, a creamy pasta side uses pre-roasted vegetables and jarred pesto for faster prep.

🥔
Base
  • 2 lbs waxy potatoes (Yukon Gold or red)
  • 1 yellow onion, diced
🥓
Savory
  • 6 slices bacon
🧂
Dressing
  • ½ cup white vinegar
  • ¼ cup chicken broth
  • 2 tablespoon sugar
  • 2 teaspoon mustard
  • Salt and black pepper
🌿
Garnish
  • 2 tablespoon fresh parsley, chopped

Ingredient Details

  • Waxy potatoes
    Choose Yukon Gold or red potatoes - they hold shape during boiling and tossing; avoid russets which turn mealy
  • Bacon
    Cook on medium-low heat 10-12 minutes until crisp - rendered fat becomes the dressing base and adds smoky richness
  • White vinegar
    Provides sharp tang that defines German potato salad; don't reduce amount or salad tastes flat
  • Yellow onion
    Soak diced onion in cold water 5-10 minutes before adding to reduce sharpness and mellow the bite
  • Mustard
    Acts as emulsifier to bind fat and vinegar; also adds sharpness - yellow mustard is traditional but Dijon works
  • Sugar
    Balances vinegar's acidity with subtle sweetness; adjust by 1-2 teaspoons based on preference
  • Chicken broth
    Thins the dressing without diluting flavor; substitute vegetable broth or water if needed

Ingredient Swaps

Rich mains need something to cut through, and salad does exactly that. For a version that comes together quickly, something rich like rolls uses thinly sliced beef and quick-braising technique for faster cooking.

Four swaps that work:

  • Bacon to turkey bacon or smoked tempeh - less fat and milder flavor; cook 2-3 minutes longer for crispness; vegetarian option sacrifices smoky depth
  • White vinegar to apple cider vinegar - slightly sweeter and less sharp; use same amount; changes tang profile but stays tangy
  • Yellow onion to red onion - sharper bite and purple color; use ¼ cup less or soak longer in cold water to mellow
  • Chicken broth to vegetable broth - neutral swap for vegetarian version; no flavor loss; water works but reduces savory depth

Regular Bacon

Works for: Traditional smoky flavor, rich fat for dressing, crispy texture

Skip if: Avoiding pork or looking for leaner option

Turkey Bacon

Works for: Lower fat content, milder flavor, pork-free

Skip if: Want maximum bacon fat for dressing or prefer traditional flavor

Smoked Tempeh

Works for: Vegetarian/vegan option, smoky flavor, firm texture

Skip if: Need rendered fat for dressing (add 2 tablespoon olive oil separately)

Instructions

You need 35-40 minutes from start to finish, with most of that time hands-off while potatoes boil. The chicken works best when it hits the table at the same time as the main, so juicy homemade chicken recipe uses one skillet and fewer dishes for faster cleanup.

  1. Boil potatoes in salted water 15-20 minutes until fork pierces with slight resistance but potatoes hold shape. Cut into 1-inch chunks for even cooking. Drain immediately and slice ¼-inch thick while warm. Transfer to large mixing bowl.
  2. Fry bacon on medium-low heat 10-12 minutes until crisp and fat renders into pan. Use skillet or frying pan. Transfer bacon to paper towel, reserve 3 tablespoons fat in pan, crumble bacon once cool.
  3. Sauté diced onion in reserved bacon fat 3-4 minutes until softened and translucent. Add vinegar, chicken broth, sugar, mustard, salt, and pepper. Whisk 1-2 minutes until sugar dissolves and dressing is warm.
  4. Pour warm dressing over sliced potatoes and fold gently with large spoon or spatula. Don't overmix or potatoes break. Add crumbled bacon and toss until potatoes are evenly coated with glossy dressing.
  5. Let sit 10 minutes at room temperature for flavors to meld and dressing to absorb. Garnish with chopped fresh parsley just before serving. Serve warm or at room temperature - not chilled.
Golden Rule
Combine warm potatoes with warm dressing for best absorption - cold dressing slides off instead of coating

What to Serve With It

Pasta adds the contrast this plate needs, but timing matters. When planning your meatless meal ideas around grain-based salads, start with lighter proteins and vegetables that won't overpower the dish.

Side Dish Prep Why It Works How to Serve
Grilled bratwurst Easy Smoky sausage pairs with tangy dressing; classic German combo Grill 12-15 minutes, serve alongside warm potato salad
Steamed green beans Easy Fresh crunch contrasts soft potatoes; adds green to plate Steam 5 minutes until crisp-tender, season with salt and butter
Sauerkraut Easy Extra tang complements vinegar dressing; traditional pairing Warm on stovetop 5 minutes or serve cold from jar
Roasted pork loin Medium Rich meat benefits from acidic potato salad; classic German meal Roast 25-30 minutes at 375°F, rest 10 minutes, slice thin
Fresh rye bread Easy Absorbs extra dressing; hearty texture matches potatoes Slice thick, toast lightly or serve fresh with butter

Three ways to serve it:

  • Backyard barbecue: Serve at room temperature alongside grilled meats; holds up 2-3 hours without refrigeration
  • Holiday side dish: Pair with roasted pork loin or ham; make 1-2 hours ahead and rewarm gently before serving
  • Weeknight comfort: Serve warm with bratwurst and steamed vegetables for traditional German meal in under 40 minutes
Best Pick
German potato salad works best at room temperature or slightly warm - refrigeration dulls flavors and firms up potatoes too much

Store and Reheat

The dressing separates slightly after refrigeration but comes back together when rewarmed. Rich mains need something to cut through, and lobster does exactly that, so a flaky lobster on the side uses butter and cream to balance the richness without overwhelming the plate.

Method Time Best For
🍳 Stovetop 5-7 min on low heat Gentle warming without drying; best for maintaining texture
📦 Microwave 1-2 min in 30-second intervals Quick warming for single servings; stir between intervals
🔥 Oven 10 min at 300°F (150°C) Warming larger portions evenly; cover with foil to prevent drying

For best results when storing:

  • Refrigerate in shallow airtight container within 2 hours of making; cools faster and stores 3-4 days safely
  • Don't freeze German potato salad - potatoes turn grainy and watery when thawed; texture breaks down completely
  • Let come to room temperature before serving after refrigeration; cold dulls tangy-sweet flavor balance
  • Stir gently before reheating to redistribute separated dressing; add 1-2 tablespoons water if too thick
  • Taste and adjust seasoning after reheating - vinegar and salt mellow overnight; add extra splash of vinegar or pinch of salt if needed

Frequently Asked Questions

Can I make German potato salad ahead and refrigerate?

Yes, make up to 24 hours ahead and store in airtight container. Let sit at room temperature 30 minutes before serving and add extra splash of vinegar to brighten flavors that mellow overnight.

How long should I boil potatoes for German potato salad?

Boil 15-20 minutes until fork pierces with slight resistance but potatoes hold shape. They firm up as they cool, so stop when slightly underdone rather than fully soft.

Is German potato salad served hot or cold?

Serve warm or at room temperature, never chilled. Cold temperatures dull the tangy-sweet flavor and firm up potatoes too much - this isn't American mayo-based potato salad.

What if my potato salad turns out soggy or mushy?

Overcooked potatoes or starchy varieties cause mushiness. Next time use waxy potatoes and stop boiling when fork pierces with resistance - you can't fix mushy potatoes after the fact.

Can I substitute red potatoes for waxy potatoes?

Red potatoes are waxy potatoes, so yes - they work perfectly. Yukon Gold also qualifies as waxy; both hold shape better than russets or other starchy varieties.

German Potato Salad

German Potato Salad

No ratings yet
German potato salad features waxy potatoes boiled until tender yet firm, tossed warm with a tangy bacon-mustard vinaigrette. The warm dressing absorbs into the potatoes, creating a savory side dish best served warm or at room temperature without mayo.
Print Recipe Pin Recipe
Prep Time 15 minutes mins
Cook Time 25 minutes mins
Total Time 40 minutes mins
Servings: 6 servings
Course: Side Dish
Cuisine: German
Ingredients Equipment Method Notes

Ingredients
  

  • 2 lbs waxy potatoes Yukon Gold or red, boiled and sliced ¼-inch thick
  • 1 whole yellow onion diced and soaked in cold water 5-10 minutes
  • 6 slices bacon fried until crisp and crumbled
  • 0.5 cup white vinegar
  • 0.25 cup chicken broth
  • 2 tablespoon sugar
  • 2 teaspoon mustard yellow or Dijon
  • salt and black pepper to taste, added to dressing
  • 2 tablespoon fresh parsley chopped, for garnish

Equipment

  • Skillet Used to fry bacon and sauté onions
  • Large pot Used for boiling potatoes
  • Mixing bowl To toss the potatoes and dressing

Method
 

  1. Boil waxy potatoes in salted water for 15-20 minutes until fork pierces with slight resistance. Drain immediately. Slice warm potatoes into ¼-inch thick pieces and transfer to a large mixing bowl.
    2 lbs waxy potatoes
  2. Fry bacon slices on medium-low heat in a skillet for 10-12 minutes until crisp and fat is rendered. Transfer bacon to paper towels to cool and crumble. Reserve 3 tablespoons bacon fat in the pan.
    6 slices bacon
  3. Add diced onion to the reserved bacon fat and sauté for 3-4 minutes until softened and translucent. Add white vinegar, chicken broth, sugar, mustard, salt, and black pepper. Whisk continuously for 1-2 minutes until sugar dissolves and dressing is warm.
    1 whole yellow onion, 0.5 cup white vinegar, 0.25 cup chicken broth, 2 tbsp sugar, 2 tsp mustard, salt and black pepper
  4. Pour the warm dressing over the sliced potatoes and fold gently with a large spoon or spatula to avoid breaking the potatoes. Add crumbled bacon and toss until potatoes are evenly coated with the glossy dressing.
    2 lbs waxy potatoes, 6 slices bacon
  5. Let the salad sit for 10 minutes at room temperature to allow flavors to meld and the dressing to absorb. Garnish with chopped fresh parsley just before serving. Serve warm or at room temperature, never chilled.
    2 tbsp fresh parsley

Notes

  • Use waxy potatoes like Yukon Gold or red potatoes to keep salad tender but firm.
  • Combine warm potatoes with warm dressing for optimal absorption and flavor.
  • Do not refrigerate salad before serving; it is best served warm or at room temperature to preserve flavor and texture.

Tried this recipe?

Let us know how it was!

Goi Ga Vietnamese Chicken Salad

May 11, 2026

When you need a fresh, tangy salad that works for meal prep or a light weeknight dinner, Goi Ga delivers crisp vegetables and tender chicken with minimal cooking. One poached chicken breast, julienned papaya, and a bright lime-fish sauce dressing do all the work.

Goi Ga Vietnamese Chicken Salad

The salad comes together in 35 minutes and tastes best served immediately. The dressing stays punchy without wilting the herbs if you toss everything just before eating.

Perfect for summer meals when cooking feels like too much effort but you still want real flavor.

QUICK SUMMARY

Goi Ga is a Vietnamese chicken salad with poached shredded chicken, julienned green papaya or daikon, carrots, fresh herbs, and peanuts tossed in a tangy lime-fish sauce dressing. Poach the chicken gently, julienne vegetables thinly, and dress the salad just before serving to keep everything crisp and bright.

⏱️Time: 35 minutes total; poach chicken 15 min, julienne 10 min, dress and toss last
🔪Method: Poach chicken at gentle simmer (180°F), shred finely, julienne papaya and carrots thin
⚠️Watch Out: Overdressing makes salad soggy; toss with dressing 1 minute before serving for crisp texture

Why This Recipe Works

Poaching chicken at a gentle simmer keeps the meat tender enough to shred easily without drying out. Most people skip salad, but it balances the meal - for a version that comes together quickly, try this simple salad recipe that uses similar technique but different flavors.

Quick Reference
⏱️
Prep Time
20 min
🔥
Cook Time
15 min
⏰
Total Time
35 min
🍽️
Servings
4 servings
📊
Difficulty
Easy
🏷️
Category
Main Dish | Appetizer | Light Meal
💡
Quick Tip
Poach chicken gently, shred finely, dress last
🎯
Best For
Weeknight | Meal prep | Entertaining

Five things that make this work:

  • Gentle poaching at 180°F keeps chicken breast moist and shreddable without rubbery edges
  • Julienned vegetables (⅛-inch strips) create crisp texture that holds up to dressing
  • Balanced dressing mixes fish sauce, lime juice, and sugar for tangy-sweet-salty harmony
  • Fresh herbs added last stay vibrant and aromatic instead of wilting from early mixing
  • Toasted peanuts on top add nutty crunch that stays crisp when added just before serving
Quick Tip
Drain shredded papaya and carrots in a colander for 10 minutes after julienning to remove excess water that would dilute the dressing.

What You'll Need

Goi Ga Vietnamese Chicken Salad - Goi Ga Vietnamese Chicken Salad

Shop for fresh herbs at Asian markets where you can grab mint, cilantro, and Thai basil in one stop. Rich mains need something to cut through, and salad does exactly that - we keep a batch ready for nights like this using a simple cups recipe that pairs well with this style of eating.

🍗
Protein
  • 2 chicken breasts (8-10 oz each)
🥬
Vegetables
  • 2 cups green papaya or daikon radish, julienned
  • 1 cup carrots, julienned
🧄
Aromatics & Herbs
  • ½ cup fresh mint leaves
  • ½ cup fresh cilantro
  • ¼ cup Thai basil (optional)
  • 2 garlic cloves, minced
  • 1-2 fresh chilies, sliced thin
🥢
Dressing
  • 3 tablespoons fish sauce
  • 3 tablespoons lime juice (2 limes)
  • 2 tablespoons sugar
  • ¼ cup roasted peanuts, chopped

Ingredient Details

  • Chicken breast
    Choose breasts of equal thickness (about 1 inch) so they poach evenly; slightly chilled chicken shreds more cleanly after cooking
  • Green papaya
    Look for firm, unripe green papaya at Asian markets; it should be hard and pale green inside without any orange tint
  • Fish sauce
    Use Vietnamese or Thai fish sauce (Three Crabs or Red Boat brands work well); check salt level and adjust if using saltier versions
  • Fresh herbs
    Buy herbs the day you make this; wilted or old herbs lose their bright flavor and make the salad taste flat
  • Lime juice
    Juice limes just before making dressing; bottled lime juice tastes dull and lacks the brightness fresh juice provides
  • Peanuts
    Toast raw peanuts in a dry skillet over medium heat for 3-5 minutes until golden and fragrant; let cool before chopping
  • Sugar
    White sugar dissolves fastest in cold dressing; palm sugar adds deeper flavor but takes longer to dissolve fully

Ingredient Swaps

Swaps work best when you match the original texture or function in the salad. A good chicken can make or break the plate - for a version that comes together quickly, try this homemade chicken recipe that uses similar poaching technique but different coating and flavor.

Four swaps that work:

  • Green papaya → daikon radish: Use equal amount daikon julienned the same way; slightly milder crunch but holds dressing well
  • Chicken breast → rotisserie chicken: Shred 2 cups rotisserie chicken; skip poaching step but toss with a bit of dressing to moisten
  • Fish sauce → soy sauce (or tamari): Use 2 tablespoons soy sauce plus 1 tablespoon water; less funky depth but still salty
  • Peanuts → toasted cashews: Chop cashews same size as peanuts; sweeter, softer crunch but works fine

Green Papaya

Works for: Authentic texture, mild flavor, absorbs dressing well

Skip if: Can't find it fresh; daikon is easier to source

Daikon Radish

Works for: Similar crunch, easy to find, works year-round

Skip if: You want milder flavor; daikon has slight peppery bite

Rotisserie Chicken

Works for: Quick weeknight version, no poaching needed

Skip if: You want exact texture control or less seasoning

Instructions

The chicken needs 15 minutes to poach, then 5 minutes to rest before shredding. The pork works best when it hits the table at the same time as the main - we keep a batch ready for nights like this using a quick pork dish with similar prep timing and serving style.

  1. Poach the chicken: Bring a pot of water to 180°F (gentle simmer with small bubbles), add chicken breasts, cover, and poach 15 minutes until internal temp hits 165°F and meat is opaque with no pink. Remove chicken, rest 5 minutes, then shred finely with fingers or two forks into bite-size pieces.

  2. Prep the vegetables: Peel green papaya and carrots, then julienne into ⅛-inch strips using a mandoline or sharp knife. Place julienned vegetables in a colander, sprinkle with a pinch of salt, and let drain 10 minutes to remove excess water.

  3. Make the dressing: Whisk together fish sauce, lime juice, sugar, minced garlic, and sliced chili in a small bowl until sugar dissolves completely. Taste and adjust balance - add more lime for tang, fish sauce for salt, or sugar for sweetness.

  4. Toast the peanuts: Heat a dry skillet over medium heat, add peanuts, and toast 3-5 minutes, stirring often, until golden and fragrant. Let cool, then chop coarsely.

  5. Toss and serve: In a large bowl, combine shredded chicken, drained vegetables, and fresh herbs (mint, cilantro, basil). Pour dressing over salad and toss gently to coat. Top with chopped peanuts and serve immediately while vegetables are still crisp.

Watch Out
Don't dress the salad more than 1 minute before serving - the acid in the dressing wilts herbs and makes vegetables soggy fast.

What to Serve With It

This salad needs something warm or starchy to round out the meal since it's light and bright on its own. For more weeknight dinner planning around chicken dishes, check out these weeknight lemon rosemary chicken meal ideas that use similar pairing logic.

Side Dish Prep Why It Works How to Serve
Steamed jasmine rice Easy Neutral, starchy base soaks up extra dressing and balances bright acidity Serve warm rice in bowls, pile salad on top or alongside
Vietnamese spring rolls Medium Adds chewy rice paper texture and turns salad into full meal Make rolls ahead, serve cold alongside salad with nuoc cham for dipping
Sautéed greens (bok choy) Easy Warm, mild vegetable contrasts with cold, tangy salad Sauté with garlic and serve hot next to chilled salad
Cucumber slices Easy Adds more crunch and cooling element without competing flavors Slice thin, toss with rice vinegar and salt, serve chilled
Vietnamese pork meatballs Medium Adds savory, rich protein that complements herby salad Grill or pan-fry meatballs, serve warm with salad for contrast

Three ways to serve it:

  • As a light lunch: Serve salad in shallow bowls over a small scoop of warm jasmine rice with extra lime wedges on the side
  • For meal prep: Pack dressing separately in small containers; toss with chicken, vegetables, and herbs right before eating to keep everything crisp
  • For entertaining: Arrange salad on a large platter, garnish with extra peanuts and herbs, and serve with rice paper wrappers for DIY spring rolls
Best Pick
Jasmine rice is the easiest pairing - it takes 15 minutes to cook while you prep the salad and soaks up any extra dressing at the bottom of the bowl.

Store and Reheat

Store the components separately to keep the salad crisp for meal prep. Salmon adds the contrast this plate needs, but timing matters - for a version that comes together quickly, pair it with a flaky salmon side dish that uses similar cooking time and serving temperature.

Method Time Best For
🍳 Stovetop 3-5 min over low heat Warming shredded chicken only; heat gently with a splash of water to prevent drying
📦 Microwave 1-2 min at 50% power Quick reheating of chicken; cover with damp paper towel to add moisture
🔥 Oven 5-7 min at 300°F Warming larger batch of chicken evenly; cover with foil to trap steam

For best results when storing:

  • Separate components: Store shredded chicken, julienned vegetables, dressing, and herbs in individual airtight containers in the fridge for up to 3 days
  • Keep dressing cold: Store dressing in a small jar or container; shake well before using since sugar may settle at bottom
  • Don't freeze: Vegetables lose their crisp texture when frozen; chicken can freeze up to 1 month but vegetables and herbs won't survive
  • Refresh before serving: Toss cold chicken with a tablespoon of fresh dressing to rehydrate before adding to salad
  • Add fresh herbs last: Keep fresh herbs stored separately with stems in water; chop and add just before serving for best flavor and color

Frequently Asked Questions

Can I use rotisserie chicken for Goi Ga Vietnamese Chicken Salad?

Yes - shred 2 cups rotisserie chicken and skip the poaching step. Toss shredded chicken with 1 tablespoon of the dressing to moisten it before adding to the salad since rotisserie chicken can be drier than freshly poached.

How long is Goi Ga salad good in the fridge and how to reheat?

Store components separately for 3-4 days - chicken, vegetables, dressing, and herbs in individual containers. Don't reheat the full salad; warm only the chicken gently (stovetop 3-5 minutes, microwave 1-2 minutes at 50% power) and toss with fresh vegetables and dressing before serving.

How do I know when poached chicken is done for shredding?

Chicken is done when it reaches 165°F internal temperature and the meat is opaque with no pink in the center. It should feel firm when you press it gently and pull apart easily into strands after resting 5 minutes.

What to do if my salad turns soggy quickly?

Drain julienned vegetables in a colander for 10 minutes after cutting to remove excess water, and don't dress the salad until 1 minute before serving. If it's already soggy, add fresh julienned vegetables and herbs to restore crunch.
Can I substitute green papaya with daikon in Goi Ga?

Yes - use equal amount of daikon radish julienned the same way as green papaya. Daikon has a slightly milder crunch and a subtle peppery bite but absorbs dressing well and stays crisp just as long.

Goi Ga Vietnamese Chicken Salad

Goi Ga Vietnamese Chicken Salad

No ratings yet
Goi Ga is a fresh Vietnamese chicken salad featuring gently poached shredded chicken, julienned green papaya or daikon, and a bright lime-fish sauce dressing. The salad combines crisp vegetables, fresh herbs, and toasted peanuts for a light, flavorful meal that comes together in just 35 minutes.
Print Recipe Pin Recipe
Prep Time 20 minutes mins
Cook Time 15 minutes mins
Total Time 35 minutes mins
Servings: 4 servings
Course: Appetizer, Light Meal, Main Dish
Cuisine: Vietnamese
Ingredients Equipment Method Notes

Ingredients
  

  • 2 chicken breast about 8-10 oz each, equal thickness
  • 2 cups green papaya or daikon radish julienned
  • 1 cup carrots julienned
  • 0.5 cup fresh mint leaves
  • 0.5 cup fresh cilantro
  • 0.25 cup Thai basil optional
  • 2 cloves garlic minced
  • 1-2 fresh chilies sliced thin
  • 3 tablespoons fish sauce Vietnamese or Thai
  • 3 tablespoons lime juice fresh, from 2 limes
  • 2 tablespoons sugar white sugar preferred for fast dissolving
  • 0.25 cup roasted peanuts toasted and chopped

Equipment

  • Pot For poaching chicken
  • Mandoline or sharp knife For julienning vegetables
  • Colander For draining julienned vegetables
  • Small bowl For whisking dressing
  • Dry skillet For toasting peanuts

Method
 

  1. Bring a pot of water to 180°F (gentle simmer with small bubbles). Add chicken breasts, cover, and poach for 15 minutes until internal temperature reaches 165°F and meat is opaque. Remove chicken and let rest for 5 minutes, then shred finely with fingers or forks into bite-size pieces.
    2 chicken breast
  2. Peel green papaya and carrots, then julienne into ⅛-inch strips using a mandoline or sharp knife. Place vegetables in a colander, sprinkle with a pinch of salt, and let drain for 10 minutes to remove excess water.
    2 cups green papaya or daikon radish, 1 cup carrots
  3. Whisk together fish sauce, lime juice, sugar, minced garlic, and sliced chili in a small bowl until sugar dissolves completely. Taste and adjust balance with more lime, fish sauce, or sugar as desired.
    2 cloves garlic, 1-2 fresh chilies, 3 tablespoons fish sauce, 3 tablespoons lime juice, 2 tablespoons sugar
  4. Heat a dry skillet over medium heat. Add roasted peanuts and toast for 3-5 minutes, stirring often, until golden and fragrant. Let cool, then chop coarsely.
    0.25 cup roasted peanuts
  5. In a large bowl, combine shredded chicken, drained vegetables, and fresh herbs (mint, cilantro, Thai basil). Pour dressing over the salad and toss gently to coat. Top with chopped peanuts and serve immediately while crisp.
    2 chicken breast, 2 cups green papaya or daikon radish, 1 cup carrots, 0.5 cup fresh mint leaves, 0.5 cup fresh cilantro, 0.25 cup Thai basil, 3 tablespoons fish sauce, 3 tablespoons lime juice, 2 tablespoons sugar, 0.25 cup roasted peanuts

Notes

  • Keep dressing separate until 1 minute before serving to prevent soggy vegetables and wilted herbs.
  • Drain julienned vegetables in a colander for 10 minutes to remove excess water and keep the salad crisp.
  • Use fresh lime juice and good quality fish sauce for a balanced, bright dressing flavor.

Tried this recipe?

Let us know how it was!

Air Fryer Beignets

May 11, 2026

Pillowy squares dusted with powdered sugar right out of the air fryer. That's what happens when you skip the deep fryer and let hot air do the crisping.

Air Fryer Beignets

The dough proofs for an hour, then you cut and cook. No oil vat, no splattering, no cleanup that takes longer than the recipe.

This works for weekend breakfast when you want something special without the mess. The air fryer circulates heat around each piece so you get golden edges and a soft center in under 10 minutes.

QUICK SUMMARY

Air fryer beignets deliver a crisp outer shell with soft, airy inside in 50 minutes total. Yeast dough proofs for an hour, then cuts into squares and air fries at 350°F for 8-10 minutes. Skip the deep fryer and get golden brown pillows with minimal oil and no splattering.

⏱️Time: 40 min proof, 8-10 min cook per batch
🔥Method: Proof yeast in warm milk, roll dough, cut squares, air fry in single layer
⚠️Watch out: Overcrowding = soggy edges; space pieces 1 inch apart

Why This Recipe Works

Active dry yeast proofs in warm milk to create the airy texture that makes beignets worth eating. For a version that comes together quickly, homemade pizza recipe uses similar dough handling with faster results.

Quick Reference
⏱️
Prep Time
40 min
🔥
Cook Time
8-10 min
⏰
Total Time
50 min
🍽️
Servings
6 servings (12-15 beignets)
📊
Difficulty
Medium
🏷️
Category
Dessert
💡
Quick Tip
Do not overcrowd air fryer basket
🎯
Best For
Weekend breakfast | Brunch | Entertaining
  • Warm milk activates yeast: Use 105°F liquid to proof yeast until frothy, 5-10 minutes before mixing
  • High heat creates puff: 350°F circulates air fast enough to crisp exterior while steam expands interior
  • Single layer spacing: Arrange pieces 1 inch apart so hot air reaches all sides for even browning
  • Halfway flip: Turn beignets at 4-5 minutes to brown both sides without burnt edges
  • Rest before dusting: Cool 5 minutes on wire rack so powdered sugar sticks instead of melting
Quick Tip
Proof yeast fully before adding flour or dough stays dense and flat

What You'll Need

Air Fryer Beignets - Air Fryer Beignets

All-purpose flour and active dry yeast form the base for pillowy texture. The fish works best when it hits the table at the same time as the main, like this flaky homemade fish recipe that takes minimal prep.

🍞
Dough Base
  • 2½ cups all-purpose flour
  • 1 packet (2¼ tsp) active dry yeast
  • ¼ cup granulated sugar
  • 1 cup whole milk (warmed to 105°F)
🧈
Richness
  • 3 tablespoon unsalted butter (melted)
  • 1 large egg
🫙
Finishing
  • Vegetable oil spray
  • Powdered sugar for dusting

Ingredient Details

  • All-purpose flour
    Moderate protein creates structure without toughness; use spooned and leveled cups
  • Active dry yeast
    Must foam in warm milk within 5-10 minutes or dough won't rise
  • Whole milk
    Warmed to 105°F activates yeast; over 115°F kills yeast
  • Unsalted butter
    Melted and slightly cooled before mixing to prevent curdling egg
  • Granulated sugar
    Feeds yeast and adds mild sweetness; adjust down for less sweet version
  • Eggs
    Room temperature blends easier; cold eggs can seize melted butter
  • Powdered sugar
    Dust when beignets are warm but not hot so it sticks without melting

Ingredient Swaps

Instant yeast skips the proofing step and goes straight into dry ingredients. Most people skip rangoon, but it balances the meal, like this easy rangoon recipe that pairs with sweet treats.

  • Whole milk → Almond or oat milk: Slightly less rich, may slow yeast activation; warm to same temp
  • All-purpose flour → Gluten-free flour blend: Different texture, add xanthan gum if blend lacks it
  • Unsalted butter → Vegan butter or coconut oil: Similar tenderness, coconut adds subtle flavor
  • Granulated sugar → Maple syrup or honey: Adds moisture; reduce milk by 2 tablespoon to compensate

Almond Milk

Works for: Dairy-free diets, mild flavor

Skip if: You want richest texture

Gluten-Free Flour

Works for: Celiac or gluten sensitivity

Skip if: Texture matters most (won't be as airy)

Coconut Oil

Works for: Vegan baking, adds tropical note

Skip if: You prefer neutral butter flavor

Instructions

Proof yeast first, then mix and rest dough before cutting. Pork adds the contrast this plate needs, but timing matters, like this quick pork dish that cooks in similar time.

  1. Proof yeast: Warm milk to 105°F, stir in yeast and 1 teaspoon sugar, let sit 5-10 minutes until foamy and frothy
  2. Mix dough: Combine flour, remaining sugar, melted butter, egg, and yeast mixture in bowl; knead 5 minutes until soft but not sticky
  3. Rest dough: Cover bowl with towel, let rise at room temp 1 hour until doubled in size
  4. Cut and prep: Roll dough ½-inch thick on floured surface, cut into 2-inch squares, spray both sides lightly with oil
  5. Air fry: Arrange squares in single layer 1 inch apart in preheated 350°F air fryer, cook 8-10 minutes flipping halfway, until golden brown and puffed
Quick Tip
Check beignets at 8 minutes; thin dough cooks faster and burns if left too long

What to Serve With It

Beignets need something tart or bitter to cut the sweetness. A good chicken can make or break the plate, or explore steak bites meal planning ideas for heartier brunch options.

Side Dish Prep Why It Works How to Serve
Fresh berries Easy Bright acidity cuts powdered sugar sweetness Toss with lemon juice, serve in bowl alongside
Greek yogurt Easy Tangy creaminess balances fried richness Dollop on plate, drizzle honey on top
Coffee or chai tea Easy Bitterness offsets sweet coating Serve hot in mugs for dipping
Maple syrup Easy Adds moisture and deeper sweetness Warm slightly, drizzle over beignets
Fruit compote Medium Warm tartness complements soft interior Simmer berries with sugar 10 min, spoon over

Three ways to serve it:

  • Weekend breakfast: Pair with scrambled eggs and bacon for sweet-savory balance
  • Brunch spread: Serve with chocolate dipping sauce and whipped cream for indulgent feel
  • Coffee pairing: Offer espresso shots or strong coffee to cut through richness
Best Pick
Fresh berries with lemon juice balance sweetness without adding more sugar

Store and Reheat

Beignets stay crisp for 3-4 days in an airtight container at room temp. Rich mains need something to cut through, and chicken does exactly that, like this classic chicken dish that reheats well too.

Method Time Best For
🔥 Air Fryer 3-4 min at 350°F Restores crispness quickly
🔥 Oven 5-7 min at 375°F Reheating larger batches evenly
📦 Microwave 15-20 seconds Speed only; texture goes soft

For best results when storing:

  • Room temp storage: Keep in airtight container up to 4 days; avoid fridge which dries them out
  • Freeze for longer: Wrap individually in plastic, freeze up to 2 months in freezer bag
  • Reheat from frozen: Add 2 minutes to air fryer time, no thawing needed
  • Avoid soggy texture: Don't stack hot beignets; cool completely before sealing container
  • Refresh powdered sugar: Dust again after reheating for fresh-made appearance

Frequently Asked Questions

Can I make air fryer beignets ahead of time?

Yes, prepare dough through step 3, cover tightly, refrigerate up to 24 hours. Let dough come to room temp 30 minutes before rolling and cutting, then air fry as directed.

How do I store and reheat air fryer beignets?

Store cooled beignets in airtight container at room temp up to 4 days. Reheat in air fryer at 350°F for 3-4 minutes or oven at 375°F for 5-7 minutes to restore crispness.

What is the best sign that air fryer beignets are fully cooked?

Look for golden brown color on both sides and puffed, pillowy shape. Internal temp should reach 190°F, or touch center and it should spring back lightly.

Why are my air fryer beignets dense instead of airy?

Yeast wasn't fully proofed or milk was too hot and killed yeast. Make sure milk is 105°F and yeast foams before mixing, then let dough rise full hour until doubled.

What side dishes or dips pair well with air fryer beignets?

Serve with fresh berries, Greek yogurt, chocolate dipping sauce, or fruit compote. Coffee or chai tea balances sweetness, while maple syrup adds moisture and deeper flavor.

Air Fryer Beignets

Air Fryer Beignets

No ratings yet
Air fryer beignets are pillowy squares with a crisp outer shell and a soft, airy inside. This recipe uses yeast dough proofed in warm milk, then air fried at 350°F for golden brown pillows without the mess of deep frying. Make a special breakfast or brunch treat with minimal oil and quick cleanup.
Print Recipe Pin Recipe
Prep Time 40 minutes mins
Cook Time 10 minutes mins
Total Time 50 minutes mins
Servings: 6 servings
Course: Breakfast, Brunch, Dessert
Cuisine: American
Ingredients Equipment Method Notes

Ingredients
  

  • 2.5 cups all-purpose flour spooned and leveled
  • 1 packet active dry yeast 2¼ tsp
  • 0.25 cup granulated sugar divided; 1 teaspoon for proofing yeast
  • 1 cup whole milk warmed to 105°F
  • 3 tablespoon unsalted butter melted and slightly cooled
  • 1 large egg room temperature
  • vegetable oil spray for spraying dough squares
  • powdered sugar for dusting

Equipment

  • Air fryer Used to cook beignet squares in a single layer at 350°F for 8-10 minutes.
  • Mixing bowl To combine ingredients and knead the dough.
  • Rolling pin For rolling the dough to ½-inch thickness.
  • Wire rack Used to cool beignets before dusting with powdered sugar.

Method
 

  1. Warm milk to 105°F, stir in active dry yeast and 1 teaspoon granulated sugar, let sit for 5-10 minutes until foamy and frothy.
    1 cup whole milk, 1 packet active dry yeast, 0.25 cup granulated sugar
  2. In a mixing bowl, combine all-purpose flour, remaining sugar, melted butter, egg, and yeast mixture. Knead for 5 minutes until dough is soft but not sticky.
    2.5 cups all-purpose flour, 0.25 cup granulated sugar, 3 tbsp unsalted butter, 1 large egg
  3. Cover bowl with a towel and let dough rise at room temperature for 1 hour or until doubled in size.
  4. Roll dough to ½-inch thickness on a floured surface. Cut into 2-inch squares and lightly spray both sides with vegetable oil spray.
    vegetable oil spray
  5. Arrange dough squares in a single layer in the preheated air fryer at 350°F, spacing pieces 1 inch apart. Cook for 8-10 minutes, flipping halfway at 4-5 minutes, until golden brown and puffed.
  6. Remove beignets from air fryer and cool on a wire rack for 5 minutes before dusting generously with powdered sugar.
    powdered sugar

Notes

  • Proof yeast fully in warm milk to ensure airy texture; milk must be 105°F not hotter.
  • Space beignet pieces 1 inch apart in the air fryer to avoid soggy edges.
  • Cool before dusting with powdered sugar so it sticks without melting.

Tried this recipe?

Let us know how it was!

Air Fryer Calzone

May 11, 2026

Crispy golden crust folded around melty mozzarella and Italian sausage. That's what happens when you air fry calzones at 375°F instead of baking them for 45 minutes in a conventional oven.

Air Fryer Calzone

The air fryer crisps the edges without drying out the filling. You get restaurant-quality texture in 12 minutes, no preheating a full oven required.

This works for weeknight dinners when you want something handheld and filling, or for meal prep when you need grab-and-go lunches that reheat without turning soggy.

QUICK SUMMARY

Air fryer calzones deliver crispy, golden crust and melty cheese filling in 12 minutes at 375°F. Roll pizza dough thin, seal edges with egg wash, and flip halfway through cooking. Works for weeknight dinners, meal prep, or entertaining when you need handheld portions that stay crisp.

⏱️Time Reality: 27 minutes total - 15 to assemble, 12 to air fry, no oven preheat wait
🔑Key Move: Roll dough to ¼ inch thickness so it cooks through without getting doughy inside
⚠️Watch Out: Too much marinara makes the filling soggy - use 2 tablespoons max per calzone

Why This Recipe Works

High heat and circulating air crisp the dough while the sealed pocket traps steam to melt the cheese. For a version that comes together quickly, try something tender like pork that pairs with Italian flavors.

Quick Reference
⏱️
Prep Time
15 min
🔥
Cook Time
12 min
⏰
Total Time
27 min
🍽️
Servings
2-4 servings
📊
Difficulty
Easy
🏷️
Category
Main Dish
💡
Quick Tip
Brush edges with egg wash for golden crust
🎯
Best For
Weeknight | Meal prep | Entertaining

Why the method works:

  • 375°F air temperature creates a crispy exterior without burning the crust before the inside cooks through
  • Egg wash on edges and top helps seal the calzone shut and produces a golden, restaurant-style finish
  • Flipping halfway through ensures both sides crisp evenly instead of one side staying pale and soft
  • Room temperature dough stretches without snapping back, making it easier to shape and seal without tears
  • Minimal sauce inside prevents the filling from turning the dough soggy while still adding moisture and flavor
Quick Tip
Preheat the air fryer for 3 minutes before adding calzones - the initial blast of heat sets the crust immediately.

What You'll Need

Air Fryer Calzone - Air Fryer Calzone

Premade pizza dough from the grocery store works just as well as homemade for this recipe. For another great garlic bread recipe that uses similar ingredients, this quick garlic bread dish complements calzones when you're feeding a crowd.

🍞
Dough
  • Pizza dough (store-bought or homemade)
🍗
Protein
  • Italian sausage (or vegetarian alternative)
🧀
Cheese & Dairy
  • Mozzarella cheese
  • Parmesan cheese
  • Egg (for egg wash)
🥢
Sauce & Oil
  • Marinara sauce
  • Olive oil
🥬
Vegetables
  • Bell peppers (optional)

Ingredient Details

  • Pizza dough
    Let sit at room temperature for 10 minutes before rolling - cold dough springs back and tears easily
  • Mozzarella cheese
    Use whole-milk mozzarella for best melt - part-skim turns rubbery and doesn't get as gooey
  • Marinara sauce
    Limit to 2 tablespoons per calzone - excess sauce seeps through the dough and makes it soggy
  • Italian sausage
    Cook and crumble the sausage before adding it to the filling so it doesn't release excess grease inside
  • Egg wash
    Beat one egg with 1 tablespoon water - brush on edges before sealing to glue the dough shut
  • Olive oil
    Brush or spray the air fryer basket to prevent sticking - parchment paper works but may blow around
  • Bell peppers
    Dice small and sauté first to remove moisture - raw peppers release water during cooking and make filling runny

Ingredient Swaps

Gluten-free or dairy-free versions work if you adjust cooking time slightly for different dough textures. For more recipe ideas using similar air fryer techniques, that quick fritters dish shows how temperature adjustments affect crust texture.

Four swaps that work:

  • Gluten-free pizza dough - Cook at 350°F for 14 minutes instead of 375°F for 12 minutes since gluten-free dough browns faster and can dry out at higher heat
  • Dairy-free mozzarella - Expect less stretch and melt - add a tablespoon of olive oil to the filling to keep it moist since dairy-free cheese doesn't release fat like regular cheese
  • Vegetarian sausage or mushrooms - Dice mushrooms and sauté until dry before adding to prevent excess moisture that makes the filling watery
  • Olive oil instead of egg wash - Brush the top and edges with olive oil for browning - you'll get less shine and a slightly different crust color but it still seals properly

Store-Bought Pizza Dough

Works for: Quick weeknight meals when you need dinner in under 30 minutes total

Skip if: You want complete control over dough thickness and chewiness

Homemade Pizza Dough

Works for: Meal prep days when you have time to let dough rest and rise properly

Skip if: You're making this on a busy weeknight with no advance planning

Instructions

The entire process takes 27 minutes from start to finish with most of that time spent air frying. A good chicken can make or break the plate, so if you're serving these as appetizers, consider pairing with an easy chicken side that takes the same amount of time.

  1. Roll the dough: Divide pizza dough into 2-4 portions depending on desired calzone size. Roll each portion into a circle about ¼ inch thick on a floured surface. Let dough rest for 2 minutes if it keeps shrinking back - this relaxes the gluten so it holds its shape.

  2. Fill and seal: Spread 2 tablespoons marinara on one half of each dough circle, leaving a 1-inch border. Add cooked Italian sausage, mozzarella, and any vegetables. Brush the edges with egg wash, fold dough over the filling, and press edges firmly to seal. Use a fork to crimp the edges for extra security.

  3. Prepare for air frying: Brush the top of each calzone with egg wash for golden color. Lightly oil the air fryer basket or use perforated parchment paper cut to fit. Preheat air fryer to 375°F for 3 minutes.

  4. Air fry: Place calzones in the basket without touching - cook in batches if needed. Air fry for 10 minutes, then use tongs to flip each calzone carefully. Cook for another 2 minutes until golden brown and crispy on both sides.

  5. Rest before serving: Remove calzones and let rest for 3 minutes before cutting. The filling stays molten hot while the crust firms up slightly, making them easier to handle and less likely to burn your mouth.

Watch Out
Don't overfill - more than ⅓ cup of filling per calzone causes the edges to burst open during cooking and creates a mess in the basket.

What to Serve With It

Calzones are self-contained meals but feel incomplete without something fresh or crunchy on the side. If you're building a full dinner spread with multiple vegetarian options, check weeknight asian salad meal ideas for pairing strategies that balance rich and light dishes.

Side Dish Prep Why It Works How to Serve
Simple green salad Easy Cuts through the richness of cheese and sausage with crisp, fresh greens Toss mixed greens with olive oil, lemon juice, and salt - serve immediately
Steamed broccoli Easy Light vegetable side balances the heavy, carb-forward calzone without competing Steam for 5 minutes, drizzle with olive oil and garlic - serve warm
Marinated olives Easy Adds salty, briny bite that contrasts with mild mozzarella and dough Serve at room temperature in a small bowl as a pre-dinner nibble
Caprese salad Easy Classic Italian pairing that echoes the tomato and cheese inside the calzone Slice tomatoes and fresh mozzarella, layer with basil, drizzle balsamic
Roasted vegetables Medium Hearty side that complements the filling without adding more carbs Roast zucchini, bell peppers, and red onion at 425°F for 20 minutes

Three ways to serve it:

  • Weeknight dinner - Pair calzones with a simple green salad and marinara on the side for dipping
  • Game day appetizers - Cut each calzone into thirds and serve with three dipping sauces: marinara, garlic butter, and spicy arrabbiata
  • Meal prep lunches - Wrap individual calzones in foil after cooling, label with date and filling type, freeze for up to 2 months
Best Pick
Marinara for dipping is non-negotiable - it reinforces the Italian flavors and adds moisture without making the crust soggy.

Store and Reheat

Calzones stay crisp longer than most leftover pizza when stored properly. Most people skip garlic bread, but it balances the meal when you're reheating calzones for lunch and want something extra on the side.

Method Time Best For
🍳 Stovetop 5-7 min, low heat, covered Avoiding dryness while crisping the bottom crust
🔥 Oven 10 min at 375°F Restoring crisp crust and melty interior like fresh
📦 Microwave 1-2 min Quick heat when you don't care about crust texture

For best results when storing:

  • Cool completely before wrapping in foil or plastic - trapping steam makes the crust soggy and encourages mold growth
  • Store in shallow airtight containers in the fridge for 3-4 days - stacking them creates condensation that softens the crust
  • Freeze individually wrapped calzones for up to 2 months - thaw in the fridge overnight before reheating for best texture
  • Reheat in the oven instead of the microwave when possible - 10 minutes at 375°F brings back the crispy crust
  • Add a tablespoon of water to the pan when reheating on the stovetop - the steam warms the filling while the direct heat crisps the bottom

Frequently Asked Questions

Can I use premade pizza dough for air fryer calzone?

Yes - store-bought pizza dough works just as well as homemade and saves 15 minutes of prep time. Let it sit at room temperature for 10 minutes before rolling so it stretches easily without tearing.

How do I store leftover air fryer calzones?

Cool completely, wrap individually in foil, and store in the fridge for 3-4 days. Reheat in a 375°F oven for 10 minutes to restore crispy crust - skip the microwave unless you're okay with soft, chewy dough.

What internal temperature shows calzone is done?

The dough should reach 200°F internally and the cheese should be fully melted. Visual cues work better - look for golden brown crust on both sides and puffed edges that feel firm when pressed.

Why is my calzone soggy after air frying?

Too much marinara or raw vegetables release moisture that soaks into the dough. Use only 2 tablespoons of sauce per calzone and sauté any vegetables before adding them to the filling to dry them out.

How do I scale the recipe for larger groups?

Make calzones in batches since they need space in the air fryer basket to crisp properly. Keep finished calzones warm in a 200°F oven while you cook the rest - they stay crispy for up to 20 minutes this way.

Air Fryer Calzone

Air Fryer Calzone

No ratings yet
Air fryer calzones provide a crispy golden crust with melty mozzarella and Italian sausage filling, cooked quickly at 375°F in 12 minutes. This method crisps the edges without drying out the filling and is ideal for quick weeknight dinners or meal prep lunches.
Print Recipe Pin Recipe
Prep Time 15 minutes mins
Cook Time 12 minutes mins
Total Time 27 minutes mins
Servings: 4 servings
Course: Main Dish
Cuisine: Italian
Ingredients Method Notes

Ingredients
  

  • 1 package pizza dough store-bought or homemade, let sit at room temperature for 10 minutes before rolling
  • 6 oz Italian sausage cooked and crumbled before filling
  • 1 cup mozzarella cheese whole-milk mozzarella for best melt, shredded
  • 2 tablespoon Parmesan cheese grated
  • 1 unit egg beaten with 1 tablespoon water for egg wash
  • 4 tablespoon marinara sauce 2 tablespoons per calzone max to avoid sogginess
  • 1 tablespoon olive oil for brushing air fryer basket to prevent sticking
  • ¼ cup bell peppers optional, diced small and sautéed before filling

Method
 

  1. Divide pizza dough into 2-4 portions based on calzone size. Roll each portion into a ¼ inch thick circle on a floured surface. Rest dough for 2 minutes if it shrinks back to relax gluten.
    1 package pizza dough
  2. Spread 2 tablespoons marinara on one half of each dough circle, leaving a 1-inch border. Add cooked Italian sausage, mozzarella cheese, Parmesan, and any vegetables. Brush edges with egg wash, fold dough over filling, and press edges firmly to seal. Crimp edges with a fork for extra security.
    6 oz Italian sausage, 1 cup mozzarella cheese, 2 tbsp Parmesan cheese, 1 unit egg, 4 tbsp marinara sauce, ¼ cup bell peppers
  3. Brush the top of each calzone with egg wash for a golden color. Lightly brush or spray the air fryer basket with olive oil or use perforated parchment paper. Preheat the air fryer to 375°F for 3 minutes.
    1 unit egg, 1 tbsp olive oil
  4. Place calzones in the basket without touching; cook in batches if needed. Air fry for 10 minutes, then carefully flip each calzone using tongs. Cook for another 2 minutes until golden brown and crispy on both sides.
  5. Remove calzones and let rest for 3 minutes to allow filling to firm up slightly while remaining hot.

Notes

  • Brush edges with egg wash to seal dough and achieve a golden crust.
  • Limit marinara sauce to avoid soggy filling; 2 tablespoons per calzone max.
  • Preheat air fryer for best crust texture before cooking.

Tried this recipe?

Let us know how it was!

Air Fryer Chili-Lime Cauliflower [Quick & Crispy]

May 11, 2026

Crisp, golden edges with a hit of smoky chili and bright lime - this air fryer cauliflower delivers on texture and flavor in under 25 minutes. The circulating heat locks in a charred, snappy exterior while keeping the inside tender enough to cut with a fork.

Air Fryer Chili-Lime Cauliflower

It's a side dish that earns its spot alongside tacos, grain bowls, or anything off the grill.

If you've had success with brussels sprout swaps that work, you'll find this follows the same logic of getting max char from a dense vegetable in dry heat.

Four pantry staples carry the whole dish.

QUICK SUMMARY

Air fryer chili-lime cauliflower is a 10-minute prep, 14-minute cook side dish built on four staples: cauliflower, oil, chili powder, and lime. Dry florets go into a hot basket and come out with golden, slightly charred edges and a citrusy, smoky coating that holds up from pan to plate.

⏱️Time Reality: 24 minutes total - no blanching required
🔑Method Shortcut: Add lime juice after cooking to prevent bitter char
⚠️Watch Out: Wet florets steam instead of crisp - pat completely dry before oiling

Why This Recipe Works

Cauliflower's dense, porous curd structure makes it one of the best vegetables for air frying. The circulating hot air pulls surface moisture away fast, triggering Maillard browning on the flat cut faces while the interior stays firm.

What separates chili-lime from a standard seasoned cauliflower is the acid applied at the finish, not before. Lime juice added early breaks down the surface and creates steam; added after cooking, it clings to the crisp crust and brightens every bite.

A light oil mist and uniform 1-1.5-inch florets handle the rest.

Check the specs below before you start.

Quick Reference
⏱️
Prep Time
10 minutes
🔥
Cook Time
14 minutes
⏰
Total Time
24 minutes
🍽️
Servings
4
📊
Difficulty
Easy
🏷️
Category
Side Dish / Snack
💡
Quick Tip
Pat florets dry and use a light oil mist for crisp edges
🎯
Best For
Weeknight dinner, quick party appetizer
  • 🔥 Cook at 400°F for maximum browning - lower temps produce steamed, pale florets
  • Cut florets so stems and crowns are similar in size, not just width
  • A single layer with airflow space is non-negotiable for crisp results
  • Shake the basket once at the 7-minute mark to expose all surfaces to heat
  • Lime zest goes on before cooking; fresh lime juice goes on after
Quick Tip
Brush florets with 1 teaspoon oil immediately after cooking, before adding lime juice - it boosts sheen and helps the seasoning stick to the hot crust.

What You'll Need

Air Fryer Chili-Lime Cauliflower - Air Fryer Chili-Lime Cauliflower

The shopping list is short. Most of these are pantry staples you already have, with fresh lime being the only item worth a specific trip.

This ingredient set also works well as a base for a air fryer broccoli recipe if you want to run both vegetables with the same seasoning. The oil and spice ratios translate directly.

🥬
Produce
  • 1 medium head cauliflower, cut into 1-1.5-inch florets
  • 1 lime (zest + juice)
  • Fresh cilantro, optional garnish
🌶️
Spices & Seasoning
  • 1½ teaspoon chili powder or chile-lime seasoning
  • ½ teaspoon garlic powder
  • ½ teaspoon salt
  • ¼ teaspoon black pepper
🫙
Fats & Sweetener
  • 1½ tablespoon neutral oil (canola or avocado)
  • 1 teaspoon honey or maple syrup (optional)

Ingredient Details

  • Cauliflower
    Buy a firm, tight head with no soft spots or browning. One medium head yields about 4-5 cups of florets, enough for 4 servings in a single batch.

  • Chili powder
    Standard chili powder includes cumin, paprika, and garlic - it delivers more depth than straight cayenne. Chile-lime seasoning (like Tajín) doubles down on the citrus-chile profile.
  • Neutral oil
    Use canola, avocado, or grapeseed oil. Olive oil has a lower smoke point and can taste bitter at 400°F in a small air fryer cavity.
  • Lime
    Zest before juicing. You need about 1 teaspoon zest and 1 tablespoon juice - enough to coat without over-wetting the florets.
  • Honey or maple syrup
    Optional but useful. A small amount rounds the heat and prevents seasoning from tasting flat. Use maple for a fully vegan dish.
  • Cilantro
    Add after cooking only. Cilantro wilts instantly in heat and loses its herby, bright quality if mixed in before air frying.
Ingredient Swaps

Four direct swaps cover the most common substitutions without losing the core chili-lime profile. For a deeper look at paprika alternatives, our guide to swapping out smoked paprika covers ratios and flavor differences across common options.

One swap shifts the flavor noticeably; the rest are near-seamless.

  • 🔄 Canola oil → avocado oil - same smoke point, similar crisp, slightly richer finish
  • 🌶️ Chili powder → smoked paprika + pinch of cayenne - smokier, sharper heat; loses the citrus-chile note
  • 🍋 Lime juice → lemon juice - holds the acidity but gives a flatter citrus aroma
  • 🍯 Honey → maple syrup - keeps sweetness, adds woodsy depth, keeps the recipe vegan

Avocado Oil

Works for: High-heat air frying, richer mouthfeel, neutral flavor

Skip if: You want the most budget-friendly option - canola costs less

Smoked Paprika + Cayenne

Works for: Deeper smokiness, pantry flexibility, no specialty seasoning needed

Skip if: The citrus-chile interplay is what you're after - this swap changes the character of the dish

Instructions

Getting the sequence right matters more than any single ingredient here. Adding lime juice to raw florets before cooking is the most common mistake - it pulls moisture out and prevents the crust you're working toward.

Following a similar approach to a air fryer sweet potato fries recipe helps here: dry surface, light oil coat, single layer, no crowding. The steps below follow that same logic.

  1. Preheat and dry - Preheat air fryer to 400°F for 3 minutes.

Pat cauliflower florets thoroughly dry with paper towels - no moisture on the surface. 2. Season - In a large bowl, toss florets with oil, chili powder, garlic powder, lime zest, salt, pepper, and honey (if using).

Toss until evenly coated. 3. Load basket - Arrange florets in a single layer with space between each piece.

Work in batches if needed - do not stack. 4. Air fry - Cook at 400°F for 14 minutes total.

Shake the basket at the 7-minute mark to expose the opposite faces to the heat element. 5. Finish - Transfer florets to a bowl.

Brush with 1 teaspoon oil, squeeze fresh lime juice over the top, and toss.

Garnish with cilantro if using.

Watch Out
Don't add lime juice inside the air fryer basket - the acid hitting the hot element can create steam that softens your crust in the final minutes. Always finish in a bowl.

What to Serve With It

Chili-lime cauliflower works as a side, a bowl component, or a party snack depending on what you build around it.

The peppery, citrusy profile contrasts well against richer proteins or creamy dips - it doesn't need much help to anchor a plate.

For a herb-forward dipping option, making indian mint cilantro chutney at home takes 5 minutes and pairs well with the chili-lime notes. It adds a cool, herby counterpoint that holds up against the heat.

Side DishPrepWhy It WorksHow to Serve
Grilled chicken or tacosMediumTangy cauliflower cuts through richer proteinPlate alongside or stuff into tacos with slaw
Steamed rice and black beansEasyContrasting textures, complete vegetarian bowlLayer in a bowl with cauliflower on top
Green salad with avocadoEasyCreamy avocado cools the spicy floretsServe cauliflower warm over dressed greens
Chipotle-lime aioliEasyEchoes the chili-lime profile as a communal dipServe in a small bowl for finger-food style
Yogurt-lime dipEasyGreek yogurt, lime zest, and cumin cool the heatMix and serve immediately alongside hot florets

Three ways to serve it:

  • Bowl meal - layer over rice and beans with a squeeze of extra lime and crumbled cotija
  • Party snack - serve on a platter with toothpick skewers, cilantro garnish, and dipping sauce on the side
  • Taco filling - stuff into corn tortillas with shredded cabbage and chipotle crema
Best Pick
The yogurt-lime dip is the fastest cooling contrast - Greek yogurt, a pinch of cumin, and lime zest takes 2 minutes and makes the heat in the cauliflower land better.

Store and Reheat

Leftovers keep for 3 days in the fridge. Store in a shallow airtight container lined with a paper towel layer to pull moisture away from the florets - this is the single biggest factor in whether they re-crisp properly.

Don't freeze this dish. Unlike freezing buffalo cauliflower, chili-lime cauliflower has no sauce coating to protect texture through a freeze-thaw cycle, so florets turn mushy.

Stick to fridge storage and reheat to order.

MethodTimeBest For
🍳 Air Fryer4-6 min at 375°FRestoring crisp exterior on single portions
🔥 Oven8-10 min at 400°FLarger batches; spreads on a sheet pan for even heat
📦 MicrowaveNot recommendedSteam builds inside and softens crust - avoid

For best results when storing:

  • Cool florets completely before sealing the container - trapping heat creates condensation
  • Use a paper towel layer under and over the florets to absorb moisture
  • Do not add extra lime juice before storing - it softens the edges overnight
  • Reheat from fridge-cold, not room temperature, for the most even re-crisp
  • Add a fresh squeeze of lime and pinch of chili powder after reheating to refresh the seasoning

Frequently Asked Questions

Can I use frozen cauliflower in this recipe?

Frozen cauliflower works but needs extra prep. Thaw completely, then press between paper towels to remove as much water as possible - frozen florets hold significantly more moisture than fresh and will steam rather than crisp if loaded into the basket wet. Add 2-3 extra minutes of cook time.

Do I need to blanch cauliflower before air frying?

No blanching required. Raw florets cut to 1-1.5 inches cook through fully at 400°F in 14 minutes, coming out tender inside with crisp edges. Blanching adds moisture and extra steps that work against the dry-heat crisping process.

How do I make this recipe vegan?

Swap honey for maple syrup - same ratio, same sweetness, fully vegan. Every other ingredient in the base recipe is already plant-based, so that single swap is all you need.

Can I double the recipe for a crowd?

Yes, but cook in separate batches - never stack florets. A doubled batch cooked in one overcrowded basket will steam, not crisp. Par-cook each batch, hold on a sheet pan in a 250°F oven, then re-crisp all florets together at 400°F for 3-5 minutes right before serving.

How do I reduce the strong smell of cauliflower when cooking?

Run your kitchen exhaust fan during the full cook time - the sulfur compounds that cause the smell dissipate quickly with ventilation. Adding lime zest to the florets before cooking also partially masks the odor during air frying.

Air Fryer Chili-Lime Cauliflower

Air Fryer Chili-Lime Cauliflower

No ratings yet
Crispy air-fried cauliflower tossed with a bright chili-lime glaze. Quick 24-minute recipe that yields golden edges, tender centers, and a tangy finish that pairs well with bowls or as an appetizer.
Print Recipe Pin Recipe
Prep Time 10 minutes mins
Cook Time 14 minutes mins
Total Time 24 minutes mins
Servings: 4 servings
Course: Side Dish / Snack
Cuisine: Mexican-American
Ingredients Equipment Method Notes

Ingredients
  

  • 1.5 lb cauliflower florets cut into 1–1.5 inch pieces
  • 2 tablespoon neutral oil canola or vegetable oil
  • 1 teaspoon kosher salt
  • 1 teaspoon chili powder
  • 0.5 teaspoon smoked paprika
  • 0.25 teaspoon black pepper freshly ground
  • 2 tablespoon lime juice about 1 lime
  • 1 teaspoon lime zest finely grated
  • 1 teaspoon honey or maple syrup for vegan
  • 2 tablespoon cilantro chopped

Equipment

  • Air fryer Basket-style or drawer, 3–5 qt capacity recommended
  • Mixing bowl Large for tossing florets
  • Measuring spoons For precise spice ratios

Method
 

  1. Preheat the air fryer to 400°F for 3 minutes while you prepare the cauliflower.
  2. Cut a 1.5–2 lb head of cauliflower into uniform 1–1.5 inch florets; pat completely dry with paper towels.
  3. Toss florets with 2 tablespoon neutral oil, 1 teaspoon kosher salt, 1 teaspoon chili powder, ½ teaspoon smoked paprika, and ¼ teaspoon black pepper in a large bowl until evenly coated.
  4. Arrange florets in a single layer in the air fryer basket with space between pieces; cook at 400°F for 7 minutes, then shake basket and cook 6–8 more minutes until edges are golden-brown and slightly charred.
  5. Mix 2 tablespoon lime juice, 1 teaspoon lime zest, and 1 teaspoon honey (or maple) in a small bowl; toss hot cauliflower with the lime glaze and 2 tablespoon chopped cilantro just before serving.

Notes

  • Pat florets fully dry and use a single layer in the basket for best crisping.
  • Add lime juice after cooking to avoid bitter burnt citrus flavor.

Tried this recipe?

Let us know how it was!

Air Fryer Chili-Lime Chicken Tenders [Weeknight Recipe]

May 11, 2026

Tangy lime, smoky chili heat, and a golden, blistered crust - these air fryer chicken tenders deliver all three in under 30 minutes. The secret is a simple chili-lime marinade that doubles as a dry-rub-style coating, letting the air fryer do the heavy lifting without a drop of oil to spare.

Air Fryer Chili-Lime Chicken Tenders

Whether you're pulling together a fast weeknight dinner or loading a platter for game day, this recipe keeps things direct and repeatable.

If you already know alternatives to chili powder, you can swap right in without missing a beat.

QUICK SUMMARY

These air fryer chili-lime chicken tenders come together in 25 minutes with a bright, zesty marinade and a crisp golden crust. Pat tenders dry, coat in the chili-lime mix, and air fry at 400°F for 10 minutes - flipping halfway. The result is juicy, snappy tenders with just enough heat and tang.

⏱️Time Reality: 15 min prep + 10 min cook - no marinating required
🔑Method Shortcut: Pat dry + light oil coat = crispiest crust with zero fuss
⚠️Watch Out: Overcrowding the basket kills crispiness - single layer only

Why This Recipe Works

Chicken tenders are the right cut for the air fryer. They're uniform, lean, and thin enough to cook through in exactly 10 minutes without drying out - unlike thicker cuts that need more time and attention.

The chili-lime coating works because it's built for high, dry heat.

Chili powder brings smoky depth that paprika alone can't match, while lime zest releases aromatic citrus oils that bloom under the air fryer's circulating heat.

That combination creates a crust that's genuinely layered in flavor.

Understanding what makes chicken distinct as a protein helps explain why tenders respond so well to this method - they're low-fat, so the coating does most of the flavor work.

Quick Reference
⏱️
Prep Time
15 minutes
🔥
Cook Time
10 minutes
⏰
Total Time
25 minutes
🍽️
Servings
4
📊
Difficulty
Easy
🏷️
Category
Main Dish / Appetizer
💡
Quick Tip
Pat dry + light oil = crispiest crust
🎯
Best For
Weeknight dinner, game day, meal prep

Here's what locks in success every time:

  • 🌡️ Target 165°F internal temp - use an instant-read thermometer at the thickest point
  • 🍋 Use both zest and juice - zest for aroma, juice for acidity; neither replaces the other
  • 🌽 A light dusting of cornstarch before the oil coat boosts crunch without changing flavor
  • 🔄 Flip once at the 5-minute mark for even browning on both sides
  • 🕐 Pull tenders from the fridge 10-15 minutes before cooking to reduce carryover heat risk
Golden Rule
Single layer in the basket, every time. Stack tenders and you steam them instead of crisping them.

What You'll Need

Air Fryer Chili-Lime Chicken Tenders - Air Fryer Chili-Lime Chicken Tenders

Everything in this recipe is straightforward grocery store territory. The only thing worth sourcing carefully is fresh lime - bottled lime juice skips the zest and loses the aromatic oils that define the coating.

If you're curious about making indian mint cilantro chutney at home, it doubles as a bright dipping option here and comes together in minutes.

🍗
Protein
  • 1½ lbs chicken tenders (tenderloins)
🍋
Citrus
  • Zest of 1 lime
  • 2 tablespoon fresh lime juice
🌶️
Spices
  • 1½ teaspoon chili powder
  • ½ teaspoon smoked paprika
  • ½ teaspoon garlic powder
  • ½ teaspoon salt
  • ¼ teaspoon black pepper
🫙
Extras
  • 1 tablespoon neutral oil (avocado or light olive)
  • 1 teaspoon cornstarch (optional, for extra crisp)
  • 1 teaspoon brown sugar (optional)

Ingredient Details

  • Chicken Tenders
    Trim to similar lengths so all pieces finish cooking at the same time. Pat completely dry with paper towels before seasoning.
  • Lime Zest
    Zest before juicing. Reserve a small pinch to sprinkle over finished tenders for fresh aroma.
  • Chili Powder
    An ancho-based blend adds deeper, earthier heat than standard grocery chili powder. Either works.
  • Cornstarch
    Optional but worth it - toss tenders in 1 teaspoon cornstarch before adding oil to build a crispier exterior.
  • Brown Sugar
    Adds a subtle caramelized note. Omit for a cleaner savory-citrus profile, or keep for a salty-sweet finish.
  • Neutral Oil
    Avocado oil handles the 400°F air fryer heat without smoking. Light olive oil works as a backup.

Ingredient Swaps

Most of this recipe is flexible once you understand the core flavor logic - chili heat, citrus brightness, and enough oil for crisping.

If you're already comfortable swapping out lime juice in other recipes, the same principles apply here for ratio and acidity level.

  • Chicken breasts cut into 1" strips replace tenders directly - add 1-2 minutes cook time and expect slightly firmer texture
  • Smoked paprika plus a pinch of cayenne replaces chili powder - more smoky, less complex; start with ¼ teaspoon cayenne and adjust
  • Spray olive oil replaces neutral oil - less even coverage, still crisps well
  • Honey replaces brown sugar - add it in the last 2 minutes only, as it browns faster than sugar

Chili Powder → Smoked Paprika + Cayenne

Works for: Smokier, more straightforward heat; great if chili powder isn't available

Skip if: You want the fuller, earthy chile complexity of traditional chili powder

Brown Sugar → Honey

Works for: Slightly floral sweetness and faster caramelization

Skip if: You're cooking at higher heat from the start - honey burns quickly

Instructions

Air frying chicken tenders is mostly about setup - the cooking itself is fast. Getting the seasoning on dry chicken and respecting the single-layer rule will carry you through.

For reference on what a good alternatives to cornstarch can do for your coating texture, arrowroot powder is the closest substitute here.

  1. Prep the chicken. Pat tenders completely dry with paper towels.

Trim to similar lengths.

Let sit at room temperature for 10-15 minutes. 2. Season. In a bowl, combine chili powder, smoked paprika, garlic powder, salt, pepper, lime zest, and brown sugar if using.

Toss tenders in cornstarch (if using), then coat in oil, then add the spice mix.

Toss until evenly coated. 3. Preheat. Set air fryer to 400°F and preheat for 3 minutes.

A hot basket helps the crust form immediately on contact. 4. Air fry. Arrange tenders in a single layer with space between each piece.

Cook for 5 minutes, flip, then cook another 5 minutes. 5. Check doneness. Use an instant-read thermometer - internal temp must hit 165°F.

Add lime juice and reserved zest over the top immediately before serving.

Watch Out
If tenders come out dry, slice and toss right away with a squeeze of fresh lime and a drizzle of oil - it rescues them within 60 seconds.

What to Serve With It

These tenders work in three directions: as a standalone protein, stuffed into tacos, or anchored to a full plate. The chili-lime profile plays well with anything cool, creamy, or crunchy alongside it.

Many of the same pairing ideas that work for what pairs with chicken thighs translate directly here - especially the rice and slaw combinations.

Side DishPrepWhy It WorksHow to Serve
Cilantro-lime riceEasyMild starch absorbs the tangy drippings without competingSpoon under or alongside tenders
Chopped cabbage slawEasyCrunchy, acidic contrast to warm, tender chickenPile next to or on top of tenders
Warm corn tortillasEasyTurns the whole plate into fast tacos with no extra workWrap tenders with fresh cilantro and onion
Pickled red onion + avocado slicesMediumBriny onion and creamy avocado balance the chili heatArrange on a platter for self-serve hosting
Chipotle-lime aioliEasySmoky, creamy dip that mirrors and deepens chili notesServe in a small bowl for dipping

Three ways to serve it:

  • Taco plate - wrap in corn tortillas with slaw, pickled onion, and a drizzle of lime crema
  • Rice bowl - serve over cilantro-lime rice with avocado slices and spicy mayo on the side
  • Party platter - fan tenders on a board with chipotle aioli, sliced lime, and fresh cilantro sprigs
Shortcut
Lime crema takes 90 seconds: stir sour cream with lime juice, zest, and a pinch of salt. Done.

Store and Reheat

Cooked tenders keep well for up to 3 days in the fridge in a shallow airtight container - glass with a vented lid works best to prevent sogginess.

For the freezer, they hold quality for up to 2 months, though the crust is best within the first month.

Store the lime zest swaps that work in mind if you want to freshen up reheated leftovers with a quick re-season before serving.

MethodTimeBest For
🍳 Air Fryer350°F, 4-6 minBest crispiness with minimal moisture loss
🔥 Oven375°F, 8-10 minLarger batches; cover 6 min then uncover to crisp
📦 Microwave + Air Fryer30-45 sec then 2 min at 350°FFastest option when short on time

For best results when storing:

  • Cool tenders completely before sealing - trapping steam softens the crust
  • Store sauce or crema separately to keep the coating intact
  • Freeze in a single layer first, then transfer to a bag once solid
  • Thaw overnight in the fridge before reheating - don't reheat from frozen
  • Add a fresh squeeze of lime after reheating to revive the citrus brightness

Frequently Asked Questions

Can we use frozen chicken tenders?

Thaw them fully in the fridge first, then pat dry before seasoning. Cooking from frozen leads to uneven cooking - the outside browns before the inside reaches 165°F.

How do we make these gluten-free?

This recipe is naturally gluten-free as written - no flour or breadcrumbs involved. Just confirm your chili powder blend and any packaged spices are certified gluten-free if cross-contamination is a concern.

Can the marinade be made ahead?

Yes - mix the dry spices up to 5 days ahead and store in a sealed jar. Add the lime zest, juice, and oil right before coating the chicken so the citrus stays bright and the moisture doesn't break down the surface.

Why did my tenders stick to the air fryer basket?

Two causes: not enough oil on the chicken, or placing them in a cold basket. Coat tenders in oil before seasoning and always preheat the air fryer for 3 minutes before adding food.

Is cornstarch necessary for crispy air fryer tenders?

It's not required, but 1 teaspoon makes a noticeable difference - it pulls surface moisture from the chicken and forms a slightly crunchier shell under the spice coat. Skip it and the tenders are still crisp, just slightly less so.

Air Fryer Chili-Lime Chicken Tenders

Air Fryer Chili-Lime Chicken Tenders

No ratings yet
Quick air fryer chili-lime chicken tenders use a lime-forward marinade, a light oil coating, and a short high-heat air-fry to produce blistered, tangy tenders ready in 25 minutes. The recipe balances zest, juice, and smoky chili powder for bright flavor and crisp texture.
Print Recipe Pin Recipe
Prep Time 15 minutes mins
Cook Time 10 minutes mins
Total Time 25 minutes mins
Servings: 4 servings
Course: Main Dish / Appetizer
Cuisine: American, Tex-Mex
Ingredients Equipment Method Notes

Ingredients
  

  • 1 lb chicken tenders trimmed, about 8–10 pieces
  • 1 lime zest and juice (zest first, then juice), about 2 tablespoon juice
  • 1 tablespoon neutral oil avocado or canola
  • 1 teaspoon chili powder or ancho-based blend
  • 1 teaspoon smoked paprika
  • 0.5 teaspoon ground cumin
  • 0.5 teaspoon garlic powder
  • 0.25 teaspoon ground cayenne adjust to heat preference
  • 1 tablespoon brown sugar packed; optional for caramelization
  • 1 teaspoon kosher salt
  • 0.5 teaspoon black pepper freshly ground
  • 1 teaspoon cornstarch optional for extra crisp
  • cilantro small handful chopped for garnish (optional)

Equipment

  • Air fryer Basket-style or drawer; 3–5 quart capacity works for 1 batch
  • Instant-read thermometer For internal temperature check
  • Mixing bowl Medium
  • Tongs For flipping tenders

Method
 

  1. Preheat the air fryer to 400°F for 3 minutes while you prep; ensure the basket is clean and dry.
  2. Pat the chicken tenders dry with paper towels and place in a medium bowl.
  3. Whisk lime zest, lime juice, oil, chili powder, smoked paprika, cumin, garlic powder, cayenne, brown sugar, salt, and pepper in a small bowl; pour over tenders and toss to coat evenly.
  4. If using cornstarch, sprinkle it over the coated tenders and toss briefly; arrange tenders in a single layer in the air fryer basket with space between pieces.
  5. Cook at 400°F for 4 minutes, flip tenders with tongs, then cook 3–4 more minutes until internal temperature reads 165°F and edges are golden with tiny blisters.
  6. Transfer to a plate and rest 3 minutes; sprinkle reserved lime zest and chopped cilantro before serving.

Notes

  • Do not overcrowd the basket—cook in two batches if necessary for even crisping.
  • Use an instant-read thermometer at the thickest point to confirm 165°F for safe, juicy tenders.

Tried this recipe?

Let us know how it was!

Air Fryer Chili-Lime Chicken Wings [Quick Weeknight Recipe]

May 11, 2026

Game-day spreads, backyard hangs, or a Friday night when you want something impressive without much effort - these air fryer chili-lime chicken wings fit every one of those moments. The combination of sharp lime zest, warm chili heat, and a sticky honey glaze produces wings that look like they came from a restaurant kitchen, and the air fryer gets them there in under 40 minutes.

Air Fryer Chili-Lime Chicken Wings

If you're building a spread and want a cooling dip alongside, a Indian mint cilantro chutney recipe works beautifully here and takes only minutes to prep.

Dry skin is everything with this recipe.

QUICK SUMMARY

Air fryer chili-lime chicken wings come together in 37 minutes with a simple dry rub, circulating air at 400°F, and a honey-lime glaze brushed on in the final minutes. Pat wings dry and cook in a single layer - those two steps determine whether you get crisp, blistered skin or steamed disappointment. Bright, tangy, and just warm enough to keep people reaching back in.

⏱️Time Reality: 37 minutes total - glaze in the last 2 minutes only
🔑Method Shortcut: Dry brine 1 hour ahead for noticeably crispier skin
⚠️Watch Out: Crowding the basket traps steam - cook in batches if needed

Why This Recipe Works

Air fryers run hot circulating air at high speed, which means the surface of a wing dries out and renders faster than in a conventional oven. That dry, fast heat is what drives the blistered, golden skin you'd otherwise need a deep fryer or very hot broiler to achieve.

If you've had success with a air fryer bbq chicken wings recipe before, this chili-lime version follows the same core logic - dry skin, space, high heat.

Quick Reference
⏱️
Prep Time
15 minutes
🔥
Cook Time
22 minutes
⏰
Total Time
37 minutes
🍽️
Servings
4
📊
Difficulty
Easy
🏷️
Category
Appetizer
💡
Quick Tip
Pat wings dry and space them for maximum crispness
🎯
Best For
Entertaining

What makes the chili-lime flavor land so well here is the layering: dry rub goes on first to season the meat and help the skin set, then the honey-lime glaze coats the already-crisped surface at the end so it caramelizes quickly without burning.

  • Cook at 400°F for maximum skin browning and fat rendering
  • Flip wings at the halfway mark for even browning on both sides
  • Apply glaze only in the last 1-2 minutes - earlier and it scorches
  • Use fresh lime zest in the rub; bottled juice alone won't deliver the same bright aroma
  • Rest wings 3 minutes after cooking so juices redistribute before serving
Golden Rule
Internal temperature must hit 165°F at the thickest part of the drumette - visual browning alone isn't a reliable doneness indicator.

What You'll Need

Air Fryer Chili-Lime Chicken Wings - Air Fryer Chili-Lime Chicken Wings

Good wings start at the grocery counter - look for drumettes and flats that are roughly equal in size so they finish cooking at the same time.

A making air fryer whole chicken at home guide will tell you the same thing: uniform pieces mean consistent results.

🍗
Protein
  • 2 lbs chicken wings (drumettes + flats)
🌶️
Spices & Rub
  • 1½ teaspoon chili powder
  • ½ teaspoon cayenne pepper
  • 1 teaspoon garlic powder
  • 1 teaspoon salt
  • ½ teaspoon black pepper
🍋
Lime
  • Zest of 2 limes
  • 3 tablespoon fresh lime juice
🫙
Glaze & Oil
  • 2 tablespoon honey
  • 1 tablespoon neutral oil
  • Fresh cilantro (garnish)

Ingredient Details

  • Chicken Wings
    Pat completely dry with paper towels before seasoning - any surface moisture steams rather than crisps in the air fryer.
  • Lime Zest
    Zest both limes before juicing; the volatile oils in the zest give the rub its sharp citrusy punch that juice alone can't replicate.
  • Chili Powder
    Standard blended chili powder gives warm, earthy heat. For sharper heat, swap part of it for cayenne but reduce quantity.
  • Honey
    Thickens the glaze and helps it cling and caramelize on contact with the hot skin - don't skip or the glaze slides off.
  • Neutral Oil
    A light coating ensures the dry rub adheres and the skin starts crisping from the first minute of airflow.
  • Cilantro
    Add fresh after cooking only - heat kills the bright herby note you want as contrast to the sticky glaze.

Ingredient Swaps

Most of the substitutions here are straightforward, though a couple change the result more than others. Knowing your way around alternatives to chili powder will help you dial the heat profile up or down without losing the warm backbone this recipe needs.

  • 🔄 Honey → maple syrup: slightly earthier and thinner; glaze still sticks but reduce it a little longer
  • 🔄 Chili powder → cayenne: use half the amount - cayenne is significantly hotter per teaspoon
  • 🔄 Chicken wings → drumsticks: add 5-8 minutes to cook time and check 165°F internal temp
  • 🔄 Neutral oil → avocado oil: nearly identical behavior at high heat with a faint fruity note

Honey vs. Maple Syrup

Works for: Either gives a sticky, caramelized glaze with sweet balance

Skip if: You want a perfectly neutral sweetness - maple adds a distinct earthy note

Chili Powder vs. Cayenne

Works for: Cayenne delivers a cleaner, sharper heat that some prefer

Skip if: You're feeding anyone sensitive to heat - cayenne amplifies quickly

Instructions

Setting up your air fryer correctly is half the work - preheat to 400°F for at least 3 minutes so the basket is hot when wings go in. If you've ever wondered about replacements for smoked paprika in a rub like this, a small amount adds a charred depth without changing the chili-lime core.

  1. Dry and season: Pat wings completely dry. Toss with oil, chili powder, cayenne, garlic powder, salt, pepper, and half the lime zest until fully coated.
  2. Load the basket: Arrange wings in a single layer with space between each piece.

Work in batches for 5-6 quart fryers - don't crowd.
3. First cook: Air fry at 400°F for 11 minutes. Flip every piece, then cook another 9 minutes until skin is golden and beginning to blister.
4. Make the glaze: Whisk honey, lime juice, and remaining zest in a small bowl.

If thin, simmer briefly in a small saucepan for 2 minutes to thicken.
5. Glaze and finish: Brush glaze over wings, return to air fryer for 2 minutes at 400°F until glaze caramelizes and skin is sticky and deep golden. Rest 3 minutes, then garnish with cilantro.

Watch Out
If glaze browns too fast in those final 2 minutes, drop temperature to 380°F - the honey caramelizes quickly and can burn at full heat.

What to Serve With It

These wings work best alongside something cool and crunchy to balance the heat. A simple slaw or sliced cucumber gives the palate a reset between pieces without competing with the chili-lime glaze.

Side Dish Prep Why It Works How to Serve
Simple cabbage slaw Easy Cool crunch cuts through chili heat Dress with lime juice and a pinch of salt; serve cold
Steamed jasmine rice Easy Neutral base soaks up dripping glaze Serve in a small bowl alongside; add lime wedge
Sliced cucumber + lime wedges Easy Refreshing palate cleanser between bites Arrange on a platter with flaky salt and chili flakes
Pickled red onions Medium Sharp acid pop balances sticky richness Pile on top of wings or serve on the side
Charred corn salad Medium Smoky-sweet veg mirrors warm chili notes Toss with lime juice and cilantro; serve at room temp

Three ways to serve it:

  • 🍽️ Party platter: pile wings on a board with lime wedges, cilantro sprigs, and creamy cilantro-lime dip in a small bowl at the center
  • 🌮 Taco-style: pull meat off the bone, tuck into warm corn tortillas with slaw and pickled onions
  • 🥗 Bowl meal: serve over jasmine rice with cucumber, extra glaze drizzled on top, and fresh lime zest
Shortcut
Store-bought creamy cilantro-lime dressing works as a quick dip - stir in a squeeze of fresh lime and a pinch of chili powder to sharpen it up.

Store and Reheat

Wings keep well for 3 days refrigerated in a shallow airtight container - lay a paper towel underneath to absorb excess moisture and keep the skin from going soft against the container bottom.

Freeze cooked wings up to 1 month in a zip bag; thaw overnight in the fridge before reheating.

Method Time Best For
🍳 Air Fryer 5-7 min at 375°F Best method - restores crisp skin closest to fresh
📦 Microwave + Broil 45-60 sec, then 1-2 min broil Quick reheats when you don't want to wait
🔥 Oven 10 min at 400°F on wire rack Larger batches; wire rack keeps base crisp

For best results when storing:

  • Cool wings fully before sealing - trapping steam softens the skin
  • Don't stack wings directly; a single layer or paper towel between layers helps
  • Reheat glaze separately and brush on after reheating, not before
  • Skip the microwave-only route - it softens skin and can make the glaze gummy
  • Add a fresh squeeze of lime after reheating to revive the bright citrus note

Frequently Asked Questions

Can we make these wings without honey?

Yes. Maple syrup is the closest swap - it's slightly thinner and adds a mild earthy note, but it still caramelizes and sticks well. Reduce it a minute longer on the stovetop if you want the same viscosity as honey.

How do we make wings extra-crispy in a small air fryer?

Cook in batches of no more than 1.5 lbs so air circulates freely around every piece. Dry brining - salting wings uncovered in the fridge for 1 hour before cooking - also pulls surface moisture out and tightens the skin significantly.

Can we marinate wings overnight for more flavor?

You can, but avoid marinating in lime juice overnight - the acid starts to break down the surface proteins and can make the skin soft rather than crisp. A dry rub overnight in the fridge is a better approach and actually improves crispness.

What internal temperature should the wings reach?

165°F at the thickest part of the drumette, checked with an instant-read thermometer away from the bone. Juices should run clear when the meat is pierced at that point.

Will this recipe work for bone-in thighs or drumsticks?

It works for both, with adjustments. Drumsticks need 5-8 extra minutes and should be checked at 165°F internal temp; bone-in thighs are thicker still and may need up to 30-32 minutes total at 400°F.

Air Fryer Chili-Lime Chicken Wings

Air Fryer Chili-Lime Chicken Wings

No ratings yet
Crispy air fryer chicken wings tossed in a sticky chili-lime glaze-bright lime, warm chili, and a touch of honey produce a balanced finish. The air fryer crisps skin quickly while keeping meat juicy; finish with fresh zest and cilantro for aroma.
Print Recipe Pin Recipe
Prep Time 15 minutes mins
Cook Time 22 minutes mins
Total Time 37 minutes mins
Servings: 4 servings
Course: Appetizer
Cuisine: American, Tex-Mex
Ingredients Equipment Method Notes

Ingredients
  

  • 2 lb chicken wings drumettes and flats, tips removed or left on
  • 1.5 teaspoon kosher salt divide: 1 teaspoon for seasoning, 0.5 teaspoon for brine if resting
  • 0.5 teaspoon black pepper freshly ground
  • 1 tablespoon neutral oil vegetable or canola oil
  • 1 tablespoon chili powder mild or medium
  • 1 teaspoon smoked paprika
  • 0.5 teaspoon garlic powder
  • 2 tablespoon honey
  • 2 tablespoon fresh lime juice from about 1 lime
  • 1 teaspoon lime zest finely grated from 1 lime
  • 1 tablespoon soy sauce or fish sauce for umami
  • 1 tablespoon unsalted butter optional; melts into glaze for shine
  • cilantro roughly chopped for garnish (about 2 tbsp)
  • lime wedges for serving

Equipment

  • Air fryer 5-6 quart basket-style or oven-style with basket; adjust times for larger units
  • Large mixing bowl For tossing wings with oil and seasoning
  • Small saucepan For reducing glaze
  • Meat thermometer Instant-read probe for checking 165°F

Method
 

  1. Preheat air fryer to 400°F for 5 minutes while preparing wings.
  2. Pat wings completely dry with paper towels; toss in a large bowl with 1 tablespoon neutral oil, 1 teaspoon kosher salt, 0.5 teaspoon black pepper, 1 tablespoon chili powder, 1 teaspoon smoked paprika, and 0.5 teaspoon garlic powder until evenly coated.
  3. Place wings in a single layer in the air fryer basket with space between pieces; cook at 400°F for 10 minutes, flip, then cook 8-12 minutes more until skin is deeply browned and crisp and internal temp reads 165°F.
  4. While wings cook, combine honey, fresh lime juice, lime zest, 1 tablespoon soy sauce, and optional 1 tablespoon butter in a small saucepan; simmer over medium-low 2-3 minutes until slightly reduced and glossy.
  5. Transfer hot wings to a large bowl, pour the warm chili-lime glaze over them, and toss until evenly coated; if glaze is too thin, return to saucepan 1-2 minutes to reduce then toss again.
  6. Serve immediately garnished with chopped cilantro and lime wedges; for extra blistering, return glazed wings to air fryer at 400°F for 1-2 minutes and watch closely.

Notes

  • Pat wings bone-dry and rest uncovered in fridge 1 hour for crisper skin when time allows.
  • Cook in batches so wings are not crowded; aim for 1-1.5 inches between pieces.
  • Brush or toss with glaze at the end; adding sugary glaze early will burn.

Tried this recipe?

Let us know how it was!

Air Fryer Chili-Lime Meatballs [Quick Appetizer]

May 11, 2026

Twenty-seven minutes from fridge to table - that's the honest time commitment here, and most of it is rolling. These chili-lime meatballs deliver a bright, garlicky punch with a thin crisp exterior that the oven simply can't replicate at this speed.

Air Fryer Chili-Lime Meatballs

The air fryer circulates heat fast enough to brown the outside while keeping the inside tender, provided you use the right fat content. Lean ground meat is the most common reason home cooks end up with dry, crumbly results.

Get the blend right and the rest follows.

QUICK SUMMARY

Air fryer chili-lime meatballs come together in under 30 minutes using an 80/20 ground beef or beef-pork blend, lime zest and juice, chili powder, and fresh garlic. Cook at 400°F for 12 minutes and finish with a squeeze of fresh lime. Chill the rolled meatballs for 10 minutes before cooking to prevent breakage.

⏱️Time Reality: 15 min prep + 10 min chill = don't skip the rest step
🔑Method Shortcut: Use a 1.5-tbsp scoop for even sizing - no guesswork
⚠️Watch Out: Overcrowding the basket steams instead of browns - leave ½ inch between each meatball

Why This Recipe Works

Fat is doing the heavy lifting here. An 80/20 beef blend - or a beef-pork split - has enough fat to self-baste during the short 12-minute cook, which is why leaner mixes consistently disappoint in a high-heat air fryer.

Understanding meat's flavor and uses helps explain why fat percentage matters so much for browning and moisture.

Quick Reference
⏱️
Prep Time
15 minutes
🔥
Cook Time
12 minutes
⏰
Total Time
27 minutes
🍽️
Servings
4
📊
Difficulty
Easy
🏷️
Category
Appetizer
💡
Quick Tip
Use a light hand on lime zest for balance
🎯
Best For
Weeknight appetizer or make-ahead party platter

Five things that make this recipe reliable:

  • 400°F air-fryer temperature creates surface browning without overcooking the center
  • Fresh garlic (not powdered) fires instantly under high heat, building aromatic depth throughout
  • Lime zest - not just juice - adheres to the meat and survives the cook without burning off
  • A measured binding ratio keeps the texture tender rather than dense or pasty
  • The 10-minute chill firms the surface so meatballs hold their shape when placed in the basket
Golden Rule
Always zest limes before juicing - once squeezed, the skin collapses and you lose half the zest yield.

What You'll Need

Air Fryer Chili-Lime Meatballs - Air Fryer Chili-Lime Meatballs

Chili powder brings warm, slightly smoky heat that holds up against the acid in the lime - smoked paprika alone won't deliver the same brightness.

Check out a ground beef street-style tacos recipe for another angle on building this same chili-lime flavor profile with ground beef.

🍗
Protein
  • 1 lb ground beef (80/20) or beef-pork blend
🧄
Aromatics
  • 3 garlic cloves, minced
  • Zest of 1 lime
  • Juice of 1 lime (about 2 tbsp)
🌶️
Spices
  • 1½ teaspoon chili powder
  • ½ teaspoon cumin
  • ½ teaspoon salt
  • ¼ teaspoon black pepper
🫙
Binders & Finish
  • ⅓ cup breadcrumbs (or panko)
  • 1 egg
  • 2 tablespoon fresh cilantro, chopped

Ingredient Details

  • Ground beef (80/20)
    The 20% fat content is non-negotiable for moisture. A beef-pork blend adds a slightly richer, sweeter background.
  • Lime zest + juice
    Zest carries the concentrated citrusy oils; juice adds wet acid. Both are needed - one doesn't replace the other.
  • Fresh garlic
    Minced fresh cloves give immediate peppery lift. Garlic powder works in a pinch but loses the sharpness under high heat.
  • Chili powder
    Use a standard blend (not pure chile powder) for a balanced warm heat rather than one-dimensional spice.
  • Breadcrumbs
    Measure by tablespoon. Too much makes dense meatballs; too little and they fall apart on the basket rack.
  • Egg
    One whole egg is sufficient for 1 lb of meat - it binds without making the mixture too wet.
  • Cilantro
    Stir in after mixing to avoid bruising; it should appear as visible flecks in the finished meatball.

Ingredient Swaps

Ground turkey is a common dietary swap, though it requires a small adjustment.

Add 1 tablespoon of olive oil to the mixture to compensate for the lower fat content - without it, the alternatives to lime zest and spices have nothing to hold onto and the meatballs taste flat.

  • 🔄 Ground beef → ground turkey: add 1 tablespoon olive oil to the mix; milder flavor overall
  • 🔄 Breadcrumbs → panko: lighter interior, slightly crisper crust
  • 🔄 Chili powder → smoked paprika + pinch cayenne: shifts from bright heat to deeper smokiness
  • 🔄 Cilantro → flat-leaf parsley: less citrusy herb note, still fresh enough to finish

Ground Turkey Swap

Works for: lower-fat diets, those avoiding red meat

Skip if: you want the richest browning and most tender bite

Panko Swap

Works for: anyone wanting a lighter, less doughy interior

Skip if: you prefer the classic soft breadcrumb texture

Instructions

High heat and spacing are the two variables that separate browned meatballs from steamed ones.

For a broader look at how pork fat behaves in fast-cooked applications, the guide on the taste of pork is worth a read if you're using a beef-pork blend.

  1. Combine ground meat, garlic, lime zest, lime juice, chili powder, cumin, salt, pepper, breadcrumbs, and egg in a bowl.

Mix until just combined - overworking makes tough meatballs. 2. Fold in chopped cilantro gently.

Cover and refrigerate the mixture for 10 minutes. 3. Roll into 1-inch balls using a 1.5-tablespoon scoop (approximately 20 meatballs).

Uniform size ensures even cooking throughout. 4. Arrange in a single layer in the air fryer basket with at least ½ inch between each meatball.

Cook at 400°F for 11-12 minutes, shaking the basket once at the halfway point. 5. Check internal temperature with an instant-read thermometer - target 160°F.

Squeeze ½ lime over the hot meatballs immediately before serving.

Watch Out
If meatballs are still soft at the 10-minute mark, add 2 more minutes rather than cranking the temperature - higher heat dries the exterior before the center reaches safe temp.

What to Serve With It

These meatballs work both as a standalone appetizer and as the protein in a quick weeknight build. There's a full breakdown of sides for meatballs if you want to go beyond the basics listed here.

Side DishPrepWhy It WorksHow to Serve
Jasmine riceEasySoaks up the tangy chili-lime juicesSpoon meatballs and any collected juices over a bowl
Cabbage slaw with lime vinaigretteEasyCrunchy contrast to the soft, rich meatballPile on top or serve alongside as a fresh counterpoint
Warm corn tortillasEasyTurns the appetizer into a taco situationTwo meatballs per tortilla with crema and cilantro
Toothpick skewers with lime cremaEasyCreamy counterpoint to the zesty exteriorMix sour cream, lime juice, pinch of salt; serve cold
Pineapple salsaMediumSweet acidity amplifies the chili-lime notesSpoon over meatballs just before serving

Three ways to serve it:

  • 🍚 Over jasmine rice as a quick weeknight bowl with sliced avocado
  • 🌮 Tucked into warm corn tortillas with crema and shredded cabbage
  • 🥢 Skewered on toothpicks with a small bowl of sweet chili glaze for dipping
Shortcut
Lime crema takes 90 seconds: 3 tablespoon sour cream + 1 teaspoon lime juice + a pinch of salt. Make it while the meatballs cook.

Store and Reheat

Cooked meatballs keep for 3 days in the fridge in a shallow airtight container - don't stack them tightly or the crust softens where they touch.

For longer storage, freeze in a single layer on a baking sheet first, then transfer to a bag; they hold well for up to 2 months.

If you're working with a turkey version and need guidance on storing turkey correctly, the same single-layer freeze method applies.

MethodTimeBest For
🍳 Air Fryer5-6 min at 350°FRestoring the crisp exterior
🔥 Oven8-10 min at 350°F (foil-covered)Larger batches without drying out
📦 Microwave30-45 sec per servingSpeed; texture will soften

For best results when storing:

  • Cool completely before refrigerating - trapped steam makes the crust soggy
  • Use a shallow container rather than a deep one to avoid crushing lower layers
  • Freeze raw meatballs (pre-cooked) if you want the freshest result after thawing
  • Thaw frozen meatballs overnight in the fridge before reheating, not on the counter
  • Add a fresh squeeze of lime after reheating to revive the brightness

Frequently Asked Questions

Can we make these meatballs ahead and freeze them?

Yes - freeze either raw (rolled and uncooked) or cooked. Raw meatballs produce the freshest texture after air-frying from frozen; add 3-4 minutes to the cook time and check for 160°F internal temp.

What internal temperature should we aim for?

160°F for a beef or beef-pork blend, measured at the center of the largest meatball. Juices should run clear when pierced with a skewer.

Can we bake these instead of using an air fryer?

Bake at 400°F for 18-20 minutes on a wire rack set over a baking sheet. The exterior won't crisp as much, but the interior stays just as tender.

How do we make them spicier without overpowering the lime?

Add ¼ teaspoon cayenne to the mix and increase lime zest by half a lime - the extra citrus keeps the heat from dominating. Avoid doubling the chili powder alone, which muddies the flavor.

Are these okay to serve to kids who dislike cilantro?

Swap cilantro for flat-leaf parsley - same quantity, milder herby note, and no soapy aftertaste for those sensitive to cilantro. The chili-lime flavor stays fully intact.

Air Fryer Chili-Lime Meatballs

Air Fryer Chili-Lime Meatballs

No ratings yet
These chili-lime meatballs cook in the air fryer for a tender interior and lightly crisp exterior. Lime zest and juice with warm chili powder give a bright, balanced profile; a quick lime crema finishes the dish.
Print Recipe Pin Recipe
Prep Time 15 minutes mins
Cook Time 12 minutes mins
Total Time 27 minutes mins
Servings: 4 servings
Course: Appetizer
Cuisine: Tex-Mex
Ingredients Equipment Method Notes

Ingredients
  

  • 1 lb ground beef 80/20
  • 0.5 lb ground pork
  • 0.5 cup panko lightly packed
  • 1 egg large
  • 1 tablespoon lime zest zest from 1 lime
  • 1 tablespoon lime juice fresh, about 1 lime
  • 1 teaspoon chili powder
  • 0.5 teaspoon ground cumin
  • 0.25 teaspoon cayenne pepper adjust to taste
  • 1 teaspoon kosher salt
  • 0.5 teaspoon black pepper freshly ground
  • 3 clove garlic minced
  • 2 tablespoon cilantro finely chopped
  • 1 tablespoon olive oil for brushing (optional)
  • 0.5 cup sour cream for lime crema
  • 0.5 tablespoon lime juice for lime crema
  • salt additional for crema if needed

Equipment

  • Air fryer Basket-style or drawer; 3–4 quart minimum
  • Mixing bowl Medium, for combining meatball mix
  • 1.5 tablespoon scoop or spoon For even meatball sizing
  • Instant-read thermometer To confirm 160°F internal temp

Method
 

  1. Preheat the air fryer to 375°F for at least 3 minutes while you mix the meatballs.
  2. Combine ground beef, ground pork, panko, egg, lime zest, 1 tablespoon lime juice, chili powder, cumin, cayenne, kosher salt, black pepper, minced garlic, and chopped cilantro in a bowl; mix gently until just combined.
  3. Portion mixture with a 1.5-tablespoon scoop and roll into 24 uniform meatballs; chill on a tray for 10 minutes to firm up.
  4. Arrange meatballs in a single layer in the air-fryer basket, leaving ½ inch between each; brush lightly with olive oil if desired.
  5. Cook at 375°F for 10–12 minutes, shaking the basket or turning meatballs halfway; they are done when internal temp reaches 160°F and exterior is lightly browned.
  6. Whisk sour cream with ½ tablespoon lime juice and a pinch of salt for the lime crema; serve meatballs hot with crema and extra cilantro.

Notes

  • Chill rolled meatballs 10 minutes to reduce breakage during air frying.
  • Use an instant-read thermometer — aim for 160°F for beef/pork blends.

Tried this recipe?

Let us know how it was!

Air Fryer Chili-Lime Salmon Bites [Weeknight Protein]

May 11, 2026

Cut skinless salmon into uniform 1-inch cubes, coat them in a chili-lime marinade, and run the air fryer for under ten minutes. What comes out is firm-edged, citrus-bright bites with a moist center - no searing pan, no oven preheating, no fuss.

Air Fryer Chili-Lime Salmon Bites

The technique is straightforward, however the details matter. Pat the salmon dry, don't over-marinate, and keep the cubes in a single layer.

If salmon isn't an option, check out replacements for salmon that hold up just as well in an air fryer at high heat.

QUICK SUMMARY

These air fryer chili-lime salmon bites come together in 20 minutes with a short marinade and a single layer in the basket. Uniform 1-inch cubes are the key to even cooking. Watch the internal temp and pull at 125-130°F for moist, flaky centers with lightly charred edges.

⏱️Time Reality: 10-min marinade max - lime acid firms the flesh fast
🔥Method Shortcut: Single layer in basket, no flipping needed for bites under 1.5 inches
⚠️Watch Out: Overcrowding the basket causes steaming, not crisping - cook in batches if needed

Why This Recipe Works

Salmon's high fat content is the reason these bites stay moist under the air fryer's circulating heat. The fat insulates the flesh, slowing moisture loss while the exterior gets a light char.

Chili powder and lime zest aren't interchangeable with other spice-citrus combos here. Chili powder brings layered warmth - mild heat plus a touch of earthiness - while lime zest releases volatile oils that fresh juice alone doesn't deliver.

Patting the cubes dry before marinating might feel like a minor step, however it's what separates crisp edges from steamed ones. Surface moisture turns to steam in the air fryer, which prevents any browning from forming.

Quick Reference
⏱️
Prep Time
10 minutes
🔥
Cook Time
8-10 minutes
⏰
Total Time
20 minutes
🍽️
Servings
4
📊
Difficulty
Easy
🏷️
Category
Main Dish
💡
Quick Tip
Pat dry before marinating - dry surface = crisp edges
🎯
Best For
Weeknight dinner
  • 🌡️ Pull at 125-130°F for medium-rare; residual heat keeps cooking after you remove the bites
  • Cut every cube to ~1 inch - smaller pieces overcook before edges char
  • Use a smoked chili blend over plain chili powder for a deeper, more complex heat
  • Add fresh lime zest after cooking, not before, for maximum citrus aroma
  • Rest the bites for 2 minutes uncovered - covering traps steam and softens the crust
Golden Rule
Marinate for 10-20 minutes only. Lime acid begins denaturing the protein surface past 20 minutes, turning the exterior chalky before it ever hits the air fryer.

What You'll Need

Air Fryer Chili-Lime Salmon Bites - Air Fryer Chili-Lime Salmon Bites

Salmon with skin-on is harder to cube cleanly - buy a skinless, boneless center-cut fillet for the most uniform pieces.

If you're curious about swapping out jasmine rice as a base grain, there are solid options that pair just as well with chili-lime flavors.

🦐
Protein
  • 1.5 lb skinless, boneless salmon fillet
🍋
Citrus
  • 2 limes (juice + zest)
🌶️
Spices
  • 1½ teaspoon chili powder
  • ½ teaspoon smoked paprika
  • ½ teaspoon garlic powder
  • ½ teaspoon salt
🫙
Marinade Base
  • 1 tablespoon olive oil
  • 1 teaspoon honey

Ingredient Details

  • Salmon (center-cut fillet)
    Center-cut gives you even thickness. Avoid tail sections - they taper too thin and overcook.
  • Lime juice + zest
    Use both. Juice carries acidity into the marinade; zest delivers citrus aroma without extra liquid.
  • Chili powder
    Standard chili powder is a blend - it adds warmth without sharp heat. Smoked varieties deepen the flavor.
  • Smoked paprika
    A small amount adds a char-like smokiness without actual fire. Don't skip it.
  • Honey
    A teaspoon helps the spices stick and promotes light caramelization on the edges.
  • Olive oil
    Binds the marinade to the fish and prevents sticking. Use a neutral oil if the olive flavor is too pronounced.

Ingredient Swaps

Steelhead trout is the closest structural match to salmon - same fat distribution, same firm texture. Check out making Indian mint cilantro chutney at home if you want a bright herby dipping sauce alongside whichever fish you use.

Quick tips: Each swap below changes the final flavor profile slightly, so taste the marinade before coating the fish.

  • 🐟 Salmon → steelhead trout: Direct swap; milder flavor, shave 1-2 minutes off cook time
  • 🍋 Lime juice → lemon juice: Brightness stays, citrus aroma shifts; still works well
  • 🌶️ Chili powder → paprika + cayenne (3:1): You dial in heat; color turns cleaner red
  • 🍯 Honey → maple syrup: Deeper caramel notes, slightly less sweet; same quantity

Salmon vs. Steelhead Trout

Works for: Cooks who want milder flavor or can't source salmon; same air-fryer method applies

Skip if: You want the richer, buttery profile salmon brings to the chili-lime marinade

Chili Powder vs. Paprika + Cayenne

Works for: Heat control - increase or decrease cayenne to taste

Skip if: You want the earthy baseline that a pre-blended chili powder already contains

Instructions

The air fryer runs at 400°F for these bites - that temperature gives you charred edges without pushing the interior past medium in under ten minutes.

For reference on olive oil swaps that work in the marinade, avocado oil is the most neutral high-heat option.

  1. Pat and cube: Pat salmon completely dry with paper towels.

Cut into uniform 1-inch cubes. 2. Make the marinade: Whisk together lime juice, lime zest, chili powder, smoked paprika, garlic powder, honey, olive oil, and salt in a bowl. 3. Coat the salmon: Add cubes to the marinade and toss gently.

Marinate for 10-15 minutes - no longer. 4. Arrange in basket: Preheat air fryer to 400°F.

Place cubes in a single layer with small gaps between each piece; work in batches if needed. 5. Cook and check: Air fry for 8-10 minutes.

Check the thickest cube at 8 minutes with an instant-read thermometer - pull at 125-130°F for medium or 140°F for well-done.

Watch Out
Don't toss or stir the basket mid-cook. Salmon cubes are fragile - moving them before the exterior sets causes them to break apart and lose their shape.

What to Serve With It

Jasmine rice is the natural base - its neutral starch absorbs the chili-lime drippings pooling at the bottom of the serving bowl. Corn tortillas are a close second, turning the bites into quick weeknight tacos with almost no extra effort.

Side DishPrepWhy It WorksHow to Serve
Steamed jasmine riceEasyNeutral starch soaks up chili-lime drippingsSpoon bites over rice in a bowl
Shredded cabbage slaw with cilantroEasyCool crunch contrasts the warm spiced bitesPile slaw alongside or underneath
Warm corn tortillasEasyWraps the bites into an instant tacoTwo bites per tortilla, lime wedge on side
Honey-lime dipping yogurtEasyCreamy, tangy counterpoint to the heatServe as a dipping sauce in a small bowl
Lettuce cups with toothpick skewersEasyLow-carb, party-ready finger foodOne skewer per cup, garnish with zest

Three ways to serve it:

  • 🍚 Rice bowl with slaw and a lime wedge for a complete weeknight plate
  • 🌮 Street-style tacos - two bites per corn tortilla, topped with cilantro and a drizzle of yogurt sauce
  • 🥬 Lettuce cups on a platter with toothpick skewers for a no-mess party bite
Shortcut
Mix plain Greek yogurt with a squeeze of lime, a drizzle of honey, and a pinch of salt for a 60-second dipping sauce that pairs with every serving style above.

Store and Reheat

Salmon bites keep for up to 2 days in a shallow airtight glass container in the fridge - a single layer prevents the pieces from pressing together and going soft.

Understanding salmon's shelf life in different storage conditions helps you judge whether day-two leftovers are still worth reheating.

MethodTimeBest For
🍳 Air Fryer2-3 min at 350°FRestoring crisp edges without drying the interior
🔥 Oven6-8 min at 300°FGentle, even warming when you're reheating a larger batch
📦 MicrowaveNot recommendedTurns bites rubbery and steams away any crust

For best results when storing:

  • 🧊 Do not freeze - salmon bites lose their texture and become watery when thawed
  • Store in a single layer where possible; stacking softens the edges
  • Keep in glass, not plastic - glass doesn't trap moisture against the fish
  • Add a squeeze of fresh lime before reheating to revive the citrus brightness
  • Reheat only what you'll eat - each reheating cycle dries the flesh further

Frequently Asked Questions

Can I use frozen salmon for this recipe?

Yes, however thaw it completely first and pat it very dry - frozen salmon releases more moisture than fresh, which will steam the bites instead of crisping them. Do not cook directly from frozen; the outside will overcook before the center reaches temperature.

What internal temperature should salmon reach?

Pull at 125-130°F for medium-rare with moist, tender flakes, or 140°F if you prefer well-done. The FDA recommends 145°F for full doneness, though most cooks find salmon dry at that temperature.

Can these be made on a grill instead of an air fryer?

Yes - thread the cubes onto metal skewers and grill over medium-high heat for 2-3 minutes per side on a well-oiled grate. A grill basket also works and prevents pieces from falling through.

How do we prevent the salmon from sticking to the basket?

Lightly spray the basket with cooking spray before adding the salmon, and make sure the surface of each cube is dry before it goes in. Don't move the bites for the first 5 minutes - they release naturally once the exterior sets.

How long to cook salmon bites in an air fryer?

At 400°F, 1-inch cubes take 8-10 minutes with no flipping required. Start checking at 8 minutes with a thermometer - size variation between air fryer models means timing can shift by a minute or two.

Air Fryer Chili-Lime Salmon Bites

Air Fryer Chili-Lime Salmon Bites

No ratings yet
Pan-seared flavor in minutes: bite-size salmon cubes tossed in a quick chili-lime marinade, air-fried at high heat for crisp edges and a moist interior. Short marinade time preserves texture and bright lime notes.
Print Recipe Pin Recipe
Prep Time 10 minutes mins
Cook Time 10 minutes mins
Total Time 20 minutes mins
Servings: 4 servings
Course: Dinner
Cuisine: American, Mexican-Inspired
Ingredients Equipment Method Notes

Ingredients
  

  • 1 lb salmon skinless, boneless, cut into 1-inch cubes
  • 2 tablespoon lime juice freshly squeezed (about 1 lime)
  • 1 teaspoon lime zest finely grated, from 1 lime
  • 1 tablespoon olive oil
  • 1 teaspoon chili powder
  • 0.5 teaspoon smoked paprika
  • 0.5 teaspoon garlic minced (about 1 small clove)
  • 1 tablespoon honey
  • 0.75 teaspoon kosher salt
  • 0.25 teaspoon black pepper freshly ground
  • fresh cilantro for garnish, chopped (optional)
  • lime wedges for serving

Equipment

  • Air fryer basket-style or drawer, 3–5 quart capacity
  • Instant-read thermometer for checking salmon doneness
  • Mixing bowl medium

Method
 

  1. Preheat the air fryer to 400°F for 3 minutes while you prep the salmon.
  2. Pat salmon cubes dry with paper towels and transfer to a medium mixing bowl.
  3. Whisk lime juice, lime zest, olive oil, chili powder, smoked paprika, minced garlic, honey, salt, and pepper in a small bowl until combined.
  4. Toss the salmon gently with the marinade for 1–2 minutes; let rest 10–20 minutes but no longer to avoid acid 'cooking'.
  5. Arrange salmon in a single layer in the air-fryer basket with ¼-inch gaps; cook at 400°F for 8 minutes, then check one cube.
  6. Flip cubes gently with tongs if your air fryer requires; continue cooking 1–2 minutes more until internal temp reads 125–130°F for medium or 140°F for well done.
  7. Transfer bites to a plate, sprinkle with chopped cilantro and a little extra lime zest, and serve immediately with lime wedges.

Notes

  • Do not over-marinate in citrus longer than 20 minutes or fish texture will firm visibly.
  • Use an instant-read thermometer to check the thickest cube for accurate doneness.

Tried this recipe?

Let us know how it was!

Air Fryer Chili-Lime Shrimp [Weeknight 20-Minute]

May 11, 2026

Chili-lime shrimp in an air fryer is a weeknight solution that takes less time than ordering takeout. The shrimp come out crisp-edged, tender inside, and coated in a bright, garlicky sauce - and the whole thing is done in 20 minutes.

Air Fryer Chili-Lime Shrimp

If you're already a fan of bold citrus-forward seafood, check out these alternatives to lemon pepper that pair well with shrimp dishes.

It's a genuinely fast cook, but a few small choices decide whether the shrimp are snappy and golden or rubbery and pale.

QUICK SUMMARY

Air fryer chili-lime shrimp is a 20-minute main dish built on dry shrimp, a bold marinade, and hot circulating air. Pat the shrimp completely dry before seasoning, keep the marinade contact under 15 minutes, and pull them the moment they're opaque with a firm spring. Single-layer cooking is non-negotiable.

⏱️Time Reality: 10 min marinade max - acid cooks shrimp fast
🔑Method Shortcut: Reserve 1 tablespoon marinade before adding raw shrimp to brush after cooking
⚠️Watch Out: Crowded baskets steam instead of crisp - always leave gaps between shrimp

Why This Recipe Works

The air fryer circulates heat at high speed, which mimics the browning effect of a hot skillet without extra oil or attention. Chili powder and lime create a coating that crisps at the edges while the shrimp's thin flesh stays tender at the center -

but only if the surface is dry when it hits the heat.

A quick brine or marinade would normally require 30+ minutes, but lime juice is acidic enough to penetrate shrimp in under 15.

That's the window where you get flavor without degrading texture - and rice preparation tips can help you time your sides to finish alongside the shrimp.

Quick Reference
⏱️
Prep Time
10 minutes
🔥
Cook Time
8-10 minutes
⏰
Total Time
20 minutes
🍽️
Servings
4
📊
Difficulty
Easy
🏷️
Category
Main Dish
💡
Quick Tip
Pat shrimp very dry for the crispiest exterior
🎯
Best For
Weeknight dinner

Here's what makes this version reliable:

  • 🌡️ Target 135-140°F internal temp - this is the sweet spot between safe and snappy
  • Hot air crisps the chili coating without burning the lime
  • Garlic provides a salty, savory base that keeps the citrus from tasting sharp
  • Single-layer spacing gives every shrimp direct heat contact on both sides
  • Reserved marinade brushed after cooking adds gloss without steaming the crust
Golden Rule
Marinate under 15 minutes. Lime juice starts breaking down shrimp proteins at around the 20-minute mark, and mushy texture can't be fixed in the air fryer.

What You'll Need

Air Fryer Chili-Lime Shrimp - Air Fryer Chili-Lime Shrimp

Medium (31-40 count) or large (21-30 count) shrimp are the right sizes here. Smaller shrimp overcook before the exterior crisps; larger shrimp stay juicy long enough to develop color. For more prep context on getting shrimp cook-ready, these air fryer shrimp preparation tips are worth a read before you start.

🦐
Protein
  • 1 lb shrimp, peeled and deveined (31-40 or 21-30 count)
🥢
Marinade
  • 2 tablespoon fresh lime juice
  • 1 teaspoon lime zest
  • 1½ teaspoon chili powder
  • 3 cloves garlic, minced
  • 1 tablespoon neutral oil
  • ½ teaspoon salt
🫙
Finishing
  • Reserved 1 tablespoon marinade (set aside before adding raw shrimp)
  • Extra lime wedges for serving

Ingredient Details

  • Shrimp (31-40 count)
    Thaw completely and pat very dry with paper towels - surface moisture is the main cause of steaming instead of browning.
  • Fresh lime juice
    Use fresh only. Bottled lime juice lacks the volatile aromatics that make the coating bright and zesty.
  • Chili powder
    Standard American chili powder works well. Ancho-based blends add more smokiness; cayenne-heavy blends increase heat.
  • Garlic (minced)
    Fresh minced garlic sticks to shrimp better than powder and caramelizes slightly in the air fryer for a deeper flavor.
  • Neutral oil
    Avocado oil is the best pick here - high smoke point, no added flavor, promotes a crisp crust at 400°F.
  • Lime zest
    Add after cooking if you want maximum citrus aroma. The volatile oils in zest fade quickly with heat.

Ingredient Swaps

Not every pantry has fresh limes or a specific chili blend on hand. Most swaps work cleanly as long as you account for how they affect the coating's texture and heat level. If you need to rethink the chili element entirely, this guide to chili powder stand-ins covers the most common alternatives.

  • Fresh lime juice can be replaced with 2 teaspoon rice vinegar + 1 teaspoon lemon juice - slightly less aromatic, but still bright
  • Chili powder swaps to 2 teaspoon gochugaru (smokier, fruitier) or 1 teaspoon sriracha (stickier, sweeter)
  • Neutral oil swaps to olive oil - fruity note adds character, but watch for smoke at high heat
  • Standard shrimp swaps to jumbo (16-20 count) or prawns - extend cook time to 12-14 minutes

Gochugaru Instead of Chili Powder

Works for: Smokier, fruitier heat with better color

Skip if: You want the familiar American chili-lime taste

Sriracha Instead of Chili Powder

Works for: Sticky glaze effect with sweet heat

Skip if: You want a dry coating - sriracha adds moisture

Jumbo Shrimp or Prawns

Works for: Meatier texture, impressive plating

Skip if: You're short on time - they need 12-14 minutes

Instructions

Dry shrimp cook faster and brown better - every step here builds toward that crisp, glossy result. These smoked paprika stand-ins are worth bookmarking if you want to push the smoky element further in future batches.

  1. Reserve marinade first. Mix lime juice, chili powder, garlic, oil, and salt.

Pull out 1 tablespoon and set it aside in a clean bowl before touching the shrimp. 2. Dry and coat. Pat shrimp completely dry with paper towels, then toss with the marinade.

Let sit 10-12 minutes - no longer. 3. Preheat and arrange. Preheat air fryer to 400°F for 3 minutes.

Arrange shrimp in a single layer with small gaps; do not stack or overlap. 4. Cook. Air fry at 400°F for 8-10 minutes, shaking the basket once at the 5-minute mark.

Pull when shrimp are opaque, pink-orange, and spring back to a light touch. 5. Finish. Brush immediately with the reserved marinade.

Grate lime zest over the top and serve with lime wedges within 5 minutes for the best texture.

Watch Out
Check at 8 minutes. Shrimp go from perfectly cooked to rubbery in under 90 seconds - internal temp should hit 135-140°F, not higher.

What to Serve With It

Chili-lime shrimp needs sides that absorb sauce, add crunch, or cool the heat. Cilantro-lime rice and quick cabbage slaw are the two fastest options that keep the whole meal under 30 minutes. Building a fresh herb sauce alongside?

A guide to making Indian mint cilantro chutney at home is a strong match for the citrus-heat profile here.

Side DishPrepWhy It WorksHow to Serve
Cilantro-lime riceEasySoaks up chili-lime sauce; neutral baseSpoon shrimp and sauce directly over rice
Quick cabbage slawEasyCool crunch balances spicy heatPile slaw into tacos or serve alongside
Warm corn tortillasEasyTurns shrimp into tacos fastWrap 3-4 shrimp per tortilla with slaw and crema
Charred pineapple salsaMediumSweet-sour contrast to smoky chiliSpoon over shrimp or serve in a side bowl
Creamy cilantro-lime cremaEasyTangy, cool foil to the spicy shrimpDrizzle or serve as a dipping sauce

Three ways to serve it:

  • 🌮 Taco night - tortillas, slaw, crema, and lime wedges on the table; everyone builds their own
  • 🍚 Rice bowl - shrimp over cilantro-lime rice with charred pineapple salsa on the side
  • 🍢 Party platter - toothpick skewers with crema for dipping and extra lime wedges
Shortcut
Bag-mix your slaw (pre-shredded cabbage, lime, mayo, salt) while the shrimp marinate. Both are ready at the same time with zero extra effort.

Store and Reheat

Cooked shrimp last 2 days in the fridge in a shallow airtight container - glass works best because it doesn't hold odors. Cool to room temp before sealing to prevent condensation from softening the crust.

Frozen cooked shrimp hold for 1 month; freeze flat on a tray first, then transfer to a bag.

MethodTimeBest For
🌀 Air Fryer2-3 min at 350°FRestoring crisp edges
🍳 Stovetop1-2 min over mediumSauced reheats; quick and moist
📦 Microwave30-45 sec on 60% powerFastest option; soft texture result

For best results when storing:

  • Don't reheat more than once - shrimp texture degrades quickly with repeated heat
  • Add a small squeeze of fresh lime after reheating to revive the citrus brightness
  • Store rice and shrimp separately so the grains don't absorb excess moisture
  • Skip the microwave for reheating if texture matters - use the air fryer instead
  • Frozen shrimp reheat best straight from frozen in the air fryer at 350°F for 4-5 minutes

Frequently Asked Questions

Can we use frozen shrimp straight from the freezer?

No - frozen shrimp release water as they cook, which causes steaming instead of browning. Thaw overnight in the fridge or under cold running water for 5 minutes, then pat completely dry before seasoning.

What size shrimp cooks best in the air fryer?

Medium (31-40 count) and large (21-30 count) work best. Smaller shrimp overcook before the exterior crisps; jumbo shrimp and prawns need 12-14 minutes and do well when you want a meatier bite.

How long can leftover cooked shrimp be kept?

Up to 2 days in the fridge in a sealed airtight container. For longer storage, freeze for up to 1 month - thaw in the fridge overnight before reheating.

Can we make the chili-lime marinade ahead of time?

Yes - mix the marinade up to 24 hours ahead and refrigerate it sealed. Don't add the shrimp until you're ready to cook; lime juice starts degrading the texture after 15 minutes of contact.

How do we keep shrimp from sticking to the air fryer basket?

The oil in the marinade handles most of the sticking risk. For extra insurance, lightly spray the basket with cooking spray before preheating, and avoid moving the shrimp in the first 3-4 minutes while the crust sets.

Air Fryer Chili-Lime Shrimp

Air Fryer Chili-Lime Shrimp

No ratings yet
Bright, quick air fryer chili-lime shrimp: medium shrimp tossed with lime, garlic, chili, and oil then air-fried 8–10 minutes for crisp-tender results. Reserve a spoonful of marinade to brush on after cooking for a glossy finish.
Print Recipe Pin Recipe
Prep Time 10 minutes mins
Cook Time 10 minutes mins
Total Time 20 minutes mins
Servings: 4 servings
Course: Dinner
Cuisine: Mexican-Inspired
Ingredients Equipment Method Notes

Ingredients
  

  • 1 lb shrimp peeled, deveined, tails on or off, medium (31–40) or large (21–30)
  • 1 tablespoon neutral oil canola or avocado
  • 1 tablespoon lime juice fresh, about 1 lime
  • 1 teaspoon lime zest finely grated
  • 1 tablespoon chili powder or 1 teaspoon gochugaru
  • 0.5 teaspoon smoked paprika
  • 1 clove garlic minced
  • 0.5 teaspoon kosher salt
  • 0.25 teaspoon black pepper freshly ground
  • 1 lime wedge for serving; 1 wedge per 2 servings
  • 2 tablespoon fresh cilantro chopped for garnish

Equipment

  • Air fryer Basket-style or drawer 3–6 quart
  • Mixing bowl Medium, non-reactive for marinating
  • Tongs For flipping and removing shrimp

Method
 

  1. Preheat the air fryer to 400°F for 3 minutes while you prepare the shrimp.
  2. Pat shrimp very dry with paper towels and place in a medium bowl.
  3. Mix oil, lime juice, lime zest, chili powder, smoked paprika, minced garlic, salt, and pepper in a small bowl and pour over shrimp; toss to coat and let sit 10–15 minutes maximum.
  4. Arrange shrimp in a single layer in the air fryer basket with minimal overlap; work in batches if necessary.
  5. Cook at 400°F for 4 minutes, shake or flip shrimp, then cook an additional 3–4 minutes until edges are slightly charred and shrimp are opaque and springy.
  6. Transfer shrimp to a platter, brush with any reserved marinade (not the raw used marinade), sprinkle chopped cilantro and extra lime zest, and serve immediately with lime wedges.

Notes

  • Do not marinate shrimp in acidic marinade longer than 15 minutes or the texture will turn mushy.
  • Cook shrimp in a single layer and avoid overcrowding — two batches for 1 lb may be necessary in small air fryers.

Tried this recipe?

Let us know how it was!

Air Fryer Churros

May 11, 2026

Crispy ridges dusted in cinnamon sugar, with a tender center that pulls apart when you bite. That's what happens when you pipe choux dough into an air fryer instead of deep-frying in oil.

Air Fryer Churros

The air fryer crisps the outside while the inside stays light. You skip the mess of heating a pot of oil and still get the texture you want.

This works for weeknight desserts when you need something fast that feels special, or when you're feeding a crowd without camping out in the kitchen.

QUICK SUMMARY

Air fryer churros use choux pastry piped through a star tip and cooked at 375°F for 8-10 minutes. The air fryer creates a crispy shell without deep-frying, and tossing them in cinnamon sugar while warm locks in flavor. Success depends on even piping and proper spacing in the basket.

⏱️Timing: 25 minutes total with 10 minutes for dough prep
🔑Key Move: Pipe churros 4 inches long and flip halfway through cooking
⚠️Watch Out: Overcrowding steams churros instead of crisping them-space 1 inch apart

Why This Recipe Works

Choux dough creates steam pockets that puff the churros while the air fryer crisps the outside. For a version that comes together quickly, this quick tots dish uses similar air fryer timing and temperature control.

Quick Reference
⏱️
Prep Time
15 min
🔥
Cook Time
10 min
⏰
Total Time
25 min
🍽️
Servings
4 servings
📊
Difficulty
Medium
🏷️
Category
Dessert
💡
Quick Tip
Pipe churros evenly for uniform cooking.
🎯
Best For
Weeknight | Entertaining

Why this method delivers:

  • Boiling the butter and water first dissolves the fat evenly and creates the right hydration level for choux dough
  • Eggs added after cooling prevent scrambling and build structure that traps air during cooking
  • Star piping tip creates ridges that increase surface area for crisping and better cinnamon sugar adhesion
  • 375°F air fryer temperature crisps the outside in 8-10 minutes without drying the inside
  • Flipping at 5 minutes browns both sides evenly and prevents one side from steaming against the basket
Golden Rule
Coat churros in cinnamon sugar immediately after air frying while they're still warm-the residual heat melts the sugar slightly for better adhesion

What You'll Need

Air Fryer Churros - Air Fryer Churros

Most ingredients are pantry staples you already have. The fries works best when it hits the table at the same time as the main, so check this related fries recipe for similar timing strategies.

🥣
Base Dough
  • 1 cup all-purpose flour
  • 1 cup water
  • ¼ cup unsalted butter
  • 2 large eggs
  • ¼ teaspoon salt
🌶️
Coating
  • ½ cup granulated sugar
  • 1 tablespoon ground cinnamon
  • vegetable oil spray
🫙
Optional
  • 1 teaspoon vanilla extract
  • powdered sugar for dusting

Ingredient Details

  • All-purpose flour
    Provides gluten structure that traps steam-bread flour makes churros too chewy, cake flour too fragile
  • Unsalted butter
    Adds richness and moisture without the unpredictable salt level of salted butter
  • Large eggs
    Room temperature eggs incorporate faster and create smoother dough-cold eggs cool the mixture too much
  • Granulated sugar (coating)
    Fine crystals stick better than coarse sugar and dissolve slightly when churros are warm
  • Ground cinnamon
    Fresh cinnamon has stronger flavor-stale spice tastes dusty and flat
  • Vegetable oil spray
    Light coating prevents sticking and helps browning-too much oil makes churros greasy
  • Star piping tip
    Large star tip (½ inch opening) creates deep ridges for texture-round tips make smooth churros that don't crisp as well

Ingredient Swaps

Most swaps work if you adjust expectations for texture. Rich mains need something to cut through, and beef does exactly that, so try this quick beef dish as a savory contrast to sweet churros.

Four swaps that work:

  • All-purpose flour → gluten-free all-purpose flour blend: Use 1:1 ratio with xanthan gum added (follow package instructions)-texture is slightly denser but still crispy
  • Unsalted butter → coconut oil or dairy-free margarine: Use same amount-coconut oil adds mild flavor, margarine makes softer dough
  • Large eggs → flaxseed meal mixture: 1 tablespoon flaxseed + 3 tablespoon water per egg-dough is denser and less puffy, needs extra 2-3 minutes cooking
  • Granulated sugar → coconut sugar: Use 1:1 ratio-coating is darker brown with caramel notes

Gluten-Free Flour Blend

Works for: gluten-free diets, similar texture with xanthan gum

Skip if: you want maximum puff-gluten-free versions rise less

Flaxseed Egg Replacement

Works for: vegan cooking, adds slight nutty flavor

Skip if: you want light texture-flax makes denser churros with less rise

Coconut Oil

Works for: dairy-free needs, adds subtle coconut flavor

Skip if: you want neutral taste-coconut oil has mild tropical notes

Instructions

The dough comes together in 15 minutes and air fries in two batches. A good chicken can make or break the plate, so if you're serving churros after dinner, simple chicken recipe timing works well for a full meal.

  1. Boil water mixture: Combine water, butter, and salt in small saucepan over medium-high heat. Bring to full boil, then remove from heat immediately when butter melts completely (about 3 minutes).

  2. Mix in flour: Add flour all at once and stir vigorously with wooden spoon until mixture forms smooth ball and pulls away from sides of pan (about 1 minute). Let cool 5 minutes.

  3. Add eggs: Beat in eggs one at a time, mixing until fully incorporated before adding next egg-dough will look broken at first, then come together smooth and glossy. Transfer to piping bag with large star tip.

  4. Pipe and spray churros: Pipe 4-inch lengths directly onto parchment paper, cutting with scissors. Transfer to air fryer basket spaced 1 inch apart. Spray lightly with oil.

  5. Air fry: Cook at 375°F for 8-10 minutes, flipping churros at 5-minute mark. Churros are done when golden brown all over with no pale spots. Toss immediately in cinnamon sugar mixture while warm.

Shortcut
Rest dough 10 minutes before piping if it's too soft-chilling firms it up and makes piping cleaner lines easier

What to Serve With It

Churros work as dessert or snack, so pair with drinks or sauces that complement cinnamon. Most people skip beef, but it balances the meal-for savory options before dessert, homemade beef recipe provides contrast to the sweet finish.

Side Dish Prep Why It Works How to Serve
Hot chocolate Easy Classic Spanish pairing, warm beverage matches warm churros Serve in mugs for dipping churros directly
Vanilla ice cream Easy Cold creamy texture contrasts warm crispy churros Scoop into bowls, place churros on top
Dulce de leche sauce Easy Traditional Latin American dipping sauce adds caramel richness Warm sauce slightly, serve in small bowls for dipping
Dark chocolate ganache Medium Bittersweet chocolate balances cinnamon sugar sweetness Drizzle over churros or serve as dipping sauce
Fresh berries Easy Tart fruit cuts through rich fried dough Toss berries with sugar, spoon alongside churros

Three ways to serve it:

  • Party platter: Arrange churros on large plate with 2-3 dipping sauces in small bowls-dulce de leche, chocolate ganache, and whipped cream
  • Weeknight dessert: Serve warm churros with mugs of hot chocolate or coffee for dipping
  • Ice cream topping: Place 2-3 churros over vanilla ice cream, drizzle with chocolate sauce
Best Pick
Hot chocolate dipping is the traditional Spanish method-the warm liquid softens the churro slightly while the cinnamon sugar stays crisp

Store and Reheat

Churros lose crispiness after a few hours but reheat well with the right method. Pork adds the contrast this plate needs, but timing matters-for meal planning help, check this quick pork dish for similar storage strategies.

Method Time Best For
🔥 Air Fryer 3-4 min at 350°F Restoring crispy texture without drying out
🔥 Oven 5-7 min at 375°F Reheating multiple servings at once
📦 Microwave 20-30 sec Quick reheating when you don't mind soft texture

For best results when storing:

  • Cool completely before storing: Warm churros create condensation in container that makes them soggy-spread on wire rack 15 minutes
  • Store in shallow container: Single layer with paper towel on bottom absorbs excess moisture better than stacking
  • Reheat from room temperature: Cold churros from fridge need 1-2 extra minutes to heat through without burning outside
  • Freeze before coating: Freeze plain churros for up to 1 month, then coat in cinnamon sugar after reheating for fresh taste
  • Skip microwave for crispiness: Microwave steams churros soft-use air fryer or oven to restore crispy shell

Frequently Asked Questions

Can I make air fryer churros ahead and reheat them?

Yes, make churros up to 4 hours ahead and store at room temperature in single layer. Reheat in air fryer at 350°F for 3-4 minutes to restore crispiness before serving.

How do I store leftover air fryer churros to keep crispiness?

Cool churros completely, then store in airtight container with paper towel on bottom for up to 3 days. Reheat in air fryer or oven-never microwave if you want crispy texture.

What is the best way to know when air fryer churros are done?

Churros are done when golden brown all over with no pale spots and firm to touch. Break one open-inside should be cooked through with no wet doughy center, about 8-10 minutes at 375°F.

Why are my air fryer churros soggy and how can I fix them?

Soggy churros come from overcrowding the basket or insufficient oil spray. Space churros 1 inch apart and spray lightly before cooking-if already soggy, return to air fryer for 2-3 minutes at 375°F.

Can I use gluten-free flour or egg substitutes for churros?

Yes, use 1:1 gluten-free flour blend with xanthan gum for similar texture but slightly less puff. For eggs, use flaxseed mixture (1 tablespoon flax + 3 tablespoon water per egg)-dough will be denser and need extra 2-3 minutes cooking time.

Air Fryer Churros

Air Fryer Churros

No ratings yet
Air Fryer Churros are crispy on the outside with a tender, light interior thanks to choux dough piped through a star tip and cooked in the air fryer. This method bypasses deep-frying, creating a clean, quick dessert with delicious ridges that hold cinnamon sugar perfectly. The churros cook evenly in about 10 minutes at 375°F, flipping halfway for a golden finish.
Print Recipe Pin Recipe
Prep Time 15 minutes mins
Cook Time 10 minutes mins
Total Time 25 minutes mins
Servings: 4 servings
Course: Dessert
Cuisine: Spanish
Ingredients Equipment Method Notes

Ingredients
  

  • 1 cup all-purpose flour provides gluten structure for trapping steam
  • 1 cup water combined with butter and salt for dough base
  • 0.25 cup unsalted butter adds richness and moisture
  • 2 large eggs room temperature, added after cooling to prevent scrambling
  • 0.5 cup granulated sugar fine crystals for coating churros
  • 1 tablespoon ground cinnamon freshly ground for optimum flavor
  • vegetable oil spray light coating to prevent sticking and aid browning
  • 1 teaspoon vanilla extract optional, adds aroma
  • powdered sugar optional, for dusting

Equipment

  • Air fryer For cooking churros at 375°F
  • Saucepan To boil water, butter, and salt
  • Wooden spoon For stirring flour into boiling mixture
  • Piping bag with large star tip To pipe churros dough into ridged shapes
  • Parchment paper To pipe churros before transferring to air fryer basket
  • Scissors To cut churro dough lengths

Method
 

  1. Combine water, unsalted butter, and salt in a small saucepan over medium-high heat. Bring to a full boil, then immediately remove from heat once the butter has melted completely, about 3 minutes.
    1 cup water, 0.25 cup unsalted butter
  2. Add all-purpose flour all at once to the boiling mixture. Stir vigorously with a wooden spoon until the mixture forms a smooth ball and pulls away from the sides, about 1 minute. Let the dough cool for 5 minutes.
    1 cup all-purpose flour
  3. Beat in eggs one at a time, mixing until fully incorporated before adding the next. The dough will appear broken initially but will come together smooth and glossy. Transfer the dough to a piping bag fitted with a large star tip.
    2 large eggs
  4. Pipe 4-inch lengths of dough directly onto parchment paper, cutting with scissors as needed. Transfer churros to the air fryer basket spaced 1 inch apart. Lightly spray churros with vegetable oil.
    vegetable oil spray
  5. Cook churros in the air fryer at 375°F for 8 to 10 minutes, flipping them halfway at 5 minutes. Churros are done when golden brown all over with no pale spots.
  6. Immediately toss warm churros in a mixture of granulated sugar and ground cinnamon to coat evenly while still warm for best adhesion.
    0.5 cup granulated sugar, 1 tablespoon ground cinnamon

Notes

  • Space churros 1 inch apart in the air fryer basket to prevent steaming and sogginess.
  • Flip churros halfway through cooking to ensure even browning on both sides.
  • Coat churros in cinnamon sugar immediately after cooking while warm for best flavor adherence.

Tried this recipe?

Let us know how it was!

Air Fryer Cinnamon Rolls

May 11, 2026

You need 35 minutes and one air fryer basket. No oven preheating, no giant mixing bowls, no sheet pans to scrub.

Air Fryer Cinnamon Rolls

The air fryer circulates heat around the rolls for even browning while keeping the centers soft. The cinnamon-sugar filling caramelizes without burning because you control the basket spacing.

This works for weekend breakfast when you want something warm and sweet without turning on the oven or waiting an hour for rolls to bake.

QUICK SUMMARY

Air fryer cinnamon rolls bake in 12-15 minutes at 350°F with soft, fluffy centers and lightly crisp edges. Proof the dough for one hour until doubled, space rolls 1 inch apart in the basket, and glaze while warm. The air fryer creates even browning without the wait time of a conventional oven.

⏱️Time Reality: 20 minutes prep, 12-15 minutes cooking, 1 hour proofing time for rise
🔥Critical First Move: Proof yeast in warm milk (100-110°F) for 5-10 minutes until foamy
⚠️Watch Out: Overcrowding traps steam and makes soggy rolls - leave 1-inch gaps between each

Why This Recipe Works

High heat in a small space crisps the edges while the enclosed basket keeps moisture in for fluffy centers. For a version that comes together quickly, this easy lobster recipe uses the same quick-cooking method with different results.

Quick Reference
⏱️
Prep Time
20 min
🔥
Cook Time
12-15 min
⏰
Total Time
35 min
🍽️
Servings
6-8 rolls
📊
Difficulty
Medium
🏷️
Category
Breakfast | Dessert
💡
Quick Tip
Avoid overcrowding for even crispiness
🎯
Best For
Weeknight | Entertaining
  • Warm milk activates active dry yeast - 100-110°F wakes up the yeast without killing it, creating rise and airiness in the dough
  • Softened butter spreads evenly - melted butter soaks into dough and makes it greasy, while cold butter tears holes when you roll
  • Brown sugar holds moisture - the molasses content keeps the filling from drying out and creates caramel notes when it heats
  • Spacing prevents steam buildup - 1-inch gaps let hot air circulate around each roll for crispy edges instead of soggy spots
  • Preheat the air fryer for 3 minutes - starting with a hot basket sets the bottom crust immediately and prevents sticking
Best Pick
Set air fryer to 350°F for 12-15 minutes - higher temps burn the sugar filling before the dough cooks through

What You'll Need

Air Fryer Cinnamon Rolls - Air Fryer Cinnamon Rolls

Most ingredients live in your pantry or fridge already. A good meatballs can make or break the plate, and this quick meatballs recipe builds on the same principle of controlled heat for even cooking.

🍞
Dough Base
  • 2½ cups all-purpose flour
  • 1 packet (2¼ tsp) active dry yeast
  • ¾ cup warm milk (100-110°F)
  • ¼ cup granulated sugar
  • 1 egg (optional for richness)
🧈
Fats
  • ¼ cup butter, softened
  • 2 tablespoon butter for filling
🌶️
Filling
  • ⅓ cup brown sugar
  • 2 teaspoon ground cinnamon
🍯
Glaze
  • 1 cup powdered sugar, sifted
  • 2 tablespoon milk or cream
  • ½ teaspoon vanilla extract

Ingredient Details

  • All-purpose flour
    Provides structure and chew - bread flour makes rolls too dense, cake flour too fragile
  • Active dry yeast
    Must proof in warm liquid for 5-10 minutes until foamy - skip this and dough won't rise
  • Warm milk
    Temperature matters - too hot kills yeast, too cold won't activate it
  • Softened butter
    Should dent easily when pressed but not be melted or greasy
  • Brown sugar
    Light or dark both work - dark adds stronger molasses flavor
  • Ground cinnamon
    Fresh cinnamon (less than 6 months old) tastes sharper and more aromatic
  • Powdered sugar
    Sift before mixing to prevent lumpy glaze - clumps won't dissolve smoothly

Ingredient Swaps

You can adjust for dietary needs or what's in the pantry. Rich mains need something to cut through, and corn on the cob does exactly that, but more veggies ideas work when you need variety.

  • Milk → almond or oat milk - mild flavor change, keeps dairy-free (measure same amount, warm to same temp)
  • All-purpose flour → gluten-free flour blend - changes texture slightly, may need xanthan gum as binder (use 1:1 ratio)
  • Butter → coconut oil or margarine - different flavor profile, similar moisture level (soften coconut oil like butter)
  • Brown sugar → coconut sugar - lower moisture content, slight caramel difference (use same measurement)

Canned Dough

Works for: Quick weeknight shortcut when time is tight - 8-10 minutes at 330°F

Skip if: You want control over sweetness or softer texture

Cream Cheese Frosting

Works for: Richer, tangier finish with more body than glaze

Skip if: You prefer lighter, pourable glaze that soaks into warm rolls

Instructions

Timing the proofing stage matters more than anything else. The chicken works best when it hits the table at the same time as the main, and this simple chicken recipe uses similar hands-off cooking for even results.

  1. Proof the yeast: Warm milk to 100-110°F (feels warm to the touch but not hot). Stir in yeast and 1 teaspoon sugar, let sit 5-10 minutes until foamy on top. If it doesn't foam, start over with fresh yeast.

  2. Make and proof dough: Mix flour, remaining sugar, softened butter, and proofed yeast mixture until dough comes together. Knead 5-8 minutes until smooth and elastic (dough should bounce back when poked). Place in greased bowl, cover, let rise in warm spot 1 hour until doubled.

  3. Roll and fill: Punch down dough, roll into 12x8-inch rectangle on floured surface. Spread 2 tablespoon softened butter evenly to edges, sprinkle brown sugar and cinnamon over butter. Roll tightly from long side, cut into 6-8 equal slices.

  4. Air fry: Preheat air fryer to 350°F for 3 minutes. Cut parchment paper to fit basket, place rolls cut-side up with 1-inch spacing. Cook 12-15 minutes until golden brown on top and dough is cooked through (check center with toothpick - should come out clean).

  5. Glaze: While rolls cook, whisk sifted powdered sugar, milk, and vanilla until smooth. Pour glaze over warm rolls immediately after removing from basket so it soaks in and sets with a shiny finish.

Watch Out
Don't overfill with cinnamon sugar - excess leaks out, burns on the basket, and creates bitter smoke

What to Serve With It

Sweet breakfast rolls need savory or bright contrast to balance the richness. Most people skip meatballs, but it balances the meal with meatless meal ideas that round out the plate without competing for attention.

Side Dish Prep Why It Works How to Serve
Fresh fruit Easy Adds brightness and cuts through sweetness with natural acidity Toss berries, melon, or citrus segments and serve chilled on the side
Coffee or tea Easy Classic warm beverage pairing that complements cinnamon spice Brew fresh, serve hot alongside warm rolls
Yogurt Easy Adds creaminess and protein contrast to balance sweet carbs Serve plain or vanilla yogurt in small bowls with honey drizzle
Scrambled eggs Easy Adds savory balance for complete breakfast spread Cook soft scrambled eggs, season with salt and pepper
Fresh berries platter Easy Colorful, light palate cleanser for brunch spreads Arrange strawberries, blueberries, raspberries on serving plate

Three ways to serve it:

  • Weekend breakfast - pair with scrambled eggs and fresh fruit for complete savory-sweet balance
  • Holiday brunch - serve alongside egg casserole, mimosas, and berry platter for festive spread
  • Quick snack - warm a roll and pair with coffee or tea for afternoon pick-me-up
Shortcut
Make dough the night before, refrigerate after first rise, then roll and air fry in the morning

Store and Reheat

Cinnamon rolls dry out fast at room temperature. Rich mains need something to cut through, and pork does exactly that with this simple pork recipe that reheats just as well as these rolls.

Method Time Best For
🍳 Stovetop 3-4 min covered on low Quick warm-up that preserves soft texture without drying
📦 Microwave 20-30 sec Fastest method but can make rolls slightly chewy
🔥 Oven 8-10 min at 325°F Reviving crisp edges and fluffy center for fresh-baked feel

For best results when storing:

  • Fridge storage: Wrap individual rolls tightly in plastic wrap or store in airtight container for 3-4 days
  • Freezer prep: Wrap unglazed rolls individually, freeze up to 2 months, thaw overnight in fridge before reheating
  • Glaze timing: Add glaze after reheating for fresh appearance - old glaze gets gummy
  • Moisture trick: Place damp paper towel over rolls when microwaving to prevent drying
  • Batch reheating: Air fry leftover rolls at 300°F for 3-4 minutes to restore crispy edges

Frequently Asked Questions

Can I use canned cinnamon roll dough in the air fryer?

Yes - cook at 330°F for 8-10 minutes with 1-inch spacing. The rolls cook faster than homemade dough because they're smaller and pre-proofed.

How do I store and reheat leftover air fryer cinnamon rolls?

Wrap tightly in plastic wrap or store in airtight container in fridge for 3-4 days. Reheat in oven at 325°F for 8-10 minutes or microwave 20-30 seconds with damp paper towel.

What is the best way to tell when air fryer cinnamon rolls are done?

Tops should be golden brown and dough should spring back when touched lightly. Insert toothpick in center - it should come out clean without wet dough clinging.

Why did my cinnamon rolls turn out dense or flat?

Yeast wasn't activated properly (milk too hot or cold) or dough didn't proof long enough. Use warm milk at 100-110°F and let dough rise until doubled in size before rolling.

Can I make air fryer cinnamon rolls ahead of time and freeze them?

Yes - freeze unglazed rolls individually wrapped for up to 2 months. Thaw overnight in fridge, then air fry at 350°F for 10-12 minutes and glaze while warm.

What To Serve With Cinnamon Rolls

Air Fryer Cinnamon Rolls

No ratings yet
These air fryer cinnamon rolls have soft, fluffy centers and lightly crisp edges thanks to the circulating heat. The recipe includes proofing the dough for one hour and cooking the rolls spaced apart in the air fryer basket for even browning. Finish with a smooth glaze while the rolls are warm for a perfect sweet treat.
Print Recipe Pin Recipe
Prep Time 20 minutes mins
Cook Time 15 minutes mins
Total Time 35 minutes mins
Servings: 6 rolls
Course: Breakfast, Dessert
Cuisine: American
Ingredients Equipment Method Notes

Ingredients
  

  • 2.5 cups all-purpose flour provides structure and chew
  • 2.25 teaspoon active dry yeast proof in warm milk until foamy
  • 0.75 cup milk warm to 100-110°F (safe to touch), used for yeast proofing and dough
  • 0.25 cup granulated sugar 1 teaspoon used for yeast proofing, rest added to dough
  • 1 large egg optional for richness
  • 0.25 cup butter softened for dough
  • 2 tablespoon butter softened for filling
  • 0.33 cup brown sugar for filling
  • 2 teaspoon ground cinnamon fresh, less than 6 months old preferred
  • 1 cup powdered sugar sifted for glaze
  • 2 tablespoon milk for glaze
  • 0.5 teaspoon vanilla extract for glaze

Equipment

  • Air fryer Used to bake the cinnamon rolls with even browning and soft centers
  • Mixing bowl For mixing and proofing dough
  • Rolling pin To roll dough into rectangle
  • Parchment paper To line air fryer basket and prevent sticking
  • Whisk To mix the glaze ingredients smoothly

Method
 

  1. Warm milk to 100-110°F, stir in yeast and 1 teaspoon sugar, let sit 5-10 minutes until foamy. If no foam forms, restart with fresh yeast.
    0.75 cup milk, 2.25 tsp active dry yeast, 0.25 cup granulated sugar
  2. Mix flour, remaining sugar, softened butter, optional egg, and proofed yeast mixture until dough forms. Knead 5-8 minutes until smooth and elastic. Place dough in greased bowl, cover, and let rise in warm spot 1 hour until doubled.
    2.5 cups all-purpose flour, 0.25 cup granulated sugar, 0.25 cup butter, 1 large egg, 2.25 tsp active dry yeast, 0.75 cup milk
  3. Punch down dough. Roll dough on floured surface into 12x8 inch rectangle. Spread 2 tablespoon softened butter evenly over dough. Sprinkle brown sugar and cinnamon evenly on top. Roll tightly from long side and cut into 6-8 equal slices.
    2 tbsp butter, 0.33 cup brown sugar, 2 tsp ground cinnamon
  4. Preheat air fryer to 350°F for 3 minutes. Cut parchment paper to fit basket. Place rolls cut-side up in basket spaced 1 inch apart. Cook rolls 12-15 minutes until golden brown and cooked through. Test with toothpick; it should come out clean.
  5. While rolls cook, whisk sifted powdered sugar, milk, and vanilla extract until smooth. Pour glaze over warm rolls immediately after removing from air fryer so it soaks in and sets with a shiny finish.
    1 cup powdered sugar, 2 tbsp milk, 0.5 tsp vanilla extract

Notes

  • Leave 1-inch gaps between rolls in air fryer basket to prevent soggy edges caused by trapped steam.
  • Warm milk must be 100-110°F to activate yeast without killing it; too hot or cold affects rise.
  • Preheat air fryer basket for 3 minutes to create a crispy bottom crust and prevent sticking.

Tried this recipe?

Let us know how it was!
« Previous Page
Next Page »

Primary Sidebar

ForkliftKitchen recipe developer

Welcome!

Recipe Developer · 12+ Yr Kitchen Veteran

I'm the recipe developer behind this site, focused on practical, well-tested dishes and smart ingredient swaps. Every recipe is written to be clear, reliable, and easy to make at home.

650+ Recipes
12+ Yrs Exp.
3x Tested
Our Story →

As Featured In

Allrecipes

TASTE OF HOME

Food52

HUFFPOST

Yahoo! Life

Our Editorial Standards

  • ✓ Every recipe tested at least 3 times before publishing
  • ✓ Substitutes verified by real kitchen trials, not guesswork
  • ✓ Reviewed for accuracy by our editorial team
  • ✓ Updated regularly with seasonal info and reader feedback

Most Popular

  • Creamy Lemon Shrimp Linguine
    Creamy Lemon Shrimp Linguine
  • Creamy Garlic Mushroom Chicken
    Creamy Garlic Mushroom Chicken
  • Sesame Ginger Chicken Noodle Bowls
    Sesame Ginger Chicken Noodle Bowls
  • Baked Lemon Herb Fish Fillets
    Baked Lemon Herb Fish Fillets
  • Veggie Loaded Fried Rice
    Veggie Loaded Fried Rice
  • Spicy Garlic Shrimp Stir Fry
    Spicy Garlic Shrimp Stir Fry

Join 8,000+ Home Cooks

Weekly Kitchen Tips

Easy recipes, smart substitutes, and real cooking shortcuts — every Thursday.

Subscribe Free →


Side Dishes

  • What to Serve With Asian Salmon? 15 Best Side Dishes
    What to Serve With Asian Salmon? 15 Best Side Dishes
  • Side Dishes for Strawberry Spinach Salad
    15 Best Side Dishes for Strawberry Spinach Salad
  • Sides for Grilled Cauliflower Steaks to Complete the Meal
    15 Sides for Grilled Cauliflower Steaks to Complete the Meal
  • 15 Sides To Serve With Calabacitas
    15 Best Sides for Calabacitas – Mexican-Inspired Favorites


Substitutes

  • 7 Best Substitutes for Hot Sauce in Marinades & Stir-Fries
    7 Best Substitutes for Hot Sauce in Marinades & Stir-Fries
  • 9 Best Substitutes for Butter in Baking and Cooking
  • 7 Best Substitutes for Tagliatelle for Italian Pasta Dishes
    7 Best Substitutes for Tagliatelle for Italian Pasta Dishes
  • 7 Best Substitutes for Udon Noodles in Asian Stir-Fries
    7 Best Substitutes for Udon Noodles in Asian Stir-Fries


Browse by Topic

  • Side Dishes320
  • Substitutes785
  • Dinner163
  • Air Fryer77
  • Taste Profiles484
  • Food Storage123


Reader Reviews

★★★★★

"Finally a food blog that tells you exactly why a substitute works instead of just listing options."

— Sarah M., via email

★★★★★

"The side dish recommendations are so specific — saved my dinner party twice this month."

— James R., Pinterest comment

★★★★★

"I trust this site more than most because they actually test everything. You can tell."

— Priya K., blog comment

Footer

↑ Back to Top

Forklift Kitchen

We do the heavy lifting so you can enjoy the cooking. Tested recipes, smart substitutes, and perfect pairings—built for real home cooks.

Content

  • Recipes
  • Substitutes
  • What to Serve With
  • Blog

Company

  • About Us
  • Contact
  • Subscribe

Legal

  • Privacy Policy
  • Terms of Service

As an Amazon Associate I earn from qualifying purchases.

© 2026 Forklift Kitchen.

Rate This Recipe

Your vote:


A rating is required
A name is required
An email is required