• Skip to primary navigation
  • Skip to main content
  • Skip to primary sidebar
  • Recipe Index
    • Air Fryer
  • Side Dishes
  • Substitutes
  • About
  • Contact
  • Subscribe

ForkLiftKitchen

menu icon
go to homepage
  • Recipe Index
    • Air Fryer
  • Side Dishes
  • Substitutes
  • About
  • Contact
  • Subscribe
subscribe
search icon
Homepage link
  • Recipe Index
    • Air Fryer
  • Side Dishes
  • Substitutes
  • About
  • Contact
  • Subscribe
×

Blog

Honey Garlic Pork Loin

March 18, 2026

When you need a protein that works for weeknight dinners, Sunday meal prep, and last-minute entertaining, pork loin delivers. One pan, 45 minutes in the oven, and a honey-garlic glaze that caramelizes into a sticky coating without constant attention.

Honey Garlic Pork Loin served on a plate

Sear the meat first and the oven handles the rest. The high heat renders the fat while the glaze sets into a golden crust.

Perfect for busy weeks when you want something that looks intentional but doesn't require babysitting.

QUICK SUMMARY

Honey Garlic Pork Loin roasts at 375°F after a quick stovetop sear. The sweet-savory glaze caramelizes in the final 10 minutes while the meat cooks to 145°F. Rest it 10 minutes before slicing to keep the juices inside instead of on the cutting board.

⏱️Time Reality: 15 minutes prep, 45 minutes cooking, plan for resting
🔥Critical Move: Sear all sides in hot oil before the oven-skipping makes pale, bland meat
⚠️Watch Out: Add glaze in the last 10 minutes or honey burns and turns bitter

Table of Contents

Toggle
  • Why This Recipe Works
  • What You'll Need
    • Ingredient Details
  • Ingredient Swaps
  • What to Serve With It
  • Store and Reheat
  • Frequently Asked Questions
  • Honey Garlic Pork Loin
    • Method 
    • Tried this recipe?

Why This Recipe Works

Searing pork loin in a hot pan before roasting creates a caramelized crust that locks in flavor. For a version that comes together quickly, a similar dinner recipe uses dry spices instead of wet glaze.

Quick Reference
⏱️
Prep Time
15 min
🔥
Cook Time
45 min
⏰
Total Time
60 min
🍽️
Servings
4-6 servings
📊
Difficulty
Medium
🏷️
Category
Main Dish
💡
Quick Tip
Rest pork 10 minutes before slicing
🎯
Best For
Weeknight | Meal prep | Entertaining

What makes this reliable:

  • High heat searing creates a golden crust before the oven takes over-no flipping or babysitting required
  • Digital thermometer ensures you hit exactly 145°F at the thickest part so meat stays juicy instead of dry
  • Late glaze application in the final 10 minutes caramelizes honey without burning it into a bitter mess
  • Resting period keeps juices inside the meat when you slice instead of bleeding onto the board
  • Balanced sweet-savory coating from honey, garlic, and soy sauce works without overpowering the mild pork
Best Pick
Use an instant-read thermometer and check the thickest part-guessing leads to overcooked, dry meat every time.

What You'll Need

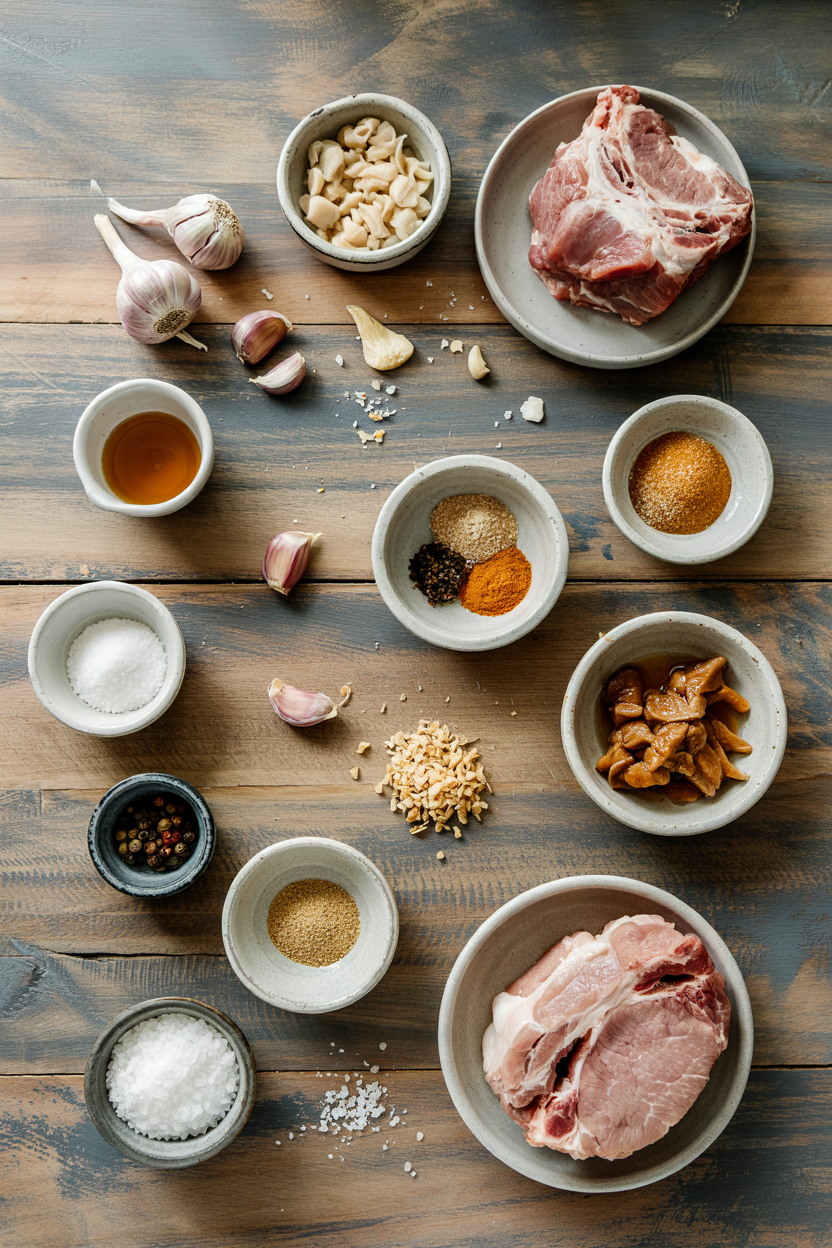
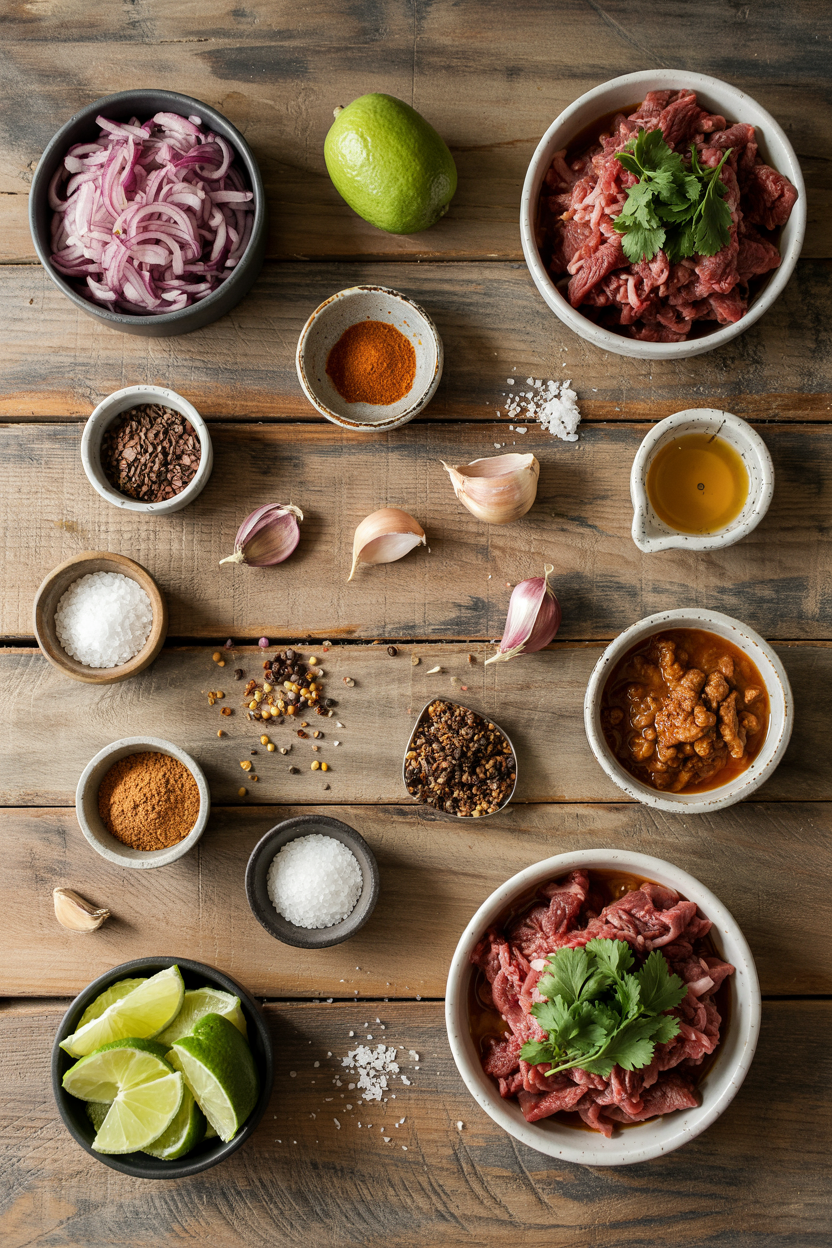
Ingredients for Honey Garlic Pork Loin

Most ingredients live in your pantry already. The pork works best when it hits the table at the same time as the main, so prep everything before you start cooking.

🥩
Protein
  • 2-3 lb pork loin roast (even thickness)
🥢
Glaze Base
  • ⅓ cup honey
  • ¼ cup soy sauce
  • 2 tablespoon brown sugar
  • 1 tablespoon apple cider vinegar
🧄
Aromatics
  • 6 cloves garlic (minced)
  • 1 teaspoon black pepper
  • 1 teaspoon salt
🫙
Cooking Fat
  • 2 tablespoon olive oil
  • Fresh herbs for garnish (optional)

Ingredient Details

  • Pork loin roast
    Pick an evenly sized cut so it cooks at the same rate-uneven thickness means dry edges and raw centers
  • Honey
    Natural sugars caramelize during roasting for a sticky glaze that clings to the meat instead of sliding off
  • Garlic
    Fresh cloves deliver pungent flavor that mellows and sweetens as it cooks with the honey
  • Soy sauce
    Adds umami and saltiness that balances the honey's sweetness-skip it and the glaze tastes one-dimensional
  • Olive oil
    High smoke point works for searing without burning-use enough to coat the pan or meat sticks
  • Apple cider vinegar
    Cuts through richness with tangy acidity-leave it out and the glaze tastes flat and overly sweet
  • Black pepper
    Mild heat and flavor depth work with garlic without competing for attention on the palate

Ingredient Swaps

Substitutions change texture and flavor but still work when you're missing ingredients. Rich mains need something to cut through, and pie does exactly that, so we keep something tender like pie ready for nights like this.

Four swaps that work:

  • Soy sauce → tamari: Same saltiness and umami without gluten-use equal amounts for the same flavor punch
  • Honey → maple syrup: Slightly thinner glaze with different sweetness but still caramelizes during roasting
  • Pork loin → pork tenderloin: Leaner, smaller cut that cooks faster-reduce oven time by 15-20 minutes and check temp early
  • Apple cider vinegar → lemon juice: More citrus-forward tang that brightens the glaze without the apple undertones

Brown Sugar

Works for: Adding molasses depth to the glaze alongside honey's floral sweetness

Skip if: You want less sweetness-white sugar works but loses the caramel undertones

Garlic Powder

Works for: Budget-friendly option when fresh garlic isn't available-use 1 teaspoon powder for 6 cloves

Skip if: You want that pungent fresh garlic aroma-powder tastes milder and less sharp

Instructions

Timing matters more than technique here. Most people skip dressing, but it balances the meal, so for a version that comes together quickly, try this quick dressing dish that's ready in 5 minutes.

  1. Rest the pork at room temperature for 20 minutes. Pat it dry with paper towels and season all sides with salt and black pepper-moisture on the surface prevents browning.
  2. Heat olive oil in an oven-safe skillet over high heat until shimmering. Sear pork 2-3 minutes per side until golden brown on all surfaces-this builds the flavor base the oven can't create.
  3. Mix honey, soy sauce, garlic, brown sugar, and vinegar in a bowl. Simmer the glaze in a small pan for 3-5 minutes until it thickens slightly and coats the back of a spoon.
  4. Transfer the seared pork to a 375°F oven and roast for 35 minutes. Brush glaze over the meat and return to oven for 10 more minutes until internal temp hits 145°F at the thickest part.
  5. Rest the pork tented in foil for 10 minutes before slicing. Cut against the grain into ½-inch slices and drizzle with any remaining glaze from the pan.
Shortcut
Let pork sit out 20 minutes before cooking-cold meat from the fridge cooks unevenly and takes longer to reach safe temp.

What to Serve With It

The glaze is rich and sticky, so you need something to cut through all that sweetness. Potato salad cuts through all that richness, so for easy pork chile verde dinner nights we pair it with bright, acidic sides that balance the plate.

Side Dish Prep Why It Works How to Serve
Steamed green beans Easy Light, crisp texture contrasts the sticky glaze without competing for attention Toss with butter and lemon zest while pork rests
Garlic mashed potatoes Medium Creamy, comforting base soaks up extra glaze and balances the sweet-savory coating Make ahead and reheat while pork roasts
Roasted sweet potatoes Easy Natural sweetness complements honey garlic without adding heaviness to the plate Cube and roast at same temp as pork
Simple salad with vinaigrette Easy Bright acidity from dressing cuts through richness and adds fresh crunch Dress right before serving so greens stay crisp
Rice or quinoa Easy Neutral starch soaks up sauce without adding competing flavors to the meal Cook while pork roasts, fluff before plating

Three ways to serve it:

  • Weeknight plate: Slice pork and arrange over rice with steamed green beans and extra glaze drizzled on top
  • Meal prep bowls: Divide sliced pork, quinoa, and roasted sweet potatoes into containers with fresh salad on the side
  • Family dinner: Serve whole roast on a platter with garlic mashed potatoes and grilled asparagus for slicing at the table
Quick Tip
Make extra glaze and keep it warm in a small pan-it doubles as a sauce for rice or vegetables on the side.

Store and Reheat

Pork loin dries out fast when stored wrong. Slice what you'll eat now and store the rest whole in an airtight container for up to 4 days-sliced meat loses moisture faster than whole portions. We keep a batch ready for nights like this, pairing it with homemade potato recipe that reheats in minutes.

Method Time Best For
🍳 Stovetop 5 minutes on low heat Small portions-add splash of broth and cover to restore glaze and moisture
📦 Microwave 1-2 minutes at 70% power Quick single servings-cover with damp paper towel to prevent drying out
🔥 Oven 15 minutes at 325°F Large portions-wrap in foil with extra glaze for even reheating without overcooking

For best results when storing:

  • Use shallow containers so pork cools quickly and evenly-deep containers trap heat and create bacterial risk
  • Store glaze separately from sliced pork to prevent sogginess-reheat and brush on when serving
  • Freeze in portions wrapped tight in plastic then foil for up to 2 months-thaw overnight in fridge
  • Slice cold pork thin for sandwiches or grain bowls instead of reheating-works great with mustard or fresh herbs
  • Add moisture when reheating with broth, glaze, or butter so meat doesn't turn dry and stringy

Frequently Asked Questions

Can I use pork tenderloin instead of pork loin?

Yes, but reduce cook time by 15-20 minutes since tenderloin is smaller and leaner. Check temp at 25 minutes to avoid overcooking.

How long can I store leftover honey garlic pork loin?

Store in an airtight container in the fridge for 3-4 days. Freeze wrapped portions for up to 2 months and thaw overnight before reheating.

What's the best way to check doneness for pork loin?

Use a digital thermometer inserted into the thickest part-pull at 145°F for juicy meat. Resting brings it to 150°F safely.

Why did my honey garlic glaze burn and how do I fix it?

Honey burns fast at high heat-add glaze only in the final 10 minutes of roasting. If it burns, scrape off the black parts and brush fresh glaze before serving.

What side dishes pair well with honey garlic pork loin?

Steamed green beans, garlic mashed potatoes, roasted sweet potatoes, and simple salads with vinaigrette all balance the sticky-sweet glaze. Pick sides that add crunch or acidity.

Honey Garlic Pork Loin served on a plate

Honey Garlic Pork Loin

No ratings yet
Honey Garlic Pork Loin is a simple, one-pan roast featuring a sweet-savory glaze that caramelizes to a golden crust. Searing the pork before oven roasting locks in juicy flavor, making it perfect for weeknight dinners or meal prep.
Print Recipe Pin Recipe
Prep Time 15 minutes mins
Cook Time 45 minutes mins
Total Time 1 hour hr
Servings: 4 servings
Course: Dinner, Main Dish
Cuisine: American
Ingredients Equipment Method Notes

Ingredients
  

  • 2-3 lb pork loin roast even thickness
  • ⅓ cup honey
  • ¼ cup soy sauce
  • 2 tablespoon brown sugar
  • 1 tablespoon apple cider vinegar
  • 6 cloves garlic minced
  • 1 teaspoon black pepper
  • 1 teaspoon salt
  • 2 tablespoon olive oil
  • fresh herbs for garnish, optional

Equipment

  • Oven-safe skillet Used for searing pork before roasting.
  • Small saucepan Used for simmering the glaze.
  • Digital thermometer To check pork internal temperature.

Method
 

  1. Rest the pork at room temperature for 20 minutes. Pat it dry with paper towels and season all sides with salt and black pepper to ensure proper browning.
    2-3 lb pork loin roast, 1 tsp black pepper, 1 tsp salt
  2. Heat olive oil in an oven-safe skillet over high heat until shimmering. Sear the pork loin for 2-3 minutes per side until golden brown on all surfaces to build flavor.
    2 tbsp olive oil, 2-3 lb pork loin roast
  3. In a bowl, mix honey, soy sauce, minced garlic, brown sugar, and apple cider vinegar. Then simmer the glaze in a small pan for 3-5 minutes until slightly thickened and coats the back of a spoon.
    ⅓ cup honey, ¼ cup soy sauce, 6 cloves garlic, 2 tbsp brown sugar, 1 tbsp apple cider vinegar
  4. Transfer the seared pork to a 375°F oven and roast for 35 minutes. Brush glaze over the meat and return to the oven for an additional 10 minutes until the internal temperature reaches 145°F at the thickest part.
    2-3 lb pork loin roast
  5. Remove the pork from the oven and tent with foil. Rest for 10 minutes before slicing against the grain into ½-inch slices. Drizzle with any remaining glaze and garnish with fresh herbs if desired.
    fresh herbs

Notes

  • Sear pork in hot oil before roasting to create a flavorful crust and avoid pale meat.
  • Add the glaze only in the last 10 minutes to prevent honey from burning and becoming bitter.
  • Rest the meat after cooking to keep juices inside and maintain tenderness when slicing.

Tried this recipe?

Let us know how it was!

What Is Sultanas? [Taste, Uses & More]

March 18, 2026

Bite into a warm scone fresh from the oven and there's a good chance those soft, amber pockets of sweetness are sultanas, not the dark raisins most people assume.

What Is Sultanas

Understanding the taste of currant helps put sultanas in context - they're gentler, less intense, and noticeably lighter in color.

If you've ever needed raisins swaps that work in a pinch, sultanas are often the answer sitting right in your pantry. Mild, plump, and honey-bright, they behave differently from other dried grapes in ways that genuinely matter at the stove.

QUICK SUMMARY

Sultanas are light golden, seedless dried grapes with a mild sweet flavor and slight tang. Softer and less concentrated than dark raisins, they hold their plump texture through baking and rehydration. Use them in scones, pilafs, chutneys, and salads. Store sealed in a cool pantry for up to 12 months.

🍇Category: Dried seedless grape, related to Thompson seedless variety
🍯Flavor: Sweet, mildly tangy, with a subtle honeyed undertone
🫙Shelf Life: Up to 12 months pantry; 18 months refrigerated
🍞Best Uses: Scones, fruit breads, pilafs, chutneys, salads
🌍Origin: Eastern Mediterranean, particularly Turkey
✅Dietary: Naturally vegan and gluten-free; calorie-dense from natural sugars

What Is Sultanas?

Sultanas are small, seedless dried grapes originating in the Eastern Mediterranean, with Turkey historically being the largest producer. The name comes from the Ottoman word for the grape variety once favored in that region.

In North America, they're widely sold as golden raisins - the same fruit treated with sulfur dioxide before drying to preserve that pale amber color.

Without that treatment, the same grape dries darker and becomes what most Americans simply call a raisin.

The base grape is typically Thompson seedless (known as Sultana in Turkey and Australia), a thin-skinned variety that dries into a particularly tender, plump piece of fruit. You'll also see them called sultane in some European labeling.

  • 🌿 Also known as - golden raisins (US), Thompson seedless dried, sultane (Europe)
  • 🇹🇷 Primary origin - Turkey, though also produced in Australia, South Africa, and California
  • 💛 Color source - sulfur dioxide treatment preserves the golden-amber hue during drying
  • 🍇 Base variety - Thompson seedless grape, naturally thin-skinned and low in tannins

What Does Sultanas Taste Like?

sultanas - What Is Sultanas

Sultanas lead with clean, bright sweetness - less heavy than dark raisins, and without the molasses-like depth that comes from sun-drying untreated grapes. Think of them as the lighter, fruitier end of the dried grape spectrum.

There's a mild vinous tang underneath the sweetness, almost like a faint wine note that keeps things from tasting flat. A subtle honeyed caramel edge rounds that out, particularly noticeable when you chew through the skin.

Sensory SnapshotModerate Intensity
👅 Flavor
bright sweetmild tanghoneyed caramel
✋ Texture
plumptender-chewyburstable skin
👃 Aroma
fruity-florallightly vinous

Heat softens them further and nudges the sweetness forward. Understanding raisins and its flavor shows the contrast clearly - sultanas consistently read as brighter and less concentrated than their darker counterparts.

How to Use Sultanas

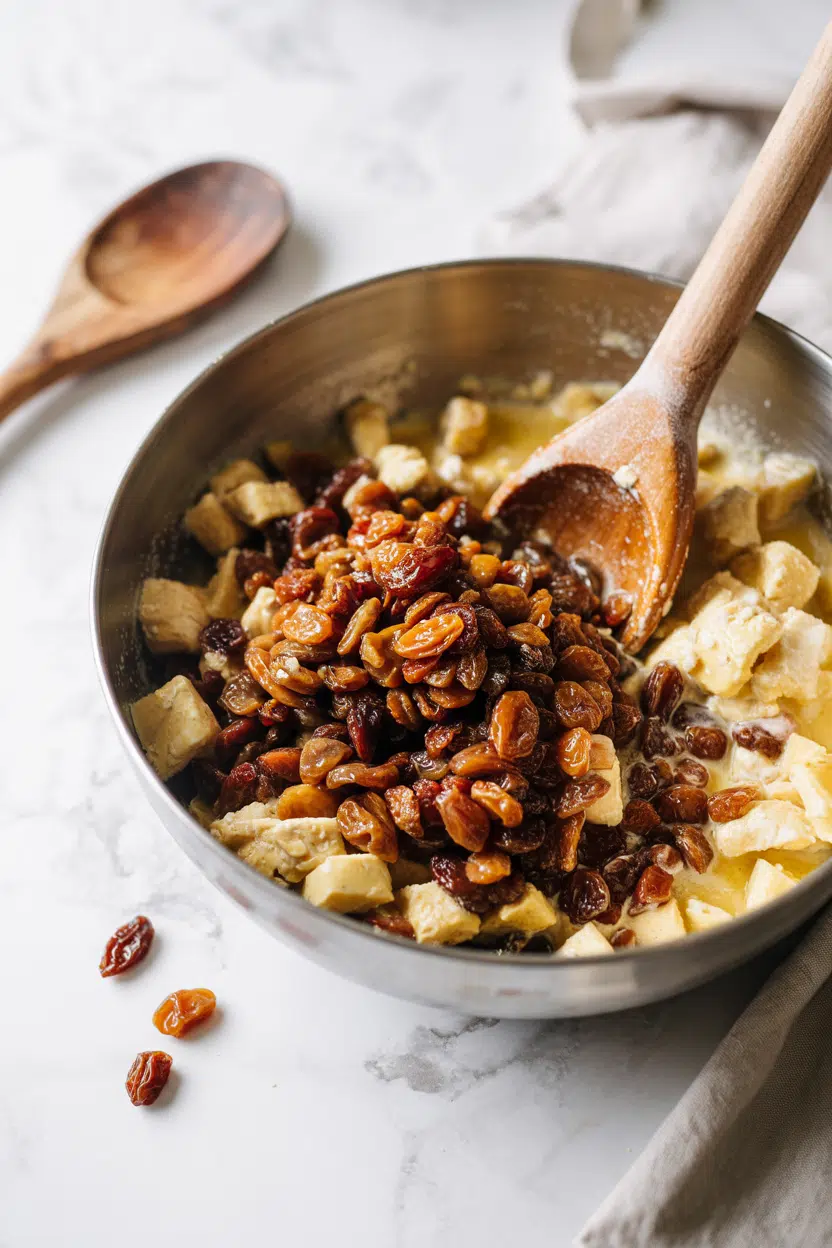
Baking is where sultanas shine most consistently. Their thin skins and plump structure mean they stay tender through oven heat rather than drying into hard pockets the way some raisins can. Folded into scone dough or fruit bread batter, they hydrate from within as the dough bakes.

Golden Rule
Soak sultanas in warm liquid for 10-15 minutes before baking any dense batter - it prevents them from pulling moisture from the crumb as it sets.

Rehydrating in rum, brandy, or strong tea unlocks their full potential for cake fillings and steamed puddings. The soaking liquid becomes part of the flavor. Beyond baking, a lemon herb quinoa pilaf recipe shows exactly how sultanas introduce gentle sweetness to grain dishes without overpowering the savory base.

Chutneys and compotes rely on their mild tang. Sultanas balance acidity and add body - they're a frequent addition to fruit-forward condiments where the kind of bold sweetness found in replacements for mango chutney isn't quite the right fit.

How Sultanas Are Used
MethodBest ForTip
🍞 BakingScones, fruit loaves, tea cakesPlump first if batter is dense or dry
♨️ SoakingCake fillings, puddings, compotesRum, brandy, or tea all work well
🥗 RawSalads, muesli, yogurt, porridgeToss with citrus vinaigrette for balance
🍲 StewingChutneys, tagines, pilafs, couscousAdd late to keep texture; avoid high-heat charring

In salads, sultanas work particularly well against bitter greens or with a sharp citrus vinaigrette.

Pair them with walnuts, pecans, or soft cheeses like ricotta and mascarpone.

Cardamom and saffron are natural partners in Middle Eastern rice dishes.

For something quicker, scatter them into granola alongside cinnamon and mixed spice - they hold their chew and color better than many alternatives.

Try It In
🍋Lemon Vinaigrette Dressing (Homemade)Sharp citrus base that balances sultana sweetness in salads→🧀Fruit & Cheese Snack BoxPairs sultanas with soft cheese for a quick no-cook snack→🌰Cinnamon Sugar Roasted NutsMix in sultanas after roasting to add chew alongside warm spice→

How to Buy and Store Sultanas

Look for plump, glossy, amber-colored fruit with no white powdery bloom on the surface. Hard or shriveled pieces indicate age.

A sour or fermented smell means the batch has gone past its best - skip it.

Watch Out
Sticky clumps often signal moisture exposure during storage, which accelerates mold growth. Buy in smaller quantities if you don't use them regularly.

Once open, transfer to an airtight container and keep them in a cool, dark pantry. For detailed guidance on timelines, how long sultanas keeps covers pantry, fridge, and freezer windows with specific signs to check.

  • Pantry (unopened) - 6 to 12 months in a sealed, cool, dark spot
  • Refrigerated (open) - up to 18 months in an airtight container
  • Freezer - up to 18 months; thaw at room temperature before using

Start With the Scone Test

If you haven't cooked with sultanas before, fold a handful into a basic scone recipe alongside lemon zest and a pinch of mixed spice.

That single bake demonstrates everything worth knowing: how they stay soft under heat, how their brightness cuts through butter and flour, and why British and Australian baking traditions reach for them so consistently.

Once comfortable there, move into grain dishes. A simple couscous or pilaf with sultanas, toasted pine nuts, and a little orange zest shows the savory side.

If you ever need swapping out sultanas for another dried fruit, that context makes the swap decision much easier.

Frequently Asked Questions

Are sultanas the same as raisins?

Not exactly. Both are dried grapes, however sultanas come specifically from seedless varieties and are treated with sulfur dioxide to stay golden. Dark raisins are typically sun-dried without treatment, producing a deeper color and more concentrated flavor.

Why use sultanas instead of raisins in scones?

Sultanas stay softer through baking because their skins are thinner and they're less concentrated than dark raisins. They also don't bleed color into pale dough, keeping the crumb clean and evenly golden.

How do you plump sultanas quickly?

Cover them in just-boiled water, tea, or warm rum for 10-15 minutes, then drain before using. For extra flavor, use the soaking liquid in the recipe itself rather than discarding it.

Are sultanas healthier than raisins?

Nutritionally they're very close - both are calorie-dense from natural sugars and provide fiber, potassium, and small amounts of iron. The main difference is that sulfur dioxide used in sultana processing can trigger reactions in people with sulfite sensitivity.

Can you use sultanas in savory cooking?

Yes - they work well in tagines, pilafs, and chutneys where a note of gentle sweetness balances spice or acidity. Add them toward the end of cooking to preserve their texture rather than letting them stew down completely.

Baked Chicken Thighs with Lemon and Garlic

March 17, 2026

Complete Article Output

Baked chicken often dries out or tastes bland. The trick is starting with bone-in, skin-on thighs and a bright lemon-garlic marinade that actually penetrates the meat.

Baked Chicken Thighs with Lemon and Garlic served on a plate

High heat crisps the skin while dark meat stays juicy. The lemon caramelizes into golden edges without burning if you watch the timing.

Make this when you need dinner that works for meal prep or a Tuesday night when the fridge is bare but you still want something that looks intentional.

QUICK SUMMARY

Baked chicken thighs with lemon and garlic roast at 400°F for 35-40 minutes until the skin crisps and the meat hits 165°F internal temp. Marinate for 15+ minutes so the citrus and garlic penetrate the meat. Pat the skin dry before baking or it steams instead of crisping.

⏱️Time Reality: 10 minutes prep, 40 minutes baking, 5 minutes resting - 55 minutes total
🔥Method Shortcut: Marinate while oven preheats, then bake skin-side up without flipping
⚠️Watch Out: Wet skin steams instead of crisps - pat dry with paper towels before seasoning

Why This Recipe Works

Bone-in thighs stay moist because the bone conducts heat evenly while the fat renders under the skin. Rich mains need something to cut through, and rice does exactly that. For a version that comes together quickly, this juicy rice side dish soaks up every drop of lemon-garlic pan sauce.

Quick Reference
⏱️
Prep Time
10 min
🔥
Cook Time
35-40 min
⏰
Total Time
45-50 min
🍽️
Servings
4 servings
📊
Difficulty
Easy
🏷️
Category
Main Dish
💡
Quick Tip
Bake skin-side up for crispiness
🎯
Best For
Weeknight | Meal prep | Entertaining

Five reasons this works:

  • High heat renders fat: 400°F melts the fat under the skin so it crisps instead of staying rubbery
  • Marinating matters: 15-30 minutes lets lemon acid tenderize and garlic penetrate beyond the surface
  • Bone-in stays juicy: The bone conducts heat evenly while protecting meat from drying out
  • Skin-side up position: Baking skin-side up the entire time exposes it to direct heat for maximum crisp
  • Resting redistributes juice: 5-10 minutes off heat lets the meat reabsorb moisture instead of bleeding onto the cutting board
Quick Tip
Check temp at 35 minutes - thighs finish fast and dry out past 165°F internal

What You'll Need

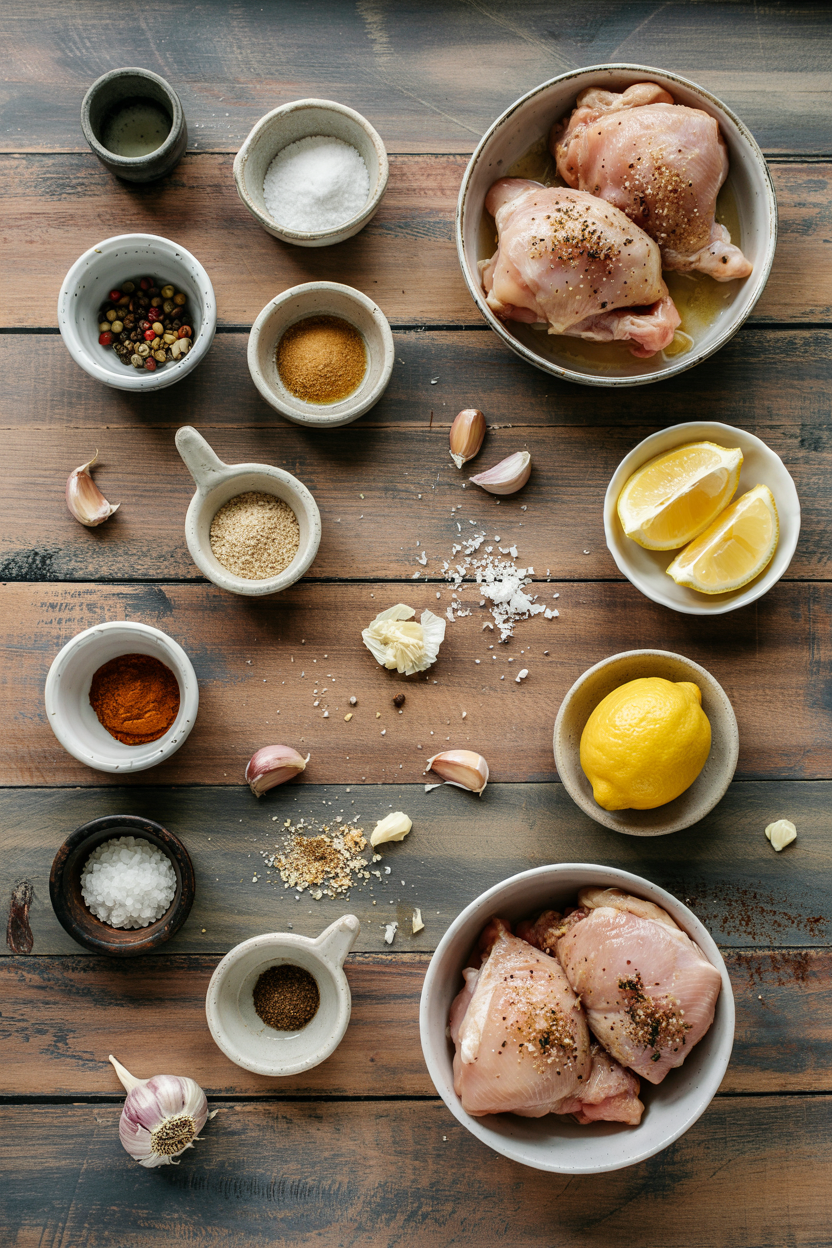
Ingredients for Baked Chicken Thighs with Lemon and Garlic

Most of this sits in your pantry already. Salad adds the contrast this plate needs, but timing matters. For a version that comes together quickly, this simple homemade salad takes 5 minutes and cuts through the richness.

🍗
Protein
  • 4 bone-in, skin-on chicken thighs (6-8 oz each)
🍋
Citrus
  • 2 lemons (juice + zest)
🧄
Aromatics
  • 6 garlic cloves, minced
  • 1 teaspoon dried thyme or rosemary
🫙
Pantry
  • 3 tablespoon olive oil
  • 1 teaspoon salt
  • ½ teaspoon black pepper

Ingredient Details

  • Bone-in, skin-on thighs
    The skin must stay on to crisp - boneless cooks faster but loses texture
  • Fresh lemon juice
    Bottled works but tastes flat - fresh juice has brighter acidity that balances garlic
  • Garlic cloves
    Mince finely so it doesn't burn - burnt garlic turns bitter and ruins the pan sauce
  • Olive oil
    Coats the skin for even browning - avocado oil works but olive oil adds flavor
  • Dried herbs
    Thyme or rosemary withstand high heat - fresh herbs burn unless added after baking
  • Salt
    Season generously - chicken needs more salt than you think for the skin to crisp
  • Lemon zest
    Optional but adds bright citrus oil - zest before juicing the lemons

Ingredient Swaps

Boneless thighs cook 10 minutes faster but the skin never gets as crispy. Potatoes soaks up every drop of sauce on the plate. For a version that comes together quickly, this creamy potatoes side dish finishes in the time it takes the chicken to rest.

Four swaps that work:

  • Olive oil → avocado or vegetable oil: Same crispiness, neutral flavor if you skip the Mediterranean vibe
  • Fresh lemon juice → bottled lemon juice: Slightly less bright but works in a pinch - use same amount
  • Fresh garlic → garlic powder: Use 1 teaspoon powder for 6 cloves - less pungent but easier
  • Dried herbs → fresh herbs: Double the amount, add after baking so they don't burn

Bone-In vs. Boneless

Works for: Bone-in takes 40 minutes, stays juicier, skin crisps better

Skip if: You need dinner in under 30 minutes - boneless cooks in 25-30 minutes but skin steams more easily

Fresh Lemon vs. Bottled

Works for: Fresh lemon has brighter acidity and oils from the zest

Skip if: You're meal prepping and need shelf-stable - bottled works but add extra black pepper for depth

Instructions

Pat the thighs dry, marinate while the oven preheats, then bake without flipping. Most people skip potato, but it balances the meal. We keep a batch ready for nights like this - hot salty fries pair with anything lemony and take 15 minutes in the air fryer.

Step-by-step:

  1. Preheat oven to 400°F (205°C). Pat chicken thighs completely dry with paper towels - this removes surface moisture so the skin crisps instead of steaming.
  2. Mix marinade: In a bowl, whisk together lemon juice, minced garlic, olive oil, dried herbs, salt, and black pepper. Add chicken thighs and turn to coat evenly. Let sit 15-30 minutes at room temp.
  3. Arrange skin-side up: Place thighs skin-side up in an oven-safe skillet or baking dish, leaving 1 inch between pieces. Pour remaining marinade over top.
  4. Bake 35-40 minutes: Roast until skin turns golden brown and internal temp hits 165°F (74°C) on a meat thermometer inserted into the thickest part without touching bone. If skin isn't crispy enough, broil 1-2 minutes at the end.
  5. Rest 5-10 minutes: Transfer to a plate and let rest before serving - this lets juices redistribute so they don't run out when you cut into the meat.
Golden Rule
Don't cover the pan - trapped steam softens the skin you worked to crisp

What to Serve With It

Lemon-garlic chicken needs something to soak up the pan sauce and cut through the richness. A good rice can make or break the plate. For ideas on building a complete dinner around similar mains, check out these weeknight chicken dinner ideas that balance protein with sides that actually work.

Side Dish Prep Why It Works How to Serve
Roasted Vegetables Easy Caramelized edges balance citrus acidity Toss broccoli, carrots, or Brussels sprouts with olive oil, roast alongside chicken
Mashed Potatoes Easy Creamy texture absorbs lemon-garlic pan sauce Make while chicken rests, spoon sauce over top
Rice Pilaf Easy Fluffy grains soak up every drop of sauce Start rice when chicken goes in oven, serve underneath thighs
Green Salad Easy Fresh greens cut through richness Toss mixed greens with olive oil and lemon juice, serve on the side
Garlic Bread Easy Crusty bread mops up pan sauce Toast baguette slices with butter and garlic, serve warm

Three ways to serve it:

  • Weeknight plate: Serve over rice pilaf with roasted broccoli on the side - everything absorbs the lemon-garlic pan drippings
  • Meal prep bowls: Slice thighs and pack with roasted vegetables and quinoa - reheat and add fresh greens day-of
  • Weekend dinner: Pair with herb roasted baby potatoes and garlic parmesan asparagus - plate looks intentional with minimal effort
Shortcut
Drizzle pan sauce over everything - the lemony drippings tie the whole plate together

Store and Reheat

Chicken thighs hold up better than breasts in the fridge because dark meat stays moist longer. Store in a shallow airtight container so they cool fast and don't sit in their own steam. Bread adds the contrast this plate needs, but timing matters. We keep a batch ready for nights like this - simple homemade bread takes 10 minutes to prep and pairs with leftover chicken for next-day lunches.

Method Time Best For
🔥 Oven 15-20 min at 350°F Maintains crispy skin and even heating - best for multiple thighs
🍳 Stovetop 5-7 min over medium heat Quick reheat with slight crisp restoration - flip halfway through
📦 Microwave 1-3 min on medium power Fast but softens skin - cover with damp paper towel to prevent drying

For best results when storing:

  • Cool completely first: Let chicken rest at room temp 10-15 minutes before refrigerating so condensation doesn't make skin soggy
  • Separate sauce: Store pan sauce in a small container and reheat separately so you can control how much goes back on
  • Fridge 3-4 days max: Dark meat holds longer than white meat but still loses moisture after day 4
  • Freeze up to 3 months: Wrap individual thighs in foil, then bag - thaw overnight in fridge before reheating
  • Reheat from fridge temp: Cold chicken reheats more evenly than frozen - oven method keeps skin crispiest

Frequently Asked Questions

How long to cook baked chicken thighs at 400°F?

Bone-in, skin-on thighs take 35-40 minutes at 400°F until the internal temp hits 165°F. Check at 35 minutes with a meat thermometer inserted into the thickest part without touching bone - timing varies based on thigh size.

Can I make lemon garlic chicken thighs ahead?

Yes - marinate up to 24 hours in the fridge for deeper flavor. Pat skin dry before baking or it won't crisp. You can also bake fully, refrigerate, and reheat in a 350°F oven for 15 minutes.

What goes well with baked chicken thighs with lemon and garlic?

Serve with rice pilaf, roasted vegetables, mashed potatoes, or a green salad. Anything that soaks up the lemon-garlic pan sauce works - crusty bread also mops up drippings.

How do I know when baked chicken thighs are done?

Insert a meat thermometer into the thickest part without touching bone - it should read 165°F. The juices run clear and the meat pulls away from the bone easily when fully cooked.

Can I use boneless skinless chicken thighs for this recipe?

Yes, but reduce baking time to 25-30 minutes and skip the crispy skin - boneless thighs dry out faster without the bone and fat. Check temp at 25 minutes to avoid overcooking.

Baked Chicken Thighs with Lemon and Garlic served on a plate

Baked Chicken Thighs with Lemon and Garlic

No ratings yet
This recipe features bone-in, skin-on chicken thighs marinated in a bright lemon-garlic mixture to ensure juicy meat and crispy skin. Baking at high heat caramelizes the lemon and crisps the skin without drying the chicken. It's perfect for easy weeknight dinners or meal prep.
Print Recipe Pin Recipe
Prep Time 10 minutes mins
Cook Time 40 minutes mins
Total Time 50 minutes mins
Servings: 4 servings
Course: Dinner, Main Dish
Cuisine: American
Ingredients Equipment Method Notes

Ingredients
  

  • 4 bone-in, skin-on chicken thighs 6-8 oz each
  • 2 lemons lemon juice and zest
  • 6 cloves garlic minced
  • 1 teaspoon dried thyme or rosemary
  • 3 tablespoon olive oil
  • 1 teaspoon salt season generously
  • 0.5 teaspoon black pepper

Equipment

  • Oven-safe skillet or baking dish To bake the chicken thighs skin-side up
  • Meat thermometer To check internal temperature of chicken
  • Mixing bowl To mix marinade and coat chicken
  • Whisk To combine marinade ingredients
  • Paper towels To pat chicken skin dry

Method
 

  1. Preheat the oven to 400°F (205°C). Pat chicken thighs completely dry with paper towels to remove surface moisture and ensure crispy skin.
    4 bone-in, skin-on chicken thighs
  2. In a mixing bowl, whisk together lemon juice, lemon zest, minced garlic, olive oil, dried thyme or rosemary, salt, and black pepper.
    2 lemons lemon, 6 cloves garlic, 1 tsp dried thyme or rosemary, 3 tbsp olive oil, 1 tsp salt, 0.5 tsp black pepper
  3. Add the chicken thighs to the marinade bowl and turn to coat evenly. Let them sit at room temperature for 15 to 30 minutes while the oven preheats.
    4 bone-in, skin-on chicken thighs
  4. Arrange the chicken thighs skin-side up in an oven-safe skillet or baking dish, leaving 1 inch between pieces. Pour any remaining marinade over the top.
    4 bone-in, skin-on chicken thighs
  5. Bake in the oven for 35 to 40 minutes until skin turns golden brown and the internal temperature reaches 165°F (74°C) when checked with a meat thermometer inserted into the thickest part without touching bone. If the skin is not crispy enough, broil for 1 to 2 minutes at the end.
    4 bone-in, skin-on chicken thighs
  6. Remove the chicken from the oven and let rest for 5 to 10 minutes before serving to allow juices to redistribute.
    4 bone-in, skin-on chicken thighs

Notes

  • Pat the chicken skin completely dry before baking or it will steam instead of crisp.
  • Use a meat thermometer to check the thickest part without touching the bone for doneness (165°F).
  • Do not cover the pan when baking to keep the skin crispy.

Tried this recipe?

Let us know how it was!

What Is Soy Milk? [Taste, Uses & More]

March 17, 2026

Doujiang - warm, lightly savory soy milk served alongside a fried dough stick - is how millions of people in China start their morning, and it's one of the clearest windows into what soy milk actually is before sweeteners and fortification get involved.

What Is Soy Milk

Most Western shoppers encounter it as a carton on the shelf, a replacements for milk option sitting next to oat and almond, but soy milk has a longer history and a more distinct flavor than that shelf position suggests.

Understanding it on its own terms changes how you use it.

QUICK SUMMARY

Soy milk is a plant-based beverage made from whole soybeans. It has a mildly beany, nutty flavor with a smooth, medium body. Use it in hot drinks, soups, baked goods, and as a base for silken tofu. Shelf-stable cartons last months; refrigerate after opening and use within a week.

🫘Origin: East Asia, with roots in Chinese doujiang tradition
👅Flavor: Mild, beany, nutty, slightly sweet with a savory edge
🥛Best For: Coffee drinks, soups, baking, and tofu-making
❄️Shelf Life: Unopened months; opened 5-7 days refrigerated
⚠️Watch: May curdle in high-acid sauces; choose barista style for coffee

What Is Soy Milk?

Soy milk is made by soaking whole soybeans, grinding them with water, boiling the slurry, and filtering out the solids.

The result is a smooth, opaque liquid - the soybean equivalent of what pressing almonds or oats produces, though the process predates both by centuries.

It originated in China, where it remains a staple known as doujiang (豆浆). From there it spread through East Asia and into Korean and Japanese food cultures, each developing their own soy-based drinks and coagulated products.

Outside Asia, it became the first widely available dairy alternative in Western markets.

You'll find it sold under several names - soya milk, soymilk, soybean milk - and in multiple formats:

  • 🛒 Shelf-stable cartons - the most common form; sweetened or unsweetened
  • ❄️ Refrigerated fresh soy milk - closer to traditional doujiang in flavor; shorter shelf life
  • ☕ Barista-style soy milk - formulated with extra fat or stabilizers to foam and resist curdling in espresso
  • 🏠 Homemade - made from dried or fresh soybeans; strongest beany character

Understanding milk's flavor and uses helps put soy milk's profile in context - it replaces dairy functionally but doesn't mimic it exactly.

What Does Soy Milk Taste Like?

soy milk - What Is Soy Milk

Soy milk has a mild, beany, nutty flavor with a quiet sweetness from the soybeans' natural sugars.

Unsweetened versions have a slight savory edge - earthy and green-forward - that sets them apart from the cleaner sweetness of oat or rice milk.

Sensory SnapshotModerate Intensity
👅 Flavor
beanynuttylightly sweetsavory edge
✋ Texture
smoothmedium-bodied
👃 Aroma
green-soytoasty when heated

Heat softens the raw, grassy note and brings out a toasty quality - warmed soy milk smells noticeably different from cold.

If you've ever made swapping out silken tofu part of a recipe, you'll recognize that same mild, neutral-savory baseline in the liquid form.

Compared to almond or pea milk, soy milk has more protein-forward body - less watery, more substantial on the palate. Sweetened commercial versions taste closer to conventional low-fat milk than most alternatives.

Golden Rule
For the cleanest soy flavor in savory cooking, always use unsweetened soy milk. Even "lightly sweetened" versions will shift the balance in miso soup or noodle broth.

How to Use Soy Milk

Soy milk is one of the more structurally capable plant milks - it has enough protein to hold together in heat, enough fat in full versions to create creaminess, and a flavor neutral enough to stay in the background when you need it to.

How Soy Milk Is Used
MethodBest ForTip
🥤 Cold/BlendedSmoothies, protein shakes, cold doujiangUse unsweetened to control sweetness of your drink
🍲 HeatedSoy lattes, miso soup, Asian noodle brothsWarm gently - avoid a rolling boil to prevent skin forming
🧁 BakedCakes, muffins, pancakes, custardsSwap 1:1 for dairy milk; add a splash of vinegar to mimic buttermilk
🧊 CoagulatedHomemade silken tofu, soy puddingUse fresh, unfortified soy milk with nigari or gypsum as coagulant

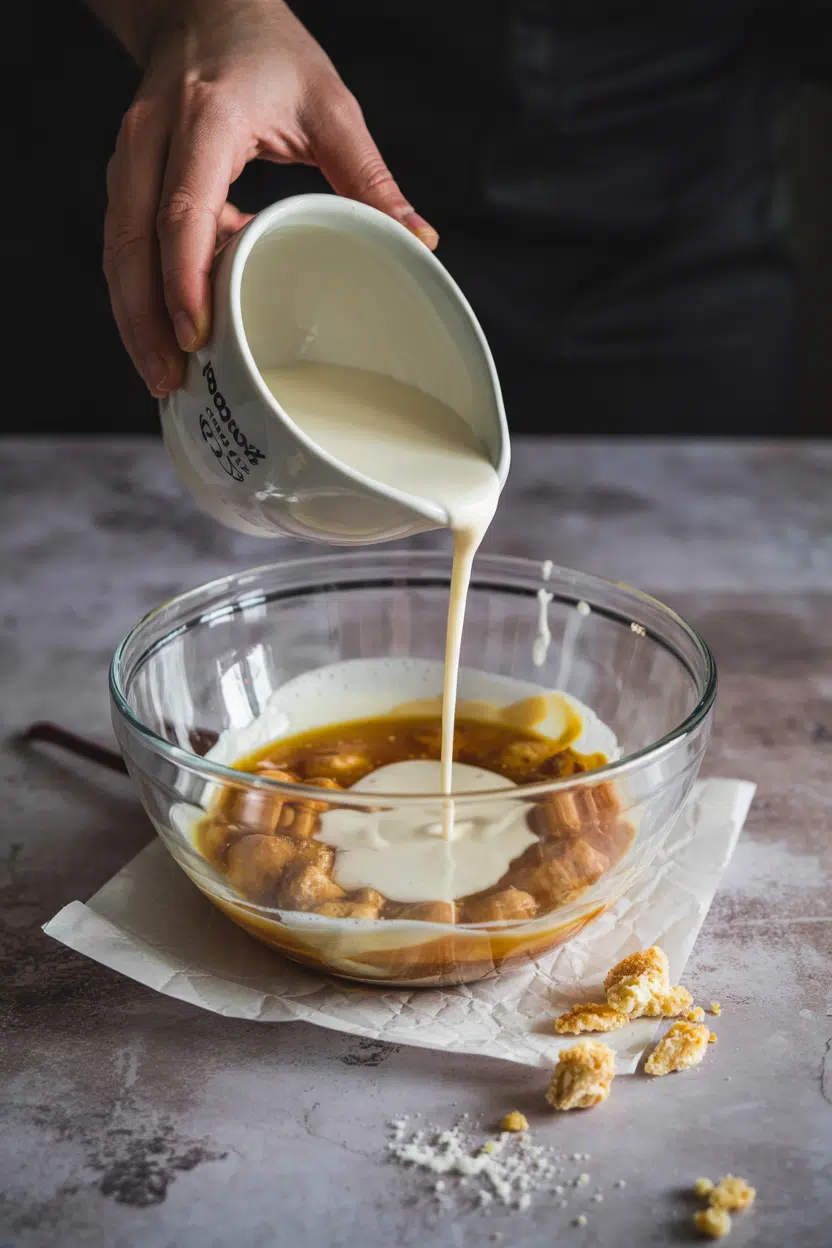
In Chinese cooking, soy milk anchors savory doujiang - seasoned with soy sauce, chili oil, dried shrimp, and scallions, then served with youtiao. Japanese cooking uses it in sauces and soft puddings.

Korean cuisine builds on soy in drinks and bean curd preparations.

For coffee, barista-style soy milk is the right choice. Its added stabilizers prevent the curdling that plain soy milk can develop when it hits hot espresso.

For smoothies, using soy milk for creaminess alongside fruit and nut butters builds a richer texture than most thin plant milks can manage.

Soy milk pairs naturally with coffee, cocoa, vanilla, cinnamon, miso, and bananas. It holds its own in savory contexts where almond milk swaps that work often fall short due to their sweeter, thinner profile.

Try It In
🥢Chinese Savory Soy Milk with YoutiaoThe classic doujiang preparation — savory, warm, and built on fresh soy milk→

How to Buy and Store Soy Milk

Unsweetened soy milk is the most useful format for cooking - it works in both sweet and savory recipes without adjustment. For coffee drinks, look specifically for a barista label, which signals added stabilizers and a higher fat content for foaming.

Watch Out
Plain (non-barista) soy milk curdles easily in hot, acidic coffee. The protein reacts with the acid. Barista-style versions use stabilizers to prevent this - they're worth the slight premium if lattes are your goal.

Fresh refrigerated soy milk - often labeled "fresh" and sold near tofu - has a cleaner, more traditional flavor. Shelf-stable cartons are convenient for pantry stocking.

  • 🛒 Unopened shelf-stable - store at room temperature until the printed date
  • ❄️ After opening - refrigerate in the original container and use within 5-7 days
  • 🥛 Fresh refrigerated - keep cold; use within 7-10 days unopened, faster once open

Knowing how to manage soy milk in dairy recipes that call for extended storage is worth checking if you're cooking in large batches and relying on milk in dairy recipes timelines as a comparison point.

Where to Start with Soy Milk

If you're new to cooking with soy milk, start with unsweetened and use it anywhere a recipe calls for dairy milk at moderate heat - soups, sauces, baked goods. That covers most situations without overthinking it.

Once you're comfortable there, try it cold in a blended drink, or warm it gently with miso paste to see how well its savory side holds up.

Barista-style soy milk earns its place only if coffee drinks are a regular use case.

Best Pick
For all-purpose use, unsweetened full-fat soy milk is the most flexible option - it handles heat, blends smoothly, and doesn't push sweetness into savory dishes.

Frequently Asked Questions

Is soy milk high in protein?

Yes - unsweetened soy milk delivers roughly 7-9 grams of complete protein per cup, more than any other plant milk. It contains all essential amino acids, which sets it apart from almond, oat, or rice milk.

Does soy milk curdle in coffee?

Plain soy milk can curdle when it hits hot, acidic espresso - the proteins react with the acid. Barista-style soy milk is formulated with stabilizers that prevent this and also foam more reliably.

Can vegans drink soy milk?

Yes - soy milk is entirely plant-based and contains no animal products. Check labels on fortified versions, as some brands use lanolin-derived vitamin D3; plant-sourced D2 or lichen-based D3 are vegan-safe alternatives.

How do you make soy milk at home?

Soak dried soybeans overnight, blend with fresh water, boil the mixture for 15-20 minutes, then strain through a fine cloth. The resulting liquid is fresh soy milk; the leftover solids are okara, which is edible and used in Japanese cooking.

Is soy milk safe to drink every day?

For most people, yes - major health authorities consider moderate daily consumption safe. Soy contains isoflavones (phytoestrogens), but current evidence does not link typical dietary intake to hormone disruption in healthy adults.

Beef and Broccoli with Oyster Sauce

March 17, 2026

Marinating beef in cornstarch and egg white creates a velvety coating that locks in moisture during high-heat stir-frying. The oyster sauce glaze thickens on contact with the hot wok, clinging to every piece of meat and broccoli instead of pooling at the bottom.

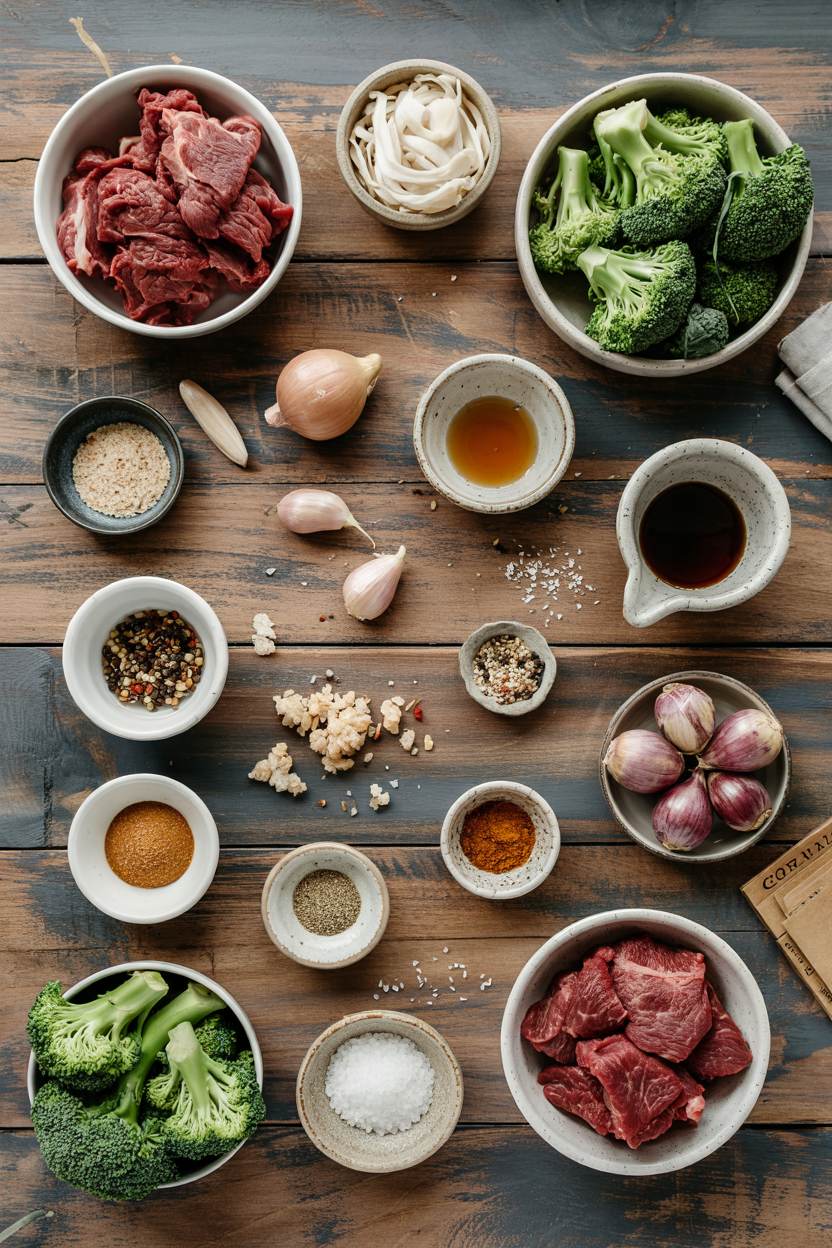
Beef and Broccoli with Oyster Sauce served on a plate

Blanching the broccoli for exactly one minute keeps it bright green and crisp-tender. Skip this step and you'll either undercook the florets or turn them musty and drab.

This is what you make when you want takeout flavors without the wait or the grease. The whole dish cooks in under 10 minutes once prep is done.

QUICK SUMMARY

Tender sliced flank steak stir-fried with crisp broccoli florets in a glossy oyster sauce glaze. Velveting the beef with cornstarch ensures a silky texture, while blanching the broccoli first keeps it vibrant and snappy. Best served immediately over steamed rice for a complete weeknight meal.

⏱️Time Reality: 15 minutes prep plus 10 minutes active cooking - marinate beef while prepping vegetables
🔪First Critical Move: Slice beef thin against the grain then coat in cornstarch slurry
⚠️Watch Out: Cook beef in batches to avoid steaming - crowding the wok turns meat gray and tough

Table of Contents

Toggle
  • Why This Recipe Works
  • What You'll Need
    • Ingredient Details
  • Ingredient Swaps
  • What to Serve With It
  • Store and Reheat
  • Frequently Asked Questions
  • Beef and Broccoli with Oyster Sauce
    • Method 
    • Tried this recipe?

Why This Recipe Works

Slicing flank steak against the grain shortens the muscle fibers, turning a potentially chewy cut into tender bite-sized pieces. For a version that comes together quickly, a simple beef recipe builds similar flavors with different spice profiles.

Quick Reference
⏱️
Prep Time
15 min
🔥
Cook Time
10 min
⏰
Total Time
25 min
🍽️
Servings
4 servings
📊
Difficulty
Medium
🏷️
Category
Main Dish
💡
Quick Tip
Velvet beef for tender bite
🎯
Best For
Weeknight | Meal prep | Budget

What makes this work:

  • Cornstarch coating: Creates a protective barrier that keeps beef juicy and helps sauce cling instead of sliding off
  • High heat searing: Caramelizes the oyster sauce glaze in seconds without burning the garlic or ginger
  • Blanch-then-stir-fry method: Broccoli gets a head start in boiling water, then finishes in the wok for maximum crunch
  • Brown sugar balance: Cuts through the salty oyster sauce and soy without making the dish taste sweet
  • Batch cooking: Gives each piece of beef direct contact with the hot wok surface for proper browning
Quick Tip
Heat oil in wok at medium-high for 1-2 minutes until it shimmers - cold oil causes beef to stick and steam instead of sear

What You'll Need

Ingredients for Beef and Broccoli with Oyster Sauce

Flank steak sits in most grocery meat cases and slices cleanly when partially frozen for 15 minutes. We keep a batch ready for nights like this - this quick beef dish uses similar cuts with a tangy marinade.

🥩
Protein
  • 1 lb flank steak, sliced thin against grain
🥦
Vegetables
  • 3 cups broccoli florets
  • 3 cloves garlic, minced
  • 1 tablespoon fresh ginger, minced
🥢
Sauce & Seasonings
  • 3 tablespoon oyster sauce
  • 2 tablespoon soy sauce
  • 1 tablespoon brown sugar
  • 1 teaspoon sesame oil
🫙
Pantry
  • 2 tablespoon cornstarch
  • 3 tablespoon vegetable oil
  • 2 tablespoon water

Ingredient Details

  • Flank steak
    Slice ¼-inch thick against visible grain lines - cutting with the grain makes beef chewy no matter how you cook it
  • Broccoli florets
    Cut into uniform 1-inch pieces so they cook evenly - oversized florets stay raw while small ones turn mushy
  • Oyster sauce
    Look for brands with oyster extract listed first - cheaper versions use MSG and caramel color instead
  • Cornstarch
    Mix with 2 tablespoon water before adding to beef - dry cornstarch clumps and won't coat evenly
  • Garlic and ginger
    Mince fine so they distribute throughout the sauce - large chunks burn and taste bitter
  • Sesame oil
    Add at the very end off heat - cooking it destroys the nutty aroma you're paying for
  • Vegetable oil
    Use neutral oil with high smoke point like canola or grapeseed - olive oil smokes and tastes off at stir-fry temperatures

Ingredient Swaps

Sirloin and skirt steak both work when flank isn't available, though sirloin needs slightly less cooking time. For a version that comes together quickly, this rich beef uses similar proteins with a spiced crust.

Four swaps that work:

  • Tamari instead of soy sauce: Same salty depth without gluten - use exact same measurement
  • Sirloin or skirt steak instead of flank: Sirloin is more tender, skirt has stronger beefy flavor - slice both against grain
  • Mushroom stir-fry sauce instead of oyster sauce: Vegetarian option with similar umami - reduce soy sauce by half to avoid oversalting
  • Arrowroot powder instead of cornstarch: Produces clearer, slightly glossier sauce - use equal amount

Peanut Oil

Works for: Higher smoke point means less burning, subtle nutty flavor complements sesame oil

Skip if: Nut allergies in household or don't want extra flavor layer

Honey or Maple Syrup

Works for: Natural sweetness that dissolves faster than granulated sugar

Skip if: Prefer less sweet sauce - liquids thin sauce more than brown sugar does

Instructions

The entire stir-fry takes 10 minutes once ingredients are prepped and lined up next to the stove. Most people skip this dish, but it balances the meal with both protein and vegetables in one pan.

  1. Marinate the beef: Mix 1 lb sliced flank steak with 1 tablespoon cornstarch, 1 tablespoon water, and 1 tablespoon soy sauce in a bowl - let sit 15 minutes while you prep vegetables and sauce.

  2. Blanch the broccoli: Boil 3 cups broccoli florets in salted water for exactly 1 minute, then drain and plunge into ice water to stop cooking - florets should be bright green and still firm.

  3. Sear the beef: Heat 2 tablespoon vegetable oil in wok over medium-high until shimmering, add half the marinated beef in single layer and cook 1-2 minutes per side until browned - remove to plate and repeat with remaining beef.

  4. Build the sauce: Add 1 tablespoon oil to same wok, cook 3 cloves minced garlic and 1 tablespoon minced ginger for 30 seconds until fragrant - stir in 3 tablespoon oyster sauce, 1 tablespoon soy sauce, 1 tablespoon brown sugar, and blanched broccoli.

  5. Finish and serve: Return beef to wok, toss everything together for 1 minute until sauce coats evenly - remove from heat, drizzle 1 teaspoon sesame oil over top, and serve immediately over steamed rice.

Golden Rule
Never add sesame oil during active cooking - wait until wok is off heat or the nutty aroma burns off completely

What to Serve With It

The dish needs a neutral starch to soak up the glossy oyster sauce and something crisp to break up the richness. For pulled beef meal planning ideas that work with similar saucy mains, that guide covers rice variations and quick vegetable sides.

Side Dish Prep Why It Works How to Serve
Steamed jasmine rice Easy Neutral base absorbs savory oyster sauce without competing Serve 1 cup rice per person, spoon beef and sauce over top
Egg fried rice Medium Adds protein and toasted flavor contrast to glossy sauce Make with day-old rice, serve alongside or underneath beef
Garlic green beans Easy Extra vegetable that picks up similar aromatics Sauté with garlic and soy sauce, plate next to beef
Cucumber salad Easy Cool crunch cuts through rich sauce and heavy protein Dress with rice vinegar and sesame seeds, serve on side
Scallion pancakes Medium Crispy carb that soaks up extra sauce like edible napkins Cut into wedges, serve warm for dipping

Three ways to serve it:

  • Weeknight bowl: Pile beef and broccoli over steamed rice with extra oyster sauce drizzled on top
  • Meal prep style: Divide into containers with rice, reheat beef and broccoli separately to maintain texture
  • Family-style platter: Arrange beef and broccoli on large plate, surround with rice and cucumber salad
Shortcut
Use frozen broccoli florets and skip blanching - add frozen directly to wok after beef, cook 3-4 minutes until tender-crisp

Store and Reheat

The beef stays tender for 3 days refrigerated but the broccoli loses its snap after 24 hours. Salad adds the contrast this plate needs, but timing matters - a crisp green salad holds up better than leftover stir-fried vegetables.

Method Time Best For
🍳 Stovetop 3-5 min Maintaining crisp-tender texture - add splash of water to loosen sauce
📦 Microwave 1-2 min Quick lunch reheat - broccoli will soften but beef stays tender
🔥 Oven 8-10 min at 350°F Even reheating for meal prep portions - cover with foil to prevent drying

For best results when storing:

  • Separate components: Store beef and broccoli in different containers if meal prepping - reheat separately and combine before serving
  • Cool quickly: Spread on sheet pan for 10 minutes before refrigerating to stop carryover cooking
  • Add liquid when reheating: Splash 1 tablespoon water or broth per serving to reconstitute sauce that thickened in fridge
  • Freeze beef only: Broccoli turns mushy when frozen - store cooked beef in sauce up to 2 months, add fresh vegetables when reheating
  • Refresh with aromatics: Toss reheated beef with fresh minced garlic or ginger to revive flavor that fades during storage

Frequently Asked Questions

How long to cook beef and broccoli at stovetop?

Beef cooks 1-2 minutes per side over medium-high heat in batches, broccoli stir-fries 1 minute after blanching. Total active cooking time is 8-10 minutes once all ingredients are prepped.

Can I make beef and broccoli with oyster sauce ahead?

Marinate beef and blanch broccoli up to 4 hours ahead, store separately in fridge. The actual stir-fry must happen right before serving or broccoli loses its crisp texture.

What goes well with beef and broccoli?

Steamed jasmine rice, egg fried rice, or plain white rice absorb the oyster sauce glaze. Add cucumber salad, garlic green beans, or scallion pancakes for textural contrast.

How do I know when beef is done in this dish?

Beef should be medium-rare to medium with slight pink in the center - thin slices cook fast, so pull from wok when edges are browned but center still looks rosy. It continues cooking in residual heat.

Can I use chicken instead of beef in beef and broccoli?

Chicken thighs work better than breasts - slice thin, marinate the same way, and cook 3-4 minutes per batch until no longer pink. Chicken needs slightly longer cooking time than beef.

Beef and Broccoli with Oyster Sauce served on a plate

Beef and Broccoli with Oyster Sauce

No ratings yet
Tender sliced flank steak stir-fried with crisp broccoli florets in a glossy oyster sauce glaze. Velveting the beef with cornstarch ensures a silky texture, while blanching the broccoli keeps it vibrant and snappy. This dish cooks quickly and delivers takeout flavors without the grease.
Print Recipe Pin Recipe
Prep Time 15 minutes mins
Cook Time 10 minutes mins
Total Time 25 minutes mins
Servings: 4 servings
Course: Main Dish
Cuisine: Asian-Inspired
Ingredients Method Notes

Ingredients
  

  • 1 lb flank steak sliced thin against grain
  • 3 cups broccoli florets cut into uniform 1-inch pieces
  • 3 cloves garlic minced finely
  • 1 tablespoon fresh ginger minced finely
  • 3 tablespoon oyster sauce choose brand with oyster extract first
  • 2 tablespoon soy sauce
  • 1 tablespoon brown sugar
  • 1 teaspoon sesame oil added off heat at end
  • 2 tablespoon cornstarch mixed with 1 tablespoon water before coating beef
  • 3 tablespoon vegetable oil neutral, high smoke point
  • 1 tablespoon water for cornstarch slurry

Method
 

  1. Mix flank steak slices with 1 tablespoon cornstarch, 1 tablespoon water, and 1 tablespoon soy sauce in a bowl. Let marinate for 15 minutes while prepping vegetables and sauce.
    1 lb flank steak, 2 tbsp soy sauce, 2 tbsp cornstarch, 1 tbsp water
  2. Boil broccoli florets in salted water for exactly 1 minute, then drain and plunge into ice water to stop cooking. They should remain bright green and crisp-tender.
    3 cups broccoli florets
  3. Heat 2 tablespoon vegetable oil in wok over medium-high heat until shimmering. Add half the marinated beef in a single layer and cook 1-2 minutes per side until browned. Remove to plate and repeat with remaining beef.
    3 tbsp vegetable oil, 1 lb flank steak
  4. Add 1 tablespoon vegetable oil to same wok. Cook minced garlic and ginger for 30 seconds until fragrant. Stir in oyster sauce, soy sauce, brown sugar, and blanched broccoli.
    3 tbsp vegetable oil, 3 cloves garlic, 1 tbsp fresh ginger, 3 tbsp oyster sauce, 2 tbsp soy sauce, 1 tbsp brown sugar, 3 cups broccoli florets
  5. Return beef to wok and toss everything for 1 minute until sauce coats evenly. Remove from heat, drizzle sesame oil over top, and serve immediately over steamed rice.
    1 lb flank steak, 1 tsp sesame oil

Notes

  • Slice beef thin and against the grain for tenderness.
  • Blanch broccoli briefly to maintain crispness and color.
  • Do not add sesame oil during cooking; add off heat to preserve aroma.

Tried this recipe?

Let us know how it was!

Tuscan Chicken with Sun-Dried Tomatoes

March 17, 2026

Tuscan Chicken with Sun-Dried Tomatoes - Complete Recipe Article

When you need a hands-off dinner that looks intentional but doesn't require all-day prep, pan-seared chicken in creamy sauce delivers. One skillet, 30 minutes, and enough savory depth to make plain pasta taste worthwhile.

Tuscan Chicken with Sun-Dried Tomatoes served on a plate

Sear the chicken at medium-high heat and the sauce does the rest. The sun-dried tomatoes and garlic create tangy richness without extra steps.

Perfect for meal prep weeks when cooking feels like a chore or weeknight entertaining when you want something that tastes restaurant-level without the fuss.

QUICK SUMMARY

Pan-seared chicken breasts simmered in a creamy sun-dried tomato sauce with garlic, spinach, and Parmesan. The key is drying the chicken thoroughly before searing so you get a golden crust instead of steamed, pale meat. Pull the chicken at 160°F internal temp and let it rest 5 minutes to hit 165°F without drying out.

⏱️Time Reality: 30 minutes start to finish-10 minutes prep, 20 minutes active cooking
🔥First Critical Move: Heat the pan 3-5 minutes before adding oil so chicken sears instead of sticks
⚠️Watch Out: Overcrowding the pan steams the chicken-leave 1-2 inch gaps between pieces or sear in batches

Why This Recipe Works

The key to juicy chicken with a golden crust is starting with a dry surface and a properly heated pan. For a version that comes together quickly, more chicken ideas show how different sauces work with the same searing technique.

Quick Reference
⏱️
Prep Time
10 min
🔥
Cook Time
20 min
⏰
Total Time
30 min
🍽️
Servings
4 servings
📊
Difficulty
Medium
🏷️
Category
Main Dish
💡
Quick Tip
Don't overcrowd pan; sear chicken in batches
🎯
Best For
Weeknight | Meal prep | Entertaining

Five reasons this works:

  • Dry chicken surface: Pat breasts dry for 30 seconds with paper towels so moisture doesn't prevent browning
  • Medium-high heat searing: Preheat pan 3-5 minutes before adding oil to create instant crust without sticking
  • Pull at 160°F: Remove chicken at 160°F internal temp and rest 5 minutes to reach safe 165°F without overcooking
  • Cream off heat: Lower heat before adding cream to prevent curdling from rapid temperature change
  • Sauce reduction: Simmer uncovered 5-7 minutes until sauce coats the back of a spoon like syrup
Quick Tip
Use an instant-read thermometer to check chicken-guessing leads to dry, overcooked meat or undercooked centers

What You'll Need

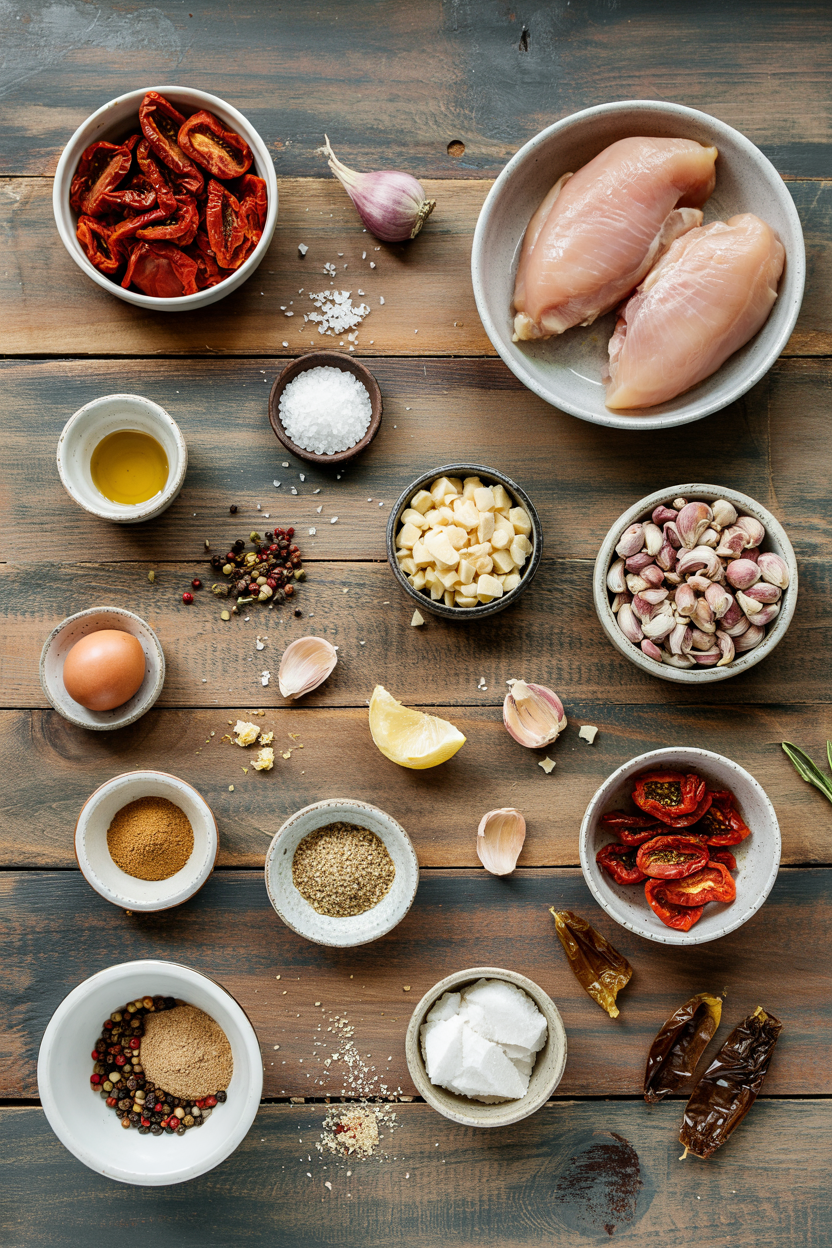
Ingredients for Tuscan Chicken with Sun-Dried Tomatoes

Shopping for this is straightforward if you know which sun-dried tomatoes to buy. We keep a batch ready for nights like this - this easy chicken recipe uses the same searing method with different flavor profiles.

🍗
Protein
  • Boneless skinless chicken breasts
🥬
Vegetables
  • Sun-dried tomatoes (jarred in oil or dry-packed)
  • Fresh spinach
  • Garlic cloves
🧀
Dairy
  • Heavy cream
  • Parmesan cheese (freshly grated)
🫙
Pantry
  • Olive oil
  • Italian herbs (basil, oregano)
  • Salt and black pepper

Ingredient Details

  • Chicken breasts
    Use room temperature chicken for even cooking-cold chicken from the fridge browns unevenly and cooks slower
  • Sun-dried tomatoes
    If using dry-packed, soak in warm water 10 minutes to soften; jarred in oil can go straight into the pan
  • Garlic
    Sauté on medium-low heat to prevent burning-burned garlic tastes bitter and ruins the sauce
  • Heavy cream
    Full-fat cream creates the richest sauce and won't curdle like lower-fat options when simmered
  • Parmesan cheese
    Freshly grated melts smoother than pre-shredded-pre-shredded has anti-caking agents that make sauce grainy
  • Spinach
    Add at the end so it wilts but doesn't turn mushy-30 seconds in hot sauce is enough
  • Olive oil
    Use regular olive oil for searing, not extra-virgin-EVOO has a lower smoke point and burns at medium-high heat

Ingredient Swaps

Most substitutions work if you adjust cooking time or texture expectations. Rich mains need something to cut through, and chicken does exactly that - a juicy chicken variation shows how mushrooms replace sun-dried tomatoes for earthy depth.

Four practical swaps:

  • Heavy cream → full-fat coconut milk: Adds slight coconut flavor, sauce will be less thick but still creamy (dairy-free option)
  • Parmesan cheese → nutritional yeast: Less salty, less melty, sauce texture slightly thinner but works for dairy-free diets
  • Chicken breasts → skinless chicken thighs: More moist and forgiving, needs ~5 extra minutes cooking time, richer flavor
  • Sun-dried tomatoes → sun-dried tomato paste: More concentrated flavor with less texture, reduce quantity by half

Full-Fat Coconut Milk

Works for: Dairy-free meals, adds tropical undertone that complements Italian herbs

Skip if: You want traditional creamy richness-coconut milk is thinner and less velvety

Chicken Thighs

Works for: Budget meals, forgiving if you overcook slightly, stays juicy longer

Skip if: You want lean protein or faster cooking-thighs need 5+ extra minutes

Greek Yogurt

Works for: Lower-fat option, tangy flavor adds brightness to sauce

Skip if: You're simmering the sauce-yogurt curdles at high heat, add off heat only

Instructions

The entire process takes 30 minutes with most of that being hands-off simmering. Most people skip this dip, but it balances the meal - a creamy dip side works with leftover sauce for dunking bread or vegetables.

  1. Prep the chicken: Pat chicken breasts dry with paper towels for 30 seconds. Season both sides with salt and pepper. Let sit at room temperature 10 minutes while you prep other ingredients.

  2. Sear the chicken: Heat a large skillet over medium-high heat for 3-5 minutes. Add 2 tablespoons olive oil, swirl to coat, then add chicken breasts leaving 1-2 inch gaps between pieces. Sear 5-6 minutes per side until golden brown and internal temp reaches 160°F. Transfer to a plate and tent with foil.

  3. Build the sauce: Lower heat to medium. Add minced garlic to the same skillet and sauté 30-60 seconds until fragrant but not browned. Add sun-dried tomatoes and stir 1 minute. Pour in heavy cream and bring to a gentle simmer.

  4. Finish the sauce: Stir in grated Parmesan and Italian herbs. Simmer uncovered 5-7 minutes, stirring occasionally, until sauce thickens enough to coat the back of a spoon. Add spinach and stir 30 seconds until just wilted.

  5. Combine and serve: Return chicken and any accumulated juices to the skillet. Spoon sauce over chicken and simmer 2 minutes to reheat. Serve immediately with extra Parmesan on top.

Golden Rule
Never add cream to a boiling pan-lower the heat first or you'll end up with curdled, grainy sauce

What to Serve With It

This dish needs something to soak up the sauce or cut through the richness. For a version that comes together quickly, complete chicken thighs meal ideas show how to build balanced plates with similar proteins.

Side Dish Prep Why It Works How to Serve
Garlic Mashed Potatoes Easy Creamy texture complements rich sauce, mild flavor doesn't compete Scoop onto plate, spoon sauce over top, garnish with parsley
Steamed Green Beans Easy Crisp freshness balances cream, adds color and crunch Serve alongside, drizzle with lemon juice and olive oil
Rice Pilaf Easy Soaks up sauce without overpowering, easy weeknight prep Mound on plate, nest chicken on top, spoon extra sauce around
Roasted Asparagus Easy Nutty flavor and tender texture, bright green color contrasts plate Arrange spears next to chicken, sprinkle with Parmesan shavings
Cauliflower Rice Easy Low-carb option, mild flavor lets sauce shine Spread on plate as base, place chicken on top, serve immediately

Three ways to serve it:

  • Weeknight plate: Serve over rice pilaf with steamed green beans on the side, sprinkle with fresh basil
  • Low-carb option: Pair with cauliflower rice and roasted asparagus, add extra Parmesan for richness
  • Entertaining dinner: Plate over garlic mashed potatoes with focaccia bread for dipping, finish with lemon arugula salad
Best Pick
Rice pilaf is the most practical weeknight side-it soaks up sauce, reheats well, and takes 15 minutes

Store and Reheat

This keeps 3-4 days in the fridge but the sauce thickens as it cools. The brussels works best when it hits the table at the same time as the main - this quick brussels dish gives you a vegetable option that reheats alongside chicken without getting mushy.

Method Time Best For
🍳 Stovetop 5-7 min Best texture retention, add splash of cream to thin sauce
🔥 Oven 15 min at 325°F Even reheating for meal prep portions, cover with foil
📦 Microwave 2-3 min at 50% power Quickest option when short on time, stir halfway through

For best results when storing:

  • Cool quickly: Let chicken cool 15-20 minutes at room temp before refrigerating to prevent condensation
  • Store in shallow containers: Use airtight containers no deeper than 2 inches for even cooling and reheating
  • Keep sauce with chicken: Store chicken submerged in sauce to prevent drying out during storage
  • Add liquid when reheating: Thin sauce with 2-3 tablespoons cream or chicken broth when reheating on stovetop
  • Freeze in portions: Freeze up to 1 month in individual portions for quick weeknight meals-thaw overnight in fridge

Frequently Asked Questions

How long to cook Tuscan Chicken with Sun-Dried Tomatoes at medium heat?

Sear chicken 5-6 minutes per side at medium-high heat until golden brown and internal temp reaches 160°F. After adding sauce, simmer 2 minutes at medium heat to reheat chicken through.

Can I make Tuscan Chicken with Sun-Dried Tomatoes ahead and reheat?

Yes, make it up to 3 days ahead and store in an airtight container. Reheat gently on the stovetop with a splash of cream to thin the sauce, stirring often to prevent sticking.

What goes well as a side with Tuscan Chicken with Sun-Dried Tomatoes?

Rice pilaf, garlic mashed potatoes, or cauliflower rice soak up the creamy sauce. Add steamed green beans or roasted asparagus for crunch and color balance.

How do I know when Tuscan Chicken with Sun-Dried Tomatoes is thoroughly cooked?

Use an instant-read thermometer inserted into the thickest part-pull chicken at 160°F and rest 5 minutes to reach safe 165°F. The juices should run clear, not pink.

Can I use sun-dried tomato paste instead of sun-dried tomatoes?

Yes, use 2-3 tablespoons sun-dried tomato paste for more concentrated flavor. You'll lose the chewy texture but get the same tangy taste throughout the sauce.

Tuscan Chicken with Sun-Dried Tomatoes served on a plate

Tuscan Chicken with Sun-Dried Tomatoes

No ratings yet
This Tuscan Chicken recipe features pan-seared chicken breasts simmered in a creamy sun-dried tomato sauce with garlic, spinach, and Parmesan. The key to success is drying the chicken thoroughly before searing to achieve a golden crust and pulling it at 160°F for juicy, tender meat.
Print Recipe Pin Recipe
Prep Time 10 minutes mins
Cook Time 20 minutes mins
Total Time 30 minutes mins
Servings: 4 servings
Course: Main Dish
Cuisine: Italian
Ingredients Equipment Method Notes

Ingredients
  

  • 4 boneless skinless chicken breasts room temperature, patted dry
  • 2 tablespoons olive oil regular olive oil for searing, not extra-virgin
  • 3 cloves garlic minced
  • ⅓ cup sun-dried tomatoes jarred in oil or dry-packed (soaked 10 minutes if dry)
  • 1 cup heavy cream full-fat
  • ⅓ cup Parmesan cheese freshly grated
  • 1 cup fresh spinach added at end to wilt
  • 1 teaspoon Italian herbs basil, oregano mix
  • salt to season chicken
  • black pepper to season chicken

Equipment

  • Large skillet Used for searing chicken and making the sauce
  • Instant-read thermometer For checking chicken internal temperature

Method
 

  1. Pat chicken breasts dry with paper towels for 30 seconds. Season both sides with salt and pepper. Let sit at room temperature for 10 minutes while preparing other ingredients.
    4 boneless skinless chicken breasts, salt, black pepper
  2. Heat a large skillet over medium-high heat for 3-5 minutes. Add olive oil and swirl to coat. Add chicken breasts leaving 1-2 inch gaps. Sear 5-6 minutes per side until golden brown and internal temperature reaches 160°F. Transfer to a plate and tent with foil.
    4 boneless skinless chicken breasts, 2 tablespoons olive oil
  3. Lower heat to medium. Add minced garlic to the same skillet and sauté for 30-60 seconds until fragrant but not browned. Add sun-dried tomatoes and stir for 1 minute. Pour in heavy cream and bring to a gentle simmer.
    3 cloves garlic, ⅓ cup sun-dried tomatoes, 1 cup heavy cream
  4. Stir in grated Parmesan cheese and Italian herbs. Simmer uncovered for 5-7 minutes, stirring occasionally, until sauce thickens enough to coat the back of a spoon. Add fresh spinach and stir for 30 seconds until wilted.
    ⅓ cup Parmesan cheese, 1 cup fresh spinach, 1 teaspoon Italian herbs
  5. Return chicken and any accumulated juices to the skillet. Spoon sauce over chicken and simmer 2 minutes to reheat. Serve immediately with extra Parmesan on top if desired.
    4 boneless skinless chicken breasts, ⅓ cup Parmesan cheese

Notes

  • Pat chicken dry thoroughly to ensure golden crust and prevent steaming.
  • Preheat pan 3-5 minutes before adding oil to avoid sticking and improve browning.
  • Pull chicken at 160°F internal temp and rest 5 minutes to avoid drying out.

Tried this recipe?

Let us know how it was!

Skillet Shakshuka with Eggs

March 17, 2026

Complete Article Output

Sautéing onion and peppers in olive oil until soft builds the sweet, aromatic base for the tomato sauce. Simmering canned whole peeled tomatoes with cumin and paprika creates a thick, spice-forward sauce that holds the eggs in place.

Skillet Shakshuka with Eggs served on a plate

The eggs poach directly in the simmering sauce. You get soft whites and runny yolks without a separate pot of water.

This works for weeknight dinners when you need protein fast, brunch gatherings where everyone eats at the table, or meal prep when you want something that reheats well. Most people skip potato, but it balances the meal. We keep a batch ready for nights like this - try this buttery potatoes recipe alongside the skillet.

QUICK SUMMARY

Skillet Shakshuka with Eggs simmers spiced tomato sauce on the stovetop, then poaches eggs directly in the bubbling liquid. The sauce reduces while the eggs cook, so timing matters. Make this when you need a one-pan breakfast that works for dinner too.

⏱️Total Time: 30 minutes with 10 minutes of hands-on prep before the simmer
🔥Critical Move: Simmer sauce uncovered for 10-12 minutes to thicken before adding eggs
⚠️Watch Out: Eggs turn rubbery if sauce boils - keep heat at medium-low during poaching

Why This Recipe Works

Toasting cumin and paprika in hot oil for 1 minute before adding vegetables releases aromatic oils that bloom throughout the sauce. A good nests can make or break the plate. For a version that comes together quickly, try this simple homemade nests when you want a different egg format.

Quick Reference
⏱️
Prep Time
10 min
🔥
Cook Time
20 min
⏰
Total Time
30 min
🍽️
Servings
3-4 servings
📊
Difficulty
Easy
🏷️
Category
Main Dish
💡
Quick Tip
Poach eggs gently in simmering sauce
🎯
Best For
Weeknight | Brunch | Entertaining

Five things that make this work:

  • Whole peeled tomatoes crush easily with a spoon and release less water than crushed or diced varieties during the simmer
  • Sautéing onions until translucent (5-7 minutes) removes raw bite and develops sweetness before the tomatoes go in
  • Covering the skillet during egg poaching traps steam that sets the whites without flipping or stirring
  • Checking egg doneness visually - whites fully set, yolks still wobbly - prevents rubbery texture from overcooking
  • Resting the sauce 2-3 minutes off heat before serving lets flavors meld and thickens the consistency slightly
Quick Tip
Use a 10-inch skillet so eggs have enough space to poach evenly without crowding the pan

What You'll Need

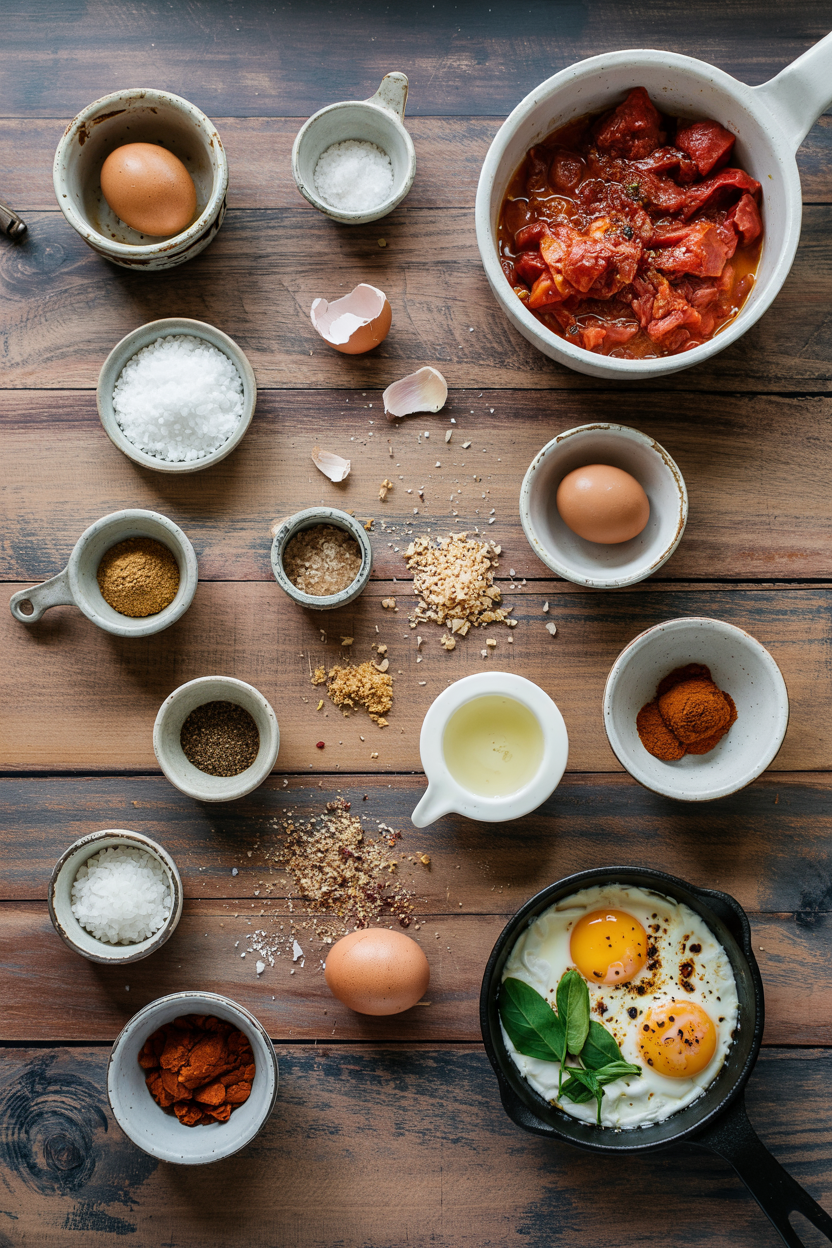
Ingredients for Skillet Shakshuka with Eggs

Stock your pantry with canned whole peeled tomatoes, cumin, and paprika. Fresh vegetables like bell peppers and onion keep in the fridge for a week, so you can make this when the craving hits. Rich mains need something to cut through, and potato does exactly that. For a version that comes together quickly, try this quick potato dish for a heartier breakfast spread.

🥚
Protein
  • 4-6 eggs
🥬
Vegetables
  • 1 can (28 oz) whole peeled tomatoes
  • 1 bell pepper, diced
  • 1 onion, diced
  • 3 garlic cloves, minced
🌶️
Spices
  • 1 teaspoon cumin
  • 1 teaspoon paprika
  • ½ teaspoon chili powder
  • Salt and black pepper
🫙
Other
  • 2 tablespoon olive oil
  • Fresh cilantro or parsley
  • Feta cheese (optional)

Ingredient Details

  • Canned whole peeled tomatoes
    Crush by hand in the skillet for chunky texture; avoid pre-crushed varieties that release excess water
  • Bell peppers
    Red or yellow add sweetness; green works but tastes more bitter and vegetal
  • Eggs
    Room temperature eggs cook more evenly than cold eggs straight from the fridge
  • Cumin and paprika
    Toast in hot oil before adding vegetables to release aromatic oils and deepen flavor
  • Garlic
    Add after onions soften to prevent burning; burnt garlic tastes bitter and ruins the sauce
  • Fresh herbs
    Stir in cilantro or parsley right before serving for bright, fresh contrast to the rich sauce
  • Olive oil
    Use enough to coat the pan and prevent vegetables from sticking during the sauté

Ingredient Swaps

Canned tomatoes are the backbone of this recipe, but fresh ripe tomatoes work if you blanch and chop them first. You'll need to simmer longer to reduce the extra liquid. This dip adds the contrast this plate needs, but timing matters. We keep a batch ready for nights like this - try this homemade sauce recipe for a completely different approach to eggs.

Four swaps that work:

  • Canned whole peeled tomatoes → fresh ripe tomatoes (blanched and chopped): Slightly fresher flavor, longer cook time to reduce water, possibly thinner sauce unless you add tomato paste
  • Bell peppers → zucchini or eggplant: Milder, less sweet; changes overall texture to softer and more melt-in-your-mouth
  • Paprika and cumin → berbere or chili powder: Adds different heat profile and earthy notes; start with less and taste as you go
  • Fresh herbs (cilantro/parsley) → dried oregano or basil: Less bright freshness, suitable when fresh herbs aren't available; use half the amount

Stovetop Poaching (Traditional)

Works for: Soft runny yolks, faster cooking, better control over doneness

Skip if: You don't want to monitor the skillet or prefer hands-off cooking

Oven Baking at 375°F

Works for: Hands-off cooking, firmer whites, even heat distribution

Skip if: You want very soft yolks or don't want to preheat the oven

Instructions

Cook the vegetables first, then simmer the sauce uncovered to reduce excess liquid. Eggs go in last and poach gently in the bubbling sauce. Most people skip salad, but it balances the meal. For a version that comes together quickly, try this easy salad side for a Mediterranean-inspired plate.

  1. Toast the spices: Heat 2 tablespoon olive oil in a 10-inch skillet over medium heat. Add 1 teaspoon cumin and 1 teaspoon paprika, stir for 1 minute until fragrant. The oil should shimmer but not smoke.

  2. Sauté the vegetables: Add 1 diced onion and cook 5-7 minutes, stirring occasionally, until translucent and soft. Add 1 diced bell pepper and cook 3-4 minutes until tender. Stir in 3 minced garlic cloves and cook 30 seconds until fragrant.

  3. Build the sauce: Pour in 1 can (28 oz) whole peeled tomatoes with juices. Crush tomatoes with a wooden spoon. Add ½ teaspoon chili powder, ½ teaspoon salt, ¼ teaspoon black pepper. Simmer uncovered over medium-low heat for 10-12 minutes, stirring occasionally, until sauce thickens and reduces by about one-third.

  4. Poach the eggs: Use the back of a spoon to make 4-6 shallow wells in the sauce. Crack 1 egg into each well. Cover skillet with a lid and cook 5-7 minutes over medium-low heat. Check at 5 minutes - whites should be set, yolks still jiggly.

  5. Finish and serve: Remove from heat, let rest 2-3 minutes. Sprinkle with fresh chopped cilantro or parsley. Add crumbled feta if using. Serve directly from the skillet with crusty bread for scooping.

Watch Out
If sauce boils during egg poaching, eggs turn rubbery - keep heat at medium-low so liquid barely bubbles

What to Serve With It

Shakshuka needs something to soak up the rich tomato sauce. Bread works, but starch adds substance and turns this into a full meal. A good coleslaw can make or break the plate. We keep a batch ready for nights like this - try this homemade coleslaw recipe for a cool, crunchy contrast. If you're planning a bigger breakfast spread, check out these weeknight scrambled eggs meal ideas for more pairing options.

Side Dish Prep Why It Works How to Serve
Crusty bread Easy Soaks up rich tomato sauce and runny yolk Toast slices and serve warm on the side
Simple green salad Easy Adds freshness and balances richness Dress lightly with lemon and olive oil
Cucumber yogurt salad Easy Cool contrast in texture and temperature Chill before serving alongside hot skillet
Roasted potatoes Medium Adds starch and heartiness for bigger appetites Roast at 425°F while sauce simmers
Pita wedges Easy Easy to share and dip into sauce Warm in oven or skillet before serving

Three ways to serve it:

  • For brunch gatherings: Serve straight from the skillet at the table with pita wedges, a mezze platter with olives and labneh, and spiced roasted carrots for color
  • For weeknight dinners: Pair with a simple green salad and crusty bread; skip the feta and herbs if you're short on time
  • For meal prep: Make the sauce ahead, store in the fridge, and reheat before cracking eggs in for fresh poached texture
Shortcut
Make a double batch of sauce and freeze half - reheat and add fresh eggs when you need a fast breakfast

Store and Reheat

Shakshuka keeps well in the fridge but the eggs firm up as they cool. The sauce reheats beautifully, so some people make extra and poach fresh eggs each time. Cool and crunchy, coleslaw resets your palate between bites. For a version that comes together quickly, try this homemade coleslaw recipe when you want something fresh on the side.

Method Time Best For
🍳 Stovetop 5 min on low heat Best texture and flavor retention; eggs stay tender
🔥 Oven 10 min at 325°F Even warming without overcooking; good for large portions
📦 Microwave 1-2 min on medium power Quick reheating but can toughen eggs; use as last resort

For best results when storing:

  • Cool quickly: Transfer shakshuka to a shallow airtight container within 2 hours of cooking to prevent bacterial growth
  • Separate sauce from eggs if meal prepping: Store sauce alone, reheat, and crack fresh eggs in for better texture
  • Store in fridge up to 3-4 days: Keep in airtight container; sauce may thicken as it sits, add a splash of water when reheating
  • Freeze sauce without eggs for up to 2 months: Thaw overnight in fridge, reheat, and poach fresh eggs for best results
  • Reheat gently on stovetop: Warm over low heat, covered, for 5 minutes until heated through; stir occasionally to prevent sticking

Frequently Asked Questions

How long to cook shakshuka eggs on stovetop?

Cook eggs 5-7 minutes covered over medium-low heat. Check at 5 minutes - whites should be fully set, yolks still jiggly.

Can I make shakshuka ahead and reheat?

Make the sauce ahead and store in the fridge up to 4 days. Reheat the sauce and crack fresh eggs in for better texture than reheating already-cooked eggs.

What goes well with shakshuka?

Serve with crusty bread, pita wedges, or roasted potatoes. Add a simple green salad or cucumber yogurt salad for freshness.

How do I know when shakshuka eggs are done?

Whites should be fully set and opaque, yolks still jiggly when you gently shake the pan. This usually takes 5-7 minutes covered over medium-low heat.

Can I use fresh tomatoes instead of canned?

Yes, blanch and chop fresh ripe tomatoes first. Simmer longer to reduce the extra liquid, and add tomato paste if the sauce stays too thin.

Skillet Shakshuka with Eggs served on a plate

Skillet Shakshuka with Eggs

No ratings yet
Skillet Shakshuka with Eggs features a spiced tomato sauce simmered on the stovetop that poaches eggs directly in the bubbling liquid for perfectly soft whites and runny yolks. This one-pan dish is ideal for quick dinners, brunch gatherings, or meal prep with its rich, aromatic flavor and easy preparation.
Print Recipe Pin Recipe
Prep Time 10 minutes mins
Cook Time 20 minutes mins
Total Time 30 minutes mins
Servings: 4 servings
Course: Main Dish
Cuisine: Mediterranean
Ingredients Equipment Method Notes

Ingredients
  

  • 4 egg room temperature
  • 28 oz canned whole peeled tomatoes crush by hand in the skillet
  • 1 medium onion diced
  • 1 medium bell pepper diced
  • 3 cloves garlic minced
  • 1 teaspoon cumin toasted in oil before vegetables
  • 1 teaspoon paprika toasted in oil before vegetables
  • 0.5 teaspoon chili powder
  • 0.5 teaspoon salt
  • 0.25 teaspoon black pepper
  • 2 tablespoon olive oil for sautéing and toasting spices
  • to taste fresh cilantro or parsley chopped, added at end
  • optional feta cheese crumbled, for serving

Equipment

  • 10-inch skillet Used to cook vegetables, simmer sauce, and poach eggs evenly
  • Wooden spoon For crushing tomatoes and stirring sauce
  • lid To cover skillet when poaching eggs

Method
 

  1. Heat 2 tablespoon olive oil in a 10-inch skillet over medium heat. Add 1 teaspoon cumin and 1 teaspoon paprika; stir for 1 minute until fragrant. The oil should shimmer but not smoke.
    1 tsp cumin, 1 tsp paprika, 2 tbsp olive oil
  2. Add 1 diced onion and cook 5-7 minutes, stirring occasionally, until translucent and soft. Add 1 diced bell pepper and cook 3-4 minutes until tender. Stir in 3 minced garlic cloves and cook 30 seconds until fragrant.
    1 medium onion, 1 medium bell pepper, 3 cloves garlic
  3. Pour in 1 can (28 oz) whole peeled tomatoes with juices. Crush tomatoes with a wooden spoon. Add ½ teaspoon chili powder, ½ teaspoon salt, and ¼ teaspoon black pepper. Simmer uncovered over medium-low heat for 10-12 minutes, stirring occasionally, until sauce thickens and reduces by about one-third.
    28 oz canned whole peeled tomatoes, 0.5 tsp chili powder, 0.5 tsp salt, 0.25 tsp black pepper
  4. Use the back of a spoon to make 4-6 shallow wells in the sauce. Crack 1 egg into each well. Cover skillet with lid and cook 5-7 minutes over medium-low heat. Check at 5 minutes - whites should be set, yolks still jiggly.
    4 egg
  5. Remove from heat and let rest 2-3 minutes. Sprinkle with fresh chopped cilantro or parsley. Add crumbled feta if desired. Serve directly from the skillet with crusty bread for scooping.
    to taste fresh cilantro or parsley, optional feta cheese

Notes

  • Simmer the sauce uncovered for 10-12 minutes before adding eggs to ensure proper thickness.
  • Keep heat at medium-low during egg poaching to avoid rubbery eggs; the sauce should barely bubble.
  • Use room temperature eggs for more even cooking and better texture.

Tried this recipe?

Let us know how it was!

What Is Sesame Seed? [Taste, Uses & More]

March 17, 2026

Most people treat sesame seeds like a garnish - scattered on a bun and forgotten.

What Is Sesame Seed

That undersells what these small, oil-rich seeds actually do: they carry a concentrated nuttiness that shifts character completely depending on whether you toast them, grind them, or press them.

If you've ever wondered why your how long bagel keeps research led you to check the seeds on top rather than the bread itself, that instinct is correct - sesame seed quality matters.

QUICK SUMMARY

Sesame seeds are small, oil-dense seeds with a nutty, mildly bitter flavor raw and a richer, sweeter nuttiness when toasted. Ground into tahini or pressed into sesame oil, they're central to Middle Eastern and East Asian cooking alike.

🌱Type: Oilseed from the Sesamum indicum plant, used whole or processed
👅Flavor: Nutty and mildly bitter raw; toasty, sweet-nutty, and savory when roasted
🍳Best Uses: Toasted on salads and grains, ground into tahini, coating proteins before searing
📦Shelf Life: Raw hulled seeds last months pantry-side; refrigerate after opening for up to a year
⚠️Watch For: Sesame is a priority allergen in many countries - always check labels carefully

What Is Sesame Seed?

Sesame seeds come from Sesamum indicum, a flowering plant believed to originate in West Africa or Ethiopia, with cultivation spreading through West Asia and across the Indian subcontinent thousands of years ago.

They are classified as an oilseed - seeds that store a significant proportion of fat - and rank among the oldest cultivated oil crops on record.

In Hindi, they're called til; in Japanese, goma. You'll find them sold under both names at specialty grocers.

The two main commercial types are hulled (white/ivory) and unhulled, with black sesame seeds representing a distinct variety rather than just an unprocessed version of white ones.

Hulled seeds have the outer husk removed, giving them a milder flavor and lighter color.

Unhulled seeds retain the bran layer, which adds more bitterness and a slightly coarser texture. Black sesame seeds have a more pronounced, earthy bitterness and are used heavily in East Asian desserts and savory dishes where that depth is wanted.

What Does Sesame Seed Taste Like?

sesame seed - What Is Sesame Seed

Raw hulled sesame seeds taste mildly nutty with a noticeable bitter edge - similar to toasted sunflower seeds or light pine nuts, but earthier.

That bitterness comes partly from compounds in the seed's natural oils, and it softens significantly once heat is applied.

Sensory SnapshotModerate Intensity
👅 Flavor
nuttybitter-tangtoasty-sweetsavory umami
✋ Texture
tiny crunchcreamy when ground
👃 Aroma
warmtoastyearthy

Toasting transforms the seeds. Dry heat blooms the oils and produces a browned-butter, caramel-nutty aroma that raw seeds simply don't have. A roasted seed also picks up a faint savory, almost umami quality - especially noticeable when sesame is used in soy-forward dishes. Ground into tahini, the flavor becomes rich and slightly bitter again, with a creamy, oily body.

How to Use Sesame Seed

Sesame seeds fit into both sweet and savory contexts without much adjustment, which is why they appear across Middle Eastern, East Asian, and Mediterranean cooking. The key variable is always whether you start raw or toasted.

How Sesame Seed Is Used
MethodBest ForTip
🥗 RawBreads, buns, bagels, coating dough before bakingRaw seeds toast during baking - no pre-toasting needed
🔥 ToastedSalads, grain bowls, gomashio, garnishing noodlesDry-toast in a skillet over medium heat; pull when golden and fragrant
🥣 GroundTahini for hummus, dressings, sauces, halvahBlend with neutral oil until smooth; over-processing can turn bitter
🍳 CrustSesame-crusted tuna, chicken, tofu before searingPress seeds firmly onto the protein so they adhere before pan contact

Sesame pairs cleanly with soy sauce, mirin, and ginger in East Asian preparations - think Japanese goma-ae (spinach dressed with ground sesame) or Korean sesame-dressed cucumber salads. In Middle Eastern cooking, tahini carries the seeds into hummus, sauces, and baked sweets like halvah.

For brightness, a hit of lemon or yuzu cuts through sesame's natural richness.

Golden Rule
Always taste your sesame seeds before using them. A rancid seed passes its off-flavor directly to any dish - no amount of toasting fixes it.

If sesame doesn't work for a dish, sesame seed stand-ins like toasted sunflower seeds or hemp seeds can fill a similar textural role without the same allergen concern.

Try It In
🥗Poppy Seed Dressing (Homemade)Shows how small oil-rich seeds build dressing body — adaptable with toasted sesame→

How to Buy and Store Sesame Seed

Uniform color and a dry surface are the two signs of a quality bag. Hulled seeds should be white to ivory; black sesame should be consistently deep, not patchy. Any oily sheen on the seeds or packaging interior signals that oxidation has already started.

Watch Out
Sesame is a priority allergen in the US, Canada, the EU, and several other countries. Even trace cross-contact in manufacturing can trigger reactions - read labels on every product that contains sesame.

Check the label for "raw" vs "roasted" before buying, since the two behave differently in recipes. For storage:

  • 🫙 Pantry (raw hulled) - airtight container, cool and dark; lasts several months
  • ❄️ Refrigerator (raw or roasted) - extends shelf life to 6-12 months for raw, 3-6 months for roasted
  • 🧊 Freezer - works well for bulk buying; seeds thaw quickly and retain flavor
  • 📋 Tahini - follow label guidance; most need refrigeration after opening

Watch for sesame seed spoilage signs like a sharp, paint-like smell or a bitter taste that lingers - both mean the oils have turned.

Tahini-based dips like hummus have their own timeline; how long hummus keeps depends on whether it's store-bought or homemade.

Where to Start With Sesame Seed

New to cooking with sesame? Toast first. A dry skillet over medium heat for two to three minutes unlocks the flavor that makes these seeds worth using. From there, the path splits depending on what you're after.

  • 🌰 For crunch and garnish - toasted seeds on grain bowls, noodles, or roasted vegetables
  • 🫙 For richness and paste - grind hulled toasted seeds with oil to make your own tahini
  • 🍗 For a crust - press raw seeds onto fish or chicken; they toast during searing
  • 🍬 For sweets - black sesame adds bitterness to ice cream and mochi; white sesame suits brittle and halvah

If you're substituting sesame oil in a stir-fry and need a swapping strategy, swapping out peanut oil covers the broader category of high-heat nut and seed oils worth considering.

Frequently Asked Questions

What is the difference between hulled and unhulled sesame seeds?

Hulled seeds have the outer bran layer removed, giving a milder flavor and ivory color. Unhulled seeds keep the husk, which adds bitterness, more calcium, and a slightly coarser bite. Most supermarket sesame seeds are hulled.

Are sesame seeds healthy?

Yes, within normal portions. They're high in healthy fats, plant protein, iron, and calcium - notably more calcium per gram in unhulled seeds. They're also calorie-dense, so a tablespoon goes further than you'd expect.

Does sesame oil taste like sesame seeds?

Toasted sesame oil does - it carries the same roasted, nutty character in concentrated liquid form. Cold-pressed (untoasted) sesame oil is much milder and closer to a neutral cooking oil with only faint nuttiness.

What are black sesame seeds used for?

Black sesame seeds appear in East Asian sweets like mochi, ice cream, and tang yuan, where their stronger, more bitter flavor is a feature. They also work in savory dishes and as a visual contrast garnish on pale foods.

How do you toast sesame seeds without burning them?

Use a dry skillet over medium heat with no oil, stirring constantly. Pull them off the heat the moment they turn golden and smell nutty - usually two to three minutes. They continue cooking briefly from residual pan heat.

What Is Sambuca? Taste, Uses & More — Anise Guide

March 17, 2026

Most people assume sambuca is just an after-dinner shot someone lights on fire at an Italian restaurant.

What Is Sambuca

That misreads it entirely - sambuca is a structured, high-proof liqueur with real depth, and understanding anise in cooking helps explain why its flavor behaves differently depending on how you apply heat.

If alternatives to anise are on your radar, you'll quickly see why sambuca sits in its own category.

QUICK SUMMARY

Sambuca is a sweet, syrupy Italian liqueur built on aniseed. It delivers strong black licorice flavor and is served neat, flamed, or stirred into espresso. It's a legitimate cooking ingredient as well as a digestif, with 38-42% ABV.

🍬Flavor: Sweet black licorice with mild floral and fennel notes
🥃Best Use: Neat digestif, flambéed, or stirred into espresso
📦Shelf Life: Opened bottles best within 1-3 years; unopened keeps indefinitely
🌡️Storage: Cool, dark place; reseal tightly after opening
⚠️Avoid With: Delicate fish and bitter greens - anise will overpower both

What Is Sambuca?

Sambuca is an Italian anise-flavored liqueur, typically bottled at 38-42% ABV and produced primarily in central-northern Italy. It's distilled from neutral grain spirit and flavored with aniseed, along with other botanicals that vary by producer.

The name most people recognize is Molinari, which helped define the modern style after Luigi Molinari began producing his version in Civitavecchia in 1945. Other major producers include Luxardo and Vaccari, each with slightly different botanical signatures.

Three main variants exist in the market:

  • ⬜ White sambuca (sambuca bianca) - Clear, the most common style; clean anise with floral sweetness
  • ⬛ Black sambuca (sambuca nera) - Deep indigo-black color; elderberry and licorice root give it a darker, earthier profile
  • 🔴 Red sambuca - Less common; colored with hibiscus or berry botanicals, slightly less anise-forward

Sambuca is distinct from anisette, which is lower in alcohol and less syrupy. It's also not the same as ouzo or raki, though all three are anise spirits - sambuca's higher sugar content and Italian production standards set it apart.

What Does Sambuca Taste Like?

sambuca - What Is Sambuca

Sambuca leads with intense black licorice sweetness - sharper and more pronounced than fennel, but with a soft floral edge that keeps it from being harsh.

The mouthfeel is noticeably thick and syrupy, coating the palate rather than cutting through it.

Sensory SnapshotStrong Intensity
👅 Flavor
black licoricesweet anisefloralfennel
✋ Texture
syrupyviscoussmooth
👃 Aroma
intense anisefloral sweetness

Heat changes sambuca considerably. Flambing briefly softens the sharp anise edge, leaving a warmer, more caramelized quality in the aroma.

Stirred into hot espresso, the sweetness integrates and the licorice note becomes a background accent rather than the main event.

Compared to ouzo, sambuca reads sweeter and thicker - ouzo has a drier, more herbaceous finish. For a full breakdown of how they compare, ouzo's flavor and uses covers the differences in detail.

Golden Rule
If you don't enjoy black licorice candy, sambuca will be difficult to like. The anise character doesn't mellow with mixers - it stays front and center.

How to Use Sambuca

Sambuca's most iconic serving is con la mosca - "with the fly" - where three coffee beans float in the glass before drinking.

The beans represent health, happiness, and prosperity in Italian tradition, and their bitter oils cut through the sweetness in each sip.

Beyond the digestif glass, sambuca earns real kitchen utility. For savory applications, a small measure brushed into a glaze for roast duck or pork belly plays the sweet-anise note against rendered fat extremely well.

It's the kind of addition that reads as complexity rather than booze.

How Sambuca Is Used
MethodBest ForTip
🥃 Neat/ChilledPost-dinner digestif, con la mosca serviceServe cold - heat amplifies anise to overwhelming levels when unintended
🔥 FlambéTableside drama, warmed cocktails, caramelized fruitIgnite briefly; prolonged flame burns off too much aroma
☕ Stirred into CoffeeEspresso cocktails, after-dinner coffee drinksAdd after brewing - heat alone integrates the sweetness cleanly
🍳 ReductionGlazes for pork or duck, dessert sauces, baked goodsReduce slowly; sugar scorches quickly at high heat
🍑 Broiled FruitPeaches, figs, or citrus segments as a dessert componentBrush lightly - one layer is enough, two turns cloying

In desserts, sambuca pairs naturally with dark chocolate, orange zest, and mascarpone. A tablespoon folded into a mascarpone cream for tiramisu adds anise depth without announcing itself loudly.

The same logic applies when using it to brush baked goods - less is more.

For Mediterranean-leaning dishes, the anise connection is direct. Just as making giouvetsi lamb with kritharaki at home shows how anise-forward aromatics work alongside braised meat, sambuca can function as a finishing splash in slow-cooked lamb sauces.

If sambuca isn't available, alternatives to sambuca outlines which anise spirits can step in without wrecking the balance.

Try It In
☕Passion Fruit Cold Brew CoffeeA splash of sambuca adds licorice depth to cold coffee drinks→🍫Passion Fruit Hot ChocolateDark chocolate and anise sweetness layer well in warm drinks→🍠Roasted Sweet Potato and Black Bean SaladA sambuca-based glaze works on roasted sweet vegetables too→

How to Buy and Store Sambuca

Choose a bottle from a named Italian producer - Molinari, Luxardo, or Vaccari are reliable starting points. Check the ABV label: anything under 38% is likely an imitation style with a thinner body.

Avoid bottles that look cloudy or hazy, which signals contamination or improper storage on the shelf.

Watch Out
Black sambuca uses elderberry and licorice root colorants - don't mistake cloudiness for the natural color. A clear black sambuca should look deep indigo, not murky or particulate.

White sambuca is the most widely available and the best entry point. Black sambuca suits those who want a less overtly sweet, earthier profile.

For storage, keep bottles upright in a cool, dark cupboard - light degrades both the color and the aromatic compounds over time. Full details on keeping sambuca fresh cover what changes after a bottle has been open for several months.

Unopened bottles hold indefinitely; opened ones are best consumed within one to three years.

Where to Start With Sambuca

Sambuca rewards people who approach it with some intention. Start with white sambuca served chilled and neat, with three coffee beans - that's the benchmark experience every other use builds from.

Shortcut
Not sure which style to buy first? White sambuca is more forgiving in both sipping and cooking. Save black sambuca for once you know you like the base flavor.

Move to cooking once you're confident with the flavor. A small reduction into a glaze, or a spoon folded into mascarpone cream, shows what sambuca does when it's working with other ingredients rather than standing alone.

Those who find the anise too sharp for neat sipping often prefer it here.

Frequently Asked Questions

Is sambuca the same as anisette?

No. Anisette is lower in alcohol (typically 25-30% ABV) and much less syrupy than sambuca. Sambuca must meet Italian production standards with higher ABV and a thicker, sugar-forward body that anisette doesn't match.

What does sambuca taste like compared to ouzo?

Sambuca is noticeably sweeter and thicker, with a more intense licorice sweetness. Ouzo has a drier, more herbaceous finish and turns milky white when diluted - sambuca stays clear. For more on how ouzo differs, see [swapping out ouzo](https://forkliftkitchen.com/ouzo-substitutes/) when a recipe calls for it.

How strong is sambuca's alcohol content?

Standard sambuca runs 38-42% ABV, putting it in the same range as whiskey or gin. Some premium expressions reach 42%, while budget versions may dip slightly below 38%.

Why serve three coffee beans with sambuca?

Three beans represent health, happiness, and prosperity in Italian tradition - the ritual is called con la mosca ("with the fly"). The beans also serve a practical purpose: their bitter oils balance the liqueur's intense sweetness with each sip.

Can you cook with sambuca if you want to avoid strong anise flavor?

Yes, but reduce it first. Cooking burns off some alcohol and softens the raw anise sharpness, especially in glazes or sauces. Use it in small amounts alongside fat-rich ingredients like duck or mascarpone, which absorb and mute the intensity. For context on how [espresso powder stand-ins](https://forkliftkitchen.com/espresso-powder-substitutes/) work in similar coffee-forward applications, the same principle of small additions applies.

Berry Chia Pudding

March 17, 2026

Chia pudding often turns out watery or clumpy when you don't nail the liquid ratio. The fix is measuring carefully and whisking hard for the first two minutes so the seeds gel evenly instead of settling into lumps.

Berry Chia Pudding served on a plate

High heat crisps the skin while the dark meat stays juicy. The chia seeds absorb liquid and swell to 10 times their size, creating a thick pudding texture without cooking.

Make this when you need grab-and-go breakfasts that hold up in the fridge for four days.

QUICK SUMMARY

Berry chia pudding takes 5 minutes of active prep and 4 hours of hands-off soaking time. Mix chia seeds with milk and sweetener, refrigerate until gelled, then layer with pureed berries. The key is whisking vigorously for 2 minutes to prevent clumps and using the right liquid-to-seed ratio.

⏱️Timing: Soak at least 4 hours or overnight for full gel
🥄First Move: Whisk chia and milk vigorously for 2 minutes before refrigerating
⚠️Watch Out: Too much liquid makes watery pudding - stick to 2-3 tablespoons chia per cup milk

Why This Recipe Works

Chia seeds form a gel coating when soaked because they're hydrophilic - they absorb liquid up to 10 times their weight. For something simple like crepe to serve alongside, the contrast in texture works well.

Quick Reference
⏱️
Prep Time
5 min
🔥
Cook Time
0 min
⏰
Total Time
4 hours 5 min
🍽️
Servings
2-4 servings
📊
Difficulty
Easy
🏷️
Category
Breakfast | Snack | Dessert
💡
Quick Tip
Soak chia at least 4 hours for gelled texture
🎯
Best For
Meal prep | Weeknight | Healthy snack

Success comes down to five moves:

  • Whisk hard initially - Vigorous whisking for 2 minutes distributes seeds evenly and prevents clumping
  • Use the right ratio - 2-3 tablespoons chia per cup liquid creates thick pudding without turning gummy
  • Soak long enough - Minimum 4 hours allows full gel formation; overnight is better
  • Puree half the berries - Blending some fruit creates color and flavor while leaving some whole adds texture contrast
  • Mix sweetener into milk first - Dissolving sweetener before adding chia distributes flavor evenly
Quick Tip
Stir the pudding once after 30 minutes in the fridge to redistribute any seeds that settled to the bottom

What You'll Need

Ingredients for Berry Chia Pudding

Shopping for this takes one trip down the baking aisle and a stop at the produce section. If you're stocking up on breakfast staples, this easy potatoes recipe keeps well for morning meal prep too.

🌾
Base
  • Chia seeds (3-4 tablespoons per serving)
  • Milk - dairy or plant-based (1 cup per serving)
🍓
Fruit
  • Mixed berries - fresh or frozen (1 cup)
  • Lemon juice - optional (1 teaspoon)
🍯
Flavor
  • Sweetener - maple syrup, honey, or agave (1-2 tablespoons)
  • Vanilla extract (½ teaspoon)
🥥
Toppings
  • Nuts - optional (2 tablespoons)
  • Coconut flakes - optional (1 tablespoon)

Ingredient Details

  • Chia seeds
    Black or white both work - white disappears into light-colored puddings visually but taste identical
  • Milk
    Full-fat milk or coconut milk makes the creamiest pudding; almond milk works but turns out thinner
  • Berries
    Fresh berries have brighter flavor but frozen work fine - just thaw and drain excess liquid first
  • Sweetener
    Start with 1 tablespoon and taste before adding more - sweetness depends on berry ripeness
  • Vanilla extract
    Pure vanilla tastes cleaner than imitation but either works in this recipe
  • Lemon juice
    Brightens berry flavor but skip it if your berries are already tart
  • Toppings
    Add texture contrast with crunchy nuts or coconut - wait until serving so they don't get soggy

Ingredient Swaps

The base recipe bends to whatever's in your pantry or fits your diet. We've tested these swaps enough to know what changes and what stays the same when you make a fresh salad on the side or adjust ingredients here.

Four swaps that work:

  • Swap dairy milk for almond, oat, or soy milk - Oat milk gives the creamiest texture; almond milk is thinnest but still gels properly
  • Use honey instead of maple syrup - Slightly sweeter and thicker; may take an extra hour to fully incorporate during soaking
  • Replace mixed berries with strawberries only - Single-berry flavor is less complex but still bright; use 1 cup sliced strawberries
  • Try flax seeds instead of chia - Grind them first; texture is less gelled and shelf life is shorter (use within 2 days)

Fresh Berries

Works for: Bright flavor, firm texture, visual appeal in clear jars

Skip if: You're on a budget or berries are out of season and expensive

Frozen Berries

Works for: Year-round availability, lower cost, already prepped

Skip if: You want the brightest color and firmest texture in the final pudding

Instructions

You're 5 minutes away from fridge-ready pudding that firms up while you sleep. If you need another hands-off breakfast option, a creamy dressing side preps just as easily for the week.

  1. Mix chia base - Whisk 3 tablespoons chia seeds, 1 cup milk, 1 tablespoon sweetener, and ½ teaspoon vanilla extract in a bowl for 2 full minutes until no clumps remain.
  2. Refrigerate initial set - Cover and chill for 30 minutes, then stir once to redistribute seeds that settled to the bottom.
  3. Prepare berry layer - Blend half your berries (½ cup) until smooth, leaving the other half whole for texture.
  4. Layer pudding - Spoon half the chia pudding into serving jars, add pureed berries, top with remaining pudding and whole berries.
  5. Final chill - Cover and refrigerate for at least 3.5 more hours (4 hours total minimum) until pudding is thick and gelled.
Golden Rule
If pudding is still liquidy after 4 hours, stir in 1 more tablespoon chia seeds and refrigerate another hour

What to Serve With It

Berry chia pudding is filling enough alone but pairs well with savory breakfast sides. The gap here is texture contrast - something warm or crispy balances the cold, creamy pudding, and complete belgian waffles meal ideas show how to build a full spread.

Side Dish Prep Why It Works How to Serve
Whole grain toast Easy Adds hearty crunch and soaks up extra berry juice Toast until golden, spread with almond butter, serve warm alongside chilled pudding
Greek yogurt Easy Boosts protein and adds tangy contrast to sweet berries Dollop on top of pudding or serve in a separate bowl for mixing
Fresh fruit salad Easy Enhances berry freshness with different fruit textures Chop melons, grapes, and kiwi; serve chilled in a side bowl
Hard-boiled eggs Easy Adds savory balance and keeps you full longer Peel and halve 2 eggs, season with salt and pepper, serve on the side
Almond biscotti Easy Adds crunch and sweetness for dipping into pudding Serve 2 pieces on the side for dunking into pudding layers

Three ways to serve it:

  • Meal prep breakfast - Portion into 4 jars with lids, layer berries between pudding, grab and go all week
  • Brunch spread - Set out pudding bar with toppings (nuts, coconut, granola, honey drizzle) and let guests build their own
  • Afternoon snack - Serve single portion in a small bowl with crunchy toppings and a drizzle of nut butter
Best Pick
Serve with warm whole grain toast and almond butter for the best temperature and texture contrast

Store and Reheat

Chia pudding holds its texture better than most meal-prep breakfasts. The seeds stay gelled for days without separating, and you can portion it before or after soaking depending on crisp coleslaw recipe timing needs or breakfast logistics.

Method Time Best For
🥶 Refrigerator 10 min at room temp Softening cold pudding before eating
📦 Microwave 15-20 seconds Slightly warming chilled pudding without cooking it
🧊 Freezer Thaw overnight in fridge Long-term storage but texture gets slightly icy

For best results when storing:

  • Use airtight containers or jars with lids - Prevents pudding from absorbing fridge odors and keeps surface from drying out
  • Store base and toppings separately - Add crunchy toppings right before eating so they don't get soggy
  • Stir before serving if separated - Natural separation happens; a quick stir brings it back together
  • Keep for 3-4 days in the fridge - Texture stays consistent; flavor is best within first 3 days
  • Freeze in portions for up to 1 month - Thaw overnight in fridge; texture is slightly icier but still edible

Frequently Asked Questions

Can I make berry chia pudding the night before?

Yes, overnight soaking actually improves texture. Mix everything before bed and it's ready by morning with no extra work.

How long does berry chia pudding keep in the fridge?

3-4 days in an airtight container. The texture stays thick and flavor holds, though berries may soften slightly by day 4.

What is the best consistency to know pudding is done?

Thick enough to coat a spoon without dripping off quickly. It should jiggle slightly when you shake the jar but not slosh around like liquid.

How to fix chia pudding if it turns out watery?

Stir in 1 tablespoon more chia seeds and refrigerate another hour. The extra seeds will absorb excess liquid and thicken the pudding.

Can I double or halve the berry chia pudding recipe?

Yes, just keep the 2-3 tablespoons chia per 1 cup milk ratio. Halving works for single servings; doubling is perfect for meal prep.

Berry Chia Pudding

No ratings yet
Berry chia pudding is a simple, no-cook breakfast or snack that thickens naturally as chia seeds gel with milk. Whisking the seeds vigorously and layering with pureed and whole berries creates a smooth, textured treat that keeps well in the fridge for up to four days.
Print Recipe Pin Recipe
Prep Time 5 minutes mins
Cook Time 4 hours hrs
Total Time 4 hours hrs 5 minutes mins
Servings: 4 servings
Course: Breakfast, Dessert, Snack
Cuisine: American
Ingredients Method Notes

Ingredients
  

  • 3 tablespoons chia seeds black or white
  • 1 cup milk dairy or plant-based, e.g. full-fat or coconut milk preferred for creaminess
  • 1 tablespoon sweetener maple syrup, honey, or agave
  • 0.5 teaspoon vanilla extract pure or imitation
  • 1 cup mixed berries fresh or frozen, thawed and drained if frozen
  • 1 teaspoon lemon juice optional, brightens berry flavor
  • 2 tablespoons nuts optional, add texture contrast
  • 1 tablespoon coconut flakes optional, add texture contrast

Method
 

  1. Whisk 3 tablespoons chia seeds, 1 cup milk, 1 tablespoon sweetener, and ½ teaspoon vanilla extract in a bowl vigorously for 2 full minutes until no clumps remain.
    3 tablespoons chia seeds, 1 cup milk, 1 tablespoon sweetener, 0.5 teaspoon vanilla extract
  2. Cover and refrigerate the mixture for 30 minutes. After 30 minutes, stir once to redistribute any seeds that settled to the bottom.
  3. Blend half of the berries (½ cup) until smooth, leaving the other half whole for added texture. Optionally stir in 1 teaspoon lemon juice to the berries.
    1 cup mixed berries, 1 teaspoon lemon juice
  4. Spoon half of the chia pudding into serving jars or bowls, layer with pureed berries, then top with remaining pudding and the whole berries.
    1 cup mixed berries
  5. Cover and refrigerate for at least 3 hours and 30 minutes more (4 hours total minimum) until pudding is thick and fully gelled.

Notes

  • Whisk vigorously for full 2 minutes to prevent clumps.
  • Soak pudding at least 4 hours or overnight for best gel texture.
  • Stir once after 30 minutes chilling to redistribute settled seeds.

Tried this recipe?

Let us know how it was!

What Is Salami? [Taste, Uses & More]

March 17, 2026

You spot a whole salami stick at the deli counter - maybe next to the prosciutto and pepperoni - and it's not immediately obvious what you're getting. Dry-cured and fermented, salami is one of those ingredients that does a lot before it ever reaches your plate, building depth through weeks or months of controlled aging.

What Is Salami

That complexity is exactly why a few thin slices can anchor a cheese board or quietly transform a pasta sauce.

QUICK SUMMARY

Salami is a dry-cured, fermented sausage with a firm texture, salty-savory flavor, and a tangy fermented bite. It ranges from mildly spiced Milano-style to heavily seasoned soppressata, served raw-cured or briefly cooked to crisp the edges.

🌡️Flavor: Salty, savory, tangy from fermentation, spiced with pepper or garlic
🔪Best Uses: Charcuterie boards, pizza, pasta sauces, sandwiches
🧊Shelf Life: Sliced lasts 3-7 days; whole stick lasts weeks to months refrigerated
🛒Buy It: Look for tight casings, distinct fat flecks, and no ammonia smell
⚠️Watch Out: High sodium and saturated fat; check labels for nitrate-free or certified halal/kosher

What Is Salami?

Salami is a dry-cured fermented sausage rooted in Mediterranean tradition, most closely associated with Italian regional food culture.

It's made from ground pork shoulder or a pork-beef blend, seasoned heavily with salt and spices, packed into a casing, and left to ferment and air-dry until firm.

The aging process is where salami earns its character. Lactic acid bacteria lower the pH during fermentation, building tang.

The white or slightly gray exterior mold - often Penicillium nalgiovense - is applied or develops naturally and protects the sausage during drying.

Regional varieties differ considerably:

  • Genoa salami - mild, finely ground, made with pork and sometimes veal, seasoned with garlic and white wine
  • Milano salami - finely ground with a refined texture, subtler spice profile, associated with northern Italy
  • Soppressata - coarser grind, pressed flat, often more intensely seasoned with red pepper or black pepper; varies by southern Italian region
  • Salami cotto - a cooked variant, softer and milder, closer to a cooked deli meat than a dry-cured product

Chorizo fills a similar pantry role in Spanish and Latin cooking, though its flavor profile leans on smoked paprika rather than fermentation tang.

What Does Salami Taste Like?

salami - What Is Salami

Salami's flavor is layered - deeply savory from cured meat, salty up front, and backed by a fermented tang that gives it more complexity than a fresh sausage. Think of it as a concentrated, spiced version of cured ham, somewhere between prosciutto in richness and pepperoni in seasoning intensity.

The fat marbling is central to how salami tastes. Those white flecks melt slightly at room temperature, delivering a creamy mouthfeel that balances the salt and acid.

Warming salami - in a pan or on a hot pizza - renders some of that fat and amplifies the savory, meaty notes.

Sensory SnapshotStrong Intensity
👅 Flavor
savorysaltytangyspiced
✋ Texture
firmslightly chewycreamy when warm
👃 Aroma
meatycuredfaintly yeasty

Spice level shifts by variety. Soppressata can have real heat.

Genoa and Milano styles stay mild and let the fermented base shine through.

How to Use Salami

Salami needs no cooking. Thin slices served at room temperature are the default, and that's where it shows best on a charcuterie board alongside hard cheeses like Parmigiano-Reggiano or aged cheddar, soft cheeses like fontina, cornichons, and olives.

Fresh fruit - figs or melon - cuts the salt cleanly.

Golden Rule
Let sliced salami sit at room temperature for 10-15 minutes before serving. Cold fat dulls both the flavor and the creamy texture.

That said, heat unlocks a different side of it. Brief pan-frying renders the fat and crisps the edges, making it a strong addition to salads, tacos, or scrambled eggs.

On pizza, it curls and browns at the edges in a way pre-cooked toppings can't match.

How Salami Is Used
MethodBest ForTip
🥗 Raw/SlicedCharcuterie, sandwiches, Italian hero, paninisSlice thin; serve at room temperature for best texture
🍳 Pan-FriedSalad topper, taco filling, breakfast scramblesMedium heat, no oil needed - the fat renders fast
🍕 BakedPizza, flatbreads, focaccia, savory quick breadsAdd in the last few minutes to prevent over-crisping
🍲 SimmeredPasta sauces, stews, braisesDice small so fat melts into the sauce evenly

In Italian-rooted cooking, diced salami simmered into a tomato sauce adds body and a salty-savory depth that builds over low heat. Folded into focaccia dough before baking, it studds the crumb with pockets of spiced fat.

Try It In
🥚Egg and Cheese Breakfast SandwichSwap in pan-fried salami for extra savory depth→🍅Roasted Garlic Marinara SauceStir in diced salami early for a heartier, saltier base→

How to Buy and Store Salami

Whole dry-cured sticks are easy to evaluate at the counter. Look for tight, unbroken casings without any bloating. A white or slightly gray exterior mold is normal and expected - it's part of the curing process. Cut slices should show distinct white fat flecks against deep red meat. Avoid anything with a sticky surface, liquid pooling in the packaging, or an ammonia-like smell.

Watch Out
An ammonia smell means the mold has gone past safe curing into spoilage. That's different from the mild, earthy scent of a properly aged casing.

Storage depends on whether the salami is whole or sliced. Whole sticks do best wrapped in butcher paper or breathable wrap - not plastic - so the casing can continue to regulate moisture.

Pre-sliced and vacuum-sealed packages go straight into the fridge and should be used within a few days of opening. For detailed timelines, check our salami freshness guide guide.

Where to Start with Salami

If you're new to this category, Genoa salami is the least intimidating entry point - mild, widely available, and works well on sandwiches or boards without overpowering other ingredients. From there, try soppressata for more heat and texture.

If you can't find salami, prosciutto replacements or pepperoni replacements can fill adjacent roles depending on whether you need a raw-cured slice or a pizza topping. And if you want to swap salami out of a recipe entirely, the salami swaps guide covers the closest matches by use case.

Frequently Asked Questions

Is salami cooked or raw?

Dry-cured salami is neither cooked nor truly raw - fermentation and drying preserve it without heat. The USDA considers fully dried salami safe to eat without cooking, though salami cotto is a cooked exception.

How long does salami last in the fridge?

An opened whole stick keeps about 2-3 weeks refrigerated. Sliced salami drops to 3-7 days once the package is open and the cut surface is exposed to air.

What is the difference between salami and pepperoni?

Pepperoni is an American-style salami made with pork and beef, heavily spiced with cayenne and paprika. Traditional Italian salami uses more varied seasoning and relies more on fermentation tang than heat for its flavor.

Can you eat the mold on salami?

Yes, the white mold on the casing of dry-cured salami is safe and intentional - it's typically Penicillium nalgiovense, applied to regulate drying. Peel or wipe it off before eating if you prefer; it's not harmful either way.

Does salami need to be refrigerated?

Whole, uncut dry-cured salami can sit at cool room temperature short-term, but refrigeration is safer and extends shelf life significantly. Once cut or sliced, refrigeration is required.

Savory Breakfast Scones with Cheddar

March 17, 2026

Savory scones often turn out dry or bland, missing the mark between bread and pastry. The fix is using cold butter and sharp cheddar that melts into pockets while the dough stays tender.

Savory Breakfast Scones with Cheddar served on a plate

High heat creates a golden crust while keeping the center moist. The cheddar sharpens as it bakes, balancing the buttery crumb.

Make this for weeknight breakfast when you want something more interesting than toast but don't have time for yeast dough.

QUICK SUMMARY

Savory breakfast scones with cheddar deliver flaky layers and a tender crumb in 30 minutes. Cold butter creates the flakes, sharp cheddar adds bite, and a 400°F oven browns the outside without drying the center. Skip the mixer and work the dough by hand to avoid tough scones.

⏱️Time Reality: 15 minutes prep, 20 minutes baking, no resting required
🧈Critical First Move: Chill butter 30 minutes before cutting into flour for flaky layers
⚠️Watch Out: Overmixing activates gluten and makes dense scones - stop when dough just comes together

Table of Contents

Toggle
  • Why This Recipe Works
  • What You'll Need
    • Ingredient Details
  • Ingredient Swaps
  • What to Serve With It
  • Store and Reheat
  • Frequently Asked Questions
  • Savory Breakfast Scones with Cheddar
    • Method 
    • Tried this recipe?

Why This Recipe Works

Cold butter cuts into flour create steam pockets that puff into flaky layers during baking. The steam escapes, leaving behind crisp edges and a tender interior that doesn't crumble when you split the scone. For something with similar richness that works for a different meal, this simple fried rice uses eggs and simple pantry staples the same way.

Quick Reference
⏱️
Prep Time
15 min
🔥
Cook Time
15-20 min
⏰
Total Time
30-35 min
🍽️
Servings
8 scones
📊
Difficulty
Easy
🏷️
Category
Breakfast | Brunch | Snack
💡
Quick Tip
Keep butter cold for flaky layers
🎯
Best For
Weeknight | Meal prep | Entertaining

What makes these scones work:

  • Baking powder lifts the dough while cold butter creates distinct flaky layers that separate when you break the scone open
  • Sharp cheddar melts into pockets instead of disappearing, giving you bursts of salty cheese in every other bite
  • Buttermilk adds tang and reacts with baking powder for extra lift, keeping the crumb soft instead of dense
  • A 400°F oven sets the crust before the butter fully melts, trapping steam that creates the layered texture
  • Minimal mixing preserves tenderness by limiting gluten development, which would otherwise turn scones tough and chewy
Quick Tip
Chill your mixing bowl in the freezer for 10 minutes before starting - it keeps butter colder longer while you work the dough.

What You'll Need

Ingredients for Savory Breakfast Scones with Cheddar

Buy cold butter and fresh baking powder - the butter creates flakes, the leavener controls rise. Everything else comes from your pantry or fridge, and sharp cheddar beats mild every time for actual flavor.

🌾
Dry Base
  • 2½ cups all-purpose flour
  • 1 tablespoon baking powder
  • 1 teaspoon salt
🧈
Fat & Dairy
  • ½ cup cold unsalted butter (1 stick)
  • 1 cup sharp cheddar cheese, shredded
  • ¾ cup milk or buttermilk
  • 1 egg (optional)
🌿
Optional Add-Ins
  • 2 tablespoons fresh herbs (chives, parsley, or thyme)
  • ½ teaspoon garlic powder

Ingredient Details

  • All-purpose flour
    Provides structure without turning scones tough - cake flour makes them too crumbly, bread flour makes them dense
  • Unsalted butter
    Must be cold (under 40°F) so it doesn't melt before baking - cut into ½-inch cubes and chill 30 minutes
  • Sharp cheddar cheese
    Shred from a block instead of buying pre-shredded - the anti-caking coating prevents proper melting
  • Baking powder
    Test freshness by dropping ½ teaspoon in hot water - if it fizzes immediately, it's good
  • Buttermilk
    Adds tang and tenderizes dough better than regular milk - substitute by mixing ¾ cup milk with 1 tablespoon vinegar, let sit 5 minutes
  • Fresh herbs
    Chop fine and fold in at the end - dried herbs work but use half the amount
  • Egg
    Optional for richer dough and deeper golden color - brush beaten egg on top before baking for shine

Ingredient Swaps

Some swaps work without changing texture, others require adjustments to timing or technique. Cheese and dairy swaps change flavor more than structure, but flour and fat swaps affect how the scones rise and flake.

Four swaps that work:

  • All-purpose flour → Gluten-free flour blend: Expect slightly crumbly texture and less rise - add 1 extra tablespoon butter to compensate for dryness
  • Unsalted butter → Coconut oil (solid, chilled): Less flaky layers but still tender - chill coconut oil until solid before cutting into flour
  • Sharp cheddar → Gruyere or fontina: Milder, nuttier flavor with creamier melt - use same amount
  • Buttermilk → Almond milk + 1 tablespoon lemon juice: Slightly less tang but similar moisture - mix and let sit 5 minutes before using

Buttermilk

Works for: Tangier flavor, extra tender crumb, better rise from acid reaction

Skip if: You want neutral flavor or only have regular milk on hand

Regular Milk

Works for: Milder taste, simpler ingredient list, works in a pinch

Skip if: You want maximum tenderness and lift from the dough

Instructions

The dough comes together in 15 minutes if you keep butter cold and avoid overmixing. Work fast, handle the dough minimally, and let the oven do the rest. Most people skip preheating and end up with pale, undercooked scones - start the oven first.

  1. Preheat oven to 400°F and mix dry ingredients. Line a baking sheet with parchment paper. Whisk flour, baking powder, and salt in a large mixing bowl until combined.

  2. Cut cold butter into flour until it looks like coarse crumbs. Use a pastry cutter or two forks to work butter into flour - you want pea-sized butter pieces, not smooth paste. This takes 2-3 minutes.

  3. Fold in cheese, then add milk until dough just comes together. Stir in shredded cheddar with a fork. Pour in buttermilk and mix until no dry flour remains - stop as soon as dough forms, even if it looks shaggy.

  4. Turn dough onto counter, pat into 8-inch circle, cut into 8 wedges. Don't knead - press dough together gently with your hands. Use a sharp knife or bench scraper to cut circle into 8 equal triangles. Space wedges 2 inches apart on prepared baking sheet.

  5. Bake 15-20 minutes until golden brown and firm to touch. Scones are done when edges turn deep golden and centers spring back when pressed lightly. Transfer to a wire rack after 5 minutes to prevent soggy bottoms.

Watch Out
If dough feels warm or butter starts melting while you work, chill it in the fridge for 10 minutes before baking - warm butter melts too fast and you lose the flaky layers.

What to Serve With It

Scones need something to balance their richness and fill out the plate. Most people serve them plain, but adding protein or a fresh side turns them into a full breakfast instead of just a snack. For more breakfast meal ideas, check out planning your breakfast burritos dinner for side dish inspiration that works with any savory morning meal.

Side Dish Prep Why It Works How to Serve
Scrambled eggs Easy Adds protein without competing with cheese flavor Serve eggs on the side, split scone and butter it
Fresh fruit salad Easy Sweet and juicy contrast cuts through richness Use berries, melon, or citrus - toss with honey
Sautéed spinach Easy Adds greens and a light garlicky note Cook spinach with garlic, serve warm alongside
Smoked salmon Easy Salty, smoky fish elevates breakfast to brunch Layer salmon on split scone with cream cheese
Avocado slices Easy Creamy texture matches scone without adding heaviness Mash avocado or slice thin, top scone halves

Three ways to serve it:

  • Split and butter while warm - the butter melts into the crumb and amplifies the cheddar without adding another flavor
  • Top with honey mustard or hot sauce - sweet-tangy or spicy kick balances the savory cheese
  • Make breakfast sandwiches - split scones, add fried egg and bacon for a handheld meal
Best Pick
Serve scones with scrambled eggs and fresh fruit for a balanced breakfast that covers protein, carbs, and something fresh without requiring extra cooking skills.

Store and Reheat

Scones dry out fast at room temperature, so refrigerate or freeze them within 2 hours of baking. The crust softens in storage but comes back crisp when reheated in the oven. For lighter savory sides that store well, try easy slaw side to keep crunchy vegetables ready for quick meals.

Method Time Best For
🔥 Oven 8-10 min at 350°F Restores crispy crust and warms evenly throughout
📦 Microwave 30-45 seconds Quick warm-up when you don't care about crisp texture
🍞 Toaster Oven 5-7 min Crisps edges while warming center without heating full oven

For best results when storing:

  • Refrigerate in airtight container for 3-4 days - layer parchment between scones to prevent sticking
  • Freeze up to 2 months wrapped individually - wrap each scone in plastic wrap, then place all in a freezer bag
  • Thaw frozen scones at room temp 30 minutes before reheating, or reheat directly from frozen adding 3-5 minutes to oven time
  • Avoid microwaving if you want crisp crust - it steams the scone and makes it rubbery instead of flaky
  • Refresh day-old scones by spritzing with water before reheating in oven - the moisture creates steam that softens the crumb

Frequently Asked Questions

Can I use a different cheese instead of cheddar?

Yes - Gruyere, fontina, gouda, or pepper jack work. Sharp cheddar gives the strongest flavor, but milder cheeses create a more subtle savory scone. Use the same amount (1 cup shredded) and shred from a block for best melt.

How do I store and reheat leftover scones?

Refrigerate in an airtight container for 3-4 days or freeze individually wrapped for up to 2 months. Reheat in a 350°F oven for 8-10 minutes to restore crispness - microwave works but makes them soft instead of flaky.

What visual cues indicate the scones are done baking?

Look for deep golden brown edges and a firm top that springs back when pressed lightly. The bottoms should be golden, not pale, and the scones should feel set rather than doughy when you touch the center.

Why do my scones turn out dense and how to fix it?

Overmixing activates gluten and creates dense scones - mix only until dough just comes together. Also check that your baking powder is fresh (test by dropping it in hot water - it should fizz). Keep butter cold and work fast to prevent melting before baking.

Can I halve or double the recipe for smaller or larger batches?

Yes - the recipe scales easily. For half batch, use 1¼ cups flour, ¼ cup butter, ½ cup cheese, and 6 tablespoons buttermilk. For double batch, keep baking time the same but use two baking sheets and rotate halfway through.

Savory Breakfast Scones with Cheddar served on a plate

Savory Breakfast Scones with Cheddar

No ratings yet
Savory breakfast scones with cheddar deliver flaky layers and a tender crumb in 30 minutes. Cold butter creates flaky pockets while sharp cheddar melts into flavorful bursts, with a golden crust from baking at 400°F.
Print Recipe Pin Recipe
Prep Time 15 minutes mins
Cook Time 20 minutes mins
Total Time 35 minutes mins
Servings: 8 scones
Course: Breakfast, Brunch, Snack
Cuisine: American
Ingredients Equipment Method Notes

Ingredients
  

  • 2.5 cups all-purpose flour Provides structure
  • 1 tablespoon baking powder Leavener for rise
  • 1 teaspoon salt
  • 0.5 cup unsalted butter Cold, cut into ½-inch cubes
  • 1 cup sharp cheddar cheese Shredded from block
  • 0.75 cup buttermilk Can substitute milk + vinegar, let sit 5 minutes
  • 1 unit egg Optional, for richer dough and glaze
  • 2 tablespoons fresh herbs Chopped (chives, parsley, or thyme), optional
  • 0.5 teaspoon garlic powder Optional

Equipment

  • Pastry cutter For cutting cold butter into flour
  • Mixing bowl To combine dry and wet ingredients
  • Baking sheet For baking scones
  • Parchment paper Lining baking sheet to prevent sticking
  • Sharp knife To cut dough into wedges
  • Wire rack To cool scones after baking

Method
 

  1. Preheat oven to 400°F and line a baking sheet with parchment paper. Whisk together flour, baking powder, and salt in a large mixing bowl until evenly combined.
    2.5 cups all-purpose flour, 1 tablespoon baking powder, 1 teaspoon salt
  2. Cut cold butter into the flour mixture using a pastry cutter or two forks until it resembles coarse crumbs with pea-sized butter pieces. This should take about 2-3 minutes.
    0.5 cup unsalted butter
  3. Fold in shredded sharp cheddar cheese and optional fresh herbs and garlic powder. Pour in buttermilk and gently mix using a fork until dough just comes together and no dry flour remains; do not overmix.
    1 cup sharp cheddar cheese, 0.75 cup buttermilk, 2 tablespoons fresh herbs, 0.5 teaspoon garlic powder
  4. Turn dough onto a lightly floured surface and pat into an 8-inch circle without kneading. Using a sharp knife or bench scraper, cut the dough into 8 equal wedges.
  5. Place the wedges 2 inches apart on the prepared baking sheet. If using, brush the tops with beaten egg for a shiny glaze.
    1 unit egg
  6. Bake in the preheated oven for 15-20 minutes until the scones are golden brown with firm tops that spring back when pressed lightly. Transfer to a wire rack to cool for 5 minutes to avoid soggy bottoms.

Notes

  • Keep butter cold and work quickly to ensure flaky layers.
  • Do not overmix dough to avoid dense, tough scones.
  • Test baking powder freshness by dropping in hot water; it should fizz immediately.

Tried this recipe?

Let us know how it was!

What Is Sake? [Taste, Uses & More]

March 17, 2026

Steamed clams arrive at the table in a shallow pool of broth - ginger, scallion, and something else that makes the liquid taste cleaner and more complete than you'd expect. That something is sake, the Japanese fermented rice beverage that quietly does more work in a kitchen than most cooks realize.

What Is Sake

Whether you're reaching for a bottle to drink alongside dinner or splashing it into a deglazing pan, understanding what sake is and how it behaves changes how you cook with it.

QUICK SUMMARY

Sake is a Japanese fermented rice beverage with umami-driven sweetness, a clean mineral finish, and moderate alcohol. It deglazes, marinates, steams, and simmers. Opened bottles last 1-4 weeks refrigerated; aroma-forward styles fade fastest.

🍶Flavor: Rice sweetness, fruity esters, clean saline or mineral finish
🔥Best Uses: Deglazing, steaming shellfish, marinades, simmered sauces
🌾Made From: Polished rice, water, koji mold, and yeast
❄️Storage: Refrigerate after opening; use within 1-4 weeks
🏷️Buy By: Look for junmai, ginjo, or daiginjo labels and check the seimaibuai number

What Is Sake?

Sake - also called nihonshu in Japan, or sometimes seishu - is a fermented beverage produced from polished rice, clean water, koji mold, and yeast.

It originated in Japan and has been brewed there for over a thousand years, making it one of the oldest and most refined fermented beverages in the world.

The production method sets sake apart from both wine and beer. Koji mold converts rice starches into sugars simultaneously as yeast ferments those sugars into alcohol - a process called multiple parallel fermentation, which is unique to sake.

The result is a clear to pale amber liquid with 12-16% ABV for most table styles.

Label classifications tell you a lot before you taste. Here's how the major styles break down:

  • Junmai - Pure rice sake with no added distilled alcohol; fuller body, more savory umami character.
  • Ginjo - Made with rice polished to at least 60%; lighter, fruitier, more aromatic than junmai.
  • Daiginjo - Highly polished rice (50% or less remaining); the most delicate and floral style.
  • Honjozo - A small addition of distilled alcohol; lighter texture, clean and dry finish.

The seimaibuai number on the label indicates the rice-polishing ratio - lower percentages mean more of the outer grain is milled away, producing cleaner, more aromatic sake.

What Does Sake Taste Like?

sake - What Is Sake

Sake reads closest to a dry white wine, but the comparison only goes so far. The sweetness comes from rice, not fruit, and it carries more amino acid-driven umami than nearly any wine will.

That savory undercurrent is what makes sake genuinely useful in cooking - it doesn't just add liquid, it adds depth.

Sensory SnapshotModerate Intensity
👅 Flavor
Rice sweetnessUmamiPear / melon estersClean mineral finish
✋ Texture
Light to medium-bodiedSilky
👃 Aroma
Fruity and floralSteamed rice

Ginjo and daiginjo styles open with noticeable fruit - pear, apple, melon - and a clean floral note. Junmai styles are earthier, drier, and more savory.

Heat drives off the fruity esters quickly, so the difference between styles matters less once sake hits a hot pan. What survives is the umami backbone and subtle sweetness, which is exactly what you want in a braise or sauce.

Golden Rule
Don't spend on daiginjo for cooking. Its delicate aromatics vanish with heat. Save it for drinking and reach for a mid-range junmai or honjozo in the pan.

How to Use Sake

Sake earns its place in a Western kitchen through a handful of high-impact techniques. Deglazing is the fastest entry point - add a splash to a hot pan after searing chicken thighs or shrimp and watch the browned fond lift into a bright, slightly sweet sauce base.

The alcohol carries aromatics across fat in a way that water simply won't.

How Sake Is Used in Cooking
MethodBest ForTip
🥢 MarinadeFish, chicken, pork before grilling or searingKeep soaks short - 15-30 min for fish, up to 2 hours for chicken
🔥 DeglazingPan sauces for seafood, poultry, mushroomsAdd off direct heat first, then return to flame to reduce
♨️ SteamingClams, mussels, whole fish, dumplingsCombine with ginger and scallion; the steam carries aroma into the protein
🍲 SimmeringNimono braises, ramen broth, stew basesAdd early so alcohol cooks off before soy sauce and sugar go in
🌾 BatterTempura, light fry battersA small amount tenderizes and adds subtle flavor without heaviness

Beyond Japanese cooking, sake works wherever a recipe calls for dry white wine in a savory context. It substitutes well in risotto-style rice dishes and pairs cleanly with European flavor profiles - mushrooms, soft herbs, cream.

If you're out of sake entirely, a dry vermouth or dry sherry covers most cooking applications; see our guide to sake alternatives for more options.

Pairing logic follows umami: sake amplifies ingredients that share its savory register. Soy sauce and mirin in a braise, kombu in a broth, salmon or mackerel on a grill - these all reinforce sake's natural character. Avoid pairing it with aggressively bitter greens or long-aged blue cheeses, where its subtle sweetness gets buried.

Try It In
🧀Fruit & Cheese Snack BoxPair with ginjo sake — the fruity esters match the fruit and soft cheese combination→🍗One-Pot Cajun Chicken and RiceSwap the liquid base for sake to deglaze and add umami depth before the rice goes in→🍲Creamy Chicken and Wild Rice SoupA splash of junmai in the broth base adds savory complexity without overpowering the cream→

How to Buy and Store Sake

At the bottle shop, start with the label. Junmai gives you the most forgiving all-purpose cooking and drinking style. For something more aromatic to serve chilled, look for ginjo.

The seimaibuai number - the rice-polishing ratio - confirms what the label says: 60% or below means a cleaner, lighter drink.

Watch Out
Cooking sake (ryorishu) sold in Asian grocery stores contains added salt - sometimes 2-3% by weight. Don't substitute it 1:1 in a recipe written for regular sake without adjusting the salt elsewhere in the dish.

Check alcohol by volume on the label - most table sake runs 12-16% ABV. Store unopened bottles upright in a cool, dark place away from direct light.

Once opened, move it to the refrigerator. Aroma-forward ginjo and daiginjo styles are particularly sensitive; drink or cook with them within one to two weeks.

Fuller junmai styles hold for up to four weeks refrigerated. For a full breakdown of how long different styles keep, see our notes on sake storage guide.

Where to Start With Sake

New to cooking with sake? Open with a junmai from a mid-price range - around $15-25 - and use it to steam clams or deglaze a chicken pan sauce.

That application shows you exactly what sake contributes without requiring any special equipment or technique.

If you drink sake alongside food, start chilled ginjo with seafood or poached fruit. Once you've tasted the difference between a fruity ginjo and a savory junmai, buying decisions get much easier.

Sake rewards attention, but it doesn't demand it - even a modest bottle makes a measurable difference in the pan.

Frequently Asked Questions

Is sake a wine or a beer?

Neither category fits perfectly. Sake is brewed from grain like beer, but its alcohol content and clear appearance are closer to wine. Most regulatory bodies classify it with wine for taxation and labeling purposes.

Does sake taste like rice?

Subtly, yes - there's a mild steamed-rice quality in the background, especially in junmai styles. The dominant notes are more often fruity esters and umami-driven sweetness than straightforward rice flavor.

How strong is sake compared to wine?

Sake typically runs 12-16% ABV, which overlaps with most table wines. Some undiluted genshu styles reach 18-20%, noticeably stronger than standard wine.

Can you cook with drinking sake?

Yes - and it produces better results than cooking sake (ryorishu) in most cases. Drinking sake has no added salt, giving you full control over seasoning in the finished dish.

What does junmai mean?

Junmai means "pure rice" in Japanese. It indicates that the sake was made with only rice, water, koji, and yeast - no added distilled alcohol. Junmai styles tend to be fuller-bodied and more savory than other classifications.

Breakfast Polenta with Eggs and Parmesan

March 17, 2026

Soft polenta often turns out bland or mushy, while eggs dry out waiting for everything else. The trick is cooking polenta low and slow, letting it firm in the fridge, then frying slices until crispy before topping with fresh eggs.

Breakfast Polenta with Eggs and Parmesan served on a plate

The pan does the work. You get golden edges on the polenta cakes without flipping more than once, and the eggs cook in the same skillet.

Make this for weekend brunch when you want something filling that doesn't require juggling five pans. Leftover polenta slices work for meal prep too.

QUICK SUMMARY

Breakfast Polenta with Eggs and Parmesan combines creamy Italian-style cornmeal cakes with crispy pan-fried edges and tender fried eggs. Cook polenta slowly for 25-30 minutes, chill until firm, then slice and pan-fry for texture that holds together. The Parmesan stirred in at the end adds nutty flavor without clumping.

⏱️Time reality: 45 minutes total, but 2-3 hours chilling needed for slicing
🔑Key move: Stir polenta every 2 minutes while simmering to prevent lumps
⚠️Watch out: Warm polenta breaks apart-chill fully before slicing or pieces won't hold

Table of Contents

Toggle
  • Why This Recipe Works
  • What You'll Need
    • Ingredient Details
  • Ingredient Swaps
  • What to Serve With It
  • Store and Reheat
  • Frequently Asked Questions
  • Breakfast Polenta with Eggs and Parmesan
    • Method 
    • Tried this recipe?

Why This Recipe Works

Cooking polenta slowly on medium-low heat gives you creamy texture without graininess, and chilling it solid makes slicing clean. For a version that comes together quickly, a creamy homemade potato recipe works when you skip the chilling step entirely.

Quick Reference
⏱️
Prep Time
10 min
🔥
Cook Time
35 min
⏰
Total Time
45 min
🍽️
Servings
4 servings
📊
Difficulty
Medium
🏷️
Category
Main Dish
💡
Quick Tip
Cook polenta slowly, slice after firm, crisp well
🎯
Best For
Weeknight | Meal prep | Casual entertaining

Five things that make this work:

  • Coarse polenta holds shape better - Fine grind turns mushy and won't slice cleanly after chilling
  • Stirring every 2 minutes prevents lumps - Constant attention for 25-30 minutes gives smooth texture
  • Adding Parmesan off heat stops clumping - Cheese melts into polenta without forming grainy pockets
  • Chilling 2-3 hours firms the base - Cold polenta slices cleanly and fries without falling apart
  • Frying in batches on medium heat - Three to four slices at once crisp edges without burning centers
Quick Tip
Salt the cooking liquid with 1 teaspoon per 4 cups-seasoning penetrates polenta evenly instead of sitting on top

What You'll Need

Ingredients for Breakfast Polenta with Eggs and Parmesan

Shopping for polenta means looking for coarse grind, not instant or fine cornmeal that turns gummy. A good tomatoes can make or break the plate. For a version that comes together quickly, a fluffy tomatoes side dish uses canned tomatoes when fresh aren't in season.

🍜
Base
  • 1 cup coarse polenta (cornmeal)
  • 4 cups water or broth
  • 1 teaspoon salt
🍗
Protein
  • 4 large eggs
🧀
Dairy & Fat
  • ½ cup grated Parmesan cheese
  • 3 tablespoons butter or olive oil
🧄
Seasoning
  • ½ teaspoon black pepper
  • Optional: fresh rosemary or thyme
  • Optional: 2 cloves garlic, minced

Ingredient Details

  • Coarse polenta
    Bob's Red Mill or similar brands work-avoid instant or fine grind that turns mushy
  • Water or broth
    Chicken or vegetable broth adds depth, but water works fine with enough salt
  • Parmesan cheese
    Grate fresh from a block-pre-grated has anti-caking agents that affect texture
  • Butter or olive oil
    Butter adds richness, olive oil keeps it dairy-light-use 1 tablespoon for cooking polenta, 2 for frying
  • Eggs
    Large eggs work best-fried, poached, or scrambled depending on preference
  • Fresh herbs
    Rosemary or thyme add aroma-chop finely and stir into polenta before chilling
  • Garlic
    Mince and cook in butter before adding polenta for deeper savory flavor

Ingredient Swaps

Parmesan brings nutty umami, but Pecorino Romano works when you want sharper flavor. Rich mains need something to cut through, and this dip does exactly that. For a version that comes together quickly, something creamy like sauce pairs when you want tangy contrast on the plate.

Four swaps that work:

  • Instant polenta for coarse - Cuts cooking time to 5 minutes but texture won't be as creamy or sturdy for slicing
  • Nutritional yeast for Parmesan - Use ¼ cup for dairy-free with slightly less umami depth
  • Vegetable broth for water - Adds savory notes without changing cooking method or texture
  • Tofu scramble for eggs - Crumble firm tofu and cook with turmeric for plant-based protein

Instant Polenta

Works for: Quick weeknight meals when you skip the chilling and slicing steps

Skip if: You want firm texture that holds shape for pan-frying

Dried Herbs

Works for: Budget cooking when fresh isn't available-use ⅓ the amount

Skip if: You want bright herbal aroma that fresh rosemary brings

Instructions

Polenta needs 25-30 minutes of stirring, then 2-3 hours chilling before you can slice and fry it. The potato works best when it hits the table at the same time as the main. For a version that comes together quickly, golden roasted potatoes cook while polenta chills in the fridge.

  1. Cook the polenta. Bring 4 cups salted water or broth to a boil in a saucepan. Whisk in 1 cup coarse polenta slowly to avoid lumps. Reduce heat to medium-low and simmer 25-30 minutes, stirring every 2 minutes, until polenta pulls away from the sides and looks thick and creamy.

  2. Add cheese and chill. Remove polenta from heat and stir in ½ cup grated Parmesan, 1 tablespoon butter, and ½ teaspoon black pepper until cheese melts. Pour into a shallow dish or plate, smooth the top, and refrigerate 2-3 hours until firm enough to slice cleanly.

  3. Slice and prep for frying. Cut chilled polenta into 8 squares or wedges about ½ inch thick. Pat dry with paper towels to remove surface moisture-this helps edges crisp.

  4. Pan-fry the polenta. Heat 2 tablespoons butter or olive oil in a nonstick or cast iron skillet over medium heat. Place 3-4 polenta slices in the pan with 2 cm space between them. Cook 3-4 minutes per side until golden and crispy, then transfer to a plate. Repeat with remaining slices.

  5. Cook the eggs. In the same skillet, add more oil if needed and crack 4 eggs. Cook on medium-low heat 2-3 minutes for runny yolks, or longer for set yolks. Place one egg on each polenta cake and serve immediately with extra Parmesan and black pepper.

Watch Out
Don't flip polenta cakes until you see golden edges-flipping early makes them stick and break apart

What to Serve With It

Breakfast polenta works solo but feels incomplete without something bright or crunchy on the side. Cool and crunchy, coleslaw resets your palate between bites. When planning your scrambled eggs dinner, pick sides that balance richness without adding prep time.

Side Dish Prep Why It Works How to Serve
Roasted cherry tomatoes Easy Bright acidity cuts through creamy polenta and rich egg yolk Roast with olive oil, salt, and herbs at 400°F for 15 minutes
Sautéed spinach Easy Adds greens and mild bitterness to balance richness Wilt in garlic and olive oil for 3-4 minutes until tender
Avocado slices Easy Creamy texture complements polenta without adding heaviness Slice fresh and sprinkle with salt and lemon juice
Mixed greens salad Easy Light freshness cuts richness and adds crunch Toss with vinaigrette and serve on the side
Crispy bacon Medium Salty crunch contrasts soft polenta and runny yolk Cook until crispy, chop, and sprinkle on top

Three ways to serve it:

  • For brunch hosting: Add grilled asparagus and fruit compote for color and sweet contrast
  • For weeknight speed: Serve with simple mixed greens tossed in lemon vinaigrette
  • For meal prep: Top cold polenta cakes with pesto or salsa verde instead of eggs
Best Pick
Roasted cherry tomatoes hit the table hot at the same time as polenta-no extra timing juggle needed

Store and Reheat

Polenta cakes keep for 3-4 days in the fridge and reheat better than you'd expect. Store cooked eggs separately if meal prepping-they don't hold texture as well. Rich mains need something to cut through, and salad does exactly that. For a version that comes together quickly, light refreshing greens stay crisp when dressed right before serving.

Method Time Best For
🍳 Stovetop 4-5 min Recrisping polenta slices-heat in oiled pan over medium until edges turn golden
🔥 Oven 10 min at 375°F Reheating multiple slices evenly-place on baking sheet and warm until edges crisp
📦 Microwave 1-2 min Quick reheating when texture doesn't matter-edges will soften

For best results when storing:

  • Cool polenta fully before slicing - Warm polenta breaks apart when you try to store it in pieces
  • Layer parchment between slices - Keeps polenta cakes from sticking together in the fridge
  • Store eggs separately - Cook eggs fresh when serving reheated polenta for best texture
  • Freeze uncooked polenta slices - Wrap individually and freeze up to 1 month, then fry from frozen
  • Reheat in batches on stovetop - Pan-frying brings back crispy edges better than oven or microwave

Frequently Asked Questions

Can I use instant polenta to speed up cooking?

Yes, but instant polenta cooks in 5 minutes and won't have the same creamy texture. It works for weeknight speed if you skip the chilling step and serve it soft instead of slicing and frying.

How should I store leftover polenta and eggs separately?

Store cooked polenta slices in an airtight container with parchment between layers for 3-4 days in the fridge. Cook eggs fresh when reheating-leftover cooked eggs turn rubbery and don't hold texture well.

How do I know when polenta is fully cooked and thickened?

Polenta is done when it pulls away from the sides of the pan and looks thick and creamy, usually after 25-30 minutes of stirring every 2 minutes. It should coat a spoon heavily without running off in thin streams.

What causes polenta cakes to be soggy and how to fix?

Soggy polenta cakes happen when the polenta wasn't chilled long enough or was sliced while warm. Fix by refrigerating for a full 2-3 hours until firm, and pat slices dry before frying to remove surface moisture.

What egg styles work best with breakfast polenta?

Fried eggs with runny yolks work best because the yolk acts as sauce for the polenta. Poached eggs also work well, while scrambled eggs add creaminess but lose the runny contrast that makes the dish work.

Breakfast Polenta with Eggs and Parmesan served on a plate

Breakfast Polenta with Eggs and Parmesan

No ratings yet
Breakfast Polenta with Eggs and Parmesan features creamy Italian polenta cooked slowly for creamy texture, chilled to firm, sliced, and pan-fried until crispy. The Parmesan cheese adds nutty flavor without clumping, and eggs cook in the same skillet for an easy brunch option.
Print Recipe Pin Recipe
Prep Time 10 minutes mins
Cook Time 35 minutes mins
Total Time 45 minutes mins
Servings: 4 servings
Course: Breakfast, Main Dish
Cuisine: Italian
Ingredients Equipment Method Notes

Ingredients
  

  • 1 cup coarse polenta cornmeal, avoid instant or fine grind
  • 4 cups water or broth salted with 1 teaspoon salt for seasoning
  • 1 teaspoon salt to season cooking liquid
  • 4 large eggs fried or cooked as desired
  • 0.5 cup Parmesan cheese freshly grated
  • 3 tablespoons butter or olive oil use 1 tablespoon in polenta, 2 tablespoons for frying
  • 0.5 teaspoon black pepper
  • 2 cloves garlic minced, optional
  • 1 teaspoon fresh rosemary or thyme optional, finely chopped

Equipment

  • Saucepan Used to cook polenta
  • Skillet (nonstick or cast iron) Used for pan-frying polenta and cooking eggs
  • Whisk To whisk polenta into boiling liquid
  • Shallow dish or plate To chill polenta until firm

Method
 

  1. Bring 4 cups salted water or broth to a boil in a saucepan. Whisk in 1 cup coarse polenta slowly to avoid lumps. Reduce heat to medium-low and simmer 25-30 minutes, stirring every 2 minutes, until polenta pulls away from the sides and looks thick and creamy.
    1 cup coarse polenta, 4 cups water or broth, 1 teaspoon salt
  2. Remove polenta from heat and stir in ½ cup grated Parmesan, 1 tablespoon butter, and ½ teaspoon black pepper until cheese melts. Pour into a shallow dish or plate, smooth the top, and refrigerate 2-3 hours until firm enough to slice cleanly.
    0.5 cup Parmesan cheese, 3 tablespoons butter or olive oil, 0.5 teaspoon black pepper
  3. Cut chilled polenta into 8 squares or wedges about ½ inch thick. Pat dry with paper towels to remove surface moisture-this helps edges crisp during frying.
    1 cup coarse polenta
  4. Heat 2 tablespoons butter or olive oil in a nonstick or cast iron skillet over medium heat. Place 3-4 polenta slices in the pan with space between them. Cook 3-4 minutes per side until golden and crispy, then transfer to a plate. Repeat with remaining slices.
    3 tablespoons butter or olive oil
  5. In the same skillet, add more oil if needed and crack 4 eggs. Cook on medium-low heat 2-3 minutes for runny yolks, or longer for set yolks. Place one egg on each polenta cake and serve immediately with extra Parmesan and black pepper.
    4 large eggs, 0.5 cup Parmesan cheese, 0.5 teaspoon black pepper

Notes

  • Cook polenta low and slow, stirring every 2 minutes to prevent lumps.
  • Chill polenta fully before slicing to ensure it holds shape when fried.
  • Pat polenta slices dry before frying to get crispy edges without sticking.

Tried this recipe?

Let us know how it was!

5 Best Substitutes for Marmite for Umami in Cooking

March 17, 2026

You've measured out Marmite for your stew, but the jar's nearly empty and darker than it should be. It happens-this ingredient often sits in pantries longer than most.

5 Best Substitutes for Marmite for Umami in Cooking

Marmite brings concentrated umami and salty richness to recipes. Success depends on matching its function-flavor depth or texture-not replicating its exact taste. Swaps vary based on whether you're making a spread, sauce, or marinade.

QUICK SUMMARY

**Vegemite** and **miso paste** deliver the closest umami punch with similar paste textures. Soy sauce works for liquid applications but needs salt adjustments. The main risk is overcompensating with salt-start with half and build.

🥄Closest match: Vegemite mirrors the yeasty depth with milder sweetness
⚖️Standard ratio: **1:1 for pastes**, 1 tablespoon soy sauce per 1 tablespoon Marmite
⚠️Common mistake: Adding full salt before tasting-most swaps are already briny

6 Top Marmite Alternatives That Hold Up

Each substitute below shifts the flavor or texture slightly. Pick based on whether you need paste consistency or just savory depth.

Quick Substitute Reference
#SubstituteBest ForRatioKey Note
1 Vegemite ✨ Both 1:1 Milder, less bitter
2 Soy Sauce 🍳 Cooking 1 tablespoon per 1 tbsp Reduce other salt
3 Miso Paste ✨ Both 1:1 Slightly sweet
4 Nutritional Yeast Mix 🌱 Vegan 1 tablespoon + 1 tsp Requires blending
5 Worcestershire Sauce 🍳 Cooking 2 teaspoon per 1 tbsp Thin, tangy

1 - Vegemite

Vegemite is a close yeast extract cousin with comparable umami and richness. The flavor profile leans milder and less syrupy than Marmite, making it slightly less aggressive in spreads.

Use it 1:1 in any recipe calling for Marmite. The texture matches almost perfectly-thick, spreadable, and dissolves smoothly in hot liquids.

Toast Spreads

Works for: Thinner layers where bitterness would overpower

Skip if: You want that sharp, molasses-like edge

Gravy & Stews

Works for: Building savory depth without changing consistency

Skip if: The recipe depends on Marmite's darker color

Here's what to know:

  • Salt levels sit lower than Marmite-taste before adding more
  • Dissolves faster in warm stock or broth

Out of Vegemite too? What to use instead covers milder umami pastes.

Skip if: you need a very dark, syrupy flavor that dominates the dish.

2 - Soy Sauce

Soy sauce offers strong umami and saltiness but lacks Marmite's paste texture. It works in liquid applications where thickness doesn't matter-soups, marinades, and braising liquids.

Use 1 tablespoon soy sauce per 1 tablespoon Marmite and reduce other salt by half. The flavor sits less intense and smoky, with more straightforward saltiness.

Quick specs:

  • Works best stirred into hot liquids or mixed into wet marinades
  • Color darkens similarly but flavor stays cleaner, less fermented
  • Skips the syrupy cling-won't coat proteins the same way
  • Sodium levels vary by brand-start conservative

Missing soy sauce as well? Soy sauce swaps ranked has liquid umami options.

Skip if: you need a thick, spreadable paste or the recipe relies on Marmite's viscosity.

3 - Miso Paste

Miso delivers fermented umami richness with a paste texture similar to Marmite. The flavor comes from soybeans instead of yeast, bringing slight sweetness alongside the savory notes.

Best Pick
Use white or yellow miso for the closest match-red miso runs too assertive and overpowers delicate dishes.

Swap 1:1 in soups, sauces, and dressings. Miso dissolves smoothly in warm liquids and holds its texture when mixed into spreads or compound butters.

The essentials:

  • Fermentation profile differs but umami punch stays strong
  • Less salty than Marmite-taste before adding extra salt
  • Slight sweetness balances better in Asian-inspired recipes

Out of miso paste too? Miso paste swaps lists fermented alternatives.

Skip if: you need a very dark, syrupy flavor or the recipe calls for that specific yeast extract taste.

4 - Nutritional Yeast Mix

Combining nutritional yeast with soy sauce recreates Marmite's yeast umami and salt. This mix works when you need savory depth but can skip the paste texture.

Mix 1 tablespoon nutritional yeast with 1 teaspoon soy sauce per 1 tablespoon Marmite. The result tastes nutty and cheesy with salty notes, less intense than the original.

Key details:

  • Best for sprinkling on dishes or stirring into sauces
  • Doesn't dissolve completely-expect texture in the final dish
  • Adjust liquid in recipes since this adds dry flakes

No nutritional yeast either? Cheesy umami swaps covers flaked options.

Skip if: you need a liquid or paste ingredient that dissolves cleanly.

5 - Worcestershire Sauce

Worcestershire adds complex umami and depth, enriching dishes where Marmite is used. It comes as a thin liquid with tangy, savory, and slightly sweet notes from anchovy and spices.

Watch Out
This swap changes the flavor profile more than others-the anchovy and vinegar notes stand out. Use 2 teaspoon per 1 tablespoon Marmite to avoid overwhelming the dish.

It works best in meat marinades and savory sauces where the complex flavor enhances rather than replaces. Reduce added salt since Worcestershire brings its own sodium.

What to expect:

  • Tanginess shifts the overall balance-works better in bold, meaty recipes
  • Thin consistency means it won't thicken sauces or spreads

Out of Worcestershire too? Tangy umami options has anchovy-free picks.

Skip if: you need pure yeast extract flavor or a thick texture that clings to ingredients.

Final Thoughts on Swapping Marmite

Start with Vegemite for the closest match. Adjust seasoning and taste before adding more salt-most swaps already bring plenty of sodium.

  • Closest match - Vegemite for similar yeasty depth
  • Easiest grab - Soy sauce for liquid recipes
  • Dietary option - Nutritional yeast mix for vegan umami

Frequently Asked Questions

Can I use beef bouillon instead of Marmite?

Beef bouillon adds umami but comes with very different flavor notes-meaty instead of yeasty. Use half a cube dissolved in 1 tablespoon warm water per 1 tablespoon Marmite, and reduce other salt significantly since bouillon runs quite salty.

Does Vegemite taste exactly like Marmite?

No, but it's very close. Vegemite tastes milder and less bitter, with a thinner consistency and slightly less molasses-like sweetness. Most recipes won't show a noticeable difference once cooked.

Can I substitute Marmite in baking recipes?

Yes, but stick with paste-texture swaps like Vegemite or miso. Soy sauce or Worcestershire add too much liquid and throw off the dough or batter consistency. Use the same amount and don't adjust other wet ingredients.

How much soy sauce replaces 1 teaspoon of Marmite?

Use 1 teaspoon soy sauce per 1 teaspoon Marmite, then cut other salt in the recipe by half. Soy sauce delivers similar umami but runs thinner and less concentrated, so you may need to simmer longer to reduce liquid.

Why does my substitute taste too salty?

Most Marmite swaps-especially soy sauce, Worcestershire, and miso-pack high sodium levels. Always reduce added salt by at least half, then taste and adjust. Start conservative and build up.

5 Best Substitutes for Marmite for Umami in Cooking

5 Best Substitutes for Marmite

No ratings yet
When you need a Marmite substitute, choose based on texture and use. Vegemite and miso paste match the paste texture and umami depth. Soy sauce fits liquid uses but reduce salt accordingly. Adjust seasoning carefully to avoid over-salting.
Print Recipe Pin Recipe
Prep Time 7 minutes mins
Cook Time 6 minutes mins
Total Time 13 minutes mins
Servings: 4 servings
Course: Sauces, Substitutes
Cuisine: General
Ingredients Method Notes

Ingredients
  

  • 1 Vegemite Use 1:1 in any recipe; milder, less bitter with similar texture
  • 1 tablespoon Soy Sauce Use 1 tablespoon soy sauce per 1 tablespoon Marmite; reduce other salt by half
  • 1 Miso Paste Use 1:1 in soups, sauces, and dressings; slightly sweet and less salty
  • 1 tablespoon Nutritional Yeast Mix Mix 1 tablespoon nutritional yeast with 1 teaspoon soy sauce per 1 tablespoon Marmite; requires blending
  • 2 teaspoons Worcestershire Sauce Use 2 teaspoon per 1 tablespoon Marmite; thin, tangy with anchovy and vinegar notes

Method
 

  1. Select your substitute based on whether you need a paste texture or just savory depth.
  2. For paste substitutes like Vegemite or Miso Paste, use a 1:1 ratio to Marmite and mix or spread as usual.
  3. For liquid substitutes like Soy Sauce, use 1 tablespoon per 1 tablespoon Marmite and reduce other salt by half.
  4. For Nutritional Yeast Mix, blend 1 tablespoon nutritional yeast with 1 teaspoon soy sauce per 1 tablespoon Marmite before adding.
  5. For Worcestershire Sauce, use 2 teaspoons per 1 tablespoon Marmite in marinades or sauces; reduce added salt.
  6. Adjust seasoning gradually by tasting; avoid adding full salt upfront to prevent overly salty results.

Notes

Add soy sauce slowly and taste-test to avoid making your dish too salty.

Tried this recipe?

Let us know how it was!

Mushroom and Swiss Omelet

March 17, 2026

When you need a protein-packed breakfast that works for weekday mornings or lazy weekend brunch, a mushroom and Swiss omelet delivers. One skillet, ten minutes, and a meal that feels more intentional than scrambled eggs.

Mushroom and Swiss Omelet served on a plate

The mushrooms cook first so they release moisture before hitting the eggs. Swiss cheese melts into pockets without turning greasy or overwhelming the earthy flavors.

Perfect for quick weeknight meals when you want something filling that doesn't require planning ahead.

QUICK SUMMARY

A mushroom and Swiss omelet combines whisked eggs with sautéed mushrooms and melted cheese in a folded package. Cook mushrooms fully first to avoid soggy eggs, then use low heat so the omelet stays tender instead of rubbery.

⏱️Time: 10-12 minutes total, 5 for prep and 5-7 for cooking
🔥Method: Sauté mushrooms until golden, pour whisked eggs over low heat, fold once
⚠️Watch out: High heat turns eggs rubbery - stick to low-medium and pull when still slightly moist

Table of Contents

Toggle
  • Why This Recipe Works
  • What You'll Need
    • Ingredient Details
  • Ingredient Swaps
  • What to Serve With It
  • Store and Reheat
  • Frequently Asked Questions
  • Mushroom and Swiss Omelet
    • Method 
    • Tried this recipe?

Why This Recipe Works

Sautéing mushrooms separately before adding eggs prevents the soggy texture that ruins most omelets. For another quick breakfast approach, try a simple jars variation that skips the stovetop entirely.

Quick Reference
⏱️
Prep Time
5 min
🔥
Cook Time
5-7 min
⏰
Total Time
10-12 min
🍽️
Servings
1-2 servings
📊
Difficulty
Easy
🏷️
Category
Main Dish
💡
Quick Tip
Cook low heat, do not stir after pouring eggs
🎯
Best For
Weeknight | Brunch | Meal prep

Five reasons it works:

  • Low heat keeps eggs tender - cooking at medium-low for 3-5 minutes prevents the rubbery texture that happens when the pan runs too hot
  • Whisking adds air - 30 seconds of vigorous whisking creates a fluffier omelet instead of a flat, dense layer
  • Mushrooms release moisture early - sautéing them 5-7 minutes until golden means the liquid evaporates before it hits the eggs
  • Swiss melts without separating - the mild, nutty cheese stays creamy instead of turning greasy like cheddar sometimes does
  • Folding traps heat - covering the pan for 30 seconds after folding finishes melting the cheese without overcooking the eggs
Quick Tip
Add salt and pepper directly to the whisked eggs before cooking for even seasoning throughout.

What You'll Need

Ingredients for Mushroom and Swiss Omelet

Fresh eggs make the biggest difference in texture and flavor since older eggs turn runnier and weaker. For another weeknight-friendly option, check out this quick potatoes dish that pairs well with any breakfast main.

🥚
Base
  • 2-3 large eggs
  • 1 tablespoon milk or cream (optional)
🍄
Filling
  • 4 oz mushrooms, sliced
  • 2 oz Swiss cheese, shredded
  • 1 tablespoon butter
🧂
Seasoning
  • Salt
  • Black pepper
  • Fresh herbs (optional)
🧅
Optional
  • Onion or shallots
  • Olive oil

Ingredient Details

  • Eggs
    Use fresh eggs within 2 weeks of purchase for best structure - older eggs create runnier omelets that don't hold their shape when folded
  • Swiss cheese
    Shred from a block instead of buying pre-shredded for better melting - pre-shredded cheese contains anti-caking agents that prevent smooth melting
  • Mushrooms
    Slice mushrooms evenly (about ¼-inch thick) so they cook at the same rate and brown properly without some pieces turning mushy
  • Butter
    Use real butter instead of margarine for sautéing mushrooms - it creates better browning and adds rich flavor that pairs with Swiss cheese
  • Milk or cream
    Adding 1 tablespoon makes eggs creamier but isn't required - skip it for a firmer texture or if you're avoiding dairy
  • Non-stick skillet
    An 8-inch non-stick pan works best for a 2-3 egg omelet - larger pans spread eggs too thin and make folding harder
  • Salt
    Season the whisked eggs and mushrooms separately - eggs need salt to enhance flavor, mushrooms need it to release moisture during cooking

Ingredient Swaps

Gruyere or mozzarella work when you don't have Swiss on hand but want similar melting properties. If you're planning a full spread, pair this with simple homemade salad for a balanced brunch plate.

Four swaps that work:

  • Swiss cheese → Gruyere or mozzarella - Gruyere adds nuttier flavor with similar melt, mozzarella stays milder and stretchier (budget-friendly for mozzarella, flavor upgrade for Gruyere)
  • Butter → olive oil - Less rich but still creates good browning on mushrooms, slight flavor change that works if you're avoiding dairy
  • Mushrooms → spinach or bell peppers - Changes moisture level and flavor profile, spinach adds iron and earthiness, peppers add sweetness and crunch
  • Milk or cream → water or omit entirely - Creates firmer texture without the creamy mouthfeel, works for dairy-free or if you prefer denser eggs

Gruyere

Works for: Nutty, complex flavor that pairs with earthy mushrooms, melts smoothly like Swiss

Skip if: You want mild cheese or need a budget option (Gruyere costs more)

Mozzarella

Works for: Mild flavor that won't overpower, stretchy melt, budget-friendly

Skip if: You want the nutty Swiss flavor or firmer cheese texture

Olive Oil

Works for: Dairy-free cooking, lighter flavor, still browns mushrooms well

Skip if: You want the rich, buttery flavor that pairs best with eggs and cheese

Spinach

Works for: Quick wilting, iron boost, earthy flavor similar to mushrooms

Skip if: You want the meaty texture mushrooms provide or prefer less moisture

Instructions

The whole process takes under 15 minutes from start to plated omelet. For a heartier breakfast spread, add this easy homemade recipe as a drizzle over greens on the side.

  1. Sauté mushrooms: Heat 1 tablespoon butter in an 8-inch non-stick skillet over medium-high heat until melted and foaming. Add sliced mushrooms in a single layer, season with salt and pepper, and cook 5-7 minutes without stirring too often until golden brown and moisture evaporates. Transfer to a plate.

  2. Whisk eggs: Crack 2-3 eggs into a bowl, add 1 tablespoon milk or cream if using, season with salt and black pepper, then whisk vigorously for 30 seconds until frothy and uniform in color with no streaks of white showing.

  3. Cook omelet base: Reduce heat to low-medium, add another small pat of butter to the same skillet, swirl to coat, then pour in whisked eggs. Let cook undisturbed for 2-3 minutes until edges set and pull away from the pan but the center stays slightly wet and shiny.

  4. Add filling and fold: Sprinkle shredded Swiss cheese over one half of the omelet, top with cooked mushrooms, then use a spatula to gently fold the empty half over the filling. Cover the pan, turn off heat, and let sit 30 seconds so trapped steam finishes melting the cheese.

  5. Slide and serve: Run the spatula around the edge to loosen, tilt the pan, and slide the omelet onto a plate in one smooth motion. The underside should be light golden with no brown spots, the inside should look slightly creamy when you cut into it. Rest 1 minute before eating.

Golden Rule
Pull the omelet when it still looks slightly wet in the center - residual heat finishes cooking it off the stove so it stays tender instead of turning dry and rubbery.

What to Serve With It

Most omelets need something starchy or fresh to round out the plate since eggs alone don't fill you up for long. Check out weeknight chicken dinner ideas for more breakfast and brunch pairing strategies.

Side Dish Prep Why It Works How to Serve
Toast or crusty bread Easy Soaks up runny yolk, adds crunch contrast to soft eggs Butter while hot, serve on the side for dipping
Mixed greens salad Easy Fresh, light contrast cuts richness of cheese and butter Dress lightly with lemon vinaigrette, serve alongside
Roasted breakfast potatoes Medium Starchy base makes meal more filling, adds crispy texture Season with herbs, serve hot next to omelet
Fresh fruit Easy Natural sweetness balances savory eggs and cheese Slice berries or melon, serve chilled on the side
Crisp bacon Easy Salty, crunchy protein adds variety to the plate Cook until crisp, drain on paper towels, serve hot

Three ways to serve it:

  • Classic brunch plate: Serve the omelet with buttered toast, crispy bacon, and fresh fruit for a balanced spread that covers sweet, salty, and savory
  • Light lunch option: Pair with mixed greens dressed in lemon vinaigrette and a slice of crusty bread for a filling but not heavy midday meal
  • Hearty breakfast: Add roasted breakfast potatoes seasoned with herbs and a side of salsa verde for dipping to make it more substantial
Best Pick
Toast works better than bagels or English muffins for soaking up any runny yolk or melted cheese - the flat surface creates more contact with the omelet.

Store and Reheat

Omelets lose texture when stored but still work for meal prep if you adjust expectations. For another make-ahead breakfast, consider homemade coleslaw recipe that stays crisp for days in the fridge.

Method Time Best For
🍳 Stovetop 3-4 min on low heat Retains texture, works for single servings
📦 Microwave 45-60 seconds at 50% power Quick reheating but watch for dryness
🔥 Oven 10 min at 300°F (150°C) Even reheating for multiple servings

For best results when storing:

  • Cool completely before storing - let the omelet rest at room temperature 10-15 minutes so condensation doesn't make it soggy in the container
  • Wrap tightly in plastic or foil - press wrap directly against the surface to prevent air exposure that dries out eggs
  • Store up to 3 days in the fridge - eggs stay safe but texture gets firmer and cheese may harden slightly after day two
  • Reheat gently on stovetop - use low heat with a small pat of butter to add back moisture and prevent rubbery texture
  • Freeze only if necessary - wrap individually in foil, freeze up to 1 month, but expect texture changes and watery spots when thawed

Frequently Asked Questions

Can I use other cheeses instead of Swiss?

Gruyere and mozzarella work best since they melt smoothly like Swiss. Cheddar turns greasy and separates at high heat, but white cheddar stays creamier if that's all you have.

How do I store and reheat leftover mushroom and Swiss omelet?

Cool completely, wrap tightly in plastic wrap, and store up to 3 days in the fridge. Reheat on the stovetop over low heat with a small pat of butter for 3-4 minutes to restore moisture and prevent rubbery texture.

What is the best way to know when the omelet is done?

The edges should pull away from the pan and look set while the center stays slightly wet and shiny. Pull it off heat at that point - residual heat finishes cooking it so it stays creamy instead of dry.

How to prevent the omelet from becoming soggy with mushrooms?

Cook mushrooms fully in a separate step until golden and all moisture evaporates before adding them to the eggs. Skipping this step releases water directly into the omelet and creates a watery, soggy texture.

Can I make mushroom and Swiss omelet ahead for meal prep?

Cook the omelet fully, cool completely, then wrap tightly and store up to 3 days in the fridge. Texture gets firmer but reheating gently on the stovetop with butter brings back some of the original creaminess.

Mushroom and Swiss Omelet served on a plate

Mushroom and Swiss Omelet

No ratings yet
A mushroom and Swiss omelet combines sautéed mushrooms with creamy melted cheese in a tender folded egg base. Cooking mushrooms first releases moisture, preventing soggy eggs and making this a quick, protein-packed breakfast or brunch option.
Print Recipe Pin Recipe
Prep Time 5 minutes mins
Cook Time 7 minutes mins
Total Time 12 minutes mins
Servings: 2 servings
Course: Breakfast, Main Dish
Cuisine: American
Ingredients Equipment Method Notes

Ingredients
  

  • 2-3 large eggs fresh, cracked
  • 1 tablespoon milk or cream optional, for creamier eggs
  • 4 oz mushrooms sliced evenly about ¼-inch thick
  • 2 oz Swiss cheese shredded
  • 1 tablespoon butter for sautéing and cooking omelet
  • to taste salt for seasoning eggs and mushrooms
  • to taste black pepper for seasoning eggs and mushrooms

Equipment

  • 8-inch non-stick skillet Used for sautéing mushrooms and cooking omelet
  • Whisk For whisking eggs
  • Spatula For folding and serving omelet
  • Bowl For mixing eggs and milk

Method
 

  1. Heat 1 tablespoon butter in an 8-inch non-stick skillet over medium-high heat until melted and foaming. Add sliced mushrooms in a single layer, season with salt and pepper, and cook 5-7 minutes without stirring often until golden brown and moisture evaporates. Transfer mushrooms to a plate.
    1 tbsp butter, 4 oz mushrooms, to taste salt, to taste black pepper
  2. Crack 2-3 eggs into a bowl. Add 1 tablespoon milk or cream if using, salt and black pepper to taste. Whisk vigorously for 30 seconds until frothy and uniform with no streaks of white.
    2-3 large eggs, 1 tbsp milk or cream, to taste salt, to taste black pepper
  3. Reduce heat to low-medium. Add a small pat of butter to the skillet, swirl to coat. Pour in whisked eggs and cook undisturbed for 2-3 minutes until edges set and pull away from pan but center remains slightly wet and shiny.
    1 tbsp butter, 2-3 large eggs, 1 tbsp milk or cream
  4. Sprinkle shredded Swiss cheese over one half of the omelet, top with the cooked mushrooms. Use a spatula to gently fold the empty half over the filling. Cover the pan, turn off heat, and let sit 30 seconds to melt the cheese with trapped steam.
    2 oz Swiss cheese, 4 oz mushrooms
  5. Run spatula around edges to loosen. Tilt the pan and slide the omelet onto a plate in one smooth motion. The underside should be light golden with no brown spots; the inside remains slightly creamy. Let rest 1 minute before eating.

Notes

  • Cook mushrooms fully first to avoid soggy omelet.
  • Use low heat for eggs to prevent rubbery texture.
  • Pull omelet off heat while slightly moist in center for best tenderness.

Tried this recipe?

Let us know how it was!

5 Best Substitutes for Red Food Coloring for Cake Decorating

March 17, 2026

Red food coloring gives cakes, frostings, and beverages their signature bright hue. Natural alternatives can match that color while keeping your ingredient list clean.

5 Best Substitutes for Red Food Coloring for Cake Decorating

Most swaps work best when you understand whether your dish is baked, chilled, or served raw. Heat affects natural pigments differently than synthetic dyes, so the right choice depends on your cooking method.

We tested five natural sources that bring red color to your recipes. Some add mild flavor, others stay completely neutral, and a few require adjustments to your ratio or technique.

QUICK SUMMARY

Beet juice concentrate delivers the brightest red without strong flavor. Pomegranate juice works for cold dishes but fades with heat. Raspberry powder adds color and texture to dry mixes, while tomato paste and paprika suit savory cooking only.

🥧Top Pick for Baking: Beet juice concentrate stays stable and neutral
🥤Best for Beverages: Pomegranate juice reduction adds color without cooking
🍝Savory Dishes Only: Tomato paste or paprika bring umami with their color
Quick Substitute Reference
# Substitute Best For Ratio Key Note
1 Beet Juice Concentrate 🥧 Baking 1 tablespoon : 1 tsp Slight earthy note
2 Pomegranate Juice Reduction 🥗 Raw 1 tablespoon : 1 tsp Fades with heat
3 Red Raspberry Powder ✨ Both 1:1 by volume Adds grainy texture
4 Tomato Paste 🍳 Cooking 1 tablespoon : 1 tsp Strong tomato flavor
5 Paprika or Red Chili Powder 🍳 Cooking Start ¼ tsp Spicy or smoky

These substitutes are ranked by how well they mimic Red Food Coloring.

1. Beet Juice Concentrate

Beet juice concentrate is the closest natural match for red food coloring in most recipes. It stays vibrant through baking and brings minimal flavor when used in small amounts.

The pigment holds up to heat better than other natural sources. You get a deep red without the artificial ingredients.

Use 1 tablespoon beet juice concentrate per 1 teaspoon red food coloring.

Key advantages:

  • Heat-stable color that survives baking
  • Neutral flavor in small amounts
  • Works in both sweet and savory dishes
  • Easy to measure and mix

The mild earthy sweetness disappears in chocolate cakes, red velvet batters, and cream cheese frosting. Color may darken slightly as it bakes, so test a small batch first if you need a precise shade.

Results vary by dish. A tested Beet replacements list helps when you need that earthy sweetness in other recipes too.

Best Pick
Start with half the amount if you're new to beet juice. You can always add more to deepen the color without overshooting.

Pomegranate Juice Reduction (Cold Dishes)

Pomegranate juice reduction works when your recipe stays cold. Reduce fresh pomegranate juice on the stovetop until it thickens and darkens, then cool it before adding to your dish.

The color fades with heat, so save this swap for beverages, smoothies, and no-bake desserts. It brings a mild tangy note that complements fruity flavors without overwhelming them.

Use 1 tablespoon concentrated pomegranate juice per 1 teaspoon red food coloring. Mix it into Greek yogurt parfaits, chia puddings, or cocktails where bright color matters and heat isn't part of the process.

The swap depends on what Pomegranate does in your recipe. Match the function first with easy Pomegranate swaps that work across different dishes.

Pomegranate Juice Reduction

Works for: Cold desserts, beverages, smoothie bowls, and uncooked frostings

Skip if: You're baking, simmering sauces, or need color that won't fade

Red Raspberry Powder - Dry Mix Option

Red raspberry powder delivers natural red pigment in a dry form that blends into icings, smoothie mixes, and protein powders. It adds sweet berry flavor that enhances fruity recipes without turning them liquid.

The color is more muted than synthetic dyes. Expect a soft pink-to-red shade rather than a bright cherry hue.

Use a 1:1 ratio by volume for red food coloring. Sift the powder before adding it to prevent clumps in your batter or frosting.

When it works:

  • Dry mixes that need color without liquid
  • Smoothies and shakes where berry flavor fits
  • Buttercream or cream cheese frosting

The grainy texture shows in thin glazes or liquid recipes. Stick to thicker mixtures where the powder can disperse evenly.

For Savory Dishes: Tomato Paste

Tomato paste brings deep red color to savory dishes where its umami-rich flavor enhances the final result. It works in pasta sauces, stews, chilis, and braised meats.

Use 1 tablespoon tomato paste per 1 teaspoon red food coloring. The thick texture also adds body to thin sauces, so you might need less liquid elsewhere in your recipe.

Why it fits savory cooking:

  • Umami depth complements garlic, onions, and herbs
  • Slightly acidic flavor balances rich meats

Skip it in baked goods or anything sweet. Each substitute behaves differently and Tomato Paste substitutes ranked by function helps you match the role it plays.

Quick Tip
Tomato paste darkens as it cooks. Add it early in the process to let the color develop fully.

Paprika or Red Chili Powder

Paprika and red chili powder add red color with spice or smokiness. They suit savory dishes where heat and depth are welcome, like rubs, marinades, and roasted vegetables.

Start with ¼ teaspoon paprika per 1 teaspoon red food coloring and adjust. Color intensity varies by brand and type-smoked paprika gives deeper red than sweet paprika, while chili powder adds heat.

The flavor is too strong for desserts or neutral dishes. Use this swap only when the spicy or smoky profile fits your recipe, and keep extra on hand since quick Paprika replacements to try can vary widely in heat level.

Picking the Right One

Match your substitute to your cooking method first. Heat changes natural pigments, so a swap that works raw might fade when baked.

1. Check your dish type - Baking needs heat-stable color like beet juice. Cold desserts can use pomegranate or raspberry powder without losing vibrancy.

2. Consider flavor impact - Tomato paste and paprika only fit savory dishes. Beet juice stays neutral enough for both sweet and savory applications.

3. Test with half amount - Natural pigments vary in strength by brand. Start with half the recommended amount, then add more until you reach your desired shade.

When in doubt, beet juice concentrate gives the most predictable results across the widest range of recipes.

Watch Out
Natural colors can shift in acidic batters. Beet juice turns more pink in recipes with lemon juice or buttermilk-add a pinch of baking soda to keep it red.

Before You Swap Red Food Coloring

Start with the closest match. Adjust seasoning and cooking time as needed.

Natural pigments behave differently than synthetic dyes. Beet juice concentrate handles heat well and stays neutral in flavor, making it your first choice for most baking projects.

Pomegranate juice works only in cold applications-it fades fast when heated. Raspberry powder adds both color and texture, so it fits dry mixes and thick frostings better than thin glazes.

Tomato paste and paprika belong in savory dishes exclusively. Their strong flavors make them poor choices for cakes or cookies but ideal for sauces, stews, and rubs where umami or spice enhances the dish.

Test a small batch first. Natural colors can surprise you with how they react to acidity, heat, or fat content in your recipe.

Frequently Asked Questions

Can I use strawberry juice instead of red food coloring?

Fresh strawberry juice gives a pale pink color that fades quickly with heat. It works in cold desserts or beverages but won't produce a bright red in baked goods. Beet juice concentrate or pomegranate reduction delivers stronger, more stable color.

Will beet juice change the taste of my cake?

Beet juice concentrate adds a very mild earthy sweetness in small amounts. Most people can't detect it in chocolate cakes or heavily spiced batters. If your recipe has delicate flavors like vanilla or lemon, start with half the recommended amount and taste the batter before adding more.

How do I make pomegranate juice reduction at home?

Simmer 1 cup pomegranate juice in a small saucepan over medium heat until it reduces to about 2-3 tablespoons. This takes 15-20 minutes. The juice should coat the back of a spoon when ready. Let it cool completely before using it in cold dishes.

Can I use tomato paste in red velvet cake?

No. Tomato paste brings a savory, acidic flavor that clashes with sweet batters. Red velvet cake needs beet juice concentrate, which stays neutral in flavor and holds up to the cocoa and buttermilk in the recipe.

Why does my natural red color turn brown when baked?

Acidity and high heat can shift natural pigments. Beet juice turns more brownish-red in very acidic batters or when overbaked. Add a pinch of baking soda to stabilize the color, and reduce your oven temperature by 25°F to protect the pigment.

Does raspberry powder need to be refrigerated?

Store raspberry powder in an airtight container in a cool, dark place. It doesn't require refrigeration but will keep its color and flavor longer if you refrigerate or freeze it. Use it within six months for the brightest color.

5 Best Substitutes for Red Food Coloring for Cake Decorating

5 Best Substitutes for Red Food Coloring

No ratings yet
Natural substitutes for red food coloring provide vibrant hues while keeping recipes clean. Each alternative suits different cooking methods - from baking with beet juice concentrate to cold dishes with pomegranate juice reduction.
Print Recipe Pin Recipe
Prep Time 10 minutes mins
Cook Time 8 minutes mins
Total Time 18 minutes mins
Servings: 4 servings
Course: Kitchen Tips, Substitutes
Cuisine: Various
Ingredients Method Notes

Ingredients
  

  • 1 tablespoon Beet Juice Concentrate Use 1 tablespoon beet juice concentrate per 1 teaspoon red food coloring; mild earthy note;
  • 1 tablespoon Pomegranate Juice Reduction Use 1 tablespoon concentrated pomegranate juice per 1 teaspoon red food coloring; fades with heat;
  • Red Raspberry Powder Use 1:1 by volume ratio with red food coloring; sift before use; adds grainy texture
  • 1 tablespoon Tomato Paste Use 1 tablespoon tomato paste per 1 teaspoon red food coloring; strong tomato flavor;
  • 0.25 teaspoon Paprika or Red Chili Powder Start with ¼ teaspoon paprika per 1 teaspoon red food coloring; spicy or smoky flavor;

Method
 

  1. Choose your substitute based on cooking method and desired flavor profile.
  2. Prepare substitutes as needed: reduce pomegranate juice, sift raspberry powder, or measure paste and powders.
  3. Apply the recommended substitution ratios and adjust quantities starting at half to control intensity.
  4. Incorporate the substitute into your dish and check the color and flavor consistency.
  5. Adjust seasoning or color depth as needed after tasting and observing coloration.

Notes

  • Beet juice concentrate is best for baking and holds color well under heat.
  • Pomegranate juice reduction works only in cold dishes and fades with heat.
  • Tomato paste and paprika offer bold color but fit savory dishes exclusively due to their strong flavors.

Tried this recipe?

Let us know how it was!

Smoked Salmon and Cream Cheese Bagel

March 17, 2026

You need 8 minutes and a toaster. No cooking skills required, no meal prep, just assembly that feels intentional.

Smoked Salmon and Cream Cheese Bagel served on a plate

The bagel gets toasted until crispy so the cream cheese doesn't make it soggy. Smoked salmon drapes over the top while thin onion slices and capers add sharp, briny pops.

This is what you make on weekend mornings when you want something that feels special but doesn't require turning on the stove. Works for quick weekday breakfast or light lunch when you're working from home.

QUICK SUMMARY

Smoked salmon and cream cheese bagel combines crispy toasted bagel, tangy cream cheese, and silky smoked salmon with sharp onion and capers. Toast the bagel fully to prevent sogginess from the cream cheese and salmon moisture. Success depends on thin, even layers and fresh salmon that's silky, not dry.

⏱️Time Reality: 5 minutes prep, 3-5 minutes toasting - assembled in under 10 minutes total.
🔑Critical First Step: Toast bagel until golden brown edges form before spreading anything.
⚠️Watch Out: Soggy bagels happen from undertoasting or too-thick cream cheese - toast fully and spread thin.

Table of Contents

Toggle
  • Why This Recipe Works
  • What You'll Need
    • Ingredient Details
  • Ingredient Swaps
  • What to Serve With It
  • Store and Reheat
  • Frequently Asked Questions
  • Smoked Salmon and Cream Cheese Bagel
    • Method 
    • Tried this recipe?

Why This Recipe Works

Toasting the bagel until golden creates a crispy barrier that holds up against moisture from cream cheese and salmon. Most people skip homemade deli-style bagels, but the texture balance matters. For a version that comes together quickly, something creamy to dunk adds freshness when the bagel feels too rich.

Quick Reference
⏱️
Prep Time
5 min
🔥
Cook Time
3-5 min
⏰
Total Time
8-10 min
🍽️
Servings
1-2 servings
📊
Difficulty
Easy
🏷️
Category
Breakfast | Brunch
💡
Quick Tip
Toast bagel fully to prevent sogginess
🎯
Best For
Weeknight | Meal prep | Entertaining

Here's what makes this work:

  • Toast bagel 3-4 minutes at medium heat until golden edges form - crispy surface prevents cream cheese from soaking through
  • Set cream cheese out 10 minutes to soften for smooth spreading - cold cream cheese tears bagel and clumps unevenly
  • Slice red onion into 1-2 mm thin rings for balanced sharpness - thick slices overpower the salmon and cream cheese
  • Handle salmon minimally and rest on paper before assembly, 1-2 min - excess moisture drips off instead of soaking into bagel
  • Zest ¼ lemon over cream cheese for bright flavor punch - citrus cuts through richness without making bagel wet
Quick Tip
Spread cream cheese first, then salmon, then onions and capers - layering order keeps bagel crisp longest.

What You'll Need

Ingredients for Smoked Salmon and Cream Cheese Bagel

Shopping is straightforward - bagels from any bakery or grocery store, fresh smoked salmon from the deli counter, and standard toppings you likely have. A good smoked salmon bagel depends on using fresh ingredients and balancing the richness. For a version that comes together quickly, fresh homemade caesar salad recipe adds greens when the bagel alone feels too heavy.

🥯
Base
  • 1 bagel (plain, sesame, or everything)
🧀
Spread
  • 2-3 tablespoons cream cheese
🦐
Protein
  • 2-3 ounces smoked salmon
🧄
Toppings
  • 1-2 thin slices red onion
  • 1 teaspoon capers
  • 1 tablespoon fresh dill
  • Black pepper to taste
  • Lemon wedge
  • Optional: cucumber slices, tomato

Ingredient Details

  • Bagel
    Choose one with moderate thickness - too dense and it overwhelms the salmon, too thin and it tears when spreading.
  • Cream Cheese
    Regular or light both work - flavored versions like chive or herb add extra dimension but aren't necessary.
  • Smoked Salmon
    Fresh smoked salmon should look silky, not dry or dull - old salmon tastes dry and affects texture and safety.
  • Red Onion
    Slice paper-thin and use sparingly - too much raw onion overpowers everything else on the bagel.
  • Capers
    Use capers sparingly - they're intensely salty and briny, a few go a long way.
  • Fresh Dill
    Fresh dill brightens the whole plate - dried dill works in a pinch but use a small pinch only.
  • Cucumber Slices
    Add thin cucumber slices just before serving to keep them crisp - they get watery if assembled too early.

Ingredient Swaps

Some swaps change texture or flavor more than others. The rich mains need something to cut through, and garlic shrimp does exactly that. For a version that comes together quickly, this quick garlic shrimp dish switches up the protein while keeping the same assembly method.

Four swaps that work:

  • Cream cheese → dairy-free cream cheese - slightly less creamy but similar texture; works for dairy-free diets
  • Bagel → gluten-free bagel - different chew and crumb, may be denser; necessary for gluten-free needs
  • Smoked salmon → smoked trout or smoked whitefish - change in flavor profile, slightly milder; budget-friendly alternative
  • Capers → green olives (chopped) - less tang, more salty flavor; method swap if capers unavailable

Everything Bagel

Works for: Bold flavor that stands up to smoky salmon and sharp toppings

Skip if: You prefer letting the salmon be the star flavor

Plain Bagel

Works for: Neutral base that showcases salmon and cream cheese balance

Skip if: You want more complex flavor from the bagel itself

Sesame Bagel

Works for: Nutty flavor and texture without overpowering other ingredients

Skip if: You need gluten-free - most sesame bagels contain gluten

Instructions

Total time runs 8-10 minutes with most of that spent toasting. The caesar salad works best when it hits the table at the same time as the bagel. For a version that comes together quickly, crunchy coleslaw side dish adds crisp freshness when the bagel feels too rich on its own.

  1. Toast bagel halves. Place bagel halves cut-side up in toaster or under broiler. Toast 3-4 minutes at medium heat until edges turn golden brown and surface feels crisp when touched. Remove and let cool 1 minute so cream cheese doesn't melt.

  2. Spread cream cheese. Spread 1-1.5 tablespoons softened cream cheese evenly on each bagel half, using thin layer about ⅛-inch thick. Add lemon zest or black pepper directly onto cream cheese if using.

  3. Layer smoked salmon. Drape 1-1.5 ounces smoked salmon over cream cheese on each half, folding salmon to create even coverage without gaps. Press gently so salmon adheres to cream cheese.

  4. Add toppings. Arrange 1-2 thin red onion slices on salmon, then scatter capers evenly across surface. Add cucumber slices if using. Sprinkle fresh dill over everything.

  5. Finish and serve. Squeeze lemon wedge over assembled bagel halves and add black pepper to taste. Slice in half if desired, using sharp serrated knife to prevent squashing. Serve immediately while bagel is still crisp.

Watch Out
Don't assemble more than 5 minutes before eating - cream cheese and salmon moisture soaks into bagel and makes it soggy.

What to Serve With It

Smoked salmon bagels need something crisp or fresh alongside to balance richness. Most breakfasts feel incomplete without a side that adds texture contrast. For more ideas on planning your meal, light seafood dish planning shows how to build a full brunch spread with bagels as the centerpiece.

Side Dish Prep Why It Works How to Serve
Simple green salad Easy Fresh contrast cuts through cream cheese richness Dress lightly with lemon vinaigrette
Sliced fresh cucumber Easy Crisp coolness complements creamy bagel Serve chilled with light salt sprinkle
Baby carrots Easy Crunchy neutral palate cleanser Raw or with light dip on side
Fruit salad Easy Juicy sweetness balances savory bagel Mix berries, melon, citrus segments
Pickled vegetables Easy Tangy flavors intensify bagel experience Serve pickled onions, pickles, peppers

Three ways to serve it:

  • Weekend brunch spread: Add mini caprese salad, avocado slices, and herbed cream cheese dips for guests to customize their bagels
  • Quick weekday breakfast: Pair with fruit salad and cucumber slices for balanced meal that doesn't slow you down
  • Light lunch: Serve with simple green salad dressed in lemon vinaigrette and pickled vegetables for tangy crunch
Best Pick
A rich main needs something to cut through, and potatoes does exactly that. For a version that comes together quickly, this easy potatoes recipe adds hearty warmth when the bagel alone doesn't feel filling enough.

Store and Reheat

Assembled bagels don't store well - cream cheese and salmon make the bagel soggy within hours. Store components separately and assemble fresh when ready to eat. The bagel works best when it hits the table at the same time as sides, so prep everything before final assembly.

Method Time Best For
🍳 Stovetop N/A Not recommended - salmon doesn't reheat well
📦 Microwave 20 seconds Warming bagel only before assembly, not after
🔥 Oven 5 min at 350°F Reheating bagel halves only, not assembled bagel

For best results when storing:

  • Store bagels separately: Keep toasted or untoasted bagels in airtight container at room temperature up to 2 days
  • Refrigerate salmon properly: Store smoked salmon in original packaging or wrapped tightly in plastic, use within 3-5 days of opening
  • Keep cream cheese fresh: Store cream cheese covered in fridge, bring to room temperature 10 minutes before using
  • Prep toppings ahead: Slice onions and store in water in fridge up to 24 hours to reduce sharpness
  • Assemble just before eating: Build bagels no more than 5 minutes before serving to prevent sogginess

Frequently Asked Questions

Can I make smoked salmon and cream cheese bagel ahead and store assembled?

No - assembled bagels get soggy within 1-2 hours from cream cheese and salmon moisture. Store components separately and assemble just before eating for crispy bagel texture.

What is the best way to store leftover bagels with smoked salmon?

Store bagels at room temperature in airtight container up to 2 days. Keep smoked salmon wrapped tightly in fridge, use within 3-5 days. Store cream cheese and toppings separately, assemble fresh when ready.

How do I tell if smoked salmon is fresh enough to eat on bagels?

Fresh smoked salmon looks silky and translucent with bright color. Old salmon appears dry, dull, or has slimy texture. Check sell-by date and use within 3-5 days of opening package.

Why did my bagel get soggy after adding cream cheese and salmon?

Bagel wasn't toasted enough or cream cheese layer was too thick. Toast bagel until golden brown edges form and spread thin ⅛-inch layer of cream cheese. Assemble no more than 5 minutes before eating.

Can I use avocado instead of cream cheese on smoked salmon bagel?

Yes - mashed avocado works as dairy-free swap with similar creamy texture. Use ¼ ripe avocado per bagel half, mash with fork, and spread thin. Add lemon juice to prevent browning.

Smoked Salmon and Cream Cheese Bagel served on a plate

Smoked Salmon and Cream Cheese Bagel

No ratings yet
Smoked salmon and cream cheese bagel features a crispy toasted bagel layered with tangy cream cheese, silky smoked salmon, and accented by thin red onion slices and briny capers. Toasting the bagel until golden brown prevents sogginess, while fresh ingredients create a balanced and satisfying breakfast or light lunch.
Print Recipe Pin Recipe
Prep Time 5 minutes mins
Cook Time 4 minutes mins
Total Time 9 minutes mins
Servings: 2 servings
Course: Breakfast, Brunch
Cuisine: American
Ingredients Equipment Method Notes

Ingredients
  

  • 1 whole bagel plain, sesame, or everything
  • 3 tablespoons cream cheese softened to spread evenly
  • 3 ounces smoked salmon fresh, silky texture preferred
  • 2 slices red onion sliced paper-thin (1-2 mm)
  • 1 teaspoon capers use sparingly
  • 1 tablespoon fresh dill
  • 1 wedge lemon for zest and squeezing

Equipment

  • Toaster Used to toast bagel halves until crispy

Method
 

  1. Place bagel halves cut-side up in toaster or under broiler. Toast 3-4 minutes at medium heat until edges are golden brown and surface feels crisp. Remove and let cool 1 minute to prevent cream cheese from melting.
    1 whole bagel
  2. Spread 1 to 1.5 tablespoons softened cream cheese evenly on each bagel half using a thin ⅛-inch layer. Add lemon zest or black pepper on top of cream cheese if desired.
    3 tablespoons cream cheese, 1 wedge lemon
  3. Drape 1 to 1.5 ounces smoked salmon over cream cheese on each half, folding to cover evenly without gaps. Press gently to help salmon adhere.
    3 ounces smoked salmon
  4. Arrange 1 to 2 thin red onion slices over salmon, then scatter capers evenly. Add fresh dill and optional cucumber slices if using.
    2 slices red onion, 1 teaspoon capers, 1 tablespoon fresh dill
  5. Squeeze lemon wedge over assembled bagel halves and add black pepper to taste. Slice in half with a sharp serrated knife to avoid squashing. Serve immediately while bagel is still crisp.
    1 wedge lemon

Notes

  • Toast bagel fully to form a crispy barrier preventing sogginess.
  • Use softened cream cheese spread thin to avoid tearing the bagel.
  • Assemble no more than 5 minutes before eating for best texture.

Tried this recipe?

Let us know how it was!

Beef Birria for Tacos

March 17, 2026

Tender shredded beef in a smoky, spiced consommé that you dip tortillas into before pan-frying them crispy. That's beef birria-slow-braised chuck roast with dried guajillo and ancho chiles that soften into a deep red sauce.

Beef Birria for Tacos served on a plate

The meat braises low and slow until it shreds with a fork. You sear it first for caramelized edges, then simmer it covered for three to four hours until the fat renders and the connective tissue melts.

This works for meal prep Sundays or weeknight entertaining when you want something that looks elaborate but mostly cooks itself. The consommé doubles as a dipping broth, so every taco gets soaked in flavor before it hits the pan.

QUICK SUMMARY

Beef birria for tacos uses chuck roast braised in a toasted chile sauce until fork-tender, then shredded and pan-fried in tortillas dipped in the cooking liquid. The high-fat chuck roast stays juicy during the long braise, and the dried chiles provide smoky depth without harsh heat. Toast the chiles first to unlock their flavor before blending them into the sauce.

⏱️Time Reality: 3-4 hours mostly hands-off braising, 20 minutes active prep and assembly.
🔥Critical First Step: Sear the beef on all sides before braising-skipping this means flat, one-note flavor.
⚠️Watch Out: Over-toasting chiles turns them bitter; pull them from the heat as soon as they puff and smell fragrant.

Table of Contents

Toggle
  • Why This Recipe Works
  • What You'll Need
    • Ingredient Details
  • Ingredient Swaps
  • What to Serve With It
  • Store and Reheat
  • Frequently Asked Questions
  • Beef Birria for Tacos
    • Method 
    • Tried this recipe?

Why This Recipe Works

Slow braising at 300°F breaks down the collagen in chuck roast into silky gelatin. The fat renders into the consommé while the meat fibers separate, making shredding effortless. For a version that comes together quickly, rich beef side dish uses a similar braising method with flank steak.

Quick Reference
⏱️
Prep Time
20 min
🔥
Cook Time
3-4 hours
⏰
Total Time
3 hr 20 min - 4 hr 20 min
🍽️
Servings
6-8 tacos
📊
Difficulty
Medium
🏷️
Category
Main Dish
💡
Quick Tip
Toast chiles lightly for best flavor
🎯
Best For
Weeknight, Meal prep, Entertaining
  • Toasting dried chiles in a dry skillet releases their oils and deepens their flavor without adding bitterness-stop when they puff slightly and smell fragrant, about 1-2 minutes per side.
  • Searing the chuck roast before braising creates a caramelized crust that adds layers of savory depth to the final consommé.
  • Blending the toasted chiles with garlic, vinegar, and spices creates a smooth base that coats the meat and infuses every bite during the long braise.
  • Straining the sauce through a fine-mesh strainer removes chile skins and seeds, leaving a silky consommé that soaks into tortillas without grittiness.
  • Pan-frying the dipped tortillas until crispy contrasts with the tender shredded beef and keeps the tacos from turning soggy.
Golden Rule
The beef is done when it reaches an internal temperature of 195°F and shreds easily with a fork-undercooked meat will be chewy and stringy.

What You'll Need

Ingredients for Beef Birria for Tacos

A good birria can make or break the plate. Stock up on dried chiles and beef chuck-the rest is pantry staples. We keep a batch ready for nights like this - quick chicken dish uses similar assembly techniques but cooks faster.

🥩
Beef
  • 3 lbs beef chuck roast
  • 2 cups beef broth
🌶️
Dried Chiles & Spices
  • 6 dried guajillo chiles
  • 4 dried ancho chiles
  • 1 teaspoon cumin
  • 1 teaspoon oregano
  • 2 whole cloves
🧄
Aromatics
  • 1 onion, quartered
  • 6 garlic cloves
  • 2 tomatoes
🫙
Finishing
  • ¼ cup vinegar
  • Corn tortillas
  • Salt to taste

Ingredient Details

  • Beef chuck roast
    Fatty, marbled cut with connective tissue that melts into gelatin during braising-flank steak works but will be leaner.
  • Dried guajillo chiles
    Provides the base smoky, mild heat-remove seeds for less heat, but keep a few for depth.
  • Dried ancho chiles
    Adds sweetness and deep reddish-brown color-don't skip or the sauce will taste flat.
  • Vinegar
    Balances the richness of the beef fat and brightens the sauce-white or apple cider vinegar both work.
  • Beef broth
    Adds savory depth to the consommé-water works but needs extra salt and seasoning.
  • Cumin and oregano
    Classic Mexican spices that warm the sauce-Mexican oregano is earthier than Mediterranean.
  • Cloves
    Optional aromatic that adds subtle warmth-use whole cloves and remove before blending if you want less intensity.

Ingredient Swaps

Beef brisket works if chuck roast isn't available-it's leaner but still tender after a long braise. Cook it the same way but check for doneness closer to 4 hours since it has less fat. For a version that comes together quickly, light refreshing greens balances the richness of the beef.

  • Beef brisket instead of chuck roast: Slightly leaner texture but similar tenderness after 3-4 hours of braising-expect less fat in the consommé.
  • Pasilla chiles instead of guajillo: Similar smokiness with a slightly different heat profile-maintains the same deep red color.
  • Lime juice instead of vinegar: Brighter, citrusy acid that's less sharp-use the same amount but add at the end of cooking.
  • Chipotle powder instead of ancho chiles: Adds smoky heat but less sweetness-start with 1 tablespoon and taste before adding more.

Water Instead of Beef Broth

Works for: Budget-friendly batches or when you need to stretch the recipe

Skip if: You want the deepest, richest consommé-water needs extra salt and lacks savory depth

Skipping Tomatoes

Works for: More intense chile flavor and simpler ingredient list

Skip if: You like brightness and acidity cutting through the richness-sauce will taste heavier without them

Instructions

The whole process takes 3-4 hours, but most of that is unattended braising time. You'll spend 20 minutes prepping and searing, then the oven does the work. For a version that comes together quickly, this easy slaw recipe adds crunch and balances the richness while the beef cooks.

  1. Toast the dried chiles in a dry skillet over medium heat for 1-2 minutes per side until they puff slightly and smell fragrant-remove stems and seeds if you want less heat, then soak in hot water for 15 minutes until softened.

  2. Sear the chuck roast in a heavy-bottomed pot over medium-high heat for 3-4 minutes per side until a dark brown crust forms-don't move it around or it won't caramelize properly.

  3. Blend the softened chiles, garlic, onion, tomatoes, cumin, oregano, cloves, vinegar, and 1 cup of beef broth until smooth, then strain through a fine-mesh strainer to remove skins and seeds-pour the sauce over the seared beef.

  4. Add the remaining beef broth to the pot, cover tightly, and braise in a 300°F oven for 3-4 hours until the beef reaches an internal temperature of 195°F and shreds easily with a fork-check at 3 hours and continue cooking if it's still tough.

  5. Remove the beef from the pot and let it rest for 10 minutes, then shred with two forks-dip corn tortillas briefly in the consommé, fill with shredded beef, fold, and pan-fry in a hot skillet for 1-2 minutes per side until crispy edges form.

Shortcut
Shred the beef while it's still warm-it pulls apart more easily and absorbs more consommé flavor than cold meat.

What to Serve With It

Rich mains need something to cut through, and slaw does exactly that. Bright, acidic sides balance the fatty beef and smoky consommé. For complete taco soup meal ideas on building a full spread, complete taco soup meal ideas covers similar pairings that work with braised beef.

Side Dish Prep Why It Works How to Serve
Mexican street corn (elote) Easy Creamy, tangy corn cuts the richness of beef fat Grill corn, slather with mayo, cotija, and chili powder
Pickled red onions Easy Sharp acidity balances smoky, fatty tacos Quick-pickle thinly sliced onions in lime juice and salt
Simple cabbage slaw Easy Refreshing crunch and color contrast against tender beef Toss shredded cabbage with lime juice, cilantro, and salt
Refried beans Easy Classic filling side that soaks up extra consommé Warm canned refried beans with a splash of broth
Lime wedges Easy Fresh citrus brightens each taco bite Cut limes into wedges and serve on the side

Three ways to serve it:

  • For entertaining: Set up a taco bar with guacamole, chopped cilantro, onion, and Mexican rice so guests can build their own.
  • For weeknight meals: Serve with a simple cabbage slaw and pickled onions for crunch and acidity without extra cooking.
  • For meal prep: Pack shredded beef and consommé separately, then reheat and assemble tacos throughout the week.
Best Pick
Serve the consommé in small bowls for dipping-it's the signature move that makes birria tacos different from regular tacos.

Store and Reheat

Birria stores well because the fat protects the meat from drying out. Keep the shredded beef submerged in consommé in a shallow airtight container for up to 4 days in the fridge. We keep a batch ready for nights like this - quick easy side dish pairs well with reheated birria for complete weeknight meals.

Method Time Best For
🍳 Stovetop 8-10 min Reheating beef with sauce gently over medium-low heat-stir occasionally to prevent sticking
📦 Microwave 2-3 min Quick single servings-stir halfway through and add a splash of consommé to keep it moist
🔥 Oven 15-20 min at 300°F Large batches in a covered baking dish-maintains moist beef texture without drying out

For best results when storing:

  • Keep shredded beef submerged in consommé to prevent it from drying out-the fat layer on top acts as a seal.
  • Store in shallow containers so the beef cools quickly and evenly, reducing the risk of bacterial growth.
  • Freeze in portions for up to 3 months in freezer-safe bags with consommé-thaw overnight in the fridge before reheating.
  • Reheat only what you'll eat since repeated heating dries out the beef and concentrates the salt in the consommé.
  • Crisp leftover tacos in a dry skillet for 1-2 minutes per side to restore texture-don't microwave assembled tacos or they'll turn soggy.

Frequently Asked Questions

How long to cook beef birria at low temperature?

Braise at 300°F for 3-4 hours until the beef reaches an internal temperature of 195°F and shreds easily with a fork. Check at 3 hours-if it's still tough, continue cooking in 30-minute increments.

Can I make beef birria ahead of time and freeze it?

Yes-freeze shredded beef in consommé in freezer-safe bags for up to 3 months. Thaw overnight in the fridge and reheat gently on the stovetop, adding a splash of broth if it looks dry.

What are the visual cues that beef birria is done?

The beef should shred easily with a fork when you pull it apart, and the consommé will have a deep reddish-brown color with a layer of fat on top. If the meat is still chewy or stringy, it needs more cooking time.

How do I fix bland or bitter birria sauce?

For bland sauce, add extra salt, vinegar, or chili powder after cooking. For bitter sauce from burnt chiles, dilute with beef broth and add a splash of vinegar to balance the flavor.

Can I scale this recipe for a larger crowd?

Yes-double the ingredients and use a larger pot or two separate pots. The braising time stays the same, but check the beef at 3 hours since larger batches may take slightly longer to reach 195°F.

Beef Birria for Tacos served on a plate

Beef Birria for Tacos

No ratings yet
Beef birria for tacos features slow-braised chuck roast cooked in a smoky dried chile sauce until fork-tender, then shredded and pan-fried in tortillas dipped in the flavorful consommé. Toasting the chiles unlocks deep smoky flavors while searing the beef creates rich caramelized notes. The consommé serves as a delicious dipping broth that makes every bite of these crispy tacos packed with savory depth.
Print Recipe Pin Recipe
Prep Time 20 minutes mins
Cook Time 4 hours hrs
Total Time 4 hours hrs 20 minutes mins
Servings: 8 tacos
Course: Main Dish
Cuisine: Mexican
Ingredients Method Notes

Ingredients
  

  • 3 lbs beef chuck roast fatty, marbled cut with connective tissue that melts during braising
  • 2 cups beef broth adds savory depth to consommé
  • 6 pieces dried guajillo chiles toasted, stems and seeds removed for less heat
  • 4 pieces dried ancho chiles toasted to add sweetness and deep color
  • 1 teaspoon cumin classic Mexican spice
  • 1 teaspoon oregano preferably Mexican oregano
  • 2 whole cloves whole cloves, remove if less intensity desired
  • 1 whole onion quartered
  • 6 cloves garlic
  • 2 whole tomatoes
  • 0.25 cup vinegar white or apple cider vinegar
  • corn tortillas for dipping and pan-frying
  • salt to taste

Method
 

  1. Toast the dried guajillo and ancho chiles in a dry skillet over medium heat for 1-2 minutes per side until they puff slightly and smell fragrant. Remove stems and seeds if a milder heat is desired. Then soak the toasted chiles in hot water for 15 minutes until softened.
    6 pieces dried guajillo chiles, 4 pieces dried ancho chiles
  2. Heat a heavy-bottomed pot over medium-high heat and sear the beef chuck roast for 3-4 minutes per side until a dark brown crust forms. Do not move the beef around while searing to ensure proper caramelization.
    3 lbs beef chuck roast
  3. Blend the softened chiles with garlic, onion, tomatoes, cumin, oregano, cloves, vinegar, and 1 cup of beef broth until smooth. Strain the sauce through a fine-mesh strainer to remove chile skins and seeds. Pour the sauce over the seared beef in the pot.
    6 pieces dried guajillo chiles, 4 pieces dried ancho chiles, 1 tsp cumin, 1 tsp oregano, 2 whole cloves, 1 whole onion, 6 cloves garlic, 2 whole tomatoes, 0.25 cup vinegar, 2 cups beef broth
  4. Add the remaining beef broth to the pot, cover tightly, and braise in a 300°F oven for 3-4 hours until the beef reaches an internal temperature of 195°F and shreds easily with a fork. Check at 3 hours and continue cooking in 30-minute increments if still tough.
    3 lbs beef chuck roast, 2 cups beef broth
  5. Remove the beef from the pot and let rest for 10 minutes. Shred with two forks while still warm. Dip corn tortillas briefly in the consommé, fill with shredded beef, fold, and pan-fry in a hot skillet for 1-2 minutes per side until crispy edges form.
    3 lbs beef chuck roast, corn tortillas

Notes

  • Always sear the beef before braising to develop rich caramelized flavor.
  • Toast chiles lightly until fragrant to avoid bitterness in the sauce.
  • Keep shredded beef submerged in consommé when storing to maintain moisture and flavor.

Tried this recipe?

Let us know how it was!

5 Best Substitutes for Half-and-half in Creamy Sauces

March 17, 2026

You pour from the half-and-half carton and realize it's well past the date. The cream-top separation looks suspect.

5 Best Substitutes for Half-and-half in Creamy Sauces

Some swaps stay close, while others require small adjustments. Match the substitute to what your recipe needs - richness for soups, neutral flavor for baking, or plant-based creaminess for vegan dishes.

QUICK SUMMARY

Whole milk and heavy cream mimic half-and-half's fat content most closely. Evaporated milk works in cooked dishes but tastes slightly caramelized. For dairy-free recipes, full-fat coconut milk provides similar richness with mild coconut notes. Start with equal swaps, then adjust based on thickness and flavor intensity.

🥛Closest match: Mix ¾ cup whole milk with ¼ cup heavy cream
⚖️Standard ratio: Use 1:1 for most swaps, reduce if substitute is thicker
⚠️Common mistake: Using Greek yogurt in hot sauces without tempering - it curdles

5 Half-and-half Substitutes Without Big Changes

Not all swaps deliver the same creaminess or neutral flavor. Some add tang, others bring plant notes, and a few work only in cooked applications.

Pick based on whether you're making cold dressings, hot soups, or baked goods that need a clean dairy taste.

Quick Substitute Reference
#SubstituteBest ForRatioKey Note
1 Milk and Cream Mix ✨ Both ¾ cup milk + ¼ cup cream Closest match for fat content
2 Evaporated Milk 🍳 Cooking 1:1 Slight caramel flavor, skip for cold dishes
3 Coconut Milk 🌱 Vegan 1:1 Adds mild coconut notes
4 Yogurt Mix 🍳 Cooking ½ cup yogurt + ½ cup water Tangy, curdles if boiled
5 Tofu Blend 🌱 Vegan ½ cup tofu + ½ cup soy milk Neutral bean flavor, blender required

1 - Milk and Cream Mix

Combining whole milk and heavy cream recreates the fat balance of half-and-half without buying a specialty product. It behaves the same in hot and cold applications.

Whole Milk Component

Works for: Thinning the texture to match half-and-half's pourable consistency

Skip if: You're making whipped cream - milk won't whip

Heavy Cream Component

Works for: Adding richness and preventing curdling in acidic recipes

Skip if: You want a lower-fat option - cream defeats that goal

Mix ¾ cup whole milk with ¼ cup heavy cream to replace 1 cup half-and-half. The blend stays stable in coffee, soups, and baked goods.

Here's what to know:

  • Store blended mix in the fridge for up to 5 days
  • Use 2% or skim milk if you prefer - add 1 more tablespoon of cream

If you're out of whole milk too, milk swaps by type covers skim and plant options that still work with cream.

2 - Evaporated Milk

Evaporated milk is shelf-stable concentrated milk with roughly 60% of the water removed. It provides creaminess and richness similar to half-and-half but tastes slightly cooked.

Use it straight from the can at a 1:1 ratio in sauces, casseroles, and baked goods. The caramelized notes work in savory dishes but stand out in delicate desserts.

Skip if: You're making cold salad dressings - the cooked flavor is too strong raw.

3 - Coconut Milk

Full-fat canned coconut milk delivers the same creamy texture as half-and-half with a mild coconut flavor that fades when cooked. It's the top pick for dairy-free recipes.

Best Pick
Shake the can before opening - the fat separates and needs mixing for even consistency.

Use 1:1 in curries, vegan soups, and baked goods where a hint of coconut complements the dish. The fat content stays stable when heated, so it won't curdle.

The essentials:

  • Buy full-fat, not light - light coconut milk is too thin
  • Chill the can overnight if you need thick coconut cream for toppings
  • Pair with vanilla extract in sweet recipes to mask coconut notes

Out of coconut milk as well? Swaps for coconut milk offers cashew cream and oat milk blends.

Skip if: Your recipe depends on neutral dairy flavor - coconut is detectable.

4 - Yogurt Mix

Diluted Greek yogurt mimics half-and-half's consistency with a tangy flavor that works in cold dressings and dips. Heat causes it to separate unless you temper it first.

Mix equal parts Greek yogurt and water to replace 1 cup half-and-half. Start with less water and add more if the mix is too thick.

If you're short on Greek yogurt too, yogurt swaps for cooking includes sour cream and buttermilk alternatives.

Skip if: You're making hot soup - the yogurt curdles unless you whisk it with a bit of hot liquid first.

5 - Tofu Blend

Blending silken tofu with soy milk creates a creamy, dairy-free base with neutral bean flavor. It works in soups, sauces, and vegan baking where you need body without dairy.

UseRatioNotes
Creamy soups½ cup tofu + ½ cup soy milkBlend until smooth for silky texture
Vegan alfredoSame ratioAdd nutritional yeast for cheesy flavor
Baked goodsSame ratioWorks best in muffins and quick breads

Blend ½ cup silken tofu with ½ cup soy milk until completely smooth - lumps ruin the texture. The blend thickens sauces without splitting when heated.

Quick specs:

  • Use soft or silken tofu, not firm - firm tofu won't blend smooth
  • Add a pinch of salt to balance the bean flavor
  • Store blended mix in the fridge for up to 3 days
  • Shake before using - it separates slightly

Missing tofu as well? Tofu swaps that work lists blended cashews and white beans.

Skip if: You need the substitute for coffee - the bean flavor is too strong.

Before You Swap Half-and-half

There's no swap that perfectly replicates half-and-half's fat content and neutral flavor. Match the substitute to your recipe's role - richness for soups, clean dairy taste for baking, or plant-based creaminess for vegan dishes.

Start with a 1:1 swap, then adjust based on thickness and flavor intensity.

  • Closest match - Milk and Cream Mix for neutral dairy richness
  • Easiest grab - Evaporated Milk for pantry convenience
  • Dietary option - Coconut Milk for full-fat vegan creaminess

Frequently Asked Questions

Can I use milk alone instead of half-and-half?

Whole milk works in a pinch but tastes thinner and less rich. Add 1 tablespoon of melted butter per cup of milk to boost fat content and mimic half-and-half's creaminess.

Does evaporated milk taste different from half-and-half?

Yes - evaporated milk has a slightly caramelized, cooked flavor from the canning process. It works fine in savory dishes and baked goods but stands out in cold or delicate recipes.

Can I substitute half-and-half in coffee with coconut milk?

Full-fat coconut milk works but adds mild coconut flavor. Use half the amount first - coconut milk is richer than half-and-half and can overpower coffee.

Will Greek yogurt curdle in hot soup?

Yes, if added directly to boiling liquid. Temper it first - whisk a few spoonfuls of hot soup into the yogurt, then stir the warmed yogurt back into the pot off heat.

Can I make half-and-half with skim milk and heavy cream?

Yes - use ⅔ cup skim milk and ⅓ cup heavy cream to replace 1 cup half-and-half. The extra cream compensates for skim milk's lower fat content.

5 Best Substitutes for Half-and-half in Creamy Sauces

5 Best Substitutes for Half-and-half

No ratings yet
When you're out of half-and-half, match the substitute to your recipe needs: richness for soups, neutral flavor for baking, or plant-based creaminess for vegan dishes. Use equal ratios initially, adjusting for thickness and flavor intensity.
Print Recipe Pin Recipe
Prep Time 10 minutes mins
Cook Time 6 minutes mins
Total Time 16 minutes mins
Servings: 4 servings
Course: Ingredient, Substitute
Ingredients Method Notes

Ingredients
  

  • 0.75 cup whole milk part of milk and cream mix
  • 0.25 cup heavy cream part of milk and cream mix
  • 1 cup evaporated milk use straight from the can; best for cooked dishes
  • 1 cup full-fat coconut milk shake can before using; adds mild coconut notes
  • Greek yogurt and water mix mix ½ cup Greek yogurt with ½ cup water; tangy, curdles if boiled
  • silken tofu and soy milk blend blend ½ cup tofu with ½ cup soy milk until smooth

Method
 

  1. Choose your substitute based on recipe needs: richness for soups, neutral flavor for baking, plant-based creaminess for vegan dishes.
  2. For milk and cream mix, combine ¾ cup whole milk with ¼ cup heavy cream; use as a 1:1 replacement for half-and-half.
  3. Use evaporated milk straight from the can at a 1:1 ratio for cooked dishes; avoid in cold recipes due to caramelized flavor.
  4. Shake full-fat coconut milk can before use and substitute at a 1:1 ratio; suitable for vegan dishes with mild coconut flavor.
  5. Mix equal parts Greek yogurt and water; use cautiously in cold dishes or temper before adding to hot recipes to prevent curdling.
  6. Blend ½ cup silken tofu with ½ cup soy milk until smooth for a creamy vegan substitute; avoid in coffee due to bean flavor.
  7. Adjust thickness and taste of the substitute as needed to match your recipe's texture and flavor requirements before final use.

Notes

Blend silken tofu and soy milk until smooth to prevent gritty texture and ensure creamy consistency.

Tried this recipe?

Let us know how it was!
« Previous Page
Next Page »

Primary Sidebar

ForkliftKitchen recipe developer

Welcome!

Recipe Developer · 12+ Yr Kitchen Veteran

I'm the recipe developer behind this site, focused on practical, well-tested dishes and smart ingredient swaps. Every recipe is written to be clear, reliable, and easy to make at home.

650+ Recipes
12+ Yrs Exp.
3x Tested
Our Story →

As Featured In

Allrecipes

TASTE OF HOME

Food52

HUFFPOST

Yahoo! Life

Our Editorial Standards

  • ✓ Every recipe tested at least 3 times before publishing
  • ✓ Substitutes verified by real kitchen trials, not guesswork
  • ✓ Reviewed for accuracy by our editorial team
  • ✓ Updated regularly with seasonal info and reader feedback

Most Popular

  • Creamy Lemon Shrimp Linguine
    Creamy Lemon Shrimp Linguine
  • Creamy Garlic Mushroom Chicken
    Creamy Garlic Mushroom Chicken
  • Sesame Ginger Chicken Noodle Bowls
    Sesame Ginger Chicken Noodle Bowls
  • Baked Lemon Herb Fish Fillets
    Baked Lemon Herb Fish Fillets
  • Veggie Loaded Fried Rice
    Veggie Loaded Fried Rice
  • Spicy Garlic Shrimp Stir Fry
    Spicy Garlic Shrimp Stir Fry

Join 8,000+ Home Cooks

Weekly Kitchen Tips

Easy recipes, smart substitutes, and real cooking shortcuts — every Thursday.

Subscribe Free →


Side Dishes

  • What to Serve With Asian Salmon? 15 Best Side Dishes
    What to Serve With Asian Salmon? 15 Best Side Dishes
  • Side Dishes for Strawberry Spinach Salad
    15 Best Side Dishes for Strawberry Spinach Salad
  • Sides for Grilled Cauliflower Steaks to Complete the Meal
    15 Sides for Grilled Cauliflower Steaks to Complete the Meal
  • 15 Sides To Serve With Calabacitas
    15 Best Sides for Calabacitas – Mexican-Inspired Favorites


Substitutes

  • 7 Best Substitutes for Hot Sauce in Marinades & Stir-Fries
    7 Best Substitutes for Hot Sauce in Marinades & Stir-Fries
  • 9 Best Substitutes for Butter in Baking and Cooking
  • 7 Best Substitutes for Tagliatelle for Italian Pasta Dishes
    7 Best Substitutes for Tagliatelle for Italian Pasta Dishes
  • 7 Best Substitutes for Udon Noodles in Asian Stir-Fries
    7 Best Substitutes for Udon Noodles in Asian Stir-Fries


Browse by Topic

  • Side Dishes320
  • Substitutes785
  • Dinner163
  • Air Fryer77
  • Taste Profiles484
  • Food Storage123


Reader Reviews

★★★★★

"Finally a food blog that tells you exactly why a substitute works instead of just listing options."

— Sarah M., via email

★★★★★

"The side dish recommendations are so specific — saved my dinner party twice this month."

— James R., Pinterest comment

★★★★★

"I trust this site more than most because they actually test everything. You can tell."

— Priya K., blog comment

Footer

↑ Back to Top

Forklift Kitchen

We do the heavy lifting so you can enjoy the cooking. Tested recipes, smart substitutes, and perfect pairings—built for real home cooks.

Content

  • Recipes
  • Substitutes
  • What to Serve With
  • Blog

Company

  • About Us
  • Contact
  • Subscribe

Legal

  • Privacy Policy
  • Terms of Service

As an Amazon Associate I earn from qualifying purchases.

© 2026 Forklift Kitchen.

Rate This Recipe

Your vote:


A rating is required
A name is required
An email is required