• Skip to primary navigation
  • Skip to main content
  • Skip to primary sidebar
  • Recipe Index
    • Air Fryer
  • Side Dishes
  • Substitutes
  • About
  • Contact
  • Subscribe

ForkLiftKitchen

menu icon
go to homepage
  • Recipe Index
    • Air Fryer
  • Side Dishes
  • Substitutes
  • About
  • Contact
  • Subscribe
subscribe
search icon
Homepage link
  • Recipe Index
    • Air Fryer
  • Side Dishes
  • Substitutes
  • About
  • Contact
  • Subscribe
×

Blog

Breakfast Farro with Apples and Cinnamon

March 17, 2026

Complete Article Output

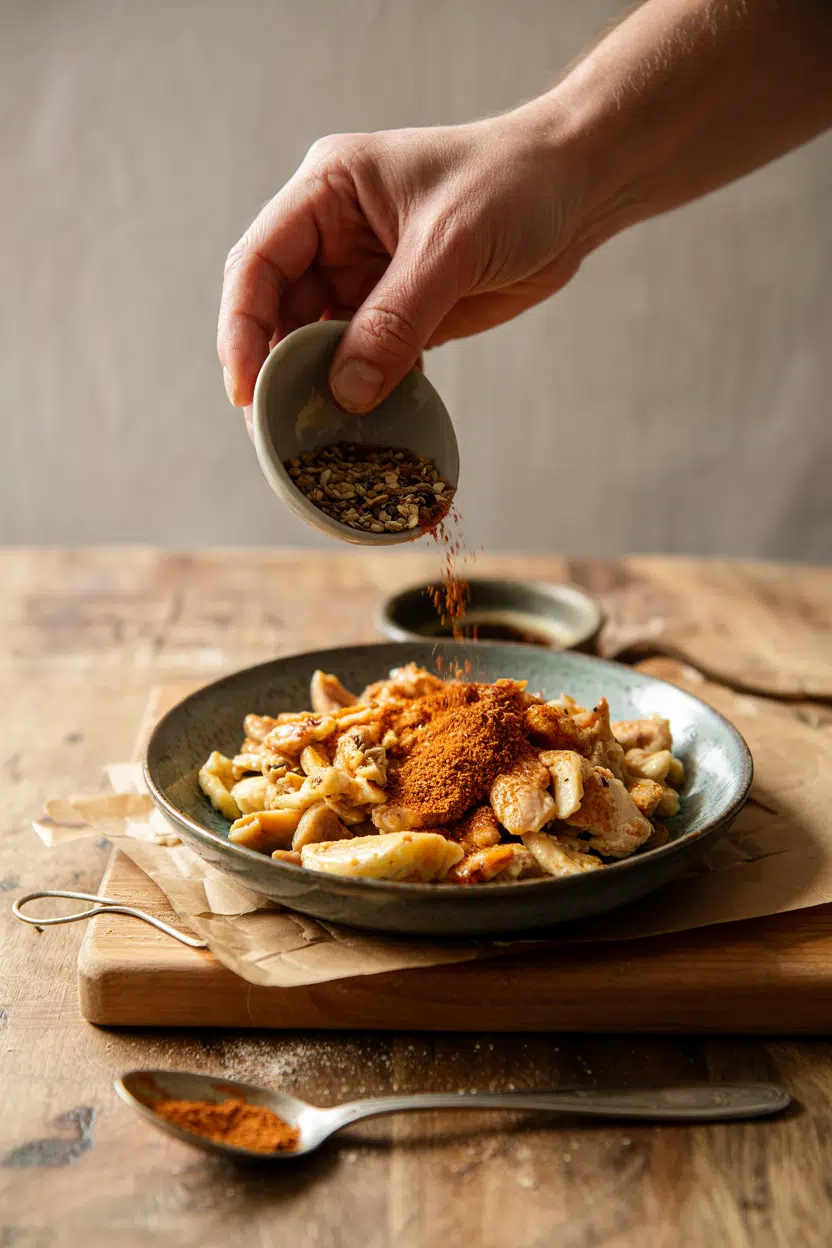
Breakfast grains often turn bland or mushy, but farro stays chewy even after sitting in warm milk. The trick is toasting it dry first and simmering with a lid on so the grains soften without losing their bite.

Breakfast Farro with Apples and Cinnamon served on a plate

The pan does most of the work. You sauté apples separately so they caramelize instead of steaming, then fold them into the porridge at the end.

Make this when you need something filling that doesn't feel heavy. Works for meal prep or weekend brunch when you want real food that isn't rushed.

QUICK SUMMARY

Breakfast Farro with Apples and Cinnamon cooks pearled farro in milk until creamy, then tops it with sautéed apples and warm cinnamon. Toast the farro first for nutty depth, simmer covered for 25-30 minutes, and cook apples separately so they caramelize instead of turning to mush.

⏱️Time Reality: 40 minutes start to finish; farro cooks mostly hands-off while you prep toppings
🔑First Move: Toast dry farro 3-4 minutes before adding liquid - builds flavor base you can't add later
⚠️Watch Out: Too much stirring makes farro gummy; stir once or twice during cooking, not constantly

Why This Recipe Works

Pearled farro holds its shape in hot liquid better than oatmeal, so you get a porridge with actual texture instead of paste. Toasting the grains first brings out their nutty flavor, and simmering in milk instead of water makes the whole bowl creamier. For a version that comes together quickly, try this classic pancakes dish that works with similar toppings.

Quick Reference
⏱️
Prep Time
10 min
🔥
Cook Time
30 min
⏰
Total Time
40 min
🍽️
Servings
4 servings
📊
Difficulty
Easy
🏷️
Category
Breakfast
💡
Quick Tip
Toast farro first for nutty flavor
🎯
Best For
Weeknight | Meal prep
  • Toast farro dry in the saucepan 3-4 minutes over medium heat before adding liquid - this deepens the grain's natural nuttiness
  • Simmer covered for 25-30 minutes so steam softens the grains evenly without drying out or scorching the bottom
  • Dice apples into uniform ½-inch pieces so they cook at the same rate and stay intact instead of dissolving
  • Sauté apples separately in butter over medium heat for 5-7 minutes - this caramelizes the edges and concentrates sweetness
  • Add maple syrup or honey at the end, not during cooking, so you can taste and adjust the sweetness level
Quick Tip
Use pearled farro, not whole grain farro - pearled cooks in 30 minutes instead of 60 and has a tender bite instead of dense chew

What You'll Need

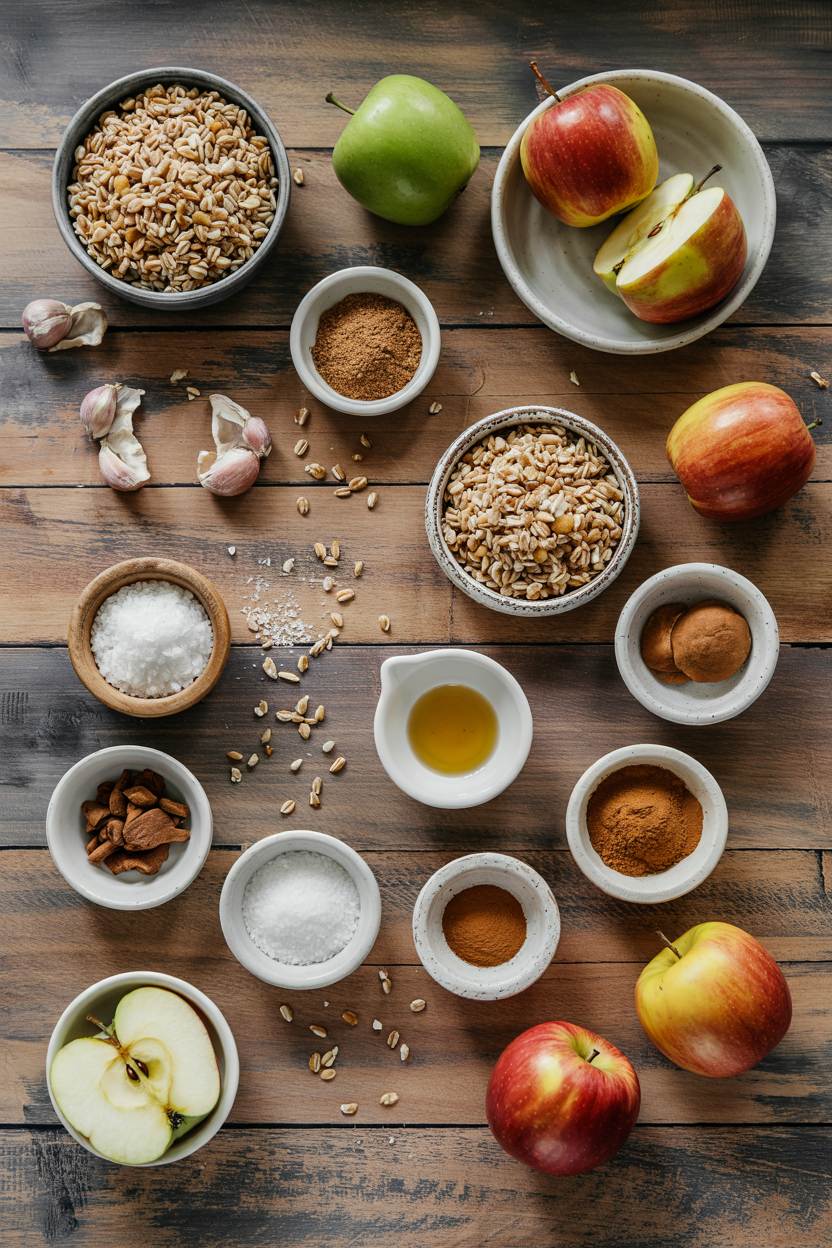
Ingredients for Breakfast Farro with Apples and Cinnamon

Shop for pearled farro in the grains aisle - it's faster than whole farro and softer than wheat berries. Rich mains need something to cut through, and something creamy to dunk balances the warm spices with cool tang.

🌾
Grain Base
  • 1 cup pearled farro
  • 2½ cups milk or plant-based milk
  • ¼ teaspoon salt
🍎
Apple Mix
  • 2 medium apples, diced
  • 1 tablespoon butter or oil
🌶️
Flavor Layer
  • 1 teaspoon ground cinnamon
  • 3 tablespoon maple syrup or honey
  • 1 teaspoon vanilla extract (optional)

Ingredient Details

  • Pearled farro
    Look for "pearled" on the label - it's been partially processed so the outer bran is removed and cook time drops to 25-30 minutes instead of 60
  • Milk or plant-based milk
    Whole milk makes the creamiest porridge; almond or oat milk works but may be thinner - add an extra ¼ cup if using plant milk
  • Apples
    Firm varieties like Granny Smith, Honeycrisp, or Fuji hold their shape when sautéed; softer apples like McIntosh turn mushy
  • Ground cinnamon
    Fresh cinnamon has stronger aroma - if yours smells faint, use 1½ teaspoon instead of 1 tsp
  • Butter or oil
    Butter adds rich flavor to sautéed apples; coconut oil works for dairy-free and adds subtle coconut notes
  • Maple syrup or honey
    Pure maple syrup tastes cleaner than pancake syrup; honey adds floral notes and slightly thicker texture
  • Salt
    Just ¼ teaspoon balances the sweetness and makes the cinnamon and vanilla more noticeable - don't skip it

Ingredient Swaps

Farro swaps change texture more than flavor, so test with a small batch first. Salad adds the contrast this plate needs, but timing matters. For a version that comes together quickly, try this fresh salad side dish that works with warm or cold grains.

  • Pearled farro → steel-cut oats: Use same liquid ratio but cook 20-25 minutes for creamier, softer texture with less chew
  • Apple → pear: Dice pears same size as apples; they soften faster so sauté only 4-5 minutes instead of 7
  • Milk → almond milk or oat milk: Thins the porridge slightly; add extra 2-3 tablespoon milk at the end if too thick
  • Maple syrup → brown sugar: Use 2 tablespoon brown sugar instead of 3 tablespoon syrup; stir in while farro is hot so sugar dissolves completely

Steel-Cut Oats

Works for: Creamier texture, faster cook time, familiar breakfast flavor

Skip if: You want chewy bite and nutty grain taste instead of porridge texture

Whole Grain Farro

Works for: Higher fiber, more nutrients, deeper nutty flavor

Skip if: You need it done in 30 minutes - whole farro takes 50-60 minutes to soften

Plant-Based Milk

Works for: Dairy-free diets, lighter texture, subtle flavor variations

Skip if: You want thick, creamy porridge - plant milks thin out more as farro absorbs liquid

Instructions

Total active time is about 15 minutes - the rest is simmering while you prep toppings. Cool and crunchy, simple homemade coleslaw resets your palate between bites of warm, sweet farro.

  1. Toast the farro: Heat medium saucepan over medium heat, add farro, toast 3-4 minutes stirring occasionally until grains smell nutty and darken slightly
  2. Simmer the porridge: Add milk and salt to toasted farro, bring to boil, reduce heat to low, cover, simmer 25-30 minutes stirring once or twice until farro is tender but still chewy
  3. Sauté the apples: While farro cooks, heat butter in skillet over medium heat, add diced apples, cook 5-7 minutes stirring often until edges caramelize and apples soften but hold shape
  4. Add cinnamon and sweetener: Stir cinnamon into cooked apples, remove from heat, stir maple syrup and vanilla (if using) into finished farro
  5. Combine and serve: Fold sautéed apples into farro or spoon on top, serve warm with extra maple syrup or nuts if desired
Golden Rule
Don't stir farro constantly like risotto - check it once or twice during cooking to prevent sticking, but too much stirring releases starch and makes it gummy

What to Serve With It

Breakfast farro feels substantial on its own, but a protein side turns it into a full meal. Most people skip creamy buttery potato side, but it balances the meal. Need more ideas? Check out delicious sweet dish planning for savory and sweet combinations that work for brunch spreads.

Side Dish Prep Why It Works How to Serve
Scrambled eggs Easy Adds protein and savory contrast to sweet farro Cook eggs soft, serve alongside warm farro with salt and pepper
Plain yogurt Easy Adds cool creaminess and tang that cuts through maple sweetness Dollop on top of farro or swirl into porridge before serving
Fresh fruit Easy Adds juicy texture and brightness without extra cooking Slice berries, bananas, or citrus and arrange on top of farro
Spiced roasted nuts Medium Adds crunchy contrast and rich, toasted flavor Roast pecans or walnuts with cinnamon, sprinkle over each bowl
Maple-glazed sausage links Easy Adds savory-sweet meat that complements apple and cinnamon Pan-fry sausages, brush with maple syrup, serve on the side

Three ways to serve it:

  • Meal prep bowls: Portion farro into containers, store apples separately, reheat farro with splash of milk and top with warmed apples
  • Brunch spread: Set out warm farro with bowls of sautéed apples, nuts, yogurt, and maple syrup so guests build their own
  • Weekday breakfast: Make farro Sunday night, reheat single portions in microwave 1-2 minutes, top with fresh banana slices
Shortcut
Cook a double batch of farro on Sunday - it reheats better than oatmeal and stays chewy for 4 days in the fridge

Store and Reheat

Cooked farro thickens as it sits because the grains keep absorbing liquid. Store farro and apples in the same container or separately depending on how you'll reheat them. We keep a batch ready for nights like this - simple reheating with a splash of milk brings back the creamy texture.

Method Time Best For
🍳 Stovetop 5-7 min over low heat Keeps texture creamy; add 2-3 tablespoon milk per serving and stir often
📦 Microwave 1-2 min on 50% power Fast single portions; cover with damp paper towel, stir halfway through
🔥 Oven 10-15 min at 325°F Reheating multiple servings; cover with foil, add splash of milk before heating

For best results when storing:

  • Cool farro quickly by spreading in shallow container before refrigerating - prevents sogginess and keeps grains from clumping
  • Store in airtight container in fridge up to 4 days; farro thickens as it sits, so expect to add liquid when reheating
  • Freeze portions in freezer bags up to 1 month; press out air, lay flat to freeze, thaw overnight in fridge before reheating
  • Store sautéed apples separately if meal prepping - reheat apples in microwave 30 seconds and spoon over reheated farro for fresh texture
  • Add extra milk, water, or plant milk when reheating - start with 2 tablespoon per serving and stir in more if farro looks dry

Frequently Asked Questions

How long to cook farro for breakfast porridge?

Simmer pearled farro covered in milk for 25-30 minutes over low heat until grains are tender but still chewy. Whole grain farro takes 50-60 minutes and needs more liquid.

Can I make breakfast farro ahead?

Cook farro up to 4 days ahead and store in the fridge. Reheat single portions in the microwave 1-2 minutes with a splash of milk, or warm on the stovetop over low heat stirring often.

What goes with apples and cinnamon farro?

Scrambled eggs add protein, plain yogurt adds cool tang, and roasted nuts add crunch. Maple-glazed sausage links or fresh berries also work for brunch spreads.

How do I know when farro is done but not mushy?

Bite a grain after 25 minutes - it should feel tender but still have slight chew, like al dente pasta. If grains are hard in the center, cook 5 more minutes and check again.

Can I use frozen apples in breakfast farro?

Thaw frozen apples first and drain excess liquid before sautéing, or they'll steam instead of caramelize. Frozen apples soften faster, so cook only 3-4 minutes instead of 7.

Breakfast Farro with Apples and Cinnamon served on a plate

Breakfast Farro with Apples and Cinnamon

No ratings yet
Breakfast Farro with Apples and Cinnamon features pearled farro toasted to bring out a nutty flavor, simmered in milk for a creamy texture but still chewy bite. The dish is topped with sautéed caramelized apples and warm cinnamon for a filling yet light meal perfect for meal prep or weekend brunch.
Print Recipe Pin Recipe
Prep Time 10 minutes mins
Cook Time 30 minutes mins
Total Time 40 minutes mins
Servings: 4 servings
Course: Breakfast
Cuisine: American
Ingredients Equipment Method Notes

Ingredients
  

  • 1 cup pearled farro toasted dry in saucepan
  • 2.5 cups milk or plant-based milk; add ¼ cup extra if plant milk used
  • 0.25 teaspoon salt
  • 2 medium apple diced into ½-inch pieces, use firm varieties
  • 1 tablespoon butter or oil, for sautéing apples
  • 1 teaspoon ground cinnamon
  • 3 tablespoons maple syrup or honey, added after cooking
  • 1 teaspoon vanilla extract optional, added after cooking

Equipment

  • Medium saucepan To toast and simmer the farro
  • Skillet For sautéing the apples
  • Measuring cups and spoons For measuring ingredients

Method
 

  1. Heat a medium saucepan over medium heat. Add pearled farro and toast dry for 3-4 minutes, stirring occasionally until the grains smell nutty and darken slightly.
    1 cup pearled farro
  2. Add milk and salt to the toasted farro. Bring to a boil, then reduce heat to low, cover, and simmer for 25-30 minutes, stirring once or twice until the farro is tender but still chewy.
    1 cup pearled farro, 2.5 cups milk, 0.25 teaspoon salt
  3. While farro cooks, heat butter in a skillet over medium heat. Add diced apples and cook for 5-7 minutes, stirring often until edges caramelize and apples soften but hold their shape.
    2 medium apple, 1 tablespoon butter
  4. Stir ground cinnamon into the cooked apples. Remove skillet from heat. Stir maple syrup and vanilla extract (if using) into the finished farro.
    1 teaspoon ground cinnamon, 3 tablespoons maple syrup, 1 teaspoon vanilla extract
  5. Fold the sautéed apples into the farro or spoon them on top. Serve warm with extra maple syrup or nuts if desired.
    2 medium apple, 3 tablespoons maple syrup

Notes

  • Toast farro dry for 3-4 minutes to bring out its natural nuttiness.
  • Simmer farro covered for 25-30 minutes without excessive stirring to avoid gummy texture.
  • Dice apples uniformly and sauté separately to caramelize edges and retain shape.

Tried this recipe?

Let us know how it was!

Pork Chops with Apples and Onions

March 17, 2026

When you need a hands-off dinner that works for weeknight meals or casual entertaining, pork chops with apples and onions delivers. One skillet, minimal cleanup, and enough caramelized sweetness to make plain mashed potatoes taste worthwhile.

Pork Chops with Apples and Onions served on a plate

Sear the chops at medium-high heat and the crust forms while the meat stays tender. The apples and onions cook in the same pan, soaking up the drippings and thyme.

Perfect for fall evenings when comfort food feels necessary but you don't want to babysit a stove.

QUICK SUMMARY

Pork chops with apples and onions is a one-skillet dinner where bone-in chops get seared until golden, then finished with caramelized onions and firm apple slices. The bone keeps the meat juicy while high heat creates a crust. Works for weeknight dinners or casual fall gatherings.

⏱️Total Time: 25-30 minutes including prep and rest time
🔥Critical First Step: Dry pork chops completely before searing for proper crust
⚠️Watch Out: Add apples last 5 minutes or they turn mushy

Table of Contents

Toggle
  • Why This Recipe Works
  • What You'll Need
    • Ingredient Details
  • Ingredient Swaps
  • What to Serve With It
  • Store and Reheat
  • Frequently Asked Questions
  • Pork Chops with Apples and Onions
    • Method 
    • Tried this recipe?

Why This Recipe Works

High heat sears the exterior while bone-in chops stay moist inside. Rich mains need something to cut through, and pork does exactly that. For a version that comes together quickly, a tender pork on the side builds flavor with similar browning techniques.

Quick Reference
⏱️
Prep Time
10 min
🔥
Cook Time
15-20 min
⏰
Total Time
25-30 min
🍽️
Servings
4 servings
📊
Difficulty
Medium
🏷️
Category
Main Dish
💡
Quick Tip
Sear pork chops before adding apples and onions
🎯
Best For
Weeknight | Casual entertaining

What makes this work:

  • Bone-in chops retain moisture during cooking - the bone acts as insulation and prevents overcooking while the exterior browns
  • Firm apples hold their shape - varieties like Granny Smith or Honeycrisp stay intact instead of turning to mush in the pan
  • Searing before deglazing creates layers - the crust forms first, then pan drippings get lifted with broth or cider for built-in sauce
  • Adding apples late preserves texture - they need only 5 minutes to soften slightly while maintaining structural integrity
  • Resting redistributes juices - 5-7 minutes off heat lets the meat reabsorb moisture instead of spilling it on the cutting board
Quick Tip
Preheat your cast iron skillet for 3-5 minutes before adding butter-the hot surface creates an immediate sear instead of steaming the meat.

What You'll Need

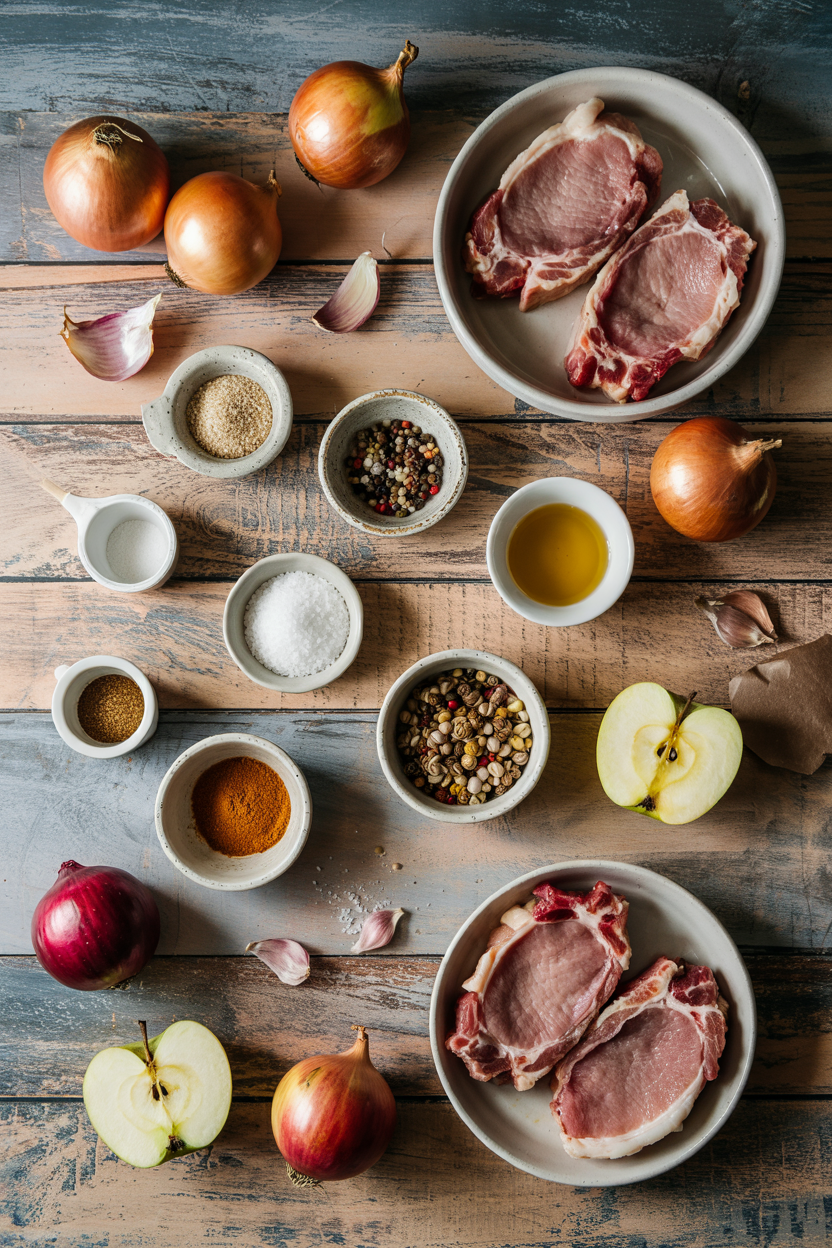
Ingredients for Pork Chops with Apples and Onions

Shopping for this takes 10 minutes in any grocery store. A good salad can make or break the plate. For a version that comes together quickly, this easy salad recipe adds freshness without competing with the main flavors.

🍗
Protein
  • 4 bone-in pork chops (1-inch thick)
🥬
Vegetables
  • 2 yellow onions (sliced)
  • 2 cloves garlic (minced)
🍋
Fruit
  • 2 firm apples (Granny Smith or Honeycrisp, sliced ¼-inch thick)
🫙
Pantry
  • 2 tablespoons butter
  • 1 tablespoon olive oil
  • ½ cup chicken broth or apple cider
  • 2 sprigs fresh thyme
  • Salt and black pepper

Ingredient Details

  • Bone-in pork chops
    Look for chops at least 1-inch thick-thinner cuts dry out before the apples and onions finish cooking.
  • Firm apples
    Granny Smith holds shape and adds tartness; Honeycrisp stays crisp with balanced sweetness. Avoid Red Delicious or McIntosh-they turn mushy.
  • Yellow onions
    Yellow onions caramelize better than white or red varieties and add sweet-savory depth without overpowering the pork.
  • Butter
    Butter browns and enriches the pan sauce-olive oil alone won't give the same richness, but you can split the fat between both.
  • Fresh thyme
    Fresh thyme releases more aroma than dried and complements both pork and apples without tasting medicinal.
  • Chicken broth or apple cider
    Broth makes it savory; cider adds sweetness. Either works for deglazing-use what you have or prefer.
  • Instant-read thermometer
    Pork is done at 145°F internal temperature-guessing leads to dry meat or undercooking.

Ingredient Swaps

You can adjust this based on what's in your fridge without breaking the recipe. The pork works best when it hits the table at the same time as the main. We keep a batch ready for nights like this-something creamy like potatoes soaks up the pan sauce without adding extra steps.

Common swaps that work:

  • Boneless pork chops instead of bone-in - cook 2-3 minutes less per side and watch temperature closely to avoid drying out
  • Pears instead of apples - use firm pears like Bosc; they're softer and sweeter but still hold shape if sliced thick
  • Shallots instead of yellow onions - milder flavor and faster caramelization in about half the time
  • Ghee instead of butter - higher smoke point prevents burning during the sear; adds nutty richness

Bone-In Chops

Works for: staying juicy during longer cooking; better flavor from bone

Skip if: you need dinner in under 20 minutes total

Boneless Chops

Works for: faster cooking; easier to slice and serve

Skip if: you tend to overcook meat-these dry out fast

Instead OfUseRatio
ButterOlive oil1:1 (slightly less rich)
Apple ciderChicken broth1:1 (more savory tone)
Fresh thymeDried thyme1 teaspoon dried = 1 tablespoon fresh
Garlic clovesGarlic powder⅛ teaspoon powder = 1 clove

Instructions

You need about 30 minutes from start to plating. Potatoes adds the contrast this plate needs, but timing matters. For a version that comes together quickly, easy potato side crisps in the air fryer while the pork rests.

  1. Pat pork chops dry with paper towels and season both sides with salt and black pepper. Let them sit at room temperature for 5 minutes while you heat a cast iron skillet over medium-high heat for 3-5 minutes. The surface should feel hot when you hover your hand 2 inches above it.

  2. Add butter and olive oil to the hot skillet and swirl to coat. Once the butter stops foaming (about 30 seconds), add pork chops with at least 1 inch of space between them. Sear without moving for 3-4 minutes until a golden crust forms, then flip and cook another 3-4 minutes. Remove chops to a plate when they reach 140°F internal temperature-they'll climb to 145°F while resting.

  3. Lower heat to medium and add sliced onions to the same skillet. Stir to coat in the drippings and cook 5-6 minutes, stirring every minute, until softened and translucent with golden edges. Add minced garlic and cook 30 seconds until fragrant.

  4. Add chicken broth or apple cider and fresh thyme sprigs to the pan. Scrape the bottom with a wooden spoon to lift browned bits. Simmer 2 minutes until liquid reduces by half, then add sliced apples. Cook 3-4 minutes, turning apples once, until they soften slightly but still hold their shape.
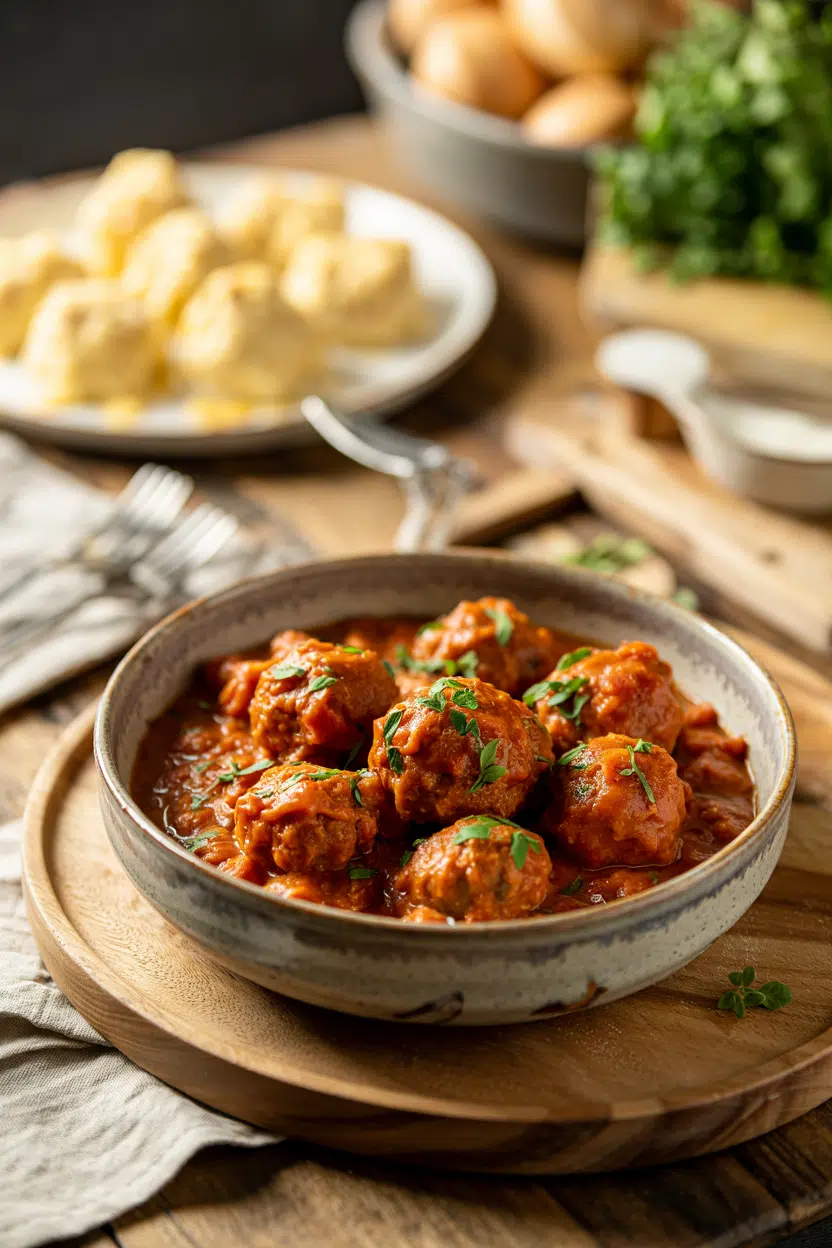
  5. Return pork chops to the skillet and spoon apples and onions over the top. Cook 1-2 minutes to warm the meat through. Remove from heat, discard thyme sprigs, and let rest 5 minutes before serving.

Golden Rule
Don't skip the rest-cutting into pork chops immediately releases all the juices onto the plate instead of keeping them in the meat.

What to Serve With It

This needs something to soak up the pan sauce and balance the sweetness. A dollop of bread takes each bite somewhere more interesting. For a version that comes together quickly, something creamy like bread adds richness without extra pans. You can also check pork souvlaki meal planning ideas for more ways to round out a pork-centered dinner.

Side Dish Prep Why It Works How to Serve
Mashed potatoes Easy Creamy texture soaks up pan sauce; mild flavor doesn't compete with apples Spoon sauce directly over potatoes on each plate
Steamed green beans Easy Fresh crispness cuts through richness; bright green adds color contrast Toss with butter and serve alongside pork and apples
Roasted Brussels sprouts Medium Earthy, slightly bitter flavor balances sweet apples and caramelized onions Roast with olive oil and salt; plate under or beside pork chops
Buttered egg noodles Easy Simple base absorbs sauce without adding competing flavors Boil noodles, toss with butter, serve under pork and apples
Wild rice pilaf Medium Nutty, hearty texture feels upscale for casual entertaining Cook rice with broth; serve alongside pork for autumn dinners

Three ways to serve it:

  • For weeknight dinners: Plate mashed potatoes first, add pork chop on top, spoon apples and onions over everything with extra sauce on the side
  • For casual entertaining: Arrange sliced pork over wild rice pilaf, pile apples and onions on top, garnish with fresh thyme sprigs
  • For meal prep: Pack pork, apples, and onions in one container with rice or noodles in a separate container to prevent sogginess
Best Pick
Mashed potatoes win for weeknights-they cook while the pork sears and taste better with pan sauce than without it.

Store and Reheat

Leftovers keep 3-4 days in the fridge if stored properly. Transfer everything to a shallow airtight container within 2 hours of cooking so it cools quickly. Freeze portions in freezer-safe containers for up to 2 months-separate pork from apples and onions if possible since the fruit texture changes more noticeably after freezing.

Method Time Best For
🍳 Stovetop 5-7 min over medium heat Preserving texture; heating evenly without drying out
🔥 Oven 15 min at 325°F covered with foil Reheating multiple servings at once without scorching
📦 Microwave 1-2 min at 50% power Speed when texture doesn't matter; single portions only

For best results when storing:

  • Add a splash of broth before reheating - leftover pork dries out easily; extra liquid keeps it moist during warming
  • Reheat pork and apples separately if possible - pork needs more time to warm through; apples turn mushy with too much heat
  • Cover tightly when storing in the fridge - exposure to air dries out the meat and turns onions rubbery within 24 hours
  • Freeze in single-serving portions - smaller containers thaw faster and let you reheat only what you need
  • Skip the microwave for best texture - stovetop or oven reheating preserves the crust and prevents rubbery pork

Frequently Asked Questions

How long to cook pork chops with apples and onions at 350°F?

At 350°F in the oven, bone-in pork chops take 20-25 minutes after an initial stovetop sear. Sear chops in an oven-safe skillet for 2-3 minutes per side, add apples and onions around the meat, then transfer the whole pan to the oven and bake until pork reaches 145°F internal temperature.

Can I make pork chops with apples and onions ahead and reheat?

Yes, but cook the pork to 140°F instead of 145°F if you plan to reheat it later-the meat will finish cooking during reheating and stay juicy. Store pork separate from apples and onions if possible, then reheat on the stovetop with a splash of broth to prevent drying out.

What sides pair best with pork chops with apples and onions?

Mashed potatoes or buttered egg noodles work best because they soak up the pan sauce without competing with the sweet-savory flavors. Steamed green beans or roasted Brussels sprouts add fresh contrast, and wild rice pilaf makes it feel more upscale for entertaining.

How do I know when pork chops with apples and onions are done cooking?

Use an instant-read thermometer inserted into the thickest part of the chop away from the bone-it should read 145°F. The meat will look slightly pink in the center but feel firm when pressed, and juices should run clear when you cut into it after resting.

Can I use boneless pork chops instead of bone-in for this recipe?

Yes, but reduce cooking time by 2-3 minutes per side and watch the temperature closely-boneless chops dry out faster than bone-in. Sear them just until they hit 140°F, then let them rest to reach 145°F so they stay tender.

Pork Chops with Apples and Onions served on a plate

Pork Chops with Apples and Onions

No ratings yet
Pork chops with apples and onions is a simple one-skillet dinner featuring bone-in chops seared to golden perfection with caramelized onions and firm apple slices. The bone keeps the meat juicy while the apples add a subtle sweetness, perfect for easy weeknight dinners or casual fall gatherings.
Print Recipe Pin Recipe
Prep Time 10 minutes mins
Cook Time 20 minutes mins
Total Time 30 minutes mins
Servings: 4 servings
Course: Dinner, Main Dish
Cuisine: American, Fall
Ingredients Equipment Method Notes

Ingredients
  

  • 4 bone-in pork chops 1-inch thick
  • 2 yellow onions sliced
  • 2 cloves garlic minced
  • 2 tablespoons butter
  • 1 tablespoon olive oil
  • 0.5 cup chicken broth or apple cider
  • 2 sprigs fresh thyme
  • salt
  • black pepper
  • 2 firm apples Granny Smith or Honeycrisp, sliced ¼-inch thick

Equipment

  • Cast iron skillet Used for searing pork chops and cooking apples and onions
  • Instant-read thermometer Check internal temperature of pork chops
  • Wooden spoon To scrape browned bits during deglazing
  • Paper towels To dry pork chops before seasoning

Method
 

  1. Pat pork chops dry with paper towels and season both sides with salt and black pepper. Let them sit at room temperature for 5 minutes while you heat a cast iron skillet over medium-high heat for 3-5 minutes until hot.
    4 bone-in pork chops, salt, black pepper
  2. Add butter and olive oil to the hot skillet and swirl to coat. Once butter stops foaming (about 30 seconds), add pork chops with at least 1 inch space between them. Sear without moving for 3-4 minutes until golden crust forms, then flip and cook another 3-4 minutes. Remove chops to a plate when they reach 140°F internal temperature; they will rise to 145°F while resting.
    4 bone-in pork chops, 2 tablespoons butter, 1 tablespoon olive oil
  3. Lower heat to medium and add sliced onions to the skillet. Stir to coat in drippings and cook for 5-6 minutes, stirring every minute, until softened and golden edged. Add minced garlic and cook for 30 seconds until fragrant.
    2 yellow onions, 2 cloves garlic
  4. Add chicken broth or apple cider and fresh thyme sprigs. Scrape bottom of pan with wooden spoon to lift browned bits. Simmer for 2 minutes until liquid reduces by half.
    0.5 cup chicken broth or apple cider, 2 sprigs fresh thyme
  5. Add sliced apples and cook for 3-4 minutes, turning once, until apples soften slightly but still hold shape. Return pork chops to skillet and spoon apples and onions over them. Cook 1-2 minutes to warm through. Remove from heat, discard thyme sprigs, and let rest 5 minutes before serving.
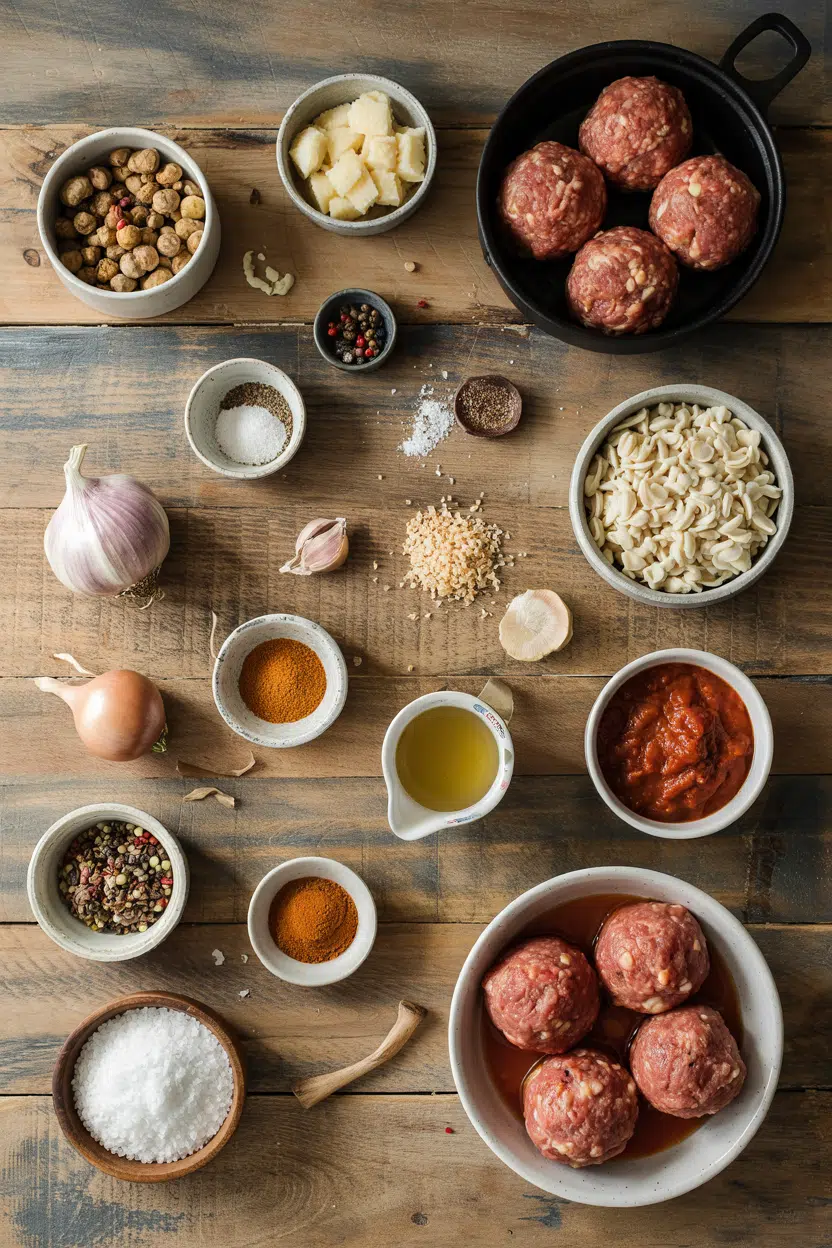
    4 bone-in pork chops, 2 firm apples

Notes

  • Dry pork chops thoroughly before searing to develop a good crust.
  • Add apples at the end to maintain their texture and avoid mushiness.
  • Let pork rest after cooking to redistribute juices and keep meat moist.

Tried this recipe?

Let us know how it was!

Shrimp Fried Rice with Scallions

March 17, 2026

You need 20 minutes and one hot pan. No marinating, no sauce prep, no stir-fry guesswork.

Shrimp Fried Rice with Scallions served on a plate

Day-old rice fries up crispy while shrimp stays tender. The key is cooking everything separately, then tossing it together at the end so nothing overcooks.

This is what we make on Tuesdays when the fridge feels bare but we still want something that tastes intentional. Works for meal prep too.

QUICK SUMMARY

Shrimp fried rice with scallions delivers fluffy rice, tender shrimp, and fresh crunch in 20 minutes. The trick is using day-old rice and cooking shrimp separately so they stay opaque and firm. High heat and quick moves prevent soggy, bland results.

⏱️Time Reality: 10 minutes prep, 10 minutes active cooking, no resting required
🔥First Move: Heat pan to 400°F before adding oil for quick sear
⚠️Watch Out: Fresh rice turns mushy - refrigerate cooked rice uncovered 1-2 hours before using

Table of Contents

Toggle
  • Why This Recipe Works
  • What You'll Need
    • Ingredient Details
  • Ingredient Swaps
  • What to Serve With It
  • Store and Reheat
  • Frequently Asked Questions
  • Shrimp Fried Rice with Scallions
    • Method 
    • Tried this recipe?

Why This Recipe Works

Day-old rice has dried out just enough to fry without clumping. For a seafood twist when you want variety, this related tuna recipe uses similar high-heat techniques - just swap the protein and adjust timing by 2 minutes.

Quick Reference
⏱️
Prep Time
10 min
🔥
Cook Time
10 min
⏰
Total Time
20 min
🍽️
Servings
4 servings
📊
Difficulty
Easy
🏷️
Category
Main Dish
💡
Quick Tip
Use day-old rice for best texture
🎯
Best For
Weeknight | Meal prep

What makes it work:

  • High heat renders moisture quickly so rice crisps instead of steams
  • Scrambling eggs separately keeps them fluffy instead of rubbery
  • Cooking shrimp 1-2 minutes per side until opaque prevents the chewy texture
  • Adding soy sauce gradually lets you taste and adjust before oversalting
  • Tossing scallions in the last 30 seconds preserves their snap
Quick Tip
Refrigerate cooked rice uncovered on a tray for 1-2 hours before storing airtight - this dries the grains just enough for frying.

What You'll Need

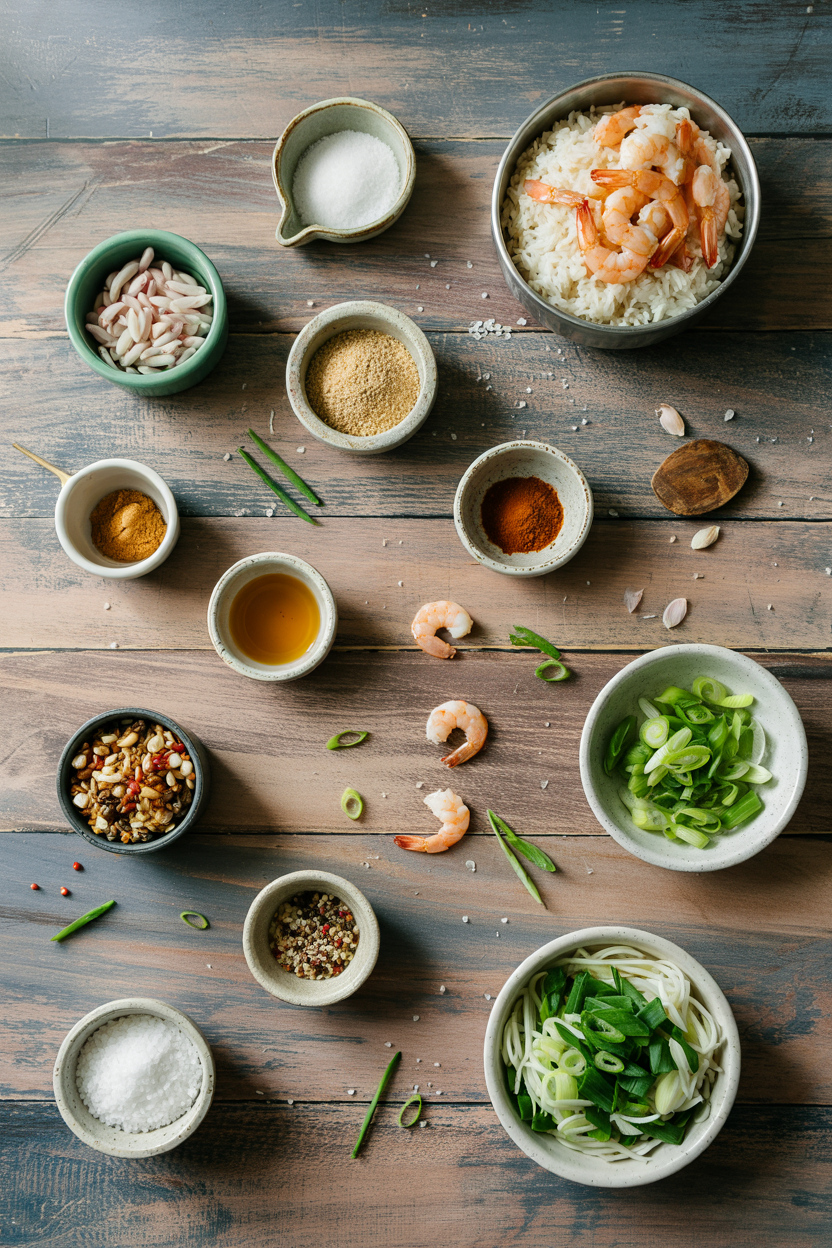
Ingredients for Shrimp Fried Rice with Scallions

Most of this lives in your pantry already. Rich mains need something to cut through, and coleslaw does exactly that - for a version that comes together quickly, crisp coleslaw recipe adds crunch with minimal chopping.

🦐
Protein
  • 1 lb shrimp (medium or large, peeled and deveined)
🍜
Base
  • 3 cups day-old cooked rice (jasmine or long grain)
  • 2 eggs
🧄
Aromatics
  • 4-5 scallions (sliced, whites and greens separated)
  • 3 cloves garlic (minced)
🥢
Seasonings
  • 3 tablespoon soy sauce
  • 2 tablespoon vegetable or sesame oil
  • ½ teaspoon white pepper (optional)
🥬
Add-ins
  • ½ cup frozen peas (optional)
  • ½ cup diced carrots (optional)

Ingredient Details

  • Day-old rice
    Fresh rice is too moist and causes soggy fried rice - refrigerate cooked rice uncovered 1-2 hours to dry out the grains.
  • Shrimp
    Medium or large shrimp both work - cook separately until opaque and slightly firm, then add back at the end.
  • Scallions
    Use both white and green parts, but add greens in the last 30 seconds to keep their crunch and brightness.
  • Soy sauce
    Add gradually and taste between additions - too much makes the dish salty and dark.
  • Vegetable or sesame oil
    Vegetable oil handles high heat without smoking; sesame oil adds toasted flavor but burns easily, so use sparingly.
  • Eggs
    Scramble 20 seconds on medium heat, remove before fully set - they finish cooking when tossed back in.
  • White pepper
    Traditional seasoning with earthy bite - black pepper works too, but the flavor is sharper.

Ingredient Swaps

Swap shrimp for chicken or tofu if seafood isn't your thing. A good coleslaw can make or break the plate - for a version that comes together quickly, simple coleslaw recipe balances richness with tangy crunch.

Four swaps that work:

  • Soy sauce → tamari: Gluten-free with similar umami depth. Use the same amount but taste as you go - tamari can be slightly saltier.
  • Shrimp → chicken or tofu: Changes cooking time by 3-4 minutes. Dice chicken small and cook through before setting aside; press tofu dry and sear until golden.
  • Vegetable oil → sesame oil: Adds toasted, nutty flavor. Use half vegetable, half sesame to avoid burning at high heat.
  • Day-old rice → fresh rice: Risk of mushy texture. Spread fresh rice on a sheet pan, cool 15 minutes, then refrigerate uncovered 1 hour before frying.

Fresh Rice

Works for: Last-minute cooking when you forgot to prep rice ahead

Skip if: You want fluffy, separated grains - fresh rice clumps and steams instead of frying

Day-Old Rice

Works for: Best texture with crispy edges and fluffy grains that don't stick

Skip if: You need dinner tonight and have no leftover rice - use the fresh rice cooling trick instead

Instructions

Scramble eggs first, cook shrimp next, then fry the rice in batches. Most people skip fries, but it balances the meal - for a version that comes together quickly, hot salty fries add crunch with minimal hands-on time.

  1. Scramble the eggs: Heat 1 tablespoon oil in a large skillet or wok over medium heat. Pour in beaten eggs, scramble 20 seconds until just set but still soft, then transfer to a plate. The eggs finish cooking when you toss them back in later.
  2. Cook the shrimp: Add another 1 tablespoon oil to the same pan over high heat. Add shrimp in a single layer, cook 1-2 minutes per side until opaque and slightly firm. Remove to the same plate as the eggs.
  3. Fry the rice: Add remaining oil, then toss in day-old rice, breaking up clumps with a spatula. Let it sit undisturbed 1-2 minutes to crisp the bottom, then stir and repeat. Add scallion whites, garlic, carrots, and peas (if using), stir-fry 2 minutes until fragrant.
  4. Season and combine: Pour soy sauce around the edges of the pan, stir 1 minute to coat rice evenly. Taste and add more soy sauce or white pepper if needed. Return eggs and shrimp to the pan, toss 30 seconds to warm through.
  5. Finish with scallions: Toss in scallion greens, stir 30 seconds, then immediately transfer to plates. Serve hot while the scallions still have snap.
Golden Rule
Cook rice in batches if your pan feels crowded - overcrowding steams instead of fries, leaving you with soft, sticky rice.

What to Serve With It

Fried rice fills you up fast, so pair it with something light or crunchy. The corn on the cob works best when it hits the table at the same time as the main - when planning your grilled salmon dinner, use the same side strategy to balance richness with brightness.

Side Dish Prep Why It Works How to Serve
Steamed broccoli Easy Light, healthy complement that doesn't compete with rice Steam 5 minutes, toss with sesame oil
Cucumber salad Easy Refreshing contrast cuts through the richness Slice thin, toss with rice vinegar and sesame seeds
Miso soup Easy Warm, umami-rich starter that sets the meal tone Simmer miso paste with dashi, add tofu cubes
Edamame Easy Easy, protein-packed snack with salty crunch Boil 5 minutes, sprinkle with coarse salt
Asian slaw Medium Bright and crunchy with tangy dressing Shred cabbage, toss with ginger-soy vinaigrette

Three ways to serve it:

  • Weeknight bowl: Top with fried egg, drizzle with chili garlic sauce, serve with steamed broccoli on the side
  • Meal prep lunch: Pack in containers with cucumber salad and edamame for grab-and-go portions
  • Quick dinner: Serve family-style with miso soup and pickled vegetables
Shortcut
Skip chopping vegetables - use frozen peas and pre-shredded carrots to cut prep time in half.

Store and Reheat

Fried rice holds up better than most stir-fries because the rice is already cooked. Most people skip dressing, but it balances the meal - for a version that comes together quickly, easy dressing side adds tangy richness with just a whisk and a bowl.

Method Time Best For
🍳 Stovetop 3-5 min Maintains texture if stirred frequently over medium heat
📦 Microwave 1-2 min Quick reheating but may soften rice - cover with damp paper towel
🔥 Oven 10-12 min at 350°F Larger portions or baked texture - spread in shallow dish, cover with foil

For best results when storing:

  • Cool fried rice to room temperature within 30 minutes to prevent bacterial growth
  • Store in shallow airtight containers so rice cools evenly in the fridge
  • Refrigerate up to 3-4 days - rice dries out after that and loses texture
  • Freeze in portions up to 1 month, but shrimp may turn rubbery when thawed
  • Reheat only once - reheating multiple times makes shrimp tough and rice mushy

Frequently Asked Questions

How long to cook shrimp fried rice at high heat?

Cook shrimp 1-2 minutes per side until opaque and slightly firm, then remove. Fry rice 3-4 minutes total, letting it sit undisturbed between stirs to crisp the bottom.

Can I make shrimp fried rice ahead and reheat later?

Yes, refrigerate up to 3-4 days in airtight containers. Reheat on the stovetop 3-5 minutes over medium heat, stirring frequently to restore texture.

What goes well as a side with shrimp fried rice?

Cucumber salad, steamed broccoli, miso soup, or edamame work best. Pair with something light and crunchy to cut through the richness.

How do I know when shrimp is properly cooked in fried rice?

Shrimp turns opaque with a slight pink-orange color and feels firm when pressed. Cook 1-2 minutes per side - overcooking makes them rubbery.

Can I use frozen shrimp for shrimp fried rice and how?

Yes, thaw frozen shrimp completely in the fridge overnight or under cold running water 5-10 minutes. Pat dry with paper towels before cooking to prevent excess moisture.

Shrimp Fried Rice with Scallions served on a plate

Shrimp Fried Rice with Scallions

No ratings yet
Shrimp fried rice with scallions delivers fluffy rice, tender shrimp, and fresh crunch in just 20 minutes. The key is using day-old rice and cooking shrimp separately to keep it tender and flavorful. High heat and quick cooking prevent soggy, bland results.
Print Recipe Pin Recipe
Prep Time 10 minutes mins
Cook Time 10 minutes mins
Total Time 20 minutes mins
Servings: 4 servings
Course: Main Dish
Cuisine: Asian-Inspired
Ingredients Equipment Method Notes

Ingredients
  

  • 1 lb shrimp medium or large, peeled and deveined
  • 3 cups cooked rice day-old, jasmine or long grain
  • 2 eggs
  • 4-5 scallions sliced, whites and greens separated
  • 3 cloves garlic minced
  • 3 tablespoon soy sauce
  • 2 tablespoon vegetable or sesame oil
  • 0.5 teaspoon white pepper optional
  • 0.5 cup frozen peas optional
  • 0.5 cup diced carrots optional

Equipment

  • Large skillet or wok Used for scrambling eggs, cooking shrimp, and frying rice
  • Spatula Used for stirring and breaking up clumps of rice
  • Plate To hold cooked eggs and shrimp

Method
 

  1. Heat 1 tablespoon oil in a large skillet or wok over medium heat. Pour in beaten eggs and scramble for 20 seconds until just set but still soft. Transfer the eggs to a plate; they will finish cooking when tossed back in later.
    2 eggs, 2 tbsp vegetable or sesame oil
  2. Add another 1 tablespoon oil to the same pan and increase heat to high. Add shrimp in a single layer and cook for 1-2 minutes per side until opaque and slightly firm. Remove the shrimp to the plate with the eggs.
    1 lb shrimp, 2 tbsp vegetable or sesame oil
  3. Add remaining oil to the pan. Toss in the day-old rice, breaking up clumps with a spatula. Let the rice sit undisturbed for 1-2 minutes to crisp the bottom, then stir and repeat. Add scallion whites, garlic, diced carrots, and peas (if using), and stir-fry for 2 minutes until fragrant.
    3 cups cooked rice, 4-5 scallions, 3 cloves garlic, 0.5 cup frozen peas, 0.5 cup diced carrots, 2 tbsp vegetable or sesame oil
  4. Pour soy sauce around the edges of the pan, stir for 1 minute to coat the rice evenly. Taste and adjust by adding more soy sauce or white pepper if needed. Return the cooked eggs and shrimp to the pan and toss for 30 seconds to warm through.
    3 tbsp soy sauce, 0.5 tsp white pepper, 1 lb shrimp, 2 eggs
  5. Toss in the scallion greens, stir for 30 seconds, then immediately transfer the fried rice to plates. Serve hot while the scallions still have a fresh snap.
    4-5 scallions

Notes

  • Use day-old rice refrigerated uncovered to achieve crispy, non-mushy fried rice texture.
  • Cook shrimp quickly over high heat to prevent rubbery texture; remove promptly when opaque.
  • Add scallion greens at the end to preserve crunch and freshness.

Tried this recipe?

Let us know how it was!

Baked Eggs with Spinach and Feta

March 16, 2026

When you need a hands-off breakfast that works for lazy weekends or weekday meal prep, baked eggs with spinach and feta delivers. One dish, minimal cleanup, and enough tangy feta to make plain toast taste worthwhile.

Baked Eggs with Spinach and Feta served on a plate

Bake the eggs at 350°F and the whites set while the yolks stay slightly runny. The sautéed spinach does all the flavor work without adding extra moisture.

Perfect for brunch gatherings when cooking feels like a chore or for meal-prepping high-protein breakfasts that reheat well.

QUICK SUMMARY

Baked eggs with spinach and feta combine sautéed greens with crumbled cheese and whole eggs in one dish. The key is removing moisture from the spinach before baking so the eggs set properly without turning watery. Works for brunch plates or make-ahead breakfast bowls that reheat in minutes.

⏱️Time Reality: 25-30 minutes total, mostly hands-off baking
🔥First Move: Sauté spinach 3-4 minutes until dry, not just wilted
⚠️Watch Out: Feta is salty-season lightly before baking, adjust after tasting

Table of Contents

Toggle
  • Why This Recipe Works
  • What You'll Need
    • Ingredient Details
  • Ingredient Swaps
  • What to Serve With It
  • Store and Reheat
  • Frequently Asked Questions
  • Baked Eggs with Spinach and Feta
    • Method 
    • Tried this recipe?

Why This Recipe Works

Sautéing the spinach before baking removes excess moisture that would otherwise make the eggs watery. For a version that comes together quickly, a crisp green salad adds freshness without extra cooking time.

Quick Reference
⏱️
Prep Time
10 min
🔥
Cook Time
15-20 min
⏰
Total Time
25-30 min
🍽️
Servings
2-4 servings
📊
Difficulty
Easy
🏷️
Category
Breakfast | Brunch
💡
Quick Tip
Use fresh spinach and room-temp eggs.
🎯
Best For
Weeknight | Meal prep | Brunch

What makes this work:

  • Room temperature eggs bake evenly without cracking from temperature shock
  • Pre-sautéed spinach releases moisture before eggs go in, keeping the dish from turning soupy
  • Crumbled feta distributed throughout adds pockets of salty tang in every bite
  • 350°F oven temperature sets the whites without overcooking the yolks
  • Light-colored baking dish prevents edges from browning too fast or burning
Quick Tip
Drain sautéed spinach well using a sieve or paper towel-extra moisture ruins the texture.

What You'll Need

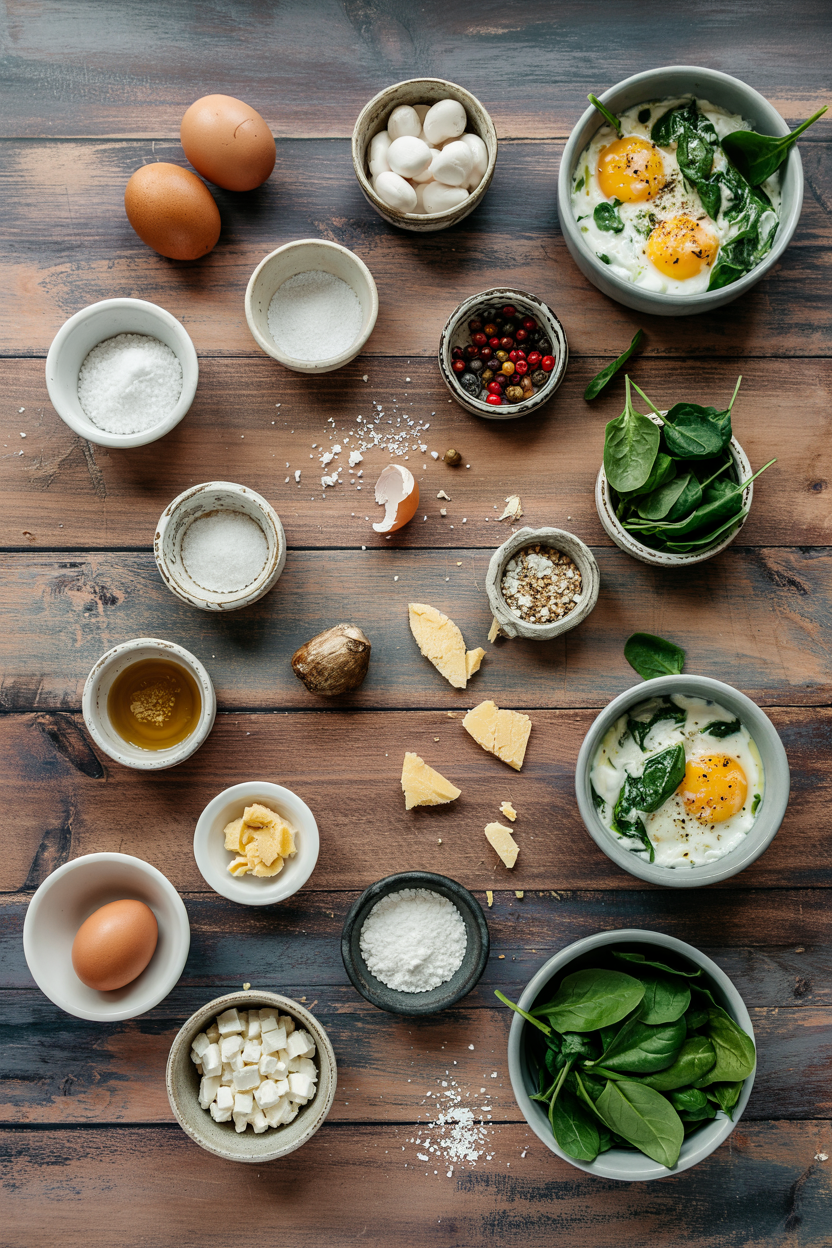
Ingredients for Baked Eggs with Spinach and Feta

Shopping is simple: eggs, fresh spinach, feta, olive oil, garlic, and basic seasonings. A good bake can make or break the plate. For a version that comes together quickly, a tender bake on the side adds protein without extra prep work.

🥚
Eggs & Dairy
  • Eggs (room temperature)
  • Feta cheese (crumbled)
🥬
Vegetables
  • Fresh spinach
  • Onion (optional)
🧄
Aromatics & Seasonings
  • Garlic
  • Olive oil
  • Salt
  • Black pepper
🌿
Herbs & Optional
  • Oregano or dill
  • Lemon juice (optional)

Ingredient Details

  • Fresh Spinach
    Choose vibrant green leaves without wilting; sauté until dry to prevent watery eggs
  • Feta Cheese
    Use block feta and crumble yourself for better texture; pre-crumbled works but can be drier
  • Eggs
    Room temperature eggs bake evenly; cold eggs crack more easily and cook unevenly
  • Olive Oil
    Use regular olive oil for sautéing; save extra virgin for finishing or drizzling
  • Garlic
    Fresh garlic adds better flavor than powder; don't let it brown or it turns bitter
  • Herbs
    Oregano and dill work best; add at the end to keep them bright and fresh
  • Lemon Juice
    Optional but adds brightness that balances the salty feta; squeeze fresh for best results

Ingredient Swaps

Frozen spinach works if you thaw and squeeze it completely dry first. The tomatoes works best when it hits the table at the same time as the main. For a version that comes together quickly, creamy tomatoes recipe adds similar Mediterranean flavors without changing the technique.

Common swaps that work:

  • Use frozen spinach instead of fresh-thaw completely, squeeze dry, then sauté to remove all moisture (budget-friendly, year-round option)
  • Swap feta for goat cheese for creamier texture and milder flavor without changing baking time
  • Replace olive oil with butter for richer flavor but slightly less fruity taste
  • Use garlic powder (½ teaspoon) if you don't have fresh garlic-milder but still flavorful
Instead OfUseRatio
Fresh spinachFrozen spinach (thawed, drained)1:1 by volume
Feta cheeseGoat cheese or ricotta1:1
Olive oilButter1:1
EggsEgg whites only2 whites per 1 whole egg
Black pepperRed pepper flakesUse ½ amount
OnionShallot1:1

Instructions

You'll spend 10 minutes prepping and sautéing, then the oven does the rest. Rich mains need something to cut through, and dare does exactly that. For a version that comes together quickly, a creamy dare on the side adds nutty richness without extra cooking time.

  1. Preheat oven to 350°F. Bring eggs to room temperature while you prep the spinach-cold eggs crack easily and bake unevenly.

  2. Heat 2 tablespoons olive oil in a skillet over medium heat. Add minced garlic and cook 30 seconds until fragrant but not browned. Toss in fresh spinach and sauté 3-4 minutes, stirring often, until completely wilted and most moisture has evaporated. Drain any excess liquid using a sieve or paper towel.

  3. Transfer spinach to a light-colored oven-safe baking dish or divide among ramekins. Crumble feta evenly over the top-don't over-salt since feta is already salty. Season lightly with black pepper and herbs if using.

  4. Crack eggs directly over the spinach. Space them evenly if using a larger dish or crack one per ramekin. Drizzle with a small amount of olive oil if desired.

  5. Bake 15-20 minutes until whites are set but yolks still jiggle slightly. Check at 15 minutes by gently shaking the dish-whites should be opaque and firm, yolks should move slightly but not be liquid. Let rest 2-3 minutes before serving to finish setting.

Golden Rule
Sauté spinach until most moisture evaporates-wet greens make watery eggs every time.

What to Serve With It

You need something to soak up the runny yolks and balance the salty feta. Cool and crunchy, coleslaw resets your palate between bites. For a version that comes together quickly, crunchy homemade coleslaw recipe adds crisp freshness without extra cooking time. For more pairing ideas, check out easy omelette dinner nights.

Side DishPrepWhy It WorksHow to Serve
Toasted Whole Grain BreadEasyAdds crunch and soaks up runny yolk perfectlyToast and serve with butter alongside eggs
Mixed Green SaladEasyLight freshness balances richness of eggs and fetaToss greens with lemon vinaigrette, serve on the side
Roasted Cherry TomatoesEasySweet acidity complements salty feta and creamy eggsRoast while eggs bake, scatter over top or serve alongside
Sliced AvocadoEasyAdds creamy texture and healthy fats without cookingSlice and arrange on plate with eggs
Warm Pita BreadEasyEasy handheld option matching Mediterranean flavorsWarm in oven last 2 minutes, serve for scooping

Three ways to serve it:

  • For brunch: Serve with toasted bread, roasted tomatoes, and a simple green salad for a complete Mediterranean-style plate
  • For meal prep: Divide into individual portions, pair with golden roasted potatoes, and reheat throughout the week
  • For quick weeknight breakfast: Keep it simple with sliced avocado and warm pita for scooping runny yolks
Best Pick
Toasted whole grain bread works best-crusty exterior soaks up yolk without getting soggy.

Store and Reheat

Baked eggs keep 3-4 days in the fridge but yolks firm up when stored. Store in shallow airtight containers to prevent absorbing fridge odors. Freeze portioned servings up to 1 month if you don't mind firmer yolks after reheating.

MethodTimeBest For
🍳 Stovetop3-4 min covered over low heatSmall portions, gentle warming without drying
📦 Microwave1-2 min at 50% powerQuick reheating, watch closely to avoid rubbery texture
🔥 Oven10 min at 325°FMaintaining texture without drying, best for larger portions

For best results when storing:

  • Cool completely before covering-trapping steam makes eggs watery and dilutes flavors
  • Store spinach and eggs together-they keep equally well and reheat at the same rate
  • Use shallow containers-eggs reheat more evenly in thin layers than deep bowls
  • Reheat gently at lower power-high heat makes eggs rubbery and tough
  • Add fresh herbs or lemon juice after reheating-brightens flavors that dull in storage

Frequently Asked Questions

How long to cook baked eggs with spinach and feta at 350°F?

Bake for 15-20 minutes at 350°F until whites are set and yolks jiggle slightly. Check at 15 minutes by gently shaking the dish-whites should be opaque and firm while yolks remain slightly runny.

Can I make baked eggs with spinach and feta ahead?

You can sauté the spinach and prep ingredients the night before, then assemble and bake fresh in the morning. Fully baked eggs keep 3-4 days in the fridge but yolks firm up when reheated.

What goes well with baked eggs with spinach and feta?

Toasted whole grain bread, roasted cherry tomatoes, mixed green salad, sliced avocado, or warm pita bread all work well. Pick sides that soak up runny yolk or add freshness to balance the richness.

How do I know when baked eggs with spinach and feta are done?

Whites should be completely set and opaque while yolks still jiggle slightly when you shake the dish. Check at 15 minutes-if whites look translucent or runny, bake 2-3 minutes longer.

Can I use frozen spinach instead of fresh in baked eggs?

Yes, but thaw completely and squeeze out all moisture first. Sauté frozen spinach longer than fresh to evaporate any remaining water-wet spinach makes the eggs watery and prevents proper setting.

Baked Eggs with Spinach and Feta

No ratings yet
Baked eggs with spinach and feta combine sautéed greens and tangy cheese for a flavorful breakfast or brunch. Pre-sautéing the spinach removes excess moisture, ensuring perfectly set eggs without watery texture. This dish is quick to prep and bakes evenly, with runny yolks and salty feta to enhance plain toast or meal-prep bowls.
Print Recipe Pin Recipe
Prep Time 10 minutes mins
Cook Time 20 minutes mins
Total Time 30 minutes mins
Servings: 4 servings
Course: Breakfast, Brunch
Cuisine: Mediterranean
Ingredients Equipment Method Notes

Ingredients
  

  • 2 tablespoons olive oil divided for sautéing and drizzling
  • 2 cloves garlic minced
  • 4 fresh spinach washed thoroughly
  • 4 eggs room temperature
  • ½ cup feta cheese crumbled, use block feta crumbled for best texture
  • to taste black pepper light seasoning
  • to taste herbs oregano or dill, optional

Equipment

  • Skillet use for sautéing spinach and garlic
  • oven-safe baking dish light-colored dish to bake eggs and spinach
  • sieve or paper towel to drain excess moisture from sautéed spinach

Method
 

  1. Preheat oven to 350°F. Bring eggs to room temperature to prevent cracking and ensure even baking.
  2. Heat 2 tablespoons olive oil in a skillet over medium heat. Add minced garlic and cook for 30 seconds until fragrant but not browned. Add fresh spinach and sauté for 3-4 minutes, stirring often, until wilted and most moisture has evaporated. Drain excess liquid with a sieve or paper towel.
  3. Transfer drained spinach to a light-colored oven-safe baking dish or divide among ramekins. Crumble feta evenly over the top. Season lightly with black pepper and herbs if using.
  4. Crack eggs directly over the spinach and feta mixture, spacing evenly. Drizzle with a small amount of olive oil if desired.
  5. Bake in preheated oven for 15-20 minutes until the egg whites are set and opaque, but yolks still jiggle slightly. Check at 15 minutes by gently shaking the dish. Let rest 2-3 minutes before serving to finish setting.

Notes

  • Sauté spinach thoroughly and drain to remove excess moisture for best texture.
  • Use room temperature eggs to avoid cracking and ensure even cooking.
  • Season lightly before baking and adjust salt after tasting since feta is salty.

Tried this recipe?

Let us know how it was!

What Is Poultry Seasoning? [Taste, Uses & More]

March 16, 2026

Most cooks reach for poultry seasoning without knowing exactly what's in the jar.

What Is Poultry Seasoning

That's a small gap worth closing, because the blend does something specific - it delivers the concentrated, roast-herb character of a well-seasoned turkey without the fuss of measuring five separate dried herbs every time.

QUICK SUMMARY

Poultry seasoning is a sage-forward dried herb blend with thyme, marjoram, rosemary, and trace warm spices. It adds savory, herbaceous depth to roast chicken, turkey stuffing, gravies, and slow-cooked soups - and keeps the spice cabinet simpler.

🌿Category: Pre-mixed dry spice blend, North American tradition
👅Flavor: Savory, earthy sage warmth with herbal brightness
🍗Best Uses: Roast chicken rubs, turkey stuffing, gravies, soups
📦Shelf Life: Peak flavor at 6-12 months; usable up to 24 months
⚠️Watch: Some commercial blends add salt or anti-caking agents - check the label

What Is Poultry Seasoning?

Poultry seasoning is a pre-mixed dried herb blend formulated specifically for chicken, turkey, and other fowl. It's a North American pantry staple, though its components - sage, thyme, marjoram, rosemary - are rooted in European roasting traditions.

Sage leads every reputable blend, typically making up the largest share. Thyme and marjoram add brightness, rosemary contributes a faint piney note, and small amounts of nutmeg or mace round out the warm undertones.

You'll find it sold under names including chicken seasoning, poultry spice, and poultry blend. Despite the name, the blend contains no actual meat or fat - just dried herbs and, in some commercial versions, black pepper or salt.

Most jars are finely ground to a unified powder. A few artisan blends keep the herb fragments coarser and more distinct, which affects both visual appeal and how quickly the flavors release during cooking.

  • 🌿 Core herbs - sage, thyme, marjoram, rosemary (always present)
  • ♨️ Warm spice add-ins - nutmeg or mace, occasionally ginger or allspice
  • 🧂 Optional additions - black pepper, salt, or anti-caking agents in commercial versions
  • 🏺 Homemade advantage - skip the fillers entirely by blending your own

What Does Poultry Seasoning Taste Like?

poultry seasoning - What Is Poultry Seasoning

Dried sage is the dominant note - earthy, slightly camphor-like, and unmistakably savory. Behind it, thyme and marjoram push brightness and a faint floral quality that keeps the blend from tasting heavy.

Sensory SnapshotModerate Intensity
👅 Flavor
sage-forwardearthy warmthherbal brightnesspeppery bite
✋ Texture
fine dry powderslightly sandy
👃 Aroma
dried sagefaint sweet spice

Rosemary keeps a low profile in most blends - piney and resinous, but subtle enough that it doesn't dominate. The nutmeg or mace, where present, adds a whisper of sweetness that ties the savory herbs together.

Raw from the jar, the blend tastes sharp and concentrated. Once it hits heat - especially fat like butter or oil - the flavors open and mellow, and the characteristic Thanksgiving roast-herb quality comes forward.

Watch Out
Poultry seasoning tastes noticeably more bitter eaten raw than cooked. Always taste it in context - rubbed into skin, stirred into warm fat, or dissolved into a simmering sauce - rather than judging it dry from the spoon.

How to Use Poultry Seasoning

The most direct application is a dry rub under the skin of roast chicken or turkey, pressed directly against the meat so the herbs bloom in the rendered fat during roasting.

Mixing the blend into compound butter with herbs works even better - the fat carries the flavor deeper and keeps the meat moist.

For stuffing and dressing, stir one to two teaspoons into the bread-and-celery base early, before you add broth. The herbs need time and moisture to fully hydrate and distribute.

How Poultry Seasoning Is Used
MethodBest ForTip
🔥 RoastingWhole chicken, turkey, root vegetablesMix into softened butter; rub under skin and over the surface
🍲 Braising / slow-cookingChicken stew, slow-cooker soupsAdd early - long cooking unlocks full herb flavor
🥘 SautéingAromatics for gravy, pan saucesAdd to onions and garlic in the pan before deglazing
🍞 Baking / mixingStuffing, meatloaf, poultry burgersStir in with dry ingredients; give it time to hydrate in wet mix
🥣 MarinadeGrilled chicken, spatchcocked birdCombine with oil and lemon juice; marinate at least two hours

Gravies and pan sauces benefit from a pinch stirred in during the deglazing step. It reinforces roast-bird flavor in dishes where gravy forms the backbone of the plate.

Don't overlook non-poultry applications. Mashed potatoes, roasted parsnips and carrots, and even meatloaf take well to the blend.

A slow cooker roast chicken is one of the easiest ways to see the blend at its most effective.

Try It In
🍿Popcorn Seasoning BlendsA surprising use of the savory herb blend — great for herbed popcorn→

How to Buy and Store Poultry Seasoning

Look for visible herb texture in the jar - distinct flecks of sage and thyme indicate a fresher blend. If the contents look uniformly gray and powdery, the herbs have aged out and the blend will taste flat.

Best Pick
Blends labeled "freshly blended" or with a recent manufacturing date outperform generic supermarket jars that have sat in distribution for months. Spice shops and online specialty retailers typically stock higher-turnover stock.

Check the label for added salt or sodium before you season aggressively - some commercial versions are closer to a seasoned salt than a pure herb blend. Pure herb blends give you full control over salt separately.

  • Pantry storage - keep in a cool, dark spot away from the stove; heat accelerates flavor loss
  • Container - transfer supermarket packets to a sealed glass jar after opening
  • Shelf life - peak flavor at 6-12 months; still usable at 24 months but noticeably weaker

After about a year, the sage character flattens and the blend loses its ability to anchor a dish.

Check your poultry seasoning freshness guide if the jar has been in the cabinet a while - just as roast chicken itself has a defined usable window, so does the spice that seasons it.

Where to Start With Poultry Seasoning

New to the blend? Start with a whole roast chicken. Rub one teaspoon per pound under the skin mixed with softened butter, and roast as usual. That single cook will show you exactly what the blend does and how strong you want to go.

If you find the sage too assertive in a given blend, look at poultry seasoning alternatives - you can dial back the sage dominance by building your own mix, or find sage swaps if that herb is the sticking point.

One jar handles the entire Thanksgiving table - the turkey, the stuffing, the gravy. That's the case for keeping it stocked year-round.

Frequently Asked Questions

What is in poultry seasoning?

The core herbs are sage, thyme, marjoram, and rosemary, with black pepper common in most blends. Many commercial versions add small amounts of nutmeg or mace for warmth. Some cheaper blends include salt or anti-caking agents - check the label.

Is poultry seasoning the same as sage?

No - sage is one component in the blend, just the dominant one. Substituting straight sage for poultry seasoning will give you the earthy base note but none of the herbal brightness from thyme and marjoram.

How much poultry seasoning per pound of chicken?

About one teaspoon per pound is a reliable starting point for roasting. For stuffing, one to two teaspoons per four cups of bread is standard - the bread absorbs and mutes the herb intensity.

Can you use poultry seasoning on pork?

Yes - the sage-thyme profile works well on pork shoulder, pork chops, and sausage blends. The herb combination has a long history with pork in British and European cooking, well beyond its North American poultry association.

How do you make poultry seasoning at home?

Combine 2 teaspoons dried sage, 1 teaspoon thyme, 1 teaspoon marjoram, ½ teaspoon rosemary, ¼ teaspoon nutmeg, and ¼ teaspoon black pepper. Grind briefly if you want a finer texture, then store in a sealed jar.

Savory Oatmeal with Egg and Cheddar

March 16, 2026

Creamy oats with sharp melted cheddar and a runny egg yolk on top. That's what happens when you cook rolled oats in broth instead of water and finish them with cheese off the heat.

Savory Oatmeal with Egg and Cheddar served on a plate

The egg goes on at the end, not stirred in. You get a runny yolk that acts like sauce when you break it with your fork.

This works for weeknight breakfasts when you want something filling that isn't sweet.

QUICK SUMMARY

Savory oatmeal cooks in 10-15 minutes using rolled oats simmered in broth, then topped with a fried egg and melted cheddar. The key is cooking the egg separately and adding cheese off heat so it melts smoothly without getting greasy. Make this when you want a high-protein breakfast that feels like real food.

⏱️Time reality: 15-20 minutes total, but the oats cook while you prep the egg
🔑Critical first move: Use 2:1 liquid-to-oat ratio and simmer on medium-low heat
⚠️Watch out: Don't add cheese while oats are still on heat or it'll get clumpy and greasy

Why This Recipe Works

Rolled oats absorb liquid slowly enough to stay creamy instead of turning to mush. Most people skip sides when making savory breakfast bowls, but homemade salad recipe adds fresh crunch that cuts through the richness.

Quick Reference
⏱️
Prep Time
5 min
🔥
Cook Time
10-15 min
⏰
Total Time
15-20 min
🍽️
Servings
2 servings
📊
Difficulty
Easy
🏷️
Category
Breakfast | Brunch
💡
Quick Tip
Use broth and butter for richer flavor
🎯
Best For
Weeknight | Meal prep

Here's what makes it work:

  • Using broth instead of water adds savory depth without extra steps
  • Cooking oats at medium-low heat for 5-7 minutes creates creamy texture without mushiness
  • Removing oats from heat before adding cheese prevents greasy, separated cheese
  • Frying eggs separately keeps yolks runny and whites fully set
  • Shredded cheddar melts smoothly into hot oats when stirred off heat
Quick Tip
Toast oats dry in the pan for 3-4 minutes before adding liquid for nuttier flavor

What You'll Need

Ingredients for Savory Oatmeal with Egg and Cheddar

Shopping for savory oatmeal takes one trip down the breakfast aisle and the dairy case. When you're looking for protein-packed meal prep ideas, a fluffy squares side uses similar ingredients and reheats just as well.

🥣
Base
  • 1 cup old-fashioned rolled oats
  • 2 cups water or broth
  • ½ teaspoon salt
🍳
Protein + Dairy
  • 2 eggs
  • ½ cup shredded cheddar cheese
  • 1 tablespoon butter or oil
🌿
Seasonings + Garnish
  • ¼ teaspoon black pepper
  • Optional: 2 tablespoon chopped green onions
  • Optional: hot sauce or mustard

Ingredient Details

  • Old-fashioned rolled oats
    Don't use instant oats - they turn mushy in under 2 minutes and can't hold texture
  • Broth (chicken or vegetable)
    Use low-sodium broth so you can control salt levels, or water works fine
  • Sharp cheddar cheese
    Pre-shredded cheese melts fast but extra-sharp blocks have better flavor
  • Butter
    Use butter for frying eggs if you want richer flavor, or olive oil for dairy-free
  • Eggs
    Room-temperature eggs cook more evenly than cold ones straight from the fridge
  • Green onions
    Chop both white and green parts for layered onion flavor and color
  • Hot sauce
    Add at the table, not during cooking, so each person controls the heat

Ingredient Swaps

Swapping ingredients in savory oatmeal keeps the method the same but shifts flavor and texture. If you need dairy-free breakfast options that deliver similar richness, smoky bake recipe uses plant-based milk and still gets creamy results.

Common swaps:

  • Quick oats for rolled oats - cook in 3-4 minutes instead of 5-7, but texture is softer and less chewy
  • Nutritional yeast for cheddar cheese - adds savory, cheesy flavor without dairy, use 3 tablespoon stirred in off heat
  • Olive oil for butter - works for frying eggs and adds fruity note instead of rich dairy flavor
  • Silken tofu scramble for egg - blend ½ cup tofu with turmeric and black salt, scramble in pan for vegan protein

Vegetable Broth

Works for: Building savory base flavor without meat stock

Skip if: You want deeper, richer flavor and have chicken broth

Smoked Paprika

Works for: Adding smoky depth instead of just black pepper heat

Skip if: You prefer clean, simple seasoning with just salt and pepper

Gluten-Free Certified Oats

Works for: Celiac or gluten sensitivity, same cooking time and texture

Skip if: Regular oats are fine for you and cost less

Instructions

The oats simmer while you prep the egg, so everything finishes at the same time. When you're planning high-protein weeknight breakfasts, this creamy potatoes cooks in the air fryer while oats cook on the stovetop.

Here's how to make it:

  1. Simmer the oats: Bring 2 cups broth or water to a boil in a medium saucepan over medium-high heat. Stir in 1 cup rolled oats and ½ teaspoon salt, reduce heat to medium-low, and simmer uncovered for 5-7 minutes, stirring every 2 minutes, until oats absorb most liquid and look creamy.

  2. Start the eggs: Heat 1 tablespoon butter or oil in a nonstick skillet over medium-low heat during the last 3 minutes of oat cooking. Crack 2 eggs into the pan, season with salt and pepper, and cook for 3-4 minutes until whites are fully set but yolks are still runny.

  3. Finish the oats: Remove oats from heat when they're thick but still slightly loose. Stir in ½ cup shredded cheddar cheese and ¼ teaspoon black pepper until cheese melts completely into the oats.

  4. Plate it: Divide oats between 2 bowls. Top each bowl with 1 fried egg, placing it yolk-side up in the center.

  5. Garnish and serve: Sprinkle chopped green onions or fresh herbs over the top. Serve immediately with hot sauce or mustard on the side.

Golden Rule
Always remove oats from heat before stirring in cheese to prevent greasy, clumpy texture

What to Serve With It

Savory oatmeal fills you up but needs something fresh or crunchy on the side. For more ways to round out breakfast bowls with sides that actually fit, check out complete omelette meal ideas for brunch-friendly pairings.

Side Dish Prep Why It Works How to Serve
Sautéed spinach Easy Adds mild bitterness that cuts through rich cheese and egg Wilt in same pan after frying eggs, season with garlic
Roasted cherry tomatoes Easy Adds sweetness and acidity that brightens the bowl Roast at 400°F for 15 minutes, spoon over oats
Crispy bacon strips Easy Adds crunch and smoky flavor that contrasts creamy oats Cook in oven or skillet, crumble or serve whole on top
Sliced avocado Easy Provides creamy, cooling contrast to salty cheddar Slice thin, fan out beside egg, season with salt
Mixed greens salad Easy Adds fresh, light crunch to balance heavy breakfast bowl Toss greens with lemon and olive oil, serve on the side

Three ways to serve it:

  • For meal prep: Make oats in bulk, store plain, then reheat and top with fresh fried egg each morning
  • For brunch hosting: Set up a topping bar with bacon, avocado, hot sauce, herbs, and extra cheese
  • For quick weeknight dinners: Add sautéed mushrooms or roasted vegetables directly into the oats before adding cheese
Shortcut
Use pre-shredded cheese and microwave-scrambled eggs to cut active cooking time to under 10 minutes

Store and Reheat

Cooked oats thicken in the fridge and need extra liquid when reheating. When you're batch-cooking savory breakfasts that reheat well, this easy sauce recipe keeps in the fridge for a week and adds bright flavor to reheated bowls.

Method Time Best For
🍳 Stovetop 3-5 min on low heat Preserving creamy texture, gentle warming with added liquid
📦 Microwave 1-2 min, stir halfway Quick reheating single servings, add 1-2 tablespoon water before heating
🔥 Oven 10 min at 300°F Reheating multiple portions in oven-safe dishes without drying out

For best results when storing:

  • Store cooked oats in shallow airtight containers for up to 3-4 days in the fridge
  • Cook eggs fresh each time instead of storing them with oats for better texture
  • Add 2-3 tablespoon water or broth when reheating to restore creamy consistency
  • Reheat oats on stovetop over low heat, stirring constantly, for most even warming
  • Freeze plain cooked oats in portions for up to 1 month, but texture may be slightly mushier after thawing

Frequently Asked Questions

Can I use quick oats instead of rolled oats in savory oatmeal with egg and cheddar?

Quick oats work but cook in 3-4 minutes instead of 5-7 and turn softer with less chew. Use the same 2:1 liquid ratio but watch closely so they don't overcook into mush.

How should I store and reheat leftovers for best texture?

Store cooked oats in airtight containers for 3-4 days in the fridge without the egg. Reheat on stovetop with 2-3 tablespoon added liquid over low heat, stirring constantly, then top with a freshly fried egg.

What is the best way to cook eggs to serve with savory oatmeal?

Fry eggs over medium-low heat in butter or oil for 3-4 minutes until whites are fully set but yolks stay runny. You can also poach or soft-boil them if you prefer a different texture.

Why is my savory oatmeal watery or clumpy, and how do I fix it?

Watery oats mean too much liquid or undercooking - simmer longer and use exactly 2 cups liquid per 1 cup oats. Clumpy cheese means you added it while oats were still on heat - always remove from heat first, then stir in cheese.

Can I double the recipe for more servings without changing cook time?

Yes, double all ingredients but use a larger saucepan to prevent overflow. Cook time stays the same at 5-7 minutes, but stir more frequently to prevent sticking at the bottom.

Savory Oatmeal with Egg and Cheddar served on a plate

Savory Oatmeal with Egg and Cheddar

No ratings yet
Savory oatmeal features rolled oats simmered in broth until creamy, then topped with a perfectly fried egg and melted sharp cheddar cheese. The egg is cooked separately to keep its yolk runny, creating a rich sauce when mixed in. This recipe makes a filling, high-protein breakfast that avoids sweetness.
Print Recipe Pin Recipe
Prep Time 5 minutes mins
Cook Time 15 minutes mins
Total Time 20 minutes mins
Servings: 2 servings
Course: Breakfast, Brunch
Cuisine: American
Ingredients Equipment Method Notes

Ingredients
  

  • 1 cup rolled oats old-fashioned
  • 2 cups broth chicken or vegetable, low sodium; or water
  • 0.5 teaspoon salt
  • 2 eggs room temperature
  • 0.5 cup cheddar cheese shredded sharp cheddar
  • 1 tablespoon butter or oil for frying eggs
  • 0.25 teaspoon black pepper
  • 2 tablespoons green onions chopped, optional for garnish
  • hot sauce or mustard optional, for serving

Equipment

  • Medium saucepan To simmer oats in broth or water
  • Nonstick skillet To fry eggs separately

Method
 

  1. Bring 2 cups broth or water to a boil in a medium saucepan over medium-high heat. Stir in 1 cup rolled oats and ½ teaspoon salt, then reduce heat to medium-low and simmer uncovered for 5-7 minutes, stirring every 2 minutes, until oats absorb most liquid and look creamy.
    2 cups broth, 1 cup rolled oats, 0.5 teaspoon salt
  2. During the last 3 minutes of oat cooking, heat 1 tablespoon butter or oil in a nonstick skillet over medium-low heat. Crack 2 eggs into the skillet, season with salt and pepper, and cook for 3-4 minutes until whites are set but yolks remain runny.
    1 tablespoon butter, 2 eggs, 0.25 teaspoon black pepper
  3. Remove oats from heat once thick but slightly loose. Stir in ½ cup shredded cheddar cheese and ¼ teaspoon black pepper until cheese melts smoothly into the oats.
    0.5 cup cheddar cheese, 0.25 teaspoon black pepper
  4. Divide the creamy oats evenly between 2 bowls. Top each bowl with 1 fried egg placed yolk-side up in the center.
    2 eggs
  5. Sprinkle chopped green onions or fresh herbs over the bowls, and serve immediately with optional hot sauce or mustard on the side.
    2 tablespoons green onions, hot sauce or mustard

Notes

  • Use a 2:1 liquid-to-oats ratio and simmer on medium-low for the best creamy texture.
  • Remove oats from heat before adding cheese to prevent clumpy and greasy texture.
  • Fry eggs separately to keep yolks runny and whites fully set.

Tried this recipe?

Let us know how it was!

Southern Bread Pudding

March 16, 2026

You need 70 minutes and one baking dish. No fancy equipment, no complex technique-just day-old bread soaking in a simple custard that bakes into golden comfort.

Southern Bread Pudding served on a plate

The oven does the work while you prep dinner or set the table. Stale bread absorbs the egg-milk mixture without turning to mush, and high heat sets the custard while crisping the top.

This is what you make for weekend brunch or holiday gatherings when you want real dessert without standing over the stove.

QUICK SUMMARY

Southern bread pudding transforms stale bread into a creamy custard dessert with crisp edges and soft center. Bake at 350°F for 55 minutes until edges firm up and center barely jiggles. The key is using day-old bread that soaks custard without falling apart.

⏱️Time reality: 15 minutes hands-on, then the oven handles the rest for an hour
🔑First move: Cube stale bread into 1-inch pieces so every bite soaks evenly
⚠️Watch out: Over-soaking turns bread mushy-10 minutes max before baking

Table of Contents

Toggle
  • Why This Recipe Works
  • What You'll Need
    • Ingredient Details
  • Ingredient Swaps
  • What to Serve With It
  • Store and Reheat
  • Frequently Asked Questions
  • Southern Bread Pudding
    • Method 
    • Tried this recipe?

Why This Recipe Works

The custard sets from the outside in, creating firm edges while the center stays creamy. Beating eggs thoroughly before mixing prevents rubbery texture and ensures even cooking. For comfort food that actually delivers, try another great fruit recipe like this one that balances richness with brightness.

Quick Reference
⏱️
Prep Time
15 min
🔥
Cook Time
55 min
⏰
Total Time
70 min
🍽️
Servings
8 servings
📊
Difficulty
Medium
🏷️
Category
Dessert
💡
Quick Tip
Use day-old bread for best texture
🎯
Best For
Weeknight | Entertaining | Holiday

Why these moves matter:

  • Stale bread absorbs custard without disintegrating-fresh bread turns soggy and falls apart during baking
  • Whisking custard for 3 minutes creates smooth texture-lumpy eggs produce rubbery pockets
  • 350°F strikes the balance between set custard and crisp crust-higher heat burns edges before center cooks
  • Cooling 20 minutes lets custard firm up-slicing hot pudding results in soupy texture
  • Golden brown crust signals doneness better than time alone-oven variations affect baking speed
Quick Tip
Insert a toothpick near the center-it should come out with moist crumbs, not wet batter

What You'll Need

Ingredients for Southern Bread Pudding

Day-old bread works best because it holds structure when soaked. Fresh bread from the bakery needs 4-6 hours on the counter to dry out enough. Check out this classic cake dish for a similar approach to transforming simple ingredients into comforting dessert.

🍞
Bread Base
  • 8 cups stale white bread or brioche, cubed
🥛
Custard
  • 2 cups whole milk
  • 4 large eggs
  • ¾ cup sugar
  • 4 tablespoons butter, melted
🌶️
Spices & Flavor
  • 2 teaspoons vanilla extract
  • 1 teaspoon cinnamon
  • ¼ teaspoon nutmeg
  • ¼ teaspoon salt
🫙
Optional Add-Ins
  • ½ cup raisins

Ingredient Details

  • Stale bread
    Day-old white bread or brioche holds custard best-avoid soft sandwich bread that dissolves
  • Whole milk
    Creates creamy custard base-2% works but produces thinner texture
  • Eggs
    Beat thoroughly before adding to prevent rubbery texture and ensure even binding
  • Sugar
    White sugar creates clean sweetness-brown sugar adds molasses notes
  • Butter
    Melted butter distributes evenly through custard-adds richness without greasy pockets
  • Vanilla extract
    Pure extract delivers floral aroma-skip imitation which tastes artificial
  • Cinnamon
    Warm spice complements vanilla-adjust amount based on personal preference

Ingredient Swaps

Dairy-free versions work but change texture slightly-almond milk produces thinner custard that takes longer to set. Gluten-free bread requires gentle handling since it breaks apart more easily during mixing.

Four swaps that work:

  • Whole milk → almond milk: Thinner custard with slightly nutty flavor-add 2 tablespoons cornstarch to thicken
  • White bread → gluten-free bread: Similar texture but more fragile-handle gently when tossing with custard
  • Butter → coconut oil: Subtle coconut aroma with comparable richness-use refined for neutral flavor
  • Raisins → chopped dates: Sweeter chew with caramel notes-cut into raisin-sized pieces for even distribution

White Bread vs Brioche

Works for: White bread absorbs custard evenly and costs less-brioche adds buttery richness

Skip if: Fresh bread of either type turns mushy-must be day-old or toasted

With Raisins vs Plain

Works for: Raisins add traditional texture and pockets of sweetness-plain version lets custard shine

Skip if: You're serving picky eaters who avoid dried fruit

Instructions

The entire process takes 70 minutes but only 15 require active work. Soaking bread for exactly 10 minutes gives it time to absorb custard without turning to mush. If you need a hearty main to serve alongside, this easy biscuits side pairs well with Southern-style desserts.

  1. Preheat oven to 350°F and prep the dish. Grease a 9x13-inch baking dish with butter or cooking spray. Cut bread into 1-inch cubes and spread in the dish.

  2. Make the custard base. Whisk eggs in a large bowl for 1 minute until frothy. Add milk, sugar, melted butter, vanilla, cinnamon, nutmeg, and salt. Whisk for 3 minutes until completely smooth with no sugar granules visible.

  3. Soak the bread. Pour custard over bread cubes and use a spatula to press bread down so it absorbs liquid. Let sit exactly 10 minutes, pressing down twice during that time. Add raisins if using and gently fold through.

  4. Bake uncovered. Place dish in oven and bake 50-55 minutes. Edges should pull away from the pan and turn golden brown while center barely jiggles when you shake the dish. If crust browns too fast after 40 minutes, tent loosely with foil.

  5. Cool before serving. Remove from oven and let rest 20 minutes on a cooling rack. Custard will firm up as it cools-this prevents soupy texture when you slice it.

Watch Out
Don't skip the resting time-hot bread pudding looks set but will collapse into liquid when cut

What to Serve With It

Most people serve bread pudding plain, but a sauce cuts through the richness and adds moisture. Temperature contrast matters-cold ice cream against warm pudding creates the textural shift this dessert needs. For complete weeknight chicken dinner ideas that work with Southern meals, check that guide for balanced planning.

Side Dish Prep Why It Works How to Serve
Fresh Berries Easy Tartness cuts sweet custard and adds bright color contrast Toss berries with 1 tablespoon sugar, spoon over warm pudding
Whipped Cream Easy Light texture balances dense custard without competing flavors Dollop cold whipped cream on each serving right before plating
Bourbon Sauce Medium Rich boozy sweetness complements cinnamon and vanilla notes Warm sauce and drizzle 2 tablespoons over each portion
Vanilla Ice Cream Easy Cold creaminess against warm pudding creates temperature contrast Scoop ice cream directly onto warm pudding so it melts slightly
Caramel Sauce Medium Buttery depth matches custard richness and adds glossy finish Drizzle warm caramel in zigzag pattern across plated servings

Three ways to serve it:

  • For weekend brunch: Serve warm with coffee and fresh berries on the side-the tartness balances sweetness
  • For holiday gatherings: Top with bourbon sauce and candied pecans-adds traditional Southern flair
  • For weeknight dessert: Skip extras and serve with cold vanilla ice cream-minimal effort for maximum contrast
Best Pick
Vanilla ice cream delivers the most impact for the least effort-temperature contrast transforms simple pudding

Store and Reheat

Bread pudding keeps 3-4 days in the fridge and actually improves overnight as flavors meld. Store in shallow airtight container so custard doesn't weep. For savory comfort food that reheats just as well, this simple gravy recipe uses similar storage principles.

Method Time Best For
🔥 Oven 20 min at 325°F Whole portions-retains crisp crust and creamy center
📦 Microwave 1-2 min medium power Single servings-quick warm-up but softens crust
🍳 Stovetop 5 min low heat, covered Small portions-gentle reheating prevents drying out

For best results when storing:

  • Cool completely before refrigerating-hot pudding creates condensation that makes it soggy
  • Cover tightly with plastic wrap pressed directly on surface-prevents skin from forming on custard
  • Reheat only what you'll eat-repeated heating dries out texture and toughens eggs
  • Add fresh sauce after reheating-warming old sauce makes it grainy and separated
  • Freeze for up to 2 months in portions-wrap individual squares in plastic then foil for easy thawing

Frequently Asked Questions

Can I use gluten-free bread for Southern bread pudding?

Yes, but gluten-free bread breaks apart more easily when mixing with custard. Handle it gently and expect slightly more fragile texture after baking.

How should I store leftover Southern bread pudding?

Cool completely, then store in airtight container in fridge for 3-4 days. Press plastic wrap directly on surface to prevent skin from forming.

How do I know when Southern bread pudding is fully cooked?

Edges should be firm and golden brown, pulling slightly away from pan sides. Center should barely jiggle when you shake the dish-insert a toothpick and it should come out with moist crumbs, not wet batter.

Why is my bread pudding soggy or too dry and how to fix it?

Soggy pudding means too much liquid or underbaking-drain excess custard before baking and bake until edges are firm. Dry pudding happens from overbaking-test doneness at 50 minutes and serve with sauce or whipped cream to add moisture back.

Can Southern bread pudding be made ahead and reheated?

Yes, make it up to 2 days ahead and store covered in the fridge. Reheat portions in the oven at 325°F for 20 minutes or microwave single servings for 1-2 minutes on medium power.

Southern Bread Pudding served on a plate

Southern Bread Pudding

No ratings yet
Southern bread pudding transforms day-old bread into a creamy custard dessert with a crisp, golden crust and soft center. Baking at 350°F sets the custard perfectly while the bread soaks without falling apart. This comforting dish is ideal for brunch, holidays, or easy weekend desserts.
Print Recipe Pin Recipe
Prep Time 15 minutes mins
Cook Time 55 minutes mins
Total Time 1 hour hr 10 minutes mins
Servings: 8 servings
Course: Dessert
Cuisine: Southern
Ingredients Equipment Method Notes

Ingredients
  

  • 8 cups white bread day-old, cubed into 1-inch pieces
  • 2 cups whole milk
  • 4 large eggs beaten thoroughly
  • 0.75 cup sugar
  • 4 tablespoons butter melted
  • 2 teaspoons vanilla extract pure extract preferred
  • 1 teaspoon cinnamon
  • 0.25 teaspoon nutmeg
  • 0.25 teaspoon salt
  • 0.5 cup raisins optional

Equipment

  • 9x13 inch baking dish Used to bake the pudding
  • Whisk For mixing eggs and custard ingredients
  • Mixing bowl To prepare custard
  • Spatula To press and fold bread in custard

Method
 

  1. Preheat oven to 350°F. Grease a 9x13-inch baking dish with butter or cooking spray. Cut bread into 1-inch cubes and spread evenly in the dish.
  2. Whisk eggs in a large bowl for 1 minute until frothy. Add milk, sugar, melted butter, vanilla extract, cinnamon, nutmeg, and salt. Whisk for 3 minutes until smooth with no sugar grains visible.
  3. Pour custard over the bread cubes. Use a spatula to press the bread down so it absorbs the liquid. Let sit exactly 10 minutes, pressing down twice during this time. If using, gently fold raisins through the soaked bread.
  4. Place the baking dish uncovered in the oven and bake for 50-55 minutes. The edges should pull away from the pan and turn golden brown, while the center barely jiggles when you shake the dish. Tent loosely with foil if the crust browns too fast after 40 minutes.
  5. Remove from oven and let the pudding rest on a cooling rack for 20 minutes. The custard will firm up as it cools, preventing a soupy texture when sliced.

Notes

  • Use day-old bread for best texture; fresh bread will become mushy.
  • Whisk eggs thoroughly to avoid rubbery texture and ensure even custard.
  • Let the pudding rest 20 minutes after baking to set properly before slicing.

Tried this recipe?

Let us know how it was!

Creamy Rice Pudding

March 16, 2026

Silky rice pudding with tender grains suspended in sweet cream. That's what you get when you simmer short-grain rice slowly with whole milk and finish it with tempered egg yolks.

Creamy Rice Pudding served on a plate

The stovetop does most of the work. You stir every few minutes while the rice releases starch and the milk reduces into something thick enough to coat a spoon.

This works for weeknight desserts when you want something warm and comforting that doesn't require fancy equipment or technique.

QUICK SUMMARY

Creamy rice pudding comes together on the stovetop in under an hour. Short-grain rice simmers in whole milk until tender, then egg yolks thicken it into custard. Frequent stirring prevents scorching and helps the rice release starch for that signature creamy texture.

⏱️Timeline: 50 minutes start to finish, mostly hands-off simmering
🔥Method: Keep heat low and stir every 3-5 minutes to avoid burning
⚠️Watch Out: Add egg yolks slowly while tempering or they'll curdle

Table of Contents

Toggle
  • Why This Recipe Works
  • What You'll Need
    • Ingredient Details
  • Ingredient Swaps
  • What to Serve With It
  • Store and Reheat
  • Frequently Asked Questions
  • Creamy Rice Pudding
    • Method 
    • Tried this recipe?

Why This Recipe Works

Short-grain rice releases more starch than long-grain varieties, which creates the thick, creamy base without adding extra thickeners. For a version that comes together quickly, try this simple pastry recipe that uses similar custard techniques but in half the time.

Quick Reference
⏱️
Prep Time
10 min
🔥
Cook Time
40 min
⏰
Total Time
50 min
🍽️
Servings
6 servings
📊
Difficulty
Easy
🏷️
Category
Dessert
💡
Quick Tip
Stir frequently to avoid scorching bottom
🎯
Best For
Weeknight | Comfort food | Budget

Five things that make this work:

  • Low heat simmering - Maintains gentle bubbles that cook rice evenly without scorching the milk on the pan bottom
  • Heavy-bottomed saucepan - Distributes heat evenly and prevents hotspots that burn dairy before rice softens
  • Tempered egg yolks - Adding hot liquid slowly to eggs prevents curdling and creates silky custard texture
  • Frequent stirring - Scrapes bottom every 3-5 minutes to release stuck rice and prevent burning
  • Resting time - Ten minutes off heat lets pudding thicken as starches set and flavors meld
Quick Tip
Toast cinnamon and nutmeg in the dry pan for one minute before adding milk for deeper spice flavor

What You'll Need

Ingredients for Creamy Rice Pudding

You need six basic ingredients plus optional mix-ins. Most people skip the egg yolks, but tempering them into the hot pudding creates that custard-like silkiness.

🍚
Base
  • short-grain rice
  • whole milk
  • heavy cream
🍬
Sweeteners
  • granulated sugar
  • vanilla extract
🌶️
Seasoning
  • salt
  • ground cinnamon
  • nutmeg
🥚
Thickener
  • egg yolks
  • raisins (optional)

Ingredient Details

  • Short-grain rice
    Use sushi rice or arborio - they release more starch than long-grain for creamy texture
  • Whole milk
    Don't use skim milk - fat content creates richness and prevents watery pudding
  • Heavy cream
    Optional but adds extra silkiness - swap with more milk for lighter version
  • Egg yolks
    Temper slowly by adding hot liquid gradually to prevent scrambling
  • Vanilla extract
    Add at the end after removing from heat to preserve aromatic flavor
  • Ground cinnamon
    Toast in dry pan before adding liquid for deeper, less dusty flavor
  • Raisins
    Stir in during last 5 minutes so they plump without disintegrating

Ingredient Swaps

You can swap the dairy or change the rice type depending on what you have. Rich mains need something to cut through, and this rich beef side dish uses similar slow-cooking techniques but with savory ingredients instead.

Four swaps that work:

  • Coconut milk for whole milk - Creates dairy-free version with subtle coconut flavor, slightly thinner final texture
  • Arborio rice for short-grain - Gives similar creaminess with firmer, more distinct rice grains that hold shape better
  • Maple syrup for granulated sugar - Natural sweetener that adds depth but may thin pudding slightly, reduce by 2 tablespoons
  • Cornstarch slurry for egg yolks - Mix 2 tablespoons cornstarch with 3 tablespoons cold milk, thickens without eggs but less silky

Arborio Rice

Works for: Firmer texture lovers, gluten-free diets, when you need visible separate grains

Skip if: You want ultra-creamy pudding or don't want rice texture noticeable

Coconut Milk

Works for: Dairy-free diets, tropical flavor variation, when whole milk unavailable

Skip if: You dislike coconut flavor or need classic neutral taste

Cornstarch Slurry

Works for: Egg-free diets, simpler technique, when tempering feels intimidating

Skip if: You want restaurant-quality silky custard texture

Instructions

The whole process takes 50 minutes with most time spent stirring occasionally while rice simmers. Most people skip the gravy, but it balances the meal when paired with something like simple homemade gravy for a complete comfort food spread.

  1. Combine rice, milk, cream, sugar, salt, and spices in heavy-bottomed saucepan. Bring to gentle simmer over medium heat, stirring constantly until sugar dissolves, about 3 minutes.

  2. Reduce heat to low and simmer uncovered for 30-35 minutes. Stir every 3-5 minutes, scraping bottom and sides to prevent sticking. Rice should be tender and milk reduced by half.

  3. Temper egg yolks in separate bowl. Slowly ladle ½ cup hot pudding into yolks while whisking constantly. Add another ½ cup, then pour tempered yolks back into saucepan.

  4. Cook 3-5 minutes more over low heat, stirring constantly. Pudding should thicken enough to coat back of spoon. Remove from heat immediately when it reaches custard consistency.

  5. Stir in vanilla extract and optional raisins. Let pudding rest 10 minutes off heat to thicken further. Serve warm or cover and refrigerate for chilled version.

Watch Out
Never let the pudding boil after adding eggs - high heat scrambles yolks and creates grainy texture

What to Serve With It

Rice pudding works as dessert but also breakfast or snack. The this side works best when it hits the table at the same time as a easy sauce side for balanced meal planning throughout the week.

Side Dish Prep Why It Works How to Serve
Fresh berries Easy Tart fruit cuts through sweet creaminess Scatter raspberries or blueberries on top before serving
Toasted nuts Easy Crunchy texture contrasts soft pudding Chop almonds or pecans, toast 5 minutes, sprinkle warm
Honey drizzle Easy Adds floral sweetness and glossy finish Warm honey slightly, drizzle over individual portions
Caramel sauce Medium Deepens sweetness with rich butterscotch notes Make or buy caramel, warm it, pour over pudding
Fruit compote Medium Tartness balances creamy sweetness Simmer berries with sugar 10 minutes, spoon on side

Three ways to serve it:

  • Breakfast bowl - Top with granola, sliced banana, and cinnamon for morning meal
  • Elegant dessert - Serve in glass bowls with whipped cream and candied orange peel
  • Snack portion - Scoop into small ramekins, chill, pack for lunch boxes
Best Pick
Fresh berries add the perfect tart contrast without extra cooking - raspberries and blackberries work especially well

Store and Reheat

Pudding thickens as it cools, which is normal. The chicken works best when it hits the table at the same time as a quick chicken dish for easy weeknight meal prep.

Method Time Best For
🍳 Stovetop 5-7 min Even reheating with control, add splash of milk while stirring
📦 Microwave 1-2 min Quick single portions, stir every 30 seconds to prevent hot spots
🔥 Oven 10 min at 325°F Reheating multiple servings, cover with foil to prevent skin forming

For best results when storing:

  • Transfer to shallow container - Cools faster and prevents bacterial growth in thick pudding
  • Press plastic wrap directly on surface - Prevents skin formation while pudding chills
  • Store within 2 hours of cooking - Don't leave dairy-based pudding at room temperature longer
  • Stir before reheating - Breaks up thickened texture and redistributes moisture evenly
  • Add milk when reheating - Stir in 2-3 tablespoons per cup to restore original creaminess

Frequently Asked Questions

How long to cook creamy rice pudding on stove?

Cook for 30-35 minutes at low simmer after bringing to initial boil. Rice should be tender and pudding thick enough to coat spoon when done.

Can I make rice pudding ahead and refrigerate?

Yes, rice pudding keeps 3-4 days in the fridge. It thickens as it cools, so stir in a splash of milk when reheating to restore creamy texture.

What goes well with rice pudding?

Fresh berries, toasted nuts, caramel sauce, or fruit compote all pair well. The tart or crunchy elements contrast the sweet creamy base.

How do I know when rice pudding is done?

Pudding is done when rice grains are tender, liquid has thickened to coat the back of a spoon, and you can draw a line through the coating that holds. It will thicken more as it cools.

Can I use brown rice for rice pudding?

Brown rice works but needs 50-60 minutes cooking time and more liquid since it doesn't break down as easily. The texture will be chewier and less creamy than white rice pudding.

Creamy Rice Pudding served on a plate

Creamy Rice Pudding

No ratings yet
This creamy rice pudding simmers short-grain rice slowly with whole milk and finishes with tempered egg yolks for a silky custard texture. Frequent stirring prevents scorching while thickening the pudding to perfection. It's a comforting dessert that's easy to make on the stovetop.
Print Recipe Pin Recipe
Prep Time 10 minutes mins
Cook Time 40 minutes mins
Total Time 50 minutes mins
Servings: 6 servings
Course: Dessert
Cuisine: American
Ingredients Equipment Method Notes

Ingredients
  

  • 1 cup short-grain rice such as sushi rice or arborio
  • 4 cups whole milk
  • ½ cup heavy cream optional, adds silkiness
  • ½ cup granulated sugar
  • ¼ teaspoon salt
  • ½ teaspoon ground cinnamon toast in dry pan before adding liquids for deeper flavor
  • ⅛ teaspoon ground nutmeg toast in dry pan before adding liquids for deeper flavor
  • 3 egg yolks tempered slowly to prevent curdling
  • ¼ cup raisins optional, stir in last 5 minutes
  • 1 teaspoon vanilla extract added at end after removing from heat

Equipment

  • Heavy-bottomed saucepan Distributes heat evenly to prevent scorching
  • Whisk Used to temper egg yolks
  • ladle For slowly adding hot pudding to egg yolks during tempering

Method
 

  1. Combine rice, whole milk, heavy cream, sugar, salt, ground cinnamon, and nutmeg in a heavy-bottomed saucepan. Bring to a gentle simmer over medium heat, stirring constantly until sugar dissolves, about 3 minutes.
    1 cup short-grain rice, 4 cups whole milk, ½ cup heavy cream, ½ cup granulated sugar, ¼ tsp salt, ½ tsp ground cinnamon, ⅛ tsp ground nutmeg
  2. Reduce heat to low and simmer uncovered for 30 to 35 minutes, stirring every 3 to 5 minutes. Scrape the bottom and sides to prevent sticking. The rice should be tender and the milk reduced by about half.
    1 cup short-grain rice, 4 cups whole milk, ½ cup heavy cream
  3. In a separate bowl, temper the egg yolks by slowly ladling ½ cup of hot pudding into the yolks while whisking constantly. Add another ½ cup, then pour the tempered yolk mixture back into the saucepan.
    3 egg yolks
  4. Cook the pudding over low heat, stirring constantly for 3 to 5 minutes more until it thickens and coats the back of a spoon. Remove from heat immediately once custard consistency is reached to avoid scrambling the eggs.
  5. Stir in vanilla extract and optional raisins. Let the pudding rest off heat for 10 minutes to thicken further. Serve warm or refrigerate for chilled pudding.
    ¼ cup raisins, 1 tsp vanilla extract

Notes

  • Use a heavy-bottomed saucepan to prevent scorching during simmering.
  • Temper egg yolks slowly by adding hot pudding gradually to avoid curdling.
  • Stir frequently every 3-5 minutes while simmering to release starch and prevent burning.

Tried this recipe?

Let us know how it was!

Lemon Bars with Shortbread Crust

March 16, 2026

You need 50 minutes and one baking pan. No mixer, no chilling overnight, no complicated steps that require pastry school.

Lemon Bars with Shortbread Crust served on a plate

The shortbread crust bakes first so the lemon filling doesn't turn it soggy. Parbake the base until it sets, then pour in the filling and bake until it jiggles slightly in the center.

This works for weeknight dessert when you want something bright and citrusy that doesn't require two hours of active work.

QUICK SUMMARY

Lemon bars with shortbread crust deliver tangy lemon filling over buttery, crumbly base. The secret is parbaking the crust before adding the filling - this keeps the bottom firm and prevents sogginess. Fresh lemon juice makes all the difference in brightness.

⏱️Time Reality: 15 minutes hands-on, 35 minutes baking, 2 hours chilling before slicing
🔑Key Move: Bake crust at 350°F for 15-20 minutes until light golden before adding filling
⚠️Watch Out: Overbaking makes filling crack and turn rubbery - remove when center jiggles slightly

Table of Contents

Toggle
  • Why This Recipe Works
  • What You'll Need
    • Ingredient Details
  • Ingredient Swaps
  • What to Serve With It
  • Store and Reheat
  • Frequently Asked Questions
  • Lemon Bars with Shortbread Crust
    • Method 
    • Tried this recipe?

Why This Recipe Works

Parbaking the crust creates a barrier between the wet lemon filling and the shortbread base. For a different take on citrus desserts, try another great dip recipe that balances sweet and tangy.

Quick Reference
⏱️
Prep Time
15 minutes
🔥
Cook Time
30-35 minutes
⏰
Total Time
50 minutes
🍽️
Servings
9-12 servings
📊
Difficulty
Easy
🏷️
Category
Dessert
💡
Quick Tip
Chill crust before baking for firmer results
🎯
Best For
Entertaining | Weeknight dessert | Picnic treat

Five ways this recipe succeeds:

  • Parbake the crust 15-20 minutes - Sets the shortbread base so the wet lemon filling doesn't make it soggy
  • Bake filling until it jiggles slightly - Center should wiggle like Jello when you shake the pan, edges set but not firm
  • Use fresh lemon juice - Bottled juice lacks brightness and makes filling taste flat and one-dimensional
  • Cool gradually at room temperature - Prevents cracks from forming as bars move from hot oven to cold fridge
  • Chill bars 2 hours before slicing - Filling firms up enough to cut clean squares without oozing
Quick Tip
Line your pan with parchment paper leaving 2-inch overhang on two sides - lift bars out in one piece for clean edges

What You'll Need

Ingredients for Lemon Bars with Shortbread Crust

The shortbread crust requires just three ingredients while the lemon filling uses eggs and fresh citrus. Rich mains need something to cut through, and quick beef dish works when you want contrast - pair it with these bars for a complete meal.

🌾
Crust Base
  • 1½ cups all-purpose flour
  • ½ cup powdered sugar
  • ¾ cup cold unsalted butter
  • Pinch of salt
🥚
Lemon Filling
  • 4 large eggs
  • 1½ cups granulated sugar
  • ⅓ cup all-purpose flour
  • ⅔ cup fresh lemon juice
🍋
Citrus & Finish
  • 2 tablespoons lemon zest
  • Powdered sugar for dusting

Ingredient Details

  • All-purpose flour
    Measure by spooning into cup and leveling - too much makes crust dry and crumbly
  • Unsalted butter
    Must be cold for flaky crust - cut into cubes and keep chilled until mixing
  • Fresh lemon juice
    Roll lemons on counter before juicing to release more juice - need 4-5 medium lemons
  • Eggs
    Bring to room temperature 30 minutes before mixing - cold eggs don't blend smoothly into filling
  • Lemon zest
    Zest only the yellow peel - white pith underneath tastes bitter and ruins filling
  • Powdered sugar
    Dust bars after they're fully chilled - warm bars make sugar dissolve and disappear
  • Granulated sugar
    Balances lemon tartness - use full amount or filling tastes too sour

Ingredient Swaps

Most swaps change texture or flavor but still produce edible bars. This side adds the contrast this plate needs, but timing matters - for a quicker option, this simple sauce comes together while bars bake.

Four swaps that work:

  • All-purpose flour → Gluten-free flour blend - Use 1:1 ratio, crust turns slightly more crumbly but holds together
  • Unsalted butter → Coconut oil - Use ¾ cup solid coconut oil, adds subtle coconut flavor and makes crust slightly denser
  • Fresh lemon juice → Bottled lemon juice - Acceptable if fresh unavailable but flavor less bright, use same amount
  • Granulated sugar → Superfine sugar - Dissolves faster in filling, makes texture slightly smoother, use 1:1 ratio

Gluten-Free Flour Blend

Works for: Celiac-friendly baking, similar bake time and handling

Skip if: You want traditional buttery shortbread texture without crumble

Coconut Oil Instead of Butter

Works for: Dairy-free diets, adds tropical notes that pair well with lemon

Skip if: You want classic shortbread flavor without coconut undertones

Instructions

The crust bakes in two stages while the filling bakes once until just set. A good this easy chicken recipe pairs well with citrus desserts - we keep a batch ready for nights like this.

  1. Mix crust and press into pan: Combine 1½ cups flour, ½ cup powdered sugar, and pinch of salt. Cut in ¾ cup cold butter cubes until mixture looks like coarse crumbs. Press firmly into parchment-lined 8x8 inch pan. Chill 30 minutes in fridge.

  2. Parbake crust: Bake chilled crust at 350°F for 15-20 minutes until edges turn light golden and center looks dry. Remove from oven but keep oven on.

  3. Make lemon filling: Whisk 4 eggs, 1½ cups granulated sugar, ⅓ cup flour, ⅔ cup fresh lemon juice, and 2 tablespoons lemon zest until smooth. Pour over hot parbaked crust.

  4. Bake filling: Return pan to 350°F oven and bake 20-25 minutes until filling is set at edges but center jiggles slightly when you shake pan. Edges should not brown.

  5. Cool and chill: Let bars cool at room temperature 1 hour, then refrigerate 2 hours until fully chilled. Lift out using parchment overhang, dust with powdered sugar, and slice into 9-12 squares.

Golden Rule
Wipe knife clean between each cut and dip blade in hot water - warm knife slices through chilled filling without dragging

What to Serve With It

Lemon bars work as standalone dessert but fresh additions cut the richness. Tahini adds the contrast this plate needs, but timing matters - pair these bars with simple homemade tahini for Middle Eastern-inspired meals.

Side Dish Prep Why It Works How to Serve
Fresh berries Easy Natural sweetness complements lemon tang without competing Scatter raspberries or blueberries on serving platter around bars
Whipped cream Easy Soft texture balances tart filling and adds richness Dollop unsweetened whipped cream on individual servings
Mint leaves Easy Fresh aroma and color contrast make presentation pop Place one small mint leaf on each bar before serving
Iced tea Easy Refreshing beverage cuts through sweet-tart dessert Serve unsweetened black or green tea over ice alongside bars
Greek yogurt Easy Creamy, mild tang complements citrus without masking it Serve small bowl of plain Greek yogurt on the side

Three ways to serve it:

  • For picnics: Pack bars in single layer in airtight container with parchment between layers, dust powdered sugar just before serving
  • For entertaining: Arrange bars on white platter, garnish with lemon zest curls and fresh mint sprigs for color
  • For tea time: Cut bars into smaller 16 pieces, serve with hot Earl Grey tea and small fork for British-style presentation
Best Pick
Serve bars cold straight from fridge - chilled filling holds shape better and tangy flavor tastes more pronounced

Store and Reheat

Lemon bars keep 3-4 days in the fridge but texture changes after freezing. The filling stays firm when properly chilled but softens at room temperature after 30 minutes.

Method Time Best For
🌡️ Room Temperature 30 minutes Best texture and flavor restoration without softening crust
📦 Microwave 15-20 seconds Quick warm-up but may soften crust texture
🔥 Oven 5-7 minutes at 325°F Restoring crisp crust without making filling runny

For best results when storing:

  • Refrigerate in airtight container - Layer parchment paper between bars to prevent sticking, keeps 3-4 days
  • Freeze up to 3 months - Wrap individual bars in plastic wrap, then foil, thaw overnight in fridge before serving
  • Don't dust powdered sugar until serving - Sugar dissolves on stored bars, making them look wet and sticky
  • Keep bars away from moisture - Humid storage makes crust soggy and filling weepy, store in coldest part of fridge
  • Bring to room temperature before serving - Cold bars taste less tangy and crust seems harder, wait 20-30 minutes

Frequently Asked Questions

Can I substitute bottled lemon juice for fresh lemon juice in lemon bars?

Yes but flavor suffers noticeably. Bottled lemon juice lacks the bright, vibrant citrus notes that fresh juice provides, making filling taste flat and one-dimensional.

How should I store and reheat leftover lemon bars?

Store in airtight container in fridge up to 4 days with parchment between layers. For best texture, bring bars to room temperature 30 minutes before serving instead of reheating.

How do I tell when lemon bars are done baking?

Filling should jiggle slightly in center like Jello when you gently shake the pan. Edges set firm but center stays soft - overbaking causes cracks and rubbery texture.

Why did my lemon bar crust turn out soggy and how can I fix it?

Soggy crust means you skipped parbaking or underbaked the base. Fix by rebaking entire pan uncovered at 325°F for 5-10 minutes to firm up bottom layer.

Can I scale this lemon bar recipe to fit a larger or smaller pan?

Yes - use 9x13 inch pan and multiply ingredients by 1.5, or use 9x9 inch pan and multiply by 1.25. Adjust bake time by checking for jiggle test at original time minus 5 minutes.

Lemon Bars with Shortbread Crust served on a plate

Lemon Bars with Shortbread Crust

No ratings yet
Lemon bars with shortbread crust deliver a tangy lemon filling over a buttery, crumbly base. Parbaking the crust before adding the filling prevents sogginess and ensures a firm texture. Fresh lemon juice brings brightness that makes these bars perfect for a quick weeknight dessert.
Print Recipe Pin Recipe
Prep Time 15 minutes mins
Cook Time 35 minutes mins
Total Time 50 minutes mins
Servings: 9 servings
Course: Dessert
Cuisine: American
Ingredients Equipment Method Notes

Ingredients
  

  • 1.5 cups all-purpose flour for crust; measure by spooning into cup and leveling
  • 0.5 cup powdered sugar for crust; dust bars after chilling
  • 0.75 cup unsalted butter cold, cut into cubes for crust
  • pinch salt for crust
  • 4 large eggs room temperature for filling
  • 1.5 cups granulated sugar for filling; balances lemon tartness
  • 0.33 cup all-purpose flour for filling
  • 0.67 cup fresh lemon juice about 4-5 medium lemons
  • 2 tablespoons lemon zest only yellow peel, no white pith
  • powdered sugar for dusting after chilling

Equipment

  • 8×8-inch baking pan Used to bake the crust and filling
  • Parchment paper Line pan with overhang for easy removal

Method
 

  1. Combine 1½ cups flour, ½ cup powdered sugar, and a pinch of salt in a bowl. Cut in ¾ cup cold cubed butter until mixture resembles coarse crumbs. Press firmly into a parchment-lined 8x8 inch pan with 2-inch overhang. Chill in fridge for 30 minutes.
    1.5 cups all-purpose flour, 0.5 cup powdered sugar, 0.75 cup unsalted butter, pinch salt
  2. Bake the chilled crust at 350°F (177°C) for 15-20 minutes until edges turn light golden and center looks dry. Remove from oven but keep oven on.
  3. Whisk together 4 room temperature eggs, 1½ cups granulated sugar, ⅓ cup flour, ⅔ cup fresh lemon juice, and 2 tablespoons lemon zest until smooth.
    4 large eggs, 1.5 cups granulated sugar, 0.33 cup all-purpose flour, 0.67 cup fresh lemon juice, 2 tablespoons lemon zest
  4. Pour the lemon filling over the hot parbaked crust. Bake at 350°F (177°C) for 20-25 minutes until edges are set and filling jiggles slightly in center when gently shaken. Edges should not brown.
  5. Allow bars to cool at room temperature for 1 hour, then refrigerate for 2 hours until fully chilled. Lift bars out using parchment overhang, dust with powdered sugar, and slice into 9-12 squares.
    powdered sugar

Notes

  • Parbake crust to prevent sogginess from lemon filling.
  • Remove bars when center jiggles slightly to avoid cracks and rubbery texture.
  • Chill bars fully before slicing for clean edges.

Tried this recipe?

Let us know how it was!

Classic Pumpkin Pie

March 16, 2026

Most desserts disappoint at the table because they're either too sweet or too bland. Pumpkin pie works when you balance warm spices with natural sweetness and bake until the custard sets without cracking.

Classic Pumpkin Pie served on a plate

The filling comes together in one bowl with no tempering or stovetop steps. You whisk everything, pour it into a crust, and let the oven do the work.

Make this for Thanksgiving dinner, holiday potlucks, or weekend dessert when you want something that looks intentional but doesn't require pastry school skills.

QUICK SUMMARY

Classic Pumpkin Pie uses canned pumpkin puree, sweetened condensed milk, and warm spices baked at 350°F until the custard sets. The center should jiggle slightly when done - overbaking creates cracks. Blind bake the crust for 10 minutes to avoid sogginess.

⏱️Time Reality: 20 minutes prep, 50-60 minutes baking, plus 2 hours cooling before slicing
🥄First Critical Step: Whisk filling gently - overmixing adds air bubbles that cause surface cracks
⚠️Watch Out: Custard continues cooking after you pull it from the oven; underbake slightly to prevent curdling

Table of Contents

Toggle
  • Why This Recipe Works
  • What You'll Need
    • Ingredient Details
  • Ingredient Swaps
  • What to Serve With It
  • Store and Reheat
  • Frequently Asked Questions
  • Classic Pumpkin Pie
    • Method 
    • Tried this recipe?

Why This Recipe Works

Baking pumpkin pie at a moderate 350°F sets the custard gradually without scrambling the eggs or burning the crust edges. Most people skip pie, but it balances the meal. For a version that comes together quickly, try easy pie side when you need something sweet with less spice.

Quick Reference
⏱️
Prep Time
20 minutes
🔥
Cook Time
50-60 minutes
⏰
Total Time
1 hour 15 minutes
🍽️
Servings
8 servings
📊
Difficulty
Medium
🏷️
Category
Dessert
💡
Quick Tip
Use canned pumpkin for consistent texture and flavor
🎯
Best For
Holiday dessert, Entertaining, Weekend dessert

Five reasons this works:

  • Canned pumpkin puree delivers consistent moisture - fresh pumpkin varies in water content and requires draining, which adds time and guesswork
  • Sweetened condensed milk eliminates the need for heavy cream - it adds sugar and richness in one ingredient while helping the custard set firmly
  • Blind baking the crust for 10 minutes prevents sogginess - the shell sets before the wet filling soaks in
  • Gentle whisking keeps air bubbles out - overmixed filling puffs up in the oven and cracks as it cools
  • Gradual cooling at room temperature avoids thermal shock - pulling the pie straight from the oven to the fridge causes the surface to split
Golden Rule
Stop baking when the edges are set but the center still jiggles like gelatin - carryover heat finishes the job during cooling

What You'll Need

Ingredients for Classic Pumpkin Pie

Shop for canned pumpkin in the baking aisle, not pumpkin pie filling which contains added sugar and spices. The this side works best when it hits the table at the same time as the main. For a version that comes together quickly, try this simple dip when you want something chocolate-forward instead of spiced.

🥫
Base
  • 15 oz canned pumpkin puree
  • 14 oz sweetened condensed milk
  • 2 large eggs
🌶️
Spices
  • 1 teaspoon ground cinnamon
  • ½ teaspoon ground ginger
  • ¼ teaspoon ground nutmeg
  • ½ teaspoon salt
🥧
Crust
  • 1 unbaked 9-inch pie crust
🍬
Sweetener
  • ½ cup granulated sugar

Ingredient Details

  • Pumpkin puree
    Use 100% pure pumpkin, not pie filling - pie filling contains sugar and spices that throw off ratios
  • Sweetened condensed milk
    One 14 oz can adds sweetness and helps the custard set - don't swap for evaporated milk without adding extra sugar
  • Eggs
    Two large eggs bind the filling - crack them into a separate bowl first to catch any shell pieces
  • Ground cinnamon
    Fresh cinnamon tastes brighter than old spice - replace bottles older than a year
  • Pie crust
    Store-bought or homemade both work - keep it chilled until you're ready to fill and bake
  • Granulated sugar
    Half a cup balances the spices without making the pie cloying - don't skip it even with sweetened condensed milk
  • Salt
    Half a teaspoon sharpens the other flavors - omit only if your crust is heavily salted

Ingredient Swaps

Swapping sweetened condensed milk for evaporated milk requires adding ¾ cup sugar to match sweetness. Most people skip this side, but it balances the meal. For a version that comes together quickly, try a simple sauce on the side when you need something savory to offset the sweet.

Four swaps that work:

  • Evaporated milk + ¾ cup sugar instead of sweetened condensed milk - Mix sugar into evaporated milk until dissolved; slightly less creamy but close in texture
  • Gluten-free pie crust instead of traditional wheat crust - Use a quality store-bought GF crust or make your own with almond flour; minor flavor difference, similar flakiness
  • Pumpkin pie spice mix instead of individual spices - Use 1½ teaspoon pumpkin pie spice to replace cinnamon, ginger, and nutmeg; simplifies measuring
  • Coconut condensed milk instead of dairy condensed milk - Adds subtle coconut flavor; keeps the pie dairy-free and matches original texture

Fresh Roasted Pumpkin

Works for: Seasonal cooking when you want to use whole sugar pumpkins; deeper roasted flavor

Skip if: You need consistent texture - fresh pumpkin requires draining and may still be watery

Brown Sugar or Maple Syrup

Works for: Adding caramel notes or deeper sweetness; maple syrup adds moisture

Skip if: You want traditional flavor - brown sugar darkens the filling and maple changes the taste profile

Instructions

Mixing the filling takes 5 minutes; the oven does the rest for the next hour. The this side works best when it hits the table at the same time as the main. For a version that comes together quickly, try easy lamb side when you need something hearty alongside dessert.

  1. Preheat your oven to 375°F and place the unbaked pie crust in a 9-inch pie dish. Press it into the edges and trim any overhang, then blind bake for 10 minutes until the edges just start to set. Remove from oven and reduce temperature to 350°F.

  2. Whisk the pumpkin puree, sweetened condensed milk, eggs, sugar, cinnamon, ginger, nutmeg, and salt in a large bowl until smooth. Mix gently - vigorous whisking adds air bubbles that cause cracks during baking.

  3. Pour the filling into the pre-baked crust and smooth the top with a spatula. Cover the crust edges with foil strips to prevent burning during the long bake time.

  4. Bake at 350°F for 50-60 minutes until the edges are firm but the center jiggles slightly when you shake the pan. The custard will continue setting as it cools - underbaking slightly prevents curdling.

  5. Cool the pie on a wire rack at room temperature for 2 hours, then refrigerate for at least 4 hours or overnight. Slicing while warm causes the filling to ooze; chilling firms the custard for clean cuts.

Shortcut
Skip blind baking if you're short on time - the crust may be slightly softer on the bottom but the filling will still set properly

What to Serve With It

Pumpkin pie tastes too sweet on its own without something to cut the richness. Most people think dessert needs no sides, but adding a contrasting texture or tartness makes each bite more interesting. For complete planning help, check weeknight crawfish pie meal ideas when you need a full spread.

Side Dish Prep Why It Works How to Serve
Whipped cream Easy Light, airy texture balances dense custard; neutral sweetness lets spices shine Dollop on each slice just before serving; add a pinch of cinnamon on top
Vanilla ice cream Easy Cold, creamy contrast to warm pie; melts into the filling for extra richness Serve warm pie with a scoop on the side; let it melt slightly before eating
Hot coffee Easy Bitterness cuts through sweetness; warm drink complements warm spices Brew strong coffee and serve black or with cream; pairs best with room-temp pie
Apple slices Easy Fresh crunch and mild tartness offset creamy filling; adds textural variety Slice Granny Smith apples thin; toss with lemon juice to prevent browning
Candied pecans Medium Crunchy, nutty, slightly sweet; adds texture missing from smooth custard Sprinkle on pie slices or serve in a small bowl on the side

Three ways to serve it:

  • For holiday entertaining: Serve with maple whipped cream and a side of spiced cider - the warm drink and enhanced cream feel special without extra work
  • For everyday dessert: Top with store-bought whipped cream and drizzle caramel sauce - takes 30 seconds and makes plain pie feel indulgent
  • For texture contrast: Serve with ginger snap cookies on the side - the crispy, spicy cookies balance the smooth, sweet filling
Best Pick
Whipped cream works with every serving style - make it fresh by beating heavy cream with a tablespoon of sugar until soft peaks form

Store and Reheat

Pumpkin pie holds in the fridge for 3-4 days wrapped tightly in plastic wrap or stored in an airtight container. The custard firms up further after the first night, making day-two slices easier to cut cleanly. The beef works best when it hits the table at the same time as the main. For a version that comes together quickly, try something rich like beef when you need a hearty main.

Method Time Best For
🔥 Oven 10-15 minutes at 325°F Rewarming whole pie or multiple slices without sogginess
📦 Microwave 30-45 seconds per slice Quick single-serving reheat when you want warm pie fast
🌡️ Room temperature 20 minutes on counter Letting chilled pie lose its fridge chill without reheating

For best results when storing:

  • Wrap tightly after cooling completely - condensation forms if you cover warm pie, making the crust soggy
  • Keep it in the fridge, not on the counter - custard pies contain eggs and dairy that spoil at room temperature after 2 hours
  • Slice only what you'll eat - whole pies stay fresher longer than pre-cut slices which dry out at the edges
  • Freeze slices individually wrapped in plastic then foil - lasts up to 1 month; thaw overnight in the fridge before serving
  • Reheat in the oven for best texture - microwave works but makes the crust rubbery; oven keeps it flaky

Frequently Asked Questions

Can I substitute fresh pumpkin for canned pumpkin puree?

Yes, but roast sugar pumpkins until tender, scoop out the flesh, and drain it in a cheesecloth-lined strainer for several hours to remove excess water. Fresh pumpkin contains more moisture than canned, which makes the filling runny if you don't drain it thoroughly.

How should I store leftover pumpkin pie and for how long?

Wrap the pie tightly in plastic wrap or store in an airtight container in the fridge for 3-4 days. The custard contains eggs and dairy, so it spoils at room temperature - refrigerate within 2 hours of baking.

How do I tell when pumpkin pie filling is fully cooked?

The edges should be set and slightly puffed while the center jiggles like gelatin when you gently shake the pan. A knife inserted 2 inches from the edge should come out clean - don't test the very center, which finishes setting during cooling.

Why did my pumpkin pie filling crack and how do I avoid it?

Cracks happen from overbaking, rapid cooling, or overmixed filling that contains too much air. Bake until the center still jiggles, cool gradually at room temperature for 2 hours before refrigerating, and mix the filling gently without vigorous whisking.

What are good alternatives to traditional pie crust?

Use a gluten-free crust made with almond or rice flour, a graham cracker crust for sweeter flavor, or a gingersnap cookie crust that echoes the pie's spices. Press crumb crusts firmly into the pan and bake for 10 minutes before adding filling.

Classic Pumpkin Pie served on a plate

Classic Pumpkin Pie

No ratings yet
Classic Pumpkin Pie balances warm spices with natural sweetness using canned pumpkin puree and sweetened condensed milk. The filling is mixed gently and baked until the custard sets with a slight jiggle to prevent cracking. Blind baking the crust and gradual cooling ensure a perfect texture.
Print Recipe Pin Recipe
Prep Time 20 minutes mins
Cook Time 1 hour hr
Total Time 1 hour hr 20 minutes mins
Servings: 8 servings
Course: Dessert
Cuisine: American
Ingredients Equipment Method Notes

Ingredients
  

  • 15 oz pumpkin puree canned, 100% pure (not pie filling)
  • 14 oz sweetened condensed milk one 14 oz can
  • 2 large eggs use large eggs, crack into separate bowl first
  • 0.5 cup granulated sugar balances the spices, do not skip
  • 1 teaspoon ground cinnamon fresh ground cinnamon preferred
  • 0.5 teaspoon ground ginger
  • 0.25 teaspoon ground nutmeg
  • 0.5 teaspoon salt omit if crust is heavily salted
  • 1 pie crust unbaked 9-inch pie crust, store-bought or homemade

Equipment

  • Oven For baking crust and pie
  • 9-inch pie dish To hold the pie and crust
  • Large bowl To whisk the filling
  • Whisk For mixing filling gently
  • Wire rack For cooling the pie
  • Foil strips To cover crust edges during baking

Method
 

  1. Preheat oven to 375°F and place unbaked pie crust into a 9-inch pie dish, pressing into edges and trimming overhang. Blind bake crust for 10 minutes until edges start to set. Remove from oven and reduce temperature to 350°F.
    1 pie crust
  2. In a large bowl, whisk pumpkin puree, sweetened condensed milk, eggs, sugar, cinnamon, ginger, nutmeg, and salt until smooth. Mix gently to avoid adding air bubbles which cause cracking during baking.
    15 oz pumpkin puree, 14 oz sweetened condensed milk, 2 large eggs, 0.5 cup granulated sugar, 1 tsp ground cinnamon, 0.5 tsp ground ginger, 0.25 tsp ground nutmeg, 0.5 tsp salt
  3. Pour the filling into the pre-baked crust and smooth the top with a spatula. Cover the crust edges with foil strips to prevent burning during the long bake.
  4. Bake at 350°F for 50-60 minutes until edges are firm but center jiggles slightly when gently shaken. The custard will continue setting as it cools, so underbake slightly to prevent curdling.
  5. Cool the pie on a wire rack at room temperature for 2 hours, then refrigerate at least 4 hours or overnight. Slicing while warm causes filling to ooze; chilling firms custard for clean cuts.

Notes

  • Blind bake crust 10 minutes for crispness and to prevent sogginess.
  • Whisk filling gently to avoid air bubbles, which cause cracks during baking.
  • Stop baking when center still jiggles slightly; carryover heat finishes setting during cooling.

Tried this recipe?

Let us know how it was!

What Is Shortening? Taste, Uses & Baking Guide

March 16, 2026

Shortening has almost no scent when you open a fresh tub - just a faint, clean stillness that sets it apart from butter or lard immediately. That neutrality is the whole point.

What Is Shortening

This solid fat built its reputation in American kitchens on what it doesn't do: it doesn't add dairy flavor, it doesn't brown the way butter does, and it doesn't melt out of pastry dough before the oven does its job.

QUICK SUMMARY

Shortening is a solid vegetable fat with a neutral flavor and high melting point. It's the go-to fat for flaky pie crusts, stable frostings, and tender cookies where buttery flavor isn't the goal. Modern non-hydrogenated versions reduce trans fat concerns.

👅Flavor: Neutral, mildly fatty, almost no dairy taste
🧁Best For: Pie crusts, frostings, biscuits, deep frying
🌡️Melting Point: Higher than butter - stays solid longer in dough
🏪Buy: Solid tubs labeled vegetable or non-hydrogenated shortening
📦Shelf Life: Unopened tubs keep for months; opened stays good if sealed and cool

What Is Shortening?

Shortening is a solid fat produced from hydrogenated or interesterified vegetable oils - most commonly soybean, cottonseed, or palm oil. The hydrogenation process adds hydrogen to liquid oils, forcing them into a solid state at room temperature.

That's what gives it a consistency similar to softened butter, but without any of the dairy.

The name comes from its function in baking: shorting the gluten strands in flour, which creates a tender, crumbly crumb rather than a chewy one. You'll see it sold as vegetable shortening, baking shortening, or hydrogenated shortening.

Traditional formulas contained significant trans fats. Many modern margarine swaps and shortening brands have now shifted to non-hydrogenated or palm-based versions to reduce that concern.

Shortening is distinct from lard, which is rendered animal fat, and from margarine, which is an emulsified water-and-fat spread. Shortening is pure fat - no water content, no emulsifiers in the basic form.

  • Hydrogenated shortening - The original formula; solid and shelf-stable, historically higher in trans fats.
  • Non-hydrogenated shortening - Uses interesterification instead; lower trans fat, similar texture.
  • Palm-based shortening - Common in commercial baking; solid at room temperature naturally.
  • Emulsified shortening - Contains added lecithin; used in professional cake batters for finer crumb.

What Does Shortening Taste Like?

shortening - What Is Shortening

Shortening is essentially flavorless. That's not a criticism - it's a technical asset. There's a faint, mildly fatty quality on the palate, but no sweetness, no saltiness, and none of the rich dairy notes you'd get from butter.

Compared to unsalted butter, shortening tastes noticeably flat. It sits closer to a neutral vegetable oil in character, but with a heavier, coating mouthfeel because it stays solid longer.

Older tins can develop a very faint roasted or stale note - a sign of oxidation, not freshness.

Sensory SnapshotMild Intensity
👅 Flavor
neutralmildly fattylow sweetness
✋ Texture
solidcreamy when worked
👃 Aroma
almost odorlessfaint vegetable note

Heat doesn't change its flavor meaningfully. In a finished baked good, shortening contributes texture - tenderness, flakiness, a clean break - far more than any identifiable taste.

How to Use Shortening

Pie crusts are where shortening earns its reputation. Its high melting point means it stays solid as you cut it into flour, creating distinct fat pockets that steam apart during baking and produce a reliably flaky, crisp crust. Butter melts faster and can blur those layers; shortening holds them longer.

Golden Rule
Use cold shortening when cutting into flour for pastry. Room-temperature shortening blends too smoothly and loses the pocket structure that creates flake.

Cookie doughs made with shortening spread less than butter-based doughs. The result is a thicker, more tender cookie rather than a crisp, browned one.

For frostings, shortening-based buttercream holds its shape at room temperature far better than all-butter versions - a standard in American bakeries for layer cakes that need to sit out.

Deep frying is another application. Shortening's high smoke point and neutral flavor make it suitable for commercial donut production and pan-frying where you don't want added flavor.

It's also used for greasing baking pans in place of butter or spray, especially when a flavorless coating matters.

How Shortening Is Used
MethodBest ForTip
🥧 Cut InPie crusts, biscuits, sconesKeep shortening cold; work quickly to preserve fat pockets
🍪 CreamedCookie dough, cake battersCream with sugar until light before adding wet ingredients
🍩 Deep FriedDonuts, fried doughMaintain oil temperature; shortening holds heat evenly
🎂 Frosting BaseStable buttercream, decorating icingMix with powdered sugar; add small amounts of liquid to thin
🍳 Pan CoatingHigh-heat greasing, non-stick layerApply thin coat; excess pools and smokes at high heat

Shortening doesn't suit every application. Skip it in recipes that rely on butter's dairy flavor - croissants, beurre monté, or brown-butter sauces won't work.

It also fails in vinaigrettes and other liquid-fat applications. If you need a swap, check our guide to shortening alternatives for context-specific options.

Try It In
🍪Chocolate Dipped Peanut Butter CookiesShortening keeps these thick and tender without excess spread→🍩Cinnamon Sugar Donut MuffinsNeutral fat lets the cinnamon sugar coating take center stage→

How to Buy and Store Shortening

Look for solid tubs or blocks labeled "vegetable shortening" at most grocery stores. Non-hydrogenated options are now widely available and worth choosing over traditional formulas.

Check packaging carefully - avoid cans or tubs with rust, dents, or any swelling, which signals oxidation inside.

Watch Out
Shortening absorbs surrounding odors easily. Don't store an open tub near onions, spices, or anything pungent - the fat will pick up those smells.

Store shortening in a cool, dark cupboard in its original sealed tub or an airtight container. Refrigeration isn't necessary and can make it harder to work with.

Opened shortening stays usable for several months if kept sealed. For a detailed breakdown of timelines and signs of spoilage, see our full shortening freshness guide guide.

Choosing Shortening for Your Baking

If your recipe demands structure over flavor - a flaky pie crust, a stable frosting, a thick cookie - shortening is the correct tool. It won't bring dairy richness, and that's fine.

If you need something closer to butter's taste, butter replacements are worth reviewing before you commit. For dairy-free baking where flavor still matters, non-hydrogenated shortening with a small amount of neutral oil gets you closer to the real thing.

Start with the pie crust. That's where shortening shows you exactly what it can do.

Frequently Asked Questions

Is shortening healthy?

Traditional hydrogenated shortening contains trans fats, which are linked to cardiovascular risk. Modern non-hydrogenated versions reduce that concern significantly. It's still calorie-dense at around 120 kcal per tablespoon, so use it where the texture benefit is worth it.

Can I substitute butter for shortening?

Yes, with trade-offs. Butter adds flavor but melts faster, so cookies spread more and pie crusts may be less flaky. Use a 1:1 swap by weight and expect a richer, slightly different texture.

Does shortening make pastry flakier than butter?

Generally, yes. Shortening's higher melting point keeps fat pockets intact longer during baking, producing more defined flake layers. Butter delivers more flavor but can merge into the dough before those layers fully set.

Is shortening the same as margarine?

No. Margarine is an emulsified blend of water and fat, formulated to mimic butter's spreadability. Shortening is pure fat with no water content, designed for baking structure rather than spreading.

Can shortening go rancid?

Yes. Exposure to heat, light, or air accelerates oxidation, producing an off or stale smell. A properly sealed tub stored in a cool cupboard resists this well for several months after opening.

Old-Fashioned Apple Pie

March 16, 2026

Classic apple pie often disappoints because the crust turns soggy or the filling slides out watery. The fix is using firm Granny Smith apples, adding cornstarch to thicken the juices, and blind-baking the bottom crust before filling.

Old-Fashioned Apple Pie served on a plate

High heat caramelizes the sugars while the lattice top releases steam. You get a golden, flaky crust with tender apple slices that hold their shape.

Make this for holiday meals when you need a dessert that looks impressive but follows a straightforward method. For a version that comes together quickly, this easy cake recipe uses a single layer and no lattice work.

QUICK SUMMARY

Old-fashioned apple pie with a flaky double crust and cinnamon-spiced filling. Tart apples and cornstarch prevent the runny, mushy filling that ruins most pies. Works for Thanksgiving, Christmas, or any weekend when you want a dessert that actually tastes homemade.

⏱️Time Reality: 80 minutes total - 30 minutes hands-on prep, 50 minutes baking.
🔪First Critical Move: Chill dough 1 hour minimum or it shrinks in the oven.
⚠️Watch Out: Pale crust means no egg wash - brush beaten egg on top before baking.

Table of Contents

Toggle
  • Why This Recipe Works
  • What You'll Need
    • Ingredient Details
  • Ingredient Swaps
  • What to Serve With It
  • Store and Reheat
  • Frequently Asked Questions
  • Old-Fashioned Apple Pie
    • Method 
    • Tried this recipe?

Why This Recipe Works

Most apple pies fail because warm butter melts into the dough or soft apples turn to mush. Keep butter ice-cold when mixing and use only firm, tart varieties like Granny Smith. For a version that comes together quickly, homemade beef recipe requires less hands-on time with similar results.

Quick Reference
⏱️
Prep Time
30 minutes
🔥
Cook Time
50 minutes
⏰
Total Time
80 minutes
🍽️
Servings
8 servings
📊
Difficulty
Medium
🏷️
Category
Dessert
💡
Quick Tip
Use tart apples and chill dough before baking.
🎯
Best For
Family gatherings | Holidays | Weekend baking

Five things that make this work:

  • Tart apples stay firm - Granny Smith holds its shape during the 50-minute bake while softer varieties turn to applesauce
  • Cornstarch thickens juices - Two tablespoons absorb the liquid apples release so filling sets instead of pooling
  • Blind-baked bottom crust - Ten minutes weighted prevents the soggy bottom that happens when raw dough meets wet filling
  • Vented top crust - Lattice or slits release steam so pressure doesn't build and crack the sides
  • 375°F balances browning and cooking - High enough to caramelize sugars, low enough to cook apples through without burning edges
Golden Rule
Chill pie dough at least 1 hour to prevent shrinkage - warm dough pulls away from the pan edges during baking.

What You'll Need

Ingredients for Old-Fashioned Apple Pie

Granny Smith apples are non-negotiable because they hold texture and provide the tartness that balances sugar. Most people skip cakes, but it balances the meal - another great cakes recipe works if you want a chocolate option alongside apple.

🍎
Core Ingredients
  • 6-7 medium Granny Smith apples (peeled, cored, sliced ¼-inch thick)
  • 2½ cups all-purpose flour (for crust)
  • ¾ cup granulated sugar
  • 1 cup (2 sticks) cold unsalted butter (cubed)
  • 2 tablespoons cornstarch
🌶️
Spices & Flavor
  • 1½ teaspoons ground cinnamon
  • ¼ teaspoon nutmeg (optional)
  • 1 tablespoon lemon juice
  • ¼ teaspoon salt
🥛
Finishing
  • 1 large egg (beaten, for egg wash)
  • 6-8 tablespoons ice-cold water
  • 2 tablespoons brown sugar (optional depth)

Ingredient Details

  • Granny Smith apples
    Slice ¼-inch thick - thicker pieces stay crunchy, thinner ones dissolve into mush.
  • Cold unsalted butter
    Cut into ½-inch cubes and keep refrigerated until mixing - warm butter makes tough, dense crust.
  • Cornstarch
    Mix directly with apples and sugar - coating each slice prevents clumping and ensures even thickening.
  • Ice-cold water
    Add 1 tablespoon at a time until dough just holds together - too much water makes crust tough.
  • Egg wash
    Brush on crust right before baking - earlier application dries out and won't brown properly.
  • Ground cinnamon
    Use fresh cinnamon within 6 months - old spice tastes flat and dusty instead of warm.
  • Lemon juice
    Toss apples immediately after slicing - prevents browning and adds brightness to balance sweetness.

Ingredient Swaps

Most swaps work if you account for texture and moisture differences. Rich mains need something to cut through, and cakes does exactly that - this related cakes recipe offers a chocolate alternative with similar richness.

Four swaps that work:

  • Dairy-free margarine or coconut oil for unsalted butter - Crust loses some flakiness but stays tender; keep fat ice-cold and handle dough gently
  • Gluten-free all-purpose flour blend for regular flour - Use 1:1 ratio; crust may be slightly crumblier but still holds together with proper chilling
  • Apple cider vinegar for lemon juice - Use same amount; adds similar acidity with subtle apple flavor instead of citrus brightness
  • Milk or cream for egg wash - Crust browns less glossy but still achieves golden color; brush on generously before baking

Whole Wheat Flour (Half or Full)

Works for: Heartier flavor and denser texture; budget-friendly option using pantry staples.

Skip if: You want traditional flaky, light crust - whole wheat creates heavier, grainier texture.

Maple Syrup or Honey for Granulated Sugar

Works for: Adding liquid sweetness with deeper caramel notes; reduces refined sugar.

Skip if: Making crust - extra liquid throws off dough consistency; works better in filling only.

Instructions

Plan for 30 minutes hands-on work, then 50 minutes baking while you clean up or prep other dishes. A good lamb can make or break the plate - simple lamb recipe pairs well with apple pie for a complete holiday meal.

  1. Make the dough - Mix 2½ cups flour and ½ teaspoon salt, cut in 1 cup cold cubed butter with pastry cutter until pea-sized crumbs form, add 6-8 tablespoons ice water 1 tablespoon at a time until dough holds together, divide in half, flatten into disks, wrap in plastic, chill 1 hour minimum.

  2. Prep the filling - Peel, core, and slice 6-7 Granny Smith apples into ¼-inch pieces, toss with ¾ cup sugar, 2 tablespoons cornstarch, 1½ teaspoons cinnamon, 1 tablespoon lemon juice in large bowl until evenly coated, let sit 10 minutes to release juices.

  3. Blind bake bottom crust - Preheat oven to 375°F, roll one dough disk on floured surface to 12-inch circle, fit into 9-inch pie dish, trim edges, line with parchment and pie weights or dried beans, bake 10 minutes, remove weights and parchment, cool 5 minutes.

  4. Assemble pie - Pour apple filling into blind-baked crust, roll second dough disk to 12-inch circle, cut into strips for lattice or leave whole with 4-5 vent slits, place over filling, trim and crimp edges, brush top with beaten egg wash.

  5. Bake until bubbling - Bake at 375°F for 45-50 minutes until crust is golden brown and filling bubbles through vents, cover edges with foil after 30 minutes if browning too fast, cool on wire rack 2 hours before slicing so filling sets.

Watch Out
Don't skip the 2-hour cooling time - cutting into hot pie makes filling run all over the plate instead of holding clean slices.

What to Serve With It

Apple pie works as a standalone dessert, but adding sides turns it into a complete holiday spread. The lamb works best when it hits the table at the same time as the main - planning your crawfish pie dinner helps coordinate timing for multi-course meals.

Side Dish Prep Why It Works How to Serve
Vanilla Ice Cream Easy Cold creaminess melts into warm pie Scoop onto individual slices just before serving
Whipped Cream Easy Light, airy contrast to dense pie Dollop on top or pass bowl at table
Sharp Cheddar Cheese Easy Salty tang cuts through sweet apples Slice thin and lay on warm pie wedge
Caramel Sauce Easy Enhances caramelized apple flavors Drizzle over each slice before plating
Hot Coffee or Tea Easy Bitter notes balance pie sweetness Serve alongside with cream and sugar

Three ways to serve it:

  • Classic holiday style - Warm pie with vanilla ice cream melting on top, served on dessert plates after clearing dinner dishes
  • Brunch centerpiece - Room-temperature slices with spiced whipped cream and fresh coffee for weekend gatherings
  • Cheese board addition - Cold pie wedges alongside sharp cheddar, crackers, and apple slices for casual entertaining
Shortcut
Buy pre-made pie crust if short on time - brush with egg wash and bake according to package directions, focusing effort on the apple filling instead.

Store and Reheat

Apple pie keeps 3-4 days at room temperature or refrigerated, though the crust softens in the fridge. The pack works best when it hits the table at the same time as the main - classic pack dish maintains texture better when stored properly in airtight containers.

Method Time Best For
🔥 Oven 15-20 minutes at 350°F Restoring crispy crust and warming filling evenly
📦 Microwave 1-2 minutes in 30-second bursts Quick single-slice reheating when crust texture doesn't matter
🍞 Toaster Oven 10-15 minutes at 350°F Small portions while maintaining some crust crispness

For best results when storing:

  • Room temperature up to 2 days - Cover loosely with foil or pie dome; keeps crust crisp but filling won't last longer than 48 hours safely
  • Refrigerate for 3-4 days - Wrap tightly in plastic wrap or store in airtight container; crust softens but reheating in oven restores some texture
  • Freeze up to 3 months - Wrap entire pie or individual slices in plastic then foil; thaw overnight in fridge before reheating
  • Reheat covered with foil - Prevents crust from over-browning while filling warms through; remove foil last 5 minutes to crisp top
  • Cool completely before storing - Storing warm pie creates condensation that makes crust soggy and promotes bacterial growth

Frequently Asked Questions

What apples can I substitute for Granny Smith in apple pie?

Use Honeycrisp, Braeburn, or Jonathan apples for similar tartness and firm texture. Avoid Red Delicious or Gala - they turn mushy and lack the acidity that balances sugar.

Can I freeze leftover apple pie and how should I reheat it?

Wrap slices or whole pie tightly in plastic then foil, freeze up to 3 months. Thaw overnight in fridge, then reheat at 350°F for 15-20 minutes covered with foil.

How do I know when the apple pie filling is fully cooked?

Watch for thick juices bubbling through vents or lattice openings - this means cornstarch has activated and filling has thickened. Crust should be deep golden brown, not pale.

Why does my apple pie crust turn out soggy and how to fix it?

Soggy crust happens when wet filling soaks into raw dough. Blind bake the bottom crust 10 minutes before adding filling, and make sure filling has cornstarch mixed in to absorb juice.

How do I scale apple pie recipe for fewer or more servings?

For a smaller 6-inch pie, cut all ingredients in half and bake 35-40 minutes. For a deeper 10-inch pie, increase apples by 50% and bake an additional 10-15 minutes until bubbling.

Old-Fashioned Apple Pie served on a plate

Old-Fashioned Apple Pie

No ratings yet
Classic old-fashioned apple pie features a flaky double crust and cinnamon-spiced filling. Using firm Granny Smith apples and cornstarch prevents a runny, mushy filling, while blind-baking the crust ensures it stays crisp and golden.
Print Recipe Pin Recipe
Prep Time 30 minutes mins
Cook Time 50 minutes mins
Total Time 1 hour hr 20 minutes mins
Servings: 8 servings
Course: Dessert
Cuisine: American
Ingredients Method Notes

Ingredients
  

  • 6-7 medium Granny Smith apples peeled, cored, sliced ¼-inch thick
  • 2.5 cups all-purpose flour for crust
  • 0.75 cup granulated sugar
  • 1 cup unsalted butter cold, cubed
  • 2 tablespoons cornstarch
  • 1.5 teaspoons ground cinnamon
  • 0.25 teaspoon nutmeg optional
  • 1 tablespoon lemon juice
  • 0.25 teaspoon salt
  • 1 large egg beaten, for egg wash
  • 6-8 tablespoons ice-cold water add 1 tablespoon at a time until dough holds together
  • 2 tablespoons brown sugar optional depth

Method
 

  1. Mix 2½ cups flour and ½ teaspoon salt. Cut in 1 cup cold cubed butter with a pastry cutter until pea-sized crumbs form. Add 6-8 tablespoons ice water, 1 tablespoon at a time, until dough just holds together. Divide in half, flatten into disks, wrap in plastic, and chill at least 1 hour.
    2.5 cups all-purpose flour, 0.25 teaspoon salt, 1 cup unsalted butter, 6-8 tablespoons ice-cold water
  2. Peel, core, and slice 6-7 Granny Smith apples into ¼-inch pieces. Toss with ¾ cup granulated sugar, 2 tablespoons cornstarch, 1½ teaspoons cinnamon, 1 tablespoon lemon juice, and optional nutmeg in a large bowl until evenly coated. Let sit 10 minutes to release juices.
    6-7 medium Granny Smith apples, 0.75 cup granulated sugar, 2 tablespoons cornstarch, 1.5 teaspoons ground cinnamon, 1 tablespoon lemon juice, 0.25 teaspoon nutmeg
  3. Preheat oven to 375°F. Roll one dough disk on floured surface to a 12-inch circle and fit into a 9-inch pie dish. Trim edges, line with parchment paper and pie weights or dried beans. Bake for 10 minutes. Remove weights and parchment, then cool crust 5 minutes.
    2.5 cups all-purpose flour, 1 cup unsalted butter
  4. Pour apple filling into blind-baked crust. Roll second dough disk to a 12-inch circle. Cut into strips for lattice top or leave whole and cut 4-5 vent slits. Place over filling, trim and crimp edges, and brush top with beaten egg wash.
    6-7 medium Granny Smith apples, 1 large egg
  5. Bake at 375°F for 45-50 minutes until crust is golden brown and filling bubbles through vents. Cover the edges with foil after 30 minutes if browning too fast. Cool pie on a wire rack for 2 hours before slicing so the filling sets.

Notes

  • Chill pie dough at least 1 hour to prevent shrinkage during baking.
  • Use firm, tart Granny Smith apples for best texture and flavor.
  • Cool pie completely before slicing to avoid runny filling.

Tried this recipe?

Let us know how it was!

What Is Saffron? [Taste, Uses & More]

March 16, 2026

Saffron hits you before it even reaches the pot. Crush a few threads between your fingers and the scent rises immediately - floral and hay-like, with something resinous underneath that no other spice quite replicates.

What Is Saffron

That singular aroma is the first clue that saffron earns its reputation as the world's most expensive spice, not through mystique alone, but through genuine sensory complexity. A single pinch steeps into deep golden warmth that shifts a dish's color, scent, and flavor in ways even a well-stocked pantry otherwise can't achieve.

QUICK SUMMARY

Saffron is the dried stigma of the Crocus sativus flower - hand-harvested, intensely aromatic, and used in tiny pinches. It delivers a floral, slightly bitter, honey-like flavor with earthy warmth. Essential to risotto, paella, and biryani, with whole threads keeping quality for up to three years.

🌸What It Is: Dried flower stigmas from Crocus sativus, hand-harvested in tiny quantities
👅Flavor: Floral, honeyed, subtly bitter with earthy metallic warmth
🍳Best Uses: Rice dishes, fish stews, custards, and slow-simmered broths
🛒Buying Tip: Deep-red threads with orange tips and a strong floral scent
📅Shelf Life: Whole threads stay potent 1-3 years; ground saffron fades within 6-12 months

What Is Saffron?

Saffron comes from Crocus sativus, a small flowering plant cultivated primarily in Iran and Mediterranean regions including Spain and Kashmir.

Each flower produces just three stigmas - the thread-like strands we call saffron - and every one must be picked by hand during a narrow autumn harvest window.

The labor involved is exactly why saffron commands such high prices. It takes roughly 75,000 flowers to yield a single pound of dried threads.

Known as zafferano in Italian, kesar in Hindi, and safran in French and Spanish, the spice travels under several names depending on the cuisine. You'll also see it listed as saffron threads or Crocus sativus threads on specialty packaging.

Three chemical compounds define saffron's character:

  • Crocin - the carotenoid pigment responsible for saffron's golden-yellow color in food
  • Safranal - the volatile compound producing its distinctive floral, hay-like aroma
  • Picrocrocin - the glycoside that delivers saffron's characteristic bitter note

These three compounds together produce an effect no single substitute can fully copy. Turmeric mimics the color but shares none of the floral depth.

If you need a closer swap for a specific recipe, saffron replacements range from annatto to a turmeric-and-floral combination, though none are exact.

What Does Saffron Taste Like?

saffron - What Is Saffron

Saffron's flavor is genuinely unlike anything else in a spice rack. The closest description: mild floral honey crossed with light hay and a faint metallic minerality - present but never sharp.

That mineral edge is what surprises most first-time users. It reads almost like warm iron, gentle enough to sit underneath the floral notes rather than overpower them.

Sensory SnapshotModerate Intensity
👅 Flavor
floralhoneyedsubtly bittermetallic warmthhay-like
✋ Texture
papery when drysilky once infused
👃 Aroma
floralhay-likeresinous

Heat changes the profile significantly. Bloomed in warm liquid, saffron opens into its fullest expression - brighter, more floral, with the bitterness smoothing out into background depth. Used dry and direct, the flavor stays muted and slightly grassy.

Watch Out
Don't add saffron threads directly to high-heat oil or a screaming-hot pan. The strands burn fast, and burned saffron turns aggressively bitter - nothing like the gentle floral notes you're after.

How to Use Saffron

Blooming saffron before adding it to a dish is the standard approach, and it exists for good reason. Steeping the threads in a few tablespoons of warm (not boiling) water, stock, or milk for 15-30 minutes extracts crocin and safranal far more completely than dropping dry threads into a pot.

Persian, Spanish, and Indian cooks have built entire flavor architectures around this technique. Iranian rice dishes use saffron-steeped water poured over the finished crust for both color and aroma.

Spanish paella blooms saffron in warm stock before the rice goes in. Risotto alla Milanese stirs infused saffron through the final ladle of broth, giving the dish its signature amber hue.

How Saffron Is Used
MethodBest ForTip
💧 Warm liquid steepRice, risotto, broths, custardsUse 2-3 tablespoon liquid at 80-90°C; steep 15-30 min
🧈 Bloomed in warm butterPaella, pilaf, baked goodsKeep heat low; swirl off direct flame once fragrant
🔨 Ground then steepedSauces, dressings, delicate custardsGrind with a pinch of sugar to protect the threads
🍲 Slow infusion in simmering brothBouillabaisse, fish stewsAdd early; long simmering develops deeper color

Saffron pairs naturally with short-grain rice varieties like Arborio and Basmati, and with proteins such as seafood and lamb. On the dairy side, cream, milk, and mascarpone all carry the flavor well - saffron-steeped milk appears in Indian kulfi and Scandinavian saffron buns alike.

Citrus zest (lemon or orange), cardamom, and pistachios are classic companions across Persian and Indian cooking.

Avoid pairing saffron with large amounts of bitter greens like radicchio or dandelion - the competing bitterness drowns out saffron's subtler floral notes without adding anything useful.

Try It In
🍚Persian Saffron Milk Rice (Sholeh Zard)A traditional rice pudding where saffron is the central flavor→🌼Sholeh Zard Persian Saffron RiceClassic version with rose water, cinnamon, and pistachio→

How to Buy and Store Saffron

Deep-red threads with slight orange tips and a strong floral scent are the marker of quality saffron. Dull brown strands signal age and low potency; anything labeled "saffron color" or "saffron powder" in unmarked sachets is often adulterated with safflower, marigold, or dyed corn silk.

Best Pick
Iranian (Persian) saffron and Spanish La Mancha saffron carry internationally recognized quality grades. Both offer deep color and strong aroma - either is a reliable choice for culinary use.

For storage, an opaque airtight container in a cool, dark cupboard is the right setup. Avoid clear glass jars on a sunny counter - light degrades crocin faster than almost anything else.

Keep whole threads intact until you're ready to use them.

The full saffron freshness guide runs 1-3 years for threads at peak quality; ground saffron loses most of its potency within 6-12 months, which is why pre-ground versions rarely offer value despite the lower price.

Where to Start With Saffron

New to saffron? Start with a rice dish - the format is forgiving and the results are immediate.

  • Begin with a steep - crush 4-5 threads into 3 tablespoons of warm water and let it sit for 20 minutes before using
  • Use sparingly - ¼ teaspoon of loosely packed threads is enough for a four-serving rice dish or risotto
  • Pick one classic - risotto alla Milanese or a simple saffron pilaf will show you exactly what the spice does without distraction

Once you're comfortable with the bloom technique, you'll find saffron works in contexts beyond rice - from custards to fish broths to baked goods.

The same pinch that colors a pot of biryani golden works just as well steeped into warm cream for a panna cotta.

Frequently Asked Questions

How much saffron should you use per cup of rice?

A small pinch - about 8 to 10 threads - per cup of dry rice is sufficient. Steep them in warm water first and stir the infused liquid into the cooking water for even color and flavor distribution.

Is saffron the same as turmeric?

No - they're entirely different plants with different flavors. Turmeric is a root with earthy, slightly bitter flavor; saffron is a flower stigma with floral, honeyed notes. They share a yellow-gold color but are not interchangeable in most recipes.

How can you tell real saffron from fake?

Drop a thread into cold water - real saffron releases color slowly over several minutes and the thread itself stays red. Fake saffron (dyed corn silk or safflower) bleeds color almost instantly and the strand turns white or pale.

Can you substitute saffron with turmeric?

For color only, yes - a small pinch of turmeric mimics the golden hue. It won't replicate the floral or honeyed notes at all, so the swap works best in heavily spiced dishes where saffron's subtlety would be lost anyway.

Does saffron dissolve completely in liquid?

The threads don't fully dissolve - they soften into silky strands that you can leave in or strain out. The pigment and aroma compounds release into the liquid fully, which is what matters for flavor and color.

5 Best Substitutes for White Chocolate in Baking Recipes

March 16, 2026

You're halfway through melting chocolate for a ganache and the bag runs out. The recipe needs that creamy sweetness and smooth fat content to set properly.

5 Best Substitutes for White Chocolate in Baking Recipes

White chocolate isn't just about color-it brings vanilla-forward richness without cocoa solids. Without it, desserts can taste flat or too bitter.

A few swaps from the pantry or specialty aisle can fill the gap.

QUICK SUMMARY

For most baking needs, we reach for couverture white chocolate or white chocolate chips-they match the fat and sweetness without changing the recipe structure. In melted applications like ganache, couverture provides smoother texture than chips, which contain stabilizers. Watch out for vegan versions that may add coconut or nutty undertones, and skip milk chocolate if color or vanilla flavor matters to the final dish.

🏆Closest match: Couverture white chocolate melts smoothly and tastes nearly identical in all recipes
🔁Use 1:1: All five swaps work at equal weight-no math needed for most dishes
⚠️Color shift: Milk chocolate adds cocoa notes and darker tone-avoid for white desserts
Quick Substitute Reference
#SubstituteBest ForRatioKey Note
1 Couverture White Chocolate ✨ Both 1:1 Melts smoothly, richer flavor
2 White Chocolate Chips 🥧 Baking 1:1 Less creamy when melted
3 Vegan White Chocolate 🌱 Vegan 1:1 Coconut or nutty undertones
4 Condensed Milk & Cocoa Butter 🍳 Cooking 3:1 Requires mixing and tempering
5 Light Milk Chocolate ✨ Both 1:1 Adds cocoa and darker color

1. Couverture White Chocolate 🎯

Couverture white chocolate comes from the baking aisle or specialty shops-it's what pastry chefs reach for when texture matters. The higher cocoa butter content makes it melt smoother than standard bars.

Use 1:1 by weight in any recipe calling for white chocolate. It works in ganache, buttercream, and molded desserts without adjusting technique.

  • ✅ Nearly identical flavor and vanilla notes
  • ✅ Melts smoothly for dipping and drizzling
  • ✅ Sets with a glossy finish
  • ⚠️ Costs more than grocery store bars

The higher fat content means it won't seize as easily when heated. We use it when the chocolate is the star of the dish.

2. White Chocolate Chips 🍪

White chocolate chips sit in most pantries already-they're built for cookies and brownies. The stabilizers that help them hold their shape also mean they don't melt as smoothly as bars.

Use 1:1 by volume in recipes where chips stay intact or just soften. They work in cookies, muffins, and scones.

They'll melt for ganache or frosting, but expect a slightly thicker texture. Stir longer over low heat to get them smooth.

Skip them if you're tempering chocolate for candy work. The stabilizers interfere with proper crystallization.

Quick Tip
Chop white chocolate bars into chip-size pieces if you need better melting behavior.

3. Vegan White Chocolate 🌱

Vegan white chocolate swaps dairy for plant-based fats like coconut oil or cocoa butter blends. The flavor runs less creamy and may carry coconut or almond undertones depending on the brand.

Use 1:1 by weight in any dairy-free recipe. It handles baking and melting the same way standard white chocolate does.

  • 🍰 In baking: Works in cakes and cookies without texture changes
  • 🍫 For melting: Some brands seize more easily-melt gently
  • ⚠️ Flavor shift: Expect nutty or coconut notes instead of pure vanilla

Brands vary widely in sweetness and fat content. Test one before committing to a large batch.

4. Condensed Milk & Cocoa Butter 🧈

Mixing sweetened condensed milk with white cocoa butter builds white chocolate from scratch. You're combining the sweet dairy base with the fat that gives chocolate its snap and melt.

Mix 3 parts condensed milk to 1 part melted cocoa butter over low heat. Stir constantly until smooth and glossy.

This works for homemade white chocolate sauces or frostings. The texture won't match tempered chocolate, so skip it for molded candies.

The mix doesn't set as firm as commercial bars. Use it warm as a drizzle or let it cool into a spreadable consistency. If you're low on condensed milk, Sweetened Condensed Milk substitutes for cooking can fill the gap.

5. Light Milk Chocolate 🥛

Light milk chocolate shifts both flavor and color-it adds cocoa notes and turns desserts beige instead of white. The sweetness and richness still land in the same range.

Use 1:1 by weight in recipes where appearance isn't critical. It works in brownies, cookie dough, or layered bars where color blends with other ingredients.

  • Flavor: Mild cocoa taste replaces vanilla notes
  • Skip if: You need pure white color or vanilla-forward taste

The cocoa content stays low enough that it won't overpower fruit or spice flavors. We use it when the chocolate adds richness but isn't the main event-similar swaps show up in replacements similar to Milk when you need creaminess with a hint of cocoa.

Picking Your White Chocolate Swap

  • 🏆 For ganache or frosting: Couverture white chocolate melts cleanest
  • 🍪 For cookies and muffins: White chocolate chips stay intact through baking
  • 🌱 For vegan baking: Plant-based bars work 1:1 but may taste nuttier
  • ⚡ Skip milk chocolate if: Color or vanilla flavor matters to the final look

Frequently Asked Questions

Can I use dark chocolate instead of white chocolate?

Dark chocolate won't work as a direct swap-it's less sweet, more bitter, and changes the color completely. If you're out of white chocolate, milk chocolate gets closer in sweetness and richness. Dark chocolate needs sugar added and still won't match the vanilla notes white chocolate brings.

Why do my white chocolate chips not melt smoothly?

Chips contain stabilizers that help them hold their shape in cookies but make them melt thicker than bars. Heat them gently over low heat and stir longer than you think you need to. Chopped bars or couverture white chocolate melt more smoothly if you need a liquid consistency.

Is white chocolate really chocolate?

White chocolate contains cocoa butter, sugar, and milk solids-but no cocoa solids, which is what gives dark and milk chocolate their brown color and cocoa flavor. It's technically chocolate because of the cocoa butter. The FDA requires at least 20% cocoa butter for a product to be labeled white chocolate.

Can I make my own white chocolate at home?

You can mix cocoa butter, powdered sugar, milk powder, and vanilla to build homemade white chocolate. The texture won't match commercial bars unless you temper it properly. For quick uses like frostings or sauces, blending sweetened condensed milk with melted cocoa butter gets close enough.

Does vegan white chocolate taste the same?

Vegan white chocolate replaces dairy with plant fats like coconut oil or nut butters, so it tastes slightly different-less creamy and sometimes nuttier. Some brands get closer to traditional flavor than others. Test a small amount first if you're sensitive to coconut or almond undertones.

5 Best Substitutes for White Chocolate in Baking Recipes

5 Best Substitutes for White Chocolate

No ratings yet
If you're out of white chocolate, several pantry or specialty aisle options can fill the gap with minimal adjustment. These substitutes vary in melting behavior, flavor, and texture but generally work well in baking, melting, or cooking applications without changing the recipe structure.
Print Recipe Pin Recipe
Prep Time 8 minutes mins
Cook Time 6 minutes mins
Total Time 14 minutes mins
Servings: 4 servings
Course: Kitchen Tips, Substitutes
Cuisine: Various
Ingredients Method Notes

Ingredients
  

  • 1 cup Couverture White Chocolate Use 1:1 by weight for all recipes; melts smoothly with richer flavor
  • 1 cup White Chocolate Chips Use 1:1 by volume in baking; melts less smoothly due to stabilizers
  • 1 cup Vegan White Chocolate Use 1:1 by weight; flavor may have coconut or nutty undertones
  • Condensed Milk & Cocoa Butter Mix 3 parts condensed milk with 1 part melted cocoa butter; requires stirring and tempering
  • 1 cup Light Milk Chocolate Use 1:1 by weight; adds cocoa flavor and darker color, skip if pure white needed

Method
 

  1. Choose your substitute based on recipe needs such as baking, melting, or vegan requirements.
  2. Prepare the substitute by chopping, melting, or mixing as needed before use.
  3. Apply the substitute in equal amounts by weight or volume as stated for each option.
  4. Stir gently and thoroughly when melting to achieve a smooth, consistent texture.
  5. Taste and check the final flavor and appearance; adjust recipe if color or vanilla notes are critical.

Notes

  • Couverture white chocolate offers the best melting texture and vanilla flavor match.
  • White chocolate chips melt less smoothly due to stabilizers; chop bars for better texture if needed.
  • Condensed milk with cocoa butter creates a homemade white chocolate but won't set as firm as bars.

Tried this recipe?

Let us know how it was!

Crockpot Split Pea Soup with Ham

March 16, 2026

Slow cooker split pea soup turns mushy or stays gritty when you rush it. The trick is letting it cook long enough to break down the peas without turning vegetables into mush.

Crockpot Split Pea Soup with Ham served on a plate

Sautéing onions and garlic first builds flavor the slow cooker can't create on its own. Ham adds smoky depth while peas thicken into a creamy base.

Make this for cold nights when you want something that fills you up without constant attention. For a similar approach to slow-cooked protein, a tender ham on the side uses the same hands-off method.

QUICK SUMMARY

Crockpot split pea soup with ham combines green split peas, ham bone or diced ham, and vegetables in a slow cooker for 6-8 hours. Sautéing aromatics first deepens flavor while low heat breaks down peas into a thick, creamy soup. Hold salt until the end since ham adds plenty.

⏱️Time: 6-8 hours on low, but you can walk away after setup
🔑Method: Sauté vegetables first, then add everything to the crockpot and let it go
⚠️Watch Out: Don't salt early-ham is already salty, taste before seasoning

Table of Contents

Toggle
  • Why This Recipe Works
  • What You'll Need
    • Ingredient Details
  • Ingredient Swaps
  • What to Serve With It
  • Store and Reheat
  • Frequently Asked Questions
  • Crockpot Split Pea Soup with Ham
    • Method 
    • Tried this recipe?

Why This Recipe Works

Sautéing onions, garlic, and celery before slow cooking creates depth the crockpot alone can't deliver. For a version that comes together quickly, creamy buttermilk side dish pairs well with rich soups.

Quick Reference
⏱️
Prep Time
15 minutes
🔥
Cook Time
6-8 hours (low)
⏰
Total Time
6h 15m - 8h 15m
🍽️
Servings
6-8 servings
📊
Difficulty
Easy
🏷️
Category
Main Dish
💡
Quick Tip
Sauté veggies first for deeper flavor
🎯
Best For
Weeknight dinner, meal prep, budget meals

Why it works:

  • Low, slow heat breaks down peas completely - 6-8 hours on low turns split peas soft and creamy without constant stirring
  • Ham bone releases collagen and smoky flavor - the bone adds body and depth you can't get from diced ham alone
  • Sautéing vegetables first caramelizes natural sugars - dry heat develops sweetness before liquid goes in
  • Peas thicken soup naturally without flour - they break down into their own starch, creating creamy texture
  • Seasoning at the end prevents over-salting - ham adds salt during cooking, so waiting lets you control final flavor
Golden Rule
Cook on low for at least 6 hours-peas need time to fully soften or soup stays grainy

What You'll Need

Ingredients for Crockpot Split Pea Soup with Ham

Split peas don't need soaking, but a quick rinse removes dust and debris. Most people skip ham, but it balances the meal.

🥩
Protein
  • Ham bone or 2 cups diced ham
🫘
Base
  • 1 pound green split peas
  • 6 cups vegetable or chicken broth
🥬
Vegetables
  • 1 large onion, diced
  • 3 carrots, diced
  • 3 celery stalks, diced
  • 4 garlic cloves, minced
🌶️
Seasonings
  • 2 bay leaves
  • Black pepper to taste
  • Salt (hold until end)

Ingredient Details

  • Green split peas
    Rinse but don't soak-they cook fine in 6-8 hours without pre-soaking
  • Ham bone
    Use leftover bone from holiday ham or buy smoked ham hocks at the butcher counter
  • Broth
    Low-sodium works best since ham adds salt-use vegetable broth to keep it lighter
  • Onion
    Yellow or white onion both work-dice small so pieces break down during long cooking
  • Carrots
    Cut into ½-inch dice so they soften but don't disintegrate into mush
  • Bay leaves
    Remove before serving-they add herbal depth but taste bitter if eaten whole
  • Black pepper
    Add at the end for bright spice-cooking it too long dulls the flavor

Ingredient Swaps

Split peas stay tender longer than other legumes, so timing matters less. We keep a batch ready for nights like this - something fresh and light cuts through the richness.

Flexible swaps:

  • Ham bone → smoked turkey leg - Same smoky depth but lighter, works if you avoid pork
  • Green split peas → yellow split peas - Cooks slightly faster and tastes sweeter, texture stays the same
  • Chicken broth → vegetable broth - Keeps it vegetarian if you skip the ham, flavor stays clean
  • Carrots → parsnips - Earthier sweetness, holds shape better during long cooking

Ham Bone

Works for: Deep smoky flavor, adds body and collagen to soup

Skip if: You want faster cleanup or don't have leftover bone

Diced Ham

Works for: Faster prep, easier to eat, no bone to fish out

Skip if: You want maximum flavor depth and thicker texture

Instant Pot Method

Works for: Cutting time from 6 hours to 30 minutes, same result

Skip if: You prefer hands-off cooking while you're out

Instructions

Set up takes 15 minutes, then the crockpot does everything else. Rich mains need something to cut through, and asparagus does exactly that - for a quick version, try something tender like asparagus.

  1. Sauté aromatics in a skillet over medium heat for 5-7 minutes. Add diced onion, celery, carrots, and garlic with a drizzle of oil. Stir until onions turn translucent and vegetables soften slightly. This step builds flavor the slow cooker can't create on its own.

  2. Transfer sautéed vegetables to the crockpot. Add rinsed split peas, ham bone or diced ham, broth, and bay leaves. Stir once to combine everything evenly. Don't add salt yet-ham releases plenty during cooking.

  3. Cook on low for 6-8 hours or high for 3-4 hours. Peas should break down into a thick, creamy texture with no gritty bits. If using ham bone, the meat should fall off easily. Skim any foam off the top after the first hour for cleaner flavor.

  4. Remove ham bone and shred meat back into soup. Discard bone, fat, and bay leaves. If soup is too thick, stir in ½ cup hot broth or water. For creamier texture, use an immersion blender to puree half the soup, leaving chunks intact.

  5. Season with salt and black pepper to taste. Start with ¼ teaspoon salt and adjust-ham adds more than you think. Taste for balance and add more pepper if you want heat.

Watch Out
Don't salt early-ham is already salty, and you can't remove it once it's in

What to Serve With It

Split pea soup is thick and filling, so sides should add crunch or acidity. Potato adds the contrast this plate needs, but timing matters - homemade potato recipe works when you need something crispy. For more pork pairing ideas, check out complete pork and sauerkraut meal ideas.

Side Dish Prep Why It Works How to Serve
Crusty bread Easy Soaks up thick soup, adds chewy texture Slice thick, toast lightly, serve warm with butter
Simple green salad Easy Adds fresh crunch and acidity to cut richness Toss greens with vinaigrette just before serving
Roasted root vegetables Medium Echoes soup flavors with caramelized edges Roast at 425°F for 25-30 minutes until golden
Pickled vegetables Easy Bright acidity balances smoky ham Serve chilled on the side or as garnish
Cheese plate Easy Sharp cheese adds savory contrast Include aged cheddar or gruyere with crackers

Three ways to serve it:

  • For weeknight meals: Ladle soup over toasted bread in the bowl, top with cracked pepper
  • For meal prep: Portion into containers with bread on the side so it doesn't get soggy
  • For hosting: Garnish with fresh parsley, serve with garlic crostini and cheese board
Shortcut
Buy pre-diced mirepoix (onion, carrot, celery mix) to skip chopping-sauté it the same way

Store and Reheat

Split pea soup thickens as it sits, so expect to add liquid when reheating. Store ham and soup together unless you're freezing-separation helps maintain texture through freeze-thaw cycles.

Method Time Best For
🍳 Stovetop 10-15 minutes Reheating full batch, adding broth to thin
📦 Microwave 3-5 minutes Single servings, quick lunches
🔥 Oven 20-25 minutes at 350°F Large portions in oven-safe container

For best results when storing:

  • Cool soup completely before refrigerating - Hot soup raises fridge temperature and creates condensation
  • Store in shallow containers for faster cooling - Deep containers stay warm too long in the danger zone
  • Add ¼ cup broth or water when reheating - Soup thickens overnight as peas absorb liquid
  • Freeze in portions for up to 3 months - Use freezer-safe containers, leave 1 inch headspace for expansion
  • Reheat gently on stovetop, stirring often - High heat can scorch thick soup on the bottom of the pot

Frequently Asked Questions

Can I substitute smoked turkey for ham in this split pea soup?

Yes-use a smoked turkey leg or turkey ham for similar smoky flavor with lighter taste. The texture changes slightly since turkey is leaner, but the soup still thickens properly.

How should I store and reheat leftover crockpot split pea soup?

Store in airtight containers in the fridge for 3-4 days or freeze for up to 3 months. Reheat on the stovetop over low heat, adding ¼ cup broth or water to thin since soup thickens as it sits.

How do I tell when split peas and ham are fully cooked in the crockpot?

Peas should be completely soft with no gritty texture-they break down into a creamy consistency after 6-8 hours on low. Ham should fall off the bone easily or be tender enough to shred with a fork.

My soup turned out bland-how can I fix split pea soup flavor?

Add salt and black pepper at the end, starting with ¼ teaspoon salt. If it's still flat, stir in a splash of vinegar or lemon juice for brightness, or add smoked paprika for depth.

Can I double this recipe for a large batch without changing cooking time?

Yes, but only if your crockpot is at least 6 quarts and the doubled ingredients fill it no more than ¾ full. Cooking time stays the same-6-8 hours on low-but check that peas are fully soft before serving.

Crockpot Split Pea Soup with Ham served on a plate

Crockpot Split Pea Soup with Ham

No ratings yet
This crockpot split pea soup with ham features slow-cooked green split peas, smoky ham, and sautéed vegetables creating a thick, creamy soup. Sautéing the aromatics first builds rich flavor that the slow cooker alone can't achieve. Cooked low and slow, the peas fully break down for a smooth texture without mushy vegetables.
Print Recipe Pin Recipe
Prep Time 15 minutes mins
Cook Time 7 hours hrs
Total Time 7 hours hrs 15 minutes mins
Servings: 8 servings
Course: Main Dish
Cuisine: American
Ingredients Equipment Method Notes

Ingredients
  

  • 1 pound green split peas rinsed but not soaked
  • 6 cups broth vegetable or chicken, low sodium preferred
  • 1 ham bone or diced ham use leftover ham bone or 2 cups diced ham
  • 1 large onion diced
  • 3 carrots diced into ½-inch pieces
  • 3 celery stalks diced
  • 4 cloves garlic minced
  • 2 bay leaves
  • black pepper to taste, add at end
  • salt hold until end to avoid over-salting

Equipment

  • Skillet To sauté onion, celery, carrots, and garlic
  • Crockpot For slow cooking the soup

Method
 

  1. In a skillet over medium heat, add a drizzle of oil and sauté diced onion, celery, carrots, and minced garlic for 5-7 minutes until onions turn translucent and vegetables soften slightly. This builds depth of flavor that the slow cooker can't create on its own.
    1 large onion, 3 carrots, 3 celery stalks, 4 cloves garlic
  2. Transfer the sautéed vegetables to the crockpot. Add rinsed split peas, ham bone or diced ham, broth, and bay leaves. Stir once to combine evenly. Do not add salt at this stage as ham will release enough saltiness while cooking.
    1 pound green split peas, 1 ham bone or diced ham, 6 cups broth, 2 bay leaves
  3. Cook on low for 6-8 hours or on high for 3-4 hours until peas break down fully into a thick, creamy texture and ham meat falls off the bone easily if using a ham bone. Skim any foam from the surface after the first hour of cooking for cleaner flavor.
  4. Remove ham bone and shred any remaining meat back into the soup. Discard the bone, fat, and bay leaves. If soup is too thick, stir in ½ cup hot broth or water. For a creamier texture, use an immersion blender to puree half the soup while leaving some chunks intact.
    1 ham bone or diced ham
  5. Season the soup with salt and freshly ground black pepper to taste, starting with ¼ teaspoon salt. Adjust seasoning as needed. Remember that ham adds salt, so taste before adding more.
    black pepper, salt

Notes

  • Cook on low for at least 6 hours to fully soften peas and avoid gritty texture.
  • Hold salt until the end to prevent over-salting since ham adds salt during cooking.
  • Sauté vegetables first to develop a deeper, sweeter flavor that crockpot alone can't create.

Tried this recipe?

Let us know how it was!

Slow Cooker Brown Sugar Ham

March 16, 2026

Holiday dinners need a centerpiece that doesn't demand constant attention. This slow cooker brown sugar ham delivers exactly that-a fully cooked ham transforms into a sticky-glazed main while you focus on everything else.

Slow Cooker Brown Sugar Ham served on a plate

The glaze builds in layers. Brown sugar, mustard, and cloves create a sweet-tangy coating that penetrates scored cuts in the meat. Basting every hour deepens the flavor without requiring precision.

Bone-in ham stays juicier during the slow cook, but boneless works if you watch the timing. Either way, you're looking at 4-6 hours on low heat for a 6-8 pound ham that serves a crowd without stress.

QUICK SUMMARY

This Slow Cooker Brown Sugar Ham uses a fully cooked ham glazed with brown sugar, mustard, and cloves for a sticky-sweet crust. Scoring the surface helps the glaze penetrate while basting every hour builds caramelized layers. Cook on low heat to avoid drying the meat and reach an internal temp of 140°F.

⏱️Timing: 4-6 hours on low heat; plan 30 minutes per pound
🔪First Move: Score ham in a diamond pattern before adding glaze
⚠️Watch Out: High heat dries the ham; stick to low and baste regularly

Table of Contents

Toggle
  • Why This Recipe Works
  • What You'll Need
    • Ingredient Details
  • Ingredient Swaps
  • What to Serve With It
  • Store and Reheat
  • Frequently Asked Questions
  • Slow Cooker Brown Sugar Ham
    • Method 
    • Tried this recipe?

Why This Recipe Works

Most holiday mains require oven space you don't have. Slow cooking frees up your oven while the glaze caramelizes naturally over hours, and you'll find simple homemade pork techniques transfer well when you want to mix up your approach.

Quick Reference
⏱️
Prep Time
10 minutes
🔥
Cook Time
4-6 hours
⏰
Total Time
4 hours 10 minutes to 6 hours 10 minutes
🍽️
Servings
6-8 servings
📊
Difficulty
Easy
🏷️
Category
Main Dish
💡
Quick Tip
Score ham for better glaze penetration and basting.
🎯
Best For
Holiday dinner | Family meal | Meal prep

Three reasons this method beats the oven:

  • Low heat preserves moisture: The slow cooker maintains steady heat that warms the ham without drying the edges
  • Glaze caramelizes gradually: Sugar melts into the scored cuts over hours, creating a sticky coating that stays put
  • Basting happens in the same pot: No transferring between roasting pans or dealing with hot racks
  • Resting time is built in: The ham stays warm in the slow cooker while you plate sides, and carryover heat finishes the job
  • Bone-in cuts stay juicier: The bone conducts heat and adds moisture during the long cook
Quick Tip
Score the ham in a ¼-inch deep diamond pattern before glazing-it holds the sauce and helps caramelization reach the meat.

What You'll Need

Ingredients for Slow Cooker Brown Sugar Ham

Most ingredients sit in your pantry already, but the ham itself requires a quick trip to the butcher. Shopping for fully cooked bone-in ham saves time, and check the weight to match your slow cooker size-6 quarts handles most 6-8 pound cuts.

🍖
Protein
  • 6-8 lb fully cooked ham (bone-in or boneless)
🥢
Glaze Base
  • 1 cup packed brown sugar
  • ¼ cup Dijon or yellow mustard
  • ½ cup pineapple juice or cider vinegar
  • ¼ cup honey or maple syrup
🌶️
Spices
  • 1 teaspoon ground cloves (or 8-10 whole cloves)
  • 1 teaspoon garlic powder
  • ½ teaspoon black pepper

Ingredient Details

  • Fully Cooked Ham
    Look for spiral-cut or whole bone-in ham-spiral cuts hold glaze better in the scored cuts. Avoid raw or uncooked ham, which needs different timing.
  • Brown Sugar
    Dark brown sugar adds deeper molasses notes; light brown works fine. Pack it firmly when measuring to avoid a thin glaze.
  • Mustard
    Dijon adds sharpness, yellow mustard brings milder tang. Both balance the sugar without overpowering the ham.
  • Pineapple Juice
    Canned juice works-avoid fresh if it's too tart. Cider vinegar diluted 1:1 with water substitutes if you skip the pineapple flavor.
  • Cloves
    Ground cloves mix into the glaze evenly; whole cloves stud the ham for aroma but require removal before serving.
  • Honey or Maple Syrup
    Adds viscosity to the glaze and deepens sweetness. Skip if you prefer a less sticky coating.
  • Garlic Powder
    Adds savory depth without raw garlic bite. Fresh minced garlic burns during the long cook.

Ingredient Swaps

Ham glazes adapt to what's open in the pantry, but the acid and sweetness ratio needs balance. Swapping sweeteners shifts the caramelization speed, and a tangy coleslaw side dish pairs well when you're adjusting flavors to match sides.

Four swaps that keep the glaze working:

  • Brown sugar → Coconut sugar or raw sugar: Lighter caramel notes with slightly less sweetness-add 2 tablespoons extra if the glaze tastes flat
  • Mustard → Whole grain or spicy brown mustard: Adds texture or heat while keeping the tang; use the same amount
  • Pineapple juice → Apple cider vinegar diluted 1:1 with water: Sharper acidity without fruit sweetness-balances heavy glazes
  • Honey or maple syrup → Light corn syrup: Neutral sweetness with no flavor complexity; works when you want brown sugar to dominate

Bone-In Ham

Works for: Holiday dinners, feeds 8+, stays juicy during long cooks

Skip if: Your slow cooker is under 6 quarts or you need faster cooking

Boneless Ham

Works for: Smaller servings, easier slicing, fits in compact slow cookers

Skip if: You're cooking for a crowd or want maximum moisture retention

Oven Finish at 400°F

Works for: Crispier caramelization in 10-12 minutes, visible glaze crust

Skip if: You need hands-off cooking or don't want to monitor closely

Instructions

The first hour sets up the glaze base, then basting every hour builds layers. Timing shifts based on ham size-6 pounds needs 4 hours, 8 pounds stretches to 6 hours on low heat.

  1. Score the ham: Use a sharp knife to cut ¼-inch deep diagonal lines across the ham in a diamond pattern. Space cuts about 1 inch apart.

  2. Make the glaze: Whisk brown sugar, mustard, pineapple juice, honey, cloves, garlic powder, and black pepper in a bowl until the sugar dissolves. Pour half the glaze over the scored ham in the slow cooker.

  3. Cook on low: Cover and cook on low for 4-6 hours (30 minutes per pound of ham). Baste with remaining glaze every hour, spooning the liquid from the bottom over the top.

  4. Check temperature: Insert a meat thermometer into the thickest part of the ham (avoid the bone). It's done at 140°F. If it's under, cook another 20-30 minutes and check again.

  5. Rest and slice: Turn off the slow cooker and let the ham rest 10 minutes. Transfer to a cutting board, slice against the grain, and spoon extra glaze from the slow cooker over the slices.

Golden Rule
Baste every hour for a sticky, caramelized crust-skip this and the glaze stays thin and slides off when you slice.

What to Serve With It

Ham needs sides that cut through the sweetness or echo the caramel notes without competing. Most people reach for potatoes, but green vegetables add contrast, and savory pork meal ideas expand your options when you're planning a full spread.

Side Dish Prep Why It Works How to Serve
Mashed Potatoes Easy Comforting starch balances sweet ham glaze with neutral base Spoon glaze over potatoes for extra flavor
Steamed Green Beans Easy Adds freshness and color, cuts through rich glaze Season with butter and lemon to match ham's tang
Roasted Sweet Potatoes Easy Echoes brown sugar notes without adding more sweetness Roast with cinnamon and serve alongside ham slices
Scalloped Potatoes Medium Rich, creamy side pairs well with ham's sweetness Bake alongside ham prep for synchronized timing
Glazed Carrots Easy Mirrors glaze flavors with added texture and color Glaze carrots with butter and honey for cohesive plate

Three ways to serve it:

  • Holiday platter: Slice ham thin, arrange on a platter with roasted sweet potatoes, steamed green beans, and something crispy like fries for texture contrast
  • Weeknight plate: Serve with mashed potatoes and a simple salad-the glaze does the heavy lifting
  • Buffet style: Keep the ham warm in the slow cooker, set out sides family-style, and let guests build their own plates
Best Pick
Scalloped potatoes absorb the ham glaze and add creamy richness that balances the sticky-sweet coating.

Store and Reheat

Ham keeps 3-4 days in the fridge if you slice it first and store it in shallow containers with extra glaze. Most people skip salad, but it balances the meal when you're reheating leftovers, and this quick salad dish works for next-day lunches.

Method Time Best For
🍳 Stovetop 5-7 minutes Small portions reheated in a covered pan with glaze for moist results
📦 Microwave 2-3 minutes Quick reheating of individual servings-cover to trap steam
🔥 Oven 15-20 minutes at 325°F Even reheating for larger slices, maintains moisture with foil cover

For best results when storing:

  • Slice before refrigerating: Whole ham dries out faster than sliced portions stored flat in containers
  • Save the glaze: Store extra glaze separately and reheat it to spoon over leftovers
  • Freeze in portions: Wrap sliced ham tightly in foil, then in freezer bags-lasts up to 3 months
  • Reheat with moisture: Add a tablespoon of water or glaze to the pan or microwave container to prevent drying
  • Avoid high heat: Reheat at moderate temps (325°F or medium stovetop) to keep the meat tender

Frequently Asked Questions

Can I use a frozen ham in the slow cooker for this recipe?

No-frozen ham won't heat evenly in the slow cooker and risks undercooking the center. Thaw the ham in the fridge 24-48 hours before cooking, then follow the recipe as written.

How should I store and reheat leftover slow cooker brown sugar ham?

Store sliced ham in shallow airtight containers with extra glaze for 3-4 days in the fridge. Reheat on the stovetop in a covered pan with a splash of water for 5-7 minutes, or in the microwave for 2-3 minutes covered.

What internal temperature indicates ham is fully heated and safe?

Ham reaches safe serving temperature at 140°F when measured with a meat thermometer in the thickest part (avoid the bone). Fully cooked ham only needs reheating, not cooking to higher temps.

Why did my glaze not stick or caramelize on the ham?

Glaze slides off if you skip scoring the ham or if the glaze is too thin. Score the ham in ¼-inch deep cuts before cooking, and reduce watery glaze by simmering it separately on the stovetop for 5 minutes before basting.

Can I scale this recipe for a smaller or larger slow cooker?

Yes-use a 4-5 pound ham in a 4-quart slow cooker (3-4 hours on low), or up to a 10-pound ham in an 8-quart slow cooker (6-7 hours on low). Adjust glaze by ¼ cup per 2 pounds of ham.

Slow Cooker Brown Sugar Ham served on a plate

Slow Cooker Brown Sugar Ham

No ratings yet
This Slow Cooker Brown Sugar Ham features a fully cooked ham glazed with brown sugar, mustard, and cloves for a sticky-sweet crust. Scoring the ham allows the glaze to penetrate deeply while slow cooking on low heat preserves moisture and builds caramelized layers with easy hourly basting.
Print Recipe Pin Recipe
Prep Time 10 minutes mins
Cook Time 6 hours hrs
Total Time 6 hours hrs 10 minutes mins
Servings: 8 servings
Course: Main Dish
Cuisine: American
Ingredients Equipment Method Notes

Ingredients
  

  • 6-8 lb fully cooked ham bone-in or boneless
  • 1 cup brown sugar packed
  • ¼ cup mustard Dijon or yellow mustard
  • ½ cup pineapple juice or cider vinegar
  • ¼ cup honey or maple syrup
  • 1 teaspoon ground cloves or 8-10 whole cloves
  • 1 teaspoon garlic powder
  • ½ teaspoon black pepper

Equipment

  • Slow cooker Used for cooking the ham on low heat
  • Sharp knife For scoring the ham in a diamond pattern
  • Meat thermometer To check the internal temperature of ham
  • Mixing bowl To whisk glaze ingredients

Method
 

  1. Use a sharp knife to cut ¼-inch deep diagonal lines across the ham in a diamond pattern, spacing cuts about 1 inch apart.
    6-8 lb fully cooked ham
  2. Whisk brown sugar, mustard, pineapple juice, honey, cloves, garlic powder, and black pepper in a mixing bowl until the sugar dissolves.
    1 cup brown sugar, ¼ cup mustard, ½ cup pineapple juice, ¼ cup honey, 1 tsp ground cloves, 1 tsp garlic powder, ½ tsp black pepper
  3. Pour half the glaze over the scored ham placed in the slow cooker. Cover and cook on low for 4 to 6 hours (approximately 30 minutes per pound).
    6-8 lb fully cooked ham, 1 cup brown sugar, ¼ cup mustard, ½ cup pineapple juice, ¼ cup honey, 1 tsp ground cloves, 1 tsp garlic powder, ½ tsp black pepper
  4. Every hour, baste the ham by spooning the remaining glaze from the bottom of the slow cooker over the top to build caramelized layers.
    1 cup brown sugar, ¼ cup mustard, ½ cup pineapple juice, ¼ cup honey, 1 tsp ground cloves, 1 tsp garlic powder, ½ tsp black pepper
  5. Insert a meat thermometer into the thickest part of the ham, avoiding the bone. When it reaches 140°F, the ham is done. If under, cook another 20-30 minutes and check again.
    6-8 lb fully cooked ham
  6. Turn off the slow cooker and let the ham rest for 10 minutes. Transfer to a cutting board, slice against the grain, and spoon extra glaze from the slow cooker over the slices before serving.
    6-8 lb fully cooked ham, 1 cup brown sugar, ¼ cup mustard, ½ cup pineapple juice, ¼ cup honey, 1 tsp ground cloves, 1 tsp garlic powder, ½ tsp black pepper

Notes

  • Score the ham in a ¼-inch deep diamond pattern before glazing to hold the sauce and help caramelization.
  • Baste every hour during cooking for a sticky, caramelized crust; skipping basting results in a thin glaze that slides off.
  • Use low heat to prevent drying out the ham and maintain juiciness, especially for bone-in cuts.

Tried this recipe?

Let us know how it was!

What Is Rum? [Taste, Uses & More]

March 16, 2026

You spot it on the shelf and see three versions of the same bottle - one clear, one gold, one nearly black. Rum is one of the few spirits where the color alone tells you something real about flavor, aging, and where it fits in the kitchen or glass.

What Is Rum

Unlike vodka swaps that aim for neutrality, rum leans into its sugarcane roots, trading on molasses, caramel, and oak in ways that make it genuinely useful far beyond cocktails.

QUICK SUMMARY

Rum is a distilled sugarcane spirit ranging from light and clean to dark and oak-aged. Its flavor runs from subtle vanilla and caramel to deep molasses and tropical fruit. It works in cocktails, marinades, baked goods, and pan sauces - and an opened bottle holds flavor for up to three years.

🌿Origin: Caribbean and Latin America, from fermented sugarcane
🍬Flavor: Molasses, caramel, vanilla, and warm spice by type
🍳Best Uses: Cocktails, flambé, marinades, baking, deglazing
📦Storage: Upright, cool and dark; opened bottles last 1-3 years
⚠️Note: Contains alcohol - plain rum is gluten-free and vegan; flavored types vary

What Is Rum?

Rum is a distilled spirit made from sugarcane byproducts - most commonly molasses, the thick residue left after sugar refining. Some styles, particularly French Caribbean rhum agricole, skip the molasses entirely and distill fresh-pressed cane juice instead, producing a grassier, more complex result.

After distillation, the liquid becomes white rum - clear, lighter-bodied, and relatively clean on the palate. Aging in oak barrels deepens the color and builds layers of caramel, vanilla, and spice, giving us gold and dark rums.

The longer the aging, the more the barrel shapes the flavor.

The spirit goes by several names depending on origin:

  • Ron - Spanish-speaking Caribbean (Cuba, Puerto Rico, Dominican Republic)
  • Rhum - French Caribbean (Martinique, Guadeloupe)
  • Rhum agricole - specifically from fresh cane juice, not molasses
  • Aguardiente - a broader term used in Latin America for cane spirits

What Does Rum Taste Like?

rum - What Is Rum

Dark rum delivers the fullest picture of what this spirit does: molasses depth, toffee sweetness, and warm spice - nutmeg and clove especially - undercut by vanilla and a gentle oak dryness from barrel aging. White rum is lighter and slightly sweet, with clean sugar and faint tropical fruit notes that don't compete with other ingredients.

Aged rum often draws comparisons to a whiskey on the sweeter, fuller end - less grain-forward, more caramel and baked fruit. Heat changes it.

When rum reduces in a pan or goes into a baked batter, the alcohol burns off and the molasses and vanilla notes concentrate.

Sensory SnapshotStrong Intensity
👅 Flavor
molassescaramelvanillatropical fruit
✋ Texture
smoothwarmingmedium to full body
👃 Aroma
toasted sugarbaked fruitoak

How to Use Rum

Rum earns its place across a wider range of cooking than most spirits. In cocktails, white rum is the base for a classic daiquiri or mojito, where its clean sweetness amplifies lime and sugar without dominating.

Aged rum shifts those same drinks toward deeper, more complex territory.

In the kitchen, the flambé technique is where rum gets dramatic. Bananas Foster is the standard application - butter, brown sugar, and dark rum heated until the alcohol ignites, coating banana slices in a sticky, caramel glaze.

The same principle applies to crêpes Suzette when rum replaces the traditional orange liqueur.

Golden Rule
Match rum type to cooking intensity: white rum for delicate dishes and cocktails, dark or aged rum wherever you want caramel depth and warm spice to come through.

Beyond flambé, rum handles several other kitchen jobs well:

How Rum Is Used in Cooking
MethodBest ForTip
🍹 CocktailsDaiquiri, mojito, mai tai, rum punchUse white for fresh citrus drinks; aged for spirit-forward sips
🔥 FlambéingBananas Foster, pan dessertsWarm the rum first - cold alcohol won't ignite easily
🥩 MarinatingJerk chicken, pork shoulder, ribsPair with lime juice, allspice, and brown sugar for Caribbean balance
🍳 DeglazingHam pan sauce, rum glazeDark rum adds body; reduce fully to cook off sharpness
🎂 BakingRum cake, rum raisin ice cream, fruit compoteMacerate raisins overnight in dark rum for maximum absorption

Rum pairs naturally with lime, brown sugar, vanilla, dark chocolate, pineapple, and allspice. It suits Caribbean and Latin American food most directly, but British rum cakes and American Southern cooking have built long traditions around it too.

Avoid using it with delicate green salads or high-acid dairy sauces - the sweetness clashes, and dairy can curdle on contact with alcohol.

Try It In
🍗Air Fryer BBQ Chicken DrumsticksA splash of dark rum deepens the BBQ glaze→🍓Strawberry Crumble BarsMacerate the fruit in white rum for added complexity→🫐Blueberry Crumble BarsDark rum pairs well with blueberry's natural tartness→

How to Buy and Store Rum

Start with the style you need. White rum suits cocktails and light marinades. Gold rum sits in the middle - some aging, more body, still approachable. Dark or aged rum is the pick for baking, sauces, and any recipe where caramel and molasses notes should dominate.

Rhum agricole is worth seeking out if you want a grassier, more nuanced flavor profile.

Watch Out
Avoid bottles with visible cloudiness or sediment - filtered spirits should be clear. Sediment in aged rum can indicate poor storage or a spoiled batch.

Check the proof and any age statement on the label. Higher proof means more intensity in cooking; older age statements signal more oak character.

Once opened, store the bottle upright in a cool, dark place with the cap tight. For a full breakdown of how long it keeps, see our guide to rum freshness guide.

Where to Start With Rum

White rum is the easiest entry point - grab it if cocktails or light cooking are the goal. If a recipe calls for dark rum and you don't have any, check our rum alternatives page before shopping.

For baking, dark aged rum makes the biggest impact and is worth buying a dedicated bottle. Start there, use it in a rum cake or a macerated fruit compote, and the difference from cheaper blended options becomes obvious fast.

Best Pick
For an all-purpose bottle that handles both cooking and cocktails, a mid-range gold rum with an age statement gives you the most range without committing to a single style.

Frequently Asked Questions

What is rum made from?

Most rum is made from molasses, the thick syrup byproduct of cane sugar refining. Rhum agricole is the exception - it's distilled from fresh sugarcane juice, producing a lighter, grassier flavor than molasses-based styles.

How does dark rum differ from light rum?

Dark rum is barrel-aged longer, which pulls color, tannins, and caramel notes from the oak. Light (white) rum is either unaged or briefly aged then filtered clear, leaving it cleaner and more neutral.

Does rum go bad?

It won't spoil in a way that's unsafe, but opened bottles gradually lose flavor. Best quality holds for one to three years after opening, depending on how tightly sealed and how much air is in the bottle.

What does rum taste like in cocktails?

White rum reads as lightly sweet with a clean finish that lets citrus and mint lead. Aged rum in cocktails adds caramel, oak, and spice - closer to a spirit-forward drink than a refreshing one.

Is rum gluten-free?

Plain rum is gluten-free - sugarcane contains no gluten, and distillation removes proteins regardless. Spiced and flavored rums may add extracts or additives, so check the label if gluten sensitivity is a concern.

5 Best Substitutes for Sauvignon Blanc in French Cooking

March 16, 2026

You're halfway through a risotto and realize the Sauvignon Blanc bottle is empty. The recipe needs that wine for a reason-it's not just flavor.

5 Best Substitutes for Sauvignon Blanc in French Cooking

White wine adds acidity to deglaze the pan and brings moisture that helps the rice release its starch. Without it, risotto can taste flat and heavy.

A few pantry swaps can fill that gap. Some match the crispness, others bring acidity without alcohol.

QUICK SUMMARY

Out of Sauvignon Blanc? Dry vermouth mimics the acidity and fruitiness in most cooked dishes. For non-alcoholic options, white wine vinegar diluted with water or broth with lemon juice handle deglazing and moisture.

🍷Best Match: Dry vermouth works 1:1 in sauces and deglazing
🚫No Alcohol: White wine vinegar mix or broth-lemon combo
⚖️Key Factor: Match the acidity level to your recipe's needs
Quick Substitute Reference
#SubstituteBest ForRatioKey Note
1 Dry Vermouth 🍳 Cooking 1:1 Slightly herbal finish
2 White Wine Vinegar Mix 🍳 Cooking 1 tbsp:2 tablespoon water No alcohol present
3 Unoaked Chardonnay 🍳 Cooking 1:1 Less grassy notes
4 Broth Lemon Mix 🍳 Cooking 3:1 ratio Adds savory depth
5 Sparkling Water Mix 🍳 Cooking ½ cup + zest Light finishing touch

1. Dry Vermouth 🍷

Dry vermouth brings the same crisp acidity and fruity notes as Sauvignon Blanc with a hint of herbal complexity. The alcohol content matches, so it deglazes pans and thins sauces just like wine.

Use it 1:1 in white sauces, risotto, or any recipe calling for a splash of white wine. The herbal undertones work well with seafood and poultry but can overpower delicate dishes.

  • ✅ Matches acidity and alcohol content
  • ✅ Deglazes pans effectively
  • ⚠️ Slightly more herbal than Sauvignon Blanc

If you're out of vermouth too, we've tested Dry Vermouth substitutes for cooking that work.

Best Pick
For most cooking applications, dry vermouth is the swap we reach for first.

2. White Wine Vinegar Mix 💧

White wine vinegar diluted with water replicates the acidity and moisture without any alcohol. The sharpness of straight vinegar gets toned down while still brightening your dish.

Mix 1 tablespoon white wine vinegar with 2 tablespoon water for every tablespoon of Sauvignon Blanc. This ratio keeps the tang balanced without overpowering other flavors.

The mix lacks the fruity aroma wine brings, so it's better for dishes where acidity matters more than complexity-think seafood, salad dressings, or pan sauces that cook down quickly.

  • Acidity: Matches wine's tang after dilution
  • Use in: Pan deglazing, dressings, light sauces
  • Skip if: Wine's fruity notes are central to the recipe

More White Wine substitutes for cooking cover broader wine swaps.

3. Unoaked Chardonnay 🍾

Unoaked Chardonnay provides similar acidity and fruit flavors with a rounder, less grassy profile. It won't bring Sauvignon Blanc's herbal snap, but the moisture and alcohol content work the same way.

Use it 1:1 in white sauces, braised chicken, or creamy pasta dishes. Chardonnay's mild character blends into the background rather than announcing itself.

Unoaked Chardonnay

Works for: white sauces, poultry, cream-based dishes

Skip if: you need Sauvignon Blanc's grassy, herbal bite

4. Broth + Lemon Juice 🥣

Broth mixed with lemon juice adds moisture and acidity without alcohol. Chicken or vegetable broth brings savory depth, while lemon supplies the tang.

Combine 3 parts broth with 1 part fresh lemon juice for every part of Sauvignon Blanc. Stir it in early so the flavors have time to meld-this combo needs a few minutes to blend properly.

The broth adds umami that wine doesn't have, so this works best in dishes where that savory note fits-deglazing pans for chicken, finishing seafood stews, or moistening grains. It won't carry a dish where wine flavor is front and center.

If you're low on lemon, Lemon Juice replacements that work can help.

5. Sparkling Water + Zest 🫧

Sparkling water with lemon zest provides moisture and a subtle citrus lift without alcohol or strong acidity. The carbonation helps lighten sauces just like wine would.

Use ½ cup sparkling water with the zest of half a lemon per cup of Sauvignon Blanc. Add it near the end of cooking-the bubbles dissipate quickly, so timing matters.

  • 🍳 In finishing sauces: Adds moisture without weight
  • ⚠️ Limited use: Can't deglaze or handle recipes needing strong acidity

This swap is best for light applications where you need liquid but not much flavor punch. Skip it if your recipe depends on wine's depth-check swaps when Lemon Pepper runs out for citrus-forward seasoning options.

Match Your Pantry

Got vermouth? That's your go-to for nearly any recipe calling for Sauvignon Blanc. The acidity and alcohol match almost exactly.

Cooking without alcohol? White wine vinegar diluted with water handles pan deglazing and adds tang. Broth mixed with lemon juice works for dishes where savory depth fits the flavor profile.

Chardonnay steps in when you've got another white wine open. Sparkling water with zest fills the moisture gap in light finishing sauces but can't handle recipes where wine does heavy lifting.

Frequently Asked Questions

Can I use apple cider vinegar instead of white wine vinegar?

Apple cider vinegar works but brings a sweeter, fruitier tang than white wine vinegar. Dilute it the same way-1 tablespoon vinegar to 2 tablespoon water. It fits better in dishes where that apple note won't clash, like pork or fall-flavored recipes.

Does cooking wine work the same as drinking wine?

Cooking wine contains added salt, which throws off your seasoning balance. If it's your only option, use it but reduce or skip added salt in the recipe. Regular drinking wine gives you better control over flavor.

Can I skip the wine entirely in risotto?

You can replace it with extra broth and a squeeze of lemon juice, but risotto won't taste the same. The wine's acidity helps the rice release starch properly and adds depth. Broth alone makes it heavier and less bright.

Will red wine work in a pinch?

Red wine changes both the flavor and color of your dish-it brings tannins and deeper fruit notes that don't match Sauvignon Blanc's crisp profile. Save it for recipes specifically calling for red wine instead.

How long does opened wine last for cooking?

White wine stays good for cooking about 3-5 days after opening if you keep it sealed in the fridge. Once it starts tasting too vinegary to drink, it's past its cooking prime too. Dry vermouth lasts longer-up to a few months refrigerated.

5 Best Substitutes for Sauvignon Blanc in French Cooking

5 Best Substitutes for Sauvignon Blanc

No ratings yet
If you run out of Sauvignon Blanc while cooking, several effective substitutes can match its acidity and moisture for sauces and risotto. Dry vermouth is the closest match for alcohol-based swaps, while white wine vinegar diluted with water or broth with lemon juice work well alcohol-free. For lighter finishing touches, sparkling water with lemon zest adds moisture without overpowering flavor.
Print Recipe Pin Recipe
Prep Time 10 minutes mins
Cook Time 8 minutes mins
Total Time 18 minutes mins
Servings: 4 servings
Course: Kitchen Tips, Substitutes
Cuisine: Various
Ingredients Method Notes

Ingredients
  

  • 1 cup Dry Vermouth Use 1:1 substitute for Sauvignon Blanc; slightly herbal finish
  • 1 tablespoon White Wine Vinegar Mix Mix 1 tablespoon white wine vinegar with 2 tablespoon water for each tablespoon of Sauvignon
  • 1 cup Unoaked Chardonnay 1:1 substitute, less grassy notes than Sauvignon Blanc
  • 3 parts broth + 1 part fresh lemon juice Broth Lemon Mix Combine 3 parts broth with 1 part lemon juice as substitute
  • ½ cup Sparkling Water Mix Use ½ cup sparkling water with zest of half a lemon per cup of Sauvignon

Method
 

  1. Choose the substitute based on availability and recipe needs.
  2. Prepare substitutes as needed: dilute vinegar, mix broth and lemon, or zest lemon with sparkling water.
  3. Apply the substitute using the recommended ratios to match the original wine amount.
  4. Adjust final seasoning and acidity to taste before finishing the dish.

Notes

  • Dry vermouth is best for cooking with alcohol and deglazing pans.
  • Diluted white wine vinegar and broth-lemon are excellent alcohol-free options.
  • Sparkling water with lemon zest works well for light sauces needing moisture but not acidity.

Tried this recipe?

Let us know how it was!

Slow Cooker Meatballs in Tomato Sauce

March 16, 2026

START OF ARTICLE

You want meatballs that don't fall apart, sauce that clings without watering down, and both done in time for dinner without hovering over a stove. Slow cooker meatballs solve all three.

Slow Cooker Meatballs in Tomato Sauce served on a plate

Mix ground beef and pork with breadcrumbs and eggs, form them into 1.5-inch rounds, and the slow cooker does the rest. Brown them first for 3-4 minutes per side - that step keeps them intact and adds the slightly firm exterior that tells you they're done right.

This works for weeknight dinners when you need hands-off cooking, meal prep Sunday when you're batch-cooking for the week, or casual entertaining when you want hot food ready without timing stress.

QUICK SUMMARY

Slow Cooker Meatballs in Tomato Sauce combines ground beef and pork with breadcrumbs and eggs for tender, juicy meatballs that cook hands-off for 4-6 hours. Brown them first to lock in shape and texture, then let the slow cooker simmer them in crushed tomatoes with garlic and Italian seasoning until they hit 160°F internal temperature.

⏱️Time Reality: 20 minutes prep, then 4-6 hours on low with zero babysitting required
🔥Critical First Step: Sear meatballs in a hot skillet before slow cooking to prevent crumbling
⚠️Watch Out: Skip the fat drain after browning and you'll end up with greasy sauce - pour it off first

Why This Recipe Works

Most people skip chicken, but it balances the meal. If you want juicy protein with minimal effort, this juicy chicken uses the same slow-cook method with different seasonings.

Quick Reference
⏱️
Prep Time
20 minutes
🔥
Cook Time
4-6 hours on low
⏰
Total Time
4 hours 20 minutes to 6 hours 20 minutes
🍽️
Servings
6-8 servings
📊
Difficulty
Easy
🏷️
Category
Main Dish
💡
Quick Tip
Brown meatballs before slow cooking for better texture.
🎯
Best For
Weeknight dinner | Meal prep | Casual entertaining
  • Ground pork adds moisture - beef alone dries out during the long cook, but pork fat keeps each bite tender and juicy without turning mushy
  • Breadcrumbs bind without toughening - they absorb liquid and create structure that holds through 6 hours of simmering without making meatballs dense
  • Searing locks in shape - 3-4 minutes per side in a hot skillet creates a slightly firm exterior that prevents meatballs from falling apart in the sauce
  • Crushed tomatoes stay thick - they break down just enough to coat meatballs without turning watery, unlike diced tomatoes that release too much liquid
  • Italian seasoning carries through - dried herbs withstand long cooking better than fresh, delivering herbaceous flavor that doesn't fade after hours in the slow cooker
Quick Tip
Form 1 to 1.5-inch meatballs for even cooking and tender texture - larger ones stay raw in the center, smaller ones overcook and dry out.

What You'll Need

Ingredients for Slow Cooker Meatballs in Tomato Sauce

Check your pantry before shopping - you probably have breadcrumbs, eggs, and Italian seasoning already. Beef adds the contrast this plate needs, but timing matters, so grab a rich beef variation if you want another slow cooker main with similar hands-off appeal.

🍗
Meat
  • 1 lb ground beef (80/20)
  • 1 lb ground pork
🫙
Binders
  • 1 cup breadcrumbs
  • 2 large eggs
  • ½ cup Parmesan cheese (grated)
🧄
Aromatics
  • 4 cloves garlic (minced)
  • ½ onion (diced)
🥢
Sauce Base
  • 28 oz canned crushed tomatoes
  • 2 teaspoon Italian seasoning
  • ¼ cup fresh parsley (chopped)
  • Salt and black pepper

Ingredient Details

  • Ground beef (80/20)
    Higher fat content keeps meatballs moist during long cooking - 90/10 lean beef produces dry, crumbly results
  • Ground pork
    Adds fat and tenderness that beef alone can't deliver - skip it and your meatballs turn dense and tough
  • Breadcrumbs
    Measure exactly - too much dries meatballs, too little makes them fall apart in the sauce
  • Eggs
    Use at least 1 egg per pound of meat - insufficient binder leads to crumbly meatballs that break apart
  • Canned crushed tomatoes
    Crushed tomatoes stay thick and cling to meatballs - diced tomatoes release too much liquid and thin out the sauce
  • Italian seasoning
    Dried herbs hold up better than fresh during 6 hours of slow cooking - add fresh parsley at the end for brightness
  • Parmesan cheese
    Optional but adds umami depth - grate it fresh for better melting and flavor than pre-grated versions

Ingredient Swaps

Ground turkey works if you're cutting fat, but add olive oil or extra egg to compensate for dryness. For a sauce with deeper flavor, try a rich beef variation that uses red wine and mushrooms instead of straight tomatoes.

  • Ground turkey for beef - Lean meat produces dryer meatballs, so add 2 tablespoons olive oil or an extra egg to restore moisture and binding
  • Gluten-free breadcrumbs for regular breadcrumbs - Maintains binding with slightly different texture; use same amount, crush rice crackers work too
  • Nutritional yeast for Parmesan cheese - Lowers fat and adds cheesy flavor without dairy; use ⅓ cup nutritional yeast for ½ cup Parmesan
  • Fresh basil and oregano for Italian seasoning - Fresher flavor but use 3 times the volume since fresh herbs are less potent than dried

Oven baking at 350°F for 25-30 minutes

Works for: Quick cooking when you don't have 4-6 hours, crustier exterior texture

Skip if: You want the most tender meatballs, you're making multiple batches, you need hands-off cooking

Passata or tomato purée for crushed tomatoes

Works for: Smoother sauce texture, thicker consistency without chunks

Skip if: You like rustic sauce with texture, you only have diced tomatoes on hand

Instructions

Mix ingredients in one bowl, form meatballs, brown them, then let the slow cooker take over. Rich mains need something to cut through, and potatoes does exactly that - for a version that comes together quickly, simple homemade potatoes roast in 25 minutes while meatballs finish cooking.

  1. Mix the meatball mixture - Combine ground beef, ground pork, breadcrumbs, eggs, Parmesan, minced garlic, diced onion, 1 teaspoon Italian seasoning, 1 teaspoon salt, and ½ teaspoon black pepper in a large mixing bowl. Stir with a wooden spoon or your hands until just combined, about 1 minute - overmixing makes meatballs tough and dense.

  2. Form and sear meatballs - Shape mixture into 1 to 1.5-inch meatballs (about 24-30 total). Heat 2 tablespoons olive oil in a large skillet over medium-high heat until shimmering, about 2 minutes. Add meatballs in batches without crowding and brown 3-4 minutes per side until golden. Drain excess fat from skillet and set meatballs aside.

  3. Layer sauce in slow cooker - Pour half the crushed tomatoes into slow cooker bottom and add remaining 1 teaspoon Italian seasoning, remaining garlic if desired, and a pinch of salt. Spread sauce evenly to prevent meatballs from sticking during cooking.

  4. Slow cook meatballs - Arrange browned meatballs in slow cooker in a single layer if possible, leaving small gaps between them. Pour remaining crushed tomatoes over top. Cover and cook on low 4-6 hours until meatballs reach 160°F internal temperature when checked with an instant-read thermometer.

  5. Rest and finish - Turn off slow cooker and let meatballs sit in sauce 10 minutes for flavors to meld. Stir in fresh parsley, taste sauce, and adjust salt and pepper. Serve hot with sauce spooned over meatballs.

Golden Rule
Don't overcrowd slow cooker - leave space between meatballs for even heat distribution and proper sauce coverage or they'll steam instead of simmer.

What to Serve With It

Meatballs need something to soak up the sauce and balance the richness. You'll want sides that take less time than the main so everything hits the table together - check out these honey garlic meatballs meal planning ideas for more pairing options beyond what's listed here.

Side Dish Prep Why It Works How to Serve
Spaghetti Easy Classic pasta absorbs tomato sauce and adds substance to the plate Boil pasta last 10 minutes of meatball cook time, toss with butter and Parmesan before plating
Garlic bread Easy Crunchy contrast soaks up extra sauce without competing with meatball flavor Toast sliced baguette with butter and minced garlic in 400°F oven for 8-10 minutes
Simple green salad Easy Fresh, crisp texture cuts through rich tomato sauce and heavy meatballs Toss mixed greens with olive oil, lemon juice, salt just before serving
Roasted vegetables Medium Earthy flavors balance richness, add color and nutrition to the plate Roast broccoli, zucchini, or bell peppers at 425°F for 20-25 minutes with olive oil and salt
Mashed potatoes Medium Comforting base soaks up sauce like pasta but with creamier, buttery texture Boil potatoes 15-20 minutes, mash with butter and milk, season with salt and pepper

Three ways to serve it:

  • Weeknight dinner - Serve over spaghetti with garlic bread and a quick green salad for a complete Italian-inspired meal
  • Meal prep - Portion meatballs and sauce into containers with cooked rice or pasta for grab-and-go lunches throughout the week
  • Casual entertaining - Arrange meatballs on a platter with toothpicks, serve sauce on the side for dipping, add polenta or focaccia
Shortcut
Use fresh herbs like parsley or basil in the last 10 minutes for bright flavor - dried herbs work during cooking but fresh ones add punch at the end.

Store and Reheat

Meatballs keep 3-4 days in the fridge if stored properly in shallow containers. A good homemade can make or break the plate, so for a version that comes together quickly, creamy homemade side dish adds brightness when reheating these rich meatballs. Freeze them up to 3 months for longer storage.

Method Time Best For
🍳 Stovetop 5-7 minutes over medium heat Even reheating of meatballs in sauce without drying out
📦 Microwave 2-3 minutes, stirring halfway Quick reheating for 1-2 servings when you're short on time
🔥 Oven 15-20 minutes at 350°F covered Reheating larger portions without drying, works for meal prep batches

For best results when storing:

  • Use shallow airtight containers - Meatballs cool faster in shallow containers (under 2 inches deep), preventing bacterial growth and maintaining texture
  • Store sauce and meatballs together - Keeping them in sauce prevents meatballs from drying out during storage and reheating
  • Freeze in portion sizes - Divide into single-meal portions before freezing so you can thaw only what you need without refreezing leftovers
  • Add moisture when reheating - Sprinkle 1-2 tablespoons water over meatballs before reheating to prevent drying, especially if sauce has thickened in storage
  • Thaw overnight in fridge - Move frozen meatballs to refrigerator 24 hours before reheating for even warming and best texture

Frequently Asked Questions

Can I substitute ground turkey for beef in slow cooker meatballs?

Yes, but add 2 tablespoons olive oil or an extra egg because turkey is leaner than beef and produces dryer meatballs. You'll get the same shape and texture if you compensate for the missing fat.

How long can I store leftover slow cooker meatballs and sauce?

Store them in an airtight container in the fridge for 3-4 days or freeze up to 3 months. Keep meatballs submerged in sauce to prevent drying during storage.

Should I brown meatballs before adding to the slow cooker?

Yes - brown them 3-4 minutes per side in a hot skillet first. Searing creates a slightly firm exterior that prevents meatballs from falling apart during 4-6 hours of slow cooking.

Why are my slow cooker meatballs dry and how do I fix them?

Dry meatballs happen when you use lean meat or cook longer than 6 hours. Include ground pork for fat, cook on low 4-6 hours maximum, and serve with extra sauce or add moisture before reheating leftovers.

Can I prepare meatballs and sauce ahead and freeze them?

Yes - brown meatballs, cool completely, then freeze in sauce for up to 3 months in freezer-safe containers. Thaw overnight in the fridge before reheating on the stovetop or in the slow cooker.

Slow Cooker Meatballs in Tomato Sauce served on a plate

Slow Cooker Meatballs in Tomato Sauce

No ratings yet
Slow Cooker Meatballs in Tomato Sauce combines tender meatballs made from ground beef and pork with a thick, flavorful tomato sauce. Browning the meatballs before slow cooking locks in their shape and texture, while the slow cooker simmers them gently for 4-6 hours to develop rich flavor and juiciness.
Print Recipe Pin Recipe
Prep Time 20 minutes mins
Cook Time 6 hours hrs
Total Time 6 hours hrs 20 minutes mins
Servings: 8 servings
Course: Main Dish
Cuisine: Italian
Ingredients Equipment Method Notes

Ingredients
  

  • 1 lb ground beef 80/20 fat
  • 1 lb ground pork
  • 1 cup breadcrumbs
  • 2 eggs large
  • 0.5 cup Parmesan cheese grated
  • 4 cloves garlic minced
  • 0.5 onion diced
  • 28 oz canned crushed tomatoes
  • 2 teaspoon Italian seasoning divide between mixture and sauce
  • 0.25 cup fresh parsley chopped, added at end
  • 1 teaspoon salt plus pinch for sauce
  • 0.5 teaspoon black pepper
  • 2 tablespoon olive oil for browning meatballs

Equipment

  • Large skillet For browning meatballs before slow cooking
  • Slow cooker To simmer meatballs in tomato sauce
  • Mixing bowl For combining meatball ingredients

Method
 

  1. Combine ground beef, ground pork, breadcrumbs, eggs, Parmesan cheese, minced garlic, diced onion, 1 teaspoon Italian seasoning, 1 teaspoon salt, and ½ teaspoon black pepper in a large mixing bowl. Stir with a wooden spoon or your hands until just combined, about 1 minute. Avoid overmixing to prevent tough meatballs.
    1 lb ground beef, 1 lb ground pork, 1 cup breadcrumbs, 2 eggs, 0.5 cup Parmesan cheese, 4 cloves garlic, 0.5 onion, 2 tsp Italian seasoning, 1 tsp salt, 0.5 tsp black pepper
  2. Shape mixture into 1 to 1.5-inch meatballs, about 24 to 30 total. Heat olive oil in a large skillet over medium-high heat until shimmering, about 2 minutes. Add meatballs in batches without crowding and brown 3 to 4 minutes per side until golden. Drain excess fat from skillet and set meatballs aside.
    2 tbsp olive oil
  3. Pour half of the crushed tomatoes into the slow cooker base, then add remaining 1 teaspoon Italian seasoning, any remaining garlic if desired, and a pinch of salt. Spread sauce evenly to prevent meatballs from sticking during cooking.
    28 oz canned crushed tomatoes, 2 tsp Italian seasoning, 1 tsp salt, 4 cloves garlic
  4. Arrange browned meatballs in the slow cooker in a single layer if possible, leaving small gaps between them. Pour remaining crushed tomatoes over the top. Cover and cook on low for 4 to 6 hours until meatballs reach an internal temperature of 160°F when checked with an instant-read thermometer.
    28 oz canned crushed tomatoes
  5. Turn off the slow cooker and let meatballs sit in sauce for 10 minutes to meld flavors. Stir in fresh chopped parsley, taste the sauce, and adjust salt and pepper as needed. Serve hot with sauce spooned over the meatballs.
    0.25 cup fresh parsley, 1 tsp salt, 0.5 tsp black pepper

Notes

  • Brown meatballs in a hot skillet to prevent them from falling apart during cooking.
  • Drain excess fat after browning the meatballs to avoid greasy sauce.
  • Leave space between meatballs in the slow cooker for even cooking and sauce coverage.

Tried this recipe?

Let us know how it was!

5 Best Substitutes for Nam Prik Pao in Thai Curry

March 16, 2026

You're halfway through a Thai stir-fry when you reach for the Nam Prik Pao and find the jar scraped clean. The recipe needs that smoky-sweet depth, but you don't have time to run out.

5 Best Substitutes for Nam Prik Pao in Thai Curry

Nam Prik Pao brings umami, smokiness, and a balance of heat and sweetness to dishes. The best substitute depends on which of those layers your recipe relies on most.

QUICK SUMMARY

Thai roasted chili paste and miso with chili oil are the closest matches for umami depth. Both deliver the savory backbone Nam Prik Pao provides, though they differ in texture and sweetness. If you need heat and smokiness fast, sambal with brown sugar and smoked paprika works for quick sauces.

🌶️Closest match: Thai roasted chili paste for stir-fries and curries
📏Ratio: 1:1 for most swaps, adjust sweetness or heat after tasting
⚠️Common mistake: Using sambal straight without balancing sweetness or smoke

5 Nam Prik Pao Substitutes Without Big Changes

These swaps keep the core flavors of Nam Prik Pao in place. Some lean more savory, others lean sweeter, but all work when you're out.

Quick Substitute Reference
#SubstituteBest ForRatioKey Note
1 Roasted Chili Paste 🍳 Cooking 1:1 Less smoky sweetness
2 Miso & Chili Oil 🍳 Cooking 1 tablespoon miso + 1 teaspoon oil Thinner texture
3 Sambal Mix 🍳 Cooking 1 tablespoon + sweetener Needs sugar and paprika
4 Pepper-Soy Paste 🍳 Cooking 1 tablespoon + seasonings Milder heat
5 Chili-Garlic Jam 🍳 Cooking 1:1 Lower umami depth

1 - Roasted Chili Paste

Thai roasted chili paste shares the same fermented chili base as Nam Prik Pao. It brings umami and heat but skips some of the caramelized sweetness.

Use 1 tablespoon per 1 tablespoon of Nam Prik Pao. Add a pinch of brown sugar or palm sugar if your dish needs that smoky-sweet finish.

Thai Roasted Chili Paste

Works for: Stir-fries, curries, marinades where chili heat and umami matter most

Skip if: Your recipe hinges on smoky sweetness as the main flavor

Nam Prik Pao

Works for: Any Thai dish where balance of sweet, smoky, and savory defines the sauce

Skip if: You need a milder, less fermented flavor profile

If you're out of roasted chili paste too, what to use for chili paste covers fermented and non-fermented options.

2 - Miso & Chili Oil

Miso paste delivers earthy umami while chili oil adds heat and a whisper of smokiness. The combination mimics Nam Prik Pao's savory backbone but stays thinner in texture.

Use 1 tablespoon miso plus 1 teaspoon chili oil per 1 tablespoon Nam Prik Pao. Stir in a small spoonful of honey or sugar to match the sweetness level if your recipe needs it.

Missing miso too? Replacements similar to miso paste has fermented and salty options that work.

Skip if: You need a thick, pulpy paste that clings to noodles or coats vegetables evenly.

3 - Sambal Mix

Sambal oelek brings straightforward chili heat. Adding brown sugar and smoked paprika layers in the sweetness and smoke Nam Prik Pao provides.

Best Pick
This combo works best in quick sauces where you control seasoning at every step.

Use 1 tablespoon sambal, 1 teaspoon brown sugar, and ¼ teaspoon smoked paprika per 1 tablespoon Nam Prik Pao. Taste as you go and adjust sugar or paprika based on the dish.

Here's what to know:

  • Sambal oelek has more upfront heat than Nam Prik Pao
  • Brown sugar rounds out the spice without making it cloying
  • Smoked paprika adds the smoky hint but won't replicate roasted chili depth
  • Works best in sauces and marinades where flavors blend during cooking

Out of smoked paprika as well? Paprika swaps that match offers smoky and mild alternatives.

Skip if: Your dish relies on slow-cooked complexity where fermented flavors deepen over time.

4 - Pepper-Soy Paste

Roasted red pepper paste gives you a smoky-sweet base. Soy sauce adds umami, honey balances it out.

The mix stays milder in heat and thinner in texture than Nam Prik Pao. It works when you need glaze consistency or a dipping sauce that won't overpower.

Quick specs:

  • Use 1 tablespoon roasted red pepper paste, 1 teaspoon soy sauce, 1 teaspoon honey per 1 tablespoon Nam Prik Pao
  • Stir together before adding to your recipe
  • Best for glazes, dipping sauces, or finishing drizzles where texture stays loose
UseRatioNotes
Glaze for grilled meat1:1Brush on during last 2 minutes of cooking
Dipping sauce1:1Thin with water or lime juice if needed
Stir-fry sauce base1:1Add chili flakes for more heat

No soy sauce either? Soy sauce replacements by recipe type covers umami-rich swaps.

Skip if: You're cooking at high heat and need a thick paste that holds its shape in the wok.

5 - Chili-Garlic Jam

Homemade chili-garlic jam brings sweetness, garlicky punch, and mild heat. It matches Nam Prik Pao's sweet-spicy balance but lacks deep fermented umami.

Use 1 tablespoon chili-garlic jam per 1 tablespoon Nam Prik Pao. It shines as a finishing glaze or spread where you want brightness over savory depth.

Shortcut
Stir a pinch of fish sauce or anchovy paste into the jam to add the missing umami layer.

The essentials:

  • Sweetness comes forward more than in Nam Prik Pao
  • Garlicky flavor stays prominent
  • Lighter on fermented complexity
  • Best for spreads, glazes, or dolloping on finished plates

Skip if: Your dish depends on a thick, savory paste with pronounced fermented notes that develop during cooking.

How to Choose a Nam Prik Pao Substitute

The best swap depends on whether your recipe needs umami depth, smoky sweetness, or both. Consider what the paste does in your dish before picking a substitute.

  • Closest match - Thai roasted chili paste for umami and chili heat
  • Easiest grab - Miso and chili oil for quick savory depth
  • Dietary option - Sambal mix with added sugar for plant-based cooking

Frequently Asked Questions

Can I use sriracha instead of Nam Prik Pao?

Sriracha works in a pinch but skews more vinegary and less smoky-sweet. Mix it with a spoonful of brown sugar and a dash of soy sauce to get closer to Nam Prik Pao's balance.

What's the ratio for substituting miso and chili oil?

Use 1 tablespoon miso paste plus 1 teaspoon chili oil per 1 tablespoon Nam Prik Pao. Add a small amount of sugar or honey if your recipe needs sweetness.

Does sambal oelek taste the same as Nam Prik Pao?

No, sambal oelek is spicier and less sweet. You need to add brown sugar and smoked paprika to mimic Nam Prik Pao's smoky-sweet profile.

Can I skip the Nam Prik Pao entirely?

You can, but your dish will lose umami depth and smoky sweetness. If you skip it, boost soy sauce and add a pinch of sugar plus chili flakes to compensate.

Which substitute works best for stir-fries?

Thai roasted chili paste is the closest match for stir-fries. It brings the same umami and chili heat, though you may need to add a touch of sugar for balance.

5 Best Substitutes for Nam Prik Pao in Thai Curry

5 Best Substitutes for Nam Prik Pao

No ratings yet
Nam Prik Pao adds umami, smokiness, and a balance of heat and sweetness to dishes. Choose a substitute based on whether you need more umami depth or smoky sweetness for your recipe.
Print Recipe Pin Recipe
Prep Time 7 minutes mins
Cook Time 6 minutes mins
Total Time 13 minutes mins
Servings: 4 servings
Course: Substitution Guide
Cuisine: Thai
Ingredients Method Notes

Ingredients
  

  • 1 tablespoon Roasted Chili Paste Use 1:1 ratio; add a pinch of brown or palm sugar if needed for smoky-sweet
  • 1 tablespoon Miso Paste Combine with 1 teaspoon chili oil; stir in honey or sugar to taste for sweetness
  • 1 teaspoon Chili Oil Mix with 1 tablespoon miso paste; add sweetener to balance heat and sweetness
  • Sambal Mix (sambal oelek + brown sugar + smoked paprika) Use 1 tablespoon sambal, 1 teaspoon brown sugar, and ¼ teaspoon smoked paprika;
  • 1 tablespoon Roasted Red Pepper Paste Mix with 1 teaspoon soy sauce and 1 teaspoon honey; stir well before use
  • 1 teaspoon Soy Sauce Combine with roasted red pepper paste and honey for milder heat and loose texture
  • 1 teaspoon Honey Add to pepper-soy paste mix to balance flavors and texture
  • 1 tablespoon Chili-Garlic Jam Use 1:1 ratio; stir in fish sauce or anchovy paste for added umami if desired

Method
 

  1. Identify your dish's main flavor need: umami depth (Roasted Chili Paste, Miso & Chili Oil), or smoky sweetness and heat (Sambal Mix, Pepper-Soy Paste, Chili-Garlic Jam).
  2. Prepare mixtures as needed: combine miso with chili oil; mix sambal with brown sugar and smoked paprika; stir roasted red pepper paste with soy sauce and honey; add fish sauce to chili-garlic jam if desired.
  3. Apply each substitute at indicated ratios: 1 tablespoon per 1 tablespoon Nam Prik Pao for roasted chili paste and chili-garlic jam; miso 1 tablespoon plus chili oil 1 tsp; sambal 1 tablespoon plus sweetener; pepper-soy paste with seasonings as specified.
  4. Adjust sweetness, heat, and smokiness by tasting and adding brown sugar, honey, or smoked paprika gradually to match your dish's flavor profile.
  5. Use substitutes mainly in cooking applications like stir-fries, sauces, marinades, glazes, and dips, adapting texture needs by thinning or thickening as required.
  6. Taste your dish near the end and fine-tune seasoning if needed to ensure balance between heat, umami, and sweetness.

Notes

  • Add miso and chili oil slowly, tasting to prevent overpowering the dish with saltiness or thin texture.

Tried this recipe?

Let us know how it was!
« Previous Page
Next Page »

Primary Sidebar

ForkliftKitchen recipe developer

Welcome!

Recipe Developer · 12+ Yr Kitchen Veteran

I'm the recipe developer behind this site, focused on practical, well-tested dishes and smart ingredient swaps. Every recipe is written to be clear, reliable, and easy to make at home.

650+ Recipes
12+ Yrs Exp.
3x Tested
Our Story →

As Featured In

Allrecipes

TASTE OF HOME

Food52

HUFFPOST

Yahoo! Life

Our Editorial Standards

  • ✓ Every recipe tested at least 3 times before publishing
  • ✓ Substitutes verified by real kitchen trials, not guesswork
  • ✓ Reviewed for accuracy by our editorial team
  • ✓ Updated regularly with seasonal info and reader feedback

Most Popular

  • Creamy Lemon Shrimp Linguine
    Creamy Lemon Shrimp Linguine
  • Creamy Garlic Mushroom Chicken
    Creamy Garlic Mushroom Chicken
  • Sesame Ginger Chicken Noodle Bowls
    Sesame Ginger Chicken Noodle Bowls
  • Baked Lemon Herb Fish Fillets
    Baked Lemon Herb Fish Fillets
  • Veggie Loaded Fried Rice
    Veggie Loaded Fried Rice
  • Spicy Garlic Shrimp Stir Fry
    Spicy Garlic Shrimp Stir Fry

Join 8,000+ Home Cooks

Weekly Kitchen Tips

Easy recipes, smart substitutes, and real cooking shortcuts — every Thursday.

Subscribe Free →


Side Dishes

  • What to Serve With Asian Salmon? 15 Best Side Dishes
    What to Serve With Asian Salmon? 15 Best Side Dishes
  • Side Dishes for Strawberry Spinach Salad
    15 Best Side Dishes for Strawberry Spinach Salad
  • Sides for Grilled Cauliflower Steaks to Complete the Meal
    15 Sides for Grilled Cauliflower Steaks to Complete the Meal
  • 15 Sides To Serve With Calabacitas
    15 Best Sides for Calabacitas – Mexican-Inspired Favorites


Substitutes

  • 7 Best Substitutes for Hot Sauce in Marinades & Stir-Fries
    7 Best Substitutes for Hot Sauce in Marinades & Stir-Fries
  • 9 Best Substitutes for Butter in Baking and Cooking
  • 7 Best Substitutes for Tagliatelle for Italian Pasta Dishes
    7 Best Substitutes for Tagliatelle for Italian Pasta Dishes
  • 7 Best Substitutes for Udon Noodles in Asian Stir-Fries
    7 Best Substitutes for Udon Noodles in Asian Stir-Fries


Browse by Topic

  • Side Dishes320
  • Substitutes785
  • Dinner163
  • Air Fryer77
  • Taste Profiles484
  • Food Storage123


Reader Reviews

★★★★★

"Finally a food blog that tells you exactly why a substitute works instead of just listing options."

— Sarah M., via email

★★★★★

"The side dish recommendations are so specific — saved my dinner party twice this month."

— James R., Pinterest comment

★★★★★

"I trust this site more than most because they actually test everything. You can tell."

— Priya K., blog comment

Footer

↑ Back to Top

Forklift Kitchen

We do the heavy lifting so you can enjoy the cooking. Tested recipes, smart substitutes, and perfect pairings—built for real home cooks.

Content

  • Recipes
  • Substitutes
  • What to Serve With
  • Blog

Company

  • About Us
  • Contact
  • Subscribe

Legal

  • Privacy Policy
  • Terms of Service

As an Amazon Associate I earn from qualifying purchases.

© 2026 Forklift Kitchen.

Rate This Recipe

Your vote:


A rating is required
A name is required
An email is required