• Skip to primary navigation
  • Skip to main content
  • Skip to primary sidebar
  • Recipe Index
    • Air Fryer
  • Side Dishes
  • Substitutes
  • About
  • Contact
  • Subscribe

ForkLiftKitchen

menu icon
go to homepage
  • Recipe Index
    • Air Fryer
  • Side Dishes
  • Substitutes
  • About
  • Contact
  • Subscribe
subscribe
search icon
Homepage link
  • Recipe Index
    • Air Fryer
  • Side Dishes
  • Substitutes
  • About
  • Contact
  • Subscribe
×

Blog

What Is Pumpkin Pie Spice? [Taste, Uses & More]

March 16, 2026

You spot it on the spice aisle every August, sometimes earlier-a small jar of warm-brown powder labeled pumpkin pie spice. Most people grab it for one recipe, then wonder what else it can actually do.

What Is Pumpkin Pie Spice

This profile covers what's in the blend, how it tastes on its own, and where it earns a place beyond the classic pie. If you need to work around it, our guide to pumpkin pie spice swaps and a separate look at apple pie spice alternatives are worth a read.

QUICK SUMMARY

Pumpkin pie spice is a pre-blended ground spice mix built on cinnamon, nutmeg, ginger, cloves, and allspice. Moderate in intensity, it's cinnamon-forward and warm, with a peppery clove note and bright ginger tang. Peak flavor lasts 6-12 months after opening.

🧄What It Is: Dry blend of five warm baking spices, finely ground
👅Flavor: Warm, cinnamon-forward, sweet-spicy with earthy nutmeg bite
🥧Best Uses: Pumpkin pie, spiced baked goods, lattes, roasted squash
📦Storage: Airtight jar, cool dark pantry, away from heat
⏱️Shelf Life: Best flavor within 6-12 months; usable but weaker up to 2-3 years

What Is Pumpkin Pie Spice?

Pumpkin pie spice is a North American spice blend formulated to replicate the spice profile traditionally mixed into pumpkin pie filling.

Rather than measuring five individual spices for every recipe, bakers in the U.S. popularized this single-jar shortcut through the mid-20th century, and it's been a fall pantry staple since.

The standard formula combines cinnamon, nutmeg, ginger, cloves, and allspice-all ground to a fine, free-flowing powder. Cinnamon makes up the largest share; cloves and allspice appear in much smaller quantities to add heat and depth without dominating.

You'll see it sold under several names, which are all the same product:

  • Pumpkin spice - the shortened name used by most cafes and beverage brands
  • Pumpkin-pie spice - hyphenated variant, same blend
  • Pumpkin pie seasoning - slightly less common, often found in baking specialty shops
  • Pumpkin spice mix - generic label used by bulk bins and store brands

The blend contains no actual pumpkin. It's strictly a spice blend, not a flavored powder with added fillers-though some commercial jars do include anti-caking agents or trace sugar, so checking the label matters.

What Does Pumpkin Pie Spice Taste Like?
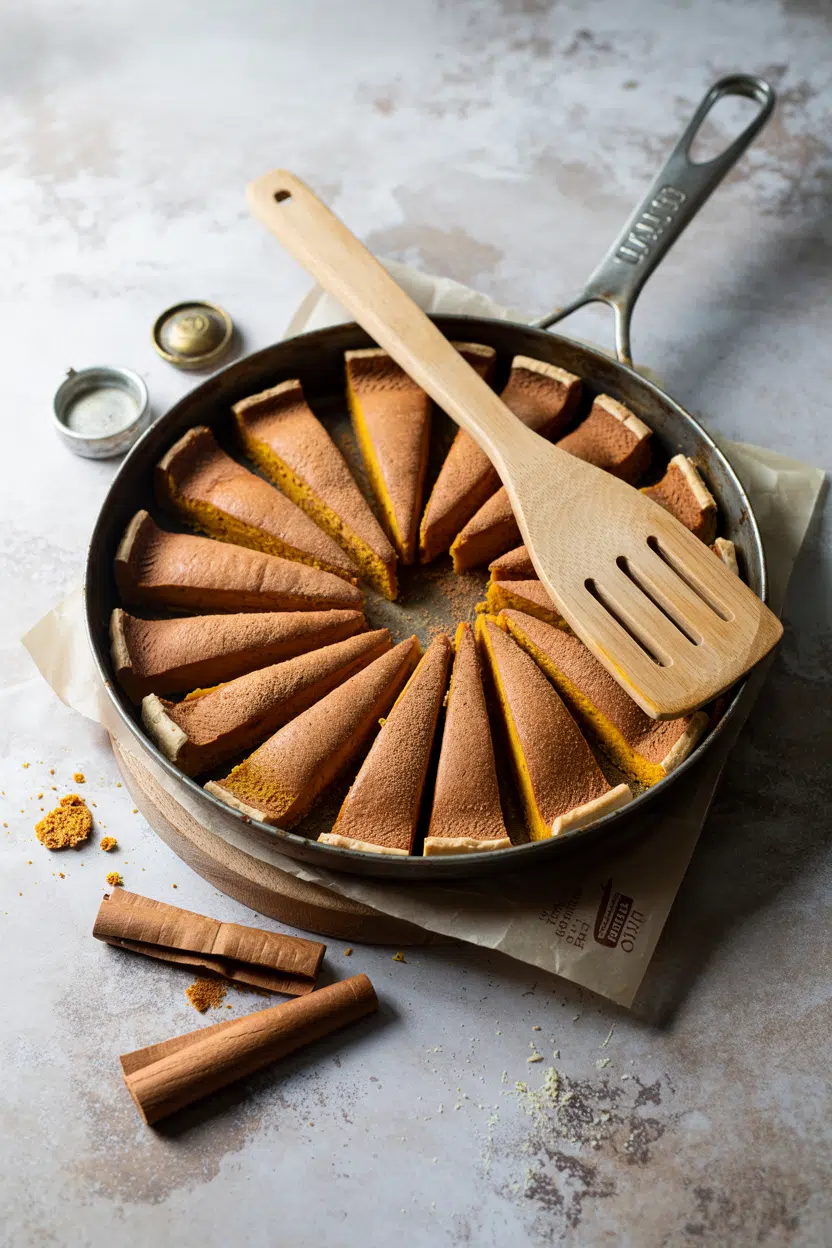
pumpkin pie spice - What Is Pumpkin Pie Spice

Cinnamon leads the flavor, giving the blend its warm, slightly sweet backbone. Ginger adds a sharp, snappy edge-similar to the bite you'd get in a ginger snap cookie, though softer because the ginger is ground and blended rather than fresh.

Nutmeg pulls the flavor toward earthy and faintly bitter territory, rounding out what would otherwise be a one-note sweetness. The cloves and allspice are subtle at normal amounts, however they punch through clearly in large quantities, adding a peppery, almost medicinal warmth.

Sensory SnapshotModerate Intensity
👅 Flavor
warm-cinnamonsweet-spicyearthy nutmegginger snap tangpeppery clove
✋ Texture
fine powderfree-flowing
👃 Aroma
toasted cinnamonwarm baked-spicesweet

Compared to chai spice, it's more cinnamon-forward and less cardamom-driven. It reads sweeter than garam masala and has none of the savory cumin notes.

Heat intensifies the aroma but softens the sharp ginger edge, making baked versions taste rounder than the raw powder.

How to Use Pumpkin Pie Spice

The most direct application is pumpkin pie filling: two teaspoons per standard pie, stirred directly into the custard base. It works in any batter-based bake-spice cake, muffins, quick bread, and pancakes all take it well at roughly ½ to 1 teaspoon per cup of flour.

Golden Rule
Start with half the amount the recipe suggests, then taste the raw batter. The blend intensifies in the oven-what smells mild in the bowl reads stronger on the plate.

Beyond baking, the blend moves comfortably into drinks and finishing applications.

How Pumpkin Pie Spice Is Used
MethodBest ForTip
🥧 Baked into custardPie filling, puddings, cheesecakeWhisk into wet ingredients before adding eggs
🍞 Folded into batterMuffins, quick bread, pancakesAdd with dry ingredients for even distribution
☕ Bloomed in hot liquidLattes, syrups, warm milkWhisk into fat or syrup first to avoid clumping
🍠 Tossed for roastingRoasted squash, sweet potatoes, carrotsCombine with oil and brown sugar before coating
🥄 Sprinkled as finishWhipped cream, oatmeal, yogurt, granolaUse sparingly-a pinch goes far as a topcoat

The blend's best pairings lean into its sweetness: brown sugar, maple syrup, and cream amplify the warmth rather than fight it. Coffee and espresso are natural partners-the cinnamon-clove profile bridges dairy and bitter notes simultaneously.

For savory uses, a light hand keeps roasted winter squash in side-dish territory rather than dessert. Avoid it with delicate seafood or herb-forward salads, where the clove and cinnamon will overpower rather than complement.

Try It In
🎂Pumpkin Spice Snack CakeThe blend carries the whole flavor profile here→☕Spiced Maple Cinnamon LatteBloomed in syrup for a clean, smooth drink→🍷Warm Spiced Mulled WineOverlapping warm-spice notes make the swap easy→

How to Buy and Store Pumpkin Pie Spice

Look for a jar with a tight-sealing lid and uniform warm-brown powder-no hard clumps, no gray or faded color. Open it and sniff before buying if you're at a bulk bin: fresh blend smells bright and sharp, with cinnamon and ginger upfront.

A flat or dusty smell means the volatile oils have faded.

Watch Out
Some commercial blends add sugar or anti-caking agents. Check the ingredient list if you're avoiding additives-a clean blend lists only spices.

Buy small jars rather than large ones unless you bake heavily. A jar you finish in one season stays potent; a jar that sits for two years loses most of its punch regardless of storage.

For more detail on how quickly potency drops, see our breakdown of pumpkin pie spice freshness guide.

Store in an airtight opaque container in a cool, dark pantry-not on the stove-top rack where ambient heat fades volatile oils faster. Peak flavor runs 6-12 months after opening; the blend stays usable up to 2-3 years but will require a heavier hand.

If your recipe calls for brown sugar and you're out, that swap affects the flavor balance of your spiced dish too.

Where to Start With Pumpkin Pie Spice

New to the blend? Begin with a spiced muffin or quick bread-forgiving formats where the ratio is easy to adjust. Already comfortable in baking? Move to the finishing and beverage uses, where a single teaspoon bloomed in warm cream or syrup shows how far a small amount actually reaches.

Skip the large economy jar on your first purchase. A small tin used fresh inside one baking season will outperform a half-empty jar from last fall every time.

Best Pick
For the most control over flavor, buy individual spices and blend your own: 3 parts cinnamon, 1 part each ginger and nutmeg, and ½ part each cloves and allspice. Adjust the ratios to suit your palate.

Frequently Asked Questions

What spices are in pumpkin pie spice?

The standard blend is cinnamon, nutmeg, ginger, cloves, and allspice, all finely ground. Cinnamon makes up the largest portion. Some commercial brands omit allspice or add mace as a nutmeg variant.

Is pumpkin pie spice the same as pumpkin spice?

Yes - they're the same spice blend sold under two names. "Pumpkin spice" is the shortened label used by cafes and beverage brands; "pumpkin pie spice" is more common on grocery spice jars.

Can you substitute pumpkin pie spice with cinnamon?

Cinnamon alone works as a quick swap but delivers none of the nutmeg depth or ginger snap. Use equal amounts and expect a flatter, one-note result. Adding a pinch of nutmeg and ginger gets closer.

How long does opened pumpkin pie spice last?

Peak flavor lasts 6-12 months after opening in a sealed jar stored away from heat. The blend stays usable for 2-3 years but loses potency steadily - you'll need more of it to hit the same flavor level.

Does pumpkin pie spice contain cloves?

Most standard blends do include ground cloves, though in small amounts. Cloves contribute the peppery warmth in the background. Check the label if you're sensitive to cloves - a few brands leave them out.
Slow Cooker Chili con Carne

March 16, 2026

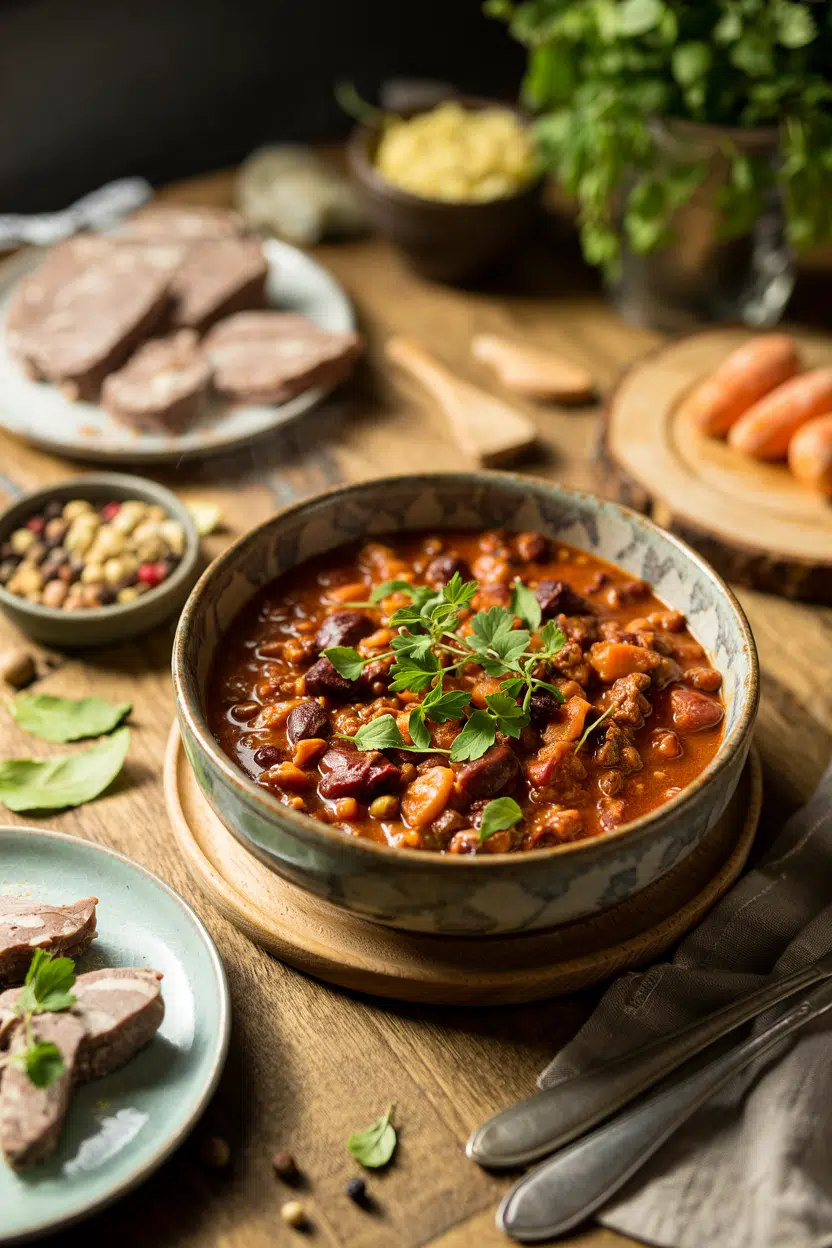
Cold weather hits and you need something substantial on the table without standing over the stove. Slow cooker chili con carne delivers hearty, smoky comfort while you're at work or running errands-throw everything in the crockpot, walk away, and come home to tender ground beef in a rich, slightly thickened tomato sauce studded with soft kidney beans.

Slow Cooker Chili con Carne served on a plate

This works for weeknight dinner when you need hands-off cooking, meal prep Sunday to stock the fridge, or game day when you're feeding a crowd. The slow cooker does the heavy lifting: long, gentle heat breaks down the meat into tender bites and gives the chili powder and cumin time to bloom into deep, balanced flavor without bitterness.

You'll get six to eight servings of chunky, satisfying chili that reheats beautifully and tastes even better the next day. Brown the meat first for flavor, add everything else, and let low heat work for six to eight hours-no stirring required.

QUICK SUMMARY

Slow cooker chili con carne combines browned ground beef, diced tomatoes, kidney beans, and chili powder in a crockpot for 6-8 hours on low. The key to success: brown the meat first to develop flavor, then let slow heat tenderize everything while the spices meld. This is your go-to when you need dinner ready when you walk in the door.

⏱️Time Reality: 15 minutes active prep, then the slow cooker handles 6-8 hours unattended.
🔥Critical First Step: Sear ground beef 5-7 minutes until deep brown before transferring to slow cooker.
⚠️Watch Out: Watery chili means too much liquid-cook uncovered the last 30 minutes or thicken on the stovetop.

Table of Contents

Toggle
  • Why This Recipe Works
  • What You'll Need
    • Ingredient Details
  • Ingredient Swaps
  • What to Serve With It
  • Store and Reheat
  • Frequently Asked Questions
  • Slow Cooker Chili con Carne
    • Method 
    • Tried this recipe?

Why This Recipe Works

Most people skip browning the meat, but that five-minute sear builds the foundation for rich, not bland, chili. The low, slow heat breaks down the ground beef into tender bites while allowing the chili powder and cumin to bloom without turning bitter. For a version that comes together quickly, this related soup recipe uses similar technique with different beans.

Quick Reference
⏱️
Prep Time
15 minutes
🔥
Cook Time
6-8 hours low or 3-4 hours high
⏰
Total Time
6-8 hours 15 minutes
🍽️
Servings
6-8 servings
📊
Difficulty
Easy
🏷️
Category
Main Dish
💡
Quick Tip
Brown meat first to boost flavor and texture
🎯
Best For
Weeknight dinner | Meal prep | Game day
  • Brown the meat fully before slow cooking - searing ground beef for 5-7 minutes until deep brown develops rich, savory flavor that survives hours in the crockpot
  • Use low heat for the full duration - cooking on low for 6-8 hours (not high) tenderizes the meat and melds the spices without turning bitter or breaking down the texture
  • Add bell peppers in the last 1-2 hours - putting them in at the start turns them mushy; waiting preserves their slight crunch and sweetness
  • Measure your broth carefully - too much liquid creates watery chili; use just enough to keep everything moist, then cook uncovered the last 30 minutes if needed to thicken
  • Taste and adjust seasoning mid-cook - stir after 4 hours to check salt, spice level, and acidity; you can still fix it before serving
Quick Tip
Drain excess fat after browning the beef-leaving it creates greasy chili that tastes heavy instead of clean and savory.

What You'll Need

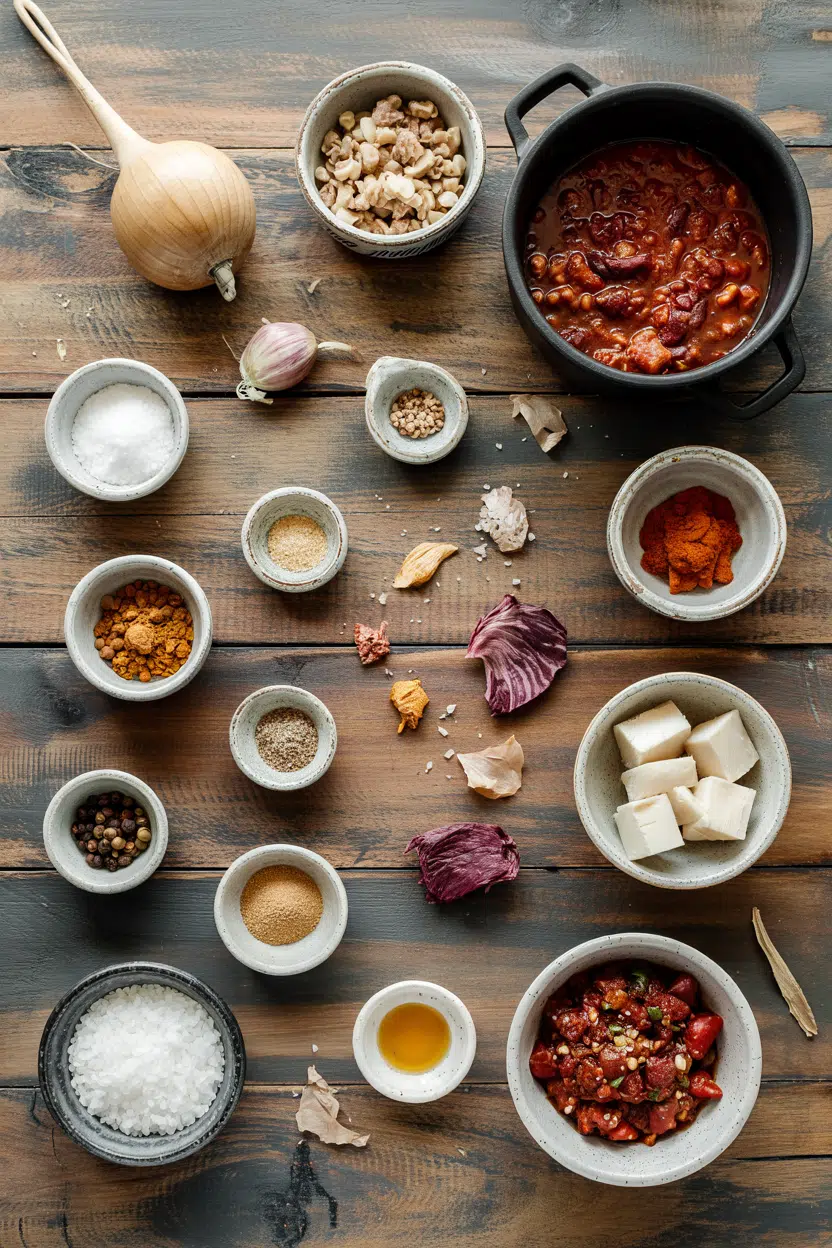
Ingredients for Slow Cooker Chili con Carne

Stock up on ground beef, kidney beans, and chili powder-the rest is pantry staples and basic aromatics. The shopping takes 10 minutes, and nothing here requires a specialty store or complicated prep.

🍗
Protein
  • 1½ pounds ground beef (80/20 blend)
🥬
Vegetables
  • 1 large onion, diced
  • 1 bell pepper, diced (any color)
  • 1 can (4 oz) diced green chilies
🧄
Aromatics
  • 4 cloves garlic, minced
🫙
Pantry & Canned
  • 1 can (28 oz) diced tomatoes
  • 2 cans (15 oz each) kidney beans, drained
  • 1 cup beef broth
  • 2 tablespoons chili powder
  • 1 tablespoon cumin
  • 1 teaspoon smoked paprika
  • Salt and black pepper to taste

Ingredient Details

  • Ground beef (80/20 blend)
    The fat content keeps the meat tender during long cooking-leaner beef dries out and turns grainy.
  • Chili powder
    Use standard chili powder, not pure ground chili peppers-it's a blend that includes cumin and garlic powder for balanced flavor.
  • Diced tomatoes
    Fire-roasted diced tomatoes add smoky depth if you want an extra layer of flavor without more work.
  • Kidney beans
    Canned beans work best here-dried beans need pre-cooking or they'll stay hard even after 8 hours in the slow cooker.
  • Beef broth
    Use low-sodium broth so you control the salt level-you can always add more, but you can't take it out.
  • Fresh garlic
    Mince it and add during the initial sauté-garlic powder works in a pinch but lacks the aromatic punch.
  • Bell peppers
    Red or yellow peppers add sweetness; green peppers bring a slightly bitter, vegetal note-pick based on what flavor you want.

Ingredient Swaps

Most chili variations hinge on protein and bean choices-you can shift the flavor profile without rewriting the entire recipe. Rich mains need something to cut through, and bright seasonal vegetables does exactly that. For a version that comes together quickly, simple homemade soup uses similar slow-cooking technique with different base ingredients.

  • Ground beef → ground turkey - leaner and milder; add an extra tablespoon of chili powder and a teaspoon of smoked paprika to compensate for less fat and beef flavor
  • Kidney beans → pinto beans or black beans - pinto beans turn creamier and break down slightly more; black beans hold their shape and add earthy flavor
  • Beef broth → vegetable broth - makes it lighter and suitable for people who want less beef intensity; the chili still tastes rich from the tomatoes and spices
  • Slow cooker → Instant Pot - pressure cook on high for 25 minutes, then natural release for 10 minutes; you'll need to adjust liquid down to ¾ cup since less evaporates

Ground Turkey

Works for: Lower fat, milder flavor, still hearty texture when cooked properly

Skip if: You want rich, beefy chili-turkey needs extra seasoning to match beef's depth

Pinto Beans

Works for: Creamier texture, breaks down slightly to thicken the chili naturally

Skip if: You prefer distinct bean shapes-pintos turn softer and less defined than kidney beans

Instructions

The entire cook happens in two stages: a quick sear on the stovetop, then everything goes into the slow cooker for 6-8 hours. Once the crockpot starts, you don't touch it until the last hour when you add the peppers. For a version that comes together quickly, this easy buttermilk recipe uses similar hands-off technique for a contrasting side.

  1. Brown the ground beef in a large skillet over medium-high heat for 5-7 minutes, breaking it into small pieces with a wooden spoon, until deeply browned with no pink remaining. Drain excess fat, leaving about 1 tablespoon in the pan. Add diced onion and minced garlic to the skillet, sautéing for 2-3 minutes until the onion turns translucent and the garlic smells fragrant.

  2. Transfer the beef mixture to your slow cooker, then add diced tomatoes (with their juice), drained kidney beans, beef broth, chili powder, cumin, smoked paprika, salt, and black pepper. Stir everything together until the spices coat the meat and beans evenly-this takes about 30 seconds of mixing.

  3. Cover the slow cooker and cook on low for 6-8 hours or on high for 3-4 hours. The chili is ready when the meat is fully tender, the broth has reduced slightly, and the flavors have melded into a cohesive, smoky-spicy profile. After 4 hours, taste and adjust salt or chili powder if needed.

  4. One hour before serving, stir in the diced bell peppers and diced green chilies. This late addition keeps the peppers from turning mushy while still giving them time to soften slightly and release their sweetness into the chili.

  5. If the chili looks too watery, remove the lid for the last 30 minutes of cooking to let excess liquid evaporate. Serve hot with your choice of toppings: sour cream, shredded cheese, diced onions, or tortilla chips for crunch.

Golden Rule
Use low heat for the full 6-8 hours-high heat shortens the cook time but toughens the meat and doesn't give the spices enough time to bloom properly.

What to Serve With It

A bowl of chili works on its own, but adding one or two sides turns it into a complete meal that feels more substantial. Most people skip comforting soup meal planning, but it balances the meal. For a version that comes together quickly, something warm like rolls uses similar hands-off technique for a bread side.

Side Dish Prep Why It Works How to Serve
Cornbread Easy Sweet, crumbly texture contrasts with spicy chili; soaks up the sauce Serve warm with butter on the side
White rice Easy Neutral base stretches servings and tames heat for sensitive palates Spoon chili over rice in bowls
Tortilla chips Easy Adds crunch and lets people scoop their own portions Set out a bowl for dipping or crumbling on top
Simple green salad Easy Light, fresh contrast cuts through the richness of the chili Toss greens with vinaigrette and serve on the side
Baked potatoes Medium Hearty base for chili; makes the meal feel more filling and customizable Split potatoes, top with chili, sour cream, and cheese

Three ways to serve it:

  • For weeknight dinner: Spoon chili over white rice with a dollop of sour cream and shredded cheese-everything goes in one bowl for easy cleanup.
  • For game day: Set out bowls of chili with a toppings bar (cheese, onions, jalapeños, tortilla chips) so people can customize their own servings.
  • For meal prep: Pack chili in individual containers with cornbread on the side-it reheats perfectly and tastes even better the next day.
Best Pick
Cornbread is the classic pairing-the sweetness balances the chili's heat, and the crumbly texture soaks up the sauce without getting soggy.

Store and Reheat

Chili improves after a day in the fridge-the flavors meld and deepen overnight, making leftovers better than the first serving. Store in shallow, airtight containers for even cooling and faster reheating. The potatoes works best when it hits the table at the same time as the main. For a version that comes together quickly, simple potatoes recipe uses similar hands-off technique for a starch side.

Method Time Best For
🍳 Stovetop 5-7 minutes over medium heat Even heating without drying out; best for larger portions
📦 Microwave 2-3 minutes, stir halfway Quick single servings when you're in a hurry
🔥 Oven 20 minutes at 325°F (163°C), covered Reheating multiple servings at once; retains texture best

For best results when storing:

  • Refrigerate within 2 hours of cooking - transfer chili to shallow containers (2-3 inches deep) so it cools quickly and evenly, preventing bacterial growth.
  • Use airtight containers - this keeps the chili from absorbing fridge odors and prevents the surface from drying out during storage.
  • Store for 3-4 days max - after that, the texture degrades and the flavors start to turn flat or slightly sour.
  • Freeze in portions - use freezer-safe containers or heavy-duty freezer bags, leaving 1 inch of headspace for expansion; chili keeps for up to 3 months.
  • Add a splash of broth when reheating - chili thickens in the fridge; stirring in a few tablespoons of beef broth or water brings back the original consistency.

Frequently Asked Questions

Can I substitute ground turkey for beef in slow cooker chili con carne?

Yes-ground turkey works but tastes milder and leaner. Add an extra tablespoon of chili powder and a teaspoon of smoked paprika to match the depth that beef fat provides.

How should I store and reheat leftover slow cooker chili con carne?

Store in shallow, airtight containers in the fridge for 3-4 days or freeze for up to 3 months. Reheat on the stovetop over medium heat for 5-7 minutes, adding a splash of broth if it's too thick.

How do I know when slow cooker chili con carne is fully cooked?

The chili is done when the meat is fully tender, the beans are soft, and the broth has reduced slightly to coat everything in a thick sauce. Taste after 6 hours on low-if the flavors taste blended and the meat breaks apart easily, it's ready.

Why is my slow cooker chili watery and how can I fix it?

Too much liquid or not enough evaporation causes watery chili. Remove the lid for the last 30 minutes of cooking to let excess liquid evaporate, or transfer the chili to a pot and simmer on the stovetop until it thickens.

What are good side dishes to serve with chili con carne for a crowd?

Cornbread, baked potatoes, and tortilla chips are crowd favorites. Set out a toppings bar with sour cream, shredded cheese, diced onions, and jalapeños so guests can customize their bowls.

Slow Cooker Chili con Carne served on a plate

Slow Cooker Chili con Carne

No ratings yet
Slow cooker chili con carne delivers hearty, smoky comfort with browned ground beef, kidney beans, and rich tomato sauce simmered for 6-8 hours on low. Browning the meat first builds deep flavor while slow heat tenderizes and melds spices perfectly. This easy recipe is ideal for weeknight dinners, meal prep, or feeding a crowd.
Print Recipe Pin Recipe
Prep Time 15 minutes mins
Cook Time 6 hours hrs
Total Time 6 hours hrs 15 minutes mins
Servings: 6 servings
Course: Dinner, Main Dish
Cuisine: American, Tex-Mex
Ingredients Equipment Method Notes

Ingredients
  

  • 1.5 pounds ground beef 80/20 blend
  • 1 large onion diced
  • 1 medium bell pepper diced, any color
  • 4 cloves garlic minced
  • 28 oz diced tomatoes with juice, canned
  • 30 oz kidney beans drained, canned
  • 1 cup beef broth low-sodium recommended
  • 2 tablespoons chili powder standard blend
  • 1 tablespoon cumin
  • 1 teaspoon smoked paprika
  • salt to taste
  • black pepper to taste
  • 4 oz diced green chilies canned

Equipment

  • Large skillet For browning ground beef and sautéing aromatics
  • Slow cooker For long slow cooking of chili
  • Wooden spoon For breaking up beef during browning

Method
 

  1. Heat a large skillet over medium-high heat. Add ground beef and cook for 5-7 minutes, breaking into small pieces with a wooden spoon, until deeply browned with no pink remaining. Drain excess fat, leaving about 1 tablespoon in the pan.
    1.5 pounds ground beef
  2. Add diced onion and minced garlic to the skillet with the reserved fat. Sauté for 2-3 minutes until onion is translucent and garlic is fragrant.
    1 large onion, 4 cloves garlic
  3. Transfer the beef mixture to the slow cooker. Add diced tomatoes with juice, drained kidney beans, beef broth, chili powder, cumin, smoked paprika, salt, and black pepper. Stir well to evenly coat the ingredients with spices.
    1.5 pounds ground beef, 1 large onion, 4 cloves garlic, 28 oz diced tomatoes, 30 oz kidney beans, 1 cup beef broth, 2 tablespoons chili powder, 1 tablespoon cumin, 1 teaspoon smoked paprika, salt, black pepper
  4. Cover and cook on low for 6-8 hours or on high for 3-4 hours. After 4 hours, taste and adjust salt or chili powder as needed.
  5. About 1 hour before serving, stir in diced bell peppers and diced green chilies to preserve their texture and sweetness.
    1 medium bell pepper, 4 oz diced green chilies
  6. If the chili is too watery, cook uncovered for the last 30 minutes to evaporate excess liquid. Serve hot with optional toppings such as sour cream, shredded cheese, diced onions, or tortilla chips.

Notes

  • Brown the meat fully before slow cooking to develop rich, savory flavor.
  • Use low heat for the entire cook time to tenderize meat and prevent bitterness.
  • Add bell peppers late to keep their texture and sweetness.
  • Drain excess fat after browning to avoid greasy chili.
  • Adjust seasoning midway through cooking for best flavor balance.

Tried this recipe?

Let us know how it was!

What Is Pumpkin? [Taste, Uses & More]

March 16, 2026

Pumpkin does something in cooking that few other vegetables manage: it carries both savory depth and natural sweetness without tipping fully into either camp.

What Is Pumpkin

That balance is why it works in a spiced pie, a coconut curry, and a roasted side dish with equal ease.

If you need a close stand-in, kabocha squash swaps that work are worth knowing, and so are sweet potato swaps that work for baked applications.

QUICK SUMMARY

Pumpkin is a mild, earthy winter squash with starchy flesh that turns creamy when cooked. Smaller pie or sugar varieties deliver the best flavor. Use it roasted, pureed, or simmered. Whole, it stores for months; cut, it needs the fridge.

🎃Category: Winter squash (gourd), Cucurbita pepo species
👅Flavor: Mildly sweet, nutty, earthy, with a subtle starchy base
🔥Best Methods: Roasting, steaming and pureeing, simmering in soups
🛒Buying Tip: Choose small pie varieties - heavy for size, firm rind
📦Shelf Life: Whole: 1-3 months cool storage; cut: 3-5 days refrigerated

What Is Pumpkin?

Pumpkin is a winter squash in the Cucurbita genus, grown across North and Central America for thousands of years before spreading globally.

Most cooking varieties belong to Cucurbita pepo, though some belong to Cucurbita maxima or Cucurbita moschata depending on region and variety.

The fruit - botanically a berry - grows on trailing vines, ripening into its familiar round, ribbed shape with a thick orange rind and dense, fibrous interior.

You'll hear it called field pumpkin, pie pumpkin, or sugar pumpkin depending on intended use. "Kabochi" occasionally appears as a regional name, though that more precisely refers to Japanese kabocha squash.

Not all pumpkins cook the same way. Here's how the main types compare:

  • 🎃 Jack-o'-lantern varieties - Large, watery flesh; fine for carving, poor for eating
  • 🥧 Pie or sugar pumpkins - Smaller, denser, sweeter; the standard for purees and baking
  • 🌿 Heirloom varieties (Cinderella, Jarrahdale) - Richer, more complex flesh; excellent roasted
  • 🌎 Regional types - Latin American and Southeast Asian varieties skew larger and starchier, suited for stews and curries

For a broader look at the winter squash family, acorn squash swaps that work show how closely related varieties compare in the kitchen.

What Does Pumpkin Taste Like?

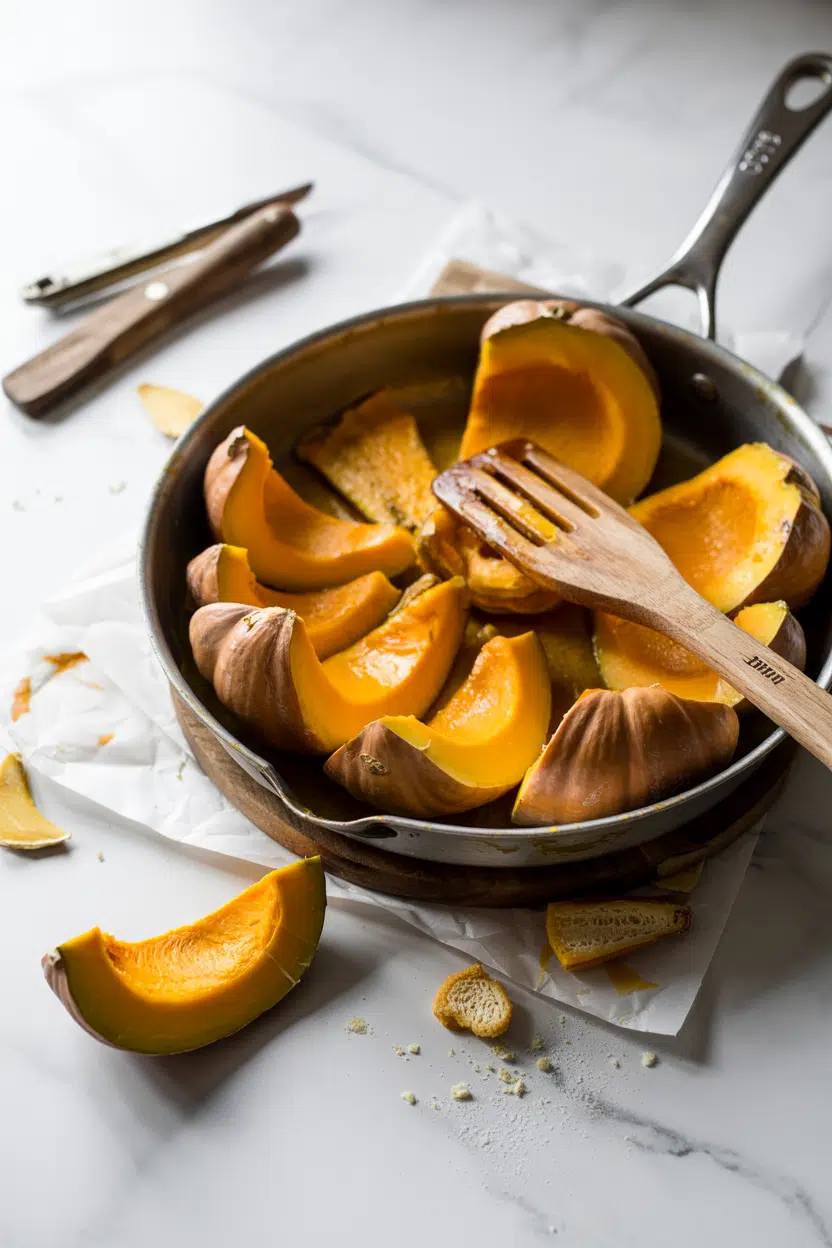
pumpkin - What Is Pumpkin

Raw pumpkin is bland. The flesh has a faint vegetal edge and firm, almost watery texture that doesn't offer much on its own. Heat changes everything.

Roasting concentrates the natural sugars, pushing the flavor toward a mellow nuttiness with earthy, warmly starchy notes underneath. The aroma shifts too - expect a slightly nutty, warmly vegetal smell that signals caramelization.

Steamed or simmered pumpkin is softer and more neutral, which is why pumpkin puree relies heavily on warm spices to build character.

Sensory SnapshotMild Intensity
👅 Flavor
mildly sweetnuttyearthystarchy
✋ Texture
firm rawcreamy cooked
👃 Aroma
warmly vegetallightly nutty when roasted

Compared to the taste of sweet potato, pumpkin is less sweet and less dense - closer to a mild butternut squash with more moisture and a slightly flatter finish without added fat or spice.

How to Use Pumpkin

Pumpkin handles heat well across several methods, which is why it appears in North American Thanksgiving tables, Southeast Asian coconut curries, Latin American tamales and stews, and European roasted sides.

Roasting is the most reliable method for developing flavor. Cut into cubes or halves, tossed with oil, and roasted at high heat, pumpkin caramelizes on the edges while staying tender inside. Steaming and pureeing produces a smoother result suited to pies, soups, and breads - though you'll need to drain off excess moisture before baking.

How Pumpkin Is Used
MethodBest ForTip
🔥 RoastingSalads, grain bowls, side dishesCut evenly; don't crowd the pan
♨️ Steaming + PureePies, soups, muffins, saucesDrain well before using in batters
🍲 SimmeringCurries, dals, stews, porridgeAdd late - it breaks down quickly
🥧 BakingPies, breads, galettes, flatbreadsUse pie pumpkin puree, not jack-o'-lantern flesh
🔥 GrillingCharred slices, side dishesOil generously; slice at least 1 inch thick

Pumpkin pairs best with maple syrup or brown sugar, warm spices like cinnamon, nutmeg, and ginger, and rich fats - cream, butter, or coconut milk.

Savory pairings include sage, roasted garlic, smoked bacon, and brown butter.

If a recipe calls for butter and you're working around dairy, knowing which butter swaps that work hold up in baked applications helps keep the texture right.

Golden Rule
Pie pumpkins and sugar pumpkins are interchangeable. Jack-o'-lantern pumpkins are not - their flesh is too watery and bland for cooking.
Try It In
🍰Pumpkin Spice Snack CakeUses pureed pumpkin to keep the crumb moist→🥧Classic Pumpkin PieThe benchmark for pie pumpkin puree→🍲Hobakjuk Korean Pumpkin PorridgeShows how pumpkin simmers into a smooth, savory base→

How to Buy and Store Pumpkin

At the market, pick up the pumpkin before committing. Heavy for its size means dense, moisture-rich flesh - light pumpkins tend to be hollow or dried out.
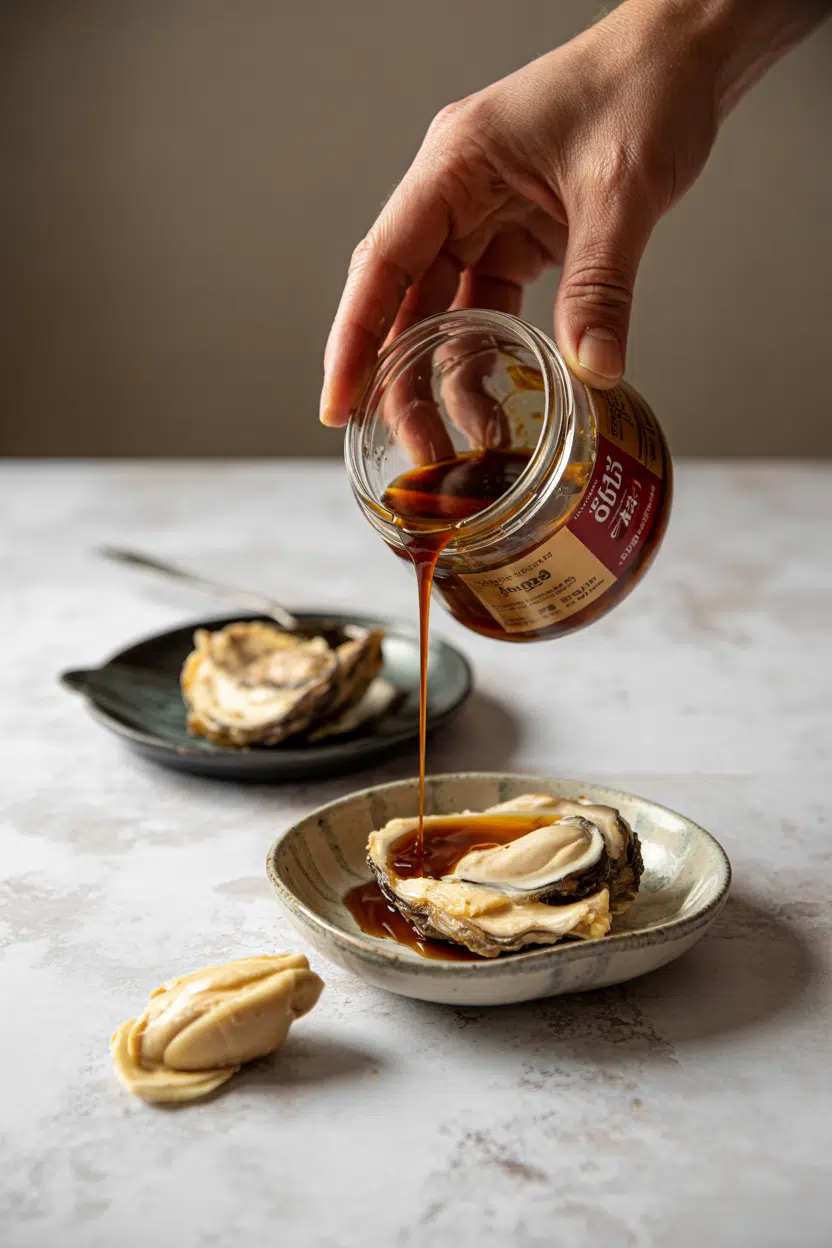
The rind should be hard with no soft spots, and the stem should be dry and intact; a missing stem invites rot at the top.

Best Pick
For cooking, reach for 'Sugar Pie' or 'New England Pie' varieties under 5 lbs. They have more flesh per pound and noticeably sweeter flavor than large carving types.

Storage depends on whether you've cut into it yet.

  • Whole pumpkin - Keep at 50-55°F in a cool, dry spot with airflow; lasts 1-3 months
  • Cut pumpkin - Wrap tightly, refrigerate in an airtight container; use within 3-5 days
  • Cooked puree - Refrigerate up to 5 days, or freeze for 3-4 months in sealed portions

Watch for softening skin, mold at the stem end, or a sour smell - the full list of pumpkin spoilage signs is worth a quick check before cooking with anything stored more than a few weeks.

Where to Start With Pumpkin

Start with roasting a pie pumpkin. Halve it, scoop out the seeds, oil the cut sides, and roast at 400°F until the flesh is fork-tender.

From there, you can puree it for a pie or soup, cube the flesh for a grain bowl, or toss the seeds with salt and roast them separately.

If you can't find pie pumpkins, alternatives to pumpkin and swapping out butternut squash both cover the closest stand-ins for specific recipes.

Frequently Asked Questions

Is pumpkin a fruit or vegetable?

Botanically, it's a fruit - specifically a berry that develops from the plant's flower. In cooking, it's treated as a vegetable for savory dishes and as a starchy base for sweet applications.

Are pie pumpkins the same as carving pumpkins?

No. Pie pumpkins (like 'Sugar Pie') are smaller with denser, sweeter flesh and less water. Carving pumpkins are bred for size and thin walls - their flesh is stringy, watery, and nearly flavorless when cooked.

Can you eat raw pumpkin?

Yes, raw pumpkin is safe to eat, but the texture is tough and the flavor is bland. Thin-shaved slices work in some salads, though most people find it far more appealing with heat applied.

What does pumpkin smell like when roasted?

Roasted pumpkin smells warmly vegetal with a light nuttiness from caramelized edges. It's subtle compared to roasted sweet potato - the aroma deepens noticeably when brown butter or warm spices are added alongside it.

How do you make canned-style pumpkin puree at home?

Roast or steam a pie pumpkin until fully soft, then scoop the flesh and blend until smooth. Strain through a cheesecloth or fine mesh sieve to remove excess water before using in recipes that call for canned puree.

Ham and Cheese Croissant Breakfast Bake

March 16, 2026

Cubes of buttery croissants soaking up a creamy custard with sharp cheese and salty ham. That's what happens when you bake croissants instead of eating them plain.

Ham and Cheese Croissant Breakfast Bake served on a plate

The dish goes from fridge to table in under an hour. You cube yesterday's croissants, pour egg custard over them, and let the oven do the rest.

This works for weekend brunch when you need something hearty that doesn't require standing over the stove. One pan, minimal cleanup, and you can prep most of it the night before.

QUICK SUMMARY

Ham and Cheese Croissant Breakfast Bake layers cubed croissants with ham, cheese, and egg custard, then bakes until golden and set. Day-old croissants absorb the custard without turning soggy, and high heat creates a crispy top layer while keeping the inside creamy.

⏱️Time reality: 15 minutes prep, 40 minutes baking, plus 10 minutes rest before serving
🔪First critical step: Cut croissants into 1-inch cubes for even custard absorption
⚠️Watch out: Over-soaking makes it soggy - limit custard soak to 15 minutes max

Table of Contents

Toggle
  • Why This Recipe Works
  • What You'll Need
    • Ingredient Details
  • Ingredient Swaps
  • What to Serve With It
  • Store and Reheat
  • Frequently Asked Questions
  • Ham and Cheese Croissant Breakfast Bake
    • Method 
    • Tried this recipe?

Why This Recipe Works

Baking croissants at 350°F sets the custard while crisping the edges. For similar breakfast ideas that work ahead, try this tender homemade cups recipe that reheats without losing texture.

Quick Reference
⏱️
Prep Time
15 min
🔥
Cook Time
40 min
⏰
Total Time
55 min
🍽️
Servings
6-8 servings
📊
Difficulty
Medium
🏷️
Category
Main Dish
💡
Quick Tip
Use day-old croissants for best texture
🎯
Best For
Weeknight | Meal prep | Entertaining

What makes this work:

  • Day-old croissants absorb custard without falling apart - fresh croissants get mushy and lose their structure when soaked
  • Layering cheese inside and on top creates two textures - melty pockets throughout plus a browned, crispy crust
  • Baking at 350°F sets the custard to 160°F internal temperature - lower temps leave it runny, higher temps dry it out
  • Resting 5-10 minutes after baking finishes setting the custard - cutting too soon makes it ooze instead of slice cleanly
  • Dotting butter on top before baking deepens browning - adds richness and helps edges crisp without burning
Golden Rule
Cube croissants into 1-inch pieces for even custard absorption - larger chunks stay dry in the center, smaller ones turn to mush

What You'll Need

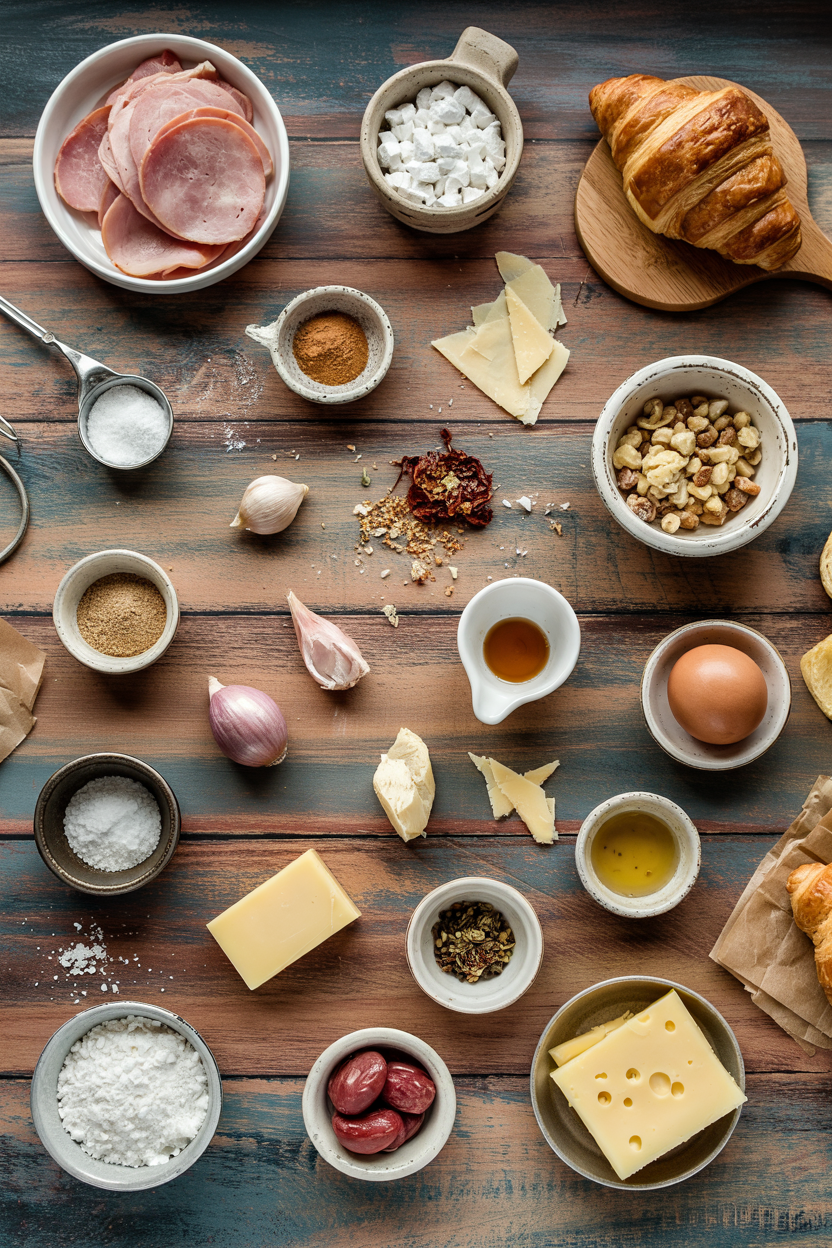
Ingredients for Ham and Cheese Croissant Breakfast Bake

Buy croissants a day ahead or use leftovers from the bakery bin. When trying something simple like pes on the side, keep the main dish straightforward with ingredients you already have.

🥐
Bread Base
  • 6 day-old croissants, cubed
🍖
Protein
  • 2 cups diced ham
  • 6 large eggs
🧀
Dairy
  • 2 cups shredded Swiss or Gruyère cheese
  • 1½ cups whole milk or cream
  • 2 tablespoon butter
🧄
Aromatics & Seasoning
  • 1 small onion or 2 shallots, diced
  • 1 teaspoon Dijon mustard
  • ½ teaspoon salt
  • ¼ teaspoon black pepper

Ingredient Details

  • Day-old croissants
    Slightly stale croissants absorb custard without turning soggy - if using fresh, leave them out overnight uncovered
  • Ham
    Deli ham works best when diced into ½-inch pieces - pre-packaged cubed ham saves time but costs more
  • Swiss or Gruyère cheese
    Shred block cheese yourself for better melt - pre-shredded contains anti-caking agents that affect texture
  • Whole milk or cream
    Cream makes richer custard, milk keeps it lighter - half-and-half splits the difference
  • Dijon mustard
    Adds tangy backbone without overwhelming - yellow mustard works but tastes sharper
  • Butter
    Dot on top before baking for deeper browning and richer flavor - salted or unsalted both work
  • Onion or shallots
    Dice finely and sauté first to remove raw bite - raw onions release moisture during baking and taste harsh

Ingredient Swaps

Different proteins change the flavor but keep the same custardy texture. Fresh bread works when croissants cost too much - for French-inspired additions, check out this this easy champagne recipe that balances the richness.

Four swaps that work:

  • Turkey instead of ham - milder flavor, slightly drier texture, works with cheddar cheese instead of Swiss
  • Bread rolls or brioche instead of croissants - less flaky, more bread-pudding texture, needs extra butter brushed on top
  • Almond or oat milk instead of dairy milk - lighter custard with less creaminess, add 2 tablespoon extra butter to compensate
  • Bacon instead of ham - smokier, fattier, cook and crumble first to render fat before adding

Fresh Croissants

Works for: Last-minute baking when day-old aren't available

Skip if: You want firm texture - fresh turns mushy when soaked

Day-Old Croissants

Works for: Best texture and custard absorption without sogginess

Skip if: You can't plan ahead - requires buying or saving ahead

Cheddar Cheese

Works for: Sharper flavor, budget-friendly, melts smoothly

Skip if: You want mild, nutty flavor - cheddar overpowers delicate ham

Gruyère Cheese

Works for: Nutty, complex flavor, melts into creamy pockets

Skip if: Budget is tight - costs 2-3x more than Swiss or cheddar

Instructions

Cube everything before you start whisking. For brunch spreads that come together fast, add creamy buttery potato side that roasts while the bake finishes in the oven.

  1. Prep croissants and baking dish. Cut 6 day-old croissants into 1-inch cubes. Butter a 9x13 inch baking dish and spread half the croissant cubes in an even layer.

  2. Layer ham and cheese. Scatter 2 cups diced ham over croissants, then sprinkle 1 cup shredded cheese on top. Add remaining croissant cubes, then top with remaining 1 cup cheese.

  3. Whisk custard. In a large bowl, whisk 6 eggs, 1½ cups milk, 1 teaspoon Dijon mustard, ½ teaspoon salt, and ¼ teaspoon pepper until smooth. Pour evenly over layered croissants.

  4. Soak and top. Let sit 10-15 minutes so croissants absorb custard. Press down gently with a spatula if dry spots remain. Dot 2 tablespoon butter on top.

  5. Bake until set. Bake at 350°F for 40-45 minutes until custard reaches 160°F internal temperature and top is golden brown. Rest 5-10 minutes before slicing.

Shortcut
Sauté diced onion in butter first, then pour into custard mixture - adds flavor without raw bite and takes 3 minutes

What to Serve With It

Most brunch plates need something crunchy or tangy to cut the richness. If you're planning your pork chops dinner instead, many of these sides work for both meals with minor tweaks.

Side Dish Prep Why It Works How to Serve
Mixed Greens Salad Easy Light, fresh, cuts through egg custard richness Toss with lemon vinaigrette, serve on the side
Fresh Fruit Easy Natural sweetness balances salty ham and cheese Slice berries, melon, grapes - arrange on platter
Roasted Potatoes Medium Crispy texture contrasts soft custard interior Roast at 425°F while bake finishes, season with herbs
Steamed Asparagus Easy Mild, tender vegetable adds green to plate Steam 5 minutes, drizzle with lemon and olive oil
Mimosa or Orange Juice Easy Classic brunch beverage, citrus cuts richness Pour chilled, serve in stemmed glasses

Three ways to serve it:

  • For casual weekend brunch - slice into squares, serve with fresh fruit and coffee on the side
  • For meal prep - cut into individual portions, refrigerate in containers, reheat singles throughout the week
  • For holiday breakfast - garnish with fresh herbs, serve family-style in the baking dish with mimosas
Best Pick
Serve with something crunchy on the side like something crunchy like coleslaw - the crisp texture and tangy dressing reset your palate between rich, custardy bites

Store and Reheat

Custard-based bakes dry out in the fridge but reheat better than most egg dishes. For leftover planning that actually works, pair with this creamy roja to brighten up day-old slices.

Method Time Best For
🔥 Oven 15-20 min at 325°F Restores crisp edges, reheats custard gently without drying
📦 Microwave 1-2 min on medium power Quick single servings but softens edges and makes texture rubbery
🍳 Stovetop 5 min covered on low Restores warmth without oven, less crisp but faster than oven

For best results when storing:

  • Refrigerate in shallow container within 2 hours of baking - deep containers trap steam and make bottom layer soggy
  • Cover tightly with plastic wrap or lid - exposed custard dries out and forms rubbery skin overnight
  • Slice before storing for faster reheating - individual portions reheat more evenly than whole pan
  • Freeze up to 1 month in airtight freezer bags - thaw overnight in fridge before reheating in oven
  • Add moisture when reheating dry leftovers - brush with melted butter or drizzle with milk before warming

Frequently Asked Questions

How long to cook ham and cheese croissant breakfast bake at 350°F?

Bake for 40-45 minutes until custard reaches 160°F internal temperature and the top turns golden brown. Check the center with a toothpick - it should come out with moist crumbs, not liquid custard.

Can I make ham and cheese croissant breakfast bake ahead?

Yes, assemble the night before, cover tightly, and refrigerate. Let it sit at room temperature for 15 minutes before baking, then add 5-10 minutes to the bake time since it starts cold.

What goes with ham and cheese croissant breakfast bake?

Serve with mixed greens salad, fresh fruit, or roasted potatoes for texture contrast. Mimosas or fresh orange juice balance the richness.

How do I know when ham and cheese croissant breakfast bake is done?

The custard should register 160°F on an instant-read thermometer and jiggle slightly when you shake the pan. The top will be golden brown with crispy edges.

Can I use turkey instead of ham in croissant breakfast bake?

Yes, diced turkey works with a milder flavor and slightly drier texture. Use cheddar cheese instead of Swiss to add sharper flavor that stands up to the turkey.

Ham and Cheese Croissant Breakfast Bake served on a plate

Ham and Cheese Croissant Breakfast Bake

No ratings yet
Ham and Cheese Croissant Breakfast Bake combines cubed day-old croissants with savory ham and sharp Swiss cheese in a creamy egg custard, baked until golden and set. This hearty brunch dish is easy to prep ahead and delivers a crispy top with a creamy interior.
Print Recipe Pin Recipe
Prep Time 15 minutes mins
Cook Time 40 minutes mins
Total Time 55 minutes mins
Servings: 6 servings
Course: Breakfast, Main Dish
Cuisine: American
Ingredients Equipment Method Notes

Ingredients
  

  • 6 croissants day-old, cubed into 1-inch pieces
  • 2 cups ham diced
  • 6 large eggs
  • 2 cups Swiss cheese shredded (can substitute Gruyère)
  • 1.5 cups whole milk or cream
  • 2 tablespoon butter dotted on top before baking
  • 1 small onion or 2 shallots, diced and optional sautéed
  • 1 teaspoon Dijon mustard
  • 0.5 teaspoon salt
  • 0.25 teaspoon black pepper

Equipment

  • 9x13 inch baking dish Used to bake the croissant custard
  • Large bowl To whisk custard ingredients

Method
 

  1. Cut 6 day-old croissants into 1-inch cubes. Butter a 9x13 inch baking dish and spread half of the croissant cubes in an even layer.
    6 croissants, 2 tbsp butter
  2. Scatter 2 cups diced ham over croissants, then sprinkle 1 cup shredded cheese on top. Add remaining croissant cubes, then top with remaining 1 cup cheese.
    2 cups ham, 2 cups Swiss cheese, 6 croissants
  3. In a large bowl, whisk together 6 eggs, 1½ cups milk, Dijon mustard, salt, and black pepper until smooth. Optionally, sauté diced onion in butter for 3 minutes and stir into the custard.
    6 large eggs, 1.5 cups whole milk, 1 tsp Dijon mustard, 0.5 tsp salt, 0.25 tsp black pepper, 1 small onion, 2 tbsp butter
  4. Pour custard evenly over layered croissants. Let sit for 10-15 minutes to allow croissants to absorb the custard. Press down gently with a spatula if dry spots remain. Dot 2 tablespoons butter on top.
    6 large eggs, 1.5 cups whole milk, 1 tsp Dijon mustard, 0.5 tsp salt, 0.25 tsp black pepper, 2 tbsp butter
  5. Bake at 350°F for 40-45 minutes until custard reaches 160°F internal temperature and the top is golden brown. Let rest 5-10 minutes before slicing and serving.

Notes

  • Use day-old croissants for best texture and custard absorption without sogginess.
  • Do not soak croissants longer than 15 minutes to prevent sogginess.
  • Resting after baking is critical for the custard to set fully before slicing.

Tried this recipe?

Let us know how it was!

Chorizo and Potato Breakfast Hash

March 16, 2026

Crispy potatoes mixed with spicy chorizo and caramelized onions in a cast iron skillet. High heat renders the fat from the sausage and browns everything until the edges turn golden and crunchy.

Chorizo and Potato Breakfast Hash served on a plate

The pan does all the work. You cook the chorizo first, use its fat to crisp the potatoes, then toss everything together at the end.

This works for weeknight breakfasts when you need something filling that comes together in under 30 minutes. Make it for weekend brunch or prep it Sunday night for quick reheats all week.

QUICK SUMMARY

Chorizo and potato breakfast hash cooks chorizo first to render fat, then uses that fat to crisp diced potatoes with onions and peppers. High heat on a cast iron skillet creates golden, caramelized edges in 15-20 minutes. The key is cooking in stages so everything browns instead of steaming.

⏱️Time Reality: 25-30 minutes start to finish, active cooking the whole time
🔥Critical First Step: Cook chorizo alone first to render fat before adding potatoes
⚠️Watch Out: Crowding the pan makes potatoes soggy - leave space between pieces

Table of Contents

Toggle
  • Why This Recipe Works
  • What You'll Need
    • Ingredient Details
  • Ingredient Swaps
  • What to Serve With It
  • Store and Reheat
  • Frequently Asked Questions
  • Chorizo and Potato Breakfast Hash
    • Method 
    • Tried this recipe?

Why This Recipe Works

Cooking chorizo separately renders the fat you need to crisp the potatoes without adding extra oil. For another take on crispy breakfast potatoes, try this simple potatoes recipe that uses a different technique.

Quick Reference
⏱️
Prep Time
10 min
🔥
Cook Time
15-20 min
⏰
Total Time
25-30 min
🍽️
Servings
4 servings
📊
Difficulty
Easy
🏷️
Category
Main Dish
💡
Quick Tip
Use medium-high heat for crispy potatoes
🎯
Best For
Weeknight | Meal prep | Weekend brunch

Five things that make this hash work:

  • Medium-high heat crisps potatoes without burning them - cook between 350-375°F for golden edges and tender centers
  • Rendering chorizo fat first eliminates extra oil - the sausage releases enough fat to coat and crisp the potatoes
  • Uniform potato dice ensures even cooking - cut pieces the same size so they finish at the same time
  • Adding aromatics halfway through prevents burning - onions and peppers go in after potatoes brown
  • Cast iron retains heat for consistent browning - the pan stays hot when you add ingredients so nothing steams
Quick Tip
Parboil diced potatoes for 5 minutes before frying if you want guaranteed tender interiors with crispy outsides.

What You'll Need

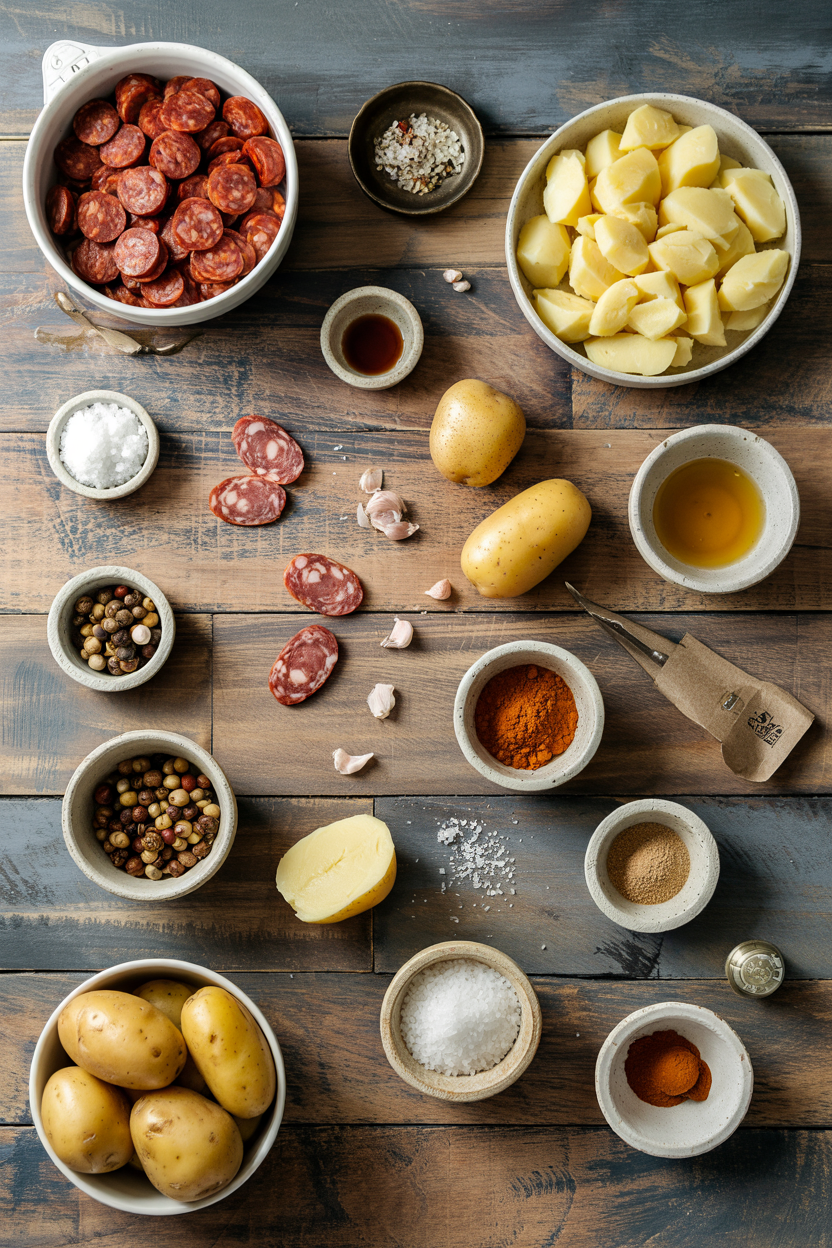
Ingredients for Chorizo and Potato Breakfast Hash

Pick russet or Yukon gold potatoes for the best texture - waxy varieties turn mushy instead of crisp. If you want a different protein base, check out a fluffy sandwich variation that uses eggs as the main ingredient.

🍗
Protein
  • 8 oz pork chorizo
  • 4 eggs (optional)
🥬
Vegetables
  • 1 lb potatoes, diced
  • 1 medium onion, diced
  • 1 bell pepper, diced
  • 2 cloves garlic, minced
🫙
Pantry
  • 2 tablespoon olive oil
  • Salt
  • Black pepper
  • Fresh parsley (garnish)

Ingredient Details

  • Chorizo
    Use Mexican chorizo (raw, loose) not Spanish chorizo (cured, firm) - Mexican version releases fat for crisping
  • Potatoes
    Russet or Yukon gold hold their shape and crisp better than red or fingerling varieties
  • Onion
    Yellow or white onion caramelizes best - sweet onion works but adds more sugar
  • Bell Pepper
    Any color works, red and yellow are sweeter, green adds slight bitterness
  • Olive Oil
    Use regular olive oil not extra virgin - high heat cooking burns delicate EVOO flavor
  • Eggs
    Cook eggs separately in a second pan so yolks stay runny and don't overcook from hash heat
  • Fresh Parsley
    Add right before serving - heat wilts parsley and kills bright green color

Ingredient Swaps

Turkey or chicken chorizo works but releases less fat so you'll need extra oil for crisping. Most swaps change texture or cooking time, like switching to sweet potatoes which take longer to soften and brown.

Four swaps that work:

  • Pork chorizo → turkey or chicken chorizo - leaner meat releases less fat, add 1-2 tablespoons oil to compensate
  • Russet potatoes → sweet potatoes - sweeter flavor and softer texture, add 3-5 minutes to cooking time
  • Bell pepper → zucchini or mushrooms - different moisture levels, cook vegetables separately to prevent sogginess
  • Eggs → tofu scramble - crumble firm tofu and season with turmeric for color and nutritional yeast for flavor

Russet Potatoes

Works for: crispy edges, fluffy interior, holds shape during high-heat cooking

Skip if: you want a creamier texture or faster cooking time

Sweet Potatoes

Works for: sweeter flavor profile, softer texture, higher vitamin A

Skip if: you want firm texture or don't want added sweetness balancing spicy chorizo

Instructions

The whole thing cooks in 15-20 minutes on medium-high heat but you can't walk away. Searing chorizo first renders fat that crisps the potatoes, then you build layers of flavor by adding vegetables in stages based on how long they take to soften.

Here's how to make it:

  1. Cook the chorizo. Heat a cast iron skillet over medium heat. Add chorizo and break it apart with a spatula. Cook 5-7 minutes, stirring occasionally, until browned and fat renders out. Remove chorizo with a slotted spoon and set aside.

  2. Crisp the potatoes. Increase heat to medium-high. Add diced potatoes to chorizo fat in a single layer. Don't stir for 3-4 minutes so bottoms brown. Flip and cook another 3-4 minutes until edges turn golden and potatoes are fork-tender.

  3. Add aromatics. Push potatoes to the sides of the pan. Add diced onion and bell pepper to the center. Sauté 3-4 minutes until onion turns translucent and pepper softens. Add minced garlic and cook 30 seconds until fragrant.
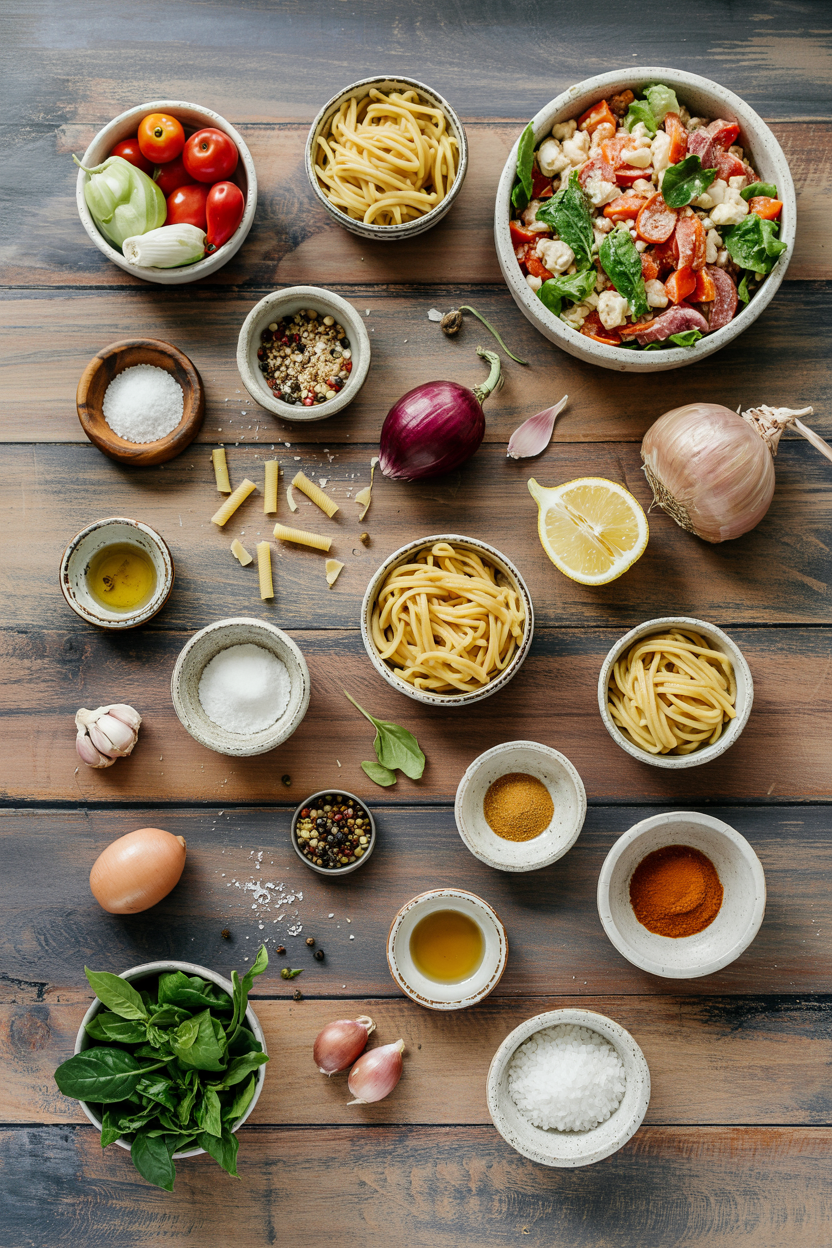
  4. Combine everything. Return chorizo to the pan and mix with potatoes and vegetables. Season with salt and black pepper. Cook 1-2 minutes to heat through and let flavors combine.

  5. Finish and serve. Remove pan from heat. Taste and adjust seasoning. Top with fried eggs if using and sprinkle fresh parsley over the top. Serve immediately while potatoes are still crispy.

Golden Rule
Don't overcrowd the pan - leave at least 1 inch between potato pieces so they brown instead of steam.

What to Serve With It

This hash needs something fresh and crunchy to balance the rich, spicy flavors. The potatoes and chorizo already provide plenty of protein and fat, so look for sides that add texture contrast or cut through the richness with acidity. For more breakfast pairing ideas, see these savory chicken dish ideas that work with similar flavors.

Side Dish Prep Why It Works How to Serve
Fresh avocado slices Easy Creamy texture and cool temperature balance spicy chorizo heat Slice and fan on the side, sprinkle with lime and salt
Crisp toast Easy Crunchy texture contrasts soft hash, soaks up egg yolk and chorizo fat Toast thick slices, butter while hot, serve on the side
Simple green salad Easy Fresh greens and vinaigrette cut through richness and add brightness Toss mixed greens with olive oil and lemon juice
Black beans Easy Extra protein and fiber, mild flavor doesn't compete with chorizo Warm canned beans with cumin and serve on the side
Roasted cherry tomatoes Medium Acidity and sweetness balance savory hash, adds fresh element Roast at 400°F for 15 minutes with olive oil and salt

Three ways to serve it:

  • For weeknight breakfast: Top hash with fried eggs and serve with buttered toast and hot sauce on the side
  • For weekend brunch: Serve family-style in the cast iron skillet with avocado slices, fresh salsa, and sour cream in bowls
  • For meal prep: Portion hash into containers with black beans and store eggs separately to fry fresh each morning
Best Pick
Serve with sour cream or Mexican crema on the side - the cool creaminess tames the chorizo spice without masking the smoky flavor.

Store and Reheat

Hash keeps for 3-4 days in the fridge but the potatoes lose some crispness. Store eggs separately if you're meal prepping - they turn rubbery when reheated with the hash. Reheat on the stovetop for best results since it restores some of the original crispiness that microwaving kills.

Method Time Best For
🍳 Stovetop 5-7 min Single servings, restores crispiness, best texture results
📦 Microwave 2-3 min Quick reheating, softens texture, convenient for work lunches
🔥 Oven 10 min at 350°F Larger portions, even warming, good for reheating multiple servings

For best results when storing:

  • Cool hash completely before refrigerating - hot hash creates condensation that makes potatoes soggy
  • Store in shallow containers - spread hash in a thin layer so it cools faster and reheats evenly
  • Keep eggs separate - cook fresh eggs each time or store hard-boiled eggs separately to avoid rubbery texture
  • Freeze for up to 2 months - portion into single servings, freeze flat in bags, thaw overnight in fridge
  • Crisp up leftovers in a dry skillet - reheat over medium-high heat without adding oil to restore browning and texture

Frequently Asked Questions

Can I substitute turkey chorizo for pork chorizo?

Yes, turkey chorizo works but it releases less fat than pork. Add 1-2 tablespoons of olive oil to the pan when you cook the potatoes so they crisp properly instead of sticking.

How do I store and reheat leftover chorizo and potato hash?

Store hash in an airtight container in the fridge for 3-4 days or freeze for up to 2 months. Reheat on the stovetop over medium-high heat for 5-7 minutes to restore crispiness, or microwave for 2-3 minutes if you're in a hurry.

How do I know when the hash is cooked through and crispy?

Potatoes should be fork-tender and golden brown on the edges. Chorizo is done when it's fully browned with no pink remaining and has released its fat into the pan.

What causes soggy potatoes and how do I fix it?

Crowding the pan or adding potatoes before the chorizo fat renders causes soggy texture. Fix it by spreading potatoes in a single layer with space between pieces and increasing heat to crisp them in a dry skillet.

What are good side dishes to serve with chorizo and potato hash?

Fresh avocado slices, crisp toast, simple green salad, or black beans all work well. You want something that adds texture contrast or cuts through the richness with acidity or freshness.

Chorizo and Potato Breakfast Hash served on a plate

Chorizo and Potato Breakfast Hash

No ratings yet
This chorizo and potato breakfast hash combines crispy diced potatoes with spicy pork chorizo and caramelized onions cooked in a cast iron skillet. Cooking the chorizo first renders the fat needed to crisp the potatoes, resulting in golden, crunchy edges in under 30 minutes.
Print Recipe Pin Recipe
Prep Time 10 minutes mins
Cook Time 20 minutes mins
Total Time 30 minutes mins
Servings: 4 servings
Course: Breakfast, Main Dish
Cuisine: American, Mexican
Ingredients Equipment Method Notes

Ingredients
  

  • 8 oz pork chorizo Mexican raw loose chorizo
  • 1 lb potatoes diced, preferably russet or Yukon gold
  • 1 medium onion diced
  • 1 medium bell pepper diced, any color
  • 2 cloves garlic minced
  • 2 tablespoon olive oil regular olive oil, not extra virgin
  • salt to taste
  • black pepper to taste
  • fresh parsley chopped, for garnish
  • 4 large eggs optional, cook separately

Equipment

  • Cast iron skillet Used for cooking chorizo and potatoes to achieve crispy browning
  • Spatula For breaking apart and stirring chorizo and hash
  • Slotted spoon To remove cooked chorizo while leaving fat behind

Method
 

  1. Heat a cast iron skillet over medium heat. Add the pork chorizo and break it apart with a spatula. Cook for 5-7 minutes, stirring occasionally, until browned and fat is rendered. Remove chorizo with a slotted spoon and set aside, leaving fat in the pan.
    8 oz pork chorizo
  2. Increase heat to medium-high. Add diced potatoes in a single layer in the chorizo fat. Cook without stirring for 3-4 minutes to brown the bottoms. Flip and cook another 3-4 minutes until edges are golden and potatoes are fork-tender.
    1 lb potatoes, 2 tbsp olive oil
  3. Push potatoes to the sides of the pan. Add diced onion and bell pepper to the center. Sauté for 3-4 minutes until onions are translucent and peppers soften. Add minced garlic and cook 30 seconds until fragrant.
    1 medium onion, 1 medium bell pepper, 2 cloves garlic
  4. Return cooked chorizo to the pan. Mix well with potatoes and vegetables. Season with salt and black pepper to taste. Cook 1-2 minutes to heat through and blend flavors.
    8 oz pork chorizo, salt, black pepper
  5. Remove skillet from heat. Adjust seasoning if needed. Top with fried eggs if using and sprinkle chopped fresh parsley over the top. Serve immediately while potatoes are crispy.
    fresh parsley, 4 large eggs

Notes

  • Do not overcrowd the pan; leave space between potato pieces for proper browning.
  • Use medium-high heat for crispy potatoes without burning.
  • Cook eggs separately to keep yolks runny and avoid overcooking from hash heat.

Tried this recipe?

Let us know how it was!

What Is Prosciutto? Taste, Uses & Flavor Guide

March 16, 2026

Most people treat prosciutto like a deli upgrade - a fancier ham to lay on a board and leave at that.

What Is Prosciutto

That undersells what aging actually does to pork: salt-curing and months of open-air aging break down muscle proteins and concentrate fat into something silky, nutty, and deeply savory in a way no smoked or cooked ham can replicate.

QUICK SUMMARY

Prosciutto is an Italian dry-cured ham sliced paper-thin from the hind leg of a pig. Salt-curing and extended air aging produce a salty-sweet, umami-rich flavor with silky fat that melts on the tongue. Eat it raw, draped over fruit or cheese, or briefly warmed on hot food.

🍖What It Is: Salt-cured, air-aged pork leg sliced paper-thin
👅Flavor: Salty, nutty, sweet-savory, umami-rich finish
🍽️Best Uses: Raw over melon, layered in sandwiches, wrapped and roasted
❄️Shelf Life: Opened slices last 3-5 days refrigerated
⚠️Watch: High sodium; naturally gluten-free; not kosher or halal

What Is Prosciutto?

Prosciutto crudo is a dry-cured Italian ham made from the hind leg of a pig, salted and hung to age in cool, moving air for a minimum of several months - and often over a year for premium cuts. No smoking, no cooking, no brine beyond the dry salt applied by hand.

The two most celebrated varieties carry protected origin status. Prosciutto di Parma, from Emilia-Romagna, uses pigs fed partially on Parmigiano-Reggiano whey, giving it a mild sweetness; prosciutto di San Daniele, from Friuli-Venezia Giulia, tends toward a slightly more intense, mineral-edged character.

Both are sliced to near-translucency, so thin the fat appears almost white and glassy.

Prosciutto is often confused with pancetta, which is cured pork belly, not leg - a different cut with a fattier, less structured texture.

Outside Italy, the closest equivalent is Serrano ham from Spain, which shares the dry-curing method but uses different pig breeds and aging conditions.

  • 🇮🇹 Prosciutto di Parma - mild, sweet, DOP-protected from Emilia-Romagna
  • 🇮🇹 Prosciutto di San Daniele - slightly firmer, more mineral, DOP-protected from Friuli
  • 🌍 Domestic prosciutto - widely available, shorter aging, less complex but still usable

What Does Prosciutto Taste Like?

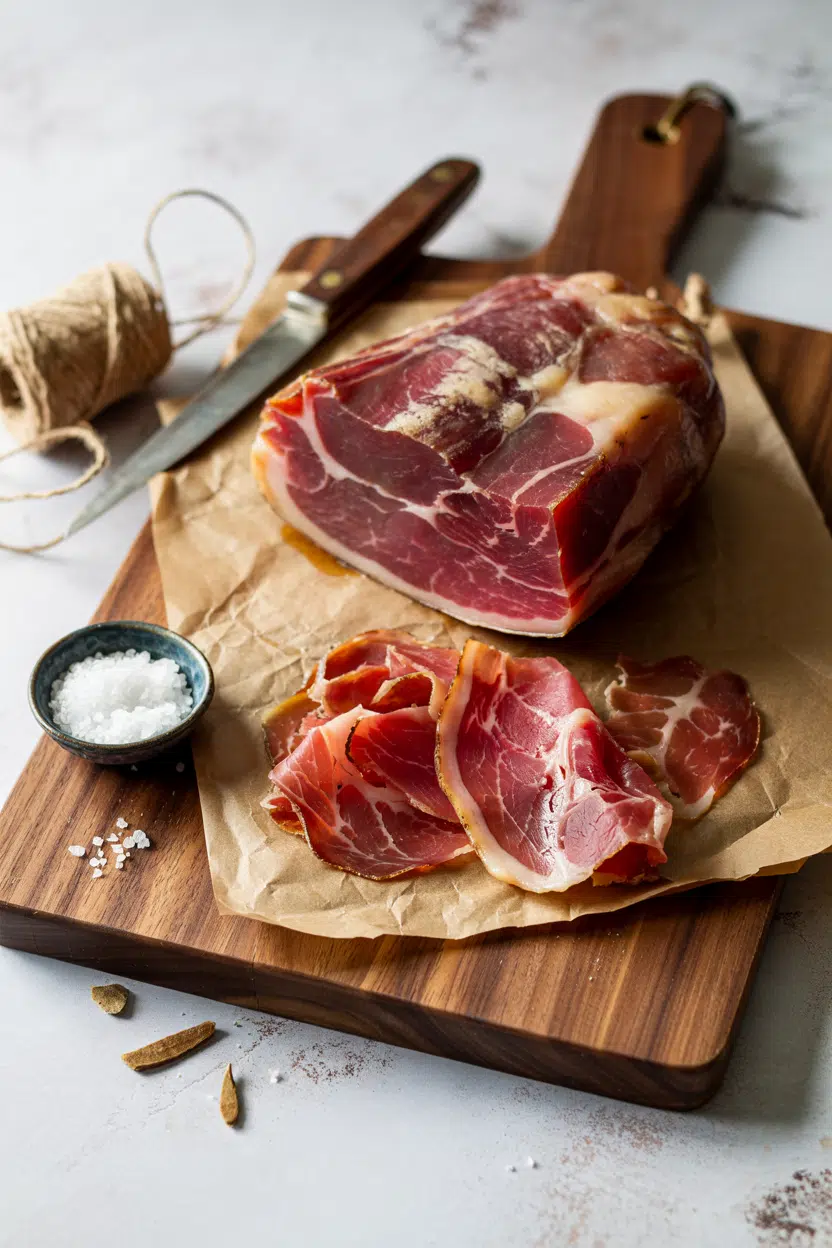
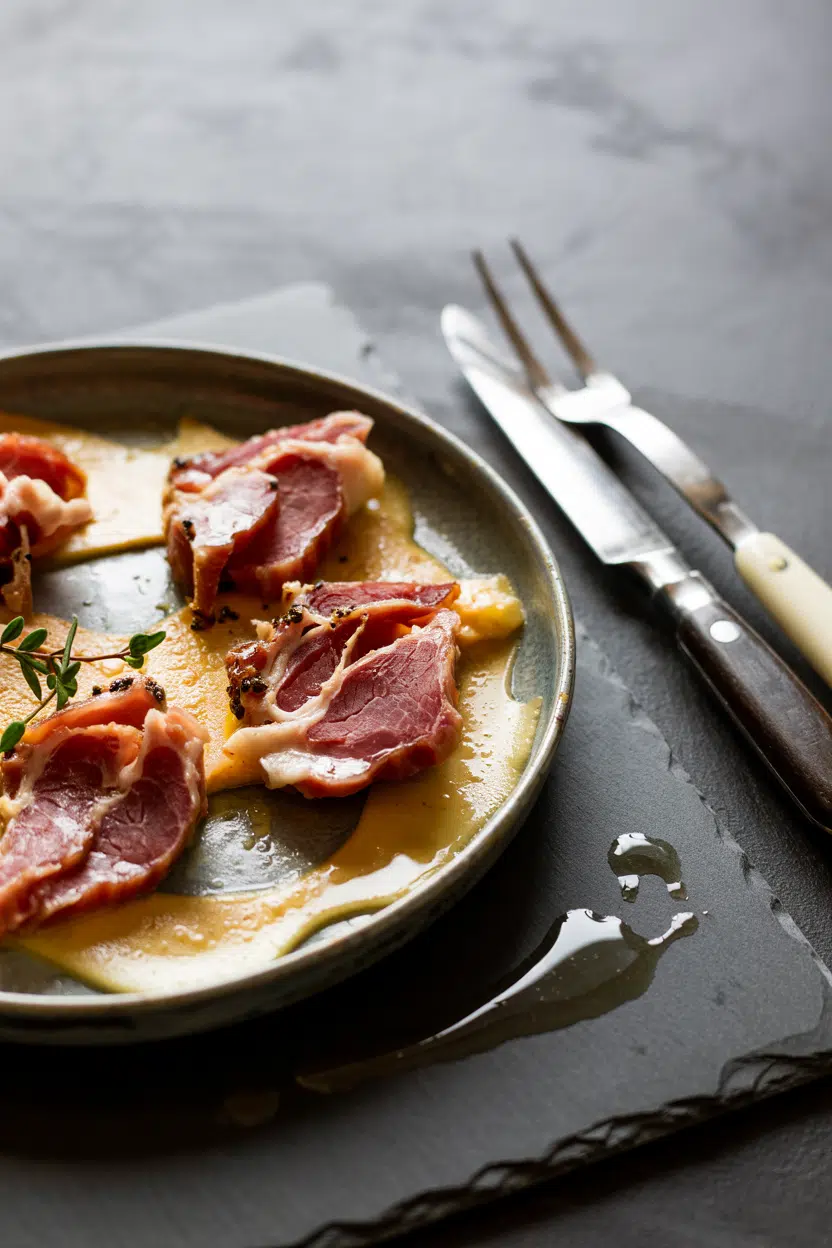
prosciutto - What Is Prosciutto

Prosciutto lands on the palate as salty and savory first, with a quiet sweetness underneath that comes from the chemical changes aging drives in the cured muscle - not added sugar.

The nutty finish is real: it develops from fat oxidation over the long hang time and is more pronounced in older legs.

Sensory SnapshotStrong Intensity
👅 Flavor
salty-curedumami-richsubtly sweetnutty finish
✋ Texture
silkyslightly chewyfat melts on tongue
👃 Aroma
aged hamcellar-likefaintly grassy

Heat changes the equation. Raw prosciutto stays silky and delicate; a few seconds in a dry pan crisps it into a crackling-like garnish with intensified salt.

Wrapped around food and roasted, it crisps on the outside while the inner fat renders into the protein it's covering - a completely different texture again.

Compared to Serrano ham, prosciutto is slightly milder and sweeter. Against American country ham, it's less aggressively salty and carries no smoke.

How to Use Prosciutto

Raw is the default, and the best showcase. Prosciutto e melone - thin slices draped over ripe cantaloupe or honeydew - is the clearest demonstration of how cured salt sharpens sweet fruit.

The same logic applies with fresh figs, burrata, or a drizzle of honey on crusty bread.

Golden Rule
Add prosciutto to hot dishes at the end. Direct sustained heat turns it rubbery and strips the nuance aging built in.

Italian cooking also folds prosciutto into warm pasta right off the heat, where residual temperature softens it without cooking it through. Layering it onto pizza after the oven - not before - keeps the silky texture intact.

For a crunchy application, a dry skillet over medium-high heat crisps slices in under two minutes, making a fast garnish for soups, salads, or eggs.

How Prosciutto Is Used
MethodBest ForTip
🥗 RawCharcuterie boards, melon, fig and burrata platesServe at room temperature - cold mutes the fat flavor
🔥 Pan-crispedGarnish for salads, soups, scrambled eggsDry pan only, no oil - its own fat renders fast
🍗 Wrapped and roastedChicken, veal, asparagus, figsSecure with a toothpick; fat side out for best browning
🍕 Post-bake layeredPizza, flatbreads, warm grain bowlsLay on immediately after pulling from oven
🍝 Folded in pastaCream sauces, carbonara-style dishesAdd off heat; toss once and serve immediately

Prosciutto pairs well with Parmigiano-Reggiano, arugula, lemon, and dry white wines. Avoid pairing it with strongly sweet syrups or delicate raw seafood - both clash with the salt-forward cured character.

Try It In
🍈Prosciutto Wrapped Melon BitesThe salt-sweet contrast at its simplest→🍗Chicken Saltimbocca with ProsciuttoShows how wrapping and searing builds a salty crust→

How to Buy and Store Prosciutto

At the deli counter, look for even pale-pink slices with creamy, glossy white fat - not yellowed, dried at the edges, or slimy. Translucent slices are ideal; torn or matted ones indicate poor handling or over-chilling before slicing.

Watch Out
Slices stacked too tightly in a sealed pack without a paper separator will fuse and tear. This doesn't affect flavor, but raw presentation suffers.

For pre-packaged options, choose vacuum-sealed packs with no large liquid pockets and a use-by date at least a week out. Once opened, wrap slices loosely in parchment, then plastic wrap, or lay them in an airtight container with a paper layer between to absorb moisture.

For full details on how long each format lasts, see our guide to prosciutto storage life.

  • Whole aged leg: Keeps for several months properly sealed
  • Vacuum-packed sliced: Up to 2-3 weeks unopened
  • Opened sliced: 3-5 days refrigerated

Where to Start with Prosciutto

If you've only ever put it on a board, try the melon pairing first - it costs nothing extra and shows exactly what the salt-sweet contrast does.

From there, wrapping it around asparagus or pork tenderloin before roasting is the fastest way to understand how heat changes its character.

Skip the pan-crisp method until you're comfortable with raw applications. Crisping is useful, however it's a supporting technique - prosciutto earns its reputation uncooked.

Frequently Asked Questions

How do you pronounce prosciutto?

Say "proh-SHOO-toh." The "sc" before "i" in Italian makes a "sh" sound, and the double "t" is soft, not clipped. Common misspellings like "prosciuto" or "prosciuta" reflect how people hear it before seeing the spelling.

Is prosciutto healthy?

It's high in complete protein and B vitamins, but also high in sodium - a few slices can carry 500-700mg. Because it's eaten in small amounts, the fat content is rarely a concern in moderation.

Can you cook with prosciutto?

Yes, but briefly. It crisps well in a dry pan in under two minutes and wraps well around proteins for roasting. Extended oven time or simmering in liquid turns it tough and strips its flavor.

What's the difference between prosciutto, jamón, and pancetta?

All three are cured pork, but from different cuts and countries. Prosciutto and jamón are both cured hind leg - Italian versus Spanish - while pancetta is cured pork belly, fattier and rolled rather than pressed flat.

How long does prosciutto last in the fridge?

Unopened vacuum-sealed slices last 2-3 weeks. Once opened, use within 3-5 days wrapped in parchment inside an airtight container. A sour smell or slimy surface means discard it.

Slow Cooker Pulled Pork Shoulder

March 15, 2026

You're staring down Sunday afternoon with zero dinner ideas and a fridge full of potential. A slow cooker pulled pork shoulder turns that pork roast into fork-tender meat that shreds with barely a nudge.

Slow Cooker Pulled Pork Shoulder served on a plate

This is the meal prep move that carries you through the week-one cook session, multiple meals. The low, slow heat breaks down connective tissue into gelatin, making the meat so tender it falls apart.

Set it before work, come home to dinner.

Perfect for weeknight dinners when you need hands-off cooking, game day spreads that feed a crowd, or meal prep Sunday when you're stocking the fridge for the week ahead.

QUICK SUMMARY

Slow Cooker Pulled Pork Shoulder cooks pork shoulder low and slow with a dry rub and minimal liquid until it reaches 195°F-205°F internally. The connective tissue melts into gelatin, creating fork-tender meat that shreds easily and stays moist when mixed with barbecue sauce.

⏱️Time Reality: 8-10 hours on low or 4-6 hours on high, plus 15 minutes prep and 15 minutes rest
🔥Key Move: Add 1 cup liquid (chicken broth or water) to the slow cooker before cooking-prevents dry meat and burnt bottom
⚠️Watch Out: Pulling the meat before internal temp hits 195°F leaves you with tough, chewy pork that won't shred-keep cooking

Table of Contents

Toggle
  • Why This Recipe Works
  • What You'll Need
    • Ingredient Details
  • Ingredient Swaps
  • What to Serve With It
  • Store and Reheat
  • Frequently Asked Questions
  • Slow Cooker Pulled Pork Shoulder
    • Method 
    • Tried this recipe?

Why This Recipe Works

The slow cooker holds a steady low temperature that melts collagen without drying out the meat. For a version that comes together quickly, more pork ideas show you what else works with similar cooking methods.

Quick Reference
⏱️
Prep Time
15 minutes
🔥
Cook Time
8-10 hours low or 4-6 hours high
⏰
Total Time
8-10 hours 15 minutes
🍽️
Servings
6-8 servings
📊
Difficulty
Easy
🏷️
Category
Main Dish
💡
Quick Tip
Sear pork before slow cooking for extra flavor.
🎯
Best For
Weeknight dinner | Meal prep | Entertaining

What makes it work:

  • Pork shoulder's high fat content keeps the meat moist through hours of cooking while connective tissue breaks down into gelatin
  • The dry rub creates a flavorful crust on the surface, building depth before the meat hits the slow cooker
  • Apple cider vinegar tenderizes the meat and cuts through richness, balancing the sweet-smoky barbecue sauce finish
  • Low temperature (190°F-210°F inside the slow cooker) gives collagen time to dissolve without squeezing out moisture
  • Resting the meat for 15 minutes after cooking lets juices redistribute, preventing dry spots when you shred
Quick Tip
Sear pork shoulder on all sides 3-4 minutes on medium-high heat before slow cooking-builds a caramelized crust that adds depth.

What You'll Need

Ingredients for Slow Cooker Pulled Pork Shoulder

Most people skip pork, but it balances the meal. We keep a batch ready for nights like this-something crispy like potato fills the gap perfectly.

🍗
Protein
  • Pork shoulder (Boston butt), 4-5 lbs
🌶️
Dry Rub
  • Brown sugar, 2 tablespoons
  • Paprika, 1 tablespoon
  • Smoked paprika, 1 tablespoon
  • Garlic powder, 1 tablespoon
  • Onion powder, 1 tablespoon
  • Salt, 2 teaspoons
  • Black pepper, 1 teaspoon
🥢
Liquid & Sauce
  • Yellow mustard, 2 tablespoons
  • Apple cider vinegar, ¼ cup
  • Chicken broth or water, 1 cup
  • Barbecue sauce, 1 cup
🧄
Aromatics
  • Yellow onion, 1 medium (sliced)

Ingredient Details

  • Pork shoulder (Boston butt)
    Use only pork shoulder-the fat and connective tissue are required for tender shredding; lean cuts like pork loin dry out and won't pull apart.
  • Dry rub spices
    Apply the rub generously and let rest 30 minutes before cooking for deeper flavor penetration into the meat surface.
  • Yellow mustard
    Mustard adds tang and helps the dry rub stick to the meat-substitute Dijon for sharper flavor or skip entirely if needed.
  • Apple cider vinegar
    Vinegar tenderizes meat fibers and balances the sweetness from brown sugar and barbecue sauce-don't skip this.
  • Chicken broth
    Do not skip liquid in the slow cooker-at least 1 cup prevents dry meat, burnt bottom, and tough texture.
  • Barbecue sauce
    Mix sauce with shredded pork off-heat just before serving to retain texture-adding during cooking makes meat soggy.
  • Smoked paprika
    Use smoked paprika for deeper flavor-substitute regular paprika plus a few drops of liquid smoke if needed.

Ingredient Swaps

A good pork can make or break the plate. For a version that comes together quickly, this easy garlic bread recipe pairs well with the same Southern comfort vibe.

Four swaps that work:

  • Pork shoulder → pork butt or pork picnic roast: Similar fat and connective tissue content yields tender, shreddable meat with slight texture differences (budget-friendly)
  • Barbecue sauce → homemade vinegar-based sauce: Changes sweetness and acidity balance but keeps the tangy-sweet finish Southern BBQ needs (flavor-swap)
  • Brown sugar → maple syrup or honey: Liquid sweeteners affect rub texture and caramelization-use half the amount to compensate for moisture (flavor-swap)
  • Slow cooker → Instant Pot (pressure cooker): Reduces cook time to 60-90 minutes at high pressure but changes texture slightly-meat won't be as fall-apart tender (method-swap)

Store-Bought BBQ Sauce

Works for: Quick weeknight cooking when you need minimal prep and consistent sweet-tangy flavor

Skip if: You want control over sugar content or prefer vinegar-forward Carolina-style sauce

Homemade Vinegar-Based Sauce

Works for: Controlling sweetness and acidity, building thinner sauce that soaks into meat without making it soggy

Skip if: You're short on time or prefer thick, molasses-heavy Kansas City-style sauce

Instructions

The ranch dressing works best when it hits the table at the same time as the main. For a version that comes together quickly, something creamy to dunk complements the smoky pork perfectly.


  1. Mix the dry rub: Combine brown sugar, paprika, smoked paprika, garlic powder, onion powder, salt, and black pepper in a small bowl until evenly mixed.

  2. Prep the pork: Pat pork shoulder dry with paper towels, then coat all sides with yellow mustard. Rub the spice mixture over the entire surface, pressing gently so it sticks. Let rest at room temperature for 30 minutes.

  3. Set up the slow cooker: Place sliced onion at the bottom of the slow cooker. Pour in chicken broth and apple cider vinegar. Set the pork shoulder on top, fat side up.

  4. Cook low and slow: Cover and cook on low for 8-10 hours or high for 4-6 hours. Check internal temperature after 8 hours-it should reach 195°F-205°F for easy shredding. The meat should pull apart with minimal resistance.

  5. Shred and sauce: Transfer pork to a cutting board and rest for 15 minutes. Use two forks or meat claws to shred into bite-sized pieces, discarding large fat chunks. Toss with barbecue sauce just before serving.

Golden Rule
Cook pork shoulder until internal temp reaches 195°F-205°F for ideal shredding-anything below 190°F leaves tough, chewy meat that won't pull apart.

What to Serve With It

Rich mains need something to cut through, and salad does exactly that. We keep a batch ready for nights like this-savory pork meal ideas round out the plate when you're planning multiple sides.

Side Dish Prep Why It Works How to Serve
Coleslaw Easy Crunchy, tangy slaw cuts through pork richness with acidity and crunch Pile on top of pulled pork sandwich or serve alongside on the plate
Cornbread Easy Classic Southern pairing-slightly sweet bread soaks up juices and balances smoky meat Serve warm with butter or crumble into the pulled pork for texture contrast
Baked Beans Easy Hearty, smoky beans complement pork's richness without competing for attention Spoon alongside pork or layer in sandwiches for extra heft
Potato Salad Medium Cool, creamy side balances hot, smoky pork-provides temperature and texture contrast Serve cold on the side or as a base layer under warm pulled pork
Macaroni and Cheese Medium Rich, creamy comfort food favorite that shares Southern roots with BBQ pork Serve hot alongside pork or mix shredded pork directly into mac and cheese

Three ways to serve it:

  • Pulled pork sandwiches: Pile shredded pork on soft hamburger buns, top with coleslaw and pickles, serve with chips or fries on the side
  • BBQ bowls: Layer pulled pork over white rice or mashed potatoes, add baked beans and steamed green beans, drizzle with extra barbecue sauce
  • Taco night: Load pulled pork into flour tortillas, top with shredded cheese, diced onions, cilantro, and lime wedges for a Southern-Mexican fusion
Best Pick
Serve pulled pork on toasted buns with tangy coleslaw on top-the crunch and acidity cut through richness while the warm bun soaks up sauce.

Store and Reheat

Salad cuts through all that richness. For a version that comes together quickly, a fresh salad side gives you the brightness this meal needs without extra work.

Method Time Best For
🍳 Stovetop 5-7 minutes over medium heat, stirring occasionally Restoring pulled pork moisture evenly-add 2-3 tablespoons broth or water to prevent drying
🔥 Oven 15-20 minutes at 325°F (163°C), covered with foil Large batches-maintains texture without drying out when spread in shallow baking dish
📦 Microwave 1-2 minutes on 50% power, covered Small portions, quick reheating-stir halfway and add splash of liquid to prevent tough edges

For best results when storing:

  • Store pulled pork in shallow airtight containers in the fridge for 3-4 days-shallow containers speed cooling and prevent bacterial growth
  • Freeze in portions for up to 3 months in freezer-safe bags or containers-squeeze out air to prevent freezer burn
  • Mix shredded pork with some sauce before storing to keep meat moist during refrigeration-dry pork toughens as it cools
  • Thaw frozen pork overnight in the fridge before reheating-never thaw at room temperature to avoid bacterial growth
  • Reheat only once after initial cooking-repeated reheating dries out meat and creates stringy, chewy texture

Frequently Asked Questions

Can I use pork loin instead of pork shoulder for pulled pork?

No-pork loin is too lean and dries out during slow cooking. Pork shoulder's high fat and connective tissue content is required for tender, shreddable meat that stays moist through 8-10 hours of cooking.

How do I store and reheat leftover pulled pork for best results?

Store pulled pork in shallow airtight containers in the fridge for 3-4 days or freeze up to 3 months. Reheat on the stovetop over medium heat for 5-7 minutes, adding 2-3 tablespoons of broth or water to restore moisture.

What internal temperature indicates pulled pork is done and ready to shred?

Pulled pork is done when internal temperature reaches 195°F-205°F (90°C-96°C). At this range, connective tissue has dissolved into gelatin, making the meat fork-tender and easy to shred.

My pulled pork turned out dry-what went wrong and how to fix it?

Dry pulled pork happens when you skip liquid in the slow cooker or use lean cuts like pork loin. Fix dry pork by mixing shredded meat with additional barbecue sauce or chicken broth-stir well and let rest 10 minutes to absorb moisture.

How can I scale slow cooker pulled pork recipe for larger groups?

Use a 6-8 quart slow cooker for larger pork shoulders (6-8 lbs). Double the dry rub and increase liquid to 1.5 cups-cook time stays the same at 8-10 hours on low since temperature, not size, determines doneness.

Slow Cooker Pulled Pork Shoulder served on a plate

Slow Cooker Pulled Pork Shoulder

No ratings yet
Slow Cooker Pulled Pork Shoulder cooks pork low and slow with a dry rub and liquid until fork-tender. The connective tissue melts into gelatin creating moist, shreddable meat that's perfect for sandwiches or bowls. This hands-off recipe is ideal for meal prep, game day, or weeknight dinners.
Print Recipe Pin Recipe
Prep Time 15 minutes mins
Cook Time 9 hours hrs
Total Time 9 hours hrs 15 minutes mins
Servings: 7 servings
Course: Main Dish
Cuisine: Southern
Ingredients Equipment Method Notes

Ingredients
  

  • 4.5 lbs pork shoulder Boston butt, fat side up
  • 2 tablespoons brown sugar part of dry rub
  • 1 tablespoon paprika part of dry rub
  • 1 tablespoon smoked paprika part of dry rub
  • 1 tablespoon garlic powder part of dry rub
  • 1 tablespoon onion powder part of dry rub
  • 2 teaspoons salt part of dry rub
  • 1 teaspoon black pepper part of dry rub
  • 2 tablespoons yellow mustard coats pork shoulder to help rub stick
  • 0.25 cup apple cider vinegar adds tang and tenderizes meat
  • 1 cup chicken broth or water, prevents drying and burnt bottom
  • 1 cup barbecue sauce toss shredded pork before serving
  • 1 medium yellow onion sliced, placed at the bottom of slow cooker

Equipment

  • Slow cooker Used to cook pork shoulder low and slow

Method
 

  1. Combine brown sugar, paprika, smoked paprika, garlic powder, onion powder, salt, and black pepper in a small bowl until well mixed.
    2 tablespoons brown sugar, 1 tablespoon paprika, 1 tablespoon smoked paprika, 1 tablespoon garlic powder, 1 tablespoon onion powder, 2 teaspoons salt, 1 teaspoon black pepper
  2. Pat pork shoulder dry with paper towels. Coat all sides with yellow mustard, then rub the dry spice mixture over the entire surface. Let rest at room temperature for 30 minutes.
    4.5 lbs pork shoulder, 2 tablespoons yellow mustard
  3. Place sliced onion at the bottom of the slow cooker. Pour chicken broth and apple cider vinegar over the onions. Set the pork shoulder on top, fat side up.
    1 cup chicken broth, 0.25 cup apple cider vinegar, 1 medium yellow onion, 4.5 lbs pork shoulder
  4. Cover and cook on low for 8-10 hours or on high for 4-6 hours. Check internal temperature after 8 hours; it should reach 195°F-205°F for easy shredding.
    4.5 lbs pork shoulder
  5. Transfer pork to a cutting board and rest for 15 minutes. Use forks or meat claws to shred into bite-sized pieces, discarding large fat chunks.
    4.5 lbs pork shoulder
  6. Mix shredded pork with barbecue sauce just before serving to retain texture and moisture.
    1 cup barbecue sauce, 4.5 lbs pork shoulder

Notes

  • Sear pork shoulder for 3-4 minutes per side before slow cooking to build flavor and a caramelized crust.
  • Do not skip the liquid in the slow cooker to avoid dry or burnt meat; at least 1 cup is needed.
  • Rest the cooked pork 15 minutes before shredding to let juices redistribute for moist results.

Tried this recipe?

Let us know how it was!

What Is Pimento Pepper? [Taste, Uses & More]

March 15, 2026

Pimento cheese - that spread of sharp cheddar, mayo, and soft red pepper - shows up at Southern potlucks, steakhouse breadbaskets, and cocktail parties with equal confidence. The pepper responsible for that gentle sweetness and deep red color is the pimento pepper, a small, heart-shaped pod with thick walls and almost no heat.

What Is Pimento Pepper

It also hides inside every green olive you've ever eaten. Most people consume it regularly without knowing its name.

QUICK SUMMARY

The pimento pepper is a mild, sweet red pepper from Spain with thick, meaty walls and virtually no heat. It's sold fresh, jarred, or roasted and appears in everything from olive stuffing to pimento cheese spread.

🫑Type: Sweet capsicum annuum, heart-shaped, Spanish origin
😋Flavor: Mild, sweet, slightly tangy when jarred or roasted
🔥Heat: Virtually zero - safe for low-spice diets
🍽️Best Uses: Pimento cheese, olive stuffing, tapas, spreads
🛒Buy It: Jarred in brine, roasted in oil, or fresh in season
📅Shelf Life: Fresh: 1-2 weeks; opened jar: 2-3 weeks refrigerated

What Is Pimento Pepper?

The pimento pepper - also written as pimiento - is a small, heart-shaped sweet pepper (Capsicum annuum) native to Andalusia and the Canary Islands of Spain.

It sits in the same family as red bell peppers but has notably thicker walls, a rounder body, and a denser, more concentrated flesh.

Fresh pimentos grow to roughly two to three inches long and ripen to a deep, glossy red. You'll find them sold three ways: fresh at specialty markets, roasted and packed in oil, or sliced and jarred in brine.

The jarred version is by far the most common in North American grocery stores.

A few naming notes worth knowing:

  • Pimento vs. pimiento - both spellings are correct; "pimiento" is the Spanish original, "pimento" the anglicized version
  • Cherry pepper confusion - red cherry peppers share a similar round shape but carry noticeably more heat; they are not the same thing
  • Smoked paprika connection - Spanish pimentón (the smoked paprika used in chorizo and stews) is made by drying and smoking pimiento peppers

What Does Pimento Pepper Taste Like?

pimento pepper - What Is Pimento Pepper

The dominant note is mild, clean sweetness - rounder and more concentrated than a red bell pepper, without any of the slight bitterness bell peppers can carry. Raw, there's a faint vegetal freshness underneath.

Sensory SnapshotMild Intensity
👅 Flavor
sweetmild tangyno heat
✋ Texture
meatysoft when cooked
👃 Aroma
sweet roastedlightly vegetal

Roasting deepens everything. The natural sugars caramelize, the flesh softens to a silky give, and a mild smokiness develops at the skin. Jarred pimentos take on a gentle tang from the brine - not sour, just bright enough to cut through rich cheeses or creamy spreads.

Heat level is essentially zero; pimentos contain negligible capsaicin, which is why they work so well in dishes designed for people who want pepper flavor without any burn.

Watch Out
Don't swap red cherry peppers for pimentos in a recipe without checking heat tolerance first. They look nearly identical but cherry peppers can land at 2,500-5,000 Scoville units - far hotter than a pimento's near-zero rating.

How to Use Pimento Pepper

Pimentos are one of the few peppers that work equally well raw, roasted, pureed, or pickled. Their thick walls hold up to long cooking without dissolving, and their sweetness rarely clashes with surrounding ingredients.

How Pimento Pepper Is Used
MethodBest ForTip
🥗 RawPotato salads, cold pasta salads, diced into spreadsSlice thin - raw walls are firm and chewy if cut thick
🍳 RoastedTapas, antipasto, sandwiches, romesco sauceChar under a broiler, steam in a bag, then peel; skin removes cleanly
🫙 Jarred/BrinedPimento cheese, pizza, olive stuffing, deviled eggsPat dry before folding into spreads - excess brine thins the texture
🫕 PureedSauces, aioli, blended dressingsRoasted pimentos blend smoother than raw for a silkier result

Pimento cheese is the most iconic application in American cooking - sharp cheddar, cream cheese or mayo, and diced or pureed pimentos, served on white bread or as a dip. In Spanish cooking, roasted pimientos appear on tapas boards alongside anchovies, olive oil, and crusty bread. They're also central to Spanish romesco sauce, which blends them with toasted almonds, tomato, and garlic.

The pepper pairs naturally with sharp cheddar, garlic, smoked paprika, capers, grilled meats, and smoked fish. Olive oil and lemon sharpen the sweetness without competing.

For similar mild-sweet pepper options in a pinch, pimento pepper alternatives include jarred roasted red bells and jarred peppadews, though neither has quite the same density.

Try It In
🍗Air Fryer Lemon Pepper Chicken TendersAdd sliced pimentos to the dipping sauce for a sweet, tangy contrast→🥦Air Fryer Lemon Pepper CauliflowerRoasted pimentos alongside cauliflower add color and mild sweetness→🍖Air Fryer Lemon Pepper MeatballsFold minced pimentos into the mix for a subtle sweet note throughout→

How to Buy and Store Pimento Pepper

Fresh pimentos appear in specialty markets and some farmers' markets in late summer. Look for firm, glossy red pods with thick walls and no soft spots or wrinkling - that's your sign they've been sitting too long.

For jarred pimentos, the brine should be clear, not cloudy, and the flesh should show uniform deep red color throughout.

Shortcut
Skip the fresh version for most recipes. Jarred pimentos are already roasted or softened, so they're ready to fold directly into pimento cheese, sauces, or salads without any prep.

Storage is straightforward:

  • Fresh whole pimentos - refrigerate in a perforated bag in the crisper drawer; use within 1-2 weeks
  • Unopened jarred/canned - store in the pantry; shelf life runs several months to well past a year
  • Opened jar - cover tightly and refrigerate; the pimento pepper storage guide after opening runs about 2-3 weeks

For longer-term needs, red bell peppers roasted and packed under olive oil behave similarly - though they're thinner-walled and milder in sweetness.

Where to Start With Pimento Pepper

If you've never cooked with pimentos intentionally, jarred is the right entry point. No roasting, no peeling, just open and use.

  • Make pimento cheese first - it's the fastest way to understand how the pepper's sweetness plays against sharp, salty dairy
  • Add diced pimentos to potato salad - they fold in without overpowering, adding color and a round, sweet note
  • Try roasting fresh ones if you spot them at a market - char, peel, and dress with olive oil and flaky salt as a stand-alone side

Once you've tasted the difference between a jarred pimento and a roasted-from-fresh one, you'll know which form your recipes actually need.

Frequently Asked Questions

Is pimento the same as pimiento?

Yes - same pepper, different spelling. "Pimiento" is the original Spanish word; "pimento" is the anglicized version used widely in the United States. Both refer to the same small, sweet, heart-shaped red pepper.

Are pimentos hot or sweet?

Sweet, with virtually no heat. Pimentos register near zero on the Scoville scale, making them one of the mildest peppers available. They're specifically chosen for olive stuffing because they add flavor without any burn.

How long do jarred pimientos last after opening?

About 2-3 weeks refrigerated once opened. Keep them submerged in their brine with a tight lid. Discard if the brine turns cloudy or the flesh shows any discoloration.

Can you freeze pimentos?

Yes, though texture softens significantly after thawing. Freeze roasted or raw pimentos on a sheet tray first, then transfer to a bag. Use thawed pimentos in cooked dishes or pureed sauces - not raw applications.

What's the difference between pimento peppers and roasted red bell peppers?

Pimentos have thicker walls and a sweeter, denser flesh than red bell peppers. Bell peppers are larger with thinner walls and a slightly more vegetal, less concentrated flavor. In most recipes they're interchangeable, but pimentos give a richer result.

Crockpot Beef Stew with Carrots and Potatoes

March 15, 2026

START OF ARTICLE

You need a meal that cooks while you work, without fussy timing or constant checking. This beef stew gives you tender chuck, soft vegetables, and a thick savory broth after 7-8 hours in the crockpot.

Crockpot Beef Stew with Carrots and Potatoes served on a plate

It works for Sunday meal prep or cold weeknight dinners. The beef breaks apart with a fork, the potatoes hold their shape, and the broth gets body from tomato paste and Worcestershire.

The searing step takes 10 minutes but builds the foundation for everything that follows. Skip it and you'll taste the difference.

QUICK SUMMARY

Crockpot Beef Stew with Carrots and Potatoes is a slow-cooked comfort meal that turns tough beef chuck into fork-tender pieces in 7-8 hours. The key to rich flavor is searing the beef before adding it to the crockpot - this step creates the savory base that makes the difference between good stew and bland soup.

⏰Active time: 20 minutes prep, then the crockpot does the work
🔥Searing first: Brown the beef in a hot pan for 2-3 minutes per side
⚠️Watch out: Add potatoes after 3-4 hours or they'll turn to mush

Why This Recipe Works

Tough cuts like beef chuck have connective tissue that needs hours of gentle heat to break down. Rich mains need something to cut through, and beef does exactly that. For a version that comes together quickly, simple homemade beef adds the contrast this plate needs without the long cook time.

Quick Reference
⏱️
Prep Time
20 minutes
🔥
Cook Time
7-8 hours low or 4-5 hours high
⏰
Total Time
7 hours 20 minutes to 8 hours 20 minutes
🍽️
Servings
6-8 servings
📊
Difficulty
Easy
🏷️
Category
Main Dish
💡
Quick Tip
Sear beef before slow cooking for better flavor.
🎯
Best For
Weeknight dinner | Meal prep | Family dinner

What makes this method reliable:

  • Low heat over 7-8 hours breaks down collagen in chuck roast without drying out the meat
  • Searing creates a caramelized crust that adds depth to the final broth
  • Adding vegetables halfway through keeps them tender but intact instead of mushy
  • Tomato paste and Worcestershire build umami layers that make store-bought broth taste richer
  • A flour slurry in the last 30 minutes thickens the broth without lumps
Quick Tip
Heat your pan to medium-high before adding beef - you should hear a sizzle when the meat hits the surface.

What You'll Need

Ingredients for Crockpot Beef Stew with Carrots and Potatoes

Stock up on beef chuck and root vegetables during your weekly shopping trip. Rich mains need something to cut through, and this dip does exactly that. For a version that comes together quickly, more dip ideas work when you need something ready faster.

🥩
Protein
  • 2 lbs beef chuck roast, cut into 1.5-inch cubes
🥬
Vegetables
  • 4 medium carrots, peeled and cut into 1-inch pieces
  • 3 medium potatoes, peeled and cut into 1-inch chunks
  • 1 large onion, diced
  • 3 cloves garlic, minced
🥢
Liquid & Seasoning
  • 3 cups beef broth
  • 2 tablespoon tomato paste
  • 2 tablespoon Worcestershire sauce
  • 2 tablespoon all-purpose flour
🌶️
Herbs
  • 2 teaspoon fresh thyme (or 1 teaspoon dried)
  • 2 bay leaves
  • Salt and black pepper to taste

Ingredient Details

  • Beef chuck roast
    Marbled cut that becomes fork-tender after slow cooking; avoid lean cuts that dry out
  • Carrots
    Cut uniformly so they cook at the same rate; too small and they'll dissolve
  • Potatoes
    Russet or Yukon Gold work best; red potatoes hold shape but have less starch for thickening
  • Beef broth
    Use low-sodium so you control salt levels; quality broth makes a noticeable difference
  • Tomato paste
    Adds acidity and depth; sauté it briefly before adding liquid to remove raw taste
  • Worcestershire sauce
    Builds savory complexity; add it at the start so flavors meld during cooking
  • Flour
    Mix with cold water to create a slurry; prevents lumps better than adding directly

Ingredient Swaps

You can adjust this stew based on what you have or dietary needs. Meatballs adds the contrast this plate needs, but timing matters. For a version that comes together quickly, a simple meatballs side works when you're short on time.

Four reliable swaps:

  • Flour → cornstarch: Use 1 tablespoon cornstarch mixed with 2 tablespoon cold water for a clearer, silkier thickening (gluten-free option)
  • Beef broth → vegetable broth: Less beefy but lighter flavor profile; works if you want milder taste
  • Potatoes → sweet potatoes: Adds natural sweetness and softer texture; cook time drops to 5-6 hours on low
  • Worcestershire sauce → soy sauce: Similar umami depth but saltier; reduce quantity to 1 tablespoon and adjust salt

Cornstarch Instead of Flour

Works for: Gluten-free diets, clearer broth, silkier texture

Skip if: You prefer thicker, more opaque gravy-style consistency

Sweet Potatoes Instead of Regular

Works for: Adding sweetness, boosting nutrients, different flavor profile

Skip if: You want traditional savory stew without competing sweetness

Instructions

The whole process takes under 10 minutes of active work, then you walk away. Rich mains need something to cut through, and beef does exactly that. Beef adds the contrast this plate needs, but timing matters - we keep a batch ready for nights like this with homemade pork recipe on standby.

  1. Heat a heavy skillet over medium-high heat with 1 tablespoon oil, season beef cubes with salt and pepper, then sear 2-3 minutes per side until browned (work in batches to avoid crowding).
  2. Add onion and garlic to the crockpot, place seared beef on top, then pour in beef broth, tomato paste, Worcestershire sauce, thyme, and bay leaves.
  3. Cover and cook on low for 4 hours (or high for 2 hours), then add carrots and potatoes and continue cooking for another 3-4 hours on low until vegetables are fork-tender.
  4. Mix 2 tablespoon flour with ¼ cup cold water to create a smooth slurry, stir into stew during the last 30 minutes of cooking to thicken the broth.
  5. Remove bay leaves, taste and adjust seasoning with salt and pepper, then serve immediately while hot.
Golden Rule
Test beef tenderness by pressing a piece with a fork - it should fall apart with light pressure, not resist or feel chewy.

What to Serve With It

This stew is hearty but needs something to complete the plate. You're looking for texture contrast or a way to stretch the meal. If you're building a full dinner around beef, check out these weeknight shredded beef sandwiches meal ideas for more pairing strategies.

Side Dish Prep Why It Works How to Serve
Crusty bread Easy Soaks up thick broth without getting soggy Slice thick, warm in oven 5 minutes, serve on the side
Simple green salad Easy Crisp greens cut through rich stew Toss with lemon vinaigrette, serve immediately
Steamed green beans Easy Light vegetable adds color and crunch Steam 4-5 minutes, season with butter and salt
Mashed cauliflower Medium Low-carb alternative adds creaminess Mash with butter and garlic, serve as base for stew
Egg noodles Easy Classic pairing soaks up broth Cook al dente, toss with butter, serve under stew

Three ways to serve it:

  • Ladle stew over buttered egg noodles or mashed potatoes for a full comfort meal
  • Serve in bread bowls with a simple side salad for casual entertaining
  • Pack in containers with crusty bread for next-day lunches that reheat well
Best Pick
Crusty sourdough or French bread works better than soft sandwich bread - it holds up to the broth without falling apart.

Store and Reheat

This stew gets better after a day in the fridge as flavors meld. Store in shallow airtight containers within 2 hours of cooking. Rich mains need something to cut through, and shrimp does exactly that - for a version that comes together quickly, a flaky shrimp on the side pairs well with reheated stew for variety.

Method Time Best For
🍳 Stovetop 10-15 minutes on medium-low Reheating larger portions evenly without drying out
📦 Microwave 3-5 minutes, stirring halfway Quick single servings when you're short on time
🔥 Oven 20 minutes at 325°F (163°C) Reheating in oven-safe dish for gatherings

For best results when storing:

  • Cool stew to room temperature before refrigerating to prevent condensation and watery texture
  • Store in shallow containers (2 inches deep max) so it cools quickly and evenly
  • Freeze in portion-sized containers for up to 3 months; thaw overnight in fridge before reheating
  • Add a splash of beef broth when reheating if stew has thickened too much
  • Reheat only what you'll eat - repeated heating breaks down vegetables and dries out beef

Frequently Asked Questions

Can I use stew meat instead of chuck roast?

Yes, pre-cut stew meat works but check the cut - it should be from chuck or similar tough cuts with marbling. Lean stew meat will dry out and turn tough even with slow cooking.

How do I store and reheat leftover crockpot beef stew?

Store in airtight containers in the fridge for 3-4 days or freeze for up to 3 months. Reheat on the stovetop over medium-low heat for 10-15 minutes, adding a splash of broth if it's too thick.

How can I tell when the beef is fully cooked and tender?

Pierce a piece of beef with a fork - it should fall apart with light pressure and feel soft, not chewy or resistant. If it's still tough after 7 hours on low, continue cooking for another hour.

What if my stew is too watery after cooking?

Mix 1-2 tablespoon cornstarch with equal parts cold water to make a slurry, stir into the stew, and cook on high for 15-20 minutes until thickened. You can also simmer uncovered on the stovetop to reduce excess liquid.

Can I double this recipe for a larger group?

Yes, but make sure your crockpot is at least 6 quarts and no more than two-thirds full. Cooking time stays the same, but check vegetables at 6 hours since larger batches can cook faster.

Crockpot Beef Stew with Carrots and Potatoes served on a plate

Crockpot Beef Stew with Carrots and Potatoes

No ratings yet
Crockpot Beef Stew with Carrots and Potatoes is a comforting slow-cooked meal where tender beef chuck and soft vegetables simmer in a rich, flavorful broth. Searing the beef before slow cooking builds depth, while adding vegetables halfway ensures perfect texture. The stew thickens with a flour slurry for a hearty finish.
Print Recipe Pin Recipe
Prep Time 20 minutes mins
Cook Time 7 hours hrs
Total Time 7 hours hrs 20 minutes mins
Servings: 6 servings
Course: Dinner, Main Dish
Cuisine: American
Ingredients Equipment Method Notes

Ingredients
  

  • 2 lbs beef chuck roast cut into 1.5-inch cubes
  • 4 medium carrots peeled and cut into 1-inch pieces
  • 3 medium potatoes peeled and cut into 1-inch chunks
  • 1 large onion diced
  • 3 cloves garlic minced
  • 3 cups beef broth low-sodium recommended
  • 2 tablespoon tomato paste
  • 2 tablespoon Worcestershire sauce
  • 2 tablespoon all-purpose flour mixed with cold water to make slurry
  • 2 teaspoon fresh thyme or 1 teaspoon dried
  • 2 bay leaves

Equipment

  • Heavy skillet Used for searing beef cubes
  • Crockpot For slow cooking the stew

Method
 

  1. Heat a heavy skillet over medium-high heat with 1 tablespoon oil. Season beef cubes with salt and pepper, then sear 2-3 minutes per side until browned. Work in batches to avoid crowding.
    2 lbs beef chuck roast
  2. Add diced onion and minced garlic to the crockpot. Place the seared beef cubes on top, then pour in beef broth, tomato paste, Worcestershire sauce, thyme, and bay leaves.
    1 large onion, 3 cloves garlic, 2 lbs beef chuck roast, 3 cups beef broth, 2 tbsp tomato paste, 2 tbsp Worcestershire sauce, 2 tsp fresh thyme, 2 bay leaves
  3. Cover and cook on low for 4 hours or on high for 2 hours.
  4. Add the carrots and potatoes to the crockpot and continue cooking on low for another 3-4 hours, until vegetables are fork-tender.
    4 medium carrots, 3 medium potatoes
  5. Mix the all-purpose flour with ¼ cup cold water to create a smooth slurry. Stir it into the stew during the last 30 minutes of cooking to thicken the broth.
    2 tbsp all-purpose flour
  6. Remove bay leaves, taste and adjust seasoning with salt and pepper, then serve immediately while hot.
    2 bay leaves

Notes

  • Sear beef before slow cooking for richer, deeper flavor.
  • Add potatoes halfway to keep them intact and avoid mushiness.
  • Use a flour slurry mixed with cold water to prevent lumps when thickening the stew.

Tried this recipe?

Let us know how it was!

What Is Pesto Sauce? [Taste, Uses & More]

March 15, 2026

Spread onto bruschetta, tossed through hot pasta, or spooned into a bowl of minestrone just before serving - pesto sauce shows up in more places than most people expect. It's a raw emulsion of basil, nuts, cheese, garlic, and olive oil that does the work of a dressing, a condiment, and a finishing sauce all at once.

What Is Pesto Sauce

Unlike cooked sauces such as salsa or Spanish romesco, pesto stays raw, which means everything you taste is direct and unfiltered.

QUICK SUMMARY

Pesto sauce is a raw, herb-based emulsion from Liguria, Italy, built on fresh basil, pine nuts, hard cheese, garlic, and extra-virgin olive oil. It delivers herbaceous, nutty, and garlicky flavor with moderate intensity and works across pasta, bread, fish, and more.

🌿Flavor: Herbaceous basil, nutty richness, sharp cheese, and garlicky bite
🍝Best Uses: Pasta, bruschetta, grilled fish, risotto finish, pizza base
🧊Shelf Life: Opened jar lasts 5-7 days refrigerated; frozen up to 3 months
⚠️Dietary Note: Contains dairy and tree nuts; naturally gluten-free and low-carb
🛒Buy It: Look for bright green color, visible herb flecks, and basil listed first

What Is pesto sauce?

Pesto alla genovese originated in Liguria, the narrow coastal region of northwest Italy centered on Genoa. The name comes from the Italian pestare, meaning to pound or crush - a reference to the mortar and pestle method used in its traditional preparation. Classically, it contains just five ingredients: fresh basil, pine nuts, garlic, hard aged cheese (either Parmigiano-Reggiano or Pecorino Romano, often both), and extra-virgin olive oil.

No cooking is involved. Everything is ground or blended into a coarse-to-smooth paste, then emulsified with oil.

Unlike herb sauces built around heat - think Argentine chimichurri - pesto relies entirely on the raw intensity of each ingredient to carry the final flavor. Variations exist across Italy and beyond, swapping in sun-dried tomatoes, walnuts, or spinach, but the Ligurian original remains the benchmark.

Outside Italy, "pesto" frequently refers to any blended herb sauce in a similar style, though nothing matches the specific balance of the classic version.

Best Pick
Traditional pesto made with Parmigiano-Reggiano delivers a more complex umami depth than versions using generic hard cheese. Worth seeking out.

What Does pesto sauce Taste Like?

pesto sauce - What Is Pesto Sauce

Pesto tastes like a concentrated herb salad dressed with olive oil and grated hard cheese - but that description only gets you partway there. The basil sweetness hits first, grassy and bright.

Then the pine nut richness rounds out the middle, adding a faint buttery quality that keeps the sauce from feeling sharp.

Garlic provides a clean bite that fades quickly, while the aged cheese brings a salty, lasting umami that anchors the whole thing. The olive oil ties it together, softening the edges without dulling any individual note.

Sensory SnapshotModerate Intensity
👅 Flavor
herbaceousnuttygarlickyumami
✋ Texture
coarse pastesilky when emulsified
👃 Aroma
fresh basil-forwardpine nut undertone

Heat changes things noticeably. Pesto tossed directly into a hot pan turns dull in color and loses its bright basil character fast.

The standard fix - stir it into pasta off the heat or at the very end - preserves what makes it worth using.

How to Use pesto sauce

Classic pesto pasta is the obvious starting point. Trofie and trenette are the traditional Ligurian shapes, though spaghetti works fine. The rule: toss pesto with al dente pasta using a splash of starchy pasta water to loosen the sauce and help it coat evenly. This is one place where pesto really cannot be replaced by a cooked tomato sauce - the texture and raw herb lift are specific to it. For a different red sauce direction, tomato sauce alternatives cover that gap well.

Beyond pasta, the uses multiply quickly.

  • 🍞 Bruschetta base - Spread on toasted bread in place of butter or a tomato topping for a sharper, herb-forward bite.
  • 🍲 Soup finish - A spoonful stirred into minestrone just before serving adds a fresh herb lift that cooked herbs can't replicate.
  • 🍕 Pizza base - Used in place of tomato sauce on white pizza, paired with mozzarella and roasted vegetables.
  • 🐟 Finishing sauce - Slathered on grilled salmon or roasted chicken in the last few minutes of cooking for herb richness.
  • 🥗 Dip or spread - Stirred into mayonnaise or yogurt for a sandwich spread that pairs well with shrimp or chicken.

Pesto pairs naturally with fresh tomatoes, mozzarella or burrata, baby potatoes, grilled zucchini, and lemon zest. One pairing to avoid: delicate salads that need a light hand.

Pesto's weight overwhelms greens that call for something closer to a béchamel-style base or a thin vinaigrette.

How Pesto Sauce Is Used
MethodBest ForTip
🥗 RawPasta toss, bruschetta, dips, cold saladsAdd pasta water to loosen; never heat directly
🍳 Brief FinishSoups, risotto, grilled fish, chickenStir in off the heat to preserve basil aroma
🍕 BakedPizza base, gratin topping under cheeseCover with cheese before baking to shield basil from direct heat
Try It In
🔥Japanese Steakhouse Yum Yum SauceSee how a creamy condiment sauce works across grilled proteins→🍅Roasted Garlic Marinara SauceA cooked red sauce contrast to pesto's raw approach→🧄Roasted Garlic Béarnaise SauceAnother herb-forward finishing sauce worth comparing→

How to Buy and Store pesto sauce

At the store, color is your first signal. Bright to deep green with visible herb flecks and a glossy oil layer means fresh, intact basil. A dark brown cast or a strong vinegar smell means it's past its best.

For jarred pesto, check that basil appears first on the ingredient list and that preservatives are minimal.

Watch Out
After opening a jar, cover the surface with a thin layer of olive oil before refrigerating. This barrier slows oxidation and keeps the top layer from browning within a day or two.

Fresh deli pesto should go straight into the fridge and be used within five to seven days. Storage details beyond that - including how long pesto sauce lasts under different conditions - are worth knowing before you buy more than you need.

  • Unopened jar: Months at room temperature; check the best-by date.
  • Opened refrigerated: 5-7 days, oil layer on top, airtight container.
  • Frozen portions: Up to 3 months; freeze in ice cube trays for easy single-serve use.

Where to Start with Pesto

If you've never cooked with pesto, trofie al pesto genovese is the clearest first test - it shows the sauce with no distractions. For a quicker entry point, spread it on toast with a slice of fresh tomato.

From there, the other uses fall into place naturally, and you'll find yourself keeping a jar on hand more often than not.

Shortcut
Freeze fresh pesto in ice cube trays, then transfer to a bag. One cube is roughly enough for a single serving of pasta - no thawing needed if you add it straight to hot pasta off the heat.

If homemade pesto isn't on the table, a good jarred version gets you most of the way there. Our guide to pesto sauce swaps covers what to reach for when you're out or need a different flavor profile.

Frequently Asked Questions

What is pesto sauce made of?

Traditional pesto alla genovese contains fresh basil, pine nuts, garlic, Parmigiano-Reggiano or Pecorino Romano, and extra-virgin olive oil. No cooking is involved - the ingredients are ground into a paste and emulsified with oil.

Can you freeze pesto?

Yes. Pesto freezes well for up to three months with minimal flavor loss. Freeze in small portions - ice cube trays work well - and thaw by stirring directly into hot pasta off the heat.

What is the difference between pesto and chimichurri?

Both are raw herb sauces, however chimichurri uses parsley and oregano with vinegar and red pepper, while pesto uses basil, pine nuts, and cheese. Chimichurri is thinner and more acidic; pesto is richer and nuttier.

Is pesto healthy?

Pesto is calorie-dense due to olive oil, nuts, and cheese, however the fats are primarily monounsaturated. It also provides vitamin K and vitamin A from basil, plus calcium and protein from hard cheese.

How do you store fresh pesto?

Refrigerate fresh pesto in an airtight container with a thin layer of olive oil covering the surface. Use within five to seven days, or freeze in portions for up to three months.

Slow Cooker Chuck Roast with Vegetables

March 15, 2026

START ARTICLE

You set the timer before work and come home to beef that pulls apart with a fork. That's the promise of slow cooker chuck roast, but most versions give you gray meat in watery broth.

Slow Cooker Chuck Roast with Vegetables served on a plate

This one solves both problems with a fast sear before the meat hits the pot. The browning adds actual flavor, not just color, and the vegetables cook in the reduced liquid so they taste like something.

Make this when you need a hands-off dinner that feeds six to eight people. It's built for meal prep Sundays and weeknight dinners when you want hot food waiting at 6 PM.

QUICK SUMMARY

Slow Cooker Chuck Roast with Vegetables turns a 3-4 pound chuck roast into fork-tender meat through an 8-hour low cook after a quick sear. The key is browning the meat first to develop color and flavor, then adding vegetables halfway through so they don't turn mushy. You'll know it's done when the internal temp hits 190-205°F and the beef pulls apart easily.

⏱️Time Reality: 20 minutes prep, then 8 hours on low or 4-5 hours on high
🔥Critical First Step: Sear the roast 3-4 minutes per side in a hot skillet before slow cooking
⚠️Watch Out: Add vegetables after 4 hours of cooking or they'll turn to mush

Why This Recipe Works

Searing before slow cooking isn't optional - it creates the browned bits that make the difference between bland and actually beefy. The quick homemade dish adds brightness without weighing down the plate.

Quick Reference
⏱️
Prep Time
20 minutes
🔥
Cook Time
8 hours (low)
⏰
Total Time
8 hours 20 minutes
🍽️
Servings
6-8 servings
📊
Difficulty
Easy
🏷️
Category
Main Dish
💡
Quick Tip
Sear roast before slow cooking to deepen flavor.
🎯
Best For
Weeknight dinner | Meal prep | Family dinner

What makes it work:

  • Chuck roast has fat marbling that breaks down during the long cook, creating tender meat instead of dry chunks
  • Searing for 3-4 minutes per side develops a caramelized crust that adds depth to the final broth
  • Deglazing the pan with ½ cup broth pulls all those browned bits into the cooking liquid
  • Adding vegetables after 4 hours gives them time to soften without turning to mush
  • Cooking to 190-205°F internal temp breaks down the connective tissue so the beef forks apart easily
Quick Tip
Cut potatoes and carrots into 1.5-inch chunks so they cook at the same rate as the beef.

What You'll Need

Ingredients for Slow Cooker Chuck Roast with Vegetables

This isn't a long shopping list - just beef, root vegetables, and a few aromatics. Most people already have thyme and bay leaves in the cabinet, and if you don't, dried works fine for this related soup recipe that uses similar slow-cooking methods.

🥩
Protein
  • 3-4 lbs chuck roast
🥬
Vegetables
  • 1 lb carrots, cut in 1.5-inch chunks
  • 1.5 lbs potatoes, cut in 1.5-inch chunks
  • 1 large onion, quartered
  • 3 celery stalks, chopped
🧄
Aromatics
  • 6 garlic cloves, smashed
  • 3 sprigs fresh thyme
  • 2 bay leaves
🥢
Liquids
  • 2 cups beef broth
  • 2 tablespoons tomato paste
  • ½ cup red wine (optional)

Ingredient Details

  • Chuck roast
    Look for a 3-4 pound roast with visible white fat running through it - that's the marbling that breaks down into tenderness.
  • Beef broth
    Low-sodium broth works best because the liquid reduces during cooking and can get too salty otherwise.
  • Carrots and potatoes
    Cut them the same size so they cook evenly - if one vegetable is smaller, it'll turn to mush while the others stay firm.
  • Garlic
    Smash the cloves with the side of your knife instead of mincing - they'll soften during the long cook without burning.
  • Fresh thyme
    Dried thyme works if that's what you have - use 1 teaspoon dried for every 3 sprigs fresh.
  • Tomato paste
    Adds umami depth to the broth - brown it in the pan after searing the meat for an extra layer of flavor.
  • Red wine
    Optional for deglazing, but if you skip it, use extra beef broth to scrape up the browned bits from the pan.

Ingredient Swaps

You can adjust this recipe based on what's in your fridge or what you're craving. If you want something lighter than beef broth, vegetable broth works but gives you less beefy depth, and a tender vegetables on the side rounds out the plate without extra work.

Four swaps that work:

  • Sweet potatoes instead of regular potatoes - They add a sweeter flavor and hold their shape well, but they cook slightly faster so check them after 3 hours
  • Parsnips instead of carrots - Similar cooking time with a sweeter, earthier taste that stays intact through the slow cook
  • Brisket instead of chuck roast - Leaner cut with similar slow-cook properties that breaks down into tender slices instead of shreds
  • Worcestershire sauce instead of tomato paste - Adds umami like the paste does but it's more liquid, so reduce the broth by ¼ cup

Sear Before Cooking

Works for: Building deep flavor and color, creating fond in the pan for deglazing

Skip if: You're tight on time and okay with less developed flavor and paler meat

Skip the Sear

Works for: Faster prep when you're rushing out the door in the morning

Skip if: You want rich, caramelized flavor and darker color in the final dish

Instructions

Plan for 20 minutes of active work, then the slow cooker does the rest. The sear happens fast - 3-4 minutes per side in a hot skillet - and after that you're just layering ingredients and setting the timer, much like simple homemade asparagus cooks hands-off in the air fryer.

  1. Pat the chuck roast dry with paper towels, then season all sides with salt and pepper. Heat 2 tablespoons oil in a cast iron skillet or heavy pan over high heat until it shimmers, about 2 minutes.

  2. Sear the roast 3-4 minutes per side until deeply browned. Don't move it around - let it sit so the crust develops. Transfer to the slow cooker.

  3. Pour ½ cup beef broth or red wine into the hot skillet and scrape up the browned bits with a wooden spoon. This is the fond that adds flavor. Pour the liquid over the roast, then add the remaining broth, tomato paste, garlic, thyme, and bay leaves to the slow cooker.

  4. Cook on low for 4 hours, then add the carrots, potatoes, onions, and celery around the roast. Continue cooking on low for another 4 hours, or until the internal temp hits 190-205°F and the beef pulls apart easily with a fork.

  5. Remove the roast and let it rest 10-15 minutes before slicing or shredding. Fish out the thyme sprigs and bay leaves. Serve the beef with the vegetables and spoon the cooking liquid over everything.

Golden Rule
Keep the slow cooker lid closed during the first 4 hours - every time you lift it, you lose heat and add 15-20 minutes to the cook time.

What to Serve With It

Chuck roast is rich and beefy, so you need sides that cut through the heaviness instead of adding to it. Most people reach for mashed potatoes, but something crunchy and fresh balances the plate better, and savory chicken dish ideas work the same way when you're planning weeknight dinners around one substantial main.

Side Dish Prep Why It Works How to Serve
Steamed green beans Easy Light, crisp texture balances the richness of the beef Toss with butter and lemon while still hot
Buttered egg noodles Easy Simple starch that soaks up the cooking liquid Cook al dente and toss with butter and parsley
Mixed green salad Easy Fresh contrast to the slow-cooked flavors Dress with vinaigrette just before serving
Crusty bread Easy Soaks up the savory broth without extra cooking Warm in the oven and serve whole or sliced
Roasted Brussels sprouts Medium Adds texture and slight bitterness to cut the richness Roast at 425°F until crispy and caramelized

Three ways to serve it:

  • Family dinner: Slice the roast against the grain and serve with the vegetables and a ladle of cooking liquid over buttered noodles
  • Meal prep: Shred the beef and portion it with vegetables into containers, then reheat with broth during the week
  • Hosting: Serve sliced roast on a platter with vegetables arranged around it, Yorkshire pudding on the side, and horseradish cream for passing
Best Pick
Steamed green beans hit the table in 5 minutes and add the crisp texture this plate needs without competing with the rich beef.

Store and Reheat

Cool the beef and vegetables completely before storing - leaving them in the pot for more than 2 hours at room temp grows bacteria. Once cooled, transfer to shallow containers so everything chills evenly in the fridge, and fresh homemade potato recipe works the same way for meal prep that lasts all week.

Method Time Best For
🍳 Stovetop 8-10 minutes over medium-low heat Preserving texture and gently reheating broth
📦 Microwave 2-3 minutes, stirring halfway Small servings; cover to retain moisture
🔥 Oven 20 minutes at 325°F (163°F) Large portions with foil cover to prevent drying

For best results when storing:

  • Transfer to shallow containers within 2 hours - Shallow containers (2 inches deep or less) cool faster and more evenly than deep pots
  • Store beef and vegetables together with broth - The liquid keeps everything moist during storage and prevents the edges from drying out
  • Keep fridge temp at 40°F or below - Check with a thermometer because bacteria grows fast in the danger zone between 40-140°F
  • Freeze in portions with extra broth - Add ¼ cup extra broth to each container before freezing to protect against freezer burn
  • Thaw overnight in the fridge, never on the counter - Room-temp thawing creates bacterial growth; plan ahead for safe defrosting

Frequently Asked Questions

Can I substitute brisket or round roast for chuck roast?

Brisket works well because it has similar fat content and slow-cooks into tender slices, but round roast is too lean and turns dry. Stick with chuck or brisket for best results.

What is the best way to store leftovers for 3-4 days?

Cool completely, then store beef and vegetables together in airtight shallow containers with some of the cooking liquid. This keeps everything moist and prevents drying in the fridge.

How do I tell when the chuck roast is fully cooked and tender?

Check the internal temp with a meat thermometer - it should hit 190-205°F. At that temp, the beef will pull apart easily when you press it with a fork.

Why is my beef dry and how can I fix it in slow cooker recipes?

Dry beef means there wasn't enough liquid in the pot or the lid wasn't sealed tight during cooking. Next time, make sure the liquid covers at least one-third of the roast and keep the lid closed.

Can I double this recipe for a larger crowd and how does time change?

You can double the ingredients if your slow cooker is big enough, but the cook time stays the same - it's based on the thickness of the roast, not the total amount of food. Just make sure everything fits in one layer.

Slow Cooker Chuck Roast with Vegetables served on a plate

Slow Cooker Chuck Roast with Vegetables

No ratings yet
Slow Cooker Chuck Roast with Vegetables delivers tender, flavorful beef through a quick sear followed by slow cooking. Vegetables are added halfway through to ensure they cook perfectly without becoming mushy, making this a hands-off meal that feeds six to eight people.
Print Recipe Pin Recipe
Prep Time 20 minutes mins
Cook Time 8 hours hrs
Total Time 8 hours hrs 20 minutes mins
Servings: 6 servings
Course: Dinner, Main Dish
Cuisine: American
Ingredients Equipment Method Notes

Ingredients
  

  • 3-4 lbs chuck roast trimmed with visible fat marbling
  • 1 lb carrots cut into 1.5-inch chunks
  • 1.5 lbs potatoes cut into 1.5-inch chunks
  • 1 large onion quartered
  • 3 stalks celery chopped
  • 6 cloves garlic smashed
  • 3 sprigs fresh thyme
  • 2 leaves bay leaf
  • 2 cups beef broth low-sodium
  • 2 tablespoons tomato paste
  • 0.5 cup red wine optional, for deglazing
  • 2 tablespoons oil for searing
  • salt and pepper for seasoning the roast

Equipment

  • Cast iron skillet For searing the roast
  • Slow cooker For slow cooking the roast and vegetables
  • Wooden spoon For scraping browned bits from pan

Method
 

  1. Pat the chuck roast dry with paper towels, then season all sides with salt and pepper. Heat 2 tablespoons of oil in a cast iron skillet or heavy pan over high heat until it shimmers, about 2 minutes.
    3-4 lbs chuck roast, 2 tablespoons oil, salt and pepper
  2. Sear the roast 3-4 minutes per side until deeply browned. Do not move it around during searing to allow crust formation. Transfer the roast to the slow cooker.
    3-4 lbs chuck roast
  3. Pour ½ cup beef broth or red wine into the hot skillet and scrape up the browned bits with a wooden spoon. Pour this deglazing liquid over the roast in the slow cooker. Add the remaining beef broth, tomato paste, smashed garlic cloves, fresh thyme sprigs, and bay leaves to the slow cooker.
    2 cups beef broth, 0.5 cup red wine, 2 tablespoons tomato paste, 6 cloves garlic, 3 sprigs fresh thyme, 2 leaves bay leaf
  4. Cook on low for 4 hours with the lid closed. Do not open the slow cooker during this time to retain heat.
  5. After 4 hours, add carrots, potatoes, quartered onion, and chopped celery around the roast. Continue cooking on low for another 4 hours, or until the internal temperature reaches 190-205°F and the beef pulls apart easily with a fork.
    1 lb carrots, 1.5 lbs potatoes, 1 large onion, 3 stalks celery, 3-4 lbs chuck roast
  6. Remove the roast and let it rest for 10-15 minutes before slicing or shredding. Remove the thyme sprigs and bay leaves. Serve the beef with the vegetables and spoon some cooking liquid over the entire plate.
    3-4 lbs chuck roast, 1 lb carrots, 1.5 lbs potatoes, 1 large onion, 3 stalks celery

Notes

  • Sear the roast before slow cooking to develop a deep, caramelized flavor.
  • Add vegetables only after 4 hours to prevent them from becoming mushy.
  • Keep the slow cooker lid closed during cooking to maintain temperature and shorten cook time.

Tried this recipe?

Let us know how it was!

What Is Pastrami? [Taste, Uses & More]

March 15, 2026

Pile pastrami high enough on rye bread and it becomes something close to a meal that defines a city. New York's Jewish deli culture built its reputation on this brined, smoked, spiced meat, and for good reason - no other cured cut delivers that combination of deep smoke, cracked pepper bark, and fork-tender brisket in a single slice.

What Is Pastrami

Like brisket itself, pastrami rewards patience in its making and bold pairings at the table.

QUICK SUMMARY

Pastrami is a brined, smoked, and spiced beef - most often brisket or navel cut - finished with a peppercorn-coriander crust. It tastes smoky, savory, and peppery with a slight tang from the brine. Best known in the classic pastrami on rye, it suits sandwiches, hashes, and eggs equally well.

👅Flavor: Smoky, savory-umami, peppery, with a slight brine tang
✋Texture: Tender, moist, thinly sliced with a fatty mouthfeel
🥩Best Uses: Rye sandwiches, Reuben-style builds, breakfast hash, pasta
🕐Shelf Life: Unopened 2-3 weeks; opened 3-5 days; frozen 2-3 months
🛒Buy It: Look for a dark, even spice crust and good marbling throughout

What Is Pastrami?

Pastrami traces its roots to Romania, where a preserved meat called pastrame - typically made from mutton or goose - traveled with Ashkenazi Jewish immigrants to New York in the late 19th century.

Once in the United States, beef became the standard, and the New York deli turned it into an institution.

The process is what sets it apart. Beef - almost always brisket or the fattier navel cut - gets cured in a seasoned brine, coated in a coarse peppercorn-coriander crust, cold-smoked, and then typically steamed before slicing.

That final steam is what gives deli pastrami its signature tenderness. Without it, you get something closer to smoked corned beef - which, while related, skips the spice crust and smoking entirely.

You may also see it labeled pastrami beef or referenced in the context of corned beef, since both start with a brined brisket. Montreal smoked meat is a close cousin - similar process, but spiced differently and sliced thicker.

  • 🥩 Primary cut - brisket (flat or point) or beef navel for higher fat content
  • 🌍 Origin - Romanian pastrame, refined in New York's Ashkenazi deli tradition
  • 🔄 vs. corned beef - corned beef skips the spice crust, smoking, and steaming steps
  • 🍖 Related - Montreal smoked meat uses a similar cure but a distinct spice profile

What Does Pastrami Taste Like?

pastrami - What Is Pastrami

Pastrami hits hard. The dominant notes are smoke and black pepper, with coriander adding a faintly citrusy warmth beneath both.

Brine contributes a salty, slightly sour edge that keeps the richness from feeling flat.

The navel cut produces a fattier, more unctuous slice than brisket flat. Fat carries smoke particularly well here, so navel pastrami often tastes more intense than its leaner counterpart.

Heat changes things noticeably. Cold pastrami straight from the fridge tastes firmer and more peppery.

Warmed or steamed, the fat softens, the smoke rounds out, and the overall flavor opens up considerably.

Sensory SnapshotStrong Intensity
👅 Flavor
smokysavory-umamipepperyslightly tangy
✋ Texture
tendermoistfatty
👃 Aroma
warm smoked meatpepper-coriander

How to Use Pastrami

The classic pastrami on rye - stacked thick with yellow mustard - remains the standard for a reason. The mustard's acidity cuts the fat cleanly, and rye's slight bitterness matches the smokiness without competing.

Beyond sandwiches, pastrami slots into a wide range of dishes.

How Pastrami Is Used
MethodBest ForTip
🥗 Cold/SlicedClassic deli sandwiches, Reuben builds, deli plates with picklesStack generously - thin slices compress when cold
♨️ SteamedWarming for service, restoring moisture to refrigerated slicesSteam over water for 3-5 minutes; don't microwave dry
🍳 Pan-SearedCrispy-edged slices for eggs, hash, flatbreads, tacosHigh heat, dry pan, 60-90 seconds per side maximum
🍲 Chopped/SautéedPotato hash, poutine, mac and cheese, creamy pastaAdd late in cooking - it's already fully seasoned

Reuben-style builds layer Swiss cheese, sauerkraut, and Russian dressing alongside the pastrami - the fermented sauerkraut echoes the brine already in the meat. For breakfast, thin slices tucked into scrambled eggs or a hash need nothing more than a fried egg on top.

Pastrami works well anywhere you'd want a salty, smoky contrast. Fold it into flatbreads or tacos for a deli-meets-street combination, or chop it into mac and cheese for a sharp, savory counterpoint to the cream.

Strong pairings include rye whiskey, dark beers, horseradish, and pickled onions - anything with enough intensity to hold its own.

Skip delicate floral desserts and light white wines. Both get buried under the smoke and pepper.

Try It In
🧀Mac and CheeseChopped pastrami adds smoky, salty contrast to a creamy base→

How to Buy and Store Pastrami

At the deli counter, look for slices with a dark, even spice crust and visible marbling throughout the meat. Avoid anything that looks dry, grayish, or has a patchy bark - those are signs of age or poor preparation.

Best Pick
Navel-cut pastrami from a deli counter that steams to order will outperform pre-sliced packaged product almost every time. Ask specifically for navel if the counter stocks both cuts.

For packaged pastrami, choose vacuum-sealed packs with an intact seal and minimal pooled liquid inside. Check the pack date and go for the freshest available.

  • Refrigerator storage - keep tightly wrapped in butcher paper or an airtight container at 32-40°F
  • Opened shelf life - use within 3-5 days for best quality
  • Unopened vacuum-sealed - holds 2-3 weeks refrigerated

For longer storage, freezing works well. For full guidance on how long it lasts, see our pastrami storage life page.

If you're comparing cured meat options, our notes on side dishes for corned beef cover similar pairing logic.

Starting With Pastrami

New to pastrami? Start with the sandwich.

A good rye, yellow mustard, and well-steamed navel pastrami from a deli counter is the clearest possible introduction to what this meat does.

Once that benchmark is set, branch into eggs, hash, or a Reuben build. If you need an alternative in a recipe, our guide to pastrami replacements covers the closest options by use case.

Golden Rule
Always steam pastrami before serving warm. Dry heat toughens it fast. Even 3 minutes over simmering water makes a measurable difference in texture and flavor.

Frequently Asked Questions

Is pastrami the same as corned beef?

No. Both start with brined beef brisket, however pastrami also gets a peppercorn-coriander crust, smoked, and then steamed. Corned beef skips all three of those steps, which is why the flavor and texture differ so significantly.

How is pastrami made?

Beef brisket or navel is cured in a seasoned brine for several days, then coated in cracked black pepper and coriander. It's cold-smoked until cooked through, then steamed before slicing to restore moisture and tenderness.

What cut of beef is used for pastrami?

Brisket is most common, using either the flat or the point. Navel cut - from the plate section - is fattier and often preferred by deli purists for its richer flavor and more tender result.

How do you reheat pastrami without drying it out?

Steam it. Place slices in a steamer basket or colander over simmering water, cover, and heat for 3-5 minutes. Microwaving without added moisture dries the meat out quickly and toughens the texture.

Can you freeze pastrami?

Yes. Wrap tightly in plastic wrap or vacuum-seal before freezing, and use within 2-3 months for best quality. Thaw overnight in the refrigerator and steam before serving to restore moisture.

Waldorf Salad with Apples and Walnuts

March 15, 2026

Complete Article Output

You need something beyond lettuce and ranch. This Waldorf Salad with Apples and Walnuts delivers crisp apples, toasted walnuts, and crunchy celery in a tangy dressing that works for picnic lunches or holiday meals.

Waldorf Salad with Apples and Walnuts served on a plate

The dressing clings without drowning the ingredients. Lemon juice keeps apples bright while adding acidity that balances the creamy mayonnaise.

Toast the walnuts first. Five minutes in a dry skillet transforms bland nuts into smoky, crunchy pieces that define this salad's texture.

QUICK SUMMARY

Waldorf Salad with Apples and Walnuts combines fresh apples, toasted walnuts, celery, and grapes in a tangy mayonnaise dressing. Toast walnuts until golden and toss apples in lemon juice immediately to prevent browning. Ready in 20 minutes with 15 minutes of prep.

⏱️Time: 20 minutes total (15 prep, 5 toasting walnuts)
🔪First step: Toast walnuts in dry skillet over medium heat for 4 minutes
⚠️Watch out: Don't skip lemon juice on apples or they'll turn brown within minutes

Why This Recipe Works

A good salad can make or break the plate. Garlic shrimp adds the contrast this plate needs, but timing matters. For a version that comes together quickly, this flaky garlic shrimp hits the table in under 30 minutes with minimal cleanup.

Quick Reference
⏱️
Prep Time
15 minutes
🔥
Cook Time
5 minutes
⏰
Total Time
20 minutes
🍽️
Servings
4-6 servings
📊
Difficulty
Easy
🏷️
Category
Side Dish
💡
Quick Tip
Toast walnuts lightly to intensify crunch and flavor
🎯
Best For
Weeknight lunch | Entertaining | Potluck

Five things that make this work:

  • Crisp apples chopped fresh - Fuji or Honeycrisp stay firm and sweet-tart, providing juicy crunch in every bite
  • Walnuts toasted in a dry skillet - Four minutes over medium heat releases oils and creates golden, smoky flavor
  • Lemon juice added immediately after chopping apples - Citric acid prevents oxidation that turns apples brown within minutes
  • Mayonnaise mixed with lemon juice for dressing - Half-cup mayo with 2 tablespoons lemon creates creamy coating that clings without pooling
  • Chilling 15-30 minutes before serving - Cold temperature melds flavors and enhances crisp texture contrast
Quick Tip
Chop apples into ½-inch cubes and toss immediately with 1 tablespoon lemon juice to maintain bright color and fresh taste.

What You'll Need

Ingredients for Waldorf Salad with Apples and Walnuts

Most ingredients sit in your fridge already. The salad works best when it hits the table at the same time as the main. We keep a batch ready for nights like this - tender salad side dish that pairs with grilled chicken or pork chops without extra planning.

🍎
Fresh Fruit
  • 2 large apples (Granny Smith, Fuji, or Honeycrisp)
  • 1 cup red or green grapes, halved
🥬
Vegetables
  • 2 celery stalks, sliced thin
🌰
Nuts
  • ½ cup walnuts, toasted and chopped
🥢
Dressing Base
  • ½ cup mayonnaise
  • 2 tablespoons fresh lemon juice
  • Salt and pepper to taste

Ingredient Details

  • Apples
    Choose firm, crisp varieties like Granny Smith for tart bite or Fuji for sweetness - soft apples turn mushy and dull
  • Walnuts
    Toast in dry skillet over medium heat for 4 minutes, stirring frequently, until golden and fragrant - burnt nuts taste bitter
  • Celery
    Slice lengthwise then crosswise into ¼-inch pieces for maximum crunch and even distribution throughout salad
  • Grapes
    Halve grapes and drain excess liquid on paper towels to prevent watering down the dressing
  • Mayonnaise
    Bring to room temperature before mixing for smoother dressing that coats ingredients evenly without clumping
  • Lemon juice
    Use fresh-squeezed lemon for brightest acidity - bottled juice lacks punch and fresh citrus oils
  • Salt and pepper
    Add gradually in small increments, tasting after each addition, to avoid over-seasoning the creamy dressing

Ingredient Swaps

Variations change texture and flavor without breaking the core recipe. Salad adds the contrast this plate needs, but timing matters. For a version that comes together quickly, homemade salad recipe takes just 10 minutes and needs no cooking at all.

Four swaps that work:

  • Greek yogurt for mayonnaise - Use equal amount for tangier, lighter dressing with less fat but similar creaminess
  • Pecans for walnuts - Swap 1:1 for slightly sweeter, buttery flavor with same crunchy texture
  • Dried cranberries for grapes - Replace with ½ cup dried cranberries for concentrated sweetness and chewy texture
  • Vegan mayonnaise for regular mayo - Use same amount to keep creamy coating while making salad dairy-free

Mayonnaise

Works for: Classic creamy texture, rich coating that clings to ingredients

Skip if: Want lower fat or tangier flavor profile

Greek Yogurt

Works for: Lighter dressing, more tang, higher protein content

Skip if: Prefer traditional rich, smooth coating without sour notes

Instructions

Total time runs 20 minutes with most spent chopping. Rich mains need something to cut through, and pork does exactly that. For a version that comes together quickly, simple pork recipe pairs with this salad for complete summer lunch in under an hour.

  1. Toast walnuts in dry skillet over medium heat for 4 minutes, stirring frequently until golden brown and fragrant. Remove from heat and let cool completely, then chop into bite-sized pieces.

  2. Chop apples into ½-inch cubes and immediately toss with 1 tablespoon lemon juice in large mixing bowl to prevent browning. Work quickly - exposed apple flesh oxidizes within 2-3 minutes.

  3. Slice celery lengthwise then crosswise into ¼-inch pieces and add to bowl with apples. Halve grapes and drain on paper towels before adding to bowl.

  4. Whisk mayonnaise with remaining 1 tablespoon lemon juice in small bowl until smooth. Season with salt and pepper, starting with ¼ teaspoon of each. Add toasted walnuts to apple mixture.

  5. Pour dressing over salad and toss gently until all ingredients are evenly coated. Taste and adjust seasoning. Refrigerate 15-30 minutes before serving to meld flavors and enhance crispness.

Best Pick
Use ½ cup mayonnaise mixed with 2 tablespoons lemon juice for balanced creaminess that coats without overwhelming fresh ingredients.

What to Serve With It

You need something that fills the plate without competing with crisp, sweet-tart flavors. Most people pair this salad wrong, loading the table with other cold dishes instead of warm mains. For complete meal planning beyond basic grilled chicken, check out ideas for easy chickpea salad dinner nights that work with light salad sides year-round.

Side Dish Prep Why It Works How to Serve
Grilled chicken breast Easy Lean protein complements crisp, creamy salad without adding heaviness Slice warm chicken and serve alongside chilled salad for temperature contrast
Whole wheat bread Easy Adds heartiness and texture contrast with chewy crumb Toast lightly and serve with butter for simple accompaniment
Simple green salad Easy Light, fresh pairing balances richness of creamy dressing Dress with vinaigrette and serve in separate bowl
Roasted sweet potatoes Medium Adds warmth and sweetness contrast to cool, tangy salad Roast at 425°F for 25 minutes, serve hot
Smoked salmon platter Easy Pairs well with creamy and fruity notes for elegant presentation Arrange salmon slices on platter with capers and red onion

Three ways to serve it:

  • Weeknight lunch - Pair with grilled chicken breast and whole wheat bread for complete meal in 30 minutes
  • Picnic spread - Pack in cooler with charcuterie board and herbed crostini for portable feast
  • Holiday meal - Serve alongside smoked salmon platter with chilled white wine for elegant appetizer course
Shortcut
Buy pre-toasted walnuts from bulk section to skip stovetop step - just chop and add directly to salad.

Store and Reheat

Waldorf salad keeps 2-3 days in the fridge but loses crunch daily. Rice adds the contrast this plate needs, but timing matters. For a version that comes together quickly, this quick rice dish reheats better than most sides and stays moist for 4 days.

Method Time Best For
🍳 Stovetop N/A Not recommended - heat wilts ingredients and breaks dressing
📦 Microwave N/A Not recommended - heat destroys crisp texture completely
🔥 Oven N/A Not recommended - salad meant to be served chilled

For best results when storing:

  • Store in airtight container in fridge for maximum 2-3 days - apples soften and lose crunch after that
  • Keep dressing separate if prepping ahead - dress salad just before serving to maintain crisp apple and celery texture
  • Don't freeze Waldorf salad - mayonnaise separates when frozen and thawed, creating watery, grainy texture
  • Drain excess liquid before serving leftovers - grapes and apples release water over time, diluting dressing
  • Add fresh walnuts when serving day-old salad - toasted nuts absorb moisture and lose crunch after 24 hours

Frequently Asked Questions

Can I substitute Greek yogurt for mayonnaise in Waldorf salad?

Yes, use equal amount Greek yogurt for lighter, tangier dressing. Mix ½ cup yogurt with 2 tablespoons lemon juice and season with salt and pepper.

How long can I store Waldorf salad before serving?

Store 2-3 days maximum in airtight container in fridge. Apples lose crunch and walnuts absorb moisture after 24 hours, so best eaten fresh.

What is the best way to toast walnuts for this salad?

Toast in dry skillet over medium heat for 4 minutes, stirring frequently. Walnuts should turn golden brown and smell fragrant - burnt nuts taste bitter.

Why did my apples brown quickly even with lemon juice?

You need to toss apples with lemon juice immediately after chopping. Exposed apple flesh oxidizes within 2-3 minutes - work quickly and coat all surfaces.

How many servings does this Waldorf salad recipe yield?

Makes 4-6 servings depending on portion size. Serves 4 as main lunch salad or 6 as side dish for dinner.

Waldorf Salad with Apples and Walnuts served on a plate

Waldorf Salad with Apples and Walnuts

No ratings yet
Waldorf Salad with Apples and Walnuts features crisp apples, toasted walnuts, celery, and grapes in a tangy mayonnaise and lemon dressing. Toasting the walnuts enhances their flavor, and lemon juice keeps the apples fresh and bright. This easy salad is ready in just 20 minutes, perfect for lunches or holiday sides.
Print Recipe Pin Recipe
Prep Time 15 minutes mins
Cook Time 5 minutes mins
Total Time 20 minutes mins
Servings: 5 servings
Course: Side Dish
Cuisine: American
Ingredients Equipment Method Notes

Ingredients
  

  • 2 large apples Firm varieties like Granny Smith, Fuji, or Honeycrisp, chopped into ½-inch cubes
  • 1 cup grapes Red or green, halved and drained
  • 2 stalks celery Sliced lengthwise then crosswise into ¼-inch pieces
  • 0.5 cup walnuts Toasted in dry skillet and chopped
  • 0.5 cup mayonnaise Bring to room temperature before mixing
  • 2 tablespoons lemon juice Freshly squeezed, divided
  • salt To taste, add gradually
  • black pepper To taste, add gradually

Equipment

  • Dry skillet Toast walnuts in skillet over medium heat
  • Mixing bowl Combine and toss salad ingredients
  • Small bowl Whisk mayonnaise and lemon juice

Method
 

  1. Toast walnuts in a dry skillet over medium heat for 4 minutes, stirring frequently until golden brown and fragrant. Remove from heat and let cool completely, then chop into bite-sized pieces.
    0.5 cup walnuts
  2. Chop apples into ½-inch cubes and immediately toss with 1 tablespoon lemon juice in a large mixing bowl to prevent browning. Work quickly to coat all apple pieces evenly.
    2 large apples, 2 tablespoons lemon juice
  3. Slice celery into ¼-inch pieces and add to bowl with apples. Halve the grapes and drain on paper towels before adding to the bowl.
    2 stalks celery, 1 cup grapes
  4. Whisk mayonnaise with the remaining 1 tablespoon lemon juice in a small bowl until smooth. Season with salt and pepper, starting with ¼ teaspoon of each.
    0.5 cup mayonnaise, 2 tablespoons lemon juice, salt, black pepper
  5. Add toasted walnuts to apple mixture. Pour dressing over the salad and toss gently until all ingredients are evenly coated. Taste and adjust seasoning. Refrigerate for 15-30 minutes before serving to meld flavors and enhance crispness.
    0.5 cup walnuts, 0.5 cup mayonnaise, salt, black pepper

Notes

  • Toast walnuts lightly to enhance flavor but avoid burning for bitterness.
  • Toss apples immediately with lemon juice to maintain fresh color and prevent browning.
  • Refrigerate the salad before serving to meld flavors and keep crisp texture.

Tried this recipe?

Let us know how it was!

Three-Bean Salad with Vinegar Dressing

March 15, 2026

START ARTICLE

Most side dishes vanish within minutes at a potluck, but three-bean salad stays behind-too watery or too sweet or just too boring. You need crisp-tender beans that hold their shape, a tangy-sweet vinegar dressing that coats without pooling, and onions that add bite without making anyone wince.

Three-Bean Salad with Vinegar Dressing served on a plate

This version fixes all three problems. Blanch green and wax beans for exactly 3-4 minutes, shock them in ice water to lock in their snap, then toss everything with a properly balanced vinegar dressing that clings instead of drips. A good salad can make or break the plate. For a version that comes together quickly, this quick salad dish uses celery seed and thin-sliced onion for the classic picnic flavor you remember-but sharper, brighter, and actually worth bringing.

Make it Sunday night for weeknight lunches, double the batch for summer cookouts, or prep it an hour before guests arrive. It holds in the fridge for 3-4 days and tastes better after the flavors meld overnight.

QUICK SUMMARY

Three-bean salad works when you blanch fresh beans until crisp-tender, drain canned beans completely, and balance the vinegar-sugar dressing so it coats without pooling. The key is proper blanching time-3-4 minutes in boiling water followed by an ice bath-and soaking sliced onions in cold water to tame their bite. Chill for at least an hour before serving so flavors meld and beans stay snappy.

⏱️Timing: 15 minutes prep plus 5-7 minutes blanching, then chill for 1-12 hours
🔪Method shortcut: Blanch beans in boiling water for 3-4 minutes, shock in ice water immediately
⚠️Watch out: Over-blanching turns beans mushy-pull them when they're tender but still snap when bent

Why This Recipe Works

Most three-bean salads fail because the beans are either crunchy-raw or mushy-soft, and the dressing tastes like straight vinegar or candy syrup. This version fixes both problems by blanching fresh beans for exactly 3-4 minutes-just long enough to soften their raw bite while keeping their snap intact. Rich mains need something to cut through, and salad does exactly that. For a version that comes together quickly, a juicy salad side keeps the plate balanced without adding heaviness or competing flavors.

Quick Reference
⏱️
Prep Time
15 minutes
🔥
Cook Time
5-7 minutes
⏰
Total Time
30-40 minutes
🍽️
Servings
6-8
📊
Difficulty
Easy
🏷️
Category
Side Dish
💡
Quick Tip
Blanch beans 3-4 minutes for crisp-tender texture
🎯
Best For
Weeknight dinner | Meal prep | Entertaining
  • Blanching stops at the right moment: Pull beans when they bend without snapping but still hold their shape-3-4 minutes in boiling water, then straight into ice water for 2-3 minutes to lock in that crisp-tender bite
  • Ice bath prevents carryover cooking: The moment beans leave boiling water they keep cooking internally, turning mushy within minutes unless you shock them cold immediately
  • Proper bean drainage eliminates wateriness: Rinse canned kidney beans twice, drain for 2 minutes, then pat dry-excess liquid dilutes the dressing and leaves a puddle at the bottom of the bowl
  • Soaked onions lose their harsh bite: Slice red onion thin, soak in cold water for 10 minutes, then drain-this mellows the sulfur compounds that make raw onion too pungent
  • Sugar-vinegar balance creates cling: Dissolve sugar completely in vinegar before adding oil so the dressing coats beans instead of separating into sweet syrup and sour liquid
Quick Tip
Blanch green and wax beans in boiling water for 3-4 minutes for crisp-tender texture-they should bend without snapping when you lift one with tongs

What You'll Need

Ingredients for Three-Bean Salad with Vinegar Dressing

Fresh green and wax beans need proper blanching to soften without losing their snap, while canned kidney beans just need a thorough rinse and drain. The vinegar dressing comes together in two minutes once you dissolve the sugar first, and celery seed adds that classic picnic-salad flavor that makes this taste like the version you remember-but sharper and brighter. The gravy works best when it hits the table at the same time as the main. For a version that comes together quickly, quick gravy recipe balances tangy beans without competing for attention.

🥬
Fresh Beans
  • 1 lb green beans, trimmed
  • 1 lb wax beans, trimmed
🫘
Canned Beans
  • 1 (15 oz) can kidney beans, rinsed and drained
🧄
Aromatics
  • 1 small red onion, thinly sliced
🥢
Dressing
  • ¾ cup white or apple cider vinegar
  • ½ cup sugar
  • ⅓ cup vegetable or olive oil
  • 1 teaspoon salt
  • ½ teaspoon black pepper
  • ½ teaspoon celery seed

Ingredient Details

  • Green beans
    Trim ends and cut into 1.5-inch pieces for uniform cooking-uneven sizes mean some pieces turn mushy while others stay raw
  • Wax beans
    These pale yellow beans add visual contrast and a slightly sweeter flavor than green beans-blanch them at the same time since they cook at the same rate
  • Kidney beans
    Rinse canned beans twice under cold water to remove the starchy liquid that makes salads gummy and cloudy
  • Red onion
    Slice thin (⅛-inch) and soak in cold water for 10 minutes to mellow the sulfur bite without losing the crunch
  • White vinegar
    White vinegar gives the sharpest tang-swap apple cider vinegar for a rounder, fruitier flavor that's slightly less aggressive
  • Sugar
    Dissolve sugar completely in vinegar before adding oil-undissolved crystals leave a grainy texture and uneven sweetness
  • Celery seed
    This small but crucial spice adds the classic picnic-salad flavor-start with ½ teaspoon and add more only if you want a stronger celery punch

Ingredient Swaps

Kidney beans anchor this salad with their firm, creamy texture, but chickpeas or black beans work if that's what you have. Apple cider vinegar softens the tang if white vinegar tastes too sharp, and frozen green beans (thawed and drained) skip the trimming and blanching when you're short on time. Most people skip pork, but it balances the meal. For a version that comes together quickly, something tender like pork complements tangy beans without overpowering their bright, acidic snap.

  • Chickpeas instead of kidney beans: Slightly firmer texture with a nuttier flavor-rinse and drain the same way to avoid gummy liquid
  • Apple cider vinegar instead of white vinegar: Milder, fruity tang that's less aggressive-use the same amount but expect a slightly darker dressing
  • Frozen green beans instead of fresh: Thaw completely, pat dry, skip blanching-they're already cooked and just need to be mixed with the dressing
  • Shallots instead of red onion: Sweeter, less pungent bite with a softer texture-slice thin and skip the soaking step since they're naturally milder

Fresh Green and Wax Beans

Works for: Crisp-tender texture, bright color, full control over doneness

Skip if: You're short on time or don't want to blanch and shock beans

Frozen Green Beans (Thawed)

Works for: Quick prep, no blanching needed, already trimmed and cut

Skip if: You want maximum crunch and bright green color-frozen beans are softer

Instructions

This salad comes together in under 20 minutes of active work, but you need to chill it for at least an hour so the vinegar dressing softens the raw onion and the flavors meld without turning the beans soggy. Blanching fresh beans takes 3-4 minutes in boiling water, shocking them in ice water takes another 2-3 minutes, and mixing everything takes less than 5 minutes once the beans are drained and dry. Chicken adds the contrast this plate needs, but timing matters. For a version that comes together quickly, quick chicken dish keeps prep simple and lets the beans stay crisp without sitting too long.

  1. Blanch the fresh beans: Bring a large pot of salted water to a rolling boil, add trimmed green and wax beans, cook for 3-4 minutes until they bend without snapping but still hold their shape, then drain immediately and transfer to a bowl of ice water for 2-3 minutes to stop the cooking.
  2. Drain and dry the beans: Remove blanched beans from ice water, drain in a colander for 2 minutes, then pat dry with a clean kitchen towel-excess water dilutes the dressing and makes the salad watery.
  3. Prepare the onion: Slice red onion into thin rounds (⅛-inch thick), separate into rings, place in a bowl of cold water, let sit for 10 minutes to mellow the bite, then drain and pat dry.
  4. Make the dressing: In a small bowl, whisk together vinegar and sugar until sugar dissolves completely (30-60 seconds), then whisk in oil, salt, pepper, and celery seed until smooth and emulsified.
  5. Combine and chill: In a large mixing bowl, combine blanched beans, drained kidney beans, and sliced onion, pour dressing over top, toss gently until everything is coated, cover, and refrigerate for at least 1 hour (or up to 12 hours) before serving cold.
Watch Out
Over-blanching turns beans mushy and dull-colored-pull them at 3-4 minutes when they bend without snapping, then shock in ice water immediately to lock in their crisp-tender bite

What to Serve With It

Three-bean salad fills the tangy, crisp gap on plates that need contrast against rich or heavy mains-think grilled meats, creamy casseroles, or anything with a thick sauce. It also works as a standalone side for potlucks and picnics since it travels well and tastes better after sitting for an hour. For more ideas on rounding out the plate, check out easy egg bites dinner nights for meal-planning shortcuts that keep beans crisp and mains balanced.

Side DishPrepWhy It WorksHow to Serve
Grilled chicken breastEasyLean protein balances tangy beans without adding heavinessSlice and serve alongside salad with cornbread
CornbreadEasySweet, crumbly texture soaks up vinegar dressingCut into squares and serve warm with butter
Steamed riceEasyNeutral base softens vinegar brightnessSpoon salad over rice or serve side by side
Fresh dinner rollsEasySoft, buttery texture contrasts crisp beansServe warm with salad and a main protein
Roasted sweet potatoesMediumNatural sweetness balances vinegar tangCube and roast until caramelized, serve alongside salad

Three ways to serve it:

  • For summer cookouts: Pair with pulled pork sliders and deviled eggs for a classic BBQ spread-the tangy beans cut through rich pork and creamy yolks
  • For weeknight dinners: Serve alongside grilled chicken and cornbread for a simple Southern-style plate that comes together in under 30 minutes
  • For meal prep: Pack in individual containers with steamed rice and a protein for lunches that taste better on day two after the flavors meld overnight
Best Pick
Serve this salad with pulled pork or grilled chicken for the most balanced plate-the vinegar dressing cuts through rich meat while the crisp beans add texture contrast

Store and Reheat

Three-bean salad keeps for 3-4 days in the fridge and actually tastes better on day two after the vinegar dressing mellows and the onions soften. Store it in an airtight, shallow container so beans stay submerged in dressing without sitting in a puddle of excess liquid. Rich mains need something to cut through, and pork does exactly that. For a version that comes together quickly, tender homemade pork recipe pairs well with chilled salad since both can be made ahead and served cold or at room temperature.

MethodTimeBest For
🧊 Serve cold (from fridge)0 minutesMaximum crunch and bright flavor-pull straight from fridge and serve
🌡️ Room temperature rest15 minutesIf salad is too cold to taste the dressing-let sit on counter to take the chill off

For best results when storing:

  • Drain excess liquid before storing: If the salad sits for more than 2 hours, drain off any pooled liquid at the bottom of the bowl to prevent beans from turning soggy
  • Keep covered but not sealed: Use a lid or plastic wrap but leave a small gap for air circulation-fully sealed containers trap moisture and make beans lose their snap
  • Stir before serving: Dressing settles to the bottom overnight, so give the salad a gentle toss before serving to redistribute flavors evenly
  • Add fresh onion if needed: If onions turn too soft after 2-3 days, slice fresh onion thin, soak briefly, and toss in just before serving for a crisp bite
  • Skip freezing: Frozen and thawed beans turn mushy and watery-this salad only works fresh from the fridge

Frequently Asked Questions

Can I use canned beans instead of fresh green and wax beans?

Yes, but they'll be softer and less snappy than blanched fresh beans. Rinse and drain canned green beans thoroughly, then skip the blanching step and toss them directly with the dressing-they won't have the same crisp-tender bite, but they'll still work in a pinch.

How long can I store the three-bean salad in the refrigerator?

Store it covered in the fridge for 3-4 days. The salad tastes better on day two after the vinegar mellows and the onions soften, but after 4 days the beans start losing their snap and the dressing gets watery.

How do I know when the beans are blanched enough without being mushy?

Pull one bean out with tongs at the 3-minute mark and bend it-it should give without snapping in half, but still hold its shape and feel firm. If it snaps cleanly, cook another 30-60 seconds, then immediately shock in ice water to stop the cooking.

What should I do if the salad tastes too sour or too sweet?

If it's too sour, stir in 1-2 tablespoons of sugar and let it sit for 10 minutes so the sugar dissolves and mellows the acidity. If it's too sweet, add 2-3 tablespoons of vinegar and a pinch of salt to sharpen the flavor and balance the sweetness.

Can I double the recipe for a large gathering without losing texture?

Yes, just blanch the beans in two separate batches so they cook evenly-overcrowding the pot lowers the water temperature and makes beans cook unevenly, leaving some raw and others mushy. Mix everything in a large bowl and chill for at least 1 hour before serving.

Three-Bean Salad with Vinegar Dressing served on a plate

Three-Bean Salad with Vinegar Dressing

No ratings yet
This three-bean salad delivers crisp-tender green and wax beans alongside drained kidney beans, all coated in a perfectly balanced vinegar-sugar dressing that clings without pooling. Proper blanching and soaking onion ensures a bright, flavorful, and snappy side dish ideal for potlucks or meal prep.
Print Recipe Pin Recipe
Prep Time 15 minutes mins
Cook Time 7 minutes mins
Total Time 22 minutes mins
Servings: 6 servings
Course: Side Dish
Cuisine: American
Ingredients Method Notes

Ingredients
  

  • 1 lb green beans trimmed and cut into 1.5-inch pieces
  • 1 lb wax beans trimmed and cut into 1.5-inch pieces
  • 15 oz kidney beans canned, rinsed and drained thoroughly
  • 1 small red onion thinly sliced (⅛-inch) and soaked in cold water for 10 minutes
  • ¾ cup white or apple cider vinegar choose vinegar for sharp or rounder flavor
  • ½ cup sugar dissolved completely in vinegar before adding oil
  • ⅓ cup vegetable or olive oil
  • 1 teaspoon salt
  • ½ teaspoon black pepper
  • ½ teaspoon celery seed adds classic picnic-salad flavor

Method
 

  1. Bring a large pot of salted water to a rolling boil. Add trimmed green and wax beans and cook for 3-4 minutes until beans bend without snapping but still hold their shape. Drain immediately and transfer beans to a bowl of ice water for 2-3 minutes to stop the cooking.
    1 lb green beans, 1 lb wax beans
  2. Remove blanched beans from ice water and drain in a colander for 2 minutes. Pat dry thoroughly with a clean kitchen towel to remove excess water that dilutes the dressing.
    1 lb green beans, 1 lb wax beans
  3. Slice red onion into thin rounds about ⅛ inch thick. Place the slices in a bowl of cold water and soak for 10 minutes to mellow the sharp bite, then drain and pat dry.
    1 small red onion
  4. In a small bowl, whisk vinegar and sugar together until sugar dissolves completely (about 30-60 seconds). Whisk in oil, salt, pepper, and celery seed until dressing is smooth and emulsified.
    ¾ cup white or apple cider vinegar, ½ cup sugar, ⅓ cup vegetable or olive oil, 1 tsp salt, ½ tsp black pepper, ½ tsp celery seed
  5. In a large bowl, combine blanched beans, drained kidney beans, and prepared sliced onion. Pour dressing over the top and toss gently until everything is evenly coated. Cover and refrigerate for at least 1 hour (up to 12 hours) before serving chilled.
    1 lb green beans, 1 lb wax beans, 15 oz kidney beans, 1 small red onion, ¾ cup white or apple cider vinegar, ½ cup sugar, ⅓ cup vegetable or olive oil, 1 tsp salt, ½ tsp black pepper, ½ tsp celery seed

Notes

  • Blanch beans for exactly 3-4 minutes and shock in ice water immediately to maintain crisp-tender texture.
  • Drain and dry beans thoroughly to prevent watery salad and pooling dressing.
  • Soak sliced red onion in cold water for 10 minutes to mellow harsh bite while keeping crunch.

Tried this recipe?

Let us know how it was!

What Is Parsnip? [Taste, Uses & More]

March 15, 2026

Most people who dislike parsnips have only eaten them raw or boiled without purpose - pale, fibrous, and oddly sharp. That version barely hints at what this root vegetable can do.

What Is Parsnip

Roast one at high heat and you get something almost unrecognizable: caramelized edges, a honeyed sweetness, and a nutty depth that puts it closer to a side dish centerpiece than an afterthought. Whether you're new to parsnips or just underusing them, this profile covers everything from raw flavor to the best way to buy and store them.

QUICK SUMMARY

Parsnip is a cream-colored taproot with a sweet, nutty, earthy flavor that deepens with heat. Raw, it's sharp and fibrous. Cooked, it turns creamy and caramelized. Best roasted, mashed, or simmered in soups and stews.

🥕Category: Root vegetable (taproot), related to carrot and parsley
👅Flavor: Sweet, honeyed, earthy, nutty with a celery-like spice
🍳Best Uses: Roasting, mashing, soups, stews, gratins
🧊Shelf Life: 2-4 weeks whole in the fridge; a few days once cut
🌍Common In: British, Northern European, Scandinavian, and American roast cooking

What Is Parsnip?

Parsnip (Pastinaca sativa) is a tapered taproot native to temperate Eurasia, cultivated in Europe for centuries before the potato displaced it as a primary starch crop.

It belongs to the same family as carrot and parsley, which explains both its shape and its subtle herbal edge.

The root grows cream to off-white in color, with a smooth skin and a firm, dense flesh surrounding a central fibrous core.

Mature roots develop a woodier core and a slightly more bitter flavor, driven by compounds in the falcarinol family - the same class that gives carrots their faint bitterness.

You'll occasionally see it labeled pastinaca, white carrot, or parsnip root at specialty markets. The most widely grown variety in commercial and home gardens is Hollow Crown, a long, tapered type prized for consistent sweetness and manageable core size.

  • Size matters here - small-to-medium roots have a thinner, less woody core than large specimens.
  • Season - parsnips peak after the first frost, which converts more starch to sugar naturally in the ground.
  • Family ties - turnip and parsnip often appear together in root blends, though they're from different plant families entirely.

What Does Parsnip Taste Like?

parsnip - What Is Parsnip

Raw parsnip is sharper and more aggressive than most people expect. It has a peppery, celery-like bite alongside earthy nuttiness, with a fibrous texture that resists chewing.

Most people don't eat it this way for good reason.

Cooking changes everything. Heat converts the starches to sugars, and the result is a honeyed sweetness that no amount of raw tasting prepares you for.

Roasting pushes this furthest - caramelized edges with a creamy, slightly fluffy interior.

Sensory SnapshotModerate Intensity
👅 Flavor
SweetHoneyedEarthyNuttyCelery-spice
✋ Texture
Crisp rawCreamy cookedFluffy roasted
👃 Aroma
WarmNuttyHerbaceous earth

Parsnip is sweeter than carrot once roasted, though the flavors share a family resemblance. The key difference is that nuttiness and celery note - neither carrot nor turnip alternatives replicate it cleanly.

Golden Rule
Never judge a parsnip raw. Its flavor only becomes itself after heat. Roast at 400°F or above for full caramelization.

How to Use Parsnip

Parsnip pairs most naturally with the fat and salt of roast cooking. British and Northern European cuisines rely on it heavily - think Christmas roast trays alongside potatoes and carrots, or cold-weather purées served under braised meats.

How Parsnip Is Used
MethodBest ForTip
🔥 RoastingCaramelized side dish, holiday traysCut into even batons; roast at 400°F+ with oil and thyme
🥣 Boiling/MashingSilky purée under roast meatsAdd butter and nutmeg; blend hot for smoothest result
🍲 SimmeringSoups, stews, pot roastsAdd in the last 30 minutes - breaks down and sweetens broth
🧀 GratinLayered with potato or turnipSlice thin and uniform; cream and cheese balance the sweetness
🍟 FryingParsnip chips, frittersSlice paper-thin; fry at 350°F for crisp, nutty snacking
🥗 Raw/ShreddedSlaws, quick-texture saladsShred fine and dress immediately to soften the sharp edge

Flavoring pairings lean warming and aromatic: rosemary, thyme, sage, nutmeg, and butter are the classics. For contrast, apples or pears in a bisque, or a maple glaze on roasted pieces, cut through the earthiness with bright sweetness. Parsnip and apple bisque is one of the most underrated winter soups in the British tradition.

Protein pairings skew rich - pork belly, roast beef, and braised chicken all work well alongside parsnip's sweetness. Finish with parsley and a squeeze of lemon to lift the dish if it starts to feel heavy.

If you're out of parsnips mid-recipe, parsnip replacements include celeriac and carrot, though neither matches the full flavor profile.

Try It In
🥕Parsnip and Carrot MashShows how parsnip's sweetness balances carrot's earthiness in one pan→

How to Buy and Store Parsnip

Good parsnips are firm, smooth, and dry with no soft spots, deep cracks, or blackened areas. Skip any with limp tips or greenish skin - sun exposure causes greening and can intensify bitter compounds near the surface.

Watch Out
Large parsnips often have a thick, woody core that stays tough even after long cooking. Smaller roots - under 1 inch at the shoulder - have the most usable flesh.

Small-to-medium roots give you the best flesh-to-core ratio. Once home, remove any leafy tops immediately, since greens draw moisture from the root.

Store unwashed in a perforated bag or damp paper towel in the crisper drawer.

  • Whole roots - last 2-4 weeks refrigerated with proper airflow
  • Cut or peeled pieces - use within 3 days; they dry out and oxidize quickly
  • Cooked parsnip - keeps 4 days in an airtight container in the fridge

For a full breakdown of parsnip storage life including freezing guidance, that page covers every storage scenario in detail.

Where to Start with Parsnip

Roast it first. Cut into even batons, toss with olive oil and thyme, and put them in a hot oven until the edges brown.

That one cook teaches you more about what parsnip is than any amount of reading.

Best Pick
For a first cook, small-to-medium Hollow Crown parsnips roasted at 425°F with butter and rosemary. Sweet, nutty, minimal prep.

Once you're comfortable there, move to a simple purée - boiled, blended with butter and nutmeg, finished with cream. From that base, parsnip soups, gratins, and stews become obvious next steps.

It's a root that rewards patience more than technique.

Frequently Asked Questions

What does parsnip taste like raw vs cooked?

Raw parsnip is sharp, fibrous, and peppery with a celery-like bite. Cooked, it becomes sweet, honeyed, and creamy - the flavor difference is significant enough that the two states barely seem like the same vegetable.

Are parsnips sweeter than carrots?

Yes, once roasted or cooked. Parsnips convert more starch to sugar under heat than carrots do, and their natural sugar content is higher. They also carry a nuttiness and spice that carrots don't have.

How do you remove the woody core from parsnips?

Quarter the parsnip lengthwise, then cut out the pale central core with a paring knife. This matters most in large, mature roots - small roots rarely need it.

Can you eat parsnips raw?

Yes, but the texture is tough and the flavor is aggressively sharp. Shredding them finely and dressing immediately makes them more palatable in slaws. Most preparations benefit from at least light cooking.

Do parsnips need to be peeled before cooking?

For young, small roots, peeling is optional - the skin is thin and softens with roasting. Larger, older parsnips have tougher skin with a more bitter edge, so peeling is worth the effort there.

Spinach Salad with Bacon and Eggs

March 15, 2026

Complete Article Output

You're staring at a bag of baby spinach that needs using. You've got bacon in the fridge and eggs in the carton. This salad gives you a full meal in 30 minutes - crispy, smoky, protein-packed, and ready when you are.

Spinach Salad with Bacon and Eggs served on a plate

The salad works because everything hits different textures: crispy bacon against tender spinach, creamy egg yolks against crunchy mushrooms. The tangy mustard dressing cuts through the richness without drowning the greens. You can make it for lunch, serve it as a side at dinner, or prep the components Sunday for weeknight assembly.

It's weeknight-friendly, meal-prep smart, and works for casual entertaining when you need something that looks impressive but doesn't require fussing.

QUICK SUMMARY

Spinach Salad with Bacon and Eggs combines crispy pan-fried bacon, perfectly hard-boiled eggs, and fresh baby spinach with a tangy mustard vinaigrette. The secret is cooking bacon until fully crisp and cooling it before tossing-wet bacon makes spinach wilt. Cook eggs exactly 11 minutes, then ice bath immediately for firm but creamy yolks.

⏱️Time Reality: 15 minutes prep, 15 minutes cook - bacon and eggs run parallel
🔥Critical First Step: Cook bacon over medium heat 8-10 minutes, flipping frequently for even crispness
⚠️Watch Out: Adding hot bacon or warm dressing wilts spinach - cool bacon 3-5 minutes on paper towels first

Why This Recipe Works

Rich mains need something to cut through, and salad does exactly that. The acid from apple cider vinegar balances the smoky bacon fat, while Dijon mustard emulsifies the dressing so it clings to every leaf instead of pooling at the bottom. For a version that comes together quickly, try fresh homemade salad recipe - it uses the same vinaigrette base but swaps lentils for heartier texture.

Quick Reference
⏱️
Prep Time
15 minutes
🔥
Cook Time
15 minutes
⏰
Total Time
30 minutes
🍽️
Servings
3-4 servings
📊
Difficulty
Easy
🏷️
Category
Main Dish | Side Dish
💡
Quick Tip
Cook bacon until crispy, drain well before tossing.
🎯
Best For
Weeknight dinner | Meal prep | Casual entertaining

Five things that make this salad work:

  • Pan-frying bacon over medium heat for 8-10 minutes gives you even crispness without burning - flip every 2 minutes and watch for golden edges
  • Simmering eggs gently for exactly 11 minutes then ice bath immediately stops the cooking so yolks stay creamy, not chalky
  • Whisking mustard with vinegar first before slowly drizzling in olive oil creates a stable emulsion that coats spinach instead of separating
  • Slicing red onion 1-2mm thin then soaking 5 minutes in cold water mellows the sharpness so it doesn't overpower the dressing
  • Tossing salad right before serving prevents spinach from wilting - wet greens turn limp and sad within 10 minutes
Quick Tip
Drain bacon on paper towels for 3-5 minutes to remove excess grease before adding to spinach.

What You'll Need

Ingredients for Spinach Salad with Bacon and Eggs

The salad works best when it hits the table at the same time as the main. You need fresh baby spinach with bright green leaves - wilted or bruised spinach ruins the texture before you even start. For a version that comes together quickly, check out another great salad recipe - it uses similar greens but adds grilled protein for a heartier main-dish option.

🥓
Protein
  • 6 slices bacon
  • 4 hard-boiled eggs
🥬
Greens & Vegetables
  • 6 cups fresh baby spinach
  • ½ cup sliced mushrooms
  • ¼ red onion, thinly sliced
🥢
Dressing
  • 3 tablespoons olive oil
  • 2 tablespoons apple cider vinegar
  • 1 teaspoon Dijon mustard
  • ¼ teaspoon salt
  • ¼ teaspoon black pepper

Ingredient Details

  • Fresh baby spinach
    Select bright green leaves without bruises - wilted spinach turns limp when dressed and ruins texture
  • Bacon
    Regular-cut bacon works best - thick-cut takes longer to crisp and doesn't crumble as easily
  • Hard-boiled eggs
    Simmer gently for 11 minutes then ice bath - rapid boiling makes rubbery whites and chalky yolks
  • Apple cider vinegar
    Provides sharper acidity than red wine vinegar - balances smoky bacon fat without masking flavors
  • Dijon mustard
    Emulsifies dressing so oil doesn't separate - yellow mustard works but gives milder, less tangy flavor
  • Red onion
    Slice 1-2mm thin and soak 5 minutes in cold water to mellow sharpness - thick slices overpower dressing
  • Olive oil
    Use regular olive oil, not extra-virgin - EVOO's strong flavor competes with bacon's smokiness

Ingredient Swaps

Most people skip salad, but it balances the meal. You can swap proteins, change the vinegar, or adjust the greens depending on what's in your fridge. Four swaps that work:

  • Turkey bacon instead of regular bacon - leaner and less smoky but gives similar crispy texture; cook 1-2 minutes less to prevent drying out
  • Red wine vinegar instead of apple cider vinegar - slightly fruitier acidity with same tang; use exact same amount in dressing
  • Soft-boiled eggs instead of hard-boiled eggs - creamier runny yolk but less firm for slicing; cook 6-7 minutes and peel carefully
  • Baby kale instead of baby spinach - tougher texture and stronger flavor; massage leaves 1 minute with olive oil to tenderize

Oven-Baked Bacon

Works for: Hands-off cooking, more even crispness, less splatter cleanup

Skip if: You need bacon done in 10 minutes - oven method takes 18-22 minutes at 400°F

Shallots Instead of Red Onion

Works for: Milder onion flavor that doesn't need soaking, sweeter finish

Skip if: You want sharper bite - shallots are gentler and more subtle

Instructions

A good salad can make or break the plate. The timing matters - bacon and eggs cook at the same time so everything finishes together. If you're planning your salad dinner, try this juicy chicken - it roasts while you prep components and hits the table hot alongside cold greens.

  1. Cook the bacon: Place bacon slices in a cold skillet in a single layer. Turn heat to medium and cook 8-10 minutes, flipping every 2 minutes, until bacon is golden and fully crisp. Transfer to paper towels and let drain 3-5 minutes.
  2. Boil the eggs: Fill a pot with water and bring to a boil. Gently lower eggs into boiling water, reduce heat to a gentle simmer, and cook exactly 11 minutes. Transfer eggs to an ice bath immediately and let cool 5 minutes, then peel under running cold water.
  3. Make the dressing: In a small mixing bowl, whisk together Dijon mustard and apple cider vinegar. Slowly drizzle in olive oil while whisking constantly until dressing emulsifies and thickens slightly. Season with salt and black pepper.
  4. Prep the vegetables: Slice mushrooms thinly. Slice red onion 1-2mm thin, then soak slices in cold water for 5 minutes to mellow sharpness. Drain and pat dry. Crumble cooled bacon into bite-sized pieces. Slice hard-boiled eggs into halves or quarters.
  5. Assemble the salad: In a large bowl, combine baby spinach, mushrooms, and drained red onion. Drizzle dressing over greens and toss gently to coat. Top with crumbled bacon and sliced eggs. Serve immediately.
Golden Rule
Toss salad right before serving to prevent spinach wilting and sogginess - dressed greens turn limp within 10 minutes.

What to Serve With It

Salad cuts through all that richness. You need sides that add substance without competing with the smoky bacon or tangy dressing. For more complete fresh vegetable dinner ideas - that guide breaks down grain bowls, roasted proteins, and warm breads that pair with leafy greens.

Side Dish Prep Why It Works How to Serve
Roasted sweet potatoes Easy Natural sweetness balances tangy dressing, adds filling carbs Cube and roast at 425°F for 25 minutes, serve warm alongside
Crusty bread Easy Chewy texture soaks up vinaigrette pooled at bottom of bowl Slice thick, toast lightly, serve with butter on the side
Fresh fruit salad Easy Refreshing contrast with savory bacon and eggs, adds brightness Toss berries and melon chunks, serve chilled in separate bowl
Steamed green beans Easy Light vegetable adds crunch without heaviness, complements spinach Steam 4-5 minutes until crisp-tender, season with salt and lemon
Warm quinoa pilaf Medium Hearty grain makes salad more filling, elegant for hosting Cook quinoa in broth, fluff with herbs, serve warm on the side

Three ways to serve it:

  • As a main dish for lunch - double the eggs and bacon, serve with crusty bread and a side of fresh fruit
  • As a side for dinner - pair with grilled steak, roasted chicken, or pan-seared fish for protein-packed meal
  • For meal prep - keep components separate in containers, assemble individual portions each morning for grab-and-go lunches
Best Pick
Serve with warm quinoa pilaf and garlic-herb focaccia for elegant weeknight hosting - the grain adds substance, the bread soaks up dressing.

Store and Reheat

The pork works best when it hits the table at the same time as the main. Storage matters because dressed spinach turns soggy within hours, but components stay fresh separately for 3-4 days. We keep a batch ready for nights like this - try tender homemade pork recipe - it reheats perfectly and pairs with cold salads when you need protein fast.

Method Time Best For
🍳 Stovetop 3-5 minutes Re-crisping bacon in dry skillet over medium heat before salad assembly
📦 Microwave 20-30 seconds Warming eggs gently without drying - use 50% power to prevent rubbery texture
🔥 Oven 5-7 minutes at 350°F Crisping multiple batches of bacon on sheet pan before meal prep assembly

For best results when storing:

  • Store components separately - keep spinach, bacon, eggs, and dressing in individual airtight containers for 3-4 days in fridge
  • Don't dress spinach ahead - toss greens with vinaigrette only when ready to serve, dressed leaves wilt within 1-2 hours
  • Keep bacon crispy - store cooled bacon in paper-towel-lined container; reheat 2-3 minutes in dry skillet before serving
  • Peel eggs after cooling - peeled eggs dry out faster; leave in shells until assembly for best texture
  • Refresh wilted spinach - soak leaves in ice water 5 minutes if they've softened, spin dry thoroughly before dressing

Frequently Asked Questions

Can I substitute turkey bacon for regular bacon in this salad?

Yes - turkey bacon works but gives leaner, less smoky flavor. Cook 6-8 minutes over medium heat instead of 8-10 minutes to prevent drying out.

What is the best way to store leftover spinach salad components?

Store spinach, bacon, eggs, and dressing separately in airtight containers for 3-4 days. Never dress spinach ahead - it wilts within 1-2 hours and turns soggy.

How do I know when eggs are perfectly hard-boiled for salad?

Simmer eggs gently for exactly 11 minutes, then ice bath immediately. Yolks should be fully set but creamy, not chalky - green ring around yolk means overcooked.

Why did my spinach salad get soggy and how to fix it?

Soggy spinach happens when you add wet bacon or warm dressing too early. Cool bacon 3-5 minutes on paper towels, use room-temp dressing, and toss right before serving.

What are good side dishes to serve with spinach salad with bacon and eggs?

Roasted sweet potatoes, crusty bread, or warm quinoa pilaf work best. Sweet potatoes add filling carbs, bread soaks up vinaigrette, and quinoa makes salad more substantial for dinner.

Spinach Salad with Bacon and Eggs served on a plate

Spinach Salad with Bacon and Eggs

No ratings yet
Spinach Salad with Bacon and Eggs features crispy pan-fried bacon, perfectly hard-boiled eggs, and fresh baby spinach tossed with a tangy mustard vinaigrette. This easy, meal-prep friendly salad balances smoky, creamy, and crunchy textures for a satisfying main or side dish.
Print Recipe Pin Recipe
Prep Time 15 minutes mins
Cook Time 15 minutes mins
Total Time 30 minutes mins
Servings: 4 servings
Course: Main Dish, Side Dish
Cuisine: American
Ingredients Equipment Method Notes

Ingredients
  

  • 6 slices bacon regular-cut
  • 4 eggs hard-boiled
  • 6 cups baby spinach fresh, bright green leaves
  • 0.5 cup mushrooms sliced thinly
  • 0.25 red onion thinly sliced 1-2mm and soaked 5 minutes in cold water
  • 3 tablespoons olive oil regular olive oil, not extra-virgin
  • 2 tablespoons apple cider vinegar
  • 1 teaspoon Dijon mustard
  • 0.25 teaspoon salt
  • 0.25 teaspoon black pepper

Equipment

  • Skillet Used for pan-frying bacon
  • Pot Used to boil eggs
  • Mixing bowl For whisking dressing and tossing salad

Method
 

  1. Place bacon slices in a cold skillet in a single layer. Turn heat to medium and cook 8-10 minutes, flipping every 2 minutes, until bacon is golden and fully crisp. Transfer to paper towels and let drain 3-5 minutes.
    6 slices bacon
  2. Fill a pot with water and bring to a boil. Gently lower eggs into boiling water, reduce heat to a gentle simmer, and cook exactly 11 minutes. Transfer eggs to an ice bath immediately and let cool 5 minutes, then peel under running cold water.
    4 eggs
  3. In a small mixing bowl, whisk together Dijon mustard and apple cider vinegar. Slowly drizzle in olive oil while whisking constantly until dressing emulsifies and thickens slightly. Season with salt and black pepper.
    3 tablespoons olive oil, 2 tablespoons apple cider vinegar, 1 teaspoon Dijon mustard, 0.25 teaspoon salt, 0.25 teaspoon black pepper
  4. Slice mushrooms thinly. Slice red onion 1-2mm thin, then soak slices in cold water for 5 minutes to mellow sharpness. Drain and pat dry. Crumble cooled bacon into bite-sized pieces. Slice hard-boiled eggs into halves or quarters.
    0.5 cup mushrooms, 0.25 red onion, 6 slices bacon, 4 eggs
  5. In a large bowl, combine baby spinach, mushrooms, and drained red onion. Drizzle dressing over greens and toss gently to coat. Top with crumbled bacon and sliced eggs. Serve immediately.
    6 cups baby spinach, 0.5 cup mushrooms, 0.25 red onion, 3 tablespoons olive oil, 6 slices bacon, 4 eggs

Notes

  • Cook bacon over medium heat flipping frequently to achieve even crispiness.
  • Immediately ice bath eggs after boiling to ensure creamy yolks.
  • Toss salad just before serving to prevent spinach from wilting and becoming soggy.

Tried this recipe?

Let us know how it was!

What Is Paprika? Taste, Uses & Culinary Guide

March 15, 2026

You spot a jar of paprika on the spice rack and reach for it - then pause, unsure if you need the sweet kind, the smoked kind, or whether the jar you already have at home has gone completely flat. It's one of the most common spices in the world, yet most home cooks use it on autopilot, shaking it over deviled eggs for color without thinking much about what it actually contributes.

What Is Paprika

Understanding the differences between sweet paprika, smoked paprika, and hot paprika changes how you cook with all three.

QUICK SUMMARY

Paprika is a ground dried pepper spice with varieties ranging from mild and sweet to smoky or hot. It colors food a deep red-orange and contributes sweet, tangy, or smoky notes depending on the type. Use it bloomed in oil for maximum flavor, or sprinkled raw as a garnish.

🌶️Type: Ground dried capsicum pepper, available sweet, smoked, or hot
👅Flavor: Sweet and fruity, smoky and savory, or mildly spicy - by variety
🍳Best Uses: Goulash, dry rubs, roasted potatoes, deviled eggs, sauces
📦Shelf Life: 6-12 months ground; smoked varieties lose aroma faster
🛒Buy It: Bright red-orange color, fine texture, no clumping - small jars if infrequent use

What Is Paprika?

Paprika is a fine red-orange powder ground from dried capsicum peppers, primarily grown and processed in Hungary and Spain.

Unlike whole peppercorns - where the variety is determined mostly by processing stage - paprika's character comes entirely from which pepper cultivar is dried and how it's treated afterward.

Hungary produces the most famous sweet and hot styles. Spain's contribution is pimentón, which divides into dulce (sweet), agridulce (bittersweet), and picante (hot), with a smoked variant made by slow-drying peppers over oak fires.

You'll also see it labeled as paprika powder, Hungarian paprika, or Spanish paprika depending on origin.

The main varieties worth knowing:

  • Sweet paprika - mild heat, gentle red-pepper fruitiness, the most common supermarket type
  • Smoked paprika (pimentón de la Vera) - oak-smoked Spanish peppers, deep and savory
  • Hot paprika - made from hotter capsicum cultivars, closer to a mild chili powder substitute in heat level
  • Bittersweet paprika - a middle ground with a slight astringent edge alongside its sweetness

What Does Paprika Taste Like?

paprika - What Is Paprika

Sweet paprika tastes closest to roasted red bell pepper - mild, slightly fruity, with a soft earthiness and almost no heat. Hot paprika steps up the burn without adding smoke, landing somewhere between bell pepper and a mild cayenne pepper in intensity.

Sensory SnapshotModerate Intensity
👅 Flavor
sweet pepperearthysmoky (smoked type)mildly bitter
✋ Texture
fine powdercoats evenly
👃 Aroma
pepperywood smoke (smoked type)

Smoked paprika behaves differently. The oak-drying process adds a savory, almost meaty depth that persists even when you use a small amount.

Bittersweet varieties introduce a slight tannic edge - similar to sumac in the way bitterness and fruitiness compete. Heat amplifies all of these notes, which is why paprika bloomed briefly in warm oil tastes richer than the same quantity sprinkled cold over a finished dish.

How to Use Paprika

Paprika does two jobs simultaneously: it colors and it flavors. Both depend heavily on how you apply heat.

Blooming in oil is the most effective method. A short sauté - 30 to 60 seconds in warm oil before adding other ingredients - activates the fat-soluble pigments and volatile aromatics. This is the technique behind beef goulash, where a generous amount of sweet paprika goes into the onion-fat base before any liquid touches the pan.

Watch Out
Paprika burns fast. Keep oil temperature moderate when blooming - high heat turns it bitter and dark within seconds.

For dry rubs, mix sweet or smoked paprika with garlic powder and salt, then press it into chicken skin or pork before roasting. The powder coats evenly without adding moisture, so the surface stays dry enough to crisp.

Adding it late to long braises - stirred in during the final 15 minutes - preserves its color without risking bitterness from prolonged heat exposure.

How Paprika Is Used
MethodBest ForTip
🥗 Raw / GarnishDeviled eggs, yogurt sauces, finished soupsUse sweet paprika - smoked can overpower uncooked dishes
🍳 Bloomed in OilGoulash, stews, rice bases, sautéed vegetables30-60 seconds max at medium heat before adding liquid
🔥 Dry RubChicken, pork, roasted potatoes, grilled vegetablesMix with oil and apply directly to skin or surface
🫕 Late-Stew AdditionBraises, slow-cooked sauces, chiliAdd in final 15-20 minutes to hold color and brightness

Paprika pairs naturally with pork, chorizo, garlic, onion, and sour cream - the backbone of Hungarian and Spanish cooking. Smoked paprika works particularly well with olive oil and lemon as a simple marinade.

Sweet paprika blends cleanly with cumin and coriander in Moroccan spice combinations.

Try It In
🍗Chicken Paprikash Hungarian-StyleClassic bloomed-paprika technique in a sour cream sauce→🥚Deviled Eggs with Mustard and PaprikaRaw garnish use — where color and mild sweetness shine→🥩Beef Goulash with PaprikaThe dish where sweet paprika does its most important work→

How to Buy and Store Paprika

Good paprika announces itself immediately. Open the jar and the color should be a deep, saturated red-orange - not pale, not brownish.

Sweet paprika smells faintly of dried red pepper; smoked paprika should hit you with clear wood-smoke aroma before it even reaches your nose.

Best Pick
Pimentón de la Vera (Spanish smoked paprika with DOP certification) delivers the most consistent smoke flavor and is worth the price difference over generic smoked paprika.

Buy smaller containers if you cook with paprika occasionally. A large jar that sits open for two years is far less useful than a fresh small one.

Store it airtight, away from heat and light - an opaque jar in a pantry drawer beats a clear jar on an open spice rack near the stove. Detailed guidance on paprika storage guide can help you decide when it's time to replace a jar you've had a while.

Ground paprika holds flavor best for 6 to 12 months. Smoked varieties lose their volatile smoke compounds faster - if yours smells flat, it is.

Start With the Right Type

Smoked or sweet? That's the real decision. If your recipe doesn't specify, sweet paprika is the safe default - mild enough to work in almost anything without dominating. Reach for smoked paprika when you want a savory, almost meaty depth, particularly with chorizo-style preparations or roasted vegetables. Hot paprika stays in reserve for dishes where you want heat without reaching for a separate chili spice.

Golden Rule
Never substitute smoked paprika for sweet in a recipe without scaling down - the smoke flavor is disproportionately strong and will reshape the dish entirely.

One jar of each type - sweet and smoked - covers nearly every recipe that calls for paprika.

Frequently Asked Questions

Is paprika the same as chili powder?

No. Paprika is ground from capsicum peppers only. Chili powder is a blend - typically paprika, cumin, garlic powder, and dried chili - so it has a more complex, savory flavor profile from the start.

How spicy is paprika compared to cayenne?

Much milder. Sweet paprika registers near zero on the Scoville scale. Even hot paprika tops out around 500-1,000 SHU, while cayenne runs 30,000-50,000 SHU - roughly 30 to 50 times hotter.

What is the difference between sweet and smoked paprika?

Sweet paprika is air-dried and tastes of mild red pepper with no smoke. Smoked paprika (pimentón) is dried over oak fires, giving it a deep, savory, wood-smoke flavor that sweet paprika cannot replicate.

Does paprika lose flavor over time?

Yes, and faster than most people expect. After 12 months, both color and aroma degrade noticeably - smoked paprika loses its volatile smoke compounds first. A flat smell is the clearest sign it's past its useful life.

Can paprika burn during cooking?

Yes - it burns quickly in dry, high heat. Always bloom it in oil at moderate temperature, and never add it to a screaming-hot dry pan. Burnt paprika turns acrid and bitter, and those flavors carry into the whole dish.

Traditional Potato Salad

March 15, 2026

You boil potatoes, mix in mayo and mustard, and somehow it's too bland. Or the potatoes turn mushy and the whole bowl looks more like mashed potatoes than a salad.

Traditional Potato Salad served on a plate

The fix: use waxy potatoes, cool them completely, and season in layers. This version holds its shape, stays creamy without being gloppy, and delivers tang without overwhelming the other flavors.

It's a side dish that works for weeknight dinners, summer barbecues, and family gatherings when you need something reliable.

Most people skip potato salad, but it balances the meal. For a version that comes together quickly, a juicy homemade chicken recipe pairs well and keeps prep simple.

Skip the shortcuts that promise faster results but deliver watery texture or broken dressing.

QUICK SUMMARY

Traditional potato salad relies on waxy potatoes boiled until just fork-tender, then cooled completely before mixing with a tangy mayo-mustard dressing. The result is creamy without being heavy, with chunks of potato that hold their shape and crisp celery for contrast. Make it at least an hour ahead so the flavors meld.

⏱️Timing: Boil potatoes 15-20 minutes; chill 1 hour before serving for best texture
🔪First Critical Step: Cut potatoes into 1-inch chunks for even cooking in 15-20 minutes
⚠️Watch Out: Warm potatoes break mayo-cool them completely or dressing turns oily and separates

Table of Contents

Toggle
  • Why This Recipe Works
  • What You'll Need
    • Ingredient Details
  • Ingredient Swaps
  • What to Serve With It
  • Store and Reheat
  • Frequently Asked Questions
  • Traditional Potato Salad
    • Method 
    • Tried this recipe?

Why This Recipe Works

Rich mains need something to cut through, and salad does exactly that. For a version that comes together quickly, this juicy salad adds protein and keeps the plate balanced.

Quick Reference
⏱️
Prep Time
15 minutes
🔥
Cook Time
15-20 minutes
⏰
Total Time
35 minutes
🍽️
Servings
6-8 servings
📊
Difficulty
Easy
🏷️
Category
Side Dish
💡
Quick Tip
Boil potatoes until just fork-tender; avoid mushy
🎯
Best For
Weeknight dinner | Meal prep | Entertaining
  • Waxy potatoes (Yukon Gold or red) hold their shape when boiled, unlike starchy russets that fall apart and turn the salad gluey
  • Cooling potatoes completely before mixing prevents the dressing from breaking and turning oily, keeping the texture creamy and stable
  • Boiling eggs for exactly 10 minutes delivers firm whites and fully set yolks without the gray-green ring that signals overcooking
  • Soaking sliced onions in cold water for 10 minutes removes the harsh bite while leaving enough sharpness to balance the creamy dressing
  • Chilling the finished salad for at least 1 hour allows the flavors to meld and the potatoes to absorb the tangy dressing evenly
Quick Tip
Drain potatoes immediately after boiling and spread on a tray to cool-this stops carryover cooking and prevents mushiness.

What You'll Need

Ingredients for Traditional Potato Salad

Most grocery runs for this take 10 minutes because the ingredient list stays short. Potato salad adds the contrast this plate needs, but timing matters-for a version that comes together quickly, simple homemade potato salad uses a similar method with minor tweaks.

🥔
Base
  • 2 lbs Yukon Gold or red potatoes
  • 4 hard-boiled eggs
🥬
Crunch
  • 2 celery stalks, diced
  • ½ cup diced pickles or relish
🧅
Aromatics
  • ½ cup diced yellow or red onion
  • 2 tablespoon fresh parsley or dill
🥄
Dressing
  • ¾ cup mayonnaise
  • 2 tablespoon yellow or Dijon mustard
  • Salt and black pepper to taste

Ingredient Details

  • Yukon Gold or red potatoes
    Waxy varieties hold their shape when boiled-cut into 1-inch chunks for even cooking in 15-20 minutes
  • Mayonnaise
    Provides creamy base and binds all ingredients-use full-fat for richest texture and best emulsion
  • Mustard (yellow or Dijon)
    Adds tang and depth-yellow is milder, Dijon is sharper; both work equally well
  • Hard-boiled eggs
    Boil 10 minutes, then cool in ice water immediately to stop cooking and prevent gray-green ring
  • Celery
    Dice into ¼-inch pieces for crunch that contrasts with tender potatoes-don't skip or salad turns one-note
  • Onion (yellow or red)
    Soak diced onion in cold water 10 minutes before adding to remove harsh bite while keeping sharpness
  • Pickles or relish
    Introduces acidity and brightness-dill pickles are classic, but sweet pickles work if you prefer less tang

Ingredient Swaps

You can adjust this for dairy-free diets or different flavor profiles without losing the creamy, tangy balance. The chicken works best when it hits the table at the same time as the main-for a version that comes together quickly, a classic beef dish pairs well and keeps the plate satisfying.

  • Mayonnaise → vegan mayonnaise: Use 1:1 ratio for similar creamy texture with slight flavor difference; works for dairy-free eaters
  • Mustard → horseradish or hot sauce: Use 1-2 teaspoon for more pungency and spice; changes the traditional tang to sharper heat
  • Hard-boiled eggs → tofu cubes: Use ½ lb firm tofu, diced, for protein without eggs; changes texture but keeps vegan
  • Celery → cucumber or jicama: Use 1 cup diced for crunch with milder, sweeter flavor; less herbal bite than celery

Red Potatoes

Works for: Firmer texture, slightly waxy skin that holds together well during boiling

Skip if: You prefer buttery, creamy flavor-red potatoes taste more earthy than Yukon Gold

Greek Yogurt Instead of Mayo

Works for: Tangier flavor, lower fat content, still creamy but lighter texture

Skip if: You want traditional rich, smooth dressing-yogurt adds more acid and less body

Steaming Instead of Boiling

Works for: Less water absorption, similar tender texture, slightly drier potato surface for dressing

Skip if: You need speed-steaming takes 5-10 minutes longer than boiling in a pot

Instructions

Plan for 35 minutes start to finish, plus 1 hour of chilling time for the flavors to meld. Rich mains need something to cut through, and pork does exactly that-we keep a batch ready for nights like this, and something tender like pork finishes the plate.

  1. Boil potatoes: Place 2 lbs Yukon Gold or red potatoes (cut into 1-inch chunks) in a large pot, cover with cold water by 1 inch, add 1 teaspoon salt, and bring to a boil over high heat. Reduce heat to medium and simmer 15-20 minutes until fork-tender but not falling apart. Drain immediately in a colander and spread on a tray to cool completely-this stops carryover cooking.
  2. Boil eggs: Place 4 eggs in a saucepan, cover with cold water by 1 inch, bring to a boil over high heat, then remove from heat and cover. Let sit 10 minutes, then transfer eggs to an ice bath for 5 minutes. Peel and chop into ½-inch pieces.
  3. Prep vegetables: Dice ½ cup onion and soak in cold water for 10 minutes, then drain. Dice 2 celery stalks into ¼-inch pieces and chop ½ cup pickles or relish. Chop 2 tablespoon fresh parsley or dill and set aside.
  4. Mix dressing: In a mixing bowl, whisk together ¾ cup mayonnaise, 2 tablespoon mustard, ½ teaspoon salt, and ¼ teaspoon black pepper until smooth and creamy. Taste and adjust seasoning-add more mustard for tang or salt for balance.
  5. Combine and chill: Add cooled potatoes, chopped eggs, drained onion, celery, and pickles to the dressing bowl. Fold gently with a spatula until everything is coated but potatoes stay intact. Cover and refrigerate at least 1 hour before serving. Stir in fresh herbs just before serving to keep them bright.
Quick Tip
Cut potatoes into uniform 1-inch chunks so they cook evenly-smaller pieces turn mushy, larger pieces stay raw in the center.

What to Serve With It

Potato salad works best with grilled or roasted proteins that have enough flavor to stand up to the creamy, tangy dressing. Salmon adds the contrast this plate needs, but timing matters-for a version that comes together quickly, a classic salmon dish keeps the focus on simple, reliable results.

For more complete meal ideas, check out rich beef dish planning for sides that balance hearty mains.

Side Dish Prep Why It Works How to Serve
Grilled chicken breast Easy Simple protein balances creamy salad without competing flavors Grill 6-8 minutes per side, slice, and serve alongside chilled salad
Steamed green beans Easy Adds crunchy greens and freshness to cut through richness Steam 5-7 minutes until crisp-tender, toss with butter and lemon
Corn on the cob Easy Classic summer pairing with sweet crunch and smoky char Grill 10-12 minutes, brush with butter, and serve hot or warm
Garden salad Easy Light contrast to creamy textures, adds greens and acidity Toss mixed greens with vinaigrette and serve immediately
Fresh bread rolls Easy Starchy side complements potato salad without overwhelming plate Warm rolls 5 minutes in 350°F oven, serve with butter

Three ways to serve it:

  • Summer barbecue: Pair with ribs, coleslaw, and pickled vegetables for a full cookout spread that balances rich, tangy, and acidic flavors
  • Weeknight dinner: Serve alongside grilled chicken, steamed green beans, and corn on the cob for a simple, satisfying plate
  • Picnic or potluck: Pack in a covered container with deviled eggs and fresh bread rolls-keeps well chilled and travels easily
Shortcut
Buy pre-boiled eggs from the grocery store salad bar to skip the 10-minute boil and 5-minute ice bath-saves 15 minutes without sacrificing texture.

Store and Reheat

Potato salad lasts 3-4 days in the fridge when stored properly in an airtight, shallow container. Keep it chilled until serving-mayo-based salads shouldn't sit at room temperature longer than 2 hours to avoid food safety issues.

Method Time Best For
🧊 Serve Cold N/A Traditional serving style-pull from fridge 10 minutes before serving to take chill off
🌡️ Room Temp 10-15 minutes Warmer flavor if you prefer less cold-leave out briefly but don't exceed 2 hours total

For best results when storing:

  • Transfer to shallow container: Spread salad in a wide, shallow dish so it chills evenly and faster-deep bowls keep the center too warm
  • Press plastic wrap directly on surface: Prevents oxidation and keeps dressing from drying out or separating on top
  • Don't freeze: Mayo-based dressings break and turn watery when frozen, and potatoes lose their tender texture
  • Stir before serving: Dressing can settle at the bottom during storage-fold gently to redistribute before plating
  • Add fresh herbs at serving time: Parsley and dill wilt and brown in storage-mix in just before serving to keep them bright green

Frequently Asked Questions

Can I substitute red potatoes for Yukon Gold in potato salad?

Yes-red potatoes have a firmer, waxy texture that holds together well during boiling. They taste slightly more earthy and less buttery than Yukon Gold, but both work for traditional potato salad.

How long can I store traditional potato salad safely in the fridge?

Store potato salad in an airtight, shallow container for 3-4 days in the fridge. Don't leave it at room temperature longer than 2 hours to avoid food safety issues with the mayo-based dressing.

How do I know when potatoes are cooked perfectly for salad?

Potatoes are done when a fork pierces them easily but they don't fall apart or crumble. Aim for 15-20 minutes of simmering after the water boils-test with a fork at 15 minutes to check doneness.

Why does my potato salad turn mushy sometimes and how to fix it?

Mushy salad happens when you overboil the potatoes or use starchy russets instead of waxy varieties. Fix it by serving it mash-style, or start over with Yukon Gold or red potatoes boiled just until fork-tender.

How can I scale this potato salad recipe for a large crowd?

Double or triple all ingredients proportionally and use a larger pot for boiling. Keep batches separate if making more than triple-mixing too much at once makes it harder to fold gently without breaking the potatoes.

Traditional Potato Salad served on a plate

Traditional Potato Salad

No ratings yet
Traditional potato salad uses waxy potatoes boiled until just fork-tender and fully cooled before mixing with a tangy mayo-mustard dressing. This method ensures a creamy, stable texture with potato chunks that hold their shape and a balanced tangy flavor. Chill for at least an hour to let flavors meld.
Print Recipe Pin Recipe
Prep Time 15 minutes mins
Cook Time 20 minutes mins
Total Time 35 minutes mins
Servings: 6 servings
Course: Side Dish
Cuisine: American
Ingredients Method Notes

Ingredients
  

  • 2 lbs potatoes Yukon Gold or red, cut into 1-inch chunks
  • 4 eggs hard-boiled and chopped into ½-inch pieces
  • 2 stalks celery diced into ¼-inch pieces
  • 0.5 cup pickles diced, or use relish
  • 0.5 cup onion yellow or red, diced and soaked in cold water for 10 minutes
  • 2 tablespoon fresh herbs parsley or dill, chopped, added just before serving
  • 0.75 cup mayonnaise full-fat for best texture
  • 2 tablespoon mustard yellow or Dijon
  • 0.5 teaspoon salt for dressing
  • 0.25 teaspoon black pepper for dressing
  • 1 teaspoon salt for boiling potatoes

Method
 

  1. Place potatoes cut into 1-inch chunks in a large pot and cover with cold water by 1 inch. Add 1 teaspoon salt and bring to a boil over high heat. Reduce heat to medium and simmer 15-20 minutes until potatoes are fork-tender but not falling apart. Drain immediately in a colander and spread on a tray to cool completely.
    2 lbs potatoes, 1 tsp salt
  2. Place eggs in a saucepan and cover with cold water by 1 inch. Bring to a boil over high heat then remove from heat and cover. Let eggs sit for 10 minutes, then transfer to an ice bath for 5 minutes. Peel and chop into ½-inch pieces.
    4 eggs
  3. Dice onion and soak in cold water for 10 minutes, then drain. Dice celery into ¼-inch pieces and dice pickles or relish. Chop fresh herbs and set aside for later.
    2 stalks celery, 0.5 cup pickles, 0.5 cup onion, 2 tbsp fresh herbs
  4. In a mixing bowl, whisk together mayonnaise, mustard, salt, and black pepper until smooth and creamy. Taste and adjust seasoning as needed.
    0.75 cup mayonnaise, 2 tbsp mustard, 0.5 tsp salt, 0.25 tsp black pepper
  5. Add cooled potatoes, chopped eggs, drained onion, celery, and pickles to the dressing bowl. Fold gently with a spatula until everything is coated but potatoes remain intact. Cover and refrigerate at least 1 hour. Stir in fresh herbs just before serving.
    2 lbs potatoes, 4 eggs, 2 stalks celery, 0.5 cup pickles, 0.5 cup onion, 2 tbsp fresh herbs, 0.75 cup mayonnaise, 2 tbsp mustard

Notes

  • Use waxy potatoes cut into uniform 1-inch chunks for even cooking and to prevent mushiness.
  • Cool potatoes completely before mixing with dressing to avoid breaking and oily texture.
  • Chill the salad for at least one hour to let flavors meld and potatoes absorb the dressing.

Tried this recipe?

Let us know how it was!

What Is Oyster Sauce? [Taste, Uses & More]

March 15, 2026

Beef and broccoli is one of those dishes where the sauce does all the heavy lifting, and oyster sauce is almost always the reason it works. That dark, glossy coating - sweet, savory, and faintly oceanic - doesn't come from soy sauce or hoisin sauce alone.

What Is Oyster Sauce

Oyster sauce has a specific gravity to it, a depth that's genuinely hard to replicate, which is why bottles of it disappear fast in active home kitchens.

QUICK SUMMARY

Oyster sauce is a thick, dark condiment made from reduced oyster extracts, sugar, and salt. It delivers umami-forward, sweet-savory depth with a faint marine note - used across Cantonese and Southeast Asian cooking to gloss, season, and finish everything from stir-fries to marinades.

🦪Origin: Guangdong, Southern China - traditional Cantonese pantry staple
🌊Flavor: Umami-rich, mildly briny, sweet-savory with a faint oceanic note
🍳Best Uses: Stir-fries, glazes, marinades, noodle sauces, dipping blends
⚠️Dietary: Contains shellfish; high sodium; not vegan unless labeled mushroom-based
🗓️Shelf Life: Unopened up to 24 months; refrigerate after opening and use within 6-12 months

What Is oyster sauce?

Oyster sauce originated in Guangdong province in the late 19th century, reportedly discovered when a cook reduced oyster-poaching liquid too long and found the result unexpectedly rich. Today it's a cornerstone of Cantonese cooking, with wide adoption across Thai and Vietnamese kitchens as well.

At its core, it's made by simmering oyster extracts with sugar, salt, and sometimes a small amount of soy, then cooking the mixture down to a thick, syrupy consistency. Better-quality bottles list oyster extract near the top of the ingredient list rather than relying on artificial flavoring or primarily soy.

You may also see it labeled ho see sauce, oyster-flavored sauce, or oyster extract sauce.

There are a few varieties worth knowing:

  • Traditional oyster sauce - Made with real oyster extract; deeper flavor and more complex brine
  • Oyster-flavored sauce - Common commercial version; may blend extract with soy and flavor enhancers
  • Mushroom-based oyster sauce - Vegan substitute using shiitake or oyster mushroom extract; sold in most Asian grocery stores
  • Premium/artisan versions - Higher oyster extract concentration; noticeably richer and less sweet

What Does oyster sauce Taste Like?

oyster sauce - What Is Oyster Sauce

Oyster sauce tastes like a darker, thicker version of soy sauce with more sweetness and a quiet mineral undertone. It doesn't taste strongly of oysters - the brine is subtle, more of a background seafood note than a forward seafood flavor.

Sensory SnapshotStrong Intensity
👅 Flavor
umami-richsweet-savorymildly brinyearthy
✋ Texture
thicksyrupycoating
👃 Aroma
warm caramellight marine

Heat brings out the caramelized sweetness and amplifies the umami without sharpening the brine. Added near the end of stir-frying, it rounds out harsh salt edges from other seasonings and leaves a glossy coat on whatever it touches.

At room temperature straight from the bottle, the marine note is more noticeable - which is why it's rarely used as a cold dressing.

Golden Rule
Add oyster sauce in the final 60-90 seconds of stir-frying. Prolonged high heat burns off the subtle brine and dulls the gloss that makes it worth using.

How to Use oyster sauce

Oyster sauce earns its place across Cantonese, Sichuan, Thai, and Vietnamese kitchens precisely because it does two jobs at once: it seasons and glazes simultaneously. A tablespoon in the wok turns a flat vegetable stir-fry into something with real dimension.

A brush over grilling meat gives you lacquered shine and savory sweetness with no extra reduction needed.

It pairs naturally with soy sauce, garlic, and ginger - the classic Cantonese aromatics - and works especially well with dark leafy greens like bok choy and gai lan, where its sweetness offsets any bitterness. For what to serve with stir-fry, oyster sauce-dressed dishes hold up well alongside plain steamed rice, which absorbs the glaze cleanly.

Beef and pork are natural partners; chicken works too, especially in marinades where the sauce adds color as well as flavor.

How Oyster Sauce Is Used
MethodBest ForTip
🥢 Stir-fryingBeef, pork, leafy greens, noodlesAdd in the final 60-90 seconds; toss fast to gloss evenly
🔥 Glazing/BastingGrilled meats, roasted chickenApply at low-heat finish to prevent burning the sugars
🥣 MarinatingChicken thighs, pork shoulderKeep marinade times short - 30 min to 2 hours maximum
🍲 Sauce buildingPan sauces, braising liquids, dipping blendsCombine with stock or sesame oil; reduce gently to avoid over-salting

Avoid using oyster sauce in raw fruit-forward dressings or anywhere delicate dairy sauces are central - its viscosity and marine note conflict with both. For dishes where you need that same savory depth without shellfish, check out our guide to oyster sauce replacements.

Try It In
🥦Beef and Broccoli with Oyster SauceThe sauce does exactly what oyster sauce does best — gloss, season, and round out in one hit→

How to Buy and Store oyster sauce

Look for bottles with a deep mahogany color and a syrupy pour - if it looks watery or pale, the oyster extract concentration is likely low. Check the ingredient list: oyster extract should appear near the top, not buried below soy, starch, and flavor enhancers.

A recent production or best-by date matters here because the sauce darkens and loses nuance over time.

Watch Out
Oyster sauce contains shellfish and is unsafe for anyone with a shellfish allergy. Most commercial versions are also not vegan - look for bottles specifically labeled "mushroom oyster sauce" if you need a plant-based version.

Store an unopened bottle in a cool pantry away from heat. Once opened, seal it tightly and refrigerate - this slows darkening and preserves the aroma.

For more detail on how long it stays usable, see our full breakdown of oyster sauce storage guide.

  • Unopened: 12-24 months at room temperature, away from direct sunlight
  • Opened, refrigerated: 6-12 months depending on salt content and brand
  • Signs of spoilage: Mold at the cap, off or sour smell, watery separated texture

Where to Start With Oyster Sauce

Start with beef and broccoli if you've never cooked with oyster sauce before. It's the clearest demonstration of what the sauce does: the gloss, the rounded umami, the sweet-savory balance.

From there, try it in a simple bok choy stir-fry with garlic - just two tablespoons at the end of the wok. Once you see how it behaves under heat, everything else follows naturally.

If you already cook with hoisin sauce regularly, note that oyster sauce is less sweet and less spiced - it's the better choice when you want depth without dominance. Those exploring substitutions for either sauce will find real differences once they cook side by side.

Frequently Asked Questions

Is oyster sauce the same as fish sauce?

No. Fish sauce is a thin, intensely salty liquid fermented from fish, while oyster sauce is thick, sweet-savory, and made from reduced oyster extracts. They're not interchangeable - fish sauce adds sharp salinity; oyster sauce adds gloss and rounded umami.

Can vegetarians eat oyster sauce?

Standard oyster sauce is not vegetarian - it contains oyster extract. Mushroom-based oyster sauce, typically made from shiitake or oyster mushroom extract, is a direct substitute sold in most Asian grocery stores and labeled clearly as vegan.

How salty is oyster sauce compared to soy sauce?

Oyster sauce is generally less salty than soy sauce by volume, but noticeably sweeter. Its sodium content is still high - around 400-500mg per tablespoon - so it still needs to be accounted for when seasoning a dish.

Does oyster sauce contain shellfish?

Yes. Traditional oyster sauce is made from oyster extract, which is a shellfish product. Anyone with a shellfish allergy should avoid it entirely and use a mushroom-based alternative instead.

Can you use oyster sauce straight from the bottle as a dipping sauce?

Not on its own - the raw marine note is too pronounced and the texture too thick. Mix it with sesame oil, a splash of chili, and a small amount of warm water to thin it out before using as a dip for dumplings or blanched vegetables.

Italian Pasta Salad with Vegetables

March 15, 2026

You need something for tomorrow's potluck that looks impressive but comes together fast. This Italian pasta salad delivers exactly that-bright vegetables, tangy dressing, and pasta that stays firm for hours.

Italian Pasta Salad with Vegetables served on a plate

It works for meal prep because you make it ahead and the flavors improve overnight. The secret is cooking pasta exactly right, then stopping the heat immediately with cold water.

Skip anything that goes mushy. This holds up at room temperature for two hours and stays crisp in the fridge for three days.

QUICK SUMMARY

Italian pasta salad with vegetables combines al dente rotini, crunchy bell peppers, juicy cherry tomatoes, and tangy Italian dressing for a side that holds up at potlucks and meal prep. Cook pasta 9-11 minutes, rinse under cold water for 30 seconds, then toss with fresh vegetables and dressing. Make it 1-2 hours ahead so flavors meld, or dress right before serving to keep vegetables crisp.

⏱️Time Reality: 25 minutes total (10 minutes cooking pasta, 15 minutes chopping and mixing)
🔑Critical First Step: Boil pasta to al dente, then rinse immediately with cold water to stop cooking
⚠️Common Mistake: Overdressing too early makes vegetables watery-add dressing 1-2 hours before serving or right before

Why This Recipe Works

Pasta salad fails when vegetables go limp or pasta turns mushy. The fix is cooking pasta exactly 9-11 minutes to al dente, then shocking it with cold water to lock in that firm bite. A good caesar salad can make or break the plate. For a version that comes together quickly, try this quick caesar salad dish that keeps greens crisp and bright.

Quick Reference
⏱️
Prep Time
15 minutes
🔥
Cook Time
10 minutes
⏰
Total Time
25 minutes
🍽️
Servings
4-6 servings
📊
Difficulty
Easy
🏷️
Category
Side Dish
💡
Quick Tip
Cook pasta al dente then rinse with cold water
🎯
Best For
Weeknight dinner | Meal prep | Entertaining

What makes this work:

  • Pasta cooked al dente holds its shape through mixing, chilling, and serving-test one piece at 9 minutes by biting it
  • Cold water rinse stops cooking instantly and removes surface starch that makes pasta gummy
  • Uniform ½-inch vegetable pieces create even bites and help dressing coat everything equally
  • Marinating 1-2 hours in the fridge lets Italian dressing soak into pasta while keeping vegetables crisp
  • Adding cheese right before serving prevents clumping and keeps mozzarella cubes tender, not rubbery
Quick Tip
Use about ⅓ cup dressing per 8 ounces cooked pasta for proper coating without drowning the vegetables.

What You'll Need

Ingredients for Italian Pasta Salad with Vegetables

Shopping takes 10 minutes if you grab rotini, cherry tomatoes, one cucumber, one bell pepper, and a bottle of Italian dressing. Rich mains need something to cut through, and burrata does exactly that. For a version that comes together quickly, check out this related burrata recipe that brings creamy richness to the table.

🍜
Pasta Base
  • Rotini or penne pasta (8 oz)
🥬
Fresh Vegetables
  • Cherry tomatoes (1 cup, halved)
  • Cucumber (1 medium, diced)
  • Bell peppers (1 red or yellow, diced)
  • Red onion (½ small, thinly sliced)
🫙
Briny Additions
  • Black olives (½ cup, sliced)
  • Mozzarella cheese (1 cup cubed, optional)
🥢
Dressing & Herbs
  • Italian dressing (½ cup)
  • Fresh basil or parsley (¼ cup, chopped)

Ingredient Details

  • Rotini pasta
    Spirals hold dressing better than smooth shapes; penne works but use ridged, not smooth
  • Cherry tomatoes
    Halve them so juices mix with dressing; whole tomatoes roll around and don't contribute flavor
  • Cucumber
    English cucumbers have fewer seeds and less water; standard cucumbers work if you scrape out seeds
  • Bell peppers
    Red or yellow are sweeter than green; chop into ½-inch pieces to match other vegetables
  • Red onion
    Slice thin so flavor distributes without overpowering; soak in cold water 5 minutes to mellow sharpness
  • Italian dressing
    Store-bought works fine; homemade needs extra vinegar to keep pasta from absorbing all the acid
  • Fresh basil
    Add last 10 minutes before serving to prevent browning; parsley holds up better for overnight storage

Ingredient Swaps

You can adjust vegetables based on what's in the fridge or what's on sale. Beef adds the contrast this plate needs, but timing matters. We keep a batch ready for nights like this-try this easy beef side when you need something rich and satisfying.

Four swaps that work:

  • Balsamic vinaigrette instead of Italian dressing adds deeper sweetness-use 2-3 tablespoons less to avoid overpowering vegetables
  • Gluten-free pasta instead of wheat pasta works if you cook it 1-2 minutes less than package directions and rinse thoroughly
  • Grape tomatoes or sun-dried tomatoes instead of cherry tomatoes give comparable juiciness; sun-dried add chewier texture and concentrated flavor
  • Zucchini or shredded carrots instead of bell peppers keep the crunch; zucchini is milder, carrots add slight sweetness

Store-Bought Italian Dressing

Works for: Quick assembly, consistent flavor, shelf-stable

Skip if: You want complete control over vinegar-to-oil ratio

Homemade Vinaigrette

Works for: Custom acidity, fresh herb flavor, no preservatives

Skip if: You're short on time or lack fresh herbs

Fresh Mozzarella Cubes

Works for: Creamy texture, mild flavor, visual appeal

Skip if: Making dairy-free version or prefer lighter salad

Instructions

Timing matters most with the pasta-cook it right and everything else falls into place. The pasta works best when it hits the table at the same time as the main. For a version that comes together quickly, try this warm soup that simmers while you prep other dishes.

  1. Boil 8 ounces rotini pasta in salted water for 9-11 minutes until al dente-bite one piece to check for slight firmness in the center. Drain pasta in a colander, then rinse under cold water for 30 seconds to stop cooking and remove surface starch.

  2. Chop vegetables into uniform ½-inch pieces while pasta cools-halve 1 cup cherry tomatoes, dice 1 cucumber and 1 bell pepper, slice ½ red onion thinly, and slice ½ cup black olives. Keep pieces the same size so every forkful has balanced texture.

  3. Mix cooled pasta with all chopped vegetables in a large bowl until evenly distributed. Add ½ cup Italian dressing and toss thoroughly so every piece gets coated-you should see dressing clinging to pasta spirals, not pooling at the bottom.

  4. Cover bowl and chill in the fridge for 1-2 hours so flavors meld and pasta absorbs dressing. Stir once halfway through to redistribute dressing that settles.

  5. Add 1 cup cubed mozzarella and ¼ cup chopped fresh basil right before serving-toss gently to avoid breaking up cheese cubes. Taste and add more dressing or salt if needed.

Golden Rule
Test pasta doneness 1 minute before the package time says-you want it tender but firm, not soft or mushy.

What to Serve With It

This salad pairs with grilled proteins, crusty bread, or other Mediterranean sides. The chicken works best when it hits the table at the same time as the main. We keep a batch ready for nights like this-try this juicy chicken side dish when you need something tangy and bright.

You need a complete plate when pasta salad is the centerpiece. For weeknight garlic butter shrimp meal ideas, check out weeknight garlic butter shrimp meal ideas that show how to build the rest of the plate.

Side Dish Prep Why It Works How to Serve
Grilled chicken breast Easy Adds protein, balances salad for full meal Slice warm chicken and place on top of cold salad
Crusty garlic bread Easy Provides carb complement and texture contrast Toast slices until golden, serve on the side
Simple green salad Easy Adds leafy freshness and light crunch Dress lightly with lemon vinaigrette
Roasted vegetables Medium Warm, caramelized side that pairs well Roast zucchini and squash at 425°F for 20 minutes
Antipasto platter Easy Complements flavors and visually impressive Arrange cured meats, cheeses, marinated vegetables

Three ways to serve it:

  • As a potluck contribution: Transport in a shallow container with dressing on the side, toss right before serving
  • For meal prep lunches: Divide into individual containers, add protein like grilled chicken or hard-boiled eggs
  • At summer BBQs: Serve cold alongside grilled meats, keep chilled in a cooler until 30 minutes before eating
Best Pick
Chill salad at least 30 minutes before serving to meld flavors-it tastes better cold and holds up longer at room temperature.

Store and Reheat

Pasta salad stays fresh in the fridge for 3-4 days if you store it properly in a shallow container. A good pasta can make or break the plate. For a version that comes together quickly, try this quick pasta dish with fresh mozzarella and basil.

Method Time Best For
🥗 Serve cold No reheating Optimal texture and flavor-preferred method
📦 Microwave 30 seconds at 50% power If needing warm salad; don't overheat or vegetables wilt

For best results when storing:

  • Use a shallow airtight container instead of a deep bowl-helps salad chill faster and stay evenly cold
  • Keep dressing separate if storing longer than 2 days to prevent vegetables from releasing water and diluting flavor
  • Add fresh herbs right before serving if storing overnight-basil browns, parsley holds better
  • Stir before serving to redistribute dressing that settles at the bottom during storage
  • Toss with a paper towel if salad seems watery-absorbs excess moisture from vegetables without removing dressing

Frequently Asked Questions

Can I substitute gluten-free pasta in Italian pasta salad?

Yes-cook gluten-free pasta 1-2 minutes less than package directions since it softens faster than wheat pasta. Rinse thoroughly under cold water to remove excess starch and prevent gummy texture.

How long does Italian pasta salad last in the refrigerator?

3-4 days in an airtight shallow container. Store dressing separately after day 2 to prevent vegetables from releasing water and making salad soggy.

How do I ensure the pasta is cooked perfectly for salad?

Test pasta 1 minute before package directions say it's done-bite one piece and look for slight firmness in the center. Drain immediately and rinse under cold water for 30 seconds to stop cooking.

What to do if Italian pasta salad turns out soggy?

Toss salad with paper towels to absorb excess moisture, then add fresh chopped vegetables and 2-3 tablespoons fresh dressing. The new vegetables add crunch and the dressing refreshes flavor without adding more liquid.

Can I double the recipe for large gatherings?

Yes-cook pasta in two batches so water stays at a rolling boil and pasta cooks evenly. Double all ingredients except dressing, then add dressing gradually until pasta is coated but not swimming in liquid.

Italian Pasta Salad with Vegetables served on a plate

Italian Pasta Salad with Vegetables

No ratings yet
This Italian pasta salad features al dente rotini, crisp vegetables, and tangy dressing for a perfect side dish that holds its texture. Cooking pasta to al dente and rinsing with cold water prevents mushiness, while marinating allows flavors to meld for meal prep or potlucks.
Print Recipe Pin Recipe
Prep Time 15 minutes mins
Cook Time 10 minutes mins
Total Time 25 minutes mins
Servings: 6 servings
Course: Side Dish
Cuisine: Italian
Ingredients Equipment Method Notes

Ingredients
  

  • 8 oz rotini pasta or penne pasta; use ridged for better dressing cling
  • 1 cup cherry tomatoes halved
  • 1 medium cucumber diced; scrape out seeds if using standard cucumber
  • 1 whole bell pepper red or yellow, diced into ½-inch pieces
  • 0.5 small red onion thinly sliced; soak in cold water 5 minutes to mellow
  • 0.5 cup black olives sliced
  • 0.5 cup Italian dressing store-bought or homemade
  • 1 cup mozzarella cheese cubed; optional, add just before serving
  • 0.25 cup fresh basil or parsley chopped; add before serving for best freshness

Equipment

  • Colander Used to drain cooked pasta
  • Large bowl Used for mixing pasta, vegetables, and dressing

Method
 

  1. Boil 8 ounces rotini pasta in salted water for 9-11 minutes until al dente-bite one piece to check for slight firmness in the center. Drain pasta in a colander, then rinse under cold water for 30 seconds to stop cooking and remove surface starch.
    8 oz rotini pasta
  2. Chop vegetables into uniform ½-inch pieces while pasta cools-halve 1 cup cherry tomatoes, dice 1 cucumber and 1 bell pepper, thinly slice ½ small red onion, and slice ½ cup black olives. Keep pieces the same size for balanced texture.
    1 cup cherry tomatoes, 1 medium cucumber, 1 whole bell pepper, 0.5 small red onion, 0.5 cup black olives
  3. Mix cooled pasta with all chopped vegetables in a large bowl until evenly distributed. Add ½ cup Italian dressing and toss thoroughly so every piece is coated; dressing should cling to pasta, not pool.
    8 oz rotini pasta, 1 cup cherry tomatoes, 1 medium cucumber, 1 whole bell pepper, 0.5 small red onion, 0.5 cup black olives, 0.5 cup Italian dressing
  4. Cover bowl and chill in the fridge for 1-2 hours to let flavors meld and pasta absorb dressing. Stir once halfway through to redistribute dressing that settles.
  5. Add 1 cup cubed mozzarella and ¼ cup chopped fresh basil right before serving-toss gently to avoid breaking cheese cubes. Taste and add more dressing or salt if needed.
    1 cup mozzarella cheese, 0.25 cup fresh basil or parsley, 0.5 cup Italian dressing

Notes

  • Cook pasta until just al dente and rinse quickly to prevent mushiness.
  • Chop vegetables uniformly for even texture and flavor balance.
  • Add cheese and fresh herbs just before serving to keep them tender and fresh.

Tried this recipe?

Let us know how it was!
« Previous Page
Next Page »

Primary Sidebar

ForkliftKitchen recipe developer

Welcome!

Recipe Developer · 12+ Yr Kitchen Veteran

I'm the recipe developer behind this site, focused on practical, well-tested dishes and smart ingredient swaps. Every recipe is written to be clear, reliable, and easy to make at home.

650+ Recipes
12+ Yrs Exp.
3x Tested
Our Story →

As Featured In

Allrecipes

TASTE OF HOME

Food52

HUFFPOST

Yahoo! Life

Our Editorial Standards

  • ✓ Every recipe tested at least 3 times before publishing
  • ✓ Substitutes verified by real kitchen trials, not guesswork
  • ✓ Reviewed for accuracy by our editorial team
  • ✓ Updated regularly with seasonal info and reader feedback

Most Popular

  • Creamy Lemon Shrimp Linguine
    Creamy Lemon Shrimp Linguine
  • Creamy Garlic Mushroom Chicken
    Creamy Garlic Mushroom Chicken
  • Sesame Ginger Chicken Noodle Bowls
    Sesame Ginger Chicken Noodle Bowls
  • Baked Lemon Herb Fish Fillets
    Baked Lemon Herb Fish Fillets
  • Veggie Loaded Fried Rice
    Veggie Loaded Fried Rice
  • Spicy Garlic Shrimp Stir Fry
    Spicy Garlic Shrimp Stir Fry

Join 8,000+ Home Cooks

Weekly Kitchen Tips

Easy recipes, smart substitutes, and real cooking shortcuts — every Thursday.

Subscribe Free →


Side Dishes

  • What to Serve With Asian Salmon? 15 Best Side Dishes
    What to Serve With Asian Salmon? 15 Best Side Dishes
  • Side Dishes for Strawberry Spinach Salad
    15 Best Side Dishes for Strawberry Spinach Salad
  • Sides for Grilled Cauliflower Steaks to Complete the Meal
    15 Sides for Grilled Cauliflower Steaks to Complete the Meal
  • 15 Sides To Serve With Calabacitas
    15 Best Sides for Calabacitas – Mexican-Inspired Favorites


Substitutes

  • 7 Best Substitutes for Hot Sauce in Marinades & Stir-Fries
    7 Best Substitutes for Hot Sauce in Marinades & Stir-Fries
  • 9 Best Substitutes for Butter in Baking and Cooking
  • 7 Best Substitutes for Tagliatelle for Italian Pasta Dishes
    7 Best Substitutes for Tagliatelle for Italian Pasta Dishes
  • 7 Best Substitutes for Udon Noodles in Asian Stir-Fries
    7 Best Substitutes for Udon Noodles in Asian Stir-Fries


Browse by Topic

  • Side Dishes320
  • Substitutes785
  • Dinner163
  • Air Fryer77
  • Taste Profiles484
  • Food Storage123


Reader Reviews

★★★★★

"Finally a food blog that tells you exactly why a substitute works instead of just listing options."

— Sarah M., via email

★★★★★

"The side dish recommendations are so specific — saved my dinner party twice this month."

— James R., Pinterest comment

★★★★★

"I trust this site more than most because they actually test everything. You can tell."

— Priya K., blog comment

Footer

↑ Back to Top

Forklift Kitchen

We do the heavy lifting so you can enjoy the cooking. Tested recipes, smart substitutes, and perfect pairings—built for real home cooks.

Content

  • Recipes
  • Substitutes
  • What to Serve With
  • Blog

Company

  • About Us
  • Contact
  • Subscribe

Legal

  • Privacy Policy
  • Terms of Service

As an Amazon Associate I earn from qualifying purchases.

© 2026 Forklift Kitchen.

Rate This Recipe

Your vote:


A rating is required
A name is required
An email is required