• Skip to primary navigation
  • Skip to main content
  • Skip to primary sidebar
  • Recipe Index
    • Air Fryer
  • Side Dishes
  • Substitutes
  • About
  • Contact
  • Subscribe

ForkLiftKitchen

menu icon
go to homepage
  • Recipe Index
    • Air Fryer
  • Side Dishes
  • Substitutes
  • About
  • Contact
  • Subscribe
subscribe
search icon
Homepage link
  • Recipe Index
    • Air Fryer
  • Side Dishes
  • Substitutes
  • About
  • Contact
  • Subscribe
×

Blog

5 Best Substitutes for Rotel in Tex-Mex & Mexican Cooking

March 15, 2026

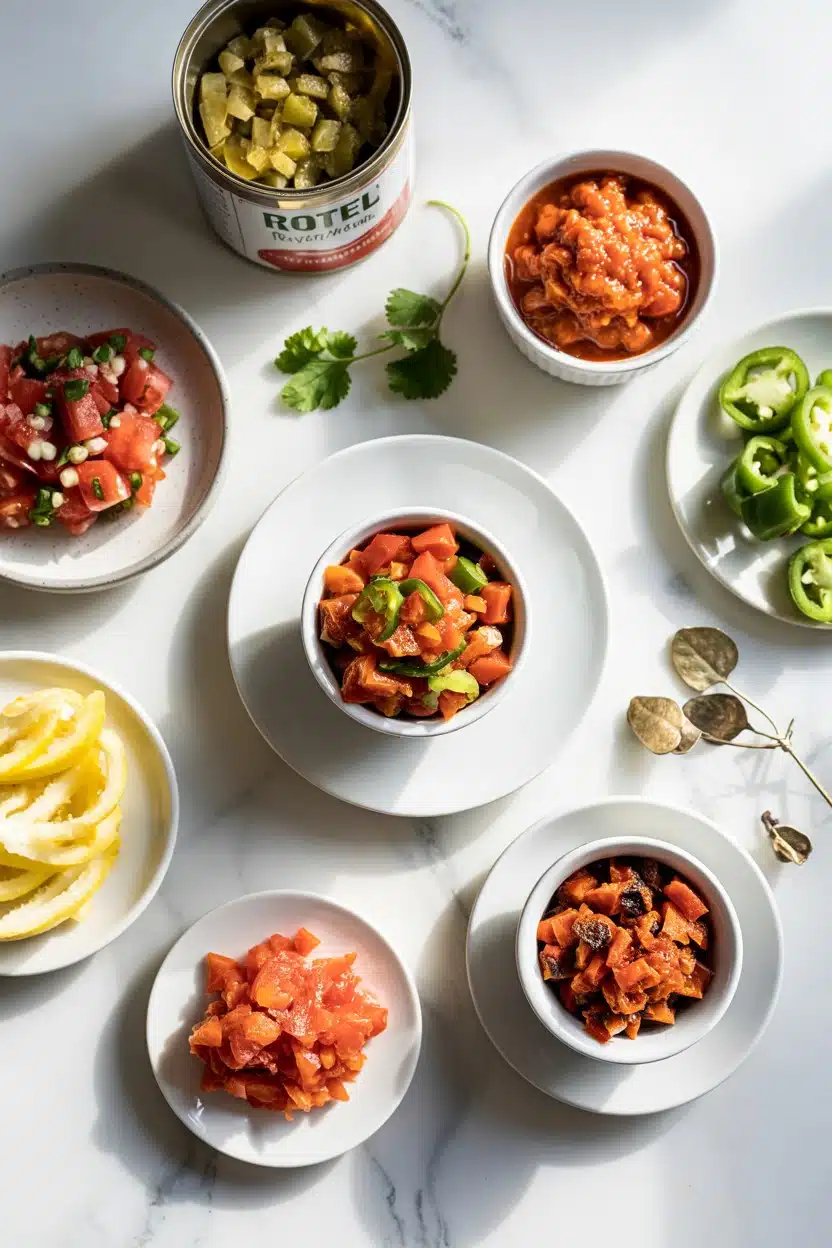
Rotel delivers tomato chunks and chile heat in one can, but we can recreate that balance when the pantry runs dry. Canned diced tomatoes with green chilies sits closest to the original, while fresh tomato-jalapeño mixes offer brighter flavor and control over heat. The key is matching both the moisture and the spice level your recipe needs.
5 Best Substitutes for Rotel in Tex-Mex & Mexican Cooking

Most Tex-Mex dips and chilis rely on Rotel's tangy, slightly smoky profile. Crushed tomatoes with hot sauce or salsa can fill that role, though each brings texture differences worth planning for.

QUICK SUMMARY

For Tex-Mex dips and chilis, use canned diced tomatoes with green chilies at a 1:1 ratio or mix crushed tomatoes with hot sauce (1 tablespoon per cup). Both deliver tomato chunks and chile heat, though canned versions offer closer flavor while fresh tomato-jalapeño blends give brighter taste. Watch moisture levels-fresh options add more liquid than canned Rotel.

🥫Closest match: Canned diced tomatoes with green chilies swap 1:1 with minimal tweaks.
🌶️Heat control: Fresh jalapeños let you adjust spice-start with one, taste, then add more.
💧Texture guard: Crushed tomatoes need water added to match Rotel's thinner consistency.
Quick Substitute Reference
# Substitute Best For Ratio Key Note
1 Diced Tomatoes + Green Chilies ✨ Both 1:1 Heat varies by brand
2 Fresh Tomato Jalapeño Mix 🍳 Cooking 1.25:1 Use more fresh tomatoes
3 Crushed Tomatoes + Heat 🍳 Cooking 1 tbsp/cup Add hot sauce gradually
4 Salsa 🍳 Cooking 1:1 Has added herbs
5 Tomato Paste + Chili Powder 🍳 Cooking 2 tbsp/½ cup No chunks, concentrated

The following options work best in different recipe situations.

1. Diced Tomatoes with Green Chilies (Closest Match)

Canned diced tomatoes with green chilies mimic Rotel's structure almost exactly. You get tomato chunks, chile pieces, and canning liquid in one package.

The 1:1 ratio makes swapping simple-use the same amount your recipe calls for. Brand differences affect heat levels, so we test first if spice tolerance matters.

What changes:

  • Heat intensity varies between brands (some run milder, others hotter)
  • Tomato texture might be softer or firmer depending on the can
  • Liquid content stays close enough that we skip adjustments

We drain excess liquid only when making thick dips where moisture control matters. For chilis, soups, and casseroles, pour the entire can in without measuring.

Best Pick
This swap works in every Rotel recipe without flavor shifts-ideal when you need exact results.

2. Fresh Tomatoes Chopped with Finely Diced Jalapeños

Fresh tomatoes and jalapeños deliver brighter, cleaner flavor than canned versions. We get full control over heat by adjusting jalapeño quantity.

Chop 2 medium tomatoes and 1-2 jalapeños (seeds removed for milder heat, kept for more kick) to replace 1 cup Rotel. Add a pinch of salt to draw out moisture and balance the flavors.

Use a 1.25:1 ratio because fresh tomatoes release more liquid during cooking. That extra volume compensates for the concentrated nature of canned products.

The downside shows up in long-simmered dishes. Fresh tomatoes lack the slightly caramelized depth that canning provides, so we add a dash of tomato paste (½ teaspoon per cup) when making chili or stew.

If you're also short on jalapeños, check out swaps when Jalapeno Pepper runs out for serrano, poblano, or cayenne fixes. Results vary by dish.

Quick Tip
Roast the jalapeños under the broiler for 3 minutes before dicing-it adds smoky notes closer to Rotel's profile.

3. Crushed Tomatoes with Cayenne Pepper or Hot Sauce

Crushed tomatoes provide smooth tomato flavor without the chunks. We add cayenne pepper or hot sauce to bring in the missing heat.

How to mix:

  • 1 cup crushed tomatoes + 1 tablespoon hot sauce = 1 cup Rotel
  • Or use ¼ teaspoon cayenne if you prefer dry spice
  • Taste after mixing and add ½ tablespoon more if you want stronger heat
  • Thin with 2 tablespoons water if the consistency runs too thick

This works brilliantly in chili, where the smoother texture blends into the sauce. It falls short in queso or dips where visible tomato chunks add visual appeal.

Hot sauce brings vinegar tang that mimics Rotel's acidity. Cayenne keeps it simpler but skips that tangy edge, so we add a splash of lime juice (½ teaspoon per cup) when using dry spice.

Running low on cayenne? Grab swaps when Cayenne Pepper runs out for chili flakes, paprika, or harissa tweaks. Each substitute behaves differently.

Watch Out
Start with half the suggested hot sauce amount-some brands pack three times the heat of others.

4. Salsa (Medium or Spicy)

Salsa combines tomatoes, chiles, onions, and herbs in ratios close to what Rotel offers. We use it 1:1 without measuring adjustments.

Chunk-style salsa works when you want texture. Smooth salsa suits creamy dips where blended consistency matters.

The trade-off is flavor complexity. Salsa includes cilantro, lime, and onion, which shift the final taste beyond what Rotel delivers. In queso or chile con queso, those additions enhance the dish. In a recipe relying on pure tomato-chile simplicity, they compete.

We pick salsa when making quick stovetop meals where cooking time stays under 15 minutes. Longer simmering concentrates the herbs and onions, making them more noticeable.

The swap depends on what salsa does in your recipe, so match the function first with Salsa substitutes ranked for pico, tomato sauce, or enchilada sauce swaps.

Salsa

Works for: Quick dips, toppings, or recipes where extra herbs help

Skip if: You need pure tomato-chile flavor without onion or cilantro

5. Tomato Paste with Water and Chili Powder

Tomato paste concentrates tomato flavor into a thick base. We thin it with water and spike it with chili powder to recreate Rotel's heat and consistency.

Mix ratio:

  • 2 tablespoons tomato paste
  • ¼ cup water
  • ½ teaspoon chili powder
  • This replaces ½ cup Rotel

Double or triple the batch as needed. Stir thoroughly so the paste dissolves without lumps.

This option skips chunks entirely, so we save it for soups, stews, and sauces where texture doesn't define the dish. It fails in recipes like Rotel dip or salsa-style toppings where visible tomato pieces matter.

The flavor runs more concentrated and slightly smoky depending on your chili powder blend. If you need milder heat, cut the chili powder to ¼ teaspoon and taste before adding more.

Each substitute behaves differently when you explore common Chili Powder swaps ranked for taco seasoning, smoked paprika, or ancho powder tweaks. Understanding the role helps you pick.

Golden Rule
Always mix tomato paste with water before adding chili powder-dry spices clump in thick paste.

How to Choose a Rotel Substitute

Start with the closest match-canned diced tomatoes with green chilies-when you want zero guesswork. It swaps 1:1 and keeps flavor shifts minimal.

Adjust seasoning and cooking time as needed based on your choice.

Diced Tomatoes + Green Chilies

Works for: Any Rotel recipe, especially dips and casseroles

Skip if: You can't find it canned near you

Fresh Tomato Jalapeño Mix

Works for: Quick-cook recipes where brightness matters

Skip if: Long simmering (use canned instead)

Crushed Tomatoes + Heat

Works for: Chilis and sauces where smooth texture helps

Skip if: Visible tomato chunks define your dish

Quick picks:

  • Closest match - Diced tomatoes with green chilies for queso, dips, and Tex-Mex casseroles
  • Easiest grab - Salsa for fast stovetop meals and taco night fillings
  • Control option - Fresh tomato-jalapeño mix when you want to set exact heat levels

Test with half the amount when trying a new swap-you can always add more but can't subtract heat.

Frequently Asked Questions

Can I use fire-roasted tomatoes instead of regular diced tomatoes?

Yes, fire-roasted tomatoes add smoky depth that complements chile heat. Use them 1:1 with green chilies just like regular diced tomatoes. The charred flavor works especially well in chili, queso, and enchilada sauce where smokiness enhances the final dish.

How do I reduce the heat if my substitute runs too spicy?

Add 2 tablespoons sour cream or 1 tablespoon sugar per cup of mixture to mellow the heat without diluting flavor. Dairy fats coat the tongue and reduce chile burn, while sugar balances acidity. Stir in gradually and taste between additions so you don't overshoot.

Can I freeze Rotel substitutes for later use?

We freeze most canned or cooked substitutes for up to 3 months in airtight containers. Fresh tomato-jalapeño mixes lose texture when frozen but still work in cooked dishes like chili or soup. Thaw overnight in the refrigerator and stir well before using, as some separation occurs during freezing.

Should I drain my substitute before using it?

Drain only when making thick dips or cheese sauces where extra liquid thins the final product. For soups, chilis, and casseroles, use the entire can including liquid to match Rotel's moisture content. Fresh tomato mixes release liquid during cooking, so we skip draining those entirely.

What's the best substitute for mild Rotel specifically?

Use canned diced tomatoes with 1 small diced poblano pepper for gentle heat that stays close to mild Rotel. Poblanos bring earthy flavor without aggressive spice, making them ideal when cooking for heat-sensitive eaters. Substitute 1:1 and add a pinch of cumin to round out the profile.

5 Best Substitutes for Rotel in Tex-Mex & Mexican Cooking

5 Best Substitutes for Rotel

No ratings yet
Rotel's signature tomato chunks and chile heat can be closely mimicked with canned diced tomatoes and green chilies or created with fresh tomato and jalapeño mixes for brightness and heat control. Other options like crushed tomatoes with hot sauce or salsa offer texture variations, while tomato paste and chili powder provide a concentrated, smooth alternative.
Print Recipe Pin Recipe
Prep Time 10 minutes mins
Cook Time 8 minutes mins
Total Time 18 minutes mins
Servings: 4 servings
Course: Kitchen Tips, Substitutes
Cuisine: Various
Ingredients Method Notes

Ingredients
  

  • 1 cup Diced Tomatoes + Green Chilies Use 1:1 ratio to replace Rotel with minimal tweaks; heat varies by brand
  • 1.25 cups Fresh Tomato Jalapeño Mix Chop 2 medium tomatoes and 1-2 jalapeños to make 1.25 cups replacing 1 cup Rotel;
  • 1 cup Crushed Tomatoes + Hot Sauce Mix 1 cup crushed tomatoes with 1 tablespoon hot sauce;
  • 1 cup Salsa (medium or spicy) Use 1:1 ratio; texture and flavor vary by salsa type
  • 2 tablespoons Tomato Paste + Chili Powder Mix 2 tablespoon tomato paste with ¼ cup water and ½ teaspoon chili powder to

Method
 

  1. Select the substitute based on your recipe needs and desired heat level.
  2. Prep the substitute by chopping fresh ingredients, mixing components, or draining excess liquid as needed.
  3. Apply the appropriate ratio for replacing Rotel, adjusting seasoning or moisture if necessary.
  4. Taste and adjust for heat and consistency before integrating into your dish.

Notes

  • Drain canned substitutes only when making thick dips or cheese sauces to avoid excess moisture.
  • Roasting jalapeños before dicing adds smoky depth similar to Rotel's flavor.
  • When heating tomato paste mixtures, stir thoroughly to prevent clumping of dry spices.
Tried this recipe?

Let us know how it was!

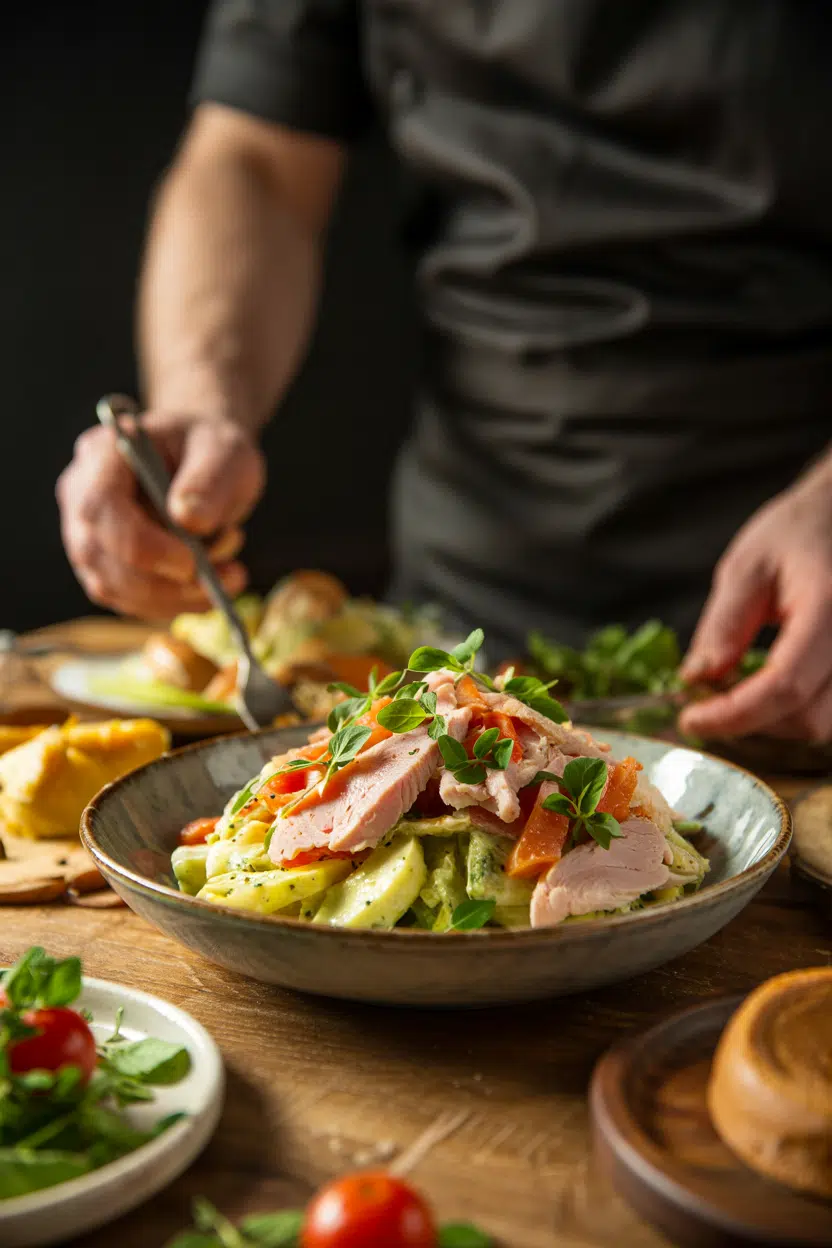
Chef Salad with Turkey and Ham

March 15, 2026

You know that lunch you grab at a deli counter? This chef salad brings it home-layered proteins, crisp vegetables, and a dressing that ties it all together.

Chef Salad with Turkey and Ham served on a plate

You get everything in one bowl: sliced turkey and ham, hard-boiled eggs, sharp cheddar, and fresh greens. The trick is keeping the greens crisp until you're ready to eat.

Make it Sunday night and portion it for the week. Or assemble it fresh when you need a meal that feels complete without turning on the stove.

QUICK SUMMARY

Chef salad with turkey and ham layers sliced deli meats, hard-boiled eggs, cheddar cheese, and fresh vegetables over crisp greens. The key is slicing meats ⅛ to ¼ inch thick and dressing just before serving. Boil eggs for exactly 10 minutes, cool them fast, and dry your greens thoroughly.

⏱️Time: 15 minutes prep, 10 minutes egg boiling
🔪First Move: Boil eggs, chill them in ice water immediately
⚠️Watch Out: Don't dress early or greens turn soggy-add dressing within 5 minutes of serving

Table of Contents

Toggle
  • Why This Recipe Works
  • What You'll Need
    • Ingredient Details
  • Ingredient Swaps
  • What to Serve With It
  • Store and Reheat
  • Frequently Asked Questions
  • Chef Salad with Turkey and Ham
    • Method 
    • Tried this recipe?

Why This Recipe Works

Deli-style salads work because each ingredient keeps its texture. For a version that comes together quickly, homemade salad recipe shows how fresh components stay crisp when assembled right before serving.

Quick Reference
⏱️
Prep Time
15 minutes
🔥
Cook Time
10 minutes
⏰
Total Time
25 minutes
🍽️
Servings
4-6 servings
📊
Difficulty
Easy
🏷️
Category
Main Dish
💡
Quick Tip
Chill greens and dressing separately for crispness
🎯
Best For
Weeknight dinner | Meal prep | Light lunch
  • Slice deli meats thin - ⅛ to ¼ inch thickness gives you tender bites without chewiness
  • Boil eggs exactly 10 minutes - then straight into ice water so yolks stay bright yellow, not gray-green
  • Dry greens completely - spin them twice if needed; wet leaves dilute dressing and go limp
  • Layer ingredients evenly - greens first, then proteins, vegetables, cheese, eggs, and dressing last
  • Assemble just before eating - or store components separately and combine when ready
Quick Tip
Chill the assembled salad uncovered for 10 minutes before serving-greens stay crisp and flavors sharpen

What You'll Need

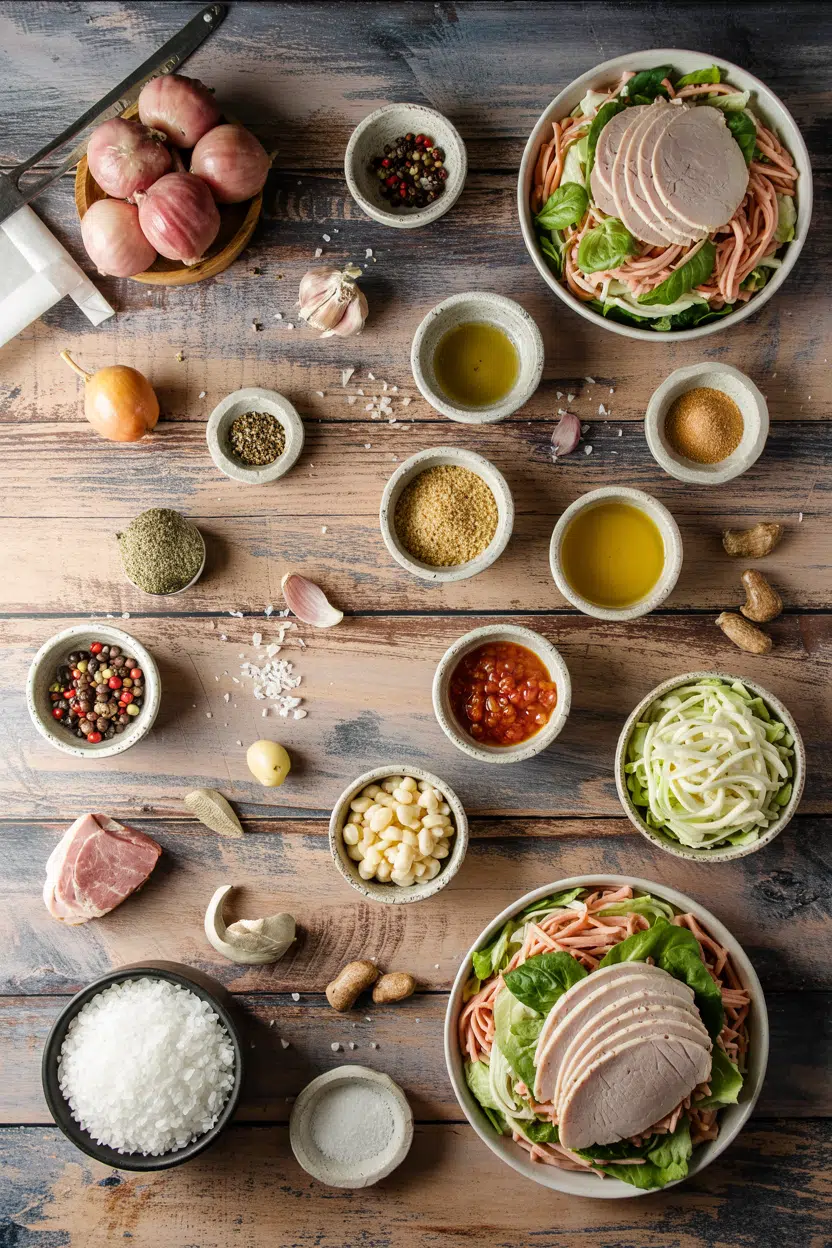
Ingredients for Chef Salad with Turkey and Ham

Shopping for this one is straightforward-hit the deli counter and produce section. Most people skip salad, but it balances the meal and this quick salad dish proves that simple ingredients deliver when you treat them right.

🍗
Proteins
  • Sliced turkey breast
  • Sliced ham
  • Hard-boiled eggs
🥬
Fresh Produce
  • Mixed salad greens
  • Cucumber
  • Tomatoes
  • Carrots
🧀
Dairy & Extras
  • Cheddar cheese
  • Croutons
  • Dressing (Ranch or vinaigrette)

Ingredient Details

  • Mixed salad greens
    Use romaine, iceberg, or spring mix-wilted greens ruin texture, so check for crispness at the store
  • Sliced turkey breast
    Get deli-style cuts, ⅛ to ¼ inch thick-thicker slices turn chewy and overpower the bowl
  • Hard-boiled eggs
    Boil exactly 10-12 minutes, then ice water immediately-overcooked yolks turn gray-green and dry
  • Cheddar cheese
    Block cheese sliced fresh stays firm-pre-shredded varieties dry out and don't layer as cleanly
  • Fresh vegetables
    Dice cucumber, tomatoes, and carrots into uniform ¼ inch pieces for even texture in each bite
  • Croutons
    Add them last or serve on the side-they go soggy fast when dressed too early
  • Dressing
    Ranch or vinaigrette both work-apply within 5 minutes of serving to keep greens from wilting

Ingredient Swaps

You can adjust this salad based on what's in your fridge or what you're avoiding. Rich mains need something to cut through, and salad does exactly that, so tender rice recipe shows how swapping proteins and dressings changes the meal without losing balance.

  • Swap cheddar for dairy-free cheese - keeps creaminess intact if you're lactose intolerant
  • Use toasted nuts instead of croutons - adds crunch, skips gluten
  • Replace turkey with grilled chicken breast - similar texture, slightly different flavor
  • Switch Ranch for vinaigrette - lighter, fewer calories, tangy instead of creamy

Ranch Dressing

Works for: Creamy, rich flavor; pairs with bold meats and cheese

Skip if: You want lower calories or a lighter, tangier finish

Vinaigrette

Works for: Bright, tangy taste; cuts through richness; fewer calories

Skip if: You prefer creamy textures or need a kid-friendly option

Instructions

Timing this one is simple-boil eggs first, then slice and assemble everything while they cool. Pork adds the contrast this plate needs, but timing matters, and tender pork side dish confirms that getting ingredients prepped in the right order keeps everything fresh.

  1. Boil the eggs - Bring a pot of water to a rolling boil, add eggs gently, cook for exactly 10 minutes, then transfer immediately to ice water for 5 minutes to stop cooking and make peeling easier.

  2. Prep the greens - Wash mixed salad greens thoroughly, spin dry twice to remove all moisture, then spread them evenly across the bottom of a large salad bowl.

  3. Slice the proteins and vegetables - Cut turkey and ham into ⅛ to ¼ inch strips, dice cucumber, tomatoes, and carrots into uniform ¼ inch pieces, and slice cheddar cheese into thin strips.

  4. Assemble the salad - Layer sliced turkey, ham, hard-boiled egg quarters, cheese, cucumber, tomatoes, and carrots over the greens, arranging ingredients in neat sections for visual appeal.

  5. Add dressing and serve - Drizzle Ranch or vinaigrette over the top within 5 minutes of serving, toss gently if desired, and add croutons last to keep them crunchy.

Best Pick
Chill the assembled salad uncovered for 10 minutes before dressing-greens stay crisp and flavors sharpen without going soggy

What to Serve With It

This salad fills the plate on its own, but adding one or two simple sides rounds out the meal. Salmon adds the contrast this plate needs, but timing matters, so planning your chicken wings dinner guides you through pairing strategies that keep everything balanced and ready at the same time.

Side Dish Prep Why It Works How to Serve
Crusty bread Easy Adds hearty balance and soaks up dressing Slice thick, toast lightly, serve warm
Fresh fruit salad Easy Complements savory with sweetness and freshness Chop seasonal fruit, chill, serve on the side
Simple soup (tomato or vegetable) Easy Completes a light meal with warmth Heat gently, serve in small bowls
Pickles or olives Easy Adds tangy contrast and bite Drain, serve chilled in small dish
Potato chips Easy Adds crunch and casual feel Serve straight from bag on the side

Three ways to serve it:

  • For weeknight dinners - pair with crusty bread and a simple tomato soup for a complete, satisfying meal
  • For office lunches - pack components separately in containers, assemble at your desk, and dress right before eating
  • For picnics or potlucks - transport greens and dressing separately, layer everything on-site, and add croutons last
Shortcut
Buy pre-cooked hard-boiled eggs from the deli section-saves 10 minutes and works when you're short on time

Store and Reheat

Store components separately for best results-dressed salads go soggy fast. Rich mains need something to cut through, and salad does exactly that, so this rich beans shows how proper storage keeps ingredients fresh for days without losing texture.

Method Time Best For
🍳 Stovetop N/A Not recommended-salads best served chilled
📦 Microwave 30-45 seconds Warming meats only-avoid greens entirely
🔥 Oven N/A Not recommended-heat wilts greens

For best results when storing:

  • Keep components separate - store greens, proteins, vegetables, cheese, and dressing in individual airtight containers
  • Refrigerate up to 3-4 days - assembled salads last only a few hours before greens wilt, so prep ingredients but don't combine
  • Dry greens before storing - moisture causes sogginess, so spin dry thoroughly and store with a paper towel to absorb condensation
  • Add dressing just before eating - pour dressing over portioned salad within 5 minutes of serving to keep greens crisp
  • Refresh wilted greens - if greens lose crispness, soak in ice water for 5 minutes, spin dry, and reassemble

Frequently Asked Questions

Can I substitute turkey breast with chicken in chef salad?

Yes, grilled chicken breast works as a direct swap for turkey. Slice it ⅛ to ¼ inch thick and use the same layering method-texture stays tender and flavor stays mild.

How should I store leftover chef salad and for how long?

Store components separately in airtight containers for 3-4 days. Don't dress the greens until you're ready to eat-dressed salads wilt within hours.

What is the best way to boil eggs for chef salad?

Boil eggs for exactly 10 minutes in rolling water, then transfer immediately to ice water for 5 minutes. This stops the cooking and keeps yolks bright yellow, not gray-green.

Why does my chef salad turn soggy and how to fix it?

Soggy salads happen when greens aren't dried completely or when dressing is added too early. Spin greens twice, dress within 5 minutes of serving, and if it's already soggy, drain excess liquid and refresh with dry greens.

Can I make chef salad ahead of time for meal prep?

Yes, prep all components ahead and store them separately in airtight containers. Assemble and dress individual portions right before eating to keep greens crisp and ingredients fresh.

Chef Salad with Turkey and Ham served on a plate

Chef Salad with Turkey and Ham

No ratings yet
This chef salad combines sliced turkey and ham, hard-boiled eggs, sharp cheddar, and fresh vegetables over crisp mixed greens. The key to success is slicing proteins thin and dressing the salad just before serving to keep the greens crisp and flavorful.
Print Recipe Pin Recipe
Prep Time 15 minutes mins
Cook Time 10 minutes mins
Total Time 25 minutes mins
Servings: 4 servings
Course: Main Dish
Cuisine: American
Ingredients Equipment Method Notes

Ingredients
  

  • 8 slices turkey breast sliced ⅛ to ¼ inch thick
  • 8 slices ham sliced ⅛ to ¼ inch thick
  • 4 large eggs hard-boiled, peeled, quartered
  • 5 cups mixed salad greens washed and thoroughly dried
  • 1 cup cucumber diced into ¼ inch pieces
  • 1 cup tomatoes diced into ¼ inch pieces
  • ½ cup carrots diced into ¼ inch pieces
  • 1 cup cheddar cheese sliced into thin strips from block cheese
  • ½ cup croutons added just before serving
  • ⅓ cup dressing ranch or vinaigrette, added last within 5 minutes of serving

Equipment

  • Pot To boil eggs
  • Salad spinner To dry greens thoroughly
  • Large salad bowl To assemble salad
  • Knife To slice meats, cheese, and vegetables

Method
 

  1. Bring a pot of water to a rolling boil, gently add eggs, and cook for exactly 10 minutes. Immediately transfer eggs to ice water for 5 minutes to stop cooking and make peeling easier.
    4 large eggs
  2. Wash mixed salad greens thoroughly and spin dry twice to remove all moisture. Spread evenly in a large salad bowl.
    5 cups mixed salad greens
  3. Cut turkey and ham into ⅛ to ¼ inch strips. Dice cucumber, tomatoes, and carrots into uniform ¼ inch pieces. Slice cheddar cheese into thin strips.
    8 slices turkey breast, 8 slices ham, 1 cup cucumber, 1 cup tomatoes, ½ cup carrots, 1 cup cheddar cheese
  4. Layer sliced turkey, ham, hard-boiled egg quarters, cheddar cheese, cucumber, tomatoes, and carrots over the greens, arranging ingredients in neat sections for visual appeal.
    8 slices turkey breast, 8 slices ham, 4 large eggs, 5 cups mixed salad greens, 1 cup cucumber, 1 cup tomatoes, ½ cup carrots, 1 cup cheddar cheese
  5. Drizzle ranch or vinaigrette dressing over the salad within 5 minutes of serving. Toss gently if desired and add croutons last to keep them crunchy.
    ½ cup croutons, ⅓ cup dressing

Notes

  • Slice deli meats ⅛ to ¼ inch thick for tender texture.
  • Boil eggs exactly 10 minutes and cool in ice water immediately to avoid gray yolks.
  • Dry salad greens thoroughly and dress just before serving to prevent sogginess.

Tried this recipe?

Let us know how it was!

5 Best Substitutes for Kombucha in Fermented Beverages

March 15, 2026

You stare at the bottle. Empty.

5 Best Substitutes for Kombucha in Fermented Beverages

Kombucha brings fizz, tang, and fermented depth to drinks, dressings, and marinades. When you swap it, match what your recipe needs most-acidity, effervescence, or that funky fermented edge.

The best swaps depend on what you're making. Most handle acidity fine, but carbonation and fermentation complexity take more effort to replicate.

QUICK SUMMARY

For drinks and dressings, **apple cider vinegar with sparkling water** mimics acidity and fizz. **Kefir water** matches fermentation notes without carbonation. Most swaps lose some depth, so adjust ratios based on whether you need tang, fizz, or both.

🥤Closest match: ACV + sparkling water for tangy fizz
⚖️Core ratio: 1 tablespoon vinegar + 1 cup sparkling water per 1 cup kombucha
⚠️Common mistake: Forgetting to add acid when using plain soda-you'll miss the tang

5 Easy Kombucha Swaps for Cooking

Some swaps stay close, while others require small adjustments. Kombucha's triple role-acid, fizz, fermentation-means no single ingredient covers everything.

Quick Substitute Reference
#SubstituteBest ForRatioKey Note
1 ACV Sparkling Water ✨ Both 1 tablespoon + 1 cup per 1 cup Sharper tang, less sweet
2 Sparkling Water & Lemon 🍳 Cooking 1 tablespoon + 1 cup per 1 cup Bright citrus, no fermentation
3 Kefir Water 🍳 Cooking 1:1 Fermented tang, less fizz
4 Grape Juice & Vinegar 🥧 Baking 1 cup + 1 teaspoon per 1 cup Sweeter, no bubbles
5 Lemon-Lime Soda 🍳 Cooking 1:1 Fizzy but sweet, low acid

1 - ACV Sparkling Water

Apple cider vinegar delivers acidity close to kombucha's tang. Sparkling water restores the fizz.

Mix 1 tablespoon apple cider vinegar with 1 cup sparkling water per 1 cup kombucha. The acidity hits sharper, and you'll lose some of the fermented sweetness.

Works for mocktails and dressings

Works for: Drinks needing tang and bubbles without fermentation depth

Skip if: You want that funky, probiotic complexity

Works for vinaigrettes

Works for: Bright acidity with a fizzy lift in cold applications

Skip if: Heat will kill the carbonation anyway

Here's what to know:

  • Use raw, unfiltered ACV for closer fermented taste
  • Add sparkling water right before serving to keep fizz
  • Start with less vinegar if kombucha was mild
  • Works best in cold drinks and uncooked dressings

If you're short on apple cider vinegar too, replacements for apple cider lists acids that hold up.

Skip if: You're cooking it-heat flattens carbonation and wastes the sparkling water.

2 - Sparkling Water & Lemon

Lemon juice provides acidity. Sparkling water handles the fizz.

Use 1 tablespoon fresh lemon juice with 1 cup sparkling water per 1 cup kombucha. You'll get bright citrus instead of fermented complexity.

Missing lemon juice as well? Citrus swaps for lemon offers lime and vinegar picks.

Skip if: You need fermentation flavor-lemon juice tastes clean, not funky.

3 - Kefir Water

Kefir water shares kombucha's fermented tang and probiotic edge. It's usually flatter, though.

Swap 1:1 for kombucha in marinades and recipes where carbonation doesn't matter. The flavor stays tangy and fermented.

Best Pick
Kefir water works best when fermentation matters more than fizz-marinades, dressings, and cooked sauces all benefit.

The essentials:

  • Use unflavored kefir water for neutral fermentation notes
  • Adjust salt if kefir water tastes saltier
  • Works best in recipes that cook down

Out of kefir water too? Fermented drink swaps covers yogurt drinks and other tangy liquids.

Skip if: You need bubbles-kefir water is mostly flat.

4 - Grape Juice & Vinegar

White grape juice adds mild sweetness. A splash of white vinegar brings acidity back.

Use 1 cup white grape juice plus 1 teaspoon white vinegar per 1 cup kombucha. You'll lose fizz and fermentation depth but keep acidity.

UseRatioNotes
Baking1 cup + 1 tspSweeter, no carbonation needed
Cooked sauces1 cup + 1 tspHeat kills fizz anyway
Cold drinksSkipToo sweet, no bubbles

Missing white vinegar too? Vinegar swaps for cooking has rice vinegar and distilled options.

Skip if: You need fizz or fermentation-grape juice stays flat and mild.

5 - Lemon-Lime Soda

Lemon-lime soda provides carbonation and citrus flavor. It's sweeter and less acidic than kombucha.

Swap equal amounts in drinks and cocktails. Add a squeeze of lemon or lime juice if you need more tang.

Quick specs:

  • Use regular soda, not diet-flavor stays closer
  • Add citrus juice for sharper acidity
Watch Out
Soda adds sugar fast-cut back on other sweeteners or your drink will taste syrupy.

Skip if: You need acidity or low sugar-soda tastes sweet, not tangy.

Final Thoughts on Swapping Kombucha

Start with acidity and fizz-those matter most in drinks and dressings. Test with a small batch if you're unsure.

Most swaps need minor tweaks. Adjust vinegar amounts, add citrus, or cut sugar to balance sweetness.

  • Closest match - ACV + sparkling water for tang and fizz
  • Easiest grab - Sparkling water + lemon for bright acidity
  • Dietary option - Kefir water for fermented tang

Frequently Asked Questions

Can I use plain vinegar instead of kombucha?

Yes, but add sparkling water for fizz. Use 1 tablespoon vinegar per 1 cup sparkling water to match kombucha's acidity and carbonation.

Does kombucha work the same in baking as in drinks?

Baking kills carbonation and probiotics, so acidity matters most. Grape juice with vinegar or plain vinegar with water work fine.

Can I use flat kombucha as a substitute?

Yes, especially in marinades and cooked sauces where fizz doesn't matter. Flat kombucha still has acidity and fermented flavor.

What if my swap tastes too sweet?

Add lemon juice or vinegar to sharpen the tang. Start with 1 teaspoon and taste before adding more.

Do I need to match the flavor of the original kombucha?

No-focus on matching acidity, fizz, or fermentation. Flavor profiles can shift without ruining the recipe.

5 Best Substitutes for Kombucha in Fermented Beverages

5 Best Substitutes for Kombucha

No ratings yet
Kombucha replacement depends on recipe needs: acidity, fizz, or fermentation. Apple cider vinegar with sparkling water provides tang and bubbles. Kefir water preserves fermented flavor without fizz. Adjust amounts for desired taste.
Print Recipe Pin Recipe
Prep Time 7 minutes mins
Cook Time 1 minute min
Total Time 8 minutes mins
Servings: 4 servings
Course: Baking, Cooking, Dressings, Drinks, Marinades
Cuisine: Substitutes
Ingredients Method Notes

Ingredients
  

  • 1 tablespoon ACV Sparkling Water Mix 1 tablespoon apple cider vinegar with 1 cup sparkling water per 1 cup kombucha. Use raw, unfiltered ACV for better fermented taste. Add sparkling water last to keep fizz.
  • 1 tablespoon Sparkling Water & Lemon Use 1 tablespoon fresh lemon juice with 1 cup sparkling water per 1 cup kombucha. Bright citrus flavor, no fermentation.
  • 1 Kefir Water Use 1:1 ratio for kombucha in recipes where fizz is not essential. Use unflavored kefir water and adjust salt if needed.
  • 1 cup Grape Juice & Vinegar Use 1 cup white grape juice plus 1 teaspoon white vinegar per 1 cup kombucha. Sweeter with no carbonation or fermentation.
  • 1 Lemon-Lime Soda Use equal parts as kombucha in drinks. Add lemon or lime juice for more tang. Soda is sweet and less acidic.

Method
 

  1. Choose your substitute based on whether you need acidity, fizz, or fermentation.
  2. Prepare the substitute by mixing vinegar or lemon juice with sparkling water if needed.
  3. Apply the appropriate ratio for each substitute when replacing kombucha.
  4. Adjust flavors by adding more acid or reducing sweetness according to taste.
  5. Use substitutes mostly in cold or cooked recipes as recommended to preserve flavor and texture.

Notes

Add apple cider vinegar slowly and taste-test to prevent overwhelming acidity or loss of fizz.

Tried this recipe?

Let us know how it was!

Greek Salad with Feta and Olives

March 15, 2026

You need a salad that looks impressive but takes 15 minutes. Greek salad delivers crisp vegetables, briny olives, and tangy feta without a single pot or pan.

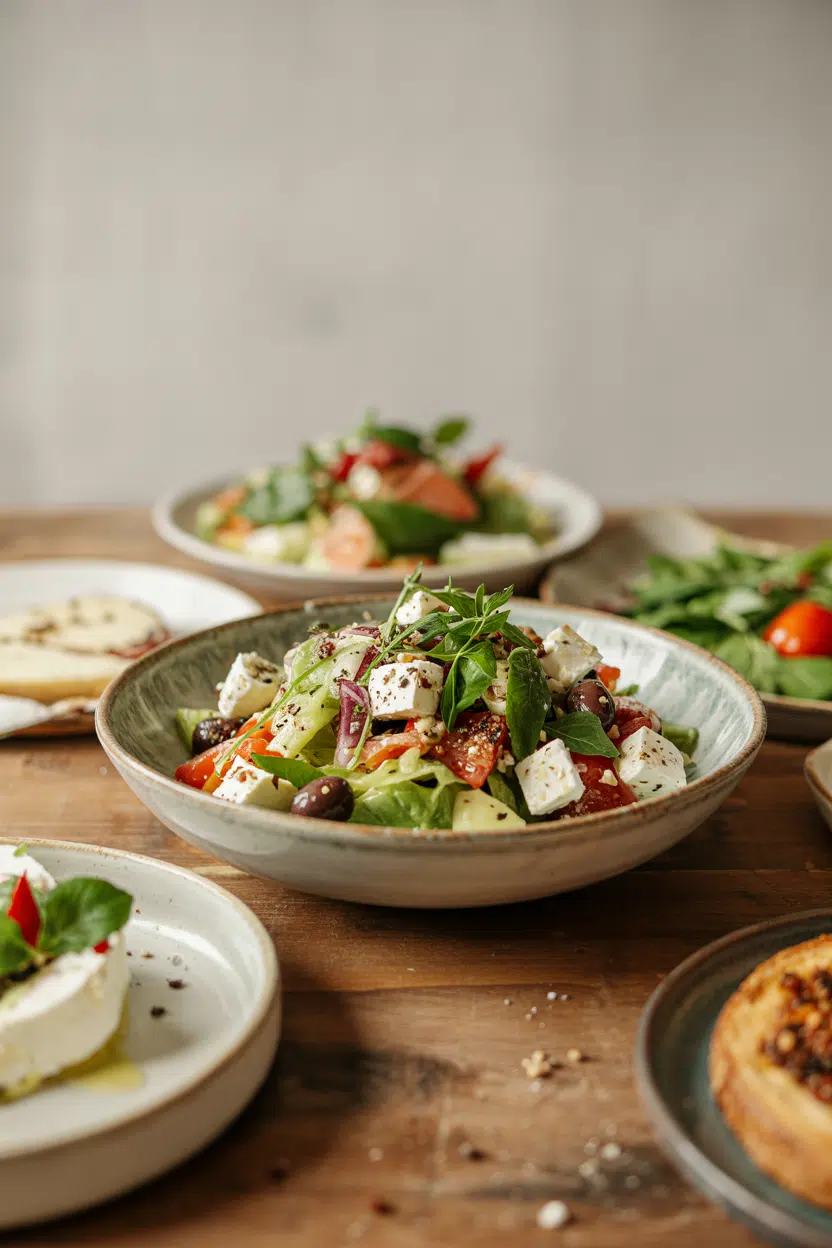
Greek Salad with Feta and Olives served on a plate

It works for weeknight dinners when you need something light, meal prep that holds up for days, or summer entertaining when turning on the oven sounds miserable. The key is chopping everything to the same size and adding the dressing right before serving.

Tomatoes and cucumbers stay firm, feta stays creamy, and Kalamata olives add that sharp, salty bite that makes every forkful different. For a version that comes together quickly, a simple chicken recipe balances the plate without overwhelming the fresh vegetables.

QUICK SUMMARY

Greek salad relies on uniform chopping and last-minute dressing to keep vegetables crisp. Cut cucumbers and tomatoes into ½-inch pieces, then toss with olive oil and red wine vinegar within 5 minutes of serving to prevent sogginess.

⏱️Timing: 15 minutes total - all chopping, no cooking required
🔪First move: Chop cucumbers and tomatoes into ½-inch pieces for even texture
⚠️Watch out: Don't dress early or vegetables turn watery - add dressing right before serving

Table of Contents

Toggle
  • Why This Recipe Works
  • What You'll Need
    • Ingredient Details
  • Ingredient Swaps
  • What to Serve With It
  • Store and Reheat
  • Frequently Asked Questions
  • Greek Salad with Feta and Olives
    • Method 
    • Tried this recipe?

Why This Recipe Works

The salad works best when it hits the table at the same time as the main. We keep a batch ready for nights like this - for a similar salad recipe that adds grains for extra heartiness.

Quick Reference
⏱️
Prep Time
15 minutes
🔥
Cook Time
0 minutes
⏰
Total Time
15 minutes
🍽️
Servings
4-6 servings
📊
Difficulty
Easy
🏷️
Category
Side Dish | Appetizer
💡
Quick Tip
Chop veggies uniformly for balanced texture and flavor
🎯
Best For
Weeknight dinner | Entertaining | Meal prep

What makes it work:

  • Uniform chopping ensures every bite has cucumber, tomato, onion, and feta in the same ratio
  • Block feta crumbled by hand creates varied texture instead of powdery pre-crumbled cheese
  • Red wine vinegar and olive oil balance tangy acidity with rich, fruity olive notes
  • Dried oregano delivers that classic Greek herb flavor without wilting like fresh herbs
  • Last-minute dressing keeps vegetables crisp and prevents the watery puddle at the bottom
Quick Tip
Cut cucumbers and tomatoes into ½-inch pieces for uniform bites that mix evenly with dressing.

What You'll Need

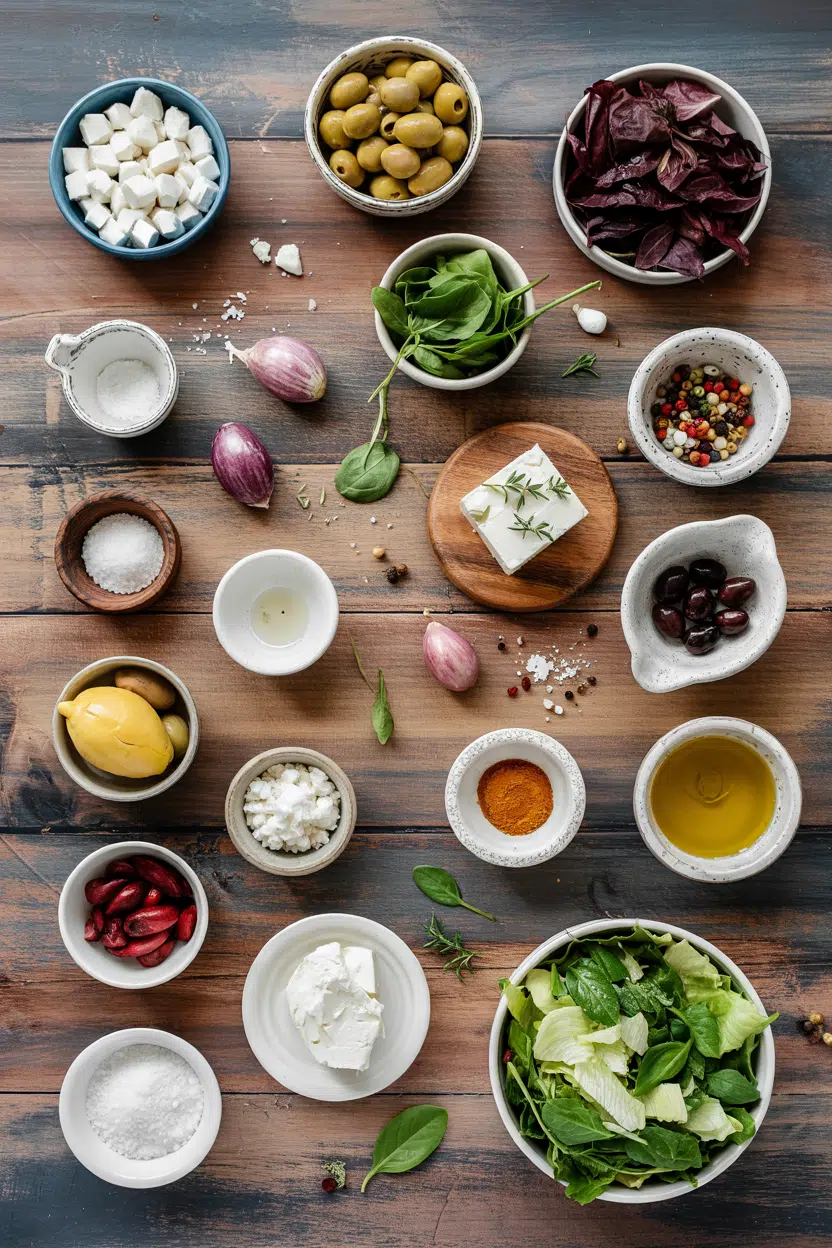
Ingredients for Greek Salad with Feta and Olives

Most people skip salad ingredients, but fresh produce matters. A good salad can make or break the plate when you're balancing rich mains - for this easy pork recipe, the salad cuts through the richness without competing for attention.

🥬
Vegetables
  • 2 medium cucumbers
  • 3 large tomatoes
  • ½ medium red onion
🫙
Briny Elements
  • 1 cup Kalamata olives
  • 6 oz block feta cheese
🥢
Dressing
  • ⅓ cup extra virgin olive oil
  • 2 tablespoon red wine vinegar
  • 1 teaspoon dried oregano
  • Salt to taste
🧄
Garnish
  • ¼ cup fresh parsley (optional)

Ingredient Details

  • Cucumber
    Use English or Persian cucumbers for fewer seeds and crisper texture; pat dry after chopping to reduce water content
  • Tomato
    Choose firm, ripe tomatoes like Roma or beefsteak; avoid overripe tomatoes that turn mushy when mixed
  • Kalamata olives
    Buy pitted for easier eating or slice in half for even distribution; rinse if they taste too briny
  • Feta cheese
    Buy block-style feta and crumble by hand for varied texture; pre-crumbled feta turns powdery and less creamy
  • Extra virgin olive oil
    Use quality olive oil since it's the base of the dressing; fruity, peppery oil adds authentic Mediterranean flavor
  • Red wine vinegar
    Adds sharp acidity that balances rich olive oil and salty feta; lemon juice works as a substitute for brighter citrus notes
  • Red onion
    Soak sliced onion in cold water for 10 minutes to reduce pungency; use green onion or shallot for milder flavor

Ingredient Swaps

Rich mains need something to cut through, and salad does exactly that. Salad adds the contrast this plate needs, but timing matters - for a version that comes together quickly, simple homemade salad builds on the same fresh vegetable base with added grains.

Four swaps that work:

  • Feta cheese → Vegan feta or firm tofu - Cuts dairy but loses some creaminess; cube tofu into ½-inch pieces and add extra salt
  • Kalamata olives → Black olives or green olives - Milder, less briny flavor; green olives add sharper, more peppery notes
  • Red wine vinegar → Lemon juice - Swaps tangy acidity for fresh citrus; use 2 tablespoons lemon juice plus ½ teaspoon zest
  • Cucumber → Raw zucchini - Less crisp, milder flavor; slice thin and pat very dry to reduce moisture

Block Feta

Works for: Creamy texture, varied crumble sizes, authentic flavor

Skip if: You need dairy-free or prefer uniform cheese distribution

Pre-Crumbled Feta

Works for: Fast prep, even mixing, consistent bite size

Skip if: You want creamier texture or less powdery cheese

Instructions

A good salad can make or break the plate. The salad works best when it hits the table at the same time as the main - for this quick shrimp dish, the crisp vegetables balance the tender protein without overwhelming the plate.

  1. Chop cucumbers and tomatoes into ½-inch pieces using a sharp knife on a cutting board. Pat cucumbers dry with paper towels to remove excess moisture.

  2. Slice red onion thinly and soak slices in cold water for 10 minutes to reduce sharpness. Drain and pat dry before adding to salad.

  3. Crumble feta by hand into varied bite-sized pieces. Pit Kalamata olives or slice them in half for easier eating.

  4. Toss vegetables with olives and feta in a large mixing bowl. Refrigerate uncovered for 5 minutes to chill slightly before dressing.

  5. Whisk dressing by combining olive oil, red wine vinegar, dried oregano, and salt. Pour over salad and toss gently 5 minutes before serving to keep vegetables crisp.

Golden Rule
Add dressing right before serving to prevent vegetables from wilting and salad from becoming soggy and watery.

What to Serve With It

Rich mains need something to cut through, and pasta does exactly that. A good pasta can make or break the plate when you're planning your rich beef dish planning for weeknight dinners or entertaining.

Side Dish Prep Why It Works How to Serve
Grilled pita bread Easy Adds warm, chewy texture that contrasts crisp vegetables Brush with olive oil, grill 2 minutes per side, serve warm
Roasted chicken thighs Medium Protein balances light salad, adds richness without heaviness Roast at 425°F for 35 minutes, rest 5 minutes before slicing
Quinoa pilaf Easy Light grain adds heartiness without overwhelming fresh flavors Cook quinoa with vegetable broth, fluff with fork, serve warm or chilled
Hummus with veggies Easy Creamy dip complements tangy salad, adds variety to plate Serve hummus chilled with carrot sticks, bell pepper, and pita
Lemon garlic roasted potatoes Medium Earthy side contrasts bright salad, adds filling starch element Roast at 425°F for 30 minutes, toss with lemon zest and garlic

Three ways to serve it:

  • Weeknight plate: Pair with grilled chicken thighs and warm pita bread for a complete Mediterranean meal in under 30 minutes
  • Meal prep bowl: Layer salad over quinoa pilaf, add roasted chickpeas, and pack dressing separately for 3-4 days of lunches
  • Entertaining spread: Serve as part of a mezze platter with hummus, dolmades, spanakopita, and grilled lamb skewers
Best Pick
Grilled pita bread adds warm, chewy contrast to crisp vegetables without competing for attention or adding heavy calories.

Store and Reheat

Most people skip storage steps, but keeping vegetables crisp matters. The salad works best when dressed at the last minute - for a classic pasta dish that holds up better for make-ahead meals, pasta salads store dressed for days without wilting.

Method Time Best For
🍳 Stovetop N/A Not applicable - serve chilled or at room temperature
📦 Microwave N/A Not applicable - microwaving wilts vegetables and turns salad soggy
🔥 Oven N/A Not applicable - serve fresh or chilled to maintain crisp texture

For best results when storing:

  • Store undressed vegetables in an airtight container for 3-4 days; keep dressing separate in a sealed jar
  • Refrigerate salad uncovered for 5 minutes before serving to chill slightly without condensation
  • Add fresh cucumber or tomato if leftover salad tastes watery; drain excess liquid before mixing
  • Keep feta separate if meal prepping longer than 2 days to prevent it from breaking down and turning mushy
  • Stir dressing well before adding to salad since olive oil and vinegar separate when stored

Frequently Asked Questions

Can I substitute feta cheese in Greek salad?

Yes - use vegan feta or cubed firm tofu for dairy-free options. Add extra salt and a squeeze of lemon to mimic feta's tangy, salty flavor.

How long can I store Greek salad in the refrigerator?

Store undressed vegetables up to 3-4 days in an airtight container. Keep dressing separate and add right before serving to prevent sogginess.

What is the best way to chop vegetables for even texture?

Cut cucumbers and tomatoes into ½-inch pieces using a sharp chef's knife. Uniform chopping ensures balanced flavor and even dressing distribution in every bite.

Why does my Greek salad get soggy, and how can I fix it?

Dressing added too early or watery vegetables cause sogginess. Pat cucumbers dry before chopping, drain excess liquid, and add dressing within 5 minutes of serving.

Can Greek salad be scaled up for large gatherings?

Yes - double or triple the recipe and keep dressing separate until serving time. Chop vegetables a few hours ahead and refrigerate uncovered to maintain crispness.

Greek Salad with Feta and Olives served on a plate

Greek Salad with Feta and Olives

No ratings yet
Greek salad combines crisp cucumbers, juicy tomatoes, briny Kalamata olives, and creamy feta cheese with a tangy red wine vinegar and olive oil dressing. The key to this fresh, no-cook dish is uniform chopping and adding the dressing just before serving to keep vegetables crisp.
Print Recipe Pin Recipe
Prep Time 15 minutes mins
Cook Time 1 minute min
Total Time 16 minutes mins
Servings: 5 servings
Course: Appetizer, Side Dish
Cuisine: Greek, Mediterranean
Ingredients Method Notes

Ingredients
  

  • 2 medium cucumber English or Persian, cut into ½-inch pieces, pat dry
  • 3 large tomato firm, cut into ½-inch pieces
  • 0.5 medium red onion thinly sliced, soaked in cold water 10 minutes and drained
  • 1 cup Kalamata olives pitted or halved
  • 6 oz feta cheese block-style, crumbled by hand
  • 0.33 cup extra virgin olive oil quality oil for dressing
  • 2 tablespoon red wine vinegar
  • 1 teaspoon dried oregano
  • salt to taste
  • 0.25 cup fresh parsley optional garnish

Method
 

  1. Chop cucumbers and tomatoes into ½-inch pieces using a sharp knife on a cutting board. Pat cucumbers dry with paper towels to remove excess moisture.
    2 medium cucumber, 3 large tomato
  2. Slice red onion thinly and soak slices in cold water for 10 minutes to reduce sharpness. Drain and pat dry before adding to salad.
    0.5 medium red onion
  3. Crumble feta by hand into varied bite-sized pieces. Pit Kalamata olives or slice them in half for easier eating.
    1 cup Kalamata olives, 6 oz feta cheese
  4. Toss chopped cucumbers, tomatoes, red onion, olives, and crumbled feta in a large mixing bowl. Refrigerate uncovered for 5 minutes to slightly chill before dressing.
    2 medium cucumber, 3 large tomato, 0.5 medium red onion, 1 cup Kalamata olives, 6 oz feta cheese
  5. Whisk together extra virgin olive oil, red wine vinegar, dried oregano, and salt until combined. Pour over salad and toss gently 5 minutes before serving to keep vegetables crisp.
    0.33 cup extra virgin olive oil, 2 tbsp red wine vinegar, 1 tsp dried oregano, salt

Notes

  • Chop cucumbers and tomatoes uniformly into ½-inch pieces for balanced texture and flavor.
  • Add dressing right before serving to prevent vegetables from becoming soggy.
  • Pat cucumbers dry after chopping and soak onions to reduce excess water and sharpness.

Tried this recipe?

Let us know how it was!

5 Best Substitutes for Lovage in Soups & Stews

March 15, 2026

You reach for your lovage and find a handful of limp, yellowing stems. The plant's past its prime, but the recipe calls for that distinct herbal celery-anise note now.

5 Best Substitutes for Lovage in Soups & Stews

Lovage substitutes vary based on what the herb does in your dish. Match the function-herbal aroma, brightness, or umami depth-then adjust the ratio to keep flavors balanced.

QUICK SUMMARY

When lovage isn't an option, **celery leaves** and **fennel fronds** deliver herbal freshness with similar aromatic profiles. Both work in soups and stocks, though celery leaves lean vegetal while fennel fronds bring stronger anise flavor. The key risk is overpowering delicate dishes-start with half the amount and taste before adding more.

🌿Closest match: Celery leaves for herbal brightness and mild celery notes
📏Core ratio: **Use 1:1 fresh to fresh** for most swaps, adjust dried to fresh at 1 teaspoon per 1 tbsp
⚠️Common mistake: Adding fennel fronds at full strength-halve the amount first to prevent licorice dominance

5 Simple Lovage Swaps to Save Time

Lovage brings a unique combination of celery, parsley, and faint anise flavors that's hard to replicate exactly. The best substitute depends on whether you need herbal lift, savory depth, or that distinctive fennel-like undertone.

Quick Substitute Reference
#SubstituteBest ForRatioKey Note
1 Celery Leaves 🍳 Cooking 1:1 Less anise flavor
2 Fennel Fronds 🍳 Cooking 1:1 Stronger anise notes
3 Lovage Root 🍳 Cooking 1:2 Earthier, more pungent
4 Lovage Powder 🍳 Cooking 1 teaspoon per 1 tablespoon fresh No fresh texture
5 Parsley Celery Seed Mix 🍳 Cooking 1 tablespoon parsley + ¼ teaspoon seed Two-part blend

1 - Celery Leaves

Celery leaves share lovage's green, herbal, slightly bitter profile and bring the same vegetal celery notes. They work best in soups, stews, and stocks where you need that fresh herbal lift without overpowering other flavors.

Use equal amounts fresh celery leaves for fresh lovage. The main trade-off is less anise undertone-celery leans more vegetal and mildly bitter.

Celery Leaves

Works for: Bright herbal aroma and mild celery flavor in long-cooked dishes

Skip if: You need pronounced anise or fennel notes

Lovage

Works for: Complex celery-parsley-anise profile with deeper umami

Skip if: Plant is wilted or past prime

Here's what to know:

  • Chop leaves finely to release oils evenly
  • Add near the end of cooking to preserve brightness
  • Double the amount if you want stronger herbal presence
  • Works in both hot dishes and cold applications like salads

2 - Fennel Fronds

Fennel fronds bring a similar anise note with bright green freshness that mimics lovage's aromatic quality. They're ideal for finishing soups and salads where you want that licorice edge.

Use equal amounts fresh fronds per fresh lovage. The stronger anise flavor can dominate, so start with half and add more if needed.

Key details:

  • Tear fronds by hand to avoid bruising and bitterness
  • Add just before serving to keep flavor delicate

Skip if: Strong anise flavor would overpower subtle dishes like creamy potato soup.

3 - Lovage Root

Lovage root delivers the same herb family compounds as the leaves but with an earthier, more pungent character. It's best in stocks and slow-cooked dishes where you want deep savory notes rather than fresh leaf flavor.

Use half the volume root for the leaf amount called for in the recipe. The root concentrates flavor, so less goes further.

Missing lovage root too? What to use instead of lovage covers leaf-based options that stay bright.

The essentials:

  • Peel and chop root into small pieces for even extraction
  • Add at the start of cooking to let flavors mellow
  • Remove pieces before serving unless you want rustic texture
Best Pick
Lovage root shines in bone broths and vegetable stocks where long simmering pulls out its deep umami.

Skip if: Fresh leaf flavor or texture is necessary for garnish or raw applications.

4 - Lovage Powder

Dried lovage powder retains the core aroma and flavor essence of fresh lovage in a concentrated form. It works well in dry rubs, seasonings, and slow cooking where you need herbal depth without fresh texture.

Use 1 teaspoon powder per 1 tablespoon fresh lovage. The powder is more intense, so start small and adjust.

Quick specs:

  • Stir powder into liquids early to let flavors bloom
  • Store in a cool, dark place to prevent flavor loss

Skip if: Fresh herb texture or brightness is needed for finishing dishes.

5 - Parsley Celery Seed Mix

Combining parsley's green freshness with celery seed's earthy spice approximates lovage's herbal and celery-anise flavor profile. This two-part blend works in soups and stews needing celery notes without relying on a single substitute.

Mix 1 tablespoon finely chopped parsley with ¼ teaspoon celery seed per 1 tablespoon lovage. The parsley brings fresh herbal lift while the celery seed adds depth and mild spice.

What to expect:

  • Crush celery seeds lightly to release oils before adding
  • Add parsley near the end to preserve color and brightness
  • Adjust celery seed up or down based on how much earthiness you want

Out of parsley as well? Swaps for fresh parsley has grassy green options.

Shortcut
Toast celery seeds in a dry pan for 30 seconds before adding-it intensifies flavor and reduces bitterness.

Skip if: Pure lovage anise flavor is vital, like in traditional European herb blends.

Before You Swap Lovage

There's no perfect replacement for lovage's unique celery-parsley-anise blend. Match the role first-herbal aroma, brightness, or savory depth-then start with half the amount and adjust gradually.

Test swaps in a small portion before committing to the full batch.

  • Closest match - Celery leaves for vegetal herbal notes
  • Easiest grab - Fennel fronds if fennel's in the fridge
  • Dried option - Lovage powder for concentrated flavor

Frequently Asked Questions

Can I use dried lovage instead of fresh in recipes?

Yes, use 1 teaspoon dried lovage powder per 1 tablespoon fresh lovage. Dried loses some brightness and texture but keeps the core herbal flavor for soups and stews.

What's the taste difference between celery leaves and lovage?

Celery leaves are milder and more vegetal with less anise undertone. Lovage has a stronger, more complex profile that blends celery, parsley, and faint licorice notes.

Can fennel fronds replace lovage in salads?

Yes, fennel fronds work well in cold salads where you want bright herbal flavor. Start with half the amount since fennel's anise flavor is more pronounced than lovage.

Is lovage root a good substitute for lovage leaves in soup?

Lovage root works in long-cooked soups and stocks but lacks the fresh leaf texture. Use half the volume root for the leaf amount and add at the start of cooking.

How do I make a lovage substitute with pantry staples?

Mix 1 tablespoon finely chopped parsley with ¼ teaspoon celery seed per 1 tablespoon lovage. The parsley brings fresh herbal notes while celery seed adds earthy depth.

5 Best Substitutes for Lovage in Soups & Stews

5 Best Substitutes for Lovage

No ratings yet
Lovage substitutes depend on the role it plays in your dish-herbal aroma, brightness, or umami depth. Use celery leaves or fennel fronds for fresh herbal notes, or lovage root and powder for savory depth. Adjust quantities gradually to balance flavor.
Print Recipe Pin Recipe
Prep Time 7 minutes mins
Cook Time 6 minutes mins
Total Time 13 minutes mins
Servings: 4 servings
Course: Substitute Guide
Ingredients Method Notes

Ingredients
  

  • 1 to 1 celery leaves (fresh, use equal amount to fresh lovage, less anise flavor)
  • 1 to 1 fennel fronds (fresh, use equal amount to fresh lovage, start with half amount to avoid overpowering)
  • 0.5 to 1 lovage root (use half the volume of fresh lovage leaf, earthier and more pungent)
  • 1 teaspoon lovage powder use 1 teaspoon per 1 tablespoon fresh lovage, no fresh texture
  • parsley celery seed mix mix 1 tablespoon parsley with ¼ teaspoon celery seed per 1 tablespoon lovage, two-part blend

Method
 

  1. Choose your substitute based on your dish's need for herbal aroma, brightness, or savory depth.
  2. For celery leaves, chop finely to release oils and add near the end of cooking.
  3. For fennel fronds, tear by hand carefully and add just before serving; start with half the amount.
  4. For lovage root, peel, chop small and add at the start of cooking; remove pieces before serving.
  5. For lovage powder, stir into liquids early in cooking to let flavors bloom, starting small and adjusting.
  6. For parsley and celery seed mix, crush seeds lightly and add parsley near the end of cooking for brightness.
  7. Adjust amounts gradually and taste to prevent overpowering your dish.

Notes

Add fennel fronds slowly and taste-test to prevent overpowering your dish with licorice notes.

Tried this recipe?

Let us know how it was!

Classic Caesar Salad with Croutons

March 15, 2026

You've crisped lettuce, mixed dressing, tossed it all together - and somehow the salad still tastes flat. The problem isn't your technique.

Classic Caesar Salad with Croutons served on a plate

Classic Caesar salad needs exact proportions and timing. The dressing must emulsify properly, croutons need even toasting, and lettuce has to stay dry until the last possible second. Get one wrong and you're eating soggy leaves with separated oil pooling at the bottom.

This version walks you through each critical step. You'll toast croutons to the right shade of golden, whisk dressing until it clings to every leaf, and assemble everything in the correct order so nothing wilts before it hits the table.

It works for weeknight lunches when you need something quick, meal prep when you want components ready to go, or entertaining when you're serving a crowd. For a version that comes together quickly, this simple beef adds the protein this plate needs without extra planning.

QUICK SUMMARY

Classic Caesar salad combines crisp romaine, crunchy croutons, and creamy anchovy-garlic dressing with fresh Parmesan shavings. Success comes from drying lettuce completely and emulsifying dressing properly before tossing everything together at the last minute. Make this when you need a side that holds up to rich mains without turning soggy halfway through the meal.

⏱️Time Reality: 25 minutes total - 15 for prep, 10 for toasting croutons
🥬First Move: Dry lettuce with salad spinner for 30 seconds until no water drips
⚠️Watch Out: Add dressing right before serving or lettuce wilts in 10 minutes

Table of Contents

Toggle
  • Why This Recipe Works
  • What You'll Need
    • Ingredient Details
  • Ingredient Swaps
  • What to Serve With It
  • Store and Reheat
  • Frequently Asked Questions
  • Classic Caesar Salad with Croutons
    • Method 
    • Tried this recipe?

Why This Recipe Works

Rich mains need something to cut through, and this salad does exactly that. Most people skip salad, but it balances the meal - try this juicy salad for variety when you want something hearty.

Quick Reference
⏱️
Prep Time
15 minutes
🔥
Cook Time
10 minutes
⏰
Total Time
25 minutes
🍽️
Servings
4 servings
📊
Difficulty
Easy
🏷️
Category
Side Dish | Appetizer
💡
Quick Tip
Toast croutons until golden and crunchy for best crunch
🎯
Best For
Weeknight dinner | Entertaining | Meal prep

Drying lettuce thoroughly prevents watery dressing and keeps every leaf crisp. Spin romaine in a salad spinner until completely dry - about 30 seconds - then pat with paper towels. Water dilutes the dressing and makes lettuce wilt faster, so this step matters more than you think.

  • Toast croutons at 350°F for 8-10 minutes, stirring halfway - even golden color means consistent crunch without burnt spots
  • Whisk egg yolk and mustard before adding oil - proper emulsification prevents oil from separating and pooling at the bottom
  • Use fresh garlic, not jarred - minced garlic releases more pungent oils that anchor the dressing's bold flavor
  • Grate Parmesan with a microplane - fine shavings melt slightly into dressing and cling to lettuce better than pre-grated cheese
  • Add dressing gradually while tossing - coating every leaf evenly without overdressing the bottom layers
Quick Tip
Use a salad spinner until no water drips, about 30 seconds spinning - bone-dry lettuce is the difference between crisp and soggy

What You'll Need

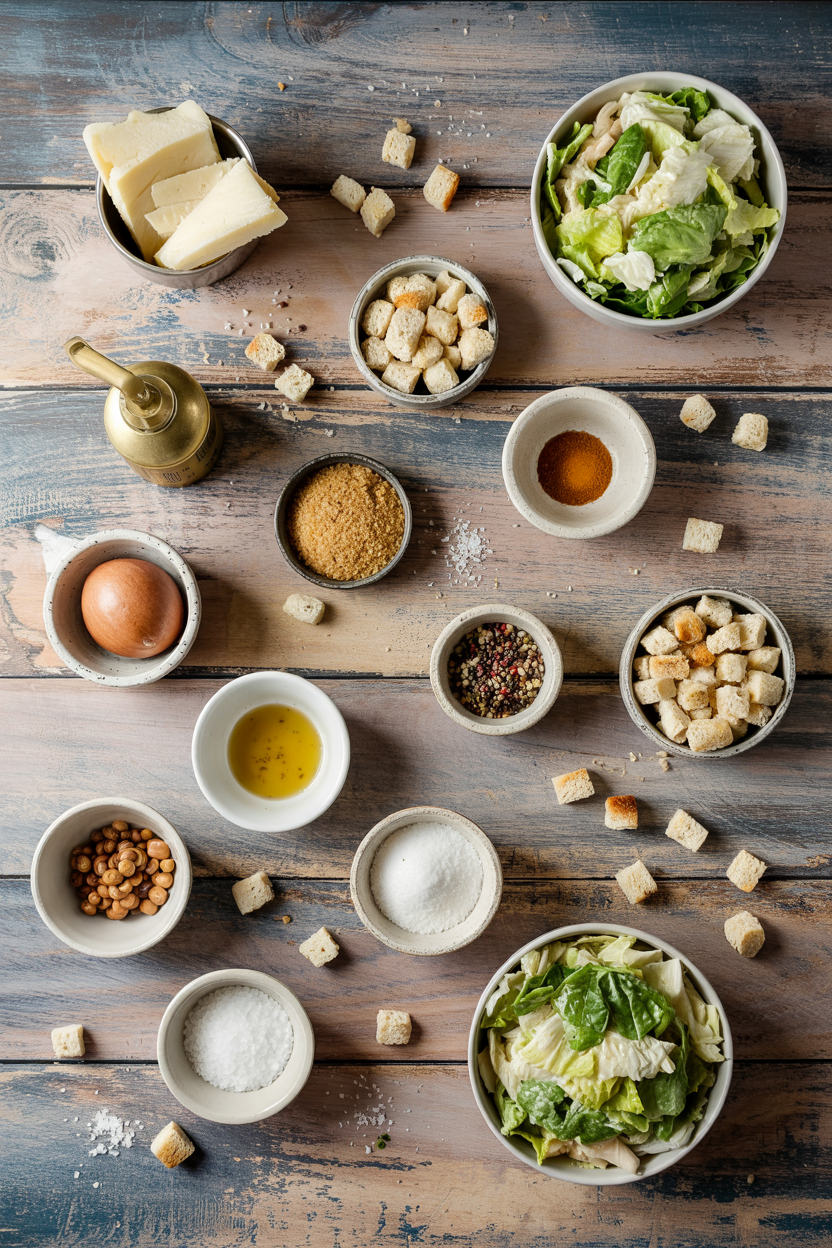
Ingredients for Classic Caesar Salad with Croutons

Salad adds the contrast this plate needs, but timing matters. For more salad ideas when you want something different, check out variations that use similar techniques but different greens.

🥬
Lettuce Base
  • 1 large head romaine lettuce (about 12 oz), chopped
🍞
Croutons
  • 2 cups cubed bread (1-inch pieces)
  • 2 tablespoons olive oil
  • Pinch of salt
🥢
Caesar Dressing
  • 2 garlic cloves, minced
  • 3-4 anchovy fillets (or 1 tablespoon anchovy paste)
  • 1 large egg yolk
  • 2 tablespoons fresh lemon juice
  • 1 teaspoon Dijon mustard
  • ½ cup olive oil
  • 1 teaspoon Worcestershire sauce
🧀
Cheese + Seasoning
  • ½ cup freshly grated Parmesan cheese
  • Black pepper to taste
  • Salt to taste

Ingredient Details

  • Romaine lettuce
    Use hearts of romaine for crisper texture - outer leaves turn bitter and wilt faster
  • Croutons bread
    Day-old bread works best - it absorbs oil without getting soggy during toasting
  • Anchovies
    Rinse packed anchovies under cold water to reduce excess salt before chopping
  • Egg yolk
    Room-temperature yolk emulsifies faster - let it sit out for 15 minutes before whisking
  • Olive oil
    Use mild olive oil, not extra-virgin - strong oil overwhelms the garlic and anchovy flavors
  • Parmesan cheese
    Buy a wedge and grate fresh - pre-grated cheese has anti-caking agents that prevent smooth melting
  • Lemon juice
    Strain seeds after juicing - one seed in the dressing ruins the smooth texture

Ingredient Swaps

A good salad can make or break the plate. Salad adds the contrast this plate needs, but timing matters - try a flaky fried rice side when you want something more filling alongside.

  • Anchovies → Capers or miso paste - Reduces fishy taste while keeping umami depth; capers add briny pop, miso gives earthy saltiness (vegetarian option)
  • Egg yolk → Mayonnaise (2 tablespoons) - Simplifies dressing and skips raw egg concern; makes it slightly thicker and creamier
  • Croutons (wheat bread) → Gluten-free bread cubes - Same crunch with safe ingredients for gluten intolerance; toast 2 minutes longer for equal crispness
  • Parmesan → Nutritional yeast (¼ cup) - Nutty, cheesy flavor without dairy; won't melt but adds similar umami (dairy-free)

Baked Croutons (Traditional)

Works for: Even toasting with consistent color; lower oil absorption

Skip if: You need croutons in under 8 minutes or don't want to heat the oven

Air-Fried Croutons (Fast Method)

Works for: Quick crisping in 5-6 minutes; uses half the oil

Skip if: You don't have an air fryer or need to make large batches at once

Stovetop Croutons (No Oven)

Works for: Fast toasting in a skillet; adds extra buttery flavor if desired

Skip if: You can't stir constantly or want hands-off cooking

Instructions

The salad works best when it hits the table at the same time as the main. For a version that comes together quickly, an easy roast side pairs well without competing for oven space.

  1. Toast croutons at 350°F for 8-10 minutes, stirring halfway through. Toss bread cubes with 2 tablespoons olive oil and a pinch of salt on a baking sheet. Spread in a single layer and bake until golden and crunchy - check at 8 minutes to avoid burning. Let cool completely before adding to salad.

  2. Mince 2 garlic cloves and mash 3-4 anchovy fillets into a paste. Use the flat side of your knife to press anchovies into garlic until smooth. This releases oils and creates the base for a bold, emulsified dressing.

  3. Whisk egg yolk, lemon juice, and Dijon mustard in a mixing bowl for 30 seconds. Add 2 tablespoons lemon juice and 1 teaspoon mustard to 1 egg yolk. Whisk until slightly thickened and pale yellow - this step sets up proper emulsification.

  4. Drizzle in ½ cup olive oil slowly while whisking constantly. Add oil in a thin stream, whisking vigorously the entire time. Dressing should thicken and turn creamy without oil separating - this takes about 2 minutes. Stir in garlic-anchovy paste, Worcestershire sauce, and black pepper.

  5. Toss chopped romaine with dressing and top with croutons and Parmesan. Add dressing gradually while tossing lettuce in a large bowl - start with half, toss, then add more until every leaf is lightly coated. Top with cooled croutons and freshly grated Parmesan. Serve immediately before lettuce wilts.

Golden Rule
Add dressing right before serving - lettuce wilts in 10 minutes once coated, and there's no way to reverse it

What to Serve With It

Most people pair Caesar salad with heavy mains, but lighter proteins balance better. For complete greek pasta salad meal ideas when you're planning a vegetarian dinner, check what works alongside fresh greens without overwhelming the plate.

Side Dish Prep Why It Works How to Serve
Grilled Chicken Breast Easy Adds lean protein without overpowering the tangy dressing Slice and arrange on top or serve alongside
Garlic Bread Easy Complements Caesar dressing with buttery, garlicky crunch Toast and serve warm in a basket
Tomato Soup Easy Light, comforting contrast to crisp salad texture Serve in bowls alongside salad plates
Roasted Vegetables Medium Adds warm, caramelized flavors and variety Toss with olive oil and serve hot
Shrimp Cocktail Easy Elegant starter that pairs well without filling guests up Chill and serve with cocktail sauce

Three ways to serve it:

  • As a starter: Serve smaller portions in individual bowls before the main course - add extra croutons for crunch
  • With grilled protein: Top with sliced chicken, shrimp, or salmon for a complete one-plate meal
  • Alongside pasta: Pair with simple olive oil pasta or garlic noodles to balance richness without doubling carbs
Best Pick
Grilled chicken breast works best - slice it warm and arrange on top right before serving for a filling, balanced meal

Store and Reheat

The salad works best when it hits the table at the same time as the main. Rich mains need something to cut through, and a tender rice recipe balances the plate without requiring extra prep - we keep a batch ready for nights like this.

Method Time Best For
🍳 Stovetop 2-3 minutes over medium heat Recrisping leftover croutons in a dry skillet
📦 Microwave Not recommended Avoid - makes lettuce limp and dressing separate
🔥 Oven 5-7 minutes at 350°F Reheating croutons in small batches until crunchy again

For best results when storing:

  • Store components separately in airtight containers - keep lettuce, dressing, and croutons apart in the fridge for up to 3 days
  • Don't dress salad until serving - once tossed, lettuce wilts within 10-15 minutes and can't be revived
  • Keep lettuce wrapped in paper towels - absorbs excess moisture and maintains crispness for 3-4 days in a sealed container
  • Refrigerate dressing in a jar with tight lid - shake before using to re-emulsify any separated oil
  • Store croutons at room temperature in a sealed bag - refrigeration makes them stale and soggy faster

Frequently Asked Questions

Can I substitute anchovies in the Caesar dressing?

Yes - use capers for briny saltiness or miso paste for umami depth. Start with 1 tablespoon of either and adjust to taste, though the flavor won't be identical to traditional Caesar.

How should I store leftover Caesar salad to keep it fresh?

Store components separately - lettuce wrapped in paper towels in a sealed container, dressing in a jar, croutons at room temperature. Don't toss salad until right before serving or it wilts in minutes.

What is the best way to know when croutons are done?

They should be golden brown and crunchy throughout - test by breaking one in half to check the center isn't soft. If they're still pale after 8 minutes, bake 2 more minutes and check again.

How do I prevent my Caesar salad from becoming soggy?

Dry lettuce completely with a salad spinner and add dressing right before serving. Water on leaves dilutes dressing and causes rapid wilting - skip this and you'll eat limp greens within 10 minutes.

How can I scale this recipe for a large crowd?

Double or triple all ingredients proportionally and make dressing in batches if your bowl isn't large enough. Toss salad in batches too - a huge bowl makes it hard to coat every leaf evenly without bruising the lettuce.

Classic Caesar Salad with Croutons served on a plate

Classic Caesar Salad with Croutons

No ratings yet
Classic Caesar Salad with Croutons features crisp romaine, crunchy baked croutons, and a creamy anchovy-garlic dressing perfectly emulsified. The key is drying the lettuce thoroughly and adding the dressing just before serving to avoid sogginess.
Print Recipe Pin Recipe
Prep Time 15 minutes mins
Cook Time 10 minutes mins
Total Time 25 minutes mins
Servings: 4 servings
Course: Appetizer, Side Dish
Cuisine: American
Ingredients Equipment Method Notes

Ingredients
  

  • 1 large head romaine lettuce chopped, use hearts for crisper texture
  • 2 cups bread cubed into 1-inch pieces, day-old bread preferred
  • 2 tablespoons olive oil for toasting croutons, use mild olive oil
  • pinch salt for croutons
  • 2 cloves garlic minced, use fresh for pungent flavor
  • 3 to 4 fillets anchovy fillets or 1 tablespoon anchovy paste, rinsed if packed
  • 1 large egg yolk room temperature for faster emulsification
  • 2 tablespoons fresh lemon juice strained to remove seeds
  • 1 teaspoon Dijon mustard
  • ½ cup olive oil for dressing, use mild olive oil
  • 1 teaspoon Worcestershire sauce
  • ½ cup Parmesan cheese freshly grated with microplane
  • black pepper to taste
  • salt to taste in dressing

Equipment

  • Salad spinner Used to dry romaine lettuce thoroughly
  • Oven To toast croutons at 350°F
  • Mixing bowl To whisk dressing and toss salad
  • Microplane grater For freshly grating Parmesan cheese

Method
 

  1. Preheat oven to 350°F. Toss bread cubes with 2 tablespoons olive oil and a pinch of salt on a baking sheet. Spread in a single layer and bake for 8-10 minutes, stirring halfway through until golden and crunchy. Let cool completely before adding to salad.
    2 cups bread, 2 tablespoons olive oil, pinch salt
  2. Mince garlic cloves and mash anchovy fillets using the flat side of a knife until a smooth paste forms, releasing oils to create the dressing base.
    2 cloves garlic, 3 to 4 fillets anchovy fillets
  3. In a mixing bowl, whisk egg yolk, lemon juice, and Dijon mustard for about 30 seconds until slightly thickened and pale yellow.
    1 large egg yolk, 2 tablespoons fresh lemon juice, 1 teaspoon Dijon mustard
  4. Slowly drizzle in ½ cup olive oil while whisking vigorously to thicken and emulsify. Stir in garlic-anchovy paste, Worcestershire sauce, black pepper, and salt to taste.
    ½ cup olive oil, 1 teaspoon Worcestershire sauce, 2 cloves garlic, 3 to 4 fillets anchovy fillets, black pepper, salt
  5. Dry chopped romaine lettuce thoroughly in a salad spinner, then pat with paper towels. Toss lettuce gradually with dressing in a large bowl, adding half first and tossing, then more until every leaf is coated. Top with cooled croutons and freshly grated Parmesan. Serve immediately.
    1 large head romaine lettuce, ½ cup Parmesan cheese

Notes

  • Dry lettuce completely with a salad spinner and paper towels to keep leaves crisp.
  • Toast croutons until evenly golden for best crunch and flavor.
  • Add dressing just before serving to prevent wilting and soggy leaves.

Tried this recipe?

Let us know how it was!

Crockpot Chicken Vegetable Soup

March 15, 2026

You scrub vegetables at the sink knowing dinner's hours away, but the crockpot fixes that gap. This soup cooks low and slow while you work, giving you tender chicken and soft vegetables in clear, savory broth.

Crockpot Chicken Vegetable Soup served on a plate

The method stays simple: chicken breasts or thighs, chopped vegetables, broth, and herbs go into the slow cooker for 4-6 hours. You come home to a meal that tastes like you spent the afternoon stirring a pot. It works for weeknight dinners when time runs short, meal prep Sundays when you batch-cook for the week, or cold weather nights when only soup will do.

QUICK SUMMARY

Crockpot Chicken Vegetable Soup combines boneless chicken, carrots, celery, onion, and potatoes in chicken broth for 4-6 hours on low. The slow cooker tenderizes chicken fully and softens vegetables without mushy texture. Low-sodium broth controls salt level while fresh herbs added at the end brighten flavor.

⏱️Timing: Set crockpot in morning; dinner ready 4-6 hours later with zero stirring
🔥First Move: Brown chicken 3-4 minutes per side before slow cooking for richer broth depth
⚠️Watch Out: Add delicate vegetables like green beans in last hour to prevent mushy texture

Table of Contents

Toggle
  • Why This Recipe Works
  • What You'll Need
    • Ingredient Details
  • Ingredient Swaps
  • What to Serve With It
  • Store and Reheat
  • Frequently Asked Questions
  • Crockpot Chicken Vegetable Soup
    • Method 
    • Tried this recipe?

Why This Recipe Works

The crockpot breaks down chicken fibers slowly, giving you tender meat that shreds easily without drying out. For contrast beyond basic comfort food, something fresh and light rounds out the meal with bright acidity.

Quick Reference
⏱️
Prep Time
15-20 minutes
🔥
Cook Time
4-6 hours on low
⏰
Total Time
4.5-6.5 hours
🍽️
Servings
6-8 servings
📊
Difficulty
Easy
🏷️
Category
Main Dish
💡
Quick Tip
Brown chicken first for richer soup flavor
🎯
Best For
Weeknight dinner | Meal prep | Budget meal

Three reasons this works:

  • Low heat over long time - Chicken reaches 165°F internally without overcooking; fibers stay moist and easy to shred
  • Uniform vegetable cuts - ½-inch pieces of carrots and potatoes cook evenly and stay intact instead of turning mushy
  • Low-sodium broth base - Controls salt concentration and lets you adjust seasoning after cooking when flavors concentrate
  • Fresh herbs added late - Parsley and thyme go in during last 15 minutes to preserve bright, herby aroma
  • Potatoes add body - Starch releases slightly during cooking, thickening broth naturally without flour or cream
Quick Tip
Sear chicken 3-4 minutes per side before slow cooking for richer flavor and golden color that transfers to broth

What You'll Need

Ingredients for Crockpot Chicken Vegetable Soup

Shopping for soup means grabbing basics: chicken, root vegetables, aromatics, and broth. A good chicken can make or break the plate, so when you want something outside basic chicken soup, a juicy chicken side offers herby, Mediterranean contrast.

🍗
Protein
  • 1.5-2 lbs boneless skinless chicken breasts or thighs
🥬
Vegetables
  • 3 medium carrots, chopped
  • 3 celery stalks, chopped
  • 1 medium onion, diced
  • 2 medium potatoes, cubed
  • 1 cup green beans, trimmed
  • 1 cup diced tomatoes (optional)
🧄
Aromatics & Herbs
  • 4 garlic cloves, minced
  • 1 teaspoon dried thyme
  • 2 tablespoon fresh parsley, chopped
🥢
Broth & Seasoning
  • 6 cups low-sodium chicken broth
  • 1 teaspoon salt
  • ½ teaspoon black pepper

Ingredient Details

  • Boneless skinless chicken breasts or thighs
    Thighs give juicier texture and more fat; breasts yield leaner soup but can dry out if overcooked
  • Low-sodium chicken broth
    Controls salt level and prevents soup from becoming too salty as liquid reduces during cooking
  • Carrots
    Cut into ½-inch pieces for uniform cooking; adds natural sweetness that balances savory broth
  • Potatoes
    Use Yukon Gold or russet; releases starch that thickens broth slightly and adds heartiness
  • Green beans
    Add during last 60 minutes of cooking to maintain snappy texture instead of turning mushy
  • Fresh parsley
    Stir in during last 15 minutes for bright, herby aroma that fades if added too early
  • Garlic
    Fresh minced garlic delivers stronger aroma than powder; add at start for mellow, savory depth

Ingredient Swaps

Soup adapts easily when you need to use what's on hand or adjust for dietary needs. Most swaps keep the same cooking time, but sweet potatoes and chicken thighs need slight adjustments.

Four reliable swaps:

  • Chicken breasts → chicken thighs - Thighs deliver more fat and flavor, cook slightly longer without drying out (flavor-swap)
  • Potatoes → sweet potatoes - Sweeter profile and softer texture; changes soup's overall sweetness balance (flavor-swap)
  • Chicken broth → vegetable broth - Lighter flavor; makes soup vegetarian if you skip chicken (dietary)
  • Fresh herbs → dried herbs (use ⅓ quantity) - Less aromatic but shelf-stable; add at start to avoid bitterness (pantry-swap)

Chicken Breasts

Works for: Leaner soup, lighter texture, faster shredding

Skip if: You want richer flavor and more forgiving cook time

Chicken Thighs

Works for: Juicier texture, richer broth, more fat and flavor

Skip if: You prefer leaner, lighter soup with less fat

Instead OfUseRatio
Fresh garlic (4 cloves)Garlic powder1 tsp
Fresh thyme (1 tsp)Dried thyme⅓ tsp
Onion (1 medium)Onion powder1 tbsp
Slow cooker (4-6 hours)Instant Pot (pressure cook)25-30 minutes

Instructions

Set the crockpot on low in the morning and walk away for 4-6 hours. If you want more hands-on control or faster dinner, creamy verde side dish adds tangy contrast in under 30 minutes while soup finishes cooking.

  1. Brown chicken (optional but recommended): Heat 1 tablespoon oil in skillet over medium-high heat, sear chicken 3-4 minutes per side until golden, then transfer to crockpot.
  2. Layer vegetables: Add chopped carrots, celery, onion, potatoes, garlic, thyme, salt, and pepper to crockpot over chicken.
  3. Add broth and cook: Pour chicken broth over vegetables, cover, and cook on low 4-6 hours or high 2-3 hours until chicken reaches 165°F internally and potatoes are fork-tender.
  4. Shred chicken: Remove chicken from crockpot, shred with two forks, return to pot, and stir to combine with vegetables and broth.
  5. Finish with herbs and vegetables: Add green beans and fresh parsley during last 60 minutes of cooking, taste broth, and adjust salt and pepper before serving.
Golden Rule
Chop vegetables into ½-inch pieces for uniform cooking and intact texture instead of mushy soup

What to Serve With It

Soup needs something with texture contrast or bright acidity to balance the rich, savory broth. When you're planning your bourbon chicken dinner, similar principles apply: starchy sides, crisp vegetables, and bread for dipping round out the meal.

Side DishPrepWhy It WorksHow to Serve
Crusty breadEasyGood for dipping, soaks up broth, adds crunchSlice thick, toast lightly, serve warm on side
Simple green saladEasyFresh crunch contrasts soft soup textureToss greens with vinaigrette, serve immediately
Steamed riceEasyMakes soup more filling, absorbs brothSpoon rice into bowl first, ladle soup over top
Garlic butter rollsMediumWarm, soft, buttery complement for gatheringsBrush with garlic butter, serve hot in basket
Roasted Brussels sproutsMediumCharred flavor and crispy texture contrastRoast at 425°F until crispy, season with salt

Three ways to serve it:

  • Weeknight dinner: Ladle soup over steamed rice in bowls with crusty bread on the side for dipping and a simple green salad for crunch
  • Meal prep batch: Portion soup into containers, store in fridge 3-4 days, reheat on stovetop with splash of broth to thin if needed
  • Cold weather gathering: Serve soup in bread bowls with garlic butter rolls and roasted Brussels sprouts for cozy, hands-on meal
Shortcut
Use rotisserie chicken instead of raw: skip browning step, add shredded chicken during last 30 minutes of cooking

Store and Reheat

Soup keeps well in the fridge and freezes without losing texture. The simple homemade potato wedges work similarly: both hold up during storage and reheat without turning mushy if you follow proper methods.

MethodTimeBest For
🍳 Stovetop5-8 minutes over medium heatRetains texture, allows stirring, reheats evenly
📦 Microwave2-3 minutes, stirring halfwayQuick single servings, convenient for lunch
🔥 Oven20 minutes at 350°F coveredLarge batches, even reheating without stirring

For best results when storing:

  • Cool before refrigerating: Let soup cool 30 minutes at room temperature before transferring to airtight containers to prevent condensation
  • Use shallow containers: Store in containers no deeper than 3 inches for faster, more even cooling and reheating
  • Add broth when reheating: Soup thickens in fridge as potatoes absorb liquid; thin with ¼-½ cup broth when reheating
  • Freeze without potatoes: Potatoes turn grainy when frozen; add fresh cooked potatoes when reheating frozen soup
  • Label with date: Mark containers with date; use refrigerated soup within 3-4 days and frozen soup within 3 months

Frequently Asked Questions

Can I substitute frozen chicken for fresh in crockpot soup?

Yes, but add 1-2 hours to cooking time on low setting. Frozen chicken takes longer to reach safe internal temperature of 165°F.

What is the best way to store leftover chicken vegetable soup?

Cool soup 30 minutes, transfer to shallow airtight containers, refrigerate up to 3-4 days. Freeze up to 3 months but add fresh potatoes when reheating.

How do I know when the chicken and vegetables are fully cooked in slow cooker?

Chicken reaches 165°F on instant-read thermometer and shreds easily with fork. Potatoes and carrots are fork-tender when pierced.

Why is my crockpot chicken vegetable soup watery and how to fix it?

Too much liquid or not enough starch from potatoes causes watery soup. Simmer uncovered 15-20 minutes on high to reduce broth, or mash a few potato pieces to thicken.

Can I double the recipe and cook it in the same crockpot?

Only if your crockpot is 6 quarts or larger and you fill it no more than two-thirds full. Add 1 hour to cooking time for larger batch.

Crockpot Chicken Vegetable Soup served on a plate

Crockpot Chicken Vegetable Soup

No ratings yet
Crockpot Chicken Vegetable Soup combines tender boneless chicken with carrots, celery, onion, potatoes, and a savory low-sodium chicken broth slow-cooked for 4-6 hours. The slow cooker tenderizes the chicken fully while softening the vegetables without becoming mushy. Fresh herbs added toward the end brighten the flavor and add fresh aroma.
Print Recipe Pin Recipe
Prep Time 20 minutes mins
Cook Time 4 hours hrs 30 minutes mins
Total Time 4 hours hrs 50 minutes mins
Servings: 6 servings
Course: Dinner, Main Dish
Cuisine: American
Ingredients Equipment Method Notes

Ingredients
  

  • 1.5-2 lbs boneless skinless chicken breasts or thighs
  • 3 medium carrots chopped into ½-inch pieces
  • 3 stalks celery chopped
  • 1 medium onion diced
  • 2 medium potatoes cubed, Yukon Gold or russet preferred
  • 1 cup green beans trimmed, added in last hour
  • 1 cup diced tomatoes optional
  • 4 cloves garlic minced
  • 1 teaspoon dried thyme
  • 2 tablespoon fresh parsley chopped, added in last 15 minutes
  • 6 cups low-sodium chicken broth
  • 1 teaspoon salt
  • 0.5 teaspoon black pepper
  • 1 tablespoon oil for optional browning of chicken

Equipment

  • Crockpot (slow cooker) Used for all-day slow cooking of soup
  • Skillet Optional, for browning chicken before slow cooking

Method
 

  1. Heat 1 tablespoon oil in a skillet over medium-high heat. Sear the chicken breasts or thighs 3-4 minutes per side until golden brown. Then transfer the chicken to the crockpot.
    1.5-2 lbs boneless skinless chicken, 1 tbsp oil
  2. Add the chopped carrots, celery, diced onion, cubed potatoes, minced garlic, dried thyme, salt, and black pepper to the crockpot on top of the chicken.
    3 medium carrots, 3 stalks celery, 1 medium onion, 2 medium potatoes, 4 cloves garlic, 1 tsp dried thyme, 1 tsp salt, 0.5 tsp black pepper
  3. Pour the low-sodium chicken broth over the vegetables and chicken. Cover and cook on low for 4-6 hours, or on high for 2-3 hours, until chicken reaches an internal temperature of 165°F and potatoes are fork-tender.
    6 cups low-sodium chicken broth
  4. Remove the chicken from the crockpot and shred it with two forks. Return the shredded chicken to the crockpot and stir to combine with the vegetables and broth.
    1.5-2 lbs boneless skinless chicken
  5. Add the trimmed green beans and chopped fresh parsley to the crockpot during the last 60 minutes of cooking. Taste the broth and adjust salt and pepper if needed before serving.
    1 cup green beans, 2 tbsp fresh parsley, 1 tsp salt, 0.5 tsp black pepper

Notes

  • Brown the chicken first for richer broth flavor and golden color.
  • Chop vegetables into uniform ½-inch pieces to ensure even cooking and prevent mushy texture.
  • Add delicate vegetables like green beans during the last hour of cooking to maintain texture.

Tried this recipe?

Let us know how it was!

Blue Cheese Dressing with Buttermilk

March 15, 2026

Complete Article Output

Making salad dressing from scratch sounds fussy until you realize it's just five minutes of whisking. This blue cheese version with buttermilk delivers sharp, tangy flavor without the store-bought gums and stabilizers that make dressing taste flat.

Blue Cheese Dressing with Buttermilk served on a plate

The best part: you control the blue cheese chunks and the tang level. Most weeknight salads need something bold enough to hold up to crisp greens or Buffalo wings, and this dressing does both without separating in the fridge.

Mix it Sunday, serve it all week. It thickens as it chills, so you'll have creamy, pourable dressing ready for game day platters or last-minute salads.

QUICK SUMMARY

Blue Cheese Dressing with Buttermilk is a 10-minute creamy dressing made by whisking mayonnaise, sour cream, buttermilk, and crumbled blue cheese with garlic and lemon juice. The key to perfect texture is adding buttermilk gradually and chilling the dressing at least one hour so flavors meld and the consistency firms up.

⏱️Total Time: 10 minutes plus 1 hour chilling - no cooking required
🥄First Critical Step: Whisk mayonnaise and sour cream until smooth before adding blue cheese
⚠️Watch Out: Add buttermilk gradually or dressing turns watery - you can always thin but can't thicken easily

Why This Recipe Works

Rich mains need something to cut through, and homemade does exactly that. For a version that comes together quickly, another great homemade recipe balances tang without blue cheese's punch.

Quick Reference
⏱️
Prep Time
10 minutes
🔥
Cook Time
0 minutes
⏰
Total Time
10 minutes plus chilling
🍽️
Servings
6-8 servings
📊
Difficulty
Easy
🏷️
Category
Appetizer | Salad Dressing
💡
Quick Tip
Chill dressing at least 1 hour before serving
🎯
Best For
Weeknight | Entertaining | Meal Prep

Here's why it works:

  • Full-fat dairy creates creamy body - Low-fat versions turn watery and thin because fat carries flavor and gives dressing cling
  • Buttermilk adds tang without thinning too much - Its thick consistency controls texture while vinegar or lemon juice would make dressing runny
  • Chilling firms the texture and melds flavors - Cold temps let buttermilk proteins tighten and blue cheese flavor spread through the base
  • Crumbled blue cheese adds texture variation - Pea-sized chunks give you creamy base plus sharp bursts of cheese in every bite
  • Gradual buttermilk addition controls consistency - You can always thin but thickening requires extra mayo which changes the flavor balance
Quick Tip
Refrigerate dressing at least 1 hour for flavors to blend and thicken - rushing this step yields bland, loose dressing

What You'll Need

Ingredients for Blue Cheese Dressing with Buttermilk

A good spread can make or break the plate. For a version that comes together quickly, homemade spread recipe delivers Southern tang with less prep.

🧀
Dairy Base
  • ½ cup mayonnaise (full-fat)
  • ½ cup sour cream (full-fat)
  • ⅓ cup buttermilk (add gradually)
  • 4 oz blue cheese crumbles
🧄
Flavor Builders
  • 2 cloves garlic, minced
  • 1 tablespoon lemon juice or white vinegar
  • 1 teaspoon Worcestershire sauce
🌶️
Seasoning
  • ½ teaspoon salt (adjust to taste)
  • ¼ teaspoon black pepper
  • 1 tablespoon fresh chives or parsley (optional)

Ingredient Details

  • Blue Cheese
    Use quality crumbled blue cheese - pre-crumbled bags work but hand-crumbled wedges give better texture variation
  • Buttermilk
    Full-fat buttermilk adds the right tang and body - low-fat or milk substitutes make dressing watery
  • Mayonnaise
    Full-fat mayo creates the creamy base - light mayo breaks down and separates when chilled
  • Sour Cream
    Boosts creaminess and adds mild acidity - full-fat works best but reduced-fat holds up better than low-fat mayo
  • Garlic
    Fresh minced garlic beats garlic powder - mince finely so you don't bite into chunks
  • Lemon Juice
    Brightens the dressing and balances richness - white vinegar works but lemon adds fresher flavor
  • Worcestershire Sauce
    Adds umami depth without changing texture - optional but recommended for fuller flavor

Ingredient Swaps

Most people skip spread, but it balances the meal. We keep a batch ready for nights like this - a simple spread variation delivers tang without blue cheese.

Four swaps that work:

  • Buttermilk → Milk + 1 tablespoon lemon juice or vinegar - Mix and let sit 5 minutes for similar acidity, though you'll lose some tang and body
  • Blue cheese → Feta or gorgonzola - Less pungent with milder cheese flavor but same creamy-chunky texture
  • Mayonnaise → Plain Greek yogurt - Creates tangier, less rich dressing with lighter consistency
  • Sour cream → Softened cream cheese - Makes thicker, richer dressing with less tang but smoother texture
Instead OfUseRatio
Buttermilk (⅓ cup)Milk + lemon juice⅓ cup milk + 1 tablespoon lemon juice
Blue cheese (4 oz)Feta or gorgonzola4 oz, same amount
Mayonnaise (½ cup)Greek yogurt½ cup, same amount
Fresh garlic (2 cloves)Garlic powder½ teaspoon powder

Instructions

The pork works best when it hits the table at the same time as the main. For a version that comes together quickly, quick pork dish pairs with sharp, tangy dressing.

  1. Whisk mayonnaise and sour cream in a mixing bowl until smooth - No lumps means even flavor distribution throughout the dressing.

  2. Add garlic, lemon juice, Worcestershire sauce, salt, and pepper - Whisk until fully combined and base is creamy with no dry spots.

  3. Gradually add buttermilk 2 tablespoons at a time, whisking after each addition - Stop when dressing reaches pourable consistency but still clings to a spoon.

  4. Crumble blue cheese into pea-sized chunks and fold into dressing with a spoon - Leave some texture for bite contrast instead of mixing until paste-like.

  5. Transfer to airtight container and refrigerate at least 1 hour before serving - Dressing firms as it chills and flavors blend into balanced tang.

Golden Rule
Add buttermilk gradually to control consistency - you can always thin but thickening requires extra mayonnaise which changes the flavor balance

What to Serve With It

Chicken adds the contrast this plate needs, but timing matters. For weeknight planning, savory chicken dish ideas show what balances tangy, creamy dressing.

Side DishPrepWhy It WorksHow to Serve
Crisp celery sticksEasyClassic crunchy pairing complements creamy dressingArrange on platter with carrot sticks for dipping
Mixed green saladEasyLettuces balance richness of dressingToss with romaine, spinach, or iceberg wedges
Buffalo chicken wingsMediumBlue cheese complements spicy wingsServe dressing on the side for cooling dip
Fresh carrot sticksEasySweet crunch contrasts tangy dressingCut into sticks and arrange with celery
Potato wedgesMediumInviting base for dipping creamy dressingRoast or fry until golden, serve warm

Three ways to serve it:

  • Over wedge salads - Drizzle over iceberg wedges with bacon bits and cherry tomatoes for classic steakhouse presentation
  • With game day wings - Set out alongside hot sauce and celery for Buffalo wing platters or chicken tender dipping
  • As veggie dip - Pour into small bowl surrounded by carrot sticks, celery, bell pepper strips, and cherry tomatoes
Best Pick
Chill dressing at least 2 hours for entertaining - flavors meld better and texture firms to perfect pourable consistency

Store and Reheat

A good beef can make or break the plate. We keep a batch ready for nights like this - a rich beef side pairs with sharp dressing without overwhelming plates.

MethodTimeBest For
🍳 StovetopN/AServe cold only to maintain texture and flavor
📦 MicrowaveN/AServe cold only to maintain texture and flavor
🔥 OvenN/AServe cold only to maintain texture and flavor

For best results when storing:

  • Refrigerate in airtight container for 3-4 days - Glass or plastic with tight seal prevents odor absorption from other fridge items
  • Stir before each use - Buttermilk can separate slightly when chilled, quick whisk brings it back together
  • Don't freeze blue cheese dressing - Dairy separates and blue cheese texture turns grainy when thawed
  • Store in shallow container - Wider surface area means easier stirring and faster temperature adjustment when serving
  • Bring to room temp 10 minutes before serving - Takes edge off cold and makes dressing pour more easily over salads

Frequently Asked Questions

Can I substitute regular milk for buttermilk in blue cheese dressing?

Yes, mix ⅓ cup milk with 1 tablespoon lemon juice or white vinegar and let sit 5 minutes. You'll get similar acidity but lose some tang and body compared to real buttermilk.

How should blue cheese dressing be stored and how long does it last?

Store in an airtight container in the fridge for 3-4 days. Stir before using since buttermilk can separate slightly when chilled.

What is the best way to achieve a creamy but chunky blue cheese dressing texture?

Whisk mayo, sour cream, and buttermilk until completely smooth, then fold in pea-sized blue cheese crumbles at the end. Don't over-mix or cheese turns paste-like.

Why does my blue cheese dressing separate and how do I fix it?

Separation happens from adding buttermilk too fast or using low-fat dairy. Whisk vigorously to re-emulsify, or blend in extra full-fat mayo to bind it back together.

How much blue cheese dressing should I plan per serving for a party?

Plan 2-3 tablespoons per person for salads or 3-4 tablespoons per person for dipping wings and veggies. This recipe serves 6-8 people depending on use.

Blue Cheese Dressing with Buttermilk served on a plate

Blue Cheese Dressing with Buttermilk

No ratings yet
Blue Cheese Dressing with Buttermilk is a creamy, tangy dressing made by whisking mayonnaise, sour cream, buttermilk, and crumbled blue cheese with garlic and lemon juice. Its texture is perfected by adding buttermilk gradually and chilling the dressing so flavors meld and it firms up. This dressing works well with crisp salads or as a dip for wings and veggies.
Print Recipe Pin Recipe
Prep Time 10 minutes mins
Cook Time 1 minute min
Total Time 11 minutes mins
Servings: 7 servings
Course: Appetizer, Salad Dressing
Cuisine: American
Ingredients Method Notes

Ingredients
  

  • 0.5 cup mayonnaise full-fat
  • 0.5 cup sour cream full-fat
  • 0.33 cup buttermilk add gradually
  • 4 oz blue cheese crumbled into pea-sized chunks
  • 2 cloves garlic minced
  • 1 tablespoon lemon juice or white vinegar
  • 1 teaspoon Worcestershire sauce
  • 0.5 teaspoon salt adjust to taste
  • 0.25 teaspoon black pepper
  • 1 tablespoon fresh chives or parsley optional

Method
 

  1. Whisk mayonnaise and sour cream in a mixing bowl until smooth with no lumps for even flavor distribution.
    0.5 cup mayonnaise, 0.5 cup sour cream
  2. Add minced garlic, lemon juice or vinegar, Worcestershire sauce, salt, and black pepper; whisk until fully combined and creamy.
    2 cloves garlic, 1 tbsp lemon juice, 1 tsp Worcestershire sauce, 0.5 tsp salt, 0.25 tsp black pepper
  3. Gradually add buttermilk 2 tablespoons at a time, whisking well after each addition until the dressing reaches a pourable consistency but still clings to a spoon.
    0.33 cup buttermilk
  4. Crumble blue cheese into pea-sized chunks and fold gently into the dressing to maintain texture contrast.
    4 oz blue cheese
  5. Transfer the dressing to an airtight container and refrigerate for at least 1 hour to allow flavors to meld and the texture to firm.

Notes

  • Use full-fat dairy for best creamy texture and flavor.
  • Add buttermilk gradually to control consistency and prevent dressing from becoming watery.
  • Chill dressing at least 1 hour before serving to allow flavors to meld and thicken.

Tried this recipe?

Let us know how it was!

Macaroni Salad with Mayonnaise

March 14, 2026

You need a side that shows up reliably at every backyard gathering. This one does-creamy pasta with crunchy celery, tangy mustard, and firm eggs that hold their texture even after hours in the fridge.

Macaroni Salad with Mayonnaise served on a plate

It works for weeknight dinners when you need something fast, meal prep Sundays when you're cooking ahead, and summer BBQs when you're feeding a crowd. The key is cooking the macaroni al dente and chilling the whole thing for at least an hour so the dressing thickens and the flavors settle.

The salad gets better overnight, which means you can make it a day ahead and skip the last-minute scramble. That's the real reason it shows up at every potluck.

QUICK SUMMARY

Macaroni Salad with Mayonnaise delivers tender elbow pasta coated in a tangy, slightly sweet dressing with crunchy celery and firm hard-boiled eggs. The secret is cooling the pasta completely before mixing and chilling the finished salad so the dressing doesn't turn watery. Best made a day ahead for deeper flavor and better texture.

⏱️Time Reality: 15 minutes active, 1+ hour chilling before serving
🔑Critical Move: Boil pasta 8 minutes, drain thoroughly, cool completely before mixing
⚠️Watch Out: Warm pasta makes watery dressing-rinse with cold water and pat dry

Table of Contents

Toggle
  • Why This Recipe Works
  • What You'll Need
    • Ingredient Details
  • Ingredient Swaps
  • What to Serve With It
  • Store and Reheat
  • Frequently Asked Questions
  • Macaroni Salad with Mayonnaise
    • Method 
    • Tried this recipe?

Why This Recipe Works

A good potato salad can make or break the plate. For a version that comes together quickly, this easy potato salad recipe keeps things simple with the same tangy-creamy balance.

Quick Reference
⏱️
Prep Time
15 minutes
🔥
Cook Time
8-10 minutes
⏰
Total Time
30 minutes including chilling
🍽️
Servings
6-8 servings
📊
Difficulty
Easy
🏷️
Category
Side Dish
💡
Quick Tip
Cool pasta completely before mixing to prevent watery salad
🎯
Best For
Weeknight dinner | Meal prep | Entertaining
  • Boil elbow macaroni exactly 8 minutes until al dente-overcooked pasta turns mushy and absorbs too much dressing
  • Chill the finished salad at least 1 hour so the mayonnaise thickens and the celery, onion, and pickle flavors meld into the dressing
  • Drain pasta thoroughly and pat dry with paper towels to remove excess water that would dilute the creamy coating
  • Hard-boil eggs for 10 minutes, then cool in ice water to prevent chalky yolks and make peeling easier
  • Season after chilling because cold temperatures mute salt and tang-you'll need more vinegar and pepper than you think
Quick Tip
Rinse cooked pasta under cold water immediately to stop carryover cooking and cool it down fast

What You'll Need

Ingredients for Macaroni Salad with Mayonnaise

Most people skip salad, but it balances the meal. The salad works best when it hits the table at the same time as the main, which is why this tender salad recipe keeps prep simple with ingredients you probably already have.

🍜
Pasta
  • 2 cups elbow macaroni (8 oz)
🥢
Dressing Base
  • 1 cup mayonnaise
  • 1 tablespoon mustard (yellow or Dijon)
  • 2 tablespoons apple cider vinegar
  • 1 tablespoon sugar
🥬
Crunch
  • 1 cup celery, finely diced
  • ½ cup red onion, finely diced
  • ¼ cup dill pickle or relish
🍗
Richness
  • 3 hard-boiled eggs, chopped
  • Salt and black pepper to taste

Ingredient Details

  • Elbow Macaroni
    Classic shape with ridges that hold dressing-boil 8 minutes for al dente texture that won't turn mushy
  • Mayonnaise
    Provides creamy binding texture-use full-fat for best richness and to prevent watery dressing
  • Celery
    Adds essential crunch-dice finely so it distributes evenly without overpowering the salad
  • Hard-Boiled Eggs
    Adds richness and traditional flavor-boil 10 minutes, cool in ice bath to prevent chalky yolks
  • Mustard
    Adds depth and slight tang-yellow mustard for classic flavor, Dijon for sharper bite
  • Apple Cider Vinegar
    Balances richness with acidity-adjust after chilling since cold mutes tang
  • Red Onion
    Adds sharpness and slight bite-dice finely to distribute onion flavor without harsh chunks

Ingredient Swaps

The salad adds the contrast this plate needs, but timing matters. For a version that comes together quickly, a similar deli recipe keeps things fast without changing the creamy-crunchy balance you're after.

  • Mayonnaise → vegan mayo or plain Greek yogurt for slightly less creamy, tangier flavor that maintains texture (dairy-free or lighter option)
  • Elbow macaroni → gluten-free pasta for same texture if cooked properly-watch timing closely to avoid mushiness (gluten-free)
  • Hard-boiled eggs → extra chopped celery or chickpeas for less richness but added texture and good protein alternative (vegetarian option)
  • Dill pickle or relish → capers or chopped olives for different briny note that adds unique Mediterranean flavor

Full-Fat Mayonnaise

Works for: Richest, creamiest texture with no separation risk

Skip if: Watching calories or want lighter, tangier flavor

Greek Yogurt

Works for: Tangier, lighter version with more protein

Skip if: You want classic creamy richness without tang

Vegan Mayo

Works for: Dairy-free version with similar creamy texture

Skip if: You're picky about mayo flavor-some brands taste different

Instructions

Rich mains need something to cut through, and fish does exactly that. For a version that comes together quickly, easy fish side keeps timing simple so everything hits the table at once.

  1. Boil 2 cups elbow macaroni in salted water for 8 minutes until al dente-pasta should still have slight firmness when bitten. Drain in colander, rinse immediately under cold water to stop cooking, then pat dry with paper towels to remove excess moisture.

  2. Whisk together 1 cup mayonnaise, 1 tablespoon mustard, 2 tablespoons apple cider vinegar, and 1 tablespoon sugar in large mixing bowl until smooth and slightly glossy. The dressing should coat the back of a spoon without running off immediately.

  3. Chop 3 hard-boiled eggs, dice 1 cup celery and ½ cup red onion finely, then measure ¼ cup dill pickle or relish. All vegetables should be uniform size-roughly ¼-inch pieces-so they distribute evenly without clumping.

  4. Add cooled pasta, chopped eggs, celery, onion, and pickle to dressing, then fold gently with spatula until every piece is evenly coated. The pasta should look glossy without puddles of dressing at the bottom.

  5. Season with salt and black pepper to taste, cover tightly, and refrigerate at least 1 hour before serving. The chilling time lets the dressing thicken and flavors meld-adjust seasoning after chilling since cold mutes salt and tang.

Golden Rule
Never mix warm pasta with mayonnaise-the heat thins the dressing and creates a watery, separated mess that can't be fixed

What to Serve With It

Most weeknight plates need something simple on the side that doesn't compete for attention. For weeknight waldorf salad meal ideas that round out the plate without extra work, pair this with grilled protein and one fresh vegetable.

Side Dish Prep Why It Works How to Serve
Grilled Chicken Breast Easy Light protein complements creamy salad without overpowering Slice warm chicken, serve alongside chilled salad
Steamed Green Beans Easy Adds fresh, crisp vegetable balance to rich pasta Steam 5 minutes, season with butter and salt
Corn on the Cob Easy Classic summer pairing with natural sweetness Boil or grill, serve hot with butter
Fresh Fruit Salad Easy Refreshes palate with natural sweetness and acidity Toss watermelon, berries, grapes-serve cold
Crusty Bread Easy Simple carb to round out meal and soak up dressing Slice thick, serve at room temperature

Three ways to serve it:

  • For summer BBQs: Set out macaroni salad alongside pulled pork sliders, baked beans, and coleslaw-the classic cookout spread that covers all bases
  • For weeknight dinners: Pair with grilled chicken breast and steamed green beans for a balanced plate that comes together in under 30 minutes
  • For potlucks: Make a day ahead and transport in a shallow container-it travels well and tastes better after the flavors meld overnight
Best Pick
Grilled chicken breast is the easiest pairing-the light, smoky protein balances the creamy, tangy salad without competing for attention

Store and Reheat

The salad works best when it hits the table at the same time as the main. Rich mains need something to cut through, and fish does exactly that, which is why simple chicken recipe timing matters when you're planning ahead.

Method Time Best For
🍳 Stovetop Not recommended Macaroni salad is meant to be served cold or at room temperature
📦 Microwave Not recommended Heat separates mayonnaise and ruins texture-serve chilled only
🔥 Oven Not recommended Mayonnaise-based salads should never be reheated-make fresh if needed

For best results when storing:

  • Refrigerate in airtight, shallow container for 3-4 days-shallow containers cool faster and prevent condensation that makes salad watery
  • Stir gently before serving to redistribute dressing that may have settled at the bottom, then adjust seasoning with extra vinegar, salt, or pepper
  • Add fresh celery or onion if the salad tastes flat after a day-vegetables lose crunch over time and fresh ones brighten the flavor
  • Drain off any liquid that accumulates at the bottom before serving-pasta releases starch and vegetables release water as the salad sits
  • Never freeze macaroni salad-mayonnaise separates when thawed and the texture turns grainy and watery with no way to fix it

Frequently Asked Questions

Can I substitute Greek yogurt for mayonnaise in macaroni salad?

Yes-use plain full-fat Greek yogurt for a tangier, lighter version with similar creamy texture. You'll get less richness but more protein, and the salad will taste sharper.

How long can macaroni salad be stored in the refrigerator?

3-4 days in an airtight container. The salad tastes best after 1-2 days when flavors have melded, but watch for watery liquid accumulating at the bottom-drain it off before serving.

How do I know when the pasta is perfectly cooked for macaroni salad?

Boil elbow macaroni 8 minutes until al dente-it should have slight firmness when bitten, not mushy or chalky. Overcooked pasta absorbs too much dressing and turns soggy.

Why is my macaroni salad watery and how can I fix it?

Watery salad comes from undrained pasta or mixing while pasta is still warm. Drain off the liquid, pat the salad dry with paper towels, then stir in 2-3 tablespoons fresh mayonnaise to rebind the dressing.

What are good side dishes to serve with macaroni salad for a barbecue?

Grilled chicken breast, pulled pork sliders, corn on the cob, baked beans, and coleslaw. The creamy pasta pairs well with smoky, grilled proteins and fresh vegetables.

Macaroni Salad with Mayonnaise served on a plate

Macaroni Salad with Mayonnaise

No ratings yet
Macaroni Salad with Mayonnaise features tender elbow pasta tossed in a tangy, creamy dressing with crunchy celery and firm hard-boiled eggs. The secret is cooling the pasta completely before mixing and chilling the salad for at least an hour to thicken the dressing and meld flavors. Best made a day ahead for optimal taste and texture.
Print Recipe Pin Recipe
Prep Time 15 minutes mins
Cook Time 10 minutes mins
Total Time 30 minutes mins
Servings: 8 servings
Course: Side Dish
Cuisine: American
Ingredients Method Notes

Ingredients
  

  • 2 cups elbow macaroni uncooked
  • 1 cup mayonnaise full-fat for best richness
  • 1 tablespoon mustard yellow or Dijon
  • 2 tablespoons apple cider vinegar
  • 1 tablespoon sugar
  • 1 cup celery finely diced
  • 0.5 cup red onion finely diced
  • 0.25 cup dill pickle or relish
  • 3 hard-boiled eggs chopped
  • salt to taste
  • black pepper to taste

Method
 

  1. Boil 2 cups elbow macaroni in salted water for 8 minutes until al dente; pasta should have slight firmness when bitten. Drain in a colander, rinse immediately under cold water to stop cooking, then pat dry with paper towels to remove excess moisture.
    2 cups elbow macaroni
  2. Whisk together 1 cup mayonnaise, 1 tablespoon mustard, 2 tablespoons apple cider vinegar, and 1 tablespoon sugar in a large mixing bowl until smooth and slightly glossy. The dressing should coat the back of a spoon without running off immediately.
    1 cup mayonnaise, 1 tablespoon mustard, 2 tablespoons apple cider vinegar, 1 tablespoon sugar
  3. Chop 3 hard-boiled eggs, dice 1 cup celery and ½ cup red onion finely, then measure ¼ cup dill pickle or relish. Ensure all vegetables are roughly ¼-inch pieces so they distribute evenly without clumping.
    1 cup celery, 0.5 cup red onion, 0.25 cup dill pickle, 3 hard-boiled eggs
  4. Add cooled pasta, chopped eggs, celery, onion, and pickle to the dressing, then fold gently with a spatula until every piece is evenly coated. The pasta should look glossy without puddles of dressing at the bottom.
    2 cups elbow macaroni, 1 cup celery, 0.5 cup red onion, 0.25 cup dill pickle, 3 hard-boiled eggs, 1 cup mayonnaise, 1 tablespoon mustard, 2 tablespoons apple cider vinegar, 1 tablespoon sugar
  5. Season with salt and black pepper to taste, cover tightly, and refrigerate at least 1 hour before serving. Chilling thickens the mayonnaise dressing and lets flavors meld. Adjust seasoning after chilling since cold mutes salt and tang.
    salt, black pepper

Notes

  • Always rinse cooked pasta under cold water immediately to stop overcooking and prevent watery dressing.
  • Chill salad for at least 1 hour before serving to allow dressing to thicken and flavors to meld.
  • Season the salad after chilling as cold temperatures mute salt and vinegar flavors.

Tried this recipe?

Let us know how it was!

Potato Salad Dressing with Mustard

March 14, 2026

Most people grab store-bought potato salad without realizing how fast you can make a better one at home. This version with mustard dressing takes 30 minutes and gives you tangy, creamy results that taste like you spent all afternoon in the kitchen.

Potato Salad Dressing with Mustard served on a plate

The mustard adds sharp contrast to the creamy mayonnaise base, and the vinegar keeps everything bright instead of heavy. Make this for weeknight dinners when you need a reliable side, or double the batch for weekend BBQs and potlucks where it sits on the table for hours without getting watery.

QUICK SUMMARY

Potato Salad Dressing with Mustard combines waxy potatoes with a tangy dressing that balances mustard sharpness against creamy mayonnaise. The key is cooling the potatoes completely before mixing to prevent the dressing from separating. You'll know it's ready when the potatoes hold their shape but pierce easily with a fork.

⏱️Time Reality: 30 minutes start to finish, plus 1 hour chill time for flavors to meld
🔑First Critical Step: Boil waxy potatoes 15-20 minutes until just tender, drain immediately
⚠️Common Failure: Mixing warm potatoes curdles mayo-cool them 10 minutes first

Table of Contents

Toggle
  • Why This Recipe Works
  • What You'll Need
    • Ingredient Details
  • Ingredient Swaps
  • What to Serve With It
  • Store and Reheat
  • Frequently Asked Questions
  • Potato Salad Dressing with Mustard
    • Method 
    • Tried this recipe?

Why This Recipe Works

The mustard works best when it hits the table at the same time as the main. For a version that comes together quickly, another great salad recipe brings sweet crunch from grapes and walnuts that contrast the tangy dressing here.

Quick Reference
⏱️
Prep Time
15 minutes
🔥
Cook Time
15-20 minutes
⏰
Total Time
30-35 minutes
🍽️
Servings
6-8 servings
📊
Difficulty
Easy
🏷️
Category
Side Dish
💡
Quick Tip
Cool potatoes before mixing to avoid dressing separation
🎯
Best For
Weeknight dinner | Meal prep | Entertaining

Why the technique works:

  • Waxy potatoes hold their shape through boiling and mixing without turning mushy like russets
  • Whisking mustard with vinegar before adding mayo distributes tang evenly throughout the dressing
  • Cooling potatoes firms up their texture and prevents heat from breaking the mayo emulsion
  • Hard-boiled eggs add richness and soft texture that contrasts the tender potato chunks
  • Resting the salad one hour in the fridge lets salt draw out moisture and flavors meld together
Quick Tip
Pierce potato with fork at 15 minutes; should go in with slight resistance

What You'll Need

Ingredients for Potato Salad Dressing with Mustard

Most people skip salad, but it balances the meal. For a version that comes together quickly, creamy homemade dressing recipe adds sweet pickle relish and paprika that work well on sandwiches too.

🥔
Base
  • 2 lbs waxy potatoes (Yukon Gold or red potatoes)
  • Water for boiling
  • 1 teaspoon salt (for boiling water)
🥢
Dressing
  • ¾ cup mayonnaise
  • 2 tablespoon yellow mustard or Dijon
  • 1 tablespoon white vinegar
  • ½ teaspoon salt
  • ¼ teaspoon black pepper
🥬
Mix-Ins
  • 2 stalks celery, diced
  • ¼ cup diced red or white onion
  • 3 hard-boiled eggs, chopped
  • 2 tablespoon fresh parsley or dill

Ingredient Details

  • Waxy Potatoes (Yukon Gold or Red)
    These varieties hold their shape after boiling unlike russets which get mealy and fall apart when mixed
  • Mustard (Yellow or Dijon)
    Yellow gives classic deli tang while Dijon adds sharper bite; measure before mixing for balanced flavor
  • White Vinegar
    Add before mayonnaise to ensure proper acid distribution throughout the dressing base
  • Celery
    Dice into ½-inch pieces for consistent crunch that matches potato size
  • Hard-Boiled Eggs
    Cook 10 minutes then plunge in ice bath for easy peeling and firm whites that chop cleanly
  • Fresh Herbs (Parsley or Dill)
    Add last to preserve bright green color and fresh aroma that fades with early mixing
  • Red Onion
    Rinse diced onion under cold water to mellow sharp bite that can overpower the dressing

Ingredient Swaps

Four swaps that work:

  • Plain Greek yogurt instead of mayonnaise - cuts fat and adds extra tang, though the dressing comes out less rich and slightly thinner
  • Apple cider vinegar instead of white vinegar - brings milder, fruitier acidity that softens the mustard's sharpness
  • Cucumber instead of celery - maintains crunch with lighter, more watery flavor that refreshes the creamy dressing
  • Omit hard-boiled eggs - makes the salad lighter and keeps it vegetarian without losing the core mustard tang

Yellow Mustard

Works for: Classic deli tang, mild sharpness, bright yellow color

Skip if: You want bolder mustard bite or sophisticated flavor

Dijon Mustard

Works for: Sharper tang, grown-up flavor, pale dressing color

Skip if: Feeding kids who prefer milder taste

Spicy Brown Mustard

Works for: Extra heat, coarse texture, German-style potato salad fans

Skip if: Guests expect traditional creamy potato salad

Instructions

A dollop of dressing takes each bite somewhere more interesting. We keep a batch ready for nights like this - classic shrimp dish needs something cool and tangy on the side to cut through the garlic butter richness.

  1. Boil the potatoes: Place whole potatoes in medium pot, cover with cold water by 1 inch, add 1 teaspoon salt. Bring to boil over high heat, then reduce to medium and cook 15-20 minutes until fork pierces with slight resistance. Drain immediately in colander and let cool 10 minutes.

  2. Make the dressing: In large mixing bowl, whisk together mustard, vinegar, salt, and black pepper until smooth. Add mayonnaise and whisk until fully combined with no streaks.

  3. Chop the ingredients: While potatoes cool, dice celery and onion into ½-inch pieces. Chop hard-boiled eggs into similar-sized chunks. Mince fresh parsley or dill.

  4. Combine everything: Cut cooled potatoes into ¾-inch chunks, leaving skin on if using red potatoes. Add potatoes, celery, onion, and eggs to dressing bowl. Fold gently with rubber spatula until everything's coated but potatoes stay intact.

  5. Rest and chill: Stir in fresh herbs, taste for salt and pepper, adjust as needed. Cover bowl with plastic wrap and refrigerate at least 1 hour before serving to let flavors meld and dressing thicken.

Golden Rule
Cool potatoes completely before combining to prevent mayonnaise from curdling

What to Serve With It

Pork adds the contrast this plate needs, but timing matters. For a version that comes together quickly, tender pork side dish brings smoky BBQ sauce that picks up the mustard tang without fighting it.

Side Dish Prep Why It Works How to Serve
Grilled Chicken Breast Easy Lean protein balances creamy richness Slice diagonally, serve warm alongside chilled salad
Steamed Green Beans Easy Light vegetable cuts through mayo tang Season with salt and butter, serve hot
Corn on the Cob Easy Natural sweetness contrasts mustard sharpness Brush with butter, sprinkle salt, serve hot
Grilled Sausages Medium Smoky char enhances deli-style salad appeal Grill until browned, nest in bun with salad on side
Soft Dinner Rolls Easy Mop up extra dressing, add carb heft Warm briefly, serve with butter alongside

Three ways to serve it:

  • BBQ plate: Pair with grilled sausages and corn on the cob for summer cookout spread
  • Picnic basket: Pack alongside fried chicken, pickles, and soft rolls for outdoor meal
  • Meal prep bowl: Portion with grilled chicken, steamed green beans, and cherry tomatoes for grab-and-go lunches
Best Pick
Grilled sausages or brats pair best with mustard notes in the dressing for casual BBQ appeal

Store and Reheat

A good beef can make or break the plate. We keep a batch ready for nights like this - classic beef dish needs something cool and creamy on the side to balance the rich gravy.

Method Time Best For
🧊 Serve Chilled No reheating Maintains optimal creamy texture and fresh crunch
🌡️ Room Temperature 15-20 minutes rest Takes edge off fridge chill without warming dressing

For best results when storing:

  • Transfer to airtight, shallow container within 2 hours of making to prevent bacterial growth
  • Press plastic wrap directly on surface before lidding to prevent oxidation and browning
  • Store up to 3-4 days in fridge; discard if dressing separates or smells sour
  • Stir gently before serving to redistribute settled dressing without breaking potato chunks
  • Never freeze potato salad - thawed potatoes turn grainy and mayonnaise separates permanently

Frequently Asked Questions

Can I substitute Dijon mustard with yellow mustard in potato salad dressing?

Yes, use the same amount of yellow mustard for milder, classic deli tang. Dijon gives sharper bite and paler color, so swap based on whether you want traditional or grown-up flavor.

How long can mustard potato salad be stored in the refrigerator?

Store up to 3-4 days in airtight container. Discard if dressing separates, potatoes get slimy, or you smell sour odor.

How do I know when potatoes are cooked perfectly for salad?

Pierce potato with fork at 15 minutes - it should go in with slight resistance but not crumble. Drain immediately when fork slides in easily to prevent mushiness.

Why is my mustard potato salad watery and how to fix it?

You mixed warm potatoes with mayo, which broke the emulsion. Chill the salad 2 hours to thicken, or drain excess liquid and stir in 2-3 tablespoons extra mayonnaise.

Can I scale this potato salad recipe for a large crowd?

Yes, multiply ingredients by servings needed and boil potatoes in batches to maintain even cooking. Mix in largest bowl you own or use roasting pan for easier folding without breaking chunks.

Potato Salad Dressing with Mustard served on a plate

Potato Salad Dressing with Mustard

No ratings yet
This mustard potato salad dressing combines waxy potatoes with a tangy, creamy mayonnaise base balanced by sharp mustard and bright vinegar. Cooling the potatoes completely before mixing prevents dressing separation, resulting in a perfect textured salad.
Print Recipe Pin Recipe
Prep Time 15 minutes mins
Cook Time 20 minutes mins
Total Time 35 minutes mins
Servings: 8 servings
Course: Side Dish
Cuisine: American
Ingredients Method Notes

Ingredients
  

  • 2 lbs waxy potatoes Yukon Gold or red potatoes
  • 1 teaspoon salt for boiling water
  • 0.75 cup mayonnaise
  • 2 tablespoon yellow mustard or Dijon mustard
  • 1 tablespoon white vinegar
  • 0.5 teaspoon salt for dressing
  • 0.25 teaspoon black pepper
  • 2 stalks celery diced into ½-inch pieces
  • 0.25 cup red onion diced, rinsed under cold water to mellow
  • 3 hard-boiled eggs chopped
  • 2 tablespoon fresh parsley or dill, minced

Method
 

  1. Place whole waxy potatoes in a medium pot and cover with cold water by 1 inch. Add 1 teaspoon salt and bring to a boil over high heat. Reduce heat to medium and cook 15-20 minutes until a fork pierces with slight resistance. Drain immediately in a colander and let cool 10 minutes.
    2 lbs waxy potatoes, 1 tsp salt
  2. In a large mixing bowl, whisk together mustard, white vinegar, ½ teaspoon salt, and black pepper until smooth. Add mayonnaise and whisk until fully combined with no streaks.
    0.75 cup mayonnaise, 2 tbsp yellow mustard, 1 tbsp white vinegar, 0.5 tsp salt, 0.25 tsp black pepper
  3. While the potatoes cool, dice celery and onion into ½-inch pieces. Chop hard-boiled eggs and mince fresh parsley or dill.
    2 stalks celery, 0.25 cup red onion, 3 hard-boiled eggs, 2 tbsp fresh parsley
  4. Cut cooled potatoes into ¾-inch chunks, leaving skin on if using red potatoes. Add potatoes, celery, onion, and eggs to the dressing bowl. Fold gently with a rubber spatula until all ingredients are coated but potatoes hold their shape.
    2 lbs waxy potatoes, 2 stalks celery, 0.25 cup red onion, 3 hard-boiled eggs
  5. Stir in fresh herbs and taste for salt and pepper, adjusting if needed. Cover the bowl with plastic wrap and refrigerate for at least 1 hour before serving to let flavors meld and the dressing thicken.
    2 tbsp fresh parsley

Notes

  • Cool potatoes completely before mixing to prevent mayonnaise from curdling.
  • Use waxy potatoes like Yukon Gold or red potatoes so chunks hold their shape after boiling.
  • Rest the salad in the fridge at least 1 hour to let flavors meld and dressing thicken properly.

Tried this recipe?

Let us know how it was!

What Is Millet? Taste, Uses, Nutrition & More

March 14, 2026

Millet does something no other ancient grain does quite as cleanly: it shifts identity based on how you cook it. Simmer it short and you get light, fluffy grains ready to stand in for rice beneath a stew.

What Is Millet

Cook it long with milk and it collapses into a creamy breakfast porridge. Toast it dry first and the whole flavor profile deepens.

That range - from neutral base to nutty, to creamy - is what makes millet flour and whole millet worth understanding before you reach for something more familiar.

QUICK SUMMARY

Millet is a small cereal grain with a mild, nutty flavor that shifts from fluffy to creamy depending on cook time. It's naturally gluten-free, widely used across West Africa and South Asia, and works as a rice substitute, porridge base, or ground into flour.

🌾Type: Small-seeded cereal grain, multiple species and varieties
👅Flavor: Mildly nutty, slightly sweet, earthy - very mild intensity
🍳Best Uses: Rice substitute, breakfast porridge, flatbread flour, grain bowls
📦Shelf Life: Pearled: 6-12 months pantry; hulled: 3-6 months or refrigerate
✅Dietary: Naturally gluten-free, low FODMAP at standard servings, plant protein source

What Is Millet?

Millet isn't a single plant - it's a collective name for several small-seeded grass species domesticated across East Asia and West Africa thousands of years ago. Pearl millet (Pennisetum glaucum), known as bajra across South Asia, is the most widely grown.

Proso millet and finger millet round out the major types consumed as food.

The kernels are tiny, round, and range from ivory-yellow to gray or red depending on the variety. Like amaranth, millet is an ancient grain that predates many staple crops now considered standard.

Hulled versus pearled matters at the store. Hulled (whole-grain) millet retains its bran layer, giving it more fat, fiber, and nutrients. Pearled millet has that bran polished away, cooks faster, and stores longer without going rancid. Most millet sold in Western supermarkets is pearled.

  • Pearl millet (bajra) - the dominant global variety; used in rotis, porridges, and fermented batters
  • Proso millet - common in Eastern European and East Asian cooking; mild, quick-cooking
  • Finger millet (ragi) - deep reddish-brown; stronger flavor, popular in South Indian cooking

What Does Millet Taste Like?

millet - What Is Millet

Raw millet tastes faintly grainy and grassy, which isn't especially appealing on its own. Cooking changes everything. Simmered in water, the grains turn mildly nutty and slightly sweet - closer to lightly toasted corn than anything sharp or assertive.

Sensory SnapshotMild Intensity
👅 Flavor
nuttyslightly sweetearthy
✋ Texture
fluffy when simmered shortcreamy when overcooked
👃 Aroma
warm grainysubtle grassy

Compared to quinoa, millet is milder and less bitter. Farro has more chew and a wheat-forward depth that millet simply doesn't carry.

One caveat: unrinsed millet can carry a faint bitterness from surface saponins and natural compounds, so a quick rinse before cooking is standard practice.

Toasting the dry kernels in a hot pan for two to three minutes before adding water adds a noticeably deeper, popcorn-adjacent note. That one step is worth doing whenever you have time.

How to Use Millet

Millet's neutral baseline flavor makes it one of the more adaptable grains in a pantry. The cooking method you choose shapes what it becomes.

How Millet Is Used
MethodBest ForTip
🍚 SimmeredRice substitute under stews, grain bowls, side dish1:2 millet-to-water ratio; don't stir during cooking
🥣 Long-cooked porridgeBreakfast porridge with milk, sweetener, or fruitUse 1:4 ratio and simmer 25-30 min, stirring often - similar to a [coconut milk rice porridge](https://forkliftkitchen.com/coconut-milk-rice-porridge/) approach
🔥 Toasted then cookedPilaf base, salad topper, grain bowls needing more depthToast dry in a skillet 2-3 min before adding liquid
🫓 Ground into flourBajra roti, gluten-free flatbreads, baked goodsCombine with a binding agent in baking - millet flour lacks gluten structure
🫧 FermentedBatter for injera-style crepes, regional fermented drinksSoak 24-48 hours before blending for best fermentation

West African cooking uses millet in stews and thick porridges. South Asian kitchens rely on bajra roti - unleavened flatbreads that pair with ghee, yogurt, and spiced lentils.

East Asian congee-style preparations cook millet very soft alongside rice or alone.

For pairings, millet's earthiness responds well to warm spices: cumin, coriander, and turmeric are natural fits. Roasted root vegetables - beet, carrot - add sweetness that complements the grain's own mild notes.

Legumes like lentils and chickpeas are classic partners across multiple cuisines.

Golden Rule
Always rinse millet before cooking. A 30-second rinse removes surface compounds that cause bitterness - skip it and the flavor suffers noticeably.

Puffed millet works as a lighter swap for puffed rice in granola or snack bars. If you need a different grain entirely, a millet substitute guide covers the closest options by texture and use.

Try It In
🥗Mediterranean Chickpea SaladSwap or add toasted millet for extra grain texture→🍫Homemade Granola BarsPuffed millet adds crunch without heaviness→🌰Cinnamon Sugar Roasted NutsToss in toasted millet for a seedy, grain-forward mix→

How to Buy and Store Millet

Hulled or pearled - that's the first decision at the store. Hulled whole-grain millet is ivory-to-golden with a slightly rough surface. Pearled millet is paler, smoother, and cooks about five minutes faster. Both should smell faintly grainy and clean.

Watch Out
Avoid bags with dark specks, a musty smell, or crushed kernels. These signal age, insect activity, or poor storage - and the grain will taste flat or off regardless of how you cook it.

At home, pearled millet stores fine in an airtight container in a cool pantry for 6-12 months. Hulled millet has higher natural oil content, which means it can go rancid faster - refrigerate or freeze it to get the full 6-month window without quality loss.

Millet flour is more perishable than whole kernels. Check the flour storage guide guidelines for ground grains, since milled forms degrade faster.

For whole kernels, storage timelines are similar to other ancient grains covered in the millet freshness guide guide.

Where to Start With Millet

Millet rewards low-commitment cooking. If you haven't used it before, start with simmered whole grains as a rice swap - it's the fastest way to understand its texture and flavor without any special technique.

From there, try a dry toast before cooking. That single step makes the largest flavor difference and costs nothing extra.

  • For grain bowls and salads - simmer until just fluffy, cool, dress simply
  • For breakfast - cook long with milk, a pinch of salt, and whatever sweetener you prefer
  • For baking - use millet flour blended with another gluten-free flour for structure
Shortcut
Cook a large batch of simmered millet on Sunday. It keeps refrigerated for 4-5 days and reheats in minutes, making grain bowls and porridge nearly instant on weekdays.

Frequently Asked Questions

Is millet a grain or a seed?

Botanically, it's both - millet kernels are the seeds of grass plants, and in culinary and nutritional contexts they're classified as cereal grains. The distinction rarely matters in practice, since millet is cooked and eaten exactly like other whole grains such as rice or quinoa.

How do you cook millet so it's not mushy?

Use a 1:2 millet-to-water ratio, bring to a boil, then reduce to a low simmer for 15-18 minutes without stirring. Remove from heat and let it steam, covered, for 5 more minutes before fluffing - stirring during cooking breaks the grains and causes mushiness.

Is millet gluten-free?

Yes, millet is naturally gluten-free. People with celiac disease should verify the package is certified gluten-free, since cross-contamination during processing is possible when millet is handled in facilities that also process wheat or barley.

What is the difference between pearl millet and hulled millet?

Pearl millet refers to the species Pennisetum glaucum, while hulled versus pearled describes the processing level applied to any millet variety. Hulled millet keeps its bran layer intact; pearled millet has it removed, making it cook faster but reducing fiber and healthy fat content.

Can millet be used in baking?

Yes, though millet flour lacks gluten, so it needs a structural partner like tapioca starch or another gluten-free flour to hold baked goods together. Whole cooked millet can also be folded into muffin or quick-bread batters to add moisture and a mild grain texture.

Creamy Coleslaw Dressing

March 14, 2026

ToggleYou made the slaw. Now the dressing looks too thin, or it tastes flat, or it separated in the bowl.

This creamy coleslaw dressing fixes that. It stays thick on the cabbage, balances tangy and sweet without tasting like straight vinegar, and takes 10 minutes to whisk together. You chill it for 30 minutes and it's ready.

Creamy Coleslaw Dressing served on a plate

Make it Sunday night for weeknight dinners, double it for summer cookouts, or whisk it up 20 minutes before serving. It holds in the fridge for three days and tastes better after the flavors meld.

QUICK SUMMARY

This creamy coleslaw dressing uses full-fat mayo, apple cider vinegar, and granulated sugar for a thick, tangy-sweet base that coats cabbage evenly. The key is dissolving the sugar in vinegar first, then whisking into mayo for proper emulsification. Chill 30 minutes before serving so flavors meld and the dressing thickens to the right consistency.

⏱️Time Reality: 10 minutes active, 30+ minutes chilling (no cooking required)
🥄First Move: Whisk mayo and Dijon mustard together before adding vinegar for better emulsification
⚠️Watch Out: Add vinegar gradually and taste frequently or it overpowers the balance

Why This Recipe Works

Most store-bought dressings taste watery or cloyingly sweet. For a version that comes together quickly, this easy butter recipe balances mayonnaise richness with apple cider vinegar tang and granulated sugar sweetness without either dominating.

Quick Reference
⏱️
Prep Time
10 minutes
🔥
Cook Time
0 minutes
⏰
Total Time
10 minutes (plus 30+ minutes chilling)
🍽️
Servings
6-8 servings
📊
Difficulty
Easy
🏷️
Category
Side Dish
💡
Quick Tip
Chill dressing 30 minutes for best flavor melding
🎯
Best For
Weeknight dinner | Meal prep | Entertaining

Here's what makes it work:

  • Full-fat mayonnaise creates the creamy base - Low-fat versions turn thin and runny after chilling
  • Dissolving sugar in vinegar first prevents graininess - Undissolved crystals make the texture rough
  • Dijon mustard emulsifies the dressing - It binds oil and acid so they don't separate in the bowl
  • Celery seed adds the classic coleslaw flavor - Without it, the dressing tastes generic and flat
  • Chilling 30+ minutes thickens and develops flavor - Fresh dressing tastes sharp; chilled tastes balanced
Quick Tip
Whisk mayo and mustard first before adding vinegar for better emulsification

What You'll Need

Ingredients for Creamy Coleslaw Dressing

Most people skip the shopping context when planning side dishes. The dressing works best when you use fresh lemon juice and Dijon mustard rather than bottled versions, and for planning your spaghetti and meatballs dinner, it pairs with grilled proteins or pulled pork sandwiches that need tangy contrast.

🧀
Creamy Base
  • 1 cup mayonnaise (full-fat)
  • 2 tablespoons heavy cream (optional)
🥢
Tangy Components
  • 3 tablespoons apple cider vinegar
  • 1 tablespoon lemon juice (optional)
  • 1 tablespoon Dijon mustard
🌶️
Sweetener & Seasoning
  • 2 tablespoons granulated sugar
  • 1 teaspoon celery seed
  • ½ teaspoon salt
  • ¼ teaspoon black pepper

Ingredient Details

  • Mayonnaise
    Use full-fat for thick, creamy texture; low-fat turns thin and runny after chilling
  • Apple Cider Vinegar
    Measure precisely; too much tastes sharp and overpowers sweetness
  • Granulated Sugar
    Dissolve completely in vinegar before mixing to prevent gritty texture
  • Dijon Mustard
    Emulsifies dressing and adds mild heat; don't skip or dressing separates
  • Celery Seed
    Classic coleslaw flavor; lightly crush seeds to release fuller aroma
  • Heavy Cream
    Optional richness booster; omit for lighter dressing or substitute milk
  • Lemon Juice
    Optional brightness; use fresh for sharper flavor than bottled

Ingredient Swaps

A good homemade can make or break the plate. We keep a batch ready for nights like this - creamy homemade side dish makes tangy variations when you swap Greek yogurt for half the mayo or honey for granulated sugar.

Four swaps that work:

  • Greek yogurt for half or all mayonnaise - Adds tang and lowers fat, slightly thinner texture (stir in gradually)
  • White wine vinegar for apple cider vinegar - Slightly lighter acidity and cleaner finish
  • Honey or maple syrup for granulated sugar - Natural sweetness with thinner consistency (use 1½ tablespoons instead of 2)
  • Yellow mustard for Dijon mustard - Milder flavor and less sharpness (use same amount)

Greek Yogurt Swap

Works for: Lower-fat version with extra tang and protein

Skip if: You want the richest, thickest dressing possible

Honey Swap

Works for: Natural sweetness and slightly floral notes

Skip if: You need consistent thickness (honey thins dressing)

Instructions

The homemade works best when it hits the table at the same time as the main. For a version that comes together quickly, simple homemade pork pairs with this dressing when you whisk all ingredients together and chill for 30 minutes before tossing with shredded cabbage.

  1. Whisk mayo and mustard in a mixing bowl until smooth - Start with these two for better emulsification before adding acid (30 seconds whisking).

  2. Dissolve sugar in vinegar in a separate small bowl - Stir until no crystals remain, about 1 minute, to prevent grainy texture.

  3. Pour vinegar mixture into mayo slowly while whisking constantly - Add in steady stream, not all at once, to maintain emulsion (1 minute total).

  4. Stir in celery seed, salt, pepper, and optional heavy cream or lemon juice - Mix until uniform, about 20 seconds, then taste and adjust seasoning.

  5. Cover and chill in refrigerator for at least 30 minutes before serving - This thickens dressing and lets flavors meld; toss with 1 pound shredded cabbage when ready.

Golden Rule
Always taste after chilling and adjust salt, sugar, or vinegar before serving since acidity intensifies when cold

What to Serve With It

Most people skip the gap between dressing and main protein. Most people skip simple shrimp recipe, but it balances the meal when you serve creamy coleslaw alongside grilled chicken, pulled pork sandwiches, or barbecue ribs that need tangy, crunchy contrast.

Side Dish Prep Why It Works How to Serve
Grilled Chicken Breast Easy Creamy dressing complements mild grilled protein Serve coleslaw chilled on the side or on top of sliced chicken
Pulled Pork Sandwich Easy Cuts richness with tangy crunch Pile coleslaw directly on sandwich or serve in separate bowl
Roasted Sweet Potatoes Easy Sweetness pairs well with creamy tang Serve warm sweet potatoes with chilled coleslaw for temperature contrast
Cornbread Easy Classic Southern combination Serve warm cornbread wedges alongside coleslaw at picnics or cookouts
BBQ Ribs Medium Traditional pairing ideal for parties Plate ribs with coleslaw and extra napkins for messy summer meals

Three ways to serve it:

  • Toss with shredded cabbage and carrots - Mix 1 cup dressing with 1 pound vegetables 10 minutes before serving for best texture
  • Use as sandwich spread - Spread thin layer on burger buns or hoagie rolls before adding protein
  • Drizzle over grilled vegetables - Pour over charred zucchini, bell peppers, or asparagus for tangy finish
Shortcut
Store dressing separate from cabbage until serving to prevent soggy slaw; toss together 5-10 minutes before eating

Store and Reheat

Beef adds the contrast this plate needs, but timing matters. For a version that comes together quickly, homemade beef recipe stays fresh when you store dressing in an airtight container in the refrigerator for 3-4 days maximum.

Method Time Best For
🍳 Stovetop N/A Not applicable - serve chilled or room temperature only
📦 Microwave N/A Not applicable - heating breaks emulsification
🔥 Oven N/A Not applicable - dressing should stay cold

For best results when storing:

  • Use airtight, shallow container - Prevents flavor absorption from other fridge foods (glass or plastic both work)
  • Store unmixed from cabbage - Keeps dressing thick and cabbage crisp for 3-4 days
  • Stir before serving - Dressing may separate slightly after chilling; quick whisk brings it back
  • Don't freeze - Freezing breaks emulsification and changes texture permanently
  • Label with date - Dressing lasts 3-4 days maximum; discard if it smells off or separates completely

Frequently Asked Questions

Can I substitute Greek yogurt for mayonnaise in creamy coleslaw dressing?

Yes, swap Greek yogurt for half or all the mayo for tangier, lower-fat dressing. The texture will be slightly thinner, so add yogurt gradually and expect a looser consistency than full-mayo versions.

How long can I store creamy coleslaw dressing in the refrigerator?

Store in an airtight container for 3-4 days maximum. Discard if it separates completely, smells off, or tastes overly acidic after that time.

Why is my creamy coleslaw dressing too runny and how can I fix it?

Too much vinegar or skipping the chilling step causes runny dressing. Add 2-3 tablespoons more mayo and chill for 30 minutes to thicken, or whisk in 1 tablespoon sugar to absorb excess liquid.

What is the best way to emulsify creamy coleslaw dressing without separation?

Whisk mayo and mustard together first, then add vinegar in a slow, steady stream while whisking constantly. The mustard acts as an emulsifier that binds oil and acid so they stay mixed.

How can I scale creamy coleslaw dressing recipe for large gatherings?

Double or triple all ingredients proportionally, but whisk in batches if making more than triple. Large batches emulsify better when mixed in smaller portions, then combined after chilling.

Creamy Coleslaw Dressing served on a plate

Creamy Coleslaw Dressing

No ratings yet
This creamy coleslaw dressing balances tangy apple cider vinegar, sweet granulated sugar, and rich mayonnaise for a thick and flavorful coating on cabbage. It emulsifies smoothly with Dijon mustard and thickens after chilling, making it perfect for quick weeknight dinners or summer cookouts.
Print Recipe Pin Recipe
Prep Time 10 minutes mins
Cook Time 1 minute min
Total Time 11 minutes mins
Servings: 8 servings
Course: Side Dish
Cuisine: American
Ingredients Method Notes

Ingredients
  

  • 1 cup mayonnaise full-fat
  • 2 tablespoons heavy cream optional
  • 3 tablespoons apple cider vinegar
  • 1 tablespoon lemon juice optional, fresh
  • 1 tablespoon Dijon mustard
  • 2 tablespoons granulated sugar
  • 1 teaspoon celery seed
  • 0.5 teaspoon salt
  • 0.25 teaspoon black pepper

Method
 

  1. Whisk mayonnaise and Dijon mustard together in a mixing bowl until smooth, about 30 seconds, to start the emulsification.
    1 cup mayonnaise, 1 tablespoon Dijon mustard
  2. In a small separate bowl, stir granulated sugar into apple cider vinegar until no crystals remain, about 1 minute.
    3 tablespoons apple cider vinegar, 2 tablespoons granulated sugar
  3. Slowly pour the vinegar and sugar mixture into the mayonnaise while whisking constantly to maintain a stable emulsion, continuing for about 1 minute.
    3 tablespoons apple cider vinegar, 2 tablespoons granulated sugar, 1 cup mayonnaise, 1 tablespoon Dijon mustard
  4. Stir in celery seed, salt, black pepper, and optionally heavy cream and lemon juice until uniform, about 20 seconds. Taste and adjust seasoning as desired.
    1 teaspoon celery seed, 0.5 teaspoon salt, 0.25 teaspoon black pepper, 2 tablespoons heavy cream, 1 tablespoon lemon juice
  5. Cover and chill the dressing in the refrigerator for at least 30 minutes before serving to thicken and allow flavors to meld.

Notes

  • Use full-fat mayonnaise for a thick, creamy texture; low-fat versions become runny after chilling.
  • Dissolve sugar fully in vinegar before mixing to avoid grainy texture.
  • Whisk mayo and mustard first, then add vinegar slowly to prevent separation.

Tried this recipe?

Let us know how it was!

Classic Caesar Salad Dressing

March 14, 2026

Toggle

You want a dressing that doesn't break or taste flat. Classic Caesar pulls that off with just a few ingredients and a steady hand.

Most store versions skip the anchovy depth and lean on shelf stabilizers. This one uses fresh garlic, real Parmesan, and a raw egg yolk that emulsifies into something creamy without feeling heavy.

Classic Caesar Salad Dressing served on a plate

Make it once and you'll notice the difference-sharper lemon, cleaner garlic, no gummy aftertaste. It works for weeknight salads, meal prep bowls, or when you're hosting and need something that feels intentional but doesn't require actual cooking.

QUICK SUMMARY

Classic Caesar Salad Dressing uses raw egg yolk, anchovies, and fresh lemon juice to build a creamy emulsion with sharp umami depth. The key is adding olive oil drop by drop while whisking continuously-rush it and the dressing splits. Skip the bottled versions and you'll get a brighter, cleaner flavor that coats romaine without sliding off.

⏱️10 minutes start to finish: No cooking, just whisking and assembling in one bowl.
🥄Add oil slowly: Drizzle it in over 2-3 minutes while whisking to form a stable emulsion.
⚠️Watch the garlic: Use fresh cloves and mince finely-old or crushed-too-long garlic turns bitter fast.

Why This Recipe Works

The emulsion happens when fat meets egg yolk under constant agitation. Most people skip pork, but it balances the meal. For a version that comes together quickly, this easy pork recipe uses a simple method that keeps the focus on technique, not equipment.

Quick Reference
⏱️
Prep Time
10 minutes
🔥
Cook Time
0 minutes
⏰
Total Time
10 minutes
🍽️
Servings
4-6 servings
📊
Difficulty
Easy
🏷️
Category
Side Dish
💡
Quick Tip
Whisk egg yolk slowly into oil for creamy texture
🎯
Best For
Weeknight dinner | Entertaining | Meal prep
  • Tempering the egg yolk first: Beat the yolk alone, then add lemon juice gradually before introducing oil-this prevents curdling and gives you a smoother base to build on.
  • Anchovy fillets mashed to paste: Mincing them finely distributes the umami evenly so you don't hit pockets of fishiness in any single bite.
  • Fresh lemon juice over bottled: Bottled versions oxidize and taste flat-fresh-squeezed keeps the acidity bright and prevents rancid notes from developing in the fridge.
  • Fine-grated Parmesan: A microplane breaks the cheese into tiny shreds that dissolve into the dressing instead of clumping at the bottom of the bowl.
  • Chilled bowl and whisk: Cold tools help stabilize the emulsion, especially in warm kitchens where heat can cause the fat to separate before it binds.
Quick Tip
Keep your mixing bowl and whisk chilled before you start-it makes the emulsion more forgiving and cuts down on the risk of separation.

What You'll Need

Ingredients for Classic Caesar Salad Dressing

Stock your pantry with anchovies, Parmesan, and fresh garlic first. A dollop of homemade takes each bite somewhere more interesting. For a version that comes together quickly, classic homemade dish shows you how to work with similar building blocks for a lighter profile.

🦐
Umami Base
  • Anchovy fillets
  • Worcestershire sauce
🧀
Emulsion & Texture
  • Egg yolk
  • Parmesan cheese (finely grated)
🧄
Aromatics
  • Garlic
  • Dijon mustard
🥢
Fat & Acid
  • Olive oil
  • Lemon juice (fresh)
  • Black pepper

Ingredient Details

  • Anchovy fillets
    Mash to a paste with the flat of your knife before adding-this distributes the umami without leaving visible chunks.
  • Garlic
    Press fresh cloves just before use; old garlic or anything pre-minced from a jar turns bitter as it sits in the dressing.
  • Egg yolk
    Room temperature yolks emulsify more easily than cold-let the egg sit out for 10 minutes before cracking.
  • Lemon juice
    Squeeze fresh lemons right before mixing; bottled juice oxidizes and tastes flat within a few days.
  • Olive oil
    Use a mild or light olive oil if you find extra-virgin too peppery-the flavor mellows as it emulsifies but can still dominate.
  • Parmesan cheese
    Grate on a microplane for the finest texture; pre-grated cheese often contains anti-caking agents that make the dressing grainy.
  • Dijon mustard
    Adds a subtle tang and helps stabilize the emulsion-skip it if you want a more straightforward Caesar profile.

Ingredient Swaps

Anchovy phobia is real, but the dressing loses its backbone without that umami hit. The homemade works best when it hits the table at the same time as the main. We keep a batch ready for nights like this-this easy style recipe keeps anchovy flavor front and center without the fillets themselves.

  • Anchovy fillets → Worcestershire sauce or capers: Worcestershire adds savoriness but less brininess; capers bring salt and tang but no fishy depth-use 2 teaspoons Worcestershire or 1 tablespoon minced capers.
  • Egg yolk → Mayonnaise or Greek yogurt: Mayo keeps it creamy and safer for raw-egg concerns; Greek yogurt adds tang but makes it thicker-start with 3 tablespoons and thin with lemon juice if needed.
  • Parmesan cheese → Pecorino Romano: Sharper and saltier than Parmesan, so cut the amount by one-third to avoid overpowering the lemon and garlic.
  • Garlic → Garlic powder: Use ⅛ teaspoon powder per clove; it's milder but can taste dusty if you add too much-start small and adjust.

Raw Egg Yolk

Works for: Traditional texture, clean emulsion, no tang interference

Skip if: You're serving to young kids, pregnant guests, or anyone with compromised immunity

Mayonnaise

Works for: Quick assembly, no raw egg risk, stable in the fridge for a week

Skip if: You want that silky, just-whisked texture-mayo makes it thicker and slightly sweet

Greek Yogurt

Works for: Extra protein, tangy kick, lighter mouthfeel without sacrificing creaminess

Skip if: You're going for classic Caesar flavor-yogurt shifts it into ranch territory

Instructions

Set out all your ingredients before you start whisking. A good this seafood can make or break the plate. The this seafood works best when it hits the table at the same time as the main-this quick sauce dish keeps the timing simple and the flavors sharp.

  1. Mince garlic and mash anchovies: Press 2 garlic cloves through a press or mince finely with a knife. Mash 3-4 anchovy fillets into a paste using the flat side of your knife-this takes about 30 seconds and ensures even distribution.

  2. Whisk egg yolk and lemon juice: Crack 1 egg yolk into a chilled mixing bowl. Whisk for 10 seconds, then slowly add 2 tablespoons fresh lemon juice while continuing to whisk-this tempers the yolk and prevents curdling.

  3. Incorporate oil drop by drop: Drizzle ½ cup olive oil into the bowl one drop at a time while whisking constantly. After the first 2 tablespoons emulsify (the mixture will thicken and lighten in color), you can add the remaining oil in a thin, steady stream-this takes 2-3 minutes total.

  4. Stir in garlic, anchovies, Parmesan, and mustard: Add the mashed anchovies, minced garlic, ¼ cup finely grated Parmesan, 1 teaspoon Dijon mustard, and ½ teaspoon Worcestershire sauce. Whisk until smooth and fully combined-taste and adjust with more lemon juice or black pepper if needed.

  5. Toss with romaine just before serving: Tear 1 large head of romaine lettuce into bite-sized pieces and spin dry. Add half the dressing to the leaves and toss with tongs-add more dressing until each leaf is lightly coated but not swimming. Finish with extra Parmesan and cracked black pepper on top.

Golden Rule
Add oil slowly while whisking vigorously-rushing it breaks the emulsion and leaves you with separated oil floating on top instead of a creamy dressing.

What to Serve With It

Caesar dressing does more than coat romaine. Rich mains need something to cut through, and chicken does exactly that. Most people skip chicken, but it balances the meal-a juicy chicken on the side keeps the plate from feeling one-note, especially on easy turkey burgers dinner nights when you need variety without adding steps.

Side Dish Prep Why It Works How to Serve
Grilled chicken breast Easy Neutral protein that lets the dressing's anchovy and garlic shine Slice thinly and lay over dressed romaine, or chop into cubes and toss directly with the salad
Garlic bread Easy Crunchy, buttery contrast to creamy dressing Serve warm on the side for dipping or tearing over the top for extra crunch
Roasted cherry tomatoes Easy Fresh acidity cuts through the richness Roast at 400°F for 15 minutes, then scatter over the salad just before serving
Steamed asparagus Easy Light vegetable with crisp texture that doesn't wilt under the dressing Steam until tender-crisp (3-4 minutes), chill, then toss with dressed romaine
Quinoa salad Medium Adds protein and bulk for a full meal Mix cooked quinoa with chopped cucumbers, red onion, and a spoonful of Caesar dressing for a grain-bowl base

Three ways to serve it:

  • Drizzle over grilled romaine halves for a charred, smoky twist on the classic salad
  • Use as a dip for raw vegetables (carrots, celery, bell peppers) for a tangy alternative to ranch
  • Spread on sandwiches or wraps in place of mayo for a garlicky, umami-rich spread
Shortcut
Make a double batch and store half in the fridge-it lasts 3-4 days and saves you from pulling out the whisk on a busy weeknight.

Store and Reheat

Caesar dressing keeps in the fridge for 3-4 days in an airtight glass jar. Gravy adds the contrast this plate needs, but timing matters. For a version that comes together quickly, homemade gravy recipe uses a straightforward method that doesn't require constant stirring or a whisk.

Method Time Best For
🍳 Stovetop Not applicable N/A - Caesar dressing is served cold or at room temperature
📦 Microwave Not applicable N/A - Caesar dressing is served cold or at room temperature
🔥 Oven Not applicable N/A - Caesar dressing is served cold or at room temperature

For best results when storing:

  • Transfer to a glass jar or airtight container immediately after making-plastic can absorb garlic odor and taint the flavor over time.
  • Keep it in the coldest part of your fridge (usually the back of the middle shelf) to slow oxidation and preserve the lemon's brightness.
  • Stir or shake vigorously before using after storage-emulsions can separate slightly as they sit, and a quick mix brings the texture back.
  • If the dressing thickens too much in the fridge, thin it with 1-2 teaspoons of cold water or fresh lemon juice and whisk until smooth.
  • Toss dressing with romaine just before serving-dressed greens wilt within 10-15 minutes and lose their crisp snap.

Frequently Asked Questions

Can I substitute anchovies in Caesar dressing?

Yes-use 2 teaspoons Worcestershire sauce or 1 tablespoon minced capers. Worcestershire adds similar savoriness but less brininess; capers bring salt and tang without the fishy depth.

How long can I store Caesar dressing in the fridge?

3-4 days in an airtight glass jar. The fresh lemon juice and raw egg yolk degrade faster than shelf-stable versions, so use it within that window for best flavor and safety.

How do I ensure Caesar dressing emulsifies properly?

Add olive oil drop by drop while whisking continuously for the first 2 tablespoons. Once the mixture thickens and lightens, you can drizzle the rest in a thin stream-rushing it breaks the emulsion.

What to do if Caesar dressing turns bitter?

Old or over-minced garlic is usually the culprit. Dilute the bitterness by whisking in 1-2 tablespoons extra olive oil or fresh lemon juice, or start over with fresh garlic pressed just before mixing.

Can I double or halve the Caesar dressing recipe?

Yes-scale all ingredients proportionally and follow the same whisking technique. Doubling works well for meal prep; halving is trickier with one egg yolk, so consider using 3 tablespoons mayo instead if you're making a small batch.

Classic Caesar Salad Dressing

No ratings yet
Classic Caesar Salad Dressing uses raw egg yolk, anchovies, and fresh lemon juice to create a creamy, bright emulsion with rich umami depth. The key is whisking olive oil in slowly to prevent breaking and achieve a stable, silky texture. This dressing brightens salads with sharper lemon and clean garlic flavors without any gummy aftertaste.
Print Recipe Pin Recipe
Prep Time 10 minutes mins
Cook Time 1 minute min
Total Time 11 minutes mins
Servings: 6 servings
Course: Side Dish
Cuisine: American
Ingredients Equipment Method Notes

Ingredients
  

  • 3 fillets anchovy fillets mashed to a paste
  • 2 cloves garlic pressed or finely minced
  • 1 large egg yolk room temperature
  • 2 tablespoons lemon juice fresh squeezed
  • 0.5 cup olive oil added slowly drop by drop
  • 0.25 cup Parmesan cheese finely grated
  • 1 teaspoon Dijon mustard
  • 0.5 teaspoon Worcestershire sauce

Equipment

  • Mixing bowl Used for whisking and assembling dressing
  • Whisk To emulsify the oil and egg yolk
  • Garlic press To press garlic cloves finely
  • Microplane grater To finely grate Parmesan cheese
  • Knife For mincing anchovies and garlic

Method
 

  1. Press 2 garlic cloves through a press or mince finely with a knife. Mash 3-4 anchovy fillets into a paste using the flat side of your knife to ensure even distribution. This takes about 30 seconds.
    3 fillets anchovy fillets, 2 cloves garlic
  2. Crack 1 egg yolk into a chilled mixing bowl. Whisk for 10 seconds, then slowly add 2 tablespoons fresh lemon juice while continuing to whisk to temper the yolk and prevent curdling.
    1 large egg yolk, 2 tablespoons lemon juice
  3. Drizzle ½ cup olive oil into the bowl one drop at a time while whisking constantly. After the first 2 tablespoons emulsify and thicken the mixture, add the remaining oil in a thin, steady stream. This process takes 2-3 minutes.
    0.5 cup olive oil
  4. Stir in the mashed anchovies, minced garlic, ¼ cup finely grated Parmesan, 1 teaspoon Dijon mustard, and ½ teaspoon Worcestershire sauce. Whisk until smooth and fully combined. Taste and adjust with more lemon juice or black pepper if desired.
    3 fillets anchovy fillets, 2 cloves garlic, 0.25 cup Parmesan cheese, 1 teaspoon Dijon mustard, 0.5 teaspoon Worcestershire sauce
  5. Tear 1 large head of romaine lettuce into bite-sized pieces and spin dry. Add half the dressing and toss with tongs to coat. Add more dressing until each leaf is lightly coated but not swimming. Finish with extra Parmesan and cracked black pepper on top.

Notes

  • Add olive oil slowly and whisk constantly to form a stable emulsion; rushing causes the dressing to break.
  • Use fresh garlic pressed just before mixing to avoid bitterness.
  • Store in an airtight glass jar in the fridge and use within 3-4 days for best freshness and safety.

Tried this recipe?

Let us know how it was!

Southern Pimento Cheese Spread

March 14, 2026

You need something on the table for guests, but chips and dip only go so far. Southern pimento cheese spread brings tang and creaminess to crackers, celery, or toasted bread without requiring cook time or active monitoring.

Southern Pimento Cheese Spread served on a plate

The mix comes together in 10 minutes, then chills while you handle everything else. Sharp cheddar provides the backbone, mayonnaise binds it smooth, and pimentos add sweet pepper notes that cut through the richness.

This works for game day spreads, picnic baskets, or weeknight snacking when you want something more interesting than store-bought dips. The spread keeps in the fridge for 3-4 days, so you can make it ahead and pull it out when people show up hungry.

QUICK SUMMARY

Southern pimento cheese spread mixes sharp cheddar, cream cheese, and diced pimentos into a creamy, spreadable dip. Freshly grated cheddar prevents clumping and creates smooth texture, while an hour of chilling lets flavors meld and firms the spread for easy serving.

⏱️Time Reality: 10 minutes active, 1 hour chilling before serving
🧀Technique Key: Grate cheese finely and mix thoroughly for lump-free texture
⚠️Watch Out: Pre-shredded cheese creates grainy texture-grate your own for smooth results

Table of Contents

Toggle
  • Why This Recipe Works
  • What You'll Need
    • Ingredient Details
  • Ingredient Swaps
  • What to Serve With It
  • Store and Reheat
  • Frequently Asked Questions
  • Southern Pimento Cheese Spread
    • Method 
    • Tried this recipe?

Why This Recipe Works

Sharp cheddar tang balances mayo richness, while cream cheese smooths everything into spreadable consistency. For a version that comes together quickly, a simple homemade spread recipe offers similar creamy texture with different flavor profiles.

Quick Reference
⏱️
Prep Time
10 minutes
🔥
Cook Time
0 minutes
⏰
Total Time
10 minutes + 1 hour chilling
🍽️
Servings
8-10 servings
📊
Difficulty
Easy
🏷️
Category
Appetizer
💡
Quick Tip
Chill at least 1 hour to meld flavors and thicken
🎯
Best For
Entertaining | Weeknight snack | Picnic

Why it delivers:

  • Freshly grated cheddar melts into the mayo without the anti-caking agents that make pre-shredded cheese clump and separate
  • Cream cheese adds body that keeps the spread thick enough to cling to crackers instead of sliding off
  • Diced pimentos stay visible in the mix, giving you sweet pepper bursts and the orange-pink color that makes this recognizable
  • Worcestershire sauce builds umami depth that stops the spread from tasting flat or one-dimensional
  • One hour of chilling firms the texture and lets garlic powder and onion powder bloom into the dairy base
Quick Tip
Grate cheese finely for smooth, spreadable texture with no large chunks

What You'll Need

Ingredients for Southern Pimento Cheese Spread

Stock up on sharp cheddar and cream cheese-that's where texture and tang come from. For a version that comes together quickly, creamy tartar sauce side dish uses similar mixing techniques with a different flavor direction.

🧀
Dairy Base
  • Sharp cheddar cheese
  • Cream cheese
  • Mayonnaise
🌶️
Peppers & Flavor
  • Diced pimentos
  • Worcestershire sauce
  • Hot sauce (optional)
🧄
Seasonings
  • Garlic powder
  • Onion powder

Ingredient Details

  • Sharp cheddar cheese
    Grate your own-pre-shredded contains cellulose that prevents smooth mixing and creates grainy texture
  • Cream cheese
    Let sit at room temperature 15 minutes before mixing so it blends smoothly without lumps
  • Mayonnaise
    Measure carefully-too much makes the spread runny, too little makes it stiff and hard to spread
  • Diced pimentos
    Drain thoroughly and pat dry with paper towels to prevent watery spread
  • Worcestershire sauce
    Adds savory depth that stops the spread from tasting flat-don't skip this
  • Garlic powder
    Use powder instead of fresh garlic-it distributes evenly and blooms during chilling without harsh bite
  • Hot sauce
    Start with a few dashes and taste-easier to add heat than remove it

Ingredient Swaps

Most people swap mayo for Greek yogurt when cutting fat, but texture changes. Most people skip spread, but it balances the meal. For a version that comes together quickly, another great spread recipe walks you through different variations with similar techniques.

Four swaps that work:

  • Greek yogurt replaces half the mayonnaise - tangier flavor and lighter texture, but reduces creaminess slightly
  • Colby or Monterey Jack swap for sharp cheddar - milder, softer texture that's less tangy but more budget-friendly
  • Jarred roasted red peppers replace pimentos - less sweet with more fibrous texture, but adds smoky depth
  • Cayenne pepper replaces hot sauce - dry heat without vinegar tang, use ⅛ teaspoon per 2 teaspoons hot sauce

Hand Mixing

Works for: Traditional chunky texture with visible cheese shreds and pimento pieces

Skip if: You want ultra-smooth spread or need to save time on mixing

Food Processor Blending

Works for: Smooth, uniform texture that spreads easily and mixes faster

Skip if: You prefer Southern-style chunky texture with distinct cheese pieces

Instructions

Mix everything in one bowl, then wait while it chills. The chicken works best when it hits the table at the same time as the main. For a version that comes together quickly, juicy chicken side dish uses similar timing and temperature management.

  1. Grate 8 ounces sharp cheddar cheese using the fine holes on a box grater until you have finely shredded cheese with no large chunks-this prevents grainy texture.
  2. Mix room-temperature cream cheese (8 ounces), mayonnaise (½ cup), garlic powder (½ teaspoon), onion powder (½ teaspoon), and Worcestershire sauce (1 teaspoon) in a large bowl until smooth and evenly combined with no lumps.
  3. Fold in grated cheddar and mix thoroughly until cheese distributes evenly throughout the mayo mixture-scrape bowl sides to catch unmixed spots.
  4. Drain one 4-ounce jar diced pimentos, pat dry with paper towels, then gently fold into cheese mixture until evenly distributed-overmixing breaks down pimento pieces.
  5. Cover and chill at least 1 hour so flavors meld and spread firms to spreadable consistency-taste after chilling and adjust seasoning if needed.
Golden Rule
Chill assembled spread at least 1 hour for texture firming and flavor melding

What to Serve With It

Pimento cheese needs texture contrast to cut through the creaminess. A good gravy can make or break the plate. For a version that comes together quickly, a simple gravy side offers rich accompaniment that complements the spread's tang.

Side Dish Prep Why It Works How to Serve
Celery sticks Easy Fresh crunch cuts creamy richness Slice into 3-inch sticks, serve cold
Saltine crackers Easy Neutral base lets spread shine Arrange on plate, spread generously
Sliced cucumbers Easy Light, refreshing contrast to tangy spread Slice ¼-inch thick rounds, top with spread
Mini toast points Medium Crisp texture elevates presentation Toast bread, cut diagonally, spread before serving
Pretzel sticks Easy Salty crunch complements sharp cheese Serve in cup for dipping or spreading

Three ways to serve it:

  • As a sandwich filling - spread thick between toasted bread slices with lettuce and tomato for lunch
  • On a cheese board - surround with crackers, pickles, and sliced vegetables for entertaining spreads
  • Stuffed in celery - pipe or spread into celery sticks for easy finger food at parties
Best Pick
Toast bread or crackers to add texture contrast serving pimento cheese

Store and Reheat

Pimento cheese keeps 3-4 days when stored properly, but separation happens if it sits too long. Shrimp adds the contrast this plate needs, but timing matters. For a version that comes together quickly, flaky shrimp side dish uses similar temperature management and storage techniques.

Method Time Best For
🌡️ Room temperature rest 10-15 minutes Softening chilled spread for easier spreading
📦 Microwave 10-15 seconds low power Carefully softening too-hard spread without melting

For best results when storing:

  • Transfer to shallow airtight container immediately after making so spread chills evenly without developing condensation on top
  • Press plastic wrap directly onto surface before sealing lid to prevent air exposure that causes browning and separation
  • Stir gently before serving if spread has been refrigerated more than 24 hours-this reincorporates any separated liquid
  • Let sit at cool room temperature 10 minutes before serving if spread has been chilled longer than 2 hours for easier spreading
  • Use within 3-4 days for best flavor and texture-after that, cheese can start tasting sharp and mayo may separate

Frequently Asked Questions

Can I substitute jarred roasted red peppers for pimentos?

Yes, but texture and flavor change. Roasted red peppers taste smokier and less sweet, with more fibrous texture than pimentos. Chop them finely and drain thoroughly before folding in.

How should I store leftover pimento cheese and for how long?

Store in a shallow airtight container in the fridge for 3-4 days. Press plastic wrap directly onto the surface before sealing to prevent browning and separation.

What is the best technique to achieve creamy, lump-free spread?

Use freshly grated sharp cheddar and room-temperature cream cheese. Mix cream cheese and mayo first until smooth, then fold in grated cheese thoroughly. Pulse briefly in a food processor if lumps remain.

Why does my pimento cheese sometimes turn watery and how to fix it?

Excess mayo or wet pimentos cause watery spread. Drain and pat pimentos dry, measure mayo carefully, and chill at least 1 hour. If already watery, fold in more cream cheese or grated cheddar and chill again.

Can I scale this recipe for large gatherings and how?

Double or triple all ingredients proportionally. Mix in batches if your bowl isn't large enough, then combine and chill. Make ahead up to 2 days before serving for easier party prep.

Southern Pimento Cheese Spread served on a plate

Southern Pimento Cheese Spread

No ratings yet
Southern pimento cheese spread combines freshly grated sharp cheddar, cream cheese, mayonnaise, and diced pimentos into a creamy, tangy dip. Chilling the mixture for one hour melds the flavors and firms the spread for easy serving. This no-cook appetizer is perfect for entertaining or snacking with crackers and vegetables.
Print Recipe Pin Recipe
Prep Time 10 minutes mins
Cook Time 1 hour hr
Total Time 1 hour hr 10 minutes mins
Servings: 8 servings
Course: Appetizer
Cuisine: Southern
Ingredients Equipment Method Notes

Ingredients
  

  • 8 ounces sharp cheddar cheese freshly grated, finely shredded
  • 8 ounces cream cheese room temperature for smooth blending
  • ½ cup mayonnaise measure carefully to avoid runniness
  • 1 teaspoon Worcestershire sauce adds savory depth
  • ½ teaspoon garlic powder distributes evenly and blooms during chilling
  • ½ teaspoon onion powder
  • 4 ounces diced pimentos drained thoroughly and patted dry
  • to taste hot sauce optional, start with few dashes

Equipment

  • Box Grater For finely grating sharp cheddar cheese
  • Mixing bowl To combine ingredients

Method
 

  1. Grate 8 ounces sharp cheddar cheese using the fine holes on a box grater until finely shredded with no large chunks to prevent grainy texture.
    8 ounces sharp cheddar cheese
  2. In a large mixing bowl, combine room-temperature cream cheese (8 ounces), mayonnaise (½ cup), garlic powder (½ teaspoon), onion powder (½ teaspoon), and Worcestershire sauce (1 teaspoon). Mix until smooth and evenly combined with no lumps.
    8 ounces cream cheese, ½ cup mayonnaise, ½ teaspoon garlic powder, ½ teaspoon onion powder, 1 teaspoon Worcestershire sauce
  3. Fold in the grated cheddar cheese and mix thoroughly until cheese is evenly distributed throughout the mayo mixture, scraping the bowl sides to catch unmixed spots.
    8 ounces sharp cheddar cheese
  4. Drain one 4-ounce jar of diced pimentos and pat dry with paper towels. Gently fold pimentos into the cheese mixture until evenly distributed, avoiding overmixing to keep pimento pieces intact.
    4 ounces diced pimentos
  5. Cover the bowl and chill the mixture at least 1 hour so flavors meld and the spread firms to a spreadable consistency. Taste after chilling and adjust seasoning if needed.

Notes

  • Grate cheddar cheese freshly for smooth texture without graininess.
  • Chill at least 1 hour to meld flavors and firm the spread.
  • Drain and dry pimentos thoroughly to prevent watery spread.

Tried this recipe?

Let us know how it was!

Rotisserie Chicken Salad

March 14, 2026

You already bought the rotisserie chicken. Now you need lunch that doesn't require turning on the stove.

Rotisserie Chicken Salad served on a plate

This chicken salad gives you tender shredded meat with crunchy celery and a creamy, tangy dressing. The chicken's already cooked, so you're just mixing and chilling. Mix everything in one bowl, let it sit 30 minutes, and you've got four servings ready for sandwiches or straight from the container.

Make it Sunday for grab-and-go lunches all week. Bring it to a picnic or serve it at a casual lunch where you need something filling that holds up at room temp for an hour.

QUICK SUMMARY

Rotisserie Chicken Salad turns pre-cooked chicken into a creamy, crunchy lunch in 15 minutes. Shred warm chicken for easier handling, mix with mayo and lemon juice, then chill at least 30 minutes so the flavors blend. If your salad tastes flat, you need more salt and a squeeze of lemon.

⏱️Time reality: 15 minutes active, plus 30 minutes chilling before serving
🔪First critical step: Shred chicken while it's still warm for cleaner, easier pieces
⚠️Watch out: Adding lemon juice all at once makes watery salad - add gradually and taste

Table of Contents

Toggle
  • Why This Recipe Works
  • What You'll Need
    • Ingredient Details
  • Ingredient Swaps
  • What to Serve With It
  • Store and Reheat
  • Frequently Asked Questions
  • Rotisserie Chicken Salad
    • Method 
    • Tried this recipe?

Why This Recipe Works

Shredding warm chicken pulls apart cleanly instead of tearing into ragged chunks. Most people skip verde, but it balances the meal - for a version that comes together quickly, try this easy verde recipe and fold in a tablespoon for briny brightness.

Quick Reference
⏱️
Prep Time
15 minutes
🔥
Cook Time
0 minutes
⏰
Total Time
15 minutes
🍽️
Servings
4-6 servings
📊
Difficulty
Easy
🏷️
Category
Main Dish | Lunch
💡
Quick Tip
Chill salad at least 30 minutes for best flavor melding
🎯
Best For
Meal prep | Weeknight dinner | Casual entertaining
  • Chill before serving: Refrigerate salad at least 30 minutes so the lemon juice, mustard, and herbs blend into one cohesive flavor instead of tasting like separate ingredients
  • Dice celery small: Cut celery into ¼ inch pieces so every bite has crunch without overwhelming chunks that stick out
  • Use warm chicken: Shred rotisserie chicken while it's still warm - the fibers pull apart cleanly instead of shredding into stringy, uneven pieces
  • Season gradually: Add salt, pepper, and lemon juice in small amounts, tasting after each addition so you don't overshoot and end up with watery or over-salted salad
  • Avoid food processor: Use your hands or two forks for shredding - a food processor turns chicken into paste and kills the texture you want
Quick Tip
Add herbs last - fold in fresh parsley, dill, or tarragon just before serving so they stay bright green instead of wilting into the mayo

What You'll Need

Ingredients for Rotisserie Chicken Salad

You need a rotisserie chicken and five pantry staples. A dollop of verde takes each bite somewhere more interesting - we keep a batch ready for nights like this and stir in this easy verde recipe for a Mediterranean twist when plain mayo feels boring.

🍗
Protein
  • Rotisserie chicken meat (3-4 cups shredded)
🥬
Vegetables
  • Celery (2 stalks, diced)
  • Red onion (¼ cup, finely diced)
🥢
Dressing
  • Mayonnaise (½ cup)
  • Dijon mustard (1 tablespoon)
  • Lemon juice (1-2 tablespoons)
🧄
Seasonings
  • Fresh herbs (2 tablespoons parsley, dill, or tarragon)
  • Salt and black pepper (to taste)

Ingredient Details

  • Rotisserie chicken meat
    Shred while warm for clean pieces; use breast and thigh meat for balanced flavor and moisture
  • Mayonnaise
    Start with ½ cup and add more if salad looks dry; full-fat mayo gives creamier texture than low-fat
  • Celery
    Dice into ¼ inch pieces for crunch without overwhelming chunks; pat dry if very wet
  • Red onion
    Rinse diced onion under cold water for 30 seconds to mellow sharpness if raw bite is too strong
  • Lemon juice
    Add 1 tablespoon first, taste, then add more gradually - too much makes watery salad
  • Fresh herbs
    Parsley is neutral, dill adds brightness, tarragon brings anise notes - pick one or mix two
  • Dijon mustard
    Adds tang and helps emulsify dressing; yellow mustard works but tastes sharper

Ingredient Swaps

Greek yogurt cuts the richness if mayo feels too heavy. The raita works best when it hits the table at the same time as the main - for a version that comes together quickly, check out a similar deli recipe that uses yogurt as the base instead of mayo.

  • Mayonnaise → Greek yogurt: Use 1:1 ratio for lighter texture with tang; salad will be less creamy but still moist
  • Celery → Cucumber: Swap 1:1 for different crunch and milder flavor; peel and seed cucumber first to avoid excess water
  • Red onion → Green onion/scallions: Use 3-4 sliced scallions for milder onion flavor without sharp bite
  • Lemon juice → Apple cider vinegar: Start with 1 tablespoon vinegar instead of 2 tablespoons lemon for slightly fruitier acidity

Greek Yogurt Instead of Mayo

Works for: Lighter lunch with tangy flavor and fewer calories from fat

Skip if: You want traditional creamy richness or serving to mayo-lovers

Cucumber Instead of Celery

Works for: Different crunch with milder, fresher flavor profile

Skip if: You need traditional chicken salad texture or cucumber releases too much water

Instructions

The whole process takes 15 minutes if you shred efficiently. Pork adds the contrast this plate needs, but timing matters - for a version that comes together quickly, make a tender pork on the side and serve the chicken salad as a lighter pairing option.

  1. Shred the chicken: Pull rotisserie chicken meat off the bones while it's still warm, discarding skin. Use your hands or two forks to shred into bite-sized pieces about ½ inch long. You need 3-4 cups shredded meat.
  2. Dice the vegetables: Cut celery stalks into ¼ inch pieces. Dice red onion finely into ⅛ inch pieces. Pat celery dry with paper towel if it's wet.
  3. Mix the dressing: In a large mixing bowl, whisk together mayonnaise, Dijon mustard, 1 tablespoon lemon juice, salt, and black pepper until smooth and combined.
  4. Combine everything: Add shredded chicken, diced celery, and red onion to the dressing. Fold gently with a spatula until all pieces are evenly coated. Taste and add more lemon juice, salt, or pepper if needed.
  5. Chill and finish: Cover bowl and refrigerate at least 30 minutes so flavors blend. Just before serving, fold in chopped fresh herbs. Serve cold on bread, crackers, or lettuce cups.
Golden Rule
Fold gently when mixing - stirring too vigorously breaks chicken into mushy bits instead of keeping distinct tender pieces

What to Serve With It

You need something to offset the creamy richness without competing for attention. For complete meal planning ideas beyond just sides, see our guide to easy caprese chicken dinner nights that walks through building balanced plates around chicken-based mains.

Side DishPrepWhy It WorksHow to Serve
Mixed green saladEasyLight, fresh complement without heavinessToss greens with lemon vinaigrette, serve alongside
Whole grain bread or crackersEasyProvides texture contrast and extra substanceToast bread lightly or serve crackers on the side
Sliced cucumbersEasyAdds fresh crunch and hydrationSlice thin, sprinkle with salt and lemon
Baby carrotsEasyEasy crunchy veggie for balanceServe raw or blanch 2 minutes if preferred
Fresh fruit (apple slices or grapes)EasyAdds sweet freshness and contrastSlice apples thin or serve grapes whole

Three ways to serve it:

  • Spread on toasted sourdough with lettuce and tomato for a classic sandwich
  • Scoop onto butter lettuce cups for a low-carb wrap option
  • Pile onto crackers with a slice of sharp cheddar for a quick snack plate
Best Pick
Serve on toasted whole grain bread with crisp lettuce - the warm toast softens slightly from the mayo while the lettuce stays crunchy

Store and Reheat

Chicken salad keeps 3-4 days in the fridge but tastes best the first two days. Rich mains need something to cut through, and fish does exactly that - we keep a batch ready for nights like this and pair cold chicken salad with this easy fish recipe when we want hot and cold contrast on the same plate.

MethodTimeBest For
🥶 Serve chilled0 minBest texture and freshness - this is how it's meant to be eaten
📦 Microwave15-30 seconds on lowWarming small portion slightly - avoid full heat or mayo separates

For best results when storing:

  • Transfer to airtight, shallow container within 2 hours of making to prevent bacterial growth
  • Press plastic wrap directly onto surface before sealing lid to minimize air exposure and prevent drying
  • Store dressing separately if prepping salad more than 2 days ahead - mix just before serving for crispest texture
  • Don't freeze chicken salad - mayo breaks and becomes watery and grainy when thawed
  • Add fresh herbs right before serving instead of storing with them - they wilt and darken in the fridge

Frequently Asked Questions

Can I use store-bought rotisserie chicken for this salad?

Yes - store-bought rotisserie chicken is the whole point of this recipe. It's already cooked and seasoned, so you're just shredding and mixing.

How long does rotisserie chicken salad keep in the fridge?

3-4 days in an airtight container, but the texture and flavor are best in the first two days. After that, vegetables start releasing water and the salad gets watery.

What is the best indicator that the chicken is fully cooked?

Rotisserie chicken from the store is already fully cooked and safe to eat cold. If you're unsure, check that the meat pulls away from the bone easily and there's no pink near the bone.

Why is my chicken salad watery and how do I fix it?

Too much lemon juice or wet vegetables cause watery salad. Pat celery and onion dry before mixing, add lemon juice gradually, and drain any liquid pooling at the bottom before serving.

Can I scale this recipe for a large party and how?

Yes - double or triple all ingredients, but taste and adjust seasoning after mixing since larger batches need more salt and acid. Make it the day before and store in the fridge so flavors blend.

Rotisserie Chicken Salad served on a plate

Rotisserie Chicken Salad

No ratings yet
Rotisserie Chicken Salad transforms pre-cooked chicken into a creamy, crunchy lunch in just 15 minutes of prep. The shredded warm chicken mixes easily with a tangy mayo dressing and crisp vegetables, then chills to meld flavors perfectly for sandwiches or salads.
Print Recipe Pin Recipe
Prep Time 15 minutes mins
Cook Time 1 minute min
Total Time 16 minutes mins
Servings: 4 servings
Course: Lunch, Main Dish
Cuisine: American
Ingredients Method Notes

Ingredients
  

  • 3.5 cups rotisserie chicken meat shredded while warm, discard skin
  • 2 stalks celery diced into ¼ inch pieces
  • ¼ cup red onion finely diced into ⅛ inch pieces
  • ½ cup mayonnaise start with ½ cup, add more if needed
  • 1 tablespoon Dijon mustard adds tang and emulsifies dressing
  • 1-2 tablespoons lemon juice add gradually, taste to avoid watery salad
  • 2 tablespoons fresh herbs parsley, dill, or tarragon, chopped
  • to taste salt add gradually, taste as you go
  • to taste black pepper add gradually, taste as you go

Method
 

  1. Pull rotisserie chicken meat off the bones while still warm, discarding skin. Use your hands or two forks to shred into bite-sized pieces about ½ inch long. You need 3 to 4 cups shredded meat.
    3.5 cups rotisserie chicken meat
  2. Cut celery stalks into ¼ inch pieces. Dice red onion finely into ⅛ inch pieces. Pat celery dry with paper towel if very wet.
    2 stalks celery, ¼ cup red onion
  3. In a large bowl, whisk together mayonnaise, Dijon mustard, 1 tablespoon lemon juice, salt, and black pepper until smooth and combined.
    ½ cup mayonnaise, 1 tablespoon Dijon mustard, 1-2 tablespoons lemon juice, to taste salt, to taste black pepper
  4. Add shredded chicken, diced celery, and red onion to the dressing. Fold gently with a spatula until all pieces are evenly coated. Taste and add more lemon juice, salt, or pepper if needed.
    3.5 cups rotisserie chicken meat, 2 stalks celery, ¼ cup red onion, ½ cup mayonnaise, 1 tablespoon Dijon mustard, 1-2 tablespoons lemon juice, to taste salt, to taste black pepper
  5. Cover bowl and refrigerate at least 30 minutes so flavors blend. Just before serving, fold in chopped fresh herbs. Serve cold on bread, crackers, or lettuce cups.
    2 tablespoons fresh herbs

Notes

  • Shred chicken while warm for clean bite-sized pieces.
  • Add lemon juice and seasoning gradually to prevent watery or over-salty salad.
  • Dice celery finely and pat dry to maintain crunch and avoid excess moisture.

Tried this recipe?

Let us know how it was!

Old-Fashioned Tuna Salad

March 14, 2026

Most people think tuna salad is boring until they taste the version with crisp celery, tangy pickles, and hard-boiled eggs. This one hits the balance between creamy and chunky without turning watery or bland.

Old-Fashioned Tuna Salad served on a plate

You'll get firm flakes of tuna coated in just enough mayo, crunchy vegetables that stay crisp, and rich egg pieces that make it feel substantial. The secret is draining the tuna completely and mixing gently so everything stays textured.

Make it for meal prep Sundays, office lunches, or budget-conscious weeknights when you need protein fast. It chills in 30 minutes and lasts 3-4 days in the fridge.

QUICK SUMMARY

This old-fashioned tuna salad balances creamy mayo with chunky tuna, crisp celery, and tangy pickles. The key is draining the tuna thoroughly and chopping vegetables into small, uniform pieces. Hard-boiled eggs add richness without making it heavy.

⏱️Time Reality: 15 minutes active, 10 more if you're boiling eggs fresh
🔪First Move: Drain tuna for a full minute and press gently with a fork
⚠️Watch Out: Too much mayo or wet vegetables make it watery-fix by adding more drained tuna

Why This Recipe Works

The technique that makes this work is draining the tuna completely before mixing. Most watery tuna salads happen because people skip this step or rush it. Rich mains need something to cut through, and a juicy chicken on the side pairs well when you want a complete meal.

Quick Reference
⏱️
Prep Time
15 minutes
🔥
Cook Time
10 minutes
⏰
Total Time
25 minutes
🍽️
Servings
4-6
📊
Difficulty
Easy
🏷️
Category
Main Dish | Lunch
💡
Quick Tip
Drain tuna thoroughly to avoid watery salad
🎯
Best For
Weeknight dinner | Meal prep | Picnic
  • Draining prevents dilution - pressing tuna with a fork removes hidden moisture that would otherwise water down the mayo and make the salad bland
  • Hard-boiled eggs add substance - they contribute richness and texture without overwhelming the fish, making each bite feel more complete
  • Celery stays crisp when chopped small - ¼-inch pieces give you crunch in every spoonful without dominating the texture or requiring excessive chewing
  • Pickles balance the creaminess - dill or sweet pickle relish cuts through the mayo and adds a necessary zing that keeps the salad from feeling heavy
  • Chilling melds the flavors - 30 minutes in the fridge lets the onion mellow, the mayo coat everything evenly, and the whole mixture taste more settled
Quick Tip
Drain tuna for at least 1 minute and press gently with a fork to remove all moisture before mixing.

What You'll Need

Ingredients for Old-Fashioned Tuna Salad

Stock up on canned tuna, fresh vegetables, and a few pantry staples. The homemade works best when it hits the table at the same time as the main, so if you're planning ahead, check out creamy homemade homemade recipe for another quick side option.

🦐
Protein
  • 2 cans (5 oz each) tuna in water or oil
  • 2 hard-boiled eggs, chopped
🥬
Vegetables
  • 2 celery stalks, finely chopped
  • ¼ cup red onion, finely diced
  • 2 tablespoon dill pickle or sweet pickle relish
🧀
Binders
  • ⅓ cup mayonnaise
  • 1 teaspoon yellow mustard
🌶️
Seasonings
  • ¼ teaspoon salt
  • ¼ teaspoon black pepper

Ingredient Details

  • Canned tuna
    Use tuna packed in water for a lighter texture or oil for richer flavor-both work, but drain completely either way
  • Mayonnaise
    Full-fat mayo gives the best creamy coating; Greek yogurt works as a tangy substitute but makes the salad less rich
  • Celery
    Chop into ¼-inch pieces and pat dry with a paper towel if it's very wet from washing
  • Red onion
    Dice finely and soak in cold water for 5 minutes if you want a milder bite, then drain before adding
  • Dill pickle or relish
    Dill gives sharper tang, sweet relish adds mild sweetness-use whichever matches your preference
  • Hard-boiled eggs
    Boil for 10-12 minutes, then shock in ice water for easy peeling and fully cooked yolks
  • Yellow mustard
    Adds mild acidity and tang; swap lemon juice for a brighter, fresher flavor if you prefer

Ingredient Swaps

You can adjust the creaminess, tang, and texture based on what you have. Most people skip homemade, but it balances the meal-for a similar deli option, try this easy herb recipe when you want something simple.

  • Swap mayonnaise for Greek yogurt - cuts fat and adds tang, but the texture becomes lighter and less creamy
  • Swap yellow mustard for lemon juice - gives a fresher, brighter acidity without the mustard's mild heat
  • Swap dill pickle for sweet pickle relish - makes the salad sweeter and less sharp, with a softer texture overall
  • Swap canned tuna in oil for tuna in water - reduces richness and fat content, making the salad feel lighter

Greek Yogurt Instead of Mayo

Works for: Cutting calories and adding tang without losing the creamy base

Skip if: You want the richest, most classic texture and don't mind the fat content

Sweet Pickle Instead of Dill

Works for: People who prefer a milder, slightly sweet flavor profile

Skip if: You like sharp, tangy bites that cut through the creaminess

Instructions

Expect 15 minutes of chopping and mixing, plus 10 more if you're boiling eggs fresh. Garlic shrimp adds the contrast this plate needs, but timing matters-check out this quick garlic shrimp dish if you want something ready at the same time.

  1. Drain tuna completely - open cans, press tuna with a fork for 1 minute to remove all liquid, transfer to a medium bowl
  2. Hard-boil eggs - simmer eggs in water for 10-12 minutes, shock in ice water, peel, chop into ½-inch pieces
  3. Chop vegetables - dice celery and red onion into ¼-inch pieces, pat celery dry if wet, add to bowl with tuna
  4. Mix binders and seasonings - add mayonnaise, mustard, pickles, salt, and pepper to bowl, fold gently with spatula until evenly coated but still chunky
  5. Chill before serving - cover bowl, refrigerate 30 minutes to let flavors meld and onion mellow
Golden Rule
Fold ingredients gently with a spatula instead of stirring hard-this keeps the tuna in firm chunks and prevents a mushy texture.

What to Serve With It

This salad needs something starchy or crisp to complete the plate. Weeknight meals work best when sides hit the table fast, so for more ideas, see our guide on complete tuna melts meal ideas when you're planning a full spread.

Side Dish Prep Why It Works How to Serve
Leafy green salad Easy Adds freshness and lightness to balance the creamy salad Toss greens with vinaigrette, serve alongside tuna salad
Whole grain crackers Easy Provides crunchy texture contrast and a neutral base Serve crackers on the side for scooping tuna salad
Sliced tomatoes Easy Offers juicy acidity that cuts through the mayo Slice thick, season with salt, serve cold
Baby carrots Easy Adds sweet crunch and bright color to the plate Serve raw on the side, or roast at 400°F for 20 minutes
Pickled vegetables Medium Enhances tanginess and adds more crisp texture Serve chilled pickles (cucumbers, carrots) alongside salad

Three ways to serve it:

  • On toasted bread - spread tuna salad thick on whole grain toast, top with lettuce for a classic sandwich
  • In avocado halves - scoop tuna salad into avocado halves for an elegant, low-carb presentation
  • With cucumber rounds - pile tuna salad on thick cucumber slices for a fresh, crunchy bite
Best Pick
Serve on toasted whole grain bread with crisp lettuce-the warm toast contrasts with the cold salad and the lettuce adds snap.

Store and Reheat

Tuna salad lasts 3-4 days in the fridge when stored properly. The tuna works best cold, so you won't need to reheat it-if you're looking for another quick side that travels well, check out this smoky pork recipe for meal prep ideas.

Method Time Best For
🥶 Cold (no reheating) 0 minutes Salad is best served chilled directly from fridge
📦 Not recommended N/A Heating tuna salad makes mayo separate and fish taste off
🔥 Not recommended N/A Warmth ruins the creamy texture and vegetable crunch

For best results when storing:

  • Use shallow, airtight containers - this prevents air exposure and keeps the salad from absorbing fridge odors
  • Store for 3-4 days maximum - after that, the vegetables start to release water and the mayo separates
  • Don't freeze tuna salad - freezing makes the mayo break and the eggs turn rubbery when thawed
  • Stir before serving leftovers - mayo can settle at the bottom, so mix gently to redistribute before eating
  • Keep chilled until serving - letting tuna salad sit at room temperature longer than 2 hours risks bacterial growth

Frequently Asked Questions

Can I substitute canned salmon for tuna in this salad?

Yes, canned salmon works as a direct swap using the same measurements. The flavor will be richer and slightly more oily, so you might want to reduce the mayo by 1-2 tablespoons.

How should I store leftover tuna salad and for how long?

Store in an airtight, shallow container in the fridge for 3-4 days maximum. After that, vegetables release water and the mayo starts to separate, making the texture watery.

Is it necessary to hard-boil eggs before mixing with tuna?

Yes, eggs must be fully hard-boiled (10-12 minutes) so the yolks are cooked through and firm. Undercooked eggs will make the salad runny and unsafe to store.

Why does my tuna salad turn watery and how can I fix it?

Watery salad happens when tuna isn't drained enough or wet vegetables release moisture. Fix it by draining and pressing the tuna with a fork for a full minute, and patting celery dry before adding.

What sides pair best with old-fashioned tuna salad for a dinner?

Serve with whole grain crackers, a leafy green salad, or sliced tomatoes for a complete meal. These add crunch, freshness, and acidity to balance the creamy salad.

Old-Fashioned Tuna Salad served on a plate

Old-Fashioned Tuna Salad

No ratings yet
This old-fashioned tuna salad balances creamy mayo with chunky tuna, crisp celery, and tangy pickles. Draining the tuna thoroughly and chopping vegetables finely keeps the texture perfect. Hard-boiled eggs add richness without being heavy.
Print Recipe Pin Recipe
Prep Time 15 minutes mins
Cook Time 10 minutes mins
Total Time 25 minutes mins
Servings: 4 servings
Course: Lunch, Main Dish
Cuisine: American
Ingredients Method Notes

Ingredients
  

  • 10 oz canned tuna drain completely before mixing
  • 2 large egg hard-boiled and chopped into ½-inch pieces
  • 2 stalks celery finely chopped into ¼-inch pieces, patted dry if wet
  • ¼ cup red onion finely diced
  • 2 tablespoons dill pickle relish or sweet pickle relish
  • ⅓ cup mayonnaise full-fat for best flavor, or Greek yogurt as substitute
  • 1 teaspoon yellow mustard can substitute lemon juice for brightness
  • ¼ teaspoon salt
  • ¼ teaspoon black pepper

Method
 

  1. Open the cans and press the tuna with a fork for 1 minute to remove all excess liquid. Transfer to a medium bowl.
    10 oz canned tuna
  2. Simmer eggs in water for 10-12 minutes, then shock in ice water to cool. Peel and chop into ½-inch pieces.
    2 large egg
  3. Dice celery and red onion into ¼-inch pieces. If celery is wet, pat dry with paper towel. Add to the bowl with tuna.
    2 stalks celery, ¼ cup red onion
  4. Add mayonnaise, yellow mustard, pickle relish, salt, and pepper to the bowl. Fold gently with a spatula until evenly coated but still chunky.
    2 tablespoons dill pickle relish, ⅓ cup mayonnaise, 1 teaspoon yellow mustard, ¼ teaspoon salt, ¼ teaspoon black pepper
  5. Fold in the chopped hard-boiled eggs gently. Cover the bowl and refrigerate for 30 minutes to let flavors meld and onion mellow.
    2 large egg

Notes

  • Drain tuna thoroughly to avoid watery salad.
  • Chop celery small and pat dry to maintain crispness.
  • Fold gently to keep tuna in firm chunks and prevent mushy texture.

Tried this recipe?

Let us know how it was!

What Is Orzo? [Taste, Uses & More]

March 14, 2026

Orzo does something no other small pasta quite manages: it reads like a grain, cooks like pasta, and absorbs broth the way rice does in a well-made pilaf.

What Is Orzo

That triple-duty quality makes it one of the most practical shapes in the pantry, whether you're finishing a weeknight soup, building a cold lunch salad, or looking for a creamy base that lands somewhere between arborio rice and a classic pasta bake.

QUICK SUMMARY

Orzo is a rice-shaped durum wheat pasta with a mild, slightly nutty flavor and firm, chewy bite. It boils like pasta, absorbs broth like rice, and suits soups, salads, pilafs, and bakes. Shelf life runs 12-24 months unopened.

🌾Category: Short-cut pasta made from durum wheat semolina
👅Flavor: Mild, wheaty, faintly nutty - neutral background
🍲Best Uses: Soups, pilafs, salads, casseroles, orzo risotto
📦Shelf Life: 12-24 months sealed; 6-12 months once opened
⚠️Note: Contains gluten - not suitable for gluten-free diets

What Is orzo?

Orzo is a short-cut pasta shaped like a large grain of rice, made from durum wheat semolina. Despite its appearance, it belongs firmly in the pasta category - same dough, same cooking behavior, same starch release.

The name comes from the Italian word for barley, referencing its shape rather than its ingredients.

In Italy, the same shape is often sold as risoni - "large rice" - and appears in regional soups and brothy dishes. Greek cooking adopted it heavily, most famously in avgolemono-style soups and baked casseroles.

Middle Eastern and Turkish cooks use risoni in pilafs and stuffed vegetables alongside or in place of rice.

Orzo comes in a few forms worth knowing:

  • Standard semolina orzo - the most common; smooth, pale yellow, all-purpose
  • Whole-wheat orzo - slightly earthier in flavor, higher in fiber, less common in stores
  • Enriched/fortified orzo - standard semolina with added iron and B vitamins
  • Gluten-free orzo - made from rice or corn flour; texture differs noticeably from the wheat version

What Does orzo Taste Like?

orzo - What Is Orzo

Orzo has a mild, wheaty flavor with a faint nuttiness from the semolina - subtle enough that it takes on the character of whatever it's cooked in.

Compared to most rice varieties, it reads slightly more neutral, with less of the grassy or starchy notes you get from long-grain white rice.

Sensory SnapshotMild Intensity
👅 Flavor
wheatyfaintly nuttyneutral
✋ Texture
firmchewycreamy when stirred
👃 Aroma
mild wheattoasty when dry-cooked

Texture shifts significantly with method. Boiled and drained, it stays firm with a grain-like chew. Stirred into soups or cooked risotto-style, it releases starch slowly and turns creamy without becoming mushy.

Toasting it dry in oil before adding liquid lifts the aroma noticeably - a brief, nutty warmth that plain boiling doesn't produce.

Golden Rule
Toast orzo in olive oil for 2-3 minutes before adding liquid. The nutty aroma it develops makes a bigger flavor difference than any seasoning shortcut.

How to Use orzo

Orzo's mild flavor makes it one of the more adaptable small pastas in the kitchen. Its starch behavior sits between standard pasta and Arborio rice, which is why it works in preparations borrowed from both worlds.

If you're already comfortable cooking couscous replacements, orzo fits into many of the same roles with even better broth absorption.

Greek and Italian cooks have the longest track record with it. In Greek cooking, it finishes soups, bakes into casseroles layered with meat and béchamel, and appears in avgolemono where its starch helps thicken the egg-lemon broth.

Italian regional cooking uses risoni in minestrone and brothy vegetable soups. American adaptations lean toward cold orzo salads and creamy baked dishes.

How Orzo Is Used
MethodBest ForTip
🍳 Toasted then simmeredPilafs, side dishes, grain bowlsUse a 1:2 ratio of orzo to broth; don't stir too often
🥗 Boiled and chilledSalads with feta, herbs, lemonRinse after draining to stop cooking and prevent clumping
🍲 Added to soupChicken soups, seafood stews, minestroneAdd in last 8-10 minutes; it swells and absorbs broth quickly
🥘 Baked in casseroleGratins, orzo mac-and-cheese, stuffed peppersPartially cook before baking so it doesn't absorb all moisture

Orzo pairs well with lemon, olive oil, feta, dill, parsley, chicken, tomatoes, and seafood. It holds up to roasted vegetables and integrates naturally into a lemon-herb pilaf format.

Avoid pairing it with very heavy cream-and-fat sauces that bury its neutral character without adding anything in return.

Try It In
🍄One-Pot Creamy Mushroom OrzoShows orzo's risotto-style starch release at its best→🧄Garlic Butter OrzoSimple toasted-then-simmered pilaf method→🍤Lemon Garlic Shrimp OrzoClassic orzo-seafood pairing with bright citrus→

How to Buy and Store orzo

Look for packages where the pieces are uniformly shaped and intact, with no powdery residue at the bottom. Check the ingredient list - "semolina" or "durum wheat semolina" should be the first item.

Broken pieces cook unevenly and release excess starch, which clouds soups and makes salads gluey.

Watch Out
Avoid packages with a stale or cardboard smell when opened. Oxidized orzo cooks fine but loses the faint nutty character that makes pilaf and toasted preparations worth the effort.

Storage is straightforward:

  • Unopened - keep in its original sealed bag in a cool, dry pantry; lasts 12-24 months
  • Opened - transfer to an airtight container immediately; use within 6-12 months
  • Cooked - refrigerate in a sealed container for up to 4 days; toss with a little oil to prevent clumping

For a full breakdown of how long it keeps under different conditions, see our guide to orzo freshness guide. Cooked orzo salads have a shorter window - check the orzo salad storage life guide if you're prepping ahead.

Start Here With Orzo

New to orzo? Toast it in olive oil first, then simmer in chicken broth. That single method - pilaf-style - teaches you how it absorbs liquid, how it builds texture, and when to pull it before it overcooks.

From there, soup and salad applications follow naturally. If you want to swap it into a dish that currently calls for rice or another small grain, the orzo swaps guide covers ratios and method adjustments worth checking before you start.

Frequently Asked Questions

Is orzo a rice or pasta?

Pasta. It's made from durum wheat semolina dough, extruded into a rice-like shape. The resemblance to rice is purely visual - its starch structure, cooking behavior, and gluten content are all identical to standard pasta.

How long does orzo take to cook?

Boiled in salted water, orzo reaches al dente in 8-10 minutes. Added directly to soup, it takes roughly the same time but absorbs broth as it cooks, so check at 8 minutes to avoid overcooking.

Can I use orzo in place of rice?

Yes, in most applications. Pilafs, stuffed peppers, grain bowls, and soups all work well with a straight swap. Use slightly less liquid than you would for rice - orzo absorbs broth faster and can turn mushy if the ratio is too high.

What does orzo taste like compared to rice?

Orzo is slightly more neutral than most rice varieties, with a faint wheaty nuttiness from semolina. It lacks the grassy or floral notes of jasmine rice and the earthy depth of brown rice.

Is orzo gluten-free?

No. Standard orzo is made from durum wheat and contains gluten. Rice- or corn-based gluten-free versions exist but cook differently and have a softer, less chewy texture than wheat orzo.

Southern-Style Egg Salad

March 14, 2026

You just boiled a dozen eggs and now they're sitting in the fridge. What comes next matters more than you think-too much mayo and the salad turns soupy, too little mustard and it tastes flat.

Southern-Style Egg Salad served on a plate

Southern-style egg salad fixes both problems with a tangy-sweet balance that holds up in the fridge for days. The secret sits in the ratio: equal parts mayo and mustard create the creamy backbone, while sweet pickle relish and celery add crunch without watering things down.

Make this for weeknight lunches, picnic spreads, or meal prep Sundays. It takes 22 minutes start to finish, and the hardest part is waiting an hour for the flavors to marry in the fridge.

Most people skip ranch dressing, but it balances the meal. For a version that comes together quickly, a creamy ranch dressing side pairs perfectly with the tangy notes in this salad.

QUICK SUMMARY

Southern-style egg salad blends hard-boiled eggs with mayo, yellow mustard, sweet pickle relish, and celery for a creamy, tangy side dish. The key is chilling your eggs completely before mixing-warm eggs cause mayo to separate and turn the salad watery. Make it for weeknight sandwiches, picnics, or meal prep that lasts 3-4 days in the fridge.

⏱️Timing: 10 minutes active, 12 minutes boiling, 1 hour chill time before serving
🎯First Step: Simmer eggs gently for 10-12 minutes, then shock in ice water immediately
⚠️Watch Out: Adding mayo to warm eggs creates separation-chill eggs fully before chopping

Table of Contents

Toggle

  • Why This Recipe Works
  • What You'll Need
    • Ingredient Details
  • Ingredient Swaps
  • What to Serve With It
  • Store and Reheat
  • Frequently Asked Questions
  • Southern-Style Egg Salad
    • Method 
    • Tried this recipe?

Why This Recipe Works

The difference between good egg salad and great egg salad comes down to temperature control. A good scratch can make or break the plate. For a version that comes together quickly, this easy scratch recipe delivers consistent results without the guesswork.

Quick Reference
⏱️
Prep Time
10 minutes
🔥
Cook Time
12 minutes
⏰
Total Time
22 minutes
🍽️
Servings
4-6 servings
📊
Difficulty
Easy
🏷️
Category
Side Dish
💡
Quick Tip
Chill egg salad at least 1 hour before serving
🎯
Best For
Weeknight dinner | Meal prep | Picnic
  • Gentle simmering for 10-12 minutes gives you fully set yolks without the green ring that signals overcooked, bitter eggs
  • An immediate ice bath stops carryover cooking and makes peeling easier-skip this step and you'll fight the shells
  • Chopping eggs into quarter-inch pieces creates the right balance between creamy and chunky texture
  • Adding mayo last prevents overmixing and keeps the salad light instead of paste-like
  • Chilling for at least an hour lets the mustard, relish, and seasonings penetrate the eggs instead of sitting on the surface
Quick Tip
Simmer eggs gently for 10-12 minutes for fully set yolks without green rings

What You'll Need

Ingredients for Southern-Style Egg Salad

Shopping for egg salad means hitting three aisles: eggs, condiments, and produce. Rich mains need something to cut through, and potato does exactly that. For a version that comes together quickly, this easy potato recipe balances the richness without stealing the spotlight.

🥚
Base Protein
  • 8 hard-boiled eggs
🥢
Creamy Binder
  • ⅓ cup mayonnaise
  • 1 tablespoon yellow mustard
  • 2 tablespoons sweet pickle relish
🥬
Fresh Crunch
  • 2 stalks celery (finely diced)
  • 2 green onions (optional, sliced thin)
🌶️
Seasonings
  • ½ teaspoon paprika
  • ¼ teaspoon salt
  • ¼ teaspoon black pepper
  • Pinch cayenne pepper (optional)

Ingredient Details

  • Hard-boiled eggs
    Fully cook eggs to avoid texture issues; undercooked yolks stay runny, overcooked ones turn chalky with a green ring
  • Mayonnaise
    Room temperature mayo mixes easier, but always add it to completely chilled eggs to prevent separation
  • Yellow mustard
    Classic Southern choice for tangy bite-Dijon works but changes the flavor profile to sharper and less sweet
  • Sweet pickle relish
    Drain relish well and pat dry with paper towels if it looks especially juicy-excess liquid waters down the salad
  • Celery
    Dice celery into small, uniform pieces for even crunch distribution-large chunks overpower the tender eggs
  • Paprika
    Sprinkle paprika on top just before serving for best color-mixing it in early turns the salad peachy instead of white
  • Green onions
    Optional fresh bite-use white and light green parts only, discarding the tough dark green tops

Ingredient Swaps

Every pantry runs out of something eventually, and egg salad adapts better than most recipes. The shrimp works best when it hits the table at the same time as the main. For a version that comes together quickly, a flaky shrimp on the side complements the creamy texture without competing for attention.

  • Mayonnaise → Greek yogurt: Cuts fat and adds tang, but the salad ends up less creamy and slightly looser-mix with a tablespoon of mayo if you want richer texture
  • Sweet pickle relish → diced dill pickles with a pinch of sugar: Creates crisper texture and more acidic bite-add sugar gradually until you hit the right sweet-tangy balance
  • Yellow mustard → Dijon mustard: Sharper and less sweet, which moves the flavor away from classic Southern style-use half the amount first, then taste
  • Celery → cucumber or jicama: Both add crunch with milder flavor-peel and seed cucumber first, dice jicama into quarter-inch pieces for similar bite

Greek Yogurt Instead of Mayo

Works for: Lower-fat version, extra protein, tangy flavor preference

Skip if: You want classic creamy texture and rich mouthfeel

Dill Pickles Instead of Sweet Relish

Works for: Less sweet preference, crisper texture, more pronounced acidity

Skip if: You're aiming for traditional Southern-style sweetness

Instructions

The entire process takes 22 minutes, but most of that is hands-off boiling time. A good chicken can make or break the plate. For a version that comes together quickly, this juicy chicken hits the right notes without adding complicated steps.

  1. Boil the eggs: Fill a saucepan with water, bring to a rolling boil, then gently lower eggs into the water with a slotted spoon. Reduce heat to maintain a gentle simmer (bubbles breaking the surface but not a hard boil) and cook for 10-12 minutes-set a timer.

  2. Shock and chill: Transfer eggs immediately to a bowl of ice water using the slotted spoon. Let them sit for 5-10 minutes until completely cold, then peel under cool running water-the shells should slip off easily.

  3. Chop the eggs: Pat eggs dry with paper towels, then chop into roughly quarter-inch pieces using a sharp knife. Transfer to a mixing bowl and add diced celery, green onions if using, salt, black pepper, and cayenne.

  4. Mix in the binder: Stir in sweet pickle relish and yellow mustard first, coating the egg mixture evenly. Add mayonnaise last and fold gently with a spoon until just combined-stop when you no longer see white streaks.

  5. Chill and serve: Cover the bowl with plastic wrap and refrigerate for at least 1 hour before serving. Sprinkle paprika over the top just before serving for color and a subtle smoky note.

Shortcut
Chop eggs small-roughly ¼ inch pieces-for ideal texture and mouthfeel

What to Serve With It

Egg salad sits in an odd spot on the table-it's rich enough to satisfy but light enough that you need something else. Most weeknight meals need a gap filled, and planning ahead makes the difference. For complete bunless burgers meal ideas that work with creamy sides like this, start with the protein and build backward.

Side Dish Prep Why It Works How to Serve
Fresh sliced tomatoes Easy Juicy acidity cuts through creamy richness Slice thick, season with salt and pepper, serve alongside or layered on sandwiches
Buttered white bread or sandwich rolls Easy Classic pairing turns salad into complete meal Toast lightly, butter while warm, pile egg salad high
Leafy green salad Easy Light contrast balances heavy mayo base Dress with vinaigrette, serve on the side
Pickled okra or green beans Easy Southern-inspired tang complements sweet relish Serve cold straight from the jar
Kettle potato chips Easy Crisp texture contrast to soft eggs Pile on the side or crush on top of sandwich

Three ways to serve it:

  • Sandwich-style on toasted white bread with lettuce and tomato for classic lunch
  • Scooped onto butter lettuce cups for low-carb lunch or light dinner
  • Spread on crackers with hot sauce drizzled on top for quick appetizer
Best Pick
Serve on toasted bread with crisp lettuce and thick tomato slices-the combination of hot toast, cold salad, and juicy tomato hits all the right notes

Store and Reheat

Egg salad keeps better than you'd expect, but only if you store it right. The shrimp works best when it hits the table at the same time as the main. For a version that comes together quickly, a flaky shrimp on the side stays fresh in the fridge just like this salad-both last 3-4 days when stored properly.

Method Time Best For
🍳 Stovetop N/A Not recommended-heat breaks the mayo and turns eggs rubbery
📦 Microwave 30 seconds low power Warming small portions gently-not recommended generally, texture suffers
🔥 Oven N/A Not recommended-heat destroys creamy texture completely

For best results when storing:

  • Transfer egg salad to an airtight, shallow container immediately after mixing-shallow containers chill faster and more evenly than deep bowls
  • Press plastic wrap directly onto the surface before sealing the lid to prevent oxidation and browning on top
  • Store on a middle shelf in the fridge where temperature stays most consistent-avoid the door, where temps fluctuate
  • Use within 3-4 days for best flavor and texture-mayo-based salads don't freeze well and turn watery when thawed
  • If the salad looks watery after storage, drain off excess liquid and stir in a tablespoon of fresh mayo before serving

Frequently Asked Questions

Can I substitute Greek yogurt for mayonnaise in Southern-style egg salad?

Yes, but the texture turns out less creamy and more tangy. Mix half Greek yogurt and half mayo if you want lower fat without sacrificing all the richness.

How long can I store Southern-style egg salad in the refrigerator?

3-4 days in an airtight container on a middle shelf. Press plastic wrap directly on the surface before sealing to prevent browning.

What is the best way to tell when boiled eggs are done for egg salad?

Set a timer for 10-12 minutes at a gentle simmer-yolks should be fully set but still bright yellow without a green ring. Spin one egg on the counter after chilling; if it spins smoothly, it's fully cooked.

Why does my egg salad turn out watery or runny?

Adding mayo to warm eggs causes separation, and excess relish juice dilutes the mixture. Chill eggs completely before mixing and drain relish well-pat it dry with paper towels if it looks especially wet.

Can Southern-style egg salad be made in advance for picnics or parties?

Yes, make it up to 24 hours ahead and keep it chilled until serving-the flavors actually improve overnight. Pack it in a cooler with ice packs for picnics and keep it below 40°F to stay safe.

Southern-Style Egg Salad served on a plate

Southern-Style Egg Salad

No ratings yet
Southern-style egg salad blends hard-boiled eggs with mayonnaise, yellow mustard, sweet pickle relish, and celery for a creamy, tangy side dish. The key is chilling the eggs completely before mixing to prevent mayo separation. Perfect for weeknight sandwiches, picnics, or meal prep that stores well for 3-4 days in the fridge.
Print Recipe Pin Recipe
Prep Time 10 minutes mins
Cook Time 12 minutes mins
Total Time 22 minutes mins
Servings: 6 servings
Course: Side Dish
Cuisine: Southern
Ingredients Method Notes

Ingredients
  

  • 8 egg hard-boiled
  • ⅓ cup mayonnaise room temperature, added last to prevent separation
  • 1 tablespoon yellow mustard
  • 2 tablespoons sweet pickle relish well drained, patted dry if very juicy
  • 2 stalks celery finely diced
  • 2 green onion thinly sliced, optional, use white and light green parts only
  • ½ teaspoon paprika sprinkle on top just before serving
  • ¼ teaspoon salt
  • ¼ teaspoon black pepper
  • pinch cayenne pepper optional

Method
 

  1. Fill a saucepan with water and bring it to a rolling boil. Gently lower eggs into the water using a slotted spoon. Reduce heat to maintain a gentle simmer with bubbles breaking the surface but no hard boil. Cook for 10-12 minutes, then set a timer.
    8 egg
  2. Immediately transfer eggs to a bowl of ice water using the slotted spoon. Let sit for 5-10 minutes until completely cold. Peel under cool running water; shells should slip off easily.
    8 egg
  3. Pat eggs dry with paper towels. Chop into roughly quarter-inch pieces using a sharp knife. Transfer to a mixing bowl and add diced celery, sliced green onions if using, salt, black pepper, and cayenne pepper.
    8 egg, 2 stalks celery, 2 green onion, ¼ teaspoon salt, ¼ teaspoon black pepper, pinch cayenne pepper
  4. Stir in sweet pickle relish and yellow mustard first, coating the egg mixture evenly. Add mayonnaise last and fold gently with a spoon until just combined, stopping when no white streaks remain.
    ⅓ cup mayonnaise, 1 tablespoon yellow mustard, 2 tablespoons sweet pickle relish
  5. Cover the bowl with plastic wrap and refrigerate for at least one hour before serving. Sprinkle paprika on top just before serving for color and subtle smoky flavor.
    ½ teaspoon paprika

Notes

  • Chill eggs completely before mixing with mayo to avoid watery separation.
  • Drain pickle relish well to prevent excess liquid in the salad.
  • Chilling the salad at least 1 hour before serving lets flavors meld together for best taste.

Tried this recipe?

Let us know how it was!

5 Best Substitutes for Hominy in Latin American Dishes

March 14, 2026

You grab your hominy can and it's lighter than expected. You need at least two cups, but only half that remains.

5 Best Substitutes for Hominy in Latin American Dishes

Hominy's chewy, firm texture holds up in soups and stews where other ingredients might break down. The best swap depends on whether you need that distinct corn flavor or just the chewiness. Some alternatives match texture but not taste, while others bring similar bulk without the kernel bite.

QUICK SUMMARY

**White corn**, **corn grits**, and **lima beans** work as hominy swaps when you need bulk and texture. White corn comes closest in appearance but tastes sweeter. Grits thicken like hominy but lose the kernel shape. Lima beans provide chew without corn flavor.

🌽Closest match: White corn mimics look and texture best
⚖️Core ratio: **Use 1:1 for most swaps**, adjust liquid for grits
⚠️Common mistake: Treating all corn the same-sweet corn breaks down faster

5 Easy Hominy Swaps for Cooking

Each swap performs differently based on cooking time and dish type. Pick the one that matches what hominy does in your specific recipe.

Quick Substitute Reference
#SubstituteBest ForRatioKey Note
1 White Corn 🍳 Cooking 1:1 Sweeter than hominy
2 Corn Grits 🍳 Cooking ¾ cup cooked per 1 cup Cook before adding
3 Lima Beans 🍳 Cooking 1:1 Buttery bean flavor
4 Jicama 🍳 Cooking 1:1 Best raw or lightly cooked
5 Navy Beans 🍳 Cooking 1:1 Creamier than hominy

1 - White Corn

Canned white corn kernels look most like hominy when you ladle out a bowl. The kernels hold their shape through simmering and provide that satisfying bite in every spoonful.

Use 1 cup white corn per 1 cup hominy in pozole, stews, or chili. Expect a sweeter finish and less of that earthy, lime-treated flavor hominy brings.

White Corn

Works for: Soups and stews where kernel shape matters more than deep corn flavor

Skip if: You need that distinct alkaline tang hominy provides

Hominy

Works for: Traditional Mexican dishes where the lime-processed flavor is essential

Skip if: You prefer a lighter, sweeter corn taste

Quick specs:

  • Drain before adding-extra liquid thins broth
  • Add in the last 10 minutes of cooking
  • Kernels soften faster than hominy

2 - Corn Grits

Coarse polenta or dried corn grits thicken stews while adding corn flavor throughout. Cook the grits separately first, then fold them in where you'd normally add hominy.

Use ¾ cup cooked grits per 1 cup hominy. The texture turns creamy rather than chewy, so this works best when you need body more than distinct kernels.

The essentials:

  • Cook grits in stock for more flavor
  • Stir frequently to prevent clumping

Missing grits too? What to use for grits covers coarser corn alternatives.

Skip if: Your dish needs whole kernels you can see and bite into.

3 - Lima Beans

White lima beans bring that firm, satisfying chew hominy lovers expect. The mild, buttery flavor works in hearty stews where corn taste isn't the focus.

Best Pick
Use cooked lima beans 1:1 with hominy in thick stews or casseroles where texture matters most.

Use 1 cup cooked lima beans per 1 cup hominy. Add them during the last 15 minutes so they heat through without breaking apart.

Here's what to know:

  • Frozen limas work as well as canned
  • Rinse canned beans to reduce sodium
  • They hold shape better than most bean swaps
  • Bean flavor comes through in lighter broths

Skip if: You're making a dish where corn flavor is the main feature.

4 - Jicama

Chopped jicama delivers crunch and mild sweetness in cold or barely-cooked dishes. The crisp texture mimics raw hominy but doesn't soften with heat the way cooked hominy does.

Dice jicama into ½-inch pieces, matching hominy's size. Use 1 cup per 1 cup hominy in salads or salsas where you want that snap.

Quick specs:

  • Peel thick skin completely before chopping
  • Add just before serving to keep crunch
  • Works in posole served cold

Out of jicama as well? Crisp jicama swaps lists vegetables with similar snap.

Watch Out
Jicama turns mushy in long-simmered dishes-stick to quick-cook recipes or raw applications.

Skip if: You're simmering soup for more than 20 minutes.

5 - Navy Beans

Cooked white navy beans add bulk and mild flavor to soups without the corn element. They're softer than hominy but common enough to grab from the pantry when you're stuck.

UseRatioNotes
Thick stews1:1Blend a few for creaminess
Quick soups1:1Add near end to prevent splitting
Casseroles1:1Works when baked covered

Use 1 cup cooked navy beans per 1 cup hominy. They break down more easily, so add them after the liquid comes to a simmer.

Key details:

  • Rinse canned beans before using
  • Mash a spoonful to thicken broth naturally

Missing navy beans too? Navy bean alternatives covers firmer legumes that hold shape.

Skip if: You need something that holds up to aggressive stirring or high heat.

Before You Swap Hominy

The best swap depends on whether you need corn flavor, firm texture, or just something to fill the bowl. White corn comes closest for most recipes, while beans work when texture matters more than taste.

Here's how to choose:

  • Closest match - White corn for soups needing kernel shape
  • Easiest grab - Corn grits when you want corn flavor
  • Dietary option - Lima beans for protein-rich bulk

Frequently Asked Questions

Can I use regular yellow corn instead of white corn as a hominy substitute?

Yes, but yellow corn tastes sweeter and has a brighter color that changes the look of your dish. It works fine in hearty stews where appearance matters less than texture.

How do I adjust cooking time when using grits instead of hominy?

Cook grits separately first, then add them to your recipe during the last 10 minutes. Pre-cooked grits need less time than hominy and prevent your dish from thickening too much.

Do bean substitutes work in pozole?

Lima beans work in pozole when you need texture more than corn flavor. Navy beans turn too soft for traditional pozole's long simmer time, so stick with firmer varieties.

Why does my white corn substitute taste so much sweeter than hominy?

Hominy goes through an alkaline treatment that removes the sweet corn flavor and adds an earthy taste. Regular corn keeps its natural sugars, making it noticeably sweeter in the same dish.

Can I mix different hominy substitutes in one recipe?

Yes, combining white corn and lima beans gives you both corn flavor and firm texture. Use half of each to get closer to hominy's overall effect without relying on a single swap.

5 Best Substitutes for Hominy in Latin American Dishes

5 Best Substitutes for Hominy

No ratings yet
This guide covers five practical substitutes for hominy that preserve texture or flavor in soups, stews, or salads. Choose based on whether you want corn flavor, chewiness, or bulk for your dish.
Print Recipe Pin Recipe
Prep Time 6 minutes mins
Cook Time 8 minutes mins
Total Time 14 minutes mins
Servings: 4 servings
Course: Substitutes
Cuisine: General
Ingredients Method Notes

Ingredients
  

  • 1 cup White Corn Use 1:1 ratio to hominy. Drain before adding to prevent thinning broth; kernels soften faster than hominy.
  • 0.75 cup Corn Grits, cooked Use ¾ cup cooked per 1 cup hominy; cook grits separately and stir frequently to prevent clumping.
  • 1 cup Lima Beans, cooked Use 1:1 ratio with hominy. Add in last 15 minutes to heat through without breaking apart.
  • 1 cup Jicama, diced ½ inch Use 1:1 ratio raw or lightly cooked. Peel skin fully before chopping; add just before serving to maintain crunch.
  • 1 cup Navy Beans, cooked Use 1:1 ratio with hominy. Rinse before use and add after liquid simmers to prevent breaking down.

Method
 

  1. Choose your substitute based on the need for corn flavor, texture, or bulk as detailed in the guide.
  2. Prepare the substitute if needed: drain canned items, cook grits separately, or dice jicama.
  3. Adjust quantities to the recommended ratios, typically 1:1 except for grits which require ¾ cup cooked per 1 cup hominy.
  4. Add the substitute towards the end of cooking to maintain texture and flavor; times vary by ingredient.
  5. Check the dish for flavor balance and consistency, making adjustments if needed after adding the substitute.

Notes

Drain white corn before adding to prevent a watery broth.

Tried this recipe?

Let us know how it was!

5 Best Substitutes for Pam Cooking Spray

March 14, 2026

You reach for the Pam can to spray a baking sheet and realize you're down to one pathetic sputter. It leaves bare patches and forces you to dig through the pantry for something that'll keep dinner from welding itself to the pan.

5 Best Substitutes for Pam Cooking Spray

Most swaps work if you match the job. Some add fat and flavor, others just prevent sticking-pick based on whether you're baking, frying, or roasting.

QUICK SUMMARY

**Vegetable oil in a spray bottle** mimics Pam's thin even coat. **Butter** adds flavor in baked goods. **Silicone mats** skip fat entirely for oven use. Control how heavy you apply and you won't see a difference.

✅Closest Match: Vegetable oil spray delivers neutral nonstick action
📏Core Ratio: **1 teaspoon oil = 1 spray of Pam**-spread thin
⚠️Common Mistake: Over-greasing makes food soggy-less is more

5 Pam Cooking Spray Swaps That Keep Flavor Balanced

Some swaps stay neutral. Others bring flavor or skip fat entirely.

Use texture and heat as your guide-baking needs less fat than frying, and high heat rules out some options.

Quick Substitute Reference
#SubstituteBest ForRatioKey Note
1 Vegetable Oil Spray ✨ Both 1 teaspoon oil per spray Neutral, mimics Pam closely
2 Butter 🥧 Baking ½ teaspoon melted per spray Adds creamy richness
3 Olive Oil 🍳 Cooking ½ teaspoon per spray Fruity, peppery flavor
4 Silicone Mat 🥧 Baking 1 mat per sheet No fat, reusable
5 Parchment Paper 🥧 Baking Line pan Barrier only, no browning

1 - Vegetable Oil Spray

Pouring vegetable oil into a clean spray bottle gives you the same thin, even coat as Pam. It prevents sticking on pans, baking sheets, and grills without pooling.

Use 1 teaspoon of oil spread evenly per spray. A light mist keeps food from welding to metal without adding greasy patches.

For Frying and Roasting

Works for: high-heat cooking and daily pan prep

Skip if: you need an ultra-fine commercial mist

For Quick Spray Jobs

Works for: muffin tins and waffle irons

Skip if: bottle clogs or sprays unevenly

Quick specs:

  • Neutral flavor, closest to Pam's original taste
  • Works on grill grates and nonstick pans alike

If you're short on vegetable oil too, what to use instead of vegetable oil covers milder alternatives.

2 - Butter

Melted butter rubbed onto a pan creates a thin nonstick layer. It adds a creamy, slightly sweet note-especially useful for cookies, cakes, and muffins where the extra flavor enhances the finished dish.

Use about ½ teaspoon melted butter per spray. Spread it evenly with a pastry brush or paper towel to avoid thick spots.

Here's what to know:

  • Best for baking at moderate heat-high temps can scorch milk solids
  • Works in cast iron and metal baking pans
  • Adds a golden crust to breads and pastries

Missing butter as well? Butter replacements that work covers fat swaps that stay neutral.

Skip if: you need neutral flavor or you're cooking above 350°F.

3 - Olive Oil

Brushed or drizzled olive oil coats pans for sautéing and roasting. It prevents sticking and adds a fruity, peppery edge that works in savory dishes like roasted vegetables or frittatas.

Best Pick
Use **½ teaspoon olive oil spread thin** per spray-just enough to slick the surface without pooling.

The robust flavor makes it ideal for Mediterranean recipes. For neutral cooking, pick a lighter oil or a different swap.

Quick specs:

  • Smoke point lower than vegetable oil-watch the heat
  • Pairs with garlic, herbs, and roasted meats

Don't have olive oil either? Olive oil swaps by recipe type covers lighter options.

Skip if: you want no added taste or you're baking delicate cakes.

4 - Silicone Mat

A nonstick silicone mat lines a baking sheet and prevents food from sticking without adding any fat. It's reusable, heat-safe to around 480°F, and works for cookies, roasted vegetables, and anything baked flat.

Shortcut
Place **one mat per sheet**-no greasing, no cleanup-just rinse and reuse.

The mat doesn't promote browning the way oil or butter does. Foods come off clean but may not develop as much golden crust.

The essentials:

  • No flavor contribution-purely functional
  • Dishwasher-safe and lasts years
  • Doesn't work for frying or direct-flame grilling
  • Cookies may spread slightly less than on greased metal

Skip if: you need stovetop release or you want a crisp, browned bottom.

5 - Parchment Paper

Parchment paper lines pans and acts as a nonstick barrier in the oven. It handles heat up to 450°F, making it safe for cookies, cakes, and roasted vegetables without adding fat or flavor.

Cut a sheet to fit your pan and lay it flat-no greasing required. Food lifts off cleanly and the paper goes straight into the trash or compost.

Key details:

  • Neutral taste with zero grease
  • Prevents sticking on metal and glass pans
  • Not suitable for stovetop or broiler use

Out of parchment paper too? Parchment paper replacements for steaming covers heat-safe liners.

Skip if: you're frying or need a fat coating to crisp food.

Choosing the Right Pam Cooking Spray Substitute

Start with vegetable oil spray for neutral nonstick action. Add butter for baking, olive oil for savory dishes, or a mat when you want zero fat.

Adjust based on heat and flavor-you'll hit the right balance faster than you think.

  • Closest match - Vegetable oil spray for all-around nonstick release
  • Easiest grab - Butter for baking at moderate temps
  • Dietary option - Silicone mat for zero added fat

Frequently Asked Questions

Can I use olive oil instead of Pam for baking?

Yes, but expect a fruity, peppery flavor. Spread ½ teaspoon olive oil thinly on the pan-works better for savory baked goods like focaccia than for cakes.

What's the best nonstick substitute for high-heat frying?

Vegetable oil in a spray bottle handles high heat without smoking. Apply a light coat before the pan gets hot to prevent sticking.

Do silicone mats work as well as spray for cookies?

They prevent sticking but don't add fat, so cookies may not brown as deeply. If you want crisp edges, use a light spray of oil instead.

Can I replace Pam with butter for roasting vegetables?

Yes, melt about ½ teaspoon butter per spray and toss vegetables before roasting. Keep the oven under 400°F to avoid scorching milk solids.

Does parchment paper need oil when replacing Pam?

No, parchment creates a nonstick surface on its own. Line the pan and bake-no extra grease required unless you want added browning.

5 Best Substitutes for Pam Cooking Spray

5 Best Substitutes for Pam Cooking Spray

No ratings yet
When you're out of Pam cooking spray, choose your substitute based on the cooking method. Vegetable oil spray covers high heat and daily prep, butter adds flavor for baking, olive oil suits savory cooking, and silicone mats or parchment paper work for fat-free baking.
Print Recipe Pin Recipe
Prep Time 6 minutes mins
Cook Time 5 minutes mins
Total Time 11 minutes mins
Servings: 4 servings
Course: Guide, Substitute
Ingredients Method Notes

Ingredients
  

  • 1 teaspoon Vegetable Oil Spray Use 1 teaspoon oil spread thinly per spray for neutral, even nonstick coating
  • 0.5 teaspoon Butter Use ½ teaspoon melted butter per spray, spread evenly with brush or towel
  • 0.5 teaspoon Olive Oil Use ½ teaspoon olive oil spread thinly per spray for savory dishes
  • Silicone Mat Use one mat per baking sheet; no fat needed, reusable
  • Parchment Paper Line baking pan with parchment paper as a nonstick barrier without adding fat

Method
 

  1. Identify your cooking method: frying and roasting suit vegetable or olive oil; baking benefits from butter, silicone mats, or parchment paper.
  2. If using vegetable oil spray, pour vegetable oil into a clean spray bottle and apply 1 teaspoon of oil spread evenly per spray to the cooking surface.
  3. For butter, melt and evenly spread about ½ teaspoon per spray on the pan using a pastry brush or paper towel to avoid thick spots.
  4. If opting for olive oil, brush or drizzle ½ teaspoon per spray thinly on the pan surface, ideal for savory cooking with medium heat.
  5. Line baking sheets with one silicone mat per pan for a fat-free, reusable nonstick surface; clean by rinsing after use.
  6. Alternatively, cut parchment paper to pan size and lay flat as a nonstick barrier in the oven without additional grease required.
  7. Adjust the amount applied based on cooking method and heat; avoid over-greasing to prevent soggy food and uneven cooking.
  8. For flavored oils like olive oil, consider the recipe's flavor profile to avoid overpowering delicate dishes or baked goods.

Notes

  • Use vegetable oil spray by spreading thinly to avoid greasy patches and prevent sticking effectively.

Tried this recipe?

Let us know how it was!
« Previous Page
Next Page »

Primary Sidebar

ForkliftKitchen recipe developer

Welcome!

Recipe Developer · 12+ Yr Kitchen Veteran

I'm the recipe developer behind this site, focused on practical, well-tested dishes and smart ingredient swaps. Every recipe is written to be clear, reliable, and easy to make at home.

650+ Recipes
12+ Yrs Exp.
3x Tested
Our Story →

As Featured In

Allrecipes

TASTE OF HOME

Food52

HUFFPOST

Yahoo! Life

Our Editorial Standards

  • ✓ Every recipe tested at least 3 times before publishing
  • ✓ Substitutes verified by real kitchen trials, not guesswork
  • ✓ Reviewed for accuracy by our editorial team
  • ✓ Updated regularly with seasonal info and reader feedback

Most Popular

  • Creamy Lemon Shrimp Linguine
    Creamy Lemon Shrimp Linguine
  • Creamy Garlic Mushroom Chicken
    Creamy Garlic Mushroom Chicken
  • Sesame Ginger Chicken Noodle Bowls
    Sesame Ginger Chicken Noodle Bowls
  • Baked Lemon Herb Fish Fillets
    Baked Lemon Herb Fish Fillets
  • Veggie Loaded Fried Rice
    Veggie Loaded Fried Rice
  • Spicy Garlic Shrimp Stir Fry
    Spicy Garlic Shrimp Stir Fry

Join 8,000+ Home Cooks

Weekly Kitchen Tips

Easy recipes, smart substitutes, and real cooking shortcuts — every Thursday.

Subscribe Free →


Side Dishes

  • What to Serve With Asian Salmon? 15 Best Side Dishes
    What to Serve With Asian Salmon? 15 Best Side Dishes
  • Side Dishes for Strawberry Spinach Salad
    15 Best Side Dishes for Strawberry Spinach Salad
  • Sides for Grilled Cauliflower Steaks to Complete the Meal
    15 Sides for Grilled Cauliflower Steaks to Complete the Meal
  • 15 Sides To Serve With Calabacitas
    15 Best Sides for Calabacitas – Mexican-Inspired Favorites


Substitutes

  • 7 Best Substitutes for Hot Sauce in Marinades & Stir-Fries
    7 Best Substitutes for Hot Sauce in Marinades & Stir-Fries
  • 9 Best Substitutes for Butter in Baking and Cooking
  • 7 Best Substitutes for Tagliatelle for Italian Pasta Dishes
    7 Best Substitutes for Tagliatelle for Italian Pasta Dishes
  • 7 Best Substitutes for Udon Noodles in Asian Stir-Fries
    7 Best Substitutes for Udon Noodles in Asian Stir-Fries


Browse by Topic

  • Side Dishes320
  • Substitutes785
  • Dinner163
  • Air Fryer77
  • Taste Profiles484
  • Food Storage123


Reader Reviews

★★★★★

"Finally a food blog that tells you exactly why a substitute works instead of just listing options."

— Sarah M., via email

★★★★★

"The side dish recommendations are so specific — saved my dinner party twice this month."

— James R., Pinterest comment

★★★★★

"I trust this site more than most because they actually test everything. You can tell."

— Priya K., blog comment

Footer

↑ Back to Top

Forklift Kitchen

We do the heavy lifting so you can enjoy the cooking. Tested recipes, smart substitutes, and perfect pairings—built for real home cooks.

Content

  • Recipes
  • Substitutes
  • What to Serve With
  • Blog

Company

  • About Us
  • Contact
  • Subscribe

Legal

  • Privacy Policy
  • Terms of Service

As an Amazon Associate I earn from qualifying purchases.

© 2026 Forklift Kitchen.

Rate This Recipe

Your vote:


A rating is required
A name is required
An email is required