• Skip to primary navigation
  • Skip to main content
  • Skip to primary sidebar
  • Recipe Index
    • Air Fryer
  • Side Dishes
  • Substitutes
  • About
  • Contact
  • Subscribe

ForkLiftKitchen

menu icon
go to homepage
  • Recipe Index
    • Air Fryer
  • Side Dishes
  • Substitutes
  • About
  • Contact
  • Subscribe
subscribe
search icon
Homepage link
  • Recipe Index
    • Air Fryer
  • Side Dishes
  • Substitutes
  • About
  • Contact
  • Subscribe
×

Blog

Beef and Vegetable Pot Pie

March 18, 2026

Most pot pies leak filling all over the plate or come out with soggy crusts. The fix is cooking the filling thick on the stovetop before assembly and chilling the crust.

Beef and Vegetable Pot Pie served on a plate

Beef chuck breaks down during long simmering while a butter-flour roux keeps the gravy from thinning out. High oven heat sets the pastry before steam makes it soggy.

This works for weeknight dinners when you need comfort food that holds together and for meal prep batches you can freeze.

QUICK SUMMARY

Beef and vegetable pot pie layers tender stew meat, carrots, potatoes, and gravy under flaky pastry. The filling simmers 25-30 minutes until thick so the crust stays crisp. Bake at 375°F for 35-40 minutes until golden and bubbly.

⏱️Time Reality: 90 minutes total with 30 minutes hands-on prep and assembly
🔥First Critical Step: Sear beef 3-4 minutes per side before simmering for tender chunks
⚠️Watch Out: Thin filling makes crust soggy-cook filling thick before assembling pie

Why This Recipe Works

Beef chuck breaks down during long simmering while starchy vegetables absorb the broth. For a version that comes together quickly, this easy beef recipe uses similar braising methods with different cuts.

Quick Reference
⏱️
Prep Time
30 min
🔥
Cook Time
60 min
⏰
Total Time
90 min
🍽️
Servings
6 servings
📊
Difficulty
Medium
🏷️
Category
Main Dish
💡
Quick Tip
Use cold butter for flakey crust
🎯
Best For
Weeknight | Meal prep | Entertaining

Success markers you can see:

  • Beef falls apart when pressed with a fork after 25-30 minutes simmering
  • Roux-thickened filling coats the back of a spoon without running off
  • Crust turns golden brown with bubbly filling visible through vent slits
  • Internal temperature hits 160°F at the center for fully cooked beef
  • Pastry edges crisp up and pull slightly away from the pan sides
Quick Tip
Chill the assembled pie 20 minutes before baking to prevent crust shrinkage and maintain structure during high-heat baking.

What You'll Need

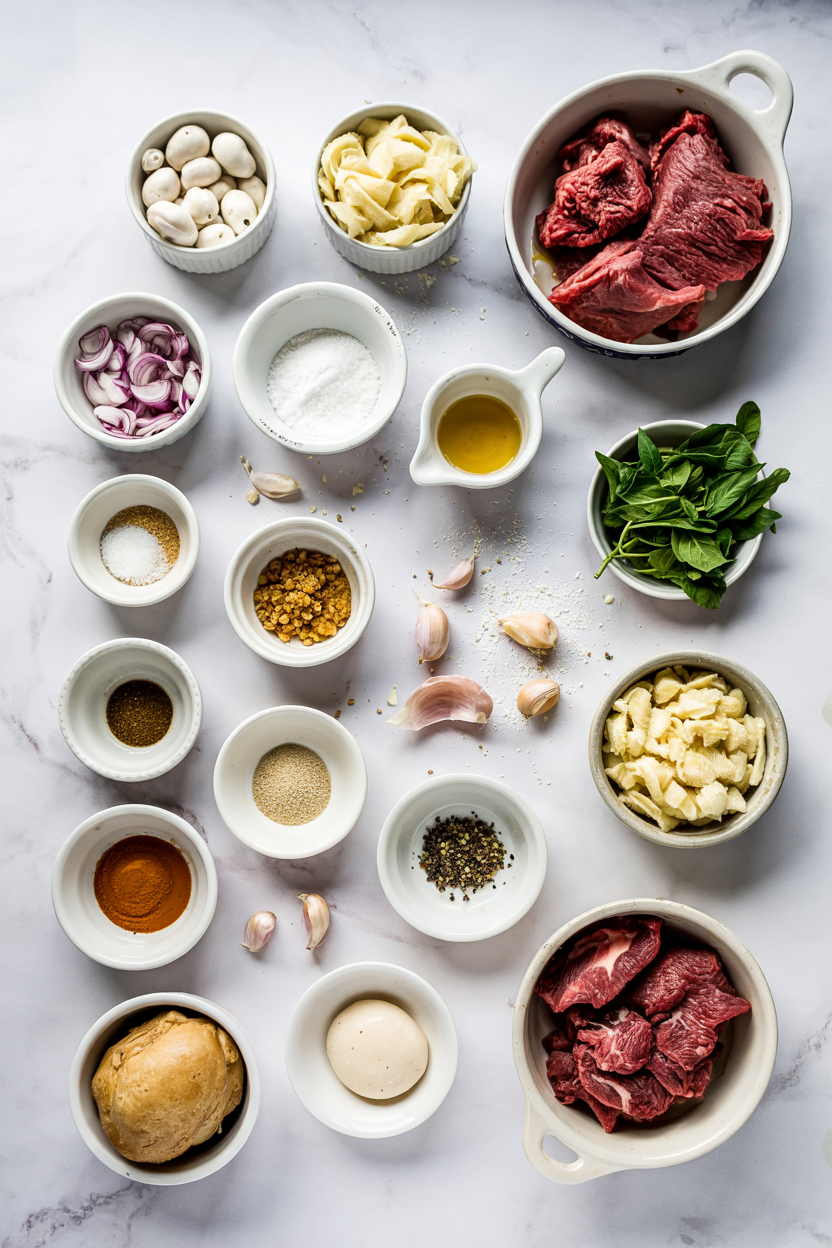
Ingredients for Beef and Vegetable Pot Pie

Stock up on stew meat and root vegetables during shopping trips. Most people skip beef, but it balances the meal.

🥩
Protein
  • 2 lbs beef chuck or stew meat
🥕
Vegetables
  • 3 medium carrots, diced
  • 2 celery stalks, diced
  • 1 large onion, chopped
  • 3 medium potatoes, cubed
  • 1 cup frozen peas (optional)
🧂
Roux & Liquid
  • 4 tablespoon butter
  • ¼ cup all-purpose flour
  • 2 cups beef broth
  • Salt and black pepper
🥧
Crust
  • 1 package pie crust or puff pastry
  • 1 egg (for egg wash)

Ingredient Details

  • Beef chuck or stew meat
    Tough cuts with marbling become fork-tender during long simmering-lean cuts dry out and toughen
  • All-purpose flour
    Creates the roux base that thickens broth into gravy-cornstarch works but changes texture slightly
  • Pie crust or puff pastry
    Store-bought saves time while homemade offers better flavor control-both need chilling before baking
  • Carrots
    Classic pot pie vegetable that adds natural sweetness and holds shape during long cooking
  • Beef broth
    Foundation liquid that becomes savory gravy-use low-sodium to control salt levels
  • Butter
    Fat component for roux that enhances richness-olive oil works but loses depth
  • Potatoes
    Yukon Gold or Russet both work-waxy varieties hold shape better than starchy ones

Ingredient Swaps

Most variations change texture or cooking time. The potato wedges works best when it hits the table at the same time as the main.

Four proven substitutions:

  • All-purpose flour → cornstarch (1:2 ratio): Slightly clearer gravy with less wheaty taste but thickens faster
  • Beef chuck → short ribs or stew beef: Similar tenderness after braising with richer beefy flavor from bone marrow
  • Pie crust → puff pastry or phyllo: Crispier, flakier layers but requires different handling and baking time
  • Fresh vegetables → frozen mixed vegetables: Cuts prep time but may release extra moisture needing longer simmering

Store-Bought Pie Crust

Works for: Quick assembly on busy nights when prep time matters most

Skip if: You want full control over butter content and pastry texture

Homemade Pastry

Works for: Better flavor depth and flakier texture worth the extra effort

Skip if: Dough-making intimidates you or timing is tight for weeknight cooking

Puff Pastry

Works for: Ultra-crisp layers and impressive rise that looks professional

Skip if: You need sturdy crust that holds up during transport or reheating

Instructions

Beef needs 25-30 minutes simmering before the filling thickens properly. A good salad can make or break the plate.

  1. Sear the beef: Heat 2 tablespoon oil in a Dutch oven over medium-high heat and sear beef chunks 3-4 minutes per side until browned, working in batches to avoid crowding-transfer to a plate and set aside.
  2. Build the filling: Sauté onions, carrots, and celery in the same pan for 5 minutes until softened, then add butter and flour, stirring constantly for 2-3 minutes until the roux turns golden and smells nutty.
  3. Simmer until thick: Pour in beef broth while whisking to prevent lumps, return beef to the pan, add potatoes, and simmer partially covered for 25-30 minutes until beef is fork-tender and gravy coats the back of a spoon-season with salt and pepper.
  4. Assemble the pie: Transfer filling to an oven-safe pie dish, let cool 10 minutes, then drape pie crust over the top, trim excess, crimp edges, cut 3-4 vent slits, brush with beaten egg, and chill 20 minutes.
  5. Bake and rest: Bake at 375°F for 35-40 minutes until crust turns golden brown and filling bubbles through the vents-let rest 10 minutes before serving to set the gravy.
Golden Rule
Cook the filling until it's too thick rather than too thin-you can always add liquid but can't easily thicken after assembly without making the crust soggy.

What to Serve With It

Rich pot pie needs something to cut through the gravy and pastry. For more options that balance hearty mains, check out hearty beef dinner ideas for complete plate planning.

Side Dish Prep Why It Works How to Serve
Simple green salad Easy Crisp greens and tangy vinaigrette cut through rich gravy Toss with lemon dressing just before serving
Steamed green beans Easy Fresh snap and mild flavor balance heavy filling Season with butter and cracked black pepper
Glazed carrots Easy Natural sweetness contrasts savory beef and pastry Roast with honey and thyme until caramelized
Roasted Brussels sprouts Medium Slightly bitter char adds complexity to comfort plate Roast at 425°F until crispy edges form
Garlic bread Easy Crisp carb soaks up extra gravy from the plate Toast until golden and serve warm on the side

Three ways to serve it:

  • For casual weeknight dinners: Serve family-style in the baking dish with this quick asparagus dish and buttered rolls for a complete comfort plate
  • For meal prep batches: Portion into individual ramekins before baking so you can freeze separately and reheat singles as needed
  • For entertaining guests: Pair with glazed carrots and a quick salad dish to create a balanced restaurant-style presentation
Shortcut
Make filling up to 2 days ahead and refrigerate-cold filling actually makes assembly easier since the crust doesn't melt while you're working.

Store and Reheat

Leftover pot pie holds for 3-4 days in the fridge when stored properly. Asparagus adds the contrast this plate needs, but timing matters.

Method Time Best For
🔥 Oven 25-30 min at 350°F Restoring crust crispiness for full portions
🍳 Stovetop 10-15 min covered on low Quick filling reheating when you skip the crust
📦 Microwave 2-3 min stirring halfway Fast single servings but crust softens

For best results when storing:

  • Cool completely before covering to prevent steam from softening the crust during storage
  • Store in shallow airtight containers no deeper than 2 inches so filling cools evenly
  • Freeze unbaked assembled pies up to 3 months wrapped tightly in plastic then foil
  • Reheat frozen pies directly from freezer at 375°F for 50-60 minutes covered with foil
  • Place reheated slices on a wire rack in the oven to crisp the bottom crust

Frequently Asked Questions

Can I make beef and vegetable pot pie ahead and freeze it?

Yes-assemble the pie completely, wrap tightly in plastic then foil, and freeze up to 3 months. Bake directly from frozen at 375°F for 50-60 minutes covered with foil, then uncover for the last 10 minutes to brown the crust.

How should I store leftover beef pot pie and reheat it?

Store cooled pie in airtight containers in the fridge for 3-4 days. Reheat in a 350°F oven for 25-30 minutes to restore crust crispiness-microwave works for quick reheating but softens the pastry.

How do I know when the beef filling is fully cooked inside the pie?

Check that the internal temperature hits 160°F at the center using a meat thermometer. The filling should bubble through the vent slits and the crust should turn golden brown after 35-40 minutes at 375°F.

What are common reasons for a soggy crust and how to fix it?

Thin filling and warm dough cause soggy crusts. Cook the filling until thick enough to coat a spoon, let it cool slightly before assembly, and chill the assembled pie 20 minutes before baking to set the pastry.

Can I scale this beef pot pie recipe for smaller portions?

Yes-divide filling into individual ramekins and top each with a smaller crust round. Bake at 375°F for 25-30 minutes since smaller portions cook faster than a full pie dish.

Beef and Vegetable Pot Pie served on a plate

Beef and Vegetable Pot Pie

No ratings yet
Beef and vegetable pot pie features tender stew meat and root vegetables in a thick, savory gravy under a flaky pastry crust. The filling is simmered until thick to ensure the crust stays crisp during baking.
Print Recipe Pin Recipe
Prep Time 30 minutes mins
Cook Time 1 hour hr
Total Time 1 hour hr 30 minutes mins
Servings: 6 servings
Course: Main Dish
Cuisine: American
Ingredients Equipment Method Notes

Ingredients
  

  • 2 lbs beef chuck stew meat cut into chunks
  • 3 medium carrots diced
  • 2 stalks celery diced
  • 1 large onion chopped
  • 3 medium potatoes cubed
  • 1 cup peas frozen, optional
  • 4 tablespoon butter
  • 0.25 cup all-purpose flour
  • 2 cups beef broth
  • 1 package pie crust or puff pastry store-bought or homemade
  • 1 egg egg for egg wash

Equipment

  • Dutch oven Used for searing beef and simmering filling
  • Oven-safe pie dish Used for assembling and baking the pot pie

Method
 

  1. Heat 2 tablespoon oil in a Dutch oven over medium-high heat. Sear beef chunks for 3-4 minutes per side until browned, working in batches to avoid crowding. Transfer to a plate and set aside.
    2 lbs beef chuck
  2. In the same pan, sauté onions, carrots, and celery for 5 minutes until softened. Add butter and flour, stirring constantly for 2-3 minutes until the roux turns golden and smells nutty.
    1 large onion, 3 medium carrots, 2 stalks celery, 4 tbsp butter, 0.25 cup all-purpose flour
  3. Pour in beef broth while whisking to prevent lumps. Return beef to the pan, add potatoes, and simmer partially covered for 25-30 minutes until beef is fork-tender and gravy coats the back of a spoon. Season with salt and pepper.
    2 cups beef broth, 2 lbs beef chuck, 3 medium potatoes
  4. Transfer filling to an oven-safe pie dish and let cool 10 minutes. Drape pie crust over the top, trim excess, crimp edges, cut 3-4 vent slits, brush with beaten egg, and chill for 20 minutes.
    1 package pie crust or puff pastry, 1 egg egg
  5. Bake at 375°F for 35-40 minutes until crust is golden brown and filling bubbles through vents. Let rest 10 minutes before serving to set the gravy.
    1 package pie crust or puff pastry

Notes

  • Cook filling thick enough to coat a spoon to prevent soggy crust.
  • Chill the assembled pie before baking to maintain crust structure.
  • Use beef chuck or stew meat for tender results after simmering.

Tried this recipe?

Let us know how it was!

Stuffed Shells with Ricotta and Spinach

March 18, 2026

You need about an hour start to finish and one baking dish. Cook the pasta shells separately, mix the filling while they cool, then stuff and bake.

Stuffed Shells with Ricotta and Spinach served on a plate

The hardest part is keeping the shells intact while you fill them. Undercook them slightly during boiling so they hold their shape through baking.

This works for weeknight dinners when you want something substantial that reheats well for lunch the next day.

QUICK SUMMARY

Jumbo pasta shells stuffed with ricotta, spinach, and mozzarella, baked in marinara sauce until bubbly. The filling stays creamy if you drain the spinach well and the shells hold their shape when you boil them just until firm to bite. Make this when you need comfort food that works for meal prep.

⏱️Time Reality: 20 minutes prep, 30-40 minutes baking, plan for an hour total
🔑First Move: Boil shells 10-12 minutes until al dente-they finish cooking in the oven
⚠️Watch Out: Wet spinach makes soggy filling-sauté then press it dry in paper towels

Table of Contents

Toggle
  • Why This Recipe Works
  • What You'll Need
    • Ingredient Details
  • Ingredient Swaps
  • What to Serve With It
  • Store and Reheat
  • Frequently Asked Questions
  • Stuffed Shells with Ricotta and Spinach
    • Method 
    • Tried this recipe?

Why This Recipe Works

The ricotta-spinach filling stays creamy because the egg binds everything without drying it out. Baking covered traps steam so the shells cook through without the cheese turning rubbery. Most people skip covering the dish with foil during baking, which makes the top cheese dry and stringy. When you want a similar dinner recipe that uses different proteins, the same covered-baking technique applies.

Quick Reference
⏱️
Prep Time
20 min
🔥
Cook Time
30-40 min
⏰
Total Time
50-60 min
🍽️
Servings
6 servings
📊
Difficulty
Medium
🏷️
Category
Main Dish
💡
Quick Tip
Sauté spinach to remove excess moisture
🎯
Best For
Weeknight | Meal prep | Casual entertaining

Five things that make this work:

  • Jumbo shells hold their shape - The large size creates enough space for filling without tearing during stuffing
  • Al dente boiling prevents mush - Cooking shells 10-12 minutes leaves them firm enough to finish baking without falling apart
  • Sautéed spinach stays dry - Cooking fresh spinach in a skillet then pressing it removes the water that would make the filling runny
  • Covered baking traps steam - Foil keeps moisture in for the first 25 minutes so the pasta cooks through and the cheese melts evenly
  • Resting sets the filling - Letting the dish sit 10 minutes after baking firms up the ricotta so it doesn't spill when you serve
Quick Tip
Use room temperature eggs in the filling-they mix smoother with cold ricotta and bind better during baking

What You'll Need

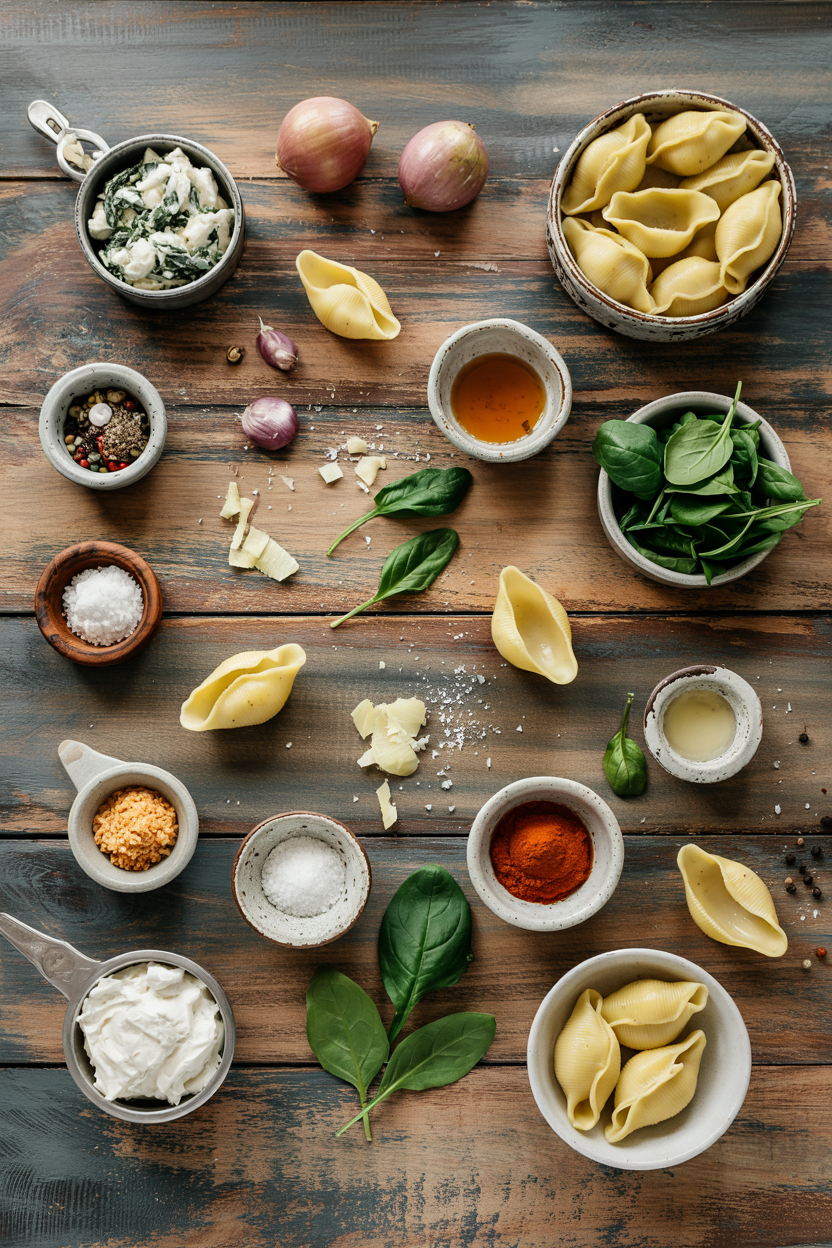
Ingredients for Stuffed Shells with Ricotta and Spinach

Shop for jumbo pasta shells in the dried pasta aisle and fresh spinach in bunches or bags. For a version that uses different grains, creamy homemade side dish ideas follow the same build-a-plate logic.

🍜
Pasta
  • 1 box jumbo pasta shells (12 oz)
🧀
Cheese Filling
  • 2 cups ricotta cheese
  • 1½ cups shredded mozzarella
  • ½ cup grated parmesan
  • 1 large egg
🥬
Vegetables
  • 10 oz fresh spinach
  • 3 cloves garlic, minced
🥢
Sauce & Seasoning
  • 3 cups marinara sauce
  • 2 teaspoon Italian seasoning
  • Salt and pepper

Ingredient Details

  • Jumbo pasta shells
    Look for shells labeled "jumbo" or "large"-regular shells are too small to stuff easily and fall apart when you try
  • Ricotta cheese
    Whole milk ricotta stays creamier during baking than part-skim, which can turn grainy and dry
  • Fresh spinach
    Bunched spinach wilts more than bagged baby spinach-you need about 10 oz fresh to get 1 cup cooked and drained
  • Mozzarella cheese
    Block mozzarella you shred yourself melts smoother than pre-shredded, which has anti-caking powder that makes it clumpy
  • Egg
    One large egg binds about 2 cups of filling-using more makes the texture rubbery instead of creamy
  • Marinara sauce
    Use jarred sauce straight from the container or homemade-either works as long as it's not watery or it'll pool in the dish
  • Garlic
    Fresh minced garlic adds more flavor to sautéed spinach than garlic powder, but powder works if you stir it into the filling

Ingredient Swaps

Most swaps center on dairy or gluten restrictions. The filling texture changes slightly with each substitute but the dish still works for weeknight meals or casual entertaining.

Four swaps that work:

  • Ricotta → cottage cheese - Blend cottage cheese until smooth or leave it slightly chunky for texture (saves money, slightly tangier flavor)
  • Fresh spinach → frozen spinach - Thaw 10 oz frozen spinach, squeeze out all water in a clean towel until bone-dry (easier to store, takes less prep time)
  • Jumbo shells → gluten-free shells or manicotti tubes - Cook gluten-free pasta 2-3 minutes less than package time or use manicotti tubes and pipe filling in with a plastic bag (dietary swap, different shape)
  • Mozzarella → dairy-free shredded cheese - Use shredded dairy-free mozzarella but expect less stretch and browning (vegan option, milder flavor)

Cottage Cheese Instead of Ricotta

Works for: Budget cooking, when you want tangier filling, already have cottage cheese

Skip if: You want the traditional creamy texture, prefer mild cheese flavor

Frozen Spinach Instead of Fresh

Works for: Convenience, meal prep batches, when fresh spinach looks wilted

Skip if: You're worried about excess moisture, want brighter green color

Instructions

Plan for 50-60 minutes total with most of the time spent baking. The shells cool while you make the filling, then everything goes in the oven at once. A good baking dish can make or break the plate-we make a tender cauliflower on the side while the shells bake to use the oven efficiently.

  1. Boil the pasta shells - Bring a large pot of salted water to a rolling boil, add 24-30 jumbo shells, cook 10-12 minutes until al dente (firm to bite but not crunchy), drain and rinse with cold water to stop cooking, lay shells on a baking sheet so they don't stick together.

  2. Sauté spinach and garlic - Heat 1 tablespoon olive oil in a skillet over medium heat, add minced garlic and cook 30 seconds until fragrant, add fresh spinach in batches and cook 3-4 minutes until completely wilted, transfer to a fine-mesh sieve or line a bowl with paper towels and press spinach hard to remove all liquid, chop roughly.

  3. Mix the cheese filling - Combine ricotta, 1 cup mozzarella, parmesan, egg, Italian seasoning, chopped spinach, ½ teaspoon salt, and ¼ teaspoon black pepper in a large bowl, stir until everything is evenly distributed and no egg streaks remain.

  4. Stuff and assemble - Preheat oven to 350°F, spread 1 cup marinara sauce in the bottom of a 9x13-inch baking dish, fill each shell with about 2 tablespoons of cheese mixture using a spoon or piping bag, arrange stuffed shells in the dish opening-side up, pour remaining 2 cups sauce over the top, sprinkle remaining ½ cup mozzarella on top.

  5. Bake covered then uncovered - Cover dish tightly with aluminum foil, bake 25 minutes, remove foil and bake 10-15 minutes more until cheese is melted and lightly golden and sauce is bubbly at the edges, let rest 10 minutes before serving so filling sets.

Golden Rule
Don't skip the resting time-the filling needs 10 minutes to firm up or it'll spill out when you scoop the first serving

What to Serve With It

Rich cheesy pasta needs something fresh or crunchy to balance the plate. Most people skip salad, but it balances the meal-when you're planning your macaroni and tomatoes dinner, the same plate-building logic applies here.

Side Dish Prep Why It Works How to Serve
Simple green salad Easy Fresh greens cut through creamy filling Toss mixed greens with olive oil and lemon juice, serve on the side
Garlic bread Easy Crunchy texture contrasts with soft pasta Toast sliced bread with butter and garlic, serve warm
Steamed broccoli Easy Light vegetable balances richness Steam until bright green and tender-crisp, season with salt
Roasted cherry tomatoes Easy Sweet-tart flavor adds brightness Roast at 400°F for 15 minutes, drizzle with balsamic
Caesar salad Medium Classic pairing for Italian dishes Toss romaine with Caesar dressing and croutons

Three ways to serve it:

  • For weeknight dinners - Pair with a fresh salad side and store-bought garlic bread for minimal extra cooking
  • For meal prep - Make a double batch, freeze half before baking, thaw overnight and bake when needed
  • For casual entertaining - Add an antipasto platter with olives, salami, and cheese as a starter while the shells bake
Shortcut
Use a piping bag or zip-top bag with the corner cut off to fill shells faster-it's neater than spooning and you won't tear the pasta

Store and Reheat

Stuffed shells keep in the fridge for 3-4 days in a shallow airtight container. The filling stays creamy if you don't stack them too deep, which traps moisture and makes the pasta soggy. A good storage container can make or break the plate-we keep hot salty fries in separate containers so textures don't mix.

Method Time Best For
🔥 Oven 20-25 min at 350°F Full batch reheating, best texture and even heating
📦 Microwave 3-5 min covered Single servings, quick weekday lunches
🍳 Stovetop 8-10 min with sauce When shells are separated and you want to add extra marinara

For best results when storing:

  • Use shallow containers - Layer shells in a single layer or at most two layers to prevent sogginess from trapped steam
  • Cover tightly - Wrap the baking dish with plastic wrap or foil if storing in the original dish to keep shells from drying out
  • Freeze before or after baking - Assemble shells in a disposable aluminum pan, cover tightly with foil, freeze up to 3 months, bake from frozen adding 15-20 minutes to cook time
  • Add extra sauce when reheating - Drizzle 2-3 tablespoons marinara over shells before reheating to restore moisture lost during storage
  • Let come to room temp before baking - If reheating from the fridge, let the dish sit on the counter 15-20 minutes so it heats evenly and doesn't crack the dish

Frequently Asked Questions

Can I make stuffed shells ahead and freeze them?

Yes, assemble the shells in a foil pan, cover tightly with plastic wrap then foil, and freeze up to 3 months. Bake from frozen at 350°F for 50-60 minutes covered, then 10 minutes uncovered.

What is the best way to reheat stuffed shells without drying?

Cover the shells with foil and reheat in a 350°F oven for 20-25 minutes, or microwave individual portions covered for 3-5 minutes. Add a spoonful of marinara before reheating to keep them moist.

How do I know when stuffed shells are fully cooked?

The sauce should bubble at the edges and the cheese on top should be melted and lightly golden. The filling will be hot all the way through-test by inserting a knife in the center for 5 seconds, then touch it to your wrist to check if it's hot.

Why are my stuffed shells soggy and how do I fix it?

Soggy shells come from wet spinach or overcooked pasta. Sauté fresh spinach then press it hard in paper towels to remove all water, and boil shells only 10-12 minutes. Bake uncovered for the last 10 minutes to evaporate excess liquid.

How can I adjust the recipe for gluten-free or dairy-free diets?

Use gluten-free jumbo shells and cook them 2-3 minutes less than package directions. For dairy-free, swap ricotta with cashew cream or tofu ricotta and use dairy-free mozzarella, but expect less stretchy cheese and milder flavor.

Stuffed Shells with Ricotta and Spinach served on a plate

Stuffed Shells with Ricotta and Spinach

No ratings yet
Jumbo pasta shells are stuffed with a creamy mixture of ricotta, spinach, and mozzarella, then baked in marinara sauce until bubbly and golden. The filling remains moist by sautéing and draining the spinach well, and the shells hold their shape by boiling just until al dente. This dish is perfect for weeknight dinners and reheats well for meal prep.
Print Recipe Pin Recipe
Prep Time 20 minutes mins
Cook Time 40 minutes mins
Total Time 1 hour hr
Servings: 6 servings
Course: Main Dish
Cuisine: Italian
Ingredients Equipment Method Notes

Ingredients
  

  • 24 shells jumbo pasta shells about 12 oz box
  • 2 cups ricotta cheese whole milk ricotta preferred
  • 1.5 cups mozzarella cheese shredded, divided
  • 0.5 cup parmesan cheese grated
  • 1 large egg room temperature
  • 10 oz fresh spinach bunched or bagged
  • 3 cloves garlic minced
  • 3 cups marinara sauce jarred or homemade
  • 2 teaspoon Italian seasoning
  • 0.5 teaspoon salt for filling
  • 0.25 teaspoon black pepper for filling
  • 1 tablespoon olive oil for sautéing spinach and garlic

Equipment

  • Large pot For boiling pasta shells
  • Skillet To sauté spinach and garlic
  • Fine-mesh sieve or bowl with paper towels To drain sautéed spinach
  • 9x13 inch baking dish For assembling and baking shells
  • Aluminum foil To cover dish during baking
  • Spoon or piping bag For stuffing shells with filling

Method
 

  1. Bring a large pot of salted water to a rolling boil. Add 24-30 jumbo pasta shells and cook for 10-12 minutes until al dente, firm to bite but not crunchy. Drain and rinse with cold water to stop cooking, then lay shells flat on a baking sheet to prevent sticking.
    24 shells jumbo pasta shells
  2. Heat 1 tablespoon olive oil in a skillet over medium heat. Add minced garlic and cook 30 seconds until fragrant. Add fresh spinach in batches, cooking 3-4 minutes until wilted. Transfer spinach to a fine-mesh sieve or bowl lined with paper towels and press hard to remove all moisture, then chop roughly.
    10 oz fresh spinach, 3 cloves garlic, 1 tbsp olive oil
  3. In a large bowl, combine ricotta, 1 cup mozzarella, grated parmesan, egg, Italian seasoning, chopped sautéed spinach, salt, and pepper. Stir until evenly mixed and no egg streaks remain.
    2 cups ricotta cheese, 1.5 cups mozzarella cheese, 0.5 cup parmesan cheese, 1 large egg, 10 oz fresh spinach, 2 tsp Italian seasoning, 0.5 tsp salt, 0.25 tsp black pepper
  4. Preheat oven to 350°F. Spread 1 cup marinara sauce evenly in the bottom of a 9x13-inch baking dish. Using a spoon or piping bag, fill each cooked shell with about 2 tablespoons of cheese mixture. Arrange stuffed shells opening-side up in the prepared dish. Pour remaining 2 cups marinara sauce over shells and sprinkle remaining ½ cup shredded mozzarella on top.
    1.5 cups mozzarella cheese, 3 cups marinara sauce
  5. Cover the baking dish tightly with aluminum foil and bake for 25 minutes. Remove foil and bake for an additional 10-15 minutes until cheese is melted, lightly golden, and sauce is bubbly around edges. Remove from oven and let rest uncovered for 10 minutes before serving to let filling set.

Notes

  • Undercook pasta shells slightly to prevent tearing during stuffing.
  • Sauté and thoroughly drain spinach to avoid soggy filling.
  • Cover the dish with foil during initial baking to trap steam and keep cheese creamy.

Tried this recipe?

Let us know how it was!

Korean Beef Bulgogi

March 18, 2026

When you need a hands-off dinner that works for meal prep or a last-minute weeknight, Korean beef bulgogi delivers. One pan, minimal cleanup, and enough sweet-savory glaze to make plain rice taste worthwhile.

Korean Beef Bulgogi served on a plate

High heat sears the beef while the marinade caramelizes into a sticky coating. The thinly sliced ribeye or sirloin cooks in under 10 minutes.

Perfect for busy weeks when cooking feels like a chore but you still want something that looks intentional. This works for casual entertaining too-set out lettuce leaves and let people build their own wraps.

QUICK SUMMARY

Korean beef bulgogi is thinly sliced beef marinated in soy sauce, sugar, garlic, and sesame oil, then seared over high heat until caramelized. The key is marinating at least 30 minutes and cooking in batches to get crispy edges instead of steamed meat. Pair it with rice and kimchi for a complete meal.

⏱️Timeline: 15 min prep, 30 min marinating minimum, 5-7 min cooking
🔪First Move: Slice beef paper-thin while partially frozen for even cooking
⚠️Watch Out: Overcrowding the pan causes steaming-cook in two batches for caramelized edges

Table of Contents

Toggle
  • Why This Recipe Works
  • What You'll Need
    • Ingredient Details
  • Ingredient Swaps
  • What to Serve With It
  • Store and Reheat
  • Frequently Asked Questions
  • Korean Beef Bulgogi
    • Method 
    • Tried this recipe?

Why This Recipe Works

A good beef can make or break the plate. For a similar dinner recipe that uses different cuts, slow cooking works, but bulgogi relies on speed and surface area-thin slices mean more caramelization in less time.

Quick Reference
⏱️
Prep Time
15 min (plus 30 min marinating)
🔥
Cook Time
5-7 min
⏰
Total Time
40 min
🍽️
Servings
4 servings
📊
Difficulty
Medium
🏷️
Category
Main Dish
💡
Quick Tip
Use very thin beef slices for fast cooking
🎯
Best For
Weeknight | Meal prep | Casual entertaining

Five reasons this bulgogi works:

  • Sugar caramelizes the beef: The marinade's sugar content creates a shiny glaze and crispy edges without burning if you use medium-high heat
  • Thin slices cook fast: ⅛-inch beef slices sear in 3-5 minutes, staying tender while developing charred spots
  • Sesame oil adds depth: Adding it off heat preserves the nutty aroma instead of burning it away
  • Garlic and soy build umami: The combination creates savory depth that makes plain rice taste intentional
  • Marinating tenderizes: At least 30 minutes lets the soy sauce break down fibers while flavors penetrate the meat
Quick Tip
Freeze beef for 30 minutes before slicing-it firms up enough to cut paper-thin slices without sawing through the meat.

What You'll Need

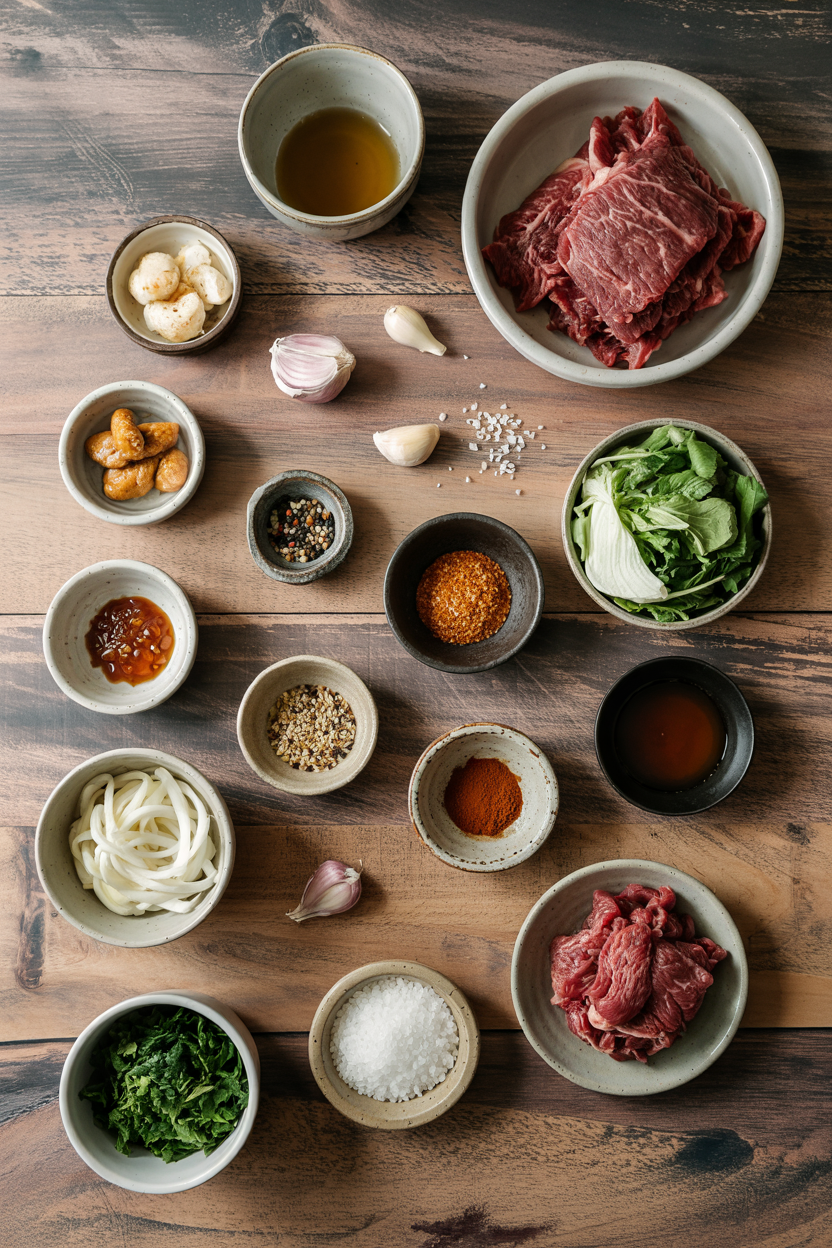
Ingredients for Korean Beef Bulgogi

Most bulgogi shopping lists look the same. For simple homemade punch to serve alongside, you'll want drinks that don't compete with the sweet-savory beef-but first, the marinade ingredients matter more than the cut.

🥩
Protein
  • 1½ lbs thinly sliced ribeye or sirloin beef
🥢
Marinade Base
  • ⅓ cup soy sauce
  • 3 tablespoon sugar
  • 2 tablespoon sesame oil
  • 1 tablespoon neutral oil
🧄
Aromatics
  • 6 cloves garlic, minced
  • 4 green onions, sliced
  • 1 small onion, thinly sliced
  • 1 teaspoon ginger, minced (optional)
🫙
Extras
  • ½ Asian pear or apple, grated (optional)
  • ½ teaspoon black pepper
  • 1 tablespoon toasted sesame seeds for garnish

Ingredient Details

  • Thinly sliced beef (ribeye or sirloin)
    Ribeye has more marbling and stays tender; sirloin is leaner but can dry out if overcooked-freeze 30 minutes before slicing for clean cuts
  • Soy sauce
    Provides the savory backbone and tenderizes the meat-use low-sodium if you're watching salt intake, or swap for tamari for gluten-free
  • Sugar
    Enables caramelization and balances the saltiness-brown sugar adds molasses depth, honey browns faster and can burn if heat's too high
  • Garlic
    Fresh minced garlic gives pungent depth-jarred garlic works but tastes milder and slightly metallic
  • Sesame oil
    Toasted sesame oil adds nutty aroma-add it after cooking off heat to preserve flavor instead of burning it away
  • Asian pear or apple
    Grated fruit adds sweetness and natural enzymes that tenderize beef-skip if you don't have it, the marinade still works
  • Green onions
    Adds mild onion flavor and freshness-slice white and green parts separately, add whites to marinade and greens as garnish

Ingredient Swaps

Bulgogi adapts to what's in your fridge. For fresh homemade salad recipe to serve alongside, cucumbers cut through the richness-but first, here's how to modify the marinade without losing the core flavors.

Four swaps that work:

  • Soy sauce → tamari: Use 1:1 ratio for gluten-free version-flavor's nearly identical with slightly less sharp saltiness
  • Sugar → honey or brown sugar: Swap equal amounts-honey caramelizes faster so watch for burning, brown sugar adds molasses undertones
  • Ribeye → sirloin or flank steak: Use same weight but cook 1-2 minutes less-leaner cuts dry out faster and need careful monitoring
  • Asian pear → apple or kiwi: Grate equal amount-kiwi tenderizes faster so marinate no more than 2 hours or meat gets mushy

Ribeye

Works for: Rich marbling keeps meat tender even if slightly overcooked

Skip if: You want leaner meat or lower fat content

Sirloin

Works for: Budget-conscious cooks who want less fat

Skip if: You tend to overcook-it dries out faster than ribeye

Chicken Thighs

Works for: Non-beef eaters who want similar texture

Skip if: You want authentic flavor-chicken needs longer marinating and different cook times

Instructions

Most people skip punch, but it balances the meal. For something crispy like fry to round out the plate, stir-fried vegetables work-but bulgogi itself takes only 5-7 minutes once the marinade's done its job.

  1. Slice beef paper-thin: Freeze beef 30 minutes, then slice against the grain into ⅛-inch strips-uniform thickness ensures even cooking and prevents thick pieces from staying raw while thin ones overcook.

  2. Mix marinade and marinate: Whisk soy sauce, sugar, garlic, ginger, sesame oil, black pepper, and grated pear in a bowl-add beef and sliced onion, toss to coat, cover and refrigerate minimum 30 minutes (up to 4 hours for deeper flavor).

  3. Heat pan to medium-high: Warm cast-iron skillet or non-stick pan over medium-high heat with 1 tablespoon neutral oil until shimmering-pan must be hot before beef hits it or meat steams instead of sears.

  4. Cook in two batches: Add half the beef in single layer, cook undisturbed 2-3 minutes until edges caramelize and turn deep brown-flip with tongs, cook 1-2 minutes more until no pink remains but meat stays juicy, then transfer to plate and repeat with remaining beef.

  5. Rest and garnish: Let cooked beef rest 2 minutes off heat-sprinkle with sliced green onions and toasted sesame seeds, serve immediately over steamed rice with kimchi on the side.

Watch Out
Overcrowding the pan drops the temperature and causes beef to steam in its own juices-cook in two batches even if it feels slow, the crispy caramelized edges are worth the extra 3 minutes.

What to Serve With It

A dollop of this dip takes each bite somewhere more interesting. For homemade dip recipe, hummus adds creamy contrast-but bulgogi needs sides that cut through the sweet-savory glaze without competing for attention. For more ideas on building a complete meal around hearty beef dishes, check out complete beef barley soup meal ideas.

Side Dish Prep Why It Works How to Serve
Steamed white rice Easy Neutral base soaks up glaze and balances saltiness Serve hot in bowls, spoon bulgogi and sauce over top
Kimchi Easy Spicy fermented crunch cuts through richness Serve cold in small dish on the side for contrast
Sautéed spinach or bok choy Easy Mild bitterness and freshness lighten the plate Toss with garlic and sesame oil, serve warm alongside beef
Pickled radishes Medium Acidity and crunch refresh palate between bites Slice thin, serve cold in small bowl as condiment
Lettuce leaves for wraps Easy Interactive eating and fresh crunch balance rich beef Set out whole leaves, let diners build wraps with beef and rice

Three ways to serve it:

  • Rice bowls: Pile bulgogi over steamed rice, top with fried egg and kimchi for fast weeknight meal
  • Lettuce wraps: Set out Boston lettuce leaves, cooked rice, bulgogi, and ssamjang for build-your-own wraps
  • Meal prep: Pack bulgogi with rice and sautéed vegetables in containers for grab-and-go lunches
Best Pick
Steamed rice and kimchi hit the classic combo-the fermented spice and neutral grain balance bulgogi's sweet-savory glaze without extra cooking.

Store and Reheat

Bulgogi holds well for meal prep but texture changes with reheating. Store cooled beef in shallow airtight containers in fridge up to 3-4 days or freeze up to 1 month-separate rice from beef to prevent sogginess.

Method Time Best For
🍳 Stovetop 3-5 min over medium heat Small portions-quick reheating retains texture
📦 Microwave 1-2 min on medium power, covered Single servings-fast but can toughen edges
🔥 Oven 10 min at 300°F (150°C) Larger batches-gentle heat prevents drying

For best results when storing:

  • Cool completely before sealing: Hot beef creates condensation that makes meat soggy-spread on plate 10 minutes before packing
  • Store sauce separately: Excess marinade makes beef mushy-drain before storing, save sauce in small container to drizzle when serving
  • Reheat with splash of water: Add 1 tablespoon water or broth when reheating to restore moisture without making beef watery
  • Freeze in single-layer portions: Spread cooled beef on parchment-lined sheet pan, freeze 1 hour, then transfer to freezer bag-prevents clumping
  • Thaw in fridge overnight: Slow thawing preserves texture better than microwave defrost-plan ahead for best results

Frequently Asked Questions

Can I use flank steak instead of ribeye for bulgogi?

Yes, flank steak works but slice it thinner than ribeye and marinate at least 2 hours-it's leaner and tougher, so longer marinating and careful cooking prevent dryness. Cook 1-2 minutes less than ribeye to avoid chewiness.

How should I store and reheat leftover bulgogi?

Store cooled bulgogi in airtight containers in fridge up to 3-4 days or freeze up to 1 month. Reheat on stovetop over medium heat 3-5 minutes with a splash of water to restore moisture-microwave works but can toughen the edges.

How do I know when bulgogi beef is cooked through?

Bulgogi is done when the beef is no longer pink inside and edges turn deep brown with caramelized spots-thin slices cook in 3-5 minutes total. The meat should feel firm when pressed with tongs but still give slightly, not hard or bouncy.

Why is my bulgogi tough or dry after cooking?

Tough bulgogi usually means overcooking or slicing too thick-beef should be ⅛-inch thin and cooked no more than 5 minutes total. Marinating less than 30 minutes also causes toughness since the soy sauce doesn't have time to tenderize.

Can I double or halve this bulgogi recipe easily?

Yes, bulgogi scales easily-double all ingredients for 8 servings or halve for 2. When doubling, cook beef in 3-4 batches instead of 2 to avoid overcrowding the pan, which causes steaming instead of caramelization.

Korean Beef Bulgogi served on a plate

Korean Beef Bulgogi

No ratings yet
Korean beef bulgogi features thinly sliced ribeye or sirloin marinated in a sweet-savory blend of soy sauce, sugar, garlic, and sesame oil, then seared quickly over high heat. The marinade caramelizes into a sticky coating, creating tender, flavorful beef perfect for serving with rice and kimchi. Marinating at least 30 minutes and cooking in batches ensures a crispy caramelized crust.
Print Recipe Pin Recipe
Prep Time 45 minutes mins
Cook Time 7 minutes mins
Total Time 52 minutes mins
Servings: 4 servings
Course: Dinner, Main Dish
Cuisine: Korean
Ingredients Equipment Method Notes

Ingredients
  

  • 1.5 lbs beef thinly sliced ribeye or sirloin, freeze 30 minutes before slicing
  • 0.33 cup soy sauce low-sodium or tamari for gluten-free
  • 3 tablespoon sugar white sugar; brown sugar or honey can be used as alternatives
  • 2 tablespoon sesame oil add after cooking to preserve nutty aroma
  • 1 tablespoon neutral oil for searing beef
  • 6 cloves garlic minced fresh
  • 4 green onions sliced; whites for marinade, greens for garnish
  • 1 small onion thinly sliced
  • 1 teaspoon ginger minced, optional
  • 0.5 asian pear or apple grated, optional
  • 0.5 teaspoon black pepper
  • 1 tablespoon toasted sesame seeds for garnish

Equipment

  • Cast iron skillet Heat skillet over medium-high heat for searing beef.
  • Non-stick pan Alternative to skillet for cooking beef.
  • Mixing bowl To whisk marinade and coat beef.
  • Tongs To flip beef slices during cooking.

Method
 

  1. Freeze beef for 30 minutes to firm, then slice against the grain into ⅛-inch strips ensuring uniform thickness for even cooking.
    1.5 lbs beef
  2. Whisk together soy sauce, sugar, garlic, ginger, sesame oil, black pepper, and grated pear in a mixing bowl. Add sliced beef and onion, toss to coat. Cover and refrigerate for at least 30 minutes (up to 4 hours for deeper flavor).
    0.33 cup soy sauce, 3 tbsp sugar, 6 cloves garlic, 1 tsp ginger, 2 tbsp sesame oil, 0.5 tsp black pepper, 0.5 asian pear or apple, 1.5 lbs beef, 1 small onion
  3. Heat a cast iron skillet or non-stick pan over medium-high heat with 1 tablespoon neutral oil until shimmering to ensure it is hot before adding beef to avoid steaming.
    1 tbsp neutral oil
  4. Add half the beef in a single layer, cook undisturbed for 2-3 minutes until edges caramelize and turn deep brown, then flip with tongs and cook for 1-2 minutes more until no pink remains but beef is still juicy. Transfer to plate and repeat with remaining beef.
    1.5 lbs beef
  5. Let cooked beef rest off heat for 2 minutes. Sprinkle with sliced green onion tops and toasted sesame seeds. Serve immediately over steamed rice with kimchi on the side.
    4 green onions, 1 tbsp toasted sesame seeds

Notes

  • Freeze beef before slicing to achieve thin, even strips.
  • Cook beef in batches to avoid overcrowding and steaming; crispy edges develop with proper searing.
  • Add sesame oil off heat to preserve its nutty aroma.

Tried this recipe?

Let us know how it was!

Shrimp and Grits Southern-Style

March 18, 2026

Overcooked shrimp turns rubbery and bland grits taste like wallpaper paste. The fix is cooking each component separately at the right temperature and stirring cheese in at the exact moment the grits come off the heat.

Shrimp and Grits Southern-Style served on a plate

Stone-ground grits need 20-25 minutes of gentle simmering with frequent whisking. Shrimp cook in under 4 minutes total, which means you finish them last while the grits stay warm.

This works for weeknight dinners when you want something that feels special without multi-step prep. Also good for casual entertaining or holiday brunch when you need a crowd-pleaser that comes together fast.

QUICK SUMMARY

Stone-ground grits simmered in chicken broth with sharp cheddar, topped with sautéed shrimp and crispy bacon. Cook grits low and slow for creamy texture, then sear shrimp separately for 2-3 minutes per side. Success depends on adding cheese off heat and not overcooking the shrimp.

⏱️Time Reality: 35 minutes total, grits need 25 minutes of active stirring
🔥First Critical Move: Render bacon fat completely before cooking shrimp for smoky flavor
⚠️Watch Out: Adding cheese on high heat makes grits grainy-remove from heat first

Table of Contents

Toggle
  • Why This Recipe Works
  • What You'll Need
    • Ingredient Details
  • Ingredient Swaps
  • What to Serve With It
  • Store and Reheat
  • Frequently Asked Questions
  • Shrimp and Grits Southern-Style
    • Method 
    • Tried this recipe?

Why This Recipe Works

Cooking grits in chicken broth instead of water builds flavor from the start, and whisking every few minutes prevents lumps. The shrimp cook separately in rendered bacon fat, which means they stay tender instead of turning rubbery from sitting in liquid. For more seafood ideas, we make this easy fish side when the menu needs variety.

Quick Reference
⏱️
Prep Time
10 min
🔥
Cook Time
25 min
⏰
Total Time
35 min
🍽️
Servings
4 servings
📊
Difficulty
Medium
🏷️
Category
Main Dish
💡
Quick Tip
Cook shrimp last for perfect tenderness
🎯
Best For
Weeknight, Entertaining

Five things that make this work:

  • Stone-ground grits cooked in broth: The coarse texture holds up to long simmering and chicken broth adds depth that water can't match
  • Bacon fat for cooking shrimp: Renders slowly over 8-10 minutes to create smoky flavor without burning
  • Cheese stirred in off heat: Sharp cheddar melts smoothly when the pot comes off the burner, avoiding grainy texture
  • Medium heat for shrimp: Keeps them tender with 2-3 minutes per side instead of rubbery from high heat
  • Fresh lemon juice at the end: Brightens the richness right before serving instead of cooking out during the process
Golden Rule
Grits thicken as they cool, so finish them slightly looser than you want-they'll set up while the shrimp cook

What You'll Need

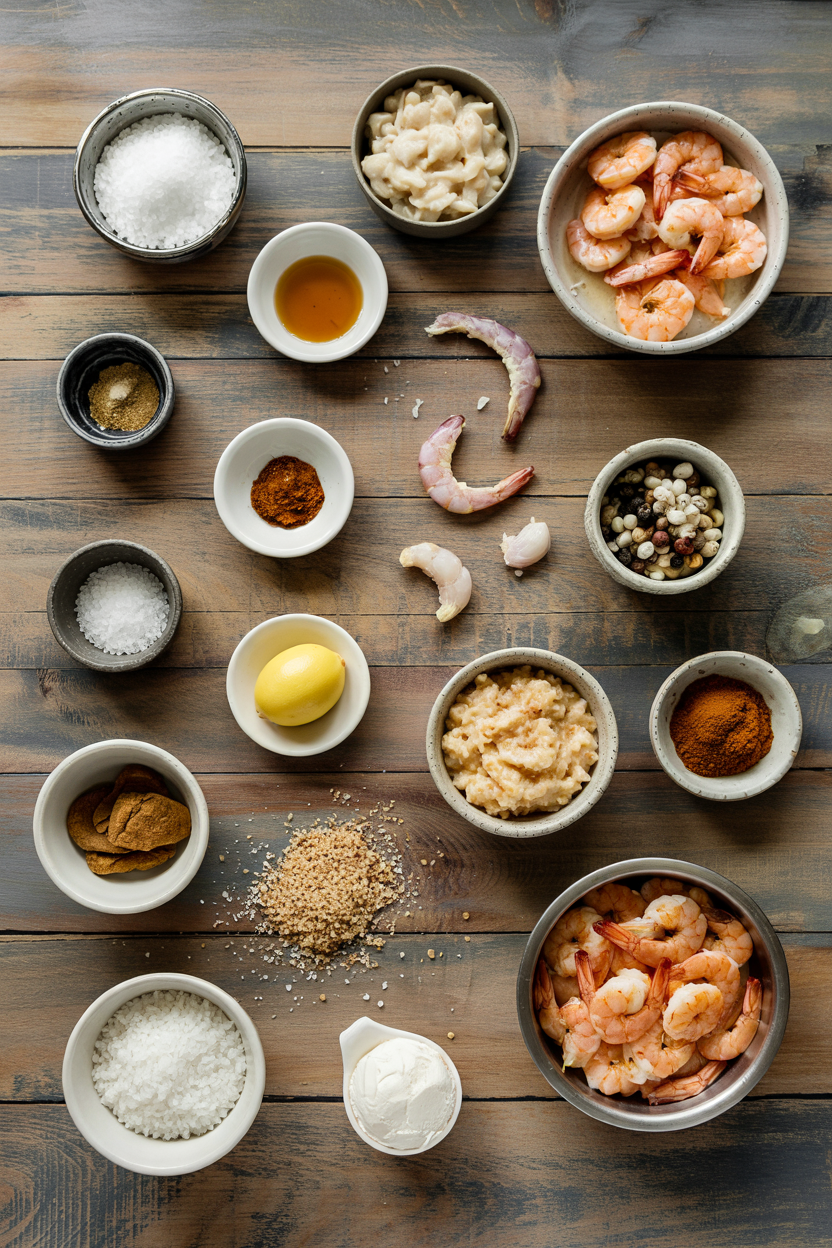
Ingredients for Shrimp and Grits Southern-Style

Stone-ground grits take longer to find than instant but the texture difference is worth the trip to a specialty store. Sharp cheddar and bacon or smoked sausage aren't optional-they build the smoky, creamy base that defines the dish. We pair this with a simple ranch dressing recipe when the meal needs something creamy on the side.

🦐
Protein
  • 1 lb shrimp (peeled, deveined)
  • 4 slices bacon or ½ lb smoked sausage
🌾
Grains
  • 1 cup stone-ground grits
  • 4 cups chicken broth
🧀
Dairy
  • 1 cup sharp cheddar cheese (shredded)
  • 2 tablespoon butter
🧄
Aromatics & Finishing
  • 3 cloves garlic (minced)
  • 2 tablespoon lemon juice
  • 3 green onions (sliced)
  • Salt and black pepper

Ingredient Details

  • Stone-ground grits
    Coarse texture from whole corn kernels, takes 20-25 minutes to cook but holds up without turning mushy
  • Sharp cheddar cheese
    Aged cheddar adds tangy depth that mild cheese can't match-shred it yourself for smoother melting
  • Bacon or smoked sausage
    Bacon renders more fat for cooking shrimp; sausage adds concentrated smoky flavor with less grease
  • Chicken broth
    Low-sodium lets you control salt levels-grits absorb a lot of liquid so flavor builds during cooking
  • Fresh shrimp
    Thawed frozen shrimp work fine if drained well-pat dry before cooking to get a good sear
  • Garlic
    Cook on low heat for 1-2 minutes until fragrant but not browned-burnt garlic tastes bitter
  • Lemon juice
    Fresh citrus added at the end cuts through butter and cheese without cooking out

Ingredient Swaps

Instant grits cook faster but turn pasty without the texture of stone-ground. Frozen shrimp work if you thaw them completely and pat dry before cooking-wet shrimp steam instead of sear.

Four swaps that work:

  • Stone-ground grits → instant grits: Cook in 5 minutes instead of 25, but texture is softer and less toothsome-use 4:1 liquid ratio (budget-friendly)
  • Sharp cheddar → vegan cheese or nutritional yeast: Less creamy and different flavor profile, but works for dairy-free diets-add extra butter substitute (dairy-free)
  • Bacon → smoked turkey or omit entirely: Lighter flavor and fewer calories, but you lose the rendered fat for cooking shrimp-use olive oil instead (budget-friendly)
  • Chicken broth → vegetable broth: Milder flavor but suitable for vegetarians-add extra garlic and butter to compensate (vegetarian)

Stone-Ground Grits

Works for: Traditional texture, holds up to long cooking, authentic flavor

Skip if: You need dinner in under 15 minutes or can't find specialty grains

Instant Grits

Works for: Quick weeknight meals, tight budgets, beginner cooks

Skip if: You want creamy texture that doesn't turn gummy after sitting

Instructions

Grits need 25 minutes of simmering with frequent stirring, so start them first. Shrimp cook in under 4 minutes total, which means they go in the pan last while the grits stay warm off the heat.

  1. Cook the bacon: Cut 4 slices into 1-inch pieces and cook in a large skillet over medium-low heat for 8-10 minutes, stirring occasionally, until crispy and fat is fully rendered. Transfer bacon to a paper towel-lined plate and leave 2 tablespoons fat in the pan.

  2. Simmer the grits: Bring 4 cups chicken broth to a boil in a medium saucepan. Whisk in 1 cup stone-ground grits, reduce heat to low, and simmer for 20-25 minutes, whisking every 3-5 minutes, until grits are thick and tender. Remove from heat, stir in 1 cup shredded sharp cheddar and 2 tablespoons butter until melted, then cover to keep warm.

  3. Cook the garlic: Heat the reserved bacon fat in the skillet over medium heat. Add 3 minced garlic cloves and cook for 1-2 minutes, stirring constantly, until fragrant but not browned.

  4. Sear the shrimp: Add 1 lb peeled, deveined shrimp to the skillet in a single layer. Cook for 2-3 minutes per side without moving them, until they turn pink and opaque. Season with salt and black pepper, then squeeze 2 tablespoons lemon juice over the top.

  5. Serve immediately: Divide grits among 4 bowls, top with shrimp and crispy bacon, then garnish with sliced green onions. Serve hot.

Shortcut
If grits thicken too much while sitting, whisk in chicken broth or water 1 tablespoon at a time until they loosen-they'll absorb liquid as they cool

What to Serve With It

Creamy grits need something crisp or acidic to balance the richness. Sautéed greens or roasted tomatoes add fresh contrast without extra carbs. For easy planning around seafood mains, check out these easy fish meal ideas that cover the same dinner lane.

Side Dish Prep Why It Works How to Serve
Sautéed Greens Easy Bitter greens cut through butter and cheese Wilt in bacon fat with garlic, serve alongside grits
Simple Side Salad Easy Fresh crunch balances creamy textures Toss greens with vinaigrette, serve before or alongside
Cornbread Muffins Easy Classic Southern pairing, soaks up extra sauce Warm in oven while grits simmer, serve in basket
Roasted Cherry Tomatoes Easy Acidity brightens rich grits, adds color contrast Roast at 400°F for 15 minutes, spoon over shrimp
Collard Greens Medium Traditional hearty side, good for feeding a crowd Simmer with bacon for 45 minutes, serve in bowls

Three ways to serve it:

  • Weeknight dinner: Pair with sautéed greens and cornbread muffins-everything cooks while grits simmer
  • Brunch spread: Serve with roasted cherry tomatoes and simple side salad for fresh contrast
  • Casual entertaining: Add collard greens and black-eyed peas for a full Southern spread that feeds 6-8
Best Pick
Roasted cherry tomatoes take 15 minutes in the oven and add acidity that balances butter and cheese without extra effort

Store and Reheat

Grits thicken significantly in the fridge and shrimp turn rubbery when reheated. Store components separately in shallow containers so they cool quickly-this prevents bacterial growth and maintains better texture. When grits need loosening, we keep a crispy homemade potato recipe on hand for nights when leftovers feel like too much work.

Method Time Best For
🍳 Stovetop 5-7 min Reheating grits gently with added broth for creamy texture
🔥 Oven 10-12 min at 300°F Even warming of grits and shrimp separately without drying out
📦 Microwave 1-2 min covered Quick reheating but may alter shrimp texture-add liquid to grits

For best results when storing:

  • Cool grits and shrimp separately: Store in separate airtight containers for 3-4 days in the fridge-grits thicken, shrimp stay tender longer apart
  • Add liquid when reheating grits: Whisk in chicken broth or water 1-2 tablespoons at a time on the stovetop until they loosen to original consistency
  • Reheat shrimp gently: Warm in a covered skillet with a splash of broth for 2-3 minutes over low heat-high heat makes them rubbery
  • Freeze grits only: Portion cooked grits in freezer bags for up to 1 month, but skip freezing shrimp-they turn mushy when thawed
  • Refresh with lemon juice: Squeeze fresh lemon over reheated shrimp and grits to revive brightness lost during storage

Frequently Asked Questions

Can I use frozen shrimp for shrimp and grits?

Yes, thaw frozen shrimp completely in the fridge overnight or under cold running water for 15 minutes. Pat them dry with paper towels before cooking-wet shrimp steam instead of searing, which prevents browning and makes them rubbery.

How should I store leftover shrimp and grits, and reheat them?

Store grits and shrimp in separate airtight containers in the fridge for 3-4 days. Reheat grits on the stovetop over low heat, whisking in chicken broth 1 tablespoon at a time until they loosen. Warm shrimp separately in a covered skillet with a splash of broth for 2-3 minutes-high heat makes them tough.

How do I know when the shrimp and grits are fully cooked?

Shrimp turn opaque and bright pink after 2-3 minutes per side-they should feel firm but still spring back when pressed. Grits are done when they're thick enough to hold a spoon upright and taste tender, not gritty, after 20-25 minutes of simmering.

Why is my grits texture gritty or lumpy, and how to fix?

Gritty grits mean they didn't cook long enough-simmer for the full 20-25 minutes until tender. Lumps form when you don't whisk frequently enough during cooking. Fix lumpy grits by whisking vigorously or blending with an immersion blender, then stir in a splash of hot broth to smooth them out.

Can I scale shrimp and grits for a larger group?

Yes, double or triple the recipe but cook shrimp in batches to avoid overcrowding the pan-too many at once lowers the temperature and they steam instead of sear. Grits scale easily in a larger pot, just whisk more frequently to prevent sticking as volume increases.

Shrimp and Grits Southern-Style served on a plate

Shrimp and Grits Southern-Style

No ratings yet
This Southern-style Shrimp and Grits recipe features stone-ground grits simmered gently in chicken broth and finished with sharp cheddar cheese for creamy texture. Shrimp are seared in rendered bacon fat to keep them tender and smoky, then brightened with fresh lemon juice. Cooking each element separately ensures perfect flavors and textures for a quick weeknight dinner or casual entertaining.
Print Recipe Pin Recipe
Prep Time 10 minutes mins
Cook Time 25 minutes mins
Total Time 35 minutes mins
Servings: 4 servings
Course: Main Dish
Cuisine: Southern
Ingredients Method Notes

Ingredients
  

  • 1 lb shrimp peeled and deveined
  • 4 slices bacon or ½ lb smoked sausage
  • 1 cup stone-ground grits coarse texture
  • 4 cups chicken broth low sodium
  • 1 cup sharp cheddar cheese shredded
  • 2 tablespoon butter
  • 3 cloves garlic minced
  • 2 tablespoon lemon juice fresh
  • 3 green onions sliced
  • salt to taste
  • black pepper to taste

Method
 

  1. Cut 4 slices of bacon into 1-inch pieces and cook in a large skillet over medium-low heat for 8-10 minutes, stirring occasionally, until crispy and fat is fully rendered. Transfer bacon to a paper towel-lined plate and leave 2 tablespoons fat in the pan.
    4 slices bacon
  2. Bring 4 cups chicken broth to a boil in a medium saucepan. Whisk in 1 cup stone-ground grits, reduce heat to low, and simmer for 20-25 minutes, whisking every 3-5 minutes, until grits are thick and tender. Remove from heat, stir in 1 cup shredded sharp cheddar and 2 tablespoons butter until melted, then cover to keep warm.
    1 cup stone-ground grits, 4 cups chicken broth, 1 cup sharp cheddar cheese, 2 tbsp butter
  3. Heat the reserved bacon fat in the skillet over medium heat. Add 3 minced garlic cloves and cook for 1-2 minutes, stirring constantly, until fragrant but not browned.
    3 cloves garlic, 4 slices bacon
  4. Add 1 lb peeled, deveined shrimp to the skillet in a single layer. Cook for 2-3 minutes per side without moving them, until they turn pink and opaque. Season with salt and black pepper, then squeeze 2 tablespoons lemon juice over the top.
    1 lb shrimp, salt, black pepper, 2 tbsp lemon juice
  5. Divide grits among 4 bowls, top with shrimp and crispy bacon, then garnish with sliced green onions. Serve hot.
    3 green onions, 1 lb shrimp, 4 slices bacon

Notes

  • Cook shrimp last to maintain tenderness and prevent rubbery texture.
  • Stir cheese into grits off the heat to avoid grainy texture.
  • Whisk grits frequently during cooking to prevent lumps and create creamy consistency.

Tried this recipe?

Let us know how it was!

Chicken Florentine with Spinach Cream Sauce

March 18, 2026

When you need a restaurant-style dinner that works for a Tuesday or weekend guests, this delivers. One skillet, 35 minutes, and enough cream sauce to make plain rice worth eating.

Chicken Florentine with Spinach Cream Sauce served on a plate

Sear the chicken until golden, then build the sauce in the same pan. The spinach wilts into the cream while the parmesan thickens everything into a silky coating.

Good for weeknight meal prep or when cooking feels like you should try harder.

QUICK SUMMARY

Chicken Florentine layers seared chicken breasts with a garlic-cream sauce loaded with fresh spinach and parmesan. The high-heat sear locks in moisture while the sauce simmers gently to avoid breaking. Make this when you want something creamy that still feels intentional.

⏱️Time Reality: 35 minutes total-15 minutes prep, 20 minutes cooking, no marinating required
🔥Key Move: Pound chicken to ½ inch thickness so it cooks evenly in 4-5 minutes per side
⚠️Watch Out: Crowded pan steams instead of sears-leave space between pieces or work in batches

Why This Recipe Works

The skillet does double duty. Searing the chicken first creates fond on the pan bottom, then deglazing with garlic and cream picks up all those browned bits for flavor. For another approach to creamy chicken dishes, try a juicy chicken side that pairs citrus with orzo instead of spinach.

Quick Reference
⏱️
Prep Time
15 min
🔥
Cook Time
20 min
⏰
Total Time
35 min
🍽️
Servings
4 servings
📊
Difficulty
Medium
🏷️
Category
Main Dish
💡
Quick Tip
Sear chicken until golden, then simmer sauce gently
🎯
Best For
Weeknight | Meal prep | Entertaining

What makes it work:

  • Pounding chicken to even thickness means it cooks through in 4-5 minutes per side without drying out the edges
  • Preheating the skillet for 3 minutes creates the surface heat needed for a crispy golden sear
  • Resting the cooked chicken 5 minutes lets juices redistribute so they don't run out when you slice
  • Adding spinach last and cooking just 1-2 minutes keeps the color vibrant instead of army-green
  • Using a meat thermometer to hit 165°F ensures safe doneness without overcooking
Quick Tip
Deglaze the pan with ¼ cup chicken broth or white wine after searing to capture all the browned bits stuck to the bottom-that's where the flavor lives.

What You'll Need

Ingredients for Chicken Florentine with Spinach Cream Sauce

Shop for boneless skinless chicken breasts, heavy cream, fresh spinach, and parmesan. The rest is pantry staples like garlic, olive oil, and butter.

🍗
Protein
  • 4 boneless skinless chicken breasts (6 oz each)
🥬
Greens
  • 4 cups fresh spinach
🧀
Dairy
  • 1 cup heavy cream
  • ½ cup grated parmesan cheese
  • 2 tablespoon butter
🧄
Aromatics & Seasonings
  • 4 cloves garlic, minced
  • 2 tablespoon olive oil
  • 2 tablespoon lemon juice
  • Salt and black pepper to taste

Ingredient Details

  • Boneless skinless chicken breasts
    Pound to ½ inch thickness for even cooking-thick spots dry out while thin spots overcook
  • Fresh spinach
    Use baby spinach for tenderness or mature spinach if you want more structure; avoid pre-washed bags that look slimy
  • Heavy cream
    Creates the silky base for the sauce-don't substitute milk or it won't thicken properly without flour
  • Parmesan cheese
    Freshly grated melts smoother than pre-shredded, which contains anti-caking agents that make sauce gritty
  • Garlic
    Mince fine and cook on medium-low heat to avoid burning-burnt garlic tastes bitter and ruins the sauce
  • Olive oil
    Use for searing chicken at high heat-its smoke point handles the temperature without breaking down
  • Lemon juice
    Adds brightness that cuts through the cream-add at the end so the acid doesn't curdle the dairy

Ingredient Swaps

Frozen spinach works if you're stuck, but you'll need to squeeze out the water first or the sauce turns thin. Half-and-half can replace heavy cream if you whisk in 1 tablespoon of flour to help it thicken.

Four practical swaps:

  • Heavy cream → Half-and-half with 1 tablespoon flour - Thinner sauce that needs 2-3 extra minutes of simmering to reach the right consistency
  • Fresh spinach → Frozen spinach (well-drained) - Thaw completely, squeeze in a dish towel to remove excess water, then add to sauce
  • Boneless skinless chicken breasts → Chicken thighs - More fat means juicier meat, but cook 2-3 minutes longer per side to render properly
  • Parmesan cheese → Nutritional yeast (3 tbsp) - Dairy-free with a nutty, cheesy flavor, but won't thicken the sauce as much

Half-and-Half + Flour

Works for: Lighter sauce with fewer calories, budget-friendly swap when cream costs too much

Skip if: You want the richest texture or don't want to fuss with whisking flour smooth

Frozen Spinach

Works for: Keeping a bag in the freezer for last-minute meals, stretching your grocery budget

Skip if: You care about bright green color or hate the texture of squeezed-out spinach

Instructions

Budget 35 minutes start to finish. The chicken sears for 8-10 minutes total, then the sauce comes together in another 8-10 while the meat rests.

  1. Pound chicken breasts to ½ inch thickness using a meat mallet or heavy pan. Season both sides with salt and black pepper.
  2. Heat 2 tablespoons olive oil in a large skillet over medium-high heat for 3 minutes. Add chicken breasts without crowding-leave at least 1 inch between pieces. Sear 4-5 minutes per side until golden and internal temperature hits 165°F. Transfer to a plate and tent with foil to rest.
  3. Lower heat to medium-low and add 2 tablespoons butter to the same skillet. Once melted, add minced garlic and cook 30-45 seconds until fragrant but not browned. Pour in 1 cup heavy cream and scrape up any browned bits stuck to the pan.
  4. Simmer cream sauce 3-5 minutes until it thickens slightly. Stir in ½ cup grated parmesan cheese and cook 1-2 minutes until melted. Add 4 cups fresh spinach and cook 1-2 minutes, stirring constantly, until wilted. Stir in 2 tablespoons lemon juice.
  5. Return chicken to the skillet and spoon sauce over the top. Simmer 2 minutes to warm through, then serve immediately.
Watch Out
If your sauce turns out too thin, simmer it uncovered for 3-4 more minutes-don't crank the heat or the cream will break and look curdled.

What to Serve With It

Rich, creamy mains need something crisp or tangy to balance the plate. Roasted vegetables or a bright salad cut through all that dairy without competing for attention. For more options, check out savory chicken dish ideas that follow the same logic.

Side Dish Prep Why It Works How to Serve
Steamed White Rice Easy Neutral base soaks up extra cream sauce Spoon sauce over rice, serve chicken on top
Garlic Mashed Potatoes Medium Comforting texture matches tender chicken Plate potatoes first, nestle chicken beside them
Roasted Asparagus Easy Fresh crunch and color contrast to creamy sauce Roast at 425°F for 12-15 minutes, serve alongside
Simple Green Salad Easy Light balance cuts through richness Dress with vinaigrette, serve on separate plate
Butter Noodles Easy Classic pairing for any creamy sauce Toss hot noodles with butter, top with chicken and sauce

Three ways to serve it:

  • Weeknight plate: Butter noodles on the bottom, chicken sliced on top, sauce drizzled over everything
  • Company dinner: Risotto as the base, whole chicken breast plated beside it, extra parmesan grated over the top
  • Meal prep bowl: Rice, sliced chicken, roasted broccoli, sauce in a separate container to add when reheating
Shortcut
Use rotisserie chicken if you're in a rush-skip the searing step, shred the meat, and toss it into the finished sauce to warm through.

Store and Reheat

This keeps in the fridge 3-4 days in an airtight container. The sauce thickens as it cools, so thin it with a splash of cream or chicken broth when reheating. Store chicken and sauce together so the meat doesn't dry out.

Method Time Best For
🍳 Stovetop 5-7 min on medium-low Best texture-gentle heat preserves creaminess
🔥 Oven 10-15 min at 325°F Even warming for multiple servings at once
📦 Microwave 1-2 min on medium power Quick fix but sauce may separate slightly

For best results when storing:

  • Cool completely before sealing - Hot food in a closed container creates condensation that makes the chicken soggy
  • Store in shallow containers - Food cools faster and reheats more evenly in containers under 2 inches deep
  • Add a splash of cream when reheating - The sauce thickens in the fridge, so thin it back out with 1-2 tablespoons of heavy cream
  • Freeze in portions for up to 2 months - Separate into meal-sized servings so you only thaw what you need
  • Reheat gently to avoid curdling - High heat breaks the cream sauce-stick to medium-low on the stovetop or 50% power in the microwave

Frequently Asked Questions

Can I use frozen spinach instead of fresh for Chicken Florentine?

Yes, but thaw it completely and squeeze out all the water in a dish towel first. Frozen spinach releases excess liquid that thins the sauce if you don't drain it properly.

How do I store and reheat Chicken Florentine leftovers?

Store in an airtight container in the fridge for 3-4 days. Reheat on the stovetop over medium-low heat for 5-7 minutes, adding a splash of cream to loosen the sauce.

How do I know when the chicken is fully cooked?

Use an instant-read thermometer and check that the thickest part reaches 165°F. The juices should run clear, not pink, when you pierce the meat.

What if my sauce turns out too thin or watery?

Simmer it uncovered for 3-5 more minutes to reduce and thicken. If it's still thin, whisk together 1 teaspoon cornstarch with 1 tablespoon cold water and stir it into the sauce.

Can I double the recipe for a larger crowd?

Yes, but sear the chicken in batches to avoid overcrowding the pan. Double the sauce ingredients and use a wider skillet or two pans to keep everything moving at the right pace.

Chicken Florentine with Spinach Cream Sauce served on a plate

Chicken Florentine with Spinach Cream Sauce

No ratings yet
Chicken Florentine features seared chicken breasts topped with a rich garlic cream sauce studded with fresh spinach and parmesan. The high-heat sear locks in moisture while the sauce gently simmers to create a silky, restaurant-quality dinner.
Print Recipe Pin Recipe
Prep Time 15 minutes mins
Cook Time 20 minutes mins
Total Time 35 minutes mins
Servings: 4 servings
Course: Main Dish
Cuisine: American
Ingredients Equipment Method Notes

Ingredients
  

  • 4 boneless skinless chicken breasts pounded to ½ inch thickness
  • 4 cups fresh spinach
  • 1 cup heavy cream
  • ½ cup parmesan cheese grated
  • 2 tablespoon butter
  • 4 cloves garlic minced
  • 2 tablespoon olive oil
  • 2 tablespoon lemon juice

Equipment

  • Large skillet Used for searing chicken and making the sauce
  • Meat mallet or heavy pan To pound chicken breasts to even thickness
  • Meat thermometer To check chicken internal temperature reaches 165°F

Method
 

  1. Pound chicken breasts to ½ inch thickness using a meat mallet or heavy pan. Season both sides with salt and black pepper.
    4 boneless skinless chicken breasts
  2. Heat 2 tablespoons olive oil in a large skillet over medium-high heat for 3 minutes. Add chicken breasts without crowding, leaving at least 1 inch between pieces. Sear chicken 4-5 minutes per side until golden and internal temperature reaches 165°F. Transfer chicken to a plate and tent with foil to rest.
    4 boneless skinless chicken breasts, 2 tbsp olive oil
  3. Lower heat to medium-low and add 2 tablespoons butter to the same skillet. Once melted, add minced garlic and cook 30-45 seconds until fragrant but not browned. Pour in 1 cup heavy cream and scrape up any browned bits stuck to the pan.
    2 tbsp butter, 4 cloves garlic, 1 cup heavy cream
  4. Simmer cream sauce for 3-5 minutes until it thickens slightly. Stir in ½ cup grated parmesan cheese and cook 1-2 minutes until melted. Add 4 cups fresh spinach and cook 1-2 minutes, stirring constantly, until wilted. Stir in 2 tablespoons lemon juice.
    ½ cup parmesan cheese, 4 cups fresh spinach, 2 tbsp lemon juice
  5. Return chicken to the skillet and spoon sauce over the top. Simmer 2 minutes to warm through, then serve immediately.
    4 boneless skinless chicken breasts

Notes

  • Do not overcrowd the skillet when searing chicken to avoid steaming instead of searing.
  • Rest chicken for 5 minutes after cooking to let juices redistribute for moist meat.
  • Add spinach last and cook briefly to keep its bright green color and texture.

Tried this recipe?

Let us know how it was!

Beef and Bean Enchiladas

March 18, 2026

You need 50 minutes and one baking dish. No complicated prep, no multi-step sauces, no special equipment.

Beef and Bean Enchiladas served on a plate

Ground beef and refried beans cook in a skillet while you warm the tortillas. The enchilada sauce goes on before and after assembly so everything bakes moist without drying out.

This is the kind of recipe you make when the family wants Mexican food but you're not ordering takeout.

QUICK SUMMARY

Ground beef and refried beans rolled in corn tortillas, covered in enchilada sauce, and baked until the cheese melts. Warm the tortillas before rolling to prevent cracking. The filling cooks on the stovetop first so you're just heating and melting in the oven.

⏱️Time Reality: 20 minutes prep, 25-30 minutes baking, plus 5-minute rest before serving
🔥First Move: Brown the beef over medium-high heat until no pink remains, then drain the fat
⚠️Watch Out: Cold tortillas crack when you roll them - wrap in a damp towel and microwave 30 seconds

Table of Contents

Toggle
  • Why This Recipe Works
  • What You'll Need
    • Ingredient Details
  • Ingredient Swaps
  • What to Serve With It
  • Store and Reheat
  • Frequently Asked Questions
  • Beef and Bean Enchiladas
    • Method 
    • Tried this recipe?

Why This Recipe Works

Most people skip this rich beef when they want something faster. But browning the ground beef first builds flavor you can't get from raw meat baked in sauce. For a version that comes together quickly, try this method for weeknight dinners.

Quick Reference
⏱️
Prep Time
20 min
🔥
Cook Time
25-30 min
⏰
Total Time
50 min
🍽️
Servings
6
📊
Difficulty
Medium
🏷️
Category
Main Dish
💡
Quick Tip
Warm tortillas to prevent cracking
🎯
Best For
Weeknight | Meal prep | Casual entertaining

The success markers you're looking for:

  • Cook beef over medium-high heat for 5-7 minutes - breaking up clumps until no pink shows and the meat browns at the edges
  • Drain rendered fat before adding beans - prevents greasy filling that makes tortillas soggy
  • Warm corn tortillas wrapped in damp towel - 30 seconds in the microwave makes them pliable enough to roll without tearing
  • Use 2-3 tablespoons filling per tortilla - overfilling makes them split when you roll and bake
  • Pour at least 1 cup sauce over assembled enchiladas - full coverage keeps them moist and delivers the characteristic flavor
Quick Tip
Bake uncovered at 350°F for 25-30 minutes. The cheese should bubble at the edges and the sauce should thicken slightly where it touches the pan.

What You'll Need

Ingredients for Beef and Bean Enchiladas

Shopping for this takes one trip down the Mexican aisle and a stop at the meat counter. The filling works best when you match a tender roasted vegetable side that balances the richness, and we keep a batch ready for nights like this - it stores well and reheats without losing texture.

🍗
Protein
  • 1 lb ground beef
🫙
Pantry
  • 1 can (15 oz) refried beans
  • 12 corn tortillas
  • 2 cups enchilada sauce
  • 2 cups shredded cheese
🧄
Aromatics
  • 1 onion, chopped
  • 3 cloves garlic, minced
🌶️
Spices
  • 1 teaspoon cumin
  • 1 teaspoon chili powder
  • 1 tablespoon olive oil

Ingredient Details

  • Ground beef
    85/15 blend works best - enough fat for flavor without excessive grease to drain
  • Refried beans
    Use traditional refried beans for creamy texture; black beans work but need mashing
  • Corn tortillas
    Fresh tortillas from the refrigerated section roll easier than shelf-stable packages
  • Enchilada sauce
    Red enchilada sauce is traditional; green works but changes the flavor profile completely
  • Shredded cheese
    Cheddar melts with good coverage; Monterey Jack is milder and stretchier
  • Onion
    Yellow or white onion - dice small so it cooks quickly and distributes evenly
  • Garlic
    Fresh garlic adds sharpness; garlic powder works in a pinch but use half the amount

Ingredient Swaps

The base recipe works with what's in your fridge. Beef brings the contrast this plate needs, but timing matters when you're swapping proteins or beans.

Four swaps that work:

  • Refried beans → mashed black beans - less creamy texture but more fiber; mash with a fork until mostly smooth
  • Ground beef → ground turkey - leaner and milder; cook 2-3 minutes less to avoid drying out
  • Corn tortillas → flour tortillas - softer and easier to roll but not gluten-free; use 8 large flour tortillas instead of 12 corn
  • Shredded cheddar → dairy-free cheese - melts differently and lacks richness; add nutritional yeast to filling for savory depth

Ground Turkey

Works for: leaner option, shorter cook time, similar texture

Skip if: you want deeper beef flavor or higher fat content for richness

Flour Tortillas

Works for: easier rolling, softer texture, no steaming needed

Skip if: you need gluten-free or want traditional corn flavor

Black Beans

Works for: chunkier texture, higher fiber, firmer filling

Skip if: you want creamy refried bean texture or smooth filling consistency

Instructions

The stovetop takes 15 minutes, then the oven does the rest. Most people skip this step, but browning the aromatics first builds the base that makes the filling taste intentional instead of flat.

  1. Brown the beef. Heat a large skillet over medium-high heat and cook 1 lb ground beef for 5-7 minutes, breaking up clumps with a spatula until no pink remains and edges turn golden. Drain excess fat into a bowl and discard.

  2. Sauté aromatics and season. Add 1 tablespoon olive oil to the same skillet and cook 1 chopped onion for 3-4 minutes until translucent. Stir in 3 minced garlic cloves, 1 teaspoon cumin, 1 teaspoon chili powder, and cook 1 minute until fragrant. Mix in refried beans and stir until combined and heated through.

  3. Warm tortillas. Wrap 12 corn tortillas in a damp kitchen towel and microwave for 30 seconds. Keep covered until ready to assemble so they stay pliable.

  4. Assemble enchiladas. Pour ½ cup enchilada sauce in the bottom of a 9x13-inch baking dish. Spread 2-3 tablespoons beef-bean filling down the center of each tortilla, roll tightly, and place seam-side down in the dish. Pour remaining sauce over top and sprinkle with 2 cups shredded cheese.

  5. Bake and rest. Bake uncovered at 350°F for 25-30 minutes until cheese melts and bubbles at the edges. Let rest 5 minutes before serving so the filling sets and doesn't spill out when you plate it.

Golden Rule
Don't skip the rest time after baking. Five minutes lets the sauce thicken and the cheese set so enchiladas hold their shape when you lift them out.

What to Serve With It

A good slaw can make or break the plate when you're serving enchiladas for family dinner or meal prep. For planning your easy beef on weck dinner nights, we keep a batch ready for nights like this - it balances the richness without adding more cook time.

Side Dish Prep Why It Works How to Serve
Mexican-style rice Easy Complements flavors and adds bulk to the plate Serve warm alongside enchiladas with lime wedge
Simple green salad Easy Balances richness with fresh, crisp contrast Toss with vinaigrette and serve on the side
Refried beans Easy Reinforces bean flavors and adds extra protein Warm in pot and serve in small bowl
Corn chips Easy Adds crunch contrast to soft enchiladas Serve in basket with salsa for scooping
Mexican street corn salad Medium Flavorful, shareable side for hosting Serve chilled or room temp in serving bowl

Three ways to serve it:

  • Weeknight plate: Mexican rice, simple salad, sour cream on the side
  • Meal prep: Portion with rice in containers, reheat together
  • Hosting: Street corn salad, guacamole, pico de gallo, extra enchilada sauce
Best Pick
Mexican-style rice works best because it soaks up extra sauce and adds bulk without competing flavors. Cook it while the enchiladas bake so everything hits the table hot.

Store and Reheat

Enchiladas hold up better than most baked dishes because the sauce keeps them moist. Store in shallow containers within 2 hours of baking, and they'll last 3-4 days without getting soggy or drying out.

Method Time Best For
🔥 Oven 20 min at 350°F Even heating, restore slightly crisp edges
📦 Microwave 2-3 min medium power Quick reheating, softer texture throughout
🍳 Stovetop 8-10 min covered low heat Small portions, preserve moisture without drying

For best results when storing:

  • Cool completely before covering - trapping steam makes tortillas soggy and encourages bacterial growth
  • Store in single layer if possible - stacking compresses enchiladas and they lose their shape
  • Freeze assembled but unbaked - wrap tightly in foil, bake from frozen adding 15 minutes to cook time
  • Add fresh cheese when reheating - sprinkle on top before warming so it melts fresh instead of getting rubbery
  • Reheat covered in oven - prevents top from drying out while the center warms through

Frequently Asked Questions

How long to cook beef and bean enchiladas at 350°F?

Bake uncovered for 25-30 minutes until the cheese melts and bubbles at the edges. The sauce should thicken slightly where it touches the pan, and the enchiladas should be hot through the center.

Can I make beef and bean enchiladas ahead of time?

Assemble them completely, cover tightly with foil, and refrigerate up to 24 hours before baking. Add 5-10 minutes to the bake time if going straight from fridge to oven.

What are good side dishes for beef and bean enchiladas?

Mexican-style rice, simple green salad, refried beans, and corn chips work best. For hosting, add Mexican street corn salad, guacamole, and pico de gallo.

How do I know when beef and bean enchiladas are done baking?

The cheese should be fully melted and bubbling around the edges, the sauce should be hot and slightly thickened, and the enchiladas should be firm enough to hold their shape when you lift one corner with a spatula.

Can I substitute black beans for refried beans in enchiladas?

Use drained black beans mashed with a fork until mostly smooth but still chunky. The texture is firmer and less creamy than refried beans, but the flavor works and you get more fiber.

Beef and Bean Enchiladas served on a plate

Beef and Bean Enchiladas

No ratings yet
Ground beef and refried beans rolled inside warm corn tortillas, covered with enchilada sauce, and baked to bubbly, melty perfection. Warming the tortillas before rolling prevents cracking and ensures pliability. Browning the beef first builds rich flavor making this a great weeknight Mexican dinner.
Print Recipe Pin Recipe
Prep Time 20 minutes mins
Cook Time 30 minutes mins
Total Time 50 minutes mins
Servings: 6 servings
Course: Main Dish
Cuisine: Mexican
Ingredients Equipment Method Notes

Ingredients
  

  • 1 lb ground beef use 85/15 blend for flavor and manageable fat
  • 1 can refried beans 15 oz can, traditional style for creamy texture
  • 12 corn tortillas fresh or refrigerated for pliability
  • 2 cups enchilada sauce red sauce preferred for traditional flavor
  • 2 cups shredded cheese cheddar or Monterey Jack for melting
  • 1 onion chopped finely
  • 3 cloves garlic minced fresh
  • 1 tablespoon olive oil for sautéing onion and garlic
  • 1 teaspoon cumin
  • 1 teaspoon chili powder

Equipment

  • Large skillet Used to cook beef and bean filling
  • 9x13 inch baking dish Used to assemble and bake the enchiladas
  • Microwave Used to warm tortillas wrapped in damp towel

Method
 

  1. Heat a large skillet over medium-high heat and cook ground beef for 5-7 minutes, breaking up clumps with a spatula until no pink remains and edges turn golden. Drain excess fat and discard.
    1 lb ground beef
  2. Add olive oil to the same skillet. Cook chopped onion for 3-4 minutes until translucent. Stir in minced garlic, cumin, and chili powder, cooking 1 minute until fragrant. Mix in refried beans and stir until heated through.
    1 onion, 3 cloves garlic, 1 tbsp olive oil, 1 tsp cumin, 1 tsp chili powder, 1 can refried beans
  3. Wrap corn tortillas in a damp kitchen towel and microwave for 30 seconds. Keep covered to stay pliable.
    12 corn tortillas
  4. Pour ½ cup enchilada sauce into the bottom of a 9x13-inch baking dish. Spread 2-3 tablespoons beef-bean filling down the center of each tortilla, roll tightly, and place seam-side down in the dish. Pour remaining sauce over the top and sprinkle with shredded cheese.
    2 cups enchilada sauce, 1 lb ground beef, 1 can refried beans, 2 cups shredded cheese, 12 corn tortillas
  5. Bake uncovered at 350°F for 25-30 minutes until cheese melts and bubbles at the edges. Let rest 5 minutes before serving to set the filling.
    2 cups shredded cheese, 2 cups enchilada sauce

Notes

  • Warm tortillas just before assembling to prevent cracking during rolling.
  • Drain fat from beef to avoid greasy filling and soggy tortillas.
  • Rest enchiladas 5 minutes after baking for best texture and easier serving.

Tried this recipe?

Let us know how it was!

Sausage and Peppers Italian-Style

March 18, 2026

Pan-fried sausage often turns out dry or rubbery because it's cooked straight through at high heat. The solution is searing first for crispy casing, then simmering with peppers in tomato sauce to finish cooking gently.

Sausage and Peppers Italian-Style served on a plate

Medium heat keeps the peppers tender-crisp while the sausage reaches 160°F without drying out. One skillet handles everything from browning to final simmer.

Make this when you need a weeknight dinner that doesn't require babysitting the stove or washing three pans.

QUICK SUMMARY

Sausage and peppers comes together in one skillet with seared Italian sausage, bell peppers, onions, and tomato sauce simmered until tender. The key is searing sausage first for crispy casing before adding vegetables, then finishing everything together so flavors meld without overcooking. Use an instant-read thermometer to confirm sausage reaches 160°F internal temperature.

⏱️Time: 35 minutes total - 10 minutes prep, 25 minutes cook time
🔥First move: Sear sausages 4-5 minutes per side before anything else touches the pan
⚠️Watch out: Burnt garlic ruins the batch - add it last 2 minutes of sautéing

Why This Recipe Works

Searing the sausage before adding vegetables creates a crispy casing that stays intact during simmering. For a version that comes together quickly, another great pepe recipe uses a similar one-pan approach that keeps cleanup minimal.

Quick Reference
⏱️
Prep Time
10 min
🔥
Cook Time
25 min
⏰
Total Time
35 min
🍽️
Servings
4 servings
📊
Difficulty
Easy
🏷️
Category
Main Dish
💡
Quick Tip
Sear sausages well before adding peppers
🎯
Best For
Weeknight | Meal prep | Entertaining

Key success factors:

  • Sausage casing stays intact - Keeps juices inside and creates crispy texture when seared at medium-high heat
  • Even pepper slicing at ¼-inch - Uniform pieces cook at the same rate and caramelize without burning
  • Garlic added last 2 minutes - Prevents bitter burnt garlic taste that ruins the whole dish
  • Internal temp hits 160°F - Sausage cooks through without drying out when finished in sauce
  • 5-minute simmer - Flavors meld while peppers soften to tender-crisp without turning mushy
Quick Tip
Pat dry sausages and peppers with paper towels before cooking to prevent oil splatter and ensure proper searing instead of steaming.

What You'll Need

Ingredients for Sausage and Peppers Italian-Style

Italian sausage forms the protein base while bell peppers add sweetness and color. The tomato sauce ties everything together without overwhelming the dish.

🍗
Protein
  • 1½ lbs Italian sausage (sweet or hot)
🥬
Vegetables
  • 3 bell peppers (mixed colors)
  • 1 large yellow onion
  • 4 cloves garlic
🥢
Sauce & Seasonings
  • 2 tablespoons olive oil
  • 1 cup tomato sauce
  • 1 teaspoon Italian seasoning
  • Salt and black pepper
  • Red pepper flakes (optional)

Ingredient Details

  • Italian sausage
    Choose sweet for mild flavor or hot for spice - both work equally well. Keep casing intact to hold juices during cooking.
  • Bell peppers
    Mix red, yellow, and orange for color variety. Green peppers work but taste more bitter. Slice uniformly at ¼-inch thickness.
  • Yellow onion
    Adds natural sweetness when caramelized. White or red onions substitute fine but change the flavor slightly.
  • Garlic
    Fresh cloves deliver better flavor than powder. Mince finely and add at the end to prevent burning.
  • Tomato sauce
    Plain tomato sauce works best. Crushed tomatoes create chunkier texture. Avoid marinara which adds competing flavors.
  • Italian seasoning
    Blend of oregano, basil, and thyme. Use individual dried herbs if that's what you have - ½ teaspoon each.
  • Olive oil
    Use regular olive oil, not extra virgin which can smoke at medium-high heat. Measure 2 tablespoons to avoid greasy results.

Ingredient Swaps

Chicken sausage works when you want less fat, though it needs closer monitoring to prevent drying. Frozen peppers save time but release more water during cooking, so drain the pan halfway through.

Common substitutions:

  • Italian pork sausage → Chicken or turkey sausage - Milder flavor and less fat, but slightly drier texture. Cook to same 160°F internal temp.
  • Fresh bell peppers → Frozen pepper mix - Less crisp texture and requires 3-4 minutes longer cooking time. Drain excess liquid from pan.
  • Tomato sauce → Crushed canned tomatoes - Chunkier sauce with fresher taste. Use same 1-cup measurement.
  • Olive oil → Vegetable or canola oil - Neutral flavor instead of fruity olive notes. Same cooking properties and smoke point.

Sweet Italian Sausage

Works for: Milder flavor that kids prefer, balances spicy peppers or hot sauce

Skip if: You want noticeable heat without adding red pepper flakes separately

Hot Italian Sausage

Works for: Built-in spice level, pairs well with sweet bell peppers for balance

Skip if: Serving picky eaters or controlling exact heat level matters

Chicken Sausage

Works for: Lower fat option, lighter meal that still feels substantial

Skip if: You want crispy casing and rich flavor - chicken sausage dries faster

Instructions

The entire dish cooks in one skillet starting with sausage sear, then vegetables, then a short simmer. Total active cooking time is 25 minutes with no complicated techniques required.

  1. Sear the sausages. Heat 1 tablespoon olive oil in large skillet over medium-high heat. Add sausages and cook 4-5 minutes per side until golden brown with crispy casing. Remove to plate.
  2. Cook peppers and onions. Add remaining 1 tablespoon oil to same pan. Add sliced peppers and onions, cook 8-10 minutes stirring occasionally until tender-crisp with slight char on edges.
  3. Add garlic and seasonings. Stir in minced garlic, Italian seasoning, salt, and black pepper. Cook 1-2 minutes until fragrant but not browned.
  4. Simmer everything together. Pour in tomato sauce, nestle seared sausages back into pan. Reduce heat to medium, cover, and simmer 10-12 minutes until sausage reaches 160°F internal temperature.
  5. Rest and serve. Remove from heat, let rest uncovered 5 minutes so juices redistribute. Slice sausages if desired, spoon sauce and peppers over top.
Golden Rule
Don't skip the sear on sausages - those caramelized edges create flavor you can't get back once everything simmers together in sauce.

What to Serve With It

Rich sausage and sweet peppers need something to cut through the fat or soak up the sauce. A simple side balances the plate without adding complexity. For a version that comes together quickly, this easy salad recipe brings brightness that contrasts with the savory main dish.

Side Dish Prep Why It Works How to Serve
Crusty bread Easy Sops up tomato sauce and adds texture contrast Slice thick, toast lightly, serve warm on the side
Simple green salad Easy Light freshness cuts through rich sausage fat Toss mixed greens with vinaigrette, serve immediately
Creamy polenta Medium Soft base absorbs sauce, complements Italian flavors Spoon polenta on plate, top with sausage and peppers
Roasted potatoes Medium Adds starch and texture contrast to soft peppers Roast at 425°F until crispy, season with salt
Garlic bread Easy Classic pairing that soaks up sauce perfectly Toast with butter and garlic, serve hot

Three ways to serve it:

  • On hoagie rolls - Stuff sausage, peppers, and sauce into split rolls for Italian sausage sandwiches
  • Over pasta - Toss with penne or rigatoni, adding pasta water to thin sauce if needed
  • With polenta - Spoon creamy polenta on plate, top with sausage mixture, drizzle extra sauce
Shortcut
Store-bought garlic bread toasts in 10 minutes and handles sauce-soaking duty without any knife work or measuring.

Store and Reheat

Sausage and peppers hold up well in the fridge for weeknight lunches or quick dinners. The sauce keeps everything moist during storage. For a version that comes together quickly, a crispy fries side reheats faster than most alternatives and adds textural contrast.

Method Time Best For
🍳 Stovetop 5-7 min over medium heat Restoring crispy edges on sausage and tender peppers without drying
🔥 Oven 10-12 min at 350°F Even reheating of large portions, works for meal prep batches
📦 Microwave 1-2 min at 50% power Single servings when speed matters more than texture

For best results when storing:

  • Cool to room temperature - Let sit 30 minutes uncovered before refrigerating to prevent condensation that makes peppers soggy
  • Use shallow airtight containers - Store in containers no deeper than 2 inches so everything cools and reheats evenly
  • Keep sauce with sausage - The tomato sauce prevents sausage from drying out during 3-4 days in fridge
  • Freeze in portions - Divide into single-serving containers, freeze up to 2 months, thaw overnight in fridge before reheating
  • Add moisture when reheating - Splash 2 tablespoons water or broth into pan if sauce looks dry after refrigeration

Frequently Asked Questions

How long to cook sausage and peppers at medium heat?

Cook sausage 4-5 minutes per side at medium-high for searing, then simmer everything together 10-12 minutes at medium until sausage hits 160°F internal. Total cook time is 25 minutes.

Can I make sausage and peppers ahead and reheat?

Yes, make up to 3 days ahead. Store in airtight container in fridge, reheat on stovetop 5-7 minutes over medium heat with 2 tablespoons water to restore moisture.

How do I know when sausage and peppers are done?

Sausage is done at 160°F internal temperature - use instant-read thermometer inserted into thickest part. Peppers should be tender-crisp with slight char on edges.

What are common mistakes when cooking sausage and peppers?

Burnt garlic from adding too early, soggy peppers from overcrowding the pan, and dry sausage from cooking past 160°F. Add garlic last 2 minutes, leave space between pieces, and use a thermometer.

Can I use chicken sausage instead of pork sausage in this recipe?

Yes, chicken sausage works but dries out faster. Cook to same 160°F internal temp, watch closely during final simmer, and add extra tablespoon of sauce or broth if needed.

Sausage and Peppers Italian-Style

No ratings yet
Sausage and Peppers Italian-Style is a one-skillet dish featuring seared Italian sausage, bell peppers, onions, and tomato sauce simmered together for tender, flavorful results. Searing the sausage first creates a crispy casing and helps retain moisture while the peppers stay tender-crisp during the gentle simmer.
Print Recipe Pin Recipe
Prep Time 10 minutes mins
Cook Time 25 minutes mins
Total Time 35 minutes mins
Servings: 4 servings
Course: Main Dish
Cuisine: Italian
Ingredients Equipment Method Notes

Ingredients
  

  • 1.5 lbs Italian sausage sweet or hot, casing intact
  • 3 units bell peppers mixed colors, sliced ¼-inch
  • 1 large yellow onion sliced
  • 4 cloves garlic minced, add last
  • 2 tablespoons olive oil regular, not extra virgin
  • 1 cup tomato sauce plain tomato sauce
  • 1 teaspoon Italian seasoning
  • salt to taste
  • black pepper to taste
  • red pepper flakes optional

Equipment

  • Instant-read thermometer Use to ensure sausage reaches 160°F internal temperature
  • Large skillet For searing and simmering all ingredients

Method
 

  1. Heat 1 tablespoon olive oil in a large skillet over medium-high heat. Add sausages and cook 4-5 minutes per side until golden brown with crispy casing. Remove sausages to a plate.
    1.5 lbs Italian sausage, 2 tablespoons olive oil
  2. Add remaining 1 tablespoon olive oil to the skillet. Add sliced bell peppers and onions. Cook 8-10 minutes, stirring occasionally, until tender-crisp with slight char on edges.
    3 units bell peppers, 1 large yellow onion, 2 tablespoons olive oil
  3. Stir in minced garlic, Italian seasoning, salt, and black pepper. Cook 1-2 minutes until fragrant but not browned. Add red pepper flakes if using.
    4 cloves garlic, 1 teaspoon Italian seasoning, salt, black pepper, red pepper flakes
  4. Pour in tomato sauce and nestle seared sausages back into the pan. Reduce heat to medium, cover, and simmer 10-12 minutes until sausages reach an internal temperature of 160°F.
    1.5 lbs Italian sausage, 1 cup tomato sauce
  5. Remove skillet from heat and let rest uncovered for 5 minutes to allow juices to redistribute. Slice sausages if desired and spoon sauce and peppers over top to serve.
    1.5 lbs Italian sausage

Notes

  • Always sear sausages first to develop crispy casing and lock in juices.
  • Cut peppers uniformly to ensure even cooking and avoid sogginess.
  • Add garlic last to prevent burning and bitter flavor.

Tried this recipe?

Let us know how it was!

What Is Worcestershire Sauce? [Taste, Uses & More]

March 18, 2026

Worcestershire sauce does something in a recipe that's hard to explain until you taste the difference it makes. A few drops into a beef marinade or a pan sauce and the whole dish shifts - there's suddenly a savory depth, a background complexity that makes everything taste more like itself.

What Is Worcestershire Sauce

It works the same way soy sauce does, but where soy sauce is singular and saline, Worcestershire is layered: fermented, tangy, faintly sweet, and unmistakably anchovy-driven. Nothing else replicates it.

QUICK SUMMARY

Worcestershire sauce is a dark, fermented British condiment made from vinegar, tamarind, molasses, and anchovies. It delivers concentrated umami, tang, and mild sweetness in small quantities - used in marinades, sauces, braises, and cocktails to add savory depth without tasting like any single ingredient.

🍶Flavor: Umami-rich, tangy vinegar brightness, sweet molasses undertone, mildly spiced
🌍Origin: England (West Midlands) - fermented condiment tradition since the 1830s
🥩Best For: Beef marinades, pan sauces, Bloody Marys, stews, burger mixes, barbecue sauces
🧊Storage: Pantry before opening; refrigerate after to preserve aroma and slow oxidation
⏱️Shelf Life: Up to 3 years unopened; 6-12 months refrigerated after opening for best flavor

What Is Worcestershire Sauce?

Worcestershire sauce is a fermented liquid condiment originating from the West Midlands of England - specifically Worcester - in the early 19th century. The brand Lea & Perrins brought it to commercial production around 1837, and their recipe remains the most recognized version worldwide.

The base formula combines distilled malt vinegar, tamarind extract, molasses, anchovies, garlic, shallots, cloves, and a proprietary spice blend - then ferments the mixture for an extended period. That aging process is what makes the sauce more than the sum of its parts.

You'll see it labeled as Worcester sauce, Worcestershire, or simply by brand name. Vegan and gluten-free versions exist, swapping anchovy for anchovy paste swaps like mushroom extract or soy, though the flavor profile shifts noticeably.

Common variants include:

  • Standard (anchovy-based) - the authentic style with full umami depth from fermented fish
  • Vegan/vegetarian - replaces anchovies with mushroom or yeast extract; lighter and less complex
  • Low-sodium - reduced salt versions for dietary restrictions, often thinner in body
  • Gluten-free - omits wheat-derived malt vinegar; check labels carefully for tamarind and soy sources

What Does Worcestershire Sauce Taste Like?

worcestershire sauce - What Is Worcestershire Sauce

The closest single comparison is a concentrated fish sauce crossed with balsamic vinegar - but sweeter and considerably more complex than either alone. Anchovy-driven umami leads, giving a savory depth that lands at the back of the palate rather than on the front.

Tamarind adds a sour-fruity pull, while molasses rounds the edges with malt sweetness. The vinegar keeps everything bright and prevents the sauce from reading as heavy.

Sensory SnapshotStrong Intensity
👅 Flavor
Umami-richTangyMalt-sweetLightly spiced
✋ Texture
Thin-syrupySlightly viscous
👃 Aroma
Fermented anchovyWarm spiceVinegar lift

Heat concentrates the sauce quickly, intensifying the umami while softening the vinegar edge. In cold applications - dressings, cocktails - the tangy and fermented notes stay forward and bright.

Watch Out
Worcestershire is strong enough to overpower delicate proteins like white fish or subtle dishes built on floral aromatics. A few drops is a finishing accent - not a base sauce.

How to Use Worcestershire Sauce

Worcestershire earns its place across heat levels and cooking stages - stirred into something cold, deglazed into a hot pan, or dropped raw into a cocktail shaker. The key is restraint; it's measured in teaspoons, not tablespoons.

In British and American cooking, it appears most in beef and lamb dishes. Whisk it into a marinade alongside mustard and garlic before grilling steaks, or add a teaspoon into meatloaf or burger mix for savory complexity that reads as depth, not fishiness.

Pan sauces benefit from a small pour after deglazing - it rounds out wine-based reductions cleanly.

How Worcestershire Sauce Is Used
MethodBest ForTip
🥗 Raw/ColdVinaigrettes, Caesar dressing, Bloody Mary, cocktail basesAdd to acid-forward bases - the vinegar in the sauce integrates naturally
🍳 Hot SaucesPan sauces, gravies, braises, stewsAdd near the end of cooking; prolonged heat fades the top notes
🥩 MarinadesBeef, lamb, pork before grilling or searingCombine with [soy sauce substitutes](https://forkliftkitchen.com/soy-sauce-substitutes/) or molasses for a deeper base
🍖 Mixed InMeatloaf, burger patties, meatballs1-2 teaspoons per pound of meat is enough; more turns salty
🍖 BarbecueBarbecue sauce blending, glazesPairs with [molasses](https://forkliftkitchen.com/molasses-substitutes/) and smoked paprika for sweet-savory balance

It pairs naturally with red meat, tomato-based sauces, mustard, brown sugar, and garlic. Avoid using it near light floral ingredients or delicate seafood - the fermented anchovy note will dominate.

Try It In
🌶️Japanese Steakhouse Yum Yum SauceA small dash adds savory backbone to the mayonnaise base→🍅Roasted Garlic Marinara SauceDeepens the tomato base without announcing itself→🧄Roasted Garlic Béarnaise SauceA drop balances the butter richness with a fermented edge→

How to Buy and Store Worcestershire Sauce

Look for bottles in dark glass or opaque packaging - light degrades the volatile aromatics over time. Check the label for anchovies or fermented fish; their presence signals authentic umami construction.

Avoid bottles with swollen or leaked caps, which indicate heat exposure or compromised sealing.

Golden Rule
Refrigerate after opening. Room-temperature storage after the seal breaks accelerates oxidation and dulls the fermented top notes within weeks.

Shelf life for an unopened bottle runs one to three years at pantry temperature. Once opened and refrigerated, expect peak flavor for six to twelve months - the sauce stays shelf-stable longer, however the aroma fades noticeably past that window.

For a full breakdown, see our guide on worcestershire sauce freshness guide.

If you run out or need a substitute, worcestershire sauce swaps that combine soy sauce, tamarind, and a touch of vinegar come closest.

Start Here If You're New to It

Use Worcestershire as a background ingredient, not a feature. If you can taste it distinctly in the finished dish, you've used too much.

Start with beef. A teaspoon in a steak marinade or a half-teaspoon in a pan sauce after deglazing shows you what it does at its best - a shift in depth that makes the whole dish more cohesive.

From there, try it in a Bloody Mary or a simple vinaigrette.

One bottle lasts most home cooks well over a year. It's a low-commitment addition with high payoff across a wide range of savory cooking.

Frequently Asked Questions

Is Worcestershire sauce vegan?

Standard Worcestershire is not vegan - it contains anchovies. Several brands produce vegan versions using mushroom extract or yeast to replicate the umami, though the depth is noticeably less complex than the anchovy-based original.

Does Worcestershire sauce contain anchovies?

Yes, in all traditional formulations. Anchovies are fermented into the sauce and are not detectable as a distinct fish flavor - they dissolve into the broader umami profile. Anyone with a fish allergy should treat standard Worcestershire as a fish product.

How does Worcestershire sauce differ from soy sauce?

Soy sauce is saltier, thinner, and single-note savory. Worcestershire is more complex - it adds tamarind sourness, molasses sweetness, and fermented spice alongside the umami. The two aren't interchangeable, though each can partially substitute the other in small amounts.

Can I use Worcestershire sauce in a Bloody Mary?

Yes - it's a standard ingredient. A few dashes add savory backbone and fermented complexity that hot sauce alone can't provide. Start with half a teaspoon per drink and adjust from there.

What is Worcestershire sauce made of?

The core ingredients are malt vinegar, tamarind, molasses, anchovies, garlic, shallots, and a blend of spices including cloves. These are combined and fermented over an extended period before bottling, which develops the sauce's layered flavor.

Creamy Mushroom Pork Chops

March 18, 2026

Searing pork chops in a hot pan, then building a creamy mushroom sauce in the same skillet creates layers of flavor without extra dishes. The high heat forms a golden crust while the pan drippings become the base for a rich, savory sauce.

Creamy Mushroom Pork Chops served on a plate

You don't flip the chops more than once. Pat them dry, sear four minutes per side, then let them rest while the sauce simmers.

This works for weeknight dinners when you want something that feels special but doesn't require babysitting. The whole meal comes together in 30 minutes with ingredients you probably have on hand.

QUICK SUMMARY

Pan-seared pork chops with a creamy mushroom sauce made in the same skillet. The key is thick-cut chops (at least 1 inch) and proper searing temperature to lock in moisture. Perfect for busy weeknights when you need dinner in 30 minutes without compromising on flavor.

⏱️Time Reality: 10 minutes prep, 20 minutes cooking, no marinating needed
🔥First Critical Step: Pat chops completely dry before searing for proper crust
⚠️Watch Out: Add cream only after deglazing to prevent curdling

Table of Contents

Toggle
  • Why This Recipe Works
  • What You'll Need
    • Ingredient Details
  • Ingredient Swaps
  • What to Serve With It
  • Store and Reheat
  • Frequently Asked Questions
  • Creamy Mushroom Pork Chops
    • Method 
    • Tried this recipe?

Why This Recipe Works

Searing pork chops at medium-high heat (around 375°F) creates a caramelized crust that seals in juices, while deglazing with chicken broth captures all the browned bits that make the sauce taste restaurant-quality. For a version that comes together quickly, a similar dinner recipe uses the same pan-searing technique with different seasonings.

Quick Reference
⏱️
Prep Time
10 min
🔥
Cook Time
20 min
⏰
Total Time
30 min
🍽️
Servings
4 servings
📊
Difficulty
Medium
🏷️
Category
Main Dish
💡
Quick Tip
Sear pork chops 4 minutes per side
🎯
Best For
Weeknight | Meal prep | Casual entertaining

Why thick-cut chops matter:

  • Chops at least 1 inch thick stay juicy during the sear and sauce simmer without drying out
  • Bone-in chops add extra flavor to the sauce, but boneless cook 2-3 minutes faster
  • Cooking mushrooms separately in batches prevents them from steaming and keeps them golden
  • Deglazing the pan with chicken broth before adding cream builds deeper flavor layers
  • Resting the chops for 5 minutes after cooking redistributes juices for tender meat
Quick Tip
Use a digital thermometer to check for 145°F internal temp - the meat will still look slightly pink in the center but will be safe and juicy.

What You'll Need

Ingredients for Creamy Mushroom Pork Chops

Shopping for this recipe takes one trip to the meat counter and a quick stop in produce. The coleslaw works best when it hits the table at the same time as the main. For a version that comes together quickly, a crunchy coleslaw on the side uses a tangy dressing that balances the richness of the pork.

🍗
Protein
  • 4 pork chops (bone-in or boneless, 1-inch thick)
🥬
Vegetables
  • 8 oz mushrooms (cremini or button)
  • 3 cloves garlic
  • 1 small onion (optional)
🧀
Dairy
  • 1 cup heavy cream
  • 2 tablespoons butter
🥢
Liquids & Seasonings
  • ½ cup chicken broth
  • 2 tablespoons olive oil
  • 1 teaspoon thyme
  • Salt and black pepper

Ingredient Details

  • Pork chops
    Look for chops at least 1 inch thick with a little fat around the edge - the fat renders during cooking and keeps the meat tender.
  • Mushrooms
    Cremini mushrooms have deeper flavor than white button mushrooms, but both work - just wipe them clean with a damp towel instead of rinsing.
  • Heavy cream
    Heavy cream creates the richest sauce, but whole milk thickened with a flour slurry works if you're cutting calories.
  • Chicken broth
    Low-sodium broth gives you more control over the final seasoning - add salt after tasting the finished sauce.
  • Garlic
    Mince the garlic fine so it melts into the sauce - big chunks turn bitter if they burn during the sear.
  • Butter
    Butter browns the mushrooms better than oil alone, but use olive oil first to prevent the butter from burning at high heat.
  • Thyme
    Fresh thyme tastes best, but dried thyme works at half the amount - add it early so the flavor blooms in the sauce.

Ingredient Swaps

Some nights you need to work with what's already in the fridge or pantry. A good corn on the cob can make or break the plate. For a version that comes together quickly, this tender corn on the cob roasts in 12 minutes and brings color to the plate.

Four swaps that work:

  • Heavy cream → coconut cream: Use the same amount for a dairy-free sauce with a subtle coconut flavor that doesn't overpower the mushrooms
  • Chicken broth → vegetable broth: Keeps the recipe vegetarian-friendly and works just as well for deglazing and building sauce
  • Butter → olive oil: Double the olive oil if you're avoiding dairy - the sauce won't be quite as rich but still tastes good
  • Thyme → rosemary: Use half the amount because rosemary is stronger - it changes the flavor profile but pairs well with pork

Heavy Cream

Works for: Rich, silky sauce with full body and classic flavor

Skip if: Watching calories or avoiding dairy

Coconut Cream

Works for: Dairy-free meals with similar texture and subtle sweetness

Skip if: You don't like coconut flavor or want traditional taste

Whole Milk + Flour

Works for: Budget-friendly sauce that still coats the pork well

Skip if: You want the richest possible sauce or don't want to thicken it

Instructions

The entire recipe happens in one skillet with clear visual cues at each step. Salad cuts through all that richness. For a version that comes together quickly, a crisp green salad adds freshness and takes less than 10 minutes.

  1. Pat the pork chops dry with paper towels and season both sides with salt and pepper. Heat 2 tablespoons olive oil in a cast iron skillet or heavy-bottomed pan over medium-high heat until it shimmers (about 2 minutes). Place the chops in the pan without crowding and sear for 4 minutes without moving them - they should release easily when a golden-brown crust forms.
  2. Flip the chops and sear the second side for 4 minutes. Check the internal temperature with a meat thermometer - you're aiming for 145°F. Remove the chops to a plate and tent with foil to rest while you make the sauce.
  3. Lower the heat to medium and add 2 tablespoons butter to the same pan. Add the sliced mushrooms in a single layer and cook for 5-7 minutes without stirring for the first 3 minutes - this lets them brown instead of steam. Stir occasionally after that until they're golden and caramelized.
  4. Add the minced garlic (and onion if using) and cook for 1 minute until fragrant. Pour in ½ cup chicken broth and scrape the bottom of the pan with a wooden spoon to release all the browned bits. Let the broth simmer for 2 minutes to reduce by half.
  5. Lower the heat to low and slowly stir in 1 cup heavy cream and 1 teaspoon thyme. Simmer the sauce for 3-4 minutes until it thickens enough to coat the back of a spoon. Taste and adjust seasoning with salt and pepper. Return the pork chops to the pan, spoon sauce over them, and serve immediately.
Watch Out
Add the cream after the broth reduces and only when the heat is low - high heat or acidic liquid can cause the cream to curdle and separate.

What to Serve With It

Creamy pork needs sides that either soak up the sauce or cut through the richness with something bright or crunchy. Rich mains need something to cut through, and this dip does exactly that. For a version that comes together quickly, smooth creamy dip adds tang and brightness to heavy pork dishes. For more ideas on easy pork vindaloo dinner nights, check our full guide to pork pairings.

Side Dish Prep Why It Works How to Serve
Mashed Potatoes Easy Smooth texture absorbs every drop of creamy mushroom sauce Scoop onto plate first, then place pork chop on top with extra sauce
Buttery Egg Noodles Easy Wide noodles catch the sauce and cook while you make the pork Toss noodles with butter and parsley, serve alongside pork with sauce spooned over both
Steamed Green Beans Easy Snappy texture and bright color balance the rich creamy sauce Steam until crisp-tender, season with lemon juice and serve on the side
Roasted Carrots Medium Natural sweetness complements savory pork and caramelized mushrooms Roast with olive oil and thyme at 400°F for 25 minutes, serve hot
Simple Side Salad Easy Acidic dressing cuts through sauce richness and adds fresh crunch Toss greens with vinaigrette right before serving on separate plates

Three ways to serve it:

  • Weeknight comfort: Serve pork chops over mashed potatoes with steamed green beans on the side - the potatoes soak up sauce and everything cooks in 30 minutes
  • Meal prep bowls: Slice leftover pork and pack with buttery egg noodles, roasted carrots, and extra sauce in containers for reheating
  • Casual entertaining: Plate pork chops over creamy polenta with sautéed spinach and roasted asparagus for a restaurant-style presentation
Shortcut
Make the side dish first and keep it warm - the pork chops cook fast and taste best when served immediately after resting.

Store and Reheat

Leftover pork chops stay tender for 3-4 days if you store them properly with the sauce. Cool the pork and sauce separately to room temperature within 2 hours, then store in shallow airtight containers in the fridge. Freezing works for up to 2 months, but the cream sauce may separate slightly when thawed - whisk it while reheating to bring it back together.

Method Time Best For
🍳 Stovetop 5-7 min over low heat Preserves sauce texture and keeps pork tender - add a splash of broth if sauce thickens
📦 Microwave 1-2 min at 50% power Quick reheating for single portions - cover with damp paper towel to prevent drying
🔥 Oven 15 min at 300°F Even reheating for multiple servings - cover with foil and add extra sauce before warming

For best results when storing:

  • Store pork chops in sauce instead of separately so the meat stays moist and absorbs more flavor
  • Reheat only what you'll eat that day - repeated reheating dries out the pork and breaks down the cream
  • Add a tablespoon of chicken broth or cream when reheating if the sauce looks too thick
  • Slice leftover pork thin before reheating - smaller pieces warm through faster without drying out
  • If freezing, cool completely first and use freezer-safe containers with minimal air space to prevent ice crystals

Frequently Asked Questions

Can I make creamy mushroom pork chops ahead and reheat?

Cook the pork chops and sauce up to 2 days ahead, cool completely, and store in the fridge. Reheat gently on the stovetop over low heat with a splash of broth to loosen the sauce - this prevents the pork from drying out and keeps the cream from separating.

How long should I cook pork chops for creamy mushroom pork chops?

Sear 1-inch thick pork chops for 4 minutes per side over medium-high heat, then check the internal temperature with a thermometer. Pull them at 145°F for juicy, slightly pink centers - thinner chops need 3 minutes per side, while bone-in chops may need an extra minute.

What internal temperature indicates pork chops are done?

Pork chops are safe to eat at 145°F internal temperature with a 3-minute rest. The meat will still look slightly pink in the center but will be tender and juicy - overcooking past 150°F dries them out.

How do I prevent the sauce from curdling?

Add the cream only after deglazing with broth and only when the heat is turned down to low. High heat or adding cream to an acidic pan causes it to separate - if it does curdle, remove from heat and whisk vigorously to bring it back together.

Can I use boneless pork chops instead of bone-in?

Boneless chops work perfectly and cook 2-3 minutes faster than bone-in. They won't add quite as much flavor to the sauce, but they're easier to slice and eat - just make sure they're at least 1 inch thick so they don't dry out during cooking.

Creamy Mushroom Pork Chops served on a plate

Creamy Mushroom Pork Chops

No ratings yet
Pan-seared pork chops with a rich, creamy mushroom sauce made in the same skillet. The recipe hinges on thick-cut pork chops and proper searing to lock in moisture while creating layers of savory flavor. Perfect for a flavorful weeknight dinner ready in 30 minutes.
Print Recipe Pin Recipe
Prep Time 10 minutes mins
Cook Time 20 minutes mins
Total Time 30 minutes mins
Servings: 4 servings
Course: Dinner, Main Dish
Cuisine: American
Ingredients Equipment Method Notes

Ingredients
  

  • 4 pieces pork chops 1-inch thick, bone-in or boneless
  • 8 oz mushrooms cremini or button, sliced
  • 3 cloves garlic minced finely
  • 1 small onion optional, diced
  • 1 cup heavy cream
  • 2 tablespoons butter
  • 0.5 cup chicken broth low sodium
  • 2 tablespoons olive oil
  • 1 teaspoon thyme fresh or dried

Equipment

  • Cast iron skillet or heavy-bottomed pan Used for searing pork chops and making the mushroom sauce
  • Meat thermometer To check pork internal temperature for perfect doneness
  • Wooden spoon To scrape browned bits when deglazing the pan
  • Paper towels For drying pork chops before searing

Method
 

  1. Pat the pork chops dry with paper towels and season both sides with salt and pepper. Heat 2 tablespoons olive oil in a cast iron skillet or heavy-bottomed pan over medium-high heat until it shimmers, about 2 minutes. Place the chops in the pan without crowding and sear for 4 minutes without moving them until a golden-brown crust forms and they release easily.
    4 pieces pork chops, 2 tablespoons olive oil
  2. Flip the chops and sear the second side for 4 minutes. Check internal temperature with a meat thermometer aiming for 145°F. Remove chops to a plate and tent with foil to rest while you make the sauce.
    4 pieces pork chops
  3. Lower heat to medium and add 2 tablespoons butter to the same pan. Add sliced mushrooms in a single layer and cook for 5-7 minutes without stirring for the first 3 minutes to brown them. Stir occasionally after to caramelize evenly.
    8 oz mushrooms, 2 tablespoons butter
  4. Add minced garlic and optional onion and cook for 1 minute until fragrant. Pour in ½ cup chicken broth and scrape the bottom of the pan with a wooden spoon to release browned bits. Let broth simmer for 2 minutes to reduce by half.
    3 cloves garlic, 1 small onion, 0.5 cup chicken broth
  5. Lower heat to low and slowly stir in 1 cup heavy cream and 1 teaspoon thyme. Simmer sauce 3-4 minutes until thick enough to coat the back of a spoon. Taste and adjust salt and pepper. Return pork chops to pan, spoon sauce over them, and serve immediately.
    1 cup heavy cream, 1 teaspoon thyme

Notes

  • Pat pork chops completely dry before searing for a proper crust.
  • Add cream only after deglazing and reduce heat to prevent curdling.
  • Let chops rest 5 minutes after cooking to redistribute juices for tenderness.

Tried this recipe?

Let us know how it was!

5 Best Substitutes for Wasabi for Sushi & Asian Finishing

March 18, 2026

You're plating sushi and the wasabi tube squeezed out its last pale green smear two rolls ago. The sharp, nasal heat that balances fatty fish isn't there.

5 Best Substitutes for Wasabi for Sushi & Asian Finishing

Wasabi wakes up raw fish and cuts through rich flavors with a brightness soy sauce can't match. Without it, the dish feels incomplete.

A few swaps can bring back that bite.

QUICK SUMMARY

For dipping sauces and raw fish, we turn to prepared horseradish first-it mimics that sharp nasal heat closest. Watch the texture since horseradish runs coarser and lacks the green color. Fresh grated horseradish root brings even brighter heat if you can find it.

🏆Closest Match: Prepared horseradish delivers that nasal bite in a 1:1 swap
📊Ratio Check: Mix 1 tablespoon mustard + ¼ teaspoon horseradish for milder heat
⚠️Skip Chili Paste: Brings general heat but misses wasabi's sharp profile entirely
Quick Substitute Reference
#SubstituteBest ForRatioKey Note
1 Prepared Horseradish ✨ Both 1:1 Closest nasal heat match
2 Wasabi Powder ✨ Both 1 teaspoon + water Needs rehydration time
3 Mustard Mix 🥗 Raw 1 tablespoon + ¼ tsp Milder with mustard tang
4 Fresh Horseradish 🥗 Raw 1:1 Sharpest fresh heat
5 Chili Paste 🍳 Cooking ½ tbsp Different heat profile

1. Prepared Horseradish 🌿

Prepared horseradish is wasabi's botanical cousin-both pack that distinctive nasal heat that clears your sinuses. Use it 1:1 in place of wasabi for dipping sauces and marinades.

The flavor runs earthier and more intense than wasabi. The texture is coarser, and there's no green color to speak of.

It works best when mixed into sauces where color doesn't matter. We reach for Horseradish swaps that match when that option runs out too.

Best Pick
For most uses, prepared horseradish is our first choice-it brings the heat without hunting down specialty ingredients.

2. Wasabi Powder Rehydrated 🥄

Wasabi powder bridges the gap when fresh wasabi paste isn't available. Mix 1 teaspoon powder with 1 teaspoon water to match 1 tablespoon of paste.

Let it sit for 5 minutes before using-the flavor needs time to bloom. The taste runs milder and slightly more artificial than fresh wasabi.

  • ✅ Closest flavor when fresh isn't an option
  • ✅ Shelf-stable for months
  • ⚠️ Can taste flat if not bloomed properly

The green color matches what you'd expect from wasabi paste. It works in any context-sushi, dressings, or finishing sauces.

3. Mustard + Horseradish Mix 🥫

Mixing prepared mustard with horseradish creates a spicy accent that mimics wasabi's bite. Use 1 tablespoon mustard plus ¼ teaspoon horseradish per tablespoon of wasabi.

The heat is milder than straight horseradish. The mustard brings its own tangy sharpness that complements raw fish and cold cuts.

  • 🥗 In dipping sauces: Thin with rice vinegar for a lighter texture
  • 🍱 With sushi: Mix in a small dish rather than spreading directly
  • ⚠️ Color difference: Expect yellow instead of green
  • 🔄 Ratio tweak: Dial up horseradish if you need more heat

If you need more heat without adding mustard tang, instead of Horseradish try these for cleaner swaps.

4. Fresh Grated Horseradish Root 🌱

Fresh horseradish root brings the brightest, sharpest heat of any swap. Grate it fine and use 1:1 in place of wasabi for raw applications.

The heat hits harder than prepared horseradish and fades faster. Grate it just before using-the pungency weakens within minutes of exposure to air.

  • ✅ Sharpest nasal heat available
  • ✅ No preservatives or additives
  • ⚠️ Fades fast-use immediately after grating

Skip this for cooked dishes since heat mellows too much. Horseradish substitutes for cooking work better when heat needs to last.

5. Sriracha or Chili Paste 🌶️

Chili paste brings general heat but misses wasabi's sharp nasal bite entirely. Use ½ tablespoon per tablespoon of wasabi if you just need spice without the specific flavor.

The taste runs garlicky and fruity rather than clean and sharp. Color varies from red to orange-never green.

It works in cooked applications where wasabi would be a finishing accent. Don't use it for sushi or raw fish-the flavor profile clashes too much.

We keep swaps when Chili Paste runs out handy for when that bottle empties too.

Matching Your Wasabi Swap

  • For sushi and sashimi: Prepared horseradish or rehydrated wasabi powder
  • For dipping sauces: Mustard-horseradish mix if you need milder heat
  • For cooked dishes: Skip wasabi swaps entirely-they lose their bite with heat

Frequently Asked Questions

Can I use regular mustard instead of wasabi?

Yes, but add a pinch of horseradish to bring the nasal heat closer. Mustard alone tastes tangy without that sharp bite wasabi provides. Mix 1 tablespoon mustard with ¼ teaspoon horseradish for a closer match.

Does wasabi powder taste the same as fresh wasabi?

No, it's milder and slightly more artificial. Fresh wasabi brings brighter, more complex heat that fades quickly. Powder works well for most home cooking but won't match restaurant-quality sushi bars that use fresh wasabi root.

Can I cook with wasabi substitutes?

You can, but the heat mellows significantly with cooking. Wasabi's sharp bite fades fast when exposed to heat. For cooked dishes, add substitutes at the very end or use them raw in finishing sauces.

How do I make prepared horseradish less watery?

Drain it through a fine-mesh strainer and press gently to remove excess liquid. Don't squeeze too hard or you'll lose flavor along with the moisture. The drained version works better in dipping sauces where you need thicker consistency.

Why does fresh horseradish lose heat so fast?

The volatile compounds that create heat break down quickly when exposed to air. Grate fresh horseradish just before serving and use it within 15 minutes. Store grated horseradish in an airtight container with a splash of vinegar to slow the loss of pungency.

5 Best Substitutes for Wasabi for Sushi & Asian Finishing

5 Best Substitutes for Wasabi

No ratings yet
Wasabi provides a unique sharp, nasal heat that complements sushi and raw fish. This guide explores five effective substitutes that mimic wasabi's bite for dipping sauces, raw fish, and cooked dishes with different flavor profiles and preparation requirements.
Print Recipe Pin Recipe
Prep Time 10 minutes mins
Cook Time 5 minutes mins
Total Time 15 minutes mins
Servings: 4 servings
Course: Kitchen Tips, Substitutes
Cuisine: Various
Ingredients Method Notes

Ingredients
  

  • 1 cup Prepared Horseradish Use 1:1 to replace wasabi paste for dipping sauces and marinades; coarse texture, earthier flavor,
  • 1 teaspoon Wasabi Powder Mix 1 teaspoon wasabi powder with 1 teaspoon water and let sit 5 minutes before
  • 1 tablespoon Mustard Mix (prepared mustard + horseradish) Mix 1 tablespoon mustard with ¼ teaspoon horseradish for milder heat;
  • 1 cup Fresh Grated Horseradish Root Use 1:1 for raw applications; grate fresh just before use because heat fades quickly
  • 0.5 tablespoon Chili Paste Use ½ tablespoon per tablespoon of wasabi in cooked dishes only;

Method
 

  1. Choose your substitute based on the use case: prepared horseradish or wasabi powder for raw fish and sauces, mustard mix for milder dipping, fresh horseradish for brightest raw heat, and chili paste for cooked dishes.
  2. Prepare the substitute by draining excess liquid from prepared horseradish, rehydrating wasabi powder, mixing mustard with horseradish, or finely grating fresh horseradish just before use.
  3. Apply the substitute using suggested ratios: 1:1 for prepared and fresh horseradish, 1 teaspoon powder + 1 teaspoon water, 1 tablespoon mustard + ¼ teaspoon horseradish, or ½ tablespoon chili paste per tablespoon wasabi.
  4. Allow rehydrated wasabi powder to bloom for 5 minutes before serving; mix mustard-based substitutes with rice vinegar if thinning is desired for dipping sauces.
  5. Check final flavor and consistency, adjusting horseradish amount in mustard mix or the amount of substitute to suit heat preference and dish compatibility.

Notes

  • Prepared horseradish lacks wasabi's green color but closely mimics the heat.
  • Fresh grated horseradish heat fades quickly-use immediately after grating.
  • Chili paste should only be used in cooked dishes as its flavor profile is very different from wasabi.

Tried this recipe?

Let us know how it was!

What Is Tomato Puree? [Taste, Uses & More]

March 18, 2026

Crack open a can of tomato puree and the smell hits you first - warm, faintly sweet, with that unmistakable cooked-tomato depth that fresh fruit can't match.

What Is Tomato Puree

It's thicker than water but still pourable, a smooth concentrate that sits squarely between thin sauce and stubborn paste.

If you've ever wondered why some tomato sauces have real body without tasting pasty, tomato puree is usually the reason.

QUICK SUMMARY

Tomato puree is a cooked, strained tomato concentrate - smoother than crushed tomatoes, thinner than paste, with bright acidity and mild umami. Use it as a ready-made tomato base for sauces, soups, braises, and stews without a long simmer.

🍅Flavor: Bright acidic tomato, moderate sweetness, mild umami
🥄Texture: Smooth, slightly viscous, pourable but thicker than sauce
🍳Best Uses: Marinara base, soups, shakshuka, braises, tomato cream sauce
📦Shelf Life: Unopened: up to a year; opened: 5-7 days refrigerated
✅Dietary: Naturally vegan and gluten-free; check sodium on salted varieties

What Is Tomato Puree?

Tomato puree is a cooked tomato concentrate made by briefly cooking ripe tomatoes, then straining and blending them into a smooth, pourable liquid.

It originated in Mediterranean processing traditions and became a pantry staple through Italian-influenced canning methods that spread globally in the twentieth century.

You'll also see it labeled strained tomatoes or canned tomato puree, and it overlaps significantly with Italian passata - though the differences between tomato passata vs paste are worth understanding before you substitute one for the other.

The alternate spelling "tomato purée" refers to the same product.

In the tomato-product spectrum, puree sits between whole or crushed canned tomatoes and thick tomato paste. It has more body than tomato sauce but pours freely, making it the mid-strength option when you need tomato presence without fighting the consistency.

If canned tomatoes aren't available, you can explore alternatives to canned tomato that cover similar ground.

  • 🍅 Cooked concentrate - briefly heat-processed, not raw
  • Smooth texture - strained free of seeds and skins
  • Mid-strength - more concentrated than sauce, less than paste
  • Common formats - cans, cartons, and glass jars all widely available

What Does Tomato Puree Taste Like?

tomato puree - What Is Tomato Puree

Bright, acidic, and moderately sweet - that's the baseline. The brief cooking mellows raw tomato sharpness without fully cooking off the freshness, so there's a livelier edge here than in paste.

Sensory SnapshotModerate Intensity
👅 Flavor
bright acidicmildly sweetumami
✋ Texture
smoothslightly viscous
👃 Aroma
warm cooked tomatofaintly herbaceous

Compared to cooked crushed tomatoes, puree is less chunky but carries similar flavor weight.

It reads lighter on the palate than paste, which has a more intense, sometimes slightly bitter, deeply reduced character.

When you reduce puree over heat, the acidity sharpens and the natural sugars concentrate - a few extra minutes in the pan shifts it noticeably toward a richer, darker profile.

Golden Rule
Don't judge puree cold from the can. A two-minute simmer with olive oil and garlic opens up the umami and rounds the acidity significantly.

How to Use Tomato Puree

Tomato puree's smooth body makes it a natural starting point for sauces where you want tomato flavor distributed evenly from the first minute.

It's thinner than paste, so it blends into liquids without clumping, and thicker than sauce, so it adds structure without watering down a braise.

How Tomato Puree Is Used
MethodBest ForTip
🍲 SimmeredMarinara, spaghetti sauce, shakshuka baseSimmer with mirepoix - understanding [the differences between mirepoix vs trinity](https://forkliftkitchen.com/mirepoix-vs-trinity/) helps here - for deeper flavor
🔥 ReducedPizza sauce, concentrated tomato cream sauceStir frequently; puree scorches faster than chunkier tomato products
🥣 Stirred inChili, stews, soups, Bloody Mary mixAdd near the midpoint of cooking so acidity can mellow
🍶 Blended rawDressings, cold tomato-based saucesBalance with a fat - olive oil or cream - to soften the raw acidity

Italian and Mediterranean cooking lean on puree most heavily - it's foundational to marinara and chicken cacciatore. Middle Eastern cooks use it as the tomato base in shakshuka before the eggs go in.

Mexican-style stews and American casseroles also reach for it when they need smooth tomato body without a separate reduction step.

Olive oil and garlic are the most natural pairing, building an aromatic base before the puree hits the pan. Adding anchovy or a splash of soy sauce introduces extra umami that amplifies the tomato's own savory notes. For richness, stir in butter or cream at the end - that combination works particularly well in a quick tomato cream sauce served over pasta. Red wine deglazes a pan beautifully before puree goes in, and the acidity of each complements the other. If you need to swap it out mid-recipe, tomato puree swaps that work covers the most practical options, and swapping out tomato sauce is worth a read if you're moving in the other direction.

Try It In
🍗Air Fryer Chili-Lime Chicken WingsTomato puree anchors the tangy chili base→🧄Air Fryer Garlic Parmesan Chicken TendersUse as a quick dipping sauce base alongside the parmesan→🍯Air Fryer Honey Garlic Chicken TendersPuree adds tomato depth to the honey-garlic glaze→

How to Buy and Store Tomato Puree

Look for cans or cartons labeled "tomato puree" specifically - not "tomato sauce," which is thinner and usually pre-seasoned.

A good can shows a deep, uniform red with no watery separation on opening, and the smell should be clean and fruity, not metallic.

Watch Out
Off-smell, dark discoloration, or visible separation that doesn't mix back in are all signs of a compromised product - review the full list of tomato puree spoilage signs before using anything you're uncertain about.

Prefer ingredient lists that read only tomatoes, salt, and citric acid - the citric acid preserves color and acidity without affecting flavor.

If you're curious about what citric acid actually does here, preparing fruit fresh vs citric acid properly explains the preservation chemistry.

  • Pantry storage - unopened cans keep up to a year in a cool, dark spot
  • Refrigerate after opening - transfer to a nonreactive container; use within 5-7 days
  • Freeze for longer storage - portion into an ice cube tray; frozen puree keeps 3-4 months

Where to Start with Tomato Puree

New to it? Open a can, warm two tablespoons of olive oil in a pan, add minced garlic, then pour in the puree and let it simmer for five minutes.

That alone is a usable pasta sauce.

Shortcut
If a recipe calls for tomato paste but you only have puree, reduce the puree in a dry pan for 8-10 minutes, stirring often - it concentrates into a workable near-paste consistency. For more detail on that swap, see preparing tomato paste properly.

If you cook soups or braises regularly, keep two or three cans stocked. Puree adds tomato body without the effort of processing whole tomatoes, and it integrates faster than paste.

Start with marinara or shakshuka - both are forgiving and show off what puree does at its best.

Frequently Asked Questions

Is tomato puree the same as passata?

Nearly, but not exactly. Both are strained, smooth, uncooked or lightly cooked tomato products, however Italian passata is traditionally uncooked or very briefly heated, giving it a slightly fresher flavor. American canned tomato puree is usually cooked a bit longer and may contain added salt or citric acid.

Can I use tomato puree instead of tomato paste?

Yes, with adjustments. Puree is much thinner, so reduce it in a dry pan for 8-10 minutes to approximate paste's concentration. Use roughly three tablespoons of reduced puree for every one tablespoon of paste the recipe requires.

What is the difference between tomato puree and tomato sauce?

Tomato sauce is thinner and almost always pre-seasoned with herbs, garlic, or salt. Puree is unseasoned and thicker, giving you more control over flavor - it's a base ingredient, not a finished sauce.

Does tomato puree need to be cooked?

No - it's already heat-processed and safe to eat straight from the can. However, a brief simmer noticeably improves the flavor by mellowing acidity and developing the umami compounds further.

How do you thin tomato puree for sauces?

Add water, broth, or wine a tablespoon at a time until you reach the consistency you need. Broth adds a savory note; water keeps the flavor neutral; wine introduces acidity that complements the tomato.

What Is Tarragon? Taste, Uses, Varieties & More

March 18, 2026

Most cooks reach for tarragon once, find it overpowering, and never go back. That's the wrong takeaway.

What Is Tarragon

The herb's anise-forward intensity is exactly what makes it indispensable - it's a precision tool, not a background note, and using it correctly changes everything from a chicken pan sauce to a simple vinaigrette. Add it too early or in too large a quantity and it dominates; get the timing right and it delivers a compound butter herb or a cream sauce a brightness no other herb can replicate.

Tarragon rewards restraint.

QUICK SUMMARY

Tarragon is a narrow-leaved French herb with a distinctive anise-licorice flavor and a bright, slightly peppery finish. It's a cornerstone of classical French cooking, best used fresh and late in the cook to preserve its volatile aroma.

🌿What It Is: Aromatic leaf herb; French variety is the gold standard for flavor
👅Flavor: Anise-sweet, bittersweet herbal, mild peppery edge, faint citrus
🍳Best Uses: Béarnaise, cream sauces, vinaigrettes, compound butters, omelettes
🧊Shelf Life: Fresh 5-10 days; dried 6-12 months; frozen in oil 3-6 months
⚠️Watch Out: Volatile oils fade fast - add at the end of cooking, not the beginning

What Is Tarragon?

Tarragon - botanically Artemisia dracunculus - is a perennial herb native to Eurasia and long cultivated across Europe, particularly in France. Its narrow, lanceolate leaves are glossy and deep green, growing on thin, branching stems that reach knee height at maturity.

Two varieties dominate the kitchen. French tarragon (A. dracunculus var. sativa) is the culinary standard, prized for its clean anise character; Russian tarragon, by contrast, is taller, more bitter, and significantly less aromatic.

A third plant, Mexican tarragon (Tagetes lucida), is botanically unrelated but carries a similar flavor and is used as a substitute in regions where French tarragon won't thrive.

The herb goes by several names across languages - estragon in French and German, "dragon herb" in older English texts - a nod to its serpentine root structure. It's one of the four classic fines herbes of French cooking, alongside parsley, chervil, and chives.

  • 🌿 French tarragon - the only variety worth seeking for cooking; propagated by division, not seed
  • 🌱 Russian tarragon - grows easily from seed but tastes bitter and flat; avoid for cooking
  • 🌼 Mexican tarragon - a heat-tolerant substitute with a comparable anise flavor

What Does Tarragon Taste Like?

tarragon - What Is Tarragon
Sensory SnapshotStrong Intensity
👅 Flavor
anise-sweetbittersweet herbalmild pepperyfaint citrus
✋ Texture
delicateslightly waxy rawsoftens quickly
👃 Aroma
licorice-sweetgreen herbal perfume

Tarragon tastes closer to fennel or star anise than to any other herb - but it's greener and less syrupy than either. The anise note sits on top, followed by a mild bitterness and a faint peppery tingle at the back of the palate.

That citrusy brightness is subtle but real, and it's what keeps the flavor from feeling heavy.

Heat changes the equation quickly. Brief warmth mellows the sharpest anise notes and lets the herbal sweetness come forward; prolonged heat strips the volatile oils entirely, leaving almost nothing behind.

This is why tarragon works in Béarnaise - the sauce barely touches the heat - and fails in a long braise unless added right at the end.

Golden Rule
Add fresh tarragon in the final minute of cooking or off heat entirely. It's one of the few herbs where timing isn't optional - it's the whole point.

How to Use Tarragon

Tarragon's natural home is French cuisine, where it shapes some of the most recognized sauces in the repertoire. Béarnaise - the emulsion built on egg yolk, butter, shallot, and white wine vinegar - gets its defining character almost entirely from tarragon.

It also anchors cream sauces for chicken and white fish, where the anise notes cut through the richness without competing with the protein.

Beyond the classics, tarragon works well chopped raw into vinaigrettes or potato salads. Paired with good mustard and white wine vinegar, it's a sharp, aromatic dressing with almost no effort.

Compound butters are another reliable application - mix chopped fresh tarragon with softened butter, roll in clingfilm, freeze, and slice onto grilled fish or steak directly before serving.

How Tarragon Is Used
MethodBest ForTip
🥗 Raw / ChoppedVinaigrettes, potato salads, omelette garnish, soft cheeseUse leaves only; stems are fibrous and overly bitter
🍳 Briefly WiltedBéarnaise, cream sauces, pan sauces for chicken or fishAdd in the final 30-60 seconds; don't let it boil
🧈 Compound ButterFinishing steak, grilled fish, roasted vegetablesFreeze logs for up to 3 months; slice from frozen
🫙 InfusedTarragon vinegar, cream for custards or ice creamSteep for 10-15 minutes, then remove; don't over-extract

Tarragon pairs naturally with egg, chicken, salmon, cream, butter, lemon, and mustard. It's less at home with strong spices - clove-heavy blends or assertive chili pastes will erase its subtlety instantly.

Eastern European cooking uses Russian tarragon in drinks and pickles, though that variety's flavor is noticeably flatter.

Try It In
🍗Air Fryer Lemon Pepper Chicken TendersTarragon's citrus edge sharpens the lemon-pepper profile→🐟Air Fryer Lemon Pepper Salmon BitesCream-and-tarragon is a natural pairing for salmon→🥗Lemon Vinaigrette Dressing (Homemade)A tablespoon of chopped tarragon lifts the whole dressing→

How to Buy and Store Tarragon

At the market, reach for bunches with bright, glossy, deep-green leaves and a clear licorice smell when you rub a leaf between your fingers. Yellowing tips, limpness, or a musty odor all signal that the aroma is already fading.

When the label specifies variety, choose French tarragon without hesitation - Russian tarragon is rarely labeled as such but looks coarser and paler.

Best Pick
French tarragon bought from a farmers' market or specialty grocer is almost always fresher than supermarket packs - and its aroma is measurably stronger.

Storage is straightforward. Wrap unwashed sprigs loosely in a damp paper towel and keep them in a perforated bag or herb keeper in the refrigerator.

For longer storage, chop leaves, mix with a small amount of neutral oil, and freeze in ice cube trays - you can read more about tarragon storage life if you're managing a larger batch. Fresh sprigs hold for about 5-10 days; dried tarragon lasts 6-12 months but loses much of its complexity.

  • ✅ Buy fresh - dried tarragon is a pale shadow of the real thing for most uses
  • ❄️ Freeze in oil - best method for extending shelf life without losing all the aroma
  • 🚫 Skip dried for Béarnaise - the sauce needs fresh leaves to hit the right flavor; check [Béarnaise sauce shelf life](https://forkliftkitchen.com/bearnaise-sauce-shelf-life/) if you're making it ahead

Start Here with Tarragon

If this herb is new to you, start with a simple tarragon vinaigrette - whisk fresh chopped leaves with shallot, white wine vinegar, mustard, and olive oil, and taste it over potato salad or roasted chicken. That single recipe demonstrates the herb's range clearly.

Once you're confident with the flavor, move to cream sauces and then to Béarnaise. If French tarragon isn't available, check the options on our tarragon replacements page before settling for the Russian variety.

Shortcut
Freeze fresh tarragon in small oil cubes at peak freshness. Drop one cube into a pan sauce or cream sauce straight from frozen - no chopping, no waste.

Frequently Asked Questions

Is tarragon the same as fennel?

No. Both share an anise-like flavor because they contain similar aromatic compounds, but they're botanically unrelated. Fennel is sweeter and more pronounced; tarragon is greener, more herbal, and fades much faster with heat.

Can I substitute tarragon with dill?

Dill works in a pinch for fresh herb applications like salads and compound butters, but it won't replicate tarragon's anise character. For closer flavor, a small amount of fresh fennel frond is a better swap in most recipes.

What dishes use tarragon most?

Béarnaise sauce is the most iconic use. Beyond that, it appears in French chicken fricassee, tarragon cream sauce, classic vinaigrettes, and compound butters for fish and steak.

Can you use dried tarragon instead of fresh?

Yes, but with a significant flavor trade-off - dried tarragon loses most of its bright, anise-forward character. Use it only in longer-cooked dishes where the fresh herb would disappear anyway, and use roughly one-third the quantity.

Is tarragon safe during pregnancy?

Fresh tarragon leaves used in normal cooking quantities are generally considered safe. Concentrated tarragon essential oil or large supplemental doses are not recommended during pregnancy due to the high concentration of estragole.

Chicken Shawarma with Garlic Sauce

March 18, 2026

When you need a hands-off protein that works for meal prep, weeknight dinners, or a casual weekend gathering, chicken shawarma delivers. One marinade, high heat, and a creamy garlic sauce turn basic chicken thighs into something worth making twice a week.

Chicken Shawarma with Garlic Sauce served on a plate

The marinade does the flavor work while you handle everything else. Yogurt and lemon juice tenderize the meat, cumin and coriander build the spice base, and garlic ties it all together.

This is what we make when the fridge needs restocking but dinner still needs to feel intentional. Slice it thin, pile it on pita, drizzle the sauce, and you're done.

QUICK SUMMARY

Chicken shawarma marinates boneless skinless chicken thighs in yogurt, lemon juice, and Middle Eastern spices, then cooks them at high heat for crispy edges and juicy interiors. The 1-hour marinade is what makes the difference - acid and yogurt tenderize while spices penetrate deep. Serve with garlic sauce, pita, and fresh vegetables for a complete meal.

⏱️Time Reality: 15 min active, 1 hour marinating, 15 min cooking
🔥Critical First Step: Pat chicken dry before marinating so spices stick better
⚠️Watch Out: Overcrowding the pan causes steaming not searing - leave 1 inch between pieces

Table of Contents

Toggle
  • Why This Recipe Works
  • What You'll Need
    • Ingredient Details
  • Ingredient Swaps
  • What to Serve With It
  • Store and Reheat
  • Frequently Asked Questions
  • Chicken Shawarma with Garlic Sauce
    • Method 
    • Tried this recipe?

Why This Recipe Works

High heat creates crispy edges while dark meat stays juicy inside. The yogurt-based marinade tenderizes and flavors in one step, no precooking required. Chicken thighs handle the heat better than breasts - less drying, more forgiving timing. For a version that comes together quickly, a homemade chicken recipe uses similar techniques with different spices.

Quick Reference
⏱️
Prep Time
15 min
🔥
Cook Time
15 min
⏰
Total Time
30 min
🍽️
Servings
4 servings
📊
Difficulty
Medium
🏷️
Category
Main Dish
💡
Quick Tip
Marinate 1 hour for deep flavor
🎯
Best For
Weeknight | Meal prep | Entertaining

What makes this work:

  • Dark meat tolerance - thighs stay moist even if you miss the exact doneness window by a minute or two
  • Acid-based marinade - yogurt and lemon juice break down proteins for tender texture without precooking
  • Spice layering - cumin, coriander, and paprika build depth without needing a dozen ingredients
  • High-heat sear - 400°F creates caramelized edges and charred spots that taste like actual grill marks
  • Garlic sauce emulsion - whisking garlic with oil or mayo first prevents watery separation later
Quick Tip
Rest the cooked chicken 5 minutes before slicing - it redistributes juices and makes every bite tender instead of dry at the edges

What You'll Need

Ingredients for Chicken Shawarma with Garlic Sauce

Most of these ingredients sit in your spice cabinet or fridge already. Shopping takes 10 minutes if you're starting from scratch. We keep a batch ready for nights like this - a homemade homemade recipe uses similar pantry staples with different ratios.

🍗
Protein
  • 2 lbs boneless skinless chicken thighs
🧀
Dairy
  • ½ cup plain yogurt
🧄
Aromatics
  • 6 cloves garlic, minced
  • 3 tablespoons lemon juice
🌶️
Spices
  • 2 teaspoons ground cumin
  • 2 teaspoons ground coriander
  • 1 teaspoon ground paprika
  • 1 teaspoon salt
🥢
Sauce Base
  • 3 tablespoons olive oil
  • 2 tablespoons tahini (optional)

Ingredient Details

  • Boneless skinless chicken thighs
    Dark meat stays juicy under high heat - breasts dry out faster and need closer timing
  • Plain yogurt
    Full-fat works best for marinade richness, but low-fat or Greek yogurt both work in a pinch
  • Lemon juice
    Fresh lemon juice adds brightness bottled juice can't match - use 1-2 lemons for 3 tablespoons
  • Ground cumin
    Earthy backbone of shawarma spice - toast whole seeds and grind for deeper flavor
  • Garlic
    Minced garlic in both marinade and sauce - jarred garlic loses punch, fresh cloves deliver sharper bite
  • Olive oil
    Extra virgin for marinade, regular olive oil for cooking - saves money without losing flavor
  • Tahini
    Sesame paste adds nutty richness to garlic sauce - stir well before measuring since it separates

Ingredient Swaps

Most swaps work if you understand what each ingredient does. The marinade needs acid and fat, the spices need earthiness and warmth. For a version that comes together quickly, simple homemade salad offers similar Middle Eastern flavors with different textures.

Four swaps that work:

  • Plain yogurt → coconut yogurt - dairy-free option with slight sweetness, less tang but similar tenderizing effect
  • Chicken thighs → chicken breast - leaner cut cooks faster, needs closer watch to avoid drying (165°F internal temp still applies)
  • Tahini → sunflower seed butter - nut-free sauce base with similar creamy texture, slightly different nutty flavor
  • Grill or oven → air fryer - faster cook time at 400°F for 12-14 minutes, crispier edges with less oil

Chicken Thighs

Works for: Juicy texture, forgiving timing, higher fat content prevents drying

Skip if: Watching fat intake or prefer white meat texture

Chicken Breast

Works for: Leaner protein, cooks 2-3 minutes faster, lighter texture

Skip if: You tend to overcook chicken - breasts dry out faster under high heat

Full-Fat Yogurt

Works for: Richest marinade, best tenderizing, creamy garlic sauce base

Skip if: Dairy-free diet - use coconut yogurt instead

Instructions

The marinade sits while you prep everything else - no active babysitting required. Cooking takes 15 minutes once the pan heats up. We keep a batch ready for nights like this - easy bread side cooks alongside using the same spice profile.

  1. Mix the marinade: Whisk yogurt, lemon juice, minced garlic, cumin, coriander, paprika, salt, and 2 tablespoons olive oil in a bowl until smooth. Pat chicken thighs dry with paper towels, add to marinade, coat all sides, cover, and refrigerate 1-24 hours.

  2. Prep the garlic sauce: Whisk remaining minced garlic with 1 tablespoon olive oil (or mayonnaise) until it forms a paste. Slowly add tahini and a tablespoon of cold water, whisking constantly until creamy and emulsified. Set aside at room temperature.

  3. Heat the pan: Preheat a cast iron skillet or heavy pan over medium-high heat for 3 minutes. Add 1 tablespoon olive oil, swirl to coat, and wait until oil shimmers but doesn't smoke - that's 375-400°F.

  4. Sear the chicken: Remove chicken from marinade, shake off excess, and place pieces 1 inch apart in the hot pan. Cook 6-7 minutes per side without moving them - you want golden-brown edges with charred spots. Check internal temp reaches 165°F with a meat thermometer.

  5. Rest and slice: Transfer cooked chicken to a cutting board, tent loosely with foil, and rest 5 minutes. Slice thin across the grain into ¼-inch strips. Drizzle with garlic sauce and serve immediately with pita, vegetables, or rice.

Golden Rule
Don't flip the chicken early - it needs 6 full minutes undisturbed to develop crispy caramelized edges that taste like actual grill marks

What to Serve With It

The chicken works best when it hits the table at the same time as the sides. Fresh vegetables cut through the richness, starches soak up the garlic sauce. For planning your meal around this protein, weeknight chicken dinner ideas covers similar Middle Eastern pairings with different textures.

Side Dish Prep Why It Works How to Serve
Cucumber Tomato Salad Easy Fresh crunch cuts through rich garlic sauce Dice cucumber and tomatoes, toss with lemon juice and olive oil
Rice Pilaf Easy Neutral base soaks up sauce and juices Cook rice with butter and chicken broth for extra flavor
Roasted Vegetables Medium Adds fiber and texture variety to the plate Roast zucchini, bell peppers, and onions at 425°F for 20 minutes
Pita Bread Easy Traditional serve method, picks up sauce well Warm pita in oven or microwave, stuff with chicken and vegetables
Pickled Turnips Easy Tangy acidity balances rich spices Buy jarred or quick-pickle turnips in vinegar and beet juice

Three ways to serve it:

  • Wrap style - pile sliced chicken, vegetables, and sauce into warm pita, fold in half, eat immediately
  • Bowl style - layer rice, chicken, fresh vegetables, and drizzle with garlic sauce and tahini
  • Platter style - arrange sliced chicken on a large plate with sides around the edges, serve family-style
Best Pick
Serve with extra garlic sauce on the side - people always want more than you think they will

Store and Reheat

Store cooked chicken and garlic sauce separately to prevent soggy texture. The chicken keeps well for meal prep but needs gentle reheating to stay moist. We keep a batch ready for nights like this - this easy fries recipe reheats alongside using the same method.

Method Time Best For
🍳 Stovetop 4-5 min Retaining crisp edges - heat in skillet with 1 teaspoon oil
📦 Microwave 1-2 min Quick reheating single portions - cover with damp paper towel
🔥 Oven 10 min at 350°F Warming larger portions evenly - spread on sheet pan in single layer

For best results when storing:

  • Refrigerate in shallow containers - cool chicken to room temp within 2 hours, store in airtight containers for 3-4 days
  • Keep sauce separate - garlic sauce lasts 5-7 days refrigerated, chicken gets soggy if stored mixed together
  • Freeze in portions - freeze cooked chicken up to 1 month in freezer bags, press out air before sealing
  • Thaw overnight - move frozen chicken to fridge 24 hours before reheating for even texture
  • Add moisture when reheating - drizzle olive oil or extra sauce over chicken before warming to prevent drying

Frequently Asked Questions

How long to cook chicken shawarma at 400°F?

Cook chicken thighs 12-15 minutes total at 400°F - 6-7 minutes per side without flipping early. Check internal temp reaches 165°F with a meat thermometer inserted into the thickest part.

Can I make chicken shawarma ahead of time?

Marinate chicken up to 24 hours ahead, or cook and refrigerate up to 3 days. Store cooked chicken and garlic sauce separately to prevent sogginess - reheat gently on the stovetop or in the oven.

What goes well with chicken shawarma?

Serve with rice pilaf, pita bread, cucumber tomato salad, roasted vegetables, or pickled turnips. Add hummus, tabbouleh, or grilled halloumi for entertaining.

How do I know when chicken shawarma is cooked through?

Check internal temp reaches 165°F with a meat thermometer - insert into the thickest part of the thigh. Juices run clear and meat is no longer pink when fully cooked.

Can I use chicken breast instead of thighs in shawarma?

Yes, but breasts cook faster and dry out easier - reduce cook time to 10-12 minutes total and watch internal temp closely. Thighs stay juicier and more forgiving under high heat.

Chicken Shawarma with Garlic Sauce served on a plate

Chicken Shawarma with Garlic Sauce

No ratings yet
Chicken shawarma marinates boneless skinless chicken thighs in a yogurt and lemon juice marinade infused with Middle Eastern spices, then sears at high heat for crispy edges and juicy interiors. Paired with a creamy garlic sauce, this dish delivers bold flavor perfect for meal prep or weeknight dinners.
Print Recipe Pin Recipe
Prep Time 15 minutes mins
Cook Time 15 minutes mins
Total Time 30 minutes mins
Servings: 4 servings
Course: Main Dish
Cuisine: Middle Eastern
Ingredients Equipment Method Notes

Ingredients
  

  • 2 lbs boneless skinless chicken thighs Pat dry before marinating
  • 0.5 cup plain yogurt Full-fat preferred for richness
  • 6 cloves garlic Minced; divided between marinade and sauce
  • 3 tablespoons lemon juice Freshly squeezed
  • 2 teaspoons ground cumin
  • 2 teaspoons ground coriander
  • 1 teaspoon ground paprika
  • 1 teaspoon salt
  • 3 tablespoons olive oil 2 tablespoons for marinade, 1 tablespoon for cooking
  • 2 tablespoons tahini Optional; for garlic sauce
  • 1 tablespoon cold water For thinning garlic sauce

Equipment

  • Cast iron skillet Used for high-heat searing of chicken
  • Whisk To mix marinade and garlic sauce

Method
 

  1. Whisk yogurt, lemon juice, 3 cloves minced garlic, cumin, coriander, paprika, salt, and 2 tablespoons olive oil in a bowl until smooth. Pat chicken thighs dry with paper towels, add to marinade, coat all sides, cover, and refrigerate 1 to 24 hours.
    2 lbs boneless skinless chicken thighs, 0.5 cup plain yogurt, 6 cloves garlic, 3 tablespoons lemon juice, 2 teaspoons ground cumin, 2 teaspoons ground coriander, 1 teaspoon ground paprika, 1 teaspoon salt, 3 tablespoons olive oil
  2. Whisk remaining 3 cloves minced garlic with 1 tablespoon olive oil or mayonnaise until it forms a paste. Slowly add tahini and 1 tablespoon cold water, whisking constantly until creamy and emulsified. Set aside at room temperature.
    6 cloves garlic, 3 tablespoons olive oil, 2 tablespoons tahini, 1 tablespoon cold water
  3. Preheat a cast iron skillet or heavy pan over medium-high heat for 3 minutes. Add 1 tablespoon olive oil, swirl to coat, and wait until oil shimmers but does not smoke (approximately 375-400°F).
    3 tablespoons olive oil
  4. Remove chicken from marinade, shake off excess moisture, and place pieces 1 inch apart in hot pan. Cook undisturbed 6 to 7 minutes per side until golden-brown edges with charred spots occur. Ensure internal temperature reaches 165°F with a meat thermometer.
    2 lbs boneless skinless chicken thighs
  5. Transfer cooked chicken to cutting board, tent loosely with foil, and rest for 5 minutes to redistribute juices. Slice thinly across the grain into ¼-inch strips. Drizzle with garlic sauce and serve immediately with pita, vegetables, or rice.
    2 lbs boneless skinless chicken thighs, 2 tablespoons tahini

Notes

  • Pat chicken dry before marinating to help spices adhere better.
  • Leave space between chicken pieces during cooking to prevent steaming and ensure searing.
  • Rest chicken before slicing to keep juices distributed and maintain tenderness.

Tried this recipe?

Let us know how it was!

5 Best Substitutes for Jackfruit in Vegan Pulled 'Pork'

March 18, 2026

You're prepping vegan pulled "pork" and the store's out of canned jackfruit. The recipe counts on that shredded, meat-like texture to hold the sauce.

5 Best Substitutes for Jackfruit in Vegan Pulled 'Pork'

Jackfruit works because it pulls apart into fibrous strands and soaks up whatever flavors you throw at it. Without it, the dish can feel more like mush than barbecue.

A few swaps from the produce or canned aisle can fill in.

QUICK SUMMARY

For vegan tacos and stews, we swap jackfruit with shredded artichoke hearts, pulled oyster mushrooms, or hearts of palm. All three mimic the fibrous, shreddable texture and absorb marinades-though artichokes run tangier and mushrooms bring deeper umami. Watch for softer bite in lighter dishes, and add extra seasoning if your swap tastes milder than expected.

🥬Closest match: Canned artichoke hearts shred like jackfruit and work in most recipes
🍄For savory dishes: Oyster mushrooms add umami but skip sweet applications
⚠️Texture guard: Hearts of palm stay firmer-better for salads than slow braises
Quick Substitute Reference
#SubstituteBest ForRatioKey Note
1 Young Jackfruit ✨ Both 1:1 Exact match, different form
2 Artichoke Hearts 🌱 Vegan 1:1 Tangier, softer texture
3 Oyster Mushrooms 🍳 Cooking 1:1 Deeper umami flavor
4 Hearts of Palm 🥗 Raw 1:1 Mild, nutty, firmer bite
5 Green Plantains 🍳 Cooking 1:1 Starchy, less fibrous

1. Young Jackfruit 🥫

Young green jackfruit is the same ingredient you're replacing-just in canned or fresh form instead of whatever you ran out of. It delivers the exact texture and neutral flavor profile.

Use it 1:1 in any recipe calling for jackfruit. Drain and rinse canned versions to remove brine before cooking.

  • ✅ Identical texture and flavor
  • ⚠️ Canned versions may vary in sweetness by brand

This is the swap we'd pick first if you can find it. If young jackfruit isn't available at all, the next four options cover you.

2. Artichoke Hearts 🥬

Shredded artichoke hearts mimic jackfruit's stringy, meat-like texture and absorb marinades just as well. The flavor runs slightly earthier and tangier.

Use equal volume after draining canned artichokes. Shred them with a fork or chop roughly before adding to your dish.

  • ✅ Best texture match for tacos and sandwiches
  • ⚠️ Softer bite than jackfruit after cooking

The tangy edge works in savory applications but can clash with sweet or mild recipes. If you're working with bold spices or barbecue sauce, Artichoke Heart substitutes for cooking cover other swaps too.

3. Oyster Mushrooms 🍄

Pulled oyster mushrooms deliver a fibrous, tender texture that holds up in stews and vegan barbecue. The flavor leans earthy and umami-rich-darker than jackfruit's neutral base.

Use 1:1 volume after cleaning and shredding the mushrooms by hand. Sauté or braise them to develop the meaty texture.

They shine in savory dishes where the umami adds depth. Skip them for recipes needing sweetness or neutral flavor.

Add them early in cooking so they soften and absorb the sauce. If mushrooms aren't your thing, easy Oyster Mushroom swaps that work list other fungi options.

Best Pick
For vegan barbecue and stews, oyster mushrooms bring texture and umami without needing extra prep.

4. Hearts of Palm 🌴

Shredded hearts of palm offer a mild, slightly nutty flavor and fibrous texture similar to jackfruit. They stay firmer after cooking, which makes them better for fresh or lightly cooked dishes.

Use equal volume straight from the can. Shred with a fork before tossing into salads, wraps, or quick sautés.

  • ✅ Great for cold salads and wraps
  • ⚠️ Less tender in slow-cooked dishes
  • ⚠️ Milder flavor than jackfruit

The firm bite holds up in fresh applications where jackfruit might get too soft. For other palm-based swaps, Hearts Of Palm alternatives to try covers similar options.

5. Green Plantains 🍌

Boiled and shredded green plantains provide the bulk and starchy body of jackfruit, but without the same fibrous texture. The flavor stays neutral to slightly starchy.

Use 1:1 volume after boiling until tender and pulling apart with a fork. Add to stews or filling dishes where texture matters less than heartiness.

They absorb flavors well but won't shred into strings like jackfruit does. The starchy quality makes them better for thick, saucy dishes than lighter fare.

Skip this swap if the recipe needs distinct pulled strands-the plantain's texture won't match.

Picking Your Jackfruit Swap

  • For vegan barbecue or tacos: Artichoke hearts or oyster mushrooms
  • For fresh salads and wraps: Hearts of palm
  • For hearty stews: Green plantains or mushrooms

Frequently Asked Questions

Can I use ripe jackfruit instead of young green jackfruit?

Ripe jackfruit is sweet and soft-it won't work for savory dishes. Young green jackfruit stays neutral and firm, which is what you need for pulled "pork" or curries. Stick with unripe versions for cooking.

Do these substitutes work in curries?

Artichoke hearts and oyster mushrooms both work in curries. They absorb coconut milk and spices just like jackfruit does. Hearts of palm can turn mushy in long simmers, so add them near the end.

Which substitute tastes most like jackfruit?

Artichoke hearts come closest in texture and neutral flavor. They shred similarly and don't add strong flavors that compete with your seasonings. Oyster mushrooms work well too but bring more umami.

Can I freeze these substitutes after cooking?

Cooked artichoke hearts and mushrooms freeze well for up to three months. Hearts of palm and plantains can get mushy after freezing. Thaw in the fridge and reheat gently to preserve texture.

Do I need to cook canned substitutes before using them?

Canned artichokes and hearts of palm are already cooked-you can use them straight from the can in cold dishes. For hot applications, sauté or simmer them to let flavors meld. Fresh mushrooms and plantains need cooking first.

5 Best Substitutes for Jackfruit in Vegan Pulled 'Pork'

5 Best Substitutes for Jackfruit

No ratings yet
If you're out of canned jackfruit, there are several great alternatives that mimic its fibrous, shredded texture and flavor-absorbing qualities. Popular substitutes include young jackfruit, artichoke hearts, oyster mushrooms, hearts of palm, and green plantains-each working best in specific dishes.
Print Recipe Pin Recipe
Prep Time 10 minutes mins
Cook Time 8 minutes mins
Total Time 18 minutes mins
Servings: 4 servings
Course: Kitchen Tips, Substitutes
Cuisine: Various
Ingredients Method Notes

Ingredients
  

  • 1 cup Young Jackfruit Use 1:1 volume ratio; drain and rinse canned versions before use.
  • 1 cup Artichoke Hearts Use equal volume; drain canned artichokes and shred before use.
  • 1 cup Oyster Mushrooms Use 1:1 volume; clean, shred by hand, and sauté or braise for best texture.
  • 1 cup Hearts of Palm Use equal volume straight from can; shred with fork before use.
  • 1 cup Green Plantains Use 1:1 volume after boiling and shredding; better for thick, hearty dishes.

Method
 

  1. Choose the substitute based on your dish (e.g., artichoke hearts for tacos, hearts of palm for salads).
  2. Prepare the substitute by draining, shredding, or cooking as needed (e.g., rinse canned jackfruit or boil plantains).
  3. Use a 1:1 volume ratio to replace jackfruit in your recipe and adjust seasoning as needed.
  4. Heat or simmer your substitute in sauces or marinades to allow flavor absorption and develop texture.
  5. Check texture and taste before serving, adding extra seasoning if flavor is milder than expected.

Notes

  • Drain canned ingredients well to avoid excess moisture.
  • Adjust seasoning to compensate for milder flavor in some substitutes like hearts of palm.
  • Use firm substitutes like hearts of palm for salads and softer ones like mushrooms for stews.

Tried this recipe?

Let us know how it was!

Beef Kofta with Spiced Yogurt Sauce

March 18, 2026

Ground beef kofta often tastes bland or falls apart on the grill. The fix is using 80/20 beef with finely grated onion and cooking at medium heat until the internal temp hits 160°F.

Beef Kofta with Spiced Yogurt Sauce served on a plate

The spiced yogurt sauce does the heavy lifting. Cool, tangy yogurt balances the warm spices without masking the beef.

Make this when you want something that feels intentional but doesn't require marinating or multiple pans. Works for weeknight dinners or casual gatherings when you need protein that holds together.

QUICK SUMMARY

Beef kofta uses ground beef mixed with cumin, coriander, and fresh parsley, shaped into logs and cooked until browned. The 80/20 beef ratio keeps them juicy without excess grease. Serve with spiced yogurt sauce for a complete meal.

⏱️Time Reality: 15 minutes prep, 10-12 minutes cooking-no marinating required
🔥Critical Move: Shape with chilled hands to prevent sticking and get uniform size
⚠️Watch Out: Too much onion moisture makes kofta soggy-squeeze out excess liquid before mixing

Table of Contents

Toggle
  • Why This Recipe Works
  • What You'll Need
    • Ingredient Details
  • Ingredient Swaps
  • What to Serve With It
  • Store and Reheat
  • Frequently Asked Questions
  • Beef Kofta with Spiced Yogurt Sauce
    • Method 
    • Tried this recipe?

Why This Recipe Works

Most people skip beef, but it balances the meal. For a version that comes together quickly, this rich homemade beef recipe uses similar warming spices and delivers consistent results.

Quick Reference
⏱️
Prep Time
15 min
🔥
Cook Time
10-12 min
⏰
Total Time
25-30 min
🍽️
Servings
4 servings
📊
Difficulty
Medium
🏷️
Category
Main Dish | Appetizer
💡
Quick Tip
Use chilled hands to shape uniform kofta
🎯
Best For
Weeknight | Entertaining | Meal prep

The technique delivers consistent results:

  • 80/20 ground beef keeps kofta juicy without excess grease - leaner ratios dry out before the exterior browns
  • Grated onion distributes moisture evenly - chunky pieces create wet pockets that make kofta fall apart
  • Medium heat browns the outside while cooking through - high heat burns the spices before the center reaches 160°F
  • Resting for 5 minutes redistributes juices - cutting immediately releases all the moisture onto the plate
  • Combining spices with onion first ensures uniform flavor - adding them directly to meat creates uneven seasoning
Quick Tip
Chill hands in cold water before shaping for uniform, non-sticky kofta

What You'll Need

Ingredients for Beef Kofta with Spiced Yogurt Sauce

The shopping list stays short but each ingredient has a job. Slaw adds the contrast this plate needs, but timing matters-for something that comes together in minutes, an easy slaw side works without extra prep.

🍗
Protein
  • Ground beef (80/20)
🧄
Aromatics
  • Onion
  • Garlic
  • Fresh parsley
🌶️
Spices
  • Ground cumin
  • Ground coriander
  • Ground cinnamon
🧀
Dairy & Acid
  • Plain yogurt
  • Lemon juice
  • Olive oil

Ingredient Details

  • Ground beef (80/20)
    Base protein that provides flavor and juiciness-leaner ratios dry out
  • Onion
    Adds moisture and sweetness-grate or chop finely and squeeze out excess liquid
  • Ground cumin
    Signature warm earthiness to kofta spice blend-measure carefully to avoid overpowering
  • Ground coriander
    Bright citrusy spice that complements beef-balances the earthiness of cumin
  • Plain yogurt
    Creamy base for spiced sauce-use full-fat for best texture and richness
  • Fresh parsley
    Herbal freshness that balances spices-dried works but lacks the same brightness
  • Lemon juice
    Adds brightness to yogurt sauce-whisk in last to avoid curdling

Ingredient Swaps

Most swaps work but change the outcome. A good salad can make or break the plate-for something that pairs well with Middle Eastern mains, a fresh salad side dish adds brightness without extra effort.

Four swaps that work:

  • Ground lamb instead of ground beef - adds gamey richness that pairs well with cumin and coriander, traditional in many kofta recipes
  • Dairy-free coconut yogurt for plain yogurt - slightly sweeter but keeps the sauce creamy, works for dairy-free diets
  • Fresh cilantro instead of fresh parsley - changes herb notes to brighter, more citrusy profile, common in some regional variations
  • Pan-frying in cast iron instead of grilling - less smoky flavor but similar browning, better for indoor cooking or when weather doesn't cooperate

Ground Turkey

Works for: Lighter protein option, lower fat content, mild flavor that takes spices well

Skip if: You want juicy kofta-turkey dries out faster and needs careful monitoring

Apple Cider Vinegar

Works for: Similar acidity to lemon juice, pantry-friendly swap when citrus isn't available

Skip if: You want bright, clean flavor-vinegar has sharper tang that can overpower yogurt

Instructions

The steps stay straightforward but timing determines texture. Rich mains need something to cut through, and this dip does exactly that-for a cooling counterpoint, this creamy sauce pairs with grilled meats without masking their flavor.

  1. Mix spices with grated onion in a bowl. Combine cumin, coriander, cinnamon, garlic, and parsley with the squeezed onion. This distributes seasonings evenly before adding meat.

  2. Add ground beef and mix gently until just combined. Overmixing makes kofta tough. Stop when you no longer see dry patches-about 30 seconds of gentle folding.

  3. Shape into 8-10 uniform logs with chilled hands. Dip hands in cold water between shaping. Make each kofta about 4 inches long and 1 inch thick for even cooking.

  4. Cook over medium heat for 3-4 minutes per side. Use a grill pan or cast iron skillet brushed with olive oil. Flip when the bottom develops a golden-brown crust with slight char marks.

  5. Check internal temperature reaches 160°F, then rest 5 minutes. Insert meat thermometer into the thickest part. Transfer to a plate and tent with foil while making yogurt sauce.

Golden Rule
Cook kofta until internal temp reaches 160°F (71°C) for safe beef-use a meat thermometer for accuracy

What to Serve With It

The plate needs balance and most people miss the gap. A good bread can make or break the plate-for a version that comes together quickly, something warm like bread soaks up the spiced yogurt sauce without competing with the kofta. If you're planning the full meal, check out these weeknight shredded beef sandwiches meal ideas for more pairing inspiration.

Side Dish Prep Why It Works How to Serve
Cucumber Salad Easy Refreshes palate with cool crunch Dice cucumbers, toss with lemon, serve cold alongside kofta
Rice Pilaf Easy Mild grain complements spices Toast rice with butter, simmer until fluffy, spoon under kofta
Pita Bread Easy Makes kofta handheld and filling Warm pitas, stuff with kofta and yogurt sauce, add greens
Tabbouleh Medium Bright, herbaceous Mediterranean salad Chop parsley fine, mix with bulgur and lemon, serve alongside
Hummus Platter Easy Encourages communal dipping and variety Spread hummus on plate, arrange kofta on top, drizzle olive oil

Three ways to serve it:

  • Build a pita wrap: Warm pita bread, fill with kofta, spiced yogurt sauce, diced cucumber, and shredded lettuce for handheld eating
  • Make a rice bowl: Serve kofta over rice pilaf with roasted vegetables, drizzle yogurt sauce over everything, add fresh herbs
  • Create a mezze platter: Arrange kofta with hummus, tabbouleh, olives, and warm pita for entertaining or casual gatherings
Best Pick
Serve kofta with rice pilaf and cucumber salad-the cool crunch balances warm spices without extra prep

Store and Reheat

Kofta keeps well but reheating requires attention to avoid drying. Most people skip this dip, but it balances the meal-for a cooling counterpoint that keeps in the fridge, we mix yogurt with lemon and cumin ahead of time so it's ready when dinner hits the table.

Method Time Best For
🍳 Stovetop 5-7 min Retaining crisp exterior using skillet
🔥 Oven 10 min at 350°F Heating evenly without drying
📦 Microwave 1-2 min Quick reheating but may soften crust

For best results when storing:

  • Cool kofta completely before refrigerating - store in shallow airtight container for 3-4 days, separate layers with parchment
  • Freeze shaped uncooked kofta for meal prep - arrange on parchment-lined sheet, freeze solid, transfer to freezer bag for up to 3 months
  • Make spiced yogurt sauce 1 hour ahead - prepare and chill to blend flavors, whisk lemon juice in just before serving to avoid curdling
  • Reheat in oven for best texture - place kofta on sheet pan at 350°F for 10 minutes, flip halfway through
  • Add moisture when reheating if needed - brush with olive oil or spoon yogurt sauce over kofta before warming to prevent dryness

Frequently Asked Questions

How long to cook beef kofta at medium heat?

Cook kofta for 3-4 minutes per side over medium heat until internal temperature reaches 160°F. Flip when the bottom develops a golden-brown crust with slight char marks.

Can I make beef kofta ahead and freeze?

Yes, shape uncooked kofta and freeze on a parchment-lined sheet until solid, then transfer to freezer bags for up to 3 months. Cook from frozen, adding 2-3 minutes per side.

What goes with beef kofta for a quick dinner?

Serve kofta with rice pilaf, cucumber salad, and warm pita bread. The cool crunch and mild grains balance the warm spices without requiring extra cooking time.

How do I know when beef kofta is done?

Insert a meat thermometer into the thickest part-kofta is done at 160°F internal temperature. The exterior should be golden-brown with slight char marks.

Can I use ground turkey instead of beef?

Yes, but ground turkey dries out faster than beef. Use 93/7 turkey and watch cooking time carefully-check temperature at 8 minutes instead of 10.

Beef Kofta with Spiced Yogurt Sauce served on a plate

Beef Kofta with Spiced Yogurt Sauce

No ratings yet
Beef kofta made with 80/20 ground beef and a blend of cumin, coriander, and fresh parsley is shaped into uniform logs and grilled to juicy perfection. The spiced yogurt sauce provides a cool, tangy contrast that complements the warm spices and keeps every bite flavorful. This recipe requires no marinating and comes together quickly for a dependable weeknight or entertaining meal.
Print Recipe Pin Recipe
Prep Time 15 minutes mins
Cook Time 12 minutes mins
Total Time 27 minutes mins
Servings: 4 servings
Course: Appetizer, Main Dish
Cuisine: Mediterranean, Middle Eastern
Ingredients Equipment Method Notes

Ingredients
  

  • 1 pound ground beef 80/20 ratio
  • 1 medium onion finely grated, excess liquid squeezed out
  • 2 cloves garlic minced
  • 2 tablespoons fresh parsley finely chopped
  • 1 teaspoon ground cumin
  • 1 teaspoon ground coriander
  • ¼ teaspoon ground cinnamon
  • ½ cup plain yogurt full-fat recommended
  • 1 tablespoon lemon juice whisk in last to avoid curdling
  • 1 tablespoon olive oil for cooking and sauce

Equipment

  • Grill pan Used for cooking the kofta over medium heat
  • Meat thermometer To check the internal temperature for doneness
  • Bowl For mixing spices, onion, and beef

Method
 

  1. Combine ground cumin, ground coriander, ground cinnamon, minced garlic, and chopped fresh parsley with the grated and squeezed onion in a bowl. Stir thoroughly to distribute seasonings evenly before adding the meat.
    1 medium onion, 1 teaspoon ground cumin, 1 teaspoon ground coriander, ¼ teaspoon ground cinnamon, 2 cloves garlic, 2 tablespoons fresh parsley
  2. Add ground beef to the mixture and fold gently until just combined, about 30 seconds. Avoid overmixing to keep the kofta tender and juicy.
    1 pound ground beef
  3. Chill your hands in cold water and shape the mixture into 8 to 10 uniform logs about 4 inches long and 1 inch thick for even cooking.
  4. Heat a grill pan or cast iron skillet brushed with olive oil over medium heat. Cook the kofta logs for 3-4 minutes per side until the exterior is golden-brown with slight char marks and the internal temperature reaches 160°F (71°C).
    1 tablespoon olive oil
  5. Remove kofta from heat and let rest under foil for 5 minutes to redistribute juices before serving.
  6. Whisk plain yogurt with lemon juice and a pinch of ground cumin until smooth. Chill the sauce until ready to serve alongside the kofta.
    ½ cup plain yogurt, 1 tablespoon lemon juice, 1 teaspoon ground cumin

Notes

  • Use 80/20 ground beef to keep the kofta juicy without excess grease.
  • Grate and squeeze out onion moisture to prevent soggy kofta that falls apart.
  • Cook over medium heat and use a meat thermometer to ensure internal temperature reaches 160°F for safe and consistent doneness.

Tried this recipe?

Let us know how it was!

What Is Sweetened Condensed Milk? [Taste, Uses & More]

March 18, 2026

Most people assume sweetened condensed milk is just milk made thicker, when in fact it's a fundamentally different product - one where water removal and heavy sugar addition change both structure and behavior in ways regular milk simply can't replicate.

What Is Sweetened Condensed Milk

Understanding those differences is what separates desserts that set correctly from ones that don't.

QUICK SUMMARY

Sweetened condensed milk is a thick, shelf-stable dairy concentrate with an intensely sweet, caramelized flavor. It's used across Latin American, Southeast Asian, and American baking - from tres leches cake to no-churn ice cream - and nothing substitutes it exactly.

🍬Flavor: Very sweet, caramelized milk sugar with a buttery, creamy undertone
🥄Texture: Thick and syrupy; spreadable cold, silky when stirred or warmed
🧁Best Uses: Dessert bases, coffee and tea, flan, no-churn ice cream, dulce de leche
📦Shelf Life: Up to 24 months unopened; 7-10 days once opened and refrigerated
⚠️Note: High in sugar and dairy - not suitable for low-sugar or lactose-free diets unless labeled

What Is Sweetened Condensed Milk?

Sweetened condensed milk starts as whole cow's milk, reduced by evaporation to remove roughly 60% of its water content.

Sugar is added during processing - typically at a ratio that results in a final product of around 40-45% sugar by weight - leaving a dense, pourable concentrate that stays shelf-stable without refrigeration until opened.

Its origin is tied to 19th-century canning innovation, when Gail Borden developed a commercial process to extend milk's usable life. The product spread globally and became foundational in cuisines that lacked reliable refrigeration.

You may also see it called leche condensada in Spanish-speaking markets, or "sweetened evaporated milk" - though that's technically a misnomer, since evaporated milk is a separate, unsweetened product.

Cans are the standard format, though tubes and glass jars exist in some markets. Most versions use whole milk, but low-fat and lactose-free varieties appear on shelves with increasing regularity.

Watch Out
Don't swap sweetened condensed milk for evaporated milk at equal volume - evaporated milk has no added sugar and is far thinner, which will break most dessert recipes.

What Does Sweetened Condensed Milk Taste Like?

sweetened condensed milk - What Is Sweetened Condensed Milk

The dominant note is caramelized sugar, specifically the kind of sweetness that reads almost cooked rather than raw - similar to what happens when milk sugar undergoes low-level Maillard browning during the evaporation process.

It's not quite dulce de leche, which takes that reaction much further, but it's already partway there.

Underneath the sweetness sits a mild, milky creaminess and a faint buttery undertone. There's very little dairy tang compared with regular milk or cream.

Sensory SnapshotStrong Intensity
👅 Flavor
CaramelizedVery SweetButteryMilky
✋ Texture
ThickSyrupySilky
👃 Aroma
SweetCaramel-milkLow tang

Heat intensifies the caramel character further. Warming sweetened condensed milk over low heat - or baking it in-can submerged in water - pushes it into full dulce de leche territory, darker, thicker, and distinctly toasted.

How to Use Sweetened Condensed Milk

Sweetened condensed milk functions as both a sweetener and a structural agent, which is what makes it so useful across different recipe types. It contributes sugar and body in a single pour, without the added liquid volume that plain sugar dissolved in cream would bring.

How Sweetened Condensed Milk Is Used
MethodBest ForTip
🥄 Direct MixCoffee, tea, beverage sweeteningStir thoroughly - it sinks to the bottom of cold drinks
🍮 Baked or SimmeredDulce de leche, custards, flanKeep heat low and even; high heat scorches the sugars fast
❄️ Chilled/No-HeatNo-churn ice cream, bar fillings, fridge-set dessertsCombine with whipped cream for no-churn; it sets firm when frozen
💧 DilutedTres leches cake soak, milk-based poursMix with whole milk or evaporated milk to loosen the texture

In Southeast Asian cooking - particularly Filipino cuisine - sweetened condensed milk anchors leche flan, a firmer, denser custard than its French cousin, relying on the sugar content to set properly. Latin American kitchens use it extensively, from tres leches cake soaks to the filling for alfajores cookies.

Southern U.S. baking reaches for it in chess pie and key lime pie, where its acidity-binding properties hold the custard together.

It pairs cleanly with strong brewed coffee or espresso, cocoa, vanilla, cinnamon, tropical fruits like mango and banana, and citrus zest used for contrast.

Avoid combining it directly with sharp acidic ingredients like undiluted vinegar-based dressings - the sugar and protein structure can separate unpleasantly under high acid.

Shortcut
For a no-churn ice cream base, fold one can of sweetened condensed milk into two cups of heavy whipped cream, add your flavoring, freeze overnight. No machine needed.
Try It In
🥞Fluffy Buttermilk PancakesDrizzle condensed milk instead of syrup for a caramelized finish→☕Iced Brown Sugar Oat Milk LatteSee how a sweet dairy concentrate changes cold coffee drinks→🍵Iced Matcha Oat Milk LatteCondensed milk works as a rich alternative sweetener here→

How to Buy and Store Sweetened Condensed Milk

At the store, check every can for dents, bulges, or rust before adding it to your cart. A bulging can signals internal pressure from spoilage - skip it entirely.

For glass jars or tubes, look for a clear, syrupy consistency and no visible sugar crystallization at the bottom.

  • Unopened cans - Store at room temperature, away from direct sunlight and heat sources; shelf life runs 12-24 months.
  • Opened portions - Transfer to an airtight container and refrigerate immediately; use within 7-10 days.
  • Tubes and jars - Follow the label, but refrigerate after opening regardless of format.

The sweetened condensed milk storage life is generous compared with fresh dairy, but once you break the seal, it behaves more like any other opened dairy product.

If you need a replacement and don't have a can on hand, sweetened condensed milk alternatives do exist, though most require cooking down heavy cream with sugar to approximate the same texture and sweetness level.

Golden Rule
Never store an opened can in the fridge with its lid on. Transfer the contents to a sealed container - metal cans impart off-flavors to dairy once exposed to air.

Start Here

Reach for sweetened condensed milk when a recipe needs both sweetness and body without adding extra liquid volume. If you're new to it, stir a spoonful into strong coffee first - that single use demonstrates exactly how it behaves: it melts in, thickens slightly, and sweetens without thinning.

From there, no-churn ice cream is the next logical step before moving into baked custards and flan.

Frequently Asked Questions

How is sweetened condensed milk different from evaporated milk?

Evaporated milk is unsweetened and thinner - it's just milk with water removed. Sweetened condensed milk has sugar added during processing, giving it a thick, syrupy texture and nearly double the caloric density of evaporated milk.

Can you substitute sweetened condensed milk with heavy cream and sugar?

Yes, but you need to cook them together first. Simmer one cup of heavy cream with a third cup of sugar for 20-25 minutes until reduced and thickened - the result approximates the texture and sweetness, though the flavor is slightly less caramelized.

How long does opened sweetened condensed milk last in the fridge?

Seven to ten days in a sealed, non-metal container. Beyond that, watch for off smells, color darkening, or visible mold - any of those means discard it.

Does sweetened condensed milk need to be refrigerated before opening?

No. The combination of reduced water content and high sugar concentration makes it shelf-stable at room temperature. Refrigerating it before opening won't hurt, but it thickens considerably when cold and becomes harder to pour.

Can you make dulce de leche from a can of sweetened condensed milk?

Yes. Submerge the unopened can in water and simmer for two to three hours, keeping the can fully covered throughout. The result is a thick, deeply caramelized spread - never open the can while it's still hot.

5 Best Substitutes for Herbsaint for Home Bartenders

March 18, 2026

You're scaling up a Sazerac recipe and realize you only have half the Herbsaint you need. The bottle looked fuller than it was.

5 Best Substitutes for Herbsaint for Home Bartenders

Absinthe and Pernod fill the same anise-forward gap with minimal fuss. Picking between them depends on how much sweetness or herbal bite you want in the final drink.

QUICK SUMMARY

**Absinthe** delivers the closest match with strong licorice and herbal depth. **Pernod** offers a sweeter, smoother profile. Both work 1:1. The main risk is over-sweetening or introducing bitterness if you don't adjust proportions.

🥃Closest match: Absinthe replicates the herbal complexity
📏Golden ratio: **Use 1:1 for all liqueur swaps**
⚠️Common mistake: Pouring extract directly without diluting first

5 Herbsaint Replacements for Better Texture

Some swaps stay close, while others require small adjustments. Match the anise intensity to your recipe's purpose-cocktails need balance, sauces need complexity.

Quick Substitute Reference
#SubstituteBest ForRatioKey Note
1 Absinthe ✨ Both 1:1 More bitter than Herbsaint
2 Pernod ✨ Both 1:1 Sweeter profile
3 Ouzo ✨ Both 1:1 Mediterranean herbal twist
4 Anise Extract Mix 🥧 Baking 1 teaspoon extract + 1 tablespoon vodka per 1 tbsp Very concentrated
5 Fennel Vodka 🍳 Cooking 1:1 Milder licorice

1 - Absinthe

Absinthe shares Herbsaint's core anise and herbal backbone, making it the tightest match. It carries a more pronounced bitter edge and higher alcohol warmth.

Pour it 1:1 in cocktails or sauces. The herbal bite stands up to strong spirits and bold aromatics without disappearing.

Absinthe

Works for: Full-bodied cocktails, savory pan sauces

Skip if: Recipe needs smooth sweetness

Herbsaint

Works for: Balanced drinks, mild anise presence

Skip if: You want sharper herbal notes

Here's what to know:

  • Herbal bitterness peaks faster than Herbsaint
  • Works best in stirred cocktails where dilution softens edges
  • Pair with citrus or sugar to balance intensity

If you're out of Absinthe too, swaps with bolder flavor cover options that match intensity.

Skip if: You need a mild, approachable anise note without sharpness.

2 - Pernod

Pernod leans sweeter and more accessible than Herbsaint. It smooths out without the same herbal complexity.

Use it 1:1 in drinks or sauces where you want licorice flavor without bitterness. It blends easily into cream-based applications or citrus-forward cocktails.

Don't have Pernod either? Swaps for sweeter anise lists options that add gentle flavor.

Skip if: You need herbal depth or a drier finish.

3 - Ouzo

Ouzo brings anise flavor with a sweeter Mediterranean twist. It sits somewhere between Herbsaint and Pernod in intensity.

Best Pick
Use 1:1 in seafood dishes or drinks where subtle sweetness complements citrus or olive oil.

The herbal balance shifts slightly, adding a rounder licorice note. It works in savory applications where a hint of sweetness doesn't clash with aromatics.

Missing Ouzo as well? Options for sweet anise covers substitutes that lean milder.

Skip if: You're aiming for a bone-dry finish or avoiding extra sugar.

4 - Anise Extract Mix

Combining anise extract with vodka mimics Herbsaint's alcohol and flavor without the liqueur's complexity. It's concentrated and direct.

Mix 1 teaspoon anise extract with 1 tablespoon vodka per 1 tablespoon Herbsaint. The result is strong, so start with less and adjust up.

The essentials:

  • Extract packs intense licorice without herbal undertones
  • Vodka brings alcohol warmth but no sweetness
  • Works best in baking or simple syrups
  • Add a pinch of sugar if the recipe needs balance

Out of anise extract too? Options ranked by intensity shows how other extracts compare.

UseRatioNotes
Cocktails1 teaspoon extract + 1 tablespoon vodka per 1 tbspStart with half, taste, adjust
Sauces1 teaspoon extract + 1 tablespoon vodka per 1 tbspAdd sugar to round out sharpness
Baking1 teaspoon extract + 1 tablespoon vodka per 1 tbspMeasure carefully—extract dominates

Skip if: You need the full herbal depth and smoothness of a liqueur.

5 - Fennel Vodka

Infusing vodka with fennel seeds creates a milder anise flavor with alcohol warmth. It's subtler than Herbsaint but still recognizable.

Steep 1-2 teaspoon crushed fennel seeds in 1 cup vodka for 24 hours. Strain and use 1:1.

Shortcut
Warm the vodka gently before adding fennel seeds to speed extraction to 4-6 hours.

Quick specs:

  • Softer licorice than liqueur-based swaps
  • No added sweetness or herbal bitterness
  • Works in light cocktails or vinaigrettes

Missing fennel seeds as well? Backups for seed-based flavor lists options that replicate anise without bulk.

Skip if: You need richer herbal complexity or immediate sweetness.

Making Herbsaint Substitutes Work

Start with Absinthe if you want the closest match. Adjust sweetness or bitterness with simple syrup or citrus as needed.

  • Closest match - Absinthe for herbal complexity
  • Easiest grab - Pernod for smooth sweetness
  • Dietary option - Fennel Vodka for no added sugar

Frequently Asked Questions

Can I use anise extract instead of Herbsaint?

Yes, but dilute it first. Mix 1 teaspoon anise extract with 1 tablespoon vodka per 1 tablespoon Herbsaint to match alcohol content and avoid overwhelming flavor.

Does Pernod taste exactly like Herbsaint?

Not exactly-Pernod is sweeter and less herbal. It works well in cocktails and sauces but shifts the flavor profile slightly toward sugar.

Will Absinthe make my drink too bitter?

It can. Use 1:1 and balance with a touch of simple syrup or citrus if the bitterness stands out too much.

Can I skip the alcohol and just use anise extract?

In baking, yes. In cocktails, no-the alcohol warmth and mouthfeel matter. Dilute extract with water or a neutral spirit to mimic the base.

How long does fennel-infused vodka last?

Up to 3 months in a sealed bottle at room temperature. Strain out seeds after infusing to prevent continued extraction and bitterness.

5 Best Substitutes for Herbsaint for Home Bartenders

5 Best Substitutes for Herbsaint

No ratings yet
This guide offers practical alternatives to Herbsaint for cocktails, sauces, and baking. Choose substitutes based on flavor profile and recipe type, following correct ratios and preparation tips for best results.
Print Recipe Pin Recipe
Prep Time 12 minutes mins
Cook Time 8 minutes mins
Total Time 20 minutes mins
Servings: 4 servings
Course: Baking, Cocktail, Sauce
Cuisine: French, Mediterranean
Ingredients Method Notes

Ingredients
  

  • 1 to Absinthe Use 1:1 substitution ratio - more bitter than Herbsaint
  • 1 to Pernod Use 1:1 substitution ratio - sweeter profile
  • 1 to Ouzo Use 1:1 substitution ratio - Mediterranean herbal twist
  • Anise Extract Mix Mix 1 teaspoon anise extract with 1 tablespoon vodka per 1 tablespoon Herbsaint; very concentrated
  • 1 to Fennel Vodka Use 1:1 substitution ratio - milder licorice

Method
 

  1. Select your substitute based on the recipe use: Absinthe for complexity, Pernod for sweetness, Fennel Vodka for no added sugar, Anise Extract Mix for baking.
  2. For Fennel Vodka, steep 1-2 teaspoon crushed fennel seeds in 1 cup vodka for 24 hours, then strain before use.
  3. Mix Anise Extract Mix by diluting 1 teaspoon anise extract with 1 tablespoon vodka per 1 tablespoon Herbsaint.
  4. Apply the substitute using the 1:1 ratio for liqueurs, or the specified mix ratio for Anise Extract Mix.
  5. Adjust sweetness or bitterness by adding simple syrup or citrus as needed to balance flavor.
  6. Taste your final mixture to ensure flavor balance and adjust amounts carefully, especially with extracts to avoid overpowering.

Notes

Dilute Anise Extract Mix slowly to prevent overpowering sharpness in recipes.

Tried this recipe?

Let us know how it was!

Ground Turkey Stuffed Zucchini Boats

March 18, 2026

Stuffed zucchini boats often taste bland or turn soggy halfway through baking. The fix is salting the zucchini first to draw out moisture and cooking the turkey filling completely before assembly.

Ground Turkey Stuffed Zucchini Boats served on a plate

High heat crisps the edges while keeping the filling juicy. The cheese melts into a golden layer instead of sliding off or staying cold in the center.

Make this when you need a high-protein dinner that doesn't require measuring portions or tracking macros.

QUICK SUMMARY

Ground Turkey Stuffed Zucchini Boats are hollowed zucchini halves filled with seasoned turkey, vegetables, and tomato sauce, then baked with melted cheese on top. The key is salting the zucchini first to prevent sogginess and cooking the turkey filling to 165°F before stuffing. Best for weeknight dinners or meal prep when you want a complete one-dish meal.

⏱️Time Reality: 20 minutes prep, 30 minutes baking - no marinating or multi-step prep needed
🔪First Critical Move: Salt zucchini halves and let drain 15 minutes before stuffing to avoid watery boats
⚠️Watch Out: Thin zucchini walls collapse during baking - leave ¼ to ½ inch thickness when scooping

Why This Recipe Works

High heat crisps the zucchini edges while the ground turkey stays moist inside its vegetable shell. Rich mains need something to cut through, and corn does exactly that. For a version that comes together quickly, this quick corn dish uses similar baking techniques for tender results.

Quick Reference
⏱️
Prep Time
20 min
🔥
Cook Time
30 min
⏰
Total Time
50 min
🍽️
Servings
4 servings
📊
Difficulty
Medium
🏷️
Category
Main Dish
💡
Quick Tip
Sauté turkey until no pink remains
🎯
Best For
Weeknight | Meal prep | Casual entertaining

Five reasons this works:

  • Salting zucchini first draws out excess moisture - prevents soggy bottoms and keeps the boat structure intact during baking
  • Sautéing vegetables separately - onions and peppers cook 3-5 minutes before adding turkey for deeper flavor
  • Cooking turkey to 165°F before stuffing - ensures safety and prevents dry, overcooked filling after baking
  • Baking uncovered at 375°F - allows steam to escape while creating slightly crisp edges on the zucchini
  • Shredded cheese melts faster than slices - covers the filling evenly and browns under the broiler in 2-3 minutes
Golden Rule
Leave ¼ to ½ inch thickness when hollowing zucchini - thinner walls collapse under the weight of the filling during baking

What You'll Need

Ingredients for Ground Turkey Stuffed Zucchini Boats

Shopping takes one trip with mostly pantry staples and fresh zucchini from the produce section. The chicken works best when it hits the table at the same time as the main. For a version that comes together quickly, something juicy like chicken pairs well with the Italian-inspired seasonings here.

🍗
Protein
  • 1 lb ground turkey
🥬
Vegetables
  • 4 medium zucchini
  • 1 onion, diced
  • 1 bell pepper, diced
  • 3 cloves garlic, minced
🥢
Sauce & Seasonings
  • 1 cup tomato sauce
  • 2 teaspoon Italian seasoning
  • Salt and pepper to taste
🧀
Cheese & Fat
  • 1 cup shredded mozzarella
  • ¼ cup grated parmesan
  • 2 tablespoon olive oil

Ingredient Details

  • Ground turkey
    Use 93% lean for moist filling without excess grease - leaner turkey dries out during baking
  • Zucchini
    Pick medium to large zucchini (8-10 inches) - smaller ones don't hold enough filling, larger ones turn mushy
  • Onion
    Yellow or white onion adds sweetness - chop into ¼-inch pieces so they soften during the short sauté
  • Bell pepper
    Any color works, but red or orange adds natural sweetness - green tastes more bitter and grassy
  • Tomato sauce
    Plain tomato sauce works best - marinara has extra seasonings that can overpower the turkey
  • Mozzarella cheese
    Shred from a block instead of pre-shredded - anti-caking agents prevent smooth melting and browning
  • Italian seasoning
    Use dried herbs for consistent flavor - if using fresh basil or oregano, triple the amount and add after cooking

Ingredient Swaps

Most swaps work without changing the method, but watch moisture levels when substituting vegetables. A good coleslaw can make or break the plate. For a version that comes together quickly, simple coleslaw recipe adds crunch and balances the richness of the cheese topping.

Four swaps that work:

  • Ground turkey → ground chicken - Similar lean texture with slightly milder flavor; cook to same 165°F internal temperature
  • Mozzarella → dairy-free shredded cheese - Melts less smoothly but creates a golden top layer; add 2-3 minutes under broiler
  • Bell pepper → mushrooms - Chop into small pieces and sauté 5 minutes to release moisture before adding turkey
  • Italian seasoning → 1 teaspoon each dried basil and oregano - Mix directly into turkey filling for brighter herbal notes

Yellow Squash Instead of Zucchini

Works for: Similar texture and mild flavor; slightly sweeter taste after baking

Skip if: You prefer the neutral base of zucchini or want less natural sweetness competing with tomato sauce

Ground Beef Instead of Turkey

Works for: Richer, fattier filling with more pronounced meat flavor; no texture changes needed

Skip if: You're watching fat content or prefer the lighter protein profile of turkey for meal prep

Instructions

You need 50 minutes from start to finish with 20 minutes of active prep. Cauliflower adds the contrast this plate needs, but timing matters. For a version that comes together quickly, classic cauliflower dish roasts in the same timeframe and serves alongside these boats.

  1. Prep the zucchini boats. Halve zucchini lengthwise, scoop out centers leaving ¼ to ½ inch walls, sprinkle cut sides with ½ teaspoon salt, and let drain on paper towels for 15 minutes. Pat dry before stuffing.

  2. Cook the vegetables and turkey. Heat 2 tablespoon olive oil in a skillet over medium-high heat, sauté diced onion and bell pepper for 3-5 minutes until softened, add minced garlic and cook 30 seconds, then add 1 lb ground turkey and cook 6-8 minutes until no pink remains and internal temperature reaches 165°F.

  3. Mix the filling. Stir ¾ cup tomato sauce and 2 teaspoon Italian seasoning into the cooked turkey mixture, simmer 2-3 minutes to thicken slightly, season with salt and pepper, then remove from heat.

  4. Stuff and bake the boats. Arrange drained zucchini halves in a baking dish with 1-inch gaps between each boat, divide turkey filling evenly among the hollowed centers, top with 1 cup shredded mozzarella and ¼ cup parmesan, then bake uncovered at 375°F for 25-30 minutes until zucchini is tender and cheese is melted.

  5. Brown the cheese (optional). Switch oven to broil, move the baking dish to the top rack, and broil for 2-3 minutes watching carefully until cheese develops golden spots. Let rest 5 minutes before serving.

Shortcut
Use pre-cooked ground turkey from meal prep - skip the sauté step and just mix with sauce and seasonings before stuffing

What to Serve With It

You need something fresh or crisp to balance the rich cheese topping and tender turkey filling. Most people skip salad, but it balances the meal. We keep a batch ready for nights like this - a fresh salad on the side adds protein and texture contrast. For more complete dinner ideas, check out these broccoli rice casserole meal planning ideas for similar vegetable-based mains.

Side Dish Prep Why It Works How to Serve
Simple green salad Easy Light, fresh contrast to baked boats with crisp lettuce cutting through cheese Toss mixed greens with olive oil and lemon juice, serve cold alongside hot boats
Garlic bread Easy Complements Italian flavors and adds crunch for scooping up any extra filling Toast sliced baguette with butter and garlic during last 10 minutes of baking
Quinoa or rice Medium Extra fiber and bulk for a filling meal, soaks up tomato sauce from the boats Cook quinoa or white rice separately, serve ½ cup portions on the side
Roasted vegetables Medium Adds variety and nutrition with caramelized edges and smoky notes Roast Brussels sprouts or carrots at 400°F while boats bake at 375°F
Caprese salad Easy Pairs fresh mozzarella and basil flavors already in the boats with bright tomato slices Layer sliced tomatoes and mozzarella, drizzle with balsamic glaze just before serving

Three ways to serve it:

  • As meal prep lunches - pack one boat with ½ cup quinoa and side salad in separate containers for grab-and-go meals
  • For casual entertaining - arrange boats on a large platter with antipasto sides and crusty bread for a buffet-style spread
  • As weeknight dinner - serve one boat per person with garlic bread and a simple green salad for a complete 30-minute plate
Best Pick
Garlic bread or crusty artisan bread - perfect for soaking up extra tomato sauce and any cheese that slides off during serving

Store and Reheat

Stuffed boats hold up in the fridge for 3-4 days but lose some texture after freezing. Store cooled boats in shallow airtight containers with parchment between layers to prevent sticking. Salad adds the contrast this plate needs, but timing matters. For a version that comes together quickly, this easy homemade recipe makes a tangy dressing that brightens leftover boats.

Method Time Best For
🔥 Oven 15-20 min at 350°F Multiple servings with crispy edges and evenly melted cheese
🍳 Stovetop 5-7 min Single servings in covered skillet with a splash of water to steam
📦 Microwave 2-3 min Quick reheating when texture isn't critical - cover with damp paper towel

For best results when storing:

  • Let boats cool completely before refrigerating - prevents condensation that makes zucchini soggy and dilutes the filling
  • Store in shallow containers - stack no more than 2 boats high with parchment paper between layers to maintain shape
  • Reheat in oven uncovered - restores crispy edges and prevents trapped steam from making zucchini mushy
  • Add fresh cheese before reheating - sprinkle extra mozzarella on top for better browning and fresh dairy flavor
  • Freeze without cheese topping - add fresh cheese after thawing and before final baking for better melt and texture

Frequently Asked Questions

Can I make ground turkey stuffed zucchini boats ahead and refrigerate?

Yes, assemble boats up to 24 hours ahead, cover tightly with plastic wrap, and refrigerate. Add 5-10 minutes to baking time since you're starting from cold.

How long do I bake ground turkey stuffed zucchini boats and at what temperature?

Bake at 375°F for 25-30 minutes uncovered until zucchini is tender when pierced with a fork and cheese is melted and bubbly. Optional: broil 2-3 minutes at the end for golden cheese spots.

What is the best way to know if the turkey filling is fully cooked?

Use a meat thermometer to check that ground turkey reaches 165°F internal temperature during the stovetop sauté step. The filling cooks before stuffing, so baking only heats it through.

How can I prevent my zucchini boats from becoming soggy?

Salt the hollowed zucchini halves and let drain on paper towels for 15 minutes, then pat completely dry before stuffing. Bake uncovered so steam escapes instead of condensing back onto the boats.

Can I double or halve the recipe easily for more or fewer servings?

Yes, scale all ingredients proportionally and adjust baking dish size to maintain 1-inch spacing between boats. Baking time stays the same regardless of batch size.

Ground Turkey Stuffed Zucchini Boats served on a plate

Ground Turkey Stuffed Zucchini Boats

No ratings yet
Ground Turkey Stuffed Zucchini Boats are hollowed zucchini halves filled with seasoned ground turkey, vegetables, and tomato sauce, topped with melted cheese and baked until crispy. Salting the zucchini first prevents sogginess and cooking the turkey filling fully before stuffing ensures moist, safe-to-eat results. This recipe is perfect for a high-protein, no-fuss weeknight dinner.
Print Recipe Pin Recipe
Prep Time 20 minutes mins
Cook Time 30 minutes mins
Total Time 50 minutes mins
Servings: 4 servings
Course: Dinner, Main Dish
Cuisine: Italian
Ingredients Equipment Method Notes

Ingredients
  

  • 1 lb ground turkey Use 93% lean for moist filling
  • 4 medium zucchini Halve lengthwise, hollow leaving ¼ to ½ inch walls
  • 1 whole onion Diced into ¼-inch pieces
  • 1 whole bell pepper Diced; red or orange preferred for sweetness
  • 3 cloves garlic Minced
  • 1 cup tomato sauce Plain tomato sauce best
  • 2 teaspoon Italian seasoning Dried herbs
  • 1 cup mozzarella cheese Shredded from block
  • ¼ cup parmesan cheese Grated
  • 2 tablespoon olive oil
  • 0.5 teaspoon salt For zucchini salting

Equipment

  • Skillet To sauté vegetables and cook ground turkey
  • Baking dish To bake the stuffed zucchini boats
  • Meat thermometer To check turkey internal temperature of 165°F

Method
 

  1. Halve zucchini lengthwise and scoop out the centers leaving ¼ to ½ inch thick walls. Sprinkle cut sides with ½ teaspoon salt and let them drain on paper towels for 15 minutes. Pat dry before stuffing.
    4 medium zucchini, 0.5 tsp salt
  2. Heat 2 tablespoons olive oil in a skillet over medium-high heat. Sauté diced onion and bell pepper for 3 to 5 minutes until softened. Add minced garlic and cook for 30 seconds. Add ground turkey and cook 6 to 8 minutes until no pink remains and internal temperature reaches 165°F.
    1 whole onion, 1 whole bell pepper, 3 cloves garlic, 1 lb ground turkey, 2 tbsp olive oil
  3. Stir ¾ cup tomato sauce and Italian seasoning into cooked turkey mixture. Simmer 2 to 3 minutes to thicken slightly. Season with salt and pepper as desired, then remove from heat.
    1 cup tomato sauce, 2 tsp Italian seasoning, 1 lb ground turkey
  4. Arrange zucchini halves cut side up in a baking dish with about 1-inch gaps. Divide turkey filling evenly among the boats. Top each with shredded mozzarella and grated parmesan. Bake uncovered at 375°F for 25 to 30 minutes until zucchini is tender and cheese is melted.
    4 medium zucchini, 1 lb ground turkey, 1 cup mozzarella cheese, ¼ cup parmesan cheese
  5. Switch oven to broil and move baking dish to the top rack. Broil for 2 to 3 minutes, watching carefully until cheese develops golden spots. Let the boats rest 5 minutes before serving.
    1 cup mozzarella cheese, ¼ cup parmesan cheese

Notes

  • Salting the zucchini halves before baking draws out moisture to prevent soggy boats.
  • Cook ground turkey fully to 165°F before stuffing to ensure safety and juiciness.
  • Baking uncovered at 375°F crisps edges while keeping the filling moist.

Tried this recipe?

Let us know how it was!

Chicken Paprikash Hungarian-Style

March 18, 2026

You need 60 minutes and one heavy-bottom skillet. No marinating overnight, no juggling multiple pans, no stress about timing.

Chicken Paprikash Hungarian-Style served on a plate

Bone-in chicken simmers gently in sweet paprika sauce while you cook noodles or set the table. The sour cream goes in at the end so it stays velvety instead of curdled.

This is what we make on cold Tuesday nights when comfort food sounds right but effort doesn't. Works for family dinners or meal prep days when you want something that reheats well and tastes even better the next day.

QUICK SUMMARY

Chicken Paprikash is tender bone-in chicken simmered in sweet Hungarian paprika sauce with sour cream. The key is adding paprika off direct heat to avoid bitterness and tempering sour cream before stirring it into hot sauce. Best for cozy weeknight dinners that need minimal hands-on time.

⏱️Time reality: 15 minutes prep, 45 minutes simmering - total hour start to finish
🔥First critical step: Sear chicken skin-side down 4-5 minutes until golden before simmering
⚠️Watch out: Cold sour cream added directly to hot sauce will curdle - temper it first

Table of Contents

Toggle
  • Why This Recipe Works
  • What You'll Need
    • Ingredient Details
  • Ingredient Swaps
  • What to Serve With It
  • Store and Reheat
  • Frequently Asked Questions
  • Chicken Paprikash Hungarian-Style
    • Method 
    • Tried this recipe?

Why This Recipe Works

Bone-in chicken with skin stays juicy during the 40-minute simmer while skinless breasts dry out. The fat renders into the sauce and creates richness that lean meat can't match, plus a juicy chicken side uses similar browning technique for crispy exterior.

Quick Reference
⏱️
Prep Time
15 min
🔥
Cook Time
45 min
⏰
Total Time
60 min
🍽️
Servings
4 servings
📊
Difficulty
Medium
🏷️
Category
Main Dish
💡
Quick Tip
Add paprika off-heat to avoid bitterness
🎯
Best For
Weeknight | Comfort Meal

What makes it reliable:

  • Sweet Hungarian paprika added off direct heat creates signature orange-red color without burning or turning bitter
  • Searing skin-side down renders fat and builds golden crust that holds up through long simmering
  • Covering and simmering gently for 35-40 minutes keeps chicken at 165°F without overcooking or drying out
  • Tempering sour cream with hot sauce before stirring prevents curdling and creates smooth velvety texture
  • Flour roux cooked 2-3 minutes in fat thickens sauce without lumps or raw flour taste
Golden Rule
Add paprika immediately after onions soften, then pull the pan off heat for 30 seconds before deglazing with broth

What You'll Need

Ingredients for Chicken Paprikash Hungarian-Style

Shop for bone-in thighs or drumsticks and sweet Hungarian paprika - the two ingredients that make this taste authentic. Skip the paprika labeled "hot" unless you want serious heat, and this easy homemade recipe uses similar creamy base with tangy finish.

🍗
Chicken
  • 2 lbs bone-in, skin-on chicken thighs or drumsticks
  • Salt and black pepper
🧄
Aromatics
  • 1 large onion, diced
  • 2 cloves garlic, minced
🌶️
Spices
  • 2 tablespoons sweet Hungarian paprika
🥢
Sauce Base
  • 1½ cups chicken broth
  • ¾ cup sour cream
  • 2 tablespoons all-purpose flour
  • 2 tablespoons butter or neutral oil

Ingredient Details

  • Bone-in, skin-on chicken
    Thighs or drumsticks work best - dark meat stays juicy during long simmer and skin adds fat to sauce
  • Sweet Hungarian paprika
    Look for "sweet" or "mild" on label - hot paprika changes the dish completely and Spanish smoked paprika tastes wrong
  • Onion
    Yellow or white onion both work - dice small so pieces soften completely and blend into sauce
  • Sour cream
    Full-fat tastes best and holds up better to heat - low-fat curdles easier even with tempering
  • Chicken broth
    Low-sodium gives you control over salt level - broth creates base for sauce and keeps chicken moist
  • All-purpose flour
    Mix into fat to create roux for thickening - gluten-free flour blend works with same ratio
  • Butter or oil
    Butter adds richness, neutral oil has higher smoke point - pick based on whether you want dairy flavor

Ingredient Swaps

Swaps work when the replacement matches the original's job in the dish - thickening, adding tang, creating fat base. Some change texture or flavor but still deliver a solid meal, while others shift the dish into different territory entirely.

Common swaps that work:

  • Greek yogurt for sour cream - tangier and lighter with similar creamy texture, but curdles faster if sauce gets too hot or boils
  • Gluten-free flour blend for all-purpose - thickens sauce equally well with minimal texture difference, use exact same measurement
  • Chicken breasts for thighs - leaner and dries out faster so reduce simmer time by 5-10 minutes and check internal temp at 30 minutes
  • Vegetable broth for chicken broth - less rich but creates lighter sauce that still works, add extra salt to compensate for milder flavor

Coconut Cream (Unsweetened)

Works for: dairy-free meals, adds slight coconut flavor that some people like with paprika

Skip if: you want traditional taste - coconut changes flavor profile noticeably and sauce stays thinner

Cornstarch Slurry

Works for: gluten-free thickening, creates glossy sauce similar to flour roux

Skip if: you prefer traditional method - mix 1 tablespoon cornstarch with 2 tablespoons cold water, stir into sauce near end

Instructions

Start searing chicken while onions soften in the same pan - layering tasks cuts active time by 10 minutes. The whole dish cooks in one skillet so cleanup stays minimal, and simple rolls recipe bakes while chicken simmers if you want something to soak up extra sauce.

Step-by-step method:

  1. Sear chicken skin-side down 4-5 minutes in butter or oil over medium-high heat until golden brown, then flip and cook 3 minutes more - transfer to plate and leave 2 tablespoons fat in pan.
  2. Sauté diced onion 5-6 minutes in remaining fat over medium heat until soft and translucent, add minced garlic and cook 30 seconds until fragrant - pull pan off heat.
  3. Stir in paprika off direct heat for 30 seconds to coat onions completely, return pan to heat and add flour - cook flour roux 2-3 minutes stirring constantly until light golden.
  4. Deglaze with chicken broth while scraping browned bits from pan bottom, return chicken to pan skin-side up and bring to gentle simmer - cover and simmer 35-40 minutes until internal temperature reaches 165°F.
  5. Temper sour cream by whisking ¼ cup hot sauce into it slowly, then stir tempered cream into remaining sauce off heat - season with salt and pepper, rest 10 minutes before serving.
Shortcut
Leave 2cm space between chicken pieces when returning to pan - crowding creates steam instead of maintaining simmer and makes skin soggy

What to Serve With It

The sauce begs for something that soaks it up - plain rice or noodles work but they don't add much contrast. Rich mains need something to cut through, and weeknight chicken dinner ideas covers more pairing strategies for creamy chicken dishes.

Side Dish Prep Why It Works How to Serve
Egg noodles Easy Classic base that catches sauce in every bite without adding competing flavors Toss with butter, pile chicken and sauce on top
Buttered rice Easy Neutral starch that stretches the meal and balances rich paprika cream Spoon sauce over rice, serve chicken alongside
Roasted potatoes Medium Crispy edges add texture contrast to creamy sauce and velvety chicken Roast while chicken simmers, serve on same plate
Steamed green beans Easy Light crunch and fresh flavor cut through richness without heavy prep Steam 4-5 minutes, season with salt and serve on side
Cucumber salad with sour cream Easy Tangy and cooling - traditional Hungarian pairing that refreshes between bites Slice cucumbers thin, toss with sour cream and dill

Three ways to serve it:

  • Weeknight simple: Egg noodles with butter, spoon chicken and sauce over top, add steamed green beans on the side
  • Traditional Hungarian: Serve over nokedli (egg dumplings) with cucumber salad and crusty bread for dipping extra sauce
  • Meal prep batch: Pack chicken and sauce separately from rice or noodles so starch doesn't get soggy when reheating
Best Pick
Egg noodles stay our go-to - they're quick, catch sauce perfectly, and you can boil them while chicken simmers in the final 10 minutes

Store and Reheat

Paprikash tastes even better the next day after flavors blend overnight in the fridge. Store chicken and sauce together in shallow airtight container so it cools fast and stays food-safe, and light refreshing greens work as quick lunch side when you reheat leftovers.

Method Time Best For
🍳 Stovetop 8-10 min over medium-low Best texture - sauce stays smooth and chicken heats evenly without drying
🔥 Oven 15-20 min at 325°F Large portions - cover with foil and heat until internal temp hits 165°F
📦 Microwave 2-3 min in intervals Single serving speed - stir halfway through and watch for hot spots

For best results when storing:

  • Cool completely before refrigerating - hot food raises fridge temperature and creates condensation that waters down sauce
  • Use shallow containers - food cools faster in wide containers than deep ones, reaching safe temp within 2 hours
  • Store up to 4 days in fridge - sauce stays good 3-4 days but chicken quality drops after day 4
  • Freeze up to 2 months - sour cream can separate slightly when frozen but whisking after thawing brings it back together
  • Add splash of broth when reheating - sauce thickens in fridge so thin it with 2-3 tablespoons broth or water while warming

Frequently Asked Questions

Can I make Chicken Paprikash ahead and reheat later?

Yes - make it up to 2 days ahead and refrigerate in airtight container. Reheat gently on stovetop over medium-low heat, adding splash of broth if sauce thickened too much.

What is the best way to know when chicken in Paprikash is fully cooked?

Use instant-read thermometer inserted into thickest part of thigh without touching bone - 165°F means safe and done. Juices should run clear when you pierce meat with knife.

Can I use chicken breasts instead of thighs in Chicken Paprikash?

Yes, but reduce simmer time to 25-30 minutes since breasts cook faster and dry out easier. Check internal temp at 25 minutes and remove from heat at 165°F.

How do I prevent the sauce from curdling when adding sour cream?

Temper sour cream by whisking ¼ cup hot sauce into it first, then stir tempered mixture into remaining sauce off direct heat. Never add cold sour cream directly to boiling liquid.

What sides pair well with traditional Chicken Paprikash?

Egg noodles, buttered rice, or nokedli (Hungarian dumplings) soak up sauce best. Add cucumber salad with sour cream or steamed green beans for lighter contrast to rich paprika cream.

Chicken Paprikash Hungarian-Style

No ratings yet
Chicken Paprikash features tender bone-in chicken simmered in a sweet Hungarian paprika sauce finished with velvety sour cream. The recipe uses a single skillet, adding paprika off heat to avoid bitterness and tempering sour cream for a smooth texture. Perfect for cozy weeknight dinners requiring minimal hands-on time.
Print Recipe Pin Recipe
Prep Time 15 minutes mins
Cook Time 45 minutes mins
Total Time 1 hour hr
Servings: 4 servings
Course: Main Dish
Cuisine: Hungarian
Ingredients Equipment Method Notes

Ingredients
  

  • 2 lbs bone-in skin-on chicken thighs or drumsticks best for juiciness and rich flavor
  • 1 large onion diced
  • 2 cloves garlic minced
  • 2 tablespoons sweet Hungarian paprika add off direct heat to prevent bitterness
  • 1.5 cups chicken broth low-sodium preferred
  • 0.75 cup sour cream full-fat, tempered before adding
  • 2 tablespoons all-purpose flour used for roux
  • 2 tablespoons butter or neutral oil choose based on flavor preference
  • to taste salt and black pepper season to finish

Equipment

  • Heavy-bottom skillet Used for searing chicken and simmering the sauce

Method
 

  1. Heat butter or oil in a heavy-bottom skillet over medium-high heat. Sear chicken skin-side down for 4-5 minutes until golden brown, then flip and cook for 3 more minutes. Transfer chicken to a plate and leave 2 tablespoons of fat in the pan.
    2 lbs bone-in skin-on chicken thighs or drumsticks, 2 tablespoons butter or neutral oil
  2. Add diced onion to the skillet and sauté for 5-6 minutes over medium heat until soft and translucent. Add minced garlic and cook for 30 seconds until fragrant. Remove pan from heat.
    1 large onion, 2 cloves garlic
  3. Stir in sweet Hungarian paprika off direct heat for 30 seconds to coat the onions completely. Return pan to heat and add flour. Cook the flour roux for 2-3 minutes, stirring constantly until light golden and no raw flour taste remains.
    2 tablespoons sweet Hungarian paprika, 2 tablespoons all-purpose flour
  4. Deglaze the pan with chicken broth, scraping browned bits from the bottom. Return chicken to the pan, skin-side up, and bring to a gentle simmer. Cover and simmer for 35-40 minutes until chicken reaches an internal temperature of 165°F.
    1.5 cups chicken broth, 2 lbs bone-in skin-on chicken thighs or drumsticks
  5. Temper the sour cream by slowly whisking in ¼ cup of the hot sauce from the pan. Stir the tempered sour cream into the remaining sauce off heat. Season with salt and black pepper. Let the dish rest for 10 minutes before serving.
    0.75 cup sour cream, to taste salt and black pepper

Notes

  • Add paprika only off direct heat to avoid bitterness and preserve vibrant color.
  • Tempering sour cream prevents curdling and creates a smooth sauce.
  • Leave space between chicken pieces while simmering to keep skin crispy.

Tried this recipe?

Let us know how it was!

What Is Sumac? [Taste, Uses & More]

March 18, 2026

Most people reaching for sumac have already tasted it - they just didn't know the name. That tart, citrus-forward hit on a fattoush salad or over a plate of grilled kebabs often gets credited to lemon, when the real source is this deep-red ground spice.

What Is Sumac

Sumac does what lemon does, but without the liquid, which makes it far more useful as a finishing spice than most Western cooks realize. If you've been defaulting to labneh or roasted eggplant with tahini without knowing what gives them that bright, fruity backbone, sumac is likely the answer.

QUICK SUMMARY

Sumac is a coarsely ground dried berry from the Middle East with a tangy, citrus-like tartness and mild astringency. It works as a finishing spice, a lemon substitute, and a key ingredient in za'atar blends - no heat required.

🍋Flavor: Tangy, bright, lemon-citrus with mild cranberry-like tartness
🌍Origin: Eastern Mediterranean and Middle East, wild sumac shrubs
🍖Best Uses: Finishing grilled meats, fattoush, yogurt dips, za'atar blends
🫙Shelf Life: Peak flavor within 6-18 months; usable up to 2 years sealed
✅Dietary: Gluten-free, vegan, low-calorie - replaces acidic liquids in many dishes

What Is Sumac?

Sumac - sold under the botanical name Rhus coriaria, and also spelled sumaq or sommack - is a ground dried berry harvested from wild shrubs native to the Eastern Mediterranean and Middle East.

The berries are dried and coarsely milled into a reddish-purple powder that ranges from brick red to deep burgundy depending on freshness.

Unlike most spices derived from seeds or bark, sumac comes from the fruit itself. That origin is why the powder carries a distinct fruity note underneath its sharpness - it isn't purely acidic the way citric acid is.

There are no major commercial varieties to choose between, but quality varies considerably. Whole sumac berries can be found in some Middle Eastern grocers for those who prefer to grind their own, though ground powder is the format most home cooks will use.

Best Pick
Single-ingredient ground sumac from a Middle Eastern grocer or spice specialist will outperform any generic supermarket blend. Look for deep burgundy color and a citrusy smell the moment you open the jar.

Sumac sits at the heart of Levantine, Turkish, Iranian, and North African cooking. It's not a background spice - it's typically applied at the end of cooking or at the table, where its tartness lands bright and clean.

What Does Sumac Taste Like?

sumac - What Is Sumac

The closest comparison is lemon zest combined with a mild cranberry tartness - bright and fruity, but with a dry, slightly astringent finish that zest alone doesn't deliver. It doesn't taste vinegary, and it doesn't read as "sour" in the way pickles do.

Sensory SnapshotModerate Intensity
👅 Flavor
tangycitrus-brightmildly astringentfruity
✋ Texture
coarse powderslightly gritty
👃 Aroma
citrus-forwardsubtly earthy

Heat dulls sumac's brightness noticeably. Cooked into a sauce from the start, it loses much of that citrus lift and becomes more of a background note.

That's why most cooks add it after the heat is off - on top of finished dishes, stirred into cold dressings, or sprinkled at the table.

The astringency is mild enough that it doesn't feel mouth-drying. Think of the slight dryness of a fresh cranberry, not strong black tea.

How to Use Sumac

Sumac works almost exclusively as a finishing or blending spice, not a base for building flavor from the start. Its acidity functions the way lemon juice does in a dressing - cutting richness and adding brightness - but without adding any moisture.

How Sumac Is Used
MethodBest ForTip
🥗 Raw / FinishingFattoush, grilled meats, roasted vegetables, labneh dipsAdd after cooking or at the table to keep acidity bright
🥣 Stirred Into DressingsSalad dressings, marinades, yogurt saucesWhisk with olive oil and a pinch of salt - no extra acid needed
🧂 Dry BlendsZa'atar spice mix, dry rubs for lamb or chickenCombine with thyme, sesame, and salt at a 2:1:1:0.5 ratio
🍗 Cooked Into DishesRice pilaf, bulgur, braises where mild background tartness is enoughExpect reduced brightness - add more at serving if needed

Sumac pairs especially well with olive oil, yogurt, lamb, chickpeas, parsley, and tomato. Those pairings aren't accidental - the spice's fruit-derived acidity cuts animal fat and lifts legumes the way a squeeze of citrus would.

It also stands in well where citric acid is called for as a tartening agent, though it adds color and a more complex flavor profile. Avoid pairing it with strong aged cheeses - the competing sharpness makes both flavors muddy.

Golden Rule
Add sumac last. Heat kills its citrus brightness fast. Whether it's a kebab, a bowl of hummus, or roasted eggplant, the spice earns its place at the end - not at the start of cooking.
Try It In
🍗Palestinian Musakhan Chicken SumacThe dish where sumac is the main event, not a garnish→

How to Buy and Store Sumac

Color is the first test. Fresh sumac powder should be deep burgundy - not brown, not dull pink. Open the jar and smell it: there should be an immediate citrusy, slightly fruity tang. A flat or purely dusty smell means the volatile compounds are gone and the spice won't perform.

  • 🔴 Color check - Deep burgundy red signals freshness; brownish or faded powder is past its prime
  • 👃 Smell test - Citrusy and slightly fruity on opening; flat or stale smell means skip it
  • 🧂 Ingredient list - Buy single-ingredient ground sumac, not pre-blended mixes if you want control over tartness
  • 🫙 Storage - Airtight jar, cool dark pantry; avoid humidity, which causes clumping

Ground sumac holds peak aroma for 6-18 months, though it stays usable up to two years if kept dry and sealed. For a full breakdown, the sumac storage guide guide covers what to watch for as it ages.

Watch Out
Don't store sumac near the stove. Heat and steam accelerate flavor loss faster than time alone does. A spice rack above the cooktop will flatten ground sumac within weeks.

Start With One Dish

The fastest way to understand sumac is to make sumac onions - thinly sliced red onion, a generous pinch of sumac, a little olive oil, and salt. Let them sit for ten minutes.

That's the spice's character in its simplest form: tart, fruity, and clean. From there, it becomes easy to see where else it fits.

If you need a swap, there are reliable sumac swaps worth knowing - lemon zest plus a touch of vinegar gets reasonably close. However, nothing quite replicates the dry tartness sumac delivers without adding liquid.

Frequently Asked Questions

Does sumac taste like lemon?

It's similar but not identical. Sumac shares lemon's citrus acidity, however it also carries a mild cranberry-like fruitiness and a dry, astringent finish that lemon lacks. The key difference is that sumac adds no liquid.

Is sumac safe to eat?

Yes. Culinary sumac (Rhus coriaria) is safe and widely consumed across the Middle East. It's unrelated to poison sumac (Toxicodendron vernix), which is a different genus entirely. Anyone with known plant allergies in the Anacardiaceae family should consult a doctor.

What can I substitute for sumac?

Lemon zest mixed with a small amount of red wine vinegar is the closest dry-to-wet substitute. Amchur (dried mango powder) also works for tartness but brings a different fruit note. Neither fully replicates sumac's astringency.

How long does ground sumac last?

Peak flavor holds for 6-18 months in a sealed, airtight jar stored away from heat and light. After two years, the citrus compounds fade significantly and the powder loses most of its tartness.

Can sumac be used in sweet dishes?

Rarely, but it works in specific contexts - a small pinch over yogurt with honey, or in a berry-based sauce where extra tartness and color are both welcome. It's not a baking spice and doesn't suit most desserts.

« Previous Page
Next Page »

Primary Sidebar

ForkliftKitchen recipe developer

Welcome!

Recipe Developer · 12+ Yr Kitchen Veteran

I'm the recipe developer behind this site, focused on practical, well-tested dishes and smart ingredient swaps. Every recipe is written to be clear, reliable, and easy to make at home.

650+ Recipes
12+ Yrs Exp.
3x Tested
Our Story →

As Featured In

Allrecipes

TASTE OF HOME

Food52

HUFFPOST

Yahoo! Life

Our Editorial Standards

  • ✓ Every recipe tested at least 3 times before publishing
  • ✓ Substitutes verified by real kitchen trials, not guesswork
  • ✓ Reviewed for accuracy by our editorial team
  • ✓ Updated regularly with seasonal info and reader feedback

Most Popular

  • Creamy Lemon Shrimp Linguine
    Creamy Lemon Shrimp Linguine
  • Creamy Garlic Mushroom Chicken
    Creamy Garlic Mushroom Chicken
  • Sesame Ginger Chicken Noodle Bowls
    Sesame Ginger Chicken Noodle Bowls
  • Baked Lemon Herb Fish Fillets
    Baked Lemon Herb Fish Fillets
  • Veggie Loaded Fried Rice
    Veggie Loaded Fried Rice
  • Spicy Garlic Shrimp Stir Fry
    Spicy Garlic Shrimp Stir Fry

Join 8,000+ Home Cooks

Weekly Kitchen Tips

Easy recipes, smart substitutes, and real cooking shortcuts — every Thursday.

Subscribe Free →


Side Dishes

  • What to Serve With Asian Salmon? 15 Best Side Dishes
    What to Serve With Asian Salmon? 15 Best Side Dishes
  • Side Dishes for Strawberry Spinach Salad
    15 Best Side Dishes for Strawberry Spinach Salad
  • Sides for Grilled Cauliflower Steaks to Complete the Meal
    15 Sides for Grilled Cauliflower Steaks to Complete the Meal
  • 15 Sides To Serve With Calabacitas
    15 Best Sides for Calabacitas – Mexican-Inspired Favorites


Substitutes

  • 7 Best Substitutes for Hot Sauce in Marinades & Stir-Fries
    7 Best Substitutes for Hot Sauce in Marinades & Stir-Fries
  • 9 Best Substitutes for Butter in Baking and Cooking
  • 7 Best Substitutes for Tagliatelle for Italian Pasta Dishes
    7 Best Substitutes for Tagliatelle for Italian Pasta Dishes
  • 7 Best Substitutes for Udon Noodles in Asian Stir-Fries
    7 Best Substitutes for Udon Noodles in Asian Stir-Fries


Browse by Topic

  • Side Dishes320
  • Substitutes785
  • Dinner163
  • Air Fryer77
  • Taste Profiles484
  • Food Storage123


Reader Reviews

★★★★★

"Finally a food blog that tells you exactly why a substitute works instead of just listing options."

— Sarah M., via email

★★★★★

"The side dish recommendations are so specific — saved my dinner party twice this month."

— James R., Pinterest comment

★★★★★

"I trust this site more than most because they actually test everything. You can tell."

— Priya K., blog comment

Footer

↑ Back to Top

Forklift Kitchen

We do the heavy lifting so you can enjoy the cooking. Tested recipes, smart substitutes, and perfect pairings—built for real home cooks.

Content

  • Recipes
  • Substitutes
  • What to Serve With
  • Blog

Company

  • About Us
  • Contact
  • Subscribe

Legal

  • Privacy Policy
  • Terms of Service

As an Amazon Associate I earn from qualifying purchases.

© 2026 Forklift Kitchen.

Rate This Recipe

Your vote:


A rating is required
A name is required
An email is required