• Skip to primary navigation
  • Skip to main content
  • Skip to primary sidebar
  • Recipe Index
    • Air Fryer
  • Side Dishes
  • Substitutes
  • About
  • Contact
  • Subscribe

ForkLiftKitchen

menu icon
go to homepage
  • Recipe Index
    • Air Fryer
  • Side Dishes
  • Substitutes
  • About
  • Contact
  • Subscribe
subscribe
search icon
Homepage link
  • Recipe Index
    • Air Fryer
  • Side Dishes
  • Substitutes
  • About
  • Contact
  • Subscribe
×

Blog

Greek Yogurt Tzatziki Sauce

March 20, 2026

Grated cucumber mixed with thick yogurt and fresh dill. That's all you need for tzatziki that actually tastes garlicky and bright instead of watered-down and bland.

Greek Yogurt Tzatziki Sauce served on a plate

The key is squeezing the cucumber dry before mixing. Most tzatziki turns soupy because people skip this step or rush it.

This works for weeknight meal prep when you want something creamy to dip pita or pile on grilled chicken.

QUICK SUMMARY

Greek yogurt tzatziki sauce combines strained yogurt, grated cucumber, fresh garlic, lemon juice, and dill into a creamy dip. Squeeze the cucumber thoroughly to remove water - this prevents the sauce from getting watery. Chill at least 1 hour before serving so the garlic mellows and flavors blend.

⏱️Time: 15 minutes active, 1 hour chilling (no cooking required)
🥒Critical Step: Wrap grated cucumber in towel and squeeze 2-3 minutes until dry
⚠️Watch Out: Don't skip straining the yogurt or you'll get runny sauce that separates

Why This Recipe Works

Thick Greek yogurt stays creamy while cucumber adds crunch without making the sauce watery. Rich mains need something to cut through, and this dip does exactly that. For a version that comes together quickly, this quick sauce dish uses a roux base instead of yogurt.

Quick Reference
⏱️
Prep Time
15 min
🔥
Cook Time
0 min
⏰
Total Time
15 min (+ 1 hr chilling)
🍽️
Servings
6
📊
Difficulty
Easy
🏷️
Category
Side | Appetizer
💡
Quick Tip
Squeeze cucumber thoroughly to avoid watery sauce
🎯
Best For
Weeknight | Entertaining | Meal prep

Why it works:

  • Straining Greek yogurt for 2-4 hours removes excess liquid so the base stays thick instead of separating
  • Grating cucumber creates texture while squeezing removes 60-70% of water that would otherwise dilute the sauce
  • Fresh dill and garlic balance the tangy yogurt without overpowering - dried herbs taste flat and stale
  • Chilling for 1 hour lets garlic mellow and flavors blend so you don't get sharp raw garlic bite
  • Lemon juice adds brightness that balances the rich yogurt and prevents the sauce from tasting flat
Quick Tip
Use a garlic press instead of mincing by hand - it creates a finer texture and releases less harsh garlic oil.

What You'll Need

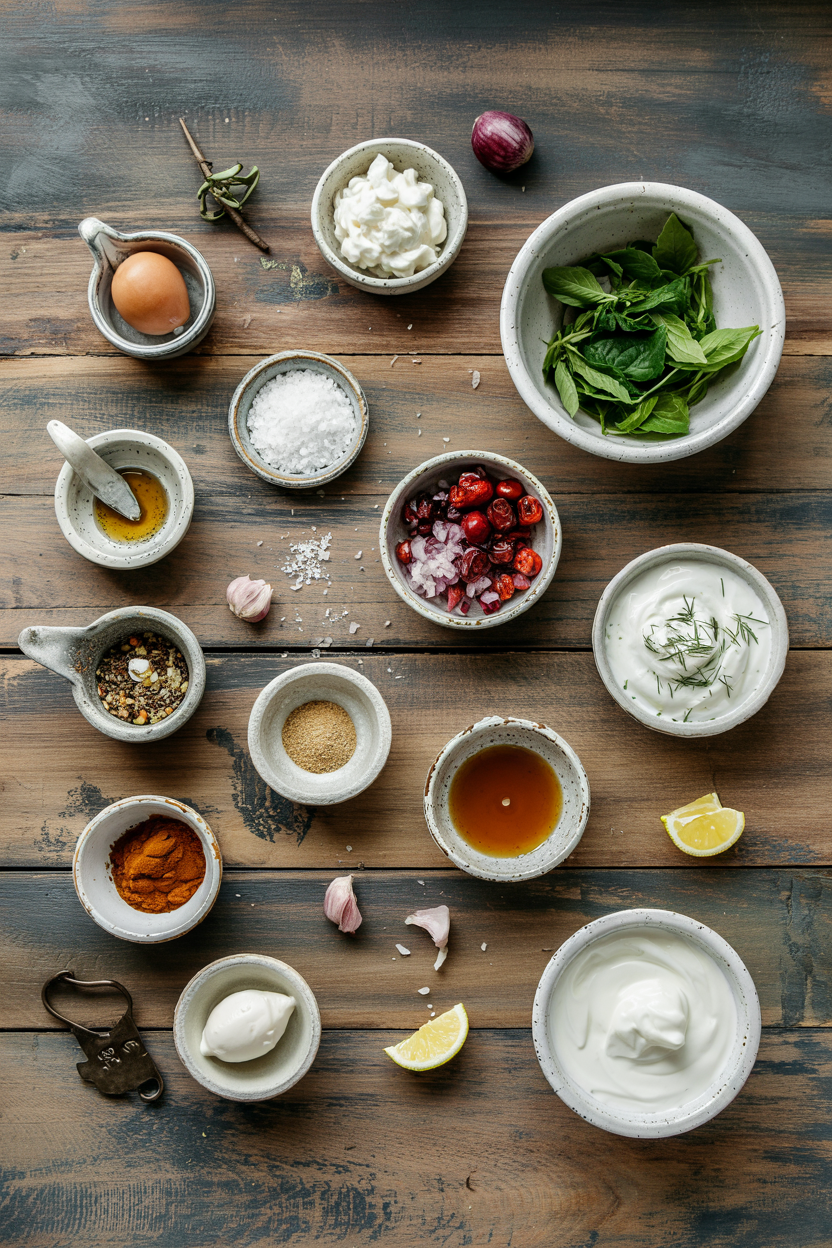
Ingredients for Greek Yogurt Tzatziki Sauce

You need thick yogurt, one cucumber, and fresh herbs. The salad works best when it hits the table at the same time as the main. For a version that comes together quickly, bright salad recipe uses pasta instead of vegetables for a creamy side.

🧀
Dairy Base
  • 2 cups Greek yogurt (full-fat or 2%)
🥬
Vegetables
  • 1 medium cucumber (English or Persian)
🧄
Aromatics
  • 2-3 garlic cloves
  • 3 tablespoons fresh dill
  • Optional: 1 tablespoon fresh mint
🫙
Seasonings & Acid
  • 2 tablespoons lemon juice
  • 1 tablespoon olive oil
  • ½ teaspoon salt
  • ¼ teaspoon black pepper

Ingredient Details

  • Greek yogurt
    Use full-fat for creamiest texture - strain in cheesecloth for 2-4 hours if you want extra-thick sauce
  • Cucumber
    English or Persian cucumbers have fewer seeds and less water - grate on large holes and squeeze until barely damp
  • Garlic
    Use a microplane or garlic press for fine texture that distributes evenly - mincing by hand leaves chunks that taste too sharp
  • Fresh dill
    Chop just before mixing so it stays bright green - dried dill loses 80% of flavor and smells musty
  • Lemon juice
    Add 1 tablespoon at a time and taste - too much makes the sauce sour instead of bright
  • Olive oil
    Use extra virgin for flavor or any neutral oil if you want pure yogurt taste - skip it entirely for lower fat version
  • Salt
    Season before chilling then adjust after resting - flavors mellow as they sit and you might need more salt before serving

Ingredient Swaps

Four common swaps:

  • Greek yogurt → Strained regular yogurt: Line a fine mesh strainer with cheesecloth, add regular yogurt, and refrigerate overnight - you'll lose about half the volume but get similar thickness
  • Fresh dill → Dried dill: Use 1½ teaspoons dried dill instead of 3 tablespoons fresh - flavor will be weaker so add more lemon juice to compensate
  • Cucumber → Zucchini: Grate zucchini and squeeze even harder than cucumber since it holds more water - flavor will be milder and slightly sweeter
  • Lemon juice → White wine vinegar: Use 1½ tablespoons vinegar instead of 2 tablespoons lemon juice - taste is sharper and less fruity but still bright

Regular Yogurt (Strained)

Works for: Budget cooking when Greek yogurt costs too much

Skip if: You don't have 8+ hours to strain - unstrained regular yogurt makes soupy sauce

Dried Herbs

Works for: Last-minute batches when you forgot to buy fresh dill

Skip if: You're serving this to guests - dried herbs taste stale and look dull

Dairy-Free Yogurt

Works for: Vegan or lactose-intolerant diners who still want tzatziki

Skip if: Texture matters - coconut yogurt separates faster and almond yogurt tastes noticeably different

Instructions

The whole process takes 15 minutes of mixing plus 1 hour chilling. A good a juicy sweet potatoes side can make or break the plate, and this sauce pairs perfectly when you need something cool and creamy.

  1. Strain the yogurt: Line a fine mesh strainer with cheesecloth, add Greek yogurt, and set over a bowl. Refrigerate 2-4 hours if you want extra-thick sauce, or skip this step if using already-thick Greek yogurt.

  2. Prep the cucumber: Peel cucumber if skin is tough, then grate on large holes of box grater. Wrap grated cucumber in clean kitchen towel and squeeze firmly for 2-3 minutes - you should extract about ¼ cup liquid and the cucumber should feel nearly dry.

  3. Mix the base: In a mixing bowl, combine strained yogurt, squeezed cucumber, pressed garlic, lemon juice, olive oil, salt, and pepper. Stir until fully blended and no streaks of yogurt remain.

  4. Add herbs: Chop fresh dill (and mint if using) and fold into yogurt mixture with a spoon. Taste and adjust salt or lemon juice - remember flavors will develop as it chills.

  5. Chill and rest: Cover bowl with plastic wrap or transfer to airtight container. Refrigerate at least 1 hour (up to 4 hours is better) so garlic mellows and flavors blend. Stir once before serving and adjust seasoning if needed.

Golden Rule
Always squeeze the cucumber until your hands hurt - if you see any pooling liquid in the bowl after mixing, you didn't squeeze enough.

What to Serve With It

Tzatziki needs something to scoop it or a protein that benefits from cooling contrast. The sauce works best when it hits the table at the same time as the main. We keep a batch ready for nights like this - peruvian chicken meal planning ideas shows how to build complete dinners around bold proteins that need creamy sides.

Side Dish Prep Why It Works How to Serve
Warm pita bread Easy Classic pairing - soft bread scoops thick sauce without breaking Warm pita in oven 3 minutes at 350°F, cut into wedges, serve alongside bowl of tzatziki
Grilled chicken skewers Medium Cool sauce balances charred spice from grilled meat Marinate chicken in lemon and oregano, grill 4 minutes per side, serve with tzatziki for dipping
Roasted vegetables Easy Creamy sauce adds richness to crispy vegetables without heaviness Roast zucchini, peppers, eggplant at 425°F for 25 minutes, drizzle tzatziki on top
Greek salad Easy Herbaceous sauce enhances fresh tomatoes and cucumbers Toss romaine, tomatoes, olives, feta, then dollop tzatziki on side instead of dressing
Lamb meatballs Medium Garlicky sauce cuts through rich fatty meat Bake lamb meatballs 20 minutes at 400°F, serve in pita with tzatziki and sliced tomato

Three ways to serve it:

  • As a dip: Serve in shallow bowl surrounded by pita chips, raw vegetables (carrots, peppers, celery), or crackers for appetizer spread
  • On a plate: Dollop 2-3 tablespoons next to grilled meat or fish so diners can drag each bite through the sauce
  • In a sandwich: Spread thick layer inside pita or flatbread before adding falafel, gyro meat, or grilled vegetables
Best Pick
Pair with anything charred or spicy - the cool creamy sauce balances heat and smoke better than any other condiment.

Store and Reheat

Tzatziki keeps 3-4 days refrigerated in a shallow airtight container. Most people skip homemade fish recipe, but it balances the meal when you want something flaky to dip in leftover sauce.

Method Time Best For
🍳 None 0 min Serve chilled straight from fridge - reheating breaks the texture and makes yogurt separate

For best results when storing:

  • Transfer tzatziki to shallow container with tight lid - wide surface area helps it chill evenly and prevents condensation from making it watery
  • Press plastic wrap directly onto surface before sealing lid to prevent skin from forming on top
  • Store in coldest part of fridge (usually back of bottom shelf) where temperature stays consistent
  • Stir once before serving - some liquid may separate on top but mixing it back in restores creamy texture
  • Discard after 4 days or if you see any pink/gray color, smell sourness, or notice watery separation that won't reincorporate

Frequently Asked Questions

Can I use regular yogurt instead of Greek yogurt for tzatziki?

Yes, but you must strain it first. Line a fine mesh strainer with cheesecloth, add regular yogurt, and refrigerate 8-12 hours until it reduces by half and reaches Greek yogurt thickness.

How long can I store tzatziki in the refrigerator?

Tzatziki keeps 3-4 days in an airtight container in the fridge. Store in a shallow container and press plastic wrap directly on the surface to prevent skin from forming.

How do I prevent tzatziki from becoming watery?

Squeeze the grated cucumber in a clean towel for 2-3 minutes until barely damp. Use thick Greek yogurt or strain regular yogurt overnight, and avoid adding cucumber liquid back into the mixture.

What is the best way to prepare cucumber for tzatziki?

Grate cucumber on large holes of a box grater, then wrap in a clean kitchen towel and squeeze firmly for 2-3 minutes. You should extract about ¼ cup liquid and the cucumber should feel nearly dry before mixing.

Can I make tzatziki sauce in advance and freeze it?

No, freezing breaks the yogurt's protein structure and makes it grainy and watery when thawed. Make tzatziki fresh or up to 4 days ahead and store it in the refrigerator instead.

Greek Yogurt Tzatziki Sauce served on a plate

Greek Yogurt Tzatziki Sauce

No ratings yet
Greek Yogurt Tzatziki Sauce blends thick yogurt, grated cucumber, fresh garlic, lemon juice, and dill for a creamy, bright dip. Properly squeezing the cucumber prevents watery sauce, and chilling it lets flavors meld and garlic mellow for the best taste.
Print Recipe Pin Recipe
Prep Time 15 minutes mins
Cook Time 1 minute min
Total Time 16 minutes mins
Servings: 6 servings
Course: Appetizer, Side Dish
Cuisine: Greek, Mediterranean
Ingredients Method Notes

Ingredients
  

  • 2 cups Greek yogurt full-fat or 2%, strain if desired for extra-thick
  • 1 medium cucumber English or Persian, peeled if skin is tough, grated
  • 3 cloves garlic pressed or finely minced
  • 3 tablespoons fresh dill chopped just before mixing
  • 1 tablespoon fresh mint optional, chopped
  • 2 tablespoons lemon juice add gradually and taste
  • 1 tablespoon olive oil extra virgin preferred, optional
  • 0.5 teaspoon salt season before chilling, adjust after
  • 0.25 teaspoon black pepper

Method
 

  1. If using regular yogurt, line a fine mesh strainer with cheesecloth, add the yogurt, and refrigerate 2-4 hours for extra thick sauce. Skip if using thick Greek yogurt.
    2 cups Greek yogurt
  2. Peel cucumber if skin is tough, grate using large holes of a box grater. Wrap grated cucumber in a clean kitchen towel and squeeze firmly for 2-3 minutes until mostly dry and about ¼ cup liquid is extracted.
    1 medium cucumber
  3. In a mixing bowl, combine strained yogurt, squeezed cucumber, pressed garlic, lemon juice, olive oil, salt, and black pepper. Stir until fully blended with no streaks.
    2 cups Greek yogurt, 1 medium cucumber, 3 cloves garlic, 2 tablespoons lemon juice, 1 tablespoon olive oil, 0.5 teaspoon salt, 0.25 teaspoon black pepper
  4. Chop fresh dill and optional mint; fold into the yogurt mixture. Taste and adjust salt or lemon juice as needed.
    3 tablespoons fresh dill, 1 tablespoon fresh mint, 0.5 teaspoon salt, 2 tablespoons lemon juice
  5. Cover bowl with plastic wrap or transfer to airtight container. Refrigerate at least 1 hour, up to 4 hours, to let garlic mellow and flavors blend. Stir once before serving and adjust seasoning if needed.

Notes

  • Squeeze cucumber thoroughly to prevent watery sauce; if liquid pools after mixing, squeeze more.
  • Strain yogurt for 2-4 hours to remove excess liquid for a thicker, creamier base.
  • Chill tzatziki at least 1 hour before serving to mellow garlic and blend flavors.

Tried this recipe?

Let us know how it was!

Honey Cinnamon Cream Cheese

March 20, 2026

FORKLIFT KITCHEN RECIPE ARTICLE

Whipping softened cream cheese with honey and cinnamon creates a fluffy spread in under 5 minutes. The powdered sugar dissolves smoothly while cinnamon adds warmth without grittiness.

Honey Cinnamon Cream Cheese served on a plate

The bowl does most of the work. You get spreadable texture without separating or runny consistency.

This works for weeknight breakfasts when you need something fast that turns plain bagels into actual food.

QUICK SUMMARY

Honey cinnamon cream cheese combines softened cream cheese with honey, cinnamon, and powdered sugar for a fluffy, spreadable topping in 5 minutes. The key is room-temperature cream cheese and gradual liquid additions to prevent runny texture.

⏱️Time Reality: 5 minutes active, 30 minutes chill optional
🔑First Move: Soften cream cheese 30 minutes at room temp
⚠️Watch Out: Cold cream cheese causes lumps-microwave 10 seconds if rushed

Why This Recipe Works

Powdered sugar dissolves faster than granulated, creating smooth texture without graininess. Room-temperature cream cheese whips into fluffy consistency while honey adds natural sweetness that maple syrup can't match, especially when you're making a creamy homemade ranch dressing recipe for dipping later-the viscosity matters for both spreads.

Quick Reference
⏱️
Prep Time
5 min
🔥
Cook Time
0 min
⏰
Total Time
5 min
🍽️
Servings
8 servings
📊
Difficulty
Easy
🏷️
Category
Spread | Appetizer
💡
Quick Tip
Whip cream cheese for fluffier spread
🎯
Best For
Weeknight | Entertaining

Five things that make this work:

  • Softened cream cheese mixes without lumps while cold blocks create grainy texture
  • Powdered sugar dissolves instantly where granulated leaves gritty residue
  • Fresh ground cinnamon (under 6 months old) tastes warm not bitter
  • Electric mixer for 3-4 minutes adds air that makes spread fluffy
  • Gradual milk additions (1 teaspoon at a time) prevent runny consistency
Quick Tip
Soften cream cheese out 30 minutes or microwave 10 seconds for smooth mix

What You'll Need

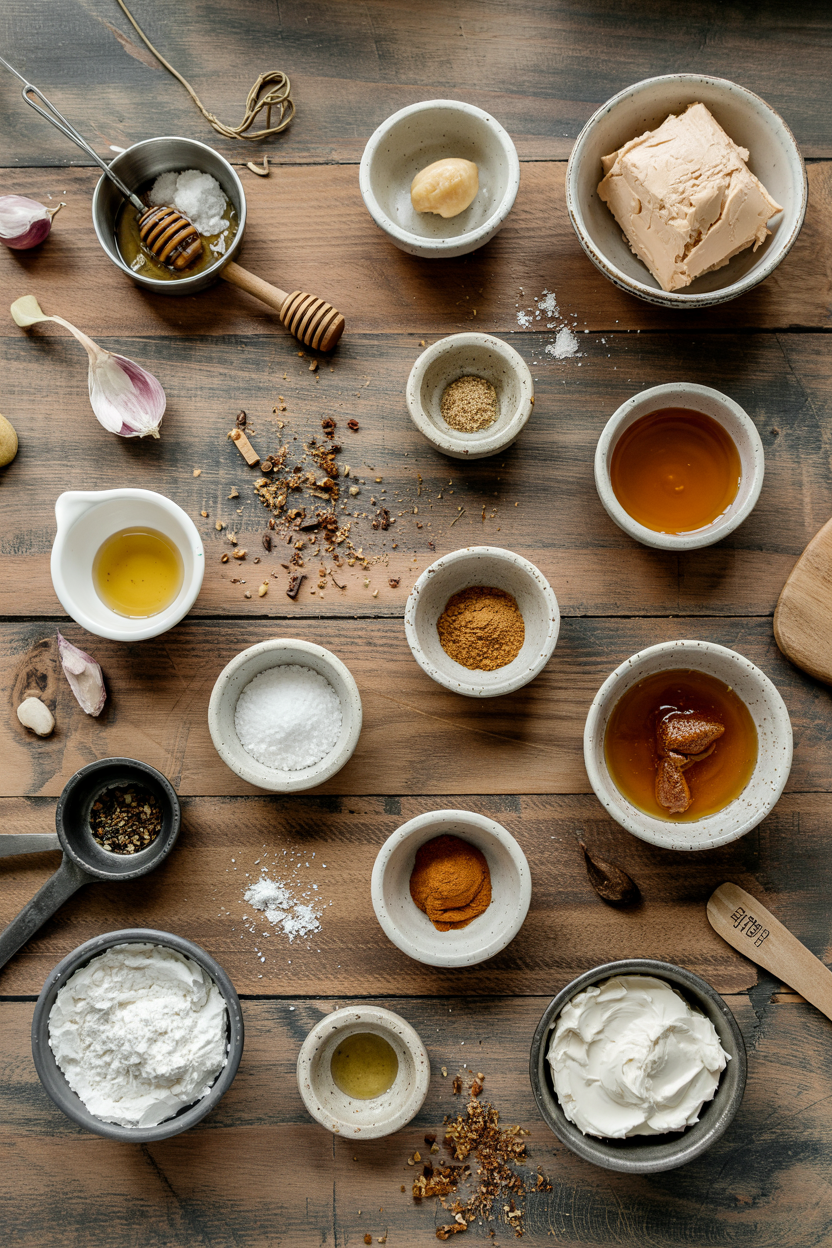
Ingredients for Honey Cinnamon Cream Cheese

Shopping takes 5 minutes since most ingredients sit in your pantry already. The cream cheese needs room temperature before you start, and for variety later try a similar deli recipe using compound butter techniques that follow the same mixing logic.

🧀
Base
  • 8 oz cream cheese (softened)
  • 3 tablespoon honey
  • 2 tablespoon powdered sugar
🌶️
Flavor
  • 1½ teaspoon ground cinnamon
  • 1 teaspoon vanilla extract
  • Pinch of salt
🫙
Optional
  • 1-2 tablespoon milk or cream
  • ½ teaspoon lemon zest

Ingredient Details

  • Cream cheese
    Leave out 30 minutes or microwave 10 seconds-cold blocks won't mix smooth
  • Honey
    Use clover or wildflower for mild sweetness; dark honey tastes too strong
  • Powdered sugar
    Sift before adding to prevent lumps in final spread
  • Ground cinnamon
    Fresh spice (under 6 months) tastes warm not bitter-measure exact or flavor overpowers
  • Vanilla extract
    Add last and mix 30 seconds only to preserve aroma
  • Milk or cream
    Add 1 teaspoon at a time-too much makes spread runny
  • Lemon zest
    Optional but adds brightness that cuts sweetness

Ingredient Swaps

Four swaps that work:

  • Maple syrup instead of honey - milder sweetness and slight flavor shift (use same amount)
  • Pumpkin pie spice instead of cinnamon - adds nutmeg and ginger complexity (use 1 tsp)
  • Dairy-free cream cheese - slightly different texture but spreads fine (soften fully first)
  • Powdered erythritol instead of powdered sugar - lower carb option (may taste less sweet, add 1 tablespoon more)

Maple Syrup Swap

Works for: Milder sweetness preference, honey allergy

Skip if: You want robust honey flavor depth

Plant Milk Swap

Works for: Dairy-free needs, thinner spreadability

Skip if: You need thick consistency for piping

Instructions

The mixing takes 5 minutes total with no heat involved. Timing matters less than texture-stop when spread looks fluffy and smooth, which pairs well with something juicy like rice bowls where you need contrasting textures on the plate.

  1. Soften cream cheese - Leave 8 oz cream cheese at room temperature 30 minutes or microwave 10 seconds until soft but not melted.

  2. Mix base ingredients - Beat cream cheese with electric mixer on medium 2 minutes until fluffy, then add 3 tablespoon honey, 2 tablespoon powdered sugar, 1½ teaspoon cinnamon, and pinch of salt.

  3. Whip until smooth - Beat on medium-high 3-4 minutes, scraping bowl halfway, until spread turns light and airy with no lumps visible.

  4. Add vanilla and adjust - Mix in 1 teaspoon vanilla extract for 30 seconds, then add milk 1 teaspoon at a time only if spread looks too thick for easy spreading.

  5. Chill to set - Transfer to airtight container and refrigerate 30 minutes for spread to firm slightly before serving (optional but improves texture).

Quick Tip
Whip for 4 full minutes-rushing leaves grainy texture instead of fluffy spread

What to Serve With It

Breakfast needs contrast between creamy spread and crunchy base. The spread works best on toasted items where texture difference stands out, and if you're planning fresh seafood dinner ideas for later meals, keep this spread refrigerated for quick brunch use the next morning.

Side Dish Prep Why It Works How to Serve
Bagels Easy Classic base with chewy texture contrasts creamy spread Toast lightly, spread thick layer while warm
Apple Slices Easy Fresh crunch and tartness cuts sweet cinnamon richness Slice thin, dip or spread on each piece
Whole Grain Toast Easy Nutty flavor balances honey sweetness without competing Toast crisp, spread edge to edge
Cinnamon Raisin Bread Easy Enhances existing cinnamon notes for double spice hit Toast or serve fresh with generous spread
Mini Waffles Medium Finger-food format makes entertaining easy, sweet pairs sweet Toast until crisp, dollop spread on each waffle

Three ways to serve it:

  • Breakfast board - Arrange spread in bowl surrounded by bagels, toast points, and fruit for self-serve brunch
  • Snack dip - Serve in ramekin with apple slices, graham crackers, and cinnamon pita chips for afternoon snacking
  • Dessert topping - Dollop on warm cinnamon rolls, pancakes, or French toast for extra sweetness
Best Pick
Toasted bagels stay the top pairing-chewy base needs creamy contrast this spread provides

Store and Reheat

The spread lasts 3-4 days refrigerated in airtight container. Texture firms up cold but softens back to spreadable consistency at room temperature, and leftovers work great alongside a rich homemade rice recipe where you need contrasting flavors on weeknight dinner plates.

Method Time Best For
🏠 Room Temp 10-15 min Restoring spreadable texture without heat
📦 Microwave 5-7 sec Quick softening when pressed for time
❌ Stovetop N/A Not recommended-direct heat separates spread

For best results when storing:

  • Use shallow airtight container - Prevents flavor absorption from other fridge items
  • Press plastic wrap on surface - Stops skin from forming on top during storage
  • Label with date - Track freshness since spread lasts only 3-4 days maximum
  • Freeze up to 1 month - Texture changes slightly but still spreads after thawing overnight in fridge
  • Let sit 10 minutes before serving - Brings chilled spread to ideal spreadable consistency

Frequently Asked Questions

Can I substitute brown sugar for honey in honey cinnamon cream cheese?

Use ¼ cup packed brown sugar instead of 3 tablespoon honey for similar sweetness. Brown sugar adds molasses notes that change flavor slightly but still works fine.

How long does homemade honey cinnamon cream cheese keep in the fridge?

Store in airtight container for 3-4 days maximum. Press plastic wrap directly on surface to prevent drying and check for off smell before using.

What is the best way to achieve a smooth texture without lumps?

Soften cream cheese to room temperature 30 minutes before mixing, then beat with electric mixer on medium-high for 3-4 minutes. Cold cream cheese always causes lumps.

Why does my honey cinnamon cream cheese become runny after chilling?

You added too much milk or cream during mixing. Add liquid only 1 teaspoon at a time and stop when spread reaches desired consistency-you can't remove excess liquid once added.

Can I make a larger batch and freeze honey cinnamon cream cheese?

Freeze up to 1 month in airtight container but texture turns slightly grainy after thawing. Thaw overnight in fridge then rewhip briefly before serving to restore smoothness.

Honey Cinnamon Cream Cheese served on a plate

Honey Cinnamon Cream Cheese

No ratings yet
Honey Cinnamon Cream Cheese is a fluffy, spreadable topping made by whipping softened cream cheese with honey, cinnamon, and powdered sugar. The gradual addition of liquid and room-temperature cream cheese ensure a smooth, airy texture perfect for breakfast spreads.
Print Recipe Pin Recipe
Prep Time 5 minutes mins
Cook Time 1 minute min
Total Time 6 minutes mins
Servings: 8 servings
Course: Appetizer, Breakfast, Spread
Cuisine: American
Ingredients Equipment Method Notes

Ingredients
  

  • 8 oz cream cheese softened, room temperature
  • 3 tablespoon honey preferably clover or wildflower honey
  • 2 tablespoon powdered sugar sifted
  • 1.5 teaspoon ground cinnamon fresh, less than 6 months old
  • 1 teaspoon vanilla extract
  • 1-2 tablespoon milk or cream add 1 teaspoon at a time if needed for spreadability
  • 0.5 teaspoon lemon zest optional, adds brightness
  • pinch salt

Equipment

  • Electric mixer Used to whip cream cheese mixture
  • Microwave Optional for softening cream cheese

Method
 

  1. Leave 8 oz cream cheese at room temperature for 30 minutes or microwave for 10 seconds until soft but not melted.
    8 oz cream cheese
  2. Beat cream cheese with electric mixer on medium speed for 2 minutes until fluffy, then add honey, powdered sugar, ground cinnamon, and a pinch of salt.
    8 oz cream cheese, 3 tbsp honey, 2 tbsp powdered sugar, 1.5 tsp ground cinnamon, pinch salt
  3. Beat on medium-high for 3-4 minutes, scraping bowl halfway through, until the spread turns light and airy with no visible lumps.
  4. Mix in vanilla extract for 30 seconds, then add milk or cream 1 teaspoon at a time if the spread is too thick for easy spreading.
    1 tsp vanilla extract, 1-2 tbsp milk or cream
  5. Transfer spread to an airtight container and refrigerate for 30 minutes to firm slightly before serving (optional).

Notes

  • Soften cream cheese fully at room temperature to avoid lumps or microwave briefly if rushed.
  • Add milk or cream gradually, 1 teaspoon at a time, to prevent runny texture.
  • Use fresh ground cinnamon for best flavor without bitterness.

Tried this recipe?

Let us know how it was!

Garlic and Herb Compound Butter

March 20, 2026

When you need a fast flavor upgrade for weeknight meals or a quick entertaining trick, compound butter delivers. One batch stored in the fridge turns plain bread into garlic bread, steamed vegetables into something worth eating, and grilled steak into a restaurant-style dinner.

Garlic and Herb Compound Butter served on a plate

Mixing softened butter with fresh herbs and garlic takes 10 minutes. The work happens in one bowl with a spoon.

This is what we make ahead on Sundays for busy weeks when cooking feels like a chore. Roll it into a log, slice as needed, and watch it melt into whatever you're serving.

QUICK SUMMARY

Garlic and Herb Compound Butter is softened unsalted butter mixed with fresh garlic, parsley, thyme, and chives. Room temperature butter mixes smoothly without lumps and the herbs distribute evenly when finely minced. Roll it into a log, chill for an hour, and slice portions as needed for weeknight meals or entertaining.

⏱️Time Reality: 10 minutes active, 1 hour chilling - no cooking required
🔪Critical First Move: Soften butter at room temp 30-45 minutes before mixing
⚠️Watch Out: Cold butter creates lumps - warm it slightly if you forgot to soften

Table of Contents

Toggle
  • Why This Recipe Works
  • What You'll Need
    • Ingredient Details
  • Ingredient Swaps
  • What to Serve With It
  • Store and Reheat
  • Frequently Asked Questions
  • Garlic and Herb Compound Butter
    • Method 
    • Tried this recipe?

Why This Recipe Works

Softened butter absorbs minced garlic and herbs evenly without clumping. Fresh herbs stay bright and aromatic instead of turning musty like dried versions do. For a version that comes together quickly, try a similar deli recipe that uses cream as the base instead of butter.

Quick Reference
⏱️
Prep Time
10 min
🔥
Cook Time
0 min
⏰
Total Time
10 min + chilling
🍽️
Servings
8 servings (2 tablespoon each)
📊
Difficulty
Easy
🏷️
Category
Side | Appetizer
💡
Quick Tip
Use room temp butter for easy mixing
🎯
Best For
Weeknight | Meal prep | Entertaining

The technique breaks down like this:

  • Room temperature butter mixes without resistance - cold butter fights the spoon and leaves chunks that never blend
  • Finely minced garlic distributes flavor evenly - large garlic pieces create pockets of sharp bite instead of balanced flavor
  • Fresh parsley and thyme add bright herby notes - dried herbs taste flat and absorb moisture from the butter
  • Rolling in parchment creates uniform slices - a log shape makes portioning consistent and storage simple
  • Chilling for at least one hour sets the shape - warm butter smears instead of slicing cleanly
Quick Tip
Leave butter on the counter for 30-45 minutes before you start - it should dent easily when pressed

What You'll Need

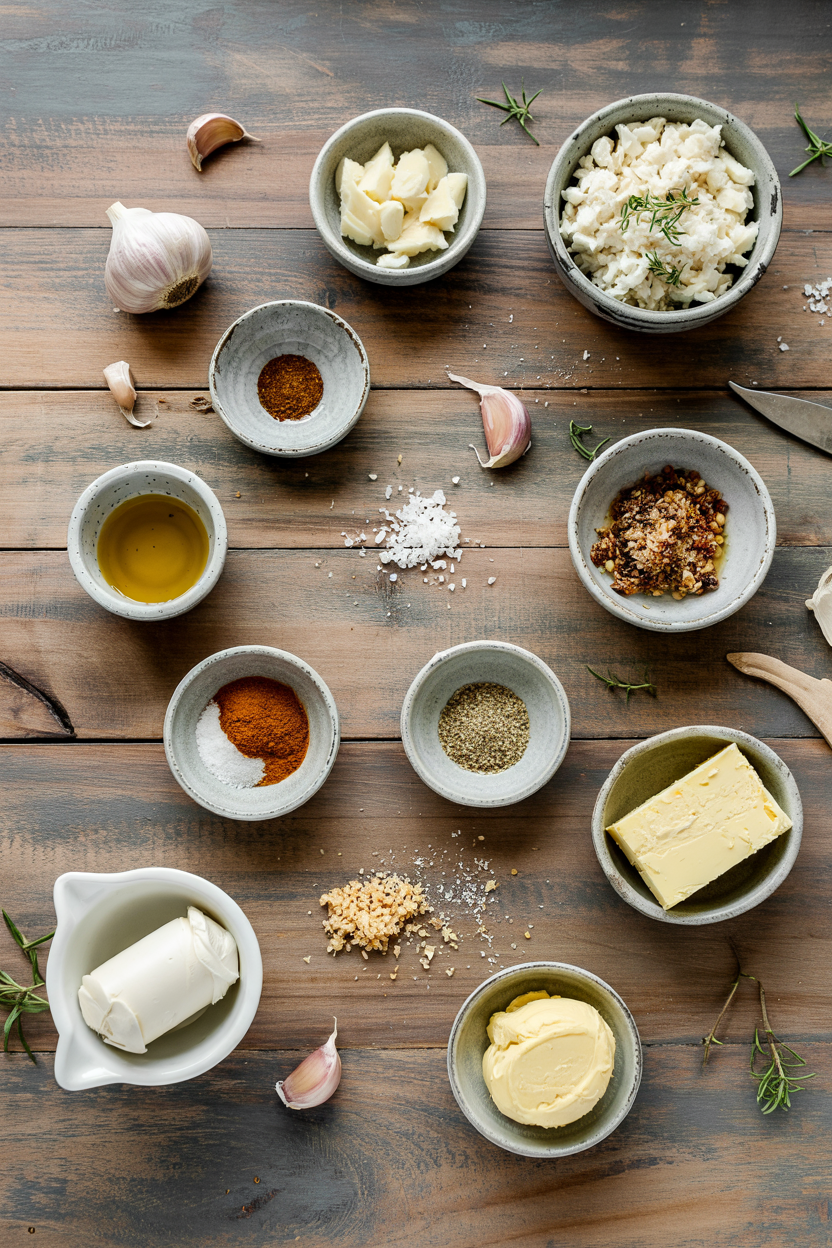
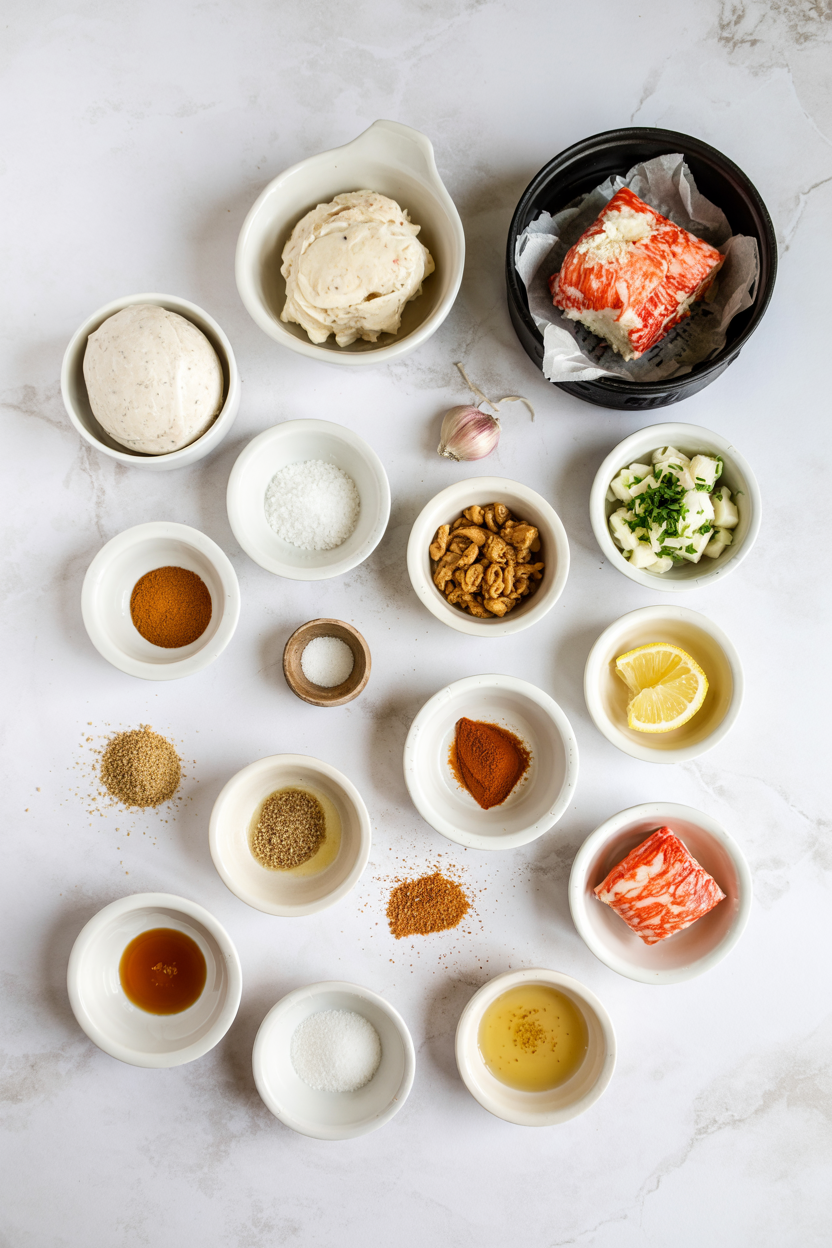
Ingredients for Garlic and Herb Compound Butter

Stock your pantry with unsalted butter, fresh garlic, and three fresh herbs. The shopping list stays minimal because compound butter relies on quality ingredients more than quantity. We keep a batch ready for nights like this - check out another great homemade recipe if you want a tangy option that pairs with salads.

🧀
Butter Base
  • ½ cup unsalted butter (1 stick)
🧄
Aromatics
  • 2 cloves fresh garlic, minced
  • 2 tablespoon fresh parsley, finely chopped
  • 1 teaspoon fresh thyme leaves
  • 1 tablespoon fresh chives, minced
🌶️
Seasonings
  • ¼ teaspoon salt
  • ¼ teaspoon black pepper
  • 1 teaspoon lemon zest (optional)
  • ¼ teaspoon red pepper flakes (optional)

Ingredient Details

  • Unsalted Butter
    Controls salt levels - salted butter throws off the balance and makes the final product too salty
  • Fresh Garlic
    Provides bright pungent flavor - press or mince finely so no large chunks create sharp bites
  • Fresh Parsley
    Classic herb that adds fresh green flavor - chop finely with a sharp knife for even distribution
  • Fresh Thyme
    Earthy depth balances the garlic - strip leaves from stems and discard woody parts
  • Fresh Chives
    Mild onion flavor adds complexity - mince into small pieces so they blend smoothly
  • Lemon Zest
    Optional brightness - use 1 teaspoon maximum or the citrus overpowers the herbs
  • Black Pepper
    Adds subtle heat - freshly cracked works best for maximum flavor

Ingredient Swaps

Most swaps work when you keep the butter-to-herb ratio consistent. Dried herbs cut the freshness but they'll do in a pinch if you reduce the quantity by half.

Four swaps that work:

  • Vegan butter or margarine instead of unsalted butter - texture and flavor shift slightly but it stays spreadable (dairy-free)
  • Garlic powder (¼ teaspoon per clove) instead of fresh garlic - less pungent and more muted but faster (budget)
  • Dried herbs (half the amount) instead of fresh herbs - milder flavor and may dry out the butter slightly (budget)
  • Cilantro instead of fresh parsley - changes the flavor profile to Latin or Asian style (flexible)

Room Temperature Softening

Works for: Planning ahead - butter softens evenly over 30-45 minutes

Skip if: You forgot to plan - takes too long when you need butter now

Microwave Softening (5-7 seconds)

Works for: Last-minute mixing - butter softens in seconds

Skip if: You overshoot timing - butter melts instead of softening and won't hold shape

Instructions

Ten minutes of mixing and rolling, then an hour in the fridge to set. The butter softens while you chop herbs so everything's ready when you start mixing. The shrimp works best when it hits the table at the same time as the main, so if you're planning a bigger spread, start with flaky homemade shrimp recipe and add the compound butter at the end.

  1. Soften butter at room temperature for 30-45 minutes - press lightly with your finger to check; it should dent easily without melting or feeling greasy
  2. Mince garlic finely and chop fresh parsley, thyme, and chives - use a sharp knife and chop until no large pieces remain; herbs should look like small green flecks
  3. Mix softened butter with minced garlic, herbs, salt, pepper, and optional lemon zest in a bowl - stir vigorously with a spoon until herbs distribute evenly and no white streaks of plain butter remain
  4. Spoon butter mixture onto a sheet of parchment paper and roll into a 1.5-inch diameter log - fold parchment over butter and use your hands to shape it into an even cylinder, twisting ends to seal
  5. Chill compound butter in the fridge for at least 1 hour until firm - butter should slice cleanly without smearing; store wrapped in parchment up to 4 days or freeze up to 3 months
Shortcut
If butter's too cold, microwave it for 5-7 seconds at 30% power - watch closely so it softens without melting

What to Serve With It

Most people skip sides when they make compound butter, but it balances the meal. Rich mains need something to cut through, and homemade does exactly that when you plan it right - for bigger meals, check out tender pork dinner ideas that work with this butter.

Side Dish Prep Why It Works How to Serve
Grilled Steak Easy Butter melts into meat adding rich herb and garlic flavor Place 1 tablespoon slice on top of hot steak right before serving
Steamed Vegetables Easy Adds creamy richness to plain vegetables Toss hot vegetables with 1-2 tablespoon melted butter
Baked Potatoes Easy Melts inside creating rich herby filling Split hot potato and add 1 tablespoon butter to center
Crusty Bread Easy Classic garlic bread flavor without extra steps Spread softened butter on bread slices and toast under broiler
Grilled Corn Easy Butter melts into kernels enhancing natural sweetness Brush hot corn with melted butter immediately after grilling

Three ways to serve it:

  • On grilled proteins - slice 1 tablespoon portions and place on hot steak, chicken, or fish right before serving so butter melts into the meat
  • Mixed into sides - toss hot roasted vegetables or rice with 2 tablespoon compound butter for instant flavor upgrade
  • As garlic bread - spread softened butter on crusty bread slices and broil for 2-3 minutes until golden and bubbly
Best Pick
Store sliced portions in the freezer - grab one piece at a time without thawing the entire log

Store and Reheat

Wrap the butter log tightly in parchment paper or plastic wrap. Label it with the date because compound butter lasts 3-4 days in the fridge or 3 months frozen. Most people skip rice, but it balances the meal when you're building a full plate - pair this butter with homemade rice recipe and watch the butter melt into each grain.

Method Time Best For
🌡️ Room Temperature 10-20 min Softening slices before spreading on bread
📦 Microwave 5-7 seconds at 30% power Quick softening of small amounts without melting
🔥 Oven Melt 1-2 min at 350°F Melting butter directly on hot dishes like vegetables

For best results when storing:

  • Wrap tightly in parchment paper or plastic wrap - prevents butter from absorbing fridge odors and keeps herbs fresh
  • Label with date made - butter stays good 3-4 days in fridge, up to 3 months frozen
  • Slice before freezing for easy portioning - cut log into 1 tablespoon rounds and freeze on a sheet before transferring to a container
  • Store away from strong-smelling foods - butter absorbs odors quickly, especially garlic and onions
  • Bring to room temp 10-15 minutes before spreading - cold butter tears bread instead of spreading smoothly

Frequently Asked Questions

Can I use dried herbs instead of fresh in compound butter?

Yes, but reduce the amount by half - dried herbs are more concentrated and can dry out the butter. Fresh herbs stay brighter and blend more smoothly.

How long does garlic and herb compound butter keep in the fridge?

3-4 days wrapped tightly in parchment or plastic wrap. Freeze it for up to 3 months if you want longer storage - slice before freezing for easy portioning.

How do I know when the butter and herbs are fully combined?

Look for even green flecks throughout with no white streaks of plain butter. Stir vigorously until herbs distribute uniformly and the mixture looks consistent.

What should I do if my compound butter is too runny?

Chill it in the fridge for 30 minutes to firm it back up. Avoid overheating butter in the microwave - 5-7 seconds at 30% power is enough to soften without melting.

Can I make garlic and herb compound butter in large batches?

Yes - double or triple the recipe and freeze extra portions. Roll into multiple logs or slice into rounds before freezing so you can grab portions as needed.

Garlic and Herb Compound Butter served on a plate

Garlic and Herb Compound Butter

No ratings yet
Garlic and Herb Compound Butter combines softened unsalted butter with fresh garlic, parsley, thyme, and chives for a bright and aromatic flavor boost. The mixture rolls into a log and chills to set, making it easy to slice and use as a quick topping for a variety of dishes.
Print Recipe Pin Recipe
Prep Time 10 minutes mins
Cook Time 1 minute min
Total Time 11 minutes mins
Servings: 8 servings
Course: Appetizer, Side Dish
Cuisine: American
Ingredients Method Notes

Ingredients
  

  • 0.5 cup unsalted butter softened to room temperature
  • 2 cloves garlic minced finely
  • 2 tablespoon parsley fresh, finely chopped
  • 1 teaspoon thyme fresh leaves, stripped from stems
  • 1 tablespoon chives fresh, minced
  • 0.25 teaspoon salt
  • 0.25 teaspoon black pepper
  • 1 teaspoon lemon zest optional
  • 0.25 teaspoon red pepper flakes optional

Method
 

  1. Soften butter at room temperature for 30-45 minutes until it dents easily without melting or feeling greasy.
    0.5 cup unsalted butter
  2. Mince garlic finely and chop parsley, thyme leaves, and chives until no large pieces remain; herbs should look like small green flecks.
    2 cloves garlic, 2 tbsp parsley, 1 tsp thyme, 1 tbsp chives
  3. Mix softened butter with garlic, herbs, salt, pepper, and optional lemon zest and red pepper flakes in a bowl. Stir vigorously until herbs distribute evenly and no white streaks remain.
    0.5 cup unsalted butter, 2 cloves garlic, 2 tbsp parsley, 1 tsp thyme, 1 tbsp chives, 0.25 tsp salt, 0.25 tsp black pepper, 1 tsp lemon zest, 0.25 tsp red pepper flakes
  4. Spoon butter mixture onto parchment paper and roll into a 1.5-inch diameter log. Fold parchment over and shape into an even cylinder, twisting ends to seal.
    0.5 cup unsalted butter
  5. Chill compound butter in the refrigerator for at least 1 hour until firm enough to slice cleanly without smearing. Store wrapped in parchment up to 4 days or freeze up to 3 months.
    0.5 cup unsalted butter

Notes

  • Use room temperature butter for smooth mixing without lumps.
  • Wrap tightly in parchment or plastic to avoid absorbing fridge odors.
  • Slice before freezing for convenient portioning and longer storage.

Tried this recipe?

Let us know how it was!

Herbed Goat Cheese Spread

March 20, 2026

Mix room-temperature goat cheese with minced fresh herbs and a splash of olive oil. The cheese softens into a spreadable consistency while the herbs disperse evenly throughout.

Herbed Goat Cheese Spread served on a plate

High-quality goat cheese is the foundation-cheap versions taste chalky. Fresh thyme, chives, and parsley add brightness without overpowering the tangy base.

Make this for entertaining when you need an appetizer that looks intentional but takes less than 15 minutes.

QUICK SUMMARY

Herbed Goat Cheese Spread blends tangy goat cheese with fresh herbs, olive oil, and garlic into a creamy, spreadable appetizer. Room-temperature cheese mixes smoothly without lumps. Perfect for meal prep, weeknight snacks, or holiday parties.

⏱️Time: 10 minutes active, optional 30-minute chill for fuller flavor
🔑Key Move: Soften cheese 30 minutes before mixing to prevent grainy texture
⚠️Watch Out: Add liquids gradually-too much oil or lemon makes the spread runny

Table of Contents

Toggle
  • Why This Recipe Works
  • What You'll Need
    • Ingredient Details
  • Ingredient Swaps
  • What to Serve With It
  • Store and Reheat
  • Frequently Asked Questions
  • Herbed Goat Cheese Spread
    • Method 
    • Tried this recipe?

Why This Recipe Works

Fresh herbs deliver concentrated flavor that dried versions can't match. For similar herbal richness in a different format, try a quick butter recipe that uses the same technique. The lemon juice brightens the tangy goat cheese instead of competing with it.

Quick Reference
⏱️
Prep Time
10 min
🔥
Cook Time
0 min
⏰
Total Time
10-15 min
🍽️
Servings
8 servings
📊
Difficulty
Easy
🏷️
Category
Appetizer
💡
Quick Tip
Use softened cheese for easy blending
🎯
Best For
Entertaining | Weeknight | Meal prep
  • Room-temperature cheese blends smoothly - Cold goat cheese stays grainy no matter how long you mix it
  • Minced herbs distribute evenly - Chopping to 2-3 mm pieces prevents clumps and ensures every bite tastes balanced
  • Olive oil creates spreadable texture - Adding 1-2 tablespoons loosens the mixture without making it soupy
  • Chilling melds flavors fully - A 30-minute rest in the fridge lets garlic and herbs infuse the cheese
  • Fresh lemon juice adds brightness - Bottled juice tastes flat; fresh-squeezed lifts the tangy goat cheese
Quick Tip
Soften cheese 30 minutes before mixing for smooth, lump-free texture

What You'll Need

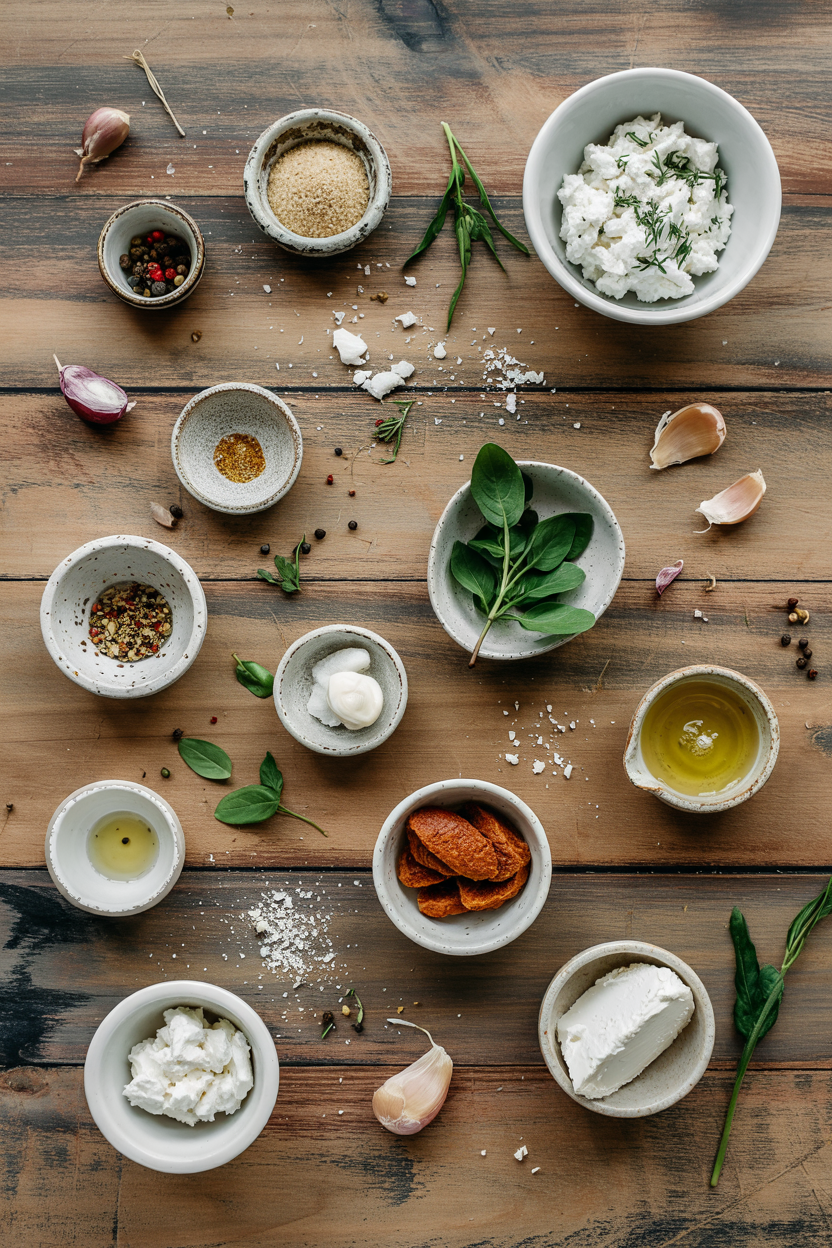
Ingredients for Herbed Goat Cheese Spread

Shop for fresh herbs in bunches, not dried jars-they make the spread taste like it came from a deli. Rich mains need something to cut through, and salad does exactly that. For a version that comes together quickly, try something tender like salad for similar freshness.

🧀
Cheese Base
  • 8 oz goat cheese (softened)
  • 2 oz cream cheese (optional, for smoother texture)
🧄
Aromatics
  • 2 cloves garlic (minced)
  • 2 tablespoon fresh thyme (minced)
  • 2 tablespoon fresh chives (minced)
  • 2 tablespoon fresh parsley (minced)
🥢
Liquid & Seasoning
  • 2 tablespoon olive oil
  • 1 tablespoon lemon juice (fresh-squeezed)
  • ¼ teaspoon salt
  • ¼ teaspoon black pepper
🫙
Optional Add-Ins
  • 1 teaspoon honey (for sweetness)
  • ¼ teaspoon red pepper flakes (for heat)

Ingredient Details

  • Goat Cheese
    Use log-style goat cheese, not crumbled-it blends smoother and tastes fresher
  • Fresh Herbs
    Pick bright green bunches without wilted leaves; rinse and dry completely before mincing
  • Garlic
    Mince finely or use a microplane to avoid chunky garlic bites
  • Olive Oil
    Use extra-virgin for richer flavor; regular olive oil works if that's what you have
  • Lemon Juice
    Squeeze half a lemon just before mixing-bottled juice tastes metallic
  • Cream Cheese
    Optional but makes the spread milder and smoother; skip if you want pure goat cheese tang
  • Honey
    Add if you prefer a sweet-savory balance; start with ½ teaspoon and taste before adding more

Ingredient Swaps

Goat cheese provides the signature tang, but cream cheese works if you prefer milder flavor. Dried herbs substitute at ⅓ the amount-1 tablespoon dried equals 3 tablespoons fresh.

  • Goat cheese → cream cheese - Milder flavor, creamier texture, less tang (use same amount)
  • Fresh herbs → dried herbs - Less vibrant flavor, more concentrated taste (use ⅓ the amount)
  • Olive oil → avocado oil - Neutral flavor, similar richness (use same amount)
  • Lemon juice → white wine vinegar - Sharper acidity, slightly different flavor profile (use same amount)

Cream Cheese Base

Works for: Milder tang, smoother spread, kids who dislike goat cheese

Skip if: You want authentic goat cheese flavor or sharper tang

Dried Herbs

Works for: Budget cooking, pantry swaps, longer shelf life

Skip if: You want bright, fresh herb flavor or making for guests

Roasted Garlic

Works for: Mellower garlic flavor, sweeter notes, less sharp bite

Skip if: You need to make this in under 15 minutes or prefer raw garlic punch

Instructions

The entire recipe happens in one bowl and takes 10 minutes. Most people skip butter, but it balances the meal. For a version that comes together quickly, try a homemade pork recipe that uses similar mixing techniques.

  1. Soften the goat cheese - Leave 8 oz goat cheese at room temperature for 30 minutes until it mashes easily with a fork (cold cheese stays grainy)
  2. Mince the herbs and garlic - Chop 2 tablespoon each of thyme, chives, and parsley into 2-3 mm pieces; mince 2 cloves garlic finely to avoid chunks
  3. Combine cheese and aromatics - Mix softened goat cheese with minced herbs and garlic in a medium bowl using a fork or hand mixer until blended
  4. Add liquids gradually - Stir in 2 tablespoon olive oil and 1 tablespoon fresh lemon juice one tablespoon at a time while mixing to prevent runny texture
  5. Season and chill - Add ¼ teaspoon salt and ¼ teaspoon black pepper; taste and adjust; refrigerate 30 minutes for flavors to meld before serving
Golden Rule
Add liquids one tablespoon at a time-too much at once makes the spread soupy and unfixable

What to Serve With It

A creamy spread needs something crunchy to balance the texture. For more options that complement rich appetizers, check out marinara sauce meal planning ideas that work for similar entertaining scenarios. Pair with acidic or salty sides to cut through the richness.

Side Dish Prep Why It Works How to Serve
Toasted baguette slices Easy Crunchy base contrasts creamy spread; soaks up excess oil Slice baguette ½-inch thick, toast at 400°F for 5 minutes until golden
Crisp cucumber slices Easy Refreshing crunch balances rich cheese; adds hydration Slice cucumber ¼-inch thick, arrange around spread bowl
Raw carrot sticks Easy Natural sweetness offsets tangy goat cheese; sturdy for dipping Peel and cut carrots into 3-inch sticks; serve chilled
Whole grain crackers Easy Nutty flavor complements herbs; holds spread without breaking Arrange crackers on platter, serve spread in shallow bowl
Prosciutto slices Easy Salty meat balances creamy cheese; adds protein to appetizer spread Drape thin prosciutto slices around spread; serve at room temp

Three ways to serve it:

  • Appetizer board - Spread on toasted baguette slices with marinated olives and grilled vegetables for Mediterranean-style entertaining
  • Snack dip - Serve in shallow bowl surrounded by cucumber slices, carrot sticks, and whole grain crackers for easy weeknight snacking
  • Brunch spread - Dollop on bagels or English muffins alongside smoked salmon and capers for elevated breakfast
Best Pick
Toasted baguette slices provide the perfect crunchy contrast-sturdy enough to hold the spread without getting soggy

Store and Reheat

Herbed goat cheese spread lasts 3-4 days in the fridge and actually tastes better the next day after flavors meld. The bread works best when it hits the table at the same time as the main. For a version that comes together quickly, try simple homemade bread that reheats well alongside this spread.

Method Time Best For
🏠 Room Temperature 20-30 min Softening chilled spread before serving-full flavor returns at room temp
📦 Microwave 10-15 sec Quick softening of small amounts-watch closely to prevent melting
🍳 Stovetop Warm 1-2 min low heat Warming spread for drizzling over warm bread-stir constantly

For best results when storing:

  • Use shallow, airtight containers - Glass or plastic containers prevent fridge odors from seeping into the spread
  • Press plastic wrap directly on surface - Eliminates air exposure that causes browning on top layer
  • Store up to 4 days maximum - Fresh herbs lose brightness after that; goat cheese stays safe but flavor dulls
  • Freeze up to 1 month if needed - Texture becomes slightly grainy after thawing but flavor remains intact
  • Bring to room temp before serving - Cold spread tastes muted and won't spread smoothly on bread or crackers

Frequently Asked Questions

Can I substitute cream cheese for goat cheese in this spread?

Yes-use the same amount of cream cheese for a milder, less tangy spread. The texture will be smoother and creamier, but you'll lose the signature goat cheese flavor.

How long can I store herbed goat cheese spread in the fridge?

Store in an airtight container for 3-4 days maximum. Fresh herbs lose brightness after that, and the garlic flavor intensifies over time.

What is the best way to know when the spread is mixed well?

The spread is ready when it's smooth and spreadable with visible green herb flecks distributed evenly throughout. No white cheese streaks should remain, and the texture should hold its shape when scooped.

Why does my herbed goat cheese spread become watery sometimes?

Too much olive oil or lemon juice added at once makes the spread runny. Add liquids one tablespoon at a time while mixing, and if it gets too thin, stir in more goat cheese or chill for 30 minutes to firm up.

Can I scale this recipe for a large party?

Yes-double or triple all ingredients proportionally. Mix in batches if your bowl is too small, and plan for 2 oz of spread per guest as an appetizer portion.

Herbed Goat Cheese Spread served on a plate

Herbed Goat Cheese Spread

No ratings yet
Herbed Goat Cheese Spread blends tangy goat cheese with fresh herbs, olive oil, and lemon juice into a creamy, flavorful appetizer. Softening the goat cheese beforehand ensures a smooth, lump-free texture perfect for entertaining or snacking.
Print Recipe Pin Recipe
Prep Time 10 minutes mins
Cook Time 1 minute min
Total Time 11 minutes mins
Servings: 8 servings
Course: Appetizer
Cuisine: American
Ingredients Method Notes

Ingredients
  

  • 8 oz goat cheese softened to room temperature
  • 2 oz cream cheese optional, for smoother texture
  • 2 cloves garlic minced finely
  • 2 tablespoon fresh thyme minced to 2-3 mm pieces
  • 2 tablespoon fresh chives minced to 2-3 mm pieces
  • 2 tablespoon fresh parsley minced to 2-3 mm pieces
  • 2 tablespoon olive oil extra-virgin recommended
  • 1 tablespoon lemon juice fresh-squeezed
  • 0.25 teaspoon salt
  • 0.25 teaspoon black pepper
  • 1 teaspoon honey optional, for sweetness
  • 0.25 teaspoon red pepper flakes optional, for heat

Method
 

  1. Leave 8 oz goat cheese at room temperature for 30 minutes until it softens and mashes easily with a fork.
    8 oz goat cheese
  2. Chop fresh thyme, chives, and parsley into 2-3 mm pieces and mince the garlic finely to avoid chunky bites.
    2 cloves garlic, 2 tbsp fresh thyme, 2 tbsp fresh chives, 2 tbsp fresh parsley
  3. Mix softened goat cheese and optional cream cheese with minced herbs and garlic in a medium bowl using a fork or hand mixer until well blended.
    8 oz goat cheese, 2 oz cream cheese, 2 cloves garlic, 2 tbsp fresh thyme, 2 tbsp fresh chives, 2 tbsp fresh parsley
  4. Stir in olive oil and fresh lemon juice one tablespoon at a time while mixing to prevent a runny texture.
    2 tbsp olive oil, 1 tbsp lemon juice
  5. Add salt, black pepper, and optional honey and red pepper flakes; taste and adjust seasoning. Refrigerate for 30 minutes to let flavors meld before serving.
    0.25 tsp salt, 0.25 tsp black pepper, 1 tsp honey, 0.25 tsp red pepper flakes

Notes

  • Soften cheese before mixing for smooth, lump-free spread.
  • Add liquids one tablespoon at a time to avoid runny texture.
  • Chill the spread for 30 minutes to meld flavors fully before serving.

Tried this recipe?

Let us know how it was!

Cream Cheese and Olive Spread

March 20, 2026

You need 10 minutes and a bowl. No cooking, no waiting for the oven, no multistep chopping sequences.

Cream Cheese and Olive Spread served on a plate

Softened cream cheese mixed with finely chopped olives creates a tangy spread that holds up on crackers without sliding off. The lemon juice and olive oil smooth out the texture while keeping it thick enough to scoop.

This is what we make for last-minute snack plates when the fridge has more condiments than actual food. Entertaining crowd? Pork adds the contrast this plate needs, but timing matters. For a version that comes together quickly, classic pork dish sets the stage while this spread does the work.

QUICK SUMMARY

Cream cheese and olive spread combines softened cream cheese with finely chopped mixed olives, garlic, lemon juice, and fresh herbs. The spread needs 30 minutes in the fridge before serving so the flavors meld and the texture firms up. Mix everything in a bowl, chill, and serve with crackers or vegetables for a quick appetizer that works for weeknight snacks or party spreads.

⏱️Time Reality: 10 minutes active, 30-60 minutes chilling before serving
🔪First Move: Soften cream cheese 20 minutes at room temp, chop olives into ⅛-inch pieces
⚠️Watch Out: Olives are salty - taste before adding extra salt or the spread becomes too briny

Table of Contents

Toggle
  • Why This Recipe Works
  • What You'll Need
    • Ingredient Details
  • Ingredient Swaps
  • What to Serve With It
  • Store and Reheat
  • Frequently Asked Questions
  • Cream Cheese and Olive Spread
    • Method 
    • Tried this recipe?

Why This Recipe Works

Chopping olives finely before mixing distributes the salty-tangy flavor throughout the cream cheese instead of leaving big briny pockets. Most people skip dressing, but it balances the meal. For a version that comes together quickly, tangy dressing recipe keeps prep simple while this spread adds more body.

Quick Reference
⏱️
Prep Time
10 min
🔥
Cook Time
0 min
⏰
Total Time
10-70 min (including chilling)
🍽️
Servings
6-8 servings
📊
Difficulty
Easy
🏷️
Category
Appetizer
💡
Quick Tip
Chill 30+ minutes before serving
🎯
Best For
Weeknight | Entertaining | Meal prep

Five things that make this spread work:

  • Softening cream cheese at room temp prevents clumps - cold cream cheese won't mix smoothly and leaves lumpy streaks throughout
  • Chopping olives into ⅛-inch pieces creates a spreadable consistency instead of chunky bits that fall off crackers
  • Adding lemon juice one teaspoon at a time lets you balance the acidity without overshooting into sour territory
  • Mixing cream cheese and lemon juice first creates a smooth base before the olives go in, preventing separation later
  • Chilling for at least 30 minutes lets the garlic mellow and the olive brine distribute evenly through the cream cheese
Quick Tip
Pat olives dry with a paper towel after draining them - excess brine makes the spread runny and overly salty.

What You'll Need

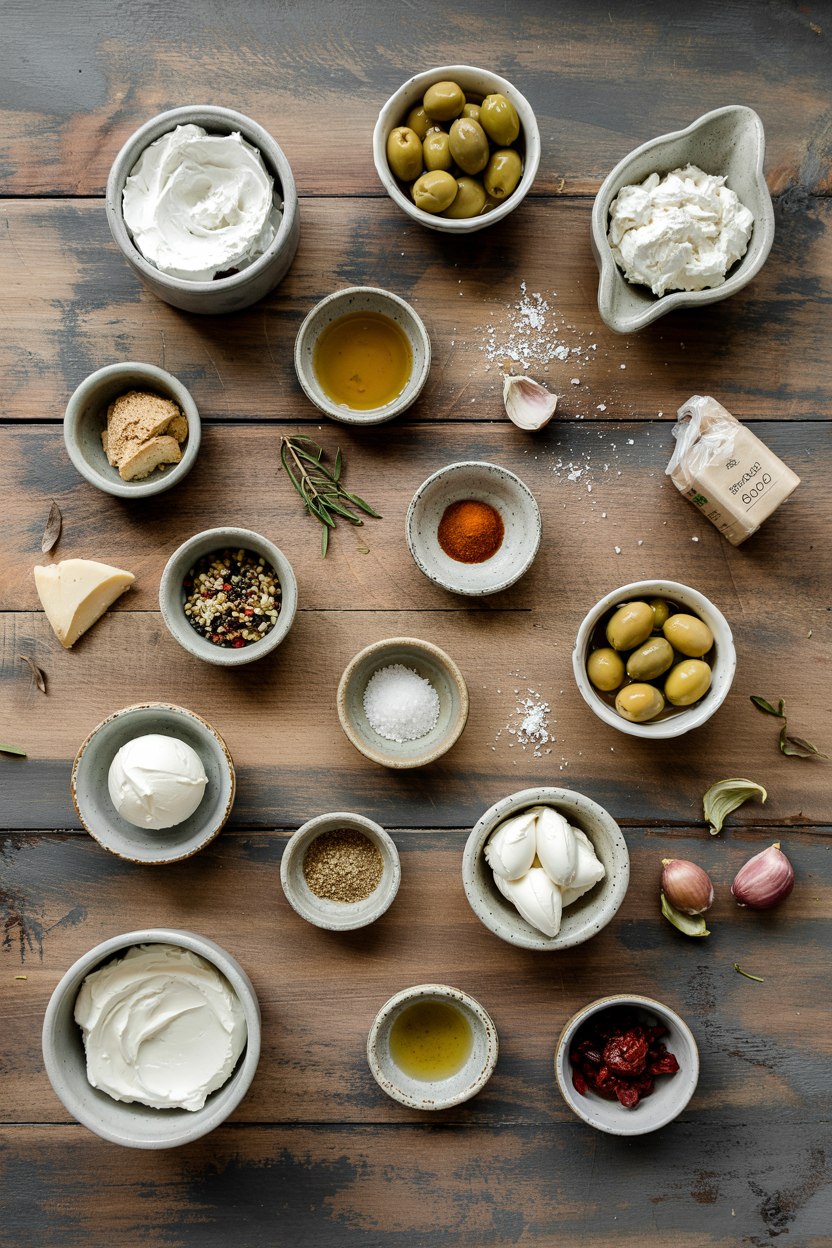
Ingredients for Cream Cheese and Olive Spread

Mixed olives work best when you use a combination of green and black varieties. A good scratch can make or break the plate. For a version that comes together quickly, this easy scratch recipe gives you the same savory baseline while this spread adds the olive kick.

🧀
Dairy Base
  • 8 oz cream cheese, softened
🫒
Olives & Aromatics
  • ½ cup mixed olives (green and black)
  • 2 garlic cloves, minced
🥢
Acid & Fat
  • 2 tablespoon lemon juice
  • 1 tablespoon olive oil
🌿
Seasoning
  • 2 tablespoon fresh herbs (parsley, dill, or basil)
  • ¼ teaspoon black pepper
  • ¼ teaspoon red pepper flakes (optional)

Ingredient Details

  • Cream cheese
    Use full-fat brick cream cheese - low-fat versions make the spread grainy and thin
  • Mixed olives
    Pit olives yourself if using whole - jarred pitted olives work but check for pit fragments
  • Lemon juice
    Fresh lemon juice tastes brighter than bottled - use 1 medium lemon for about 2 tablespoons
  • Olive oil
    Extra virgin olive oil adds fruity notes but regular olive oil works if that's what you have
  • Fresh herbs
    Chop herbs finely so they distribute evenly - large pieces clump together and taste too grassy
  • Garlic
    Mince garlic into tiny pieces (not chunks) so the flavor spreads evenly without raw garlic bites
  • Black pepper
    Use freshly cracked black pepper for sharper flavor - pre-ground pepper tastes flat

Ingredient Swaps

Dairy-free versions need vegan cream cheese or blended silken tofu as the base. Vegan cream cheese keeps the same texture but silken tofu makes the spread lighter and less tangy, so add extra lemon juice to balance.

Four swaps that work:

  • Cream cheese → silken tofu or vegan cream cheese - Blend silken tofu until smooth (adds 2 minutes prep); vegan cream cheese swaps 1:1 but check the salt level
  • Mixed olives → capers or chopped pickles - Use half the amount of capers (they're more intense); pickles add crunch but less oily richness
  • Olive oil → avocado oil - Swaps 1:1 with a milder flavor; vegetable oil works but tastes more neutral
  • Fresh herbs → dried herbs - Use 1 tablespoon dried (half the fresh amount); stir in 10 minutes before serving so they rehydrate

Vegan Cream Cheese

Works for: Same texture and tang as dairy cream cheese, spreads easily

Skip if: You want the richest, creamiest result - vegan versions are slightly less dense

Silken Tofu

Works for: Lighter texture, lower calorie count, blends smooth

Skip if: You want traditional cream cheese tang - tofu is milder and needs more lemon juice

Ricotta Cheese

Works for: Softer, grainier texture that's still spreadable

Skip if: You want smooth consistency - ricotta has curds that don't fully blend

Instructions

Total time runs 10 minutes active plus 30 to 60 minutes chilling. The potato works best when it hits the table at the same time as the main. We keep a batch ready for nights like this - this easy potato recipe pairs with most proteins while this spread handles the snack side.

  1. Soften cream cheese at room temperature for 20 minutes. Press it with your finger - it should dent easily without cracking.
  2. Drain olives and pat dry with paper towels, then chop into ⅛-inch pieces. Olives should be small enough to spread on a cracker without falling off.
  3. Mix cream cheese and lemon juice in a bowl until smooth, then stir in olive oil. The mixture should look creamy without visible streaks or lumps.
  4. Fold in chopped olives, minced garlic, herbs, black pepper, and red pepper flakes if using. Stir until olive pieces are evenly distributed throughout the cream cheese.
  5. Cover and refrigerate for 30 to 60 minutes before serving. The spread firms up and the garlic flavor mellows during chilling.
Golden Rule
Taste the spread before adding extra salt - the olives and olive brine provide most of the salt you need.

What to Serve With It

Crackers and fresh vegetables are the default, but a warm main dish turns this from a snack into part of a meal. Chicken adds the contrast this plate needs, but timing matters. For a version that comes together quickly, juicy chicken side dish balances the richness while the spread does the heavy lifting on flavor.

Side Dish Prep Why It Works How to Serve
Crackers Easy Crisp base that doesn't compete with creamy spread Arrange on a plate, spread keeps 2 hours at room temp
Sliced cucumbers Easy Fresh crunch cuts through richness, adds water content Slice into ¼-inch rounds, top each with a dollop of spread
Toast points Easy Crispy texture complements creamy spread, holds up longer than soft bread Cut toasted bread into triangles, serve warm or at room temp
Fresh vegetable sticks Easy Healthy dipping option, adds color to the plate Use carrots, celery, bell peppers - cut into 3-inch sticks
Sliced baguette Easy Classic presentation, crusty edges contrast with soft spread Slice into ½-inch rounds, toast lightly before serving

Three ways to serve it:

  • On a charcuterie board: Pair with cured meats, hard cheeses, marinated olives, and roasted nuts for a Mediterranean-style spread
  • As a dip for vegetables: Set out carrot sticks, celery, bell pepper strips, and cherry tomatoes alongside the spread in a shallow bowl
  • On toast points for brunch: Top toasted baguette slices with the spread, add a thin slice of smoked salmon or prosciutto
Shortcut
Use pre-made olive tapenade instead of chopping olives - stir ¼ cup tapenade into softened cream cheese for a faster version with bolder flavor.

Store and Reheat

The spread keeps 3 to 4 days in an airtight container in the fridge. Texture firms up more after the first day, so pull it out 15 minutes before serving if you want it spreadable at room temperature.

Method Time Best For
🧊 Room Temperature 15-20 min Softening chilled spread for easier spreading
📦 Microwave 10-15 seconds on low Quick softening if you forgot to take it out early
❌ Not Recommended N/A Reheating - serve this spread chilled or at room temp only

For best results when storing:

  • Use a shallow, airtight container - spreads the mixture thin so it chills faster and stays fresh longer
  • Press plastic wrap directly on the surface before sealing the lid to prevent a dry skin from forming
  • Stir before serving if the olive oil separates - a quick mix brings everything back together
  • Freeze in small portions for up to 1 month - thaw overnight in the fridge, stir well before serving
  • Don't leave at room temperature longer than 2 hours - cream cheese spoils quickly in warm conditions

Frequently Asked Questions

Can I make cream cheese and olive spread ahead of time?

Yes, make it up to 2 days ahead and store in the fridge. The flavors improve after sitting overnight as the garlic mellows and the olive brine distributes evenly.

How long does cream cheese and olive spread keep in the refrigerator?

The spread keeps 3 to 4 days in an airtight container. After 4 days the texture gets watery as the olive oil separates and the cream cheese breaks down.

How finely should olives be chopped for the spread?

Chop olives into ⅛-inch pieces (about 3mm). Pieces this size spread evenly through the cream cheese and stay on crackers instead of falling off in chunks.

What can I do if the spread tastes too salty?

Stir in more cream cheese (1 to 2 tablespoons at a time) or add a small dollop of plain Greek yogurt. Both dilute the salt without thinning the texture.

What are good pairing ideas for serving this spread?

Serve with crackers, sliced baguette, fresh vegetables, or toast points. For a fuller meal, pair with cured meats, hard cheeses, and marinated vegetables on a charcuterie board.

Cream Cheese and Olive Spread served on a plate

Cream Cheese and Olive Spread

No ratings yet
Softened cream cheese mixed with finely chopped olives, garlic, lemon juice, and fresh herbs creates a tangy spread perfect for crackers or fresh vegetables. Chilling for at least 30 minutes allows flavors to meld and firms up the texture for easy scooping. This quick no-cook spread works well for weeknight snacks and entertaining.
Print Recipe Pin Recipe
Prep Time 10 minutes mins
Cook Time 1 minute min
Total Time 11 minutes mins
Servings: 8 servings
Course: Appetizer
Cuisine: Mediterranean
Ingredients Method Notes

Ingredients
  

  • 8 oz cream cheese softened
  • 0.5 cup mixed olives pitted and finely chopped into ⅛-inch pieces
  • 2 cloves garlic minced finely
  • 2 tablespoon lemon juice fresh if possible
  • 1 tablespoon olive oil
  • 2 tablespoon fresh herbs parsley, dill, or basil, chopped finely
  • 0.25 teaspoon black pepper freshly cracked
  • 0.25 teaspoon red pepper flakes optional

Method
 

  1. Soften cream cheese at room temperature for 20 minutes. Press it with your finger - it should dent easily without cracking.
    8 oz cream cheese
  2. Drain olives and pat dry with paper towels, then chop into ⅛-inch pieces so they spread evenly without falling off crackers.
    0.5 cup mixed olives
  3. Mix cream cheese and lemon juice in a bowl until smooth, then stir in olive oil for a creamy, lump-free mixture.
    8 oz cream cheese, 2 tbsp lemon juice, 1 tbsp olive oil
  4. Fold in chopped olives, minced garlic, fresh herbs, black pepper, and red pepper flakes if using. Stir until evenly distributed.
    0.5 cup mixed olives, 2 cloves garlic, 2 tbsp fresh herbs, 0.25 tsp black pepper, 0.25 tsp red pepper flakes
  5. Cover and refrigerate for 30 to 60 minutes before serving to allow flavors to meld and the spread to firm up.

Notes

  • Use full-fat cream cheese softened to room temperature for smooth mixing without lumps.
  • Pat olives dry to prevent the spread from becoming too runny or salty.
  • Chill at least 30 minutes to let flavors blend and firm up the texture for easy spreading.

Tried this recipe?

Let us know how it was!

Air Fryer Stuffed Zucchini Boats

March 19, 2026

When weeknight dinners need vegetables that don't feel like a chore, stuffed zucchini boats deliver protein and veggies in one tidy package. The air fryer crisps the edges while keeping the center tender, no oven preheating required.

Air Fryer Stuffed Zucchini Boats served on a plate

Ground meat cooks into the zucchini instead of drying out. Cheese melts into a golden layer that holds everything together.

This works for meal prep Sundays or Tuesday nights when you want something that looks intentional but doesn't require babysitting.

QUICK SUMMARY

Air Fryer Stuffed Zucchini Boats pack ground meat, tomato sauce, and melted mozzarella into hollowed zucchini halves that cook in 18 minutes. The air fryer crisps the edges without drying out the filling. Salt the zucchini first to prevent soggy boats.

⏱️Time Reality: 30 minutes start to finish, 15 minutes hands-on
🔪Critical First Step: Hollow zucchini and salt for 10 minutes to draw moisture
⚠️Watch Out: Overcrowding blocks airflow and causes uneven cooking-space boats 1 inch apart

Table of Contents

Toggle
  • Why This Recipe Works
  • What You'll Need
    • Ingredient Details
  • Ingredient Swaps
  • What to Serve With It
  • Store and Reheat
  • Frequently Asked Questions
  • Air Fryer Stuffed Zucchini Boats
    • Method 
    • Tried this recipe?

Why This Recipe Works

High heat from the air fryer caramelizes the cheese topping while rendering fat from the meat filling. The zucchini acts as an edible bowl that steams from the inside while the outside gets crispy edges, something simple like chicken can't replicate when you need a complete meal in one component.

Quick Reference
⏱️
Prep Time
15 min
🔥
Cook Time
15-18 min
⏰
Total Time
30-33 min
🍽️
Servings
4 servings
📊
Difficulty
Easy
🏷️
Category
Main Dish
💡
Quick Tip
Hollow zucchini, don't overcrowd air fryer basket
🎯
Best For
Weeknight | Meal prep | Entertaining

Five things that make this work:

  • Pre-salting the zucchini draws out excess moisture that would otherwise steam the filling into mush and create watery boats
  • Sautéing the meat filling first ensures the ground beef cooks through completely before hitting the air fryer where it only needs to heat
  • Fine breadcrumbs bind the filling into a cohesive texture that stays packed instead of crumbling out when you cut into the boats
  • 375°F air fryer temperature crisps the zucchini edges and caramelizes cheese without burning the top or leaving raw centers
  • Single-layer spacing with gaps between boats allows hot air to circulate evenly and cook all sides at the same rate
Golden Rule
Salt hollowed zucchini halves for exactly 10 minutes, then pat completely dry-skipping this step guarantees soggy boats no matter how you cook them.

What You'll Need

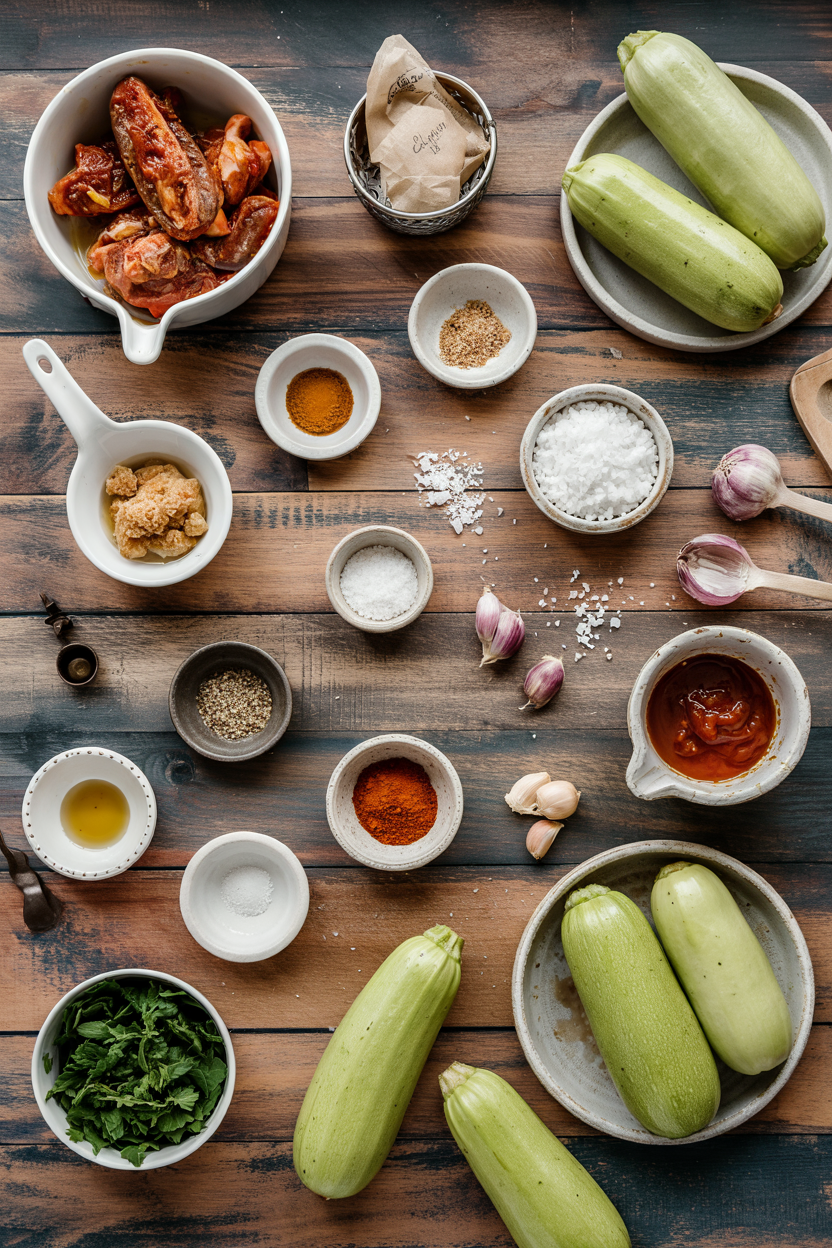
Ingredients for Air Fryer Stuffed Zucchini Boats

Shop for medium zucchini that feel firm with no soft spots-oversized ones have watery centers that won't hold up to stuffing. For a quick eggs dish that uses similar air fryer techniques, the shopping list overlaps with staple ingredients you likely have.

🥒
Base
  • 4 medium zucchini
  • 1 teaspoon salt (for drawing moisture)
🥩
Filling
  • 1 lb ground beef or turkey
  • ½ cup tomato sauce
  • ⅓ cup breadcrumbs
  • 1 cup shredded mozzarella
  • ¼ cup grated parmesan
🧄
Aromatics
  • ½ medium onion, diced
  • 3 cloves garlic, minced
  • 1 tablespoon olive oil
  • 1 teaspoon Italian seasoning

Ingredient Details

  • Zucchini
    Pick 6-8 inch zucchini that are straight and uniform-curved ones tip over in the air fryer basket
  • Ground meat
    93% lean beef works best for balanced fat without greasiness; 85% lean makes the filling swim in oil
  • Breadcrumbs
    Use plain fine breadcrumbs, not panko-panko's coarse texture won't bind the meat mixture properly
  • Mozzarella cheese
    Shred from a block instead of pre-shredded bags which contain anti-caking agents that prevent smooth melting
  • Tomato sauce
    Plain tomato sauce adds moisture without competing flavors; skip marinara which can make filling too wet
  • Garlic
    Fresh garlic minced fine integrates into the meat; jarred minced garlic clumps and tastes sharp
  • Italian seasoning
    Dried herbs bloom better in hot oil during sautéing; fresh herbs added raw taste grassy and raw

Ingredient Swaps

Ground turkey cuts fat by half but needs extra olive oil in the pan to prevent sticking. We keep a batch ready for nights like this-a similar airfryer-side recipe that works when you want variation without changing your shopping list.

Four swaps that work:

  • Ground beef → ground turkey or chicken: Use 93% lean poultry and add 1 tablespoon olive oil to the pan when sautéing-turkey dries out faster than beef
  • Mozzarella → dairy-free shreds: Expect less stretch and browning; add nutritional yeast for savory depth the dairy cheese naturally provides
  • Breadcrumbs → almond flour: Swap 1:1 for gluten-free or keto; almond flour absorbs less liquid so reduce tomato sauce by 2 tablespoons
  • Italian seasoning → fresh basil and oregano: Use 1 tablespoon fresh herbs for every 1 teaspoon dried; add after cooking to preserve bright flavor

Ground Beef (85% lean)

Works for: Rich flavor, juicy filling, forgiving if slightly overcooked

Skip if: Watching fat intake, want lighter texture, concerned about grease pooling

Ground Turkey (93% lean)

Works for: Lower calories, leaner protein, mild flavor that takes seasoning well

Skip if: Want rich taste, concerned about dry texture, prefer hands-off cooking

Plant-Based Ground

Works for: Vegetarian meals, similar texture to beef, cooks in same time

Skip if: Want authentic meat flavor, avoiding processed foods, on strict budget

Instructions

Total active time clocks in at 15 minutes with another 18 minutes of air fryer time where you're free to make sides. For a version that comes together quickly, this juicy chicken uses the same 375°F temperature and similar timing.

  1. Prep the zucchini: Cut each zucchini in half lengthwise and use a spoon to scoop out the center flesh, leaving a ¼-inch border all around. Sprinkle cut sides with salt, set on paper towels for 10 minutes, then pat completely dry with fresh towels.

  2. Cook the filling: Heat olive oil in a skillet over medium-high heat. Add diced onion and cook 3 minutes until soft, then add garlic and ground meat. Break meat into small pieces with a wooden spoon and cook 5-7 minutes until no pink remains. Stir in tomato sauce, breadcrumbs, and Italian seasoning.

  3. Stuff the boats: Preheat air fryer to 375°F for 3 minutes. Divide meat filling among hollowed zucchini halves, packing gently without overstuffing-filling should sit level with zucchini edges, not mounded above.

  4. Air fry in batches: Arrange 4 stuffed boats in air fryer basket with 1 inch between each. Cook 8 minutes, then flip carefully with tongs. Cook another 5 minutes, top with shredded mozzarella, and cook final 3-4 minutes until cheese melts and edges turn golden.

  5. Rest before serving: Let boats sit 3 minutes after removing from air fryer. The zucchini should feel tender when pierced with a fork but still hold its shape, and cheese should be bubbly with light brown spots.

Shortcut
Skip the skillet entirely by using pre-cooked ground meat from meal prep-just mix cold cooked meat with sauce and breadcrumbs, stuff boats, and add 2 minutes to air fryer time.

What to Serve With It

These boats need something to soak up the tomato-cheese juices that pool on the plate, planning your stuffed acorn squash dinner means picking sides that won't compete with the garlic and herbs already in the filling.

Side Dish Prep Why It Works How to Serve
Simple green salad Easy Crisp lettuce cuts richness, light vinaigrette balances cheese Toss with lemon juice and olive oil, serve alongside boats
Garlic bread Easy Crunchy texture contrasts soft zucchini, soaks up sauce Toast in air fryer last 3 minutes, serve warm
Roasted potatoes Medium Starchy base makes meal more filling, golden edges add crunch Roast at 400°F while boats cook, season with salt and herbs
Steamed broccoli Easy Mild flavor won't compete, adds green vegetable nutrition Steam 4 minutes, toss with butter and garlic salt
Caprese salad Easy Fresh tomato and mozzarella echo boat filling, basil brightens Slice tomatoes and mozzarella, drizzle with balsamic

Three ways to serve it:

  • Weeknight dinner: Pair with garlic bread and a simple green salad for a complete meal that takes 30 minutes total with minimal cleanup
  • Meal prep: Make boats ahead, refrigerate uncooked, then air fry fresh each night-add 3 minutes to cook time for cold boats
  • Entertaining: Serve with antipasto platter and herb focaccia for an Italian-style spread that looks impressive but requires minimal effort
Best Pick
Garlic bread toasted in the air fryer during the last 3 minutes of boat cooking time-it picks up residual flavor from the basket and comes out perfectly crispy.

Store and Reheat

Cooked boats keep 3-4 days in an airtight container but the zucchini softens more each day as moisture continues releasing from the vegetable. The air fryer re-crisps edges better than any other method, making leftovers taste freshly made instead of microwaved and sad.

Method Time Best For
🔥 Air Fryer 5-7 min at 350°F Re-crisping edges and melting cheese-tastes closest to fresh
🔥 Oven 10 min at 350°F Reheating multiple boats at once without texture loss
📦 Microwave 1-2 min on high Quick lunch reheating when texture doesn't matter

For best results when storing:

  • Cool boats completely before refrigerating: Condensation from warm zucchini creates excess moisture that makes reheated boats soggy
  • Store in shallow containers: Stack boats in single layers separated by parchment paper to prevent cheese from welding together
  • Freeze before adding cheese topping: Assemble boats with filling only, freeze up to 2 months, then add cheese when air frying from frozen
  • Add fresh cheese when reheating: Old cheese doesn't remelt well-scrape off cooled cheese and add fresh shreds for last 2 minutes of reheating
  • Pat surface dry before reheating: Use paper towels to remove moisture that collected during storage so boats crisp instead of steam

Frequently Asked Questions

How long to cook stuffed zucchini boats at 375°F in air fryer?

Cook 15-18 minutes total: 8 minutes on first side, flip, 5 minutes on second side, then add cheese and cook final 3-4 minutes until cheese melts and edges turn golden. Boats are done when zucchini feels tender when pierced with a fork but still holds its shape without collapsing.

Can I make air fryer stuffed zucchini boats ahead and refrigerate?

Assemble stuffed boats up to 24 hours ahead and refrigerate covered-add 3 minutes to air fryer time when cooking from cold. For longer storage, freeze assembled boats without cheese topping for up to 2 months, then air fry from frozen at 375°F for 22-25 minutes, adding cheese in last 4 minutes.

What sides pair well with stuffed zucchini boats?

Serve with garlic bread for soaking up juices, simple green salad for cutting richness, or roasted potatoes for a heartier meal. For entertaining, pair with caprese salad and herb focaccia to create an Italian-style spread.

How do I know when stuffed zucchini boats are fully cooked?

Zucchini should feel tender when pierced with a fork but still hold its boat shape without collapsing, cheese should be melted with light golden-brown spots, and edges should look slightly crispy. If meat was pre-cooked before stuffing, you're just heating through-internal temp should reach 165°F if starting with raw meat.

Can I use ground chicken instead of beef for stuffed zucchini boats?

Ground chicken works but needs 1 tablespoon olive oil added during sautéing to prevent drying since it's leaner than beef. Season more aggressively with salt, garlic, and Italian herbs since chicken has milder flavor that won't stand up to the tomato sauce without extra seasoning.

Air Fryer Stuffed Zucchini Boats served on a plate

Air Fryer Stuffed Zucchini Boats

No ratings yet
Air Fryer Stuffed Zucchini Boats are packed with ground meat, tomato sauce, and melted mozzarella inside hollowed zucchini halves. The air fryer crisps the edges while keeping the filling tender, delivering a complete weeknight meal quickly and easily.
Print Recipe Pin Recipe
Prep Time 15 minutes mins
Cook Time 18 minutes mins
Total Time 33 minutes mins
Servings: 4 servings
Course: Main Dish
Cuisine: Italian
Ingredients Equipment Method Notes

Ingredients
  

  • 4 medium zucchini cut in half lengthwise and hollowed, salt to draw moisture
  • 1 teaspoon salt for salting zucchini
  • 1 lb ground beef can substitute ground turkey or chicken with added olive oil
  • 0.5 cup tomato sauce plain tomato sauce
  • 0.33 cup breadcrumbs plain fine breadcrumbs, not panko
  • 1 cup mozzarella cheese shredded from a block
  • 0.25 cup parmesan cheese grated
  • 0.5 medium onion diced
  • 3 cloves garlic minced
  • 1 tablespoon olive oil
  • 1 teaspoon Italian seasoning dried herbs

Equipment

  • Air fryer Used to cook the stuffed zucchini boats and crisp edges
  • Skillet For sautéing onion, garlic, and ground meat
  • Wooden spoon To break up meat while cooking
  • Spoon To scoop out zucchini flesh

Method
 

  1. Cut each zucchini in half lengthwise and scoop out the center flesh leaving a ¼-inch border. Sprinkle cut sides with salt and set on paper towels for 10 minutes to draw out moisture. Pat completely dry with fresh towels.
    4 medium zucchini, 1 tsp salt
  2. Heat olive oil in skillet over medium-high heat. Cook diced onion for 3 minutes until soft, then add garlic and ground meat. Break meat into small pieces and cook 5-7 minutes until no pink remains. Stir in tomato sauce, breadcrumbs, and Italian seasoning.
    1 tbsp olive oil, 0.5 medium onion, 3 cloves garlic, 1 lb ground beef, 0.5 cup tomato sauce, 0.33 cup breadcrumbs, 1 tsp Italian seasoning
  3. Preheat air fryer to 375°F (190°C) for 3 minutes.
  4. Divide the meat filling evenly among the hollowed zucchini halves. Pack gently without overfilling; filling should be level with edges.
    4 medium zucchini, 1 lb ground beef, 0.5 cup tomato sauce, 0.33 cup breadcrumbs, 1 cup mozzarella cheese, 0.25 cup parmesan cheese
  5. Arrange 4 stuffed zucchini boats in the air fryer basket spacing them 1 inch apart to allow airflow. Cook for 8 minutes.
    4 medium zucchini
  6. Carefully flip each zucchini boat using tongs. Cook for 5 minutes on the other side.
    4 medium zucchini
  7. Top each boat with shredded mozzarella cheese and cook for an additional 3 to 4 minutes until cheese melts and edges turn golden brown.
    1 cup mozzarella cheese
  8. Remove zucchini boats from air fryer and let rest for 3 minutes before serving. The zucchini should be tender but hold its shape, with bubbly golden cheese on top.

Notes

  • Salt zucchini halves for exactly 10 minutes and pat dry to avoid soggy boats.
  • Do not overcrowd the air fryer basket; leave 1 inch between boats for even cooking.
  • Sauté the meat filling first to ensure fully cooked and flavorful filling before air frying.

Tried this recipe?

Let us know how it was!

Air Fryer Crab Cakes

March 19, 2026

Crispy crab cakes in under 30 minutes with minimal cleanup. The air fryer crisps the outside while keeping the crab meat tender and moist, no oil splatter or pan-watching required.

Air Fryer Crab Cakes served on a plate

You mix, form, and air fry. The high heat sets the breadcrumb coating into a golden shell that holds everything together.

This works for weeknight appetizers when you need something that feels special or meal prep when you want protein-packed lunches ready to reheat.

QUICK SUMMARY

Air fryer crab cakes deliver crispy exteriors and tender interiors in 12-14 minutes. Pat the crab meat dry before mixing to avoid soggy patties, and chill the formed cakes for 20-30 minutes before air frying. The 375°F heat crisps the breadcrumb coating without overcooking the delicate crab.

⏱️Time: 15 minutes prep, 12-14 minutes cook, plus 20-30 minutes chill time
🔑Key Move: Dry the crab meat thoroughly with paper towels before mixing to prevent excess moisture
⚠️Watch Out: Overmixing makes dense cakes - mix just until combined, about 30 seconds

Table of Contents

Toggle
  • Why This Recipe Works
  • What You'll Need
    • Ingredient Details
  • Ingredient Swaps
  • What to Serve With It
  • Store and Reheat
  • Frequently Asked Questions
  • Air Fryer Crab Cakes
    • Method 
    • Tried this recipe?

Why This Recipe Works

Lump crab meat keeps its chunky texture when you don't overwork it. The breadcrumbs absorb just enough moisture to bind without turning gummy, and the air fryer heat crisps the coating in half the time of oven baking. For a complete plate, pair these with flaky homemade shrimp recipe that uses the same quick-cook method.

Quick Reference
⏱️
Prep Time
15 min
🔥
Cook Time
12-14 min
⏰
Total Time
27-29 min
🍽️
Servings
4 servings (8 medium cakes)
📊
Difficulty
Easy
🏷️
Category
Appetizer
💡
Quick Tip
Do not overcrowd air fryer basket
🎯
Best For
Weeknight | Meal prep | Entertaining

Five things that make this work:

  • Dry crab meat prevents soggy patties - pat with paper towels before mixing to remove excess moisture
  • Chilling firms the mixture - 20-30 minutes in the fridge helps cakes hold their shape during cooking
  • 375°F crisps without burning - high enough to brown the breadcrumbs, low enough to cook the egg through
  • Flipping at 6-7 minutes - ensures both sides brown evenly and develop that golden crust
  • Internal temp of 145°F - confirms the egg is set and the cakes are safe to eat
Quick Tip
Preheat your air fryer for 3 minutes at 375°F before adding the cakes for more even browning

What You'll Need

Ingredients for Air Fryer Crab Cakes

Lump crab meat and dry breadcrumbs are the base. Most people skip something simple like peppers, but it balances the meal. You need enough binder to hold the cakes together but not so much that they taste like fried mayo.

🦐
Seafood
  • 1 lb lump crab meat
🫙
Binders
  • ⅓ cup mayonnaise
  • 1 large egg
  • ½ cup breadcrumbs
🧄
Seasonings
  • 1 tablespoon Dijon mustard
  • 1 teaspoon Worcestershire sauce
  • 1½ teaspoon Old Bay seasoning
  • ¼ teaspoon salt
🍋
Freshness
  • 2 tablespoon fresh parsley, chopped
  • 1 tablespoon lemon juice

Ingredient Details

  • Lump crab meat
    Use dry, not wet - pat with paper towels before mixing to prevent sogginess
  • Breadcrumbs
    Dry breadcrumbs absorb moisture better than fresh - panko works too for extra crunch
  • Egg
    Binds the mixture - use cold egg straight from the fridge for better texture
  • Old Bay seasoning
    The signature crab cake flavor - don't skip it or the cakes taste flat
  • Dijon mustard
    Adds tang and helps emulsify the mixture - yellow mustard works in a pinch
  • Mayonnaise
    Use full-fat for best moisture - light mayo can make cakes dry
  • Lemon juice
    Fresh lemon brightens the flavor - bottled works but tastes less vibrant

Ingredient Swaps

Canned crab meat costs less but loses the chunky texture. Rich mains need something to cut through, and peppers does exactly that. For a version that comes together quickly, this easy potato wedges recipe uses the same air fryer method with different timing.

Four swaps that work:

  • Gluten-free panko or crushed pork rinds for breadcrumbs - keeps the crispy coating intact, pork rinds add extra crunch
  • Greek yogurt for mayonnaise - cuts fat by half but may need an extra tablespoon of breadcrumbs to compensate for moisture
  • Flax egg (1 tablespoon flaxseed + 3 tablespoon water) for egg - works for egg allergies but takes 5 minutes to gel before mixing
  • Canned crab meat for lump crab - saves money but breaks apart more easily, add an extra 2 tablespoons breadcrumbs to help bind

Gluten-Free Panko

Works for: Same crisp texture, identical cooking time, no flavor change

Skip if: You prefer traditional breadcrumb flavor or want the softest interior

Greek Yogurt

Works for: Lower fat content, adds tang, same binding power with extra crumbs

Skip if: You want the richest, creamiest texture or don't want to adjust ratios

Instructions

You need about 27-29 minutes from start to finish, including chill time. The pork works best when it hits the table at the same time as the main. For a version that comes together quickly, smoky pork recipe uses the same high-heat approach with bone-in cuts.

  1. Mix the crab mixture. Pat crab meat dry with paper towels. Combine crab, mayonnaise, egg, breadcrumbs, Dijon mustard, Worcestershire sauce, Old Bay, parsley, lemon juice, and salt in a bowl. Stir gently with a fork until just combined, about 30 seconds - overmixing makes dense cakes.

  2. Form the patties. Scoop ¼ cup portions and shape into 8 patties about ¾ inch thick. Press gently to compact but don't squeeze hard. Place on a plate and refrigerate for 20-30 minutes to firm up - this helps them hold together during cooking.

  3. Preheat the air fryer. Set air fryer to 375°F and preheat for 3 minutes. Lightly spray the basket with cooking oil to prevent sticking.

  4. Air fry the crab cakes. Arrange patties in a single layer with space between each - don't overcrowd or they steam instead of crisp. Spray tops lightly with oil. Cook for 6-7 minutes, flip carefully with a spatula, spray again, and cook 6-7 minutes more until golden brown and internal temp reaches 145°F.

  5. Rest before serving. Transfer cakes to a plate and let rest 2-3 minutes. The coating sets and the interior stays moist. Serve immediately with lemon wedges or your choice of sauce.

Golden Rule
Mix just until combined - 30 seconds max - to keep cakes tender, not dense

What to Serve With It

These need something to cut the richness and fill out the plate. Most people pair crab cakes with heavy sides that compete instead of balance. Check weeknight crab legs meal ideas for more seafood pairing strategies that work year-round.

Side Dish Prep Why It Works How to Serve
Simple green salad Easy Light greens cut through the rich crab without adding weight Toss with lemon vinaigrette, serve chilled alongside hot cakes
Roasted asparagus Easy Earthy vegetable complements seafood, roasts in same timeframe Drizzle with olive oil, roast at 400°F for 12-15 minutes
Coleslaw Easy Crunchy texture contrasts tender crab, tangy dressing balances richness Make ahead, serve cold in small portions next to cakes
Garlic mashed potatoes Medium Creamy comfort side makes this feel like a full dinner Keep warm, portion onto plates before adding crab cakes on top
Corn on the cob Easy Sweet corn pairs naturally with seafood, classic pairing Boil or grill, serve with butter and Old Bay seasoning

Three ways to serve it:

  • As an appetizer - plate 2 cakes per person with lemon garlic aioli for dipping and a small green salad
  • For meal prep - store cooled cakes in single layers separated by parchment paper, reheat in air fryer at 350°F for 4-6 minutes
  • For entertaining - arrange on a platter with three sauce options (tartar, remoulade, lemon aioli) and lemon wedges
Best Pick
Lemon garlic aioli adds brightness and creamy tang without masking the crab flavor

Store and Reheat

These keep for 3-4 days in the fridge but lose crispness after day two. Shrimp adds the contrast this plate needs, but timing matters. For a version that comes together quickly, this rich beef uses longer oven time but delivers the same weeknight reliability.

Method Time Best For
🍳 Air Fryer 4-6 min at 350°F Restoring crispy texture, best overall method
🔥 Oven 8-10 min at 375°F Reheating multiple cakes when air fryer isn't available
📦 Microwave 1-2 min on medium Quick lunch reheating when you don't care about crispness

For best results when storing:

  • Cool completely before storing - hot cakes release steam that makes them soggy in the container
  • Layer with parchment paper - prevents cakes from sticking together or squishing in the fridge
  • Store in shallow containers - keeps cakes from getting crushed under their own weight
  • Freeze unbaked for 2 months - form patties, freeze on a tray until solid, then transfer to freezer bags
  • Thaw frozen cakes in the fridge overnight - cook from chilled, not frozen, for even browning

Frequently Asked Questions

Can I use canned crab meat for air fryer crab cakes?

Yes, but drain it well and add 2 extra tablespoons of breadcrumbs to compensate for the softer texture. Canned crab breaks apart more easily than lump crab, so handle the patties gently when forming and flipping.

How should I store leftover crab cakes and for how long?

Store cooled crab cakes in an airtight container in the fridge for 3-4 days. Layer them with parchment paper to prevent sticking and keep them in a shallow container so they don't get squished.

What internal temperature indicates crab cakes are done?

The internal temperature should reach 145°F (63°C) when measured with an instant-read thermometer inserted into the center. The cakes should also be golden brown on both sides with a firm texture.

Why did my crab cakes fall apart in the air fryer?

Under-bound mixture or skipping the chill time causes this. Refrigerate formed patties for 20-30 minutes before air frying, and make sure you're using enough egg and breadcrumbs to hold the mixture together.

Can I double or halve the crab cake recipe easily?

Yes, this recipe scales well in both directions. Just keep the cooking time the same - 12-14 minutes total at 375°F - and work in batches if you're doubling so you don't overcrowd the air fryer basket.

Air Fryer Crab Cakes served on a plate

Air Fryer Crab Cakes

No ratings yet
Air fryer crab cakes deliver crispy exteriors with tender, moist interiors in under 30 minutes. The high heat crisps the breadcrumb coating while keeping the lump crab meat chunky and flavorful, making these perfect for quick appetizers or meal prep.
Print Recipe Pin Recipe
Prep Time 15 minutes mins
Cook Time 14 minutes mins
Total Time 29 minutes mins
Servings: 4 servings
Course: Appetizer
Cuisine: American
Ingredients Equipment Method Notes

Ingredients
  

  • 1 lb lump crab meat pat dry with paper towels before mixing
  • ⅓ cup mayonnaise use full-fat for best moisture
  • 1 large egg cold from fridge for better texture
  • ½ cup breadcrumbs dry breadcrumbs absorb moisture better, panko optional
  • 1 tablespoon Dijon mustard adds tang and emulsifies mixture
  • 1 teaspoon Worcestershire sauce
  • 1.5 teaspoon Old Bay seasoning signature crab cake flavor
  • 0.25 teaspoon salt
  • 2 tablespoon fresh parsley chopped
  • 1 tablespoon lemon juice fresh preferred

Equipment

  • Air fryer Used to crisp crab cakes evenly without oil splatter
  • Mixing bowl To combine crab cake ingredients
  • Paper towels To dry crab meat before mixing
  • Spatula To flip crab cakes halfway through cooking

Method
 

  1. Pat lump crab meat dry with paper towels. In a mixing bowl, combine crab meat, mayonnaise, egg, breadcrumbs, Dijon mustard, Worcestershire sauce, Old Bay seasoning, parsley, lemon juice, and salt. Stir gently with a fork just until combined, about 30 seconds to avoid dense cakes.
    1 lb lump crab meat, ⅓ cup mayonnaise, 1 large egg, ½ cup breadcrumbs, 1 Tbsp Dijon mustard, 1 tsp Worcestershire sauce, 1.5 tsp Old Bay seasoning, 0.25 tsp salt, 2 Tbsp fresh parsley, 1 Tbsp lemon juice
  2. Scoop ¼ cup portions of the mixture and shape into 8 patties approximately ¾ inch thick. Press gently to compact but do not squeeze hard. Place patties on a plate and refrigerate for 20-30 minutes to help them hold together during cooking.
  3. Set the air fryer to 375°F (190°C) and preheat for 3 minutes. Lightly spray the basket with cooking oil to prevent sticking.
  4. Arrange patties in a single layer in the air fryer basket with space between each to avoid steaming. Spray tops lightly with oil. Cook for 6-7 minutes, then carefully flip each patty with a spatula, spray again, and cook an additional 6-7 minutes until golden brown and internal temperature reaches 145°F (63°C).
  5. Transfer crab cakes to a plate and let rest for 2-3 minutes to allow the coating to set. Serve immediately with lemon wedges or your choice of sauce.

Notes

  • Pat crab meat thoroughly dry to prevent soggy patties.
  • Chill formed patties 20-30 minutes before cooking to help them hold shape.
  • Flip crab cakes halfway through air frying to ensure even browning.

Tried this recipe?

Let us know how it was!

Air Fryer Pork Schnitzel

March 19, 2026

Breaded pork often comes out soggy or overcooked. The fix is using an air fryer instead of a pan and making sure your meat is thin before breading.

Air Fryer Pork Schnitzel served on a plate

High heat circulates around the schnitzel and crisps the breadcrumb coating without needing a pool of oil. The pork stays tender because thin cuts cook through in 10-12 minutes at 400°F.

This works for weeknight dinners when you want something crispy without standing over a stove or dealing with splattered grease.

QUICK SUMMARY

Pound thin pork loin, coat in flour-egg-breadcrumb layers, and air fry at 400°F for 10-12 minutes. The three-step breading sticks when the meat is dry and creates a crispy golden crust without deep frying. Serve with lemon wedges for brightness.

⏱️Time Reality: 15 minutes prep, 12 minutes cooking, no marinating needed
🔨First Critical Move: Pound pork to ¼-inch thickness so it cooks evenly
⚠️Watch Out: Wet meat causes soggy breading-pat dry before flouring

Why This Recipe Works

The air fryer mimics deep frying by circulating 400°F heat around the schnitzel instead of submerging it in oil. Thin pork cooks in the same time it takes for breadcrumbs to turn golden and crisp, so nothing dries out or burns while waiting for the other to finish.

Quick Reference
⏱️
Prep Time
15 min
🔥
Cook Time
10-12 min
⏰
Total Time
25-27 min
🍽️
Servings
4 servings
📊
Difficulty
Easy
🏷️
Category
Main Dish
💡
Quick Tip
Pound pork thin for even, crisp cooking
🎯
Best For
Weeknight | Meal prep

Here's what makes it work:

  • Pounding to ¼-inch thickness ensures the pork cooks through in the same 10-12 minutes it takes to crisp the crust
  • Seasoning each breading layer (flour, egg wash, breadcrumbs) builds flavor instead of relying on the meat alone
  • Light oil spray on both sides promotes browning without soaking the breadcrumbs or making them greasy
  • Spacing pieces 1 inch apart in the basket allows hot air to circulate and prevents steaming
  • Resting 5 minutes on a wire rack after cooking lets excess moisture escape so the crust stays crisp
Quick Tip
Use an instant-read thermometer to check for 145°F internal temp-overdone pork turns dry and tough even with a crispy crust

What You'll Need

Ingredients for Air Fryer Pork Schnitzel

The breading station uses three shallow bowls for flour, beaten eggs, and breadcrumbs. For a truly crispy texture with minimal prep, try pairing this with an easy potato wedges side that air fries alongside.

🥩
Protein
  • Pork loin or thin pork chops
🫙
Breading Station
  • All-purpose flour
  • Eggs (beaten)
  • Plain breadcrumbs or panko
🌶️
Seasonings
  • Salt
  • Black pepper
  • Optional: paprika or garlic powder
🫙
Finishing
  • Vegetable oil spray
  • Lemon wedges for serving

Ingredient Details

  • Pork loin or thin chops
    Use lean cuts; marbling adds flavor but can make breading slide off during cooking
  • All-purpose flour
    Creates the base layer that helps egg wash stick; season it with salt and pepper for better flavor
  • Eggs
    Beat until smooth; add a tablespoon of water to thin slightly for easier coating
  • Plain breadcrumbs or panko
    Panko creates a lighter, crunchier crust; plain breadcrumbs give a denser, more traditional texture
  • Vegetable oil spray
    Use a light mist-too much makes breadcrumbs greasy instead of crispy
  • Lemon wedges
    Squeeze fresh over the hot schnitzel; the acidity cuts through richness and brightens the flavor

Ingredient Swaps

Most people skip gluten-free versions, but the right flour swap keeps the crust crisp. If you want a lower-carb breading that still crisps up, check out another great pork recipe for timing tips.

Four swaps that work:

  • All-purpose flour → Gluten-free flour blend for a lighter crust with similar texture (gluten-free)
  • Plain breadcrumbs → Panko or crushed cornflakes for extra crunch; cornflakes add a slight sweetness
  • Vegetable oil spray → Olive oil spray for a stronger flavor with equally effective browning
  • Pork loin → Thinly pounded chicken breast for lighter flavor and faster cook time

Panko Breadcrumbs

Works for: Extra-crispy texture, lighter coating, stays crunchier longer

Skip if: You want traditional dense schnitzel crust or don't have panko on hand

Almond Flour Instead of Breadcrumbs

Works for: Low-carb meals, gluten-free diets, nutty flavor

Skip if: You expect a crispy golden crust-almond flour stays dense and browns faster

Flaxseed Egg Wash (1 tablespoon flax + 3 tablespoon water per egg)

Works for: Dairy-free cooking, vegan adaptations, binding dry ingredients

Skip if: You need a thin, even coating-flax creates a denser, stickier layer

Instructions

You need 25 minutes total: 15 for breading setup and 10-12 for air frying. A good plate needs a contrast in textures, and pairing this with a crispy homemade french fries recipe delivers exactly that-both finish at the same time.

  1. Pound the pork to ¼-inch thickness. Use a meat mallet or rolling pin between two sheets of plastic wrap. Thin, even pieces cook through without drying out.

  2. Set up three shallow bowls. Bowl 1: flour seasoned with salt and pepper. Bowl 2: beaten eggs with 1 tablespoon water. Bowl 3: breadcrumbs or panko seasoned with salt, pepper, and optional paprika.

  3. Coat each pork piece. Dredge in flour, shake off excess, dip in egg wash, then press into breadcrumbs. Pat the breadcrumbs gently so they stick. Place on a plate and repeat with remaining pieces.

  4. Spray and air fry. Preheat air fryer to 400°F. Spray both sides of breaded pork lightly with oil. Place in basket with 1 inch between pieces. Cook 10-12 minutes, flipping halfway, until golden and internal temp hits 145°F.

  5. Rest on a wire rack. Transfer cooked schnitzel to a wire rack for 5 minutes. This keeps the bottom from steaming and losing crispness. Serve with lemon wedges.

Watch Out
Don't stack breaded pieces before cooking-they'll stick together and the coating will peel off when you separate them

What to Serve With It

Rich mains need something to cut through, and a tangy side does exactly that. If you're planning a full German-style meal, check out pork buns meal planning ideas for timing your sides.

Side Dish Prep Why It Works How to Serve
Mashed potatoes Easy Creamy contrast to crispy schnitzel Serve warm with butter on top
Simple green salad Easy Lightens the meal, adds freshness Toss with vinaigrette, serve cold
Roasted vegetables Medium Adds nutrition and flavor depth Roast at 425°F while schnitzel rests
Spätzle or egg noodles Easy Traditional starch complement Boil, toss with butter, serve hot
Steamed green beans Easy Quick, crisp vegetable side Steam 5 minutes, season with salt

Three ways to serve it:

  • With potato salad and cucumber salad for a traditional German plate-make both ahead for easy assembly
  • Over a bed of arugula tossed with lemon vinaigrette for a lighter meal that still feels complete
  • Alongside sauerkraut and pretzel rolls for authentic texture contrast and satisfying chewiness
Best Pick
Serve with lemon wedges and creamy mustard sauce-the acidity cuts the richness and the mustard adds tangy depth

Store and Reheat

Schnitzel stays crisp for 3-4 days in the fridge if you store it right. The trick is keeping moisture away from the crust, and a quick potato salad dish stores equally well for meal prep.

Method Time Best For
🔥 Air Fryer 3-5 min at 350°F Restoring crispness without drying out the meat
🔥 Oven 10 min at 375°F Even reheating that maintains texture
📦 Microwave 30-60 sec Quick heat when crispiness doesn't matter

For best results when storing:

  • Let schnitzel cool completely before refrigerating-residual heat creates condensation that softens the crust
  • Store in an airtight container with paper towels between layers to absorb moisture
  • Refrigerate for 3-4 days max; the breading loses crispness after that even when reheated
  • Freeze for up to 1 month in freezer-safe bags with parchment between pieces; thaw overnight in the fridge before reheating
  • Reheat in the air fryer at 350°F for 3-5 minutes for best texture-oven works but takes longer

Frequently Asked Questions

How long to cook air fryer pork schnitzel at 400°F?

Cook for 10-12 minutes, flipping halfway through. Thin ¼-inch cutlets cook evenly and develop a golden crust without drying out.

Can I make air fryer pork schnitzel ahead and reheat?

Yes, store cooked schnitzel in the fridge for 3-4 days. Reheat in the air fryer at 350°F for 3-5 minutes to restore crispness.

What is the ideal internal temperature for pork schnitzel?

145°F is the safe internal temp for pork. Use an instant-read thermometer to check-overcooked pork dries out even with a crispy crust.

How to prevent the breading from falling off during cooking?

Pat the pork dry before breading and follow the three-step flour-egg-breadcrumb process without skipping. Dry meat and proper layering keep the coating stuck.

What are good side dishes to serve with pork schnitzel?

Mashed potatoes, potato salad, cucumber salad, roasted vegetables, or steamed green beans all work. Lemon wedges and mustard sauce add brightness and cut the richness.

Air Fryer Pork Schnitzel served on a plate

Air Fryer Pork Schnitzel

No ratings yet
Air Fryer Pork Schnitzel features thinly pounded pork coated in seasoned flour, egg wash, and breadcrumbs, air fried until golden and crisp. This method avoids soggy breading and keeps the pork tender with minimal oil. Serve with lemon wedges for a bright finish.
Print Recipe Pin Recipe
Prep Time 15 minutes mins
Cook Time 12 minutes mins
Total Time 27 minutes mins
Servings: 4 servings
Course: Main Dish
Cuisine: German
Ingredients Equipment Method Notes

Ingredients
  

  • 1 pound pork loin pounded to ¼-inch thickness, or thin pork chops
  • 1 cup all-purpose flour seasoned with salt and black pepper
  • 2 large eggs beaten with 1 tablespoon water
  • 1 cup plain breadcrumbs or panko seasoned with salt, black pepper, and optional paprika
  • vegetable oil spray light spray on both sides for browning
  • 4 wedges lemon for serving
  • salt for seasoning flour and breadcrumbs
  • black pepper for seasoning flour and breadcrumbs
  • paprika optional, for seasoning breadcrumbs

Equipment

  • Air fryer Used to cook the schnitzel evenly with hot circulating air
  • Meat mallet or rolling pin To pound pork to ¼-inch thickness
  • Three shallow bowls For flour, egg wash, and breadcrumb coating
  • Wire rack For resting schnitzel after air frying to keep crust crisp

Method
 

  1. Pound the pork to ¼-inch thickness using a meat mallet or rolling pin between two sheets of plastic wrap to ensure even and quick cooking.
    1 pound pork loin
  2. Set up three shallow bowls: one with seasoned flour (salt and pepper), second with beaten eggs mixed with 1 tablespoon water, and third with seasoned breadcrumbs (salt, pepper, and optional paprika).
    1 cup all-purpose flour, 2 large eggs, 1 cup plain breadcrumbs or panko, salt, black pepper, paprika
  3. Coat each pork piece by dredging in flour, shaking off excess, dipping into the egg wash, then pressing into the breadcrumbs. Gently pat the breadcrumbs so they adhere well. Place coated pieces on a plate.
    1 pound pork loin, 1 cup all-purpose flour, 2 large eggs, 1 cup plain breadcrumbs or panko
  4. Preheat the air fryer to 400°F. Lightly spray both sides of the breaded pork pieces with vegetable oil spray. Place them in the basket spaced about 1 inch apart to allow air circulation. Cook for 10-12 minutes, flipping halfway through, until golden brown and internal temperature reaches 145°F.
    vegetable oil spray
  5. Transfer the cooked schnitzel to a wire rack and let rest for 5 minutes to keep the crust crisp. Serve with lemon wedges.
    4 wedges lemon

Notes

  • Pound the pork thin for even cooking and a tender interior.
  • Pat meat dry before breading to prevent soggy coating.
  • Lightly spray oil to promote browning without grease.

Tried this recipe?

Let us know how it was!

Air Fryer Chicken Shawarma Thighs

March 19, 2026

Warm spices hitting crispy chicken edges while the inside stays juicy and tender. That's what happens when you marinate boneless thighs in shawarma spices and air fry them at 380°F for 18 minutes.

Air Fryer Chicken Shawarma Thighs served on a plate

The air fryer does the work while you prep sides. You get caramelized spots without standing over a skillet or heating up the oven.

This works for weeknight dinners when you need something fast that tastes like you put in effort. Great for meal prep too since the chicken reheats without turning rubbery.

QUICK SUMMARY

Air Fryer Chicken Shawarma Thighs delivers crispy edges and juicy interiors in 33 minutes total. Marinate boneless thighs in Middle Eastern spices for at least 1 hour, then air fry at 380°F for 18 minutes with one flip halfway through. Internal temp hits 165°F when done-rest 5 minutes before slicing.

⏱️Time Reality: 15 min hands-on, but marinate 1+ hour for full flavor
🔥First Move: Don't overcrowd the basket-leave 1 inch between pieces
⚠️Watch Out: Skipping the flip at 9 minutes causes uneven browning and pale spots

Table of Contents

Toggle
  • Why This Recipe Works
  • What You'll Need
    • Ingredient Details
  • Ingredient Swaps
  • What to Serve With It
  • Store and Reheat
  • Frequently Asked Questions
  • Air Fryer Chicken Shawarma Thighs
    • Method 
    • Tried this recipe?

Why This Recipe Works

High heat and minimal flipping create the contrast between crispy caramelized edges and tender meat. For readers exploring similar techniques with different proteins, our juicy homemade chicken recipe shows how the same method works for whole birds with adjusted timing.

Quick Reference
⏱️
Prep Time
15 min
🔥
Cook Time
18 min
⏰
Total Time
33 min
🍽️
Servings
4
📊
Difficulty
Easy
🏷️
Category
Main Dish
💡
Quick Tip
Marinate 1+ hour, cook 380°F 18 min crisp
🎯
Best For
Weeknight | Meal prep | Casual entertaining

Five things that make this work:

  • Boneless skinless thighs stay juicy - dark meat has more fat than breasts, which prevents drying out even at high heat
  • 380°F balances crisp and cook time - lower temps steam the chicken, higher temps burn the spices before the interior reaches 165°F
  • Flipping at 9 minutes ensures even browning - the bottom side crisps first, so flipping halfway gives both sides equal heat exposure
  • 1-inch spacing prevents steaming - crowded pieces trap moisture and turn soggy instead of developing caramelized edges
  • Resting 5 minutes redistributes juices - cutting immediately causes liquid to run out, leaving drier meat on the plate
Golden Rule
Always check internal temp with an instant-read thermometer-165°F is the safe minimum, and thighs can handle a few degrees higher without drying out

What You'll Need

Ingredients for Air Fryer Chicken Shawarma Thighs

Shop for boneless skinless thighs, Middle Eastern spices, and fresh garlic and lemon. For another air fryer main that uses similar pantry staples, check out this easy fries recipe that pairs well with Mediterranean flavors.
🍗
Protein
  • 1½ lbs boneless skinless chicken thighs
🌶️
Spices
  • 2 teaspoon ground cumin
  • 2 teaspoon ground coriander
  • 1 teaspoon ground paprika
  • ½ teaspoon ground turmeric
  • ¼ teaspoon ground cinnamon
  • Salt and pepper to taste
🧄
Aromatics & Acid
  • 3 cloves garlic, minced
  • 2 tablespoon lemon juice
  • 2 tablespoon olive oil

Ingredient Details

  • Boneless skinless chicken thighs
    Look for pieces roughly the same size so they cook evenly-trim any excess fat but leave some for moisture
  • Ground cumin and coriander
    These two spices form the foundation of shawarma flavor-buy from a store with high turnover for fresher taste
  • Garlic
    Fresh minced garlic delivers more punch than powder, but powder works in a pinch-use 1 teaspoon garlic powder if needed
  • Lemon juice
    Fresh lemon juice tenderizes the meat and adds brightness-bottled juice lacks the same acidity and flavor
  • Olive oil
    Coats the chicken and helps spices stick while promoting crispy edges in the air fryer-don't skip it
  • Paprika
    Sweet paprika adds color and mild flavor, smoked paprika adds deeper smoky notes-either works
  • Turmeric and cinnamon
    These add warmth and color but aren't essential-you can omit them if you don't have them on hand

Ingredient Swaps

You can adapt this recipe based on what proteins you have or which spices are in your pantry. If you're working with different chicken cuts or missing specific spices, these swaps keep the core shawarma flavor intact while adjusting cook times and intensity.

Four swaps that work:

  • Chicken breasts instead of thighs - reduce air fry time to 15-16 minutes since breasts have less fat and cook faster, but expect drier texture
  • Avocado oil instead of olive oil - neutral flavor with similar smoke point, works if you prefer less Mediterranean taste in the marinade
  • Lime juice instead of lemon juice - slightly sweeter and less acidic, but still tenderizes and adds brightness to balance the warm spices
  • Smoked paprika instead of sweet paprika - adds deeper smoky flavor that mimics charcoal-grilled shawarma, use same amount

Chicken Breasts

Works for: Lower fat preference, quicker cook time

Skip if: You want maximum juiciness and forgiving texture

Convection Oven at 400°F

Works for: No air fryer, cooking larger batches

Skip if: You want the crispiest edges-oven takes 20-22 minutes and yields less caramelization

Instructions

Plan for 15 minutes hands-on work plus 1+ hour marinating before you air fry for 18 minutes. The chicken needs one flip at the halfway point to ensure both sides crisp evenly without burning the spices.

  1. Mix the marinade and coat the chicken. Combine olive oil, minced garlic, lemon juice, cumin, coriander, paprika, turmeric, cinnamon, salt, and pepper in a mixing bowl. Add chicken thighs and toss until every piece is fully coated. Cover and refrigerate for at least 1 hour or up to 6 hours.

  2. Preheat the air fryer to 380°F. Let it run empty for 3-4 minutes so the basket reaches full temperature before adding chicken. This helps the spices sear on contact instead of steaming.

  3. Arrange chicken in a single layer with space between pieces. Place thighs in the basket leaving at least 1 inch of gap between each piece. Don't stack or overlap-cook in batches if needed.

  4. Air fry for 9 minutes, then flip and continue for 9 more minutes. Use tongs to turn each piece so the pale side faces up. Check internal temp with an instant-read thermometer-it should read 165°F in the thickest part.

  5. Rest for 5 minutes before slicing. Transfer chicken to a cutting board and let it sit uncovered. Slice against the grain into strips for wraps or leave whole for plating.

Shortcut
Skip the marinating time by using a fork to poke holes in the chicken before coating-this lets the spices penetrate faster, but you'll lose some depth of flavor

What to Serve With It

Rich spiced chicken needs sides that add freshness or starch to balance the warm flavors. Mediterranean staples like pita, hummus, and bright salads cut through the richness while rice or roasted vegetables provide a neutral base that soaks up any drippings.

Side Dish Prep Why It Works How to Serve
Pita bread Easy Warm pita adds chewiness and scoops up juices Warm in oven 2-3 min, slice into wedges
Cucumber-tomato salad Easy Cold crisp vegetables balance warm spices Dice cucumbers and tomatoes, toss with lemon and salt
Hummus Easy Creamy texture contrasts with crispy chicken edges Serve in a bowl with drizzle of olive oil
Rice pilaf Medium Neutral starch absorbs chicken drippings and spices Cook rice with butter and onions, fluff before plating
Tahini sauce Easy Nutty flavor complements shawarma spices without competing Whisk tahini with lemon juice and water until pourable

The plate feels incomplete without something fresh or a sauce to drizzle. For more pairing ideas that work with spiced chicken mains, see our guide to savory chicken dish ideas that covers vegetables, grains, and sauces.

Three ways to serve it:

  • Wrap style - slice chicken into strips, stuff in pita with diced tomatoes, cucumbers, pickled turnips, and tahini sauce
  • Plated dinner - serve whole thighs over rice pilaf with roasted vegetables and a side of garlic yogurt sauce
  • Meal prep bowls - divide sliced chicken among containers with quinoa, chopped salad, and hummus for grab-and-go lunches
Best Pick
Garlic yogurt sauce is the easiest complement-mix plain Greek yogurt with minced garlic, lemon juice, and salt, then chill for 10 minutes before serving

Store and Reheat

Cooked chicken stays good in the fridge for 3-4 days when stored properly in an airtight container. Let it cool completely before sealing to prevent condensation that makes the coating soggy. For extending shelf life, freeze portions up to 2 months. Try our homemade salad recipe as a make-ahead side that stores just as well.

Method Time Best For
🍳 Stovetop 3-4 min medium heat Quick single-serving reheat, retains some crispiness if you use a dry skillet
📦 Microwave 60-90 sec medium power Fastest option when you're rushed, but edges soften and lose crunch
🔥 Oven 6-8 min at 350°F Reheating multiple servings at once while maintaining texture closest to fresh-cooked

For best results when storing:

  • Cool chicken completely before refrigerating - hot chicken in a sealed container creates steam that softens the crispy coating
  • Store in shallow airtight containers - spreading pieces in a single layer prevents them from steaming each other and maintains better texture
  • Separate chicken from sauces - store tahini or yogurt sauce in a different container to keep chicken from getting soggy
  • Freeze in portion sizes - divide into meal-sized amounts so you only thaw what you need without repeated freeze-thaw cycles
  • Reheat in air fryer for crispiest results - 3-4 minutes at 350°F brings back caramelized edges better than microwave or stovetop

Frequently Asked Questions

How long to cook air fryer chicken shawarma thighs at 380°F?

Cook for 18 minutes total-9 minutes on the first side, flip, then 9 more minutes. Check internal temp reaches 165°F with an instant-read thermometer in the thickest part before removing.

Can I make air fryer chicken shawarma thighs ahead for meal prep?

Yes-marinate and cook the chicken, then store in airtight containers for 3-4 days in the fridge. Reheat in the air fryer at 350°F for 3-4 minutes to restore crispiness.

What goes with air fryer chicken shawarma thighs for sides or sauces?

Serve with pita bread, cucumber-tomato salad, hummus, rice pilaf, or tahini sauce. Garlic yogurt sauce and pickled turnips also balance the warm spices.

How do I know when air fryer chicken shawarma thighs are done safely?

Use an instant-read thermometer to check the thickest part-it should read 165°F minimum. The juices run clear and the meat pulls apart easily when fully cooked.

Can I use chicken breasts instead of thighs for air fryer shawarma?

Yes, but reduce cook time to 15-16 minutes total since breasts have less fat and cook faster. Expect drier texture compared to thighs-rest for 5 minutes before slicing to help retain moisture.

Air Fryer Chicken Shawarma Thighs served on a plate

Air Fryer Chicken Shawarma Thighs

No ratings yet
Air Fryer Chicken Shawarma Thighs deliver juicy, tender chicken with crispy, caramelized edges by marinating boneless skinless thighs in Middle Eastern spices and air frying at 380°F. This quick and easy method cooks the chicken in just 18 minutes, making it perfect for weeknight dinners or meal prep.
Print Recipe Pin Recipe
Prep Time 15 minutes mins
Cook Time 18 minutes mins
Total Time 33 minutes mins
Servings: 4 servings
Course: Main Dish
Cuisine: Middle Eastern
Ingredients Equipment Method Notes

Ingredients
  

  • 1.5 lbs boneless skinless chicken thighs trim excess fat but leave some for moisture
  • 2 teaspoon ground cumin fresh for best flavor
  • 2 teaspoon ground coriander fresh for best flavor
  • 1 teaspoon ground paprika sweet or smoked paprika works
  • 0.5 teaspoon ground turmeric optional for color and warmth
  • 0.25 teaspoon ground cinnamon optional for warmth
  • 3 cloves garlic minced fresh garlic for best flavor
  • 2 tablespoon lemon juice fresh for brightness and tenderizing
  • 2 tablespoon olive oil helps spices stick and crisps edges
  • to taste salt and pepper season to taste

Equipment

  • Air fryer Preheat and cook chicken thighs
  • Mixing bowl Combine marinade ingredients and coat chicken
  • Tongs Flip chicken halfway during cooking
  • Instant-read thermometer Check internal temperature reaches 165°F

Method
 

  1. In a mixing bowl, combine olive oil, minced garlic, lemon juice, ground cumin, ground coriander, ground paprika, ground turmeric, ground cinnamon, salt, and pepper. Toss the boneless skinless chicken thighs in the marinade until fully coated. Cover and refrigerate for at least 1 hour or up to 6 hours.
    1.5 lbs boneless skinless chicken thighs, 2 tsp ground cumin, 2 tsp ground coriander, 1 tsp ground paprika, 0.5 tsp ground turmeric, 0.25 tsp ground cinnamon, 3 cloves garlic, 2 tbsp lemon juice, 2 tbsp olive oil, to taste salt and pepper
  2. Preheat the air fryer to 380°F for 3 to 4 minutes to ensure the basket is fully heated before adding the chicken.
  3. Arrange the marinated chicken thighs in a single layer in the air fryer basket, leaving at least 1 inch of space between each piece to prevent steaming.
    1.5 lbs boneless skinless chicken thighs
  4. Air fry the chicken thighs at 380°F for 9 minutes. Using tongs, flip each piece so the other side faces up, then continue air frying for an additional 9 minutes. Check the internal temperature with an instant-read thermometer; it should reach 165°F at the thickest part.
    1.5 lbs boneless skinless chicken thighs
  5. Remove the chicken from the air fryer and let it rest uncovered on a cutting board for 5 minutes to redistribute the juices before slicing or serving.
    1.5 lbs boneless skinless chicken thighs

Notes

  • Do not overcrowd the air fryer basket - leave 1 inch between each chicken piece for best caramelization.
  • Flip chicken halfway at 9 minutes for even browning and crisp edges.
  • Always check internal temperature with an instant-read thermometer to ensure it reaches 165°F for safe consumption.

Tried this recipe?

Let us know how it was!

Beef and Mushroom Skillet

March 19, 2026

You need 25-30 minutes and one skillet. No marinating, no precooking, no multi-step prep.

Beef and Mushroom Skillet served on a plate

Ground beef browns while mushrooms caramelize, and a quick deglaze with beef broth pulls it all together. The cast iron skillet does the heavy lifting-high heat sears the beef, then the same pan finishes the mushrooms.

This is the kind of recipe you make on a Tuesday when the fridge is bare but you still want real food.

QUICK SUMMARY

Beef and Mushroom Skillet builds savory depth by searing ground beef first, then adding mushrooms to caramelize in the rendered fat. Medium-high heat creates browning without burning, and deglazing with beef broth scrapes up the flavorful bits stuck to the pan. The whole meal comes together in one skillet with minimal cleanup.

⏱️Time Reality: 10 minutes prep, 15-20 minutes cooking, no resting required
🔥Critical First Move: Sear beef 4-5 minutes without stirring for a proper crust
⚠️Watch Out: Don't add mushrooms too early or they'll steam instead of brown-wait until beef is mostly cooked

Table of Contents

Toggle
  • Why This Recipe Works
  • What You'll Need
    • Ingredient Details
  • Ingredient Swaps
  • What to Serve With It
  • Store and Reheat
  • Frequently Asked Questions
  • Beef and Mushroom Skillet
    • Method 
    • Tried this recipe?

Why This Recipe Works

High heat sears the beef to create a caramelized crust, then the mushrooms cook in the same pan to absorb the rendered fat and browned bits. For texture contrast that keeps each bite interesting, try this easy cauliflower recipe on the side.

Quick Reference
⏱️
Prep Time
10 min
🔥
Cook Time
15-20 min
⏰
Total Time
25-30 min
🍽️
Servings
4 servings
📊
Difficulty
Easy
🏷️
Category
Main Dish
💡
Quick Tip
Sear beef to brown before adding mushrooms
🎯
Best For
Weeknight | Meal prep | Budget

What makes this work:

  • Brown beef first, then add mushrooms-searing the ground beef on medium-high heat for 4-5 minutes without stirring creates a caramelized crust that locks in flavor
  • Maintain heat around 375°F-cast iron skillets hold heat better than non-stick pans, which means better browning and less sticking
  • Slice mushrooms ¼-inch thick-uniform cuts ensure even caramelization and prevent some pieces from turning mushy while others stay raw
  • Season in stages-salting the beef during browning pulls moisture to the surface for better crust formation, then adjust seasoning at the end for balanced flavor
  • Deglaze with ¼ cup beef broth-scraping the browned bits off the pan bottom adds umami depth and prevents waste
Quick Tip
Leave 2cm gaps between beef pieces in the pan-steam escapes, edges crisp, and you get proper browning instead of gray boiled meat.

What You'll Need

Ingredients for Beef and Mushroom Skillet

Shopping for this takes 10 minutes and one grocery trip. Ground beef and mushrooms do the work-you probably have the rest in your pantry already, and if you're building up from here, a rich beef on the side fills out the meal without doubling your effort.

🍗
Protein
  • 1 lb ground beef (85% lean)
🥬
Vegetables
  • 8 oz mushrooms (cremini or button)
  • 1 medium onion
  • 3 cloves garlic
🧄
Aromatics & Seasonings
  • 2 tablespoon butter
  • 1 tablespoon olive oil
  • 1 teaspoon dried thyme
  • Salt and black pepper
🥢
Liquid
  • ¼ cup beef broth

Ingredient Details

  • Ground beef (85% lean)
    Higher fat content means juicier beef-90% lean cooks drier, 80% lean releases more grease that you'll need to drain partway through
  • Mushrooms (cremini or button)
    Slice ¼-inch thick so they cook evenly-thicker slices stay raw in the center, thinner ones turn mushy
  • Onion
    Dice into ¼-inch pieces to match mushroom size-uniform cuts mean everything finishes at the same time
  • Garlic
    Mince finely and add after beef browns-garlic burns quickly on high heat and turns bitter
  • Butter
    Adds richness and helps browning-you can swap half with olive oil if the butter starts smoking
  • Beef broth
    Use low-sodium if you're salt-sensitive-you can always add more salt but you can't take it out
  • Thyme
    Dried thyme works better here than fresh-it releases flavor slowly and doesn't wilt into the pan

Ingredient Swaps

Most swaps work if you adjust cooking time and seasoning. Leaner proteins cook faster, fattier ones need draining midway.

Four swaps that work:

  • Ground beef → ground turkey or chicken-leaner but less flavor, cooks 2-3 minutes faster and needs extra salt to compensate for milder taste (budget | lean protein)
  • Butter → olive oil or dairy-free margarine-reduces dairy without affecting texture, though you lose some of the nutty browned-butter flavor (dairy-free)
  • Beef broth → vegetable broth or water-lighter flavor with less umami depth, add a pinch of soy sauce if you want savory richness back (dairy-free | budget)
  • Mushrooms → portobello or shiitake-denser texture and deeper earthy flavor, but shiitakes take 3-4 minutes longer to soften fully (flavor swap)

Ground Turkey

Works for: Leaner option with fewer calories, faster cooking time

Skip if: You want rich beefy flavor-turkey tastes milder and dries out easier

Portobello Mushrooms

Works for: Meatier texture with deeper umami, holds up to longer cooking

Skip if: You're short on time-portobellos take 3-4 minutes longer to soften

Instructions

Start to finish takes 25-30 minutes with one skillet. Brown the beef first without stirring-that's where the flavor comes from, and if you're plating this with something bright and fresh, something fresh like salad cuts through the richness without extra work.

  1. Heat cast iron skillet over medium-high heat for 2 minutes. Add 1 tablespoon olive oil and swirl to coat the bottom. The pan should shimmer but not smoke-around 375°F if you have an infrared thermometer.

  2. Add 1 lb ground beef in an even layer and let it sear undisturbed for 4-5 minutes. Break into large chunks with a wooden spoon only after the bottom browns. Season with ½ teaspoon salt and ¼ teaspoon black pepper, then cook another 2-3 minutes until beef reaches 160°F and no pink remains.

  3. Push beef to the edges of the pan and add 2 tablespoon butter to the center. Once melted, add diced onion and cook 3 minutes until softened. Stir in minced garlic and 1 teaspoon dried thyme, cooking 30 seconds until fragrant.

  4. Add 8 oz sliced mushrooms and spread in a single layer. Let them sit undisturbed for 2 minutes to brown on one side, then stir and cook another 3-4 minutes until golden and tender. If liquid pools in the pan, increase heat to evaporate it.

  5. Pour in ¼ cup beef broth and scrape the bottom of the pan with a wooden spoon to release browned bits. Simmer 2-3 minutes until liquid reduces by half and coats the beef and mushrooms. Taste and adjust salt and pepper before serving.

Golden Rule
Don't overcrowd the pan-leave 2cm gaps between beef pieces or they'll steam instead of sear, and you'll end up with gray boiled meat instead of a caramelized crust.

What to Serve With It

Rich beef needs something to cut through the heaviness. A crisp side or creamy starch balances each bite, and if you're planning beyond one night, complete teriyaki beef meal ideas show how to mix proteins and sides without repeating the same plate twice.

Side Dish Prep Why It Works How to Serve
Steamed Green Beans Easy Light, crisp contrast to rich skillet Steam 4-5 minutes, toss with butter and salt
Simple Mixed Greens Salad Easy Freshness cuts through beef richness Dress with olive oil and lemon juice
Mashed Potatoes Medium Comforting, creamy pairing that soaks up pan juices Make ahead and reheat while beef cooks
Rice or Quinoa Easy Absorbs sauce and adds texture without heaviness Cook in beef broth for extra flavor
Roasted Root Vegetables Medium Adds color and earthy sweetness Roast at 425°F while beef cooks

Three ways to serve it:

  • Over egg noodles-the wide noodles catch the pan sauce and turn this into a complete meal without extra sides
  • Tucked into warmed flour tortillas-add shredded cheese and sour cream for quick tacos that use up leftovers
  • Spooned over toasted bread-pile the beef and mushrooms on thick slices of sourdough for an open-faced sandwich
Best Pick
Mashed potatoes soak up the pan juices and add creamy contrast-make a batch on Sunday and reheat portions throughout the week for instant comfort food.

Store and Reheat

Leftovers keep 3-4 days in the fridge in a shallow airtight container. Cool the skillet to room temperature first-packing it hot creates condensation that makes mushrooms soggy, and if you're building a rotation of make-ahead meals, creamy potatoes side dish reheats well alongside this for a complete plate.

Method Time Best For
🍳 Stovetop 5-7 min over medium heat Retains texture, reheats evenly without drying out
📦 Microwave 2-3 min, stirring halfway Quick reheating, but watch for soggy mushrooms
🔥 Oven 15 min at 350°F Large portions, maintains crisp edges on beef

For best results when storing:

  • Transfer to shallow containers within 2 hours of cooking-deep containers trap heat in the center, which keeps the food in the temperature danger zone longer
  • Add a splash of beef broth when reheating-the liquid rehydrates the beef and prevents it from drying out in the microwave or on the stovetop
  • Freeze in single-serving portions for up to 3 months-flat freezer bags stack better than round containers and thaw faster when you need a quick meal
  • Reheat from frozen on the stovetop over low heat for 12-15 minutes-add ¼ cup broth and cover the pan to create steam that speeds thawing without burning the bottom
  • Skip reheating mushrooms in the microwave if texture matters-they turn rubbery and release water, but stovetop reheating keeps them tender

Frequently Asked Questions

Can I use ground turkey instead of beef in beef and mushroom skillet?

Yes, but reduce cooking time by 2-3 minutes since turkey cooks faster and dries out easier. Season with extra salt and add a tablespoon of butter at the end to compensate for turkey's milder flavor.

How long can I store leftover beef and mushroom skillet in the fridge?

3-4 days in an airtight container. Cool to room temperature before sealing-packing it hot creates condensation that makes mushrooms soggy.

How do I know when the beef and mushroom skillet is fully cooked?

Ground beef should reach 160°F with no pink remaining, and mushrooms should be golden and tender when pierced with a fork. If liquid pools in the pan, increase heat to evaporate it.

Why is my mushroom and beef skillet coming out soggy?

You're either overcrowding the pan or adding mushrooms too early. Cook beef first until mostly browned, then add mushrooms in a single layer with 2cm gaps between pieces so steam escapes instead of pooling.

What are good side dishes to serve with beef and mushroom skillet?

Mashed potatoes soak up pan juices, steamed green beans add crisp contrast, and rice or quinoa turns it into a complete meal. A simple mixed greens salad cuts through the richness without extra effort.

Beef and Mushroom Skillet served on a plate

Beef and Mushroom Skillet

No ratings yet
Beef and Mushroom Skillet combines seared ground beef and caramelized mushrooms cooked in one skillet for a rich, savory dish. High heat browns the beef to lock in flavor, while mushrooms absorb the rendered fat and browned bits, all finished with a quick deglaze of beef broth for depth.
Print Recipe Pin Recipe
Prep Time 10 minutes mins
Cook Time 20 minutes mins
Total Time 30 minutes mins
Servings: 4 servings
Course: Main Dish
Cuisine: American
Ingredients Equipment Method Notes

Ingredients
  

  • 1 lb ground beef 85% lean
  • 8 oz mushrooms sliced ¼-inch thick, cremini or button
  • 1 medium onion diced ¼-inch
  • 3 cloves garlic minced finely
  • 2 tablespoon butter
  • 1 tablespoon olive oil
  • 1 teaspoon dried thyme
  • 0.25 cup beef broth low-sodium preferred
  • 0.5 teaspoon salt added during cooking and adjusted to taste
  • 0.25 teaspoon black pepper added during cooking and adjusted to taste

Equipment

  • Cast iron skillet Used for searing beef and caramelizing mushrooms
  • Wooden spoon For breaking beef and scraping browned bits during deglaze

Method
 

  1. Heat cast iron skillet over medium-high heat for 2 minutes. Add 1 tablespoon olive oil and swirl to coat the bottom. The pan should shimmer but not smoke, around 375°F.
    1 tbsp olive oil
  2. Add 1 lb ground beef in an even layer and let it sear undisturbed for 4-5 minutes. Break into large chunks with a wooden spoon after the bottom browns. Season with ½ teaspoon salt and ¼ teaspoon black pepper, then cook another 2-3 minutes until beef reaches 160°F and no pink remains.
    1 lb ground beef, 0.5 tsp salt, 0.25 tsp black pepper
  3. Push beef to edges of pan and add 2 tablespoon butter to the center. Once melted, add diced onion and cook 3 minutes until softened. Stir in minced garlic and 1 teaspoon dried thyme, cooking 30 seconds until fragrant.
    2 tbsp butter, 1 medium onion, 3 cloves garlic, 1 tsp dried thyme
  4. Add 8 oz sliced mushrooms spreading in a single layer. Let them cook undisturbed for 2 minutes to brown on one side, then stir and cook another 3-4 minutes until golden and tender. Increase heat if liquid pools to evaporate moisture.
    8 oz mushrooms
  5. Pour in ¼ cup beef broth and scrape bottom of the pan with a wooden spoon to release browned bits. Simmer 2-3 minutes until liquid reduces by half and coats beef and mushrooms. Taste and adjust salt and pepper before serving.
    0.25 cup beef broth, 0.5 tsp salt, 0.25 tsp black pepper

Notes

  • Do not overcrowd the pan; leave 2cm gaps between beef pieces for proper searing and browning.
  • Add mushrooms after beef is mostly browned to avoid steaming them.
  • Use dried thyme for slow flavor release and better texture.

Tried this recipe?

Let us know how it was!

Moroccan-Spiced Chicken Thighs

March 19, 2026

Golden-brown chicken skin with warm spices clinging to every ridge. That's what happens when you sear bone-in thighs in a hot skillet before finishing them in the oven.

Moroccan-Spiced Chicken Thighs served on a plate

The spice blend does the flavor work while high heat handles the texture. You get crispy edges and juicy meat without constant flipping or basting.

This works for weeknight dinners when you want something that tastes intentional but doesn't require babysitting. The marinade takes 10 minutes to mix and the skillet does the rest.

QUICK SUMMARY

Moroccan-spiced chicken thighs seared skin-side down then roasted until the skin crisps and the meat hits 165°F. The bone and skin are non-negotiable - they protect the meat and create the texture contrast. Make this when you need a hands-off main that works for meal prep or last-minute entertaining.

⏱️Total Time: 40-45 minutes including 15 minutes hands-on prep
🔥Critical First Step: Pat skin completely dry before seasoning or it steams instead of crisps
⚠️Watch Out: Burnt spices happen from over-searing - transfer to oven after 3-4 minutes skin-side down

Table of Contents

Toggle
  • Why This Recipe Works
  • What You'll Need
    • Ingredient Details
  • Ingredient Swaps
  • What to Serve With It
  • Store and Reheat
  • Frequently Asked Questions
  • Moroccan-Spiced Chicken Thighs
    • Method 
    • Tried this recipe?

Why This Recipe Works

Bone-in thighs with intact skin create two textures in one piece of meat. Rich mains need something to cut through, and a crunchy slaw side dish does exactly that. For a version that comes together quickly, we keep a batch ready for nights like this.

Quick Reference
⏱️
Prep Time
15 min
🔥
Cook Time
25-30 min
⏰
Total Time
40-45 min
🍽️
Servings
4 servings
📊
Difficulty
Medium
🏷️
Category
Main Dish
💡
Quick Tip
Sear skin first for best crispiness
🎯
Best For
Weeknight | Meal prep | Entertaining

What makes this work:

  • Bone-in skin-on thighs stay juicy - The bone slows heat transfer and the skin renders fat that bastes the meat from the outside
  • Cumin and cinnamon create warm depth - Ground spices bloom in the hot skillet and develop complex flavor without extra steps
  • Searing then roasting splits the work - High stovetop heat crisps the skin while oven heat cooks the meat through evenly
  • Lemon juice balances richness - Acidity cuts through the fat and prevents the spices from tasting one-dimensional
  • Resting redistributes juices - Five minutes tented lets the meat reabsorb moisture instead of spilling it on the cutting board
Quick Tip
Pat chicken skin dry with paper towels for 2 minutes before seasoning - moisture is the enemy of crispy skin

What You'll Need

Ingredients for Moroccan-Spiced Chicken Thighs

Shopping for this recipe means hitting the spice aisle and the meat counter. Most people skip something juicy like chicken, but it balances the meal. For a version that comes together quickly, we keep a batch ready for nights like this.

🍗
Protein
  • 4 bone-in skin-on chicken thighs (6-8 oz each)
🌶️
Spices
  • 2 teaspoon ground cumin
  • 1½ teaspoon paprika
  • 1 teaspoon ground coriander
  • ½ teaspoon ground cinnamon
  • 1 teaspoon salt
  • ½ teaspoon black pepper
🧄
Aromatics & Acid
  • 4 garlic cloves, minced
  • 2 tablespoon lemon juice
  • 3 tablespoon olive oil
🫙
Optional
  • 1-2 teaspoon harissa paste
  • Fresh cilantro or parsley for garnish

Ingredient Details

  • Bone-in skin-on chicken thighs
    Look for thighs around 6-8 oz each so they cook evenly - avoid mixing small and large pieces in the same batch
  • Ground cumin
    Fresh cumin smells earthy and slightly citrusy - replace if it smells dusty or has been in your cabinet over a year
  • Paprika
    Regular paprika works but smoked paprika adds another layer - just don't use hot paprika unless you want significant heat
  • Ground cinnamon
    A little goes a long way - too much makes the dish taste like dessert instead of dinner
  • Garlic
    Fresh minced garlic crisps slightly in the marinade - jarred garlic burns faster and tastes sharper
  • Lemon juice
    Fresh-squeezed lemon juice brightens the spices better than bottled - one large lemon yields about 3 tablespoons
  • Olive oil
    Regular olive oil works fine here - save extra-virgin for finishing since high heat dulls its flavor anyway

Ingredient Swaps

Some substitutions change texture or cooking time. Most people skip homemade roja recipe, but it balances the meal. For a version that comes together quickly, we keep a batch ready for nights like this.

Four swaps that work:

  • Boneless skinless thighs instead of bone-in skin-on - Reduce oven time to 18-20 minutes and skip the sear step since there's no skin to crisp
  • Canola oil instead of olive oil - Neutral flavor and higher smoke point make this a straight swap with no ratio change
  • Chili powder plus cayenne instead of harissa - Start with ½ teaspoon chili powder and ¼ teaspoon cayenne then adjust for heat preference
  • Lime juice instead of lemon juice - Use the same amount but expect a slightly sweeter citrus note

Bone-In Skin-On Thighs

Works for: Crispy skin texture, juicy meat, traditional presentation, meal prep

Skip if: You need faster cooking or prefer boneless convenience

Boneless Skinless Thighs

Works for: Faster cooking, easier eating, lower fat content, budget meals

Skip if: You want crispy skin or worry about dry meat

Instructions

The whole process takes 40-45 minutes from start to finish. The chicken works best when it hits the table at the same time as warm crusty bread rolls. For a version that comes together quickly, we keep a batch ready for nights like this.

  1. Mix the spice blend and marinate the chicken. Combine cumin, paprika, coriander, cinnamon, salt, pepper, garlic, lemon juice, and olive oil in a mixing bowl. Pat chicken thighs completely dry with paper towels, then rub the spice mixture all over each piece, getting under the skin where possible. Let sit at room temperature for 15-30 minutes while you preheat the oven to 400°F.

  2. Sear the chicken skin-side down. Heat a cast iron or oven-safe skillet over medium-high heat for 2 minutes. Place thighs skin-side down in the hot pan, leaving at least 1 inch between pieces. Let cook undisturbed for 3-4 minutes until the skin turns golden brown and releases easily from the pan.

  3. Flip and transfer to the oven. Flip thighs so skin-side faces up. Transfer the entire skillet to the preheated oven. Roast for 20-25 minutes without opening the oven door.

  4. Check doneness with a thermometer. Insert an instant-read thermometer into the thickest part of one thigh without touching bone. You're looking for 165°F internal temperature. If it reads lower, return to the oven for 3-5 more minutes and check again.

  5. Rest before serving. Remove the skillet from the oven and tent loosely with foil. Let the chicken rest for 5 minutes so the juices redistribute. Garnish with fresh cilantro or parsley if using.

Watch Out
Don't overcrowd the pan - moisture trapped between thighs steams the skin instead of crisping it

What to Serve With It

Moroccan spices pair with sides that either echo the warm flavor profile or provide cooling contrast. The salad works best when it hits the table at the same time as the main, and weeknight pesto chicken breast meal ideas cover similar ground. For a version that comes together quickly, we keep a batch ready for nights like this.

Side Dish Prep Why It Works How to Serve
Couscous Easy Absorbs spices and pan juices without competing with chicken flavor Fluff with fork, drizzle with olive oil, season lightly
Roasted vegetables Medium Caramelized edges match chicken texture while adding color Toss carrots, zucchini, bell peppers with oil and roast alongside chicken
Simple green salad Easy Fresh, cool contrast cuts through rich spiced meat Dress lightly with lemon vinaigrette just before serving
Rice pilaf Easy Neutral base soaks up sauce without adding competing flavors Toast rice briefly before cooking, finish with butter
Warm pita bread Easy Perfect for scooping and mopping up every bit of spice and juice Warm in oven during chicken's resting time, serve whole or torn

Three ways to serve it:

  • Weeknight plate: Pile chicken over couscous with roasted vegetables on the side - everything goes on one plate for easy cleanup
  • Meal prep bowls: Divide chicken, rice pilaf, and roasted vegetables into containers - reheat portions throughout the week
  • Casual entertaining: Arrange chicken on a platter with a fresh salad side and warm pita, let guests build their own plates
Best Pick
Couscous with a spoonful of yogurt on top balances the warm spices and soaks up pan drippings perfectly

Store and Reheat

Cooked chicken thighs hold up better than breasts in the fridge because dark meat stays moist. Store within two hours of cooking in shallow airtight containers so they cool quickly and evenly. For nights when you need a complete dinner ready to go, a a fresh salad on the side rounds out the plate.

Method Time Best For
🍳 Stovetop 5-7 min over medium-low Quick reheating with crisp skin restoration - add 1 tablespoon water and cover
🔥 Oven 10-12 min at 350°F Even reheating preserving texture - place on baking sheet uncovered
📦 Microwave 1-2 min short bursts Fast reheating when you're in a rush - skin will soften but meat stays moist

For best results when storing:

  • Refrigerate in shallow containers - Stack thighs in a single layer so they cool to 40°F within 2 hours and prevent bacterial growth
  • Separate skin from sauce if meal prepping - Store leftover pan drippings separately and add back when reheating to keep skin from getting soggy
  • Freeze in portions for up to 2 months - Wrap individual thighs tightly in plastic wrap then foil before freezing so you can grab one or two at a time
  • Thaw overnight in the fridge - Never thaw at room temperature since chicken enters the danger zone quickly
  • Add moisture when reheating - Splash 1-2 tablespoons water or broth into the pan to create steam that prevents drying out

Frequently Asked Questions

How long to cook Moroccan-Spiced Chicken Thighs at 400°F?

Roast for 20-25 minutes after searing, checking with an instant-read thermometer at 20 minutes. Pull them when the internal temperature hits 165°F at the thickest part without touching bone.

Can I make Moroccan-Spiced Chicken Thighs ahead and refrigerate?

Marinate the thighs up to 2 hours ahead in the fridge, then bring to room temperature for 15 minutes before cooking. You can also cook them completely, refrigerate for up to 4 days, and reheat using the stovetop or oven methods above.

What goes well side dish-wise with Moroccan-Spiced Chicken Thighs?

Couscous soaks up the spices best, but rice pilaf, roasted vegetables, or a simple green salad all work. Warm pita bread is perfect for mopping up pan juices.

How do I know when Moroccan-Spiced Chicken Thighs are fully cooked?

Use an instant-read thermometer inserted into the thickest part without touching bone - you're looking for 165°F. The juices should run clear, not pink, when you pierce the meat.

Can I use boneless chicken thighs instead of bone-in for this recipe?

Boneless skinless thighs work but cook faster - reduce oven time to 18-20 minutes and skip the sear since there's no skin to crisp. Check temperature early to avoid drying them out.

Moroccan-Spiced Chicken Thighs served on a plate

Moroccan-Spiced Chicken Thighs

No ratings yet
Moroccan-Spiced Chicken Thighs deliver crispy skin and juicy meat thanks to searing in a hot skillet before roasting. A warm blend of spices including cumin, paprika, and cinnamon provides complex flavors balanced with fresh lemon juice.
Print Recipe Pin Recipe
Prep Time 15 minutes mins
Cook Time 25 minutes mins
Total Time 40 minutes mins
Servings: 4 servings
Course: Main Dish
Cuisine: Moroccan
Ingredients Equipment Method Notes

Ingredients
  

  • 4 pieces chicken thighs bone-in, skin-on, about 6-8 oz each
  • 2 teaspoon ground cumin
  • 1.5 teaspoon paprika
  • 1 teaspoon ground coriander
  • 0.5 teaspoon ground cinnamon
  • 1 teaspoon salt
  • 0.5 teaspoon black pepper
  • 4 cloves garlic minced
  • 2 tablespoon lemon juice freshly squeezed
  • 3 tablespoon olive oil
  • 1.5 teaspoon harissa paste optional
  • cilantro or parsley optional, for garnish

Equipment

  • Cast iron skillet Use for searing and oven roasting
  • Instant-read thermometer Check internal temperature of chicken

Method
 

  1. Combine cumin, paprika, coriander, cinnamon, salt, pepper, garlic, lemon juice, and olive oil in a bowl. Pat chicken thighs completely dry with paper towels. Rub spice mixture all over each thigh, getting under skin where possible. Let sit at room temperature for 15-30 minutes while you preheat oven to 400°F.
    2 tsp ground cumin, 1.5 tsp paprika, 1 tsp ground coriander, 0.5 tsp ground cinnamon, 1 tsp salt, 0.5 tsp black pepper, 4 cloves garlic, 2 tbsp lemon juice, 3 tbsp olive oil, 4 pieces chicken thighs
  2. Heat a cast iron or oven-safe skillet over medium-high heat for 2 minutes. Place chicken thighs skin-side down in the pan, leaving 1 inch between pieces. Cook undisturbed for 3-4 minutes until skin is golden brown and releases easily from pan.
    4 pieces chicken thighs
  3. Flip thighs skin-side up and transfer skillet to the preheated oven. Roast for 20-25 minutes without opening oven door.
    4 pieces chicken thighs
  4. Use an instant-read thermometer inserted into the thickest part of the thigh without touching bone. The internal temperature should be 165°F. If not reached, return to oven for 3-5 more minutes and check again.
    4 pieces chicken thighs
  5. Remove skillet from oven and tent chicken loosely with foil. Let rest for 5 minutes to redistribute juices. Garnish with fresh cilantro or parsley if desired.
    4 pieces chicken thighs, cilantro or parsley

Notes

  • Pat chicken skin dry thoroughly to ensure crispiness.
  • Do not overcrowd pan to avoid steaming skin.
  • Use instant-read thermometer to ensure safe internal temperature.

Tried this recipe?

Let us know how it was!

Garlic Butter Shrimp with Rice

March 19, 2026

When you need a weeknight dinner that feels special without the fuss, garlic butter shrimp delivers. One pan, 20 minutes, and enough garlicky sauce to make plain rice taste like you ordered takeout.

Garlic Butter Shrimp with Rice served on a plate

The shrimp cook in under 5 minutes while the rice simmers on its own. No marinating, no timing gymnastics, just butter, garlic, and lemon working together.

This is what we make for quick dinners when cooking feels like a chore but you still want something that looks intentional.

QUICK SUMMARY

Sautéed shrimp in garlic butter sauce served over fluffy white rice. The trick is cooking shrimp hot and fast - 2-3 minutes per side - so they stay tender. Rice cooks separately while you prep, then everything comes together in one quick assembly.

⏱️Timing: Start rice first, then sauté shrimp while it simmers - both finish together
🔑Critical Move: Cook garlic on medium-low heat for 1-2 minutes to soften without browning
⚠️Watch Out: Overcrowding the pan steams shrimp instead of searing - cook in batches if needed

Table of Contents

Toggle
  • Why This Recipe Works
  • What You'll Need
    • Ingredient Details
  • Ingredient Swaps
  • What to Serve With It
  • Store and Reheat
  • Frequently Asked Questions
  • Garlic Butter Shrimp with Rice
    • Method 
    • Tried this recipe?

Why This Recipe Works

Sautéing shrimp in butter with garlic creates a sauce that clings to every grain of rice. The high heat sears the shrimp quickly, keeping them tender while the butter browns just enough to add nutty depth. For a flaky salmon variation that uses a similar quick-cooking approach, that same timing principle keeps the protein moist.

Quick Reference
⏱️
Prep Time
10 min
🔥
Cook Time
20 min
⏰
Total Time
30 min
🍽️
Servings
4 servings
📊
Difficulty
Easy
🏷️
Category
Main Dish
💡
Quick Tip
Avoid overcooking shrimp; cook rice fluffy
🎯
Best For
Weeknight | Meal prep | Entertaining

What makes it work:

  • Peeled, deveined shrimp cook evenly in 2-3 minutes per side without shells getting in the way
  • Medium-low heat for garlic softens the cloves without burning, which would turn the sauce bitter
  • 1:2 rice to water ratio produces fluffy, separate grains that don't turn mushy
  • Lemon juice added off heat brightens the butter sauce without breaking the emulsion
  • Fresh parsley at the end keeps its color and gives a clean finish instead of turning dull
Quick Tip
Cook shrimp in a single layer with space between each piece - crowding creates steam instead of a sear

What You'll Need

Ingredients for Garlic Butter Shrimp with Rice

Everything for this meal comes from the seafood counter and pantry staples. You'll need fresh or frozen shrimp, butter, garlic, and long-grain rice. If you're stocking up on proteins, this quick potato wedges dish uses similar weeknight-friendly timing.

🦐
Protein
  • 1½ lbs shrimp (peeled, deveined, 16-20 count)
🧄
Aromatics
  • 6 cloves garlic (minced)
  • ¼ cup fresh parsley (chopped)
🍜
Base
  • 1½ cups long-grain white rice
  • 3 cups water or chicken broth
🧈
Sauce & Fat
  • 4 tablespoon unsalted butter
  • 2 tablespoon olive oil
  • 2 tablespoon lemon juice
  • Salt and black pepper to taste

Ingredient Details

  • Shrimp (16-20 count)
    This size cooks evenly in 2-3 minutes per side - smaller shrimp overcook too quickly
  • Unsalted butter
    Use unsalted so you control the salt level in the sauce - salted butter can make the dish too salty
  • Fresh garlic
    Minced cloves give pungent flavor that garlic powder can't match - use 6 cloves for noticeable garlic taste
  • Long-grain white rice
    Cooks to fluffy, separate grains in 15-18 minutes - short-grain rice turns sticky and clumps
  • Fresh parsley
    Adds bright green color and fresh herb flavor - add right before serving so it doesn't wilt
  • Lemon juice
    Brightens the rich butter sauce - add off heat to prevent the sauce from breaking
  • Olive oil
    Prevents butter from burning at medium heat - use half butter, half oil for stable cooking fat

Ingredient Swaps

You can adjust this recipe based on what's in your kitchen or dietary needs. Some swaps change texture or flavor, so pick based on what matters most to you. For more seafood ideas that work with similar ingredients, those variations use comparable techniques.

Common swaps that work:

  • Unsalted butter → olive oil or vegan butter - Makes the sauce lighter and dairy-free, though you lose some richness
  • Long-grain white rice → cauliflower rice - Cuts carbs significantly and cooks in 5 minutes instead of 18
  • Fresh shrimp → frozen shrimp - Thaw in cold water for 15 minutes and drain well to avoid extra moisture in the pan
  • Fresh parsley → cilantro or dried parsley - Cilantro adds citrusy notes, dried parsley works but lacks the fresh pop

Olive Oil Instead of Butter

Works for: Dairy-free diets, lighter sauce, preventing burned butter at high heat

Skip if: You want the rich, nutty flavor that butter adds to the garlic

Cauliflower Rice Instead of White Rice

Works for: Low-carb meals, faster cooking (5 min vs 18 min), lighter texture

Skip if: You want a filling starch base that soaks up the garlic butter sauce

Frozen Shrimp Instead of Fresh

Works for: Budget cooking, longer shelf life, available year-round

Skip if: You have access to fresh shrimp - frozen can add extra moisture if not thawed properly

Instructions

Start the rice first so it finishes as you sauté the shrimp. Both components cook separately and come together at the end. If you need crispy golden french fries on the side, those can cook while the rice simmers.

  1. Cook the rice. Combine rice and water (or broth) in a medium saucepan with a pinch of salt. Bring to a boil, reduce heat to low, cover, and simmer for 15-18 minutes until water absorbs. Remove from heat and let rest 5 minutes covered.

  2. Heat the pan. While rice cooks, heat olive oil and 2 tablespoons butter in a large skillet over medium heat. Pat shrimp dry with paper towels and season with salt and pepper.

  3. Sauté the shrimp. Add shrimp in a single layer - don't crowd the pan. Cook 2-3 minutes per side until pink and opaque. Remove shrimp to a plate.

  4. Cook the garlic. Lower heat to medium-low and add remaining 2 tablespoons butter to the same pan. Add minced garlic and cook 1-2 minutes, stirring constantly, until softened and fragrant but not browned.

  5. Finish and serve. Return shrimp to the pan and toss with garlic butter. Remove from heat, add lemon juice and chopped parsley, and stir to coat. Fluff rice with a fork and serve shrimp over rice, spooning extra sauce on top.

Golden Rule
Pull shrimp from the heat the moment they turn opaque - carryover heat finishes the cooking while you toss them with garlic butter

What to Serve With It

Garlic butter shrimp needs something green or crunchy to balance the richness. Steamed vegetables or a crisp salad cut through the butter without competing with the garlic. For fresh seafood dinner ideas that round out the plate, those combinations work with similar weeknight timing.

Side Dish Prep Why It Works How to Serve
Steamed Broccoli Easy Green vegetable balances richness, adds fiber and crunch Steam 4-5 min until tender-crisp, season with salt
Simple Garden Salad Easy Fresh greens and tangy vinaigrette cut through butter sauce Toss mixed greens with lemon vinaigrette, serve alongside
Roasted Asparagus Easy Complements garlic butter with earthy, slightly charred flavor Roast at 400°F for 12-15 min with olive oil and salt
Garlic Bread Easy Extra garlic flavor, perfect for soaking up leftover sauce Toast sliced baguette with butter and garlic in oven
Caesar Salad Medium Classic pairing for entertaining, creamy dressing complements shrimp Toss romaine with Caesar dressing and parmesan

Three ways to serve it:

  • Weeknight plate: Serve shrimp over rice with steamed broccoli on the side and a wedge of lemon
  • Casual gathering: Arrange on a large platter with Caesar salad and garlic bread for mopping up sauce
  • Meal prep bowls: Divide rice and shrimp into containers with roasted vegetables for grab-and-go lunches
Shortcut
Use pre-minced garlic from a jar and microwavable rice pouches - the dish still works when you need dinner in 10 minutes

Store and Reheat

Cooked shrimp and rice keep for 3-4 days in the fridge when stored in an airtight container. Separate storage isn't necessary, but reheat gently to avoid rubbery shrimp. If you're batch-cooking proteins, this easy ranch dressing side adds flavor to reheated portions without extra cooking.

Method Time Best For
🍳 Stovetop 3-5 min Best texture - add a tablespoon of butter and heat on medium-low, stirring gently
📦 Microwave 1-2 min Fastest option - heat in 30-second intervals, stirring between, covered with damp paper towel
🔥 Oven 10 min at 325°F Large portions - cover with foil, add splash of broth to prevent drying

For best results when storing:

  • Cool completely before refrigerating - hot food in a closed container creates condensation that makes rice mushy
  • Use shallow containers - food cools faster and reheats more evenly in containers no deeper than 2 inches
  • Add a splash of broth when reheating - helps loosen the sauce and prevents dry, clumpy rice
  • Freeze only the shrimp - cooked rice doesn't freeze well, but shrimp in garlic butter sauce freezes for up to 1 month
  • Reheat to 165°F - use a thermometer to ensure food safety, especially if frozen and thawed

Frequently Asked Questions

Can I substitute frozen shrimp for fresh shrimp in garlic butter shrimp with rice?

Yes - thaw frozen shrimp in a bowl of cold water for 15 minutes, then drain and pat completely dry with paper towels. Extra moisture from frozen shrimp can make the pan steam instead of sear, so drying is critical for getting a good texture.

How should I store leftovers and reheat garlic butter shrimp with rice?

Store in an airtight container in the fridge for 3-4 days. Reheat on the stovetop with a tablespoon of butter over medium-low heat for 3-5 minutes, stirring gently to avoid breaking up the shrimp.

How do I know when shrimp is perfectly cooked in this dish?

Shrimp is done when it turns opaque pink and forms a loose C-shape - this takes 2-3 minutes per side over medium heat. If shrimp curls into a tight O-shape, it's overcooked and will be rubbery.

Why did my garlic butter sauce separate and how can I fix it?

The sauce separates when butter gets too hot or cold liquid hits hot fat. Fix it by removing the pan from heat and whisking in a tablespoon of cold butter or a splash of water to re-emulsify the sauce.

What sides pair best with garlic butter shrimp and rice for dinner?

Steamed broccoli, roasted asparagus, or a simple garden salad work best - they add green vegetables and crunch without competing with the garlicky sauce. Garlic bread is good for soaking up extra butter.

Garlic Butter Shrimp with Rice served on a plate

Garlic Butter Shrimp with Rice

No ratings yet
Garlic butter shrimp sautéed quickly for tender, flavorful seafood served over fluffy white rice. The garlic butter sauce and lemon brighten the dish, making plain rice taste special and perfect for a quick weeknight dinner.
Print Recipe Pin Recipe
Prep Time 10 minutes mins
Cook Time 20 minutes mins
Total Time 30 minutes mins
Servings: 4 servings
Course: Main Dish
Cuisine: American
Ingredients Method Notes

Ingredients
  

  • 1.5 lbs shrimp peeled, deveined, 16-20 count
  • 6 cloves garlic minced
  • 0.25 cup parsley fresh, chopped
  • 1.5 cups long-grain white rice
  • 3 cups water or chicken broth
  • 4 tablespoon unsalted butter divided
  • 2 tablespoon olive oil
  • 2 tablespoon lemon juice
  • salt to taste
  • black pepper to taste

Method
 

  1. Combine rice and water or broth in a medium saucepan with a pinch of salt. Bring to a boil, then reduce heat to low, cover, and simmer for 15-18 minutes until liquid is absorbed. Remove from heat and let rest covered for 5 minutes.
    1.5 cups long-grain white rice, 3 cups water or chicken broth, salt
  2. While rice is cooking, heat olive oil and 2 tablespoons of butter in a large skillet over medium heat. Pat shrimp dry and season with salt and black pepper.
    2 tbsp olive oil, 4 tbsp unsalted butter, 1.5 lbs shrimp, salt, black pepper
  3. Add shrimp in a single layer without crowding the pan. Cook 2-3 minutes per side until pink and opaque. Remove shrimp to a plate.
    1.5 lbs shrimp
  4. Lower heat to medium-low and add remaining 2 tablespoons butter to the pan. Add minced garlic and cook 1-2 minutes, stirring constantly, until softened and fragrant but not browned.
    4 tbsp unsalted butter, 6 cloves garlic
  5. Return shrimp to the pan and toss with garlic butter sauce. Remove from heat, then stir in lemon juice and chopped parsley. Fluff the rice with a fork and serve shrimp over rice, spooning extra sauce on top.
    1.5 lbs shrimp, 4 tbsp unsalted butter, 2 tbsp lemon juice, 0.25 cup parsley

Notes

  • Cook shrimp in a single layer to avoid steaming and ensure a good sear.
  • Use medium-low heat for garlic to soften without browning and avoid bitterness.
  • Add lemon juice off the heat to brighten the sauce and prevent it from breaking.

Tried this recipe?

Let us know how it was!

5 Best Substitutes for Kalamata Olives in Mediterranean...

March 19, 2026

You reach for Kalamata olives and find an empty spot. A good swap fills the same gap.

5 Best Substitutes for Kalamata Olives in Mediterranean...

These options range from direct swaps to workable stand-ins. Match the briny, fruity character first, then adjust for texture.

QUICK SUMMARY

Gaeta olives deliver the closest match with similar brininess and mild fruitiness. Manzanilla olives work for cold dishes but bring firmer texture. Capers replicate saltiness without olive texture-best for sauces and dressings.

🫒Closest Match: Gaeta olives for comparable briny depth
⚖️Standard Ratio: 1:1 for most olive swaps
⚠️Common Mistake: Using mild canned olives in dishes needing fruity tang

5 Kalamata Olives Swaps That Keep Flavor Balanced

Some swaps stay close, while others require small adjustments. Pick based on whether you need brininess, texture, or both.

Quick Substitute Reference
#SubstituteBest ForRatioKey Note
1 Gaeta Olives ✨ Both 1:1 Milder but similarly briny
2 Manzanilla Olives 🍳 Cooking 1:1 Firmer texture, less fruity
3 Capers 🍳 Cooking 1 teaspoon per 1 tbsp Sharper tang, no texture match
4 Sun-Dried Tomatoes 🍳 Cooking Equal volume Rich umami, loses brininess
5 Black Olives ✨ Both 1:1 Softer, less complex flavor

1 - Gaeta Olives

Gaeta olives bring briny saltiness with a subtle fruity note. They soften when cooked and hold up in salads without overpowering other ingredients.

Use 1 tablespoon per 1 tablespoon of Kalamata olives. The flavor stays balanced but slightly less intense-add a pinch of red wine vinegar if you need more tang.

Gaeta Olives

Works for: Mediterranean salads, pasta dishes, cooked sauces

Skip if: recipe demands bold, fruity olive punch

Kalamata Olives

Works for: any dish needing briny depth and fruity complexity

Skip if: flavor needs to stay extremely mild

Here's what to know:

  • Purple-brown color stays visually close to Kalamata
  • Texture softens more quickly during cooking

2 - Manzanilla Olives

Manzanilla olives deliver crisp texture and clean brininess. They're firmer than Kalamata and bring a nutty undertone instead of fruity depth.

Use 1 tablespoon per 1 tablespoon in cold dishes or finishing touches. For salads or grain bowls, chop them finely to distribute flavor evenly.

Quick specs:

  • Green color shifts the visual-works best when appearance isn't critical
  • Firmer bite holds up in preparations where Kalamata would turn mushy
  • Less fruity depth means you may want extra lemon juice or vinegar
  • Spanish origin brings slightly different regional flavor profile

Skip if: you're cooking a dish where olives need to soften and blend into the sauce.

3 - Capers

Capers replicate the briny, salty hit without matching texture. Rinse them first to control the sharp vinegar tang.

Golden Rule
Use 1 teaspoon rinsed capers per 1 tablespoon Kalamata olives-capers pack more concentrated flavor.

They work in tapenades, dressings, and sauces where you're blending ingredients. Chop them to spread the salty punch evenly.

If you're short on capers too, what to use for capers covers briny alternatives with similar tang.

The essentials:

  • More floral and acidic than Kalamata
  • No meaty texture-they dissolve into sauces

Skip if: you need chunks of olive for texture or visual appeal.

4 - Sun-Dried Tomatoes

Sun-dried tomatoes bring rich umami and chewy texture. They're sweet-tart instead of briny, so they shift flavor direction.

Chop them to match the size of olive pieces in your recipe. Use equal volume and add a pinch of salt to compensate for lost brininess.

Key details:

  • Oil-packed versions add richness-dry-packed ones need rehydrating first
  • Concentrated sweetness balances savory dishes
  • Red color changes the look but blends well in cooked preparations

They work in pasta, grain salads, and roasted vegetable dishes where Mediterranean flavor is more important than strict brininess. Add a splash of lemon juice or vinegar to restore some acidity.

Skip if: you're making a dish where briny saltiness defines the flavor profile.

5 - Black Olives

Common canned black olives deliver mild brininess and soft texture. They're less fruity and earthy, but close enough for casual preparations.

UseRatioNotes
Pizza toppings1:1Softer texture, less intense flavor
Casual salads1:1Works when flavor doesn't need to stand out
Cooked sauces1:1Blends in without dominating

Use 1 tablespoon per 1 tablespoon of Kalamata olives. They won't bring the same fruity depth, so finish with extra herbs or a squeeze of lemon.

What to expect:

  • Less salt means you may need to adjust seasoning
  • Softer texture can turn mushy when cooked too long
  • Muted flavor works best in dishes with bold sauces or dressings
Shortcut
Drain well and pat dry before using to avoid watery texture.

Skip if: your recipe showcases Kalamata olives as a primary flavor.

How to Choose a Kalamata Olives Substitute

The best substitute depends on your recipe. Match brininess first, then decide whether texture or fruitiness matters more.

  • Closest match - Gaeta olives for similar briny depth
  • Easiest grab - Black olives for casual dishes
  • Dietary option - Capers for concentrated saltiness

Frequently Asked Questions

Can I use green olives instead of Kalamata olives?

Yes, but they're firmer and less fruity. Manzanilla olives work best-chop them finely and add a splash of vinegar to match the tangy depth.

What's the best substitute for Kalamata olives in Greek salad?

Gaeta olives deliver the closest briny flavor with mild fruitiness. Use them 1:1 and add a pinch of oregano to boost Mediterranean character.

Can I substitute capers for Kalamata olives in pasta?

Yes, but use 1 teaspoon rinsed capers per 1 tablespoon olives. Chop them to distribute the sharp brininess evenly-they won't provide texture but they'll add salty punch.

Do black olives taste the same as Kalamata olives?

No, black olives are milder and less fruity. They work for casual dishes like pizza or quick salads, but they won't replicate Kalamata's bold, tangy depth.

Can I use sun-dried tomatoes instead of Kalamata olives?

Yes, for cooked dishes where you want rich umami instead of brininess. Chop them to match olive size and add extra salt and a splash of lemon juice to balance the sweetness.

5 Best Substitutes for Kalamata Olives in Mediterranean...

5 Best Substitutes for Kalamata Olives

No ratings yet
Find effective substitutes for Kalamata olives based on matching briny, fruity flavor and texture. Choose from direct swaps like Gaeta olives or stand-ins such as capers and sun-dried tomatoes for sauces and salads.
Print Recipe Pin Recipe
Prep Time 6 minutes mins
Cook Time 5 minutes mins
Total Time 11 minutes mins
Servings: 4 servings
Course: Condiments, Substitutes
Cuisine: Mediterranean
Ingredients Method Notes

Ingredients
  

  • 1 tablespoon Gaeta Olives Milder but similarly briny; use 1:1 ratio; add pinch of red wine vinegar if more tang needed
  • 1 tablespoon Manzanilla Olives Firmer texture, less fruity; use 1:1 ratio in cold dishes; chop finely for salads or grain bowls
  • 1 teaspoon Capers Use 1 teaspoon rinsed capers per 1 tablespoon Kalamata olives; sharper tang, no texture match
  • Sun-Dried Tomatoes Use equal volume; chop to olive size; add pinch of salt and splash of lemon juice or vinegar
  • 1 tablespoon Black Olives Softer, less complex flavor; use 1:1 ratio; drain well and pat dry before using

Method
 

  1. Choose a substitute based on whether you need brininess, texture, or both in your dish.
  2. Drain or rinse ingredients like black olives and capers to avoid watery or overly salty texture.
  3. Chop substitutes such as Manzanilla olives, capers, and sun-dried tomatoes finely to spread flavor evenly.
  4. Use Gaeta, Manzanilla, and Black olives in a 1:1 ratio to replace Kalamata olives; use 1 teaspoon capers per 1 tablespoon olives; use equal volume sun-dried tomatoes.
  5. Adjust flavor by adding a pinch of vinegar or lemon juice when needed to restore tang and balance.
  6. Taste your dish and adjust seasoning last to ensure balanced briny and fruity profiles according to the substitute used.

Notes

Drain black olives well before use to prevent watery texture when substituting Kalamata olives.

Tried this recipe?

Let us know how it was!

Chicken and Rice Pilaf

March 19, 2026

Complete ForkliftKitchen Recipe Article

You need 40 minutes and one large skillet with a lid. No marinating, no multi-step prep, no complicated timing-just chicken, rice, and a handful of vegetables cooked together in one pan.

Chicken and Rice Pilaf served on a plate

The rice toasts in the pan before you add the broth, so each grain stays separate instead of clumping. The chicken cooks through while the rice simmers, and everything finishes at the same time.

This is what you make on a Tuesday when you want real dinner without washing six pans.

QUICK SUMMARY

One-pan chicken and rice pilaf cooks chicken thighs with long-grain rice, onion, and broth in a covered skillet. Toast the rice before adding liquid for fluffy, separate grains, and keep the lid on during simmering so the rice steams properly. The chicken stays tender, the rice stays light, and you only dirty one pan.

⏱️Time Reality: 40-45 minutes total-10 minutes prep, 30-35 minutes hands-off cooking
🔥First Critical Move: Toast rice in butter 3-4 minutes until translucent for nutty flavor and texture
⚠️Watch Out: Too much broth makes rice mushy-measure exactly 2 cups for 1 cup rice

Why This Recipe Works

Toasting rice in fat before adding liquid coats each grain and prevents clumping. For a version that comes together quickly, this easy chicken recipe uses boneless thighs that stay juicy even if you slightly overcook them.

Quick Reference
⏱️
Prep Time
10 min
🔥
Cook Time
30-35 min
⏰
Total Time
40-45 min
🍽️
Servings
4
📊
Difficulty
Easy
🏷️
Category
Main Dish
💡
Quick Tip
Toast rice for nutty, fluffy grains.
🎯
Best For
Weeknight | Meal prep

Five things that make this work:

  • Long-grain white rice stays separate - short-grain rice gets sticky and clumps together, breaking the fluffy texture you want
  • Cooking chicken first builds flavor - the browned bits on the pan bottom dissolve into the rice when you add the broth
  • Covering the pan traps steam - the rice needs constant moisture and heat for 18-20 minutes to cook through evenly
  • Resting off heat distributes moisture - five minutes with the lid on lets the rice absorb any remaining liquid without overcooking
  • Fresh herbs at the end keep their color - stirring in parsley or thyme after cooking preserves their bright aroma instead of dulling it
Quick Tip
Cut chicken into 1½-inch pieces so they cook at the same rate as the rice-larger chunks stay raw in the center while smaller bits dry out.

What You'll Need

Ingredients for Chicken and Rice Pilaf

Shop for long-grain rice, not jasmine or basmati, which cook differently. Most people skip chicken, but it balances the meal when you need simple homemade brussels for weeknight dinner planning.

🍗
Protein
  • 1½ pounds boneless skinless chicken thighs or breasts
🍜
Grains
  • 1 cup long-grain white rice
🥬
Vegetables
  • 1 medium onion, diced
  • 2 carrots, diced
  • 2 celery stalks, diced
🧄
Aromatics & Flavor
  • 3 cloves garlic, minced
  • 2 tablespoons butter or olive oil
  • 2 cups chicken broth
  • Fresh parsley or thyme
  • Salt and black pepper

Ingredient Details

  • Boneless skinless chicken thighs
    Dark meat stays juicy and tender even if you cook it a few minutes past 165°F-breasts dry out faster
  • Long-grain white rice
    Grains stay separate and fluffy when cooked-avoid jasmine or basmati which have different starch levels and cook times
  • Chicken broth
    Low-sodium broth lets you control salt levels-full-sodium broth can make the pilaf too salty after reducing
  • Onion
    Yellow onion adds sweetness and umami as it softens-white onion works but tastes sharper
  • Butter or olive oil
    Butter creates richer flavor, olive oil makes it dairy-free-both toast the rice and coat the grains equally well
  • Fresh herbs
    Add after cooking to keep their bright green color and fresh aroma-cooking them dulls the flavor
  • Carrots and celery
    Optional but add texture and sweetness-dice them the same size as the onion so everything cooks evenly

Ingredient Swaps

Brown rice needs 45-50 minutes and more liquid, so it changes the entire timing. Most chicken swaps work fine, but chicken breasts need shorter cooking to avoid drying out.

Four swaps that work:

  • Chicken breasts instead of thighs - leaner meat, shorter cook time (reduce by 3-4 minutes), less forgiving if overcooked
  • Olive oil instead of butter - slightly lighter flavor, dairy-free, same toasting and coating effect on rice
  • Vegetable broth instead of chicken broth - more neutral flavor, less rich, works for lighter taste preference
  • Dried herbs instead of fresh (use ⅓ amount) - less vibrant color and aroma, but convenient when fresh aren't available

Chicken Thighs

Works for: forgiving cook time, stays juicy, rich flavor

Skip if: you want leaner meat or faster cooking

Chicken Breasts

Works for: leaner protein, slightly faster cook, milder taste

Skip if: you tend to overcook chicken-breasts dry out quickly

Brown Rice

Works for: nuttier flavor, chewier texture, more fiber

Skip if: you don't want to add 15-20 minutes to cook time and adjust liquid amounts

Instructions

The entire dish cooks in one skillet in under 45 minutes. Brussels brings the color this plate needs, and for a version that comes together quickly, easy brussels side adds crisp texture without extra pans.

  1. Brown the chicken: Heat 1 tablespoon butter in a large skillet over medium-high heat. Season chicken with salt and pepper, then cook 4-5 minutes per side until golden brown. Remove and set aside-it doesn't need to be fully cooked yet.

  2. Toast the aromatics and rice: Add remaining butter to the same pan. Sauté onion, carrots, and celery for 3-4 minutes until softened. Add garlic and cook 30 seconds until fragrant. Stir in rice and toast 3-4 minutes, stirring often, until grains turn translucent.

  3. Add liquid and chicken: Pour in chicken broth and scrape up any browned bits from the pan bottom. Nestle the chicken pieces into the rice, bring to a simmer, then cover with a tight-fitting lid.

  4. Simmer covered: Reduce heat to low and cook 18-20 minutes without lifting the lid. The rice should absorb all the liquid and the chicken should reach 165°F on an instant-read thermometer.

  5. Rest and fluff: Remove from heat and let sit covered for 5 minutes. Fluff rice gently with a fork, stir in fresh herbs, and serve immediately.

Watch Out
Don't lift the lid during the 18-20 minute simmer-every time you peek, steam escapes and the rice takes longer to cook, leaving you with crunchy grains.

What to Serve With It

This pilaf needs something crisp or acidic to cut through the richness. A good brussels can make or break the plate, so we keep planning your garlic chicken dinner ready for busy weeks when you need complete meals fast.

Side Dish Prep Why It Works How to Serve
Steamed Green Beans Easy Light vegetable balances the richness without competing flavors Toss with butter and lemon zest, serve alongside pilaf
Simple Salad with Vinaigrette Easy Acidity cuts through savory pilaf and adds fresh crunch Dress greens right before serving to keep them crisp
Roasted Carrots Easy Natural sweetness complements savory pilaf flavors Roast at 425°F for 20 minutes with olive oil and thyme
Greek Yogurt with Lemon Zest Easy Cool creamy contrast balances warm, savory pilaf Dollop on top of each serving or serve on the side
Warm Flatbread Easy Great for scooping pilaf and soaking up any pan juices Warm in oven for 3-4 minutes before serving

Three ways to serve it:

  • Weeknight dinner: Pair with steamed green beans and a quick salad for a balanced 30-minute meal
  • Meal prep: Portion into containers with roasted vegetables for grab-and-go lunches that reheat well
  • Casual entertaining: Serve family-style in the skillet with warm flatbread and a yogurt sauce on the side
Best Pick
A dollop of this dip takes each bite somewhere more interesting-for a version that comes together quickly, classic dip dish adds tangy creaminess that balances the savory pilaf perfectly.

Store and Reheat

This holds in the fridge for 3-4 days in a shallow airtight container. Salad cuts through all that richness, so for a version that comes together quickly, light refreshing greens add crisp texture without extra cooking when you're reheating leftovers.

Method Time Best For
🍳 Stovetop 5-7 minutes over medium-low heat Even warming that retains texture-add 2 tablespoons water to prevent drying
📦 Microwave 2-3 minutes with cover Quick single servings-add water and cover to trap steam
🔥 Oven 10-15 minutes at 325°F Reheating larger portions evenly-cover with foil to prevent drying

For best results when storing:

  • Let cool completely before storing - hot pilaf creates condensation in the container, making rice soggy when you reheat it
  • Use shallow containers - pilaf cools faster in shallow containers and reheats more evenly without dried-out edges
  • Add a splash of broth when reheating - rice dries out in the fridge, so 2 tablespoons of broth brings back moisture
  • Freeze in portions - individual servings thaw faster and you only reheat what you need instead of the whole batch
  • Reheat chicken and rice together - separating them dries out both components and adds unnecessary steps

Frequently Asked Questions

How long to cook chicken and rice pilaf on the stovetop?

Cook covered on low heat for 18-20 minutes after bringing to a simmer. The chicken should reach 165°F and the rice should absorb all the liquid with separate, tender grains.

Can I make chicken and rice pilaf ahead and reheat?

Yes, store in the fridge for 3-4 days in an airtight container. Reheat on the stovetop with 2 tablespoons of broth to restore moisture, or microwave covered for 2-3 minutes.

How do I know when the chicken and rice pilaf is fully cooked?

Check that the chicken reaches 165°F with an instant-read thermometer and the rice grains are tender with a slight bite. All the liquid should be absorbed and the rice should look fluffy, not wet or clumpy.

What causes soggy rice and how can I avoid it?

Too much broth or cooking too long makes rice soggy. Use exactly 2 cups broth for 1 cup rice and don't lift the lid during the 18-20 minute simmer so steam doesn't escape.

What side dishes pair well with chicken and rice pilaf?

Steamed green beans, simple salad with vinaigrette, roasted carrots, or Greek yogurt with lemon zest all balance the savory richness. The fries works best when it hits the table at the same time as the main-for a version that comes together quickly, a crispy fries side adds hot, salty contrast without competing with the pilaf flavors.
Chicken and Rice Pilaf served on a plate

Chicken and Rice Pilaf

No ratings yet
This one-pan chicken and rice pilaf cooks chicken thighs with long-grain rice, onion, and broth in a covered skillet for tender, juicy chicken and fluffy rice. Toasting the rice before adding liquid prevents clumping, while simmering covered ensures even cooking. The dish finishes with fresh herbs for bright flavor and requires minimal cleanup.
Print Recipe Pin Recipe
Prep Time 10 minutes mins
Cook Time 35 minutes mins
Total Time 45 minutes mins
Servings: 4 servings
Course: Main Dish
Cuisine: American
Ingredients Equipment Method Notes

Ingredients
  

  • 1.5 pounds chicken thighs boneless, skinless, cut into 1.5-inch pieces
  • 1 cup long-grain white rice
  • 1 medium onion diced
  • 2 carrots diced
  • 2 stalks celery diced
  • 3 cloves garlic minced
  • 2 tablespoons butter or olive oil
  • 2 cups chicken broth
  • to taste salt
  • to taste black pepper
  • as needed fresh parsley or thyme chopped, stirred in after cooking

Equipment

  • large skillet with lid Used to brown chicken, toast rice, and simmer pilaf
  • Instant-read thermometer For checking chicken internal temperature

Method
 

  1. Heat 1 tablespoon butter in a large skillet over medium-high heat. Season the chicken pieces with salt and pepper, then cook for 4-5 minutes per side until golden brown. Remove the chicken from the skillet and set aside. It does not need to be fully cooked at this stage.
    1.5 pounds chicken thighs, 2 tablespoons butter, to taste salt, to taste black pepper
  2. Add the remaining butter to the skillet. Sauté the diced onion, carrots, and celery for 3-4 minutes until softened. Add the minced garlic and cook for 30 seconds until fragrant. Stir in the rice and toast for 3-4 minutes, stirring often, until the grains become translucent.
    1 medium onion, 2 carrots, 2 stalks celery, 3 cloves garlic, 2 tablespoons butter, 1 cup long-grain white rice
  3. Pour in the chicken broth and scrape up any browned bits from the skillet bottom with a spatula. Nestle the browned chicken pieces into the rice mixture. Bring to a simmer, then cover the skillet with a tight-fitting lid.
    2 cups chicken broth, 1.5 pounds chicken thighs
  4. Reduce the heat to low and cook covered for 18-20 minutes without lifting the lid, until the rice has absorbed all the liquid and the chicken reaches an internal temperature of 165°F.
  5. Remove the skillet from heat and let it sit covered for 5 minutes. Fluff the rice gently with a fork and stir in the fresh parsley or thyme. Serve immediately.
    as needed fresh parsley or thyme

Notes

  • Toast the rice before adding broth to keep grains separate and fluffy.
  • Do not lift the lid during simmering to prevent steam loss and uneven cooking.
  • Use boneless skinless chicken thighs for juicier meat that is forgiving if slightly overcooked.

Tried this recipe?

Let us know how it was!

Air Fryer Salmon Patties

March 19, 2026

Most salmon patties either fall apart in the air fryer or turn out dry and bland. The trick is using canned salmon with just enough binder to hold shape while the high heat crisps the outside.

Air Fryer Salmon Patties served on a plate

The air fryer creates a golden crust without any oil. You get texture and moisture in one pan with minimal cleanup.

This works when you need a high-protein dinner that doesn't require defrosting or marinating.

QUICK SUMMARY

Air Fryer Salmon Patties cook in 12 minutes at 375°F with a crispy golden exterior and moist flaky interior. Press patties firmly before cooking to prevent crumbling. The combination of breadcrumbs, egg, and mayonnaise creates a binder that holds together under high heat without drying out the salmon.

⏱️Total Time: 22 minutes from mixing to plating
🔑Key Move: Preheat air fryer 3 minutes before adding patties
⚠️Watch Out: Pat salmon dry if mixture feels wet-excess moisture makes soggy patties

Why This Recipe Works

High heat at 375°F renders moisture from the salmon while the breadcrumb coating crisps into a golden shell. For more seafood ideas, tender rangoon recipe uses similar air fryer timing and temperature.

Quick Reference
⏱️
Prep Time
10 min
🔥
Cook Time
12 min
⏰
Total Time
22 min
🍽️
Servings
4 servings
📊
Difficulty
Easy
🏷️
Category
Main Dish
💡
Quick Tip
Press patties firmly to avoid falling apart.
🎯
Best For
Weeknight

Five things that make this work:

  • Canned salmon stays moist - The natural fat and moisture in canned salmon prevents drying even at high heat
  • Breadcrumbs create structure - They absorb excess liquid while forming a stable base that holds patties together
  • Flipping at 6 minutes - Halfway flipping ensures even browning and prevents one side from burning
  • 375°F temperature - Hot enough to crisp the exterior but not so high that the inside stays raw
  • 3-minute rest after cooking - Resting firms up the texture and prevents patties from falling apart when you plate them
Quick Tip
Form patties about 3 inches diameter and ¾ inch thick for even cooking and easy flipping.

What You'll Need

Ingredients for Air Fryer Salmon Patties

The pantry staples do most of the work here. We keep a batch ready for nights like this - this fresh caesar salad pairs well when you want something crisp alongside.

🦐
Protein
  • Canned salmon (14.75 oz, drained)
  • Egg (1 large)
🫙
Binders
  • Breadcrumbs (½ cup)
  • Mayonnaise (¼ cup)
🧄
Aromatics & Seasoning
  • Onion (¼ cup, finely diced)
  • Parsley (2 tbsp, chopped)
  • Lemon juice (1 tbsp)
  • Dijon mustard (1 tsp)
🌶️
Spices
  • Salt (½ tsp)
  • Black pepper (¼ tsp)

Ingredient Details

  • Canned salmon
    Drain well and check for bones-pink or red salmon both work fine
  • Breadcrumbs
    Plain or seasoned work; add gradually to control moisture
  • Egg
    Use cold egg straight from fridge to help mixture bind without getting loose
  • Mayonnaise
    Full-fat mayo works best for moisture and richness
  • Onion
    Dice finely so pieces distribute evenly and don't create weak spots
  • Parsley
    Fresh parsley adds color and mild herby flavor without overpowering salmon
  • Lemon juice
    Fresh lemon juice brightens flavor-bottled works in a pinch

Ingredient Swaps

Budget constraints or dietary needs change what goes in the bowl. Most people skip swaps, but they balance the meal.

Four swaps that work:

  • Canned tuna instead of salmon - Milder flavor but same texture and cook time, costs less per can
  • Gluten-free breadcrumbs for regular - No texture difference, keeps the recipe gluten-free without adjusting other ingredients
  • Plain yogurt instead of mayonnaise - Less rich but still moist, use same amount for binding
  • Flax egg (1 tablespoon flaxseed + 3 tablespoon water) for regular egg - Slightly denser but still holds together, works for vegan or egg-free diets

Gluten-Free Breadcrumbs

Works for: Same binding power and texture as regular breadcrumbs

Skip if: You need bulk quantity on a tight budget

Plain Yogurt

Works for: Lower fat option that still keeps patties moist

Skip if: You want the richness mayo provides

Canned Tuna

Works for: Budget-friendly swap with similar flaky texture

Skip if: You want the distinct salmon flavor

Instructions

Mixing to serving takes 22 minutes with one flip halfway through. A good potato dish can make or break the plate-creamy buttery potato side cooks in the same time window.

  1. Preheat air fryer to 375°F for 3 minutes - This ensures the basket is hot enough to start crisping the patties immediately when they hit the surface.
  2. Mix salmon, breadcrumbs, egg, onion, mayo, lemon juice, mustard, parsley, salt, and pepper in a bowl until combined - Don't overmix or patties turn dense; stop when ingredients just come together.
  3. Form mixture into 4 patties, about 3 inches diameter and ¾ inch thick - Press firmly with your hands so they hold together during cooking and don't crumble when flipped.
  4. Place patties in air fryer basket with 1-inch gaps between each - Crowding prevents even browning and crispy edges; cook in batches if needed.
  5. Air fry 6 minutes, flip carefully with spatula, cook another 6 minutes until golden and internal temp reaches 145°F - Let patties rest 3 minutes after removing from basket to firm up texture.
Golden Rule
Check internal temperature with a probe thermometer at 145°F-no need to guess doneness by color alone.

What to Serve With It

These patties need something crisp or tangy to balance the richness. Rich mains need something to cut through, and simple homemade homemade does exactly that for dunking.

Side Dish Prep Why It Works How to Serve
Simple green salad Easy Fresh crunch balances rich salmon patties Toss greens with lemon vinaigrette, serve cold alongside
Steamed green beans Easy Light vegetable pairing adds color and nutrients Steam 5 minutes, toss with butter and garlic
Roasted baby potatoes Medium Crisp exterior complements patty texture Roast at 400°F for 25 minutes with olive oil and rosemary
Coleslaw Easy Creamy acidity cuts through salmon richness Use store-bought or homemade, serve cold in a bowl
Corn on the cob Easy Classic seafood pairing with natural sweetness Boil 5 minutes or grill, brush with butter

Three ways to serve it:

  • With tartar sauce and lemon wedges - Traditional seafood pairing that adds tangy brightness
  • On a bun with lettuce and tomato - Turn patties into a sandwich for casual lunches or picnics
  • Over mixed greens with balsamic vinaigrette - Makes a high-protein salad for meal prep or lighter dinners
Best Pick
Serve with lemon aioli or sweet chili sauce for dipping-creamy or spicy contrast enhances the mild salmon flavor.

Store and Reheat

Cooked patties hold texture for 3-4 days in the fridge. Most people skip reheating tips, but the right method keeps them crisp instead of soggy-a crispy potato side reheats the same way.

Method Time Best For
🔥 Air Fryer 4-5 min at 350°F Retaining crispiness on the exterior
🔥 Oven 8-10 min at 350°F Larger batches or gentle reheating
📦 Microwave 1-2 min Speed, but softens exterior texture

For best results when storing:

  • Cool patties completely before refrigerating - Hot patties create condensation that makes them soggy
  • Use shallow airtight containers - Stacking patties creates moisture buildup; layer with parchment paper between
  • Freeze up to 2 months in freezer bags - Press out air before sealing to prevent freezer burn
  • Reheat from frozen in air fryer - Add 2-3 minutes to cook time, no need to thaw first
  • Store sauce separately - Don't add tartar sauce or aioli until serving to keep patties crisp

Frequently Asked Questions

Can I use fresh salmon instead of canned for salmon patties?

Yes, cook and flake 12 ounces of fresh salmon first, then proceed with the recipe. Fresh salmon adds better texture but requires extra prep time compared to canned.

How should I store leftover salmon patties and for how long?

Store cooked patties in an airtight container in the fridge for 3-4 days. For longer storage, freeze up to 2 months in freezer-safe bags with parchment paper between layers.

What internal temperature indicates salmon patties are fully cooked?

Use a probe thermometer to check for 145°F in the center of the patty. The exterior should be golden brown with no raw spots visible when you cut into one.

My salmon patties are falling apart, how do I fix this?

Add another egg or 2-3 tablespoons more breadcrumbs to the mixture and press patties firmly before cooking. If the mixture feels too wet, pat the salmon dry before mixing.

What sides and sauces pair well with air fryer salmon patties?

Serve with tartar sauce, lemon aioli, or sweet chili sauce for dipping. Pair with coleslaw, steamed green beans, roasted potatoes, or a simple green salad to balance the richness.

Air Fryer Salmon Patties served on a plate

Air Fryer Salmon Patties

No ratings yet
Air Fryer Salmon Patties deliver crispy golden exteriors with moist, flaky interiors using canned salmon and a binder of breadcrumbs, egg, and mayonnaise. The air fryer crisps without oil, making these patties perfect for a high-protein, easy dinner with minimal cleanup.
Print Recipe Pin Recipe
Prep Time 10 minutes mins
Cook Time 12 minutes mins
Total Time 22 minutes mins
Servings: 4 servings
Course: Main Dish
Cuisine: American
Ingredients Equipment Method Notes

Ingredients
  

  • 14.75 oz canned salmon drained well and checked for bones
  • 0.5 cup breadcrumbs plain or seasoned, added gradually to control moisture
  • 1 large egg cold from fridge for better binding
  • 0.25 cup mayonnaise full-fat for moisture and richness
  • 0.25 cup onion finely diced
  • 2 tablespoon parsley fresh, chopped
  • 1 tablespoon lemon juice fresh or bottled
  • 1 teaspoon Dijon mustard
  • 0.5 teaspoon salt
  • 0.25 teaspoon black pepper

Equipment

  • Air fryer Used to cook the salmon patties at 375°F for a crispy exterior.
  • Mixing bowl To combine salmon, binders, and seasonings.
  • Spatula For flipping patties halfway through cooking.

Method
 

  1. Preheat the air fryer to 375°F for 3 minutes to ensure the basket is hot enough to start crisping the patties immediately.
  2. In a mixing bowl, combine the drained salmon, breadcrumbs, egg, finely diced onion, mayonnaise, lemon juice, Dijon mustard, chopped parsley, salt, and black pepper. Mix until just combined without overmixing.
    14.75 oz canned salmon, 0.5 cup breadcrumbs, 1 large egg, 0.25 cup onion, 0.25 cup mayonnaise, 1 tbsp lemon juice, 1 tsp Dijon mustard, 2 tbsp parsley, 0.5 tsp salt, 0.25 tsp black pepper
  3. Form the mixture into 4 patties, each about 3 inches in diameter and ¾ inch thick. Press firmly with your hands to help them hold together during cooking.
  4. Place the patties in the air fryer basket with at least 1-inch gaps between each patty for even cooking. Cook in batches if necessary.
  5. Air fry the patties for 6 minutes, then carefully flip each with a spatula. Continue cooking another 6 minutes until patties are golden and reach an internal temperature of 145°F.
  6. Remove patties from the air fryer and let them rest for 3 minutes to firm up the texture before serving.

Notes

  • Press patties firmly before cooking to avoid crumbling.
  • The internal temperature should reach 145°F to ensure doneness.
  • Pat salmon dry if the mixture feels too wet to prevent soggy patties.

Tried this recipe?

Let us know how it was!

5 Best Substitutes for Sultanas in Baking & Cooking

March 19, 2026

You're halfway through making hot cross buns and realize the sultanas are gone. The recipe calls for them specifically-not just any dried fruit.

5 Best Substitutes for Sultanas in Baking & Cooking

Sultanas bring mild sweetness and soft texture to baked goods without overpowering other flavors. They rehydrate easily and stay tender after baking.

Most dried fruits can step in with minor adjustments to taste and chew.

QUICK SUMMARY

For baking and cooking, we reach for golden raisins first-they match sultanas' softness and mild sweetness almost exactly. Currants work when you need smaller bursts of fruit, though they're tarter. Watch texture in baked goods: some swaps like dried apricots or dates are firmer or denser than sultanas and can change the final chew.

🏆Closest match: Golden raisins swap 1:1 in any recipe without flavor shift
⚖️Size matters: Currants use ¾ cup per 1 cup-they're smaller and more intense
🔥Texture check: Dates and apricots need chopping and taste richer than sultanas
Quick Substitute Reference
#SubstituteBest ForRatioKey Note
1 Golden Raisins ✨ Both 1:1 Nearly identical texture
2 Currants 🥧 Baking ¾ cup Smaller and tarter
3 Dried Apricots 🍳 Cooking ¾ cup Firmer with tang
4 Chopped Dates 🥧 Baking 1:1 Dense caramel sweetness
5 Dried Cranberries 🥗 Raw 1:1 Tart and chewy

1. Golden Raisins 🥇

Golden raisins are dried white grapes just like sultanas. The main difference is processing-golden raisins are often treated with sulfur dioxide to keep their lighter color.

Use 1 cup golden raisins per 1 cup sultanas in any recipe. They swap straight across without adjustments.

The flavor runs slightly sweeter and less tart than sultanas. The texture matches almost perfectly-soft, plump, and moist.

  • ✅ Works in baking and cooking without tweaks
  • ✅ Same soft chew and moisture content
  • ⚠️ Color may be a shade lighter
Best Pick
Golden raisins are the closest swap we've found-most people won't notice the difference.

2. Currants (Zante) 🫐

Zante currants are dried Black Corinth grapes. They're smaller than sultanas with a more concentrated tartness.

Use ¾ cup currants per 1 cup sultanas. They pack more intensity into less volume.

The size difference matters in baking-currants distribute more evenly through batters and doughs. The flavor tilts tart with less background sweetness than sultanas.

They work best in scones, cookies, and salads where small bursts of fruit fit the texture. If you're out of currants entirely, we've got quick Currant replacements to try that cover similar ground.

3. Dried Apricots (Chopped) 🍑

Chopped dried apricots bring tangy sweetness with a firmer bite. You'll need to chop them into sultana-sized pieces before using.

Use ¾ cup chopped dried apricots per 1 cup sultanas. Their stronger flavor means less goes further.

The texture stays chewier even after baking or cooking. The tang adds brightness to pilafs, tagines, and trail mixes where sultanas would normally soften into the background.

  • 🍳 In cooking: Holds shape better in rice dishes and stews
  • 🔪 Prep work: Chop into raisin-sized pieces first
  • ⚠️ Skip in delicate baking: The firm texture doesn't mimic sultanas' softness

Apricots work when you want the fruit to stand out. For more dried fruit options, check the common Apricot swaps ranked by texture and use.

4. Chopped Dates 🌴

Chopped dates swap moisture and natural sweetness for sultanas' light fruity notes. The flavor runs deeper-think caramel instead of grape.

Use 1 cup chopped dates per 1 cup sultanas. Chop them into small pieces so they distribute evenly.

The texture is denser and stickier than sultanas. Dates don't dry out the same way during baking, so they stay moist and heavy.

They shine in energy bars, dense cakes, and breakfast bakes where rich sweetness fits. They'll darken the final color more than sultanas would. Need more date options? See what to use for Date when texture and sweetness matter.

5. Dried Cranberries 🔴

Dried cranberries bring tart punch with chewy texture. Most commercial versions add sugar to balance cranberries' natural tartness.

Use 1 cup dried cranberries per 1 cup sultanas. They swap straight across but taste sharper.

The color shifts from golden-brown to red. The tartness changes the flavor profile-it won't taste like sultanas but works in recipes where contrast helps.

  • 🥗 Cold dishes: Great in salads and grain bowls
  • 🥣 Breakfast: Works in oatmeal and granola
  • ⚠️ Baking caution: The tartness can overpower delicate cakes

Cranberries work best when you're fine with a different flavor direction. For more berry-based swaps, we've got tested Cranberries replacements sorted by sweetness.

Picking Your Sultanas Swap

  • For baking: Golden raisins first, then currants if you want smaller fruit
  • For cooking: Dried apricots in pilafs and stews, golden raisins in everything else
  • For raw dishes: Golden raisins or cranberries depending on how much tang you want

Frequently Asked Questions

Can I use regular raisins instead of sultanas?

Yes, regular dark raisins work in most recipes. They're slightly chewier and less sweet than sultanas but function the same way. Use them 1:1 in baking and cooking-the main difference is a darker final color.

Are golden raisins and sultanas the same thing?

They're nearly identical-both are dried white grapes. Golden raisins are often treated with sulfur dioxide to maintain their lighter color, while sultanas may be naturally dried. The taste and texture differences are minimal enough that they swap 1:1 without issues.

Why use less currants than sultanas in recipes?

Currants are smaller and more intensely flavored than sultanas. Using ¾ cup currants per 1 cup sultanas accounts for their concentrated tartness and prevents the finished dish from tasting too sharp. Their size also means more individual fruit pieces per volume.

Do dried cranberries need soaking before using as a sultanas substitute?

No, dried cranberries don't need pre-soaking when swapping for sultanas. They rehydrate during cooking or baking just like sultanas do. Soaking can help if you're using them in cold salads or want to reduce their tartness slightly.

Can I mix different dried fruits to replace sultanas?

Yes, mixing dried fruits works well. Combine golden raisins with chopped apricots or dates to get closer to the volume you need while adding complexity. Just keep the total amount the same as the sultanas called for and chop larger fruits to match sultanas' size.

5 Best Substitutes for Sultanas in Baking & Cooking

5 Best Substitutes for Sultanas

No ratings yet
These 5 best substitutes for sultanas offer a range of options for baking, cooking, and raw dishes. Golden raisins provide the closest match with an identical texture and sweetness level. Smaller fruits like currants bring a tarter burst, while firmer dried apricots or denser chopped dates change texture and flavor profiles.
Print Recipe Pin Recipe
Prep Time 10 minutes mins
Cook Time 5 minutes mins
Total Time 15 minutes mins
Servings: 4 servings
Course: Kitchen Tips, Substitutes
Cuisine: Various
Ingredients Method Notes

Ingredients
  

  • 1 cup Golden Raisins Use 1:1 in any recipe with nearly identical texture and softness
  • 0.75 cup Currants Use ¾ cup per 1 cup sultanas; smaller size and tarter flavor
  • 0.75 cup Dried Apricots (Chopped) Use ¾ cup chopped apricots per 1 cup sultanas; firm texture and tangy sweetness
  • 1 cup Chopped Dates Use 1 cup chopped dates per 1 cup sultanas; dense caramel sweetness, chop evenly
  • 1 cup Dried Cranberries Use 1:1 ratio; tart and chewy with distinct flavor

Method
 

  1. Choose the substitute based on recipe type: golden raisins for most uses, currants for baking, apricots for cooking, dates for richer sweetness, cranberries for tartness.
  2. If needed, chop larger dried fruits like apricots and dates into sultana-sized pieces for even distribution.
  3. Measure the substitute according to the recommended ratios to match sultanas' volume and flavor impact.
  4. Incorporate the substitute into your recipe as you would sultanas, adjusting texture or sweetness if required.
  5. Taste and check texture before final cooking or baking to ensure the substitute fits your desired outcome.

Notes

  • Golden raisins are the best all-around substitute with minimal changes.
  • Use less currants due to their intense flavor and smaller size.
  • Chop firmer fruits like apricots and dates to mimic sultana texture.

Tried this recipe?

Let us know how it was!

5 Best Substitutes for Raisins in Baking Recipes

March 19, 2026

You pulled out the measuring cup mid-recipe. Not enough raisins. You need at least another quarter cup to hit the recipe amount.

5 Best Substitutes for Raisins in Baking Recipes

We've ranked five swaps by how closely they match raisins in texture, sweetness, and moisture. Pick based on whether your recipe relies more on chewiness or on the subtle caramel-sweet flavor raisins bring.

QUICK SUMMARY

Dried currants and golden raisins match raisins most closely in texture and sweetness. For tart brightness, try dried cranberries. Dates add deep caramel notes but bring more moisture. Chopped dried apricots work when you want tang over classic raisin sweetness.

🔄Closest match: Golden raisins keep the same chew and nearly identical sweetness
⚖️Core ratio: 1:1 for most swaps - adjust slightly for apricots (use ¾ cup)
⚠️Common mistake: Swapping dates in salads without accounting for their softer, stickier texture

5 Simple Raisins Swaps to Save Time

These five replacements cover different flavor angles and cooking styles. Some lean tart, others lean sweet. Match the swap to what your recipe needs most - texture, moisture, or specific sweetness.

Quick Substitute Reference
#SubstituteBest ForRatioKey Note
1 Dried Currants ✨ Both 1:1 More tart than raisins
2 Dried Cranberries 🥧 Baking 1:1 Often sweetened; check label
3 Chopped Dates 🥧 Baking 1:1 Richer, more moisture
4 Golden Raisins ✨ Both 1:1 Milder, lighter flavor
5 Chopped Dried Apricots ✨ Both ¾ cup per 1 cup Tangy, less sweet

1 - Currants

Currants give you the chew and natural sweetness raisins provide, but with a noticeably tart edge. They work in oatmeal cookies, grain salads, and breakfast porridge where a bit of brightness helps.

Swap 1:1. The tartness balances sugary batters well, but if your recipe already has citrus or vinegar, taste as you go.

Currants in Baking

Works for: Scones, cookies, sweet breads where tartness adds contrast

Skip if: You want the mellow, caramel-sweet flavor classic raisins bring

Currants in Savory Dishes

Works for: Grain salads, couscous, rice pilafs that benefit from tangy pops

Skip if: The recipe relies on raisins to add sweetness without any tartness

Here's what to know:

  • They plump slightly less than raisins - soak in warm water for 5 minutes if you need more moisture
  • Flavor is more grapey and tart, less sweet and mellow

If you're short on currants too, currant swaps for baking covers firmer dried-fruit picks.

2 - Cranberries

Dried cranberries match raisins in chewiness and bring natural sweetness, but most commercial brands add sugar to balance the fruit's tartness. They shine in trail mixes, granola, and oatmeal cookies where bright, tangy-sweet flavor works.

Use 1:1. Check the ingredient label - if sugar is listed, your batter or dough might end up sweeter than expected.

The essentials:

  • They hold their shape better than raisins when baked, staying plump and distinct
  • Tartness cuts through rich doughs and buttery batters - great for scones and muffins

Missing cranberries as well? Dried cranberry swaps ranked has picks for similar chew.

Skip if: You want less tartness and no added sugar.

3 - Dates

Dates bring the chewiness and moisture raisins add, plus a deep caramel-like sweetness that feels richer and more intense. They work in sticky bar cookies, energy bites, and dense quick breads.

Best Pick
For recipes where you want more natural sweetness and don't mind a softer, stickier texture than raisins give.

Swap 1:1. Chop them small so they distribute evenly - larger pieces can clump. They add more moisture than raisins, so your batter may feel slightly wetter before baking.

If you're out of dates too, date swaps by use covers sticky-sweet picks.

Skip if: You need firmer pieces that stay separate, or if you're making a salad where sticky texture won't work.

4 - Golden Raisins

Golden raisins are nearly identical to regular raisins in texture and sweetness but offer a lighter, slightly fruitier flavor. They work in stuffing, rice pilafs, chutneys, and baked goods where you want the classic raisin chew without the darker caramel notes.

Swap 1:1. They plump and soften at the same rate as regular raisins. The main difference is flavor - golden raisins taste brighter and less molasses-sweet.

Shortcut
If the recipe just says "raisins" with no color specified, golden raisins work without any other changes.

They're processed with sulfur dioxide to keep their light color, which also preserves a fresher, fruitier taste. Missing both kinds? Raisin swaps by recipe has backups for different textures.

Skip if: The recipe specifically needs the deeper, caramel-sweet flavor of dark raisins.

5 - Dried Apricots

Chopped dried apricots give you chewiness and natural sweetness, but with a distinct tart, tangy flavor that's brighter and less mellow than raisins. They work in savory grain salads, Moroccan-style tagines, and baked goods where a fruity tang adds contrast.

Use ¾ cup chopped apricots per 1 cup raisins. They're larger and denser, so chopping them small helps them blend into batters and doughs.

UseRatioNotes
Baking (cookies, muffins)¾ cup per 1 cupChop fine; adds tang and moisture
Salads (grain, green)¾ cup per 1 cupFirmer chew; bright, fruity flavor
Savory cooking (pilafs, tagines)¾ cup per 1 cupTang balances spices and richness

Key details:

  • They bring more moisture than raisins - reduce added liquid slightly if your batter looks wet
  • Flavor is tangier and more fruit-forward, less sweet and mellow
  • Color shifts recipes toward orange - fine in most dishes, but noticeable in pale batters

Out of apricots too? Dried apricot swaps has options for similar chew.

Skip if: You want less fruit tang and firmer pieces that stay separate.

Final Thoughts on Swapping Raisins

The best substitute depends on your recipe. Match the swap to what raisins do - add chewiness, natural sweetness, or moisture. If flavor matters most, stick with golden raisins or currants. If texture drives the dish, dates or cranberries hold up better.

  • Closest match - Golden raisins for nearly identical sweetness and chew
  • Easiest grab - Dried cranberries for bright, tangy-sweet flavor
  • Dietary option - Chopped dates for sticky sweetness and richer moisture

Frequently Asked Questions

Can I use dried cranberries instead of raisins in cookies?

Yes, swap 1:1. Dried cranberries add tartness and hold their shape better than raisins when baked, which works well in oatmeal cookies and scones.

Do golden raisins taste the same as regular raisins?

They're close, but golden raisins taste lighter and fruitier. Regular raisins have a deeper, more caramel-sweet flavor from sun-drying.

Can I substitute dates for raisins in baking?

Yes, use 1:1. Chop dates small so they distribute evenly. They add more moisture and a richer, caramel-like sweetness than raisins.

Why do I need to chop dried apricots before using them as a raisin substitute?

Dried apricots are larger and denser than raisins. Chopping them to raisin size helps them blend into batters and cook evenly.

Can I use currants in savory dishes instead of raisins?

Yes, swap 1:1. Currants add tartness, which balances rich pilafs and grain salads. Taste as you go if your dish already has acidic ingredients.

5 Best Substitutes for Raisins in Baking Recipes

5 Best Substitutes for Raisins

No ratings yet
When you run out of raisins, these five substitutes cover different textures, sweetness levels, and moisture content. Choose based on whether you need chewiness, caramel-sweet flavor, or tart brightness in your recipe.
Print Recipe Pin Recipe
Prep Time 6 minutes mins
Cook Time 5 minutes mins
Total Time 11 minutes mins
Servings: 4 servings
Course: Substitute Guide
Ingredients Method Notes

Ingredients
  

  • 1 cup Dried Currants Swap 1:1 with raisins; soak in warm water 5 minutes for more moisture if needed
  • 1 cup Dried Cranberries Swap 1:1 with raisins; check label for added sugar which may increase sweetness
  • 1 cup Chopped Dates Swap 1:1 with raisins; chop small to distribute evenly and account for added moisture
  • 1 cup Golden Raisins Swap 1:1 with raisins; lighter flavor but similar texture and sweetness
  • Chopped Dried Apricots Use ¾ cup per 1 cup raisins; chop finely for best texture and to avoid

Method
 

  1. Choose your substitute based on recipe needs: chewiness and sweetness (currants, golden raisins), tartness (cranberries), moisture and richness (dates), or tang and fruitiness (apricots).
  2. For currants, soak in warm water for 5 minutes if more moisture is desired.
  3. Chop dates and dried apricots finely to ensure even distribution and texture consistency.
  4. Apply the substitute using a 1:1 ratio for all except dried apricots, which require ¾ cup per 1 cup raisins.
  5. Adjust liquid in your recipe if using dates or apricots, as they add more moisture than raisins.
  6. Taste and monitor consistency as you cook or bake to ensure the flavor and texture suit your dish.

Notes

  • Chop chopped dried apricots finely to avoid excess moisture and maintain batter consistency in place of raisins.

Tried this recipe?

Let us know how it was!

Air Fryer Vegetable Samosas

March 19, 2026

Fried samosas usually mean a pot of hot oil and the cleanup that comes with it. Air frying gives you the same crispy shell with a fraction of the oil and none of the splatter.

Air Fryer Vegetable Samosas served on a plate

The air fryer crisps the pastry while keeping the filling moist. You get golden edges without flipping constantly or worrying about grease absorption.

This works for weeknight snacks or meal prep when you want something that feels homemade but doesn't require deep-frying equipment or watching a stove.

QUICK SUMMARY

Air Fryer Vegetable Samosas deliver crispy, golden pastry filled with spiced potatoes and peas in 35 minutes. High heat at 350°F crisps the shell while the filling stays tender - no deep frying required. Perfect for appetizers, snacks, or meal prep when you want handheld food that actually tastes fried.

⏱️Time Reality: 20 minutes prep, 15 minutes air frying - make filling ahead to save time
🔥First Critical Move: Cook filling until completely dry or pastry turns soggy
⚠️Watch Out: Seal edges tightly with water - loose seams leak filling and brown unevenly

Why This Recipe Works

The air fryer circulates hot air at 350°F to crisp the pastry without submerging it in oil. For a version that comes together quickly, classic tacos dish takes the same approach with roasted vegetables.

Quick Reference
⏱️
Prep Time
20 min
🔥
Cook Time
15 min
⏰
Total Time
35 min
🍽️
Servings
4 servings (8-10 samosas)
📊
Difficulty
Medium
🏷️
Category
Appetizer
💡
Quick Tip
Air fry at 350°F for crisp, golden samosas
🎯
Best For
Weeknight | Meal prep | Entertaining

Why it works:

  • Uniform potato dice: Even ½-inch cubes cook through in 10-12 minutes and mash easily for consistent filling texture
  • Dry filling base: Cooking vegetables on medium heat for 8-10 minutes evaporates moisture that would otherwise soften the pastry
  • Light oil spray: A fine mist promotes browning without making the pastry greasy or heavy
  • Flipping halfway: Turning samosas at the 7-minute mark ensures both sides crisp evenly and develop golden color
  • Resting after cooking: Five minutes off heat sets the shell and prevents steam from softening the crisp exterior
Golden Rule
Leave 1-inch space between each samosa in the basket - crowding causes steaming instead of crisping

What You'll Need

Ingredients for Air Fryer Vegetable Samosas

Buy samosa pastry wrappers at Indian grocery stores or use phyllo dough from regular supermarkets. We keep a batch ready for nights like this - homemade corn on the cob recipe works the same way with simple vegetables.

🥔
Filling Base
  • 2 medium potatoes, diced small
  • ½ cup frozen peas
  • ½ cup diced carrots
  • 1 small onion, finely chopped
🧄
Aromatics
  • 1 tablespoon minced ginger
  • 1 green chili, minced
  • 1 teaspoon cumin seeds
🌶️
Spices
  • 1 tablespoon garam masala
  • ½ teaspoon turmeric
  • Salt to taste
🫙
Wrapper & Finish
  • 12-15 samosa pastry wrappers or phyllo sheets
  • Oil spray
  • 2 tablespoons water for sealing

Ingredient Details

  • Potatoes
    Use starchy varieties like russet - they mash smoothly and bind the filling without turning gummy
  • Frozen peas
    No need to thaw - they cook through in the filling without adding excess moisture
  • Garam masala
    The essential spice blend - curry powder changes the flavor profile but works in a pinch
  • Samosa pastry wrappers
    Thicker than phyllo, holds filling better - find them at Indian markets or order online
  • Oil spray
    Use a pump spray bottle or aerosol can - brushing oil works but takes longer and uses more oil
  • Green chili
    Adjust heat by removing seeds or using half - jalapeño works as a substitute
  • Cumin seeds
    Toast them in the pan first for 30 seconds - releases nutty aroma before adding other ingredients

Ingredient Swaps

Rich mains need something to cut through, and noodles does exactly that. For a version that comes together quickly, this creamy noodles uses similar spices with a different base.

Four practical swaps:

  • Sweet potatoes or cauliflower instead of potatoes - Sweet potatoes add natural sweetness and softer texture; cauliflower makes the filling lighter but requires 3-4 minutes longer cook time
  • Green beans or corn instead of peas - Green beans need chopping and add crunch; corn brings sweetness and holds up well in the filling
  • Phyllo dough instead of samosa pastry - More delicate and flakier; handle carefully and use 2-3 layers brushed lightly with oil between sheets
  • Curry powder instead of garam masala - Changes the spice profile to more turmeric-forward; use 1 tablespoon plus ½ teaspoon for similar heat

Wonton Wrappers

Works for: Quick prep when you can't find samosa pastry - thinner shell, cooks in 10-12 minutes

Skip if: You want thick, substantial crust - wonton wrappers tear easily when filled

Fresh Peas

Works for: Peak season when fresh peas are sweet - blanch 2-3 minutes before adding to filling

Skip if: Off-season or budget cooking - frozen peas cost less and taste better year-round

Instructions

Most people skip noodles, but it balances the meal. For a version that comes together quickly, this rich beef uses the same folding technique with different fillings.

  1. Cook the filling. Boil diced potatoes in salted water for 10-12 minutes until fork-tender, then drain completely. Heat 1 tablespoon oil in a nonstick skillet over medium heat, add cumin seeds and cook 30 seconds until fragrant. Add chopped onion, ginger, and green chili, sauté 3-4 minutes until onion softens. Stir in carrots and frozen peas, cook 4-5 minutes. Add cooked potatoes, garam masala, turmeric, and salt, mash roughly with a fork while stirring for 2-3 minutes until filling is dry and well-mixed. Let cool 10 minutes before filling pastry.

  2. Prepare the wrappers. Cut samosa pastry sheets in half to form triangles or rectangles (if using phyllo, stack 2-3 sheets and cut). Keep unused wrappers covered with a damp towel to prevent drying. Place 2 tablespoons filling in the center of each wrapper, leaving ½-inch border on all sides.

  3. Fold and seal. Brush wrapper edges lightly with water using your finger or a pastry brush. Fold one corner over filling to form a triangle, press edges firmly to seal. Continue folding in triangular pattern until wrapper is completely sealed, making sure no filling shows at edges. Press final edge with water and pinch tightly.

  4. Air fry the samosas. Preheat air fryer to 350°F for 3 minutes. Spray basket lightly with oil. Arrange samosas in a single layer with 1-inch space between each. Spray tops lightly with oil. Cook 7 minutes, flip carefully with tongs, spray other side with oil, cook 7-8 minutes more until golden brown and crisp.

  5. Rest before serving. Transfer samosas to a wire rack and let rest 5 minutes - this sets the filling and keeps the shell crisp. Serve warm with mint chutney or tamarind sauce.

Watch Out
If filling leaks during cooking, lower temperature to 325°F for the next batch and seal edges more firmly with water paste

What to Serve With It

Fish adds the contrast this plate needs, but timing matters. For a version that comes together quickly, quick fish dish brings similar complexity to easy chicken meal planning.

Side Dish Prep Why It Works How to Serve
Cucumber raita Easy Cool yogurt cuts heat from spices Mix grated cucumber with plain yogurt, cumin, salt - serve chilled
Mixed greens salad Easy Fresh crunch balances fried texture Toss greens with lemon vinaigrette - plate alongside samosas
Mint cilantro chutney Easy Herby brightness matches spiced filling Blend fresh mint, cilantro, green chili, lemon juice - serve in small bowl for dipping
Tamarind chutney Medium Sweet-tangy contrast to fried pastry Simmer tamarind paste with jaggery and spices - serve warm or room temperature
Pickled vegetables Easy Sharp acidity cuts through rich filling Serve store-bought Indian pickles or quick-pickle carrots and onions

Three ways to serve it:

  • Appetizer platter: Arrange samosas on a large plate with 3 small bowls of chutney - mint, tamarind, and plain yogurt for dipping variety
  • Light lunch: Serve 2-3 samosas per person with a side salad and cucumber raita for a complete vegetarian meal
  • Party snack: Make mini samosas using half the filling - cook 10-12 minutes total and serve on toothpicks for easy finger food
Best Pick
Mint cilantro chutney - blend 1 cup mint leaves, ½ cup cilantro, 1 green chili, juice of 1 lemon, ½ teaspoon salt in a food processor until smooth

Store and Reheat

The pork works best when it hits the table at the same time as the main. For a version that comes together quickly, a tender pork side uses similar storage methods with slightly different timing.

Method Time Best For
🍳 Air Fryer 5-7 minutes at 350°F Restoring crispy texture - best method for maintaining crunch
🔥 Oven 8-10 minutes at 350°F Reheating larger batches - place on wire rack over baking sheet
📦 Microwave 30-45 seconds When you're in a hurry - results in softer, less crisp shell

For best results when storing:

  • Cool completely before storing - Hot samosas create condensation in containers that softens the crisp shell within hours
  • Use shallow containers - Stack no more than 2 layers with parchment paper between to prevent sticking and maintain texture
  • Freeze before cooking - Assemble samosas, freeze on a baking sheet until solid, then transfer to freezer bags for up to 2 months
  • Don't refrigerate more than 4 days - Pastry absorbs moisture from filling over time and loses crispness even with proper storage
  • Reheat from frozen - Add 3-5 minutes to air fryer time, no need to thaw - cook at 350°F for 18-20 minutes total

Frequently Asked Questions

How long to cook air fryer vegetable samosas at 350°F?

Cook for 15 minutes total - 7 minutes on the first side, flip, then 7-8 minutes on the second side until golden brown and crisp. If cooking from frozen, add 3-5 minutes to total time.

Can I make air fryer samosas ahead and refrigerate or freeze them?

Yes - assemble samosas completely, freeze uncooked on a baking sheet until solid, then transfer to freezer bags for up to 2 months. Cook directly from frozen at 350°F for 18-20 minutes total, flipping halfway.

What goes well with vegetable samosas for appetizers or snacks?

Serve with mint cilantro chutney, tamarind chutney, or plain yogurt for dipping. Add cucumber raita or a mixed greens salad on the side to balance the fried texture with fresh, cooling elements.

How do I know when air fryer samosas are fully cooked and crisp?

Look for uniform golden-brown color on both sides and a firm, crisp shell when you touch it. The pastry should not feel soft or doughy - if it does, cook for an additional 2-3 minutes.

Can I use wonton wrappers or phyllo dough instead of samosa pastry?

Yes - wonton wrappers cook faster at 10-12 minutes but tear easily, so handle carefully and seal edges well. Phyllo dough works best in 2-3 layers brushed with oil between sheets for a flakier texture that's more delicate than traditional samosa pastry.

Air Fryer Vegetable Samosas served on a plate

Air Fryer Vegetable Samosas

No ratings yet
Air Fryer Vegetable Samosas offer crispy, golden pastry filled with spiced potatoes and peas without the need for deep frying. The air fryer crisps the pastry evenly while keeping the filling moist, making it a perfect snack or appetizer option with less oil and mess.
Print Recipe Pin Recipe
Prep Time 20 minutes mins
Cook Time 15 minutes mins
Total Time 35 minutes mins
Servings: 4 servings
Course: Appetizer
Cuisine: Indian
Ingredients Equipment Method Notes

Ingredients
  

  • 2 medium potatoes diced small; use starchy variety like russet
  • 0.5 cup peas frozen, no need to thaw
  • 0.5 cup carrots diced
  • 1 small onion finely chopped
  • 1 tablespoon ginger minced
  • 1 green chili chili minced; adjust heat by removing seeds
  • 1 teaspoon cumin seeds
  • 1 tablespoon garam masala essential spice blend
  • 0.5 teaspoon turmeric
  • to taste salt
  • 12-15 pieces samosa pastry wrappers or phyllo sheets
  • oil spray for spraying basket and samosas
  • 2 tablespoons water for sealing edges

Equipment

  • Air fryer Used to crisp samosas without deep frying
  • Nonstick skillet For cooking the filling ingredients
  • Tongs Used to flip samosas in the air fryer
  • Wire rack For resting samosas after cooking to keep crisp

Method
 

  1. Boil diced potatoes in salted water for 10-12 minutes until fork-tender, then drain completely.
    2 medium potatoes, to taste salt
  2. Heat 1 tablespoon oil in a nonstick skillet over medium heat. Add cumin seeds and cook 30 seconds until fragrant.
    1 teaspoon cumin seeds
  3. Add chopped onion, minced ginger, and green chili; sauté 3-4 minutes until onion softens.
    1 small onion, 1 tablespoon ginger, 1 green chili chili
  4. Stir in diced carrots and frozen peas, cook 4-5 minutes.
    0.5 cup peas, 0.5 cup carrots
  5. Add cooked potatoes, garam masala, turmeric, and salt. Mash roughly with a fork while stirring for 2-3 minutes until the filling is dry and well mixed. Let cool 10 minutes before filling pastry.
    2 medium potatoes, 1 tablespoon garam masala, 0.5 teaspoon turmeric, to taste salt
  6. Cut samosa pastry sheets in half to form triangles or rectangles. Keep unused wrappers covered with a damp towel to prevent drying.
    12-15 pieces samosa pastry wrappers
  7. Place 2 tablespoons filling in the center of each wrapper, leaving ½-inch border on all sides.
    2 tablespoons water
  8. Brush wrapper edges lightly with water using your finger or a pastry brush. Fold one corner over filling to form a triangle, press edges firmly to seal. Continue folding triangularly until completely sealed, then pinch edges tightly.
    2 tablespoons water
  9. Preheat air fryer to 350°F (about 3 minutes). Spray basket lightly with oil.
    oil spray
  10. Arrange samosas in a single layer in the basket with at least 1-inch space between each. Spray tops lightly with oil.
    oil spray
  11. Cook samosas 7 minutes, flip carefully with tongs, spray the other side with oil, then cook 7-8 minutes more until golden brown and crisp.
    oil spray
  12. Transfer samosas to a wire rack and let rest 5 minutes to set the filling and keep the shell crisp. Serve warm with chutneys or sauces.

Notes

  • Seal edges tightly with water to prevent filling leaks and uneven browning.
  • Flip samosas halfway through cooking to ensure even crisping.
  • Leave at least 1-inch space between samosas in air fryer basket to avoid steaming.

Tried this recipe?

Let us know how it was!

Air Fryer Chicken Kiev

March 19, 2026

When you need a restaurant-quality dinner that doesn't require an hour of hands-on work, air fryer chicken Kiev delivers. Crispy breading seals in herbed garlic butter while the air fryer crisps the coating without deep frying.

Air Fryer Chicken Kiev served on a plate

The air fryer handles the temperature control while you prep sides. You get golden breading and juicy chicken in 35 minutes from start to finish.

This works for weeknight dinners when you want something more elevated than plain chicken, or for meal prep when you need portions that reheat well.

QUICK SUMMARY

Stuffed chicken breasts coated in crispy breadcrumbs cook in the air fryer at 360°F for 14-16 minutes. Cold butter stays inside when you chill the logs before wrapping. The key is pounding chicken to even ¼-inch thickness so the coating browns at the same rate the meat cooks through.

⏱️Time Reality: 20 minutes prep, 15 minutes cook time, plus 15 minutes to chill butter logs
🔧Critical First Step: Pound chicken to ¼ inch thickness with meat mallet before stuffing
⚠️Watch Out: Butter leaks if logs aren't chilled firm or edges aren't sealed tight-freeze butter 15 minutes

Why This Recipe Works

The air fryer circulates hot air around the breaded chicken to crisp the coating without submerging it in oil. Rich mains need something to cut through, and soft buttery dinner bread does exactly that.

Quick Reference
⏱️
Prep Time
20 min
🔥
Cook Time
15 min
⏰
Total Time
35 min
🍽️
Servings
4 servings
📊
Difficulty
Medium
🏷️
Category
Main Dish
💡
Quick Tip
Chill butter logs before wrapping chicken
🎯
Best For
Weeknight | Meal prep | Entertaining

What makes this work:

  • Compound butter - garlic and fresh parsley mix into softened butter, then chill into firm logs that stay solid during breading
  • Triple breading sequence - flour dries the surface so egg sticks, then breadcrumbs adhere to the egg for a coating that doesn't peel off
  • Even thickness - pounding chicken breasts to ¼ inch means the center cooks through exactly when the breading turns golden
  • 360°F air fryer temperature - hot enough to crisp breadcrumbs but not so hot the coating burns before the chicken reaches 165°F internally
  • Flip halfway through - turning at the 7-minute mark ensures both sides brown evenly without gaps in the coating
Golden Rule
Pat chicken completely dry with paper towels before the flour step-moisture under the breading creates steam pockets that make the coating soggy

What You'll Need

Ingredients for Air Fryer Chicken Kiev

Shopping for chicken Kiev means buying fresh chicken breasts and unsalted butter, then grabbing pantry staples you likely have. Most people skip this easy chicken recipe, but it balances the meal.

🍗
Protein
  • 4 boneless skinless chicken breasts (6 oz each)
  • 2 large eggs
🧀
Dairy & Fat
  • ½ cup unsalted butter, softened
🧄
Aromatics & Herbs
  • 3 cloves garlic, minced
  • 3 tablespoons fresh parsley, chopped
🫙
Breading & Seasoning
  • 1 cup all-purpose flour
  • 1 ½ cups breadcrumbs (or panko)
  • 1 teaspoon salt
  • ½ teaspoon black pepper
  • 1 tablespoon lemon juice (optional)

Ingredient Details

  • Chicken breasts
    Pick breasts roughly the same size so they cook at the same rate-uneven pieces mean some dry out while others stay undercooked
  • Unsalted butter
    Soften at room temperature for 30 minutes so it mixes with garlic and parsley without clumps, then chill the compound butter until firm
  • Breadcrumbs
    Regular breadcrumbs create a tighter seal, panko makes a crunchier coating-both work but panko needs firmer pressing to adhere
  • All-purpose flour
    The flour layer pulls moisture off the chicken surface so the egg coating sticks instead of sliding off during air frying
  • Eggs
    Whisk eggs completely until no streaks remain-unwhisked eggs create thin spots in the coating where breadcrumbs fall off
  • Fresh parsley
    Chop parsley fine so it distributes evenly through the butter-large chunks create gaps where the butter doesn't seal the chicken
  • Garlic
    Mince garlic instead of using a press for compound butter-pressed garlic releases more moisture that can make the butter mixture too soft

Ingredient Swaps

The base recipe uses standard breading components, but you can swap for dietary needs or different textures. For a version that comes together quickly, homemade potato wedges recipe pairs with the main while you prep the butter logs.

Four practical swaps:

  • Unsalted butter → dairy-free margarine - use stick margarine (not tub spread) so it firms up when chilled; flavor is slightly less rich but the technique stays the same
  • All-purpose flour → gluten-free flour blend - any 1:1 baking blend works for the first breading layer; coating may be slightly grainier but still crisps properly
  • Breadcrumbs → crushed cornflakes or gluten-free breadcrumbs - cornflakes create extra crunch; gluten-free breadcrumbs work for celiac diets without changing the method
  • Chicken breasts → chicken thighs - thighs stay juicier but irregular shape makes even pounding harder; expect 2-3 minutes longer cook time

Regular breadcrumbs

Works for: tight seal, classic texture, even browning

Skip if: you want maximum crunch or gluten-free option

Panko breadcrumbs

Works for: extra crispy coating, light texture, dramatic crunch

Skip if: you prefer traditional Kiev texture or need finer crumbs

Crushed cornflakes

Works for: gluten-free diets, crunchiest coating, holds up to reheating

Skip if: you want classic breading or softer texture

Instructions

The entire process takes 35 minutes including chilling time for the butter. Chicken adds the contrast this plate needs, but timing matters.

  1. Mix and chill compound butter - combine softened butter with minced garlic, chopped parsley, salt, pepper, and lemon juice in a bowl; divide into 4 equal portions and shape into logs; wrap each in plastic wrap and freeze for 15 minutes until firm (butter must be cold or it melts during cooking)

  2. Pound and stuff chicken - place chicken breasts between plastic wrap or parchment paper; pound with meat mallet or rolling pin to even ¼-inch thickness; place one chilled butter log in the center of each breast; fold chicken around butter and seal edges by pressing firmly (gaps let butter leak out)

  3. Set up breading station - arrange three shallow bowls: one with flour, one with whisked eggs, one with breadcrumbs mixed with salt and pepper; coat each stuffed chicken piece in flour (shake off excess), dip in egg (let excess drip), then press into breadcrumbs until fully covered

  4. Air fry at 360°F - place breaded chicken in air fryer basket in single layer with ½ inch space between pieces; cook 14-16 minutes, flipping at 7-minute mark; chicken is done when internal temperature reaches 165°F on instant-read thermometer and coating is golden brown

  5. Rest before slicing - transfer cooked chicken Kiev to plate and rest 5 minutes before cutting; resting lets butter redistribute and coating set so it doesn't fall off when you cut into it

Watch Out
Don't skip the resting step-cutting immediately causes hot butter to pour out instead of staying in the chicken, and the coating is more likely to crack or peel

What to Serve With It

Rich chicken Kiev needs sides that balance the buttery filling without adding more heaviness. For more ways to round out the plate, bbq chicken meal planning ideas covers timing and pairing strategies that work here too.

Side Dish Prep Why It Works How to Serve
Steamed green beans Easy Light texture cuts through rich butter without competing for attention Toss with lemon zest while chicken rests
Mashed potatoes Easy Classic comfort pairing soaks up garlic butter that leaks onto plate Make while chicken cooks, keep warm covered
Simple garden salad Easy Acidity from vinaigrette balances richness and adds fresh crunch Dress just before serving so greens stay crisp
Roasted carrots Medium Natural sweetness complements garlic without adding more fat Roast at 400°F while chicken preps, finish together
Buttery garlic rice Easy Absorbs butter that escapes during cutting, matches garlic flavor Start rice first, keep warm until chicken finishes

Three ways to serve it:

  • Weeknight plate - pair with steamed green beans and a simple garden salad for a balanced meal that doesn't require multiple pans
  • Comfort dinner - serve over mashed potatoes with roasted carrots for a classic meat-and-potatoes approach that works for family meals
  • Entertaining option - add a creamy mushroom sauce on the side and warm crusty bread for mopping up extra garlic butter
Best Pick
Steamed green beans hit the table fastest and add the contrast this plate needs without making the meal feel heavy-blanch them while the chicken rests

Store and Reheat

Leftover chicken Kiev keeps for 3-4 days in the fridge when stored properly in shallow airtight containers. A good side dish can make or break the plate, and a fresh salad on the side does exactly that.

Method Time Best For
🔥 Oven 10 min at 375°F Restores crispy coating evenly without drying out the chicken
🍳 Air Fryer 3-5 min at 350°F Quickest way to crisp coating back up without overcooking chicken
📦 Microwave 1-2 min at 50% power Fast reheating when coating texture doesn't matter and you need lunch now

For best results when storing:

  • Cool completely before storing - hot chicken creates condensation in sealed containers that makes the breading soggy within hours
  • Use shallow containers - stack no more than two pieces per container so weight doesn't compress the coating and make it dense
  • Separate chicken and sides - storing chicken Kiev with wet sides like salad transfers moisture and ruins the crispy coating
  • Freeze before frying option - assemble breaded chicken, freeze on sheet pan until solid, then transfer to freezer bags for up to 1 month; cook from frozen adding 5 minutes to air fryer time
  • Reheat from fridge not counter - letting chicken sit at room temperature before reheating risks bacterial growth in the butter filling

Frequently Asked Questions

Can I use frozen chicken breasts for air fryer chicken Kiev?

Thaw chicken completely in the fridge before using-frozen or partially frozen breasts won't pound to even thickness and the center stays cold while the coating burns. Pat thawed chicken very dry with paper towels since defrosting releases extra moisture that makes breading slide off.

How do I store and reheat leftover air fryer chicken Kiev?

Store in shallow airtight containers in the fridge for 3-4 days. Reheat in the air fryer at 350°F for 3-5 minutes to restore crispy coating, or use the oven at 375°F for 10 minutes if reheating multiple pieces at once.

How do I know when chicken Kiev is cooked through safely?

Insert an instant-read thermometer into the thickest part of the chicken (not into the butter pocket)-it should read 165°F. The coating will be golden brown and crispy when the chicken reaches safe temperature if you cooked at 360°F.

What can I do if butter leaks out during cooking?

Make sure butter logs are frozen firm before wrapping and seal chicken edges tightly by pressing with your fingers. If butter still leaks, add a second layer of breadcrumbs after the first coating and chill the breaded chicken for 10 minutes before air frying.

Can I make chicken Kiev ahead and freeze before frying?

Yes-assemble breaded chicken completely, freeze on a sheet pan until solid, then transfer to freezer bags for up to 1 month. Cook from frozen in the air fryer at 360°F for 19-21 minutes, flipping halfway, checking internal temperature reaches 165°F.

Air Fryer Chicken Kiev served on a plate

Air Fryer Chicken Kiev

No ratings yet
Air fryer chicken Kiev offers a restaurant-quality dinner with crispy breading and juicy chicken sealed with herbed garlic butter. The air fryer crisps the coating perfectly in just 15 minutes while you prep sides, making this an ideal elevated weeknight meal or meal prep option.
Print Recipe Pin Recipe
Prep Time 20 minutes mins
Cook Time 15 minutes mins
Total Time 35 minutes mins
Servings: 4 servings
Course: Main Dish
Cuisine: European
Ingredients Equipment Method Notes

Ingredients
  

  • 4 pieces chicken breasts boneless skinless, about 6 oz each
  • 2 large eggs whisked completely
  • 0.5 cup unsalted butter softened
  • 3 cloves garlic minced
  • 3 tablespoons fresh parsley chopped
  • 1 cup all-purpose flour
  • 1.5 cups breadcrumbs or panko
  • 1 teaspoon salt
  • 0.5 teaspoon black pepper
  • 1 tablespoon lemon juice optional

Equipment

  • Air fryer Cook chicken kiev at 360°F
  • Meat mallet Pound chicken breasts to even ¼-inch thickness
  • Instant-read thermometer Check chicken internal temperature reaches 165°F
  • Mixing bowls Set up breading station with flour, eggs, and breadcrumbs

Method
 

  1. Combine softened butter with minced garlic, chopped parsley, salt, pepper, and optional lemon juice in a bowl. Divide into four equal portions, shape into logs, wrap each in plastic wrap, and freeze for 15 minutes until firm.
    0.5 cup unsalted butter, 3 cloves garlic, 3 tablespoons fresh parsley, 1 teaspoon salt, 0.5 teaspoon black pepper, 1 tablespoon lemon juice
  2. Place chicken breasts between plastic wrap or parchment paper and pound with a meat mallet or rolling pin to even ¼-inch thickness. Place one chilled butter log in the center of each breast, fold chicken around butter and seal edges firmly to prevent leaks.
    4 pieces chicken breasts
  3. Arrange three shallow bowls: one with flour, one with whisked eggs, and one with breadcrumbs mixed with salt and pepper. Coat each stuffed chicken piece in flour shaking off excess, dip in eggs letting excess drip, then press into breadcrumbs until fully covered.
    1 cup all-purpose flour, 2 large eggs, 1.5 cups breadcrumbs, 1 teaspoon salt, 0.5 teaspoon black pepper
  4. Place breaded chicken in a single layer in the air fryer basket with ½ inch spacing. Air fry at 360°F for 14 to 16 minutes, flipping at the 7-minute mark. Confirm chicken is cooked when the internal temperature reaches 165°F and coating is golden brown.
    4 pieces chicken breasts
  5. Transfer cooked chicken Kiev to a plate and rest for 5 minutes before slicing. Resting allows the butter to redistribute and the coating to set, preventing cracking or peeling when cut.

Notes

  • Chill butter logs until firm to prevent butter leakage during cooking.
  • Pound chicken breasts evenly to ¼ inch thickness for uniform cooking and browning.
  • Rest chicken after cooking to keep coating intact and retain juicy filling.

Tried this recipe?

Let us know how it was!

Air Fryer Lamb Chops

March 19, 2026

Lamb chops in the air fryer give you crispy edges and a tender, juicy center in under 15 minutes of cooking. High heat circulates fast, searing the outside while keeping the middle pink.

Air Fryer Lamb Chops served on a plate

This works for busy weeknight dinners or last-minute entertaining when you want something that looks intentional. You don't need to marinate for hours or babysit a skillet.

The herb rub sticks to the meat and caramelizes instead of burning off. Garlic and rosemary are classic pairings, but you can swap in whatever herbs you have.

Make this when you want a fast dinner that still feels like you put in effort.

QUICK SUMMARY

Air fryer lamb chops cook in 8-12 minutes at 400°F with a simple herb rub. Pat the chops dry before seasoning for crispy edges. Pull them at 135°F internal for medium-rare and rest 5 minutes before serving.

⏱️Total Time: 20 minutes start to finish, 10 minutes hands-on
🔥Key Move: Flip chops at 5 minutes for even browning on both sides
⚠️Watch Out: Overcrowding the basket causes steaming not crisping - leave 1 inch between chops

Table of Contents

Toggle
  • Why This Recipe Works
  • What You'll Need
    • Ingredient Details
  • Ingredient Swaps
  • What to Serve With It
  • Store and Reheat
  • Frequently Asked Questions
  • Air Fryer Lamb Chops
    • Method 
    • Tried this recipe?

Why This Recipe Works

The air fryer mimics the dry heat of a grill, crisping the fat cap while keeping the meat tender. For another quick dinner option that uses high heat efficiently, try this tender salmon recipe that delivers similar crispy edges in less time.

Quick Reference
⏱️
Prep Time
10 min
🔥
Cook Time
8-12 min
⏰
Total Time
20 min
🍽️
Servings
2-4 servings
📊
Difficulty
Easy
🏷️
Category
Main Dish
💡
Quick Tip
Pat dry chops for crispier crust
🎯
Best For
Weeknight | Entertaining
  • Preheat the air fryer for 3 minutes - this jump-starts the sear on contact and prevents sticking
  • Pat chops completely dry with paper towels - surface moisture steams instead of crisps, ruining the crust
  • Season at least 15 minutes before cooking - salt pulls moisture to the surface which then evaporates, concentrating flavor
  • Flip once at the halfway mark - even browning on both sides without constant flipping or oil splatter
  • Rest 5 minutes after cooking - juices redistribute through the meat instead of running onto the cutting board
Quick Tip
Use a meat thermometer to hit 135°F for medium-rare - the chops will coast up another 5 degrees while resting

What You'll Need

Ingredients for Air Fryer Lamb Chops

You need lamb chops, olive oil, garlic, rosemary, salt, and pepper. A good meat thermometer removes the guesswork, and if you're looking to expand your air fryer routine, this simple donuts side dish uses the same quick-cook method with different ingredients.

🍖
Protein
  • Lamb chops (rib or loin, 4-6 pieces)
🧄
Aromatics + Herbs
  • Garlic (3 cloves, minced)
  • Fresh rosemary (1 tbsp, chopped)
  • Fresh thyme (1 tsp, optional)
🥢
Seasoning + Oil
  • Olive oil (2 tbsp)
  • Salt (1 tsp)
  • Black pepper (½ tsp)
  • Paprika (½ tsp, optional)
🍋
Finishing Touch
  • Lemon juice (1 tbsp, optional)
  • Mustard (1 tsp, optional)

Ingredient Details

  • Lamb chops (rib or loin)
    Rib chops have more fat and stay juicier; loin chops are leaner but cook faster - both work fine
  • Olive oil
    Prevents sticking to the basket and helps herbs adhere - don't skip this or the rub slides off
  • Fresh garlic
    Minced fresh garlic gives the best flavor - garlic powder works in a pinch but tastes less bright
  • Fresh rosemary
    Classic pairing with lamb; strip leaves from the stem and chop finely to avoid woody bits
  • Salt
    Use kosher salt for even coverage - table salt is finer and can oversalt if you're not careful
  • Paprika (optional)
    Adds mild smoky color without changing the core flavor - smoked paprika intensifies the effect
  • Lemon juice (optional)
    Brightens the richness of the lamb - squeeze fresh over the finished chops for best results

Ingredient Swaps

Lamb chops work with most herb combinations, and the core method stays the same. If you want another protein that cooks fast with similar results, check out this tender pork that uses the same temperature and timing.

  • Olive oil → avocado oil - higher smoke point, neutral flavor, same browning results
  • Rosemary → thyme or oregano - milder herb profile but still Mediterranean; use same amount
  • Lamb chops → pork chops - similar thickness works, but cook 2-3 minutes longer for safe internal temp
  • Black pepper → white pepper - slightly different heat, lighter color if you want a cleaner look on the crust

Fresh Garlic

Works for: bright, pungent flavor that caramelizes without bitterness

Skip if: you only have old garlic that's sprouting or turning brown

Garlic Powder

Works for: quick convenience when you're out of fresh or short on time

Skip if: you want the best flavor - it's flat compared to fresh minced garlic

Smoked Paprika

Works for: adding smoky depth without a grill or extra equipment

Skip if: you want a cleaner herb flavor without competing smoke notes

Instructions

You're working with high heat and short cook time, so prep everything before you start. The chops need attention at the 5-minute mark, and if you're planning a full meal, this quick potato dish reheats fast while the lamb rests.

  1. Pat lamb chops dry with paper towels and rub with olive oil. Mix garlic, rosemary, thyme, salt, pepper, and paprika in a small bowl, then press the herb mixture onto both sides of each chop. Let sit 15 minutes at room temp while the air fryer preheats.

  2. Preheat air fryer to 400°F for 3 minutes. Place chops in the basket in a single layer with at least 1 inch of space between them - work in batches if needed to avoid overcrowding.

  3. Cook 5 minutes on the first side. The edges will start to brown and you'll see the fat cap turning golden and crispy at the edges.

  4. Flip chops with tongs and cook 3-7 minutes more. Exact time depends on thickness - 8 minutes total for rare (120-125°F), 10 minutes for medium-rare (130-135°F), 12 minutes for medium (140-145°F). Check internal temp with a meat thermometer inserted into the thickest part.

  5. Remove chops when they hit 5 degrees below target temp. Transfer to a plate, tent loosely with foil, and rest 5 minutes. The internal temp will rise to final doneness while juices redistribute through the meat.

Golden Rule
Never slice into lamb chops straight from the air fryer - resting prevents all the juice from running out onto your cutting board

What to Serve With It

Lamb chops are rich and herby, so they need something lighter or starchy to balance the plate. For more structured meal planning around proteins like this, browse complete onion rings meal ideas that follow the same pairing logic.

Side Dish Prep Why It Works How to Serve
Roasted vegetables Easy Caramelized edges mirror the lamb's crust, adds color Toss carrots, Brussels sprouts, or asparagus with olive oil and roast at 425°F for 20 min
Simple salad Easy Fresh greens cut through richness, bright acidity balances fat Mix arugula or spinach with lemon vinaigrette and shaved parmesan
Steamed green beans Easy Light, clean, adds snap without competing flavors Steam 5 minutes, toss with butter and garlic
Couscous or quinoa Easy Starchy base soaks up juices, fills out the plate Cook according to package, fluff with herbs and olive oil
Garlic mashed potatoes Medium Creamy starch balances the crispy lamb texture Boil potatoes, mash with butter, cream, and roasted garlic

Three ways to serve it:

  • With mint yogurt sauce - mix Greek yogurt, fresh mint, lemon juice, and salt for a cooling contrast
  • Over herb rice pilaf - fragrant rice with parsley and dill soaks up meat juices and adds bulk
  • With chimichurri - bright, herbaceous sauce adds acidity and fresh garlic punch
Best Pick
Roasted vegetables hit the table at the same time as the lamb and use the same high-heat method - cook them while the chops rest

Store and Reheat

Cooked lamb chops keep 3-4 days in the fridge but dry out if you reheat them too aggressively. The air fryer brings back crispness better than the microwave, and if you're storing multiple proteins this week, juicy chicken side dish keeps just as long with similar reheating needs.

Method Time Best For
🍳 Air Fryer 3-5 min at 350°F Restores crispy edges without drying out the meat
🔥 Oven 10 min at 300°F Gentle reheating for multiple chops at once
📦 Microwave 1-2 min low power Fast emergency option if you don't care about texture

For best results when storing:

  • Cool completely before sealing - hot steam creates condensation that makes the crust soggy
  • Store in shallow layers - stacking chops traps moisture and ruins the sear
  • Use airtight containers - prevents lamb from absorbing fridge odors and drying out
  • Reheat from fridge temp - don't microwave from frozen or you'll get rubbery edges and a cold center
  • Freeze for up to 3 months - wrap individually in plastic then foil to prevent freezer burn

Frequently Asked Questions

How long to cook air fryer lamb chops at 400°F?

Cook 8-12 minutes total, flipping once at 5 minutes. Thinner chops (¾ inch) take 8 minutes for medium-rare; thicker chops (1½ inches) need 12 minutes for the same doneness.

Can I substitute lamb chops with pork or beef in air fryer?

Yes, pork chops cook at the same temp but need 10-14 minutes total to reach 145°F safe internal temp. Beef steaks work too but adjust time based on thickness and desired doneness.

What internal temperature indicates lamb chops are safely done?

Pull lamb at 135°F for medium-rare (pink center), 145°F for medium (slight pink), or 155°F for well-done. The temp will rise 5 degrees while resting.

Why did my lamb chops come out dry or tough from the air fryer?

Overcooking past 145°F dries out lamb fast. Use a meat thermometer and pull chops 5 degrees before target temp, then rest 5 minutes to let juices redistribute.

Can I make air fryer lamb chops ahead?

Season chops up to 24 hours ahead and refrigerate, but cook them fresh for best texture. Cooked chops reheat well in the air fryer for 3-5 minutes at 350°F.

Air Fryer Lamb Chops

No ratings yet
Air fryer lamb chops deliver tender, juicy meat with crispy edges in under 15 minutes of cooking. This simple herb rub featuring garlic and rosemary caramelizes beautifully without burning, making it perfect for quick weeknight dinners or last-minute entertaining.
Print Recipe Pin Recipe
Prep Time 10 minutes mins
Cook Time 12 minutes mins
Total Time 22 minutes mins
Servings: 4 servings
Course: Main Dish
Cuisine: Mediterranean
Ingredients Equipment Method Notes

Ingredients
  

  • 4-6 pieces lamb chops rib or loin
  • 2 tablespoon olive oil for coating chops to prevent sticking
  • 3 cloves garlic minced
  • 1 tablespoon fresh rosemary chopped
  • 1 teaspoon fresh thyme optional, chopped
  • 1 teaspoon salt
  • 0.5 teaspoon black pepper
  • 0.5 teaspoon paprika optional
  • 1 tablespoon lemon juice optional, for finishing
  • 1 teaspoon mustard optional, for finishing

Equipment

  • Air fryer Used for cooking the lamb chops
  • Meat thermometer To check internal temperature for doneness
  • Tongs For flipping the lamb chops

Method
 

  1. Pat lamb chops dry with paper towels. Rub each chop with olive oil.
    4-6 pieces lamb chops, 2 tbsp olive oil
  2. In a small bowl, mix minced garlic, chopped rosemary, thyme (if using), salt, black pepper, and paprika. Press the herb mixture evenly onto both sides of each chop. Let sit at room temperature for 15 minutes while the air fryer preheats.
    3 cloves garlic, 1 tbsp fresh rosemary, 1 tsp fresh thyme, 1 tsp salt, 0.5 tsp black pepper, 0.5 tsp paprika
  3. Preheat the air fryer to 400°F for 3 minutes.
  4. Place lamb chops in the air fryer basket in a single layer, leaving at least 1 inch of space between each chop to avoid steaming.
    4-6 pieces lamb chops
  5. Cook the chops for 5 minutes on the first side until edges start browning and fat cap crisps.
    4-6 pieces lamb chops
  6. Flip chops using tongs and cook for an additional 3 to 7 minutes depending on desired doneness (8 minutes total for rare, 10 minutes for medium-rare, 12 minutes for medium). Use a meat thermometer to check internal temperature.
    4-6 pieces lamb chops
  7. Remove chops from the air fryer when their temperature is 5 degrees below your target (135°F for medium-rare). Tent with foil and let rest 5 minutes for juices to redistribute.
    4-6 pieces lamb chops
  8. If desired, drizzle with lemon juice and/or spread mustard over chops as a finishing touch before serving.
    1 tbsp lemon juice, 1 tsp mustard

Notes

  • Pat chops completely dry before seasoning for a crisp crust.
  • Do not overcrowd the air fryer basket to avoid steaming instead of crisping.
  • Use a meat thermometer to remove lamb at 5 degrees below your target temperature and let rest for best juiciness.

Tried this recipe?

Let us know how it was!
« Previous Page
Next Page »

Primary Sidebar

ForkliftKitchen recipe developer

Welcome!

Recipe Developer · 12+ Yr Kitchen Veteran

I'm the recipe developer behind this site, focused on practical, well-tested dishes and smart ingredient swaps. Every recipe is written to be clear, reliable, and easy to make at home.

650+ Recipes
12+ Yrs Exp.
3x Tested
Our Story →

As Featured In

Allrecipes

TASTE OF HOME

Food52

HUFFPOST

Yahoo! Life

Our Editorial Standards

  • ✓ Every recipe tested at least 3 times before publishing
  • ✓ Substitutes verified by real kitchen trials, not guesswork
  • ✓ Reviewed for accuracy by our editorial team
  • ✓ Updated regularly with seasonal info and reader feedback

Most Popular

  • Creamy Lemon Shrimp Linguine
    Creamy Lemon Shrimp Linguine
  • Creamy Garlic Mushroom Chicken
    Creamy Garlic Mushroom Chicken
  • Sesame Ginger Chicken Noodle Bowls
    Sesame Ginger Chicken Noodle Bowls
  • Baked Lemon Herb Fish Fillets
    Baked Lemon Herb Fish Fillets
  • Veggie Loaded Fried Rice
    Veggie Loaded Fried Rice
  • Spicy Garlic Shrimp Stir Fry
    Spicy Garlic Shrimp Stir Fry

Join 8,000+ Home Cooks

Weekly Kitchen Tips

Easy recipes, smart substitutes, and real cooking shortcuts — every Thursday.

Subscribe Free →


Side Dishes

  • What to Serve With Asian Salmon? 15 Best Side Dishes
    What to Serve With Asian Salmon? 15 Best Side Dishes
  • Side Dishes for Strawberry Spinach Salad
    15 Best Side Dishes for Strawberry Spinach Salad
  • Sides for Grilled Cauliflower Steaks to Complete the Meal
    15 Sides for Grilled Cauliflower Steaks to Complete the Meal
  • 15 Sides To Serve With Calabacitas
    15 Best Sides for Calabacitas – Mexican-Inspired Favorites


Substitutes

  • 7 Best Substitutes for Hot Sauce in Marinades & Stir-Fries
    7 Best Substitutes for Hot Sauce in Marinades & Stir-Fries
  • 9 Best Substitutes for Butter in Baking and Cooking
  • 7 Best Substitutes for Tagliatelle for Italian Pasta Dishes
    7 Best Substitutes for Tagliatelle for Italian Pasta Dishes
  • 7 Best Substitutes for Udon Noodles in Asian Stir-Fries
    7 Best Substitutes for Udon Noodles in Asian Stir-Fries


Browse by Topic

  • Side Dishes320
  • Substitutes785
  • Dinner163
  • Air Fryer77
  • Taste Profiles484
  • Food Storage123


Reader Reviews

★★★★★

"Finally a food blog that tells you exactly why a substitute works instead of just listing options."

— Sarah M., via email

★★★★★

"The side dish recommendations are so specific — saved my dinner party twice this month."

— James R., Pinterest comment

★★★★★

"I trust this site more than most because they actually test everything. You can tell."

— Priya K., blog comment

Footer

↑ Back to Top

Forklift Kitchen

We do the heavy lifting so you can enjoy the cooking. Tested recipes, smart substitutes, and perfect pairings—built for real home cooks.

Content

  • Recipes
  • Substitutes
  • What to Serve With
  • Blog

Company

  • About Us
  • Contact
  • Subscribe

Legal

  • Privacy Policy
  • Terms of Service

As an Amazon Associate I earn from qualifying purchases.

© 2026 Forklift Kitchen.

Rate This Recipe

Your vote:


A rating is required
A name is required
An email is required