• Skip to primary navigation
  • Skip to main content
  • Skip to primary sidebar
  • Recipe Index
    • Air Fryer
  • Side Dishes
  • Substitutes
  • About
  • Contact
  • Subscribe

ForkLiftKitchen

menu icon
go to homepage
  • Recipe Index
    • Air Fryer
  • Side Dishes
  • Substitutes
  • About
  • Contact
  • Subscribe
subscribe
search icon
Homepage link
  • Recipe Index
    • Air Fryer
  • Side Dishes
  • Substitutes
  • About
  • Contact
  • Subscribe
×

Blog

What Is Amaro Averna? [Taste, Uses & More]

March 27, 2026

You spot a squat, dark bottle on the back bar - the label reads Averna, the wax seal intact, the amber liquid almost opaque inside.
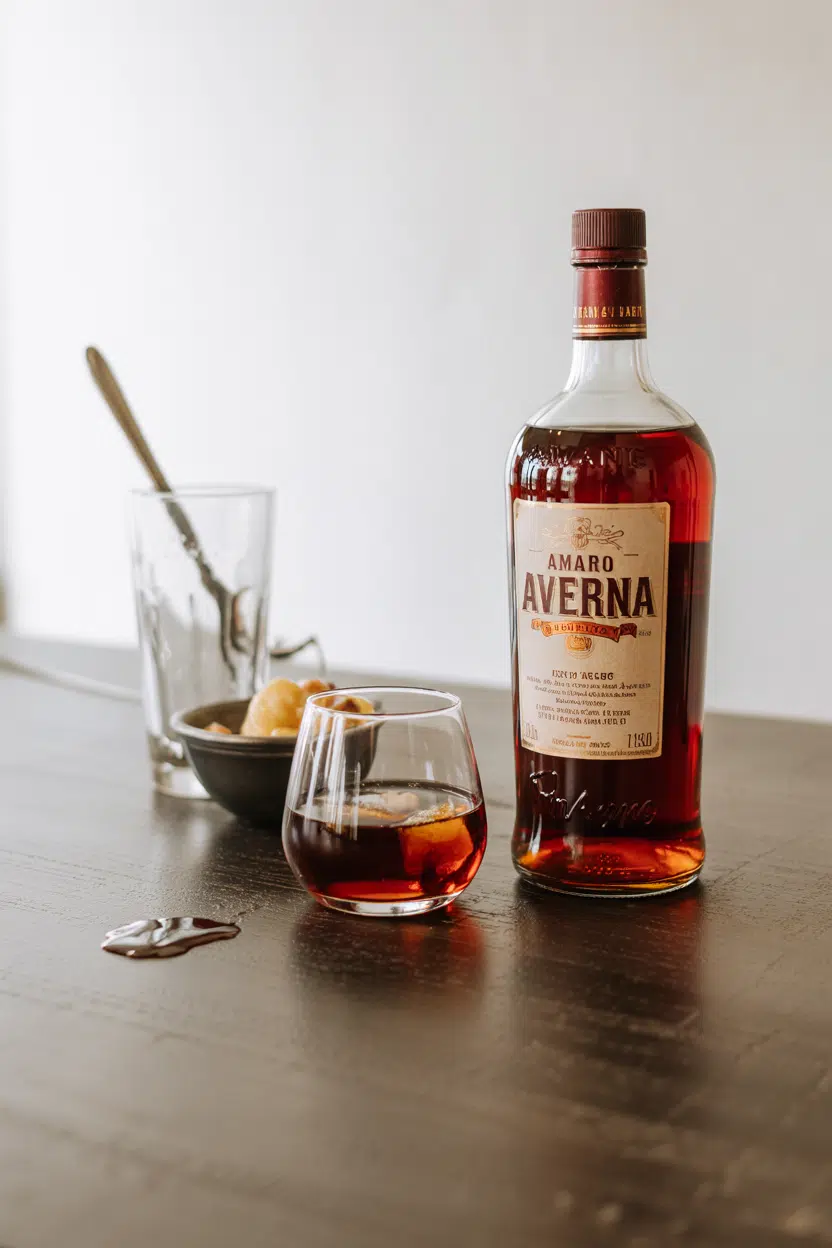
What Is Amaro Averna

It's the kind of bottle that belongs at the end of a meal, not the beginning, and understanding that distinction matters for how you use it.

Averna sits at a different crossroads than a standard aperitif, and the differences between aperitifs vs digestifs help explain why this Sicilian liqueur has earned its place at the table's close.

Even if you're building something like a caramel apple nachos recipe, a small pour of Averna stirred into a butterscotch drizzle can add unexpected bittersweet depth.

QUICK SUMMARY

Amaro Averna is a Sicilian herbal liqueur - syrupy and dark, built on bitter orange peel, licorice, and Mediterranean botanicals. Sweeter and more caramel-forward than most Italian amari, it works as a digestif, a cocktail modifier, and a cooking ingredient for glazes and desserts.

🍊Flavor: Bitter citrus, caramel, licorice, and dark herbal notes
🥃Best Uses: Digestif, Black Manhattan, glazes, chocolate desserts
📦Shelf Life: Indefinite unopened; best within 2-3 years once opened
🌡️Storage: Cool, dark cabinet, sealed tightly after each use
⚠️Note: Contains alcohol (~29% ABV) and high sugar; not for children or those avoiding alcohol

What Is Amaro Averna?

Amaro Averna is a Sicilian amaro - an Italian category of bitter herbal liqueur traditionally consumed as a digestif. The recipe dates to 1868, when a Benedictine monk in Caltanissetta, Sicily passed the formula to Salvatore Averna, and production has remained tied to the island ever since.

The liqueur falls under the broader amaro classification, meaning "bitter" in Italian, though Averna reads noticeably sweeter than many of its counterparts. It's also sold as Amaro di Sicilia and simply Averna, depending on the market.

Averna's botanical blend includes:

  • 🍊 Bitter orange peel - the primary citrus driver, lending both tartness and candied depth
  • Licorice root and aniseed - giving the characteristic dark, anise-forward finish
  • Gentian - the classic amaro bittering agent, present but not dominant here
  • Myrtle and Mediterranean herbs - adding earthy, resinous undertones unique to Sicilian botanicals

The spirit clocks in at approximately 29% ABV, placing it in the mid-strength range among Italian amari. Compared to Ramazzotti or Montenegro, Averna sits darker, sweeter, and thicker - closer to a syrup than a standard spirit.

What Does Amaro Averna Taste Like?
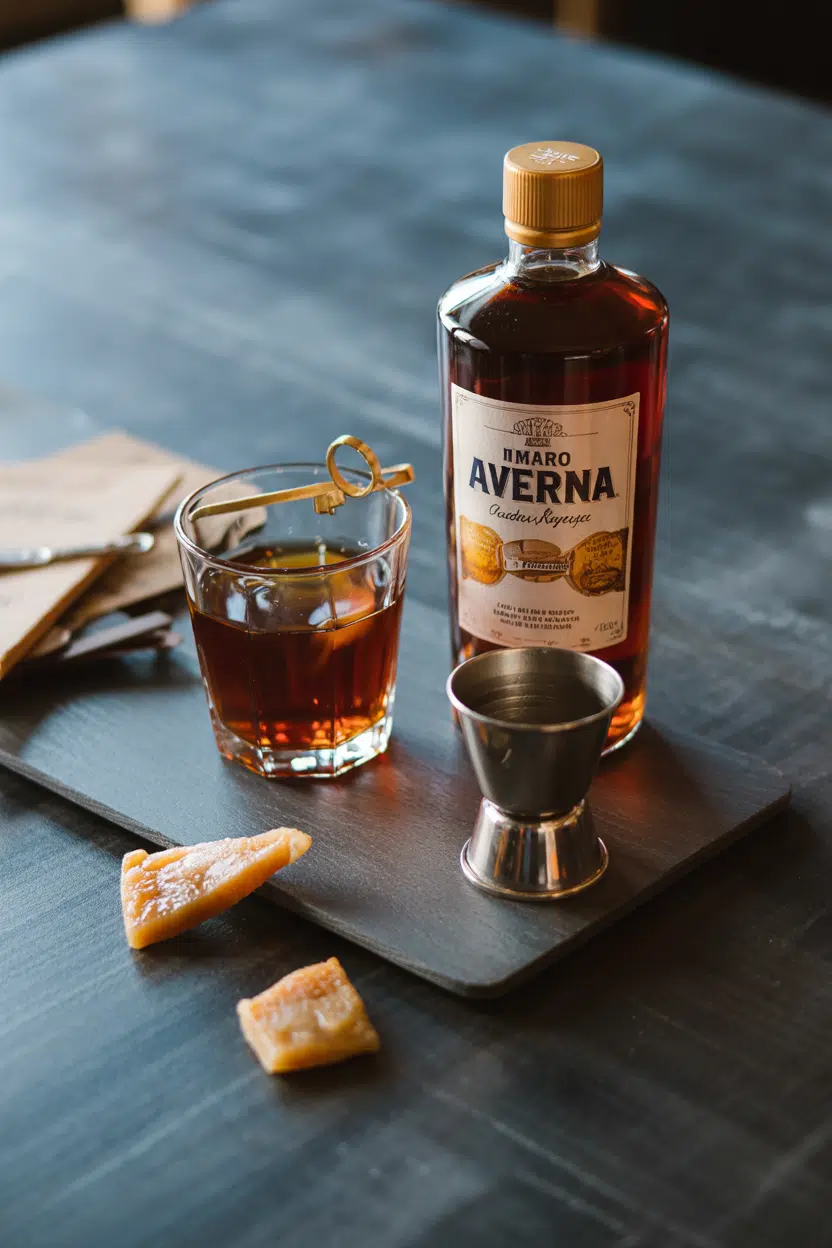
amaro averna - What Is Amaro Averna

Averna opens with caramel and candied orange, the sweetness arriving first and coating the palate before the bitterness follows. That bitterness is present but restrained - rooted in gentian and licorice rather than sharp citrus pith.

Sensory SnapshotModerate Intensity
👅 Flavor
bitter citruscaramellicoricedark herbal
✋ Texture
syrupyviscouscoating
👃 Aroma
warm caramelcandied orange rindanise-herbal

The finish is long and warming, with licorice and myrtle lingering after the caramel fades. When chilled over ice, the sweetness contracts slightly, making the herbal bitterness more pronounced.

If you've had Ramazzotti, think of Averna as richer and darker - less sharp, more molasses.

Golden Rule
Serve Averna at room temperature first. Chilling dulls the caramel and shifts the balance toward bitter, which changes how it pairs with food.

How to Use Amaro Averna

Averna's syrupy viscosity makes it more adaptable in the kitchen than most spirits, but its best-known role remains the digestif.

Served neat in a small glass at the end of a meal, it does exactly what Italian amari are designed to do: slow the pace and settle the stomach.

In cocktails, it replaces sweet vermouth in a Black Manhattan - the most recognizable Averna cocktail - where it adds darker, more herbal weight than vermouth alone. Stirred with bourbon or rye, it holds up without overpowering.

If you're looking at other dark amaro options, swapping out amaro averna covers the closest substitutes in detail.

How Amaro Averna Is Used
MethodBest ForTip
🥃 Neat / On IcePost-meal digestif, slow sippingRoom temperature first; add ice if you prefer a longer, more bitter finish
🍹 Cocktail baseBlack Manhattan, amaro sodasReplaces sweet vermouth 1:1 in spirit-forward stirred drinks
🍖 Reduction / GlazeRoasted pork, duck, stone fruitReduce with stock or butter; the alcohol cooks off, leaving bitter-caramel depth
🍫 Dessert fold-inChocolate ganache, truffle filling, panna cottaAdd 1-2 tablespoon per batch; pairs with dark chocolate and vanilla cream
☕ Espresso finishAmaro-spiked affogato-style drinksStir a small pour into hot espresso; complements the coffee's roast - similar contrast to what [swapping out espresso powder](https://forkliftkitchen.com/espresso-powder-substitutes/) tries to recreate

Averna also makes a simple aperitivo mixer: a splash over ice with blood orange soda keeps the ABV low and leans into the citrus backbone.

Avoid it with delicate flaky fish or light salads - the bitterness overwhelms those dishes without the fat or richness to balance it.

Try It In
☕Passion Fruit Hot ChocolateA small Averna pour deepens the chocolate's bitterness→🧀Fruit & Cheese Snack BoxPairs with aged pecorino and blood orange for a Sicilian-style board→🍠Roasted Sweet Potato and Black Bean SaladAverna glaze over roasted roots echoes the caramel-bitter contrast→

How to Buy and Store Amaro Averna

Look for the dark, sealed bottle with a clear "Averna" label and Sicilian production stamp. Skip any bottle showing cloudiness or sediment - Averna should be a clear, deep amber.

A clean cork or screwcap with a visible lot stamp signals proper handling through the supply chain.

Watch Out
Heat and direct light are Averna's main enemies. A bottle stored near a stove or window loses aroma noticeably within months, even unopened.

Storage is straightforward:

  • Unopened - keeps indefinitely in a cool, dark cabinet; no refrigeration needed
  • Opened - best within 2-3 years; reseal tightly after every pour to limit oxidation
  • Refrigeration - optional but not required; chilling thickens the texture without harming flavor

For questions about longer-term storage options, the guide on freezing amaro averna covers shelf life in detail.

Averna is not the kind of bottle you need to race through - unlike something perishable like keeping rice fresh, a well-sealed bottle of Averna waits patiently.

Where to Start With Averna

If you've never opened a bottle, pour it neat at room temperature after dinner. That single pour tells you everything: how sweet, how bitter, how herbal.

From there, the Black Manhattan is the logical next step if you want to move it into cocktails.

Best Pick
For cooking, the reduction method earns the most return - roasted pork or duck with an Averna-butter glaze showcases the bitter-caramel balance better than any other application.

If you find Averna too sweet for your preference, amaro montenegro swaps that work point toward lighter, drier amari in the same family. Averna rewards patience - the more you use it, the more situations it fits.

Frequently Asked Questions

Is Averna sweet or bitter?

Both, but sweetness leads. Caramel and candied orange arrive first, with gentian and licorice bitterness following on the finish. It's noticeably sweeter than most other Italian amari.

How strong is Amaro Averna?

Averna sits at approximately 29% ABV - mid-strength for an amaro. That's lower than most whiskeys but higher than wine, so standard pour sizes still carry real alcohol content.

What cocktails use Averna?

The Black Manhattan is the most recognized - Averna replaces sweet vermouth alongside rye or bourbon. It also works in amaro sodas and as a float over espresso drinks.

Can you cook with Amaro Averna?

Yes. It reduces well into glazes for roasted pork or duck, and folds into chocolate ganache or dessert creams. The alcohol cooks off during reduction, leaving the bitter-caramel flavor behind.

Is Averna served hot or cold?

Traditionally served at room temperature or over ice. Room temperature emphasizes caramel sweetness; chilling shifts the balance toward the herbal bitterness. Hot espresso applications are a modern exception.

Crockpot Chicken Mole

March 27, 2026

When you need hands-off dinner that works for meal prep or a quiet weeknight, crockpot chicken mole delivers. One pot, minimal attention, and enough rich, spiced sauce to make plain rice taste intentional.

Crockpot Chicken Mole served on a plate

The slow cooker does the work while you handle the rest of your day. The chicken turns tender, the mole thickens into a glossy coating, and the chocolate-chili balance settles into something that feels restaurant-level without the effort.

Perfect for busy weeks when cooking feels like a chore but you still want real food on the table.

QUICK SUMMARY

Crockpot chicken mole slow-cooks chicken thighs in a rich, spiced chocolate-chili sauce. Brown the chicken first for deeper flavor, then let the crockpot handle the rest. The result is tender, shreddable chicken coated in glossy mole sauce.

⏱️Time Reality: 15 minutes hands-on, then 6-8 hours in the crockpot on low
🔥Critical First Step: Sear chicken thighs 4-5 minutes per side before slow cooking
⚠️Watch Out: Too much liquid makes the sauce watery - stick to 1-1.5 cups broth max

Table of Contents

Toggle
  • Why This Recipe Works
  • What You'll Need
    • Ingredient Details
  • Ingredient Swaps
  • What to Serve With It
  • Store and Reheat
  • Frequently Asked Questions
  • Crockpot Chicken Mole
    • Method 
    • Tried this recipe?

Why This Recipe Works

Dark chocolate and toasted spices create a complex sauce that develops over hours without babysitting. The crockpot keeps the temperature steady while the flavors deepen and the chicken turns fall-apart tender. For a juicy chicken variation with similar hands-off timing, that works too.

Quick Reference
⏱️
Prep Time
15 min
🔥
Cook Time
6-8 hours (low) | 3-4 hours (high)
⏰
Total Time
6-8 hours 15 min
🍽️
Servings
6
📊
Difficulty
Easy
🏷️
Category
Main Dish
💡
Quick Tip
Brown chicken before slow cooking for deeper flavor
🎯
Best For
Weeknight | Meal prep

Five things that make this work:

  • Chicken thighs stay moist - dark meat holds up to long cooking without drying out like breasts do
  • Browning adds depth - searing the chicken first creates caramelized bits that flavor the sauce
  • Toasted spices bloom - heating dried chiles and spices for 2-3 minutes unlocks their oils and aroma
  • Chocolate balances heat - dark chocolate rounds out the chili peppers and adds silky body to the sauce
  • Low, slow heat melds flavors - 6-8 hours lets the spices, chocolate, and tomato blend into complex mole
Quick Tip
Use an instant-read thermometer to confirm chicken reaches 165°F at the thickest part before shredding

What You'll Need

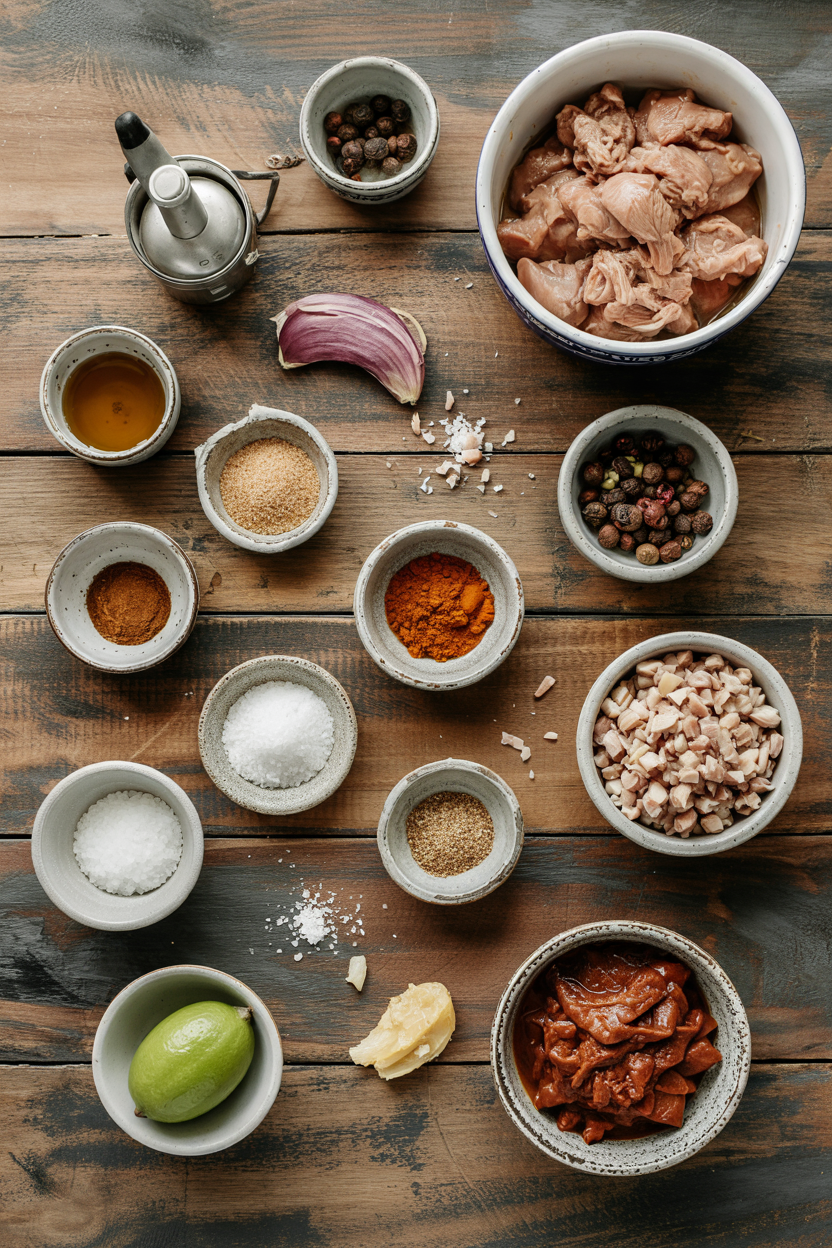
Ingredients for Crockpot Chicken Mole

Shopping for this is straightforward if you have a stocked spice rack. The chocolate and dried chiles matter most - skip the milk chocolate and grab dark. For this tender corn to serve alongside, keep fresh corn on hand too.

🍗
Protein
  • 2 lbs chicken thighs (bone-in or boneless)
🥢
Mole Base
  • 2-3 dried chipotle peppers
  • 2 oz dark chocolate (60-70% cacao)
  • 2 tablespoon tomato paste
  • 1 cinnamon stick
🧄
Aromatics
  • 1 large onion, diced
  • 4 cloves garlic, minced
🫙
Liquid & Finishing
  • 1-1.5 cups chicken broth
  • Fresh cilantro (garnish)
  • Lime wedges (garnish)

Ingredient Details

  • Chicken thighs
    Bone-in adds more flavor, boneless cooks slightly faster - either works for shredding
  • Dark chocolate
    Use 60-70% cacao - milk chocolate makes the sauce too sweet and cloying
  • Chipotle peppers
    Dried chipotles give smoky heat; substitute ancho or pasilla chiles for milder mole
  • Chicken broth
    Low-sodium lets you control salt levels as the sauce reduces and concentrates
  • Tomato paste
    Adds umami and helps thicken the sauce without making it tomato-forward
  • Cinnamon stick
    One stick adds warm background spice; ground cinnamon works but use only ¼ tsp
  • Onion and garlic
    Fresh aromatics build the sauce base - pre-minced garlic turns bitter during long cooking

Ingredient Swaps

Most variations center on adjusting heat or using what you have in the pantry. The chocolate and chicken thighs are worth keeping consistent. For something simple like tacos on the side, that keeps the Mexican theme going without extra work.

Four swaps that hold up:

  • Chicken breasts for thighs - reduce cook time to 4-5 hours on low or they'll dry out; thighs stay more forgiving
  • Ancho chile powder for chipotles - milder, less smoky flavor; use 1-2 tablespoon for similar heat level
  • Unsweetened cocoa powder for dark chocolate - mix 3 tablespoon cocoa with 1 tablespoon sugar and 1 teaspoon butter; less creamy but works
  • Vegetable broth for chicken broth - slightly lighter flavor but keeps the recipe dairy-free

Chicken Breasts

Works for: Leaner protein, shorter cook time

Skip if: You want fall-apart texture and maximum moisture

Ancho Chile Powder

Works for: Milder heat, easier to find in grocery stores

Skip if: You want smoky depth from chipotles

Instructions

The entire process takes 15 minutes of active work, then the crockpot runs unattended. Browning the chicken first makes the biggest difference in final flavor. For a simple grapefruit on the side to serve later, prep that while the chicken cooks.

  1. Sear the chicken - heat 1 tablespoon oil in a skillet over medium-high, brown chicken thighs 4-5 minutes per side until golden, remove and set aside (internal temp will be around 140°F, finishes in crockpot).

  2. Toast the spices - in the same pan, add dried chipotle peppers and cinnamon stick, toast 2-3 minutes until fragrant, then add onion and garlic, cook 3 minutes until softened.

  3. Build the mole sauce - transfer toasted spices, onion, garlic, tomato paste, dark chocolate (chopped), and 1 cup chicken broth to a blender, blend until smooth (sauce should be thick but pourable).

  4. Slow cook - pour sauce into crockpot, add seared chicken thighs, cover and cook 6-8 hours on low or 3-4 hours on high (chicken is done when it reaches 165°F and shreds easily with a fork).

  5. Finish and serve - remove chicken, let rest 5 minutes, shred with two forks, return to crockpot and stir into sauce, garnish with fresh cilantro and lime wedges before plating.

Golden Rule
Don't overfill the crockpot past ⅔ capacity - crowding causes uneven cooking and watery sauce

What to Serve With It

Rich mole needs something to cut through the depth and soak up the sauce. Rice or tortillas handle that job, while a bright side balances the plate. For easy beer can chicken dinner nights with similar Mexican sides, check that list for more options.

Side Dish Prep Why It Works How to Serve
Mexican rice Easy Absorbs mole sauce, adds bulk to the plate Spoon chicken and sauce over rice, garnish with cilantro
Black beans Easy Protein-rich, contrasts the richness of mole Serve alongside chicken or mix into rice
Corn tortillas Easy Wrap or scoop chicken, makes the meal handheld Warm tortillas, fill with shredded chicken and toppings
Simple green salad Easy Refreshes palate, adds crunch and brightness Toss greens with lime vinaigrette, serve on the side
Roasted vegetables Medium Adds texture contrast, soaks up extra sauce Roast zucchini or bell peppers while chicken cooks, plate together

Three ways to serve it:

  • Over rice with beans - classic combination that handles the sauce and adds protein
  • In warm tortillas - shred chicken, add mole sauce, top with crema and cilantro for tacos
  • With roasted vegetables - charred zucchini or bell peppers add smoky sweetness that complements the mole
Best Pick
Mexican rice soaks up the mole sauce without getting mushy - make it while the chicken slow cooks

Store and Reheat

Crockpot chicken mole holds up well in the fridge and freezes without losing texture. The sauce stays glossy when reheated properly. For something creamy like homemade dressing to drizzle over leftovers, that adds brightness to reheated portions.

Method Time Best For
🍳 Stovetop 5-7 min over medium-low, stir frequently Even reheating without drying out the chicken
🔥 Oven 15 min at 325°F, covered Large portions or reheating in a baking dish
📦 Microwave 2-3 min, stir halfway Quick single servings when you're short on time

For best results when storing:

  • Cool completely - let chicken and sauce reach room temp before transferring to containers (prevents condensation buildup)
  • Use shallow containers - spreads the chicken out for faster, more even cooling and reheating
  • Separate extras - store garnishes like cilantro and lime separately so they stay fresh
  • Freeze in portions - divide into meal-sized containers so you only thaw what you need
  • Add liquid when reheating - if sauce thickens too much in storage, stir in 2-3 tablespoon broth while warming

Frequently Asked Questions

Can I make crockpot chicken mole ahead and reheat?

Yes, make it up to 3 days ahead and store in the fridge. Reheat gently on the stovetop or in the oven, adding a splash of broth if the sauce thickens too much.

How long should I cook chicken mole in the crockpot on low?

Cook chicken thighs 6-8 hours on low until they reach 165°F and shred easily. Chicken breasts need 4-5 hours or they'll dry out.

Is it okay to use chicken breast instead of thighs?

You can, but reduce cook time to 4-5 hours on low to avoid dryness. Thighs stay more forgiving and turn fall-apart tender during long cooking.

What do I do if my mole sauce is too bitter or spicy?

Stir in 1-2 teaspoon honey or a pinch of sugar to balance bitterness. For heat, add a dollop of sour cream or extra chicken broth to mellow the spice.

What are good side dishes to serve with chicken mole?

Mexican rice, black beans, and warm corn tortillas work best. Add a simple green salad or roasted vegetables for crunch and brightness.

What kind of chocolate goes in mole sauce?

Use dark chocolate with 60-70% cacao. Milk chocolate makes the sauce too sweet and throws off the balance of chili and spice.

Can I freeze crockpot chicken mole leftovers?

Yes, freeze in airtight containers for up to 3 months. Thaw overnight in the fridge and reheat on the stovetop with a splash of broth to restore the sauce.

Crockpot Chicken Mole served on a plate

Crockpot Chicken Mole

No ratings yet
Crockpot Chicken Mole slow-cooks chicken thighs in a rich, spiced chocolate-chili sauce that develops depth without the fuss. Browning the chicken first adds caramelized flavor, while long, low heat melds spices and chocolate into a tender, shreddable dish perfect for busy nights.
Print Recipe Pin Recipe
Prep Time 15 minutes mins
Cook Time 7 hours hrs
Total Time 7 hours hrs 15 minutes mins
Servings: 6 servings
Course: Main Dish
Cuisine: Mexican
Ingredients Equipment Method Notes

Ingredients
  

  • 2 lbs chicken thighs bone-in or boneless
  • 2-3 dried chipotle peppers
  • 2 oz dark chocolate 60-70% cacao, chopped
  • 2 tablespoon tomato paste
  • 1 stick cinnamon stick
  • 1 large onion diced
  • 4 cloves garlic minced
  • 1-1.5 cups chicken broth low-sodium preferred
  • fresh cilantro for garnish
  • lime wedges for garnish
  • 1 tablespoon oil for searing chicken

Equipment

  • Skillet For searing chicken and toasting spices
  • Blender To blend mole sauce ingredients smooth
  • Crockpot For slow cooking chicken and sauce

Method
 

  1. Heat 1 tablespoon oil in a skillet over medium-high heat and brown chicken thighs 4-5 minutes per side until golden. Remove and set aside. The internal temperature will be around 140°F and will finish cooking in the crockpot.
    2 lbs chicken thighs, 1 tbsp oil
  2. In the same pan, add dried chipotle peppers and cinnamon stick and toast for 2-3 minutes until fragrant. Then add diced onion and minced garlic, cooking for another 3 minutes until softened.
    2-3 dried chipotle peppers, 1 stick cinnamon stick, 1 large onion, 4 cloves garlic
  3. Transfer toasted spices, onion, garlic, tomato paste, chopped dark chocolate, and 1 cup chicken broth to a blender. Blend until smooth; sauce should be thick but pourable.
    2-3 dried chipotle peppers, 1 stick cinnamon stick, 1 large onion, 4 cloves garlic, 2 tbsp tomato paste, 2 oz dark chocolate, 1-1.5 cups chicken broth
  4. Pour sauce into crockpot and add seared chicken thighs. Cover and cook 6-8 hours on low or 3-4 hours on high until chicken reaches 165°F and shreds easily with a fork.
    2 lbs chicken thighs
  5. Remove chicken and let rest for 5 minutes. Shred with two forks, return to crockpot and stir into sauce. Garnish with fresh cilantro and lime wedges before serving.
    fresh cilantro, lime wedges, 2 lbs chicken thighs

Notes

  • Brown chicken before slow cooking for deeper, richer flavor.
  • Don't exceed 1.5 cups of broth to prevent a watery sauce.
  • Use an instant-read thermometer to ensure chicken reaches 165°F before shredding.

Tried this recipe?

Let us know how it was!

How Long Does Balsamic Vinegar Last? [Storage Guide]

March 27, 2026

Freezing balsamic vinegar isn't something most cooks think about - and for good reason, because balsamic vinegar is one of the few pantry staples that practically outlasts everything around it.

How Long Does Balsamic Vinegar Last

An unopened bottle, sealed and kept in a dark cabinet, can hold its quality for three years or more; artisanal aged balsamic from Modena often remains stable almost indefinitely.

Once opened, a standard bottle stays good for two to five years with minimal effort.

Understanding what makes balsamic vinegar distinct - its concentrated grape must base and high acidity - helps explain why spoilage is rare but not impossible.

QUICK SUMMARY

Balsamic vinegar keeps almost indefinitely unopened and 2-5 years once opened, stored at room temperature in a cool, dark cabinet. Refrigeration is rarely needed. Freezing is possible for glaze portions but can affect viscosity and is generally unnecessary.

🏠Pantry (unopened): 3+ years; artisanal aged bottles stable almost indefinitely
🏠Pantry (opened): 2-5 years with cap sealed, away from heat
🧊Fridge (opened): Indefinite quality; only needed for infused or low-acidity versions
❄️Freezer: 6-12 months in portions; texture may change
⚠️Key Rule: Discard only if smell turns rotten or mold appears on the surface

How Long Does Balsamic Vinegar Last?

Shelf life for balsamic vinegar depends almost entirely on whether the bottle is sealed and what type you're working with.

Commercial bottles hold quality for three or more years unopened; once you break the seal, expect two to five years of peak flavor if the cap goes back on each time.

Infused versions - those with herbs, citrus, or fruit added - are the exception. These can degrade faster because added ingredients introduce moisture and, in some cases, lower the overall acidity.

Balsamic Vinegar Shelf Life
MethodStateDurationNotes
🏠 PantryUnopened3+ years / indefiniteArtisanal aged balsamic stable almost indefinitely when sealed
🏠 PantryOpened2-5 yearsFlavor may mellow over time; cap tightly after each use
🧊 FridgeOpenedIndefiniteUnnecessary for standard bottles; slows changes in infused versions
❄️ FreezerOpened6-12 monthsUse for glaze portions only; viscosity may change after thawing

One thing to note: balsamic naturally develops fine dark sediment as grape must concentrate settles over time. That sediment is harmless and actually signals an authentic, minimally processed product.

How to Store Balsamic Vinegar

Standard balsamic vinegar doesn't need anything fancy. A cool, dark cabinet - away from the stove and out of direct sunlight - is all it requires for the long term.

Golden Rule
Always reseal the cap tightly after pouring. Exposure to air triggers slow oxidation, which gradually flattens the sweet top notes that make aged balsamic worth buying.

Pantry: Store the original bottle upright in a cabinet away from heat sources. Dark glass bottles work better than clear ones because light degrades the delicate aromatic compounds over time - buy in dark bottles whenever possible.

Fridge: Reserve refrigeration for low-acidity specialty balsamics or any infused balsamic that contains fresh herbs or fruit. Store those upright in the original sealed bottle or a food-grade glass jar with an airtight lid, and use within one to three months once opened.

Counter: Keep bottles off the counter entirely if they're near a sunny window or sitting beside the stove. That habit is one of the most common ways to fade the sweet top notes of a quality bottle - more on that mistake in the tips below.

A note on bottle choice: if you're considering parallels with other acidic condiments, the storage logic for replacements for apple cider vinegar or alternatives to red wine vinegar follows similar pantry-first principles for high-acidity products.

Can You Freeze Balsamic Vinegar?

You can freeze balsamic vinegar, though it's rarely the right call for a whole bottle. The real use case is portioning balsamic glaze into single-use cubes you can drop directly into a hot pan or onto roasted vegetables.

Watch Out
Freezing thin or low-viscosity balsamic can cause separation and light crystal formation. Gentle warming after thawing usually restores pourability, but very delicate aged balsamics may lose some aromatic complexity.
  1. Portion it out - Pour measured amounts into a silicone ice-cube tray or small freezer-safe containers. Don't freeze the entire bottle.
  2. Seal and label - Cover the tray tightly with plastic wrap or a fitted lid. Write the date; aim to use within 6-12 months.
  3. Freeze flat - Keep the tray level in the freezer so cubes form uniformly and are easy to pop out.
  4. Thaw before use - Move one cube to the fridge for a few hours, or thaw at room temperature for 30-60 minutes. Reheat gently if using as a glaze to restore fluidity.

Frozen balsamic cubes work well as single-use portions for quick glazes on roasted meats - much the same way storing honey glazed salmon correctly uses portion control to minimize waste.

Signs Balsamic Vinegar Has Gone Bad

Genuine spoilage in balsamic vinegar is uncommon, but it does happen - mostly in infused balsamics where added ingredients lower acidity and shorten stability. Knowing the difference between normal aging and actual spoilage prevents unnecessary waste.

Signs It's Gone Bad
👀
VisualSudden cloudiness or murky sediment (not the slow, fine settling of aging) · Floating film or colored mold on the surface (especially in infused versions)
👃
SmellSharp, rotten, or putrid aroma - distinct from the expected tangy, syrupy vinegar scent
✋
TextureSlimy film · Large persistent clumps that don't re-dissolve after shaking

Fine dark sediment at the bottom of an aged bottle is not a spoilage sign. That's mother of vinegar, a naturally occurring byproduct of the fermentation that produced the balsamic in the first place.

Discard only when the smell or appearance deviates sharply from what you'd expect: a syrupy, tangy, slightly sweet aroma and a clear-to-slightly-cloudy appearance.

Getting the Most From Your Bottle

A good bottle of balsamic vinegar rewards a little attention. These habits keep both everyday and premium bottles in the best possible condition.
  • 🍶 Buy dark bottles - Dark glass blocks the light that gradually strips sweet aromatic notes from aged balsamic.
  • 🍳 Keep two bottles - Reserve high-quality aged balsamic for finishing dishes; use a cheaper everyday bottle for cooking to preserve what you paid for.
  • 🌿 Refrigerate infused versions - Any balsamic with fresh herbs or fruit goes in the fridge immediately and should be used within one to three months.
  • 🔥 Revive older balsamic - Simmer it gently to reduce into a glaze; this concentrates flavor and refreshes the aroma of a bottle that's mellowed.
  • 🧊 Use freezer cubes strategically - Frozen glaze portions are practical single-use tools, not a substitute for proper pantry storage.

If a bottle has genuinely reached the end of its useful life, check out replacements for balsamic vinegar for quick alternatives that work across salad dressings, marinades, and reductions.

Shortcut
To quickly assess an older bottle: smell it before you use it. Balsamic should smell tangy and sweet, never sharp or rotten. If it passes the smell test, it's almost certainly fine.

Frequently Asked Questions

Does balsamic vinegar go bad?

Rarely. Standard balsamic's high acidity makes it naturally resistant to spoilage. Infused versions with added herbs or fruit are the main exception and should be refrigerated and used within one to three months.

Should balsamic vinegar be refrigerated?

Not for standard aged or commercial bottles. Refrigeration is only necessary for low-acidity specialty versions or balsamics infused with fresh ingredients. Keeping a standard bottle in the fridge can actually cause it to absorb odors if left uncapped.

How long does opened balsamic vinegar last?

Two to five years in a cool, dark pantry with the cap tightly sealed after each use. Flavor may gradually mellow, but the vinegar remains safe and usable well beyond that window in most cases.

What does spoiled balsamic vinegar look like?

Sudden murky cloudiness or a floating film on the surface - not the fine settled sediment that's normal in aged bottles. Colored mold is a definitive discard sign, particularly in infused versions.

Can you freeze balsamic vinegar?

Yes, though it's only practical for glaze portions frozen in ice-cube trays. Viscosity may increase after freezing, and thin balsamics can separate slightly; gentle warming restores pourability in most cases.

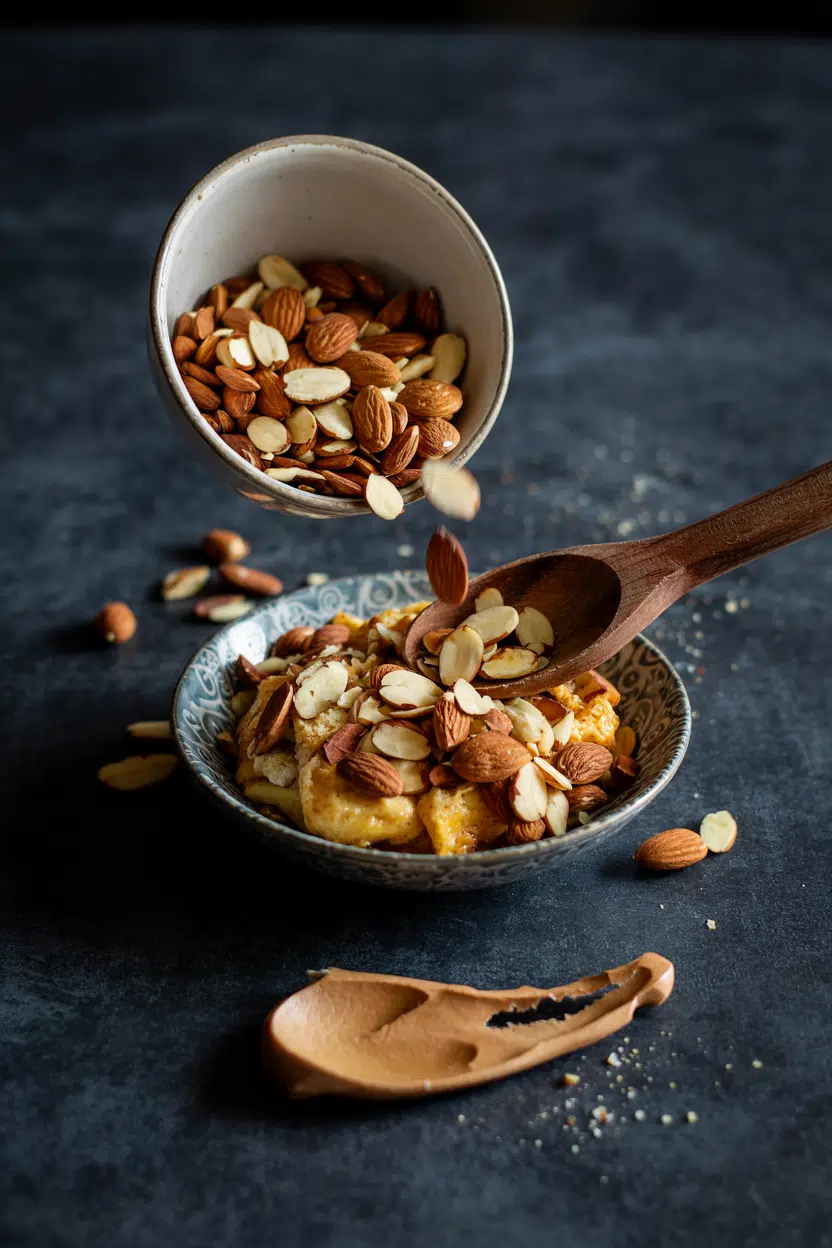
What Is Almonds? [Taste, Uses & More]

March 27, 2026

Most people assume almonds are a simple snack ingredient - something you grab from a bowl and move on.

What Is Almonds

What they miss is how dramatically the nut changes depending on what you do to it: raw almonds are firm and lightly sweet, while roasting them unlocks a deeper, almost buttery nuttiness that behaves differently in cooking.

If you've ever wondered why a recipe insists on blanched rather than raw, or why marzipan swaps that work matter so much when almond paste is the base flavor, the answer starts with understanding what almonds actually are and how their form shapes their taste.

QUICK SUMMARY

Almonds are edible tree nut seeds with a mildly sweet, buttery flavor that intensifies when roasted. Sold raw, roasted, blanched, or ground, they work across sweet and savory cooking. Store them cold to prevent rancidity and use within 6-12 months once opened.

🌰Type: Tree nut seed, sold raw, roasted, blanched, or ground
👅Flavor: Buttery, mildly sweet, toasty and nutty when roasted
🍽️Best Uses: Baking, garnishing, almond flour, almond butter, almond milk
🛒Buy: Plump, uniform tan kernels - avoid shriveled or dark-spotted nuts
📦Shelf Life: 2-3 months at room temp, 6-12 months refrigerated
⚠️Note: Major allergen - avoid entirely if you have a tree nut allergy

What Is Almonds?

Almonds are the edible seeds of Prunus dulcis, a flowering tree native to the Levant and Mediterranean region.

Despite being called a nut in every kitchen context, the almond is technically a drupe seed - the kernel inside a stone fruit, like a peach pit you can eat.

Most almonds in commercial supply are sweet almonds, the variety grown across California, Spain, and Italy for food use.

Bitter almonds (Prunus dulcis var. amara) are a separate subtype containing amygdalin, a compound that converts to hydrogen cyanide in raw form, making them unsafe to eat unprocessed - their flavor shows up instead in extracts and liqueurs.

At market, sweet almonds appear in several forms:

  • 🌰 Raw almonds - whole, unprocessed kernels with the brown testa (skin) intact
  • Blanched almonds - skin removed by brief hot-water treatment, revealing a smooth white kernel
  • Roasted almonds - dry-roasted or oil-roasted, with intensified flavor
  • Almond flour / almond meal - ground from blanched or whole almonds respectively; not interchangeable in fine pastry work
  • Almond butter - ground to a paste, used like peanut butter in spreads and sauces

California produces roughly 80% of the world's commercial almond supply, so most almonds on U.S. shelves are California almonds, typically the Nonpareil variety.

What Does Almonds Taste Like?

almonds - What Is Almonds

Raw almonds have a mild, buttery sweetness with a faint floral note underneath - nothing aggressive, nothing sharp. That restraint is exactly what makes them so useful across different cuisines.

Roasting changes everything. Heat drives off moisture and triggers browning reactions that push the flavor toward a deeper, toasty nuttiness with more pronounced richness.

Ground into almond flour, that same kernel becomes slightly creamy and almost neutral, absorbing surrounding flavors rather than competing.

Sensory SnapshotModerate Intensity
👅 Flavor
butterymildly sweettoastyfaintly floral
✋ Texture
crunchy (raw/roasted)creamy (ground/soaked)
👃 Aroma
warm nuttyalmond-floral

Compared to cashews, almonds are firmer with a more pronounced toasty edge - when blended into milk, though, the creaminess is similar. Bitter almonds carry a sharp, almost medicinal marzipan note that sweet almonds only hint at faintly.

Watch Out
Bitter almonds and the extract made from them are very different things. Never substitute raw bitter almonds for sweet almonds in cooking - use only processed bitter almond extract in small amounts as directed.

How to Use Almonds

Almonds shift roles depending on their form, and understanding that is what separates average cooking from precise cooking. Whole roasted almonds add crunch to grain bowls and green salads; slivered and toasted, they finish roasted vegetables cleanly.

Almond-crusted fish - trout or tilapia with a coarse almond coating - is a simple technique that adds real texture contrast.

In baking, almond flour is the backbone of macarons, frangipane tarts, and most gluten-free cakes. Note that keeping almond flour fresh matters more than with whole nuts - ground almonds go rancid faster because of increased surface area exposure.

Marzipan and almond paste both rely on blanched almonds pureed with sugar, though they differ in ratio and texture.

For beverages and dairy-free cooking, soaked almonds blended and strained produce almond milk with a clean, slightly sweet character.

Almond butter works anywhere you'd consider alternatives to butter in sauces or spreads - it adds body and a mild nuttiness without overpowering.

How Almonds Are Used
MethodBest ForTip
🥗 RawSnacking, salad toppings, soaking for milkSoak overnight to soften skins before blending
🔥 Dry-RoastedGarnishing, grain bowls, snackingWatch closely - almonds go from golden to burnt fast
🧁 Ground (Flour)Macarons, frangipane, gluten-free cakesUse blanched for fine pastry; meal for denser bakes
🍯 CaramelizedPraline, brittle, ice cream mix-insUse dry sugar method for even coating
🥛 Soaked & BlendedAlmond milk, almond creamStrain through a nut bag for the smoothest result

Almonds pair particularly well with honey, dark chocolate, and citrus - orange and almond is a classic French patisserie combination. In Mediterranean and Middle Eastern cooking, they appear alongside dried apricot and fig.

Indian cuisine uses ground almonds to thicken and enrich korma-style sauces.

Try It In
🌿Savory Herb Roasted AlmondsShows how dry-roasting and seasoning transforms plain raw almonds→🍚Breakfast Couscous with Dates and AlmondsClassic Middle Eastern pairing of almonds with dried fruit→🥦Charred Broccoli Salad with AlmondsDemonstrates almonds as a crunchy finish for roasted vegetables→

How to Buy and Store Almonds

Good almonds look plump, with a uniform tan color and firm texture. Reject any kernels that are shriveled, oily to the touch, or show dark spotting - those are signs of rancidity or poor storage, and the off-flavor will carry through into whatever you cook.

Best Pick
For baking and pastry work, buy raw or blanched almonds and roast them yourself - you control the color and intensity, and they're almost always fresher than pre-roasted bags.

Once opened, almonds need protection from heat, light, and air. Refrigeration is the practical choice for most kitchens - a sealed container keeps shelled almonds good for 6-12 months.

Freezing extends that window to 12-24 months without quality loss, and the details of storing almonds correctly make a real difference if you buy in bulk.

At room temperature, opened almonds hold for about 2-3 months if kept away from heat sources. Don't store them near the stove.

Where to Start With Almonds

Almonds reward anyone willing to work with more than one form.

If you're new to cooking with them, start with dry-roasting - a dry skillet over medium heat for 4-5 minutes gives you an immediately better product than anything from a pre-roasted bag.

From there, try swapping out almonds when a recipe calls for a different nut - almonds hold up in most contexts where cashews or hazelnuts are used.

Once you're comfortable with whole and sliced forms, moving into almond flour or almond butter opens up a much wider range of dishes.

Golden Rule
Match the form to the function: whole for crunch, blanched for smooth pastes, flour for baking, soaked for milk. Using the wrong form is the most common almond mistake.

Frequently Asked Questions

Are almonds nuts or seeds?

Technically, almonds are seeds - the kernel of a stone fruit related to peaches and plums. In cooking and food labeling, however, they're classified as tree nuts, and that distinction matters most for allergy purposes.

Can you eat almonds raw?

Yes - raw sweet almonds are safe to eat straight from the bag. Most commercially sold "raw" almonds in the U.S. are actually pasteurized, typically via steam treatment, though the process doesn't meaningfully change flavor.

What do bitter almonds taste like?

Bitter almonds have an intense, sharp marzipan-like flavor - much stronger than sweet almonds and with a medicinal edge. That character comes from amygdalin, the compound that also makes raw bitter almonds unsafe to consume directly.

Is almond flour the same as almond meal?

No. Almond flour is made from blanched (skinless) almonds and has a finer, lighter texture suited to macarons and frangipane. Almond meal is ground from whole almonds with skins, producing a coarser, darker result better for dense cakes and crusts.

How long do almonds last in the fridge?

Shelled almonds kept in an airtight container in the refrigerator stay fresh for 6-12 months. Rancidity - detected by a bitter, paint-like smell - is the main spoilage sign to check for before using older stock.

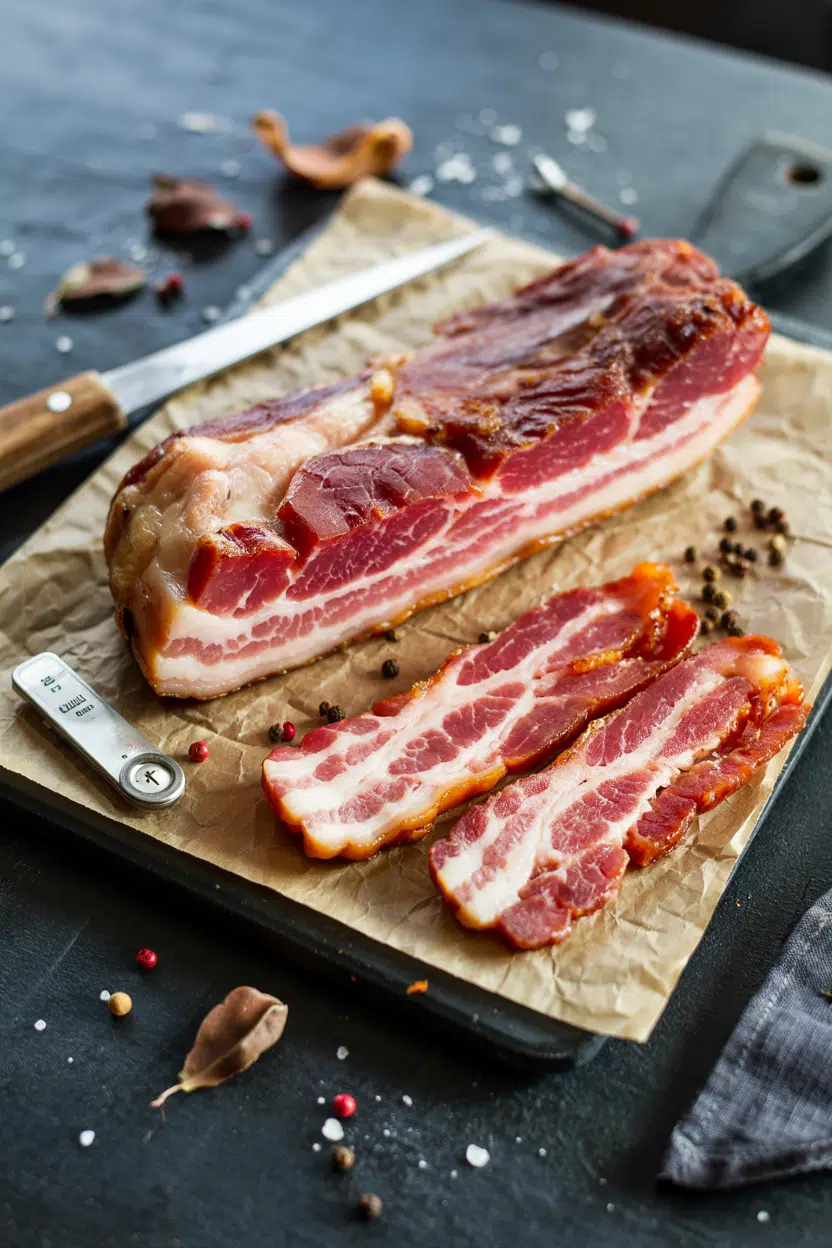
What Is Bacon? Taste, Texture, Uses & Storage Guide

March 27, 2026

Bacon does something in a pan that few other ingredients can match - it releases fat, crisps at the edges, and fills the kitchen with a smoky, savory smell that signals the whole dish is about to get more interesting. That rendered fat is as valuable as the meat itself, carrying the same smoky depth and coating everything it touches.

What Is Bacon

Whether you're building a French lardon stew, a British full breakfast, or a weeknight pasta, understanding how bacon works means getting more out of every slice.

QUICK SUMMARY

Bacon is a cured, often smoked pork product made from pork belly or back. It delivers salty, smoky, umami-rich flavor and renders fat that doubles as a cooking medium. Used across breakfast, sandwiches, pasta, and stews, it's a strong-flavored ingredient that earns its place in small amounts.

🐷Type: Cured pork product, typically from pork belly or back
🧂Flavor: Salty, smoky, umami-rich, slightly sweet from curing
🍳Best Uses: Pan-frying, oven-baking, wrapping proteins, pasta, stews
❄️Shelf Life: Unopened 2-3 weeks; opened cooked bacon 4-5 days in fridge
⚠️Watch For: High sodium and saturated fat; nitrates present in most cured varieties

What Is Bacon?

Bacon is a cured pork product with roots in Northern European preservation traditions, where salting and smoking meat extended its shelf life through winter. Most bacon sold in the US comes from pork belly, yielding the familiar streaky slices with alternating bands of meat and fat.

UK and Irish bacon, called rashers, typically comes from the back loin and is leaner with a larger meat eye.

Across Europe, cured pork takes several regional forms worth knowing.

  • Streaky bacon - the American standard, cut from pork belly, with high fat content and strong crisping ability
  • Back bacon - cut from the loin, common in British cooking; meatier and less fatty than streaky
  • Pancetta - the Italian equivalent, cured with spices but rarely smoked; sold rolled or flat
  • Lardons - small cubed cuts of cured pork belly used in French cooking, rendered in stews and salads
  • Salt pork - heavily salted pork belly used as a flavor base in beans and braises, not typically sliced and eaten alone

The curing process involves salt, often sugar, and sometimes sodium nitrate, which fixes the pink color and prevents bacterial growth during smoking or aging.

What Does Bacon Taste Like?

bacon - What Is Bacon

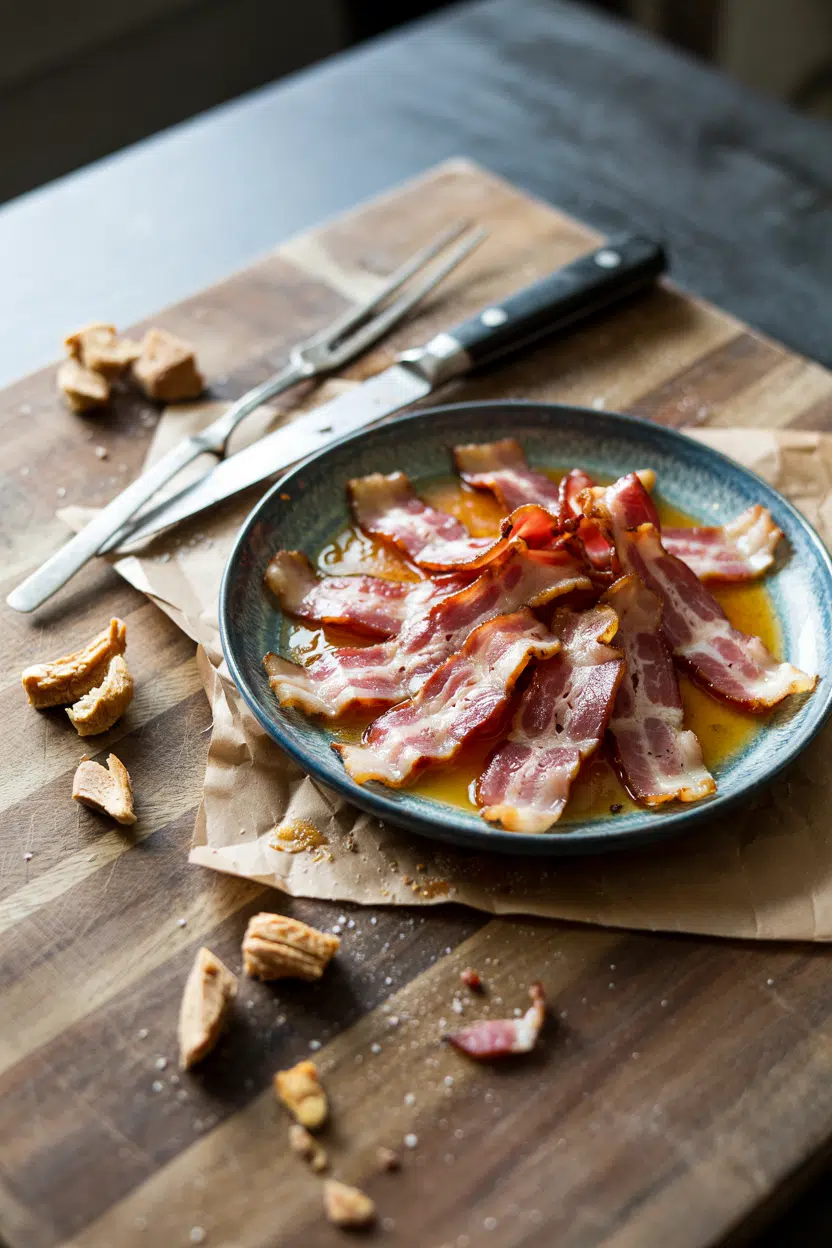
Bacon's flavor is assertive and layered - primarily salty, with deep umami from the curing process and a smoky finish that lingers. Think of concentrated ham with added smoke and the richness of rendered pork fat. The slight sweetness you notice in many American varieties comes from sugar or maple in the cure, not the meat itself.

Sensory SnapshotStrong Intensity
👅 Flavor
saltysmokyumami-richslightly sweet
✋ Texture
crispy edgestender-chewy fatsilky when rendered
👃 Aroma
smokysavory cured pork

Heat changes everything. Raw bacon is soft, pale, and mildly salty - edible but unappealing.

As it cooks, the fat renders out and the Maillard reaction browns the meat, concentrating flavor and building those crispy edges. Overcook it and bitterness appears; undercook it and the fat stays waxy and chewy.

Golden Rule
Pull bacon off heat just before it looks done. Residual heat finishes the crisping, and it won't cross into bitter territory.

How to Use Bacon

Bacon functions in two ways in a recipe: as the featured ingredient or as a background flavor builder. Knowing which role it's playing changes how you cook it.

How Bacon Is Used
MethodBest ForTip
🍳 Pan-FryingBreakfast plates, BLTs, crumbling over saladsStart in a cold pan to render fat evenly before crisping
🫙 Oven-BakingBatch cooking, even crispness across multiple stripsUse a wire rack over a sheet pan so fat drips away
🔥 Slow-CookingStews, braises, lardons in French-style dishesCut into lardons first; fat melts into the sauce over time
🌯 WrappingBacon-wrapped scallops, dates, filets, or vegetablesSecure with a toothpick; cook seam-side down first
🫕 Rendered FatSautéing greens, frying eggs, deglazing for pan saucesStrain and store in a sealed jar; keeps weeks in the fridge

In American cooking, bacon defines the breakfast plate alongside eggs and toast. British cooking uses back bacon rashers in a full breakfast or a bacon butty.

French cuisine relies on lardons - diced pork belly - sautéed in a hot pan to build the fat base for salads like frisée aux lardons or slow-cooked dishes like coq au vin. Italian-influenced dishes lean on pancetta alternatives when pancetta isn't available, with bacon stepping in as the closest match.

Bacon pairs naturally with eggs, sharp cheddar, and blue cheese. It cuts through the bitterness of kale and Brussels sprouts and bridges sweet-savory combinations with apples, pears, or maple glaze.

Stirred into pasta or mac and cheese, it adds smoky umami without requiring a complex sauce. Avoid pairing smoked bacon with delicate white fish - the smoke will overwhelm rather than complement.

Try It In
🌴Bacon Wrapped DatesSweet-salty contrast at its most direct→🐚Bacon Wrapped ScallopsSmoky fat balances delicate seafood→🍝Chicken Bacon Ranch Pasta BakeSmoky umami backbone in a one-pan bake→

How to Buy and Store Bacon

At the store, look for slices with clearly defined alternating bands of meat and fat - unevenly fatty slabs often crisp poorly because the meat-to-fat ratio is off. Pale pink meat with translucent white fat is the target.

For smoked varieties, check the label: "natural smoke" or "hickory smoked" differs from "smoke flavoring," which is a liquid additive.

Watch Out
Packages labeled "smoke flavor added" use liquid smoke concentrate, not actual wood smoking. The flavor is sharper and less complex than traditionally smoked bacon.

Storage matters as much as purchase quality. Unopened, vacuum-sealed bacon keeps 2-3 weeks in the fridge. Once opened, wrap tightly in parchment then foil, or use an airtight container - exposure to air speeds up rancidity and odor transfer. For full details on bacon freshness guide and freezer timelines, raw bacon frozen properly holds for 4-6 months. Rendered and strained bacon fat stores well in the fridge for several weeks and works as a lard substitute in savory baking.

Where to Start With Bacon

Start with pan-fried streaky bacon in a cold skillet - no oil needed, low to medium heat, and patience. That single technique teaches you everything: how the fat renders, when to pull it, and how to use what's left in the pan.

Once you have the basic fry down, the rendered fat opens a second layer of cooking. Sauté greens in it, fry eggs in it, or build a pan sauce.

If you need a leaner alternative with similar cured pork flavor, bacon replacements like pancetta or turkey bacon cover most of the same ground with different fat levels.

Shortcut
Oven-bake a full pack at 400°F on a wire rack for 15-18 minutes. Store cooked strips in the fridge and reheat in 30 seconds - faster than pan-frying every time.

Frequently Asked Questions

What is the difference between streaky bacon and back bacon?

Streaky bacon comes from pork belly and has high fat content; it crisps aggressively and renders a lot of fat. Back bacon comes from the loin, carries more meat per slice, and stays chewier rather than crisping to a snap.

Can bacon be eaten raw?

Technically it's cured, not raw, but eating it uncooked is not recommended. Curing reduces bacterial risk; however, it doesn't eliminate pathogens the way cooking does, and the fat texture is unpleasant and waxy without heat.

How long does bacon last in the fridge?

Unopened refrigerated bacon holds 2-3 weeks; check the sell-by date. Once opened, cooked bacon keeps 4-5 days wrapped tightly, and raw opened bacon is best used within 7 days.

How is bacon made?

Pork belly or back is rubbed or brined with salt, sugar, and often sodium nitrate, then left to cure for several days. Most commercial bacon is then cold- or hot-smoked over hardwood before being sliced and packaged.

Is bacon healthy?

Bacon is high in sodium, saturated fat, and nitrates - all flagged in high-consumption diets. In small quantities it contributes protein, niacin, and B12, but it's not a health food by standard nutritional benchmarks.

What Is Aji Amarillo? [Taste, Uses & More]

March 27, 2026

Ají amarillo is the pepper behind some of Peru's most recognizable dishes - it's what gives a aji de gallina creamy chicken recipe its signature golden color and what layers fruity heat through making causa rellena potato terrine at home.

What Is Aji Amarillo

Outside Peru, it stays relatively unknown, which means most cooks haven't yet experienced a chile that delivers genuine heat alongside notes of banana, apricot, and citrus in the same bite.

QUICK SUMMARY

Ají amarillo is a bright orange-yellow Peruvian chile with fruity, medium heat and thick flesh. Use it fresh, roasted, or as a paste in classic Peruvian cooking - from ceviche to braises to dipping sauces.

🌶️Flavor: Fruity and citrusy with banana-apricot notes and clean medium heat
🍽️Best Uses: Ají de gallina, causa, ceviche, braises, dipping sauces
🛒Buy It As: Fresh pods, jarred paste, or frozen purée at Latin grocery stores
🧊Shelf Life: Fresh pods 1-2 weeks refrigerated; opened paste 2-3 weeks in the fridge
⚠️Avoid With: Strong bitter greens or heavy smoked meats that overpower its floral notes

What Is Aji Amarillo?

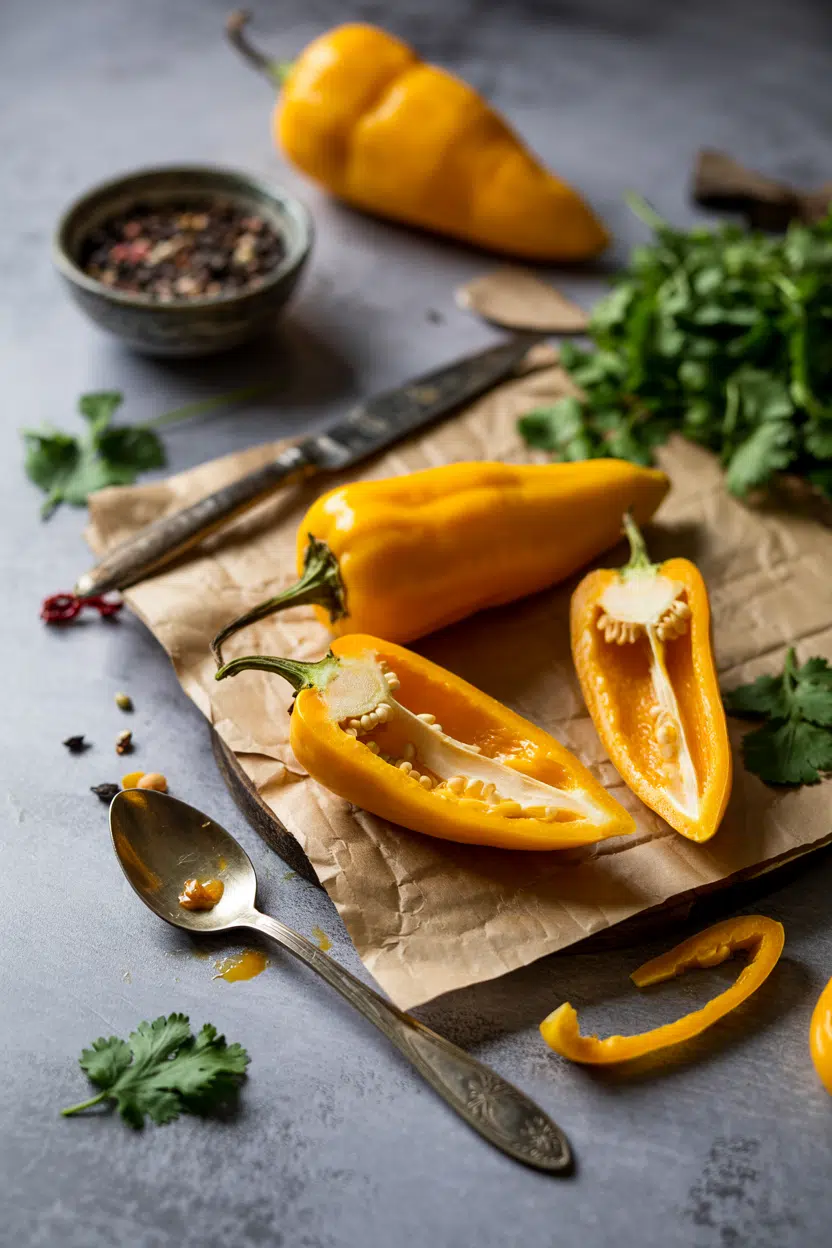
Ají amarillo (Capsicum baccatum) is a chile native to Peru, cultivated along the Andean coast and highlands for centuries. "Amarillo" means yellow in Spanish, though fully ripe pods are actually a vivid orange - the name refers to the color of younger fruit.

It belongs to the Capsicum baccatum species, which sets it apart from more common supermarket chiles like jalapeño or serrano (Capsicum annuum). That botanical difference contributes to its distinctly fruity, floral character.

You'll find it sold under several names: ají amarillo pepper, ají amarillo paste, or simply conserva de ají amarillo. Some labels drop the accent mark entirely.

Fresh pods are meaty and thick-walled, roughly 4-5 inches long. Outside Peru, paste form is far easier to source - it's widely available jarred or frozen at Latin specialty stores and online.

Best Pick
If you can only buy one form, reach for a jarred paste with a short ingredient list - real peppers, water, and salt. Vivid orange color means good quality; muddy brown means avoid it.

Two other Peruvian chiles are worth knowing by comparison: ají limo is smaller and sharper, used raw in ceviche, while ají panca is deep red-brown with smoky, earthy notes - a full breakdown of comparing aji panca vs aji amarillo options makes it clear they aren't interchangeable.

What Does Aji Amarillo Taste Like?

aji amarillo - What Is Aji Amarillo

Ají amarillo sits at a flavor intersection that most chiles never reach. Fruity heat is the short answer - but the detail matters.

Sensory SnapshotModerate Intensity
👅 Flavor
fruitybanana-apricotbright citrusclean heat
✋ Texture
meatysilky when pureed
👃 Aroma
tropical-fruityslightly floral

Think of a habanero stripped of its harsh, fuel-like top notes and replaced with ripe apricot and underripe banana. The heat is medium - roughly 30,000-50,000 Scoville units - but it arrives cleanly and fades quickly, without lingering burn.

Raw fresh pods lean more sharply fruity and bright. Roasting deepens the sweetness and rounds out the heat.

Pureed into paste with a little oil, ají amarillo becomes silky and slightly mellow - still fruity, but with more body behind it.

How to Use Aji Amarillo

Ají amarillo anchors the flavor profile of Peruvian cooking more than any other single ingredient. Sweating paste in oil is usually the first step in many traditional preparations - it releases color and aroma into the fat, which then carries both through the whole dish.

How Aji Amarillo Is Used
MethodBest ForTip
🥗 Raw / FreshDiced as a garnish over grilled fish or cevicheRemove seeds and veins to dial back heat without losing flavor
🍳 Sweated in OilBuilding a sauce base for ají de gallina or secoCook paste on medium-low; high heat scorches the sugars fast
🔥 Roasted / CharredBlending into ceviche marinades for deeper sweetnessChar directly over flame, then peel before blending
🥣 Pureed PasteCausa layers, dipping sauces, sanduche spreadsThin with evaporated milk or crema for a richer sauce
🫙 Quick PickledBright condiment for grilled meats or roasted vegetablesUse a light brine - too much vinegar masks the fruit notes

Classic pairings work because of contrast or complement. Lime and lemon cut through the richness and amplify the citrus notes already in the chile. Potato - starchy and neutral - lets ají amarillo carry the whole flavor load in causa. White fish and shellfish are mild enough to let the pepper shine without competition. Knowing what to serve alongside a dish matters too; the sides for ceviche that work best tend to echo those same starchy, neutral principles.

Huacatay, Peruvian black mint, is the herbal partner worth seeking out. Its dark, anise-like earthiness balances the brightness of ají amarillo in sauces and marinades.

If a recipe calls for fresh pods and you only have paste, use about one tablespoon of paste per fresh pepper. For alternatives in a pinch, replacements for aji amarillo covers which chiles come closest by heat and fruit character.

Try It In
🥔Air Fryer Garlic Parmesan Potato WedgesStir ají amarillo paste into the seasoning mix for fruity heat→🍯Air Fryer Honey Garlic Potato WedgesThe sweetness plays well against ají amarillo's citrus notes→🧄Roasted Garlic Garlic AioliBlend in ají amarillo paste for a Peruvian-style dipping sauce→

How to Buy and Store Aji Amarillo

Fresh pods should be firm, glossy, and uniformly orange to deep yellow-orange. Skip any that feel soft, show dark spots, or have started to wrinkle - those have lost moisture and flavor.

Paste is the more practical buy for most cooks outside Peru. Check the ingredient list before purchasing: the best jars contain peppers, water, salt, and little else.

Vivid orange color signals quality; anything brown or dull has likely oxidized.

Watch Out
Once opened, ají amarillo paste oxidizes quickly. Press plastic wrap directly onto the surface before closing the lid, and use it within 2-3 weeks for best color and flavor.

Store fresh peppers loosely wrapped in a paper bag in the crisper drawer.

For a full breakdown of aji amarillo's shelf life across fresh, paste, and frozen forms, the specifics vary more than you'd expect.

Sealed commercial paste keeps for months at room temperature; opened jars belong in the fridge.

For reference, the same logic applies to other perishable liquids - understanding how long milk keeps once opened follows a similar principle of cold storage and surface exposure.

Start Here With Aji Amarillo

New to this chile? Begin with the paste. It's shelf-stable, easy to measure, and gets you into the flavor immediately without any prep.

  • 🌶️ First dish to try - Sweat a tablespoon of paste in oil, add shredded chicken, evaporated milk, and bread to make a simple ají de gallina sauce.
  • 🥔 Easiest application - Mash paste directly into warm potato for causa; the starch softens the heat and carries the fruit forward.
  • 🐟 If you want it raw - Dice fresh pods finely and scatter over grilled fish as a garnish; remove the seeds first if heat sensitivity is a concern.

Once you're comfortable, move to charring whole pods or blending your own paste. The flavor reward is proportional to the effort.

Golden Rule
Don't substitute another fresh chile and expect the same result. Ají amarillo's fruity-floral character is specific to the species - heat alone won't replace it.

Frequently Asked Questions

Is aji amarillo spicy?

Yes, but moderately so. It ranges from 30,000 to 50,000 Scoville units - hotter than a jalapeño, milder than a habanero. The heat arrives cleanly and fades quickly without prolonged burn.

Can I use aji amarillo in ceviche?

Yes - charred and blended, it adds fruit-forward heat to the leche de tigre. Some cooks use ají limo instead for sharper raw heat, but ají amarillo gives a rounder, sweeter result.

How do you make aji amarillo paste?

Blanch fresh pods briefly to reduce bitterness, then blend with a neutral oil and a pinch of salt until smooth. Strain for a silkier texture. Refrigerate and use within two weeks.

Where can I buy aji amarillo paste?

Latin grocery stores and specialty food shops carry it most reliably. Online retailers also stock several brands. Look for jars labeled "pasta de ají amarillo" with vivid orange color.

What is the heat level of aji amarillo compared to jalapeño?

Ají amarillo is roughly 3-5 times hotter than a typical jalapeño. A jalapeño tops out around 8,000 Scoville units; ají amarillo starts around 30,000. The heat profile also differs - fruitier, less grassy.

How Long Does Apple Juice Last? [Storage Guide]

March 27, 2026

Leftover apple juice sitting in the fridge after a weekend brunch raises a fair question: how long is it actually safe to drink? Opened pasteurized apple juice lasts 7-10 days refrigerated, while fresh-pressed varieties push that window down to 3-5 days - a difference that matters more than most people expect.

Can You Freeze Apple Juice

Understanding apple juice's flavor and uses helps explain why the type you buy directly affects how carefully you need to monitor it.

Frozen, it keeps for up to a year, making the freezer a genuinely useful backup rather than a last resort.

Knowing which signals mean it's gone and which are harmless - like the sediment that settles after storing herbs in ice cube trays correctly or portioning any liquid in ice trays - can save you a wasted carton.

QUICK SUMMARY

Opened apple juice lasts 7-10 days in the fridge (3-5 for fresh-pressed). Sealed shelf-stable cartons keep in the pantry until the printed date. Frozen juice holds best quality for 8-12 months. Fermentation smell or mold means discard immediately.

🧊Fridge (opened): 7-10 days pasteurized; 3-5 days fresh-pressed
🏠Pantry (unopened): Until best-by date; typically 6-12 months
❄️Freezer: 8-12 months best quality in airtight containers

How Long Does Apple Juice Last?

Shelf life for apple juice splits sharply by type and whether the bottle has been opened. UHT-pasteurized cartons sit happily in the pantry until their printed best-by date - typically 6-12 months out - because heat treatment eliminates the microbes that drive spoilage.

Once oxygen enters the picture, that safety margin drops fast.

Apple Juice Shelf Life
MethodStateDurationNotes
🏠 PantryUnopened (shelf-stable)6-12 monthsUse by printed best-by; keep cool and dry
🧊 FridgeUnopened (refrigerated)2-3 weeksUnpasteurized or fresh-pressed; follow label date
🧊 FridgeOpened (pasteurized)7-10 daysKeep at ≤40°F (4°C); reseal tightly after each use
🧊 FridgeOpened (fresh-pressed)3-5 daysNo preservatives; spoils faster than pasteurized
❄️ FreezerOpened or portioned8-12 monthsBest quality within a year; safe beyond but flavor fades

Fresh-pressed apple juice lacks the heat treatment that slows oxidation and fermentation, which is why it ages roughly twice as fast as its pasteurized counterpart. Regional naming adds confusion here - what some call apple cider is simply unfiltered fresh-pressed juice, and the same short window applies. If you're weighing options mid-recipe, replacements for apple cider covers what works when you're short on either.

How to Store Apple Juice

Storage method should match the type of juice you have. Matching container to contents makes a real difference in how long that window holds.

Pantry: Keep sealed shelf-stable cartons and cans upright in a cool, dark spot away from the stove or any heat source. Don't rely on best-by dates if packaging looks swollen or dented - discard without tasting.

Fridge: After opening, reseal the original cap tightly and return the bottle to the coldest part of the fridge (usually toward the back, not the door). If the original container doesn't reseal well, transfer juice to a glass or airtight plastic container with minimal headspace to slow oxidation.

Freezer: Pour into freezer-safe containers, leaving 1-1.5 inches of headspace for expansion. Ice cube trays work well for smaller portions - fill, freeze solid, then transfer to a sealed bag and label with the date.

Golden Rule
Never freeze apple juice in a sealed glass bottle with no headspace - liquid expands roughly 9% when frozen and will crack or shatter the container.

Can You Freeze Apple Juice?

Yes - apple juice freezes well, and the quality difference after thawing is minor for most uses. Some separation and mild cloudiness are normal and harmless; they don't signal spoilage.

The process for freezing orange juice follows nearly identical steps, so the same approach applies here.

How to freeze apple juice:

  1. Portion Pour juice into freezer-safe containers or ice cube trays, leaving 1-1.5 inches headspace for expansion.
  2. Seal Remove as much air as possible; use a zip-seal freezer bag or snap-lid container with a tight fit.
  3. Label Write the freeze date clearly; use oldest batches first, prioritizing them for smoothies or cooking.
  4. Freeze Lay bags flat for even freezing and easier stacking; stand rigid containers upright.
  5. Thaw Move to the fridge overnight for gentle thawing, or use cold running water for faster results.

After thawing, shake or stir well to reincorporate settled solids. Thawed juice should be used within 3-5 days and kept refrigerated - don't refreeze it, as each freeze-thaw cycle accelerates off-flavors.

Shortcut
Freeze apple juice in ice cube trays for smoothie use - cubes chill drinks instantly without watering them down and thaw faster than full containers.

Signs Apple Juice Has Gone Bad

Most spoilage in apple juice is driven by fermentation - wild yeasts converting sugars into alcohol and CO₂ - rather than bacterial rot. That means the signs are more specific than simple mold growth.

Discard immediately if you notice any of the indicators below; don't rely on taste to confirm.

Signs It's Gone Bad
👀
VisualPersistent foam or bubbles in still juice · Dramatic increase in cloudiness · Visible mold on surface or inside cap · Bulging or leaking carton
👃
SmellSharp, alcoholic or yeasty odor · Sour, vinegary off-smell
✋
TextureExcessive fizzing on opening · Slimy film on surface

Note that slight natural cloudiness in fresh-pressed juice is not a spoilage sign - it's just suspended apple solids settling. The red flag is cloudiness that appears suddenly or grows noticeably in pasteurized juice that was previously clear.

Watch Out
A bulging carton means gas has built up inside - a direct sign of fermentation or bacterial activity. Don't open it; place it in a sealed bag before discarding.

Getting the Most from Every Bottle

Good habits at the point of purchase carry through to the last glass. These four actions cover the biggest gaps in everyday apple juice storage.

  • 🏷️ Label immediately - Write the open date on the bottle as soon as you break the seal; 7-10 days disappears faster than expected.
  • ❄️ Keep fresh-pressed cold always - Unlike shelf-stable cartons, fresh-pressed and unpasteurized juice should never sit at room temperature beyond 2 hours.
  • 🔄 Rotate frozen batches - Label freeze dates and use older portions first; flavor fades noticeably past the 12-month mark even if the juice is technically safe.
  • 🍹 Use thawed juice strategically - Thawed apple juice works well in marinades, sauces, and baked goods where minor texture change goes unnoticed; when flavor matters most, [alternatives to apple juice](https://forkliftkitchen.com/apple-juice-substitutes/) may be a better call for fresh applications.

Just as doing blanch kale for freezing properly comes down to a few non-negotiable steps, apple juice storage rewards one or two consistent habits rather than complicated protocols.

Frequently Asked Questions

Can you freeze apple juice in the carton?

Not without modification. Remove the cap first and leave at least 1-1.5 inches of headspace to accommodate expansion. Seal the carton loosely while it freezes, then tighten once solid to prevent splitting.

How long does opened apple juice last in the fridge?

Pasteurized juice lasts 7-10 days; fresh-pressed lasts 3-5 days. Both require refrigeration at ≤40°F (4°C) and a tightly resealed container after each use.

Will apple juice explode in the freezer?

It can crack or burst if frozen in a sealed container with no headspace. Liquid expands roughly 9% when frozen, so leaving 1-1.5 inches of room prevents breakage in both plastic and glass containers.

Is cloudy apple juice bad?

Not always. Natural cloudiness in fresh-pressed juice is harmless suspended apple solids. The warning sign is cloudiness appearing suddenly in previously clear pasteurized juice, especially if paired with off-smell or bubbling.

Can you refreeze thawed apple juice?

Avoid it. Refreezing is technically safe if the juice was thawed in the fridge and not held beyond 3-5 days, however each cycle compounds off-flavors and dulls the juice noticeably. Portion before freezing to avoid the problem entirely.

Slow Cooker Beef Barbacoa

March 27, 2026

Barbacoa often tastes flat or turns out stringy. The trick is searing the beef first and cooking low for 8 hours so the fat melts into the meat instead of leaving it dry.

Slow Cooker Beef Barbacoa served on a plate

High heat on the stovetop creates a crust that locks in flavor. The slow cooker finishes the job while you're at work or asleep.

Make this when you want tacos that taste like you drove to get them but you didn't leave the house.

QUICK SUMMARY

Chuck roast slow-cooked with chipotle peppers, garlic, and lime juice for 8 hours on low. Sear the beef before adding it to the slow cooker - browning builds the smoky-rich base that makes barbacoa taste like barbacoa. Works for weeknight tacos, meal prep, or feeding a crowd without hovering over the stove.

⏱️Timeline: 15 minutes prep, 8 hours unattended cooking, no babysitting required
🔥Critical Move: Brown beef 3-4 minutes per side in hot skillet before slow cooking
⚠️Watch Out: Skipping the sear leaves you with bland meat - 8 minutes of browning prevents 8 hours of regret

Why This Recipe Works

Slow cooker barbacoa works because chuck roast has enough fat to stay moist during long cooking. The marbling melts into the meat instead of drying it out. For a beef cut that works similarly in another dish, check out this easy corn side that also benefits from slow, steady heat.

Quick Reference
⏱️
Prep Time
15 min
🔥
Cook Time
8 hours low or 4 hours high
⏰
Total Time
8-8.5 hours
🍽️
Servings
6-8 servings
📊
Difficulty
Easy
🏷️
Category
Main Dish
💡
Quick Tip
Sear beef before slow cooking for richer flavor
🎯
Best For
Weeknight | Meal prep | Casual entertaining

Five reasons this method delivers:

  • Searing creates depth - browning the beef first builds a caramelized crust that adds smoky richness you can't fake with more spices
  • Low and slow prevents stringiness - cooking at low heat for 8 hours breaks down collagen into gelatin, making the meat shreddable instead of chewy
  • Chipotle plus lime balances - smoky heat from adobo peppers meets citrus brightness so the flavor doesn't taste flat or one-note
  • Chuck roast stays juicy - fat marbling melts during cooking, basting the meat from the inside so it doesn't dry out
  • Minimal hands-on time - once you sear and add everything to the slow cooker, the pot does the work while you're gone
Quick Tip
Check beef hits 195-205°F internal temp for shreddable doneness - anything lower stays tough, anything higher turns mushy

What You'll Need

Ingredients for Slow Cooker Beef Barbacoa

Most of this is pantry staples plus one trip to the meat counter. Stock up on chipotle peppers in adobo - the small can lasts through multiple batches and gives you the smoky heat that defines barbacoa.

🍗
Protein
  • Chuck roast (3-4 lbs)
🧄
Aromatics
  • Garlic (6 cloves)
  • Onion (1 medium)
🥢
Sauce & Liquid
  • Chipotle peppers in adobo (3-4 peppers)
  • Beef broth (1 cup)
  • Lime juice (3 tbsp)
  • Apple cider vinegar (2 tbsp)
🌶️
Spices
  • Cumin (1 tbsp)
  • Oregano (1 tsp)
  • Ground cloves (¼ tsp)
  • Bay leaves (2)
  • Salt (1 tsp)

Ingredient Details

  • Chuck roast
    Look for well-marbled cuts with visible fat streaks - leaner cuts dry out during long cooking
  • Chipotle peppers in adobo
    Use 3 peppers for moderate heat, 4 for spicier - remove seeds if you want smoke without burn
  • Beef broth
    Low-sodium broth lets you control salt levels - regular broth concentrates as it cooks and can turn too salty
  • Garlic
    Fresh cloves give sharper flavor than powder - smash them with the side of your knife for easier peeling
  • Lime juice
    Fresh lime juice adds brightness that bottled juice can't match - squeeze it right before adding to the pot
  • Cumin
    Ground cumin works fine, but toasting whole seeds first and grinding them yourself adds deeper earthy notes
  • Apple cider vinegar
    The acidity cuts through richness and tenderizes meat - don't skip it even if it seems like a small amount

Ingredient Swaps

Barbacoa adapts to what you have without losing the core smoky-tangy profile. Swap the beef cut or adjust the heat level depending on your fridge and spice tolerance.

Four swaps that work:

  • Beef brisket or short ribs for chuck roast - similar fat content keeps meat tender, cooking time stays about the same
  • Ancho chili powder plus smoked paprika for chipotle peppers - use 2 teaspoon ancho and 1 teaspoon paprika for milder smoky heat without the burn
  • Water or vegetable broth for beef broth - less rich but still works, just add an extra pinch of salt
  • Lemon juice for lime juice - different citrus note but same acidity to balance the smoke

Instant Pot Method

Works for: Cutting cook time to 90 minutes on high pressure, same tender texture

Skip if: You want hands-off cooking while you're away - pressure cookers require monitoring

Oven Braising

Works for: No slow cooker available, prefer stovetop-to-oven method in Dutch oven

Skip if: You don't want to tie up your oven for 4 hours at 300°F

Instructions

Sear the beef first, then let the slow cooker do the rest. The total hands-on time is under 20 minutes - everything else happens while you're doing something else.

  1. Brown the beef in hot skillet. Heat 2 tablespoon oil over medium-high heat. Sear chuck roast 3-4 minutes per side until dark crust forms. Transfer to slow cooker.
  2. Deglaze the pan. Pour ¼ cup beef broth into hot skillet. Scrape browned bits from bottom with wooden spoon. Pour liquid over beef in slow cooker.
  3. Mix the sauce. Blend chipotle peppers, remaining broth, lime juice, vinegar, garlic, onion, cumin, oregano, cloves, and salt until smooth. Pour over beef. Add bay leaves.
  4. Slow cook on low. Cover and cook 8 hours on low or 4 hours on high. Beef is done when internal temp hits 195-205°F and shreds easily with fork.
  5. Shred and mix. Transfer beef to cutting board. Rest 10 minutes. Shred with two forks. Remove bay leaves from sauce. Skim fat from surface. Return shredded beef to sauce and stir.
Golden Rule
Let beef rest 10 minutes before shredding - juices redistribute and meat pulls apart cleanly instead of tearing into messy strings

What to Serve With It

Barbacoa needs something to soak up the sauce and cut the richness. For more ideas on building a complete plate around beef dishes, check out these complete beef and broccoli meal ideas that use similar pairing logic.

Side Dish Prep Why It Works How to Serve
Mexican rice Easy Absorbs sauce, adds bulk Spoon rice onto plate, top with barbacoa and sauce
Corn tortillas Easy Traditional taco vessel Warm in dry skillet 30 seconds per side, fill with beef
Refried beans Easy Creamy contrast to smoky beef Spread on plate or tortilla, layer beef on top
Simple slaw Easy Crunchy, tangy balance Pile on tacos or serve on the side
Avocado slices Easy Cools spice, adds creaminess Fan slices on plate or tuck into tacos

Three ways to serve it:

  • Taco night - warm tortillas, pile on shredded beef, top with slaw and avocado
  • Burrito bowls - layer rice, beans, barbacoa, and all the toppings in one bowl
  • Nachos - spread chips on sheet pan, cover with beef and cheese, broil until melted
Best Pick
Street corn salad hits every note - sweet, tangy, creamy - and the char from grilled corn echoes the barbacoa's smoky heat

Store and Reheat

Barbacoa keeps well and reheats without drying out if you store it with some sauce. Skip the microwave if you want the texture to stay right.

Method Time Best For
🍳 Stovetop 5-7 minutes on low Retains moisture, reheats evenly, best texture
🔥 Oven 15-20 minutes at 325°F Large portions, crispier edges if you want texture contrast
📦 Microwave 2-3 minutes, stir halfway Single servings when you're in a rush

For best results when storing:

  • Store beef in sauce - keeps meat moist and prevents it from drying out in the fridge
  • Use shallow containers - barbacoa cools faster in wide containers, reducing bacteria growth
  • Freeze in portions - divide into single-meal amounts so you can thaw only what you need
  • Label with date - barbacoa lasts 3-4 days in fridge, up to 3 months in freezer
  • Add fresh lime after reheating - brightens flavor that dulls during storage

Frequently Asked Questions

How long to cook slow cooker beef barbacoa?

Cook on low for 8 hours or high for 4 hours. Check that internal temp hits 195-205°F and beef shreds easily with a fork before removing from slow cooker.

Can I make beef barbacoa ahead and store it?

Yes, barbacoa keeps 3-4 days in the fridge or up to 3 months frozen. Store shredded beef in sauce to prevent drying out, and reheat gently on the stovetop.

What goes well with slow cooker beef barbacoa?

Serve with Mexican rice, corn tortillas, refried beans, simple slaw, or avocado slices. The sides should absorb sauce and balance the smoky-spicy richness of the beef.

How do I know when beef barbacoa is done and tender?

Use a meat thermometer to check for 195-205°F internal temp. The beef should shred easily when you pull it with two forks - if it resists, keep cooking.

Can I use flank steak instead of chuck roast for barbacoa?

Skip flank steak - it's too lean and turns stringy during long cooking. Stick with chuck roast, brisket, or short ribs for the fat marbling that keeps meat tender and juicy.

Slow Cooker Beef Barbacoa served on a plate

Slow Cooker Beef Barbacoa

No ratings yet
This slow cooker beef barbacoa features chuck roast seared for a rich crust and cooked low and slow for 8 hours until tender and shreddable. The smoky chipotle and bright lime juice create a balanced, flavorful sauce perfect for tacos or meal prep.
Print Recipe Pin Recipe
Prep Time 15 minutes mins
Cook Time 8 hours hrs
Total Time 8 hours hrs 15 minutes mins
Servings: 6 servings
Course: Main Dish
Cuisine: Mexican
Ingredients Equipment Method Notes

Ingredients
  

  • 3 pounds chuck roast well-marbled cuts with visible fat streaks
  • 3 cloves garlic fresh, smashed
  • 1 medium onion chopped
  • 3 pieces chipotle peppers in adobo for moderate heat, seeds removed for less spice
  • 1 cup beef broth low sodium preferred
  • 3 tablespoons lime juice freshly squeezed
  • 2 tablespoons apple cider vinegar
  • 1 tablespoon cumin ground
  • 1 teaspoon oregano dried
  • 0.25 teaspoon ground cloves
  • 2 bay leaves
  • 1 teaspoon salt
  • 2 tablespoons oil for searing, such as vegetable or canola oil

Equipment

  • Skillet Used to sear beef and deglaze pan.
  • Slow cooker Used for slow cooking the seared beef with sauce.
  • Wooden spoon Used to scrape browned bits while deglazing.

Method
 

  1. Heat 2 tablespoons oil in a skillet over medium-high heat. Sear the chuck roast 3-4 minutes per side until a dark crust forms. Transfer the beef to the slow cooker.
    3 pounds chuck roast, 2 tablespoons oil
  2. Pour ¼ cup beef broth into the hot skillet. Scrape the browned bits from the bottom with a wooden spoon and pour the liquid over the beef in the slow cooker.
    1 cup beef broth
  3. Blend chipotle peppers, remaining beef broth, lime juice, apple cider vinegar, garlic, onion, cumin, oregano, ground cloves, and salt until smooth. Pour the sauce over the beef in the slow cooker and add bay leaves.
    3 pieces chipotle peppers in adobo, 1 cup beef broth, 3 tablespoons lime juice, 2 tablespoons apple cider vinegar, 3 cloves garlic, 1 medium onion, 1 tablespoon cumin, 1 teaspoon oregano, 0.25 teaspoon ground cloves, 1 teaspoon salt, 2 bay leaves
  4. Cover and cook on low for 8 hours or on high for 4 hours. The beef is done when the internal temperature reaches 195-205°F and shreds easily with a fork.
  5. Transfer beef to a cutting board and let rest for 10 minutes. Shred the beef with two forks. Remove bay leaves from the sauce and skim any fat off the surface. Return the shredded beef to the sauce and stir to combine.
    2 bay leaves

Notes

  • Sear the beef before slow cooking to develop a richer, smoky flavor.
  • Check for an internal temperature of 195-205°F for optimal shreddable tenderness.
  • Store shredded beef in its sauce to keep it moist during refrigeration or freezing.

Tried this recipe?

Let us know how it was!

What Is Anise Seed? [Taste, Uses & More]

March 27, 2026

You spot a small jar labeled "anise seed" near the fennel and caraway, pause, and wonder if it's worth adding to your spice rack - it is.

What Does Anise Seed Taste Like

These tiny, ridged seeds carry the same sweet anethole oil that flavors ouzo and raki, making them one of the more distinctive spices you can work with in both baking and savory cooking.

Whether you're folding them into biscotti dough or steeping them into a braising liquid for lamb, understanding anise in cooking helps you use them with confidence rather than guesswork.

QUICK SUMMARY

Anise seed is a sweet, licorice-forward spice from the Eastern Mediterranean used in baking, spirits, and savory braises. Its flavor comes from anethole oil, which intensifies when toasted. Whole seeds keep their aroma far longer than pre-ground.

🌿Flavor: Sweet licorice with a warm, faintly peppery finish
🍽️Best For: Biscotti, braised meats, spice blends, and anise spirits
🛒Buy: Whole seeds only - plump, medium brown, with visible ridges
📦Store: Airtight container, dark and cool; grind just before use
⏱️Shelf Life: Whole seeds: 2-3 years; ground: 6 months for peak aroma

What Is Anise Seed?

Anise seed is the dried fruit of Pimpinella anisum, a flowering herb in the Apiaceae family - the same botanical family as caraway, fennel, and dill.

Native to the Eastern Mediterranean and Southwest Asia, the plant has been cultivated for thousands of years across Greece, Egypt, Turkey, and the Levant.

Each seed is small, roughly 3-5mm long, with a curved shape, longitudinal ridges, and a warm medium-brown color. You'll also see it sold as aniseed, or labeled anís in Spanish and anis in French markets.

One point of regular confusion: anise seed is not the same plant as star anise, though both share anethole as their dominant flavor compound - the differences between anise vs star anise come down to plant family, potency, and how each is best used.

  • 🌱 Botanical name - Pimpinella anisum, unrelated to star anise (Illicium verum)
  • 🌍 Origin - Eastern Mediterranean and Southwest Asia; now grown widely in India and Mexico
  • 🧴 Active compound - Anethole, a phenylpropene responsible for its signature licorice aroma
  • 🌾 Forms available - Whole seed, coarsely cracked, and ground (pre-ground loses aroma fastest)

What Does Anise Seed Taste Like?

anise seed - What Does Anise Seed Taste Like

Anise seed leads with sweet, clean licorice - brighter and more candy-like than star anise, which carries a deeper, almost medicinal quality. There's a warm, slightly peppery edge underneath that keeps the sweetness from feeling flat.

Sensory SnapshotStrong Intensity
👅 Flavor
sweet licoricewarmly spicyfaintly peppery
✋ Texture
dry and hard wholecrisp when toasted
👃 Aroma
bright anetholearomatic licorice

Heat changes the profile noticeably. Toasting whole seeds in a dry pan deepens their sweetness and coaxes out a nuttier undertone, while grinding releases anethole immediately - meaning ground anise should go in close to when you need it.

Compared to fennel seed, anise seed is sweeter and more forward; compared to tarragon, it's warmer and less grassy. Both comparisons are worth understanding if you're weighing anise seed swaps that work in a specific recipe.

Golden Rule
Toast whole anise seeds before grinding. Thirty seconds in a dry pan over medium heat opens up the anethole and gives you a measurably richer result in biscotti, spice blends, and braises.

How to Use Anise Seed

Anise seed earns its place in both sweet and savory cooking, though baking is where most home cooks first encounter it. Italian anise biscotti rely on whole or lightly crushed seeds mixed directly into the dough, giving each slice an intermittent hit of licorice rather than uniform flavor.

Middle Eastern semolina puddings and ka'ak cookies steep anise in warm milk or syrups first, which softens the impact.

On the savory side, whole seeds work well in long braises.

Levantine braised lamb often includes them alongside cinnamon and allspice, where the anethole mellows over hours into something rounder and less sharp. Toasted and ground anise goes into sausage mixes and dry rubs for cured meats across Mediterranean kitchens.

How Anise Seed Is Used
MethodBest ForTip
🌾 WholeBiscotti dough, braises, pickling liquidAdd early so seeds soften slightly in moisture
🔥 ToastedSpice blends, sausage seasoning, dry rubsToast 30 sec in a dry pan, then grind immediately
💧 SteepedTeas, syrups, infused milk for puddingsRemove seeds after 10 minutes to avoid bitterness
🧁 GroundCookie doughs, cake batters, spice mixesGrind just before use - aroma fades within hours

Anise seed pairs naturally with fennel seeds, orange peel, cardamom, cloves, and honey. It shows up across Greek, Italian, Lebanese, Turkish, North African, and South Asian kitchens.

Spirits like ouzo and raki are infused with it - if a recipe calls for one of those and you're out, knowing about swapping out ouzo keeps the project on track.

Keep it away from delicate herbs like chervil, which it overpowers, and avoid stirring it into cold raw dairy where the oil can turn cloying rather than fragrant.

Try It In
🥗Poppy Seed Dressing (Homemade)A seed-forward dressing where anise seed adds a sweet, aromatic lift→

How to Buy and Store Anise Seed

Buy whole seeds every time - pre-ground anise loses aroma within weeks, not months. Look for seeds that are uniformly plump, medium brown, and show clear longitudinal ridges.

Gray, dusty, or musty-smelling seeds have already lost most of their anethole.

Watch Out
Containers labeled just "anise" sometimes contain star anise powder rather than Pimpinella anisum seeds. Check the label for the botanical name or visible whole seeds before buying.

Store whole seeds in an airtight, dark container away from heat and light - a spice drawer works, but a cabinet near the stove does not. Grind only what you need, when you need it.

For a full breakdown of how long they keep and what signs to watch for, anise seed's shelf life covers the specifics in detail.

  • Whole seeds - best aroma within 2-3 years of purchase
  • Ground anise - use within 6 months before the anethole fades
  • Freezing - not necessary for whole seeds stored properly in an airtight jar

Start With the Biscotti

If this is your first time cooking with anise seed, fold a teaspoon of whole seeds into a batch of biscotti dough.

That single use teaches you how the seeds perform in heat, how their flavor distributes, and whether you want to go heavier next time.

From there, fennel seed in cooking is a natural next step - the two spices overlap enough that understanding one sharpens your instincts for the other, though their differences matter when precision counts.

Anyone weighing one against the other will also find fennel seed swaps that work a useful reference alongside anise.

Frequently Asked Questions

Is anise seed the same as star anise?

No. They share anethole as their primary flavor compound but come from completely different plants. Star anise (Illicium verum) is stronger and more medicinal-tasting; anise seed (Pimpinella anisum) is sweeter and brighter. They're not interchangeable at equal quantities.

Can you substitute fennel seed for anise seed?

Yes, with adjustments. Fennel seed is milder and slightly more savory, so use about 1.5 times the amount to approximate anise seed's intensity. The swap holds best in savory dishes and spice blends; it falls short in delicate baked goods where sweetness matters.

How do you grind anise seeds without a grinder?

A mortar and pestle works well - toast the seeds first so they're brittle, then grind in short circular strokes. Alternatively, seal them in a zip bag and crush with a rolling pin for a coarser result suitable for doughs and rubs.

Does anise seed have health benefits?

In culinary amounts it contributes iron, calcium, and manganese, and has a long history as a digestive tisane ingredient. Medicinal doses are a different matter - concentrated anethole can interact with certain medications and is not recommended during pregnancy.

Can anise seed be used in savory cooking, or is it only for baking?

It's genuinely at home in savory dishes. Whole seeds go into Levantine lamb braises and pickling liquids; toasted and ground seeds season sausages and cured meats across Mediterranean kitchens. The key is using heat or long cooking to mellow the raw sharpness.

Roasted Red Pepper and Tomato Salad

March 27, 2026

Roasting red peppers and tomatoes at 425°F with olive oil creates soft, slightly charred vegetables in 25 minutes. The high heat caramelizes natural sugars while the skins blister and peel away easily.

Roasted Red Pepper and Tomato Salad served on a plate

You don't need special equipment or techniques. Sheet pan, knife, mixing bowl, and the oven handle everything.

This works for weeknight sides when you need something colorful that tastes like you tried, or for meal prep when you want a salad that holds up for three days.

QUICK SUMMARY

Roasted Red Pepper and Tomato Salad delivers tender roasted vegetables with fresh basil and red wine vinegar. High heat creates char without mushiness. Rest the peppers before peeling for easy skin removal.

⏱️Time Reality: 40 minutes total with 15 minutes hands-on prep
🔥Critical Move: Roast vegetables spaced 1 inch apart to prevent steaming
⚠️Watch Out: Peel peppers after they rest 10 minutes covered, not before

Table of Contents

Toggle
  • Why This Recipe Works
  • What You'll Need
    • Ingredient Details
  • Ingredient Swaps
  • What to Serve With It
  • Store and Reheat
  • Frequently Asked Questions
  • Roasted Red Pepper and Tomato Salad
    • Method 
    • Tried this recipe?

Why This Recipe Works

Roasted vegetables at high temperature concentrate sweetness while creating texture contrast. Most people skip salad, but it balances the meal-try a juicy salad variation when you want something hearty.

Quick Reference
⏱️
Prep Time
15 min
🔥
Cook Time
25 min
⏰
Total Time
40 min
🍽️
Servings
4 servings
📊
Difficulty
Easy
🏷️
Category
Side
💡
Quick Tip
Roast peppers until blistered and tomatoes until softened
🎯
Best For
Weeknight | Meal prep | Entertaining

The method delivers consistently:

  • Roast at 425°F for 20-25 minutes - Peppers blister and char while tomatoes soften without turning to mush
  • Rest peppers covered for 10 minutes - Steam loosens skins so they peel away in sheets instead of tearing
  • Marinate 15 minutes before serving - Red wine vinegar and olive oil soak into vegetables and balance sweetness
  • Cut tomatoes into 1-inch pieces - Uniform size ensures even roasting and prevents some pieces from burning while others stay raw
  • Add fresh basil last - Preserves vibrant green color and aromatic oils that fade with heat or long storage
Quick Tip
Space vegetables 1 inch apart on the sheet pan-overcrowding creates steam instead of char

What You'll Need

Ingredients for Roasted Red Pepper and Tomato Salad

Red bell peppers and ripe tomatoes form the base, but quality matters. Rich mains need something to cut through, and salad does exactly that-for a version that comes together quickly, we lean on a similar salad recipe with crusty bread.

🥬
Vegetables
  • 3-4 red bell peppers
  • 4 ripe tomatoes (or 2 cups cherry tomatoes)
🧄
Aromatics
  • 3 cloves garlic, minced
  • ¼ cup fresh basil, torn
🥢
Dressing
  • 3 tablespoons olive oil
  • 2 tablespoons red wine vinegar
  • Salt and black pepper
🫙
Optional Add-Ins
  • ⅓ cup feta cheese, crumbled
  • 2 tablespoons capers

Ingredient Details

  • Red bell peppers
    Use firm peppers with smooth, unblemished skin-wrinkled peppers have less moisture and won't roast evenly
  • Ripe tomatoes
    Pick tomatoes that give slightly when pressed but aren't mushy-under-ripe tomatoes stay hard and acidic even after roasting
  • Olive oil
    Use regular olive oil for roasting (not extra virgin)-high heat can make extra virgin taste bitter
  • Fresh basil
    Tear leaves by hand instead of cutting-knife edges bruise basil and turn it black faster
  • Red wine vinegar
    Start with 2 tablespoons and add more after tasting-too much vinegar overpowers roasted sweetness
  • Garlic
    Mince garlic fine so it distributes evenly-large chunks stay raw and sharp in cold salad
  • Feta cheese (optional)
    Add just before serving-feta gets soggy when mixed with dressing too early

Ingredient Swaps

Yellow or orange bell peppers work when red aren't available, though they taste sweeter. Balsamic vinegar replaces red wine vinegar but shifts the flavor toward sweeter and less sharp.

Four swaps that work:

  • Yellow or orange bell peppers instead of red - Sweeter flavor, similar texture, slight color change
  • Cherry tomatoes instead of regular tomatoes - Smaller pieces, less soft when roasted, slightly sweeter
  • Balsamic vinegar instead of red wine vinegar - Adds sweetness, less sharp acidity, darker color
  • Parsley instead of basil - Milder herbal note, less aromatic, stays green longer

Fresh vs Jarred Roasted Peppers

Jarred works for: Quick weeknights when 25 minutes matters, consistent texture without monitoring

Skip jarred if: You want smoky char flavor, avoiding excess liquid in salad, controlling salt levels

Roma vs Cherry Tomatoes

Cherry works for: Faster roasting time, less chopping, sweeter concentrated flavor

Skip cherry if: You want larger tomato pieces, softer texture, more juice in finished salad

Instructions

The salad needs 25 minutes in the oven and 15 minutes to marinate. A good pork can make or break the plate-we keep a batch ready for nights like this with a tender pork side dish that cooks while you prep vegetables.

  1. Roast the vegetables. Heat oven to 425°F. Cut peppers into 2-inch strips and tomatoes into 1-inch pieces. Toss with 2 tablespoons olive oil, spread on sheet pan 1 inch apart. Roast 20-25 minutes until peppers blister and tomatoes soften.

  2. Rest and peel the peppers. Transfer roasted peppers to a bowl, cover with foil, rest 10 minutes. Peel skins by rubbing with your fingers or a paper towel-they should slide off in sheets. Chop peeled peppers into bite-size pieces.

  3. Make the dressing. Whisk remaining 1 tablespoon olive oil, red wine vinegar, minced garlic, salt, and black pepper in a large bowl. Taste and add more vinegar if needed for brightness.

  4. Combine and marinate. Add chopped peppers and roasted tomatoes to dressing bowl. Toss gently to coat without mashing tomatoes. Let sit 15 minutes at room temperature for flavors to meld.

  5. Finish and serve. Tear fresh basil leaves and fold into salad just before serving. Top with feta cheese and capers if using. Serve at room temperature or chilled.

Golden Rule
Don't skip the 10-minute pepper rest-trying to peel hot peppers tears the flesh and wastes time

What to Serve With It

This salad pairs with grilled proteins or sits next to grain bowls. For more complete meal ideas, check out easy strawberry spinach salad dinner nights that follow similar assembly logic.

Side Dish Prep Why It Works How to Serve
Grilled chicken breast Easy Lean protein complements roasted vegetables without competing for attention Slice chicken, arrange over salad or serve alongside
Crusty bread Easy Sops up olive oil and vinegar dressing, adds textural contrast Toast slices, serve warm on the side for dipping
Quinoa or couscous Easy Adds whole grain and makes salad more filling for light meals Cook plain, serve under salad or mixed in as base
Herbed focaccia Medium Soft bread with herbs enhances Mediterranean flavor profile Cut into squares, serve warm for soaking up dressing
Marinated olives Easy Adds briny element and variety for appetizer-style serving Drain and serve in small bowl alongside salad

Three ways to serve it:

  • As a light lunch - Pile salad over mixed greens, add feta and crusty bread on the side
  • For entertaining - Arrange on platter with charcuterie, herbed focaccia, and roasted garlic hummus
  • Weeknight dinner side - Pair with grilled chicken breast or simple homemade shrimp over quinoa
Shortcut
Make dressing in the serving bowl to save washing an extra dish-just add vegetables and toss

Store and Reheat

The salad keeps for 3-4 days in the fridge but gets softer as it sits. Chicken adds the contrast this plate needs, but timing matters-for a version that comes together quickly, lean on a tender chicken recipe that frees up the oven.

Method Time Best For
🍽️ Serve Cold No reheating Best texture and freshest flavor
🌡️ Room Temp 15-20 min on counter Takes chill off without cooking further
🔥 Oven 5-7 min at 300°F Gentle warming if you prefer it warm

For best results when storing:

  • Keep in shallow container - Spreads salad thin so it cools fast and prevents sogginess from trapped steam
  • Store dressing separately for day 3+ - Prevents vegetables from getting too soft and watery
  • Add fresh basil before serving - Stored basil turns black and loses aroma after 24 hours
  • Drain excess liquid before serving - Tomatoes release juice over time, pour off before plating to avoid watery salad
  • Consume within 3 days - Roasted vegetables fade in color and flavor after that, lose their fresh appeal

Frequently Asked Questions

Can I use jarred roasted red peppers instead of roasting fresh?

Yes, jarred peppers work for quick meals. Drain them well and skip the roasting step-add them directly to the dressing with roasted tomatoes.

How should I store leftover roasted red pepper and tomato salad?

Store in airtight container in fridge for 3-4 days. For longer storage, keep dressing separate and add fresh basil before serving to maintain color and texture.

How do I know when the peppers and tomatoes are perfectly roasted?

Peppers should be blistered with charred spots and softened throughout. Tomatoes should be tender but still hold their shape-if they collapse completely, they're overcooked.

Why is my roasted pepper and tomato salad soggy, and how to fix it?

Over-ripe tomatoes or excess dressing create sogginess. Use just-ripe tomatoes, moderate the oil and vinegar, and drain any excess liquid before serving.

How can I scale this recipe for a larger group?

Double or triple ingredients but roast in batches-overcrowding prevents char. Use multiple sheet pans and rotate positions halfway through for even roasting.

Roasted Red Pepper and Tomato Salad served on a plate

Roasted Red Pepper and Tomato Salad

No ratings yet
Roasted Red Pepper and Tomato Salad delivers tender roasted vegetables with a fresh basil and red wine vinegar dressing. High heat roasting creates a perfect char on peppers and softness on tomatoes without mushiness, resulting in a vibrant, flavorful salad.
Print Recipe Pin Recipe
Prep Time 15 minutes mins
Cook Time 25 minutes mins
Total Time 40 minutes mins
Servings: 4 servings
Course: Side Dish
Cuisine: Mediterranean
Ingredients Equipment Method Notes

Ingredients
  

  • 3 pieces red bell pepper firm with smooth skin, cut into 2-inch strips
  • 4 pieces tomatoes ripe, cut into 1-inch pieces
  • 3 cloves garlic minced finely
  • ¼ cup fresh basil torn by hand
  • 3 tablespoons olive oil regular olive oil, divided
  • 2 tablespoons red wine vinegar
  • salt to taste
  • black pepper to taste
  • ⅓ cup feta cheese crumbled, optional
  • 2 tablespoons capers optional

Equipment

  • Oven Used for roasting peppers and tomatoes
  • Sheet pan Used to spread and roast vegetables
  • Mixing bowl For making dressing and tossing salad
  • Knife For cutting vegetables

Method
 

  1. Preheat oven to 425°F. Cut red bell peppers into 2-inch strips and tomatoes into 1-inch pieces. Toss vegetables with 2 tablespoons olive oil and spread them 1 inch apart on a sheet pan. Roast in the oven for 20-25 minutes until peppers blister and tomatoes soften without collapsing.
    3 pieces red bell pepper, 4 pieces tomatoes, 3 tablespoons olive oil
  2. Transfer the roasted peppers to a bowl, cover with foil, and let rest for 10 minutes. Peel the skins off by rubbing with fingers or a paper towel; the skins should slide off easily in sheets. Chop the peeled peppers into bite-size pieces.
    3 pieces red bell pepper
  3. In a large mixing bowl, whisk together the remaining 1 tablespoon olive oil, red wine vinegar, minced garlic, salt, and black pepper. Taste and adjust vinegar for brightness if needed.
    3 cloves garlic, 3 tablespoons olive oil, 2 tablespoons red wine vinegar, salt, black pepper
  4. Add chopped peppers and roasted tomatoes to the dressing bowl. Toss gently to coat the vegetables without mashing the tomatoes. Let the salad sit at room temperature for 15 minutes to allow flavors to meld.
    3 pieces red bell pepper, 4 pieces tomatoes
  5. Tear fresh basil leaves and fold into the salad just before serving. Optionally, top with feta cheese and capers. Serve at room temperature or chilled.
    ¼ cup fresh basil, ⅓ cup feta cheese, 2 tablespoons capers

Notes

  • Rest peppers covered for 10 minutes before peeling to loosen skins and avoid tearing the flesh.
  • Space vegetables at least 1 inch apart on the sheet pan to prevent steaming and ensure proper charring.
  • Add fresh basil only before serving to preserve vibrant color and aroma.

Tried this recipe?

Let us know how it was!

What Is Angostura Bitters? [Taste, Uses & More]

March 27, 2026

Most people assume angostura bitters is something bartenders use and cooks ignore - a cocktail accessory with no place beyond the bar.

What Is Angostura Bitters

That assumption costs you a lot of depth.

A single dash can sharpen a butter sauce, anchor a braise, or do what making classic manhattan cocktail at home confirms: two drops in the right glass changes the entire balance of a drink.

QUICK SUMMARY

Angostura bitters is a concentrated alcoholic tincture of gentian root, bark, and warm spices. Used by the dash, it adds bitter-spiced depth to cocktails, sauces, and braises. A sealed bottle lasts years.

🌿Type: Aromatic cocktail bitters, ~44.7% ABV alcoholic extract
👅Flavor: Bitter, spiced, woody - gentian root with warm spice finish
🍸Best Uses: Old Fashioned, Manhattan, butter sauces, chocolate glazes
🏠Storage: Upright in a cool, dark pantry; cap sealed tight always
⏳Shelf Life: Opened bottles stay potent 1-3 years; unopened lasts 2-5 years or more

What Is Angostura Bitters?

Angostura bitters is a concentrated aromatic tincture - dark brown, roughly 44.7% ABV - made from gentian root, bark, and a proprietary blend of herbs and spices.

It was developed in the 1820s by a German physician named Johann Siegert in Venezuela, later produced in Trinidad where the House of Angostura still operates today.

The bottle is unmistakable: an oversized paper label on a small glass bottle with a dasher cap that meters drops rather than pours. That cap is intentional - this is an ingredient measured in dashes, not teaspoons.

It sits in the category of cocktail bitters, which are botanical extracts used as flavor concentrates. Where orange bitters lean citrus-forward, angostura bitters goes deeper into root and bark territory.

You may see it listed as "Angostura aromatic bitters" or misspelled "angustora bitters," but one product dominates: the Trinidad-made original.

  • 🌍 Origin - Developed in Venezuela, now produced in Trinidad by the House of Angostura
  • 🧪 Base ingredient - Gentian root, a powerfully bitter botanical, drives the flavor
  • 🍶 Format - Dispensed in single-drop dashes from a dasher cap or dropper
  • 📋 Common misspelling - "Angustora bitters" refers to the same product

What Does Angostura Bitters Taste Like?

angostura bitters - What Is Angostura Bitters

Think of very concentrated black tea steeped with warm spices, then given a tonic-like bitter finish. That's the closest shorthand.

The gentian root drives a clean, root-driven bitterness - not acrid, not harsh, but present and structural.

Sensory SnapshotStrong Intensity
👅 Flavor
bitterspicedwoodytannic
✋ Texture
thin liquidviscous on palate
👃 Aroma
warm spicecitrus peelbark

Layered on top of that bitterness are cinnamon, clove, and cardamom-adjacent notes - not a single identifiable spice, but a composite warmth. The aroma opens with bright citrus peel top-notes before settling into bark and dried spice.

In cooking, heat softens some of the top-note brightness while the bitter backbone stays in place. Add it too early in a sauce and you lose the citrus lift; finish with it and both registers come through.

Golden Rule
Angostura bitters at full strength tastes overwhelming. Its job is to exist just below perception - you notice its absence more than its presence.

How to Use Angostura Bitters

Cocktails are the home ground. Two dashes in an Old Fashioned sharpen the bittersweet edge of rye or bourbon without announcing themselves. A Manhattan takes one or two drops to add woody spice and lengthen the finish. If you're ever swapping out orange bitters in a recipe, angostura bitters can step in - though the result reads darker and less citrus-forward.

In the kitchen, the applications are more surprising.

A few drops folded into béarnaise or butter sauces cut through fat and add aromatic lift at the finish.

Chocolate and caramel sauces gain a bitter-sweet depth from a single drop stirred in off heat.

Red meat marinades benefit from one or two dashes added alongside acid - the aromatic bitterness works against the richness the same way a bitter green would.

How Angostura Bitters Is Used
MethodBest ForTip
🍸 DashingOld Fashioned, Manhattan, shrubs, savory cocktails1-2 dashes max; taste before adding more
🍳 FinishingButter sauces, béarnaise, braisesAdd after heat is off to preserve aroma
🍫 InfusingChocolate glazes, caramel sauces, simple syrupsOne drop at a time - it concentrates quickly
🎂 BakingCake batters, glazes, fruit compotesPair with orange zest to echo the citrus top-note

Steer clear of delicate dishes. Light fish courses and fresh green salads don't have the weight to carry angostura's bark-and-spice profile - it doesn't blend in, it takes over.

Try It In
🧄Roasted Garlic Béarnaise SauceA dash cuts the butter richness cleanly at the finish→🍫Lemon Mint Hot ChocolateOne drop deepens the chocolate without reading as "bitters"→🍤Lemon Garlic Butter Shrimp PastaA finishing dash balances the butter-citrus base→

How to Buy and Store Angostura Bitters

Buy a sealed dark glass bottle with an intact dasher cap - the small plastic top that meters drops. Check the neck for sticky residue, which signals past leakage and potential aroma loss.

A full bottle with a clean neck and the "Angostura" stamp on the label is the right starting point.

Watch Out
Cloudy liquid or visible separation inside the bottle indicates degraded botanicals. Don't buy it regardless of price or fill level.

Store the bottle upright in a cool, dark pantry or liquor cabinet. Heat and direct sunlight break down the volatile aromatic compounds faster than anything else. Keep the cap tight between uses to prevent evaporation.

Shelf life is generous. If you want to know what actual angostura bitters spoilage signs look like, the short answer is aroma fade rather than anything visible - a flat-smelling bottle has lost its edge even if it looks fine.

Where to Start With Angostura Bitters

Start with one dash in your next whiskey cocktail, then stop. That's the fastest way to understand what it does before applying it anywhere else.

  • 🥃 New to bitters - Add one dash to bourbon over ice, taste, then try two
  • 🍳 Kitchen use - Start with a butter sauce or chocolate glaze before bolder applications
  • 🔄 Need a substitute - See our guide to [replacements for angostura bitters](https://forkliftkitchen.com/angostura-bitters-substitutes/) for the closest options
  • ⚠️ Avoiding alcohol - Skip it in recipes for children or strict alcohol-free diets; heat doesn't reliably cook off all the ABV at dash volumes

One bottle handles both bar and kitchen duties for years. That's a reasonable ask for something this concentrated.

Frequently Asked Questions

Is angostura bitters alcoholic?

Yes - Angostura aromatic bitters is approximately 44.7% ABV, making it stronger than most spirits. However, a standard dash adds only a fraction of a milliliter to a drink, so total alcohol contribution per serving is negligible in cocktails.

How much angostura bitters should you use in a cocktail?

One to two dashes is the standard range for most classic cocktails. A single dash from the dasher cap is roughly 0.6 ml - enough to shift balance without dominating the drink.

Can you cook with angostura bitters?

Yes, and it works well in butter sauces, chocolate desserts, braises, and marinades. Add it at the end of cooking when possible - early heat strips the citrus top-notes and leaves only the bitter base.

Are angostura bitters vegan?

Yes, in practical terms - the botanical extract contains no animal products. The proprietary recipe isn't fully disclosed, but no dairy, gelatin, or animal-derived fining agents are listed or reported by the manufacturer.

What's the difference between angostura bitters and orange bitters?

Orange bitters lead with dried citrus peel and have a lighter, brighter profile. Angostura bitters goes deeper - gentian root and bark give it a darker, woodier character that reads more bitter than fruity.

What Is Balsamic Vinegar? [Taste, Uses & More]

March 27, 2026

Most people buy balsamic vinegar once, use it on salads, and assume that's the full story. That assumption costs them most of what the ingredient can actually do.

What Is Balsamic Vinegar
QUICK SUMMARY

Balsamic vinegar is a concentrated, aged grape-must vinegar from Modena and Reggio Emilia, Italy. It delivers a sharp-sweet, wood-aged depth that ranges from thin commercial versions to thick, syrupy tradizionale aged for decades. Use it as a finisher, glaze, or dressing base.

🍇Origin: Modena and Reggio Emilia, Italy - made from cooked grape must
🍬Flavor: Sweet-tangy with a sharp acid backbone and caramel, molasses depth
🍽️Best Uses: Finishing drizzle, pan sauces, glazes, vinaigrettes, Caprese salads
🕐Shelf Life: Indefinitely unopened; best aroma within 3-5 years of opening
🛒Buy: Look for IGP-labeled "Balsamic Vinegar of Modena" for everyday use; tradizionale for serious finishing

What Is balsamic vinegar?

Balsamic vinegar - aceto balsamico in Italian - is made from freshly crushed grape must that's cooked down, fermented, and then aged in a progression of wooden barrels.

Unlike standard wine vinegars, it never starts as wine; the must is reduced before fermentation even begins, which concentrates the natural grape sugars from the start.

Two protected designations matter here. Aceto Balsamico Tradizionale (from Modena or Reggio Emilia) carries DOP status, must age a minimum of 12 years across multiple wood types - oak, chestnut, cherry, mulberry - and is bottled in small, legally mandated quantities.

The commercial alternative, Balsamic Vinegar of Modena IGP, is made faster, often blended with wine vinegar, and ranges widely in quality.

You'll also encounter "balsamic glaze" sold in squeeze bottles - that's a reduced, sweetened version of commercial balsamic, not a separate product category.

  • Tradizionale DOP - minimum 12-year aging, thick and syrupy, sold in small certified bottles
  • Balsamic Vinegar of Modena IGP - the everyday bottle, quality varies; check for dark color and viscosity
  • Balsamic glaze / condimento - pre-reduced, often with added sugar; convenient but less complex

What Does balsamic vinegar Taste Like?

balsamic vinegar - What Is Balsamic Vinegar

The closest comparison is a concentrated red wine vinegar swaps that's been deepened with brown sugar and molasses - but that still undersells it. There's a woody barrel character underneath the acidity, and a subtle umami undertow that most fruit vinegars don't have.

Sensory SnapshotStrong Intensity
👅 Flavor
sweet-tangycaramelmolassesumami depth
✋ Texture
viscoussilky
👃 Aroma
caramelized grapewarm barrel wood

Heat changes the profile noticeably. Reducing balsamic in a pan drives off the sharper volatile acids and amplifies the caramel sweetness, making it softer and more syrupy.

Raw, it hits with more acid upfront before the sweetness follows. Traditional aged balsamic reads differently still - the sweetness and acid are already integrated, with far less of that initial bite.

Golden Rule
Add commercial balsamic at the end of cooking, not the beginning. Early heat destroys the acidity that gives it lift, leaving only flat sweetness.

How to Use balsamic vinegar

Balsamic's strongest role is as a finishing ingredient. A few drops over fresh strawberries or sliced figs need nothing else.

The same logic applies to a classic Caprese - skip the heavy dressing and drizzle balsamic directly over tomatoes and mozzarella with a good extra-virgin olive oil.

Reducing it into a glaze opens a second lane entirely. Simmer commercial balsamic over medium heat until it coats a spoon, and you have a concentrated glaze that works on roasted pork, carrots, or beets.

The reduction cuts the sharpness and produces a sauce-weight consistency without adding any thickener.

How Balsamic Vinegar Is Used
MethodBest ForTip
🥗 Finishing DrizzleCaprese, strawberries, aged cheeses, grilled steakUse tradizionale or a quality IGP bottle - thin balsamic runs and pools without coating
🔥 Glaze / ReductionRoasted vegetables, pork, carrots, pan saucesReduce 3:1 over medium heat; watch closely after 5 minutes - sugars burn fast
🥣 VinaigretteGreen salads, grain salads, roasted beet saladsCombine with extra-virgin olive oil at roughly 1:3 ratio; add a small amount of honey or mustard to emulsify
🍳 Pan Sauce AdditionBeef, pork, duck pan saucesAdd 1-2 teaspoons near the end to balance fat and richness without full reduction

In dressings, balsamic pairs naturally with Parmesan or aged cheeses on the side, and it holds up to bold partners - roasted root vegetables, pork, and beef all take it well.

Avoid using it with delicate raw fish; the strong sweet-acid character simply overpowers subtle flavors.

If you need a stand-in in a recipe, balsamic vinegar swaps cover several workable options depending on whether you need the sweetness or the acidity to carry the dish.

Try It In
🍅Caprese Skewers with Balsamic GlazeWhere the drizzle is the whole point→🫘Three-Bean Salad with Vinegar DressingBalsamic adds sweetness to a sharp vinaigrette base→

How to Buy and Store balsamic vinegar

For everyday cooking, buy "Balsamic Vinegar of Modena IGP" in a dark glass bottle. Look for a label that lists grape must first - not wine vinegar topped up with caramel color.

A good bottle should have visible viscosity; swirl it and watch how slowly it coats the glass.

Best Pick
For finishing dishes without reduction, spend up on a small bottle of Aceto Balsamico Tradizionale. A few drops go a long way - a 100ml bottle can last months.

For storage, keep it upright in a cool, dark cabinet with the cap tight. Heat and light degrade the aroma over time.

Unlike extra-virgin olive oil, which has a firm best-by window, balsamic vinegar is highly shelf-stable - an unopened bottle keeps essentially indefinitely. Opened, best aroma holds for 3-5 years, though the vinegar remains usable well beyond that.

Full details are at our guide to balsamic vinegar storage guide.

  • Avoid clear glass bottles - they offer no UV protection and indicate a lower-quality product
  • Skip anything labeled "balsamic-style" or "balsamic flavored" - these are not real balsamic

Where to Start With Balsamic

Buy one IGP bottle for daily use and keep it for vinaigrettes, pan sauces, and quick glazes. Once you've worked through that, add a small bottle of tradizionale - it's a different ingredient, not just a better version of the same thing.

Start with strawberries or a Caprese to understand the finishing role before you try reducing or marinating.

Frequently Asked Questions

What is balsamic vinegar made from?

It's made from freshly crushed grape must - the whole pressed juice including skins, seeds, and stems - cooked down and then aged in wooden barrels. No wine is involved; the must is reduced before fermentation, which is what makes the flavor distinct from standard wine vinegar.

Is balsamic vinegar sweet or sour?

Both, but the balance shifts with age. Commercial balsamic hits acid-first with sweetness behind it. Traditional aged balsamic is noticeably sweeter and more integrated, with less of that sharp upfront bite.

How is traditional balsamic different from commercial balsamic?

Tradizionale is aged a minimum of 12 years in a sequence of different wood barrels, producing a thick, syrupy texture and deeply complex flavor. Commercial balsamic is made in weeks to months, often blended with wine vinegar, and is far thinner and sharper.

Can you cook with balsamic vinegar?

Yes, but timing matters. Add it late in pan sauces to preserve its acidity, or reduce it separately into a glaze. Avoid adding it at the start of long braises - prolonged heat flattens the flavor and can cause excessive darkening from the sugars.

Does balsamic vinegar need to be refrigerated after opening?

No. Its high acidity makes it self-preserving at room temperature. Store it upright in a cool, dark cabinet with the cap sealed - refrigeration is unnecessary and can thicken traditional versions to the point where they're hard to pour.

What Is Almond Extract? [Taste, Uses & More]

March 27, 2026

You spot a tiny bottle of almond extract on the baking aisle and wonder whether it's worth the shelf space - especially when almond flour's shelf life and other almond products already crowd your pantry.

What Is Almond Extract

A few drops of this concentrated liquid can do what a handful of whole almonds never quite manages: deliver a sharp, marzipan-forward aroma that anchors cakes, cookies, and icings in a way no other flavoring replicates.

If you've ever reached for lemon extract swaps that work because you ran out mid-bake, you already know how much a single extract can anchor a recipe.

Here's what almond extract actually is, what it tastes like, and how to use it without overdoing it.

QUICK SUMMARY

A concentrated flavoring extract made from bitter almonds or benzaldehyde, used in small amounts to add a sharp, marzipan-like aroma to baked goods, icings, and confections. A little goes a long way - most recipes need no more than ½ to 1 teaspoon.

🍶Category: Flavoring extract, liquid concentrate
👅Flavor: Sweet marzipan, sharp bitter-almond edge, slightly floral
🍪Best Uses: Cakes, amaretti, icings, custards, fruit compotes
📦Shelf Life: Unopened 3-5 years; opened 1-2 years best aroma
⚠️Watch Out: High heat destroys aroma; too much turns medicinal fast

What Is Almond Extract?

Almond extract is a flavoring extract produced by dissolving aromatic compounds - primarily benzaldehyde - in an alcohol-and-water base.

Natural versions source that benzaldehyde from bitter almonds or from the pits of stone fruits like apricots and peaches, which share the same aromatic chemistry.

You'll also see it sold as bitter almond extract, almond essence, or almond flavoring. "Amaretto extract" is a colloquial name used for versions with a rounder, slightly sweet profile, though it's a different product from the liqueur - for a direct side-by-side, see comparing amaretto vs almond extract options.

Imitation almond extract skips the plant-based source entirely and uses synthetically produced benzaldehyde. The aroma is chemically identical, however the depth of supporting notes is thinner.

  • 🌿 Natural almond extract - benzaldehyde from bitter almonds or stone-fruit pits, richer background notes
  • 🧪 Imitation almond extract - synthetic benzaldehyde in alcohol, one-dimensional but shelf-stable and nut-free
  • 🍶 Almond essence - a term used mostly in British and Australian baking; functionally the same product

What Does Almond Extract Taste Like?

almond extract - What Is Almond Extract

The dominant note is sweet marzipan - the same concentrated almond candy character you get in a frangipane tart or a fresh amaretti cookie.

Behind that sits a sharper benzaldehyde edge that plain whole almonds don't deliver, because roasting mellows their volatile compounds.

Sensory SnapshotStrong Intensity
👅 Flavor
sweet marzipanbitter almondslightly floral
✋ Texture
thin liquidfast-evaporating
👃 Aroma
sharp benzaldehydemarzipan-scented

On the palate it evaporates fast, landing as aroma more than sustained taste. Overuse is the most common mistake - past about ¾ teaspoon in a standard cake batch, it tips from marzipan into something almost medicinal.

Watch Out
Almond extract doesn't scale linearly. Doubling the quantity doesn't double the almond character - it overwhelms it. Start at ¼ teaspoon and adjust from there.

How to Use Almond Extract

Timing matters more than quantity. Because benzaldehyde is highly volatile, adding almond extract after removing a batter or sauce from heat preserves far more aroma than stirring it in at the start of cooking.

In baking, it performs best folded into cake batters, cookie doughs like amaretti or almond biscotti, and glazes just before use. For a full amaretti-style application, the amaretto extract recipe shows how a small measure shapes the entire cookie.

How Almond Extract Is Used
MethodBest ForTip
🧁 Baked Into BatterCakes, financiers, almond biscottiAdd to wet ingredients, not dry - distributes evenly
🥣 Stirred Into IcingRoyal icing, glaze, buttercreamAdd off heat after mixing; don't warm the icing again
🍮 Folded Into CustardCrème anglaise, panna cotta, puddingsStir in after removing from heat to preserve top note
🍹 Finishing in DrinksAmaretto-style cocktails, mocktails1-2 drops max; shake or stir to integrate
🍑 Fruit CompotesCherry, pear, apricot compotesAdd at the end - heat drives off aroma fast

It pairs cleanly with vanilla, dark chocolate, brown butter, and citrus zest - orange especially. Cherry is its closest natural partner, since bitter almond and cherry pit share the same benzaldehyde chemistry.

For dishes where almond extract feels too sharp, alternatives to almond extract covers swaps that keep the marzipan note without the intensity.

Savory use is narrow but real. Moroccan-style tagines occasionally include a small drop to echo the stone-fruit notes in the sauce - however it clashes in salty, high-reduction contexts.

Try It In
🍪Amaretto Extract RecipeShows how a small measure of extract defines the whole cookie→

How to Buy and Store Almond Extract

Always choose a bottle labeled "pure almond extract" over imitation. Check the ingredient list for "bitter almond oil," "almond oil," or "alcohol, water, benzaldehyde" - generic "natural flavor" is a sign the source is vague.

Dark glass bottles with a tight metal cap are the best packaging; they block light and slow evaporation.

Golden Rule
Seal the bottle immediately after each use. Leaving it open on the counter for even a few minutes accelerates aroma loss - benzaldehyde escapes fast at room temperature.

Store it in a cool, dark cabinet away from the stove or any heat source. Sunlight and warmth break down volatile compounds quickly.

For a full breakdown of timelines and signs of degradation, almond extract's shelf life covers what to expect at every stage.

  • Unopened - 3-5 years at peak aroma in a dark cabinet
  • Opened - 1-2 years before noticeable fading; still usable after, just weaker
  • Imitation - slightly longer stable window since no natural volatiles to degrade

Almond extract isn't interchangeable with almond oil - one is an aromatic flavoring, the other a fatty oil used in cooking and finishing; if you need a replacement for the latter, almond oil stand-ins lists practical options.

Start Small and Adjust

If you're new to almond extract, begin with ¼ teaspoon in any recipe that calls for it. That single small measure is often enough to register the marzipan note clearly without overwhelming the other flavors.

For recipes that use vanilla extract as the sole flavoring, consider splitting the quantity - half vanilla, half almond - rather than replacing one entirely.

The extract comparison in comparing vanilla extract vs vanilla powder options is a useful reference for understanding how extract-based flavorings behave differently from dry alternatives.

And when a recipe calls for replacements for amaretto, a few drops of almond extract diluted in simple syrup is often the most direct stand-in.

Frequently Asked Questions

Is almond extract the same as almond oil?

No. Almond extract is an alcohol-based flavoring built around benzaldehyde aroma compounds. Almond oil is a fatty oil pressed from sweet almonds - it has almost no almond scent and is used for cooking or finishing, not flavoring.

Does almond extract contain nuts?

Pure almond extract may contain trace almond proteins from bitter almonds, so people with tree-nut allergies should avoid it. Imitation almond extract uses synthetic benzaldehyde and is typically nut-free - check the label to confirm.

Why does almond extract taste bitter?

The bitterness comes from benzaldehyde, the same compound found in bitter almonds and stone-fruit pits. Used correctly it reads as marzipan; too much and the bitter edge dominates because benzaldehyde is not balanced by sweetness at high concentrations.

Can you substitute almond extract for vanilla?

Only in recipes where an almond note fits - cakes, cookies, and custards work well. Use half the amount, since almond extract is significantly stronger than vanilla. It won't work as a neutral background the way vanilla does.

Can almond extract be used in savory dishes?

Sparingly, yes. Moroccan tagines and some Middle Eastern sauces use a single drop to echo stone-fruit notes. Avoid it in salt-forward reductions or dishes with competing sharp flavors - the floral benzaldehyde note clashes badly.

What Is Asparagus? [Taste, Uses & More]

March 27, 2026

Shaved raw over a spring pasta with lemon and Parmesan, asparagus barely registers as a "cooked" ingredient - and that's exactly the point.

What Does Asparagus Taste Like

It shares some DNA with what makes green bean distinct and carries a mild bitterness closer to leek swaps that work, but asparagus holds its own category entirely.

Knowing how it tastes, behaves under heat, and how to pick a good bunch is what separates great spring cooking from forgettable side dishes.

QUICK SUMMARY

**Asparagus** is a spring vegetable harvested as tender young spears. It tastes green and grassy raw, turning nutty and slightly sweet with high heat. Use it blanched, roasted, or grilled. Fresh spears last about 4-7 days in the fridge with proper storage.

🌿Flavor: Green, grassy, mildly bitter, nutty-sweet when roasted
🍽️Best Uses: Roasting, grilling, blanching, risotto, pasta
🛒Buy: Firm spears, tight tips, no woody split ends
❄️Shelf Life: 4-7 days fresh; up to 12 months frozen
✅Pairs With: Lemon, butter, Parmesan, prosciutto, eggs, garlic

What Is Asparagus?

Asparagus (Asparagus officinalis) is a perennial plant native to Europe and Western Asia. We harvest it in spring as young shoots - called spears - before they branch out and fern.

Three main varieties appear at markets. Green asparagus is the most common, with a pronounced grassy flavor. White asparagus, grown underground away from light, tastes milder and slightly more bitter. Purple asparagus has a sweeter profile and tends to revert to green color once cooked.

Spear thickness varies widely, from pencil-thin to jumbo. Thicker spears aren't tougher by default - the base end is the problem zone regardless of width.

You'll sometimes see it labeled "garden asparagus" or referred to by its species name, but in most grocery and farmers' market contexts, asparagus spear covers all of them.

  • 🟢 Green asparagus - standard variety, grassy and slightly bitter, widely available
  • ⬜ White asparagus - blanched underground during growth, pale, milder flavor
  • 🟣 Purple asparagus - sweeter, anthocyanin-rich, turns green when heated

What Does Asparagus Taste Like?

asparagus - What Does Asparagus Taste Like

Raw asparagus tastes green and grassy, with a clean brightness and a mild bitter edge - closer to a snap pea than a leafy green. There's also a faint leek-like quality that comes through, especially near the tip.

Heat changes everything. Roasting at high temperature draws out natural sugars and creates a nutty, almost caramelized note that raw spears never hint at. Grilling adds a char layer on top of that sweetness.

Sensory SnapshotModerate Intensity
👅 Flavor
greengrassymildly bitternutty-sweet (roasted)
✋ Texture
crisp-tenderfibrous at base
👃 Aroma
freshlightly vegetaltoasty when charred

Some asparagus - particularly older or overcooked spears - develops a faint sulfurous note. This comes from asparagusic acid compounds, which are also responsible for the well-known urine odor effect.

Fresh, properly cooked spears keep this well in the background.

How to Use Asparagus

Asparagus handles most cooking methods well, but method choice changes the outcome significantly. Quick cooking preserves its green bite; high-heat roasting or grilling builds sweetness and char.

How Asparagus Is Used
MethodBest ForTip
🥗 Raw / ShavedSalads, thin-sliced spring pastaUse a peeler on thick spears for ribbon-thin slices
♨️ BlanchedPasta toss, cold sides, prep for freezingShock in ice water immediately to lock in color
🔥 RoastedSheet-pan sides, vinaigrette dishesRoast at 425°F (220°C) for 10-12 minutes, single layer
🍖 GrilledSteak or fish sides, char-forward dishesToss in oil before grilling to prevent sticking
🍤 Tempura-FriedAppetizers, Japanese-style preparationsKeep batter cold and fry immediately for crunch

Italian and French kitchens use asparagus most heavily - think risotto with tips stirred in at the last minute, or classic French preparations finished with hollandaise. A full a eggs benedict with hollandaise recipe shows exactly how well asparagus works alongside that sauce.

Asparagus pairs cleanly with lemon, butter, and aged hard cheeses like Parmesan or pecorino.

Wrapping spears in prosciutto before roasting adds salt and fat without overpowering the green flavor.

Avoid heavy sugary glazes - they mask what makes this vegetable worth cooking in the first place.

If asparagus isn't available, checking asparagus swaps that work gives you the closest matches for each dish type.

Try It In
🍋Air Fryer Lemon Garlic AsparagusFast weeknight side with bright citrus finish→🌿Roasted Asparagus with LemonHigh-heat roast that builds nutty sweetness→🥓Air Fryer Bacon Wrapped AsparagusSalt and fat from bacon, no hollandaise needed→

How to Buy and Store Asparagus

Look for straight, firm spears with tightly closed, compact tips and smooth skin along the stalk. Limp stalks, shriveled or splayed tips, and split ends at the base all signal age.

Best Pick
Medium-thickness spears give the best balance between tender tips and a base that doesn't need heavy peeling. Jumbo spears taste fine but always peel the bottom third.

At home, stand cut ends upright in a jar with an inch of water and cover the tips loosely with a bag.

Alternatively, wrap the cut ends in a damp paper towel before refrigerating.

Either method keeps tips crisp for up to a week.

For longer storage, blanch first - freezing kale without blanching explains why that blanching step matters even for hardy greens, and the logic applies here too.

A full breakdown of timing and conditions is in our guide on how long asparagus keeps, including frozen shelf life up to 12 months.

Where to Start With Asparagus

Spring is the window - asparagus outside its season loses flavor fast and costs more.

Quick Tip
First time cooking it? Roast at high heat with olive oil and salt. Ten minutes at 425°F is the fastest route to understanding what asparagus actually tastes like at its best.

If you're after something familiar and low-effort, roasted or grilled spears as a side are the entry point. Move to blanching once you want to use them in pasta or cold dishes.

The prosciutto-wrapped baked version is the right call when you need something guests will actually remember.

  • 🔥 Start roasting - if you've never cooked asparagus, high heat is your baseline
  • 🥗 Start raw - if you want to taste the vegetable before committing to a method
  • 🍝 Start blanching - if pasta or cold preparations are your goal
  • 🥓 Start wrapped - if you want a crowd-pleasing first dish with built-in flavor backup

Frequently Asked Questions

Why does asparagus make your pee smell?

Asparagusic acid breaks down during digestion into sulfur-containing compounds that your kidneys excrete quickly. Not everyone can detect the odor - that's a genetic difference in smell receptors, not digestion.

How long does asparagus last in the fridge?

Fresh spears last 4-7 days stored upright in water or with damp-wrapped ends. Cooked asparagus keeps 3-4 days in a sealed container.

Can you eat asparagus raw?

Yes. Raw asparagus is safe and has a firm, crisp texture with a clean grassy flavor. Thin spears or shaved ribbons work best raw - thick ones can taste woody without heat.

Are asparagus tips edible?

Yes - tips are the most tender and flavorful part of the spear. They cook faster than the stalk, so add them slightly later if you're cutting and sautéing.

How do you fix tough asparagus stems?

Snap or cut off the woody bottom third - it separates naturally where the tender part begins. For thick spears, peeling the lower stalk with a vegetable peeler removes the fibrous outer layer.

What Is Agar Agar? [Taste, Uses & More]

March 27, 2026

You spot it on the shelf between xanthan gum and tapioca starch - a small packet labeled "agar agar" or sometimes just "kanten." Maybe you're replacing animal gelatin in a recipe, or trying to make a dessert that won't melt at a summer party. Agar agar is a plant-based gelling agent extracted from red algae, and it behaves differently from anything else in your pantry.

What Is Agar Agar

Understanding those differences is what makes it work.

QUICK SUMMARY

Agar agar is a seaweed-derived gelling agent from red algae. It sets firmer and more brittle than gelatin, holds at room temperature, and has a nearly neutral flavor. Available as powder, flakes, or bars, it's the standard vegan swap for gelatin in desserts, aspics, and molded sweets.

🌿Origin: East Asia, derived from red algae, popularized in Japan
👅Flavor: Neutral with a faint, barely noticeable mineral edge
🍮Best For: Vegan jellies, molded desserts, room-temperature gels
📦Shelf Life: 2-3 years sealed, dry, away from humidity
✅Dietary: Vegan, vegetarian, gluten-free, and nut-free

What Is agar agar?

Agar agar is a polysaccharide - a chain of complex carbohydrates - extracted from the cell walls of red algae, primarily species like Gelidium and Gracilaria.

It has been used in East Asian cooking for centuries, first formalized in Japan during the 17th century under the name kanten.

It goes by several names: agar, agar-agar, kanten, and China grass. All refer to the same substance in different forms.

  • Powder - the most precise form; dissolves quickly and measures easily by the teaspoon
  • Flakes - less concentrated than powder; require longer simmering and use roughly 3× the volume
  • Bars - traditional dried form, common in Japanese markets; soak before use

Unlike gelatin, which comes from animal collagen, agar is fully plant-derived and sets without refrigeration.

It also gels at a higher temperature - around 95°F (35°C) - meaning a panna cotta or aspic made with agar stays firm on a warm plate where gelatin would not.

Golden Rule
Always boil agar fully - at least 2 minutes at a rolling boil. Undissolved agar powder won't gel no matter how long you chill it.

What Does agar agar Taste Like?

agar agar - What Is Agar Agar

Agar agar is essentially tasteless. That's one of its main strengths as a gelling agent - it doesn't compete with whatever liquid it's setting.

At standard recipe quantities (roughly 1-2 teaspoons per cup of liquid), you won't detect any flavor at all. Use it in excess, however, and a faint vegetal, sea-like minerality can come through - not unpleasant, but noticeable.

Sensory SnapshotMild Intensity
👅 Flavor
neutralfaint minerallightly vegetal
✋ Texture
firmbrittleclean snap
👃 Aroma
barely marineneutral

The texture is where agar diverges sharply from gelatin. A set agar gel snaps cleanly rather than wobbling or stretching - think firm tofu more than Jell-O.

This makes it ideal for slicing layered desserts or unmolding shapes that need to hold an edge.

How to Use agar agar

Agar agar earns its place across Japanese, Chinese, Southeast Asian, and modernist kitchens. The most traditional applications are kanten - a firm, lightly sweetened Japanese jelly - and yokan, a dense red bean confection that uses agar to achieve its characteristic dense, sliceable block.

Beyond those classics, agar handles a wide range of modern applications well.

How Agar Agar Is Used
MethodBest ForTip
🍳 Boiled & SetFruit jellies, kanten, molded dessertsBoil at least 2 min to fully activate; pour into molds while still liquid
🥣 Simmered SavoryAspics, consommés, savory gels with dashi or soyStrain through fine mesh before pouring to remove any undissolved bits
🍮 Chilled MoldVegan panna cotta, layered dessert sheetsSets at room temp; refrigerate for a firmer, cleaner slice
🔬 MolecularShaped gels, hot gels, spherification variationsAgar gels survive temperatures up to ~185°F - gelatin cannot

Fruit pairings that work especially well include citrus juices, apple, and berry - all of which set clearly without discoloring. Coconut milk and oat milk make for rich, creamy gels.

For savory uses, dashi and a touch of soy sauce create an aspic that holds its shape at room temperature on a warm plate.

One pairing to avoid: raw tropical fruits. Pineapple, kiwi, and papaya contain proteolytic enzymes that break down the gel structure.

Cook them first, and the problem disappears.

Try It In
🧋Iced Brown Sugar Oat Milk LatteOat milk gels cleanly with agar for a layered, coffee-shop style drink→

How to Buy and Store agar agar

Agar powder is the most reliable form for home cooking. It measures precisely, dissolves faster than flakes, and produces consistent results. Look for fine, uniform powder - no clumps, no darkened particles, and no moisture in the packet.

Best Pick
Food-grade agar powder from Japanese or Taiwanese brands tends to be more finely milled than generic versions, which means faster dissolving and fewer texture issues.

Labels sometimes say "kanten" rather than agar-agar - both are the same product. Flakes work in a pinch but require more volume and longer simmering, which affects the final gel clarity.

For storage, keep agar in an airtight container in a cool, dry pantry away from direct sunlight. Humidity is the only real enemy - it causes clumping and weakens gel strength.

Stored correctly, powdered and flake agar keep well for 2-3 years. Bars last similarly as long as they're fully dried and wrapped between uses.

Start Here with agar agar

If you're new to agar, begin with a simple fruit juice jelly - it shows you exactly how the gel behaves without involving other variables. Once you understand the snap and firmness, move to layered desserts or vegan panna cotta.

Those switching from gelatin should know that agar is not a straight 1:1 swap. Use roughly one teaspoon of agar powder for every tablespoon of gelatin powder, and expect a firmer, less elastic result.

If you need more flexibility, look at agar substitutes that offer different textures for different applications.

Frequently Asked Questions

Can agar agar replace gelatin 1:1?

No. Agar is roughly three times stronger than gelatin by volume. Use about one teaspoon of agar powder in place of one tablespoon of gelatin powder. The set will be firmer and less elastic.

Does agar agar taste like seaweed?

Not at normal quantities. At standard recipe amounts, agar is virtually flavorless. A very faint mineral note can appear if you use more than the recipe calls for.

Why does my agar not set?

The most common cause is underdissolving - agar must reach a full boil for at least two minutes. Acidic liquids can also weaken the gel; add citrus juice after boiling and just before pouring into molds.

How do you dissolve agar powder correctly?

Whisk agar powder into cold liquid first, then bring to a full boil while stirring. This prevents clumping and ensures even hydration before the gelling process begins.

Is agar agar the same as pectin?

No - both are plant-based gelling agents, but they behave differently. Pectin comes from fruit cell walls and typically requires sugar and acid to gel. Agar gels without either, and sets much firmer.

What Is Apple Cider Vinegar? [Taste, Uses & More]

March 27, 2026

Most people assume apple cider vinegar is just a sharper, cheaper stand-in for the taste of rice vinegar or replacements for balsamic vinegar - a pantry backup with no real personality.

What Is Apple Cider Vinegar

That's the wrong read. Apple cider vinegar has a distinct profile: bright, tangy acidity with a faint apple fruitiness that no other vinegar quite replicates.

It shows up in barbecue sauces, quick pickles, coleslaw, and shrubs, but it also disappears into dishes as a finishing acid that rounds out richness without announcing itself. Knowing how to use it -

and when not to - is what separates a well-balanced dressing from one that tastes like vinegar for its own sake.

QUICK SUMMARY

Apple cider vinegar is a fermented fruit vinegar with bright tang, mild apple fruitiness, and a sharp finish. It suits dressings, marinades, quick pickles, and finishing sauces. Unopened, it keeps 2-5 years; opened, expect peak flavor for 1-2 years.

🍎Flavor: Bright tangy acid, faint apple sweetness, sharp astringent finish
🫙Best Uses: Vinaigrettes, quick pickles, marinades, deglazing, shrubs
🧪Key Feature: Unfiltered versions contain the live 'mother' culture
📦Shelf Life: Unopened 2-5 years; opened 1-2 years for peak flavor
⚠️Watch Out: High acidity - use cautiously if you have acid reflux

What Is Apple Cider Vinegar?

Apple cider vinegar starts as fermented apple cider. The cider converts to alcohol first, then a second fermentation converts that alcohol into acetic acid - the compound responsible for vinegar's sharp bite.

Traditional, unfiltered production leaves behind the 'mother' of vinegar: a cloudy mass of beneficial bacteria, enzymes, and cellulose strands that settle at the bottle's bottom.

Filtered versions are clear amber and shelf-stable; unfiltered versions are hazy and slightly viscous, with visible strands.

You'll see it labeled several ways:

  • 🍎 ACV - shorthand across most English-speaking markets
  • 🍎 Raw or unfiltered ACV - retains the mother culture
  • 🍎 Distilled apple cider vinegar - filtered clear, no mother, milder character
  • 🍎 Cider vinegar - common British labeling, same product

It sits in the fermented fruit vinegar category alongside white wine vinegar and red wine vinegar, and it's been produced in temperate Europe and North America for centuries.

Unlike malt vinegar or distilled white vinegar, its starting material - apples - carries through as detectable fruit character in the finished product.

If you're ever looking at white vinegar stand-ins or replacements for malt vinegar, ACV is a frequent candidate, though its fruitiness will shift the flavor.

What Does Apple Cider Vinegar Taste Like?

apple cider vinegar - What Is Apple Cider Vinegar

Apple cider vinegar leads with sharp, bright acidity - more assertive than white wine vinegar, less sweet than balsamic. The apple origin comes through as a mild, slightly cooked-fruit note sitting beneath the tang, not as obvious sweetness.

Sensory SnapshotStrong Intensity
👅 Flavor
bright tangymild apple fruitinesssubtle sweetnessastringent finish
✋ Texture
wateryslightly viscous (unfiltered)
👃 Aroma
sharp vinegar tangfaint cooked apple

The finish turns astringent - that dry, puckering sensation on the back of the palate. Heat softens acetic acid somewhat, so ACV added mid-cook reads differently than ACV in a cold dressing.

Raw in a vinaigrette, it's upfront and assertive; stirred into a warm braise at the end, it integrates as a bright background note rather than a sharp edge.

Golden Rule
Add apple cider vinegar at the end of cooking, not the beginning. Heat drives off acetic acid quickly, and you'll lose the acidity you cooked it in for.

How to Use Apple Cider Vinegar

ACV is one of the most adaptable acids in the kitchen. Its apple fruitiness makes it a natural partner for pork, root vegetables, and honey-based sauces - pairings that a more neutral white wine vinegar wouldn't flatter as well.

How Apple Cider Vinegar Is Used
MethodBest ForTip
🥗 RawVinaigrettes, coleslaw, cold marinadesBalance with olive oil and a small amount of honey or maple syrup
🫙 PicklingQuick-pickled cucumbers, onions, cabbageCombine with salt and a pinch of sugar; no heat required for fast pickles
🍳 FinishDeglazing pans, brightening braises, balancing chutneysAdd in the last 2-3 minutes; taste and adjust before serving
🥤 DrinksShrubs, tonics, cocktail mixersDilute heavily - 1 teaspoon per 240ml is a reasonable starting point

The cuisines where ACV appears most are American barbecue (vinegar-based sauces and slaws), British pickling traditions, and Eastern European vegetable preserves.

Modern bartenders also use it in shrubs - drinking vinegars built on fruit, acid, and sugar - where its rounded acidity works better than harsh distilled vinegar.

It pairs well with olive oil, mustard, garlic, fresh herbs like tarragon and parsley, soy sauce in small amounts, and anything pork-adjacent.

Avoid it in dishes requiring neutral-tasting acidity, like some custards, where its fruitiness will clash.

If a recipe calls for something you don't have, understanding swapping out apple cider vinegar or checking alternatives to red wine vinegar can help you navigate without wrecking the balance.

Try It In
🥗Three-Bean Salad with Vinegar DressingACV's apple fruitiness rounds out the sharp dressing→🥔German Potato Salad with VinegarUses ACV as the backbone acid against warm bacon fat→

How to Buy and Store Apple Cider Vinegar

Start at the label. Unfiltered, raw ACV - with a visible cloudy mother - is the traditional choice if you want full character.

Filtered versions are cleaner-tasting and fine for most cooking, but you lose the live cultures and some depth.

Best Pick
Choose bottles labeled 'raw' or 'unfiltered' in amber glass or BPA-free plastic. Avoid overly bright, sediment-free liquid if traditional character matters to you.

Storage is straightforward:

  • Pantry, sealed - the standard approach; a cool, dark spot away from the stove
  • Cap tight - acetic acid is volatile and will escape through a loose lid over time
  • Refrigerator option - not required, but slows flavor changes in opened bottles

Unopened bottles hold peak flavor for 2-5 years. After opening, plan to use it within 1-2 years for best results - though acidity remains effective much longer.

You won't need to worry about freezing apple cider vinegar; the high acidity means it keeps well at room temperature without any spoilage risk.

Where to Start With Apple Cider Vinegar

If you're new to cooking with ACV, start with a simple vinaigrette: three parts olive oil, one part ACV, a small spoon of mustard, and a drizzle of honey.

That ratio showcases everything distinctive about it - the apple note, the rounded tang, the way it holds against fat.

From there, try it as a finishing acid in a braised pork dish or a pan sauce.

Those two applications cover most of what makes ACV worth keeping on your shelf, and they'll teach you the difference between raw and cooked acidity faster than any description can.

Shortcut
A 3:1 oil-to-ACV ratio is the baseline for any vinaigrette. Adjust sweetness (honey) and sharpness (mustard) from there depending on what you're dressing.

Frequently Asked Questions

Is apple cider vinegar the same as regular vinegar?

No. Both contain acetic acid, but ACV is made from fermented apple cider, which gives it mild fruitiness and a rounded acidity. Distilled white vinegar is sharper, more neutral, and lacks any fruit character.

What is the 'mother' in apple cider vinegar?

The mother is a mass of beneficial bacteria, enzymes, and cellulose strands formed during fermentation. It's harmless and signals unfiltered, traditionally made ACV - shake the bottle to redistribute it before use.

Can you use apple cider vinegar for pickling?

Yes, and it works well for quick pickles specifically. Its apple fruitiness adds a subtle layer that plain white vinegar won't. For long-term canning, confirm the acidity level is at least 5% before using it.

How much apple cider vinegar should you use in a dressing?

Start with a 3:1 ratio of oil to ACV. For a single salad serving, that's roughly 1 tablespoon ACV to 3 tablespoons oil - then adjust based on how assertive you want the acid to read.

Does apple cider vinegar go bad?

Not in the traditional sense. Its high acidity prevents spoilage, though flavor can darken and mellow significantly past the 2-year mark after opening. The mother may grow thicker over time - that's normal.

Moroccan Carrot Salad

March 27, 2026

Boiling carrots with Moroccan spices creates a tender, tangy salad that works as a side or light lunch. The cumin and paprika bloom in the warm carrots while lemon juice keeps everything bright instead of heavy.

Moroccan Carrot Salad served on a plate

You don't need to marinate for hours. The dressing soaks in while the carrots cool, and fresh herbs go in last so they stay green and punchy.

This works for meal prep or weeknight dinners when you want something that tastes intentional but doesn't require constant attention.

QUICK SUMMARY

Moroccan Carrot Salad delivers tender-crisp carrots dressed with cumin, lemon juice, and olive oil. The carrots boil for 8-10 minutes, then cool quickly before you toss them with spices and fresh herbs. Perfect for weeknight sides or meal prep when you need something that holds up in the fridge.

⏱️Time Reality: 20 minutes total, most of it hands-off boiling time
🔪First Move: Cut carrots into even 2-inch sticks so they cook uniformly
⚠️Watch Out: Drain carrots at 10 minutes max or they turn mushy-rinse with cold water immediately

Table of Contents

Toggle
  • Why This Recipe Works
  • What You'll Need
    • Ingredient Details
  • Ingredient Swaps
  • What to Serve With It
  • Store and Reheat
  • Frequently Asked Questions
  • Moroccan Carrot Salad
    • Method 
    • Tried this recipe?

Why This Recipe Works

Boiling carrots instead of roasting them keeps the salad light and lets the spices stand out. For a version that comes together quickly, this bright caesar salad recipe uses a similar build-your-own approach with fresh ingredients.

Quick Reference
⏱️
Prep Time
10 min
🔥
Cook Time
10 min
⏰
Total Time
20 min
🍽️
Servings
4 servings
📊
Difficulty
Easy
🏷️
Category
Side
💡
Quick Tip
Cook carrots tender-crisp for best texture
🎯
Best For
Weeknight | Meal prep | Entertaining

What makes this reliable:

  • Boiling carrots for 8-10 minutes keeps them tender but firm - they hold their shape instead of turning to mush, and the texture stays snappy when chilled
  • Cold water stops the cooking immediately - draining and rinsing locks in that tender-crisp bite before carryover heat softens them further
  • Cumin and paprika bloom in warm carrots - the residual heat opens up the spices so they taste roasted instead of raw and dusty
  • Lemon juice balances the sweetness - carrots have natural sugar, and the acid cuts through without needing much honey or extra oil
  • Fresh herbs go in last - cilantro and parsley wilt fast in heat, so adding them after the carrots cool keeps them bright green and punchy
Quick Tip
Start checking carrots at 8 minutes-pierce with a fork and they should give slightly but not fall apart

What You'll Need

Ingredients for Moroccan Carrot Salad

Firm carrots are the only hard requirement here. A good chicken can make or break the plate. For a version that comes together quickly, this classic chicken dish uses a similar quick-cook method with bright flavors.

🥕
Main Vegetable
  • Carrots (1 lb, cut into 2-inch sticks)
🧄
Aromatics & Herbs
  • Garlic (2 cloves, minced)
  • Fresh cilantro (¼ cup, chopped)
  • Fresh parsley (2 Tbsp, chopped)
🌶️
Spices & Seasonings
  • Ground cumin (1 tsp)
  • Paprika (½ tsp, smoked or sweet)
  • Red chili flakes (¼ tsp, optional)
  • Salt and pepper
🍋
Dressing
  • Olive oil (2 Tbsp)
  • Fresh lemon juice (2 Tbsp)
  • Honey (1 tsp, optional)

Ingredient Details

  • Carrots
    Use firm, thick carrots-thin or bendy ones turn mushy fast and lose texture when boiled
  • Ground cumin
    Start with ½ teaspoon if you're not used to warm spices, then add more after tasting-it's the signature Moroccan flavor
  • Lemon juice
    Fresh lemon juice matters here-bottled tastes flat and doesn't balance the sweetness as well
  • Olive oil
    Use at least 2 tablespoon to coat all the carrots-too little and the spices clump instead of spreading evenly
  • Fresh cilantro
    Add it after the carrots cool or it wilts and turns brown-fresh herbs keep the salad looking bright
  • Honey
    Optional but balances the lemon-start with 1 teaspoon and taste before adding more
  • Paprika
    Smoked paprika adds depth, sweet paprika keeps it mild-both work depending on what you want

Ingredient Swaps

Most salads need flexibility for what's in the fridge. Pork adds the contrast this plate needs, but timing matters. For a version that comes together quickly, this tender homemade pork recipe uses a similar approach with warm spices and acid.

Four swaps that work:

  • Maple syrup or agave instead of honey - same sweetness with a slightly different finish, and it keeps the salad vegan if that matters
  • Lime juice or white vinegar instead of lemon juice - lime tastes brighter and more tropical, vinegar is sharper but still cuts the sweetness
  • Ground coriander instead of cumin - lighter and less earthy, closer to citrus than warm spice, but still Moroccan-adjacent
  • Fresh parsley only instead of cilantro - skips the soapy taste some people hate, still gives you the green herb brightness

Boiled Carrots

Works for: Quick prep, tender texture, absorbs dressing fast

Skip if: You want caramelized flavor or crispy edges

Roasted Carrots

Works for: Deeper flavor, caramelized edges, no water needed

Skip if: You're short on time-roasting takes 25-30 minutes

Instructions

The whole thing happens in one pot, then a mixing bowl. Chicken adds the contrast this plate needs, but timing matters. For a version that comes together quickly, we keep a batch ready for nights like this - this easy soup side uses the same quick-rest technique.

  1. Boil the carrots: Bring a pot of salted water to a rolling boil, add the carrot sticks, and cook for 8-10 minutes until a fork pierces them easily but they still have a slight snap-not mushy.
  2. Drain and cool immediately: Pour the carrots into a colander, then rinse under cold running water for 30 seconds to stop the cooking-this locks in the tender-crisp texture before carryover heat softens them further.
  3. Mix the dressing: In a mixing bowl, whisk together olive oil, lemon juice, minced garlic, cumin, paprika, red chili flakes (if using), honey (if using), salt, and pepper until the spices are evenly distributed and the oil emulsifies slightly.
  4. Toss the carrots: Add the drained, cooled carrots to the bowl with the dressing and toss until every piece is coated-let the salad sit for 15-20 minutes at room temperature so the flavors soak in.
  5. Finish with fresh herbs: Right before serving, fold in the chopped cilantro and parsley so they stay bright green and punchy instead of wilted and brown.
Golden Rule
Add fresh herbs only after the carrots cool completely-heat wilts them instantly and turns them dull

What to Serve With It

This salad needs something hearty to balance the bright acidity. Most people skip planning what goes with a salad, but it determines whether the meal feels complete. For more ideas on planning your chicken salad dinner, we cover pairing strategies and side options.

Side Dish Prep Why It Works How to Serve
Grilled chicken Easy Adds protein without competing with the spices Slice and serve on the side or over the salad
Couscous Easy Traditional Moroccan pairing, soaks up the dressing Fluff with a fork and serve underneath or alongside
Flatbread Easy Balances the acidity and helps scoop the salad Warm briefly and tear into pieces for serving
Roasted lamb Medium Classic Moroccan pairing with complementary spices Slice thin and serve alongside the salad
Hummus Easy Adds creamy texture contrast to the bright salad Dollop on the plate or serve in a separate bowl

Three ways to serve it:

  • As a side salad for grilled meats - the lemon and cumin cut through rich proteins like lamb or chicken without overpowering them
  • Over couscous or quinoa - turn it into a light lunch by adding a starch base that soaks up the dressing
  • With flatbread and hummus - make it a mezze-style spread for entertaining or picnics when you need something that holds up at room temperature
Best Pick
Serve this with couscous and grilled chicken for a complete Moroccan-style meal that feels intentional but doesn't require multiple pots

Store and Reheat

This salad holds up in the fridge better than most because the carrots are cooked and dressed. Rich mains need something to cut through, and beef does exactly that. For a version that comes together quickly, this a rich beef side uses a similar quick-cook method.

Method Time Best For
🌡️ Room temperature 10-15 min Serving as a fresh side-most salads taste best not cold
📦 Microwave 20-30 seconds Quick warming if you prefer it slightly warm-not recommended

For best results when storing:

  • Transfer to an airtight container within 2 hours - leaving it out longer risks bacterial growth, especially with the garlic and oil
  • Store in the fridge for 3-4 days max - the carrots stay firm and the dressing keeps well, but fresh herbs fade after day 3
  • Keep extra herbs separate - if meal prepping, add fresh cilantro and parsley right before eating so they don't wilt in the fridge
  • Taste and adjust before serving leftovers - chilled salads lose some punch, so add a squeeze of lemon juice or pinch of salt to brighten it
  • Don't freeze this salad - the carrots turn mushy and watery when thawed, and the fresh herbs turn black and slimy

Frequently Asked Questions

How long to cook Moroccan carrot salad carrots?

Boil carrots for 8-10 minutes until a fork pierces them easily but they still have a slight snap. Drain immediately and rinse with cold water to stop the cooking-any longer and they turn mushy.

Can I make Moroccan carrot salad ahead?

Yes-make the salad up to 2 days ahead, but keep fresh cilantro and parsley separate until serving so they don't wilt. Store in an airtight container in the fridge.

What goes with Moroccan carrot salad?

Serve it with grilled chicken, roasted lamb, couscous, flatbread, or hummus. The bright, tangy flavors balance rich proteins and make it work as a side or light lunch base.

Can I substitute fresh ginger instead of cumin in Moroccan carrot salad?

You can, but it changes the flavor completely-ginger tastes sharp and citrusy, while cumin is warm and earthy. If you swap it, use ½ teaspoon minced fresh ginger and expect a different salad.

Is Moroccan carrot salad gluten-free?

Yes-the salad has no wheat, flour, or gluten-containing ingredients. Just check your spices and honey for cross-contamination if you're strictly gluten-free.

Moroccan Carrot Salad served on a plate

Moroccan Carrot Salad

No ratings yet
Moroccan Carrot Salad features tender-crisp carrots boiled with cumin and paprika, then tossed in a vibrant lemon and olive oil dressing. The fresh herbs added at the end keep the salad bright and punchy, making it a perfect side or light lunch.
Print Recipe Pin Recipe
Prep Time 10 minutes mins
Cook Time 10 minutes mins
Total Time 20 minutes mins
Servings: 4 servings
Course: Side Dish
Cuisine: Moroccan
Ingredients Method Notes

Ingredients
  

  • 1 lb carrots cut into 2-inch sticks
  • 2 cloves garlic minced
  • 0.25 cup cilantro fresh, chopped
  • 2 tablespoon parsley fresh, chopped
  • 1 teaspoon ground cumin
  • 0.5 teaspoon paprika smoked or sweet
  • 0.25 teaspoon red chili flakes optional
  • salt
  • black pepper
  • 2 tablespoon olive oil
  • 2 tablespoon fresh lemon juice
  • 1 teaspoon honey optional

Method
 

  1. Bring a pot of salted water to a rolling boil. Add the carrot sticks and cook for 8-10 minutes until a fork pierces them easily but they still have a slight snap.
    1 lb carrots
  2. Pour the carrots into a colander, then rinse under cold running water for 30 seconds to stop the cooking and lock in the tender-crisp texture.
    1 lb carrots
  3. In a mixing bowl, whisk together olive oil, lemon juice, minced garlic, cumin, paprika, red chili flakes (if using), honey (if using), salt, and black pepper until emulsified.
    2 cloves garlic, 1 tsp ground cumin, 0.5 tsp paprika, 0.25 tsp red chili flakes, 2 Tbsp olive oil, 2 Tbsp fresh lemon juice, 1 tsp honey, salt, black pepper
  4. Add the drained, cooled carrots to the bowl with the dressing and toss until evenly coated. Let the salad sit for 15-20 minutes at room temperature to soak in flavors.
    1 lb carrots
  5. Right before serving, fold in the chopped cilantro and parsley so they stay bright green and punchy, not wilted or brown.
    0.25 cup cilantro, 2 Tbsp parsley

Notes

  • Boil carrots just 8-10 minutes to keep them tender-crisp and avoid mushiness.
  • Rinse carrots with cold water immediately after boiling to stop cooking and retain texture.
  • Add fresh herbs only after carrots have cooled to keep them bright and fresh.

Tried this recipe?

Let us know how it was!

Warm Farro Salad with Mushrooms

March 27, 2026

When meal prep containers need something that tastes good cold or warm, chewy farro with earthy mushrooms delivers. The grains hold up for days without getting mushy or bland.

Warm Farro Salad with Mushrooms served on a plate

Pearled farro cooks in 30 minutes and stays tender with a bite. Sautéed mushrooms add juice and umami that plain grains can't match.

This works for vegetarian gatherings when you need a hearty dish that doesn't rely on cheese or fake meat. Make it on Sunday and eat it all week.

QUICK SUMMARY

Warm farro salad with mushrooms combines chewy pearled farro with caramelized mushrooms and shallots. The key is cooking farro until tender but not mushy, then tossing it warm with sautéed mushrooms and a hit of acid to keep everything balanced.

⏱️Time Reality: 45 minutes start to finish, most of it hands-off boiling
🔥Critical Move: Brown mushrooms undisturbed for 5 minutes before stirring to develop flavor
⚠️Watch Out: Drain farro immediately when tender to prevent soggy texture

Why This Recipe Works

High heat on the mushrooms creates browning that builds savory depth without extra ingredients. The farro absorbs the pan juices when you toss everything together while it's still warm. A good salad can make or break the plate. For a version that comes together quickly, this simple salad recipe delivers similar earthy flavors with a different grain base.

Quick Reference
⏱️
Prep Time
15 min
🔥
Cook Time
30 min
⏰
Total Time
45 min
🍽️
Servings
4 servings
📊
Difficulty
Medium
🏷️
Category
Side | Main Dish
💡
Quick Tip
Toast farro for nuttier flavor before boiling
🎯
Best For
Weeknight | Meal prep | Entertaining

What makes this work:

  • Pearled farro cooks faster than whole grain and stays chewy without turning to mush
  • Browning mushrooms undisturbed for the first 5 minutes builds caramelized flavor instead of steaming them
  • Caramelizing shallots low and slow adds sweetness that balances the earthy mushrooms
  • Adding lemon juice off heat preserves brightness and prevents the acid from turning bitter
  • Draining farro immediately when tender stops the cooking and prevents waterlogged grains
Quick Tip
Toast farro in a dry skillet for 5 minutes before boiling to deepen the nutty flavor

What You'll Need

Ingredients for Warm Farro Salad with Mushrooms

Grocery stores stock pearled farro near quinoa and rice, not in the bulk bins. Rich mains need something to cut through, and salad does exactly that. For a version that comes together quickly, this classic salad dish uses canned beans instead of cooking grains from scratch.

🍜
Grains
  • 1 cup pearled farro
  • 3 cups water
🥬
Vegetables
  • 12 oz cremini or button mushrooms, sliced
  • 2 shallots, thinly sliced
  • 3 garlic cloves, minced
🥢
Flavor Base
  • ¼ cup olive oil
  • 2 tablespoon lemon juice
  • ½ cup fresh parsley, chopped
  • ¼ cup Parmesan, grated (optional)
  • Salt and black pepper

Ingredient Details

  • Pearled farro
    Look for pearled, not whole grain-it cooks in 25-30 minutes instead of 45
  • Cremini mushrooms
    Slice ¼-inch thick so they brown evenly without drying out
  • Shallots
    Slice thin and cook low heat for 10 minutes to caramelize without burning
  • Olive oil
    Use extra virgin for flavor since it's a big part of the dressing
  • Lemon juice
    Add after removing pan from heat to keep the brightness sharp
  • Fresh parsley
    Chop just before serving to preserve color and prevent wilting
  • Parmesan cheese
    Optional but adds savory depth; skip for dairy-free version

Ingredient Swaps

Brown rice adds 15 minutes to the cook time but works if you can't find farro. The chicken works best when it hits the table at the same time as the main. For a version that comes together quickly, simple beef side dish pairs with this grain salad when you need protein on the plate.

Common swaps:

  • Pearled farro → brown rice or barley - Brown rice takes 40-45 minutes, barley 30-35, both softer texture (gluten-free with rice)
  • Cremini mushrooms → shiitake or oyster mushrooms - Shiitake adds more umami, oyster mushrooms cook faster and stay tender
  • Olive oil → avocado oil - Neutral flavor, slightly higher smoke point, works for budget cooking
  • Parmesan → nutritional yeast - Use 2 tablespoon for cheesy flavor without dairy, adjust salt since it's less salty

Brown Rice

Works for: Gluten-free diets, similar chew with slightly softer texture

Skip if: You want faster cooking time or nuttier flavor

Shiitake Mushrooms

Works for: Deeper umami and meaty texture, holds up to reheating

Skip if: Budget is tight-they cost 2-3x more than cremini

White Wine Vinegar

Works for: Same acidity as lemon juice, sharper flavor profile

Skip if: You prefer bright citrus notes over vinegar tang

Instructions

Farro takes 30 minutes to cook, mushrooms 10, so start the grain first and prep vegetables while it simmers. Chicken adds the contrast this plate needs, but timing matters. For a version that comes together quickly, classic chicken dish roasts alongside vegetables on one pan.

  1. Boil farro: Bring 3 cups water to boil in medium saucepan, add 1 teaspoon salt and 1 cup farro, reduce to simmer. Cook 25-30 minutes until tender with slight chew, drain immediately in fine mesh strainer, spread on plate to cool.

  2. Brown mushrooms: Heat 2 tablespoon olive oil in large skillet over medium-high heat until shimmering. Add sliced mushrooms in single layer, cook undisturbed 5 minutes until golden brown on bottom, stir and cook 2-3 minutes more until tender.

  3. Caramelize shallots and garlic: Reduce heat to medium, add remaining 2 tablespoon olive oil and sliced shallots to mushrooms. Cook 8-10 minutes, stirring occasionally, until shallots soften and turn golden. Add minced garlic, cook 1 minute until fragrant.

  4. Combine warm: Remove skillet from heat, add drained farro to mushroom mixture, toss to coat with pan juices. Stir in lemon juice and chopped parsley, season with salt and black pepper to taste.

  5. Finish and serve: Transfer to serving bowl, top with grated Parmesan if using, drizzle with extra olive oil if it looks dry. Serve warm or at room temperature within 30 minutes for best texture.

Watch Out
Don't add garlic with the shallots-it burns before the shallots caramelize. Add it in the last minute.

What to Serve With It

Farro salad sits in the gap between side dish and light main. The rice works best when it hits the table at the same time as the main. For meal planning around similar grain-based dishes, planning your kale salad dinner covers strategies for building complete vegetarian plates.

Side Dish Prep Why It Works How to Serve
Roasted chicken thighs Easy Protein balances the grains and adds richness Slice thighs over warm farro, drizzle pan juices
Simple green salad Easy Fresh greens cut through earthy mushrooms Dress lightly, serve on the side for contrast
Steamed broccoli Easy Mild vegetable that doesn't compete with mushrooms Toss with butter and lemon, serve alongside
Crusty bread Easy Soaks up olive oil and pan juices Toast slices, serve warm with butter
Charred asparagus Medium Smoky flavor pairs with caramelized shallots Grill or broil until tips char, serve hot

Three ways to serve it:

  • As a side: Pair with grilled sausages or roasted salmon for weeknight dinners where you need something hearty
  • As a main: Top with a fried egg and serve with crusty bread for vegetarian lunch that fills you up
  • For meal prep: Pack in containers with roasted vegetables and rotate proteins throughout the week
Best Pick
Serve alongside roasted chicken thighs-the pan drippings add richness that plain farro can't match

Store and Reheat

Farro holds texture for 3-4 days but mushrooms release liquid over time. Store in shallow containers to cool quickly and prevent bacterial growth. The chicken works best when it hits the table at the same time as the main. We keep a batch ready for nights like this - something flaky like shrimp reheats better than most grain salads and pairs with the same vegetables.

Method Time Best For
🍳 Stovetop 5-7 min Restoring texture without drying when served warm
🔥 Oven 10 min at 300°F Even warming for larger portions, add splash of water
📦 Microwave 1-2 min Quick reheating, cover to retain moisture

For best results when storing:

  • Cool completely before sealing in containers to prevent condensation and soggy farro
  • Store dressing separately if making ahead-toss just before serving to keep parsley bright
  • Add fresh herbs after reheating instead of before storing to preserve color and flavor
  • Refresh with lemon juice and olive oil after reheating to restore brightness
  • Eat within 4 days for best texture-farro gets firmer but mushrooms get softer in the fridge

Frequently Asked Questions

Can I make warm farro salad with mushrooms ahead and reheat?

Yes, make up to 3 days ahead and store in the fridge. Reheat on the stovetop with a splash of water or broth to restore moisture, then add fresh herbs and a squeeze of lemon before serving.

How long should I cook farro to achieve chewy, tender texture?

Pearled farro takes 25-30 minutes in boiling water at a simmer. Check at 25 minutes-it should be tender with a slight chew, not mushy. Drain immediately to stop cooking.

What side dishes pair well with warm farro mushroom salad?

Roasted chicken thighs, grilled sausages, or a simple green salad work best. The farro sits between side and main, so add protein or keep it vegetarian with a fried egg on top.

How do I prevent mushrooms from becoming soggy or undercooked?

Cook mushrooms on medium-high heat in a single layer without stirring for the first 5 minutes. This browns them instead of steaming. Don't crowd the pan-work in batches if needed.

Can I substitute brown rice or quinoa for farro in this salad?

Brown rice works but takes 40-45 minutes to cook and has softer texture. Quinoa cooks in 15 minutes but lacks the chewy bite that makes farro work here. Barley is the closest swap at 30-35 minutes.

Warm Farro Salad with Mushrooms served on a plate

Warm Farro Salad with Mushrooms

No ratings yet
Warm farro salad with mushrooms features chewy pearled farro cooked to tender perfection and caramelized mushrooms for deep savory flavor. Tossed warm with lemon juice and fresh parsley, this dish works well for meal prep and vegetarian gatherings.
Print Recipe Pin Recipe
Prep Time 15 minutes mins
Cook Time 30 minutes mins
Total Time 45 minutes mins
Servings: 4 servings
Course: Main Dish, Side Dish
Cuisine: Vegetarian
Ingredients Method Notes

Ingredients
  

  • 1 cup pearled farro cooks in 25-30 minutes, use pearled not whole grain
  • 3 cups water
  • 12 oz cremini mushrooms sliced about ¼ inch thick
  • 2 shallots thinly sliced
  • 3 cloves garlic minced
  • ¼ cup olive oil extra virgin recommended
  • 2 tablespoon lemon juice add off heat to preserve brightness
  • ½ cup fresh parsley chopped just before serving
  • ¼ cup Parmesan cheese grated, optional
  • salt to taste, added to boil water and seasoning
  • black pepper to taste

Method
 

  1. Bring 3 cups water to a boil in a medium saucepan. Add 1 teaspoon salt and 1 cup pearled farro. Reduce to a simmer and cook for 25-30 minutes until tender but still slightly chewy. Drain farro immediately in a fine mesh strainer and spread on a plate to cool.
    1 cup pearled farro, 3 cups water, salt
  2. Heat 2 tablespoons olive oil in a large skillet over medium-high heat until shimmering. Add sliced mushrooms in a single layer and cook undisturbed for 5 minutes until golden brown on the bottom. Stir and cook for another 2-3 minutes until tender.
    12 oz cremini mushrooms, ¼ cup olive oil
  3. Reduce heat to medium and add remaining 2 tablespoons olive oil and sliced shallots to the mushrooms. Cook for 8-10 minutes, stirring occasionally, until shallots soften and turn golden. Add minced garlic and cook for 1 minute until fragrant.
    2 shallots, 3 cloves garlic, ¼ cup olive oil
  4. Remove skillet from heat and add drained farro to the mushroom and shallot mixture. Toss to coat with pan juices. Stir in lemon juice and chopped parsley. Season with salt and black pepper to taste.
    1 cup pearled farro, 2 tbsp lemon juice, ½ cup fresh parsley, salt, black pepper
  5. Transfer the warm salad to a serving bowl. Top with grated Parmesan if using and drizzle with extra olive oil if it looks dry. Serve warm or at room temperature within 30 minutes for best texture.
    ¼ cup Parmesan cheese, ¼ cup olive oil

Notes

  • Toast farro in a dry skillet for 5 minutes before boiling to enhance nutty flavor.
  • Brown mushrooms undisturbed for 5 minutes before stirring to develop caramelized flavor.
  • Drain farro immediately when tender to prevent soggy texture.

Tried this recipe?

Let us know how it was!

Thai Green Papaya Salad (Som Tam)

March 27, 2026

Shred green papaya into thin matchsticks, pound it with lime, chilies, and fish sauce, and you get Som Tam-a salad that's crispy, tangy, and spicy all at once. The mortar and pestle bruises the papaya just enough to absorb the dressing without making it soggy.

Thai Green Papaya Salad (Som Tam) served on a plate

This works for weeknight meals when you want something fresh that doesn't require cooking. The high-acid dressing keeps the papaya crunchy for hours.

QUICK SUMMARY

Thai Green Papaya Salad (Som Tam) combines shredded unripe papaya with lime juice, fish sauce, palm sugar, chilies, and peanuts for a bright, crunchy side dish. The key is balancing sweet, sour, salty, and spicy while keeping the papaya crisp. Serve within 30 minutes to avoid wilting.

⏱️Time Reality: 15 minutes hands-on, no cooking required
🔪First Critical Step: Shred papaya 2-3 inches long, ⅛ inch thick for ideal crunch
⚠️Watch Out: Over-pounding turns papaya mushy-10-15 gentle tosses only

Table of Contents

Toggle
  • Why This Recipe Works
  • What You'll Need
    • Ingredient Details
  • Ingredient Swaps
  • What to Serve With It
  • Store and Reheat
  • Frequently Asked Questions
  • Thai Green Papaya Salad (Som Tam)
    • Method 
    • Tried this recipe?

Why This Recipe Works

Pounding the ingredients in a mortar releases oils and bruises the papaya slightly so it grabs the dressing. Salad adds the contrast this plate needs, but timing matters. For a version that comes together quickly, classic salad dish uses a similar balance of lime and fish sauce.

Quick Reference
⏱️
Prep Time
15 min
🔥
Cook Time
0 min
⏰
Total Time
15 min
🍽️
Servings
4 servings
📊
Difficulty
Easy
🏷️
Category
Appetizer | Side
💡
Quick Tip
Pound gently, keep papaya crunchy, balance flavor
🎯
Best For
Weeknight | Summer | Entertaining

What makes this work:

  • Unripe papaya stays crisp: Green papaya has almost no sugar and holds its texture under acid
  • Fish sauce adds umami depth: Provides salty backbone that balances lime and sugar
  • Pounding releases papaya juices: Gentle bruising helps papaya absorb dressing without breaking down
  • Toasted peanuts add crunch: Fresh roasted peanuts stay crispy and add nutty contrast
  • Lime juice brightens immediately: Fresh-squeezed lime keeps the salad tasting sharp and clean
Best Pick
Use a mortar and pestle instead of a bowl-pounding releases more flavor than mixing alone.

What You'll Need

Ingredients for Thai Green Papaya Salad (Som Tam)

Buy a firm, pale green papaya with no soft spots. Most people skip salad, but it balances the meal. We keep a batch ready for nights like this-this related salad recipe uses a cooling yogurt base instead of acid.

🥬
Base
  • Green papaya
  • Cherry tomatoes
  • Green beans
🧄
Aromatics
  • Garlic
  • Bird's eye chilies
🥢
Dressing
  • Lime juice
  • Fish sauce
  • Palm sugar
🫙
Toppings
  • Roasted peanuts
  • Dried shrimp (optional)

Ingredient Details

  • Green papaya
    Pick a papaya that's hard and pale green with no yellow spots-ripe papaya turns mushy and sweet
  • Fish sauce
    Use a high-quality brand with clear liquid-cloudy fish sauce tastes murky
  • Palm sugar
    Brown sugar works in a pinch but palm sugar has a deeper caramel flavor
  • Bird's eye chilies
    Start with one chili and add more-these are significantly hotter than jalapeños
  • Lime juice
    Squeeze fresh limes right before mixing-bottled juice tastes flat
  • Roasted peanuts
    Toast raw peanuts yourself for 3-5 minutes at 350°F-pre-roasted peanuts lose crunch
  • Dried shrimp
    Soak in warm water for 5 minutes to soften before adding-skip entirely for vegan version

Ingredient Swaps

You can adjust heat and protein while keeping the core texture. Rich mains need something to cut through, and salad does exactly that. For a version that comes together quickly, a creamy noodles side balances spice with richness.

Four swaps that work:

  • No green papaya? Use julienned carrot or cucumber-texture is less crisp but still crunchy
  • No palm sugar? Use brown sugar or honey-increase sweetness slightly, add in smaller amounts
  • Making it vegan? Skip dried shrimp, add chopped toasted cashews for umami crunch
  • Too spicy? Use jalapeño instead of bird's eye chilies-heat drops significantly

Carrot Substitute

Works for: Budget cooking, when green papaya unavailable

Skip if: You want authentic texture and flavor

Tamari Instead of Fish Sauce

Works for: Gluten-free and vegetarian versions

Skip if: You need traditional umami depth

Instructions

The salad comes together in one bowl after you shred the papaya. Chicken adds the contrast this plate needs, but timing matters. We keep a batch ready for nights like this-simple homemade shrimp uses a similar sweet-sour-salty balance.

  1. Shred the papaya: Peel the green papaya and use a julienne peeler or knife to shred it into matchsticks 2-3 inches long and ⅛ inch thick. Put shredded papaya in a large bowl.

  2. Pound the aromatics: Add garlic and bird's eye chilies to a mortar and pestle. Pound for 30 seconds until fragrant and slightly broken down but not pulverized.

  3. Mix the dressing: Add lime juice, fish sauce, and palm sugar to the mortar. Stir until sugar dissolves completely-taste and adjust so it's balanced between sour, salty, and sweet.

  4. Combine gently: Pour dressing over shredded papaya, add halved cherry tomatoes, chopped green beans, and dried shrimp if using. Toss gently 10-15 times with your hands or tongs-avoid over-mixing or papaya breaks down.

  5. Finish and serve: Top with toasted peanuts right before serving. Serve within 30 minutes to keep papaya crisp and flavors bright.

Quick Tip
Taste the dressing before adding it to the papaya-you should taste all four flavors (sweet, sour, salty, spicy) equally.

What to Serve With It

Som Tam needs a protein or starch to round out the meal. The beef works best when it hits the table at the same time as the main. For a version that comes together quickly, a rich beef on the side adds savory contrast to the bright, acidic salad.

Side Dish Prep Why It Works How to Serve
Sticky rice Easy Neutral base soaks up tangy dressing Serve warm in a basket, let guests grab handfuls
Grilled chicken skewers Easy Adds savory protein, complements fresh salad Grill 8-10 min, serve hot alongside salad
Steamed jasmine rice Easy Balances spicy and sour flavors Spoon salad over rice or serve side by side
Thai grilled fish Medium Traditional pairing, adds smoky richness Grill whole fish or fillets, serve with salad on the side
Fresh herbs (mint, cilantro) Easy Adds freshness and aromatic contrast Place whole leaves on a plate, let guests add as desired

Three ways to serve it:

  • As an appetizer before grilled meats or noodle dishes
  • Over sticky rice with grilled chicken for a complete meal
  • On a Thai platter with satay, spring rolls, and peanut sauce
Shortcut
Pre-shred the papaya in the morning and store in cold water-drain well before tossing with dressing.

Store and Reheat

Som Tam loses its crunch fast, so eat it fresh. Most people skip chicken, but it balances the meal. For a version that comes together quickly, homemade chicken recipe adds protein that holds up better for meal prep.

Method Time Best For
🚫 Not Recommended N/A Salad is best served fresh and cold

For best results when storing:

  • Store in fridge up to 2 days: Keep dressing separate from papaya in an airtight container
  • Add peanuts right before serving: Prevents them from getting soggy
  • Drain excess liquid before storing: Pat papaya dry with paper towels to avoid pooling
  • Refresh with fresh lime juice: Add a squeeze of lime when serving leftovers to brighten flavors
  • Don't freeze: Papaya turns mushy and watery when thawed

Frequently Asked Questions

Can I replace green papaya with carrot or cucumber?

Yes, use julienned carrot for a similar crunch or cucumber for a lighter, more watery texture. Carrots are sweeter and cucumbers are milder, so adjust lime and sugar accordingly.

How long can I store Thai green papaya salad in the fridge?

Store up to 2 days with dressing separate from the papaya. Toss right before serving and add fresh peanuts on top to keep them crunchy.

What is the best way to know when the salad flavors are balanced?

Taste the dressing before adding it to the papaya-you should taste sweet, sour, salty, and spicy in equal amounts. Adjust with more lime, sugar, or fish sauce as needed.

Why does my Som Tam sometimes turn soggy and how to fix it?

Soggy salad happens when papaya is shredded too thin or sits too long in dressing. Fix it by draining excess liquid, adding freshly shredded papaya, and tossing gently just before serving.

How many servings does a typical batch of Som Tam make?

One medium green papaya makes about 4 servings as a side dish or appetizer. Double the recipe for larger gatherings or meal prep.

Thai Green Papaya Salad (Som Tam) served on a plate

Thai Green Papaya Salad (Som Tam)

No ratings yet
Thai Green Papaya Salad (Som Tam) features shredded unripe papaya combined with lime juice, fish sauce, palm sugar, chilies, and peanuts for a bright and crunchy side dish. The salad balances sweet, sour, salty, and spicy flavors while keeping the papaya crisp using gentle pounding in a mortar and pestle. Serve within 30 minutes to maintain freshness and texture.
Print Recipe Pin Recipe
Prep Time 15 minutes mins
Cook Time 1 minute min
Total Time 16 minutes mins
Servings: 4 servings
Course: Appetizer, Side
Cuisine: Thai
Ingredients Equipment Method Notes

Ingredients
  

  • 1 medium green papaya peeled and shredded into 2-3 inch matchsticks
  • 2 cloves garlic peeled
  • 1 to 3 bird's eye chilies start with one and adjust to taste
  • 3 tablespoons lime juice freshly squeezed
  • 2 tablespoons fish sauce high-quality, clear liquid
  • 1 tablespoon palm sugar or brown sugar as substitute
  • 8 pieces cherry tomatoes halved
  • ½ cup green beans chopped
  • ¼ cup roasted peanuts toasted fresh
  • 1 tablespoon dried shrimp optional, soaked 5 minutes in warm water

Equipment

  • Mortar and Pestle Used for pounding garlic, chilies, and mixing dressing
  • Julienne peeler or knife Used for shredding green papaya into matchsticks
  • Large bowl To hold shredded papaya and mix the salad

Method
 

  1. Peel the green papaya and shred it using a julienne peeler or knife into matchsticks about 2-3 inches long and ⅛ inch thick. Place the shredded papaya into a large bowl.
    1 medium green papaya
  2. Add garlic and bird's eye chilies to a mortar and pestle. Pound gently for about 30 seconds until fragrant and slightly broken down without pulverizing.
    2 cloves garlic, 1 to 3 bird's eye chilies
  3. Add lime juice, fish sauce, and palm sugar to the mortar. Stir and pound gently until the sugar completely dissolves. Taste and adjust the balance of sour, salty, and sweet flavors as needed.
    3 tablespoons lime juice, 2 tablespoons fish sauce, 1 tablespoon palm sugar
  4. Pour the dressing over the shredded papaya in the bowl. Add halved cherry tomatoes, chopped green beans, and soaked dried shrimp if using. Toss gently 10-15 times with hands or tongs to combine without breaking down the papaya.
    1 medium green papaya, 8 pieces cherry tomatoes, ½ cup green beans, 1 tablespoon dried shrimp
  5. Top the salad with toasted peanuts just before serving. Serve within 30 minutes to keep the papaya crunchy and flavors bright.
    ¼ cup roasted peanuts

Notes

  • Pound gently to bruise papaya just enough for flavor absorption without making it mushy.
  • Use fresh lime juice for the best brightness and flavor balance.
  • Serve the salad fresh within 30 minutes to maintain crisp texture.

Tried this recipe?

Let us know how it was!

What Is Ancho Chile Pepper? [Taste, Uses & More]

March 27, 2026

Most cooks treat ancho chiles as a one-note heat source - and that's exactly the wrong read. Ancho chile pepper is the dried form of the poblano, and its real job is building depth: that low, sweet smokiness that makes a sauce taste like it's been cooking for hours.

What Is Ancho Chile Pepper

If you've ever reached for enchilada sauce in spice blends or wondered why your mole lacks body, ancho is usually what's missing.

It also shows up wherever replacements for adobo sauce are needed for a richer, fruitier base note.

QUICK SUMMARY

Ancho chile pepper is a dried poblano with mild heat, sweet raisiny fruitiness, and a subtle cocoa backbone. It's the foundation of mole poblano and enchilada sauces, available whole or ground, with a shelf life of up to two years for dried pods.

🌶️Heat Level: Mild - 1,000 to 1,500 Scoville units
🍫Flavor: Sweet, raisiny, earthy, with cocoa undertones
🍽️Best Uses: Mole, enchilada sauce, adobo rubs, braises
🛒Buy As: Whole dried pods or ground ancho powder
📅Shelf Life: Whole pods up to 2 years; ground powder 6-12 months

What Is ancho chile pepper?

Ancho chile is a dried, mature poblano pepper - the same chile that, when picked green and fresh, fills chiles rellenos across Mexico.

Once left to ripen fully to red and then dried, the poblano becomes the ancho: a wide, wrinkled, deep mahogany pod measuring roughly 4 inches long.

The name comes from the Spanish word for "wide," which describes its broad, flat shape well.

It originates in central Mexico, with Puebla being the most historically significant producing region. Outside Mexico, you'll see it labeled as dried poblano, ancho pepper, or ancho poblano - all the same thing.

It belongs to the Capsicum annuum species, the same family as bell peppers and jalapeños.

A note on related chiles worth knowing:

  • ⚠️ Mulato chile - another dried poblano variant, but harvested later and darker; earthier, less sweet than ancho
  • Pasilla chile - often confused with ancho at markets; longer and thinner with a more herbaceous character
  • Guajillo chile - brighter, tangier, and hotter than ancho; frequently used alongside it in sauces

What Does ancho chile pepper Taste Like?

ancho chile pepper - What Is Ancho Chile Pepper

Ancho sits in a category of its own among dried Mexican chiles. The dominant note is a sweet, raisiny fruitiness - closer to a dried plum than a hot pepper.

Beneath that runs a quiet cocoa-like bitterness, a faint earthiness, and just enough heat to register without demanding attention.

Sensory SnapshotModerate Intensity
👅 Flavor
sweet-raisinymild smoky heatcocoa-earthyslightly nutty
✋ Texture
leathery driedsilky when pureed
👃 Aroma
deep smokydried fruitearthy cocoa

Compared to guajillo, ancho is sweeter and less bright - guajillo has a sharper, berry-like tang that cuts through. Against pasilla, ancho reads as fruitier and milder.

Heat-wise, 1,000-1,500 Scoville units puts it at the low end - most people with any tolerance for spice won't notice it as hot at all.

Toasting the dried pod before rehydrating deepens the cocoa and smoky notes noticeably. Skip the toast and the flavor stays rounder and sweeter.

How to Use ancho chile pepper

Ancho works in two primary forms: whole rehydrated pods and ground powder. Each has its territory.

Knowing alternatives to cumin helps here too, since cumin is one of ancho's most natural spice partners in rubs and braising liquids.

How Ancho Chile Is Used
MethodBest ForTip
🔥 Toast + RehydrateMole, enchilada sauce, braising liquidToast 30 seconds per side in a dry pan; soak in hot water 20 minutes
🌿 Grind to PowderAdobo rubs, marinades, spice blendsRemove seeds first; grind in a spice grinder for even texture
🍲 Simmer WholePozole, stews, braised meatsAdd whole to pot early; remove and blend or discard stems and seeds after
🥄 Puree into SauceMole poblano, red enchilada baseBlend with soaking liquid for deeper flavor; strain for silky texture

Mole poblano is the most complex application - anchos blended with dark chocolate, cinnamon, toasted nuts, tomatoes, and a dozen other ingredients into a sauce that takes most of a day to build. Enchilada sauce is more approachable: rehydrate, blend, strain, season. For grilled meats, ground ancho combined with cumin, garlic, and a little lime makes a dry rub that works especially well on pork shoulder or beef short ribs.

Ancho pairs tightly with cinnamon, dark chocolate, onion, garlic, tomato, and lime. Mexican cooking uses it most in Puebla-style and central Mexican preparations, but Tex-Mex and New Mexican fusion dishes pull from it heavily too.

Avoid pairing it with delicate floral desserts or raw seafood where the smoky character overshadows everything else.

Try It In
🍗Puebla Mole Poblano ChickenAncho is the structural base of this classic mole→

How to Buy and Store ancho chile pepper

Good whole pods tell you immediately: pliable, not brittle. A fresh-enough dried ancho bends slightly without cracking and holds a deep mahogany color with no white powdery spots, which signal mold.

Faded, reddish-brown pods with an almost orange tint have lost most of their aromatic compounds. Avoid oily-feeling pods too - surface oil suggests improper storage or age.

Watch Out
Brittle, pale, or powdery-smelling pods are past their best - the cocoa-raisin character degrades first, leaving only dusty heat with no depth.

For ground ancho powder, check the roast date on the label and open the bag to smell it. A good powder smells unmistakably of cocoa and dried fruit.

No scent means no flavor. Understanding ancho chile pepper's shelf life in more detail helps you decide whether to refrigerate or freeze ground powder for best results.

Store whole pods in an airtight container in a cool, dark pantry - they hold well for one to two years. Ground powder loses potency faster; refrigerate after opening and aim to use it within six to twelve months.

Where to Start With Ancho

If you've never cooked with ancho before, don't start with mole.

Rehydrate a single pod in hot water for twenty minutes, blend it with a little garlic and tomato, and use that puree as the base for a braised chicken dish instead.

Golden Rule
One rehydrated ancho pod plus its soaking liquid is enough to build a full-flavored braising sauce for two to four portions - you don't need a dozen ingredients to taste what it does.

Once you understand how the chile behaves - how its sweetness anchors a sauce and its smokiness deepens over heat - the more complex applications make sense quickly.

Anyone running short on anchos will find useful direction in alternatives to ancho chile pepper that preserve a similar flavor profile without hunting for a specialty shop.

Frequently Asked Questions

Are ancho and poblano the same?

Same pepper, different stage. A poblano is the fresh green chile; an ancho is that same pepper left to ripen red and then dried. Drying concentrates the sugars and deepens the flavor significantly.

How hot is an ancho pepper?

Mildly hot - 1,000 to 1,500 Scoville units, which is at the low end of the chile scale. A jalapeño runs roughly 3-5 times hotter. Most people notice warmth rather than heat.

Can I substitute guajillo for ancho?

You can, but the result will be brighter and tangier with less sweetness. Guajillo works better as a partial swap - use it alongside a sweeter dried chile like mulato to approximate ancho's depth.

How do you rehydrate ancho chiles?

Remove the stem and seeds, then submerge the pod in near-boiling water or warm broth for 20 minutes until soft and pliable. Save the soaking liquid - it carries flavor and works well added to sauces.

How do you make ancho powder at home?

Toast whole dried pods briefly in a dry skillet, let them cool, then remove stems and seeds. Grind in a spice grinder until fine. Use within a few weeks for the strongest aroma.

« Previous Page
Next Page »

Primary Sidebar

ForkliftKitchen recipe developer

Welcome!

Recipe Developer · 12+ Yr Kitchen Veteran

I'm the recipe developer behind this site, focused on practical, well-tested dishes and smart ingredient swaps. Every recipe is written to be clear, reliable, and easy to make at home.

650+ Recipes
12+ Yrs Exp.
3x Tested
Our Story →

As Featured In

Allrecipes

TASTE OF HOME

Food52

HUFFPOST

Yahoo! Life

Our Editorial Standards

  • ✓ Every recipe tested at least 3 times before publishing
  • ✓ Substitutes verified by real kitchen trials, not guesswork
  • ✓ Reviewed for accuracy by our editorial team
  • ✓ Updated regularly with seasonal info and reader feedback

Most Popular

  • Creamy Lemon Shrimp Linguine
    Creamy Lemon Shrimp Linguine
  • Creamy Garlic Mushroom Chicken
    Creamy Garlic Mushroom Chicken
  • Sesame Ginger Chicken Noodle Bowls
    Sesame Ginger Chicken Noodle Bowls
  • Baked Lemon Herb Fish Fillets
    Baked Lemon Herb Fish Fillets
  • Veggie Loaded Fried Rice
    Veggie Loaded Fried Rice
  • Spicy Garlic Shrimp Stir Fry
    Spicy Garlic Shrimp Stir Fry

Join 8,000+ Home Cooks

Weekly Kitchen Tips

Easy recipes, smart substitutes, and real cooking shortcuts — every Thursday.

Subscribe Free →


Side Dishes

  • What to Serve With Asian Salmon? 15 Best Side Dishes
    What to Serve With Asian Salmon? 15 Best Side Dishes
  • Side Dishes for Strawberry Spinach Salad
    15 Best Side Dishes for Strawberry Spinach Salad
  • Sides for Grilled Cauliflower Steaks to Complete the Meal
    15 Sides for Grilled Cauliflower Steaks to Complete the Meal
  • 15 Sides To Serve With Calabacitas
    15 Best Sides for Calabacitas – Mexican-Inspired Favorites


Substitutes

  • 7 Best Substitutes for Hot Sauce in Marinades & Stir-Fries
    7 Best Substitutes for Hot Sauce in Marinades & Stir-Fries
  • 9 Best Substitutes for Butter in Baking and Cooking
  • 7 Best Substitutes for Tagliatelle for Italian Pasta Dishes
    7 Best Substitutes for Tagliatelle for Italian Pasta Dishes
  • 7 Best Substitutes for Udon Noodles in Asian Stir-Fries
    7 Best Substitutes for Udon Noodles in Asian Stir-Fries


Browse by Topic

  • Side Dishes320
  • Substitutes785
  • Dinner163
  • Air Fryer77
  • Taste Profiles484
  • Food Storage123


Reader Reviews

★★★★★

"Finally a food blog that tells you exactly why a substitute works instead of just listing options."

— Sarah M., via email

★★★★★

"The side dish recommendations are so specific — saved my dinner party twice this month."

— James R., Pinterest comment

★★★★★

"I trust this site more than most because they actually test everything. You can tell."

— Priya K., blog comment

Footer

↑ Back to Top

Forklift Kitchen

We do the heavy lifting so you can enjoy the cooking. Tested recipes, smart substitutes, and perfect pairings—built for real home cooks.

Content

  • Recipes
  • Substitutes
  • What to Serve With
  • Blog

Company

  • About Us
  • Contact
  • Subscribe

Legal

  • Privacy Policy
  • Terms of Service

As an Amazon Associate I earn from qualifying purchases.

© 2026 Forklift Kitchen.

Rate This Recipe

Your vote:


A rating is required
A name is required
An email is required