• Skip to primary navigation
  • Skip to main content
  • Skip to primary sidebar
  • Recipe Index
    • Air Fryer
  • Side Dishes
  • Substitutes
  • About
  • Contact
  • Subscribe

ForkLiftKitchen

menu icon
go to homepage
  • Recipe Index
    • Air Fryer
  • Side Dishes
  • Substitutes
  • About
  • Contact
  • Subscribe
subscribe
search icon
Homepage link
  • Recipe Index
    • Air Fryer
  • Side Dishes
  • Substitutes
  • About
  • Contact
  • Subscribe
×

Blog

What Is Brown Sugar? [Taste, Uses & More]

March 28, 2026

You spot it on the shelf next to the white sugar - same bag shape, different color - and wonder whether it's worth the extra reach. Brown sugar isn't just tinted white sugar; it's sucrose coated or blended with molasses, which changes its moisture, color, and flavor in ways that matter in the kitchen.

What Is Brown Sugar

If you want chewier cookies, deeper glazes, or a warm caramel note in your baked beans, brown sugar is the specific tool for that job.

QUICK SUMMARY

Brown sugar is sucrose mixed with molasses, producing a moist, clump-prone granule with a warm caramel and toffee flavor. It comes in light and dark varieties, with darker types carrying a stronger molasses punch. It sweetens, adds chew to baked goods, and creates sticky, glossy glazes.

🍬Flavor: Sweet caramel with molasses tang and light toffee bitterness
🧁Best Uses: Cookies, glazes, spice rubs, baked beans, banana bread
🫙Storage: Airtight container at room temperature; lasts indefinitely when sealed
🛒Buy: Soft-packed bags or sealed tubs; avoid visible hard lumps
⚠️Watch Out: Moisture content causes clumping; avoid using near delicate meringues

What Is Brown Sugar?

Brown sugar belongs to the sucrose family, but unlike fully refined white sugar, it retains or is re-blended with molasses - the dark, bitter syrup left behind during the sugarcane refining process.

Most commercial brown sugar you find in grocery stores is actually refined white sugar with molasses added back in.

Light brown sugar contains roughly 3.5% molasses by weight. Dark brown sugar sits closer to 6.5%, producing a deeper color and a more pronounced flavor. Beyond those two, you'll find muscovado, an unrefined cane sugar where molasses was never removed, making it the most intensely flavored option.

Originating in Caribbean and colonial sugarcane-producing regions, brown sugar became a staple sweetener before industrial refining made pure white sugar cheap and abundant.

Demerara is a related type - a coarse, golden raw sugar named for a region in Guyana - though its texture and moisture level differ significantly from the soft-packed variety most recipes call for.

Best Pick
For most baking recipes, light brown sugar is the default choice. Reach for dark brown sugar when a recipe specifically needs deeper molasses flavor - sticky toffee pudding, baked beans, or intense barbecue glazes.

What Does Brown Sugar Taste Like?

brown sugar - What Is Brown Sugar

Brown sugar tastes like a mellower, warmer version of plain sweetness. The molasses coating adds a caramel and toffee note that white sugar simply doesn't have, along with a faint roasted bitterness at the back of the palate.

Sensory SnapshotModerate Intensity
👅 Flavor
carameltoffeemolasses tangmildly bitter
✋ Texture
softmoistclump-prone
👃 Aroma
warm caramelmolasses-forward

Light brown sugar sits closest to caramelized white sugar in flavor - approachable and slightly buttery. Dark brown sugar is noticeably more assertive, approaching black treacle territory without the full bitterness.

Heat amplifies everything: when brown sugar caramelizes in a pan or browns in a cookie, the toffee and roasted notes become more complex and deeper.

Muscovado, by contrast, can feel almost smoky and intensely mineral. If you've never tasted it raw, it reads more like a condiment than a sweetener.

How to Use Brown Sugar

Brown sugar earns its place across both sweet and savory cooking. Its moisture content and molasses-derived flavor make it a different tool from white sugar - not a simple swap.

How Brown Sugar Is Used
MethodBest ForTip
🥄 Raw / SprinkledOatmeal, cereal, coffee, fresh fruitSprinkle just before serving - it dissolves fast on warm foods
🍪 Creamed in BakingCookies, cakes, banana bread, muffinsPack it tightly when measuring; loose packing throws off ratios
🍳 Dissolved in GlazesBBQ sauces, ham glazes, stir-fry saucesLow-medium heat prevents scorching; add acid to prevent seizing
🌶️ Dry RubsPork ribs, chicken thighs, smoked brisketMix with salt and spices - sugar caramelizes on the crust as it cooks

In American baking, packed brown sugar is responsible for the chew and darker color in chocolate chip cookies. The molasses is hygroscopic - it draws in moisture - which keeps baked goods soft longer than white sugar does.

Carrot cake, banana bread, and gingerbread all rely on this property.

Savory applications work because brown sugar balances acidity and salt. Stirred into barbecue sauce with vinegar and mustard, it creates the sticky sheen on ribs.

Folded into baked beans, it provides the background molasses note that makes the dish feel slow-cooked. For spice rubs, it chars slightly on pork or chicken, adding crust and color.

Brown sugar pairs well with butter, vanilla, cinnamon, and warm spices - all of which highlight its caramel character. It also works in sauces with bourbon or rum, and in savory glazes alongside soy sauce.

Try It In
☕Iced Brown Sugar Oat Milk LatteBrown sugar syrup adds caramel depth without overpowering the espresso→🍖Slow Cooker Brown Sugar HamThe glaze caramelizes into a sticky, glossy crust over low heat→

How to Buy and Store Brown Sugar

At the store, reach for soft-packed bags or sealed tubs - packages that give slightly when pressed still have adequate moisture. Avoid bags with visible rock-hard corners, which signal the molasses has dried out.

For dark brown sugar, a strong caramel-molasses smell through the bag is a good sign.

Shortcut
To soften hardened brown sugar fast, place a damp paper towel over it in a microwave-safe bowl and heat in 20-second bursts. A terra-cotta brown sugar saver placed directly in the container prevents hardening in the first place.

Once open, transfer brown sugar to an airtight container at room temperature, away from heat sources. A slice of apple, a halved marshmallow, or a terra-cotta disc in the container will keep moisture levels stable.

For shelf life details across sugar types, the white sugar storage guide comparison is useful context.

Unopened brown sugar lasts 12 months or more. Opened and stored correctly, it remains usable indefinitely - hardening is a texture problem, not a spoilage problem.

More on that at brown sugar freshness guide.

Where to Start With Brown Sugar

Brown sugar isn't a specialty ingredient - it's already in most kitchens. The question is whether you're using it intentionally.

  • Start with cookies - swap white sugar for brown in a standard cookie recipe and compare the chew and color directly.
  • Try a glaze - dissolve dark brown sugar with butter and a splash of bourbon for a fast pan sauce on pork chops.
  • Upgrade oatmeal - sprinkle light brown sugar on plain oats instead of white; the difference in aroma alone is immediate.

If you need a stand-in when you run out, the brown sugar swaps guide covers your closest options. And if you're working with coarser raw sugars in a recipe, demerara sugar swaps helps sort those out separately.

Frequently Asked Questions

What is brown sugar made of?

Most commercial brown sugar is refined white sugar with molasses added back in. Light brown sugar contains about 3.5% molasses; dark brown sugar contains about 6.5%. Muscovado is an exception - it's an unrefined cane sugar that retains its natural molasses.

Is brown sugar healthier than white sugar?

Not meaningfully. Both are primarily sucrose and have the same caloric and metabolic impact. Dark brown sugar contains trace amounts of minerals from molasses, but the quantities are too small to matter nutritionally.

Can you substitute brown sugar for white sugar?

Yes, in a 1:1 ratio for most recipes. Expect a slightly darker color, more moisture, and added molasses flavor. In very delicate preparations - pale cakes or meringues - the flavor and moisture shift may be noticeable.

How do you soften hardened brown sugar?

Microwave it with a damp paper towel in 20-second bursts until pliable. For overnight softening, place a slice of apple or a piece of bread in the sealed container - both release moisture slowly into the sugar.

What is the difference between light and dark brown sugar in baking?

Dark brown sugar has roughly double the molasses content of light brown sugar, producing a stronger flavor and slightly more moisture. Most recipes work with either, but dark brown sugar intensifies flavor in gingerbread, baked beans, and barbecue sauces noticeably more.

What Is Beef Tenderloin? [Taste, Uses & More]

March 28, 2026

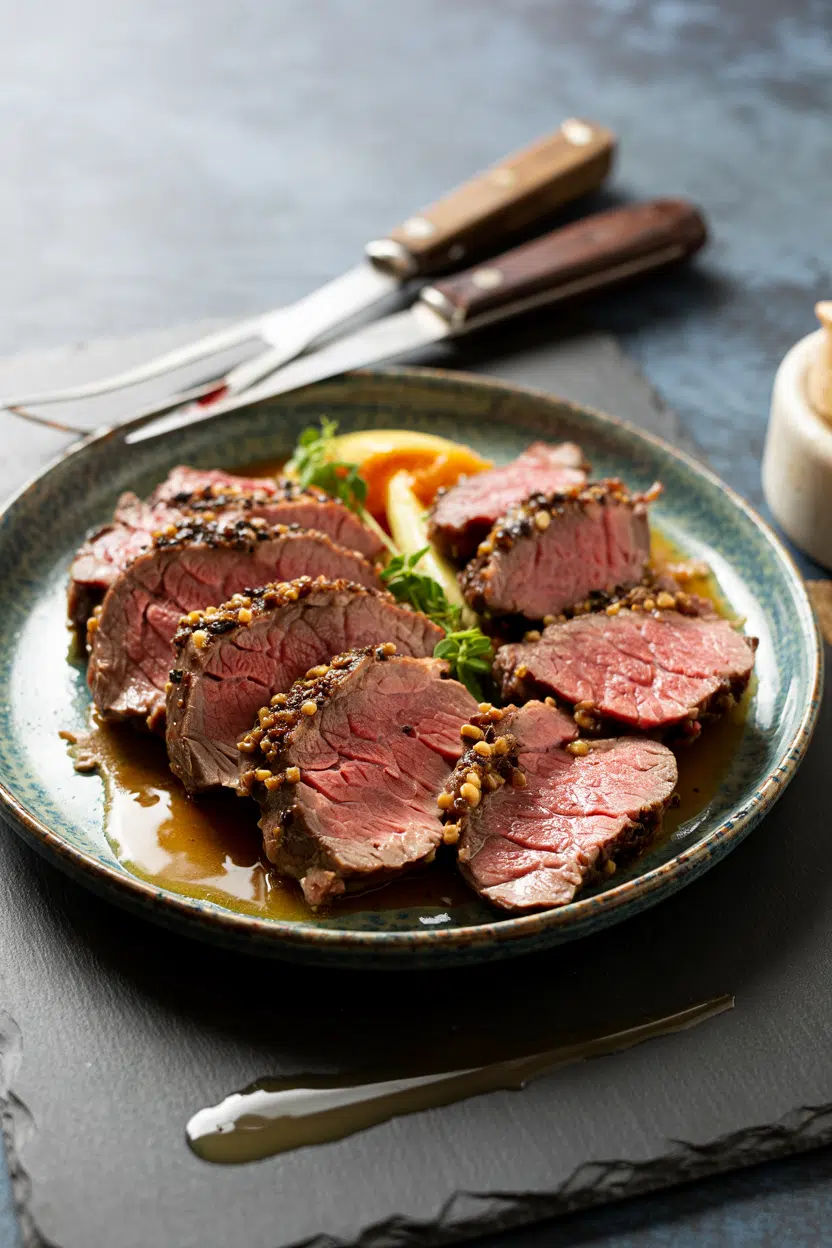
Beef tenderloin hits the plate with a softness that stops you mid-bite. It's not the loudest cut on the table - no heavy fat cap, no chewy connective tissue - just a clean, mild beefy flavor and a texture so fine-grained it almost dissolves.

What Is Beef Tenderloin

If you've eaten filet mignon at a steakhouse or carved a whole roast at a holiday dinner, you already know what this muscle can do.

QUICK SUMMARY

Beef tenderloin is the psoas major muscle from along the spine - prized for extreme tenderness and a mild, clean beefy flavor. It's lean, fine-grained, and suited to high-heat cooking. Best used whole for roasting or sliced into filet mignon steaks for pan-searing.

🥩Flavor: Mild beefy umami, subtly buttery, lean and clean on the palate
✋Texture: Exceptionally tender, fine-grained, and soft - almost melting
🍳Best Uses: Whole roasting, filet mignon steaks, beef Wellington, tournedos
🛒Buy It: Uniform pale-red color, no silverskin, tight grain, minimal odor
🧊Shelf Life: Raw fridge 2-3 days; frozen up to 12 months; cooked fridge 3-4 days

What Is Beef Tenderloin?

Beef tenderloin is the psoas major, a long, narrow muscle that runs along either side of the cow's lumbar spine.

Because the animal rarely uses this muscle for movement, it develops almost no connective tissue - which is exactly why it's the most tender cut on the whole carcass.

Butchers sell it whole, trimmed of silverskin and external fat, or pre-portioned. The whole loin has three sections: the thick butt end, the center (the most uniform for slicing), and the tapered tip.

You may also see it labeled as filet, eye of tenderloin, or psoas major at specialty butchers.

When butchers cut the center into individual steaks, those become filet mignon. Thicker center-cut rounds tied with butcher's twine are called tournedos, a classic of French service.

Understanding this structure helps when buying - center-cut portions cook more evenly than tip sections. Unlike a flank steak, which has long muscle fibers and benefits from marinating, tenderloin needs no such treatment to stay tender.

What Does Beef Tenderloin Taste Like?

beef tenderloin - What Is Beef Tenderloin

The flavor is mild - noticeably less beefy than a hanger steak or chuck, and leaner than a ribeye. Think of it as a clean umami foundation: gentle, slightly buttery, and without any gaminess or pronounced fat flavor.

Sensory SnapshotMild Intensity
👅 Flavor
mild umamisubtly butterylean savory
✋ Texture
fine-grainedexceptionally soft
👃 Aroma
clean roasted beeflightly nutty when seared

Heat transforms the surface while leaving the interior soft. A hard sear creates a Maillard crust with a lightly nutty, roasted aroma - this exterior contrast is what makes a well-cooked filet mignon memorable, since the interior alone is quiet in flavor.

Without sauce or seasoning, tenderloin reads as elegant but understated.

How to Use Beef Tenderloin

This is a cut that responds best to high, fast heat - searing, roasting, or grilling - then a proper rest. Long, slow braises waste it entirely; the muscle has no collagen to break down, so extended heat only dries it out.

How Beef Tenderloin Is Used
MethodBest ForTip
🔥 Whole RoastHoliday centerpiece, dinner service portionsTie with twine for even shape; rest 10-15 min before carving
🍳 Pan-SearFilet mignon steaks, medallions with pan jusPat completely dry; finish with compound butter in the pan
🥐 Pastry-WrappedBeef Wellington, bacon-wrapped filetSear first to build crust; chill before wrapping to prevent soggy pastry
🥩 Raw / Thin-SlicedCarpaccio, quick-seared thin stripsUse center-cut only; freeze briefly for cleaner slicing
🔆 Reverse SearEven doneness edge-to-edge on thick cutsRoast low (250°F) first, then blast in a screaming-hot pan

French cuisine built a canon around this muscle - tournedos Rossini, béarnaise-sauced filet mignon, and bordelaise reductions all come from that tradition. American steakhouses rely on it as the centerpiece steak, while British roast service often presents it whole alongside root vegetables and jus.

Pairing it with rich, fatty elements compensates for its leanness: butter and garlic, salty prosciutto or bacon wrapped around the exterior, and creamy peppercorn or béarnaise sauces all do this well.

For what to serve alongside a whole tenderloin roast, pommes Anna and mashed potatoes are the classic calls. Herb sprigs - thyme and rosemary particularly - belong in the roasting pan.

Golden Rule
Never skip the rest period. A whole tenderloin needs at least 10 minutes off heat before carving - cutting too soon pushes all the juices out and leaves the interior dry.
Try It In
🌿Garlic Herb Roasted Pork TenderloinSame roasting logic — great technique reference for whole loin cuts→🍖Herb-Roasted Pork TenderloinShows herb-crust technique that translates directly to beef tenderloin→

How to Buy and Store Beef Tenderloin

Look for a whole loin with uniform pale-red color and a smooth, slightly moist surface. Avoid any with grey patches, a strong odor, or visible silverskin still attached - silverskin doesn't break down with heat and will shrink, pulling the meat out of shape.

Watch Out
Silverskin left on the loin tightens during cooking and can bow the meat. Ask your butcher to remove it, or trim it yourself with a thin boning knife held nearly flat against the surface.

Storage is straightforward but the timeline is short. Keep raw tenderloin in the coldest part of the fridge - vacuum-sealed packaging extends life longer than loose wrapping, for the same reason vacuum-sealed proteins in general resist spoilage better.

Raw whole loin keeps 2-3 days refrigerated; frozen, it holds quality for up to 12 months. For more detail on shelf life across different storage conditions, see our beef tenderloin freshness guide guide.

  • Raw, refrigerated - 2-3 days, tightly wrapped or vacuum-sealed
  • Raw, frozen - up to 6-12 months in airtight packaging
  • Cooked, refrigerated - 3-4 days; reheat gently to avoid toughening

Where to Start With Beef Tenderloin

Start with a center-cut filet mignon if you're new to the muscle. Two inches thick, patted dry, seared hard on both sides in a hot cast-iron pan, finished with butter and thyme.

That single cook shows you everything this cut does well.

Once you're comfortable with doneness control, move to a whole roast. The reverse sear method - low oven first, hot sear at the end - gives you the most even medium-rare edge to edge.

If you want a benchmark for how beef tenderloin alternatives compare in texture and flavor, that whole roast is the best reference point.

Best Pick
For a whole roast, center-cut USDA Choice or Prime tenderloin gives the most consistent diameter and even cooking. The butt end cooks unevenly - fold it under and tie it if using the full loin.

Frequently Asked Questions

What is the difference between filet mignon and beef tenderloin?

Filet mignon is a steak cut from the beef tenderloin - specifically from the center or narrow end of the loin. The tenderloin is the whole muscle; filet mignon is one portioned slice of it.

Is beef tenderloin lean or fatty?

It's one of the leaner premium beef cuts - far less intramuscular fat than ribeye. That's why recipes often wrap it in bacon or finish it with butter, compensating for the lower fat content.

How tender is beef tenderloin compared to ribeye?

Tenderloin is significantly more tender - it's the least-worked muscle on the animal. Ribeye has more marbling and stronger flavor, however, so the choice depends on whether you prioritize texture or taste.

Can you grill a whole beef tenderloin?

Yes - butterfly the loin open so it lies flat, or grill it whole over two-zone heat. Start over indirect heat, then sear over direct flame at the end for crust development.

How do you cook whole beef tenderloin to medium-rare?

Pull it from the oven at an internal temperature of 125-128°F and rest it - carryover heat will bring it to 130-135°F (medium-rare). A probe thermometer is non-negotiable for accuracy on a whole loin.

What Is Carob Powder? [Taste, Uses & More]

March 28, 2026

Carob powder does something no other ingredient quite replicates: it delivers a roasted, mildly sweet depth that reads chocolate-adjacent without any of cocoa's sharpness or caffeine load.

What Is Carob Powder

Unlike cocoa, which depends on fat and bitterness for its character, carob powder draws its appeal from natural sugars already present in the dried pod - meaning it contributes sweetness and body at the same time.

Whether you're stirring it into a warm drink alongside keeping milk fresh on the counter, or folding it into muffin batter, it changes how you think about caffeine-free baking entirely.

QUICK SUMMARY

Carob powder is a naturally sweet, caffeine-free cocoa substitute ground from dried carob pods. It has a mild roasted flavor with caramel-like warmth, substitutes for cocoa at a 1:1 ratio, and suits baking, drinks, and energy-ball recipes well.

🌱Category: Legume-derived powder from dried, roasted carob pods
👅Flavor: Mild roasted sweetness with earthy, caramel-like warmth
☕Caffeine: Completely caffeine- and theobromine-free
🍫Best Swap: Replaces cocoa 1:1; reduce sugar slightly in most recipes
📦Shelf Life: 6-12 months in an airtight container in a cool, dark pantry

What Is carob powder?

Carob powder comes from the dried, roasted, and ground pods of the carob tree (Ceratonia siliqua), a legume native to the Eastern Mediterranean.

The pods themselves are long, flat, and leathery - harvested when fully ripe, then dried and milled into the fine tan-brown powder sold in health food stores and specialty grocers.

You may also see it labeled as carob flour, St. John's bread powder, or Ceratonia siliqua powder.

These names all refer to the same product, though "carob flour" occasionally indicates a less roasted, lighter-colored version with a subtler flavor.

Two main types exist: raw carob powder (lighter, less roasted) and roasted carob powder (darker, with deeper caramel notes). Most recipes call for the roasted variety, which is what fills the majority of retail bags.

  • 🌍 Origin - Eastern Mediterranean, cultivated for thousands of years across the Mediterranean Basin
  • 🫘 Category - Legume-derived (the carob tree is in the Fabaceae family, same as beans and lentils)
  • 🍬 Natural sugars - Contains sucrose naturally, which is why it tastes sweet without added sweetener
  • ☕ No stimulants - Lacks both caffeine and theobromine, making it safe for caffeine-sensitive people

What Does carob powder Taste Like?

carob powder - What Is Carob Powder

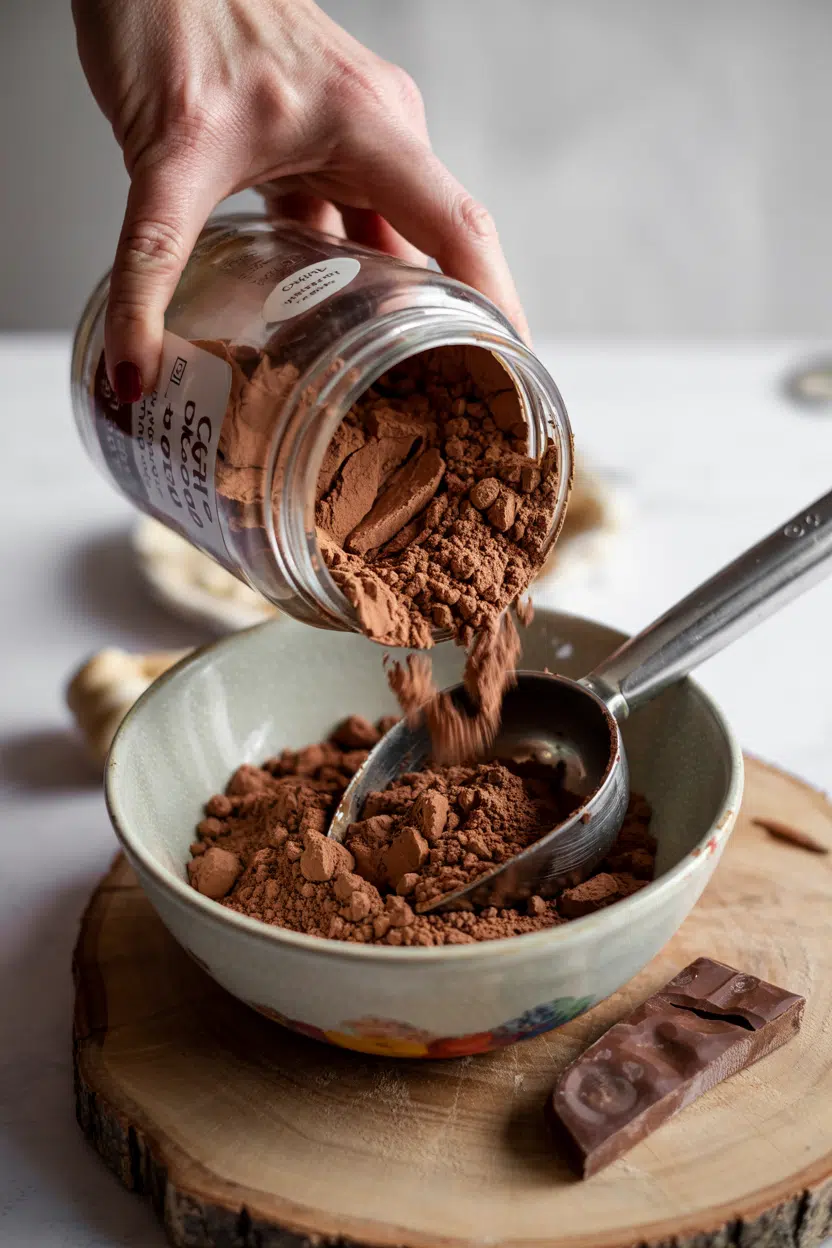
Carob powder tastes similar to unsweetened cocoa but softer in every dimension. The bitterness cocoa relies on is mostly absent here - instead, you get a toasted, brown-sugar warmth with faint earthy and nutty undertones.

Sensory SnapshotMild Intensity
👅 Flavor
roastedmildly sweetearthycaramel-like
✋ Texture
fine powdercreamy when wet
👃 Aroma
toastedbrown sugar

Heat amplifies the roasted quality. Blooming carob powder in hot liquid - just as you would cocoa - brings out a richer, more rounded flavor than simply stirring it cold.

That caramel edge sharpens slightly when baked, which is why carob muffins and quick breads often taste more complex out of the oven than the raw batter suggests.

Golden Rule
Don't expect carob to mimic dark chocolate's bite. Its strength is gentle, caramel-forward sweetness - lean into that rather than chasing a cocoa clone.

How to Use carob powder

Carob powder works across a wider range of applications than most people initially expect. Its natural sweetness means recipes often need less added sugar, and its fat content is far lower than cocoa, which slightly affects texture in baked goods.

How Carob Powder Is Used
MethodBest ForTip
🥛 Bloomed in liquidHot drinks, sauces, glazesUse hot (not boiling) liquid and whisk thoroughly to avoid lumps
🧁 Dry mixed into batterMuffins, quick breads, cookiesSieve before mixing to prevent graininess in the crumb
⚡ No-bake blendingEnergy balls, bars, trufflesCombine with nut butter and dates; the natural sugars bind well
🍯 Simmered into syrupCake glazes, pastry drizzlesCook low and slow - high heat dulls the caramel notes

In Mediterranean and Middle Eastern kitchens, carob has a long history in syrups and confections. Modern vegan baking adopted it readily because it contributes chocolate-like color and mild sweetness without dairy or stimulants.

Pairings that work well include cinnamon, cardamom, orange zest, vanilla, almond, and hazelnut. Dates and dried fruits are especially natural companions, since their own caramel sweetness mirrors carob's profile. Nut butters - particularly almond and tahini - round out the earthy notes in no-bake recipes.

If you want stronger chocolate-forward flavor alongside carob, consider how cacao nibs in cooking can add genuine cocoa bitterness without overwhelming the blend.

For cases where carob simply won't work, a full guide to alternatives to carob powder covers the main options with ratios.

Watch Out
Carob cannot replace cocoa in recipes that depend on fat for structure or tempering - it contains no cocoa butter, so it won't set like chocolate or produce a glossy ganache.
Try It In
🍫Passion Fruit Hot ChocolateSwap cocoa for carob to soften the bitterness against bright fruit→🥜Cinnamon Sugar Roasted NutsA dust of carob powder deepens the roasted coating alongside cinnamon→🎂Rich Chocolate Layer CakeSee how carob compares when subbed into a full cocoa batter→

How to Buy and Store carob powder

Good carob powder has a uniform dark tan-brown color with no gray cast or clumps. Smell before buying if the bag allows - it should register as toasted and faintly sweet, not flat or stale.

Clumping usually signals moisture exposure, which degrades both flavor and texture.

Best Pick
Choose sealed bags with a recent production date over bulk-bin powder, which is more exposed to humidity and odor transfer from neighboring spices.

Once opened, store in an airtight container in a cool, dark pantry away from heat sources and strong-smelling spices - carob absorbs ambient odors readily.

A full breakdown of keeping carob powder fresh covers signs of spoilage and whether refrigeration actually helps.

For reference on how other cocoa-category powders compare in shelf behavior, comparing cocoa powder vs baking cocoa options is worth a read.

  • Shelf life - 6-12 months opened; refrigeration can extend this, but bring to room temperature before using to avoid condensation
  • Signs of decline - Flat aroma, grayish color, or off taste mean it's past its best
  • Avoid moisture - Never use a wet spoon; even small amounts of water cause clumping

Start With the Drink

If carob powder is new to you, the quickest way to understand its character is a simple carob hot chocolate: whisk a tablespoon into warm oat or soy milk, no sugar needed at first.

That single cup shows you both the mild roasted sweetness and the natural body it brings before committing it to a whole batch of baked goods.

From there, move to no-bake energy balls with dates and almond butter - the recipe is forgiving and the carob flavor shines without any heat. Baked applications come last, once you know how its sweetness and low-fat profile shift results compared to cocoa.

Frequently Asked Questions

Does carob powder contain caffeine?

No. Carob powder is completely free of both caffeine and theobromine, the stimulant that also appears in cocoa. This makes it a reliable option for caffeine-sensitive people, children, and those avoiding stimulants for medical reasons.

How do you substitute carob for cocoa in recipes?

Use a 1:1 ratio by volume - one tablespoon of carob powder for every tablespoon of cocoa. Because carob is naturally sweeter, reduce added sugar by roughly 20-25% to avoid an overly sweet result.

Is carob powder healthier than cocoa?

It depends on the goal. Carob is lower in fat and naturally sweet, so it fits caffeine-free and lower-fat diets well. However, cocoa provides more antioxidants (flavonoids), so neither is universally superior.

How does carob powder affect baking texture?

Carob's lower fat content produces a slightly drier, denser crumb than cocoa in the same recipe. Adding a teaspoon of neutral oil or an extra tablespoon of wet ingredient compensates well in most quick breads and muffins.

Can you make carob chocolate?

Not in the traditional sense. Without cocoa butter, carob powder won't set into a bar or produce a snap. Carob chips use added vegetable fat to mimic that texture, but homemade carob powder alone can't replicate it.

What Is Apple Butter? Taste, Uses & Flavor Guide

March 28, 2026

Apple butter earns its place on the table not as a condiment but as a workhorse ingredient - it glazes, binds, sweetens, and deepens flavor in ways a simple jam or applesauce cannot.

What Is Apple Butter

Unlike standard fruit spreads, which stop short of full reduction, apple butter is cooked down so completely that the apples essentially become themselves twice over: concentrated, caramelized, and spiced.

It sits in a different category from comparing jam jelly vs fruit preserves options on a technical level, and it behaves differently in a kitchen, too.

Understanding what it does best makes it easy to reach for the right tool.

QUICK SUMMARY

Apple butter is a slow-cooked, caramelized apple spread with deep spice notes and tangy sweetness. Thicker and more concentrated than applesauce, it works as a spread, glaze, batter addition, or savory complement - and keeps for 4-8 weeks in the fridge once opened.

🍎What It Is: Concentrated cooked apple purée with cinnamon, clove, and sugar
👅Flavor: Caramelized apple sweetness with warm spice and mild tangy bite
🍳Best Uses: Toast, glazing pork, baking batters, yogurt, barbecue sauces
📦Buy It: Deep mahogany color, glossy surface, no visible separation in jar
🗓️Shelf Life: Unopened pantry: up to 1 year; opened refrigerated: 4-8 weeks

What Is Apple Butter?

Apple butter is a fruit butter - a category of spread made by cooking whole fruit down to a thick, paste-like purée with no actual dairy butter involved.

The name refers to texture: smooth, spreadable, and rich enough to coat a knife cleanly.

Its roots trace to Pennsylvania Dutch cooking and Central European traditions, where the German equivalent, Apfelbutter, was a way to preserve autumn harvests before refrigeration existed.

The process is what separates it from applesauce. Long, slow reduction - traditionally over an open fire in copper kettles - drives off moisture and concentrates natural sugars until they caramelize.

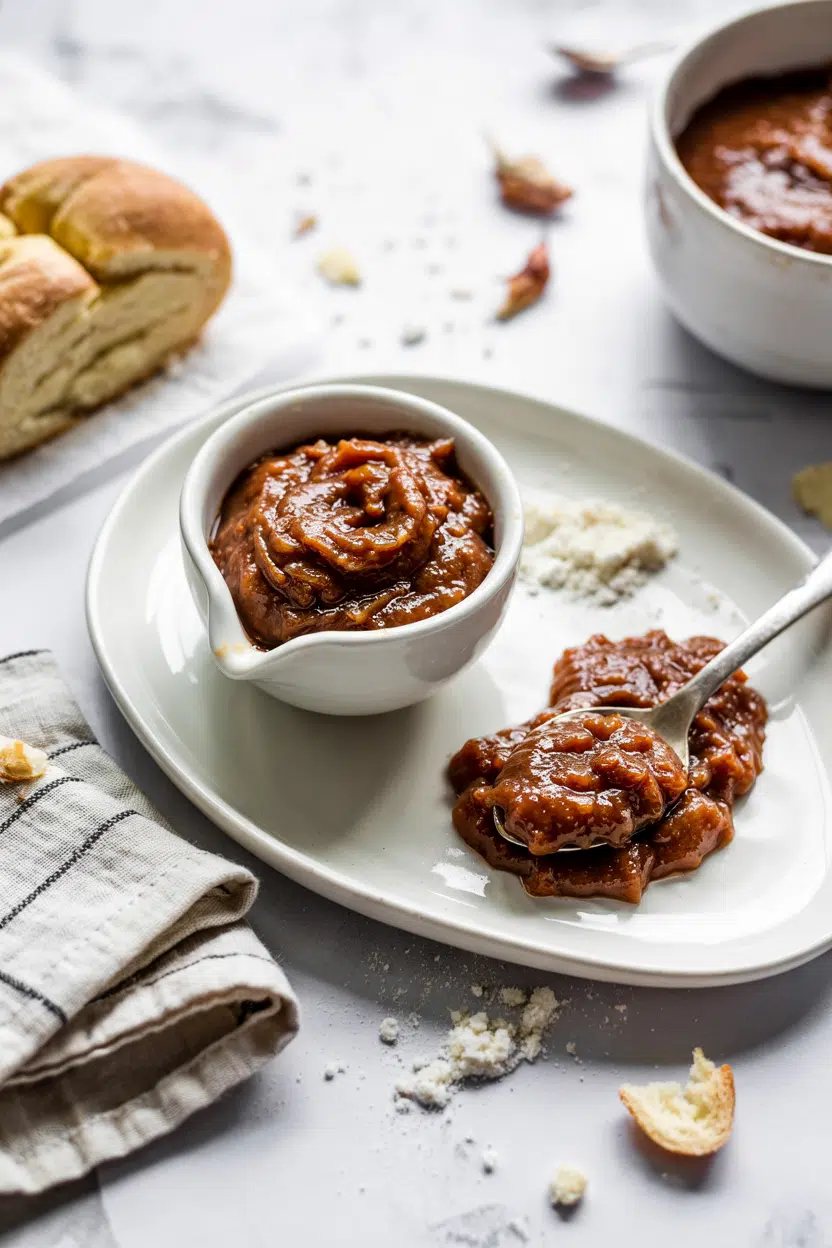
The result is a deep mahogany spread that carries notes of malt and bittersweet toffee alongside the apple's original tartness.

Varieties range by apple base - Granny Smith lends brightness, McIntosh gives a softer, floral finish - and by spice blend, though cinnamon and clove are the constants.

Some producers add cider vinegar for extra acidity; others keep it simple with just apples and sugar.

Commercially, it's sold shelf-stable in jars; butter's shelf life is a useful comparison point for understanding how preservation differs across spread categories.

What Does Apple Butter Taste Like?

apple butter - What Is Apple Butter

Apple butter tastes like concentrated applesauce that sat next to a caramel pot long enough to absorb its character. The front note is deep, malty apple sweetness - not fresh-fruit bright, but rounded and slightly toasty from the reduction.

Warm cinnamon and clove carry the mid-palate, and a quiet tangy acidity from the apples themselves keeps it from tasting heavy.

Sensory SnapshotModerate Intensity
👅 Flavor
caramelized applewarm spicebittersweettangy
✋ Texture
thicksilkyspreadable
👃 Aroma
spiced appletoasty caramel

The closest comparison is pumpkin butter - similarly spiced and deeply reduced - though apple butter carries more tartness and a slightly thinner body.

If you're adjusting recipes that call for cloves and can't source them, clove swaps that work can help maintain that aromatic backbone without breaking the flavor profile.

How to Use Apple Butter

Apple butter moves between sweet and savory uses more naturally than most spreads. On the breakfast table, it belongs on toast, English muffins, or biscuits - spread alone or layered under sharp cheddar.

Swirled into plain yogurt or stirred into oatmeal, it acts as a spiced sweetener that also adds body.

In baking, it works as a moisture-adding ingredient folded into muffin, quick-bread, or pancake batter. A tablespoon or two deepens the caramel notes without adding oil.

For a layered breakfast, consider how using classic cinnamon french toast for creaminess shows the same principle - concentrated sweetness doing double duty as flavor and texture.

Its savory side is underused. Apple butter glazes pork chops and ham with a sweet-tangy crust that caramelizes under heat.

Stirred into barbecue sauce or whole-grain mustard, it adds sweet-tangy depth without tasting like dessert. The full range of pairing ideas for apple butter is broader than most people expect - especially the cheese and bread combinations.

Golden Rule
Don't use apple butter in delicate raw salads or light seafood dishes - its concentrated sweetness will overpower anything mild.
How Apple Butter Is Used
MethodBest ForTip
🥗 SpreadToast, biscuits, English muffins, bagelsLayer under cheese for contrast
🔥 GlazePork chops, ham, roasted root vegetablesBrush on during last 10 minutes of roasting
🧁 Baked InMuffins, quick breads, pancake batterReplace up to half the sugar; reduce added liquid slightly
🫙 Stirred InOatmeal, yogurt, barbecue sauce, mustardStart with 1 tablespoon - it concentrates quickly in hot dishes
🥧 FillingThumbprint cookies, hand pies, sandwich cookiesChill before piping; it firms up and holds shape better

For recipes where apple butter stands in for other dairy-adjacent ingredients, the guide on apple butter in dairy recipes covers swap ratios and texture adjustments worth knowing.

Try It In
🥞Fluffy Buttermilk PancakesFold a spoonful into the batter for caramel depth→🌿Compound Butter (Herb)Swap in apple butter base for a sweet-savory spread→🧄Compound Butter (Garlic)Use alongside apple butter for a contrast pairing on pork→

How to Buy and Store Apple Butter

A good jar tells you what's inside before you open it. Look for a deep mahogany-to-rust color and a glossy, uniform surface - pale or watery-looking butter has been undercooked or over-diluted.

Avoid jars with visible separation, fermentation bubbles, or any sour smell when opened.

Watch Out
Homemade apple butter sold at markets sometimes skips proper canning. Check that lids are sealed and the surface shows no signs of mold or off-odor before buying.

Once open, store it refrigerated with the lid tight.

  • 🏪 Unopened commercial jars - Keep in a cool, dark pantry for up to one year
  • ❄️ Opened jars - Refrigerate and use within 4-8 weeks
  • 🏠 Home-canned jars - Follow water-bath canning timelines; up to one year after opening when refrigerated
  • 🧊 Freezer option - Worth considering for large batches; [freezing apple butter](https://forkliftkitchen.com/apple-butter-shelf-life/) can extend shelf life significantly beyond the fridge window

Start Simple, Then Build

If apple butter is new to your kitchen, spread it on sourdough with aged gouda first - that pairing shows both the sweet and savory range in one bite.

Once you know how it behaves, move to glazing a pork chop or folding it into batter.

The ingredient rewards incremental use. Start with one application.

Add a second when the first feels natural. Apple butter doesn't need reinventing - it needs to be in the right recipe at the right moment.

Frequently Asked Questions

What is apple butter made of?

Apples, sugar, and warm spices - typically cinnamon and clove. The apples are cooked down slowly until they reduce into a thick purée. Some recipes add cider vinegar or apple cider for extra acidity.

Is apple butter the same as applesauce?

No. Applesauce stops short of full reduction and stays pale and mild. Apple butter cooks far longer, losing most of its moisture and developing a dark color, concentrated sweetness, and caramel notes applesauce lacks.

How long does apple butter last after opening?

Commercially sealed jars keep 4-8 weeks refrigerated after opening. Home-canned versions follow the same rule. Always check for off-odors or surface mold before using.

Can you can apple butter at home?

Yes - water-bath canning works well for apple butter because its acidity and sugar content support safe preservation. Use tested recipes and proper jar sterilization; processing time is typically 10-15 minutes depending on jar size.

Does apple butter contain actual butter?

No dairy butter is involved. The name refers to the spread's thick, butter-like consistency after long reduction. Apple butter is typically vegan and gluten-free, though labels should be checked for added preservatives.

What Is Bread Flour? Taste, Uses & Baking Tips

March 28, 2026

You spot it on the shelf next to all-purpose and wonder if the difference is worth it. Bread flour carries a protein content of roughly 11-14%, significantly higher than standard flour, and that gap matters enormously once yeast and water enter the picture.

It's the flour that gives sourdough its chew, baguettes their tight crumb, and bagels their characteristic bite - and once you bake with it, the flour freshness guide question becomes worth knowing too.

QUICK SUMMARY

Bread flour is a high-protein wheat flour built for yeast breads. Its elevated protein creates strong gluten networks that trap gas, producing chewy crumb, good rise, and firm crust. Mild in flavor, grain-forward in aroma. Best for loaves, pizza, bagels, and enriched rolls.

🌾Type: High-protein milled wheat flour, 11-14% protein content
👅Flavor: Mild, clean, slightly nutty with grain-forward character
🍞Best For: Artisan loaves, pizza dough, bagels, enriched sandwich bread
📦Shelf Life: ~6 months pantry; 1 year refrigerated; up to 2 years frozen
⚠️Avoid: Delicate pastries, thin batters - too much gluten will toughen them

What Is Bread Flour?

Bread flour is a high-protein wheat flour milled specifically to support gluten-intensive baking. It falls into the milled wheat flour category alongside all-purpose, pastry, and whole wheat - however, protein content is what separates it from the rest.

Most bread flours run between 11% and 14% protein, compared to all-purpose flour's typical 9-11%. That additional protein means more glutenin and gliadin molecules available to bond when hydrated, forming a strong, elastic gluten network capable of trapping carbon dioxide from yeast fermentation.

You'll also see it labeled as strong flour or high-gluten flour in some markets. In the UK and Australia, "strong flour" is the standard name for what North Americans call bread flour.

  • Bread flour - Standard North American label; 11-13% protein typical for home baking
  • High-gluten flour - Higher end at 13-14%; used commercially for bagels and hard rolls
  • Vital wheat gluten - A concentrated extract sometimes added to boost weaker flours
  • Whole wheat bread flour - Includes bran and germ; adds fiber and a nuttier profile

Most commercial versions are enriched with iron, folate, niacin, and riboflavin. The pastry flour swaps page is a useful reminder of why you can't simply swap these flour types - protein content drives completely different outcomes.

What Does Bread Flour Taste Like?

bread flour - What Is Bread Flour

Bread flour on its own tastes mild and clean, with a faint wheaty nuttiness from traces of bran left after milling. It's grain-forward rather than sweet, and noticeably more robust than all-purpose flour.

Compared to pastry flour - which has a faintly sweet, almost neutral profile - bread flour reads as earthier and slightly more savory.

That character doesn't overwhelm finished bread; it supports the toasty, yeasty notes that develop during fermentation and baking rather than competing with them.

Sensory SnapshotModerate Intensity
👅 Flavor
mild wheatyslightly nuttygrain-forwardclean
✋ Texture
powdery rawchewy crumb bakedfirm crust
👃 Aroma
breadygrainysubtle toasty

Heat amplifies the nuttiness and brings out deeper toasty notes, especially in high-temperature baking with steam. Long cold fermentation - overnight in the fridge - also develops complexity that straight same-day doughs lack.

How to Use Bread Flour

Bread flour earns its keep in any yeasted application that demands chew, structure, and oven spring. The high protein content means it can hold up to vigorous kneading, long fermentation windows, and the expansion that happens as dough hits a hot oven.

How Bread Flour Is Used
MethodBest ForTip
🤲 KneadingArtisan loaves, sandwich bread, rollsDevelop gluten fully - 8-10 min by hand or until windowpane holds
⏳ Autolyse / Long FermentBaguettes, sourdough, ciabattaRest hydrated dough 20-60 min before kneading to reduce mixing time
🔥 High-Temp Baking with SteamBoules, batards, baguettesSteam in first 10-15 min keeps crust flexible for maximum oven spring
🔄 Folding & LaminationCiabatta variants, focaccia-style doughsStretch-and-fold replaces kneading for high-hydration doughs

In American baking, it's the standard for sandwich loaves and burger buns where you need lift that holds after slicing. Italian pizza and focaccia bakers often reach for it when they want higher oven spring and a chewier bite than a softer flour provides.

French boulangerie uses it for baguettes and bâtards alongside doppio zero in some hybrid recipes.

Bread flour pairs well with active dry yeast or instant yeast, olive oil or butter in enriched doughs, salt (which tightens gluten and sharpens flavor), and diastatic malt for improved browning and rise.

A sourdough starter works beautifully with it for long, slow fermentation that deepens flavor.

Watch Out
Don't use bread flour in thin batters or delicate pastry recipes. The high gluten formation makes batters gummy and quick breads, cakes, and shortbreads noticeably tough.

For applications like pretzels and bagels, where a dense, chewy crumb is the goal rather than a liability, bread flour is the right call - nothing else replicates that bite.

If you need to swap in a different flour, the bread flour replacements guide covers your closest options by recipe type.

Try It In
🥞Besan Flour PancakesSee how a high-protein flour changes pancake texture→

How to Buy and Store Bread Flour

Look for a bag or tub clearly labeled 11-14% protein - this number should appear in the nutritional panel if not on the front. Choose a fine, pale off-white flour with no visible clumps; clumping signals moisture exposure.

Avoid bags with any signs of insect damage or tears.

Golden Rule
Always transfer opened bread flour to an airtight container. Flour absorbs odors and moisture quickly, and both degrade baking results faster than age alone.

Storage by method:

  • Pantry (airtight container) - Up to 6 months; keep away from heat sources and strong-smelling foods
  • Refrigerator - Up to 1 year; bring to room temperature before using to avoid slowing yeast activity
  • Freezer - 1-2 years; seal tightly in a freezer bag and thaw overnight before baking

For a deeper look at how storage conditions affect flour over time, the bread flour storage life page has specifics on signs of spoilage and when to discard.

Start With One Loaf

Bread flour is the right starting point if you're baking anything yeasted and want consistent results. Pick a simple sandwich loaf or pizza dough first - these recipes expose how gluten development actually feels and what good oven spring looks like. Once that's familiar, lean doughs like baguettes and sourdough become far more manageable.

The all-purpose flour substitutes page can help if you're working across multiple baking projects and need to mix flour types.

Frequently Asked Questions

Is bread flour the same as all-purpose flour?

No. Bread flour runs 11-14% protein versus all-purpose flour's 9-11%. That difference produces significantly more gluten, giving yeast breads chewier texture and better rise - effects that all-purpose flour can't fully replicate.

Does bread flour make bread chewier?

Yes, directly. Higher protein means more gluten strands, and gluten is what creates chew. Bagels and pizza crusts rely on this - switching to all-purpose noticeably softens the crumb.

Can I substitute all-purpose flour for bread flour?

You can in most yeasted recipes, though the crumb will be softer and rise slightly less. For bagels or dense rolls where chew is essential, the swap produces noticeably different results.

When should I use high-gluten flour instead of bread flour?

Reach for high-gluten flour (13-14% protein) when making bagels, hard rolls, or New York-style pizza where maximum chew and density are the goal. Bread flour at 11-13% suits most home loaves and softer rolls.

How much protein is in bread flour?

Typically 11-14% by weight, depending on the brand and wheat variety used. Check the nutrition label - a 30g serving should show roughly 4g of protein to confirm you're in the right range.

What Is Banana? [Taste, Uses & More]

March 28, 2026

Banana earns its place in more kitchens than almost any other fruit - not because it's convenient, but because it changes form so dramatically as it ripens.

What Is Banana

The same fruit that thickens a smoothie bowl on Monday becomes the foundation of a banana bread batter by Thursday, and that transformation is the whole point.

QUICK SUMMARY

Banana is a soft tropical fruit that shifts from starchy and mild when green to sweet and honeyed when fully ripe. It works raw, baked, fried, or frozen, making it one of the most adaptable fruits in everyday cooking.

👅Flavor: Sweet, lightly floral, and honeyed when ripe; starchy and mild when green
🍳Best Uses: Baking, smoothies, frying, raw snacking, and savory plantain dishes
🌍Cuisines: Southeast Asian, Caribbean, West African, Latin American, and Western baking
❄️Shelf Life: 2-7 days at room temperature; up to 3 months frozen and peeled
🛒Buy: Yellow for eating now, green for later use, fully spotted for baking

What Is Banana?

Banana is the fruit of plants in the Musa genus, domesticated thousands of years ago in the New Guinea and Philippines region of Southeast Asia. Botanically, it's classified as a berry - which surprises most people who assume it's simply a "fruit."

Commercially, two broad categories dominate: dessert bananas (the sweet, raw-eating type) and plantains (starchy, cooking-forward varieties used like a vegetable).

The Cavendish variety accounts for the majority of global export bananas, though hundreds of cultivars exist, ranging from stubby red bananas to finger-sized Lady Finger types.

A few things to know about the broader banana family:

  • Cavendish - The standard yellow supermarket banana; mild sweetness, reliable texture
  • Plantain - Larger, starchier, and rarely eaten raw; essential to Caribbean, West African, and Latin American cooking
  • Red banana - Shorter and denser with a slightly raspberry-like finish when very ripe
  • Lady Finger (sugar banana) - Smaller, sweeter, and thinner-skinned than Cavendish

The word "banana" itself traces through Portuguese and Spanish, likely borrowed from West African languages during the era of trade and colonization.

What Does Banana Taste Like?

banana - What Is Banana

Ripe banana tastes like a blend of pear candy and soft vanilla - sweet, slightly floral, and almost creamy on the palate. The sweetness comes primarily from fructose and glucose that develop as the starch breaks down during ripening.

Sensory SnapshotMild Intensity
👅 Flavor
sweethoneyedlightly floralstarchy when green
✋ Texture
creamy and soft (ripe)firm and waxy (underripe)
👃 Aroma
candy-like (ripe)green, herbal (unripe)

Unripe banana is a different experience entirely. Green fruit tastes closer to a mild potato - starchy, slightly astringent, and low in sweetness.

That starchiness comes from resistant starch, which also makes green bananas harder to digest than their spotted counterparts.

Heat intensifies banana's sweetness noticeably. Grilling or frying concentrates the sugars and produces caramel-like depth that raw banana never reaches on its own.

Golden Rule
The riper the banana, the sweeter and less starchy the flavor - and the better it performs in baking batters where you want pronounced banana character.

How to Use Banana

Raw banana needs almost no preparation: peel, slice, eat. It adds natural sweetness to yogurt bowls, oatmeal, and cereal without any added sugar.

Frozen ripe banana, blended alone or with a splash of milk, produces a creamy dairy-free ice cream with no additional ingredients required.

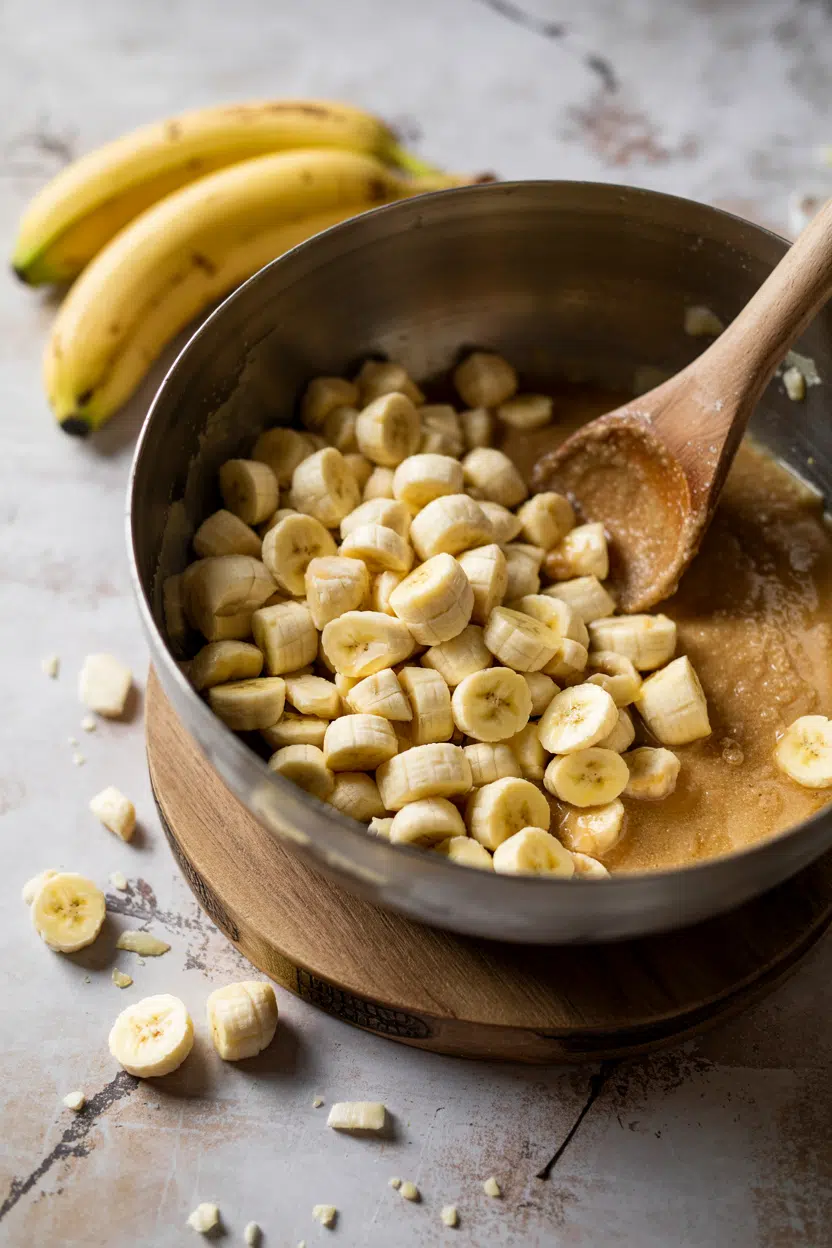
Baking is where overripe bananas shine hardest. Mashed banana replaces some of the fat and sugar in batters for muffins, pancakes, and quick breads, contributing moisture and body. Three heavily spotted bananas are enough to sweeten a standard loaf without extra sugar adjustment. If you're low on ripe fruit, check whether banana swaps can fill the gap in your recipe.

For savory applications, plantains lead. Twice-fried tostones (green plantains smashed and fried until crisp) and sweet maduros (ripe plantains caramelized in oil) are both staples in Caribbean and Latin American cooking.

If you're building a plate around tostones, knowing pairings for tostones broadens the menu fast.

How Banana Is Used
MethodBest ForTip
🥗 RawSnacking, yogurt bowls, smoothies, cereal toppingsUse fully yellow to spotted fruit for best sweetness
🍞 BakingBanana bread, muffins, pancake batterOnly heavily spotted bananas give strong banana flavor
🍳 FryingTostones, maduros, caramelized banana dessertsGreen plantains for tostones; ripe for sweet maduros
🔥 Grilling/BroilingCaramelized desserts, warm fruit sidesLeave peel on while grilling to hold shape
❄️ FreezingSmoothies, dairy-free ice cream, baking prepPeel and slice before freezing for easier blending

Banana pairs cleanly with peanut butter, cinnamon, chocolate, lime, and brown sugar. Avoid combining it with strongly astringent ingredients - unripe persimmon, for instance - which creates an unpleasant chalky mouthfeel.

Try It In
🍞Moist Banana BreadUses heavily spotted bananas for deep, natural sweetness→🥣Banana Nut Baked Oatmeal CupsMashed banana binds and sweetens without added sugar→🥞Chocolate Chip Banana PancakesRipe banana adds moisture and natural sweetness to the batter→

How to Buy and Store Banana

Buy based on when you plan to eat. Green-tinged bananas ripen at room temperature over 3-5 days, so they're the right call for mid-week use. Bright yellow fruit with minimal spotting is ready today.

Heavily brown-spotted bananas should go straight into baking or the freezer.

Watch Out
Avoid bananas with soft, sunken spots, sticky residue on the peel, or any visible mold near the stem - these signal decay, not just ripeness.

At home, store bananas at room temperature away from direct sunlight. Wrapping the stem cluster in plastic wrap slows the release of ethylene gas and extends ripeness by a day or two.

Once ripe, move them to the refrigerator - the peel will darken quickly, however the flesh inside stays firm for another 3-7 days.

For longer storage, peel, slice, and freeze. Frozen bananas keep well for up to three months and go directly from freezer to blender.

The full breakdown of banana storage life covers fridge, counter, and freezer timelines in more detail. For comparison, mango storage life follows a similar ripeness-based storage logic.

Where to Start With Banana

Banana rewards attention to ripeness above everything else.

If you've only ever eaten it as a quick snack, start with a caramelized version: halve a ripe banana, cook it cut-side down in butter and brown sugar for two minutes, and finish with a pinch of cinnamon.

  • For baking - Wait until the peel is more brown than yellow. That fruit is past snacking prime but at peak baking power.
  • For savory cooking - Buy green plantains specifically; standard dessert bananas don't hold up to frying the same way.
  • For smoothies - Freeze ripe bananas in advance. They blend smoother and colder than fresh.

One fruit, three very different starting points. Pick the one that fits your kitchen this week.

Frequently Asked Questions

What does banana taste like when unripe?

Unripe banana tastes starchy and mildly astringent, closer to a plain cooked potato than sweet fruit. The sweetness is almost absent because the starches haven't yet converted to simple sugars.

Why do bananas taste sweet?

Ripening converts resistant starch into fructose and glucose, which register as sweetness on the palate. The more spotted the peel, the further that conversion has progressed.

Are bananas good for baking?

Yes - overripe bananas are excellent in quick breads, muffins, and pancake batters. They add moisture, natural sweetness, and structure, often reducing the need for added fat or sugar.

How long do bananas last in the fridge?

Ripe bananas refrigerated in their peel last 3-7 days before the flesh softens too far. The peel turns dark brown or black quickly in the cold, but that's cosmetic - the inside stays usable.

Can you freeze bananas for smoothies?

Yes. Peel and slice them before freezing so they're blender-ready straight from the bag. Frozen banana also blends into a thick, creamy dairy-free ice cream with no other ingredients needed.

What Is Calvados? [Taste, Uses & More]

March 28, 2026

Most people assume calvados is just fancy apple juice that got out of hand.

What Is Calvados

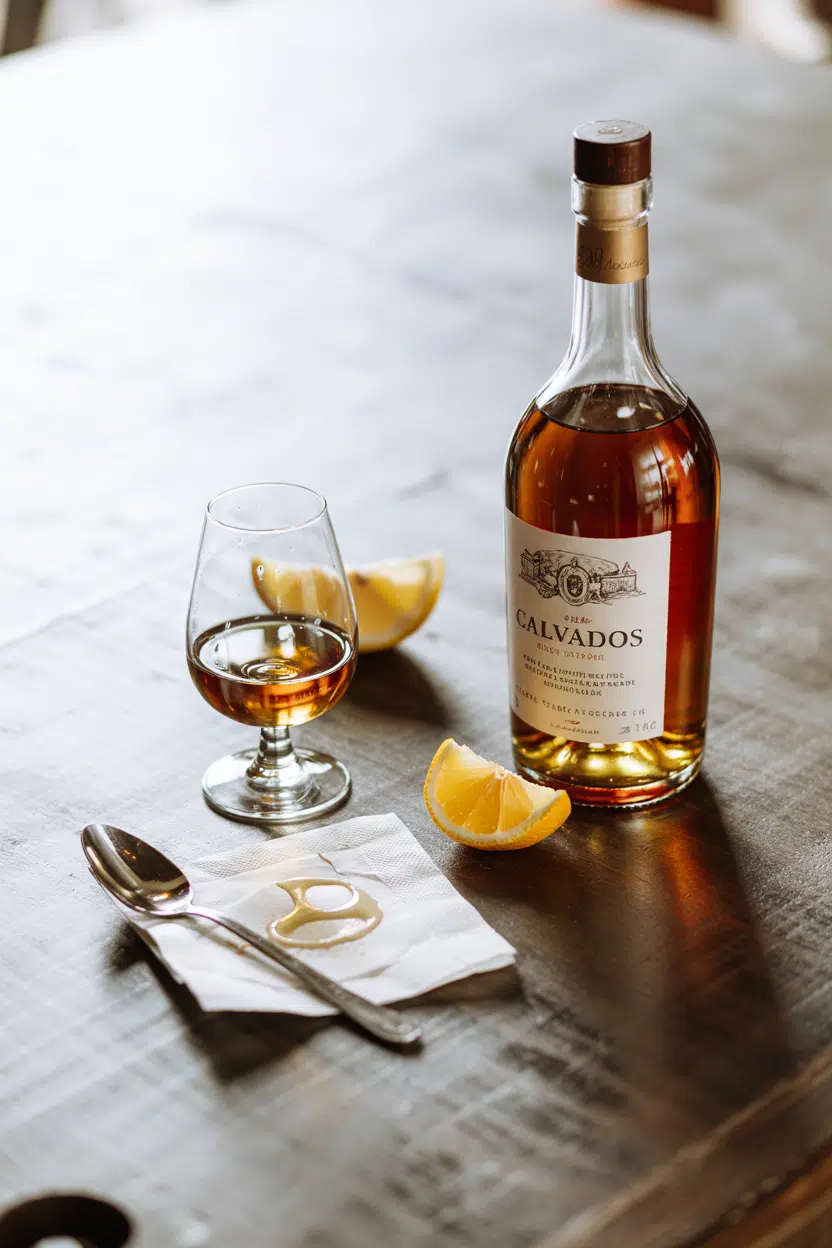
That assumption undersells one of France's most carefully governed spirits - a distilled apple brandy with its own appellation system, age classifications, and a flavor depth that makes it genuinely useful far beyond the glass.

Understanding what makes brandy distinct as a category helps explain why calvados occupies a category of its own: more orchard-specific than cognac, more structured than most fruit eaux-de-vie.

QUICK SUMMARY

Calvados is a French apple brandy from Normandy, aged in oak and graded by age statement. It tastes of baked apple, vanilla, and warm spice with a dry finish. Use it for deglazing, flambéing, or soaking fruit. An opened bottle stays at its best for 1-3 years.

🍎Flavor: Baked apple, dried orchard fruit, vanilla, oak, warm spice
🇫🇷Origin: Normandy, France - AOC-protected appellation
🍳Best Uses: Deglazing pork or duck, flambé, fruit soaking, pan sauces
📦Storage: Cool, dark place; reseal tightly after opening
⏱️Shelf Life: Indefinite unopened; 1-3 years once opened, depending on fill level

What Is Calvados?

Calvados is an apple brandy produced exclusively in Normandy, France, made by fermenting apple cider (and sometimes a proportion of pear) into a low-alcohol base, then distilling it and aging it in oak barrels.

Its production is governed by AOC (Appellation d'Origine Contrôlée) law, meaning the fruit source, distillation method, and minimum aging periods are all legally defined.

Three main appellations exist within the AOC framework:

  • 🏆 Calvados Pays d'Auge - the prestige sub-appellation, requiring double distillation in a pot still and a minimum of two years' oak aging; typically richer and more complex
  • Calvados Domfrontais - must include at least 30% pear and uses column distillation; tends to be lighter and slightly floral
  • Calvados (generic AOC) - may use either distillation method; widest production zone in Normandy

Age statements mirror the cognac system: VS (minimum two years), VSOP (four years), and XO (six or more years). Younger expressions show brighter, greener apple character; older XO releases lean toward dried fruit, vanilla, and oak spice.

You may see it misspelled as "calvado" or "calvadoss" - neither is a recognized term.

What Does Calvados Taste Like?

calvados - What Is Calvados

Calvados lands somewhere between an orchard and a spice cabinet.

The apple character is front and center - not the candy-sweet apple of a liqueur, but baked apple and dried orchard fruit, with quince and pear notes emerging in older expressions.

Sensory SnapshotStrong Intensity
👅 Flavor
baked appledried quincevanillatoasted oakcinnamon
✋ Texture
silkywarmingdry finish
👃 Aroma
fresh appleapple tartoakfloral esters

The finish is dry with a mild tannic grip - more structured than American applejack, and fruitier than cognac.

Applied heat during cooking drives off the alcohol rapidly, concentrating the apple and oak notes while mellowing the burn.

A fruit-forward cognac is the closest reference point for anyone approaching it without prior context, though calvados has far more orchard-fruit clarity by comparison.

How to Use Calvados

Calvados earns its place in cooking mainly through heat. It deglazes well - add a splash to a hot pork or duck skillet, let the alcohol flame off, then reduce until the pan sauce tightens into a glossy, apple-scented base.

That single technique covers a significant portion of Norman cuisine.

Watch Out
Don't use calvados with delicate raw seafood or large amounts of fresh herbs. The oak and residual alcohol will overwhelm rather than accent.

Beyond deglazing, there are several applications worth knowing:

How Calvados Is Used
MethodBest ForTip
🔥 DeglazePork chops, duck breast, game bird pan saucesAdd off the direct flame to control flare-up; reduce by half
🍳 FlambéCrepes, sautéed apples, banana variantsWarm the calvados slightly before igniting for a clean flame
🍐 MacerationPoached pears, dried apricots, prunesSoak overnight; a little goes a long way with XO expressions
🎂 BakingBrushing into gâteaux, cake syrups, custard infusionsUse VS or VSOP; XO flavor becomes expensive to bake off
🥃 CocktailsOld Fashioned variants, stirred apple cocktailsPair with walnut bitters and a cinnamon garnish

Calvados pairs most naturally with pork, duck, cream, and aged cheeses like Comté or Gruyère.

Cinnamon, nutmeg, and vanilla amplify its warm-spice register without competing.

For a different flambé application, a flambéed crêpes suzette with orange recipe shows how the same technique translates from calvados-based preparations to citrus contexts.

If you're out of calvados entirely, check the available replacements for calvados before reaching for a generic brandy - some substitutes hold up far better in sauce work than others.

For broader substitution options, alternatives to brandy covers the wider field.

Try It In
🍐Red Wine Poached PearsSubstitute calvados for a portion of liquid to add apple-oak depth→🧀Fruit & Cheese Snack BoxPairs naturally with aged cheeses that complement calvados's dry finish→🍋Lemon Pound Cake (No-Bake)Brush calvados syrup over layers to add warmth to citrus notes→

How to Buy and Store Calvados

Start with the label. Any bottle worth buying carries an AOC designation - look for "Calvados Pays d'Auge" for the most tightly regulated style, or the generic "Calvados" AOC for everyday cooking bottles.

Age statements matter for how you'll use it: VS and VSOP for cooking and cocktails, VSOP and XO for sipping.

Best Pick
For pan sauces and baking, a VSOP gives the right balance of apple brightness and oak depth without the cost premium of an XO.

Once you have a bottle, storage is straightforward. Store it upright, away from heat, light, and temperature swings - a kitchen cabinet away from the stove works fine.

After opening, reseal tightly; a nearly empty bottle oxidizes faster, so decanting into a smaller vessel extends the flavor window.

Tracking calvados's shelf life matters more once the bottle drops below the halfway mark.

Where to Start With Calvados

Don't open with your best bottle. A VS or entry-level VSOP is the right starting point for anyone using it in the kitchen - it delivers the apple-oak character without the complexity you'd bake off anyway.

  • 🍳 First cook - deglaze a pork chop pan with two tablespoons; reduce until syrupy
  • 🥃 First sip - try a VSOP neat or over one ice cube to understand the base flavor
  • 🍐 First experiment - soak sliced pears overnight and fold into a tart or custard

Work up to Pays d'Auge or XO expressions once you know what the younger spirit tastes like. The difference becomes obvious - and worth it.

Frequently Asked Questions

Is calvados the same as apple brandy?

Not exactly. All calvados is apple brandy, but not all apple brandy is calvados. The AOC designation restricts production to Normandy, with defined distillation methods and minimum aging - standards most generic apple brandies don't meet.

How does calvados differ by age statement?

VS (2+ years) tastes greener and more apple-forward. VSOP (4+ years) adds vanilla and light oak. XO (6+ years) leans toward dried fruit, deeper oak, and warm spice - the least versatile for cooking, the most rewarding for sipping.

What cocktails use calvados?

Calvados works well in stirred, spirit-forward builds. The most common are Old Fashioned variants with walnut or aromatic bitters, and the Corpse Reviver No. 1, which uses it alongside cognac and sweet vermouth.

Can you cook with calvados?

Yes - it's one of the more practical spirits in a French kitchen. Heat drives off the alcohol and concentrates the apple-oak flavor. A VS or VSOP is the right grade; don't cook with XO expressions.

How long does an opened bottle of calvados last?

Typically 1-3 years with good storage. The key variable is headspace - a bottle that's three-quarters empty oxidizes faster. Decanting into a smaller bottle and resealing tightly keeps flavor stable longer.

What Is Amaro Montenegro? [Taste, Uses & More]

March 28, 2026

Amaro Montenegro earns its place in a bottle collection not because it's the most complex amaro on the shelf, but because it bridges two worlds - the bitter aperitif side and the sweet digestif side - with more grace than almost anything in its category.

What Is Amaro Montenegro

It sits at 23% ABV, lower than most spirits, making it approachable for cooking, mixing, and sipping without the alcohol heat getting in the way.

Experienced amateurs reaching for a classic italian negroni recipe or building a Montenegro Spritz as an alternative to making italian aperol spritz cocktail at home will find this Bologna-born liqueur rewarding from the first pour.

It also pairs well with Prosecco - and for those exploring pairing ideas for prosecco, Amaro Montenegro is one of the stronger candidates in that conversation.

QUICK SUMMARY

Amaro Montenegro is a bittersweet Italian herbal liqueur from Bologna, made from a proprietary botanical blend. At 23% ABV, it's lower-proof than most amari, with orange-forward flavor, soft vanilla warmth, and gentle bitterness. It works as a digestif, cocktail ingredient, and cooking addition.

🍊Flavor: Bittersweet orange peel, vanilla, caramel, and light herbal spice
🥃Best Uses: Digestif neat or on ice, spritz, Negroni variation, cooking glazes
📦Storage: Cool, dark place; opened bottles hold flavor for 1-3 years when sealed
🌿Category: Aromatic bitter liqueur (amaro), produced in Bologna, Italy
⚡Key Fact: Lighter and less medicinal than Fernet-Branca; sweeter than most amari

What Is Amaro Montenegro?

Amaro Montenegro is a proprietary Italian bitter liqueur first produced in Bologna in 1885 by Stanislao Cobianchi, who named it after Princess Elena of Montenegro. It belongs to the amaro category - Italian herbal liqueurs traditionally consumed as digestifs - but sits at the lighter, sweeter end of the spectrum.

The exact botanical formula is a closely guarded recipe, though the brand confirms over 40 botanicals including orange peel, vanilla, juniper berries, eucalyptus, and aromatic roots.

Most amari are regionally distinct, and Montenegro's origins in Emilia-Romagna give it that region's characteristic balance of warmth and refinement.

It's also sold under the name Amaro di Montenegro and frequently misspelled as "Amaro Montengro." Unlike heavier amari such as Averna or the intensely bitter Fernet-Branca, Montenegro reads more like an orange-vanilla digestif with herbal undertones than a medicinal spirit.

  • 🇮🇹 Origin - Bologna, Emilia-Romagna, Italy; produced continuously since 1885
  • ABV - 23%, lower than most amari and standard spirits
  • Style - Sweet-leaning amaro; orange-forward with herbal backbone
  • Alternate names - Montenegro, Amaro di Montenegro, occasionally "Montenegro amaro"

What Does Amaro Montenegro Taste Like?

amaro montenegro - What Is Amaro Montenegro

Amaro Montenegro opens with bright orange peel - the dominant note - backed immediately by soft vanilla and a caramel warmth that keeps the bitterness in check.

That bitterness does arrive, but it's gentle: faintly juniper-like and slightly eucalyptus-adjacent rather than sharp or medicinal.

Sensory SnapshotModerate Intensity
👅 Flavor
bittersweet orangevanillacaramelgentle herbal
✋ Texture
syrupysilky
👃 Aroma
citrus peelorange blossomwarm spice

The syrupy, silky mouthfeel distinguishes it from drier amari - it coats the palate without being cloying. Compared to Campari, Montenegro is less sharp and far less astringent.

Against Fernet-Branca, it barely registers as medicinal.

In cooking, heat amplifies the caramel and spice notes while pulling back some citrus brightness, which is worth accounting for when using it in glazes or warm drinks.

Golden Rule
Montenegro reads sweeter neat and warmer when reduced - always taste your glaze before adding more, as the sweetness concentrates fast.

How to Use Amaro Montenegro

Montenegro's most traditional role is as a post-dinner digestif - served neat at room temperature or over a single large ice cube. That's still its strongest showing.

However, the cocktail world has embraced it for good reason: the orange-vanilla profile integrates cleanly into both stirred and built drinks.

How Amaro Montenegro Is Used
MethodBest ForTip
🥃 Neat / On IceDigestif, slow sippingServe at room temperature or with one large cube - dilution opens the botanicals
🍹 CocktailsSpritz, Montenegroni, low-ABV buildsSwap for Aperol in a spritz for more orange depth; replace Campari in a Negroni for softer bitterness
🍯 Reduction / GlazeRoasted pork, duck, game meatsReduce with honey over low heat; stop when it coats a spoon - it thickens further off heat
🍐 Poaching LiquidPears, stone fruitAdd to a light sugar syrup with a strip of orange peel; simmer fruit gently for 15-20 minutes
🎂 BakingSponge cake soaks, custards, ganacheUse sparingly - a tablespoon adds orange-vanilla aroma without making desserts taste boozy

In Italian-style aperitivo settings, Montenegro works beautifully alongside Prosecco. Modern European bistro cooking uses it in chocolate desserts - a small pour stirred into ganache or folded into mousse adds complexity without an obvious alcohol note after setting.

Dark chocolate, blood orange, and roasted coffee are the three pairings that work most reliably across applications. Avoid pairing it directly with very bitter greens; the combination doubles down on bitterness without balance.

Those exploring swapping out amaro montenegro will find the closest matches are other sweet-leaning amari, though none replicate the specific orange-vanilla pairing exactly.

For cocktail builds using bitters as a base, the broader guide to alternatives to campari covers several overlap options.

Try It In
☕Ginger Cold Brew CoffeeA splash of Montenegro adds orange-herbal depth to the ginger-coffee base→🍯Honey Cold Brew CoffeeMontenegro's caramel notes align naturally with honey and cold brew coffee→🌿Passion Fruit Cold Brew CoffeeThe citrus brightness of Montenegro bridges passion fruit and coffee effectively→

How to Buy and Store Amaro Montenegro

Identify the correct bottle by its distinctive orange-trim label, amber-colored liquid, and the 23% ABV marking on the front. Avoid bottles with cloudiness, sediment, or faded labels - these signal poor storage or questionable provenance. If buying older vintages, check for an intact manufacturer seal or tax stamp.

Watch Out
Common spelling errors - "Amaro Montengro" or simply "Montenegro liqueur" - can lead to counterfeit or mislabeled products online. Buy from licensed retailers and verify the ABV.

Store opened bottles upright in a cool, dark location, away from direct sunlight or heat sources.

The lower ABV means it's more vulnerable to flavor degradation than higher-proof spirits, so resealing the cap tightly matters more here than with a 40% whisky.

Opened bottles hold well for 1-3 years; flavor softens gradually after that without becoming unsafe. For guidance on detecting deterioration, check the full breakdown of amaro montenegro spoilage signs.

If you're also working with vanilla-forward baking projects alongside this liqueur, the guide on replacements for vanilla sugar can fill gaps when the two flavors overlap.

Where to Start With Amaro Montenegro

Neat over ice is the entry point. One pour after dinner tells you more about the bottle than any cocktail will.

From there, the Montenegroni - a Negroni with Montenegro replacing Campari - is the most useful next move for cocktail builders. It shows the liqueur's range quickly.

  • 🍊 Start here - Neat at room temperature, after a meal
  • 🍹 First cocktail - Montenegro Spritz: Montenegro, Prosecco, splash of soda, orange slice
  • 🍯 First cooking use - Honey-Montenegro glaze over roasted duck or pork tenderloin
  • 🎂 For bakers - One tablespoon stirred into chocolate ganache before setting

Those who find Montenegro too sweet for neat sipping will get more from it in cooking, where the sugar drives the glaze and the botanicals contribute the character.

Best Pick
For a first-time buyer: a 500ml bottle covers all the bases - sipping, one cocktail experiment, and a cooking trial - without committing to a full liter.

Frequently Asked Questions

Is Amaro Montenegro sweet or bitter?

Both, but sweetness leads. The orange peel and vanilla notes dominate upfront, with bitterness arriving as a soft finish rather than a sharp hit. It's considerably sweeter than most amari.

How strong is Amaro Montenegro?

It's 23% ABV - lower than most spirits and amari, which typically range from 28-35%. That lower proof makes it more suitable for cooking and light cocktail builds where alcohol heat would be intrusive.

What cocktails use Amaro Montenegro?

The Montenegroni (Montenegro replacing Campari in a Negroni) and the Montenegro Spritz (with Prosecco and soda) are the two most common builds. It also appears in low-ABV stirred cocktails and paper-plane riffs.

How do you substitute Amaro Montenegro in a recipe?

Meletti or Ramazzotti are the closest substitutes - both orange-forward with moderate sweetness. For cocktails needing more bitterness, Aperol can stand in for spritz applications, though it lacks the herbal depth.

Can you cook with Amaro Montenegro?

Yes - it reduces well into glazes and infuses cleanly into custards, syrups, and cake soaks. Use no more than one to two tablespoons in baked goods; heat concentrates the sweetness and can overwhelm delicate flavors.

What Is Bonito Flakes? [Taste, Uses & More]

March 28, 2026

Most cooks assume bonito flakes are simply a garnish - those feathery wisps waving on hot dishes for show - but that reading misses most of what they do. Katsuobushi, the Japanese name for the dried, smoked, fermented block these flakes are shaved from, is one of the highest natural sources of inosinate, the compound that makes umami sing.

What Is Bonito Flakes

If you've reached for swapping out furikake as a topping or wondered why a broth tasted flat without them, understanding bonito flakes from the ground up changes how you cook.

QUICK SUMMARY

Bonito flakes are paper-thin shavings of katsuobushi - skipjack tuna that's smoked, fermented, and dried hard. They deliver a smoky, salty, deep umami flavor used in dashi stock, as a finishing topper, or as a seasoning base across Japanese cooking.

🐟What It Is: Smoked, fermented, dried skipjack tuna shaved paper-thin
🌊Flavor: Smoky, salty, clean umami - not oily or pungent
🍜Best Uses: Dashi stock base, okonomiyaki topper, furikake component
📦Shelf Life: Unopened months; opened best within 1-3 months
⚠️Note: Contains fish allergens; not vegetarian or vegan

What Is Bonito Flakes?

Bonito flakes come from skipjack tuna (Katsuwonus pelamis), processed through one of food's most involved preservation methods.

The fish is boiled, smoked repeatedly, then inoculated with Aspergillus glaucus mold and left to ferment and dry for months - sometimes years for premium grades - until the block becomes nearly as hard as wood.

That block is katsuobushi. Shaving it produces the flakes most people encounter in grocery stores.

The shave thickness matters: hana-katsuo refers to the fine, feathery flakes sold for finishing and topping, while kezurikatsuo is a thicker cut better suited to extracting flavor in stock. Both are bonito flakes, but they behave differently in the kitchen.

Japan's Kōchi and Kagoshima prefectures are the centers of traditional production, and the ingredient appears under several names depending on context.

  • 🐟 Katsuobushi - the whole dried block and its category name
  • 🌸 Hana-katsuo - thin finishing flakes ("flower bonito")
  • 🔪 Kezurikatsuo - thicker shave for dashi brewing
  • 🌊 Bonito shavings - the common English label on packaging

What Does Bonito Flakes Taste Like?

bonito flakes - What Is Bonito Flakes
Sensory SnapshotStrong Intensity
👅 Flavor
umamismokysaltylightly fishy
✋ Texture
paper-thindelicatecurls with heat
👃 Aroma
smoked fishsea-dried

The flavor lands somewhere between anchovy and Parmesan - both share glutamate-forward umami - but bonito flakes bring a dry smokiness that neither has.

The fishiness is clean, not oily or briny, which makes these flakes far more neutral-tasting than you'd expect from a fermented fish product.

Heat changes the experience noticeably. Steeped in hot water for dashi, the flakes release inosinate and amino acids into the liquid, leaving behind spent shavings that have given most of their flavor.

Eaten dry as a topper, they carry more smoke and salt on the palate.

Golden Rule
Bonito flakes are an umami amplifier, not a fish flavoring. Used correctly, they deepen other ingredients without tasting overtly of fish.

How to Use Bonito Flakes

Dashi is the most important use by volume. A basic ichiban dashi steeps kombu in cold water, brings it just to a simmer, removes the kombu, then adds a generous handful of bonito flakes and cuts the heat immediately. The flakes steep for three to four minutes, then strain out - the result is a light, clear stock that forms the base of miso soup, ramen broth, and countless Japanese sauces. For a deeper, second-draw stock (niban dashi), the spent flakes go back in and simmer longer.

As a finishing element, bonito flakes go on just before serving.

Scattered over hot okonomiyaki - the savory Japanese pancake - the flakes undulate with the rising steam in the dish's most recognizable visual moment.

The same approach works on takoyaki and hot tofu (hiyayakko).

If you want to understand keeping okonomiyaki fresh after cooking, knowing that those flakes on top soften quickly helps set timing expectations.

Beyond Japanese technique, bonito flakes work well stirred into dressings and vinaigrettes for an umami punch - a small amount in a soy-based dressing adds savory depth without obvious fishiness.

Cooks working with swapping out soy sauce in a recipe will often find bonito flakes help compensate for the lost salt and umami.

They also grind into a dry seasoning powder alongside sesame and nori as a furikake component.

How Bonito Flakes Are Used
MethodBest ForTip
🍵 SteepedDashi stock, broths, ramen baseDon't boil - steep off heat 3-4 min to keep dashi clear
🌸 Raw finishOkonomiyaki, tofu, takoyaki toppingAdd at the last second; heat makes them wave and softens texture
🧂 PowderedFurikake, dry rubs, dressingsPulse briefly in a spice grinder; season immediately
🥘 SimmeredBraised vegetables, niban dashiUse spent dashi flakes for a second, richer extraction
Try It In
🥗Caesar Dressing (Homemade)Bonito powder adds umami depth to this classic dressing→🍋Italian Dressing (Homemade)A pinch of ground flakes rounds out the herb-acid balance→🌿Green Goddess Dressing (Homemade)Smoky bonito notes complement the herbaceous base→

How to Buy and Store Bonito Flakes

Good flakes look pale pink-beige to light brown and feel completely dry and papery to the touch.

Avoid anything that clumps, looks grey, or carries a musty or sour smell - that signals moisture damage or age.

For dashi, look for thicker-cut kezurikatsuo or labeled "thick shave." For finishing dishes, thin hana-katsuo that flutters when you open the bag is the right choice.

Watch Out
Humidity is the enemy. Even briefly exposing an open bag to steam from cooking can introduce moisture that flattens the aroma and encourages clumping.

Once open, transfer flakes to an airtight jar and store in a cool, dark pantry or the refrigerator. Refrigeration extends aroma life noticeably.

For a full breakdown of keeping bonito flakes fresh across different storage conditions, the timing differences between pantry and fridge are worth knowing before you buy in bulk.

Unopened bags last several months at room temperature. Open bags are best used within one to three months for peak smokiness.

The flakes won't become unsafe quickly, however, they will lose most of what makes them worth using.

Where to Start With Bonito Flakes

Make dashi first. A 10-minute kombu-and-bonito steep shows you exactly what these flakes bring to a dish - the broth is light but unmistakably savory in a way stock cubes don't replicate.

From there, try scattering a small handful over hot rice or tofu to experience the texture and finishing role.

If substitutes are your starting point, a guide to alternatives to bonito flakes maps out which options come closest for dashi versus finishing.

For a plant-based dashi, shiitake mushroom stand-ins show how dried shiitake and kombu can approximate the savory depth without fish.

Similarly, the fermentation character in bonito has some parallels with how kombucha's flavor and uses work - both involve controlled microbial activity creating complexity from a simple base.

Shortcut
Buy a small bag of hana-katsuo first. It works for both finishing and a basic dashi, so you learn the ingredient before committing to bulk kezurikatsuo.

Frequently Asked Questions

Are bonito flakes the same as bonito fish?

No. Bonito fish refers to fresh skipjack tuna, while bonito flakes are the result of a months-long process of smoking, fermenting, and drying that same fish into a hard block. The flavor and texture have almost nothing in common with fresh fish.

How do you use bonito flakes in dashi?

Add a large handful to just-simmered water after removing the kombu, then steep off the heat for three to four minutes and strain. Boiling the flakes makes dashi cloudy and slightly bitter.

Can vegetarians eat bonito flakes?

No. Bonito flakes are a fish product and are not suitable for vegetarian or vegan diets. Plant-based dashi typically uses kombu alone, or kombu combined with dried shiitake mushrooms.

Do bonito flakes need to be refrigerated?

Not strictly, however refrigeration does preserve the smoky aroma significantly longer after opening. An unopened bag keeps at room temperature, but once open, a sealed jar in the fridge is the better option.

Why do bonito flakes move on hot food?

The flakes are thin enough that rising heat and steam from the dish physically moves them. It's convection, not any property unique to the flakes - but their extreme thinness makes the effect visible.

What Is Cherry Pepper? [Taste, Uses & More]

March 28, 2026

Most people assume cherry peppers are just a shrunken version of a bell pepper - sweet, mild, forgettable.

What Is Cherry Pepper

That assumption leads to a lot of missed meals, because the cherry pepper's real value is in how it straddles two worlds: fruity sweetness and a clean, bright heat that wakes up a dish without overwhelming it.

If you've ever hit a pickled cherry pepper on a sandwich and felt the need to add more, you already understand the appeal.

The filling possibilities alone - including classic pairings with seasoning with cream cheese - make this small pepper worth knowing inside out.

QUICK SUMMARY

The cherry pepper is a small, round capsicum with thin skin, mild-to-moderate heat, and a fruity brightness that intensifies when pickled. It's sold fresh or jarred in brine, and works best stuffed, sliced onto pizzas, or served in antipasti - anywhere a compact, sweet-hot note belongs.

🌶️Flavor: Sweet-fruity raw, bright and tangy when pickled, gentle heat
✋Texture: Crisp and juicy fresh; softens quickly when pickled or cooked
🍽️Best Uses: Stuffed appetizers, pizza toppings, antipasti, pickled sandwich toppers
🛒Buy: Choose firm, glossy peppers with taut skin and intact stems
⏱️Shelf Life: Fresh 1-2 weeks refrigerated; jarred 4-6 weeks after opening

What Is Cherry Pepper?

Cherry pepper is a small, round capsicum that grows to roughly the size of a golf ball - sometimes smaller.

It originated in South America and was later commercialized through cultivars developed in South Africa and Portugal, most notably under the Peppadew brand name, which is a trademarked variety sold in sweet brine.

The fruit ripens to red or yellow, though red is most common in markets. It belongs to the Capsicum annuum species alongside bells, jalapeños, and pimientos.

You'll find it sold under several names depending on format and origin:

  • 🌶️ Peppadew - the branded South African cultivar, typically sold pickled in sweet brine
  • Sweet cherry pepper - a general market name for mild, red round varieties
  • Pimiento cherry - sometimes used when referencing the Spanish/Portuguese tradition of preserved small peppers
  • Cherry bomb - a related but distinct variety that runs hotter than a standard sweet cherry pepper

The cherry bomb deserves a separate mention: it shares the round shape but carries noticeably more capsaicin. If a recipe or jar is labeled cherry bomb, expect a sharper bite than the standard sweet version delivers.

What Does Cherry Pepper Taste Like?

cherry pepper - What Is Cherry Pepper

Raw cherry peppers taste like a fruity, milder jalapeño crossed with a roasted pimiento - but with a cleaner, almost cherry-like sweetness up front. The heat sits in the background, present but not sharp.

A subtle floral note shows up mostly in red-ripe specimens.

Pickling changes the profile considerably. Brine-pickled cherry peppers develop a bright tang that amplifies the fruity base while tamping down residual sweetness.

That sweet-sour contrast is what makes jarred versions so popular as a topping - they contribute acid, sugar, and mild heat in one bite.

Sensory SnapshotMild Intensity
👅 Flavor
sweet-fruitybright tanggentle heatfloral
✋ Texture
thin-skinnedcrispjuicy
👃 Aroma
fresh pepperysweetlightly floral

Cook it, and the sweetness concentrates. Roasted cherry peppers lose crispness fast - their thin skin blisters quickly - but the caramelized result is rich and jammy in a way raw peppers simply aren't.

How to Use Cherry Pepper

Cherry peppers work across a wide range of formats, and the method you choose shapes the final dish significantly. Raw, they add crunch and a pop of fruity heat to salads and grain bowls.

Roasted or blistered over high heat, they soften into something closer to a concentrated sweet pepper paste - excellent on flatbreads or antipasti boards.

Stuffing is the preparation most associated with this pepper. The round shape and hollow interior are built for it: fill them with goat cheese, cream cheese, or even a mixture of cured meat and cheese, then serve as an appetizer or preserve in oil.

How Cherry Pepper Is Used
MethodBest ForTip
🥗 RawSalads, grain bowls, salsas, relishesSlice thin - the sweetness distributes better than chunks
🫙 PickledSandwich toppers, pizza, antipasti, snackingUse the brine in dressings - it carries the pepper's flavor well
🔥 RoastedTapas plates, pasta sauces, flatbreadsBlister under a broiler whole; skin slips off easily after
🧀 Stuffed & BakedAppetizers, party plates, preserved in oilPack filling tight - the pepper shrinks slightly in the oven

Italian antipasti and Mediterranean meze traditions both incorporate cherry peppers alongside olives, cured meats, and roasted vegetables.

The pepper pairs well with prosciutto, salami, capers, and a drizzle of olive oil.

For anyone working without cherry peppers on hand, reviewing replacements for cherry pepper can point you toward pimientos or mild pepperoncini - though alternatives to pepperoncini work in the opposite direction too, when cherry peppers sub in for something more acidic.

Golden Rule
Don't discard the brine from jarred cherry peppers. It's a ready-made sweet-acidic dressing base - deglaze a pan with it, or whisk it into a vinaigrette.
Try It In
🍗Air Fryer Lemon Pepper Chicken TendersAdd sliced pickled cherry peppers for sweet heat contrast→🥦Air Fryer Lemon Pepper CauliflowerCherry pepper pieces roast well alongside cauliflower florets→🍖Air Fryer Lemon Pepper MeatballsPickled cherry peppers make a sharp, fruity dipping accompaniment→

How to Buy and Store Cherry Pepper

Fresh cherry peppers should feel firm and heavy for their size. Taut, glossy skin and an intact green stem are reliable indicators of quality.

Skip any with wrinkled skin, soft spots, or dark blemishes near the blossom end - those signal overripeness or bruising.

Watch Out
Jars with cloudy or discolored brine aren't always bad - but murky brine combined with an off smell means discard. Bright pink or red brine is a good sign; grey or brown is not.

For jarred pickled cherry peppers, check the brine color and the pack date.

Store fresh peppers in a perforated produce bag in the refrigerator.

Opened jars go back in the fridge and stay good for 4-6 weeks.

Unopened jars keep for several months at room temperature.

If you're curious about longer storage options, tracking cherry pepper in spice blends and dried formats extends shelf life well beyond fresh or jarred versions.

Where to Start With Cherry Pepper

Start with a jarred variety. It's the lowest-commitment way to understand what this pepper does - crack open a jar, taste one plain, then taste another with goat cheese.

That combination alone captures most of what makes cherry peppers useful.

From there, try roasting fresh ones using a rack you already have - a simple setup works fine, and you don't need specialized equipment, though knowing your replacements for roasting rack options helps if your oven setup is limited.

Anyone who likes the fruity heat of a jalapeño but wants less intensity will find cherry peppers a natural step - the same approachable profile covered in jalapeno pepper swaps that work applies here in reverse.

Frequently Asked Questions

Are cherry peppers spicy?

Most are mild. Standard sweet cherry peppers sit below 3,500 Scoville units - noticeably warmer than a bell pepper but far gentler than a jalapeño. The cherry bomb variety is a different story, running significantly hotter.

What is the difference between peppadew and cherry pepper?

Peppadew is a trademarked cultivar of cherry pepper developed in South Africa, always sold pickled in sweet brine. "Cherry pepper" is the broader category - it includes peppadew-style peppers, sweet varieties, and the hotter cherry bomb.

How do you stuff cherry peppers?

Slice off the top, scoop out seeds with a small spoon, and pipe or spoon in your filling - cream cheese, goat cheese, or a meat-and-cheese mixture all work. Pack the filling firmly, since the pepper shrinks slightly during baking.

Can you roast cherry peppers?

Yes. Place them whole under a broiler or directly over a gas flame until the skin blisters and chars in spots. The thin skin slips off easily after a few minutes in a covered bowl, leaving soft, sweet, jammy flesh.

How long do pickled cherry peppers last after opening?

Four to six weeks in the refrigerator, kept submerged in brine. Always use a clean utensil when retrieving peppers - introducing bacteria shortens that window considerably.

What Is Baguette? Taste, Texture, Uses & More

March 28, 2026

That first crack when you snap a fresh baguette - the crust shattering into brittle shards, the steam still rising from the open crumb - is the whole point.

What Is Baguette

Few breads hit that contrast so cleanly: a thin, crackly shell wrapped around a pale, chewy interior with an open, irregular hole structure.

Whether you're reaching for one to serve alongside alternatives to ciabatta at a dinner table or slicing it thin for a classic jambon-beurre, understanding what makes a baguette tick helps you use it at its best.

QUICK SUMMARY

A baguette is a long, thin French loaf with a crackly golden crust and an airy, chewy crumb. It has a mild wheaty sweetness with a light lactic tang from fermentation. Best eaten fresh within a day or two, it works for sandwiches, crostini, soups, and table bread.

🌾What It Is: Long, thin leavened wheat loaf from French bakery tradition
👅Flavor: Mild wheaty, lightly tangy crust, subtle toasty and savory notes
🥗Best For: Sandwiches, crostini, dipping into soups, table service
📅Shelf Life: 1-2 days at room temperature; freeze slices for up to 3 months
🛒Buy It When: Crust is deep golden, blistered, and sounds hollow when tapped

What Is a Baguette?

A baguette is a long, thin loaf of leavened wheat bread originating from Parisian bakeries in the Île-de-France region. The name translates loosely to "wand" or "stick" in French - an apt description of its narrow, elongated shape.

It's also called pain long, baton, or baguette tradition, depending on the bakery and country. The baguette de tradition française is a protected designation in France, requiring specific flour, no additives, and hand or minimal-machine shaping.

At its core, a baguette uses four ingredients: wheat flour, water, salt, and yeast. The dough undergoes a slow fermentation, which develops both structure and flavor.

High-heat baking with steam in the oven's early minutes sets the crust and allows that signature crackle to form.

  • 🥖 Baguette tradition - additive-free, hand-shaped, flour-dusted, sold at artisan bakeries
  • 🏪 Industrial baguette - machine-formed, softer crust, more uniform crumb, shorter fermentation
  • 🌾 Baguette complète - made with whole wheat flour, denser crumb, nuttier flavor
  • 🧀 Ficelle - a thinner, lighter version with an even crispier crust-to-crumb ratio

What Does a Baguette Taste Like?

baguette - What Is Baguette

A fresh baguette has a mild wheaty sweetness at its core, lifted by a light lactic tang that comes directly from the fermentation process.

The crust adds toasty, slightly caramelized notes - the part most people eat first and remember longest.

Compared to sourdough bread and its flavor, a baguette is noticeably gentler on acidity and less dense in texture. It's closer to a plain country loaf, however with a far crispier shell and a more open, irregular crumb structure.

Sensory SnapshotModerate Intensity
👅 Flavor
wheatylactic tangtoastysavory
✋ Texture
crackly crustchewy crumbopen holes
👃 Aroma
warm toastfermented yeast

Flavor shifts noticeably as the loaf ages. Within hours of baking, the crust softens as moisture migrates from the crumb outward.

By day two, the crumb firms and the wheat flavor flattens - which is why bakers say a baguette is a same-day food.

How to Use a Baguette

A baguette's neutral, mild base means it works across an unusually wide range of preparations without competing with other ingredients. French and European bistro cooking lean on it hardest, however Mediterranean-influenced menus use it just as freely.

Golden Rule
Match the preparation to the baguette's age. Fresh loaves are for eating whole or slicing raw. A day-old baguette is better toasted, pan-fried, or cubed - it holds up to heat and absorbs without going mushy.
How a Baguette Is Used
MethodBest ForTip
🥗 Sliced RawJambon-beurre, ham-and-cheese, table breadCut on a bias for longer surface area
🔥 Broiled/ToastedCrostini with tapenade, ricotta, or roasted vegBrush with olive oil before broiling for even color
🍳 Pan-FriedGarlic bread, buttered breakfast toastUse day-old slices - fresh bread absorbs too much butter
🍲 Torn for DippingFrench onion soup, bouillabaisse, potageTear rather than slice to create more surface for dipping
🍞 Cubed and BakedCroutons for salads, pain perdu (bread pudding)Stale baguette works best - it crisps without burning

Pairings tend to follow a simple logic: mild, fatty, or acidic ingredients complement the bread's restrained flavor without drowning it.

Unsalted or cultured butter is the most common pairing, however soft cheeses like brie and camembert work just as well.

Cured meats, including jambon and saucisson, pair with it in French tradition - understanding meat's flavor and uses helps clarify why fatty, salt-cured cuts balance the baguette's subtle acidity.

If you want to try a baguette-based appetizer, a tomato basil burrata crostini recipe shows exactly how toasted slices hold up under fresh toppings.

Try It In
🍳Egg and Cheese Breakfast SandwichSplit baguette holds fillings without going soggy→🍞Classic Cinnamon French ToastDay-old baguette absorbs custard perfectly→🫒Mediterranean Olive TapenadeCrostini slices carry the spread without crumbling→

How to Buy and Store a Baguette

At the bakery or grocery counter, tap the loaf on the bottom - a hollow sound means the crumb is properly open and the crust has set.

Avoid loaves with a pale, matte crust or a soft exterior at purchase time; that's a sign of underbaking or humidity exposure.

Watch Out
Never refrigerate a baguette. Cold air speeds up starch retrogradation and dries the crumb far faster than room temperature storage does.

Store at room temperature in a paper bag or loosely wrapped - not sealed in plastic, which traps moisture and ruins the crust within hours.

For anything beyond two days, slice the loaf first and freeze the pieces flat; frozen slices go directly into a toaster oven without thawing.

Tracking baguette's shelf life more closely helps if you're buying in bulk or planning meals ahead.

  • Same day - Best crust texture and full flavor; eat as-is or serve at the table
  • Day two - Crust softens; ideal for toasting, pan-frying, or making croutons
  • Day three+ - Crumb firms significantly; use for pain perdu or discard

Starting Points for a Better Loaf

A baguette rewards simplicity. If you're new to eating or cooking with one, start with just butter - it reveals the bread's wheat and fermentation character without distraction.

For replacements for butter when dairy isn't an option, a drizzle of good olive oil works just as well on a sliced baguette.

If you already know the basics and want to branch out, try it toasted for crostini or torn into a bowl of French onion soup. Those two uses expose entirely different sides of the same loaf.

For situations where a baguette isn't available, knowing the alternatives to baguette keeps your recipe on track without sacrificing too much in texture or crust character.

Frequently Asked Questions

What is a baguette made of?

Four ingredients: wheat flour, water, salt, and yeast. A baguette de tradition française adds the requirement of no additives or improvers, relying entirely on slow fermentation for flavor and structure.

What is the difference between a baguette and sourdough?

Sourdough uses a wild-yeast starter and has a stronger, more acidic flavor. A baguette uses commercial yeast, ferments for a shorter time, and produces a much milder, lighter loaf with a thinner crust.

How long does a baguette stay fresh?

One to two days at room temperature before the crust softens and the crumb dries. Sliced and frozen, it keeps for up to three months with no meaningful quality loss.

Can you freeze a baguette?

Yes, but slice it first. Freezing a whole loaf makes it harder to portion later, and the crust shatters when thawed. Frozen slices go straight from freezer to toaster oven at 375°F for three to four minutes.

What is the proper way to cut a baguette?

Use a serrated bread knife and cut on a diagonal bias. Angled cuts produce longer, wider slices with more surface area - useful for crostini or open-faced sandwiches where topping coverage matters.

How Long Does Butternut Squash Last? [Storage Guide]

March 28, 2026

Reaching into the pantry and finding your butternut squash sunken, mottled, and smelling faintly sour is a frustrating waste - especially when a few storage decisions made weeks earlier could have prevented it.

Can You Freeze Butternut Squash

Unlike butter spoilage signs, which follow a short and predictable window, whole butternut squash can last months under the right conditions or deteriorate within days if stored carelessly.

Understanding what makes butternut squash distinct - its dense, low-moisture flesh, thick skin, and cured outer rind - explains why storage method matters so much.

Done correctly, a single squash can carry you well into winter.

QUICK SUMMARY

Whole butternut squash lasts 4-12 weeks in a cool, dry pantry. Cut or cooked squash needs the fridge and should be used within a week. Frozen cubes or puree keep up to 12 months when properly prepped and sealed.

🥶Fridge (cut): 4-7 days in an airtight container
❄️Freezer: Up to 12 months for cubes or puree
🏠Pantry (whole): 4-12 weeks in cool, ventilated spot away from light

How Long Does Butternut Squash Last?

Shelf life for butternut squash depends almost entirely on whether the squash is whole, cut, or cooked. Whole, cured squash has a protective skin barrier; once that's broken, the clock moves faster.

The neck end of a butternut - denser and seedless - tends to store longer than the bulbous base, both in the pantry and after cutting.

Much like acorn squash's shelf life, pantry duration swings widely depending on how well the skin was cured before storage.

Butternut Squash Shelf Life
MethodStateDurationNotes
🏠 PantryWhole (cured)4-12 weeksCool, dry, ventilated; stem intact; keep away from direct light
🧊 FridgeRaw, cut4-7 daysAirtight container or sealed bag; flesh oxidizes and softens over time
🧊 FridgeCooked3-5 daysShallow airtight container; cool quickly to limit bacterial growth
❄️ FreezerBlanched or roasted cubes10-12 monthsFlash-freeze first; transfer to labeled airtight bags with air removed
❄️ FreezerPuree10-12 monthsFreeze flat in portions; puree may separate slightly on thawing

Freshly harvested squash from a farm stand may fall on the shorter end unless you cure it first. A purchased, already-cured squash from a grocery store typically holds toward the middle of that pantry range.

How to Store Butternut Squash

Storage method splits cleanly by whether the squash is intact or cut. Each state has a different priority.

Pantry (whole): Keep butternut squash in a single layer in a cool (50-60°F), dry, well-ventilated space - a basement shelf or cupboard away from the stove works well. Leave the stem intact; a broken or missing stem creates an entry point for rot. Never store whole squash in the fridge, since temperatures below 50°F cause cold damage that accelerates decay.

Fridge (cut or cooked): Place cut butternut flesh in a shallow airtight container or vacuum-sealed bag with excess air pressed out. Loosely wrapped cut squash dries and oxidizes quickly, so the seal matters. Cooked squash should be cooled in shallow containers before refrigerating to bring the temperature down fast.

Golden Rule
Never wash whole butternut squash before storing - surface moisture accelerates mold growth at the stem and blossom end. Wash only when you're ready to cut and cook.

If you recently bought squash direct from a grower, cure it at room temperature for 7-10 days before moving it to long-term storage. This toughens the skin and dramatically extends pantry life.

Can You Freeze Butternut Squash?

Yes - butternut squash freezes well, provided you prep it correctly before it goes in. Raw, unblanched wet cubes thrown straight into a bag produce icy, waterlogged results.

Watch Out
Freezing raw cubes without blanching or roasting first traps surface moisture, which forms large ice crystals that break down cell walls. The result is noticeably soggier squash after thawing.

For best freezer texture, roasting the cubes until just tender before freezing outperforms blanching - roasted flesh holds richer flavor and releases less water on thaw.

  1. Peel and seed the squash, then cut into 1-inch cubes. For puree, cut into large chunks.
  2. Blanch or roast - blanch cubes in boiling water for 2-3 minutes, or roast at 400°F until just tender.
  3. Cool quickly - spread on a tray and cool to room temperature, then drain and pat completely dry.
  4. Flash-freeze by spreading cubes in a single layer on a parchment-lined tray; freeze until solid, about 2 hours.
  5. Transfer and seal - move frozen cubes into labeled freezer bags, remove all air, and freeze flat for up to 12 months.

Thawing: Move frozen squash to the fridge overnight for soups, mash, or puree applications. For roasting, you can cook cubes directly from frozen - no thawing needed. Just know that thawed butternut flesh becomes noticeably softer and more watery, so it suits soups, stews, and purees far better than crisp-roasted dishes.

Signs Butternut Squash Has Gone Bad

Whole squash gives clear warning signals before it becomes a food safety issue. Cut or cooked squash, however, can turn without obvious visual cues - smell and texture are equally important checks.

Signs It's Gone Bad
👀
VisualDeep sunken soft spots · large black mold patches at stem or blossom end · excessively wrinkled, collapsed skin
👃
SmellSour or fermented odor from cut flesh · rotten smell at the stem of whole squash
✋
TextureSlimy or stringy cut flesh · watery layers separating from the interior

Small surface blemishes on whole squash don't automatically mean discard - if the interior is firm and smells neutral, trim the blemish and cook soon.

Significant mold, any foul odor, or slimy cut flesh means the squash goes in the bin, no exceptions.

Putting It All Together

A few targeted habits cover most of the common mistakes people make with butternut squash storage.

If you're running through a large haul, knowing butternut squash swaps that work also helps when one squash goes bad and you need a quick substitute.

The same blanch-before-freeze logic applies across other vegetables too - keeping kale without blanching fresh shows how skipping that step affects a different ingredient.

  • 🏠 Rotate your stock - pantry for squash you'll use soon, a cooler cellar spot for longer holds, fridge only after cutting.
  • 🏷️ Label every freezer bag with the date and form (cubes vs. puree) so you use the oldest portions first.
  • 🔪 Cut only what you need - a freshly cut half in an airtight container outlasts a bag of pre-cut cubes sitting loosely sealed.
  • 🌡️ Check your pantry temperature - anything consistently above 65°F cuts the 12-week potential down significantly.

Frequently Asked Questions

Can you freeze butternut squash raw?

Technically yes, but the texture suffers significantly. Raw cubes frozen without blanching or roasting develop large ice crystals that make the flesh watery and mushy after thawing. At minimum, blanch for 2-3 minutes and dry thoroughly before freezing.

How long does butternut squash last in the fridge after cutting?

Cut butternut squash lasts 4-7 days refrigerated in an airtight container. The flesh slowly oxidizes and softens toward the end of that window, so use it in cooked applications if it's been close to a week.

Does freezing change butternut squash texture?

Yes, noticeably. Thawed butternut squash is softer and releases more water than fresh, making it poorly suited for crisp roasted dishes. It works well in soups, stews, mashes, and purees where texture is less critical.

Is it safe to eat butternut squash with soft spots?

Small, isolated soft spots on whole squash can be cut away if the interior is firm and smells neutral. Deep or sunken spots, large mold patches, or any foul odor mean the whole squash should be discarded.

Can you freeze roasted butternut squash?

Yes, and it's actually the preferred method. Roasted cubes freeze with better flavor and less water separation than blanched ones. Cool completely, flash-freeze on a tray, then transfer to sealed bags for up to 12 months.

Fattoush Lebanese Bread Salad

March 27, 2026

Crispy pita shards tossed with crunchy vegetables and bright lemon-sumac dressing. That's what happens when you toast day-old bread until golden and combine it with fresh romaine, tomatoes, cucumber, and herbs.

Fattoush Lebanese Bread Salad served on a plate

The salad stays crisp because you add the toasted pita right before serving. No soggy bread, no wilted greens.

This works for weeknight sides when you need something fresh that feels intentional, or for entertaining when you want a colorful mezze spread.

QUICK SUMMARY

Fattoush is a Lebanese bread salad built on crispy toasted pita, fresh vegetables, and a tangy lemon-sumac dressing. The key is toasting the bread until golden (not burnt) and adding it last so it stays crunchy. Add dressing just before serving to prevent soggy vegetables and limp herbs.

⏱️Time Reality: 20 minutes total - 15 minutes chopping, 5-7 minutes toasting pita
🔥Critical First Move: Use stale or day-old pita bread for better crisping without burning
⚠️Watch Out: Adding dressing too early turns vegetables soggy - toss right before serving

Why This Recipe Works

Toasting pita at 375°F for 5-7 minutes gives you crispy shards that hold up against the dressing. For a version that comes together quickly, this simple tabbouleh recipe uses similar fresh herbs and bright lemon flavors.

Quick Reference
⏱️
Prep Time
15 min
🔥
Cook Time
5-7 min
⏰
Total Time
20-22 min
🍽️
Servings
4 servings
📊
Difficulty
Easy
🏷️
Category
Side
💡
Quick Tip
Toast pita until golden and crisp, not burnt
🎯
Best For
Weeknight | Entertaining | Meal prep

Five reasons this salad delivers:

  • Stale pita crisps better than fresh - the drier texture absorbs less oil and stays crunchy longer
  • Sumac provides authentic tangy brightness - no other spice gives that characteristic Lebanese tartness
  • Uniform ½-inch vegetable cuts - ensures every bite has balanced crunch and flavor
  • Whisking lemon juice with sumac first - creates an emulsified dressing that coats evenly instead of pooling
  • Adding pita at the last second - prevents the bread from absorbing moisture and turning soggy
Quick Tip
Toast pita pieces spread in a single layer on a sheet pan - overlapping causes uneven browning and soft spots

What You'll Need

Ingredients for Fattoush Lebanese Bread Salad

Shop for fresh herbs and vegetables the day you plan to make this. Rich mains need something to cut through, and salad does exactly that - for a version that comes together quickly, this bright salad recipe balances rich plates with fresh produce.

🥖
Bread
  • 2 pita breads (stale or day-old)
  • 2 tablespoon olive oil (for toasting)
🥬
Vegetables
  • 3 cups romaine lettuce (chopped)
  • 2 medium tomatoes (diced)
  • 1 cucumber (diced, seeds removed)
  • 4 radishes (sliced thin)
  • 3 green onions (chopped)
🌿
Fresh Herbs
  • ½ cup fresh parsley (chopped)
  • ¼ cup fresh mint (chopped)
🍋
Dressing
  • 3 tablespoon lemon juice (fresh)
  • 2 teaspoon sumac
  • ¼ cup olive oil
  • 1 garlic clove (minced, optional)
  • Salt and black pepper

Ingredient Details

  • Pita bread
    Use stale or day-old pita - fresh bread turns chewy instead of crispy when toasted
  • Sumac
    Provides signature tangy-lemony flavor - no direct substitute captures the same profile
  • Romaine lettuce
    Sturdy leaves hold up better than delicate greens like butter lettuce
  • Cucumber
    Remove seeds before dicing to prevent excess moisture that makes the salad watery
  • Fresh mint
    Adds cooling brightness that balances acidic lemon - dried mint works but loses intensity
  • Lemon juice
    Fresh-squeezed juice gives brighter flavor than bottled - taste dressing and adjust in ½ tablespoon increments
  • Olive oil
    Use extra virgin for richer flavor or mild olive oil if you prefer neutral taste

Ingredient Swaps

Most swaps work if you need gluten-free bread or can't find sumac at your store. Crust adds the contrast this plate needs, but timing matters - for a version that comes together quickly, a flaky crust on the side balances lighter salads.

Four swaps that work:

  • pita bread → gluten-free flatbread or crackers - texture less chewy, flavor differs moderately; crumble crackers just before serving for best crunch
  • sumac → lemon zest plus a pinch salt - loses some tangy complexity but still delivers brightness; use zest from 1 lemon
  • romaine lettuce → mixed greens or iceberg lettuce - less sturdy, salad becomes waterier; serve immediately to prevent wilting
  • fresh mint → dried mint (½ tsp) - milder minty flavor with less brightness; rehydrate in dressing for 5 minutes before tossing

Fried Pita (Traditional)

Works for: Richer flavor, extra-crispy texture, authentic preparation

Skip if: You want less oil or faster cleanup

Toasted Pita (Lighter)

Works for: Healthier option, easier method, still crispy when done right

Skip if: You want maximum crunch and traditional richness

Instructions

Toasting pita takes 5-7 minutes, then you chop vegetables and whisk dressing. Most people skip crust, but it balances the meal - for a version that comes together quickly, try homemade pork recipe alongside this crisp salad.

  1. Toast the pita bread: Preheat oven to 375°F (190°C). Tear or cut pita into 1-inch pieces. Toss with 2 tablespoon olive oil, spread in single layer on sheet pan. Toast 5-7 minutes until golden and crisp with no soft spots.

  2. Prep the vegetables: Chop romaine into ½-inch pieces. Dice tomatoes and cucumber into ½-inch cubes (remove cucumber seeds first). Slice radishes thin, chop green onions. Chop parsley and mint finely into ¼-inch pieces.

  3. Make the dressing: In small bowl, whisk lemon juice and sumac together first. Slowly drizzle in ¼ cup olive oil while whisking to emulsify. Add minced garlic if using. Season with salt and black pepper to taste.

  4. Combine the salad: In large mixing bowl, combine romaine, tomatoes, cucumber, radishes, green onions, parsley, and mint. Toss gently to mix vegetables evenly.

  5. Finish and serve: Add toasted pita and dressing right before serving. Toss everything together until vegetables are coated and pita is distributed. Serve immediately while bread is still crispy.

Golden Rule
Never dress the salad more than 2 minutes before serving - the bread absorbs moisture fast and loses all crunch

What to Serve With It

Fattoush pairs well with grilled proteins or works as part of a mezze spread. The salad works best when it hits the table at the same time as the main - check out easy garlic butter shrimp dinner nights for complete seafood meal ideas.

Side Dish Prep Why It Works How to Serve
Grilled Chicken Easy Adds protein, complements bright salad flavors Slice and place alongside salad
Hummus and Olives Easy Classic Middle Eastern mezze pairing Serve in small bowls for scooping
Roasted Vegetables Medium Warm contrast to crisp cold salad Roast at 425°F for 20-25 minutes
Lentil Soup Medium Light and filling, balances fresh vegetables Serve in bowls with salad on side
Falafel Involved Popular vegetarian choice for full mezze spread Fry until golden, serve hot alongside salad

Three ways to serve it:

  • As a side salad - pair with juicy chicken side dish or this quick beef dish for a complete weeknight plate
  • As a light lunch - double the recipe and add grilled protein directly to the salad bowl
  • For entertaining - serve as part of mezze spread with hummus, baba ganoush, stuffed grape leaves, and warm pita
Shortcut
Buy pre-washed romaine and pre-chopped vegetables to cut prep time in half - just focus on toasting pita and whisking dressing

Store and Reheat

Store salad components separately to keep pita crispy and vegetables fresh. Never store dressed salad - it turns soggy within hours.

Method Time Best For
🔥 Oven 3-5 min at 350°F (175°C) Re-crisping pita bread that's lost crunch
🍳 Skillet 2-3 min medium heat Quickly reheating small batches of pita
📦 Microwave 15-20 seconds Warming pita (loses some crispness)

For best results when storing:

  • Store toasted pita separately in airtight container at room temperature for up to 2 days - re-toast 3 minutes before serving if needed
  • Keep chopped vegetables in fridge in airtight container for up to 2 days - pat dry with paper towel before using
  • Make dressing ahead and refrigerate up to 3 days - whisk again before adding to salad
  • Never dress salad until serving - moisture from dressing wilts vegetables and softens pita within 30 minutes
  • Re-crisp soggy pita by spreading on sheet pan and toasting at 350°F for 3-5 minutes until crunchy again

Frequently Asked Questions

Can I use gluten-free bread for fattoush?

Yes, use gluten-free flatbread or sturdy crackers. Toast the same way at 375°F until golden and crisp, about 5-7 minutes. Crumble crackers just before serving for best texture.

How long does fattoush salad keep in the fridge?

Store components separately for up to 2 days - chopped vegetables in one container, toasted pita in another, dressing in a third. Combine just before serving to keep pita crispy and vegetables fresh.

How do I know when pita is toasted enough for fattoush?

Pita should be golden brown with crisp edges and no soft spots when you press it. If it bends instead of snapping, toast 2-3 minutes longer. Watch closely after 5 minutes to prevent burning.

What to do if fattoush salad turns soggy quickly?

Remove soggy pita, toast fresh pieces, and add to undressed portions of salad. Next time, remove cucumber seeds before dicing, pat vegetables dry, and add pita plus dressing only right before serving.

How can I scale fattoush recipe for a larger group?

Double or triple all ingredients proportionally. Toast pita in batches on multiple sheet pans to ensure even browning. Prepare vegetables and dressing ahead, then combine everything right before serving to maintain crunch.

Fattoush Lebanese Bread Salad served on a plate

Fattoush Lebanese Bread Salad

No ratings yet
Fattoush is a Lebanese bread salad featuring crispy toasted pita paired with fresh romaine, tomatoes, cucumber, and herbs. Toasting the pita until golden and adding it just before serving keeps the salad crisp and flavorful. The lemon-sumac dressing adds bright tanginess that complements the crunchy vegetables perfectly.
Print Recipe Pin Recipe
Prep Time 15 minutes mins
Cook Time 7 minutes mins
Total Time 22 minutes mins
Servings: 4 servings
Course: Side Dish
Cuisine: Lebanese
Ingredients Equipment Method Notes

Ingredients
  

  • 2 pieces pita bread stale or day-old, torn or cut into 1-inch pieces
  • 2 tablespoon olive oil for toasting pita
  • 3 cups romaine lettuce chopped into ½-inch pieces
  • 2 medium tomatoes diced into ½-inch cubes
  • 1 cucumber diced into ½-inch cubes, seeds removed
  • 4 pieces radishes sliced thin
  • 3 pieces green onions chopped
  • 0.5 cup fresh parsley chopped finely
  • 0.25 cup fresh mint chopped finely
  • 3 tablespoon lemon juice fresh
  • 2 teaspoon sumac
  • 0.25 cup olive oil for dressing
  • 1 clove garlic minced, optional
  • salt to taste
  • black pepper to taste

Equipment

  • Oven To toast pita bread
  • Sheet pan To spread pita for toasting
  • Mixing bowl To combine salad ingredients
  • Whisk To emulsify dressing

Method
 

  1. Preheat oven to 375°F (190°C). Tear or cut pita into 1-inch pieces. Toss with 2 tablespoon olive oil and spread in a single layer on a sheet pan. Toast for 5-7 minutes until golden and crisp with no soft spots.
    2 pieces pita bread, 2 tbsp olive oil
  2. Chop romaine into ½-inch pieces. Dice tomatoes and cucumber (seeds removed) into ½-inch cubes. Slice radishes thin and chop green onions. Finely chop parsley and mint into ¼-inch pieces.
    3 cups romaine lettuce, 2 medium tomatoes, 1 cucumber, 4 pieces radishes, 3 pieces green onions, 0.5 cup fresh parsley, 0.25 cup fresh mint
  3. In a small bowl, whisk lemon juice and sumac together first. Slowly drizzle in ¼ cup olive oil while whisking to emulsify. Add minced garlic if using. Season with salt and black pepper to taste.
    3 tbsp lemon juice, 2 tsp sumac, 0.25 cup olive oil, 1 clove garlic, salt, black pepper
  4. In a large mixing bowl, combine romaine, tomatoes, cucumber, radishes, green onions, parsley, and mint. Toss gently to mix vegetables evenly.
    3 cups romaine lettuce, 2 medium tomatoes, 1 cucumber, 4 pieces radishes, 3 pieces green onions, 0.5 cup fresh parsley, 0.25 cup fresh mint
  5. Add toasted pita and dressing right before serving. Toss everything together until vegetables are coated and pita is evenly distributed. Serve immediately while bread is still crispy.
    2 pieces pita bread, 3 tbsp lemon juice, 2 tsp sumac, 0.25 cup olive oil, 1 clove garlic, salt, black pepper

Notes

  • Use stale or day-old pita bread for better crisping without burning.
  • Add dressing just before serving to avoid soggy vegetables and limp herbs.
  • Toast pita pieces in a single layer to ensure even browning and crispness.

Tried this recipe?

Let us know how it was!

How Long Does Bacon Grease Last? [Storage Guide]

March 27, 2026

Bacon grease pulled from the pan smells fine today, but last week's jar in the back of the fridge looks off - that's the moment most cooks realize they never tracked a date. Bacon fat is genuinely shelf-stable longer than most people expect, yet rancidity and contamination can sneak up fast when storage steps are skipped.

How Long Does Bacon Grease Last In The Fridge

If you render drippings from bacon in cooking regularly, knowing exactly how long each jar lasts is worth a few minutes of your time.

For a full breakdown of bacon grease's flavor and uses, that context lives elsewhere - here we focus solely on keeping it safe and usable.

QUICK SUMMARY

Bacon grease keeps 3-6 months in the fridge when properly strained and sealed in a glass jar. Frozen portions last up to a year. Room-temperature storage is short-term only - 1-2 weeks max, and only if solids are fully removed.

🧊Fridge: 3-6 months in a sealed glass jar, strained clean
❄️Freezer: 6-12 months portioned in ice cube trays or small jars
⚠️Key Rule: Always strain out meat bits before storing - solids accelerate rancidity fast

How Long Does Bacon Grease Last?

Rendered bacon fat outlasts most cooking fats at room temperature, yet storage method makes a dramatic difference. A jar left unsealed on the counter degrades in days, while one properly strained and refrigerated stays usable for months.

The type of bacon matters too. Grease from streaky, high-fat cuts renders cleaner than grease from water-injected supermarket bacon, which carries more moisture and shortens fridge life.

Moisture inside the jar accelerates both mold growth and oxidation - the two main enemies here.

Bacon Grease Shelf Life
MethodStateDurationNotes
🏠 PantryStrained, sealed1-2 weeksShort-term only; keep away from heat and light
🧊 FridgeStrained, sealed jar3-6 monthsStore at 34-40°F; label with date
❄️ FreezerPortioned, sealed6-12 monthsFlavor mellows slightly; texture becomes more granular

Grease stored alongside bacon spoilage signs - like leftover bits of cooked bacon - degrades faster than clean-strained fat, so the quality of your straining step directly sets the clock.

How to Store Bacon Grease

Start every storage session with one non-negotiable step: strain while the grease is still warm and pourable. Once it cools and solidifies, fine particles of cooked meat and carbon lock in and begin breaking down the fat.

Golden Rule
Cool grease slightly before sealing the jar. Pouring hot fat into a sealed container traps steam, creating condensation that promotes mold - even in the fridge.

Pantry: Strain through fine mesh or cheesecloth into a dry, heatproof jar, seal tightly, and use within 1-2 weeks. Keep it in a cool, dark cupboard away from the stove.

Fridge: Let the grease cool to near room temperature first. Strain into a clean, wide-mouth glass jar - mason jars work well because glass won't absorb flavors or react with the fat the way thin plastic or reactive metal containers can. Press a small piece of parchment on top before sealing if you want to reduce air contact, then label with the date. The same principle applies to keeping butter fresh - minimizing air contact inside the container slows oxidation considerably.

Freezer: Portion before freezing rather than freezing one large block you'll have to chip at. Full freezing instructions are in the next section.

Can You Freeze Bacon Grease?

Yes - and for long-term storage, freezing is the most reliable option. Flavor mellows slightly after freezing, but the grease remains perfectly usable for sautéing vegetables, seasoning cast iron, or frying eggs.

Shortcut
Freeze in an ice cube tray first, then transfer the solid cubes to a labeled freezer bag. Each cube is roughly 1 tablespoon - a ready-made single-use portion with no mess.

Portioning bacon grease this way mirrors how cooks store herbs in ice cube trays's shelf life - small, measured amounts that go from frozen to pan without thawing fuss.

  1. Strain the cooled grease through fine mesh or cheesecloth to remove all solids before freezing.
  2. Pour into an ice cube tray or small freezer-safe containers in single-use portions.
  3. Freeze solid (about 2-3 hours), then pop cubes out and transfer to a labeled, zip-seal freezer bag.
  4. Thaw in the fridge overnight or drop a frozen cube directly into a hot pan - no microwave needed.

After freezing, the fat may appear more brittle and granular when it melts back to liquid. That's normal - it doesn't affect cooking performance.

Signs Bacon Grease Has Gone Bad

Fresh bacon grease is pale golden to off-white when solid and clear amber when liquid. Anything that deviates significantly from that picture deserves a close look before you cook with it.

Signs It's Gone Bad
👀
VisualDark brown or gray streaks in pale fat · Visible mold or fuzzy surface growth · Cloudy water layer with suspended particles when liquid
👃
SmellSour or vinegary odor instead of smoky bacon aroma · Sharp metallic or chemical off-note
✋
TextureSlimy film or tacky surface when warmed · Granular or sandy mouthfeel in cooked dishes

Rancidity in bacon fat is caused by oxidation - the fat reacts with air over time. It won't necessarily make you sick in small amounts, however rancid fat tastes unpleasant and signals chemical degradation you don't want in your food. Discard any jar where smell or appearance is off - no exceptions.

Getting the Most From Every Jar

Good habits at the pan make every storage step easier. These four practices cover the most common failure points:

  • 🧺 Strain every time - even a small amount of leftover meat bits left in the jar will accelerate spoilage for the entire batch.
  • 📅 Label with date and bacon type - note whether it came from streaky or back bacon so older jars get used first.
  • 🚫 Skip burnt or watery grease - grease from burnt bacon or water-injected cuts carries off-flavors and extra moisture that shorten fridge and freezer life.
  • 🔁 Rotate your jars - if you cook bacon regularly, keep the newest jar at the back and pull from the oldest first.

If you ever run low, bacon grease swaps that work can fill the gap without derailing the dish - and separately, lard swaps that work are worth knowing if you need a neutral rendered fat instead.

Frequently Asked Questions

Can you keep bacon grease at room temperature?

Yes, but only short-term. Fully strained, sealed grease kept in a cool, dark cupboard stays usable for 1-2 weeks. Any moisture or meat bits in the jar will shorten that window significantly.

Is bacon grease safe to eat after a month in the fridge?

Yes, if it was properly strained and stored in a sealed glass jar. One month falls well within the 3-6 month fridge window. Smell and appearance should still match fresh pale-golden fat.

Can you reuse bacon grease for frying?

Yes. Bacon grease has a smoke point around 325-375°F, suitable for pan-frying and sautéing. Strain it after each use before returning it to storage - reusing unstrained grease speeds rancidity.

How long can you keep bacon grease in the freezer?

Up to 12 months in a properly sealed, labeled container. Quality is best within 6 months - after that, flavor can mellow noticeably, though the grease remains safe to use.

Does bacon grease go bad faster if mixed with new grease?

It can. Adding fresh grease to an older jar resets the contamination risk but not the clock - the older fat is still aging. Keep separate jars and use oldest first.

What Is Alfredo Sauce? Taste, Uses & More Explained

March 27, 2026

Alfredo sauce does one thing no other sauce does quite as well: it clings. That glossy, buttery coat - built from heavy cream, butter, and Parmigiano-Reggiano - wraps every strand of fettuccine in a way that's closer to a dairy emulsion than a traditional poured sauce.

What Is Alfredo Sauce

It's not a simple cream sauce, and it's not béchamel either. Understanding how it works changes how you cook with it.

QUICK SUMMARY

Alfredo sauce is a rich, dairy-based emulsion of butter, heavy cream, and aged Parmesan with a silky, clinging texture. It has a buttery, umami-forward flavor with salty cheese sharpness, and works best tossed hot with ribbon pasta or baked into casseroles.

🧀Flavor: Rich buttery umami, salty aged cheese, mild tang
🍝Best Use: Tossed with fettuccine, baked pasta, chicken Alfredo
🥛Key Ingredients: Heavy cream, butter, Parmigiano-Reggiano
❄️Shelf Life: Opened jar 3-5 days; homemade 3-4 days refrigerated
⚠️Watch: Breaks easily over high heat - finish off the burner

What Is Alfredo Sauce?

Alfredo sauce belongs to the category of emulsion sauces - dairy-based, fat-forward, and built for coating rather than pooling. The original Roman version, credited to restaurateur Alfredo di Lelio in early 20th-century Rome, used only butter and Parmesan, no cream at all.

The American version expanded that base to include heavy cream, which is now the standard in most homes and restaurants outside Italy.

It goes by a few names - salsa Alfredo, Alfredo's sauce - but the formula varies more than the label suggests. Jarred commercial versions often add starch thickeners and stabilizers.

Fresh or homemade versions rely on the emulsification between fat, protein, and pasta starch to hold their texture. Both work, but they behave differently in the pan.

Golden Rule
Real Alfredo sauce doesn't need flour. The emulsion holds through fat, Parmesan protein, and starchy pasta water - not a roux.

What Does Alfredo Sauce Taste Like?

alfredo sauce - What Is Alfredo Sauce

The dominant note is buttery richness, followed immediately by the sharp, salty depth of aged Parmesan. It's not a sweet sauce - there's no caramelization, no tomato acidity.

The tang comes entirely from the aged cheese, which reads more umami-forward than sour.

A useful comparison: think of spaghetti carbonara without the egg-yolk richness and smokiness. Both are fatty, cheese-heavy, and cling to pasta - but Alfredo reads creamier and milder.

It's noticeably richer than béchamel, which is flour-thickened and comparatively neutral.

Sensory SnapshotModerate Intensity
👅 Flavor
butteryumamisaltymild tang
✋ Texture
silkythickclingy
👃 Aroma
butterynutty aged cheese

Heat changes the profile noticeably. Overcooking drives off moisture and makes the sauce greasy and grainy rather than glossy.

Finished off the heat, it stays silky and cohesive.

How to Use Alfredo Sauce

Alfredo sauce works across more applications than its pasta reputation suggests, though high-heat and acidic environments are its two consistent weak points. The emulsion breaks under aggressive heat, and heavy cream doesn't pair well with acid-heavy tomato sauces.

How Alfredo Sauce Is Used
MethodBest ForTip
🍳 TossFettuccine, gnocchi, ravioliAdd a splash of starchy pasta water to tighten the emulsion
🫙 BakePasta casseroles, al forno dishesAdd breadcrumbs on top; brief bake only - overcooking breaks it
🍕 SpreadWhite pizza base under mushrooms or spinachUse sparingly - it thickens further under oven heat
🥦 DrizzleSteamed vegetables like broccoliFinish off heat; let residual warmth keep it fluid

For pasta, fettuccine is the standard pairing because the flat, wide surface holds the clingy sauce better than round or tubular shapes. Ribbon pastas generally outperform everything else here.

Grilled chicken folded into a finished Alfredo is the most common protein addition - the mild char complements the buttery sauce without overwhelming it.

Beyond pasta, Alfredo works as a white pizza sauce under mushrooms and spinach, and it blends well with pesto for a cream-pesto hybrid that softens pesto's sharpness.

If you need a swap in any of these applications, check our guide to alfredo sauce replacements for workable alternatives.

  • 🧀 Cheese additions - Pecorino Romano stirred in at the end sharpens the overall salt and tang without changing the texture.
  • 🌿 Pesto blend - Mix one part pesto to three parts Alfredo for a cream-pesto pasta that balances richness and herbaceous bite.
  • 🍄 Mushroom pairing - Sautéed cremini or shiitake add an earthy counterpoint that prevents the sauce from feeling one-dimensional.
  • 🫙 Casserole use - Combine with cooked pasta, protein, and vegetables, then bake briefly with breadcrumbs for a textured crust.
Try It In
🧄Creamy Garlic Parmesan Alfredo SauceA from-scratch version that shows exactly how the emulsion comes together→

How to Buy and Store Alfredo Sauce

When buying jarred Alfredo, read the ingredient list first. Jars listing cream and Parmesan near the top outperform those built primarily on modified starch and vegetable oil.

Look for a smooth, glossy appearance through the jar - visible separation or a greasy film at the top signals lower-quality emulsification.

Watch Out
A sour smell in fresh or refrigerated Alfredo means the dairy has turned. Don't cook with it - the off-flavor won't cook out.

For refrigerated tubs or homemade sauce, check for a bright ivory color and a faint nutty aroma from the cheese. Once opened or made, store in a sealed shallow container in the fridge - shallow containers cool faster, which matters for a dairy sauce.

For full shelf life details, see our breakdown of alfredo sauce storage guide.

  • Unopened jar: Stable in the pantry until the printed date.
  • Opened jar or fresh tub: 3-5 days refrigerated.
  • Homemade sauce: 3-4 days refrigerated; does not freeze well without separation.

Where to Start With Alfredo Sauce

Alfredo rewards restraint. Start with good Parmigiano-Reggiano - not pre-shredded - and finish the sauce off the heat.

The difference between Parmesan and Parmigiano-Reggiano matters more here than in most applications, since the cheese does most of the flavor work.

If you're choosing between jarred and homemade, jarred works fine for casseroles and pizza bases. For tossed pasta, homemade is worth the fifteen minutes.

That's the clearest decision the sauce asks you to make.

Frequently Asked Questions

What is Alfredo sauce made of?

The classic base is butter and Parmigiano-Reggiano, emulsified with starchy pasta water. American versions add heavy cream to extend the sauce and increase stability. Commercial jars often include starch thickeners and stabilizers.

How does Alfredo sauce differ from béchamel?

Béchamel is a flour-thickened white sauce with a neutral, mild flavor. Alfredo contains no flour - it holds through fat and cheese protein - and has a much stronger, saltier Parmesan character. See our full béchamel vs Alfredo comparison for cooking differences.

Can you freeze Alfredo sauce?

Technically yes, but the emulsion almost always breaks on thawing, leaving a greasy, grainy texture. If you must freeze it, thaw slowly in the fridge and reheat gently while whisking in a small splash of cream.

What pasta pairs best with Alfredo sauce?

Fettuccine is the standard - its flat, wide surface holds the clingy sauce better than tubular or thin round pastas. Pappardelle and tagliatelle work equally well for the same reason.

Why does homemade Alfredo sauce turn grainy?

Graininess usually means the heat was too high when you added the Parmesan, causing the proteins to clump rather than melt smoothly. Pull the pan off the heat before adding cheese, and use finely grated - not shredded - Parmesan.

What Is Apricot? [Taste, Uses & More]

March 27, 2026

Most people reach for an apricot expecting a peach, then pause at the first bite - the sweetness is more concentrated, the tartness sharper, and there's a floral note that plum and peach simply don't carry.

What Is Apricot

That gap between expectation and reality is exactly why apricots get misused: too often eaten underripe, or dismissed as "just for apricot jam." They deserve better.

QUICK SUMMARY

Apricots are small stone fruits with sweet-tart, honeyed flavor and a floral edge. Fresh apricots peak in summer and bruise easily; dried and canned forms work year-round. They shine in both sweet and savory cooking - from French confiture to Moroccan tagines.

🍑Flavor: Sweet-tart with honeyed, floral, and faint citrus notes
🌍Origin: Central Asia, spread via the Silk Road trade routes
🔪Best Uses: Jam, tagines, tarts, roasted glazes, dried snacking
📦Shelf Life: Ripe fresh apricots last 2-4 days refrigerated
⚠️Watch For: Wrinkled skin, brown bruising, or mold near the stem cavity

What Is Apricot?

Apricots belong to the stone fruit family (Prunus armeniaca), alongside peaches, plums, and cherries. Native to Central Asia, they traveled westward along the Silk Road and took root across the Mediterranean, Middle East, and eventually Europe and North America.

The fruit is small and round, rarely larger than a golf ball, with velvety skin ranging from pale yellow to deep orange.

A single hard pit sits at the center - that pit kernel, by the way, is the raw material for marzipan's close cousin, almonds being the more common stand-in in modern baking.

Several varieties define commercial and home markets:

  • Blenheim apricot - A California heirloom prized for its complex, aromatic flavor; considered the gold standard for fresh eating and jam-making.
  • Moorpark apricot - A larger English variety with deep orange flesh and rich sweetness; popular for preserving and baking.
  • Turkish apricot - Usually sold dried; smaller and more intensely flavored than fresh Western varieties, dominant in Middle Eastern and Central Asian cooking.
  • Canned apricot halves - Whole halves packed in juice or syrup; useful when fresh is out of season, though the texture softens considerably.

Regional names vary. In parts of France the dried form appears on charcuterie boards alongside cheese and called abricot sec, while in some older texts the Latin Prunus armeniaca still appears.

What Does Apricot Taste Like?

apricot - What Is Apricot

Fresh apricots deliver a sweet-tart balance that sits closer to honeyed sweetness than pure sugar. There's a bright citrus tang - more concentrated than a peach, without the peach's milder, watery finish.

Sensory SnapshotModerate Intensity
👅 Flavor
sweet-tarthoneyedfloralcitrus tang
✋ Texture
firm-yieldingjammy when cooked
👃 Aroma
floralstone-fruit perfume

Texture shifts noticeably with heat. Raw, a ripe apricot is firm but yields quickly under pressure - jammy just below the skin.

Cook it down and that flesh collapses into a thick, glossy sauce with deeper, more caramel-like sweetness.

Dried apricots behave differently again. The drying process strips water and concentrates the tartness, producing a chewier, more acidic bite. Unsulfured dried apricots turn dark brown and taste earthier; sulfured ones stay bright orange and hold more of that fresh, tangy character.

Watch Out
An underripe apricot tastes flat and mealy - not just less sweet, but actively unpleasant. If your apricots are firm and pale, give them 1-3 days at room temperature before eating.

How to Use Apricot

Apricots cross the sweet-savory line more naturally than most fruit. North African cooking exploits this best - braised into lamb tagines with ras el hanout and preserved lemon, Turkish dried apricots add a jammy, concentrated backbone that balances fatty meat.

In French and Mediterranean kitchens, fresh apricots poach into elegant tarts, and confiture d'abricot (apricot jam) doubles as a glaze for pastries. Roasting apricot halves at high heat with a drizzle of honey caramelizes the cut face and amplifies the floral notes considerably.

How Apricot Is Used
MethodBest ForTip
🥗 Fresh/RawYogurt bowls, cheese boards, sliced saladsUse only fully ripe fruit; slice just before serving
🍳 Stewed/JamConfiture, compotes, glazesAdd lemon juice early - it sharpens flavor and helps pectin set
🔥 Roasted/GrilledHoney-glazed desserts, savory meat accompanimentsHalve and place cut-side down first for better caramelization
🫙 Poached/CannedTarts, compotes, wine-poached fruitUse dry white wine or verjuice for a less sweet result
🌿 DriedTagines, trail mix, grain salads, stuffingsSoak briefly in warm water to restore texture before cooking

Pairings lean heavily on complementary richness and acidity. Goat cheese or ricotta softens the tartness; almonds mirror the pit kernel's nuttiness; rosemary or thyme bridges fresh apricots into savory territory. Citrus - especially lemon and orange zest - sharpens the floral note rather than competing with it.

Avoid strong anise or licorice flavors. They overwhelm apricot's delicate floral profile entirely.

Try It In
🍗Chicken Tagine with ApricotsDried apricots fold into the braise and melt into the sauce→🥩Moroccan Lamb Tagine with ApricotsClassic sweet-savory pairing with warm spice and preserved lemon→

How to Buy and Store Apricot

Good fresh apricots have a warm orange blush, slight give near the stem end, and no green patches. Avoid fruit with wrinkled skin, brown bruises, or any soft collapse around the stem cavity - those signal over-the-hill or damaged flesh.

Best Pick
Blenheim apricots - most common at farmers markets in early summer - have the most complex flavor of any widely available variety. If you spot them, buy more than you need and make jam with the extras.

For storage: ripen firm apricots at room temperature, away from direct sun, for 1-3 days. Once they yield slightly to pressure, move them to the fridge in a breathable container or paper bag.

Ripe fruit holds for 2-4 days before softening further. If you need a swap mid-recipe, plum replacements cover similar sweet-tart roles in most savory applications.

For dried apricots, store in an airtight container in a cool, dark pantry. They keep for several months without refrigeration.

Where to Start with Apricot

New to cooking with apricots? Begin with dried Turkish apricots - they're forgiving, shelf-stable, and immediately useful in grain dishes, cheese boards, or a quick tagine. Fresh apricots reward patience: buy a few days ahead, ripen them properly, and eat them at peak.

Once you're confident with the flavor, move into roasting or jam. A simple honey-roasted apricot over yogurt is the fastest way to understand how heat transforms this fruit - and it takes under twenty minutes.

Shortcut
No fresh apricots available? Good-quality canned apricot halves in juice (not syrup) work in most cooked applications - jam, tagines, and tart fillings included. Drain and pat dry before roasting.

Frequently Asked Questions

What does an apricot taste like compared to a peach?

Apricots are sweeter and more concentrated than peaches, with a sharper tartness and a distinct floral note. Peaches taste milder and juicier; apricots have more citrus edge and less water in the flesh.

How do you ripen apricots at home?

Leave firm apricots at room temperature, stem-side down, away from direct sunlight. They typically soften within 1-3 days. Don't refrigerate until they yield slightly to gentle pressure near the stem.

Are apricots high in sugar?

Fresh apricots are relatively low in sugar - about 3-4 grams per fruit. Dried apricots concentrate that sugar significantly, delivering roughly 8-9 grams per 5-piece serving, so portion size matters there.

Can you freeze apricots?

Yes - halve and pit them first, then freeze on a tray before transferring to a bag. Thawed apricots are soft and best used in cooked applications like jam, sauces, or baked goods rather than eaten fresh.

Is the apricot pit kernel safe to eat?

Raw apricot kernels contain amygdalin, which converts to cyanide during digestion - eating several can be harmful. Small amounts used in some traditional confections are processed to reduce this risk, but snacking on raw kernels isn't recommended.

Slow Cooker Lamb Curry

March 27, 2026

Most slow-cooked lamb comes out bland or dry. The fix is searing the meat first and letting it cook low for hours until it falls apart.

Slow Cooker Lamb Curry served on a plate

Brown chunks get caramelized edges that add depth the slow cooker alone can't deliver. Coconut milk and curry powder do the rest, building a sauce that clings to rice without tasting watery.

This works when you want dinner ready but don't want to stand at the stove all evening.

QUICK SUMMARY

Sear lamb shoulder chunks in a hot pan, then slow cook them on low for 6-8 hours with curry powder, coconut milk, and aromatics. The fat in lamb shoulder breaks down slowly, making the meat tender without drying out. Skip the sear and you lose the caramelized flavor that makes this curry rich instead of flat.

⏱️Time Reality: 20 minutes hands-on, then 6-8 hours unattended on low heat
🔥Critical First Step: Brown lamb in batches 4-5 minutes per side before slow cooking
⚠️Watch Out: Don't salt early-flavors concentrate as sauce reduces and can turn too salty

Why This Recipe Works

Fatty lamb shoulder needs hours to break down collagen into gelatin. Searing before slow cooking builds a flavor base that stays rich even after eight hours on low, which is why a classic curry dish like this relies on technique as much as spice blends.

Quick Reference
⏱️
Prep Time
20 min
🔥
Cook Time
6-8 hrs low
⏰
Total Time
6 hr 20 min
🍽️
Servings
6
📊
Difficulty
Easy
🏷️
Category
Main Dish
💡
Quick Tip
Sear lamb first for deeper curry flavor
🎯
Best For
Weeknight | Meal prep | Entertaining

Here's what makes it reliable:

  • Searing locks in caramelized flavor - browning lamb chunks in a hot skillet before slow cooking adds depth curry powder alone can't achieve
  • Low heat prevents drying - cooking on low for 6-8 hours keeps lamb juicy while collagen melts into the sauce
  • Coconut milk balances spices - the fat in coconut milk mellows sharp curry notes and creates a creamy texture without dairy
  • Stir midway for even cooking - stirring gently after 3-4 hours redistributes heat and prevents bottom pieces from overcooking
  • Wait to season - salt and adjust spices after cooking since flavors concentrate as liquid reduces
Quick Tip
Check internal temperature at 6 hours-lamb is done when it reads 190°F and shreds easily with a fork

What You'll Need

Ingredients for Slow Cooker Lamb Curry

Pick lamb shoulder with visible marbling since lean cuts dry out during long cooking. Stock your pantry with curry powder and coconut milk so you can build this on weeknights without extra shopping, much like you'd prep for more recipe ideas that rely on a few core ingredients.

🍖
Protein
  • 2 lbs lamb shoulder, cubed
🧄
Aromatics
  • 1 large onion, diced
  • 4 cloves garlic, minced
  • 2 tablespoon fresh ginger, grated
🥢
Sauce Base
  • 2 tablespoon curry powder
  • 2 tablespoon tomato paste
  • 1 can (14 oz) coconut milk
  • 1 cup vegetable broth
🧀
Finishing
  • ½ cup yogurt (optional)
  • ¼ cup fresh cilantro, chopped

Ingredient Details

  • Lamb shoulder
    Use well-marbled pieces-fat melts during slow cooking and keeps meat tender instead of dry
  • Curry powder
    Fresh curry powder matters-check the date on your jar since old spices taste dusty instead of vibrant
  • Coconut milk
    Full-fat coconut milk creates a richer sauce than lite versions, which can taste thin after hours of cooking
  • Ginger
    Grate fresh ginger on a microplane for better distribution-chunks can turn fibrous during long cooking
  • Onion
    Sauté onion until translucent before adding to slow cooker-raw onion can taste harsh even after 8 hours
  • Tomato paste
    Cook tomato paste with aromatics for 1-2 minutes to remove raw metallic taste before deglazing
  • Vegetable broth
    Use low-sodium broth so you can control salt levels-full-sodium versions often turn too salty as sauce reduces

Ingredient Swaps

Lamb shoulder works best but beef chuck delivers similar tenderness for less money. Swap based on what you find marked down or what fits your budget, since slow cooking makes most cuts fork-tender if you give them enough time.

Four swaps that work:

  • Lamb shoulder → beef chuck - Same fatty texture that breaks down slowly; flavor shifts from gamey to beefy but sauce adjusts
  • Coconut milk → heavy cream - Creates richer sauce with dairy notes instead of coconut; use same amount
  • Curry powder → garam masala + turmeric + chili powder - Mix 1 tablespoon garam masala, 1 teaspoon turmeric, 1 teaspoon chili powder for custom spice blend
  • Fresh ginger → ground ginger - Use 1 teaspoon ground for every 2 tablespoon fresh; flavor is sharper so start small

Beef Chuck

Works for: Budget cooking, feeding picky eaters who skip lamb

Skip if: You want authentic gamey lamb flavor or need high-protein content

Heavy Cream

Works for: Extra-rich sauce, avoiding coconut flavor

Skip if: You're dairy-free or want lighter calorie count

Instructions

You need 20 minutes upfront to sear meat and sauté aromatics, then the slow cooker handles the rest. Set it on low before work and dinner is ready when you walk in, which means you can tackle other tasks like prepping simple rolls recipe to serve alongside without timing stress.

  1. Sear lamb in hot skillet - Heat 2 tablespoon oil over high heat, brown lamb chunks 4-5 minutes per side in batches, transfer to slow cooker

  2. Sauté aromatics - In same skillet over medium heat, cook onion 5 minutes until soft, add garlic and ginger, stir 1 minute until fragrant

  3. Build sauce base - Stir in curry powder and tomato paste, cook 2 minutes, pour in vegetable broth, scrape pan to deglaze, pour mixture over lamb in slow cooker

  4. Add coconut milk and cook - Pour coconut milk into slow cooker, stir to combine, cover and cook on low 6-8 hours until lamb reads 190°F and shreds easily

  5. Finish and serve - Stir gently, taste and adjust salt, garnish with yogurt and cilantro before serving over basmati rice

Quick Tip
Stir curry gently after 3-4 hours to redistribute heat and prevent bottom pieces from sticking-use a wooden spoon to avoid shredding meat too early

What to Serve With It

This curry needs something neutral to soak up sauce and something fresh to cut through richness. Plain rice works but gets boring fast, which is why we rotate sides based on what's already in the fridge-check weeknight chicken dinner ideas for more practical pairing strategies.

Side Dish Prep Why It Works How to Serve
Steamed basmati rice Easy Neutral base absorbs curry sauce without competing flavors Scoop warm rice into bowls, ladle curry over top
Cucumber raita Easy Cool yogurt sauce balances warm curry spices Serve in small bowl on the side for spooning between bites
Steamed green beans Easy Crisp texture and fresh flavor contrast rich sauce Steam 5 minutes, season with salt, serve alongside curry
Warm naan bread Easy Soft flatbread perfect for scooping curry and sauce Warm in oven 2 minutes, tear into pieces at table
Jeera rice (cumin rice) Medium Fragrant cumin adds depth without overpowering curry Toast cumin seeds in butter, toss with cooked basmati

Three ways to serve it:

  • Weeknight bowl - Spoon curry over rice in deep bowls, top with yogurt and cilantro, serve with steamed green beans on the side
  • Meal prep containers - Divide curry and rice into separate compartments so rice doesn't get soggy, pack raita in small container
  • Casual dinner party - Serve curry in large serving bowl at table, set out naan bread and side dishes for passing family-style
Best Pick
Pair with cucumber raita and warm naan for the most balanced plate-cool yogurt and soft bread handle spicy curry better than plain rice alone

Store and Reheat

Curry gets better after a day in the fridge since spices bloom and flavors marry. Store in shallow containers so it cools fast and reheats evenly, which matters when you're meal prepping for the week or packing lunches-similar logic applies to any slow-cooked dish you'd find in a tangy sauce recipe that relies on depth over time.

Method Time Best For
🍳 Stovetop 8-10 min over medium heat Even warming that keeps lamb tender without drying edges
📦 Microwave 2-3 min, stir halfway Quick single servings when you're rushing lunch
🔥 Oven 15-20 min at 325°F covered Reheating larger portions for family meals without hotspots

For best results when storing:

  • Cool curry within 2 hours - transfer to shallow containers and refrigerate promptly to prevent bacterial growth
  • Store rice separately - keep curry and rice in different containers so rice doesn't absorb too much liquid and turn mushy
  • Freeze in portions - divide into 2-cup servings for easy thawing; freezes up to 3 months without texture loss
  • Add liquid when reheating - stir in 2-3 tablespoon coconut milk or broth if sauce thickened too much in fridge
  • Refresh herbs before serving - add fresh cilantro after reheating since stored herbs turn brown and lose flavor

Frequently Asked Questions

Can I use bone-in lamb cuts for slow cooker lamb curry?

Bone-in lamb chops work but need 1-2 hours longer cooking time since bones slow heat transfer. Remove bones before serving or warn guests they're present-boneless shoulder is cleaner for meal prep.

How long does slow cooker lamb curry keep refrigerated and frozen?

Refrigerate in airtight containers 3-4 days or freeze up to 3 months. Freeze in portions so you can thaw only what you need-curry reheats better than most slow-cooked meals.

How do I know when slow cooker lamb curry is fully cooked?

Lamb is done when it reads 190°F on a meat thermometer and shreds easily with a fork. Check at 6 hours on low-if pieces are still tough, cook another 1-2 hours.

Why is my slow cooker lamb curry bland and how to fix it?

Skipping the sear or using old curry powder causes flat flavor. Fix bland curry by stirring in 1-2 teaspoon fresh curry powder, 1 tablespoon lime juice, and salt to taste 15 minutes before serving.

What are good side dishes for slow cooker lamb curry?

Serve with steamed basmati rice, warm naan bread, cucumber raita, or steamed green beans. Rice soaks up sauce while raita and greens cut through richness-pick two for a balanced plate.

Slow Cooker Lamb Curry served on a plate

Slow Cooker Lamb Curry

No ratings yet
This slow cooker lamb curry features seared lamb shoulder chunks cooked low and slow for tender, flavorful meat. Coconut milk and curry powder build a rich, creamy sauce that clings to rice, perfect for easy weeknight meals with minimal hands-on time.
Print Recipe Pin Recipe
Prep Time 20 minutes mins
Cook Time 6 hours hrs
Total Time 6 hours hrs 20 minutes mins
Servings: 6 servings
Course: Dinner
Cuisine: Indian
Ingredients Equipment Method Notes

Ingredients
  

  • 2 lbs lamb shoulder cubed, well-marbled
  • 1 large onion diced
  • 4 cloves garlic minced
  • 2 tablespoon fresh ginger grated
  • 2 tablespoon curry powder
  • 2 tablespoon tomato paste
  • 14 oz coconut milk full-fat
  • 1 cup vegetable broth low-sodium
  • 0.5 cup yogurt optional, for garnish
  • 0.25 cup fresh cilantro chopped, for garnish
  • 2 tablespoon oil for searing

Equipment

  • Skillet Sear lamb and sauté aromatics
  • Slow cooker Cook lamb curry low and slow
  • Wooden spoon Stir curry gently during cooking

Method
 

  1. Heat oil in a hot skillet over high heat. Brown lamb chunks in batches, cooking 4-5 minutes per side until caramelized. Transfer browned lamb to slow cooker.
    2 lbs lamb shoulder, 2 tbsp oil
  2. In the same skillet over medium heat, cook diced onion for 5 minutes until soft. Add garlic and grated ginger, stirring 1 minute until fragrant.
    1 large onion, 4 cloves garlic, 2 tbsp fresh ginger
  3. Stir curry powder and tomato paste into the aromatics. Cook 2 minutes, then pour in vegetable broth and scrape the pan to deglaze. Pour this mixture over the lamb in the slow cooker.
    2 tbsp curry powder, 2 tbsp tomato paste, 1 cup vegetable broth
  4. Pour coconut milk into slow cooker and stir to combine. Cover and cook on low for 6-8 hours, until lamb reaches 190°F and shreds easily with a fork.
    14 oz coconut milk
  5. After 3-4 hours, gently stir curry with a wooden spoon to redistribute heat and prevent bottom pieces from overcooking.
  6. Taste and adjust salt if needed. Garnish with optional yogurt and chopped cilantro. Serve over steamed basmati rice or with warm naan.
    0.5 cup yogurt, 0.25 cup fresh cilantro

Notes

  • Sear lamb chunks before slow cooking to develop caramelized flavor.
  • Cook curry on low heat for 6-8 hours to keep lamb tender and juicy.
  • Wait to season with salt after cooking to avoid overly salty sauce.

Tried this recipe?

Let us know how it was!

What Is Annatto Seed? [Taste, Uses & More]

March 27, 2026

You spot a small bag of reddish-orange seeds at a Latin grocery and wonder if they're worth the detour from your usual spice rack - they are.

What Is Annatto Seed

Annatto seed, also called achiote, is what gives Caribbean rice its golden hue, Yucatán pork its deep rust color, and Filipino kare-kare its warm, earthy base, doing jobs that alternatives to saffron or swapping out achiote paste can only approximate. Mild in heat, strong in color, it's a seed that punches well above its flavor weight.

QUICK SUMMARY

Annatto seed is a natural coloring spice from the Bixa orellana shrub. Its flavor is mild - earthy, faintly peppery, slightly nutty - while its pigment is bold reddish-orange. Used whole, ground, or simmered into oil, it's a staple across Mexican, Filipino, and Caribbean cooking.

🌶️Flavor: Mild, earthy, faintly peppery with a subtle nutty note
🎨Best Use: Infusing oil, making achiote paste, coloring rice and stews
🌍Cuisines: Mexican, Filipino, Caribbean, Peruvian, Central American
🛒Buy: Look for deep reddish-orange, glossy whole seeds
📦Shelf Life: Whole seeds 1-2 years; powder 6-12 months; paste 1-3 months refrigerated

What Is Annatto Seed?

Annatto seed comes from Bixa orellana, a flowering shrub native to the Amazon basin and Central America.

The shrub produces spiky pods that split open to reveal dozens of small, hard, brick-red seeds coated in a pigment-rich resin.

That resin is the source of bixin and norbixin, the carotenoid compounds responsible for annatto's signature orange-red color in foods, fabrics, and cosmetics.

You'll find it sold under several names depending on region.

  • 🌿 Achiote - the Spanish name, used across Latin America and in paste form
  • 🌿 Urucum - the Brazilian Portuguese name, common in South America
  • 🌿 Annatto powder - dried, ground seeds sold as a loose spice
  • 🌿 Achiote paste - seeds ground with spices and citrus into a wet seasoning brick

Whole seeds are hard and brittle, roughly the size of a lentil. Ground powder is fine and rust-colored, while commercial achiote paste varies from dark maroon to bright orange depending on the producer's spice blend.

What Does Annatto Seed Taste Like?

annatto seed - What Is Annatto Seed

Annatto's flavor is mild - noticeably more subtle than its color suggests. The closest comparison is toasted paprika, though with less sweetness and none of smoked paprika's char. There's a faint pepper note, a dry nuttiness, and a barely-there tang that surfaces when seeds are briefly toasted before grinding.

Sensory SnapshotMild Intensity
👅 Flavor
earthyfaintly pepperyslightly nuttysubtle tang
✋ Texture
hard & brittle (whole)fine & dry (ground)
👃 Aroma
warmwoodyfaintly floral

Heat changes annatto's character.

Simmered in oil, the seeds release a mellow, nutty depth without any sharpness.

In achiote paste, the addition of cumin, cloves, citrus, and oregano builds on that base - the seeds provide the backbone, not the headline flavor.

If you've ever tasted dishes that use paprika swaps that work for color, annatto sits in that same register: more colorant than spice, but not flavor-neutral.

Golden Rule
Never eat whole annatto seeds directly. They're too hard to chew and contribute no flavor until their pigment is extracted through oil, water, or grinding.

How to Use Annatto Seed

Annatto oil - called achiote oil - is the most accessible starting point. Simmer a tablespoon of whole seeds in neutral oil over low heat for about five minutes until the oil turns deep orange, then discard the seeds. That oil substitutes for plain cooking fat in rice, soups, and stewed meats, carrying color through the whole dish.

How Annatto Seed Is Used
MethodBest ForTip
🫙 Infused OilRice, chicken stews, sofrito baseKeep heat low; seeds burn quickly and turn bitter above medium
🧱 Achiote PasteYucatán pork marinades, chicken rubsMix with sour orange juice to loosen before applying
🌾 Ground PowderSpice blends, cheese, dry rubsUse sparingly - color intensifies more than flavor does
💧 Hot Water SteepSauces and broths needing color without oilStrain before adding to dish; liquid will be bright orange

Achiote paste is where annatto really earns its place in complex cooking. Blended with cumin, cloves, cinnamon, citrus, and garlic, it becomes the defining marinade for making Yucatan cochinita pibil pork at home - the slow-roasted dish that banana leaves and underground ovens were made for. In the Philippines, annatto seeds steep directly in coconut milk for kare-kare, the peanut-based oxtail stew. Caribbean cooks use achiote oil as a base for rice and beans, while Peruvian preparations fold annatto powder into stewed chicken dishes like arroz con pollo.

It pairs well with citrus (especially sour orange and lime), garlic, cumin, and oregano. Coconut milk and pork both absorb annatto's color beautifully.

Try It In
🐷Yucatan Cochinita Pibil PorkThe definitive use of achiote paste — slow-roasted pork with citrus and annatto→

How to Buy and Store Annatto Seed

At the store, whole seeds should look deep reddish-orange and glossy. Dull, grayish, or dusty seeds have lost pigment potency and will give weak color.

For achiote paste, read the label: quality products list annatto, spices, and citrus - nothing more. Pastes padded with food starch or artificial color are worth skipping.

Watch Out
Annatto compounds (bixin and norbixin) can trigger rare allergic reactions - skin irritation or respiratory sensitivity - in some individuals. If you're trying annatto for the first time, start with a small amount.

Storage is straightforward:

  • Whole seeds - airtight, opaque container away from heat and light; good for 1-2 years
  • Ground powder - same conditions, but flavor fades faster; use within 6-12 months
  • Prepared paste - refrigerate in a sealed container and use within 1-3 months; freeze for longer storage

Check for annatto seed spoilage signs if your seeds have been in the pantry awhile - faded color and no aroma are the clearest signals.

Where to Start With Annatto Seed

If you've never cooked with annatto, start with annatto oil.

It takes five minutes, uses whole seeds, and immediately shows you how the color works in rice or a simple stew.

From there, achiote paste is the natural next step - especially if you're drawn to Mexican or Caribbean cooking.

Understanding the role natto plays versus annatto also helps: both trade on fermented or aged character in their respective cuisines, but annatto's job is purely color and mild earthiness.

If you run short, check the alternatives to annatto seed before reaching for paprika - the substitution logic matters.

Shortcut
Buy whole seeds over powder. They last twice as long and give you the flexibility to make oil, paste, or ground spice from a single ingredient.

Frequently Asked Questions

Is annatto seed the same as achiote?

Yes. Achiote is simply the Spanish name for annatto seed and the Bixa orellana plant. In most Latin American markets, "achiote" refers to both the whole seeds and the spiced paste made from them.

Are annatto seeds spicy?

No. Annatto has no heat. The faint pepper note is more aromatic than spicy - significantly less sharp than black pepper and with no capsaicin whatsoever.

Does annatto taste like paprika?

They're in the same flavor neighborhood - earthy, mild, with reddish-orange color - but annatto is less sweet and has a slightly more mineral, woody character. Smoked paprika diverges further; annatto has no smokiness at all.

How do you make annatto oil at home?

Combine one tablespoon of whole annatto seeds with a quarter cup of neutral oil in a small pan. Heat on low for four to five minutes until the oil turns deep orange, then strain out and discard the seeds.

Can annatto be used as a natural food dye?

Yes - it's one of the most widely used natural food colorings globally. Bixin and norbixin, the carotenoids in annatto, color cheese, butter, snack foods, and beverages without synthetic additives.

What Is Bamboo Shoot? [Taste, Uses & More]

March 27, 2026

Stir-fried pork with bamboo shoots is one of those dishes where a single ingredient quietly holds everything together - the shoots absorb the soy sauce and ginger while keeping a crunch that softens but never disappears.

What Is Bamboo Shoot

Most home cooks encounter them in canned form first, which is a decent starting point but nowhere near the full picture.

Fresh and fermented varieties change the equation significantly, and knowing which form to reach for - and what to do with it - makes a real difference.

If you're already building a stir-fry around these, good pairing ideas for stir fry can round out the plate, and whenever soy sauce anchors the dish, knowing your soy sauce swaps that work is worth a few minutes.

QUICK SUMMARY

Bamboo shoots are young edible sprouts harvested before the bamboo stem hardens. They have a mild, slightly bitter flavor similar to artichoke heart, hold their crisp texture through most cooking methods, and appear fresh, canned, or fermented across East and Southeast Asian kitchens.

🌱What It Is: Young bamboo sprout, harvested before the stem firms up
👅Flavor: Mildly sweet and earthy with a faint bitter edge
🍳Best Uses: Stir-fries, soups, curries, braised dishes, pickling
🧊Shelf Life: Fresh: up to 10 days; canned unopened: months to years
⚠️Key Note: Always boil or blanch fresh shoots before eating to remove trace cyanogenic compounds

What Is Bamboo Shoot?

Bamboo shoots are the young, emerging growth of bamboo plants, cut from the base before the stem hardens into woody cane. They grow across East and Southeast Asia and have been harvested for food for thousands of years.

The shoot itself is a conical spear wrapped in overlapping papery sheaths. Strip those away and the inner core - pale yellow-white and firm - is what ends up in the pan.

Takenoko is the Japanese term, referring specifically to the spring-harvested shoots prized in that cuisine. In other contexts you'll see them called bamboo sprouts, mesu, or simply bambusa shoots depending on regional dialect.

Several varieties reach the market:

  • 🌿 Moso bamboo - the most common commercially; large, mild, widely available fresh and canned
  • 🌿 Phyllostachys varieties - smaller, more tender; common in Japanese spring dishes
  • 🥫 Canned bamboo shoots - pre-boiled and packed in water; convenient but softer than fresh
  • 🫙 Fermented/pickled shoots - sharp, funky, used as a condiment or side in Burmese and Vietnamese cooking

What Does Bamboo Shoot Taste Like?

bamboo shoot - What Is Bamboo Shoot

Fresh bamboo shoot has a mild, slightly sweet earthiness with a faint bitterness that sits toward the back of the palate.

It's closest in character to a young artichoke heart - and if you've worked with artichoke heart stand-ins before, many of the same flavor dynamics apply here.

Raw shoots carry that bitterness more sharply, which is why blanching is standard practice. Heat mellows it considerably.

Sensory SnapshotMild Intensity
👅 Flavor
mildly sweetearthyfaint bitter
✋ Texture
crisp when freshfirm-tender when cooked
👃 Aroma
grassysubtly nutty

Cooked in broth or a stir-fry, the shoot absorbs surrounding flavors readily without losing its own mild profile. Fermented shoots are a different animal - sharper and more pungent, functioning almost like a condiment rather than a background vegetable.

Watch Out
Fresh bamboo shoots contain trace cyanogenic glycosides. Always boil or blanch them for at least 20 minutes in unsalted water before using in any recipe.

How to Use Bamboo Shoot

Bamboo shoots appear across Chinese, Japanese, Thai, Vietnamese, and Burmese cooking in ways that reflect each cuisine's priorities. The ingredient is a structural player - it adds texture and absorbs flavor rather than announcing itself.

How Bamboo Shoot Is Used
MethodBest ForTip
🥘 BlanchingRemoving bitterness; prep step for all fresh shootsBoil 20+ min in plain water; discard water after
🍳 Stir-fryingPork and soy dishes; quick weeknight cookingSlice thin for faster cook and better soy absorption
🍲 SimmeringMiso soup, dashi-based takenoko dishes, coconut curriesAdd shoots in the last 10 min to preserve some firmness
🫕 BraisingChinese clay-pot dishes with mushrooms and porkLong braises work well - shoots soften but hold shape
🫙 PicklingPreserved side dishes; condiment in Burmese cuisineUse rice vinegar or brine; fermented version has sharper bite

In Japanese cooking, takenoko rice (takenoko gohan) simmers the shoots with dashi and soy before folding them into rice - a spring dish where the shoot is the centerpiece, not a supporting player.

Southeast Asian cooks add sliced shoots to coconut milk curries, where the fat and spice round off any residual bitterness.

Knowing how to keep that base sauce fresh matters too - advice on keeping coconut milk fresh applies directly when building these dishes ahead.

Pairing-wise, soy sauce, ginger, garlic, and mushrooms are natural companions. Miso-based broths suit the shoot's mild earthiness well; if you're short on miso, the approach covered in swapping out miso paste keeps the dish balanced.

Avoid heavy dairy sauces - cream mutes the shoot's texture and flavor without adding anything useful.

Try It In
🧄Air Fryer Garlic Parmesan Zucchini FriesSee how garlic and a light crisp texture work together in a fast side→🫙Roasted Garlic Garlic AioliA dipping sauce that pairs cleanly with blanched or stir-fried shoots→🍅Roasted Garlic Marinara SauceShows how roasted garlic deepens sauces served alongside shoot-based dishes→

How to Buy and Store Bamboo Shoot

Fresh shoots should feel heavy and firm with tight, intact outer sheaths. Pass on anything with soft spots, darkened patches, or sheaths that have already started separating.

The inner core, when you peel back a layer, should be pale and clean - not gray or slimy.

Best Pick
For fresh shoots, look for small-to-medium sized ones at Asian grocery stores in spring. Smaller shoots tend to be more tender and less bitter than large mature ones.

For canned bamboo shoots, check that the liquid is clear and the can shows no bulging or dents. Once opened, cover the shoots in their brine and store in an airtight container in the refrigerator.

Storage by form:

  • Whole fresh shoots - wrap in a damp cloth, refrigerate in the crisper, use within 5-10 days
  • Blanched fresh shoots - store submerged in cold water in the fridge; change the water daily
  • Opened canned shoots - keep in brine in an airtight container; use within 4-7 days
  • Unopened canned shoots - shelf-stable for months to years per the label

For a full breakdown, the guide on storing bamboo shoot correctly covers every form in detail. If dashi is part of your broth base and you need an alternative, swapping out dashi powder keeps that component covered.

Start with Canned, Then Go Fresh

If you haven't cooked with bamboo shoots before, canned is the practical entry point - pre-boiled, ready to slice, and available year-round at most Asian grocery stores.

Once you're comfortable with the flavor and how it behaves in stir-fries or soups, fresh shoots in spring are worth seeking out. They have noticeably more texture and a cleaner flavor.

And if you find yourself without shoots mid-recipe, the bamboo shoot swaps that work covers the closest alternatives without rebuilding the dish from scratch.

Frequently Asked Questions

Are bamboo shoots poisonous raw?

Some varieties contain cyanogenic glycosides that can cause nausea if eaten raw in quantity. Boiling or blanching for at least 20 minutes in plain water neutralizes these compounds. Canned shoots are already processed and safe to eat without further cooking.

How long do bamboo shoots last in the fridge?

Fresh whole shoots last 5-10 days wrapped in a damp cloth in the crisper. Opened canned shoots stored in their brine in an airtight container keep for 4-7 days.

Do canned bamboo shoots taste the same as fresh?

Not quite. Canned shoots are softer and have a more neutral flavor since they've already been boiled and stored in water. Fresh shoots have more pronounced earthiness and a firmer, snappier texture.

Why do my bamboo shoots smell sour after opening the can?

A mild sour or slightly tangy smell is normal - it comes from the acidified packing liquid used to extend shelf life. Rinse them under cold water before using; a sharp or sulfurous smell, however, means the product has spoiled.

Can you freeze bamboo shoots?

Freezing is possible but degrades the texture significantly - shoots become mushy after thawing. Blanch first, then freeze in an airtight container if you must; use within one month and add directly to cooked dishes rather than eating as-is.

Panzanella Tuscan Bread Salad

March 27, 2026

You need 20 minutes for prep and about 10 to toast the bread. No marinating, no babysitting while things cook, just chopping vegetables and mixing a quick vinaigrette.

Panzanella Tuscan Bread Salad served on a plate

The bread soaks up the dressing while you set the table. Tomato juice and olive oil turn stale chunks into tender, flavorful bites without turning them to mush.

This works for weeknight sides when you need something fresh that uses up leftover bread and ripe tomatoes sitting on the counter.

QUICK SUMMARY

Panzanella Tuscan Bread Salad combines toasted stale bread with juicy tomatoes, crisp cucumber, and fresh basil in a tangy vinaigrette. The key is toasting the bread until golden so it softens from the dressing without falling apart. Make this when you have day-old bread and ripe tomatoes.

⏱️Time Reality: 30 minutes total-10 for toasting bread, 20 for chopping and mixing
🔑Critical First Step: Toast bread at 375°F until golden and dry throughout
⚠️Watch Out: Don't over-soak the bread or it turns to paste-5 minutes is enough

Table of Contents

Toggle
  • Why This Recipe Works
  • What You'll Need
    • Ingredient Details
  • Ingredient Swaps
  • What to Serve With It
  • Store and Reheat
  • Frequently Asked Questions
  • Panzanella Tuscan Bread Salad
    • Method 
    • Tried this recipe?

Why This Recipe Works

Toasting stale bread until completely dry creates structure that absorbs dressing without disintegrating. A good bright salad recipe uses ripe tomatoes for juice and sweetness, plus red wine vinegar for sharp contrast that keeps every bite fresh.

Quick Reference
⏱️
Prep Time
20 min
🔥
Cook Time
10 min
⏰
Total Time
30 min
🍽️
Servings
4-6 servings
📊
Difficulty
Easy
🏷️
Category
Side
💡
Quick Tip
Dry bread thoroughly to avoid sogginess
🎯
Best For
Weeknight | Entertaining | Picnic

What makes it work:

  • Stale rustic bread holds its shape when soaked-fresh bread turns to mush in under a minute
  • Toasting at 375°F for 10-12 minutes dries the bread completely so it absorbs dressing evenly without dissolving
  • 3 parts olive oil to 1 part vinegar balances richness with acidity and coats every ingredient
  • Resting 20 minutes at room temperature lets tomato juice soak into the bread while vegetables stay crisp
  • Adding fresh basil just before serving keeps the herbal aroma bright instead of wilted and bitter
Best Pick
Use day-old ciabatta or sourdough-the open crumb structure soaks up dressing without falling apart like dense sandwich bread does.

What You'll Need

Ingredients for Panzanella Tuscan Bread Salad

Shopping takes 10 minutes if you already have stale bread and olive oil at home. For a creamy salad side dish that balances rich mains, grab ripe tomatoes, red onion, cucumber, and fresh basil from the produce section.

🍞
Bread Base
  • 8 oz stale rustic bread (ciabatta or sourdough)
🍅
Vegetables
  • 3 large ripe tomatoes
  • 1 cucumber
  • ½ red onion
🫒
Dressing
  • ¼ cup extra-virgin olive oil
  • 2 tablespoon red wine vinegar
  • Salt and black pepper
🌿
Fresh Herbs
  • ½ cup fresh basil leaves
  • Optional: 2 tablespoon capers or 4 anchovies

Ingredient Details

  • Stale rustic bread
    Use day-old ciabatta or sourdough with open crumb-avoid dense sandwich bread that turns gummy
  • Ripe tomatoes
    Pick tomatoes that give slightly when pressed-underripe ones lack juice and sweetness
  • Red onion
    Soak sliced onion in ice water 10 minutes to mellow the sharp bite before adding to salad
  • Extra-virgin olive oil
    Use fruity, peppery olive oil-it's the main flavor in the dressing so quality matters
  • Red wine vinegar
    Measure exactly 2 tablespoons-too much makes the salad sour, too little leaves it flat
  • Fresh basil
    Tear large leaves by hand instead of chopping-bruising releases aroma without turning them dark
  • Cucumber
    Peel and seed cucumber if the skin is thick or seeds are large-adds crunch without excess moisture

Ingredient Swaps

Most swaps work as long as you keep the bread-to-dressing ratio the same. White wine vinegar or lemon juice changes the acidity slightly but still balances the olive oil-just stick to 2 tablespoons total.

Four swaps that work:

  • Gluten-free bread for rustic bread - Becomes softer faster so soak only 3 minutes instead of 5
  • Shallots for red onion - Sweeter and milder, skip the ice water soak
  • Cherry tomatoes for large tomatoes - Halve them for more surface area and faster juice release
  • Fresh parsley or mint for basil - Different herbal flavor but still bright-use same amount

White Wine Vinegar

Works for: Lighter, brighter acidity than red wine vinegar

Skip if: You want traditional Tuscan flavor profile

Lemon Juice

Works for: Fresh citrus punch instead of wine tang

Skip if: You need consistent acidity-lemon strength varies

Balsamic Vinegar

Works for: Sweeter, darker dressing with richer flavor

Skip if: You want bright, sharp traditional panzanella

Instructions

The entire process takes 30 minutes from start to finish-10 for toasting, 10 for chopping, 10 for mixing and resting. The pasta works best when it hits the table at the same time as the main, so for a creamy pasta on the side that complements bread salad, start both together.

  1. Toast the bread: Cut stale bread into 1-inch cubes and spread on a baking sheet. Toast at 375°F for 10-12 minutes until golden and completely dry throughout. Let cool 5 minutes while you prep vegetables.

  2. Prep the vegetables: Chop tomatoes and cucumber into 1-inch pieces. Slice red onion thinly and soak in ice water for 10 minutes. Tear basil leaves by hand into large pieces.

  3. Make the dressing: Whisk together ¼ cup olive oil, 2 tablespoons red wine vinegar, ½ teaspoon salt, and ¼ teaspoon black pepper in a large bowl. Taste and adjust-it should be sharp but not puckering.

  4. Combine everything: Drain onion and pat dry. Add toasted bread cubes to dressing and toss to coat. Let soak 5 minutes until bread softens but still holds shape. Add tomatoes, cucumber, drained onion, and torn basil. Toss gently to combine.

  5. Rest before serving: Let salad sit at room temperature 20 minutes so tomato juice soaks into bread and flavors meld. Taste and add more salt, vinegar, or olive oil if needed. Serve immediately or chill up to 2 hours.

Quick Tip
If bread turns too soft after resting, toss in a handful of fresh toasted cubes right before serving to add back crunch.

What to Serve With It

Panzanella fills the gap on plates that need something bright and crunchy next to rich proteins or creamy pasta. Most people skip chicken, but it balances the meal-try easy chicken wings dinner nights when you want variety without extra cooking.

Side Dish Prep Why It Works How to Serve
Grilled chicken breast Easy Lean protein balances light salad Slice and serve alongside, drizzle pan juices over both
Roasted vegetables Easy Adds warm, hearty contrast to cold salad Roast zucchini and bell peppers, serve on same plate
Lentil soup Medium Comforting, protein-rich complement Serve salad on the side as fresh, crunchy contrast
Antipasto platter Easy Varied textures and flavors pair well Arrange olives, cheeses, cured meats around salad bowl
Charcuterie board Easy Salty meats contrast fresh salad Serve salad in center, surround with meats and crackers

Three ways to serve it:

  • As a light lunch - Add canned tuna or white beans for protein, serve with crusty bread on the side
  • For summer entertaining - Double the recipe and serve in a large shallow bowl so guests can see the bright colors
  • With grilled meats - Spoon any extra vinaigrette over grilled chicken or steak for extra tang
Shortcut
Skip toasting entirely if your bread is rock-hard after 2+ days-just soak it directly in the dressing for 8-10 minutes instead of 5.

Store and Reheat

Panzanella lasts 2-3 days in the fridge but the bread softens more each day. Rich mains need something to cut through, and this chicken does exactly that-keep a simple sauce recipe ready to drizzle over leftovers for extra moisture.

Method Time Best For
🌡️ Room Temperature 20 min Serving after refrigeration-best texture
❄️ Serve Cold 0 min Quick lunch straight from fridge
🍞 Add Fresh Bread 5 min Reviving texture if stored too long

For best results when storing:

  • Store in shallow airtight container in the fridge so bread doesn't get crushed-keeps 2-3 days
  • Add fresh basil after reheating instead of storing it with the salad-old basil turns black and bitter
  • Drain excess liquid before storing if tomatoes released a lot of juice-prevents bread from turning to mush
  • Toast fresh bread cubes and toss them in right before serving day-old salad to add back crunch
  • Don't freeze panzanella - bread texture becomes grainy and vegetables turn watery when thawed

Frequently Asked Questions

How long to soak bread for Panzanella?

Soak toasted bread cubes for 5 minutes in the vinaigrette-they should soften but still hold their shape when you toss the salad. If bread is rock-hard after 2+ days, extend soaking to 8-10 minutes.

Can I make Panzanella ahead and store it?

You can make it 2-3 hours ahead and keep at room temperature, or refrigerate up to 2 days. The bread will continue softening, so add fresh toasted cubes before serving if you want crunch back.

What goes well with Panzanella salad?

Grilled chicken breast, roasted vegetables, lentil soup, or an antipasto platter all balance the bright acidity and crunchy texture. For light meals, add canned tuna or white beans directly to the salad.

How do I know when Panzanella is ready to serve?

The bread should be tender but not mushy, vegetables should still be crisp, and the dressing should coat everything evenly without pooling at the bottom. Let it rest 20 minutes at room temperature for flavors to meld.

Can I use gluten-free bread or other substitutes in Panzanella?

Gluten-free bread works but softens faster-soak for only 3 minutes instead of 5. Avoid dense sandwich bread or soft rolls, which turn gummy instead of tender when soaked.

Panzanella Tuscan Bread Salad served on a plate

Panzanella Tuscan Bread Salad

No ratings yet
Panzanella Tuscan Bread Salad combines toasted stale rustic bread with juicy tomatoes, crisp cucumber, and fresh basil in a tangy red wine vinaigrette. Toasting the bread until golden allows it to soak up the dressing without turning to mush, making this a perfect fresh side for weeknight meals or entertaining.
Print Recipe Pin Recipe
Prep Time 20 minutes mins
Cook Time 10 minutes mins
Total Time 30 minutes mins
Servings: 5 servings
Course: Side Dish
Cuisine: Italian
Ingredients Method Notes

Ingredients
  

  • 8 oz stale rustic bread ciabatta or sourdough, cut into 1-inch cubes
  • 3 tomatoes large, ripe, chopped into 1-inch pieces
  • 1 cucumber peeled and seeded if thick skin, chopped into 1-inch pieces
  • 0.5 red onion thinly sliced and soaked in ice water for 10 minutes
  • 0.25 cup extra-virgin olive oil
  • 2 tablespoon red wine vinegar
  • 0.5 teaspoon salt
  • 0.25 teaspoon black pepper freshly ground
  • 0.5 cup fresh basil leaves torn by hand into large pieces
  • 2 tablespoon capers optional

Method
 

  1. Cut stale rustic bread into 1-inch cubes and spread evenly on a baking sheet. Toast in a preheated oven at 375°F for 10-12 minutes until golden and completely dry throughout. Remove and let cool for 5 minutes while preparing other ingredients.
    8 oz stale rustic bread
  2. Chop tomatoes and cucumber into 1-inch pieces. Thinly slice red onion and soak in ice water for 10 minutes to mellow the sharpness. Tear fresh basil leaves by hand into large pieces.
    3 tomatoes, 1 cucumber, 0.5 red onion, 0.5 cup fresh basil leaves
  3. In a large bowl, whisk together extra-virgin olive oil, red wine vinegar, salt, and black pepper until well combined. Adjust seasoning to achieve a sharp but balanced flavor.
    0.25 cup extra-virgin olive oil, 2 tbsp red wine vinegar, 0.5 tsp salt, 0.25 tsp black pepper
  4. Drain the red onion and pat dry. Add toasted bread cubes to the dressing and toss to coat thoroughly. Let the bread soak for 5 minutes until it softens but still holds its shape.
    8 oz stale rustic bread, 0.5 red onion, 0.25 cup extra-virgin olive oil, 2 tbsp red wine vinegar, 0.5 tsp salt, 0.25 tsp black pepper
  5. Add chopped tomatoes, cucumber, drained red onion, and torn basil leaves to the bread and dressing mixture. Toss gently to combine all ingredients evenly.
    3 tomatoes, 1 cucumber, 0.5 red onion, 0.5 cup fresh basil leaves
  6. Let the salad rest at room temperature for 20 minutes so the tomato juice soaks into the bread and flavors meld. Taste and adjust seasoning with additional salt, vinegar, or olive oil if needed. Serve immediately or chill for up to 2 hours.
    8 oz stale rustic bread, 3 tomatoes, 1 cucumber, 0.5 red onion, 0.25 cup extra-virgin olive oil, 2 tbsp red wine vinegar, 0.5 tsp salt, 0.25 tsp black pepper, 0.5 cup fresh basil leaves

Notes

  • Use day-old ciabatta or sourdough bread with an open crumb for best soaking results.
  • Do not over-soak the bread; 5 minutes is sufficient to soften without turning mushy.
  • Tear basil leaves by hand just before serving to maintain bright aroma and color.

Tried this recipe?

Let us know how it was!
« Previous Page
Next Page »

Primary Sidebar

ForkliftKitchen recipe developer

Welcome!

Recipe Developer · 12+ Yr Kitchen Veteran

I'm the recipe developer behind this site, focused on practical, well-tested dishes and smart ingredient swaps. Every recipe is written to be clear, reliable, and easy to make at home.

650+ Recipes
12+ Yrs Exp.
3x Tested
Our Story →

As Featured In

Allrecipes

TASTE OF HOME

Food52

HUFFPOST

Yahoo! Life

Our Editorial Standards

  • ✓ Every recipe tested at least 3 times before publishing
  • ✓ Substitutes verified by real kitchen trials, not guesswork
  • ✓ Reviewed for accuracy by our editorial team
  • ✓ Updated regularly with seasonal info and reader feedback

Most Popular

  • Creamy Lemon Shrimp Linguine
    Creamy Lemon Shrimp Linguine
  • Creamy Garlic Mushroom Chicken
    Creamy Garlic Mushroom Chicken
  • Sesame Ginger Chicken Noodle Bowls
    Sesame Ginger Chicken Noodle Bowls
  • Baked Lemon Herb Fish Fillets
    Baked Lemon Herb Fish Fillets
  • Veggie Loaded Fried Rice
    Veggie Loaded Fried Rice
  • Spicy Garlic Shrimp Stir Fry
    Spicy Garlic Shrimp Stir Fry

Join 8,000+ Home Cooks

Weekly Kitchen Tips

Easy recipes, smart substitutes, and real cooking shortcuts — every Thursday.

Subscribe Free →


Side Dishes

  • What to Serve With Asian Salmon? 15 Best Side Dishes
    What to Serve With Asian Salmon? 15 Best Side Dishes
  • Side Dishes for Strawberry Spinach Salad
    15 Best Side Dishes for Strawberry Spinach Salad
  • Sides for Grilled Cauliflower Steaks to Complete the Meal
    15 Sides for Grilled Cauliflower Steaks to Complete the Meal
  • 15 Sides To Serve With Calabacitas
    15 Best Sides for Calabacitas – Mexican-Inspired Favorites


Substitutes

  • 7 Best Substitutes for Hot Sauce in Marinades & Stir-Fries
    7 Best Substitutes for Hot Sauce in Marinades & Stir-Fries
  • 9 Best Substitutes for Butter in Baking and Cooking
  • 7 Best Substitutes for Tagliatelle for Italian Pasta Dishes
    7 Best Substitutes for Tagliatelle for Italian Pasta Dishes
  • 7 Best Substitutes for Udon Noodles in Asian Stir-Fries
    7 Best Substitutes for Udon Noodles in Asian Stir-Fries


Browse by Topic

  • Side Dishes320
  • Substitutes785
  • Dinner163
  • Air Fryer77
  • Taste Profiles484
  • Food Storage123


Reader Reviews

★★★★★

"Finally a food blog that tells you exactly why a substitute works instead of just listing options."

— Sarah M., via email

★★★★★

"The side dish recommendations are so specific — saved my dinner party twice this month."

— James R., Pinterest comment

★★★★★

"I trust this site more than most because they actually test everything. You can tell."

— Priya K., blog comment

Footer

↑ Back to Top

Forklift Kitchen

We do the heavy lifting so you can enjoy the cooking. Tested recipes, smart substitutes, and perfect pairings—built for real home cooks.

Content

  • Recipes
  • Substitutes
  • What to Serve With
  • Blog

Company

  • About Us
  • Contact
  • Subscribe

Legal

  • Privacy Policy
  • Terms of Service

As an Amazon Associate I earn from qualifying purchases.

© 2026 Forklift Kitchen.

Rate This Recipe

Your vote:


A rating is required
A name is required
An email is required