• Skip to primary navigation
  • Skip to main content
  • Skip to primary sidebar
  • Recipe Index
    • Air Fryer
  • Side Dishes
  • Substitutes
  • About
  • Contact
  • Subscribe

ForkLiftKitchen

menu icon
go to homepage
  • Recipe Index
    • Air Fryer
  • Side Dishes
  • Substitutes
  • About
  • Contact
  • Subscribe
subscribe
search icon
Homepage link
  • Recipe Index
    • Air Fryer
  • Side Dishes
  • Substitutes
  • About
  • Contact
  • Subscribe
×

Blog

How Long Does Baking Soda Last? [Storage Guide]

March 27, 2026

Leftover baking soda from a recipe is easy to forget about - it sits in the pantry for months while you wonder whether it still works. Sodium bicarbonate doesn't spoil in the traditional sense, however its leavening potency fades over time, and that's what matters most if you're baking anything that needs a reliable rise.

How Long Does Baking Soda Last

Understanding baking soda in cooking makes it clear how much chemical activity depends on freshness - a flat cake is often a storage problem, not a technique problem.

QUICK SUMMARY

An unopened box stays potent for up to 24 months. Once opened, use it for baking within 6-12 months. Freezing is possible but won't preserve leavening strength - an airtight pantry container is all you need.

🗓️Unopened: Up to 24 months in a cool, dry pantry
📦Opened: 6-12 months for baking; 1-3 months as a fridge deodorizer
⚠️Key Rule: Test potency with vinegar before any precision baking

How Long Does Baking Soda Last?

Baking soda shelf life splits into two separate questions: physical stability and chemical potency. The powder itself won't grow mold or go rancid - however, its ability to release CO₂ when combined with an acid weakens steadily after opening.

Baking Soda Shelf Life
MethodStateDurationNotes
🏠 PantryUnopened24 monthsCheck manufacturer date; potency holds well when sealed.
🏠 PantryOpened6-12 monthsAirtight container extends the upper end; cardboard box shortens it.
🧊 FridgeOpened (deodorizer)1-3 monthsBox saturates with odors; replace regularly.
❄️ FreezerOpenedIndefinitePhysically stable but potency still ages from manufacture date.

The 6-month mark is the practical threshold for precision baking - layer cakes, soufflés, and quick breads where rise is non-negotiable. Much like flour's shelf life, the printed date tells you the outer boundary, not when quality peaks.

Golden Rule
Label your container with the date you opened it. Without that reference, you're guessing at potency every time you bake.

How to Store Baking Soda

The original cardboard box is fine short-term, however it absorbs both moisture and odors from surrounding pantry items. Transferring sodium bicarbonate to an airtight container immediately after opening is the single most effective storage upgrade.

Pantry: Move opened baking soda into a dry, airtight container - glass with a tight-fitting lid works well. Keep it away from acidic pantry items and strong-smelling spices, both of which the powder readily absorbs.

Fridge (deodorizer use): Place an open box or shallow dish at the back of the fridge, not a sealed container. Replace it every one to three months once it's saturated; a box doing deodorizer duty shouldn't double as your baking supply.

Counter: Skip it entirely. Room temperature exposure isn't the issue - humidity and nearby odor sources are.

  • 🧂 Two-container rule - Keep one airtight container for baking and one open box for deodorizing; never pull from the deodorizer box for recipes.
  • 📍 Location matters - Store away from the stove, dishwasher, and sink where steam and heat cycle through.
  • 🗓️ Label everything - Write the open date directly on the container or lid in marker.

Can You Freeze Baking Soda?

Freezing baking soda is technically possible, however it solves a problem that doesn't exist. Chemical potency loss is a function of time from manufacture, not temperature - a frozen box ages at the same rate as a pantry box once you account for the original production date.

Watch Out
Never open a cold container of baking soda straight from the freezer. Condensation forms instantly and clumps the powder - bring it to room temperature first, then open.

If you do freeze it - for example, buying in bulk - follow these steps:

  1. Portion and seal Divide baking soda into usable amounts and pack each into a moisture-proof, airtight freezer bag or container.
  2. Expel air and label Press out excess air before sealing, then write the manufacture date (not your freeze date) on the label.
  3. Thaw sealed Move the container to the counter and let it reach room temperature completely before opening - this prevents condensation from clumping the powder.
  4. Test before baking Run a potency check after thawing; freezing doesn't reset the clock on leavening strength.

If your recipe relies on a strong rise and your baking soda is past its window, looking into swapping out baking soda is more reliable than hoping a frozen old box still has strength.

Signs Baking Soda Has Gone Bad

Most baking soda doesn't "go bad" in a food-safety sense - the concern is potency loss and contamination from moisture or odors. Physical signs of degradation are still worth knowing.

Signs It's Gone Bad
👀
VisualHard clumps · yellowing or brown flecks · crusting at container edges
👃
SmellSour or musty odor · absorbed fridge smells
✋
TextureGritty resistance · hard cakes that won't sift through

Clumping alone isn't a discard trigger - break it up and run the vinegar test. Clumping combined with off-odors or discoloration means the box has absorbed enough environmental contamination to affect flavor; discard it.

Practical Tips for Getting the Most From Your Box

Four habits separate bakers who get consistent results from those who troubleshoot flat bakes repeatedly. None of them require extra equipment - just a bit of system.

  • 🧪 Vinegar test - Drop 1 teaspoon baking soda into ½ cup vinegar; vigorous immediate fizzing confirms adequate potency for baking. Weak or slow fizz means it's past reliable use.
  • 📦 Replace on schedule - For precision recipes, swap in a fresh box every 6 months after opening, regardless of how much remains.
  • 🔄 Downgrade, don't waste - An older box that fails the vinegar test still works for cleaning, deodorizing drains, or absorbing fridge odors.
  • 🔗 Check your other leaveners - Since baking soda and baking powder are often used together, checking [how long baking powder keeps](https://forkliftkitchen.com/baking-powder-shelf-life/) at the same time keeps your whole leavening stock current.
Shortcut
Buy smaller boxes more often rather than bulk quantities. A fresh 8-oz box costs little and removes all guesswork about potency windows.

If a recipe calls for both leaveners and your baking soda is borderline, knowing your options for swapping out baking powder alongside baking soda gives you more flexibility without starting from scratch.

Frequently Asked Questions

Does baking soda expire?

It doesn't expire in a food-safety sense - it won't grow mold or become toxic. However, leavening potency fades, and after 12 months opened, it may not produce enough CO₂ to lift baked goods reliably.

Can you use expired baking soda for baking?

Only if it passes the vinegar test - a strong fizz means enough potency remains. For casual recipes like pancakes, marginal baking soda is workable. For cakes or soufflés where rise is critical, use a fresh box.

How do I test if baking soda is still active?

Add 1 teaspoon to ½ cup of white vinegar or hot water with a splash of vinegar. Vigorous, immediate bubbling confirms active leavening strength. Weak or delayed fizz means it's too depleted for precision baking.

Can you freeze baking soda to extend shelf life?

Freezing keeps it physically stable but doesn't stop potency loss - chemical aging continues from the manufacture date regardless of storage temperature. It's useful for bulk storage convenience, not for preserving leavening strength.

Why does my baking soda smell like the fridge?

Sodium bicarbonate actively absorbs odors - that's what makes it useful as a deodorizer. A baking box stored unsealed near strong-smelling foods picks up those odors and will transfer them to baked goods.
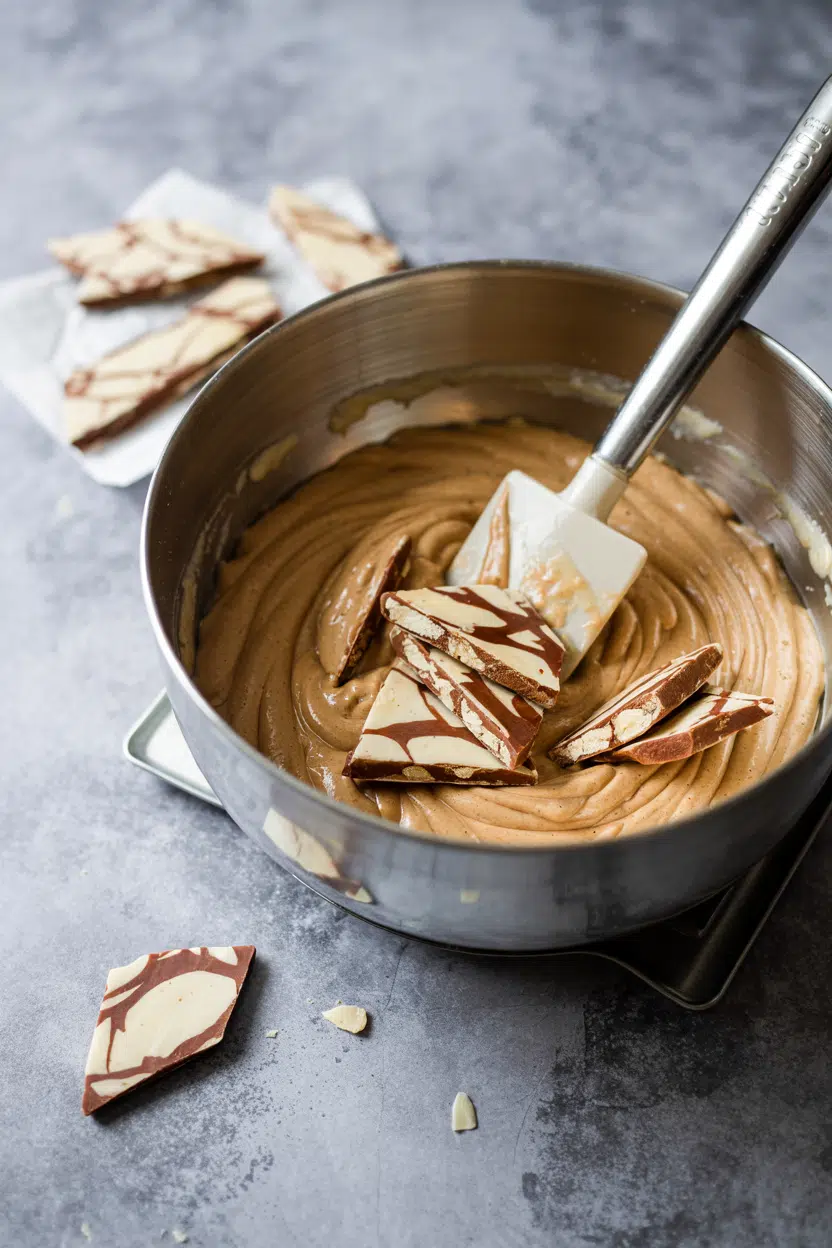
What Is Almond Bark? [Taste, Uses & More]

March 27, 2026

Most people assume almond bark is just a budget stand-in for chocolate - something you reach for when the real thing isn't worth the trouble.

What Is Almond Bark

That assumption undersells it. Almond bark is a purpose-built confectionery coating that does things real chocolate can't: it melts without seizing, sets without tempering, and holds a glossy finish even in a warm kitchen.

Knowing what it actually is - and what it isn't - makes it a far more useful tool.

QUICK SUMMARY

Almond bark is a sugar-and-vegetable-fat confectionery coating that melts smooth, sets firm, and requires no tempering. It tastes sweet and vanilla-forward in white varieties, with mild cocoa notes in chocolate versions. Best for dipping, molding, and holiday candy bark.

🍬Category: Confectionery coating, not real chocolate
🍦Flavor: Sweet, vanilla-forward; mild cocoa in chocolate varieties
🔥Best Use: Dipping, molding, and holiday bark without tempering
📦Shelf Life: Up to a year unopened; 3-6 months after opening
⚠️Watch Out: Check labels - it may contain no real almonds at all

What Is almond bark?

Despite the name, almond bark rarely contains actual almonds. It's a confectionery coating built from sugar, vegetable fats (typically palm or partially hydrogenated oils), and flavoring - most commonly vanilla for white varieties, or cocoa powder for chocolate almond bark.

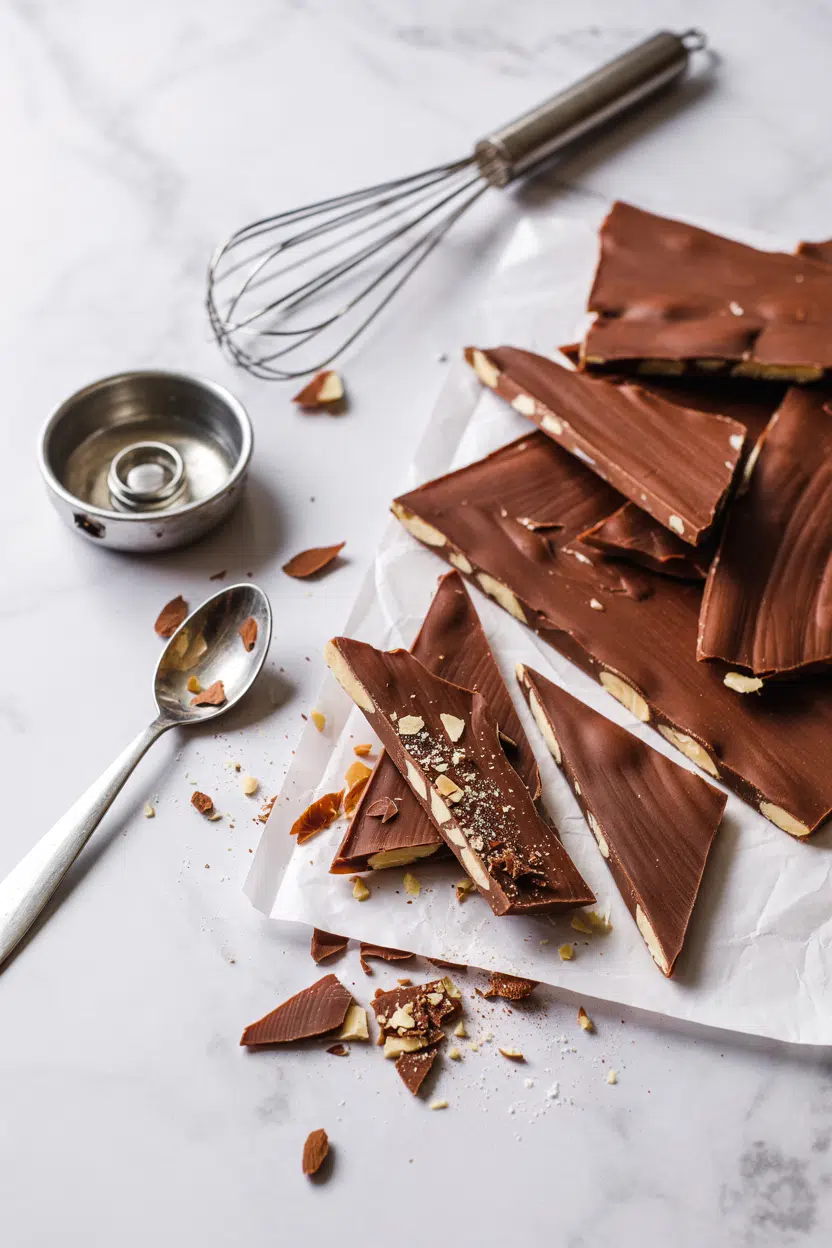
The name comes from the candy it's traditionally used to make: a flat sheet of melted coating studded with roasted almond pieces, broken into irregular "bark" shapes once set.

Sold as blocks, wafers, or discs, it's a staple of North American holiday candy-making.

You'll also find it labeled as confectionery coating or almond confection coating at craft and grocery stores - these are the same product.

Because it contains no cocoa butter, it behaves differently from real chocolate and doesn't require the precise temperature control that tempering demands.

  • 🍫 White almond bark - vanilla-flavored, ivory-colored; the most common variety
  • 🍫 Chocolate almond bark - uses cocoa for mild chocolate flavor without real couverture
  • 🧱 Forms available - sold in 1-2 lb blocks, wafer discs, or chip bags
  • 🌿 Fat base - vegetable shortenings replace cocoa butter entirely

What Does almond bark Taste Like?

almond bark - What Is Almond Bark

White almond bark leads with sweetness and a clean vanilla note - closer to a candy coating than a fine confection. The chocolate variety adds mild cocoa and faint caramel undertones, though neither version has the layered finish of real chocolate.

Sensory SnapshotModerate Intensity
👅 Flavor
sweetvanilla-forwardmild cocoacaramel hint
✋ Texture
smooth when meltedslightly waxy setcreamy mouthfeel
👃 Aroma
sweet vanillalight fatty-caramel

The mouthfeel is where it diverges most noticeably from real chocolate. Almond bark lacks cocoa butter's sharp melt point, so it feels slightly waxy rather than the clean snap you'd expect from couverture.

For context, the taste of white chocolate shares the vanilla sweetness but carries a richer, creamier finish that almond bark doesn't quite reach.

That gap matters less once it's coating a pretzel or anchoring a bark slab - the supporting ingredients do a lot of the sensory work.

How to Use almond bark

Almond bark's main advantage is its reliability. Melt it gently and it behaves - no bloom, no seizing, no thermometer required.

That makes it the go-to coating for home candy projects where precision isn't realistic.

How Almond Bark Is Used
MethodBest ForTip
🫕 Microwave MeltQuick dipping batches, cake popsUse 30-second bursts at 50% power; stir between each
🍳 Double BoilerLarge batches, sustained warmthKeep water below a simmer - steam moisture causes clumping
🧁 Mold PouringShaped holiday candies, bark slabsTap mold on counter after filling to release air bubbles
✨ DrizzlePopcorn, cookies, browniesThin with a small amount of coconut oil for cleaner lines

For holiday almond bark candy, spread the melted coating onto a parchment-lined sheet pan, then scatter roasted almonds, dried cranberries, or salted pretzels across the surface before it sets.

It pairs particularly well with salty or tart add-ins - cinnamon, cardamom, dark chocolate bits, or dried cherries all work cleanly against the sweet base.

Dipping strawberries, cookies, and truffles is where almond bark earns its reputation. It sets faster than tempered chocolate at room temperature, which speeds up production when you're coating dozens of pieces. If you need a coating but don't have almond bark on hand, a look at replacements for almond bark covers the closest-performing options.

Watch Out
Don't use almond bark in high-heat baking. Oven temperatures cause the vegetable fat base to scorch and separate - it's a coating, not a baking ingredient.
Try It In
🌿Mauby Caribbean Bark DrinkA bark-based drink that shows how bark ingredients work beyond candy→

How to Buy and Store almond bark

Look for packages labeled "almond bark" or "confectionery coating" - both names refer to the same product. Blocks and wafer discs are equally good; wafers melt slightly faster since they're pre-portioned.

Best Pick
Wafer-form almond bark melts more evenly than block form - no chopping required, and the smaller pieces reduce the risk of scorching in the microwave.

Check the surface before buying: white streaking or greasy spots signal bloom or separation from poor storage.

Always read the ingredient label if you have nut or soy allergies - despite the name, many products contain no almonds at all, though some include soy lecithin as an emulsifier.

Store opened almond bark in an airtight container in a cool, dry place, away from strong odors like coffee or spices, which it absorbs readily.

For a full breakdown of how long almond bark keeps under different conditions, that guide covers fridge, pantry, and freezer timelines in detail.

Unopened, it's shelf-stable for up to a year; opened, plan to use it within three to six months.

Getting Started with Almond Bark

New to almond bark? Start with a simple dipping project - pretzels or strawberries - before moving to molds or full bark slabs.

  • 🍓 First project - Dip pretzels or strawberries; flat learning curve, fast results
  • 🧱 Block vs. wafers - Wafers for speed; blocks if you're buying in bulk
  • 🌰 Add texture early - Press almonds or dried fruit into the coating before it sets
  • 🫙 Storage first - Seal leftovers immediately; it picks up odors faster than you'd expect

If you frequently make candy coatings and want options beyond the standard product, exploring alternatives to shortening can inform which fat-based coatings behave most similarly to almond bark in terms of set and texture.

Frequently Asked Questions

Is almond bark the same as white chocolate?

No. White chocolate contains cocoa butter and milk solids; almond bark uses vegetable fats instead. Almond bark is sweeter and slightly waxier, and it melts without the temperature sensitivity that white chocolate requires.

Does almond bark contain real almonds?

Usually not. Most commercial almond bark products are nut-free and use artificial or natural vanilla flavoring. Always check the label if you need to confirm almond content or avoid nut allergens.

How do you melt almond bark without seizing?

Use low heat and keep moisture away. Microwave in 30-second intervals at 50% power, stirring between each. Even a few drops of water can cause the coating to clump and seize.

Can you bake with almond bark?

Not effectively. Almond bark scorches at oven temperatures and the vegetable fat base separates under sustained heat. Use it as a coating or drizzle after baking, not as a baking ingredient.

Can you reuse almond bark after it has set?

Yes - it re-melts cleanly without quality loss if it was stored properly. Reheat gently using the same low-and-slow method, and avoid mixing in set pieces with fresh product from a different batch.

What Is Asian Pear? Taste, Texture & Uses Explained

March 27, 2026

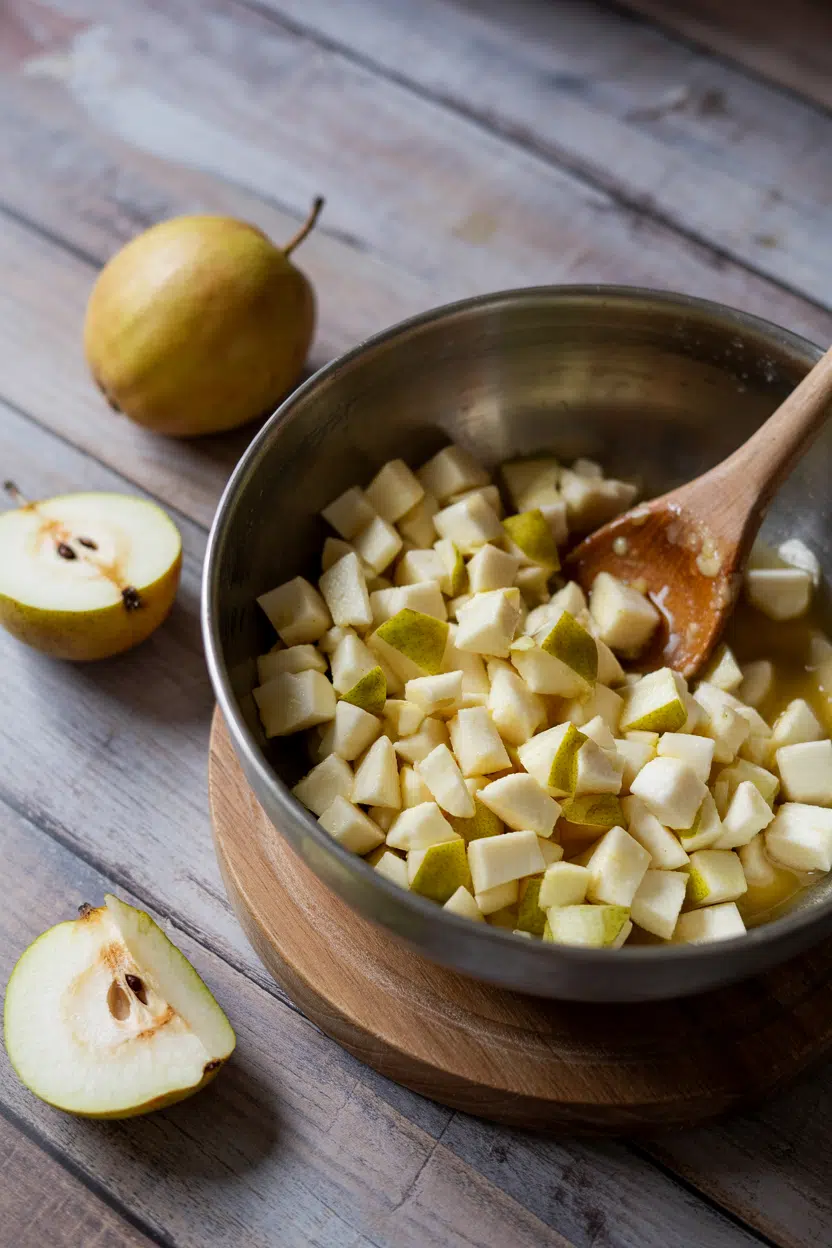
Most people assume Asian pear is just a rounder, more exotic-looking European pear - it isn't. Asian pear keeps a firm, apple-like crunch even when fully ripe, which changes how you cook with it and what you pair it with entirely.

What Is Asian Pear

It turns up as a thin, sweet counterpoint in dishes alongside sashimi, grated raw into bulgogi marinades, and sliced across cheese boards where its mild sweetness cuts through salt without going soft.

Getting familiar with it starts with understanding what that crispness actually does.

QUICK SUMMARY

Asian pear is a round, crisp pome fruit from East Asia with pale yellow to brown skin and very firm white flesh. It tastes cleanly sweet with mild floral notes and light acidity - closer to a crisp apple than a European pear.

🍐Also Called: Nashi, apple pear, Korean pear, Japanese pear
👅Flavor: Clean sweet, mild floral, light apple-like acidity
✋Texture: Very crisp, juicy, firm - stays crunchy even when ripe
🍳Best Uses: Raw in salads, grated in marinades, poached, quick-pickled
🗓️Shelf Life: Room temp 3-7 days; refrigerated whole up to 4 weeks

What Is Asian Pear?

Asian pear is a pome fruit in the same botanical family as European pears and apples, but it behaves more like the latter at the table.

Native to China, Korea, and Japan, it has been cultivated for over three thousand years and goes by several names - nashi in Japanese and Australian markets, Korean pear, apple pear, or simply nashi pear.

Unlike European pears, Asian pear doesn't soften dramatically as it ripens. The flesh stays dense, fine-grained, and very crunchy from harvest through the end of its shelf life.

Several varieties exist across the fruit's range:

  • 🟡 Nijisseiki (20th Century) - pale yellow-green skin, mild flavor, very juicy; popular in Japan
  • 🟤 Hosui - russet-brown skin, slightly richer sweetness; widely grown in Korea and exported globally
  • 🟢 Shinseiki - yellow-green skin, clean flavor, good for raw applications
  • 🔵 Ya pear - Chinese variety, slightly more elongated, mild and very refreshing

Shape ranges from nearly spherical to slightly flattened, with skin colors spanning greenish-yellow to golden-brown depending on variety and maturity.

What Does Asian Pear Taste Like?

asian pear - What Is Asian Pear
Sensory SnapshotMild Intensity
👅 Flavor
clean sweetmild florallight acidity
✋ Texture
very crispjuicyfine-grained
👃 Aroma
mildly floralfreshgreen-fruited

Think of a very crisp Fuji apple crossed with a mild European pear, then strip away the buttery, grainy softness of the latter.

What remains is a clean, refreshing sweetness with a whisper of floral and just enough acidity to keep it from tasting flat.

Raw, the flavor reads light and neutral enough to work with bold ingredients without competition.

Heat doesn't improve it - prolonged cooking softens the crispness without deepening the flavor, so Asian pear is at its best when treated gently or not cooked at all.

Watch Out
Don't confuse ripeness with softness here. A fully ripe Asian pear still feels firm under your fingers - if it gives like a Bartlett, it's overripe.

How to Use Asian Pear

Grating Asian pear into meat marinades is one of its most practical applications, and the one most cooks overlook. The fruit contains enzymes that break down muscle fibers, making it a natural tenderizer in bulgogi and other Korean beef dishes - adding sweetness and biochemical function at the same time.

Raw sliced applications are equally strong. A few thin rounds add crisp, juicy texture to arugula salads, cheese boards alongside brie or camembert, or plated next to sashimi where the clean sweetness contrasts oily fish.

How Asian Pear Is Used
MethodBest ForTip
🥗 Raw SlicedSalads, cheese plates, sashimi accompanimentsCut just before serving - flesh oxidizes slowly but texture stays best fresh
🥩 Grated RawMeat marinades (bulgogi, pork)Grate on the fine side; marinate beef no longer than 4 hours or texture turns mushy
🍲 PoachedDesserts, spiced syrupsKeeps some crispness even when poached - don't overcook past tender-firm
🥒 Quick-PickledKimchi-style ferments, condimentsShort brining preserves crunch; long fermentation softens it significantly
🥘 BraisedKorean pork dishes, savory braisesAdd late in cooking to retain some texture and sweetness

When you need a different fruit in any of these roles, understanding options for swapping out asian pear keeps a recipe on track without sacrificing the textural goal.

Cuisines that rely on it most heavily are Korean, Japanese, and Chinese, though modern Western kitchens have adopted it in salads and fruit-forward cheese courses. It pairs cleanly with soy sauce, mirin, ginger, toasted sesame, yuzu or lemon, and mizuna.

Try It In
🍐Red Wine Poached PearsAsian pear holds its shape better than European varieties through poaching→

How to Buy and Store Asian Pear

Choose fruits that feel heavy for their size - water content is a direct indicator of freshness, and a light Asian pear is a dry one.

Skin should be smooth and unbroken, with no soft spots or fermented smell near the stem.

Best Pick
A firm, heavy fruit with golden-brown or pale yellow skin and no blemishes. Press gently near the stem - it should resist like a fresh apple, not yield like a ripe peach.

Storage is straightforward:

  • Room temperature - holds 3-7 days; fine if you plan to use it within the week
  • Refrigerator crisper drawer - keeps whole fruit crisp for 2-4 weeks; store unwashed
  • Sliced - store in an airtight container and use within 2-3 days

For longer-term storage, the guide on freezing asian pear covers whether the texture holds up and which applications still work after thawing.

Where to Start With Asian Pear

Raw is the right entry point. Slice one thin, lay it across a cheese board, and taste it against a piece of brie - that contrast shows exactly what the fruit brings before any cooking gets involved.

From there, try grating half a pear into a beef marinade before cooking. The results on texture are immediately visible, and it pairs naturally with everything already in a sides for beef bulgogi spread.

Golden Rule
Keep heat brief and add late. Asian pear's value is in its crispness and enzymes - both degrade quickly under sustained high heat.

Frequently Asked Questions

Is an Asian pear the same as a regular pear?

No. Both are pome fruits, however Asian pear stays firm and crunchy at full ripeness while European pears soften to a buttery texture. Asian pear is also rounder, with a higher water content and a milder, less complex flavor.

Why do Korean recipes use pear in marinades?

Asian pear contains natural enzymes that break down meat proteins, tenderizing beef in bulgogi marinades while adding mild sweetness. Marinating longer than four hours can over-soften the meat, so timing matters.

How do you eat an Asian pear?

Most commonly raw - sliced like an apple, skin on or peeled. The skin is edible and thin on most varieties, though some cooks peel russet-skinned types for a cleaner presentation.

How long do Asian pears last in the fridge?

Whole, unwashed Asian pears last 2-4 weeks in the crisper drawer. Once sliced, use them within 2-3 days stored in a sealed container.

Can you cook Asian pear the same way as European pear?

Partly. Asian pear poaches well and holds its shape better than European varieties. However, it lacks the softening and flavor concentration that makes European pear work in long braises or baked tarts.

How Long Does Acorn Squash Last? [Storage Guide]

March 27, 2026

Leaving acorn squash on the counter next to a fruit bowl is one of the most common mistakes home cooks make - ethylene gas from apples and bananas nearby accelerates softening and decay faster than warm air alone.

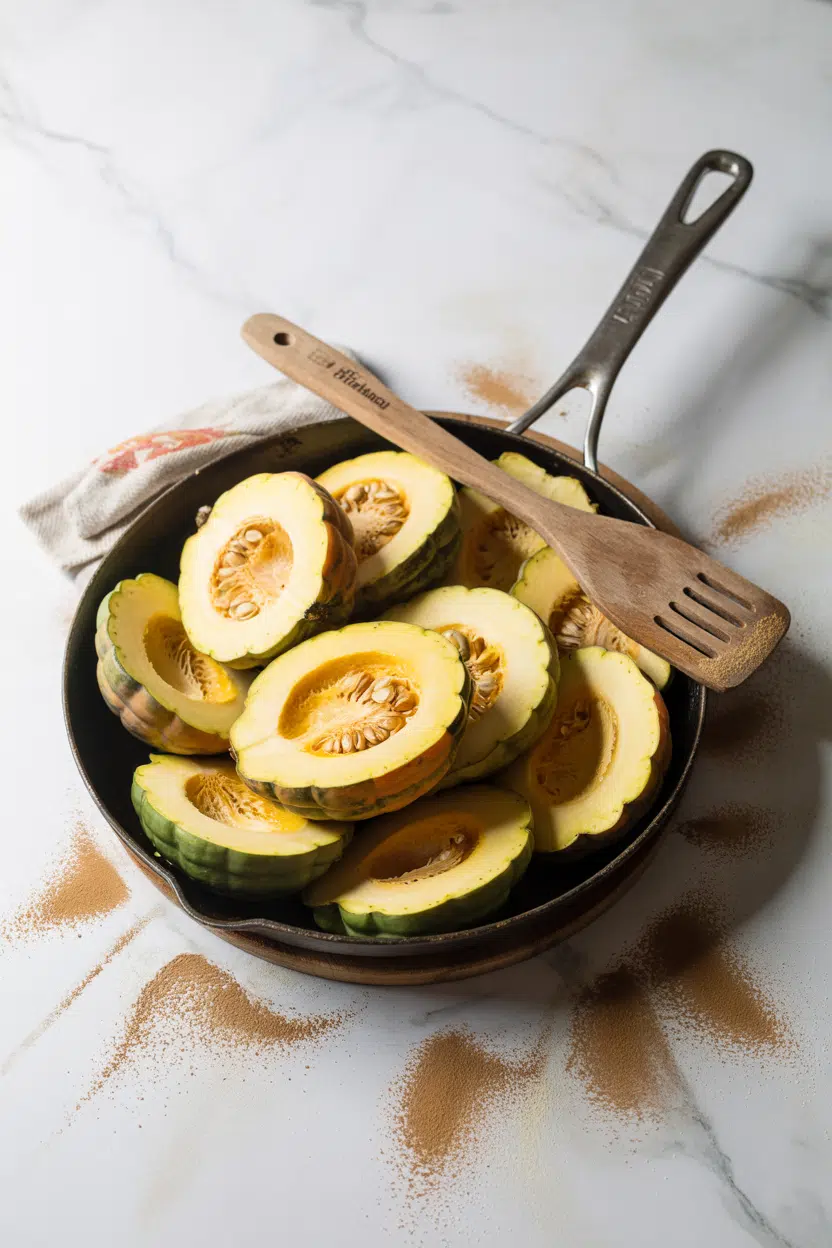
Can You Freeze Acorn Squash

A whole, uncut squash actually keeps well for months under the right conditions, but most people treat it like any other produce and lose it weeks early.

Understanding what makes acorn squash distinct from other winter squash - its dense, ridged rind and high moisture flesh - explains why storage method matters so much.

If you're also tracking squash's shelf life across varieties, acorn sits at the shorter end of the winter squash spectrum compared to harder-skinned types.

QUICK SUMMARY

A whole acorn squash lasts 2-3 months in a cool, dark pantry. Once cut, wrap it tightly and refrigerate for 3-5 days. Cooked squash keeps 3-4 days in the fridge. Frozen cooked squash lasts 8-12 months - raw freezing is not recommended.

🏠Pantry/Counter: 2-3 months whole, away from heat and ethylene producers
🧊Fridge (cut/cooked): 3-5 days cut raw; 3-4 days cooked, airtight
❄️Freezer: 8-12 months cooked or blanched; puree holds best quality longest

How Long Does Acorn Squash Last?

Acorn squash's lifespan shifts dramatically depending on whether it's whole, cut, or cooked. A dry stem stub and dull rind signal a mature squash that will hold longest - shiny skin often means immaturity and shorter shelf life.

Acorn Squash Shelf Life
MethodStateDurationNotes
🏠 PantryWhole2-3 monthsCool, dry, dark spot; inspect weekly for soft spots
🏠 CounterWhole2-3 monthsKeep from heat and sunlight; warm kitchens shorten this
🧊 FridgeCut / Raw3-5 daysWrap tightly, seed-side down on a plate
🧊 FridgeCooked3-4 daysAirtight container; limits moisture loss and odor transfer
❄️ FreezerCooked / Pureed / Blanched8-12 monthsSingle-serving bags; texture softens but works in soups and baking

Whole squash does fine on a counter, but only if the kitchen stays reasonably cool. Kitchens above 70°F shorten the window noticeably - a dedicated pantry at 50-60°F is the better option.

Compared to butternut squash's shelf life, acorn squash is slightly more sensitive once cut, thanks to its thinner flesh walls and higher moisture content.

Watch Out
Never store whole acorn squash next to apples, bananas, or pears. Ethylene gas from those fruits accelerates decay and can cut weeks off the squash's pantry life.

How to Store Acorn Squash

Whole squash needs space and darkness - store it in a single layer in a cool, dry pantry, and check it weekly. Any squash that develops a soft spot should come out immediately to prevent spread to the others.

Fridge storage only applies once the squash is cut or cooked. Wrap cut halves tightly with plastic wrap or press them into a zip-lock bag, and always place them seed-side down on a plate to slow browning. Cooked cubes or squash puree go straight into airtight rectangular containers or vacuum-seal bags - loose storage invites fridge odors and dries the flesh.

A few other rules worth following:

  • 🌡️ Ideal pantry temp - 50-60°F; warmer than 70°F cuts storage time significantly
  • 📦 Single layer only - stacking whole squash traps moisture and creates soft spots where surfaces touch
  • 🍎 Keep away from ethylene producers - apples, bananas, and pears belong on a separate shelf or countertop
  • 🧊 Emergency fridge storage - if your kitchen runs hot, store whole squash in the crisper drawer at the back, where it's coldest

Can You Freeze Acorn Squash?

Yes - with one firm rule: never freeze acorn squash whole or raw. The dense rind and high-moisture flesh make thawing uneven, and the texture becomes unusable.

Cook or blanch it first. The same principle applies to most dense vegetables - kale without blanching spoilage signs illustrate how skipping that prep step shortens quality fast.

For the longest freezer quality, roast then puree before freezing - this locks in more flavor and reduces ice crystals compared to cubes.

Labeled freezer bags with a note like "puree for pie" or "cubes for soup" save confusion months later.

  1. Cook or blanch Roast or steam until tender, or peel and blanch cubes 2-3 minutes in boiling water.
  2. Ice bath Transfer immediately to ice water to stop cooking and cool the flesh quickly.
  3. Dry thoroughly Drain and pat dry - excess moisture causes freezer burn and icy crystals.
  4. Flash-freeze cubes Spread on a sheet tray and freeze until solid before bagging, so pieces don't clump.
  5. Bag and label Transfer to freezer bags, remove as much air as possible, and mark with date and intended use.

Thaw overnight in the fridge for best results. Frozen puree works directly in baking after a short countertop thaw - stir well before measuring. Cubes reheat straight from frozen into soups or stews without issue.

Golden Rule
Freeze acorn squash as puree when you can. It thaws evenly, skips the clumping problem of cubes, and goes straight into pies, muffins, and casseroles with no extra prep.

Signs Acorn Squash Has Gone Bad

Whole squash can look fine from across a room while hiding early rot on the underside. Inspect the rind all over, including the stem scar and the flat base where it rested on a surface.

Signs It's Gone Bad
👀
VisualDeep soft spots that collapse inward · Dark brown or black flesh around rind damage · Fuzzy white, green, or blue mold on cut surfaces or stem scar
👃
SmellSour or fermented odor from cut flesh · Sharp, musty smell near stem or storage wounds
✋
TextureSlimy or stringy flesh when scooped · Excessive watery mushiness after cooking beyond normal tenderness

One exception: a white powdery bloom on the rind is surface mold from humid storage, not necessarily rot. Scrub it off and check the flesh directly beneath - if it's firm and smells clean, the squash is still usable.

Any soft spot, mold on cut flesh, or fermented smell means discard.

Getting the Most From Your Acorn Squash

A few targeted habits extend your squash's life well past what most kitchens manage. Toast the seeds immediately after scooping - they spoil faster than the flesh and shouldn't sit raw in a bowl overnight.

When a recipe doesn't need the whole squash, acorn squash swaps that work can help you use what you have instead of cutting into a fresh one prematurely.

  • 🌿 Inspect weekly - one soft squash can spread moisture and mold to neighbors quickly
  • 🔪 Cut only what you need - whole squash outlasts cut squash by months, so avoid halving early
  • 🏷️ Label freezer portions - include date and use (e.g., "cubes for roasting" vs. "puree for baking")
  • 🍂 Use cooked leftovers fast - the 3-4 day fridge window is real; plan a second use by day two

If your squash puree is destined for baking, it can stand in for pumpkin in most recipes - the same applies in reverse, and knowing replacements for pumpkin gives you flexibility when either ingredient runs short.

For roasting whole halves, using the right pan setup matters - roasting rack stand-ins can help when you don't have one on hand.

Shortcut
Roast a whole batch, puree everything, and freeze in half-cup portions. You'll have ready-to-use squash for soups, pies, and casseroles all season without touching another raw squash.

Frequently Asked Questions

Can you freeze acorn squash raw?

No. Raw acorn squash freezes unevenly due to its dense flesh and high moisture content. Always roast, steam, or at minimum blanch cubes before freezing to preserve usable texture.

How long does cooked acorn squash last in the fridge?

Cooked acorn squash keeps 3-4 days refrigerated in an airtight container. After that, texture degrades and the risk of off-smells increases even if it looks fine.

How do you freeze acorn squash for pies?

Roast until fully tender, scoop the flesh, and puree it smooth before freezing in half-cup portions. Puree freezes with fewer ice crystals than cubes and thaws evenly for baking.

Can whole acorn squash be refrigerated?

Short-term, yes - use the crisper drawer at the back of the fridge for up to two weeks. Long-term, cold refrigerator temperatures below 50°F can actually damage the flesh and cause pitting.

Do you peel acorn squash before freezing?

Yes, if freezing cubes. The rind is tough to remove from frozen flesh. Peel before blanching, freeze the cubes on a tray first, then bag them to prevent clumping.

How Long Does Apple Cider Last? [Storage Guide]

March 27, 2026

Half-used jugs of apple cider are a staple leftover in many kitchens, and figuring out whether the one at the back of the fridge is still good is a genuinely useful thing to know.

Can You Freeze Apple Cider

Fresh-pressed and pasteurized versions behave very differently once opened, and understanding the role apple cider plays in everything from baked goods to braised meats helps explain why proper storage actually matters.

Much like tracking apple juice spoilage signs, the cues for cider are specific - and knowing them can save you from a mouthful of something that's quietly started fermenting.

QUICK SUMMARY

Opened pasteurized apple cider lasts 5-7 days in the fridge. Fresh-pressed unpasteurized cider gives you just 3-5 days before fermentation sets in. Freeze for up to 12 months, always leaving headspace. Discard if it smells yeasty, alcoholic, or shows any mold.

🧊Fridge (opened): 5-7 days pasteurized; 3-5 days fresh-pressed unpasteurized
❄️Freezer: 6-12 months in airtight container with headspace
⚠️Key Rule: Never leave opened cider at room temp longer than 24 hours

How Long Does Apple Cider Last?

Not all apple cider has the same shelf life, and the label won't always tell you why. Pasteurized retail cider lasts considerably longer than fresh-pressed because heat treatment eliminates the wild yeast and bacteria that drive fermentation. Fresh-pressed, unpasteurized cider contains live microorganisms that start working almost immediately -

especially once you open the bottle and introduce more oxygen.

Apple Cider Shelf Life
MethodStateDurationNotes
🧊 FridgeOpened (pasteurized)5-7 daysKeep tightly sealed; check for fermentation signs after day 5
🧊 FridgeOpened (fresh-pressed)3-5 daysUnpasteurized; fermentation can begin before spoilage is obvious
🧊 FridgeUnopened (pasteurized)2-3 weeksCheck 'best by' date; refrigerated retail bottles only
❄️ FreezerOpened or unopened6-12 monthsBest quality within 6 months; safe longer if continuously frozen
🏠 PantryUnopened (UHT/canned)6-12 monthsShelf-stable only; store away from heat and sunlight
🏠 CounterOpened24 hours maxFermentation accelerates fast at room temp - refrigerate immediately

The 2-3 week fridge window for unopened refrigerated cider assumes the bottle stays cold from purchase.

Shelf-stable UHT and canned versions are a separate category - they don't need refrigeration until opened, but once cracked they follow the same fridge rules as any other cider.

How to Store Apple Cider

Where you store cider depends entirely on what type you have and whether it's been opened. Pasteurized cider is the most forgiving - it tolerates a couple of days before the clock really starts ticking. Fresh-pressed cider needs the fridge from the moment you buy it, no exceptions.

  • 🛒 Buy pasteurized for flexibility - it gives you the full 5-7 day window and handles brief temperature swings better than fresh-pressed.
  • Fridge storage: Keep opened cider in its original bottle or a glass jar with a tight lid; an opaque container slows light-driven oxidation.
  • Pantry storage: Only truly shelf-stable UHT or canned cider belongs at room temperature - and only while unopened.
  • Label fresh-pressed clearly - mark the bottle with the date and "unpasteurized" so you don't confuse it with a pasteurized bottle and lose track of the shorter window.
Watch Out
Leaving opened fresh-pressed cider on the counter is the most common storage mistake. At room temperature, wild yeast gets to work within hours - refrigerate opened cider the same day you open it.

Can You Freeze Apple Cider?

Yes, and it's worth doing if you bought more than you'll use in a week. Freezing stops fermentation entirely, which makes it a reliable option for both pasteurized and fresh-pressed cider.

The main trade-off is texture: thawed cider may separate or turn slightly grainy, though a good shake or a quick strain brings it back to a drinkable consistency.

  1. Leave headspace - pour cider into a freezer-safe container but fill only to about an inch below the rim; liquid expands and a full rigid container will crack or rupture.
  2. Portion for convenience - freeze smaller amounts in ice cube trays, then transfer the frozen cubes to a zip bag; the same technique used for [freezing herbs in ice cube trays](https://forkliftkitchen.com/herbs-in-ice-cube-trays-shelf-life/) works just as well here.
  3. Label with date and type - note whether it's pasteurized or fresh-pressed and the freeze date, so you can prioritize accordingly.

Thaw overnight in the fridge rather than at room temperature.

For mulled cider, skip the full thaw - bring frozen cubes or partially thawed cider directly to a simmer.

Heat actually masks the slight flavor dulling that freezing can cause, making warm drinks the best use for previously frozen cider.

If you run out and need a stand-in, there are apple cider swaps that work well in cooked applications too.

Golden Rule
Never freeze cider in a completely full glass bottle. The expansion pressure is enough to shatter it. Use freezer-safe plastic or leave visible headspace in rigid containers.

Signs Apple Cider Has Gone Bad

Fresh, good cider smells cleanly of apple - sweet, slightly tart, nothing else. Any sharp departure from that is your first signal.

Similar to watching for milk spoilage signs, the nose rarely lies with cider.

Signs It's Gone Bad
👀
VisualBubbling or foaming on surface · Floating slimy film or mold patches (green/white/gray) · Unusual heavy cloudiness beyond normal fresh-pressed sediment
👃
SmellStrong sour or yeasty odor · Vinegar-like or alcoholic smell replacing fresh apple aroma
✋
TextureFizz or tingly mouthfeel from active fermentation · Slimy or viscous coating indicating microbial spoilage

Mold is a hard stop - discard immediately without tasting. A mildly yeasty smell with no visible mold is a gray zone: if the cider has no mold and only a slightly fermented edge, it can still work in cooked recipes like braises or sauces where the heat neutralizes it. Don't drink it straight, and note that this early-stage fermentation is actually how what happens to gluten during fermentation guide overlaps with wild yeast chemistry - the same organisms at work.

Getting the Most From Every Bottle

Good habits at purchase time save a lot of waste later. Choosing pasteurized cider unless you're using it within two to three days is the single most impactful decision you can make.

Once you're home, the rest comes down to container discipline and cold temperatures.

  • Go small for freezing - ice cube portions let you pull out exactly what a recipe needs without thawing a full container.
  • Use heat to your advantage - bring thawed cider to a simmer for mulled drinks; flavor dulling becomes a non-issue.
  • Check the label twice - "fresh" on a store label doesn't always mean unpasteurized, but it's worth confirming before you plan a week's worth of use around it.
  • Slightly fermented cider isn't always wasted - a yeasty edge with no mold makes it functional in cooked dishes, even if it's past its drinking window. The same principle applies when exploring [alternatives to apple juice](https://forkliftkitchen.com/apple-juice-substitutes/) in recipes that need a mild acid.
Shortcut
Freeze a batch of cider in an ice cube tray right after opening a fresh-pressed bottle. You'll always have small portions ready for cooking, and nothing goes to waste if life gets in the way.

Frequently Asked Questions

Can you freeze apple cider in glass?

Not recommended. Liquid expands as it freezes, and a full glass bottle will crack or shatter under the pressure. If you only have glass containers, leave at least two inches of headspace and use wide-mouth jars.

Is apple cider the same as apple juice?

No. Apple cider is unfiltered pressed apple liquid - cloudy, with more pulp and a sharper flavor. Apple juice is filtered and often sweetened, giving it a clearer appearance and milder taste.

Does pasteurization extend apple cider shelf life?

Yes, significantly. Pasteurization kills wild yeast and bacteria responsible for fermentation, extending opened fridge life from 3-5 days to 5-7 days. Unopened pasteurized cider can last 2-3 weeks refrigerated.

Can you make hard cider from fermented apple cider?

Technically yes, but uncontrolled kitchen fermentation produces unpredictable results. Intentional hard cider requires specific yeast strains, controlled temperatures, and proper equipment - spontaneous fridge fermentation isn't a reliable starting point.

Should apple cider be refrigerated before opening?

Only if it's sold refrigerated or is fresh-pressed. Shelf-stable UHT and canned cider can sit at room temperature unopened. Once any variety is opened, refrigerate it immediately.

Roasted Eggplant Salad with Tahini

March 27, 2026

Most roasted vegetable salads end up either mushy or dry. The solution is high heat that caramelizes the edges while the inside stays creamy, plus a tahini dressing that actually coats instead of sliding off.

Roasted Eggplant Salad with Tahini served on a plate

Roast eggplant in a single layer with space between the pieces. Crowding the pan traps steam and you get soggy, pale vegetables instead of golden edges.

This works for weeknight sides when you need something that looks intentional but takes less than an hour. For a version that comes together quickly, this easy salad recipe adds protein and turns the whole thing into a meal.

QUICK SUMMARY

Roasted Eggplant Salad with Tahini combines tender roasted eggplant with a tangy tahini-lemon dressing. High heat (400°F) caramelizes the edges while keeping the inside silky. Mix the tahini dressing gradually so it emulsifies into a creamy coating instead of separating.

⏱️Time Reality: 40-50 minutes total, mostly hands-off roasting time
🔪First Critical Step: Cut eggplant into 1-inch cubes for even roasting
⚠️Watch Out: Too much oil makes eggplant greasy-use just enough to coat

Table of Contents

Toggle
  • Why This Recipe Works
  • What You'll Need
    • Ingredient Details
  • Ingredient Swaps
  • What to Serve With It
  • Store and Reheat
  • Frequently Asked Questions
  • Roasted Eggplant Salad with Tahini
    • Method 
    • Tried this recipe?

Why This Recipe Works

Roasting eggplant at 400°F renders it creamy inside while the edges turn golden and slightly crispy. The chicken works best when it hits the table at the same time as the main. For a version that comes together quickly, juicy homemade chicken recipe balances the creamy tahini flavors.

Quick Reference
⏱️
Prep Time
10 min
🔥
Cook Time
30-40 min
⏰
Total Time
40-50 min
🍽️
Servings
4 servings
📊
Difficulty
Easy
🏷️
Category
Appetizer | Side
💡
Quick Tip
Roast eggplant until edges caramelize well
🎯
Best For
Weeknight | Meal prep | Entertaining

Five reasons this method delivers:

  • Uniform 1-inch cubes roast evenly - same-sized pieces hit doneness at the same time instead of some burnt, some raw
  • Minimal oil prevents sogginess - light coating lets moisture escape so edges caramelize instead of steaming
  • Fresh lemon juice brightens tahini's richness - bottled juice tastes flat and bitter; fresh gives the dressing its tangy backbone
  • Whisking tahini with lemon first creates emulsion - adding water slowly afterward keeps the dressing creamy instead of separated
  • Adding herbs last preserves color and flavor - stirring parsley or cilantro in right before serving keeps them vibrant green
Quick Tip
Preheat the oven fully to 400°F before roasting-starting in a cold oven steams the eggplant instead of caramelizing it.

What You'll Need

Ingredients for Roasted Eggplant Salad with Tahini

Shop for firm, glossy eggplants with no soft spots or scratches. A good salad can make or break the plate. For a version that comes together quickly, simple homemade soup rounds out a Mediterranean-style meal.

🥬
Main Vegetable
  • 2 medium eggplants (about 1.5 lbs)
🥢
Tahini Dressing
  • 3 tablespoon tahini
  • 3 tablespoon lemon juice
  • 2 cloves garlic, minced
  • 2-3 tablespoon water
🫙
Finishing Touches
  • 2 tablespoon olive oil
  • ¼ cup fresh parsley or cilantro, chopped
  • Salt and pepper to taste

Ingredient Details

  • Eggplant
    Choose firm eggplants with smooth, glossy skin-wrinkled or soft spots mean they're past their prime and will taste bitter
  • Tahini
    Stir the jar well before measuring-the oil separates and settles on top, so mixing first ensures consistent texture
  • Lemon juice
    Fresh-squeezed only-bottled juice has a metallic aftertaste that flattens the dressing's brightness
  • Garlic
    Mince garlic finely or use a press so it distributes evenly through the dressing without chunky bites
  • Olive oil
    Use regular olive oil for roasting (not extra-virgin)-high heat destroys extra-virgin's delicate flavor anyway
  • Fresh herbs
    Parsley gives a clean, grassy note; cilantro adds citrusy brightness-pick whichever you prefer or have on hand
  • Salt
    Season eggplant before roasting and taste dressing after mixing-under-seasoning is the most common mistake

Ingredient Swaps

Most substitutions change the flavor profile but keep the method intact. Rich mains need something to cut through, and salad does exactly that. For a version that comes together quickly, this easy salad recipe uses lentils for a protein-rich variation.

Four swaps that work:

  • Zucchini or mushrooms for eggplant - Different texture (firmer, less creamy) but roasts in the same time at 400°F; mushrooms add earthy depth while zucchini stays mild
  • Sunflower seed butter or almond butter for tahini - Less traditional but similar creamy consistency; sunflower tastes nuttier, almond sweeter-thin with extra water if needed
  • White wine vinegar or apple cider vinegar for lemon juice - Swaps citrus tang for sharper acidity; use 2 tablespoon vinegar instead of 3 tablespoon lemon to avoid overpowering the dressing
  • Grilling or pan-roasting instead of oven roasting - Adds smokiness; grill over medium-high for 4-5 minutes per side or pan-roast in batches with 1 tablespoon oil

Oven Roasting (Traditional)

Works for: Large batches, hands-off cooking, even caramelization on all pieces

Skip if: You want smoky flavor or need the oven for something else

Grilling

Works for: Adding char and smoke, cooking outdoors, thick slices instead of cubes

Skip if: You're cooking for more than 2-3 people (grilling in batches takes longer)

Pan-Roasting

Works for: Small portions, faster cooking (15-20 minutes), creating fond for extra flavor

Skip if: You need hands-free time (requires stirring every 3-4 minutes)

Instructions

Roasting takes 30-40 minutes but only 5 minutes need your attention. Most people skip soup, but it balances the meal. For a version that comes together quickly, simple homemade soup pairs well when you want a warm starter.

  1. Preheat oven to 400°F and prep eggplant. Cut eggplant into 1-inch cubes. Toss with 2 tablespoon olive oil, salt, and pepper in a bowl. Spread in a single layer on a baking sheet with space between pieces-crowding traps steam and prevents caramelization.

  2. Roast until golden and tender. Roast for 30-40 minutes, stirring halfway through. Eggplant is done when very soft, slightly collapsed, and edges turn golden brown. The flesh should yield easily when pressed with a fork.

  3. Make tahini dressing while eggplant roasts. Whisk 3 tablespoon tahini, 3 tablespoon lemon juice, and minced garlic in a bowl until combined. Add 2-3 tablespoon water gradually, whisking constantly, until dressing reaches pourable consistency. Season with salt and pepper.

  4. Chop fresh herbs. Roughly chop ¼ cup parsley or cilantro. Keep stems if using cilantro-they add flavor and texture.

  5. Combine and serve. Transfer warm roasted eggplant to a serving bowl. Drizzle tahini dressing over top and toss gently to coat. Stir in fresh herbs just before serving. Serve warm or at room temperature.

Golden Rule
Check eggplant at 25 minutes-oven temperatures vary and thin pieces can burn quickly in the final 5-10 minutes.

What to Serve With It

The salad needs something to anchor it-bread for scooping or a protein to make it a full meal. You need 40 minutes and one sheet pan. For quick weeknight ideas, easy carrot salad dinner nights shows how to build complete vegetarian plates.

Side Dish Prep Why It Works How to Serve
Crusty bread Easy Soaks up tahini dressing and roasted juices Tear into chunks, serve warm or toasted on the side
Grilled chicken breasts Medium Adds lean protein and complements smoky eggplant Slice and serve on top or alongside salad
Quinoa or couscous Easy Light grain pairs well and adds texture contrast Serve salad over warm grain or mix together
Simple green salad Easy Balances creamy eggplant with fresh crunch Dress lightly with lemon and olive oil, serve on the side
Roasted chickpeas Easy Adds crunch and plant-based protein Scatter over top right before serving

Three ways to serve it:

  • As a mezze spread: Serve with pita wedges, hummus, olives, and feta cheese for a Middle Eastern-style appetizer platter
  • Grain bowl base: Pile over warm quinoa or farro with a fried egg on top for a vegetarian lunch
  • Sandwich filling: Stuff into pita pockets with cucumber, tomato, and extra tahini sauce
Best Pick
Serve at room temperature for meal prep-the flavors develop overnight and the texture stays creamy without reheating.

Store and Reheat

This salad holds well for 3-4 days and actually tastes better the next day as flavors meld. The chicken works best when it hits the table at the same time as the main. For a version that comes together quickly, a rich beef side makes for hearty leftover grain bowls.

Method Time Best For
🍳 Room temperature 15-20 min Preserving texture and flavor-best option for leftovers
📦 Microwave 1-2 min on medium Quick reheating of small portions, though texture softens
🔥 Oven 10 min at 350°F Warming larger portions gently without drying out

For best results when storing:

  • Store dressing separately if making ahead - keeps eggplant from getting soggy; dress just before serving for best texture
  • Use shallow, airtight containers - wider containers expose more surface area so eggplant cools faster and prevents condensation
  • Refrigerate within 2 hours of cooking - sitting at room temperature longer risks bacterial growth on the moist vegetables
  • Add fresh herbs after reheating - stored herbs turn brown and slimy; stir in newly chopped parsley or cilantro before serving leftovers
  • Don't freeze this salad - thawed eggplant turns mushy and watery; tahini dressing separates and won't re-emulsify properly

Frequently Asked Questions

How long to cook roasted eggplant salad at 400°F?

Roast eggplant cubes at 400°F for 30-40 minutes, stirring halfway through. The eggplant is done when very soft, slightly collapsed, and edges turn golden brown.

Can I make roasted eggplant salad ahead and store?

Yes, store in an airtight container in the fridge for 3-4 days. For best results, store the tahini dressing separately and add fresh herbs right before serving.

What goes well with roasted eggplant salad for dinner?

Serve with crusty bread, grilled chicken, or quinoa to make it a complete meal. It also works as part of a mezze spread with hummus, pita, and olives.

How do I know when roasted eggplant is done and tender?

Press a piece with a fork-it should yield easily and feel very soft inside. The edges should be golden brown and slightly caramelized, and the flesh should look slightly collapsed.

Can I use almond butter instead of tahini in the salad?

Yes, almond butter works but tastes sweeter and less nutty than tahini. Thin it with extra water to reach pourable consistency and expect a milder, less traditional flavor.

Roasted Eggplant Salad with Tahini served on a plate

Roasted Eggplant Salad with Tahini

No ratings yet
Roasted Eggplant Salad with Tahini features tender, caramelized eggplant cubes coated in a creamy, tangy tahini-lemon dressing. High heat roasting creates golden edges while keeping the inside silky, and gradual whisking of the dressing ensures a smooth emulsion.
Print Recipe Pin Recipe
Prep Time 10 minutes mins
Cook Time 35 minutes mins
Total Time 45 minutes mins
Servings: 4 servings
Course: Appetizer, Side Dish
Cuisine: Mediterranean
Ingredients Method Notes

Ingredients
  

  • 2 medium eggplant cut into 1-inch cubes
  • 2 tablespoon olive oil for tossing and roasting
  • 3 tablespoon tahini stirred well before measuring
  • 3 tablespoon lemon juice fresh-squeezed
  • 2 cloves garlic minced finely
  • 2-3 tablespoon water to thin dressing gradually
  • 0.25 cup fresh parsley or cilantro chopped, stems kept if using cilantro
  • salt to taste, season eggplant and dressing
  • black pepper to taste

Method
 

  1. Preheat oven to 400°F. Cut eggplant into 1-inch cubes. Toss cubes with olive oil, salt, and pepper in a bowl. Spread evenly on a baking sheet in a single layer with space between pieces to avoid steaming.
    2 medium eggplant, 2 tbsp olive oil, salt, black pepper
  2. Roast the eggplant for 30-40 minutes, stirring halfway through. Check at 25 minutes to prevent burning. The eggplant is done when very soft, slightly collapsed, and edges are golden brown.
    2 medium eggplant
  3. While eggplant roasts, whisk tahini, lemon juice, and minced garlic in a bowl until combined. Gradually add water, whisking constantly, until dressing is pourable. Season with salt and pepper.
    3 tbsp tahini, 3 tbsp lemon juice, 2 cloves garlic, 2-3 tbsp water, salt, black pepper
  4. Roughly chop fresh parsley or cilantro, keeping stems if using cilantro.
    0.25 cup fresh parsley or cilantro
  5. Transfer warm roasted eggplant to a serving bowl. Drizzle tahini dressing over and toss gently to coat. Stir in fresh herbs just before serving. Serve warm or at room temperature.
    2 medium eggplant, 3 tbsp tahini, 3 tbsp lemon juice, 2 cloves garlic, 2-3 tbsp water, 0.25 cup fresh parsley or cilantro

Notes

  • Preheat oven fully to 400°F to ensure caramelized edges rather than steamed eggplant.
  • Use minimal olive oil to prevent sogginess and encourage roasting.
  • Add fresh herbs last to preserve color and flavor.

Tried this recipe?

Let us know how it was!

What Is Apple Cider? [Taste, Uses & More]

March 27, 2026

Apple cider turns up in a hot mug at autumn farm stands, in the braising liquid for Sunday pork shoulder, and in the vinaigrette you drizzle over roasted carrots - often without much fanfare.

What Is Apple Cider

It's one of those ingredients that does quiet, important work across both sweet and savory cooking. Pressed from whole apples and left unfiltered, it carries a cloudy body, a bright acidic bite, and a depth that commercial apple juice simply doesn't have.

QUICK SUMMARY

Apple cider is unfiltered, pressed apple juice with a cloudy body, bright tartness from malic acid, and mild tannins. It works in hot mulled drinks, savory braises, pan sauces, and baked goods. Refrigerate after opening and use within 7-10 days for pasteurized versions.
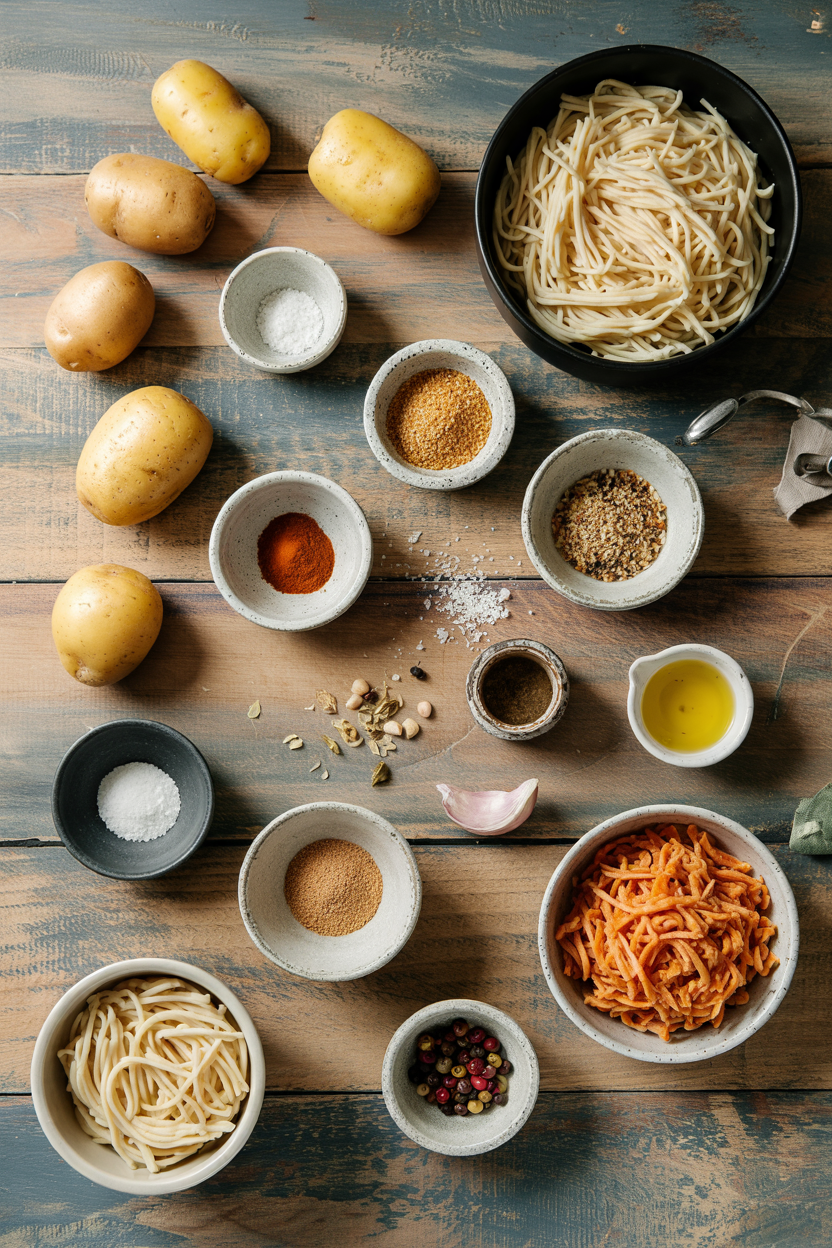
🍎What It Is: Cloudy, unfiltered juice pressed from whole fresh apples
👅Flavor: Bright tart, apple-sweet, with a light tannic finish
🍳Best Uses: Mulled drinks, braising liquid, pan sauces, vinaigrettes
🛒Buying Tip: Choose cloudy, not clear - cloudiness signals unfiltered cider
⏱️Shelf Life: Opened pasteurized cider lasts 7-10 days refrigerated; unpasteurized 3-7 days

What Is Apple Cider?

Apple cider is the juice extracted by pressing whole fresh apples - skins, seeds, and all - without filtering out the solids. That process is what gives it the cloudy, slightly pulpy appearance that sets it apart from clarified commercial apple juice.

In the United States, "apple cider" almost always means the non-alcoholic version: fresh-pressed, lightly processed, and often sold at orchards or farm stands in the fall.

The fermented, alcoholic version goes by "hard cider" in American usage, while in the UK and much of Europe, "cider" defaults to the alcoholic drink.

Several names travel with it depending on context:

  • Sweet cider - the non-alcoholic pressed version, common in New England
  • Cloudy apple juice - used interchangeably in some UK and Australian markets
  • Pressed apple juice - the descriptor you'll see on more artisan or farm-direct labels
  • Unfiltered cider - highlights the production method rather than flavor

Pasteurized cider has been heat-treated for safety and shelf stability. Unpasteurized or "raw" cider skips that step, preserving more of the fresh orchard flavor but requiring faster consumption.

What Does Apple Cider Taste Like?

apple cider - What Is Apple Cider

The flavor comes from two competing forces: natural apple sugars (mainly sucrose and fructose) pulling it sweet, and malic acid pulling it tart. Neither wins outright, which is what makes it interesting.

Sensory SnapshotModerate Intensity
👅 Flavor
Bright tartApple-sweetLightly tannicPhenolic
✋ Texture
CloudySlightly pulpyMouthcoating
👃 Aroma
Fresh crushed appleGreen appleOrchard spice

Compared to commercial apple juice, cider is less sweet and noticeably more complex. The tannins from skins and seeds add a mild astringency - closer to unfiltered pear juice in body than to the thin clarity of filtered juice.

Heat changes the profile. Simmered cider concentrates its sugars and loses some of its sharp acidity, turning rounder and almost caramel-adjacent when reduced far enough.

Heirloom apple varieties pressed together can add subtle spicy or phenolic notes that single-variety commercial juice rarely has.

Golden Rule
Taste your cider before cooking with it. Sweeter batches need less added sugar in a glaze; more acidic batches handle reduction better without turning flat.

How to Use Apple Cider

Apple cider earns its place at both ends of the stovetop. On the savory side, it works as a braising liquid for pork shoulder, where its acidity cuts fat and its sugars build a subtle glaze.

Deglaze a pan of seared pork chops with cider, reduce by half, and you have a pan sauce with no additional stock needed.

How Apple Cider Is Used
MethodBest ForTip
🥗 Cold/RawVinaigrettes, cocktail base, mocktailsUse unpasteurized for brightest flavor; shake before measuring
🍳 SimmeringMulled cider, poached fruit, braising liquidAdd spices whole; remove before serving to avoid bitterness
🔥 ReductionGlazes for pork, roasted root vegetablesReduce to about one-third volume for a syrupy, concentrated glaze
🧁 BakingMuffins, quick breads, cake battersSubstitute for milk or water to add moisture and apple aroma
🥩 DeglazingPan sauces, fond-lifting after searing meatAdd off heat first, then return to medium to control reduction speed

Cider pairs well across a focused set of flavors: pork, aged cheddar, root vegetables, cinnamon, clove, star anise, mustard, ginger, and bourbon.

Those pairings hold across cuisines - New England mulled cider traditions, Alsatian-style fruit sauces, and British braised dishes all draw on the same core relationships.

For baking, cider adds moisture and a faint apple character to muffins and quick breads. It's not a strong flavor once baked in, however - the aroma comes through more than the taste.

If you're short on cider for a recipe, apple cider alternatives that match both the acidity and the body work better than plain water or juice.

Keep it away from delicate raw fish and heavily bitter greens. The sweetness amplifies bitterness in greens like radicchio and clashes with the subtle flavors of raw white fish.

Try It In
🍗Slow Cooker Roast ChickenCider adds brightness to the braising liquid→

How to Buy and Store Apple Cider

Cloudiness is the signal. A bottle of clear, bright apple liquid is filtered apple juice - not cider. Look for visible sediment or opacity, a "pressed on" or harvest date, and no off-odors when you open it.

Watch Out
Unpasteurized cider is not safe for young children, pregnant people, elderly individuals, or anyone immunocompromised. If you're unsure, choose pasteurized.

For shelf life, the numbers are fairly strict. Opened pasteurized cider holds 7-10 days refrigerated, tightly sealed.

Unpasteurized drops to 3-7 days. If you buy cider in volume at peak season, freeze it in measured cup portions - it thaws well for cooking even if the texture shifts slightly for drinking.

  • Buy local when possible - farm-stand cider pressed from mixed heirloom varieties has more complexity than single-variety supermarket bottles
  • Check the date - cider sold without a pressed-on date has likely been sitting longer than you'd want
  • Store at the back of the fridge - the door is too warm and causes faster fermentation once opened

Starting Points for Using Apple Cider

If you've never cooked with cider, start with a pan sauce or a braise - the learning curve is low and the payoff is immediate. Swap half the stock in a pork braise for cider and reduce the remaining liquid at the end.

For drinks, hot mulled cider is the most forgiving entry point: simmer with cinnamon sticks, cloves, and a few strips of orange peel for 20 minutes. No precision required.

Shortcut
Reduce two cups of cider to half a cup in a saucepan over medium heat. Use that syrup as a glaze, a salad dressing base, or stir it into yogurt. One ingredient, three uses.

If your recipe calls for apple juice and you want more acidity and body, cider is the direct upgrade. The reverse also works - when cider is unavailable, apple juice swaps can approximate the sweetness, though you'll lose the tannins and cloudiness.

Frequently Asked Questions

Is apple cider alcoholic or non-alcoholic?

In the U.S., apple cider sold at stores and orchards is non-alcoholic pressed juice. The alcoholic version is called hard cider and goes through fermentation. Fresh-pressed cider can start fermenting naturally if left too long, but it isn't intentionally alcoholic.

How is apple cider different from apple juice?

Apple juice is filtered and often pasteurized to a clear, uniform liquid. Cider is unfiltered, retaining pulp, tannins, and more complex acidity from the skins and seeds. The flavor is noticeably more tart and less sweet.

What season is apple cider available?

Fresh-pressed cider peaks in fall, typically September through November, when apple harvests are at their height. Pasteurized cider is available year-round in many grocery stores, though the variety and quality are better at orchard stands in autumn.

Can you cook with apple cider?

Yes - it works in braises, pan sauces, glazes, vinaigrettes, and baked goods. Heat concentrates its sugars and mellows the sharp acidity, making it particularly useful for savory reductions with pork or root vegetables.

How long does opened apple cider last?

Pasteurized cider keeps 7-10 days after opening if refrigerated and tightly sealed. Unpasteurized cider is shorter - use it within 3-7 days. Signs it has turned include a yeasty or vinegary smell and visible active bubbling.

Caprese Salad with Fresh Mozzarella

March 27, 2026

Fresh mozzarella, ripe tomatoes, and basil leaves arranged on a plate make a classic appetizer that works for weeknight dinners or summer entertaining. The key is slicing everything evenly and adding the dressing right before serving.

Caprese Salad with Fresh Mozzarella served on a plate

Room temperature ingredients taste better than cold ones. The cheese softens, the tomatoes release their natural sweetness, and the basil stays fragrant instead of wilting.

This is what we make when the farmer's market has good tomatoes or when we need something light that still feels intentional.

QUICK SUMMARY

Caprese salad layers fresh mozzarella, ripe tomatoes, and basil with olive oil and balsamic. The trick is slicing everything ¼ inch thick so each bite has balanced texture. Assemble just before serving to prevent watery pooling.

⏱️Time: 10 minutes with no cooking required
🔪First Move: Pat mozzarella dry before slicing to prevent soggy layers
⚠️Watch Out: Salt draws moisture-season right before serving or the salad turns watery

Table of Contents

Toggle
  • Why This Recipe Works
  • What You'll Need
    • Ingredient Details
  • Ingredient Swaps
  • What to Serve With It
  • Store and Reheat
  • Frequently Asked Questions
  • Caprese Salad with Fresh Mozzarella
    • Method 
    • Tried this recipe?

Why This Recipe Works

Layering sliced ingredients instead of chopping them creates visual appeal and lets each component shine. Rich mains need something to cut through, and something juicy like chicken does exactly that. For a version that comes together quickly, something juicy like chicken works when you need a complete plate.

Quick Reference
⏱️
Prep Time
10 min
🔥
Cook Time
0 min
⏰
Total Time
10 min
🍽️
Servings
4 servings
📊
Difficulty
Easy
🏷️
Category
Appetizer
💡
Quick Tip
Use ripe tomatoes and fresh mozzarella slices
🎯
Best For
Weeknight | Entertaining

What makes it succeed:

  • Even slicing at ¼ inch - Creates uniform layers that stack neatly and look intentional on the plate
  • Fresh mozzarella quality - Soft texture and mild creaminess balance the acidity from tomatoes and balsamic
  • Ripe but firm tomatoes - Juicy sweetness without mushiness that would break down the structure
  • Basil added last - Prevents browning and keeps the herbaceous aroma fresh until serving
  • Room temperature assembly - Brings out natural flavors that stay muted when ingredients are cold
Quick Tip
Pat mozzarella dry with paper towels 5 minutes before slicing to remove excess moisture that would pool under the cheese

What You'll Need

Ingredients for Caprese Salad with Fresh Mozzarella

Shopping for this takes one trip to the produce section and cheese counter. Salad adds the contrast this plate needs, but timing matters. For a version that comes together quickly, this fresh salad works when you need a complete plate.

🧀
Dairy
  • Fresh mozzarella (8 oz)
🥬
Produce
  • Ripe tomatoes (3 medium)
  • Fresh basil leaves (12-15 leaves)
🥢
Pantry
  • Extra virgin olive oil (3 tbsp)
  • Balsamic vinegar (2 tbsp)
  • Salt and black pepper

Ingredient Details

  • Fresh mozzarella
    Look for mozzarella packed in brine or water, not vacuum-sealed blocks-the moisture content creates that soft, creamy texture
  • Ripe tomatoes
    Choose tomatoes that give slightly when pressed but hold their shape-overripe ones turn mushy and release too much liquid
  • Fresh basil leaves
    Pick bright green leaves without brown spots-add them whole or tear gently to avoid bruising that causes browning
  • Extra virgin olive oil
    Use a good quality oil since it's a main flavor-fruity or peppery varieties add more character than generic brands
  • Balsamic vinegar
    Standard balsamic works fine, but a thicker aged version or homemade reduction adds sweet-tangy complexity
  • Salt
    Flaky sea salt provides crunch and bursts of saltiness that table salt can't match-sprinkle right before serving
  • Black pepper
    Freshly cracked pepper adds subtle heat and aromatic depth-pre-ground loses most of its punch

Ingredient Swaps

Most substitutions work if you match the original texture and moisture level. The burrata works best when it hits the table at the same time as the main. For a version that comes together quickly, more recipe ideas work when you need a complete plate.

Four swaps that work:

  • Fresh mozzarella → burrata - Creamier center adds richness but needs gentle handling since it's more delicate than regular mozzarella
  • Ripe tomatoes → heirloom or cherry tomatoes - Varied colors and sweetness levels change the appearance and flavor balance slightly
  • Balsamic vinegar → lemon juice or red wine vinegar - Sharper acidity without the sweet notes that balsamic provides
  • Fresh basil → fresh oregano or mint - Different herbal profiles that shift the aroma from sweet-peppery to earthy or cool

Burrata Instead of Fresh Mozzarella

Works for: Special occasions when you want extra creaminess and richness in every bite

Skip if: You're assembling ahead-burrata breaks down faster and releases more liquid than regular mozzarella

Cherry Tomatoes Instead of Sliced Tomatoes

Works for: Quick prep when you want to halve instead of slice, plus they hold their shape longer

Skip if: You want classic presentation-cherry tomatoes don't layer the same way as sliced rounds

Instructions

The entire process takes 10 minutes from start to finish. A good bread can make or break the plate. For a version that comes together quickly, quick bread dish works when you need a complete plate.

  1. Pat the mozzarella dry with paper towels and let it sit for 5 minutes. Slice both the mozzarella and tomatoes into ¼-inch rounds using a sharp knife-uneven slices look sloppy and don't stack well.

  2. Arrange tomato slices on a serving plate in a single layer, slightly overlapping each piece. Place one mozzarella slice on top of each tomato, maintaining the overlapping pattern for visual balance.

  3. Tuck fresh basil leaves between the tomato and cheese layers or scatter them on top. Whole leaves look cleaner than torn ones, but tearing prevents browning if you're assembling early.

  4. Drizzle extra virgin olive oil evenly over the arranged layers, using about 3 tablespoons total. Follow with 2 tablespoons balsamic vinegar, concentrating the drizzle over the cheese rather than pooling it on the plate.

  5. Season with flaky sea salt and freshly cracked black pepper right before serving. Adding salt too early draws moisture from the tomatoes and turns the salad watery within minutes.

Golden Rule
Bring all ingredients to room temperature 15 minutes before assembling-cold mozzarella stays rubbery and cold tomatoes taste flat

What to Serve With It

This salad works as an appetizer, light lunch, or side dish for heavier mains. Most people skip paella, but it balances the meal. For weeknight planning with hearty mains, try weeknight lamb burgers meal ideas for more options.

Side Dish Prep Why It Works How to Serve
Crusty bread Easy Soaks up the olive oil and balsamic pooling on the plate Slice thick and toast lightly, serve warm on the side
Grilled chicken breast Medium Adds protein to turn the salad into a complete meal Slice grilled chicken and arrange next to salad, drizzle with extra oil
Simple mixed greens Easy Adds freshness and texture contrast without competing flavors Dress lightly with lemon and olive oil, serve alongside
Roasted vegetables Medium Warm vegetables contrast with cool salad temperature Roast zucchini or bell peppers with garlic, serve on same platter
Prosciutto slices Easy Salty meat balances creamy mozzarella and sweet tomatoes Drape thin slices over salad or fold them on the side

Three ways to serve it:

  • As an appetizer before pasta - Portion onto individual plates with 2-3 slices each, serve with crusty bread for soaking up dressing
  • As a light lunch with soup - Double the portion size and add grilled chicken or prosciutto for extra protein
  • As a side for grilled meats - Keep portions smaller and skip the balsamic to let the main dish shine
Shortcut
Make balsamic reduction ahead by simmering ½ cup vinegar over low heat for 10 minutes until syrupy-store in a squeeze bottle for easy drizzling

Store and Reheat

Assembled salad doesn't keep well since salt and acid draw moisture from the tomatoes. Most people skip beef, but it balances the meal. For a version that comes together quickly, simple beef recipe works when you need a complete plate.

Method Time Best For
📦 Fridge 1-2 days Store components separately-slice fresh when ready to serve
❌ Reheating Not recommended Salad is meant to be served fresh at room temperature

For best results when storing:

  • Keep components separate - Store sliced tomatoes, mozzarella, and basil in separate containers to prevent moisture transfer
  • Pat mozzarella dry again - Before assembling leftovers, blot any excess liquid that accumulated during storage
  • Refresh the basil - Discard wilted leaves and use fresh ones when reassembling instead of reusing stored basil
  • Hold the dressing - Add olive oil, balsamic, salt, and pepper only when you're ready to serve, not before storing
  • Use within 2 days - Quality drops fast-mozzarella gets rubbery and tomatoes turn mushy after 48 hours in the fridge

Frequently Asked Questions

Can I use pre-shredded mozzarella for Caprese salad?

Pre-shredded mozzarella doesn't work because it's coated with anti-caking agents that prevent the creamy texture you need. Fresh mozzarella packed in water or brine gives you the soft, moist consistency that makes this salad work.

How long can I store Caprese salad in the fridge?

Assembled salad lasts 1-2 days maximum, but quality drops fast as the salt and acid draw moisture out. Store components separately and assemble fresh for better results.

How do I tell if fresh mozzarella is good quality?

Good mozzarella feels soft and slightly springy when you press it, and it's packed in brine or water. Skip anything vacuum-sealed in plastic-that's low-moisture mozzarella meant for melting, not fresh eating.

What causes watery Caprese salad and how do I fix it?

Salting too early draws moisture from the tomatoes and creates pooling liquid. Season right before serving, and if you're already dealing with water, drain it off and add a fresh drizzle of olive oil to revive the flavors.

Can I double the recipe for a large party?

Doubling works fine-just use a larger platter and maintain the same layering pattern. Assemble no more than 30 minutes before serving to prevent the bottom layers from getting soggy under the weight of extra ingredients.

Caprese Salad with Fresh Mozzarella served on a plate

Caprese Salad with Fresh Mozzarella

No ratings yet
Caprese Salad layers fresh mozzarella, ripe tomatoes, and basil leaves with olive oil and balsamic for a classic appetizer. Even slicing and room temperature ingredients bring out balanced flavors and texture in each bite. Assemble just before serving to avoid watery pooling.
Print Recipe Pin Recipe
Prep Time 10 minutes mins
Cook Time 1 minute min
Total Time 11 minutes mins
Servings: 4 servings
Course: Appetizer
Cuisine: Italian
Ingredients Method Notes

Ingredients
  

  • 8 oz fresh mozzarella pat dry before slicing; packed in brine or water
  • 3 medium tomatoes ripe but firm; slice into ¼-inch rounds
  • 12-15 leaves fresh basil whole or gently torn to avoid browning
  • 3 tablespoon extra virgin olive oil good quality for flavor
  • 2 tablespoon balsamic vinegar standard or aged reduction for complexity
  • flaky sea salt season right before serving to prevent moisture release
  • black pepper freshly cracked

Method
 

  1. Pat the mozzarella dry with paper towels and let it sit for 5 minutes. Slice both the mozzarella and tomatoes into ¼-inch rounds using a sharp knife for even layering.
    8 oz fresh mozzarella, 3 medium tomatoes
  2. Arrange tomato slices on a serving plate in a single layer, slightly overlapping each piece. Place one mozzarella slice on top of each tomato maintaining the overlapping pattern.
    8 oz fresh mozzarella, 3 medium tomatoes
  3. Tuck fresh basil leaves between the tomato and cheese layers or scatter them on top. Using whole leaves gives a cleaner look while torn leaves prevent browning if assembled early.
    12-15 leaves fresh basil
  4. Drizzle extra virgin olive oil evenly over the arranged layers, using about 3 tablespoons total. Follow with 2 tablespoons balsamic vinegar, focusing the drizzle over the cheese rather than pooling on the plate.
    3 tbsp extra virgin olive oil, 2 tbsp balsamic vinegar
  5. Season with flaky sea salt and freshly cracked black pepper right before serving to prevent the salad from becoming watery.
    flaky sea salt, black pepper

Notes

  • Slice all ingredients evenly to about ¼ inch thickness for balanced texture.
  • Season the salad only immediately before serving to avoid moisture drawing out from the tomatoes.
  • Bring all ingredients to room temperature about 15 minutes before assembling for best flavor.

Tried this recipe?

Let us know how it was!

What Is Anaheim Pepper? [Taste, Uses & More]

March 27, 2026

You spot them at the produce section - long, tapered green chiles sitting quietly between the jalapeños and the bell peppers.

What Is Anaheim Pepper

The Anaheim pepper doesn't demand attention the way a habanero does, but it earns its place in the cart every time.

Cooks reaching for mild heat with real flavor know this chile delivers without the fire-alarm capsaicin of jalapeno pepper stand-ins or alternatives to serrano pepper.

At 500-2,500 Scoville units, it's approachable, roast-friendly, and genuinely useful across a wide range of dishes.

QUICK SUMMARY

The Anaheim pepper is a long, thin-walled fresh chile with mild heat and sweet green vegetal flavor. It roasts cleanly, peels easily, and works in stews, salsas, and stuffed chile dishes. Raw peppers last about a week; roasted, they keep 3-5 days refrigerated.

🌶️Flavor: Mild, sweet-green, slightly smoky after roasting
🔥Heat Level: 500-2,500 Scoville units - gentle, accessible
🍳Best Uses: Roasted, stuffed, stewed, sautéed, pickled
🛒Buy It: Firm, glossy, 6-10 inches; bright green or red-ripe
📦Shelf Life: Raw ~1 week fridge; roasted 3-5 days; frozen up to 6 months

What Is Anaheim Pepper?

The Anaheim pepper is a fresh chile pepper originating in the Southwest United States, with roots in New Mexico and California.

It gets its name from Anaheim, California, where a New Mexico grower transplanted the seed stock in the early 1900s.

You'll see it labeled several ways at markets - California Anaheim, Anaheim chile, or sometimes loosely called a New Mexico chile.

Strictly speaking, New Mexico chiles are a related but distinct variety, typically grown at higher elevation and carrying slightly more heat.

The pepper runs 6-10 inches long with a gentle taper, thin walls, and smooth glossy skin. It matures from bright green to deep red, and that ripening matters in the kitchen.

  • 🟢 Green (unripe) - milder, grassier, best for roasting and stews
  • 🔴 Red (ripe) - sweeter, slightly hotter, good for sauces and drying
  • 🌶️ Dried red - becomes a California or New Mexico dried chile used in red sauces

Understanding the role poblano pepper plays in Mexican cooking helps put the Anaheim in context - it occupies a similar mild-chile niche but with less earthiness and a more delicate wall.

What Does Anaheim Pepper Taste Like?

anaheim pepper - What Is Anaheim Pepper

Raw, the Anaheim delivers crisp, bright, green-vegetal sweetness with a gentle tingle at the back of the throat. It's closer in flavor to a mild poblano than to a jalapeño - less earthy, more like fresh grass and sweet capsicum.

Heat changes everything. Roasting over a flame develops a toasty, smoky depth that raw tasting doesn't hint at, and the thin walls collapse into a silky, tender texture that absorbs surrounding flavors readily.

Sensory SnapshotMild Intensity
👅 Flavor
sweet-greenmildly spicysmoky (roasted)
✋ Texture
crisp rawsilky cooked
👃 Aroma
green herbaceoustoasty-smoky

Red-ripe Anaheims push slightly sweeter and warmer on the heat scale - still mild, however, never punishing.

How to Use Anaheim Pepper

Roasting is where the Anaheim shines brightest. Char it directly over a gas burner or under a broiler until the skin blisters black, then steam it in a covered bowl for 10 minutes and peel - the charred skin slips off cleanly, revealing tender, smoky flesh beneath.

If you don't have a wire rack for this, guidance on swapping out roasting rack setups can help you improvise.

Once roasted and peeled, the Anaheim becomes the backbone of several classic dishes. New Mexico-style green chile stew layers it with pork, potato, and garlic for a slow-simmered braise.

Chile rellenos stuff the whole roasted pepper with cheese before battering and frying.

Blended into a sauce, roasted Anaheims join tomatillos well - similar to how they appear in a roasted tomatillo salsa verde recipe that layers green, smoky flavors together.

Raw, sliced Anaheims add mild heat and crunch to pico de gallo or salads. Sautéed, they soften quickly and pair with eggs, onion, and corn in breakfast scrambles.

How Anaheim Pepper Is Used
MethodBest ForTip
🥗 RawSalads, pico de gallo, garnishSlice thin; thick cuts can taste watery
🔥 RoastedRellenos, stews, sandwich toppingBlister fully before steaming to peel
🍳 SautéedFajitas, scrambles, rice dishesHigh heat, brief cook - 3-4 minutes max
🫙 PickledTacos, sandwiches, burgersVinegar brine with garlic and oregano
🥘 SimmeredGreen chile stew, enchilada sauceAdd early; long cook deepens the flavor

Strong cheese pairings - cheddar, Monterey Jack, queso fresco - work especially well because the pepper's mild sweetness doesn't fight the dairy. Pork, corn, black beans, tomatillo, and lime round out the natural partnership list.

For cooks who find seasoning with anaheim pepper tricky in a specific recipe, swapping in a milder variety is always an option.

Try It In
🍗Air Fryer Lemon Pepper Chicken TendersAdd diced Anaheim for mild heat alongside the bright citrus crust→🥦Air Fryer Lemon Pepper CauliflowerToss in sliced Anaheim strips for extra color and gentle heat→🍖Air Fryer Lemon Pepper MeatballsMix in roasted Anaheim for a Southwestern twist on the classic→

How to Buy and Store Anaheim Pepper

At the market, reach for peppers that feel firm and heavy for their size, with skin that's smooth and glossy rather than wrinkled or puckered.

Avoid any soft spots, slimy patches, or stems that look dried out and brown - these signal age.

Best Pick
Bright green peppers for stews and roasting; red-ripe Anaheims for sweeter sauces and pickling. Both are worth keeping on hand when they're in season.

Back home, store them unwashed in a perforated plastic bag in the produce drawer.

Raw peppers hold well for about a week.

Roasted and peeled, they keep 3-5 days in the fridge in a sealed container.

For longer storage, freeze roasted flesh flat on a sheet tray, then transfer to a bag - the details on how long anaheim pepper keeps in each format are worth knowing before you buy a bulk bag.

Watch Out
Don't wash Anaheims before refrigerating. Moisture on the skin accelerates soft spots and mold within days.

Starting Points for the Anaheim Pepper

This pepper rewards cooks who want mild chile flavor without heat management headaches.

If you're new to it, roast one whole over a gas flame and eat it straight - that single step shows you exactly what the pepper does best.

Cooks already comfortable with the poblano pepper swaps that work in their rotation will find the Anaheim fills a slightly different slot: lighter body, cleaner heat, better suited to fresh salsas and quick sautés.

Start with green chile stew or a stuffed relleno - both give the pepper room to perform.

Golden Rule
Always roast and peel before stuffing or blending. Raw Anaheim skin is tough and bitter - charring it first is non-negotiable for good texture.

Frequently Asked Questions

Are Anaheim peppers spicy?

Not significantly. At 500-2,500 Scoville units, they register as mild - far below a jalapeño's average of 5,000. Most people sensitive to heat can eat them without discomfort.

How do you roast Anaheim peppers?

Place them directly over a gas flame or under a broiler, turning until skin is fully blackened. Steam in a covered bowl for 10 minutes, then peel the charred skin off by hand.

How do Anaheim and poblano peppers compare in heat?

Poblanos run 1,000-2,000 Scoville units - overlapping but similar to Anaheim. The bigger difference is flavor: poblanos taste earthier and darker, while Anaheims taste sweeter and greener.

Can you substitute an Anaheim pepper for a jalapeño?

Yes, with a trade-off. You'll lose most of the heat and gain more sweetness. Use a larger quantity of Anaheim to compensate for the milder flavor profile in cooked dishes.

How long do roasted Anaheim peppers last?

Refrigerated in a sealed container, roasted and peeled Anaheims last 3-5 days. Frozen flat in a single layer, they keep up to 6 months without significant texture loss.

What Is Baking Soda? [Taste, Uses & More]

March 27, 2026

Crisp-edged Belgian yeast waffles get their lift from yeast, but a recipe that reaches for baking soda instead is making a deliberate choice - one about speed, acidity, and chemistry. Baking soda is sodium bicarbonate in its purest form, a fine alkaline powder that reacts with acids to produce carbon dioxide and push batters skyward in minutes rather than hours. It shows up in self-rising flour substitutes, Irish soda bread, chocolate chip cookies, and crispy roasted vegetables.

What Is Baking Soda

Understanding what it does - and what it tastes like when something goes wrong - makes it a far more useful tool in the kitchen.

QUICK SUMMARY

Baking soda is a pure alkaline leavening agent that reacts with acids to create carbon dioxide, lifting batters and doughs. Used in small amounts, it's nearly tasteless. Too much produces a soapy, bitter edge. Shelf life is 2-3 years sealed; 6-12 months once opened.

🧪Also Called: sodium bicarbonate, bicarbonate of soda, bicarb
👅Flavor: Mildly alkaline, faintly salty, soapy-bitter if overused
🍞Best Uses: Quick breads, cookies, soda bread, roasted vegetables
⏱️Shelf Life: 2-3 years sealed; 6-12 months after opening
⚠️Watch Out: Needs an acid to activate; excess leaves a soapy, bitter aftertaste

What Is Baking Soda?

Baking soda is sodium bicarbonate (NaHCO₃), a naturally occurring mineral compound that is now commercially produced at industrial scale. It belongs to a small category of chemical leavening agents, sitting alongside baking powder - though the two are not interchangeable without adjustment.

Pure baking soda is a single ingredient, whereas baking powder contains sodium bicarbonate plus a dry acid and starch already blended in. That distinction matters in practice: baking soda needs an external acid in the recipe to do its job.

You'll find it under several names depending on where you shop:

  • Sodium bicarbonate - the chemical name, used on food-grade packaging
  • Bicarbonate of soda - common in British and Irish recipes, including traditional soda bread
  • Bicarb - casual shorthand used in Australian and UK kitchens

There are no meaningful varieties or subtypes for culinary use. Food-grade baking soda is a single standardized product - what differs is packaging size, not the compound itself.

Golden Rule
Baking soda needs an acid partner - buttermilk, yogurt, lemon juice, or vinegar - to release carbon dioxide and leaven. Without it, the batter won't rise properly and will likely taste bitter.

What Does Baking Soda Taste Like?

On its own, baking soda has a faintly salty, mineral quality with a sharp alkaline edge - think the back-of-the-throat sensation of brushing your teeth, but milder. The texture dissolves into a slick, slightly soapy mouthfeel.

Correctly dosed in a baked good, you won't taste it at all. The acid in the recipe neutralizes the alkaline powder during the reaction, producing carbon dioxide and water instead of flavor.

Sensory SnapshotModerate Intensity
👅 Flavor
alkalinemildly saltysoapy-bitter
✋ Texture
fine powderslick when dissolved
👃 Aroma
neutralfaintly alkaline

Overuse is where things go wrong. Excess baking soda - even an extra quarter teaspoon - leaves a distinctive soapy, bitter aftertaste that no additional flavoring can mask.

Heat intensifies that bitterness rather than cooking it out.

How to Use Baking Soda

Baking soda works quickly once it contacts moisture and acid, so recipes built around it move fast. Quick breads, muffins, and buttermilk pancakes rely on this immediate carbon dioxide release rather than the slower double-action of baking powder.

The standard ratio for leavening is roughly ¼ teaspoon of baking soda per cup of flour, adjusted for how much acid the recipe contains. More acidic recipes - heavy on yogurt or molasses - can tolerate slightly more.

How Baking Soda Is Used
MethodBest ForTip
🍞 Dry mixQuick breads, cookies, muffinsWhisk with dry ingredients before adding liquids
🥘 Soak waterDried beans and legumesAdd ¼ teaspoon per litre; rinse well before cooking
🥦 Surface rubRoasted vegetables, chicken skinUse sparingly - a light dusting, not a coat
🍜 Alkaline liquidRamen-style noodles, pretzel doughDissolve in boiling water for an alkaline bath

Beyond leavening, baking soda serves specific textural roles. Sprinkled on chicken skin or vegetables before roasting, it raises the surface pH and accelerates the Maillard reaction, producing deeper browning at lower oven temperatures.

Added to bean soaking water, it speeds up softening by breaking down the outer cell walls.

East Asian kitchens use an alkaline solution - baking soda dissolved in hot water - to give ramen noodles their characteristic chew and yellow tint. British and Irish bakers use it as the sole leavener in soda bread, paired with the natural lactic acid in buttermilk.

If you need baking soda swaps or are working backward from baking powder swaps, understanding these acid-base ratios is the starting point.

Try It In
🍞Irish Soda Bread TraditionalClassic four-ingredient loaf where baking soda is the only leavener→

How to Buy and Store Baking Soda

Good baking soda is pure white and flows freely. Clumping or yellowing signals moisture exposure, which means it has already partially reacted and lost potency - skip it.

Watch Out
Baking soda absorbs odors readily. Don't store it near spices, onions, or open containers. A sealed airtight jar is better than the original box once opened.

When buying, check for food-grade labeling - the package should read "sodium bicarbonate" and show a production or best-by date. Larger bulk tubs are economical for frequent bakers but only if you'll use the quantity before potency fades.

  • Shelf life sealed - 2-3 years; well within the bread storage guide window for most pantry planning
  • Shelf life opened - 6-12 months in an airtight container, cooler climates extending that range
  • Potency test - drop ½ teaspoon into hot water with a splash of vinegar; vigorous bubbling means it's still active

For a deeper look at how long it stays reliable, the full guide to baking soda storage life covers every storage scenario.

When to Reach for Baking Soda

Choose baking soda when your recipe already contains an acid - buttermilk, sour cream, citrus, or brown sugar and molasses. It acts fast, so mix and bake immediately; don't let the batter rest.

Reach for baking powder instead when the recipe has no acidic component. If you're mid-recipe and out of either, the guides to self-rising flour substitutes and baking powder swaps map out the conversions clearly.

Shortcut
1 teaspoon of baking powder can replace ¼ teaspoon of baking soda in a pinch - but only if you also reduce or remove another acid in the recipe to avoid over-leavening.

Start with the minimum amount a recipe calls for. More is never better with baking soda.

Frequently Asked Questions

What is baking soda used for in baking?

It acts as a chemical leavener, reacting with acids in the recipe to produce carbon dioxide bubbles that make batters and doughs rise. It also promotes browning in cookies and deepens color in chocolate cake by raising the batter's pH.

How do I test if my baking soda is still good?

Drop ½ teaspoon into hot water with a splash of white vinegar or lemon juice. Strong, immediate bubbling means it's still active. A slow trickle or no reaction means it's lost potency and should be replaced.

Can I substitute baking powder for baking soda?

Yes, but you need roughly 3 teaspoons of baking powder to replace 1 teaspoon of baking soda. That much baking powder can add a slightly metallic taste and may over-leaven delicate batters.

How much baking soda per cup of flour?

The standard is ¼ teaspoon per cup of flour. Recipes with more acid - heavy buttermilk or molasses content - may use slightly more, but exceeding ½ teaspoon per cup risks a soapy, bitter result.

Is baking soda safe to eat directly?

In small culinary amounts, yes. Medicinal use - swallowing it as an antacid - is a different matter and should be discussed with a clinician, particularly for people on low-sodium diets or with kidney conditions.

What Is Allspice? [Taste, Uses & More]

March 27, 2026

You spot a small jar labeled "allspice" at the grocery store and reach for it, assuming it's a premixed blend - cinnamon, clove, nutmeg, the works. It isn't. Allspice is a single spice, the dried berry of the Pimenta dioica tree, and it naturally carries those layered warm-spice notes on its own.

What Is Allspice

Whether you've been avoiding it out of confusion or using it without fully understanding what it does, this guide covers everything worth knowing.

QUICK SUMMARY

Allspice is a dried Caribbean berry that tastes like clove, cinnamon, and nutmeg combined. Ground or whole, it anchors jerk seasoning, pickling brines, baked goods, and mulled drinks. Whole berries last up to 4 years; ground loses potency within a year.

🫙Type: Dried berry spice from the Pimenta dioica tree
👅Flavor: Warm clove-forward with cinnamon and nutmeg undertones
🌍Origin: Jamaica and Central America
🍖Best Uses: Jerk marinades, pickling brines, spice cakes, mulled wine
⏱️Shelf Life: Whole: 2-4 years; ground: 6-12 months
🛒Buy: Choose whole berries over pre-ground for longer-lasting aroma

What Is Allspice?

Allspice berries are the dried, mature fruits of Pimenta dioica, an evergreen tree native to Jamaica and Central America. The berries are harvested while still green, then sun-dried until they turn a deep reddish-brown - resembling large, slightly rough peppercorns.

The name "allspice" was coined by 17th-century English traders who believed it captured the essence of several spices at once.

You'll also find it sold under the names pimento, Jamaica pepper, or pimenta - which causes its own confusion, since pimento also refers to a red sweet pepper.

Two main forms exist in most markets:

  • Whole berries - preferred for brines, stocks, and long simmers where berries can be fished out
  • Ground allspice - used in rubs, batters, and spice blends where even distribution matters

Jamaica produces the majority of the world's supply and is still considered the benchmark for quality.

What Does Allspice Taste Like?

allspice - What Is Allspice

Allspice lands with a clove-forward punch first - warm, slightly sharp, unmistakably spiced. That initial bite softens into a sweeter cinnamon note, followed by a quieter nutmeg-like earthiness underneath.

There's also a faint peppery heat that lingers without dominating.

Sensory SnapshotStrong Intensity
👅 Flavor
clove-likesweet-warmearthypeppery
✋ Texture
hard berryfine powder
👃 Aroma
richsweet-warmresinous

Heat amplifies allspice's resinous, woody depth - briefly toasting whole berries before grinding pulls volatile oils to the surface and makes the clove character noticeably sharper. In long-simmered dishes, its edges round out and it reads more as background warmth than a dominant note.

Watch Out
Allspice is strong. A half-teaspoon of ground allspice in a small batch can easily overpower delicate herbs like basil or mint - use it with restraint in lighter dishes.

How to Use Allspice

Jerk seasoning is the most iconic use, and for good reason. Ground allspice is the backbone of authentic Jamaican jerk - blended with scotch bonnet, garlic, and thyme, then rubbed into pork or chicken before grilling. If you need a swap in a pinch, check our guide to jerk seasoning swaps.

Beyond jerk, allspice works across a wider range than most people expect.

How Allspice Is Used
MethodBest ForTip
🔥 Toasted + GroundDry rubs, spice blends, marinadesToast whole berries 60-90 seconds in a dry pan before grinding
🍲 Simmered WholeStocks, pickling brines, bean dishesAdd 4-6 berries per quart of liquid; remove before serving
🍰 Ground in BatterSpice cakes, gingerbread, cookiesPair with molasses or brown sugar to reinforce its warmth
🍷 Infused in LiquidMulled wine, cider, cocktail syrupsCombine with orange peel and cloves; steep, don't boil

In Middle Eastern cooking, allspice appears in baharat - a warming blend used in braised lamb and rice dishes. Scandinavian bakers fold it into holiday breads and pepparkakor alongside cardamom.

Caribbean cooks add whole berries to stewed kidney beans and oxtail braises for aromatic depth that clove alone doesn't achieve.

Pork and game meats are naturals here - the spice's resinous character cuts through fat without turning bitter. Citrus zest, particularly orange and lime, brightens the blend and keeps heavier dishes from feeling dense. For a closer look at how allspice compares to one of its flavor neighbors, our clove profile covers the distinction well.

Try It In
🧅Crispy Sweet Chili Onion RingsA warm spice addition lifts the chili-sweet glaze→🧄Roasted Garlic Garlic AioliA pinch deepens the savory base alongside garlic→🍅Roasted Garlic Marinara SauceOne berry simmered in adds quiet aromatic depth→

How to Buy and Store Allspice

Buy whole allspice berries whenever possible. They look like small dark brown peppercorns with a slightly roughened surface, and they hold their volatile aromatic oils far longer than pre-ground powder.

Best Pick
Whole berries from Jamaica are considered the benchmark for quality - look for deep brown color and a dense feel. Avoid pale, lightweight berries; they've dried out and lost most of their oils.

For ground allspice, check that the color is a deep, warm brown and that it still smells strongly when the jar is opened. Pale, dusty-smelling powder is past its useful life.

  • Whole berries - store in an airtight container away from light and heat; best within 2-4 years
  • Ground allspice - use within 6-12 months for full potency; store in an opaque jar in a cool pantry
  • Grind fresh - a spice grinder or mortar and pestle before use makes a noticeable difference

Our full breakdown of allspice storage life goes deeper on when to replace your stock.

Start With Whole, Go From There

If you only have room for one format, buy whole berries and grind them yourself. That single choice gives you both options - berries for brines and stocks, fresh-ground powder for rubs and baking.

For recipe substitutions, our guide to allspice replacements maps out the best swaps, and if you need clove swaps for a recipe that calls for both, that's worth a read alongside it.

Frequently Asked Questions

Is allspice the same as pimento?

Yes - "pimento" is just another name for allspice, derived from the Spanish word for pepper. The confusion arises because pimento also refers to a type of sweet red pepper, which is an entirely different plant.

Can you substitute ground cloves with allspice?

Yes, but allspice is less intense than cloves, so use slightly more - about 1¼ teaspoons of allspice for every 1 teaspoon of cloves. It works best in baked goods and braises where the difference is minimal.

What is the difference between allspice and mixed spice?

Allspice is a single spice; mixed spice is a British blend that typically contains allspice, cinnamon, nutmeg, cloves, and coriander. They're not interchangeable - mixed spice is broader and milder by design.

Does allspice come from a pepper plant?

No. Despite the name "Jamaica pepper," allspice belongs to the myrtle family, not the pepper family. Early European traders named it for its pepper-like appearance, not its botanical relationship.

Can allspice be used in sweet and savory dishes equally?

Yes, and it's one of the few spices that genuinely crosses both lanes without adjustment. Its clove-cinnamon character reads as warm-savory in braises and rubs, and as warm-sweet in cakes and syrups.

What Is Asiago Cheese? [Taste, Uses & More]

March 27, 2026

You spot a wedge of asiago at the cheese counter and wonder whether to grab the pale, springy block labeled "Pressato" or the golden, crumbly wheel marked "d'allevo." These are not interchangeable - they're two distinct cheeses sharing a name, and choosing the wrong one for your dish means missing what asiago actually does well.

What Is Asiago Cheese

If you've been reaching for provolone cheese swaps that work or defaulting to parmesan, asiago deserves a closer look as a sharper, more affordable alternative with genuine regional character.

QUICK SUMMARY

Asiago is an Italian cow's milk cheese from the Veneto and Trentino regions, sold in two forms. Young Pressato is mild and creamy; aged d'allevo is sharp, salty, and granular. Use it grated, melted, or shaved depending on age.

🧀Type: Italian cow's milk cheese, semi-firm to aged
👅Flavor: Mild and buttery young; sharp, nutty, salty when aged
🍽️Best Uses: Grating over pasta, melting into risotto, cheese boards
🌡️Intensity: Moderate - increases significantly with age
🛒Buy: Look for pale ivory Pressato or golden, crystalline d'allevo
📅Shelf Life: Young: 2-3 weeks opened; aged: 4-6 weeks opened, wrapped

What Is asiago cheese?

Asiago is a PDO-protected Italian cheese produced exclusively on and around the Altopiano di Asiago, a plateau straddling the Veneto and Trentino regions of northern Italy.

Only wheels made in this designated zone from local cow's milk can legally carry the name.

Two distinct forms exist, and they behave nothing alike. Asiago Pressato (also called asiago fresco) is pressed and sold young - typically aged fewer than 60 days. Asiago d'allevo is the aged version, ripened anywhere from a few months (mezzano) up to two years or more for the stravecchio grade.

Pressato has a smooth, moist paste with a few scattered eyes and a mild, lactic character.

D'allevo develops a firm, tighter grain with crystalline specks as proteolysis breaks down the proteins during aging.

Both forms are made from part-skimmed cow's milk, which keeps the fat content slightly lower than many comparable Italian cheeses.

Knowing which form you're buying matters before anything else.

What Does asiago cheese Taste Like?

asiago cheese - What Is Asiago Cheese

Young Pressato reads as milky, buttery, and clean - closer in feel to a young provolone or a mild cheddar than to anything sharp or pungent. There's a gentle tang from the lactic fermentation, but it stays soft and approachable.

Aged d'allevo shifts the profile considerably. The flavor becomes nutty, tangy, and umami-forward, with a saltiness that intensifies the longer the wheel has ripened.

Well-aged wheels develop those crystalline shards - tyrosine clusters - that deliver brief pops of savory intensity, similar to what you find in Parmigiano-Reggiano but at a slightly milder register.

Heat changes things. Melted Pressato becomes creamy and neutral; melted d'allevo releases a brothy, savory depth that holds up in a sauce.

The aroma follows the same arc - clean and lactic when young, earthy and brothy as it ages.

Sensory SnapshotModerate Intensity
👅 Flavor
milkynuttysharpumami
✋ Texture
springy (young)granular (aged)
👃 Aroma
lacticearthybrothy

How to Use asiago cheese

Asiago earns its place across a wide range of applications, and matching the form to the method makes all the difference. Aged d'allevo behaves like a grating cheese; Pressato behaves like a melting cheese.

How Asiago Cheese Is Used
MethodBest ForTip
🥗 Shaved RawSalads with bitter greens, cheese boardsUse aged d'allevo; shave thin so the saltiness spreads
🍳 MeltedRisotto, creamy soups, paniniPressato melts cleaner; add off-heat to avoid graininess
🧀 GratedPolenta, pasta, roasted vegetablesAged d'allevo grates finer; use like you would parmesan
🫓 BakedFocaccia, savory scones, broiled gratinsEither form works; aged creates a darker, crispier crust

Grated aged asiago over polenta is one of the most direct uses - the saltiness cuts through the starchy base without overwhelming it.

For risotto, stirring in Pressato at the end adds creamy body; learning using risotto for creaminess helps get the finish texture right.

Asiago also pairs well with replacements for polenta like soft grits or cauliflower mash if you're looking for alternatives in that same grated-cheese application.

On a cheese board, cube young Pressato for spreading and break aged d'allevo into shards for nibbling. Pear, quince, and honey are natural companions - the sweetness offsets the salt.

Walnuts, prosciutto, and a glass of Pinot Grigio round out a northern Italian spread cleanly.

Golden Rule
Never add asiago to a sauce over high heat. Pull the pan off the burner first, then stir it in - aged asiago especially will turn grainy if it hits a boil.

If you need a stand-in, there are solid replacements for asiago cheese depending on whether you need the young or aged version's properties.

Try It In
🧀Cheddar Cheese StrawsSwap aged asiago for half the cheddar for a nuttier, saltier straw→🍳Egg and Cheese Breakfast SandwichPressato melts evenly here without overpowering the egg→

How to Buy and Store asiago cheese

At the counter, look at the paste. Pressato should be pale ivory, smooth, and moist with a few small eyes.

D'allevo should show a denser, golden paste with visible crystalline specks in older grades - those specks confirm proper aging, not spoilage.

Watch Out
Pre-shredded asiago often contains anti-caking agents that prevent proper melting. For any cooked application, buy a wedge and grate it yourself.

Buy a whole wedge when possible - cut surfaces dry and harden faster. Wrap cut asiago first in wax paper, then loosely in plastic or a resealable bag, and store it in the cheese drawer where humidity stays higher.

Avoid airtight wrapping directly against the paste; it traps moisture and accelerates mold.

For a full breakdown of timing by form and grade, how long asiago cheese keeps covers opened and unopened shelf life in detail. In general: young Pressato lasts about 2-3 weeks opened; aged d'allevo holds 4-6 weeks with proper wrapping.

Where to Start With Asiago

New to asiago? Buy Pressato first. It's forgiving, mild, and gives you a clean read on the cheese before committing to the sharper aged versions.

Best Pick
For cooking, a mezzano-grade d'allevo (medium-aged, around 3-8 months) hits the sweet spot - enough sharpness to add character, but it still melts reasonably well.

Aged d'allevo is the better pick once you know you want that parmesan-adjacent sharpness - and comparing parmesan vs parmigiano reggiano options helps clarify where asiago sits in that grated-cheese lineup. Start young, age up when you're ready.

Frequently Asked Questions

Is asiago the same as parmesan?

No. Both are Italian aged cow's milk cheeses, but asiago comes from the Veneto plateau while Parmigiano-Reggiano is produced in Emilia-Romagna under stricter rules. Aged asiago has a similar sharpness but is less dense and typically less salty than true Parmigiano.

What is the difference between fresh and aged asiago?

Fresh Pressato is springy, mild, and melts smoothly. Aged d'allevo is firm, granular, sharp, and better suited to grating. They share a name but function like completely different cheeses in the kitchen.

Can you melt asiago in sauces?

Yes, with care. Pressato melts smoothly and works well stirred into cream-based sauces. Aged d'allevo can go grainy if overheated - add it off the heat and stir gently.

How salty is asiago cheese?

Young Pressato is only mildly salty. Aged d'allevo is noticeably saltier, comparable to a medium-aged pecorino. If you're using it in a dish with other salty components, taste before adding extra salt.

Does asiago contain lactose?

In small amounts. Young asiago retains more lactose than aged versions, where extended ripening breaks most of it down. People with mild lactose sensitivity often tolerate aged d'allevo without issue.

What Is Acorn Squash? Taste, Uses & Cooking Tips

March 27, 2026

You spot it at the farmers market in late September - small, dark green, deeply ribbed, sitting in a pile next to the gargantuan butternuts and pale spaghetti squash.

What Does Acorn Squash Taste Like

Acorn squash gets overlooked partly because of its size, and partly because cooks aren't sure what to do with it.

That's worth fixing.

Among winter squash, it's one of the most practical: the shell becomes a natural bowl for stuffing, the flesh roasts quickly, and the flavor stays mild enough to work across both savory and sweet preparations.

If you've been curious about replacements for kabocha squash or swapping out spaghetti squash, acorn squash often lands in that conversation.

QUICK SUMMARY

Acorn squash is a small, ribbed winter squash with orange-yellow flesh that turns sweet and tender when roasted. It's milder than butternut or kabocha, pairs well with butter, maple, and sage, and stays good for weeks whole or up to five days cut in the fridge.

🫙Also Known As: Pepper squash, acorn pumpkin, acorn-type squash
🍂Flavor: Mildly sweet, nutty, buttery - less sugary than kabocha
🔥Best Methods: Roasting halves, stuffing and baking, pureeing for soup
🧺Shelf Life: Whole: up to 2 months; cut: 3-5 days refrigerated
🛒Buy It: Heavy for its size, dull matte rind, firm skin with no soft spots

What Is Acorn Squash?

Acorn squash is a winter squash native to North America, domesticated by Indigenous peoples in the eastern United States long before European contact.

Its common name comes from its shape - a compact, acorn-like form with pronounced ridges running from stem to tip.

The rind is typically dark forest green, sometimes streaked with orange patches as it ripens; fully yellow varieties exist but are less common in markets.

Inside, the hollow seed cavity holds a web of seeds and stringy pulp that's scooped out before cooking, leaving dense, orange-yellow flesh.

You'll also see it labeled pepper squash or acorn pumpkin at some farm stands, though both refer to the same thing.

It sits alongside butternut and kabocha in the winter squash category, meaning its tough rind protects it through long storage - a useful trait in a cool pantry.

Understanding pumpkin and its flavor helps put acorn squash in context, since both belong to the same Cucurbita family but taste quite different.

What Does Acorn Squash Taste Like?

acorn squash - What Does Acorn Squash Taste Like

Raw acorn squash barely hints at its cooked potential - the flesh is dense, starchy, and faintly sweet. Heat changes everything. Roasting draws out natural sugars, and the flesh shifts from firm and bland to golden, tender, and mildly sweet with a nutty, buttery undertone.

Sensory SnapshotMild Intensity
👅 Flavor
mildly sweetnuttybutteryearthy
✋ Texture
dense when rawtender when roastedcreamy when mashed
👃 Aroma
warm roasted sweetnesslight vegetal

Compared to butternut squash, acorn is noticeably milder and less sugary. The taste of kabocha squash runs richer and more intensely sweet - acorn squash sits below both on the sweetness scale.

That restraint is actually useful: it takes on seasonings without fighting them.

How to Use Acorn Squash

Acorn squash is most often halved and roasted cut-side down, then flipped to finish with butter and maple syrup in the cavity - a method that caramelizes the flesh and requires almost no prep work.

Its natural bowl shape makes stuffing straightforward; the shell holds a filling of grains, sausage, or quinoa without any extra vessel.

How Acorn Squash Is Used
MethodBest ForTip
🔥 Roasting halvesSimple sides, stuffed presentationsStart cut-side down for 25 min, then flip to caramelize
🫕 Baking stuffedOne-dish meals with grains or sausagePar-cook filling before adding so both finish together
🍲 Simmering + pureeingSoups with sage and creamRoast first for deeper flavor before blending
🥘 Pan-searing cubesSheet-pan roasts, warm saladsPar-boil cubes briefly so the interior cooks through
🥧 Baking into sweetsPies, bars, spiced fillingsBlend with cinnamon, nutmeg, and sugar after roasting

Acorn squash anchors American autumn cooking - New England and Midwest recipes lean on it for cold-weather sides alongside roasted chicken and braised pork.

It pairs cleanly with maple syrup (or a honey alternative if you're swapping out maple syrup), sage, thyme, and warm spices like nutmeg and smoked paprika.

Walnuts, pecans, apples, and dried cranberries add texture and contrast in stuffed preparations.

Golden Rule
Don't skip roasting cut-side down first. That direct contact with the pan draws moisture out and concentrates flavor in the flesh before you add any fat or sweetener.

Avoid pairing it with overly assertive citrus - heavy lemon or lime can mask the squash's mild sweetness rather than brighten it. Delicate raw dressings also don't hold well against its dense, warm texture.

Try It In
🫕Stuffed Acorn SquashUses the shell as a natural bowl for a grain-and-sausage filling→

How to Buy and Store Acorn Squash

At the market, weight is the first signal. Lift two squash of similar size - the heavier one has denser flesh and less hollow air space.

Look for a dull, matte rind: shiny patches indicate surface moisture, which can mean uneven ripeness. Ribs should be firm and well-defined, not soft or collapsed.

Watch Out
A shriveled or very dry stem means the squash has been stored too long already. The stem cures and dries naturally, but if it's brittle and pulling away from the rind, pass on it.

Storage is simple for whole squash:

  • 🧺 Whole, uncut - Keep in a cool, dry spot away from sunlight; lasts several weeks to 2 months.
  • 🔪 Cut or halved - Wrap tightly in plastic or seal in an airtight container; refrigerate and use within 3-5 days.
  • 🍲 Cooked flesh - Stores in the fridge for 3-4 days; reheat gently to avoid waterlogging.

Check for acorn squash spoilage signs before using stored squash - soft rind spots, off odor, or slimy flesh all mean it's past its window.

If you need an alternative mid-recipe, a guide to replacements for acorn squash covers the closest options by texture and sweetness level.

For the butternut side of things, swapping out butternut squash covers when the two are interchangeable and when they aren't.

Where to Start With Acorn Squash

New to it? Roast a half with butter and brown sugar first - that's the fastest path to understanding how the flesh behaves and what it naturally wants to be.

From there, stuffing is the logical next step: fill the roasted cavity with cooked grains, sausage, and sage, and you have a complete meal in the shell.

It holds well across dietary constraints - naturally gluten-free, low-fat, and rich in vitamin A and potassium from its beta-carotene content. The flavor is forgiving enough for beginners and structured enough to anchor a serious autumn menu.

Frequently Asked Questions

Is acorn squash the same as winter squash?

Acorn squash is one type of winter squash, not a separate category. Winter squash includes butternut, kabocha, delicata, and others - all share a hard rind and long shelf life, but differ in flavor intensity and texture.

How do you tell if acorn squash is ripe?

Look for a patch of orange on the rind where it rested on the ground - that's a reliable ripeness indicator. The rind should resist fingernail pressure entirely; any give means it was harvested early or has started to deteriorate.

Can you eat acorn squash raw?

Technically yes, but the flesh is very dense, starchy, and barely sweet in its raw state. Heat is what converts the starches and releases the mild sweetness - raw acorn squash offers little of what makes it worth eating.

Is acorn squash healthy?

Yes - it's low in calories, provides dietary fiber, potassium, vitamin C, and significant vitamin A from beta-carotene. Notably, cooking increases carotenoid availability, so roasted acorn squash delivers more of those nutrients than raw.

How long does acorn squash last in the fridge once cut?

Cut acorn squash lasts 3-5 days refrigerated when wrapped tightly in plastic or sealed in an airtight container. Cooked flesh has a slightly shorter window - use it within 3-4 days for best texture.

Tabbouleh with Parsley and Bulgur

March 27, 2026

Soaking bulgur in cold water for 15 minutes while you chop fresh parsley creates tender grains without mushiness. The cold water hydrates the wheat slowly, keeping each grain separate and chewy.

Tabbouleh with Parsley and Bulgur served on a plate

You don't need to cook anything. The bulgur softens in the bowl while the herbs stay bright and crisp.

This works for weeknight sides when you need something fresh that travels well to potlucks or meal prep containers.

QUICK SUMMARY

Tabbouleh with parsley and bulgur combines finely chopped herbs with soaked bulgur wheat, tomatoes, and lemon juice for a fresh Middle Eastern salad. Cold water soaking prevents mushy grains while keeping prep hands-off. The salad tastes better after resting 10 minutes in the fridge.

⏱️Time reality: 20 minutes active, plus 15 minutes for bulgur to soak
🔪First move: Soak bulgur in cold water immediately, then chop herbs while it hydrates
⚠️Watch out: Hot water cooks bulgur too fast-use cold water only and drain thoroughly

Why This Recipe Works

Cold-soaking bulgur instead of boiling keeps the grains firm and separate. For a similar fresh approach with different textures, try this quick salad dish that uses chickpeas for crunch.

Quick Reference
⏱️
Prep Time
20 min
🔥
Cook Time
0 min (soaking 15 min)
⏰
Total Time
35 min
🍽️
Servings
6 servings
📊
Difficulty
Easy
🏷️
Category
Side | Appetizer
💡
Quick Tip
Soak bulgur in cold water, don't over-soak
🎯
Best For
Weeknight | Meal prep | Entertaining

The success markers:

  • Bulgur feels tender but still has bite when you press a grain between your fingers after 15 minutes
  • Parsley stays bright green when chopped with a sharp knife in quick, clean cuts
  • Lemon juice added after mixing keeps the herbs from wilting and turning dark
  • The salad tastes balanced-herby but not grassy, tangy but not sour-after resting 10 minutes
  • Tomato seeds removed before chopping prevent watery puddles at the bottom of the bowl
Quick Tip
Drain bulgur in a fine mesh sieve and press gently to remove excess water before mixing with herbs

What You'll Need

Ingredients for Tabbouleh with Parsley and Bulgur

Fresh parsley and bulgur wheat form the base, with most ingredients already in your produce drawer. When you want another great cups recipe that uses fresh herbs differently, lettuce cups offer a lighter wrapper option.

🍜
Grain
  • Bulgur wheat
🥬
Herbs & Vegetables
  • Fresh parsley (flat-leaf)
  • Fresh mint
  • Tomatoes
  • Cucumber
  • Green onions
🍋
Citrus & Oil
  • Lemon juice
  • Olive oil
🌶️
Seasonings
  • Salt
  • Black pepper

Ingredient Details

  • Parsley (flat-leaf)
    Look for dark green leaves with no yellowing; curly parsley works but has a tougher texture
  • Bulgur wheat
    Use fine or medium grind; coarse bulgur takes longer to soften and has chewier texture
  • Lemon juice
    Fresh-squeezed tastes brighter than bottled; you'll need 2-3 lemons for about ⅓ cup juice
  • Tomatoes
    Roma or plum tomatoes have fewer seeds and less water than beefsteak varieties
  • Cucumber
    English cucumbers have thinner skin and smaller seeds; peel regular cucumbers and scoop out seeds
  • Fresh mint
    Spearmint is traditional; peppermint tastes stronger and can overpower the parsley
  • Olive oil
    Extra-virgin adds fruity flavor; use regular olive oil if you prefer milder taste

Ingredient Swaps

Four common swaps:

  • Quinoa instead of bulgur: Rinse and cook quinoa first, then cool completely-adds nuttier flavor and gluten-free option but changes the traditional texture
  • Cilantro for parsley: Switches the flavor profile to more citrusy and herbaceous-use half cilantro, half parsley if you're unsure
  • Lime juice for lemon: Works in a pinch with slightly different acidity-start with less and taste as you go
  • Shallots for green onions: Finer texture and more pungent bite-soak chopped shallots in cold water for 10 minutes to mellow sharpness

Bulgur (Traditional)

Works for: Classic chewy texture, 15-minute cold soak, mild nutty flavor

Skip if: You need gluten-free or want softer grain texture

Quinoa (Gluten-Free)

Works for: Gluten-free diets, higher protein, slightly nuttier flavor

Skip if: You want traditional texture or don't want to cook grains first

Couscous (Quick)

Works for: Faster prep, finer texture, mild flavor that absorbs dressing well

Skip if: You want more texture or need gluten-free option

Instructions

The entire process happens in one bowl with no heat involved. When planning your meal around homemade beef recipe that needs longer cooking, make this salad first and let it rest while the main finishes.

  1. Soak the bulgur: Place 1 cup bulgur in a large mixing bowl and cover with 2 cups cold water-let sit 15 minutes until tender but still chewy, then drain through fine mesh sieve and press gently to remove excess water.
  2. Prep the vegetables: While bulgur soaks, finely chop 2 cups fresh parsley (about 2 large bunches), ¼ cup fresh mint, 2 tomatoes (seeds removed), 1 cucumber (peeled and seeded), and 4 green onions-aim for pieces roughly the size of a grain of rice.
  3. Combine ingredients: Return drained bulgur to the bowl, add all chopped herbs and vegetables, then drizzle with ⅓ cup olive oil and ¼ cup fresh lemon juice-toss gently with clean hands or a large spoon until everything's evenly coated.
  4. Season and taste: Add ½ teaspoon salt and ¼ teaspoon black pepper, mix again, then taste-add more lemon juice for brightness, salt for depth, or olive oil for richness.
  5. Rest before serving: Cover the bowl and refrigerate for at least 10 minutes (or up to 4 hours)-the flavors meld and the bulgur absorbs the dressing, making the salad taste more balanced.
Golden Rule
Never use hot water to soak bulgur-it cooks the grains too fast and turns them mushy instead of tender

What to Serve With It

Tabbouleh needs something rich or protein-heavy to balance the bright herbs and citrus. For chicken salad meal planning ideas that work with fresh sides like this, light proteins pair better than heavy sauces.

Side Dish Prep Why It Works How to Serve
Grilled chicken Easy Adds protein without heavy sauces that compete with herbs Serve sliced chicken over tabbouleh or alongside
Hummus and pita Easy Classic mezze pairing with creamy contrast to crisp vegetables Scoop tabbouleh into pita pockets with hummus spread
Falafel Medium Vegetarian protein with crunchy texture that complements soft bulgur Serve falafel on top of tabbouleh or wrap together
Labneh Easy Tangy strained yogurt adds creamy richness to herbaceous salad Drizzle labneh over tabbouleh or serve in separate bowl
Roasted vegetables Medium Warm, caramelized vegetables balance the cold, fresh salad Arrange roasted veggies alongside tabbouleh for temperature contrast

Three ways to serve it:

  • As a side to grilled meats or fish-the lemon juice and herbs cut through rich proteins without heavy dressing
  • In lettuce wraps or pita pockets-pile tabbouleh into Romaine leaves or warm pita for handheld portions at picnics
  • As part of a mezze spread-serve with hummus, baba ganoush, olives, and pita chips for entertaining
Best Pick
Tabbouleh tastes best 30 minutes to 2 hours after mixing-the bulgur absorbs the dressing and the flavors marry without the herbs wilting

Store and Reheat

Tabbouleh keeps for 3-4 days but tastes freshest within 48 hours. The herbs stay brighter when stored in a shallow container with minimal air exposure.

Method Time Best For
🥶 Serve Cold 0 min Best texture and flavor-serve straight from fridge
🌡️ Room Temp 15-20 min Let sit on counter to take chill off before serving
📦 Microwave 20 sec low Only if you prefer warm-texture softens and herbs wilt slightly

For best results when storing:

  • Transfer tabbouleh to a shallow airtight container within 30 minutes of mixing to preserve herb brightness
  • Press plastic wrap directly on the surface before sealing to minimize air exposure and prevent browning
  • Store in the coldest part of your fridge (usually the back of the bottom shelf) for up to 4 days
  • If the salad looks watery after storage, drain excess liquid and refresh with a squeeze of lemon juice and drizzle of olive oil
  • Don't freeze tabbouleh-the vegetables turn mushy and the herbs lose their fresh flavor completely

Frequently Asked Questions

How long to soak bulgur for tabbouleh?

Soak bulgur in cold water for exactly 15 minutes, then drain well. Over-soaking past 20 minutes makes the grains mushy and waterlogged.

Can I make tabbouleh ahead of time?

Yes, tabbouleh tastes better after resting 30 minutes to 2 hours in the fridge. Make it up to 24 hours ahead, but add extra lemon juice and olive oil just before serving to refresh the flavors.

What goes well with tabbouleh?

Grilled chicken, falafel, hummus, baba ganoush, and roasted vegetables all pair well. The bright herbs and lemon juice balance rich, protein-heavy dishes without competing flavors.

How do I know when tabbouleh is done?

Tabbouleh is done when the bulgur feels tender but still has a slight chew, and the herbs stay bright green without wilting. Taste it after 10 minutes of resting-if it tastes flat, add more lemon juice and salt.

Can I use quinoa instead of bulgur in tabbouleh?

Yes, cooked and cooled quinoa works as a gluten-free swap. Use the same amount of quinoa as bulgur, but cook it first and let it cool completely before mixing with herbs and vegetables.

Tabbouleh with Parsley and Bulgur served on a plate

Tabbouleh with Parsley and Bulgur

No ratings yet
Tabbouleh with parsley and bulgur is a fresh Middle Eastern salad that uses cold-soaked bulgur for tender, chewy grains and bright, crisp herbs. This no-cook recipe comes together quickly with simple chopping and resting, perfect for easy sides or meal prep.
Print Recipe Pin Recipe
Prep Time 20 minutes mins
Cook Time 1 minute min
Total Time 21 minutes mins
Servings: 6 servings
Course: Appetizer, Side Dish
Cuisine: Middle Eastern
Ingredients Equipment Method Notes

Ingredients
  

  • 1 cup bulgur wheat fine or medium grind
  • 2 cups fresh parsley flat-leaf, finely chopped
  • 0.25 cup fresh mint finely chopped
  • 2 tomatoes seeds removed, finely chopped
  • 1 cucumber peeled, seeded, finely chopped
  • 4 green onions finely chopped
  • 0.33 cup olive oil extra-virgin preferred
  • 0.25 cup fresh lemon juice freshly squeezed
  • 0.5 teaspoon salt
  • 0.25 teaspoon black pepper freshly ground

Equipment

  • Large mixing bowl For soaking bulgur and mixing salad
  • Fine-mesh sieve To drain bulgur after soaking
  • Sharp knife For finely chopping herbs and vegetables

Method
 

  1. Place 1 cup bulgur in a large mixing bowl and cover with 2 cups of cold water. Let soak for 15 minutes until tender but still chewy. Drain through a fine mesh sieve and press gently to remove excess water.
    1 cup bulgur wheat
  2. While the bulgur soaks, finely chop 2 cups fresh parsley, ¼ cup fresh mint, 2 tomatoes (seeds removed), 1 cucumber (peeled and seeded), and 4 green onions. Aim for pieces roughly the size of a grain of rice.
    2 cups fresh parsley, 0.25 cup fresh mint, 2 tomatoes, 1 cucumber, 4 green onions
  3. Return the drained bulgur to the bowl. Add all chopped herbs and vegetables. Drizzle with ⅓ cup olive oil and ¼ cup fresh lemon juice. Toss gently with clean hands or a large spoon until everything is evenly coated.
    1 cup bulgur wheat, 2 cups fresh parsley, 0.25 cup fresh mint, 2 tomatoes, 1 cucumber, 4 green onions, 0.33 cup olive oil, 0.25 cup fresh lemon juice
  4. Add ½ teaspoon salt and ¼ teaspoon black pepper. Mix again, then taste. Add more lemon juice for brightness, salt for depth, or olive oil for richness as needed.
    0.5 teaspoon salt, 0.25 teaspoon black pepper, 0.33 cup olive oil, 0.25 cup fresh lemon juice
  5. Cover the bowl and refrigerate for at least 10 minutes, or up to 4 hours. This resting allows flavors to meld and the bulgur to absorb the dressing, balancing the salad's taste.

Notes

  • Use cold water only for soaking bulgur to avoid mushy grains.
  • Drain bulgur well with a sieve and press excess water out before mixing.
  • Chop herbs finely with a sharp knife to keep parsley bright and tender.

Tried this recipe?

Let us know how it was!

Salade Lyonnaise with Bacon and Egg

March 27, 2026

You need 30 minutes and a skillet. No marinating, no complex technique, just crisp bacon, runny eggs, and tangy vinaigrette on bitter greens.

Salade Lyonnaise with Bacon and Egg served on a plate

The bacon fat becomes your dressing base while the eggs poach. Toast croutons in the rendered fat and everything comes together in one bowl.

This works for quick lunches or light dinners when you want something that feels intentional but doesn't take over your afternoon.

QUICK SUMMARY

Salade Lyonnaise layers crispy bacon lardons, poached eggs with runny yolks, and bitter frisée greens with a warm vinaigrette. The key is keeping everything separate until assembly so the greens stay crisp and the croutons don't turn soggy. Make this when you want a French bistro meal that comes together in under 30 minutes.

⏱️Timing: Cook bacon and poach eggs simultaneously to save 10 minutes
🔪First Move: Dry greens thoroughly in a salad spinner before any other prep
⚠️Watch Out: Over-poached eggs turn rubbery - pull them at 3 minutes for runny yolks

Why This Recipe Works

High heat crisps the bacon while rendering fat that becomes your vinaigrette base. The salad works best when it hits the table at the same time as the main - for a version that comes together quickly, pair it with a classic shrimp dish that takes the same amount of time.

Quick Reference
⏱️
Prep Time
15 min
🔥
Cook Time
15 min
⏰
Total Time
30 min
🍽️
Servings
4 servings
📊
Difficulty
Medium
🏷️
Category
Main Dish | Appetizer
💡
Quick Tip
Toast croutons until golden for crunch
🎯
Best For
Weeknight | Entertaining | Brunch

Why it succeeds:

  • Bacon renders fat at medium heat - 6-8 minutes gives you crispy lardons without burning, and the fat becomes your vinaigrette base
  • Poaching at 180°F keeps yolks runny - water that's too hot sets the yolk, too cool and whites stay loose
  • Frisée's bitter edge balances rich bacon - the slightly rough texture holds onto vinaigrette without wilting
  • Day-old bread crisps better than fresh - moisture has evaporated so croutons toast evenly in bacon fat
  • Warm vinaigrette wilts greens just enough - cold dressing sits on top, warm dressing coats every leaf
Golden Rule
Assemble salad within 5 minutes of finishing all components or greens turn soggy and croutons lose their crunch

What You'll Need

Ingredients for Salade Lyonnaise with Bacon and Egg

Most grocery stores stock frisée in the specialty greens section, and day-old baguette works better than fresh. Rich mains need something to cut through, and salad does exactly that - for a version that comes together quickly, try a fresh salad side dish with similar bright flavors.

🥬
Greens
  • Frisée lettuce (1 head, about 6 cups)
🥓
Bacon
  • Bacon lardons (6 oz, cut into ½-inch pieces)
🥚
Eggs
  • Eggs (4 large, preferably poached)
🧄
Aromatics
  • Shallots (2 medium, thinly sliced)
🥢
Dressing
  • White wine vinegar (3 tbsp)
  • Dijon mustard (1 tsp)
  • Olive oil (¼ cup)
🍞
Croutons
  • Day-old baguette (3 cups cubed)

Ingredient Details

  • Frisée lettuce
    Look for pale yellow-green heads with crisp, curly leaves - avoid dark green or wilted bunches
  • Bacon lardons
    Cut thick-cut bacon into ½-inch pieces or buy pre-cut lardons from the deli counter
  • Eggs for poaching
    Use the freshest eggs possible - older eggs have looser whites that spread in the water
  • White wine vinegar
    Don't substitute balsamic or red wine vinegar - they're too sweet and overpower the greens
  • Day-old bread
    Leave fresh baguette out overnight or toast slices at 300°F for 10 minutes to dry them out
  • Dijon mustard
    The mustard emulsifies the vinaigrette and adds sharpness - don't skip it unless you're allergic
  • Shallots
    Slice paper-thin with a sharp knife - thick slices taste too sharp and don't blend into the dressing

Ingredient Swaps

Some versions use soft-boiled eggs instead of poached, which gives you more control over timing. A good salad can make or break the plate - for a version that comes together quickly, check out this easy salad recipe with a different vinaigrette approach.

Four reliable swaps:

  • Turkey bacon for pork bacon - leaner with less fat, cook 2-3 minutes longer to crisp, milder smoky flavor
  • Curly endive for frisée - similar bitterness and texture, slightly darker green color
  • Soft-boiled eggs for poached eggs - boil 6 minutes for runny yolks, easier timing control, peel under cold water
  • Apple cider vinegar for white wine vinegar - slightly fruitier but still tangy, use same amount

Turkey Bacon

Works for: Lower fat content, leaner texture, still crisps well

Skip if: You want rich bacon flavor and plenty of rendered fat for dressing

Soft-Boiled Eggs

Works for: Easier timing, less chance of broken yolks, consistent results

Skip if: You prefer the silky texture of perfectly poached eggs

Curly Endive

Works for: Similar bitterness, holds dressing well, more widely available

Skip if: You want the classic pale yellow-green look of authentic Lyonnaise

Instructions

Cook bacon and poach eggs at the same time to cut 10 minutes off your timeline. The beef works best when it hits the table at the same time as the main - for a version that comes together quickly, serve alongside a classic beef dish that shares the French bistro flavor profile.

  1. Cook bacon in a medium skillet over medium heat 6-8 minutes, stirring every 2 minutes, until edges turn golden and fat renders. Bacon should be crisp but not burnt. Transfer to a paper towel-lined plate with a slotted spoon, leaving fat in the pan.

  2. Toast bread cubes in bacon fat 5-7 minutes, tossing every minute, until all sides turn golden brown. Remove croutons to a separate plate and wipe skillet clean.

  3. Bring a small saucepan of water to 180°F (just below a simmer with tiny bubbles on the bottom). Crack each egg into a small bowl, then slide into water. Poach 3 minutes for runny yolks with set whites. Remove with a slotted spoon and set on a clean towel.

  4. Whisk vinegar and mustard in a small bowl until combined. Slowly drizzle in olive oil while whisking constantly until dressing thickens and emulsifies. Add 1 tablespoon warm bacon fat and whisk again.

  5. Toss frisée with half the vinaigrette in a large bowl, coating leaves evenly. Divide greens among 4 plates. Top each with croutons, bacon, shallots, and one poached egg. Drizzle remaining vinaigrette over eggs and serve immediately.

Shortcut
Make croutons and bacon up to 2 days ahead - store separately and recrisp in a 350°F oven for 3 minutes before serving

What to Serve With It

Most Lyonnaise salads work as a light meal on their own, but adding a warm side turns it into dinner. Rich mains need something to cut through, and this salad does exactly that - pair it with a quick chicken dish or browse more healthy veggie main dishes for weeknight meal planning.

Side Dish Prep Why It Works How to Serve
Warm roasted potatoes Easy Hearty starch balances light greens and complements smoky bacon Roast cubed potatoes at 425°F for 25 minutes, season with salt
Steamed green beans Easy Light, fresh crunch adds color without competing with salad Steam 5 minutes until tender-crisp, toss with butter
Crusty baguette slices Easy Soaks up extra vinaigrette and runny yolk, adds more crunch Slice thick, toast 3 minutes, serve warm on the side
Simple tomato slices Easy Sweetness cuts bitterness of frisée, adds bright acidity Slice ripe tomatoes, sprinkle with salt and olive oil
Light vegetable soup Medium Warm, comforting starter balances cool, crisp salad Serve in small bowls before salad course

Three ways to serve it:

  • As a main: Add another egg per person and serve with extra baguette for soaking up yolk
  • For brunch: Serve alongside smoked salmon, fresh fruit, and mimosas for a French bistro spread
  • As a starter: Use smaller plates with half portions before a roast chicken or steak dinner
Best Pick
Crusty baguette slices work best - they soak up vinaigrette and runny yolk without getting soggy like soft bread does

Store and Reheat

Store components separately or the salad turns into a soggy mess within hours. Greens wilt, croutons soften, and eggs turn rubbery when everything sits together.

Method Time Best For
🍳 Stovetop 2-3 min Warming bacon and croutons in a dry skillet before assembly
🔥 Oven 5 min at 350°F Recrisping croutons and bacon on a baking sheet before serving
📦 Microwave Not recommended Eggs turn rubbery and greens wilt - skip this method entirely

For best results when storing:

  • Fridge bacon and croutons separately in airtight containers for up to 2 days - recrisp before using
  • Don't store dressed greens - they wilt within 30 minutes and can't be revived
  • Poach eggs fresh each time - reheated eggs turn tough and yolks set fully
  • Make vinaigrette ahead and store in a jar for 3 days - whisk again before using
  • Keep frisée dry and unwashed in the crisper drawer for up to 3 days - wash and dry just before serving

Frequently Asked Questions

How long to poach eggs for Salade Lyonnaise?

Poach eggs for exactly 3 minutes in water held at 180°F for runny yolks with set whites. Water that's too hot sets the yolk, and longer than 3 minutes turns yolks chalky.

Can I make Salade Lyonnaise ahead and store it?

Store components separately for up to 2 days - bacon and croutons in airtight containers, vinaigrette in a jar, unwashed greens in the crisper. Poach eggs fresh and assemble within 5 minutes of serving.

How do I know when the eggs are done poaching?

Whites should be completely set and opaque with no translucent parts, while yolks stay soft when you gently press them with a spoon. Pull them at 3 minutes exactly.

Why is my salad soggy and how to fix it?

Soggy salad comes from wet greens or adding dressing too early. Spin greens completely dry in a salad spinner, dress just before serving, and use only half the vinaigrette for tossing - drizzle the rest over plated salads.

Can I use turkey bacon instead of pork bacon?

Turkey bacon works but renders less fat and tastes milder. Cook it 2-3 minutes longer to get crispy edges, and add 1-2 tablespoons olive oil to the pan for making vinaigrette since turkey bacon produces less fat.

Salade Lyonnaise with Bacon and Egg served on a plate

Salade Lyonnaise with Bacon and Egg

No ratings yet
Salade Lyonnaise features crispy bacon lardons, poached eggs with runny yolks, and bitter frisée greens dressed in a warm vinaigrette made from rendered bacon fat. This simple French bistro salad comes together quickly and balances rich and bitter flavors perfectly for a light yet intentional meal.
Print Recipe Pin Recipe
Prep Time 15 minutes mins
Cook Time 15 minutes mins
Total Time 30 minutes mins
Servings: 4 servings
Course: Appetizer, Main Dish
Cuisine: French
Ingredients Equipment Method Notes

Ingredients
  

  • 6 cups frisée lettuce about 1 head, dried thoroughly
  • 6 oz bacon cut into ½-inch pieces
  • 4 large eggs preferably poached
  • 2 medium shallots thinly sliced
  • 3 tablespoon white wine vinegar
  • 1 teaspoon Dijon mustard
  • 0.25 cup olive oil
  • 3 cups day-old baguette cubed for croutons

Equipment

  • Skillet Used to cook bacon and toast croutons
  • Small saucepan To poach eggs at controlled temperature
  • Salad spinner To dry frisée greens thoroughly
  • Slotted spoon For removing bacon and poached eggs
  • Whisk To emulsify vinaigrette dressing

Method
 

  1. Cook bacon in a medium skillet over medium heat 6 to 8 minutes, stirring every 2 minutes, until edges are golden and fat is rendered. Bacon should be crisp but not burnt. Transfer bacon to a paper towel-lined plate using a slotted spoon, leaving the fat in the pan.
    6 oz bacon
  2. Toast bread cubes in the bacon fat in the skillet 5 to 7 minutes, tossing every minute, until all sides are golden brown. Remove croutons to a separate plate and wipe skillet clean.
    3 cups day-old baguette
  3. Bring a small saucepan of water to 180°F, just below simmering with tiny bubbles on the bottom. Crack each egg into a small bowl and gently slide into the water. Poach eggs for 3 minutes for runny yolks with set whites. Remove with a slotted spoon and drain on a clean towel.
    4 large eggs
  4. Whisk white wine vinegar and Dijon mustard in a small bowl until combined. Slowly drizzle in olive oil while whisking constantly until the dressing emulsifies and thickens. Add 1 tablespoon warm bacon fat and whisk to combine.
    3 tbsp white wine vinegar, 1 tsp Dijon mustard, 0.25 cup olive oil
  5. Toss frisée lettuce with half the vinaigrette in a large bowl to coat evenly. Divide the greens among 4 plates. Top each plate with croutons, bacon, sliced shallots, and one poached egg. Drizzle the remaining vinaigrette over the eggs and serve immediately.
    6 cups frisée lettuce, 6 oz bacon, 2 medium shallots, 4 large eggs

Notes

  • Cook bacon and poach eggs simultaneously to save time.
  • Dry greens completely before dressing to prevent sogginess.
  • Assemble salad within 5 minutes of finishing to maintain crispness and texture.

Tried this recipe?

Let us know how it was!

Air Fryer Potato Rösti

March 26, 2026

Grate russet potatoes with onion and squeeze out all the water using a kitchen towel. Season with salt and pepper, form into flat patties, and air fry at 375°F for 15 minutes.

Air Fryer Potato Rösti served on a plate

The air fryer crisps the edges while keeping the inside tender. You don't flip until halfway through, and the oil spray does the rest.

This works for weeknight dinners when you want something quick that looks like you put in effort. Use it for brunch or as a side that's ready while the main cooks.

QUICK SUMMARY

Air fryer potato rösti delivers crispy golden edges with tender potato inside in 30 minutes total. The trick is squeezing out every bit of moisture from grated potatoes before air frying, then using oil spray for even browning. Skip this step and you'll get soggy patties instead of crispy ones.

⏱️Time reality: 15 min prep, 15 min cook - no babysitting required
🔧First move: Wrap grated potatoes in towel and squeeze for 3 minutes straight
⚠️Watch out: Wet potatoes steam instead of crisp - dry them completely

Table of Contents

Toggle
  • Why This Recipe Works
  • What You'll Need
    • Ingredient Details
  • Ingredient Swaps
  • What to Serve With It
  • Store and Reheat
  • Frequently Asked Questions
  • Air Fryer Potato Rösti
    • Method 
    • Tried this recipe?

Why This Recipe Works

The air fryer creates crispy edges without deep frying because the circulating hot air removes moisture while browning the surface. Starchy russet potatoes hold their shape better than waxy varieties. For a version that comes together quickly, this easy shrimp recipe works as the main while rösti cooks alongside.

Quick Reference
⏱️
Prep Time
15 min
🔥
Cook Time
15 min
⏰
Total Time
30 min
🍽️
Servings
4 servings
📊
Difficulty
Easy
🏷️
Category
Side
💡
Quick Tip
Dry potatoes well for crispiness
🎯
Best For
Weeknight | Brunch | Entertaining

Here's what makes it work:

  • Grating instead of slicing exposes more surface area to hot air for faster crisping and even browning throughout
  • Drying removes excess starch that would otherwise make patties gummy instead of crispy with defined edges
  • 375°F hits the sweet spot - hot enough to brown quickly but not so high that edges burn before centers cook through
  • Oil spray on both sides promotes even golden color and prevents sticking to the air fryer basket
  • Resting for 2 minutes after cooking lets steam escape and firms up texture so patties don't fall apart when you plate them
Golden Rule
Squeeze grated potatoes in a kitchen towel for 3 full minutes - when you think they're dry enough, squeeze again

What You'll Need

Ingredients for Air Fryer Potato Rösti

Russet potatoes are the base because their high starch content crisps better than waxy varieties. Most people skip easy cauliflower side when making rösti, but the contrast works for weeknight meals.

🥔
Base
  • Russet potatoes
  • Onion
🧂
Seasoning
  • Salt
  • Black pepper
🫗
Fat
  • Vegetable oil
  • Butter (optional)
🌿
Optional
  • Fresh herbs

Ingredient Details

  • Russet potatoes
    Use starchy russets, not waxy red or Yukon gold - they crisp better and hold shape when grated
  • Onion
    Grate on the large holes of a box grater for pieces that match potato size and cook evenly
  • Salt
    Add after drying potatoes - salt draws out moisture and makes patties soggy if added too early
  • Vegetable oil
    Use cooking spray for even coverage on both sides - it's faster than brushing and prevents pooling
  • Butter
    Melted butter adds richer flavor than oil but browns faster - watch the timing closely
  • Fresh herbs
    Chop parsley, dill, or chives and mix in after drying for bright color and aroma without extra moisture

Ingredient Swaps

Russet potatoes work best, but sweet potatoes add natural sweetness if you prefer a different flavor profile. A good donuts can make or break the plate, and another great donuts recipe fills the gap when you need variety.

Four swaps that work:

  • Sweet potatoes for russets - softer texture, sweeter taste, needs 3-5 extra minutes cook time
  • Olive oil for vegetable oil - slightly fruity flavor, same browning, use regular not extra virgin
  • Onion powder for fresh onion - less moisture, milder flavor, use 1 teaspoon per large onion
  • Low sodium salt for regular salt - same function, less salty taste, use same amount

Sweet Potato Rösti

Works for: sweeter flavor preference, extra vitamin A, softer texture fans

Skip if: you want classic crispy edges, cooking in a hurry, feeding picky eaters

Butter Instead of Oil

Works for: richer flavor, European-style rösti, brunch entertaining

Skip if: dairy-free diet, watching smoke point, air fryer runs very hot

Instructions

Grating and drying takes 10 minutes, air frying takes 15, and you flip once halfway through. Most people skip this quick chicken dish when planning dinner, but timing matters when you want the main and side ready together.

  1. Grate potatoes and onion using the large holes of a box grater into a mixing bowl, then wrap in a clean kitchen towel and squeeze firmly for 3 minutes until no more liquid comes out.
  2. Season and form patties by mixing dried potatoes with salt and black pepper, then shape into 4 flat patties about ½ inch thick and 4 inches wide using your hands.
  3. Preheat air fryer to 375°F for 3-5 minutes, then spray basket with oil spray to prevent sticking before adding patties.
  4. Air fry first side by placing patties in basket with 1-inch gaps between them, spraying tops with oil, and cooking for 7-8 minutes until edges turn golden brown.
  5. Flip and finish cooking by carefully turning patties with a spatula, spraying the second side with oil, and air frying for another 7-8 minutes until both sides are crispy and deep golden brown.
Shortcut
Use a food processor with the grating disc to shred potatoes in 30 seconds instead of hand-grating for 5 minutes

What to Serve With It

Rösti works as a side for breakfast or dinner, but most plates need a protein to feel complete. Rich mains need something to cut through, and planning your sausage and cabbage dinner pairs well when you're building a full meal.

Side Dish Prep Why It Works How to Serve
Mixed green salad Easy Fresh contrast cuts through rich potato with bright acidity Toss with lemon vinaigrette, serve alongside rösti while warm
Steamed broccoli Easy Adds color and nutritional balance to a starch-heavy plate Steam 5 min, season with salt and lemon zest, plate next to rösti
Fried eggs Easy Simple protein that turns rösti into a complete breakfast Fry eggs while rösti cooks, place on top so yolk runs into potato
Sautéed mushrooms Medium Earthy umami flavor enhances mild potato taste Sauté in butter 8 min, spoon over rösti just before serving
Smoked salmon Easy Elegant salty-smoky pairing for brunch or entertaining Layer thin slices on top, add capers and fresh dill

Three ways to serve it:

  • Classic brunch plate: Top with fried egg, sour cream, fresh chives, and serve with mixed greens on the side
  • Dinner side: Pair with this simple burgers and steamed vegetables for a complete weeknight meal that cooks in 30 minutes
  • Appetizer platter: Cut into smaller patties, serve with spicy aioli and pickled vegetables for entertaining
Best Pick
Sour cream and chives is the traditional Swiss topping - the creaminess balances crispy edges and adds tang

Store and Reheat

Rösti keeps for 3-4 days in the fridge but loses crispiness as it sits. Pork adds the contrast this plate needs, but timing matters when reheating for the best texture. For a version that comes together quickly, simple pork recipe works as the main while you reheat the rösti.

Method Time Best For
🔥 Air Fryer 5-7 min at 350°F Restoring crispiness - closest to fresh-made texture
🔥 Oven 10-12 min at 350°F Reheating multiple servings evenly without overcrowding
📦 Microwave 30-45 sec Quick reheating when texture doesn't matter much

For best results when storing:

  • Cool completely before storing - hot rösti creates condensation that makes patties soggy in the container
  • Stack with parchment between layers - prevents patties from sticking together and tearing when you separate them
  • Store in shallow airtight container - keeps moisture out better than zip-top bags that can trap condensation
  • Freeze in single layer on sheet pan first - flash freeze for 2 hours, then transfer to freezer bag for up to 2 months
  • Reheat from frozen in air fryer - add 3-5 minutes to cook time, no need to thaw first

Frequently Asked Questions

Can I make air fryer potato rösti ahead and reheat later?

Yes - cook fully, cool completely, then store in the fridge for up to 4 days. Reheat in air fryer at 350°F for 5-7 minutes to restore crispiness.

How long to cook air fryer potato rösti at 375°F?

15 minutes total - 7-8 minutes per side. Flip halfway through when edges turn golden brown and crispy.

What goes with air fryer potato rösti?

Fried eggs, smoked salmon, sautéed mushrooms, or steamed broccoli all work. It pairs well with proteins for dinner or makes a complete breakfast with eggs and greens.

Why is my rösti soggy and how to fix it?

Excess moisture in grated potatoes causes sogginess. Squeeze potatoes in a towel for 3 minutes until no liquid comes out, then return soggy rösti to air fryer for 3-5 extra minutes.

Can I use sweet potatoes for air fryer rösti?

Yes - sweet potatoes work but create softer texture and sweeter taste. Add 3-5 minutes to cook time and expect less crispy edges than russets.

Air Fryer Potato Rösti served on a plate

Air Fryer Potato Rösti

No ratings yet
Air fryer potato rösti delivers crispy golden edges with tender potato inside using grated russet potatoes dried thoroughly before air frying. The technique of squeezing out moisture and spraying oil ensures perfect browning without flipping too often. This easy side or brunch dish cooks in 30 minutes total with minimal effort.
Print Recipe Pin Recipe
Prep Time 15 minutes mins
Cook Time 15 minutes mins
Total Time 30 minutes mins
Servings: 4 servings
Course: Side Dish
Cuisine: Swiss
Ingredients Equipment Method Notes

Ingredients
  

  • 4 medium russet potatoes peeled and grated
  • 1 medium onion grated
  • 1 teaspoon salt add after drying potatoes
  • 0.5 teaspoon black pepper
  • as needed vegetable oil spray for air fryer basket and patties
  • optional butter melted, for richer flavor instead of oil
  • optional tablespoon fresh herbs chopped parsley, dill, or chives

Equipment

  • Box Grater Used to grate potatoes and onion
  • Air fryer Cooks rösti to crispy perfection without deep frying
  • Kitchen Towel Wrapps grated potatoes to squeeze out moisture
  • Spatula Used to flip patties halfway through cooking

Method
 

  1. Grate russet potatoes and onion using the large holes of a box grater into a mixing bowl. Wrap the mixture in a clean kitchen towel and squeeze firmly for 3 minutes until no more liquid comes out.
    4 medium russet potatoes, 1 medium onion
  2. Mix dried grated potatoes with salt and black pepper. If using fresh herbs, mix them in now. Shape the mixture into 4 flat patties about ½ inch thick and 4 inches wide using your hands.
    1 tsp salt, 0.5 tsp black pepper, optional tbsp fresh herbs
  3. Preheat the air fryer to 375°F for 3-5 minutes. Spray the air fryer basket with vegetable oil spray to prevent sticking.
    as needed vegetable oil spray
  4. Place patties in the basket with 1-inch gaps between them. Spray the tops with oil spray. Cook for 7-8 minutes until edges are golden brown and crispy.
    as needed vegetable oil spray
  5. Carefully flip patties using a spatula. Spray the second side with oil spray. Air fry for another 7-8 minutes until both sides are crispy and deep golden brown. Let rest for 2 minutes before serving.
    as needed vegetable oil spray

Notes

  • Squeeze grated potatoes in a kitchen towel for 3 full minutes to remove moisture; otherwise, rösti will be soggy.
  • Use starchy russet potatoes rather than waxy varieties for better crispiness and structure.
  • Spraying oil on both sides promotes even browning and prevents sticking in the air fryer basket.

Tried this recipe?

Let us know how it was!

Air Fryer Spinach and Cheese Borek

March 26, 2026

Most phyllo pastries turn out either soggy or dry, with fillings that leak or crusts that burn. The fix is sautéing spinach first to remove moisture, brushing phyllo layers lightly with oil, and air frying at exactly 350°F.

Air Fryer Spinach and Cheese Borek served on a plate

The air fryer crisps the phyllo without constant monitoring. You fold triangles, brush oil on each layer, and let the machine handle the rest.

This works for weeknight appetizers when you want something that looks like effort but doesn't require babysitting.

QUICK SUMMARY

Air Fryer Spinach and Cheese Borek delivers crispy, flaky phyllo triangles filled with spinach, feta, and mozzarella. Sautéing spinach before mixing removes excess moisture that would otherwise turn the pastry soggy. Brush phyllo layers thinly with olive oil to crisp without greasiness. Cook at 350°F for 10-12 minutes, rotating halfway for even browning.

⏱️Time Reality: 15 minutes prep, 12 minutes cooking, 2 minutes resting before serving
🔧Critical Move: Drain sautéed spinach with paper towels to prevent soggy filling
⚠️Watch Out: Torn phyllo from dryness - keep unused sheets under damp towel

Why This Recipe Works

The air fryer gives you crispy phyllo without deep frying or oven preheating. Rich mains need something to cut through, and pork does exactly that. For a version that comes together quickly, this quick pork dish works alongside these triangles.

Quick Reference
⏱️
Prep Time
15 min
🔥
Cook Time
10-12 min
⏰
Total Time
25-27 min
🍽️
Servings
4 servings (8 pieces)
📊
Difficulty
Medium
🏷️
Category
Appetizer
💡
Quick Tip
Brush phyllo edges well to avoid tearing
🎯
Best For
Weeknight | Entertaining

What makes this work:

  • Sautéing spinach first removes water that would make phyllo soggy - press cooked spinach with paper towels before mixing
  • Egg binds the filling so cheese and spinach stay together during folding and cooking
  • Thin oil brushing between phyllo layers creates flaky texture without greasiness
  • 350°F temperature crisps phyllo evenly without burning edges before the center cooks through
  • Triangle folding method seals filling inside while creating multiple crispy edges per piece
Quick Tip
Rotate the air fryer basket halfway through cooking for even browning on all sides

What You'll Need

Ingredients for Air Fryer Spinach and Cheese Borek

Shopping takes 10 minutes if you grab phyllo from the freezer section and fresh spinach from produce. A good meatballs can make or break the plate. For a version that comes together quickly, this easy meatballs recipe rounds out the spread.

🥬
Greens
  • Fresh spinach (2 cups)
  • Onion (1 small, diced)
  • Garlic (2 cloves, minced)
🧀
Cheese & Egg
  • Feta cheese (crumbled)
  • Mozzarella cheese (shredded)
  • Egg (1 large)
🫓
Pastry
  • Phyllo dough (8 sheets)
  • Olive oil (for brushing)
🌶️
Seasonings
  • Salt
  • Black pepper

Ingredient Details

  • Phyllo dough
    Thaw in fridge overnight - frozen sheets tear when folded, dry sheets crack
  • Fresh spinach
    Sauté 3-4 minutes until wilted, then press with paper towels to remove all water
  • Feta cheese
    Crumble into small pieces for even distribution - large chunks create lumpy filling
  • Egg
    Beat well before mixing into filling to bind cheese and spinach together
  • Olive oil
    Use pastry brush to apply thin layer - 1 teaspoon per phyllo sheet prevents greasiness
  • Mozzarella cheese
    Adds creaminess to balance salty feta - ricotta works as swap
  • Onion
    Dice small and sauté until translucent for sweet background flavor

Ingredient Swaps

You can adjust cheese types or switch to frozen spinach without ruining texture. The carrots works best when it hits the table at the same time as the main. We keep a batch ready for nights like this - more recipe ideas keep the variety going.

Four swaps that work:

  • Frozen spinach for fresh spinach - thaw completely, squeeze out all liquid with paper towels, adds slight softness to filling
  • Ricotta or queso fresco for feta - milder flavor, less salty, maintains creamy texture
  • Puff pastry for phyllo dough - less flaky, more buttery, easier to handle but different texture
  • Butter or avocado oil for olive oil - butter adds richness, avocado oil has neutral flavor

Fresh Spinach

Works for: bright color, firmer texture, less prep cleanup

Skip if: frozen already on hand, want softer filling texture

Frozen Spinach

Works for: budget cooking, convenience, less shrinkage when cooking

Skip if: not squeezed dry completely, can make filling watery and soggy

Instructions

Folding takes practice but the method stays the same every time. Most people skip chicken, but it balances the meal. For a version that comes together quickly, simple homemade chicken pairs with these triangles.

  1. Sauté spinach and aromatics: Heat skillet over medium heat, cook diced onion 2-3 minutes until translucent, add garlic for 30 seconds, then add fresh spinach and cook 3-4 minutes until wilted. Press cooked spinach with paper towels to remove all moisture, let cool 5 minutes.
  2. Mix filling: Combine pressed spinach, crumbled feta, shredded mozzarella, beaten egg, salt, and black pepper in mixing bowl. Stir until egg coats all ingredients evenly and mixture holds together when pressed.
  3. Prepare phyllo and fold triangles: Lay one phyllo sheet flat, brush lightly with olive oil using pastry brush (about 1 teaspoon), place second sheet on top and brush again. Cut into 3-inch wide strips lengthwise. Place 1 tablespoon filling at bottom of each strip, fold corner over to form triangle, continue folding flag-style to end of strip. Press edges to seal.
  4. Air fry first batch: Preheat air fryer to 350°F for 3 minutes. Place folded triangles seam-side down in basket without touching, brush tops lightly with oil. Cook 10-12 minutes, rotating basket halfway, until phyllo turns golden brown and edges crisp.
  5. Rest and serve: Remove borek from basket, place on wire rack or plate, let rest 2 minutes before serving. The filling sets during resting so cheese doesn't immediately leak when bitten.
Watch Out
Keep unused phyllo sheets covered with damp towel while working - exposed sheets dry out and tear within 5 minutes

What to Serve With It

Turkish appetizers work with Mediterranean sides that add freshness or cooling contrast. Rich mains need something to cut through, and salmon does exactly that. For a version that comes together quickly, simple homemade salmon complements the cheese filling, or browse weeknight chicken wings meal ideas for more pairings.

Side Dish Prep Why It Works How to Serve
Cucumber yogurt salad Easy Cool, creamy contrast to crispy pastry and salty filling Toss sliced cucumbers with Greek yogurt, lemon juice, dill, salt
Tomato salad Easy Fresh acidity brightens rich cheese flavors Dice tomatoes, mix with olive oil, red onion, parsley, salt
Hummus Easy Creamy dip pairs well with crispy phyllo texture Store-bought or homemade, serve with lemon wedge, drizzle olive oil
Red pepper dip Medium Smoky sweetness balances savory spinach-cheese filling Roast red peppers, blend with walnuts, garlic, olive oil
Tabbouleh Medium Fresh herb salad cuts richness of cheese and phyllo Mix bulgur, chopped parsley, mint, tomato, lemon juice

Three ways to serve it:

  • Party appetizer spread: Arrange borek on platter with hummus, olives, cucumber salad, pita chips
  • Light lunch plate: Serve 3-4 triangles with tomato salad, garlic yogurt sauce, lemon wedges
  • Mediterranean dinner starter: Plate 2 triangles per person with tabbouleh, red pepper dip
Best Pick
Garlic yogurt sauce (Greek yogurt + minced garlic + lemon juice + salt) adds cooling element that balances salty feta

Store and Reheat

Borek stays crispy for 3-4 days in the fridge if stored properly. Chicken adds the contrast this plate needs, but timing matters. We keep a batch ready for nights like this - juicy homemade chicken recipe rounds out the meal.

Method Time Best For
🔥 Air Fryer 4-5 min at 350°F Restoring crispness to phyllo, single servings
🔥 Oven 8-10 min at 350°F Large batches, even reheating without monitoring
📦 Microwave 30-45 sec Quick reheats when texture doesn't matter, soft filling

For best results when storing:

  • Cool completely before storing - hot borek creates condensation that makes phyllo soggy
  • Use shallow airtight container - stack with parchment between layers to prevent sticking
  • Refrigerate up to 4 days - phyllo stays crispy if container seals tightly
  • Freeze unbaked triangles - assemble, freeze on tray, transfer to freezer bag for up to 1 month
  • Reheat frozen borek directly - add 3-4 minutes to air fryer time, no thawing needed

Frequently Asked Questions

How long to cook Air Fryer Spinach and Cheese Borek at 350°F?

Cook 10-12 minutes at 350°F, rotating the basket halfway through. The phyllo turns golden brown and edges crisp when done.

Can I make Air Fryer Spinach and Cheese Borek ahead?

Yes. Assemble triangles, freeze on tray until solid, transfer to freezer bag for up to 1 month. Air fry directly from frozen, adding 3-4 minutes to cooking time.

What goes with Air Fryer Spinach and Cheese Borek?

Serve with cucumber yogurt salad, hummus, tomato salad, or garlic yogurt sauce. The cool, creamy sides balance the crispy, salty pastries.

How do I know when Air Fryer Spinach and Cheese Borek is done?

Look for golden brown phyllo on all sides and crispy edges. The pastry should feel firm when touched, not soft or doughy.

Can I use frozen spinach in Air Fryer Spinach and Cheese Borek?

Yes, but thaw completely and squeeze out all liquid using paper towels. Excess moisture makes the filling watery and prevents phyllo from crisping.

Air Fryer Spinach and Cheese Borek served on a plate

Air Fryer Spinach and Cheese Borek

No ratings yet
Air Fryer Spinach and Cheese Borek creates crispy, flaky phyllo triangles filled with a moist spinach and cheese mixture. Sautéing the spinach removes excess moisture, while brushing phyllo layers thinly with olive oil ensures a perfectly crisp texture cooked at 350°F.
Print Recipe Pin Recipe
Prep Time 15 minutes mins
Cook Time 12 minutes mins
Total Time 27 minutes mins
Servings: 4 servings
Course: Appetizer
Cuisine: Mediterranean, Turkish
Ingredients Equipment Method Notes

Ingredients
  

  • 2 cups spinach fresh, sautéed and pressed dry
  • 1 small onion diced
  • 2 cloves garlic minced
  • 0.5 cup feta cheese crumbled
  • 0.5 cup mozzarella cheese shredded
  • 1 large egg beaten
  • 8 sheets phyllo dough thawed if frozen
  • as needed olive oil for brushing phyllo layers
  • to taste salt
  • to taste black pepper

Equipment

  • Air fryer Used to crisp phyllo triangles evenly at 350°F
  • Skillet For sautéing spinach, onion, and garlic
  • Pastry brush For brushing olive oil thinly between phyllo layers
  • Mixing bowl To combine filling ingredients

Method
 

  1. Heat a skillet over medium heat and cook diced onion for 2-3 minutes until translucent. Add minced garlic and cook for 30 seconds. Add fresh spinach and sauté for 3-4 minutes until wilted. Press the cooked spinach with paper towels to remove all moisture, then let cool for 5 minutes.
    1 small onion, 2 cloves garlic, 2 cups spinach
  2. In a mixing bowl, combine the pressed spinach, crumbled feta, shredded mozzarella, beaten egg, salt, and black pepper. Stir until the egg evenly coats all ingredients and the mixture holds together when pressed.
    2 cups spinach, 0.5 cup feta cheese, 0.5 cup mozzarella cheese, 1 large egg, to taste salt, to taste black pepper
  3. Lay one phyllo sheet flat and brush lightly with olive oil (about 1 teaspoon) using a pastry brush. Place a second phyllo sheet on top and brush again. Cut the layered sheets lengthwise into 3-inch wide strips. Place 1 tablespoon of filling at the bottom of each strip, fold the corner over to form a triangle, and continue folding flag-style to the end of the strip. Press edges together to seal.
    8 sheets phyllo dough, as needed olive oil
  4. Preheat the air fryer to 350°F for 3 minutes. Place folded triangles seam-side down in the basket without touching each other. Brush tops lightly with olive oil. Cook for 10-12 minutes, rotating the basket halfway through for even browning, until phyllo is golden brown and crispy.
    8 sheets phyllo dough, as needed olive oil
  5. Remove the borek from the air fryer basket and place on a wire rack or plate. Let rest for 2 minutes before serving to allow the filling to set and prevent cheese from leaking immediately when bitten.

Notes

  • Keep unused phyllo sheets covered with a damp towel to prevent drying and tearing.
  • Press cooked spinach thoroughly with paper towels to avoid soggy filling.
  • Brush phyllo layers thinly with olive oil (approximately 1 teaspoon per sheet) for a crisp, flaky texture without greasiness.

Tried this recipe?

Let us know how it was!

Air Fryer Beef Taquitos

March 26, 2026

Crispy edges that snap when you bite down, tender beef seasoned with cumin and garlic, and cheese that holds it all together. That's what happens when you roll corn tortillas tight and air fry them at 400°F for 10 minutes.

Air Fryer Beef Taquitos served on a plate

The air fryer does the work while you make rice or chop salad. No deep frying, no oil puddles, no flipping halfway through unless you want extra browning.

Make these on Tuesday when the grocery run feels far away but you still want something that tastes intentional.

QUICK SUMMARY

Air Fryer Beef Taquitos deliver crispy corn tortillas wrapped around well-seasoned ground beef and melted cheese. Roll them tight to prevent filling from spilling, and spray lightly with oil for golden browning. The air fryer crisps the exterior in 10-12 minutes while keeping the filling moist.

⏱️Time Reality: 15 minutes prep, 10-12 minutes cooking - under 30 minutes start to finish
🔥First Critical Move: Preheat air fryer to 400°F for 3 minutes before adding taquitos
⚠️Watch Out: Overfilled taquitos burst open - use 2 tablespoons filling per tortilla max

Why This Recipe Works

High heat crisps corn tortillas without deep frying, while the tight roll keeps the filling secure. For a version that comes together quickly, this quick beef dish uses ground beef that cooks in under 8 minutes and needs no marinating.

Quick Reference
⏱️
Prep Time
15 min
🔥
Cook Time
10-12 min
⏰
Total Time
27 min
🍽️
Servings
4 servings (8-12 taquitos)
📊
Difficulty
Easy
🏷️
Category
Main Dish | Appetizer
💡
Quick Tip
Roll tightly for crisp edges and secure filling
🎯
Best For
Weeknight | Meal prep | Casual entertaining

Key success factors:

  • Preheating the air fryer ensures even crisping from the first minute and prevents soggy spots
  • Draining cooked ground beef removes excess grease that would make tortillas limp instead of crisp
  • Light oil spray on each side creates golden browning without the calories or mess of deep frying
  • Warming tortillas for 20 seconds wrapped in damp paper towel makes them pliable enough to roll without cracking
  • Resting taquitos for 3 minutes after air frying lets the filling set so it doesn't spill when you bite
Quick Tip
Cook no more than 6 taquitos at once - overcrowding blocks airflow and creates steamed instead of crispy edges

What You'll Need

Ingredients for Air Fryer Beef Taquitos

Fresh corn tortillas and well-drained beef make the difference between crispy taquitos and soggy ones. For a version that comes together quickly, fresh homemade salad recipe adds brightness without extra cooking time.

🍗
Beef Filling
  • 1 lb ground beef
  • ½ medium onion, diced
  • 2 garlic cloves, minced
🌶️
Seasonings
  • 1 teaspoon cumin
  • ½ teaspoon chili powder
  • ½ teaspoon salt
  • ¼ teaspoon black pepper
🧀
Assembly
  • 8-12 corn tortillas
  • 1 cup shredded cheese
  • Oil spray

Ingredient Details

  • Ground beef
    80/20 lean-to-fat ratio stays moist without being greasy - drain after browning to prevent soggy taquitos
  • Corn tortillas
    Fresh (not stale) tortillas roll without cracking - warm them 20 seconds wrapped in damp paper towel before rolling
  • Shredded cheese
    Cheddar, Monterey Jack, or Mexican blend all melt well - adds richness and helps bind the filling
  • Cumin
    Key spice for authentic warm notes - don't skip or substitute, it defines the taquito flavor
  • Onion
    Dice small (¼-inch) so it distributes evenly and cooks fully during browning - adds sweetness and moisture
  • Oil spray
    Light coat on each side browns tortillas without making them greasy - use cooking spray or brush with olive oil
  • Garlic
    Fresh minced garlic adds depth - cook with onion until fragrant, about 30 seconds, before adding beef

Ingredient Swaps

Ground turkey or chicken work if you want leaner protein, but they cook faster and can dry out if you're not careful. For a version that comes together quickly, classic chicken dish uses similar seasonings and air fryer timing.

Four swaps that work:

  • Ground beef → ground turkey or chicken - leaner with slightly drier texture, reduce cook time by 1-2 minutes and watch for dryness
  • Corn tortillas → flour tortillas - more pliable and less likely to crack, but won't crisp as well in the air fryer
  • Shredded cheese → dairy-free cheese - similar melt and binding power, slightly altered flavor but works for dairy-free diets
  • Chili powder → smoked paprika - adds smokiness without heat, good if you want milder flavor or cooking for kids

Ground Turkey

Works for: Leaner option with less grease to drain

Skip if: You want richer flavor or tend to overcook meat

Flour Tortillas

Works for: Easier rolling with less risk of cracking

Skip if: You want maximum crispiness or need gluten-free

Dairy-Free Cheese

Works for: Dietary restrictions while keeping binding properties

Skip if: Flavor matters more than dietary needs

Instructions

Brown the beef first, let it cool slightly while you prep tortillas, then assemble and air fry in batches. For a version that comes together quickly, this easy fries recipe uses the same air fryer temperature and timing.

Step-by-step:

  1. Brown the filling. Heat a skillet over medium-high heat, add ground beef, onion, and garlic. Cook 6-8 minutes, breaking up beef with a spoon, until no pink remains. Drain excess grease, stir in cumin, chili powder, salt, and pepper. Let cool 5 minutes.

  2. Warm tortillas. Stack corn tortillas, wrap in damp paper towel, microwave 20 seconds. This makes them pliable enough to roll without cracking.

  3. Assemble taquitos. Lay one tortilla flat, spoon 2 tablespoons beef filling in a line down the center. Sprinkle with 1 tablespoon shredded cheese. Roll tightly from one edge to the other, tucking filling in as you go. Place seam-side down. Repeat with remaining tortillas.

  4. Air fry first batch. Preheat air fryer to 400°F for 3 minutes. Spray taquitos lightly with oil on all sides. Place 5-6 taquitos in basket in single layer, seam-side down, leaving space between each. Air fry 10-12 minutes until golden brown and crispy, flipping halfway through at 6 minutes for even browning.

  5. Rest and serve. Remove taquitos from air fryer, let rest 3 minutes so filling sets and doesn't spill. Repeat with remaining taquitos. Serve with sour cream, salsa verde, or guacamole.

Golden Rule
Don't skip the 3-minute rest after air frying - the filling needs time to set or it will ooze out when you bite

What to Serve With It

Taquitos need something fresh to cut the richness and something creamy to dunk. For a version that comes together quickly, jamaican beef patties meal planning ideas offers similar pairing strategies for handheld beef mains.

Side Dish Prep Why It Works How to Serve
Mexican rice Easy Filling, absorbs any spilled filling, complements beef spices Serve warm on the side, let taquitos rest on top
Mixed green salad Easy Adds freshness and crunch, balances rich beef and cheese Toss with lime vinaigrette, serve immediately
Black beans Easy Adds protein and fiber, mild flavor doesn't compete with taquitos Heat canned beans with cumin, serve warm
Corn salsa Easy Bright and tangy contrast to beef, adds texture Spoon over taquitos or serve on the side for dipping
Guacamole Medium Creamy dip cools spicy beef, adds richness Serve in small bowl for dipping crispy taquitos

Three ways to serve it:

  • Weeknight plate: Mexican rice, black beans, and sour cream for dipping - filling, balanced, minimal prep
  • Appetizer spread: Guacamole, pico de gallo, queso dip, and tortilla chips - turn taquitos into finger food for casual entertaining
  • Light dinner: Mixed green salad with lime vinaigrette and corn salsa - keeps the meal fresh and less heavy
Best Pick
Serve with sour cream and salsa verde - the cooling dairy and herbaceous tang balance the spiced beef without overwhelming it

Store and Reheat

Cooked taquitos keep 3-4 days in the fridge, and you can freeze assembled uncooked ones for up to 2 months. For a version that comes together quickly, simple homemade recipe stores just as well and reheats in similar timeframes.

Method Time Best For
🔥 Air fryer 4-5 min at 400°F Best crispiness retention, single servings
🍳 Oven 8-10 min at 400°F Reheating multiple taquitos at once
📦 Microwave 30-45 sec Speed when crispiness doesn't matter

For best results when storing:

  • Cool completely before storing - hot taquitos create condensation in containers that makes them soggy
  • Store in shallow airtight container - single layer prevents crushing and maintains shape
  • Separate layers with parchment - if stacking, place parchment between layers to prevent sticking
  • Freeze uncooked for meal prep - assemble taquitos, place on baking sheet until frozen solid (2 hours), then transfer to freezer bag for up to 2 months
  • Cook frozen taquitos directly - no thawing needed, add 3-4 minutes to air fryer time and check for 160°F internal temperature

Frequently Asked Questions

Can I make air fryer beef taquitos ahead and freeze them?

Yes, assemble taquitos completely, place on a baking sheet in a single layer, freeze for 2 hours until solid, then transfer to a freezer bag for up to 2 months. Cook from frozen, adding 3-4 minutes to the air fryer time.

What's the best way to reheat taquitos without losing crispiness?

Air fryer at 400°F for 4-5 minutes restores crispiness best. Oven works too (8-10 minutes at 400°F) for larger batches, but skip the microwave unless you're okay with soft tortillas.

How do I know when the beef in taquitos is fully cooked?

Cook ground beef until no pink remains and it reaches 160°F internal temperature before assembling taquitos. The air fryer crisps the outside but doesn't cook raw meat, so the filling must be fully cooked first.

Why do my taquitos turn out soggy and how can I fix that?

Soggy taquitos happen from excess grease in the filling or overcrowding the air fryer basket. Drain beef thoroughly after browning, use light oil spray (not too much), and leave space between taquitos so air circulates. Reheat soggy ones at 400°F for 3-5 minutes to re-crisp.

Can I use flour tortillas instead of corn for beef taquitos?

Yes, flour tortillas roll easier and crack less, but they won't crisp as well as corn tortillas in the air fryer. They're more pliable and forgiving, good if you struggle with cracking, but the texture will be softer.

Air Fryer Beef Taquitos served on a plate

Air Fryer Beef Taquitos

No ratings yet
Air Fryer Beef Taquitos feature crispy corn tortillas tightly rolled around seasoned ground beef and melted cheese. The air fryer crisps the exterior in just 10-12 minutes while keeping the filling moist, making them a quick and delicious meal or appetizer.
Print Recipe Pin Recipe
Prep Time 15 minutes mins
Cook Time 12 minutes mins
Total Time 27 minutes mins
Servings: 4 servings
Course: Appetizer, Main Dish
Cuisine: Mexican
Ingredients Equipment Method Notes

Ingredients
  

  • 1 lb ground beef 80/20 lean-to-fat ratio, drain excess grease after cooking
  • 0.5 medium onion diced finely (about ¼-inch pieces)
  • 2 cloves garlic minced
  • 1 teaspoon cumin
  • 0.5 teaspoon chili powder
  • 0.5 teaspoon salt
  • 0.25 teaspoon black pepper
  • 8-12 count corn tortillas fresh, warmed 20 seconds in damp paper towel before rolling
  • 1 cup shredded cheese cheddar, Monterey Jack, or Mexican blend
  • to taste oil spray light spray on each side to brown tortillas

Equipment

  • Air fryer Used to crisp the taquitos without deep frying.
  • Skillet To brown the ground beef filling.
  • Microwave To warm tortillas for pliability before rolling.

Method
 

  1. Heat a skillet over medium-high heat and add ground beef, diced onion, and minced garlic. Cook for 6-8 minutes, breaking up the beef with a spoon, until no pink remains. Drain excess grease. Stir in cumin, chili powder, salt, and pepper. Let the filling cool slightly for 5 minutes.
    1 lb ground beef, 0.5 medium onion, 2 cloves garlic, 1 tsp cumin, 0.5 tsp chili powder, 0.5 tsp salt, 0.25 tsp black pepper
  2. Stack the corn tortillas, wrap them in a damp paper towel, and microwave for 20 seconds to make them pliable and prevent cracking when rolling.
    8-12 count corn tortillas
  3. Lay one tortilla flat and spoon 2 tablespoons of the beef filling in a line down the center. Sprinkle 1 tablespoon of shredded cheese on top. Roll the tortilla tightly from one edge to the other, tucking the filling in as you go. Place the rolled taquito seam-side down on a plate. Repeat with remaining tortillas.
    1 lb ground beef, 8-12 count corn tortillas, 1 cup shredded cheese
  4. Preheat the air fryer to 400°F for 3 minutes. Lightly spray the taquitos with oil on all sides. Place 5-6 taquitos in a single layer in the basket, seam-side down, leaving space between each. Air fry for 10-12 minutes until golden brown and crispy, flipping halfway at 6 minutes for even browning.
    to taste oil spray
  5. Remove taquitos from the air fryer and let them rest for 3 minutes to allow the filling to set and prevent spilling. Repeat with remaining taquitos. Serve warm with sour cream, salsa verde, or guacamole.

Notes

  • Preheat the air fryer to ensure even crisping from the start.
  • Drain excess grease from cooked beef to avoid soggy taquitos.
  • Lightly spray oil on tortillas to achieve golden browning without deep frying.
  • Warm tortillas wrapped in a damp towel to make rolling easier and prevent cracking.
  • Rest taquitos for 3 minutes after cooking so filling sets and doesn't spill.

Tried this recipe?

Let us know how it was!

Green Goddess Dressing

March 26, 2026

When you need a vibrant dressing that doubles as a dip and works for meal prep or casual entertaining, green goddess delivers. Fresh herbs blended with creamy mayo and tangy lemon create a bright sauce that stays smooth in the fridge for days.

Green Goddess Dressing served on a plate

The blender does most of the work. You pulse herbs with anchovy and garlic, add the creamy base, and blend until smooth.

Perfect for weeknight salads when plain vinaigrette feels boring or for potlucks where you need something that travels well.

QUICK SUMMARY

Green goddess dressing combines fresh parsley, tarragon, and chives with mayo and anchovy for a creamy, herby sauce. Chill at least 1 hour after blending so the flavors meld and the color deepens. The anchovy adds umami without fishiness if you measure carefully.

⏱️Time Reality: 10 minutes active plus 1 hour chilling before serving
🔪Method Shortcut: Pulse herbs first to keep color vibrant before adding liquids
⚠️Watch Out: Add lemon juice slowly to avoid curdling the mayo base

Table of Contents

Toggle
  • Why This Recipe Works
  • What You'll Need
    • Ingredient Details
  • Ingredient Swaps
  • What to Serve With It
  • Store and Reheat
  • Frequently Asked Questions
  • Green Goddess Dressing
    • Method 
    • Tried this recipe?

Why This Recipe Works

Fresh herbs stay vibrant when you pulse them briefly instead of over-blending. For another herby option that uses a similar technique, try a creamy dip on the side with cucumber and dill.

Quick Reference
⏱️
Prep Time
10 min
🔥
Cook Time
0 min
⏰
Total Time
10 min plus 1 hour chilling
🍽️
Servings
8 servings
📊
Difficulty
Easy
🏷️
Category
Appetizer | Salad Dressing
💡
Quick Tip
Chill at least 1 hour to meld flavors
🎯
Best For
Weeknight | Meal prep | Entertaining

Five reasons this dressing works:

  • Cold ingredients emulsify better - Mayo and sour cream straight from the fridge blend into a stable, smooth base that won't separate
  • Pulsing herbs preserves color - Five to six quick pulses keep the green vibrant instead of turning muddy from over-processing
  • Anchovy adds depth without fishiness - One to two fillets or half a teaspoon of paste gives umami without overpowering the herbs
  • Acid balances richness - Lemon juice cuts through the creamy base and brightens the herby flavor when added gradually
  • Chilling melds flavors - An hour in the fridge lets the garlic mellow and the herbs infuse into the mayo base
Best Pick
Use anchovy paste instead of fillets if you want easier measuring and no mincing

What You'll Need

Ingredients for Green Goddess Dressing

Stock up on fresh herbs and a good mayo for the best texture. The creamy base works with another great chicken recipe that also relies on blending for smooth results.

🧀
Creamy Base
  • ¾ cup mayonnaise
  • ½ cup sour cream or Greek yogurt
  • 1 tablespoon olive oil
🥬
Fresh Herbs
  • 1 cup fresh parsley leaves
  • 3 tablespoons fresh tarragon
  • 3 tablespoons fresh chives
  • 2 green onions, chopped
🧄
Aromatics
  • 2 anchovy fillets or 1 teaspoon paste
  • 1 garlic clove
  • 2 tablespoons lemon juice
  • Salt and black pepper to taste

Ingredient Details

  • Mayonnaise
    Use full-fat mayo for the richest texture; light versions can taste watery and thin
  • Fresh herbs
    Chop herbs within 30 minutes of blending to keep the color bright and the flavor sharp
  • Anchovy fillets
    Two fillets equal about one teaspoon of paste; start with less and add more if needed
  • Sour cream
    Greek yogurt works as a swap but adds more tang; full-fat yogurt gives the closest texture
  • Lemon juice
    Add in one-teaspoon increments and taste after each addition to avoid over-acidifying the base
  • Olive oil
    Extra-virgin adds flavor; regular olive oil keeps the dressing neutral if you want the herbs to dominate
  • Garlic
    One clove is enough; more than that overpowers the delicate herb flavor

Ingredient Swaps

You can adjust the base or the anchovy depending on what's in your fridge. If you're planning a protein to go with this, easy pork side dishes pair well with herby dressings.

Four swaps that work:

  • Sour cream → Greek yogurt - Adds more tang and slightly thinner texture; use full-fat for creaminess
  • Mayonnaise → vegan mayo - Same texture with plant-based ingredients; works for dairy-free needs
  • Anchovy fillets → capers with seaweed powder - Less umami but still salty and briny; good for vegetarian versions
  • Lemon juice → white wine vinegar - Similar acidity with a sharper, less citrusy flavor

Greek Yogurt

Works for: lighter texture, extra tang, meal prep

Skip if: you want the richest mouthfeel

Vegan Mayo

Works for: plant-based diets, similar texture

Skip if: you want traditional flavor

Capers + Seaweed Powder

Works for: vegetarian versions, briny flavor

Skip if: you want the full umami depth

Instructions

The dressing comes together in under 10 minutes if you have a blender or food processor. For a main that benefits from a creamy herby sauce, pair this with simple homemade chicken for an easy weeknight plate.

  1. Prep the herbs and aromatics. Roughly chop parsley, tarragon, chives, and green onions. Mince garlic and anchovy fillets if using whole fillets instead of paste.

  2. Pulse herbs in blender. Add herbs, garlic, and anchovy to blender or food processor. Pulse 5-6 times until finely chopped but not pureed. Scrape down sides between pulses.

  3. Add creamy base. Add mayo, sour cream, olive oil, and lemon juice to the blender. Blend on low for 10-15 seconds until smooth and uniform with no visible herb chunks.

  4. Season and taste. Add salt and black pepper to taste. Blend for 5 more seconds to incorporate seasoning. Taste and adjust lemon juice or salt if needed.

  5. Chill before serving. Transfer dressing to airtight container and refrigerate for at least 1 hour. Stir before serving to recombine if any separation occurs.

Shortcut
Use anchovy paste instead of fillets to skip mincing and get consistent umami in every batch

What to Serve With It

This dressing needs something to coat or dip. For more ideas on building a full plate, check out complete sausage and cabbage meal ideas that use similar herby sauces.

Side Dish Prep Why It Works How to Serve
Mixed greens salad Easy Crisp lettuce lets the herby dressing shine without competing flavors Toss greens with dressing just before serving for maximum crunch
Roasted vegetables Easy Caramelized edges get coated in creamy dressing for sweet-savory contrast Drizzle warm vegetables with cold dressing right before plating
Grilled chicken breast Medium Lean protein stays moist when topped with rich, herby sauce Slice chicken and serve dressing on the side or drizzled over top
Crudité platter Easy Raw vegetables get flavor boost from creamy dip without extra cooking Serve dressing in small bowl surrounded by carrot sticks, celery, radishes
Shrimp cocktail Medium Cold shrimp pair with cold dressing for elegant appetizer presentation Arrange shrimp on platter with dressing in center for dipping

Three ways to serve it:

  • As salad dressing - Toss with romaine or butter lettuce and add sliced cucumbers for crunch
  • As dip - Serve with raw vegetables, pita chips, or crusty bread slices for appetizers
  • As sauce - Drizzle over grilled fish, chicken, or roasted potatoes for added richness
Quick Tip
The dressing thickens slightly after chilling, so thin with a teaspoon of water or lemon juice if needed before serving

Store and Reheat

Green goddess dressing keeps well in the fridge for quick salads or last-minute appetizers. If you need a protein that pairs well, easy gravy side dishes work with this dressing as a contrasting sauce.

Method Time Best For
🥶 Cold Storage 3-4 days Serving chilled on salads or as dip
🍽️ Room Temperature 15-20 minutes Taking chill off before serving with warm dishes

For best results when storing:

  • Use shallow containers - Store in airtight glass or plastic container no more than 1 inch deep for faster chilling
  • Stir before serving - Give the dressing a quick stir or 5-second blend if any separation occurs after a day or two
  • Keep herbs fresh - Store extra chopped herbs separately and stir in fresh right before serving for brighter color
  • Avoid freezing - The mayo base separates when frozen and won't re-emulsify properly after thawing
  • Label with date - Write the prep date on the container so you know when to use it by day four

Frequently Asked Questions

Can I substitute Greek yogurt for sour cream in Green Goddess dressing?

Yes, Greek yogurt works as a direct swap for sour cream with a slightly tangier flavor and similar creamy texture. Use full-fat yogurt for the richest mouthfeel closest to the original recipe.

How long can I store Green Goddess dressing in the refrigerator?

The dressing keeps for 3-4 days in an airtight container in the fridge. After that, the herbs start to lose their bright color and the garlic flavor intensifies.

What is the best way to tell when Green Goddess dressing is properly emulsified?

The dressing should look uniform with no visible streaks of mayo or oil and hold its shape when drizzled from a spoon. If it looks watery or separated, blend for another 5-10 seconds until smooth.

Why does my Green Goddess dressing separate and how do I fix it?

Separation happens when you add too much lemon juice too fast or the ingredients aren't cold enough. Fix it by adding a tablespoon of cold mayo or sour cream and blending again for 10 seconds to re-emulsify.

Can I make Green Goddess dressing in advance for a party?

Yes, make it up to 2 days ahead and store in an airtight container in the fridge. The flavors actually improve after a day as the garlic mellows and the herbs infuse into the creamy base.

Green Goddess Dressing served on a plate

Green Goddess Dressing

No ratings yet
Green Goddess dressing is a creamy, herby sauce made with fresh parsley, tarragon, and chives blended with mayonnaise, sour cream, and lemon juice. Its vibrant flavor and smooth texture make it perfect for salads, dips, or sauces. Chill the dressing for at least an hour before serving to meld flavors and enhance the vibrant green color.
Print Recipe Pin Recipe
Prep Time 10 minutes mins
Cook Time 1 minute min
Total Time 11 minutes mins
Servings: 8 servings
Course: Appetizer, Salad Dressing
Cuisine: American
Ingredients Equipment Method Notes

Ingredients
  

  • 0.75 cup mayonnaise use full-fat for richest texture
  • 0.5 cup sour cream or Greek yogurt, full-fat for closest texture
  • 1 tablespoon olive oil extra-virgin adds flavor; regular keeps neutral
  • 1 cup fresh parsley leaves roughly chopped within 30 minutes of blending
  • 3 tablespoons fresh tarragon roughly chopped
  • 3 tablespoons fresh chives roughly chopped
  • 2 green onions chopped
  • 2 fillets anchovy fillets or 1 teaspoon anchovy paste; mince if using whole fillets
  • 1 clove garlic minced
  • 2 tablespoons lemon juice add slowly to avoid curdling
  • salt to taste
  • black pepper to taste

Equipment

  • Blender or food processor Used to pulse herbs and blend dressing smoothly

Method
 

  1. Roughly chop parsley, tarragon, chives, and green onions. Mince garlic and anchovy fillets if using whole fillets instead of paste.
    1 cup fresh parsley leaves, 3 tablespoons fresh tarragon, 3 tablespoons fresh chives, 2 green onions, 1 clove garlic, 2 fillets anchovy fillets
  2. Add herbs, garlic, and anchovy to blender or food processor. Pulse 5-6 times until finely chopped but not pureed, scraping down sides between pulses.
    1 cup fresh parsley leaves, 3 tablespoons fresh tarragon, 3 tablespoons fresh chives, 2 green onions, 1 clove garlic, 2 fillets anchovy fillets
  3. Add mayonnaise, sour cream, olive oil, and lemon juice to the blender. Blend on low for 10-15 seconds until smooth with no visible herb chunks.
    0.75 cup mayonnaise, 0.5 cup sour cream, 1 tablespoon olive oil, 2 tablespoons lemon juice
  4. Add salt and black pepper to taste. Blend for 5 seconds to incorporate seasoning. Taste and adjust lemon juice or salt if needed.
    salt, black pepper, 2 tablespoons lemon juice
  5. Transfer dressing to an airtight container and refrigerate for at least 60 minutes. Stir before serving to recombine if any separation occurs.

Notes

  • Use cold ingredients to ensure a stable, smooth emulsion that won't separate.
  • Pulse herbs briefly to preserve vibrant green color and fresh flavor.
  • Chill dressing for at least one hour to meld flavors and deepen the color.

Tried this recipe?

Let us know how it was!

Anchovy Butter French-Style

March 26, 2026

You need 10 minutes and room-temperature butter. No cooking, no wait time for marinating, no fancy equipment.

Anchovy Butter French-Style served on a plate

The anchovy fillets mash directly into softened butter with garlic and herbs. Chilling the mixture afterward lets the flavors bloom without any heat.

This works for entertaining when you need something that looks intentional but comes together while guests arrive. It's also solid for weeknight meals when plain bread needs upgrading.

QUICK SUMMARY

Anchovy Butter French-Style blends umami-rich anchovy fillets with unsalted butter, garlic, fresh parsley, and lemon juice into a smooth, spreadable compound butter. Softening the butter fully before mixing prevents lumps, while finely mincing the anchovies ensures even flavor distribution. The result is a savory spread that works on bread, vegetables, or melted over proteins.

⏱️Time: Soften butter 30-45 minutes before mixing; total prep is 10 minutes
🔪Critical First Step: Mince anchovies to paste consistency with a sharp knife or fork
⚠️Watch Out: Salted butter or too many anchovies creates oversalting; use unsalted and measure carefully

Table of Contents

Toggle
  • Why This Recipe Works
  • What You'll Need
    • Ingredient Details
  • Ingredient Swaps
  • What to Serve With It
  • Store and Reheat
  • Frequently Asked Questions
  • Anchovy Butter French-Style
    • Method 
    • Tried this recipe?

Why This Recipe Works

Most people skip compound butter, but it balances the meal. Rich mains need something to cut through, and a hearty beef recipe does exactly that.

Quick Reference
⏱️
Prep Time
10 min
🔥
Cook Time
0 min
⏰
Total Time
10 min
🍽️
Servings
8 servings (2 tablespoon each)
📊
Difficulty
Easy
🏷️
Category
Appetizer
💡
Quick Tip
Soften butter before mixing evenly
🎯
Best For
Entertaining | Weeknight | Make-ahead
  • Softening butter at room temperature for 30-45 minutes creates a smooth base that blends evenly with minced ingredients without lumps
  • Mincing anchovy fillets to paste consistency distributes the salty umami flavor throughout the butter without fibrous bits
  • Adding lemon juice last balances the richness and prevents the butter from breaking or separating during mixing
  • Folding ingredients gently with a spatula for 2-3 minutes incorporates everything without beating in excess air that creates graininess
  • Chilling the finished butter for 1-2 hours firms the texture and allows garlic, herbs, and anchovy flavors to meld and bloom
Quick Tip
Mince garlic to a paste with the flat side of your knife for even distribution and no harsh raw garlic bite.

What You'll Need

Ingredients for Anchovy Butter French-Style

The shopping list is short and most ingredients sit in your pantry already. For a version that comes together quickly, a fluffy paprika variation uses similar French techniques with different flavor profiles.

🧈
Base
  • Unsalted butter (½ cup, softened)
🐟
Umami
  • Anchovy fillets (4-6, oil-packed)
🧄
Aromatics
  • Garlic (2 cloves, minced)
  • Shallots (1 tbsp, minced, optional)
🌿
Herbs & Brightness
  • Fresh parsley (2 tbsp, minced)
  • Lemon juice (1 tsp)
  • Black pepper (¼ tsp)
  • Fresh thyme (optional)

Ingredient Details

  • Unsalted butter
    Use only unsalted to control saltiness; salted butter breaks the flavor balance and oversalts the spread
  • Anchovy fillets
    Look for oil-packed fillets from Italy or Spain; mince finely with a knife or mash with a fork to paste consistency
  • Garlic
    Mince to a paste using the flat side of your knife or a garlic press for even distribution without harsh raw bites
  • Fresh parsley
    Flat-leaf parsley has better flavor than curly; add it last to preserve color and brightness
  • Lemon juice
    Add sparingly (1 teaspoon per ½ cup butter) to brighten without making the butter too acidic or causing it to separate
  • Shallots
    Optional but adds mild onion sweetness; mince finely and use about 1 tablespoon for subtle depth
  • Fresh thyme
    Strip leaves from stems and mince; adds earthy Provencal notes that complement the anchovy

Ingredient Swaps

Oelek adds the contrast this plate needs, but timing matters. Rich mains need something to cut through, and a homemade oelek recipe does exactly that.

  • Anchovy fillets → anchovy paste: Use 1 teaspoon paste per 2 fillets; easier to blend but stronger, so start with less and taste
  • Fresh parsley → dried parsley or cilantro: Use 1 tablespoon dried (less aromatic) or swap cilantro for a brighter, different herb profile
  • Lemon juice → white wine vinegar: Sharper acidity that can overpower; use half the amount and add gradually
  • Garlic → garlic powder: Use ⅛ teaspoon powder per clove; less pungent but needs careful measurement to avoid chemical taste

Anchovy Paste

Works for: Quick prep, no mincing, easier to measure and adjust for salt level

Skip if: You want cleaner flavor; paste can taste fishier and more processed than fillets

Vegan Butter or Margarine

Works for: Dairy-free diets, similar spreading texture when fully softened at room temperature

Skip if: You want creamy richness; vegan butter is less silky and can taste oily or waxy

Instructions

The process takes 10 minutes of active work with no heat involved. The paprika works best when it hits the table at the same time as the main, and paprika adds protein and richness to the meal with a quick pork dish alongside.

  1. Soften butter at room temperature for 30-45 minutes. Butter should yield easily to a fork but not melt; if it's too cold, it won't blend smoothly and you'll get lumps.

  2. Mince anchovy fillets to paste consistency using a sharp knife or fork. The finer you mince, the more evenly the salty umami flavor distributes; large chunks create pockets of overpowering fishiness.

  3. Mince garlic to a paste and chop fresh parsley finely. Press garlic with the flat side of your knife or use a garlic press; parsley should be minced small to avoid stringy bits.

  4. Fold all ingredients into softened butter using a spatula for 2-3 minutes. Scrape down the sides of the bowl to incorporate everything evenly; mixture should be light beige with visible herb specks and no raw butter streaks.

  5. Roll butter in parchment paper or plastic wrap and chill for 1-2 hours. Chilling firms the texture and lets the garlic and anchovy flavors meld; you can slice it into rounds or scoop it soft for spreading.

Watch Out
If butter is grainy or lumpy after mixing, it was too cold or anchovies weren't minced finely enough. Warm the bowl slightly and remix with a spatula until smooth.

What to Serve With It

Most people pair compound butter with simple sides, but it needs something with texture contrast or mild flavor. For complete lamb burgers meal ideas, pair this butter with roasted vegetables or crusty bread to balance the rich, salty spread.

Side Dish Prep Why It Works How to Serve
Crusty baguette slices Easy Neutral base lets anchovy butter shine; crispy crust adds texture Toast lightly and spread butter while warm
Steamed green beans Easy Fresh, crisp vegetable contrasts creamy, salty butter Toss hot beans with a tablespoon of butter
Boiled new potatoes Medium Starchy potatoes absorb butter beautifully; classic French pairing Halve warm potatoes and top with a pat of butter
Grilled asparagus Easy Charred vegetal flavor balances rich umami from anchovy Drizzle melted butter over hot asparagus spears
Seared scallops Involved Delicate seafood enhances anchovy depth without overpowering sweetness Top each scallop with ½ teaspoon butter before serving

Three ways to serve it:

  • Spread on warm baguette slices as an appetizer before dinner with a glass of white wine
  • Melt over grilled fish or roasted chicken for a quick finishing sauce that adds richness and umami depth
  • Toss with roasted or steamed vegetables like green beans, asparagus, or baby carrots for an instant flavor upgrade
Best Pick
Crusty bread is the easiest pairing - toast slices lightly, spread butter while warm, and serve as an appetizer or alongside soup.

Store and Reheat

Anchovy butter keeps in the fridge for up to 4 days wrapped tightly in parchment or plastic. For a version that comes together quickly, a juicy potatoes side dish uses similar storage methods with different reheating approaches for maintaining texture.

Method Time Best For
🏠 Room Temperature 15-30 min Softening before spreading on bread or melting naturally on hot food
🔥 Oven 2-3 min at 250°F Melting slightly to drizzle over roasted vegetables or grilled proteins
📦 Microwave 5-10 sec bursts Quick softening when you need spreadable butter fast; watch to avoid melting

For best results when storing:

  • Wrap chilled butter tightly in parchment paper or plastic wrap to prevent absorbing fridge odors
  • Store in an airtight container if wrapped butter sits longer than 2 days to maintain freshness
  • Freeze wrapped butter for up to 3 months; thaw overnight in fridge before using
  • Slice butter into rounds before freezing so you can grab individual portions without defrosting the entire log
  • If butter separates after storage, let it come to room temperature and remix gently with a spatula to reemulsify

Frequently Asked Questions

Can I use anchovy paste instead of fillets in anchovy butter?

Yes, use 1 teaspoon of anchovy paste per 2 fillets. Paste blends easier but tastes stronger and fishier, so start with less and add gradually to avoid oversalting.

How should I store anchovy butter and how long does it last?

Wrap butter tightly in parchment or plastic and store in the fridge for up to 4 days. Freeze for up to 3 months; thaw overnight in the fridge before using.

How do I know when my anchovy butter is ready to serve?

The butter should be smooth and spreadable with light beige color and visible herb specks. No raw butter streaks should remain, and the mixture should hold its shape when chilled.

What should I do if the anchovy butter is too salty or grainy?

If too salty, mix in more unsalted butter or add lemon juice gradually to balance. If grainy, the butter was too cold or anchovies weren't minced finely; warm the bowl slightly and remix until smooth.

What dishes pair best with anchovy butter French-style?

Spread on crusty bread, melt over grilled fish or steak, toss with roasted vegetables, or top seared scallops. It works best with mild foods that let the umami flavor shine.

Anchovy Butter French-Style served on a plate

Anchovy Butter French-Style

No ratings yet
Anchovy Butter French-Style combines umami-rich anchovy fillets with unsalted butter, garlic, fresh parsley, and lemon juice to create a smooth, flavorful compound butter. Softening the butter fully before mixing and mincing the anchovies finely ensures a creamy spread that enhances bread, vegetables, and proteins. This no-cook recipe comes together quickly for entertaining or weeknight meals.
Print Recipe Pin Recipe
Prep Time 10 minutes mins
Cook Time 1 minute min
Total Time 11 minutes mins
Servings: 8 servings
Course: Appetizer
Cuisine: French
Ingredients Method Notes

Ingredients
  

  • 0.5 cup butter unsalted, softened to room temperature
  • 5 fillets anchovy fillets oil-packed, minced to paste consistency
  • 2 cloves garlic minced to a paste
  • 1 tablespoon shallots minced, optional
  • 2 tablespoon fresh parsley minced
  • 1 teaspoon lemon juice fresh
  • 0.25 teaspoon black pepper
  • to taste fresh thyme optional, minced leaves

Method
 

  1. Soften the unsalted butter at room temperature for 30-45 minutes until it yields easily to a fork but is not melted.
    0.5 cup butter
  2. Mince the anchovy fillets finely with a sharp knife or mash with a fork to create a paste consistency.
    5 fillets anchovy fillets
  3. Mince the garlic cloves to a paste using the flat side of a knife or a garlic press. Finely chop the fresh parsley and shallots if using.
    2 cloves garlic, 1 tbsp shallots, 2 tbsp fresh parsley
  4. Gently fold the minced anchovies, garlic, parsley, shallots (if using), lemon juice, black pepper, and fresh thyme (if using) into the softened butter using a spatula for 2-3 minutes until fully combined and smooth.
    0.5 cup butter, 5 fillets anchovy fillets, 2 cloves garlic, 1 tbsp shallots, 2 tbsp fresh parsley, 1 tsp lemon juice, 0.25 tsp black pepper, to taste fresh thyme
  5. Roll the mixed butter into parchment paper or plastic wrap and chill in the refrigerator for 1-2 hours to firm the texture and allow flavors to meld before serving.

Notes

  • Use only unsalted butter to prevent oversalting from anchovies.
  • Mince anchovies finely to avoid overpowering fishy pockets.
  • Chill the butter after mixing to firm texture and allow flavors to bloom.

Tried this recipe?

Let us know how it was!
« Previous Page
Next Page »

Primary Sidebar

ForkliftKitchen recipe developer

Welcome!

Recipe Developer · 12+ Yr Kitchen Veteran

I'm the recipe developer behind this site, focused on practical, well-tested dishes and smart ingredient swaps. Every recipe is written to be clear, reliable, and easy to make at home.

650+ Recipes
12+ Yrs Exp.
3x Tested
Our Story →

As Featured In

Allrecipes

TASTE OF HOME

Food52

HUFFPOST

Yahoo! Life

Our Editorial Standards

  • ✓ Every recipe tested at least 3 times before publishing
  • ✓ Substitutes verified by real kitchen trials, not guesswork
  • ✓ Reviewed for accuracy by our editorial team
  • ✓ Updated regularly with seasonal info and reader feedback

Most Popular

  • Creamy Lemon Shrimp Linguine
    Creamy Lemon Shrimp Linguine
  • Creamy Garlic Mushroom Chicken
    Creamy Garlic Mushroom Chicken
  • Sesame Ginger Chicken Noodle Bowls
    Sesame Ginger Chicken Noodle Bowls
  • Baked Lemon Herb Fish Fillets
    Baked Lemon Herb Fish Fillets
  • Veggie Loaded Fried Rice
    Veggie Loaded Fried Rice
  • Spicy Garlic Shrimp Stir Fry
    Spicy Garlic Shrimp Stir Fry

Join 8,000+ Home Cooks

Weekly Kitchen Tips

Easy recipes, smart substitutes, and real cooking shortcuts — every Thursday.

Subscribe Free →


Side Dishes

  • What to Serve With Asian Salmon? 15 Best Side Dishes
    What to Serve With Asian Salmon? 15 Best Side Dishes
  • Side Dishes for Strawberry Spinach Salad
    15 Best Side Dishes for Strawberry Spinach Salad
  • Sides for Grilled Cauliflower Steaks to Complete the Meal
    15 Sides for Grilled Cauliflower Steaks to Complete the Meal
  • 15 Sides To Serve With Calabacitas
    15 Best Sides for Calabacitas – Mexican-Inspired Favorites


Substitutes

  • 7 Best Substitutes for Hot Sauce in Marinades & Stir-Fries
    7 Best Substitutes for Hot Sauce in Marinades & Stir-Fries
  • 9 Best Substitutes for Butter in Baking and Cooking
  • 7 Best Substitutes for Tagliatelle for Italian Pasta Dishes
    7 Best Substitutes for Tagliatelle for Italian Pasta Dishes
  • 7 Best Substitutes for Udon Noodles in Asian Stir-Fries
    7 Best Substitutes for Udon Noodles in Asian Stir-Fries


Browse by Topic

  • Side Dishes320
  • Substitutes785
  • Dinner163
  • Air Fryer77
  • Taste Profiles484
  • Food Storage123


Reader Reviews

★★★★★

"Finally a food blog that tells you exactly why a substitute works instead of just listing options."

— Sarah M., via email

★★★★★

"The side dish recommendations are so specific — saved my dinner party twice this month."

— James R., Pinterest comment

★★★★★

"I trust this site more than most because they actually test everything. You can tell."

— Priya K., blog comment

Footer

↑ Back to Top

Forklift Kitchen

We do the heavy lifting so you can enjoy the cooking. Tested recipes, smart substitutes, and perfect pairings—built for real home cooks.

Content

  • Recipes
  • Substitutes
  • What to Serve With
  • Blog

Company

  • About Us
  • Contact
  • Subscribe

Legal

  • Privacy Policy
  • Terms of Service

As an Amazon Associate I earn from qualifying purchases.

© 2026 Forklift Kitchen.

Rate This Recipe

Your vote:


A rating is required
A name is required
An email is required