• Skip to primary navigation
  • Skip to main content
  • Skip to primary sidebar
  • Recipe Index
    • Air Fryer
  • Side Dishes
  • Substitutes
  • About
  • Contact
  • Subscribe

ForkLiftKitchen

menu icon
go to homepage
  • Recipe Index
    • Air Fryer
  • Side Dishes
  • Substitutes
  • About
  • Contact
  • Subscribe
subscribe
search icon
Homepage link
  • Recipe Index
    • Air Fryer
  • Side Dishes
  • Substitutes
  • About
  • Contact
  • Subscribe
×

Blog

Roasted Red Pepper Feta Dip

March 26, 2026

Blending roasted red peppers with tangy feta and olive oil creates a creamy dip in under 30 minutes. The peppers char under high heat while you prep the other ingredients, then everything goes into the food processor.

Roasted Red Pepper Feta Dip served on a plate

The blender does most of the work. You get smooth texture with slight chunkiness that holds up on pita chips without turning runny.

This works for entertaining when you need something that looks impressive but doesn't keep you stuck in the kitchen.

QUICK SUMMARY

Roasted Red Pepper Feta Dip combines charred peppers, salty feta, and olive oil into a creamy Mediterranean spread. Roast peppers at 450°F until blistered, peel them, then pulse with feta and lemon juice for a tangy dip that holds its shape on crackers or vegetables.

⏱️Time Reality: 30 minutes total-10 for roasting, 20 for cooling and blending
🔑Key Move: Steam roasted peppers in a covered bowl to loosen skins before peeling
⚠️Watch Out: Over-salting from feta-season after blending to avoid grainy texture

Table of Contents

Toggle
  • Why This Recipe Works
  • What You'll Need
    • Ingredient Details
  • Ingredient Swaps
  • What to Serve With It
  • Store and Reheat
  • Frequently Asked Questions
  • Roasted Red Pepper Feta Dip
    • Method 
    • Tried this recipe?

Why This Recipe Works

The high broiler heat chars pepper skins while keeping the flesh tender, creating smoky sweetness that balances feta's saltiness. For a version that comes together quickly, try a quick dip dish that uses similar blending techniques.

Quick Reference
⏱️
Prep Time
10 min
🔥
Cook Time
20 min
⏰
Total Time
30 min
🍽️
Servings
6 servings
📊
Difficulty
Easy
🏷️
Category
Appetizer
💡
Quick Tip
Roast peppers until charred, then peel well
🎯
Best For
Entertaining

Five things that make this dip work:

  • Broiling at 450°F for 10-15 minutes chars pepper skins evenly when you turn them every 5 minutes
  • Steaming roasted peppers in a covered bowl for 10 minutes loosens skins so they peel cleanly without tearing the flesh
  • Pulsing 6-8 times instead of pureeing leaves slight lumps that give the dip texture and prevent it from turning into soup
  • Adding olive oil slowly while blending emulsifies the mixture into a creamy base that doesn't separate when chilled
  • Chilling for 30 minutes before serving melds the tangy feta and smoky pepper flavors while thickening the consistency
Quick Tip
Add lemon juice after blending to preserve brightness and prevent bitterness from over-processing

What You'll Need

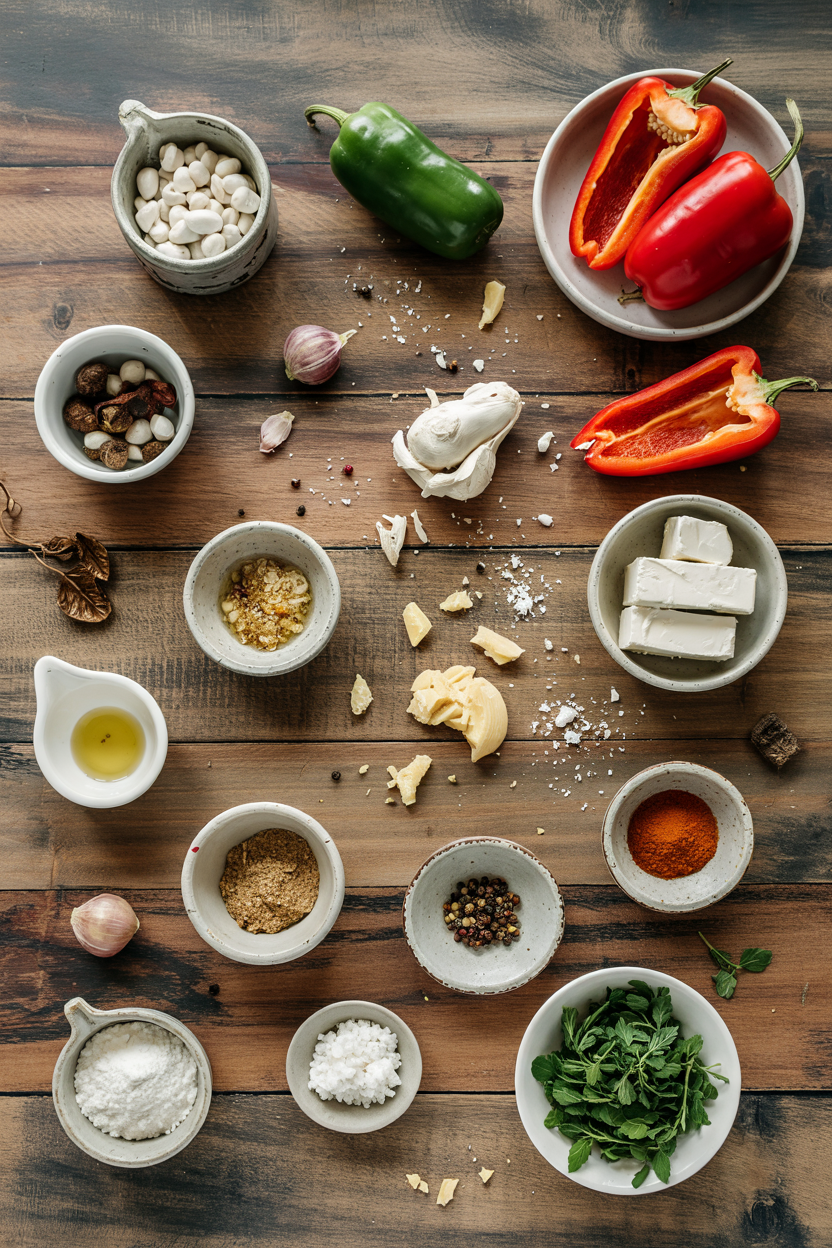
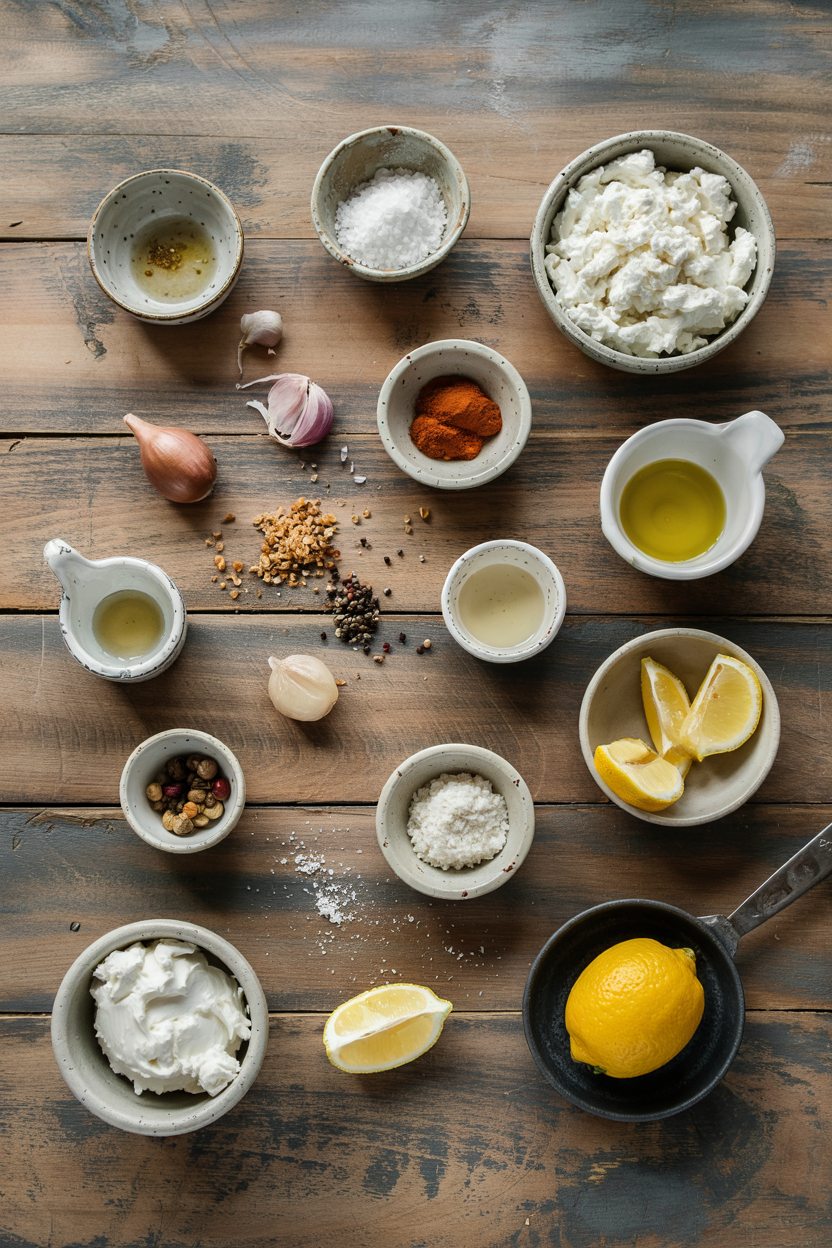
Ingredients for Roasted Red Pepper Feta Dip

Shopping for this dip means grabbing fresh red peppers and quality feta-the two ingredients that define the flavor. We keep a batch ready for nights like this - this easy tartar sauce recipe uses a similar quick-blend method.

🫑
Peppers
  • 3 large red bell peppers
🧀
Dairy
  • 8 oz crumbled feta cheese
  • ¼ cup Greek yogurt or cream cheese
🧄
Aromatics
  • 2 garlic cloves, minced
  • 2 tablespoon lemon juice
🫙
Base
  • 3 tablespoon olive oil
  • ½ teaspoon smoked paprika (optional)
  • Salt and black pepper to taste

Ingredient Details

  • Roasted red peppers
    Fresh peppers roast better than jarred-char them until blistered and peel thoroughly to avoid bitter bits
  • Feta cheese
    Block feta crumbles cleanly and blends smoother than pre-crumbled, which often contains anti-caking agents that turn grainy
  • Olive oil
    Extra virgin adds fruity notes that complement the smoky peppers-add it slowly while blending to emulsify properly
  • Garlic
    Mince finely or sauté for 30 seconds in olive oil to mellow the raw bite before blending
  • Lemon juice
    Add at the end after blending to preserve brightness-too much makes the dip thin and sour
  • Greek yogurt
    Full-fat yogurt adds creamy tang without turning the dip watery-cream cheese works if you want richer texture
  • Smoked paprika
    Enhances the roasted pepper smokiness but isn't necessary-skip it if you want cleaner pepper flavor

Ingredient Swaps

Some ingredients change the texture or tang, but most swaps work if you adjust proportions. Rich mains need something to cut through, and tartar sauce does exactly that with quick chicken dish options that pair well.

Four swaps that work:

  • Jarred roasted red peppers instead of fresh - Rinse them to remove vinegar tang, then drain thoroughly before blending
  • Goat cheese or ricotta instead of feta - Use slightly less since they're milder and creamier, then add extra lemon juice for tang
  • Silken tofu or vegan sour cream instead of Greek yogurt - Blend until smooth for dairy-free creaminess with similar body
  • Garlic powder (½ tsp) instead of fresh garlic - Stir it in after blending for milder aroma that won't overpower the peppers

Fresh Roasted Peppers

Works for: Maximum smoky sweetness and clean flavor without vinegar notes

Skip if: You need the dip done in under 15 minutes total

Jarred Roasted Peppers

Works for: Quick assembly when you're short on time and oven space

Skip if: You're sensitive to vinegar tang or want full control over char level

Instructions

The whole process takes 30 minutes, with most of that time spent waiting for peppers to cool. We keep a batch ready for nights like this - something tender like pork pairs well when you need a complete appetizer spread.

  1. Roast the peppers: Set oven to broil at 450°F. Place whole red peppers on a sheet pan and broil 10-15 minutes, turning every 5 minutes with tongs until skins blister and char evenly. Transfer to a bowl, cover tightly with plastic wrap, and let steam 10 minutes-skins will loosen and peel easily.

  2. Peel and seed: Peel charred skins off peppers under cool running water, then remove stems and seeds. Pat flesh dry with paper towels to remove excess moisture that would thin the dip.

  3. Blend the base: Add roasted peppers, crumbled feta, Greek yogurt, and minced garlic to a food processor. Pulse 6-8 times until slightly chunky, scraping down sides once halfway through.

  4. Emulsify with oil: With processor running, slowly drizzle olive oil through the feed tube until mixture turns creamy and smooth. Add lemon juice, smoked paprika, and a pinch of black pepper, then pulse twice to combine.

  5. Chill and season: Transfer dip to a serving bowl, cover, and refrigerate 30 minutes to thicken and meld flavors. Taste before serving and adjust salt carefully-feta already adds plenty of saltiness.

Golden Rule
Season after chilling, not during blending-cold temperatures dull saltiness and you'll over-season if you taste while warm

What to Serve With It

A good dip needs vehicles that can scoop without breaking, plus a main that doesn't compete with the tangy-smoky flavor profile. For a version that comes together quickly, try a rich beef on the side - we use similar savory steak meal ideas when planning appetizer spreads.

Side Dish Prep Why It Works How to Serve
Pita chips Easy Crisp texture scoops creamy dip without breaking Arrange in a basket next to dip bowl
Fresh vegetable sticks Easy Crunchy carrots and celery cut through rich feta Slice into 3-inch batons and serve chilled
Crusty bread slices Easy Absorbs dip and adds chewy contrast to creamy texture Toast lightly and cut into triangles
Grilled chicken skewers Medium Adds protein and complements tangy Mediterranean flavors Thread on wooden skewers and grill until charred
Marinated olives Easy Briny, salty notes enhance the appetizer spread Toss with olive oil and herbs before serving

Three ways to serve it:

  • As a spread on sandwiches or wraps - Layer it thick under grilled vegetables or roasted chicken for tangy moisture
  • Mixed into pasta salad - Toss with cooked orzo, cherry tomatoes, and cucumbers for a creamy Mediterranean side
  • Dolloped on grilled fish or lamb - Use it like a sauce to add smoky richness without extra cooking
Best Pick
Serve with warm pita bread and cucumber slices for maximum contrast-the cool vegetables balance the rich, tangy dip

Store and Reheat

This dip keeps well in the fridge but doesn't freeze perfectly due to the dairy content that can separate when thawed. Most people skip this seafood, but it balances the meal with classic fish dish options that round out an appetizer spread.

Method Time Best For
🍳 Room temperature 20-30 min rest Serving with natural texture and full flavor
📦 Microwave 30-60 sec low power Quick warming when you need it ready fast
🔥 Stovetop 2-3 min on low Gentle warming to avoid curdling the dairy

For best results when storing:

  • Transfer to an airtight container immediately after chilling - Press plastic wrap directly on the surface to prevent oxidation and browning
  • Store in the fridge up to 4 days - The dip thickens as it sits, so stir in a tablespoon of olive oil or lemon juice before serving if it gets too stiff
  • Freeze in portions for up to 1 month - Use ice cube trays or small containers, then thaw overnight in the fridge and stir well before serving
  • Let it come to room temperature 20 minutes before serving - Cold dip tastes dull and the flavors meld better when slightly warm
  • Stir well after storage - The olive oil may separate on top, so mix thoroughly to re-emulsify before serving

Frequently Asked Questions

Can I use jarred roasted red peppers instead of fresh?

Yes, rinse them thoroughly to remove vinegar brine, then drain and pat completely dry before blending. They save 20 minutes but add slight tanginess that fresh peppers don't have.

How long will homemade roasted red pepper feta dip last stored?

Store it in an airtight container in the fridge for 3-4 days. Press plastic wrap directly on the surface to prevent browning and stir well before serving.

What are signs that roasted red peppers are properly cooked for dip?

Skins should be blistered and blackened in spots with the flesh underneath tender but not mushy. The peppers collapse slightly when you press them with tongs.

Why is my dip grainy and how can I fix it?

Graininess comes from over-salting or using pre-crumbled feta with anti-caking agents. Add more Greek yogurt or olive oil and blend again to smooth it out.

How can I scale this dip recipe for a large party?

Double or triple all ingredients and blend in batches if your food processor is small. The dip holds well for 2 days, so make it ahead and store covered in the fridge.

Roasted Red Pepper Feta Dip served on a plate

Roasted Red Pepper Feta Dip

No ratings yet
Roasted Red Pepper Feta Dip blends charred red peppers, tangy feta cheese, and olive oil into a creamy Mediterranean spread. Roasting the peppers at high heat and steaming them allows easy peeling and smoky flavor, while pulsing the mixture keeps a pleasant texture that holds on crackers or vegetables.
Print Recipe Pin Recipe
Prep Time 10 minutes mins
Cook Time 20 minutes mins
Total Time 30 minutes mins
Servings: 6 servings
Course: Appetizer
Cuisine: Mediterranean
Ingredients Equipment Method Notes

Ingredients
  

  • 3 large red bell peppers roasted and peeled
  • 8 oz feta cheese crumbled, block preferred
  • 0.25 cup Greek yogurt or cream cheese
  • 2 cloves garlic minced
  • 3 tablespoon olive oil extra virgin, add slowly while blending
  • 2 tablespoon lemon juice add after blending
  • 0.5 teaspoon smoked paprika optional
  • black pepper to taste

Equipment

  • Oven broiler Used to char red bell peppers
  • Sheet pan To roast the peppers
  • Mixing bowl To steam and cover the hot roasted peppers
  • Food processor To pulse and blend the dip ingredients
  • Tongs For turning peppers while roasting

Method
 

  1. Set the oven to broil at 450°F. Place whole red peppers on a sheet pan and broil for 10-15 minutes, turning every 5 minutes with tongs until skins blister and char evenly. Transfer peppers to a bowl, cover tightly with plastic wrap, and let steam for 10 minutes to loosen skins.
  2. Peel the charred skins off peppers under cool running water. Remove the stems and seeds, then pat the flesh dry with paper towels to remove excess moisture that could thin the dip.
  3. Add peeled roasted peppers, crumbled feta cheese, Greek yogurt, and minced garlic to a food processor. Pulse 6-8 times until the mixture is slightly chunky, scraping down the sides once halfway through.
  4. With the food processor running, slowly drizzle olive oil through the feed tube until the mixture turns creamy and smooth. Add lemon juice, smoked paprika, and a pinch of black pepper, then pulse twice more to combine.
  5. Transfer the dip to a serving bowl, cover, and refrigerate for 30 minutes to thicken and meld flavors. Taste before serving and adjust salt carefully, as feta adds plenty of saltiness.

Notes

  • Season the dip after chilling to avoid over-salting and grainy texture.
  • Steam roasted peppers in a covered bowl to loosen skins for easy peeling.
  • Pulse rather than pureeing to maintain a pleasant texture with slight lumps.

Tried this recipe?

Let us know how it was!

Labneh with Olive Oil and Za’atar

March 26, 2026

You need 10 minutes and one strainer. No cooking, no babysitting, just thick yogurt that drips slowly while you sleep.

Labneh with Olive Oil and Za’atar served on a plate

Greek yogurt transforms into creamy labneh after 24-48 hours in the fridge. The whey separates, leaving behind a spreadable cheese that holds its shape on a plate.

This works for meal prep when you want protein-packed snacks ready all week. Drizzle olive oil and za'atar on top for a dip that's better than store-bought.

QUICK SUMMARY

Labneh is strained Greek yogurt that turns thick and spreadable after 24-48 hours in the fridge. Salt the yogurt before straining for even seasoning, then top with olive oil and za'atar. The result is a tangy, creamy dip that works for breakfast, snacks, or entertaining.

⏰Planning: 10 min hands-on, 24-48 hrs passive straining in fridge
🥄First Move: Salt yogurt, line strainer with cheesecloth, let gravity work
⚠️Watch Out: Warm temps cause sourness-strain in fridge below 40°F for fresh tang

Table of Contents

Toggle
  • Why This Recipe Works
  • What You'll Need
    • Ingredient Details
  • Ingredient Swaps
  • What to Serve With It
  • Store and Reheat
  • Frequently Asked Questions
  • Labneh with Olive Oil and Za'atar
    • Method 
    • Tried this recipe?

Why This Recipe Works

Full-fat yogurt has enough solids to create a thick, spreadable texture without additives. Straining in the fridge for 24-48 hours removes excess whey while keeping the yogurt cold enough to prevent spoilage. Rich mains need something to cut through, and butter does exactly that. For a version that comes together quickly, a simple butter variation adds depth without extra straining time.

Quick Reference
⏱️
Prep Time
10 min
🔥
Cook Time
0 min
⏰
Total Time
12-48 hours (mostly straining)
🍽️
Servings
6 servings
📊
Difficulty
Easy
🏷️
Category
Appetizer
💡
Quick Tip
Strain yogurt 24-48 hrs for creamy thick texture
🎯
Best For
Weeknight | Meal prep | Entertaining

What makes this work:

  • Straining yogurt 24-48 hours at 38-40°F removes whey without over-drying the solids
  • Adding 1 teaspoon salt per 2 cups yogurt before straining seasons evenly throughout
  • Double-layer cheesecloth or coffee filter creates fine mesh that catches solids but lets whey drip
  • Spreading labneh in a shallow bowl with 1 tablespoon olive oil drizzle on top creates the traditional presentation
  • Fresh za'atar sprinkled over the oil layer adds herby, nutty flavor that defines the dish
Quick Tip
Check texture at 24 hours-labneh should be thick enough to hold its shape but still creamy, not crumbly.

What You'll Need

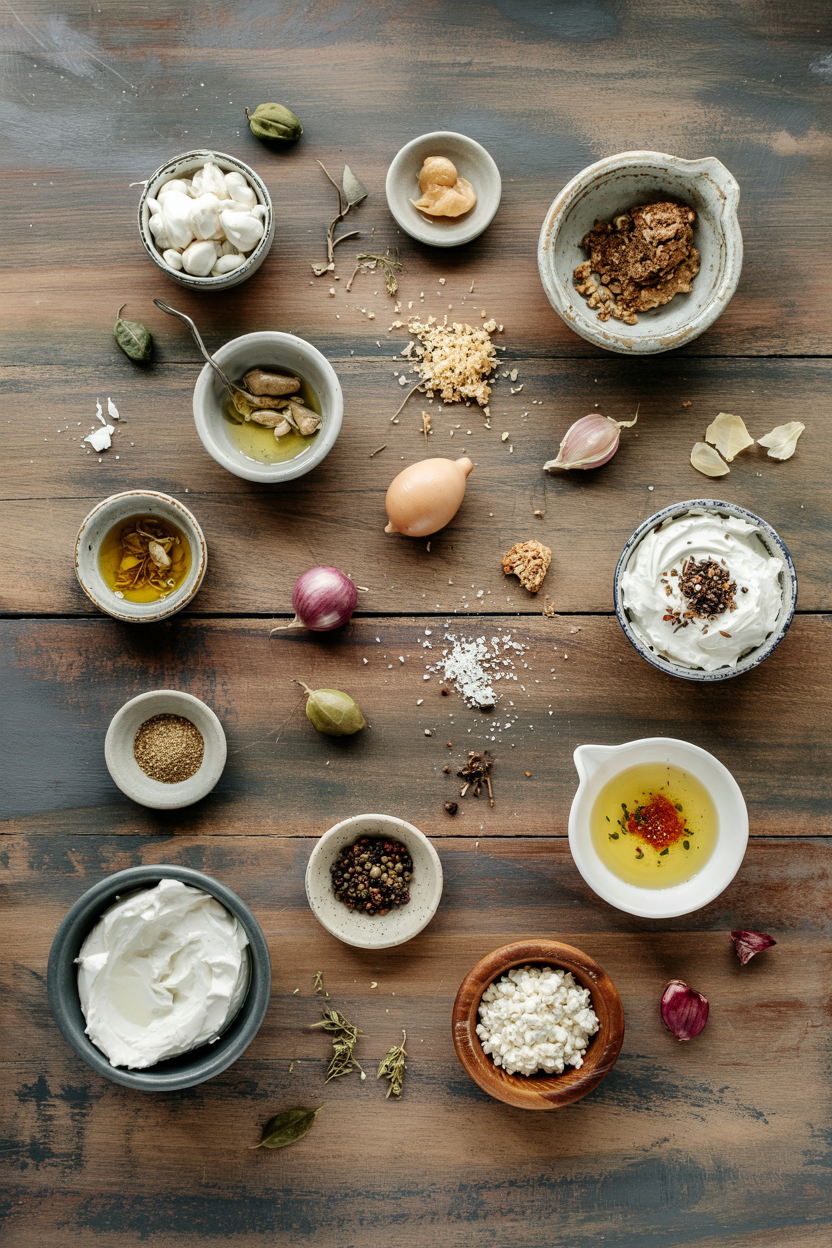
Ingredients for Labneh with Olive Oil and Za’atar

Full-fat Greek yogurt is the only type that strains thick enough without additives. The homemade works best when it hits the table at the same time as the main. We keep a batch ready for nights like this-homemade homemade recipe pairs well when you want something tangy on the side.

🧀
Dairy
  • 2 cups full-fat Greek yogurt
🌶️
Spices & Seasonings
  • 1 teaspoon salt
  • 1 tablespoon za'atar spice blend
🥢
Finishing Touches
  • 1 tablespoon olive oil
  • ½ teaspoon lemon juice
🫙
Optional
  • Fresh herbs (mint, parsley)
  • 1 clove garlic, minced

Ingredient Details

  • Full-fat Greek yogurt
    Provides thick, creamy base with enough solids to strain properly-low-fat versions stay watery
  • Salt
    Add before straining so it distributes evenly and enhances the natural tang without making it salty
  • Za'atar spice blend
    Mix of thyme, sumac, sesame seeds-buy pre-mixed or make your own for fresher flavor
  • Olive oil
    Use good extra virgin for fruity, peppery notes that balance the yogurt's tang
  • Lemon juice
    Brightens the finished labneh-add just before serving so it stays fresh
  • Cheesecloth or fine mesh strainer
    Double-layer cheesecloth or coffee filter catches yogurt solids without letting them slip through
  • Fresh herbs
    Mint or parsley add color and fresh flavor-optional but traditional for garnish

Ingredient Swaps

Plain yogurt works if you're out of Greek, but it takes longer to strain and yields less. Soup adds the contrast this plate needs, but timing matters. For a version that comes together quickly, warm homemade soup recipe hits the table at the same time without extra planning.

Four swaps that work:

  • Full-fat Greek yogurt → plain strained yogurt - Thinner texture, add 6-12 hours straining time for similar thickness
  • Za'atar → thyme and sumac mix - Use 1 teaspoon dried thyme + ½ teaspoon sumac + ½ teaspoon toasted sesame seeds for DIY blend
  • Olive oil → avocado oil - Milder flavor but still smooth and silky on the plate
  • Cheesecloth → coffee filter or clean kitchen towel - Slower drainage, check for lint before using fabric towels

Full-Fat Greek Yogurt

Works for: thick, creamy texture that strains in 24 hours

Skip if: you only have low-fat on hand-it won't thicken properly

Plain Yogurt

Works for: budget-friendly option when Greek isn't available

Skip if: you need it done fast-takes 36-48 hours to strain thick

Dairy-Free Yogurt

Works for: plant-based diets needing a labneh-style dip

Skip if: texture matters-coconut and almond yogurts stay thinner even after straining

Instructions

The yogurt does most of the work while you sleep. A good chicken can make or break the plate. We keep a batch ready for nights like this-this quick chicken dish balances the tang without overpowering the za'atar.

  1. Salt the yogurt: Stir 1 teaspoon salt into 2 cups full-fat Greek yogurt until evenly mixed. The salt seasons throughout and draws out moisture during straining.

  2. Set up the strainer: Line a fine mesh strainer with double-layer cheesecloth or coffee filter. Place over a bowl with at least 2 inches clearance so whey doesn't touch the yogurt.

  3. Strain in the fridge: Pour salted yogurt into lined strainer. Cover with plastic wrap and refrigerate 24-48 hours. Check at 24 hours-labneh should be thick and spreadable but not dry.

  4. Transfer and plate: Scrape labneh from cheesecloth into a shallow serving bowl. Spread it about ½ inch thick with the back of a spoon to create a smooth surface.

  5. Finish with oil and za'atar: Drizzle 1 tablespoon olive oil over the labneh. Sprinkle 1 tablespoon za'atar evenly on top. Add ½ teaspoon lemon juice just before serving for brightness.

Golden Rule
Keep straining temperature below 40°F (4°C)-warmer temps cause sour flavors and texture breakdown.

What to Serve With It

Labneh sits on the table next to bread, vegetables, or proteins that need a creamy, tangy contrast. The fish works best when it hits the table at the same time as the main. For a version that comes together quickly, this quick fish dish balances the richness without competing for attention.

Side Dish Prep Why It Works How to Serve
Warm pita bread Easy Soft, chewy texture perfect for scooping creamy labneh Warm pita in oven 5 min, cut into wedges, serve alongside
Sliced cucumber Easy Fresh crunch and water content balance rich, tangy yogurt Slice thin rounds, arrange on plate with labneh
Grape tomatoes Easy Juicy sweetness cuts through tang and adds bright color Halve tomatoes, toss with salt, pile next to labneh
Roasted chickpeas Medium Crunchy texture and protein boost make it a complete snack Roast chickpeas with olive oil 25 min, sprinkle on top
Assorted olives Easy Briny, salty flavors complement Mediterranean profile Drain olives, serve in small bowl beside labneh

Three ways to serve it:

  • Spread labneh on toast with cherry tomatoes and fresh herbs for breakfast
  • Use as a base for grain bowls with roasted vegetables and quinoa
  • Serve as a dip with raw vegetables and pita chips for snacking

For more pairing ideas with hearty proteins, check out savory steak meal ideas that balance rich mains with tangy sides.

Shortcut
Make labneh balls by rolling strained yogurt into 1-inch spheres, then store under olive oil in a jar-they keep for a week and look impressive on a cheese board.

Store and Reheat

Labneh keeps 3-4 days in the fridge when stored properly. The pork works best when it hits the table at the same time as the main. We keep a batch ready for nights like this-simple pork recipe pairs well without extra reheating steps.

Method Time Best For
🍃 Room temperature 20-30 min before serving Restoring creamy texture and bringing out full flavor
📦 Microwave 10-15 seconds low power Softening very chilled labneh only-don't overheat
❄️ Freezer Up to 1 month Partial success-texture gets grainy, best for cooking not dipping

For best results when storing:

  • Transfer labneh to shallow glass or ceramic dish with tight-fitting lid
  • Pour thin layer of olive oil over top to seal and prevent drying
  • Keep refrigerated below 40°F (4°C) and use within 3-4 days for best flavor
  • Bring to room temperature 20-30 minutes before serving for creamiest texture
  • Freeze in airtight container up to 1 month but expect grainy texture after thawing

Frequently Asked Questions

How long to strain labneh for thickest texture?

Strain full-fat Greek yogurt for 24-48 hours in the fridge at 38-40°F. Check at 24 hours-it should hold its shape when spooned but still feel creamy, not dry or crumbly.

Can I make labneh ahead of time?

Yes, labneh keeps 3-4 days in an airtight container in the fridge. Pour a thin layer of olive oil on top to seal it and prevent drying out.

What goes with labneh as a dip?

Serve with warm pita bread, sliced cucumber, grape tomatoes, or roasted chickpeas. Fresh vegetables and flatbreads work best for scooping the thick, creamy texture.

How do I know when labneh is done straining?

Labneh is ready when it's thick enough to hold its shape on a spoon but still spreadable. It should look smooth and creamy, not watery or crumbly-usually 24-48 hours.

Can I use low-fat yogurt for making labneh?

Low-fat yogurt doesn't strain thick enough because it lacks the fat and solids needed for a creamy texture. Stick with full-fat Greek yogurt for proper results.

Labneh with Olive Oil and Za'atar served on a plate

Labneh with Olive Oil and Za'atar

No ratings yet
Labneh is a creamy, tangy dip made by straining full-fat Greek yogurt for 24-48 hours to achieve a thick, spreadable texture. Salted before straining and finished with a drizzle of olive oil and sprinkle of za'atar, this dish is perfect for snacks, breakfast, or entertaining.
Print Recipe Pin Recipe
Prep Time 10 minutes mins
Cook Time 1 day d
Total Time 1 day d 10 minutes mins
Servings: 6 servings
Course: Appetizer
Cuisine: Mediterranean
Ingredients Equipment Method Notes

Ingredients
  

  • 2 cups full-fat Greek yogurt provides thick, creamy base
  • 1 teaspoon salt added before straining for even seasoning
  • 1 tablespoon za'atar spice blend herby, nutty flavor for topping
  • 1 tablespoon olive oil extra virgin, drizzled on top
  • 0.5 teaspoon lemon juice added just before serving for brightness
  • fresh herbs (mint, parsley) optional garnish
  • 1 clove garlic minced, optional

Equipment

  • Fine-mesh strainer Used to strain yogurt
  • Cheesecloth or coffee filter Lining for the strainer to catch yogurt solids

Method
 

  1. Stir 1 teaspoon salt into 2 cups full-fat Greek yogurt until evenly mixed. This seasons the yogurt and helps draw out moisture during straining.
    2 cups full-fat Greek yogurt, 1 tsp salt
  2. Line a fine mesh strainer with double-layer cheesecloth or coffee filter. Place the strainer over a bowl ensuring at least 2 inches clearance so the whey can drip freely without touching the yogurt.
  3. Pour the salted yogurt into the lined strainer, cover with plastic wrap and refrigerate for 24 to 48 hours. Check at 24 hours; the labneh should be thick and spreadable but not dry.
    2 cups full-fat Greek yogurt, 1 tsp salt
  4. Scrape the thickened labneh from the cheesecloth into a shallow serving bowl. Spread it about ½ inch thick using the back of a spoon to create a smooth surface.
  5. Drizzle 1 tablespoon olive oil over the labneh. Sprinkle 1 tablespoon za'atar spice blend evenly on top. Add ½ teaspoon lemon juice just before serving for a bright finish.
    1 tbsp za'atar spice blend, 1 tbsp olive oil, 0.5 tsp lemon juice

Notes

  • Keep straining in the fridge at temperatures below 40°F to avoid sourness.
  • Check labneh at 24 hours for ideal creamy thickness.
  • Use double-layer cheesecloth or coffee filter to catch solids but allow whey drainage.

Tried this recipe?

Let us know how it was!

Garlic Toum Lebanese-Style

March 26, 2026

Most garlic sauces turn out thin or grainy because the oil goes in too fast. The trick is adding it drop by drop at first, then in a slow stream once the emulsion starts forming.

Garlic Toum Lebanese-Style served on a plate

A food processor keeps the blending consistent while your hands stay free to control the oil. Cold ingredients and patience prevent the mixture from breaking.

Make this when you want a condiment that works on grilled meats, roasted vegetables, or pita bread. It stores in the fridge for up to four days and tastes sharper than store-bought versions.

QUICK SUMMARY

Garlic toum is a Lebanese garlic sauce that turns into a thick, spreadable paste when you emulsify oil into minced garlic. The key is adding oil very slowly while the food processor runs. Use fresh garlic cloves and neutral oil for clean flavor that doesn't overpower grilled meats or vegetables.

⏱️Time Reality: 10 minutes active blending, no downtime needed before serving
🔑Critical First Step: Mince garlic finely before starting to prevent grainy texture
⚠️Watch Out: Adding oil too quickly breaks the emulsion - drizzle drop by drop for first two minutes

Table of Contents

Toggle
  • Why This Recipe Works
  • What You'll Need
    • Ingredient Details
  • Ingredient Swaps
  • What to Serve With It
  • Store and Reheat
  • Frequently Asked Questions
  • Garlic Toum Lebanese-Style
    • Method 
    • Tried this recipe?

Why This Recipe Works

A stable emulsion forms when oil disperses into tiny droplets surrounded by water and garlic solids. Most people skip this when you need a similar deli recipe that delivers sharp garlic punch without dairy.

The food processor keeps everything moving at the same speed while you control oil flow. Ice water regulates temperature so the mixture doesn't separate from heat friction.

Quick Reference
⏱️
Prep Time
10 min
🔥
Cook Time
0 min
⏰
Total Time
10 min
🍽️
Servings
8 servings
📊
Difficulty
Medium
🏷️
Category
Appetizer
💡
Quick Tip
Add oil slowly to prevent separation
🎯
Best For
Weeknight | Entertaining | Meal prep

Five things that make this work:

  • Neutral oil stays in the background - vegetable or canola oil lets garlic flavor dominate instead of competing with olive oil's fruitiness
  • Drop-by-drop oil addition for first two minutes - creates stable emulsion before switching to slow stream
  • Ice water controls temperature - keeps mixture cold so friction heat doesn't break emulsion during blending
  • Minced garlic blends smoother - finely chopping cloves before processing prevents grainy bits in finished sauce
  • Salt added at start - seasons garlic directly and helps stabilize emulsion as oil incorporates
Quick Tip
Stop blending midway to chill the food processor bowl for 5 minutes if the mixture feels warm to touch

What You'll Need

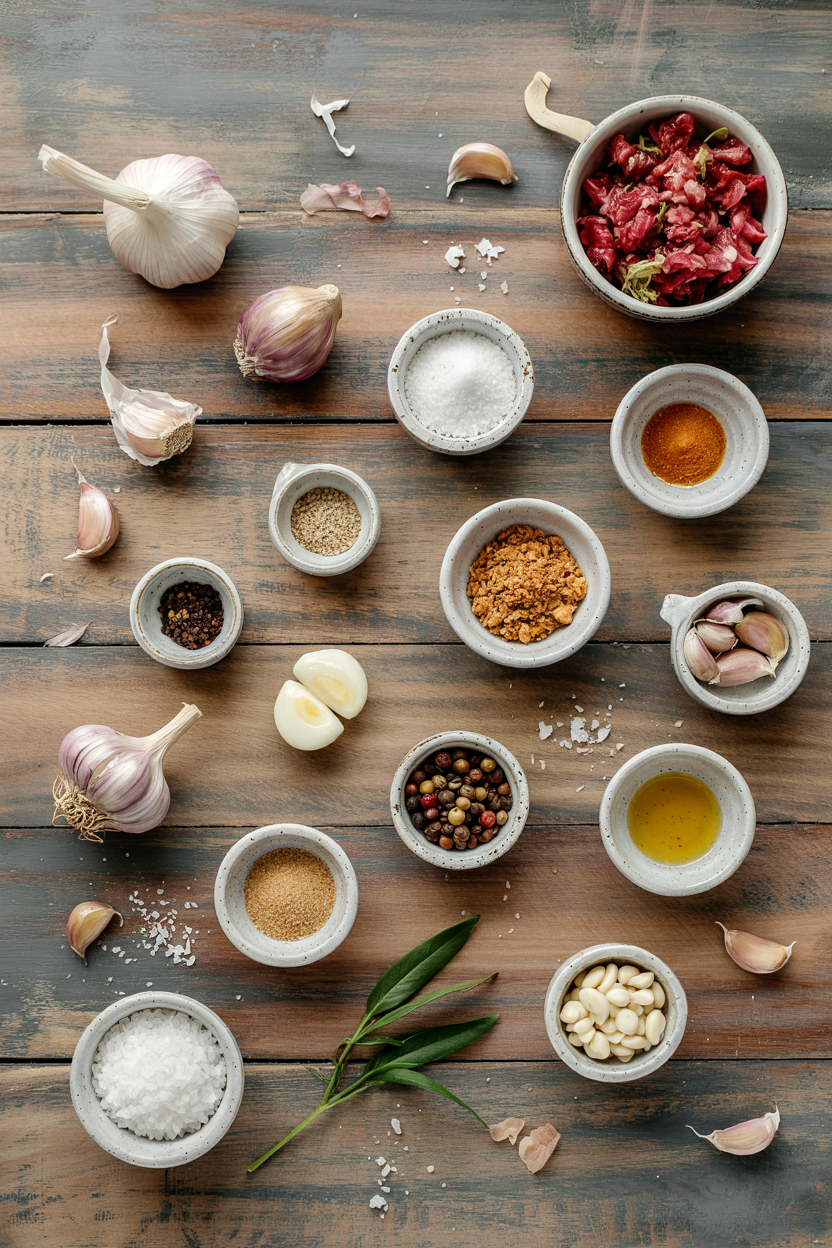
Ingredients for Garlic Toum Lebanese-Style

Stock up on fresh garlic and neutral oil before starting. For a version that comes together quickly, something juicy like rice makes a complete meal when you serve the toum as a side sauce.

🧄
Aromatics
  • 1 cup peeled garlic cloves (about 3 heads)
  • 1 teaspoon salt
🥢
Liquids
  • 2 cups neutral oil (vegetable, canola, or sunflower)
  • ¼ cup fresh lemon juice
  • ¼ cup ice water
🫙
Optional
  • 1 egg white (for easier emulsification)

Ingredient Details

  • Garlic cloves
    Use fresh whole cloves - pre-minced garlic from jars tastes bitter and won't emulsify properly
  • Neutral oil
    Vegetable or canola oil keeps the flavor clean; olive oil adds fruitiness that can overpower the garlic
  • Lemon juice
    Fresh-squeezed tastes brighter than bottled; add half early and half at the end for balanced acidity
  • Ice water
    Cold temperature prevents emulsion breakdown from blender heat; add 1 tablespoon after every ⅓ cup oil
  • Salt
    Start with 1 teaspoon, then taste after blending to adjust - salt stabilizes the emulsion
  • Egg white
    Optional emulsifier makes the process more forgiving; skip it for vegan version with slightly thinner texture

Ingredient Swaps

Different oils change the flavor profile but keep the same creamy texture. Oelek adds the contrast this plate needs, but timing matters when you try simple oelek recipe variations with different heat levels.

Four swaps that work:

  • Light olive oil instead of neutral oil - adds mild fruity notes and slight green tint; use 50/50 blend with neutral oil to keep garlic flavor dominant
  • White vinegar or lime juice instead of lemon juice - changes acidity profile with sharper or citrusy notes; use same amount but expect less bright lemon aroma
  • Roasted garlic instead of raw cloves - mellows pungency for sweeter, softer flavor; roast whole heads at 400°F for 30 minutes before peeling
  • Cold sparkling water instead of ice water - may increase volume and create lighter, airier texture; add same amounts during blending

With Egg White

Works for: easier emulsification, thicker texture, more stable sauce

Skip if: making vegan version, want cleaner garlic-only flavor

Without Egg White

Works for: vegan diets, pure garlic taste, dietary restrictions

Skip if: first-time making toum, need foolproof emulsion

Instructions

The entire process takes 10 minutes of active blending with precise oil control. Rich mains need something to cut through, and pork does exactly that when you serve easy pork side dishes alongside sharp garlic sauce.

  1. Mince garlic and add to food processor - pulse 3-5 times until finely chopped but not paste, then add salt and half the lemon juice; process for 30 seconds until smooth paste forms

  2. Start oil incorporation - with processor running on low speed, add oil literally drop by drop for first 2 minutes using squeeze bottle or very slow pour; you'll see mixture turn white and thicken as emulsion starts

  3. Add ice water gradually - after first ⅓ cup oil is incorporated and mixture looks thick, add 1 tablespoon ice water; continue alternating slow oil stream and ice water additions until all oil and water are used (about 6-8 minutes total)

  4. Finish with remaining lemon juice - once all oil is incorporated and sauce is thick and airy, add remaining lemon juice through feed tube while processor runs; blend 30 seconds more until fully combined

  5. Taste and adjust - check seasoning and add more salt if needed, or thin with additional ice water if too thick; toum should be spreadable like thick mayonnaise with bright white color and no oil separation visible

Watch Out
If oil separates and sauce looks broken, stop adding oil and slowly drizzle in 1-2 tablespoons ice water while processor runs to re-emulsify before continuing

What to Serve With It

Toum needs protein or bread to balance its sharp garlic punch. Most people skip fish, but it balances the meal when planning your garlic butter shrimp dinner with complementary sides that don't compete with the sauce.

Side Dish Prep Why It Works How to Serve
Grilled chicken Easy Lean protein needs rich, creamy sauce for moisture Dollop toum on top of hot chicken thighs or breast
Warm pita bread Easy Bread soaks up garlic sauce without overpowering flavor Tear pita into pieces and use as dipping vehicle
Roasted vegetables Easy Caramelized char contrasts with bright, creamy garlic Drizzle over hot vegetables or serve in small bowl alongside
French fries Easy Crispy potatoes need rich dipping sauce upgrade from ketchup Serve toum in ramekin for dipping hot fries
Falafel Medium Traditional Middle Eastern pairing with complementary textures Spread toum inside pita pocket with falafel and vegetables

Three ways to serve it:

  • As sandwich spread - replace mayo on turkey, chicken, or roast beef sandwiches for sharp garlic kick that cuts through rich meats
  • With grilled lamb - traditional Lebanese pairing where toum's brightness balances lamb's fattiness and gamey notes
  • On charcuterie board - serve in small bowl alongside cured meats, cheeses, and crackers as garlicky alternative to mustard
Best Pick
Serve toum with rotisserie chicken and warm pita for weeknight dinner that feels special without extra cooking

Store and Reheat

Toum keeps its creamy texture in the fridge for 3-4 days when stored properly. A good potato can make or break the plate when you pair simple potato recipe sides with garlic sauce that stays fresh.

Method Time Best For
🌡️ Room temperature 15-20 min Restoring spreadable texture before serving
❌ Stovetop Not recommended Heat breaks emulsion and causes separation
❌ Microwave Not recommended Heat disrupts stable emulsion structure

For best results when storing:

  • Transfer to shallow airtight container - wider surface area allows sauce to chill faster and stay fresh longer than deep jars
  • Press plastic wrap directly on surface - prevents air exposure that causes oxidation and browning on top layer
  • Store in coldest part of fridge - back of top shelf maintains consistent temperature that keeps emulsion stable
  • Let sit at room temperature 15 minutes before serving - cold toum is too thick to spread; warming slightly restores creamy texture
  • Freeze in ice cube trays for longer storage - lasts up to 1 month frozen; thaw individual portions overnight in fridge and stir before using

Frequently Asked Questions

Can I make garlic toum ahead and how long will it keep?

Make toum up to 4 days ahead and store in an airtight container in the fridge. The flavor actually improves after 24 hours as the garlic mellows slightly.

How do I prevent garlic toum from separating?

Add oil very slowly - drop by drop for the first 2 minutes, then in a thin stream. Keep ingredients cold and add ice water after every ⅓ cup of oil to stabilize the emulsion.

What oil works best for keeping the flavor neutral?

Use vegetable, canola, or sunflower oil for clean flavor that lets garlic shine. Olive oil adds fruity notes that can overpower the garlic; if using it, blend with neutral oil in a 50/50 ratio.

Is egg white necessary for a stable emulsion?

No, but it helps. Egg white makes emulsification easier and creates thicker texture, but you can skip it for vegan toum - just add oil more slowly and expect slightly thinner consistency.

What dishes pair well with garlic toum?

Serve toum with grilled chicken, roasted lamb, falafel, shawarma, or as a spread for sandwiches. It also works as a dip for warm pita bread, french fries, or roasted vegetables.

Garlic Toum Lebanese-Style served on a plate

Garlic Toum Lebanese-Style

No ratings yet
Garlic toum is a thick Lebanese garlic sauce made by slowly emulsifying oil into minced garlic using a food processor. The key is adding oil drop by drop to create a stable, spreadable paste that's perfect for grilled meats, roasted vegetables, and pita bread.
Print Recipe Pin Recipe
Prep Time 10 minutes mins
Cook Time 1 minute min
Total Time 11 minutes mins
Servings: 8 servings
Course: Appetizer
Cuisine: Lebanese
Ingredients Equipment Method Notes

Ingredients
  

  • 1 cup garlic cloves peeled and minced finely
  • 1 teaspoon salt start with this amount and adjust to taste
  • 2 cups neutral oil vegetable, canola, or sunflower oil
  • 0.25 cup lemon juice split half early, half at end
  • 0.25 cup ice water add incrementally during blending
  • 1 egg white egg white optional for easier emulsification

Equipment

  • Food processor Used to emulsify garlic and oil
  • Squeeze bottle or slow pour container To add oil slowly

Method
 

  1. Pulse peeled garlic cloves in the food processor 3-5 times until finely chopped but not a paste. Add salt and half the lemon juice, then process for 30 seconds to form a smooth paste.
    1 cup garlic cloves, 1 teaspoon salt, 0.25 cup lemon juice
  2. With food processor running on low speed, add the neutral oil drop by drop for the first 2 minutes to start a stable emulsion and thicken the mixture.
    2 cups neutral oil
  3. After incorporating the first third of the oil, add 1 tablespoon ice water. Continue alternating between a slow stream of oil and small increments of ice water until all oil and water are used, about 6-8 minutes total.
    2 cups neutral oil, 0.25 cup ice water
  4. Add the remaining lemon juice through the feed tube while the processor runs, and blend for 30 seconds more until fully combined and airy.
    0.25 cup lemon juice
  5. Taste and add more salt if needed, or thin with extra ice water if too thick. The sauce should resemble thick mayonnaise and have a bright white color without oil separation.
    1 teaspoon salt, 0.25 cup ice water

Notes

  • Add oil very slowly to prevent breaking the emulsion-start drop by drop for two minutes.
  • Use fresh whole garlic cloves and finely mince before blending to avoid grainy texture.
  • Chill the food processor bowl if the mixture becomes warm during blending to preserve emulsion stability.

Tried this recipe?

Let us know how it was!

Whipped Feta with Honey

March 26, 2026

Complete Article Output

Whipping feta with cream cheese and olive oil creates a silky spread in under 10 minutes. A food processor breaks down the cheese while air gets folded in, giving you that restaurant-style texture without the restaurant timeline.

Whipped Feta with Honey served on a plate

You don't need special equipment or technique. Room temperature cheese blends faster and smoother than cold blocks straight from the fridge.

This works for last-minute appetizer trays when guests text they're on the way or weeknight snacks when crackers and vegetables need something more interesting than plain hummus.

QUICK SUMMARY

Whipped feta combines tangy cheese with cream cheese or Greek yogurt for a smooth, airy dip finished with honey drizzle. The food processor does the work in 5 minutes, and room temperature cheese is the key to avoiding grainy texture. Balance matters - feta is salty, so measure honey carefully to avoid one flavor overpowering the other.

⏱️Time Reality: 10 minutes total with no cooking required
🔧First Critical Move: Let feta sit at room temp 20 minutes before blending
⚠️Watch Out: Over-blending creates grainy texture - pulse in short bursts instead

Why This Recipe Works

The technique relies on breaking down feta's crumbly structure while introducing air for lightness. Most people skip salad, but it balances the meal. For a version that comes together quickly, this tender homemade salad recipe keeps prep time under 15 minutes.

Quick Reference
⏱️
Prep Time
10 min
🔥
Cook Time
0 min
⏰
Total Time
10 min
🍽️
Servings
6 servings
📊
Difficulty
Easy
🏷️
Category
Appetizer
💡
Quick Tip
Use room temperature feta for fluffier whip
🎯
Best For
Entertaining | Weeknight | Meal prep
  • Warm cheese blends faster: Room temperature feta breaks down in seconds instead of clumping into gritty bits
  • Pulse over continuous blend: Ten short bursts prevent over-processing that turns creamy texture into separated paste
  • Add liquids gradually: Drizzling olive oil one tablespoon at a time lets you control final consistency
  • Fresh lemon juice brightens: Two teaspoons of freshly squeezed juice cuts through richness without making the spread sour
  • Chill firms texture: Fifteen minutes in the fridge after whipping gives you spreadable consistency instead of runny dip
Quick Tip
If the mixture looks separated or grainy, fold in one tablespoon of cream cheese and pulse three more times to smooth it out

What You'll Need

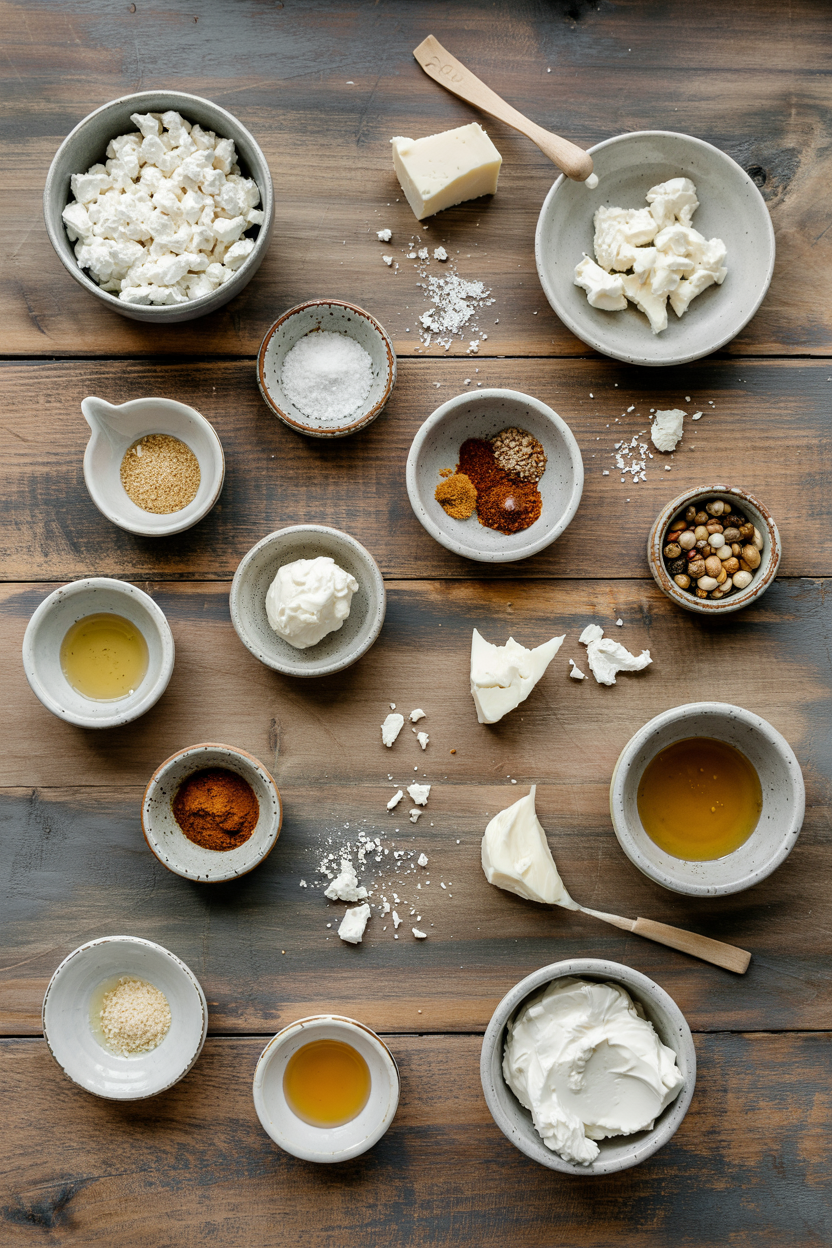
Ingredients for Whipped Feta with Honey

Shopping for this takes one pass through the dairy aisle and pantry staples you likely have. A good oil can make or break the plate. For a version that comes together quickly, another great oil recipe uses similar Mediterranean flavors with different texture.

🧀
Cheese Base
  • 8 oz feta cheese
  • 4 oz cream cheese or Greek yogurt
🥢
Flavor & Texture
  • 3 tablespoon olive oil
  • 2 teaspoon lemon juice
  • 2 tablespoon honey
🌶️
Seasoning
  • Black pepper to taste
  • Fresh herbs (optional)
  • Garlic (optional)

Ingredient Details

  • Feta cheese
    Block feta works better than pre-crumbled versions which contain anti-caking agents that prevent smooth whipping
  • Cream cheese
    Full-fat creates silkier texture than reduced-fat options; bring to room temperature with the feta
  • Greek yogurt
    Use full-fat for creaminess or 2% for lighter tang; avoid non-fat which makes the spread watery
  • Olive oil
    Extra virgin adds fruity notes; regular olive oil works if you want neutral flavor
  • Honey
    Drizzle right before serving to keep the glossy appearance; stirring it in early makes it disappear
  • Lemon juice
    Fresh-squeezed gives brighter flavor than bottled; start with 1 teaspoon and add more to taste
  • Black pepper
    Freshly cracked adds subtle heat; omit if serving to kids or those who prefer mild flavors

Ingredient Swaps

Variations let you adjust richness, tang, or dietary restrictions without losing the creamy texture. Most people swap cream cheese first, but other changes affect flavor balance more dramatically.

  • Goat cheese instead of feta: Milder flavor and slightly creamier texture; use same amount but reduce lemon juice by half
  • Greek yogurt instead of cream cheese: Tangier taste with lighter mouthfeel; adds protein without heaviness
  • Maple syrup instead of honey: Similar sweetness with different flavor notes; works for vegan versions when using plant-based cheese
  • Red pepper flakes instead of black pepper: Adds visible heat and Mediterranean character; start with ¼ teaspoon

Greek Yogurt

Works for: Lighter texture, higher protein, tangier finish

Skip if: You want ultra-rich mouthfeel or neutral backdrop for honey

Cream Cheese

Works for: Silky texture, mild flavor, stable consistency

Skip if: You prefer bright tang or want to reduce fat content

Goat Cheese

Works for: Milder flavor, creamier base, different flavor profile

Skip if: You want traditional salty-tangy feta punch

Instructions

The entire process takes less time than preheating an oven. Chicken adds the contrast this plate needs, but timing matters. For a version that comes together quickly, this juicy homemade chicken recipe cooks while you prep other appetizers.

  1. Break feta into chunks and add to food processor with cream cheese or Greek yogurt that's been sitting at room temperature for 20 minutes.
  2. Pulse 10 times in short bursts until mixture looks crumbly but not smooth, scraping down sides once halfway through.
  3. Drizzle olive oil one tablespoon at a time through feed tube while pulsing, stopping when texture turns creamy and no large chunks remain.
  4. Add lemon juice and black pepper, then pulse 3-4 more times until just combined and mixture looks airy with soft peaks when you lift the blade.
  5. Transfer to serving bowl, smooth top with spatula, cover and chill 15 minutes, then drizzle honey in zigzag pattern right before serving.
Watch Out
Stop blending as soon as the mixture looks smooth - over-processing creates grainy texture that no amount of stirring will fix

What to Serve With It

Whipped feta needs something with texture contrast to make sense on the plate. Most appetizer spreads sit next to similar soft dips, but this works better with crunchy or crisp elements. When planning meals around rich sides like this, rich beef dish planning shows how to balance heavy and light components.

Side Dish Prep Why It Works How to Serve
Warm pita wedges Easy Soft bread scoops creamy spread without overwhelming delicate texture Cut pitas into 6 wedges, warm 2 minutes in dry skillet
Sliced cucumbers Easy Fresh crunch and water content balance rich, salty feta Slice ¼-inch thick rounds, arrange around serving bowl
Baby carrots Easy Natural sweetness complements honey drizzle without competing Serve raw or blanch 2 minutes for slight tenderness
Crackers Easy Adds savory crunch and sturdy base for spreading thick layer Choose plain or seeded varieties, avoid flavored types
Grilled flatbread Medium Crispy charred edges contrast with creamy spread, adds visual appeal Grill 1-2 minutes per side until marked, cut into strips

Three ways to serve it:

  • Spread on toasted baguette slices with cherry tomatoes and fresh basil for bruschetta variation
  • Dollop on Mediterranean grain bowls with roasted vegetables and chickpeas for protein boost
  • Layer in wraps with grilled vegetables and greens as creamy sauce replacement
Best Pick
Warm pita and cucumber slices give you the classic Mediterranean pairing - soft, crunchy, creamy all in one bite

Store and Reheat

Whipped feta keeps better than you'd expect for a dairy spread. The oil and cheese combination stays stable in the fridge for several days. The soup works best when it hits the table at the same time as the main. For a version that comes together quickly, this quick soup dish makes weeknight meal prep easier.

Method Time Best For
🍽️ Serve Chilled N/A Best texture and flavor straight from fridge
🌡️ Room Temp 15-20 min Softer spreading consistency, more pronounced flavor
📦 Microwave 10-15 sec at 30% Quick soften if too firm from fridge, stir after

For best results when storing:

  • Transfer to shallow airtight container within 2 hours of making to prevent drying out
  • Press plastic wrap directly on surface before sealing to prevent skin from forming
  • Store in coldest part of fridge (back of middle shelf) for 3-4 days maximum
  • Stir gently before serving to restore creamy texture if mixture separates slightly
  • Add fresh honey drizzle each time you serve since original drizzle absorbs into spread

Frequently Asked Questions

Can I make whipped feta ahead and how long to store?

Make it up to 3 days ahead and store in an airtight container in the fridge. The texture stays smooth and spreadable, though you may need to stir gently before serving and add fresh honey drizzle.

What is the best method to whip feta smooth?

Use room temperature cheese in a food processor and pulse in short bursts rather than continuous blending. Add olive oil gradually while pulsing until the mixture looks creamy with no large chunks remaining.

How do I fix grainy or separated whipped feta?

Fold in one tablespoon of cream cheese or Greek yogurt and pulse 3-4 more times. If it's still grainy, warm the mixture slightly in a bowl set over warm water, then reblend gently.

Can I substitute goat cheese or other cheeses?

Goat cheese works well and creates a milder, creamier spread with the same amount. Reduce lemon juice by half since goat cheese is less tangy than feta.

What are good pairing options for whipped feta?

Serve with warm pita wedges, sliced cucumbers, baby carrots, or crackers for texture contrast. It also works well spread on toasted bread or as a creamy layer in wraps and grain bowls.

Whipped Feta with Honey served on a plate

Whipped Feta with Honey

No ratings yet
Whipped Feta with Honey is a smooth, airy dip made by blending feta cheese, cream cheese or Greek yogurt, olive oil, and lemon juice. The food processor creates a creamy texture quickly, while a drizzle of honey adds a balanced sweetness perfect for appetizers or snacks.
Print Recipe Pin Recipe
Prep Time 10 minutes mins
Cook Time 1 minute min
Total Time 11 minutes mins
Servings: 6 servings
Course: Appetizer
Cuisine: Mediterranean
Ingredients Equipment Method Notes

Ingredients
  

  • 8 oz feta cheese room temperature, block feta preferred
  • 4 oz cream cheese room temperature; Greek yogurt can be substituted
  • 3 tablespoon olive oil extra virgin preferred
  • 2 teaspoon lemon juice freshly squeezed
  • 2 tablespoon honey for drizzling, added after chilling
  • black pepper to taste
  • fresh herbs optional
  • garlic optional

Equipment

  • Food processor Used to whip the cheese and combine ingredients smoothly

Method
 

  1. Break feta into chunks and place in food processor with cream cheese or Greek yogurt at room temperature.
    8 oz feta cheese, 4 oz cream cheese
  2. Pulse 10 times in short bursts until the mixture is crumbly but not smooth, scraping down the sides halfway through.
  3. While pulsing, drizzle in olive oil one tablespoon at a time until texture is creamy and no large chunks remain.
    3 Tbsp olive oil
  4. Add lemon juice and black pepper, then pulse 3-4 more times until just combined and the mixture looks airy with soft peaks.
    2 tsp lemon juice, black pepper
  5. Transfer to serving bowl, smooth the top with a spatula, cover, and chill for 15 minutes.
  6. Right before serving, drizzle honey in a zigzag pattern over the spread.
    2 Tbsp honey

Notes

  • Use room temperature feta and cream cheese for the smoothest whipping texture.
  • Pulse in short bursts to avoid grainy texture from over-processing.
  • Drizzle olive oil slowly to control creaminess and consistency.

Tried this recipe?

Let us know how it was!

Ricotta with Lemon and Olive Oil

March 26, 2026

Complete Article Output

Combining fresh ricotta with bright lemon and fruity olive oil creates a creamy spread ready in under 10 minutes. The oil adds richness while lemon zest cuts through the dairy with aromatic citrus notes.

Ricotta with Lemon and Olive Oil served on a plate

You don't cook anything. Mix ingredients in a bowl and it's done.

This works for quick snacks when you need something that feels intentional but requires zero heat.

QUICK SUMMARY

Fresh ricotta mixed with lemon zest, lemon juice, and extra virgin olive oil makes a bright, creamy spread in 5 minutes. The key is using quality ricotta and zesting before juicing to preserve aromatic oils. Serve immediately or chill for 15 minutes to let flavors meld.

⏱️Time Reality: 5 minutes active, no cooking required, ready to serve immediately
🔑First Move: Zest one full lemon before juicing to capture oils without bitter pith
⚠️Watch Out: Watery ricotta ruins texture - drain excess liquid before mixing or buy whole-milk brands

Why This Recipe Works

Rich mains need something to cut through, and this related spread recipe does exactly that with minimal effort. For a version that comes together quickly, we keep a batch ready for nights like this - it holds in the fridge for 3 days.

Quick Reference
⏱️
Prep Time
5 min
🔥
Cook Time
0-2 min
⏰
Total Time
7 min
🍽️
Servings
2-4
📊
Difficulty
Easy
🏷️
Category
Appetizer
💡
Quick Tip
Use fresh lemon zest for bright flavor
🎯
Best For
Weeknight | Entertaining

What makes this spread work:

  • Zesting before juicing preserves aromatic citrus oils - waiting until after means losing volatile compounds that give the spread brightness
  • Fresh whole-milk ricotta provides creamy base without graininess or water pooling at the bottom
  • Extra virgin olive oil adds fruity richness and silky mouthfeel that coats each bite
  • Gradual salt additions prevent over-seasoning while enhancing both dairy and citrus flavors
  • Room temperature ingredients blend smoothly without separation or clumping
Quick Tip
Warm 1 tablespoon olive oil at 100°F for 30 seconds before drizzling - it releases more aroma without cooking the ricotta

What You'll Need

Ingredients for Ricotta with Lemon and Olive Oil

A dollop of this creamy homemade takes each bite somewhere more interesting without requiring specialty ingredients. For a version that comes together quickly, pick up fresh ricotta from the deli section instead of the tubs near yogurt - better texture, less water.

🧀
Dairy Base
  • 1 cup fresh ricotta cheese (whole milk preferred)
🍋
Citrus Components
  • 1 lemon (for zest and juice)
  • 1 teaspoon lemon juice
🥢
Finishing Elements
  • 2 tablespoon extra virgin olive oil
  • ¼ teaspoon sea salt (plus more to taste)
  • Black pepper (optional)
  • 1 tablespoon fresh herbs (basil, thyme, or mint - optional)
🫙
For Serving
  • Crusty bread slices (optional)

Ingredient Details

  • Fresh ricotta cheese
    Buy whole-milk ricotta from deli section for creamier texture - tubs near yogurt often contain stabilizers that make the spread grainy
  • Extra virgin olive oil
    Use fruity, peppery oil with recent harvest date - cheap oils taste flat and waxy instead of adding richness
  • Lemon zest
    Zest only the yellow outer layer using light pressure - white pith underneath adds bitterness that ruins the bright citrus flavor
  • Lemon juice
    Add 1 teaspoon at a time and taste - too much makes the ricotta taste sour instead of bright and balanced
  • Sea salt
    Use flaky sea salt instead of table salt for cleaner flavor - add ¼ teaspoon increments to prevent over-salting dairy
  • Fresh herbs
    Chop basil, thyme, or mint finely just before serving - chopping too early bruises leaves and releases bitter compounds
  • Crusty bread
    Toast slices at 350°F for 3-4 minutes until golden - warm bread absorbs olive oil better than cold

Ingredient Swaps

Most people skip variations, but swapping one or two ingredients changes the flavor profile without adding work. Try labneh for tangier dairy or lime zest for more aromatic citrus - both work in the same 5-minute timeline.

Four swaps that work:

  • Fresh ricotta → labneh or strained yogurt - tangier flavor, slightly thinner texture; use same amount and expect more acidity
  • Extra virgin olive oil → avocado oil - milder, less fruity; works when you want neutral richness without peppery bite
  • Lemon zest → lime zest - more floral aroma, sharper citrus; reduces Mediterranean vibe but adds tropical brightness
  • Black pepper → crushed red pepper flakes - adds heat instead of mild spice; use half the amount to avoid overpowering dairy

Labneh

Works for: tangier spread with thicker consistency

Skip if: you want mild, creamy dairy flavor

Avocado Oil

Works for: budget option with neutral flavor

Skip if: you want fruity, peppery olive oil richness

Lime Zest

Works for: tropical citrus variation

Skip if: you prefer classic Mediterranean brightness

Instructions

A good spread can make or break the plate when you need something ready in minutes. The shrimp works best when it hits the table at the same time as the main, and this spread comes together while bread toasts - we keep a batch ready for nights like this with something flaky like shrimp.

  1. Zest one full lemon using a microplane or fine grater. Use light pressure to capture only yellow outer layer. Stop when you hit white pith - it tastes bitter and ruins the bright citrus flavor you're building.

  2. Juice the zested lemon and measure 1 teaspoon. Set remaining juice aside for adjusting later. Add juice gradually because too much makes ricotta taste sour instead of balanced and bright.

  3. Combine 1 cup ricotta, lemon zest, 1 teaspoon juice, and ¼ teaspoon sea salt in a small bowl. Whisk gently for 30 seconds until smooth and creamy. Check for water pooling at the bottom - drain if needed before continuing.

  4. Drizzle 2 tablespoons extra virgin olive oil over the ricotta mixture. Use circular motion to distribute evenly. Whisk briefly to incorporate without over-mixing, which causes separation and oily texture.

  5. Taste and adjust salt, adding ¼ teaspoon at a time if needed. Add black pepper or chopped fresh herbs now if using. Transfer to serving dish and drizzle remaining olive oil on top for glossy finish.

Golden Rule
Mix just until ingredients combine - overworking ricotta breaks down creamy texture and causes olive oil to separate into pools

What to Serve With It

Most people serve ricotta spread with just bread, but pairing it with the right sides turns a simple appetizer into a complete light meal. Check weeknight surf and turf meal ideas for more options when building a full plate around creamy dairy-based starters.

Side Dish Prep Why It Works How to Serve
Simple green salad Easy Fresh greens cut through creamy ricotta with crisp texture and light acidity Toss arugula or mixed greens with lemon vinaigrette, serve alongside spread on plate
Steamed asparagus Easy Mild vegetable balances bright citrus without competing for attention Steam 4-5 minutes until tender-crisp, drizzle with olive oil, serve warm next to ricotta
Grilled chicken breast Medium Neutral protein adds substance and turns appetizer into light lunch or dinner Slice grilled chicken thin, arrange on plate with dollop of ricotta spread on top
Marinated olives Easy Briny, salty olives complement olive oil in spread and add Mediterranean flavor Serve ¼ cup olives in small bowl next to ricotta for contrasting bites
Heirloom tomato slices Easy Juicy tomatoes add acidity and fresh texture that pairs with creamy dairy Slice tomatoes ¼-inch thick, season with salt, arrange around ricotta on platter

Three ways to serve it:

  • As an appetizer spread - toast crusty bread slices until golden, spread ricotta generously, top with fresh herbs for elegant starter
  • On a charcuterie board - pair with cured meats, marinated olives, and roasted vegetables for variety of textures and flavors
  • With roasted vegetables - spoon ricotta over warm roasted cauliflower or Brussels sprouts for creamy contrast to charred edges
Best Pick
Serve with warm crusty bread toasted at 350°F for 3-4 minutes - warm bread absorbs olive oil better and contrasts with cool creamy ricotta

Store and Reheat

The sweet potatoes works best when it hits the table at the same time as the main, but leftover ricotta spread holds texture better than most dairy-based recipes. We keep a batch ready for nights like this with this quick sweet potatoes dish, and it stays fresh for 3-4 days when stored properly.

Method Time Best For
🌡️ Room temperature rest 15-20 min Softening chilled ricotta without altering texture or causing separation
📦 Microwave 10 seconds low power Warming small portion gently when you need it ready immediately
🔥 Oven Not recommended Heat causes ricotta to curdle and olive oil to separate

For best results when storing:

  • Transfer ricotta spread to airtight container immediately after mixing - exposure to air dries the surface and creates skin
  • Store in shallow container instead of deep bowl so spread chills evenly without temperature pockets
  • Press plastic wrap directly onto surface of ricotta before sealing to prevent oxidation and browning
  • Keep in coldest part of fridge (back, not door) where temperature stays consistent at 35-38°F
  • Stir gently before serving to redistribute olive oil that may have pooled on top during storage

Frequently Asked Questions

Can I use bottled lemon juice instead of fresh lemon?

Bottled lemon juice works in a pinch but tastes flat and slightly bitter compared to fresh. Fresh lemon provides bright, aromatic citrus flavor that makes the spread taste vibrant instead of dull.

How long can I store ricotta with lemon and olive oil?

Store in an airtight container in the fridge for 3-4 days. Press plastic wrap directly onto the surface to prevent oxidation and keep olive oil from separating.

How do I know when the flavors in ricotta are balanced?

Taste after mixing - you should taste creamy dairy first, then bright citrus, then fruity olive oil in the finish. If one flavor dominates, adjust by adding more ricotta, lemon zest, or salt incrementally.

What if my ricotta mixture is watery or separated?

Drain excess liquid through a fine-mesh strainer for 5 minutes, then stir gently to recombine. If olive oil separated, add 1-2 tablespoons more ricotta and whisk briefly to re-emulsify.

Can I scale this recipe for a large group?

Yes - multiply all ingredients by the number of servings needed and mix in batches if making more than 4 cups. Large batches blend better when whisked in portions instead of all at once.

Ricotta with Lemon and Olive Oil served on a plate

Ricotta with Lemon and Olive Oil

No ratings yet
This bright, creamy spread combines fresh ricotta with lemon zest, lemon juice, and extra virgin olive oil for a refreshing and rich appetizer. Ready in under 10 minutes with no cooking required, it makes a perfect snack or starter with minimal effort.
Print Recipe Pin Recipe
Prep Time 5 minutes mins
Cook Time 1 minute min
Total Time 6 minutes mins
Servings: 4 servings
Course: Appetizer
Cuisine: Mediterranean
Ingredients Equipment Method Notes

Ingredients
  

  • 1 cup fresh ricotta cheese whole milk preferred; drain if watery
  • 1 lemon lemon zest and juice
  • 1 teaspoon lemon juice add gradually to taste
  • 2 tablespoon extra virgin olive oil fruity, recent harvest preferred
  • 0.25 teaspoon sea salt plus more to taste
  • black pepper optional
  • 1 tablespoon fresh herbs basil, thyme, or mint finely chopped, optional
  • crusty bread slices optional, for serving

Equipment

  • Microplane or fine grater For zesting the lemon
  • Small bowl To mix ingredients
  • Whisk To gently combine ingredients

Method
 

  1. Zest one full lemon using a microplane or fine grater, applying light pressure to capture only the yellow outer layer. Stop before the white pith to avoid bitterness.
    1 lemon lemon
  2. Juice the zested lemon and measure 1 teaspoon of juice. Set aside the remaining juice for adjustments later. Add juice gradually to maintain bright balanced flavor.
    1 lemon lemon, 1 tsp lemon juice
  3. Combine 1 cup of ricotta, the lemon zest, 1 teaspoon lemon juice, and ¼ teaspoon sea salt in a small bowl. Whisk gently for about 30 seconds until smooth and creamy. Drain excess liquid if water pools at the bottom of ricotta before mixing.
    1 cup fresh ricotta cheese, 1 lemon lemon, 1 tsp lemon juice, 0.25 tsp sea salt
  4. Drizzle 2 tablespoons extra virgin olive oil over the ricotta mixture in a circular motion. Whisk briefly to incorporate the oil evenly without over-mixing to prevent separation.
    2 tbsp extra virgin olive oil
  5. Taste the mixture and adjust salt by adding more sea salt ¼ teaspoon at a time if needed. Add black pepper or chopped fresh herbs now if desired. Transfer to a serving dish and drizzle remaining olive oil on top for a glossy finish.
    0.25 tsp sea salt, black pepper, 1 tbsp fresh herbs, 2 tbsp extra virgin olive oil

Notes

  • Zest the lemon before juicing to preserve bright aromatic oils.
  • Drain watery ricotta to maintain creamy texture without separation.
  • Warm olive oil slightly before drizzling to enhance aroma without cooking ricotta.

Tried this recipe?

Let us know how it was!

Olive Tapenade Provençal-Style

March 26, 2026

Output

Dark, briny olives blended with capers and anchovies until they're spreadable but still have bite. That's what happens when you pulse the food processor in short bursts instead of letting it run smooth.

Olive Tapenade Provençal-Style served on a plate

The texture makes the difference. You want visible olive pieces, not baby food.

This works for entertaining when you need something fast that looks like you tried. Spread it on crostini or serve it alongside simple homemade garlic shrimp for a meal that feels intentional.

QUICK SUMMARY

This Provençal olive tapenade uses black olives, capers, and anchovies pulsed to a chunky spreadable texture in under 10 minutes. The key is brief pulses and adding lemon juice at the end to preserve brightness. Serve at cool room temperature for appetizers, picnics, or meal prep.

⏱️Time: 10 minutes active, no cooking required
🎯Method: Rinse capers first, pulse in 5-second bursts until coarsely chopped
⚠️Watch: Stop before it turns into smooth paste-texture should stay chunky

Why This Recipe Works

The food processor does the work in short controlled bursts while you control the final texture. Most people skip muhammara, but it balances the meal. For a version that comes together quickly, this quick muhammara dish keeps the same Mediterranean vibe with roasted peppers instead of olives.

Quick Reference
⏱️
Prep Time
10 min
🔥
Cook Time
0 min
⏰
Total Time
10 min
🍽️
Servings
8 servings
📊
Difficulty
Easy
🏷️
Category
Appetizer
💡
Quick Tip
Pulse to desired chunky texture, don't overblend
🎯
Best For
Entertaining

What makes this work:

  • Rinsing capers under cold water for 30 seconds removes excess brine that would make the spread overwhelmingly salty
  • Pulsing in 3-5 short bursts of 5 seconds each keeps the texture spreadable but slightly coarse instead of pureed smooth
  • Adding lemon juice after blending preserves brightness and prevents the olive flavor from turning flat or discolored
  • Letting the tapenade rest 30 minutes in the fridge allows the garlic and anchovy flavors to meld without overwhelming the olives
  • Serving at cool room temperature brings out the fruity olive notes and the herbal thyme instead of masking them with cold
Quick Tip
Use 3-5 short pulses of 5 seconds each, check texture between pulses to avoid turning it into a smooth paste

What You'll Need

Ingredients for Olive Tapenade Provençal-Style

You need pitted black olives, rinsed capers, and anchovies for the base. The dressing works best when it hits the table at the same time as the main. For a version that comes together quickly, classic dressing dish adds herbaceous brightness to balance the briny olive spread.

🫙
Base
  • 1 cup pitted black olives
  • 2 tablespoons capers, rinsed
  • 2 anchovy fillets
🧄
Aromatics
  • 1 garlic clove
  • 1 tablespoon fresh lemon juice
  • Optional: 1 shallot, chopped
🥢
Binder
  • 2-3 tablespoons olive oil
🌶️
Finishing
  • 1 teaspoon fresh thyme
  • Black pepper to taste
  • Optional: chopped parsley

Ingredient Details

  • Black olives
    Use pitted Kalamata or Niçoise olives for authentic Provençal flavor without bitterness from pits
  • Capers
    Rinse well under cold water for 30 seconds to remove excess brine that would overpower the spread
  • Anchovies
    Finely chop 2 anchovy fillets before adding to processor for even umami distribution without fishiness
  • Olive oil
    Add gradually up to 3 tablespoons to control moisture-stop when the mixture binds but isn't oily
  • Fresh lemon juice
    Add 1 tablespoon after blending to preserve brightness and prevent discoloration from processing
  • Fresh thyme
    Strip leaves from 2-3 sprigs for herbal note-dried thyme works but use half the amount
  • Garlic
    One clove adds pungent sharpness without overwhelming-mince it before blending for even distribution

Ingredient Swaps

Green olives give you a brighter, tangier spread with firmer texture if you want sharper bite. A good dressing can make or break the plate. We keep a batch ready for nights like this-homemade dressing recipe uses herbs and lemon to brighten any appetizer spread.

Four swaps that work:

  • Use green olives instead of black olives for a brighter, tangier flavor with firmer texture that holds up on charcuterie boards
  • Skip anchovies and use extra capers or miso paste for vegetarian version with less umami depth but still savory
  • Swap olive oil for avocado oil if you want milder flavor that doesn't compete with the olives
  • Replace fresh thyme with dried thyme or Italian seasoning using half the amount for similar herbal note from the pantry

Green Olives

Works for: sharper, tangier spread with firmer bite for cheese boards

Skip if: you want traditional dark Provençal flavor and softer texture

Miso Paste (No Anchovies)

Works for: vegetarian version that retains savory umami depth

Skip if: you want authentic French Mediterranean flavor profile

Instructions

This takes 10 minutes of pulsing and checking. Rich mains need something to cut through, and dressing does exactly that. For a version that comes together quickly, a creamy dressing on the side adds herbaceous notes to balance the briny tapenade on the same appetizer plate.

  1. Rinse the capers under cold water for 30 seconds, then pat dry with a paper towel to remove excess brine that would make the spread too salty.
  2. Add black olives, capers, anchovies, and garlic to food processor and pulse 3-5 times in 5-second bursts until coarsely chopped with visible olive pieces-don't let it turn smooth.
  3. Drizzle in olive oil gradually up to 3 tablespoons while pulsing briefly between additions until the mixture binds but stays chunky and slightly moist.
  4. Stop the processor and stir in fresh thyme, black pepper, and lemon juice by hand to preserve brightness and keep herbs from turning brown.
  5. Taste and adjust seasoning by adding small amounts of lemon juice for brightness or olive oil to soften saltiness-let it rest 30 minutes in the fridge before serving.
Golden Rule
Use stainless steel or ceramic bowls for mixing to avoid metallic flavor-aluminum reacts with acidic ingredients like lemon juice and capers

What to Serve With It

Tapenade needs something crisp or creamy to balance the briny punch. Most people skip chicken, but it balances the meal. For a version that comes together quickly, juicy homemade chicken recipe makes a simple main that doesn't compete with the bold olive spread.

Side Dish Prep Why It Works How to Serve
Toasted baguette slices Easy Crispy base complements olive spread without competing Slice 1-inch thick, brush with olive oil, toast at 375°F for 8 minutes
Fresh crudités Easy Raw vegetables balance richness with fresh crunch Serve carrot sticks, celery, cucumber slices, bell pepper strips
Hard-boiled eggs Easy Mellow flavor and protein contrast with salty tapenade Halve eggs, spoon tapenade on top, sprinkle with parsley
Crostini with goat cheese Medium Creamy tangy cheese softens intense olive flavor Spread goat cheese on crostini, top with tapenade, drizzle olive oil
Grilled vegetables Medium Smoky char enhances olive flavors without masking them Grill zucchini, eggplant, bell peppers, serve tapenade on the side

Three ways to serve it:

  • As an appetizer spread: Put it in a shallow bowl with toasted baguette slices, crudités, and marinated artichokes for a simple Mediterranean board
  • On a charcuterie plate: Pair with prosciutto, salami, aged cheeses, and pickled vegetables to add briny punch that cuts through rich meats
  • With grilled proteins: Spoon it over grilled chicken, fish, or lamb as a finishing sauce that adds salty Mediterranean flavor

For more complete meal ideas, check out weeknight beef and broccoli meal ideas for protein-forward dinners that work with Mediterranean sides.

Best Pick
Serve tapenade at cool room temperature-let it sit 20 minutes after refrigerating to bring out the fruity olive notes and herbal thyme

Store and Reheat

Store it in a shallow airtight glass container in the fridge for up to 4 days. Rich mains need something to cut through, and beans does exactly that. For a version that comes together quickly, something rich like beans adds protein and substance to balance the light olive spread.

Method Time Best For
🌡️ Room Temperature 20 min Bringing chilled tapenade to serving temperature for best flavor

For best results when storing:

  • Transfer to a shallow glass container within 30 minutes of making to preserve freshness and prevent metallic taste from prolonged contact with the processor bowl
  • Press plastic wrap directly onto the surface before sealing the lid to prevent oxidation that turns the top brown
  • Store in the fridge for 3-4 days in an airtight container-the flavor deepens slightly as the garlic and anchovies meld
  • Freeze in small portions up to 1 month in ice cube trays covered with plastic wrap, then transfer cubes to freezer bags for single-serving convenience
  • Let it sit at room temperature 20 minutes before serving to bring out the fruity olive notes and soften the texture for easier spreading

Frequently Asked Questions

Can I make olive tapenade ahead and store it?

Yes, make it up to 4 days ahead and store in an airtight glass container in the fridge. The flavor actually improves after a day as the garlic and anchovies meld with the olives.

How long does olive tapenade keep in the fridge?

It keeps 3-4 days in a shallow airtight container. Press plastic wrap directly onto the surface before sealing to prevent the top from oxidizing and turning brown.

Can I omit anchovies and keep the flavor balanced?

Yes, skip anchovies and add an extra tablespoon of rinsed capers or 1 teaspoon of miso paste for umami depth. The spread will be less savory but still work for vegetarian diets.

How do I achieve the ideal chunky texture without overblending?

Pulse in 3-5 short bursts of 5 seconds each, checking texture between pulses. Stop when you see visible olive pieces and the mixture just starts to bind-it should be spreadable but slightly coarse, not smooth.

What are the best serving ideas for olive tapenade at parties?

Serve it on a charcuterie board with cured meats, aged cheeses, marinated artichokes, and toasted baguette slices. You can also spoon it over crostini topped with goat cheese or use it as a dip for fresh vegetables like bell peppers and celery.

Olive Tapenade Provençal-Style served on a plate

Olive Tapenade Provençal-Style

No ratings yet
This Provençal olive tapenade combines black olives, capers, and anchovies pulsed to a chunky, spreadable texture in under 10 minutes. Brief pulses and adding lemon juice at the end preserve freshness and brightness. Serve at cool room temperature as a flavorful appetizer or alongside simple mains.
Print Recipe Pin Recipe
Prep Time 10 minutes mins
Cook Time 1 minute min
Total Time 11 minutes mins
Servings: 8 servings
Course: Appetizer
Cuisine: French, Mediterranean
Ingredients Equipment Method Notes

Ingredients
  

  • 1 cup black olives pitted, preferably Kalamata or Niçoise
  • 2 tablespoons capers rinsed and patted dry
  • 2 fillets anchovies finely chopped
  • 1 clove garlic minced
  • 1 tablespoon fresh lemon juice added after blending
  • 3 tablespoons olive oil added gradually while pulsing
  • 1 teaspoon fresh thyme leaves stripped from sprigs
  • black pepper to taste
  • parsley optional, chopped
  • 1 shallot optional, chopped

Equipment

  • Food processor Used to pulse and blend ingredients to chunky texture
  • Paper towels Used to pat dry rinsed capers

Method
 

  1. Rinse the capers under cold water for 30 seconds and pat dry with a paper towel to remove excess brine that would make the spread too salty.
    2 tablespoons capers
  2. Add black olives, rinsed capers, anchovies, garlic, and optional shallot to a food processor. Pulse 3-5 times in 5-second bursts until the mixture is coarsely chopped with visible olive pieces; avoid overblending to keep chunky texture.
    1 cup black olives, 2 tablespoons capers, 2 fillets anchovies, 1 clove garlic, 1 shallot
  3. Drizzle olive oil gradually up to 3 tablespoons while pulsing briefly between additions until the mixture binds but remains slightly moist and chunky.
    3 tablespoons olive oil
  4. Stop the processor and stir in fresh thyme, black pepper, and lemon juice by hand to preserve brightness and keep the herbs from turning brown.
    1 tablespoon fresh lemon juice, 1 teaspoon fresh thyme, black pepper
  5. Taste and adjust seasoning by adding small amounts of lemon juice for brightness or olive oil to soften saltiness. Let the tapenade rest in the fridge for 30 minutes before serving to meld flavors.
    1 tablespoon fresh lemon juice, 3 tablespoons olive oil

Notes

  • Rinse capers well to prevent excessive saltiness.
  • Use short pulses to maintain a chunky texture, stopping before smooth paste forms.
  • Let tapenade rest chilled to meld flavors and serve at cool room temperature to enhance olive and herb notes.

Tried this recipe?

Let us know how it was!

Chicken Liver Pâté

March 26, 2026

Sautéing chicken livers at medium heat with butter and brandy, then blending warm creates silky pâté. The technique relies on precise cooking-just until opaque-so the livers stay tender instead of turning grainy.

Chicken Liver Pâté served on a plate

Trim away all membranes and green spots before cooking. That's what separates smooth spreads from gritty ones.

This works for appetizer plates when you need something rich that holds in the fridge for days and looks more complicated than it is.

QUICK SUMMARY

Chicken Liver Pâté blends sautéed livers with butter and brandy into a smooth, creamy spread. Success depends on trimming connective tissue, cooking livers to just opaque, and blending the warm mixture until silky. Perfect for make-ahead entertaining or weeknight appetizers that feel special.

⏱️Time Reality: 25 minutes total-15 min prep, 10 min cook, then chill 3 hours minimum
🔪First Critical Move: Pat livers dry and trim all membranes before sautéing to prevent soggy, grainy texture
⚠️Watch Out: Overcooking turns livers dry and crumbly-pull them when just opaque inside, no pink

Why This Recipe Works

Cooking chicken livers at medium heat for 5-7 minutes develops flavor without drying them out. For a version that comes together quickly, smoky pork recipe takes a similar approach with rich proteins.

Quick Reference
⏱️
Prep Time
15 min
🔥
Cook Time
10 min
⏰
Total Time
25 min
🍽️
Servings
6-8 servings
📊
Difficulty
Medium
🏷️
Category
Appetizer
💡
Quick Tip
Trim livers well for smooth texture
🎯
Best For
Weeknight | Entertaining

What makes it work:

  • Thorough trimming removes connective tissue that causes grainy texture even after blending
  • Medium heat cooks livers evenly without scorching the butter or burning aromatics
  • Deglazing with brandy adds depth while reducing alcohol bite through 1-2 minutes of simmering
  • Blending warm mixture creates silkier pâté than processing cold ingredients
  • Chilling for 3+ hours firms texture and lets flavors meld into balanced richness
Quick Tip
Pat livers dry with paper towels before cooking-moisture causes spattering and prevents proper browning.

What You'll Need

Ingredients for Chicken Liver Pâté

A dollop of dressing takes each bite somewhere more interesting. For a version that comes together quickly, tangy dressing recipe uses fresh herbs the same way.

🍗
Protein
  • 1 lb chicken livers
🧀
Dairy & Fat
  • ½ cup butter (1 stick), divided
  • ¼ cup heavy cream
🧄
Aromatics
  • 1 medium onion or 2 shallots, diced
  • 2 cloves garlic, minced
🫙
Seasonings
  • 2-3 tablespoon brandy or cognac
  • 1 teaspoon fresh thyme or ½ teaspoon dried
  • Salt and black pepper to taste

Ingredient Details

  • Chicken livers
    Look for livers that are deep red-brown with no green spots-trim all membranes and connecting tissue before cooking
  • Butter
    Use unsalted butter so you control seasoning-divide into cooking portion (4 tbsp) and blending portion (4 tbsp)
  • Onion or shallots
    Shallots add milder sweetness than onions-cook until translucent but not browned for best flavor
  • Brandy or cognac
    Alcohol deglazes the pan and adds complexity-simmer 1-2 minutes to cook off harsh bite while keeping depth
  • Heavy cream
    Adds silky texture without thinning the pâté-swap for coconut cream if avoiding dairy
  • Thyme
    Fresh thyme adds herbaceous notes-if using dried, cut amount in half to avoid overpowering
  • Salt and pepper
    Season generously after blending-livers need more salt than you think to balance richness

Ingredient Swaps

Spread adds the contrast this plate needs, but timing matters. For a version that comes together quickly, a simple spread variation builds similar creamy texture.

Four swaps that work:

  • Butter → olive oil or coconut oil: Lighter texture and dairy-free, but loses traditional richness-use same amount
  • Heavy cream → coconut cream: Adds subtle sweetness while staying dairy-free-shake can well before measuring
  • Brandy → apple cider vinegar or lemon juice: Provides acidity without alcohol depth-use 1 tablespoon and add gradually
  • Chicken livers → duck or turkey livers: Duck livers taste richer, turkey milder-cooking time stays the same

Olive Oil Instead of Butter

Works for: Dairy-free diets, lighter texture, heart-healthy fats

Skip if: You want traditional French richness and silky mouthfeel

Apple Cider Vinegar Instead of Brandy

Works for: Alcohol-free cooking, budget constraints, adding bright acidity

Skip if: You need complex depth that only alcohol provides through deglazing

Instructions

Rice adds the contrast this plate needs, but timing matters. For a version that comes together quickly, something juicy like rice hits the same savory notes.

  1. Trim and prep livers: Cut away all connective tissue, membranes, and any green spots from chicken livers. Pat completely dry with paper towels. Season with salt and pepper.

  2. Sauté aromatics and livers: Melt 4 tablespoon butter in a large skillet over medium heat. Add onion or shallots, cook 3-4 minutes until soft. Add garlic and thyme, cook 30 seconds. Add livers in single layer, cook 5-7 minutes, stirring occasionally, until opaque with no pink inside.

  3. Deglaze pan: Pour in brandy, scrape up browned bits from pan bottom. Simmer 1-2 minutes until alcohol smell fades and liquid reduces by half.

  4. Blend mixture: Transfer everything to food processor or blender while still warm. Add remaining 4 tablespoon butter (cut into pieces) and heavy cream. Blend 1-2 minutes until completely smooth. Taste and adjust salt and pepper.

  5. Chill and seal: Pour into airtight container or ramekins, smooth top. If sealing, melt 2-3 tablespoon butter and pour ¼-inch layer on top. Refrigerate minimum 3 hours, up to 4 days.

Watch Out
Don't blend cold pâté to fix graininess-it makes it worse. Instead, warm gently in a pan with a tablespoon of butter, then re-blend while warm.

What to Serve With It

Most people pair pâté with just crackers, but you're missing dimension. The right sides bridge rich liver spread to the rest of the plate, and for easy chicken meal planning the same principle applies.

Side Dish Prep Why It Works How to Serve
Toasted Baguette Slices Easy Crispy texture balances creamy pâté Toast until golden, brush with olive oil, serve warm
Cornichons Easy Bright acidity cuts through richness Drain and serve alongside pâté
Simple Green Salad Easy Light freshness contrasts dense spread Dress lightly with vinaigrette, serve cold
Fig Jam Easy Sweet contrast enhances savory notes Dollop on plate or spread on bread with pâté
Pickled Onions Medium Tangy crunch adds textural variety Make ahead, drain before serving

Three ways to serve it:

  • Appetizer spread: Serve in shallow dish with toasted baguette, cornichons, and grainy mustard on the side
  • Lunch plate: Spread on crackers, pair with simple green salad and pickled vegetables for balance
  • Entertaining board: Add fig jam, toasted nuts, and assorted breads for guests to build their own bites
Best Pick
Cornichons and mustard cut richness better than any other pairing-the sharp acidity resets your palate between bites.

Store and Reheat

The potato works best when it hits the table at the same time as the main. For a version that comes together quickly, simple potato recipe builds similar creamy comfort.

Method Time Best For
🍳 Stovetop 2-3 min on low heat Small portions, gentle warming to restore softness
🔥 Oven 10 min at 300°F Larger portions, even warming without drying out
📦 Microwave 30-45 sec low power Quick reheating, stir midway to prevent hot spots

For best results when storing:

  • Refrigerate in shallow containers: Airtight dish or ramekins chill faster and more evenly than deep bowls
  • Seal with butter layer: Pour ¼-inch melted butter on top, chill 30 minutes to create protective barrier
  • Use within 3-4 days: Pâté stays fresh in fridge but flavor fades after 4 days
  • Freeze up to 1 month: Wrap tightly in plastic, then foil-thaw overnight in fridge before serving
  • Bring to room temp before serving: Pull from fridge 20-30 minutes early for best spreadable texture and fuller flavor

Frequently Asked Questions

Can I use turkey or duck livers instead of chicken livers?

Yes-duck livers create richer, more intense flavor while turkey livers taste milder and leaner. Cooking time stays the same (5-7 minutes until opaque), but adjust seasoning since duck needs less salt.

How long does chicken liver pâté keep in the fridge and freezer?

Refrigerate in airtight container for 3-4 days. Freeze up to 1 month wrapped tightly in plastic then foil-thaw overnight in fridge before serving.

How do I know when chicken liver pâté is fully cooked and safe?

Livers are done when no pink remains inside and they feel firm but not hard when pressed-this takes 5-7 minutes at medium heat. Cut one open to check if unsure.

What causes grainy texture and how to fix it?

Grainy pâté comes from poorly trimmed membranes or blending cold mixture. Trim all connective tissue before cooking and blend while warm-if already grainy, warm gently with butter and re-blend.

Can I make chicken liver pâté ahead and how should I store it?

Yes-pâté actually improves after 24 hours as flavors meld. Make up to 3 days ahead, seal with butter layer, and refrigerate in airtight container until serving.

Chicken Liver Pâté served on a plate

Chicken Liver Pâté

No ratings yet
Chicken Liver Pâté blends sautéed livers with butter and brandy into a smooth, creamy spread. The key is trimming all membranes and cooking the livers just until opaque to keep the texture silky. This rich pâté is perfect for make-ahead appetizers or entertaining.
Print Recipe Pin Recipe
Prep Time 15 minutes mins
Cook Time 10 minutes mins
Total Time 25 minutes mins
Servings: 6 servings
Course: Appetizer
Cuisine: French
Ingredients Method Notes

Ingredients
  

  • 1 lb chicken livers trim all membranes, connective tissue, and green spots
  • 0.5 cup butter unsalted, divided into 4 tablespoon for cooking, 4 tablespoon for blending
  • 0.25 cup heavy cream
  • 1 medium onion or shallots diced
  • 2 cloves garlic minced
  • 2-3 tablespoon brandy or cognac
  • 1 teaspoon fresh thyme or 0.5 teaspoon dried
  • salt and black pepper to taste, season after blending

Method
 

  1. Cut away all connective tissue, membranes, and any green spots from chicken livers. Pat completely dry with paper towels. Season with salt and pepper.
    1 lb chicken livers, salt and black pepper
  2. Melt 4 tablespoon butter in a large skillet over medium heat. Add diced onion or shallots and cook for 3-4 minutes until soft and translucent. Add minced garlic and thyme, cook for 30 seconds. Add livers in a single layer and cook 5-7 minutes, stirring occasionally, until livers are opaque with no pink inside.
    0.5 cup butter, 1 medium onion or shallots, 2 cloves garlic, 1 tsp fresh thyme, 1 lb chicken livers
  3. Pour in brandy and scrape up browned bits from the pan bottom. Simmer for 1-2 minutes until alcohol aroma fades and liquid reduces by half.
    2-3 tbsp brandy
  4. Transfer everything while still warm to a food processor or blender. Add the remaining 4 tablespoon butter cut into pieces and the heavy cream. Blend for 1-2 minutes until completely smooth. Taste and adjust salt and pepper as needed.
    0.5 cup butter, 0.25 cup heavy cream, salt and black pepper
  5. Pour the pâté into an airtight container or ramekins and smooth the top. For sealing, melt 2-3 tablespoon butter and pour a ¼-inch layer on top. Refrigerate for a minimum of 3 hours, up to 4 days.
    0.5 cup butter

Notes

  • Trim all membranes and connective tissue thoroughly to prevent grainy texture.
  • Cook livers just until opaque with no pink inside to keep pâté silky and avoid dryness.
  • Blend the mixture while warm for the smoothest texture; reheating and re-blending warm can fix graininess.

Tried this recipe?

Let us know how it was!

Smoked Salmon Dip with Cream Cheese

March 26, 2026

Appetizer dips often fall flat or taste one-note. The fix is balancing smoky salmon with tangy lemon and fresh herbs so every bite has layers instead of just cream cheese.

Smoked Salmon Dip with Cream Cheese served on a plate

Chill the dip for at least an hour before serving. That resting time lets flavors meld and the texture firm up enough to spread cleanly on crackers.

Make this for weekend brunch or when you need a crowd-friendly appetizer that looks intentional but takes 10 minutes of actual work.

QUICK SUMMARY

Smoked Salmon Dip with Cream Cheese combines chopped smoked salmon, softened cream cheese, fresh dill, capers, and lemon juice into a creamy spread. Chop the salmon finely and soften the cream cheese completely for smooth texture. Chill one hour before serving so flavors blend and the dip firms up enough to spread easily.

⏱️Timeline: 10 minutes active, 1 hour chilling for best flavor
🔪First Move: Soften cream cheese 30 minutes before mixing
⚠️Watch Out: Add lemon juice gradually - too much overwhelms the salmon

Table of Contents

Toggle
  • Why This Recipe Works
  • What You'll Need
    • Ingredient Details
  • Ingredient Swaps
  • What to Serve With It
  • Store and Reheat
  • Frequently Asked Questions
  • Smoked Salmon Dip with Cream Cheese
    • Method 
    • Tried this recipe?

Why This Recipe Works

Most people skip entertaining, but it balances the meal. For a version that comes together quickly, try something juicy like chicken and the platter feels complete.

Quick Reference
⏱️
Prep Time
10 min
🔥
Cook Time
0 min
⏰
Total Time
10 min plus chilling
🍽️
Servings
8 servings
📊
Difficulty
Easy
🏷️
Category
Appetizer
💡
Quick Tip
Chill 1 hour to enhance flavors
🎯
Best For
Entertaining | Weeknight

Why it works:

  • Softened cream cheese mixes evenly with no lumps, creating a spreadable base that holds chopped salmon in suspension
  • Finely chopped smoked salmon distributes smoky flavor throughout instead of clumping in big chunks that overpower each bite
  • Capers and lemon juice cut through the richness with briny, tangy notes that balance the cream cheese fat
  • Fresh dill adds herbal brightness and its anise notes complement salmon's natural oils without competing
  • Chilling the dip firms the texture and lets salt from capers and salmon season the cream cheese gradually
Quick Tip
Leave cream cheese at room temperature 30 minutes before mixing - cold blocks won't blend smoothly and create grainy pockets.

What You'll Need

Ingredients for Smoked Salmon Dip with Cream Cheese

A good tuna salad can make or break the plate. We keep a batch ready for nights like this - try a flaky homemade salad recipe that adds texture contrast.

🦐
Smoked Salmon
  • 8 oz smoked salmon, finely chopped
🧀
Cream Base
  • 8 oz cream cheese, softened
  • 2-3 tablespoon cream or sour cream
🧄
Aromatics
  • 2 tablespoon red onion, minced
  • 1 clove garlic, minced (optional)
🌶️
Seasonings
  • 2 tablespoon fresh dill, chopped
  • 1 tablespoon capers, chopped
  • 2-3 teaspoon lemon juice
  • Salt and black pepper to taste

Ingredient Details

  • Smoked salmon
    Chop into 3-5 mm pieces for even distribution - big chunks create texture imbalance and uneven smoky flavor.
  • Cream cheese
    Must be room temperature and soft enough to press a finger through easily - cold cream cheese won't blend smoothly.
  • Lemon juice
    Add one teaspoon at a time and taste after each - too much masks salmon flavor and makes the dip overly acidic.
  • Fresh dill
    Chop and add last to preserve bright green color and prevent bruising - dried dill won't give the same herbal punch.
  • Capers
    Chop roughly so each bite has briny pops - whole capers create concentrated salt bursts that overwhelm.
  • Red onion
    Mince finely for mild sharpness - larger pieces taste too raw and pungent against the creamy base.
  • Cream or sour cream
    Start with 2 tablespoons and add more only if dip feels too thick - excess makes it runny and hard to spread.

Ingredient Swaps

Rich mains need something to cut through, and this dip does exactly that. For a version that comes together quickly, this quick dip dish gives you another creamy option.

Four swaps that work:

  • Greek yogurt instead of cream or sour cream - adds tang and protein with thicker texture but less richness than dairy cream
  • Lox or smoked trout instead of smoked salmon - delivers similar smoky flavor with slight texture difference and often costs less
  • Fresh parsley or chives instead of dill - shifts the herbal profile away from anise notes while keeping brightness
  • Finely chopped green olives instead of capers - provides briny contrast with milder salt level and softer texture

Dairy-Free Cream Cheese

Works for: Vegan diets or dairy restrictions

Skip if: You want the richest, creamiest texture - dairy-free versions are slightly grainy

Food Processor Instead of Bowl

Works for: Faster mixing and smoother texture with less effort

Skip if: You like slightly chunky dip - processor makes it too uniform

White Wine Vinegar Instead of Lemon Juice

Works for: Different acidic tone that's sharper without citrus notes

Skip if: You want bright, fresh flavor - vinegar tastes more pungent

Instructions

Most people skip salmon, but it balances the meal. We keep a batch ready for nights like this - try a flaky salmon side that pairs with crackers or vegetables.

  1. Soften the cream cheese - Leave 8 oz cream cheese at room temperature 30 minutes until you can press a finger through easily. Beat with a spoon or spatula until smooth with no lumps.
  2. Chop the salmon and aromatics - Cut 8 oz smoked salmon into 3-5 mm pieces using a sharp knife. Mince 2 tablespoon red onion finely and chop 1 tablespoon capers roughly.
  3. Mix the base - Add chopped salmon, minced onion, capers, and 2 tablespoon fresh dill to the cream cheese. Stir with a spoon until ingredients distribute evenly throughout.
  4. Season and adjust - Add 2 teaspoon lemon juice, stir, and taste. Add more lemon juice, salt, or pepper one small increment at a time until flavors balance. If too thick, fold in 1 tablespoon cream and mix well.
  5. Chill before serving - Transfer dip to a serving bowl, cover with plastic wrap, and refrigerate 1 hour minimum. Stir once before serving cold with crackers or vegetables.
Golden Rule
Taste after adding each teaspoon of lemon juice - one extra teaspoon shifts from bright to overpowering and there's no way to fix it.

What to Serve With It

A good chicken can make or break the plate. For light seafood dish planning ideas that balance this appetizer, start with sides that add texture contrast.

Side Dish Prep Why It Works How to Serve
Crackers Easy Crunchy base contrasts creamy dip without competing flavors Arrange plain water crackers or multigrain rounds in a circle around dip bowl
Sliced cucumber Easy Fresh, cooling vegetable balances rich salmon and provides low-carb option Cut into ¼-inch rounds and arrange on platter with dip in center
Bagel chips Easy Traditional pairing with smoked salmon that adds toasted flavor Serve store-bought or toast thinly sliced bagels at 350°F for 10 minutes
Toasted baguette slices Medium Lightly toasted bread adds crunch and looks more elegant for hosting Slice baguette ½-inch thick, brush with olive oil, toast until golden
Endive leaves Easy Natural scoops with nice bitterness that contrasts smoky salmon Separate leaves, rinse, and arrange on platter pointing outward from dip

Three ways to serve it:

  • For brunch spreads - set out dip with toasted bagels, sliced red onion, capers, and lemon wedges so guests build their own
  • For cocktail parties - pipe dip into endive leaves using a ziplock bag with corner snipped off for individual servings
  • For weeknight snacks - spread dip on celery sticks or cucumber rounds for quick protein-packed bites
Best Pick
Mini pumpernickel rounds give the most authentic deli experience - their dense texture and slightly sour flavor complement smoked salmon better than plain crackers.

Store and Reheat

A good beef can make or break the plate. For a version that comes together quickly, this quick beef dish holds up in the fridge for easy weeknight entertaining.

Method Time Best For
🍳 Stovetop N/A Not recommended - smoked salmon dip is served cold
📦 Microwave 10-15 seconds low power Slightly warming chilled dip if preferred, but cold is traditional
🔥 Oven N/A Not recommended - heat changes texture and makes salmon rubbery

For best results when storing:

  • Transfer dip to shallow airtight container within 30 minutes of making - shallow containers chill faster and more evenly
  • Press plastic wrap directly onto dip surface before sealing container to prevent oxidation and browning
  • Store in coldest part of fridge (back of bottom shelf) and use within 3-4 days for best flavor and food safety
  • Stir dip gently before serving if it separates slightly - cream can separate from solids during storage
  • Freeze in airtight container up to 1 month but texture becomes slightly grainy after thawing - best for mixing into other dishes

Frequently Asked Questions

Can I use fresh salmon instead of smoked salmon?

No, fresh salmon won't work because the dip needs the smoky, cured flavor and firm texture that only smoked salmon provides. Raw salmon would be unsafe and cooked salmon lacks the characteristic smokiness.

How long can I store smoked salmon dip in the fridge?

Store in an airtight container in the coldest part of your fridge for 3-4 days maximum. After that, the salmon flavor weakens and the dip can develop off tastes.

How do I know when the dip is well seasoned?

Taste a small spoonful - you should notice smoky salmon first, followed by tangy lemon and herbs, with no single flavor dominating. If it tastes flat, add more lemon juice or salt one small increment at a time.

Why is my smoked salmon dip too runny or too thick?

Too runny means you added too much cream or liquid - chill the dip longer to firm up or fold in more cream cheese. Too thick means not enough moisture - add cream or lemon juice one tablespoon at a time and mix well.

Can I make smoked salmon dip ahead for a party?

Yes, make it up to 24 hours ahead and refrigerate covered. The flavors actually improve with time as ingredients meld, but stir once before serving since some separation can occur.

Smoked Salmon Dip with Cream Cheese served on a plate

Smoked Salmon Dip with Cream Cheese

No ratings yet
Smoked Salmon Dip with Cream Cheese blends finely chopped smoked salmon with softened cream cheese, fresh dill, capers, and lemon juice for a flavorful creamy spread. Chilling for one hour before serving allows the flavors to meld and the texture to firm up perfectly for spreading.
Print Recipe Pin Recipe
Prep Time 10 minutes mins
Cook Time 1 minute min
Total Time 11 minutes mins
Servings: 8 servings
Course: Appetizer
Cuisine: American
Ingredients Method Notes

Ingredients
  

  • 8 oz smoked salmon finely chopped into 3-5 mm pieces
  • 8 oz cream cheese softened to room temperature
  • 2-3 tablespoon cream or sour cream optional, for thinning if dip is too thick
  • 2 tablespoon red onion minced finely
  • 1 clove garlic minced, optional
  • 2 tablespoon fresh dill chopped, add last to preserve color
  • 1 tablespoon capers roughly chopped
  • 2-3 teaspoon lemon juice add gradually, tasting each teaspoon
  • salt to taste
  • black pepper to taste

Method
 

  1. Leave 8 oz cream cheese at room temperature for 30 minutes until soft enough to press a finger through easily. Beat with a spoon or spatula until smooth and lump-free.
    8 oz cream cheese
  2. Cut 8 oz smoked salmon into 3-5 mm pieces using a sharp knife. Mince 2 tablespoon red onion finely and roughly chop 1 tablespoon capers. Mince garlic if using.
    8 oz smoked salmon, 2 tbsp red onion, 1 clove garlic, 1 tbsp capers
  3. Add chopped salmon, minced onion, capers, and 2 tablespoon fresh dill to the softened cream cheese. Stir well with a spoon to evenly distribute ingredients.
    8 oz smoked salmon, 8 oz cream cheese, 2 tbsp red onion, 2 tbsp fresh dill, 1 tbsp capers
  4. Add 2 teaspoon lemon juice to the mixture, stir, and taste. Add more lemon juice, salt, or black pepper gradually to balance flavors. If the dip is too thick, fold in 1 tablespoon cream and mix well.
    2-3 tsp lemon juice, salt, black pepper, 2-3 tbsp cream or sour cream
  5. Transfer dip to a serving bowl, cover with plastic wrap, and refrigerate for at least 1 hour. Stir once before serving chilled with crackers or vegetables.

Notes

  • Softening cream cheese before mixing ensures a smooth, lump-free dip.
  • Add lemon juice gradually and taste after each teaspoon to prevent overpowering acidity.
  • Chilling the dip for at least one hour allows flavors to meld and firms the texture for easier spreading.

Tried this recipe?

Let us know how it was!

Pork Vindaloo Goan-Style

March 25, 2026

Toast whole spices on medium heat until they release their scent, then grind them into a paste with vinegar and garlic. That's the foundation of Goan pork vindaloo - a tangy, spicy braise that gets better the longer it sits.

Pork Vindaloo Goan-Style served on a plate

Pork shoulder breaks down slowly in the acidic marinade, turning tender while the sauce thickens. You don't need fancy equipment, just time and a pot that holds heat evenly.

This is what you make when you want something bold enough for entertaining but practical enough for meal prep. The flavors sharpen overnight in the fridge.

QUICK SUMMARY

Pork vindaloo is a tangy, spicy Goan braise made by marinating pork shoulder in ground spices and vinegar, then simmering until tender. The key is toasting whole spices fresh and balancing the vinegar's acidity with a pinch of sugar. It works for weeknight dinners and meal prep since the flavor deepens over time.

⏱️Time Reality: 20 minutes prep, 3-4 hours marinating (or overnight), 90 minutes simmering
🔥First Move: Toast mustard, cumin, and coriander seeds until fragrant - 2-3 minutes stirring constantly
⚠️Watch Out: Lean cuts dry out fast - use pork shoulder and simmer low; add sugar to tame sharp vinegar tang

Table of Contents

Toggle
  • Why This Recipe Works
  • What You'll Need
    • Ingredient Details
  • Ingredient Swaps
  • What to Serve With It
  • Store and Reheat
  • Frequently Asked Questions
  • Pork Vindaloo Goan-Style
    • Method 
    • Tried this recipe?

Why This Recipe Works

Rich mains need something to cut through, and pork does exactly that. For a version that comes together quickly, quick pork dish keeps the prep minimal while delivering tender meat.

Quick Reference
⏱️
Prep Time
20 min
🔥
Cook Time
1 hr 30 min
⏰
Total Time
1 hr 50 min
🍽️
Servings
6 servings
📊
Difficulty
Medium
🏷️
Category
Main Dish
💡
Quick Tip
Toast spices first for deeper flavor
🎯
Best For
Weeknight | Meal prep | Entertaining

What makes this work:

  • Toasting spices fresh releases oils that stale ground spices can't match - mustard seeds pop, cumin turns nutty, coriander brightens
  • White vinegar preserves the pork while adding the sharp tang that defines Goan vindaloo - apple cider vinegar works but tastes sweeter
  • Pork shoulder's fat content keeps meat tender through long simmering - lean cuts like loin dry out and turn stringy
  • Searing pork before braising builds caramelized bits that dissolve into the sauce and deepen the flavor
  • Simmering low for 90 minutes breaks down connective tissue - pork should reach 160°F internally and pull apart with a fork
Quick Tip
Marinate overnight if you can - the vinegar tenderizes the pork and the spices penetrate deeper, making the final dish more cohesive

What You'll Need

Ingredients for Pork Vindaloo Goan-Style

The dumplings works best when it hits the table at the same time as the main. For a version that comes together quickly, tender homemade dumplings recipe balances richness without adding extra cook time.

🍗
Protein
  • 2 lbs pork shoulder, cut into 1-inch cubes
🌶️
Spices
  • 8-10 dried red chilies (Kashmiri or Byadgi)
  • 1 teaspoon mustard seeds
  • 1 teaspoon cumin seeds
  • 1 teaspoon coriander seeds
  • 1 small cinnamon stick
🧄
Aromatics
  • 8 garlic cloves
  • 1-inch piece fresh ginger
🫙
Other
  • ¼ cup white vinegar
  • 1 teaspoon sugar
  • 2 tablespoon oil (for browning)
  • Salt to taste

Ingredient Details

  • Pork shoulder
    Marbled fat melts during cooking and keeps meat juicy - trim large exterior fat but leave interior marbling intact
  • Dried red chilies
    Kashmiri chilies give color and mild heat; Byadgi adds deeper red hue - remove stems before toasting, keep seeds for more spice
  • White vinegar
    Distilled white vinegar has the sharpest tang and longest shelf life - don't use balsamic or rice vinegar, they're too sweet
  • Mustard seeds
    Black or brown mustard seeds work better than yellow - toast until they pop and release a nutty scent, about 2 minutes
  • Fresh garlic and ginger
    Peel both before grinding into paste - fresh ginger adds brightness that dried powder can't replicate
  • Coriander and cumin seeds
    Whole seeds toasted then ground taste brighter than pre-ground - store leftovers in an airtight jar for up to a month
  • Sugar
    Balances vinegar's acidity without making the dish sweet - start with 1 teaspoon and add more only if the sauce tastes too sharp

Ingredient Swaps

Most people skip smoothie, but it balances the meal. For a version that comes together quickly, something cold like smoothie cuts through spice without adding prep steps.

Four swaps that work:

  • Apple cider vinegar instead of white vinegar - milder acidity with a hint of sweetness; use the same amount but expect a rounder, less sharp tang
  • Red chili powder (2-3 tsp) instead of dried chilies - faster since you skip toasting and grinding; flavor is less complex but heat level stays similar
  • Pork loin instead of pork shoulder - cooks 20-30 minutes faster but dries out easier; cut pieces slightly larger and watch closely after 1 hour
  • Ground coriander and cumin (1 teaspoon each) instead of whole seeds - skips the toasting step; flavor is duller but still recognizable in the final sauce

Pork Shoulder

Works for: long simmering, meal prep, forgiving if slightly overcooked

Skip if: you need dinner in under an hour or want leaner meat

Pork Loin

Works for: faster cooking (60-75 minutes), lower fat content

Skip if: you're new to braising or tend to overcook meat - it dries out fast

Whole Spices (Toasted + Ground)

Works for: maximum flavor, fragrant sauce, impressive results for guests

Skip if: you don't have a spice grinder or mortar and pestle

Pre-Ground Spices

Works for: quick weeknight versions, smaller kitchens with less equipment

Skip if: you want the deepest, most authentic Goan flavor profile

Instructions

The pork works best when it hits the table at the same time as the main. We keep a batch ready for nights like this - something crispy like fry adds texture without competing for pan space.

  1. Toast spices in a dry pan over medium heat for 2-3 minutes, stirring constantly, until mustard seeds pop and cumin smells nutty. Transfer to a spice grinder or mortar and pestle, add dried chilies (stems removed), and grind into a coarse powder.
  2. Make the marinade by blending ground spices, garlic, ginger, vinegar, and salt into a thick paste - add 1-2 tablespoons water if needed to help the blender move. Toss pork cubes in the paste until fully coated, cover, and refrigerate for at least 3 hours (overnight is better).
  3. Sear the pork in batches in a heavy-bottomed pot with 2 tablespoons oil over medium-high heat, browning each piece 3-4 minutes per side until deep golden - don't crowd the pan or the pork will steam instead of sear. Set browned pork aside.
  4. Simmer the vindaloo by returning all pork and marinade to the pot, adding 1 cup water, and bringing to a boil. Reduce heat to low, cover, and simmer for 90 minutes, stirring every 10-15 minutes to prevent sticking - pork should reach 160°F internally and pull apart easily with a fork.
  5. Adjust and rest by tasting the sauce - add 1 teaspoon sugar if it's too sour, or simmer uncovered for 10 more minutes if the sauce is too thin. Let the vindaloo rest off heat for 15 minutes before serving so the flavors meld and the sauce thickens slightly.
Golden Rule
Cut pork into uniform 1-inch cubes so every piece cooks at the same rate - larger chunks take longer and smaller ones fall apart into shreds

What to Serve With It

A good this dip can make or break the plate. When you're planning your baby back ribs dinner, the same sides that work for ribs balance vindaloo's heat and tang.

Side Dish Prep Why It Works How to Serve
Steamed basmati rice Easy Neutral base soaks up tangy sauce without competing Mound rice in bowl, ladle vindaloo over top, serve immediately
Cucumber salad Easy Cool crunch cuts through spice and richness Slice cucumbers thin, toss with lime juice and salt, serve chilled
Chapati or naan Easy Scoop up sauce and pork, adds textural contrast Warm bread in dry pan 30 seconds each side, serve in basket
Jeera rice Medium Cumin-scented rice echoes spices in vindaloo Toast cumin seeds in ghee, add cooked rice, toss and serve
Raita (yogurt dip) Easy Cooling dairy soothes heat, adds creamy contrast Mix yogurt with grated cucumber and cumin, serve in small bowls

Three ways to serve it:

  • Weeknight meal prep: Divide vindaloo into single-serving containers with rice, freeze for up to 3 months, reheat on stovetop with a splash of water
  • For entertaining: Serve family-style in a large dish with jeera rice, raita, mango pickle, and warm naan on the side - guests build their own plates
  • Quick lunch bowl: Spoon vindaloo over leftover rice, add cucumber slices and a drizzle of mint chutney for brightness
Best Pick
Basmati rice is the most versatile pairing - it cooks in 15 minutes, absorbs sauce perfectly, and doesn't distract from the vindaloo's bold flavors

Store and Reheat

This dip adds the contrast this plate needs, but timing matters. We keep a batch ready for nights like this - tangy sauce recipe comes together in minutes and keeps for weeks in the fridge.

Method Time Best For
🍳 Stovetop 8-10 min on low heat Even warming, best texture, adds moisture with splash of water
🔥 Oven 15-20 min at 325°F Larger portions, hands-off reheating, maintains sauce consistency
📦 Microwave 2-3 min, stir halfway Single servings, fastest option, but pork can dry at edges

For best results when storing:

  • Cool completely before refrigerating - leave pot uncovered at room temp for 30 minutes, then transfer to shallow containers so it chills faster
  • Store in airtight containers for 3-4 days in the fridge - vindaloo tastes better the next day as flavors meld overnight
  • Freeze in single-serving portions for up to 3 months - leave 1 inch headspace in containers for expansion, label with date
  • Reheat gently with added liquid - add 2-3 tablespoons water or broth when reheating to loosen sauce and prevent pork from drying
  • Don't reheat more than once - bacteria multiply faster in reheated meat dishes, so only warm what you'll eat immediately

Frequently Asked Questions

How long to cook Pork Vindaloo at simmer?

Simmer pork vindaloo covered on low heat for 90 minutes, stirring every 10-15 minutes to prevent sticking. The pork should reach 160°F internally and pull apart easily with a fork when done.

Can I make Pork Vindaloo ahead of time?

Yes - vindaloo improves when made a day ahead since the flavors deepen overnight. Store in the fridge for up to 4 days or freeze for 3 months, then reheat gently on the stovetop with a splash of water.

What goes well as a side with Pork Vindaloo?

Steamed basmati rice is the most practical pairing - it absorbs the tangy sauce without competing. Cucumber salad, naan, or raita also work to cool the heat and add textural contrast.

How do I know when the pork in Vindaloo is done?

The pork is done when it reaches 160°F on an instant-read thermometer and pulls apart easily with a fork. The sauce should be thick enough to coat the back of a spoon without being watery.

Can I use pork loin instead of pork shoulder?

You can, but pork loin is leaner and dries out faster - it cooks in 60-75 minutes instead of 90. Cut pieces slightly larger and check for doneness earlier to avoid tough, stringy meat.

Pork Vindaloo Goan-Style served on a plate

Pork Vindaloo Goan-Style

No ratings yet
Pork Vindaloo Goan-Style is a tangy, spicy braised pork dish made by marinating pork shoulder in freshly toasted ground spices and vinegar. This traditional Goan recipe develops rich flavors with a slow simmer and is perfect for meal prep or entertaining. The pork becomes tender and the sauce thickens beautifully over time.
Print Recipe Pin Recipe
Prep Time 20 minutes mins
Cook Time 1 hour hr 30 minutes mins
Total Time 1 hour hr 50 minutes mins
Servings: 6 servings
Course: Main Dish
Cuisine: Goan, Indian
Ingredients Equipment Method Notes

Ingredients
  

  • 2 lbs pork shoulder cut into 1-inch cubes
  • 8-10 pieces dried red chilies Kashmiri or Byadgi chilies, stems removed
  • 1 teaspoon mustard seeds black or brown mustard seeds
  • 1 teaspoon cumin seeds
  • 1 teaspoon coriander seeds
  • 1 small cinnamon stick
  • 8 cloves garlic peeled
  • 1 inch fresh ginger peeled
  • ¼ cup white vinegar distilled white vinegar preferred
  • 1 teaspoon sugar
  • 2 tablespoon oil for browning pork
  • salt to taste

Equipment

  • spice grinder or mortar and pestle Used to grind toasted spices and dried red chilies into a coarse powder
  • Heavy-bottomed pot For searing pork and slow simmering the vindaloo

Method
 

  1. Toast mustard seeds, cumin seeds, and coriander seeds in a dry pan over medium heat for 2-3 minutes, stirring constantly, until mustard seeds pop and cumin smells nutty.
    1 tsp mustard seeds, 1 tsp cumin seeds, 1 tsp coriander seeds
  2. Transfer the toasted seeds into a spice grinder or mortar and pestle. Add dried red chilies (stems removed) and cinnamon stick, then grind into a coarse powder.
    8-10 pieces dried red chilies, 1 small cinnamon stick
  3. Blend the ground spices, garlic, ginger, white vinegar, and salt into a thick paste. Add 1-2 tablespoons water if needed to help the blender move smoothly.
    8 cloves garlic, 1 inch fresh ginger, ¼ cup white vinegar, salt
  4. Toss the pork cubes in the marinade until fully coated. Cover and refrigerate for at least 3 hours, preferably overnight.
    2 lbs pork shoulder
  5. Heat oil in a heavy-bottomed pot over medium-high heat. Brown pork cubes in batches, 3-4 minutes per side until deep golden. Avoid crowding the pan to ensure proper searing. Set pork aside.
    2 tbsp oil, 2 lbs pork shoulder
  6. Return pork and marinade to the pot. Add 1 cup water and bring to a boil. Reduce heat to low, cover, and simmer for 90 minutes, stirring every 10-15 minutes to prevent sticking. Pork should reach 160°F internally and be fork-tender.
    2 lbs pork shoulder
  7. Taste the sauce and add 1 teaspoon sugar if too sour. If sauce is thin, simmer uncovered for 10 more minutes. Let the vindaloo rest off heat for 15 minutes before serving.
    1 tsp sugar

Notes

  • Marinate pork overnight if possible to deepen flavors and tenderize.
  • Use pork shoulder for best tenderness; avoid lean cuts that dry out easily.
  • Toast spices fresh for maximum aroma and authentic Goan flavor.

Tried this recipe?

Let us know how it was!

Chicken Tagine with Apricots

March 25, 2026

Bone-in chicken thighs braised with dried apricots, cinnamon, and cumin create tender meat with a glossy, sweet-spiced sauce. The low simmer renders fat while the fruit plumps and releases tartness into the broth.

Chicken Tagine with Apricots served on a plate

The tagine does most of the work. Sear the chicken once, add everything else, then let it bubble gently for 45 minutes.

Make this when you want something that feels intentional but doesn't require constant attention.

QUICK SUMMARY

Chicken Tagine with Apricots layers bone-in thighs with dried fruit and warm Moroccan spices in a single pot. Searing the chicken first builds fond that becomes the sauce base. The gentle simmer keeps the meat tender while the apricots soften without turning to mush.

⏱️Time Reality: 15 minutes prep, 45 minutes hands-off simmering
🔥Key Move: Sear chicken skin-side down 5-7 minutes before adding liquid
⚠️Watch Out: Add apricots in the last 10 minutes or they'll dissolve into paste

Table of Contents

Toggle
  • Why This Recipe Works
  • What You'll Need
    • Ingredient Details
  • Ingredient Swaps
  • What to Serve With It
  • Store and Reheat
  • Frequently Asked Questions
  • Chicken Tagine with Apricots
    • Method 
    • Tried this recipe?

Why This Recipe Works

Bone-in thighs stay moist through long braising while the bones release gelatin that thickens the sauce. For a version that comes together quickly, this quick chicken dish uses the same spice blend with a shorter roasting method.

Quick Reference
⏱️
Prep Time
15 min
🔥
Cook Time
45 min
⏰
Total Time
60 min
🍽️
Servings
4 servings
📊
Difficulty
Medium
🏷️
Category
Main Dish
💡
Quick Tip
Sear chicken well before simmering for best flavor
🎯
Best For
Weeknight | Meal prep | Entertaining

What makes this work:

  • Searing builds flavor: Golden-brown chicken skin creates fond (browned bits) that dissolves into the braising liquid and becomes the sauce base
  • Cinnamon stick stays whole: Leaving the stick intact releases warm aroma without overwhelming the other spices or turning the sauce bitter
  • Gentle simmer at 180°F: Low heat keeps the chicken from toughening while the collagen breaks down into silky gelatin
  • Soaked apricots cook evenly: Pre-soaking dried fruit in warm water for 20 minutes prevents leathery texture and helps them plump faster
  • Honey goes in late: Adding sweetener in the last 10 minutes prevents caramelization on the pot bottom and preserves brightness
Golden Rule
Check internal temp at 165°F with an instant-read thermometer-the meat should pull away from the bone easily but not fall apart

What You'll Need

Ingredients for Chicken Tagine with Apricots

Stock bone-in thighs, dried apricots, and whole spices. A good chicken can make or break the plate, so we keep a batch ready for nights like this-this quick chicken dish uses the same spice foundation with less braising time.

🍗
Protein
  • Bone-in chicken thighs (6-8 pieces)
🍋
Fruit
  • Dried apricots (1 cup)
🧄
Aromatics
  • Yellow onion (1 large)
  • Garlic (4 cloves)
  • Fresh ginger (1 tablespoon)
🌶️
Spices
  • Cinnamon stick (1 whole)
  • Ground cumin (2 teaspoons)
  • Harissa or smoked paprika (1 teaspoon)
🥢
Liquid + Sweet
  • Chicken broth (2 cups)
  • Honey (2 tablespoons)

Ingredient Details

  • Bone-in chicken thighs
    Dark meat stays moist through long braising; bones add gelatin that thickens the sauce naturally
  • Dried apricots
    Soak in warm water 20 minutes before cooking to prevent leathery texture and ensure even plumping
  • Cinnamon stick
    Whole stick releases warm aroma slowly; ground cinnamon turns sauce muddy and bitter
  • Ground cumin
    Bloom in oil with onions for 3-5 minutes to unlock earthy depth and prevent raw spice taste
  • Chicken broth
    Low-sodium works best so you can control salt as the liquid reduces; adds savory base for sauce
  • Honey
    Add in the last 10 minutes to balance tart apricots without burning or making sauce cloying
  • Harissa or smoked paprika
    Harissa adds complex heat with fermented depth; smoked paprika gives milder warmth with no spice

Ingredient Swaps

Boneless thighs cut cooking time but lose the gelatin that thickens the sauce. Cool and crunchy dishes reset your palate between bites, and this quick slaw dish adds contrast without competing with the warm spices.

Common swaps:

  • Boneless skin-on thighs for bone-in: Reduces cook time to 30 minutes but yields thinner sauce-add 1 teaspoon cornstarch slurry at the end to thicken
  • Dried cherries or raisins for apricots: Changes sweetness profile; cherries add tartness, raisins bring molasses notes
  • Maple syrup or agave for honey: Both work for sweetness and gloss; maple adds subtle woodsy flavor, agave stays neutral
  • Vegetable broth for chicken broth: Less rich but keeps it vegetarian if swapping protein; simmer 5 minutes longer to concentrate flavor

Fresh Apricots (in season)

Works for: brighter flavor, firmer texture, when you want less sweetness

Skip if: out of season (mealy texture), need concentrated tang, want longer storage

Chicken Breasts

Works for: leaner protein, fewer calories, when you prefer white meat

Skip if: braising longer than 25 minutes, want self-basting meat, need rich sauce

Ground Spices Instead of Whole Cinnamon

Works for: quicker infusion, when you don't have whole sticks

Skip if: braising longer than 30 minutes (turns bitter), want clear sauce, prefer subtle warmth

Instructions

Sear the chicken first to build fond, then simmer everything together for 45 minutes. Most people skip the aromatics bloom, but it balances the meal-a warm rolls on the side soaks up the extra sauce without diluting the spice.

  1. Sear the chicken: Heat 2 tablespoons oil in a heavy-bottomed pot over medium-high. Pat chicken thighs dry, season with salt, and sear skin-side down 5-7 minutes until golden brown. Flip and sear 3 minutes more. Remove and set aside.
  2. Bloom the aromatics: Lower heat to medium. Add diced onion and cook 5 minutes until soft. Stir in minced garlic, grated ginger, cumin, and harissa. Cook 3 minutes, stirring constantly, until fragrant and the spices coat the onions.
  3. Build the braise: Add chicken broth and scrape up browned bits from the pot bottom with a wooden spoon. Return chicken thighs skin-side up, add the cinnamon stick, and bring to a simmer. Cover and cook 35 minutes at a gentle bubble (180°F).
  4. Add apricots and honey: Stir in pre-soaked drained apricots and honey. Simmer uncovered 10 minutes until apricots are plump and sauce thickens slightly. Check chicken internal temp reaches 165°F.
  5. Rest and serve: Remove pot from heat, discard cinnamon stick, and let rest covered 5 minutes. The sauce will thicken as it cools slightly and the flavors meld.
Shortcut
Skip the sear if you're short on time-add chicken directly to the aromatics and broth, but know the sauce will lack depth and the skin won't crisp

What to Serve With It

Grains soak up the glossy sauce, and greens cut the richness. Rich mains need something to cut through, and fresh sides do exactly that-for a full meal plan, check weeknight chicken puttanesca meal ideas for side-pairing strategies.

Side Dish Prep Why It Works How to Serve
Couscous Easy Absorbs sauce, cooks in 5 minutes, neutral base Fluff with fork, spoon tagine and sauce over top
Steamed green beans Easy Adds fresh crunch, bright color contrast, no competing flavors Toss with lemon zest, serve alongside
Simple flatbread Easy Scoops sauce, complements warm spices, soaks up liquid Warm briefly, tear into pieces, serve in basket
Roasted carrots Medium Natural sweetness echoes apricots, caramelized edges add texture Roast at 425°F for 25 minutes, drizzle with olive oil
Saffron rice Medium Elegant presentation, subtle floral notes, holds sauce well Cook rice with pinch of saffron, fluff before serving

Three ways to serve it:

  • Weeknight plate: Spoon tagine over couscous, add steamed green beans on the side, warm flatbread for scooping
  • Meal prep bowls: Divide rice into containers, top with chicken and sauce, pack roasted carrots separately to reheat
  • Hosting spread: Arrange tagine in center of table, surround with saffron rice, mint yogurt sauce, and toasted almonds
Best Pick
Couscous is the traditional pairing-it soaks up sauce without getting mushy and cooks faster than rice

Store and Reheat

The tagine thickens as it cools and tastes better the next day when the spices bloom fully. Rich mains need something to cut through, and creamy sides do exactly that-we keep a batch ready for nights like this with tangy dressing recipe for drizzling over greens.

Method Time Best For
🍳 Stovetop 5-7 min over medium-low Even warming, adding liquid to thin sauce, heating multiple servings
🔥 Oven 15-20 min at 325°F covered Large portions, keeping chicken moist, reheating with sides
📦 Microwave 2-3 min on 70% power Single servings, quick lunches, when you're short on time

For best results when storing:

  • Cool completely before storing: Let tagine sit uncovered 30 minutes at room temp so condensation doesn't dilute the sauce
  • Store in shallow containers: Use wide containers so the tagine cools fast and reheats evenly without overcooking edges
  • Refrigerate up to 4 days: Keep chicken and sauce together in airtight containers; the flavors deepen overnight
  • Freeze up to 3 months: Portion into freezer-safe containers, leave 1 inch headspace for expansion, label with date
  • Add liquid when reheating: Stir in 2-3 tablespoons broth or water if sauce thickens too much; it should coat the back of a spoon but still flow

Frequently Asked Questions

How long to cook chicken tagine with apricots at simmer?

Simmer bone-in thighs covered for 35 minutes at 180°F, then add apricots and cook uncovered 10 minutes more. Total simmer time is 45 minutes until chicken reaches 165°F internal temp and pulls away from the bone.

Can I make chicken tagine with apricots ahead?

Yes-make it up to 2 days ahead and refrigerate in an airtight container. The flavors deepen overnight as the spices bloom. Reheat on the stovetop over medium-low, adding 2-3 tablespoons broth if the sauce thickens too much.

What goes with chicken tagine with apricots?

Serve over couscous or rice to soak up the sauce, with steamed green beans or a fresh salad on the side for crunch. Warm flatbread and mint yogurt sauce round out the meal.

How do I know when chicken tagine is done?

Check with an instant-read thermometer-chicken should reach 165°F at the thickest part of the thigh. The meat should pull away from the bone easily but not fall apart, and the sauce should coat the back of a spoon.

Can I use fresh apricots instead of dried apricots?

Yes, when they're in season-halve fresh apricots and add them in the last 5 minutes of cooking so they soften without disintegrating. Skip the soaking step and reduce cook time since fresh fruit breaks down faster than dried.

Chicken Tagine with Apricots served on a plate

Chicken Tagine with Apricots

No ratings yet
Chicken Tagine with Apricots layers bone-in thighs with dried fruit and warm Moroccan spices in a single pot. Searing the chicken first builds fond that becomes the sauce base while the gentle simmer keeps the meat tender and the apricots soft without turning to mush.
Print Recipe Pin Recipe
Prep Time 15 minutes mins
Cook Time 45 minutes mins
Total Time 1 hour hr
Servings: 4 servings
Course: Dinner, Main Dish
Cuisine: Moroccan
Ingredients Equipment Method Notes

Ingredients
  

  • 6-8 pieces bone-in chicken thighs pat dry, skin-on
  • 1 cup dried apricots soaked in warm water 20 minutes, drained
  • 1 large yellow onion diced
  • 4 cloves garlic minced
  • 1 tablespoon fresh ginger grated
  • 1 stick cinnamon stick whole, left intact
  • 2 teaspoons ground cumin
  • 1 teaspoon harissa or smoked paprika harissa for heat, paprika for mild warmth
  • 2 cups chicken broth low-sodium recommended
  • 2 tablespoons honey added in last 10 minutes
  • 2 tablespoons vegetable oil for searing chicken
  • to taste salt for seasoning chicken

Equipment

  • Heavy-bottomed pot Used for searing chicken and braising the dish
  • Wooden spoon For scraping fond and stirring ingredients

Method
 

  1. Heat 2 tablespoons of oil in a heavy-bottomed pot over medium-high heat. Pat the chicken thighs dry and season with salt. Sear skin-side down for 5-7 minutes until golden brown, then flip and sear for 3 minutes more. Remove the chicken and set aside.
    6-8 pieces bone-in chicken thighs, 2 tablespoons vegetable oil, to taste salt
  2. Lower the heat to medium. Add the diced onion to the pot and cook for 5 minutes until soft. Stir in the minced garlic, grated ginger, ground cumin, and harissa or smoked paprika. Cook for 3 minutes, stirring constantly, until fragrant and the spices coat the onions.
    1 large yellow onion, 4 cloves garlic, 1 tablespoon fresh ginger, 2 teaspoons ground cumin, 1 teaspoon harissa or smoked paprika
  3. Add the chicken broth to the pot and scrape up the browned bits from the bottom with a wooden spoon. Return chicken thighs skin-side up to the pot, add the cinnamon stick, and bring to a simmer. Cover and cook for 35 minutes at a gentle bubble (about 180°F).
    6-8 pieces bone-in chicken thighs, 1 stick cinnamon stick, 2 cups chicken broth
  4. Stir in the pre-soaked, drained apricots and honey. Simmer uncovered for 10 minutes until the apricots are plump and the sauce thickens slightly. Check that the chicken has reached an internal temperature of 165°F.
    1 cup dried apricots, 2 tablespoons honey
  5. Remove the pot from heat, discard the cinnamon stick, and let the chicken rest covered for 5 minutes. The sauce will thicken slightly as it cools and the flavors meld before serving.
    1 stick cinnamon stick

Notes

  • Sear chicken skin well to build a rich fond that flavors the sauce.
  • Soak dried apricots 20 minutes before adding to soften and prevent leathery texture.
  • Add honey last to preserve its brightness and avoid burning.

Tried this recipe?

Let us know how it was!

Beef Stroganina Russian-Style

March 25, 2026

Most raw beef dishes require precision marinating or curing over days. Stroganina skips all that and relies on one principle: freeze the meat solid, slice it paper-thin, and serve it icy cold with sharp seasonings.

Beef Stroganina Russian-Style served on a plate

The freezer does the work. You get translucent slices that melt on your tongue without any heat or complicated prep.

This is what Russians make in winter when you want a bold appetizer that looks intentional but takes ten minutes of actual hands-on time.

QUICK SUMMARY

Beef stroganina is thinly sliced raw frozen beef served with salt, lemon juice, and horseradish. The key is freezing beef sirloin or tenderloin solid for 12-24 hours, then slicing it razor-thin with a sharp knife just before serving. It works for special gatherings when you want a traditional cold starter that requires minimal active prep.

⏰Time Reality: 12-24 hours freezing time, 10 minutes slicing and seasoning before serving
🔪First Move: Freeze beef uncovered until fully solid, then slice 1-2mm thick with a razor-sharp knife
⚠️Watch Out: Slicing warm or semi-frozen beef creates thick uneven pieces - keep meat frozen solid and work quickly

Why This Recipe Works

High heat and marinating don't apply here because the beef never cooks. The texture comes from freezing meat until it's rock-hard, which lets you shave off translucent slices that thaw instantly on your tongue. For a contrasting approach to beef that involves slow braising instead of freezing, try this easy beef side - it pairs well with crusty bread and red wine.

Quick Reference
⏱️
Prep Time
10 min
🔥
Cook Time
0 min
⏰
Total Time
12-24 hours
🍽️
Servings
4-6 servings
📊
Difficulty
Medium
🏷️
Category
Appetizer
💡
Quick Tip
Freeze beef solid; slice paper-thin
🎯
Best For
Special occasion | Winter meal

Five things that make this work:

  • Lean beef cuts freeze into a firm block - sirloin or tenderloin stay solid enough to slice thin without turning mushy like fatty ribeye
  • Freezing for 12-24 hours creates the right texture - fully frozen beef lets you shave translucent slices that separate cleanly and thaw instantly when they hit your tongue
  • Sharp knife matters more than technique - a razor-sharp blade glides through frozen meat in one stroke instead of tearing or creating jagged edges
  • Minimal seasoning keeps the focus on clean beef flavor - coarse salt, fresh lemon juice, and grated horseradish add brightness without masking the meat
  • Serving on a chilled platter holds the icy texture - room-temperature plates thaw slices too fast and turn them limp before anyone takes a bite
Quick Tip
Sharpen and hone your knife right before slicing - a dull blade drags and tears frozen meat instead of cutting clean translucent ribbons.

What You'll Need

Ingredients for Beef Stroganina Russian-Style

Stroganina uses ingredients you can pick up in one grocery run, but the beef cut matters. Choose firm lean cuts like sirloin or tenderloin that freeze solid and slice cleanly without turning grainy. Skip fatty cuts like ribeye - they soften too fast and create uneven slices that tear instead of separating.

🥩
Protein
  • 1 lb beef sirloin or tenderloin
🌶️
Seasonings
  • 2 teaspoon coarse salt
  • 1 teaspoon black pepper
  • 2 tablespoon fresh lemon juice
  • 2 tablespoon finely grated horseradish
🧄
Aromatics
  • ¼ cup chopped onion (optional)
  • 2 tablespoon fresh dill, chopped (optional)
🫙
Other
  • ¼ cup cold vodka or ice water
  • Sour cream for serving (optional)

Ingredient Details

  • Beef sirloin or tenderloin
    Use lean cuts that freeze into firm blocks - fatty cuts like ribeye stay soft and slice unevenly.
  • Coarse salt
    Coarse grains cling to frozen slices better than fine salt - kosher salt works if you adjust the amount.
  • Fresh lemon juice
    Squeeze lemons right before serving - bottled juice tastes flat and changes the acid balance.
  • Finely grated horseradish
    Fresh horseradish gives sharp pungent heat - prepared sauce in jars works but adds watery texture.
  • Cold vodka or ice water
    Vodka adds a subtle spirit note and keeps slices chilled - ice water works if you skip the alcohol.
  • Chopped onion
    Raw onion adds sharp bite - use shallots for milder flavor or skip entirely for simpler seasoning.
  • Fresh dill
    Dill brings herbal brightness to the cold beef - chop it fine and sprinkle just before serving.

Ingredient Swaps

Most stroganina variations come down to choosing different cuts of beef or adjusting the seasonings. You can swap lean beef for other red meats like venison, but fatty cuts create soft slices that tear instead of separating cleanly.

Four swaps that work:

  • Beef sirloin → beef ribeye - Higher fat content makes slicing harder and texture softer, but it adds richer flavor if you don't mind uneven pieces
  • Fresh lemon juice → fresh lime juice - Similar acidity with a different citrus aroma, works equally well for the acid balance
  • Finely grated horseradish → prepared horseradish sauce - Easier to use and less pungent, but it adds watery texture that can make slices soggy
  • Vodka → cold water - Loses the subtle spirit flavor and doesn't preserve slices as well, but works fine if you serve immediately

Beef Sirloin

Works for: firm slicing, clean translucent texture, traditional preparation

Skip if: you want richer flavor or prefer fattier cuts

Beef Ribeye

Works for: richer taste, higher fat content, more forgiving if slightly thawed

Skip if: you want clean thin slices or need firm texture for presentation

Instructions

Stroganina takes 12-24 hours to freeze but only ten minutes of active work. The key move is keeping the beef frozen solid while you slice it razor-thin, then seasoning and serving immediately before the slices thaw.

  1. Freeze the beef uncovered - Place the beef sirloin or tenderloin on a tray in the freezer for 12-24 hours until it's rock-hard all the way through. Freezing uncovered prevents ice crystals from forming on the surface.

  2. Sharpen your knife right before slicing - Use a razor-sharp chef's knife or long slicing knife and hone the blade. Place the frozen beef on a cold cutting board and slice 1-2mm thick, working quickly so the meat stays frozen.

  3. Separate the slices on a chilled platter - Lay each slice flat on a cold serving plate or place parchment paper between layers if you're stacking them. Keep the platter in the fridge until you're ready to season and serve.

  4. Season just before serving - Sprinkle coarse salt over the slices first, then drizzle fresh lemon juice and add finely grated horseradish. Add chopped onion and fresh dill if using.

  5. Serve immediately with vodka or ice water - Bring the platter to the table right away while the edges are still frosty. Serve with small glasses of chilled vodka or ice water on the side for rinsing between bites.

Golden Rule
Slice stroganina just before serving - even ten minutes at room temperature turns icy translucent slices into limp thawed beef that loses texture.

What to Serve With It

Stroganina pairs with sides that balance the cold raw beef and sharp seasonings. You need something starchy to ground the dish or something acidic to cut through the richness. For more complete beef pairing ideas, check out planning your bbq beef sandwiches dinner - the principles for balancing rich beef translate well to cold preparations.

Side DishPrepWhy It WorksHow to Serve
Rye breadEasyHearty base balances cold slices and soaks up lemon juiceSlice thick, toast lightly, serve warm on the side
Pickled cucumbersEasyAdds acidity and crunch that contrasts with tender beefDrain and serve chilled in a small bowl
Fresh chopped onionEasySharp bite complements rich beef and adds traditional flavorChop fine, sprinkle over slices or serve on the side
Boiled potatoesMediumSimple starch pairs traditionally and balances sharp seasoningsBoil until tender, serve warm with butter
Sour cream dollopEasySmooth texture softens bold flavors and adds creamy richnessSpoon onto each slice or serve in a small dish

Three ways to serve it:

  • For winter gatherings: Serve stroganina with chilled vodka shots, black rye crisps, and horseradish cream sauce for a traditional Russian cold appetizer spread
  • For special occasions: Pair with something fresh like potato salad, fresh dill sprigs, and chive lemon aioli for an elegant cold starter
  • For casual meals: Serve with classic rolls dish, pickled vegetables, and mustard dill sauce for a simple cold plate
Best Pick
Rye bread works best - the dense texture and slightly sour flavor balance the cold beef and sharp horseradish without overwhelming the dish.

Store and Reheat

Stroganina doesn't store well once sliced because the thin pieces thaw too quickly and lose texture. If you need to prep ahead, keep the beef frozen solid and slice it right before serving. For other beef dishes that handle leftovers better, try this creamy sauce - it works with cold beef slices as a dipping option.

MethodTimeBest For
🍳 StovetopNot recommendedStroganina served raw chilled only
📦 MicrowaveNot recommendedStroganina served raw chilled only
🔥 OvenNot recommendedStroganina served raw chilled only

For best results when storing:

  • Freeze unsliced beef up to 3 months - Wrap the whole piece tightly in plastic wrap and foil to prevent freezer burn, then slice fresh when you're ready to serve
  • Store sliced stroganina in the fridge for 1-2 days max - Place slices in an airtight container with parchment paper between layers to prevent sticking
  • Keep slices separated with parchment - Stacking without barriers makes them freeze together into a solid block that's hard to separate
  • Don't refreeze thawed slices - Once the beef thaws, the texture turns mushy and you lose the clean translucent quality
  • Season right before serving - Adding salt and lemon juice too early draws moisture out and makes slices soggy and limp

Frequently Asked Questions

How long to freeze beef for stroganina?

Freeze beef for 12-24 hours until it's rock-hard all the way through. Semi-frozen meat won't slice thin enough and creates thick uneven pieces that tear instead of separating cleanly.

Can I make beef stroganina ahead?

Keep the beef frozen solid and slice it just before serving. Sliced stroganina loses texture within minutes at room temperature, so prep everything else ahead but save the slicing for last.

What goes with beef stroganina?

Serve stroganina with rye bread, pickled cucumbers, boiled potatoes, or sour cream. The starchy and acidic sides balance the cold raw beef and sharp seasonings.

How do I know when stroganina is safe to eat?

Use fresh high-quality beef from a trusted source and freeze it for at least 12 hours to kill potential parasites. Keep all surfaces and tools clean to prevent cross-contamination.

Can I use ribeye instead of sirloin for stroganina?

Ribeye works but creates softer slices that tear more easily because of the higher fat content. Sirloin or tenderloin freeze firmer and slice cleaner for traditional translucent texture.

Beef Stroganina Russian-Style served on a plate

Beef Stroganina Russian-Style

No ratings yet
Beef stroganina is a traditional Russian appetizer of thinly sliced raw frozen beef served icy cold with simple seasonings like salt, lemon juice, and horseradish. The key is freezing lean cuts like sirloin or tenderloin solid for 12-24 hours, then slicing razor-thin just before serving for a melt-in-your-mouth texture.
Print Recipe Pin Recipe
Prep Time 10 minutes mins
Cook Time 1 minute min
Total Time 11 minutes mins
Servings: 5 servings
Course: Appetizer
Cuisine: Russian
Ingredients Equipment Method Notes

Ingredients
  

  • 1 lb beef sirloin or tenderloin lean cut, freeze solid
  • 2 teaspoon coarse salt sprinkle over slices before serving
  • 1 teaspoon black pepper seasoning
  • 2 tablespoon fresh lemon juice drizzle just before serving
  • 2 tablespoon finely grated horseradish fresh for sharp pungent heat
  • 0.25 cup chopped onion optional, raw for sharp bite
  • 2 tablespoon fresh dill optional, chopped fine
  • 0.25 cup cold vodka or ice water serve chilled alongside slices
  • sour cream optional, for serving

Equipment

  • Freezer To freeze the beef solid for slicing
  • Sharp slicing knife Razor-sharp knife needed to slice frozen beef thinly
  • Cutting board Chilled cutting surface for slicing frozen beef
  • Chilled serving platter Keep slices cold and firm before serving

Method
 

  1. Freeze the beef sirloin or tenderloin uncovered on a tray in the freezer for 12 to 24 hours until fully rock-hard. Freezing uncovered prevents ice crystals from forming on the surface.
    1 lb beef sirloin or tenderloin
  2. Sharpen and hone a razor-sharp slicing knife just before slicing. Place the frozen beef on a chilled cutting board and slice 1-2mm thick slices quickly to keep the meat frozen.
  3. Arrange the thin slices flat on a chilled serving platter or layer with parchment paper if stacking. Keep the platter chilled in the fridge until ready to season and serve.
  4. Sprinkle coarse salt first over the beef slices, then drizzle fresh lemon juice and add finely grated horseradish. Add chopped onion and fresh dill if using for extra flavor.
    2 tsp coarse salt, 2 tbsp fresh lemon juice, 2 tbsp finely grated horseradish, 0.25 cup chopped onion, 2 tbsp fresh dill
  5. Serve immediately with small glasses of chilled vodka or ice water on the side for rinsing between bites. Optionally serve with sour cream.
    0.25 cup cold vodka or ice water, sour cream

Notes

  • Freeze beef uncovered to avoid surface ice crystals and ensure smooth slicing.
  • Use a razor-sharp knife to cut clean translucent slices; dull knives tear the meat.
  • Season just before serving to maintain the texture and avoid sogginess.

Tried this recipe?

Let us know how it was!

Air Fryer Chicken Sausage and Peppers

March 25, 2026

Air frying chicken sausage with peppers and onions creates golden-browned edges and tender-crisp vegetables in under 20 minutes. The high heat circulates around every piece, crisping the sausage casing while the peppers soften and caramelize.

Air Fryer Chicken Sausage and Peppers served on a plate

You don't need multiple pans or constant flipping. Toss everything with oil and seasoning, shake the basket halfway through, and dinner's done.

This is what we make on weeknights when cooking feels like a chore but takeout feels worse.

QUICK SUMMARY

Air fryer chicken sausage and peppers delivers juicy sausage with tender-crisp vegetables in 15-18 minutes at 400°F. The key is cutting uniform pieces and tossing halfway through so everything cooks evenly without steaming. Make this when you need a high-protein meal that works for dinner tonight or meal prep tomorrow.

⏱️Time: 25 minutes total with 10 minutes hands-on prep
🔥Method: Preheat 3 minutes, toss at 8 minutes for even browning
⚠️Watch Out: Overcrowding causes steaming; cook in batches if needed

Table of Contents

Toggle
  • Why This Recipe Works
  • What You'll Need
    • Ingredient Details
  • Ingredient Swaps
  • What to Serve With It
  • Store and Reheat
  • Frequently Asked Questions
  • Air Fryer Chicken Sausage and Peppers
    • Method 
    • Tried this recipe?

Why This Recipe Works

Most people skip blue cheese on Italian dishes, but it balances the meal. A dollop of dressing takes each bite somewhere more interesting, especially when the peppers lean sweet and the sausage stays mild - for a version that comes together quickly, try this tangy dressing recipe and keep a batch in the fridge.

Quick Reference
⏱️
Prep Time
10 min
🔥
Cook Time
15-18 min
⏰
Total Time
25-30 min
🍽️
Servings
4 servings
📊
Difficulty
Easy
🏷️
Category
Main Dish
💡
Quick Tip
Toss halfway for even cooking and browning
🎯
Best For
Weeknight, Meal prep, Casual entertaining

Success markers:

  • Sausage reaches 165°F internal temp with golden-browned edges and a slightly crisped casing
  • Peppers soften to tender-crisp texture with light caramelization but still hold their shape
  • Onions turn translucent and soft with no raw crunch, picking up color at the edges
  • Garlic and herbs coat everything evenly without burnt spots or raw pockets
  • Basket pieces don't stick together - tossing halfway prevents steaming and ensures air circulation
Quick Tip
Pat peppers and onions dry before tossing with oil - excess moisture causes steaming instead of crisping

What You'll Need

Ingredients for Air Fryer Chicken Sausage and Peppers

Chicken adds the contrast this plate needs, but timing matters. Most people overbuy or underbuy sausage depending on whether they're feeding four or meal prepping for the week - for a version that comes together quickly, check this tender chicken recipe when you want another air fryer option that cooks in similar time.

🍗
Protein
  • 1 lb fully cooked chicken sausage (links or sliced)
🥬
Vegetables
  • 2 bell peppers (mixed colors), sliced into ½-inch strips
  • 1 medium onion (yellow or red), sliced into ½-inch strips
🧄
Aromatics & Seasoning
  • 2 cloves garlic, minced
  • 1 teaspoon Italian seasoning or dried herbs
  • ½ teaspoon salt
  • ¼ teaspoon black pepper
  • Optional: ¼ teaspoon crushed red pepper flakes
🫙
Fat & Finishing
  • 2 tablespoon olive oil
  • Optional: 1 tablespoon lemon juice or balsamic vinegar

Ingredient Details

  • Fully cooked chicken sausage
    Cuts cooking time and ensures safe internal temp; raw sausage needs 10+ extra minutes
  • Bell peppers in mixed colors
    Red, yellow, and orange peppers add sweetness and visual appeal; green peppers work but taste more bitter
  • ½-inch uniform strips
    Thicker pieces stay crunchy; thinner pieces burn - consistency matters more than exact size
  • Olive oil coating
    Essential for browning and preventing sticking; skip the cooking spray and use real oil
  • Italian seasoning blend
    Basil, oregano, and thyme combo works; substitute with ½ teaspoon each dried basil and oregano if needed
  • Yellow or red onion
    Yellow onions caramelize well; red onions add color but stay sharper in flavor
  • Optional finishing acid
    Lemon juice brightens; balsamic vinegar adds depth - drizzle after cooking, not before

Ingredient Swaps

Turkey sausage cooks at the same temp and time as chicken sausage, so the swap works without adjusting anything. Plant-based sausage needs watching - it dries out faster and may finish 3-4 minutes earlier.

Four swaps that work:

  • Turkey sausage instead of chicken sausage: Same texture and cook time; slightly leaner flavor but otherwise identical results
  • Poblano peppers instead of bell peppers: Adds mild heat and firmer texture; keeps same cooking time but check for doneness at 15 minutes
  • Avocado oil instead of olive oil: Neutral flavor with higher smoke point; prevents any burnt oil taste in air fryer
  • Fresh basil and oregano instead of Italian seasoning: Use 1 teaspoon fresh basil + ½ teaspoon fresh oregano for brighter flavor; add after cooking to preserve color

Zucchini or summer squash

Works for: Adding bulk without extra carbs; similar cook time to peppers

Skip if: You want the sweetness bell peppers bring; zucchini releases more moisture

Garlic powder (½ tsp)

Works for: Easier distribution; no chopping; shelf-stable pantry option

Skip if: You want fresh garlic punch; powder tastes milder and slightly different

Instructions

The basket needs space for air to move or everything steams instead of crisps. Plan 25 minutes start to finish - 3 minutes to preheat, 15-18 minutes to cook, 2 minutes to rest.

  1. Preheat air fryer to 400°F for 3 minutes. Pat peppers and onions dry with paper towels to remove excess moisture.

  2. Slice sausage into ½-inch rounds or leave links whole. Toss sausage, peppers, onions, garlic, olive oil, Italian seasoning, salt, and pepper in a mixing bowl until evenly coated.

  3. Arrange mixture in air fryer basket in a single layer. Leave 1-inch space between pieces; cook in two batches if needed to avoid overcrowding.

  4. Air fry for 8 minutes, then open basket and toss everything with tongs. Rearrange pieces so inside edges move to outside for even browning.

  5. Cook for 7-10 more minutes until sausage hits 165°F and peppers soften with light char. Let rest 2 minutes before serving; drizzle with lemon juice or balsamic vinegar if using.

Golden Rule
Check internal temp at 15 minutes - thin sausage slices finish faster than whole links

What to Serve With It

Rich mains need something to cut through, and fries does exactly that. The fries works best when it hits the table at the same time as the main, so if you're prepping sides ahead, skip anything that wilts or goes soggy in the fridge - for a version that comes together quickly, try simple homemade fries and keep them warm in a 200°F oven while the sausage finishes.

Side Dish Prep Why It Works How to Serve
Garlic mashed potatoes Easy Creamy base balances sausage and peppers Serve warm in a bowl, let sausage juices mix in
Simple green salad Easy Light contrast and freshness cuts richness Dress lightly with vinaigrette, serve on the side
Steamed rice Easy Neutral starch soaks up flavors and juices Make ahead, reheat with splash of water
Crusty bread Easy Good for sopping up olive oil and sausage drippings Warm in oven 5 minutes, serve whole or sliced
Roasted baby potatoes Medium Comforting, easy portion sides that hold temp well Roast at 425°F for 25 minutes, season with salt and rosemary

Three ways to serve it:

  • Over pasta: Toss with cooked penne or rigatoni and add marinara sauce for a one-bowl meal
  • In hoagie rolls: Pile sausage and peppers into rolls, top with provolone and broil 2 minutes
  • With polenta: Serve over creamy polenta for a hearty, Italian-style dinner

For more meal ideas that work with chicken-based mains, check these chicken schnitzel meal planning ideas for pairing inspiration.

Shortcut
Cook rice in chicken broth instead of water - it picks up extra flavor without extra work

Store and Reheat

Air-fried food loses crispness in the fridge but reheats better than you'd expect. Store sausage and peppers separately if you plan to freeze - sausage holds texture better than vegetables after thawing.

Method Time Best For
🍳 Stovetop 4-6 min over medium heat Quick reheating that preserves texture; add splash of water if dry
📦 Microwave 1-2 min at 50% power Fastest option but softens everything; cover to prevent drying
🔥 Oven 10 min at 350°F Even reheating without drying out; spread on sheet pan

For best results when storing:

  • Cool completely before sealing in airtight containers - hot food creates condensation that makes everything soggy
  • Store in shallow containers (2-inch depth max) so food cools quickly and reheats evenly
  • Keep sausage and peppers in same container if eating within 3 days; separate for freezing
  • Freeze in single-serving portions for grab-and-go lunches; thaw overnight in fridge
  • Add fresh herbs or a squeeze of lemon after reheating to brighten flavors that dull in storage

Frequently Asked Questions

How long to cook air fryer chicken sausage and peppers at 400°F?

Cook for 15-18 minutes at 400°F, tossing halfway through at the 8-minute mark. Sausage slices finish faster than whole links - check internal temp at 15 minutes and add 2-3 minutes if needed.

Can I make air fryer chicken sausage and peppers ahead and reheat?

Yes, store in an airtight container in the fridge for 3-4 days or freeze for up to 2 months. Reheat on the stovetop for 4-6 minutes over medium heat to restore texture better than the microwave.

What goes well with air fryer chicken sausage and peppers?

Serve with garlic mashed potatoes, steamed rice, crusty bread, or a simple green salad. For a one-bowl meal, toss with cooked pasta and marinara sauce or pile into hoagie rolls with melted provolone.

How do I know when the chicken sausage is fully cooked in this dish?

Check internal temp with a meat thermometer - sausage should hit 165°F. Look for golden-browned edges and a slightly crisped casing; fully cooked sausage only needs reheating, so color and temp matter more than time.

Can I use turkey sausage or vegetarian sausage instead of chicken sausage?

Turkey sausage works with the same cook time and temp as chicken sausage. Plant-based sausage cooks faster and dries out more easily - check at 12 minutes and reduce time by 3-4 minutes if needed.

Air Fryer Chicken Sausage and Peppers served on a plate

Air Fryer Chicken Sausage and Peppers

No ratings yet
Air fryer chicken sausage and peppers creates juicy sausage with tender-crisp vegetables in under 20 minutes. Tossing halfway through ensures even browning and caramelization without steaming. This high-protein dish is perfect for quick dinners or meal prepping.
Print Recipe Pin Recipe
Prep Time 10 minutes mins
Cook Time 18 minutes mins
Total Time 28 minutes mins
Servings: 4 servings
Course: Dinner, Main Dish
Cuisine: Italian
Ingredients Method Notes

Ingredients
  

  • 1 lb chicken sausage fully cooked, links or sliced
  • 2 bell peppers mixed colors, sliced into ½-inch strips
  • 1 onion medium, yellow or red, sliced into ½-inch strips
  • 2 cloves garlic minced
  • 1 teaspoon Italian seasoning or dried herbs
  • 0.5 teaspoon salt
  • 0.25 teaspoon black pepper
  • 2 tablespoon olive oil
  • 1 tablespoon lemon juice or balsamic vinegar optional, drizzle after cooking
  • 0.25 teaspoon crushed red pepper flakes optional

Method
 

  1. Preheat air fryer to 400°F for 3 minutes. Pat bell peppers and onion strips dry with paper towels to remove excess moisture.
    2 bell peppers, 1 onion
  2. Slice sausage into ½-inch rounds or leave links whole. Toss sausage, peppers, onions, garlic, olive oil, Italian seasoning, salt, black pepper, and optional red pepper flakes in a mixing bowl until evenly coated.
    1 lb chicken sausage, 2 bell peppers, 1 onion, 2 cloves garlic, 1 tsp Italian seasoning, 0.5 tsp salt, 0.25 tsp black pepper, 2 tbsp olive oil, 0.25 tsp crushed red pepper flakes
  3. Arrange mixture in a single layer in the air fryer basket, leaving about 1 inch space between pieces. Cook in batches if needed to avoid overcrowding and steaming.
  4. Air fry for 8 minutes. Open basket and toss everything with tongs to rearrange so inside edges move to the outside for even browning.
  5. Cook for 7 to 10 more minutes until sausage reaches 165°F internal temperature and peppers soften with light char. Let rest for 2 minutes before serving. Drizzle with lemon juice or balsamic vinegar if using.
    1 lb chicken sausage, 2 bell peppers, 1 tbsp lemon juice or balsamic vinegar

Notes

  • Pat peppers and onions dry before tossing with oil to prevent steaming.
  • Cook in batches if basket overcrowds to ensure crisping.
  • Check sausage internal temperature at 15 minutes and add time as needed.

Tried this recipe?

Let us know how it was!

Chicken Pozole Rojo

March 25, 2026

Toasting dried guajillo and ancho chilies in a dry pan releases their smoky oils, which blend into a deep red sauce that coats every bite. The high heat transforms the chilies from papery to fragrant in under two minutes.

Chicken Pozole Rojo served on a plate

Simmer the broth low and slow at 180-200°F so the chicken stays tender while the hominy softens without turning mushy. Add the hominy in the final 30 minutes to keep its texture firm but yielding.

Make this for weeknight dinners when you want something that fills the house with the smell of garlic and toasted chilies. It also works for meal prep since the flavors deepen overnight in the fridge.

QUICK SUMMARY

Chicken pozole rojo is a Mexican soup made by simmering chicken thighs in a smoky red chili broth with hominy until tender. The key is toasting dried chilies before blending them into the broth and maintaining a low simmer to prevent tough, dry meat. Add fresh garnishes like cabbage, radishes, and lime just before serving to balance the rich, spicy broth.

⏱️Plan ahead: You need 2 hours start to finish, with 30 minutes of active prep
🔥Toast first: Heat chilies in a dry pan for 1-2 minutes to unlock smoky flavor
⚠️Watch the simmer: Keep it at 180-200°F or the chicken dries out and hominy turns to mush

Table of Contents

Toggle
  • Why This Recipe Works
  • What You'll Need
    • Ingredient Details
  • Ingredient Swaps
  • What to Serve With It
  • Store and Reheat
  • Frequently Asked Questions
  • Chicken Pozole Rojo
    • Method 
    • Tried this recipe?

Why This Recipe Works

Dried guajillo chilies need heat to release their oils, which is why toasting them before blending creates a broth with actual depth instead of watery spice. For a version that comes together quickly, a homemade rice recipe uses similar layered flavors with less hands-on time.

Quick Reference
⏱️
Prep Time
25 min
🔥
Cook Time
1 hr 30 min
⏰
Total Time
1 hr 55 min
🍽️
Servings
6 servings
📊
Difficulty
Medium
🏷️
Category
Main Dish
💡
Quick Tip
Toast chilies for richer flavor
🎯
Best For
Weeknight | Meal prep | Entertaining

What makes this work:

  • Toast dried chilies in a dry pan for 1-2 minutes until fragrant but not blackened - this releases smoky oils that form the base of the broth without turning bitter
  • Simmer at 180-200°F instead of a rolling boil so chicken thighs reach 165°F while staying moist and tender, not stringy
  • Add hominy in the final 30 minutes to keep its texture soft but intact, preventing it from breaking down into mush
  • Blend the chili sauce with garlic and onion to create a smooth, emulsified base that coats the broth evenly instead of separating
  • Skim fat every 20 minutes during simmering to reduce greasiness and create a cleaner, brighter-tasting broth
Quick Tip
Use a thermometer to check chicken reaches 165°F (74°C) instead of guessing by time - overcooked chicken turns dry even in broth

What You'll Need

Ingredients for Chicken Pozole Rojo

Stock up on dried chilies, hominy, and chicken thighs since those three ingredients define the dish. Rice adds the contrast this plate needs, but timing matters - for a version that comes together quickly, a homemade rice recipe uses similar layered flavors with less hands-on time.

🍗
Chicken
  • 2 lbs chicken thighs (bone-in or boneless)
🌶️
Chilies & Spices
  • 6 dried guajillo chilies
  • 3 dried ancho chilies
  • 1 tablespoon cumin
  • 2 teaspoon oregano
🧄
Aromatics
  • 1 medium onion
  • 6 cloves garlic
🍜
Hominy & Broth
  • 2 cans (29 oz) hominy, drained
  • 8 cups chicken broth
🍋
Garnishes
  • Shredded cabbage
  • Sliced radishes
  • Fresh cilantro
  • Lime wedges

Ingredient Details

  • Dried guajillo chilies
    Provide the signature smoky heat and deep red color - toast them in a dry pan for 1-2 minutes until fragrant but not blackened to avoid bitterness
  • Chicken thighs (bone-in or boneless)
    Stay moist and tender during long simmering better than breasts - use bone-in for richer broth or boneless for faster shredding
  • Hominy (canned)
    Defines the texture of pozole - drain and rinse before adding, then simmer only 20-30 minutes to keep kernels soft but intact, not mushy
  • Dried ancho chilies
    Add mild sweetness and complexity to the broth - remove stems and seeds before toasting to reduce bitterness
  • Garlic (fresh cloves)
    Adds essential aromatic depth when blended with the chili sauce - use fresh cloves instead of powder for richer flavor
  • Cumin (ground)
    Brings earthy warmth that balances the chili heat - toast whole cumin seeds and grind them for deeper flavor, or use ground if short on time
  • Oregano (dried Mexican preferred)
    Provides classic herbal finish - Mexican oregano has a slightly citrusy note that works better than Mediterranean varieties

Ingredient Swaps

Most people skip variations, but the chili type changes the heat level and smoke intensity. A good veggies can make or break the plate - for a version that comes together quickly, a quick charred veggie dish uses similar layered flavors with less hands-on time.

Four swaps that work:

  • Dried guajillo chilies → pasilla or chipotle chilies - pasilla brings earthier flavor, chipotle adds smokier heat (use 4-5 chilies instead of 6 since chipotles are stronger)
  • Chicken thighs → chicken breasts - leaner meat but dries out faster (reduce simmer time to 45 minutes and check for 165°F internal temp)
  • Canned hominy → dried hominy - richer corn flavor but requires overnight soaking and 2-3 hours of cooking before adding to pozole
  • Fresh oregano → dried marjoram or thyme - marjoram is milder and slightly sweeter, thyme adds a different herbal note (use same amount as dried oregano)

Chicken Thighs (Bone-In)

Works for: Richer broth, stays moist during long simmering, more forgiving timing

Skip if: You need faster shredding or want leaner meat

Chicken Breasts

Works for: Leaner protein, quicker cooking time, easier to shred

Skip if: You want maximum flavor or tend to overcook meat

Dried Hominy

Works for: Deeper corn flavor, firmer texture, traditional preparation

Skip if: You don't have time for overnight soaking and 2-3 hours of pre-cooking

Instructions

You need about 2 hours total, with 30 minutes of active prep for toasting chilies and chopping garnishes. Rich mains need something to cut through, and punch does exactly that - for a version that comes together quickly, a quick easy side dish uses similar layered flavors with less hands-on time.

  1. Toast the dried chilies: Heat a large dry skillet over medium heat. Add guajillo and ancho chilies, pressing them flat with a spatula. Toast for 1-2 minutes per side until fragrant and slightly darkened but not blackened. Remove stems and seeds, then soak chilies in 2 cups hot water for 15 minutes until softened.

  2. Blend the chili sauce: Transfer softened chilies and 1 cup of soaking liquid to a blender. Add garlic, half the onion (roughly chopped), cumin, and oregano. Blend on high for 1-2 minutes until completely smooth. Strain through a fine-mesh sieve to remove any gritty bits.

  3. Simmer the chicken: Pour chicken broth into a large stockpot and bring to a boil over high heat. Add chicken thighs, the remaining half onion (quartered), and the strained chili sauce. Reduce heat to low and maintain a gentle simmer at 180-200°F. Cover and cook for 45-60 minutes, skimming fat from the surface every 20 minutes. Check chicken with a thermometer - it's done at 165°F.

  4. Add hominy and shred chicken: Remove chicken from the pot and let it cool for 5 minutes. Add drained hominy to the broth and simmer uncovered for 20-30 minutes. Shred the chicken with two forks, then return it to the pot. Taste and adjust seasoning with salt.

  5. Serve with garnishes: Ladle pozole into bowls. Top with shredded cabbage, sliced radishes, chopped cilantro, and a squeeze of lime. Serve with warm corn tortillas on the side.

Golden Rule
Maintain the simmer between 180-200°F - a rolling boil toughens the chicken and breaks down the hominy into mush

What to Serve With It

Pozole needs crisp, fresh sides to cut through the rich broth and tender chicken. Cabbage, radishes, and lime are traditional, but you can add more substantial sides for a full meal. For more pairing ideas, check out these weeknight chicken dinner ideas.

Side Dish Prep Why It Works How to Serve
Shredded cabbage Easy Adds crunchy freshness that balances the soft hominy and tender chicken Pile on top of each bowl just before eating so it stays crisp
Diced radishes Easy Provides spicy, crisp contrast and bright color against the deep red broth Slice thin and serve in a small bowl for guests to add as desired
Warm corn tortillas Easy Traditional accompaniment that soaks up broth and adds mild corn flavor Heat on a dry skillet for 30 seconds per side and serve wrapped in a towel
Avocado slices Easy Adds creamy texture and richness that cools down spicy broth Slice just before serving and drizzle with lime to prevent browning
Pickled red onions Medium Tangy sharpness and bright pink color elevate the presentation Make ahead and store in fridge - quick pickle in lime juice for 20 minutes

Three ways to serve it:

  • Family-style weeknight: Set out bowls of shredded cabbage, radishes, cilantro, and lime wedges so everyone builds their own bowl at the table
  • Meal prep lunch: Pack broth and chicken in one container, garnishes in another, then reheat broth and add fresh toppings when ready to eat
  • Weekend gathering: Serve with Mexican street corn salad (esquites), hot sauce selection, and warm tortillas for a full spread
Best Pick
Chop garnishes just before serving - cabbage wilts and radishes lose their snap if cut too far ahead

Store and Reheat

Pozole keeps well in the fridge and actually tastes better the next day after the flavors meld overnight. Cool it quickly by transferring to shallow containers, then refrigerate within 2 hours. Salad cuts through all that richness - for a version that comes together quickly, a fresh homemade salad recipe uses similar layered flavors with less hands-on time.

Method Time Best For
🍳 Stovetop 10-15 min over medium-low heat Retaining texture of hominy and chicken without drying out
🔥 Oven 15-20 min at 325°F (163°C) covered Warming larger quantities evenly for serving a crowd
📦 Microwave 3-5 min stirring halfway Quick single servings when you need lunch fast

For best results when storing:

  • Cool pozole quickly by transferring to shallow containers - this prevents bacterial growth and keeps the broth from turning sour
  • Store broth and garnishes separately - cabbage, radishes, and cilantro turn soggy and bitter if left in the liquid overnight
  • Refrigerate up to 4 days in airtight containers, keeping hominy submerged in broth so it doesn't dry out
  • Freeze for up to 3 months in freezer-safe containers, leaving 1 inch of headspace for expansion - thaw overnight in the fridge before reheating
  • Reheat gently on the stovetop over medium-low heat, stirring occasionally, until it reaches 165°F - avoid high heat or the chicken turns stringy and the hominy breaks apart

Frequently Asked Questions

Can I substitute chicken breasts for thighs in pozole rojo?

Yes, but reduce the simmer time to 45 minutes and check for 165°F internal temp since breasts dry out faster than thighs. Use a thermometer instead of guessing by time to avoid tough, stringy meat.

How long can I store chicken pozole rojo in the fridge?

Store in airtight containers for 3-4 days in the fridge. Keep garnishes like cabbage and radishes separate since they turn soggy and bitter if left in the broth overnight.

How do I know when the chicken is fully cooked in pozole rojo?

Use a meat thermometer to check for 165°F (74°C) in the thickest part of the thigh. The meat should pull apart easily with a fork and show no pink color near the bone.

Why is my pozole rojo broth bitter and how can I fix it?

Bitterness comes from overtoasting the chilies or burning them in the pan. Toast only until fragrant (1-2 minutes) and avoid black spots. If the broth is already bitter, strain the sauce through a fine-mesh sieve and add a teaspoon of sugar or honey to balance it.

What are good side dishes to serve with chicken pozole rojo?

Serve with shredded cabbage, sliced radishes, diced onion, fresh cilantro, lime wedges, and warm corn tortillas. For a fuller meal, add avocado slices, pickled red onions, or Mexican street corn salad on the side.

Chicken Pozole Rojo served on a plate

Chicken Pozole Rojo

No ratings yet
Chicken pozole rojo is a traditional Mexican soup featuring tender chicken thighs simmered in a smoky, rich red chili broth with hominy. Toasting dried guajillo and ancho chilies unlocks deep smoky flavors, while a gentle simmer ensures moist chicken and perfectly textured hominy. Fresh garnishes like cabbage, radishes, and lime brighten and balance the hearty soup.
Print Recipe Pin Recipe
Prep Time 25 minutes mins
Cook Time 1 hour hr 30 minutes mins
Total Time 1 hour hr 55 minutes mins
Servings: 6 servings
Course: Main Dish
Cuisine: Mexican
Ingredients Equipment Method Notes

Ingredients
  

  • 2 lbs chicken thighs bone-in or boneless
  • 6 pieces dried guajillo chilies toast in dry pan 1-2 min
  • 3 pieces dried ancho chilies remove stems and seeds before toasting
  • 1 tablespoon cumin ground
  • 2 teaspoon oregano dried Mexican preferred
  • 1 medium onion half blended, half quartered
  • 6 cloves garlic fresh cloves
  • 2 cans hominy 29 oz cans, drained and rinsed
  • 8 cups chicken broth
  • shredded cabbage for garnish
  • sliced radishes for garnish
  • fresh cilantro for garnish
  • lime wedges for garnish

Equipment

  • Large dry skillet For toasting dried chilies
  • Blender To blend chili sauce with garlic and onion
  • Large stockpot For simmering chicken and soup
  • Fine-mesh sieve To strain chili sauce
  • Meat thermometer To check chicken internal temperature

Method
 

  1. Toast dried guajillo and ancho chilies in a large dry skillet over medium heat for 1-2 minutes per side until fragrant and slightly darkened but not blackened. Remove stems and seeds, then soak chilies in 2 cups hot water for 15 minutes until softened.
    6 pieces dried guajillo chilies, 3 pieces dried ancho chilies
  2. Blend softened chilies and 1 cup of soaking liquid in a blender. Add garlic, half the chopped onion, cumin, and oregano. Blend on high for 1-2 minutes until completely smooth. Strain through a fine-mesh sieve to remove any gritty bits.
    6 pieces dried guajillo chilies, 3 pieces dried ancho chilies, 1 medium onion, 6 cloves garlic, 1 tbsp cumin, 2 tsp oregano
  3. Bring chicken broth to a boil in a large stockpot. Add chicken thighs, remaining quartered onion, and strained chili sauce. Reduce heat and maintain a gentle simmer at 180-200°F. Cover and cook for 45-60 minutes, skimming fat every 20 minutes. Use a meat thermometer to check chicken is done at 165°F.
    2 lbs chicken thighs, 1 medium onion, 8 cups chicken broth
  4. Remove chicken from broth and let cool for 5 minutes. Add drained hominy to the broth and simmer uncovered for 20-30 minutes. Shred the chicken with two forks and return it to the pot. Taste and adjust seasoning with salt as needed.
    2 lbs chicken thighs, 2 cans hominy
  5. Ladle the pozole into bowls and top with shredded cabbage, sliced radishes, chopped cilantro, and a squeeze of lime. Serve with warm corn tortillas on the side if desired.
    shredded cabbage, sliced radishes, fresh cilantro, lime wedges

Notes

  • Toast chilies only until fragrant to avoid bitterness.
  • Maintain simmer at 180-200°F to keep chicken tender and hominy intact.
  • Use a thermometer to ensure chicken reaches 165°F for safety and optimal texture.

Tried this recipe?

Let us know how it was!

Air Fryer Cod Fish Cakes

March 25, 2026

Most fish cakes turn out dry or fall apart in the pan. The fix is combining flaky cod with mashed potatoes and air frying at high heat instead of pan-frying.

Air Fryer Cod Fish Cakes served on a plate

The air fryer crisps the breadcrumb coating without adding extra oil. You get golden edges and a moist interior without flipping halfway through or babysitting the basket.

This works for weeknight dinners when you need protein that reheats well and doesn't leave the kitchen smelling like fried food.

QUICK SUMMARY

Air Fryer Cod Fish Cakes combine flaky cod with mashed potatoes and herbs, then air fry at 375°F for 12 minutes. The high heat crisps the breadcrumb coating while keeping the interior moist. Chill the mixture before shaping to prevent cakes from falling apart during cooking.

⏱️Time Reality: 27 minutes total; 15 minutes to mix and shape, 12 to air fry
🔥Success Move: Drain cooked potatoes completely before mashing to avoid soggy mixture
⚠️Watch Out: Overcrowding the basket causes uneven browning; leave 1-2 inches between cakes

Table of Contents

Toggle
  • Why This Recipe Works
  • What You'll Need
    • Ingredient Details
  • Ingredient Swaps
  • What to Serve With It
  • Store and Reheat
  • Frequently Asked Questions
  • Air Fryer Cod Fish Cakes
    • Method 
    • Tried this recipe?

Why This Recipe Works

Air frying at 375°F creates a crispy exterior without the oil mess of pan-frying. The egg and mashed potatoes bind the flaky cod while breadcrumbs add texture, and the high heat sets everything in 12 minutes. For a version that comes together quickly, quick calzone recipe uses the same air fryer method with different fillings.

Quick Reference
⏱️
Prep Time
15 min
🔥
Cook Time
12 min
⏰
Total Time
27 min
🍽️
Servings
4 servings
📊
Difficulty
Easy
🏷️
Category
Main Dish
💡
Quick Tip
Chill cakes 15 min before air frying
🎯
Best For
Weeknight | Meal prep | Casual entertaining

What makes these fish cakes work:

  • Cod stays flaky instead of mushy - boiling the fish separately before flaking preserves texture and prevents waterlogged cakes
  • Potatoes bind without turning gluey - draining them completely and letting them cool slightly keeps the mixture firm enough to shape
  • Breadcrumbs crisp up in the air fryer - the dry heat at 375°F toasts the coating evenly without needing a oil bath
  • Chilling the mixture for 15 minutes - lets the starches in the potatoes set so the cakes hold their shape during cooking
  • Internal temperature hits 145°F at 12 minutes - this guarantees the fish is safe and the potato binding is fully cooked through
Quick Tip
Spray cakes lightly with oil before air frying for a deeper golden crust that rivals pan-fried versions.

What You'll Need

Ingredients for Air Fryer Cod Fish Cakes

The cod provides flaky texture while potatoes bind everything together without eggs doing all the work. Most people skip the mayonnaise, but it adds moisture and keeps the cakes from drying out in the air fryer's high heat. For a version that comes together quickly, this easy cauliflower recipe uses similar air fryer timing with different seasonings.

🦐
Seafood
  • 1 lb cod fillets (fresh, not frozen)
🍜
Starch
  • 2 medium potatoes (peeled, cubed)
  • ½ cup breadcrumbs (plain or seasoned)
🧄
Aromatics
  • ½ small onion (finely diced)
  • 2 tablespoon fresh parsley (chopped)
🫙
Binders & Seasoning
  • 1 large egg (beaten)
  • 2 tablespoon mayonnaise
  • 1 tablespoon lemon juice
  • ½ teaspoon salt
  • ¼ teaspoon black pepper

Ingredient Details

  • Cod fillets
    Use fresh cod instead of frozen - frozen releases too much water during cooking and makes the mixture runny
  • Potatoes
    Drain completely and let cool 5 minutes before mashing - excess moisture causes cakes to fall apart in the air fryer
  • Egg
    Beat the egg before adding so it distributes evenly through the mixture and binds every bite
  • Breadcrumbs
    Add them last to control moisture - if the mixture feels wet, add 2-3 more tablespoons
  • Mayonnaise
    Don't skip this - it adds moisture without making the mixture watery like milk or cream would
  • Onion
    Dice it finely so every bite gets flavor without chunky pieces that can make shaping harder
  • Lemon juice
    Fresh lemon juice brightens the fish flavor better than bottled - use about half a lemon

Ingredient Swaps

Swap the cod for pollock or haddock if your market doesn't stock fresh cod regularly. The texture stays flaky and mild. We keep a batch ready for nights like this - this easy pork recipe works with the same air fryer temperature and timing.

Four swaps that work:

  • Mayonnaise → Greek yogurt or vegan mayo - Greek yogurt adds tang and protein but makes the mixture slightly thinner; vegan mayo keeps the same moisture level for dairy-free diets
  • Breadcrumbs → crushed gluten-free crackers - maintains the crisp coating texture while making the recipe gluten-free; use the same amount by volume
  • Potatoes → mashed sweet potatoes - adds natural sweetness and a softer texture but requires an extra 2-3 minutes of air frying time to firm up
  • Parsley → fresh dill or cilantro - shifts the flavor profile toward herbaceous (dill) or bright and citrusy (cilantro) without changing the texture

Cod Fillets

Works for: mild fish flavor, flaky texture, holds shape when mixed with potatoes

Skip if: you only have frozen cod on hand - it releases too much water and makes the mixture runny

Pollock or Haddock

Works for: budget-friendly swap, similar flaky texture, slightly firmer than cod

Skip if: you want the mildest fish flavor possible - both have slightly more pronounced taste than cod

Instructions

The entire process takes 27 minutes from start to finish if you prep while the potatoes boil. Chilling the shaped cakes for 15 minutes before air frying prevents them from falling apart. Rich mains need something to cut through, and pork does exactly that. For a version that comes together quickly, this easy pork recipe uses similar air fryer timing with different proteins.

  1. Boil potatoes and cod separately. Bring a pot of salted water to a boil, add cubed potatoes, and cook 12-15 minutes until fork-tender. In a separate pot, gently simmer cod fillets 8-10 minutes until they flake easily with a fork. Drain both completely and let cool 5 minutes.

  2. Mash potatoes and flake cod. Mash the drained potatoes until smooth with no lumps. Flake the cod into bite-sized pieces using a fork, checking for any bones. Combine both in a large mixing bowl.
  3. Mix in remaining ingredients. Add beaten egg, mayonnaise, diced onion, chopped parsley, lemon juice, salt, and black pepper to the bowl. Mix gently with a fork until everything is evenly distributed. Fold in breadcrumbs last, adding more if the mixture feels too wet to shape.

  4. Shape and chill fish cakes. Form the mixture into 8 equal patties, about 3 inches wide and 1 inch thick. Place them on a plate, cover with plastic wrap, and refrigerate 15 minutes to firm up. This step prevents them from falling apart in the air fryer.

  5. Air fry at 375°F for 12 minutes. Preheat the air fryer to 375°F for 3 minutes. Spray the basket and fish cakes lightly with oil. Arrange cakes in a single layer with 1-2 inches between each one. Air fry 6 minutes, flip gently with a spatula, then cook another 6 minutes until golden brown and the internal temperature reaches 145°F.

Watch Out
Don't overcrowd the air fryer basket - cakes need airflow on all sides to crisp evenly. Cook in batches if necessary.

What to Serve With It

Fish cakes need a fresh, acidic side to cut through the richness of the potato and mayo mixture. Most plates feel incomplete without a crisp vegetable or tangy sauce to balance the mild fish flavor. For complete tuna melts meal ideas that work with other seafood dishes, check out our pairing guide.

Side Dish Prep Why It Works How to Serve
Green Salad Easy Crisp lettuce and tangy vinaigrette cut through the richness of the fish cakes Toss mixed greens with lemon vinaigrette, serve cold alongside hot cakes
Steamed Broccoli Easy Adds color and a healthy vegetable element without competing flavors Steam 5-7 minutes, season with salt and lemon juice, serve warm
Roasted Sweet Potatoes Medium Natural sweetness balances the savory fish and adds heartiness to the plate Roast at 400°F for 25 minutes, season with paprika and olive oil
Tartar Sauce Easy Classic creamy, tangy dip that pairs perfectly with any fish dish Mix mayo, pickles, capers, lemon juice; serve chilled in a small bowl
Brown Rice Easy Adds whole grain fiber and bulk to make the meal more filling Cook according to package directions, fluff with a fork, serve warm

Three ways to serve it:

  • Weeknight dinner - pair with steamed broccoli and tartar sauce for a quick, balanced meal that takes less than 30 minutes total
  • Casual entertaining - serve with lemon-dill aioli, herb quinoa salad, and grilled asparagus for a colorful, restaurant-style plate
  • Meal prep - make a double batch, store in the fridge, and serve throughout the week with different sauces and sides to keep meals interesting
Best Pick
Tartar sauce is the classic pairing - the tangy, creamy flavor complements mild fish without overpowering it.

Store and Reheat

Fish cakes stay moist in the fridge for 3-4 days if you store them in a shallow, airtight container. The air fryer is the best reheating method because it restores the crispy coating without drying out the interior. Chicken adds the contrast this plate needs, but timing matters. For a version that comes together quickly, classic chicken dish uses the same air fryer method with different proteins.

Method Time Best For
🍳 Air Fryer 5-7 min at 350°F Restoring crisp crust without drying interior; best texture
📦 Microwave 1-2 min Quick warming only; crust will be soft instead of crispy
🔥 Oven 10 min at 350°F Gentle reheating for larger batches; slightly less crisp than air fryer

For best results when storing:

  • Cool completely before refrigerating - hot fish cakes create condensation in the container which makes the coating soggy
  • Layer with parchment paper - prevents cakes from sticking together and keeps the coating intact when you pull them apart
  • Freeze uncooked cakes for longer storage - shape the cakes, freeze on a baking sheet for 2 hours, then transfer to a freezer bag for up to 2 months
  • Air fry frozen cakes directly - no need to thaw; just add 3-5 minutes to the cooking time and check that the internal temperature reaches 145°F
  • Store leftover sauce separately - tartar sauce or aioli stays fresh longer when kept in its own container instead of mixed with the fish cakes

Frequently Asked Questions

Can I use frozen cod for air fryer fish cakes?

Use fresh cod instead of frozen - frozen cod releases too much water when it thaws and cooks, which makes the fish cake mixture runny and hard to shape. If you only have frozen cod, thaw it completely in the fridge overnight, then pat it very dry with paper towels before flaking.

How should I store and reheat leftover fish cakes?

Store cooked fish cakes in an airtight container in the fridge for 3-4 days. Reheat in the air fryer at 350°F for 5-7 minutes to restore the crispy coating, or microwave for 1-2 minutes if you don't mind a softer crust.

How do I know when air fryer cod fish cakes are fully cooked?

The cakes are done when they're golden brown on both sides and the internal temperature reaches 145°F. Insert an instant-read thermometer into the center of the thickest cake - if it reads 145°F or higher, they're safe to eat and fully cooked through.

What causes fish cakes to fall apart and how to fix it?

Fish cakes fall apart when there's too much moisture or not enough binder. Drain the cooked potatoes completely, make sure you use enough egg and breadcrumbs, and chill the shaped cakes for 15 minutes before air frying - this firms up the starches and helps them hold together during cooking.

Can I double or halve the fish cake recipe easily?

Yes, this recipe scales easily - just multiply or divide all ingredients proportionally. Keep the cooking time and temperature the same at 375°F for 12 minutes, but cook in batches if you're doubling so the air fryer basket doesn't get overcrowded.

How to prevent fish cakes from falling apart?

Chill the shaped cakes for at least 15 minutes before air frying - this sets the potato starch and helps everything bind together. Also make sure your potatoes are drained completely and your mixture isn't too wet - add extra breadcrumbs if needed.

Can I freeze cooked air fryer fish cakes?

Yes, freeze cooked fish cakes for up to 2 months. Cool them completely, then freeze in a single layer on a baking sheet for 2 hours before transferring to a freezer bag. Reheat directly from frozen in the air fryer at 350°F for 8-10 minutes.

Air Fryer Cod Fish Cakes served on a plate

Air Fryer Cod Fish Cakes

No ratings yet
Air Fryer Cod Fish Cakes combine flaky cod with mashed potatoes and herbs, air fried at 375°F to achieve a crispy breadcrumb coating and moist interior. Chilling the shaped cakes before cooking ensures they hold together perfectly during air frying.
Print Recipe Pin Recipe
Prep Time 15 minutes mins
Cook Time 12 minutes mins
Total Time 27 minutes mins
Servings: 4 servings
Course: Main Dish
Cuisine: American
Ingredients Method Notes

Ingredients
  

  • 1 lb cod fillets fresh, not frozen
  • 2 medium potatoes peeled, cubed
  • 0.5 cup breadcrumbs plain or seasoned
  • 0.5 small onion finely diced
  • 2 tablespoon fresh parsley chopped
  • 1 large egg beaten
  • 2 tablespoon mayonnaise
  • 1 tablespoon lemon juice fresh
  • 0.5 teaspoon salt
  • 0.25 teaspoon black pepper

Method
 

  1. Boil potatoes in salted water for 12-15 minutes until fork-tender. In a separate pot, gently simmer cod fillets 8-10 minutes until flaky. Drain both completely and let cool 5 minutes.
  2. Mash the drained potatoes until smooth with no lumps. Flake the cod into bite-sized pieces using a fork and check for any bones. Combine both in a large mixing bowl.
  3. Add beaten egg, mayonnaise, finely diced onion, chopped parsley, lemon juice, salt, and black pepper to the bowl. Mix gently until evenly distributed. Fold in breadcrumbs last, adding extra if the mixture feels too wet.
  4. Shape the mixture into 8 equal patties, about 3 inches wide and 1 inch thick. Place on a plate, cover with plastic wrap, and refrigerate for 15 minutes to firm up the cakes.
  5. Preheat air fryer to 375°F for 3 minutes. Lightly spray basket and fish cakes with oil. Arrange cakes in a single layer with 1-2 inches between each. Air fry for 6 minutes, flip gently, then cook another 6 minutes until golden brown and internal temperature reaches 145°F.

Notes

  • Drain and cool potatoes fully before mashing to prevent soggy cakes.
  • Chill shaped cakes for 15 minutes before air frying to help them hold together.
  • Do not overcrowd air fryer basket; leave space for even browning and crisping.

Tried this recipe?

Let us know how it was!

Air Fryer Falafel Wrap Filling

March 25, 2026

You need 20 minutes of prep and one air fryer. No deep frying, no splatter guard, no oil-soaked countertops.

Air Fryer Falafel Wrap Filling served on a plate

The air fryer crisps chickpeas while you chop vegetables for the wrap. The trick is soaking dried chickpeas overnight so the mixture binds without turning into paste.

This is the kind of recipe you make when you want lunch that feels intentional without the mess of traditional frying.

QUICK SUMMARY

Air fryer falafel comes out crispy on the outside and tender inside when you start with dried chickpeas and pulse them to a coarse texture. The high heat at 375°F crisps the exterior in 15 minutes while the interior stays moist. Skip canned chickpeas or you'll get dense, soggy balls that fall apart.

⏱️Time Reality: 20 min active plus 12-hour chickpea soak, no shortcuts
🔥First Critical Move: Pulse chickpeas to coarse texture, not paste
⚠️Watch Out: Overcrowding the basket makes falafel steam instead of crisp

Table of Contents

Toggle
  • Why This Recipe Works
  • What You'll Need
    • Ingredient Details
  • Ingredient Swaps
  • What to Serve With It
  • Store and Reheat
  • Frequently Asked Questions
  • Air Fryer Falafel Wrap Filling
    • Method 
    • Tried this recipe?

Why This Recipe Works

The high heat renders moisture from the chickpeas while forming a golden crust. For a version that comes together quickly, a creamy pasta side pairs well when you need something filling on the table.

Quick Reference
⏱️
Prep Time
20 min (plus 12 hr soak)
🔥
Cook Time
15 min
⏰
Total Time
15 min active + 12 hr soak
🍽️
Servings
4-6 servings
📊
Difficulty
Medium
🏷️
Category
Main Dish
💡
Quick Tip
Soak chickpeas overnight, air fry 15 min at 375°F
🎯
Best For
Weeknight | Meal prep | Entertaining

What makes this work:

  • Dried chickpeas soak up moisture then release it during cooking - creates steam inside while the outside crisps
  • Coarse texture from pulsing holds shape - over-processing turns mixture into paste that spreads instead of holds
  • Baking powder creates air pockets - lightens the texture so falafel isn't dense
  • 375°F air fryer temperature - hot enough to crisp without burning the herbs
  • Light oil spray on falafel surfaces - promotes browning and prevents sticking to basket
Quick Tip
Chill the shaped falafel for 30 minutes before air frying so they hold together better and develop deeper color.

What You'll Need

Ingredients for Air Fryer Falafel Wrap Filling

Stock your pantry once and you can make this any weeknight without a grocery run. Bites adds the contrast this plate needs, but timing matters - this quick bites dish works when you need protein that crisps fast.

🫘
Base
  • Dried chickpeas
  • Onion
  • Fresh parsley
  • Flour (chickpea or all-purpose)
🧄
Aromatics
  • Garlic cloves
🌶️
Spices
  • Ground cumin
  • Ground coriander
  • Baking powder
  • Salt
  • Black pepper

Ingredient Details

  • Dried chickpeas
    Soak 12-24 hours until doubled in size - canned chickpeas have too much moisture and make dense falafel
  • Fresh parsley
    Use leaves and tender stems for herbaceous flavor - dried parsley won't work here
  • Onion
    Yellow or white onion adds moisture and sweetness - don't skip or falafel will be dry
  • Garlic
    Fresh cloves give pungency that garlic powder can't match - use 3-4 cloves for noticeable flavor
  • Ground cumin
    The signature warm spice in Middle Eastern falafel - measure with a heavy hand
  • Baking powder
    Creates air pockets for lighter texture - don't confuse with baking soda
  • Flour
    Chickpea flour keeps it gluten-free, all-purpose works too - add just enough to bind without making paste

Ingredient Swaps

Most swaps work if you adjust liquid or binding. The bread works best when it hits the table at the same time as the main - for an easy bread side that uses similar seasonings, try flatbread.

Common substitutions:

  • Canned chickpeas instead of dried - drain, pat completely dry, spread on towel for 30 minutes, add extra 2 tablespoons flour to compensate for moisture
  • Chickpea flour instead of all-purpose - use same amount for gluten-free version with slightly denser texture
  • Fresh cilantro instead of parsley - swap 1:1 for different herb profile, still fresh and green
  • Oven baking instead of air frying - bake at 400°F for 20-25 minutes, flip halfway, won't get quite as crispy

Dried Chickpeas (Traditional)

Works for: Crispy exterior with tender interior, holds shape well, authentic texture

Skip if: You forgot to soak overnight or need falafel in under an hour

Canned Chickpeas (Quick Version)

Works for: Last-minute meals when you didn't plan ahead, budget-friendly option

Skip if: You want crispy texture - these turn out denser and may fall apart without extra flour

Instructions

The entire process takes 15 minutes of active cooking once chickpeas are soaked. A good chicken can make or break the plate - for a juicy chicken on the side that cooks in the same amount of time, consider chicken kiev.

  1. Drain soaked chickpeas and pat completely dry - spread on clean kitchen towel for 10 minutes to remove surface moisture. Excess water makes mixture too wet to hold shape.

  2. Pulse chickpeas, onion, garlic, parsley, cumin, coriander, salt, and pepper in food processor 10-15 times - stop when mixture is coarse with some texture, not smooth paste. You should see small chickpea pieces throughout.

  3. Add flour and baking powder, pulse 3-4 times to combine - mixture should hold together when squeezed but still feel slightly grainy. Add 1 tablespoon more flour if too wet to shape.

  4. Shape into 12-16 balls or patties, place on plate, chill 30 minutes - chilling firms the mixture so falafel hold together during cooking. Spray lightly with oil on all sides.
  5. Air fry at 375°F for 12-15 minutes, flipping halfway - space falafel 2cm apart in basket for air circulation. Done when golden brown, crispy outside, and firm to touch.

Golden Rule
Don't skip the 12-hour chickpea soak or the 30-minute chill time - both prevent falafel from falling apart.

What to Serve With It

Falafel needs something creamy, something tangy, and something fresh to balance the herbs. Most people skip the sauce, but it prevents dry bites - for more baked potatoes meal planning ideas that work with Middle Eastern flavors, check the pairing guide.

Side Dish Prep Why It Works How to Serve
Tahini sauce Easy Creamy, nutty element cools spiced falafel Drizzle inside wrap or serve as dipping sauce
Pickled vegetables Easy Tangy crunch cuts through rich chickpeas Tuck into wrap or pile on the side
Hummus Easy Smooth chickpea base complements crispy texture Spread inside wrap or serve as dip
Mixed green salad Easy Fresh greens add lightness to dense falafel Serve on the side with lemon dressing
Cucumber slices Easy Cool, crunchy contrast balances warm spices Layer in wrap or serve as quick salad

Three ways to serve it:

  • Classic wrap: Stuff warm pita with falafel, tahini, pickled vegetables, cucumber, tomatoes - the sauce is non-negotiable here
  • Bowl meal: Serve over quinoa or couscous with hummus, greens, roasted vegetables, lemon wedge for brightness
  • Appetizer platter: Arrange falafel on tray with dipping sauces, pita chips, olives, stuffed grape leaves for entertaining
Best Pick
For meal prep, make a double batch and freeze half before air frying - they cook from frozen in 18-20 minutes.

Store and Reheat

Cooked falafel keeps 3-4 days in the fridge but loses crispness. Most people skip chicken, but it balances the meal - for classic chicken dish that reheats well, wings work great for meal prep.

Method Time Best For
🔥 Air Fryer 4-5 min at 350°F Restoring original crispiness
🔥 Oven 7-10 min at 350°F Reheating multiple pieces evenly
📦 Microwave 30-45 seconds Fast reheating when crisp doesn't matter

For best results when storing:

  • Cool completely before refrigerating - storing warm falafel creates condensation that makes them soggy
  • Stack between parchment paper layers - prevents sticking and makes grabbing single servings easier
  • Freeze uncooked falafel for later - shape, freeze on tray, transfer to bag, cook from frozen adding 3-5 minutes
  • Reheat in air fryer for crispness - microwave works but makes falafel soft instead of crunchy
  • Let rest 5 minutes after reheating - allows texture to set and prevents burning your mouth

Frequently Asked Questions

Can I use canned chickpeas for falafel instead of dried?

Canned chickpeas work but make denser, wetter falafel that's harder to crisp. Drain them completely, pat dry with towels, spread on a clean towel for 30 minutes, then add 2 extra tablespoons flour to the mixture to compensate for moisture.

How do I store and reheat air fryer falafel?

Store cooked falafel in an airtight container in the fridge for 3-4 days or freeze up to 2 months. Reheat in the air fryer at 350°F for 4-5 minutes to restore crispness, or use the oven at 350°F for 7-10 minutes for multiple pieces.

What is the best way to know falafel is cooked in an air fryer?

Falafel is done when the exterior is golden brown and crispy, and they feel firm to the touch. The inside should be tender but not musty or raw - check one by cutting it in half to confirm it's cooked through.

Why does my falafel fall apart and how can I fix it?

Falafel falls apart when there's not enough flour to bind or the mixture was over-processed into paste. Add 1-2 tablespoons more flour, pulse just until coarse, and chill shaped falafel for 30 minutes before air frying so they firm up.

How can I scale this recipe for a larger group?

Double or triple the ingredient amounts and air fry in batches, spacing falafel 2cm apart each time. You can shape all the falafel ahead, refrigerate or freeze them, then cook as needed - frozen falafel take 18-20 minutes at 375°F.

Air Fryer Falafel Wrap Filling served on a plate

Air Fryer Falafel Wrap Filling

No ratings yet
This air fryer falafel recipe delivers crispy exteriors and tender interiors using dried chickpeas pulsed to a coarse texture. It skips traditional frying mess with a quick 15-minute air fry at 375°F, perfect for flavorful wrap fillings or meal prep.
Print Recipe Pin Recipe
Prep Time 20 minutes mins
Cook Time 15 minutes mins
Total Time 35 minutes mins
Servings: 5 servings
Course: Main Dish
Cuisine: Middle Eastern
Ingredients Equipment Method Notes

Ingredients
  

  • 1 cup dried chickpeas soaked 12-24 hours and drained
  • 0.5 cup onion rough chopped, yellow or white
  • 3 cloves garlic peeled
  • 0.5 cup fresh parsley leaves and tender stems
  • 2 tablespoon flour chickpea or all-purpose, add more if needed
  • 1 teaspoon baking powder
  • 1 teaspoon ground cumin measure heavily for signature flavor
  • 1 teaspoon ground coriander
  • 0.5 teaspoon salt
  • 0.25 teaspoon black pepper
  • oil spray lightly sprayed on falafel before air frying

Equipment

  • Air fryer Used to crisp falafel at 375°F
  • Food processor Pulses chickpeas and aromatics to coarse texture
  • Clean kitchen towel Used to dry soaked chickpeas before processing

Method
 

  1. Drain soaked chickpeas and spread on clean kitchen towel; pat completely dry for 10 minutes to remove surface moisture.
    1 cup dried chickpeas
  2. Pulse chickpeas, onion, garlic, parsley, cumin, coriander, salt, and pepper in food processor 10-15 times until mixture is coarse with visible small pieces, not smooth paste.
    1 cup dried chickpeas, 0.5 cup onion, 3 cloves garlic, 0.5 cup fresh parsley, 1 tsp ground cumin, 1 tsp ground coriander, 0.5 tsp salt, 0.25 tsp black pepper
  3. Add flour and baking powder, pulse 3-4 times to combine. Mixture should hold together when squeezed but remain slightly grainy; add 1 tablespoon more flour if too wet to shape.
    2 tbsp flour, 1 tsp baking powder
  4. Shape mixture into 12-16 balls or patties, place on a plate, and chill for 30 minutes to firm up.
  5. Lightly spray all sides of falafel with oil spray before air frying.
    oil spray
  6. Air fry falafel at 375°F for 12-15 minutes, flipping halfway through, spacing falafel about 2 cm apart to allow air circulation. Cook until golden brown and crispy outside but tender inside.

Notes

  • Always soak dried chickpeas 12-24 hours for best texture; canned chickpeas result in dense falafel.
  • Pulse mixture just until coarse, over-processing will cause falafel to fall apart.
  • Chilling shaped falafel for 30 minutes improves shape retention and color development during air frying.

Tried this recipe?

Let us know how it was!

Air Fryer Chicken Empanadas

March 25, 2026

When you need a hands-off appetizer that works for meal prep or a last-minute weeknight, air fryer empanadas deliver. One basket, minimal cleanup, and enough savory filling to make plain rice feel like a side note.

Air Fryer Chicken Empanadas served on a plate

The air fryer crisps the dough while the chicken stays tender inside. No deep frying, no oil splatter, no waiting for a pot to heat.

Perfect for busy weeks when you want something that feels like you tried without the usual mess.

QUICK SUMMARY

Air fryer chicken empanadas give you crispy golden crust and tender chicken filling in 32 minutes. Pre-cook the filling so moisture stays in check and the dough crisps evenly. Make a batch on Sunday and reheat throughout the week.

⏱️Time reality: 20 minutes prep, 12 minutes air frying, plus 5 minutes rest time
🔥Critical move: Sauté chicken and veggies 6-8 minutes until moisture reduces before filling
⚠️Watch out: Soggy crust means filling was too wet or basket was overcrowded-leave 1-inch gaps

Table of Contents

Toggle
  • Why This Recipe Works
  • What You'll Need
    • Ingredient Details
  • Ingredient Swaps
  • What to Serve With It
  • Store and Reheat
  • Frequently Asked Questions
  • Air Fryer Chicken Empanadas
    • Method 
    • Tried this recipe?

Why This Recipe Works

Pre-cooking the filling keeps the chicken at 165°F and removes excess moisture before assembly. For a version that comes together quickly, this juicy chicken uses a similar high-heat approach to lock in tenderness.

Quick Reference
⏱️
Prep Time
20 min
🔥
Cook Time
12 min
⏰
Total Time
32 min
🍽️
Servings
6-8 empanadas
📊
Difficulty
Medium
🏷️
Category
Appetizer
💡
Quick Tip
Don't overcrowd air fryer basket.
🎯
Best For
Weeknight | Meal prep | Entertaining

Five moves that matter:

  • Roll dough to ⅛ inch (3 mm) thick - Thicker dough stays raw inside, thinner dough tears when you fold it
  • Brush egg wash on edges before sealing - Creates a tight bond so filling doesn't leak during cooking
  • Cook at 375°F for 12 minutes, flip halfway - High heat crisps the outside while the filling heats through evenly
  • Leave 1-inch gaps between empanadas - Air circulation prevents soggy spots and ensures golden browning
  • Rest 5 minutes after air frying - Filling sets so it doesn't spill when you bite in
Best Pick
Chill assembled empanadas 20 minutes before air frying-cold dough holds its shape better and crisps faster.

What You'll Need

Ingredients for Air Fryer Chicken Empanadas

Shop for empanada dough in the frozen aisle near pie crusts, or use refrigerated pie dough if that's what you have. Rich mains need something to cut through, and dip does exactly that. For a version that comes together quickly, homemade homemade recipe keeps in the fridge for quick weeknight meals.

🍗
Protein
  • 1 lb chicken breast or thigh, diced
🍜
Dough
  • 1 package empanada dough or pie crust (10-12 rounds)
  • 1 egg (for wash)
🧄
Aromatics
  • 1 medium onion, diced
  • 3 cloves garlic, minced
  • 1 bell pepper, diced
🌶️
Spices
  • 1½ teaspoon cumin
  • 1 teaspoon paprika
  • Salt and pepper to taste

Ingredient Details

  • Chicken breast or thigh
    Thighs stay juicier with longer cook times, breasts work if you dice small and don't overcook
  • Empanada dough
    Look for Goya discos in the freezer aisle-thaw 30 minutes before rolling
  • Onion
    Yellow or white onions caramelize better than red, which turns bitter when sautéed
  • Egg wash
    Beat 1 egg with 1 tablespoon water-brush edges before sealing and tops before air frying
  • Cumin
    Ground cumin adds earthy warmth-toast whole seeds in a dry pan first for deeper flavor
  • Bell pepper
    Red or orange peppers add sweetness, green peppers taste more vegetal and bitter
  • Cheese (optional)
    Shredded cheddar or Monterey Jack melts well-add 1-2 tablespoon per empanada after filling cools

Ingredient Swaps

Most swaps work if you adjust cook time slightly or drain extra moisture before filling. A good chicken can make or break the plate. We keep a batch ready for nights like this - this easy potato recipe stores in the fridge for quick reheating.

Four swaps that work:

  • Chicken breast → ground turkey - Cook turkey filling 5-6 minutes until no pink remains, drain fat before cooling
  • Empanada dough → gluten-free dough mix - Add 2-3 minutes air frying time, dough may be less elastic when sealing
  • Egg wash → olive oil or nondairy milk - Less shine and browning, but crust still crisps at 375°F
  • Cumin → chili powder - Adds heat and smoky depth, use 1 teaspoon chili powder for every 1½ teaspoon cumin

Store-Bought Pie Crust

Works for: Quick assembly when empanada dough is sold out, similar flaky texture

Skip if: You want authentic flavor-pie crust tastes sweeter and less savory

Conventional Oven

Works for: Larger batches, bake at 400°F for 20-25 minutes until golden

Skip if: You want faster results-air fryer cuts cook time nearly in half

Instructions

Cook the filling first so it cools completely before you assemble-warm filling makes dough soggy. The fries works best when it hits the table at the same time as the main. We keep a batch ready for nights like this - this quick fries dish pairs with just about anything.

  1. Sauté filling 6-8 minutes: Heat 1 tablespoon oil in a skillet over medium-high. Add diced chicken, onion, garlic, bell pepper, cumin, paprika, salt, and pepper. Cook until chicken reaches 165°F and moisture reduces. Let cool 10 minutes.
  2. Roll dough to ⅛ inch thick: Place empanada rounds on a lightly floured surface. Roll each round once or twice if needed to thin slightly. Don't overwork the dough or it gets tough.
  3. Fill and seal each empanada: Spoon 2-3 tablespoon cooled filling onto one half of each round. Brush edges with beaten egg wash. Fold dough over filling, press edges firmly with a fork to seal.
  4. Brush tops with egg wash: Beat 1 egg with 1 tablespoon water. Brush tops and edges of empanadas for golden browning. Arrange in air fryer basket with 1-inch gaps.
  5. Air fry 12 minutes at 375°F, flip halfway: Cook 6 minutes, flip empanadas, cook 6 more minutes until golden and crisp. Rest 5 minutes before serving so filling sets.
Shortcut
Use rotisserie chicken to skip the sautéing step-just shred 2 cups cooked chicken, mix with sautéed onion, garlic, bell pepper, and spices.

What to Serve With It

Most people skip slaw, but it balances the meal. For broader weeknight chicken dinner ideas, pair empanadas with cooling sides that cut through the savory filling.

Side Dish Prep Why It Works How to Serve
Simple green salad Easy Fresh, crisp contrast to rich empanada filling Toss mixed greens with lime vinaigrette, serve chilled
Black beans and rice Easy Completes protein and carb balance for full meal Warm canned black beans, serve over white rice
Sliced avocado Easy Adds creamy richness without heavy sauces Slice ripe avocado, drizzle with lime juice and salt
Chopped tomato and onion salad Easy Bright acidity refreshes palate between bites Dice tomatoes and red onion, toss with cilantro and lime
Corn on the cob Medium Sweet and crunchy compliment to savory empanadas Boil or grill corn, brush with butter and chili powder

Three ways to serve it:

  • For casual entertaining: Arrange empanadas on a platter with small bowls of chimichurri, spicy salsa roja, and sour cream for dipping
  • For meal prep lunches: Pack 2 empanadas with a side of guacamole and cherry tomatoes in divided containers
  • For weeknight dinners: Serve empanadas alongside black beans and rice, top with pico de gallo and sliced avocado
Quick Tip
Freeze uncooked assembled empanadas on a tray for 1 hour, then transfer to a freezer bag-air fry straight from frozen, adding 3-4 minutes to cook time.

Store and Reheat

Empanadas keep 3-4 days in the fridge but lose crispness after the first day. Reheat in the air fryer or oven to restore texture-microwaving makes the crust soft and chewy. Most people skip potatoes, but it balances the meal. For a version that comes together quickly, quick easy side dish works for weeknights when you need something fast.

Method Time Best For
🔥 Oven 8-10 min at 350°F Re-crisping leftover empanadas, larger batches
💨 Air fryer 5-7 min at 350°F Quick crisp reheating, single servings
📦 Microwave 30-45 sec Quick warm-up when you don't care about crispy crust

For best results when storing:

  • Cool completely before refrigerating - Condensation forms if you seal warm empanadas, making crust soggy
  • Store in shallow airtight container - Stack with parchment paper between layers to prevent sticking
  • Freeze uncooked empanadas up to 3 months - Assemble, freeze on a tray 1 hour, then bag-air fry from frozen
  • Reheat from frozen adds 3-4 minutes - No need to thaw, just increase air fryer time to 15-16 minutes total
  • Skip the microwave for leftovers - Air fryer or oven restores crispness, microwave makes dough chewy and soft

Frequently Asked Questions

Can I use store-bought pie crust instead of empanada dough?

Yes, refrigerated pie crust works as a substitute. Roll it slightly thinner and expect a sweeter, flakier texture than traditional empanada dough.

How should I store leftover air fryer chicken empanadas and reheat?

Store in an airtight container in the fridge for 3-4 days. Reheat in the air fryer at 350°F for 5-7 minutes to restore crispness-avoid the microwave for soggy crust.

What is the best way to check if chicken empanadas are fully cooked?

Check that the crust is golden brown and crisp after 12 minutes at 375°F. Since the filling is pre-cooked, focus on dough doneness-no raw, pale spots.

Why do my empanadas sometimes come out soggy and how to avoid it?

Soggy empanadas mean the filling was too wet or the basket was overcrowded. Drain excess moisture from cooked filling and leave 1-inch gaps between empanadas for air circulation.

Can I double the recipe and cook all empanadas at once in the air fryer?

Only if your air fryer is large enough to leave 1-inch gaps between empanadas. Otherwise, cook in batches to ensure even crisping and browning.

Air Fryer Chicken Empanadas served on a plate

Air Fryer Chicken Empanadas

No ratings yet
Air fryer chicken empanadas offer a crispy golden crust with tender, flavorful chicken filling. Pre-cooking the filling reduces moisture, ensuring a perfectly crisp dough without sogginess. This hands-off appetizer is ideal for meal prep and quick weeknight meals.
Print Recipe Pin Recipe
Prep Time 20 minutes mins
Cook Time 12 minutes mins
Total Time 32 minutes mins
Servings: 6 empanadas
Course: Appetizer
Cuisine: Latin
Ingredients Equipment Method Notes

Ingredients
  

  • 1 lb chicken breast or thigh diced
  • 1 package empanada dough 10-12 rounds, thaw before use
  • 1 egg egg beaten with 1 tablespoon water for egg wash
  • 1 medium onion diced
  • 3 cloves garlic minced
  • 1 medium bell pepper diced
  • 1.5 teaspoon cumin
  • 1 teaspoon paprika

Equipment

  • Skillet Used to sauté chicken and vegetables for filling
  • Air fryer Used to cook empanadas for crispy crust
  • Rolling pin Used to thin empanada dough to ⅛ inch thickness
  • Fork Used to seal empanada edges
  • Brush Used to brush egg wash on empanadas

Method
 

  1. Heat 1 tablespoon oil in a skillet over medium-high heat. Add diced chicken, onion, garlic, bell pepper, cumin, paprika, salt, and pepper. Sauté for 6-8 minutes until chicken reaches 165°F and excess moisture evaporates. Remove from heat and let filling cool completely, about 10 minutes.
    1 lb chicken breast or thigh, 1 medium onion, 3 cloves garlic, 1 medium bell pepper, 1.5 tsp cumin, 1 tsp paprika
  2. Place empanada dough rounds on a lightly floured surface. Roll each round once or twice to thin to about ⅛ inch thick, being careful not to overwork the dough.
    1 package empanada dough
  3. Spoon 2-3 tablespoons of cooled filling onto one half of each dough round. Brush edges with beaten egg wash. Fold dough over filling and press edges firmly with a fork to seal.
    1 lb chicken breast or thigh, 1 egg egg
  4. Brush tops and edges of each empanada with egg wash. Arrange empanadas in the air fryer basket leaving 1-inch gaps between each for air circulation.
    1 egg egg, 1 package empanada dough
  5. Air fry empanadas at 375°F for 12 minutes, flipping halfway through after 6 minutes. Cook until crust is golden and crisp. Let empanadas rest for 5 minutes before serving to let filling set.

Notes

  • Pre-cook the filling completely and let it cool before assembling to avoid soggy crust.
  • Do not overcrowd the air fryer basket; leave 1-inch gaps for proper air circulation.
  • Brush egg wash on edges and tops to ensure a tight seal and golden browning.

Tried this recipe?

Let us know how it was!

Air Fryer Arancini Rice Balls

March 25, 2026

Crispy breadcrumb shells shatter into creamy risotto rice with molten mozzarella centers. Air frying at 375°F for 12 minutes crisps the exterior without deep-frying oil or mess.

Air Fryer Arancini Rice Balls served on a plate

The air fryer basket does the work. You shape chilled risotto into balls, coat them in breadcrumbs, and let hot circulating air turn them golden brown on all sides.

Make these for weeknight appetizers when you need something that looks like effort but only takes 20 minutes of hands-on time.

QUICK SUMMARY

Chilled risotto rice shapes into balls, stuffs with mozzarella, coats with egg and breadcrumbs, then air fries to crispy golden exteriors with gooey cheese centers. The air fryer eliminates deep-frying oil while creating the same crunchy crust in 12 minutes at 375°F.

⏱️Time Reality: Refrigerate risotto 1 hour before shaping or balls fall apart
🔑Method Shortcut: Spray balls with oil every 4 minutes and flip at 6 minutes for even browning
⚠️Watch Out: Overcrowding the basket blocks air circulation-cook in batches with 1-inch gaps

Why This Recipe Works

Air frying circulates hot air around each rice ball to crisp breadcrumbs without submerging in oil. High heat at 375°F sets the coating fast while the cheese inside melts without leaking.

Quick Reference
⏱️
Prep Time
20 min
🔥
Cook Time
12 min
⏰
Total Time
32 min
🍽️
Servings
6 servings (12 balls)
📊
Difficulty
Medium
🏷️
Category
Appetizer
💡
Quick Tip
Chill risotto before shaping for best results
🎯
Best For
Weeknight | Meal prep | Entertaining

Five things that make this work:

  • Chilled risotto firms up so rice balls hold their shape during breading and air frying without falling apart
  • Fine breadcrumbs create crunch by forming a tight coating that crisps evenly under circulating hot air
  • Mozzarella centers stay contained because egg wash seals the outer layer before the cheese melts inside
  • Single-layer spacing allows air to hit all surfaces at once for uniform golden browning in 12 minutes
  • 375°F temperature is hot enough to crisp breadcrumbs but gentle enough to cook risotto through without burning
Quick Tip
Spray each rice ball lightly with oil before air frying and again at 6 minutes for crispier crust

What You'll Need

Ingredients for Air Fryer Arancini Rice Balls

Leftover risotto works better than fresh because cooling time is built in. For a batch that comes together quickly, try more potatoes ideas that use similar air fryer technique.

🍚
Rice Base
  • 2 cups cooked risotto rice (chilled)
  • 1 egg (beaten)
  • ¼ cup Parmesan cheese (grated)
🧀
Filling
  • 4 oz mozzarella cheese (cubed)
  • Optional: meat ragu or peas
🍞
Coating
  • 1 cup breadcrumbs (fine)
  • Olive oil spray
  • Salt and black pepper
🌿
Optional
  • Fresh parsley or basil (chopped)

Ingredient Details

  • Cooked risotto rice
    Must be chilled at least 1 hour-warm rice is too sticky to shape and balls will collapse during cooking
  • Mozzarella cheese
    Cut into ½-inch cubes so each rice ball gets one piece that melts but doesn't leak out
  • Breadcrumbs
    Fine ground breadcrumbs crisp better than coarse-panko works but won't get as crunchy
  • Egg
    Beat completely so the wash coats evenly and helps breadcrumbs stick without bare patches
  • Parmesan cheese
    Mix directly into risotto for salty umami flavor that makes plain rice taste seasoned
  • Olive oil spray
    Spray basket and balls lightly before cooking and again halfway through for golden crispy crust
  • Fresh herbs
    Add chopped parsley or basil to risotto before shaping for herby flavor without buying separate ingredients

Ingredient Swaps

Regular short-grain rice works when you don't have leftover risotto but the texture won't be as creamy. For other air fryer sides that stretch ingredients, check out this easy corn side using similar breading technique.

Four swaps that work:

  • Gluten-free breadcrumbs or crushed rice cereal replace regular breadcrumbs with the same crunch-coat evenly for crispy exterior
  • Vegan dairy-free cheese swaps mozzarella for plant-based melting-flavor changes slightly but balls stay intact
  • Aquafaba or flax egg replaces egg wash for vegan binding-mix 1 tablespoon flax meal with 3 tablespoons water, let sit 5 minutes
  • Cheddar or provolone cheese works instead of mozzarella-stronger flavor, melts differently but still gooey inside

Regular cooked short-grain rice

Works for: Budget cooking when no leftover risotto available

Skip if: You want creamy interior-regular rice is drier and less cohesive

Baking instead of air frying

Works for: Large batches-bake at 400°F for 20 minutes, flip halfway

Skip if: You want maximum crispiness-oven takes longer and crust is less crunchy

Instructions

Shape all balls before you start breading so the process moves fast once your hands get sticky. Rich mains need something to cut through, and corn does exactly that-for a version that comes together quickly, try this classic beef dish as a pairing option.

  1. Mix risotto with Parmesan and egg. Stir chilled risotto, grated Parmesan, and half the beaten egg in a bowl until combined. Season with salt and black pepper.

  2. Shape rice balls with cheese centers. Dampen hands slightly with water. Scoop 2 tablespoons risotto, flatten in palm, place one mozzarella cube in center, wrap rice around cheese, and roll into a tight 2-inch ball. Repeat with remaining risotto.

  3. Coat balls in egg wash and breadcrumbs. Dip each ball in remaining beaten egg, turning to coat completely. Roll in breadcrumbs, pressing gently so crumbs stick evenly on all sides. Place on a plate.

  4. Air fry at 375°F for 12 minutes. Spray air fryer basket with oil. Arrange rice balls in single layer with 1-inch gaps between each. Spray tops lightly with oil. Air fry 6 minutes, flip balls, spray again with oil, and cook 6 more minutes until golden brown.

  5. Check doneness and rest 2 minutes. Look for uniformly golden color on all sides. Internal temperature should reach around 160°F if using a thermometer. Let balls rest 2 minutes so cheese sets slightly before serving.

Golden Rule
Never skip the oil spray-dry breadcrumbs won't crisp properly even with circulating air

What to Serve With It

These rice balls fill the appetizer gap but need something on the side for a complete meal. Pasta adds the contrast this plate needs, but timing matters-try this easy pasta recipe if you need a main dish that finishes at the same time as the arancini.

Side Dish Prep Why It Works How to Serve
Simple green salad Easy Fresh lettuce and vinaigrette cut through fried richness Toss greens with lemon juice and olive oil
Marinara sauce Easy Tangy tomato acidity balances creamy cheese filling Warm jarred sauce or make quick fresh version
Roasted vegetables Medium Caramelized edges add color and healthy contrast Roast zucchini, peppers, or broccoli at 425°F
Garlic bread Easy Complements Italian flavors for filling appetizer spread Toast sliced baguette with butter and garlic
Antipasto platter Involved Variety of olives, meats, cheeses for entertaining Arrange store-bought items on serving board

Three ways to serve it:

  • With marinara for dipping - warm jarred or homemade sauce in a small bowl alongside rice balls
  • On an antipasto platter - add olives, cured meats, marinated vegetables, and breadsticks for party spread
  • With spicy arrabbiata sauce - add red pepper flakes to marinara for adults who want heat
Best Pick
Marinara sauce is the classic pairing-acidity cuts through fried coating and adds moisture to each bite

Store and Reheat

Arancini hold up well in the fridge for quick reheating but lose some crispness. Most people skip chicken, but it balances the meal-for a version that comes together quickly, check out a juicy chicken side that reheats just as easily.

Method Time Best For
🔥 Air fryer 5-7 min at 350°F Restoring crispy texture-flip halfway through
🔥 Oven 10-12 min at 375°F Large batches-spread on baking sheet
📦 Microwave 1-2 min Quick reheating when you don't care about crust

For best results when storing:

  • Refrigerate in airtight container - layer rice balls between parchment paper to prevent sticking, keep 3-4 days
  • Freeze up to 1 month - place uncooked breaded balls on baking sheet, freeze until solid, transfer to freezer bag
  • Reheat frozen balls directly - add 3-4 minutes to air fryer time, no need to thaw first
  • Don't microwave for crispy results - steam from microwave softens breadcrumb coating into soggy texture
  • Serve reheated balls with fresh sauce - marinara or garlic aioli adds moisture to rice that dried out slightly

Frequently Asked Questions

Can I use leftover regular cooked rice instead of risotto rice?

Yes, but the interior won't be as creamy. Regular short-grain rice works if you mix in extra egg and Parmesan to help binding, but expect drier texture since risotto's starch creates the signature creaminess.

How long do air fryer Arancini last refrigerated and how to reheat?

Refrigerate cooked arancini in an airtight container for 3-4 days. Reheat in the air fryer at 350°F for 5-7 minutes to restore crispiness, or use the oven at 375°F for 10-12 minutes if reheating a large batch.

How do I know when the Arancini are cooked through in the air fryer?

Look for uniformly golden brown color on all sides after 12 minutes at 375°F. Internal temperature should reach around 160°F if you use a thermometer, and the cheese inside should be fully melted when you cut one open.

Why do my Arancini fall apart and how can I fix it?

Falling apart happens when risotto is too warm or too wet. Refrigerate risotto at least 1 hour before shaping, press firmly when rolling balls, and make sure egg wash coats completely so breadcrumbs adhere.

Can I scale this recipe up for a large party and freeze ahead?

Yes-double or triple the recipe, shape and bread all balls, then freeze uncooked on a baking sheet until solid. Transfer to freezer bags and store up to 1 month, then air fry directly from frozen adding 3-4 minutes to cook time.

Air Fryer Arancini Rice Balls served on a plate

Air Fryer Arancini Rice Balls

No ratings yet
Air Fryer Arancini Rice Balls feature crispy breadcrumb shells with creamy risotto interiors and molten mozzarella centers. Air frying crisps the exterior perfectly without the mess of deep-frying, making these a quick and impressive appetizer.
Print Recipe Pin Recipe
Prep Time 20 minutes mins
Cook Time 12 minutes mins
Total Time 32 minutes mins
Servings: 6 servings
Course: Appetizer
Cuisine: Italian
Ingredients Equipment Method Notes

Ingredients
  

  • 2 cups cooked risotto rice chilled at least 1 hour
  • 1 large egg beaten, divided for mixing and coating
  • 0.25 cup Parmesan cheese grated, mixed into risotto
  • 4 oz mozzarella cheese cubed into ½-inch pieces for filling
  • 1 cup breadcrumbs fine ground for crispy coating
  • olive oil spray for coating basket and rice balls during air frying
  • salt to season risotto mixture
  • black pepper to season risotto mixture
  • fresh parsley or basil optional, chopped, added to risotto for herb flavor

Equipment

  • Air fryer Used to crisp rice balls at 375°F for 12 minutes
  • Mixing bowl To mix risotto with parmesan and egg

Method
 

  1. In a mixing bowl, combine chilled risotto rice with grated Parmesan and half of the beaten egg. Season the mixture with salt and black pepper, and stir until evenly mixed.
    2 cups cooked risotto rice, 1 large egg, 0.25 cup Parmesan cheese, salt, black pepper
  2. Dampen your hands slightly with water. Scoop about 2 tablespoons of the risotto mixture, flatten it in your palm, place one mozzarella cube in the center, then wrap the rice around the cheese and form a tight 2-inch ball. Repeat with remaining mixture.
    2 cups cooked risotto rice, 4 oz mozzarella cheese
  3. Dip each rice ball into the remaining beaten egg to coat completely. Then roll each ball in the fine breadcrumbs, pressing gently to ensure an even coating. Place the coated balls on a plate.
    1 large egg, 1 cup breadcrumbs
  4. Spray the air fryer basket lightly with olive oil spray. Arrange rice balls in a single layer with at least 1-inch gaps between them. Spray the tops of the balls lightly with olive oil spray.
    olive oil spray
  5. Air fry the rice balls at 375°F for 12 minutes total, spraying them with olive oil spray every 4 minutes. Flip the balls at 6 minutes for even browning on all sides.
  6. Remove the rice balls when they are uniformly golden brown. Use a thermometer to check for an internal temperature of about 160°F. Let the balls rest for 2 minutes before serving to allow the cheese centers to set slightly.

Notes

  • Chill risotto at least 1 hour before shaping to prevent falling apart.
  • Use fine breadcrumbs for a crispier, tighter crust.
  • Spray rice balls and basket with oil before and during cooking for best crunch.

Tried this recipe?

Let us know how it was!

Air Fryer Lamb Kofta

March 25, 2026

You need 27 minutes and one air fryer. No marinating, no skewers, no fussy shaping that falls apart.

Air Fryer Lamb Kofta served on a plate

Ground lamb mixed with warm spices crisps up in 12 minutes while you chop a salad. The cumin and parsley do the flavor work without a long ingredient list.

This works for weeknight dinners when you want something that feels intentional without the effort. The air fryer crisps the outside while keeping the inside juicy, so you skip the dry, crumbly kofta that happens with other methods.

QUICK SUMMARY

Air Fryer Lamb Kofta delivers golden-crisp exteriors and juicy interiors in 12 minutes using ground lamb, cumin, and fresh parsley. The air fryer handles the cooking without flipping or monitoring. Space kofta 1 inch apart for even crisping and cook to 160°F internal temperature.

⏱️Time Reality: 15 minutes prep, 12 minutes cooking, no marinating required
🔥First Critical Step: Squeeze excess moisture from grated onion to prevent sticky mixture
⚠️Watch Out: Overcrowding traps steam and makes soggy kofta - leave 1-inch gaps between pieces

Table of Contents

Toggle
  • Why This Recipe Works
  • What You'll Need
    • Ingredient Details
  • Ingredient Swaps
  • What to Serve With It
  • Store and Reheat
  • Frequently Asked Questions
  • Air Fryer Lamb Kofta
    • Method 
    • Tried this recipe?

Why This Recipe Works

High heat crisps the lamb without drying it out because the fat content keeps the interior moist. Rich mains need something to cut through, and this easy pork recipe does exactly that. For a version that comes together quickly, preheat the air fryer to 400°F before adding the kofta.

Quick Reference
⏱️
Prep Time
15 min
🔥
Cook Time
12 min
⏰
Total Time
27 min
🍽️
Servings
4 servings
📊
Difficulty
Easy
🏷️
Category
Main Dish
💡
Quick Tip
Do not overcrowd air fryer basket
🎯
Best For
Weeknight | Meal prep | Entertaining

Why it works:

  • Ground lamb's natural fat content (80/20 ratio) keeps kofta juicy at high heat without basting
  • Fresh parsley balances the richness and adds brightness that dried herbs can't match
  • Grated onion adds moisture and sweetness when excess liquid is squeezed out first
  • Circulating air at 400°F crisps the exterior while the inside reaches 160°F safely
  • Even 2-inch logs cook at the same rate and brown uniformly without flipping
Quick Tip
Leave 1-inch gaps between kofta in the air fryer basket for crisp edges instead of steamed texture.

What You'll Need

Ingredients for Air Fryer Lamb Kofta

Shopping is straightforward - ground lamb, onion, garlic, fresh parsley, and four spices you probably have. Most people skip another great bourekas recipe, but it balances the meal. For a version that comes together quickly, grab pre-minced garlic and skip the food processor.

🍖
Protein
  • 1 lb ground lamb (80/20)
🧄
Aromatics
  • ½ medium onion, grated
  • 3 garlic cloves, minced
  • ¼ cup fresh parsley, chopped
🌶️
Spices
  • 1 teaspoon ground cumin
  • ½ teaspoon ground coriander
  • ¼ teaspoon ground cinnamon
  • 1 teaspoon salt
  • ½ teaspoon black pepper
🫙
Other
  • 1 tablespoon olive oil

Ingredient Details

  • Ground lamb
    Use 80/20 meat-to-fat ratio for juicy kofta - leaner grinds dry out at high heat
  • Fresh parsley
    Dried parsley loses the bright, fresh flavor that cuts through rich lamb
  • Grated onion
    Squeeze out excess liquid before mixing to prevent sticky, loose kofta mixture
  • Ground cumin
    Provides the warm, earthy base that defines kofta flavor - don't skip it
  • Olive oil
    Brushing kofta with oil before air frying enhances browning and crisping
  • Garlic
    Fresh garlic delivers pungent aroma that garlic powder can't replicate
  • Ground cinnamon
    A small pinch adds warmth without making kofta taste sweet - measure carefully

Ingredient Swaps

You can swap ground lamb for beef or turkey if lamb isn't available or preferred. Most people skip something simple like meatballs, but it balances the meal. For a version that comes together quickly, use ground beef for a milder flavor.

Four practical swaps:

  • Ground beef instead of lamb - lighter, less gamey flavor but similar texture (use 80/20 blend)
  • Ground turkey instead of lamb - leaner option that dries out faster (brush with extra oil before cooking)
  • Dried parsley (1 tbsp) instead of fresh - less bright flavor but acceptable in a pinch
  • Avocado oil instead of olive oil - similar crisping with milder flavor

Ground Beef

Works for: Milder flavor, budget-friendly, widely available

Skip if: You want traditional lamb richness and distinct taste

Ground Turkey

Works for: Lower-fat option, lighter meal

Skip if: You want juicy kofta without extra oil or monitoring

Dried Parsley

Works for: Pantry staple when fresh isn't available

Skip if: Fresh herbs are accessible - flavor difference is noticeable

Instructions

The entire process takes 27 minutes from start to finish with no waiting or marinating. Most people skip this easy noodles recipe, but it balances the meal. For a version that comes together quickly, preheat the air fryer while you mix the kofta.

  1. Mix the kofta. Grate the onion and squeeze out excess liquid using your hands or a paper towel. Combine ground lamb, squeezed onion, minced garlic, chopped parsley, cumin, coriander, cinnamon, salt, and pepper in a mixing bowl. Mix gently until just combined - overmixing toughens the texture.

  2. Shape the kofta. Divide the mixture into 8 equal portions (about 2 oz each). Roll each portion into a 2-inch log shape using your hands. Keep the thickness consistent so all pieces cook at the same rate.

  3. Prepare the air fryer. Preheat the air fryer to 400°F for 3 minutes. Brush the kofta lightly with olive oil on all sides to enhance browning and prevent sticking.

  4. Air fry the kofta. Place kofta in the air fryer basket in a single layer with 1-inch gaps between pieces. Cook for 10-12 minutes, flipping halfway through, until the exterior is golden and crisp. Check internal temperature with a meat thermometer - it should read 160°F.

  5. Rest and serve. Remove kofta from the air fryer and let rest for 5 minutes before serving. The resting redistributes juices and prevents them from running out when you cut into the kofta.

Golden Rule
Never overcrowd the air fryer basket - trapped steam prevents crisping and creates soggy kofta.

What to Serve With It

Kofta needs something to balance the richness and soak up the spiced meat juices. Rich mains need something to cut through, and easy chicken fried rice dinner nights does exactly that. For a version that comes together quickly, pair with pita bread and a quick cucumber salad.

Side Dish Prep Why It Works How to Serve
Cucumber yogurt salad Easy Cool, creamy contrast to warm spiced kofta Chop cucumbers, mix with yogurt, lemon, salt
Pita bread Easy Soft texture complements kofta, aids serving Warm pitas, cut into wedges, serve alongside
Roasted vegetables Medium Adds fiber and earthy balance to rich meat Toss veggies with olive oil, roast at 425°F
Herbed couscous Easy Light grain side pairs well with warm spices Cook couscous, fluff with parsley and lemon
Tabbouleh salad Medium Refreshing parsley-bulgur salad contrasts kofta Mix bulgur, tomatoes, parsley, lemon juice

Three ways to serve it:

  • Wrap kofta in warm pita with tzatziki, sliced tomatoes, and shredded lettuce for handheld meals
  • Plate kofta over herbed couscous with a side of cucumber yogurt salad for sit-down dinners
  • Serve kofta as an appetizer with hummus, baba ganoush, and grilled flatbreads for entertaining
Shortcut
Buy pre-made tzatziki and pre-chopped vegetables to cut prep time in half for weeknight meals.

Store and Reheat

Kofta stores well and reheats without drying out if you add moisture back. Most people skip rich homemade beef recipe, but it balances the meal. For a version that comes together quickly, reheat in the oven with a splash of water in the pan. Store cooled kofta in an airtight container in the fridge for up to 4 days or freeze for up to 3 months.

Method Time Best For
🍳 Stovetop 4-5 min on medium heat Quick reheating that preserves texture
📦 Microwave 1-2 min on medium power Fast reheating but may soften exterior
🔥 Oven 8-10 min at 350°F Even reheating for multiple servings

For best results when storing:

  • Let kofta cool completely before transferring to an airtight container to prevent condensation
  • Place parchment paper between layers when stacking to prevent sticking
  • Freeze kofta on a baking sheet first, then transfer to a freezer bag for easy portioning
  • Thaw frozen kofta in the fridge overnight before reheating for even warming
  • Add a tablespoon of water or broth when reheating in the oven to restore moisture

Frequently Asked Questions

Can I make air fryer lamb kofta ahead and reheat later?

Yes, shape the kofta and refrigerate for up to 24 hours before cooking. You can also cook them fully and reheat using stovetop or oven methods for best texture.

How long to cook air fryer lamb kofta at 375°F?

At 375°F, cook for 14-16 minutes, flipping halfway through. Check internal temperature with a meat thermometer - it should reach 160°F for safe doneness.

What is the best way to tell when lamb kofta is fully cooked?

Use an instant-read meat thermometer inserted into the center of the thickest kofta. It should read 160°F for fully cooked lamb that's safe to eat.

How to prevent lamb kofta from drying out in air fryer?

Use 80/20 ground lamb instead of lean cuts, brush kofta with oil before cooking, and avoid overcooking past 160°F internal temperature. Let kofta rest 5 minutes before serving to redistribute juices.

Can I use ground beef or chicken instead of lamb for kofta?

Yes, ground beef (80/20) works with similar results and milder flavor. Ground chicken or turkey is leaner and may dry out - brush with extra oil and check temperature carefully at 165°F.

Air Fryer Lamb Kofta served on a plate

Air Fryer Lamb Kofta

No ratings yet
Air Fryer Lamb Kofta delivers golden-crisp exteriors and juicy interiors in just 12 minutes with ground lamb, warm spices, and fresh parsley. This easy recipe requires no marinating and minimal shaping, making it perfect for weeknight dinners. The air fryer crisps evenly without flipping, ensuring moist and flavorful kofta every time.
Print Recipe Pin Recipe
Prep Time 15 minutes mins
Cook Time 12 minutes mins
Total Time 27 minutes mins
Servings: 4 servings
Course: Main Dish
Cuisine: Middle Eastern
Ingredients Equipment Method Notes

Ingredients
  

  • 1 lb ground lamb Use 80/20 ratio for juiciness
  • 0.5 medium onion grated and excess liquid squeezed out
  • 3 cloves garlic minced
  • 0.25 cup fresh parsley chopped
  • 1 teaspoon ground cumin
  • 0.5 teaspoon ground coriander
  • 0.25 teaspoon ground cinnamon small pinch for warmth without sweetness
  • 1 teaspoon salt
  • 0.5 teaspoon black pepper
  • 1 tablespoon olive oil for brushing kofta before air frying

Equipment

  • Air fryer Used to cook the kofta evenly and crisp on all sides without flipping.
  • Mixing bowl Used to combine kofta ingredients.
  • Meat thermometer To check internal temperature reaching 160°F for doneness.

Method
 

  1. Grate the onion and squeeze out any excess liquid using your hands or a paper towel. In a mixing bowl, combine ground lamb, grated onion, minced garlic, chopped parsley, ground cumin, coriander, cinnamon, salt, and black pepper. Mix gently just until combined to avoid toughening the texture.
    1 lb ground lamb, 0.5 medium onion, 3 cloves garlic, 0.25 cup fresh parsley, 1 tsp ground cumin, 0.5 tsp ground coriander, 0.25 tsp ground cinnamon, 1 tsp salt, 0.5 tsp black pepper
  2. Divide the meat mixture into 8 equal portions, about 2 ounces each. Roll each portion between your palms to form 2-inch logs of consistent thickness to ensure even cooking.
  3. Preheat the air fryer to 400°F for 3 minutes to ensure immediate high-heat cooking.
  4. Lightly brush all sides of each kofta log with olive oil to enhance browning and prevent sticking.
    1 tbsp olive oil
  5. Place the kofta in a single layer in the air fryer basket, leaving 1-inch gaps between pieces to prevent steaming. Cook for 10-12 minutes, flipping halfway through, until golden and crispy on the outside. Use a meat thermometer to check that internal temperature reaches 160°F.
  6. Remove the kofta from the air fryer and let them rest for 5 minutes to redistribute juices before serving.

Notes

  • Do not overcrowd the air fryer basket; leave 1-inch gaps to ensure crispy edges and avoid soggy kofta.
  • Squeeze excess moisture from grated onion to prevent a sticky, loose mixture.
  • Use ground lamb with 80/20 meat-to-fat ratio for juicy kofta that stays moist at high heat.

Tried this recipe?

Let us know how it was!

Air Fryer Vegetable Pakoras

March 25, 2026

When you need a crispy snack that feels intentional but doesn't require deep-frying or a pile of dishes, air fryer pakoras deliver. The air fryer crisps the gram flour batter while the vegetables stay tender inside.

Air Fryer Vegetable Pakoras served on a plate

One basket, 12 minutes, and a light spray of oil does all the work. The pakoras turn golden without flipping constantly or monitoring oil temperature.

This works for weeknight snacking when you want something warm and satisfying, or for entertaining when you need a vegetarian appetizer that actually tastes good.

QUICK SUMMARY

Air fryer vegetable pakoras crisp up in 12 minutes without deep-frying. Gram flour binds the vegetables while rice flour adds crunch. The air fryer circulates heat so you get golden edges and a non-greasy finish.

⏱️Time Reality: 15 minutes prep, 12 minutes cook, no marinating or precooking needed
🔑Key Move: Preheat air fryer to 360°F and spray oil before and halfway through
⚠️Watch Out: Thin batter makes soggy pakoras-keep it thick enough to coat a spoon

Why This Recipe Works

High heat crisps the batter while the vegetables steam inside. For a version that comes together quickly, a warm soup side dish works when you need something savory to balance the spiced pakoras.

Quick Reference
⏱️
Prep Time
15 min
🔥
Cook Time
12 min
⏰
Total Time
27 min
🍽️
Servings
4 servings
📊
Difficulty
Medium
🏷️
Category
Appetizer
💡
Quick Tip
Air fry at 360°F, flip halfway for crispness
🎯
Best For
Weeknight | Entertaining

Five things that make this work:

  • Gram flour binds without eggs - the protein structure holds vegetables together while forming a crisp crust
  • Rice flour adds snap - starch granules create texture that stays crispy instead of turning leathery
  • 360°F crisps without burning - hot enough to set the batter but not so high that spices turn bitter
  • Flipping halfway browns evenly - air circulation works best when both sides get direct exposure
  • Uniform sizing cooks consistently - 1.5-inch pakoras finish at the same rate without raw centers or burnt edges
Shortcut
Let the batter rest 10 minutes before scooping-gram flour absorbs water and thickens naturally so you don't have to adjust later

What You'll Need

Ingredients for Air Fryer Vegetable Pakoras

Shop for gram flour in the bulk section or Indian grocery stores where it costs less than packaged versions. We keep a batch ready for nights like this - this quick meatballs dish uses similar air fryer timing if you're looking for something savory to serve alongside.

🫙
Batter Base
  • Gram flour (besan) - 1 cup
  • Rice flour - 2 tablespoons
  • Water - ½ cup, cool
🥬
Vegetables
  • Onion - 1 medium, thinly sliced
  • Potato - 1 medium, julienned
  • Spinach or mixed greens - 1 cup, chopped
🌶️
Spices & Heat
  • Cumin seeds - 1 teaspoon
  • Turmeric powder - ½ teaspoon
  • Garam masala - 1 teaspoon
  • Green chili - 1, minced
  • Salt - 1 teaspoon
🫙
Finishing
  • Oil spray - for basket and pakoras

Ingredient Details

  • Gram flour (besan)
    Use fine-ground gram flour, not coarse-grainy texture won't bind vegetables and creates crumbly pakoras
  • Rice flour or corn starch
    This is what makes pakoras crisp instead of soft-skip it and the crust turns chewy
  • Onion
    Slice thinly so they cook through in 12 minutes without leaving raw crunch in the center
  • Potato
    Julienne into matchsticks, not chunks-thicker pieces stay raw while the batter burns
  • Cumin seeds
    Toast them lightly in a dry pan before mixing into batter for deeper flavor
  • Cool water
    Warm water starts cooking the flour too early and creates a gummy batter
  • Oil spray
    Spray the basket before loading and the pakoras at 6 minutes-skipping either step leaves soft spots

Ingredient Swaps

Most swaps work if you adjust the batter thickness to match the vegetable's moisture. For a version that comes together quickly, a similar airfryer-side recipe crisps in the same timeframe if you want something with different spices.

Four swaps that work:

  • Gram flour → chickpea flour: Use 1:1 ratio-same texture and flavor since they're identical, just different names
  • Rice flour → corn starch: Use 1:1 ratio-similar crispness with slightly smoother texture
  • Spinach → cauliflower florets or bell peppers: Chop small and adjust batter by 1-2 tablespoons water since cauliflower holds less moisture
  • Green chili → red chili flakes: Use ½ teaspoon flakes-distributes heat differently but works when fresh chilies aren't available

Sweet Potato Instead of Regular Potato

Works for: Adding sweetness and softer texture to pakoras

Skip if: You want traditional savory flavor without sweetness interfering

Oven Baking Instead of Air Frying

Works for: Larger batches when feeding more than 4 people

Skip if: You want maximum crispness-oven takes 18-20 minutes and needs oil brushing

Instructions

Pakoras finish in 12 minutes once the air fryer preheats. A good side dish can make or break the plate - this quick chicken dish crisps in similar timing if you're making a full appetizer spread.

  1. Preheat air fryer to 360°F for 3-5 minutes. Spray the basket lightly with oil. Mix gram flour, rice flour, cumin seeds, turmeric, garam masala, and salt in a large bowl.

  2. Add water gradually and whisk 3-5 minutes until smooth. Batter should coat the back of a spoon thickly without dripping off instantly. Let rest 10 minutes while you chop vegetables.

  3. Toss onion, potato, spinach, and green chili into the batter. Mix until vegetables are evenly coated. Scoop 1.5-inch portions and drop into the air fryer basket, leaving 1-inch gaps between each.

  4. Air fry 6 minutes, then spray pakoras lightly with oil. Flip each pakora gently and spray again. Cook another 6 minutes until golden brown and firm to touch.

  5. Check doneness by pressing lightly-pakoras should feel firm, not squishy. No raw batter taste should remain. Serve immediately while crisp.

Golden Rule
Don't overcrowd the basket-pakoras need air circulation to crisp up, and touching pieces steam instead of fry

What to Serve With It

Most people skip planning sides, but pakoras need something tangy or cooling to balance the spices. If you're stuck on what works, complete grilled cauliflower steaks meal ideas include similar vegetable-forward options that pair with Indian-spiced dishes.

Side Dish Prep Why It Works How to Serve
Mint Chutney Easy Fresh herb contrast cuts through fried richness Blend mint, cilantro, lime juice, green chili; serve cold in small bowls
Tamarind Chutney Easy Tangy-sweet balance offsets savory spices Simmer tamarind paste with jaggery and cumin; cool before serving
Plain Yogurt Easy Cools palate and adds creamy texture Whisk yogurt with pinch of salt; serve in individual bowls
Cucumber Salad Easy Crisp crunch and freshness contrast fried texture Dice cucumber, toss with lemon juice, salt, chaat masala
Masala Chai Medium Traditional beverage pairing for Indian snacks Steep black tea with ginger, cardamom, cloves; add milk and sugar

Three ways to serve it:

  • As a starter before curry: Serve pakoras with mint chutney and tamarind sauce while the main simmers
  • With afternoon chai: Pair warm pakoras with masala chai for traditional Indian tea-time snack
  • On a mezze platter: Arrange with hummus, pickled vegetables, and flatbread for vegetarian appetizer spread
Best Pick
Mint chutney works better than store-bought-blend fresh mint, cilantro, lime juice, and green chili in 2 minutes for bright flavor that cuts through the fried batter

Store and Reheat

Pakoras lose crispness after 30 minutes at room temperature, but they reheat well if you use the right method. Rich mains need something to cut through, and chicken adds the contrast this plate needs - simple chicken recipe reheats in similar timing if you're prepping multiple dishes.

Method Time Best For
🔥 Air Fryer 3-5 min at 350°F Restoring crisp texture without added oil
🔥 Oven 8-10 min at 375°F Larger batches when reheating for multiple people
📦 Microwave 30-45 sec Quick warmth when crispness doesn't matter

For best results when storing:

  • Cool pakoras completely on a wire rack before storing-trapping steam makes them soggy
  • Store in shallow airtight container with paper towel layer between pakoras to absorb moisture
  • Refrigerate up to 3-4 days or freeze up to 2 months in freezer-safe container
  • Reheat from frozen by adding 2-3 minutes to air fryer time
  • Skip microwave for leftovers if you care about texture-it turns the crust leathery

Frequently Asked Questions

Can I make air fryer vegetable pakoras ahead and reheat?

Yes-cook pakoras fully, cool completely, then store in the fridge for 3-4 days. Reheat in the air fryer at 350°F for 3-5 minutes to restore crispness.

What temperature and time should I air fry vegetable pakoras?

Air fry at 360°F for 12 minutes total, flipping halfway at 6 minutes. Spray oil before cooking and again at the flip for even browning.

How do I tell when pakoras are cooked through and crispy?

Press lightly-pakoras should feel firm, not squishy. Look for golden brown color and no raw batter taste when you bite in.

Why are my air fryer pakoras soggy and how to fix?

Soggy pakoras come from thin batter or overcrowding the basket. Thicken batter to coat-the-spoon consistency and leave 1-inch gaps between pakoras for air circulation.

What vegetables work best for pakoras besides onion and potato?

Cauliflower florets, bell peppers, and zucchini work well-chop them small and adjust batter thickness based on the vegetable's moisture content.

Air Fryer Vegetable Pakoras served on a plate

Air Fryer Vegetable Pakoras

No ratings yet
Air fryer vegetable pakoras offer a crispy, non-greasy snack made with gram flour batter and mixed vegetables. The air fryer crisps the coated vegetables evenly in 12 minutes, producing golden, tender pakoras without deep frying.
Print Recipe Pin Recipe
Prep Time 15 minutes mins
Cook Time 12 minutes mins
Total Time 27 minutes mins
Servings: 4 servings
Course: Appetizer
Cuisine: Indian
Ingredients Equipment Method Notes

Ingredients
  

  • 1 cup gram flour fine ground besan
  • 2 tablespoons rice flour for added crispness
  • 0.5 cup water cool, to mix batter
  • 1 medium onion thinly sliced
  • 1 medium potato julienned into matchsticks
  • 1 cup spinach chopped, or mixed greens
  • 1 green chili minced
  • 1 teaspoon cumin seeds lightly toasted
  • 0.5 teaspoon turmeric powder
  • 1 teaspoon garam masala
  • 1 teaspoon salt
  • oil spray for basket and pakoras

Equipment

  • Air fryer Used to cook pakoras at 360°F with oil spray and flipping halfway
  • Large mixing bowl To mix batter and vegetables
  • Whisk To mix batter smoothly

Method
 

  1. Preheat air fryer to 360°F for 3-5 minutes and spray the basket lightly with oil. In a large bowl, mix gram flour, rice flour, cumin seeds, turmeric, garam masala, and salt.
    1 cup gram flour, 2 tablespoons rice flour, 1 teaspoon cumin seeds, 0.5 teaspoon turmeric powder, 1 teaspoon garam masala, 1 teaspoon salt
  2. Add water gradually to the bowl and whisk for 3-5 minutes until the batter is smooth and thick enough to coat the back of a spoon without dripping. Let the batter rest for 10 minutes.
    0.5 cup water, 1 cup gram flour, 2 tablespoons rice flour
  3. Toss the thinly sliced onion, julienned potato, chopped spinach, and minced green chili into the rested batter. Mix until vegetables are evenly coated.
    1 medium onion, 1 medium potato, 1 cup spinach, 1 green chili
  4. Scoop 1.5-inch portions of the batter-coated vegetables and place into the air fryer basket, leaving about 1-inch gaps between pakoras.
  5. Air fry the pakoras for 6 minutes. Then spray them lightly with oil, flip each pakora gently, spray again, and cook for another 6 minutes until golden brown and firm to the touch.
    oil spray
  6. Check doneness by pressing lightly; pakoras should feel firm, not squishy, with no raw batter taste. Serve immediately while crisp.

Notes

  • Let the batter rest 10 minutes to thicken naturally for better binding and texture.
  • Do not overcrowd the air fryer basket; maintain gaps for proper air circulation and crispness.
  • Using rice flour or cornstarch is key for a crisp, non-chewy crust on the pakoras.

Tried this recipe?

Let us know how it was!

Air Fryer Chicken Satay Skewers

March 25, 2026

Most air fryer chicken comes out dry or bland because home cooks rush the marinade or crank the heat too high. The fix is giving the satay marinade at least 30 minutes to work and keeping the air fryer at 400°F so the sugars caramelize without burning.

Air Fryer Chicken Satay Skewers served on a plate

You get juicy chicken with lightly crisped edges and sticky peanut coating. The air fryer circulates heat fast enough that you skip the grill without losing the char.

Make this when you want dinner that tastes intentional but doesn't keep you in the kitchen for an hour.

QUICK SUMMARY

Air fryer chicken satay skewers deliver juicy, tender chicken with crispy edges and a sticky peanut-coconut marinade. The key is marinating for at least 30 minutes and flipping the skewers halfway through cooking. This works for weeknight dinners, meal prep, or entertaining when you want authentic Southeast Asian flavors without firing up the grill.

⏱️Time Reality: 15 min prep plus 30 min marinating, then 10-12 min cooking
🔥First Move: Preheat air fryer to 400°F for 3-5 minutes before adding skewers
⚠️Watch Out: Overcrowding the basket makes chicken steam instead of crisp-leave 1 inch between skewers

Table of Contents

Toggle
  • Why This Recipe Works
  • What You'll Need
    • Ingredient Details
  • Ingredient Swaps
  • What to Serve With It
  • Store and Reheat
  • Frequently Asked Questions
  • Air Fryer Chicken Satay Skewers
    • Method 
    • Tried this recipe?

Why This Recipe Works

The peanut-coconut marinade tenderizes the chicken while building a glaze that caramelizes at 400°F. A good chicken can make or break the plate-for a version that comes together quickly, something juicy like chicken pairs well with similar cooking times.

Quick Reference
⏱️
Prep Time
15 min
🔥
Cook Time
10-12 min
⏰
Total Time
25-30 min
🍽️
Servings
4 (8 skewers)
📊
Difficulty
Easy
🏷️
Category
Appetizer | Main Dish
💡
Quick Tip
Preheat air fryer, flip skewers halfway
🎯
Best For
Weeknight | Meal prep | Entertaining

Five things that make this work:

  • Marinating for 30+ minutes lets the peanut butter and soy sauce penetrate the meat - rushing this step leaves bland chicken with surface-level flavor
  • Preheating the air fryer to 400°F creates a hot environment immediately - cold starts make the chicken steam instead of sear
  • Cutting chicken into 1-inch cubes ensures even cooking - uneven pieces mean some dry out while others stay raw
  • Flipping skewers at the 6-minute mark exposes both sides to direct heat - skipping the flip leaves one side pale and soft
  • Checking internal temp at 165°F prevents guesswork - visual cues lie but a thermometer doesn't
Quick Tip
Soak wooden skewers in water for 30 minutes before threading-dry skewers char and splinter in the air fryer's concentrated heat.

What You'll Need

Ingredients for Air Fryer Chicken Satay Skewers

You need peanut butter, coconut milk, and fresh lime juice for the marinade base. Rich mains need something to cut through, and fry does exactly that-for a version that comes together quickly, simple fry recipe balances the savory-sweet coating.

🍗
Protein
  • 1.5 lbs chicken breast or thigh, cut into 1-inch cubes
🥢
Marinade Base
  • ¼ cup peanut butter (smooth or chunky)
  • ¼ cup coconut milk (full-fat for richness)
  • 2 tablespoon soy sauce
  • 2 tablespoon lime juice (fresh only)
  • 1 tablespoon brown sugar
🧄
Aromatics & Spices
  • 3 garlic cloves, minced
  • 1 teaspoon turmeric (optional, for color)
🫙
Equipment
  • 8 wooden or metal skewers

Ingredient Details

  • Chicken breast or thigh
    Thighs stay juicier but take 2-3 minutes longer to cook-breasts are leaner and cook faster but dry out if you push past 165°F
  • Peanut butter
    Smooth blends easier into the marinade but chunky adds texture to the coating-both work, just whisk longer for chunky
  • Coconut milk
    Full-fat coconut milk creates a creamy glaze that sticks to the chicken-light versions separate and slide off during cooking
  • Soy sauce
    Provides the salty umami backbone-swap tamari for gluten-free or reduce-sodium versions if you're watching salt intake
  • Lime juice
    Fresh lime juice brightens the peanut richness-bottled juice tastes flat and won't tenderize the meat the same way
  • Garlic
    Minced fresh garlic adds sharp aromatic depth-jarred garlic works in a pinch but loses some punch during marinating
  • Wooden skewers
    Soak in water for 30 minutes before threading to prevent burning-metal skewers skip the soak but heat up fast and can overcook chicken near the stick

Ingredient Swaps

Most people skip chicken, but it balances the meal. When you're out of one ingredient or working around allergies, these swaps keep the core satay flavor intact.

Four swaps that work:

  • Peanut butter → sunflower seed butter - Similar creamy texture with a milder, slightly earthy flavor (allergy-friendly, dairy-free)
  • Soy sauce → tamari or coconut aminos - Same salty umami punch but gluten-free (coconut aminos are sweeter, reduce brown sugar by half)
  • Brown sugar → honey or maple syrup - Adds sweetness but thins the marinade slightly (use 1 tablespoon less liquid if using syrup)
  • Chicken thighs → chicken breast - Leaner and cooks 2 minutes faster (watch temp closely-breasts dry out past 165°F)

Sunflower Seed Butter

Works for: Nut allergies, similar creamy coating, readily available

Skip if: You want authentic peanut flavor or dislike earthy notes

Coconut Aminos

Works for: Gluten-free diets, slightly sweeter profile, lower sodium

Skip if: You want sharp salty umami-coconut aminos lean sweeter and need sugar adjustment

Almond Milk

Works for: Lower-fat option, mild flavor, thinner consistency

Skip if: You want rich, creamy coating-almond milk lacks coconut's fat content and the glaze slides off

Instructions

The chicken marinates for 30 minutes while you preheat the air fryer. The salad works best when it hits the table at the same time as the main-for a version that comes together quickly, bright salad recipe balances the rich peanut coating.

  1. Mix the marinade: Whisk peanut butter, coconut milk, soy sauce, lime juice, brown sugar, minced garlic, and turmeric (if using) in a mixing bowl until smooth. Add chicken cubes and toss until every piece is coated. Cover and refrigerate for 30 minutes (or up to 4 hours for deeper flavor).

  2. Prep the skewers: Thread 4-5 chicken cubes onto each skewer, leaving small gaps between pieces for air circulation. Pat off excess marinade with a paper towel-too much liquid drips and burns on the air fryer basket.

  3. Preheat and load: Set air fryer to 400°F and preheat for 3-5 minutes. Arrange skewers in a single layer with at least 1 inch of space between each-overcrowding traps steam and makes the chicken soggy instead of crisp.

  4. Cook and flip: Air fry for 6 minutes, then flip each skewer and cook another 4-6 minutes. Check internal temperature with an instant-read thermometer-chicken is done at 165°F in the thickest part of the cube.

  5. Rest and serve: Transfer skewers to a plate and let rest for 5 minutes off heat. The juices redistribute so the first bite isn't dry on the edges and wet in the center. Serve with extra peanut sauce, lime wedges, and cucumber slices.

Watch Out
If marinade starts smoking after 5 minutes, reduce air fryer temp to 375°F-high sugar content burns fast at 400°F in smaller air fryer models.

What to Serve With It

You need sides that cut through the rich peanut glaze without competing for attention. The cauliflower works best when it hits the table at the same time as the main-for a version that comes together quickly, quick cauliflower dish adds crunch and balances the protein-heavy skewers when planning your tuscan chicken dinner.

Side Dish Prep Why It Works How to Serve
Steamed jasmine rice Easy Neutral starch soaks up peanut sauce and balances spice Serve warm in bowls, drizzle extra sauce over rice and chicken
Cucumber salad Easy Cold, crisp texture cuts through rich, creamy coating Toss sliced cucumbers with rice vinegar, sugar, salt-serve chilled
Stir-fried vegetables Medium Adds fiber and color, complements Southeast Asian flavors Quick-cook bok choy, snap peas, bell peppers in sesame oil
Quinoa Easy Gluten-free protein boost with nutty flavor that pairs with peanut Cook in chicken or vegetable broth, fluff with fork before serving
Thai mango salad Medium Sweet-tart contrast refreshes palate between bites of savory chicken Shred green mango, toss with lime, fish sauce, chili, peanuts

Three ways to serve it:

  • Weeknight plate: Jasmine rice, cucumber salad, chicken skewers with lime wedges-everything ready in under 30 minutes
  • Meal prep bowls: Quinoa base, stir-fried vegetables, sliced chicken (off skewers), peanut sauce in separate container for reheating
  • Entertaining platter: Arrange skewers over coconut rice, side of Thai mango salad, small bowls of peanut sauce and sweet chili for dipping
Best Pick
Steamed jasmine rice works every time-it's ready in 15 minutes and the neutral flavor lets the peanut marinade shine without fighting for attention.

Store and Reheat

Cooked chicken satay holds up in the fridge for 3-4 days if stored properly. The ranch dressing works best when it hits the table at the same time as the main-for a version that comes together quickly, simple ranch dressing recipe adds creamy contrast and keeps in the fridge alongside leftover skewers.

Method Time Best For
🍳 Air Fryer 3-5 min at 350°F Restoring crispy edges without drying out the chicken
🔥 Oven 8-10 min at 350°F Reheating multiple skewers at once, gentle and even heat
📦 Microwave 1-2 min, covered Speed when texture isn't critical-chicken stays moist but loses crisp

For best results when storing:

  • Cool completely before sealing: Hot chicken in an airtight container traps steam and makes the coating soggy within hours
  • Store skewers in a single layer: Stack them and the bottom pieces get compressed and lose texture
  • Keep sauce separate: Store extra peanut sauce in a jar-it stays fresh for 5 days and you can thin with water if it thickens
  • Freeze for up to 2 months: Remove chicken from skewers, freeze in freezer bags with air pressed out-thaw overnight in the fridge before reheating
  • Reheat once only: Repeated heating dries out chicken and breaks down the marinade coating into a gummy layer

Frequently Asked Questions

How long to cook air fryer chicken satay at 400°F?

Cook for 10-12 minutes total-6 minutes on the first side, flip, then 4-6 minutes on the second side. Check internal temp at 165°F with an instant-read thermometer in the thickest cube.

Can I make air fryer chicken satay ahead and refrigerate?

Yes-marinate the chicken up to 4 hours before cooking or cook the skewers completely and refrigerate for 3-4 days. Reheat in the air fryer at 350°F for 3-5 minutes to restore crispy edges.

What goes well with chicken satay skewers?

Steamed jasmine rice, cucumber salad, stir-fried vegetables, or quinoa balance the rich peanut coating. For dipping, serve extra peanut sauce, sweet chili sauce, or a simple soy-lime mix on the side.

How do I know when chicken satay is fully cooked?

Insert an instant-read thermometer into the thickest part of a chicken cube-it's done at 165°F. The outside should look golden with slight char spots, and juices run clear when you press the meat.

Can I use chicken thighs instead of breast in satay?

Yes-thighs stay juicier and have more flavor but need 2-3 extra minutes of cook time to reach 165°F. Cut them into 1-inch cubes like breasts and check temp in the center of each piece.

Air Fryer Chicken Satay Skewers served on a plate

Air Fryer Chicken Satay Skewers

No ratings yet
Air fryer chicken satay skewers offer juicy, tender chicken with crispy edges and a sticky peanut-coconut glaze. Marinating for at least 30 minutes and flipping the skewers halfway through cooking ensures even caramelization and flavor. This recipe delivers authentic Southeast Asian taste quickly without needing a grill.
Print Recipe Pin Recipe
Prep Time 15 minutes mins
Cook Time 12 minutes mins
Total Time 27 minutes mins
Servings: 4 servings
Course: Appetizer, Main Dish
Cuisine: Southeast Asian
Ingredients Equipment Method Notes

Ingredients
  

  • 1.5 lbs chicken breast or thigh cut into 1-inch cubes
  • 0.25 cup peanut butter smooth or chunky
  • 0.25 cup coconut milk full-fat for richness
  • 2 tablespoon soy sauce
  • 2 tablespoon lime juice fresh only
  • 1 tablespoon brown sugar
  • 3 cloves garlic minced
  • 1 teaspoon turmeric optional, for color
  • 8 pieces wooden or metal skewers wooden soak in water 30 minutes before use

Equipment

  • Air fryer Used for cooking the chicken skewers at 400°F
  • wooden skewers Soaked in water to prevent burning
  • Instant-read thermometer To check chicken internal temperature of 165°F
  • Mixing bowl For combining marinade and chicken

Method
 

  1. Whisk peanut butter, coconut milk, soy sauce, lime juice, brown sugar, minced garlic, and optional turmeric until smooth in a mixing bowl. Add chicken cubes and toss to coat evenly. Cover and refrigerate for at least 30 minutes or up to 4 hours.
    0.25 cup peanut butter, 0.25 cup coconut milk, 2 tbsp soy sauce, 2 tbsp lime juice, 1 tbsp brown sugar, 3 cloves garlic, 1 tsp turmeric, 1.5 lbs chicken breast or thigh
  2. Soak wooden skewers in water for 30 minutes if using. Thread 4-5 chicken cubes per skewer, leaving small gaps between pieces. Pat off excess marinade with paper towel to avoid drips.
    1.5 lbs chicken breast or thigh, 8 pieces wooden or metal skewers
  3. Preheat the air fryer to 400°F for 3-5 minutes before cooking the skewers to ensure immediate searing.
  4. Arrange skewers single layer in the air fryer basket with at least 1 inch space between to prevent steaming. Cook at 400°F for 6 minutes, then flip and cook another 4-6 minutes until internal temperature reaches 165°F.
    8 pieces wooden or metal skewers, 1.5 lbs chicken breast or thigh
  5. Transfer cooked skewers to a plate and rest for 5 minutes off heat. Serve with extra peanut sauce, lime wedges, and cucumber slices.

Notes

  • Marinate chicken for at least 30 minutes to let flavors penetrate deeply.
  • Preheat air fryer to 400°F to get crispy edges and caramelized glaze.
  • Flip skewers halfway through cooking to ensure even browning.

Tried this recipe?

Let us know how it was!
« Previous Page
Next Page »

Primary Sidebar

ForkliftKitchen recipe developer

Welcome!

Recipe Developer · 12+ Yr Kitchen Veteran

I'm the recipe developer behind this site, focused on practical, well-tested dishes and smart ingredient swaps. Every recipe is written to be clear, reliable, and easy to make at home.

650+ Recipes
12+ Yrs Exp.
3x Tested
Our Story →

As Featured In

Allrecipes

TASTE OF HOME

Food52

HUFFPOST

Yahoo! Life

Our Editorial Standards

  • ✓ Every recipe tested at least 3 times before publishing
  • ✓ Substitutes verified by real kitchen trials, not guesswork
  • ✓ Reviewed for accuracy by our editorial team
  • ✓ Updated regularly with seasonal info and reader feedback

Most Popular

  • Creamy Lemon Shrimp Linguine
    Creamy Lemon Shrimp Linguine
  • Creamy Garlic Mushroom Chicken
    Creamy Garlic Mushroom Chicken
  • Sesame Ginger Chicken Noodle Bowls
    Sesame Ginger Chicken Noodle Bowls
  • Baked Lemon Herb Fish Fillets
    Baked Lemon Herb Fish Fillets
  • Veggie Loaded Fried Rice
    Veggie Loaded Fried Rice
  • Spicy Garlic Shrimp Stir Fry
    Spicy Garlic Shrimp Stir Fry

Join 8,000+ Home Cooks

Weekly Kitchen Tips

Easy recipes, smart substitutes, and real cooking shortcuts — every Thursday.

Subscribe Free →


Side Dishes

  • What to Serve With Asian Salmon? 15 Best Side Dishes
    What to Serve With Asian Salmon? 15 Best Side Dishes
  • Side Dishes for Strawberry Spinach Salad
    15 Best Side Dishes for Strawberry Spinach Salad
  • Sides for Grilled Cauliflower Steaks to Complete the Meal
    15 Sides for Grilled Cauliflower Steaks to Complete the Meal
  • 15 Sides To Serve With Calabacitas
    15 Best Sides for Calabacitas – Mexican-Inspired Favorites


Substitutes

  • 7 Best Substitutes for Hot Sauce in Marinades & Stir-Fries
    7 Best Substitutes for Hot Sauce in Marinades & Stir-Fries
  • 9 Best Substitutes for Butter in Baking and Cooking
  • 7 Best Substitutes for Tagliatelle for Italian Pasta Dishes
    7 Best Substitutes for Tagliatelle for Italian Pasta Dishes
  • 7 Best Substitutes for Udon Noodles in Asian Stir-Fries
    7 Best Substitutes for Udon Noodles in Asian Stir-Fries


Browse by Topic

  • Side Dishes320
  • Substitutes785
  • Dinner163
  • Air Fryer77
  • Taste Profiles484
  • Food Storage123


Reader Reviews

★★★★★

"Finally a food blog that tells you exactly why a substitute works instead of just listing options."

— Sarah M., via email

★★★★★

"The side dish recommendations are so specific — saved my dinner party twice this month."

— James R., Pinterest comment

★★★★★

"I trust this site more than most because they actually test everything. You can tell."

— Priya K., blog comment

Footer

↑ Back to Top

Forklift Kitchen

We do the heavy lifting so you can enjoy the cooking. Tested recipes, smart substitutes, and perfect pairings—built for real home cooks.

Content

  • Recipes
  • Substitutes
  • What to Serve With
  • Blog

Company

  • About Us
  • Contact
  • Subscribe

Legal

  • Privacy Policy
  • Terms of Service

As an Amazon Associate I earn from qualifying purchases.

© 2026 Forklift Kitchen.

Rate This Recipe

Your vote:


A rating is required
A name is required
An email is required